

Welcome to the Star Wars: Empire at War walkthrough guide. You will learn here how to command effectively the forces of Empire and Rebellion. It will also help you to finish both available campaigns. It's important to mention, that this game is not very difficult. You don't need to be the chosen of the force to finish it in 1 or 2 days. That's why, if you want to have some fun, you should choose the highest difficulty setting from the very beginning.
It's up to you which campaign to start first, but it's easier to take the Empire campaign. Commanding rebel forces takes more skill and experience - it's also more difficult to gain advantage in the galaxy. To be successful rebel commander, you need to know your units and their abilities very well. Empire on the other hand is all about strength, heavy warships and robust economy. It's easier to master for those, who are not acknowledged with the game.
If you choose to start with Rebel campaign, it may turn out that after a very difficult and frustrating beginning, the second campaign of the game will be too easy for you.
This guide is divided into two parts. The first one is dedicated to Empire, the second - to the rebel forces. Both of them include solutions and tactic guides.
Empire at War is a combination of three RTS games. In a galactic mode, you may control production, development of planets and plan your attacks. There are two other modes - a space and a land one. They are used to determine outcome of battles and they also push the plot forward. The planet, which is a destination of a new mission, is usually marked with a red cross. Detailed description of mission is available in the holocron.
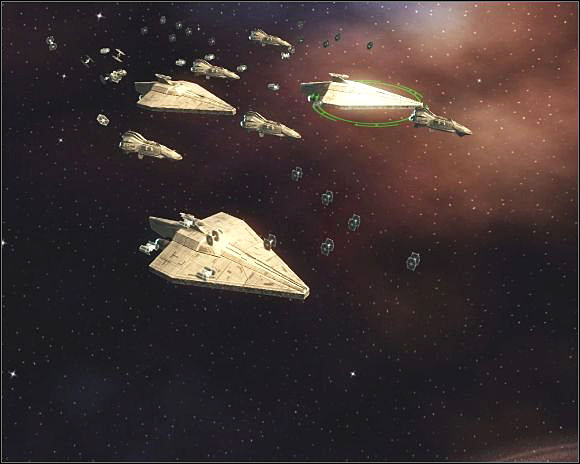 In Empire at War you have to fight both in space and on planets surface.
Between missions, you must build-up your forces on the galaxy map. Last tasks require strong, advanced army. That's why I've put short chapters called "Conquest" between mission solutions. They will tell you how to prepare for upcoming battles.
Remember that you may change the game speed during battles and on the galaxy map using "Gameplay" menu. I recommend you to leave the first one as it is - it makes battles more dynamic. The second one however should be decreased by one. If you don't do this, galactic time will flow very fast and briefings with "talking heads" will take you a lot of time needed for other actions. You may also need some extra time to queue production on all your planets, especially if you have a lot of them.
In this moment I should mention that important events in the galaxy are triggered by completing your tasks and are not connected with the time. You can use this fact to make the game easier. If you conquer all available systems (excluding your next mission objective), you may speed the game up the time and make money as long as you like. After a while the mission marker may disappear, but you can finish this task anyway. However, remember that having thousands of credits makes the game not so funny, as it can be.
On behalf of the commanding officer, welcome to the training course. You have been chosen as the best young officers of the imperial army. You will bee trained to carry out most important tasks and to serve your Emperor well. As you are aware, the Emperor doesn't tolerate defeats, so better listen to me carefully. Making notes and records is prohibited - everything mentioned from this moment is top secret.
First of all, let's learn something about space battles and our imperial vessels. I see that you are surprised. I know that you may find those informations in your field manuals. But you should be aware, that there are some things, which cannot be mentioned in books. Rebel spies are everywhere.
A very cheap unit that takes little time to build. A lot of young officers underestimate its value. It's always good to have some Probe Droids, since you can use them to know, how many troops are stationed in enemy systems.
Scouts are the only TIE unit, that cannot be manufactured in our destroyer hangars. They aren't used very often, because they are extremely specialized. Their abilities let them uncover distant parts of the battlefield. You may use them to locate targets for Broadside units.
TIE Scouts are not very helpful in dogfights, so you should keep them out of combat. Just hide them in the middle of asteroid belt or a nebula.
These are basic fighters of the Empire. You don't need to be worried about their production. Cruisers and assault ships have special hangars and assembly lines ready to create TIE fighters, so your captains replace casualties of their own. In the beginning of a battle, each destroyer releases contingent of TIE units. Once they are destroyed, ship begins production of new squadrons.
TIE Fighters are quite proficient at destroying rebel fighters - at least when used in large groups. Unfortunately, they are very easily destroyed by corellian corvettes and gunships. This is why you'd better keep them away from those ships. Fighter pilots are numerous and easy to train, but the Emperor doesn't tolerate inconsiderate losses.
TIE bombers can destroy rebel frigates or cruisers with ease. Their proton torpedoes ignore force fields and can damage critical systems directly. The best idea is to concentrate bombers fire on essential parts of the ship or base. Usually it is a hangar or a shield generator.
Light rebel ships, like corvettes, are the greatest danger for bombers, so you should keep them behind until they're clear to attack.
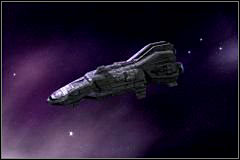
This light cruiser is essential unit in the Empire space force. They may seem weak, but without them enemy bombers will rip your destroyers apart one by one. A couple of Tartan cruisers can easily shot down any number of small vessels, that's why the commander should always protect his main forces with these units.
Usually they should be placed near your destroyers. If the enemy has many big ships nearby, it's better to move Tartans behind them though. They can still shoot at fighters and bombers, but will be protected from the fire of lager warships.
I should mention that Tartan crew can direct additional power to cannons for a short time. It is very helpful ability when there are lots of enemy vessels nearby.
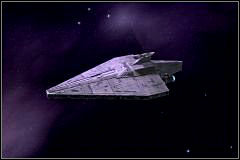
Older type of the imperial destroyer. In many sectors it is still in use, but we are replacing it slowly with more modern Victory-class warship. Acclamator is quite resistant, has its own hangars with fighters and bombers, but is not very fast. Acclamators are best used in formation, protected by Tartans.
As well as Tartans or Victory destroyers, Acclamators have possibility to boost their canons for a short time. In such case, they becomes slow and their shields stop regenerating, but turbo lasers fire stronger and faster. You should use this ability when your Acclamator faces the enemy and isn't under heavy fire.
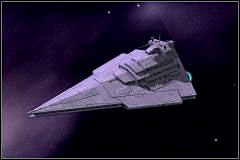
Victory star destroyers are very important in the imperial fleet. They are tough, have considerable firepower and hangars full of TIE units. Similar to Acclamators, they should be used as a main part of the offensive group. In a battle formation they can break even very large enemy forces.
Victory star destroyers can defeat rebel frigates quite easily, and they also gun down corvettes fast. Their biggest enemy is the Y-wing fighter, so your patrol cruisers should always protect them. Also, They shouldn't be left under fire of Marauder missile ships.
While commanding Victory star destroyer you should remember about their special ability and take advantage of it as often as it possible.
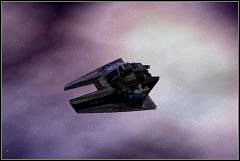
In your field manuals these units are called the "space artillery". It's hard to argue with that. Broadsides have great range and firepower. Unfortunately, they are almost defenseless in close quarters. You might loose them very fast in battle chaos, so they should always follow the main force at safe distance. Also, remember not to leave them too far behind, because they may be destroyed by rebel sneak attack.
Broadside cruisers fire dangerous missile volleys. Because of the range, they can strike distant targets while staying stay out of their reach. They only need few scouts or other vessels, to locate proper targets.
Broadsides are very important, if you plan to attack space station of 4th or 5th level. Overcoming shields without them would be difficult and would take a lot of casualties.
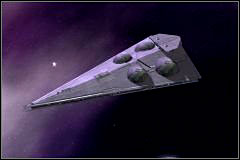
This is highly specialized unit used to block hyperspace movement. Interdictors aren't a part of standard imperial combat groups. They are used mostly in special missions. You shouldn't take them with your fleet all the time, because they have poor firepower and will take valuable place. In case you have an Interdictor on a battlefield, you should remember about its second ability - it can disturb enemy missiles.
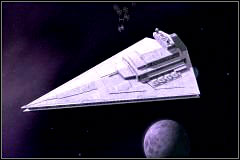
This huge unit is available only for experienced officers. To command the Imperial destroyer you need to deserve it! Building one of them takes a lot of money, but they are indispensable in large battles. Thanks to their impressive firepower, they can engage advanced space stations or Mon Calamari cruisers. It takes them only few seconds to destroy any enemy frigate.
Destroyers of this class, as well as smaller Victory units, are prone to bomber attacks or missile cruiser's fire. This is why they always need proper backup.
In the middle of the battle, it's easy to forget about ships special weapon - the tractor beam. A vessel caught with it cannot move and becomes an easy target!
Now lets talk about typical space battle. Most imperial units move and turn very slow, which makes them most effective in formations. A destroyer formation, supported by Broadsides and Tartans, is always the core of your fleet. Such a group can slowly but systematically move through the map eliminating all opposition. Only Marauder missile cruiser can disturb their movement, firing out of the cannon range. So when you spot the Marauder, you should immediately send small group (for example one Tartan and fighter squadron) after him.
If Imperial star destroyers are available, it's good to make them main part of your assault force. Remember though, that they turn very slow, so it's better to have a some smaller units with them.
If you have some own missile cruisers available, then use them to weaken enemy stations and capital ships. Very advanced stations should be attacked only from a safe distance. After taking down all shields, you should fire at most important points of your target - hangars and shield generators for example.
It's enough for today. You can dismiss. The cantina will be opened from 8pm. All interested in a trip to the one of the moons are asked to report to me. Tomorrow we will talk about the land combat.
Welcome once more. We start the second day of our training. First of all, I'd like to say how sorry I am for those, who took part in unfortunate Yavin's moon trip. Let it be a lesson to remember, that the rebels never sleep - and that we should always be prepared for their treacherous attacks. Officer responsible for security has been executed at Moff Tarkin's order. Unfortunately, it won't compensate the loss of six excellent officers, who died yesterday.
Today we will talk about land combat. Rebel forces have a big army and are supported by local populations of many planets, so you fighting them on planet surface won't be easy. Let's start with a few words about imperial land unit's.
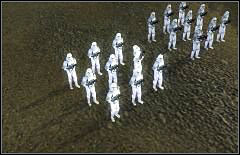
In spite of the rebel propaganda, stormtroopers are very good soldiers. They never retreat, are expert shooters and - thanks to good armor - they are able to survive under fire for a long time. Of course you must give them order to take cover first. Stormtroopers never crouch without an direct order.
Stormtroopers are the most important unit in many battles - especially when opponent has no artillery. You should move them in groups of at least three squads and keep some vehicle backup behind them. Rebel commanders usually don't run them down with their vehicles, but stormtroopers can be easily killed by artillery or turrets. This is why you should always take some AT-ST or TIE Maulers with them. Also remember that Stormtroopers don't have any anti-tank weapons, and are not capable of destroying heavy rebel tanks.
Stormtroopers are very cheap to train and equip, so you should have at least 10 squads of them in any army. The history proves that many battles were won by the huge stormtroopers reserve.
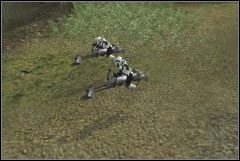
This is a fast, but not very tough unit. There are only two of them in a squad, so you'd rather not use them in combat. They are much more effective in guerrilla warfare - just get close to your enemy and throw out some thermodetonators. The explosion may kill whole infantry squad!
You should also use speeders to locate targets for other units. They can easily find the enemy generator or get into his base to bring down an orbital attack.
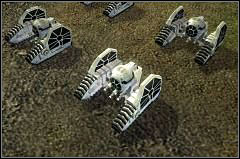
This fast, but poorly armored vehicle isn't very good in combat. It can fire at enemy infantry, but usually the opponent has soldiers with PLEX launchers, which immediately destroy TIE maulers. Instead of using their cannons, it is better to run down enemies. You may also detonate damaged mauler if it is surrounded by rebel units.
Due to the lack of shields, TIE maulers shouldn't engage larger groups of enemy vehicles. The only exception is a rebel artillery. It can be quickly destroyed by group of maulers, because artillery can't fire at a close target.
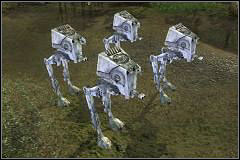
This is quite good unit in many situations. It's tougher than TIE mauler, but unfortunately doesn't have the shield either. AT-STs are able to concentrate fire on small area and cause a lot of damage. You can use them to exterminate small enemy vehicles and infantry. They can also destroy turrets, so you may use them to support stormtroopers in case you have no heavier vehicles.
It's worth remembering that AT-STs are also able to crush enemy infantry.
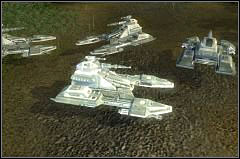
A very good unit with a nice firepower. It's quite tough in comparison to others. Moreover, it has a shield.
Those tanks may be the main part of your strike force. They are also excellent support for the groups of infantry. They have possibility to boost their cannons, which helps them to destroy enemy units and buildings very fast. Remember that when you use this ability, their shields won't regenerate.
If you want to reduce your casualties, you can withdraw tanks that lost their shields. You also shouldn't engage PLEX launcher groups.
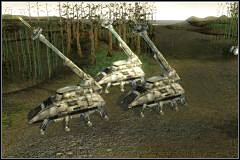
The mobile SPMA-T artillery in many cases is most important unit on the battlefield. Once set up, they can almost immediately destroy any incoming infantry or vehicle. They are perfect in defense, so place them in important parts of the map and surround with some stormtroopers or tanks. Remember that SPMA-Ts can't attack nearby targets, so it's important to keep distance between your artillery units, so that they may cover each other.
SPMA-T artillery units have great range and can easily exterminate enemy turrets. You can also use them to attack the base, from the safe distance. You should always have at least two groups of SPMA-Ts in your army.
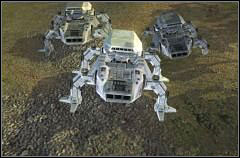
The rebels have their T-47 air speeder, but imperial strategists decided, that we don't need similar unit. Instead we use AT-AA to shoot down enemy planes. Those mobile anti-air units are not really useful for anything else, although they may also stop disturb enemy rockets because of their special ability.
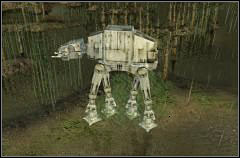
A huge and really tough transporter. It can drop some stormtroopers, so it may take over construction and support points. It has also good firepower.
AT-ATs are very expensive, but using them in battle pays off. A couple of them may cause a real problem for the opponent. They have one main enemy - the air speeder, so better give them support of an anti-air turret or an AT-AA.
There are two tactics - one for cheaper, not so advanced armies and second for more developed offensive groups. Both of them have something in common. It's always worth to capture support points as quick as it possible and to have more of them than the opponent. Also, you should only land on planet if you have destroyer with a group of TIE bombers at the orbit. Properly placed airstrike may turn tide of the battle in your favor.
It's also good to build turrets and repair stations whenever possible.. Remember to always hit your unit limit and to drop reinforcements if one of your unit dies. Also, leave 1 or 2 infantry squads near captured support points.
Let's move to special tactics. First, a few words about less advancer armies - you should simply attack with a couple of stormtrooper platoons supported by AT-ST or TIE mauler. Weaken your enemy with mauler suicide missions and/or some airstrikes. In case the opponent has a lot of PLEX soldiers, it's better to avoid the close combat with vehicles.
If you have access to the advanced technologies, main part of your army should be made of heavy tanks and AT-ATs. To make it cheaper, you can also use some stormtroopers, but most of them will quickly die under the fire of enemy artillery. SPMA-T should proceed close behind and prepare to fire very time you meet large group of enemy units.
Sometimes one of the most important imperial heroes is interested in some particular mission. Be prepared that Lord Vader or even the Emperor himself may join you at the battlefield. They have a great power, so they can face many opponents at the same time. However, you must remember, that even lords of the Dark Side may be defeated - if surrounded by enemies and under the heavy fire. When that happens, they won't be available for some time - the time you might need them.
Empire prepares another attack against one of the Rebel bases. You land on the planet with reasonable army composed of stormtroopers and AT-ST walkers. These forces could finish your task on their own, but apart from them, you can command lord Vader. This powerful Sith can destroy rebel forces with only minimal support, so head north and crush any opposition.
Remember, that Vader can eliminate infantry with his force strike, and vehicles with force crush. Those skills will allow him to defeat all rebel forces along the way. Use captured construction points to build healing stations, for they will regenerate Vader's health.
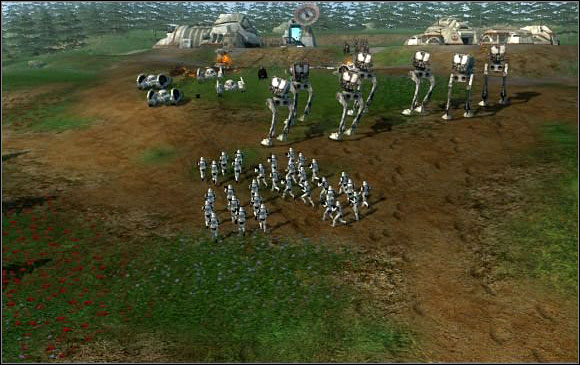 Rebel base is open, once you destroy field generator.
Soon, you will get to the comm station. When it is destroyed, you will be notified about nearby base. It is protected by field generator, so you have to take it out before assaulting the base. Generator is on south-east. Remember to keep your stormtroopers near Vader, because Rebels can have considerable forces here. After destroying generator, take over nearby support point - some reinforcements will arrive. Now you can destroy Rebel buildings. Simply attack with all your forces, but be sure to eliminate all enemy turrets in the first place. They kill infantry very fast and their concentrated fire can be deadly even to Darth Vader.
For the first time you see map of the "galaxy far far away". Once Vader is done talking with the officer, stop the time and take careful look at the planets. On every one, that has at least four construction points (right now it should be Anaxes, Corruscant, Thyferra), build a mine. Mines are crucial for raising your daily income, so you will have to build them on every new planet. Also, build larger space station on Anaxes - it is good to have multiple stations capable of constructing heavy warships. Finally, begin production of 3-4 Acclamators. You should also leave small garrisons of stormtroopers on Thyfera and Abregado, and build officer academy on Corruscant.
When you feel ready, and Acclamators will fly out of dock, send your fleet and strong land force to the Fonfor orbit. There is one main issue concerning your armies: never leave border planets without any defense. It is almost sure, that Rebels will seize opportunity and attack unguarded system. Even orbital fleet won't stop them, since smaller Rebel rides can get past your spaceships.
Don't attack Fondor right now. Instead send your fleet (with Vader!) to Taris. There are several pirate frigates, some smaller ships and poorly armed station. It will be perfect training battle - line your Acclamators and Tartans, and then clear whole orbit. Then you can capture Taris (same strategy as in first mission: Vader goes first, covered from behind by your stormtroopers). Build a mine, barracks and space station. After that, take a while to check all your planets. If all important things are already built, then go on with the storyline and attack Fondor.
Just after landing, take over two nearby construction points. You should build anti-infantry turret on the first one, and healing station on the second. In first wave drop Vader, stormtroopers and one TIE Mauler platoon.
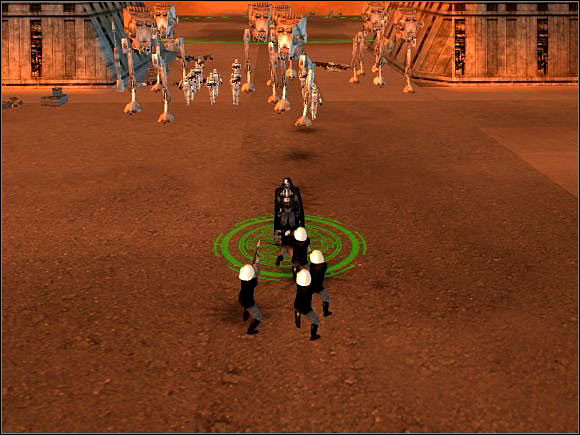 To minimize casualties it is good to have Vader in front of your army. Rebels are no match for him.
 There are few tall, metallic buildings scattered across the battlefield. They spawn groups of local infantry at fast rate. There is also Rebel base behind the wall north of your starting position. This mission is not very tough, but it requires aggressive gameplay. Steel "skyscrapers" and Rebel base will continue to produce enemy units until you destroy them. If you get stuck somewhere and go into defense, they will slowly overwhelm you.
Be quick. Just after landing send Vader and stormtroopers west (keep AT-ST walkers behind - many rebels are armed with PLEX Launchers). If you haven't done that during first mission, assign "take cover" order of your stormtroopers to one accessible key. Turn this ability on every time your men take fire - it will reduce casualties. Also, remember about few important rules:
1) Always have all available forces on battlefield - when one unit dies, immediately drop new one from the orbit.
2) Never leave support points without defense or enemy will recapture them almost instantly. One or two infantry groups are usually enough - at least they will buy you time to send some reinforcements.
3) Use airstrikes! Every time large enemy group appears, request bomber support. You will save a lot of time and units. If enemy is moving, be sure to place airstrike marker ahead of him. It will take few seconds, before bombing fly in.
4) When airstrikes are not available, use your TIE Maulers to crush infantry. Badly damaged tanks can be self-destructed near enemy groups.
5) Capture and utilize every construction point. If you leave them behind, some rebel scouts may appear out of nowhere, just to build handful of turrets behind your back.
Remember those rules and advance fast to disable all enemy buildings. After capturing second support point, attack enemy base. It isn't heavily defended, but buildings can spawn troops fast, so use airstrikes to bring them down.
Build important structures on Fondor and then, according to the orders, send spybot to Illum system. Build up your army in the meantime. Be sure to buy fleet and field commanders, as they will make battles easier and will give your units considerable health bonus. Other planets are still unavailable, so after a while you can send Boba with your fleet to start another task.
At first, mission is quite simple - you have to destroy sensors with Boba's ship. Fortunately, sensors are shown on your map, and Slave I is a very fast ship. Tactic is simple here: get near the sensors and drop thermal detonator ignoring enemy fighters. After that, shot down any rebels, that survived explosion.
When last sensor is gone, you get access to the reinforcements menu. Bring your Acclamators and some Tartans from hyperspace, and attack the station with concentrated fire. After a while you will be notified about pirate boss, who is trying to get away in small ship. Attack this ship with every available unit, and when you deal enough damage, mission will be over.
You're going to have a lot of work right now! Most important thing is taking over Endor-Bestine-Corulag line. This trade route will generate good income, and will allow you to quickly move troops from one side of the empire to another. Then you can conquer planets in lower part of the galaxy. Remember to leave garrisons on your border worlds!
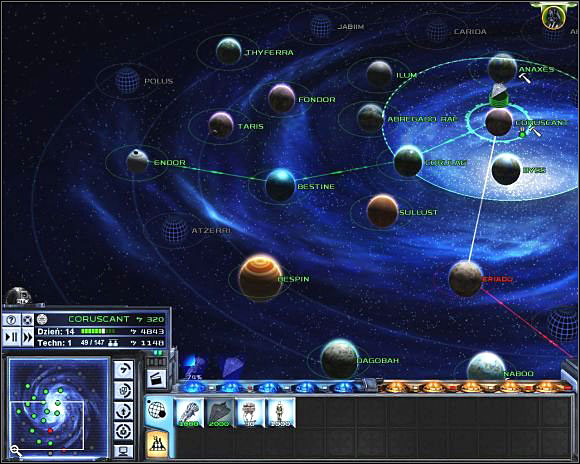 Endor-Bestine-Corulag-Corruscant route is main axis of the Empire. Take it over, and it will earn you a lot of credits.
After that, build large number of Probots in one of your stations. They are very cheap, and thanks to them you will know which planets are poorly defended (Sulust for example can have only few fighters and station at the beginning). Weak planets should be your first target. They will provide financial and military support needed to conquer more guarded systems.
Because you are going to fight many battles now, remember about auto-resolve options. Use it, if you outnumber enemy, but remember to save your game first. Auto-resolving sometimes doesn't work as you would predict.
Remember to place buildings on every new planet. Level 1 station, mine, barracks and light factory are must. Factories don't only produce units. They are also important in your defense, because at the beginning of every land battle, they provide small, but renewable group of troops.
Don't get to far with building up your space force. Ten Acclamators is completely enough, because soon you will have access to superior Victory class destroyers.
When you conquer almost every (or every) active planet, you may go on with the plot. There is quite large Rebel fleet at the Genosis orbit, unless you have already defeated it - on Eriadu for example. Build strong space force with Vader and fleet commander. Do not take any land units in first attack. Their transports could be easily destroyed during orbital battle.
First phase of this mission shouldn't be hard if you were prepared. Send tight formation of Acclamators protected by light cruisers right into enemy station. On the way, destroy all rebel ships. When near the station, pump some torpedoes into hangar. It's better to destroy it first, as you won't have to deal with reinforcements. Be sure to spot any bright-blue rocket explosions, 'cause there could be some Marauder cruisers nearby. If you see any, sand Vader or one Acclamator right away to destroy it.
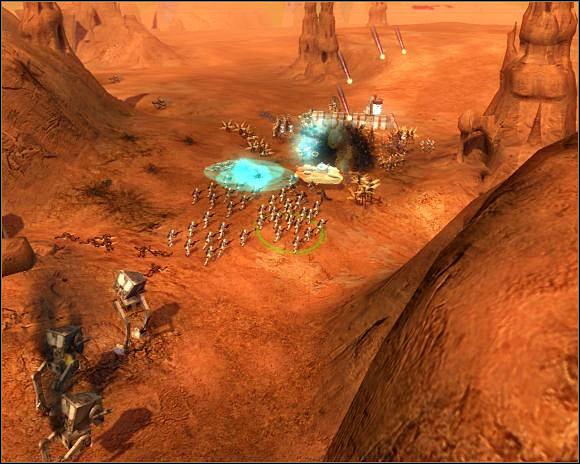 If there are to many Genosians around, airstrike should help.
When you'll finish space battle, second phase of operation begins. Drop your troops from the orbit and scourge rebels from the planet surface. This part is very similar to battle of Fondor. You're fighting one rebel base and many local buildings, that spawn hostile Genosians. Your first wave should compose of Vader, field commander and as many stormtroopers as it is possible. Destroy hive near the landing zone, and then attack in western direction, destroying other "hives" on sight. If you spot large group of Rebels, remember about airstrikes and Vader's special power.
After capturing second point, you can drop some reinforcements and attack the base in north-eastern corner of the map. If you would like do have greater forces, you can also take over third support point. It will allow you to literally flood enemy base with your troops.
Now you're going to get some fun! Not only new planets become active, but you also receive access to the Victory class ships. Don't hesitate and order them in all shipyards. By the way - you should have at least three or four planets with largest available station. It will allow you to quickly build many heavy vessels. You should also add some Broadside cruisers to your force. They are invaluable when fighting enemy space stations - and you are going to fight a lot of them now.
Your land forces also receive several upgrades. You can build heavy vehicle factories now, which allow construction of 2-M repulsor tanks and SPMA-T artillery. These are expensive units, but they greatly enhance your strength, so get them as fast as you can and then conquer all new Rebel systems.
Your main task is to open road to Mon Calamari - objective of your next mission. You have to control Kuat and further systems, but it is also very wise to take over lower planers - Ryloth and Nal Hutta. They will earn you many credits.
Next task appears to be simple - you need to control Mon Calamari orbit. After recent battles you should know how to utilize Victory destroyers and Broadside cruisers. At least I hope so, because this mission will be hard, especially if you play it for the first time.
When fleet appears on the screen, stop the game and divide your forces into groups. It is especially important to put all the bombers in one squad and to get them to safest possible position - you won't be able to finish this missions without LOTS of Tie-bombers. After that, begin to move your fleet to the lower-right corner of the map. Some rebel ships and Marauder cruisers will strike you on the way, so deal with them fast, but do not get to close to the enemy base.
When in lower-right corner, assemble your battle-lines and then assault the base. All bombers should stay in asteroid field with 1-2 Tartans for protection. Let Broadsides bomb enemy station from maximal range. Battle near the station will be hard. Rebels have a lot of sips, and base itself is very tough. Protect your Tartans and immediately bring reinforcements if one of your ships is destroyed. When new destroyer joins the battle, remember to send away his bombers. Try not to lose fleet commanders - if your flagship gets badly damaged, get him behind your lines.
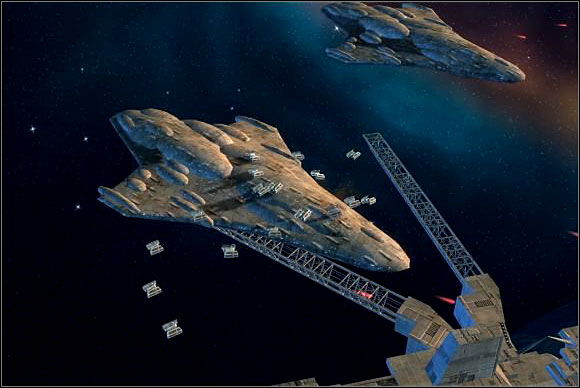 Mon Calamari cruisers are even tougher than Imperial-class destroyers.
In the midst of this battle, two Mon Calamari cruisers will jump in to the system. These powerful ships can blow up star destroyer in a matter of seconds. Don't worry though. Continue your battle near the base and send all your bombers to deal with enemy dreadnoughts. Shoot them with Broadsides too, if you have any left. One cruiser should be destroyed, before getting to your positions. Other one will probably survive long enough to scrap few of your ships, but you probably have still some destroyers in reinforcement queue, so that won't matter much.
This time there is little do be done. Take over any remaining planets, and build most important structures on Mon Calamari. Remember to upgrade stations near Calamari and Kuat. You will need them to construct largest Imperial ships, when they become available.
This is a land-based mission, and you can start it right after conquering Mon Calamari. It may be very hard, or quite easy - it depends on your approach. Main task is to defend imperial prisons against Han Solo. Time is very precious - Solo takes buildings down quite fast. To make matter worse, you will be under constant attack of Wookies and rebels.
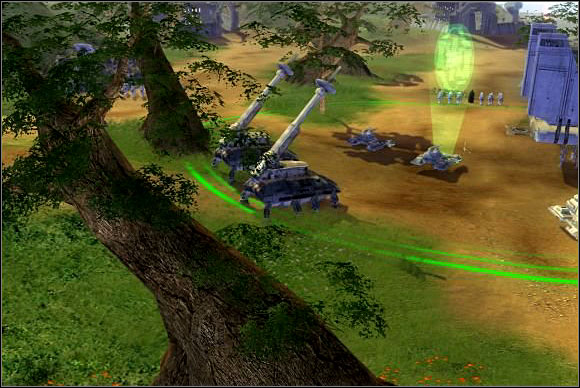 Positions defended by artillery are impossible to capture with infantry.
Fortunately, you have SPMA-T artillery now and you know how to handle it. Drop your artillery, lord Vader, some tanks and stormtroopers. Then move fast in the direction of nearby support point. It is located near the river, that cuts map in two halves. Do not go to the other side - it is to late. Instead set up your defense, prepare artillery, and drop reinforcements to capture second point as well. Then block both fords with stormtroopers. With artillery behind them, they will be able to stop any attack. If things start to look bad, remember about airstrikes.
Soon, Solo himself will show up. Send Vader after him - rebel will escape, once badly wounded. Soon after that, mission will be over.
Once more there is nothing to do. Emperor wants you to move Vader and Veers to Carida. There are no new planets to conquer, so after filling your production queues, go for the next mission.
This one is very simple and short. You control only one unit - AT-AT walker. At first, listen to the officer who is managing this presentation and do exactly what he asks. Soon unexpected rebel attack will occur. Send your machine to the north-western island. One of the bunkers is there, as well as construction point. While fighting waves of rebel infantry, drop squad of stormtroopers, capture this point, and build repair station. Having this station around, you will only have to stand there and fight any incoming hostiles.
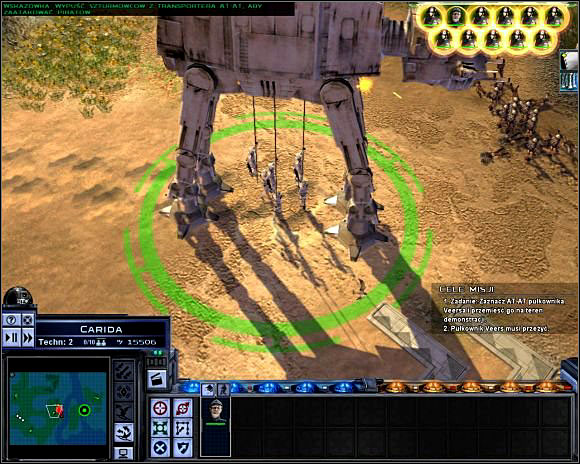 AT-AT can drop stormtrooper squadron - they aren't strong fighting force, but they allow walker to capture construction and support points.
 Finally, something is starting to change. New planets become active in the vicinity of Carrida. One of them is Jabim - objective of your next mission. Before you start it, defeat all new rebel planets and strengthen your border garrisons, for Jabim defenders will most certainly try to raid your planets.
You can build advanced factories now, so have at least two. They will allow you to build regular AT-AT walkers, which (although weaker than Veers prototype) are still excellent unit.
Resistance will be firm on some of new planets, but powerful fleet and good economy will most certainly let you win. In land battles use Veers and other AT-AT, but remember that while tough, they are not invincible. Support them with artillery, Vader and heavy tank squadrons. Before you go on with Jabim mission, be sure to have at least half of your unit cap used. Big battles are coming, so it is best time to raise considerable army!
Defeating Jabiim won't be easy, as planet has large garrison and fleet. You should use really large fleet with lots of destroyers and Broadside cruisers in reserve. At the beginning, don't be hasty. Stick around your starting position, and let some gunships and corvettes come after you. Blow them apart, and then begin to move in direction of the base. You're going to have hard time now. Base is very strong and there's lot of enemy frigates nearby. To make matter worse, ion cannon is shooting from the planet - it will soon immobilize some of your ships. Be ready to use a lot of reinforcements. When you take down station shields, concentrate all fire on it. You should take the base down after a while, and then just hunt down any rebel remnants.
Now you can commence land attack. Remember, that you can't use scouts or repulsor tanks here, so be sure to have enough other units. This battle won't be very hard, but it will be long. Enemy has lots of infantry (yeah, once again locals have turned against you) and plenty of vehicles. Drop AT-AT's, artillery and move around the map slowly, destroying all structures and building turrets in every available place. After destroying all neutral buildings, you can deal with the rebel base. First, destroy generator powering its shields. It can be found in north-eastern corner of the map. When it is destroyed, you only have to weaken enemy defenses with your airstrikes, and then bring in AT-AT's and artillery to finish the task.
If there are any Rebel planets left, capture them now. No new systems will appear, but before going to the next mission it is good to build up army a little bit. Most probably, you have suffered some casualties during previous battles. If you want to hang around on galactic map for some time, build defensive garrisons around Atzeri - enemy will start to attack you, if you give him enough time.
Moff Calast has betrayed his emperor and deserves to die! There is one problem though - Calast commands powerful Imperial class destroyer, which outguns every single ship in your fleet. Since you don't have any other options, build up large fleet and go after him to Atzeri.
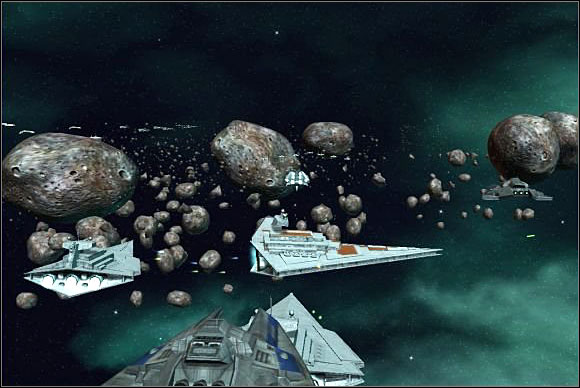 Traitor is surrounded
When battle begins, Calast's ship will be near your fleet. It will jump away though before you can deal some serious damage. You have two options now - terminate mission or fight on with rebel forces. I strongly recommend second choice, as you will have to defeat Atzeri anyway.
This battle won't be very different from those you fought before, although between you and enemy base there is a broad asteroid belt. Enemy Marauders fire from behind it. You can go around asteroids, but it is going to take some time. So I suggest you to charge through the rocks and attack enemy cruisers and base right on. Some ships will be damaged, but that shouldn't be very troubling. Soon you'll blow apart the base and Atzeri is almost yours.
That doesn't solve main problem though, as Calast is still free. Fortunately, emperor will send Interdictor cruiser to help you in next ambush. It prevents enemy ships from jumping into hyperspace, so immediately join it with your army, and then wait. Soon Calast will show himself around one of the planets. Go there immediately.
It is hard to say something about this battle, because Calast shows at random planets. However, you should stop the time at very beginning, and then divide your fleet into several groups. Order Interdictor to fly behind your forces. After turning on gravitation field, it will be totally immobile, so it should be as far from the enemy, as it is possible.
Unfortunately, you have only few seconds to move your cruiser, because soon after spotting your ships, Calast will jump out of the system. If that happens, reload your game and try to turn on the field a little faster. When the field is on, traitor will go after Interdictor. Leave small escort near your cruiser, and then send rest of the fleet to intercept enemy ship before it gets close enough to shoot. Target engines first, and then take out shield generator. Ignore other rebel Ships. When you manage to deal enough damage and keep Interdictor alive, mission will be over.
If you have lost any planet due to Calast mutiny, time to take it back. Also, be sure to have largest stations on Sulust, Fondor, Kuat, and Mon Calamari. Soon you will be able to build Imperial class ships there.... But first, emperor wants to punish treacherous Bothans.
This mission has to be the most simple mission in whole campaign. Direct your fleet and Palpatine to Bothawui orbit, and then land on the planet. Emperor wants to give Bothans lesson himself, so you only got him and two guardsmen (they will probably die fast anyway).
If you won't do something very stupid, this mission is impossible to lose. Just destroy all Bothan colonies using airstrikes and Palpatine powers. Emperor can replenish his health during fight, but it is good to build some healing stations anyway - whenever it is possible. Remember, that you can strike larger groups of Bothans with lightning or (a lot funnier) convert them to your side.
Finally, Imperial-class star destroyers become available! Build as many, as you can, because they will form core of your fleet in following skirmishes. By this time, all rebel planets should be defeated, so you don't have to be afraid of sneak attacks. There is only Tatooine garrison left, but it will rather stay idle, so you can build up your forces as long, as you want to.
Lord Vader is ordered to capture princess Leia Organa. Her ship, Tantive IV, must be caught in tractor beam of your star destroyer. This task is going to be more complicated, than it looked like in original Star Wars movie.
Right after jumping into system, you find out that your Interdictors are under heavy fire. Stop the game and direct them to rest of your fleet, and then begin offensive. Old pirate frigates shouldn't be a match for Imperial destroyers. Pirate base, on the other hand, can be a problem, since it is located in the very midst of an asteroid field. You should use Broadsides and leave your bigger ships near the belt. During a fight, you can begin to hide spare ships and Interdictors in nebulas.
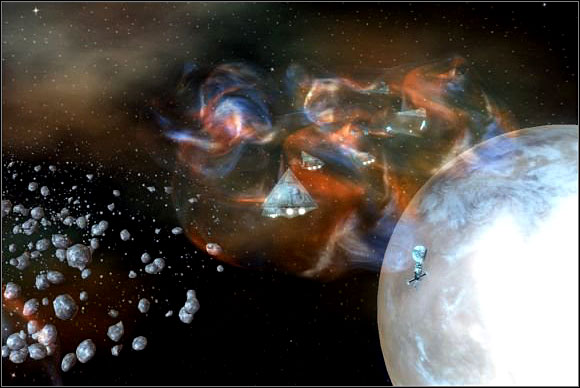 Ships hidden in a nebula are invisible to enemy. They can't use any special abilities though.
As soon as pirates are defeated, you will hear about incoming rebel scouts. You must hide your fleet fast - Interdictors should be placed near the border of your nebula. Now you must wait. Soon some X-wings will drop in, and then Tantive IV itself. Don't get out of nebula before Tantive confirms transmission!
When that happens, move your Interdictors out of nebula and turn on their gravitation fields. You have only few seconds, because Tantive will try to jump out of the system if alerted. If you stop the ship, it will roam the battlefield and some rebel forces will come to destroy your cruisers. Concentrate on the battle, leaving Leia's ship on its own. Defend your interdictors (Mon Calamari cruisers are greatest threat to them).
Once the rebels are defeated, just wait for Tantive IV to fly in the open, and then drag one Imperial destroyer from your reserve, placing it behind Leia's ship. Then you have only to turn on your tractor beam.
What conquest? Whole galaxy must be yours by now. If you want to, you can add even more destroyers to your fleet or strengthen garrisons near inactive planets. But that is not very important, since you can fly around in your brand new Death Star! Yes, Death Star is finally at your disposal, and with it - you can destroy rebellion once and for all.
Very easy, but enjoyable mission. Gather your fleet around Death Star and attack Aldeeran. You have very large forces at your disposal. Starting units do not count towards your limit, so just after beginning of the battle bring in even more ships. This great army has only one task: to survive 75 seconds needed for Death Star to reach firing position. It is almost impossible to lose, although rebels have many heavy ships. When Death Star's valve (located on your panel) becomes active, pull it to annihilate Aldeeran and to win the battle. But I recommend to destroy at least some rebel cruisers and Ackbar's Base One flagship first.
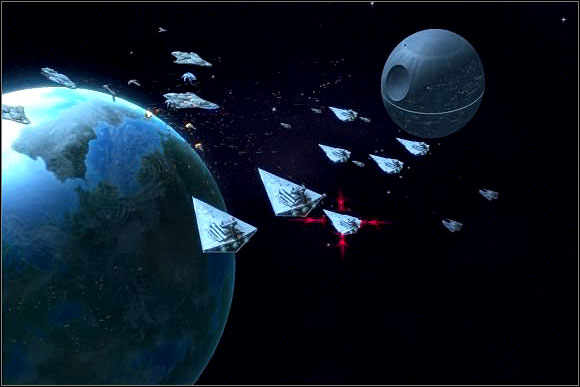 Battle for Aldeeran
After destruction of Leia's homeworld, it is time to finish the Empire campaign. Last five planets become active - remnants of rebel forces are located there. You have to destroy them and then Palpatine will rule galaxy for few next millennia. There is nothing to improve or to conquer. Although there could be some rebel sneak attacks, you can ignore them. It won't matter if you lose planet or two, because you are about to win the game.
Last five battles will be fought in space. You have enormous fleet by now, but rebels have 5-level stations, large fleets and ion cannons on every planet you are about to destroy. Casualties will be inevitable, so remember to provide reinforcements for your fleet between the battles.
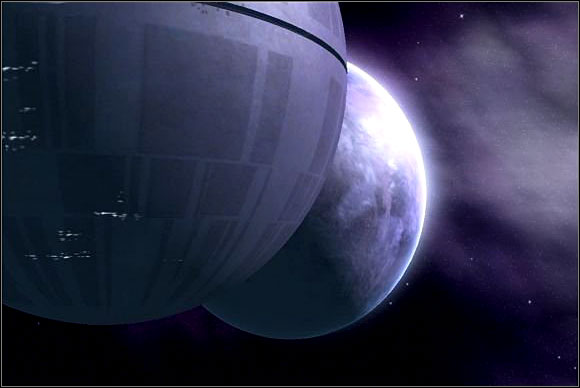 Death star at the orbit of yet another rebel planet.
I won't talk about tactics, because after conquering whole galaxy you must know principles of space battle. Rules are as always: watch out for missile cruisers, destroy hangars of the station first, move your units in proper formation, use Broadsides for long range work. Also, activate Death Star as soon as it is possible, because this way you will get rid of this annoying ion cannon.
When last target system falls, you are winner. You have restored peace and order in the galaxy. Emperor is proud of you.
Welcome to the rebel officers' training course. Now, I know that there is little room in your cabins, but this old frigate turned out to be the only possible place for our training. We are in orbit of the space station owned by a businessman, who is reliable man of Mon Mothma. In case of imperial control, you are told to pretend to be common crew of this ship.
Let's get to the point. Soon you will be sent to all parts of the galaxy, so you should learn about the advanced tactics, which helped the Rebellion to survive to the present days. First of all, we will talk about using units. I know that you are acknowledged with brochures and other provided materials. You must understand though, that some thing couldn't be mentioned there. The spies of the Emperor are everywhere.
There is one more thing! You were given copies of the imperial officers' manual. Our men exposed themselves to great danger in order to get them, so you should use them. There are many things there, that I won't repeat during this training.
Let's look at the screen now. I will tell you something about the rebel the space units...
This is an old type of space fighter. It performs well in skirmishes with TIE-class vessels. Due to weak armor, Z-95 units die very quickly when under fire of AA laser cannons, mounted on Tartan cruiser. Right now this type of fighter is slowly replaced by more modern designs, so you won't have many opportunities to command them.
Our new machine, that will soon take place of older fighters - or at least we hope so. X-Wings are very good against enemy bombers and TIE-fighter. They can even hurt larger ships if attacking in several groups. Unfortunately, Tartan and Broadside units are deadly to them, so send your X-wings into the fray only after eliminating those threats.
If X-wings need to retreat or to reposition fast, you can order them to lock their wings. It will enhance fighters speed, but will reduce their firepower.
Fast unit that can engage numerous TIE fighters and even survive Tartan's fire for very limited time. They can be used as a part of the X-wing fighters group or as you basic fighters. A-wings can lure enemy ships, which can be very useful for protecting your vital vessels or for bringing enemy groups in firing range of your corvettes.
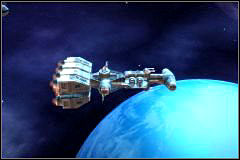
Arguably most important rebel unit. As you know, we don't have many big warships so our fleets can hardly fight destroyer-heavy empire groups. Y-wings protect us from being outgunned and even the odds. Their photon torpedoes can fly through the shields and strike vital components of enemy ship. If you target generator, then 1-2 groups of Y bombers can take down all enemy shields and leave his ship almost defenseless. They can even handle Imperial-class destroyers that are deadly to our other vessels.
Y-wing bombers are invaluable on the battlefield. Because rebel commander can't expect, that lost squadrons will be rebuild during battle, you have to locate them in safe positions and send into fight only after destroying enemy fighters and Tartan cruisers. Remember! One Tartan can destroy several Y-wing squadrons, ruining your chances to defeat heavy imperial warships. Even if Tartans are not around, it is wise to send some X-wings as an escort for bombers. They will defend them from unexpected fighter attacks.
Every Y-wing can fire one, hi-energy ion cannon round. It disturbs enemy systems, temporary lowering speed and firing rate. You should always remember about ion cannons, and use them in first strike.
Bombers can also provide air support for land operations. At least one squadron should be in orbit before attempting to capture enemy base.

This ship is equipped with several light laser cannons and is designed for fighting small enemy units. It destroys them as fast, as imperial Tartans. That's why Corellian Corvettes are very important to any fleet. Empire can field many squadrons of fighters and bombers, which can be replaced during battle. TIE units can overwhelm and defeat rebel fleet, unless you have few Corvettes to blow them to bits.
Corvettes are not very durable ships. They can fight Tartans or Broadsides, but enemy fire will destroy them quite fast. Fortunately, Corvettes can also power-up their engines, which can be used to retreat them from dangerous are.
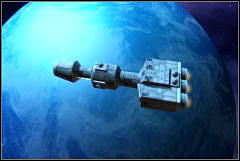
Gunships are similar to Corvettes in size, speed and toughness. There is one big difference: some of the laser batteries were replaced by rocket launchers. It makes gunship far better at fighting light cruisers, while reducing its capability to quickly gun down squadrons of TIE vessels.
Gunship is very good at hunting Tartans or Broadsides, and therefore can be very useful. But remember, that if you decide to replace corvettes with gunships, you will need some additional fighter squadrons to get rid of bombers and TIE-fighters.
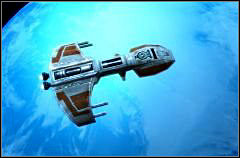
Because rebel spies couldn't provide Broadside blueprints, we use our own missile cruiser design instead. It looks different, but feels same, so look into empire field manual for basic information.
I will say only, that Marauders give you opportunity to destroy very tough enemy stations or capital ships from safe distance. Remember: Rebel forces can provide only limited number of ships, so frontal attacks on heavy imperial installations are not the way to go. That's why Marauders fit our combat style perfectly.
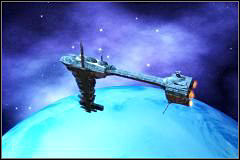
Basic capital ship of rebel forces. Unfortunately, Nebulon frigates are quite old and don't provide impressive firepower or speed. Those balanced, quite tough ships are best in groups, forming core of your fleet. They can fight enemy destroyers, but such fight will be long and hard. Because of that, it is better to target Tartan cruisers instead and let your bombers take out enemy capital ships. You should also be aware, that Nebulon frigates can be quickly damaged by TIE-bombers. Providing some AA or fighter cover for them is necessary.
Nebulon units can direct all energy to their shields. This option immediately recharges shield and makes ship almost immune to enemy fire for short period of time. Unfortunately, cannons become very weak at the same time and speed is severely reduced. Anyway, you should use this option when one of your frigates takes heavy fire - and they will do so a lot of times, because in most battles few large rebel ships must withstand concentrated barrage of numerous empire destroyers.
Boosting your shields is only possible when there is at least a little bit of energy left. That's why careful commander should monitor his frigates to know, when their shield level becomes critical. If you are late and the shield are gone, you can always retreat this ship and wait for it to recharge.
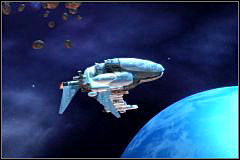
These well armed and armored ships slowly replace our good old Nebulons. Assault frigates can form excellent core of your force. They can boost their shields like Nebulon frigates, but are also better armed. Rebel commander can field them against imperial destroyers or space stations - and they will perform well. Only Imperial-class ships or numerous bombers can quickly destroy assault frigates.
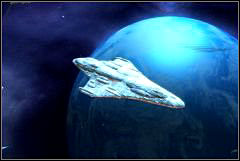
A the moment we have only few ships of this class in rebel fleet, but maybe you will be lucky enough to command them. Mon Calamari ships are heavy dreadnoughts of enormous firepower. Their fire can destroy enemy cruisers and destroyers in few moments. They can even engage Imperial class ships. As you can see, Mon Calamari ships are very versatile. If you could use them as a front line of your fleet, they would most certainly give imperial commanders terrible headache.
Remember though, that bombers are worst threat to Mon Calamari cruisers. Every ship of this class should always be escorted by some X-Wings or corvette.
Most rebel fleets are very limited in numbers. Because we don't have economical backup like Empire does, all casualties are very painful. That's why we choose more subtle tactics - rebel commanders often set up ambushes, retreat to better positions and always utilize any special power or advantage their ships may have. Because we benefit greatly from good intelligence, it is advisable to bring in fleet commanders and build sensor posts whenever it is possible.
Less advanced rebel fleets must rely on Nebulon frigates, corvettes and - of course - fighters and bombers. Smaller ships take positions in asteroid belts or nebulas, while larger ones engage enemy forces and destroy light cruisers. Then bombers come in to bring down hangars, generators and engines of large imperial vessels. Hangars are especially important, a we can't afford to fight endless waves of new bombers and fighters...
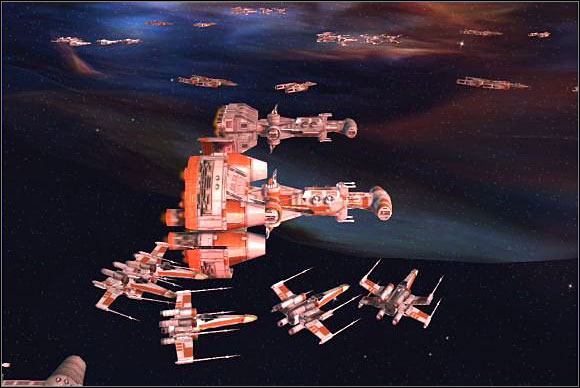 Rebel fleet must use small vessels more often, than imperial army.
More advanced fleets should make good use of Marauder rocket cruisers. Those ships should be kept in safe place - preferably with proper escort. Other part of the fleet can lure enemies into rocket range. If cruisers are in danger, all units should retreat to safe positions and repeat everything from the beginning. Space stations also should be destroyed by Marauders standing outside their firing range, though it may be wise to destroy hangar first in quick assault, because trashing stations with missile cruisers can take some time.
Very numerous and strong rebel fleets can also use straightforward, imperial-style tactics. Just form line of assault frigates or Mon Calamari Cruisers, and then move them in escort of Corvettes and smaller ships. Be aware, that such tactic will require large reserves and strong economy to replace possible casualties.
I see, that some of you are tired, but this lecture must go on. We have very little time, so be careful please.
In space our forces often loose - it's hard to fight strong and advanced empire fleet. On ground however things look different. Out combat vehicles are not worst than imperial designs - in some aspects they are even superior! We have also earned support of many local populations. Of course, clever tactics are still required.
First I will tell about all land units common to rebel forces, and - of course - about best way of using them.
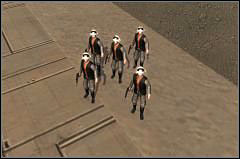
Those brave volunteers from whole galaxy are sacrificing their lives every day fighting Empire. They may appear less armed and armored than stormtroopers, but thanks to enormous determination they are good match for imperial infantry.
Rebel soldiers operate in small groups and can survive a lot of fire - especially when under cover. Unfortunately, ruthless imperial officers often use their tanks to crush our soldiers, so even large infantry groups can easily die when fighting some vehicles without proper support. However soldiers mixed with PLEX launchers offer strong, versatile force that will win many battles.
Every rebel commander should remember, that soldiers can be ordered to take cover. When this order is active, infantry moves slower, but is far more resistant to enemy fire.
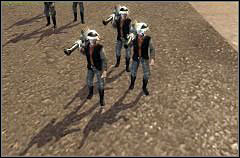
This anti-tank infantry can do heavy damage to buildings and vehicles. PLX-2M launchers offer our infantry possibility to engage and destroy groups of enemy tanks. It also makes our footsoldiers more effective and versatile than stormtroopers.
Note that fighting enemy machines with your PLEX launchers is very economical. Training few groups of those soldiers costs about sixty credits, while vehicles usually cost several hundred! That's why mixed infantry force forms very good core of rebel army. Launchers minimize threat of begin crushed under enemy wheels, because their focused fire can bring down tanks before they reach target.
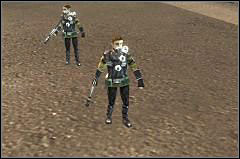
Useful, fast unit that can sabotage enemy structures. Unfortunately, it is almost certain, that you won't be able to use infiltrators during most of the incoming campaign. They require advanced technology to train, so they will join probably your last battles and will not affect outcome of a war.
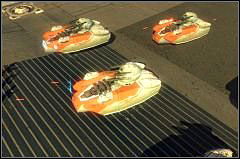
Very good, light vehicle without similar design in imperial army. T2-B tank are equipped in force shield, which gives them advantage over enemy vehicles. Those tanks are also excellent for providing support to your infantry. They can be moved in front of rebel soldiers, to prevent them from being crushed. With support of PLEX soldiers firing from behind, T2-B tanks can take down almost any enemy vehicle.
Force field allows able commander to minimize casualties. Just hide weakened machines behind rest of your forces - enemy will switch fire to new targets allowing damaged units to regenerate. In the battles with very advanced empire armies T2-B tanks are also useful for disrupting and destroying enemy artillery batteries. SPMA-T units can destroy any number of infantry, but are prone to quick raids of light vehicles. T2-B tanks can also be used to find targets for airstrike operations.
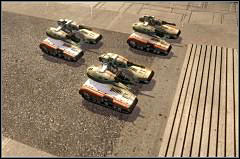
Very good, heavily armed and armored vehicles. When they become available, you should build many of them. T4-B tanks are excellent front line unit, that can engage almost any kind of enemy force. Moreover, they can bring down imperial installations in few seconds, thanks to built-in missile launchers. When supported by PLEX infantry, those tanks become almost unstoppable.
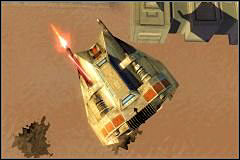
This low altitude fighter is a weapon specific to rebel forces. Empire doesn't have similar unit, so if there is no AA installations around, speeders cannot be destroyed. Their special ability is very helpful when fighting AT-AT walkers. One rope shot can bring those powerful machines down. A squadron of T-47 is welcome addition to any army. Bring in at least two if you expect enemy to field numerous AT-AT.
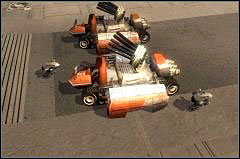
Those mobile artillery units are very different from SPMA-T in design, but very similar in use. Their firepower is impressive and allows you to immediately destroy groups of infantry, vehicles and buildings. Unfortunately, MPTL-2A are defenseless at close range, and you must set them up before using.
Consult imperial field manual for more information about artillery. There is one difference though - our vehicles use droids to find targets. Those small, fast units feature long range sensors and their special ability allows you to uncover distant parts of the map. Droids are therefore useful also for placing airstrike markers.
How our typical land battles look like? They require speed and good planning. Just after landing it is crucial to take over all surrounding support and construction points. On every new point drop all possible units.
From now everything depends on technological advancement of your army. If you have basic units only, form assault force from infantry and PLEX soldiers and protect it with some light tanks. You should use airstrikes to destroy larger enemy groups. Build turrets and other helpful structures whenever it is possible. Always leave at least one group of infantry defending your support point.
More advanced army should use tanks as main assault force and support them with PLEX launchers. Artillery units should proceed behind. Set them up every time enemy comes in range. It is good to move every artillery vehicle on its own and to keep some distance between them. This way, enemy won't block all your artillery with one unit.
Because our forces often fight alongside friendly natives, I will now tell something about them. If there are any allies available, you will see them scattered on the map from the mission beginning. Send them right away to capture support and construction points. Also, defend their structures whenever it is possible, because they will spawn reinforcements when group of allies dies.
If you find yourself in a draw, when both you and your enemy suffered heavy casualties, you can use this infinite contingent of troops to swing balance to your side. Simply flood imperial forces with recurring waves of allied infantry.
Rebels, contrary to the empire, not only can plan big all-out attacks, but also depends on small raiding parties. Our pilots are skilled enough to smuggle groups of up to three units behind orbital fleet. You may ask: what can a group of three units do without reinforcements or air support? Well, it can do many things.
First of all, if the planet has only small garrison, there is no shield covering the base, no turbolaser cannons or numerous factories - you can usually capture it with only two platoons of heavy tanks and some infantry. Just move slowly, use turrets and repair stations. And if enemy has got strong defenses, you should always scrap at least one building - preferably power generator or a factory. It's one building less to destroy in your main attack! And remember - you don't have to sacrifice all raiding troops. As soon as things get too hot, retreat them. In this way, you can slowly destroy bases protected by enemy fleet. Remember though, that time between attacks should be as short as possible or enemy will rebuild some structures.
If you know all about units and tactics, feel free to start Rebel campaign. It may be hard sometimes, so I strongly advise to finish more simple empire missions first. You should also consult both empire and rebel training sections.
Rebels are trying to steal X-wing blueprints, but they must first get rid of large imperial warships. Your mission is to sabotage shipyard in nearby Kuat system, so that warship will leave its position.
This first mission is very, very simple. You have some light ships at your disposal as well as captain Antilles and his Sundered Heart. To finish your task you have to blow up six almost unguarded constructions. Shoot in tanks near your targets, for they will start chain reaction. Shipyard security has only few Tartans and fighters - destroy them whenever they get in range with concentrated fire of all your ships.
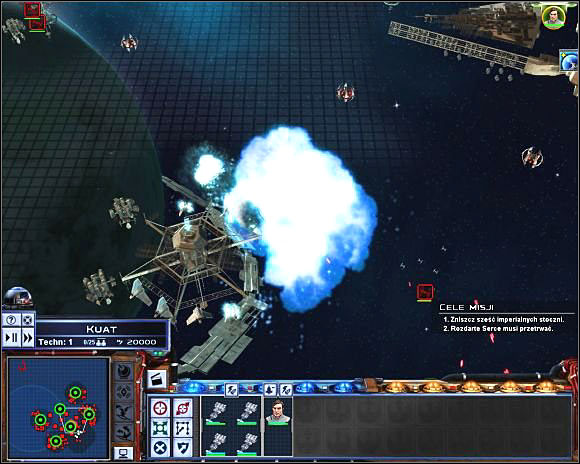 Space tanks start very nice chain reaction when hit.
 After finishing your starting mission, you will go to a galaxy map. As you can see, rebels control only small area right now. You will have to expand it fast, or else empire will crush you like a fly.
Although it may seem strange, Kuat system (that you just left) is almost defenseless. Send your fleet there right away and gather land army taking units from Alderaan and Yavin. In the meantime build up your space station on Dantooine and fill production queue with both ordinary soldiers and PLEX launchers - they are very cheap and you will need a lot of them in upcoming battles. Also build a mine on every planet. You will have to do this in every new system, because rebels can have really big problems with money in later game.
When heroes finish their chat, attack Kuat. Enemy has got only some stormtroopers and light vehicles here, so you should beat them without any problems. Just don't let enemy tanks to crush your troops and build turrets whenever possible.
After capturing Kuat you can upgrade all rebel planets - build level one space station, barracks and light factory in every system. Order your factories to train additional troops and vehicles as well as 1-2 Y-wing squadrons. Because C3PO and his little friend are invisible to enemy, send them to Corriban for some intelligence. As you can see, planet is very poorly defended: only one old frigate and some fighters in orbit. Once you have at least 6 platoons of soldiers and 6 platoons of PLEX launchers, attack. Space battle should be very simple. In land battle you must quickly capture crossroads at the center of the map, and then nearby support points. After that, crushing enemy base will be easy.
You have to lead R2D2 and C3PO to the imperial terminal. Unfortunately, terminal is located in the midst of enemy base, so you will also have to capture it. Bring in at least 10 platoons of mixed infantry and some vehicles. Drop one tank squadron and all possible infantry units in your starting point. Divide your army into three groups: vehicles, one group of soldiers and PLEX, second group of soldiers and PLEX. Leave also 2-3 units to defend your starting position.
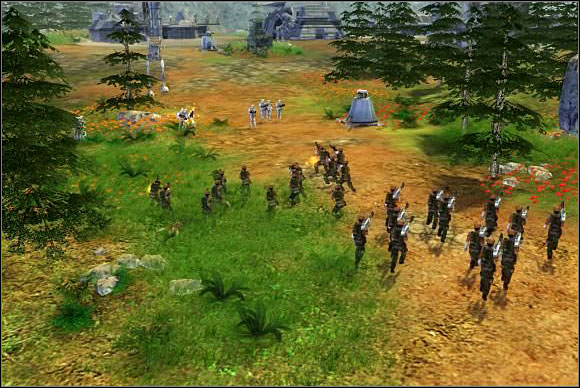 This mission can be won with only infantry units - you have to capture enemy base and then hold it for a while.
Move your main forces to the base. Infantry should proceed first. Destroy some turrets and enemy troops - remember to take cover when under fire! Once you reach the base, clear it out of hostiles, and then put your own turrets on both sides. Now you can bring your robots to the terminal and position your infantry near the turrets. Empire counterattack comes soon. Enemy will strike from two support points, but repelling him won't be hard. After that, you only need to get your robots back to starting position.
Everything is ready for the X-wing blueprints theft. New planet becomes active - it is objective of your next mission. Enque new units first and build many Y-wing ships - you're going to need a lot of them soon. Remember to keep small defensive garrison on every planet. If you haven't conquered Corriban yet, you can do it now.
Enemy base is located in the upper area of the map and X-wing prototypes are stationed nearby. Two roads lead to the base - eastern one is defended by turbolaser batteries and western is almost unguarded. This road goes through second support point and right into enemy generators. Send some infantry and PLEX soldiers there, while leaving vehicle platoon with some support to defend your starting position. Pilots should proceed in safe distance behind the attacking group - this way you can keep an eye on them o.
There is some enemy infantry on the way - attack them (ordering your man to take cover first). You will also meet some AT-ST walkers near northern support point, but missiles should take them down easily. After capturing support point, drop in the rest of your force and then prepare to storm the base. First send a scout team to the gate. When they locate enemy turrets, and some units, drop your airstrike right between them. When smoke clears, there will be no turrets, no wall and generators should be damaged badly. Now you can go in and demolish rest of the base. Remember to capture third support point as well. Once you clear whole map, bring pilots to the X-wing fighters.
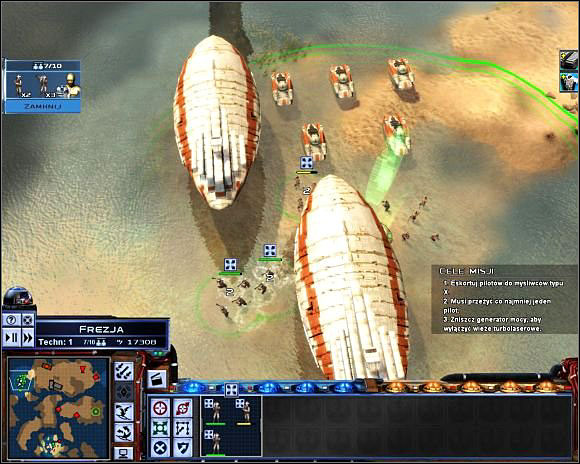 Once you capture second support point, you will outnumber enemy.
Unfortunately, mission is not won yet. Enemy begins to build AA turrets and some imperial tanks drop from the orbit. You should handle them though, if you have all available troops set on the battlefield. After combat, destroy any remaining turrets, so that X-wings may start.
Just after mission capture Fresia and take a while to build up. Only one planet becomes active, but soon you will have half of the galaxy against you so prepare well. It is good time to raise large fleet and to build some more X fighters. When you'll have enough troops, go for the next mission.
Emperor wants to send valuable personnel as a slaves to the Kessel mines. You are to capture this transport. Your starting point is a perfect place for trap. Enemy convoy is incoming from north-eastern corner of the map. It seems large, but don't worry - mission is more simple than you may think.
At the very beginning, stop the time and divide your fleet. Group your corvettes in one unit, fighters in second, and then make some groups consisting of 1-2 Y-wing squadrons. Now take a look at the convoy. You will see that some TIE-fighters are first, then goes one Acclamator, then three shuttles, another fighters, another Acclamator and the last shuttles.
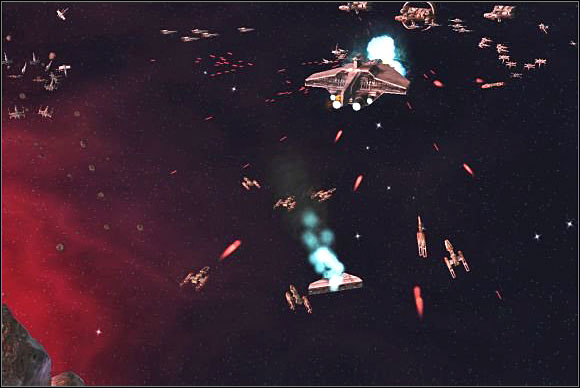 Imperial ship flies right into rebel trap.
Your plan is simple - set your corvettes and fighters right in front of enemy. TIE fighters will be destroyed almost immediately after flying into your range. Now strike enemy cruiser with all your forces, using ion cannon shot of one of your Y-wing squadrons and blasting his engines with other bombers. When shuttles come close, send one squadron of bombers after each transport. Stop them with ion cannons and then pick up with Sundered Heart. Repeat the same with another wave and don't be afraid of numerous imperial destroyers - you'll be done before they reach your positions.
Go for this mission just after finishing the last one. It is very simple. You have only to drag your robots to the "steal data" field on an enemy planet, then select technology you want to acquire. I recommend heavy factories or Marauder cruisers.
Now build your new structures - at least two Officer Academies and (when you'll have them) some heavy vehicle factories. Upgrade your stations on Aleraan and Dantooine. Now you can build some Nebulon frigates. Remember to move Mon Mothma to the system in which you are planning to build expensive units. She cuts the costs significantly.
Soon you should have at least one officer and one field commander in your army. Robots are probably done by now, so send them to snatch another technology. From now on it will be your main (and only) way to advance, so steal enemy information whenever it is possible.
Now look at newly activated planets in lover part of the map. Capture them as soon, as you'll have Nebulons, Marauders, artillery and commanders. Be sure to control all available systems before going for next mission, because soon you will get even more planets to conquer.
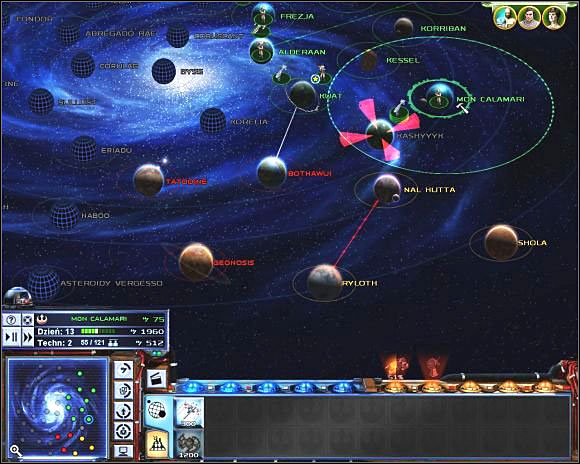 "To conquer" list gets longer and longer...
It is best to capture Bothawui first. Leave small garrison there and head for pirate Nal Hutta system. Then you should take over Ryloth (you will finish trade route this way and receive additional credits), Shola and Mon Calamari. Build important structures on every of these planets. Be sure to have largest available stations in orbits of Kuat and Mon Calamari - you will need them to build heavy rebel cruisers. Build a cantina on Ryloth - smugglers will help your economy.
By now you should have many credits and large army. Conquering Genosis and Tatooine should be easy, and once you finish - go for Kashyyk mission.
Han Solo is going to blow up some prisons and you are to help him. Mission shouldn't be hard, because you have artillery units and you know how you use them.
Drop in your field commander, light tanks and MPTL. Move your forces east to capture first prisons. Destroy them with Han Solo (you need to move him near prison gate), defeat any imperial soldiers spotted, build some turrets and then quickly set up your artillery near the river. Block the ford with your vehicles, because very strong counterattack will come soon. Use your artillery and airstrikes to defeat it, and then go through the river to destroy another prison. Take over northern support point, and once again set up defenses. All remaining prisons are nearby, so destroy them one by one and mission will be completed.
Now you're going to have a hard time. Almost half of the galaxy becomes active. Most systems are already in Emperor hands, and rest of them will be soon, before you can get to them. Enemy has greater fleet, more shipyards, and credits. But who told you, that fighting empire will be easy?
You should have access to heavy tanks, speeders and gunships by now, so build them. Then move slowly to the west, capturing all systems on your way to Atzeri. Remember to leave strong garrisons on border worlds, for Emperor will surely try to take them back. And don't be surprised if you'll have to fight very numerous enemy fleets!
It is good to conquer everything at least to Eriadu, but I recommend that you should also go for Sullust and Dagobah. Of course, if you feel very strong, you can take over all enemy systems, but this is going to be very, very hard.
If road to Atzeri is open and you have large fleet, you can start next mission. Main task is to capture smuggler who has some very important information. His ship is being chased by strong imperial force. Don't be afraid though - enemy will concentrate on capturing the smuggler, and won't come after you.
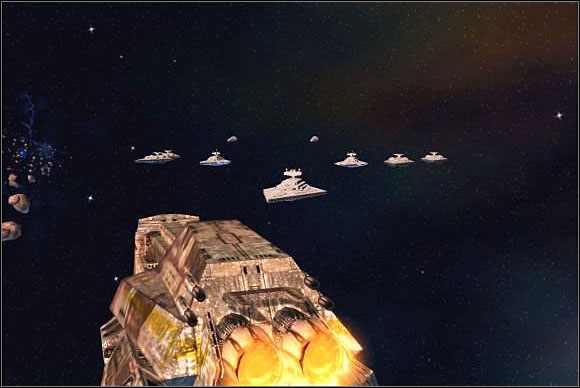 Pirate's worst nightmare
Attack enemy ships as fast, as you can. Help yourself with Marauder barrage. Remember to blow up shields, engines and hangars first. If you win, go after the pirate. Shot him until he stops moving, then use Sundered Heart to retrieve the data. Now you will only have to destroy group of Interdictor cruisers and leave the system.
Corellia becomes active now and you are notified about troubles of Han Solo. You should be able to build assault frigates by now, so add them to your fleet and head for next task.
This mission is really simple. You actually need only few Y-wing squadrons to win. Once you arrive, target tractor beam of enemy destroyer with your bombers. Ignore all remaining ships. They will be surprisingly idle. When your Y-wings destroy tractor beam, Han Solo will jump out of the system. Congratulations, mission is over.
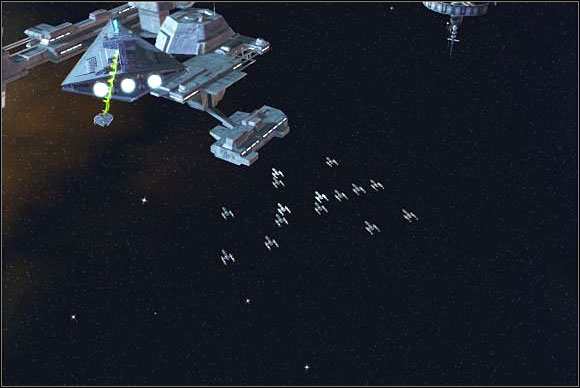 Y-wings are going after enemy destroyer. Few well placed torpedoes will do the job.
Now finish your work in Corelia and capture the planet surface. Another system becomes active, and since you have nothing serious to do, send Han Solo there to begin next mission.
Interesting, but quite hard mission. You have to scan several containers scattered around the map - Millenium Falcon is your only ship here, while enemy has got strong fleet.. It doesn't matter which container you scan first - proper one will always be last.
Try to be stealthy right from the beginning. Zoom out your screen to see what's going around. Try to work out enemy movement schemes and get after containers when there's none around. Regardless of your skill, you will be finally detected. When that happens, begin to run like hell, using asteroid belts to get rid of larger enemy vessels. Destroy faster ones and scan containers while there's none around. If you get caught under heavy fire, use Falcon's special ability that makes you invulnerable for short period of time.
After scanning about half of the containers, Boba Fett will jump in. His ship is very fast and can spoil your plans, so when Boba gets close, lure him into asteroid belt and then defeat using your special ability. After that, there will be only few containers left, so you should be able to finish your task.
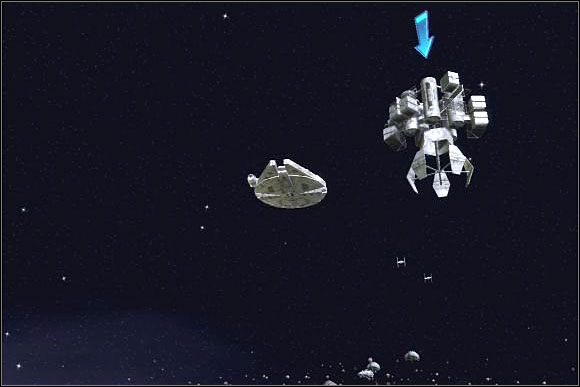 Last one!
Corulag system becomes active - that's main objective of your next mission. Build a lot of assault frigates and Y-fighters first. Serious battles are going to happen now, so you need to be prepared.
Quite short mission. When you jump into system, whole enemy fleet is paralyzed by a powerful EMP blast. Unfortunately, some ships begin to move very soon. Destroy them and then move all your fleet into positions around target station. Now you need to defend docked transports until boarding parties come back. There is no clever tactic, just stay near the base and destroy waves of incoming enemy vessels. If you loose any ship, immediately bring reinforcements from hyperspace. Once rebel troops come back, your task is complete.
Right after this mission Mon Mothma asks you to bring Han Solo to her. Don't do that yet, because next mission will start automatically. After that all remaining systems will become active and the empire will counterattack.
You should take some time to prepare now. Planets close to inactive systems (like Corelia, Fresia, Corulag, Alderaan, Dantooine) should be reinforced. Build defensive structures on their surface and keep some troops there. Check if Sulust, Kuat and Mon Calamari have best available space station. Once everything is set up, send Solo to Mon Mothma.
Introduction explains almost everything. You must get to the depot in south-eastern corner of the map, but first you must destroy generator in north-eastern part.
There are some stormtroopers patrolling square near your starting position. You can kill or avoid them. Now you need to get past two turrets located west from landing zone. Turn on Solo's sprint ability, get close to them and then activate EMP blast. Now quickly destroy turrets with both your heroes, since they will be disabled only for a short time.
You can go down the street right now untie you reach some TIE Maulers and construction point. Let Han Solo capture this point, and in the meantime steal one of the vehicles with Chewie's special ability. A lot of troops will go after you, so immediately build healing station and begin to crush enemies with your stolen vehicle. If it becomes badly damaged, self-destruct and bring Chewbacka near your station. You can defeat remaining stormtroopers there.
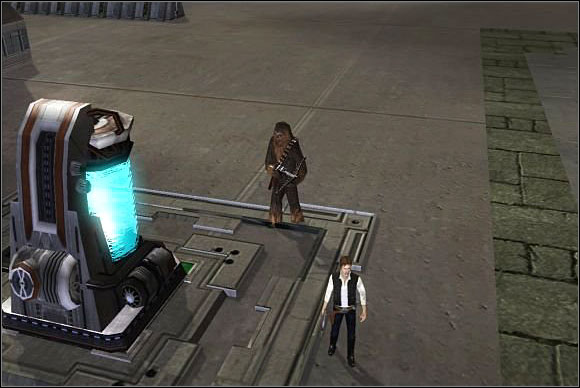 Fortunately, there are some construction points on the map. You will be able to regain your health or repair your machines there.
Once you're done with enemy infantry, wait for Chewie's skill to regenerate. Then send him to steal... an AT-AT. This mighty machine stands in north-western corner of the map. With it's help you will be able to defeat all nearby troops and vehicles. Remember, that walker can crush infantry under its feet. After clearing this area, come back to bactra tank, sell it and build repair station instead. Go to the northern part of main street (the one that cuts whole map in half). Destroy any incoming patrols healing your AT-AT between the battles. After that, blast three enemy turrets too, starting from anti-vehicle one. You might need to use Solo's EMP blast if you want to keep AT-AT alive.
When main street is clear, go after power generator. Once you blow it up, you can abandon your walker. It won't be necessary from now on. Go to the depot, destroying any imperial remnants on the way. When you'll reach your target, large contingent of enemy troops will land on the map. Position yourself on the main street. Wait for enemy, lure him into square adjacent to the depot, and then flee through the northern exit. Now run to the landing platforms and you'll win.
Just as I said before: empire takes initiative now. All planets become active and you are notified about large enemy fleet planning to take over Mon Calamari. Ruining this attempt is your next objective.
Just after returning to the galaxy map, go to Mon Calamari. Admiral Ackbar is here, as well as four powerful cruisers. Send them all to join your main force and order shipyard to build some more.
I can't tell you where empire will strike, because it is quite random. Most often, however, enemy heads for Corelia first, so gather all your forces there. If enemy takes any other route, be ready to immediately reposition.
If things go well, you will fight Emperor's fleet on your own terms - near your space station and with help of planetary ion gun. In that case just use your Mon Calamari cruisers to build solid defensive line near the station. Position corvettes, bombers and Marauders behind them and then defeat incoming waves of enemy ships. Remember to use ion cannon - it can immobilize largest enemy vessels.
If you're unlucky, you may need to fight Emperor's fleet in his system - without support of your station. Mission is harder then, but Base One and Mon Calamari ships should help you win. Mission is over, once main enemy fleet retreats or is defeated.
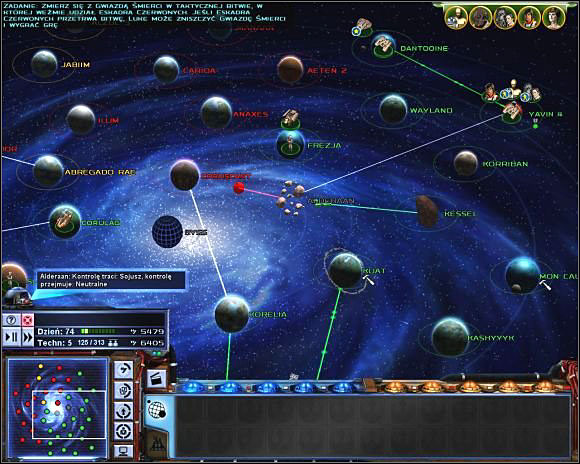 Death star strikes once more, and Rebels are gathering their forces for the final battle.
Soon rebels will suffer terrible blow. Enemy makes use of his new weapon - Death Star - to destroy Aldeeran. After that, he wants to annihilate all rebel planets! Unfortunately, you have no means to stop the Death Star right now. Of course, that doesn't mean you should give up your systems without a fight! You can still win tactical battles, although attacked planet will be destroyed regardless of battle outcome. However, if you manage to destroy Star's escort, it will be easier to take it down later.
After a while Mon Mothma will inform you, that she has some pilots capable of destroying the star. Luke Skywalker with Red Squadron and Millenium Falcon appear on Yavin. Quickly send them to your main force and attack the star. To defeat it, you only have to win tactical battle while not loosing Reds. If they survive the battle, they will blow up Death Star soon after.
It's hard to tell what forces you are going to face here. Imperial fleet can be very numerous, if you haven't fought it yet - and even if Death Star appears to be alone, it will spawn defensive fleet and space station when attacked.
If you win, then just after battle you will see the final cutscene. Congratulations, you have led Rebel forces to victory! Emperor, however, is still alive and some people say, that he is preparing to strike back. But this is a story for another game and another walkthrough guide...
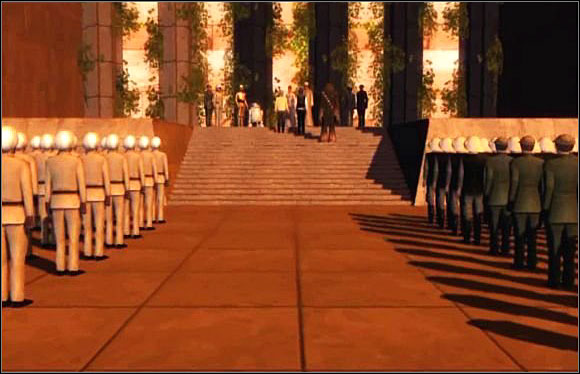 Victory! Rebel heroes receive well-deserved medals, while Emperor is preparing to strike back.



 Sid Meiers Civilization V - Gods & Kings Game Guide & Walkthrough
 Sid Meiers Civilization: Beyond Earth Game Guide & Walkthrough
 StarCraft II: Wings of Liberty Game Guide & Walkthrough
 Still Life 2 Game Guide & Walkthrough
 Silent Hill: Homecoming Game Guide & Walkthrough