This guide for Star Wars Battlefront provides thorough information on multiplayer. Here, you find a plethora of information on the available game modes, vehicles available in the game and heroes from the original movie trilogy. Apart from that, you learn what you unlock in the first place, and where you would be better off saving up. Additionally, you learn lots of hints for any situation. Apart from the multiplayer mode, in the game there also are missions that you can complete solo or with your friends. One of the chapters of the text has been devoted to collectibles available in such missions. Star Wars: Battlefront is yet another installment of shooters set in the popular Star Wars universe. The game has been developed by a newly-established Dice LA, in collaboration with Disney Interactive. The game presents to the player the universe of Star Wars, which is the backdrop for the struggle for rule over the galaxy. The game is going to be based on the Frostbite 3 engine, which has also been used in the most recent Battlefield installment. It is not only the engine that is similar here. In spite of completely different setting, the more experienced players will surely spot the similarity of movement, or some activities.
This guide for Star Wars: Battlefront includes:
Grzegorz "Cyrk0n" Niedziela ()
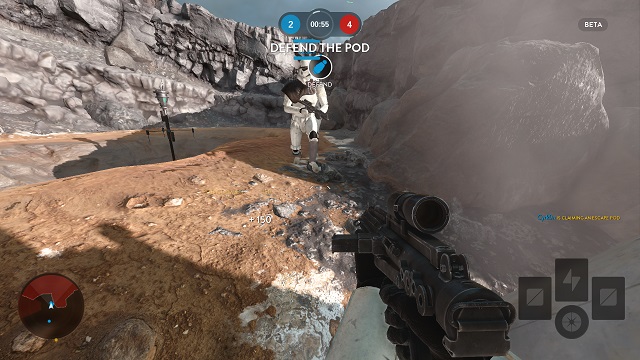
On the player's screen, there aren't many messages. This is good, because only the most important information is displayed, thanks to which you can focus on the game itself. Apart from that, you can prevent some messages from showing up, by disabling the option in the settings>gameplay tab.
 The HUD
Starting from the very top of the HUD, the first is the current score and the time remaining until the end of the match. A bit below, there are the current objectives for the squad.
The Minimap is in the bottom-left corner of the screen. On the map, you can view the current positions of your squad members, as well as the locations of the current targets (e.g. pods in the "Drop zone" mode).
In the center, there are the points and the rewards for killing streaks and other actions.
The red bar below indicates the percentage of the remaining health. This element of the HUD disappears when your character is in full health.
On the right, you can see the available cards (e.g. grenades) and the buttons to activate them. Also, this section displays your power-ups (e.g. a turret).
Directly above, there is the kill feed, which is where all the kills are recorded.

Move
Jump

Sprint

Crouch

Shoot

Aim

Primary weapon


Use Cards

Melee

Interact

Scoreboard

Camera switch

Chat with everyone

Teamspeak

Chat with your partner

Active weapon cooldown
The tips below are applicable in the beta version of Star Wars: Battlefront. They will be modified and updated accordingly after the full version is released.
1. Begin the game in the Drop Zone Mode and continue, at least until you have unlocked the following three items. They will become essential when playing the Walker Assault Mode.
2. When playing Battlefront, you need to forget many of the habits you've picked up while playing other shooters. Number one: aiming with sights/through scope. In Battlefront it doesn't do you much - no recoil reduction, no accuracy bonus; it just allows you to aim a little better. The downsides, however, are several: reduced movement speed, narrowed field of vision, and the precious time wasted on bringing the gun to your eye.
3. The game allows you to play in both FPP and TPP. While the FPP may seem like the obvious choice to most people playing online shooters, this time it's a miss. It gives you absolutely no advantages, while narrowing your field of vision. When in TPP, you can see more, and even use the old trick with looking from behind the cover while the character remains hidden.
4. The weapons in Battlefront have no ammo clips, but are prone to overheat in long firefights. To reduce the cooldown lag you can try the following methods:
5. In both the Drop Zone and Walker Assault Modes you will be defending a position from the enemy attack (capsules/Uplinks). Personal Shield can be a lifesaver, buying you the few crucial seconds necessary to win the round.
6. Blaster bolts are slower than bullet rifles. Remember that, when shooting at distant and/or moving targets. Try to aim a bit in front of them.
7. Always try to move in groups of 2 or 3. The maps available in beta are spacious and open, and the spawn points in the Drop Zone Mode are random - this means the attack can come from nearly any direction. The first one to see the enemy becomes a safe bet when guessing who's going to win a 1 on 1 situation. When in group, even if you die, you will buy your teammates the time to respond, locate the enemy, and hopefully avenge you.
8. When playing the Drop Zone Mode, remember that after you gain control of a capsule, it will drop some useful things. Don't forget to collect one of them before rejoining the fight.
9. In the Walker Assault Mode, always focus you efforts on capturing/defending Uplinks and eliminating/protecting the AT-AT walkers. It takes frags to achieve that, but it's better to kill one guy and keep the capsule than to kill three guys and lose it.
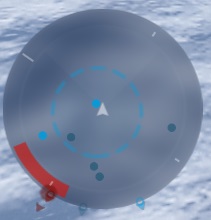
 The radar
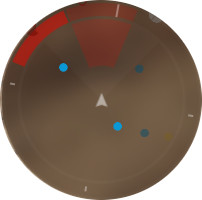
The radar provides you with lots of information about the battlefield and the opponents' locations. It is very important to know how to read information provided by the radar.
All of the allies are marked in blue. The yellow dot is the location of your partner.
If the opponent is sprinting, or shooting, he sends out a signal. These signals are marked on the radar with color red. Bars lighting up around the circumference represent opponents that are standing closer or farther away. The stronger the highlight, the more sure you can be that the enemy is there.
"Drop zone" is a highly dynamic mode, where only infantry fights. In this mode, there are two squads of eight.
 "Drop zone" is very dynamic action
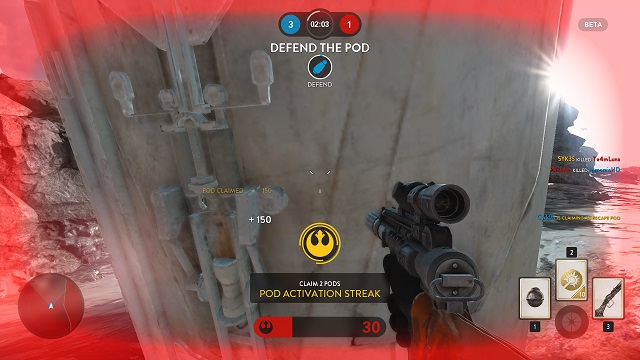
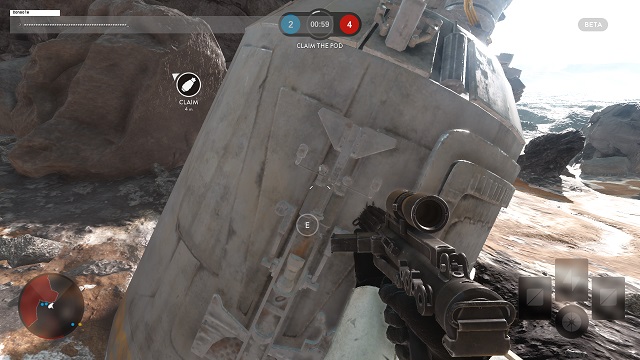
At the beginning of the game, both of the teams are deployed in random spots at the edges of the map. Also, the pod is deployed at random. The objective of both teams is to reach the pod and prepare it for evacuation. In reality, this requires one player that reaches the pod and interacts with it, in order to activate it.. The evacuation occurs after 30 seconds, which is the time during which you need to defend it from the opponents. However, if the opposing team gets to the pod, they deactivate it in the same way as you activated it before and as a result, they may score a point. At that point, the roles switch and the clock resets.
 A Drop zone
The point is awarded to a team after they activate the pod and will defend it effectively, for the successive 30 seconds. The first team to score 5 points, or have more after 10 minutes, wins the match.
In this mode, after the death, the player can respawn in a random spot at the edge of the map, or on his ally.

This icon represents the pod. It appears directly above the pod and on the minimap - in the bottom-left corner. If it is white, this means that the pod is neutral, if blue - your team needs to defend it now. If the icon is red this means that it is your team's turn to attack.
The boundary around the icon represents time remaining until the evacuation of the pod.
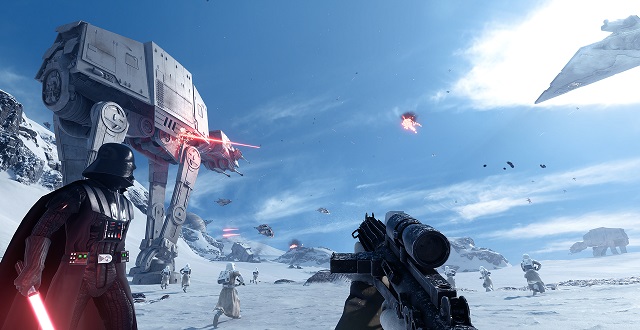 Walker Assault
In the "Walker Assault" mode, the rebels are defending themselves from the Empire attacking them with AT-AT machines. This mode takes place on the largest maps in the game and up to 40 players can participate in a single game.
In this mode, the Empire has one or two walking machines which are slowly moving towards the rebel base. Empire players are tasked with protecting them from attacks.
The map is divided into sectors. The battlefield is constantly moving towards the Rebel base. The AT-ATs are moving with the same speed which isn't affected by the situation on the battlefield.
The map is divided into sectors with three pairs of transmitters. They are the target of the ground battle. Two transmitters are active simultaneously. As the time flows, the transmitters closer to the rebel base become active.
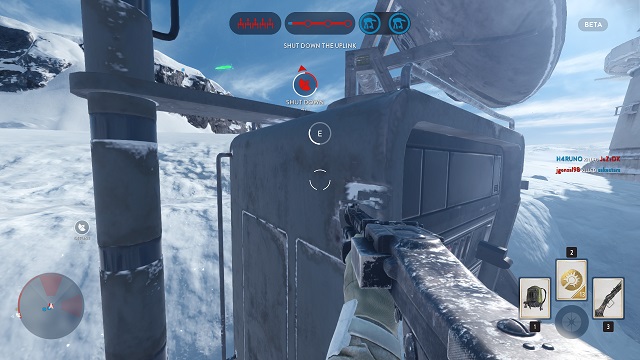 Taking control of the transmitter
In order to take control of the transmitter, the rebel must get close to it and hold the action button. The Empire player can use similar method to turn it off.
During most of the game, the rebels cannot attack AT-AT from the ground. Y-Wings are needed for that. You receive one such vehicle for defending the transmitter for 45 seconds. The time is counted separately for each transmitter, which means you can receive two Y-Wings every 45 seconds.
Because of that, the whole ground battle takes place around the transmitters. However, there is a time when AT-AT is unprotected and everyone can attack it. It happens when active transmitters are changing and empire forces are moving forward. During one minute the walking machines can be attacked with every weapon type.
Rebels must destroy all AT-ATs in order to win. Empire wins if at least one walking machine reaches the Rebel base.
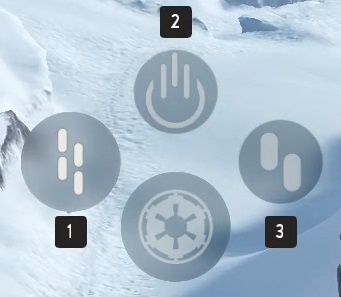
 Interface in this mode
The number of Y-Wings currently airborne is seen on the left.
The lines in the middle mark the road that AT-AT is walking through and the dots represent the pairs of transmitters.
Two symbols on the right side are AT-AT. Around them you can see how damaged they are.
Playing as rebel infantry is harder since Empire has AT-ST and AT-AT with which killing a simple soldier is very easy. You will provide the greatest help to your team if you will control Y-Wing and directly help in destroying the AT-AT. You can also select other flying machine and try to control the air space for players in Y-Wings.
If you will fail to do that and be forced to play as infantry, focus on attacking or defending one of the transmitters. When playing as Rebel infantry, select a weapon that is effective on long distance and gadgets that are useful in destroying vehicles such as ion torpedo, ion shot or ion grenade.
The easiest and safest way to earn kills on Empire side is sitting safely in AT-AT and eliminating enemies from safe distance. Other good option is using flying vehicles and protecting the walking machines from enemy Y-Wings. If you don't feel strong in airplanes, then try to get into the AT-ST.
If you are forced to play as infantry, then pick a weapon that is useful in long distance and select pulse cannon or cycler rifle as star cards - they are effective in eliminating enemies from long distance.
 Supremacy
In this mode, the Rebel and the Empire are fighting for control of five key points placed across the whole map. Up to 40 players can play together. The maps in supremacy mode are large and you can use various ground and flying vehicles.
 Flags when the game starts
In supremacy mode, two teams are fighting over five points positioned in large distance from each other. Each team starts the game having two points under control. The last point is neutral.
During any moment of the game, you can be taking over up to two of five points. The one that was taken as the last and the next one of the team that has lost a point. Because of that, the teams are always having one active unit each. When one of the teams will take over both positions, the battle will move to the next points.
 Flags after taking over the neutral point by red team
From the above picture that shows taken flags you can read that the red team has taken over the middle point. At this point, unit number 2 and 3 can be taken over. The point number two is protected by the blue team from the red team. The flag three is protected by the red team from the blue team.
 Flags after the third flag is taken over by the blue team
If the blue team would reclaim the flag number 3, the whole battlefield would move towards the red base.
When a flag is taken over, one minute is added to the basic time. It means that if the match is very fierce, it can take longer than usually.
The battle is won by the team that will take over all five flags or will have 3 or 4 points under control when the time ends. By default, the time is set at 10 minutes.
 Taking over area marked on the map
In order to take over points, you must simply find yourself in its reach. Taking over a point goes faster when more allies are in its reach. However, if there are enemies in its reach, then it goes slower.
For example, if two Rebels are taking over a point, but an Empire player will walk into its territory, the Rebels will be taking over the point with the same speed as if only one Rebel player was in the territory. Taking over a point by a single player takes one minute. Due to that, trying to obtain a point alone rarely ends in success.
Points controlled by enemy are marked in red, the blue icons represent the flags obtained by your team. While taking over, the icon slowly fills with adequate color. When taking over, a number appears on the icon as well. The number represents how many players from the team are taking the flag over. If an equal number of players from both teams can be found in the area of a flag, the point isn't taken over by any team.
Defense
Most of the players in supremacy are eager to obtain enemy points. However, the defense of your unit is just as important. Because of that, position yourself near the protected territory and wait for enemies to attack it. Not only will it let you greatly help your team in victory, but you will also improve your statistics, as it is always easier to defend than attack.
Remaining on the point territory
In a situation when you and your team are taking over a point, it is a good idea to have as many players taking over a point as possible. However, immediately after claiming a territory you should split, because a large group of targets in one place can be easily eliminated by an AT-ST or grenades.
Individual score
Many vehicles and upgrades are available for players in supremacy mode. They are very powerful, making it very hard to obtain a nice score when playing only as infantry. If you play as one of the heroes or AT-ST, you can obtain long kill streaks. Due to that, if the kill/death ratio is important to you, try to play with AT-ST or as hero.
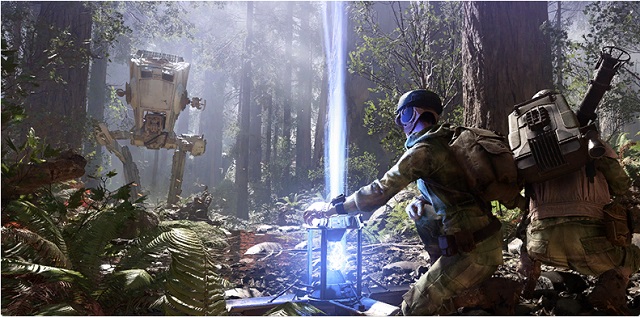
 Droid run
In "Droid run" mode, the battle takes place between six-person teams on rather small maps. The objective of both teams is to take over the droids. There are no vehicles and heroes available in this mode.
There are three walking droids in this mode. They serve as points which the players must take control of. In order to take over a point, you must get directly to the droid and hold the action button. This will start the process of taking over a point. The process takes 20 seconds.
The enemy can cancel the taking over in the same way. If you start taking over a point again, it will resume from the same moment. For example, if Rebels were taking over point A for 8 seconds and Empire stopped them, then taking the point again will take them 8 seconds as well.
The team that takes over all three droids and manages to hold all of them for 20 seconds wins.
If none of the teams manage to do it, then the team with two points taken over will win after the time runs out. By default, the time limit is 10 minutes. If one of the droids is still being taken, then the time is extended until one of the teams will take over the target.
Less running, more thinking
Most players in this mode will be running without any thought to the place where they will notice a point marked in red. However, no team will ever manage to take over and keep controlling all the points if no one will focus on defense of the already controlled droids.
Due to that, the best strategy for the game is selecting one point and guarding it. It doesn't need to be the same droid during the whole match. It is best to select the target that will be closest to you from your starting position. It doesn't matter which team has it. Attack it, and the position yourself in a place where enemy will not expect you. Defend the droid until you die.
Calmly check the perimeter
Once you get to a drone controlled by enemy, don't run blindly to the target in order to take it over as fast as possible. It won't work for you, as in order to win you must also hold the point. Calmly check the surrounding territory and start taking it over once it is safe.
The last seconds of the match are the exception, as the target must be taken over for the time to be extended. In that case, rushing is recommended.
Shoot while taking over
When you're taking a droid over, you don't need to keep watching it precisely. Being turned in its direction is enough. During the process, you can search for enemies under your aim. Since there aren't many players in this mode, it is hard to depend on your team allies. What's important, when taking over a droid, you can keep shooting and it will not cancel claiming the target.
 Blast
BlastClassic team deathmatch mode in Star Wars Battlefront version. In this full of chaos mode ten-person teams face each other on small maps with no vehicles and heroes. The only objective in this mode is killing enemies.
It's hard to even write something more about this mode. This is the place where most players are only testing weapons, settings and they learn to shoot, not considering this mode as actual matches.
In this mode, players appear in random places on the map and they are killing each other. The team that will obtain 100 kills as first or will have more kills at the end of the time, wins.
If you want to obtain a decent score in this mode, you cannot run through the center of the map. There you can be attacked from all sides, and with random spawning points it is a great risk.
 Heroes vs Villains
In this mode the bravest heroes and the most cunning villains of the galaxy face each other. On one side, there is Luke Skywalker, Princess Leia Organa and Han Solo, while against them there are Darth Vader, Emperor Palpatine and Boba Fett. This mode is played on small 6 vs 6 maps. There are no vehicles available in this mode.
In this mode, three randomly selected players from each team become the heroes or villains characters for one round.
The other players are regular soldiers. However, they can join the game regularly or as honor guards. In that case, instead of the regular star cards they will receive rocket launcher and homing missile. The only players on which you can respawn like that are Emperor Palpatine and Princess Leia Organa. There can't be more than two members of honor guard at once.
The objective of both teams is killing enemy heroes or villains. The game is divided into rounds. The heroes and villains have one life per a round. However, after they die, they can respawn as regular soldiers.
The team that kills all three heroes or villains of enemy team or will have more of them alive after three minutes, wins. In case of similar number of alive heroes after three minutes, none team receives point. During the next round, other players become heroes or villains.
The team which will gather five points as first wins the match.
1. Don't play too offensive with your heroes
Don't rush yourself ahead when playing as hero or villain. Survival is the key to victory. You should hide and wait for the end of the round, especially if you're the last one. Sometimes the game goes in such direction that a draw is the best you can get.
2. Honor guard
If it is possible, respawn as honor guard. These characters are equipped with weapon that is good for fighting heroes or villains. Additionally, the honor guard has better armor and it deals more damage to enemies.
 Hero hunt
In "Hero hunt" mode, one of eight players becomes the hero or villain and he must stand against the assaulting enemies alone. This mode is played on very small maps where vehicles aren't available.
In this mode, one of the players is randomly selected at the start and becomes one of the heroes or villains. The remaining players have one objective - to kill him.
The soldier who manages to do it respawns in random place on the map as random hero or villain. And so it goes.
The player who accumulates the greatest number of kills after 15 minutes will win.
1. Don't run if it isn't necessary
Enemies see you on the radar whenever you sprint. Because of that, avoid it when it isn't necessary.
2. Don't panic
When playing as hero in this mode, many times you will face a situation when almost the whole enemy team is running at you. You must remain calm when that happens. Don't press the buttons in random order, think about what ability will be useful now and use it.
3. Game style
There is no single tactic which can be used when playing any character. The game style will vary depending on the character and the map. Look thoroughly through the chapter of the guide that focuses on heroes and try to utilize the advices that can be found there.
 Cargo
CargoThis mode is the Star-Wars-fashioned mode the appears in other shooters as "Capture the flag". The goal of both teams is to seize crates they find in enemy bases. A match in this mode is participated by twelve players. Neither heroes nor vehicles are available here.
In this mode, at the beginning of the match, both teams receive 5 points.
Near bases of both teams, there are stations with crates - these are key for this mode. The aim of each team is to infiltrate the opponent's base, collect the crate, and carry it all the way across the map, to own base.
If successful, the team receives a point, and the opponents lose one point. This happens because the number of points corresponds to the number of crates around the map, and there always are 10 of them.
If a player is killed, while carrying the crate, it drops onto the ground and it can be picked up by any player. If this is done by an ally of the dead soldier, he resumes the run to his own base If the crate is picked up by the opponent, he does not have to run back to his base and the crate returns to the starting point.
The match is won by the team that either has collected all 10 crates or has more of them, after 15 minutes.
1. Put defense before attack
This mode is yet another one, where the player keeps running ahead, regardless of the situation on the map, In order to steal the crate from the opponent. However, defense is just as important. Apart from that, it is easier to defend than to attack. This is why you should try to defend the crates your team has. However, do not stand in one spot, by the crate. Remain in movement and try to get the attacking enemy from behind.
2. Haste is not always recommended
Do not haste if you are near the enemy base and are going to steal the opponent's crate. A point will be allotted to you after you steal the crate and carry it over to your base, anyway. This is why, if the opponents are defending the base, do not run headlong towards the crate and try to eliminate several opponents beforehand.
However, there are situations, in which haste and risk are recommended. When an opponent drops the crate, you need to dash towards it and collect it, at which point it returns to the base. In such a situation, it is even better to sacrifice your life, for the good of the entire team. It is a good idea to use star card then - personal shield.
 Fighter Squadron
Fighter Squadron is a mode that proponents of flying will appreciate. This mode is about dogfight only, on vehicles such as X-wing, A-wing, and TIE Fighters. In this mode, there are 20 players that fight against each other. However, there are more fighters here, than the number of players, because there also are 20 AI-controlled fighters here.
This mode is not too complicated. The team receives one point per one destroyed fighter.
Apart from that, every 45 seconds, transporter of one of the teams appears in the sky. It is well-armored, but not armed. If the team manages to destroy it, they receive 20 points.
The match is won by the first team to score 200 points, or has more points after 15 minutes.
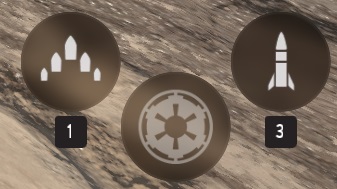
In this mode, there are three types of upgrades available. They have been distributed right above the ground level, which may be quite a problem for beginner pilots.
The rule that upgrades operate here on is different than in the case of infantry. You can then collect an upgrade and use it at any convenient moment. Here, however, upgrades are activated instantly, so you cannot collect it and use it when it is needed.
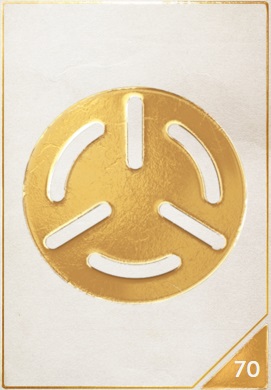
 Repair
The above screenshot presents the icon that represents extra 50 repair points. It is very important, because fighters do not repair spontaneously, which makes it the only way to make extend your life span.
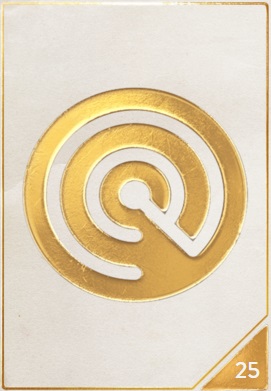
 Shorter cooldown
This symbol represents another buff. It cuts cooldown shorter, thanks to which, after you use rockets, shield or boost, you can regenerate them instantly and use them once again.
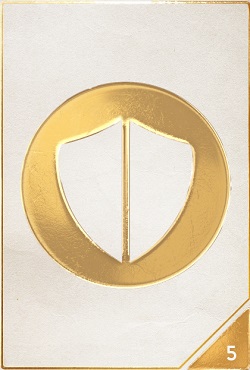
 Hero
HeroThis symbol stands for a buff for a hero. How does a hero get to a mode, where you do not play as infantry? In the game, you have access to fighters that heroes fly on - the Millenium Falcon and Slave-II. They are much better armed and their armor is thicker than that of the regular fighters thanks to which, just like in the case of heroes, you can chain kills in impressive streaks.
1. Do not fly too far away from your base
The most frequent mistake in this mode is flying too far away from your allies and facing a situation, where you are left alone against several opponents. This is why you should try and remain close to your base, thanks to which you will never have to face opponent alone.
Also, remember about defending and attacking cargo ships, when they appear on the map.
2. Differentiate between real-life players and AI
Up in the air, apart from players, you also fight against AI controlled fighters. Of course, you score points for them just like you do in the case of players, but AI controlled planes pose much less of a threat. This is why, in a situation in which you see several opponents, always deal with real-life players in the first place.
To be able to tell the difference between real players and AI, aim at the plane at any distance. If this is a player, their nickname appears on the screen.
3. Aiming and shooting
To target the opponent, you need to lock on them manually and hold down the aiming button. When you do that, fire rockets and fire your cannons afterwards. However, do not shoot in constant fire, but in bursts instead to prevent overheating the gun.
Star cards are gadgets, weapons and grenades that you buy for credits and you cannot lose them. Each player can take two star cards into the battlefield.
The best idea is to divide cards into two sets. In the first one, you put cards that are effective against infantry, whereas in the other one, those effective against vehicles. Use these sets in turns, depending on the mode that you play in.
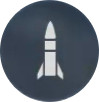
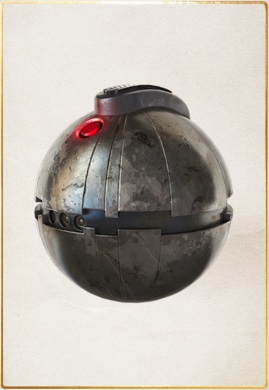 Thermal detonator
While playing as infantry, on small and medium-sized maps, it is always handy to have grenades with you. It becomes useful in many situations. From among the ones available in the game, the best grenade is the simplest one - Thermal detonator.
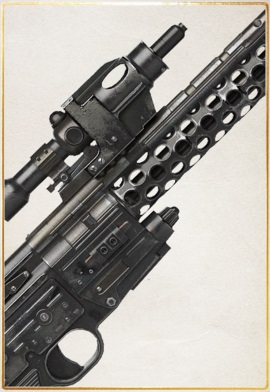 Pulse gun
On bigger maps, however, grenades prove to be less useful. This is why, it is better to replace grenade, in such cases, with a gun that allows you to eliminate opponents at a greater distance. For this, get the Pulse gun.
This is a powerful rifle with good accuracy. The force of the shot depends on how long you hold down the firing button. The greatest shortcoming is the muzzle velocity of the projectile, which makes hitting the target immensely difficult. This is why, while using the pulse gun, it is better you attack still targets and aim to the head, which ensures a kill at any distance.
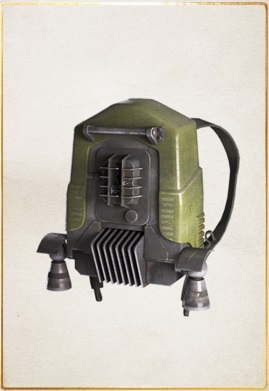 Jet pack
Jet pack allows you to take long-distance jumps. Apart from acceleration, the pack allows you to access places that seem unreachable, where the opponent does not suspect any threat. Apart from that, you can use it to escape the battlefield, in case of any threat.
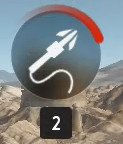
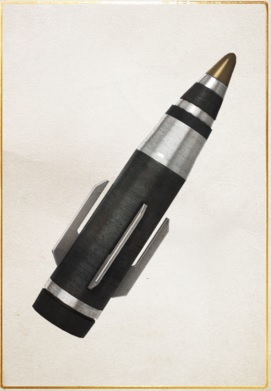 Ion torpedo
Ion torpedo is a compulsory piece of gear, for any soldier, on maps where you use vehicles. Thanks to the torpedo, you can fight against any type of machines, including stationary turrets and fighters.
To destroy an enemy vehicle, you need to target it and wait for it to be locked on. After it is fired, the projectile reaches the vehicle itself.
Each player also has a slot for consumable star cards. These are the ones that activate for several seconds. Each card has a limit of uses. Additional uses can be bought for credits, or find in the game as power ups.
 Focus fire
Focus fire is a power-up that stabilizes the gun for 7 seconds. Thanks to this, you can quickly kill an opponent, using any blaster, at any range.
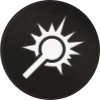
 Scan pulse
Scan pulse is a card that makes finding nearby enemies incredibly easy. After it is used, it emits a pulse that marks enemy soldiers around you, within 360 degrees area. For seven seconds, you can follow the actions of the enemy soldiers.
Scan pulse is most useful on small maps, where you can reveal positions of all defenders, while seizing a given point.
 Personal shield
Personal shield shields you from energy weapons for 7 seconds. However, it does not shield you from weapons such as pulse gun, or automatic gun. Also, you are defenseless if the opponent uses any grenade.
This card works perfectly, while attacking spots that are vital for a given mode, e.g. transmitters. Thanks to personal shield, you can run up and seize the point, while still being shielded. However, you need to remember that you should stay in movement to prevent becoming an easy target for snipers with pulse guns, or automatic guns.
DH-17
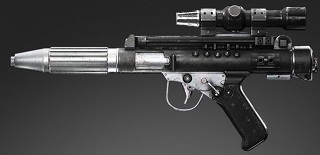 DH-17
DH-17DH-17 is a blaster-type pistol with well balanced rate of fire and damage dealt. It is perfect for short-range combat.
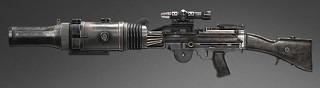
RT-97C
 RT-97C
RT-97C is a versatile blaster. It works well both over short, medium and long distance. Of course, there are weapons that work better over each of these distances, but none of them is as well-balanced and useful in every situation.
E-11
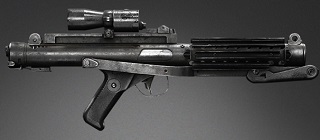 E-11
E-11E-11 is a rifle that works well over medium and long distance. Its greatest advantage is the ease of control. Even beginner players will have no problems controlling recoil.
T-21B
 T-21B
T-21BT-21B is a precision rifle that works well over long distance only. Its characteristics are typical of a sniper rifle - high damage and range, combined with low rate of fire. For this reason, the T-21B is useless over short distance. While using this rifle, it is a good idea to get the scout pistol as your star card. Thanks to this, you can engage opponents over short distance, if necessary.
DL-44
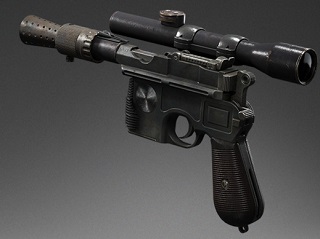 DL-44
DL-44DL-44 deals high damage, at decent rate of fire. It is a highly effective pistol over medium and short distance. Definitely, the greatest shortcoming is low cooldown, due to which the blaster overheats very quickly.
You can become one of six hero and villain characters in Star Wars Battlefront. Darth Vader, Emperor Palpatine and Boba Fett are fighting on Empire side, while Luke Skywalker, Princess Leia Organa and Han Solo are representing the Rebel Alliance.
Heroes and villains are available in majority of the game modes. There are tokens lying on the maps that allow you to become one of them. When you collect the token, you can select from all characters of your side of the conflict. Killing regular soldiers as heroes and villains is rather easy, thanks to that you can obtain long kill streaks.
In addition to that, there are modes that focus mostly on heroes and villains. These modes are: "Hero hunt" and "Heroes vs Villains".
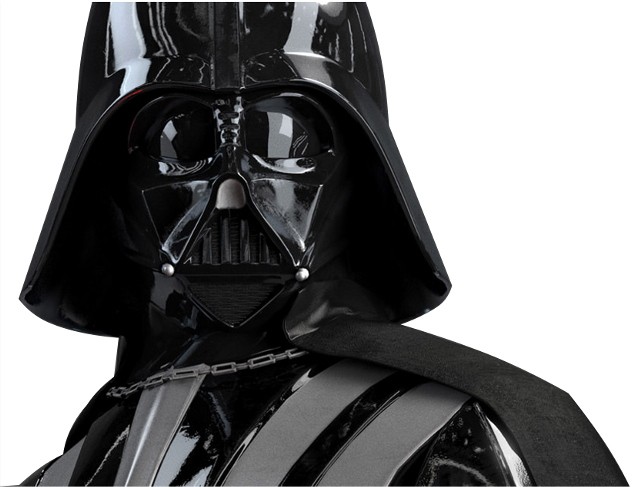 Darth Vader
Darth Vader is the character available on the Empire side. It is a character that is very powerful on short distance. His greatest disadvantage is the lack of effectiveness on larger distances combined with slow movement speed. Darth Vader has a lightsaber which is excellent in close combat. He has four abilities as well.
Heavy attack
The regular lightsaber attack, in this version it is stronger and can hit few enemies in small distance at once.
Force choke
Darth Vader uses his powers to immobilize enemies for few seconds. This ability can be used against few enemies at once.
Saber throw
Thanks to this ability, the character can attack player who is slightly more away. It is done by throwing the lightsaber as if it was a boomerang.
Deflect blaster
If you will hold the aiming button, Vader will cover himself behind his sword for few seconds. The shots fired at him will be reflected back at the shooter. Not only can you protect yourself with this, but kill the enemy with his own weapon as well.
Darth Vader is a hero whose potential can be fully utilized when walking directly into large group of enemies. That's where his abilities will work the best. First you should use his special abilities, then eliminate the rest of enemies with regular attack.
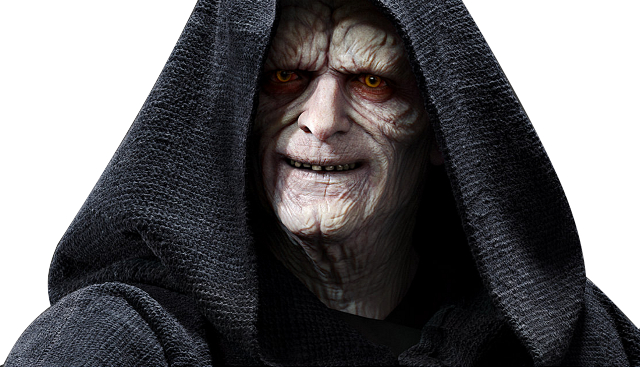 Emperor Palpatine
Despite scary look, Emperor Palpatine has some quite useful combat abilities. He is well suited for close and medium range combat. His main weapon is lightning electrifying the enemies.
Chain Lightning
In addition to the lightning that is the basic weapon of the character, he has also an ability that makes the enemies conduct the lightning, allowing the lightning to hit few of them at once.
Force Dash
Allows you to move quickly few meters ahead. Useful when you want to escape from the battlefield.
Imperial Resources
This ability gives additional power to nearby allied soldiers. Additionally, a health resource appears in the place where the skill was used. The resource can be also picked by other heroes in the "Heroes vs Villains" mode.
Passive ability
Passive abilities don't have to be activated manually as they are permanently active. In case of this character, it allows one of the players of the team to respawn on the character as a member of the honor guard. He will have a heavy blaster, homing missile and rocket launcher. Additionally, he deals more damage and has heavier armor than regular troops.
The tactic that works the best when playing as this character is quick attack and escape. On medium distance, when you don't know whether the enemies are behind the corner, lurk ahead, hit few enemies with lightning and escape. If needed, use special abilities.
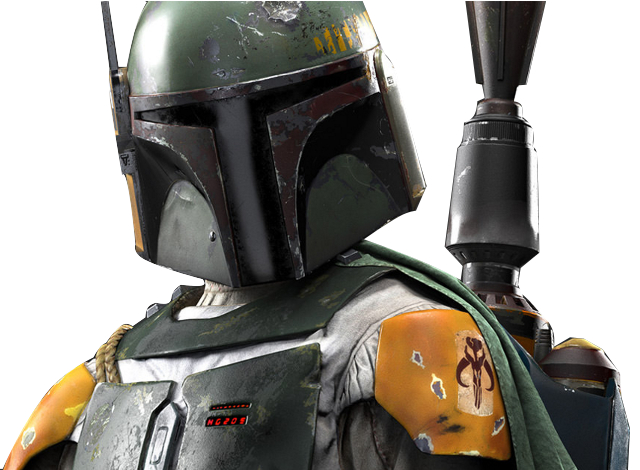 Boba Fett
Boba Fett is a character with equipment that is more useful on long distance. His basic weapon is EE-3 blaster. He can also shoot rockets and he has a jetpack on his back that makes it easier for him to move.
Rocket launcher
Boba Fett can shoot a rocket from his wrist. This weapon can be used to easily eliminate enemy from long distance.
Flame thrower
Allows you to efficiently fight at very short distance.
Thruster pack
A jetpack that allows you to move quickly and get to places that seems to be unavailable. It works for few seconds and the fuel is regenerated when it isn't used.
Boba Fett is a character with very versatile equipment. However, he is best on medium and long distance. Because of that, it is best to position yourself in safe location and eliminate helpless enemies from safe distance. If you are forced to fight on close combat, use flame thrower, and if situation will not improve, you should escape. The thruster pack is very useful when it comes to the escape part.
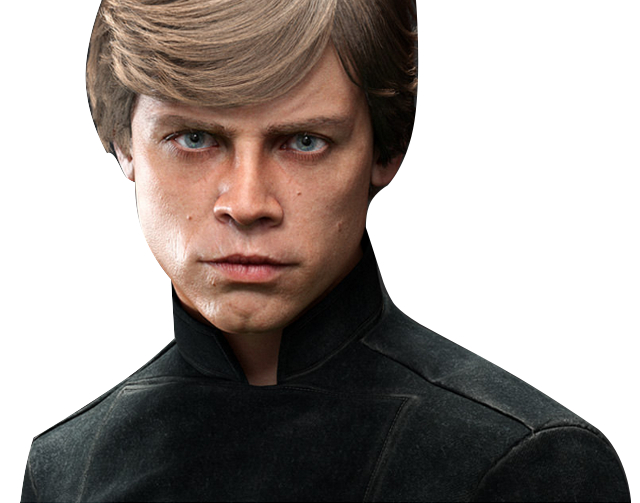 Luke Skywalker
The greatest advantage of Luke Skywalker is his ability to move very quickly combined with weaponry that is useful on short distance. His basic weapon is, similarly to Darth Vader, the lightsaber.
Heavy attack
Regular attack with the lightsaber, but stronger and able to hit few enemies standing nearby at once.
Force push
This ability allows killing enemy that is slightly more away from the character.
Saber rush
After using this ability, Luke can quickly reduce the distance between him and enemy standing ahead and attack him immediately.
Deflect blaster
If you will hold the aiming button, Luke will cover himself behind his sword for few seconds. The shots fired at him will be reflected back at the shooter. Not only can you protect yourself with this, but kill the enemy with his own weapon as well.
When playing as Luke Skywalker, you must effectively utilize his speed and agility. The best strategy when playing as this character is a quick attack and escape. This character works the best on short distances, but thanks to his abilities allowing shortening the distance, it's not a problem at all.
 Leia Organa
Princess Leia Organa is a character fighting on the Rebel Alliance side. She has abilities that don't help her in battle, but her whole team instead. Because of that, when playing as Leia, you should cooperate with your team.
Trooper bane
This ability allows killing every trooper with a single show. What's more, if that ability is active, the bullets are penetrating the squad shield.
Enhanced squad shield
A stronger version of the squad shield, which can stop even ion shots and grenades. Additionally, if the enemy will walk inside, he is not able to do anything. Leia can use the trooper bane ability while being inside the field.
Supply drop
After using this ability, health resource for the character appears. Any hero of the Rebel team can use it. Power ups for other team members appear as well.
Passive ability
Passive abilities don't have to be activated manually as they are permanently active. In case of this character, it allows one of the players of the team to respawn on the character as a member of the honor guard. He will have a heavy blaster, homing missile and rocket launcher. Additionally, he deals more damage and has heavier armor than regular troops.
When playing as Leia, try to keep close to allies from your team. Leia's equipment works best on medium and long distance, so there is no sense in rushing ahead. You should also keep attention to needs of your team. Place squad shield in vital locations and support your companions with power ups and health for heroes.
You should also remember that if you are hurt, you can use the supply drop and heal yourself.
 Han Solo
Han solo is a hero that has abilities useful in long distance combat. His basic weapon is a very strong and accurate DL-44 blaster. However, he is worse than other characters in close distance combat.
Rapid fire
Thanks to this ability, the weapon will not overheat for few seconds. It is very useful in situations during which you face a group of enemies.
Lucky shot
When you use this ability, a bullet is shot that will explode upon hitting enemy. Explosion can hurt more than one enemy.
Shoulder charge
This ability allows you to defeat the enemy who is standing on hero's way.
When playing as Han Solo, try to keep your distance from enemies. The greatest potential of this character is in his weapon that is accurate on long distance and in wisely used abilities.
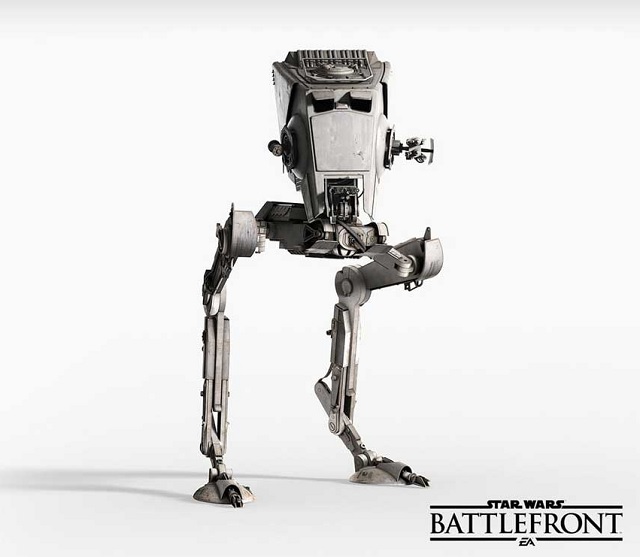 AT-ST
AT-STAT-ST is a light-armored bipedal vehicle, which you receive after you pick up an upgrade placed on map. It is armed with underslung laser cannons and weapon slots on the sides of the cab. It is available in modes "Walker Assault" and "Supremacy".
 AT-ST armoring
Cannon
It is perfect against infantry. It deals damage not only to the opponents that have been hit directly, but also to ones that are standing close to the target. It also works quite well against fighters, but hitting them is not the easiest thing.
Salvo
A salvo of grenades launched in an arching lob. It is perfect for combat against groups of enemies. The downside of the weapon is its short range.
Missile
Self-guided missile that you can attack enemy vehicles with. You simply need to fire it towards a fighter and the rocket follows it and hits it. Also, you can fire it against infantry.
While playing with the AT-ST, you can easily eliminate larger groups of enemies. It is very useful while seizing and defending key points, such as transmitters. Also, you can use it in the form of reinforcements for air force, by harassing enemy fighters with rockets, or by firing your cannon at them.
One of the greatest shortcomings of the AT-ST is its light armor. In spite of relatively high resistance to blaster fire, it does not do that well in the case of anti-tank projectiles, such as ion torpedoes or self-guided missiles. This is why standing out in the open, on this vehicle, does not ensure long life.
Approaching close to the center of fight always ends in a quick death. You need to find a good cover for yourself, to hide behind when the enemy is targeting you. AT-AT serves as a good cover. If you stand behind it, enemies will be unable to target you and, even if they will, you can use the AT-AT's legs as your cover. Thanks to your weapons, you can score lots of kills and become a difficult target yourself.
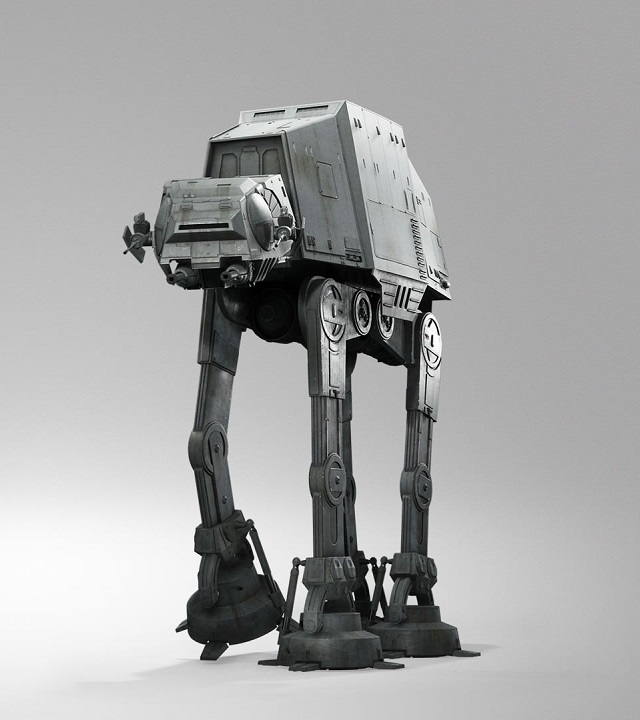 AT-AT
AT-ATAT-AT is a combat transporter on four legs. It is used by the Empire and available only in mode "Walker Assault". AT-AT moves at a constant speed, independently of the rest of the players. Inside, there is only one seat for a gunman but, after you enter the AT-AT, you can stay inside only for a minute.
 Armoring AT-AT
Light blasters
The basic weapon that you use while operating the AT-AT. It is a good weapon for killing single enemies.
Orbital attack
It acts just like any other buff. Orbital attack is an ideal weapon against big groups of enemies in a small area. While playing in the AT-AT, you can use orbital attack every 30 seconds.
Heavy laser gun
It deals more damage than light blasters, at the cost of lower rate of fire.
Remember to use the orbital attack within the initial 30 seconds, so that it cools down before you leave the vehicle.
When it come to sizeable targets, you should specially pay attention to transmitters, because they are the key tactical points on the map. You can always find big groups of opponents there.
At the beginning of this chapter, fighters have been given a more general description, because the individual models are not that different from each other. In the second part, armoring of all the fighters available in the game will be compared.
To destroy another fighter, first approach it thanks to which you can target it. For that, hold down the targeting button. First, fire rockets at it and then start pounding it with your machine guns. Remember to fire in bursts to prevent overheating the guns.
Eliminating ground targets should not be deemed a priority by any pilot. First, you need to clear the skies and then take to ground vehicles unhindered.
The first step is to slow down to the bare minimum, which will make aiming easier. Next step, the most difficult one, is finding the enemies. It is impossible to spot markers from afar, but there are several ways to find the opponent.
If you are familiar with the map, you will know where you can find the greatest abundance of enemies. Fire single shots, at those areas and watch for hit markers (the reticle turns yellow at that point). If you finally succeed, fire more shots at that area. This should result in either a kill or damaging the vehicle.
Another way is to find the opponent basing on smudges of fired projectiles.
Self guided missiles pose a deadly threat for fighters. If you are being targeted, use countering measures and escape towards your base as quickly as possible. If the missile is still following you, perform a dodging maneuver. The button to do that is always displayed in the left corner of the screen, after you enter the vehicle.
Side of conflict
Velocity build-up
Ion cannon
Sensor interference
Proton torpedo
Shield
Shock warheads
X-Wing
Rebels
X
X
X
V
V
X
A-Wing
Rebels
X
X
X
X
V
V
TIE Fighter
Empire
V
V
X
X
X
X
TIE Interceptor
Empire
V
V
X
X
X
X
Snow Speeder
Rebels
V
X
V
X
X
X
 Sensor interference
Sensor interference - the fighter is impossible to be targeted and it is invisible to the radars.
 Ion cannon
Ion cannon - Homing torpedo.
 Shield
Shield - for the duration of several seconds, the vehicle is shielded from any type of fire.
 Proton torpedo
Proton torpedo - homing torpedo.
 Shock warheads
Shock warheads - anti-vehicle, short-range projectiles.
The above vehicles are available in "Fighter Squadron", Supremacy" and Walker Assault" modes. Snow speeder is not available in the "Fighter Squadron" mode.
X-wing, A-wing, TIE Fighter and TIE Interceptor are very similar to each other and hey differ only in terms of details. All of them have been designed with dogfight in mind, but ground attack is also an option.
The only vehicle that is discernibly different than the rest is the snow speeder. It is a vehicle that has been designed for destroying ground targets and it steps down to fighters, when it comes to air combat. Apart from the weaponry listed above, the vehicle has one more hidden weapon.
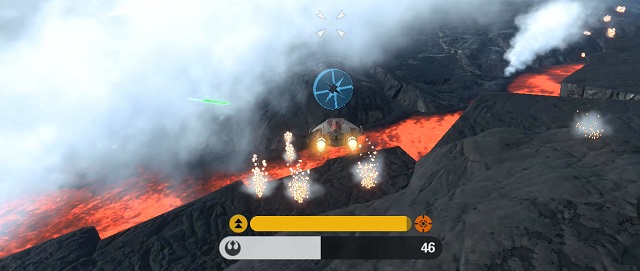
In the "Walker Assault" mode, during the final phase of the game, when the AT-AT is exposed, you can use the snow speeder to destroy the walker in a matter of seconds. While flying close nearby, there appears an option to "leash" the walker with tow rope. The appropriate button is then displayed on the screen.
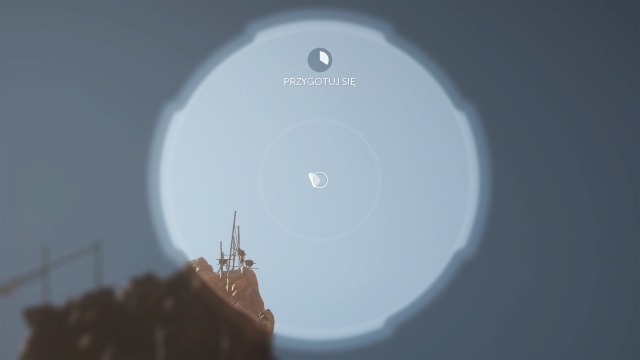
 Firing of the tow rope
Then, you will have to play a minigame. The above icon appears o the screen.
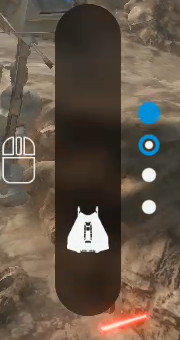 Minigame
To eliminate the walker, you need to keep the T-47 symbol within the lane for successive circuits around the walker. Depending on your platform, you either use the game pad for that, or the mouse. If you succeed, the walker will be destroyed.
 1/5
1/5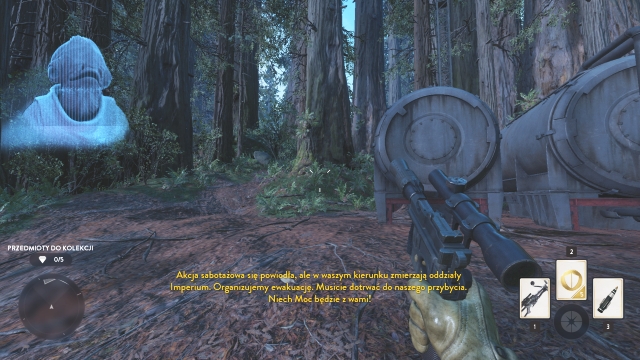 1/5
1/5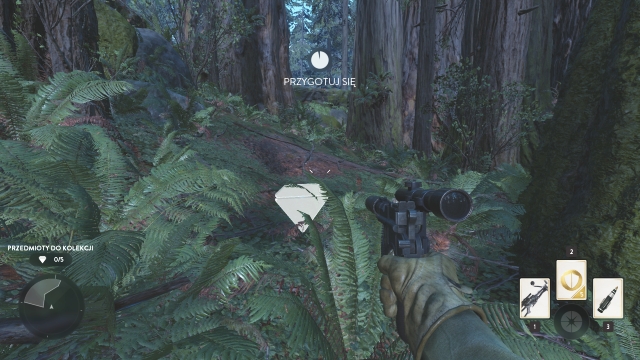 1/5
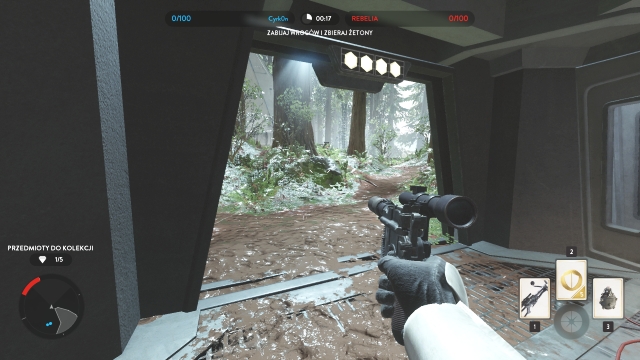
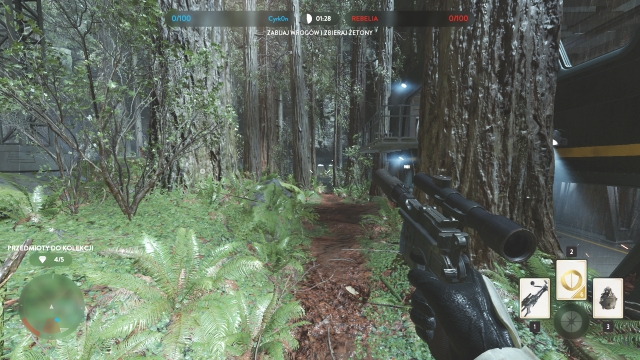
1/5To find the first item, right after you start the mission, turn back by 180 degrees and jump onto the entrance. Then, go left. Pass by two tanks and find the first collectible behind the tree.
 2/5
2/5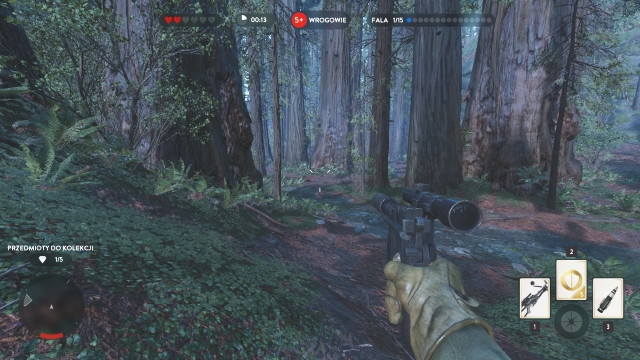 2/5
2/5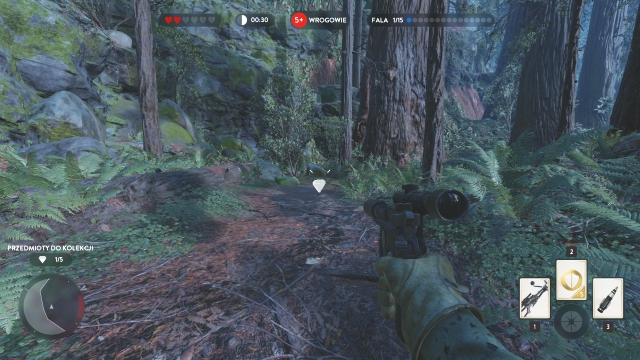 2/5
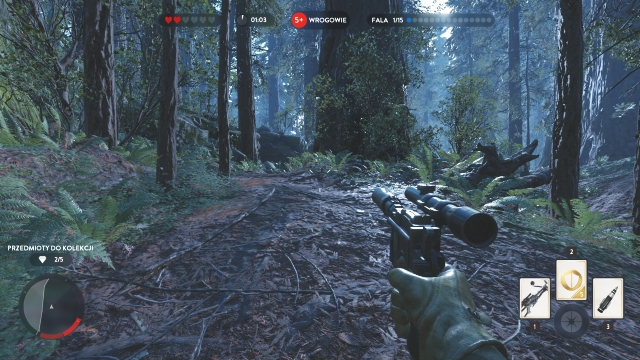
2/5Then, go left (if you are facing toward the center of the map), down/ Cross the brook and go toward the corner of the map. There is where you find another collectible.
 3/5
3/5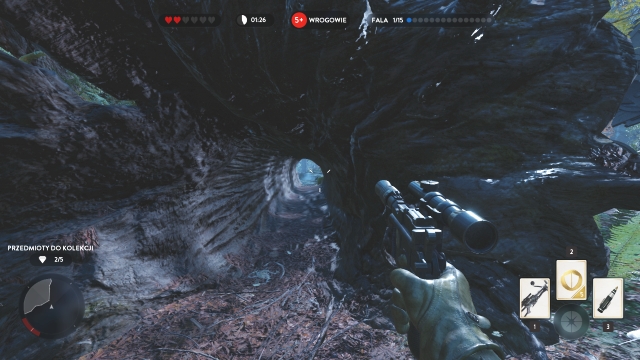 3/5
3/5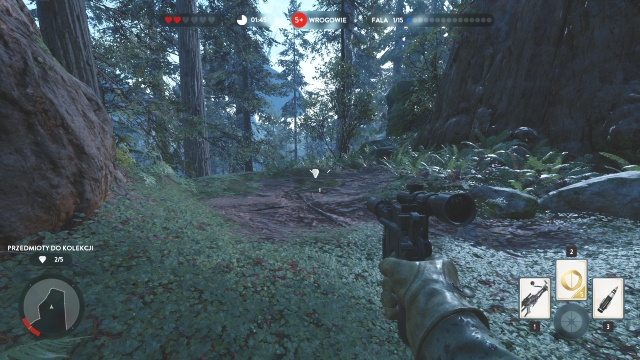 3/5
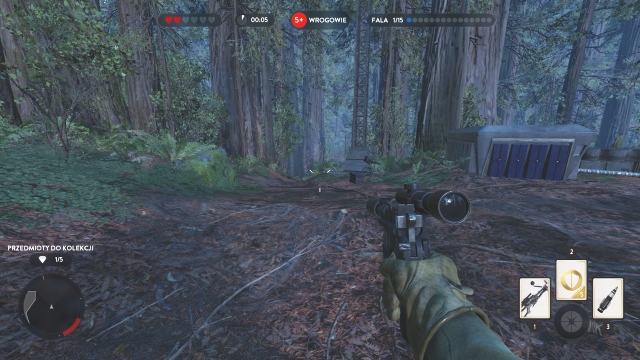
3/5To find this one, go along the edge of the map, up until you reach the end.
 4/5
4/5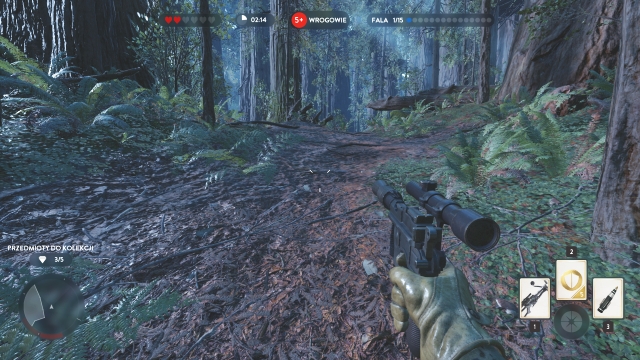 4/5
4/5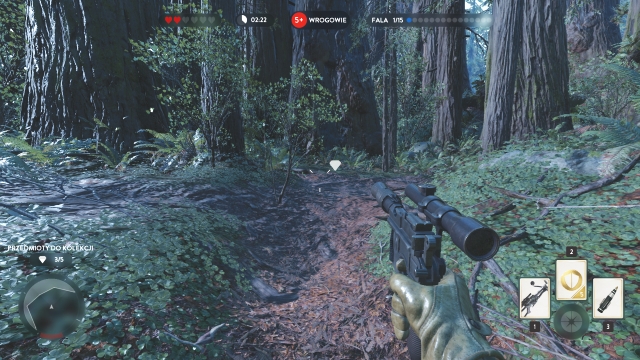 4/5
4/5After you find the previous collectible, turn towards the center and go left. The next item is also at the map boundary.
 5/5
5/5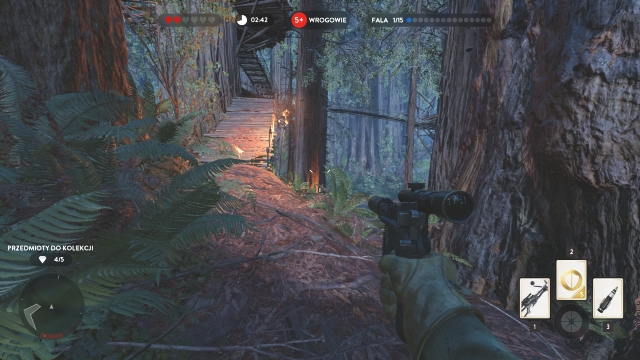 5/5
5/5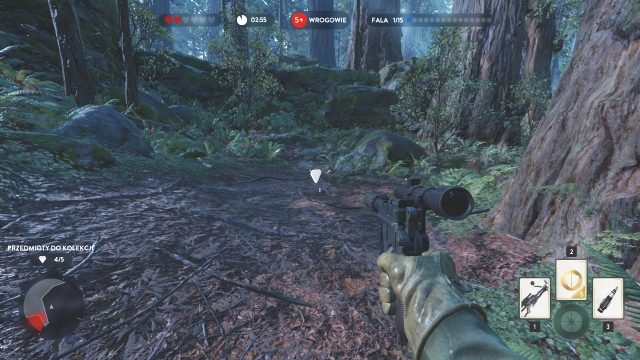 5/5
5/5The last collectible on Endor is in the same direction - by the verge of the map. To find it, follow the edge.
 1/5
1/5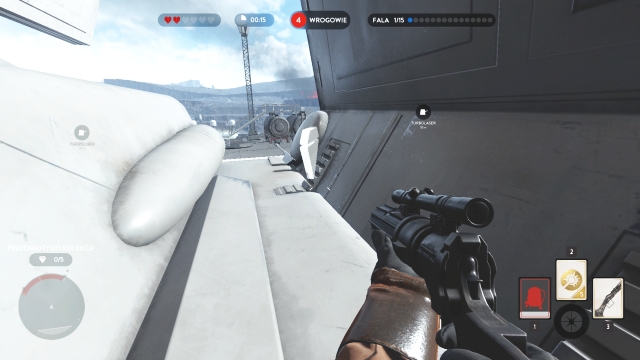 1/5
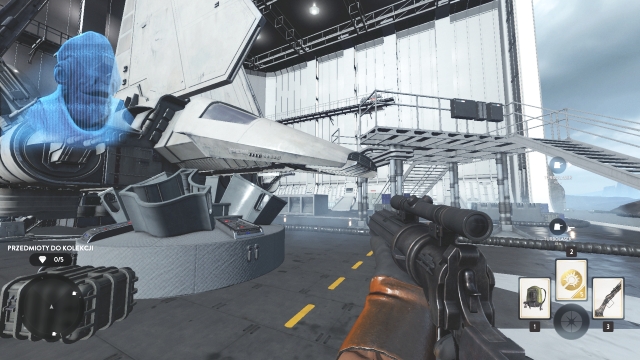
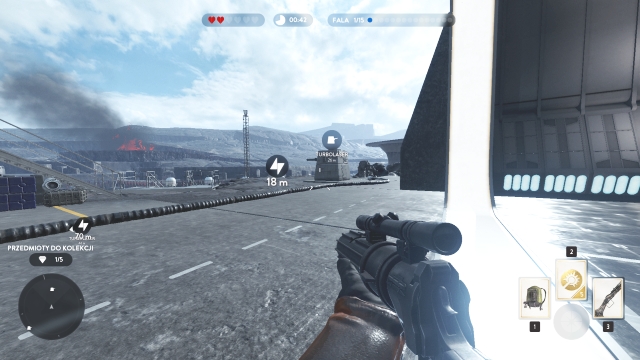
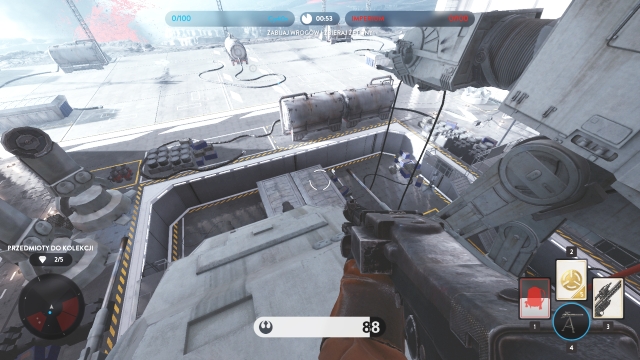
1/5The first collectible on the map is on the plane wing. Get there using the jetpack.
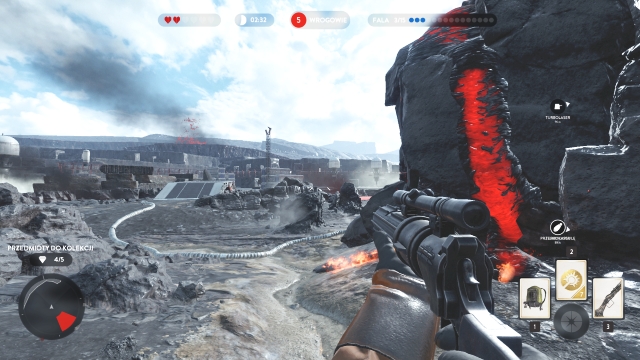
 2/5
2/5 2/5
2/5The next collectible is nearby, to the right, behind the turbolaser.
 3/5
3/5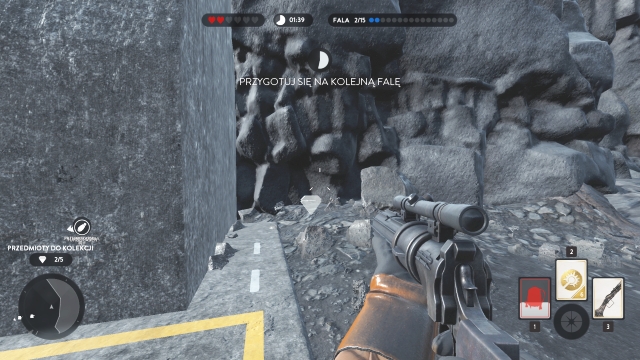 3/5
3/5Another collectible is also behind the turbolaser, but this time at the other side of the map.
 4/5
4/5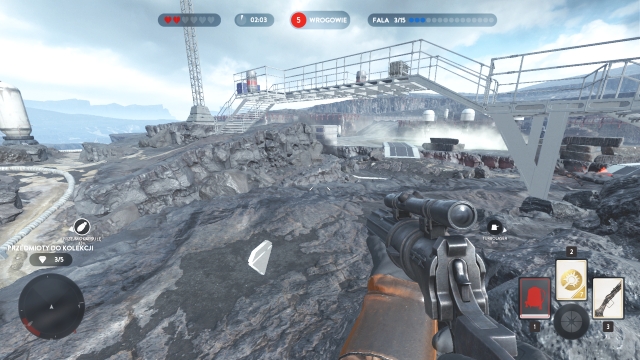 4/5
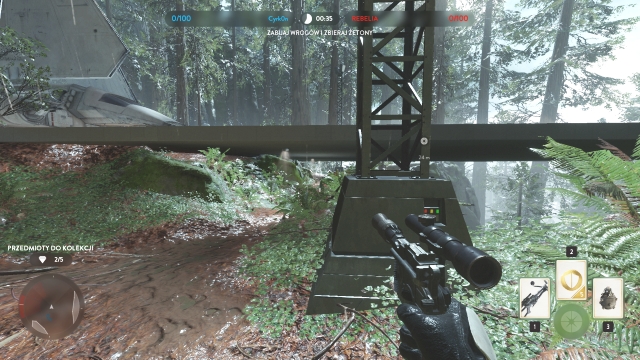
4/5To find the next item, climb down the stairs and find the collectible by the footbridge.
 5/5
5/5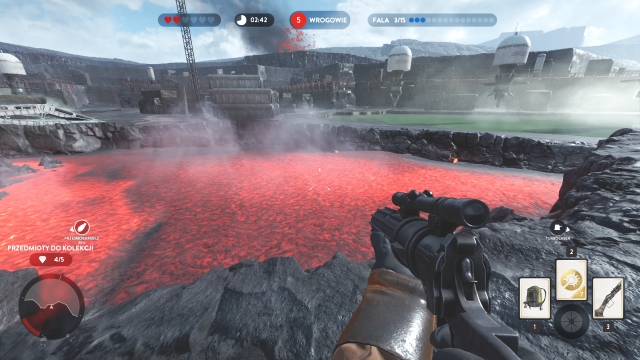 5/5
5/5
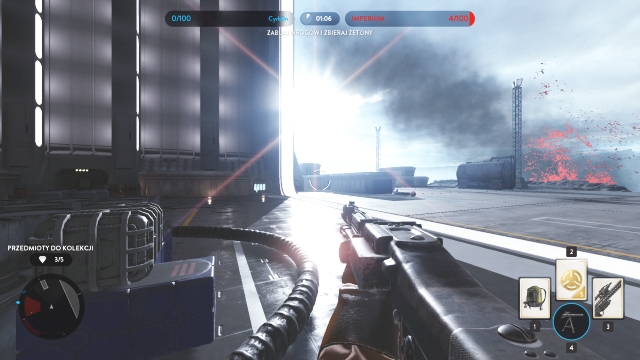
To obtain the last item in this mission, approach the lava lake and use the jetpack to grab the collectible.
 1/5
1/5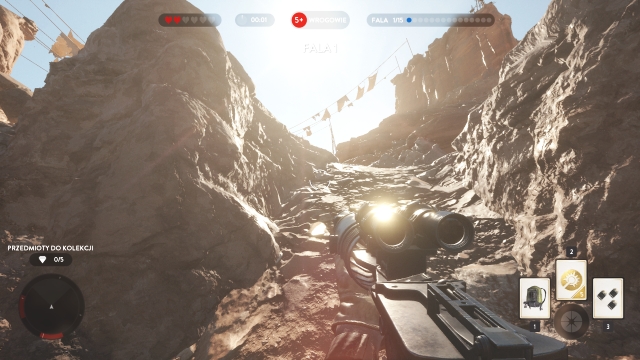 1/5
1/5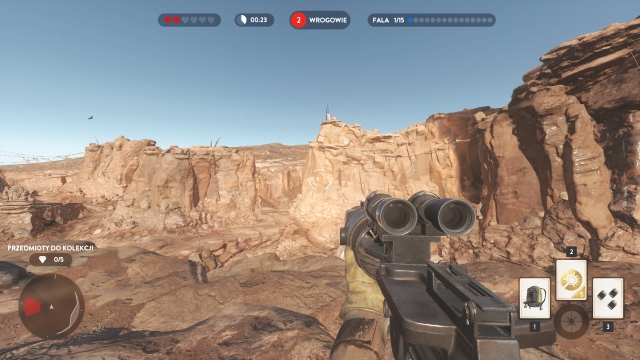 1/5
1/5The first item on the map is up in the air, close to the mission's starting point. Climb onto the elevation and use the jetpack to reach it.
 2/5
2/5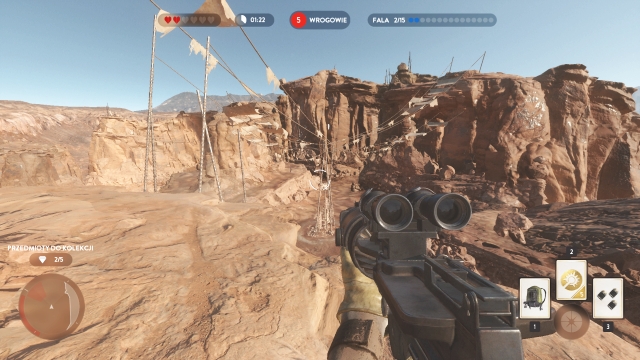 2/5
2/5The next item is also up in the air, above the poles suspending ropes. Also in this case, you need to use the jetpack.
 3/5
3/5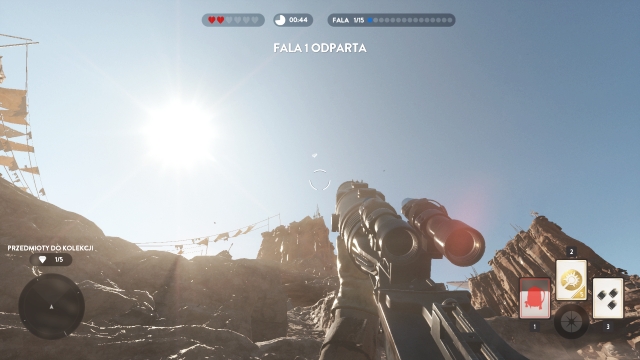 3/5
3/5 3/5
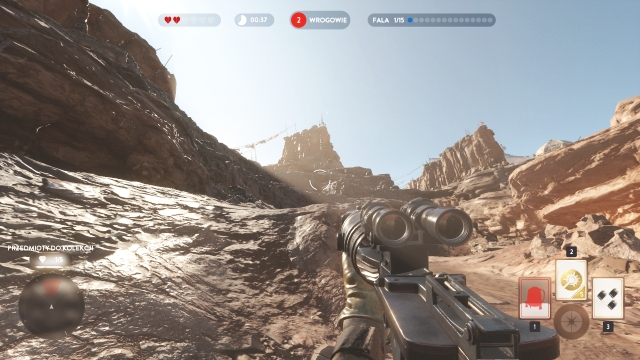
3/5To get the third item, climb onto the hill that stands out, near the previous collectible. There, use the jetpack to collect the item.
 4/5
4/5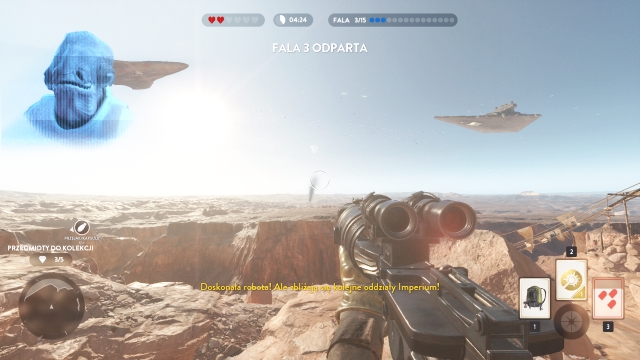 4/5
4/5The next collectible is exactly at the other side of the hill.
 5/5
5/5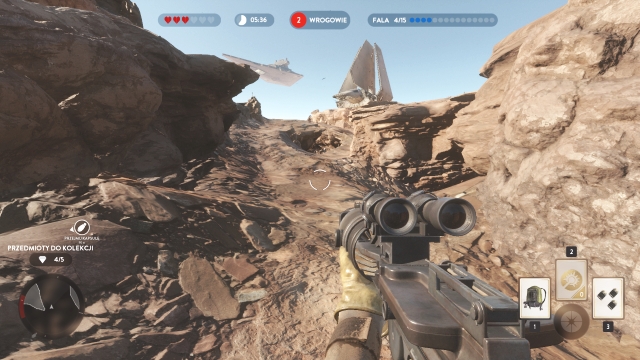 5/5
5/5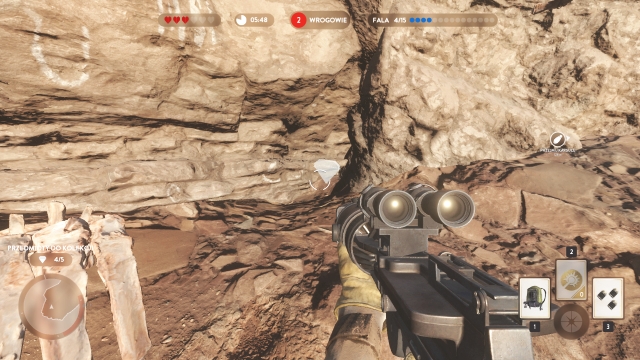 5/5
5/5To find the last item here, go down-left from where you found the previous collectibles. At some point, you will spot a cave. Enter to find the item.
 1/5
1/5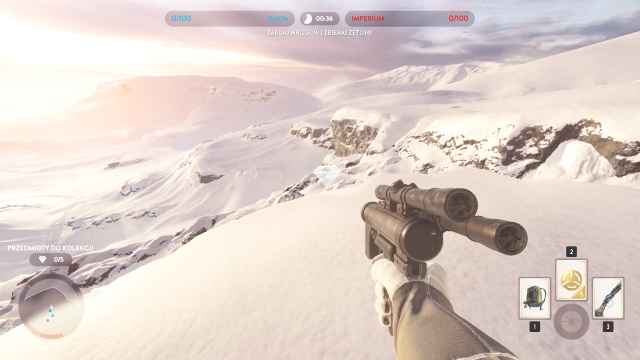 1/5
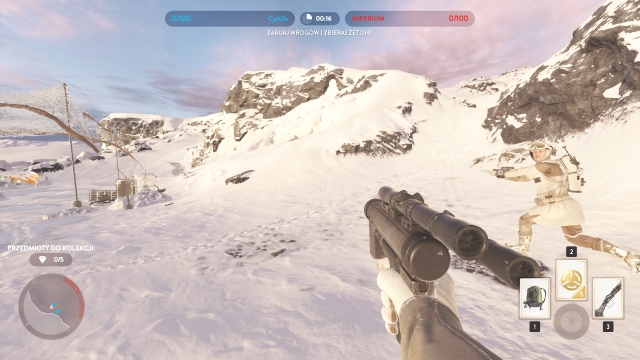
1/5To find the first item, climb the hill on the left, right after the mission starts.
 2/5
2/5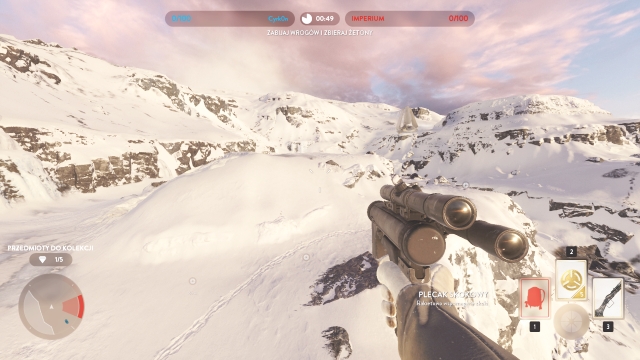 2/5
2/5The next item is on a small hill, which you reach along the map boundary.
 3/5
3/5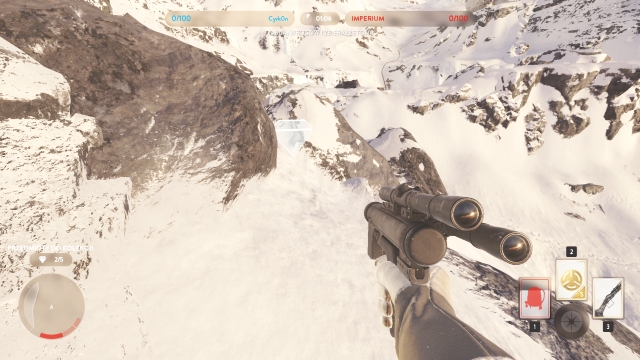 3/5
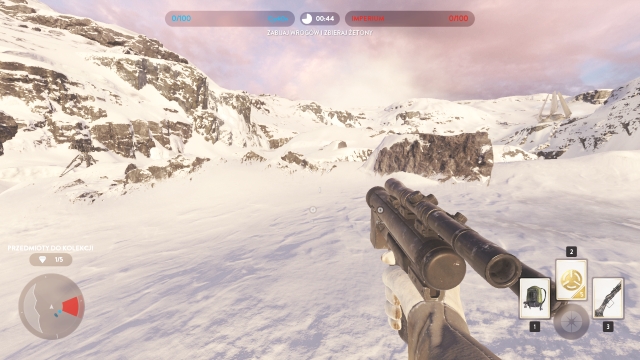
3/5Another collectible is very close to the previous one, among rocks.
 4/5
4/5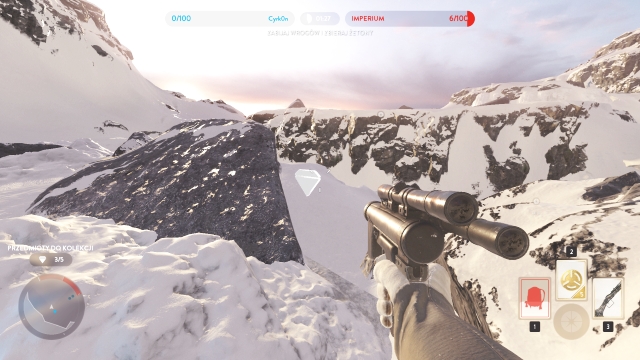 4/5
4/5To reach the next item, follow the edge of the map, up until you spot the tank presented in the above screenshot. From there, go right and find another collectible.
 5/5
5/5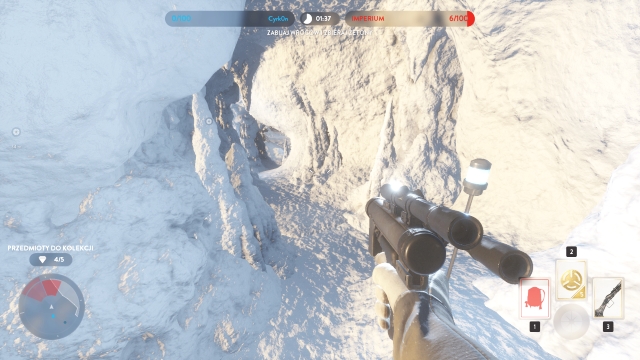 5/5
5/5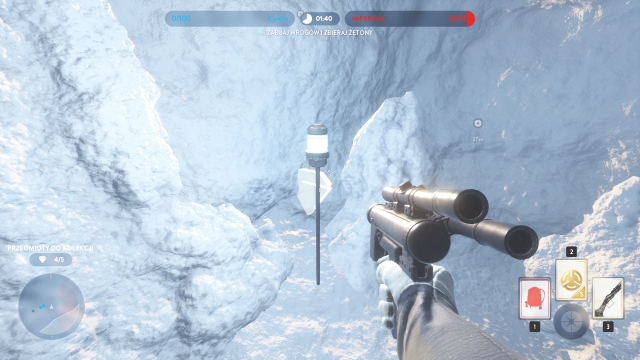 5/5
5/5
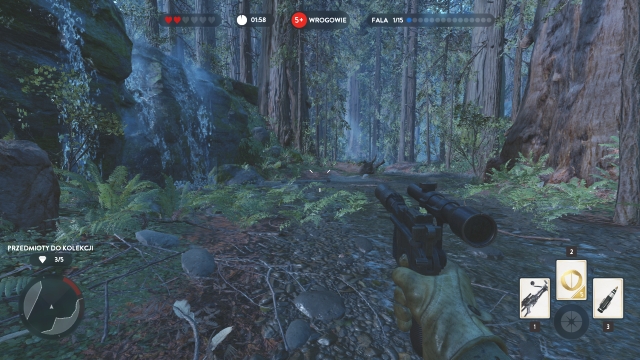
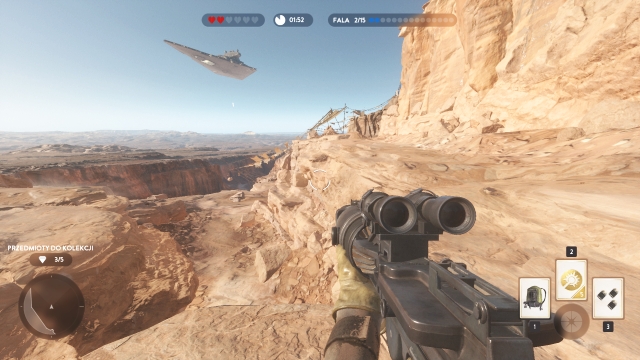
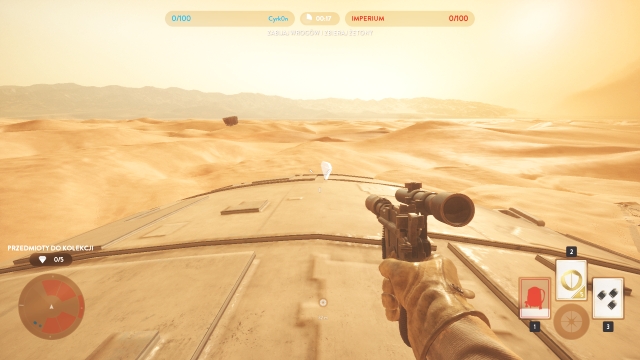
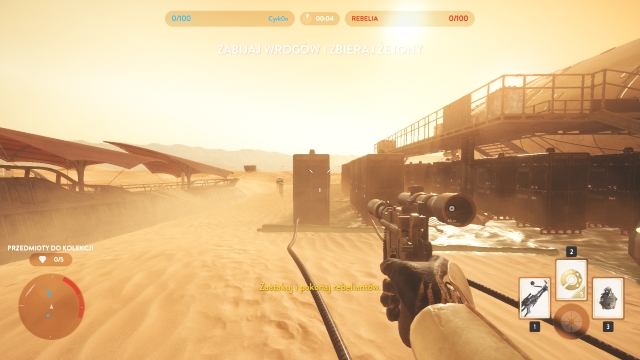 1/5
1/5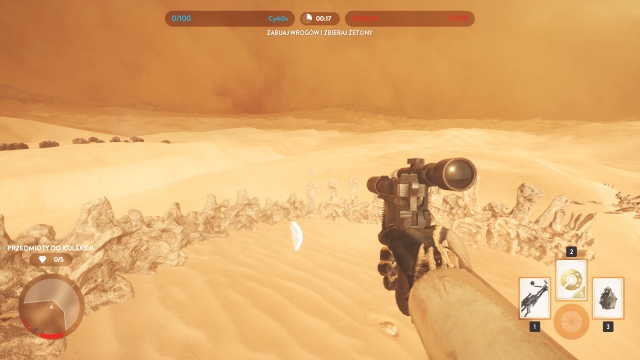 1/5
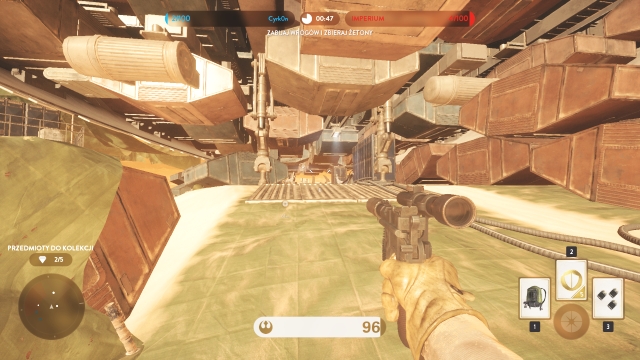
1/5After you start the mission, turn back. You will spot a dinosaur skeleton in the desert. By the tail, there is the first collectible.
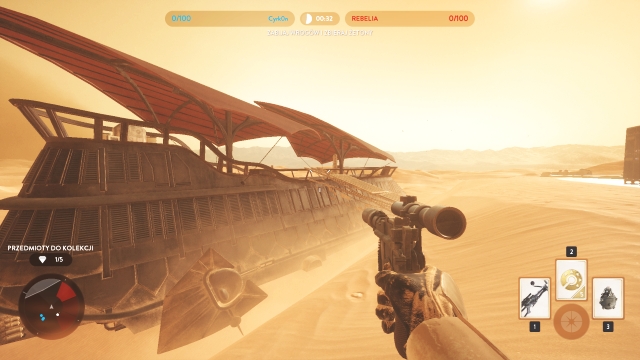 2/5
2/5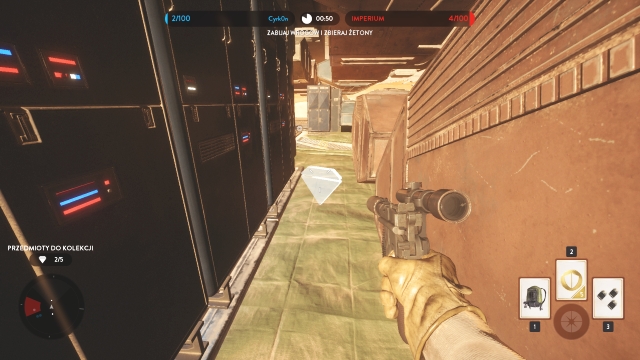 2/5
2/5The next item is aboard the ship.
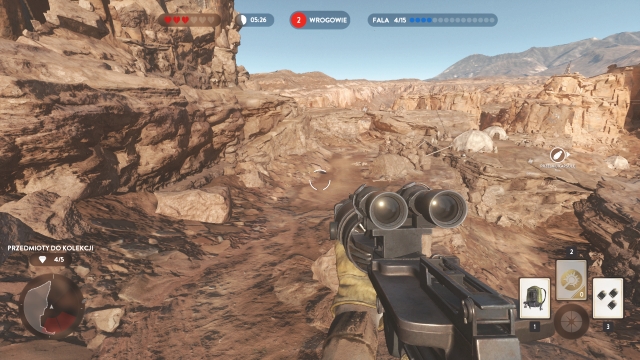
 3/5
3/5
Another one is atop the ship. Use the jetpack to get there.
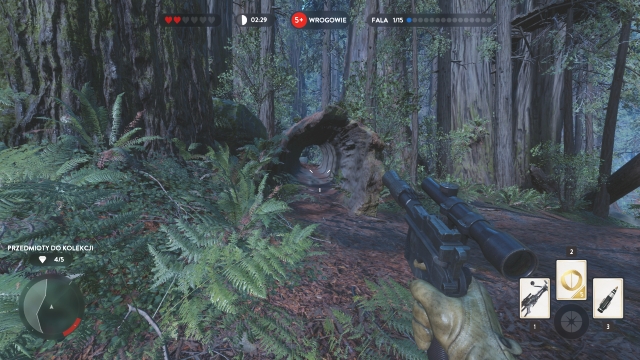
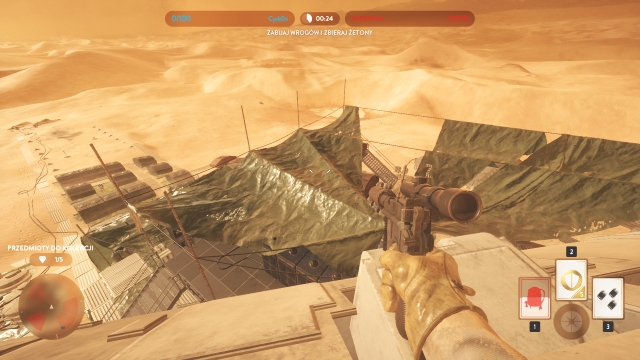 4/5
4/5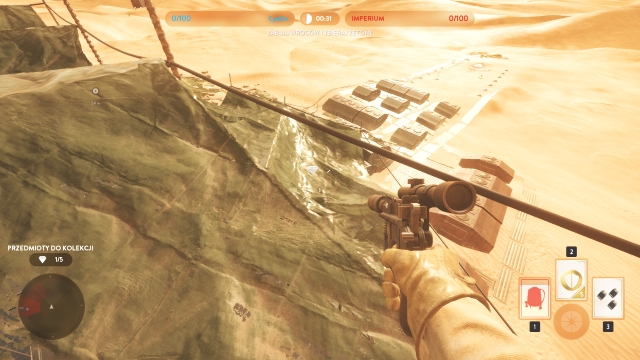 4/5
4/5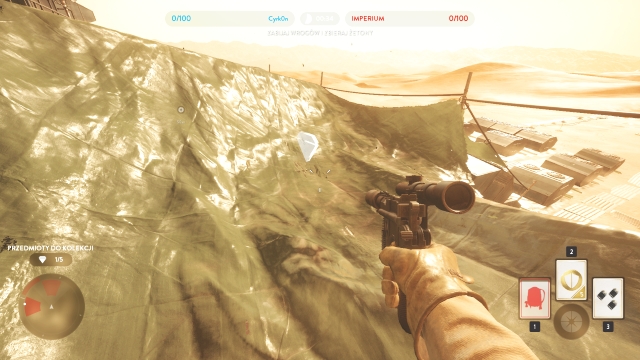 4/5
4/5Jump down onto the green tarp. This is where you find the fourth collectible.
 5/5
5/5
 5/5
5/5The last item is hidden in the center of the map, among boxes.
 1/5
1/5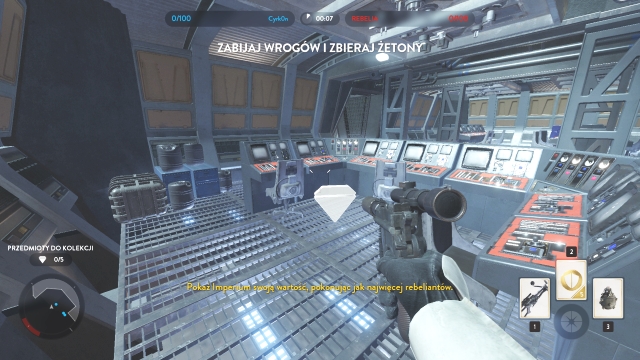 1/5
1/5The first item is in the room where you start the mission, behind one of the desks.
 2/5
2/5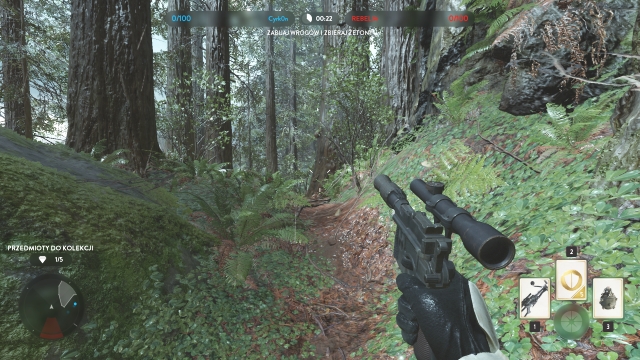 2/5
2/5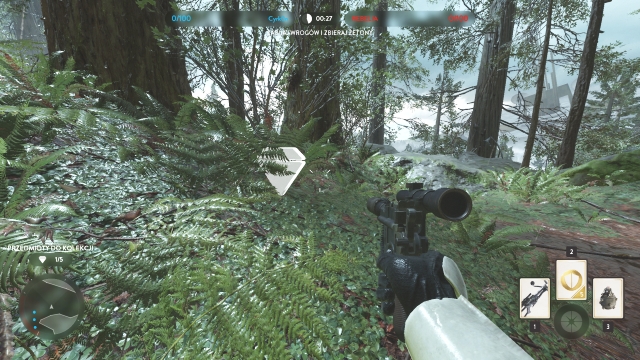 2/5
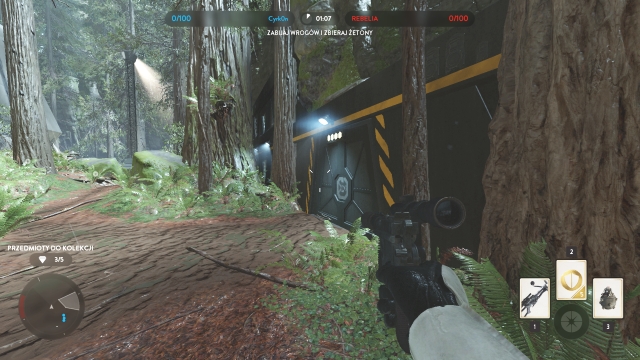
2/5Leave the building through the exit on the right. Turn left and go towards the corner of the map. This collectible is behind one of the trees.
 3/5
3/5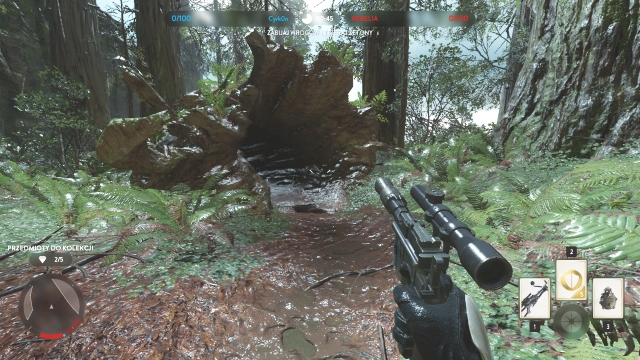 3/5
3/5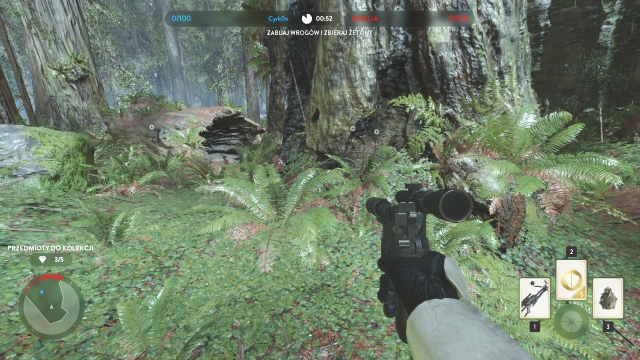 3/5
3/5To obtain the next item, walk under the platform, through the hollowed-out tree trunk. The collectible is by the tree next to you.
 4/5
4/5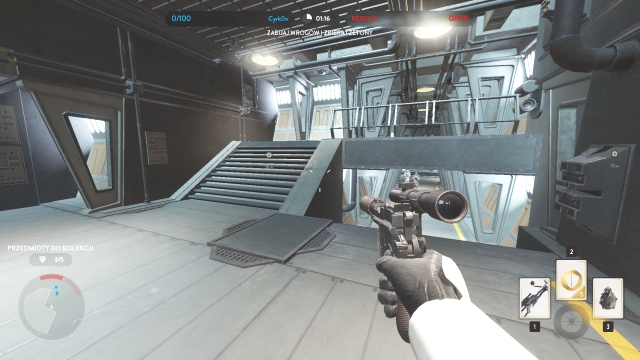 4/5
4/5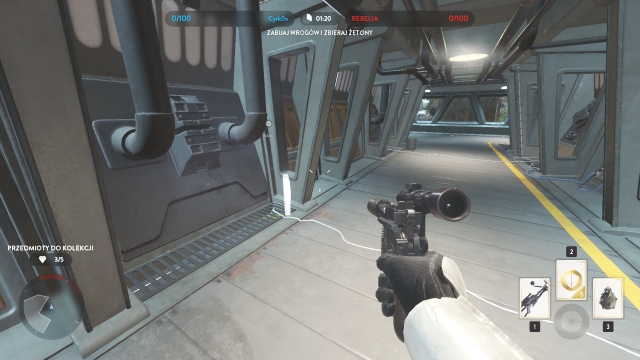 4/5
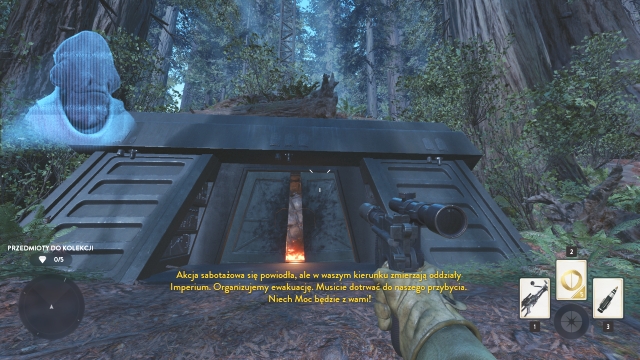
4/5Then, follow the edge of the map a little and enter the building. Inside, go right and climb up the stairs. The collectible is in the corridor.
 5/5
5/5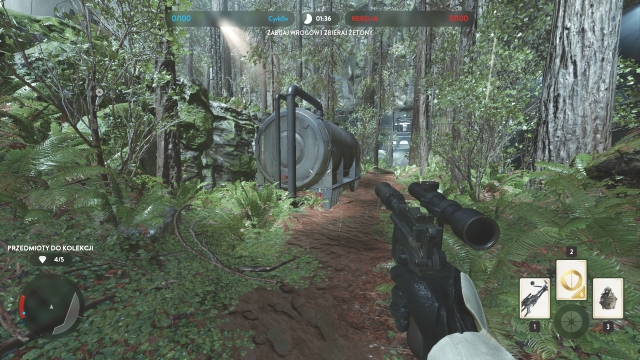 5/5
5/5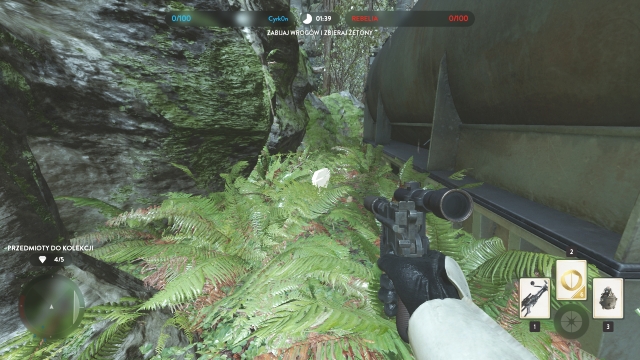 5/5
5/5Close to the center of the map, you find a tank. The collectible is hidden behind it.
 1/5
1/5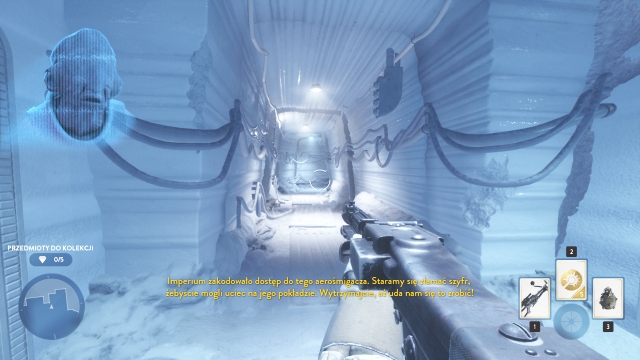 1/5
1/5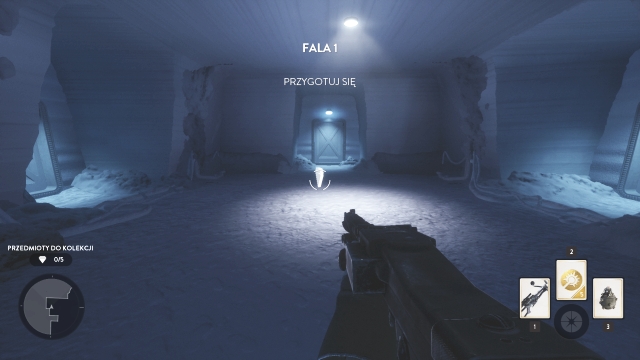 1/5
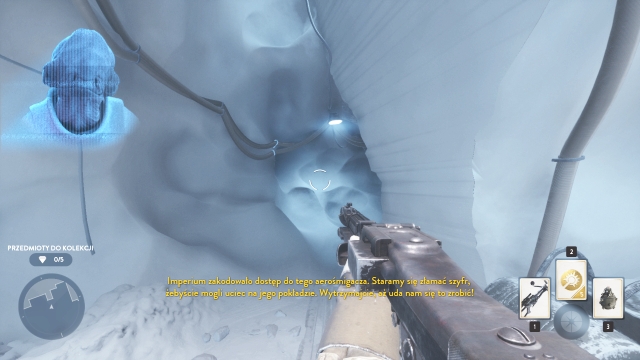
1/5To obtain the first item, turn left and enter the cave, at the beginning of the mission. Then, follow the corridor left. Through the corridor, you will get to the first item.
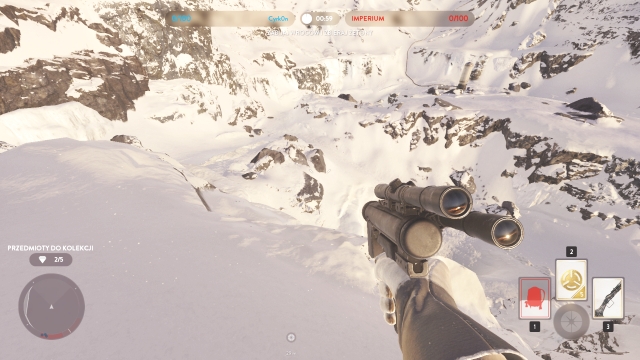
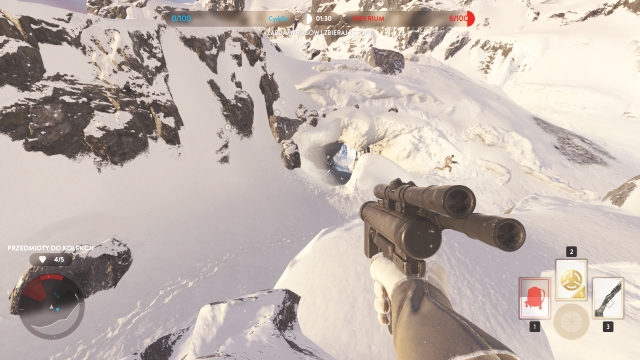
 2/5
2/5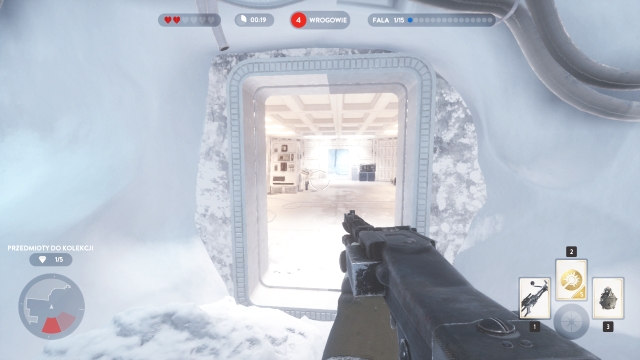 2/5
2/5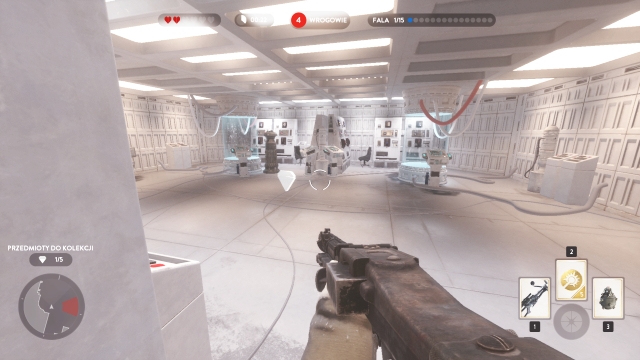 2/5
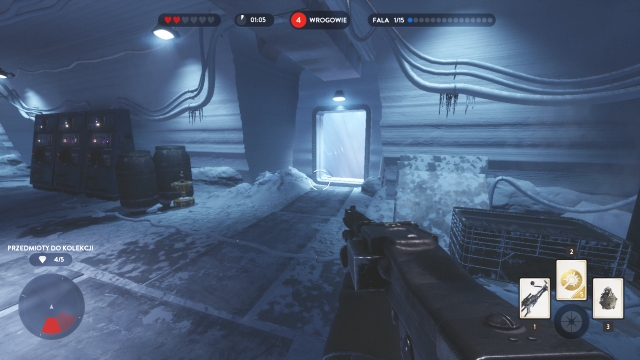
2/5Then, return to the starting point of the mission. Go left-up. There, you find an entrance to a room. In the room, turn right and you will get to the room with another collectible.
 3/5
3/5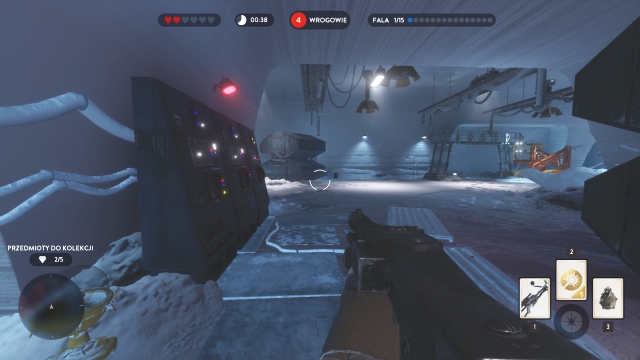 3/5
3/5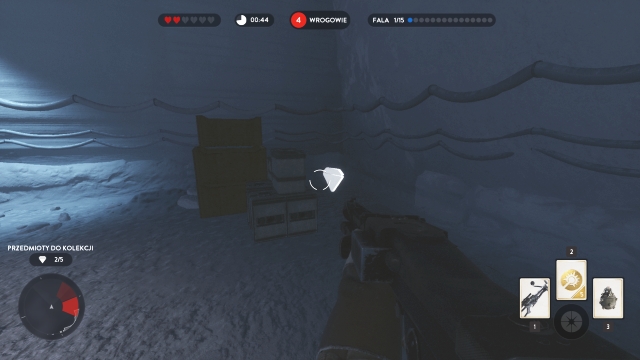 3/5
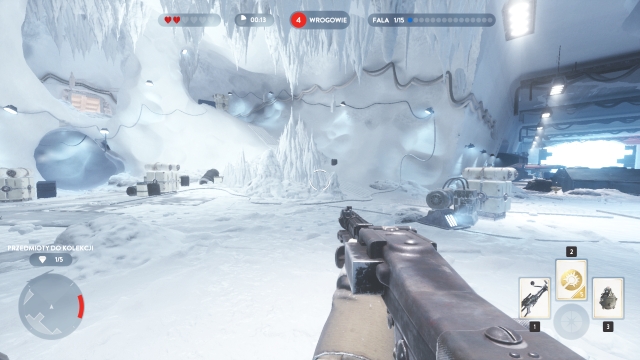
3/5To collect the third item, exit the room and go left. After you pass by the ice column, turn left. On the left, behind the boxes, there is another collectible.
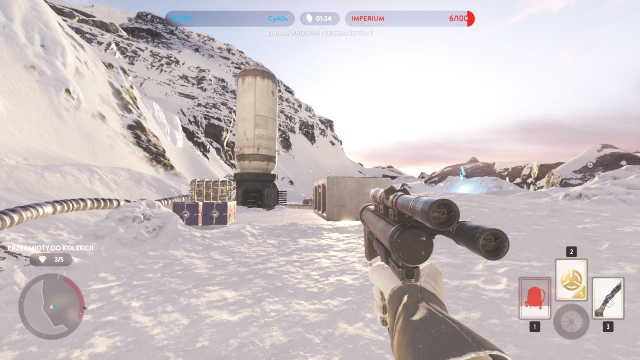
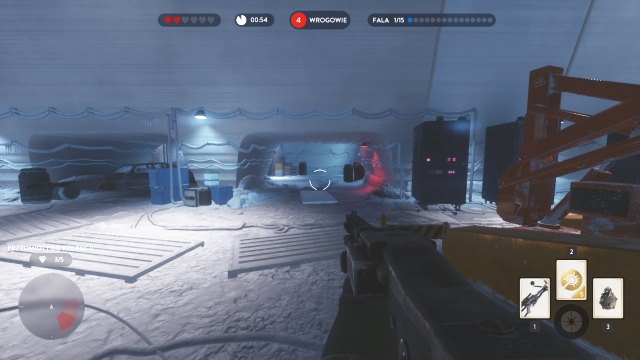 4/5
4/5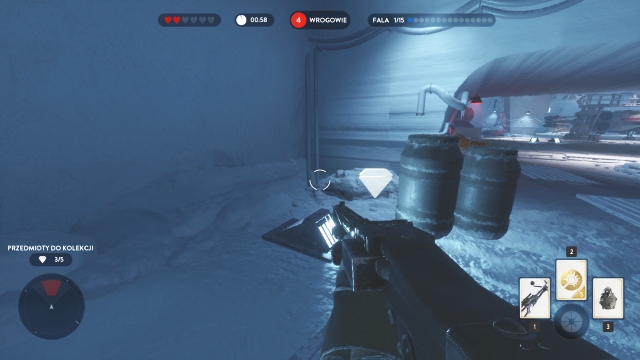 4/5
4/5Walk over to the other side of the map, now. On the right, you notice tanks. Behind them, there is the fourth item.
 5/5
5/5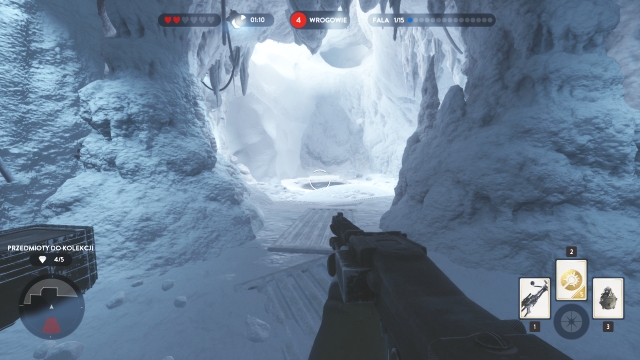 5/5
5/5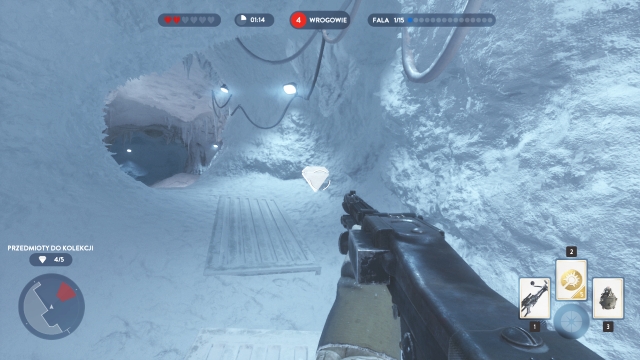 5/5
5/5Then, turn back and find a passage down. Follow it to the cave. In there, go right to find the last collectible in this mission.
 1/5
1/5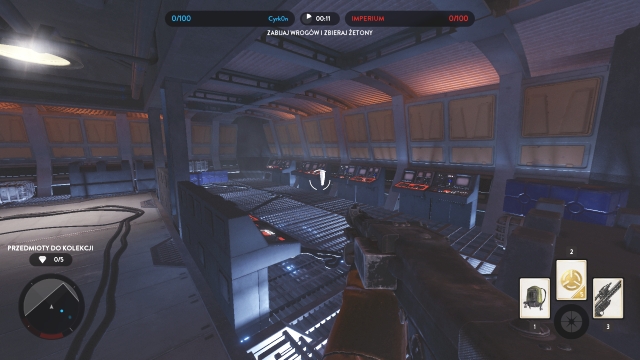 1/5
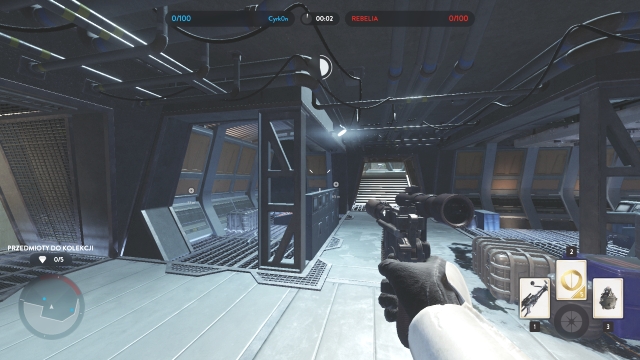
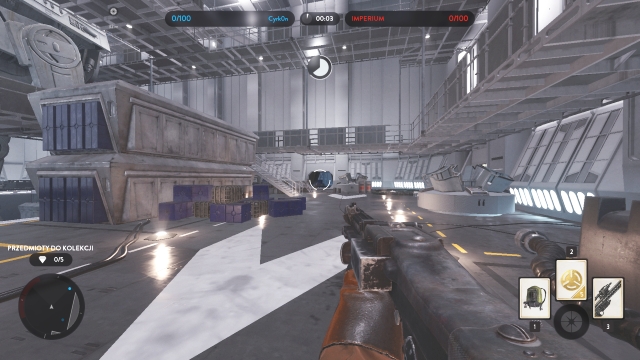
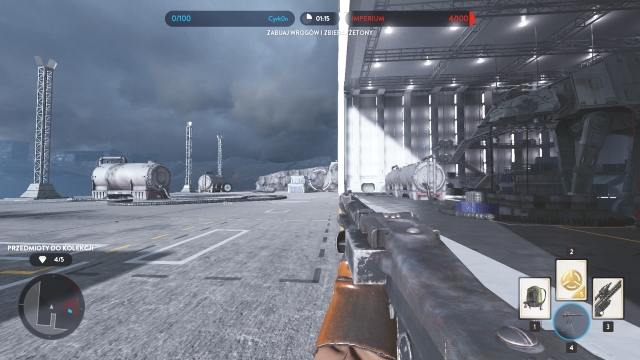
1/5After you start the mission, turn right. You will spot a room entrance. Enter and you find the first collectible on the right.
 2/5
2/5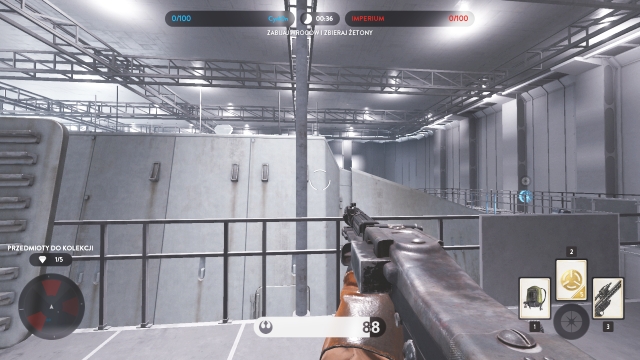 2/5
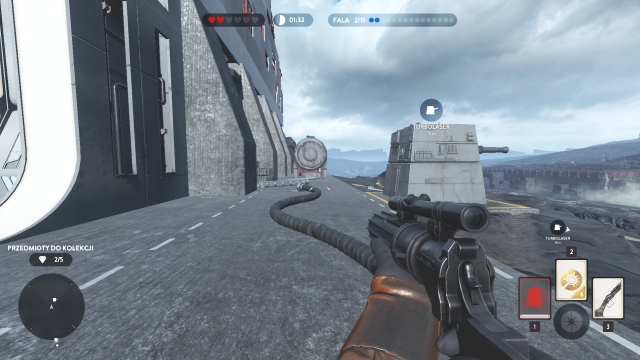
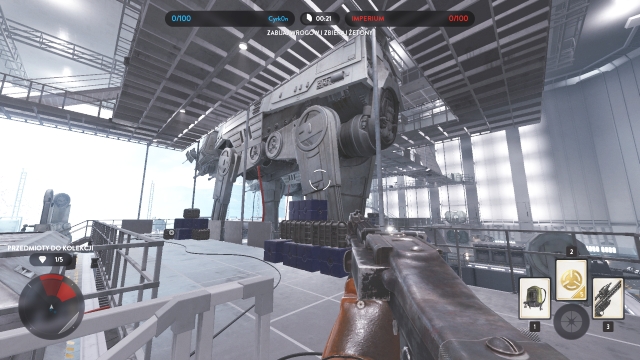
2/5The next item is hidden atop the AT-AT. You will have to use the jetpack to get there.
 3/5
3/5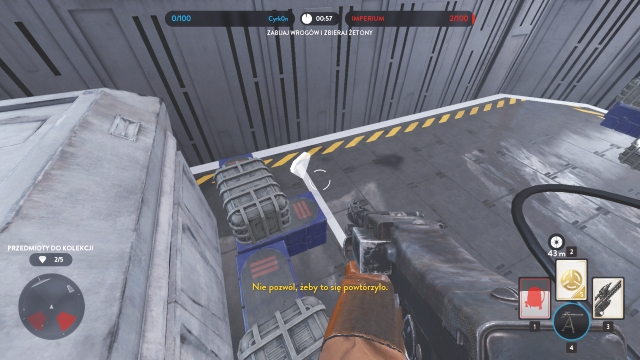 3/5
3/5Jump off the AT-AT's head and walk into the recess underneath. Next to the boxes, you find the third collectible.
 4/5
4/5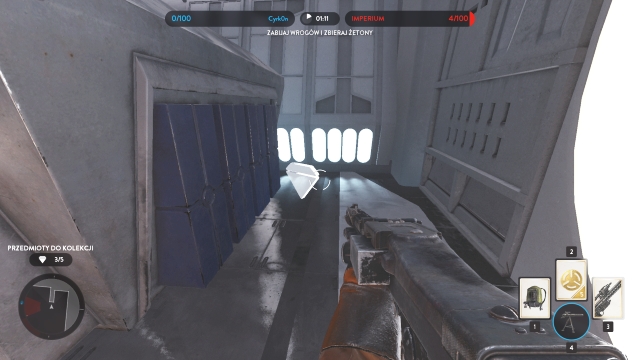 4/5
4/5To find the fourth collectible, go to the left corner by the hangar exit.
 5/5
5/5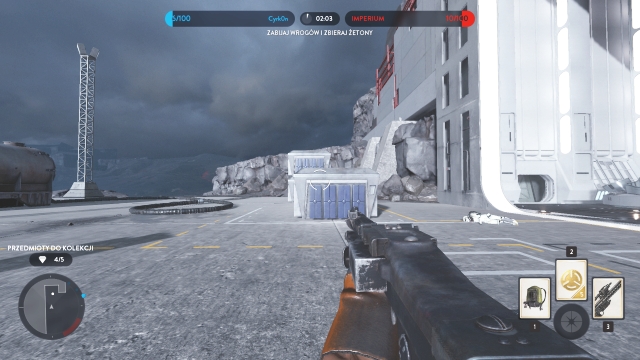 5/5
5/5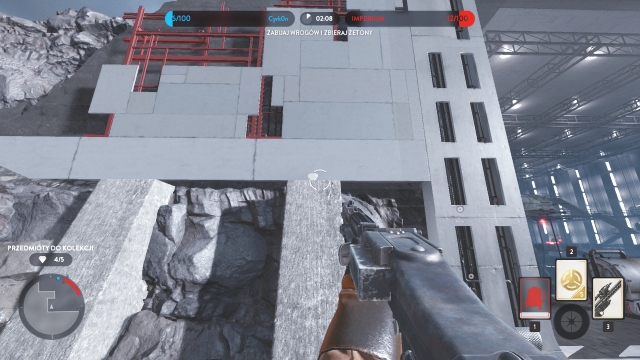 5/5
5/5To collect the last item, exit the hangar. The item is on the right, on one of the supports. You need to use the jetpack to get there.
 Sleeping Dogs Game Guide & Walkthrough
 Street Fighter IV Game Guide & Walkthrough
 S.T.A.L.K.E.R.: Clear Sky Game Guide & Walkthrough
 Star Wars: Empire at War Game Guide & Walkthrough
 Saints Row: Gat out of Hell Game Guide & Walkthrough