
This is a complete guide to Spellforce 2: Shadow Wars game. Before you start your campaign I recommend reading some useful rules, and a few explanations that make my clues more understandable.
I guess it's all you have to know before starting a campaign. Now you may start your adventure. I wish you good luck.
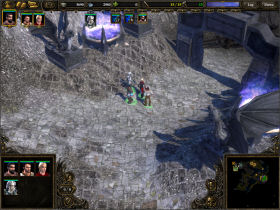
The first act is nothing else than a large tutorial. It is a great opportunity to master a user interface, and, by the way, you are being introduced into the main intrigue. That's why you don't have to worry about quests: it's not a big challenge to finish them, all you have to do is to execute narrator's instructions. This is the reason I only listed possible quests without going into details. You surely will not meet any problems if you follow narrator's tips. Let's start then.
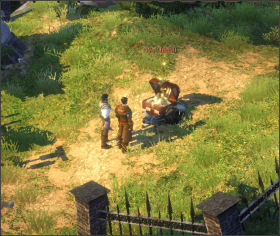
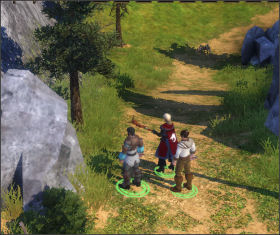
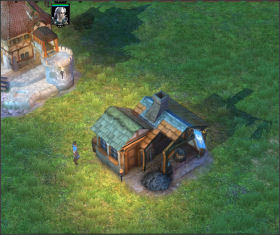
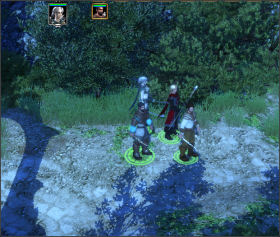
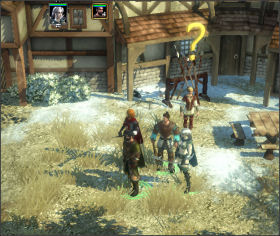
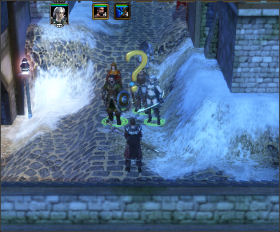
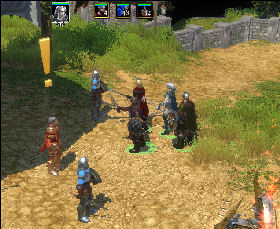
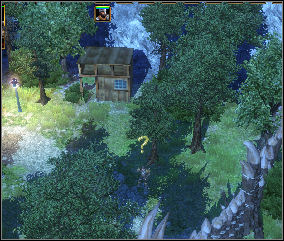
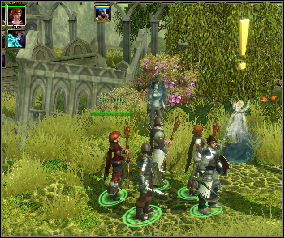
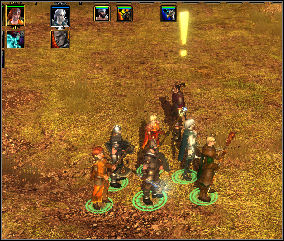
Listen to the conversation with your brother Bor. He is going to accompany you in your journey home. He gives you a first quest: visit Lya and join her to your group. Your sister lives in a small hut, north from the place you met Bor. Follow him. Now you may try different camera's views and learn how to move your hero.
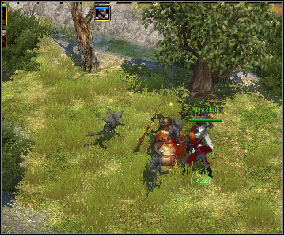
After a while you face first enemy: aggressive Wolf crosses your way. Bor rushes to attack. Narrator explains rules of the combat system.
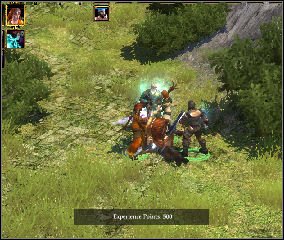
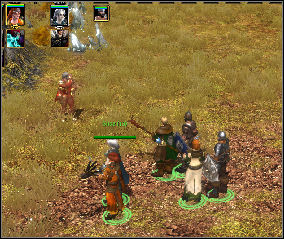
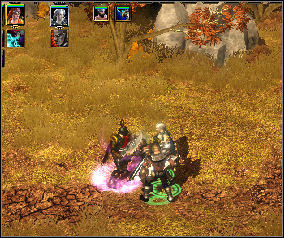
Fighting is not complicated at all. All you need to do is to click on the enemy with right button of the mouse. With Bor's help, kill approaching wolves. Successful killing of two beasts enables you to advance a level. Narrator explains what has to be done to make the hero stronger. Bor officially becomes a member of your group. Heroes fighting by your side are the strongest allies in the game. From now you may give orders to Bor.
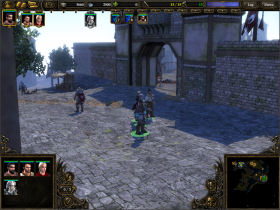
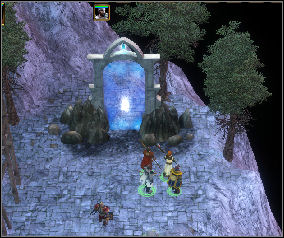
Follow the path until you reach a gate. Prepare yourself for entering much more dangerous world beyond the gate. Narrator tells you about new way of attacking your foes. Continue your journey.
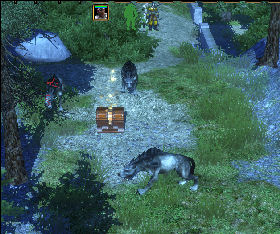
Next killed wolf leaves a chest with a treasure. Take all items with you. It's time for mastering an inventory menu. Since now always remember to check bodies of killed enemies.
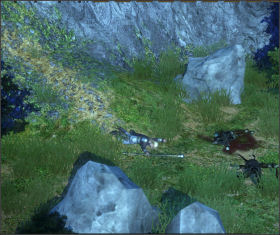
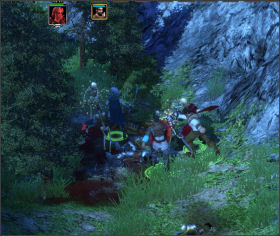
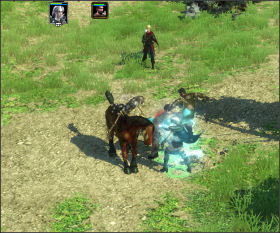
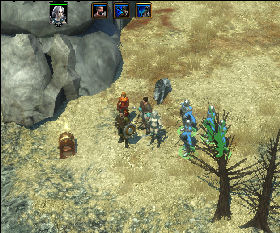
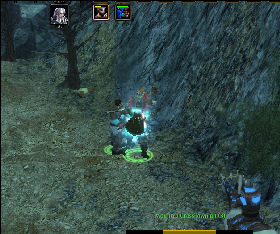
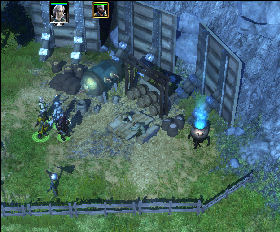
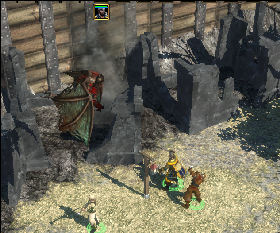
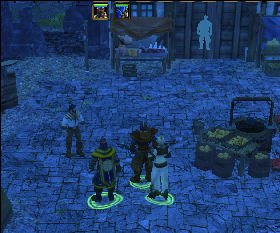
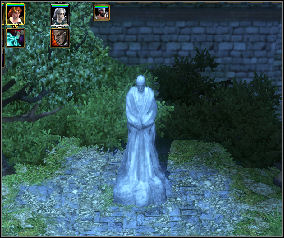
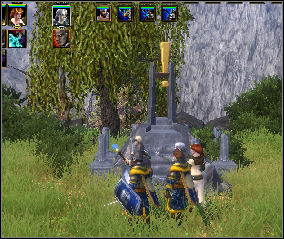
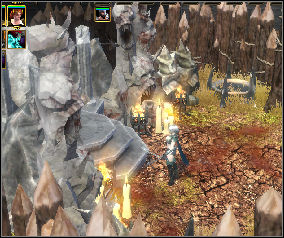
Following the path, the two of you reach Lya's hut. But things evidently go wrong: approaching the cottage you can see signs of fight and then you find your sister's body and a few dead Dark Elves. Fortunately it's not too late for help. The Shaikan have a special ability: they can resurrect their people. It's your next task: celebrate the ritual before it's too late.
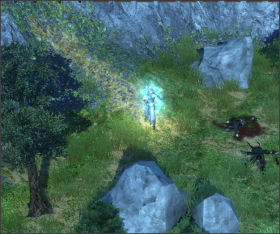
This time it's not a big challenge. All you have to do is to follow narrator's instructions. This way you bring your sister back to life and master special abilities of Shaikan race.
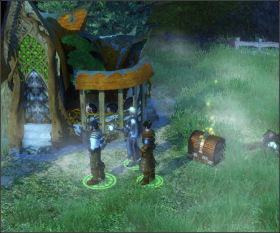
Listen to the conversation between brothers and sister. You receive a new quest: warn your people against approaching army of Shadow Elves. Narrator tells you about Quest Book inventory. Before hitting the road equip your party with items found in the chest standing next to Lya's hut.
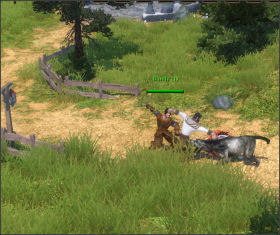
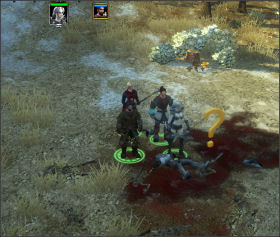
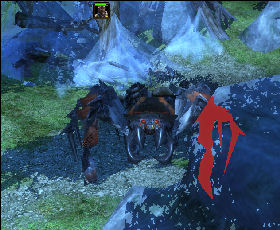
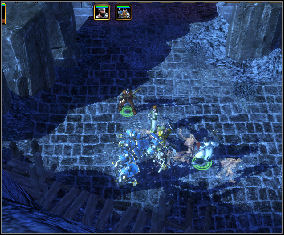
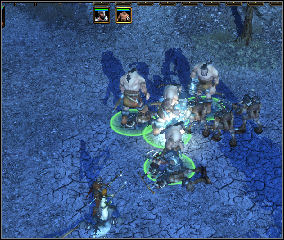
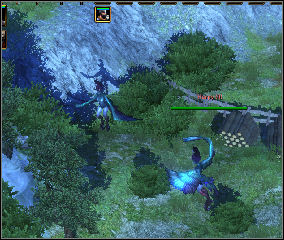
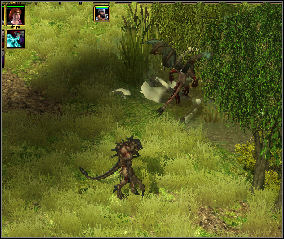
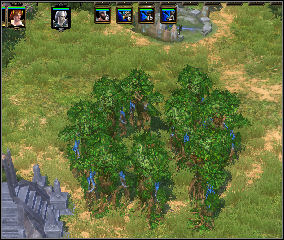
When you are ready to go, follow the path West from Lya's home. Be prepared for a fight with Sand Spiders. Killing a huge spider allows all your heroes to advance a level. Narrator teaches you how to use magic.
Kill all Dark Elves, standing on a bridge, using a spell (according to narrator's tips). Then deal skill points and continue a journey.
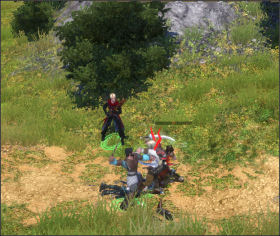
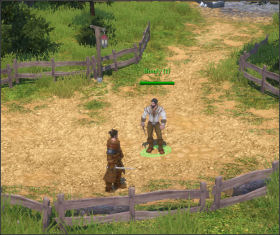
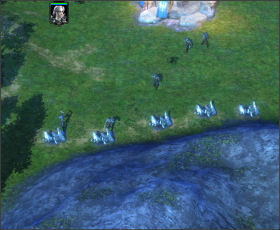
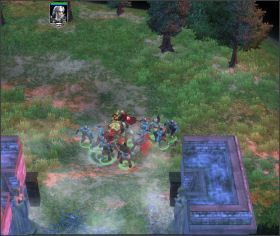
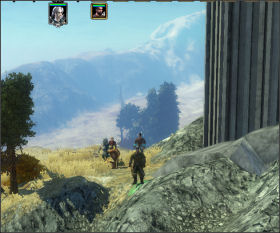
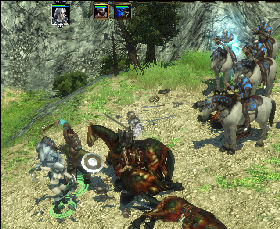
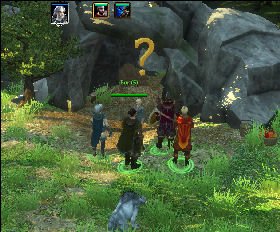
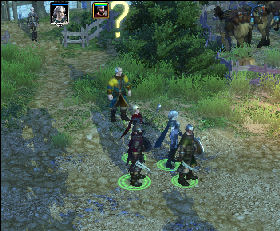
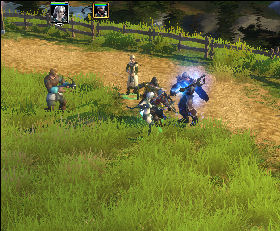
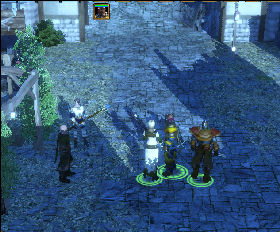
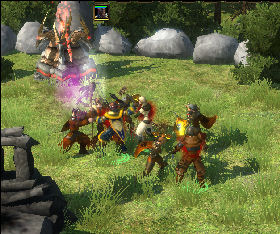
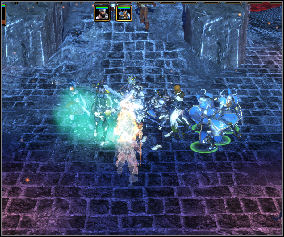
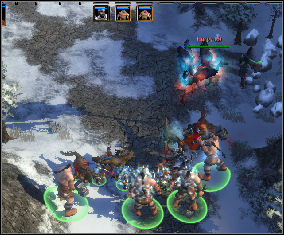
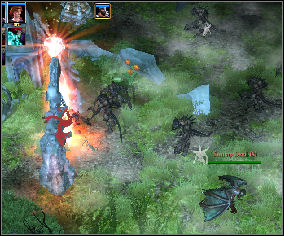
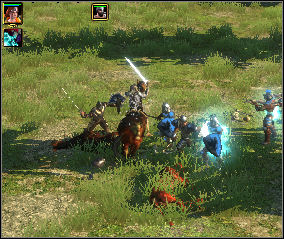
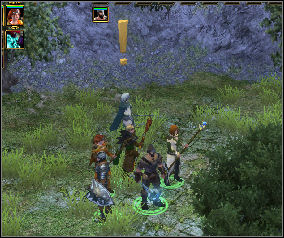
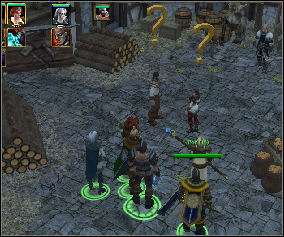
After a while you see a group of fighting figures. It's Nightsong battling two Shadow Blades. Help her. Unfortunately attackers kill Nightsong. You see a short cut scene: Bor resurrects the elf - girl. Nightsong explains the party what Shadow Blades are. You receive a quest: fire the warning signals to alarm villagers. Nightsong joins the group. She is an independent character; you can't give her orders nor develop her skills. Continue your journey.
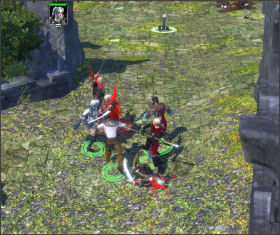
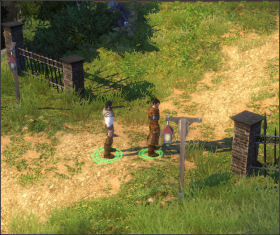
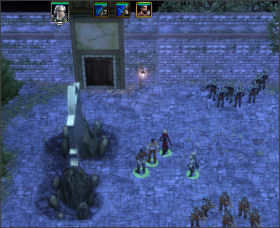
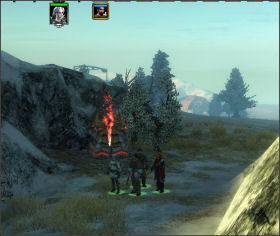
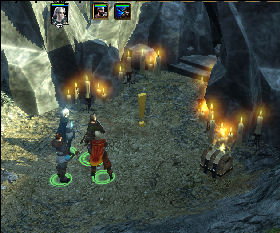
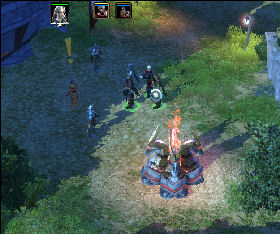
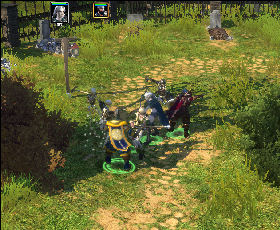
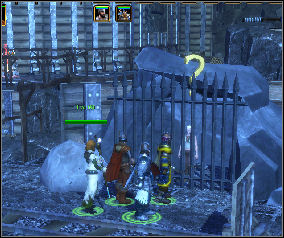
After a moment you face a band of Shadow Blades blocking the road and the lever. Kill them all. Switch the lever, it lets you to use a telescope. Unfortunately you are late, the village is encompassed and last inhabitants are being killed now. You receive a next quest: look for help to the East, in the outpost of the humans. Continue a journey, follow the East road.

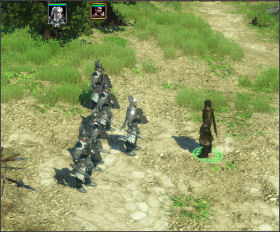
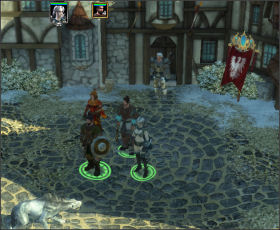
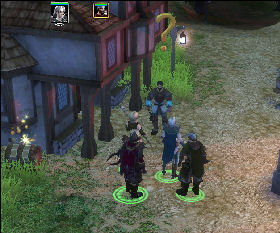
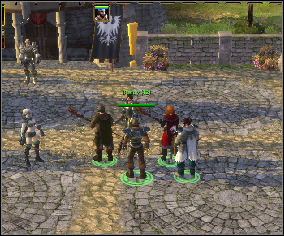
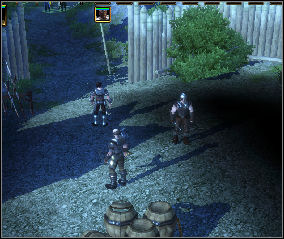
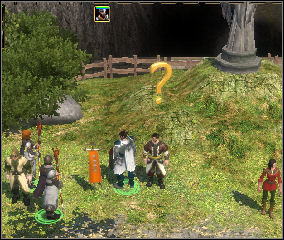
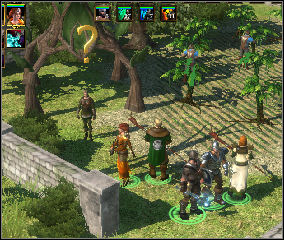
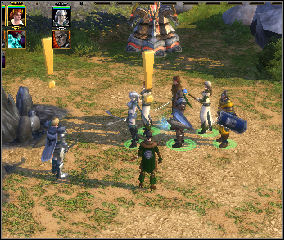
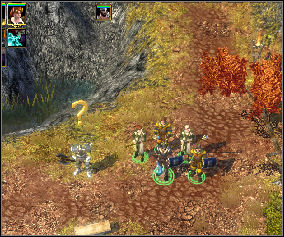
Destroy the group of Shadow Blades. When you reach a crossroad choose the East path. After a moment you meet Wulfger. Talk to him. He seems to be arrogant and distrustful but in the end he agrees to help. But there is a one condition: it is you who is going to lead the troops into a battle. You are given a next task: recruit a group of troops. Do what narrator says.
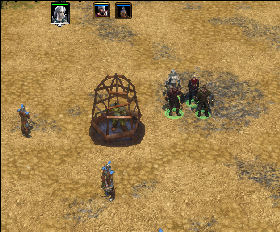
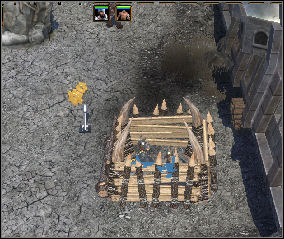
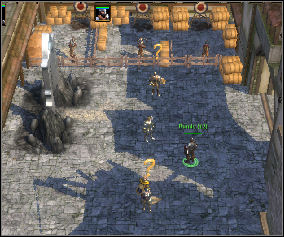
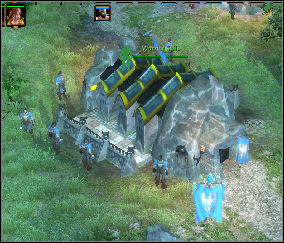
It's time of gathering materials, and constructing buildings.
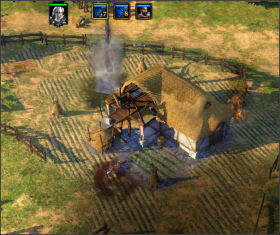
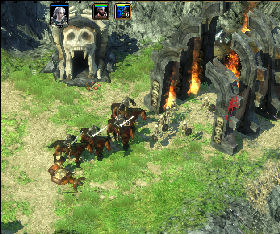
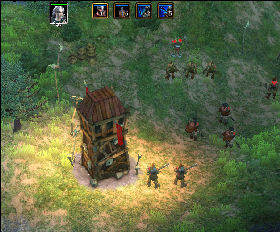
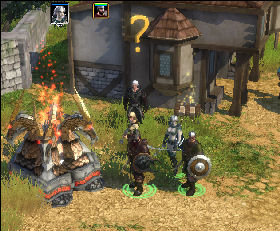
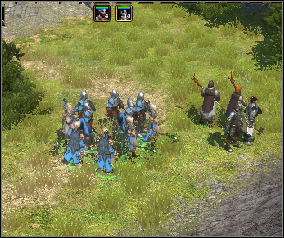
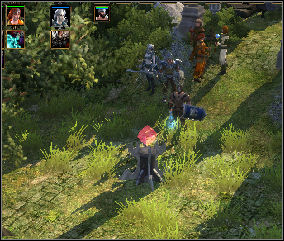
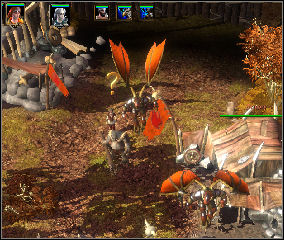
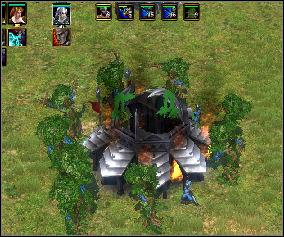
After a few minutes you can recruit first troops. Gather a group of footmen and attack the enemy (signed on a map as a red dot). Your first skirmish is a victory! Don't forget to loot a chest. Prepare yourself for an assault on the enemy's camp. Upgrade the Blacksmith and recruit a few bowmen. Listen to narrator's tips. You receive a next quest: destroy all enemy's troops and buildings.
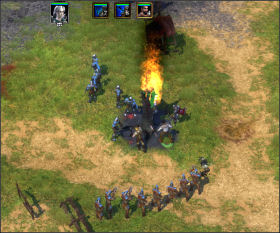
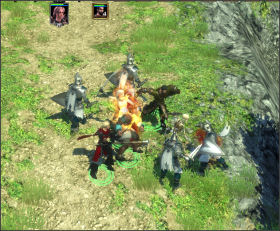
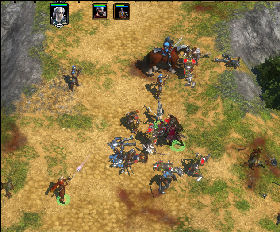
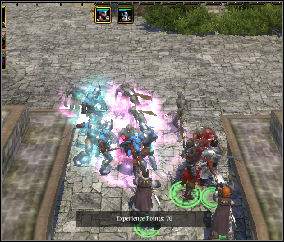
Army of heroes, footmen and bowmen is strong enough to assault a camp. Remember to attack mages with a distant weapon.
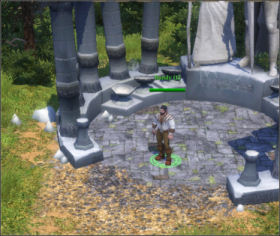
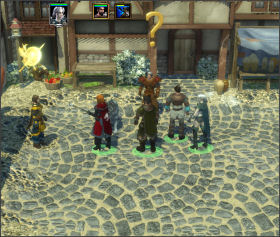
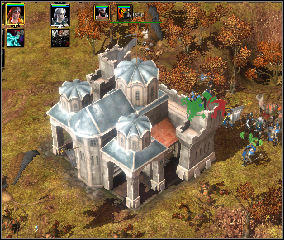
When you liberate the village go through a bridge (to the West) until you reach a town's gate. Thora is waiting for you here. She orders you to meet the Patriarch Ur. It's your next task. Hurry to the top of the citadel.
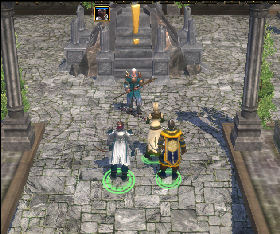
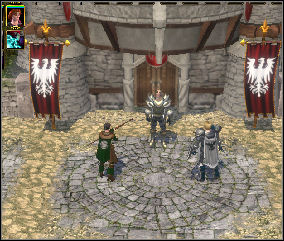
Follow the road and you easily find your goal. But there is a surprise waiting for you.
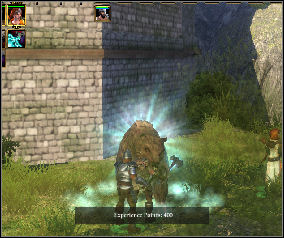
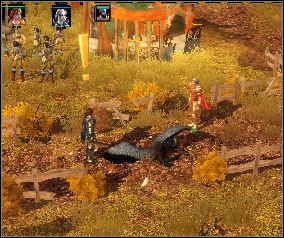
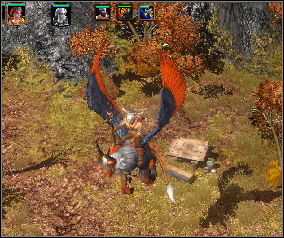
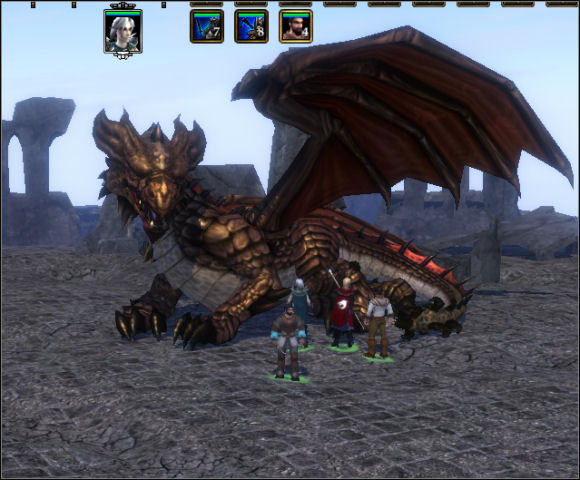 The Patriarch Ur is a huge mighty dragon!
Ur listens to your story. This is the end of the first act/tutorial. New orders are given to you. Start the second act.
You have finished following quests:
Lya: go to Lya's house in the North
The Blood Ritual: resurrect Lya with the blood ritual
Nightsong: save Nightsong from the attackers
Alarm: light the alarm fire on the hill
Help from the Human: reach the outpost of the humans in the East and talk to their commander there
Break through the Ring: destroy the besiegers of the Pact in front of the village and then talk to Thora
Ur, the Patriarch: go to the highest spot within the fortress and talk to Ur there
Frankly speaking you did not achieve a success in all missions, but in those cases you never had a chance. There were no side quests in the first act. Start the next chapter.
The Shaikur Fortress is the first line of defense against united armies of Dark Elves and Shadows now. It is sure that lonesome Skaikan are not going to stand against the enemy for long. There is only one way of salvation: to look for help on the King's Court in Highmark. It's up to you to fulfill the mission.
Your new goal is Sevenkeeps, the capital of Highmark. The journey will take you through the mountainous Norimar and the green plains of the Rushwater Downs.
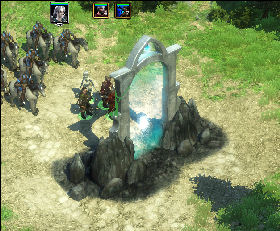
Prepare your heroes for a journey. When you're ready go back to the city. Go to the portal in the Northwest part of the city. You can see a film showing Sorvina's army arrival.
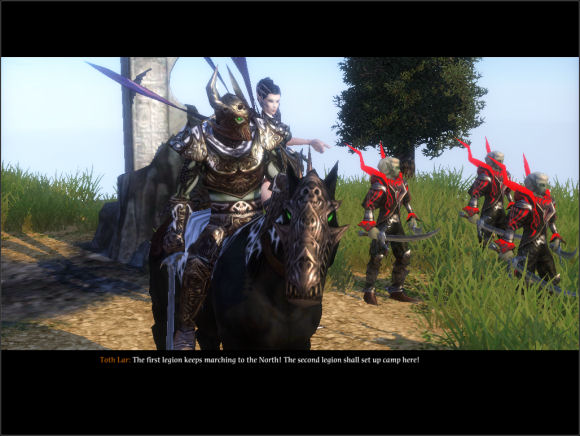 Sorvina is coming...
 ...so is her pupil.
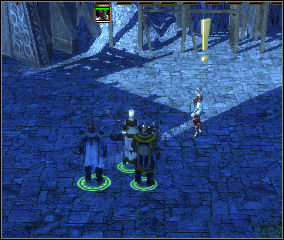
Now, talk to Colay. He mentions Malacay - the legendary creator of Shaikan race. You may go further through the portal. Do not take your soldiers, they cannot enter the teleport.
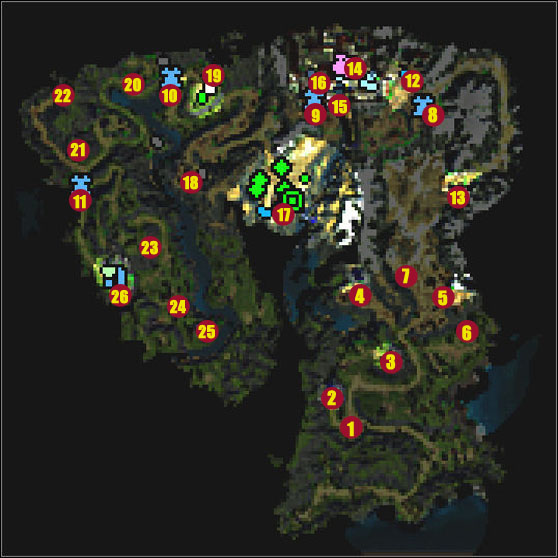
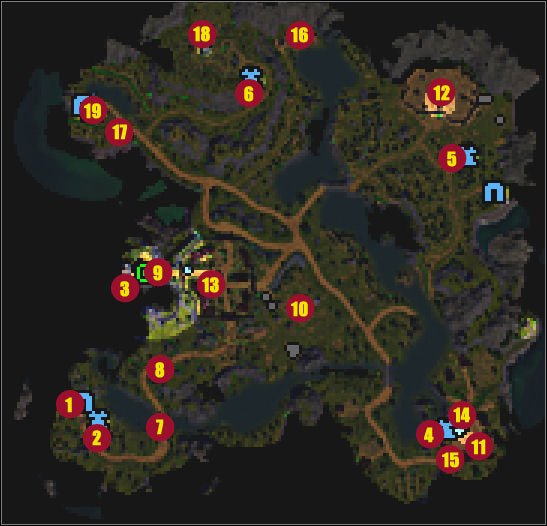
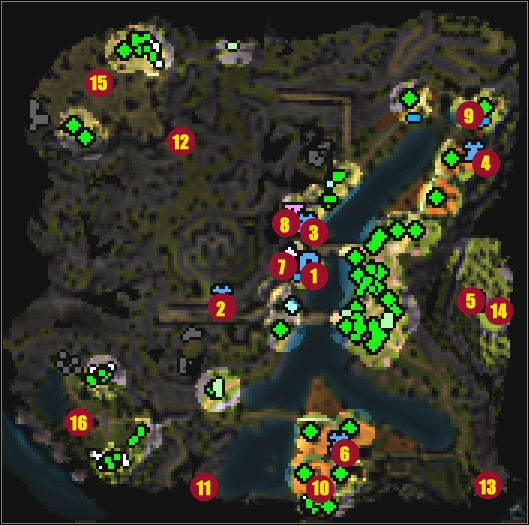
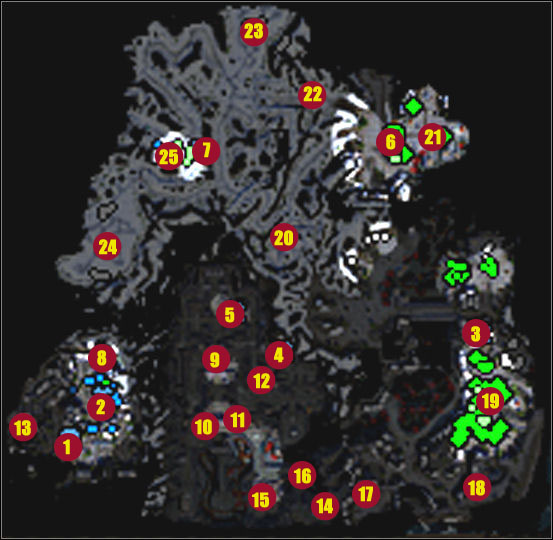
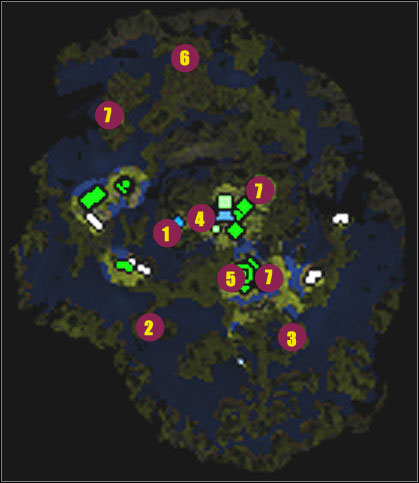
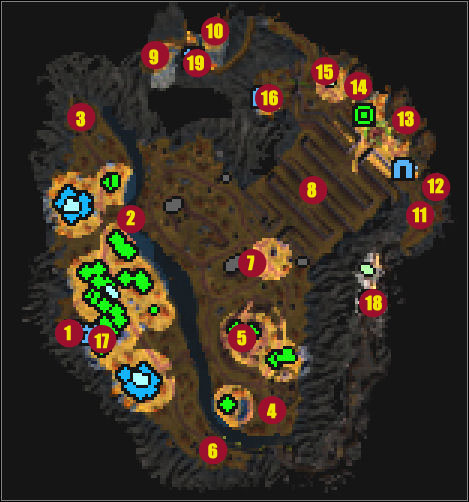
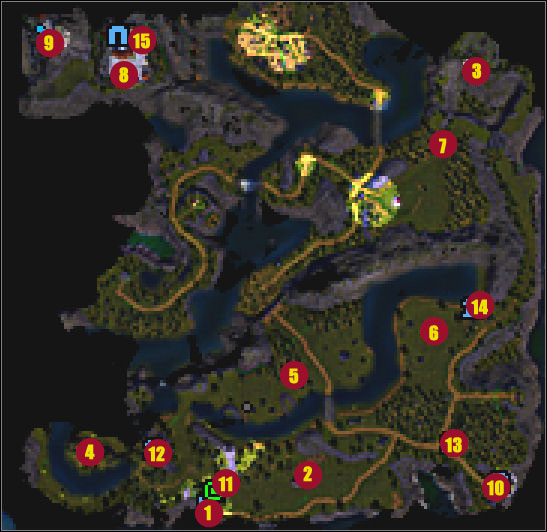
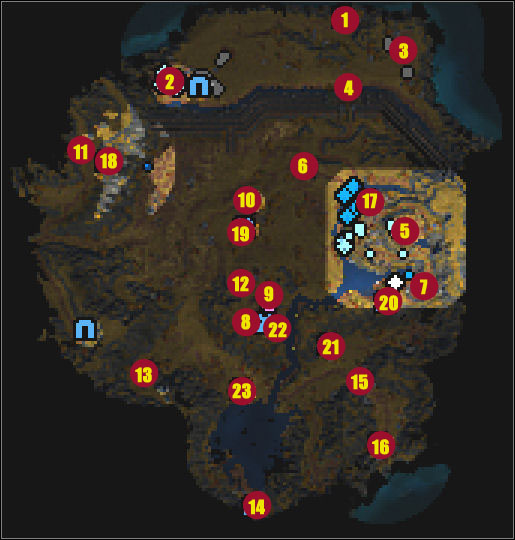
1. Rottgar and his soldiers
2, 3, 4, 5. Watchtowers
6. Revenant Lord
7. Leif's body
8, 9, 10, 11, Journey Stones
12. Solveig
13. The Dwarven Horn
14. Uland
15. Ortbrandt
16. Hedwig
17. Your headquarter
18, 19, 20, 21. Watchtowers, Undead's buildings
22. The Vault of the Undead
23. Rolf
24. Gurak
25. Inga
26. The portal to Rushwater Downs
In Norimar you are going to lead the group of your heroes only. The best tactics is to choose units casting spells and using range weapon as your first targets. Leave the strongest beasts for an end. When you meet extremely strong enemy who has his own soldiers (e.g. Revenant Lord), it's a good idea to lure enemy's soldiers outside their camp. After a while your opponent has to go back to his camp what gives you some time for healing and resurrecting your heroes. It's a good idea to equip one of your heroes with the healing wand. Keep him away from fighting soldiers and let him heal his companions. Remember that you always can resurrect your heroes so do not panic when someone dies.
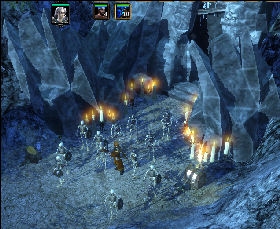
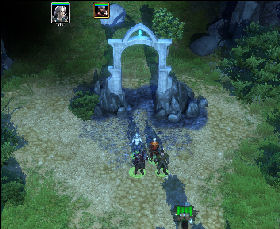
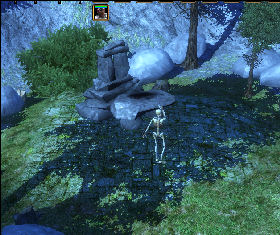
The portal teleports you to the mountains. You receive a next quest: find the Ortbrandt's fortress. Follow the path. Be aware of Skeletons.
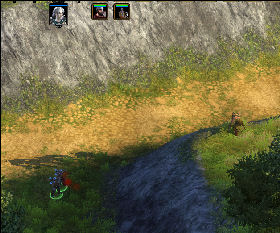
On the first embranchment turn left (Northwest). There are few Revenants in a small valley. Kill all enemies, take items and go back to the main path. Go East and then North, (there is only one path with no branching). Be careful, there are many Skeleton Warriors wondering around. After a while you can see a band of skeletons fighting a group of soldiers. Kill all Undead and search the remains. Continue a journey.
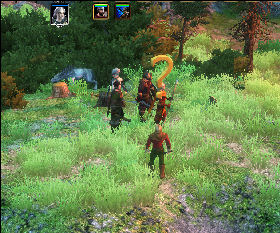
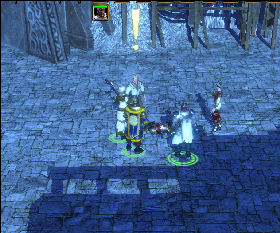
Go west and you meet Rottgar and his soldiers (1). Some Undead have driven Rottgar and his men away from the protecting watchfire and extinguished it. A quest is given to you: recapture the watchtower on the hill and light the fire.
Go West along the path leading to watchtower (2). Destroy a group of Skeleton Warriors and single Adept of the Cult. Soldiers help you in a battle. A fire burns when you defeat all Undead. Take all items and get back to the main path. Talk to soldiers. They tell you that all watchtowers must be recaptured if you want to reach Ortbrandt's fortress. Continue a conversation. Next quest is given to you: deliver a letter from Rottgar to his bride Solveig. She lives in the Falcon Castle. Follow the path leading North until you reach the second watchtower (3). It's defended by the same set of beasts as the previous one. So, choose the same way of attack: kill Adept of the Cult first, and then the rest of creatures. Watchtower nr 2 is yours. Continue a journey.
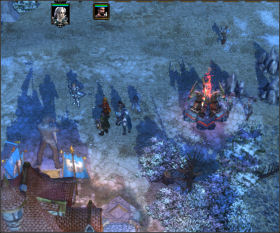
Wonder around killing all Skeletons and Revenants. Equip Lya with Simple Adept's Wand and do not let her involve into a battle. Let her heal fighting heroes. Go East until you reach Undead's outpost. You can find Revenant Lord and his followers there (6). It is very difficult enemy. Use the tactic described at the beginning of this chapter. Repeat attacks until you kill all Skeletons and Revenants. Then kill Revenant Lord. Equip items found in chests and go West. The path leads you to the third watchtower (4). Recapture it.
Now, go Northeast to recapture the last tower (5). Do it as usual. The last watchtower is yours! Search the remains and continue a journey to the citadel.
Quest solved (side quest): light the fire on watchtowers
West from the last watchtower you can find the body of a soldier (7). Search the corpse. Read the diary you found, this way you discover what connects the dead soldier with Rottgar and Solveig. Carry on. Go North killing all wolves. After a while you encounter a group of Grey and Silver Wolves, guarding a treasure. Kill all beasts and take items. Continue a journey along east pass. Beware of Wolves.
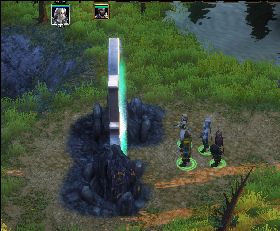
Wondering along canyon you meet first of Journey Stones (8). These are teleports, quickly transporting you from one place to another. Each Stone is shown on the journey map.
The Ortbrandt's citadel is not far away. Before you enter the city talk to Solveig, standing next to the main gate (12). She asks you about two soldiers - Rottgar and Leif (you found his body and diary). Give Solveig Rottgar's letter. Now you must decide if you want to keep or reveal Rottgar's secret. The best way is to reveal the secret and then ask for mercy on Rottgar. Solveig gives you a quest: bring news about Solveig to Uland Weapon Master. It's Solveig's father living in the fortress.
Quest solved (side quest): give Solveig the letter from Rottgar
Quest solved: find the fortress of baron Ortbrandt
Now go straight to the city. Ortbrandt awaits you. At the beginning things don't look good. Situation changes with arrival of a messenger who warns Ortbrandt about Shadow's army coming. Ortbrandt gives you a new quest: use the Horn of the Falcons to block the passage to the Iron Fields. It causes an avalanche that delays march of Shadows. Since now you can lead your first army. You can recruit simple soldiers only, so tactics is still the same.
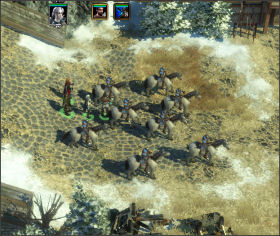
Now you command a group of mounted crossbowmen. Gather soldiers and go quickly to the pass through the mountains. Don't stop to fight with Shadow Warriors. You must reach the horn (13) as soon as possible.
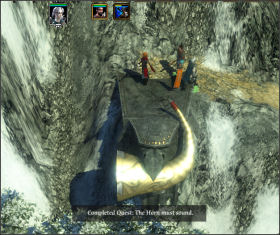
Use the horn. Cliffs fall down blocking the way. Now you may start killing enemies. You receive next quest: get back to the town, report to the baron and continue your main mission.
Quest solved: use the Horn to block the passage
Get back to the Ortbrandt's fortress. Kill all met groups of Shadow Blades. There is Uland standing on a main yard (14). Tell him Solveig sent you. Uland rewards you: choose one of three weapons. Continue a conversation. You receive a next task: track down the hidden children Inga and Rolf Cyclops dog joins your party to trail the missing. There are few merchants nearby, check their offer and sell not needed stuff. Go to the baron Ortbrandt (15).
Quest solved (side quest): bring news to Uland.
By the way you meet Hedwig (16). Talk to her. Magistra offers a quest: you are to kill Inga and Rolf. Heroes reject the offer. You receive a next quest: stop Hedwig's game. Go to the baron standing in the center of the citadel.
Report to the baron. Tell about Magistra's betrayal. Ortbrandt supports your mission and gives you a letter to the King. Before he lets you go away you are given a few quests: arrest Hedwig, escort the supply unit to Lyraine, and seal the Vault of the Undead. Start with Magistra.
Quest solved: go back to the town and report to the baron.
Quest solved (side quest): tell Ortbrandt about Hedwiga's betrayal.
Get back to the Magistra and talk to her. Hedwiga is not going to surrender, she summons The Cruel Ones and attacks you. You have to kill her. Get back to Ortbrandt and say what happened. Now you may continue a journey.
Quest solved (side quest): arrest the Magistra Hedwig.
It's time to go to the camp where you establish your headquarter. Leave the town through the Southwest gate and go along a path. Follow Falkmar. After a while you reach the camp (17). You can find here another Journey Stone and a few buildings. You receive a quest: escort Falkmar to the King's Court. Recruit a group of mounted crossbowman. Order workers to gather some materials and recruit troops. When you're ready march along the path leading West. Falkmar joins you.
Go West killing enemies. After a while you can see first Undead's buildings (next to the watchtower) (18). Destroy everything and fire starts burning. Take a treasure and carry on. The path leads you to the valley. There are few Skeleton Archers standing on cliffs, kill them with Crossbowman. Let your heroes to fight with approaching groups of Revenants. Mounted Crossbowman are very useful when you have to destroy buildings. They can shoot from the valley.
Follow the path and destroy Skull Towers. Be prepared for fighting Undead troops (including Skeleton Knights). This way you recapture the next watchtower (19).
Be consequent on attacking with Crossbowman. This way you can destroy all buildings and enemies. Recruit new soldiers in the headquarter if you need to. Recapturing watchtowers (20, 21), and destroying Skull Towers, you trail a blaze to the caravan.
After a while you face a group of Undead scouts. Attack them with the crossbowmen and kill as many as you can. If some manage to escape do not follow them for too long. Scouts run straight to the Vault of the Undead (22), and a frontal attack is not a good idea.
Prepare your crossbowmen and lure the Undead to a valley. Tactics still the same. Leave Thur - the chief of the Undead - for an end. When defeated he leaves a magic salt that is needed to seal the Vault of the Undead's entrance. The fight is not easy, remember to resurrect killed heroes. Wait with the ritual until you kill all Revenants and Skeletons. Then, order the crossbowman to shoot at Thur, and in a meantime try to resurrect heroes.
Approach to the Vault of the Undead. Use the salt to seal the gate. Now loot chests. The Undead quest is done. Continue your journey. The Falkmar's caravan moves to the portal. Let them go without escort, there are no troubles anymore. Now you have to track Inga and Rolf.
Quest solved: seal the Vault of the Undead
Go along the path leading upwards. Cyclops finds a track. Follow the dog but beware of big spiders, wolves and bears. You meet Rolf (23). Talk to him and he points out Inga's place. Send the boy to the town and continue a journey.
After a while you meet Gurak and his Storm Beasts (24). Kill them all and loot their camp Carry on.
Near the Gurak's camp there is Inga waiting (25). Talk to her. You are given a next quest: take a message from children to their father, the merchant Alwin in Rushwater Downs. The girl gives you the wand of Magistra Hedwig. Send Inga to the town and go to the portal where Falkmar awaits.
Quest solved (side quest): find Inga and Rolf
Approach to the portal (26). Follow Falkmar and his caravan. You are teleported to Rushwater Downs.
1. The portal to Norimar
2, 3, 4, 5, 6. Journey Stones
7. Grunt and his troops
8. The ambush
9. Matricus
10. The Camp, your Headquarter
11. The Connach village, Osal shaman
12. The Orc's camp
13. Alwin
14. Berengar
15. Letho Grey
16. The fermentation container
17. Doctor Mauser
18. The old Order's Stronghold
19. The portal to Sevenkeeps
In Rushwater Downs you can lead a bigger army, but still consisted of basic units. You have to take care of your base - use the defensive tactics and built a lot of towers. You have to be ready for quick action and fighting in two places at once. You are going to attack enemy's fortifications. It's a good idea to destroy defensive towers first and then enemy's soldiers. You also have to master using your hero's spells and skills.
You lead the caravan through the portal (1), but it's not the end. You receive a next quest: break through the Clan's sieging lines around Lyraine. Follow a path and activate a Journey Stone.
Follow a path, destroy all groups of mercenaries. Beware of a strong group defending a bridge (7). Their leader Grunt is extremely powerful. It's a good idea to treat him with a spell before a melee fight. With a little help from soldiers it should be OK. The next group waiting just after the bridge is not so tough. Remember to search the remains.
There is an ambush in the valley. A few Bowman stands on cliffs (8). You have to eliminate them before the caravan reaches the valley. The best way is to attack them with your own crossbowman. Do not attack all of them at once. Try to remove them one after another. Let Lya to heal your men. Its rather slow way of fighting but very effective.
You can see the town at last. There is only one battle to fight: help the defenders to destroy mercenaries besieging the town. You receive a next quest: talk to the Master Matricus. You can find him in the citadel standing on the hill. Now you may enter the city.
Quest solved: break through the Clan's sieging lines around Lyraine
Quest solved: escort supply unit to Lyraine
Quest solved: escort Falkmar to Lyraine
Go through the city heading West. You can visit merchants if you wish. On the West side of Lyraine there is a castle standing on the top of the hill, and a next Journey Stone as well. You can find Matricus over there (9). Talk to him. You receive next tasks: prevent the Clans' troops taking over Lyraine; destroy the camp of Iron Storm Clan. Do not let to set free imprisoned Orc Shaman - Osal. Go east to the soldier's camp (10). Order workers to gather some materials, recruit new ones and send them to work. Move soldiers to the watchtower to look out Orcs coming. Send your heroes to the south, to Connach village. They have to keep an eye on the shaman (11).
Quest solved: find the Master Matricus.
Before you reach the village destroy the band of Orcs blocking a way. There are also wolves nearby but it's not a dangerous enemy for you. When you reach Connach don't let Orcs to set the shaman free. But you still have to care for your Headquarter, it's constantly attacked by Orcs' troops. There must be strong group of your soldiers stationing in the Headquarter. Let your heroes to defend Connach and at the same time make your camp stronger: gather materials, build structures and recruit soldiers. Be sure that you have built few watchtowers. It's necessary for you to survive Orc's assaults.
When you're ready (it means when your base is fortified and you have a large army), you may counterattack Orcs. There is an Orcs' outpost North from your base. The best way is to attack it from two sides simultaneously: send one group from Headquarter and another from Connach. The second group must not leave a path, there are still Orcs coming to recapture Usal. After destroying the outpost head your army North. Destroy all met Orcs. This way you reach the Orcs' main camp (12). Before attack try to destroy all watchtowers and troops stationing outside a palisade.

Do not attack the camp frontally. Be patient and try to lure Orcs outside the palisade, and when you defeat them destroy the base. When succeeded you receive a next quest: go back to Matricus. Now back to the castle in the town.
Quest solved: defend Lyraine
Quest solved: destroy the Orc's camp
Quest solved: do not let to set Osal free
Talk to Matricus. He supports your mission and gives you a letter to the King. You are given a few new instructions and quests: search for the old Order's Stronghold, look for the Portal Stone there and recover four books about portal's magic. So, carry on then.
Quest solved: get back to Matricus
Going through the city you meet Alwin (13). Talk to him and give him the letter from Inga and Rolf. You are rewarded with an excellent piece of armor. Continue a chat and ask of Iron Falcons. You are given next quest: talk to Berengar (14). He is an expert of ancient Iron Falcons' armors. Before you go to the old Order Stronghold visit Berengar in Connach.
Quest solved (side quest): give Alwin the letter from Inga and Rolf
Talk to Berengar. You receive a next quest: find the Berengar's armor, lost somewhere near the portal to Sevenkeeps. Blacksmith points out Letho Grey kneeling nearby (15). Talk to Letho.
Quest solved (side quest): talk to Berengar
You receive a quest: find the Grey's family hiding somewhere in the Gate of Swords. Take items from the chest standing nearby and go to the ruins.
Before you go straight to the ruins try to explore an area. On the North you can find a fermentation container guarded by a group of wolves (16). Kill all beasts and take items you find in chests standing nearby. Now go to the West outskirts of the map.
Next to the portal you face doctor Mauser (17). Attack him, and after a while a strange man materializes next to you. It's Professor Twiddle, who helps you in a battle. Talk to him and you receive a quest: find out what the strange talk of Professor Twiddle was about. Loot the doctor's body and take items and a letter with you. Read the letter and this way you discover a mystery of Berengar's lost armor. Use a Journey Stone to teleport to Connach. Talk to Berengar. Now back to your party and go to the ruins.
Quest solved (side quest): find the Berengar's armor
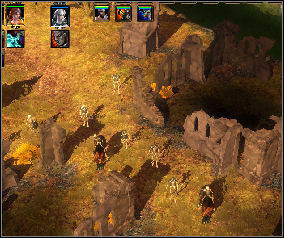
Enter the ruins (18). You can find here Skeletons grouped in a few squads. Destroy them one by one. You can find one book on each group. The last squad, led by Skeleton Mage, possesses the Portal Stone. Kill Skeletons. All quest items are yours. You may continue a journey.
Quest solved: find the Portal Stone
Quest solved (side quest): find Rohen's books
Go to the West to the portal that teleports you to Sevenkeeps. (19).
In Sevenkeeps you may lead a little squad of soldiers. These are the basic units so do not change your tactics.
Next to the portal there is Gertbrandt standing. Talk to him, he shows you the way to the King's court and tells about the plague. Explore the nearest area and then follow the path. Beware of Sand Spiders and Large Hornets. Warning! There are a lot of quest items in Sevenkeeps. You have to be careful twice as usual. Always check if there are any items left in the area and in the town as well.
Grounds around the town are infested with monsters. There is a cave inhabited by a group of Swamp Spiders. Do not enter the cave, try to lure a small group of beasts outside. Destroy following groups until you kill them all. Remember about using offensive spells. When you're done continue a journey.
Just next to the town's main gate there is a lair of mighty Sister Silverweb. You have to be careful: when defeated, Spider breeds a horde of smaller spiders. Kill them all and enter the city. Do not stop to talk to citizens, just go straight to the King Ulf. Falkmar helps you to go through a guard. But your party leaves you.
Talk to the King, courtiers and Nightsong. Unfortunately the audience does not finish well - the King makes you his fiefdom but does not support your demands. You have to look for allies in some other places. You receive a next quest: talk to the General Einar. He stands just next to the King. He tells you that the only way to get back to Iron Fields is to destroy the Orcs' fortress standing on your way. To do that you have to ask Dwarves and Elves for help. You receive a next quest: talk to Jandrim Windhammer, the dwarven ambassador. You may use a Journey Stone to reach Jandrim.
Quest solved: reach the King's court in Sevenkeeps
Quest solved: talk to the general Einar
Quest solved: escort Nightsong to the King's court
Quest solved: escort Falkmar to the King's court
This is the end of the second chapter. The following quests are done:
Nightsong and the Message for the King: accompany Nightsong to the King of Highmark and ask the King for help
The Supply Unit: bring the supply unit to Rushwater Downs. Destroy the Undead and seal the Vault of the Undead
Rescue for Lyraine: break through the Clan's sieging lines around Lyraine
Falkmar: escort Falkmar to Lyraine, and then to the King's court in Sevenkeeps
To Norimar: find the portal leading to Norimar
On the Way to the Falcons of Norimar: go to the castle of Falcons and talk to the baron Ortbrand
To Sevenkeeps: go through the portal to Sevenkeeps
The Horn of the Falcons: use the horn of the Falcons to block the passage to the Iron Fields
Master Matricus: talk to Matricus it the castle in Lyraine
Against the Iron Storm: defend the town of Lyraine and fight back attackers
Return to Matricus: return to Matricus
The old Order Stronghold: find the old Order Stronghold and look for the Portal Stone
The King of Highmark: obtain an audience with the King Ulf
A Friend: talk to the general Einar
Osal: prevent the Clan to free the imprisoned Orc Shaman
Rottgar's Letter: take Rottgar's letter to Solveig
The Wards: track down Inga and Rolf
The Iron Falcons: look for Berengar's missing armor
The Grey Family - Letho: help Letho Grey to find his peace
Traitors in Falcon Castle: put a stop to the traitor Hedwig's game
After a while Bor and Lya join you. Talk to Nightsong. She's not going to accompany you anymore. There is Utrecht standing nearby. He is the bailiff of your fiefdom - Westguard. He awaits you there. Meeting Utrecht in Westguard is your next task. Explore the area near the main court - you can find a few quest items in chests. Now, go to the portal leading to Westguard (20).
In Westguard you may improve your base to its full potential, and recruit the strongest units. But it doesn't mean you have to do that. I suggest recruiting a large number of basic and medium units. You may also recruit a Titan if you want. Quest given to you makes you to recruit at least sixty units and several towers. You have to gather materials all the time and be sure that you have a magnificent army. You are going to fight a few battles using different units. Try to create an army consisted of infantry (Men, Dwarves), cavalry (Men) and Elven Bowman and Druids. It's not possible to do that at once but you have to remember about that.
2, 3, 4, 5, 6. Journey Stones
7. Bailiff the Utrecht
8. Warrad
9. The North village
10. The South village
11. Clay Golem
12. Great Hunting Wolf
13. Dragon Spider
14. The Captain of the Cult
15. The Undead's Base
16. The Beast's Base
Utrecht is waiting in front of the portal (7), talk to him. You are given a next quest: destroy the demons that attacked the Westguard and repair damaged buildings. Continue a chat to learn the history of Westguard. Up to North there is a market where you can find merchants. It's good idea to arrange your inventory.
Quest solved (side quest): meet Utrecht in Westguard
You can also find Warrad on the market (8). Talk to him and you receive a next quest: find his missing daughter Kara. Ask Bara if she knows something. The Girl went to Sevenkeeps to visit her aunt Bara. Since then no one saw her. You should look for Bara in Sevenkeeps. But now you should take care of Demon's case. Check if you are equipped with a range weapon (only this way you can attack flying beasts), and go to the North village (9). Demons are not really demanding enemies so there should not be any problems with recapturing the village. When you set the village free try to kill al wolves and bears wondering around. You can find a few items.
When you're done go to the South village (10). By the way, you come across Clay Golem (11). Destroy it and you find 10 Lumps of Clay (quest item). Recapturing the village is quite easy. Kill all Demons and take items with you. Go back to your castle.
Quest solved (side quest): destroy Demons
Quest solved (side quest): repair damaged buildings
Talk to Utrecht once more. You are given a next task: construct the Altar of Life, the Blacksmith and the Laboratory. Order workers to gather materials. It takes some time so in a meantime try to explore the Northwest area. You can find there a large number of wolves and bears, and a lot of classy items. Beware of the ruler of this area - Great Hunting Wolf (12). Before you face him recruit a few soldiers to help you (build Barracks earlier). Search the wolf's body and you find a great weapon.
When you have all buildings ready go to Utrecht again. Talk to him and you receive new quests: recruit at least twenty soldiers, and build at least five watchtowers. Start with soldiers, they help you to kill the strongest monsters living in Westguard. Lead your army to finish exploration of the Northwest area. In the chest defended by two bears you find a scroll The Creation of Lightfist.
Quest solved (side quest): construct the Altar of Life, the Blacksmith and the Laboratory.
Now start to build watchtowers. In a meantime get all your soldiers and go to the Southeast outskirts of the map. There is a family of very mean spiders living there. Especially beware of huge Dragon Spider (13). Do not attack frontally - beasts are extremely strong. Use the tested tactic: try to lure spiders outside and attack the weakest ones. When there is only Dragon Spider standing attack it with all you have. You can find a fine weapon on its body and there is something hidden in a den too. By this time your towers should be ready. Get back to Utrecht.
Quest solved (side quest): recruit twenty soldiers and build five towers
Talk to Utrecht. There is a nice surprise waiting for you: people settling your land paid a tribute. You are given next task: build a well in Westguard. You have to talk to Warrad. Fortunately you have enough resources - give it to Warrad. The well is going to be finished in some time. Now you have to take care of something else.
It's high time to finish the case of Demon plague. Use a Journey Stone to teleport your party to Spear Heights (go there via Sevenkeeps). You can find here the Captain of the Cult (14). Talk to him and you see what is the reason of Demon's attack. Conversation ends with a fight. Kill the Captain and his summoned followers. Loot bodies. Your short journey via teleports is long enough for Warrad to finish the well. Go to Utrecht. You receive a next quest: upgrade two of the farms and the headquarter (with Elven and Dwarf upgrades). The first one needs a minute to be done, the second takes much more time. Upgrade farms and leave Westguard. Go to Sevenkeeps.
Quest solved (side quest): build a well in Westguard
Quest solved (side quest): upgrade two of the farms
Go to the University (3). You can find there a Journey Stone and a few scientists you have to talk to (Master Askan, Professor Twiddle and Professor Undergant). Talk to the Master Askan and give him magic books. You are rewarded with a ring. Now it's time for the Professor Twiddle. Talk to him and you will know whom the mysterious Doctor Mauser was. You receive a task: rescue Lela from Underhall. Now talk to Undergant. This way you recapture the Berengar's armor. You have to choose one of two armors (choose the better one for your hero). Now go to Connach (use a Journey Stone) and talk to Berengar. Blacksmith asks you if you want to keep the armor or sell it. Keep it for yourself, it's an excellent piece of armor. Go back to Sevenkeeps.
Quest solved (side quest): take four books to the Master Askan
Quest solved (side quest): find the Professor Twiddle and talk to him
Quest solved (side quest): find the Berengar's armor
Now go to the Dwarven Ambassador (4). You are given new task: get a sobering up potion that will help Jandrim. Talk to Jared. He gives you another task: get Bitter Lye and Crystal Vial. Both items are in the hands of the High Priest Alastar from Priest's Guild (5) and the Guild Master Cardogan. Start with Alastar. He can help but you have to earn some trust and respect first. It means that you have to accomplish at least one task given by priests. Priestess Sephis gives you a quest: cleanse the Sanctuary of Light in the Northwest (6). So, go there now.
Quest solved: talk to Jared
The situation seems a little suspicious - there is only one Skeleton waiting for you! And it's a trap indeed. When you kill first Skeleton the Undead starts to appear from nowhere. There are a lot of them but you should not have much trouble with them. Go back to the priestess. This way you earned some respect, but you may solve some more quests to earn more experience. Talk to Sephis and you are given a next task: unmask the followers of the Cult in Sevenkeeps. Start with Olar. This quest can be solved in the night only, so in the meantime you can find another priest and a new job.
Quest solved (side quest): cleanse the Sanctuary of Light
Quest solved: earn some respect of the Priests
There is the Priest Galius standing nearby. Talk to him. He gives you a quest: gather a few medicinal herbs for Galius. There is a chance, that you have found some of them (or even all) so far, while accomplishing other tasks. If you haven't you must take a look around the town. When searching for herbs you may also find some useful equipment and quest items. Beware of hordes of spiders, wolves and hornets. When you collect all herbs go back to Galius.
Quest solved (side quest): collect a few medicinal herbs for Galius
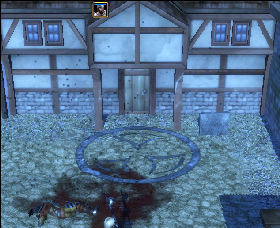
It's time to take care of cultists. You must approach a house of the accused citizen and wait until he leaves his house. And then follow his steps to see what is he going to do. You don't have to be discreet. Warning! All houses of cultists are signed with a large, circular sign in front of the door. When investigating you must remember who is a cultist and who is innocent.
It may happen that one night is not enough for you to check all houses. If so, do not waste your time and go to the Marketplace (7). You can find Baru there. Talk to Baru and she tells you where is Kara. You may also talk to Laudinia and other merchants. Jorge gives you a task: ask craftsman Firin to open Jorge's chest. You can find Firin in the Crafters Quarter. Odger asks you to find a few varieties of spidersilk. You have to look for it in the Spider Lair (8).
When you manage to observe all cultists go back to Sephis. The Cultists are: Turja, Haldor, Freja and Gunnar. The rest is innocent. Now you may go to Alastar for your prize. You will be rewarded with a few items, including Bitter Lye.
Quest solved (side quest): unmask followers of the Cult in Sevenkeeps
Quest solved: get Bitter Lye
Now go to the Crafters Quarter (9). You can find the Guild Master Cardogan and Firin there. Talk to Cardogan, who asks you for accomplishing a few quests. When you solve them you will be rewarded with Crystal Vial. Talk to crafters and ask for tasks. Start with Firin. Tell him about Jorge's chest. Firin agrees to help but he must be rewarded suitably. Go to Jorge to discuss the deal. Now you must decide if you want to support merchant's side (you have to open the chest by yourself) or crafter's side (you order Firin to do that). You need Cardogan's respect so it's better to choose the second option (if you want to do it by yourself this is the combination: Key 2 = Red, Key 9 = Blue, Key 4 = Green, Key 8 = Yellow). Now talk to Troya (she stands nearby). You are given a next task: clear the Quarry in Sevenkeeps of Golems. The Quarry is next to the Dwarven Ambassador's place (10).
Quest solved (side quest): open the Firin's chest
Now it's time to visit the Spider Lair to get some spidersilk for Odger. It's really hard battle, there are a lot of spiders. Do not attack frontally, try to lure beasts outside their lair and destroy all approaching groups. When you kill at least a half of spider's population you may storm their lair. This way you get spidersilk and a few items. Go back to Odger. Give the spidersilk to him and talk to Laudinia. Now go to the quarry and destroy all Golems. Your party should be strong enough to crush them even if you choose frontal attack. Now get back to Thoya. Talk to her and then to Cardogan. You are rewarded with a few items and Crystal Vial.
Quest solved (side quest): find a few varieties of spidersilk
Quest solved (side quest): clear the Quarry of Golems
Quest solved: get Crystal Vial
It's time to give ingredients of the potion to Jared. But there is a harsh surprise waiting for you - Jared is dying. Save him using the power of Shaikan blood. Jared joins your party. He prepares the potion for Jandrim. Go to the Dwarven Ambassador.
Talk to Jandrim who tells you about his problems. Help him to activate the portal to Underhall (11). You must use your portal stone.
Quest solved: get sobering up potion for Jandrim Windhammer
Quest solved: help Jandrim to open the portal to Underhall
In Underhall you start with the party of your heroes and a small group of soldiers (tactics still the same). But later you are going to command the base, which must be expanded with many upgrades. You have to build a lot of defending towers and recruit a large army. Moreover, you will have the occasion to use mighty dwarven catapults. Take care of it, because enemy can easily destroy it. It would be great loss because catapults have great power and can destroy building and soldiers as well. You will also lead into the battle a group of powerful Ogres (but you can't recruit new ones). Take care of them - they are really battle machines. Do not lose them recklessly. The battle you are going to fight here is the biggest one you participated so far.
2, 3, 4, 5, 6, 7. Journey Stones
8. The Portal to the mine
9. The Windhammer's ghost
10. The first lever
11. The second lever
12. Lela
13. Snow cat
14. The Heart of Niethalf
15. Iuan
16. The exit
17, 18. Petrified giant Ogres
19. The Battlefield/headquarter
20. The first line of defense
21. The Thane's camp
22. The road to Aman's base
23, 24. Beasts' bases
25. Aman the Ice Witch
When you're ready enter the portal to Underhall (1). You are introduced to the situation in the Dwarven city. A quest is given to you: enter the mine and find the exit to the city. Before you follow Jandrim, explore the nearest area. It will not take much time and you can find a few useful items. Now you may enter the portal leading to the mine (8). On the other side you meet Jandrim and a group of Dwarven soldiers. You may give orders to them.
Quest solved: enter the mine
After a while you meet Jandrim's father ghost (9). He tells you his story and gives you a few quests: look for two levers that open the inner gates and activate them, steal the Heart of Niethalf from Iuan, search for the Thane and save him. Carry on then. Go to the East to the first lever (10). Destroy all groups of skeletons and gather treasures. You also face a few groups of ghosts. To kill them you have to lure them away from crystals that restore their energy.
After a while you reach the first lever and a band of ghosts. Kill ghosts and switch the lever. Now go to the East and find the second lever (11). Once more kill all ghosts and switch the lever.
Quest solved: find and switch two levers that open the inner gates
Before you go to the South try to explore the Northeast area. You can find imprisoned Lela 12) there. Talk to her and she tells you the way you can set her free. You are given a task: look for a small animal in the area. Go back to the Dwarven city. At the Southwest corner you can find a snowcat (13). You receive a new quest: bring the snowcat to the Lela's prison. Go back to the mine.
Quest solved (side quest): look for a small animal in the area

Bring the cat close to the sleeping guardian. The guardian run away giving you time to set Lela free. You receive next task: open the Lela's prison. Take items found in the guardian's den and open the cell. You are given a next quest: go back to Professor Twiddle. Before you do that finish your business in Underhall.
Quest solved (side quest): bring the snowcat to the sleeping guardian
Quest solved (side quest): open the cell
Quest solved (side quest): save Lela
March to the South killing all met groups of ghosts and skeletons. Collect crystals and items found in chests. There is a group of skeletons led by strong Iuan's servant. Kill them all and your reward is the Heart of Niethalf (14). You are given a next task: bring the Heart of Niethalf to Windhammer. He is waiting nearby, next to the great gates.
Quest solved: steal the Heart of Niethalf
Give the artifact to Windhammer. Now the ghost is ready for the final fight with Iuan. Next quest is given to you: help Windhammer to destroy Iuan (15). Go to the South and participate in the battle. With help from Winhammers and Dwarven soldiers, you can win quite easily. After the battle talk to Windhammer last time. He gives you next quests: leave the mine, look for scattered forces and reunite them around you, use the Heart of Niethalf to revive petrified Giants. Talk to Jandrim and he tells you the story of Iuan and Aman. Leave the mine by the Eastern gate (16).
Quest solved: help Windhammer to destroy Iuan
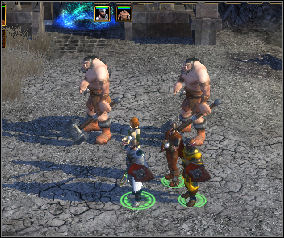
Near the gate you can find a pair of petrified giants (17). Revive them and this way you get powerful allies. Now it's time for cleansing the town from beasts. Look for imprisoned Dwarven soldiers.
From time to time you meet imprisoned soldiers. Try to set them free. Be careful because a watchtower and a group of beasts always guard prisons. Go to the East and follow the path leading upward. You can find two petrified giants there. Revive them (18). Now get back to the town to recapture all Dwarven soldiers.
Quest solved (side quests): revive petrified giants
Near the place you found petrified giants there is a great battle raging - men fighting against beasts (19). Help the defenders and this way you accomplish Windhammer's task. Now talk to the leader of soldiers. You are given new tasks: build a defense against the beasts, and send riders to the Thane's camp. Order workers to gather materials. Do not wait inactive. While building towers try to attack beasts. The group consisted of heroes, giants and few soldiers should attack camps to the North from your headquarter (19). In the meantime build a Castle in your base.
Quest solved: reunite scattered forces and cleanse the city
When you destroy Northern camps move your soldiers to the West. But before you enter the mountains recruit a group of Mounted Crossbowman. It's time for a serious offensive. Attacking the base defended by Lizards and Harpies (20) is extremely difficult because it's guarded by lots of towers. Order your giants to destroy towers, let Mounted Crossbowman to fight Harpies. Your heroes should support giants and crossbowman as well. When you destroy the first line of Ice Witch's defense, send riders to the Thane Wulfgar's base (21). Since now you may use Dwarven units (especially catapults). Now spend some time for fortifying your headquarter. There are two camps of beasts that try to destroy your base. You should build a few towers and recruit a group of defenders. Now try to attack the main camp of Ice Witch.
Quest solved: send riders to Dwarven camp
Quest solved: find and save Thane
Quest solved: fortify your base
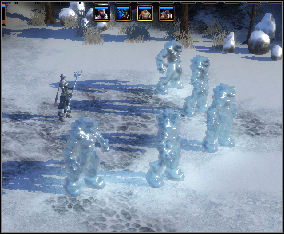
Aman fortified the way to her base with a line of defensive towers (22). Use Dwarven catapults to destroy towers. Be careful and do not let your opponent to destroy catapults. Move your army to the North and destroy a large base (23) and the next one to the West (24). Do not hurry, take care of catapults. This way you may reach the Ice Witch (25) without losing many soldiers. Aman is guarded by a group of Frost Golems. Be ready for a tough fight, even your army doesn't guarantee an easy victory. After the battle talk to Thane and Jandrim. Dwarves will support you in your battle against the Orcs. New quest is given to you: talk to Einar in Sevenkeeps. Your mission in Underhall is done.
Quest solved: destroy Aman the Ice Witch
Following quests are done:
The Sobering Up Potion: get a sobering up potion that will help Jandrim
The Ambassador of the Dwarves: talk to Jandrim Windhammer
In the Home of the Dwarves: revive the portal to Underhall and travel through it
Ruler of Underhall: rescue the ruler of the Dwarves
A Friend: talk again to the general Einar in Sevenkeeps
Utrecht: talk to your bailiff Utrecht in Westguard
Westguard: Red Plague: destroy Demons that attacked the Westguard
Westguard: Reconstruction: repair damaged buildings
Westguard: Utrecht's Wishes: build the Blacksmith, the Laboratory and the Altar of Life
Westguard: The Guard in the Westguard: recruit twenty soldiers and build five towers
Westguard: Construction of a Well: order Warrad to build a well and provide him with materials
The Dying Portals: give magic books to the Master Askan
The Iron Falcons: find out more about the Iron Falcons and their armors
Sanctuary of Light: cleanse the Sanctuary of Light
Observation: unmask followers of the Cult in Sevenkeeps
Herbs for Galius: gather a few medicinal herbs for Galius
Strange Chest: find a way to open a magic chest
Spidersilk: gather a few varieties of spidersilk for Odger
Monsters in the Quarry: clear the Quarry of Golems
The Right Twist - The Professor: help Professor to recover information about stonebreakers from Underhall
The Petrified Giant: use the Heart of Niethalf to revive petrified giants
Before you go to Einar visit the Professor Twiddle. You are rewarded with the weapon made by Professor (a bow or a dagger). Now teleport yourself to Westguard. You may now expand your headquarter with a Dwarven upgrade. Get back to Sevenkeeps and talk to Einar. The General gives you a next quest: win the Elves support. You have to talk to the Elven ambassadress in Sevenkeeps. You can find her near the Silent Glade (12). Go there.
Quest solved (side quest): return to the Professor Twiddle in Sevenkeeps
Quest solved (side quest): expand your headquarter with Dwarven upgrade
Quest solved: win the support of Dwarves
Quest solved: talk to the General Einar
Talk to Idara. She tells that the ambassadress went is searching for a cure against the plague. You have to talk to the magician Hagard from the Spring Keeps (13). Go there.

Talk to Hagard and he tells you what happened to the ambassadress. You are given next quest: interview inhabitants of Sevenkeeps about the snakenettle. Guildmasters will probably be the best to talk to. Start with the High Priest Alastar. He sends you to Alyre (The Arcanum of the Magicians) (14). Talk to her and she sends you to Laudinia. Before you visit Laudinia talk to magicians. Zacharias asks you for searching five mushrooms. There is a chance you have already found them. If you haven't look for them around the castle. Then get back to the magician. Alba asks you for gathering five Hearts of Stone. To find it you have to kill few Earth Elementals wondering to the West and to the South from Sevenkeeps. Talienne asks you to recover the lost piece of the Glass Harp. Gather your party and go To the West to kill some Elementals.
Quest solved: talk to the magician Hagard
Quest solved (side quest): gather five mushrooms for Zacharias
Groups of Earth Elementals are wandering West and South from the city. Kill all Elementals and you get five Hearts of Stone. You are South from the city so try to find the Glass Harp. Listen to the voice of the part given to you by Tallienne. You can find the missing part near the Southern farm. There is the heap of stones near a tree. If you approach close enough the exclamation mark appears. You should dig there. Now get back to the Arcanum of the Magicians. Give found items back and talk to Alyre. Now go to Laudinia. She sends you to the general Redmond (The Garrison of the Militia) (15).
Quest solved (side quest): find the Heart of Stone
Quest solved (side quest): find the missing part of the Glass Harp
General doesn't know anything, he sends you to Cardogan, a chief of the Crafters Guild. Before you go there talk to Redmond's officers. The General Irion asks you to kill at least ten Harpies, and the lieutenant Falida at least ten Ogres. You must look for them in the whole area of Sevenkeeps. Before you leave the city talk to Cardogan. He cannot help you. Now talk to Jester following you for some time. The boy tells you that, Hagard makes fool of you. Go back to the magician and ask for an explanation. But first talk to Flann Gondersen (he stands nearby). He tells you about his problems. You are given a next quest: reconquer deliveries from bandits. Now you may leave the city.
Equip your heroes with a range weapon and take a walk around the city. Start with the Southeast, and check the Southern region from the East to the West.
There is the Bandits' Camp in the Southwest corner of the map (16). You can find Flann Gondersen's stolen goods there. Kill all bandits and open the chest. You can find several addressed parcels there. You are given a next task: take deliveries to their rightful owners. You may do it by yourself or sell the goods to Siobhan the thief, waiting near the camp. Siobhan shares the goods with you and owners can reward you. You have to check what is the most convenient option for you (or your heroes). By this time you should have enough number of killed Harpies and Ogres to return to officers. Talk to Irion and Falida and then to the general Redmont. Talk once more to soldiers and you receive more quests: find the missing banner and find what kind of coup Lemuel plans. Go to the North.
Quest solved (side quest): kill ten Harpies
Quest solved (side quest): kill ten Ogres
Quest solved (side quest): reconquer stolen deliveries
Quest solved (side quest): take deliveries to their rightful owners
Quest solved: find the Black Snakenettle
Go to the North to the Lemuel's camp (17). Be careful you can meet Harpies and Ogres. Talk to Lemuel and you receive a next quest: steal five purses from citizens of Sevenkeeps. You receive the Claw of Pickpocketry. You must earn Lemuel's trust before he reveals his plans. You have to stand on the crowded street and do nothing. The Claw steals purses by itself. It also steals a few items you can sell. When you are done go to Lemuel. Talk to him and you receive a next quest: steal three bags with daily taking of the market in Sevenkeeps. The bags can be stolen in the night only. Beware of guard patrols! You must not be caught.
Quest solved (side quest): talk to Lemuel
Quest solved (side quest): steal five purses from citizens of Sevenkeeps
Get back to Lemuel. Give him the stolen money and ask about his plan. Lemuel explains you his plan. Now you have to decide if you want to reveal Lemuel's plan to Falida or you want to help the thief escape. I suggest going to Falida. Talk to her and then to Redmont and you are rewarded. Now talk to Drakkar Mentor who stands next to the marketplace. He explains you the rules of Drakkar game and lends you a few tiles. Try to play against three players standing nearby. It's an easy victory and this way you win a few Drakkar tiles. Talk to Master once more, he advises you to challenge all players living in Sevenkeeps. There is a prize for beating Drakkar Master Carla. Now go to visit Hagard.
Quest solved (side quest): steal three bags with daily taking of the market
Quest solved (side quest): uncover Lemuel's plan
Go straight to the Hagard's tower. Beware of the group of killers waiting for you. You may also meet a few Ogres. Talk to the magician. You can see a short cutscene explaining Hagard's behavior. You are given a new task: inform magicians and militia in Sevenkeeps about Hagard's conspiracy. With their help you will be able to defeat Hagard's beasts. Go to the Arcanum of the Magicians and to the Garrison of the Militia. You receive supply units. You receive a new task: destroy Hagard and set the ambassadress free. Gather your forces and attack Haggard.
Quest solved: get back to Hagard
Quest solved: inform Magicians and Militia about Hagard's conspiracy
Hagard and his creatures fight well but your supply units guarantee an easy victory. Destroy you enemy (Hagard manages to escape) and go to the tower.
There is Ylia waiting for you at the top of the tower. Talk to her. She wants to meet you in the Silent Glade. Go there. Ylia shows you the portal to Dun Mora (18) that is inactive. You receive a next task: activate the portal and go through it. Use your Portal Stone. Before entering the portal talk to Hermit waiting to the West from the Hagard's citadel. He has the banner you are looking for. Take it back from him (you may also leave the banner and then you are rewarded by Hermit). Go to the general Irion. Talk to him and then to the general Redmont.
Quest solved: destroy Hagard and set the ambassadress free
Quest solved (side quest): find the missing banner
Now try to play Drakkar. There are several players in Sevenkeeps. Some of them are very weak but there are a few good players. Remember to save a game before the match. You can beat all of them except Carla. She has more tiles than you so you have to find new tiles before challenging her. Now it's time to go to Dun Mora. Enter the portal you activated earlier.
Quest solved: activate the portal to Dun Mora and enter it
In the land of Elves you are going to command the Elven army. You can expand the base but do not exaggerate. Several towers and large army of bowman and Druids is all you really need. Build a few towers in the center of the city and near your headquarter. When leading an army use a frontal attack and always choose enemy's towers and portals as your first targets.
On the other side you meet your sister Shae, who tells you the story about the Demon plague. You are given a new task: go to the Elven Queen Sansha (1) and talk to her. Follow Shae. Talk to the Queen. You receive a new task: dismiss Elven ghosts haunting the city and free elves from apathy. Shae joins the party.
Quest solved: talk to the Elven Queen Sansha
You may dismiss Elven ghosts in a few ways. Talk to them and this way you get know how to do that. Sometimes it's a conversation sometimes you have to fight. You are given a task by one of ghosts: find the lost message and take it to the Queen. Another ghost asks you for burying his body. Go to the South.
You can find the message in the area infested by hordes of Demons (2). Be ready for a fight but it shouldn't be a problem for you party. A little to the East you can find an Elf's body (3) - bury it. Take the message to the Queen and then talk to ghosts. Now you have to act very quickly. You are given a next task: help Elves to fight off Demons attacking the city. You have to get back to the town (4) and help defenders. When Demons run away you receive a next quest: fortify the city before the next attack. Order workers to gather some materials near your headquarter (5). Build a few towers in the city and recruit a group of soldiers.
Quest solved: find the missing message and take it to the Queen
Quest solved: bury the Elf's body
Quest solved: dismiss all Elven ghosts
Quest solved: fight off Demon's attack
Demons are attacking in waves. If you have a few towers and enough number of bowmen it should be OK. After the fight you are given a next quest: go to the North and destroy Demon's portals (6). You may command all Elven forces. Such a large army guarantees a victory. Do not afraid of the Demons; attack them with all you have got. After destroying all portals go back to talk to the Queen. Elves support you in your battle against Orcs. Get back to the King Ulf in Sevenkeeps. Before you enter the portal to Sevenkeeps explore the map, you can find a lot of useful items and the Drakkar tile. Now go to Sevenkeeps.
Quest solved: fortify the city before Demons attack
Quest solved: fight off the attack
Quest solved: destroy Demons' portals
Quest solved: talk to Io and to the Queen
After arriving to Sevenkeeps go to the King Ulf. The King has sent his army to the Bullwark. This way you won a support of Men, Dwarves and Elves. But there is a problem - Nightsong has been kidnapped. You receive a quest: talk to the general Redmond. He may know something. But first go to Westguard.
Quest solved: win the Elves support
Quest solved: get back to the King Ulf
Following quests are done:
The Morhir: talk to the Elven ambassadress
A New Hope: free Elves from apathy
From the Depths: defend Dun Mora against Demons
The Archers of the Morhir: win a support of Elves
Mushrooms for Zacharias: collect a few mushrooms for Zacharias
Heart of Stone: find the Heart of Stone for Alba
The Glass Harp: find the missing part of the Glass Harp for Tallienne
Ogre Hunt: kill ten Ogres
Harpy Plague: kill ten Harpies
The Lost Deliveries: reconquer stolen goods and take it to rightful owners
The Banner: find the missing banner
Undercover Enquiries: reveal the Lemuel's plan
Build an Elven upgrade and talk to Utrecht. You are given a new quest: build the Elven Fortress and the Warrior Guild. It will not take much time. Talk to Utrecht once more. You are given a new quest: build the Dwarven Forge and the Elen Shrine. Upgrade defending towers. After a while it's done.
Quest solved (side quest): build the Elven Fortress and the Warrior Guild
Quest solved (side quest): build the Dwarven Forge and the Elen Shrine
Quest solved (side quest): upgrade defending towers
It's time for another chat with Utrecht. A quest is given to you: fight off the attack of the Undead and destroy their base. You have to be really quick. Recruit soldiers and counterattack the Undead. Your heroes and the army of twenty-five soldiers are powerful enough to destroy the enemy's camp with a frontal attack. The camp of the Undead is fortified but do not hesitate - attack with all you've got. When you're finished get back to Utrecht. You receive a next task: build a monument in the city and expand your army to sixty soldiers. Talk to Warrad who gives you a list of necessary materials. You may recruit new soldiers at once.
Quest solved (side quest): fight off the attack of the Undead and destroy their base
Quest solved (side quest): expand your army to sixty soldiers

In the meantime talk to your old friends - Jandrim and Ylia appeared in Westguard. The Dwarf waits to the South from Utrecht and Ylia stands next to the North village. Jandrim is going to serve you in Westguard. He gives you a quest: find the scroll and crystals needed for forging Lightfist, and find materials needed for forging magical dagger Thought and Memory. The first task is very easy: you already have all items (if you haven't missed any chests so far). Give it to Jandrim and you get the Lightfist. It's time to visit Ylia.
Quest solved (side quest): bring the scroll and crystals to Jandrim
Ylia also agrees to serve you. Let her bless the well you built. There is nothing to do in Westguard so go to Sevenkeeps.
Talk to the general Redmont. He tells you what happened to Nightsong. You receive a quest: look for Nightsong's kidnappers in the Northeast area. Set her free. Leave the city through the east gate (it's now opened). The East is the land of wolves and bears but you can also meet there a huge and powerful Boma. Kill it and you are rewarded with an excellent armor.
Quest solved: talk to the general Redmond
After a while you can find a track leading to your old enemy - Hagard (19). He returned to make revenge. You are given a quest: destroy Hagard. It seems that Sorvina is the person giving orders to Hagard. Kill him and enter his hideout to set Nightsong free.
Quest solved: find Nightsong's kidnappers
Nightsong tells you the story concerning the Sorvina's past. Nightsong joins your party again. Now you may go to the Orc fortress Bullwark. Use the new portal (20).
Quest solved: destroy Hagard
In front of the portal there is a strange device. To use it you must have a mindshard. Use the Sorvina's Mindshard (you found it searching the Hagard's body), to hear Sorvina's thoughts.
Now check the nearest area, loot all chests and enter the portal to the Needle.
Quest solved: set Nightsong free
You are going to lead the army of three races: Men, Elves and Dwarves. The battle you fight here is one of the biggest and toughest in the game. You have to be extremely quick: Orcs are attacking constantly and their armies are very large. Defensive towers are absolutely necessary. Build a few towers in the Headquarter and near the ferry as well. Do not expand the base until it reaches its full potential. The large army of basic units is quite good (but it must be really large). Be sure you have a lot of Paladins and Mounted Crossbowman (these are the best units). A group of Elven bowman and druids must be defending the base. In the further phase of the battle it is necessary to recruit Mages (do not exaggerate with the number of them), and Dwarven catapults. Recruiting a Titan is a good idea too. Do not hesitate to use your allies stationing nearby. And remember not to attack frontally the Orc's camp. Bullwark is mightily fortified and a frontal attack must end with a failure. Be patient, destroy successive fortifications and use catapults and allied soldiers to storm Bullwark.
1. The Portal
2. The Ferry
3, 4. North and South Orc camps
5. Imprisoned Griffons
6. The Undead's ruins
7. The Orc's base in front of the Bullwark
8. The Bullwark
9, 10. Spiritist Patriarchs
11. Kara
12, 13, 14, 15. Orc's camps
16. The Portal to Iron Fields
17, 18, 19. Journey Stones
After entering the portal you are introduced to the situation. You are given new tasks: do not let Matricus to be killed, talk to Matricus and take the lead of the headquarter. Matricus is waiting for you near the portal (1). Talk to him. He gives you new quests: destroy the Bullwark to reach the portal, stop the first wave of Orcs. Tell workers to gather materials, recruit a few soldiers. Build a few towers in the headquarter and near the ferry (2). Send a few bowmen to defend towers and the ferry. Don't forget to recruit a strong group of bowman for defending the headquarter - Orcs are going to attack and kill Matricus. If you are quickly enough there should be no problem with defending you main camp.
Quest solved: take the lead of the Headquarter
Quest solved: stop the first attack of Orcs
After the first success you are given next tasks: set the imprisoned gryphons free, discuss the tactics with generals Einar and Karan. You can find them in the center of the camp. The best idea is to order them to attack North and South camps of Orcs (let one general to storm one camp) (3,4) - it prevents Orcs from attacking you so often. In the meantime try to improve your base and recruit some soldiers. Gather two groups of soldiers and order them to defend the headquarter and the ferry. Take your heroes and try to set the gryphons free.
Quest solved: discuss tactics with Einar and Karan
Your allies are attacking Orcs' camps so you have enough time to storm the gryphons' prison. Do not stop to fight with Orcs, run directly to the hill (5). Order your heroes and a few soldiers to attack the prison. After a while gryphons are free. Now you can recruit them. You are given a quest: storm the great fortress in the East. Before you do that explore the area near your main camp. Do not forget to check the area once more after defeating Orcs. You can find treasures in ruins of all Orcs' camps. Just next to the Eastern camp you can find the entrance to a mine. Explore it, you can find there Lumps of Limestone (you need it to build a statue in Westguard) and another Drakkar tile.
Quest solved: set the gryphons free
There are strange ruins infested with The Undead in the Southeast (6). Kill them all and take all treasures. By this time your allies should destroy Orc's camps they were attacking. Talk to generals once more and order them to storm the large base in front of the Bullwark fortress (7). You may support their attacks.
With help from your allies it's quite easy to destroy the camp. You can find there the human mercenary who was fighting for Orcs. He can show you the secret entrance to the Bullwark in exchange for saving his life. Accept the proposal. Now, go back to the headquarter and prepare your army for storming the Bullwark. Talk to your allies and order them to attack the Bullwark too (8). Be careful because the Bullwark is extremely fortified. Let the army to storm the fortress but your heroes must use a Journey Stone and the entrance shown by the mercenary. You are given a quest: use dwarven catapults to destroy the Bullwark.
It's time for destroying Orcs' flying forces. There are nests of two Spiritist Patriarch in the North (9,10). You have to send your gryphons to kill them. Recruit a group of ten Mages (gryphons), and go to the North. Do not attack frontally, try to kill all bowman ant then Patriarch. Kill the second Patriarch in the same way.
After using a Journey Stone, your hero is teleported to the mine. Summon the rest of your heroes and go to the North carefully. In the meantime support Einar and Karan storming Bullwark. The best way is to recruit groups of 10 - 15 Paladins and Mounted Crossbowman and raid the fortress. Support the cavalry with catapults. There is Kara imprisoned in the first base (11) your heroes attack after leaving the mine. You are given next quest: take advantage of the clash between Orcs and Shadows to destroy Bullwark. Support your heroes with a group of cavalry and attack remaining camps.

Set Kara free. New quest is given to you: tell Warrad about his daughter fate. Now you may start demolishing of the Bullwark. Remember to loot chests.
Quest solved (side quest): find Warrad's daughter
After destroying all camps (12,13,14,15) you are being attacked by a very strong group (including Titan). Kill them all and you find the key to the portal. You can see a short cut scene. Now you have to defeat the Shadow general. When you kill him the road to Iron Fields is opened. You may enter the portal (16). Moreover, you got Orc's support against Shadows. New quest is given to you: enter the portal to Iron Fields. Before you do that visit the Westguard.
Quest solved: use catapults to storm the Bullwark
Quest solved: destroy the Bullwark
Start with Warrad and Kara. Talk to Warrad. Tell him about Kara's fate, and order him to build a statue (you have all necessary components). The statue is ready when you visit Westguard again. Now talk to Kara and then to Utrecht. New quest is given to you: build a wall around the city. You have to order it to Warrad but you must gather all materials first.
Quest solved (side quest): tell Warrad about his daughter's fate
Quest solved (side quest): order Warrad to build a statue in Westguard
Quest solved (side quest): build a statue in Westguard
Now talk to Ylia. She agrees to bless your new statue. Go back to the Needle and enter the portal to Iron Fields.
You are going to fight against the Shadow army. Shadow warriors have unique ability - they are invisible until they attack. And they are very effective in destroying buildings. The most difficult part of the mission is to start and survive until gathering a larger army. Try to build a few towers, but do not leave it without soldiers' support. The Shadows are attacking in waves and you must be very quick if you want to survive. Do not exaggerate in expanding your base, once again you must recruit the army consisted of basic units. Your gryphon Mages have to fulfill very important mission, so you must not lose them until you recapture the Iron Falcons outpost. Try to recruit shooting units, because you enemy uses flying units. In the further phase of the campaign, your heroes supported by the army of 30 units can destroy every opponent.
11, 12, 13, 14, 15. Journey Stones
You are in Iron Fields again. You can see a short cut scene showing Sorvina. Falkmar and Io enter the portal (1) with you. You are given new tasks: find the way to the besieged city and discuss tactics with your allies. Talk to Io and Falkmar. New task is given to you: gather 1000 Lenya leafs to wake the Treants, and recapture the Iron Falcons outpost Northeast from your headquarter. Only gryphons can do it, so do not let them die.
Quest solved: discuss tactics with your allies
The most important thing now is to be quick. The enemy is attacking your base (2) in waves. Try to gather materials and recruit soldiers as fast as you can. A few towers are advisable. Try to concentrate on the defense and in the meantime send your gryphons to the Iron Falcons Outpost (3). You must not be seen, so try to fly near the edge of the map. A group of your gryphons can defeat the guardians quite easily. You can find a few workers and the Lenya forest in the outpost. Start gathering Lenya.
Quest solved: recapture the Iron Falcons outpost
Defend your base and wait until workers gather 1000 Lenya leafs. When they are ready talk to Io who tells you what to do next. New quest is given to you: sacrifice lenya leafs on the altar. You can find the altar in the Southeast (4). Send your heroes there, the army must defend the headquarter. Bears wandering near the altar should not be any problem for your party. Kill all animals, gather treasures and approach the altar.
Quest solved: gather one thousand Lenya leafs
Sacrifice leafs. This way you summon a group of Treants. You receive a quest: recapture the Shaikur fortress from Shadow's hands. Gather all you army and prepare for attack. It's a good idea to explore the area with gryphons, they can kill your opponent's workers.
Quest solved: sacrifice Lenya leafs.
It's high time to attack. Gather your soldiers and storm the North base of Shadows (5). It's not your main goal but you must not leave the enemy behind your back. Leave a strong group of soldiers in your main camp, in case of Shadow's counterattack. You can find a Mindshard in the North base.
After destroying the North base go further to the North. You reach next Shadow's camp (6). Destroy it. You can find a Mindstone here. Use the Mindshard, found in the previous base, to listen to Sorvina's thoughts. Continue a march heading to the North

After a while you face a large group of Shadows blocking the way. Kill them all. After defeating Shadows let your Treants to remove the stone barrier (7). This way you clear the way to the Shaikur fortress. Gather you army and storm the fortress. Follow the road you cleared in the first act of the game: through the bridge and the village, until you reach the city and the Ur's citadel. Shadow's army is not very impressive now. You should reach the center of the town without any bigger problems (8). When you do that a new quest is given to you: kill Galgalath the Devourer - the beast summoned by Sorvina (9).
Quest solved: recapture the Shaikur fortress from Shadow's hands

It's very difficult task, you must attack with all you have got. Beware of Nightmares flying around the Galgalath. Try to attack them with crossbowman.
Standing next to the Galgalath, even Treants looks like midgets. But the frontal attack of all your soldiers may knock the beast down. It's a good idea to use many shooting units. You can also recruit a Titan, his powers are priceless. When defeating Galgalath you are shown a cut scene ending the second act of the story. You are given a new quest: go to the Gate of Swords. Go to the portal to Gate of Swords (10).
Quest solved: kill Galgalath the Devourer
Following quests are solved:
Nightsong's Kidnapping: find kidnapped Nightsong
Matricus and the Griffons: do not let Matricus to be killed in the battle
Against the Shadows: find out how to defeat Shadows
Shaikur: recapture the Shaikur fortress from Shadow's hands
Westguard: New Allies: expand farms and build dwarven and elven upgrades
Westguard: the Builder's Worries: find Warrad's daughter
Westguard: The Army of the Westguard: recruit sixty soldiers
Westguard: The Westguard Grows: build dwarven and elven buildings
Westguard: A New Home: build another dwarven and elven buildings
Westguard: The Monument: order Warrad to build a monument and support him with all necessary materials
Westguard: Grey Hordes: destroy The Undead attacking Westguard
The Art Of Forging - Lightfist: bring Jandrim components needed to forge the Lightfist
Unfortunately your alliance with Light Worshippers has been broken by Malacay's blood in your veins. Men, Elves and Dwarves are not going to accompany you in your chase after Sorvina and kidnapped Ur. The Clans are the only ones that can become your new allies.
In this chapter you are to lead Orc's soldiers. Your task is to destroy the Shadow's camp. To do that you need Orc's basic units only. When supported by heroes, Orc's soldiers can handle this. At the beginning of the mission you can build a few towers (but not too many). Attacking Shadow's camp try to destroy their towers first and when you succeed kill their soldiers. In the Gate of Swords you are going to fight on the Arena. All of your heroes can enter the arena at once and the best tactic is the tested one - magicians and bowmen first, then fighters. It is necessary to master using spell and special abilities of your heroes when fighting on the arena.
17, 18, 19, 20, 21, 22. Journey Stones
After defeating Galgalath search its body. Rearrange your equipment and go to the portal. There is the general Einar waiting for you there. Talk to him and enter the portal. On the other side you are given a new task: reach the Swordwall gate. Start with going to Orc's camp to the West. Start your journey but be aware of Shadow warriors that entered the portal (1) too.
Quest solved: enter the portal to the Gate of Swords.
Go to the West. After a while you reach the Orc's camp (2). Talk to their commander who joins your group. He promises his help in reaching the Swordwall. Search the base, you can find a chest with treasure and Lumps of Limestone (behind the Headquarter). Start gathering materials, expanding the base and recruiting soldiers.
Quest solved: reach the Orc's camp to the West
There is a large Orc's camp next to the Swordwall (3). Gather your soldiers and destroy the camp. Frontal attack is quite good idea if you have a large army. When succeeded go to the Swordwall. Now you may enter the gate (4). You are given a new quest: talk to the Orc's chieftain Iron Lord. Follow Kor, he shows you the way.
Quest solved: reach the Swordwall

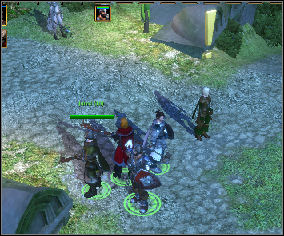
Talk to Iron Lord (5). He agrees to help you in your revenge. You are made the chieftain of the Black Fangs Clan. You receive a new quest: gather more information about the Shadows. Talk to Nightsong. She stands next to you. Nightsong advises you to speak to freetraders. They may know how to make Shadows visible.
Quest solved: talk to Iron Lord
Quest solved: talk to Nightsong
Nightsong goes to the nearest hill (6) to prey for her father. Follow her. You can see a short cut scene and then you are rewarded with some experience.
You have to continue your journey. There is a battle dome South from the Iron Lord's camp. You can find the Battlemaster there (7). Talk to him and you are explained the rules. Enter the arena to fight with a first enemy. Remember to save your game between consecutive fights. The whole party can enter the arena. You first opponent is a group of Orcs Berserkers. They can fight quite well but your heroes should be much stronger. Face the second opponent (don't forget to heal the party before the next fight).
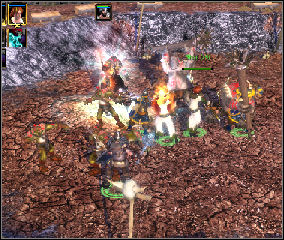
The next group consists of a few kinds of Orcs and Trolls (beware of mighty Devastator's). Start with the weakest one and kill your enemies one by one. Get your prize and try the third round. It's quite tough challenge. Start with shooting Orcs and after that kill all Devastators. Try the fourth round. There are a few Orcs and the Titan waiting for you. Once again use you're the tested tactic. Leave the Titan for an end. He is very powerful but rather slow, so you have enough time for healing and resurrecting you heroes. This way you finish the first cycle of tests. Get your prize and talk to the Battlemaster.
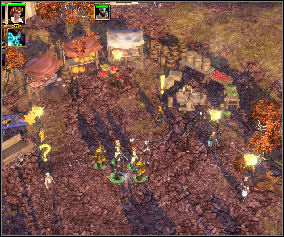
Try the next cycle of tests. Your first opponents are the Undead and a few snowcats. Use the same tactic as ever. When you finish your battle leave the arena. The next group of Fire Golems is too strong for your party. Take Lump of Limestone you can find in a chest next to the Battle dome, and continue a journey. Head to the freetrader's camp (8).
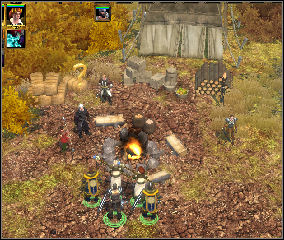
You meet the Grey Family next to the freetrader's camp (9). Talk to Letho Grey and he tells you about his problems. You are given a few tasks: give the apologies from Letho to Warrad's daughter Kara, and to the poor one in Sevenkeeps. Talk to the rest of the family. Nyano asks you for finding the Dwarven Brandy in Uram Gor. Sara asks you for bringing her the Magnet Shard. Myra asks for painting a few pictures (the Family Residence in Connach, and views of the Needle, the Silent Glade, the Fireforge and the Magnet Stone). Dario asks for delivering the parcel to merchant Marcus in Sevenkeeps. Now talk to freetraders.
Quest solved (side quest): find the Grey Family in the Gate of Swords
Talk to Zanza who gives you a quest: save Mordecay who is to be executed on the Council Mountain. There is Lela standing nearby, talk to her. She gives you a quest: find professor Twiddle missed in the Fireforge. Just next to merchant Ida you can find 10 Lumps of Clay - take it. You may also buy new equipment if you want.
Quest solved: talk to freetraders
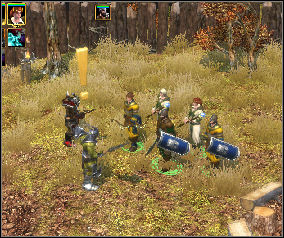
Now run to Iron Lord to save Mordecay. The mercenary is already dead, but Iron Lord let's you to resurrect him. Mordecay joins your party. You are given a quest: let Zanza know what happened to Mordecay. Go to the freetraders camp to talk to Zanza. She sends you to Messenger, who may know something about Shadows. Talk to him. Messenger gives you a few tips. You are given a quest: find the Shadow Ring. Ask Kor where to look for it. Go to the Kor's camp (10).
Quest solved: save Mordecay
Quest solved: tell Zanza what happened to Mordecay
Quest solved: talk to Messenger
This is the end of next chapter. You solved following quests:
To the Gate of Swords: reach the portal to the Gate of Swords
To the Swordwall: find a way to enter the Swordwall
Shadow and Light: gather more information about Shadows
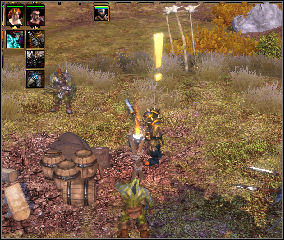
Now go to the Black Fangs' camp where you can find Chieftain Kor. Talk to him. Orc tells you where is the Oracle (11) that can answer your question. You receive a quest: go to the Oracle. Kor joins your party. There is blacksmith Morca in the camp. Talk to him and he gives you a task: use the magic sword he gives you, to summon Orc's ghosts in the Fireforge. Talk to ghosts. Now talk to Undar, who is standing nearby. He doubts your fighting skills and demands you to fight on the arena. Follow him to the battle dome and talk to him there. You have already fought on the arena so your reputation rises. Talk to Undar again and he gives you a quest: kill Laksh from Storm Blades Clan, and bring his head to Undar. You can find Laksh to the West, near the Oracle. Go back to your group and continue a journey.
Quest solved: talk to Kor
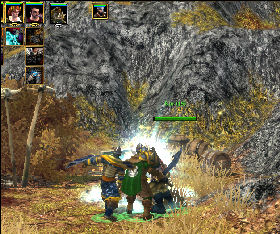
Go to the West. Beware of strong groups of the Undead patrolling the area. After a while you face Laksh. Kill him and take his head with you. Use a Journey Stone and teleport to Undar. He gives you a new quest: kill Tzang and Orog and bring their heads. Go back to your party and march to the Oracle. Take Orc soldiers from the camp with you. There are only few of them but they can help you to defeat the Undead. Destroy following groups of opponents and head to the Oracle.
Quest solved (side quest): kill Laksh and bring his head to Undar
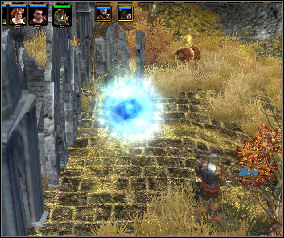
When reaching the Oracle you can see that you are not the only one who needs an answer. You are given a quest: find four lenya flowers before Madrag does, and bring them to the Oracle. Flowers grow on the Oracle hill or very near it. When you're ready go back to the Oracle and ask your question. You are given a few tips that are your new tasks: go to the Fireforge and forge your own Shadow Ring. Enter the portal to Uram Gor, South from the Oracle. Loot chests standing near the Oracle. Before you continue a journey spare some time for side quests.
Quest solved: find the Oracle
Quest solved: find four Lenya flowers and bring them to the Oracle
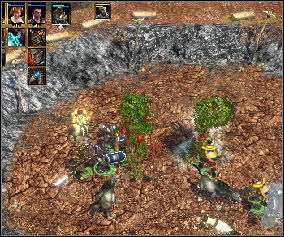
Go back to the Arena. You have additional hero in your group and a higher level so it should be a little easier. And it really is - this time you are able to defeat Fire Golems and the next group of Orc Shamans and bowman. In the next round you face wolves, Treants and Crystal Warrior. You can defeat them too. But he next group (few Demons and the Titan) is too strong.
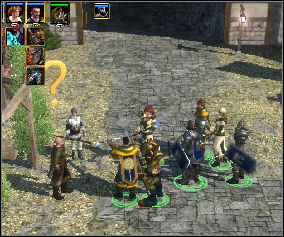
Now teleport your party to Westguard. Order Warrad to build a wall, and give Kara apologies from Letho Grey. Now go to Sevenkeeps. Give Marcus the parcel from Dario. You have to fight with Marcus. You receive a quest: go back to Dario Grey who deceived you. Now go to give apologies to the poor one. It is Hermit - you have already met him when looking for the banner. Now go to the Silent Glade to paint a picture for Myra. The correct place is signed with white, pulsating circles. You only have to stand nearby. Now go back to Westguard - the wall is done. Talk to Utrecht.
Quest solved (side quest): give Kara the apologies from Letho Grey
Quest solved (side quest): give the parcel from Dario to merchant Matricus
Quest solved (side quest): give the apologies from Letho to the poor one
Quest solved (side quest): paint the landscape of the Silent Glade
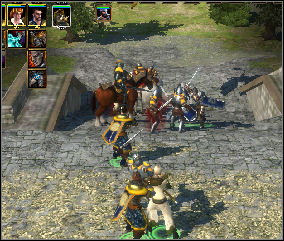
You are given a new quest: fight for independence of the Westguard. King Ulf accused you of disloyalty, and invaded your land. Fight off the attack of his army. You must be really quick, your opponent attacks from the few directions at once. Remember that you have recruited sixty soldiers earlier and it's really large army. When supported by heroes your troops should defeat King Ulf's army. After the battle talk to Utrecht. New quest is given to you: build a wall around the castle. Once again you must order Warrad to do that but first you need to collect necessary materials. Repair all damaged building, build new ones if you need to, and recruit new troops - you will need them in the future. Now teleport your group to Connach, and then to the Needle to paint landscapes for Myra.
Quest solved (side quest): build a wall around the city in Westguard
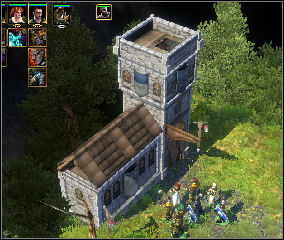
You can find the Grey Residence in the East outskirts of the map, to the North from the Connach. In the Needle you must visit the Northwest peak - that's where you killed Spiritist Patriarch when storming Bullwark.
Quest solved (side quest): paint the picture of the Grey Residence
Quest solved (side quest): paint the landscape of the Needle
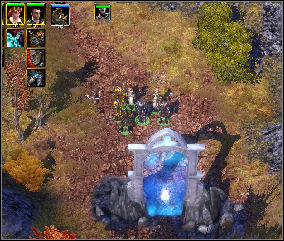
Now you have to go back to the Gate of Swords. Visit the Grey Family, talk to Letho and Dario. Take you rewards and go to the portal to Uram Gor. Enter it.
In the Uram Gor you are leading Orc's army once more. You may not recruit any other units than Shaman. The number of materials is limited so do not try to expand your base too much. A few defending towers are necessary, because you are attacked from two sides in the same time. Do not try to counterattack your both opponents. Destroy Demons first and then The Undead.
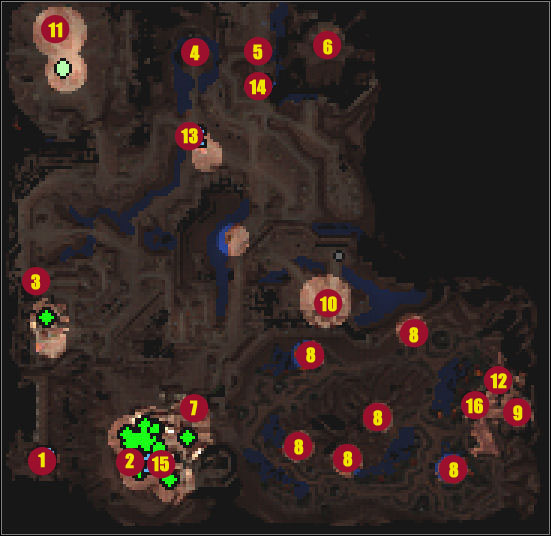
13, 14, 15, 16. Journey Stones
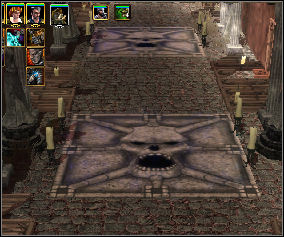
On the other side you are introduced to the situation (1). New task is given to you: find a way to open the Gate of the Nameless, and follow Kor and at least one worker to the deserted dwarven mine. Beware of Undead hordes patrolling the city. You have go through the corridor with a ground engraved in skulls. Run through it as fast as you can, because every time you steps on the skull a few ghosts appear. Let heroes run first and then workers. On the other side of the corridor you face Undead troops and their buildings. Destroy everything.
Quest solved: enter the portal to Uram Gor
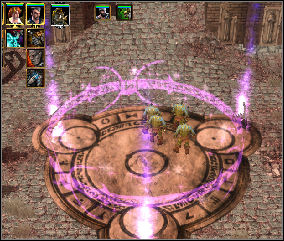
Head to the abandoned mine (2). When your heroes are fighting keep the workers in special force circles. They are safe in there.
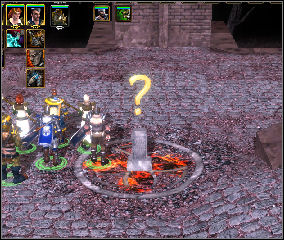
In the North you can find a strange pedestal (3). Check it and you receive a next task: find diamond eyes of Aonir's statue and put it on the correct place. You can find other pedestals. Check all of them and every time you are given new piece of story connected to Aonir. Explore all corridors and check chests until you find diamond eyes. Then head to the North.
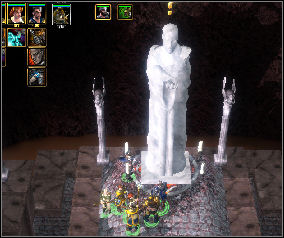
After some time you reach the Aonir statue (4). Put eyes on its place. This way you set the former inhabitants of the city free. They are not cursed anymore. Continue your journey.
Quest solved (side quest): put diamond eyes on its place on the Aonir statue
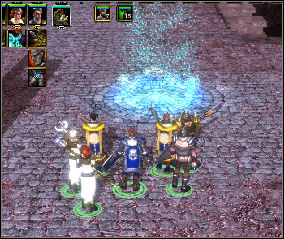
In the North you can find a strange portal (5). Suddenly Tzang appears. Kill him and take his head. Now it's your turn to enter the portal to look what hides on the other side (6). Enter the portal, summon the rest of your group and attack Orog. Beware of fire elementals helping him. Try to destroy the portals first. There are four of them in every corner of Orog's hideout. When you destroy portals kill shaman and take his head. Go back to the city.
Quest solved (side quest): kill Tzang and take his head
Quest solved (side quest): kill Orog and take his head
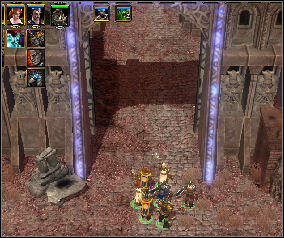
Now go to the South. Next to the Gate of the Nameless (7) you can find the Dwarven Brandy hidden in the chest. When you reach the gate you can see a short cut scene. You can see Kor opening the gate and what happens next. You are given new tasks: go through the Valley of Ashes, and use Orc Shamans to destroy Chaos Towers. You have to expand your base and recruit soldiers. You are not allowed to gather materials so be careful.
Quest solved: follow Kor and at least one worker to the Gate of the Nameless
Quest solved: find a way to open the gate
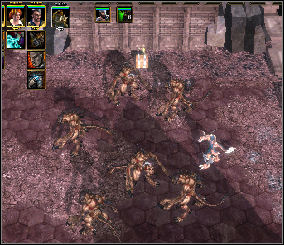
You have to be really quick because you are attacked from both directions at one time. (Demons from the East and the Undead from the North). At the beginning build at least five defensive towers. Then recruit fifteen Shamans. Let your heroes to defend the base and use Shamans to raid Demon's terrain. Destroy following Chaos Towers (8); avoid involving in skirmishes (Shamans are very quick so they can easily run away). When you destroy all towers the gates to the base of Demons and Lord Steward are opened (9). New task is given to you: destroy Lord Steward. Enter his base and kill all Demons. Lord Steward really is not so powerful as he seems - it should be a quite easy battle. After destroying Demons you may enter the portal.
Quest solved: go through the Valley of Ashes
Quest solved: destroy Chaos Towers
Quest solved: destroy Lord Steward
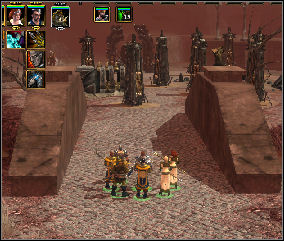
Before you do that raid camps of the Undead. When Lord Steward is killed the Undead stop to attack you, but it's a good idea to look for treasures in their camp (10). Your heroes and a group of fifteen Shamans can destroy the base without any problem. After the battle loot all chests and take items with you. Then march to the second base of the Undead (11).
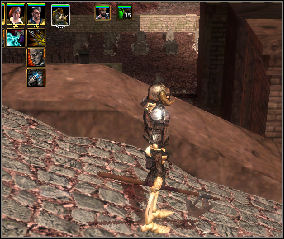
There is only one creature in the second base - a Councilman. Kill him and take the treasure from the chest. Check the base in searching for useful items. That's all you have to do in Uram Gor. Go back to the portal to Fireforge (12) and enter it.
In this land you are commanding the Barbarians and Orcs. I was using Orc's units only but you may also recruit barbarians. The most important thing is to have a large number of shooting units (or casting spells - Shamans). Your opponent uses a lot of flying units. But do not forget about melee soldiers - you have to face powerful units too (beasts and even giants). Once again the most difficult moment is the beginning. So, once again start with defensive towers.
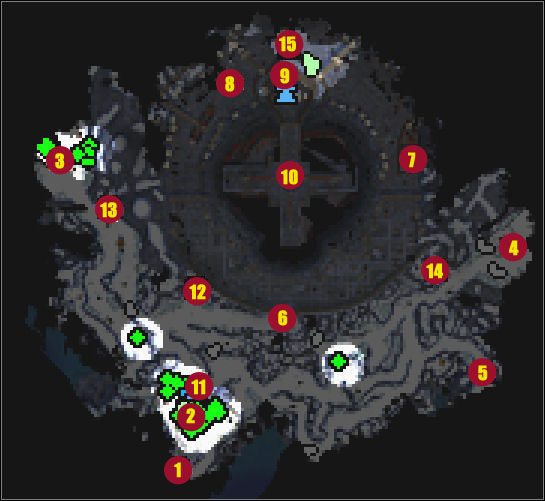
11, 12, 13, 14, 15. Journey Stones
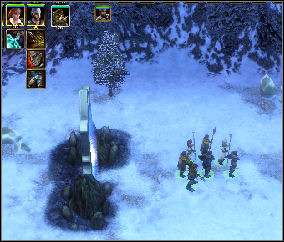
There is a winter on the other side of the portal (1). Go to the North. After a while you receive a next task: join barbarians to your army. Go to their village (2).
Quest solved: enter the portal to the Fireforge
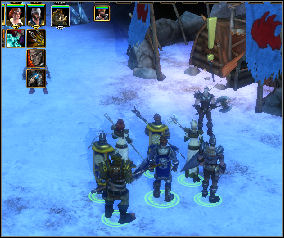
Enter the village and talk to the barbarian's leader - Vlad. Barbarians join your forces, you may give them orders and recruit barbarian units. New quest are given to you: find a way to enter the Old Town, gather three pieces of the key to the town. Vlad has one piece, the other two are in beast's hands and you have to recapture it. You must destroy two camps of the beast.
Quest solved: join barbarians to your army
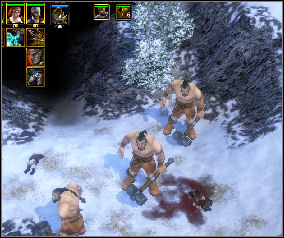
Do not wait until enemy attacks. Gather soldiers and order them to defend the headquarter. Meanwhile let your heroes to explore the area. You can find a group of giants in the West. Kill them and loot a chest.
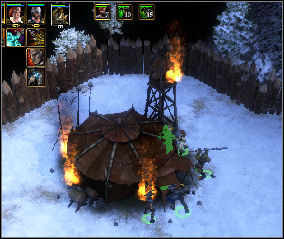
Attack the West camp first (3). Be sure that there are left enough number of units to defend the base (there must be at least twenty soldiers), and attack beasts. After destroying the beast's camp take the piece of the key from a chest. Go back to your headquarter, gather the whole army and storm the East camp (4).
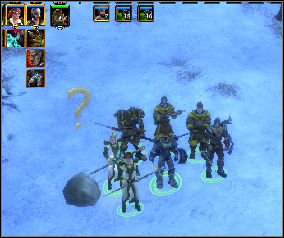
There is a strange stone in the East (5). Check it and use the sword Morca gave you. Prepare yourself for a tough battle. You have to defeat three waves of ghosts and then talk to their leader. You are rewarded with a helm that you have to show to Morca. Continue you march to the beast's camp.
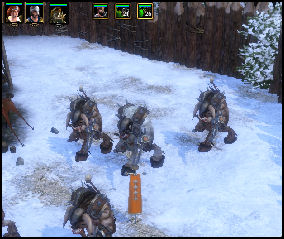
Attack with all forces you have and destroy everything. The leader of beasts has the third piece of the key and the Perfect Beastskin. You are given a new quest: destroy beasts stationing next to the gates to town. Let Vlad open the gates. Gather your soldiers and go there (6).
Quest solved: gather three pieces of the key
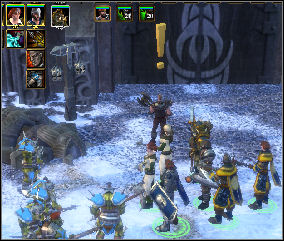
Defeating this group is not a problem at all. After a while Vlad appears. Talk to him. Give him the key but first he has to join your crusade against Shadows. This way you get another ally. Now enter the city. You have to look for treasures and items especially carefully. There is a lot of quest items and Drakkar tile hidden in the city.
Quest solved: let Vlad open the gate to the city
Gather all your army, because there is a lot of Beast and mighty Fire Golems in the city. Go right (East) until you reach chamber with Silver Wolf (7). This is Professor Twiddle who is trapped in doctor Mauser's magic trap. You are given a quest: help Professor Twiddle to retain his human shape. To do that you have to switch all levers you can find in the chamber. Switch one lever and remember what happened. Try different combinations until you set the Professor free. After that the Professor gives you a next task: meet him in the Gate of Swords and bring him the Stone of Eternal Fire. Continue your journey. The stone you are looking for is just next to the chamber with the trap. A group of fire creatures has it.
Quest solved (side quest): find the Professor Twiddle
Quest solved (side quest): help the Professor to retain his human shape
Going this way you can reach the Ghost of the Forge. But do not talk to him now; try to check the second way (West from the gate). You can find there new items and the landscape of the Fireforge (8). Now you may enter the chamber of the Ghost (9). Kill all beasts and talk to the Ghost of the Forge. You are given a new quest: find the Volcano Hammer to open the gate to the Forge. You are teleported to the Old Town. Look for the hammer here.
Quest solved (side quest): paint the landscape of the Fireforge
Quest solved: find a way to enter the Old Town

You have to fight wit a band of Fire Elementals. When you defeat them approach to the well and try to clean here the strange hammer you found in the city earlier. You can see that this is the Volcano Hammer. Use it to open the gate (10). Talk to the Ghost and you receive a next quest: light a fire in the forge. To do that you have to find four pieces of the Essence of Heat.
Quest solved: find the Volcano Hammer and use it to open the gate to the forge
You don't have to look for a long time. You just need to destroy all groups of fire creatures in the forge to gather all pieces.
Quest solved: find four pieces of the Essence of Heat
Put the Essence to the forge and then talk to the Ghost. You are given a new quest: light the yellow fire in the fireplace. You have to solve the puzzle: switch levers until reaching yellow flame. First step is to switch a small red flame on all burners. Then switch one burner until you get a white fire. Now set a green flame on the second burner. Switch the last burner only once. Then the yellow flame burns on all burners. It's time for the last quest: forge the Shadow Ring. You are given a list of necessary materials. If you didn't miss any chest you have it all. If you did, try to check the town again. When you're ready star forging.
Quest solved: set the yellow flame on all burners
Quest solved: forge the Shadow Ring
After forging the Shadow Ring the Ghost of the Mine is free at last. When you use the Ring you can see that Shadow is following you. Talk to him and you receive new task: steal the Black Mirror from Sorvina and give it back to the Shadows. This way you set them free, and Shadows are not going to serve Sorvina anymore. Meet the Shadow in the Gate of Swords. You start the new chapter of your story.
Following quests are solved:
A Question: find out where to find the Shadow Ring
The Gate of the Nameless: enter The Gate of the Nameless
Through the Valley of Ashes: go through the Valley of Ashes
The Barbarians: join barbarians to your army
The Fireforge: reach the Fireforge and look for the Shadow Ring there
The Abandoned Forge: forge the Shadow Ring in the Fireforge
Aonir's Eyes: put diamond eyes to Aonir's statue
Westguard: Freedom: fight for independence for the Westguard
The Grey Family - Letho: fulfill last wishes of Letho Grey
The Grey Family - Dario: fulfill last wishes of Dario Grey
The Right Twist: Mauser's Evil Empire: set Profesor Twiddle free
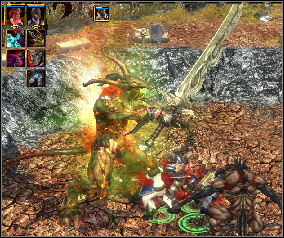
Try to solve a few side quests. Go to Westguard to give Warrad materials needed for the wall. Then move to Sevenkeeps to play Drakkar against Master Carla. Now you have enough number of tiles to win (if you still can't, do not worry - you will find more tiles). Gather the prize and carry on. Move to the Gate of Swords. Visit your own camp. Talk to Morca and give him the helm received from ghosts. Morca renews it for you. You are given a next quest: find Magnetic Detector to look for missed Black Legion armor. Now go to Undar. New quest is given to you: kill Itza and Shar. Unfortunately Undar doesn't know where to find them. Now go to the arena to win next round. It will not be easy but you can do it.
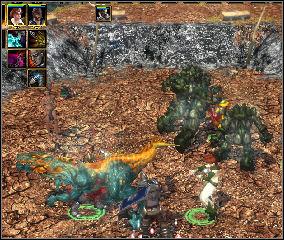
Prepare your heroes for the next round - it's a little easier that the previous one. Kill the magician, then golems and at last lizards. This is the last round before meeting the champion. Prepare yourself for a challenge. Equip your heroes with ranged weapon. Kill the druid, then soldiers and the mage.
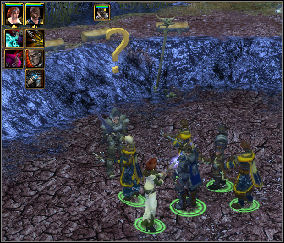
After defeating this group the champion Tor Halicos appears. Defeat him (it's much easier than previous fights) and talk to him. Offer him a vacancy of the captain of your army in Westguard. Halicos agrees. Now talk to Undar. It's time to visit the Grey family. Give the Dwarven Brandy to Nyano. Now go to the freetraders camp and talk to the Professor Twiddle. Give him the Stone of Eternal Fire. You receive a new quest: bring the Perfect Magnet Shard to Professor. Now go to talk to the Shadow (12).
Quest solved (side quest): give the Dwarven Brandy to Nyano Grey
Quest solved (side quest): meet the Professor and give him the Stone of Eternal Fire

Shadow tells you where to find the Black Mirror. Unfortunately he doesn't know how to enter the Magnet Stones. New quest is given to you: ask freetraders where is the portal to Magnet Stones. Go to their camp and talk to Zanza. She gives you a quest: find the Library of Memories and talk to the librarian. Merchants give you another tasks: look for Ardar missing in the Magnet Stones and help him to go back to the camp. Go to the South. Collect memories scattered around the country and talk to ghosts. Give found memories to ghosts bringing their memories back. Join ghosts to your party.
Quest solved: meet the Shadow in the Gate of Swords
Quest solved: ask freetraders how to enter the Magnet Stones
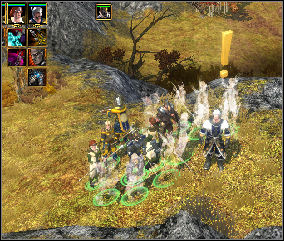
When you gather all ghosts go to the librarian (13). Talk to him and agree to his proposal. After a while Malacay, hidden inside you, speaks. New quest is given to you: look for the forgotten portal in the ruins, to the South from the Orc's main camp in the Gate of Swords. Go to the ruins, take ghosts with you.
Quest solved: find the Library of and talk to the librarian
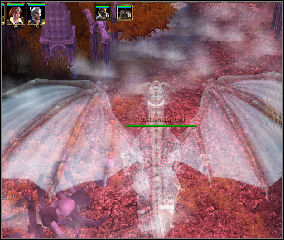
Finding portal is much easier than reaching it. There is strong group of beasts waiting for you (including dragon). It's really tough fight and sometimes you have to run away to heal your heroes. Remember to attack only single enemy at one time. After the battle the road to the portal is free (14). Before you enter it visit Westguard.
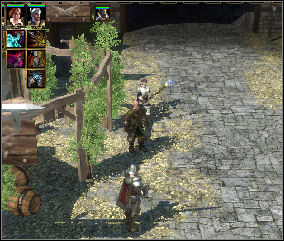
The wall around the castle is ready. Talk to Utrecht. He gives you a next task: fight off the attack of beasts. Talk to your new captain and he tells you who is leading the army of monsters. Gather all your soldiers and storm the beast's camp (16).
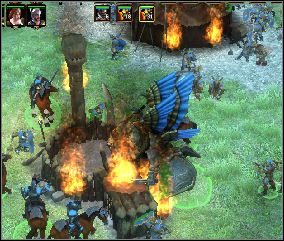
Your army can destroy the enemy quite easily. You can see a short cut scene. It seems that Westguard is safe now. Talk to Jandrim Windhammer. Hi gives you a next quest: bring him the Tear - Quenched Blade, the Piece of Dragonskin and the Living Runes. He can forge new weapon when you supply him with this materials.
Quest solved (side quest): fight off beasts' attack on Westguard
In Magnet Stones you may recruit Orcs and Trolls. I suggest recruiting Trolls only. Form groups of Devastators and Hurlers. Basic Orc's units are useful only at the beginning of scenario; you may also recruit a few later, when you lead your troll army in the area. As usual the most difficult is the beginning of scenario. Use the same tactic as ever. Remember to have a large number of Hurlers because your enemy uses a lot of flying units. Hurlers are universal soldiers, they can attack all kinds of units.
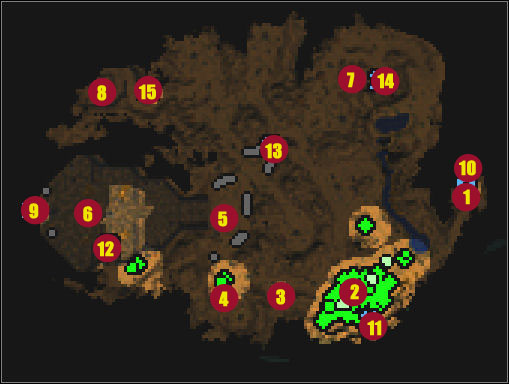
10, 11, 12, 13, 14, 15. Journey Stones
Go back to the Gate of Swords and enter the portal to Magnet Stones (1). You land in a center of the battle between the Undead and Trolls led by Ardar. You receive a quest: help to fight off the Undead attack and talk to Ardar. Kill all skeletons and talk to Ardar. Merchant gives you a few quests: stop the Undead from gathering Magnet Stones; destroy the Skull Castle and leaders of the Undead. Recapture the portal to the Crater and enter it. Ardar gives Trolls under your control and goes back to the freetraders camp.
Quest solved: find the forgotten portal to the Magnet Stones and enter it
Quest solved: help to fight off the Undead attack and talk to Adar
Quest solved (side quest): find Adar and help him to go back to the freetraders camp
Start to expand the base (2). Loot chests scattered around. West from your base there is a place you can paint (3). Do it and go back to the camp and gather soldiers. Try to clean the nearest area from monsters. You have to prepare your camp for an assault - build a lot of towers and recruit large army. When you're strong enough (it means very strong) you can counterattack.
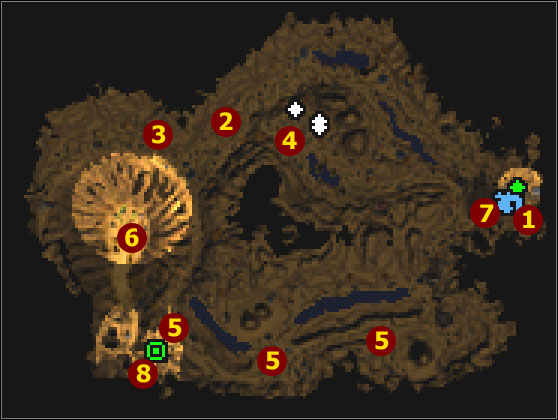
Recruit mostly Troll units. Gather a group of thirty Hurlers and Devastators and attack the base number one (4). After destroying it, heal your soldiers and attack the second base (5). Then start killing Magnet Stones harvesters. Do not attack the main base until you kill all harvesters.
Quest solved: kill all Magnet Stones harvesters
Now you may storm the main base and the Undead chieftains (6). Kill following Skeleton Masters. When you kill the last one, the portal is opened. Before entering it explore the nearest area. You can find here a lot of useful items. Do not forget to take your army with you - there are a lot of monsters in the area.
Quest solved: destroy leaders of the Undead and destroy their base
Quest solved (side quest): find the Magnet Shard for Sara Grey
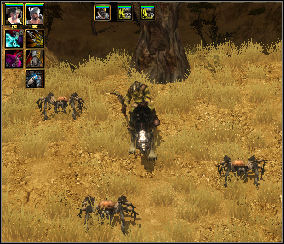
There is a hill in the Northeast, you can find there Orc Itza (7). Kill him and his spider guards. Continue you searching.
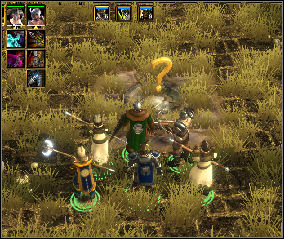
There is a strange mosaic on the hill in the Northwest (8). Check it and you are given a quest: put all fragments of the mosaic in correct places. The first fragment is just next to the mosaic. When you put it on its place a few Undead appears. Kill them all and you receive next fragment. Put it on correct place. Be sure you have enough number of soldiers because the Undead forces are very strong. Put all pieces until you solve the mosaic. When you're done you are given a next task: defeat Master of the Mosaic. To do that you need really strong army (recruiting the Titan is a good idea). This is the last task for you in the Magnet Stones, you may enter the portal to the Crater now (9).
Quest solved (side quest): put all fragments of the mosaic on its places
Quest solved (side quest): defeat the Master of the Mosaic
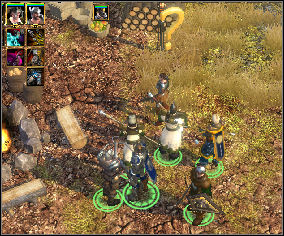
Before you go to the Crater solve a few side quests. Teleport your party to the Gate of Swords to the Grey Family. Give Myra all paints, and give the Magnet Shard to Sara. Now talk to Letho. After a while Lord of Fire appears. You may help the Grey in their fight with Lord of Fire. But do not count on any prize. They attack you if anyone survives. Kill them all and take items with you. Now go to the Professor Twiddle and give him the Magnetstone. A quest is given to you: find five pieces of Iridium and Lathanium Geodes. You are given a Magnetic Detector. You receive a task: find all pieces of the Black Legion armor. It's hidden North from the Swordwall. Use the detector received from Professor.
Quest solved (side quest): paint few pictures for Myra Grey
Quest solved (side quest): give the Magnet Shard to Sara Grey
Quest solved (side quest): give the Magnetstone to the Professor Twiddle
Quest solved (side quest): find the Magnetic Detector
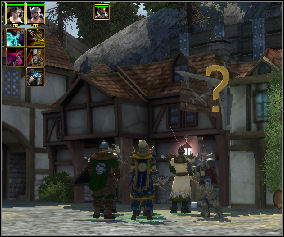
Now go to Westguard. You have all items needed for forging magic daggers. Talk to Jandrim, who forges daggers for you. Talk to Halicos and give him orders
Quest solved (side quest): bring Jandrim all items needed for forging magic daggers

Go back to the Gate of Swords. Go to the North from the Swordwall and seek for armor pieces and geodes. It becomes visible only when you come near so you have to search the area very precisely. When searching you may encounter a strange Skeleton. Kill Skeleton and take axe handle you can find on its body. When you find all armor fragments go to Morca. The blacksmith can prepare an excellent armor for you. Morca advises you to look for the axe cutting edge in other places. Now go to the Professor Twiddle and give him geodes. Unfortunately the Professor cannot use it now. He gives you a next quest: find the missing fragment of the Rohen's portal. You have to look for it in the Shal. Now go back to the Magnet Stones and enter the portal to the Crater.
Quest solved (side quest): find all pieces of the Black Legion armor
Quest solved (side quest): find all geodes for the Professor Twiddle
In this land you are leading a party of your heroes only. Your opponents are mainly Lizards and Demons so you shouldn't have any problems (if you don't charge frontally too strong group of monsters). But there are two exceptions: mighty Grozira and Maugron. Grozira is a huge lizard, extremely invulnerable to hits. To kill her you have to attack frontally and use a lot of spells and special skills. Be prepared for healing and resurrecting your heroes. Clues how to defeat Maugron are given later in the solution.
7, 8. Journey Stones
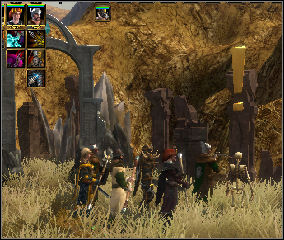
You enter the portal (1) to Crater. You can see a short cut scene showing Sorvina and her powerful servant Maugron. You are given a quest: reach the Bonewall at the bottom of the crater. There is a skeleton standing near the portal. Talk to him and skeleton tells you more about Maugron and Black Mirror.
Quest solved: recapture the portal to the Carter and enter it
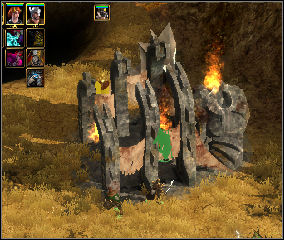
March to the North to the Undead camp (2). Destroy everything and take all coins with stars. You can use it in the Crater so try not to miss any chest.
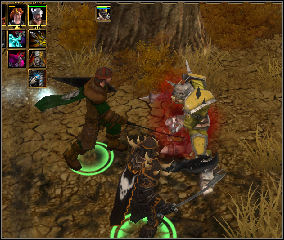
Follow the path beyond the camp. Destroy the group of Earth Elementals and after a while you face Orc Shar (3). This is your last target appointed by Undar. Attack Shar, kill his guards first and then Shar. After the battle take Shar's head and follow the path. After a while you face The Eternal One. The monster is accompanied by Earth Elementals. Kill them all (start with Elementals) and loot the chest. Now go back to the center of the map.
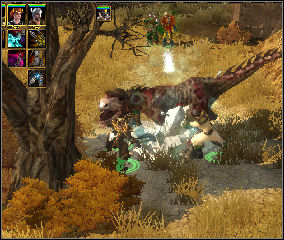
Mighty Grozira patrols the center of the map. Use the tactic described in the beginning to kill her. When you defeat the lizard follow the path leading to the center of the land. Kill all lizards and destroy their nests.
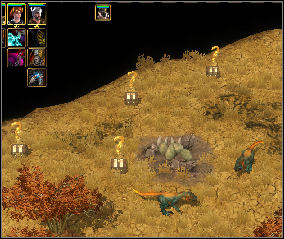
After a while you reach the glade with a lot of chests scattered around (4). Clear the glade of monsters. Now you may take care of chests. To open them you have to use coins with stars. There is a rule: each chest has a specified number of bolts; the number of bolts must be equal to the number of stars.
Before you start opening go to the South, to the Demons land (5). Destroy all Demon portals, kill all Demons and loot all chests - you get more coins. Despite this, you are short of coins to open all chests. Save your game and compare the content of each chest. This way you can pick stuff the best for your heroes. You can find more coins in the future so you would be able to return to Crater and open the rest of chests.
Now go to the bottom of the crater and it's guardian - Maugron (6). You are given a quest: destroy the guardian of Black Mirror. You have to do that in a specific way. Bonewall cannot be destroyed by any living being. You have to use a fact that Maugron is not alive. Stand just next to Bonewall towers and let Maugron to attack you with spells. In the meantime let your heroes to fight with creatures summoned by Maugron. When the guardian's spells destroy the tower move your group next to another tower. And repeat this until Maugron destroys all towers. Then attack the guardian and kill him. Approach to the Mindstone and use it. Then approach to the Black Mirror and take it with you. You are given a task: go back to the Gate of Swords and talk to the Shadow. Do not give him the Mirror until he promises to fulfill the promise.
Quest solved: destroy Maugron
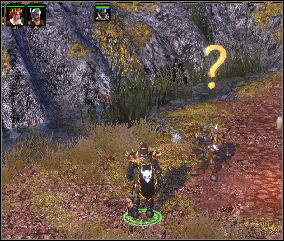
Talk to the Shadow and coordinate the warfare. Now go to Undar and give him heads of Itza and Shar.
Quest solved: steal the Black Mirror from Sorvina's hands
Quest solved: bring heads of Itza and Shar to Undar
This is the end of the chapter. You solved following quests:
The Shadow Warrior: talk to the Shadow in the Gate of Swords
The Forgotten Lands: find a way to the Magnet Stones
Thunderfist: fight off the attack of the Undead and talk to Ardar
The Magnet Stones: stop the undead workers from harvesting Magnet Stones
The Banned Portal: recapture the portal to Crater
The Bone Wall: destroy the Bone Wall and Maugron to steal the Black Mirror
Enough World and Time: find Ardar in the Magnet Stones
Westguard: Peace for Westguard: fight off the attack of beasts and destroy their base
Mosaic of Death: solve the strange mosaic
The Grey Family - Nyano: bring the Dwarven Brandy to Nyano
The Grey Family - Myra: paint all pictures for Myra
The Grey Family - Sara: bring the Magnet Shard to Sara
Blood Revenge: bring heads of Laksh, Tzang, Orog, Itza and Shar to Undar
The Right Twist - Magnetic Detector: find geodes for Professor Twiddle
The Black Legion: find all pieces of the Black Legion armor for Morca
The Art Of Forging - Thought and Memory: bring Jandrim all items needed for forging magic daggers
First quest for you is to convince the Iron Lord to storm the Dragh'Lur. Talk to him. Iron Lord agrees to do that when you complete a task he gives you. You have to go the Southeast, find the Stone God and pass the test. Talk to Nightsong and she joins your group. Check your equipment and continue a journey.
Quest solved: convince Iron Lord to storm the Dragh'Lur
Go to the South until you reach the statue of Stone God (15). Destroy the group of soldiers trying to stop you. Approach the statue and check it. The Stone God speaks and gives you a quest. Be inquiring when asking about the march direction. You discover that someone is pretending to be a god. Order him to show himself and Flink McWinter appears. Talk to him and make him to help you. Flink convinces Orcs to join your crusade. He opens the portal to Tuscari. You are given a quest: go through Tuscari. Iron Lord must not die. Destroy the next group of soldiers and enter the portal (16).
Quest solved: pass the test of Stone God
In Tuscari you are commanding Orc's and Troll's forces. Recruit basic Orc's units (mainly shooting), and a lot of Hurlers and Devastators. Defensive towers are absolutely necessary - your main base is being attacked for the whole mission. You must never forget about defending your headquarter. It's the best way to leave Orc's forces in the base (near towers), and to lead Troll units in the area. In the furthest phase of the mission you are able to recruit flying units, but I do not recommend this. You receive some units after recapturing Zarach Temple and do not recruit new ones.
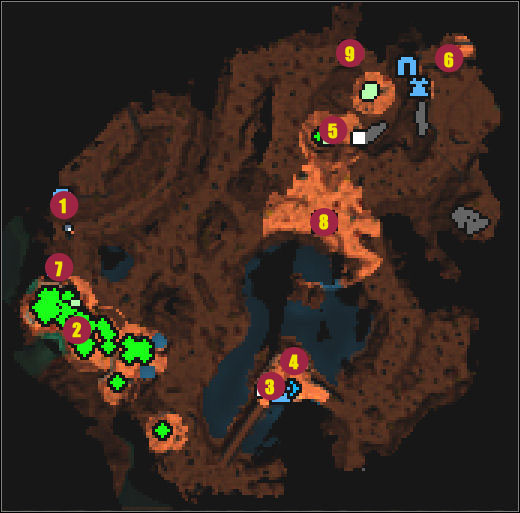
7, 8, 9. Journey Stones
You appear on the other side of the portal (1). Help Orcs in their fight against Light Worshippers. New quest is given to you: recapture Orcs imprisoned it the fortress to the West. Gather all your soldiers and follow the road. You are going to fight with giant spiders. In the meantime fortify your base. You are being attacked instantly. Try to reach the main base as fast as you can (2).
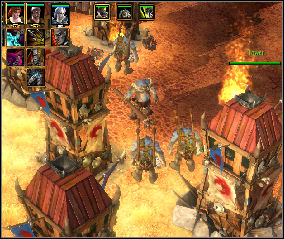
Giant spiders attack your base from all sides. Do not try to look for their nests - you can't destroy it. Spiders will never stop attacking you! Focus your moves on defending the base. In the meantime gather an army you are going to send to storm the fortress. Waiting for soldiers let your heroes to explore the nearest area. You can find a lot of items but you have to be extremely careful: Iron Lord must not die and he is wondering around all the time. Take care of him.
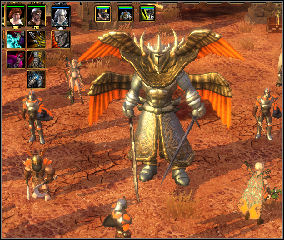
When you're ready storm the fortress (3). Be prepared for a clash with a Titan. Destroy enemy's forces. You can see a short cut scene and a new quest is given to you: talk to Sorok. He knows how to deal with spiders. Sorok (4) is one of imprisoned Orcs - talk to him. Choose one of two ways of defeating spiders. You must choose between killing Light Worshippers or killing Shygalla - the mother of all spiders. I chose the second option. You are given a quest: kill Shygalla. Sorok leads you to the altar where you can summon and kill Shygalla. Be careful because Sorok must not die!
Quest solved: recapture Orcs imprisoned in the fortress
Quest solved: talk to Sorok
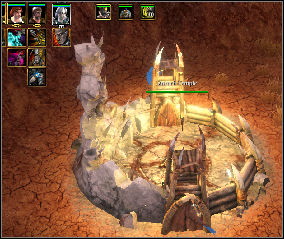
Sorok leads you through a desert to the Zarach Temple (5). He summons Shygalla here. It's up to you to kill the monster. Shygalla summons a few giant spiders - you can send your troops to fight them. When you defeat Shygalla you are given a new task: destroy the citadel of Light Worshippers and activate the portal.
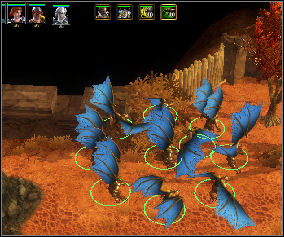
Now you have to be very quick. Send Totems to the fortress when Iron Lord waits. They can help him to fight off attack of gryphons. In your headquarter build defensive towers - the more the better. Light Worshippers are going to attack your main camp. Recruit a few soldiers as well. Lead your main forces in the area so they do not meet your rival's army. When Light Worshippers attack your camp wait a minute and counterattack them. Their forces are scattered so it should be easier to storm the citadel. When you fight off the assault on your headquarter send more troops to storm the citadel (6). Crush and burn everything.
Quest solved: summon and kill Shygalla.
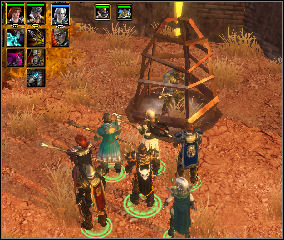
In the citadel you can find a captive who propose his service in exchange for freedom. When you destroy all buildings the portal to Dragh'Lur appears (7). New quest is given to you: enter the portal to Dragh'Lur. Before you do that explore the whole area in search for items. There are much less spiders and you can find a lot of items - including the cutting edge for the Black Legion axe. When you are ready enter the portal.
Quest solved: destroy the citadel of Light Worshippers and activate the portal
In Dragh'Lur you are commanding Orc's, Troll's and Barbarian's forces. I recruited all of them and I paid special attention to have a lot of shooting and casting spells units (Shaman, Axeman, Hurler). But you also have to recruit a strong group of units good in melee fight - there are a few Titans waiting for you. I did not recruit flying units. At the beginning you have to take care of your base - six towers and a group of fifteen soldiers should defend the base easily. But before you decide to lead your army in the area you have to recruit a lot of soldiers. Your opponent's base is strongly fortified and you will lose a lot of units. In further phase of the battle, when you capture your opponent's materials, recruit a Titan and catapults (you will need them to storm Dragh'Lur).
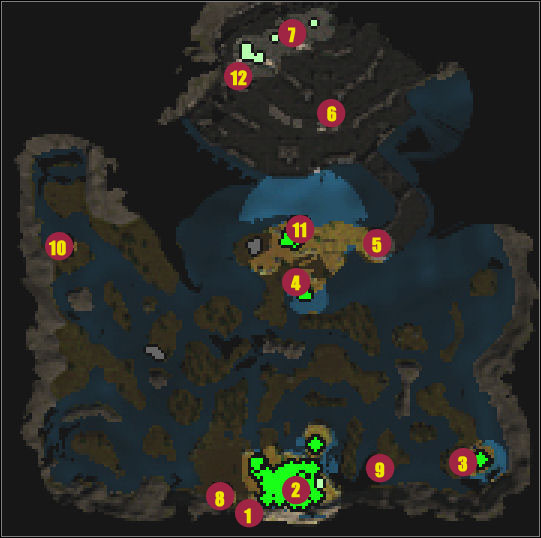
8, 9, 10, 11, 12. Journey Stones
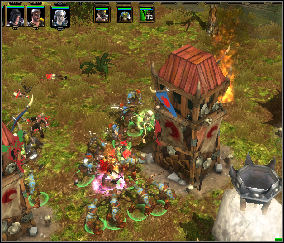
After entering the portal (1) go to your headquarter (2). Iron Lord stays here - he must not die. You are given new tasks: go through the swamp to Dragh'Lur, disarm all traps. Fortify your base quickly; your opponent is attacking instantly. You need a few towers. When you are able to fight off your enemy's attacks without help from your heroes, send your party in search for new materials. Remember to take Orc specialists with you - they are searching and disarming traps. Recruit soldiers and reveal new areas. Try to check the whole West area of the map.
Quest solved: lead Orc's army to Dragh'Lur
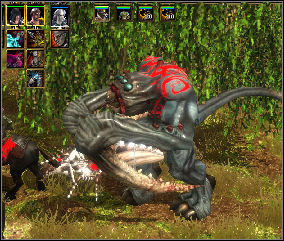
Beware of your opponent's army patrols. There is a group of soldiers (including Titan) wondering around there. Be careful because your enemy recruits a lot of Titans - when you kill one, the second appears in a minute. Do not fight with to many opponents at one time.

After searching the whole area, and collecting all treasures move your soldiers back to the headquarters. Gather all soldiers and follow the path that your opponent is coming. Conquer the land but remember about traps. After a while you reach the first base of your opponent (3). Destroy everything, loot the Captain Zarach's body and you find some material needed for Jandrim's magic daggers.
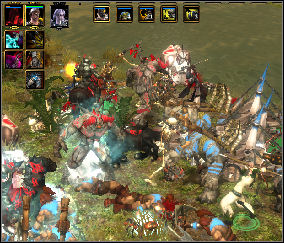
Follow the path until you reach the base in front of the fortress (4). When you can see first buildings prepare yourself for a slaughter - it is very tough battle and a lot of soldiers is going to die. Beware of Titans. After destroying all soldiers and buildings capture new materials and prepare for storming Dragh'Lur. Beware of the trap in the entrance (5). This is the last trap, you may enter the citadel now. You are given new quests: storm Dragh'Lur, destroy its defensive towers. The best way is to build a few catapults and use it to destroy towers.
Quest solved: reach the Dragh'Lur
Quest solved: disarm all traps
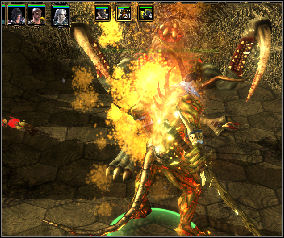
Conquer the city step by step. There are a lot of soldiers and buildings. Send catapults to destroy towers (6). But beware of your opponent's counterattacks. After a while you destroy all towers. You are given a new quest: kill Toth Lar, Sorvina's son. Gather your soldiers and do it.
Quest solved: destroy defensive towers of the Dragh'Lur fortress
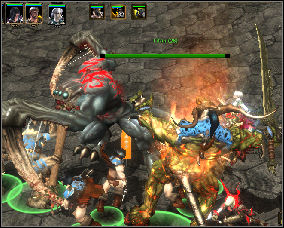
The road to Toth Lar (7) is not easy. You have to kill a few Titans and destroy all buildings.
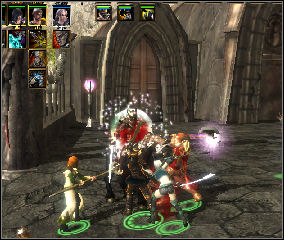
Toth Lar is not so tough as his guardians - you can kill him easily. Then you can see a film showing consequences of your actions. The portal to Sorvina's dominium - Shal - is opened now.
Quest solved: kill Toth Lar
Quest solved: storm the Dragh'Lur fortress
Quest solved: Iron Lord must not die
This is the end of the chapter. You solved following tasks:
The Storm Begins: convince Iron Lord to storm the Dragh'Lur
The Iron Lord: do not let Iron Lord to be killed
Through the Sanctuaries: go through the Tuscari to attack the Dragh'Lur from the South
The March to the Fortress: go through the swamp to reach the fortress
The Impregnable: storm the Dragh'Lur
Your allies abandon you once more - Orcs and Nightsong are going away. It is Malacay's fault who possessed new body at last. You start new act in Sorvina's dungeons.
In Shal you have the occasion to lead new kind of forces - Dark Elves. Commanding this army I never recruited the weakest unit - Shadow Blade. My army consisted of Death Knights, supported by Sorceress, Necromancer and Arachnis. Norcaine soldiers are not very efficient in destroying buildings and towers, but they have the one big advantage: Necromancers and Arachnis can summon a lot of monsters (spiders and skeletons), absorbing enemy's attention. You may order destroying tower and in the meantime summoned creature do not allow your enemy to attack your soldiers easily. That's why you need to have enough number Necromancers and Arachnis to support your Knights. Of course building towers is still important (frankly speaking it's the most important thing in this scenario).
7, 8, 9, 10, 11. Journey Stones
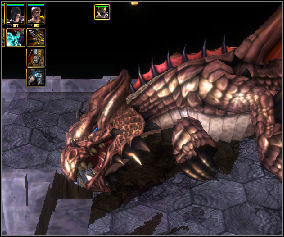
When you're free kill all guardians. You can find bodies of your dead friends in nearest cells. You have to resurrect them before it's too late. You receive a new quest: find a way to leave the Sorvina's palace. Talk to Ur. The dragon tells you where to look for Malacay. After a while Ur dies. Take the Piece of Dragonskin you can find on dragon's body. After a while Nightsong appears. Talk to her and agree to support her in the battle for the Shal. You are given new tasks: recapture fifteen Flagpoints, to control the city, and set tortured beasts free to confuse your enemy's forces. This way you can reach the portal to Crystal Wastes. Nightsong shows you the way out of Sorvina's palace. Let her join your group and continue a journey.
Quest solved: find a way to leave the Sorvina's palace
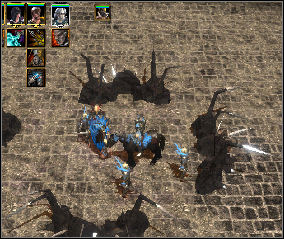
Just next to the palace's gates there is the first Flagpoint (1). Recruit a few soldiers and recapture it from your opponent's hand. Since now the Flagpoint gathers materials for you. Remember that you cannot gather materials in traditional way so try not to lose any Flagpoint.
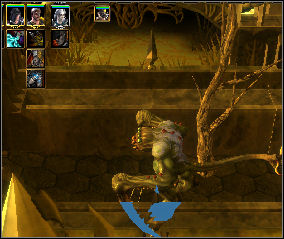
East from the first Flagpoint there is imprisoned Tortured Netherbeast (2). Set the beast free (use a key from the chest you can find nearby). The monster is going to patrol the streets and attack your enemy's soldiers (but you may be its target as well).
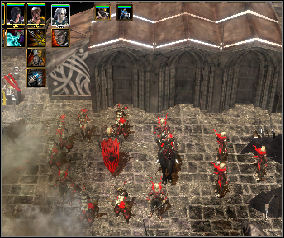
Now you have to build a lot of towers around each of possessed Flagpoints. The number of units is limited so do not leave to many of them for defending Flagpoints. You need strong army to storm your enemy's camps. Conquer the land North from the first Flagpoint. Recapture the second one and build a few towers. Gather all your soldiers and storm the large base of your enemy in the North (3). Frontal attack is the best idea. Choose towers and building as your first targets. Your enemy can recruit soldiers much faster than you, so you have to destroy his buildings as fast as you can. Just near this base there is another beast imprisoned - set it free too.
Quest solved (side quest): set tortured netherbeasts free
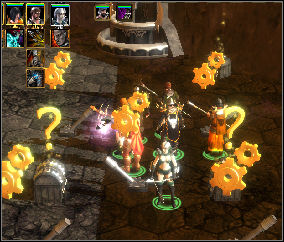
In the Northeast area of the city you can find the chamber with chests and levers (4). In the chest that is not shut you can find a piece of Rohen's portal for Twiddle. There are also two closed chests. To open them you have to switch levers in the correct position. To open the first one all levers must be turned right. Later turn levers left and the second chest is opened. Unfortunately one lever switches other ones so you have try different combinations. You can find some items and coins with stars in chests. After that continue your journey.
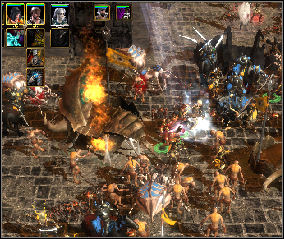
Going to the South you can find the second large base of your enemy (5). Use the previous tactic of frontal attack. Once again choose buildings as your first targets. This base is the last fortress of your opponent. When you destroy it you may finish recapturing Flagpoints. When you're done a task is given to you: enter the portal to the Crystal Wastes. Go to the portal (6). Nightsong and her soldiers join your side. Enter the portal together.
Quest solved: take control over the city
Quest solved: clear the way to the portal to Crystal Wastes
Next chapter is finished. You solved following quests:
Captured: find a way to leave the Sorvina's palace
Common Cause: help the Rebellions to clear the way to the portal to Crystal Wastes
Civil War: recapture all Flagpoints
To the Crystal Wastes: enter the portal to Crystal Wastes
The Incalculables: set free tortured beasts in Shal
You still lead Dark Elves forces. Once more the most important thing is to build a lot of defending towers. The problem is that you have not too many materials and your enemy attacks for all the time. You have to counterattack him very soon to recapture his materials. Use tested set of units (without Shadow Blades and flying units) and attack enemy's camps as fast as you can. But do not forget about defense.
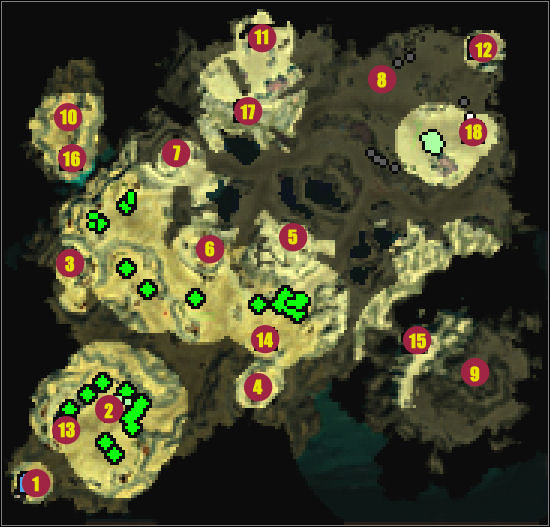
1. The portal to Shal
2. The Headquarter
3. The First Orc's base
4. The Second Orc's base
5, 6, 7. Orc's camps
8. The Orc's headquarter
9. Ice Rocks
10. Fire Rocks
11. The portal to Crystal Forest
12. The portal to Song Glass
13, 14, 15, 16, 17. Journey Stones
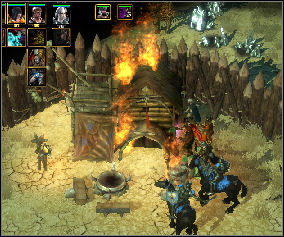
On the other side of the portal (1) you are given new tasks: destroy all camps of Orcs in Crystal Wastes, and gather all pieces of Book D'arh. Expand your base (2) and prepare yourself for Orc's attacks. There is a lack of stone so you have to build necessary buildings fast. Gather a larger group of soldiers and storm Orc's base to the West (3). You must not wait for too long because you lose all materials. When you kill the general commanding the camp you can find the first piece of the book. Quickly recruit a few new soldiers and storm the second base (4). You can find there the second piece of the book. Now lead your soldiers in the area to capture new materials. But beware of Orc's counterattacks. Build a lot of towers - your enemy is going to waste his time attacking them. During this time you should destroy the rest of Orc's camps (5, 6, 7).
Quest solved: enter the portal to the Crystal Wastes
Quest solved: gather all pieces of Book D'arh
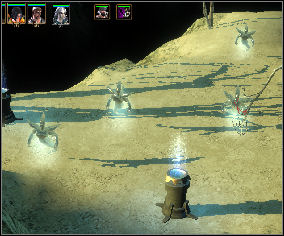
You are given a new quest: find Ice, Fire and Earth Essence. You can look for it near portals that are opened when you completed the book. But don't forget that there still is the last base of Orcs in Crystal Wastes (8).
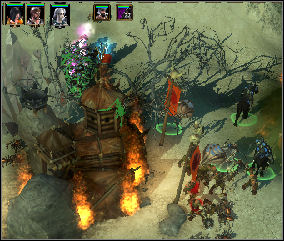
It's high time to destroy Orcs completely. Wait for their attack and then counterattack them. A group of 20 - 30 soldiers is strong enough to destroy their camp. Gather your soldiers and storm Orc's camp. When you're done gather all items you can find here. Now it's time to take care of your own business.
Quest solved: destroy all Orc's camps in the Crystal Wastes
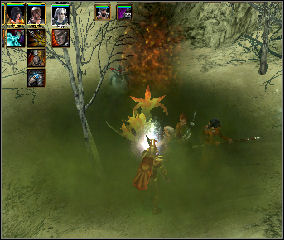
Go to the Frost Elementals portal (via Ice Rocks Journey Stone) (9). Follow the path, kill all monsters and destroy Elemental Nodes - that's how elementals appear in Crystal Wastes. When you kill the last creature you receive the Ice Essence.
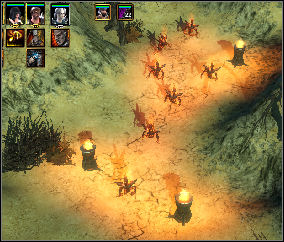
Now teleport your party to Fire Rocks (10) to gather the Fire Essence. Do it in the same way as you did with Ice Elementals. Choose nodes as your first targets. When you're done the next Journey Stone activates (the Portal to the Crystal Forest) (11). Go there.

There is a series of fights with Fire and Ice creatures waiting for you. Kill anything that is alive. When you're done, the portal to Crystal Forest is opened. Before you go to the Crystal Forest solve a few side quests. Go to Jandrim in Westguard - you have all items needed for forging the Bloodmoon axe. Than go back and check the second portal that appeared in Crystal Wastes (12). Approaches it and you get know where it leads. New quests are given to you: find missing scouts in the Song Glass, and check what happened to Malkuth. Remember that Professor Twiddle is waiting for you in the Song Glass too. Enter the portal.
Quest solved: bring Jandrim all items needed for forging the Bloodmoon axe
In the Song Glass you are commanding your heroes only. Frankly speaking there is nothing that can threaten you here if you keep the tested tactics.

1. The portal to Crystal Wastes
2. The Malkuth's hideout
3,4. Perfect Crystals
5. Lokhar
6. The Professor's Timetwister
7. The Prisoner's Camp
8, 9, 10, 11, 12, 13, 14. Journey Stones
15. The portal to Crystal Forest
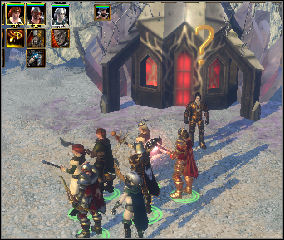
After entering the portal (1) you appear in the land of ice creatures. Kill all beasts and collect items. Follow the path until you reach the Malkuth's hideout (2). Talk to him. A quest is given to you: gather six pieces of Perfect Crystals. You already have three pieces after the fight near the portal. Look for the rest near Journey Stones activated by Malkuth. Go to both places (3,4) and kill all monsters. You can find there a lot of Perfect Crystals and Moonglass and Sunglass as well. Take everything with you and go back to Malkuth. Give crystals to him and choose the weapon he prepares for you. Now you are ready to fight with Lokhar. You receive a quest: take the Crystal Heart from Lokhar and give it back to Malkuth. Malkuth activates Journey Stone leading to Orc's camp (5).
Quest solved: check what happened to Malkuth
Quest solved (side quest): gather six pieces of Perfect Crystals
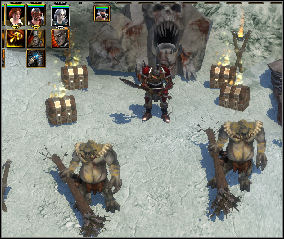
Use a Journey Stone and kill Lokhar and his guards. After the fight (not very difficult), search the area and go back to Malkuth. Give him the Crystal Heart. Malkuth is not going to join you but he agrees to make a weapon for you every time you give him six pieces of Perfect Crystal.
Quest solved: give the Crystal Heart to Malkuth
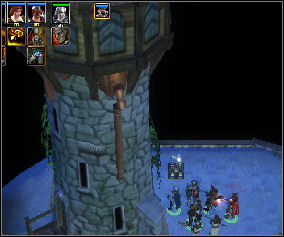
Continue your journey. Use a Journey Stone to teleport your party to The Professor's Timetwister (6). Go to the laboratory. After a while you face Twiddle and his machine.
Talk to the Professor. Give him the piece of the Rohen's portal. New quests are given to you: find the Moonglass and the Sunglass. Fortunately you already have both items - give them to Twiddle. A quest is given to you: activate the Timetwister.
Quest solved (side quest) meet the Professor Twiddle in the Song Glass
Quest solved (side quest): find the piece of the Rohen's portal and give it to Twiddle
Quest solved (side quest): find Moonglass and Sunglass and give it to Twiddle
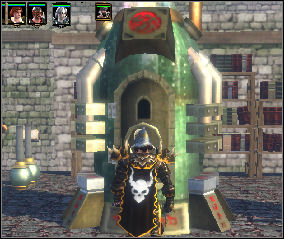
Approach to the Timetwister and check it. The puzzle is no so complicated as it seems. You know the answer for a long, long time - Professor gave it to you when he met you for the first time. You have to use four Iridium Geodes and the Moonglass. This way you can activate the Timetwister and solve the old side quest. Talk to the Professor Twiddle. You are rewarded with a crossbow made by Professor. Twiddle enters the Timetwister and disappears.
Quest solved (side quest): activate the Timetwister
Quest solved (side quest): find out what Professor's strange talk was about
Just next to the laboratory you can find boxes with lizards. Set beasts free and kill them. You are rewarded with jewels. Now use a Journey Stone to move to the Prisoners Camp (7).

There is a little skirmish waiting for you - destroy the Or'c camp. You shouldn't have any problem with doing that. When you're done loot all chests.

Set imprisoned Gargoyles free. You can also find signs saying what happened to missing scouts. Use Gargoyles for gathering Perfect Crystals situated on tops of hills. Order Malkuth to make additional weapon for you. That's all you have to do in the Song Glass. Get back to the portal to Crystal Forest (15) and enter it.
Quest solved: find out what happened to missing scouts
In Crystal Forest you are going to fight the next great battle. You still lead Norcaine forces but in the further phase of mission you can recruit Shadow units. In this battle you may recruit all kinds of units (but you must allocate your materials wisely). Recruiting Shadow forces is necessary to win the battle but do not exaggerate with the number of Shadow soldiers. You need to use Shadow's abilities - becoming invisible and easiness of destroying buildings. You are also made to recruit flying units - try to recruit minimum number of such creatures. Prepare yourself for one of the biggest battles in Spellforce 2 (the other two are battles of Dragh'Lur and Bullwark). At the beginning fortify your base. And remember about reasonable number of Necromancers and Arachnis - you will need them when storming your enemy's base.
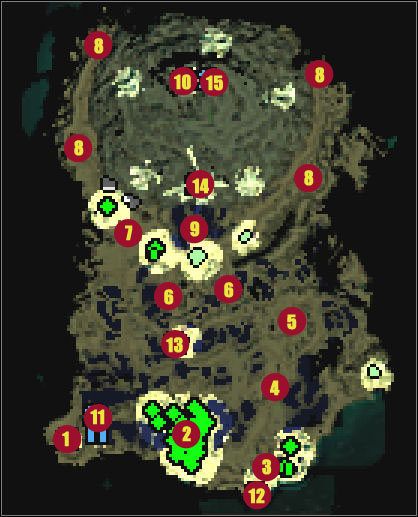
11, 12, 13, 14, 15. Journey Stones
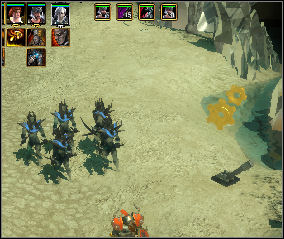
On the other side of the portal (1) you are introduced to the situation in the Crystal Forest. Go to your headquarter (2) and start gathering materials. Build a few towers immediately. Let your heroes to clear the area from creatures. Near your headquarter there are Elemental Nodes and Earth Essence (3). Destroy nodes and take what you need. In the East you can find new materials. Start to fortify your base. You are given a quest: reach the Crystal Mountain and the Malacay's laboratory. You have to go through the base of your opponent.
Quest solved: reach the Crystal Forest
Quest solved: find Ice, Fire and Earth Essence
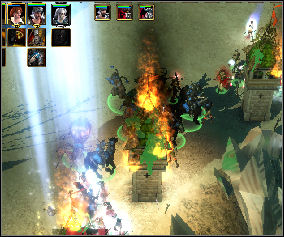
The ravine you have to go through is defended by set of towers and a large army (4). There is nothing to do except the frontal attack. Do not try to kill soldiers - your main targets are towers. Attack until you destroy everything. When you're done take all items found in the base with you (5).
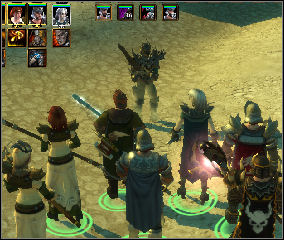
Head to the Malacay's Laboratory. Unfortunately you face a problem that can be solved only by alliance with your old enemy - the Shadow. You receive a quest: use Shadow soldiers to open gates to the fortress (6). Since now you may build Shadow buildings and recruit its units.
Gather a group of 10-12 Assassins and send them to your opponent's fortress - near the lever that opens the gate. Destroy a group of defenders and switch the lever. The road to the fortress is opened now. You are given a quest: reach the Laboratory and destroy the base of Light Worshippers. Recruit new soldiers and attack with all your might. Use the opened gates to enter the fortress.
Quest solved: use Shadows to open the gate to the fortress
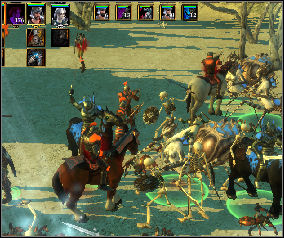
Do not attack towers. Lead your forces to your opponent's backup and destroy all his buildings and soldiers (7). When you capture his materials he cannot recruit new units. If you still have Lenya you may recruit a few Ravages that can destroy towers easily. If you're short of materials send your workers to the enemy's camp to gather some materials. Destroy following camps of your enemy (8). Beware of Titans.
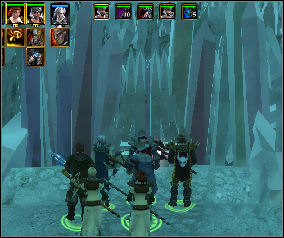
In the center of the Light Worshippers camp you can find a strange Crystal (9). A quest is given to you: gather five Crystal Shards to activate the portal. Shards are hidden in the mountains. Gryphons that can be killed only by Shadow flying units guard it. Recruit a few such creatures and gather Shards.
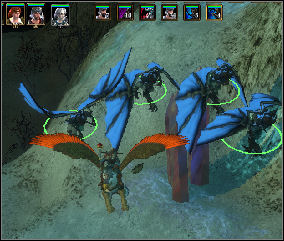
Four Transformers can kill the Gryphon in the blink of an eye. Completing all shards takes only a minute. A task is given to you: put shards in the Crystal in correct order. It should be 3-2-4-5-1 (but I'm not sure if the melody cannot change. To be sure listen to the melody first). A Journey Stone to the Laboratory is activated. Go there now.
Quest solved: destroy the base of Light Worhippers
Quest solved: gather five Crystal Shards
Quest solved: put Crystal Shards in the Crystal in the correct order
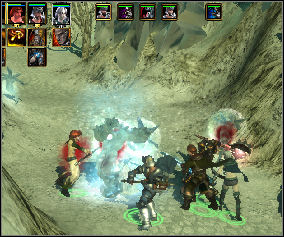
Follow the path leading to the Laboratory (10). You have to fight Ice Elementals and other creatures. You shouldn't have any serious problem. You can also find chests with Spiral and Cuboid Tile.
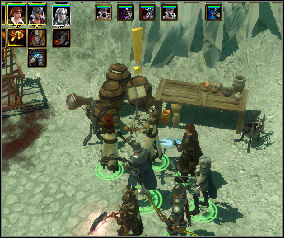
After a while you reach the Laboratory. But Malacay is not here. You are given new tasks: fond out where Malacay's hideout is and gather all tiles needed for solving the strange mosaic. Search the Laboratory and the nearest area - tiles are hidden in chests guarded by elementals.
Quest solved: reach the Malacay's Laboratory
There is a guardian waiting for you at the end of the path. You have to defeat him to enter the second part of the Laboratory.
You have to put tiles in correct places. The correct order is shown on the inner, moving circle. Now you have to guess the place to start (Southeast plate). When you put tiles in correct places the portal to Malacay's hideout appears. Enter it.
Quest solved: find all tiles and solve the mosaic
The chapter is finished. Following quests are solved:
To the Crystal Forest: destroy all camps of Orcs in Crystal Forest
The Book D'arh: gather all pieces of Book D'arh to summon Gargoyles
To the Crystal Mountain: reach the Malacay's Laboratory in the Crystal Mountain
Malacay's Hideout: find out where the Malacay's hideout is
The Song Glass: find Malkuth and missing scouts in the Song Glass
An Odd Codger: find out what Professor's strange talk was about
The Right Twist - Rohen's Portal: give the piece of Rohen's portal to Professor Twiddle
The Right Twist - Timetwister: activate the Timetwister
The Art Of Forging - Bloodmoon: bring all items needed for forging Bloodmoon to Jandrim
In Steel Shore you lead your heroes only once more. But there is an exception - you can order the group of Ravages. You need them to destroy defensive towers of Malacay. Use your tested tactics
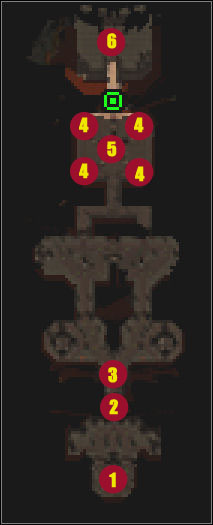
You find the Malacay's hideout at last (1). You are given a quest: find Malacay and kill him. Follow him to the North. Your ally the Shadow gives you last favor - the group of Ravages joins your group. You can use them to destroy Malacay's towers. Don't even think about attacking it with your heroes. Towers are so powerful that it can kill your heroes with a few salvos.
Malacay gathered the army of his new pupils: Malars. Single units are not dangerous to your party. Use Ravages to destroy towers and in the meantime let your heroes to kill all Malars. Than the gate to Malacay (2) is opened. He summons new Malars and run away. Follow him to the North. Use still the same tactic: heroes kill Malars, Ravages destroy towers. When you reach the embranchment (3) go one side only. Do not try to destroy towers on both sides - there are too many of them. There are no chests and items in this location so you don't have to explore the area. Beware of Malar's raids - they are attacking you constantly. They are quite strong in groups.
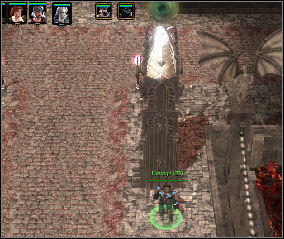
There are some places you can destroy the tower without losing the Ravage. Try to attack with Shadows so that other towers cannot shoot them.
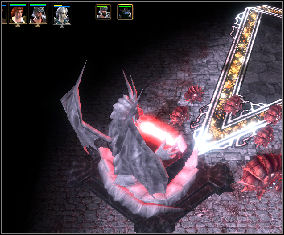
Go to North until you reach the chamber where Malars come to existence. You have to destroy Dragon Altars (4). Use Ravages if you still have some.
When you destroy the first Dragon Altar Mordecay's Blood Ghost and a few Malars attack you. Every time you destroy Dragon Altar you have to face the ghost of one of your heroes.
Malacay observes your battle hidden behind the magic shield. When you destroy the last Dragon Altar Malacay escapes. A quest is given to you: light fires on the pentacle in the correct order (5) to get to the Blood Temple. Then kill Malacay. To light the fire you have to move your hero close to the correct place. This is the correct order: West, Southeast, North, Southwest, and East. The portal to the Blood Temple (6) is opened. Enter it to face Malacay for the last time.
Quest solved: follow Malacay to the North
Quest solved: light fires on the pentacle in correct order to reach the Blood Temple
This is very long and tough fight. Malacay is extremely immune to your hits and he is teleporting constantly. You have to be patient and attack him without a break. Sometimes it's a good idea to hide in the corner of the location to heal your heroes. Malacay restores some energy too but you do it much faster. Patience is the key to the victory. After the fight you can see the film ending the game.
Quest solved: kill Malacay
You finished the last chapter and the whole game as well. Following quests are solved:
The Secret Fortress: storm the Malacay's fortress
Blood of My Blood: find and kill Malacay
CONGRATULATIONS


 Slender: The Arrival Game Guide & Walkthrough
 Shadowrun: Hong Kong Game Guide & WalkthroughSleeping Dogs Game Guide & Walkthrough
 Still Life 2 Game Guide & Walkthrough
 Scarface: The World is Yours Game Guide & Walkthrough