Spec Ops: The Line game guide
The unofficial guide to Spec Ops: The Line contains a very detailed walkthrough of all missions in the game. In the description of each chapter of single player campaign we've included information on:
Jacek "Stranger" Halas
Translated by Maciej "Elrond" Myrcha

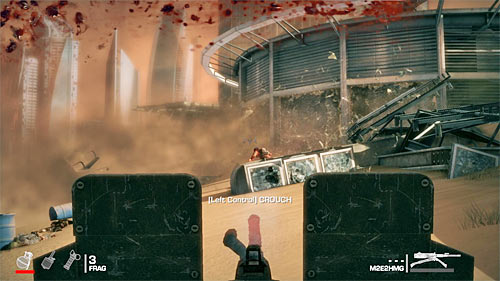
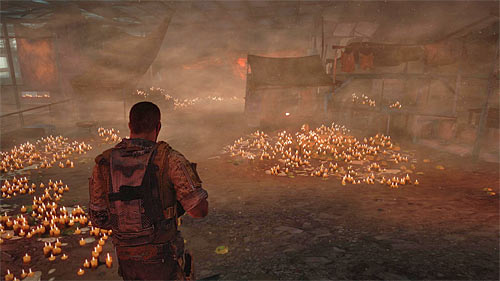
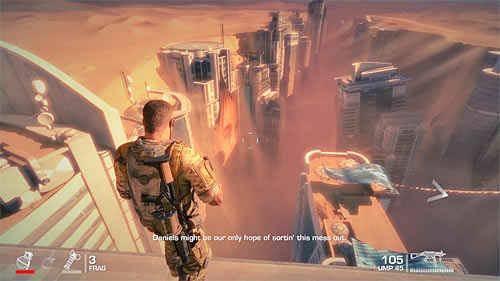
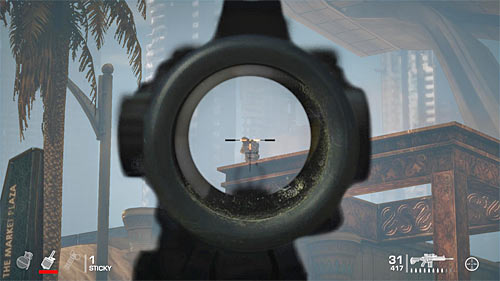
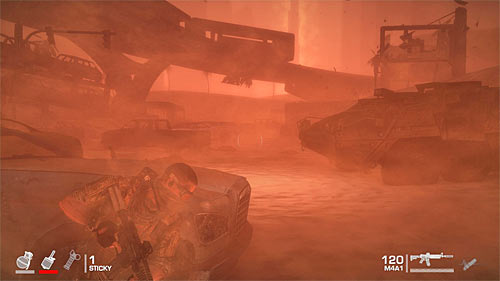
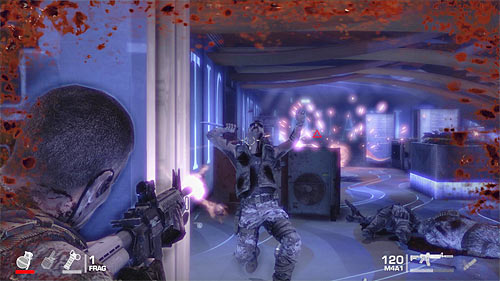
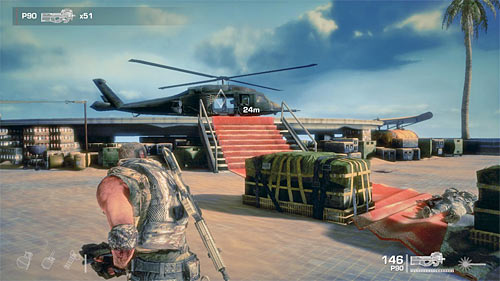
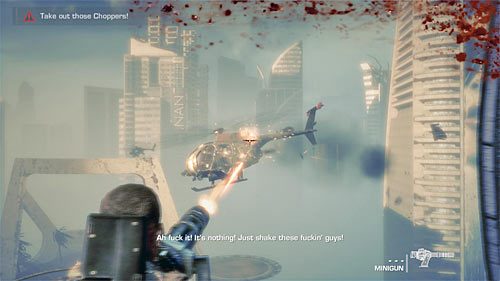
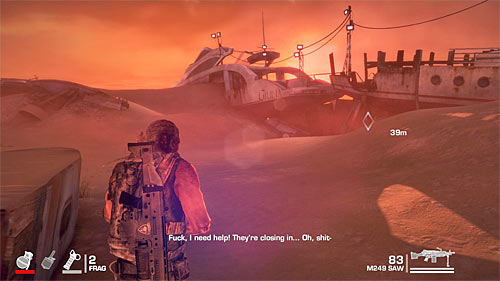
An introduction to the game is very short, providing a foretaste of what awaits you in the rest of the campaign. Once you regain control over the main character, start shooting other helicopters using the chain gun. Do not worry about ammo or weapon overheating.
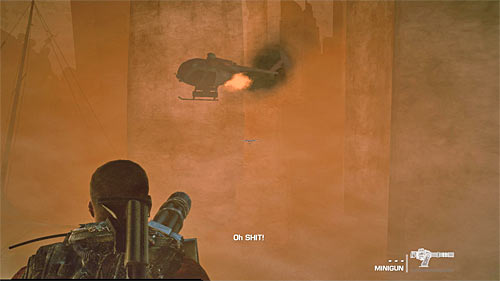
The scene of helicopter flight will end shortly after approaching the sandstorm and specifically in the moment of collision with another flying machine.
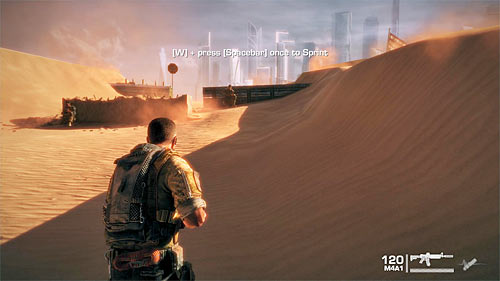
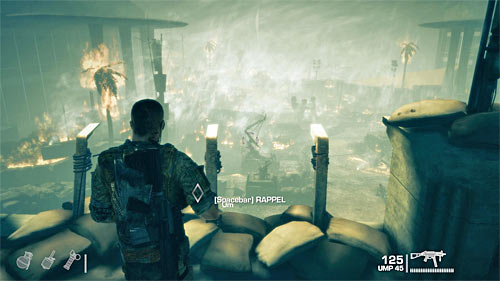
Follow your team-mates, remembering to read the game screen prompts. The first of them relates to the sprint option, activated by holding SPACEBAR. Along the way you should also practice taking cover (also SPACEBAR), although initially you won't encounter any enemies.
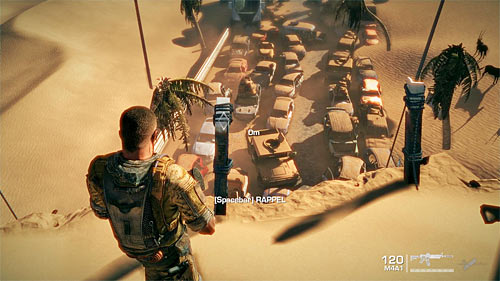
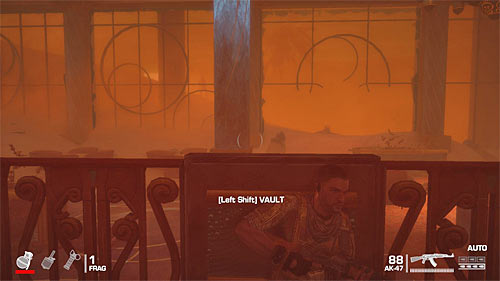
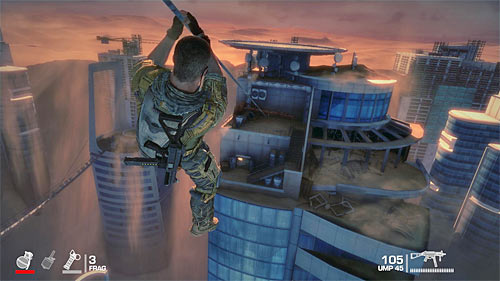
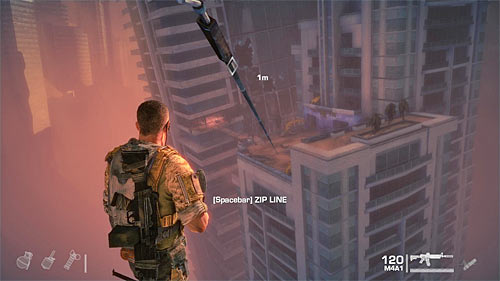
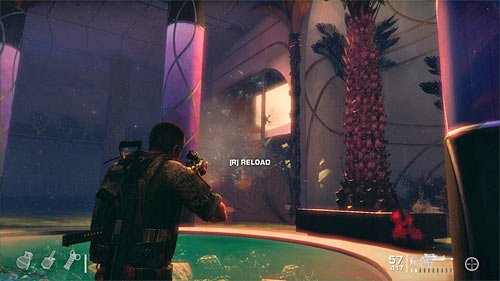
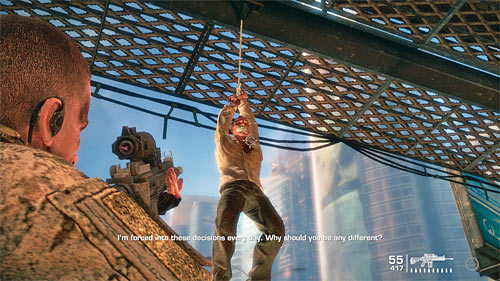
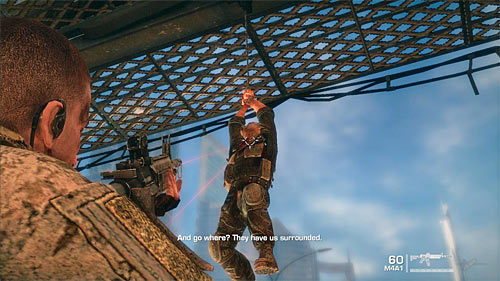
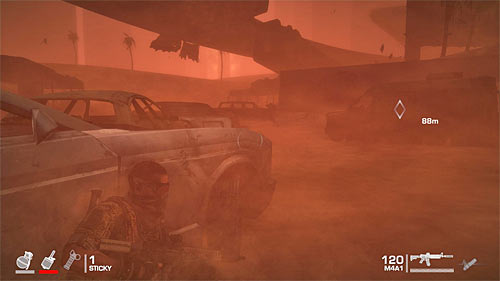
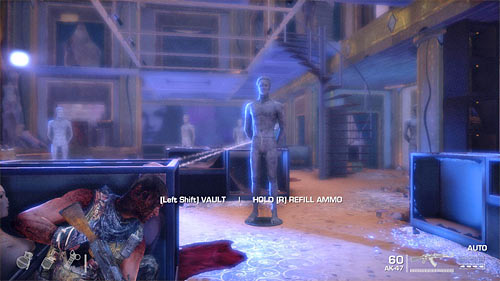
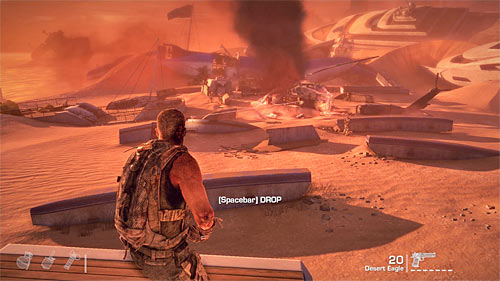
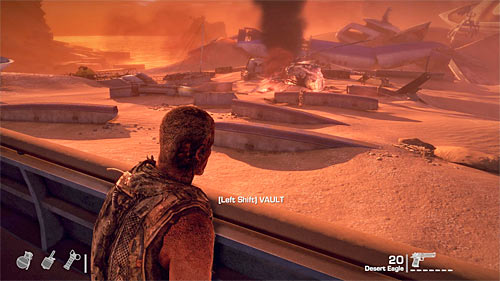
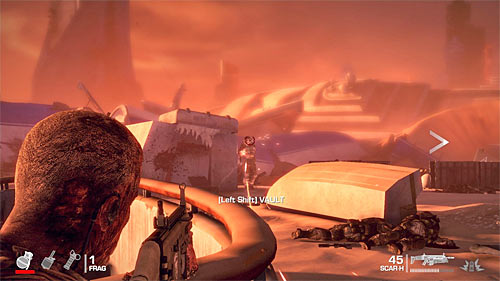
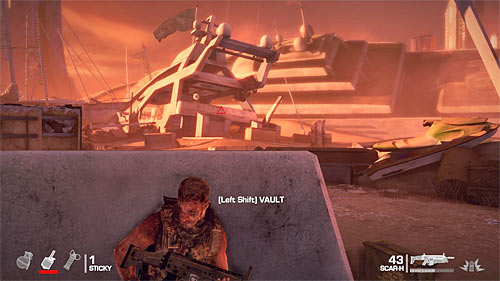
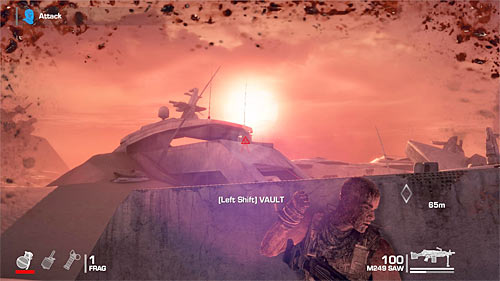
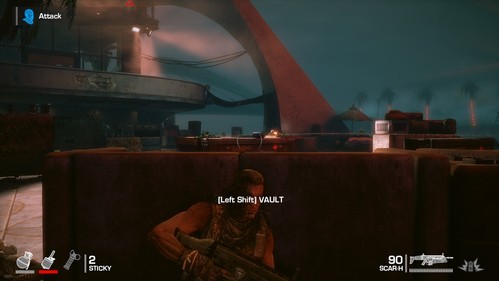
P After reaching the lookout point, turn right, jumping over an obstacle (left SHIFT). Move to the hook indicated by the game and press SPACEBARE to mount and rappel down the line. Continue to march among the wrecks of vehicles. Along the way you can practice changing your weapons, activated by pressing E. Approach the bus wreckage to get updated guidelines.
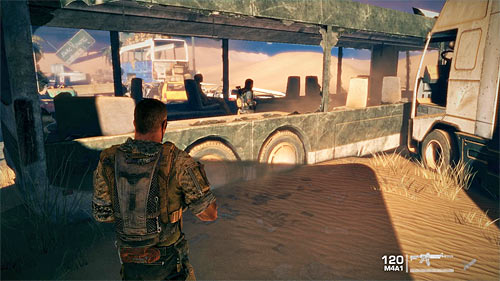
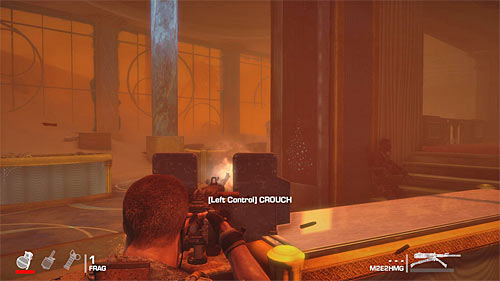
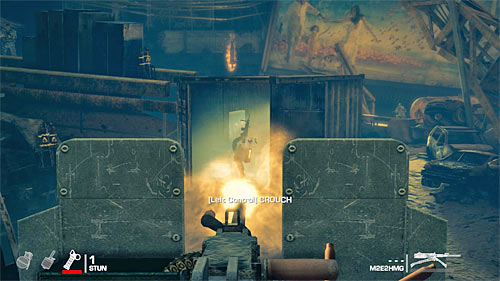
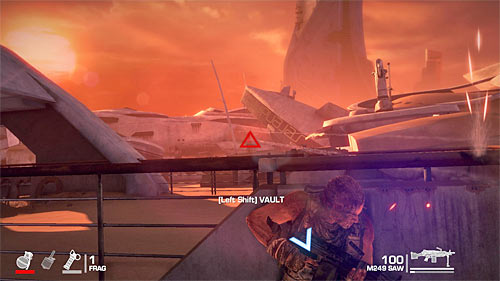
Follow your team, jumping over another obstacle. Approach the wreck of the bus from the right side (screen above), jump inside and head to the exit door, dropping down (SPACEBAR). A little further the game will force you to crouch and this is done by pressing left CTRL.
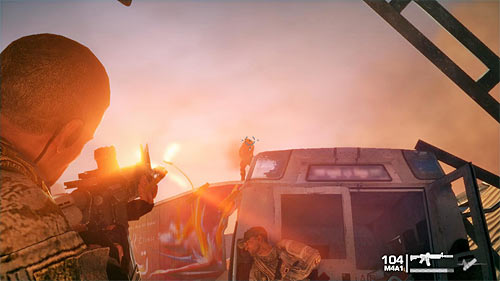
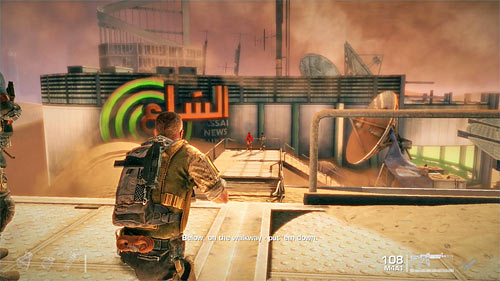
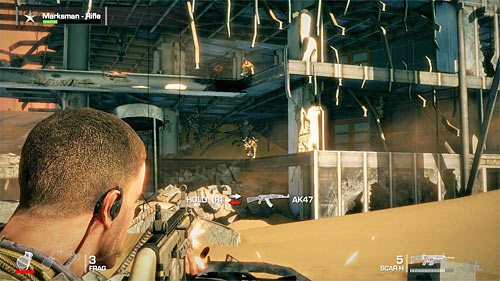
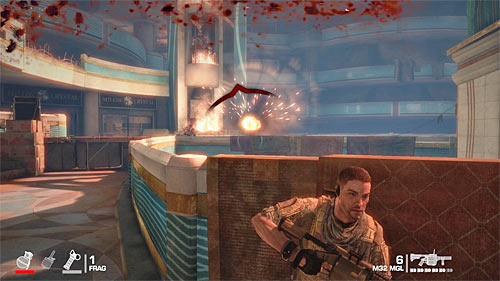
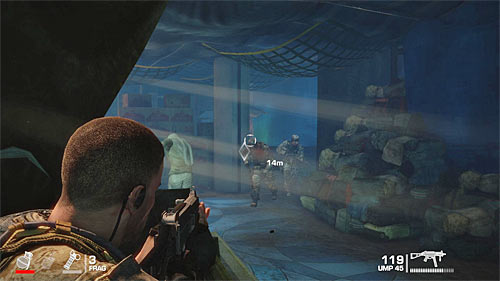
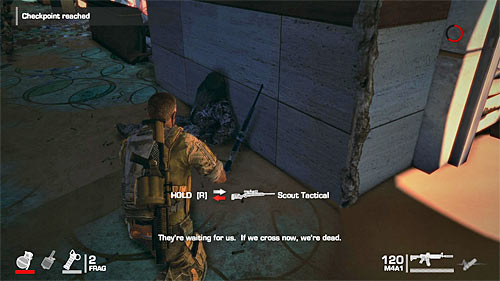
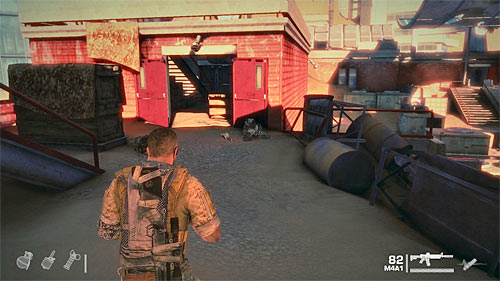
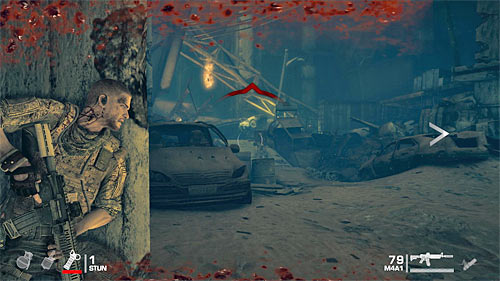
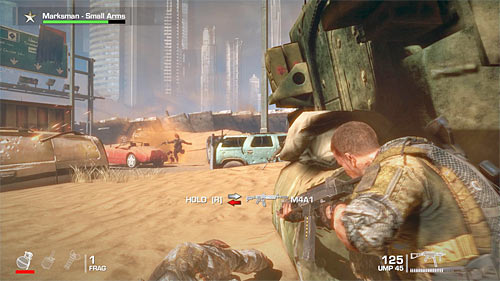
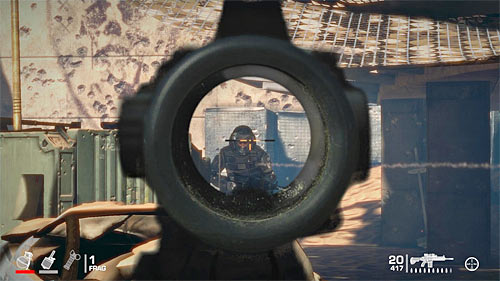
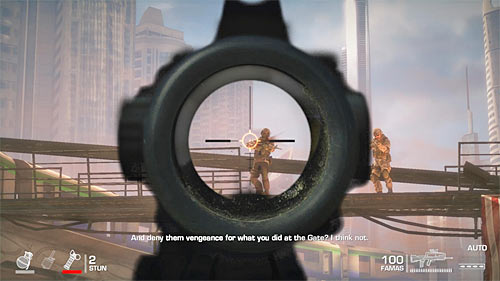
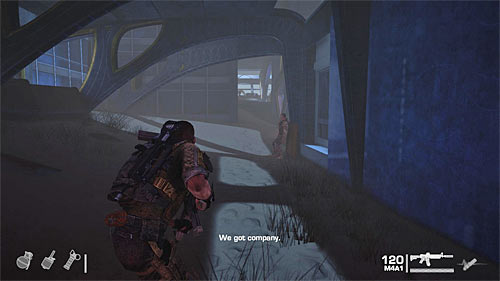
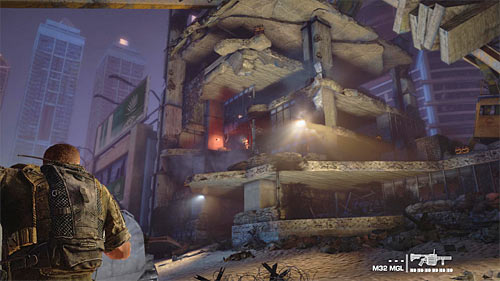
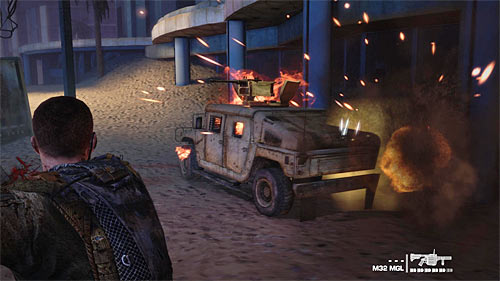
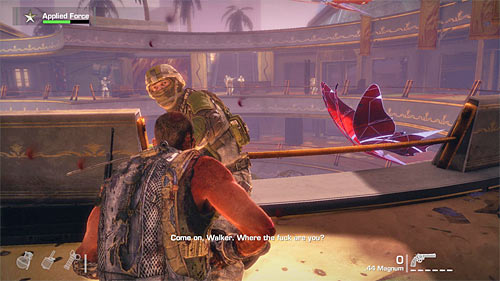
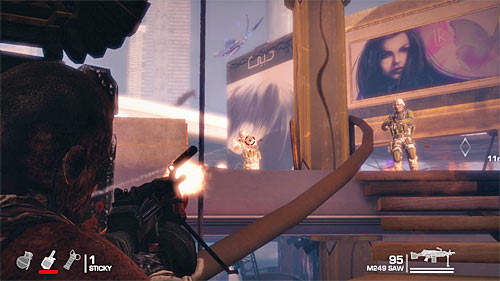
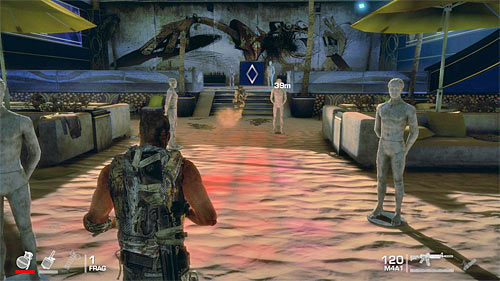
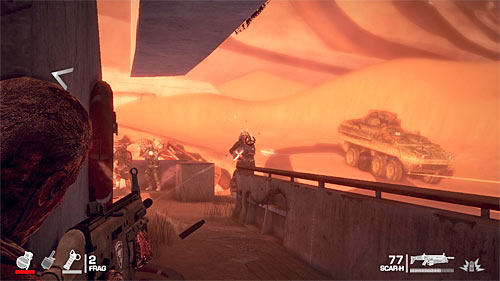
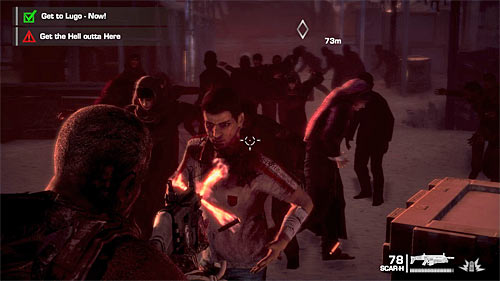
After reaching the area shown on the above screen, first approach the transmitter, at which Lugo has stopped. Then examine the jeep, which Adams is interested in. This will lead to displaying a cut-scene on meeting the first group of armed and hostile refugees.
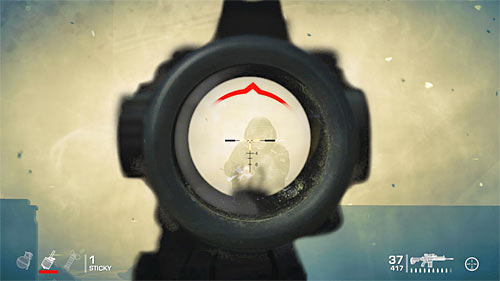
Do not wait for the end of conversation, but aim at a place indicated by the game - at one of the shutters of the sand filled bus. After that action quickly get rid of those enemies, who were not buried by sand.

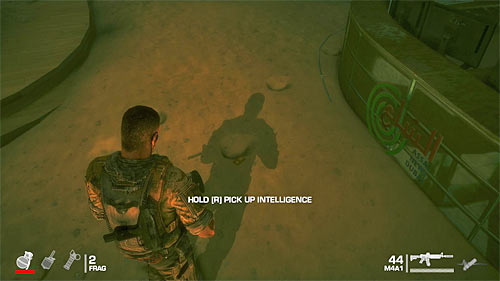
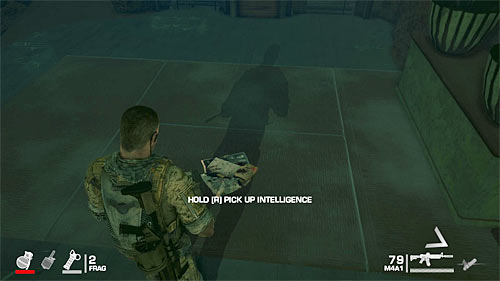
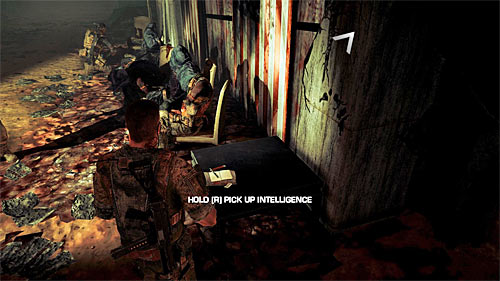
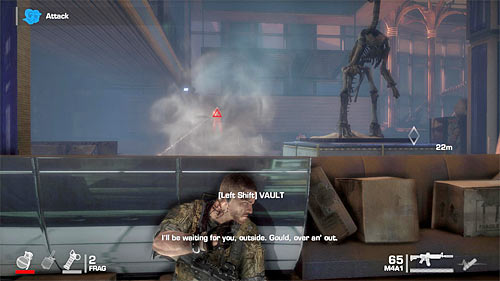
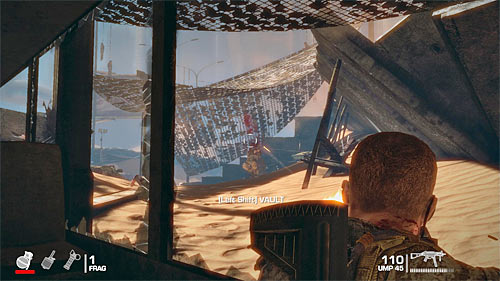
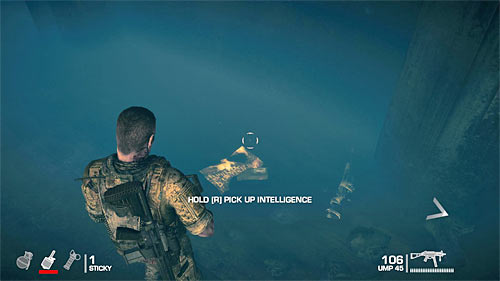
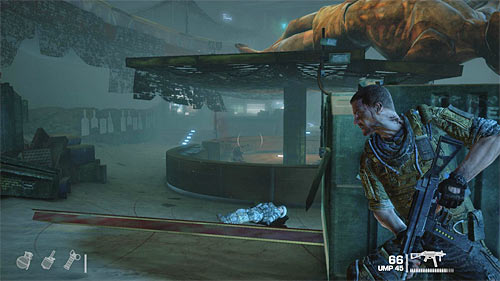
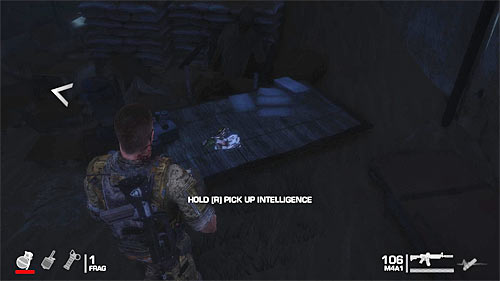
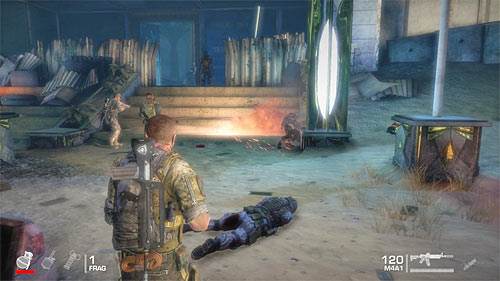
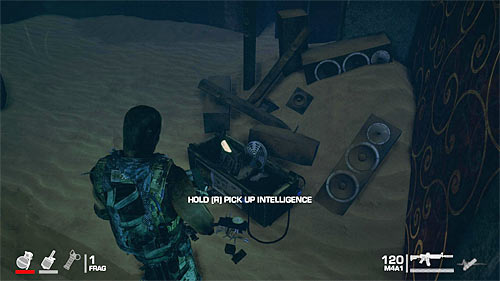
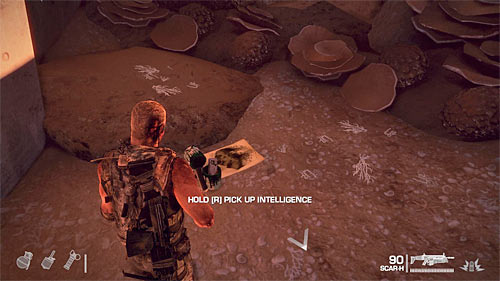
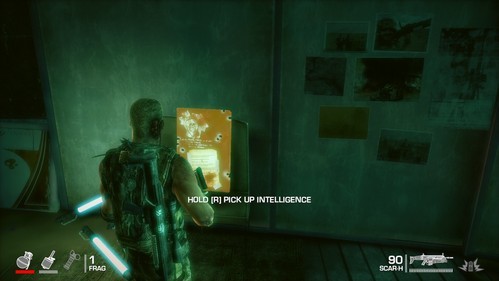
Do not run after your team-mates right away but stay for a few moments at ambush place. Look here for Intel Items shown on the above screen - Conrad Confession Letter and pick it up (hold R key).
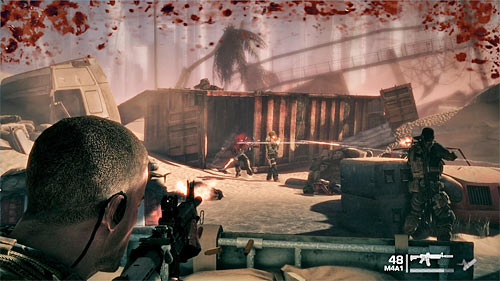
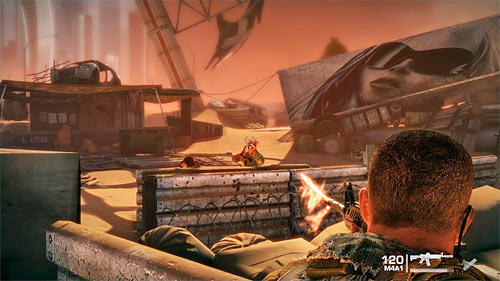
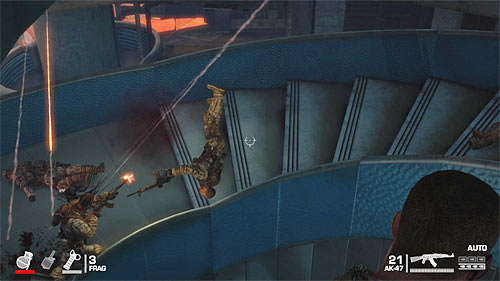
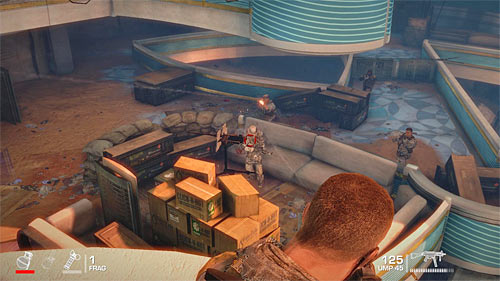
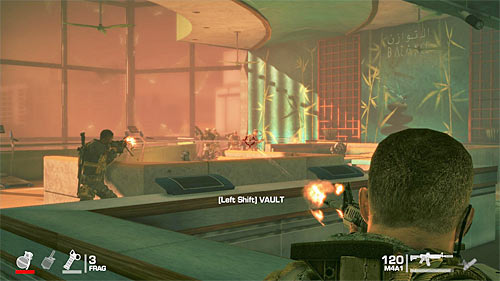
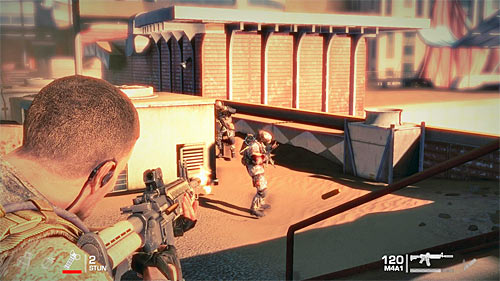
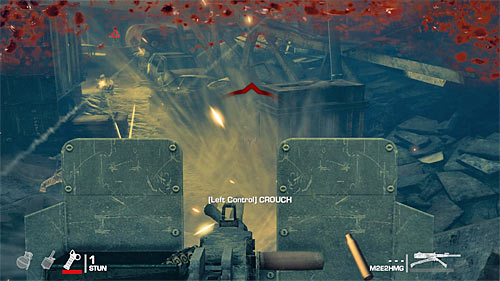
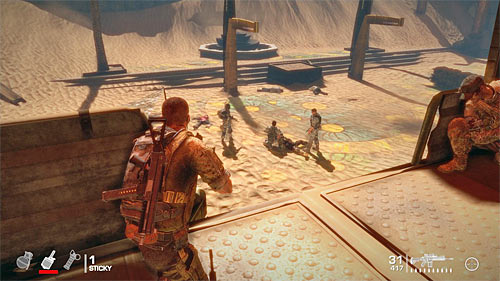
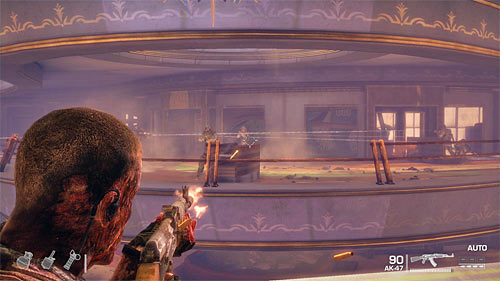
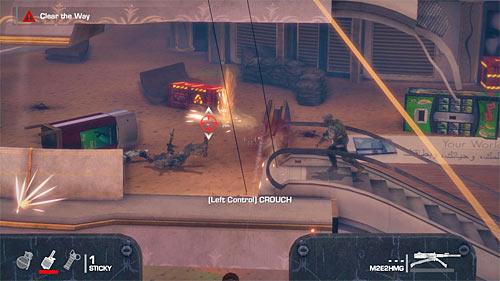
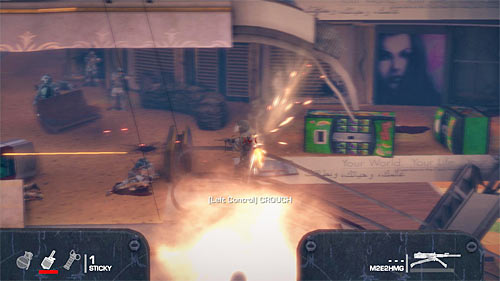
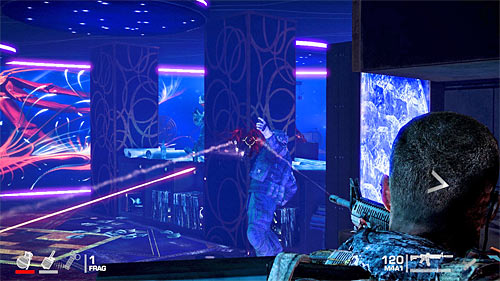
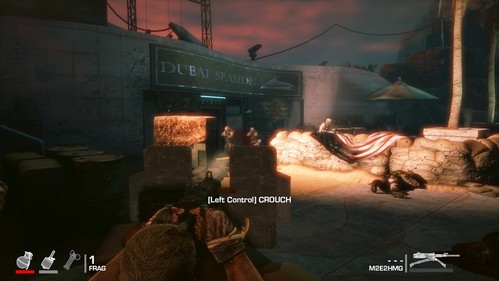
After reaching new area, quickly take cover behind nearest cover. Start with eliminating opponents standing on the platform to the right (screen above|) and then deal with these in front of your team (it is worth to target cylinders). After that take care of some bandits who will come running from the left.
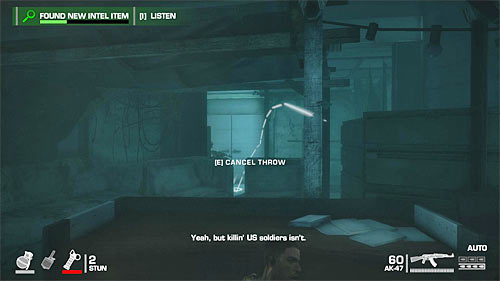
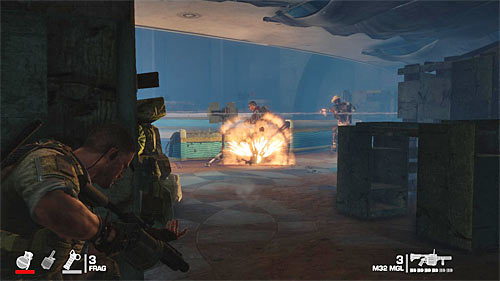
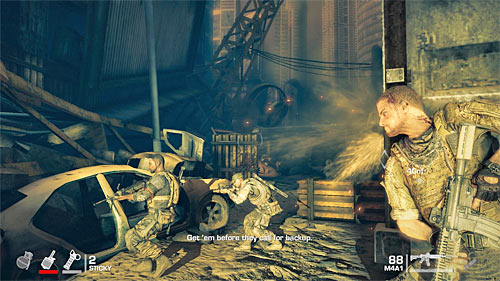
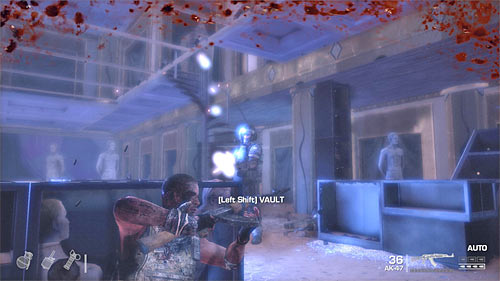
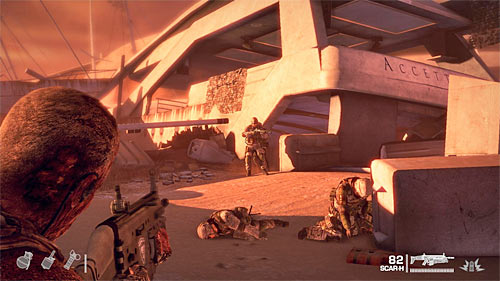
Go to the next area. Again, you have to take cover quickly. It is also a good opportunity to test flash grenades. Turn towards the bus, where enemies are hiding and press MMB to order your subordinates to throw the mentioned grenade.
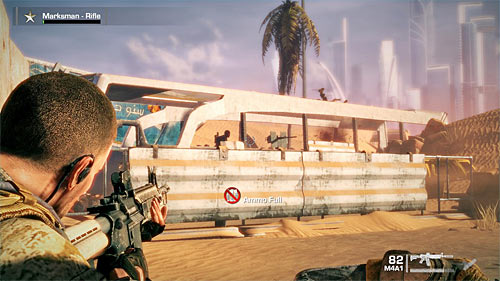
Wait until the grenade explodes and quickly shoot enemies in the bus, focusing on the machine gun operator. Also take care of bandits standing on the bus's roof. After the fight, go through the bus, used by refugees as a fortification.
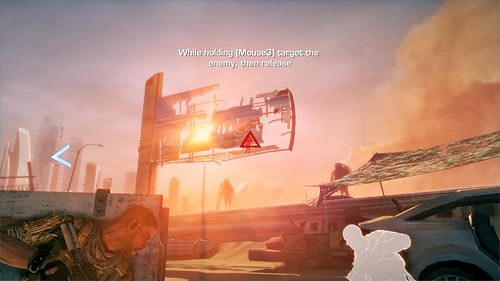
When the new fight begins, the game will propose you to test one more mechanism connected with giving orders to your subordinates (in this case it is Lugo, a sniper). Turn the camera to an enemy indicated by the game, hold MMB and point the red triangle on mentioned opponent. Now release mouse button, marking the refugee to be killed.
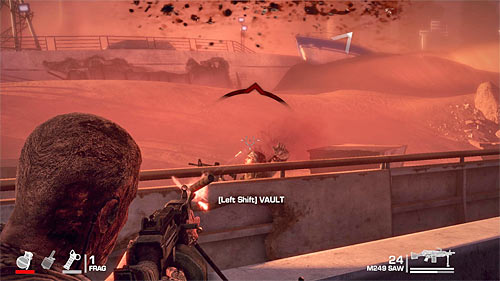
Wait until the sniper eliminates the threat and move forwards, taking cover behind one of the low walls. First take care of enemies who will appear on the bus's roof and on the container. After that attack armed refugees who will come running from one of the containers.
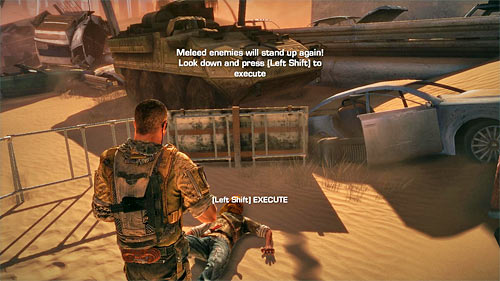
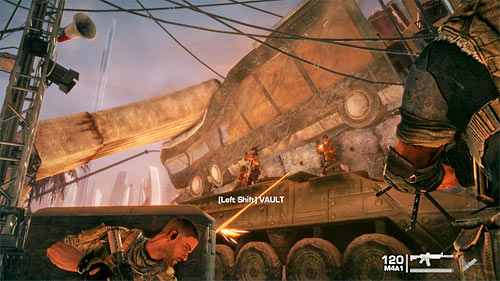
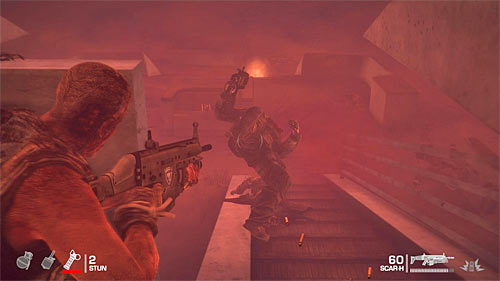
Make sure that you've eliminated all enemies and enter the container, from which some of them run out. Go to the other end of the container and perform melee attack (left SHIFT). According to the game hint, walk quickly to the fallen enemy and finish him (left SHIFT again).
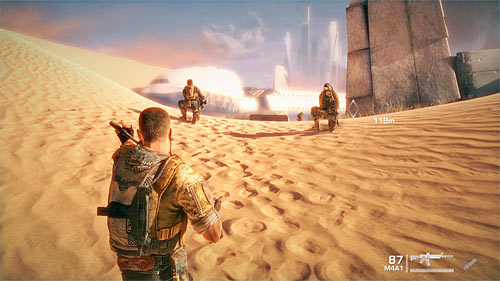
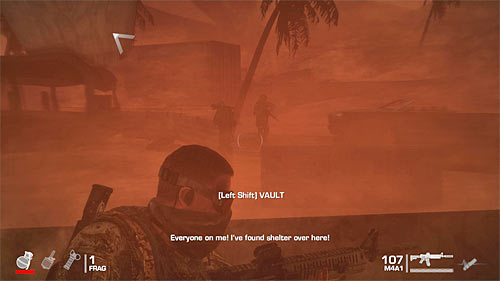
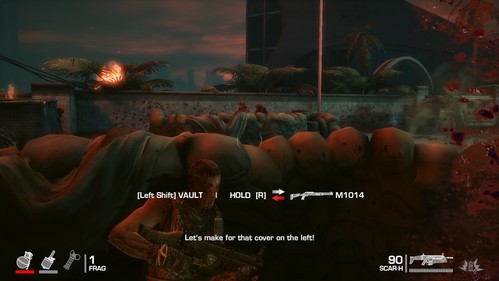
Once you regain control over Walker, start running (SPACEBAR) towards fortifications visible in the distance. Quickly take cover behind one of the nearest covers and listen to plan of your subordinates to attack enemies from the flank.
Place yourself at the edge of the cover and according to the game hint hold W key and SPACEBAR, forcing main character to run to the next cover. Now move to the left, using other covers.
Your task is to sufficiently get closer to positions occupied by refugees. Attack them by surprise. Elimination of enemies should proceed without any problems but you have to watch out for enemies who will appear on the roof of a small hut. After the fight, choose the only available passage, to which your subordinates will go.
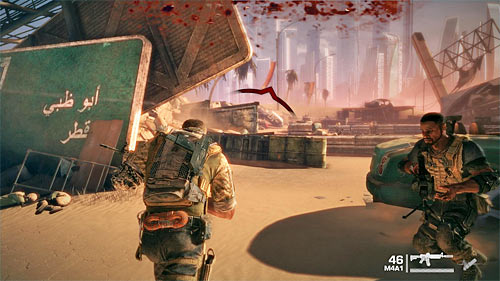
After you regain control aver Walker, move towards the plane wreckage. According the suggestion from your team members, it would be good to attack local enemies by surprise, so crouch (left CTRL) and use the silencer (C key). Only now approach the area, where fight takes place.
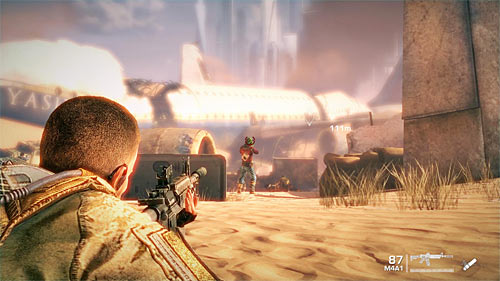
Aim at any enemy who are turned away and make a single shot, preferably in the vicinity of his head. Your allies will automatically eliminate remaining targets of this group. Now move a little further and repeat the pattern described above - kill any opponent, letting your subordinates to take care of the rest.
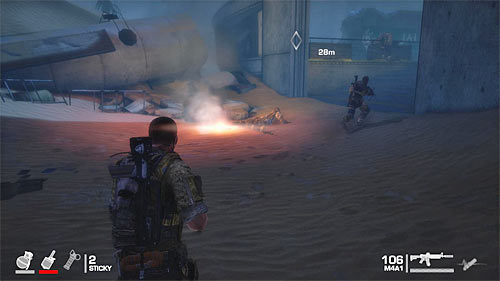
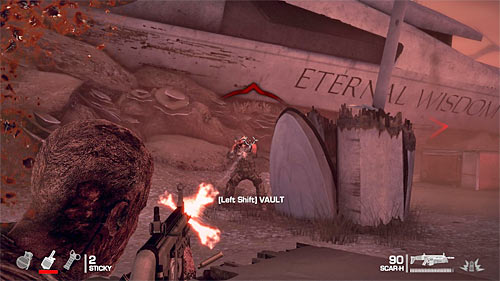
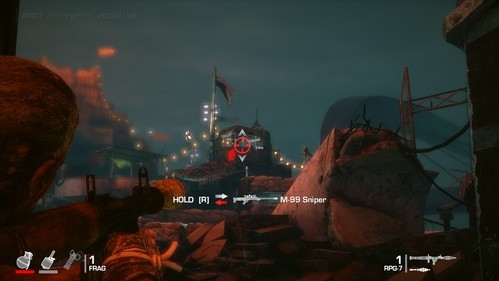
Get ready because soon you won't need the silencer anymore (you can remove it by pressing C key again). Start attacking enemies who appear on the left plane wing. During the fight particularly watch out for the refugee with the rocket launcher, not letting him shooting if possible.
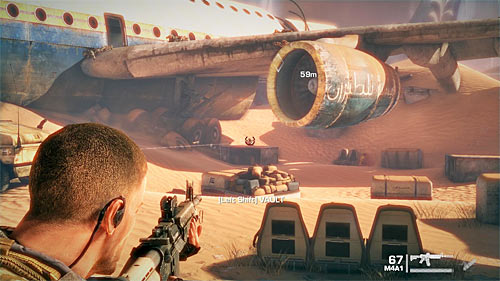
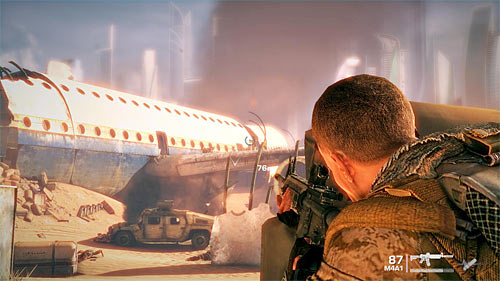
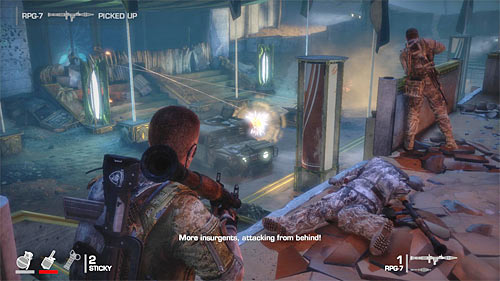
Next enemies will show up under the left plane engine and near the entrance to the plane shown on the above screen. It is best to attack them from a distance, shooting carefully. You can also try to attack from the flank or order your subordinates to do this but it is not required for success.
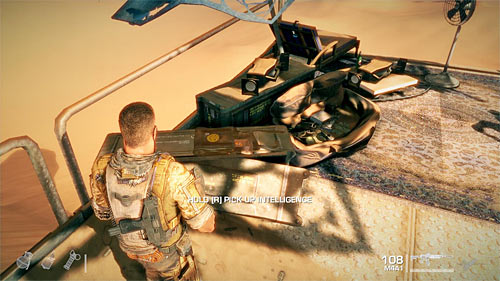
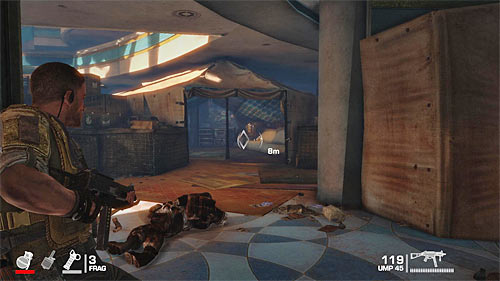
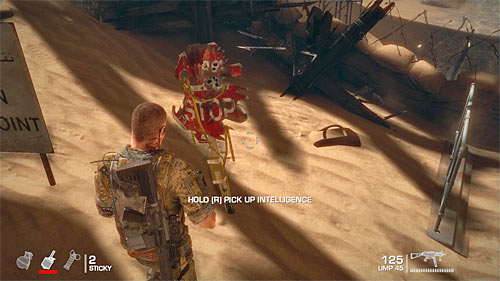
After clearing the area around the plane head to its entrance mentioned before, but watch out for two more bandits who can appear here. After eliminated them focus on finding Intel Item shown on the above screen - Damaged Black Box.
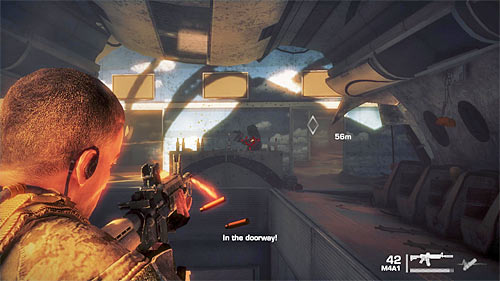
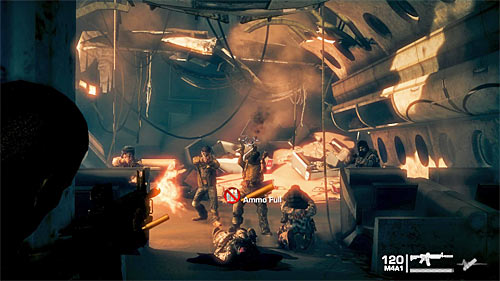
Enter the plane board and quickly turn around, dealing with two bandits who will probably try to attack you by a surprise. Wait until your allies will join you and after that start clearing the plane of enemy units.
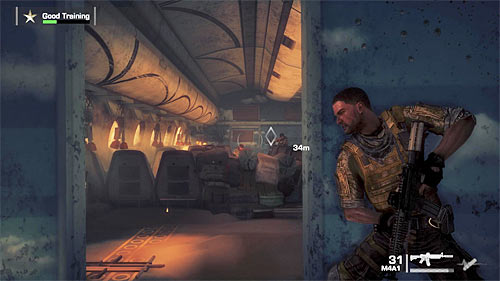
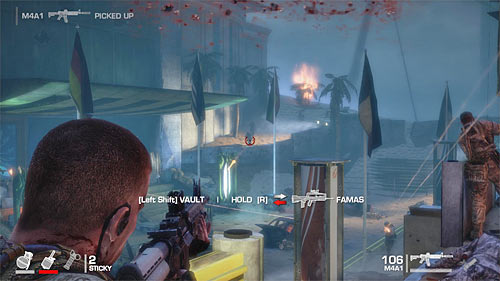
Depending on your preferences you can stay inside the plane all the time, placing yourself at successive passages or choose the left wing, thus reaching the place from which you can surprise your enemies. Keep moving towards the cockpit.
After reaching your destination, the game will display cut-scene showing refugees holding a hostage. You can't linger here because otherwise that person will die. Start with rapid shooting a thug who aims his gun at the hostage and then quickly eliminate his three colleagues. This is the end of this chapter.
Follow your team mates. Stop at the same place as them and consider eliminating two guards by surprise. To do this, aim one of the enemies by holding MMB. It doesn't matter which person you'll aim, because both enemies will be eliminated.
Stay on the place and explore the balcony to the left, finding Intel Item - Radioman Tape - Welcome to Dubai. Now you can move to the lower platform and follow your allies. Quickly eliminate single enemy, who will try to stop you and focus on the crate, inside which you can find grenades. Take frag grenades by holding R key.
Go towards the room visible in distance and watch out for enemies who will appear inside. You can eliminate them with weapons or just obtained grenades. In the later case you might hold Q key longer to carefully plan the trajectory. I do not advise storing grenades because main hero can carry limited amount of them and there are two more crates with grenades in the area.
Carefully approach the room guarded by enemies, trying to stop them from using the nearby machine gun. After securing the area jump inside the building and keep fighting enemies, remembering about taking cover. Pick up more grenades from the crate found along the way.
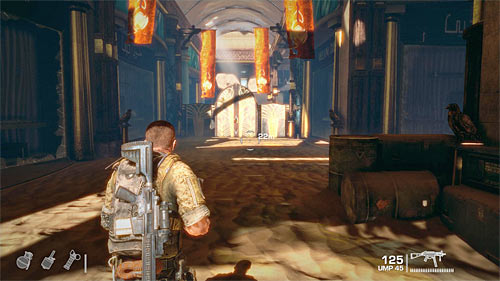
Move towards the green railing. Make sure that enemy forces are not attacking from the left and deal with opponents downstairs. It is best to use grenades against them, taking advantage of height. After the fight pick up grenades and go to the stairs leading to the TV studio.
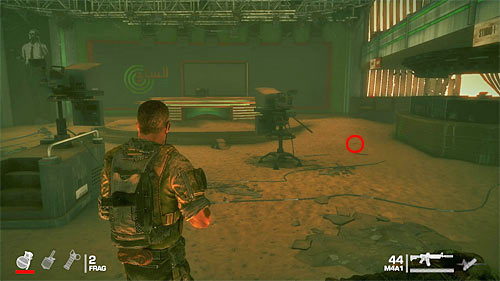
I advise to explore this area carefully because you can find another Intel Item at the place shown on the above screen - Sandstorm Cover-up. Only now choose only possible passage to the next location, watching another cut-scene.
Move forwards. You can ignore fleeing enemy because there is no reward even if you eliminate him using the silenced weapon. Stand at one of the covers and attack enemies who gathered at the bottom. It is best to use grenades from time to time.
Equally important is to take care of two snipers places on the rooftop of the right building. If you do not want to kill them yourself, you can order to do this your subordinate (hold MMB). It is worth noting that there are some ammo sheds and grenade crates in the area. You should pick them up of course.
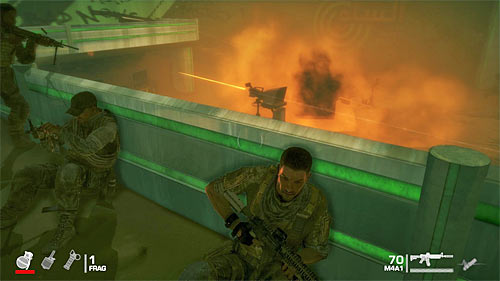
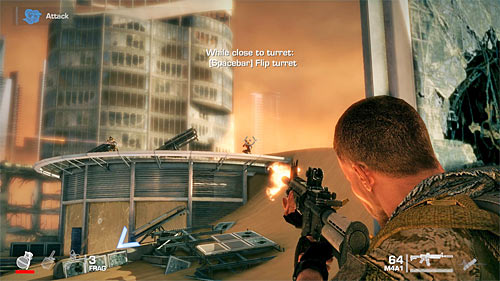
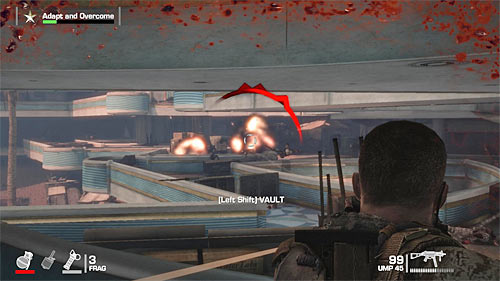
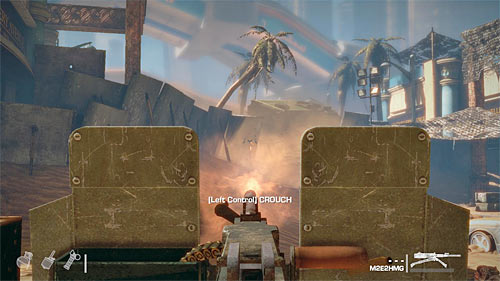
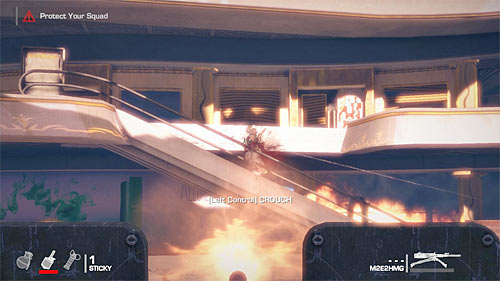
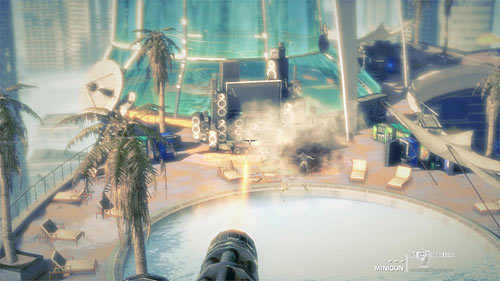
After preliminary clearing the area, jump down. Start RUNNING forwards, heading to the inactive stationary gun. Take cover near the gun and after recovering your health partially, turn the gun by pressing SPACEBAR. Now you can attack new enemies running towards you and it is best to eliminate them by shooting at shutters of the right building, because they will be then buried with sand.
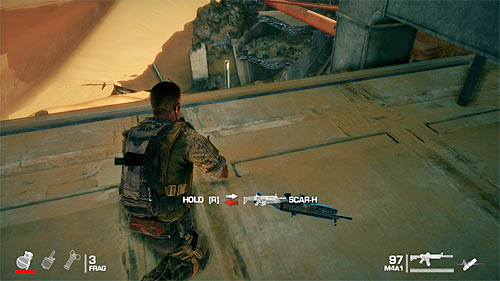
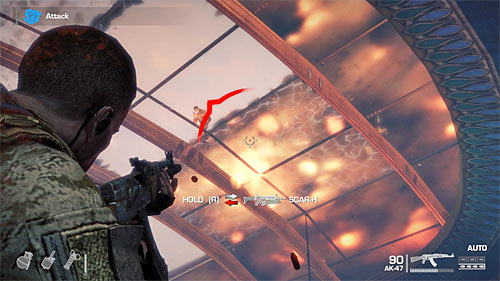
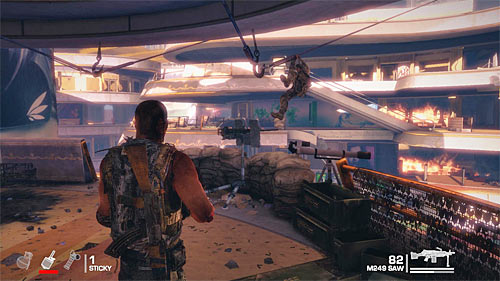
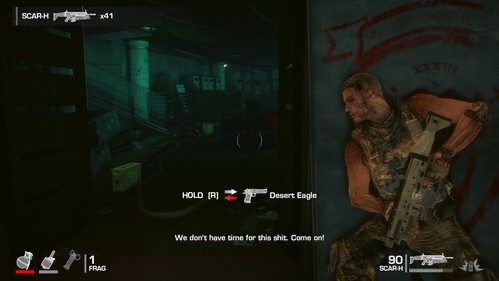
Eventually you have to secure the entire area. Now you can move forwards. Along your way you should find SCAR-H gun (screen above) and I strongly recommend picking it up because it has a grenade launcher mounted on it (you can change the fire mode by pressing C key). Jump down and approach the Nest, where you'll fight the main battle in this chapter.
Sprint to the small wall located in the left. You'll find there a shed but I do not recommend using it now, until you use all ammo for your main gun. Attack nearby enemies, helping yourself with grenade launcher and grenades. In this case you should of course aim at larger groups of enemies.

Fast elimination of enemies occupying upper floors of the building is not so crucial now. But watch out for small groups of enemies that appear on dunes located to the right (screen above). Do not allow them to attack you from the flank.
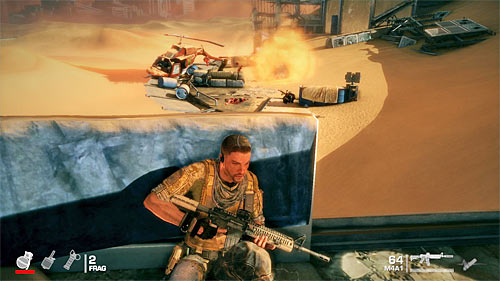
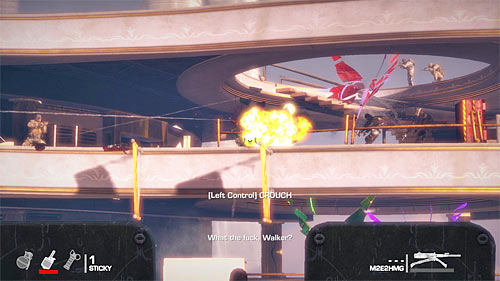
In a further phase of the battle you'll receive a warning from your colleagues about opponents with rocket launchers appearing in the area. They will occupy one of the balconies (screen above) and you should of course eliminate them quickly. If you fail, they will destroy the wall you're using as a cover. In such case quickly run to the right, placing yourself near your team-mates.
Next fights are very similar. So watch out particularly for enemies appearing in the front of your team and on the right. Do not forget about possibility of picking up weapons of defeated enemies and designating targets for your subordinates.
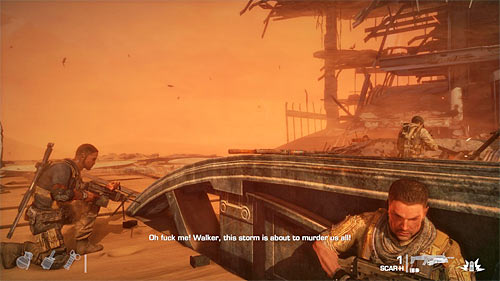
This battle will be over once the powerful sandstorm comes (screen above). Luckily you do not have to respond for it in any specific way, so stay in cover, waiting for further developments.
In the final section of this chapter prepare for very simple interactive scene, where you have to eliminate some enemies using your secondary weapon. The game will load the next chapter soon.
Use any stairs to go down and then head to the opposite end of the hall. Get ready because in just a few moments you'll be attack again by enemy forces. I suggest placing yourself on one of the side balconies or behind the middle cover, turning toward the start place. Of you have not enough ammo for your current weapon then get interested in a Kalashnikov near one of the railings.

Right after the battle begins, focus on two main issues. First of all, do not let opponents get close to the place occupied by you, attacking them in the right moments. Fortunately your subordinates should warn you against this type of attempts. Second, try to avoid grenades thrown by bandits from time to time, quickly moving away from places where they explode.
Slightly less important thing is to attack enemies that appear at the damaged building's rooftop, though you shouldn't ignore them. I suggest indicating them to be killed (MMB) and destroying glass roof parts, increasing chances to eliminate them in this way.
Repeat all above steps until you eliminate all enemy forces. Opponents soon will throw C4 to the room so you need quickly get out from here. As a result head to the left, running towards a metal gate shown on the above screen.
Move forwards. After reaching the new room, turn left, jumping down on the lower ledge. Get interested in a crate with grenades and Intel Item - Looters Bullets. The game soon will display a cut-scene with agent Castavin. Note - if you haven't managed to collect Intel data before, you can do it also after cut-scene.
After regaining control over Walker, start shooting at enemies visible in the distance, using covers all the time. During battles fought here it is highly recommended to destroy glass elements of the ceiling, burying your opponents with sand.
Keep moving forwards, using sprint option to reach further covers. Do not stop, because your opponents will probably use grenades. Watch out also for a machine gun post a little bit further, which can best be secured with grenades. After a successful action it is of course worth to run up to the stationary gun, rotate it (SPACEBAR) and use it.
Your priority is to eliminate opponents in the adjacent room and those who will come running from the dunes visible in the distance. Depending on your preferences you can use the stationary gun all the time or move to the right balcony, from which you could see the entire area (screen above).
After the fight look around for supplies (M249 SAW among other things) and then head to the building's exit. Move forwards and then slightly turn left. Try to locate and eliminate any local enemies, shooting from behind a cover. Fortunately despite of the sandstorm you do not have to hurry up, so I recommend not proceeding until you make sure that the area is secured.
Move to the entrance to the adjacent building, which should be indicated by the game in a moment. Be ready to eliminate few enemies along your way there. After reaching the destination, use the ammo crate and then rappel down the elevator shaft, which will result in ending this chapter.

Follow the only available path. Noteworthy is that initially you won't encounter any enemies so you do not have to watch out in any way. But it is worth to look around, because along your way you can obtain Intel Item - Child's Doll. Only after collecting this secret, head towards the stairs leading to the lower floor of the building.
Approach the large hole in the ground and press SPACEBAR to jump inside. Prepare for more exploration of the rooms full of candles and bodies of executed soldiers. This scene will end after you reach the room, where agent Castavin is interrogating a hostage.
After watching a cut-scene you can act in two ways. First option is to shoot the mentally unstable soldier (screen 1). Another possibility is to not attack him (screen 2) which will result in getting known his personality and releasing him.

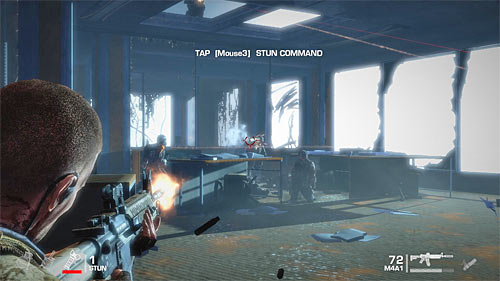
Regardless of the chosen variant, look around for the stun grenade crate. It is worth noting, that type of grenades can be changed with mouse roll (by default) and you should stick now to stun grenades. When you're done here, use any of interactive hooks and rappel down (SPACEBAR).
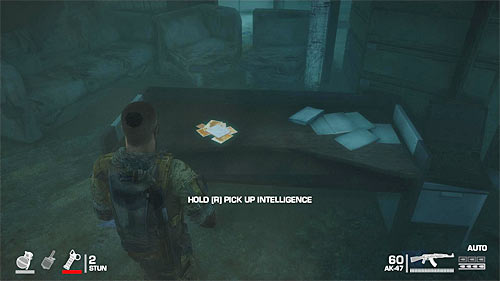
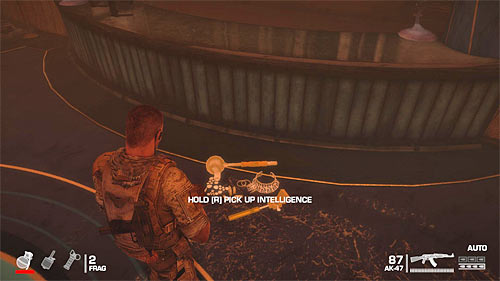
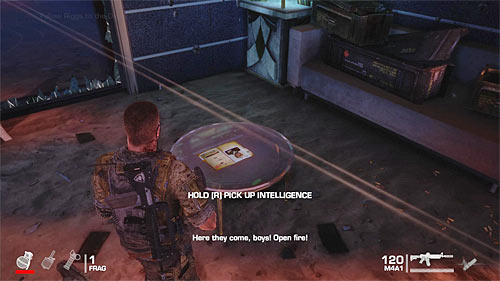
Once you get to the new area, get interested in Intel Item lying on the table - Castavin's Diary. It is worth noting that if you do not pick up the secret now, you'll be able to collect it after the battle described below.
Do not wait for the end of conversation with your team-mates, because the area is full of hostile soldiers. I suggest starting with throwing a flash grenade at the place shown on the above screen.

Right after the flash grenade explodes, run to the left and attack hostile soldiers gathered in the corridor. Of course use the fact that they are stunned and turned to direction of your helpers. After the battle wait until one of your subordinates unlock further passage. This is also a good moment to examine bodies of defeated enemies in search of ammo and better weapons (I recommend to use UMP 45 as a secondary weapon, because it is easy to obtain ammo for it).
Move towards the shutter visible in the distance and shoot two soldiers running after civilians. Stay at the cover and jump over the shutter only after elimination of all visible enemy units.
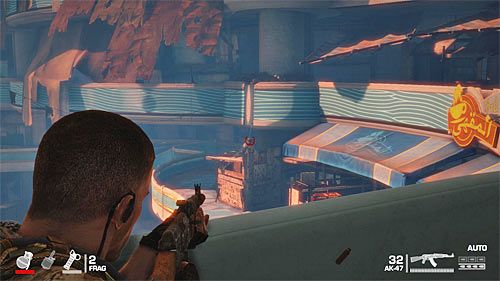
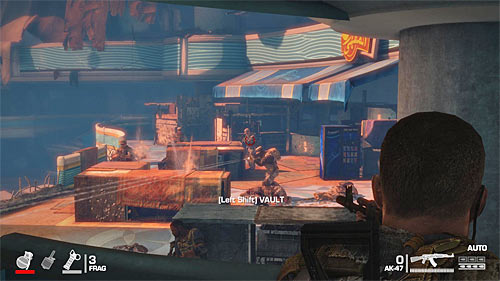
Turn right and start moving through the local market. Particularly watch out for enemies appearing on the left side, especially that some of them use grenades. Do not forget about looking around for grenade crates, so you can use them often.
There are several bigger paths leading to the market exit, but I suggest choosing the left one. You'll be able to effectively eliminate new opponents and you'll easily approach the rest of enemies, who are fighting from the beginning.
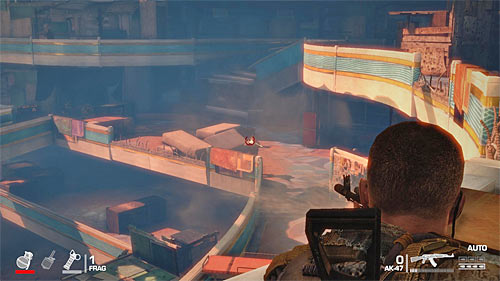
Make sure that you've eliminated all enemy soldiers and choose only possible passage to the next location, looking around for valuable supplies. Eventually you have to reach the closed door (screen above) and wait until the passage gets unlocked.
Prepare for a series of new fights, but at this moment, you do not have to attack anyone yet. Go to the left, stopping after reaching large stairs. Take cover and use the rest of your team to eliminate all enemies trying to get to the floor occupied by you. Only after that go downstairs.
Of course be ready to get rid of possible survivors on your way down to lower floor. Stop once you get there and carefully approach outer balconies. Focus primarily on murdering the soldier shown on the above screen (you can kill him by yourself or order your subordinates to do this), because he got a grenade launcher. Eliminate also standard soldiers, using the advantage of height and helping yourself with grenades.
Look around for a small room with grenades and again use the stairs. Be careful because once you approach next floor of the building, a large group of enemies will appear in the distance. Also in this case you should use grenades, especially that enemies will probably stand near each other.
After elimination of the group mentioned above, move forwards trying to kill opponents who will appear on you floor, as well as soldiers on floors below. I strongly recommend picking up a grenade launcher (M32 MGL), which was in possession of one of previously killed soldiers. You should also look around for ammo crate.
Eventually you have use small stairs leading to the lower level. Be ready to face other soldiers, who will appear in the distance. To eliminate larger groups of them you might use the grenade launcher or grenades. Do not let them get close to you and remember about taking cover.
Move forwards. If you want, you can surprise enemies gathered around a stationary gun on the lower floor (screen above). In addition look around carefully for ammo and grenade crated. Kill all enemies visible from current floor and only after that move to the next stairs.
After Walker jumps down, quickly stand behind the nearest railing. You have to neutralize a stationary gun visible in the distance and it would be good to do this by shooting at explosive object to the right from it. After killing the gun operator, attack local enemies. You should use grenades here, especially that there is a supply shed nearby. Carefully move forwards, eliminating any enemies you've missed previously.
Temporarily ignore you allies and do not try to approach neither the stairs nor ammo crate located on the left, because you could find yourself under heavy fire and could die easily. Instead, immediately choose the right passage indicated by the game (screen above).
Prepare for a walk through several narrow corridors. The game will allow you to surprise two hostile soldiers and in the same time will force you to repel an attack of several other opponents, but this should not be a big problem.
Soon you should approach the stationary gun, which you have to take over. It would be of course good to attack by surprise enemies who has gathered here, with some help of grenade launcher or normal grenades. After clearing the area run to the gun and interact with it (SPACEBAR).

Start shooting at enemies gathered at other stationary guns in front of you. Elimination of them should be easy, because they will be looking at your allies. Watch out more for soldiers who will be regularly joining the battle, jumping down from upper balconies.
Start shooting at one of the large shutter only after receiving mentioned mission objective, because you're not able to destroy it earlier. Prepare for very impressive scene of burying with sand all enemies who have attacked your team-mates.
In order to end this chapter you only have to jump down on sand at place shown on the above screen.
Follow your team members, jumping into a large hole found after few moments (SPACEBAR). You'll receive first objective of this mission after reaching the balcony shown on the above screen and you have to turn right then. It is worth noting that you do not have to be afraid of falling down accidently, because you're "defended" by invisible walls.
Walk over successive balconies, reaching place where you can rappel down to the rooftop of the opposite building. Wait until your team reaches the rooftop and use the nearby stairs. Along your way you should find M4A1 carbine and if for some reason you do not have better weapon, you should pick it up, especially that you'll also get full ammo for it.
Move carefully to the stairs and notice that there are two guards standing on the mezzanine level. It would be best to eliminate them without triggering alarm by using a weapon with a silencer or indicating one of them for your team-mates to be killed (MMB). You can continue your march.
Carefully approach larger hall, occupied by large group of enemies. It would be best to eliminate them by surprise, so at least some of them will be killed immediately.
Once the proper fight starts, I suggest running inside the hall and taking cover behind one of the stone walls. Watch out for enemies covering behind covers and bandits who come running from the left side of the stairs (screen above). It would be good to position yourself next to the railing and eliminate enemies standing on the upper floor of the main hall.
After the fight examine enemies' bodies (you could find M249 SAW among other items) and use the ammo and weapons sheds. Now you can choose stairs leading to the lower level. Once you get there, quickly take cover behind the nearby sofa and start attacking enemies visible in the distance. Watch out for your left flank, because some of opponents might try to attack you from that direction.
Keep eliminating enemies but try also to move forwards, remembering about taking cover. Particularly watch out for a group of opponents, who will come running from the side room. By one of the larger covers you can find ammo supply.

Make sure that you've eliminated all bandits and explore the side room shown on above screens. You'll find there Intel Item - (Dossier on Grey Fox). After that join the rest of your team and use the interactive hook to rappel down the line (SPACEBAR).
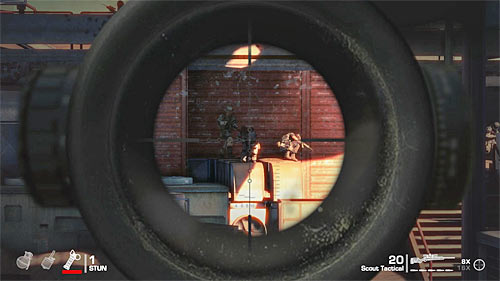
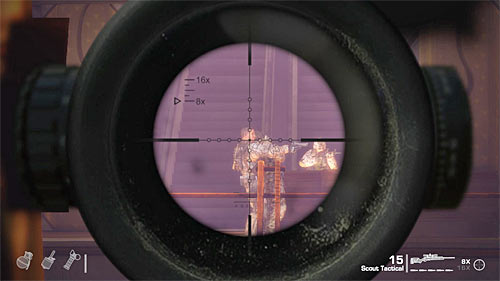
Snipers are occupying the rooftop of opposite building, but you do not have to worry about them now. Go to the left (you should stay in crouch position) and find the body with sniper rifle (Scout Tactical). Pick it up of course.

Move further to the left and place yourself behind one of the walls. Aim at any hostile sniper (you can recognize them by their laser sights) and eliminate them. Since your rifle has no silencer, the fight starts, so keep shooting. It is worth noting that you do not have to eliminate all snipers yourself, because some of them might be killed by your mates. Regardless of events remember about leaning out from behind your cover only for short moments.
Depending on your preferences you can stay with the sniper rifle or use previously used weapon. I suggest leaving the sniper rifle as a secondary weapon. Select main weapon from the inventory, jump down onto metal construction shown on the above screen and move forwards. Due to the fact, that soon you'll find yourself under attack, I suggest sprinting.
After reaching the rooftop of a new building, quickly take cover behind the nearest wall and throw grenades at enemies who will appear here. Prepare to attack those opponents who survived your previous action and try to get closer to the place occupied by you.
Once the proper fight begins, keep eliminating those enemies who try to shorten distance from your team. Also watch out for opponents on the left side. You might use the sniper rifle to eliminate distance target, but if you do not have such weapon, you can indicate those targets to be eliminated by your sniper.
You can end this battle in two main ways. First option is to march through the central part of the rooftop while eliminating all enemies on your way. Another option is to get to the rooftop of the left red construction (screen above). Performing that action would allow you to attack your enemies by surprise from the flank and gaining advantage of the height. You can also find there valuable weapons and ammo and grenade supplies.
Keep fighting until you eliminate all enemy units. Explore the area looking for supplies and then head to the entrance indicated by the game (screen above). Now you have to walk through the empty building. You won't encounter any enemies there and will find ammo crate when you reach the staircase. After reaching the exit, jump down and then jump over the railing.

Get ready, because in just few moments you'll lose ground under your feet. Try to eliminate enemies at the bottom before you land there.

Right after landing stay behind the pillar, where Walker takes cover behind by default. First deal with nearby enemies and then eliminate those, who come running from the distance. According to warnings by one of your team-mates watch also out for the mad knife fighter (screen above), killing him before he can get close to the main hero.
After clearing the first room, carefully approach the entrance to the adjacent hall. Also in this case you have to watch out for knife fighter and a sniper, occupying left balcony.
Since new enemies should appear always in the same place and in groups, you might use grenades on them. You can also try to kill enemies when they rappel down lines, because then they are totally defenseless. Keep fighting until you eliminate all enemy units.
Look around for ammo crates and then leave the building. Grab the zipline and rappel down. Once you land at the new place, use the brie leading inside the building.
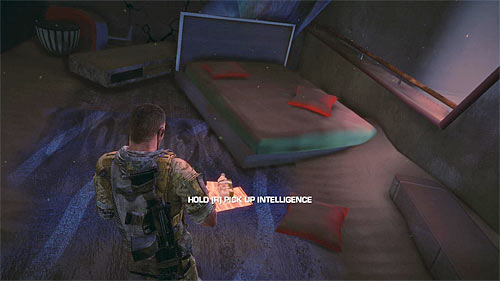
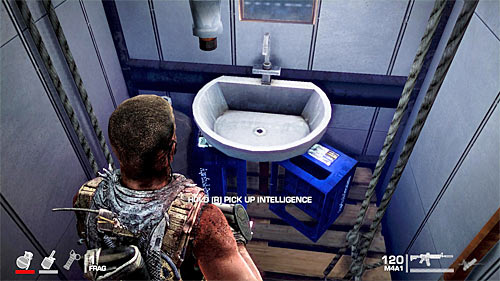
I suggest stopping here for the moment, because there is a new secret hidden in this area. Look for the stairs leading to the upper apartment floor (screen 1). After reaching the destination, turn right and go to the bedroom. Intel Item - Radioman Tape - Evacuation Cover-Up, lies on the floor (screen 2).
Return downstairs and start exploring rooms there. Fortunately you won't encounter any enemies so you do not have to watch out. Force in the door by kicking it (left SHIFT) and move forwards. Your target is the door shown on the above screen - force it in too (left SHIFT again). You'll watch effective cut-scene here and the chapter will end.
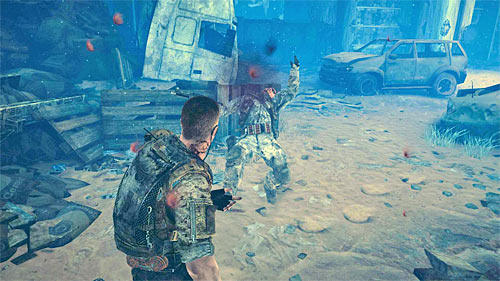
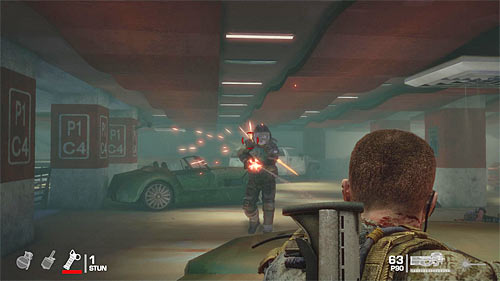
You start this chapter in a very difficult position, because you have only Desert Eagle pistol and you're surrounded by enemy units. Do not count on it that you can wait them through. You need to get rid of them all, including those who will join the fight later. I suggest starting the fight in one of two ways. First option is to wait until a hostile soldier approach from the left car wreckage where Walker hides behind. Quickly leave the cover and attack him in a melee fight (left SHIFT) and then finish him (left SHIFT again). After the duel pick up his weapon.
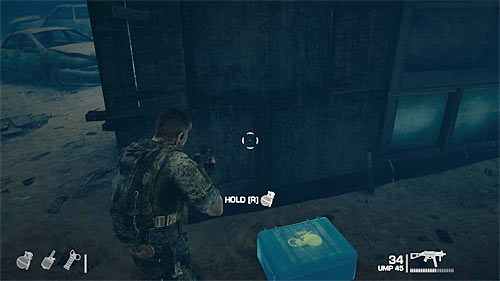
Another method is to attack enemies by a surprise, aiming at one of them with your pistol. After shooting him, run to the right finding a grenade crate and W1300 shotgun at the place shown on the above screen. If you're quick enough you could perform both above mentioned plans, so get the rifle first and then pick up grenades and a secondary weapon.
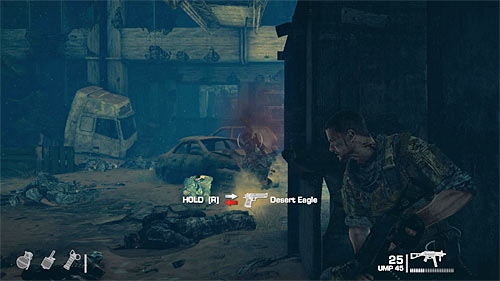
Once the proper battle begins, it is best to stay in the place where you found a grenade crate, shooting hostile soldiers from behind a high wall. Other covers are not so good because sooner or later enemies could surround you there and you would have to be very careful not to be killed.
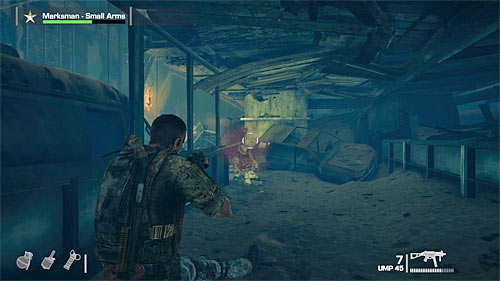
As previously mentioned, new enemies will be joining the battle regularly and you particularly have to watch out for these rappelling down the lines and jumping down from the upper balconies. Keep an eye of your flanks because it is almost sure that opponents will try to attack you by surprise. You have to defend yourself until you eliminate all enemy units, which will coincide with the arrival of the rest of your team.
Be sure to pick up ammo and supplies from defeated enemies. In order to continue your march, you have to approach a small bridge. Be careful because several new enemies will appear in this place, so eliminate them before exploring further part of the area.
Make sure to examine a crate on your way because you can find there sticking grenades, which you hadn't use yet. Now place yourself at the container shown on the above screen and shoot enemies visible in the distance, first eliminating those on upper shelves.
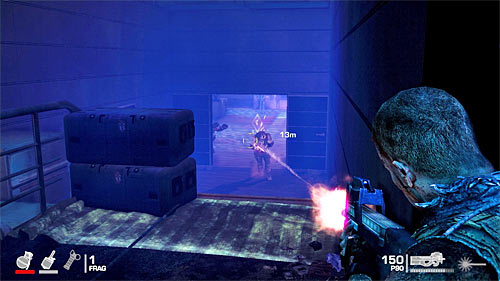
Be careful because there is a machine gun position in front of you and it can be already occupied once you get close enough. Depending on your preferences you can eliminate its operator with a rifle shot, throw a grenade at him or ask your team-mates for help.
Keep exploring the area. Soon you'll be able to choose one of two paths - left or right. Both paths are very similar and in both cases you'll encounter new enemies. After fights pick up supplies and approach the nearby gate, finding out that it is locked.
According to suggestions of one of your allies, turn back and quickly run to the previously secured stationary gun. Stay focused, because first group of enemies will appear close to your position, jumping out from the container you were passing by earlier (screen above).
Initially focus only on attacking enemies on lower paths, heading to the locked gate. You should not have big problems with that, but if you get hurt, you might crouch to regenerate health. This is done by pressing left CTRL, but you won't be able to fire accurately. I also recommend aiming at the large fuel tank visible in the distance.
Start shooting at distant enemies only after securing nearest area. Particularly watch out for snipers and soldiers with RPGs, who should be killed first. When needed, shoot also explosive cylinders. You have to defend yourself until further passage is unlocked.
Before you leave this place, it would be good to explore the container, from which some enemies came running previously, because you can find there grenade crate. After that, go to the new passage, jumping down to the large hole. Do not be afraid - there are no enemies in corridors, only bodies of murdered persons.
My advice is to look around carefully here, because along your way you'll find Intel Item - Interrogator Confession. Eventually you have to reach out of order lift with a hung body. The game will display here longer cut-scene informing you about an ambush.
Be ready to join new fight right after regaining control over Walker. Remember to eliminate not only enemies in front of you, but also opponents standing on the right. You have to move here in clockwise direction, because the passage to the right from the start place is blocked.
I strongly advise using grenades during this battle, because many opponents will stand close together. What's more, you'll find a grenade crate along your way. Eventually you have to break through to the exit from the oval room shown on the above screen.
All surrounding rooms are heavily defended by hostile soldiers, so it is very important to use covers wisely, running to next ones only after securing current area. Watch out for the grenades thrown by enemies from time to time. You can also pay them back, because you'll find along your way yet another grenade crate.
In the next part of your march you should definitely slow down, because in the left corner you'll encounter a machine gun. Depending on your preferences you can eliminate its operator with a shot from a distance or mark him to be killed. You can also blind enemy by shooting at objects located over him.
Your target is the corridor shown on the above screen. It is located right from the secured gun. Deal with rest of enemies and move forwards. This will result in displaying a cut-scene informing you about hostile helicopter appearing in the area.
The escape scene is quite difficult. ONCE YOU REGAIN control over Walker, move forwards using of course sprint option (SPACEBAR). YOU CAN'T stop anywhere nor slow down, because you'll fail in such cases. Get ready, because at the place shown on the above screen you have to turn right.
Use the stairs and do not rely on the fact that helicopter can't reach you now, because you still can't stop. After reaching the new area, slightly turn right and run forwards, ignoring surrounding explosions. This chapter will end soon.
Go down the stairs to the main hall. Ignore a single person who will fall down through the roof, because temporarily you're safe. I suggest looking around the hall, because you could find here a grenade crate among other things (it is located on the left balcony and you should use other stairs to get there).
Move to the glass wall indicated by the game, place yourself aside and start shooting. After few moments the glass will break and you'll be able to use the newly unlocked passage. Move forwards. The game will soon display longer cut-scene and update current objective of your mission.
Move to the right. Along your way you'll find several types of weapons but you probably have better ones. Eventually you have to reach the place, where you can use several interactive hooks. Rappel down and after landing go through the ravine. Eventually you have to get to the large square with car wrecks and this is where the first battle of this mission will take place.
I suggest placing yourself behind the orange car, because you can find a grenade crate there. Note also, that the game gave you an opportunity to attack your enemies by surprise. It is definitely worth to do it, killing someone or marking him to be killed.
Once the proper fight begins, watch out for opponent standing on the right part of the highway and start eliminating soldiers running from afar. It would be good to use a rifle which allows you to kill targets from a large range. Otherwise you have to wait until enemies get closer. Regardless of your tactics it is worth to use grenades regularly, throwing them at larger enemy groups.
After some time I suggest moving towards a large green military jeep and using it as a cover. Keep an eye on your left flank, because almost all enemies will come running from this side.
Next phase of the battle is connected with elimination of enemies hiding inside the bus wreckage and there would be nothing special in it, if not the fact that there is a machine gun position. Stun enemies with grenades if you can. Otherwise I suggest marking the machine gun operator to be killed or eliminate him from a safe distance.
Move towards the bus only after securing it. It would be best to eliminate new enemies who will rush towards you, from the inside of the bus. After killing them, choose the path located to the right from the wreckage, finding an ammo crate along your way.
BE CAREFUL, because after entering new area you'll be attacked from the left by second stationary gun. In this case you do not have to aim precisely at its operator because it is enough to destroy a small wall located to his left, burying the gun with sand. This action should coincide with the elimination of all enemy units.
Before you leave this area, look for a road sign shown on the above screen, located by the body of murdered soldiers. You can find Intel Item there - Radioman Tape - After The Storm. After obtaining the secret, find the grenade crate and choose the path where your subordinates are waiting for you.
After getting through the ravine you'll reach the area with burning bodies. Move a little forwards and then stand next to one of the covers. Start with eliminating two standard opponents and then attack the "elite" soldier. Be sure to take cover while aiming at him and use grenades when needed. After the fight you can of course pick up the heavy gun that was in possession of defeated soldier.
Move on, remembering not to get too close to burning bodies. Before you enter the new building, take a look to the left where you can find a sniper rifle and another Intel Item - Radioman Tape - Soldier Interview. Only now enter the building and go to its other end. The game will soon display a cut-scene with interrogation of Gould.
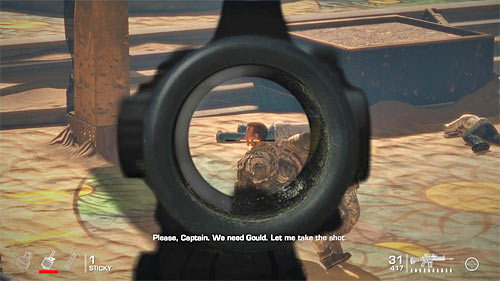
Theoretically you'll be able to act here in two ways, but practically both are very similar. If you do not perform any offensive action (screen 1), then Gould will be murdered at the end of interrogation and unfortunately your team will be spotted after few moments. So it is better not to wait until interrogation ends but immediately attack enemies interrogating Gould (screen 2).
Regardless of chosen option, jump down from the balcony and stand behind a nearest column. First thing to do should be elimination of a sniper who will appear on the left side of the rooftop of the building visible in a distance.
Now quickly move towards trenches, where one of your allies should hide himself. Pick up grenades from a crate and try to stop one of the enemies from reaching the stationary gun. If you fail then use grenades or mark him to be killed.
Further part of the battle can be fought in two different ways. First option is to quickly reach the secured gun, turn it (SPACEBAR) and start shooting enemies. An advantage of this method is that you can quickly eliminate enemies running from a distance but there is also disadvantage - the gun can be much turned to the right. So if you miss someone you'll have to move away from the gun and eliminate this opponent personally.
Another option is to stay in trenches, from which you've secured the mentioned above gun. In this case you should rely on grenades, throwing them at larger groups of enemies.
In both above described cases you should focus you attention on quick elimination of second "elite" soldier. It would be easier to kill him using the stationary gun. Otherwise you can throw grenades at him or run to the camel statue and use the RPG that you will find there.
It is worth noting that you can also destroy the wall where some of enemies are appearing by (screen above), so they will be buried with sand. Keep fighting until you defeat all enemy units, watching out for additional snipers, who can join the fights. Return to Gould in order to see another cut-scene.
The only thing to do now is to leave this location and it is a formality, because there are no new enemies in the area. Head to the building at which enemies were appearing and move to the gate indicated by the game. Wait until it gets opened, thus ending the mission and watching another cut-scene.
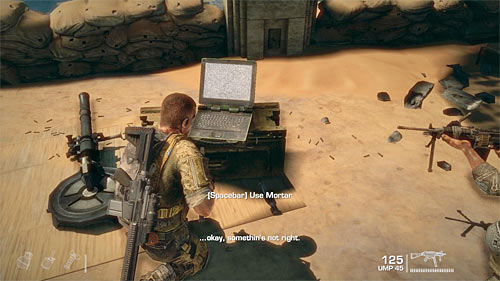
Look around the starting place for a grenade crate and then head to the stairs visible in a distance. After leaving the building you'll watch a cut-scene showing enemy forces in this area. Do not try to attack enemies from the balcony but go right away to the mortar control console shown on the above screen.
Prepare for quite easy action - during this scene you just have to indicate targets for mortar attacks. Use the LMB to shoot and the RMB to zoom, but you do not have to use it at all. You move the camera with direction keys. I suggest starting with shooting those targets, which are surrounded by red squares. Remember also that mortar needs some time to reload after each shot. Keep attacking targets until you destroy all of them indicated by the game.
Now head to the left and use one of the interactive hooks to rappel down. You have to walk through the bombarded area. Ignore dying enemies, because none of them can attacks you. Soon the game will display longer cut-scene.
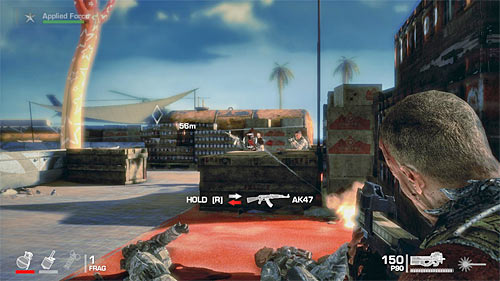
After regaining control over Walker, head forwards and prepare for long fight. Your objective is to capture a hill occupied by enemy forces and I suggest placing yourself behind one of the walls away from the hill. This is advisable especially if you have a rifle with a mounted sight, thus being able to successfully attack enemy forces from a distance.
Keep moving forwards, skillfully running between covers and eliminating enemies along your way. You'll find a stun grenade crate and it is worth using them to stun enemies that hide in trenches.
There is of course more than one path leading to the hill top. If you want to attack enemies from the flank, I recommend going to the left. You do not have to worry about their charges, because there are busy with defending their positions. After you get close enough to buildings visible in a distance, you'll obtain updated objectives.
Make sure that you've eliminated all visible enemies and only after that head to the building which was defended by enemy forces. I suggest placing yourself on the upper balcony and shooting enemies that gathered at the bottom. It will be easy since they are busy with attacking your team.
Once you notice that your subordinates are not coping with defending their positions, go down the stairs to the lower level. Keep fighting here, watching out for enemies, who may get close to your team by surprise.
After the fight closely explore the area. Next to the corner with TV sets you'll find some additional weapons and two grenades' sheds (stun and frag). At the end use the stairs. Eventually you have to reach the exit door and force it in (left SHIFT).
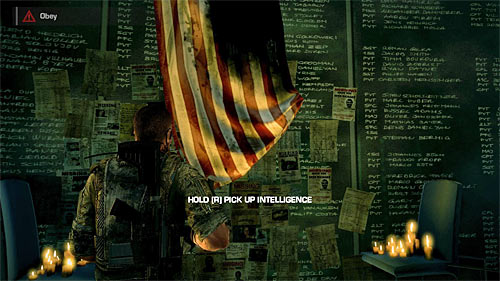
First, turn around and get back to the room with a corpse, which was shown on the last cut-scene. Look around for the flag hanging here, thus obtaining Intel Item - Konrad Flag.
Now return to the starting place and use one of the interactive hooks to rappel down. After that leave the building, jump down and move forwards. Soon you'll reach the place where Konrad gives you a choice.
You'll be able to act in three ways there. First option is to shoot civilian, arrested for stealing water. In this case snipers placed in the area won't harm you and you'll be able to move one.
Another variant is to shot a soldier captured for murdering innocent family. Also in this case sniper will let you go.
The last option is to shoot Konrad's sniper. To do this, place yourself at the cover shown on the above screen and attack two snipers on the right. After that, eliminate two more soldiers occupying left track. Note - do not try to leave this location without making any of above decisions, because in such case your team will be shot by snipers.
Now you can go on. It is worth to pick up FAMAS gun. Regardless of your tactics in the previous location, after reaching the new area, you'll have to fight Konrad's subordinates.
Start with shooting two soldiers standing on the metal bridge and then quickly move towards covers visible in a distance. I suggest placing yourself behind the left cover, because you can find there grenade crate.
Right after the proper battle begins, I suggest dealing with closest enemies and it is best to throw grenades at them. Generally you shouldn't allow them to get close to the area occupied by your team.
The greatest threat in this battle is soldiers armed with RPGs. First of them stands in front of you at the very beginning of the fight (screen 1) and second one will appear later on the roof of one of the wagons to the left (screen 2). Watch out also for other enemies occupying the left track because they have advantage of the height.
Defend yourself at the start place of the battle until a powerful sandstorm comes. Only now leave the cover and move forwards. I advise not to move too quickly, because you'll encounter new enemies on your way. First group of opponents should attack you after approaching the armored vehicle which drove here earlier.
Slowly move forward, stopping often and looking for enemy units while staying behind the cover. Ignore only a small group of enemies, running on the left dune, because they won't attack you.
After reaching bus wreckage, I suggest jumping inside and attack soldiers stationing in the area from that place. It is worth noting that you do not have to control your ammo, because almost all enemies you defeat here use good weapons.
Your target is a tunnel entrance, shown on the above screen. Get close to it, which will result in automatic end of this chapter.
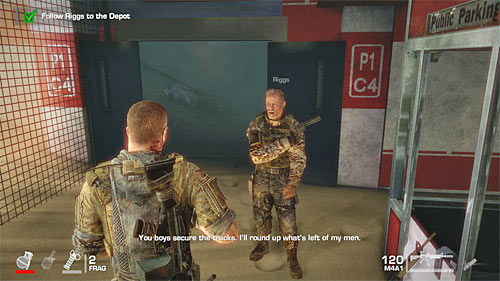
Follow the only available path. I strongly advise to carefully explore tents, by which you will pass along with your team, because in one of them you can find Intel Item - Radioman Tape - No Relief Aid.
Get interested also in a grenade crate especially that soon they can be very useful. Head to the stairs and after a while you'll reach a place where Riggs defends himself against attacks of 33rd company.
I suggest starting with shooting an opponent with RPG, standing on the right. After that, pick up this RPG and attack larger group of enemies. It is best to stay on the upper balcony, thus having an advantage of the height and keeping safe distance from enemies.
Once you get out of rockets, switch to a standard rifle. Enemies will come running mainly from dunes visible in a distance and a lower floor of the building occupied by you. To eliminate them you might use of course grenades. When needed, you can replenish your supplies with a crate located next to the left stairs.
Keep fighting until you eliminate all hostile soldiers. Only now use the previously mentioned stairs and head to the building where Riggs was defending himself. Watch the cut-scene.
Once you regain control over Walker, IGNORE the battle which has now started and pick up Intel Item from a right table - Konrad's Psych Profile. Notice - if you're almost dead after completing this action, reload the last control point, because you won't have to pick this Intel Item again.
Place yourself next to ravaged passage and start attacking enemies visible in a distance. Particularly, I advise aiming at the opponent who occupies the upper balcony. It is best to mark him to be killed. Depending on your preferences you can stay all the time near the starting point or run to the left kitchen room, where you can also find ammo crate.

CAREFULLY approach an entrance to the next room, because there is a sniper waiting for you. What's interesting, you do not have to take care of hostile sniper by yourself, because it is enough to wait until Riggs gets to upper balconies and will eliminate them with no problems.
Keep attacking enemies occupying the adjacent room, defending yourself at the entrance or moving a little further. Watch out for new enemies, who will appear over you and an elite soldier, who will join the battle in its final stage. Same as before, aim at his head, using best weapons and grenades.
Now you can go towards the passage indicated by the game. After joining Riggs, continue your march through successive rooms and corridors. Stop only at the place shown on the above screen. Do not move too far forward, because you would find yourself under massive fire. Instead, place yourself at the right wall and shoot enemies from this safe place.
Prepare for next actions only after elimination of at least several enemies. Run forwards and after a while turn right. This will allow you to get to enemies from the flank and eliminate them easily. But this is not the end of your problems, since the adjacent rooms are also occupied by enemy forces. Slowly move forwards, carefully eliminating enemies.
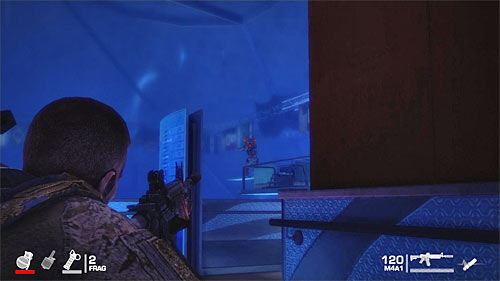
Your current target is the room, from which you can see an entrance to the coliseum. Listen to the conversation with Riggs and prepare to repel heavy surprise attack. I suggest taking positions (along with your teammates) behind covers shown on the above screen. They are located to the right from place, where you had conversation with Riggs.
Start attacking enemy units, who trying to approach you and do not let them get close. Since the battle takes place in a small room, it would be helpful to use grenades (also stun ones). Also look around and find ammo crate left in the room.
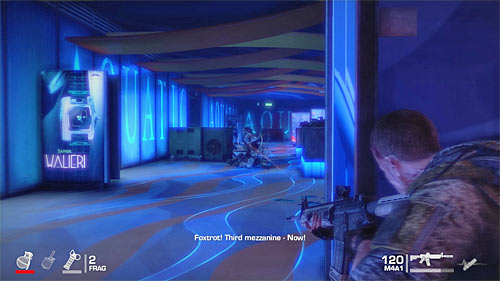
After elimination of first group of enemies, prepare for the second battle with Zulu squad members. Fortunately, this fight differs little from the previous one, except that enemies are heavier armed and use better weapons (P90 machine gun among others - you might pick up one of these).
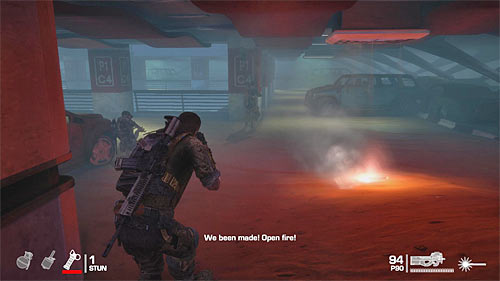
After the fight pick up weapons and ammo and then head to the door unlocked by Riggs. Force it (left SHIFT). Stop only after reaching the underground parking lot shown on the above screen and prepare for tough fights.
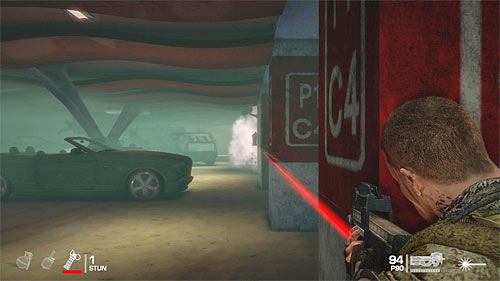
Your current objective is to eliminate all enemies in the area. Start with securing starting place, finding grenade crate on the way. After that, make a decision whether to choose left or right path. Both paths offer similar fights, but I would recommend the left one because there are better covers there (screen above).
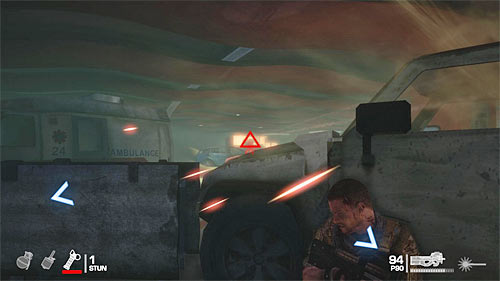
During battles fought in the underground parking lot, you have to particularly watch out for two threats. First of them is .50 caliber gun post (screen 1), mounted on the vehicle visible in a distance. If you have problems with elimination of its operator, aim at canisters near the vehicle or mark the soldier to be killed by your team-mate. Another problem is an elite soldier (screen 2). Once he appears on the battlefield, focus your fir on him remembering about using covers and all grenades you have.
After the fight head to the exit from a parking lot, where you'll find parked jeep. Open a grenade crate and use the passage unlocked by Riggs. Follow linear corridors now, finding ammo crate along your way. Stop only after approaching an entrance to the coliseum.
Very useful information is fact, that several initial opponents in coliseum can be eliminated by a surprise. If you have gun with a silencer, it would be good to start using it (there is also a sniper rifle on balconies). Otherwise mark your targets to be killed by Lugo.
Sooner or later your actions will be noticed by enemies and it will probably happen after using the stairs leading to the lower level of balconies. So start exterminating opponents carefully, remembering about using covers and looking around for ammo and grenade crates.
One of the additional difficulties connected with securing the coliseum, is the need to deal with cutthroats emerging from time to time. As you probably remember from one of previous missions, you should eliminate them before they can approach the main character. During your march you can also stand at railings from time to time and eliminate enemies occupying lower balconies.
Your objective is to get to the very bottom of the coliseum, so you have to look around for the stairs leading to lower levels. As mentioned before, you do not have to hurry because you'll encounter large groups of enemies on your way there. Remember about using grenades and a possibility to mark targets to be killed.
Once you get to the lowest level of balconies, deal with opponents standing near the trucks indicated by the game. Approach parked vehicles and necessarily take cover, because a jeep will appear in a distance. Mark the machine gun operator to be killed, but of course you can kill him by yourself. After that action you'll advance to the second part of the tenth chapter of the campaign.
This chapter is very short and also not too demanding, acting as some kind of rail shooter. Use the grenade launcher to eliminate enemies but you have to remember about two things. First of all, grenades do not move in a straight line, so make sure to take care about appropriate adjustments for aiming. Second - despite the fact that you have unlimited ammo, you have to reload the launcher. Since it takes quite a long time, you should make it in breaks between fights.
After few hundred meters, the convoy will stop and that means that you have to eliminate enemies in the area. I suggest dealing with operators of the machine gun and RPG owners first. They will be appearing on different floors of the building visible in a distance.
Later on you'll be forced to destroy several jeeps, but one shot should be enough to get rid of them. There will be also hostile helicopter that will join convoy attack. Theoretically Lugo should take care of destroying it, but you might help him. This chapter will end soon.
Move forwards. Do not worry about the fact that Walker is wounded and initially he doesn't use any weapons. You won't encounter any enemies in the area and civilians are not any threat to you.

Eventually you have to reach the place with badly wounded Riggs. After end of the conversation with him, you can act in two ways. First option is to shoot Riggs to end his sufferings (screen 1). Another option is to leave Riggs alive, making him burned alive after few moments (screen 2).

Continue marching, listening to numerous conversations along your way. After Walker jumps down, head to the building indicated by the game. Also there you won't by attacked by anyone, so you do not have to using local covers. After entering the building, listen to the message suggesting that Lugo is in danger.
Move up the stairs and head to the closest room. DO NOT SHOOT the guard standing there because it would lead to the death of Lugo. Approach mentioned person, watch a short cut-scene and then jump over sandbags (left SHIFT), running a-cross the guard and making him fall down over the railing.
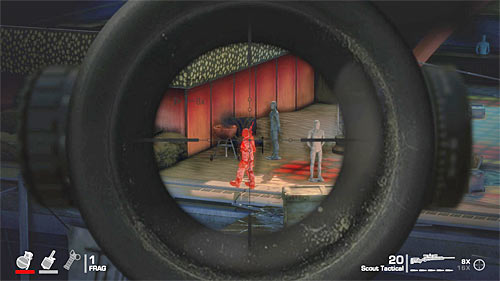
Pick up the sniper rifle (Scout Tactical) standing next to the railing and aim the persons visible in a distance. First shoot must be made at the head of the opponent shown on the above screen, so the one who took Lugo as a hostage.

After killing first opponent, shoot at other enemies, still using the sniper rifle. Fortunately you do not have to worry about Lugo, so you have more time for precise shots.
Initially take care of the rest opponents occupying the same balcony as your subordinates, but be ready to eliminate two snipers, who will appear on the rooftop. After elimination of the first group, other opponents will come running from the left. In this cane the priority is not to let them to get close to the machine gun post. If this fails, then attack stationary gun operators first.
After the fight, pick up Kalashnikov and place yourself at the left wall shown on the above screen. Focus on attacking appearing soldiers. It should not be too difficult. What's more you can count on the support of your team, which should attacks mentioned balcony, leading to the burial of remaining enemies with sand.
Replenish ammo, jump over the wall and move forward. Your team soon will ask you for help to eliminate enemies, who have appear on their balconies and you should definitely help them. Since you are far from them, I suggest using sniper rifle again. After the fight resume march, finding ammo and grenade crates in one of the side rooms.
Once you get to the end of the balcony, stand next to the right railing. Start attacking enemies, who will appear on the glass rooftop. You should of course destroy glass elements do they lose their balance and die faster.
Shoot enemies occupying lower balcony. You might also considering picking up M1014 shotgun with you (instead of sniper rifle for example), because it could be useful in few moments. After preliminary clearing of the area, stand in place shown on the above screen and rappel down the line to the balcony occupied by enemy forces.
Once you land on the lower balcony, hide behind the closest cover and attack enemies approaching you. I do not recommend using grenades or at least do not use them all, because they will be more useful bit later. After elimination of the first group of enemies, be ready to deal with some additional opponents.
Look for ammo crate and approach the nearby room. Kill visible enemies and enter the room. Be prepared for rather unusual dual with the elite soldier, because the main hero will start suffering from recent head injury. Hide behind the closest cover, shooting short bullet series at the opponent, but do not worry if you hit dummies instead of him.
Eventually you have to lead to situation in which elite soldier stops near Walker. Only now start proper attacks. You should of course use grenades here and as for shooting at him, I suggest leaning from behind the cover only for short moments or if you have much ammo, you can try to shoot him "blindly" from behind the cover. In the latter case it is worth noting that you can find ammo crate next to the starting place. After the fight, consider to pick up heavy gun, left by defeated soldier. Also look around for the second ammo crate.
Head to the exit from the room and attack by surprise soldiers, who were shooting at your subordinates. Open grenade crate and shoot at next enemies, gathered on the balcony visible in a distance. You can now move forwards, soon reaching the place, where you have to rappel down the line to a lower balcony.
Use ammo shed and carefully approach the entrance to the right room. Shoot opponents inside, starting with those close to Walker. Additionally you could shoot a glass wall located on the right, burying some of them with sand.
After the fight go inside and head to the stairs leading to the upper level. Watch out, because you'll be quite unexpectedly attacked by few more soldiers. Since you can't use any cover, you might use now one of your better weapons, performing longer shooting. Go up the stairs, turn left and eliminate rest of enemies.
For a change, go to the room on the right from the stairs. Run to the machine gun post shown on the above screen and use it to cover you allies.
Before you even get first tips from your subordinates, eliminate at least several local enemies and a soldier who tries to rappel down the line to attack you.
During the battle remember not only about completing current objectives but also about defending your allies. They can't stay under the fire for a long time. Meantime you can also kill enemies who are threat to you alone, for example those who appear on the rooftop and upper levels. Start with eliminating opponents occupying the floor below your team (subordinates will try to land there after rappelling down lines).
Resume attacking enemies, after your allies rappel down lines to the lower level, especially watching out for enemies using escalators. After your allies change their position, attack a new group of enemy soldiers which will appear on subordinates' backs, specifically near the place, where they've landed after rappelling down. During these fights first of all look around for elite soldiers, because you need more time and ammo to kill them.

In the next phase of the fight, focus mainly on efficient elimination of soldiers with RPGs, possibly not allowing them to attack you. Wait until your allies ask you to destroy the door shown on the above screen and shoot it with cannon, leading to unlock the exit on the upper floor.
Watch out for elite soldier, who should appear next to the left stairs, focusing your attacks only on him. Another group of enemies will appear on the right and in this case first deal with enemy with RPG.
After your team-mates reach the highest balcony, kill several enemies on the rooftop (notice, that you are able to destroy parts of wall) and then deal with hostile soldiers on the right. It is worth aiming at explosive objects, making extermination of enemy forces faster.
The only thing left is to wait until your colleagues safely reach the building's rooftop. Once you notice that they've started to rappel down the line, move out from the stationary gun and wait until they join you. Finally go to the nearby door. It will result in displaying cut-scene and advancing to the next chapter.
Move forwards, ignoring hostile helicopter which appears in the area. Stop at the damaged balcony and press SPACEBAR to jump down to the lower level. Follow your team, performing two more jumps down to lower ledges. Soon you'll approach enemy forces and the game will allow you to decide whether you want to start battle right away or quietly eliminate few guards first.
I recommend of course quietly killing local guards, starting with sniper standing at the edge on the left side (screen above). If you have any weapon with silencer, you can kill him by yourself. Otherwise order one of your subordinates to kill him.
There are two more opponents in the next room. They can also be eliminated quietly because they can't see you. After successful action look around for weapons and ammo and grenade crates.
At the end of "stealth part" quietly eliminate a guard patrolling adjacent corridor. After you kill him, carefully approach a new area. Use good covers along with your team and attack by surprise local enemies, using previously picked grenades if needed.
After elimination of closest enemies, move to other part of this room. Watch out for enemies who will jump in through the roof. Secure also your flanks, not letting enemies to attack you by surprise.
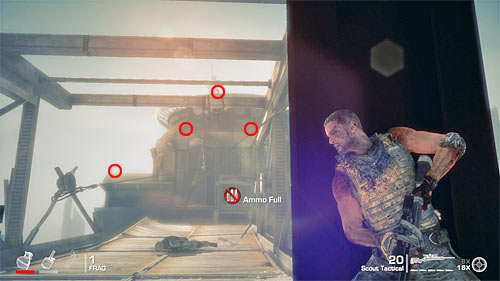
After the fight look around and listen to warning about hostile snipers in the area. Pick up (or select from inventory) sniper rifle (Scout Tactical) and take cover near the building's exit. Places where hostile snipers hide are shown on the above screen. These are:
Make sure that you've eliminated all snipers and look around for two ammo crates. After that stand on the place shown on the above screen and zip the line.
During landing Walker will collide with enemy soldier. Ignore another hallucination because if you too slow, main hero will be dead. Instead, immediately kill knocked down enemy by pressing left SHIFT.
Explore area to the right from the stairs leading to the upper balcony. At the place shown on the above screen you'll find Intel Item - Radioman Tape - Konrad Interview. Only after that, use the stairs. Go through the building, jump down to the glass balcony and turn left. Soon you'll get another objective.

Since the game will allow you now to attack enemies on the opposite rooftop by surprise, you should prepare good. First of all I suggest picking up (or selecting from the inventory) sniper rifle (Scout Tactical). In addition you should choose wisely a place to perform attack from. In this case I suggest placing yourself behind crates on the left shown on the above screen. You'll have worse view on the battlefield, but enemies won't be able to destroy your cover unlike concrete walls on the balcony.
Start attacking enemy forces, noticing that some of them are indicated in red. By the way, I suggest using zoom x8 (instead x16), so you will be able easily control battlefield situation, especially with moving targets.
During fights particularly watch out for two threats. First of them is machine gun post on the right balcony, which is best to burry under sand by shooting at glass surfaces to the right from it (screen above).
Another threat is enemies with RPGs. They appear mainly on the upper balcony in front of you and for obvious reasons they must be killed as soon as possible. Keep attacking enemies until you get rid of all of them.
Use near ammo crates to replenish your supplies and then zip down the line to the just now secured building. Do not worry about single soldier, who will appear in front of you because your allies will eliminate him. After landing move towards radio tower entrance located in front of you.
Enter the building and go up the stairs. After reaching bigger room look around for the bathroom shown on the above screen. Get inside finding another Intel Item - Radioman's Press Badge.
You can now go up the stairs to the upper level. Approach a journalist visible in a distance, thus leading to display longer cut-scene.
Now you have to return to the previously secured rooftop, but of course your task will be disturbed by new opponents. Follow Adams to the lower floor of the radio tower. Place yourself behind the closest cover and deal with small group of Zulu squad. After the fight, pick up ammo. You should also consider picking up P90 rifle, so during next fights you won't have to worry about ammo.
Use the stairs. After getting to the ground floor do not head right away to the exit but stop at the stairs. Wait until enemies blow up the door and after that start shooting them, not letting anyone to get close to you.
Clear the roof again and then head to the left stairs shown on the above screen. Along your way there you should stop from time to time to eliminate enemies appearing in a distance. Remember also that you can ask Lugo for support, indicating targets for him (MMB).
After getting to the upper balcony start slowly moving towards the helicopter landing site visible in a distance. Regularly use local covers and do not let enemies get close to you. In crisis situations you can eliminate enemies in melee fight.
Be careful, because in later phase of the fight you might be attacked by mad knife man and as you probably remember you should kill him before he gets close to you. After confirmation from Lugo, sprint towards the helicopter, ignoring single enemies, who can still stay in the area. Once you get to the helicopter, you'll watch a new cut-scene. You'll also get new objective.

Lugo will appear on the building's rooftop and your task is to cover him using the minigun. I recommend long bursts because you do not have to worry about ammo nor overheating of the gun. First, deal with enemies who appear near the landing site. Notice that you can destroy fuel tanks but you should do this only when there is a larger group of enemies near them.
Another place which you have to shoot at, is a left balcony shown on the above screen. First kill enemies with RPGs and remember that you can partially destroy the balcony so your enemies can't take cover.
Another group of enemies will appear behind Lugo. Try to eliminate these opponents before they get close to your ally. Attack enemies while Lugo runs to the helicopter and gets inside.
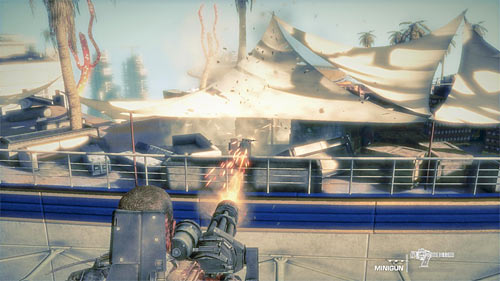
There are two more battles fought from the helicopter. In the first one you have to destroy the radio tower. Start with shooting at enemies who will appear on the landing site and then kill those occupying upper part of the rooftop (screen above).
Wait until helicopter gets near the pool and focus on destroying machine gun site near loudspeakers and a large display (screen above).
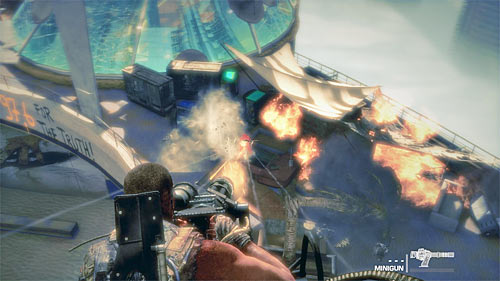
After the helicopter flies to the new position, attack two more machine gun sites (screens 1 and 2)).
Finally deal with enemies inside the radio tower. Try to secure all floors, shooting at opponents. After few moments the radio tower should collapse.
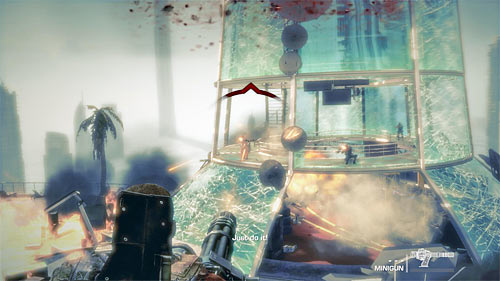
At the end of this chapter, you'll repeat the game prologue, but this scene will be more detailed that one seen in prologue. Start attacking helicopters, shooting them until they get destroyed.

Additionally watch out for two Sidewinder rockets shot at your machine. Once you get warning, turn your minigun towards the rocket indicated by a game (red crosshair) and destroy it before it hits your helicopter.
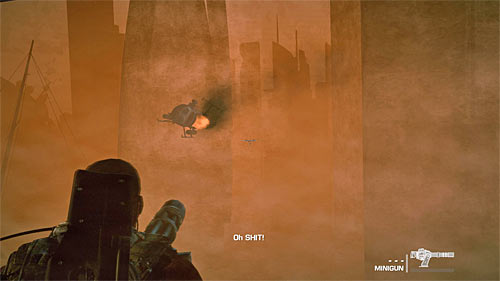
Same as in prologue, the helicopter flight will get to the end when you approach the sandstorm. You'll collide with another helicopter.
After watching a rather unusual introduction to this chapter, move forwards. Notice also, that initially you have only Desert Eagle with limited ammo. There are two paths leading to the place where Adams defends himself - a main (screen 1) and a side one (screen 2).
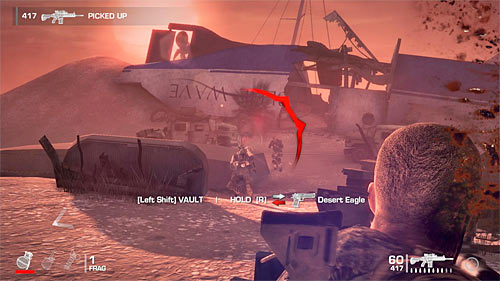
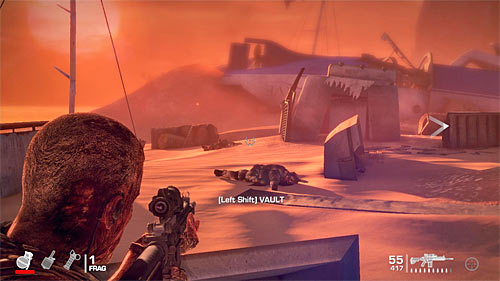
Regardless which path you choose, start with killing two closest enemies. Jump down and run to the right body, because you should find there SCAR-H gun, which has very useful grenade launcher. Pick it up and use it to eliminate any soldiers who rush towards you.
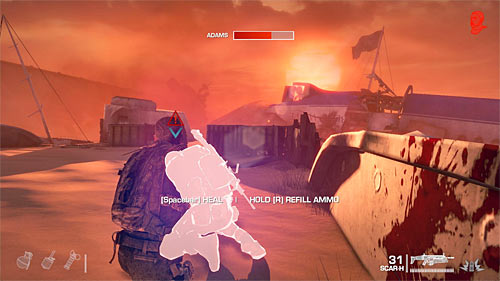
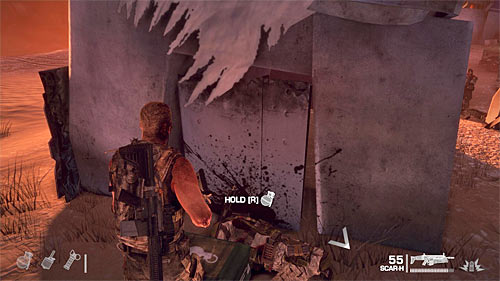
Your actions should coincide with Adams getting critical damage, so you have to hurry up to save him. I suggest going to the right, keeping safe distance from other enemies attacking your ally. Carefully approach Adams and press SPACEBAR to heal him.
Right after healing Adams look around the area and find ammo and grenade crates. Search also for any weapon which can replace your pistol (I recommend 417 rifle). Start attacking enemies which appear in a distance, remembering about using grenade launcher and standard grenades to eliminate larger groups of enemies.
During the battle here you have to watch out, because enemies will probably try to attack you from a left flank. It is also best to kill them before they can get any closer, but if you fail, you can stand at the left building (screen 1) or retreat to one of the more distant covers (screen 2). In the latter case you do not have to worry about Adams because your enemies will focus their attention on Walker.
In the final phase of the battle watch out for new soldiers, who will probably appear from the left side and for a single elite soldier. As you probably remember, you should aim at his head and help yourself with grenades. After the fight listen to a short conversation and do not forget to examine enemies' bodies to get better weapons and ammo.
Head to the large plane wreckage indicated by the game. Jump down and move forwards. After passing by the yellow tent, explore the area to your left, finding new Intel Item - Radioman Tape - Street Artist. You can now continue your march.
After reaching new area, use sprint option and take cover behind a small wall, where you'll find grenade crate (screen above). Be careful because yacht wreckage visible in a distance is occupied by enemy sniper.
Initially take care of closest enemies, watching out for a single opponent, who can try to surprise you from the left side (screen above). Eliminate also enemies who will appear on the right. If you do not want to kill them personally, you can ask Adams for help.
Only after preliminary clearing the area, try to eliminate previously mentioned sniper on the yacht (screen above). Since you probably do not yet have any weapon with sight, it is best to get close to him and kill him personally or mark him to be killed by Adams (he will throw a grenade).
The next task is to get inside the yacht and you can choose holes on the right or on the left side of the yacht. BE CAREFULL because there are additional enemies inside the yacht. After you spot them, you should retreat to one of covers and wait for them to come for you.
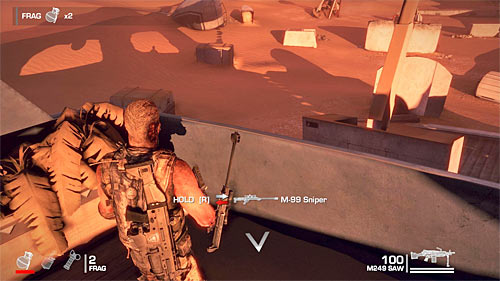
After securing the lower part of the yacht, choose stairs leading up - prepare to eliminate at least one additional opponent. After listening to conversation with Lugo, look around for a grenade crate and a sniper rifle M99. This rifle has very limited amount of ammo but its advantage is fact that one bullet almost always kills enemy.

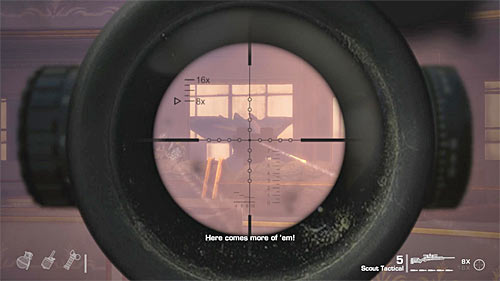
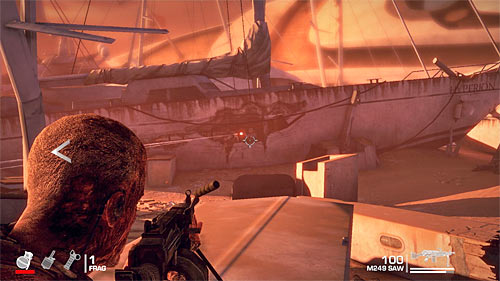
Once you decide that you're ready, jump down and quickly run to the closest wall. You'll join a new battle, where you should use sniper rifle to eliminate static, distant targets. Use grenades on enemies attacking you. Look around also for any explosive objects which can be used for your advantage.
Currently explored location is quite vast, so you have to be careful. Especially watch out for opponents hiding inside the wreckage of the right ship. Depending on your preferences you can eliminate them from a distance (screen above), throw a grenade inside or use one of two entrances and kill them in a melee fight.
You can also choose a path to get to the actual mission objective. I strongly recommend upper passage, from where you can easily see enemies. I'm talking about sniper on the left yacht (screen above) among others. You can act here the same way as previously - mark him to be killed or kill him personally of you have any sniper rifle.
Continue marching among wrecks of ships, looking for supply crates and not letting anyone to attack you by surprise. The last group of enemies occupies the area shown on the above screen. It is best to use the sniper rifle first and then run closer to them and shoot them with standard rifle and throw some grenades.
After the fight, head to the passage shown on the above screen, which leads to another part of the map. Jump to the large hole and move forwards, having a conversation with Adams along the way. Prepare, because after reaching the new location you'll get into pretty hard fights.
Do not waste too much time for replenishing your supplies (two crates on the left). You have to be hurry because the armored vehicle will appear from the right, carrying enemy soldiers. Head to the yacht indicated by the game, stopping only after reaching its lower level.
Use such cover that you can observe your enemies' actions and eliminate them effectively. In the initial phase of the fight I strongly recommend focusing on quickly and safely killing mad knife man and elite soldier.
Later on, during the battle, focus on keeping an eye on your left flank, not letting too many opponents to attack you by surprise. Finally head to the captain deck located on the upper level, killing enemies there.
Prepare for more attacks. Look around the captain's deck searching for supplies (ammo and grenade crate). First attack enemies who will appear near dunes (screen above). You should hurry up because sandstorm will come soon, drastically reducing visibility.
After the sandstorm arrives, ignore distant targets and focus only on guarding stairs leading to the upper deck, not letting any enemy to get there. At the end of the battle, when the sandstorm is over, deal with rest of the opponents near the yacht.
Leave the yacht and follow Adams to the place indicated by the game (screen above). You have to walk through some linear corridors, where you won't encounter any enemies. After reaching the target, watch longer cut-scene, showing the death of your team-mate.
When you regain control over Walker, you can act in two main ways. Shoot at civilians (screen 1) or shoot in the air or ground (screen 2). Do not try to walk between civilians or wait until they go away, because it would result in your death.

You can now go forwards. On your way you won't meet any new enemies, so you do not have to be careful. Look around for a kind of shrine shown on the above screen, with Intel Item. It is Konrad Effigy and can be found next to the metal gate. Once you kick the gate (left SHIFT), this chapter will end.
You start this chapter in a devastated park. Since there is no threat for you, move towards the passage indicated by the game. Jump down (SPACEBAR) and replenish your grenades and ammo supplies if needed. You'll find here also SCAR-H gun. If you do not have any better weapon, you should include it into your inventory, but I personally recommend waiting with it. It is because you can lure some enemies near to the passage where you currently are and kill them with your weapons and after that pick up the heavy gun.
Carefully move towards the courtyard and quickly hide behind the closest cover, because in addition to shooting close enemies, you'll have to watch out for two threats. One of them is snipers on upper balconies - you can get rid of them personally or order Adams to do it (MMB), but you have to cover him during this action, so he won't get killed. Another problem is a stationary machine gun visible in a distance. Initially it is not too onerous, but as soon as you move forwards, you'll begin to feel effects of its fire.
As a result I suggest choosing the leftmost path, thus significantly shortening the distance to the machine gun, without exposing yourself to its fire. Additionally you'll find there a grenade crate and ammo. Use the cover to have a good view on the hostile gun and then use a grenade to kill its operator or order Adams to do it. Further extermination of enemies should go smoothly. Remember though that opponents will try to get to the gun and use it again - of course you can't let it happen.
After the fight quickly move to the gun and use it for your purpose, since the new squad of opponents will come running from the door seen on the left.
Once you clear the area, carefully approach the door and use it as a cover to eliminate enemies inside the room. Move inside. You'll find there two ammo crates and sticky grenades, so you should replenish your supplies now, especially that soon you'll face tough battle.
When you're ready, go up the stairs and look to the right. On chairs you'll find Intel Item - Code of Conduct.

You can now move forwards. Go through the door kicked out by Adams in meantime. You'll find yourself on a courtyard full of enemies and all kind of defenses. As a welcome, you'll be shot by a mortar and Walker will become once again a victim of his delusions.
After a while Adams will summon you back to reality. In order to continue your march, you have to destroy mortar site, indicated by the game on the right side. The best way to do it is to use RPG left by your current cover. One hit should be enough. Personally I recommend keeping RPG with you, because its firepower might be used soon.
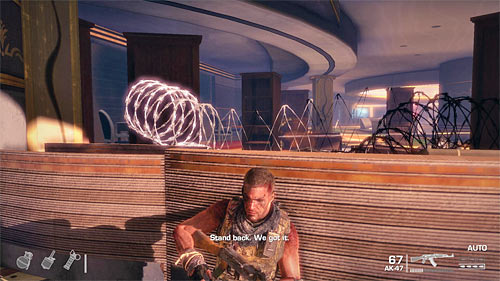
After that, turn left and help Adams to eliminate enemies defending themselves behind a barricade. Do not hurry moving forwards because there will appear two more enemies, jumping through the wall. Only after killing them, follow Adams.

While your companion will be busy shooting at enemies, move along the left wall to the next cover. Warning! In the wall recess, where you can find ammo crate, you can also encounter lurking enemy - do not let him get you by surprise.
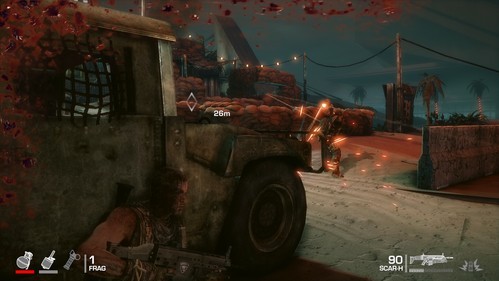
Further offensive actions are blocked by a stationary machine gun in a bunker visible on the right side. Adams will move to this direction, taking cover behind Humvee. Follow him. If you have RPG with you, this is the best moment to use it and eliminate gun's operator. Otherwise use grenades or order Adams to kill him. Move inside the bunker, eliminating enemies along your way.
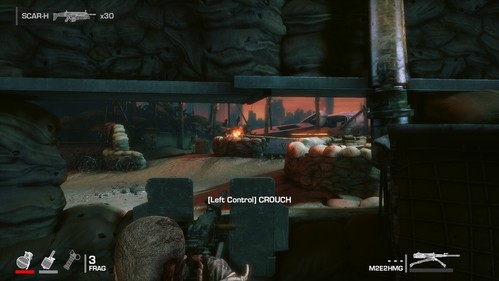
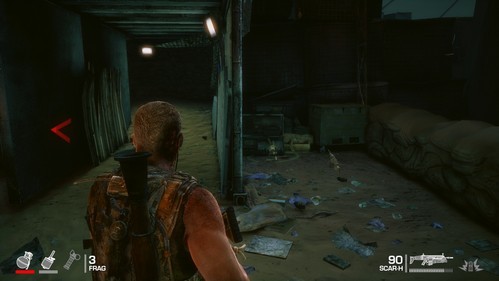
Once you get inside the bunker, use the gun on the opposite side, because enemies will carry out another attack (screen 1). Luckily those are standard soldiers, so defeating them shouldn't be a problem. Do not exit the bunker, but go through the corridor leading to the next part of the courtyard. If you're not happy with weapons you have, you might be probably interested in heavy gun M249 SAW or grenade launcher M32 MGL left next to the bunker exit (screen 2).
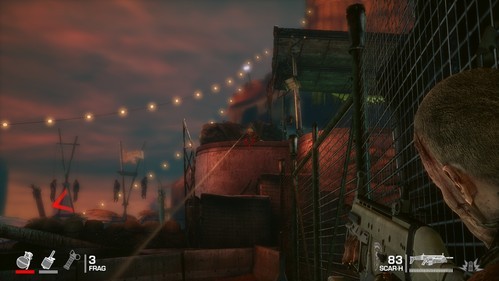
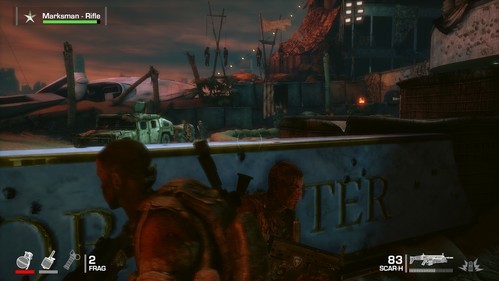
Carefully lean out from the cover, looking to the right. There is a sniper hidden upstairs, who can make your life a little hard (screen 1). Eliminate him personally or order Adams to do it (MMB). You can move one. After a while new soldiers will join the fight. Stand behind the middle cover (with sigh VISITOR CENTER) and eliminate them (screen 2).
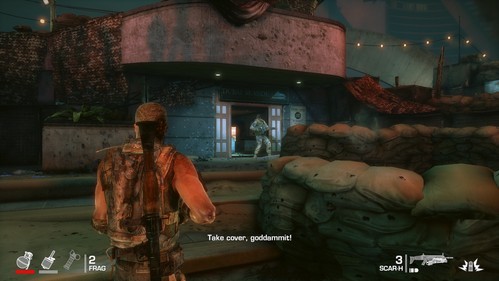
After the fight replenish ammo by picking up weapons left by enemies and carefully approach the double door leading to the DUBAI SEASIDE. Once you get close enough, the door will explode and Lugo will appear. Of course it is another Walker's hallucination - this is elite soldier, who has to be eliminated in well-known way (grenades and shooting at his head). After the fight I suggest to pick up his weapon. It is automatic shotgun AA12, with powerful firepower.
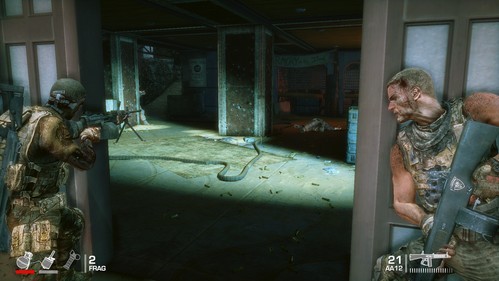
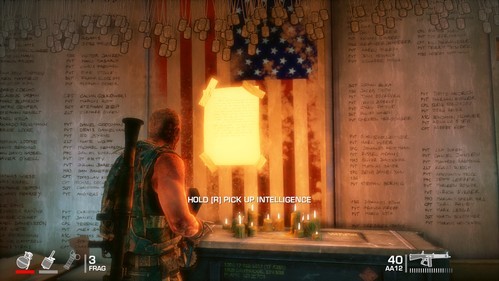
Place yourself next to the door and use it as a cover. Eliminate enemies inside the room (screen 1). Watch out for soldiers who hide behind counters on the left, as well as those who shoot at you from upper level. After the fight look around for ammo and grenade crates. In the recess to the left you'll find also another Intel Item (it is hanging on the faded USA flag) - Konrad's Final Orders (screen 2).
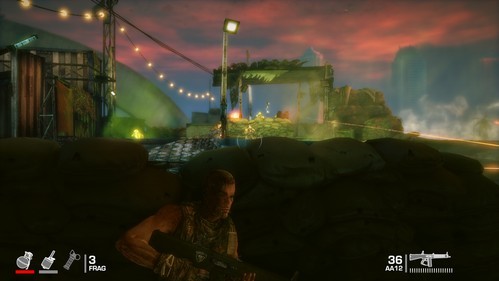
Follow Adams and prepare for the last fight of this chapter. Enemies are well covered and additionally they have a machine gun, which should be your priority. At one point an elite soldier will appear on the battlefield, so you can order Adams to kill machine gun's operator (MMB), while you take care of heavy armored opponent (grenades and shooting at his head). Unfortunately, the joy of victory will not last long. After a while the area will be full of hostile soldiers, and you'll get proposal to surrender. After a short cut-scene Adams will throw you out of the guard house, shooting at enemies in a suicide attack.

The only thing to do now is to run forwards. After a while you'll be reached by explosion blast. Watch another cut-scene, in which you'll get to the tower occupied by Konrad's soldiers.
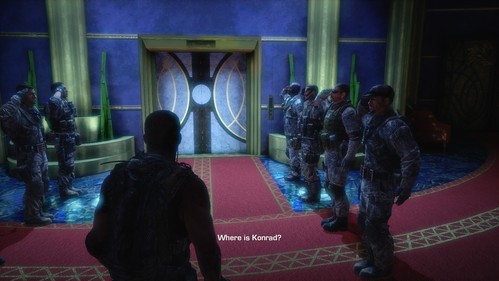
Once you regain control over Walker, go through the only possible way. Near the elevator you'll be "welcomed" by remnants of the Cursed 33rd, casting under your orders. Their leader will show you where Konrad is. You can get there with an elevator.
After another cut-scene you'll find yourself in the apartment at the top of the building. The stairs in front of you lead to Konrad, but before you get there explore the stairs to the right, and a table visible to the left.
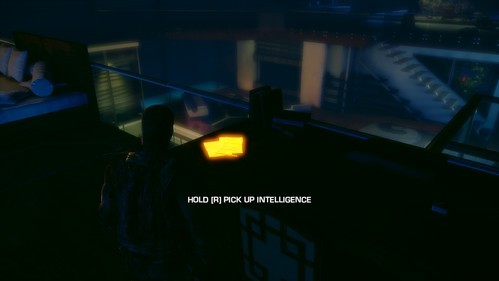
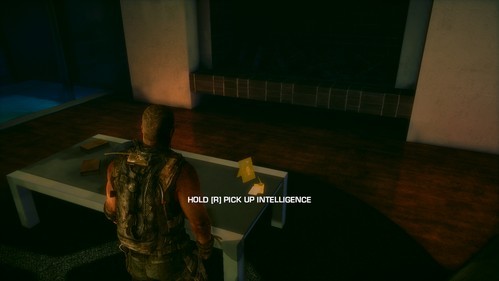
The mentioned stairs lead to Intel Item lying on the desk - Konrad Letter - Poem For Elisabeth (screen 1). In the main room, on the table, you'll find Konrad Letter - Message to Jeremy (screen 2).

You can now go upstairs to meet Konrad, painting the picture. Watch longer cut-scene, after which you'll again regain control over Walker. Go behind the picture. At the end of the sidewalk you'll find Konrad's corpse.
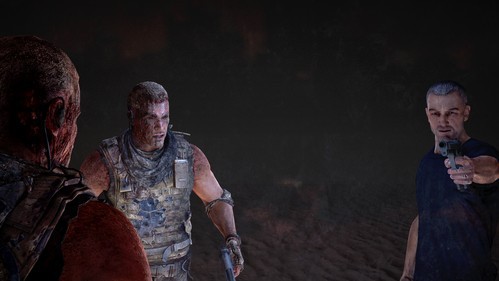
Prepare for another cut-scene, during which you'll have to make an important decision. If you commit suicide or do nothing, the game will end (Konrad will shoot you in case of no decision). But if you kill Konrad, you'll advance to the Epilogue (during credits).
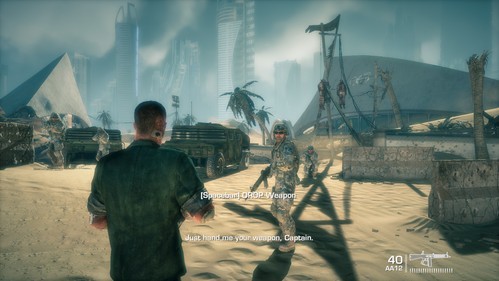
Watch the cut-scene, watching American soldiers finding Walker. Their commander will ask you to put down your weapons. You can execute this command (press SPACEBAR to put down your weapons or wait until he gets it from you) or attack soldiers. In the first case you'll watch cut-scene with Walker being taken home. In the latter case you'll fight quite easy battle (you own AA12).
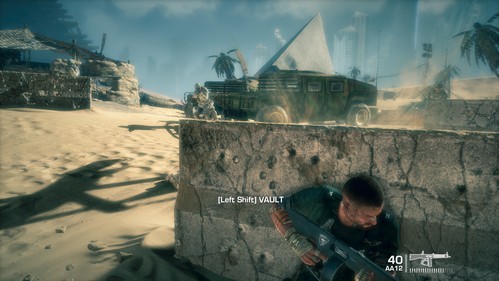
After shooting the commander and closest enemies, hide behind the right cover. There are many covers and armored vehicles on the battlefield, so you should have no problems with eliminating enemies.
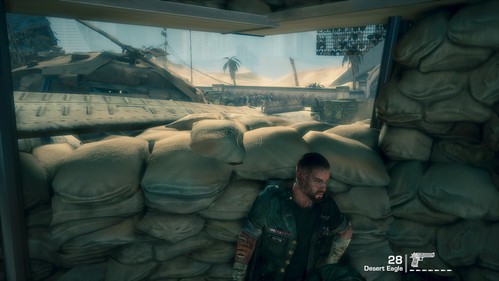
But in my opinion the easiest path is located on the left, where you can find an entrance to the bunker. Keep shooting, but remember that concrete covers can be destroyed, so they are not best cover neither for you or your opponents. After elimination of last soldier, you'll watch the cut-scene and end the game.
It can also happen that you'll die during the fight. In this cane you'll also watch another cut-scene and end the game.
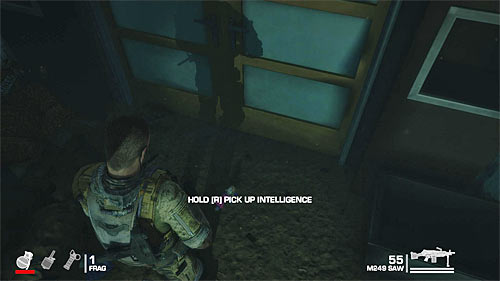
Gentlemen, welcome in Dubai!
Chapter I - The Evacuation
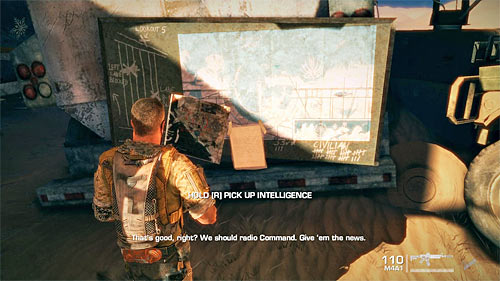
(Konrad Confession Letter
Where to find: You'll get into ambush after finding the transmitter. Kill the first group of enemies and look around for a table with Intel Item.
(Damaged Black Box)
Where to find: A wreckage of large plane. After getting inside through the lower entrance, kill two bandits who can appear there and look around for Intel Item.
Chapter II - The Dune

(Radioman Tape - Welcome to Dubai)
Where to find: Right after start of the chapter and elimination of two guards, head to the balcony on the left.

Sandstorm Cover-up
Where to find: A TV studio close to the start place. Intel Item lies on the ground on the lower level and it is easy to be overlooked.
Chapter III - Underneath

Looters Bullets
Where to find: After escaping the room where you were ambushed (they throw C4 at the end), you'll get to the new room - jump down after walking through the corridor. This Intel Item can be also picked up after cut-scene with agent Castavin.
Chapter IV - The Refugees
Child's Doll
Where to find: It lies on the ground next to the door, near the stairs leading to the lower floor.

Castavin's Diary
Where to find: After conversation with mentally unstable soldier, rappel down the line and look around for the Intel Item on a table.
Chapter V - The Edge
Dossier on Grey Fox
Where to find: After fights in two-floored apartment, look for the Intel Item in a side room of the lower floor.

Radioman Tape - Evacuation Cover-Up
Where to find: After another zip line, you'll get to the new building over the bridge. Look for stairs leading to the upper floor of apartment. Once you get there, turn right and go to the bedroom.
Chapter VI - The Pit

Interrogator Confession
Where to find: After jumping into the large hole, you'll walk through corridors full of murdered people. Get interested in the table next to the wall with USA flag.
Chapter VII - The Battle

Radioman Tape - After The Storm
Where to find: After end of the first fight in this chapter, look around for damaged STOP sign.

Radioman Tape - Soldier Interview
Where to find: After eliminating two standard soldiers and one elite opponent (after passing the area attacked by white phosphorus), you'll get to the new building. Before you get inside, go to the left finding Intel Item.
Chapter IX - The Road

Konrad Flag
Where to find: Intel Item can be found in the room where you start the game, at its opposite side. The flag hangs on the wall.
Chapter X - Riggs

Radioman Tape - No Relief Aid
Where to find: Intel Item is hidden in one of the tents in the initial part of the chapter.

Konrad's Psych Profile
Where to find: After helping Riggs to repel attack on the building where he barricaded in, you'll watch a cut-scene with yet another attack. Intel Item can be found in the current room - ignore the fight for now and pick up item from the table.
Chapter XII - The Rooftops

Radioman Tape - Konrad Interview
Where to find: After elimination of several snipers, you'll zip down the line, colliding with enemy soldier during landing. Explore the area to the right from the stairs leading to the upper balcony.

Radioman's Press Badge
Where to find: After getting inside the radio tower building, go up the stairs. After reaching larger room, look around for the bathroom. Intel Item is hidden inside.
Chapter XIII - Adams

Radioman Tape - Street Artist
Where to find: Head to the large plane wreckage indicated by the game. Jump down to the lower level and move forwards. After passing by a yellow tent, explore the area on your left. Intel Item lies on the ground.
Konrad Effigy
Where to find: Intel Item can be found in a shrine next to the metal gate leading to the next chapter.
Chapter XIV - The Bridge

Code of Conduct
Where to find: After the first fight of this chapter, you'll get to the room leading to the courtyard occupied by large enemy forces. Intel Item lies on the chairs in this room, to the right from the stairs you've used to get here.

Konrad's Final Orders
Where to find: Intel Item can be found on the USA flag, inside the room where the elite soldier (Lugo) came from.
Chapter X - Welcome

Konrad Letter - Poem For Elisabeth
Where to find: In the Konrad's apartment choose the stairs to the right. Intel Item lies on the table on the upper floor.
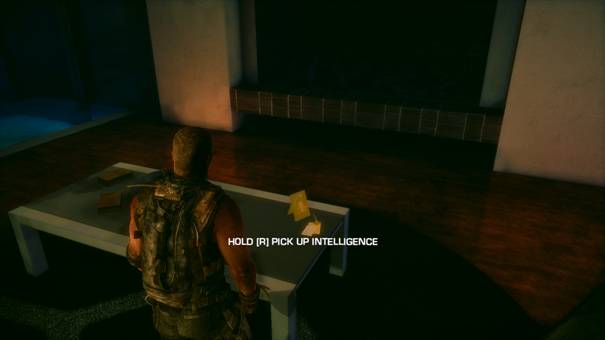
Konrad Letter - Message to Jeremy
Where to find: On the table in the main room of Konrad's apartment
Achievement name
Points
How to get is and tips
A Bridge Too Far
10
You get this achievement automatically once you finish XV chapter
A Farewell To Arms
30
In chapter XV during conversation with "mirrored" Konrad you have to commit suicide or let him kill you.
A Line, Crossed
10
In chapter XIII shoot civilians who lynched Lugo.
A Line, Held
10
In chapter XIII shoot in the air to scare off civilians.
A Man of Action
10
In chapter VII, when you have to decide either save Gould or civilians - save Gould.
A Man of Patience
10
In chapter VII, when you have to decide either save Gould or civilians - save civilians.
Adapt and Overcome
20
In the single player campaign you have to Blow up 10 explosive objects, killing at least one enemy each time. A good place to complete this achievement is last fight of chapter IV where you can find many explosive crates.
Aim High
20
In the single player campaign you have to kill at least 250 enemies with headshots. There are some places where enemies respawn until you do some further actions, for example in VIII chapter when you attack soldiers not with mortar but with normal weapons.
Airspace Control
20
In the single player campaign you have to kill at least 10 enemies while they use zip lines or are rappelling. At the end of the II chapter you'll be ambushed. There are many enemies rappelling down.
All You Can Be
20
Complete any chapter with 60%+ accuracy without dying or reloading a checkpoint. The easiest one is chapter I. Aim carefully and order your subordinates to kill enemies.
Applied Force
20
In the single player campaign you have to hit at least 10 enemies with your melee attack.
Army of One
20
In the single player campaign you have to kill at least 3 enemies with a single grenade. In chapter II, after clearing the first room, 3 bandits will come running up the stairs. Throw a grenade at them.
Battle Management
20
In the single player campaign you have to kill at least 50 enemies only using the Attack Command. Use your subordinates as often as possible to kill enemies.
Blind Luck
20
In the single player campaign you have to kill at least 5 enemies using blind fire. Just try to shoot enemies when they are close to your cover without aiming.
Boot
15
Complete game on "Walk on the Beach" difficulty.
Close Combat Carnage
20
In the single player campaign you have to kill at least 4 enemies with a shotgun in 10 seconds or less. The best place to do it is chapter X when you're attacked by enemies while Riggs tries to open the door.
Damn Close
20
In the single player campaign you have to kill an Edged Weapon Expert while he is up to five meters away.
Damned if You Do
10
In chapter IX Walker has to decide which hostage will die. You have to shoot any of them to complete this achievement.
Damned if You Don't
10
In chapter IX Walker has to decide which hostage will die. Do not shoot any of them. Instead kill Konrad's snipers.
Deer Hunter
20
In the single player campaign you have to kill Oryx. You'll see animals running on dunes during some missions. If you have sniper rifle, use it to kill one of them. Another option will rise in chapter XI, when you talk to wounded Riggs. Do not kill but instead walk away (this will unlock Unfriendly fire achievement). Few steps later you'll see Oryx. Kill it.
Desert Storm
10
At the end of chapter IV you will be shooting with stationary machine gun, covering your team-mates. At one moment you'll be able to destroy glass wall behind enemies to bury them under sand.
Friendly Fire
10
Kill Riggs at the beginning of XI chapter.
Good Training
In the single player campaign you have to sprint into cover 10 times while under fire.
In Your Face
20
In the single player campaign you have to kick an enemy by vaulting over a cover. This achievement needs some practice - you have to locate a cover, with enemy behind it. Then run towards it, take cover and quickly jump over it. If you've succeeded with all these actions, you should kick your enemy in face.
Intel Operative
50
Find all Intel Items. The exact locations of Intel Items can be found in the section dedicated to them (Intel Items). In addition, these places were given in the description of the single-player campaign walkthrough.
Marksman - Grenade
25
In the single player campaign you have to kill at least 50 enemies with grenades.
Marksman - Heavy Arms
25
In the single player campaign you have to kill at least 150 enemies with any heavy weapon.
Marksman - Rifle
25
In the single player campaign you have to kill at least 350 enemies with any rifle.
Marksman - Shotgun
25
In the single player campaign you have to kill at least 75 enemies with any shotgun.
Marksman - Small Arms
25
In the single player campaign you have to kill at least 100 enemies with any pistol or SMG.
Marksman - Sniper
25
In the single player campaign you have to kill at least 50 enemies with any sniper rifle.
MFWIC
50
Complete game on "FUBAR" difficulty.
Preventive Diplomacy
20
In the single player campaign you have to enemy just as they are throwing a grenade.
Recon
25
Find 12 Intel Items. The exact locations of Intel Items can be found in the section dedicated to them (Intel Items). In addition, these places were given in the description of the single-player campaign walkthrough.
Sierra Hotel
50
Complete three chapters in a row without being killed or reloading a checkpoint.
Situational Awareness
20
Stun an enemy by dumping sand on their head. Again the good place to do it is chapter X, when you fighting enemies and Riggs tries to open the door. Wait until any of enemies stand under the glass roof and shoot it.
Spotter
10
Find 1 Intel Item. The exact locations of Intel Items can be found in the section dedicated to them (Intel Items). In addition, these places were given in the description of the single-player campaign walkthrough.
The Devil's Disciple
30
Complete game on "Suicide Mission" difficulty.
The Great Escape
10
You get this achievement automatically once you finish chapter XII.
The Horror
10
You get this achievement automatically once you find hanging Daniel's body in chapter VI, before you get into ambush.
The Human Factor
20
In the single player campaign you have to kill an enemy by tagging him with a sticky grenade.
The Lost Battalion
10
You get this achievement automatically once you interrupt interrogation of mentally unstable hostage.
The Road Back
30
You get this achievement automatically after one of possible game endings - surrender in Epilogue.
The Road To Glory
30
You get this achievement automatically after one of possible game endings - attack American soldiers in Epilogue.
They Live
10
You get this achievement automatically after getting contact with 33rd in chapter I.
Three Kings
10
You get this achievement automatically once you cover your squad in mall at the end of chapter XI.
Too Late The Hero
30
In chapter XV during conversation with "mirrored" Konrad you have to kill him.
Treacherous Ground
10
You get this achievement automatically once you finish chapter II and fall down during the sandstorm.
Unfriendly Fire
10
Leave Riggs at the beginning of chapter XI to be burned.
We Were Soldiers
20
Complete the game on "Combat Op" difficulty.


 Soul Calibur IV Game Guide & Walkthrough
 Street Fighter IV Game Guide & Walkthrough
 Secret Files 3: The Archimedes Code Game Guide & Walkthrough
 South Park: The Stick of Truth Game Guide & Walkthrough
 Sherlock Holmes: Crimes and Punishments Game Guide & Walkthrough