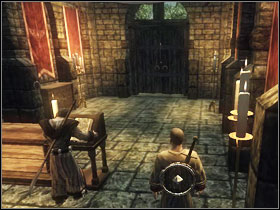
In this guide to Risen I included a thorough description of the mission for all three sides which the player can choose. I also made exact maps with a series of marks that should help in completing the more complicated challenges. Thanks to the clear distinction to chapters, fractions and location, no player should have problems with finding exactly what he wants.
The items in the guide have been marked with green. Brown is for people and animals and orange symbolizes frequent recalls to a certain mission. With Blue I marked references do points on the map. Bold text is for notes about marks on the map other than numbers (points, road etc.) or the professions (bandit / warrior of the order / mage).
One last thing - don't get caught and taken to the Monastery. You won't gain anything from it and additionally lose a lot. It's simply not worth it...
Lukasz "Terrag" Znojek
Translated to English by Jakub "cilgan" Lasota
If you want to become a bandit, you should head to the marshes and read the part of the guide covering the Bandit Camp.
Developed skills:
The 2nd and 3rd choice are connected with each other. I'd suggest beginning with the town, completing some tasks in favour of the mages and only having the recommendation (see Where are the artifacts disappearing to?) from Carlos, head to the mages headquarters. There you will be able to choose a mage path.
Developed skills:
Becoming an Warrior of the Order is another choice you can make while in the mage's Monastery and having Carlos' recommendation (Where are the artifacts disappearing to?).
If you get caught by the inquisitor's men and taken to the headquarters by force, you will be only able to become this class.
Developed skills:
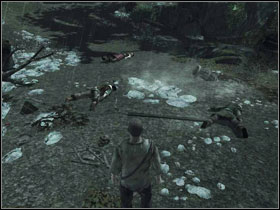

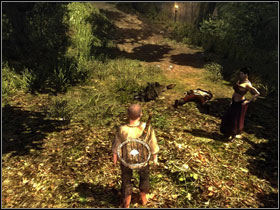
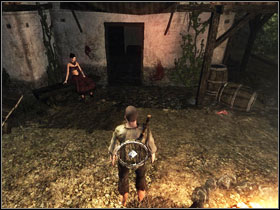
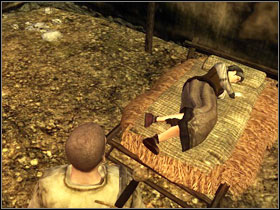
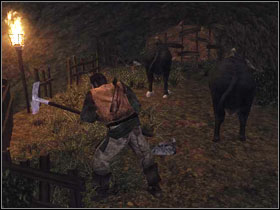
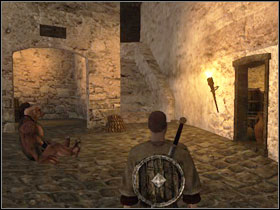
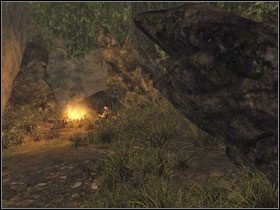
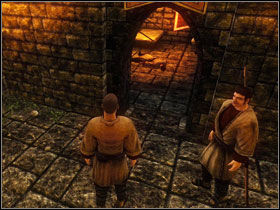
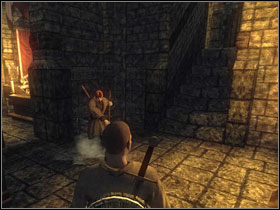
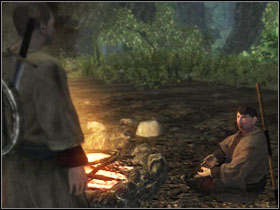
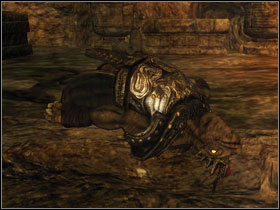
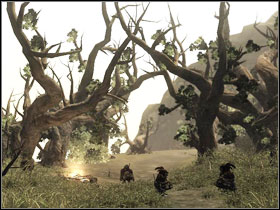
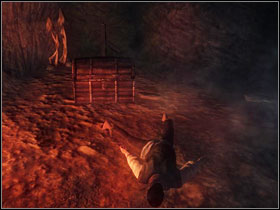
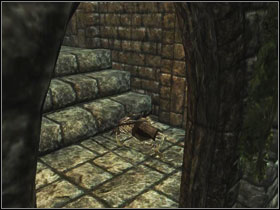
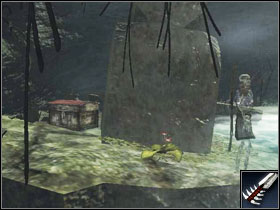
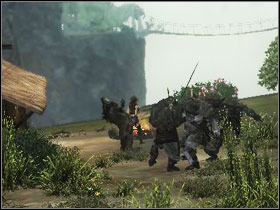
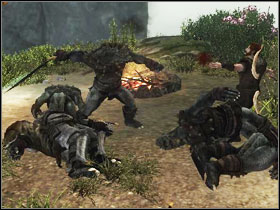
Your task is to find the castaways who are still alive. Leave the woman alone for now and search the others' pockets, you'll find some valuables. Tear out a club from the nearby branch. Search the nearby beach to find a small healing potion, some shells (double click it in the inventory screen and you'll have a chance of getting a valuable pearl) and a couple of alcohol bottles. Going too far into the water will end up quite badly, so keep on beach.
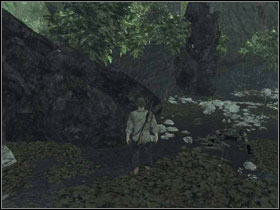
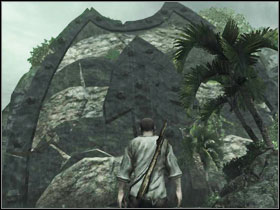
Head to the right edge of the beach where another corpse awaits us. Search it and you will find a hunting knife. Turn left and you should see a rock with a big shield. Approach it and you will find another castaway and beside him - a hungry sea vulture. You shouldn't have any problems with beating him with a couple hits.
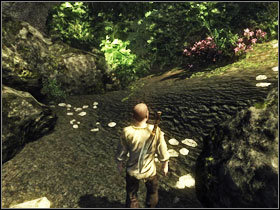
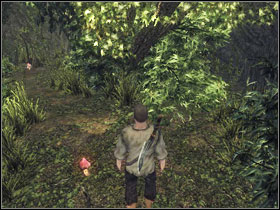
In the middle of the road between the now dead bird and the drowned body turn around and go into the jungle, passing the rocks on the left. Go straight until you find a red mushroom and then turn left. Just a couple more steps and you'll find a small shield, rusty sword and a small healing potion. Being armed like that, return to the woman on the beach. Begin a conversation and declare that you're ready to go.

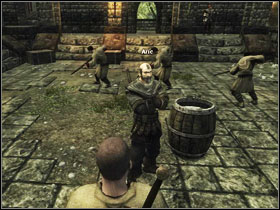
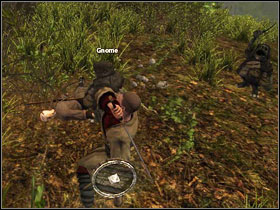
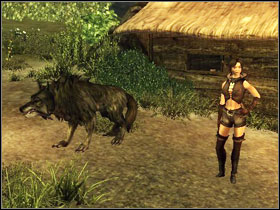
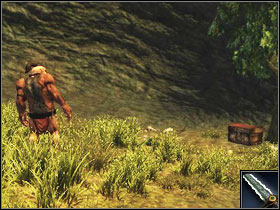
Take out the weapon and follow Sara down the path. After a while you will come across a young stingrat and a little further - a hungry wolf. Take their meat and go up. Collecting every item and plant you come across is a good habit. In the rock on the left you will find a cave and another wolf beside the entrance. Exploring the cave can wait for later. The Gnomes inside are quite a pain in this phase of the game (it can be done, however there aren't many interesting items inside). A little further you will find another stingrat and eventually you'll come across a house in which Sara decides to stay.
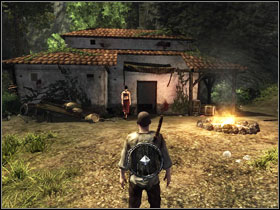
You'll finish this quest by simply going through the door of the house. If you need to replenish your health, there's a water barrel at the back. You can return to your friend and report that there's no one inside. You will receive another "ambitious" quest.
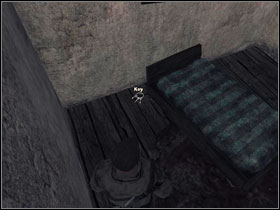
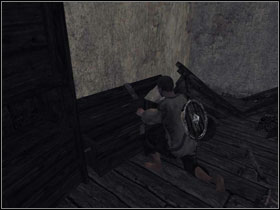
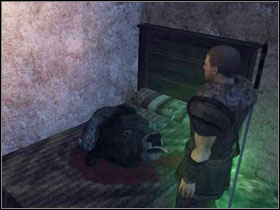
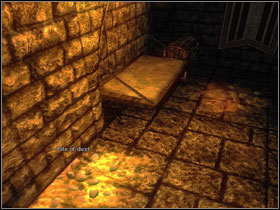
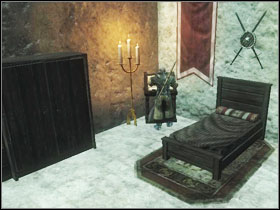
The key lies nearby the bed in the second room. After finding it, talk to Sara again to receive another task.
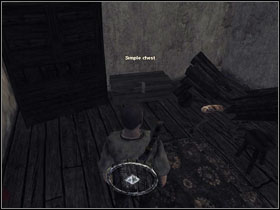
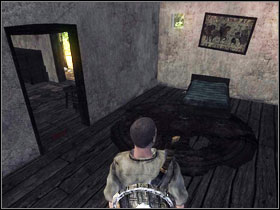
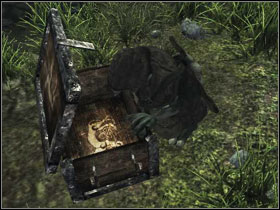
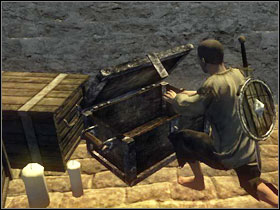
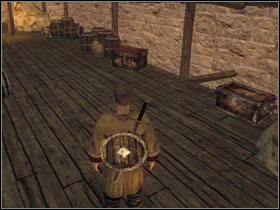
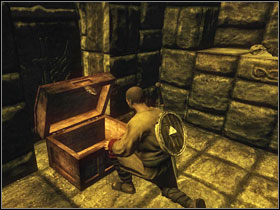
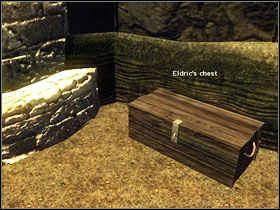
In the first room, by the wall, you'll find a chest. Take everything from inside. You will obtain frying pan among other things. Inform the woman about everything.
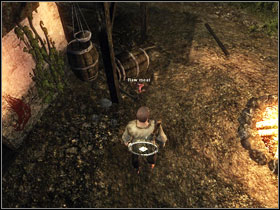
On the right you will find some raw meat. Having the pan in the inventory, approach the fire and cook whatever you can. Afterwards offer some to Sara.
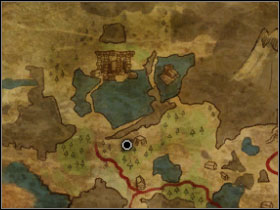
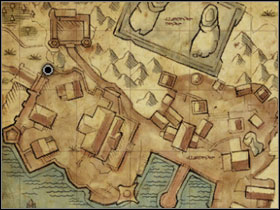
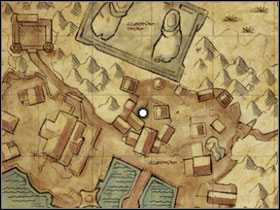
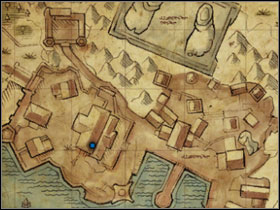
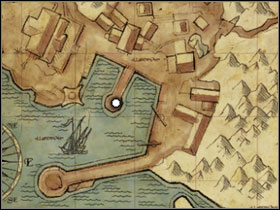
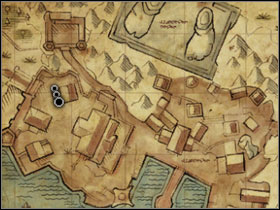
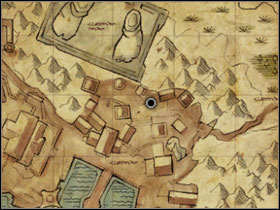
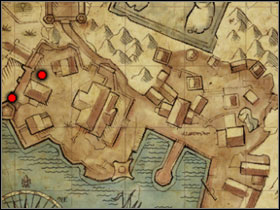
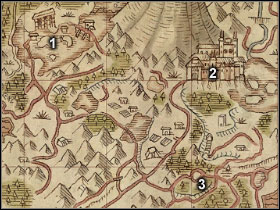
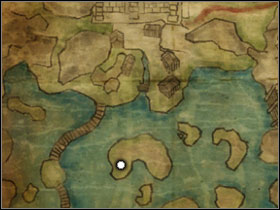
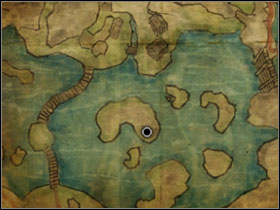
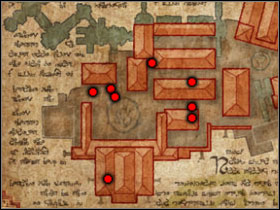
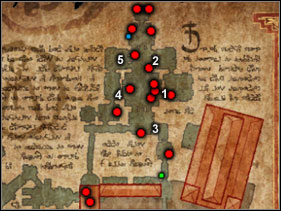
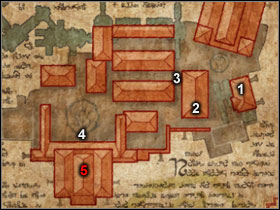
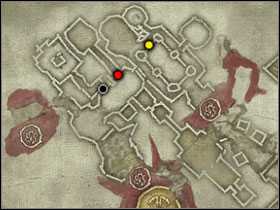
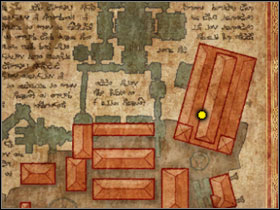
![0 - Chapter 1 - [Map M1] Risen Island - Chapter 1 - Risen - Game Guide and Walkthrough](https://game.lhg100.com/Article/UploadFiles/201512/2015121709124052.jpg)
0. The inquisitor's men who will attack you (stay away from them for now)
1. Sara
2. Jan
3. Thomas
4. Henson
5. Tristan
6. Tellur
7. Leto (Harbor city entrance)
8. Bandit camp
9. Severin, Ruben
10. Bryn
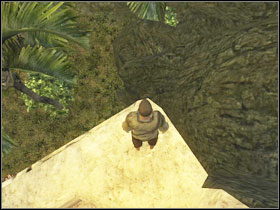
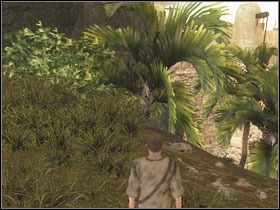
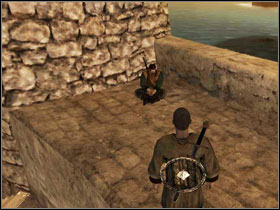
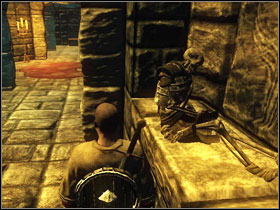
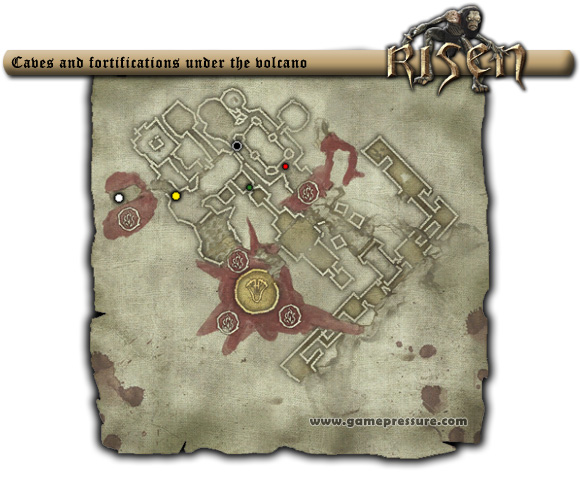
To the right from the house entrance you will find a path between the rocks. On the hill you will have to fight some birds and grave moths. Eventually you will reach a temple with nothing interesting inside, apart from one moth and a crumbling floor.

After going out of the temple, approach the ledge and climb onto it. By the candle on the tomb you will find another small shield. Continue to move upwards and left. Eventually you will find another house - enter it and the quest will end.
Your task is to pillage Jan's (M1.2) house. Upstairs in the chest, among other things you will find a sword, which is a better weapon then the knife you have been using until now and a fragment of the island map. You can tell Jan the findings. He can also show you the way to the marshes (bandit camp (M1.8)) or to Tristan's (M1.5) farm, if you wish so.
Thomas (M1.3) needs help in harvesting the plants on his field. Ripe corn is a little greener. You have to search the field (only Thomas' fragment) in search of 10 plants and afterwards talk to him. In return you'll receive a healing potion.

Henson (M1.4) asks you to help him in killing 5 hungry wolves. Their cave lies to the east of Tristan's (M1.5) house. Once you're done with the beasts and leave the cave, Henson will inform you about a man from the mage camp who came to the farm. If he sees you, he'll attack and take you to the mage Monastery, which will in effect limit your choice in the later part of the game (you won't be able to learn rune magic).
He is standing in front of Tristan's (M1.5) house. Walk past him keeping a safe distance and lay to bed in the barn next to Henson (M1.4). Once you wake up the dangerous inquisition member will be gone. You can now collect the prize from killing the wolves, a strong magic healing scroll.
If you want Sara (M1.1) to get to the bandit camp in the future, tell Jan (M1.2) about her. If you rather prefer the mages, tell Tristan (M1.5) about her. You can tell Sara that she'll get rescued and in return you'll receive a strong healing potion. In the next chapter, Sara will show up near Rhobart (M3.16) (if you sent her to the bandits) or Severin (M1.9) (if the mages took care of her).
Ask Tristan (M1.5) about getting to the city and he'll tell you to help is men on the farm. You should finish the Kill the hungry wolves and Help Thomas in the fields quests and talk to Tellur. Afterwards return to Tristan and you'll receive 2 small healing potions. Tellur will lead you to the east city gate if you want to.
Notice - these three next quests are still found on the same island, however you can accept them only after the inquisitor's men stop attacking you (see Negotiating with the volcano keep and Where are the artifacts disappearing to?).
You can ask Severin (M1.9) about the nearby ruins and the gnomes that are giving him a hard time. The will order us to kill them (6 in total, to the north from the camp). In the locked chest by the gnome camp you will find a small sapphire. Talk to Severin about the prize and then speak with Ruben (M1.9). You'll receive 200 golden coins.
If you haven't completed the Conquest of the artifact camp quest (bandit path), you can head to the west, talk with Rudolf and then return and then return to Severin (M1.9) and tell him about the situation. The prize is 2 healing potions and a tell joke scroll. In the other case, inform Severin about Rudolf's death.
Bryn (M1.10) (who you can also gift with a bear) will tell us a story about monsters roaming nearby, who will turn out to be three sly gnomes. In return you'll receive 25 golden coins.
![1 - Chapter 1 - [Map M2] Harbor Town - Chapter 1 - Risen - Game Guide and Walkthrough](https://game.lhg100.com/Article/UploadFiles/201512/2015121709124294.jpg)
1. Martha
2. Arno
3. Delgado
4. Sebastian
5. Fuller
6. Elias
7. Costa
8. Doyle
9. Philus
10. Finn
11. Belschwur
12. Flavio
13. Pavel
14. Hugh
15. Cole
16. Cutter
17. Dirk
18. Josh
19. Nelson
20. Cid
21. Kayleigh
22. Vasili
23. Ingvar
24. Nico
25. Patty
26. Dytar
27. Ukkos
28. Lukor
29. Carasco
30. Anika
31. Duram
32. Sergio
33. Marek
34. Romanov
35. Rodriguez
36. Dargel
37. Mo
38. Baxter
39. Lilly
40. Erikson
41. Sonya
42. Olga
43. Gwen
44. Jack
45. Edgar
46. Weasel
47. Garth
48. Leonardo
49. Alvaro
50. Walter
51. Hernandez
52. Marcelo
53. Toni
54. Olf
55. Tilda
56. Konrad
57. Felipe
58. Carlos
Belschwur (M2.11) will give you a couple of potions. You have to deliver them to Cole (M2.15), Josh (M2.18), Finn (M2.10),, Elias (M2.6) and Martha (M2.1) (give the potion to her husband - Arno (M2.2)). After handing all of them over, return to Belschwur.
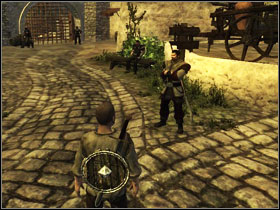
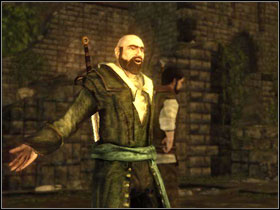
Complete the Medicine for everyone quest will result in Carlos (M2.58) calling us to his place (using a guard walking in front of his house). Once there, you can ask about the situation in the town. You will also learn that you will soon have to choose one of the sides.
If you decide to choose the bandits and won't complete the above mission, you will be called to Carlos after completing at least 4 decisive quests for them. He won't tell you anything interesting.
It's not really a typical quest, but a way to leave the town earlier. Climb the wall by the main west gate, jump down to the rocks and continue until you reach the ground. Of course the inquisition warriors will still attack us but a quick run should be enough to avoid them.
Returning to the town using this method is a bit harder. Stand on the hill, looking straight at the gate and jump into the palm leaves. You should reach the ledge you used during the escape. Carefully try to jump onto the rocks above. A couple tries and you should be high enough to return to the town.
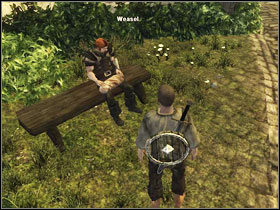
Marcelo (M2.52) orders you to solve Weasel's (M2.46) problem. The thug, who's resting on a bench, tells us to follow Garth (M2.46). One of Sonya's girls - Lilly (M2.39) will offer you quickie for 100 coins. If you agree the quest will be aborted and you'll have to start it over from the beginning. Once it's over, you can tell Sonya (M2.41) that one of her girls working on the side.
Practically you have to wait a couple of minutes and head to the marked spot. Just don't get too close to the person you're following. After exposing Garth's (M2.16) contact, you will have to fight two bandits. Once you retrieve the herb from Cutter, you have to choose between bandits and mages. If you give the drug to Marcelo (M2.52), you'll have to additionally get rid of Weasel (M2.46). You can chase him away from the town and/or kill. Giving the package to Weasel will result in gaining a big amount of mana potions.
Toni (M2.53) will tell you about Esteban's necklace which has been left in his house. If Hernandez (M2.51) doesn't want to let you through, tell his that Don left something inside and convince him that you'll be able to find the amulet. In the right wing of the house you will find a painting of a tree.
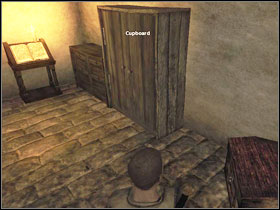
Press the switch behind it (click standing in front of it). It will make the cupboard move. In the newly exposed room you will find the amulet of the Don's family. Depending on which side you want to choose, give it to Toni (M2.53) (bandits) or Hernandez (M2.53) (mages). If you want to please the mages, you'll have to get Toni out of the city.
Lukor (M2.28) needs some armour fragments. Before you set off to find them, negotiate the prize to 400 golden coins. Begin from talking to Vasili (M2.52). You can pay 200 gold or beat him up (after telling him that 200 is too much) and rob. If you beat him, Ingvar's fragment price will fall to 50 coins. If you want to fight with Ingvar (M2.23), you have to get out with him.
The last one is Duram (M2.31). If you don't want to pay him 200 coins, you can always bet him up (for example in the building to which he's taking the barrels) and take his key. If you choose to use force, you should talk with Ukkos (M2.27) who, in exchange for a piece of roasted meat, will tell you that Duram's hideout is upstairs behind his back. You will find the two missing fragments in the chest. If you want to support the mages, give the armour fragments to Carasco (M2.29), in the other case (bandits) - Lukor (M2.28). As always - choosing the mage path will result in getting rid of the bandit.
Delgado (M2.3)has to collect the dept from Costa (M2.7) with our help. While you're on your way, Sebastian will offer you to give him the gold and support the mages. You should begin with talking to Fuller (M2.5) and provoking him to a fight. The next step is to provoke Costa and in result - taking the purse from them. If you choose not to give the gold to Delgado but to Sebastian, you'll have to kick the first one out of town.
Rodriguez (M2.35) orders us to investigate the recent robberies case. Head to Flav (M2.12), Nelson (M2.19), and Baxter (M2.38) and ask them about the robberies. You will learn that the person who has appeared in each place was Doyle (M2.8) (on the upper floor Costa's hotel) with whom you must talk. Eventually you will have to choose a side and give Doyle to the mages, tell him to get away (which will be a favour for the bandits and Cid will begin to teach us in return) or just kill him. If you choose to help the mages you should tell Cid (M2.20) about Doyle's decision.
After completing at least four quests for the mages and reporting to Carlos (M2.58) that the city should now be safe with Esteban's men gone, he'll order us to investigate the artifacts smuggling issue. Head to the brothel and pay Sonya (M2.42) for giving us the information. Ask for the inquisition, artifacts and the man responsible for the smuggling. Head to the room on the left and press the switch behind the tree painting.
In the tunnel you will find Scordo. After a long conversation, a fight will break out. Kill the bandit. Take the sewer key and go deeper into the tunnel. At the very end of the corridor you will find a secret passage out of the town. Return to Carlos (M2.58) and report about getting rid of Scordo. If you're just beginning the mage path, ask for help in beginning training in the Monastery. Mention Belschwurz (M2.11) and you'll receive a recommendation letter with which you can go to Santiago (M2.10).
Complete these quests for the mages: Evidence for Marcelo, The family heirloom, Lukor wants the five armour plates, Protection money from Costa and Find the burglar's spy!. Report to Carlos (M2.58) that the city is clear of bandits and you'll receive 1000 golden coins.
Complete these quests for the mages: Evidence for Marcelo, The family heirloom, Lukor wants the five armour plates, Protection money from Costa and Find the burglar's spy!. Report to Scordo that the whole town is now theirs and you'll receive 500 golden coins.


A minimum of four quests completed for the bandits will allow to ask one of them for their boss' whereabouts. Head to Sonya's (M2.41) brothel and pay her for giving you the information about Scordo. You have to press the button behind the painting on the left to get to the corridor where the bandit is hiding. Scordo will give us a package for Don Esteban (M3.23) and a key to the door at the end of the corridor - a secret passage out of the town.
Carasco (M2.29) orders you to find three golden bowls on the black market. In the tavern you will find Dytar (M2.26) who will try to sell one of them for 150 coins. If you don't know how to steal, buying it is your only option. Dirk (M2.17) has the next one; you can get it in the same way as the one before. The third brother - Olf (M2.54) is at Hernandez's (M2.51). Instead of paying him for the information on where he has hidden the artifact, just head to Jack's lighthouse (M2.44).
Go inside (1st floor) and pick up the telekinesis scroll lying behind the barrel. Look inside and use the spell on the golden bowl. Give the artifacts to Scordo to make an impression on the marshes people (see Talk to the bandit chief of Harbour Town), in the other case (favour for the mages) head to Carasco (M2.29). After completing the task you should talk to Hernandez (M2.51) who will free Olf (M2.54). If you found the secret town exit and completed the A gathering of triplets task you can now take the three brothers through the tunnel leading out of the town.
Cid's wife - Keyleight (M2.21) is in possession of Nelson's (M2.19) ring. You can either rob her, bring something "better", like a necklace from the locked chest marked on the map (3 lockpicking level) or just kill her (however Cid (M2.20) will get quite mad about it). If Cid has left (Find the burglar's spy! in favour of the mages), the only thing left is to beat her up. Nelson will let you keep the ring.
Flavio (M2.12) orders you to find 5 wolfskins and 5 wild boarskins. You will find them in the houses marked on the map (white - boar, black - wolf). Sometimes they're just in plain sight, sometimes hidden in chests. Cole (M2.15) will give you one wolfskin. It's worth to learn how to sneak. It will help you in getting the other skins.
One of the skins can be found on the roof above Finn (M2.10). Mo (M2.37) will give you two boarskins and one wolfskin. Once you're done collecting them, head to Baxter (M2.38), who will give you some meat which you have to take to Belschwur (M2.11). In return Flavio (M2.12) will give you two healing potions.
If you haven't visited the Monastery yet, Delgado (M2.3) will order you to collect debts from Josh, after completing the Protection money from Costa quest. You have to head to the tavern and ask for the money. If you don't want to hear about the deal between Josh (M2.18) and Delgado, just take the money. Otherwise accept to pay the debt in return for the gossip that Josh heard.
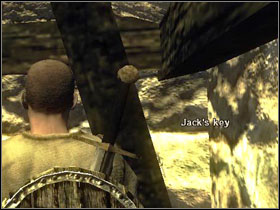
This quest is a consequence of Protection money from Josh and Josh's (M2.18) gossip. In Jack's lighthouse (M2.44), on the ground floor, behind the barrels you can find Jack's key (it's invisible). It fits into his chest on the upper floor.
After finishing The lost father quest, Patty (M2.25) will be searching for a way to get out of town. Completing either Where are the artifacts disappearing to? or Talk to the bandit chief of Harbour Town will result in discovering a hidden passage out of town which will allow you to finish this quest. After exiting the town, Patty will stay on the beach and you won't be able to talk with her until the next chapter of the adventure.
Arno (M2.2) needs a warm bed for his sick wife. Rent it from Costa (M2.7) for 30 coins. Afterwards talk with Arno and Martha (M2.1). You should tell Belschwur (M2.11) about your good deed and in return he'll give you strong healing potions.
Philus (M2.9) is trying to sell his fish house for 300 coins. You have to talk with Nico (M2.24) (firstly you'll have to give him a bottle of rum... buy it from Patty (M2.25) for 40 coins). Buy Nico's ring [+3 str] for 300 golden coins and he'll decide to take over Philus's business. In gratitude, Philus will give you two pearls.
You receive this task from Weasel (M2.46), only if you haven't been to the mage Monastery and completed the Protection money from Costa and Evidence for Marcelo quests (of course both of them in favour of the bandits). You also need to finish Walter needs a break. Tell Walter (M2.50) that you need his help and then ask about Marcelo's weapon. You'll pay 100 coins in total for the information. Return to Weasel. During the night, pay Alvaro (M2.49) a visit. Wait until he goes away from the cellar door (or just talk to him and he should move away). Sneak inside and open the door (1st level lockpicking). Once downstairs, open his chest (2nd level lockpicking). Afterwards return the weapon to Alvaro (don't try to take more money from him, accept 100).
Ask Konrad (M2.56) about a job and suggest security. Afterwards talk with Tilda (M2.55) about Konrad and report to Weasel (M2.46) about the cows. Then go to the Farmer (east of M2.21) and Weasel. Once you attack Berta (at night, because the closest guard is asleep; also make sure that the second doesn't see you), the Farmer will jump on you, so stun him. When it's dark, enter Konrad's bedroom through the roof on the other side of the house (see at the map).
Put Berta's skull into the trader's bed. The inmates will attack you, so jump out through the balcony. Weasel (M2.46) will send us to Sonya (M2.41) (wait until dawn). Afterwards visit Konrad (M2.56), who will not want to talk (you have to use the tell joke scroll). Eventually, report to Weasel.
Jack (M2.44) asks us for a bottle of rum. You can buy one from Patty (M2.25) for 40 coins.
Olf (M2.54) asks us to tell his brothers - Dytar (M2.26) and Dirk (M2.17) to meet him at the fixed spot.
Gwen (M2.43) needs help with getting rid of Erikson (M2.40). After the conversation, go outside and give him a beating. Afterwards politely ask him to leave. In Gwen and Sonya (M2.41) will give you some gold.
Pay Sonya (M2.41) 50 golden coins and spend the night with Olga (M2.42). Nothing easier... Additionally the girl will give you her tell joke scroll.
You must help Patty in finding her father. Go to Mark (M2.33) - he won't let you near Romanov (M2.34) until you find him a girl (alternatively you can provoke a fight and/or rob him). Firstly tell Sonya (M2.41) and then head to Anika (M2.30) and inform her about the job. Now just a little chat with Mark and you can go inside with the key. Tell Romanov about the key found by Erikson (M2.40) Woman beater and he'll send us to Steelbeard's hideout. Head there and search the chest found inside. Take the document to Patty (M2.25).
Romanov (M2.34) (see - The lost father quest) wants to get his casket back. Go to the square near Ukkos (M2.27), enter through the door on the right and go up the stairs. Go outside and move to the upper floor of the warehouse. Before us are three chests. Open the middle one and inside you'll find Romanov's casket which you should return to him if you want to please the bandits. In the other case (you prefer the mages), give the casket to Sergio (M2.32).
Baxter (M2.38) will put your math skills to a test. You have to answer how much does 14 * 17 give. 238 is the correct answer.
If you don't have the map from Fincher (M2.21) (Bandit path), you can order Nelson (M2.19) to make you a map of the island. He won't finish his job until you find a way to get out of the town (finish the Where are the artifacts disappearing to? or Talk to the bandit chief of Harbour Town quest). You'll need to pay 250 golden coins for it.
Walter (M2.50) the blacksmith has no time to rest. After talking with Alvaro (M2.49) you will have to find two smith's helpers, pay for them and send to work. The first one is on the wall, the second near the west gate. Now you can inform Walter that he can take a break.
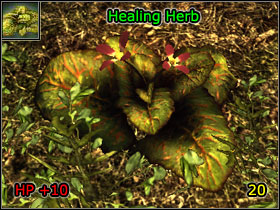
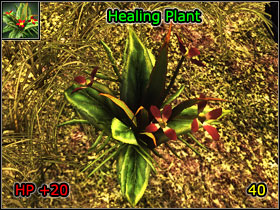
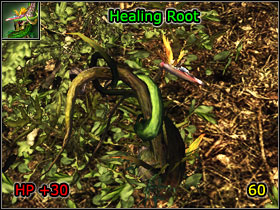
Leonardo (M2.48) is searching for healing plants. You have to bring him 10 healing herbs, 5 healing plants and 2 healing roots. In return Leonard will prepare you a potion which will increase your maximum HP by 10 points.
Walter (M2.50) orders you to collect 15 tool bags. You will gain them by hunting gnomes. In return you will receive 3 steel blanks and 300 golden coins.
Tilda (M2.55) will ask you to find her three sons. (#1) Beppo (M3.19) is at Don's camp, (#1) William (M4.8) is at the Monastery and (#1) Leon is half way between the Monastery at Harbor city (only a little to the east). If you have met of one of them before, you don't have to visit him again. Just tell the mother that he's fine.
If you joined the bandits, Cid (M2.20) can order you to remind Dargelow (M2.36) about him (after completing the Find the burglar's spy! quest, in favour of the bandits of course). Once there, kick his butt. During the conversation the butcher will state that he still doesn't want to cooperate. The task will be automatically cancelled.
Once it will become clear that Dargel (M2.36) isn't willing to cooperate (see: Fleecing the butcher), Cid (M2.20) will order us to empty the butcher's chest. You will find it on the upper floor in the building where Dargel resides. Sneak to the chest at night and open it with picklocks (1st level lockpicking) or a proper scroll. Eventually, report to Cid.
Scordo (the Talk to the bandit chief of Harbour Town quest) gives us a package for the Dona. After delivering the package to Esteban (M3.23) the quest will end. In return for the delivery, the Don will make you one of his men. You can now buy a hunter suit for 1000 coins from him. Once you report to Scordo about completing the task, he'll give you 500 coins.
![1 - Chapter 1 - [Map M3] Bandit Camp - Chapter 1 - Risen - Game Guide and Walkthrough](https://game.lhg100.com/Article/UploadFiles/201512/2015121709124980.jpg)
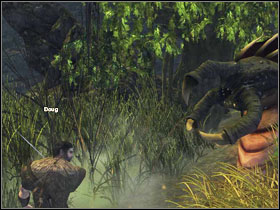
1. Doug
2. Ricardo
3. Domingo
4. Sam
5. Brogar
6. Lorenzo
7. Hawkins
8. Rogue
9. Enrico
10. Luis
11. Craig
12. Dwight
13. Clay
14. Phil
15. Obel
16. Rhobart
17. Oscar
18. Rachel
19. Beppo
20. Branon
21. Fincher
22. Cormac
23. Don Esteban
24. Karakos
25. Watchman
You will receive the swamp map from Doug (M3.1) and learn that he needs help in slaying a big insect. Follow him to the marshes and aid in killing the insect. I return you'll receive as much as 30 coins and 5 pieces of raw meat for Rachel (M3.18).
Rhobart (M3.16) asks you to deliver 10 bottles of beer to Rachel (M3.18) for 50 coins. You can persuade the woman to pay you 100, but at the same time you can take no payment at all. Similarly with Rhobart - either give him 50 golden coins or tell that Rachel didn't pay you at all.
After completing the Go hunting with Doug quest and obtaining 5 additional pieces of raw meat, head to Rachel. The animals by the camp are a good source of food. 30 coins is all you'll get in return.
After the first talk with Brogar (M3.5), you will be asked to bring him meat from Rachel (M3.18). Resisting won't help, as his men will attack you. If you have already met Rachel (Meat for the gang quest), give him the fried meat (the meat that you make yourself won't do).
Brogar (M3.5) tells you to drive Clay (M3.13) to work. You can do it by paying him 20 coins in total or by beating him in a fight. Phil (M3.14) in return will give you 25 golden coins.
Luis (M3.10) asks you for a bottle of beer. You can find it, for example, on the crates to the west (and two to the east) from Beppo (M3.19), in the house next to Lorenzo (M3.6). Another one is in Brogar's (M3.5) house. You can also get one at Oscar's (M3.17) and Rachel's (M3.18). You just have to be careful and don't get caught. You can also buy one from Obel (M3.15) for 20 coins each. Once Luis is happy, it will turn out that he can teach you quite a lot of hunting skills.
Howkins (M3.7) has some problems with driving his men to work (they're dresses exactly the same as their boss). Begin from Dwight (M3.12). When he asks why he should move, tell him that you're the man who orders him to. Tell Branon (M3.20) that you'll single-handedly kill the disgusting insects. Afterwards report to Branon that he can return to work and tell Ricardo (M3.2) about everything, so that he gives you additional gold for getting rid of the monsters.
Enrico (M3.9) will tell you about the ghost that hunts him during work. Tell Dwight (M3.12) about it and he'll suggest fooling his crazy friend. In the chest (marked spot) you will find a useless amulet thanks to which you will convince Enrico to return to work. Eventually report to Howkins (M3.7) about completing the task. You can now buy a worker suit from him for 500 coins.
Lorenzo offers to help us in robbing one of the temples. Follow him and it will turn out that the bandit is trying to cheat you. You can fight him or pay 50 coins.

Rhobart (M3.16) will pay you 70 coins for every 10 weeds that you bring him. You will find the number you need in the water around his house.
Beppo (M3.19), who's standing near the temple entrance, needs help in moving the crates. After completing The workers are to work again quest, Beppo will give you 20 golden coins.
After the first conversation with Brogar (M3.5), you can talk about him with Sam (M3.4) and then inform him that he can return to his hunter duties. Afterwards you will receive this quest. You have to drive Sam's subordinates to job. Doug (M3.1) will begin hunting if you help him with Go hunting with Doug, while Luis (M3.10) will order you to kill the nearby (white spot) scurrying stingrats before he can return to work. Sam will be able to work again once you finish the Power struggle quest and kindly ask Brogar to leave Sam alone. Or kill him at the end of the arena fight.
After completing the Brogar's lackey quest, you can ask Brogar (M3.5) about his warriors. You will learn that one of them - Dorgan has dies. Luis (M3.10) will give you his location after he receives a bottle of bear (A bottle of beer for the drunkard). Inside the cave you will find some grave moths and the poor man's body. Once you return to Brogar, he will ask about the list that was by the bandit's body. It doesn't matter if you give it or not.


At Craig's (M3.11) you can buy an arena fight. If you win, you get double the amount in return. According to skills [and price] we can distinguish: Ricardo (M3.2) [10] who you can challenge only after an initial (long) conversation, Lorenzo (M3.6) [20] who will fight with you after you have beaten him in To the temple ruins with Lorenzo quest Craig [50] and Domingo (M3.3) [100]. Before the last one wants to fight with you you'll have to bring him a beer (see - A bottle of beer for the drunkard). The last warrior you can challenge to a fight is Brogar (M3.5), however he won't want to fight until you defeat the rest of the warriors. You can kill him after the fight.
If you report to Rachel (M3.18) that Craig (M3.11) is organizing fights (The best fighter in the bandit camp), she will tell us to stop them. If you want to support her and tell Craig to cease organizing the fight the task will be cancelled, but you can also lie to Rachel, stating that the fight have stopped. Of course you don't have to tell her anything about the practices at all. Completing The best fighter in the bandit camp and reporting to Craig that no one else wants to fight you (after saying that you want to bet on someone) will end the quest.

After completing the Gone with the gold quest, Brogar (M3.5) will order you to collects depts. from the swamps citizens. You have to visit the following people: Oscar (M3.17), Hawkins (M3.7), Dwight (M3.12), Obel (M3.15), Rhobart (M3.16) (you firstly have to complete the Rhobart's bog bodies quest), Luis (M3.10), Branon, Doug (M3.1) and Enrico (M3.9). It's up to you if you will give the 200 coins to Brogar or take them for yourself.
You won't be able to collect Rhobart's (M3.16) dept until you defeat three tough bog bodies by the waterfalls near his house.
You receive this quest after talking about Brogar (M3.5) with Sam (M3.4). It will be finished after when after completing Protection money in the bandit camp, you will head to Rachel and tell her about how Brogar ordered you to collect the debts and that you have already done it. She will order you to threaten Brogar, which you can do after completing The best fighter in the bandit camp. Once you report to Rachel (M3.18) about Brogar giving up, you will be able to ask her about a place to sleep and she'll give you Brogar's old house.
Oscar the blacksmith (M3.17) orders you to find a piece of a sword for Don. Ask Luis bout the fragments (M3.10) (see A bottle of beer for the drunkard). You can buy the 1st one from Craig (M3.11) for 100 coins. Luisa will give you the 2nd one in exchange for 2 beers (you can also rob him). The 3rd one is in the chest (yellow spot). Brogar (M3.5) is in possession of the 4th one and while you can steal it from him, you can also as well complete The best fighter in the bandit camp and take it from him. You will find the last piece by Dorgan's body (Gone with the gold) (red spot). After handing over the fragments, Oscar will show you the sword. You can keep it (Oscar won't want to talk with you anymore) or give it back to him and then pay him 200 coins for being able to take it to the Don yourself.
Rachel (M3.18) orders you to check the situation at the camp. Once you complete The workers are to work again, The hunters are to go hunt and Power struggle and report to her that the camp is peaceful again, the task will end.
In order to get to the Don, you have to complete Golden fragments for Oscar. Before you head to Esteban (M3.23), you have to show the sword to Rachel (M3.18). Once you've met the Don, you can give him the sword and tell about Brogar's swindles (M3.5).

Once you're done talking with the Don, you can return to Fincher (M3.21), who will tell us about the necessity of attacking the mage forces gathered by the swamps. You can lead the attack yourself or join it under Fincher's command. Generally it's better to lead, as you'll run in the in the first line anyway. Talk with Phil (M3.13), Domingo (M3.3), Ricardo (M3.2), Craig (M3.11) and Lorenzo (M3.6). Afterwards attack the mage's camp marked on the map. Killing all the enemies will end the task. In the end, talk with Fincher and Don (M3.23).

After completing Conquest of the artifact camp, it will be necessary to move the crates throughout the camp. Fincher (M3.21), after being persuaded, will leave this job to Howkins, but you can pretty well do it yourself. You have to talk with the following bandits: Dwight (M3.12), Hawkins (M3.7) (you'll tell him to do what he's asked for), Branon and Enrico. Eventually return to Fincher.
Fincher (M3.21) will send you to the east to investigate the entrance to a strange temple. Before you go, you should ask him for an accurate map of the island. The path you should take to find the temple is marked on the map. Once you're in front of the swamps, you will have to take a poorly visible path leading east. Report to Fincher.
You have to find some treasure hunters in the Harbor city for Fincher (M3.21). The task will be completed if you find Olf (M2.54) and ask him for help. Of course you have to first free him (see Find the three golden bowls / Three golden bowls for Scordo).
Esteban (M3.23) wants you to go to the town in order to help his men. Use the eastern gate and get inside. Once you tell Scordo (see Talk to the bandit chief of Harbour Town) that the Don needs a complete report, the task will end.
After getting the three brothers out of the town (see Treasure hunter wanted), you can order them to unlock the temple entrance in the east (after you complete Tell Fincher about the strange temple entrance in the east). Afterwards report to Fincher about the progress (M3.21).
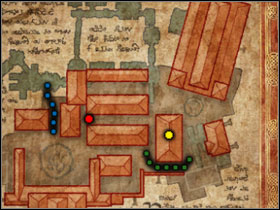
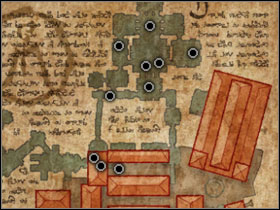
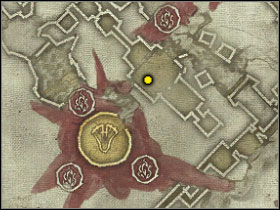
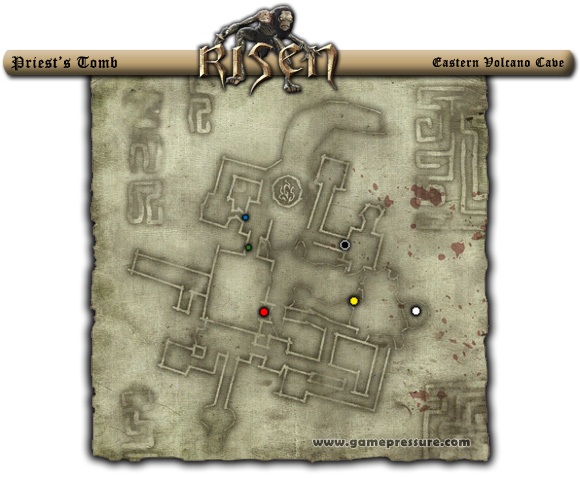
Cormac (M3.22) orders you to talk with master Illumar, who's staying at the mage's Monastery. He can help you in mastering the art of creating scrolls. You will get inside the fortress during Negotiating with the volcano keep. Illumar can be found in the yellow spot on the map. Before he'll talk with you, you have to read the two books found in the room. Afterwards head to Caspar (red spot) and ask him for a feather. You have to bring him a bone and six grave moth wings. The bone can be found in the crypt at the cemetery (blue path), inside of which you will get after giving Yoki two weed reefers, which you can get from Obel (M3.15). As for the wings, they're in the opened chests and on shelves in the rooms marked as black; the white spot is a locked chest in the room below, in which you'll find two wings. Return to Caspar and he'll give you the quill. Buy a blank scroll for 50 golden coins ant return to Illumar. You'll receive a list of ingredients required to create the given scroll and you'll also be able to learn this skill from Illumar.
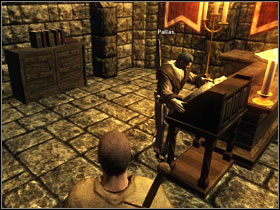
After becoming one if his men (A package for the Don quest), Esteban will order you to lead the negotiations with the Inquisitor (black spot). The mages won't attack you on your way to the cathedral. When at the entrance, inform Santiago (M4.1) that you've been sent by the Don. Pallas (M4.3) will give you a map of the place. Head along the marked path, to the upper part of the building.
On your way you will bump into Ignatius (M4.22) who you can ask about opening the gate. Now Pallas (M4.3) will let us out without any problems. Talking with the Inquisitor will end the quest. Follow the Inquisitor to the volcano entrance, where another chapter will begin. You will also receive your first teleport stone (Volcano Keep).
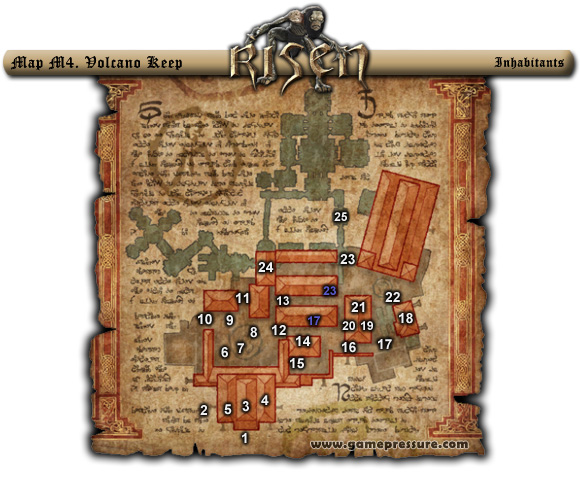
1. Santiago
2. Bryn
3. Pallas
4. Taylor
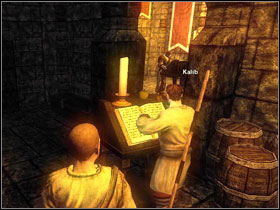
5. Kalib
6. Kato
7. Aric
8. William
9. Karlsen
10. Tucker
11. Yoki
12. Vitus
13. Caspar
14. Harlok
15. Dalman
16. Vince
17. Enzo (night)
18. Cyrus
19. Jervis
20. Erlan
21. Illumar
22. Ignatius
23. Ash (night)
24. Rufus
25. Abrax
Pallas will welcome you in the Monastery's threshold (M4.3). If you came here by your own free will and you have the recommendation from Carlos (M2.58) (see Class Choice), you'll able to choose from between a mage (melee weapons / magic crystals / runes) and an warrior of the order (melee weapons / magic crystals / magic scrolls). Depending of your choice (or not... because if you have been brought here by force, you will be only able to become a warrior), you will be sent to Kalib (M4.5) (on the left, warrior path) or Taylor (M4.4) (right, mage).
This task will begin automatically after you ask Kalib (M4.5) (or Taylor (M4.4) if you came to the Monastery out of your own will and choose the mage path) to show you where you can rest. Once you enter the courtyard, Aric will talk to you (M4.7) and another task will begin. Your guide will tell a little about the courtyard and head forward. The Inquisitor is awaiting you with a new quest. A word with the guide will end the mission.
This quest will be given to you by Aric (M4.7). You will get the staff from the blacksmith - Karlsen (M4.9), whose workshop is at the courtyard. Let Aric know about the new weapon to end the task.
If you didn't give Aric (M4.7) the required respect (call him by his name, ask to repeat) he will order you to sweep up at least ten rooms. The broom can be found near Pallas (M4.3) - in the room to the right from the Monastery entrance. The dusted rooms are those to which Kalib (M4.5) guided you in the Fallow! Quest and some from the upper level (behind Vitus (M4.12)). Clicking on a pile of dust will result in cleaning it up. After cleaning up 10 rooms, report to Aric.
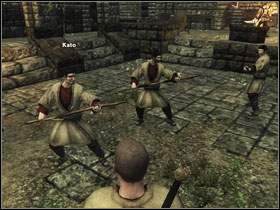
This quest will appear once Aric (M4.7) gets to know that you have obtained the staff. You have to fight three enemies. The first one is Tucker (M4.10) (who will increase your strength), the second is William (M4.8) (he'll teach you how to fight with a staff) and the last one is Kato (M4.6). Beginning a fight with each of them will result in a new quest. Despite what you might think, you don't have to fight with a staff.
Tucker (M4.10) and William (M4.8) aren't hard. As for Kato (M4.6), you'll have to fight him twice. Firstly he'll attack you on the courtyard and then the fight will move to the arena. The last enemy is Aric (M4.7). If you can't beat him take a look at the next quest. After you're done inform Vitus (M4.12) o about finishing the basic training. You will be granted access to the upper part of the Monastery.
In case you lose the fight with Aric (M4.7), you should talk with William (M4.8), who will send us to the man near Caspar's quarters (M4.13). Your next target is Dalman (M4.15), from whom, after a long conversation you'll receive the fireflush. Apart from that, you should also have two normal wines; you can buy them from Dalman for 20 coins. Now head to Karlsen (M4.9) and scrounge the worst sword in the world from him.

Now, during the conversation with z Aric (M4.7), offer the wine and choose the 1st dialogue lines. Now you can beat Aric with his own sword.
It's not a typical quest that you'll see in your journal, rather an alternative way of getting out of the Monastery. What you need to succeed is a little dexterity, access to the upper part of the building (Basic Training finished) and over 100 hp to be safe.
All you have to do is walk the roofs following the path marked on the screen. On the other hand, if you want to return to the Monastery and the door is still locked, all you have to do is go to Santiago (M4.1) - the guard by the gate.
Once you're allowed to access the upper levels of the monastery, you should head to Ignatius (M4.22). He'll firstly take you to the library and then if you talk to him again about the closed gate, he'll send you to Pallas (M4.3), who will open it.
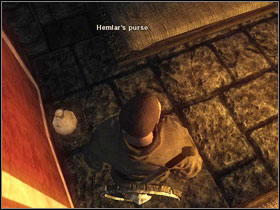
Begin with talking to Vitus (M4.12). He'll tell you to talk with Caspar (M4.13) and allow trading with him. Head to your quarters and collect every item you can find. The important ones are: the kitchen knife found by Hemlar's body, a small packet of weed resting against a bookshelf and Hemlar'a purse slipped under the bed with a wine jug beside it.
During the conversation with Caspar (M4.13), mention about the task given to you by the Inquisitor. Afterwards list out every item you have found. Head to Pallas (M4.3) and ask for the list of people who can leave the keep. You won't get it until you finish the Basic Training quest. Now there's a little running waiting for you. Ask about Hemlar each time. Begin with Ash (M4.23), show Karlsen (M4.9) the knife, talk with Tuckerem (M4.10) and then ask Harlok (M4.14) about everything you can.
Yoki (M4.11), who's guarding the cemetery entrance, is a person who you must intimidate, telling him that he'll lose his job. Next in line is Caspar (M4.13), Taylor (M4.4) (if you haven't yet talked with him, you'll have to talk two times now) and Ash (M4.23). You can avoid fighting the last one by suggesting that you can help hm. Finally you will get the weed from him and the next quest will begin.

Just some of the brothers will want to buy the weed from you. Speak with Caspar (M4.13), Kato (M4.6), Karlsen (M4.9), Yoki (M4.11) (instead of paying, he can let you access the cemetery, which will end the Access to the cemetery quest), Tucker (M4.4), Harlok (M4.14), Kalibem (M4.5), Taylor (M4.4) (you can take 50 coins more from him) and Dalman and then, with a full health bar, head to the bath house (the door near Caspar). Once the murdered appears, you will have to fight him. In return for your deeds, you will be able to choose one of two mixtures that Vitus will offer you (M4.12) (+5 strength /+5 max mana).
Yoki (M4.11) is guarding the path to the cemetery. In return for letting you through, you can give him an illusion scroll, Harlok's stew or the weed from the Distribute the weed reefers in the keep quest.
If you've finished Find Hemlar's murderer, William (M4.8) will want to talk with you. If you suggest that he can train the recruits, you'll receive this quest. You will end it by talking about William with Vitus (M4.12). Eventually you will have to let William know about the decision made in his case.
Dalman (M4.15) is searching for replacement. Tylor (M4.4) (right from Pallas (M4.3)) is the man you're searching for, but he'll agree to dismiss Dalman only in return for 10 apples. You can buy them from Caspara for 8 coins each. I have marked the locations of a couple of the apples on the screen above, in case you'd want to collect some yourself.
Inform Vitus (M4.12) that you'd like to undergo the test. Afterwards head to the crypt on the cemetery (Access to the cemetery needs to be finished) and search the skeletons in the skeletons at the very bottom. Once you find the key, open Berengir's chest, take the Wisdom in Combat and show it to Vitus. If you have also finished Dalman trusts you, Vitus will finally agree to teach you.
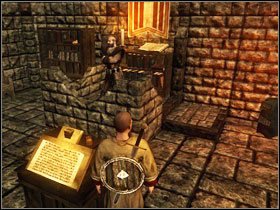
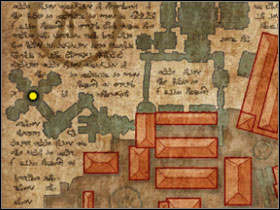
Ignatius (M4.22) will take you to the library and order to get to know a set of books. Generally, you'll just read everything you come across. Begin with asking Rufus (M4.24) to move away from the book. Afterwards pull the ring by the door and go down.
After a while you will reach the main hall. Read every book marked on the map. Pulling the ring marked with a blue dot will result in opening a door in the north, with a skeleton inside. You can lead it to Rufus (M4.24) who will help you in the fight.

Open door #1 and jump down through the hole in the floor. Read the book, go to the next room and use the crystal ball of opening. Using the spell, open doors #2 and #3. You can also open every locked chest in the area.
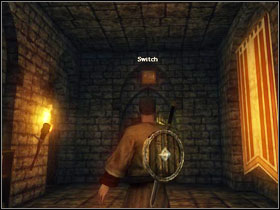
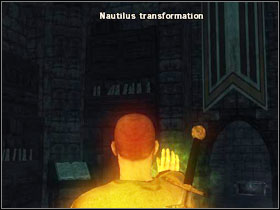
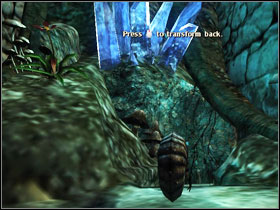
Move to room #4 and use the telekinesis crystal to push the switch above the door. Read the book inside. Using telekinesis, you can take Nautilus transformation rune from the shelf by the blue dot.
Return to room #1), use the levitation crystal and fly to room #5. The transformation crystal will change you into a crustacean, in this form you should go to #3 and then through the hole in the wall. The last book awaits you there. After pressing the switch in Abrax's room (M4.25) (marked with the green dot), you can return outside and inform Ignatius (M4.22) that you have read all the books.
Ignatius (M4.22) will order you to find the crystal of fire. If you don't have the teleportation scroll, you should revisit the library and search the chests there again. Head to the temple marked on the map. Once there, kill the quite tough war cricket.
Inside, there will be gnomes. Before heading deeper into the corridors, stand at the beginning of the one of the right and use telekinesis on the lever. Now you can safely go across the trap and take the crystal found by the novice's body. Return to Ignatius (M4.22).
Rufus (M4.24) is searching for the Wisdom in combat book. If you have finished The test of Master Vitus, you can give it to him.
Cyrus (M4.18) orders you to head to Severin (red dot). Before you set off, ask him about the details of the missions. Once there, just mention about the chests and one quest will be finished. As for the artifact - mention that Cyrus will behead you if you won't obtain it. Now just return to the Monastery and give back the items. In return you will be able to choose from between a small ruby, ring of the staff fighter and a berserker scroll.

You must click on Abrax (M4.25) the alchemist two times before he'll want to talk with you. After a looong conversation, he'll order you to find two novices and will order you to find two novices and give a list of plants he needs. You will find Sirius and Krayban at spots #1) and #2.
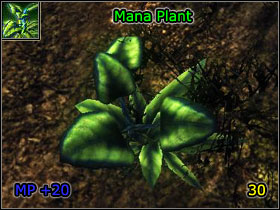
Sirius #1 is sitting by a campfire at Severin's farm (M1.9). He'll give you some plants and direct you to the woods. At spot #2 you will find Krayban's body and some gnomes. Before you return to Abrax, you'll have to collect 6 healing plants and 4 mana plants.

The quest (M4.25) will end with giving the alchemist the plants, but you can additionally get 2 small healing potion for information on each of the novices.
Begin Illumar's (M4.21) test with reading the two books by the entrance. Return to your teacher and inform him about the progress. The next step will be finding the quill. You can buy it from Enzo (M4.17) for 250 coins or ask Caspar (M4.13) about it and receive it for free. Quite the tough choice... As for the spell ingredients, you should talk with Abrax (M4.25) (and read the old book next to him) and Rufus (M4.24), who will cooperate only after you complete Rufus is seeking wisdom in combat. Exiting the library, you should read the old book to the left of the entrance.
Afterwards speak with Erlan (M4.20). You will learn about his fight with Enzo (M4.17). Head to the kitchen and talk with Harlok (M4.14). You will have to pay him 200 coins for a turkey. Share your knowledge with Enzo and go to Erlan to give him the food and get to know about the needed ingredients. Just a word with Jervis (M4.19) and you can return to Illumar (M4.21). The quest will end after you finish learning about creating scrolls and make one of you own. You can buy blank scrolls from Caspar (M4.13) for 50 coins.
Jervis (M4.19) needs a Create illusion scroll and two blank scrolls [buyable from Caspar (M4.13) for 50 coins each]. In return for our help, Jervis will teach us skills typical for a hunter.

This quest is given to you by Pallas (M4.3) if you choose the warrior path and have undertaken the other tests. You need to go to Harbor city (the entrance gate is marked on the map) and complete Medicine for everyone and Talk to the commandant of Harbour Town. Afterwards do a favour for the mages four times in appropriate quests. Then complete Where are the artifacts disappearing to? And you can return to the Monastery. What's intriguing is that if you complete the tasks in favour of the bandits, nothing will really happen. Pallas will cancel the test but Ignatius (M4.22) will recognize it as passed, which won't disrupt the Initiation.
Karlsen (M4.9) will give you a fighting staff. With the new weapon, return to Ignatius (M4.22).
If you have finished all the Master tests and the A worthy weapon quest, you can begin the ritual during which you'll have to answer some questions. As a result of each answer, your stats will increase (adequate information about the choices are visible on the screen). Once the ritual is over, your crystals knowledge will increase by 1 point. Follow the Inquisitor to the volcano entrance. You will begin another chapter and receive your first teleportation stone (Volcano Keep).
A clear distinction into classes will appear in this chapter. In effect the guide has been divided into sections depending on the path you have chosen and shared ones (see Risen Island) which you will have to complete regardless of which side of the conflict you're on.
When (during the main task - Crystal disks for the Inquisitor) you will ask Esteban (M3.23) about the disk that's in his possession, the Don will order you to bring him every disk for which the Inquisitor is searching. After returning the disks, you will be able to buy a new warrior armour from Don for 2000 golden coins. Return to the Inquisitor and inform him about the bandit chief's conditions.
After giving the disks to the Inquisitor (Crystal disks for the Inquisitor), Mendoza will order you to consult Ignatius (M4.22). After talking with Fire Master, you'll receive the amulet of the Holy Flame, which protects you from each type of damage. Return to the Inquisitor and open the gate together.
Before Vitus (M4.12) agrees to teach you how to use the magic crystal, you'll first have to acquire one. One of them can be found in one of the locked chests in the library (see The test of Master Ignatius).
Pallas (M4.3) won't begin to teach you the frost crystal magic, until you pay him 1000 golden coins. Bringing him a bog body's heart (cold heart) will lower the sum by 250 coins and a small sapphire by another 250 golden coins. The map shows the monsters' lairs and as for the crystal, you should see the Thieving gnomes quest. Before Pallas starts the teaching he'll give the frost crystal.
![1, 2, 3 - Chapter 2 - [Map M5] Risen Island - Crystal Disks - Chapter 2 - Risen - Game Guide and Walkthrough](https://game.lhg100.com/Article/UploadFiles/201512/2015121709130174.jpg)
1, 2, 3. Cyrus is late
4. Where is the golden delivery?
5, 6, 7, 8, 9, 10, 11, 12, 13. Off to the west coast
14. The mystery of the eastern temple

The Inquisitor will ask you to find five disks scattered thorough the island. Ask him everything about them, which will give you access to the quests. The first disk is in Don's possession, he'll give it away with no problem (a small exception is the bandit's path - (see Crystal disks for the Don). Complete the following quests: The mystery of the eastern temple, Cyrus is late, Where is the golden delivery? and Off to the west coast.
Give the disks to the Inquisitor, who's standing by the volcano gate. If you have chosen the warrior path, you will be promoted to an officer and receive a new armour. Once you're ready for the upcoming fight, let Mendoza know. The gate will be opened and a group of enemies will attack.


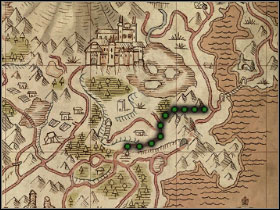
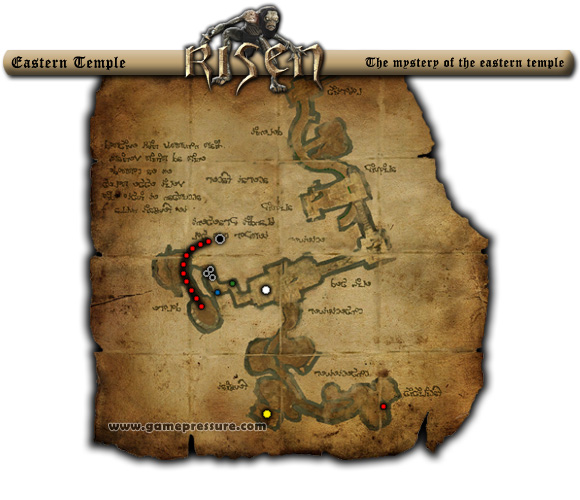
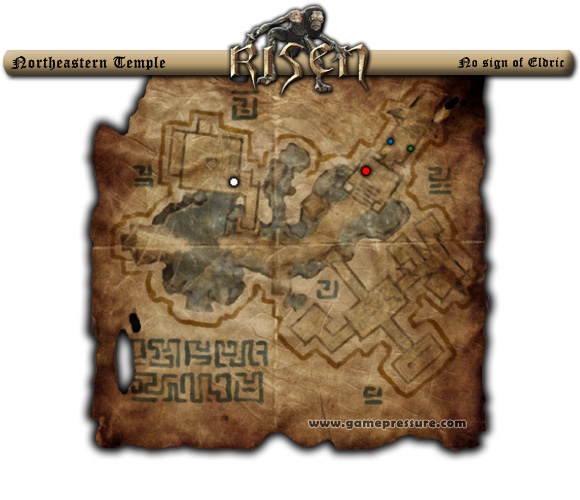
Fincher (M3.21) will give you a teleportation stone (bandit camp) and direct you to the temple in the east (M5.14). In case you haven't been there yet - follow the map and turn right before the marshes, into a path that's easy to miss.
Once there, you will find Maliko (M5.14) by the entrance and he will fill you up on the situation. Fall down through the trap (hole in the floor) a couple steps behind him and in the corridor below you will find Dirk. Enter the hall through the hole on the right and kill the ghoul. At the exit from the chamber, pull the lever by the wall, go deeper into the corridor and use the windlass by the bars. Eventually lead Dirk through the opened corridor and he'll give you an old bust. Return through the marshes to the main temple entrance.
This time head into the corridor on the right (look out for the trap in the floor). Deeper inside the temple you will come across Adan and Dytar. Try to determine what has happened and go through the hole on the left (don't worry about the bars for now). In one of the sarcophaguses you will find a decent sword (demon blade) and further you will come across two ghouls and Danilo's body, by which you will find a map.
Another bust is waiting for you in the sarcophagus (yellow dot). Go deeper into the corridor, kill the ghoul and use the lever (red dot). Talk with Olf and he'll give you the 3rd bust. Return to the chamber with the bars (white dot). Use the bust on the altar by the bars and do the same with the other two.
Pick up the nautilus transformation scroll at the green dot. Don't step on the floor marked with black dots, instead use the scroll and go through the hole in the wall marked with a blue dot. From the sarcophagus room, go into another one below (black dot). Turn left and climb the ledge.
Go further and you'll arrive at a big room with a hole in the ground. You should find yourself inside a building made of light bricks. Go to the ground level, through the door and you should see a lizard priest who's in possession of the disk you're searching for and, among other items, a teleport stone (eastern temple). Using the stone you can return to the temple entrance and talk with each of the bandits. They will share their loot with you. After talking with Maliko (M5.14) you can return to Fincher (M3.21) and give a report.
You will find Cyrus by Eldric's house, in M5.1. You have to search the house for a green druid sleeve. Under the table you will find a mana potion recipe. Cyrus is not willing to help, so go to the neighbours (M5.2).
Jasmin (M5.2), in return for 200 golden coins (buying her skins) will allow you to use her wolf pet - Rufo. If you don't have raw meat with you, buy it from her and feed the wolf. Afterwards make him smell the sleeve. Follow the wolf, attacking the monsters on your way - the wolf will stop four times in total. During the 3rd time you'll find a Druid's staff. By the 4th, you'll find the temple (M5.3).
Touch (stand and press) the magic barrier and return to Cyrus (M5.1). Lead him to the temple entrance and ask to get rid of the barrier. Use the destroy magic force field scroll, get rid of the obstacle and go inside. Deal with the lizardmen in the main hall and go right. There kill another enemy and take the map of the temple from the chest.
Fight your way through the warrior and eventually you'll reach the white dot, where you will have to face a stronger enemy (watchman), who's in possession of a key to Dork's cell (the last one on the floor). The prisoner will tell you about a ring that's needed to get to Eldric. Head to the red dot and use the windlass.

On the wall to you right (green dot) you will find a ring which will open the passage on the parallel wall (blue dot). Deal with the priest, take the teleport stone (northeastern temple) and open Eldric's cell on your right. Inform the druid that you're in need of help, take the disk and return with Eldric to his house (M5.1). You can give him back him his while you're on it. In return he'll give you an amulet [+5 dex, +3 str].
Before the druid will be able to repair the disk, you have to bring him a magic crystal from the chest behind him. Open it using the key received during the conversation. The ritual will take place on the altar that Rufo came across earlier.
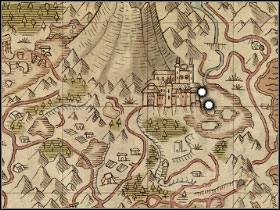
Head to Severin's farm (M5.4). After a short conversation you will find out that you came right in time to fight off a gnome attack. It turns out that the gnomes have taken Severin's disk. You have to get to their leader's - Gyrger - headquarters (big black dot). Head to the eastern edge of the island and follow the path.
Cross the bridge, fight your way through groups of goblins and eventually you'll reach the ruins. In the chest at the very beginning you will find a hotpot recipe.
Gryger is waiting for you at the highest level of the keep with the golden crystal disk in his pocket. However before you can get to him, you will have to face a big group of gnomes and their stronger versions (chieftains). It's worth to take notice of the metal rings on the walls, as they open many additional rooms with treasure inside. On your way back, tell Henrik (across the bridge) about killing the beast. You will receive a horn bow. After returning to Severin (M5.4) you can tell him about your finding and get additional 500 coins.
After completing Patty wants to leave town, you should meet your friend at (M5.5). When asked to continue the story of her father, she'll lead you to a grave in the west (M5.6). After getting the key, dig out the closest grave (stand on the ground with a shovel in the inventory and click). Get the old casket and give it to Patty.
Now it's time to search five anonymous graves placed thorough the island. Visit (M5.7) [carefully go down the rocks from the Cathedral's side and then use the teleport], (M5.8) [under the rock, behind Leon's house], (M5.9) [at the right side of the island, looking from the other shore], (M5.10) [you can visit Patty at (M5.6) and hear her interpretation of the hints], (M5.11) [to the right from the ruin's entrance, next to the rocks] and in the end return to (M5.6).
At the cemetery (M5.6), instead of Patty, you will find Erong. Follow him to the ruins and further - to (M5.12). At the intersection, choose the "upper" path. After fighting your way through the horde of skeletons, you will eventually reach Romanov (M5.12). You can kill them at once, or make a deal. Either way, enter the cave.
Don't touch the first chest. Stand in front of it and turn right. Enter the tunnel, kill two ghouls and move to the room with crystals. On the left, at the dark recess, try to find an almost invisible grave with the name "Dillinger" carved into it and dig out a chest with the disk inside.
You have a couple of options here. You may not give the map to Romanov (M5.12) and kill him, give it and then kill him/get the key to Patty or not kill at all and forget about your friend. In case you'd want to save her - having the key from Romanov, head to Ms Happy (M5.13) and search for a door leading to the ocean. Patty (M5.13) will be happy if you give her the map.
In case you gave Romanov the map in return for the key to Patty's cell (M5.13) during Off to the west coast, you will now have to get it back. The old pirate is sitting with his men by a campfire near the city gate (M5.5). He'll attack after seeing you and after a short while you will be able to take the map back to Patty.
Apart from the distinction into different classes, in the 3rd chapter I also included a walkthrough of a couple of additional quests. They were available earlier, however to complete them you have to travel through a major part of the island and high battle skills, both of which shouldn't be a problem at this stage of the game.
As for the 3rd (and 4th) chapter, it's worth telling that you will need levitation, telekinesis and nautilus transformation spells (or scrolls). All 3 of them can be bought from Illumar in reasonable amounts.
![(red) - Chapter 3 - [Map M6] Risen Island - Additional Quests - Chapter 3 - Risen - Game Guide and Walkthrough](https://game.lhg100.com/Article/UploadFiles/201512/2015121709130731.jpg)
(red). Leon
(grey). Lord Patroscon
1, 2, 3, 4, 5. The cursed lords
3, 6, 7, 8. The swords- Stormwind and Souldrinker
Once you acquire one of Saurian swords (Lizard sword), you should head to the blacksmith in Harbour city - Walter (M2.50) and show it to him. From now, in return for obsidian, Walter will be able to create a form from which you will be able to forge better quality swords. Of course to do that, you need smith skills.
Leon (red point) will order you to find 5 rings, which are in possession of skeleton lords. Each of the buildings marked on the map nest of a large group of skeletons.
At (M6.1), a skeleton will attack after you cross the threshold. Take the vassal ring from his bones. You can climb to the top, where you will find a +5 max mana potion and a small amber in the locked chest.
You can get to the ruins (M6.2) by following the marked path leading across the bridge. In this case, your target is also waiting inside the building. Remember to take the ring.

The road to (M6.3) will lead through the already visited gnome terrains. However instead of going to Gyrger, go to the ruins on the right and enter the catacombs. Take the metal ring out of the wall.

Go through the passage created in the opposite wall. One of the skeletons on the lower level of the catacombs is the lord. Take a closer look at his sword (traitor's blade) and of course take the ring. Search the corridors, opening each chest and searching the bones. You should find a small sapphire and a sword tip, among other items.
Number (M6.4) has also been already visited. Search for an entrance to the catacombs once more, where a lord with his companions and a ring is awaiting you. Search the rooms and chests, and you should find a potion that permanently increases strength recipe.
At the ruins at (M6.5), the lord is outside this time. However you should climb to the top of the tower either way and take the magic protection spell from the chest. After finding all the rings, return to Leon. Give him the first two and then ask about Lord Patroscon (grey point).
The entrance to Patroscon's area is inside a cave. The lord has an interesting shield (rune shield) and the conjure skeleton spell with him. Once more head to Leon.
You can give him the remaining rings. In return for finding them, you will receive 300 coins and three scrolls (tell joke scroll, transformation into an ashbeast scroll, open locks scroll).
There are four sword parts hidden in different parts of the island. If you completed The cursed lords M6.3, you should already have one (Sword Tip). The second part (M6.6) (Broken Bastard Sword) is in a chest in the ruins under the island in the south (entrance from the west part). Also take an emerald from the chest. In order to forge the sword (Stormwind) from these parts, you need to have the smith skill on at least level 1.
The next part (Broken Two-Handed Sword) (M6.7) is in a chest by the ogres next to a waterfall in the north. The last, fourth part (Sword Tip) is lying in a chest on the beach at the west coast (M6.8). In order to forge the sword (Souldrinker) from these parts, you need to have the smith skill on at least level 3.
After returning to town, inform Carlos (M2.58) that he should leave, as the city is returning under Esteban's rule. At the nearest opportunity, you will meet Don by his former house (see Get rid of Toni / The family heirloom). After talking to him, you will be nominated to a captain and get the chance to buy a new armour for as much as 5000 golden coins. You can tell the Inquisitor about Don taking over the city.
Carlos (M2.58) will order you to talk with Magnus (by the west city gate) and Leto (east gate). You have to get rid of the Saurians gathered in the marked spots (black - three weaklings, red - strong leaders). Afterwards report to both gates guards and Carlos about the progress.
After opening the volcano gate, riots break out in the Monastery. You have to find the mages who are still alive and send them back to Ignatius (M4.22). Visit Cyrus (#1), Illumar (#2), Abrax (#3), Vitus (#4) and dead Pallasa (#5), who you can now rob. Return to Ignatius and tell get him the dead mage's notes. After finishing The supplies from the library and The lizard warrior, report him about securing the object.
Abrax (#3) will send you to his workroom. Get there through the library (see The test of Master Ignatius). Now you must defeat 10 intruders placed in the marked spots of the building. Remember about the crystal blocking the use of magic (drive the enemies away from the crystal and kill them then). You have to search every dead body. Once you get back to Abrax, you should have three alchemical supplies and some notes. On your way you should also meet Sirius to whom you can give the notes (if you're playing as a bandit, Sirius won't be in the lab). Free of charge or for 200 coins. Don't forget to talk with Abrax.
Vitus (#4) will order you to get rid of the invader's leader, dwelling at the centre of the graveyard crypt. You can report to the mage after completing the task.
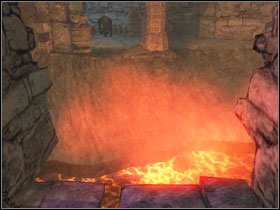
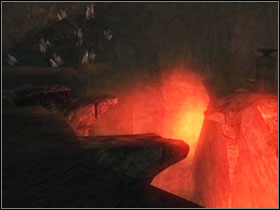
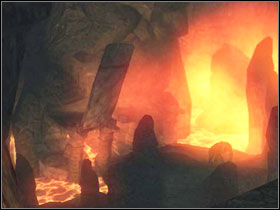
Inside the volcano, the Inquisitor will order you to open the great gate. Go right. The corridor will lead you to natural "stairs" ending with a narrow crack in the wall. Turn into a nautilus transformation and enter the temple.
Get rid of the ghouls and go the next room through the hole in the ceiling. In the corridor, jump over the floor trap and fight with the Saurians.

Jump over the spiked trap, get your weapon (spells) ready and fall down through the crumbling floor.

The stairs will lead you to a windlass - turn it. Return to the Inquisitor (you can use the "window") and report about your actions. It's time to head left.
After a few steps you should find a tunnel on the left. The tunnel turns right and after a while you should reach a pit with some ruins and three enemies on the other side of it. You have to use levitation to get there. You will find an old bust by one of the bodies.
Push the lever in the corridor on the right. Enter the corridor on the left, safely cross over the bars (the trap which you have disabled) and stand in front of a thin wall. Use the pickaxe [have it in the inventory and click the wall] and break through to the other side.
Push the lever on the other side and step into the next room at the end of the corridor, where some enemies will greet you. Take another bust from one of the bodies. Place both of them on the pedestals. Use the windlass in the newly opened room. This way you will open the great gate. Now you can read what's written on the pillar by which the Inquisitor has been standing until now.
After opening the gate, Mendoza will send you to search the inner part of the temple. Before you step below the large block, use telekinesis on the lever in the distance. The happy team will move further and you will end the task. Take a look at the next two stone pillars that you find.

Together with the Inquisitor, you reach a conclusion that the bridge needs to be lowered. Take the corridor on the right and go to another bridge. Use spells or a distance weapon to move the windlass on the other side. Deeper into the temple, you will find Brent. Complete The search for the map quest.
You can take a look around the caves. The corridor that's going down will lead you to Saurian buildings. In one of them you will find an anti-magic crystal, the other hold a big amount of magic scrolls. Return to Mendoza and show him the map. After reaching the small room with the Inquisitor, you will be sent to Vince (The opening to the crypt).
When you ask Mendoza about what needs to be done, he will lead you to a room with a pedestal on which you have to place the old bust received from the Inquisitor. Fight your way through the enemies, reach a stone pillar and examine it. Return to Vince. Have a word with the digging man and the Inquisitor and you can go inside the fortress through the hole in the wall, using the nautilus transformation scroll.
Pick up the emerald. The point at which you start is marked with a green dot. After killing all the enemies in the nearby corridors, the gatekeeper should attack you (he's normally by the windlass), who will leave behind a key which opens the crate marked with a yellow dot. The stairs leading to the upper floor are marked with a black dot. The red one is for a windlass (on the upper floor) which will lower the bridge and create a path for the Inquisitor. Return to the crate at the yellow dot, open it and talk with Ursegor (white dot).

Brent will suggest you find a map of the temple. He'll send you to Jorgensen, who's in the deeper parts of the temple. Go through the passage at Brent's left hand and further - down the path marked by the mushrooms. At your left you should find a runesword and further - Jorgensen who will tell you to follow a nearby path.

Turn right at the intersection (violet lights). At the end of the corridor you will come across a group of enemies. One of them will drop a key to the cell. Go outside and follow the path. On your way you will encounter among others, an Ashbeast (red dot).
After getting to Jasmin's house, try to save the people there. At one of the bodies you will find a map of the temple from which you have just left. Return to Brent.
Mendoza will send you for Vince. Once he goes to the Inquisitor, you will be able to read the text carved into the column.
Ursegor will send you in search of his subordinates, possessing specific crystals. Take the golden bust and return to the corridor in which the Inquisitor is at the moment.
Begin from placing the bust on the pedestal in the room marked with the black dot. Inside you will come across Zul Utur. At his body you will find some inferno and conjure skeleton spells, a sapphire, his skull ant the crystal you need. Take the bust back while going out of the room.
The room marked with the red dot will lead you to a Zel Zeret, a tougher version of the Ashbeast. Remember about searching its body.
The last enemy, called Zal Zaran, is waiting in the room marked with the yellow dot. Take his weapon (titan sword), skull and the crystal. Return to Ursegor and free his spirit. Open the sarcophagus and take Ursegor's skull.
You have to open the big gate in front of the corridor leading to Ursegora. Find the four pedestals and place the skulls in the order seen above.
After opening the door, things will get quite messy. Defeat you former allies and listen to what Ursegor has to say.
After getting the rune (destroy magic barrier) from Ursegor's sarcophagus (see Find all the pieces of the Titan Armour), you should talk with Illumar (yellow). You can tell the mage to create the scrolls but you can do it yourself as well (after completing Talk to master Illumar). It's worth choosing the first option, as you will save ingredients ant time (Illumar creates 5 scrolls at a time).
If you let Brogar (red dot) live in the first chapter, he will be waiting for you in the temple (M7.2) from The Titan Helmet quest. This time you have to kill him for good.
During the conversation with Ignatius (M4.22) (Talk to Ignatius about the volcano temple), the mage will say that you should become one of the Masters. Begin the ritual, at the end of which you will get new mage robes. Eventually you should talk with the other Masters and accept some gifts from them.
During the conversation with Carlos (M2.58) (Talk to Ignatius about the volcano temple), the Inquisitor's man will nominate you to... An Inquisitor himself. You will also receive a new armour.
![(white) - Chapter 4 - [Map M7] Risen Island - Titan Armour - Chapter 4 - Risen - Game Guide and Walkthrough](https://game.lhg100.com/Article/UploadFiles/201512/2015121709131623.jpg)
(white). Patty
(red). Saurian leaders
(grey). Eldric
1. The Titan Shield
2. The Titan Helmet
3. The Titan Hammer
4. The Titan Armour
5. The Titan Boots
Talk with Ignatius (M4.22) about the situation and Mendoza's actions. He'll tell you to talk with Don Esteban who will give you a +5 str potion and with Carlos who will give you three berserker scrolls. Eventually report to Ignatius about what you managed to achieve.
After reading the stone columns in chapter 3, head to druid Eldric and report about the progress. You will receive two transformation into an ashbeast scrolls and two speed scrolls.
Ursegor orders you to find five pieces of his equipment. Begin from taking the destroy magic barrier rune from his sarcophagus. Afterwards complete The Titan Shield, The Titan Helmet, The Titan Hammer, The Titan Armour and The Titan Boots. With the equipment complete, head to Eldric (grey dot at M7) who will fix the items. Return to Ursegor and report that the equipment is ready. It's time to confront the z Inquisitor.

Take the eyepiece and Ursegor's skull from his body. Place it on the appropriate pedestal and the door to the Titan room will open.
Notice - after entering the room, the Final fight will begin, which will definitely end the game. If you want to do some more quests, now's the last chance to.
At (M7.1) you will find a temple protected by ogres. Inside, opposite to the entrance, between some scorpions you will find a skeleton, from which you can take a map.
Go to the corridor higher up. Take the eastern volcano cave teleport stone from the body of one of the Saurians (yellow dot). Kill the Ashbeast and use a scroll to deactivate the magical barrier in the marked spot.
In the big room, read the map from the stone pillar.
Afterwards go to the corridor on the right (red dot). Turn the lever, which will open the bars; jump over the trapdoor and take the bust.
Fall through the hole in the floor on your way back. At the marked spot (white dot), dig up the Titanwing. Go to the next room at the yellow spot.
Approach the thin stone wall and break through it using the pickaxe. At the spot marked with black, use telekinesis on the lever on the left wall.

Use levitation to cross the lava river and then use the nautilus transformation (spell/scroll) and squeeze through a narrow corridor at the blue spot, leading straight to the bust. Pushing the first lever will open the door and the second will unlock a passage leading to the main room in which you have read the map on the pillar.

Place the busts on the pedestals. At the top of the stairs you will find the shield of the Titan Lord, which is a part of the equipment you're searching for. After taking the artifact, the door through which you got to the room will lock. You have to go to the small room on the right (gray dot) and push the lever hidden there. You'll find an amber in a lizard's body nearby.
There are two way of getting into the temple (M7.2). The first one is to go through the corridor of light in The Titan Shield. The second one is using the marked passage to the north of the swamps. Once you're there you can get a map of the temple from the miner's body on the left.
Get to the spot marked on the map. If you have the levitation spell/scroll, head to the door below. If not - use a spell or distance weapon to move the windlass on the other side, cross the bridge and take the levitation scroll from the chest. Break the magical barrier and go inside.
Look out for the trap in the floor. On the left there is a small room with a golden bust. Stand before the raised bars and use telekinesis on the bust of a king.
On the opposite side of the room, search for a corridor ending with a thin wall. Break through it using the pickaxe. The room with scorpions is important, but you can go further (2 x Ashbeast) and take the transformation scroll from the locked chest. In the room with the scorpions, use nautilus transformation and go through the hole in the wall.
Defeat one of the Saurians and take the bust of a king from his body. Take a sapphire and a small ruby from the chest and place the bust on the pedestal. Exit through the opened door and use the telekinesis trick again.
After placing the busts on the pedestals in the main hall, a new room will open with the helm you're searching for inside. One of the priests defending it will have a western volcano cave teleportation stone.
Before you leave the temple using one of the teleportation stones, it's worth to look up and with some jumping and a little help from levitation, get to the thin wall by the green-lit, broken stairs fragment. Inside you will find a locked chest with a good titan scepter. Break through the next wall. Look out for the trapdoor and take a rare diamond from the locked chest.
Going further will lead you to a lever opening a passage to the lava-filled cave you already know.

Get into this temple (M7.3) using the passage from Esteban's swamp hideout (M1.8). To the left from the gold pile, next to a campfire and a dancer.
Traditionally - break the blue barrier with the spell (see Find all the pieces of the Titan Armour). Before you are two empty pedestals.
Head right and levitate from the stone block to one of the big windows. Break the thin door in the middle of the wall and use the button on the revealed wall.
This way you have opened the door on the right (next to the stone pillar). Inside you will find five sarcophaguses. In the third you will find the titan axe and in the fourth a lizard mage bust. Opening the others will summon skeletons.

Return to the main room (with two pedestals) and go to the other (left) side. You will find a button behind a thin wall on the far left. Pressing it will open the middle passage.
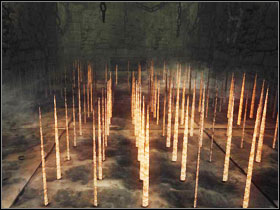
Before you as is a floor filled with spikes. There are three repeating sections (1, 2, 3, 1, 2, 3, 1, 2... etc.) where some of the spikes don't move (black spaces) and the others move in and out (red). Step on the green spaces. Your moves have been marked with roman numbers. Once on the other side, open the sarcophagus, kill the skeleton and take the lizard mage bust from the enemy's remaining. The safest way to return is to use the teleportation stone leading the bandit camp of the swamps. Return to the main room with two pedestals.
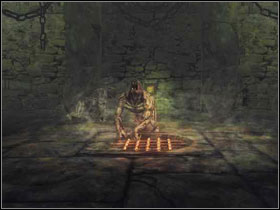
Place the busts on the pedestals. Two undead beasts and an immortal skeleton await you in the next room. Get rid of the beasts and avoid fighting the skeleton.
There are button on three of the walls. Each will activate a fire in the centre of the room. The trick is to lead the skeleton into the fire. He blindly runs forward, so you should manage to do it eventually. Take the hammer of the Titan Lord from its remaining.
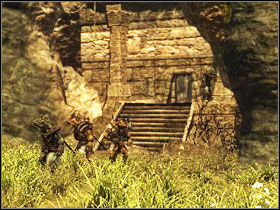

To the north of Severin (M7.4) you will find an entrance to another temple. Before you get inside, you will have to deal with one of the Saurian leaders. Inside take the first corridor on the left.
Stop before the cracked floor fragment and use telekinesis on the lever. If you go left, defeat an Ashbeast and break the red barrier with a spell, you will get to a sarcophagus, next to which, on stone ledges, you will find two potions that increase your stats [+100 exp, +10 max hp]. Return to the place in which you moved the lever.
Open the blue barrier on the right. Break through the thin wall at the end of the corridor.
Stand in front of the pedestal and turn back. Use telekinesis to take the priest's bust from the ledge above the entrance and place in on the pedestal.
The opened door on the right will lead you to a sarcophagus in which you'll find an armour piece and the titan staff.
On the way to the temple (M7.5) you will meet Patty (white dot on M7 [of course if you have saved her in Off to the west coast]). Together with your friend, fight your way through the Saurian hordes (and a leader in the end) till the waterfall. Take a small sapphire from the nearby, locked stone chest. Split with Patty and go through the waterfall.

The main corridor will lead you to a passage between violet crystals. Kill the Ashbeast and head deeper into the corridor.
Get to the next room through the hole in the "ceiling". Pick up the berserker sword sticking out of the ground. You have to break the blue barrier. Before you there will be a hole in the floor and afterwards a spine trap. Carefully jump over both of them.
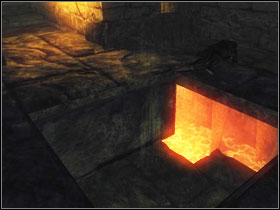
Use the trapdoor. Take a small sapphire from the sarcophagus on the right. In the big room, read the temple map from the stone pillar by the entrance.
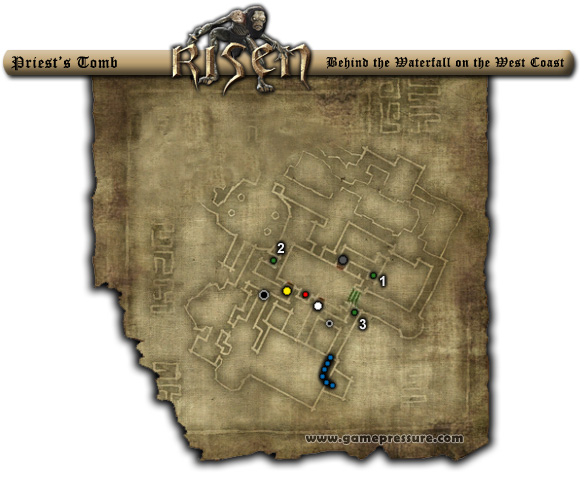
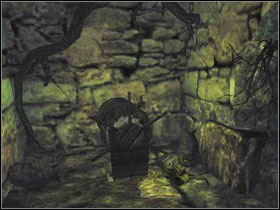
The passage marked with a grey dot is open. In the corridor you will find two spike traps on the floor, which you can avoid using levitation. The crossbow with bolts lying in the middle may come in handy if you don't have a distance weapon with you. The lever on the left deactivates the spikes and there is a small anti-magic crystal in the chest. On the right there is the first of three windlasses (green dots) which you must turn. Return to the room with the map pillar.
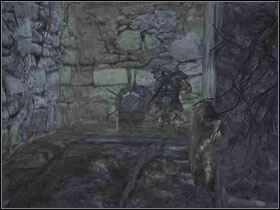
Break through the wall at the red dot. Use the revealed button twice, which will result in unlocking the passage on the right (yellow dot). Go to the second green point and use the windlass. Enter the corridor marked with black.
You can cross the small tunnel using the nautilus transformation spell. On the other side you will find a locked stone chest and inside of it a titan bow. Use one of the levers opening the passage to the corridor. Return to the spot where the small tunnel entrance is.
In the distance you should see a windlass. Shoot it using a distance weapon. Return to the main room (with the map). Use the button at the red point twice. Go to the corridor marked white. Cross the lowered bridge and turn left.
Pull the band on the wall, jump over the gap and look into the room behind the raised bars on the right. On the stone table behind the sarcophagus you will find a ruby. In the sarcophagus - two small rubies. After going out of the room, head towards the third windlass. Pull the lever (small, black dot) which will open a passage to the main room.
In the revealed room (behind three green lines), there are two Undead Beasts waiting for you. In the chest above you will find an armour piece and a titan crossbow.
The fight with the Titan is all about the proper reactions to the attack patterns described below. It requires dexterity but you shouldn't have too much problems if you can keep up with the things happening on the screen.
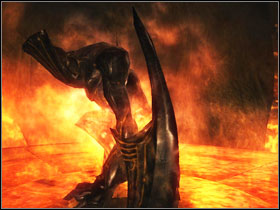
White runes keep showing up on the floor. From the moment the rune starts to blink white you have around five seconds to move to another block. After that the block will disappear, leaving a hole in the floor. After another five second the block will appear once again and other ones will disappear, so keep an eye on the floor all the time.
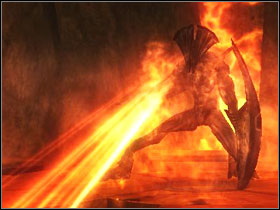
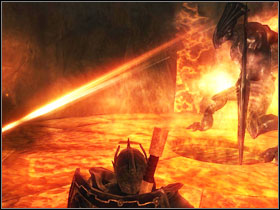
When the enemy move one leg forward, it means that he'll attack with an energy beam. Avoid it by running in the opposite direction.
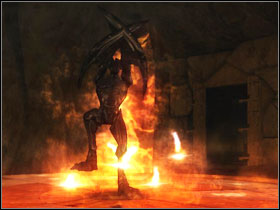
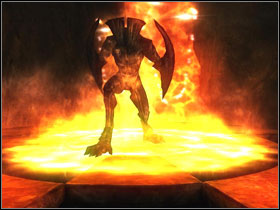
The Titan will use this each time you get too close to him (and randomly too, as well as the others). He crosses his "hands" and raises his right leg. Once he lowers it - jump to avoid the wave.
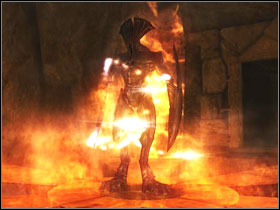
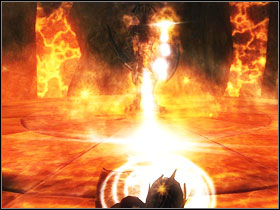
When the enemy summons white missiles that surround him, you should quickly use the shield of the Titan Lord. There are two variations of this attack. The missiles will be launched one after another or next to each other. Reflecting the missiles (and hitting the Titan) will allow you to attack.
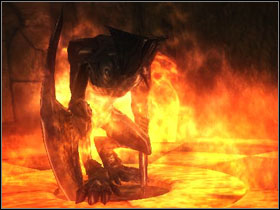
The only way to damage the Titan is to stun him (lasts for around 5 seconds) with his own missiles (see Magic missiles) and then hitting him with the hammer of the Titan Lord. He falls after receiving 7 hits. Follow this patter and eventually you will see Risen's ending credits.
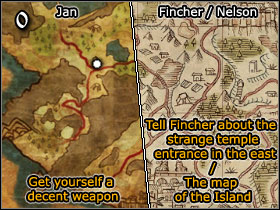
Introduction
The following text is a description of the world in the Risen game. You will find some information about all the in-game maps, teleport stones, plants, animals, skills, and most items, with exact location of each of them. I have also described properties of each weapon, mixtures and many, many others.
In the part about teachers I've strictly defined the level of skill that you are able to achieve, and possibly the quest after which (or before) they are going to talk to you. Sometimes [roman digits] will occur, which means, that this person in particular will not teach us anything, nor trade, until you meet the specific chapter of the game. I've marked regular merchants with the blue color. Enjoy your read.
Lukasz "Terrag" Znojek
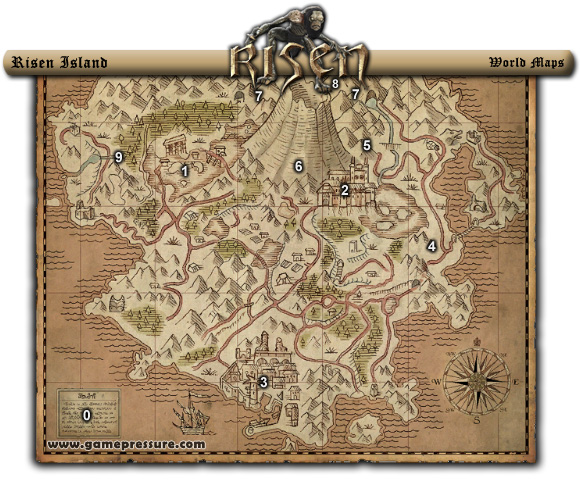
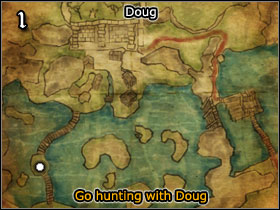
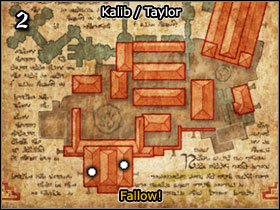
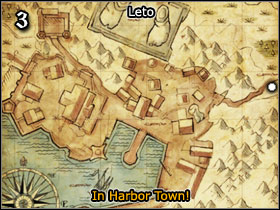
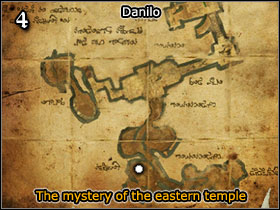
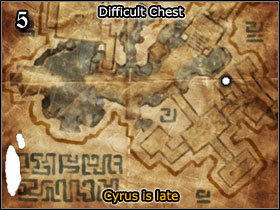
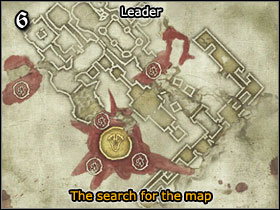
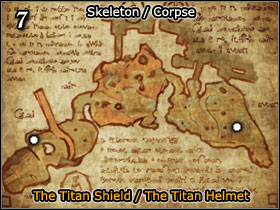
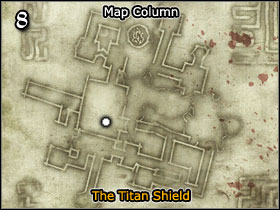
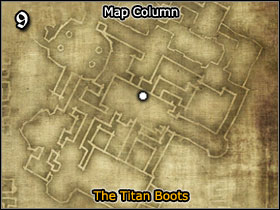
![1 - World Atlas - [Map M1] Risen Island - World Atlas - Teachers and Merchants - Risen - Game Guide and Walkthrough](https://game.lhg100.com/Article/UploadFiles/201512/2015121709132830.jpg)
1. Ruben
2. Leto
3. Jasmin
4. Henrik (Dexterity [100], Bow [7], Sneak, Skin Animals)
![1 - World Atlas - [Map M2] Harbor Town - World Atlas - Teachers and Merchants - Risen - Game Guide and Walkthrough](https://game.lhg100.com/Article/UploadFiles/201512/2015121709132875.jpg)
1. Delgado (Dexterity [100], Pickpocket [3]) - after Protection money from Costa
2. Elias
3. Costa
4. Philus / Nico - before / after Philus wants to sell his fish shop
5. Flavio
6. Cole (Dexterity [100], Bow [7], Sneak, Cut Animals)
7. Cutter (Strength [100], Sword [4]) - before Evidence for Marcelo / Bring the packages back to Weasel
8. Cid (Dexterity [100], Open Locks [3], Sneak) - after What is Rodriquez planning?
9. Kayleigh
10. Patty [II] (Open Locks [3], Acrobatics)
11. Ukkos (Strength [100], Axe [7])
12. Dargel
13. Jack
14. Edgar (Strength [100], Sword [7], Crossbow [10])
15. Garth (Alchemy [1])
16. Leonardo (Alchemy [2-2])
17. Alvaro
18. Walter (Strength [100], Smithing [3]) - after Walter needs a break
19. Olf (Prospect Ore)
20. Konrad
21. Felipe (Strength [100], Staff [4])
22. Carlos [IV] (Strength [100], Staff [10])
23. Scordo
![1 - World Atlas - [Map M3] Bandit Camp - World Atlas - Teachers and Merchants - Risen - Game Guide and Walkthrough](https://game.lhg100.com/Article/UploadFiles/201512/2015121709132832.jpg)
1. Doug
2. Ricardo (Crossbow [4])
3. Domingo (Strength [100], Axe [7]) - after The best fighter in the bandit camp
4. Luis (Dexterity [100], Bow [7], Sneak, Skin Animals) - after A bottle of beer for the drunkard
5. Sam (Dexterity [100], Bow [10], Sneak, Skin Animals)
6. Craig (Strength [100], Sword [7])
7. Oscar (Strength [100], Open Locks [2], Smithing [3]) - after Golden fragments for Oscar
8. Phil (Sneak, Pickpocket [2], Open Locks [2])
9. Obel
10. Rhobart (Alchemy [1])
11. Fincher (Strength [100], Sword [10], Crossbow [7]) - after An audience with Don Esteban
12. Cormac (Mana, Alchemy [3]) - after An audience with Don Esteban
13. Karakos (Strength [100], Axe [10]) - after An audience with Don Esteban
![1 - World Atlas - [Map M4] Volcano Keep - World Atlas - Teachers and Merchants - Risen - Game Guide and Walkthrough](https://game.lhg100.com/Article/UploadFiles/201512/2015121709132990.jpg)
1. Pallas [II] (Mana, Frost Lance [10]) - after The frost crystal
2. Tucker (Strength [100])
3. Karlsen (Open Locks [2], Smithing [3])
4. William (Dexterity [100], Staff [4])
5. Vitus (Mana, Staff [7]); [II] (Projectile [10]) - after The magic bullet
6. Caspar - after talking with Vitus about Hemlar
7. Dalman (Dexterity [100], Pickpocket [1], Sneak)
8. Jervis (Bow [4], Sneak, Skin Animals) - after Mutual aid
9. Illumar (Create Scrolls) - after The test of Master Illumar / Talk to master Illumar
10. Cyrus - after Severin's artifacts
11. Ignatius [II] (Runic Seal [4], Fireball [10]); [III] (Frost Lance [10]) - after Secure the volcano keep
12. Rufus (Strength [100], Crossbow [7])
13. Abrax (Mana, Alchemy [3])
14. Inquisitor Mendoza [II] (Strength [100], Staff [10])
Acrobats are able to fall from great heights and roll so that they take less damage.
Thanks to it, you suffer only half the damage when falling from height.

Alchemists can create powerful potions from plants.
Before you are able to create a potion, you will have to find an appropriate work station, recipe, and ingredients. Some elixirs have positive and permanent influence on your character's statistics.
Icon
Name
Usage
Price
Location

Vial
almost every mixture
5$
Abrax (M4.13), Leonardo (M2.16), Cormac (M3.12)

Wine
almost every mixture
20$
Abrax (M4.13), Leonardo (M2.16), Konrad (M2.20), Obel (M3.9), Dalman (M4.7), Cormac (M3.12)

Water
Experience Potion
10$
Abrax (M4.13), Leonardo (M2.16), Konrad (M2.20), Obel (M3.9), Cormac (M3.12)


Icon
Name, requirements
Ingredients
Location
Strong Healing Potion
(alchemy - level 3)
Healing Root, Vial, Wine
Cormac (M3.12), Leonardo (M2.16) (II)

Regular Healing Potion
(alchemy - level 2)
Healing Plant (2), Vial, Wine
Abrax's chest (M4.13), Leonardo (M2.16), Cormac (M3.12)

Weak Healing Potion
(alchemy - level 1)
Healing Herb (3), Vial, Wine
Abrax (M4.13), Leonardo (M2.16), Cormac (M3.12)

Strong Mana Potion
(alchemy - level 3)
Mana Root, Vial, Wine
Abrax (M4.13), Leonardo (M2.16) (II)

Regular Mana Potion
(alchemy - level 2)
Mana Plant (2), Vial, Wine
Abrax (M4.13), Leonardo (M2.16)

Weak Mana Potion
(alchemy - level 1)
Mana Mushroom (3), Vial, Wine
Abrax (M4.13), Leonardo (M2.16), Cormac (M3.12)

Life Potion
(alchemy - level 3)
Hero's Crown, Mushroom (10), Vial, Wine
Cormac (M3.12) (II), Leonardo (M2.16) (II)

Mana Potion
(alchemy - level 3)
Berry (10), Hero's Crown, Vial, Wine
Cyrus is late, Abrax (M4.13) (II)

Strength Potion
(alchemy - level 3)
Hero's Crown, Ogreroot, Vial, Wine
Cormac (M3.12) (II), The cursed lords

Dexterity Potion
(alchemy - level 3)
Hero's Crown, Pixie Hat, Vial, Wine
closed chest in one of the Volcano Keep rooms (on the way to library), Leonardo (M2.16) (II)

Experience Potion
(alchemy - level 2)
Wanderlust (5), Vial, Water
chest behind the red barrier in the Volcano Keep library.
Icon
Name
Effect
Price

Strong Healing Potion
HP +300
60$

Regular Healing Potion
HP +150
40$

Weak Healing Potion
HP +75
30$

Strong Mana Potion
MP +200
60$

Regular Mana Potion
MP +100
40$

Weak Mana Potion
MP +50
30$

Potion of Regeneration
HP +50, MP +50
50$

Life Potion
Max HP +10
1000$

Mana Potion
Max MP +10
1000$
Strength Potion
Strength +5
1000$

Dexterity Potion
Dexterity +5
1000$

Experience Potion
Experience +100
40$

Smithing allows you to make weapons and jewelry. In both cases, you will need tools, materials, and appropriate work station. Blacksmithing is the only way to acquire a few swords and jewelry.
Icon
Name
Usage
Price
Location

Smith's Hammer
working with anvil
30$
Costa (M2.3), Alvaro (M2.17), Oscar (M3.7), Karlsen (M4.3)

Goldsmith's Hammer
working with jewelry
30$
Costa (M2.3), Alvaro (M2.17), Oscar (M3.7), Karlsen (M4.3)

Goldsmith's Tongs
working with jewelry
30$
Costa (M2.3), Alvaro (M2.17), Oscar (M3.7), Karlsen (M4.3)
Icon
Name, requirements
Additional Parts
Location

Broken Two-Handed Sword
(smithing - level 3)
Sword Tip
The swords- Stormwind and Souldrinker
Sword Tip
(smithing - level 3)
Broken Two-Handed Sword
The swords- Stormwind and Souldrinker

Broken Bastard Sword
(smithing - level 1)
SwordTip
The swords- Stormwind and Souldrinker

Sword Tip
(smithing - level 1)
Broken Bastard Sword
The swords- Stormwind and Souldrinker

Obsidian Blank (2-H S.)
(smithing - level 3)
-
Lizard swords

Obsidian Blank (Bastard S.)
(smithing - level 2)
-
Lizard swords

Obsidian Blank (Sword)
(smithing - level 1)
-
Lizard swords

Steel Blank (2-H Sword)
(smithing - level 3)
-
prospect ore + Walter (M2.18)/ Oscar (M3.7) / Karlsen (M4.3)

Steel Blank (Bastard Sword)
(smithing - level 2)
-
prospect ore + Walter (M2.18)/ Oscar (M3.7) / Karlsen (M4.3)

Steel Blank (Sword)
(smithing - level 1)
-
prospect ore + Walter (M2.18)/ Oscar (M3.7) / Karlsen (M4.3)
Icon
Name (hands)
Damage
Required Strength
Price

Sharp Souldrinker (2)
75
72
1000$

Stormwind (2)
60
56
800$

Obsidian Two-Handed Sword (2)
50
90
75$

Sharp Obsidian Sword (2)
70
65
800$

Sharp Obsidian Sword (1)
50
45
450$

Sharp Two-Handed Sword (2)
58
54
500$

Sharp Bastard Sword (2)
50
47
430$

Sharp Sword (1)
30
25
250$
Icon
Name, requirements
Required Gold
Location

Diamond
(smithing - level 3)
10
The Titan Helmet
Small Diamond
(smithing - level 2)
5
closed chest near the west coast, Scordo (M2.23) (III)

Ruby
(smithing - level 2)
10
The Titan Boots

Small Ruby
(smithing - level 1)
5
Severin's artifacts, Scordo (M2.23) (II), The Titan Helmet, The Titan Boots (2x)
Sapphire
(smithing - level 3)
10
The Titan Helmet

Small Sapphire
(smithing - level 2)
5
Thieving gnomes, The Titan Boots (2x)

Emerald
(smithing - level 3)
10
Sword of stormwind, Open the large drawbridge, Oscar (M3.7) (IV)

Small Emerald
(smithing - level 1)
5
The cursed lords

Amber
(smithing - level 3)
10
Weasel, sarcophagus in Harbor, Oscar (M3.7), dungeon with Dorgan, The Titan Shield

Small Amber
(smithing - level 1)
5
Where is the golden delivery?, The cursed lords

Anti-Magic Crystal
(smithing - level 2)
10
Open the large drawbridge, Cyrus (M4.10) (IV)

Small A-M Crystal
(smithing - level 1)
5
closed chest in the swamp at east
Icon
Name
Effect
Price

Shield Amulet
DAB+10, DABW+10, DAF+5, DAI+5, DAM+5, DAPW +10
750$

Ring of the Fighter
DAB+8, DABW+8, DAPW +8
500$

Amulet of the Warrior
DAB+8, DABW+8, DAPW +8, MaxHP+20, Strength +8
1000$

Ring of Strength
Max HP +20, Strength +3
400$

Amulet of the Mage
Fireball +2, Frost +2, Magic Bullet +2
800$

Ring of Magic
Max MP +20
300$

Amulet of the Hunter
Archery +2, Dexterity+10
500$

Ring of Dexterity
Dexterity +5
150$

Amulet of Strength
Strength +15
400$

Ring of Strength
Strength +5
150$

Amulet of Anti-Magic
DAF+15, DAI+15, DAM+15, Fireball -2, Frost -2, Magic Bullet -2
250$

Protection Ring of Magic
DAF+5, DAI+5, DAM+5
100$
Your skill in stealing from people. This particular skill is accessible from the dialog menu. As a fast way of acquiring key items, it will help you finish a number of quests.

Only pure mages can use rune magic.
Understanding of magic seals is necessary for using runes of magic.
To increase your level of magic seal, you will have to improve your wisdom by reading book of knowledge (bookstands) and stone plates.
Icon
Name
Requirements
Mana
Location

Fire Crystal
(fireball - level 1)
8
The crystal of fire

Magic Crystal
(magic bullet - level 1)
5
library in the Volcano Keep

Frost Crystal
(frost - level 1)
10
The frost crystal

Light Spell
(seal - level 1)
10
The test of Master Illumar, Cyrus (M4.10)

Create Illusion
(seal - level 1)
20
Illumar (M4.9), Cyrus (M4.10)

Tell Joke
(seal - level 1)
20
Illumar (M4.9), Cyrus (M4.10)

Telekinesis
(seal - level 1)
10
Illumar (M4.9), Cyrus (M4.10)

Levitation
(seal - level 2)
20
Illumar (M4.9) (II), Cyrus (M4.10) (II)

Speed
(seal - level 3)
40
Cyrus (M4.10) (III)

Nautilus Transformation
(seal - level 1)
20
library in the Volcano Keep, Illumar (M4.9), Cyrus (M4.10)

Inferno
(seal - level 4)
80
Cyrus (M4.10) (IV)

Berserker
(seal - level 2)
40
Cyrus (M4.10) (II)

Magic Protection
(seal - level 2)
60
The cursed lords, Illumar (M4.9) (II)

Transformation into an Ashbeast
(seal - level 4)
60
The Titan Boots (from the room with trapdoor, through the grating. You jump above the abyss and land on the higher level)

Conjure Skeleton
(seal - level 3)
40
The cursed lords
Strong Magic Healing
(seal - level 3)
40
In the bandit camp, on the rock platform between Domingo and Rachel (you will have to use levitate spell)

Medium Magic Healing
(seal - level 2)
30
Illumar (M4.9) (II), Cyrus (M4.10) (II)

Weak Magic Healing
(seal - level 1)
20
Illumar (M4.9), Cyrus (M4.10)

Open Locks
(seal - level 3)
30
Chieftain (gnom) near Gyrgera, Cyrus (M4.10) (III)

Destroy Magic Barrier
(seal - level 2)
40
Find all the pieces of the Titan Armour

Destroy Magic Force Field
(seal - level 1)
20
Cyrus is late (scrolls)
With this skill, you can take valuable trophies from slain animals. Apart from skill itself, you will need to have specific tools in your backpack.
Icon
Name
Usage
Price
Location

Horn Saw
horns
100$

Jaw Chisel
teeth
100$
Doug (M3.1)

Sting Breaker
stings
100$
Flavio (M2.5), Jasmin (M1.3)

Jaw Tongs
fangs
100$
Flavio (M2.5), Jasmin (M1.3)

Wing Shearks
wings
100$
Doug (M3.1)
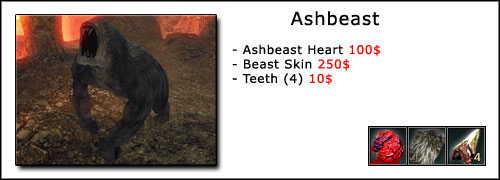


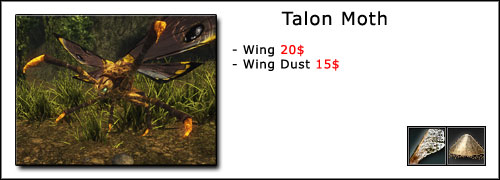
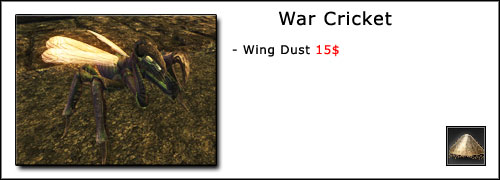

This skill allows you to open locks without a key. Lock picks are necessary, as well as completing the mini game, which difficulty level depends on the kind of lock (how sophisticated it is).
Combining this skill with sneaking (and optionally - illusion spell) is the fastest way to become reach at the beginning of the game.
Icon
Name
Usage
Price
Location

Lockpicks
opening locks
10$
Kaspar (M4.6), Patty (M2.10), Kayleigh (M2.9), Oscar (M3.7), Ash (III)

With this skill, you can create your own magic scrolls.
Quill , appropriate ingredients and spell that you want to make the scroll from are necessary.
Scrolls are the only way to use rune magic if you are playing as a bandit, or the inquisition warrior.
Icon
Name
Usage
Price
Location

Quill
making scrolls
30$
The test of Master Illumar
Icon
Name
Usage
Price
Location

Blank Scroll
every scroll
50$
Caspar (M4.6), Illumar (M4.9)
Gold Coin
Light Spell
1$
the in-game currency

Wine
Create Illusion
Abrax (M4.13), Leonardo (M2.16), Konrad (M2.20), Obel (M3.9), Dalman (M4.7), Cormac (M3.12)

Perl
Tell Joke
50$
in the shells on the beach (double click on the shell)

Wing Dust
Telekinesis
15$
skin animals

Wing
Levitation
20$
skin animals

Wanderlust
Speed
10$
alchemical plant

Nautilus Shell
Nautilus Transformation
10$
Jack (M2.13), on the beaches and dungeons (you have to kill the nautilus)

Tusk
Inferno
20$
skin animals

Teeth
Berserker
10$
skin animals

Obsidian
Magic Protection
10$
prospect ore

Ashbeast Heart
Transformation into an Ashbeast
100$
skin animals

Bone
Conjure Skeleton
10$
skeletons

Healing Root
Strong Magic Healing
60$
alchemical plant

Healing Herb
Medium Magic Healing
40$
alchemical plant

Healing Plant
Weak Magic Healing
20$
alchemical plant

Lock Pick
Open Locks
10$
Caspar (M4.6), Patty (M2.10), Kayleigh (M2.9), Oscar (M3.7), Ash (III)

Mana Root
Destroy Magic Barrier
40$
alchemical plant

Mana Plant
Destroy Magic Force Field
30$
alchemical plant
Icon
Name
Ingredients

Light Spell
Blank Scroll, Gold Coin (10)

Create Illusion
Blank Scroll, Wine

Tell Joke
Blank Scroll, Pearl

Telekinesis
Blank Scroll, Wing Dust

Levitation
Blank Scroll, Wing (2)

Speed
Blank Scroll, Wanderlust

Nautilus Transformation
Blank Scroll, Nautilus Shell

Inferno
Blank Scroll, Tusk (2)
Berserker
Blank Scroll, Teeth (10)

Magic Protection
Blank Scroll, Obsidian (2)

Transformation into an Ashbeast
Blank Scroll, Ashbeast Heart

Conjure Skeleton
Blank Scroll, Bone (2)

Strong Magic Healing
Blank Scroll, Healing Root

Medium Magic Healing
Blank Scroll, Healing Plant

Weak Magic Healing
Blank Scroll, Healing Herb

Open Locks
Blank Scroll, Lock Pick (2)

Destroy Magic Barrier
Blank Scroll, Mana Root

Destroy Magic Force Field
Blank Scroll, Mana Plant
Talent for the use of swords and light close combat weapons.
There are many swords that you can choose from. This skill also allows you to use shield, which provides a great protection in combat.
Icon
Name (n. of hands)
Damage
Strength
Price
Location

Titanwing (2)
100
100
2000$
The Titan Shield

Obsidian Two-Handed Sword(2)
90
90
1000$
smithing

Berserker Sword (2)
80
80
1500$
The Titan Boots

Sharp Souldrinker (2)
75
72
1000$
The swords- Stormwind and Souldrinker

Demon Blade (2)
66
66
650$
The mystery of the eastern temple

Sharp Two-Handed Sword (2)
58
54
500$
smithing, Oscar (M3.7) (II)

Lizard Sword (2)
50
90
75$
lizardmen

Two-Handed Sword (2)
50
50
300$
Alvaro (M2.17), Oscar (M3.7)

Rusty Two-Handed Sword (2)
30
30
30$
crypt at the cemetery in the Volcano Keep

Titan Sword (2)
80
75
1200$
Free the ghost of Ursegor
Sharp Obsidian Sword (2)
70
65
800$
smithing

Runesword (2)
64
60
1000$
The search for the map

Stormwind (2)
60
56
800$
The swords- Stormwind and Souldrinker

Traitor's Blade (2)
55
52
700$
The cursed lords

Sharp Bastard Sword (2)
50
47
430$
smithing, Alvaro (M2.17) (II), Oscar (M3.7) (II)

Evil Bastard (2)
46
44
400$
Oscar (M3.7) (II)

Bastard Sword (2)
42
40
300$
Alvaro (M2.17), Oscar (M3.7)

The Don's Sword (1)
60
50 (dexterity)
600$
Don Esteban

Sharp Obsidian Sword (1)
50
45
450$
smithing

War Mace (1)
46
44
445$
Oscar (M3.7) (II)

Rapier (1)
+2 sword fighting
38
33 (dexterity)
400$
Alvaro (M2.17) (II)

Fine Sword (1)
35
30
300$
Romanov

Aric's Sword (1)
+1 sword fighting
30
25
300$
trick Aric

Golden Sword (1)
30
30
500$
Golden fragments for Oscar

Sharp Sword (1)
30
25
250$
smithing

Skullsplitter (1)
28
26
180$
Oscar (M3.7), skeletons

Cutlass (1)
25
20
120$
Alvaro (M2.17), gnomes
Machete (1)
20
15
85$
Costa (M2.3), Alvaro (M2.17), Oscar (M3.7)

Saber (1)
18
15 (dexterity)
70$
Alvaro (M2.17)

Thorn Mace (1)
18
16
65$
Oscar (M3.7), Brogar

Sword (1)
15
10
50$
get yourself a decent weapon

Hunting Knife (1)
12
8
26$
Find survivors of the shipwreck

Rusty Sword (1)
10
10
18$
Find survivors of the shipwreck

Sickle (1)
10
6
10$
gnomes, Leto (M1.2) (II)

Club (1)
8
5
8$
Find survivors of the shipwreck

The Worst Sword In The World (1)
5
25
10$
trick Aric
Talent for the use of staves and spears.
Staff can compete with sword and protection from shield, only on higher levels of skill knowledge. It is harder to fight with staff and you will find that at the beginning it is far less effective than sword and shield.
Icon
Name
Damage
Strength
Price
Location

Titan Scepter
80
70
2000$
The Titan Helmet

Titan Staff
70
60
1500$
The Titan Armour

Double Bladed Staff
58
50
1 000$
Karlsen (M4.3) (III), Inquisitor (M4.14)

War Spear
52
44
650$

Honed Blade Staff
50
45
300$
Collect from Alvaro

Executioner's Staff
46
38
300$
Karlsen (M4.3), Alvaro (M2.17) (II)

Druid's Staff
42
36
400$
Cyrus is late

Fighting Staff
32
26
180$
A worthy weapon, Alvaro (M2.17), Karlsen (M4.3)

Spear
24
18
100$
Alvaro (M2.17), Oscar (M3.7), Karlsen (M4.3)

Novice's Staff
16
10
50$
Get yourself a fighting staff, Karlsen (M4.3)

Sturdy Branch
10
10
15$
Leto (M1.2)
Talent for the use of axes and heavy close combat weapons.
The main difference in comparison to sword is less variety of weapons from this category. On the bright side - you will deal greater damage when using axes and hammers.
Icon
Name
Damage
Strength
Price
Location

Hammer of the Titan Lord
+6 axe fighting
120
3000$
The Titan Hammer

Titan Axe
120
100
3500$
The Titan Hammer

Stonesplitter
108
90
2500$

Warhammer
96
80
1800$
Oscar (M3.7) (II)
Berserker Axe
85
70
1200$
Oscar (M3.7) (II)
Battleaxe
72
60
850$
Alvaro (M2.17) (II)

Raven's Beak
58
45
680$
Oscar (M3.7), Alvaro (M2.17) (II)

Bearded Axe
48
30
400$
Oscar (M3.7)

Light Battleaxe
36
20
200$
Alvaro (M2.17), Oscar (M3.7)

Sledgehammer
25
15
80$
Erikson, Oscar (M3.7)

Woodcutter's Axe
20
10
50$
Leto (M1.2)
Talent for the use of bow and arrow.
This weapon is pretty useful at the beginning of the game. Later on, you will encounter many tough enemies in small areas such as passageways. In such situation it is difficult to use any type of range weapon.
Icon
Name
Damage
Dexterity
Price
Location

Titan Bow
80
80
1400$
The Titan Boots

War Bow
70
70
1000$
Jasmin (M1.3) (III), Flavio (M2.5) (IV), Doug (M3.1) (IV)

Bone Bow
60
60
750$
Doug (M3.1) (III), Flavio (M2.5) (III)
Horn Bow
50
50
600$
Where is the golden delivery?

Hunting Bow
40
40
500$
Jasmin (M1.3) (II), Doug (M3.1) (II)

Cole's Hunting Bow
30
25
350$
Costa (M2.3)

Longbow
30
30
350$
Flavio (M2.5) (II), Doug (M3.1) (II)

Poacher's Bow
20
20
200$
Doug (M3.1)

Short Bow
10
10
75$
Flavio (M2.5), Doug (M3.1), Jasmin (M1.3)
Talent for the use of crossbow.
It requires both strength (possibility of using crossbow) and dexterity (dealt damage). Crossbows don't offer such precision as bows, and the delay between shots is far greater. The bright side of this weapon is greater damage that it can provide.
Icon
Name
Damage
Strength
Price
Location

Titan Crossbow
125
90
1500$

War Crossbow
100
70
750$

Hunting Crossbow
75
50
500$
Alvaro (M2.17)

Crossbow
50
30
250$
Alvaro (M2.17)

Light Crossbow
25
10
100$
Leto (M1.2), Oscar (M3.7), Ricardo
With this skill, you can prospect ore (iron, obsidian, and gold). You should learn this if you want to be a smith. Before you are able to prospect, you need to have a pickaxe in your backpack.
Icon
Name
Usage
Price
Location

Pickaxe
prospecting ore
50$
bandit camp (swamp)
With this skill, you can move silently.
It is useful when combined with opening locks (and optionally illusion spell). It is a perfect solution to the problem with wealth at the beginning. However sneaking is completely useless in combat.
Teleport stones occur in the second chapter. Thanks to them we can move ourselves to a specific location in the world without using any mana during procedure.
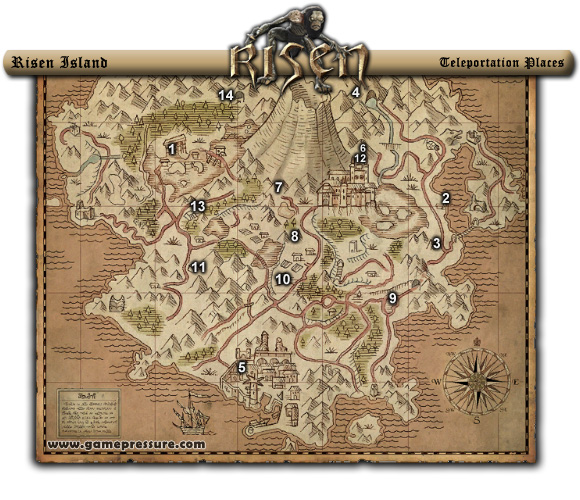
L.P.
Icon
Name
Location
1

Bandit Camp
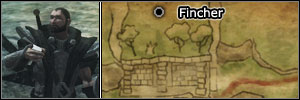
2

East Coast
3
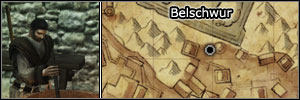
Eastern Temple

4

Eastern Volcano Cave
5
Harbor City
6

Northeastern Temple
7

Northern Temple
8

Plains Temple
9

Southeast Coast
10
Southern Ruins
11

Southwestern Ruins
12

Volcano Keep
13
Western Ruins
14

Western Volcano Cave

Cooking allows you to prepare meals. Some of them will permanently increase your character's statistics. Before you are able to cook, you have to find a stove, fireplace or cauldron, recipe, and of course have appropriate tools in your backpack.
Icon
Name
Usage
Price
Location

Frying Pan
baking
25$
Leto (M1.2), Elias (M2.2), Dargel (M2.12), Konrad (M2.20)

Scoop
cooking
10$
Caspar (M4.6), Elias (M2.2), Dargel (M2.12), Konrad (M2.20)
Icon
Name
Effect
Location

Raw Meat
-
Dargel (M2.12), Jasmin (M1.3), skin animals

Raw Chicken
-
skin animals

Raw Shark
-
Nico (M2.4), Philus (M2.4)

Raw Plaice
-
Nico (M2.4), Philus (M2.4)
Herring
HP +5
Nico (M2.4), Philus (M2.4)

Bread
HP +10
Elias (M2.2)

Cheese
HP +10
Konrad (M2.20)

Wine
MP +5
Abrax (M4.13), Leonardo (M2.16), Konrad (M2.20), Obel (M3.9), Dalman (M4.7), Cormac (M3.12)

Water
MP +5
Abrax (M4.13), Leonardo (M2.16), Konrad (M2.20), Obel (M3.9), Cormac (M3.12)

Bag of Spices
-
Konrad (M2.20)

Potatoes
-
Elias (M2.2), Konrad (M2.20)

Onions
-
Elias (M2.2), Dargel (M2.12), Konrad (M2.20)

Mushroom
HP +5
alchemical plant
Icon
Name, requirements
Ingredients
Location

Hotpot
Onions, Potatoes, RawMeat(10)
Where is the golden delivery?

Hearty Meat Stew
Onions, Potatoes, RawMeat(5)
chest in the forest, south from Leon (near ashbeast)

Meat Stew
Onions, Potatoes, RawMeat(2)
Leon's shack, The farmer's sick wife

Novice's Stew
Potatoes, Raw Meat (2), Wine

Fish Soup
Herring, Onions, Water
on the wall of the John's bar , chest in Rachel's home

Meat-stuffed Bread
Bag of Spices, Bread, Onions, RawMeat (3)
chest in Rachel's home

Plaice Melt
Bag of Spices, Cheese, Potatoes, Raw Plaice (3)
Baxter's chest

Hunter's Fry-up
Bag of Spices, Mushroom, Potatoes, Raw Meat (3)
chest in Patty's Inn (M2.10)
Icon
Name
Effect
Price
Hotpot
HP +200
50$

Hearty Meat Stew
HP +100
50$

Meat Stew
HP +50
50$

Novice's Stew
HP +25, MP +25
50$

Fish Soup
HP +10, MP +20
50$

Meat-stuffed Bread
Max HP +2
50$

Plaice Melt
Max MP +2
50$
Hunter's Fry-up
Dexterity +1
50$

Fried Meat
HP +15
10$

Chicken Drumstick
HP +10
10$

Shark Steak
Exp +15, HP +15, MP +15
75$

Fried Plaice
HP +10, MP +10
30$

Fried Herring
HP +5, MP +5
15$
Name
Gamerscore
Requirements
Field hand
10
10 grain plants collected (Help Thomas in the fields)
Philanthropist
10
Rescue Sara from the wilderness completed
Samaritan
20
Medicine for everyone completed
Peacekeeper
30
Peace and order completed
Fence
30
A package for the Don completed
Ladies' man
10
Woman beater completed
Sidelined
20
Power struggle completed
The merciful one
10
The farmer's sick wife completed
Wise man
20
The test of Master Ignatius completed
Family man
20
The sons of Tilda completed
Archaeologist
20
The mystery of the eastern temple completed
Little hero
20
rescuing Patty (Off to the west coast)
Rune master
20
mastering the fourth seal of rune magic
Ghost hunter
20
The cursed lords completed
Beginner
10
first monster killed
The brave little tailor
10
seven grave moths killed
Ferocious wild boars
10
20 wild boars killed
Terror of the hens
10
20 chickens killed
Beast slayer
30
500 monsters killed
Big game hunter
50
2000 monsters killed
Ogre friend
10
rescuing the ogre, Dork (Cyrus is late)
Hard worker
50
250 quests completed
Expert
20
100% achieved in an attribute
Workaholic
20
every profession learned
Mage
20
all crystals learned
Gladiator
20
every close combat talent learned
Sharpshooter
20
every ranged combat talent learned
Master of the classes
30
100 % achieved in three attributes
Fervent swimmer
10
caught by the tideworm 10 times
The fourth triplet
10
10 treasures found
Idiot
10
fell to death 3 times
Jester
30
25 Jest spells used
Safecracker
10
100 locks picked
Weaponsmith
10
100 weapons forged
Master thief
10
50 pockets picked
Well-to-do
10
1.000 gold coins obtained
Moneybags
30
100,000 gold coins obtained
King Midas
50
300,000 gold coins obtained
Adventurer
10
found way out of the first ruin
Map reader
10
found first map in the game
Archer
10
found first bow
King of the handymen
20
20 tool bags collected in inventory (Everything that isn't nailed down)
Master detective
20
Find Hemlar's murderer completed
Death of a Legend
20
killing Gyrger (Where is the golden delivery?)
Defender
20
Secure the volcano keep completed
Freedom fighter
20
Esteban's return to Harbour Town completed
Pandora's box
20
The titan trap completed
The traveler
20
finding all teleport stones
Showdown
50
killing Inquisitor Mendoza (Find all the pieces of the Titan Armour)
Titan Lord
50
defeating Titan (final boss)


 RIFT Game Guide & Walkthrough
 Resident Evil: Revelations Game Guide & Walkthrough
 Resident Evil: Revelations 2 Game Guide & Walkthrough
 Randals Monday Game Guide & Walkthrough
 Race Driver GRID Game Guide & Walkthrough