You'll find here a complete walkthrough for the main missions, a few general tips about the gameplay and some minor hints connected with upgrades, events and Web of Intrigue targets. On the last pages you'll find maps with marked locations of Hints and Landmarks.
Maciej "Sandro" Jalowiec
1. Try to have the soldier's appearance available all the time. It seems it gives you the most abilities and opportunities - stealing tank without raising the alarm, using the artillery, infiltrating enemy bases, etc.;
2. Master the art of quick shapeshifting. Many times you'll find yourself in a situation, in which you'll get out of enemies' sight for a second or two. It seems it is possible to change the appearance in such a short time. This'll fool the opponents, so learn to change your shape fast;
3. From time to time complete some side mission, like those about movement, finishing enemies in a limited amount of time, etc. Thanks to that you'll get extra Evolution Points, which you may spend on new upgrades;
4. Destroying bases and hives is a great way to earn extra Evolution Points. In case of infected hives, it is always good to use a helicopter. Mutants won't be able to reach your machine. If you want to blow up some military bases, choose a tank. A heli would be a nice target for all the anti-air weapons located near the main army building. A land unit should therefore do more damage;
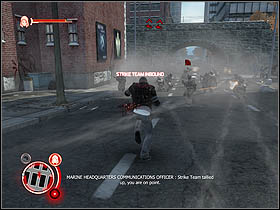
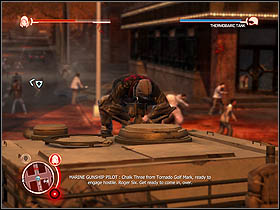
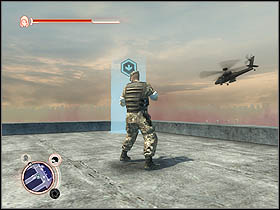
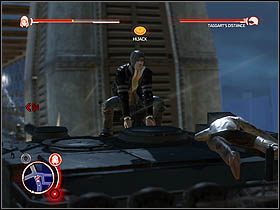
5. One of the toughest enemies in the whole game is the Strike Team. Their units are marked with icons of thunders on your map and radar. They consist of helicopters and flying UAV detectors - that's why it is quite difficult to run away from a Strike Team. They arrive at the battlefield only when prompted. When an enemy calls for reinforcements, a red-black icon appears above his head (or armor, as it might be a vehicle as well). If you manage to finish the enemy before he ends his radio transmission, the Strike Team will not arrive. Once you obtain the ability to hijack and pilot helicopters, you won't have much trouble eliminating Strike Teams. Note this'll give you huge EP bonuses;
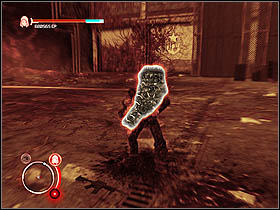
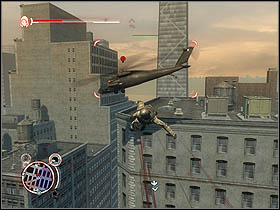
6. Hijacking helicopters flying above you is much easier if you use the Flying Kick ability. Once you spot a machine worth hijacking, jump, lock on it and perform a Flying Kick. This way you'll get near the helicopter. Quickly tap the button responsible for entering vehicles. Then get near the cockpit, rip out the window and kill the crew. This whole thing is, of course, connected with some risk - if you tap the button too late, Mercer will simply kick the heli, inflicting some damage;
7. If you manage to complete an event and earn a bronze or silver medal, try it again after obtaining some new skills. Maybe as an enhanced Mercer you'll get the gold?
8. Not every base contains valuable people, whose special skills can be obtained by consuming them. Bases with important soldiers are marked with a standard icon with an extra plus sign on your map.
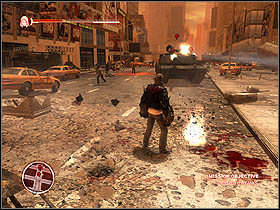
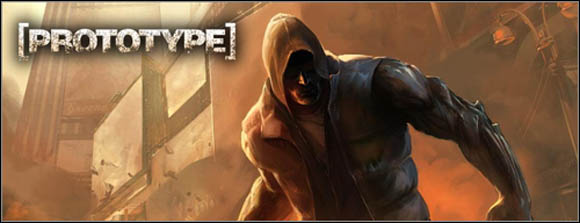
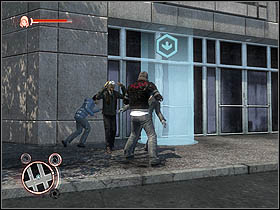
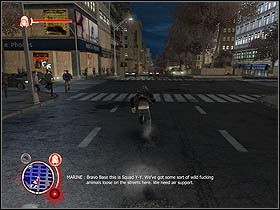
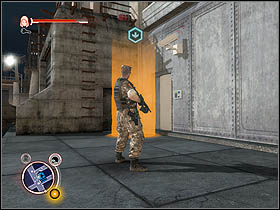
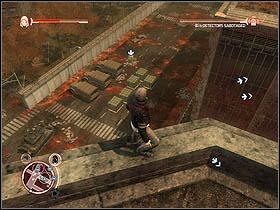
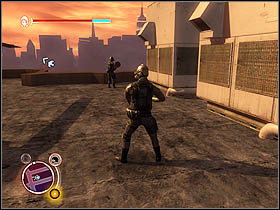
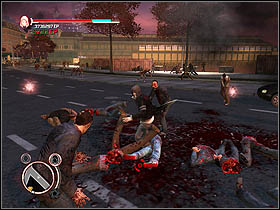
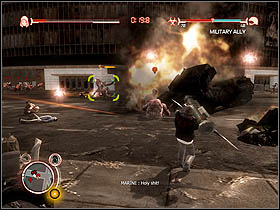
Start the game by killing all soldiers nearby. Try various buttons, train your attacks, get familiar with the controls, etc. Once you finish them off, move towards the place marked on the radar. You'll encounter even more enemies there. Kill them too.
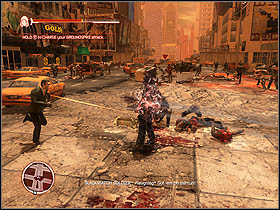
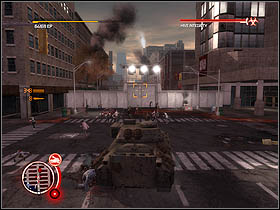
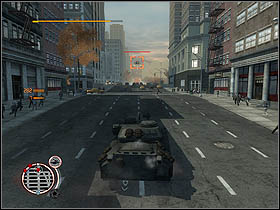
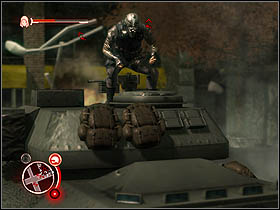
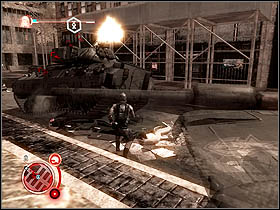
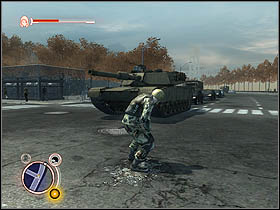
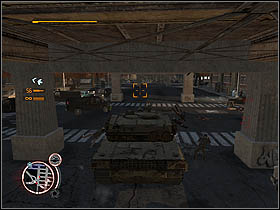
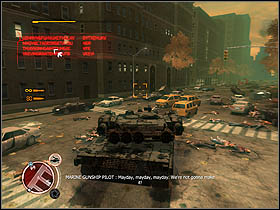
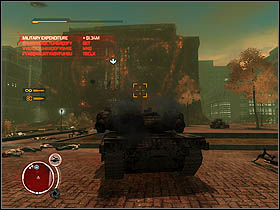
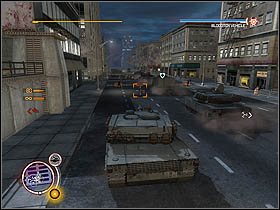
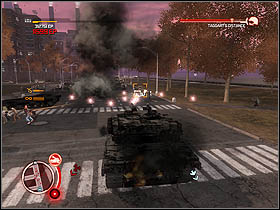
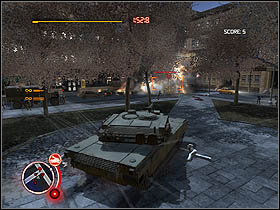
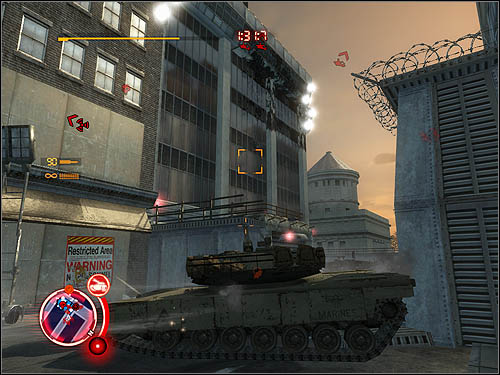
After the fight another marker will appear on the radar. Go towards it. A few tanks will come in your way - destroy them all. Try jumping a lot, so the tanks will not be able to hit you.
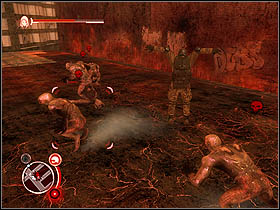
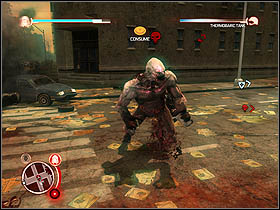
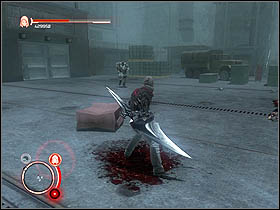
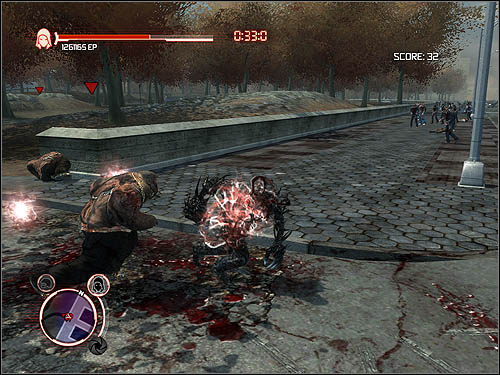
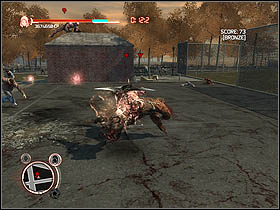
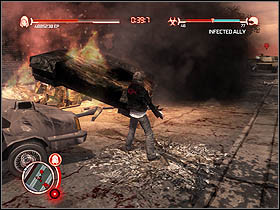
Infected enemies are your next targets. Mercer will prepare a suitable weapon for them - blade. I prefer using special attacks against mutants, connected with a jump. Once you finish them off, go to the next marker. This time you'll have to kill just one enemy - grab and consume the marked soldier.
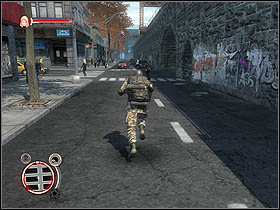
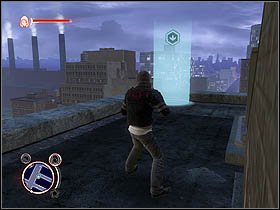
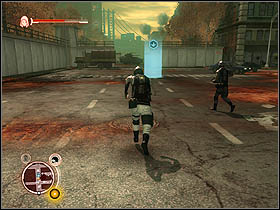
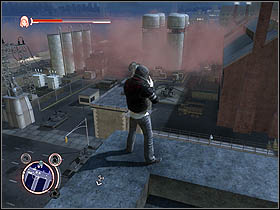
It's time for a flashback. You have to escape the GENTEK facility. Jump over the fence and then run towards the place marked on your map and radar. Ignore the helicopter chasing you right now.
Once you get to the spot, confront the enemy. Mercer will grab a taxi cab and your job is to lock on the helicopter and throw the car towards it.
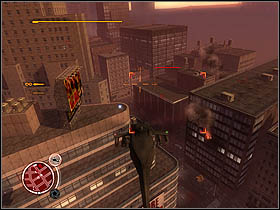
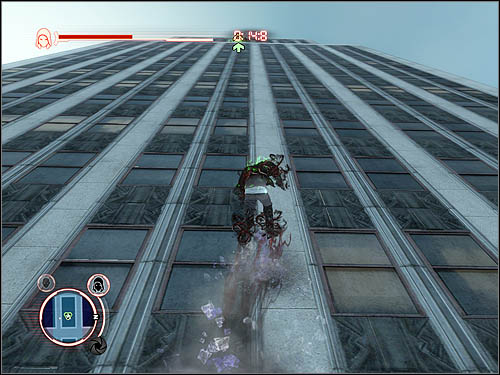
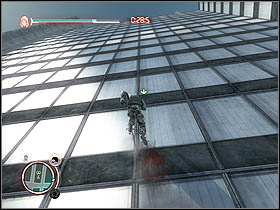
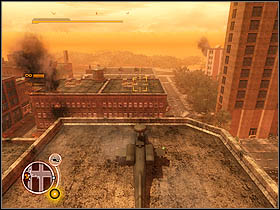
Once the machine will fall down, climb the nearby skyscraper. You can do it by using the sprint button. Use the objects on the roof to eliminate enemy helicopters coming your way. Perform the throws while the machines are not moving - otherwise you might miss them.
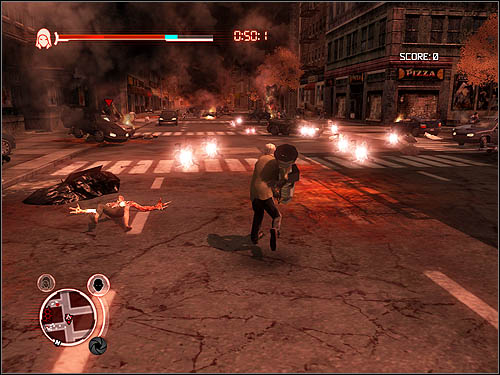
Time for another flashback. Consume the guy who comes to you in the alley, watch the cut-scene and then move to marker on the map - Mercer's sister's apartment. Once you get there, climb up on a roof nearby and stand in the designated location.
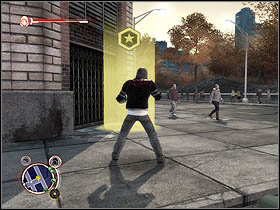
It's time to use a disguise. Shapeshift into the soldier you've consumed recently and enter the apartment.
Reward: 5000 EP
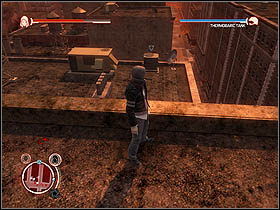
After the cut-scene you'll find yourself on one of the rooftops. Get to your own apartment by any means necessary (marker is, of course, on your map and radar).
Soldiers will come here shortly after your arrival. Try to eliminate the guy calling for reinforcements. If you won't do it quickly enough, better run away. Once you get out of their sights, change your appearance, wait for a cooldown, and then return to your apartment.

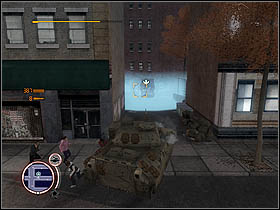
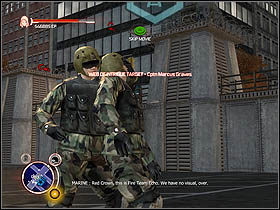
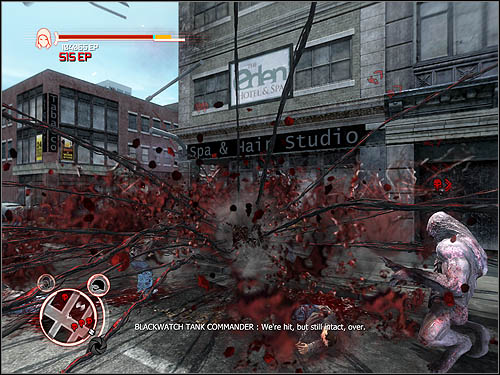
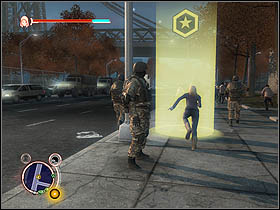
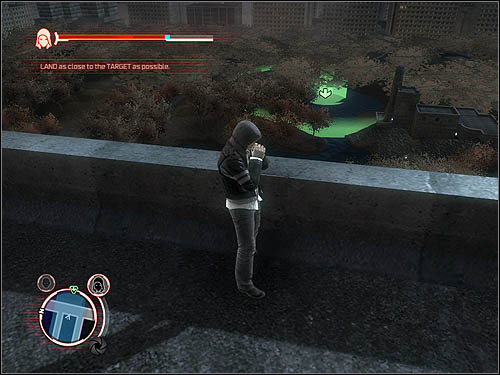
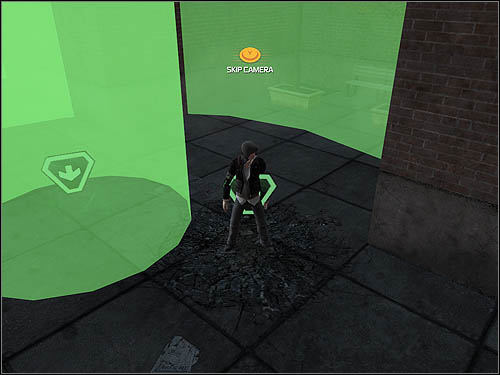
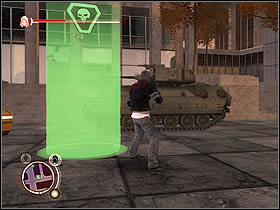
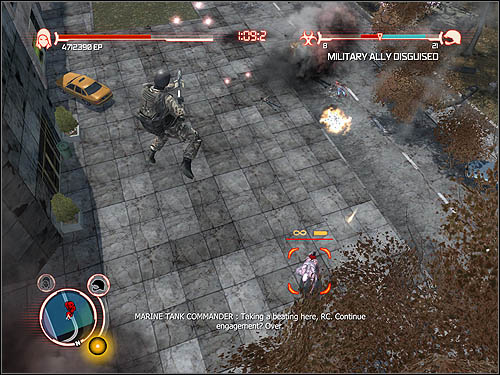
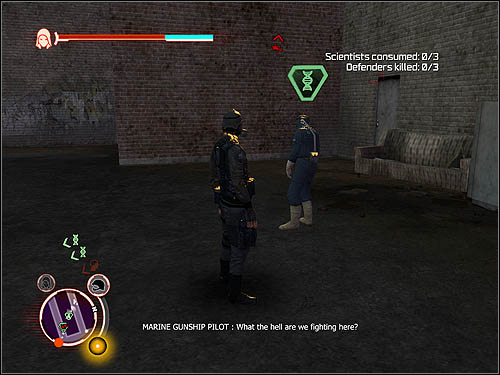
You'll get some intel on your target - he's going to be evacuated soon, from the park nearby. Run towards his extraction point. And change your appearance, you have to look like a soldier.
Once you approach your target's vehicle, announce that the area is secured. A guy in a suit will get out of the vehicle and go towards the tunnel. Run to him and consume the guy.
Soldiers will, of course, try to shoot you. Run away from them, changing your disguise once you get of their sights.
Reward: 15000 EP, 2 new events available

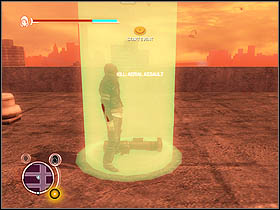
You start on one of the rooftops. In order to begin the mission, you have to go to Mercer's sister, Dana. First, however, you must get yourself the Diveroll ability. Further missions will require specific skill, so I guess you just have to get used to it. When you're ready, enter the marker to start the mission.
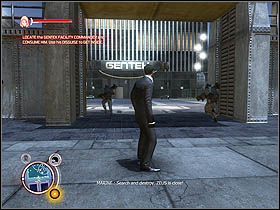
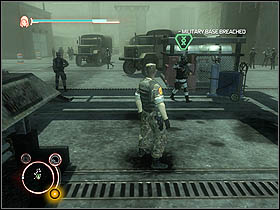
You have to visit the GENTEK building in this mission. Firstly, enter the marker located in front of the facility. You need a military disguise in order to infiltrate this place. You probably already have one - all in all, you've consumed some enemies lately.

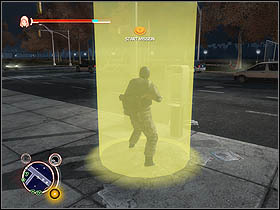
Once you enter the restricted area, approach the local commander. Only with his appearance you can access the building. Grab his and quickly consume. Note, that there are detectors all over the place, they're able to recognize you even when in disguise. If you start the alarm, run on top of the building - you can wait there for the alert to stop.
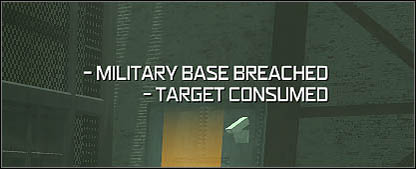
Once everything cools down, get down on the ground and enter the building through the main door. After the cut-scene, you'll land in front of the GENTEK facility. Run away from here if you don't want to be killed by mutants. Run towards the military base nearby, shapeshifting into a soldier on your way there.
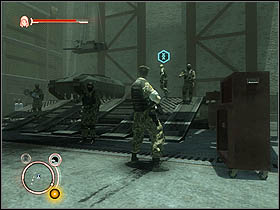
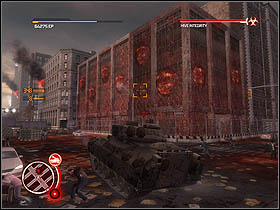
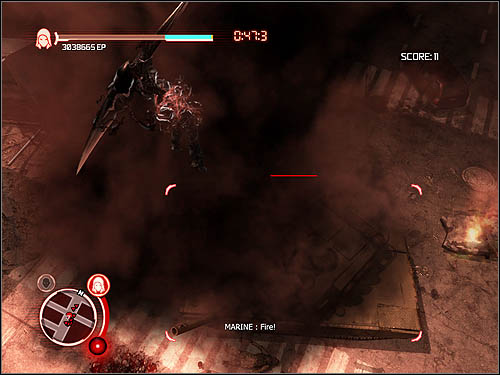
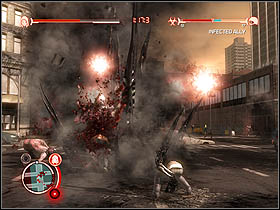
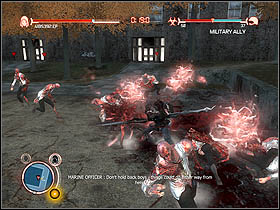
Enter the building through the window in the roof. Now this'll be a slaughterhouse. Let's start with finishing a few soldiers (you might want to consume some of them to maximize your health). Once the infected enemies come to party, grab a grenade or rocket launcher - there are lots of these things in the corners.
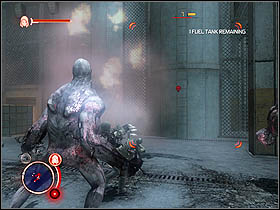
Blow up all mutated opponents. Try to absorb some of them (those with red markers above their heads) - not only you'll save some ammo, but also regain a lot of health. Once you kill several mutants, the game will inform you that in order to make a progress, you must destroy the fuel tanks at the walls. Destroy them all in any fashion to complete this mission.
Reward: 20000 EP, 20 upgrades unlocked, 3 new events available
First of all, go to Karen's house. She's Mercer's ex-girlfriend. You'll notice that the vicinity of her home is under control of the infected people. Go to her flat and watch the cut-scene.

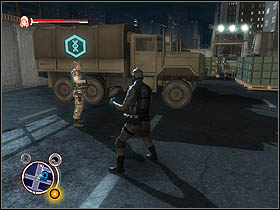
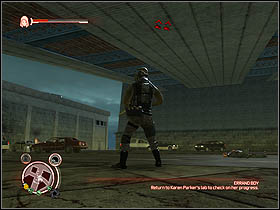
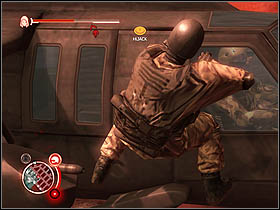
You need an armored car to get her out of there safely. Consume the military guy in front of the Karen's block, then shapeshift into a soldier. Go to the military base nearby. Find its commander and consume him as well - Stealth Consume ability allows you to absorb a hostile even when other enemies are near you.
After consuming the commander, enter the base. Find the driver and consume in the very same way as the commander.
Get out of the base and enter the armored vehicle standing next to the gate. Now go to the park nearby and do some shooting practice. You have infinite amount of ammunition, so you just have fun at this point. Finish all the mutants, using the main gun as well as rockets. From now on the ammo will be limited, so stop spraying it all over the place - you'll need a few bullets soon.
Go to Karen's place. Break through the military gate standing in your way and then destroy the building transformed recently into an infected hive.
Once you destroy the hive, drive into the blue marker to take Karen with you. Now go to the designated spot. If you want to avoid trouble on your way to the marker, do not attack military personnel and generally avoid attracting any attention. You'll find an alley between two buildings. Park your vehicle in there to end this mission with a success.
Reward: 25000 EP, 5 new events available
Note that now you can visit military bases. By performing just like in this mission, I mean consuming the commander, you can infiltrate all the army buildings in Manhattan. I strongly advise you to do so, as in the bases you may find A LOT of interesting people. Some of them are Web of Intrigue targets and others may have special abilities, like artillery barrages, sharpshooter skills, etc.
This task is literally weird. First of all, you have to get to a rooftop marked on your map and radar. A cut-scene there will show you an infected water reservoir. If you get close to it, the mutant inside will come out of the reservoir and attack you. It is your job to destroy the water tank before the infected enemy gets out of by himself. A few samples fall out from every single destroyed reservoir. You have to collect them all.
With each sample collected you fill the progress bar located in top right corner of the screen. Destroy several water tanks to get enough virus samples. The reservoirs are marked with red skulls on your map and radar.

Once you finish your job with the reservoirs, go towards the infected hive located nearby. Now you must collect virus samples from it. First of all, enter the marker to watch the cut-scene. Note that the samples fall out from the building without any additional actions. You just have to run around the place and collect the samples. You need a lot of these, so you'll be exposed to enemy fire. Try to avoid bullets.
Soldiers will try to destroy the hive - from time to time the game will inform you about the building's condition. If you realize that the military personnel fires way too many shots at the hive, kill a few soldiers to stop their progress.
Reward: 25000 EP, 22 upgrades unlocked, 1 new event available
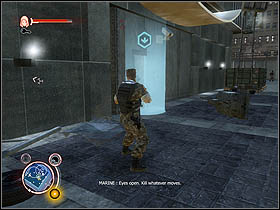
You start this mission near a military base. Shapeshift into a soldier and jump on the ground. Beware of the virus detectors, however! You have them all marked on your radar.
Infiltrate the enemy base and find the local commander. Consume him to get some knowledge about the detectors and patrols driving around the city.

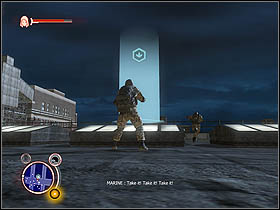
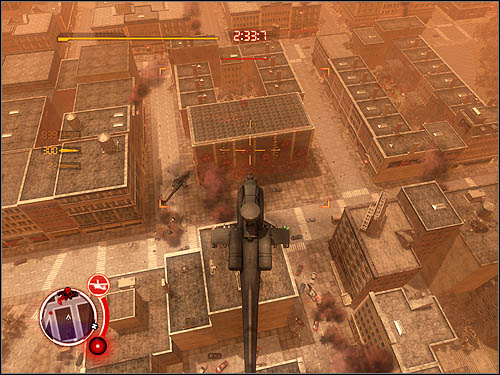
Now you have a series of patrols to eliminate. Run towards the first of them and destroy two flying UAV detectors and two armored personnel carriers. I strongly advise you to hijack one of these vehicles and use it to destroy the remaining enemies. From time to time the army will call in reinforcements - helicopters and commandos. With an APC you can try fighting them, as destroying each Strike Team gives a lot of bonus Evolution Points.
Some patrols will be able to pinpoint Dana's location. In such cases a timer appears at the top of the screen and your job is to wipe out the whole patrol before the time runs out. Therefore, I advise you to hurry and to use the Glide ability - it actually gives you a nice boost.
Reward: 32500 EP, 2 new events available
The task is very simple here. You have to destroy several virus detectors to prevent soldiers from finding Dana. The first detector is fortunately marked on your radar, but the others are not. If you check your map, you should notice that a few blocks and roads are marked with a green color. Look for other detectors in that region. Once you get close to them, they will appear as markers on your radar, making your job a little easier.
Try to finish enemy soldiers as well as the machines, thanks to that you will be able to restore some health. If you can, liquidate helicopters as well, by throwing at them various objects you may find on rooftops.
Reward: 25000 EP, 1 new event available
First of all, go to one of the infected hives. Enter the marker in order to watch a cut-scene and carry on with the mission. Jump down and find a commander - just walk around the battlefield and the leader will suddenly appear on your radar, marked with a specific icon. Consume the guy and then run away, towards the next hive.
When you get there, you'll surely notice a few virus detectors over there. Shepeshift into a soldier and run to the first detector. You have to turn it off by completing a simple quick-time event. Specific buttons will appear on the screen and you just have to simply press them in the right time and order. Shut down all four detectors and then go to the marker placed near the helipad. Announce via the radio that the area has been secured, so dr. McMullen will arrive in a helicopter.
The machine with your target on board will not land, however. What is more, a horde of helicopters ready to blow you up sky high will suddenly appear. You can try hijacking a nearby vehicle and shoot down the enemy machines, but under such circumstances it might be extremely difficult.
Better get yourself a decent firearm (a grenade launcher would be the best here, but a simple assault rifle should do the trick as well) and hide under a bridge. Most of the helicopters will not be able to reach you there. And even if you notice someone trying to do that, you should have a car or something else to throw at the poor bastard. Infantry may become a problem here, but that's why you have the firearm mentioned a second ago. Eliminate all enemies standing or flying nearby in order to change appearance and end this mission with a success.
Reward: 50000 EP, 1 new event available
Nice assignment - you must enter an infected hive and take some samples. Go to the nearest mutated building. There's an entrance in the rooftop.
Samples will fall of the walls. Start collecting them. Suddenly Specialist Cross will join the party. He's a tough enemy, but he's not invincible. Before you start the fight, you should learn a few things about him.
First of all, do not use firearms against him. Grenades, for instance, do a lot of damage, but each time you attack him with such a weapon, he rapidly goes into melee. He's extremely good in hand-to-hand combat, so do not prompt him to attack in such fashion.
Secondly, eliminate other enemies in whole groups. Get yourself some decent, area attacks, like Groundshatter or Groundshatter Drop.
Thirdly, the best way to harm Cross is to attack him while he's busy with aiming (a laser beam appears every time he wants to shoot you). If you attack him under different conditions, you'll end up electrified by Cross, and that takes some health. I advise you to use to use Flying Kick ability - necessarily charge your attacks to do more damage and knock down your enemy, making him unable to fight for a few seconds.
Once you finish him, watch the cut-scene. Some of your abilities will not be available for the next few missions, but it should not be a problem to run away from the military and end this mission.
Reward: 75000 EP, 2 new events available
You just need to return to Dana's house. Watch the cut-scene in order to end this mission successfully. You won't get any reward for this one. Moreover, notice that energy orb located on Mercer's back. Chemicals injected by Cross are still working.
Reward: none
Now you need to find doctor Ragland. First of all, go to his morgue, and then to a designated area controlled by the military. The problem is, there are flying UAV detectors all over the place. Get on a building located next to an APC you decided to hijack, shapeshift into a soldier and then jump off the roof. During your freefall use the Flying Kick ability - lock on a detector and eliminate it. Nobody should notice you and the detector itself should have enough time to raise the alarm. Once you fall on the ground, enter the vehicle without attracting anyone's attention.
After that, leave the vehicle and go towards an infected hive, still in you military disguise. Stand right behind soldiers armed with rocket launchers. Use Stealth Consume to absorb one of these guys and take his weapon. Use it to destroy as many tanks as possible - you should be able o do some damage before they realize, who you really are. Once your cover is blown, eliminate other soldiers on the roof, jump on the street and hijack a tank. Use it to destroy remaining vehicles and additional incoming forces. The last enemy is driving an APC. Hijack his machine to consume the guy and end the whole mission.
Reward: 100000 EP, 3 new events available
You have to take dr. Ragland to an abandoned military base. You must use a tank to transport that guy. It seems that his morgue is surrounded by such machines. Shapeshift into a soldier and hijack one of these (they're marked with big white spots on your radar). Drive the tank into the marker and take Ragland with you.
Now go to the abandoned base, but try not to attract any attention. Driving this monster really encourages to do some serious havoc, but hold your reins - avoid roadkills, operational military bases, etc. once you get to the abandoned camp, drive into the marker in order to move on with your mission.
Ragland needs a few minutes to collect the samples from dead bodies located in the base. Your job is to repel attacks of the infected people and make sure that the windows behind you are in one piece all the time. Use the firearms located on the ground to eliminate a few first hostiles. You'll soon realize that there are several enemies already at the windows, so forget about grenades and bullets, because using them may damage the glass. Instead, better use go to melee fighting. Flying Kick should do the trick here. Better don't charge your attacks, you just want to knock enemies down in order to prevent them from breaking the glass.
Once Ragland gets all his samples, you will have to kill the rest of your enemies. Now it's going to be totally unleashed - charge your attacks, use grenades, rifles and any other weapons you can find in the base.
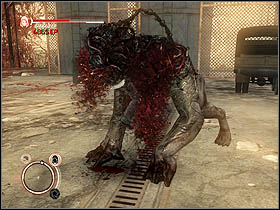
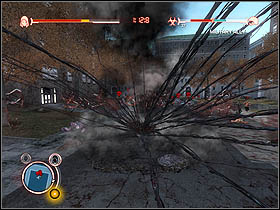
When you kill them all, Mercer and Ragland will return to the tank. The problem is, you will have a new enemy now - a monster living underground, sticking above the ground level his tentacles from time to time.
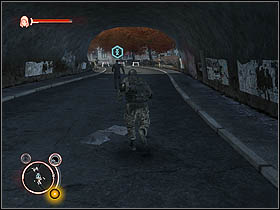
Right after you leave the base, turn left and follow that road until you reach a road covered with a bridge - this "tunnel" is a zone practically unavailable for monster's tentacles. Thanks to it, you can get near Ragland's morgue without encountering the monster. However, it doesn't lead directly to the morgue, so you need to take a normal road. I advise you to find a narrow one. The monster usually avoids narrow roads.
Reward: 100000 EP, 2 new events available
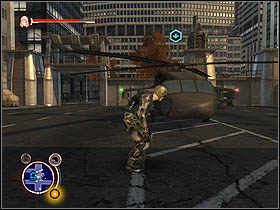
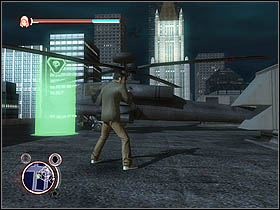
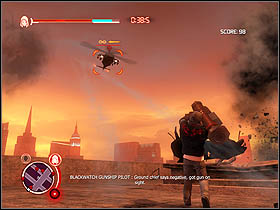
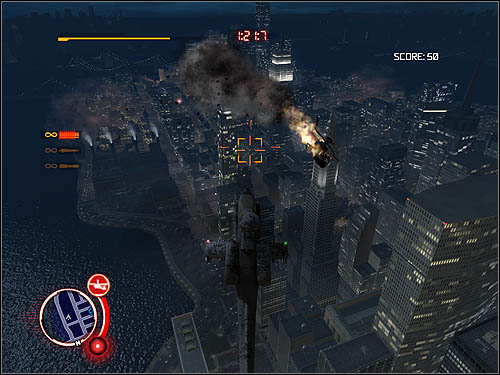
Weird, but nice assignment. First of all, shapeshift into a soldier and approach the helicopter pilot. Use Stealth Consume to absorb him without making much noise. Now get to the helicopter. Follow the instructions presented on the screen to learn the basics of flying.
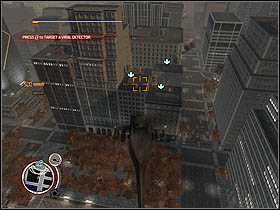

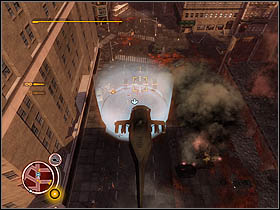
Go to the designated location. You'll find there three virus detectors. Lock on them and destroy them all, using both machine gun and rockets. Once you blow them all up, go to an infected area of Manhattan. You must circle above the city until you find a water reservoir with a specific mutant inside.
When the signal bar fills completely, one of the reservoirs will receive a marker on your map and radar. Lock on and scan it.
After the scanning get out of the helicopter. You have to beat the mutant, so you will be able to grab him. Do it to inject him the antidote.
The mutant will run scared. Chase him, but do not kill him - antibodies must ripen in him first. Suddenly, the enemy will stop and the game will inform you that now you can consume your hostile. Beat him once again, grab and absorb. But be careful, as there are some more enemies in this area.
Reward: 120000 EP, 18 upgrades unlocked, 1 new event available
Go to Dana's place, watch the cut-scene, and then pursue the monster that kidnapped the girl. You'll reach a place, where you'll be surrounded by infected enemies. Finish them all, using your latest and deadliest upgrades.
Reward: 100000 EP, 2 new events available
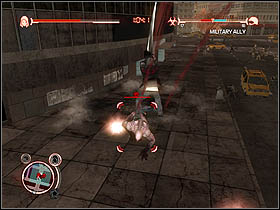
Run to the leader of the infected. Go into the marker and get familiar with the situation around here. The leader is tough, so I advise you to steal a tank and shoot him several times. While the monster is stunned, perform a grab-and-consume action... or at least try to do it.
Looks like it is not so easy to absorb such a though enemy. Go to the nearest infected hive. Get on its roof and start fighting your enemies. It seems they're personal bodyguards of the leader or something like that.

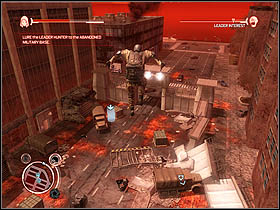
When you finish them all off, you will have to lure the leader to the abandoned military base. Run towards that place. However, notice that your target keeps losing its interest in Alex Mercer. In order to keep the leader interested, you must hit him from time to time. The army will attack the mutant as well, prevent soldiers from killing the monster.
Once you get to the base, you will have to beat the leader a little. Use powerful area attacks and Flying Kicks.
Reward: 165000 EP, 3 new events available
First of all, go to the abandoned military base and consume the mutant trapped in there.
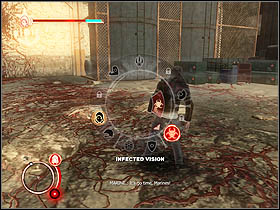
You will gain a new vision mode - you'll be able to distinguish people between the normal ones and virus carriers. Turn on this power and check if there are any soldiers with a bright white light. Consume the guy and run away from the base.
In order to pinpoint the mutant leader's location, you have to consume a few more virus carriers. A military base is marked on you radar. Go there, disguised as a soldier. Find a few carriers and absorb them, preferably using the Stealth Consume ability. You will probably have to deactivate the detectors as well. When you fill the progress bar in top right corner of the screen, you will reveal the leader's location. Go and find him.
You must weaken the monster and then consume it. Turn on your armor and attack the enemy with your blade. Feed on smaller enemies to regain health. When you absorb the leader, the mission will end with a success.
Reward: 120000 EP, 2 new events available
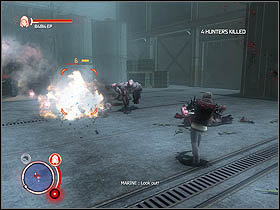
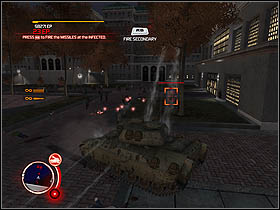
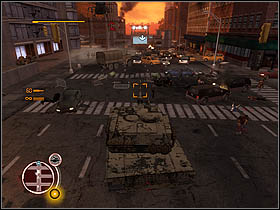
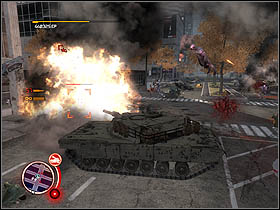
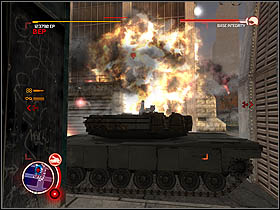
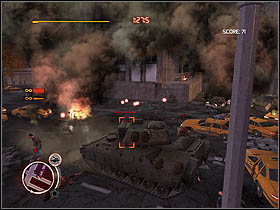
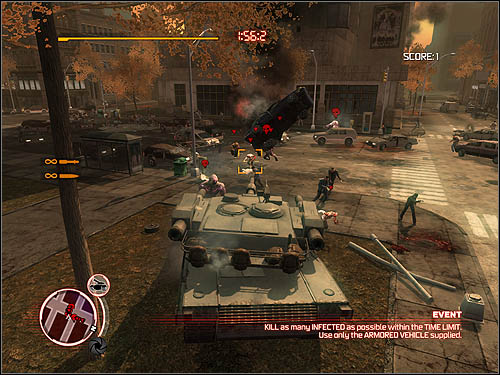
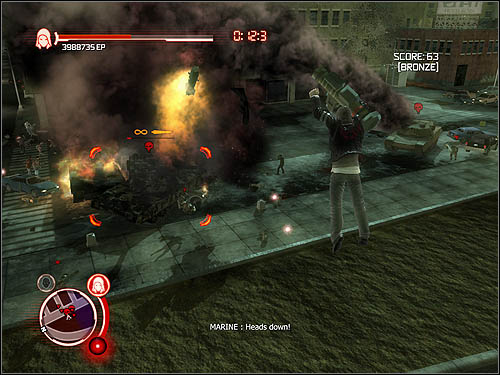
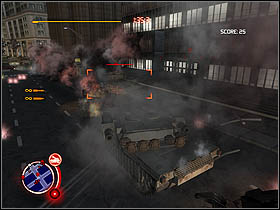
The army will send a special tank, which is quite useful in destroying infected hives. Go towards it. You must escort it to the first hive - it requires killing a few mutants, no big deal. Note that you can always borrow one of the regular tanks.
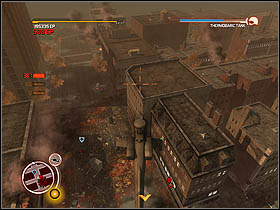
After destroying the first hive, the task will become more difficult. There will be more mutants on your way, including strong leader hunters. In order to protect the special tank, steal a helicopter and use its machine gun to eliminate the mutants. Moreover, try shooting only the enemies BEHIND the tank, not those who are IN FRONT of it. Thanks to that you will not damage the tank itself. Attacks infected leaders with rockets.
Once the tank destroys the second hive, it will go directly to the third one. Things will get a little complicated here, because right before the shot the whole tank crew will die. You must get out of the helicopter and enter the tank. Fire a single shot at the infected hive to destroy it.
The last objective is to destroy the primary hive. Drive near it (although it is almost invulnerable, shoot the mutants - one accurate shot kills everything that may stand in your way). One projectile shot at the primary hive will open it. It will also end this mission successfully. It is time to fight with the leader mutant of this hive.
Reward: 20000 EP, 20 upgrades unlocked, 3 new events available

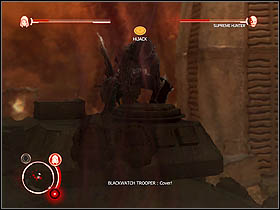
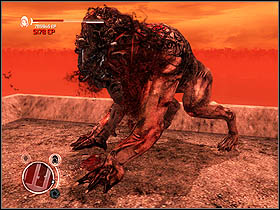
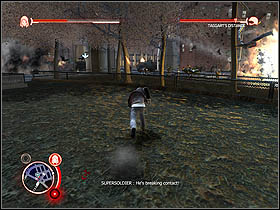
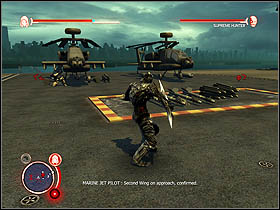
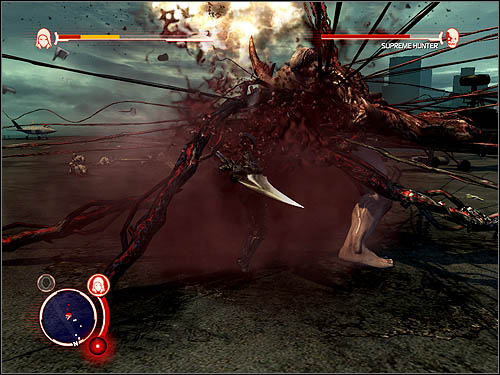
The beginning is quite difficult. Put on your armor and use your blade during the whole fight. If you can, consume the smaller mutants in order to regain health. I strongly advise you to get the Adrenaline Surge for this battle. Thanks to it, you'll be able to launch one devastator attack while Mercer is almost dead. If the Supreme Hunter will beat you a little (and he probably will), you'll be able to fight back with, for example, spikes going straight from the ground. Thanks to that you will not only eliminate Supreme Hunter's friends, but also weaken your main enemy.
You can jump on the stunned Supreme Hunter and punch him a few times, taking a lot of health. Try doing this at least one in the whole battle. Thanks to that, you will make some progress in the whole mission, and the army will join the fight. Hijack APCs and attack the Supreme Hunter with rockets (the machine gun is a nice solution as well. Just make sure that the barrel is points the Supreme Hunter, otherwise you will simply waste your ammunition). After a few strong shots Hunter should die.
Reward: 300000 EP, 10 upgrades unlocked, 2 new events available

Before you start Men Like Gods mission, buy the Blade Air Slice upgrade (requires 1000000 EP).
You can start this mission by answering a phone call. First of all, go to a lookout point to examine the current situation.
Better consume a soldier before carrying on with this mission. In my opinion, stealth is the best way to do this task. Shapeshift into a military guy to avoid raising the alarm, and then climb on the rooftop with a helicopter on it. You must consume another soldier up there, so you'll look like a Blackwatch crewmember. If you want to absorb other soldiers on the rooftop, then be my guest.
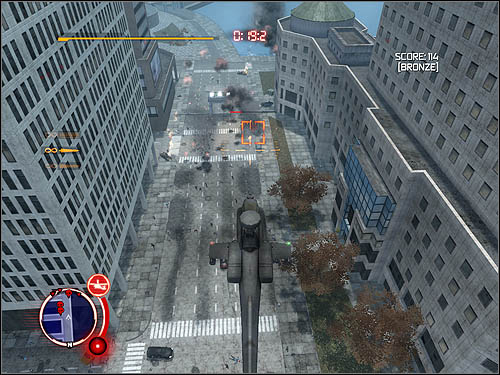
Next task - get in the helicopter and go towards enemy soldiers. Do not shoot even a single bullet - just land in the designated location.
Now go towards the infected hive. Destroy it and use your rockets to finish all mutants in the streets. Once you get rid of all red markers indicating infected enemies, land in the marked spot, so the soldiers will be able to get down to the ground.

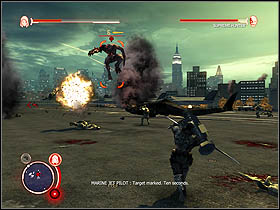
Fly to the next point of interest - a group of soldiers surrounded by tentacles of hydra. Land in the crossroads and watch the cut-scene. Right after it, gain some altitude and get out of this place, as the tentacles will throw cars at you. Shoot them from a distance (notice, that you have 20 special rockets on board, these might be useful against the hydra). The tentacles will keep hiding - in such conditions lose some altitude to lure them out of hiding. This'll give you an opportunity to finish the hydra. After killing a few tentacles you'll complete the task. Extract soldiers out of this place.
You next objective is to pick up two groups of soldiers who are under constant attacks executed by hydra and smaller mutants. Actually, you do not have to fight them all, just quickly land and start. Thanks to that you'll do your job and hopefully avoid being hit by a car or something like that.
Once you get both groups, fly to the military base. Land on the helipad to end this mission.
You'll surely need the Blade Air Slice upgrade here - thanks to it you'll easily destroy the device filling the whole room with Bloodtox, substance that harms Alex's body. Once you blow this thing up, slaughter all soldiers in any fashion - they're not difficult enemies.
After killing those guys, you'll encounter the first supersoldier. He's a tough guy, but if you hit him 2 or 3 times with Blade Air Slice, you'll easily cut him into pieces without losing much health.
A few normal military men will come to you, next to the supersoldier. Consume them all, so you will have enough health to unleash a devastator attack - tendrils or groundspikes. The last group of enemies here is really huge, so you'd probably like to use something very powerful against them. Using a devastator should eliminate all of them in - literally - a blink of an eye.
Do the same with the group located outside the base. You'll find there A LOT of enemy soldiers, but 1-2 devastators should eliminate them all. Get out of there to end this mission successfully. If a hostile manages to call in a Strike Team, have no fear - Blade Air Slice ability allows you to destroy helicopters and other vehicles with great efficiency.
Reward: 80000 EP, 3 new events available
Simple and easy mission. Your objective is to destroy nine Bloodtox-releasing machines located on the Manhattan Island. The best way to do this is to approach the device (preferably in a military disguise, so nobody except supersoldiers should bother you) rapidly, then pull out your blade and perform a Blade Air Slice attack. With a lock-on the machine you should destroy it with a single cut. Once you do that, you'll blow your cover, so run away, from your enemies, shapeshift in a soldier once again and go towards the next Bloodtox device.
Reward: 10000 EP, 3 new events available
This mission starts near a military base. You must consume the local commander. The problem is, guy is walking in a cloud of Bloodtox, the thing that kills Mercer and mutants with ease. If you get yourself a military disguise and quickly consume the guy, you should be able to walk out of the Bloodtox before you die. Once you absorb your enemy, go to the marker placed near the base entrance.
Now it should be quite easy. Enter the tank or helicopter (I strongly advise you to take that second option) and escort the Bloodtox vehicle to its destination. Hydra's tentacles will appear on your way, so it is important to drive/fly in front of the Bloodtox vehicle and quickly eliminate all of the threats.
Reward: 150000 EP, 2 new events available
Run the Bloodtox pump and get ready for a nice, big fight. Armor and your blade will probably come in very handy here.
The mutants will attack you in a few waves. Eliminate them by using your blade and do not let them damage the Bloodtox pump. The army shouldn't attack you during this fight, they'll be rather concentrated on the infected hostiles. Keep an eye on your health bar and consume one guy or two if you're not feeling very good. Notice that you can use your devastator attacks near the pump - they will not damage the Bloodtox device at all. Use such an attack to kill two hunter leaders coming here at the end of the mission. Although they're very tough, one devastator should wipe them out. In the end you'll have to kill two hydra tentacles. If you don't' have a decent vehicle, try cutting them with your blade.
Reward: 275000 EP, 1 new event available
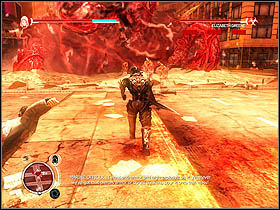
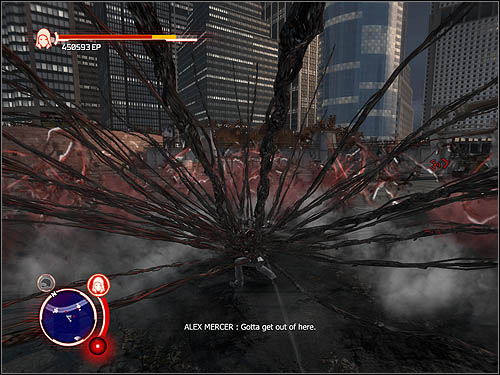
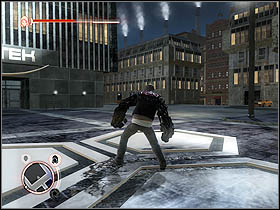
It is time to defeat Elizabeth Greene. Battle with her will be quite long, but not necessarily difficult... if you know a few things about your enemy. The monster has several attacks. The first one is spitting debris. This one is very dangerous, as it may attack even when you're in air. Besides, Elizabeth releases some kind of venom or poison (green orbs flying around the place) - that's actually easy to avoid. The last kind of attack is a devastating wave. It is impossible to block, and it does a lot of damage. Climb buildings in order to get away every time Elizabeth wants to execute this attack.
Prepare your armor and blade. Elizabeth has two tentacles and one core, and you have to destroy it all. Each one of these parts has an own health bar. Climb a building (the higher you are, the better attacks you can perform) and jump on the monster with your blade locked on tentacles/core. When all the health bars will indicate that the monster is in really bad condition, consume a few mutants to unlock your devastator attacks. Then finish the remaining tentacle/core - this will make Elizabeth unable to defend herself. It is a really great moment to perform one of your devastators. The monster will, however, regenerate its tentacles and core, so you will have to repeat the whole operation a few more times - that's why this battle gets so long.
Meanwhile, the army will join the fight. You may try hijacking a helicopter and shooting the monster with your rockets, but it all requires avoiding debris spitted out by Elizabeth.
Reward: 300000 EP, 1 new event available
This mission is short, but also quite difficult in my opinion. It is all about destroying a few machines in a Bloodtox factory. The base is heavily guarded, and the substance in the air will lower your health with great speed. Consume a few guys outside the base to have access to your devastator attacks. Once you do that, enter the base and find a place, in which two (or more) Bloodtox devices stand near themselves. Perform a devastator attack and then quickly run out of there, before the enemy calls in the helicopters. Repeat this operation until you destroy all of the Bloodtox devices. You can, of course, have some fun and try destroying these things with your blade or other powers, but I believe it makes the game quite difficult.
Reward: 100000 EP, 4 upgrades unlocked, 1 new event available
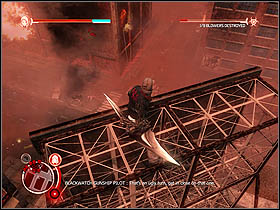
This task is - in theory - very easy. After you talk to Cross, run towards the first helicopter base. You'll find there a machine hovering right above the roof. Although it is not marked as a target, hijack it and kill the pilots. Thanks to that action, you'll save yourself some time later in the mission.
Helicopters will be your next targets. You can try destroying them with a hijacked machine, but it will be difficult because of lots of the anti-air weaponry on the ground. Instead, better jump on buildings, and then try hijacking the helicopters. Use the Flying Kick ability in order to get close to enemy machines.
In this mission you must visit three helicopter bases. Every time you have an opportunity to change your appearance and fool your enemies, do it - thanks to that you'll get some time to regenerate your health.
Reward: 275000 EP, 1 new event available
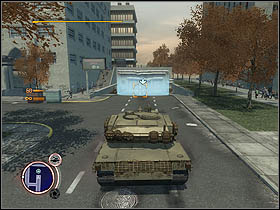
Go to Ian Taggart's base. Hijack a tank located in there and shoot a few projectiles at the main base building. Once it collapses, Taggart will get away in his special tank, trying to leave the Manhattan Island. However, he will stop several times, always among other tanks. Your objective is to follow the target and destroy every single tank Taggart meets on his way.
You can try destroying these machines with your blade, artillery strikes, hijacking one and shooting the others, etc. The only thing you can't do is to approach them in a military disguise, because the supersoldiers nearby will recognize you anyway.
All in all, you'll get an information that Ian Taggart is on one of the bridges leading outside of Manhattan. Run to his tank and enter it (this doesn't differ from hijacking other machines). Alex Mercer will automatically consume Ian Taggart.
Reward: 250000 EP, 1 new event available
The last fight is in my opinion the most difficult of all battles in the game. Your enemy is able to block many of your attacks. What is more, his hits are extremely powerful and dangerous. There are a few ways to defeat him, I managed to kill him with a combination of them all.
First of all, notice bombs and rockets located on the carrier's deck. You can grab them and throw at the mutant (preferably with the usage of the Musclemass ability) when he's not moving (that only happens when he uses a devastator attack - it takes long enough to throw 3-4 objects at him).
Use EVERY SINGLE rocket launcher you find. Devastating attacks and launchers can stun the monster, which gives an opportunity to jump on his back and perform a series of very powerful hits.
It is quite difficult to have a full health bar and access to devastator attacks, so I advise you to finish the Supreme Hunter in a very risky way. Let your enemy hit you a few times, so Mercer will reach the Adrenaline Surge state. This will allow you to perform one devastator attack. Once you execute it, run away to regenerate your health (feed on soldiers). Then repeat this whole operation a few more times. Better do this without armor, so you'll lose health quickly and it'll be easier for you to run away from your enemy after performing devastators.
Hijacking a helicopter and using its rockets against the Supreme Hunter is also a nice idea, but it requires extraordinary skills - the monster will throw pieces of carrier at you, and the ship's crew will try to shoot you down. Although you can always launch a few rockets at your enemy.
When the mutant has about 30% of his health bar, a timer will appear at the top of the screen. From now on you have two minutes to finish the Supreme Hunter. In such conditions I advise you to forget about helicopters - they're less effective than your other attacks. The rest doesn't change at all. Once you kill the Supreme Hunter, you will end the last mission connected with the game's plot.
Reward: 500000 EP, 2 new events available
Medals
Time
Evolution Points
Bronze
0:38:0
2500
Silver
0:33:0
4000
Gold
0:26:0
6500
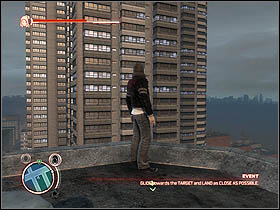
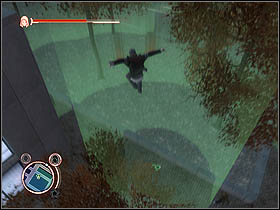
In this event you must climb a building, going through all the checkpoints on your way up. They're placed on one line, so you do not need to change your direction. During your run on the wall you may jump a few times to give yourself a nice boost. Once you reach the top, simply jump of the building to reach the place where you started the whole event. Improved sprint and jump are essential if you want to get a gold medal here.
Medals
Time
Evolution Points
Bronze
1:05:0
2500
Silver
0:55:0
4000
Gold
0:45:0
6500
In the beginning make sure to jump very high and fly towards the first building without touching the columns - thanks to that you'll save yourself about one second. After that, try to run as fast as possible (upgrade this ability if you want to achieve gold). Moreover, while your jumping, make sure you're not missing even the smallest rooftops. Otherwise you may have nothing to jump from and continue your run. The path that is designated by control points is not very complicated, so you should learn it quickly.
Medals
Time
Evolution Points
Bronze
0:32:0
2500
Silver
0:27:0
4000
Gold
0:21:0
6500
The path here is very simple, but that doesn't mean it's an easy event. Focus on your jumps, especially those from a high on a low building - there's a risk that you may miss one checkpoint because of a too long jump. To get the gold, get yourself the improved Jumps and Sprint ability. You may also use the Airdash upgrade.
Medals
Time
Evolution Points
Bronze
0:40:0
13000
Silver
0:35:0
16500
Gold
0:30:0
30000
The beginning is the most difficult. Try jumping on the western wall of the tower immediately. Once you get on it, run to the top and get your first control point. The rest is easier - jump off the building to get to the second checkpoint.
It gets even easier here. Third and fourth checkpoints require a fast sprint and long jumps, connected with gliding. If you want to get the gold medal, develop those three skills. This event might not be the easiest of them all, but note it's worth a decent amount of Evolution Points.
Medals
Time
Evolution Points
Bronze
1:00:0
25000
Silver
0:50:0
40000
Gold
0:40:0
65000
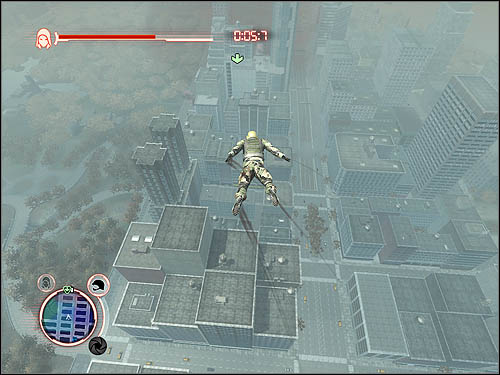
This event requires from you great skills in jumping and connecting jumps. You must perform jumps, then use the Glide ability, and after that lengthen your flight (by using the Airdash upgrade, then once again Glide, etc. Thanks to that you won't have to land so frequently.
What is more, pay attention to sprint - running on walls is particularly important when you want to get to the last checkpoint, placed on a very high skyscraper.
Medals
Time
Evolution Points
Bronze
1:25:0
25000
Silver
1:12:0
40000
Gold
1:02:0
65000
A good jump, lengthening jumps (Airdash), and the Glide ability - these three upgrades are necessary here. This event is quite difficult, but doable. In the beginning, when you get to the first control point, try to jump off the edge of the skyscraper. Thanks to that you won't have no trouble getting to the second checkpoint.
Reaching others checkpoints requires running on walls. Make sure you've got your Sprint upgraded if you want to get the gold medal.
Medals
Time
Evolution Points
Bronze
1:15:0
32500
Silver
1:00:0
45500
Gold
0:42:0
78000
This event is quite difficult if you want to achieve gold. In other cases, it is rather easy. First three control points can be reached by using a jump connected with gliding. Note that they're not on one line, so I advise you to run/fly about a meter from them - thanks to that you'll be able to collect them without changing your direction at all.
The next part is actually based on getting acquainted with the vicinity. There are a lot of turns in this event and you'll surely have to restart this challenge a few times in order to learn the layout of checkpoints. I can advise here only self-control - don't rush yourself, do not try turning rapidly, especially when in air. Better land and spare literally half of a second to turn in the desired direction and continue your speed run. Thanks to that you'll avoid stupid mistakes that may cost you a few precious seconds.
Medals
Time
Evolution Points
Bronze
2:30:0
32500
Silver
2:20:0
45500
Gold
2:00:0
78000
Very long event. The first control point is really far, and that means you must have a very well developed Airdash upgrade. You may also use the Glide ability. Use the buildings on your way to the first checkpoint to jump off them and return to air. There might be an infected hive or a military base on your way, but simply ignore the enemies trying to attack you.
Remember that when you run on the rooftops, you should avoid all the obstacles - ledges, ventilation shafts, etc. We don't want them to slow Alex Mercer down, do we?
Medals
Time
Evolution Points
Bronze
1:05:0
32500
Silver
0:55:0
45500
Gold
0:45:0
78000
There's a lot flying in this event. Jumps and the Airdash and Glide abilities are essential here. It also won't hurt to have a nice sprint, as this challenge includes a lot of wall running.

What is more, remember that when you do a wall run, you can jump in order to move faster. Moreover, try to charge your jumps every time you want to get on another building. Thanks to it you'll save yourself some trouble while trying to get to the third control point. When you go for the last checkpoint, you'll notice it is located quite far. Don't be afraid to land on one of the buildings and continue the event by running on rooftops, instead of performing long jumps.
Medals
Time
Evolution Points
Bronze
1:35:0
40000
Silver
1:22:0
55000
Gold
1:15:0
80000
In my personal opinion, this is the most difficult movement event in the whole game. There are not many checkpoints in here, but one is very far from another, which means there's A LOT of movement in this challenge. Upgrade your Jump, Airdash and Glide abilities - you'll need them all in this thing.
Always charge your jumps in this one - thanks to it you'll easily glide towards the checkpoints. What is more, every time you climb a building, avoid jumping. Most skyscrapers in this event are shaped like a pyramid, and that means one faulty jump ruins the whole attempt to get silver or gold medal.
Medals
Distance from the centre
Evolution Points
Bronze
25m
1300
Silver
12m
2000
Gold
5m
3300
Gliding and landing in a designated location is very easy, in fact. This event, in addition, is one of the easiest in the whole game. You must land next to a military base, in order to get gold you don't need spend a lot of EP on upgrading jumps. That means you can get the gold medal right after to unlock and buy the Glide ability.
Medals
Distance from the centre
Evolution Points
Bronze
25m
3300
Silver
12m
4500
Gold
5m
8000
You have to jump off the rooftop and glide towards the park nearby. You may use a nice, long jump in this one (charge it the beginning, by holding the jump button). Fortunately, there are no obstacles in you way, so this event is quite easy.
Medals
Distance from the centre
Evolution Points
Bronze
25m
6500
Silver
12m
8300
Gold
5m
15000
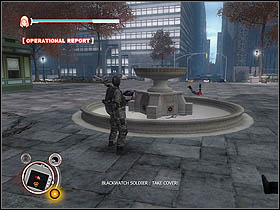
The goal here is to land on the fountain located nearby. Upgrade your jump (get yourself the Airdash if you want to get the gold) and try to jump high at first in order to glide from a greater height.
Medals
Distance from the centre
Evolution Points
Bronze
25m
6500
Silver
12m
8300
Gold
5m
15000
This event is practically the same as Fountain of Youth, but here you jump off a lower building, and the fountain is closer to your starting position. If you want to get the gold, get yourself the Airdash ability. You can also gain some momentum at the beginning if you want.
Medals
Distance from the centre
Evolution Points
Bronze
25m
6500
Silver
12m
8300
Gold
5m
15000
Very easy and nice challenge. Although you need the Airdash ability, you may forget about upgrading your jumping skills. What is more, there are no obstacles in your way to the target, so achieving gold should not be a problem in this one.
Medals
Distance from the centre
Evolution Points
Bronze
25m
12500
Silver
12m
20000
Gold
5m
33000
This one is very interesting. The target is very far and, to be honest, you won't get there even with all the upgrades available. If you want to get the gold, you must use a little trick. Note that the circles are located near a small pond. You have to fall into the water (preferably as close to the target as possible). Mercer will jump out of the water, gaining a decent altitude, which will allow you to glide towards the target. You won't get far, but it should be enough to achieve gold medal.
Medals
Distance from the centre
Evolution Points
Bronze
15m
12500
Silver
7m
20000
Gold
2m
33000
This one is quite difficult to pull off, as it requires landing between blocks of flats. The target is surrounded by tall building and the distances from the centre as smaller, as you can see in the chart above. You'll need have the best Jump upgrade available. The same refers to your Airdash ability. Try to maintain high altitude all the time. Once you find yourself above the block of flats, start falling towards the target. Well, to be honest, this event requires a lot of luck. What is more, beware of the fire escapes installed on the blocks' walls - hitting them ends with a failure in most cases.
Medals
Distance from the centre
Evolution Points
Bronze
25m
16500
Silver
12m
25000
Gold
5m
40000
Get yourself the best upgrades of the following abilities - Jump and Airdash. This event is about flying among skyscrapers and finally landing in the designated spot. Every time you pass by the first building, use the Airdash ability to change the direction of your flight. Then simply glide until you'll have to change the direction once again. What is more, try not to fly close to the walls, as you might accidentally run on one of these, and that ends the whole event with a failure. The landing itself shouldn't be difficult, even though the target is surrounded by trees.
Medals
Distance from the centre
Evolution Points
Bronze
25m
16500
Silver
12m
25000
Gold
5m
40000
Once more you have to face obstacles in your way to the target. Before you start this event, upgrade your Jump and Airdash abilities. You must land between two road bridges. You'll need to lengthen your jump at least once (by using that Airdash skill I mentioned before) in order to achieve the gold medal. Try to glide to the very end of your jump, do not freefall at the end, as you might easily fall on one of the bridges.
If you don't care about the gold medal, you may just land on of the bridges. You'll get silver or bronze for that.
Medals
Distance from the centre
Evolution Points
Bronze
25m
16500
Silver
12m
25000
Gold
5m
40000
Very interesting and quite difficult event, at the same time. It's all about landing under a bridge. You'll need an upgraded jumps and developed Airdash ability (both on the maximum level). If you just want to get silver medal, land ON the bridge - note there's a small sign of the smallest circle on the asphalt.
But if you want to get the gold, you have to jump and start gliding very, very late - you just have to keep yourself right above the railway tracks. Thanks to Airdash ability you should be able to maintain that small altitude in the end of the flight. If you hit the bridge, don't stop, just keep going forward - it is possible that the program will treat it as a normal, next part of the flight.
Medals
Required points
Evolution Points
Bronze
16
2500
Silver
22
4000
Gold
28
6500
This task is really easy if you have the Groundspike ability unlocked already. Once you fully upgrade it, getting gold is like a walk in the park. Remember that you can use only one of Mercer's powers (claws in this event), so victims killed with, let's say, a kick, will not count towards the general amount of diseased enemies.
Medals
Required points
Evolution Points
Bronze
40
6500
Silver
65
9000
Gold
80
16000
You have to use claws in this one. Once you see a group of enemies coming towards you, use the Groundspike ability to perforate them all simultaneously (this advice also refers to bigger enemies - Hunters). In other cases use you classic attacks. Achieving gold here requires well developed upgrades, so if you want to do this event at the beginning of the game, return to it at the end in order to get that gold medal.
Medals
Required points
Evolution Points
Bronze
150
6500
Silver
210
9000
Gold
270
16000
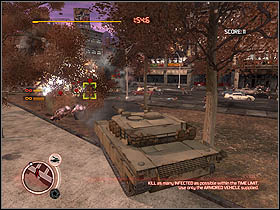
This is about killing infected enemies by using an armored vehicle. In order to finish off a lot of enemies with ease, you must move around the place all the time. Do not let the opponents come close to your machine, or you won't be able to shoot them. It is just impossible to lower the main gun so low. Use that machine gun to kill most of your hostiles, but if you notice a group of enemies or someone hiding behind an obstacle (car, tree, etc.), use your rocket launcher.
Medals
Required points
Evolution Points
Bronze
60
6500
Silver
80
9000
Gold
120
16000
This thing is quite difficult if you want to get the gold medal. It is based on killing enemies only with the use of your Hammerfist ability. I advise you to upgrade that skill and get some new moves. Thanks to that you'll be able to eliminate enemies that surround Alex Mercer - and that happens a lot of times.
Medals
Required points
Evolution Points
Bronze
100
13000
Silver
150
16500
Gold
200
30000
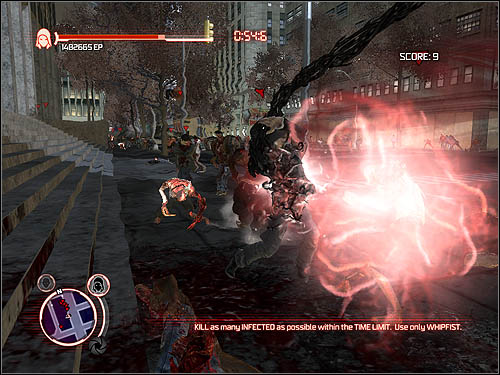
In this event you'll be using your Whipfist. To get the bronze, you just need your normal set of moves, but if you want to get something more, better get yourself the Street Sweeper upgrade. Thanks to that you can attack lots of enemies gathered around you, even at a great distance. ATTENTION: I believe it's a bug or something in this event, because it is impossible to get the gold by killing only those enemies, who are marked on your radar and map. To get more points, jump into a crowd of unmarked infected hostiles and start slaying them like a mass murderer.
Medals
Required points
Evolution Points
Bronze
25
13000
Silver
50
16500
Gold
65
30000
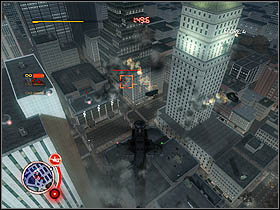
This event requires some pilot skills. Get into the helicopter and gain some altitude. Eliminate other helicopters in the first place, preferably by using rocket launchers. Your other targets are flying UAV detectors. They'll approach you from all directions, so I advise you just hang in one place and turn around, shooting everything getting close to you. The main machine gun should be enough here.
Medals
Required points
Evolution Points
Bronze
75
13000
Silver
110
16500
Gold
150
30000
A helicopter once again. Now you'll have to fight other machines of the same type. Gain some altitude, ignore all the land targets, activate your rocket launchers and start blowing up other helicopters. If you're fast enough, you'll be able to eliminate them so fast that there will be always only one helicopter coming at you at the same time. Concentrate only on air targets and you'll get the gold with ease.
Medals
Required points
Evolution Points
Bronze
45
13000
Silver
65
16500
Gold
85
30000
This is an APC event. The problem is, the enemy will send also some APCs against you. Don't forget that they have rocket launchers as well as you, and they're eager to use them. You don't want your vehicle destroyed before the time runs out, right? In order to make things easier for you, drive into an alley leading through the park. Thanks to that you'll avoid attacks from behind and eliminating hostiles will become so much simpler.
Medals
Required points
Evolution Points
Bronze
40
20000
Silver
70
26000
Gold
100
40000
Now it's time to use the grenade launcher. Your enemies are the infected people of New York. The enemies are fast, so they're able to get close to you. That means if you shoot them with a grenade, the blast will also hurt you. Here's a tip - jumps a lot. In order to get plenty of points, aim at large groups of hostiles. Moreover, remember about changing your targets manually. The game has this flaw - the lock on system works also with enemies already blown up.
Medals
Required points
Evolution Points
Bronze
60
20000
Silver
90
26000
Gold
125
40000
Time for tank. In order to get the gold, visit a few military bases first. You'll find there some tank drivers - consuming them enhances Mercer's driving skills. Use your main gun as well as the machine gun - thanks to that you'll be able to effectively eliminate both armored vehicles and the infantry. Of course concentrate on those enemies, who have red markers above.
Medals
Required points
Evolution Points
Bronze
150
6500
Silver
210
9000
Gold
270
16000
Here you must eliminate enemy troops with a grenade launcher. Make sure you have full health and jump into the action. At first attack the infantry - well, there are no other targets anyway. Later a helicopter and some APCs will join the action. You'll get more points for these enemies, so focus on them and leave alone the rest of hostiles. They'll have all guns pointed at you, so don't forget about collecting life orbs left by killed enemies.
Medals
Required points
Evolution Points
Bronze
80
20000
Silver
120
26000
Gold
175
40000
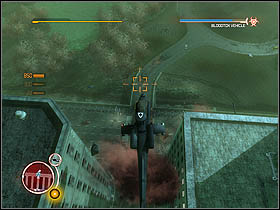
Use the helicopter to eliminate an awful lot of mutants. Gain a great altitude, so the enemies will not be able to hit you with cars or something like that. What is more, note the tentacles coming from the ground - killing them is worth many points. Use both main gun and rockets to easily eliminate all kinds of enemies you may encounter here. You can also consume a few pilots in order to improve your flying skills.

Medals
Required points
Evolution Points
Bronze
150
20000
Silver
220
26000
Gold
325
40000
In this event you will have to use a tank. Try moving around the place all the time (but don't fall into the water) and don't let the enemies come very close to you. Otherwise you won't be able to aim at them. Bigger enemies can be eliminated with your main gun, attack smaller with the machine gun (if their next to a wall, use your main gun as well. They won't get a direct hit, but the explosion should help you get rid of them).
Medals
Required points
Evolution Points
Bronze
45
25000
Silver
60
40000
Gold
85
65000
It is time to use the blade. In order to get the bronze and silver medals, you'll need only your basic attack - eliminate the infantry and, if possible, try to avoid tank projectiles. If you already have the Blade Air Slice ability, you can easily get the gold by attack only the tanks. One Blade Air Slice attack should blow up a vehicle into smithereens, giving a lot of bonus Evolution Points.
Medals
Required points
Evolution Points
Bronze
120
25000
Silver
200
40000
Gold
270
65000
You'll need a lot of health in this one, as there will be a lot enemy helicopters... with all their guns pointing at you. Run as much as possible and collect all the life orbs that fall out of destroyed vehicles and - hopefully! - land on your skyscraper's rooftop. If you want to get the gold, upgrade your health and enhance your rocket launcher usage abilities. When you notice you can destroy a helicopter by firing a single homing missile, try getting the gold medal in this event.
Medals
Required points
Evolution Points
Bronze
25
25000
Silver
35
40000
Gold
45
65000
Quite difficult thing to do, requires unbelievable health and going down to the streets, which takes some time. I advise you to do this after acquiring the Hammerfist Elbow Slam upgrade - thanks to it, you'll be able to destroy tanks without much problem. There are lots of tanks in this event, so you might want to use that ability. However, do not concentrate on tanks only - fight also groups of infantry to get the gold.
Medals
Required points
Evolution Points
Bronze
250
25000
Silver
450
40000
Gold
650
65000
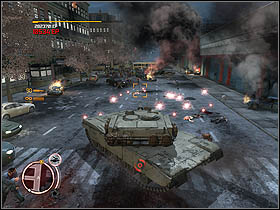
Pleasant and nice event. You'll get the enhanced tank here, prepared for the extermination of the infected enemies. It seems like hordes of such hostiles are moving towards you, trying to destroy the tank and kill you. Move fast, so the opponents will not be able to get close to you (however, if you'll let them do so, shoot at walls nearby). The enemies will usually attack you in large groups, so use special shells against them. The explosion of these things is so big that it should wipe out the whole vicinity. Don't care about the tank - it is almost invulnerable. If you want to get the gold, you might try enhancing your driving skills.
Medals
Required points
Evolution Points
Bronze
55
25000
Silver
85
40000
Gold
110
65000
Once you start this event, run towards one of the streets (cutting the enemies on your way there, of course). Thanks to that the enemies will have better access to you, and that means you'll have more opportunities to get some extra points. Use Blade Air Slice ability to get rid of tougher enemies, like Hunters. Normal enemies should die of a combination of traditional attacks.
Medals
Required points
Evolution Points
Bronze
100
25000
Silver
200
40000
Gold
300
65000
Not so nice event, requiring a lot of luck from the gamer. It seems like it is hard to tell, where the most enemies will spawn, and how many of them you'll encounter. From what I've seen I can tell that the most hostiles appear on the main road (pictured below), leading to the military base located nearby. Big enemies (like Hunters) eliminate with rockets. You can also use them to defeat even smaller infected, but not if they're moving fast. If they are, use your main gun to perforate them. Fly low (the infected probably won't try to take you down) and be careful with the military - you don't want to turn their AA systems online.
Medals
Required points
Evolution Points
Bronze
150
20000
Silver
220
26000
Gold
325
40000
Jump down on the road and start fighting the military personnel. The enemy has some tanks and soldiers armed with rocket launchers. That means, if you want to be an efficient fighter, you have to avoid enemy projectiles. I advise you to jump a lot. Aim and shoot while being in the peaks of your jumps. You'll get the most points for destroying tanks, so focus right on them.
Medals
Required points
Evolution Points
Bronze
40
32500
Silver
60
45500
Gold
90
78000
Once you get the rocket launcher, jump down on the road and start killing off all marked enemies. Eliminate the bigger ones, Hunters, in the first place - you'll get an awful lot of points for them. Avoid jumping - this will only slow you down in this event. Collect all life orbs left on the battlefield in order to restore your health.
Medals
Required points
Evolution Points
Bronze
80
32500
Silver
120
45500
Gold
160
78000
Very easy thing to do. The beginning is the worst here - take off immediately and eliminate all of the enemies nearby. After a few first shots, new enemies will come to you, one after another. That means you can just place your self in one location and simply turn around, shooting everything that comes near you. I advise you to use the main gun in this one. It is very accurate, and because of small amount of enemies, it won't get overheated.
Medals
Required points
Evolution Points
Bronze
15
40000
Silver
25
55000
Gold
35
80000
Use your Whipfist to eliminate some soldiers in this event. Use the Street Sweep ability in order to do this one without any difficulties. Just remember that you have attack whole groups of enemies and collect the life orbs left by the killed army men. Thanks to that you won't die because of bullet wounds.
Medals
Required points
Evolution Points
Bronze
110
46000
Silver
150
60000
Gold
180
105000
This is a tough one if you want to get the gold medal. If you only care about the bronze one, you don't even have to move the tank, just shoot at the incoming forces, infantry and vehicles alike.

Things get much more complicated when you want to get a better medal. First of all, upgrade your tank driving abilities. The special tank you get here is like a weapon of mass destruction, but a good driver can always do even more damage. Secondly, get yourself on a busy intersection. That alley you start in just won't let you encounter as many enemies as you want.. Thirdly, use various types of ammunition. Attack single vehicles with normal shells. Use the special ammo against great groups of infantry - the splash damage should let you kills even more than ten enemies wit ha single shot.
Medals
Time
Evolution Points
Bronze
3:10:0
6500
Silver
2:50:0
9000
Gold
2:30:0
16000
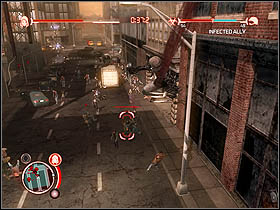
In this War event you have to help the infected in their fight against the military. I personally love to use Flying Kicks in eliminating infantry (including those who stand on buildings) and the Claws power to destroy armored vehicles (Groundspike ability is really deadly so better use it). Using all these types of hits you'll be able to eliminate a lot of soldiers with great efficiency, without killing your "allies".
Medals
Time
Evolution Points
Bronze
2:45:0
13000
Silver
2:15:0
16500
Gold
1:50:0
30000
I advise you to use the blade or claws in this one. You may also need a huge variety of moves in order to kill with ease both powerful and weak enemies. What is more, start this event with a full health, thanks to that you'll be able to unleash some devastator attacks. If you'll use the wisely, you will eliminate a lot of infected hostiles, while almost nobody from the army will die.
Medals
Time
Evolution Points
Bronze
3:40:0
6500
Silver
3:20:0
9000
Gold
2:50:0
16000
Quite difficult thing to do, requires a lot of jumping and rapid target changing. Try to be in air as often as possible, so the mutants won't get to you so easily. Note, that if you'd be surrounded, a shot from a grenade launcher would had knocked you off your feet. If you want to get the gold, enhance your health, grenade launcher abilities and also remember that the last enemy in this event comes late to the battle. In order to fit in the time limit, you have to go towards him and finish him quickly, near the fountain.
Medals
Time
Evolution Points
Bronze
2:45:0
20000
Silver
2:10:0
26000
Gold
1:45:0
40000
By using your grenade launcher here, you have to kill a few dozens of infected enemies. With the maximum level of grenade launcher abilities, getting the gold medal is just a walk in the park. Be in motion all the time (if necessary, jump a lot), so your enemies won't be able to surround you. What is more, if you run from your enemies, they may follow you, forming a nice, straight line, making your job so much easier.
Medals
Time
Evolution Points
Bronze
3:40:0
6500
Silver
3:20:0
9000
Gold
2:50:0
16000
Start this fight with a full health, so you'll be able to perform devastator attacks. These will be here really useful. I advise you to use your Blade power as well. The first wave of enemies consists of losers only, so you'll cut them into pieces by using only your standard set of moves. Next waves are more difficult, as powerful and tough enemies join the fight. Start using your devastators in order to eliminate whole waves in relatively short time. Although it's fun, better keep out of the soldiers, as you may accidentally kill some of them.
Medals
Time
Evolution Points
Bronze
3:30:0
25000
Silver
3:00:0
40000
Gold
2:30:0
65000
The best way to beat this event is to use the blade an - from time to time - a rocket launcher. Casual enemies should not be a problem, but the Hunters are a lot worse (in this event you'll meet their enhanced version). Try killing them by using various techniques connected with your blade. Moreover, remember about collecting life orbs left by fallen enemies - without these you probably won't make it to the end of the fight. If you want to use devastators, do it wisely. You don't want to kill your "allied" soldiers, right?
Medals
Time
Evolution Points
Bronze
4:00:0
32500
Silver
3:30:0
45500
Gold
2:40:0
78000
This is an easy thing to do. You have to fight against the military. In the beginning finish one infantry guy and take his weapon (a light machine gun would be perfect for this, but an assault rifle should do the trick as well). Use it to kill other enemies left in the vicinity. Remember that it only takes literally 2-3 shots to put a soldier out of his misery. That means one clip should be enough to kill more than ten enemies. Tanks will come after you from time to time. Prepare a good weapon for them - I personally prefer the blade and the Blade Air Slice ability. Thanks to it, the weapon goes through the tank like it was a butter.

Medals
Time
Evolution Points
Bronze
3:30:0
32500
Silver
3:00:0
45500
Gold
2:45:0
78000
Without changing your appearance, you have to use the grenade launcher to finish off all the mutants nearby. The thing is quite easy, but you have to learn to change the enemies you want to lock on quickly, and make sure you have some decent skills connected with the grenade launcher. What is more, do not shoot at enemies standing near the soldiers - a blast may kill that "ally" as well as the monster. The normal soldiers will probably die in his battle anyway, and only supersoldiers will remain. If the situation on the battlefield looks like described above, launch at the infected all you've got. Supersoldiers can withstand a lot of grenades, so don't worry about them.

Medals
Time
Evolution Points
Bronze
4:15:0
46000
Silver
3:55:0
60000
Gold
3:35:0
105000
Very tough thing to do. In this event, you must help the infected fight the military supersoldiers. I advise you to prepare the Blade power. Cut you enemies using the Blade Air Slice and Blade Frenzy abilities. You may also use a lot of health and nice timing - supersoldiers may grab you and if you don't hit the right button in a proper moment, Mercer won't be able to block a powerful hit. If possible try not to cut the mutants. I know it might be easy to write and hard to perform, but I assure you that getting the gold is possible here.
Absorbing military targets is divided into three types. First one is based on consuming people, who might know something about the virus and Mercer's history (the Web of Intrigue targets). Amount of these guys varies, depending on the difficulty level. You've got them all marked on the map, the radar always shows you the location of the closest one. Absorb guys one after another, running away from the military who may catch you red-handed. The timer at the top of the screen informs you, how much time you've got to consume the remaining targets.
Difficulty level
Targets
Time
Evolution Points for one target
Evolution Points for completing event
Easy
3
2:50
7000
8000
Medium
4
2:45
31000
14400
Hard
5
3:00
31000
19200
Scientist Hunt is the second type of Military Consume Events. Here's what you have to do - get to a group of eggheads (always wearing their biohazard suits, so you should have no trouble recognizing them) collecting samples for their tests. The time is limited, so you must hurry. Scientists always have some guards near them, but you don't have to worry about them, unless you don't have a military disguise. You have to kill the soldiers and absorb the scientists. Let's start with the army guys. Use your Patsy ability to accuse them of being infected, so they'll simply shoot at each other. Consume the last defender. Without guards, the scientists are totally powerless. Consume them silently or blow your cover and show everyone who's the boss around here - without the military personnel nothing will stand in your way.
Once you complete all Scientist Hunt events, you'll receive a small side mission based on finding Karen Parker. No big deal, just walk into the marker shown on your map and radar.
Difficulty level
Targets
Time
Evolution Points for one scientist
Evolution Points for killing the escort units
Easy
5
1:50
2000
2000
Medium
6
1:20
3600
3600
Hard
7
1:00
4800
6000
Third and the last type of military events is Base Infiltration. Well, the name says everything - it's all about infiltrating military bases. Consume a soldier and shapeshift into him, so you'll be able to visit an army compound without raising the alarm. In the compound, you must locate and absorb the base commander (guys with shades and rolled up sleeves). Later in the game, bases are filled with virus detectors, so you probably won't be able to use your Stealth Consume ability. Therefore, I advise you to simply run into the compound, consume the commander and then run away from there, getting out of enemies' sights (and this usually includes the Strike Team). Once you do it, shapeshift into the commander and return to the base. The enemies won't recognize you, and you will gain full access to the base. You have three (or less) minutes to do all these things (time limit depends on the difficulty level).
Quickly enter the base (virus detectors can still recognize you). At this moment, the time limit turns off, so you can rest a little. There are no detectors inside the building, so you can freely walk around the place and check all soldiers' locations and their patrol routes. In the base, you will always find at least one guy you have to consume. Try consuming them all without much noise. Some of these guys may even know something about the whole plot (Web of Intrigue Targets).
Once you absorb the soldier with a DNA icon above his head, look at the top right hand corner of your screen. You should notice signs pictured below.
They mean you can now leave the base. This will end the whole event successfully.
Difficulty level
Time
Evolution Points for completing event
Easy
3:00
10000
Medium
2:45
21600
Hard
2:30
30000
This type of event is one of the easiest. You simply have to blow up the marked military base. I advise you to shapeshift into a soldier, go to that base and then use enemy tanks to destroy the base's main building. You'll surely unleash hell by doing so - other tanks and helicopter will come to destroy you. Once they blow up your machine, simply get yourself a new one and finish your job in that base. Do not shoot at the enemies, focus on the building, as the time to do this whole event is always limited.
Difficulty level
Time
Evolution Points for completing event
Easy
3:30
14400
Medium
3:00
19200
Hard
2:30
24000
Some events are based on destroying infected hives. In order to do it quickly, hijack a tank or a helicopter (that second option is better, as the mutants are not so good at attacking flying objects) and then shoot several projectiles at the target. Yes, it's that simple!
Difficulty level
Time
Evolution Points for completing event
Easy
3:30
14400
Medium
3:00
19200
Hard
2:30
24000
When you kill your enemies, complete missions, find hidden objects (Hints, Landmarks) located on the Manhattan Island, you get more and more Evolution Points. You can spend them on new upgrades, thanks to which Alex Mercer can become an ultimate killing machine. Below, you can find a list of abilities you should pay attention to.
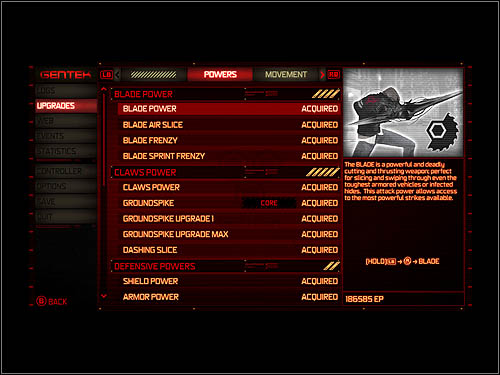
Weapons that can prove useful in almost every fight. Although there are many powers available, I advise you to focus on three of them.
Blade - excellent weapon against whole crowds of people. In connection with the Blade Air Slice ability, you can use it to fight infected Hunters, supersoldiers and tanks with great efficiency. However, there are two problems with the blade. First of all, you gain access to it very late, and secondly - upgrades cost A LOT of points.
Claws - the first power you gain access to. Maybe it is not as good as the blade, but it will surely make a few things easier, especially when you get yourself the Groundspike ability.
Hammerfists - nice weapon against a group of enemies standing next to each other. It not only damages, but also knocks down on the ground and stuns your enemies. What is more, in connection with other powers (like Hammerfist Elbow Slam) it becomes a great weapon in your fights against armored vehicles and tanks.
I personally think you should avoid buying the Thermal Vision Power. In my humble opinion better avoid also the Shield ability - I prefer to fight my enemies by using acrobatic skills and the Shield practically makes you unable to do a few things in air. Spend your points on Muclemass upgrades if you like to fight with your bare hands or throw various objects at them.
If you want to perform some acrobatic moves while you fight, then the Movement upgrades are very important to you. First of all, take a look at the first section connected with flying (Air Upgrades) - Airdash and Glide abilities unlock extra attack moves, like the Bulletdive Drop. What is more, upgrades connected with the movement are extremely necessary if you want to perform some Movement events and get a few gold medals.
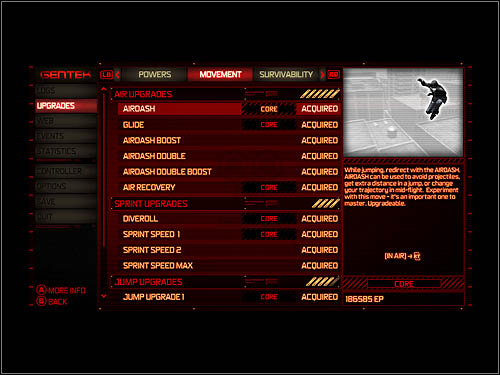
I believe that all upgrades connected with Mercer's health are worth their prices. Now I'd like to point two of them, which should be bought as soon as possible.
Critical Mass Ability allows you to perform devastator attacks. These are the most powerful moves Mercer can do in the whole game. It is basically impossible to beat the game without them. When you get more than 100% of Mercer's health, he enters the Critical Mass mode and enables the devastators. Try to guy this ability when you plan on unlocking your first devastator. This ability can be upgraded - on the highest level Alex can perform three devastator attacks, one right after another.
The other utterly important upgrade is Adrenaline Surge. Thanks to this one, Alex is able to unleash one devastator attacks when he has very little health. It is quite useful, when you need something that can save you from dying.
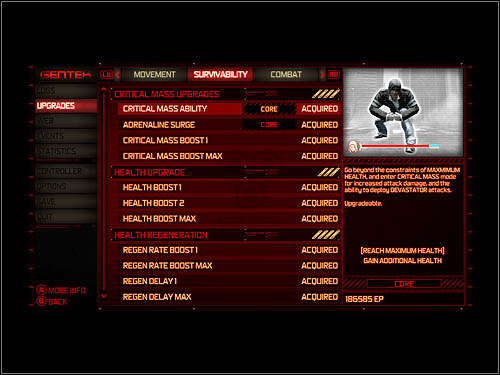
The most important part of upgrades, as all the devastators are here. Let's say a few words about ach of them.
Groundspike Graveyard Devastator - area attacks, it's all about perforating enemies nearby, with the use of spikes coming straight from the ground.
Tendril Barrage Devastator - slightly more expensive then the one described above, works in a very similar way - tentacles coming out of Mercer's body eliminate everything standing close to him.
Critical Pain Devastator - the only devastators that is not an area attack. Is as all about sending an energy beam in the chosen direction. It takes an awful lot of health, but on the other hand it damages very few enemies. Available after buying the Palm Slap ability.
All these attacks have also their air equivalents. Pay attention to them if you like to combine your hits with jumps. Devastators are extremely useful while fighting large groups of strong enemies (huge mutants, supersoldiers) and in boss battles.
And what about other important upgrades in the Combat list? The Flying Kick Boost is surely worth its price. This hit is not only useful during a normal fight (especially at the beginning of the game), but also makes hijacking enemy helicopters a lot easier. Moreover, I found the Hunter Dirtnap ability very useful. It allows you to temporarily stun Hunters and other big mutants.
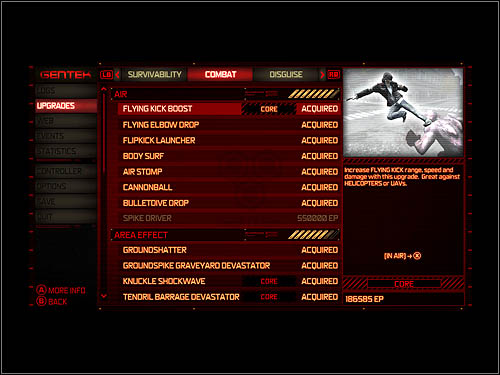
Here, you can spend your Evolution Points only on abilities from the first section, called Consume. The basic skill of absorbing enemies is free. Take a closer look at the Stealth Consume instead - thanks to this one, you can absorb your enemies without raising the alarm. This ability is extremely useful each time you plan on infiltrating a military base.
The Artillery Strike ability can be obtained only when you infiltrate an enemy base and consume a soldier able to call in the barrage. During the game, visit a few military camps and consume some army guys not only to obtain, but also to upgrade your artillery strikes. Remember that you can use them only in a military disguise.
The Patsy ability should be treated like an additional, funny thing, not like a serious ability, allowing you to fight the army.
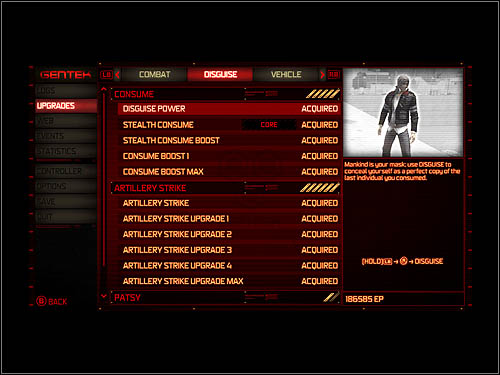
Your vehicle abilities can be improved only by consuming military drivers and pilots. Acquiring your basic skills is a natural part of the game, so you'll gain them when you make some progress. In order to improve then, you have to visit military bases and consume more pilots and drivers. I advise you to spend some time on absorbing these guys, as the heavy machinery is usually very useful in destroying hives, bases and Strike Teams - and you get a lot of bonus evolution points for that!
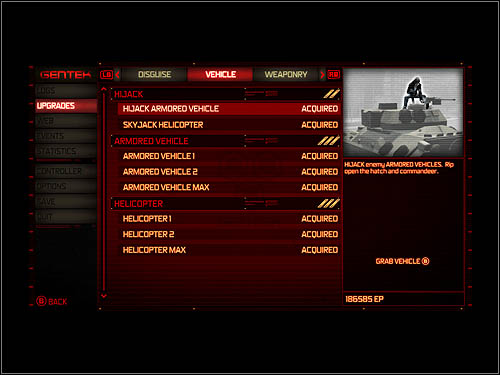
These abilities, like the ones connected with operating vehicles, can be acquired by consuming soldiers. Core skills are granted from the beginning of the game, but in order to enhance them, you must absorb a few military guys, who know very well how to handle a gun. You'll find them all in military bases.
Mercer himself is a nice killing machine, so these upgrades are useful only if you plan on using firearms often. Actually, some events in the game require it.
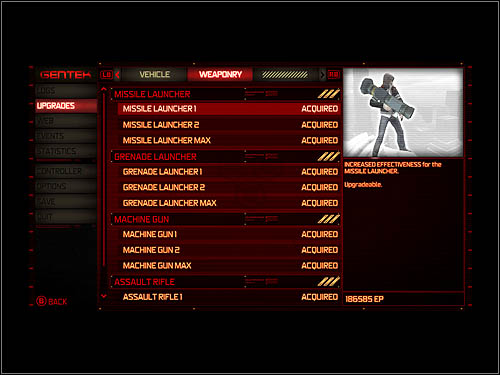
There are over a hundred people in the game's world, who know something about Mercer's history, the virus, other characters in Prototype, etc. How to find them all? I hope these tips will help you in completing that task.
1. Complete all main missions. I know this sounds quite stupid, but only by doing so you can find and consume the most important Web of Intrigue targets. Some of them will be absorbed without your specific action (during a cut-scene, for example), the other must be handled by you. Check out the Walkthrough section of this guide - you'll find there some more information about missions and people you have to absorb.
2. Walk around the Manhattan Island. This may get quite dull after a while, but allows you to find a lot of people (usually scientists) knowing something about the virus. Do not worry if you accidentally kill a Web of Intrigue target. Just go to another part of town, wait a while and return where you found that person for the first time. The character will sooner or later appear in the game again. A nice idea is to perform the events - thanks to that you simultaneously wander around the island, whether you like it or not.

3. Infiltrate military bases. By doing so, you can find soldiers who may know something important. Consume the commander, enter the main base building (like in The Wheels of Chance mission) and then find a guy with a significant red-black icon above his head.
4. Complete all events based on consuming targets within the time limit. They're marked with a green-black icon of a helmet. Tasks in these events are various, and to be honest, not all of them end up with obtaining some additional memories or information. However, remember that completing these can give you access to new event, in which you may find people you keep looking for. If you can't find those helmet icons, get back to tip number two. Once or twice I had this situation, in which consuming a Web of Intrigue passer-by unlocked a consume event.
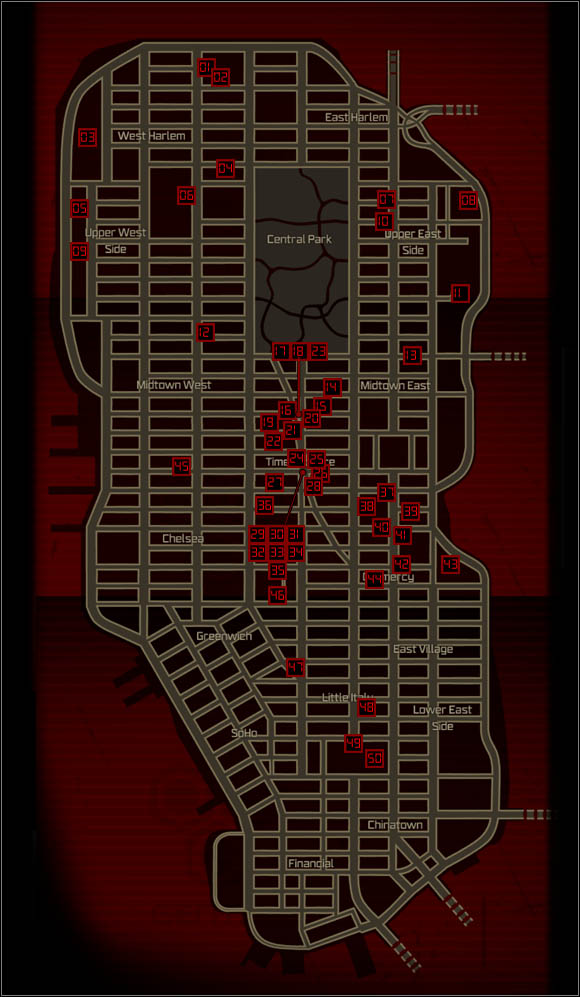


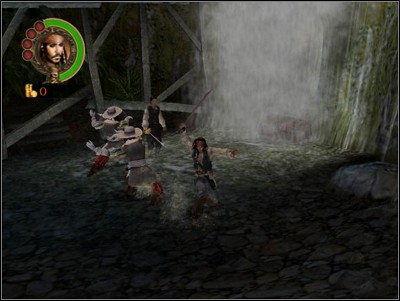

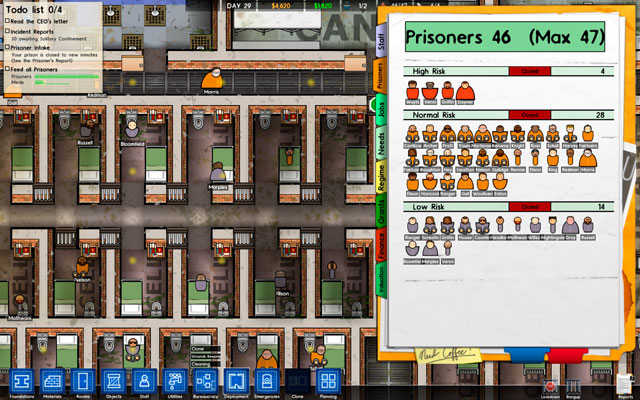 Prison Architect Game Guide & Walkthrough
 Prince of Persia Game Guide & Walkthrough
 Path of Exile Game Guide & WalkthroughPeter Jacksons King Kong Game Guide & Walkthrough
 Prison Break: The Conspiracy Game Guide & Walkthrough