This guide for Pillars of Eternity offers a full set of information that help grasp the key elements of this expansive role playing game, and helps explore the fantasy world offered by the game. This guide has been divided into two main parts. The first part is the guide to the game and it provides the description of all the key elements of the game. The main purpose of this part is to prepare you for experiencing the game, and to complement the information provided in the manual. The first chapter of the guide encompasses general hints and tips, that you should follow throughout the game. Also, it includes basic information on the character creation and development process. A big portion of the text focuses on the analysis of all the available character classes: brief characteristics of each, further steps to take in the process of creation and development at the initial stages of the game, as well as practical information concerning playing style. The guide also presents the game world alongside with suggestions concerning world exploration. This guide also encompasses issues connected with combat and it focuses on explaining the key terms and mechanics implemented. It also includes information on part management, from accepting new party members, to commanding them. This same chapter introduces all 8 companions, who you can meet while playing, and accept into the party.
The last major chapter has been devoted to the description of the keep managed by you. It describes the way to seize it, the way to manage it, as well as shows the recommended direction of development. Finally, it presents the basic mechanics of the crafting system. The second part of this guide comprises of a comprehensive walkthrough for all the quests in the game and detailed descriptions of the locations that you visit. Walkthroughs of the individual quests provide information on the circumstances in which you receive them, the locations that you visit, while completing them, as well as all the possible ways to complete them. Descriptions of locations list their key features - their landmarks, NPCs, quests that can be received there, and types of monsters residing there. The walkthrough has been enriched with the world map and several dozens of maps of all the major locations. The maps provide you with information on quest-specific areas, but also of the whereabouts of important NPCs, locked passages, traps or dens of strong monsters. Pillars of Eternity is a game developed by Obsidian Entertainment, it has been created with the support from the Kickstarter platform and it is heavy with references to such classics of the genre as Baldur's Gate or Icewind Dale. In the game, you get to explore a vast world that has been presented in the top-down view, complete interesting quests meet interesting NPCs and fight demanding battles.
This guide has been color-coded in the following manner:
Brown - names of locations
Blue - spells and skills
Green - NPCs and possible party members
Orange - quest names
Italics - remaining terms and items that require highlighting
Patryk Greniuk & Jacek "Stranger" Halas ()
In Pillars of Eternity, many of the actions are performed with the mouse only. The most important ones are:
The below table presents the most important hotkeys used in the game:

Pause the game. In this mode, you can issue orders to the party.

Highlight interactive objects (items, containers, switches, etc).

Inventory

Change the pointer to the attack mode. This mode makes your character attack the NPC that you left-clicked onto, even if they are not hostile towards you, by default.

Journal

Character record

Enters free mode. It provides you with more time to perform an action, but unlike the SPACE key, it does not pause the game.

Enters fast mode (unavailable during combat).

Formation selection window

Cancellation of the action

Rest window

Opens the grimoire (the spell book)

Party management window
 to
to 
Selects the individual party members

Selects all party members

Move camera

Stealth mode

Quick save
Quick load
Save the game as frequently as possible. You will avoid frustrating necessity to replay the same location for the second time after the death of your party. Important - Don't rely solely on automatic and quick saves. You should also create standard savegames regularly, especially after arriving in a brand new location. Doing this will allow you to avoid problems caused by wrong choices or by encountering a bug in the game that may interfere with the progress.
Think before picking a difficulty level. If you don't have experience with other games from same genre, start the game on easy difficulty. You can change your decision at any moment of the game. Two additional modes set before a new game are exception: Expert mode (it disables all hints and other help functions) and Trial of Iron - they cannot be changed later in the game. The Trial of Iron mode forces the player to play the game using only a single saved state (creating saved games on your own is not possible). This means that if all of your team members die the game ends and you're forced to repeat it from the very beginning. Obviously you shouldn't be choosing this difficulty level during your first playthrough. Consider playing in this mode once you've perfected the game and when you know what to expect in all the main locations.
Read dialogues and descriptions of the world. Not only will you know where to go and what to do, but you will become more immersed in the game and it will become more fun to play.
Explore the game world. Gather all herbals and resources (use the TAB key to highlight all interactive objects from the surrounding area). Your inventory has unlimited space and gathered items can be later used for weapon upgrading and creating potions. You can sell then as well.
Rest in inns whenever you need. For a rather small price you will receive stats bonus without the need of using camp materials. Resting in your stronghold is free and after upgrading it gives various temporary stats boost (although lover than in inns).
Rely on camping supplies when going on longer trips. They're your best help if retreating to the keep or to the nearest town would be time-consuming or when you're know that you're about to take part in a difficult battle with a boss or a group of strong enemies. Sadly you're allowed to store a very limited number of camping supplies - no more than 6 for the easy difficulty setting, no more than 4 for normal and only 2 for the high difficulty level. You can replenish your camping supplies by finding them in the game world or by buying them from the merchants. Important - Your team is not allowed to rest using camping supplies if it's engaged in battle or if it has been spotted by one of the enemies. Additionally you may be forbidden from using camping supplies if you're in a city or inside a small building.
While being in buildings and dungeons, search chests and barrels. Many time you will find something interesting inside.
When exploring, use scouting mode. If you see something suspicious or you're in narrow locations (dungeons, rooms), use scouting mode that not only allows you to see traps, but hidden lockers and switches as well. For example, it allows you to find a hidden door that will lead you to a shortcut or inaccessible in other way treasure.
Sometimes valuable items can be found in not so obvious places like bookshelves or in vases.
Complete side quests. Not only they increase your party level, but give you dozens of hours of additional gameplay.
Talk with characters that have unique name. If a character name is marked with yellow color, it means you can "touch" his soul and read a short history of that person. Characters that give side quests usually talk when you walk near them.
Carry with you lockpick, rope with grappling hook, hammer and chisel. You should have two or three pieces of each. It will allow you to get to hardly accessible places. You can purchase all of the tools mentioned above from certain merchants, however you will also find plenty of them as a result of careful exploration.
Visit your stronghold from time to time. Try to expand it regularly. You will increase possibility of event occurrence and will gain other profits.
Use crafting - alchemy, enchanting and scroll making. You know all the recipes from the beginning of the game, all you need is to get required level. By using potions or scrolls you improve your chances when fighting stronger enemies. Certain requirements must be met to create some items, like using spells or having specific lore level.
Learn how to manipulate time. Not the active pause during combat, but the possibility to speed and slow the game speed. You can speed up the game when you travel through already explored location and you want to get to a certain point, by doing it you will avoid waiting. Slowing the game is useful when sneaking - it gives you certainty that you will see enemy before he sees you. By default you control time with the "s" and "d" keys.
Expend some time to create your character. Thoroughly read descriptions of classes, races, origins and their biography. You cannot undo your decisions.
Give various roles to different party members. Try to have at least one person that specializes in mechanics and stealth. It is good when each of your companions have a specialization - if you're not using it directly (like mechanic for lock picking), it doesn't mean you're not using it in different way than assumed, like athletics to climb on normally unavailable walls/rocks during scripted interactions.
Develop your character in one direction. At the beginning think about your character development path and pick only those abilities and talents that will suit it.
Don't wait with character developing. Upgrade your party equipment whenever it is possible. Don't wait with using ability and skill points as well.
Don't wait with upgrading your character's equipment. Opening the window and comparing stats of two items doesn't take much time and it can greatly improve your character.
More isn't always better. You don't need to expand your party to six members. If you think that you have created a perfect 4-person team, then don't change it. Gained experience is split between all party members. The less members, the quicker they will level up.
Companions that you met are not the best choice for the party. They are not strong. When playing on high difficulty levels, it is more profitable to create new character from scratches than use those predefined.
Use active pause. Change game settings so that each encounter starts with active pause. Use it as often as you need. You're not capable of giving orders to six characters at the same time.
Be careful with some abilities. Especially offensive spells with area of effect. It might happen that you will not only kill your enemies, but your whole team as well. Even shooters can hard their companions when they stand in their way.
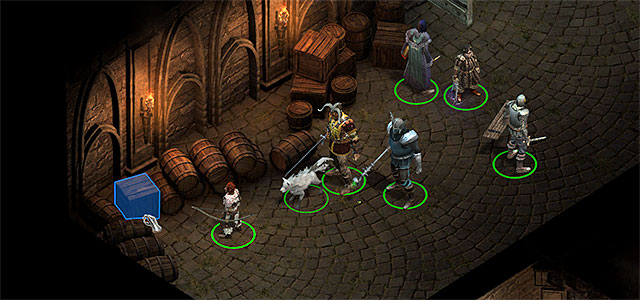
Position your party in the right formation. Characters that use melee combat should stand in first line, shooters and mages behind them.
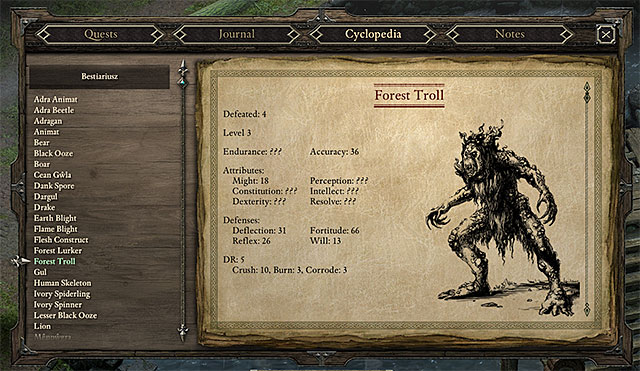
In bestiary you will find information about all encountered enemies. The more monsters you slay, the more information you will gather.
Make use of your surroundings. By blocking a door with warrior, you make it impossible for enemies to get to your shooters.
Use support items. During harder encounters don't be afraid of using potions or scrolls.
Enemy is too strong? Return to him later. Sometimes You will meet enemy that you have no way of defeating at current level. Return to him after you gain some experience.
Frequently study the bestiary. There you will find valuable information about encountered creatures. This knowledge might be useful when facing stronger opponents.
Always have two weapon types. Sometimes enemy is resistant to a certain weapon type, it is a good idea to change your weapon to another one in that case.
Creating your character is first thing that you will do in Pillars of Eternity. You should give yourself as much time for it as possible. You can't change your decisions later, and they have key value for the rest of the game. Before making them, learn about available options and what profits do they give you.
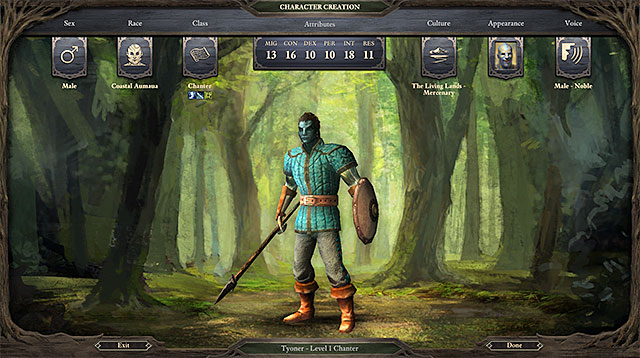
Any time during character creation you can change previous decisions without the need to completing all phases all over again.
Gender
Choice between male and female isn't important, it only determines some conversation options.
Race
Choice of race should depend on class you have chosen. If you know your class of choice, you will be able to pick race that gives you the best stat bonuses and passive abilities. Each race have few sub-races. They differ mostly in their passive abilities, stat boosts remain unchanged. They can change the way NPCs treat your character in small degree as well.
Class
A choice that will determine rest of your game. It's the decision that you should make most cautiously. Make your choice based on gameplay style you prefer.
Classes are divided into two main groups: melee and range fighters. First group consists of fighter, barbarian, monk and paladin. Range fighters are ranger and magic classes - priest, druid, wizard and cipher. In case of rogue and chanter you will decide in which direction they should develop.
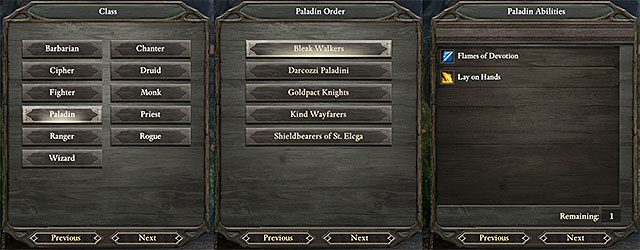
Some classes require you to pick an Order to which you belong as well. It influence your character's personality.
Difficulty using a class is important. For inexperienced player fighter will be perfect as he doesn't require a complicated development strategy and is forgiving of mistakes. Monk and barbarian are easy to play as well. As for range characters, hunter with his animal companion is interesting. When you play for the first time, avoid using cipher, chanter or rogue. Those classes require you to spend some time on planning character development path and learning their combat style.
At this phase you must pick first abilities as well. If you still have trouble with choosing the right ones or picking a specific class, move to the further part of this guide, where you will find a short description of all classes with instruction on creating an example character.
Attributes
At this point you can spend a specific amount of attribute points. You can choose from might, constitution, dexterity, perception, intellect and resolve. Game marks which attributes are most important for a specific class (golden stars) and which ones are recommended (silver stars). Pick one, most important attribute on which you will base your character and improve it to maximum level. Develop second attribute by 3-4 points less than the main one. Take some points from attributes less useful for your character and use them on recommended ones. Some attributes influence the availability of dialogue options during hard situations, for example while having high might level you can blackmail your enemies and thanks to perception you will notice their nervous behavior to know that they are lying.
Culture and background
At this point you must choose a territory from which your hero comes and what was he doing before. Pick the culture based on the class you have chosen. Culture should give you bonus to most important attribute for your class. On culture depends with what equipment you will start the game, but you shouldn't worry about that as it can be cheaply and quickly changed. When selecting a background, future character development is most important factor. On background additional boost to ability points depends. If you're creating a melee fighter, think about a background that gives you bonus to athletics or survival, and for a mage lore would be best choice.
Appearance and voice
Last part of character creation is to choose a portrait, modification of character head and his skin. You can also select a voice based on few available propositions, but doesn't matter too much as your character speaks only if he affirms that he understood your order.
Only thing that remains is to give your character a name and click the ""Done" button. Congratulations! You've managed to create a character with whom you will spend next few dozens of hours in the world of Pillars of Eternity.
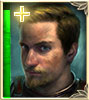
A golden plus in the left upper corner of character portrait informs you about gaining new level.
Pillars of Eternity has a specific system of gaining experience. Its most important aspect is the lack of experience for defeating enemies (the only exception is if killing a monster has earned you a new entry in the bestiary - these types of actions are awarded with xp). A won duel gives you only new items and pushes the storyline further. Experience is given to the whole team, not specific members. It means that a team with less members will gain experience faster than a team with more of them. Four most important sources of experience are:
Quests - you will get most experience for completing main story quests, but without completing side quests you won't develop your character to max level. With a party of 6 characters main quest will allow you to get no further than to 8 experience level.
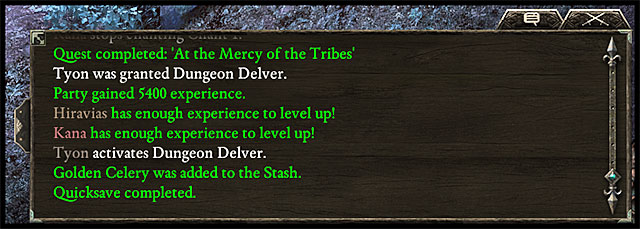
As in every RPG, experience is the key to character development in Pillars of Eternity.
World exploration - for entering a new location (including some buildings and caves) you will get a small amount of experience.
Interacting with the world - experience is given for disarming traps, opening chests and any other form of interaction with the game world.

Experience showing in the combat window is not given for defeating enemy but filling the bestiary.
Updating the bestiary - you receive small amount of experience for few first fights with a specific monster type. It is given for unveiling enemy stats. How fast you reveal it depends on lore level of your character. You don't receive experience for the battle itself.
Every time you gain new level you receive few skill points that can be spent on increasing one of five skills: stealth, athletics, lore, mechanics and survival. They determine the rise of your character stats, interaction with items and new dialogue options. Your character at the beginning of the game has few points already used on skills recommended for his class, culture or background. Increasing skill by one level at the beginning costs one point and with each level is priced one point more.
Main character should specialize in lore, athletics or survival while skills like stealth or mechanics can be left for companions.
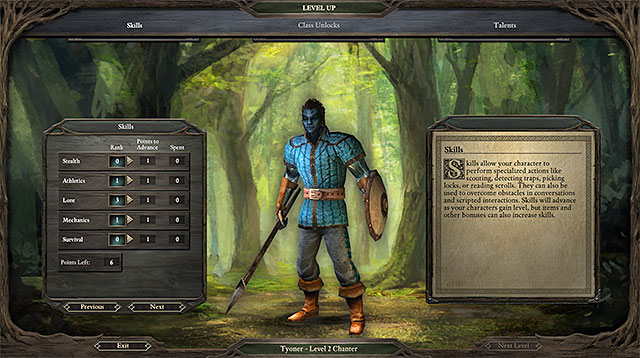
Use your points wisely. A character should specialize in only one skill.
Stealth - this skill allows you to sneak to enemy to know their position or simply pass near them. When in scout mode, it will allow you to notice hidden switches and traps that can be disarmed. At least one of your companions should have high stealth level (it's best that this person becomes a scout in your team so that he or she will be helpful in locating enemies and traps).
Athletics - the higher athletics level, the greater chance for interactions with surrounding like climbing or swimming. It allows you to travel the world longer before receiving negative fatigue effect.
Lore - high lore level gives you new dialogue options, quicker filling of entries in bestiary and the ability to use scrolls during combat.
Mechanics - one of more important skills. Allows you to open locks in doors and chests, providing access to unique treasures or to optional passageway helpful in avoiding tougher enemies. At least one person in your party should have high mechanics level.
Survival - this skill prolong the effects of food or potions. Each character should have this skill improved by at least few points.
Each class has its unique set of abilities.
Class abilities are skills used mostly in combat. You must have few rules in your mind when picking them. Most of all, before you choose an ability, learn its description and what does it do. Think what sort of character you want to develop. You should have a plan for your character from the beginning of the game. If you know what you want to achieve, it is much easier to choose abilities. Your character should create a coherent whole. Plan ahead. Pick effect that your character doesn't already have, avoid duplicates.
Before making a decision check all available talents from four available columns.
You gain one talent point every two character levels. Most of them are passive skills that gives you various bonuses and boosts to character stats. Frequently they improve previously chosen skills, increasing their effect or area of damage.
Talents are divided into four groups: class, offensive, defensive and utility. First group, as name suggests, consists of talent available exclusively for the class you play with. New talents become available as you reach new levels. Other three groups consist of more than dozen talents available for all classes no matter of current character level.
During first phase of the game pick class talents. They are usually matched in a way so that they are best suited for created character. Further in the game you can choose few talents from other groups. When playing a magic class - wizard or druid - most of your choices should focus on class talents. When playing as melee fighters adding few talents from offensive and defensive tree is necessary to create a strong character.

There are eleven character classes in Pillars of Eternity. Each of them has different fighting style and unique skills and talents. Classes are very well balanced and it depends only on player whether he will fully utilize their potential.
In this chapter all available classes are presented: barbarian, fighter, paladin, rogue, ranger, wizard, druid, cipher, priest, monk and chanter. Each description consists of four parts: short class characteristic, process of character creation, its development during first phase of the game and practical advises about playing style and combat. After reading it all you will gain general knowledge about creating a specific character and playing it without the need to learn on your mistakes.
For each class one, classic development model have been shown. It doesn't mean that it is the only right one. Don't be afraid to experiment, it is important that you feel well with your character.
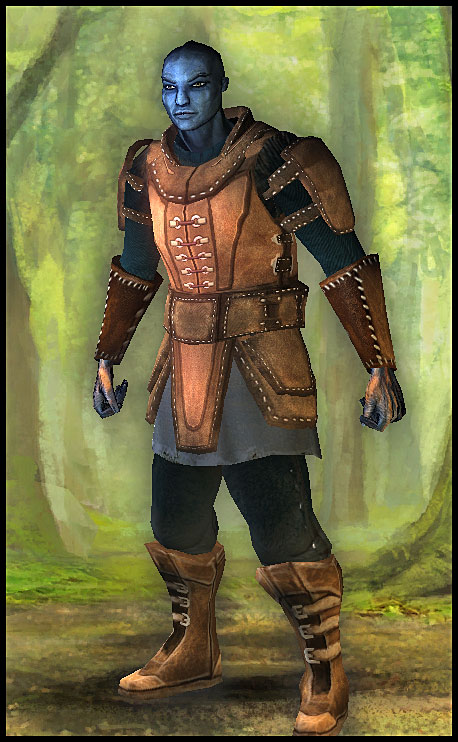
Barbarian is a class that focuses on strength more than any other in the game. He has lots of health points and endurance, low defense and average accuracy. He is best to fight many enemies at once. Best effects can be achieved when he is used together with fighter or paladin who will take most of damage on himself so that the barbarian will be free to deal damage.
 Don't be afraid to use barbarian skills, they renew after every battle.
Barbarian skills can be divided into two categories - direct and supporting. Direct ones are usually a powerful attacks that additionally weaken enemy. Supporting ones are skills with area of effect that weaken enemy on quite large territory. All skills are renewed after every battle.
Race - of all available races select the island aumaua, which has +2 bonus to might and bonus to movement speed, or mountain dwarf which have +2 to might, +1 to constitution, -1 to dexterity and bonus to defense against poison and disease.
Abilities - you can choose between two abilities: frenzy, which gives attack bonus for limited time, or barbaric yell that for twelve seconds makes your enemies fear you, what makes them less effective in combat. A better choice for the beginning will be frenzy.
Attributes -for barbarian, might and constitution points are most important. One of those two attributes should have about 20 points, the second can be weaker by 3-4 points. You should improve dexterity as well. You can reduce perception and resolve (not more than by 2 points).
Culture - best choices are: The Living Lands (+1 to might), The White that Wends (+1 to perception) or Deadfire Archipelago (+1 to dexterity).
Background - decide between slave, laborer or raider. Survival and athletics are most valuable for you.
When spending ability points focus mostly on athletics and survival. Spend then more or less equally, but you can give slightly more to athletics. Pick one of two skills - stealth or mechanics and try to keep it on highest level possible.
Level
Decision
Suggested development path
2
Talent
Barbaric Blow
3
Ability
Savage Defiance
4
Talent
Accurate Carnage
5
Ability
One Stands Alone
Barbarian receive stat bonus when he fights with more than one enemy at once. Try it to be two enemies at once, when there is more of them, retreat.
Equip male or scale armor, though they give you less defense than plate armor, they less limit your movement.
Stay closely behind your tank. You must be as close the center of the fight as possible and in the same time hide behind a character that is responsible for defense.
During the battle keep attention to endurance bar of your character. If you see that it drops very quickly, retreat for few meters. Return to the battle when enemy focuses his attention on other party member.
Don't be afraid of using skills. At the beginning of battle you should use one that will weaker or scare your enemies and after that use offensive ones.
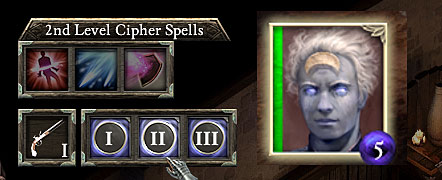
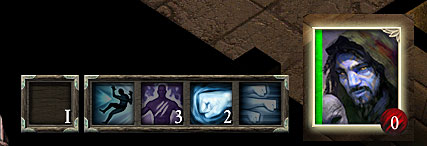
Cipher is a character that has paranormal psychic abilities which allows him not only to contact spirit world, but influence it as well. He can use it to weaker enemy or even give him some direct damage. This class has low endurance and health. Deflection on the other hand is pretty high.
Cipher abilities are divided into six levels from which each is unlocked every two character levels. Used correctly they will have vital impact on the outcome of battle. But this character must help himself with conventional weapon, preferably ranged one. This class is recommended for more experienced players, it forces you to pick successive spells wisely, both when gaining level and in battle.
 Keep an eye on your focus level.
Cipher requires a specific level of focus to cast a spell. Its current state is shown in the right lower corner of character icon. When battle starts, focus is at maximum level and every spell takes a specific amount of it. To recharge focus level, you must attack enemy with Soul Whip ability activated. Cipher will suck part of enemy soul and increase his focus level. Focus recharge automatically after every battle.
Race - In case of cipher the best choice is godlike, sub-race is less important.
Powers - You can choose between two powers when creating character. Mind wave will be the best choice for the beginning, as it is a good offensive attack - not only it deals damage, but it knocks down enemies that are nearby as well. Soul Shock should be your second power, which is offensive as well. Remember that you must be careful with spells as they might damage your companions as well.
Attributes - intellect is most important attribute of cipher. You should improve it to maximum level. After that, increase might and dexterity to 15-16 points. You can lower perception and constitution - even by 8 points.
Culture - Intellect is most important for cipher, so you should pick from two territories that give you +1 to it - Rauatai or Old Vailia.
Background - Choose a background that will give you bonus to intellect. Like aristocrat or scholar.
Use most ability points on lore. You can improve athletics and survival by few points as well. First levels are rather cheap and they will allow you to fight longer and use potions more effectively.
Level
Decision
Suggested development path
2
One first level power and one talent
Power: Eyestrike
Talent: Greater focus
3
Two second level powers
Mind blades
Psychovampiric shield
4
One second level power and one talent
Power: Mental binding
Talent: Biting whip
5
Two third level powers
Soul ignition
Puppet master
Stay as far away from enemies as possible, you have very little endurance points and virtually no armor. Don't even try to get into fight, just run away to safe distance.
Keep controlling your focus level. Don't forget to activate your soul whip ability whenever you use regular weapon.
Attack speed is most important, so use light armors, preferably robes.
Try not to enter any rooms as first of your party, all enemies will focus on you.
Keep attention to what skills are you using. In case of very strong enemies it is better to weaken enemy that to deal him small amount of damage.
Keep attention to your equipment, bonuses that an item gives is more important than armor. If you have more money, buy a good ring or amulet.
Fighter is the most versatile class available in the game, at least in close combat. He works perfectly as a warrior with shield, two-handed sword, two daggers or even spear. It is one of less complicated classes as well - learning to use him well takes least time. It makes fighter a perfect class for beginners or for those that don't know with which class they want to play. Fighter is forgiving of many mistakes and playing him is interesting since the prologue to the final quests.
Fighter have lots of health and endurance points and they also have a great defense. When he gains level, you can choose from many various skills and talents. Many of them are passive abilities that doesn't require any actions at your side, which makes them perfect for beginners or those that don't want to waste time on clicking successive skills during combat. Warrior has special attacks as well, you usually can use them once or twice. They recharge after battle.
Race - you should choose between a human and a mountain dwarf. A dwarf is slightly better as he has bonus to defense against poison and disease.
Abilities - if you're creating a defensive character, then Vigorous defense which greatly improve defensive stats is a good choice.
Attributes - invest ability points mostly in constitution (maximum amount). Then invest in resolve and rest of unused points use on perception.
Culture - select a culture that gives you resolve bonus - Aedyr or Ixamitl plains (+1 to resolve).
Background - mercenary will be a perfect choice, but any other that gives you +1 to athletics will be good as well.
When spending skill points you should focus on athletics. You should improve survival by few levels as well. As for the side abilities, improve mechanics.
Level
Decision
Suggested development path
2
Talent
Rapid recovery
3
Ability
Guardian stance
4
Talent
Hold the line
5
Ability
Weapon specialization: Aristocrat
or
Weapon specialization: Knight
You're the hardest link of your team. If you die, rest of the team has small chances for victory.
A fighter with shield should always walk first. He must focus enemy attention on himself.
During battles in tunnels try to block the passage by, for example, standing in the room entrance. Enemies won't be able to get to your companions that fight from distance.
Equip the heaviest armors, preferably plate armor. They give a 50% attack speed penalty, but it's not most important in case of your character. Invest in good shield as well.
Don't forget about enchanting ability. Improve every better armor that you gain. You should invest in overall quality of the armor.
Eat and drink! Consume something before battle, it will give you maximum endurance level. Don't be afraid to use potions during battle.
Your abilities recharge after every battle so you don't need to save them.
Paladin is a warrior that supports his attacks with magic Similarly to fighter, he has lots of health points and endurance and also great defense. The necessity to choose an order to which paladin belongs is important. Order determines with what bonuses to specific character traits you begin the game. At some points in the game, you can gain thanks to it new dialogue options or pick different quest ending, but those changes are small and not important.
During battle, Paladin has both melee combat abilities and magic. But his magic has only supporting role. It is hard to create a paladin that will be focused mainly on spells. Most of his abilities recharge after every battle so paladin doesn't need to rest as frequently as magic classes.
Race - in case of paladin it isn't very important, so pick one that you like the most.
Order - every paladin is a member of specific order. You can choose from five of them:
Each order has different rules and is perceived differently by various social classes. If you create a calm character focused on defense, then Shieldbearers of St. Elega will be perfect choice. If your paladin is focused on attacking, then think about choosing Bleak Walkers. If you want your character to be liked by most people, then pick Kind Wayfarers and if you want to be respected, then Goldpack Knights will be best choice.
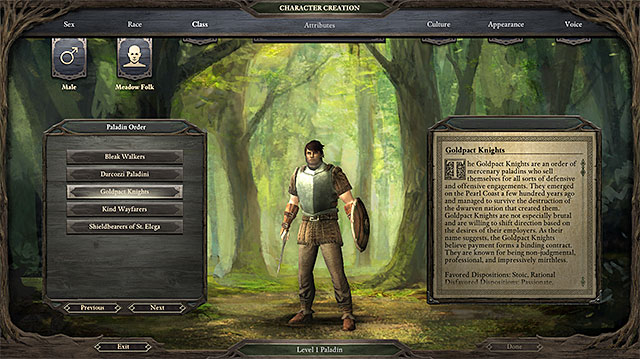
Order is not a factor on which you should build your character.
Paladin abilities - you can pick one of two abilities when creating paladin. Lay on hands will be better as in case of lack of right support from your allies it might determine your life or death.
Attributes - spend most attribute points on constitution, use around 17-18 points on it. Depending on whether you want to focus on melee combat or magic, improve might or intellect as well.
Culture - you should be interested in one of three cultures: The Living Lands, Rauatai or Old Vailia.
Background - mercenary is best choice for paladin.
When spending points, you should give them to athletics, survival and lore. In that exact order.
Level
Decision
Suggested development path
2
Talent
Deep faith
3
Ability
Flames of devotion
4
Talent
Enduring flames
5
Ability
Zealous endurance
Paladin should stand in the first line and protect other party members.
Paladin should use heavy armors. In case of character focused on defense wear plate armor, and in case of mixed character - mail armor or brigantine.
Make sure to have the best possible weaponry. If you have enough money, you can buy a good armor or shield
Use potions and food. First ones will save you in combat, second will increase your endurance for some time.
You have pretty strong spells, especially on higher levels, don't forget to use them.
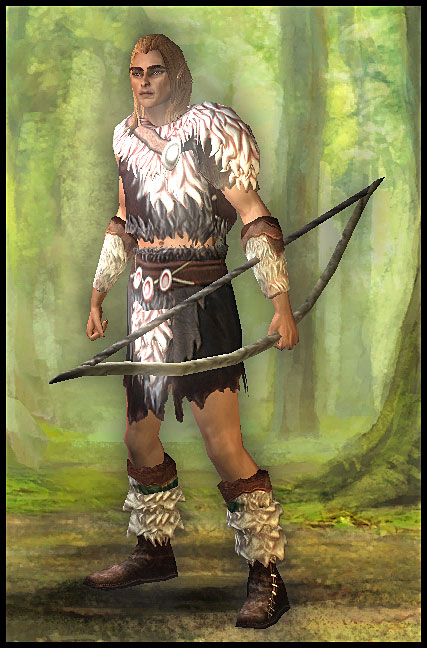
Ranger is one of few classes that focuses on dealing damage with ranged weapons. He is different from other classes by having an animal companion that follows you during the game and support you in combat. Depending on what animal you choose, his role in the team will be different. The hunter himself has very little health points. His defense is decent and he's shining when it comes to attack strength and aiming.
Most of archer skills are special ranged attacks that either deal more damage or weaken the enemy. Those are rechargeable abilities, which mean that after using them they replenish to the maximum level after the battle.
Race - wood elf is best choice as not only does he gives stats boost (+1 to dexterity, +1 to perception), but he has a very good race ability as well, that increase accuracy and attack speed whenever enemy is more than 4 meters away from the hunter.
Abilities - Wounding shot, which weakens enemy and deals him small amount of damage, will be best for the beginning.
Animal companions - during character creation you can choose your animal companion. Available animals are divided into three categories:
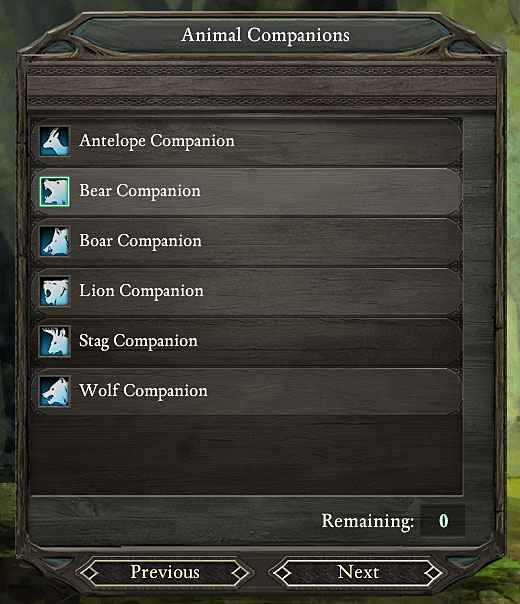 The lower in the list an animal can be found, the less recommended he is for beginners.
Attributes - spend ability points mostly on dexterity and then might which can be 2-3 points lower. You can use few points o perception as well. You are allowed to reduce intellect and resolve.
Culture - you should decide on culture that will give you +1 to dexterity - Deadfire Archipelago.
Background - hunter or drifter are best choices as they have +1 bonus to stealth and +1 to survival.
When allocating skill points gained with each level, you should focus on survival and stealth. Don't forget about adding few points to athletics as well as it will improve your condition.
Level
Decision
Suggested development path
2
Talent
Vicious companion
or
Resilient companion
3
Ability
Swift aim
4
Talent
Swift and steady
5
Ability
Stalkers' link
Keep yourself as far away from enemy as possible. Take advantage of your weapon's reach.
Use the right skills at right time. Especially the wounding shots. This skill should be used at the beginning of battle. Thanks to that, enemy will be weakened for the whole fight.
Don't forget about your pet. If he is focused on defense, let him go in first line. Keep a lion or stag in the second line. Wolf is perfect for far scouting.
Your animal cannot die, he only loses his consciousness, so don't be afraid to send him to the center of the battle.
You don't need to limit yourself to only one ranger in the party.
Use leather armor if you tend to end in close combat. If you stay at the back all the time, then you can use light armor.
Apart from ranged weapon, have something to melee combat as well, it will come in handy whenever enemy gets to close.
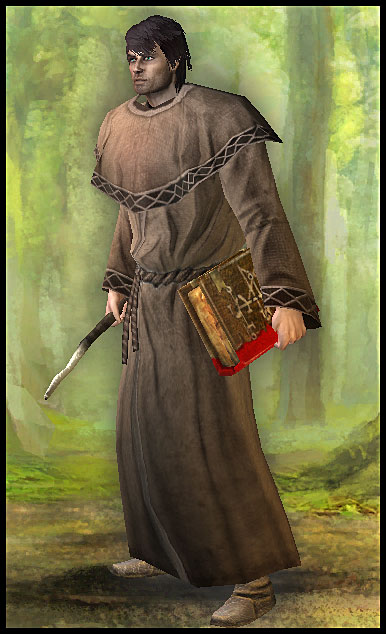
In Pillars of Eternity wizard returns to the roots of the genre. It is a class with very powerful offensive capabilities, a great variety of spells with various effects, weak defense and very small amount of health and endurance points. This class is easy to play with, but mastering it will take dozens of hours spent on character development and picking the right spells.

Pick spells to your Grimoire carefully as you're not able to change them during combat.
In battle wizard is using two attack types. First ones are regular attacks with weapon held in the hand. Second are spells that character has learned. They is few dozens of spells in total, divided into few levels. What's specific for a wizard is that even if he knows a spell, it must be moved to his spellbook (Grimoire). In Grimoire there is space for four spells of every level. During battle you can use only spells that are inside the book. Wizard can have more than one Grimoire, but changing them during combat makes your character helpless for some time.
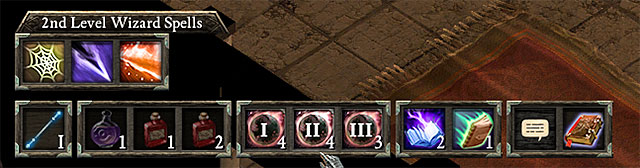
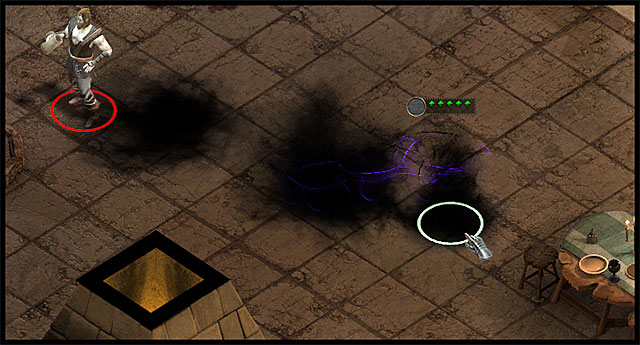
Keep attention to how many spells of a specific level you can still cast.
Number on the selection bar shows how many spells of specific level can be still casted before resting. Only the level of a spell matters, not it type.
Race - Death Godlike that gives +1 to intellect is the best choice as it deals more damage to enemy that has less than 15% of health points.
First spells - You can choose four out of more than dozen spells. Best choices are:
Attributes - focus mostly on intellect and might. In second order increase dexterity. If you lack points, you can slightly lower constitution.
Culture - best territories for wizard are Old Vailia (+1 to intellect), Ruatau (+1 to intellect) and The Living Lands (+1 to might).
Background - best choice is explorer, merchant, scholar, aristocrat or scientist.
Skill points should be split between lore, athletics and survival. Lore should be your priority.
Level
Decision
Suggested development path
2
One first level spell and talent
Spell: Eldritch aim
Talent: Blast
3
Two second level spells
Infuse with vital essence
Ray of fire
4
One second level spell and talent
Spell: Concelhaut's corrosive siphon
Talent: Penetrating blast
5
Two third level spells
Fireball
Llengrath's displaced image
Use only robes, or, if left with no other choice, leather armor.
Use your spells sparingly when in battle. You have a limited amount of those and not always you can set a camp.
Keep as far away from enemies as possible. During battle you should be 5-6 meters away from enemy.
Keep attention to range of a spell, some you can throw from far away, others require you to touch the enemy.
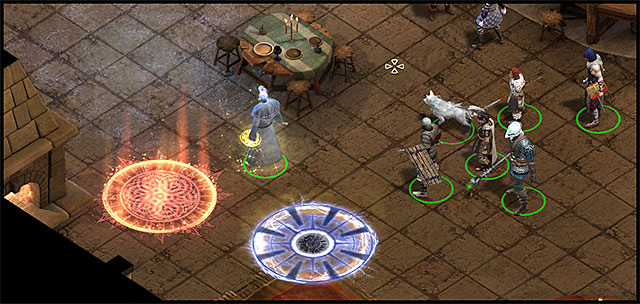
Be careful when using spells! Some of them can hurt your allies.
When casting some spells with area of effect, you might see two circles. In the smaller one damage is dealt both to enemies and allies. In the space between smaller and larger one only enemies receive damage.
Interesting detail! There is an item that is very useful for wizards - The Ring of the Selonan. It increase the maximum amount of first and third level spells you can cast by 2. You can find it at the end of the cave which you can enter from the southwestern part of Pearlwood Bluff. To enter the cave you must click the large rock and use the rope with grappling hook.
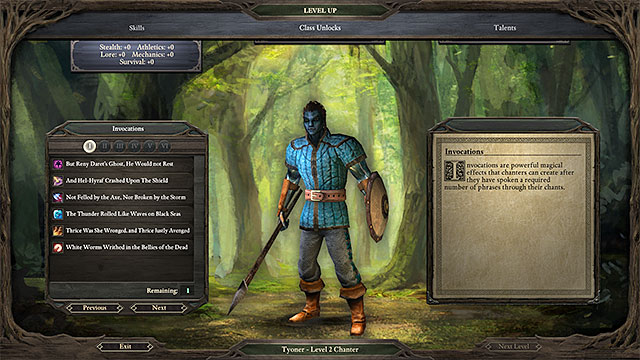
Chanter is one of more interesting classes available in Pillars of Eternity. His task is to sing phrases during combat which influence his allies and enemies. In addition to singing, he also fights in more regular way, though he has a small amount of health points and endurance which makes him vulnerable to enemy attacks.
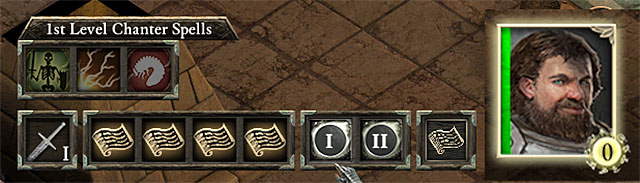
Keep attention to the amount of chanted phrases shown in the right lower corner of character icon. Thanks to them you can use powerful spells.
Chanter can use phrases and invocations. Phrases are short verses that chanter combines into single song. Each of them take a specific amount of time and gives some profits. Songs combined from phrases are singed automatically during battle and they do not limit chanter movement in any way, so he can both sing and use a sword at the same time. Invocations are strong spells that chanter can use after singing a specific amount of phrases, usually three or four.
Race - Boreal Dwarf, with his +2 to might and +1 to constitution is a good choice. He additionally has +15 to accuracy against all primordial and wilder enemies.
Phrases - at this point you can choose two phrases. "Dull the edge, Blunt the point" that reduces damage dealt by enemies and "At the sight of their comrades, their hearts grew bold" that increase companions stats are best.
Invocations - pick the "If their bones still slept under that hill, none can say" invocation. After singing three phrases you will be able to summon three skeletons that will fight by your side till the end of the battle
Attributes - Intellect is most important from your point of view, you should increase it to maximum level. Second most important trait, constitution, should be increased by around 15-16 points. You can slightly lower might and rest of points spent on resolve.
Culture - pick a culture that gives resolve or intellect bonus. So you shouldn't choose Deadfire archipelago, The Living Lands nor The White that Wends.
Background - Aristocrat, artist or mercenary will be best.
During character development spent most points on lore and then on athletics and survival. You can add few points to mechanics as well.
Level
Decision
Suggested development path
2
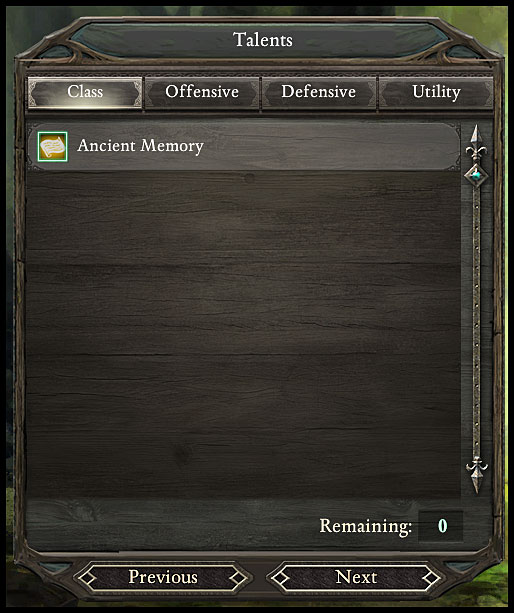
One invocation and talent
Invocation: "Thrice was she wronged, and thrice justly avenged"
Talent: Ancient memory
3
One first level phrase
"Come, come soft winds of death"
4
One invocation and talent
Invocation: "White worms writhed in the bellies of the dead"
Talent: Beloved spirits
5
One second level phrase
"Rime and frost followed the footalls of Karth"
Try to create few different chants that can be used in different circumstances.
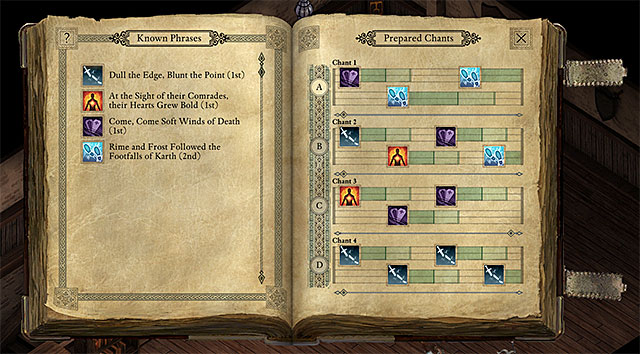
You gain access to the option of creating chants by opening the chanter portrait and then the last icon that shows a scroll with musical notes. In newly opened windows you will see all your phrases and by clicking the right mouse button you will see description how they work how long they are chanted and how long they work. The latter usually is few seconds longer than the time of chanting them, so their effects combine with each other. Number next to a phrase shows its level.
On the right side of the book there is a field with lines, like in sheet note. This is where you will place selected phrases which together will create a chant. One chant consists of not more than 10 phrases that can repeat many times. When a chant ends, it immediately starts over from the beginning. You can create four different songs that during combat can be changed, but not modified.
When creating a chant you must remember about some things. First - combine bonuses for your companions and penalties for your enemies in one chant. Avoid repeating one chant two times in a row. If you have more phrases to pick from, create few chants from which each should be useful in different situation.
Try to be very close to the center of the fight, but don't move to the frontline.
Remember to modify your chants every time you get to a new level. With each level gained you are rewarded with new phrase or invocation, so you should slightly change the chant to use character new level.
Selection of chant should depend on your position in battle. If you fight in front line, pick ones that weaker your enemies. If you more away, select chants that makes your allies stronger.
Each time you get to three or four chanted phrases, use invocation.
Use the possibility to create scrolls. Thanks to high lore level you will be able to use even the best spells, which will be especially useful at the beginning of combat.
Armor has no impact on chanting speed, so you should wear plate armor.
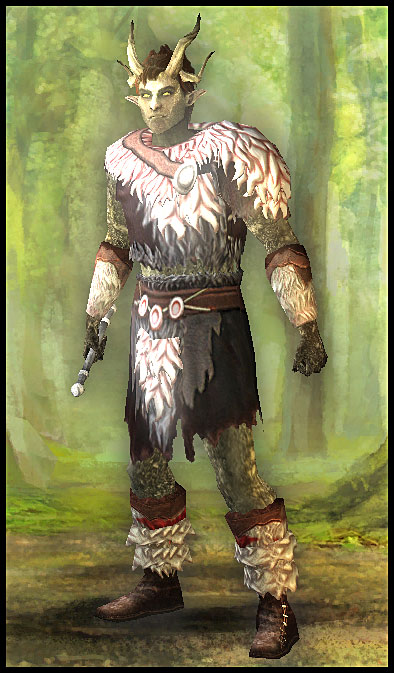
Druid is one of magic classes, but has two unique traits. He doesn't need to learn magic spells and he can transform into an animal during combat. Animal form is picked when creating character and it cannot be changed later. When druid transforms into an animal, he receives boost co combat-related stats. In his normal form he has small amount of health and endurance points and lacks defense.
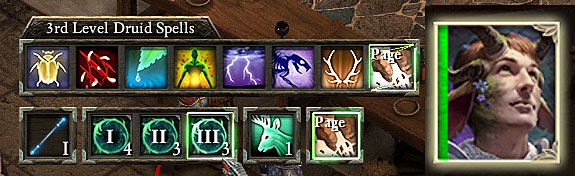 Control the amount of spells you can cast from a specific level.
Druid has access to all spells from the beginning of the game. When he gains level, he automatically learns all new spells. But the limitation of amount of specific level spells casted between resting is still there.
Race - nature godlike is the best choice, both because of its +1 intellect bonus, and the immersion of future gameplay.
Spiritshift - each druid has mastered one animal shape. It is used usually when you want to fight closely to enemy. You can use animal form only three times before you will need to rest. You can choose from five forms, each has different traits:
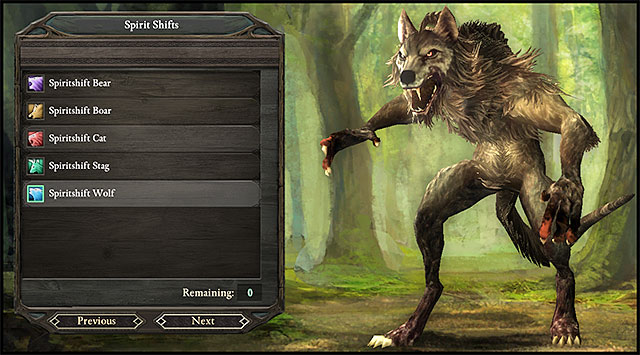
Think about picking an animal form. You won't be able to change it later.
Attributes - You should spend most of attribute points on intellect and might. Ratio between one trait and another should be around 19:16. You can lower dexterity or perception by one or two points and give them to resolve.
Culture - you should choose one of three territories: Old Vailia (+1 to intellect), Rauatai (+1 to intellect) or The Living Lands (+1 to might).
Background - pick a biography that will give you survival bonus. Explorer will be best.
When developing a druid class, use most of points equally on survival and lore. Add some points to athletics as well, especially if you want to use transformation into animal frequently.
Level
Decision
Suggested development path
2
Talent
All available talents will give your attacks elemental bonus. Differences are small, so pick element that you like the most.
3
None
All second level spells (there is 9 of them) unlocks at this level.
4
Talent
Additional first level spell
5
None
8 new third level spells unlocks at this point.
Be careful when you cast a spell. For example, Hail storm can do more harm than good.
When casting some spells with area of effect, you might see two circles. In the smaller one damage is dealt both to enemies and allies. In the space between smaller and larger one only enemies receive damage.
Equip robes, and if you want to use animal form frequently, then leather armor.
Use your spells sparingly during combat. You have a limited amount of them, and not always you can set a camp. When fighting weaker enemies, use animal forms.
When casting spells, keep distance from enemies.
Monk is a warrior that uses only his fists in combat. His main advantage is great amount of health points, endurance and very good class abilities. You can equip him with a weapon, but then not all skills and talents will give you so good bonuses. He is quite resistant to enemy attacks, but not thanks to his armor. It's thanks to his dexterity.
 Amount of received wounds can be seen on the circled red field in the right lower corner of character icon.
To activate his abilities, monk needs wounds gathered by receiving damage. Most of abilities require a specific amount of wounds. They shouldn't be saved for later, as after some time they start to weaken your character. Most of abilities focuses on dealing direct damage to enemy.
Race - any race except for orlans will be good.
Abilities - swift strikes that costs one wound and greatly improve your character's speed will be a good choice for the beginning.
Attributes - focus mostly on dexterity, increase it to around 19 points, then constitution (16 points). You can take away some points from intellect and resolve, but not more than 2 points. Use then to increase character's might.
Culture - you should choose between The White that Wends and Deadfire Archipelago. The first one gives you +1 to perception and the second one offers a +1 bonus to dexterity.
Background - athletics bonus is most important for you. You have more than one option, but slave will be best as it will not only give you +1 to athletics, but +1 to survival as well.
Monk is a very versatile character and points should be distributed versatile as well. Spend most on athletics which should be on highest level. Don't forget about survival which improve the way potions and food work. Lore might be important for monk as it will allow him to use spells from scrolls.
Level
Decision
Suggested development path
2
Talent
Lesser wounds
3
Ability
Force of anguish
4
Talent
Lightning strikes
5
Ability
Stunning blow
Remain on the second line. Attack and at the same time hide behind a fighter or paladin.
If necessary, retreat and wait until enemy focuses on someone else.
Add few ability points to lore, you can use magic scrolls during battle. Don't be afraid to use potions.
Wear medium and even stronger light armors. Attack speed is more important for you than defense.
Control the amount of wounds received and immediately use them.
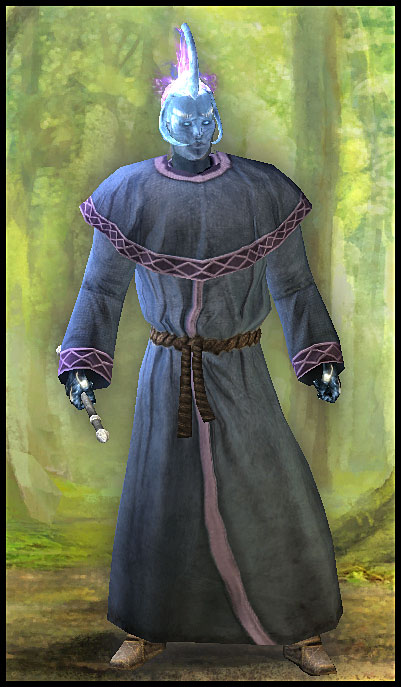
Priest is a magic class focused on spells supporting and weakening, he has no offensive ones. He has small amount of health points and endurance. He mostly wears robes and other light armors, so he doesn't have high defense. It is a character recommended for experienced players who will be able to utilize his abilities.
 Priest, in addition to spells, has a special aura that has large working radius and constantly heals his allies a little bit.
Priest, just as the druid, doesn't need to learn new spells. Every second level he automatically learns all spells on that level. But there is a limit of spells casted between resting. Available spells usually have area of effect and they work positively on other party members by increasing their stats. Priest as one of very few classes has spells that regenerate endurance during combat. When you create a priest, you can choose his deity, which has role similar to paladin's order and have impact mostly on character's personality and slightly on available dialogue options.
Race - Moon godlike is a good choice as it has race ability that is very useful for priest. When character's endurance drop below 75/50/25% a wave of energy is released that heals your allies.
Deity - Deity doesn't give specific bonuses nor penalties. It only affects character's traits and the way he is treated by NPCs at the beginning of the game. You might choose from five gods:
Attributes - most attribute points should be spent on intellect, the more, the better. Intellect should have at least 18-19 points. You should increase might as well, to around 15 points. You can slightly reduce constitution and perception and saved points use on dexterity and resolve.
Culture - pick a culture that gives +1 to intellect, like Old Vailia or Rauatai.
Background - aristocrat or scholar that have +2 to lore will work best.
Ability points received each time you gain a level should be spent mostly on lore. In second order you should invest them in survival that will allow you to use potions effectively. You should improve athletics by few levels as well.
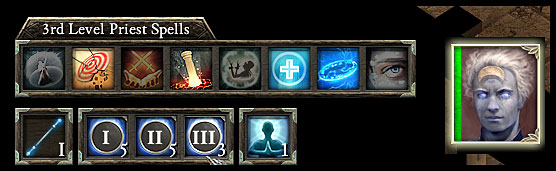
Level
Decision
Suggested development path
2
Talent
Brilliant radiance
3
None
At this level all nine second level spells become unlocked.
4
Talent
Additional first level spell
5
None
Your character automatically learns all third level spells.
Use as light armors as possible, robes are best choice.
For normal attacks, use a wand or ranged weapon.
Keep yourself possibly far away from enemy, but close enough to be able to react quickly and, for example, heal your companion.
Don't forget about activating aura that heals your companions, and after some upgrading deals damage to enemies as well.
Most spells of priest have an small area of effect.
Use your skills wisely. Use supporting and weakening spells mostly at the beginning of battle.
Control the state of your companions endurance and cast a healing spell whenever needed.
Don't be afraid of using magic scrolls. They give you access to strong offensive spells.
Rogue is one of most interesting, versatile and hard to use classes in Pillars of Eternity. As a silent killer he use his dexterity and sneaking ability to attack enemy from behind and deal him massive damage. He has small amount of health points and endurance. It is a class recommended for more experienced players.
Most abilities of rogue recharge after every battle. Playing this class is very unique. To fully utilize rogue's abilities you must get close to enemy undetected. In a way, it forces you to make attacks alone. It makes playing rogue much less dynamic than playing other classes. On other hand, it is probably the only class in the game that allows you to complete the game alone, with no companion.
Race - elf will be the best choice. It can be either wood elf or a pale elf. Orlan will make a good rogue as well.
Ability - at the beginning you should pick blinding strike which will make it hard for enemy to hit you for ten seconds.
Attributes - spend as much points as possible on dexterity. Improve might to high level as well, around 16. You can additionally take 2-3 points from resolve and give them to perception.
Culture - pick Deadfire Archipelago, this territory will give you a +1 bonus to dexterity.
Background - raider is the best choice as it gives you +1 bonus to stealth and +1 to athletics.
Rogue is the only class in case of which stealth should take priority when allocating ability points. However, you should also remember about improving athletics and survival.
Level
Decision
Suggested development path
2
Talent
Backstab
3
Ability
Escape
4
Talent
Shadowing beyond
5
Ability
Riposte
Before every battle try to sneak up to enemy and make sneak attack.
If you have a small party, you can simply avoid some enemies by using stealth ability.
Rogue shouldn't wear anything heavier than leather armors as it would greatly limit his movement.
Use the chance to disappear as quickly as possible.
Use two weapon types. First, main set of weapon should be a sword plus one or two daggers. But have some ranged weapon as well.
Don't forget about character's abilities, especially ones that allow you to "disappear" for short time. Use that time to deal a finishing blow or retreat behind your allies.
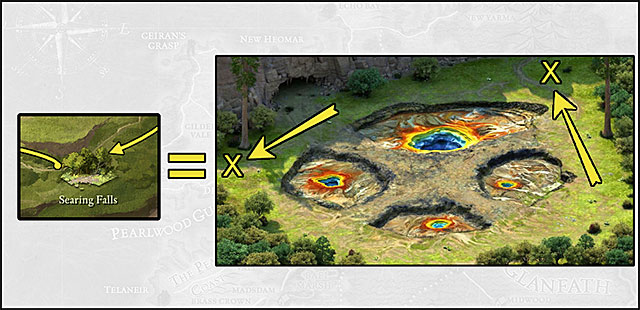
Above you can see a map of the entire world of Pillars of Eternity. The map shows all of the primary locations. The yellow arrows represent main passageways between the adjacent locations. The green arrows and the inscriptions tell about the areas where you can add new companions to your team. You can find out more about the possible followers from the walkthrough and from the Party chapter.
Map of the game world consists of dozens of location to which access you unlock as you progress in the main storyline. Unlocking new location happens in a specific way. There are paths that connect locations. To unlock a new location, you must walk to a specific edge of the map and click on the icon of the so called "exit point". There might be more than just one such point on edge of the map that allows you to leave a location. But first time you must find specific one that unlocks new location. His location is not always obvious. Places connected to the main quest are exception - they might not show on the map even if you use the correct point in previous location. Map above shows where you can expect to find exit point that allows you to unlock a new location. Additionally, this map shows which road you should take to get to far away locations and where you will meet companions.
If you manage to find the correct exit point and click on it, a new location is unlocked and from now on you will have access to it. You can get to unlocked locations from any place.
Enter every location. You receive experience from finding new place. Even if you meet too strong enemies, you shouldn't have trouble with retreating.
While being in some location, try to find all exit points. Best option is to walk along all edges of the map and click on every possible exit point.
Try to explore as much of the map as possible. By doing so, not only will you find caves or chests with equipment, but new companions to your party as well.
Pay attention to anything that stands out. In some dungeons or undergrounds you can find weirdly looking walls. It is a good idea to activate scouting mode then and search for a switch that opens hidden passage.
Pay attention to places and items above which magnifying glass icon appears. Usually after clicking it only an information about item will show, but sometimes it starts a side quest.
Gather all plants and resources. They are placed in a locker with infinite space and they prove to be very useful when creating potions, scrolls or enchanting items.
Pay attention to places with a special interaction option, like climbing on a rock. You can do that when having specific athletics level or by using the right tool.
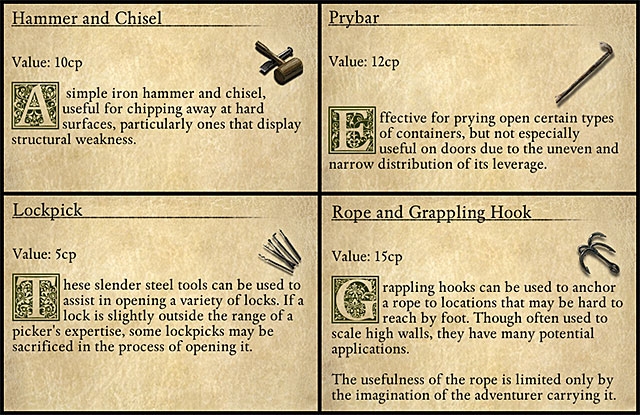
There are items in the game that can be very helpful for those with too low level of a specific ability. Each tool can be used once and is destroyed afterwards. Most obvious one is lockpick. It is used for opening chests and doors closed with a lock. Amount of lockpicks used on opening a lock depends on character's mechanics level. With high level, you don't need lockpicks at all to open weaker locks and from one to even few of them to open medium one. If lock level is higher than character's mechanics level by two or more levels, then it is impossible to open it, even with lockpick. Replenish your lockpicks supply as often as possible and have at least five of them with you all the time.
Second group of tools consist of rope with a grappling hook, prybar, hammer and chisel. Those tools allow you to get to places unavailable in any other way. Rope with a grappling hook allows you to get through broken bridges, climb on ledges or get down into caves. It is the most versatile tool and you should have at least two ropes with you. Prybar is used to heave a rock and unlock a passage through strewn corridors. Hammer and chisel allows you to get through a weakened walls. During adventure you should have not more than two pieces of those tools as - in difference to rope - they are used rarely.
Dialogues and reputation system are important aspects of Pillars of Eternity. Each decision have an influence on character's personality and his reputation among the factions found in the game.
When having a conversation, don't click random dialogue lines. Read all available options and choose the one you mostly agree with it. In most conversations in the main storyline you can make a single decision and have no way of changing your mind later. With each answer you progress the story and you are not allowed to return to previous dialogues. If you will pick your answers unwisely, you might offend your interlocutor or even provoke him to attack.
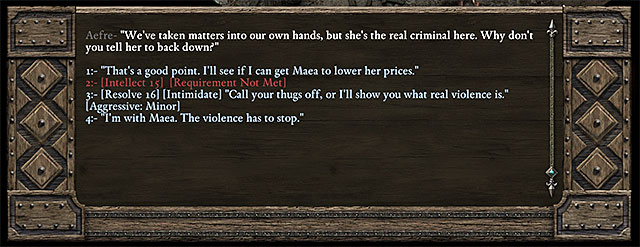
During conversations, additional information will show both on the left and the right (after turning on the "Show personality/reputation" option) side of the dialogue lines. On the left you can see requirements that must be met to be able to say a specific line. There are few types of requirements. One of them is minimal level of some character attribute (might, constitution, dexterity, intellect, perception or resolve). The right skill is a second requirements type (athletics, lore, stealth, survival or mechanics). Sometimes to be able to pick a specific dialogue lines you must be of correct race, class or even have the right deity. If you met the requirements, that line gives you some bonus, like some enemies will run away before battle, some of them will surrender immediately, you can be awarded with additional reward as well.
On the right side of the dialogues consequences of your decision for your personality are shown. For example, when you're joking from others, your character will gain traits like cruelty or cleverness. Virtually every dialogue line has a small impact on your character's personality. His current personality can be seen on the right side of character screen. Each indicators doesn't have important influence on the gameplay, sometimes the way other NPCs treats you depends on them.
During some quests you might be forced to face a very important moral decision. As a consequence of some of them you might even lose a companion. Luckily, usually they talk to you and suggest which option should be chosen for them not to leave the party.
Much more important than your character personality are his relations with factions. Many times you must back one of two or more groups fighting each other. It has impact on large amount of side quests. When you're making such decision for the first time, it is wise to pick one faction and stay with it for the rest of the game. Sadly, it means that you won't be able to complete few quests for other factions, what's more - they might even become your enemies. It ends with them sending a group of assassins at you, whom you might meet in random locations. They might even attack your stronghold.
When you're stealing, you lose reputation. When you're caught, you lose reputation at the faction to which the item belonged. If you're not inside a faction building, but, for example, in inn, your reputation at the local community will drop. But there is no trouble with selling stolen items, even in the same place where you acquired them.
Don't worry too much about reputation. It is more like an indicator of your route and decisions so far than an important factor that influence the game. Most side quests and possibilities remain available no matter of your decision.
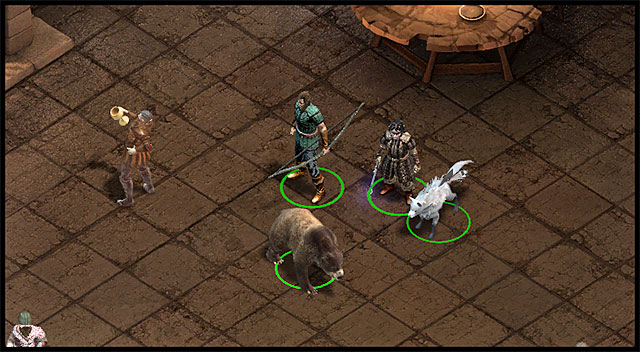
You can travel through the game world with up to 5 companions. At the beginning you create only your own character, rest must be added during adventure. You can do that in two ways. First is recruitment in tavern or inn. Second is adding to the party characters met when exploring the game world. There is eight such characters in the game. Each of them has his own unique history, personality and goal he wants to achieve. Although you meet those companions in different phases of the game, they always have same level as you. After a character joins your group, you gain complete control over him, you can give him orders, change his equipment or pick skills and talents after gaining a level. You should ad all companions to the party os quickly as possible. Thanks to that, you will have more control over their abilities.
Important - If you want to remove someone from your active team then you must return to the Caed Nua stronghold and perform the changes there. There's an exception to that rule, because since the moment your team reaches its limit (6 people) you will be asked about the preferred roster each time someone new joins your party. This will give you an opportunity to make the necessary changes without going on a trip to Caed Nua.
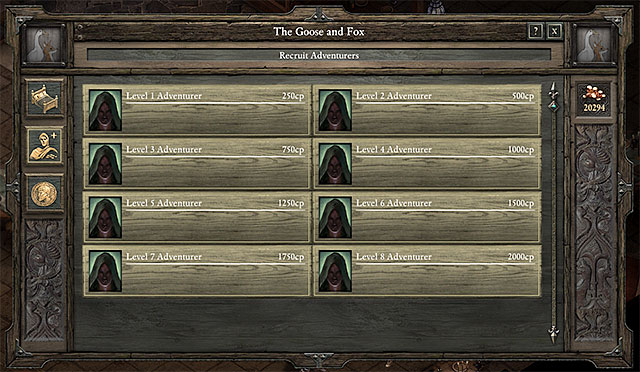
The easiest and quickest way to increase size of your party is to go to the closest inn or tavern - there is at least one in every village and city. You must talk with the innkeeper, he will allow you to recruit an adventurer. Maximum level of companion that you can recruit depends on your main character level, it is one point lower. For every adventurer level you pay 250 coins, which means that if you recruit character on eight level, you must pay 2000 for him. The only logical choice is to recruit companions on highest level possible. It is better to wait and save some money than waste time and funds on slowly developing your companion. When you decide upon a specific adventurer, you will be moved to the character creation screen, known from the beginning of the game. You can pick all parameters of your future ally. Newly created character will be on first level, but you will be able to immediately level up it to the level you have bought.
Aloth: wizard, wood elf, aristocrat
This character has equally distributed stats. Most points (16) are given to perception and intellect, rest stats are slightly smaller, which makes it hard to give Aloth a specific specialization. Great advantage of Aloth is that you meet him at the beginning of the game, it gives you possibility to pick most of his abilities and talents. When he joins your team, he has few offensive spells.
Aloth can be found in Gilded Vale near the entrance to Black Hound Inn (M4,2 in our walkthrough). You meet him during a quarrel with local community. Join the conversation, pick up the side of the wizard and he, as a sign of his gratitude, will decide to join you in your adventure. Aloth is connected to the main storyline, although not in a direct way. As you will complete successive quests, you will learn new interesting facts about your companion.
Aloth's personal quest is Two-Sided. You can unlock it by talking to Aloth after you've left the Temple of Woedica in Defiance Bay (M19,8).
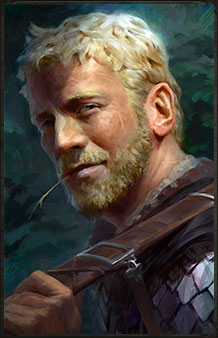
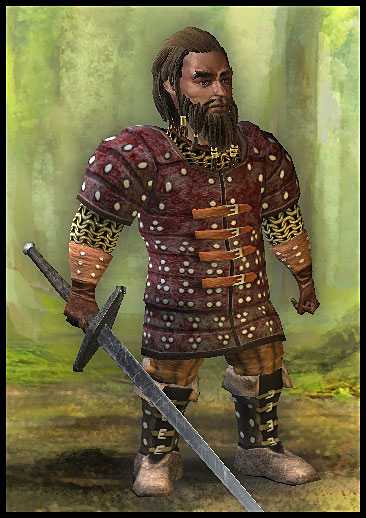
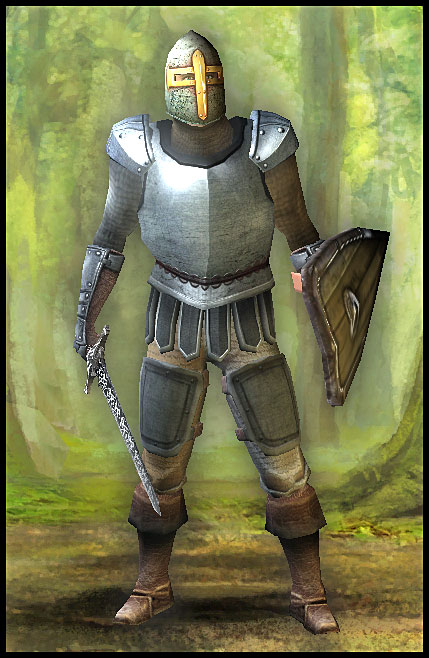
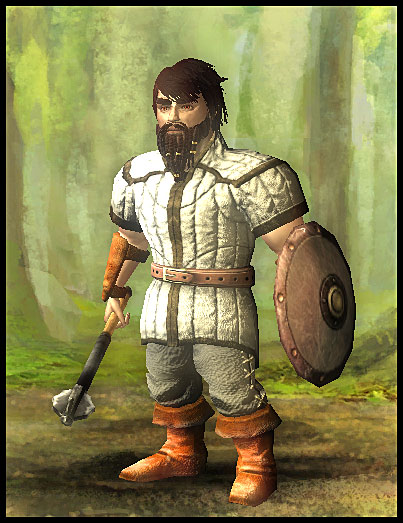
Eder: warrior, savannah human, Dyrwood farmer
This warrior has 17 points of both might and constitution. He works much better as a warrior focused on dealing high melee damage in direct combat. You will meet him almost at the same time as Aloth, so it is possible to have influence on almost all his future decisions and talents.
Eder can be found in Gilded Vale at the left from the entrance to ruined Temple of Eothas (M4,1 in our walkthrough). After a short conversation you will learn that his relations with rest of local community are pretty bad and he is just waiting to be lynched. Because of his hard situation, he will gladly accept your offer to join the party. At the beginning Eder won't tell you what his goal is, you will learn it after more than dozen days together.
Important - Don't meet with Eder immediately after arriving in the village. Try initating the conversation AFTER you've touched Caldara de Berranzi's soul by the big tree. Performing this action is a part of the Visions and Whispers main quest.
Eder's personal quest is Fragments of a Scattered Faith. It's unlocked after he joins your party.
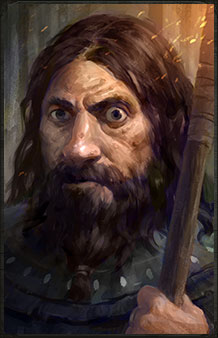
Durance: priest of Magran, savannah human, Dyrwood Clergyman
Durance, as his name suggests, has large resolve level - 18 points. But he has a low level of intellect for a priest, and his might and constitution aren't better. You will meet him early in the game, he should be more or less at third level at that point, so you will still have an impact on his future development. His abilities work best in a team that consist of maximum amount of members.
You can meet Durance in Magran's Fork, where he prays near a large monument of his goddess. This statue can be found above a crossroad in the central part of the map (M6,1 in our walkthrough). This Priest is a very talkative person, so you shouldn't have trouble with making him join your party. He quickly recognizes that you have a "gift" and decides that both of you can learn much from each other.
Durance's personal quest is Trials of Durance. It's unlocked after he joins your party.
Kana: Chanter, Island Aumaua, scholar
Cana has large intellect and might level. When you meet him, he should be at level 4. At this point he has pretty good phrases and invocations. His biggest weakness is his small amount of health and endurance - as a character fighting close to enemy he is usually the weakest link of your party. You should add him to your party when entering the Endless Paths, but for normal game, especially on higher difficulty level, it is better to create a different bard.
Kana stands near the entrance to your future stronghold - Caed Nua (M12,9 in our walkthrough). During conversation you should show interest in his matters and he will gladly join your team. Goal of his journey is quite interesting as he want to uncover the mysteries of Endless Paths beneath the fortress.
Kana Rua's personal quest is Time and Tide. It's unlocked after he joins your party.
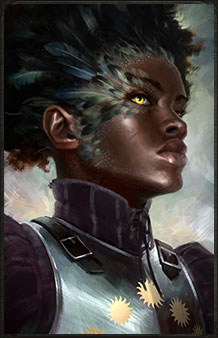
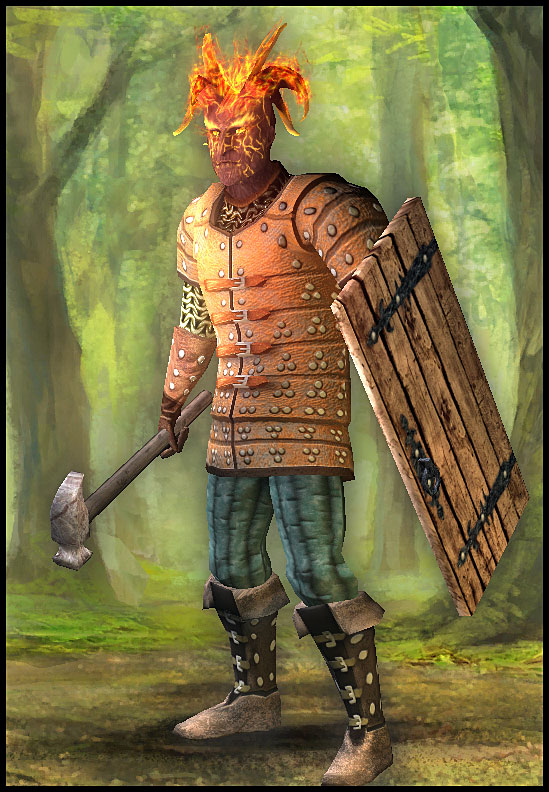
Pallegina: paladin, Avian Godlike, Vailian Republics soldier
Pallegina is the most interesting of all companions. Her race is unique in the game, just as her background. She has a low might level for a paladin, only 12 points. Other stats are distributed pretty much equally - 15 resolve points and 14 perception. Her role in the party might be various, she will work nice as a tank or as a character focused on combat. When you meet her, she will be at level 4-5 so you still will have some impact on her specialization.
It is pretty hard to make Pallegina join your team. First you must travel to Defiance Bay, specifically to Ondra's Gift. There you must go to the building in the central part of the map - the Vailian Trading Company (M23,6 in our walkthrough). Inside you will meet Mestre Verzano that will give you a suspicious quest. You can complete it in various ways, but the result shouldn't impact the possibility to recruit Pallegina. After completing the quest Pallegina will stand on the left from the entrance to Vailian Trading Company. She had enough of petty tasks and she wants to discover the true threat that lurks at her homeland Vailian Republics.
Pallegina's personal quest is The Child of Five Suns. It's unlocked after she joins your party.
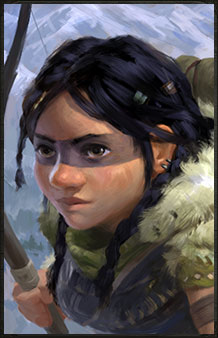
Sagani: Ranger with an arctic fox companion, Boreal Dwarf, Naasitaq hunter
Sagani has high perception and dexterity level. Her stats perfectly suit a ranger character. She will be a valuable addition to your party. You meet her when she is around level 5 so you will have a limited influence on her abilities.
You will find her in the Woodend Plains location, on a crossroad in the central part of the map (M16,1 in our walkthrough). You must simply be nice and give her some attention and she will want to join your party. Interesting quest is connected to her. Sagani must find a spirit of her ancestor which currently resides in different body. Your task is obviously to help her.
Sagani's personal quest is The Long Hunt. It's unlocked after she joins your party.
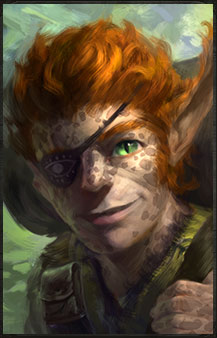
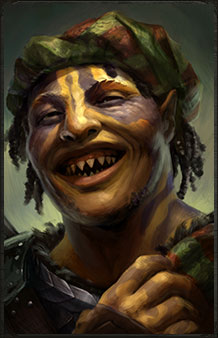
Hiravias: druid, Hearth orlan, Eir Glanfath drifter
He has an equal level of dexterity, might and constitution. You will meet him more or less at the same time as Sagani and he will be around 5 experience level. He has various spells. Staelgar is his animal form.
He resides in the Stormwall Gorge location. He stands over an edge of a cliff, right from underground ruins, near route that leads to the valley (M28,3 in our walkthrough). He is a representative of Eir Glanfath culture. He research unknown species of fauna and flora and he is currently on his way to his home city - Twin Elms. Despite that, he decides to join you.
Hiravias's personal quest is True to Form. It's unlocked after he joins your party.
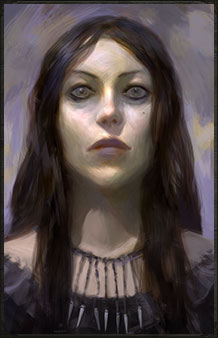
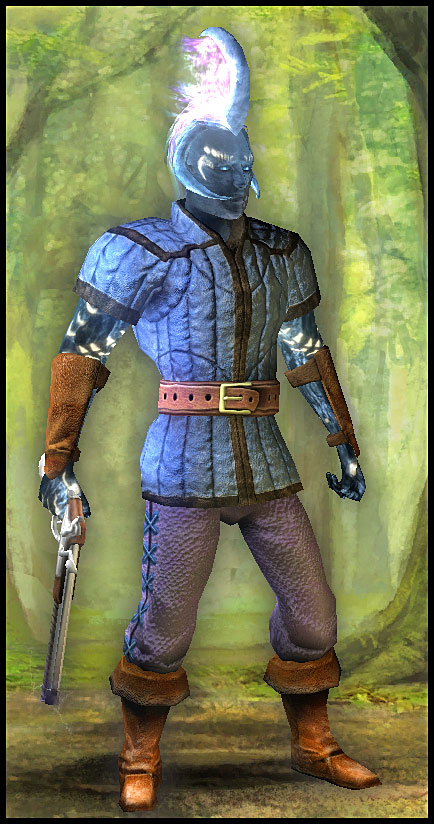
Grieving Mother: cipher, Savannah Human, Dyrwood midwife
You meet her as last of your companions. At this point she can be at level 6 or even 7. She has strong spells and abilities. She has high perception and dexterity level as well - 17 and 16 points.
Grievious Mother can be found on the eastern border of the Dyrfold Village (M29,6 in our walkthrough). In theory, thanks to her powerful psychic abilities she is invisible, but you, having a gift, can talk to her. After a short while she decides to join you. Her past holds many mysteries which - if you want - you can help her discover and solve her problems.
Greving Mother's personal quest is Dream and Memory. It's unlocked after she joins your party.
One of the most important things in Pillars of Eternity is the correct picking of your party members. Rooster of your team will change many times during game. You will meet new companions and want to include them in your party, so lots of choices await you. Below you will find an example of a perfect team - maximally versatile and useful in every situation.
Fighter or paladin with a shield is absolutely necessary in your party. At least one character should be focused on taking damage from enemies. All his stats, abilities and skills should be focused on defense. Such character will be almost indestructible and other party members will be able to concentrate on dealing damage. You should have another melee fighter in your time, but focused on dealing damage. She should be able to block enemies as well, so that they won't target your shooters. Barbarian with two-handed weapon is a good choice for that.
Warriors should have support from distance. Because of that, one of your companions should be a ranger. First of all, he has longest reach, so he can safely attack even most far away enemies, and he has an animal companion that will support other warriors. Next are characters that are 100% focused on dealing damage. Wizard and a druid will be best choices. They have very strong spells, and a combined attack of both those classes in one point will end with quick death of enemies.
In that way you have a five-member party, but you still have one free slot. You have two options to fill that place - pick a priest that will heal and help his companions, or chanter. Second option seems to be better as chants have long range, greatly improve your companions and the character is able to use a strong spell from time to time. Additionally, you can equip chanter with strong armor or shield and he will be able not only to support the team, but help paladin or fighter in blocking enemies. It will improve his endurance as well, so he will be very effective all the time.
In summary, "dream team" should consist of six characters: a paladin, barbarian, chanter, hunter, wizard and a druid. It will be a versatile team that will work in every situation with any opponent it will face.
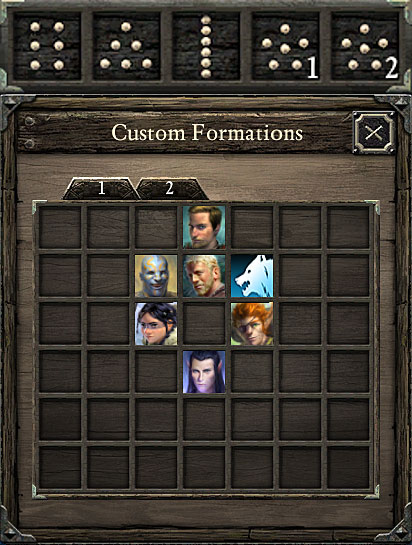
Both during battle and while you travel through the world, your team is set in a specific combat formation. You can choose from three predefined settings: two columns, wedge or straight line. You can also create your own formations. That option gives you access to an area with 7x6 fields on which you can position your party members as you want. Each character uses one field so you many options. Creating your own formation is the best option as it gives you complete control over your companions position, but you must keep some rules in your mind.
Your team shouldn't be too extended to the sides. There shouldn't be more than three companions in one line. It will limit blocking in narrow passages. At front you should place fighter with a shield or another character that is focused on defense and taking damage. In the second row, just behind fighter, place other melee fighters, like barbarian, monk or animal companion. In third line magic classes should be positioned, like wizards or druids. Most of their spells require getting close to the target so they must be near warriors. At the end position rangers and other characters that fight using bows, crossbows or gunfire as they have the longest reach.
You can create two predefined formations and you should utilize both of them. Character placement shouldn't change, but distance between them can be adjusted. One formation should be used for fighting in buildings and dungeons, second for encounters in open space, like forests. Dungeon formation shouldn't have any empty spaces between companions. There is not much space for characters to move in narrow passages or tunnels. And you can't be attacked from sides so tight formation will be best. It's different when in open space. Here enemy can flank you at any time. The formation should be much less tight. Remember to keep the distance between the fighter at the front and the shooter at the back at least few fields. Thanks to that you will uncover bigger part of the map when you will walk through at and - what's most important - during battle your shooters will remain at safe distance from enemy. You won't waste time on retreating but you will be able to immediately get to fighting.
Changing between formations takes not more than 3 seconds and greatly improve your situation at the beginning of battle. When clicking and holding the right mouse button you can pick a direction towards which your party should be placed.
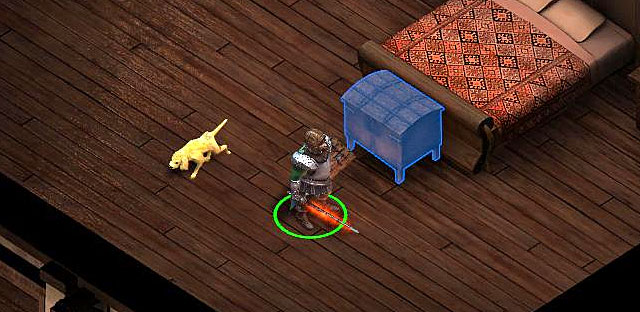 An example of one of the pets
Pets are a side attraction in Pillars of Eternity. They were designed for the players who wanted to have their own animal friend within the game. The important thing to know is that their only role in the game is to follow the main character and to look cute. They don't have any other functions. The pets, in contrast to rogue's animals or summoned creatures, don't take part in any of the fights. They can't help you in eliminating your enemies, but you also don't have to worry about them being targeted by the monsters you encounter in the game. You can have one pet at a time and you can "activate it" by dragging its icon to the correct slot in the main character's inventory window. From this moment onwards the pet you've chosen will be visible on the screen and will follow you everywhere you go.
The table seen below lists all of the locations where you can find new pets. Some of them are typical companions (a cat or a dog), however you can also adopt more unique creatures like a miniature version of an animat or a tiny wurm.
PET
AREA WHERE YOU CAN FIND IT
Beagle Dog
Complete the Brave Derrin side quest received from Odda in the Ondra's Gift district in Defiance Bay (M23,4).
Black Cat
Head over to Raedric's Hold. Enter the keep's dungeons and proceed towards one of the northern rooms. It's the room where you can also find Osrya (M10,11).
Calico Cat
Go to The Salty Mast brothel located in the Ondra's Gift district in Defiance Bay (M23,5) and meet with Maea.
Mix Cat
Explore the Valtas Residence located in the Heritage Hill district in Defiance Bay (M24,4). Do this AFTER you've completed the Safe Haven side quest.
Orange Tabby Cat
You can find this pet near the Builders' Hearth found in the Hearthsong district in Twin Elms (M36,6).
Piglet
Meet with farmer Rumbald in the Dyrford Village (M29,3) and agree to complete A Farmer's Plight side quest.
Small Black Lab
Find the pet on the upper floor of The Black Hound Inn located in Gilded Vale (M4,2). Once you've said hello to the dog ask the inn's owner if you can adopt it.
Terrier
Meet with Gordy in the Copperlane district in Defiance Bay (M18,10). You must complete the Something Secret side quest.
Tiny Animat
Proceed to Cliaban Rilag ruins. You must get to one of the chambers located in the middle part of the first level (M33,10). Kill the monsters in this room and locate the pet.
Tiny Beetle
Meet with Alarhi in the marketplace area located in the Hearthsong district in Twin Elms (M36,5). She will appear in the market AFTER you've completed the Hard Bargain side quest the way she wanted to.
Tiny Obsidian Wurm
This pet is reserved for the people who backed Pillars of Eternity during the Kickstarter campaign. If you supported the game then the wurm will be available from the very beginning.
Tiny Spider
Go to Caed Nua (M12) and explore the keep in order to locate this pet.
Tiny Sporeling
Meet with Iswld in The Golden Grove located in the Elms' Reach district in Twin Elms (M37,5).
Tiny White Wurm
Explore the second level of the Endless Paths of Od Nua and interact with a wurm egg found in the northern part of the map (M42,2).
Yellow Lab
Find the dead pilgrims in the Woodend Plains (M16).
Pillars of Eternity is a direct successor to classic RPGs. So it shouldn't be a surprise that battle is based on dozens of combinations of different factors. Such solution combined with the fact that some elements are random generated makes the battle both complex and clear. You can read about mechanics in the Journal (Cyclopedia tab, then Combat mechanics). There you will find information about how the game calculates damage, armor etc. Below some most important aspects has been described from practical point of view.
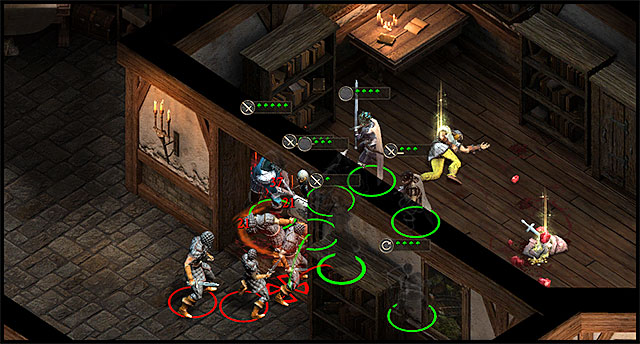 Use the surrounding to block enemies.
During the game pay attention to stats of items that you wear. In case of weapon not only the damage is important, but its type as well. All enemies have different resistance to different damage types. To avoid situations in which you can't deal any damage to enemy, you should do two things. First, if it is possible, pick weapon that deals two damage types, like piercing and slashing.
Second solution is to wear two different weapon types, like sword and a mace. At the same time you can have two weapon sets, and if you choose a specific talent, even three. During combat you can change your sets any time you want.
Remember about picking correct armor, each of them have different amount of defense points against specific attacks. Movement limitation created by different armors is important as well - the heavier it is, the more it slows you down. It means attacking and using abilities less quickly. Wear the lightest armor you can afford to, heavy armor should be used only by your fighter or paladin.
Another important thing is the order in which you fight enemies. Wizards should be your priority. If you won't eliminate them at the beginning of battle, they can quickly kill few of your companions. If you have easy access to enemy archers, eliminate them before fighting warriors. If you're facing large groups of enemies, not necessarily human ones, in first order eliminate enemies that use any form of magic. Then focus on the weakest ones and eliminate then gradually in order from weakest to strongest one. It is important to concentrate all your party on single target. Only paladin or fighter should distract other enemies.

Always keep an eye on health and endurance of your companions. Endurance shows current condition of character, it drops due to enemy attacks and can be improved by potions and spells. It recharges automatically to maximum level after each battle. The bar on the left side of character portrait shows general health state. It gradually drops each time you lose endurance. Health level is more or less 4-5 times larger than endurance. When it drops to zero, character goes into agony state. It means that if in that state it will lose endurance, it will die. Character's death is irreversible and can happen to anyone, but as long as your main character is alive you can go on.
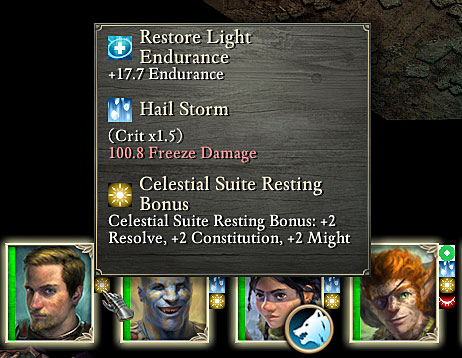
Modifiers are very important during combat. There are two groups of them: permanent and temporary. Temporary modifiers are active from few seconds to few minutes. They can be positive, like buffs given by priest or chanter, or negative, like fear or poison, and in case of some stronger attacks - bleeding or vulnerability to a specific element.
Negative modifiers can be removed in two ways. First one is simply waiting until it wears off. Second is using skills of priest or other magic class that has a spell that takes away any negative effects from your companions.
Permanent modifiers are different. An example of permanent modifier is stats boost for resting in an inn or character contusions. Resting boost is active for few days since sleeping.
After a while your characters get tired - how fast depends on athletics level (the higher, the slower your character get tired).
Fatigue has few states - each gives stats penalties, mostly to endurance. When you reach "critical fatigue" penalties are so big that it is completely unwise to keep fighting and you should get some rest as quickly as possible.
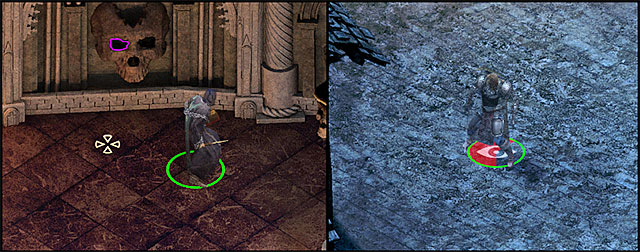
Stealth is useful both in combat and exploration (when traveling through dungeons or opening chests). It allows you to find and disarm traps. In some cases in scouting mode you will find secret switches that open secret passages. Thanks to that you will greatly shorten your road to the target or get to a room with treasures. During combat use scouting to learn of position, numbers and strength of enemies. Keep an eye on the circle around your character, it will be gradually filled first with yellow, then red color. Yellow means enemy hasn't spotted you yet, but is suspecting something. Red is a warming that enemy has seen you.
Before battle send only one character on scouting, the one that has highest stealth level. It will allow you to retreat any time you need. It takes more time, but is more effective than sneaking at enemy with whole group. You can travel with whole group in scouting mode when you're walking through dungeons and search for traps.
Important - Some of the most complex traps and secret stashes may not be discovered by your scout if his Stealth skill is not high enough. This means you should be working on increasing this skill from the very beginning of the game. If you really want to get your hands on some secret treasure during your first visit to a location where it's hidden then you can use potions as an alternative solution (like the one which temporarily increases the character's perception).
As you progress in the game you gain new equipment. Usually it is easy to compare two items and pick the more useful one. But remember about few things. Don't focus on helmets, they give no bonuses to your character. You have only one field for two item types - on your neck you can only wear amulet or robe.
Howe to gain best equipment? There are two ways - first is completing successive quests. As you progress in the storyline you will be rewarded with better equipment. Second way is buying needed equipment. Merchants have very good equipment even at the beginning of the game, although their prices vary from 8000 to 14000 coins. Good thing is, such expensive item will be sufficient for the rest of the game. Don't waste money on middle-class equipment.
Keep attention to items for specific class, like for paladin or wizard. They are usually very good and offer specific, most needed for that class bonuses. Such items can be found in few places in the game world, you can also simply buy them - but their prices will be even more expensive.
Your main character has one additional slot for your pet. It might be, for example, a cat, dog, pig or even small snake. Animals are gained in various ways, some of them can be bought in inn, others are rewards for quests, and the most interesting ones can be found while traveling through the game world. They serve no purpose except showing on the map and being a friend to your party.
During the game you will at least few times meet an opponent that you won't be able to defeat, even after more than one try. It might be a dragon or very strong group of ogres. Dragons can be found, for example, in cave in Siring Falls, Temple of Hylea or on lower levels of Od Nua. Below few conditions have been described, meting which should help you prepare for battle and lead it in the right direction. Of course, you can use that tactic on every opponent, but it will consume massive amounts of time and resources.
Just before going to battle, let your team rest - in the fortress or an inn. Choose more expensive options to gain more long term stat boost.
First pick a character with highest stealth level. Try to find enemy position, whether he has some helpers etc. Remaining in the scouting mode, set at least two traps, the stronger the better. It will give you advantage from the beginning of battle.
Feed every member of the team. By doing so, you will increase their endurance and other stats.
With crafting, create potions and give them to all your companions. Develop some offensive scrolls and equip companions with high lore level with them. Don't be afraid to use potions and scrolls during battle.
Your companions very often have skills that buffs other party members. Some of them can be used before battle starts. Priest has the most of such abilities, but other classes have supporting spells as well.
Position your party in the right way. Each member of the team should be as far away from others as possible. Even ranged characters shouldn't stand close to each other. It will make enemy attacks with area of effect less effective.
During battle, position fighting characters in a way so that each of them will face enemy from different side. Whenever one of your characters start to lose health too fast, retreat him to safe distance until enemy becomes interested in someone else. Only after that return that character to battle.
Use all available abilities of each class. Be careful with spells and try to avoid the ones with area of effect. At the beginning of battle use mostly abilities that weakens enemy.
Use active pause as often as you need it.
The stronghold is one of most interesting aspects of Pillars of Eternity. You gain access to it at the end of first level, which means about 5-6 hours focused on the main storyline. One of the quests is about searching for someone called Maerwald. He resides in Caed Nua, in the largest building of the stronghold - the keep. To find him, you must descent to the dungeons, and then to first level of Endless Paths. Maerwald is in a closed room near the stairs. You will open the door by using high (at least four) level of mechanics or by finding a key that is in the room opposite to doors to Maerwald. You must kill three xaurips hidden in the corner of the room - one of them has the item you need.
After talking to Maerwald, the Steward of the Stronghold will decide that from now on you're the master of the stronghold. From that point, you unlock access to stronghold managing menu.
Stronghold is described by two indicators:
Prestige - shows how attractive the stronghold is for nearby citizens. The higher prestige level, the more often it will be visited by merchants and guests. It has impact on amount of taxes gathered as well. Sadly, larger prestige means that bandits will attack you more frequently.
Security - this indicator shows how well is your stronghold protected from bandits attacks. The highest its level, the less money will be stolen from the vault and less damage will be done by bandits attacks.
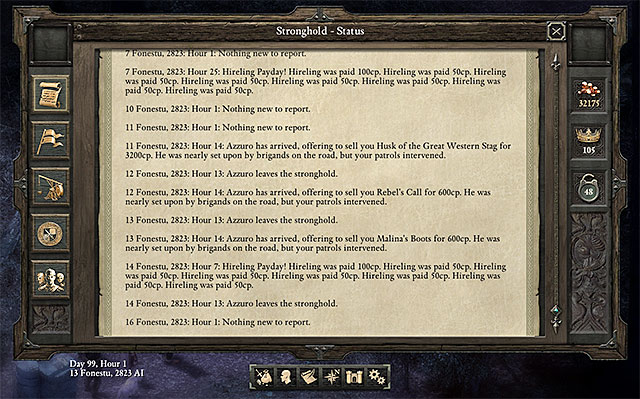
Stronghold can be managed from any place on the map. From the menu you can see its current state, recruit hirelings, build upgrades or react on events. Only if you want to change your party rooster you must get to the stronghold personally.
By buildings barracks, you gain access to hirelings recruitment. Depending on your choices during game and reputation at various factions you will have access to different mercenaries - each type gives you a bonus to prestige and safety, so you should pay attention to those parameters when recruiting. Hirelings require a onetime fee when recruiting and constant, paid every week salary, so keep that in mind when you plan your budget. You can have up to 8 hirelings at the same time and their number is partially responsible for probability of random event occurrence, such as merchant or other guest visit.
You should recruit hirelings later in the game, when you have placed most of the buildings and the stronghold generates sufficient amount of gold.
Completing quests and exploring the game's world can grant you access to some unique hirelings. You should definitely be interested in them, because adding them will give you much bigger bonuses to prestige and/or security than what you achieve with "standard" helpers. Here's a list of these unique characters:
Dozens Captain (+6 to security, +4 to prestige) - You can hire him after you've managed to improve your relations with the Dozens (it's one of the fractions in Defiance Bay). To be more specific, it becomes possible after completing The Bronze Beneath the Lake quest.
Korgrak (+12 to security, -10 to prestige) - Korgrak is an ogre and you can find him in the cave in Dyrford Crossing (M30,2). You can meet with this creature while completing A Farmer's Plight side quest and you will be allowed to invite the ogre to your stronghold.
Avenger of Skaen (-5 to security, +7 to prestige) - Recruiting this character is possible while completing the Blood Legacy side quest in Dyrford Village (M29). In the final part of that quest you will have a chance to side with the priest Wymund and allow Aelys to leave. Doing this will grant you a new hireling.
Crucible Knight (+4 to security, +8 to prestige) - You can hire him after you've managed to improve your relations with the Crucible Knights (it's one of the fractions in Defiance Bay). To be more specific, it becomes possible after completing the Winds of Steel quest.
Doemenel Thug (+8 to security, +2 to prestige) - You can hire him after you've managed to improve your relations with the Doemenels (it's one of the fractions in Defiance Bay). To be more specific, it becomes possible after completing The Changing of The Guard quest.
After you build the dungeons, you can take some characters meet into captivity. This option is usually available during combat with enemy. When his endurance drops drastically, you are given the choice whether you want to continue fighting and kill the enemy or imprison him in your stronghold (he goes to the dungeons and you continue the battle if someone is still on the battlefield).
Each prisoner has a separate cell guarded by one guard. Prisoner can be released at any time, and when you visit the dungeons you can ask jailor how a prisoner behaves. If he behaves badly, you can punish him yourself, but it will increase your cruelty - one of main character personality traits. It is not possible to talk with captured enemies, however there are unique events tied to some of them (they've been described on the next page of this game guide). For instance, you may be informed about a slaver showing up in your stronghold and wanting to buy one of the prisoners from you. In this scenario you could agree to the transaction or refuse the slaver in order to maintain high prestige.
Here's a list of the most important characters you can take as prisoners:
Aefra - This character can be found in a ruined home in the Ondra's Gift district in Defiance Bay and is connected with the Supply and Demand side quest.
Eorn - This character can be found in the Catacombs under the Copperlane district and is connected with the Unwanted side quest.
Esmer - This character can be found the mercenaries camp in Northweald and is connected with the At the Mercy of the Tribes side quest.
Gramrfel - This character can be found with a group of bandits after you return to Magran's Fork later in the game (after visiting Defiance Bay).
Kestorik - This character can be found on the twelfth level of the Endless Paths of Od Nua (dungeons located beneath the Caed Nua stronghold).
Naelde - This character can be found in the Stormwall Gorge after you've advanced to the third act and it takes part in an ambush during your journey to the Twin Elms.
Nyrid - This character can be found in the Copperlane district in Defiance Bay and is connected with the His Old Self side quest.
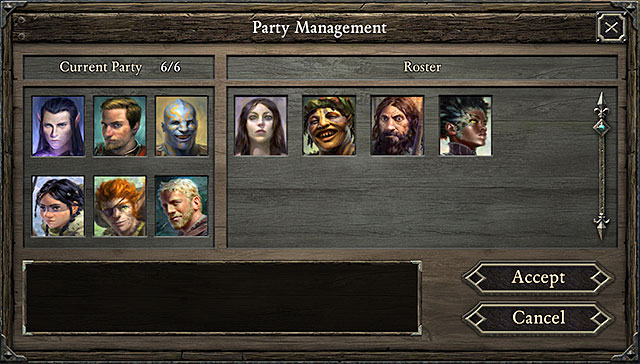
Party management window is available in two situations. First is when you're in the stronghold, where you have unlimited access to the option of sending away and recruiting companions to your team. Second is when you recruit a new companion. It might be one of characters met or someone recruited in an inn. But remember, that if you send someone to the stronghold while being in inn, he will be unavailable for a while, until he gets to his destination. You won't be able to return him to the party until he arrives, so change your rooster wisely so that you won't have to return unnecessarily to the stronghold.
As time flows, your stronghold generates income and resources. All items go to a special chest in the treasury which can be found in the northeastern part of the keep. There you will find gathered taxes, items produced by buildings (like plants) and bough from merchants. You should go to the chest from time to time and take all things. After some upgrading, at the same room a merchant shows that will buy all unneeded items.
Life in the stronghold goes its own course, no matter of your progress in the main storyline. Event occurrence is strictly connected to passing of days in the game. You should react differently on each of few different event types.
Most of your attention is required when a group of enemies, usually bandits or faction members that don't like you, us coming to the fortress. Usually, you will be informed about their attack three days before they come. You can order your hirelings and companions that reside in the stronghold to prepare defense. This order doesn't cost much, but virtually always few buildings are destroyed during battle. Rebuilding them not only take few days, but cost thousands of coins as well. A better solution is to return to the stronghold and face enemy by your own. You lose some time on that, but save lots of gold. After every attack you must rebuild basic infrastructure, which costs few hundred gold. If player doesn't have enough money, a loan is taken automatically which then is paid by money generated from taxes. Player can pay the loan automatically as well.
From time to time, traveling merchants will visit you. The higher your prestige level, the more often it will happen. They usually offer you one very good item for not so small price. Usually it costs 3000 coins, which is two or three times less than if you would like to buy the same item at normal merchant. Before deciding, check if that item will be useful for any of your party members. Bought items can be found in chest in the keep.
Sometimes you are given an opportunity to send one of your companions with a mission. It usually takes few days and is profitable for more than one reason. Companion receives experience, you gain gold, and in some cases even prestige or reputation.
Sometimes an unexpected guest arrives at the stronghold. It might be a lord that was passing nearby and decided to stay for a while in your fortress, thus temporary increasing your prestige. Sadly, it might be a local criminal as well, that will cause both prestige and safety to drop. There are two ways of getting rid of him. You can pay him to get out or order one of your companions to "escort" him out.
You receive information about other events as well. Each week you receive a report which describes how much money have you gathered and how many coins have been robbed from the treasury. If bandits took too much money, it is a sign that you should increase strongholds safety - by placing new buildings or hiring other hirelings. Each weak you receive information about how much does all hirelings cost you as well.
Stronghold gives you access to additional quests. Usually those are quests that focus on eliminating a specific person or group. To be able to take those quests, you must build a Warden's Lodge. This building can be found outside stronghold walls, in the northwest part of the map. Inside you will find Warden Fyrgen who is an intermediary between you and your employers and is responsible for paying rewards. At the same time you can take more than one quest.
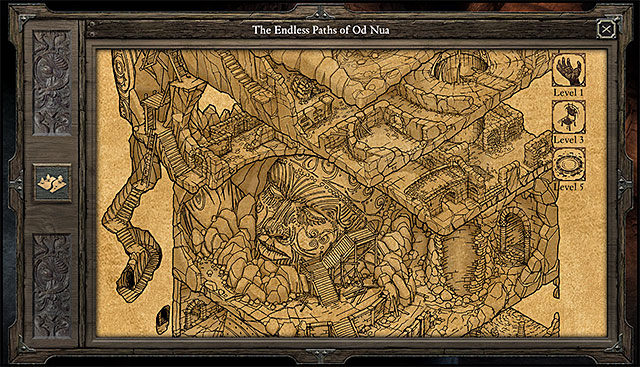
Od Nua is a mysterious labyrinth build under the fortress, also known as Endless Paths, It has fifteen levels and on each level you will face stronger and more numerous opponents.It is one of more interesting locations in the game. Visiting it (with the exception of several rooms from the first level) is not mandatory and not required to finish the main storyline. Still, you shouldn't ignore this chance. Just make sure that you don't walk there if you have low experience level - enemies will be too strong for you. In Od Nua you will find various references to Dyrwood history and groups that live in it, so at the beginning of the game you won't be able to understand all new information. Virtually every floor has a quest for you, and some of them take even few floors to visit. In addition to various interesting (and strong) enemies, like dragons or ogres, in tunnels of Od Nua you will find many traps, so you should use scouting mode very often. If you give it enough time and attention, you might gather dozens of thousands of coins from chests and found items. Usually each two levels there is a possibility to use Master Staircase that allow you to quickly navigate up and down the Endless Paths.
Important - A detailed description of all fifteen levels of Od Nua (along with high quality maps) can be found in the walkthrough section of this guide.
Fortress can be upgrades by repairing successive buildings and rooms. It always cost some money, but increase prestige and security of the stronghold. When upgrading your fortress, you must keep a balance between those two indicators. It will give you high tax level and at the same time you will be protected from too much stealing of goods.
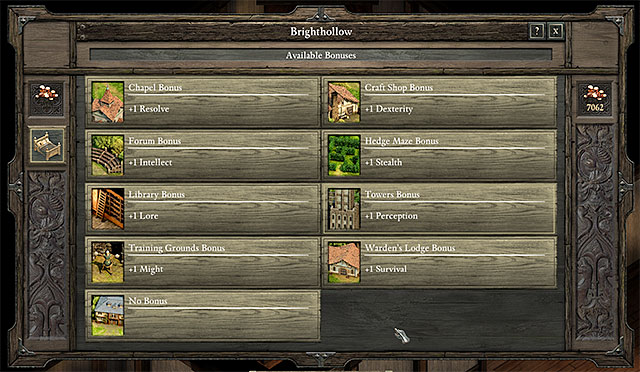
When sleeping in the bed in Brighthollow, you can decide what bonus you want to receive.
During the first phase of the game, you won't have too much money, so you should use it sparingly on further upgrades. Below is a list of few buildings that you should build at first:
Main Keep - It will allow you to welcome visitors and further upgrade the fortress .
Bailey - it cleans up strongholds surroundings and allows further upgrades.
Warden's Lodge - you receive the possibility to get new quests.
Barracks - they allow you to recruit hirelings, and thus increase prestige and safety pretty cheaply.
Dungeons - it allows you to take prisoners during some fights.
Botanical Gardens - each turn your stronghold will produce one random plant that can be taken from the chest in the keep.
You have access to many other buildings from the upgrade menu, but they give you much less profits than the ones above and they should be build in second order. Most of them give you resting bonus. To use it, you must sleep in a bed in the Brightfollow and pick the right option. Bed can be found on the first floor in the room on the left from the stairs. Sadly, available bonuses are much weaker than the ones in inns, so it is better to spend 200 coins and receive better stat boost than to sleep in the stronghold.
Crafting is an important aspect of the game, with which everyone will meet sooner or later. It is very simple and intuitive. Your character knows all recipes from the beginning of the game, only limitation is the need for having the right level and required resources.
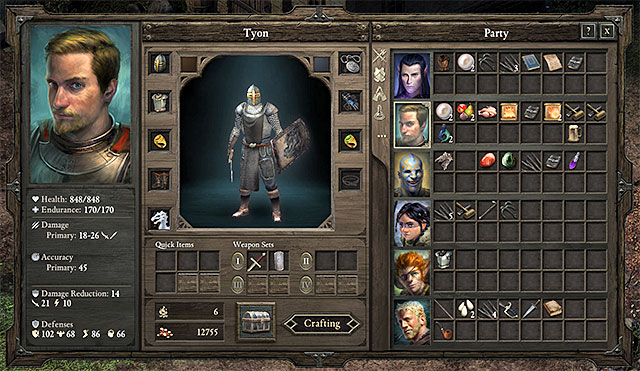
There are two ways to gain access to the crafting menu. To use alchemy, cooking or scroll-making, you must enter your equipment and then click the crafting icon in the lower part of the window. To use enchanting, you must click the right mouse button on an item. In the newly opened window you can read item description and check its stats, and in the lower part there is an enchanting button that moves you to a separate menu.
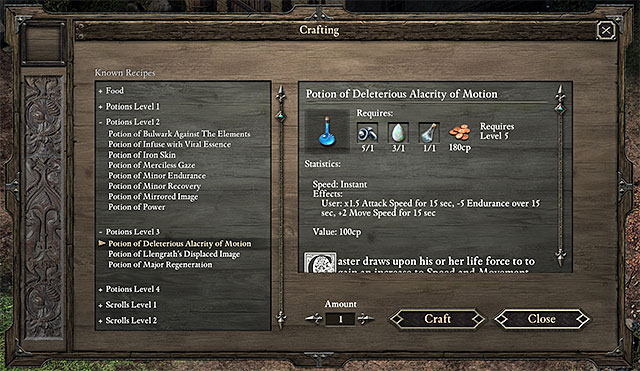
Some item require a lot of gold for creating as well.
Alchemy gives you access to dozens of recipes. Best option is to create potions just before facing an enemy you have trouble defeating. If, for example, you're fighting a dragon, create some potions that improve your elemental resistance. Each of your characters should have at least one potion with them that immediately recover some endurance. Remember, that alchemy is relatively cheap.
Cooking creates food that gives bonuses to various parameters (mostly endurance). To create food, you don't need gold, only resources. Food is very useful for characters that use melee combat, so try to ensure that they will always have access to it. Instead of cooking yourself, you can buy food in nearby tavern as well.
Crafting scrolls become very important on higher difficulty levels, when spells that your magic characters have are no longer enough. Thanks to scrolls your priest can cast powerful offensive spells, and wizard will heal your companions. Remember, that high lore level is required to use a scroll.
Enchanting is probably the most important type of crafting. It allows you to greatly improve your equipment stats, and thus your character. You must remember few things when enchanting. You can enchant only weapon and armor. Up to three effects can be enchanted into one item. You should enchant only those items that you are sure you will be using for long time. In case of warriors it is best to improve overall armor quality. In case of weapons add secondary damage. As for magic classes, you should add some stat bonuses to armor, like to intellect.
During your exploration of the game world, you encounter many strong opponents, who are not that easy to defeat. Among these elite opponents, great dragons deserve a separate mention, especially that tracking down and killing these beasts, is rewarded with an achievement. Below, you can find information about the dens of great dragons. The descriptions of the localizations of each individual dragon are provided with the number of the map, in the walkthrough, and the name of the quest, in which it is best to find the den.
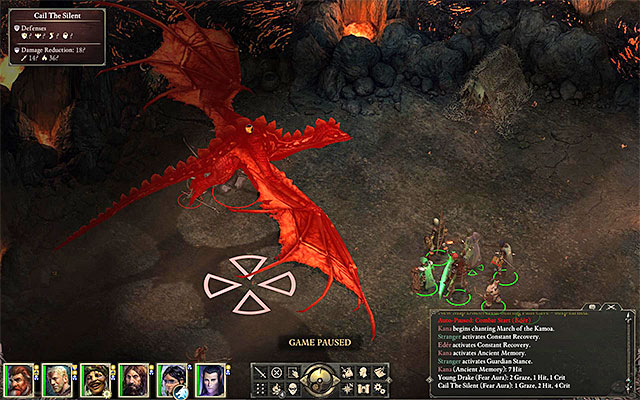 Cail the Silent
The first of the great dragons is Cail the Silent. You find the beast in Searing Falls (M26,1), i.e. the small location to the east of Defiance Bay. It is best to attack the dragon during the Cinders of Faith quest, which you receive from Fyrga in First Fires (M22,4).
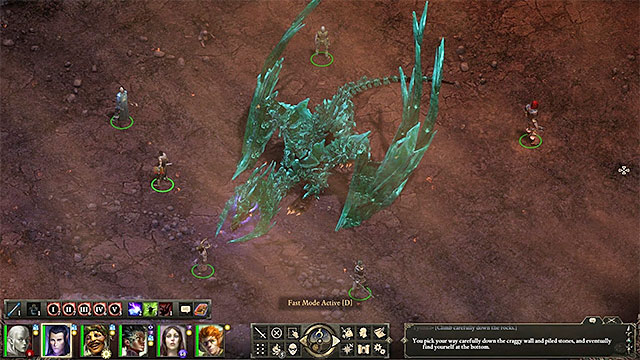 The Adra Dragon
The second of the great dragons is the Adra Dragon. He is staying at the lowest, fifteenth, level of the Endless Paths of Od Nua (M55,2), i.e. the vast dungeons underneath the Caed Nua Keep. It is best to attack this dragon, while completing The Master Below side quest that you receive from the Steward in the keep' main hall (M13,1).
 Sky Dragon
The third one of the great dragons is the Sky Dragon. You find him in the large nest in the Temple of Hylea (M58,2), i.e. one of the last locations that you visit during the game, past Twin Elms. The best moment to attack this dragon is during the quest from goddess Hylea - The Nest Above the Clouds.
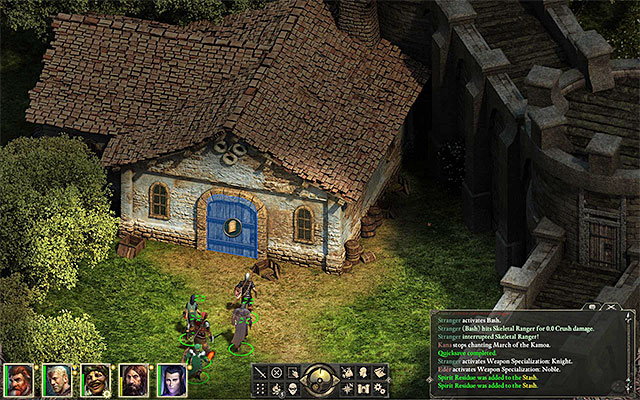 You can take quests from bounty hunters only after you have restored warden's Lodge in Caed Nua
In Pillars of Eternity you gain experience in a quite standard way - by completing quests and defeating opponents. However, if you want to speed up the process of leveling up, see the hints presented below:
Note - remember that in a weaker party, e.g. one consisting of four, instead of six members, your characters progress faster.
In Pillars of Eternity, you need gold mainly for buying items from traders and for expanding the Caed Nua keep. Since this often requires lots of gold, below you can find a number of hints on how to earn quick money:
Level
1
2
3
4
5
1
2
-
-
-
-
2
3
-
-
-
-
3
4
2
-
-
-
4
4
3
-
-
-
5
4
4
2
-
-
6
4
4
3
-
-
7
4
4
4
-
-
8
4
4
4
2
-
9
4
4
4
3
-
10
4
4
4
4
-
11
4
4
4
4
2
12
4
4
4
4
3
The above table presents the number of uses of spells of an individual level that you can use. For each character level, the number is different. This data only concerns the classes that can use magic, i.e. the Druid, the Mage and the Priest. Te number of uses is not final and it can be additionally increased. You can do that by picking an appropriate talent, while leveling up the character, or by putting on a special item that increases the number of spell casts.
The below table provides two pieces of information: the number of experience points that you need to level up, and bonuses that you receive with each higher level. All of the characters gain experience separately. The important piece of information is that the number of points does not reset after you progress to the next level. Additionally, each level adds a bonus to one of the four defense statistics in that character. You also receive a bonus to accuracy. The below bonuses do not add up and each level has been provided with an overall bonus to statistics.
Level
Experience required
Bonuses granted to all defense and accuracy statistics
1
0
0
2
1,000
+3
3
3,000
+6
4
6,000
+9
5
10,000
+12
6
15,000
+15
7
21,000
+18
8
28,000
+21
9
36,000
+24
10
45,000
+27
11
55,000
+30
12
66,000
+33
The below table presents all of the upgrades that you can purchase at your keep. You can build them one after another (the game does not make you choose between X or Y). each upgrade has been provided with key information: a short description and a bonus to two key statistics - prestige and defenses. Additionally, each building requires an appropriate amount of gold and requires you to wait for 2-3 days, before the building works are over.
Name
Description
Prestige
Defense
Eastern barbican
Grants access to a new part of the map. This purchase is required for you to advance in the main storyline (Never Far From the Queen quest).
+1
+2
Western barbican
Increases defense
0
+2
Brighthollow restoration
Adds the option to rest (bed on the upper floor).
+2
0
Castle
Adds the option to welcome traders and travelers
+3
+4
Main yard
Allows you to expand the keep
+2
0
Towers
A bonus to Perception, while resting at the Brighthollow.
+2
+1
South Curtain Wall
Increases defense.
0
+4
Western Curtain Wall
Increases defense.
0
+4
Library
A bonus to Knowledge, while resting at the Brighthollow.
+2
0
Barracks
You can recruit mercenaries
0
+3
Dungeon
You can take prisoners
0
0
Merchant stalls
An additional trader appears in the keep
0
0
Craft Hall
Adds a bonus to dexterity, while you are resting at the Brighthollow. A weapons trader appears.
+1
+1
Curio Shop
Each turn, it generates one crafting material. A trader in reacting agents appears.
+1
0
Artificer's hall
Adds a bonus to Mechanics do Mechanics while you are resting at Brighthollow. A trader in traps appears.
+1
0
Chapel
Adds a bonus to Resolution while you are resting at Brighthollow.
+4
0
Forum
Adds a bonus to Intellect while you are resting at Brighthollow
+4
0
Training grounds
Adds a bonus to Might while you are resting at Brighthollow.
0
+2
Botanical garden
Each turn. It generates a random plant
+1
0
Hedge Maze
Adds a bonus to Stealth while you are resting at Brighthollow.
0
+3
Warden's Lodge
Adds a bonus to Survival while you are resting at Brighthollow. Allows you to receive several additional side quests (bounty hunter missions).
+2
+2
Woodland Trails
Adds a bonus to Constitution and Athletics while you are resting at Brighthollow
+1
+2
Brighthollow Hearth
Restores hearth. No real profits.
+1
0
Brighthollow laboratory
Restores laboratory. No real profits.
+1
0
Brighthollow Fountain
Restores fountain. No real profits.
+1
0
Above, you can see the world map, with all of the main locations from the walkthrough marked. You can find detailed information on the individual locations, and quests connected with them, later in the walkthrough.
Note - The world map provides only major locations. The minor ones, e.g. keeps or dungeons have not been marked.
Note - The game's starting location- the Encampment - M1 has not been marked on the world map.
The list of locations on the world map and the numbers assigned to them:
M2 - Cilant Lis
M3 - Valewood
M4 - Gilded Vale - there is a minor location in here: the Temple of Eothas - M5
M6 - Magran's Fork
M7 - Anslog's Compass
M8 - Esternwood
M9 - Raedric's Hold - there is a minor area in this in location: Raedric's Hold: Interior - M10
M11 - Black Meadow
M12 - Caed Nua - there are as many as 16 minor areas in this location: Caed Nua: Keep - M13 and 15 levels of Endless Paths of Nua - M14 and M42-M55
M15 - Madhmr Bridge
M16 -Woodend Plains
M17 -Aedelwan Bridge
M18 -Copperlane - there is a minor area in this in location: Catacombs - M19
M20 -Brackenbury - there is a minor area in this in location: Sanitarium - M21
M22 -First Fires
M23 - Ondra's Gift
M24 - Heritage Hill- there is a minor area in this in location: Heritage Hill: Tower - M25
M26 - Searing Falls
M27 -Pearlwood Bluff
M28 -Stormwall Gorge - there is a minor area in this in location: Lle a Rhemen (M34)
M29 -Dyrford Village
M30 - Dyrford Crossing - there is a minor area in this in location: Dyrford Ruins - M31
M32 - Cliaban Rilag - there is a minor area in this in location: Cliaban Rilag: Ruins - M33
M35 - Elmshore
M36 - Hearthsong
M37 - Elms' Reach - there is a minor area in this in location: Blood Sands - M38
M39 - Oldsong - there are two minor areas in this location: Galawain's Maw - M40 and Noonfrost - M41
M56 - Burial Isle - there is a minor area in this in location: Breith Eaman (M59)
M57 - Northweald
M58 - Temple of Hylea
Below, you can find the list of all the main quests in Pillars of Eternity. Accepting each of the quests is not player-dependent and they appear in your journal automatically, right after you have completed the previous one. It is possible to have several active main quests, at a time.
Quest name
Location
Questgiver
A Moment's Respite
The Encampment (M1)
Appears in the journal automatically
A Gilded Vale
The Encampment (M1)
Appears in the journal automatically
The Ruins of Cilant Lis
Cilant Lis (M2)
Appears in the journal automatically
Visions and Whispers
Cilant Lis (M2)
Appears in the journal automatically
The Old Watcher
Gilded Vale (M4)
Appears in the journal automatically
Never Far from the Queen
Endless Paths of Od Nua 1 (M14)
Appears in the journal automatically
Through Death's Gate
Catacombs (M19)
Appears in the journal automatically
Undying Heritage
Catacombs (M19)
Appears in the journal automatically
The Man Who Waits
Catacombs (M19)
Appears in the journal automatically
The Hermit of Hadret House
Brackenbury (M20)
Appears in the journal automatically
The Assassin at Large
Aedelwan's Bridge (M17)
Appears in the journal automatically
Council of Stars
Elms' Reach (M37)
Appears in the journal automatically
Court of the Penitents
Elms' Reach (M37)
Appears in the journal automatically
Memories of the Ancients
Breith Eaman (M59)
Appears in the journal automatically
In Pillars of Eternity, there are several tens of side quests available. The majority of them are more complex than main quests themselves and this is with these quests that you spend the majority of your time. Below, you can find a list of all the available quests, alongside with locations that you receive them in and the questgiver. each map of the location has been provided with a reference to the map, or to the specific location on the map. To learn more about an individual quest, find it by the reference number. Each quest has been described, in detail, further in this guide.
Quest name
Location
Questgiver
Late for Dinner
Valewood (M3)
Tenfrith (M3,1)
Vengeance from the Grave
Valewood (M3)
Lost Soul (M3,5)
Fragments of a Scattered Faith
Gilded Vale (M4)
Eder (M4,1)
Against the Grain
Gilded Vale (M4)
Go to the windmill(M4,5)
The Smith's Shipment
Gilded Vale (M4)
Tuatanu (M4,6)
A Mother's Plea
Gilded Vale (M4)
Aufra (M4,8)
Lord of a Barren Land
Gilded Vale (M4)
Kolsc (M4,1)
Buried Secrets
Temple of Eothas (M5)
Wirtan (M5,1)
Trials of Durance
Magran's Fork (M6)
Durance (M6,1)
Time and Tide
Caed Nua (M12)
Kana Rua (M12,9)
Bounty: Warchief Iklak
Caed Nua (M12)
Warden Fyrgen (M12,1)
Bounty: Sly Cyrdel
Caed Nua (M12)
Warden Fyrgen (M12,1)
Bounty: The Dweller
Caed Nua (M12)
Warden Fyrgen (M12,1)
Bounty: Nalrend the Wise
Caed Nua (M12)
Warden Fyrgen (M12,1)
The Master Below
Caed Nua Keep (M13)
Steward (M13,1)
The blade of the endless paths
Endless Paths of Od Nua 2 (M42)
Collect the blade from the Xaurip house(M42,4)
Desperate Measures
Endless Paths of Od Nua 3 (M43)
Thulgar (M43,1)
Seals of the Endless Paths
Endless Paths of Od Nua 4 (M44)
Collect the seal from the chest (M44,1)
The Master's Tools
Endless Paths of Od Nua 12 (M52)
Tcharek (M52,1)
Ferry Flotsam
Madhmr's Bridge (M15)
Peregund (M15,1)
The Long Hunt
Woodend Plains (M16)
Sagani (M16,1)
His Old Self
Copperlane (M18)
Kaenra (M18,2)
A Two Story Job
Copperlane (M18)
Langden (M18,4)
Rogue Knight
Copperlane (M18)
Osric (M18,5)
The Parable of Wael
Copperlane (M18)
Grimda (M18,9)
A voice from the past
Copperlane (M18)
Dalton (M18,11)
Something Secret
Copperlane (M18)
Gordy (M18,10)
The Bronze Beneath the Lake
Copperlane (M18)
Wenan (M18,5)
Two-Sided
Catacombs (M19)
Aloth (M19,8)
Far From Home
Brackenbury (M20)
Thristwn (M20,2)
The Changing of The Guard
Brackenbury (M20)
Gedmar Doemenel (M20,3)
Hard Feelings
Brackenbury (M20)
Bricanta Doemenel (M20,3)
The Theorems of Pandrgam
Brackenbury (M20)
Nedyn (M20,5)
The Final Act
Brackenbury (M20)
Kurren (M20,4)
Unwanted
First Fires (M22)
Collect the letter (M22,1)
Missing Sentries
First Fires (M22)
Wyla (M22,1)
Built to last
First Fires (M22)
Commander Clyver (M22,1)
Winds of Steel
First Fires (M22)
Commander Clyver (M22,1)
Cinders of Faith
First Fires (M22)
Fyrga (M22,4)
At All Costs
Ondra's Gift (M23)
Mestre Verzano (M23,6)
Brave Derrin
Ondra's Gift (M23)
Odda (M23,4)
Supply and Demand
Ondra's Gift (M23)
Maea (M23,5)
Clandestine Cargo
Ondra's Gift (M23)
Imatl (M23,11)
All Hands on Deck
Ondra's Gift (M23)
Marceno (M23,11)
The Wailing Banshee
Ondra's Gift (M23)
Niah (M23,11)
The Child of Five Suns
Ondra's Gift (M23)
Pallegina (M23,6)
Save Haven
Heritage Hill (M24)
Enter Valtas Residence (M24,4)
True to form
Stormwall Gorge (M28)
Hiravias (M28,3)
Cat and mouse
Dyrford Village (M29)
Medreth (M29,1)
Blood legacy
Dyrford Village (M29)
House Harond Guard (M29,2)
A farmer's plight
Dyrford Village (M29)
Rumbald (M29,3)
Nest egg
Dyrford Village (M29)
Hedyna (M29,6)
Dream and memory
Dyrford Village (M29)
Grieving Mother (M29,6)
The Sealed Missive
Elmshore (M35)
Dying Monk (M35,4)
Hard Bargain
Hearthsong (M36)
Rinatto (M36,2)
The Champion of Berath
Hearthsong (M36)
Frightened Villager (M36,2)
At the Mercy of the Tribes
Hearthsong (M36)
Cwineth (M36,2)
Hunter, Brother
Hearthsong (M36)
Ridai (M36,4)
The Nest Above the Clouds
Elms' Reach (M37)
Hylea (M37,7)
The Old Queen and the New King
Elms' Reach (M37)
Galawain (M37,7)
A Servant of Death
Elms' Reach (M37)
Berath (M37,7)
Into the White Void
Elms' Reach (M37)
Rymrgand (M37,7)
Sacrificial Bloodlines
Elms' Reach (M37)
Simoc (M37,4)
Songs of the Wild
Oldsong (M39)
Delem (M39,4)
Prison of Ice
Galawain's Maw (M40)
Larha (M40,4)
During the game, you get to make many choices, which affect the game world to a greater or lesser extent. Some of them are presented in the final summary, along with the effects that they take, in the long run. Below, you can view the majority of decisions that affect the game world.
Note! Spoiler alert!
The above map presents the Encampment, i.e. the location in which you start Pillars of Eternity. You are not going to spend too much time there, but this place plays an important tutorial role. While staying there, you will learn, among other thing, the basics of combat and interactions with NPCs. Towards the end of your stay there, make sure that you save the game (more precisely, do it before the final fight with bandits, as one of your allies will live or die as a result of your decisions).
1. Encampment
This is where you start the game.
Main quests: A Moment's Respite - it appears in your journal automatically.
Main quests: Gilded Vale - it appears in your journal automatically.
Heodan - a trader; he sells melee weapons, ranged weapons, armors, potions of regeneration and lockpicks.
Chest - requires 1 lockpick or 1 Mechanics point
2. Wolf's Lair
Main quests: A moment's Respite - kill the wolf and pick the nearby berries.
4. The waterskin at the abandoned encampment
Main quests: Gilded Vale- after the fight with the opponents, pick the waterskin.
Main quests: A Moment's Respite - It appears in your journal automatically.
Main quests: Gilded Vale - It appears in your journal automatically.
Caravan Master Odema (M1,1) - You talk to him at the very beginning of the game.
Calisca - (M1,1) She joins your party for the duration of the initial quests.
Heodan (M1,1) - Above all, he is a trader - he sells melee weapons, ranged weapons, armors, Potion of regeneration, and lockpicks. Towards the end of your stay at the Encampment his life will be in danger and you may try to save him.
Young Wolf
Glanfathan Hunter - Always attack archers first.
Glanfathan Leader - Attack him in the first place after the final fight starts.
The game does not allow you to leave the encampment by approaching the map's edge. You reach the next location during A moment's Respite main quest.
 This is where you find the water skin
You receive this quest at the very beginning of the game (M1,1). Listen to the conversation with Caravan Master Odema and note that your party has been, temporarily, joined by warrior Calisca. Head west and go past Sparfel. Reach a small grove (M1,2). There, attack the Young Wolf who is not going to present a big challenge. After you win the fight, approach one of the bushes and collect the Springberries.
Right after you pick the berries, a short cutscene of the conversation with Calisca starts; its course is determined by your character's origin and background. Head south and locate the bridge leading to the abandoned western camp (M1,3). Find the Waterskin there (M1,4). Your party will be attacked by two Glanfathan Hunters. When the fighting starts, first attack the archer. After you win, plunder the corpses and head back towards the main Encampment (it is a good idea to save the game at this point!) (M1,1). On your way there, defeat one more enemy hunter.
When you reach the encampment, a conversation with the Glanfathan Leader starts and you will not have much influence on its course. You should only avoid the option to lay down your arms, because if you do, they will be removed from the active slots and moved to the inventory. Regardless of your choices, another battle starts. First, attack the leader. Once he's dead, deal with the supporting hunter.
Alternative solutions:
During your meeting with the Glanfathan Leader you can choose a unique dialogue option reserved for a character with 15 or more points of Intellect. This will allow Heodan to avoid injuries since all of your enemies will be focused on you. Avoid on the other hand choosing the option of putting away your weapons, because they will be removed from your active slots and moved to the inventory (meaning you will begin the fight barehanded).
Before you leave this place, you have to make your first decision; it is connected with Heodan, whose life will be in danger. I advise against leaving him to his fate (option 3), because he will die as a result. A much better idea is to throw your own weapon at the bandit attacking Heodan (option 1). Subsequently, Heodan will survive, but your character will lose their main weapon.
Alternative solution:
If you are playing as a character with Perception at the level of at least 15 points AND if you have a ranged weapon at your disposal then you will receive a chance to behave in an alternative way (option 2). Choosing this new option will allow you to save Heodan without endangering his life and without having to lose your own weapon.
Note - The above decision is not important; even if you save Heodan, he will not stay in the party permanently.
All of the above variants end in the same way - you reach Cilant Lis. At this point, you receive another main quest - The Ruins of Cilant Lis.
You receive this quest at the very beginning of the game, i.e. right after you get to the Encampment. It consists in reaching the Gilded Vale; in order to do that, you need to complete the following quests:
The above map presents the ruins of Cilant Lis, which you reach automatically once you complete the Prologue at the Encampment. This location consists of two areas; you start in the underground part of the ruins. You need to keep all precautions here, because many monsters lurk in the area. Apart from that, in one of the main corridors, there are several rows of traps. The second part of the ruins is the surface area. There are no enemies there, nor any other threats.
1. Starting point
Here you start your exploration of the ruins.
Main quests: The Ruins of Cilant Lis - it appears in your journal automatically.
3. The damaged wall
Main quests: The Ruins of Cilant Lis - you can shatter the wall with a hammer and a chisel, or ask Calisca to help you.
5. The pillar hall
Main quests: The Ruins of Cilant Lis - kindling fire at the six pillars activates some of the traps in the corridor with pressure plates.
7. The corridor with traps
Main quests: The Ruins of Cilant Lis - after you kindle fires in the pillar hall, some of the traps activate (pressure plates .
Main quests: The Ruins of Cilant Lis - It appears in your journal automatically, after you get into the underground part of the ruins.
Main quests: Visions and Whispers - It appears in your journal automatically after you resurface from the underground part.
None. While exploring the ruins, you are only going to encounter monsters.
Xaurip - These monsters aim for melee combat and attack party members with spears.
Skuldr Whelp - These monsters can attack the party both directly and at range.
Spear Spiderling - This is the smallest variety of spiders.
Lesser Black Ooze - Try to keep these monsters from attacking the party at range (they spit with green ooze).
Once you leave the underground part of the ruins, you permanently lose your companions (Calisca and Heodan - only if you managed to save him earlier. Do not worry about that, because you cannot prevent it. Also, remember to plunder the corpses and collect the items from the inventory of the dead party members.
While exploring the ruins, your character will probably collect enough points to progress to the second experience level. Try to do that as soon as possible.
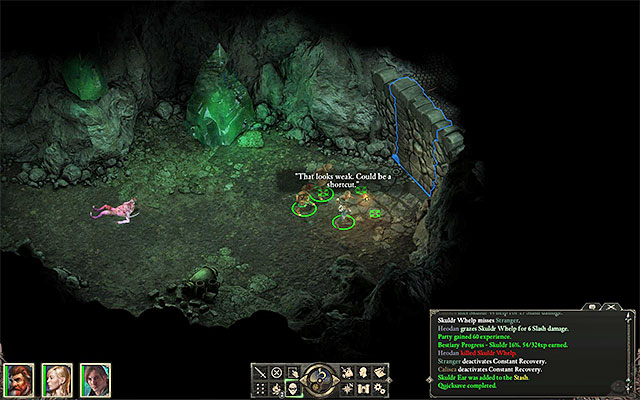 The location, where you find the weakened wall
You receive this quest right after you enter the ruins of Cilant Lis. The starting point is in the south-western part of the underground ruins (M2,1), and your goal is to exit them in the north-eastern part of the map (M2,8). There are two main paths to reach the exit. This first variant assumes that you cross the eastern part of the ruins. While traveling eastward you will encountered a xaurip and a skuldr whelp. The xaurip won't be hostile towards you at first - you can avoid contact with this creature, kill it or bribe it using the meat collected after killing the skuldr whelp. Choosing the last option will have an additional outcome - you will receive a spear from the xaurip. Soon, you will reach the exit through the final part of the corridor; however, there is a weakened wall there (M2,3), which you need to examine.
You can destroy the wall with a Hammer and Chisel; both of the items can be found in a small encampment near the starting point (M2,2). However, they are not required, because you can simply ask Calisca to help you (she is strong enough to do it). Shattering the wall unlocks the eastern passage to the farther parts of the ruins.
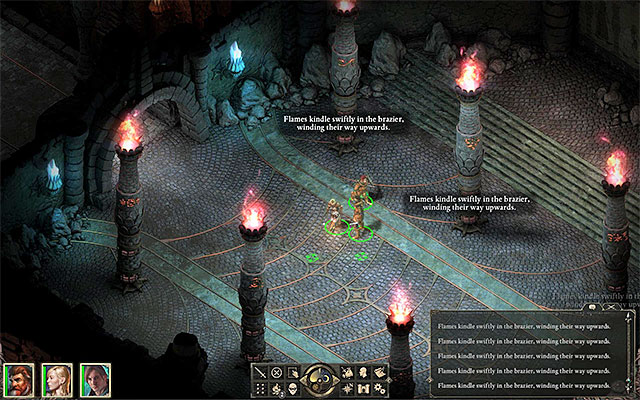 Kindle fires in six different spots
The second variant assumes that you cross the central part of the ruins. There, you can find a corridor with pressure plates (M2,7). Unfortunately, each plate is connected to a trap; if any of them is activated, your party will be severely wounded. Open the door to the left to reach the hall with six pillars (M2,5). Approach each pillar and start a fire next to the baskets, using a torch (you can find one in Calisca's inventory).
Alternative solution:
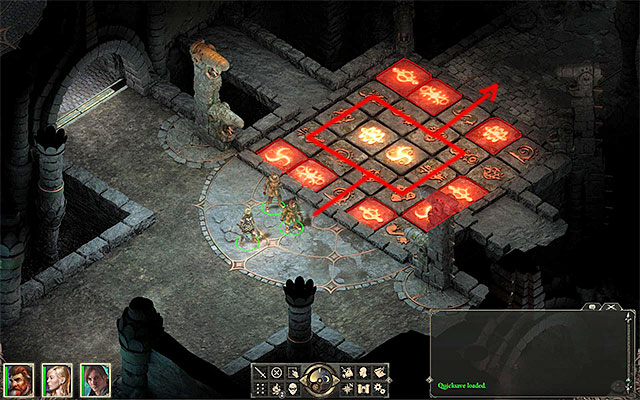
When you start the fire in six locations, return to the corridor with traps (M2,7). Activate the sneak mode there, because trap detection is one of its features. The above screenshot shows the corridor after the changes have been implemented. You need to avoid stepping on the red plates. Do not step on the two with the glowing symbols on them, in the center of the corridor. Try to lead the party members along the safe path one at a time instead of all at once.
Both of the routes described above will lead you to the exit from the underground ruins (M2,8). Kill the small spiders (Spear Spiderlings) and get to the surface. Take several steps ahead to activate the cutscene of the ritual (M2,8).
You receive this quest after you resurface from the underground ruins of Cilant Lis (M2,8), once you've witnessed the ritual on the surface (M2,9). Collect the items that Calisca and Heodan dropped, and reach the southern exit. Take the six-hour journey to Valewood. Cross the entire Valewood and take the southern exit from the location. This will allow you to embark on a new journey with the goal to reach The Gilded Vale.
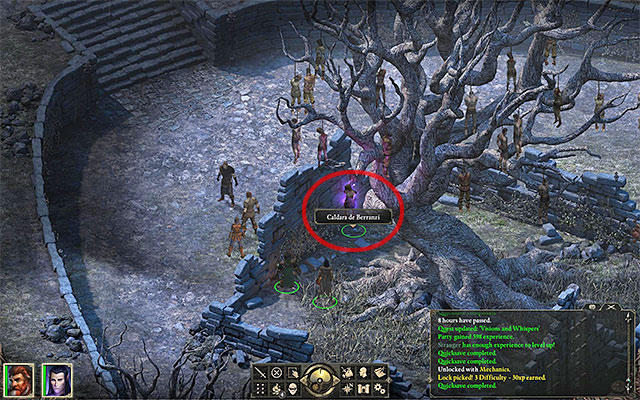 The spirit that you need to touch to
Once you reach the village, take several steps ahead (M4,1), thus initiating the conversation with Urgeat (the conversation is linear, although you can also report on your travels so far). The man suggests that you take rest, so head towards the Black Hound Inn (M4,2). At the inn, talk to Pasca and rent any room (you may choose the one that is free of charge). You will experience a vision. Leave the inn and go towards the big tree with bodies hanging off its branches (M4,1). Find the corpse of Caldara de Berranzi there and touch her soul to speak to her.
The above map presents Valewood, i.e. a small location that you visit for the first time on your way to Gilded Vale back from the ruins of Cilant Lis. If you want to, you can cross Valewood quickly, without engaging into any additional activities, but I recommend that you spend some time here. It is a good idea to explore the area in detail (watch out for the bear's lair where you are going to fight a slightly difficult battle) and add two new side quests to your journal.
1. Bandit camp
Side quest: Late for Dinner - rescue cook Tenfrith who is held captive by bandits.
2. Ruins
You can find a climbing wall there. You can use it, if any of the party members has Athletics at the level of at least 4 points. Optionally, you can return here once you have obtained a grappling hook. Atop the ruins, you can find, i.a., a corpse with a letter on it.
3. Riverside camp
Nonton - he tells you about the bear's lair.
5. Bear's lair
Side quest: Vengeance from the Grave - enter the cave, kill the young bear and touch the spirit of a lost soul.
Side quest: Late for Dinner - you can unlock it once you free the captive Tenfrith who is held by bandits in their encampment M3,1 .
Side quest: Vengeance from the Grave - you can unlock the quest by meeting the lost soul in the bear's cave M3,5 .
Tenfrith M3,1 - He is the cook that is held captive by bandits in their encampment.
Nonton M3,3 - You meet him in the southern part of the map and you learn about the bear's lair from him.
The Lost Soul M3,5 - You find the spirit in the bear's cave; he tells you about the circumstances of his death.
Young Wolf
Xaurip
Bandit
Young Bear - You find the bear in the cave in the north-western part of the map. While fighting it, watch out for its relatively strong attacks. Keep in mind that its health bar is longer than that of the other creatures in Valewood.
Before you enter the bear's cave, make sure that your character is not severely wounded. Otherwise consider, e.g., setting up a campsite to regenerate their vitality.
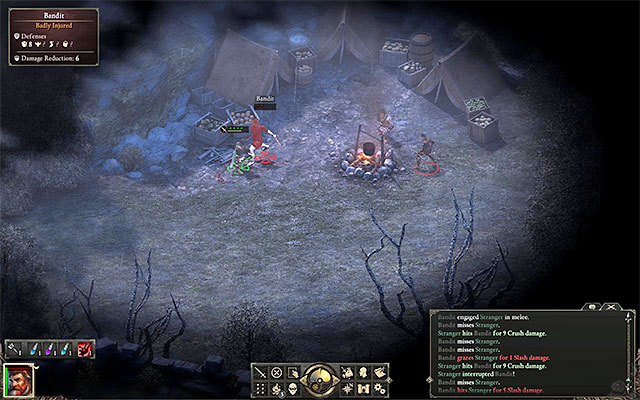 You find the cook in the bandit encampment
You can unlock this quest during your first stay at Valewood. Explore the eastern side of this location (M3,1) where you will find the bandit encampment. Start combat. If you want to, you can get closer to the opponents by sneaking, and attack them by surprise. After the fight, talk to cook Tenfrith who was imprisoned there. He will give you an invitation to an inn in the Gilded Vale. Apart from that, you receive positive reputation points in that village.
Take the southern exit from Valewood and travel to the Gilded Vale. After you get to the village, go to the Black Hound Inn (M4,2). Talk to Tenfrith (positive reputation, cake) and to Pasca, the inn owner (positive reputation).
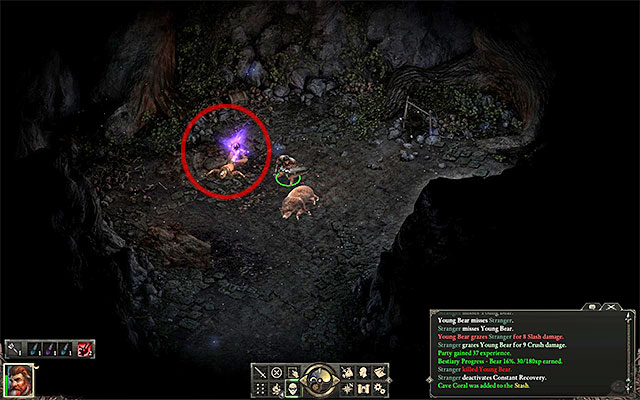 Examine the corpse in the bear's cave
In the southern part of Valewood you can find Nonton (M3,3). It is optional to talk o him, but I recommend that you do this anyway. Nonton will tell you about the death of his friend and you will be warned that there is a bear's cave nearby. Go there (M3,5). Once you enter the cave, approach the Young Bear and start the fight. Keep in mind that the bear deals a lot of melee damage; this is especially important if your character prefers fighting at range. After you kill the bear, plunder the corpse in the cave and confirm that you want to touch the Lost Soul. Regardless of the choices that you make from now on, you learn from the soul that it was Nonton who caused his death.
You can now leave the cave and take the southern exit from Valewood. Travel to the Gilded Vale and enter Ingroed's Home (M4,4). Start the conversation with Ingroed and Nonton. You can complete this quest either in an amicable or in a hostile way. If you go for the former, allow them to leave the village, either taking their gold or letting them keep it (positive reputation). As for the hostile variant, it takes place once you attack Ingroed and Nonton, or try to report them to the magistrate. It is best to start the fight once you have recruited party members, because the pair is quite strong.
The above map presents the village called Gilded Vale. It is the first bigger location that you visit in the game world. You reach it for the first time once you've headed south from Valewood. In Gilded Vale you will find both main and side quests to complete. It is highly recommended that you explore the entire village thoroughly. Take a peek into all the buildings, including the inn and the smithy, among others. Apart from that we can also find the Temple of Eothas which has been presented on a separate map.
1. Big tree
Main quests: Visions and Whispers - Talk to Urgeat after you get to the Gilded Vale for the first time. The meeting takes place close to a big tree. Return there after you have rested at the inn, and find Caldara de Berranzi.
Eder - He is standing close to the big tree and is a potential party member. You can recruit him only after you have completed the Visions and Whispers main quest (You simply need to talk to Eder).
Kolsc - He accosts you close to the big tree, after you have completed A Mother's Plea side quest. This gives you the opportunity to start another side quest - Lord of a Barren Land (it has been described on the Raedric's Hold page).
2. Black Hound Inn
Aloth - He is standing in front of the inn and he is a potential party member. To recruit him, you first need to solve the problem with the Angry Townsmen. You can either encourage them to leave the spot, without provoking a riot (this requires a high level of Perception, Strength or Intelligence), or attack them (they are not very demanding opponents).
Pasca - She is the owner of the inn. While talking to her, you can rent a room from her (a free-of-charge one or one you pay for that provides a temporary increase in your statistics). Apart from that, you can hire a traveler (a new party member) and trade - Pasca sells camping equipment, potions, food and beverages.
At the upper floor of the tavern, there are two locked containers. The chest in the Southern room requires 2 points of Mechanics and 3 lockpicks, or 3 points of Mechanics. The wardrobe in the northern room requires 1 point of Mechanics and 2 lockpicks or 2 points of Mechanics. There's a dog at the end of the corridor. You can pet it and then talk to the inn's owner about it. Doing this will give you a chance to adopt the dog as a pet.
4. Ingroed's House
Side quest: Vengeance from the Grave- Talk to Ingroed and Nonton, and either let them leave the village or kill them.
5. Windmill
Side quest: Against the Grain - See the cutscene in front of the windmill and talk to Trumbel inside the building.
6. Black Hammer Smithery
Side quest: The Smith's Shipment - talk to blacksmith Tuatanu.
Tuatanu - Trader; sells melee weapons, ranged weapons, outfit elements, rings, grappling hooks and prybars.
7. Eothas's destroyed Temple
There is nothing interesting on the surface. Enter the underground part of the Eothas Temple (map M5).
8. Aufra's Home
Side quest: A Mother's Plea- Talk to Aufra about her daughter.
Main quests: The Old Watcher - It appears in your journal automatically.
Side quest: Fragments of a Scattered Faith - You need to recruit Eder (M4,1).
Side quest: Against the Grain - You need to go to the windmill (M4,5).
Side quest: The Smith's Shipment - Meet up with smith Tuatanu (M4,6).
Side quest: A Mother's Plea - Meet with Aufra (M4,8).
Side quest: Lord of a Barren Land- talk to Kolsc after you complete the A Mother's Plea side quest (M4,1). This quest has been described in the chapter connected with Raedric's Hold (M9 .
Urgeat (M4,1) - He is next to the big tree.
Aloth (M4,2 - He is in front of the Black Hound Inn, you can ask him to join your party.
Eder (M4,1 - He is next to the big tree, you can ask him to join your party (only after you have talked to the Lost Soul).
Pasca (M4,2) - She is the owner of the Black Hound Inn (she is on the ground floor).
Trumbel (M4,5) - You can find him in the windmill and you can talk to him about the trouble with the farmers.
Tuatanu (M4,6) - Trader; he sells melee weapons, ranged weapons, outfit elements, rings, grapple hooks and prybars.
Aufra (M4,8) - You can find her at her home and you can talk to her about her daughter.
All around Gilded Vale, you can encounter lost souls and you can recognize them by the yellow color that they have been marked with. You can approach the ghosts and touch their souls. Each time, you get to learn the story of a given soul.
Before you head on to different locations, make sure that Aloth and Eder have joined your party. You can find both of them in the main part of the village.
The above map presents the Temple of Eothas. It is a minor location that you can visit during your stay in the Gilded Vale. The entrance to the temple is in the central part of the village. In the temple itself, you need to complete one longer side quest. Expect to fight frequent battles with monsters which may prove to be quite demanding opponents for an underdeveloped party. Apart from that, access to some of the more valuable treasures is blocked by locked doors and traps.
1. Starting point
Side quest: Buried Secrets - Talk to Wirtan to unlock this quest which consists in exploring the temple.
6. The puzzle with bells
Side quest: Buried Secrets - To complete the puzzle, strike the bells in the following order: the right one, the middle one, the left one and the right one..
7. Stairs between both levels of the temple
Take the stairs to get to the lower level of the temple.
9. Water control dial
Side quest: Buried Secrets - Kill all the shadows and interact with the dial.
10. Silver Key
Side quest: Buried Secrets - Collect the key after you lower the water level.
11. Locked door
Side quest: Buried Secrets - Open the door with the key, lockpicks, or using the Mechanics skill at the appropriate level.
12. Remains of priests
Pull the lever in the nearby corridor to gain access to the hall where the remains lay and talk to the lost soul. After the conversation, collect the remains.
14. Stairs between both levels of the temple
You can climb this staircase only along your way back from the place where you have found the remains, to Wirtan's staying place.
Side quest: Buried Secrets - talk to Wirtan in the first chamber of the temple (M5,1).
Wirtan (M5,1) - He gives you the quest to explore the temple.
Ivory Spiderling
Skuldr Whelp
Skuldr
Will-O'-Wisp - Try to prevent the Will-O'-Wisps from casting their magical ranged attacks.
Shadow - Attack the shadows one by one. You need to keep in mind that they can cast freezing and stunning attacks on the party members.
Phantom - Attack the phantoms one by one. You need to keep in mind that they can cast freezing and stunning attacks on the party members.
Lesser Black Ooze
There are many monsters to defeat in the temple; they often work in groups. Therefore, it is best to postpone the exploration of this location a little bit. While exploring the temple, try to eliminate monsters one by one and rest whenever the party is significantly weakened (or you can simply retreat into the inn and rest there).
You receive this quest right after you complete the Visions and Whispers main quest, i.e. once you have talked to Caldara de Berranzi by the big tree (M4,1). You need to reach the Caed Nua keep. You can use the southern exit from the village and head for the Magran's Fork or use the eastern exit and head for the Esternwood. Both of the locations lead to the Black Meadow. Take the Eastern path in the Meadow to reach Caed Nua. Head towards the keep (M12,7) and expect at least several monsters along your path (Will-O'-Wisps and Shadows, among others).
Get inside the hold. After you enter the huge hall (M13,1), defeat the nearby monsters and talk to the Steward, from whom you will learn where to look for Maerwald. Climb dwon the northern stairs into the dungeon (M13,6). Carefully deal with all the spiders in the dungeon (do not attack all of the groups at once) (M13,7) and take the passage to the first floor of the Endless Paths of Od Nua.
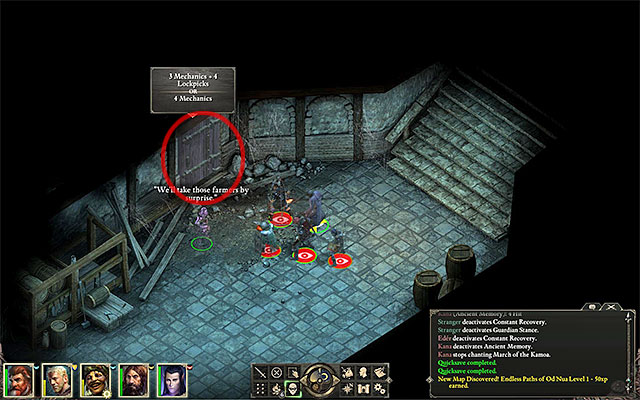 The room in the dungeon where Maerwald resides
Maerwald is staying in the closest chamber of the dungeon (M14,1). If you have appropriate skills and/or lockpicks, you can open it straight away. Otherwise, head southwards and find xuarips (M14,2). Defeat them and plunder their corpses to find the key.
After you get access to the room with Maerwald inside, a longer conversation with this character awaits you. Regardless of the dialogue options that you choose, towards the end of the meeting Maerwald attacks the party. Attack the mage and try to keep him from casting powerful spells. You should watch out especially for Maerwald's AoE attacks and retreat from the endangered areas whenever necessary. You should rely on stunning or knocking-down attacks of warriors, because they make it more difficult for Maerwald to regenerate his health.
After the battle, you will have to make a choice. You can:
This quest appears in your journal after you invite Eder to join your party (M4,1). It does not require too much involvement from you, because it involves going to Caed Nua which is already a part of the game's main storyline. You need to reach Maerwald at the Endless Paths of Od Nua (Level 1) (M14,1). After you kill the mage, exit the keep and try to leave Caed Nua. Wait for Eder to speak and start a conversation with him, which is going to be about his murdered brother.
You need to go to Defiance Bay, i.e. to the First Fires district. Head to the Ducal Palace (M22,4). At the palace, find the Records Keeper and ask for access to the archives. At first, you will be refused access. The necessary information can be obtained in two ways - use the dialogue option associated with well-developed Strength (at least at the level of 16), or wait for the party's reputation in Defiance Bay to reach the sufficient level. Once you use the special dialogue option, or you have developed your reputation, the man will give you the file. You will learn that Eder's brother died in the battle of Cliaban Rilag. Go there - it is a location near Dyrford Village, which you visit during Through Death's Gate main quest.
After you get to Cliaban Rilag, find the Looters' camp (M32,3). Approach the bandits and after a short conversation, attack them. After the fight, loot the camp. In one of the containers, you will find Raedceran Standard Piece. Listen to the conversation with Eder about the item that you have found.
Finally, you need to go to Twin Elms in the Eastern part of the world map (you can do that only after you have progressed to act III of the game). After you get there, travel to the Oldsong district and find Fangs Mind Hunter in its eastern part (M39,3). Show the artifact to this NPC and listen to the conversation.
This quest appears in your journal after you approach the Windmill (M4,5). See the cutscene and enter the building to talk to Trumbel. After you listen to his side of the story, you can agree to talk to Sweynur who represents the farmers, or try to convince Trumbel to change his testimony.
Sweynur can be found at the ground level of the Black Hound Inn (M4,2). If you have already dealt with the problem on Trumbel's side, you only have to give him the good news. Otherwise, interact with Pasca to select the option to order drinks for the farmers. Then, you can try to persuade them to soften their approach, or attack them (negative reputation). Report back to Trumbel, if necessary, to complete the quest (you can either claim your reward or refuse to take it).
Alternative solutions:
This quest appears in your journal after you have spoken to smith Tuatanu in the Black Hammer Smithery (M4,6). For your search of the missing shipment, head out to the Black Meadow - you can get there through Magran's Fork or Esternwood. Examine the destroyed cart (M11,3) and the northern part of the Meadow, where a bandit camp is located (M11,1). Kill all of the opponents and check out the interactive containers to find the cargo crate. Return with the recovered shipment to Tuatanu (the reward includes gold, a unique shield and positive reputation points).
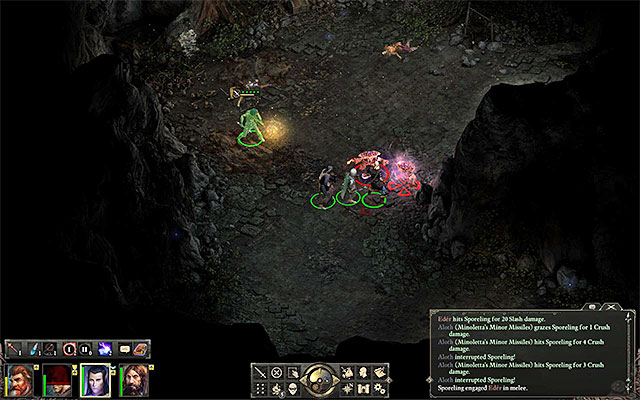 Kill the two sporelings at the sea cave in the Anslog's Compass
This quest appears in your journal after you talk to Aufra in Aufra's Home (M4,8). The woman asks you to meet up with midwife Ranga. Exit the house, leave the Gilded Vale and head southwards to Magran's Fork. Go through that location and again choose the southern exit to reach Anslogs's Compass. To meet with Ranga leave the Southern encampment (M7,2). Ranga first asks you to get rid of the local monsters. These are xaurips from the north-eastern camp, which are easy to eliminate (M7,3). Your second task is connected with traveling to the Sea Cave (M7,4). After you get there, attack the two Sporelings. Attack the monsters one by one and keep in mind that they deal quite a huge damage. After the battle, examine the sporelings and collect the Dank Spores. Return to Ranga with the spores and wait for her to prepare the potion (at the same time, you will learn that it has no healing properties).
Return to the Gilded Vale and meet Aufra again (M4,8). You can give her the potion and choose not to inform her about its lack of effect, or tell her that its only effect is to make the user feel better. For this quest, you are rewarded with gold and reputation points.
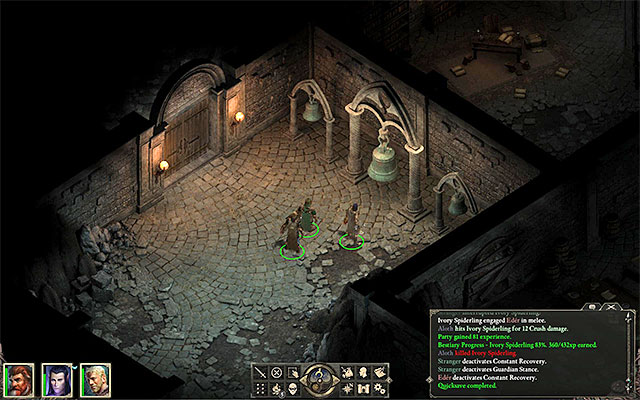 Reach the chamber with three bells
You can receive this quest after you reach the Temple of Eothas. The entrance to the temple is in the central part of the village (M4,7). Once you're inside, talk to Wirtan in the first chamber (M5,1); he's the one to give you this quest. Your first task is to reach the chamber with three bells, located in the western part of the upper level of the temple (M5,6). You can take a shortcut (the secret switch in the western chamber) (M5,2) or a longer way around. It is optional to explore the rest of the rooms at the upper level - in some of them (M5,3)(M5,5) you can receive hints for the nearby puzzle.
To complete the puzzle, you need to strike the bells in the correct order:
For solving the puzzle, you are rewarded with access to the stairs leading to the lower level of the temple (M5,7).
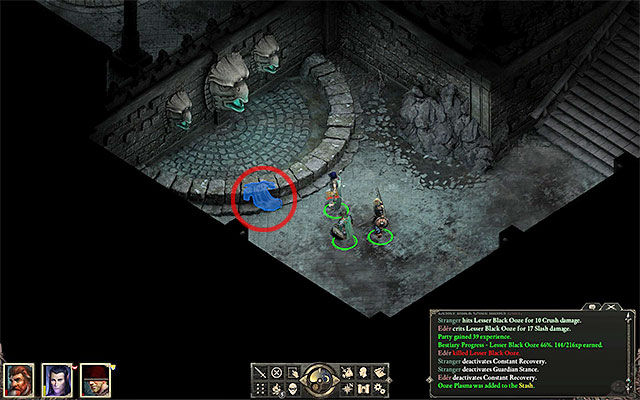 The spot where you find the silver key
At the lower level of the temple, your priority is to find the remains of the priests of Eothas. They are in the chamber in the south-eastern corner of the map (M5,12) and you cannot get there at first. The access to that part of the temple is guarded by locked door (M5,11) and without the skills to open it, you need to obtain a key first. Take interest in chamber with a group of Shadows (M5,9), which unfortunately you have to defeat. Try to eliminate them next to a narrow exit from the chamber and use traps to help you. Once you have secured the area, enter the room and turn the valve. Now, you can go south (M5,10). Kill more monsters and find the robe next to which the Gleaming Silver Key lies.
Head towards the room with the remains and eliminate the monsters that you encounter. The room with the dead priests is locked, but you can gain access by pulling the lever in the corridor. Enter the room and talk to one of the lost souls, which will allow you to experience a vision and learn about the actual events. Now, you need to go back to the quest-giver (M5,1). You can either take the same path or take the eastern stairs (M5,14) that are guarded by more monsters. Start a conversation with Wirtan. You can either claim your reward without asking additional questions or accuse the man of treachery and demand explanations. This will allow you to suggest that he should atone for his sins by burying the priests (positive reputation points). If you prefer resolving issues by force, you can attack Wirtan (negative reputation points).
Alternative solutions:
The above map presents the Magran's Fork, i.e. the small location south of the Gilded Vale. You cross this location on your way to Black Meadow or Anslog's Compass. In this area, you will encounter a new potential party member - Durance. Apart from that, you can engage in several fights with wild animals, wolfs and a forest troll, among others. It is a good idea to take this opportunity and gain some more experience.
1. Fork
Durance - He is a potential party member - you simply need to have a conversation with him and confirm that you want him in your party. At the same time, you can obtain the Trials of Durance quest.
2. Encampment
Talk to Foelmar and get rid of the attacking wolves after the conversation. Foelmar gives you several potions for saving him.
3. Cottage
Side quest: Lord of a Barren Land- You meet Kolsc here (only if you have allied yourself with Raedric after meeting him at the Raedric Hold).
4. Bandits
Be prepared to attack Ludrana and the Goldpact Paladin. You first need to kill Ludrana to stop her from casting her spells. After the battle, search her corpse and collect, among others, a grimoire and a document with orders.
6. Forest Troll's den
Eliminate the troll and search its den to find, among others, a corpse with several valuable items.
Side quest: Trials of Durance - You need to accept Durance in the party(M6,1).
Durance (M6,1 - He is standing at the fork, you can ask him to join your party.
Foelmar (M6,2 - You meet him at the Encampment.
Young Wolf
Wolf - Do not let your party be surrounded by the entire pack, because defeating the wolves may prove more difficult then.
Will-O'-Wisp
Ludrana and Goldpact Paladin - First attack Ludrana, because she uses magic.
Forest Troll - Use strong attacks, because the monster is quite tough.
Young Boar
Remember to accept Durance in the party before you leave this place. Having him as a companion will make it easier to keep the members of your party alive during many battles.
This quest appears in your journal after you accept Durance in the party (M6,1). You do not receive any detailed instructions, because you only need to make sure that Durance remains on the party as an active member.
After you have taken several rests, you will be able to talk to him about the staff. Ask him about it and continue the conversation for as long as possible. At one point, you will learn Durance's entire story. Help him come to terms with the past and point him in the direction he should follow. Completing the quest is only connected with the conversation itself and you do not need to take any additional steps.
The above map presents the Anslogs's Compass. It is a small location that you visit mostly in the course of completing A Mother's Plea side quest that you receive at the Gilded Vale. You can reach the Anslog's Compass only from the direction of the Magran's Fork. In this location, you also meet several friendly NPCs. But most of the time, you encounter various types of monsters there.
2. Ranga's camp
Side quest: A Mother's Plea (you received this quest in the Gilded Vale - M4) - Talk to Ranga about the situation that Aufra has gotten herself into.
3. Xaurip camp
Side quest: A Mother's Plea - Kill all the xaurips at Ranga's request.
4. Sea Cave
Side quest: A Mother's Plea - Kill two sporelings in the cave and collect the dank spores that they drop.
Ranga (M7,1) - You meet her in the Encampment and you receive two quests from her.
Xaurip
Gul - These monsters can weaken your targets.
Sporelings - These monsters can be found in the Sea Cave. Try to attack them one by one, because they are tough.
All around the map, you will be running into corpses that it is good to loot. Thanks to this, not only will you get some valuable loot and gear elements, but also various letters and notes.
//mapa: Pillars of Eternity M8 - Anslog's Compass
The above map presents the Esternwood. It is a tiny location that you are not going to spend too much time in. The only purpose of this place is to connect three more important locations - Gilded Vale, Raedric's Hold and Black Meadow. The only interesting spot to see in the Esternwood is the cemetery in the northern part of the map (watch out for the skeletons guarding it).
1. Cemetery
You can examine the graves at the cemetery - the inscriptions mention the players that funded Pillars of Eternity.
Wicht - These monsters are not too problematic and they die quickly.
Human Skeleton - Skeletons appear as warriors (with sword and shield) and archers. It is best to eliminate the latter in the first place.
Spear Spiderling
The above map presents Raedric's Hold. It is a big location that you visit while completing the Lord of a Barren Land side quest which you receive in Gilded Vale. The hold comprises four smaller locations and you have to explore the surface area before you infiltrate it. Since the party cannot access the hold, you need take into account that they might be attacked by the guards of the hold if they are spotted. Luckily, there are several ways to access the hold, which makes it possible to avoid some of the fighting or all of it.
1. Guards at the drawbridge
You are refused access to the hold. There are two options to choose from - kill Cletlan and Ludwin or find another way into the hold.
2. Main gate of the hold
There are numerous guards here, with paladin Paladin of Berath and an Archer among them. To defeat the opponents and gain access to the hold, you require a strong party.
3. Climbing wall
Climbing this wall allows you to reach the upper walls of the hold and, ultimately, get to the sanctuary (one of the hold's levels) To climb the wall, you need to have a party member with Athletics at the level of at least 3, or possess a grappling hook in your inventory.
4. Grates
Bending the grates allows your party to get to the dungeon, which is one of the hold's levels. To do that, you need to have a party member of high Strength, or own a prybar.
6. Siege platform
You can reach the hold's rooftop only from the sanctuary. You can find some loot there.
7. Eastern wall
You can reach the eastern walls from the dungeon (a ladder can be found in one of the underground chambers). There are quite a few opponents there, commanded by the Captain of the Guard. After you win the battle, plunder the enemy corpses and explore the eastern part of the hold in search of loot.
While at the hold, you may be attacked by every living opponent that you encounter, assuming that you enter a place that you aren't allowed to be in. You can bypass the enemies (by sneaking or thanks to disguise), or gradually eliminate them.
Often, guards in the hold come in groups. If you intend to fight them, try to lure single opponents away from the rest, or at least first attack those guards that pose the greatest threat to you (mages, archers, Captain of the Guard on the Eastern walls, etc.).
The area with the siege platform and the eastern part of the walls are inaccessible to the party at first. You can get there only by taking certain passages in the hold (map M10).
It is recommended that you explore the hold thoroughly no sooner than towards the end of your stay there. Regardless of the decisions that you take towards the end of the Lord of a Barren Land quest, you will be able to explore this location without the necessity to fight any additional battles.
The above map presents the three main levels of Raedric's Hold. These are the Sanctuary, the main level where Raedric himself resides, and the Dungeon where you mostly encounter monsters. You can visit these locations in any order you want and explore them as soon as you get there or once you complete the side quest associated with the hold.
1. Chest with Berathian robes
The robes from the chest allow you to move freely around the Sanctuary, without the necessity to engage in fights. Note that your character needs to have a high level of Resolution, because you party will be stopped at least twice, and you need to work your way out using appropriate dialogue options.
3. Chapel
Close to the altar in the chapel, there is a hidden switch (sneak to get there). Using it will make it easier to get to Nedmar's chamber.
4. Nedmar's Chamber
Side quest: Lord of a Barren Land (you received it in the Gilded Vale - M4) - Nedmar may help you get to Raedric, but first you need to find his acquaintance Giacco in the dungeon. Optionally, you can kill Nedmar, at Osrya's request. Note that during the conversation with Nedmar you can ask for a free rest.
8. Switch
The switch opening the door to the dungeon.
9. Dungeon entrance
This is the starting point if you had decided earlier to enter by bending the grates by the moat in the outside part of the hold.
10. Giacco's holding cell
Side quest: Lord of a Barren Land- You can break into Giacco's cell or kill Osrya and thus obtain the key. You rescue Giacco at Nedmar's request.
11. Osrya's chamber
Side quest: Lord of a Barren Land- Osrya may help you get to Raedric, but you first need to kill Nedmar at her request (Sanctuary). Note that during the conversation with Osrya, you may ask for a free rest.
12. Osrya's secret passage
It becomes available after you complete the quest for Osrya and get the key from her.
13. Nedmar's secret passage
It becomes available after you complete the quest for Nedmar and get the key from him.
14. Throne room
You can talk to Raedric there and agree to his plan, or attack him. In the latter case, watch out not only for Raedric, but also, i.a., for the archmage that accompanies him (it is a good idea to save the game before the battle).
Nedmar (M10,4) - You can find him in his chamber at the Hold. He helps you reach Raedric.
Giacco (M10,10) - He is being held in a cell in the dungeon. You can rescue him at the request of Nedmar.
Osrya (M10,11) - You can find her in the dungeon. She can help you get to Raedric.
Raedric (M10,14) - He is in the throne room, at the main level of the hold. You can kill him at the request of Kolsc or start cooperation with him.
While inside the hold, you can get attacked by any of the living opponents that you encounter, assuming that you've entered a place you are not allowed to be in. You can bypass the opponents (by sneaking, or thanks to disguise) or eliminate them.
Gul
Revenant - This is one of the strongest types of the undead.
Human Skeleton
Black Ooze
Aumaua Skeleton - they use spears.
It is necessary that you take interest in the Berathian robes found in the chest in the western part of the sanctuary. They will allow you to explore the entire Sanctuary freely without engaging into fights. However, keep in mind that the party will be stopped by guards in at least two spots, and your character will have to display a proper level of Resolution to avoid being recognized.
While exploring the inside of the hold, try to have sneak mode on, at all times. This is especially important in the dungeon, where there are many traps. Luckily, the majority of them do not deal too much damage if you trigger them by accident. As for the rest of the levels of the hold, sneak mode will allow you to surprise the enemies and find hidden switches and stashes.
Do not waste your lockpicks attempting to open the secured door to the sanctuary, and at the main level of the hold, unless you are bent on more experience points. The key to the locked rooms is in Nedmar's possession. Depending on your decisions, he will either give it to you, or you will be able to take it from his corpse.
Some of the passages that you find can take you to unique places, e.g. to the siege platform, and to the western part of the walls (map M9). It is optional to use them, but keep them in mind, if you want to explore 100% of the hold.
Nedmar (the sanctuary) and Osrya (dungeons) are two friendly NPCs that you meet in the hold. During conversations with them, you can ask for rest. It is necessary that you do that (even more than once, if needed), because it is for free (i.e. you do not need to use up your supplies).
It is best if you wait with the full exploration of the hold until the end of your stay there. Regardless of your decisions made in the last part of Lord of a Barren Land quest, you will have ensured the possibility to explore this location without the need of additional fights (with the exception of the fights against monsters in the dungeon).
 Two alternative hold entrances - the climbing wall and the grate into the dungeon
You get the opportunity to start this quest during your stay in the Gilded Vale. You can receive it once you have completed A Mother's Plea side quest. After you leave Aufra's Home in the village (M4,8), your party should be accosted by Kolsc (M4,1) close to the big tree. Agree to the plan to kill Lord Raedric. Take the eastern exit from the village and cross the Esternwood, which will lead you to Raedric's Hold.
Your first task is to make it into the hold. You can talk to Cletlan and Ludwin guarding the main entrance (M9,1), but do not expect to be let in, even if your Resolution is at a high level. Therefore, you need to decide whether you want to attack the guards or search for another way in. If you choose to enter by force, defeating the guards on the bridge does not do the job, because there are more of them in the main yard, and by the main entrance to the hold. (M9,2). You would have to win some challenging fights there and there would be more to come once you enter the hold.
It is a much better idea to find an alternative way in. One of the ways is to interact with the vines on the walls of the hold in the western part of the map (M9,3). You can use them to climb onto the upper walls, if any of your party members has Athletics at the level of at least 3, or if you own a grappling hook. On the upper walls, there are several opponents to defeat and you should especially watch out for the Priest of Berath who wields magic. Locate the door into the storage in the hold's sanctuary. (M10,1).
Another option is to reach the grate leading to the hold's dungeon, which is located by the moat in the eastern part of the map (M9,4). You need a character with lots of Strength here, or a prybar, which will enable you to enter the underwater corridor. It will lead you into the south-eastern part of the dungeon. (M10,9).
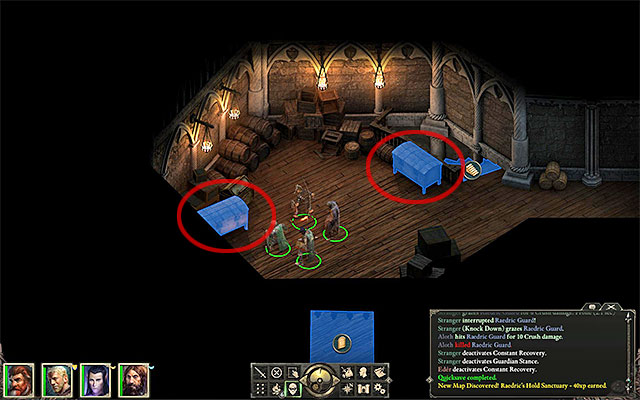 The chests with robes that can be worn by the party members
If in spite of the above-mentioned suggestions, you have fought your way through the main entrance into the hold, you start at the main level of the hold. Expect that you will have to fight two more demanding fights in the chambers at the entrance. Along your path, you will run into a locked door and you can break the lock, or take the route around, through the dining chamber.
If you chose to go through the sanctuary, you start in the storage (M10,1). Take interest in the chests located there and loot them in search for Berathian robes. Wearing them prevents the party members from being perceived as threat by the NPCs there. Still, you cannot feel completely safe, because you will be stopped by at least two guards there. To avoid getting into a fight, you need to use dialogue options connected with Resolution.
If you decide to go through the dungeon (M10,9), during your exploration you need to watch out for numerous monsters (guls, skeletons, etc.) and for traps that are most plentiful in the western part of the map.
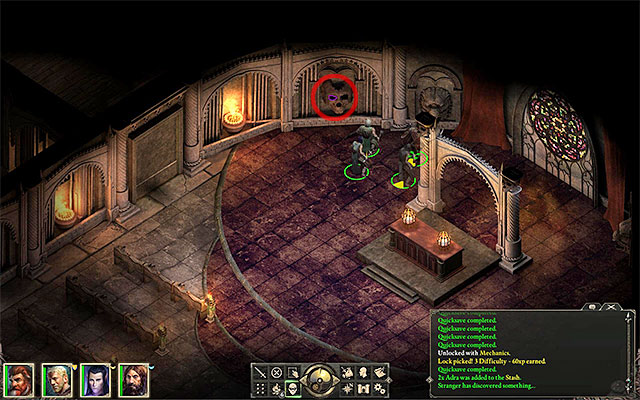 The secret switch in the chapel
There are two NPCs that can help you get to the throne room where Raedric resides (M10,14). These are: Nedmar in the sanctuary (M10,4) and Osrya in the dungeon (M10,11). Nedmar's chamber is protected by locked door, but you can walk over to the adjacent chapel (M10,3), where you can find a secret switch at the altar. Once you have talked to Nedmar, you will be asked to rescue his friend Giacco. Return to the chapel and find the stairs into the dungeon. Use the switch (M10,8) and reach the holding cells in the central part of the map (M10,10). You can free Giacco thanks to lockpicks, or if your Mechanics is developed well enough. If this is not possible, go to the chamber where Osrya is, attack her (M10,11), plunder her corpse and collect the key to open the cell. After you have rescued Giacco, return to Nedmar. He will give you a universal key, which you can use to open a secret passage in the northern part of the Sanctuary (M10,13).
Osrya is staying in the northern part of the dungeon, near the area with the holding cells. She asks you to kill Nedmar for her. You therefore need to get to the priest's location and kill him (preferably when nobody sees you). After it's done, return to Osrya. You can now use the nearby secret passage (M10,12).
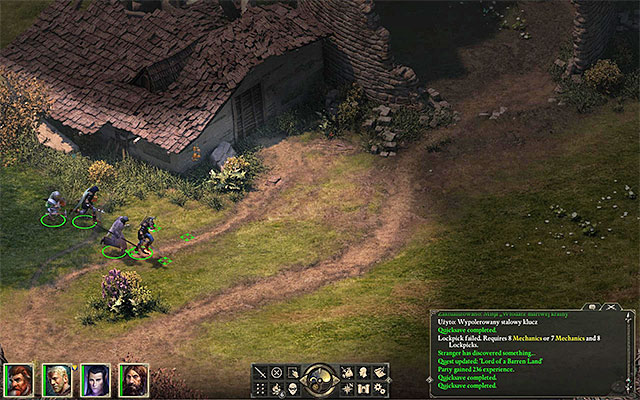 The cottage in Magran's Fork, where you find Kolsc
All of the variants provided above (fighting your way through the main part of the hold, using Nedmar's or Osrya's secret passage) grant you access to the throne room at the main level, where Raedric resides(M10,14). This quest can be completed in two ways. The first one is to attack Raderic. Unfortunately, he is a good fighter, which makes it difficult to kill him. What is more, you need to kill an archmage who accompanies him as quickly as possible, because he can cast powerful spells. After the battle, try to leave the throne room. Aa cutscene featuring Kolsc will pe shown. Apart from experience, you receive many reputation points in Gilded Vale.
The second variant assumes that you consent to Raedric's plan to murder Kolsc. To do this, you ned to leave the hold and go to Magran's Fork, i.e. the small location to the south of Gilded Vale. After you get there, head towards the cottage in the north-eastern part of the map (M6,3). Apart from Kolsc, you also need to kill several of his companions, and it is most important to watch out for the priestess and the rogue there. After you have murdered Kolsc, return to the hold and report to Raedric. Apart from experience, you receive lots of reputation points in the Defiance Bay.
The above map presents the Black Meadow. It is a small location serves as a fork, because you can reach as many as four different locations using it (the most important one is, without a doubt, Caed Nua). While exploring the Meadow, you need to expect fights with forest trolls, which are quite tough. Apart from that, it is a good idea to take interest in the bandit camp, which is connected with the side quest given by the blacksmith in Gilded Vale.
1. Bandit camp
Side quest: The Smith's Shipment- kill all the bandits and find the smith's shipment.
2. Galwain's shrine
Before you examine the shrine (use sneak mode) kill the Forest Lurker.
5. Drake's skeleton
IN the drake's skull, you can bury your Scroll of Wael. This is connected with the The Parable of Wael quest that you receive from Grimda (M18,9).
Forest Troll
Bandit Leader - Attack him first when you reach the bandit camp.
Bandit
Scavenger
Forest Lurker - use your best attacks here, because the monster is tough. Keep the weaker party members away from him, as the beast deals a lot of damage and may also knock down its targets.
Wicht
Spear Spiderling
The above map presents Caed Nua. It is the area around the titular keep, which you visit during the game's main storyline. After you have sufficiently developed your party, it also becomes the main field base for the party. This means that you will be able to (and want to) return there on a regular basis. During your initial stay in Caed Nua, you will receive a hostile welcome from the monsters. What's more, all of the nearby buildings are ruined (the game allows you to undertake the reconstruction).
1. Forester's Lodge (available only after you have expanded the keep)
You can meet Warden Fyrgen and take on new assignments.
2. Workshop (available only after you have expanded the keep)
The craftsman offers weapons and armors.
3. Inventor's home (available only after you have expanded the keep)
From the Inventor you can buy traps.
4. Curio Shop (available only after you have expanded the keep)
From the trader, you can buy crafting materials.
5. Chapel (available only after you have expanded the keep)
The priest sells magic scrolls. In the chapel, there is a descent into the Endless Paths of Od Nua (you first need to unlock it from the inside).
6. Brighthollow
It serves as your character's home. At first, it is in shambles and you need to restore it. Inside you can find, among other things, a bedroom at the upper floor (take a rest to receive a bonus to your statistics) and a holding chest. Apart from that, there are additional rooms for the rest of the party members.
7. Caed Nua keep
Main quests: The Old Watcher - Enter the keep to meet up with Maerwald.
8. Eastern Barbican (available only after you have expanded the keep)
In the Never Far from the Queen quest, choose to fix the barbican to gain access to the rest of the map (Woodend Plains and other locations).
9. Bridge over the river
Kana Rua - He is standing by the bridge and is a potential party member.
Side quest: Time and Tide - You need to accept Kana Rue into the party (M12,9).
Kana Rua (M12,9 - He is standing by the bridge on the river; you can ask him to join your party.
Shadow
Phantom
Will-O'-Wisp
Small Flame Blight - These monsters deal fire damage but are fortunately easy to kill.
Do not worry if you cannot find the NPCs and buildings shown on the provided map when you first come to Caed Nua. New elements of this location are added in the course of expanding and restoring the keep (the first designs become available after you have unlocked the Never Far from the Queen main quest). To learn more, see a separate part of this guide.
It is a good idea to return to Caed Nua on a regular basis (e.g. once a week according to the in-game time). This will allow you to supervise the progress in restoring the keep, meet new NPCs and task new restoration assignments.
If you want information on the keep itself (the key building in this location) see the description for location M13 - Caed Nua: The keep.
The above map presents the interior of the Caed Nua Keep. You can explore this building once you have arrived in Caed Nua, which is visible on the world map. The purpose of this is mainly associated with completing one of the game's main quests. After you get to the keep for the first time, you encounter several groups of monsters, whose eliminating is not going to be too difficult.
1. Great Hall
Main quests: The Old Watcher - deal with several monsters and talk to the Steward about Maerwald.
7. Dungeon
In the dungeon, there are lots of spiders - some of them are in the main corridor, and some in the cells. Attack them one by one. In the dungeon, there is a passage to the first level of the Endless Paths of Od Nua (where Maerwald is).
8. Treasury
You need to restore this location to turn it into the treasury. This will result in the appearance of the General Goods Merchant. Among other things, he offers potions and a prybar.
Side quest: The Master Below - Talk to the Steward right after you kill Maerwald (M13,1).
Steward (M13,1) - talk to her after you arrive in the keep, and again after you kill Maerwald.
Shadow
Phantom
Spear Spiderling
Ivory Spiderling
Spear Spider - These spiders are bigger and more difficult to defeat. Deal with them before you take on the smaller monsters
The keep comprises several small areas, which are connected by climbing stairs. It is fully optional to explore the library and the barracks. You will visit the great hall and the dungeon as you progress in the main storyline.
You should find a very fine sword in the vase at the keep's entrance (Great hall). It is worth it to obtain the sword and hand it over to a warrior in the party.
Around the keep, you encounter souls. It is possible to have short conversations with them, but it is fully optional and you can locate Maerwald without their help.
At first, the keep is ruined. You can restore it and the options to do that become available some time after you have started the Never Far from the Queen main quest (again, talk to the Steward and access the keep's options menu).
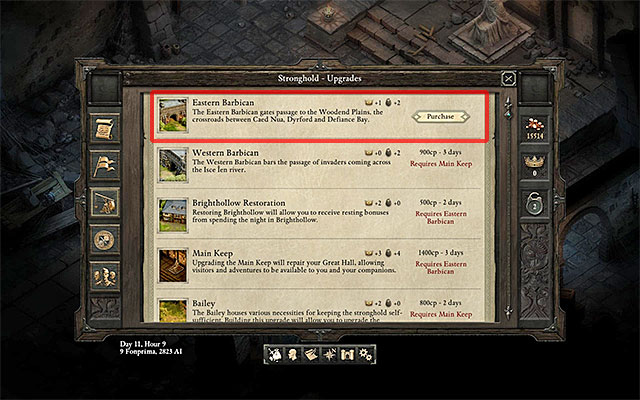 Pick the barbican from the list
You receive this quest right after you have completed The Old Watcher main quest, i.e. right after you have dealt with Maerwald in the Endless Paths of Od Nua (Level 1) (M14,1). Return upstairs and meet the Steward in the Great Hall (M13,1). She will tell you that you have become the master of the keep and that you can assign first restoration works. First, select the Eastern Barbican from the list. The restoration of the barbican is immediate. Thanks to this, you gain access to the south-eastern exit from Caed Nua (M12,8) and additionally receive prestige and defense points.
Your next task is to reach Defiance Bay, i.e. the largest city on the world map. Exit the keep and take the newly-unlocked passage to the Woodend Plains. After you get there, turn west. Reach the Aedelwan Bridge. If you want to you can ask the Justiciars (M17,1) about the location of the temple, thanks to which you will learn that you can find it in the First Fires District. Enter the city. After you get to Copperlane district you can follow the hint that you have recently received and go to First Fires. There, after the conversation with the Ghost you will discover that the entrance to the Temple of Woedica (M22,2) is temporarily inaccessible. As a result, you need you take an alternative route. It will take you through the Catacombs. The entrance to the catacombs is in w the south-western part of Copperlane (M18,13).
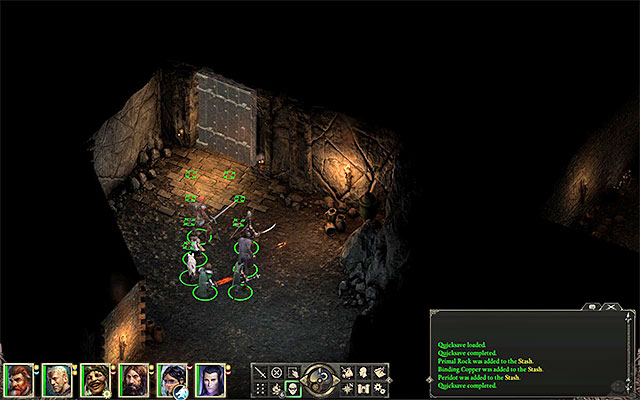 It is a good idea to put the hood on before you approach the last temple door
After you get to the catacombs, head south-west and be prepared to eliminate small groups of monsters along your path. You need to get to the stairs between the main level and the Temple of Woedica (M19,5). See the vision and head west. Stop at the passage blocked, among others, by Hafmacg (M19,6). You can access the temple, e.g. by bribing the guards with 350 gold, killing them, using Resolution/Intellect at the level of at least 13 points, or by putting on the Woedica Hood onto your character's head. You can find the hood in the eastern part of the catacombs, on the body of a murdered novice. (M19,4). After you have walked around the guards, you can also take a look into the chamber where Initiate is (M19,7). He also has Woedica's Hood; he will give it to you only if you agree to listen to his rehearsal and if the level of your Strength or Resolution is at least 14 points.
Your destination is the main chamber at the Temple of Woedica (M19,8). Before you come close, put on the hood that you have either found on the corpse, or got from the novice. Approach the door and confirm that you want to enter the chamber alone. Have a longer conversation with the Shrouded Woman and always pick the first answer on the list. You will be rewarded with a vision.
Alternative solution:
You can also solve things with force. Do not put the hood on and after you approach the door to the main chamber, enter with the entire party. After a short exchange of lines,, you start a fight with the shrouded women and men here. During the fight, first deal with the opponents that wield magic. After the fight, approach one of the ghosts and touch his soul.
During your stay in Caed Nua you can unlock minor bounty hunter missions. They're all about hunting down and killing dangerous individuals. The game will allow you to start completing these simple quests after you've restored the Warden's Lodge in Caed Nua (M12,1). Once the lodge is ready you can head inside and talk to Guardian Fyrden to unlock new assignments. There are fifteen bounty missions in total, however they're divided into sets of four missions each (the only exception is the final set - it has only 3 missions). You must complete all quests from the current set before missions from the next set become available.
Like I've said, all of the bounty hunter missions have very similar principles. You must begin by tracking down the person that has a bounty on their head and then kill that enemy. Sadly most of the fugitives will be surrounded by other hostile beings. This makes killing them much harder and that's why you should take interest in the bounty missions when you're close to the final part of the campaign. Once you've managed to kill the person from the quest you must click on the corpse in order to collect a severed head as a proof of the kill. You must then deliver the head to Fyrgen. All of the bounty hunter quests are rewarded with experience points and gold, however some of the missions have additional prizes and in most cases they're very valuable (various rare items).
Check the table seen below for a full list of contracts.
BOUNTY
SET
LOCATION OF THE FUGITIVE
REWARDS
Cyrdel
1
Magran's Fork - check the adra formation (M6,5)
xp, gold, Drake's bell
Iklak
1
Valewood - check the xaurip camp (M3,4)
xp, gold
Nalrend
1
Elmshore - check the northern cave (M35,1)
xp, gold
Dweller
1
Black Meadow - check a small clearing (M11,4)
xp, gold
Daroth
2
Catacombs - check the area near the stairs leading to the Temple of Woedica (M19,5)
xp, gold
Glasdial
2
Lle a Rhemen - check the additional level of the ruins (M34,9)
xp, gold
Roska
2
Cliaban Rilag - check the area near the campsite (M32,3)
xp, gold, armor
Thorfen
2
Esternwood - check the cemetery (M8,1)
xp, gold, rare cloak
Dalgard
3
Madhmr Bridge - check the area near the crossroads (M15,1)
xp, gold
Devwen
3
Northweald - check the northern cave (M57,4)
xp, gold
Foemyna
3
Woodend Plains - check the area to the north-west of the crossroads (M16,1)
xp, gold, rare bow
Muarumi
3
Anslog's Compass - check the central cave (M7,4)
xp, gold, rare firearm
Naroc
4
Cilant Lis - check the area where the ritual was performed at the beginning of the game (M2,9)
xp, gold, rare armor
Sserkal
4
Pearlwood Bluff - check the area to the north of the cliff (M27,2)
xp, gold, rare armor
Ysly
4
Heritage Hill: Tower - check the second level of the tower (M25)
xp, gold, rare wand
Endless Paths of Od Nua is the vastest network of dungeons, in Pillars of Eternity. In total, ther are, as many as, fifteen levels to explore. At each of the levels, you bothare going to fight monsters and find treasures. Apart from that, there is an option to complete a number of side quests.
The dungeons are under the Caed Nua Stronghold (the map M13) and you can access them by climbing down the stairs in the Stronghold's dungeons (M13,7). A very important piece of information is that it is optional to do the full exploration of the Endless Paths. If you are not interested in exploring the location, you can restrict yourself to partial exploration of the first level. The purpose of this is to complete The Old Watcher main quest, by defeating Maerwald in direct battle.
If you want to explore the entire of the Endless Paths of Od Nua, you do not need to do that in one take. It is best to distribute the process over time and resurface, each time after you explore several levels, to replenish your supplies, and to rest (there are stairs on each level, thanks to which you can make the entire process faster). This is especially recommended, since there are strong monsters, on the lower levels, which you will fail to, most probably, with an underdeveloped party. Therefore, it is best to explore the lowest levels towards the end of the game, when your party is strong enough.
On the following pages, you find walkthroughs for all the levels of the Endless Paths. Descriptions of all the levels have been provided with maps, which you can consult to find treasures, hidden passages, traps or dens of stronger monsters.
Important information - While exploring some of the lower levels of the Endless Paths of Od Nua your team may encounter friendly beings. The only way to communicate with them is if you already know the engwithan language. The only way to learn this language is to participate in the Undying Heritage main quest during your visit to Defiance Bay (II act of the campaign). It's recommended that you wait until you've learned the ancient language so you won't miss out on anything interesting in Od Nua.
The above map presents the first level of Endless Paths of Od Nua under the Caed Nua Stronghold. There are a dozen-or-so levels to the Paths and at each level, you find the more and more demanding challenges. For the purposes of The Old Watcher main quest , you only need to explore the first level and, in addition to that, only certain parts of it. This does not mean that you can expect an easy time, because the fight with Maerwald in the Northern room is quite demanding.
1. Maerwald's Room
Main Quest: The Old Watcher - Break into the room with Maerwald (lockpicks/Mechanics) or obtain the key from Xaurips (02). Save the game, before the encounter, because the mage attacks the party, towards the end, and he is a demanding opponent.
2. A group of Xaurips
Kill the Xaurips and examine the corpses to obtain the key (01) .
5. Spider Queen
Kill the Spider Queen (she drops an unique dagger) and the rest of the monsters there. After the fight, take interest in the corridor to the ladder (level 2).
6. Main Stairs
Thanks to the stairs, you can get to the levels that you have already explored, within the Endless Paths. The main stairs are, usually, every second, or third level. To gain access to them, you first need to move the wall and activate the pressure plate. However, it is at the other side of the wall so, you first need to go to level 3 (Level 3),3) and take the main stairs to reach level 1.
7. Hand of Titan
Place the Dragon's Amulet here, to infuse it with the soul of the Adra Dragon. This is an action connected with The Master Below quest.
Main Quest: Never Far from the Queen - Automatically, after you defeat Maerwald (M14,1).
Maerwald (M14,1) - You need to talk to him and defeat him in battle.
Maerwald - Avoid his spells, especially the AoE ones, and try to prevent him from restoring his health bar.
Spear Spiderling
Ivory Spiderling
Spear Spider
Xaurip
Small Flame Blight
Stone Beetle - Attack beetles one-by-one, because they are tough and deal quite a damage.
Wood Beetle
Looter
Spider Queen - try to drag away the smaller spiders, from the queen, and only after you deal with them, attack the queen. Attract the monster's attention, as the fighter of the party, and still before the battle, try to increase the characters' resistance to poison.
Before you go to the lower levels of the Endless Paths of Od Nua, it is best to wait, until your part is strong enough. Also, before you descend, it is best to take rest and ensure enough supplies.
At the second level of Endless Paths of Od Nua, you mainly encounter Xaurips. They are not too demanding opponents so, you can explore this level even if your party is not too strong. Still, remember about the Stealth mode, because there are many traps around.
1. Wounded Xaurip
In a small room, there is a Xaurip on the ground. You can approach it and examine it. It is up to you if you leave it alive, or are merciful enough to slit the creature's throat, to save it from more pain. There are no repercussions to your decision.
2. Wyrm's egg
Click the egg. You will be able to collect the tiny white wurm. It can be your pet so, it will be following you around, in the world of the Pillars of Eternity.
3. Sacrificial chamber
Kill all the Xaurips. In the center of the room, there is a big hole. Across it, you can get to level 5 of the Endless Paths (M45). To get across the hole, you can:
This is a one-way jump and you will not be able to return.
4. The cottage of Xaurips
Kill the Xaurips, collect the broken blade in the cottage, thanks to which a new quest appears in your journal.
Side quest: The Blade of the Endless Paths .
Side quest: The blade of the endless paths - from the cottage of Xaurips, retrieve the broken blade (Level 2),4).
Xaurip
Wurm
Xaurip High Priest
Do not jump into the hole, if your party is too weak. The return may be too difficult for you and you will be stuck down there for good. It is a much better option to explore the levels, one after another.
Remember to collect the broken blade from the cottage of Xaurips (M42,4). This way, you will start a quest that remains active throughout several more levels.
At the third level of the Endless Paths of Od Nua, you mainly find a dozen-or-so ogres. Also, you will get to complete one side quest. Just like in the case of the previous levels, watch out for traps and search for secret stashes, in the Stealth mode.
1. The Northern chamber
Here, you find an amiable ogre - Thulg. You can talk to him.
Side quest: Desperate Measures - talk to Thulgr.
2. The ogre encampment
Kill Zolla and the ogre that helps her. Collect her amulet (torc) thanks to which you complete the quest you receive from Thulg (M43,1).
3. Main stairs
Thanks to these stairs, you can travel to any level, of the Endless Paths that you have already explored. Main stairs are to be found, usually, every third level.
4. Statue
Put the "Resolution" sabre in the statue to open the door to the secret chamber (M43,5). You need to have the sabre in your character's inventory (if it is in the stash, you will not be able to put it in the statue). You can obtain the sabre by killing the big black ooze on the fourth level of the Endless Paths (M44,2). Placing the sabre in the statue unlocks the secret chamber (M43,5).
5. Secret chamber
To move the wall, you need to put the resolution "Resolution" sabre in the statue(M43,4).
Thulgr (M43,1) - The ogre that you can help.
Side quest: Desperate Measures - talk to ogre Thulgr (M43,1).
Ogre
Small Black Ooze
Black Ooze
Before you start exploring this level, make sure that your party will be capable of dealing with two ogres at the same time (level 4-5 should be high enough).
Try to explore the majority of corridors in the Stealth mode. Thanks to this, you will avoid springing traps and discover several secret stashes.
Remember to complete the quest you receive from Thulg (M43,1).
At the fourth level of the Endless Paths of Od Nua, there are few interesting things. The location, in itself, is not too big, you encounter several opponents, predominantly trolls and Black Ooze. Also, you find here the head of the huge adra statue which, however, you cannot interact with.
1. Demolished library
Open the chest and take the bloodstone overseer seal, which activates a new quest. Watch out because the chest is trapped.
Side quest: Seals of the Endless Paths .
2. Greater black ooze
Defeat the monster and examine its remains to collect a "Resolution" sabre. The sabre can be inserted into a statue found on the third level of the dungeon (M43,4). This action will unlock access to a secret room.
Side quest: Seals of the Endless Paths - from the chest in the demolished library (M44,1), collect the bloodstone overseer seal .
Troll
Greater Black Ooze
Black Ooze
Small Black Ooze
Wood Beetle
Level five of the Endless Paths of Od Nua is a small location, where you mainly find Xaurips, although these here are the stronger ones. However, the most dangerous opponent is the drake, whose strength matches that of a regular dragon.
1. Main stairs
Thanks to the stairs, you can get to the levels that you have already explored, within the Endless Paths. The main stairs are, usually, every second, or third level.
2. The secret chamber
To gain access, you need to enter the Stealth mode, find the switch on the wall and press it. Inside, there is quite a few gold. One of the containers also holds an ornate sword hilt , which is another part of the sword, which you need to put together, for The Blade of the Endless Paths quest.
3. Blood container
Here, you start the exploration of this level, if you have decided to jump into the hole at level two (M42,3).
4. Drake's nest
You find a drake here, whose strength matches that of a dragon. Additionally, there are 9 Xaurip Champions and High Priests. Talk to the drake and kill him. What you are going to find very useful here is offensive AoE spells. First deal with the Xaurips and with the drake afterwards.
Xaurip skirmisher
Xaurip champion
Xaurip high priest
drake - This opponent is stronger than the other drakes. He deals quite a lot of damage at close quarters and often uses fire-based attacks.
If you want to return to the surface quickly, take the main stairs. The next time you will be able to use them is level 8.
Remember to collect the second part of the sword, from the hidden chamber (M45,2).
Before the fight with the drake, make sure that you are well-rested. This especially goes for the mages, they should be able to use their strong offensive spells, preferably AoE, at least several times.
Level six, of the Endless Paths of Od Nua is infested with skeletons and darguls. Here, you find the corpses of all the rest members of the expedition that came here. To descend even lower, you will have to find all the seals and open the door.
1. The Eastern chamber
Kill the opponents, collect the sapphire overseer seal from the chest. Watch out, because the chest is secured with a trap. In the same chamber, you find the corpse of the adventurer that died, while trying to find all three seals.
2. The Western chamber
Kill the skeletons and collect the peridot overseer seal from the sarcophagus. IT is secured with a trap.
3. Crypt entrance
To open the door, you need 3 seals that you need to put into the correct slots:
Left slot - eye symbol - sapphire overseer seal (M46,1);
Middle slot - sword symbol - bloodstone overseer seal (M44,1);
Right slot - chisel symbol - peridot overseer seal (M46,2).
After you put all three seals in place, you can open the door .
The entire process is connected with the Seals of the Endless Paths quest.
Skeletons - At this level of the Endless Paths, you encounter skeletal fighters, mages and archers.
Dargul
Before you search chests and tombs, always enter the Stealth mode. The majority of them are secured with quite strong traps, which you should detect and disarm beforehand.
While fighting opponents, always take on the mages in the first place, then the archers and finally the fighters.
The seventh level of the Endless Paths of Od Nua is infested with Blights - of wind, fire, rain and earth. Here, you encounter those opponents in all phases of their development. Also, there are 4 forges here, separate for all types of blights. You can activate them by placing appropriate prisms on the pedestals - this action is rewarded with an enormous amount of experience points. Additionally, at this level, you can complete one of the companion quests - of Kana Rua - Time and Tide .
1. Earth Blight forge
Kill all the blights and collect the wind prism from the nearby crate, which you use to activate the wind blight forge (M47,6).
You can activate the Earth Blight forge with the earth prism in the room of Garbannos (M47,8). You need to slide it into the pedestal.
2. Fire Blight forge
Kill all the blights. You can activate the forge with the fire prism that you slide into the pedestal. It is in a small room (M47,5).
3. Shades' room
Kill all the shades. They should not be a threat, as long as you keep them away from your mages and archers. From the chest, collect the rain prism and the old copper key.
Thanks to the Rain Prism, you can activate the Rain Blight forge (M47,7).
Thanks to the old copper key, you can open the door to the room of Garbannos (M47,8).
4. Main chamber
Defeat the four major blights, each of a different type.
Press the brick on the pedestal, in the center of the room. This opens a door with stairs behind it. Over the stairs, you get to the next level of the Endless Paths.
5. Small room
From the chest, collect the fire prism. Thanks to this, you activate the Fire Blight forge (M47,2).
6. Wind Blight forge
To activate the forge, you need to slide the wind prism into the pedestal, which you find in the Earth Blight forge (M47,1).
7. Rain Blight forge
To activate the forge, you need to slide the rain prism into the pedestal, which you find in the Shades' room (M47,3).
8. Room of Garbannos
You open the door with the old copper key, which you find in the Shades' room (M47,3).
Kill the skeletal mage - most probably, this is Garbannos. From the table, collect the tablet. This way, you will complete the quest from Kana Rua - Time and Tide . Kana Rua needs to be on the party, while you are completing this quest.
From the chest to the South, collect the earth prism, which you will use to activate the Earth Blight forge (M47,1).
Earth Blight
Fire Blight
Wind Blight
Rain Blight
Spectre
Shade
Shadow
Swamp Slime
At the seventh level of the Endless Paths, there are no hidden traps so, you do not need to watch out for them. However, activate the Stealth mode, occasionally, because you may find several stashes with valuable treasures, this way. It is optional to activate all of the forges, this does not translate into any real rewards.
Level eight of the Endless Paths of Od Nua is one of the largest locations that you visit and, at the same time, much more demanding than the previous ones. Here, you encounter Fampyrs - very strong opponents that a weaker party cannot deal with. So, if your characters are not at, at least, level 8, do not get down here.
1. Statue hand
By walking onto the statue hand, you spot several darguls, which remain pensive. As you go onwards, you encounter a Fampyr on the throne. Talk to him but, he will not be willing to let you pass. To proceed, you need to do either of the following:
Important - You won't be allowed to talk to the Fampyr unless you know the engwithan language. The main character can learn this unique language while completing the Undying Heritage main quest in Defiance Bay (Act II of the main storyline) If you don't know this language and if you don't want to wait then the only available option will be to fight the creature.
2. Main stairs
Thanks to the stairs, you can get to the levels that you have already explored, within the Endless Paths. The main stairs are, usually, every second, level.
Skeletons - At this level, you find fighters, archers and mages. You should be especially wary of the mages, and eliminate them in the first place.
Fampyr - A strong opponent with high defense and lots of Endurance points. He attacks with magic. A very demanding opponent, even if by himself.
Adra Beetle - A very strong opponent. It deals lots of damage at short range. It has high defense and lots of Endurance points. It can attack with orbs of energy that deal lots of damage over a vast area.
Dargul
During the conversation with the Fampyr, agree to clear the level of the other fampyrs. You will learn lots of interesting things about Endless Paths and Od Nua. Apart from that, there is nothing to prevent you from killing the Fampyr and obtain a valuable armor.
Watch out for traps placed, mainly, in narrow corridors. In such places, use Stealth, because the traps deal lots of damage.
You should not come down here with a party below level 7. Simply, the opponents are too demanding here.
Level nine of the Endless Paths of Od Nua matches the preceding one, when it comes to its difficulty. Without Mechanics at level 12, you will have to make it through a difficult stage which, for a character that is low on health points, may be impossible to complete. Here, you will encounter groups of Adra Beetles and Swamp Slimes. Each of the group consists of 4, or even 6 opponents.
1. Room with spikes
The floor of the entire room is covered with spikes, which deal some damage, with each step you take. To make it to the next room, you need to do the following:
2. Hidden chamber
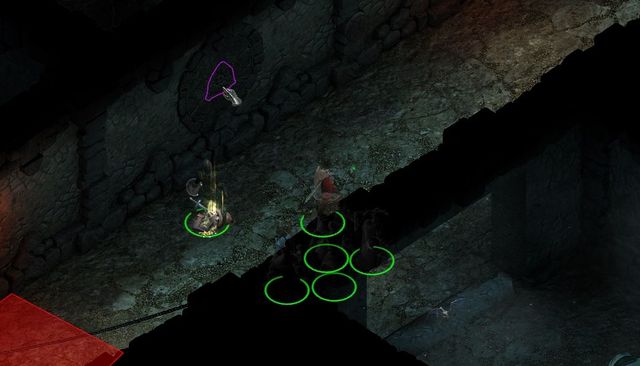 To discover the switch, you need to activate the Stealth mode.
The room is hidden behind the moving wall. To gain access, you need to press the switch on the wall. You will be able to spot it only in the Stealth mode.
In the center of the room, there is a big container with the broken blade inside. This is another element of the weapon that you are searching for, in The Blade of the Endless Paths quest.
Adra Beetle
Swamp Slime
Spectre
The tenth level of the Endless Paths of Od Nua is much smaller, and even easier than the previous two. Here, you find all sorts of spiders that, although in large groups, are much easier than fampyrs or adra Beetles. Making it through the entire level should not take longer than 5-10 minutes.
1. Southern Chamber
You start here. After you take several steps, around 10 shades appear around. They should not be too much of a problem, but remember to protect your mages and archers.
2. Western Chamber
The entrance is locked. The only way to open is use a special adra key that you can find in the Eastern part of the location, in the spider cave (M50,3). Inside, you will have to defeat several spirits, but you find nothing interesting.
3. Spider cave
Here, you find two, quite big, groups of spiders and the best solution here is to use several offensive AoE spells. In the stash in the wall, there is a key that you open the Western Chamber with (M50,3).
Shade
Spectre
Cean Gwla
Crystal Eater
Ivory Spiderling
Widowmaker
The eleventh level of the Endless Paths of Od Nua matches the tenth one, in terms of size so, it is not too big. However, it is probably the most difficult of all. This results from the presence of Dank Spores. Their attacks "confuse" your party members, who then turn against you. Fortunately, the majority of the fights can be avoided.
1. Main Stairs
Thanks to the stairs, you can get to the levels that you have already explored, within the Endless Paths. The main stairs are, usually, every second, or third level.
2. Vines
You can walk through them. After you do, you will be unable to return. Along the way back, you encounter two strong groups of enemies so, take this into consideration to prevent getting stuck there for good.
3. Northern Cave
You find a huge dunk spore here, and two dunk spores. This is one of the most difficult fights in all of the Endless Paths. In fact, their every attack turns a party member against you, for about 15 seconds. If you start a fight with all three, after one attack, you will only have a half of the party left. Therefore, try to deal with them, one after another. Use as many offensive AoE attacks, as possible, as well as ones that deal the most damage.
Sporeling
Menpwgra
Forest Lurker
Shade
Shadow
Disease Pudding
Swamp Slime
Swamp Spore
The twelfth level of the Endless Paths of Od Nua is much bigger than the previous two. Here, you find mainly spiders - Crystal Eaters. To the North of the location, you find Vithracks - they built the labyrinth. You can talk to them and also complete a quest for them. They will not bother you , afterwards, and you will be able to get to the next level.
1. Vithrack camp
The place, where you find Vithracks. They do not attack you. You can approach them and talk to their leader - Tcharek. He sends you on an errand that concerns adra's secret - The master's tools.
In the nearby room, you find another Vithrack - Krivi. Talk to him after you have explored the Southern chamber (M52,2) and killed the mad Vithrack and he gives you a precious stone. After you have completed The Master's Tools, he will trade with you (gems, magic scrolls and light armors).
2. Southern chamber
You find the mad Vithrack and several spiders here. Kill them and from the body of the female, collect the polished pommel stone, which is the last element of the weapon from The blade of the endless paths .
3. Eastern chamber
Here, you find the passage to the next level of the Endless Paths. Also, you find two Vithracks here and a spider. They do not attack you on one condition - talk to Tcharek beforehand (M52,1) and accept The Master's Tools quest.
Tcharek (M52,1) - The Vithrack leader; he wants to learn the secret of adra.
Krivi (M52,1) - The Vithrack that is searching for his friend.
Kestorik (M52,3) - The Vithrack that is guarding the passage to the next level of the Endless Paths.
Side quest: The Master's Tools - Talk to Tcharek (M52,1).
Crystal Eater
Vithrack Sentry - He is a strong opponent - all of his statistics are high, the melee attack and ranged attack, or the number of health points. However, they come in small groups so, you should have no problems with them, at your current level.
Level 13 of the Endless Paths of Od Nua is the last large level in the labyrinth. Here, you predominantly find adra animats and several Shades. They are not as strong opponents as the ones that you have been encountering at several earlier levels, on condition that you figure out the appropriate tactic to fight them.
Important - There are some friendly ghosts on this level of the Endless Paths. You can have conversations with them only if you already know the engwithan language. You can automatically learn this language while completing the Undying Heritage main quest in Defiance Bay. It is recommended that you visit this level of the dungeon (and the two remaining floors) after you've completed the quest mentioned above.
1. Destroyed room
In the room, there are four adra animats, kill them. After that, a ghost appears, who you can talk to. Mention the password during the conversation with the ghost. It's an important step on your way to opening the main door (M53,5).
2. The room with adra
Collect the glittering adra fragment, from the small altar. It is one of the three items that you need to complete The master's tools quest tasked to you by Tcharek (M52,1).
3. Broken machine
From the broken machine, collect the engwithan machine part, watch out for the traps on the floor. Thanks to this, you obtain the next items necessary to complete The master's tools quest tasked to you by Tcharek (M52,1).
4. Northern cave
Kill Caen Gwla and animancers, collect the shell . This is the last one of the three items, which you need to complete The master's tools quest tasked to you by Tcharek (M52,1).
5. Door
You can talk to the door, but to get through, you first need to give the correct password. Deal with the adra animats from the destroyed room (M53,1) and with the Caen Gwla creatures from the round room (M53,6). There's a chance to talk to a ghost in each of these locations, but only when it's safe.
While talking to the door, you receive two new dialogue options. By saying that you are the servant of the Od Nua, the door remains shut and you will be wounded with a wave of energy. If you say that you are Od Nua' enemy, the door will open.
6. Round room
Kill the Caen Gwla creatures found in this room and once they're gone talk to a ghost. If you've decided to absorb Maerwald's door on the first level of the Endless Paths (M53,5) then you can ask the ghost for a password needed to open a door (M53,5). You can also press the platform found in the middle of the room to move a wall. This will unlock access to a secret chamber with two treasure chests.
7. Main chamber
Kill the guardian of Od Nua and 4 adra animats. The Od Nua guardian is stronger than the rest of the animats, but he does not have any unique attacks so, you should have no problems defeating him. Remember to loot the corpse, because you find a valuable items there.
Adra animat
Cean Gwla
Spectre
Guardian of Od Nua - He is a very strong animat. He has lots of health points and high defense. However, his attacks are weak. The key to victory is to block him off, with your fighters, so as to prevent him from getting to the mages.
Watch out for the traps near the door (M53,5) . There are 4 of them and they are very strong.
Adra animats usually come in groups of 3-4. The best tactic to defeat them is to send fighters ahead, who block their attacks. The rest of the party members should be occupied with dealing damage to them. Magic attacks are the most effective here.
Level fourteen of the Endless Paths of Od Nua is a surprisingly small location and, additionally, there is only one interesting item that you find here - adra crystal in the center of the room. You can interact with it, but this is optional. You can easily pass by, to the last, fifteenth level of the Endless Paths.
1. Main Stairs
Thanks to the stairs, you can get to the levels that you have already explored, within the Endless Paths. The main stairs are, usually, every second, or third level.
2. Adra crystal
In the center of the room, you find a huge adra crystal with a silhouette in it. As soon as you click it, Spirit of Od Nua appears next to you. You learn that it is him that built the entire complex, but he does not rule it, as of now. He sends you to the last, fifteenth, level of the Endless Paths. IF your statistics are not very high, you do not avoid the battle.
You will have to fight against, not only, the Spirit of Od Nua, but also with three other summoned spirits - Riomara, Isarna, Andala. Deal with them, in the first place, and with the Od Nua afterwards.
Spirit of Od Nua - A very strong opponent, has high defense and strong melee attacks. He can teleport.
Riomara, Isarna, Anadala - Strong opponents that, in their abilities and vigor, Shadows and Spectres.
The last level of the Endless Paths of Od Nua is a big location, but an empty one, to a large extent. You only find several Xaurips here. The most important thing, however, is the den of the adra dragon - the actual ruler of the underworld.
1. Destroyed stairs
The stairs are destroyed. You need to interact with them to get downstairs. However, you need no tools, nor skills to do that.
2. Adra dragon
The adra dragon is the ruler of the underground that you are looking for. As soon as you approach his den, a conversation with him starts automatically. There are two ways out of the situation:
3. Treasury
It becomes available only after you have completed The Master Below quest.
Here, you find several containers with valuable items.
Xaurip
Xaurip Champion
Xaurip High Priest
Xaurip Skirmisher
Adra dragon - An immensely mighty opponent, possibly the most difficult in the entire game. Fortunately, you can avoid the battle, if you complete a quite easy quest for him.
This quest appears in your journal after you have invited Kana Rua into the party (M12,9) and it is concerned with finding a tablet with holy scriptures, by that party member. First of all, meet with Maerwald in Endless Paths of Od Nua (Level 1) (M14,1). After you kill the mage, examine the magic barrier at the first level of the dungeon (M14,3).
To complete this quest, go to the seventh level of the Endless Paths. First of all, find the Old copper key in a small room (M47,5). With the key on you, go to the room, where there is Garbannos - the scholar that Kana Rua is searching for (M47,8). Kill the skeletal mage, pick up the tablet from the table. Kana will speak to you. After the conversation, the quest ends automatically.
After you return to the first level of the Endless Paths, you will be attacked by a group of assassins sent by the Leaden Key Brotherhood. You should have no problems defeating them, there are a mage and two fighters there, only.
NOTE! You need to have Kana Rua on the party, while completing this quest.
You can receive this quest after you have completed The Old Watcher main quest. Again, meet Steward in the grand chamber of the Caed Nua Keep (M13,1). From her, you learn about the titular master below and to get to him, you will have to fight your way through the levels of the Endless Paths of Od Nua.
Your objectives for this mission update for the first time, while you are examining the huge statue head, at level 4. It is an optional phase of this mission. The first task you need to perform is at level 6, where you need to open the door (M46,3). This is connected with The seals of the endless paths quest. After you open the door, your journal will be updated.
The next update takes place at level eight, after you have completed the quest for the Fampyr (M48,1).
The second-last step that you need to take is getting to level 14 of the Endless Paths and talking to the Od Nua Spirit (M54,2). From him, you learn that it is him the build the entire complex and that currently, he is not the one that rules it. There is something much mightier down below. You need to get there.
At level 15, you meet the adra dragon. During the conversation, you have to options. Either kill him or convince him to move to another place. The former is faster, but the adra dragon is incredibly powerful. Even with the party developed to the highest level possible, you will have problems defeating him. Not only does he deal immense damage, but also there is no limit to the range of his attack so, regardless of how far away your mages are standing, they will take damage.
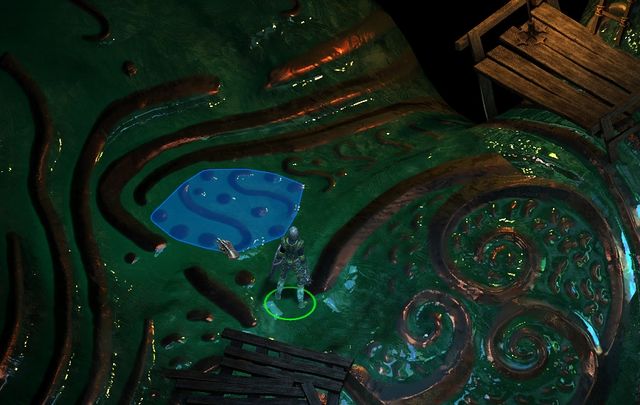 Place the amulet in the titan's hand.
A much better solution is to convince the dragon that he should leave his den. During the conversation, try to convince him that the place will soon run out of adra anyways so, it is a better way out if he leaves. The dragon consents, but you will have to help him. He gives you The dragon's amulet, which you need to infuse with his soul and put around the neck of a powerful being, for the soul transfer to complete. For this, go to the first level of the Endless Paths and walk onto the palm of the titan (M14,7). Place the amulet on his hand. After a while, it will fill with the dragon's soul.
Now, you need to go to Falanroed, the famous dragon slayer, on whose neck to hang the amulet. She is standing next to the shrine of Galawain in Black Meadow (M11,2). Place the amulet around her neck. You will still have to fight her, which is not going to be too difficult. After the battle, the Adra dragon enters her body and leaves, after a short conversation. Return to the last level of the Endless Paths. Search the treasury (M55,3), past the location, where the adra dragon stood. You find several thousand gold and several valuable items, there.
Alternative solutions:
Instead of placing the amulet around Falanroed's neck, you can tell her the truth. The amulet breaks then, but she will teach you Scale-breaker talent in return, which considerably decreases accuracy and all defensive statistics of the dragon. Now, you need to return to level 15, of the Endless Paths, and defeat the adra dragon. IT is not going to be much easier, even if you use that skill.
This quest appears in your journal automatically, after you find and collect the broken blade from the cottage of Xaurips (M42,4). Your task will be to find the remaining fragments of the blade, all around the Endless Paths.
The second fragment of the sword, the ornate sword hilt, is at level five, of the Endless Paths, in the secret chamber (M45,2). To get inside, you need to enter the Stealth mode and click on the switch on the wall. This opens the door. The hilt is in one of the heaps of gold.
The third fragment - the broken blade - is in the secret chamber at level 9 of the Endless Paths (M49,2).
The fourth fragment - the polished pommel stone - is at level 12 of the Endless Paths in the cave in the Southern part of the location (M52,2).
After you have completed all of the fragments, you need to re-forge the weapon. For this, go to First Fires, to the Crucible Keep (M22,1). In the Western part of the building, there is blacksmith Dunstan whom you ask to re-forge the sword.
During the conversation with the ogre Thulgr (M43,1) you learn that he is ashamed of what his kin has become. You need to put an end to their despicable practices and eliminate their leader - Zolla.
She is staying in the encampment to the South (M43,2). Next to her, there is one more ogre so, you will have to fight them both, at a time. Try to make use of your mages' offensive spells. After you defeat her, loot the corpse for the Zolla's torc and return to Thulg.
From him, you will obtain the Rundl's Finery - a very good light armor for your mage. Right after that, Thulgr leaves.
This quest will be automatically added to your journal, after you take the bloodstone overseer seal from the chest in the destroyed library (M44,1).
The remaining two seals are at level 6 of the Endless Paths, i.e. in the Eastern (M46,1), and the Western chambers (M46,2). Now you need to go to the room with the locked doors (M46,3).
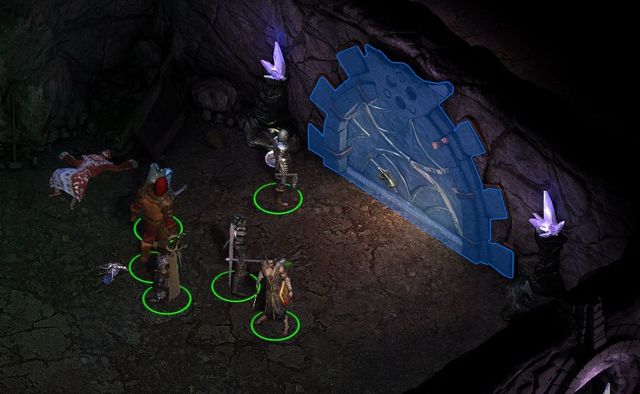 After you have found all three seals, find and click the door.
Click the door. There are three slots, in which to put appropriate seals. Note that to the right of each slot, there is a symbol - eye, chisel and sword. To find out which seal goes with which symbol, you need to enter your inventory, find a seal and right-click it. In the description, you learn what symbol is etched into it.
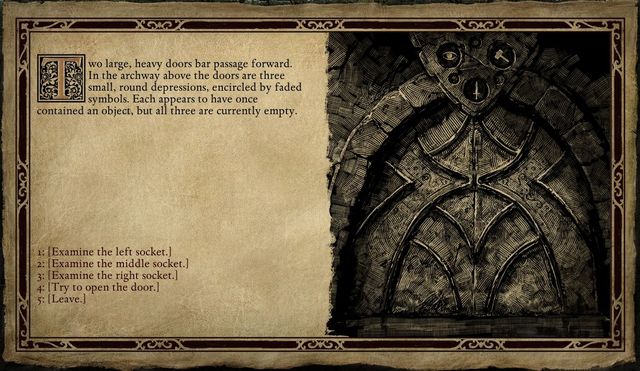 While putting the seals into the slots, pay attention to the symbols.
Left slot - eye - the sapphire overseer seal ;
Middle slot - sword - the bloodstone overseer seal ;
Right slot - chisel - peridot overseer seal .
With all three seals in their places, open the door.
You receive this quest from Tcharek (M52,1). He is a Vithrack, who is researching into the uses and ways to shape adra. The answer is, most probably, at one of the lower levels, you need to explore them and discover the secret.
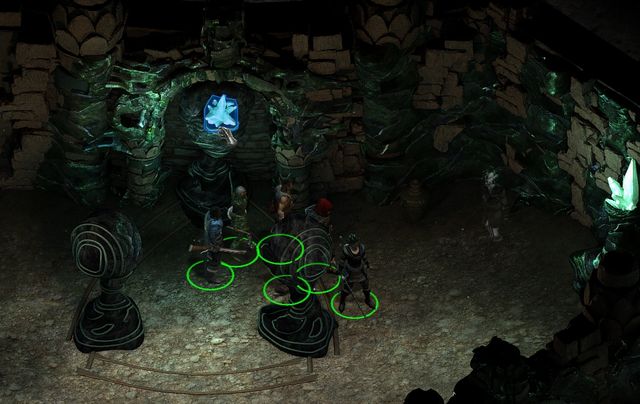 From the small altar, collect the Gleaming adra fragment.
Go to level 13 and find the room with adra (M53,2). On the small altar, you find a gleaming adra fragment. This way, you obtain one of the three items that you need to complete this quest.
The second item - the engwithan machine part is in the Western part of the location (M53,3).
You find the last item in the cave to the North (M53,4). Kill Caen Gwla and the adra animants. The item - the adra shell - is next to the armor in the Northern part of the chamber.
Now you need to return to Tcharek (M52,1). As soon as you return to level 12, you will be accosted by Kestorik (M52,3), who demands that you give him all the items. To avoid the fight, you need to lie to him and yell that you have not yet found everything; or have at least 15 Intellect, 16 Resolution or 18 Dexterity. Also, you can start a fight, which should not be too difficult. What is important is that you focus on Kestorik. When he is low on Endurance points, you will have to choose, whether to take him prisoner or kill him.
Talk to Tcharek. From him, you receive 2000 gold and a very good dagger - Drawn in Spring. If you demand more, you also receive several gems.
The above map presents the Madhmr Bridge, i.e. a small location that you can take a peek into, i.e. while on your way from the Gilded Vale to the Caed Nua Keep. In spite of what you might expect, you cannot cross the bridge and enter the Defiance Bay without any problems. Since the bridge is destroyed, you need to take the way around - through Caed Nua (map M12), Woodend Plains (M16) and Aedelwan Bridge (M17). Still, it is worth it to stop our journey and complete the simple side quest.
1. Fork
Side quest: Ferry Flotsam - Talk to Peregund.
4. The shipwrecked
Side quest: Ferry Flotsam - Talk to Hanwen. You can either attack the survivors or choose the peaceful variant and agree to lie to Peregund.
Side quest: Ferry Flotsam - Talk to Peregund (M15,1).
Peregund (M15,1) - receive a side quest from him.
Hanwen (M15,4) - You can help him and the rest of the survivors, or kill the people by the shipwreck.
Xaurip
Troll - Watch out for the trolls' strong attacks and keep the weaker party members away from it.
Looter
You can receive this quest after you meet with Peregund (M15,1). Head out to find the shipwreck in the southern part of the map (M15,4). Along your path, deal with several looters. After you get there, talk to Hanwen and listen to his side of the story. You can either attack Hanwen and the rest of the shipwrecked who are not going to pose a threat to you (negative reputation in Defiance Bay) or go with the peaceful solution and agree to lie to Peregund (lots of positive reputation in Defiance Bay). In both cases, you obtain a valuable headgear (Hanwen either gives it to you, or you find it on his corpse).
The above map presents the Woodend Plains. You need to cross this location on your way from Caed Nua to Defiance Bay. It is worth it to stay here a little longer, in order to accept a new member in the party. Apart from that, you can clear this area of monsters. Some of the fights are going to be more difficult than the ones you have fought already, but thanks to them you will gain experience.
1. Fork
Sagani - she is standing at the roadside and she is a potential party member.
2. Abandoned house
Here, you find a group of thieves that stole the Scroll of Wael. Finding the scroll is connected with the The Parable of Wael quest, which you receive from Grimda (M18,9). The thieves themselves should not be a problem. Just watch out for the mages and ranged opponents.
3. Encampment
Here, you find a group of the Giantslayers, who have been dispatched to find an ancient weapon. Conversation with them is connected with the The Bronze Beneath the Lake quest, which you receive from Wenan (M18,5). During the conversation, or if your statistics are sufficiently high, you should obtain the Engraved adra disc .
Side quest: The Long Hunt - You need to accept Sagani into the party (M16,1).
Sagani (M16,1 - she is standing at the roadside, you can ask her to join your party.
Lion - Keep the weaker party members away from lions.
Forest Troll
Pwgra - try to kill these monsters in the first place, as they can, among others, cast AoE attacks and summon all kinds of Blights.
Forest Lurker
Woodend Plains lead not only to the city, but also to two other locations - Searing Falls and Stormwall Gorge. However, it is better to explore them later into the game, after you have stayed in the Defiance Bay for a longer period of time.
You receive this quest after you invite Sagani into your party (M16,1). It consists in reaching the location seen in the vision that your character had during the first meeting with the dwarf.
To find the first location from Sagani's vision, you need to go to the Perlwood Bluff and approach the cliff (M27,2). You do not find Persoq there, but you will have a vision, in which you see the adra arch.
Go now to the Elmshore. Find the adra arch (M35,3) there, touch the sphere of energy, and you will have another vision. This time round, you need to find a forest with ruins.
Your next destination should be Northweald. Approaching the cave (M57,4) initiates a conversation with a group of hunters, who hunted the great white stag. It is at the brink of dying. Sagani will be disappointed with what she saw, and with Persoq, but she determines that her job is done.
The above map presents the Aedelwan Bridge. It is a tiny location that you need to cross on your way from the Caed Nua Keep to the city. The bridge leads to the Copperlane, i.e. one of the districts in the Defiance Bay.
1. Guards at the gate
You can talk to the Justiciars and ask them about, i.a., the location of the temple from the main quest.
Main Quest: The Assassin at Large - At Defiance Bay, complete the The Hermit of Hadret House main quest (M17,1).
Justiciary Forgant (M17,1
Justiciary (M17,1
You receive this quest automatically, after you have progressed to act three of the game, i.e. after you have completed The Hermit of Hadret House main quest. After you leave the city, you travel to Aedelwan's Bridge (M17,1). Head East, across the Woodend Plains to the Stormwall Gorge. Take the valley access that used to be inaccessible (M28,2).
Right after you descend, you will be halted by the members of the Leaden Key. You can try to talk your way out of the fight using high persuasion, however it's going to be tricky - start off by intimidating your opponents and then convince them that you'll let them live if they walk away. If you fail the conversation then you will be forced to take part in a rather difficult battle. After the fights start, attack mages and rogues, in the first place, and fighters afterwards. You can now go to the passage to the Elmshore (M35). Cross this location (talk to at Thaos the bridge) and take the South-Eastern exit. This way, you get to Hearthsong, i.e. the first are of the Twin Elms .
In Hearthsong talk to the Warrior at the palisade (M36,1) and then, to the Concerned Tribesmen a bit ahead. You can now go to The Passage of the Six building (M36,4). There, talk to Anamenfath Bethwl who is the head of the Anamenfath Council.
Exit the building and take the Eastern passage to the Elms' Reach. Head towards Twin Elms in the North-Eastern part of the reach (M37,6). At the bridge, listen to the conversation with Thaos and meet with delemgan sisters, i.e. Sidha and Rihenwn. You receive two new main quests.
Defiance Bay is the largest city in the game and one of the elements that make it different from the rest of the locations is the presence of three different factions-House Doemenel, The Knights of the Crucible and The Dozens. You can complete quests for those factions. At first, each one of them is neutral towards the party, but this may change, with time. By completing a quest for the representative of a given faction, you gain positive reputation with that faction, but this may thwart your relationship with the rest of the factions. This is especially true for the Knights of the Crucible and the Dozens, who hate each other. Therefore, at the beginning of your visit to the city, it is recommended that you meet with the representatives of all factions to learn about their worldviews and check out on their initial quests. Then, you should take your decision on which one to ally yourself with, and remain with them until the end of the game, by striving for the best reputation with them. Note - receiving a quest from a faction does not mean automatic consent to ally yourself with that faction. You usually receive reputation points at the end of each quest.
Your selection of the factions affects, predominantly, the type of side quests that you receive. Apart from that, you can gain access to unique items or traders. Also, it is worth adding that after you progress to the later part of The Hermit of Hadret House main quest, you will have to ask for help from any given faction. If you have ignored the faction issue at first, it is in this point into the story that you will have to choose to make closer friends with, at least, one of them. To learn the details on completing this specific quest, see the page The Hermit of Hadret House - main quest.
Below, you can find information on the HQs of each of the factions, their leaders and quests that initiate cooperation with them.
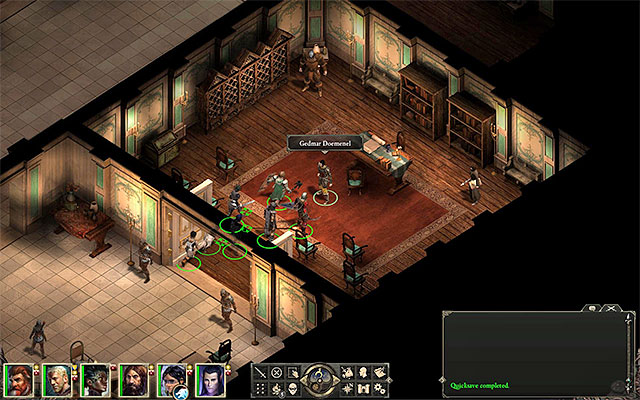 House Doemenel is led by Gedmar Doemenel
House Doemenel's HQ is in Brackenbury. Precisely, this is the Doemenel Manor (M20,3). One of the first quests from this faction is A Two Story Job and it assumes that you meet up with Abrecan Doemenel. Apart from that, you can also receive a small quest Hard Feelings from Bricana Doemenel at the first floor of the building. After you have gained enough reputation with House Doemenel, you can meet up with Gedmar Doemenel, who offers more quests for to party.
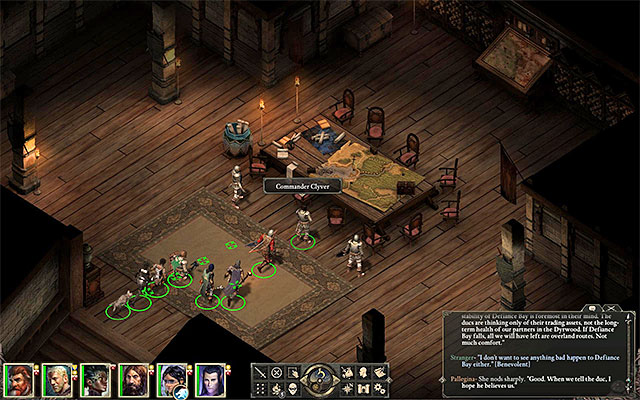 Commander Clyver is the one that you need to defeat at the Crucible Keep
The Knights of the Crucible are housed in First Fires. More specifically, it is the Crucible Keep (M22,1). One of the first quests that you receive from this faction is Built to Last and you receive it directly from the faction leader - Commander Clyver. Apart from that, you can complete Missing Sentries (tasked by Wyla next to the training grounds) and Unwanted (you need to collect the wanted notice from the keep). After you have completed Built to Last , you can receive more quests from Clyver.
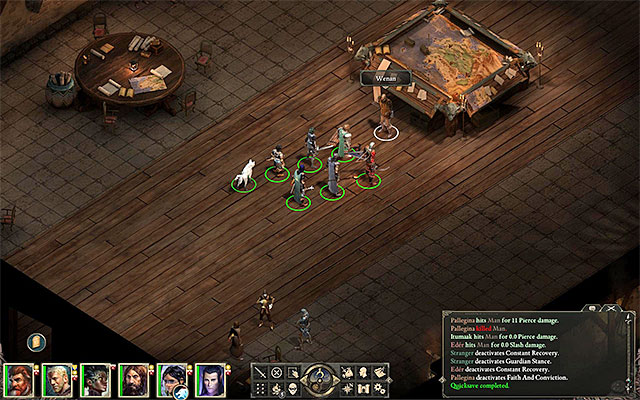 Wenan is the most important NPC in the HQ of the Dozens
The Dozens are in Copperlane, i.e. the location that you visit right after you reach the Defiance Bay. They are occupying the Admeth's Den Expedition Hall (M18,5). One of the first quests connected with this factions is the Rogue Knight, which you receive from Osric. It is trifle long, but after you complete it, you will be able to meet the leader of the faction - Wenan - in the Admeth's Den and receive more quests from him.
The above map presents Copperlane, which is the first district of Defiance Bay that you can access. It is the second-largest district, so you are going to spend a lot of time there. From here, you can get to two other districts of Defiance Bay - Brackenbury and First Fires. Due to the destroyed bridge, the northern passage is inaccessible. You can take and complete several side quests there, so take a peek into all accessible buildings, especially Goose and Fox Inn, Admeth's Den and Hall of Revealed Mysteries; talk to the NPCs you meet there. In Copperlane, there also is a passage to the Catacombs, which has been presented on a separate map. In the catacombs you can find, among others, the Temple of Woedica, connected with one of the main quests of the game!
1. Covenant
Rowan - the representative of the Dozens. You can ask him about the faction that he represents and you will obtain information on the individual districts of Defiance Bay.
2. Goose and Fox
An inn where you can replenish your supplies, hire adventurers, take a rest and complete several quests. Apart from that, there are several locked crates and containers in the inn. The most difficult lock requires 4 lockpicks and 3 Mechanics points, or 4 Mechanics points.
Side quest: His Old Self - Talk to Kaenra.
3. Marketplace
You can find several traders there.
Lora - She sells potions, rings, magic scrolls and crafting materials.
Igrun - He sells weapons, armors and tools (lockpicks, prybars, grappling hooks).
Narmer - He sells camp materials and food.
Peregund - He appears only if you have helped him in Madhmr Bridge (M15,1). He sells camp materials, traps and grappling hooks.
4. Thieves' Hideout
Once you enter, you meet thieves talking about their next "job". Regardless of which dialogue option you select, they attack you. One of them has a letter on him; when you take it from him, A Two Story Job quest automatically starts. In the building, you can find a lot of gold so remember to plunder it (watch out for a chest with a trap by the bed!).
5. Admeth's Den
Headquarters of adventurers and, at the same time, the seat of the Dozens. You can complete several optional quests there, hire adventurers and trade with Sonild (once you're in the Dozens' good graces). Apart from that, there are several locked chests and containers in the den. The most demanding locks require 5 lockpicks and 4 points of Mechanics, or 5 points of Mechanics.
Side quest: Rogue Knight - Talk to Osric.
Side quest: The Bronze Beneath the Lake - Talk to Wenan. You first need to complete the Rogue Knight quest.
6. Purnisc's house
Side quest: His Old Self - Save Purnisc and kill his double.
8. Scriveners Dormitory
Inside, you find Coren - substance trader.
9. Hall of Revealed Mysteries
This is a huge library which, at the same time, plays the role of the Temple of Wael.
Side quest: The Parable of Wael - Talk to Grimd.
11. Dalton
Side quest: A Voice from the Past - Talk to Dalton.
13. Catacombs
Here, you find the passage to the municipal catacombs and the Temple of Woedica (main storyline).
Side quest: His Old Self - Talk to Kaenra (M18,2).
Side quest: A Two Story Job - Defeat Langden (M18,4) and plunder his corpse to find a letter.
Side quest: Rogue Knight - Talk to Osric (M18,5).
Side quest: The Parable of Wael - Talk to Grimd (M18,9).
Side quest: A voice from the past - Talk to Dalton. (M18,11).
Side quest: Something Secret - Talk to Gordy (M18,10).
Side quest: The Bronze Beneath the Lake - Talk to Wenan. You first need to complete the Rogue Knight quest.
Rowan (M18,1) - a representative of the Dozens. He introduces you to one of the factions that you can join in Defiance Bay.
Kaenra (M18,2) - The woman that you need to help leave her husband.
Osric (M18,5) - He trains mercenaries at the Expedition Hall. You can talk to him about a family breastplate.
Lora (M18,3) - She sells potions, rings, magic scrolls and crafting materials.
Igrun (M18,3) - He sells weapons, armors and tools.
Narmer (M18,3) - He sells camping materials and food.
Coren (M18,8) - He trades in substances.
Grimd (M18,9) - Priestess of Wael, you can talk to her about a stolen scroll.
Dalton (M18,11) - An elder that you can talk to about his former friend.
Gordy (M18,10) - A boy whose dream is to get a knife made of March Steel.
Wenan (M18,5) - The leader of the Dozens who you can talk to to join the faction and complete a quest.
In Copperlane, just like in the other districts of Defiance Bay (with the exception of Heritage Hill), you don't encounter any enemies by default. However, this does not mean that you can feel completely safe, because in the course of your quests, you may, e.g. be accosted by bandits on the street and attacked. The same goes for exploring buildings - in some of them, there may be hostile NPCs who will attack you immediately, or after a short conversation.
Copperlane is home for the Dozens, i.e. one of the three main factions of Defiance Bay. Consider whether you want to complete quests for this faction; this may make it impossible for you to complete the ones for the other factions (especially for the Crucible Knights). Therefore, it is best to meet the representatives of all the main factions first, and make your decision after you receive several initial quests.
While in Copperlane, it is worth it to visit the market place. There, you can sell all of the items that you do not need and replenish your supplies. A good place to rest is the Goose and Fox Inn.
There is a crate near the market place in which you can find a Grappling Hook. Collect it, because you might need it elsewhere.
The entrance to the Catacombs is in Copperlane. Catacombs are the place where bandits and dangerous monsters hide. You can complete several side quests there. You will also find lots of valuable items, guarded by quite strong opponents. Catacombs comprise two levels; the Temple of Woedica, which is connected with the main storyline, is located deeper.
1. Entrance
Here, you start your exploration of the Catacombs.
Close to the entrance, there is a corpse of a Dead Initiate of Leaden Key Brotherhood.
2. Necromancer's Laboratory
Side quest: A voice from the Past - Talk to Helig.
3. Eorn's Hideout
Here, you find Eorn, an Orlan who is hiding from the Crucible Knights.
4. Eastern Chamber
In the room, there are many opponents - Sporelings and Dank Spores. First of all, watch out for the Dank Spores. In the center of the chamber, there is a corpse that you can plunder to find and collect the Hood of Woedica. Thanks to the hood, you will be able to enter the meeting of the Leaden Key Brotherhood without starting a fight (M19,6).
5. Entrance to the Temple of Woedica
You visit the temple during the Never Far from the Queen quest.
6. Passage
A guarded passage into the temple. To enter, you need to put on the Hood of Woedica, pay 350 gold, attack the guards, and have Intellect or Resolution at the level of 13. You can find the hood in the Catacombs, one floor up, on the corpse of a novice (M19,4).
7. The chamber with a novice
While talking to the novice, you can convince him to give you the Hood of Woedica (you need to have Strength or Resolution at the level of at least 14 points).
8. The main chamber
Main quest: Never Far from the Queen - Put on the Hood of Woedica (04 or 07) and enter the chamber alone, or deal with all of the opponents. After you complete the main quest, unlock the passage to the First Fires (M22) by pulling the lever.
Main quest: Through Death's Gate - It appears in your journal automatically after you have seen the vision at the Temple of Woedica (M19,8).
Main quest: Undying Heritage - It appears in your journal automatically after you have seen the vision at the Temple of Woedica (M19,8).
Main quest: The Man Who Waits - It appears in your journal automatically after you have seen the vision at the Temple of Woedica (M19,8).
Side quest: Two-Sided - Talk to Aloth after you exit the Temple of Woedica (M19,8).
Helig of Thein (M19,2) - A necromancer that has his workshop in the north-western part of the Catacombs.
Eorn (M19,3) - an Orlan that is hiding from the Crucible Knights.
Black Ooze - all types, ranging from small to big.
Troll - a very strong opponent, but occurring individually it should not be a problem to you.
Skeletal Fighter - an opponent that is strong only in big groups.
Skeletal Wizard - He deals a lot of AoE damage, but has little Endurance. Defeating him should be your priority during the fight.
Dank Spore
Sporeling
Watch out for traps, as there are many of them in the Catacombs. Pay special attention while going to the Necromancer's Laboratory , in the north-western part of this location.
At the second level of the location, in the Temple of Woedica, remember to open the passage to First Fires in the end. It is going to shorten your future travels into the underground.
You receive this quest automatically, once you complete the Never Far from the Queen main quest, i.e. after you have seen the vision in the Temple of Woedica in the Catacombs under Copperlane (M19,8). Exit the temple and leave Defiance Bay. Head towards Dyrford Village located south of the city. Again, cross the Aedelwan Bridge and Woodend Plains. Take the eastern exit from the plains to travel to Stormwall Gorge and complete your journey towards Dyrford Village (another eastern passage).
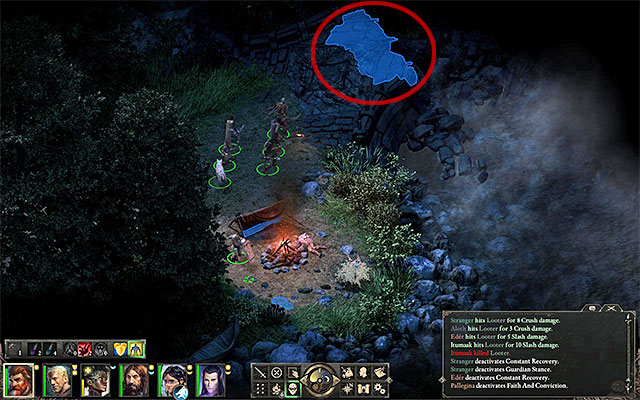 There is an alternative entrance to the ruins by the destroyed bridge
After you reach the village, enter the Temple of Berath (M29,1) and meet up with Harbinger Beodmar. He will share with you the information on Cliaban Rilag Ruins - this is your next destination. Take the north-eastern exit from the village to reach Dyrford Crossing. Here, take the northern path to Cliaban Rilag. You need to enter the ruins; there are two ways to do this. The first variant is taking the main entrance (M32,1). It is guarded by Sleafhota, a Glanfathan warrior and a Glanfathan hunter with a tamed wolf. You would have to defeat them all before you could enter. The second variant assumes that you reach the destroyed bridge (M32,2). On your way there you can be halted by looters that are easy to defeat (M32,3). It is risky to cross the bridge, because the characters with low Athletics could get injured and, as a result, they will start the exploration of the ruins weakened.
Regardless of the path that you take, you start the exploration of the Cliaban Rilag Ruins in the eastern part (M33,1). You do not need to explore the entire ruins - instead, focus on finding the stairs to the second level (M33,2). It is better to take the shorter route below, although there are several traps there. Along your path to the stairs, keep eliminating the monsters and try not to attack too many at a time. In the first place, kill pwgras and druids that wield magic, as well as animats, who use various spells in battle. In the last chamber, try to deal with the dank spores as quickly as possible and make sure that you do not spring any traps by accident.
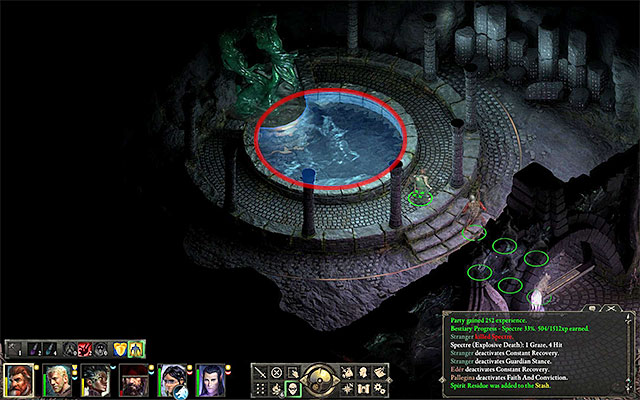 The spot where you find the Engwithan key
Your first task on the second level of the ruins is to reach the main hall (M33,4). If your character has a high level of Mechanics (at least 6 points), you can open the nearby door. Otherwise, go and find the Engwithan key, which is in the chamber in the northern part of the ruins (M33,5). Along your path, watch out for more traps and eliminate specters and animats. In the chamber with the key, there is also a slightly stronger shadow to defeat. Examine the water reservoir and fish out the key.
Use the key on any door leading to the main hall. Eliminate the Rain Blights here and reach the stairs (M33,6). Thanks to this, you will get to the part on the first level of the ruins that had been inaccessible so far. Approach the huge Engwithan machine (M33,7) and interact with the nearby statue, which will result in a new vision.
Finally, leave the ruins. You can return along the same path or interact with the nearby stream (M33,8), which would transport the party westwards(M33,9). It is especially recommended, if there is a party member with at least 16 points of Constitution. In this case, you can grab on to the edge of the tunnel, after you jump into the stream, and find a valuable treasure.
You receive this quest automatically, once you complete the Never Far from the Queen main quest, i.e. after you have seen the vision in Catacombs under Copperlane (M19,8). Exit the temple. Your destination is the Heritage Hill district. You can reach it from the direction of First Fires or from Ondra's Gift. On you attempt to enter the district (M24,1), you will be halted by the Justiciar. There are two ways in which to enter the Heritage Hill - use high Strength at the level of at least 18 points or mention Wyla. The latter option is available only if you have unlocked the Missing Sentries quest. It is Wyla you receive it from at Crucible Keep in First Fires (M22,1). If you do not have it in your journal, pay a visit to the Keep.
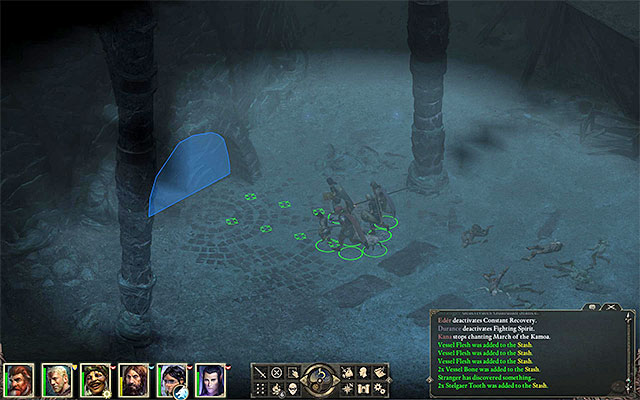 The entrance to the Tower - you can open it only if you have this quest in your journal
After you have entered Heritage Hill, head towards the Western part of the map. Along your path, fight the undead and try not to attack too many of them at once. Apart from that, watch out for Skeletal mages and kill them as quickly as possible. You need to reach the entrance to the Tower (M24,6). Of course, you start at the bottom level (M25,1) and you need to reach the very top (M25,4). Start climbing and expect to have to eliminate numerous groups of monsters. After you get to the top, approach Aldhelm and talk to him about the machinery there.
Return to the bottom and exit the Tower. Head towards the Northern part of the Heritage Hill and find Icantha's House (M24,5). Enter and talk to Icantha about the machinery so that she can teach the main character the engwithan language. Don't leave the cottage just yet. It's recommended that you explore the entire building. You will encounter a locked door and you can open it if you have 4 lockpicks and 3 points of Mechanics or 4 points of Mechanics. A group of people was being held prisoner in the locked room. If you rescue them and send them to the Tower then you will have a chance to end this quest in an alternative way (details at the bottom of this page).
You can now return to the top of the Tower (M25,4). Interact with the Engwithan machine and do not talk to Aldhelm again or he will attack the party. There are two things that you can do - either disable the machine, or sabotage it by increasing its throughput which results in an overload. You receive more positive reputation points if you do the latter.
Alternative solution:
If you've rescued a group of prisoners in Icantha's House then Aldhelm will absorb them and you will be allowed to talk to him once you've returned to the top of the Tower (without that he would simply attack your party). He will offer you a chance of ending the quest in an alternative way - by consuming the energy of the engwithan machine. End the conversation, interact with the machine and choose a newly unlocked third option if you want to do as Aldhelm suggested.
You receive this quest automatically, once you complete the Never Far from the Queen main quest, i.e. after you have seen the vision in the Temple of Woedica in the Catacombs under Copperlane (M19,8). Exit the temple and ask any of the Justiciars that you meet about the place full of madness. You will be pointed to the Sanitarium in Brackenbury (M20,5). After you enter the Sanitarium, talk to the Head Warden Ethelmoer (M21,1) about a member of the Leaden Key Brotherhood member. Ask Audmer, in one of the nearby rooms, about the member. Then, take the stairs to the lower level. (M21,2).
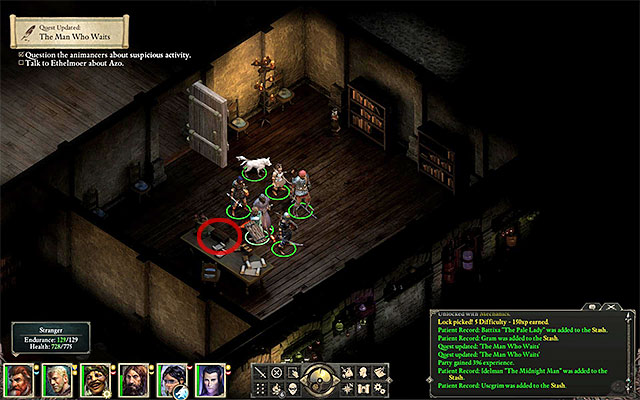 The locked chest with patient records
After you reach the animancers' laboratory (M21,3), meet with the three NPCs in the nearby rooms - Bellasege, Moedred and Riply. Apart from that, in the room in which Riply is, you can pick the lock on the chest (it requires 5 points of Mechanics) and take four patient records from it. You can also open the crate and take the Note from Azo. After you have collected enough information, return to the Head Warden. After the conversation, you gain access to the patient ward. Return downstairs and take the passage that has been locked. (M21,4).
Enter the main hall of the patient ward (M21,5) and talk to Freyol, who tells you where Caedman Azo is. You can find the man in the nearby lab (M21,6). As a result of this meeting, you will receive a key. Take it to the door to the North Ward (M21,7). Enter the ward (M21,8) and start by talking to Gram, while touching his soul. Then, walk over to the cell at the end of the corridor and touch the soul of Uscgrim, who turns out to be the Brotherhood member you are looking for.
Uscgrim takes to his heels so you have to head back to the stairs leading to the upper level. (M21,2). Unfortunately, along your path, you will have to fight several opponents. First of all, watch out for the Flesh Constructs and for Gram, Battixa and Idelman who dash out of their cells. Keep pushing forward. After you return to the upper level, meet the Head Warden Ethelmoer again.
You receive this quest from Kaenra (M18,2) at the "Goose and Fox" Inn. You learn that she has some problems with her husband - Purnisc - who turned their home into a drug den. Your task is to take back her engagement ring to the would-be husband who is in his house. (M18,6).
Purnisc is in the first room on the right. Give the ring back to him. During the conversation, Purnisc does not remember his fiance. To find out what he means, you need to go to the upper floor of the building. At the foot of the stairs, you are halted by a mercenary, whom you need to pay 100 gold to avoid a fight, or use Resolution at the level of at least 14 points. As soon as you climb to the upper floor, you must fight with three mercenaries. One of them has a key to the locked room, in the eastern part of this floor.
After the conversation with Purnisc, return downstairs and talk to the man who claims to be the owner of the house. After you tell him what you have seen, he assumes his true form. You then learn that his real name is Nyrid. You cannot free Purnisc without fighting Nyrid and several more mercenaries. In the first place, focus on the mage himself. As soon as his Endurance becomes low, you will get to decide whether to kill him or to throw him into the dungeon in Caed Nua Keep - of course, assuming that you had built the dungeon earlier. If you throw Nyrid to the dungeon, after some time a slave hunter will arrive in the keep and offer a lot of gold for him.
Go upstairs again and tell Purnisc about the death of his double. He asks a favor of you. You need to go to Kaenra and ask her to return to him. However, you cannot tell her that Purnisc deals Svef, thanks to which you will get a discount on the goods.
Go to the "Goose and Fox Inn" (M18,2) and talk to Kaenra. Tell her that the real Purnisc has been imprisoned at the upper floor of the house. It is your decision whether to tell her that he deals Svef. Your decision will not have any effect on your reward or the future events. Either way, Kaenra gives you a medallion of Unwavering Resolve, which increases Intelligence +2 and Resolution +1.
Alternative solutions:
As soon as during the first conversation with the fake Purnisc, you can discover his actual identity. Handle the conversation so as to make him admit it himself. Fight the entire group, go upstairs to free the real Purnisc, and return to Kaenra.
After you discover Nyrid's identity, you can ask for a discount on Svef. However, to prove your good intentions, you will have to return upstairs and kill the real Purnisc. As soon as you do that, return to Nyrid. From now on, you will be allowed to buy Svef at a 50% discount. Kaenra is not going to be in the inn anymore so there is no way to tell her about the husband's death.
After you kill Nyrid, you can intimidate Purnisc while talking to him, provided that you have Power at the level of 14. Regardless of what you tell Kaenra, you will receive a discount on Svef.
You receive this quest automatically after you kill a group of thieves and take a letter from Langden's corpse (M18,4). You learn from the letter that the group has been planning to rob the house of Lord Reymont. Your task is to tell somebody about this.
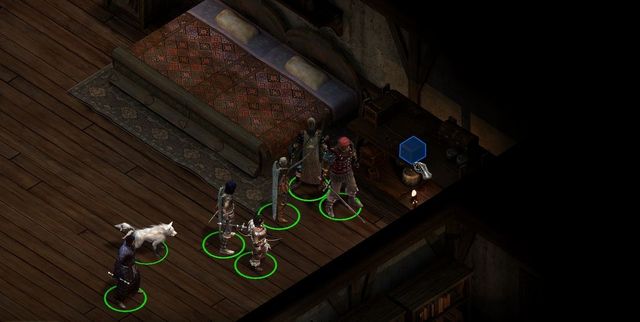 Watch out for the trap in the crate.
Before you move on, ransack the house where you can find quite a lot of gold. Watch out for the trap in one of the crates.
Knowing that the group has been planning a robbery and what they wanted to steal, you can do it yourself instead. In order to do that, you must go to Reymont Manor (M20,1) and climb to the first floor. As soon as you enter, Reymont's servant will come up to you and won't let you pass through. If you have Power at the level of 13 points, you can strike her and thus avoid getting into a fight. You can also simply attack her and kill her. Regardless of your decision, you will have to defeat two guards at the same floor.
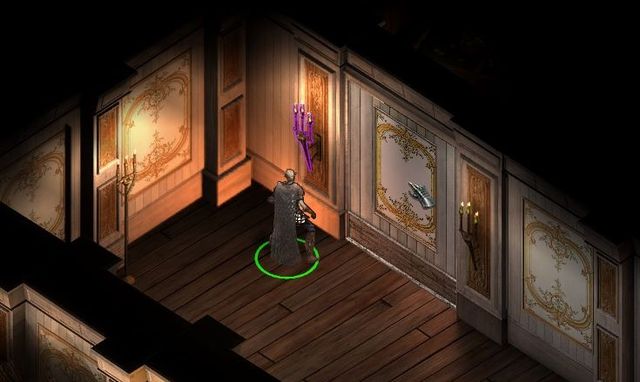 The treasure is in a hidden room, which you can open with a switch on the wall.
The room with the treasure is at the end of the corridor, behind a false wall. To move it aside, you need to pull the candlestick that is active only in the scouting mode. The gem that you are looking for is in the last crate that is secured with a trap. Do not forget to explore the entire floor to collect as much gold as possible. NPCs on the ground floor will not react, as if nothing really happened.
You can return the letter to the instigator of the theft, i.e. the Doemenel family. In order to do that, go to their manor (M20,3). Show the letter to the butler at the door and he will let you in. You need to find Abrecan Doemenel in the building and return the letter. He will want you to steal the gem for him. At this moment, you should already have it, so hand it over to him. You will receive quite a lot of gold for it.
Alternative solutions:
You can reach the first floor across the window on the side (examine the left wall of the building). To do this, you need to have a grappling hook on you.
You can take the letter to Lord Reymont (M20,1), who will thank you for your trouble and reward you with gold.
During the conversation with Abrecan Doemenel (M20,3), you can try your way out of the conversation, or refuse to steal the gem, but you will then have to fight him and his guards.
After you complete this quest, you will be able to select the Domenel family as your faction.
You receive this quest from Osric (M18,5). He will tell you that he wants to recover his breastplate, a family memento. At the moment it's in possession of Penhelm, one of the Crucible Knights. To get it back, you first need to find something to blackmail Penhelm with.
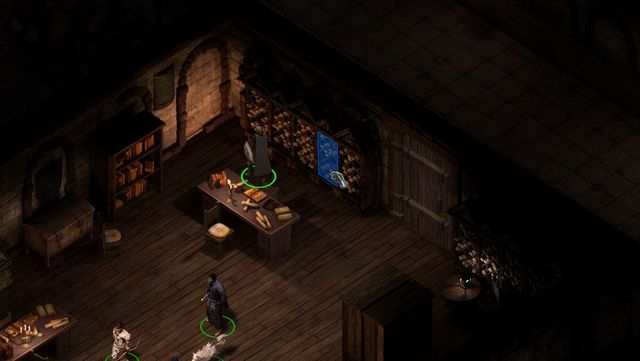 The location where you can find Penhelm's Affidavit.
What you need is the document certifying that Penhelm has no associations with former authorities and that he can be trusted. The Affidavit is in one of the middle rooms in Crucible Keep (M22,1). The room is full of shelves with all sorts of documents. The Affidavit is on the second shelf from the entrance. There are no skills required to get it.
Once the affidavit as in your hands, you can find out whether its authentic. To do that, you need to go to the person who signed it - Kurren. He is in the Hadret House (M20,4) in Brackenbury, on the ground floor. Kurren will tell you that the document is, without any doubt, a forgery. As soon as you leave the building, Penhelm appears in front of you with two guards. He wants you to give him the affidavit back. If you don't agree, he will attack you. You will have to kill him. You can plunder his body to find Osric's family Breastplate. Now, return to Osric (M18,5). As soon as you give him back the breastplate, your reputation with Defiance Bay and with the Dozens will rise. You also receive 2000 gold and the option to trade with Sonild in the eastern part of the building.
Alternative solutions:
During the conversation in front of the Hadret House, you can return the affidavit to Penhlem. During the conversation, you will have an option to convince Penhelm to return the breastplate:
If you do not return the breastplate to Osric you will lose much of your reputation with the Dozens.
After you complete this quest, you will be able to select the Dozens as your faction.
Accepting this quest means choosing the Dozens as your faction in Defiance Bay.
To receive this quest, you first need to complete the Rogue knight quest, which you receive from Osric (M18,5).
Talk to Wenan, in the Admeth's Den (M18,5). He tells you that, some time ago, he has dispatched a group of adventurers for an ancient weapon. They have not been back, so far and your task is to find them and learn about what has happened.
First, you need to go to the Woodend Plains and find the encampment of the Giantslayers (M16,3). There is little chance of avoiding the fight, during the conversation. First of all, watch out for the mage. You should have little problems dealing with the rest of the fighter, although the entire group is quite strong. Loot the corpses for their equipment and, what is most important, the Engraved adra disc .
Go now to the Stormwall Gorge and locate the entrance to the Lle a Rhemen ruins (M28,1). Watch out, because there is a group of the Crucible Knights around, who attack you at first sight. They have lots of Endurance points and high defense but, they should not pose a major problem.
Approach the stone circle, to the South-West of the temple entrance. First of all, click the "Wait for Several Hours" option. Repeat several times, until the nightfall and until the ruins around start to glow. Now, slide the Engraved adra Disc into the slot. At this point, the water starts to fall from the reservoir, which reveals that descent into the underground. This may take several seconds.
Enter the temple. Now, you need to cut through into the Tunnel (M34,2). Watch out, because you may encounter several strong opponents, along you path. Take one of the options to get to the other side. The best option is to crawl under the cobwebs.
Now, enter the Southern Chamber (M34,3). Talk to Nridk; from the perspective of the quest completion, this does not matter, whether you kill him or let him walk. Approach the sarcophagus, at the end of the room, and collect the Ancient engwithan weapon .
Now, you need to return to Wenan (M18,5). Return the Engwithan weapon to him and you will gain reputation both with the Dozens and in Defiance Bay. Additionally, you receive the Cloudpiercer - a very good bow. After the conversation, you receive the Mob Justice Talent , which adds +5 to accuracy, if you attack an opponent that has already been attacked by a party member.
Alternative solutions:
During the conversation with the Giantslayers, you can avoid the fight. However, you require 16 Resolution, 16 Intellect, 17 Dexterity or 17 Power. You can then obtain the Engraved adra disc without the necessity to kill the opponents.
You receive this quest from Grimd (M18,9). You learn that one of the legendary scrolls of Wael has been stolen. Your task is to find the thieves and return the scroll to its rightful owners.
Go to the Woodend Plains and head towards the Abandoned House (M16,2). In front of the building, there is a group of thieves, of 5 NPCs, and a bear. You need to defeat them. On one of them, you find the scroll.
As soon as you pick up the scroll, you hear a mysterious voice, which you can presume is Wael's. You learn that the scroll theft was no coincidence. You are to finish the job and take the scroll to Black Meadow where you bury it under the drake skull facing Eastwards (M11,5). Now you need to return to Grimda (M18,9). She will not be too happy with the course of events, but she will not hold it against you that you have made your choice. You will be rewarded with the rise in reputation, in Defiance Bay, a as well as the Foodpad's hood, which permanently increases Stealth by +2 and Perception by +1. Also, you receive the Key to the elder archive, which becomes useful in other quests.
Alternative solutions:
You can ignore Wael and return the scroll to Grimda. The reward will be the same, as in the case of burying the scroll.
After the conversation with Dalton (M18,11), you will learn that he is looking for his friend. According to his visions, she is roaming the nearby Catacombs (M18,13). As soon as you enter there, go to Helig of Thein (M19, 2) whom you can ask about Rowyna (it's the name of the missing friend). He agrees to tell you everything he knows if you bring back Moedred's Grimoire to him. He will also give you the key that you need. Moedred is in the Sanitarium (M20,5) in his underground lab (M21,4).
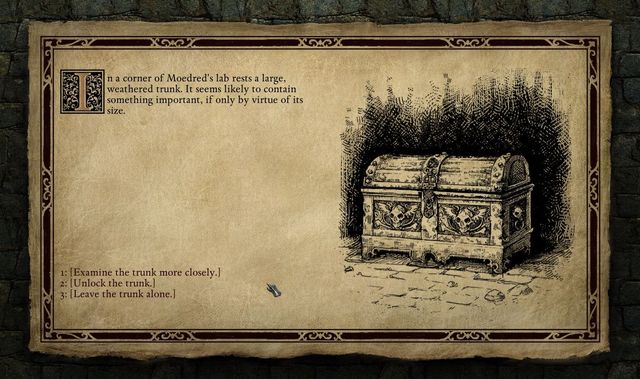
He will tell you that it was him who killed Helig, through the experiments that he was conducting. At this moment, you will have to choose whether to keep helping Helig or turn against him. If you choose the former, you can open the chest even without Moedred's consent. Inside, instead of the grimoire, you will find a monster - Wicht. He will attack and kill Moedred, and you will have to defeat him.
Now you have to return to Helig in the Catacombs. He will be very pleased with the course of the events and, as a reward, will give you a special amulet with the soul of Rowyna, the woman that you have been searching for. Now, return to Dalton. There are several options to choose from during the conversation:
Alternative solutions:
If you choose to eliminate Helig, you need to return to the Catacombs. During the conversation, you can return the chest key to Moedred. After you are back in the Catacombs, talk to Helig and attack him. The fight should not be difficult, on condition that you first kill Helig. Plunder his corpse to find the amulet with Rowyna. The conversation with Dalton is then identical as in the case of leaving Helig alive.
Even if you free the Wicht and have Moedred die, you can tell Helig, after you return to him, that this was not the deal and you can attack him.
During the conversation with Gordy (M18,10), you learn that he knows the location of a stash with valuables. He will reveal it only if you bring him a knife made of March steel. The knife is in the possession of trader Igrun (M18,3). Igrun already sold the dagger to some adventurers currently staying at the Goose and Fox Inn (M18,2). You need to talk to Two-Tone Weaxel. You can either buy the knife from him or attack him, However, you will have to take on the entire group of adventurers. Then, you need to return the knife to Gordy. He will reveal the secret then.
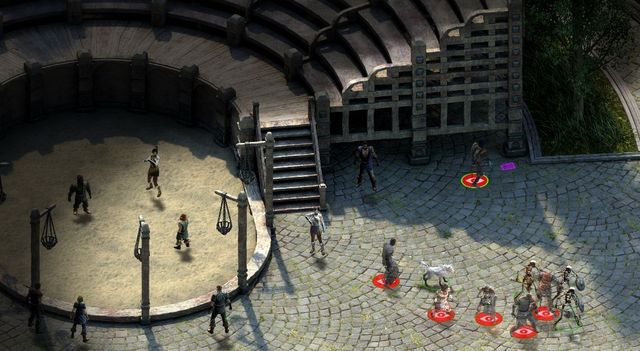 Activate the sneaking mode to find the location of the treasure.
Gordy tells you that one of the actors hid something under a loose stone, close to the Theater. The stone is to the right of the stage that the actors perform on. To reveal it, you need to activate the sneaking mode; the stone will be highlighted in violet. It is impossible to find it in the normal mode.
After you return here later into the game, you will witness a situation in which a man - Hamor - takes the dagger away from Gordy and accuses him of theft. You can join the conversation and confirm that Gordy is telling the truth, or deny it. However, there is no greater significance to it.
Alternative solutions:
If you have Power at the level of 12, you can make Gordy tell you the secret without having to bring him the knife. This will automatically complete this quest.
With your Resolution at level 12, Gordy will tell you where the treasure is, but you will still be able to bring him the knife.
Exit the Temple of Woedica (M19,8) after you complete the Never Far from the Queen main quest. If Aloth is on the party, he will want to talk to you. You can now go to Brackenbury district and enter the Sanitarium (M20,5) where you need to talk to the Expert on Awakenings. At the upper level of the Sanitarium (M21,1) talk to Head Warden Ethelmoer, and you will be sent to the lower level to talk to Bellasege. You will find the woman in one of the animancers' labs (M21,3). Start a conversation and volunteer Aloth. During the session, you can select dialogue options freely and assure the elf that this is only a dream. This quest is completed once you have talked to Bellasege.
Brackenbury is one of the five districts of the Defiance Bay. It is adjacent to three other districts - Copperlane, Ondra's Gift and First Fires. This is the upper-class district of nobility and rich merchant families. There, you can find buildings that gain on significance later into the game, both for side and main quests (Sanitarium). Also, it houses one of the factions - the Doemenel family.
1. Reymont Manor
On the first floor of the manor, there is a gem from the A Two Story Job quest (the chest with a trap in the secret room). You receive the quest after you have collected the letter from the body of a defeated thief (M18,4). You can enter the manor through the main entrance or through side windows (it requires a grappling hook). In the manor, there are several locked chests and containers. The most difficult lock requires 4 lockpicks and 3 points of Mechanics or 4 points of Mechanics.
2. The Charred Barrel
The inn where you can replenish your supplies, hire an adventurer or rest.
Side quest: Far From Home - talk to Thristwn.
3. Doemenel Manor
The house of one of the richest families in Defiance Bay, and a thieves' den at the same time. Here, you can pick the Doemenel family as your faction, by accepting The Changing of The Guard quest. If you do not want to ally yourself with the Domenels, you can choose to attack during the initial conversation with the butler, and after the fight is over, plunder the entire manor. In the building, there are several locked chests and containers. The most difficult lock requires 6 lockpicks and 5 points of Mechanics or 6 points of Mechanics.
Side quest: The Changing of The Guard - Talk to Gedmar Doemenel on the first floor of the manor.
Side quest: Hard Feelings - Talk to Bricanta Doemenel on the first floor of the manor.
4. Hadret House
The HQ for the Durynd Row. Apart from that, in the building there are several locked chests and containers. The most difficult lock requires 7 lockpicks and 6 points of Mechanics or 7 points of Mechanics.
Main quest: The Hermit of Hadret House - Talk to Lady Webb.
5. Sanitarium
Main quest: The Man Who Waits - Meet with Head Warden Ethelmoer.
Main quest: The Hermit of Hadret House - Meet the messenger after you have completed The Man Who Waits main quest (M20,5).
Side quest: Far From Home - talk to Thristwn (M20,2).
Side quest: The Changing of The Guard - Talk to Gedmar Doemenel (M20,3) on the first floor of the manor.
Side quest: Hard Feelings - Talk to Bricanta Doemenel (M20,3) on the first floor of the manor.
Side quest: The Theorems of Pandrgam - Talk to Nedyn (M20,5).
Side quest: The Final Act - Talk to Kurren in the war room of the Hadret House (M20,4).
Lord Reymont (M20,1) - One of the most influential people in Defiance Bay.
Thristwn (M20,2) - A young Glanfathan who needs help retrieving his necklace.
Abrecan Doemenel (M20,3) - The representative of the Doemenel family.
Gedmar Doemenel (M20,3) - The main leader of the Doemenel family. He can take you in as an apprentice.
Bricanta Doemenel (M20,3) - She liquidates stolen goods. She wants you to teach Kolfecg a lesson.
Kurren (M20,4) - He's inside the building (in the war room). He can give you a side quest.
Nedyn (M20,5) - An animancer that you can help obtain an incredibly important manuscript.
If you let Ingroed and Nonton go in the Vengeance from the Grave quest, they are now working at the Charred Barrel Inn.
Brackenbury is the home to the Doemenel family, i.e. one of the main factions in Defiance Bay. Consider whether you want to complete quests for this faction, especially that this may make you unable to complete quests for the other factions. Therefore, it is best to meet the representatives of all the main factions first and make your decision after you receive several initial quests from them.
Sanitarium is one of the most important buildings in Brackenbury. It is located in the western part of the district. It is the HQ for researchers dealing with animancy. The building plays a significant role, both in the main storyline and several side quests connected with, among others, your party members.
1. Main Hall
Main quest: The Man Who Waits - Talk to Head Warden Ethelmoer.
Audmer - Animancer.
3. Animancer labs.
Bellasege - An animancer connected with the Two-Sided side quest (a personal quest from Aloth, which you can receive after you visit the Temple of Woedica)(M19,8).
Moedred - An animancer connected with A Voice from the past quest. You receive the quest from Dalton (M18,11).
Riply - An animancer.
4. Entrance to the patients' ward
Main quest: The Man Who Waits - after you have gathered enough information in the animancers' lab (M19,3) ask Head Warden Ethelmoer (M19,1) to be allowed into the patients' ward.
5. Patients' ward main hall
Main quest: The Man Who Waits - Talk to Freyol about Caedman Azo.
6. Laboratory
Main quest: The Man Who Waits - Talk to Caedman Azo about his experiments and receive his key to the north ward (M21,7).
7. Entrance to the North ward
Use the key from Caedman Azo (M21,6).
8. North ward
Main quest: The Man Who Waits - Find the cells where Gram and Uscgrim are kept. Talk to them.
Head Warden Ethelmoer (M21,1) - the most important NPC in Sanitarium
Bellasege (M21,4) - An animancer
Moedred (M21,4) - An animancer working on the Hollowborn.
Riply (M21,4) - An animancer
Freyol (M21,5)
Caedman Azo (M21,6) - He has the key for the north ward(M21,7).
Gram (M21,8) - He is in one of the cells.
Uscgrim (M21,8) - Talk to him towards the end of your stay at the patients' ward.
Crazed Patient
Flesh Construct - try to eliminate them one by one
Wicht
Do not worry if you cannot access all of the rooms at the ground floor of the Sanitarium. This becomes possible after you have progressed sufficiently in the main storyline.
You receive this quest automatically, after you have completed The Man Who Waits main quest. After you exit Sanitarium (M20,5) you will be accosted by a Dunryd Row Messenger. Listen to the message and head towards the Hadret House (M20,4). Witness the meeting with Thaosem near the house and enter. Here, you need to speak to Lady Webb (she is staying in the room that used to be inaccessible). Tell her about the events in the Sanitarium. Apart from that, she will ask you to report to her on the activities of the Leaden Key Brotherhood.
Return to Lady Webb after you have disabled or destroyed the Engwithan machine atop the Tower of the Heritage Hill (M24,6). You visited that location in the Undying Heritage main quest. At the same time, in front of the entrance to the Hadret House, you should meet a Courier, who gives you a rare pistol.
Return to Lady Webb again, after you have completed the Through Death's Gate main quest, i.e. after you have examined another Engwithan Machine in the ruins of Cliaban Rilag (M33,7). From Lady Webb, you learn that you need to obtain an invitation to the animancy hearings.
To obtain the invitation, you first need to win the favor with one of the three factions in the Defiance Bay -House Doemenel , The Knights of the Crucible or the Dozens. House Doemenel is a big manor in the center of the Brackenbury district (M20,3), The Knights of the Crucible are stationed in the keep, in the First Fires district (M22,1), whereas you can find the Dozens un the Admeth's Den Copperlane district (M18,5). To learn more about the individual factions and the quests connected with them, see the Defiance Bay - Choosing the faction chapter. After you have obtained some reputation points, with one of the factions (you are free to choose - this will not have any effect on the rest of the quest), meet the leader of the faction, at the faction's HQ and ask for the invitation.
IMPORTANT NOTE - Do not continue this quest, until you have completed all of the side quests in Defiance Bay. After this quest ends, you will not be able to return to the Bay, for some time. The same goes for all the rest of the important activities, such as exploration of available locations (it is imperative that you explore the Sanitarium, because it becomes inaccessible), or meeting with traders.
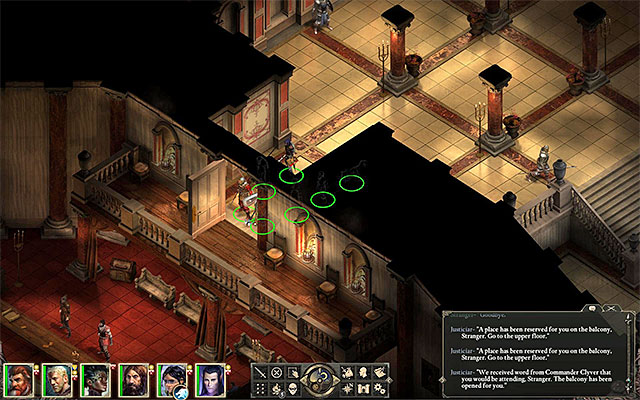 The access to the side balcony
After you receive the invitation, from one of the factions, return to Lady Webb and talk to her. Travel to First Fires and enter the Ducal Palace (M22,4). After you enter, do not use the main door, because it is locked. Instead, find the access to the side balcony. Wait for the hearings to start (it is chaired by Duke Aevar). It does not matter, which dialogue options you choose, during the hearings. Regardless of what you do, the Duke is murdered towards the end of the scene.
After you see all the cutscenes and receive a vision, exit the Ducal Palace. You need to return to Lady Webb, i.e. to Brackenbury (M20,4). Since the city is being ravaged by fires, you cannot use all of the passages, as a result of riots so, take the Southern exit from the First Fires, i.e. the one right next to the Crucible Keep. Enter the Hadret House and go to the room on the upper floor. Touch the soul on Lady Webb's bed. Automatically, you leave the city and are promoted to the next act.
During the conversation with Thristwn (M20,2), you will learn that he wants to retrieve a necklace from his partner in crime.
That partner is a woman called Serel, who now works at the Salty Mast (M23,5) in Ondra's Gift. To meet up with her, you need to pay 1000 gold to the owner of the brothel - Maei. She is at the ground floor of the building, whereas Serel is at the first floor. You can buy the medallion from Serel for 6000 gold. Now, you only need to return to Thristwn (M20,2) and give the item back to him. For this, you will receive 2000 gold and an increase in reputation in Twin Elms.
Alternative Solutions:
During the conversation with Serel, you can tell her that you want her to keep the medallion, and thus fail to complete the quest for Thristwn. To complete the quest, you need to have Resolution at the level of 17 or Power at the level of 16. You can also simply attack Thristwn, but this means fighting everybody at the inn.
You can refuse accepting the money from Thristwn, thanks to which your reputation in Twin Elms goes even higher up.
You can receive this quest after you have returned the gem to Abrecan Doemenel (M20,3) in A Two Story Job quest. You receive it from Gedmar Doemenel at the upper floor of the manor. Accepting this quest means joining the Doemenel family as your faction, which is an irreversible decision.
You need to kill Wenfeld, one of the representatives of the opposing faction - Crucible Knights - and frame the Dozens - another opposing faction - for this murder. As soon as you climb down, you will be accosted by the son of the quest giver - Abrecan Doemenel. He asks you not to fulfill his father's will and not to frame the Dozens.
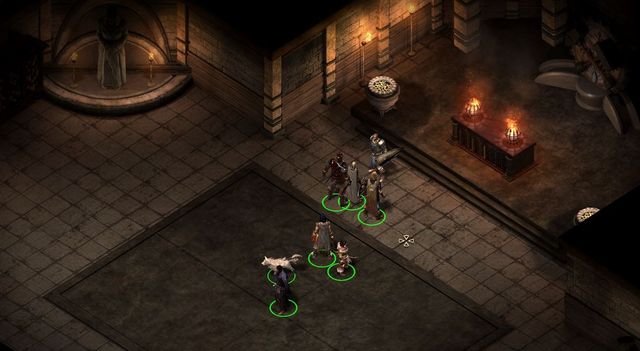 Wenfeld is in the western part of the Crucible Keep and he is a quite demanding opponent.
Marshal Wenfeld is in the Crucible Keep (M22,1), in the temple in the Eastern part of the complex. He is praying in front of the altar. Every now and then, there is a guard that enters the room. Wait for the right moment and only then attack Wenfeld. He is a quite strong opponent, but with a sufficiently big party, you should have no problems with defeating him.
After the fight, approach the nearby altar and leave the Dozens Token on it. You can now return to Gedmar Doemenel (M20,3). You will gain quite a lot of reputation with the Doemenel family. You will be allowed to pick your reward: gold, a powerful weapon (a high grade dagger) or a favor in the future.
Alternative solutions:
You can follow Abrecan's request and choose not to plant the Dozens Token. Eventually, Gedmar will not hold this against you and the reward will remain the same.
To receive this quest, you need to talk to Bricanta Doemenel (M20,3) at the first floor of the manor.
Your task will be to teach Kolfecg a lesson. He can be found in Ondra's Gift in his house (M23,2). During a short conversation attack Kolfecg and kill him. After your return to Bricanta, she will be happy to hear that the mission was successful and she will trade with you from now on.
Alternative solutions:
You can let Kolfecg flee the city. After you return to Bricanta, you can lie to her and tell her Kolfecg is dead, and the reward will be the same as if you killed him.
Instead of killing Kolfecg, you can simply beat him up. Bricanta will be just as pleased.
During a conversation with Nedyn (M20,5) you will learn that she requires a manuscript of a certain Pandrgam to continue her work. Unfortunately, nobody wants to give her access to the document. Your task is to go to the Hall of Revealed Mysteries (M18,9). As soon as you get there, your journal will be automatically updated and your next step will be finding the ancient archives. The archives are in the same building, in the western side. However, you need to get the key to enter, which is in possession of Grimd in the same building. To obtain it from her, you need to complete the Parable of Wael quest.
Grimda gives you the Key to the elder archive. Go to the Western part of the Hall of Revealed Mysteries. Pandrgam's Theorem is in the chest, at the very end of the room. Watch out, because it is trapped.
Now, return to Nedyn (M20,5). From her, you receive 500 gold and the Ring of eternal funding , which returns 5 gold to you, per each round in your keep.
Alternative solutions:
After you get to the Hall of Revealed Mysteries (M18,9), you can tell Grimd that Nedyn wants access to the Pandrgam's Theorem. As soon as she learns about this, she will do everything in her power not to let this happen. This way, you complete the quest and receive 200 gold, and your reputation in Defiance Bay slightly increases.
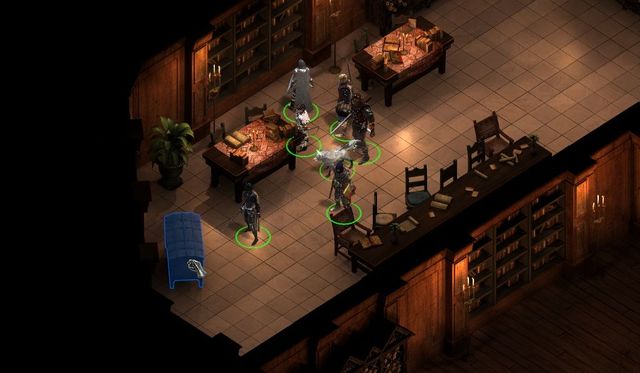 Watch out for the trap hidden in the chest.
With Mechanics at the level of 5, you can open the archives door. They are in the Western side of the Hall of Revealed Mysteries (M18,9). However, expect to be attacked by the guardians of the Temple of Wael. Pandrgam's Theorem is in the Western side of the room. The chest is secured with a trap. With the book on you, you can return to Nedyn.
You can activate this quest by talking to Kurren in the Hadret House (M20,4). He can be found in the war room and you should know that this conversation may not be available if you didn't begin the Hermit of the Hadret House main quest. The first part of this quest will be about talking to several people in various parts of the city. Naturally you will be allowed to meet them in which order you desire so you don't have to follow this guide exactly.
The first person is in Brackenbury so you don't have to leave this district straight away. Search the area by the fountain located near the Hadret House and find Elcga. Make sure that you question the woman thoroughly by choosing all of the available dialogue options. The next district you must visit it Copperlane. Here you should talk to two people. Start off by finding Lumdala near the theatre (M18,12). Once you're done with that conversation proceed to the market area and locate Lora (M18,3). Just as before you must take part in a full conversation (it is very linear so don't worry about your responses). You may now go to the Ondra's Gift district. Once you're there enter the Salty Mast brothel (M23,5) and locate Oly. Listen to the conversation with this character during which Lumdala will be designated at the top suspect.
Return to the Copperlane district and meet with Lumdala again. Present your accusations. Once you're done talking to her find Kadal near the theatre and talk to him as well. Kadal will ask your party to meet with him in Lumdala's House and it's located in the northern part of the map (M18,7). Enter the building and initiate a new conversation with Kadal, receiving a key from him as a result of this meeting. Use the key you've just obtained to open a nearby door. Enter a new room and locate a hidden staircase. The stairs will lead you to a previously inaccessible part of the Catacombs (M19,9). Make sure that you explore the secret room in the catacombs very thoroughly so that you'll find an item that belonged to Kora and you'll be treated with a new vision. Lumdala will soon show up here - you can attack her (aside from her you would also have to defeat five of her helpers) or you can listen to her proposition involving Lord Gaderman and allow her to leave. If you've chosen the second option you will receive 1000 gold. No matter how you've decided it's time to exit this place - use the stairs again or find a secret switch leading to the main part of the catacombs.
You may now return to questgiver - Kurren from the Hadret House (M20,4). The conversation with Kurren will be different depending on if you've killed Lumdala or not and what type of a report you've presented to him. He will give you 3000 or 4000 gold.
Alternative solution:
If you didn't murder Lumdala in the catacombs and if you've listened to her proposal then you can end this quest in an alternative way and this means that you must locate Lord Gaderman. He can be found near The Charred Barrel inn in the Brackenbury district (M20,2). Initiate a conversation with Gaderman and agree to the plan of framing Linette. Gaderman will give you 1000 gold and a silver ring. You must now go to Kurren. Show him the ring and accuse Linette of committing all of the murders.
First Fires First Fires is one of the five districts of Defiance Bay. It is here that you can find the most important buildings, such as Duke's Palace, Embassy of the Vailian Republic or the HQ of the Crucible Knights. It is also the central district, from which you can get to the rest of the city's districts. First of all, you should visit the Crucible Keep and the Temple of Woedica. As for the rest of the buildings, you visit them later into the game.
1. Crucible Keep
It is the HQ for the Crucible Knights faction. In the keep, there are several locked chests and containers. The most difficult lock requires 7 lockpicks and 6 points of Mechanics or 7 points of Mechanics.
Side quest: Unwanted - Collect the Edict of Arrest from the desk in one of the rooms in the Crucible Keep.
Side quest: Missing Sentries - Talk to Wyla who is next to the training ground in the Crucible Keep.
Side quest: Built to Last - Talk to Commander Clyver in the council room in the northern part of the Crucible Keep
2. Temple of Woedica
Main quest: Never Far from the Queen - As soon as you come close to the temple, a cutscene starts in which you are approached by a ghost and you need to talk to him.
To the right of the temple there is an entrance to the Catacombs. To enter there, you first need to activate it from the inside. The other entrance is in Copperlane and it is there that you need to go first.
3. Vailian Embassy
Embassy of the Vailian Republic, the southern neighbor of the Dyrwood Palatinate. At the embassy, there are several locked chests and containers. The most difficult lock requires 8 lockpicks and 7 points of Mechanics or 8 points of Mechanics.
4. Duke's Palace
The HQ of the city's authorities.
Side quest: Cinders of Faith - Talk to Fyrga.
Side quest: Fragments of a Scattered Faith - Talk to the Records Keeper.
Side quest: Unwanted - Collect the Edict of Arrest from the desk in one of the rooms in the Crucible Keep (M22,1).
Side quest: - Talk to Wyla who is next to the training ground in the Crucible Keep.
(M22,1).
Side quest: Built to Last - Talk to Commander Clyver in the council room in the Northern part of the Crucible Keep (M22,1).
Side quest: Winds of Steel - Talk to Commander Clyver after you have completed Built to Last (M22,1).
Side quest: Cinders of Faith - Talk to Fyrga (M22,4).
Penhelm (M22,1) - One of the Crucible Knights.
Wyla (M22,1) - He trains Crucible Knights recruits; he has a problem with the Heritage Hill.
Commander Clyver (M22,1) - The head chief of the Crucible Knights.
Dunstan (M22,1) - A blacksmith who works on creating new steel knights. After you complete Built to Last, he will agree to trade with you. He offers one of the best armors in the game.
Fyrga (M22,4) - Priestess of Magrana, who wants you to help her find a certain item.
Justiciary Aldmar (M22,1) - The butler at the Crucible Keep.
First Fires houses the Crucible Knights, i.e. one of the main factions in Defiance Bay. Consider whether you want to complete quests for this faction, especially that this may make it impossible to complete the ones for the other factions. Therefore, it is best to meet the representatives of all the main factions first and make your decision after you receive several initial quests from them.
This quest appears in your journal automatically, after you collect a letter from the desk. The letter is the Edict of arrest on Eorn. He is in the Crucible Keep (M22,1) in the central room of the complex. It is the same room as for the Rogue Knight quest.
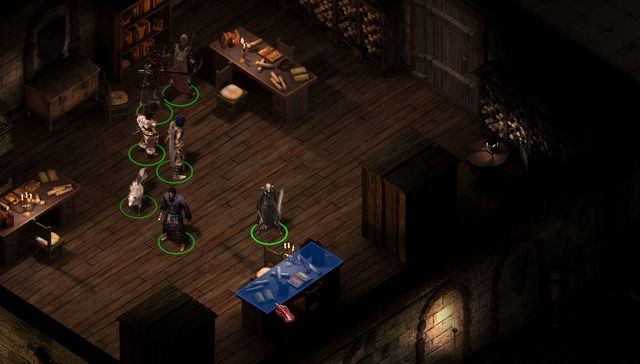 The location where you can find the letter that activates the quest.
You can learn from your journal that Eorn should be somewhere around the city. To learn more, talk to Justiciary Aldmar (M22,1) who is the butler at the Crucible Keep and can be found by the entrance. He will tell you that you should go looking in the Catacombs (M19,3). It turns out that Eorn, by accident, killed one of the Crucible Knights in defense and they want him dead now. While talking to Eorn, you can either attack him straight away, or try to convince him to appear before the court. The latter option will result in a fight anyways and in a subsequent death of Eorn.
You now need to return to to Crucible Keep in First Fires (First Fires, 1). Say that you have found Eorn and inform Justiciary Aldmar that you have also killed him The Justiciary can be found by the keep entrance. You will gain reputation with the Crucible Knights and earn 250 gold.
Alternative solutions:
If you have sympathy for Eorn's situation, you can let him walk, or even give him 300 gold to move out of the city.
You receive this quest from Wyla by the training grounds, in the south-eastern part of the Crucible Keep (M22,1). She has a problem with one of the districts of Defiance Bay - Heritage Hill (map M24). Some time ago, her sentries started to go missing there. You need to get there and find the missing troops.
They can be found in the Tomb to the north of the location (M24,3). Inside, there are 4 sentries and Leyra. She is a ghost, but she still thinks she is alive. If you have Resolution at the level of 13 you can talk one of the sentries into joining your side. Not only will you avoid the fight, but also he will help you fight his companions. The fight is not that easy and the sentries are highly resistant to melee attacks, so try to cast offensive spells. Also, remember to plunder the tomb in the center. Just watch out for the trap that it is secured with.
Now, you only need to return to Wyla (M22,1). Your reputation with the Crucible Knights and in Defiance Bay will increase, and also you will also receive 1000 gold.
You receive this quest after you talk to the Commander in Chief of the Crucible Knights - Commander Clyver. He is in the council room in the northern part of the Crucible Keep (M22,1). He will tell you that he works in collaboration with blacksmith Dunstan on creating steel knights that will do the job of humans. To continue their work, they require results of certain research, which you need to find.
The research is conducted by Vianna, who was last seen in the Scriveners Dormitory (M18,8). You will learn from Coren that Vianna left to see her friend in w Ondra's Gift.
Vianna is in the Abandoned House (M23,3). Further in the building, in the room to the left, you note that Vianna is accompanied by Dodwyna - a representative of the Dozens. She wants to intercept Vianna's research results in order to thwart the plans of the Crucible Knight. Regardless of the dialogue option that you select, you will have to fight with three opponents. Attack Dodwyna in the first place, because she wields magic. You need to take the research results from the corpse of Dodwyna. Vianna will be thankful for saving her life.
Now, you need to return to the Crucible Keep (M22,1) and hand the results over to Dunstan, the smith in the Western part of the complex. He is not too happy with the idea of creating steel knights, but he starts working. After a while, you will be able to see the results of his work. You will gain reputation with the Crucible Knights and in Defiance Bay.
After you complete this quest, you will be able to select the Crucible knights as your faction.
You can receive this quest after you have completed the Built to Last quest, but only if you haven't lost good graces with the Crucible Knights by completing quests for the other factions of the city. Accepting this quest means joining the Crucible Knights. Meet Commander Clyver in the Crucible Keep (M22,1). After the conversation, leave the city.
Aranroed can be found at the pier
You need to go to Anslogs's Compass (M7 - map), i.e. the small seaside location to the south of Gilded Vale. Go to the pier (M7,6) and meet with Aranroed. The conversation will be interrupted by Padebald and a group of Mercenaries. Start fighting and try to eliminate the enemy mage and the archer first. Only then, deal with Padebald and, finally, with the rest of the fighters. After the fight, talk to Aranroed (positive reputation with the Crucible Knights) and leave this location.
Head back to the Crucible Keep in First Fires (M22,1). After you approach the keep, it will turn out that it has been attacked. Eliminate the steel knights (it is a good idea to take them out one by one, because they are rather tough) and enter the keep. You need to kill all the remaining enemy knights inside. It is convenient that many of them are already engaged in fights. After you secure the entire keep, meet with Commander Clyver again (positive reputation with the Crucible Knights and in Defiance Bay).
Talk to Fyrga in Ducal Palace (M22,4). She is in the temple in the eastern side of the complex. She is concerned about the situation in the city, but she had a vision telling her that there is an item in a temple that can help her deal with the situation. Your task is to find that place and bring the item to her.
To know what you are looking for, you first need to go to Admeth's Den (M18,5). There, find Wenan, at the entrance, and ask him about the cave. He will tell you that it is situated in the Searing Falls. You now need to go to the Cave (M26,1). As soon as you are inside, reach its very end. At first, nobody will bother you. You encounter a large drake there - Cail the silent. The fight is quite difficult because, not only is Cail a strong opponent, but also he is backed up with two young drakes and several Xaurips. First of all, focus on the Young Drakes, then deal with the Xaurips, and finally the drake himself. Keep your eyes on the Endurance bar, at all times, especially for the magical party members and ranged fighters.
From the corpse of the drake, collect the Burning Stone. Loot all of the corpses and find the container with treasure, at the end of the cave. Watch out, because it is trapped. With the stone on you, you can return to Fyrga (M22,4). While returning the stone to Fyrga, you can pick from among several options:
Ondra's Gift is one of the five districts of Defiance Bay. It is the poorest of the districts, and the most squalid. It also serves as the docks. It is here that you can find the majority of thieves and bandits. While in Ondra's Gift, explore all the buildings and walk along all the streets, because you can get quite a few side quests here. Also, find the Lighthouse there. You should visit it later into the game, due to very strong opponents staying there.
1. Abandoned House
Inside the building there are three drug addicts.
2. Kolfecg's House
Inside, there is Kolfecg, whom you need to find in the Hard Feelings quest. You receive the quest from Bricanta Doemenel (M20,3).
3. Abandoned House
Vianna - Built to Last side quest. To receive this quest, talk to Commander Clyver (M22,1).
4. Odda's House
Side quest: Brave Derrin.
After you receive the Supply and Demand quest, there will be a group of 3 thugs by a nearby monument. You need to deal with them. You receive this quest from Maea (M23, 5).
5. Salty Mast
After you come closer to the building, you will witness one of the nobles being robbed. The building is a brothel. However, you can take rest there, replenish your supplies or hire adventurers. Also, you will find there many people to get busy with, regardless of your sex.
If you talk to the Older Drunkard, you may gain an item: the Ring of the Club of Refined and Prestigious Gentlemen. Thanks to this ring, you will be able to enter a locked room on the upper floor. There, you will find Vincent Dwellier, who is a trader and offers incredibly valuable items, especially weapons, amulets and rings.
Side quest: Supply and Demand - Talk to Maea.
6. Vailian Trading Company
After you come close to the building, you will be accosted by Pallegina, who seems to be dissatisfied with her employer. Talk to him, complete his quest and you will be able to accept Pallegina into your party later on. After the quest, you can find Pellagina to the left of the entrance to the building.
Cartugo - a trader that deals in valuable items.
In the office of the trading company there are several locked chests and containers. The most difficult lock requires 5 lockpicks and 4 points of Mechanics or 5 points of Mechanics.
Side quest: At All Costs - Talk to Mestre Verzano.
Side quest: The Child of Five Suns - First, complete the At All Costs quest, and talk to Pallegina. This quest appears in your journal automatically, after you accept her into the party.
7. Crumbling house
At first, it is locked. To open it, you need Mechanics at the level of 4 or Mechanics at the level of 3 + 4 to Lockpicking. There are no people inside.
You can also find a key to the door. In order to do that, you need to have the Demand and Supply quest active and defeat the thugs near Odda's House (M23,4). One of them has the key to the house, on him. Inside, you find three more bandits. You receive this quest from Maea (M23,5).
8. Lighthouse
Side quest: The Wailing Banshee - Enter the lighthouse and clear it of the monsters inside. This may prove difficult, especially the fight against Lilith atop the lighthouse.
In the lighthouse there are several locked chests and containers. The most difficult lock requires 7 lockpicks and 6 points of Mechanics or 7 points of Mechanics.
9. House in Ondra's Gift
There are two lost souls inside.
11. Docks
The area encompassing all of the planks that form a network.
Imatl: A sailor that you can ask about the missing boy Derrin. He also gives you a side quest - Clandestine Cargo.
Marceno: A sailor in the southern part of the docks. He tasks you with the All Hands on Deck quest.
Niah: The docks' worker in the center. She tasks you with The Wailing Banshee quest.
12. Eastern Dock
You can find Waldr "Three Fingers" there. He stole the chest of the captain in the All hands on deck quest. He attacks you as soon as he sees you. You receive this quest from Marceno (M23,11).
Side quest: At All Costs - Talk to Mestre Verzano (M23,6).
Side quest: Brave Derrin - Talk to Odda (M23,4).
Side quest: Supply and Demand - Talk to Maea (M23,5).
Side quest: Clandestine Cargo - Talk to Imatl (M23,11).
Side quest: All Hands on Deck - talk to Marceno (M23,11).
Side quest: The Wailing Banshee - Talk to Niah (M23,11).
Side quest: The Child of Five Suns - Complete the At All Costs quest, talk to Pallegina (M23,6).
Pallegina (M23,6) - A soldier of the Vailian Republics. You can offer her to join your party, but only after you complete the At All Costs side quest.
Kolfecg (M23,2) - The elf that you are looking for while completing the quest for the Doemenel family.
Mestre Verzano (M23,6) - The master of the traders' guild, the representative of the Vailian Trading Company.
Odda (M23,4) - The mother of the missing boy Derrin.
Maea (M23,5) - The owner of the bawdy house troubled by the bandits.
Weyn (M23,5) - Odda's husband who "lost" his son and is now drinking in the bar.
Vincent Dwellier (M23,5) - A trader dealing in exceptional armory, amulets and rings.
Imatl (M23,11) - A sailor that is looking for three fragments of a powerful artifact.
Marceno (M23,11) - A sailor who allowed the captain's chest to be stolen.
Niah (M23,11) - A worker of the Dock who has problems with the haunted lighthouse.
Rain Blight - An opponent that is dangerous in groups, he attacks with magic.
Animancer - A dangerous opponent with a lot of endurance. Sometimes he uses magic.
Shade
Shadow
Lilith - She is atop the lighthouse and defeating her is very difficult
While exploring Ondra's Gift, you can enter the water in several spots. This is required, if you want to complete, among others, the Brave Derrin side quest. The game allows you to explore these areas only if the current water level is low. The water level changes depending on the time of day so if you can't proceed you can use the rest feature to speed up the time.
To receive this quest you need to go to the Vailian Trading Company (M23,6) and talk to Mestre Verzano. He will tell you that he needs a courier to deliver a package to a client.
The delivery includes extremely valuable seeds and the client is Gareth. He is in the Copperlane in the "Goose and Fox" Inn (M18,2). Talk to him and give him the package. After the conversation the inn is stormed by a group of men who do not want trading in underhand goods to be done by someone other than them. The leader of the group is Danna Doemenel. She will ask you to kill Mestre Verzano for interfering with her business. To find him, go to the Vailian Trading Company (M23,6) in Ondra's Gift. After you get to Verzano and tell him about the Doemenel offer, a cutscene will start in which Pallegina will explain to you the situation Verzano is in. During the conversation, you will have to choose:
After you complete the quest, remember to talk to Pallegina, who will be in front of the building, and ask her to join your party.
Alternative solutions:
During your conversation with Danna, you can lead to a situation in which you will have to fight her. First of all, focus on the two mages and then on Danna. Then, deal with the two fighters. After the fight, return to Mestre Verzano. In Ondra's Gift, you will be accosted by a group of bandits hired by the Doemenel family. You will have to kill them. Still, they should not be too much of a problem. After you reach Verzano (M23,6) and tell him about the offer of the Doemenels, a cutscene will start in which Pallegina will explain to you the situation Verzano is in. After he learns that you have already killed Danna Doemenel he will thank you, give you 1000 gold and the Forgiveness pistol. Then he will flee. Killing Danna does not affect your relationship with the Doemenel family.
Even if you kill Danna, you can also kill Verzano. You will be fighting Mestre Verzano and 4 guards, which may be quite difficult. You can plunder Verzano's corpse in search for the Forgiveness pistol and a pocket watch.
After the conversation with Odda (M23,4), you will learn that her husband and son went out for a hunting trip and have not returned yet. Your task is to find the son, first of all.
You will find the husband at the Salty Mast (M23,5), drinking at the bar. You will learn that his son was supposed to wait for him in front of the entrance to the bar, but he was gone after several minutes.
You can learn more from Imatl (M23,11) who says that Derrin always enjoyed playing near the ships in the dock. You will find him near the Salty Mast (M23,5). He is dead, but you can touch his soul and talk to him. You can also plunder the corpse of the boy and find a dagger that will tell you, more or less, who killed him. Important - You may be forbidden from reaching the corpse of Derrin if the current water level is too high. If that's the case you must wait until a different time of day (using the rest option is recommended).
Next, go near the house in Ondra's Gift (M23,9) and talk to Bragan. After you show the dagger to him, he will admit to having committed the murder. During a fight, you will have to kill him. Remember that you will be fighting an entire group of 5 thugs.
The last thing to do is return to Odda and tell her everything that you know. Regardless of what you say, you will receive a Sturdy Dagger and a Small Ring of Protection.
Alternative choices:
While talking to Bragan, you can forgive him for what he did and you will receive a Topaz from him.
You receive this quest after the conversation with the owner of the brothel - Maea - who complains that bandit attacks are becoming more and more frequent. Your task is to deal with the problem.
The bandits are by the monument, near Odda's house (M23,4). There are three of them and you should not have any problems dealing with them. One of them has a Rusty Bronze Key on him, thanks to which you can access the HQ of the thugs. You need to go to the Crumbling House (M23,7). Inside, there are two bandits and their leader - Aefra. If you want to complete Maea's quest, you will have to deal with the bandits. They should not pose too much of a challenge, but focus on killing Aefra first. When her health bar is low, you will get to choose whether to kill her or, provided that you have a dungeon in your keep, imprison her. Maea will give you 600 gold and your reputation in Defiance Bay will rise slightly.
Alternative solutions:
While talking to Aefra, accept the arguments she gives and talk to Maea about a drop in prices. If your reputation with the Doemenel family is, at least, +3, Maea will ask a favor of you. You need to go to Bricanta Doemenel (M20,3), at the first floor of the manor, and talk to her about the prices. Bricanta will agree to bring down the prices without any fuss, provided that you have completed the Hard Feelings quest for her. Return to Maea in Salty Mast (M23,4). She will give you 600 gold and your reputation in Defiance Bay will rise significantly.
During a conversation with Imatl (M23,11) you will learn that there has been an artifact in the ship that has crashed nearby. It has fallen apart into 4 parts - the man has one of them, and the others we will have to find. The fragments should be scattered on the rocks that you can walk onto only during low tide. This takes place only during the day.
One of the fragments is hidden right next to the ship, in a crate. The crate is not secured in any way. The second one is slightly to the south of a dilapidated house. The last one is near the very edge of the pier. To get to the location of this fragment, climb down the stairs near Imatl, and keep to the edge of the docks. The stash is in the corner.
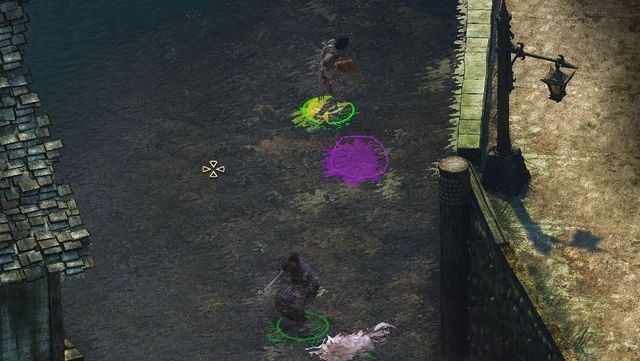 While searching for the artifacts, you can also find stashes visible only in the sneaking mode.
Additionally, while searching for the fragments, you can find stashes hidden at the bottom of the sea. You can only find them in you are in the sneaking mode. You'll either find gold or some item inside.
As soon as you find all three fragments, return to Imatl (M23,11).
In the southern part of the Docks (M23,11), there is a sailor called Marceno. Him and the rest of the crew have unloaded cargo from the ship. Unfortunately, they let their eyes off the cargo for a moment and someone stole the captain's chest. Your task is to find the thieves and retrieve the stolen goods.
The chest is in the Eastern Docks (M23,12). It was stolen by Waldr "Three Fingers". He attacks you as soon as you come closer. His group is 6 men strong but they should not be a challenge to you. The stolen chest is several meters away from where Waldr stood.
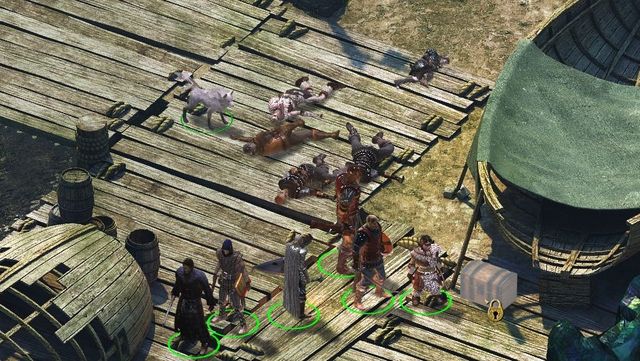 Before you return the chest, you can borrow several items, on condition that you have Mechanics at level 4.
Now you only need to take the chest back to Marceno (M23,11). To show his gratitude, he will pay you 300 gold, and if you demand more, he will also give you the Drinking Horn of Moderation that increases, among others, Intellect by 2, when your Endurance is above 50%.
Alternative choices:
With Mechanics at level 4, you can open the chest and, before you return it, take out a rapier and a protective hat. Still, at the moment of returning the chest, you can admit to the theft and return the items.
In the central part of the Docks (M23,11) you will find Niah who is looking for workers. However, during a conversation, you will learn that the actual problem is the haunted lighthouse, which scares all of the potential workers away. Your mission is to clear the lighthouse of all the evil spirits.
In order to do that, you will need to go to the Lighthouse (M23,8). You can open the door with the key from Niah. The building consists of three levels and there are several opponents on each. Remember, however, that they appear only when you reach a certain spot, or do a certain thing.
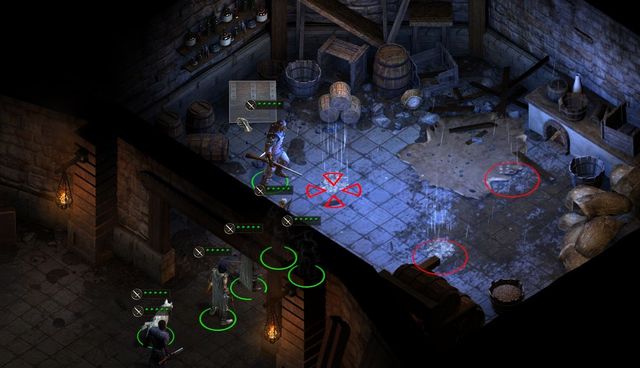 Looting the chest results in the appearing of three Rain Blights
At the first level, the appearing of opponents is determined by the opening of the chest in the northern part of the map. Three Rain Blights will appear that you should be able to deal with without any problems, if only you eliminate them one by one. The second spot in which opponents appear is the door to the room with stairs. Then, 7-8 shadows and shades will appear which are immensely dangerous in such a big group. The best tactic is to position your party in the room which you have just cleared of Blights so as to make the characters fighting at range unreachable for the opponents. You have to use one of your characters to approach the stairs to make the opponents appear. Remember to eliminate the opponents one by one; however, even if you do it, the fight is still going to be very difficult.
At the second level of the Lighthouse, you can avoid getting into a fight altogether. The condition is that you have Mechanics at least at level 4, thanks to which you will be able to open the locked door. You can also use 4 lockpicks with Mechanics at level 3.
At the third, last, floor, you find Lilith. With Perception at level 12, at least, you can note that there is blood, or ink, on the hands of the apparition. Around, you can search for clues, pertaining to what you have just discovered. Enter the Stealth mode and collect a journal, from the table to the North of the room. After you read it, you learn that the apparition has been awaiting a ship.
Go to Niah, who should be near the lighthouse. She tells you that the ship is a pirate vessel,, commanded by Maerwith. It so happens that she is staying in the city, i.e. at the Charred Barrel Inn (M20,2) in Brackenbury.
Maerwith is at the upper floor, accompanied by three 3 pirates. Talk to her. If you play your cards well, Maerwith goes to the lighthouse. Do not suggest that she is afraid, or she will attack you, along with the pirates.
Now, you only need to return to the Lighthouse (M23,8) and talk to Niah nearby. You learn that the problem is non-existent anymore and you gain reputation in Defiance Bay, as well as 1000 gold. Remember to return to the, already restored, Lighthouse which is full of people now, and collect everything of value.
To the North of the room, there also is a locked chest, which requires 7 Mechanics. Inside, there is a very good medium armor - Jack of wide waters. On the table in the left part of the room, there is Lilith's Shawl, which adds +1 to Stealth and +3 to Perception.
Alternative solutions:
If you want to complete this quest quickly, you simply need to defeat Lilith. As soon as you come closer, she attacks you. After several seconds, she summons, around, 7 Shadows and Shades, which surround you. In this case, fighting will be more difficult than on the first floor, because there is nowhere to run here, with your ranged characters. After you dealt with all of the summons, and collected everything valuable, return to Niah.
This quest appears in your journal automatically, after you accept Pallegina into the party. To achieve this, first you need to complete the "At All Costs" quest. Pallegina is to the left of the entrance to the Vailian Trading Company (M23,6).
The first thing you need to do is go to the Vailian Embassy (M22,3) and talk to Agosti.
Your first step should be to go to the Vailian Embassy (M22,3) and talk to Agosti . The Ambassador tells Pallegina, and you, as a result, that you should go to Twin Elms to establish trading connections.
Heritage Hill is one of the districts of Defiance Bay. Due to the research on animancy conducted in a nearby tower, the area has been infested by the living dead. There are not too many places to see here and the only ones worth mentioning are Icantha's House, Valtas Manor and the tower in the south-west part of the location. The latter is connected with the game's main storyline.
1. Main gate
Your starting point. The gate is locked and it is guarded. You can enter if your Power is at level 18 and if you either intimidate the guard, or mention Wyla during the Missing Sentries quest. You receive the quest in the Crucible Keep (M22,1). The most extreme way of entering this district is to attack the guards and then loot their corpses for a key to the gate. It's not a recommended solution, because you'll lose a lot of reputation.
2. Valtas Mausoleum
A shrine in the center of the location. It opens only after you have received the Safe Haven quest (M24,4).
3. Tomb
Inside the shrine, there is the missing team of sentries whom you're looking for for Wyla in the Missing Sentries quest. You receive this quest from Wyla in Crucible Keep (M22,1). The sentries are under the control of Leyra and defeating this spirit is quite difficult.
4. Valtas Manor
The manor of this family is infested by the undead. Inside, you will find 3 Guls and the transformed family - Lord Valtas, Lady Valtas and Emilio Valtas. Only the little girl - Saeda - hid in a separate room and survived.
Side quest: Safe Haven - Kill the transformed family.
5. Icantha's House
Main quest: Undying Heritage - Inside, you will find Icantha, the woman who survived the catastrophe. Talk to her.
Inside, there is a chest that you can open with Mechanics at level 4, or at level 3 with 4 lockpicks. There is also a door there, which has the same requirements as the chest. As soon as you open it, you will discover three captives that Icantha preys on to remain sane. You can release them. Icantha does not react to this.
6. Tower
Main quest: Undying Heritage - reach the top of the tower.
Side quest: Save Haven - Enter the Valtas Manor (M24,4) and kill all of the opponents.
Saeda (M24,4) - The girl that you need to save.
Icantha (M24,5) - The woman that survived the catastrophe in her house.
Gul - Fast opponents with melee attacks. When alone, they pose no threat, but they usually come in groups of 3-4.
Revenant - A weak zombie.
Dargul - A strong zombie. It deals little damage, but it is tough.
Skeletons
Take your time while exploring Heritage Hill, so as not to get attacked by too many undead. Try to lure single zombies or small groups away from the rest to make things easier.
The above map presents the Tower in Heritage Hill. You will visit it during the Undying Heritage main quest. At the successive levels of the Tower, you will engage in quite intense fights, but fortunately, there are no exceptionally strong beasts there that would pose a problem to your party.
1. Starting point
You start at the bottom and you need to reach the top of the Tower (04).
4. Engwitan Machine atop the Tower
Main quest: Undying Heritage - Talk to Aldhelm about the machine.
Aldhelm (M25,4) - Talk to him about the machine atop the Tower.
Gul
Dargul
Revenant
Skeletons - You should be most wary of the skeletal mages. Hunters and archers may be dangerous too.
Do not go to the Tower before you receive the Undying Heritage main quest, or you will not be able to access it. Before you enter the Tower, it is also a good idea to heal the entire party (set up a camp or return, e.g. to any inn in the city).
While exploring the Tower, check out on all of the chests. This will allow you, among others, to obtain more pages from Aldhelm's journal.
This quest appears in your journal automatically after you see the cutscene in which three Darguls try to get to a girl - Saeda. This takes place at Valtas Manor (M24,4). You need to save the girl. The first step is killing all six opponents in the residence.
Now, go to the Valtas Mausoleum (M24,2). The door is open. It turns out that Saeda is not in the Manor and she hid in the tomb. After a short conversation, tell her to go to the Main Gate.
You now need to search the tomb. In the grave in the center, you will find a very good item - Iridescent Scarab Figurine, which allows you to summon a powerful scarab during a fight, once per resting event. It is going to help you in combat. Watch out though, because the sarcophagus is secured with a trap.
Saeda is at the Main Gate (M24,1).
Alternative choices:
If your Mechanics is at level 5 you can open the locked door at the residence. In the locker, you can find an interesting item - a black-and-white cat that you can keep as your pet.
Searing Falls is a small location to the south of the Woodend Plains. The most important location there is a cave in which you can find a huge dragon. It is worth noting that the entire location is full of Drakes, which are also challenging opponents, so try not to wander into this area too early in the game.
1. The Cave
In the cave you can find one of the dragons - Cail the Silent. He is in the chamber at the end of the cave. At first, he will not bother you at all, and you will easily get there. However, after a conversation, you will have to defeat not only him, but also two Young Drakes and several Xaurips.
You can plunder the corpse of Cail and find the Burning Stone. You will need it to complete the Cinders of faith quest, which you receive from Fyrga at the Ducal Palace (M22,4).
Remember to search the remaining corpses and containers. While you're heading to the exit, you will encounter Xaurips that you had passed by earlier - they will be hostile now.
Young Drake - A strong opponent with strong defense and quite a few health points. He deals a lot of damage, both in direct combat and at range (fire attacks).
Drake - a stronger version of Young Drake. All of its statistics are proportionally higher, which makes him a more dangerous opponent.
Xaurip - A weak opponent, but it can be a nuisance while you are fighting the stronger Drakes. He can use melee weapons, ranged weapons or even magic.
Xaurip High Priest - A strong Xaurip that uses magic in combat. It supports other xaurips and deals high damage. It has relatively few endurance points, so defeating it should not be too much of a problem.
Xaurip Champion - a strong xaurip that uses a spear. It is not dangerous by itself, but it can be a threat in groups.
Pearlwood Bluff is a small edge location. There is only one path leading out of it, to Searing Falls. There, you can only find a small cave to the west and several opponents.
1. The rock
The rock to which you can attach a grappling hook. Thus, you can get to a cave. In the cave, you can find a valuable item - Ring of the Senolan. The ring can only be worn by the mage and it adds +2 to the overall number of times the spells of level 1 and 3 can be used.
2. Cliff
You can find a lost soul there, whom you can ask about the whereabouts of Persoq who is sought by Sagani, one of your party members.
Forest Lurker - one of the stronger opponents in the game. It has high defense and a lot of endurance points; however, it deals low damage.
Xaurip - A weak opponent, but it can be a nuisance, while you are fighting the stronger Drakes. He can use melee weapons, ranged weapons or even magic. You can also encounter several stronger representatives of this race.
Wind Blight - An opponent of medium difficulty. It deals a lot of damage with electrical ranged attacks, but it has low defenses and a low number of endurance points.
Drake - A strong opponent with high defense and many health points that deals a lot of damage in close combat. He can breathe fire during battle.
Stormwall Gorge is a location that connects Defiance Bay, Dyrford Village and Twin Elms. At first, the southern part of this location is inaccessible. First, you need to complete all of the main quests in Defiance Bay for the water level to drop. Only then you can go into further locations. You can find a potential party member there - druid Hiravias.
1. Lle a Rhemen
Ancient Glanfathan ruins. To get inside, you need to wait until act III, until water level drops.
There also is a way to gain access, into the ruins, before that. You need to choose the Dozens as your faction, in Defiance Bay. Thanks to this, you will receive a quest that will allow you to find a stone, with which to lower the water level. The quest in question is entitled The bronze beneath the lake and you receive it from Wenan (M18,5).
2. Valley descent
At first, the vale is flooded. You cannot access it. The water level drops only after you have completed all of the main quests in Defiance Bay, after you have progressed to act III of the game.
Descending into the valley initiates a cutscene, where a group of the Leaden Key members approaches you. Try to talk your way out of a fight of proceed with the battle - remember to deal with the mage in the first place, then the bard and finally the fighters.
3. Deer carcass
Here, you encounter druid Hiravias, whom you can ask to join your party.
Side quest: True to Form (M28,3) - invite Hiravias into the party and talk to him.
Hiravias (M28,3) - A Druid standing at the cliff; you can invite him to join your party.
Feral Druid - A relatively strong opponent, although most of them use melee weapons. With proper backup from your mages you shouldn't find it difficult to defeat even the biggest groups of druids.
Lion - A strong animal opponent. It only attacks directly, and has a lot of endurance points as well as high defenses. It usually appears alone.
Pwgra - A strong opponent that wilds magic. It summons all sorts of Blights, which help it in combat.
Swamp Spore
Dunk Spore
Staelgar - A strong animal opponent; even stronger than the lion. It can both come by itself and in larger groups.
Lle a Rhemen are temple ruins and it is a minor location within the Stormwall Gorge. There are two ways to gain access. You receive the first opportunity while completing The Bronze Beneath the Lake for the Dozens in Defiance Bay. The other option is to wait until act III of the game, when the dropping water level reveals the ruins entrance.
1. Entrance
This is where you start the exploration of the temple and where you find the exit to the surface.
In act II, you also find a descent to the lower level, in the temple, here.
As soon as you approach the passage, the Stone Head talks to you.
2. The tunnel between two parts of the ruins
By following this tunnel, you get to the other part of the ruins, at the same level. There are three ways to cross the tunnel:
3. Southern chamber
After you enter the chamber, the spiders will not attack; you can cross the chamber and talk to Nridk. During the conversation, you can decide whether to let him walk or attack him. You can loot the corpse for the Soul vessel, which you need to carry out the ritual (M34,8).
From the sarcophagus at the end of the chamber, collect another item that is key to the rite - the Engwithan Soul Spear - Cladhaliath. If you are in the course of completing The Bronze Beneath the Lake quest, in the sarcophagus, you also find an ancient Engwithan weapon.
4. Stairs between two levels of Lle a Rhemen
To climb, you are going to need a grappling hook.
5. The Eastern chamber
Here, you find adventurers called Giantslayers. They are around only if you decide to go down to Lle a Rhemen in act III. If you are in the course of completing The Bronze Beneath the Lake quest, you find them alive in a different location.
After you approach the center of the ring, there appears a group of 4 spectres.
6. The Western Chamber
Kill the shades and specters, talk to the stone head and pick one of the dialogue options.
7. The Northern Chamber
Kill the phantoms and specters, and Cean Gwla, talk to the stone head and pick one of the dialogue options.
8. The ritual site
Here, you can conduct a ritual, but you need to do the following, for that:
9. The cave
Here, you find passage to Stormwall Gorge.
Widowmaker
Crystal eater spiderling
Crystal eater
Ivory spiderling
Cean Gwla
Spectre
Phantom
Sporeling
Troll
To receive this quest, you need to accept Hiravias into the party. He is in Stormwall Gorge, to the right of mysterious ruins, close to the corpse of a dead animal (M28,3). After he joins you, talk to him and ask him about his animal form. You are going to need 12 Perception, 14 Power or 14 Intellect to convince Hiravias to talk to you.
You learn that his faunal form is the Autumn Staelgar which is why he is not accepted by the rest of the tribesmen. He wants to learn more about his form and for this, you need to go to the Twin Elms. There, find Tamwrn, who is close to The Golden Grove in Elms' Reach (M37,5). Let Hiravias talk to him. He tells nothing of importance, however, and advises you to go searching for more information in Blood Sands (M38), in the Northern part of Elms' Reach.
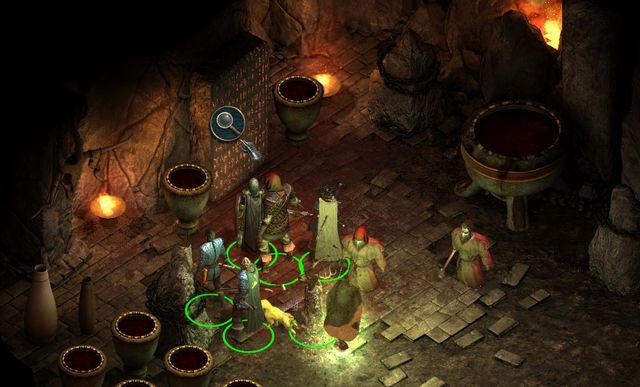 In Blood Sands, you need to find four stone tablets.
While in Blood Sands, you need to find four stone tablets. They are not hidden and they are, usually, in bigger rooms. There is no way to miss them, while exploring the location. If you have any problems finding them, take a look at the map of this location (M38). After you click on the magnifying glass, Hiravias will talk to you.
After you find all four stone tablets, Hiravias tells you that he would like to go to the Burial Isle (M56). Go to the Grotto of Echoes (M56,4). There, you find Scathden, whose faunal form is also the Autumn Staelgar, just like Hiravias's. He will strive for a fight, but Hiravias does not want it. To avoid the fight, you are going to need 12 of Resolution for the first dialogue option. For the second one, you are going to need one of the following: 14 of Power, 14 of Resolution or 14 of Dexterity.
If you do not meet these requirements, you will have to fight Scathden and 4 staelgars. What is important is that you deal with the druid in the first place. After the fight, talk to Hiravias and loot the opponent's corpse for a very good halberd.
Dyrford Village is the second village that you visit in Pillars of Eternity. It is situated between two big cities - Defiance Bay and Twin Elms. While exploring the location, check out all of the buildings. You will find all necessary traders; you can also take rest there and hire adventurers. In Dyrford Village, you can receive several side quests, and you will also find a new potential party member - the Grieving Mother.
1. Temple of Berath
Main quest: Through Death's Gate - Meet with Harbinger Beodmar at the temple
Side quests: Cat and Mouse - Talk to Medreth on the bridge.
2. Dyrford Mill
Side quests: Blood Legacy - talk to House Harond Guard.
3. Rumbald's House
Side quest: A farmer's plight - talk to Rumbald.
4. Dracogen Inn
After you talk to the innkeeper, you can rent a room, replenish your supplies or hire a new adventurer.
On the ground floor you will find Sid who will tell you about a legend saying that there is a powerful staff hidden in the walls or in the floor of the inn. As it turns out, the legend is true. The staff is under a plank in one of the rooms on the first floor. To find it, you need to enter the sneaking mode. Apart from the staff, there are several locked chests and containers at the inn. The most difficult lock requires 6 lockpicks and 5 points of Mechanics, or 6 points of Mechanics.
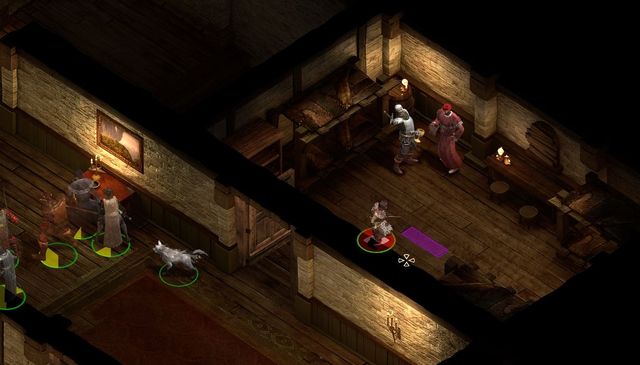 The spot where the staff is hidden.
On the first floor of the inn you will find Nyfre, an Orlan female in hiding, who is wanted for the Cat and Mouse quest. You will receive the quest from Medreth (M29,1).
5. Trygil's Curriery
Inside the building you will find Trygil, the owner. He trades in leather armors and belts.
There is also a passage to the Dyrford Ruins there (M31), but to use it you will need 7 points of Mechanics and you will have to defeat Trygil.
6. Hendyna's Home
Hedyna is standing by a small cart next to her house. She can sell you crafting materials.
South of the house, you can find a potential party member - Grieving Mother.
Side quests: Nest egg - talk to Hedyna.
Side quests: Dream and memory - talk to the Grieving Mother.
7. Winfrith's Arms and Armory
Inside the building, you will find Winfrith, who deals in weapons, armors and tools (grappling hook, hammer and chisel, prybar, lockpicks).
Side quests: Cat and mouse - talk to Medreth (M29,1).
Side quests: Blood legacy - talk to House Harond Guard (M29,2).
Side quests: A farmer's plight - talk to Rumbald (M29,3).
Side quests: Nest egg - talk to Hedyna (M29,6).
Side quests: Dream and memory - talk to Grieving Mother (M29,6).
Harbinger Beodmar (M29,1) - Talk to him about the Cliaban Rilag Ruins.
Medreth (M29,1) - A representative of the Doemenel family. He is looking for the Orlan Nyfre.
Hedyna (M29,6) - She sells potions and alchemist ingredients. She is looking for a dragon egg.
Nyfre (M29,4) - The Orlan female hiding in the Dracogen Inn.
Grieving Mother (M29,6) - A potential party member.
Winfrith (M29,7) - The blacksmith that sells weapons, armors and tools.
Trygil (M29,5) - The curriery owner. He deals in leather armors and belts.
Lord Harond (M29,4) - A nobleman from Defiance Bay, whose daughter has gone missing.
Sid (M29,4) - A client of the inn who tells you about the staff that is rumored to have been hidden in the floor of the inn.
It is not necessary to attack Trygil at the curriery to gain access to Dyrford Ruins. Just as well, you can wait for the party to reach the main entrance to the ruins in the Dyrford Crossing (M30,1).
Do not attempt to steal the items on display while in the main part of the village. You can be easily spotted by guards and, as a result, lose your reputation. If you really want to steal something, use the sneaking mode.
While talking to Medreth (M29,1), you will learn that she is looking for an Orlan female Nyfre. Presumably, she stole from the Doemenel family. Your task is to find her and bring her back to Medreth. Note - if your reputation with the Doemenel family is bad, you may not receive this quest.
Nyfre can be found on the first floor of the Dracogen Inn (M29,4), in the first room by the stairs. While talking to Nyfre at the inn, you can simply attack her and kill her. Remember to search the corpse. She has a very good medium armor - Night-Runner, which adds +2 to sneaking and +1 to Resolution. Remember to return to Medreth (M29,1). You will gain reputation with the Doemenel family and receive 1000 gold.
Alternative solutions:
You can tell Nyfre to go east where it is safe. You will receive 750 gold for that. You need to return to Medreth (M29,1). Now, there are two options. If you tell her that you let Nyfre escape, you will have to fight Medreth and two of her companions. From the corpse, you will collect 1000 gold. You can also lie and say that Nyfre managed to flee and escaped northwards; however, if you don't have 14 Resolution, Medreth will not believe you and you will have to fight her.
If you have Resolution at level 16 you can tell Nyfre to see Medreth, as originally assumed by the quest. If you fail to meet this condition, there are two remaining options for you to choose from: either attack Nyfre or let her escape.
A guard on the bridge close to the Windmill (M29,2) will tell you that Lord Harond is in the village. His daughter, Lady Aelys, has gone missing. First, you should go to the Dracogen Inn (M29,4) and talk to Lord Harond. You will find him quarreling with the innkeeper. After the conversation, approach him and ask him about the situation. Unfortunately, the Lord knows little about the event. You need to ask around the village to get additional information.
Information that you need to obtain:
Go to the Ogre's Cave in Dyrford Crossing (M30,2). According Trygil, this is where Aelys should be. Explore the cave and watch out, especially for the Spider Queen. Unfortunately, after you talk to the ogre, you will learn that none of what Trygil said was true. As for the ogre himself, you can choose whether to fight him or not.
You can return to Trygil (M29,5) and tell him what you have learned from the ogre. Immediately after that, he will attack you. You will have to defeat him, which should not be too difficult. Unfortunately, this will not lead you to Aelys, because Trygil does not have any note or key on him. If you do not want to fight Trygil, you can resume your search for Aelys right after your encounter with the ogre.
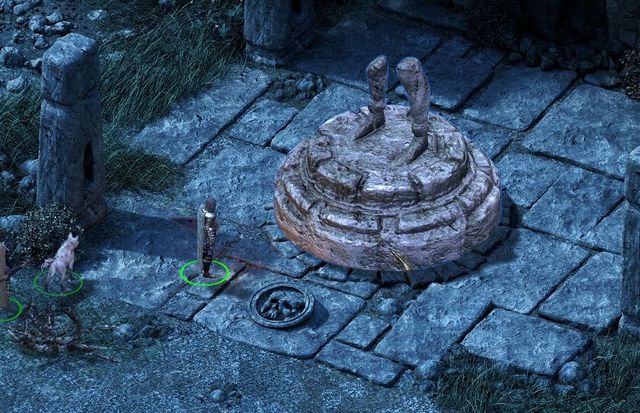
Return to Dyrford Crossing (M30). In the center of the location there is a temple entrance (M30,1). There are several ways to get inside:
While in the temple, first go to the Crossroads (M31,2). Along your path, watch out for traps and several Skaen cultists. On the crossroads, you will have to choose. There are three options:
As soon as you make it to the other side, you will need to find an Old dungeon key. It will let you open the main door to the temple. It is in one of the rooms of the Skaen cultists (M31,3) and it is locked in a chest.
Once you have the key, go to the very center of the Temple of Skaen (M31,6), open the door and approach the Blood Pool. While talking to the pool, you will be able to sacrifice one of the party members. As a reward, you will receive the Effigy's Resentment talent: The name of the party member, e.g. Effigy's Resentment: Kana. This Talent provides a permanent bonus to statistics, but the exact characteristics depend on the party member that you sacrifice. Usually, it is +1 to one of the character's statistics and several points to one of the defense statistics. Important - You can't sacrifice any of the nameless adventurers you've hired while staying in one of the inns in the game's world. It has to be a "primary" party member.
Go to the Library now (M31,7), right past the Blood Ritual spot. On the table, there is the Crypt's master key.
You can now go to the Crypt (M31,8). Open the door with the key you've found. As soon as you enter, a cutscene featuring the Skaen cultists will start. Some sort of a ritual has just been performed on Aelys. Priest Wymund will tell you that Aelys is not Lord Harond's daughter, but his niece. What's more, he has a child with her. To complete this quest, you do not need to fight with Wymund. It is enough to let Aelys go.
You now need to return to Lord Harond (M29,4). If you have 7 Mechanics, you can take the shortcut (M31, 4). During the conversation with Lord Harond, you have several options:
Alternative solution:
With Mechanics at level 7, you can go to Trygil's Curriery (M29,5) and open the door into the underground. This way, you will avoid having to defeat dozens of opponents and crossing the rest of the locations.
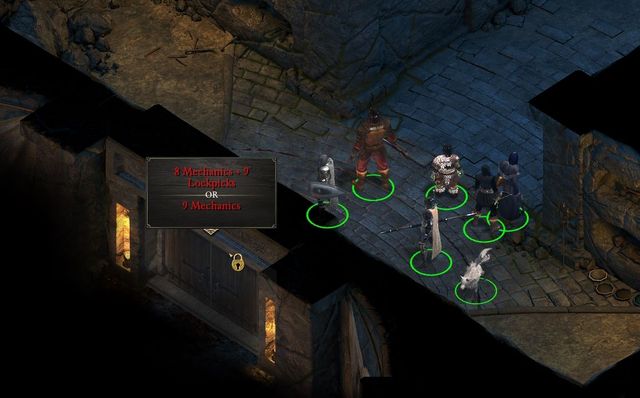 Thanks to high Mechanics, you can avoid crossing the entire temple.
With Mechanics at level 9, you can avoid crossing the entire temple. You simply need to open the door next to the entrance to the temple (M31,1).
While talking to Wymund, if you allow the Grieving Mother to "enter" Aelys's mind, you will start a fight with Wymund and 4 other Skaen devotees. The fight will be very difficult, because each opponent uses magic and has a lot of endurance points. Plunder Wymund's corpse to find Wymund's key which you can use to open the chest in the northern part of the room. Aelys may survive in this scene or she can die. If you weren't able to rescue her then you can immediately return to Lord Harond found on the upper floor of the inn and choose one of the following options:
You will achieve the same effect, if you break Aelys' neck.
If you've managed to prevent Aelys from dying then you will have a chance to talk to her after the fighting is over and to suggest her where should she go.
Rumbald (M29,3), a farmer in Dyrford Village, has a problem with an ogre that abducted his herd. Your task is to find the ogre, kill him and deliver his head to Rumbald, as a proof of his death.
Trygil, the owner of the Curriery, (M29,5) will tell you that the ogre is probably to the east of the Dyrford Village. Go to Dyrford Crossing and find the Ogre's cave (M30,2). The Ogre is in the south-eastern part of the cave.
During the conversation with ogre Korgrak, you will learn that it was him who ate Rumbald's pigs. If you want to complete the quest, you need to attack the ogre. Plunder the corpse to take Korgrak's head.
Now, return to Rumbald (M29,3) and show him the severed ogre head. This way, you will gain reputation in Dyrford Village, and receive 600 gold as well as a piglet, as your pet. You can refuse to accept the money, but you will gain nothing from it.
Alternative solutions:
During the conversation with Korgrak, you can make him leave the cave and go elsewhere, where he will not be bothering the villagers. This way, you will avoid the fight. What is interesting, you can offer him a position in your Keep. To recruit him, however, you need to have barracks built and hire him as a regular mercenary. However, you will need to explain your decision to Rumbald.
While talking to Hedyna (M29,6), you will learn that she requires some ingredients to brew potions. Additionally, she would like to get a highly valued ingredient - a Drake egg. Your task is to find one and deliver it to her.
In order to do that, you will need to go to the Ledge in Dyrford Crossing (M30,3). As soon as you come close, you will be accosted by Sevis, a leader of a group that also searches for the egg. To continue your search, you will have to defeat them. First of all, focus on the mage, then the ranged opponent, and finally on the fighters. The fight should not be too challenging. Remember to plunder their bodies, because they have quite valuable items on them.
The egg is to the north-west of where Sevis was standing, on a small ledge. Click on it:
Return to Hendyna (M29,6). You will gain reputation in Dyrford Village, 600 gold and several alchemical ingredients.
Alternative solutions:
If you have resolution at level 13, you will be able to convince two opponents to flee during the conversation with Sevis. It will make the fight much easier.
You can also pay Sevis to leave. The price is 800 gold.
You will receive this quest once you have talked to, and accepted into your party, the Grieving Mother (M29,6). Your task is to learn about the past of the new companion. The first thing that you need to do is to question the Grieving Mother thoroughly. However, you will not learn much.
The Grieving Mother should be in the party for the whole time. After a while, you may experience additional visions, which may take weeks, or even months of the in-game time. As soon as you gather more information, talk to the Grieving Mother, but pay attention to which dialogue options you pick. You may anger the mother and she leaves the party. You will then not be able to include her into the party again.
Dyrford Crossing is a location to the east of the Dyrford Village. There are places there in which you can complete side quests in connection with the village itself. Here, you will find the Ogre's Cave, Temple of Skaen or the ledge that you collect the drake's egg from. By taking the northern exit, you can reach Cliaban Rilag.
1. Dyrford Ruins
Under the statue, there is a passage to a separate location - Dyrford Ruins (M31). To gain access, however, you need to do one of the following:
2. The Ogre's Cave
In the south-eastern part of the cave, there is an ogre from A Farmer's Plight quest. You will receive this quest from Rumbald (M29,3). After you handle the conversation properly, you will be able to hire the ogre as a mercenary for your keep. You can also defeat the ogre in combat, or leave him alone.
In the north-western part of the location, you will find a passage to the ledge. You will find the Skull key on a corpse there, which you will be able to use to open the passage to the Dyrford Ruins (M30,1).
In the north-eastern part of the cave, there is a Spider Queen, a very strong opponent. Unfortunately, killing the queen is not connected with any quest, nor does she drop any valuable items.
Remember to loot the cave. In the walls, there are stashes with valuable items hidden.
3. The Ledge
Here, you will encounter adventurers led by Sevis. To the north-west, there is a ledge with a drake egg on it. Both of the above are connected with the Nest egg quest, which you receive from Hendyna (M29,6).
Wood beetle - The weakest enemy type in this location. Harmless, even in larger groups.
Stone beetle - A stronger version of the Wood Beetle. It has much more endurance and it is more resistant to attacks.
Widowmaker - A spider that is a threat only in larger groups.
Ivory spiderling - A small spider that is not too dangerous, but it usually attacks in groups.
Spider Queen - You can encounter the Queen in the Ogre's Cave. She has a lot of endurance points, but her attacks are not too strong, so you should have no problems here.
Wurm - The youngest stadium of drake, not too harmful when alone.
Forest Lurker - One of the strongest opponents in the game. It has high defense and a lot of endurance points, but it deals little damage.
Pwgra - A strong opponent that uses magic. It summons all sorts of Blights, which assist it in combat.
You can enter the ruins under this location also while in Dyrford Village. The passage is in the Curriery (M29,5); in order to use it you have to kill Trygil first and break the locks on the door.
Dyrford Ruins is a location that is minor to Dyrford Crossing and Dyrford Village itself. Inside, there is a temple complex, which is occupied by the devotees of Skaen. In the eastern part of the location, there is a passage to Dyrford Crossing, and in the western part - to Dyrford Village. In the ruins, there are many traps and secret stashes, so it is a good idea to explore them thoroughly.
1. Ruins entrance
It is here that you start your exploration of the location, if you have taken the passage in Dyrford Crossing.
2. Crossroads
There is a collapsed bridge here. You can cross if you have a grappling hook.
3. The room of the devotees of Skaen
In one of the chests, there is an old dungeon key. It opens the main door of the temple.
4. Dyrford Village Passage
Over the ladder, you can enter the Trygil's Curriery (M29,5) in Dyrford Village. Remember, however, that if you exit and you have not fought Trygil before, he will attack you.
There is also a shortcut into the underground. However, you need 7 Mechanics to open the door in Trygil's Curriery.
5. False wall
You can open the false wall from the inside, after the confrontation with Wymund. Thanks to this, you will shorten your way to the surface.
6. Blood Ritual
It is here that the secret ritual is performed. You can find the Blood Pool and sacrifice one of your companions, in exchange for a permanent bonus to statistics.
7. Library
Here, you find the key to the Crypt (08). It is on the table in the center of the room.
8. Crypt
The Crypt door can be opened with the key from the Library (07).
Skaen cultist - depending on the type, he can fight in melee, at range or with magic. The weakest of the opponents in the temple.
Skaen temple guard - The strongest opponent in the temple. He use predominantly melee weapons. He has a lot of defense and a high number of endurance points.
Skaen guard - A stronger Skaen cultist, who can use a wide variety of attacks.
Stone beetle - A stronger version of the Wood beetle. He has much more Endurance and is more resistant to attacks.
Cliaban Rilag is a small location Northwards of the Dyrford Crossing. You go there mainly in the course of the Through Death's Gate main quest. On the surface, there is nothing of interest, apart from several NPCs and three wolves that you can defeat. The most important elements of this location are the two entrances to the Cliaban Rilag Ruins.
1. Bridge
The Bridge leads to the Cliaban Rilag Ruins. In front of the entrance you will encounter Sleafhota - the leader of the temple sentries. You will have to fight him in order to pass.
2. Destroyed Bridge
A alternative way into the Cliaban Rilag Ruins. You can jump over the destroyed bridge. Remember, however, that characters with low Athletics of around 3-4 points may get injured as a result (sprained wrist or ankle) which will decrease their combat value.
3. Looters' camp
They can stop you while you are going for the destroyed bridge (02). Defeat them in combat.
The Fragments of a Scattered Faith side quest - Explore the camp, find the Standard Piece, and talk to Eder about it.
Looter - watch out for the stronger Looter Leader.
Wolf
You can gain access to the location only after you have completed the Through Death's Gate quest. To unlock it, you need to go to Dyrford Village, and talk to Beodmar in the Temple of Berath (M29,1).
Cliaban Rilag Ruins is a minor location within Cliaban Rilag. There are two levels of this location. You can complete one of the main quests here - Through Death's Gate. You will encounter many opponents and also find many traps. It should be noted that you can walk around some of the opponents, without engaging in a fight.
1. Ruins entrance
Here, you start your exploration of the ruins. Depending on your choice, you will be starting next to one of the entrances. It does not make much of a difference - the paths come together after several meters.
3. Eastern Chamber
In this room, there is one of the strongest opponents in the game - Adra Animat. Also, there are several regular animats here. Kill them, plunder the corpses as well as the entire room and you will find several valuable items.
4. Main Hall
The main hall connects all of the rooms on this floor. On both sides, there are doors that you can open with high level of Mechanics. If this is not an option, you need to find the Engwithan key (M33,5). You can use it to open the door in the ruins.
5. Western Chamber
Kill the Spectre, collect the Engwithan key from the pond, thanks to which you open all the doors in the ruins.
7. Engwithan Machine
Watch a short cutscene. Approach the statue and touch it. Talk to him, thanks to which you will complete one of the main quests.
8. Stream
Thanks to the stream, you can shorten your way back considerably. Additionally, with Constitution at the level of at least 16, you can find a treasure. You need to grab on to the edge of the tunnel. Then, you will have to choose who to send ahead. Send the character with the highest Constitution. The treasure that you will find is the The Rose of Salthollow - a two-handed morning star, one of the best in the game.
10. Animats' Room
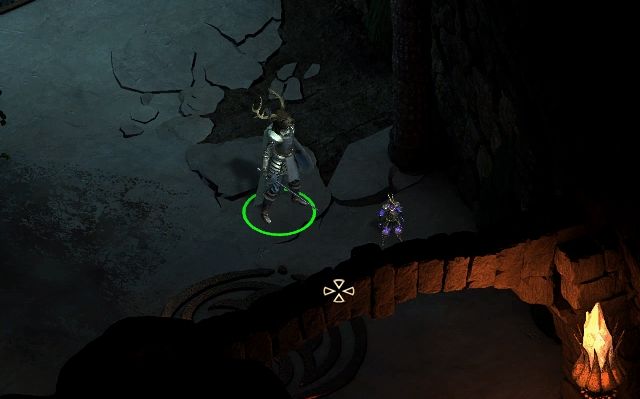 In the Animats' Room, you will find the Tiny Animat, who is going to follow you during the game.
You can open this room with Mechanics at level 7 or with an Engwithan key (M33,5). Inside, there are two animats that you need to kill. From the weapon stand, take the item Tiny Animat. He plays the role of a pet and he will follow you around the world of the Pillars of Eternity.
Troll - An opponent with high defenses and a high number of endurance points. Alone he is not too strong, but you need to be careful if he's in a group with other opponents.
Swamp Lurker - it is quite a strong opponent, although he has low resistance to attacks. It is dangerous only in larger groups.
Swamp Slime - An opponent that you need to be careful with. He does not have too many endurance points, but he makes up for that with the strength of his attacks. He can attack at range and poison your companions.
Corrupted Druid - as the name suggests, it is a Druid, that uses spells characteristic for this class. He is very dangerous over a longer distance, but has very few endurance points. Killing him should be your priority during a fight.
Pwgra - A strong opponent that uses magic. It summons all sorts of Blights, which back it up in combat.
Black Ooze - An opponent that is demanding especially due to high defenses and ranged attacks. In smaller groups, it should not be a problem.
Sporeling - A weak opponent, but you may have problems defending your mages against a group of 4-5.
Dank Spore - A strong opponent. Its most dangerous attack consists in releasing sporelings that aid the spore in combat. They attack one of the characters and make them fight on the side of the Dank Spore for some time. In case of fighting two such opponents, things may become dangerous.
Phantom - A quite easy opponent that fights directly. He has quite high defenses, but in small groups it should pose no problem.
Animat - A very strong opponent. He fights with melee weapons and uses magic to his aid. The very high defense and lots of endurance points, fortunately, does not go hand-in-hand very low with damage dealt. He may heal himself.
Adra Animat - One of the strongest opponents that you encounter in the game. Incredibly high defenses and a lot of endurance points. The only upside is that he doesn't deal a lot of damage which can easily be taken on by a shielded fighter. However, you need to watch out, because he heals both himself and his allies, which may make the fight drag on. Without strong magic attacks, it is difficult to defeat him.
Rain Blight - it attacks at range with magic. It is easy to eliminate if you can get closer. Otherwise, it can quickly eliminate your companions. It may summon smaller Blights.
Will-O'-Wisp - not too dangerous of an opponent. Its attacks may wreak some havoc to your ranged party members and mages, but it has so few endurance points that it will probably not even manage to attack you.
The above map presents Elmshore, i.e. the location of little significance, which you visit on your way from Defiance Bay to Twin Elms. Here, you can encounter quite a few monsters, although it is optional to fight the majority of them and you can, just as well, walk around them. You should especially consider whether you want to take a peek in the cave in Elmshore, because you encounter a group of quite strong opponents there.
1. Elmshore cave
Side quest: Bounty: Nalrend the Wise - You need to kill Nalrend and his bodyguards, mainly elite types of ogres. This is a very difficult fight so, do not engage the opponent unless your party is sufficiently strong.
There is a locked chest in the cave - requires 5 points of Mechanics.
4. Dying monk
Side quest: The Sealed Missive - talk to the Dying Monk sitting by the tree.
Side quest: The Sealed Missive - Talk to the Dying Monk (M35,4).
Rain Blight - various types.
Earth Blight - various types.
Will-O'-Wisp
Ogre - keep the weaker party member clear of the ogres, because they deal high damage in melee. Apart from that, try to eliminate ogres one-by-one, because they are quite tough.
Elder Bear - It deals more damage and is stronger than regular bears.
Ogre Matron - This monster is more demanding than regular ogres. Focus your party's attacks on it.
Ogre Druid - deal with druids as quickly as possible, because not only are they strong, but also they can use magic.
Stelgaer
Adra Beetle - this is one of the most dangerous types of beetles.
Adragan - Do not allow the monster to cast spells.
Forest Lurker
Forest Troll
The passage to Elmshore from Stormwall Gorge is, initially, unavailable. You can take it only after you have progressed to act II of the game's main storyline, i.e. after you have taken part in the council at the Ducal Palace and left Defiance Bay.
In the North-Eastern part of Elmshore, you find the Dying Monk (M35,4). Talk to him. He asks you to deliver the titular missive to the members of the order in the Twin Elms. You can either place the missive in your inventory intact, or break the seal. In the latter case, you learn about the artifact hidden under the floor of one of the houses in Elms' Reach.
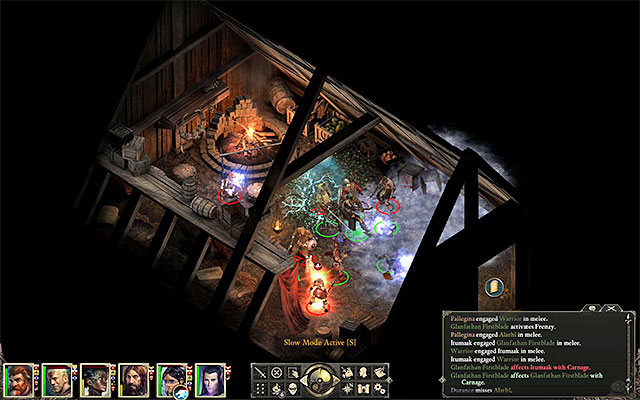 The location, where you find a rare armor in the Elms' Reach cottage
Reach Hearthsong in Twin Elms and take the elevator to the Celestial Sapling Inn (M36,2). In one of the rooms, you meet the High Monk, who you can give the missive to. You will be rewarded with positive reputation points for Twin Elms.
Alternative solutions:
During your meeting with the High Monk, you can lie and say that you received nothing from the dying monk. Also, you can try to find the item, mentioned in the document, on your own (you do not need to break the seal - you can simply follow this walkthrough). For this, you need to go to Elms' Reach, which neighbors Hearthsong. Enter the Northern Glafanthan Home (M37,3) and enter the Stealth mode to locate a secret stash in the floor. You can now collect the rare light armor.
The above map presents Hearthsong, i.e. the first district of Twin Elms that you can enter (the rest of them become available later on) The central point of this location is the building called The passage of the Six, where you need to meet up with the Anamfath Council. Apart from that, it is a good idea to take a look into the Celestial Sapling Inn, where you can rest or take on new quests, as well as local market place, where there are several traders, who offer various goods.
1. Palisade wall
Talk to the Warrior after you reach Hearthsong for the first time. Apart from that, it is a good idea to talk to the concerned tribesmen a bit farther.
2. The Celestial Sapling Inn elevator
In front of the inn, find Rinatto and talk to him - the Hard Bargain side quest. IN the inn itself, you can replenish your supplies, hire adventurers and get several quests. Apart from that, in the inn, there are several locked chests and containers. The most difficult lock requires 8 lockpicks 7 points of Mechanics or 8 points of Mechanics.
Side quest: The Champion of Berath - In the inn, talk to the Frightened Villager.
Side quest: At the Mercy of the Tribes - In the inn, talk to Cwineth.
3. Glafanthan Home
You can enter the house only after you have received the Sacrificial Bloodlines quest in Elms' Reach (M37,4). This is required if you want to perform all the actions, according to Simoc's plan, i.e. sacrifice the child.
4. The passage of the Six
Main quest: The Assassin at Large - Meet with the Anamfath Council.
Side quest: Hunter, Brother - Talk to Ridai on your way to the building's exit, right after you have completed your meeting with the council.
5. Hearthsong - Market
You find several traders here:
Rhanet - camping supplies, melee and ranged weapons, rare items, traps
Masden - camping supplies, food
Derwn - melee and ranged weapons, shields, armors
Tamra - armors, traps
Also Alarhi may appear on the market, but only after you have completed Hard Bargain. She sells potions and crafting materials.
7. Glafanthan Home
Side quest: Hard Bargain - Murder Alarhi and her guards, or listen to her alternative plan.
Side quest: Hard Bargain - Talk to Rinatto (M36,2) in front of the inn.
Side quest: The Champion of Berath - Talk to Frightened Villager (M36,2).
Side quest: At the Mercy of the Tribes - Talk to Cwineth (M36,2).
Side quest: Hunter, Brother - Talk to Ridai (M36,4).
Rinatto (M36,2) - You can receive quests from him and trade with him (he sells crafting materials).
Ellitherion "Haggard Shoes" (M36,2) - The innkeeper. Here, you can trade for camping supplies, food rent a room and hire adventurers.
Cwineth (M36,2) - Unlock a quest, as a result of a conversation.
Anamenfath Bethwl (M36,4) - She heads the Anamfath Council. Meeting with her is required by the game's storyline.
Ridai (M36,4) - Unlock a quest, as a result of a conversation.
High Monk (M36,4) - Give him the missive that you receive from the dying monk (M35,4).
Rhanet (M36,5) - He sells camping supplies, melee and ranged weapons, rare items and traps.
Masden (M36,5) - He sells camping supplies and food.
Derwn (M36,5) - He sells melee and ranged weapons, shields and armors.
Tamra (M36,5) - She sells armors and traps.
Alarhi (M36,7) - Kill her , by the order of Rinatto or listen to her plan.
Passages to the other parts of the Twin elms, i.e. Elms' Reach (M37) and Oldsong (M39), are initially unavailable. While trying to use one, you will be halted by the Protector and told to get back. Fortunately, you do no need to mull over accessing the locations. You only need to meet up with Anamfath Bethwl in The passage of the Six building (M36,4) which is a part of The Assassin at Large main quest.
The place where you find Alarhi. Murdering her is the more extreme solution. You can also take a more amicable approach.You receive this quest from trader Rinatto, who you can meet close to the elevator to the Celestial Sapling Inn (M36,2). From Rinatto, you learn about the failed transaction with herbalist Alarhi and he asks you to find out about the reason, for which the woman refuses to return the money. You do not need to search for Alarhi at the local market (only her employee Iwen is there) Instead, go to her cottage in the Northern part of Hearthsong (M36,7).
Alternative solutions:
If you have decided to give Rinatto the cage, you can try unique actions, only available for characters with 13 points of Constitution, 15 points of Dexterity and 15 points of Resolution. If, on the other hand, the strength of your character is, at least, 18, right at the beginning of the meeting, where you ask Rinatto to leave the Elms, you will be able to pick the unique dialogue option.
If Rinatto left Twin Elms voluntarily, you encounter him again on Elmshore. Rinatto Comes with guards and after a short conversation he attacks you. Fortunately, defeating the trader and the mercenaries is not too difficult. It is worth adding that Rinatto drops, among others, an unique firearm.
You can receive this quest only if you have managed to overthrow Raedric, during the Lord of a Barren Land quest, while at the Raedric's Hold (M9). Now, at the Celestial Sapling Inn (M36,2) meet up with the Frightened Villager, from whom you learn about the return of Lord Raedric from the dead.
After you reach the Raedric's Hold, by the drawbridge, meet the Fampyr (M9,1). Allow him to take you and the party to the place where Raedric is, which is the siege engine on the rooftop of the keep (M9,6). Here, you meet Raedric and, after the conversation, you are going to fight a difficult fight with him. During the fight, you should predominantly, take care of the weaker party members and keep Raedric away from them, with your warriors. Examine Raedric's body after you've defeated him (he was using a high quality sword and armor). You can also meet with Fampyr again and decide if you want to kill this character or send him to your stronghold.
Rind ranger Cwineth at the Celestial Sapling Inn (M36,2) and talk to her. She asks you to locate the Dyrwoodian expedition and warn the members of the expedition about the Glanfanthan trap. Go to Oldsong (M39) and cross the passage to Northweald (M57). Start by exploring the pilgrim camp near the starting point (M57,1). Get rid of the wolves (watch out for the wolf leader) and examine the corpse. Now, go Eastwards. Soon, you reach Cwineth's new staying place (M57,2),. Talk to her. You will learn about the stalemate between the group of Fangs and the members of the expedition, who are defending in the nearby tower.
Go eastwards and you will encounter a group of Fangs (M57,7). Here, talk to Fangs Bright Blood. There are two ways to handle the situation - either promise that you look into the case, or attack the Fangs straight away. In such a situation, you will have to win a fight of medium difficulty and you would even not need to meet up with the mercenaries, and return to Cwineth instead.
Alternative solution:
During the conversation with Fangs Bright Blood, you can use persuasion. This is possible if your reputation in Twin Elms high , or if your character has, at least, 17 points of Resolution. IN such a situation, you will be able to reach a compromise. The elf will agree to let the expedition go, save its leader, who needs to be punished. Then, during the conversation with Esmar (M57,6), you can mention this and use persuasion to see the plan through.
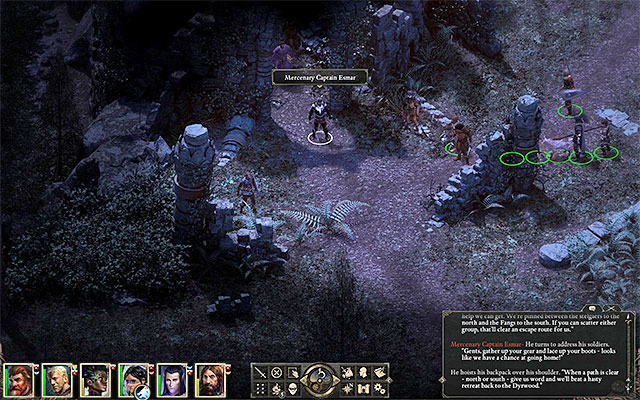 The expedition members are by the destroyed tower
The surrounded mercenaries are by the destroyed tower (M57,6). Here, you need to meet up with Captain Esmar. Also in this case, two options are available - you can either offer to help the mercenaries get out of the plight, or attack them. If you have chosen the former, head South to eliminate the Fangs (M57,7) or North to deal with the monsters on the escape route (M57,8). In the latter case, you would have to defeat a group of spotted stelgaers and you need to watch out the mot for the adult ones, which are the strongest. If you have chosen to attack the mercenaries, after you do, apart from Esmera, deal with the enemy mage and rogue, as quickly as possible. Then, return to the Fangs and report to Bright Fangs Blood about the completion of the task.
If you have helped the mercenaries, regardless of the way in which you did it, finally meet up with Cwineth again (M57,2). You will be rewarded with the Dungeon Crawler skill.
After you meet up with Anamfath Bethwl in The Passage of the Six, (M36,4). In the building, find Ridai and talk to him, to learn that the Glafanthan would like to know what happened to his missing bother Fiorm. Leave the building. Before you reach the village, travel to Elms' Reach. Find Arthwn in front of the entrance to the Hall of Warriors (M37,4) and talk to him, to learn that Fiorm has decided to lead his life in exile.
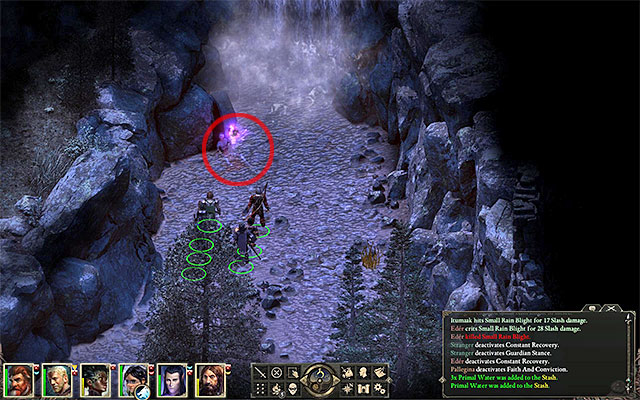 The place where you find Fiorm
Only now, head towards Northweald. Explore the central part of the location, i.e. the area around the waterfall (M57,9). Find the dead Fiorm - you will be able to touch his soul and see the vision. Now, head towards Sentinel Ridge (take the eastern or the Western path) (M57,5). Deal with the group of stelgaers in this area (watch out for the adult ones) and see the corpse of the great one. Again, touch its soul, thanks to which you will see the actual course of events.
You can now return to The passage of the Six in Hearthsong. Talk to Ridai and walk over to the chamber where there is Anamenfath Bethwl. Share the information with the people there, on your findings. After the meeting, talk to Anamfath again, who will reward you with an unique sword.
Alternative solution:
While reporting on the events in Northweald, you can pick lies, each time. Thanks to which, you will gain Arthwn's favor, who gives you a rare bow, after the meeting.
Elms' Reach is one of the four districts in Twin Elms. It is a priority to visit this location, because you start and finish several of the main quests here, the majority of which is connected with Twin Elms and the adjacent Teir Evron. Still, apart from those places, it is still worthwhile to visit the Hall of Warriors. In Elms' Reach, there also is the path to a minor location - Blood Sands .
3. Glafanthan Home
After you enter, initiate the Stealth mode to find the stash in the floor. Inside, you find an unique light armor, referenced to by the dying monk in the Sealed Missive (M35,4).
4. Hall of Warriors
Outside of the Hall of Warriors, talk to Arthwn - the Hunter, Brother side quest.
Side quest: Sacrificial Bloodlines - In the Hall of Warriors meet with Simoc.
In the Hall of Warriors, there are several locked chests and containers. The most difficult lock requires 6 lockpicks and 5 points of Mechanics or 6 points of Mechanics.
5. The Golden Grove
Talk to Bledha and ask her for the poison that you may use for the Sacrificial Bloodlines side quest. Apart from that, you can trade with her and talk to Tamrwn and Iswld.
6. Twin Elms
Listen to the conversation with Sidha and Rihenwn, i.e. delemgan sisters - The Assassin at Large main quest. You receive 2 new main quests.
7. Teir Evron
You can pray to various gods, for the Council of Stars main quest. For each correct prayer, you receive a new side quest. If you make a mistake, you will be attacked by monsters (different ones, depending on the deity)
Main quest: Council of Stars - Automatically, after you complete the Assassin at Large main quest.
Main quest: Court of the Penitents - Automatically, after you complete the Assassin at Large main quest.
Side quest: The Nest Above the Clouds - Pray to Hylea in Teir Evron (M37,7).
Side quest: The Old Queen and the New King - Pray to Galawain in Teir Evron (M37,7).
Side quest: A Servant of Death - Pray to Berath in Teir Evron (M37,7).
Side quest: Into the White Void - Pray to Rymrgand in Teir Evron (M37,7).
Side quest: Sacrificial Bloodlines - Inside the Hall of Warriors meet with Simoc (M37,4).
Arthwn (M37,4) - Talk to him about the missing person.
Simoc (M37,4) - He gives you a new side quest.
Lliras (M37,4) - He offers an alternative solution, for Simoc's quest.
Bledha (M37,5) - You can ask her for the poison, which you can use in the quest from Simoc, and barter with her (potions, crafting materials).
Sidha, Riihenwn (M37,6) - You meet the delemgan sisters during the main storyline.
By default, Elms' Reach is inaccessible, at the moment of reaching Twin Elms. Fortunately, there is an easy way, in which you can change that, i.e. by meeting with Anamfath Bethwl inside The passage of the Six in Hearthsong (M36,4). You have the conversation during The Assassin at Large main quest.
Blood Sands is a small underground location that you can access only from the direction of Elms' Reach. At first, you encounter no enemies here, but this will change. Therefore, get prepared properly for that. You can explore all of the chambers without any problems and meet all of the important NPCs. After all, it is a good idea to take a good look around, because there is a secret chamber in this location.
1. The first chamber
Talk to Keeper Garost about Ethik Nol and the preformed rituals.
2. The Western chamber
In here, you can meet with Keeper Wrdha, for the Sacrificial Bloodlines side quest (only if you have decided to sacrifice the child).
3. The secret chamber
Find the hidden switch in the nearby corridor. In the chamber, there are two chests with valuable items, but they are protected with highly advanced traps.
5. Blood Sacrifice Chamber
Talk to Archdruid Rechstin and after you have dealt with all your business in Blood Sands, attack him. Killing him is a part of the quest from Berath - A Servant of Death .
Keeper Garost (M38,1)
Keeper Wrdha (M38,2) - A conversation with her is an optional part of the Sacrificial Bloodlines side quest.
Archdruid Rechstin (M38,5) - You need to murder him, by Berath's request -A Servant of Death quest.
Do not attack Archdruid Rechstin too early (murdering him is required for the Servant of death quest). As a result of that, all of the NPCs in the Blood Sands will turn hostile towards you. This may make it impossible to complete one of the variants of the Sacrificial Bloodlines side quest, which assumes that you meet up with Keeper Wrdha and give her the sacrifice child.
In Blood Sands, there are many urns and chests, where you find lots of gold, magic scrolls or rare potions, among others. It is best to start exploring this location after murdering the archdruid, thanks to which you will not risk being caught stealing.
You receive this quest after you meet with Sidha and Rihenwn in Twin Elms in Elms' Reach (M37,6) while completing The Assassin at Large main quest. You need to reach the ruins of the ancient prison on the Burial Isle. First of all, go to Oldsong. In the Eastern part of the district, there is a ferry crossing (M39,2). Talk to Dorvhal and confirm that you want to go to the Burial Isle.
 As soon as you gain favor with one of the deities, jump into the pit.
After you get to the Burial Isle go to The Pit (M56,1) and jump inside. Note! Before you take the jump, make sure that you have gained favor with one of the deities.
You can gain favor of the deities by completing specific quests (they have been described on the page entitled Deity Quests in Elms' Reach):
Rymrgand - Into the White Void ;
Berath - A Servant of Death ;
Galawain - The Old Queen and the New King ;
Hylea - The Nest Above the Clouds .
Now you only need to jump into the Pit. The quest will then be automatically completed.
After you take the jump, you will be unable to return to the world map. Therefore, make sure that you have already done everything that needs attending and you want to complete the game.
You receive this quest after you meet with Sidha and Rihenwn in Twin Elms, in Elms' Reach (M37,6) during The Assassin at Large main quest. It assumes that you pray to deity for their favor and, for this, enter Teir Evron (M37,7). Go to the eastern part of that location and find the altar with Luminescent Adra Shards. Take the item and go to the central part of the Hall of Stars to put it in appropriate slot. This will unlock some of the pulpits, thanks to which you will be able to pray to the specific deity.
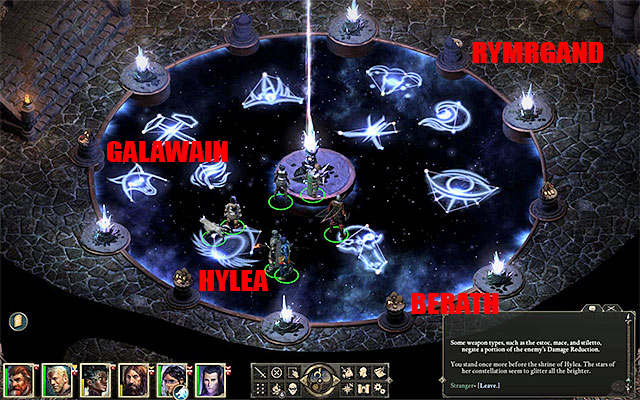
Pick, at least, one deity (you can take interest in all the available ones) and interact with the pulpit linked to that deity. This will initiate a cutscene, in which it will be necessary to pick the appropriate dialogue option, connected with the correct ritual text. You can use the books, which you find all around Teir Evron, for reference, but if you do not feel like reading them, use the ready-made solutions. If you do everything correctly, you unlock a new quest connected with a given deity, e.g. doing a favor or taking a streak of tests. If you make a mistake, you will be attacked by monsters, whose types depend on the individual deity.
Hylea - Pick the fourth dialogue option- "Live every note of life's song". You receive The Nest Above the Clouds quest.
Galawain - Pick the third dialogue option -"Survival begins with strength from within". You receive The Old Queen and the New King quest.
Berath - Pick the second dialogue option -"There is life in death, and death in life". You receive the A Servant of Death quest.
Rymrgand - Pick the seventh dialogue option -"All life ends in stillness" . You receive Into the White Void quest.
The quests that you receive have been described in the chapter entitled "Gods quests in Elms' Reach".
After you perform the actions for the given deity, return to the pulpit and pray again. During the vision, always pick the action at the top of the list of dialogue options, thanks to which you do not alienate the deity and do not lose the favor. For the purposes of the storyline, you only need the favor of one of the four deities, but it is better, of course, to complete all four tasks.
Below, you can find the descriptions for the quests connected with the deity, which you unlock thanks to performing correct rituals in Teir Evron, in Elms' Reach (M37,7). It is a part of the Court of the Penitents main quest.
Important! Completing all four quests of the gods is not required to finish the game. The game requires that you finish at least one of them before proceeding with the last part of the campaign. If you don't mind you should still take interest in all of them since completing them will allow you to gather a lot of experience and valuable items.
You need to travel to the Temple of Hylea up in the mountains, above Twin Elms to deal with the threat that haunts it. Travel to Oldsong in Twin Elms and examine the Hylea's Shrine (M39,1). Talk to Casfath and Onwen, to learn that there is a huge dragon residing in the temple. Leave Oldsong through the Northern exit, to reach Northweald .
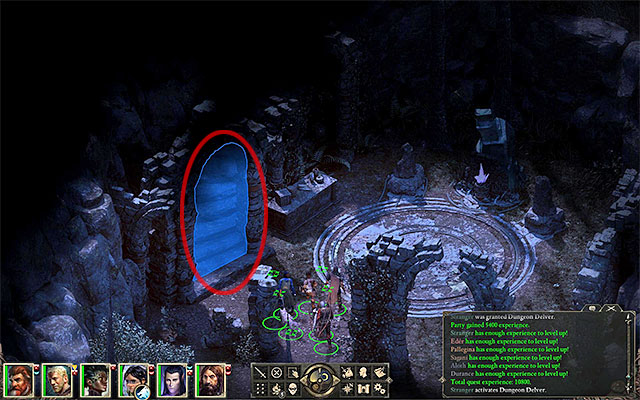 The stairs in Northweald to the Temple of Hylea
Reach the stairs in the North-Western part of the map (M57,3) and deal with several monsters led by adragana. Interact with the stairs. You can cut your way through, by using the chisel an hammer, by moving the huge boulder (requires a character with, at least 16 points of Strength) or try to walk around the obstacle. Regardless of what you did, you need to keep in mind that, along the path to the Temple of Hylea, the party members with low Athletics may take damage. If necessary, take a rest afterwards.
You start in the Southern part of the temple (M58,1). Head towards the big nest (M58,2) where there is the Sky Dragon. After the conversation with the dragon starts, you can do either of the following. The more obvious variant is to attack the dragon, and the wyrm. It is a very tough battle, because the beast deals lots of damage, is resistant to many of the ranged attacks and can, additionally, stun party members, as well as form the aura of fear. Therefore, it is advisable that you use all sorts of protecting and buffing potions, before you start the battle. An alternative is to handle the conversation with the dragon in such a way, so as to allow him to stay in the temple. During the conversation, avoid too aggressive and resolute answers, thanks to which you will reach the desired effect.
Regardless of whether the dragon died or stayed in the nest, return to Teir Evron afterwards (M37,7) to talk to goddess Hylea again, and gain her favor.
During the vision, you will see a stone maw in the shape of a wolf's one. This is a hint on which location you need to visit to complete this quest - i.e. Galawain's Maw (M40). The entrance is in the central part of Oldsong (M39).
You start in the South-Western part of the Maw (M40,1) and your first task is reach the Galawain's Shrine in the North-Eastern corner (M40,6). There are several paths that you can take to get there. You can cross the first part of the location, by meeting with Desthwn by the Northern passage (M40,3). After the conversation, you receive a key. Use the key in the door, but expect to encounter lions, lionesses and members of the Lion clan. The fights are not too demanding, but avoid attacking too many opponents at a time. An alternative way is to take interest in the destroyed bridge (M40,2). Here, you need to have a grappling hook. By choosing this variant, you will be able to avoid some of the fights. There also are two ways to cross the second part of the location. The better idea is to reach the vines (M40,5) and squeeze through them. The other variant is to cross the eastern part of the caves and fight several fights. In both cases, watch out for numerous traps on the ground. Walk around them or disarm them, on a regular basis.
In the Galawain's Shrine (M40,6), there are Irensi and lioness Sul. Two main ways to act here assume that you attack the opponents here, in order to kill Sul or, to agree to eliminate Oernos the Bear. If you decided to follow the first variant, you are up for a VERY demanding fight. Apart from Sul, you will also have to defeat Irensi, the lesser lions and the clan members.
Alternative solution:
During the encounter with Irensi, you can use persuasion and pick one of the unique dialogue options. They are exclusive for druids, Bleak Walkers Hunters and Ranger.
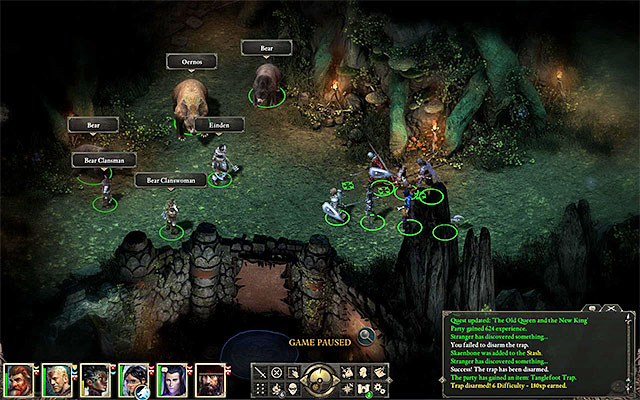 The area where Oernos the Bear appears - he appears at the Maw later on
If you have not attacked Irensi and Sul straight away, you can meet up with Einden, who is waiting with Oernos the Bear at the northern exit from the Maw (M40,7). The pattern of actions is very similar here. After the conversation ends, you can, first of all, decide to kill Einden and Oernos, or alternatively, agree to kill lioness Sul. The ensuing fight with the bear and the rest of the enemies is slightly easier, than in the case of the lioness. Apart from Einden and Oernos, you would have to defeat clan members and two smaller bears.
Regardless of what you did at Galawain's Maw, all being done, return to Teir Evron (M37,7) to talk to god Galawain again, and gain his favor.
Alternative solutions:
During the encounter with Einden, you can use persuasion and pick one of the unique dialogue options. They are exclusive for the Fighter, Ranger and the Darcozzi Paladini.
Still another solution to the conflict at the Galawain's Maw is to kill both of the beasts, i.e. the lioness Sul and Oernos the Bear. However, do not do that if your party is not sufficiently strong. Also, in such a situation, have your party rest after the first battle.
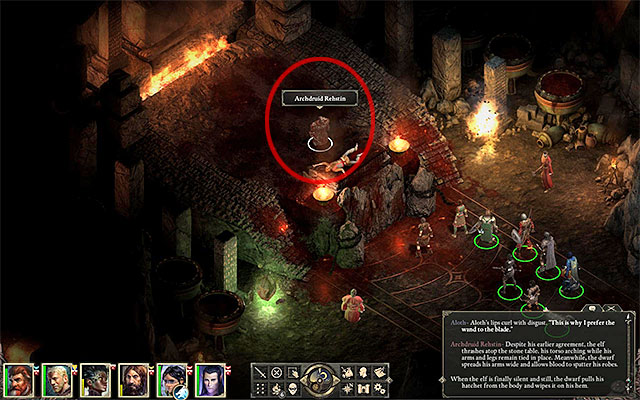 The Archdruid is the first one singled out by Berath
You need to kill two NPCs - a dwarf and an elf, who you have seen in your vision from Berath. The dwarf that you are looking for is Archdruid Rechstin who is staying at the Blood Sands (M38,5), i.e. the underground location that you enter from the side of the Elms' Reach. After you enter the cave, go to the Blood Sacrifice Chamber. Before you attack the archdruid, make sure that you have completed all of the other quests at the Blood Sands, because all of the NPCs in this location will attack you afterwards. Try to kill the archdruid as quickly as possible and focus on the rest of the opponents then. You should especially watch out for the various types of blights and for sentinels that can cast spells.
The elf that you are looking for is the High Ovate Erona. Go to The Golden Grove in Elms' Reach (M37,5) and talk to Iswld. You learn that Erona often travels to Elmshore where you need to go also. The Ovat is by the circle in the Eastern part of the map (M35,5). Attack Erona and try to kill her in the first place. Deal with the rest of the opponents only after she dies.
Finally, return to Teir Evron (M37,7) to talk to god Berath again, and gain his favor.
Alternative solution:
In the case, in which your character has, at least, 15 points of Resolution, you can convince Erona that her life cycle has drawn to an end. After that, she will take her life herself and you will not have to defeat her in battle.
During your vision, you see The Frost-Hewn Breach in the Noonfrost temple (M41). The entrance to the temple is in the Northern part of Oldsong (M39). After you get inside, talk to Vesgel in the first chamber (M41,1). You learn that visitors are not allowed in, including The Frost-Hewn Breach (M41,8) connected with this quest.
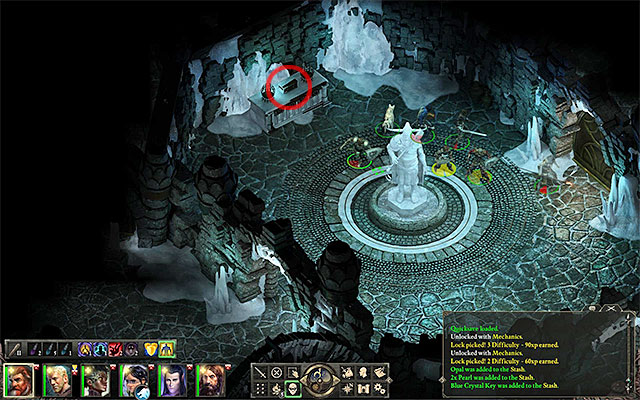 Take the blue key, after the guard exits
You can storm The Frost-Hewn Breach by force. To do that, go North, attack the guards in front of the inaccessible entrance (M41,4) and pick the easy lock.
Things get very much complicated, if you want to reach your destination without getting into fight. For that, first reach the North-Eastern chamber in the temple (M41,2). Wait for the guard to leave the room and open the lock on the chest (requires 3 points of Mechanics) and collect the blue crystal key. Go to the door to the West of where you met up with Vesgel (M41,3). Open the door with the key and from here on, proceed in the Stealth mode. You need to break into the room to the side (again, it requires 3 points of Mechanics) (M41,5) and open another chest there (requires 6 points of Mechanics). From the chest, take the white crystal key and open the Northern door with it (M41,6). Carefully, walk around the single mage and in the office (M41,7), find the secret switch that moves a fragment of the wall.
After you reach The Frost-Hewn Breach (M41,8) approach Glasvahl to start a conversation. First of all, you can attack all of the NPCs here, but you need to be prepared to fight a difficult fight (as quickly as possible, kill the most powerful mages). If you do not want to attack them, give
Glasvahl the luminescent ice crystal that you have received from Rymrgand. Glasvahl and his people will cross the portal (negative reputation).
Regardless of what you did in Noonfrost, all being done, return to Teir Evron (M37,7) to talk again to god Rymrgand and gain his favor.
Alternative solution:
If your character has, at least, 17 points of Resolution, you can convince Glasvahl not to use the crystal. In such a situation, all of the NPCs leave the temple (lots of positive reputation points). Before you leave the temple, slide the crystal into the interactive slot, to close the breach.
Talk to anamfath Simoc at the Hall of Warriors (M37,4). He asks you to take an Orlan girl from one of the houses in Hearthsong and escort her to Keeper Wrdha to perform a ritual and sacrifice the kid. While leaving the Hall of Warriors, you will be accosted by Lliras -Simoc's son. He offers you an alternative solution to the problem, i.e. poisoning his father, which will end his plans for the bloody ritual.
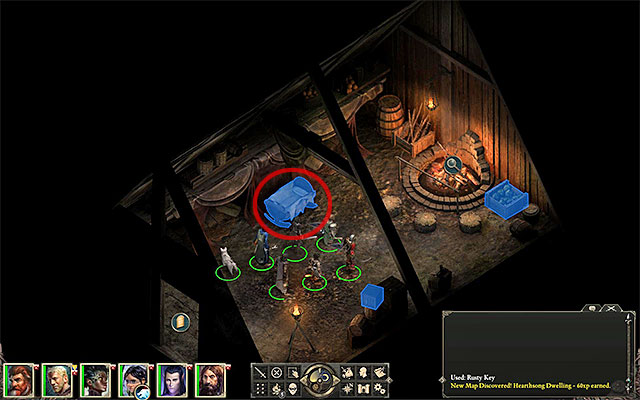 If you want to help Simoc, you need to take the child from the cradle
Note - If you opted for the plan to poison Simoc, make sure that your character's statistics are high enough because, if you fail to convince Simoc, a tough fight against him and his men will ensue.
Alternative solution:
You can try to poison Simoc even if you have earlier abducted the child and murdered Lliras. In such a situation, the clan loses both its leader and the rightful successor.
Oldsong is one of the four districts of Twin Elms. There is nothing much to do, in the main part of the location, but there are two vast minor locations connected with it - Galawain's Maw and Noonfrost . You visit both of them while completing quests, connected with the Court of the Penitents main quest. Apart from that, in Oldsong, there also is ferry crossing and it is the only way to reach the Burial Isle .
1. Hylea's Shrine
Talk to Casfath and Onwen about the dragon in the Temple of Hylea - Hylea's The Nest Above the Clouds quest.
Also, there is a passage to the Galawain's Maw here, but you need to open it from the inside.
2. Ferry crossing
Dorvhal manages the ferry and he can take your party to the Burial Isle at any moment. You visit this location to complete the Court of the Penitents main quest.
3. Path
Talk to the Fangs Mind Hunter to complete Eder's personal quest -Fragments of a Scattered Faith .
4. Southern yard
Songs of the Wild Side quest - Delem asks you to find rare birds.
Side quest: Songs of the Wild - Talk to Delem (M39,4).
Casfath and Onwen (M39,1) - Talk to the priests about the Temple of Hylea.
Dorvhal (M39,2) - He manages the ferry crossing to the Burial Isle.
Fangs Mind Hunter (M39,3) - Talk to him about Eder's brother.
Delem (M39,4) - He tasks you with a side quest.
Urwa (M39,5) - She trades potions and crafting materials.
By default, Oldsong is inaccessible, when you arrive in Twin Elms. There is an easy way to change this, though, i.e. meet with Anamfath Bethwl in The Passage of the Six building in Hearthsong (M36,4). You talk to Bethwl during The Assassin at Large main quest.
Galawain's Maw is a medium-sized underground location, which you can enter while in Oldsong . You visit this location, nearly solely to complete The Old Queen and the New King quest that you receive from god Galawain in Teir Evron. You encounter here both friendly and initially hostile NPCs here. Apart from that, you will have to alleviate the conflict between powerful beasts, by killing one or two creatures.
2. Destroyed bridge
It is only possible to cross the bridge using the grappling hook. Thanks to this, you skip the journey across the Northern part of the location (M40,3) and some of the fights with lions and members of the Lion's clan.
3. The Fangs' Heart - Northern passage
Meet Desthwn here, who gives you the key to Galawain's Maw (use it on the nearby door).
4. Southern passage
By default, the passage is inaccessible. You can open it later on, e.g. along your way back to the surface - you need to locate the switch Eastwards of the door.
Side quest: Prison of Ice - Talk to Larha.
Larha sells camping supplies, various weapons and tools.
5. Vines
This is another, next to the destroyed bridge, possible shortcut. It allows you to reach Galawain's shrine faster (M40,6) and to avoid several fights. After you interact with the vine, pick the option to squeeze through.
6. Galawain's shrine
You encounter Irensi and lioness Sul here, i.e. one of the two creatures for Galawain's quest. You can attack Irensi and Sul, use Persuasion to convince the woman to change her stance, or kill Oernos the Bear, which appears in the Northern part of the Maw (M40,7).
7. Oernos the Bear
Einden and Oernos the Bear appear right after you leave Galawain's Maw, after the meeting with Irensi (M40,6). Just like in the case of the lioness, you can attack Einden and Oernos, use Persuasion to convince the man to change his stance, or eliminate lioness Sul (M40,6).
Side quest: Prison of Ice - Talk to Larha (M40,4).
Desthwn (M40,3) - You receive a key from him.
Larha (M40,4) - You can receive side quests from her and trade with her, she sells camping supplies, weapons, armors and tools.
Irensi (M40,6) - She guards lioness Sul.
Einden (M40,7) - He protects Oernos the Bear. Note - At first, he is standing close to the entrance to the Maw (M40,1), but you can only have a short conversation with him, then.
Lion
Lioness
Lion Clansman
You cannot feel entirely safe, while at the Galawain's Maw. After you leave the initial chambers, and along your path to Irensi, you will have to eliminate both various types of lions, as well as Lion Clansmen. Therefore, it is best to reach your destination as quickly as possible, because your meeting with Irensi changes the disposition of all the creatures around, towards your party. The exception, of course, is the situation, in which you attack Irensi and lioness Sul straight away, without meeting with Einden to learn the possible alternative solutions to Galawain's quest.
Lioness Sul and Oernos the Bear are very tough beasts. They deal lots of damage. Before you decide to eliminate, at least, either of them (you can also kill both) have the party rest. Keep in mind that you will also have to eliminate all of the accompanying creatures, unless you managed to change their disposition, with Persuasion.
In Galawain's Maw, there are lots of traps, especially in the Eastern corridors. You should not ignore them, because many of them deal significant damage. Unfortunately, if there is nobody with high Mechanics in your party, you will have to walk around many of them (you should especially watch your step in narrow corridors and cross them with one character, at a time).
Noonfrost is a medium-sized underground location that you can enter while in Oldsong. You visit here, mainly to complete the Into the White Void quest, which you receive from god Rymrgand in Teir Evron. The Northern chambers in this location are initially inaccessible and, at each attempt to enter, your party may be attacked by nearby NPCs. Fortunately, there is a safe passage to The Frost-Hewn Breach (which is connected with the abovementioned quest), across the Western chambers.
1. The first chamber
From Vesgel, you learn that there is no entry to some of the areas of the temple. You may be attacked if you ignore the warning guards at the inaccessible passages (M41,4) or if you open one of the locked doors.
2. The chamber with the Blue Crystal Key
The key is locked up. Before you collect it, wait for the guards leaves the room. You can use the key to open the Western passage (M41,3).
5. Side room
Another key is locked up in a chest. If you manage to pick the lock, you will gain access to the easier way to the Northern part of the temple (M41,6).
7. The office
In the Stealth mode, you can find the switch and use it to move a fragment of the wall.
In the office, there is an interactive altar. If you manage to disarm the advanced trap on it, you obtain a rare staff.
8. The Frost-Hewn Breach
Rymrgand's quest: Into the White Void - Kill Glasvahl and all of his company, or try to solve the problem in an amicable way (appropriate dialogue options).
9. The Library
Here, you find the silver key to the locked room in the Northern part of the temple (M41,10).
10. Locked room
Side quest: Prison of Ice - Use the silver key that you find in the library and free the imprisoned Alwah.
Vesgel (M41,1) - She bids you welcome, after you enter the temple.
Glasvahl (M41,8) - Meet him during the main quest from god Rymrgand.
Alwah (M41,10) - You can rescue her, by the request of Larha, from the Galawain's Maw (M40,4).
If you do not want to be attacked, along your path to The Frost-Hewn Breach, rely on stealth and obtain the keys: first the blue one in the Eastern chamber (M41,2) and the white key in the Southern storage (M41,6). The only problems you may have is while opening the chest with the second key, because someone on the party needs to have Mechanics of, at least, 5 points (an preferably of 6 points - you need no lockpicks then).
Talk to Orlan Delem, whom you find on the Southern square (M39,4). He asks you to find three rare songbirds.
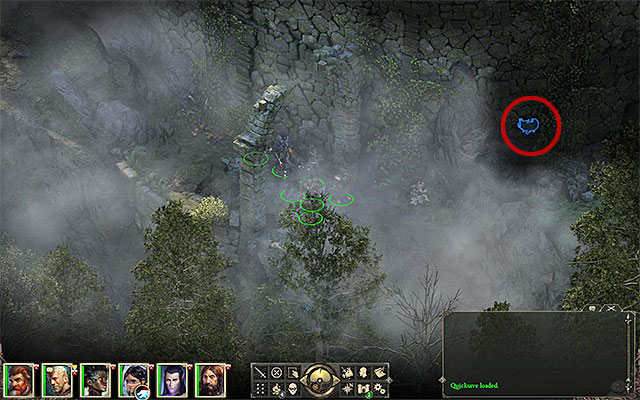
The first one is the Cloudsinger Songbird and inarguably, it is the most difficult one to get to. The nest of this bird is in the Southern part of the Temple of Hylea (M58,3) and it has been presented in the above screenshot. It is best to get the Cloudsinger Songbird while you are at the temple, for the problem of the dragon here.
You can find the second bird while in Twin Elms. Go to Hearthsong and enter the Glafanthan Home in the Northern part of the map (M36,8). Ignore Llensi and sneak a peek into the chest by the entrance, because it is there that the Tiam Songbird is.
Note - You do not need to ask Llensi for her permission to take the bird. Actually, this is recommended against, because you could lose your reputation points if you, e.g. try to intimidate her. The only upside of the meeting with Llensi is that you learn that Delem plans on eating the birds that you collect.
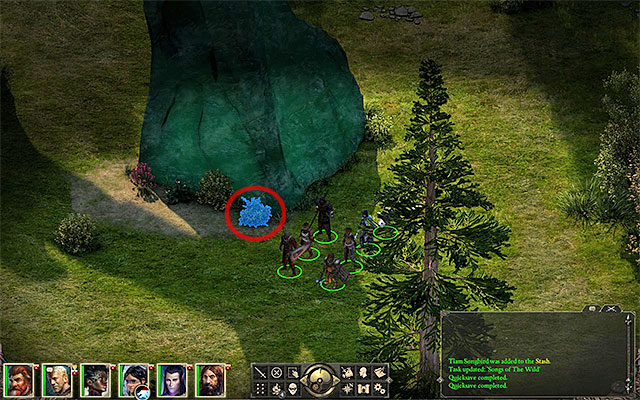
The last bird is the Shardwing Songbird and to find it, you need to go to Elmshore. Take a look around for an interactive bush, near the adra arch (M35,3) - it has been shown in the above screenshot.
After you collect all three birds, return to Delem (M39,4) and give them to him.
Alternative solution:
You can convince Delem not to eat the birds, but this is possible only with sufficiently high statistics - 14 points of Perception, 13 points of Intellect or 14 points of Resolution. Each one of the unique dialogue options can only be used once, i.e. if you need to save all of the birds, each of the abovementioned statistics must be at a sufficiently high level.
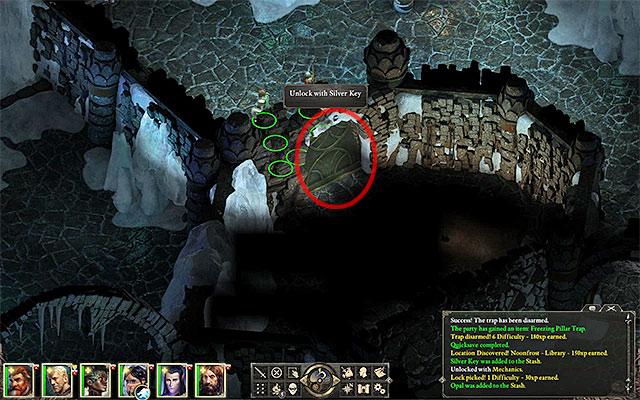 It is easy to miss the entrance to the cell that Alwah is being held in
You can receive this quest from Larha in Galawain's Maw (M40). Find her next to the Southern passage (M40,4) and talk to her. She asks you to find the missing Fang scout, Alvah, in Noonfrost. Leave Maw and get to the cave that the woman mentioned (M41).
Alwah is being kept in one of the Northern rooms of the temple (M41,10). It is best to free her after you have completed the Into the White Void quest that you receive from Rymrgand, because you will not have to bother about any opponents then, and Alwah a safe passage will be secure. Start with the library (M41,9) and find the silver key there. Then, reach the locked room and free Alwah. If there is nobody left in the temple (Glashval and his men are dead, have crossed the portal, or left the temple) you can tell her that the way to the exit is clear.
Return to Galawain's Maw and meet with Larha (M40,4). You can seize the opportunity and ask Alwah for a lesson. Thanks to this, you will unlock the Blooded Hunter skill, which provides you with a bonus to Stealth and damage reduction.
The above map presents the small location near Twin Elms. You cannot travel there from the level of the main map and the only path is across Oldsong . This is one of the last locations that you visit in the game, it is from the Burial Isle that you pass to Thaos - your main enemy. If you decide to go there, you there is no way back. It is a good idea to complete all of the remaining quests beforehand, and furnish your party with the best equipment possible, as well as to have them rest.
1. The Pit
2. The Passage
Thanks to this passage, the way to The Pit (M56,1) is much shorter. To take the passage, you need:
To avoid any injury, while crossing the tunnel, you need 17 Constitution.
3. The dock
You start exploring the isle here. To leave, you need to talk to Darvhal. You will be transported to Oldsong (M39,2).
4. Grotto of Echoes
You can end the quest for one of your party members - Hiravias. Here, you find a druid with four staelgars, but only at one exact moment into the quest. There is nobody here, before or after that.
Dorvhal (M56,3) - He can take you to Oldsong .
Shade
Phantom
Shadow
Will-o'-wisp
Cean Gwla
Menpwgra
Pwgra
Explore the entire isle thoroughly. There are no strong opponents here and you can find several interesting items. You should especially pay attention to mummies.
Do not jump into The Pit (M56,1) if you have not secured the favor of one of the deity (the Council of Stars main quest). Each time, this will end up in you dying. Also, remember that such a jump will be irreversible and you will not be able to travel to any other location. Do this only towards the end of the game, after you have completed all of the quests and prepared your party for the final battle.
The above map presents Northweald - the location Northwards of Twin Elms. This is the last big location that you visit in this part of the map. Farther northwards, there only is the Temple of Hylea, the stairs to which are in the North-Western part of Northweald. Here, you encounter a wide variety of opponents, the majority of which are connected with the forces of nature, ranging from regular wolves, to the strong forest lurkers.
2. Ford
As soon as you come closer, Cwineth will approach and ask you to save her companions (M57,6). It is a part of the At the Mercy of the Tribes quest that you have obtained earlier.
3. The Nest
The path leads to the Temple of Hylea. To unlock the stairs, you need to do one of the following:
- Use chisel and hammer;
- Have Power at the level of 16;
- Try to walk around the stone.
Note - Character with low Athletics may be injured in the course of this.
4. The cave
Inside, there are several interesting items. Watch out for the multitude of forest lurkers (around 7-8, in two groups).
5. Sentinel Ridge
Here, find the corpse of the great stelgaer and touch its soul (the Hunter, Brother side quest).
6. Mercenary camp
A group of mercenaries connected with the At the Mercy of the Tribes quest. You can:
- Help them out, along the Northern passage. You need to kill the spotted staelgars (M57,8);
- Help them out Southwards. Kill the group of Fangs (M57,7);
- Use Persuasion and convince Esmar to give in to the Fangs;
- Attack them, which means siding with the Fangs (M57,7).
If you decide to attack them, eliminate the mage and the ranged fighter in the first place.
7. Group of Fangs
They are looking for a group of mercenaries (M57,6) and want you to get rid of them. This way, you will complete the At the Mercy of the Tribes quest. Also, you can kill them and complete this quest, on the side of the mercenaries.
9. Waterfall
Find Fiorm's corpse, from the Hunter, Brother side quest and touch his soul.
Cwineth (M57,2)
Esmar (M57,6) - the leader of the mercenaries that are trying to escape the trap set by the Fangs .
Fangs Bright Blood (M57,7) - The leader of the fangs that are looking for the mercenaries that trespassed the grounds of the ancestors.
Wolf leader
Wolf
Stone beetle
swamp lurker
Bear
Adragana
Forest lurker
Staelgar
Elder staelgar - A stronger version of the regular staelgar.
Spotted staelgar - Staelgar with characteristic looks. It is slightly stronger than the regular Staelgar.
Elder spotted staelgar - The stronger version of the spotted staelgar.
Rain blight
Temple of Hylea is one of the last locations that you visit in the game and you can reach it only from the direction of Northweald. You visit this place mainly to complete The Nest Above the Clouds quest that you receive from goddess Hylea in Teir Evron in Twin Elms. Apart from the nest of the Sky Dragon, there is nothing much to do here.
2. The nest
In the nest, you find a powerful Sky Dragon, connected with the quest from The Nest Above the Clouds. You can defeat the beast in a direct fight, or solve the matter in an amicable way and let the dragon stay in the temple.
If your party members have taken damage, while traveling from Northweald to the Temple of Hylea, take some rest after you get to the new location. It is especially important if you are going to defeat the dragon in direct combat, because it is exceptionally difficult. Therefore, it is best to start the battle well-rested and with full repertoire of spells.
By the nest of the Sky Dragon, there are several stashes with highly valuable items. However, ignore them, if you have decided on the peaceful variant, because you will then have the dragon on your head.
Breith Eaman is the last location that you visit in Pillars of Eternity. There is only one path that you can access the location, through the pit on the Burial Isle . There is no return path from this location. It consists of three small levels, where you encounter few opponents. At the last level, you encounter Thaos, your main enemy. After you defeat him and start the ancient machine moving, you complete the game and get to see the summary of all the choices that you have made throughout the game.
1. The Pit
This is where you start the exploration of the ancient ruins. New quest automatically appears in your journal.
Main quest: Memories of the Ancients
2. Column of adra
Kill all of the opponents. The ghost of Iovara appears. Talk to her and you will learn many things not only about Thaos, but also about your past.
4. Walk of Souls
After you approach the walk of Souls, a short cutscene starts, where the souls that you have already collected illuminate a part of the map.
5. Guardians' Dome
After you get here, another part of the map will be illuminated. Defeat the Shadow Drake and several Engwithan Shades.
6. Court
After you get here, another part of the map is illuminated. Defeat several Engwithan Shades and the Shadow Drake. You can now cross the door above, into the third level of Breith Eaman.
8. Main platform
While you are crossing the platform, a cutscene starts, in which Thaos appears, both is his spiritual form and in the flesh. Talk to him, but you cannot avoid the battle. Kill both him and the two animated statues.
9. The machine
After you defeat Thaos, approach the switch. You will be able to decide what is to become of the collected souls. After you have made your choice, you get to see the summary of all the choices that you have made, followed by end credits. You will get back to the game's main menu.
Iovara (M59,2) - The lost soul of an ancient researcher
Shade
Spectre
Shadow
Animat
Adra animat
Engwithan shade - this opponent is very similar to a regular shade and is only slightly stronger and has completely different looks.
Shadow drake - a strong opponent that surpasses regular drakes in strength. Still, at this level, he should pose no major challenge to you.
Woedica's Judge - one of the animated statues. It has lots of health points, high defense and medium attack. He should not be too much of a challenge, because he does not use magic.
Woedica's Headsman - The other of the animated statues. His statistics are, practically, the same as those of the Woedica's Judge.
This quest appears in your journal automatically after you have jumped into The Pit on the Burial Isle (M56,1). Your task is to find and square off against Thaos.
Your first step should be to go to the room with the column of adra, kill all of the opponents there and talking to Iovara. You learn many interesting facts about your past. Then, go to the second level of the ruins (M59,3). It is completely dark here and, to illuminate the path, you need to proceed onwards.
This location is completely linear so, you simply need to keep to the path. Occasionally, you will watch a cutscene of the illumination of another part of the map, after which you will have to defeat several opponents. In the final room, you find the door to the third level of Breith Eaman (M59,7).
The third level comprises a long, winding catwalk, with circular platforms on it. On each one, there will appear a ghost of Thaos and he will speak to you. You can completely ignore that. Go to the main platform (M59,8). There, talk to Thaos, but the fight is inevitable. Two big statues will be animated - the Woedica's Judge and the Woedica's Headsman .
First of all, attack Thaos. As soon as his health drops to a half, he transfers his soul to either the Judge or the Headsman. It is on that statue that you should focus all of your attacks now. However, you should kill, in the first place, the statue that has not been possessed by Thaos's soul. Thanks to this, you will not be bothered by this one, later during the main battle. After you defeat the statue with Thaos's soul, he returns to his body and regains his health. Again, focus all of your attacks on him, to kill him as quickly as possible. You should, predominantly, watch out for all of his AoE attacks. The best tactic here is to put each of the character in a different part of the arena.
After you defeat Thaos, you will be able to decide what to do with his soul. There is only a plotline significance to this choice. Approach the machine now (M59,9) and decide what happens to the collected souls. The only thing that it affects is the ending.
Congratulations! You have just completed the Pillars of Eternity. Unfortunately, after you see the summary, you cannot continue your gameplay.
Thaos is the final boss of Pillars of Eternity. You will be forced to fight him after you've reached the last chamber in Breith Eaman (map M59 in our walkthrough). This fight takes place as a part of the last main quest of the game entitled Memories of the Ancients. Sadly you won't be able to avoid the last boss and the other bad news is that Thaos poses a big challenge.
After you defeat Thaos, you will have to make two important choices and they have a key significance for the game's storyline.
The first decision is what to do with Thaos. You can:
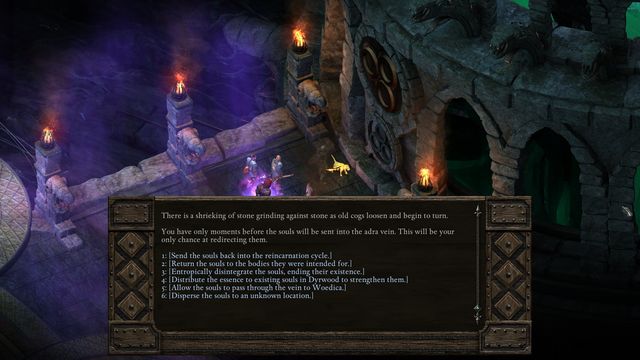
The second decision concerns the souls collected by Thaos.
This decision has no meaning for your character. It only determines the ending of the entire story and affects future events.
This page contains a list of all 31 achievements available in Pillars of Eternity. Each achievement has a description of how you can obtain it. We've also added our own commentary in many cases, providing valuable hints on the easiest possible unlock.
You must build at least five upgrades in your Caed Nua stronghold. You can choose the fastest and the cheapest projects if you want to collect this achievement without additional difficulties.
You must prepare three different potions. Consult the Crafting page in our game guide for more details on alchemy.
You must complete all four quests received from the gods residing in Teir Evron in the Twil Elms. Their descriptions can be found in the walkthrough - check the Gods quests in Elms' Reach page.
You must finish the game in the expert mode. This mode turns off all of the hints and you can choose it only at the beginning of the game.
You must finish the game, killing at least 1200 creatures and NPC's in the process. You shouldn't have any problems with this achievement. Make sure to visit all of the available locations, because a lot of them are inhabited by monsters and other hostile beings. Additionally, try to solve quests using aggressive methods, without relying on negotations.
You must visit all of the locations available in the game. Consult the walkthrough section of the guide. It contains descriptions and maps all of all areas.
You must travel through levels 1-5 of the Endless Paths of Od Nua. They're the vast dungeons located beneath the Caed Nua stronghold. Each level of the Endless Paths has been described in our walkthrough.
You must travel through levels 6-10 of the Endless Paths of Od Nua. They're the vast dungeons located beneath the Caed Nua stronghold. Each level of the Endless Paths has been described in our walkthrough.
You must travel through levels 11-15 of the Endless Paths of Od Nua. They're the vast dungeons located beneath the Caed Nua stronghold. Each level of the Endless Paths has been described in our walkthrough.
You must finish the game in three different modes - Expert, Trial of Iron and Path of the Damned. Trial of Iron is by far the most difficult one, because it forbids the player from creating savegames. The game itself restarts upon the death of all team members.
You must finish the game in three different modes (Expert, Trial of Iron and Path of the Damned) while playing solo. This means you can't add any team members. There is only one exception to that requierement and it applies to the prologue. You can explore the campsite and the Cilant Lis ruins with other people (assuming they didn't die).
You must finish the game in Trial of Iron mode. You can choose this mode only at the beginning of the game. It blocks the posssibility of creating own savegames. This means that you'll lose if your entire team dies. You shouldn't choose this mode unless you know the game really well (especially the locations with dangerous monsters encounters).
You must finish the game without anyone in your team being knocked out as a result of losing all endurance points. This of course requires you to be very careful while taking part in battles. Constantly monitor the state of your heroes. Use potions, spells or simply make them retreat when their endurance levels are low. You should also save the game often so that you can repeat unsuccessful fights.
You must place at least five traps. You can create new traps on your own, find them while exploring locations of purchase them from the merchants.
You must prepare three different scrolls. Consult the Crafting page in our game guide for more details on spell making.
You must complete the entire game while playing solo. This means you can't add any team members. There is only one exception to that requierement and it applies to the prologue. You can explore the campsite and the Cilant Lis ruins with other people (assuming they didn't die). It is recommended that you choose the lowest difficulty level and an easy class to master.
You must prepare five different types of food. Consult the Crafting page in our game guide for more details on cooking.
You must create and then hire a new person using the Adventurer's Hall. This must be an entirely new character, not one of the "main" companions whom you may find in the game's world.
You must finish the game on the highest difficulty setting named Path of the Named. This mode offers a huge challenge so you shouldn't choose it for your first playthrough.
You must finish the first act of the main campaign. This act ends once you arrive in Defiance Bay (first large city of the game).
You must finish the second act of the main campaign. This act ends after you've taken part in the events in the Ducal Palace and left Defiance Bay.
You must finish the third act of the main campaign.
You must attain the third rank in at least three different dispositions. This achievement is about gaining reputation from behaving differently while meeting with other characters. The game will always tell you about the type of the behavior you can achieve by choosing a certaing dialogue option. You can for example be cruel, honest or diplomatic. Start off by choosing one of these dispositions and continue using it during conversations until you've advanced to rank 3. After you've done that choose the second disposition and repeat all the steps. Finish off with the third disposition of your choosing. Once you've attained the required rank for the third time you will be awarded with the achievement.
You will automatically receive this achievement if you've supported Pillars of Eternity during its crowdfunding campaign on Kickstarter.
You must find and recruit all eight team members. You can find out where to look for them and how to add them from the Party chapter in our guide.
You must build all upgrades for the Caed Nua stronghold. It's not a difficult achievement, however gaining access to all the upgrades will take a lot of money and time (a single upgrade usually needs a few days before it's finished).
You must finish the game, killing less than 175 creatures and people in the process. This is one of the hardest achievements in the entire game, because it requires you to play differently. First of all, ignore all the side quests which force your team to take par in battles. Make sure to complete non-fighting quests so that you won't have a weak party due to lack of xp. The same tactic applies to the available locations - ignore all the dungeons, caves and other places inhabited by hostile beings. Stay on the main paths while exploring the primary locations so that you won't be attacked by the additional monsters. The bad news from all of this is that your team will have to take part in the mandatory battles in a weakened state so make sure to play on the lowest difficulty setting.
You must kill all the dragons in the game. The Giant dragon lairs page in our guide offers info on the areas where you can find the biggest dragons.
You must apply five different enchantments. Consult the Crafting page in our game guide for more details on enchanting.
You must finish the game, allowing the team to rest less than ten times. This applies to your entire playthrough. Obviously it makes the achievement a really difficult one since your team members can get tired without rest and this makes them weaker in combat situations. I strongly recommend that you attempt this achievement while playing on the lowest difficulty setting. Plan the allowed number of rests very carefully and rest only in the locations that offer bonuses to character statistics (inns or Caed Nua stronghold after it's been restrored).
You must finish the game and you can achieve that on the difficulty level of your choosing (easy is allowed).
System requirements of Pillars of Eternity are not too high. Still, they are not as low as you would expect of a top-down RPG and a two-dimensional game world. To launch Pillars of Eternity, you only require a low-performance Intel Core i3 CPU, although it is advisable that you own something better, if you want to maintain appropriate performance. The same goes for the GPU and RAM (Pillars of Eternity requires, at least, 4GB RAM, but you should have, at least, 8GB RAM). While preparing this guide, we have not experienced any major problems with stability, although the framerate discernibly dropped, in larger locations.
Singleplayer: Yes
Offline co-op (split screen/hot seat): No
Co-op over the Internet: No
Multiplayer: No
This guide has been prepared for the PC version, on a computer of below specs:
The above specification allowed for the 1920x1200 resolution and all of the additional graphics options. For the majority of time, the maximum framerate was possible and the game slowed down only in bigger locations, with higher number of NPCs, or e.g. additional smoke and fire effects.
Yes, it is possible to play Pillars of Eternity on laptop computers.
This guide contains a full set of information helpful in exploring the world and learning the story of the first expansion to Pillars of Eternity, called The White March Part I. The most important part of the guide is a complete walkthrough of all the quests in the game and a thorough description of all new locations. Each of the descriptions contains a detailed map will all the most important places, characters and enemies marked on it. In one of the chapters you will find the characteristics of two new potential companions that can join your party, including their most important statistics and information about how to obtain them.
The guide to Pillars of Eternity - White March Part I contains:
Patryk Greniuk ()
The guide to Pillars of Eternity: The White March Part I contains a set of information required for completing all the quests in the game, including a presentation of the consequences of choices made during dialogues and while interacting with the game world. Following color markings have been used in the guide:
Brown - quest names
Blue - spells and skills
Green - characters and heroes met during game
Orange - location names
Italics - other definitions and items that require highlighting
The guide has been divided into chapters, each of them focusing on one large location in the game world. In such chapter you will find all most needed information. In some cases additional sub chapters have been added that presents side locations to which you can enter from the main one. In a chapter you will also find descriptions of all quests that start in that location.
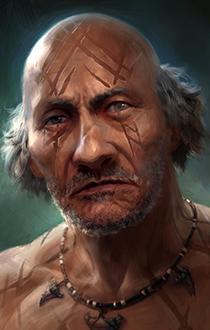
Zahua: Monk, savannah human, thinker
Zahua is one of the strongest companions you will meet, he has 17 might points. His dexterity and constitution are worth mentioning as well, they are at level 13-14. The other statistics are around 10 points. You will meet him at around 8-10 experience level. At that point he will have a pretty high attack power. However, he will lose health very fast. Think about giving him some light armor or skills that will increase his defense.
You will meet this companion near the Fishery (M1,6) in the Stalwart village. You must walk towards the fish barrel at the western wall of the building. When you try to pull a strange item from the inside, the monk will jump out. After a short conversation you will be able to add him to your party.
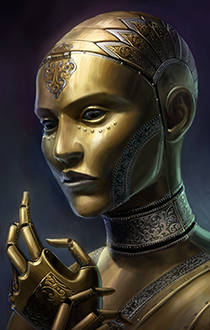
Devil of Caroc: Construct, Rogue, Trapper
Devil of Caroc is one of the most interesting companions available in the game. Not only her race is unique - she is a construct, a human soul cursed into mechanical body - but she is also the only rogue that can be added to the party. She has high Perception (16 points), Resolve (15 points) and Might (13 points). She also has many Mechanics and Stealth points. Since the Devil is made of metal, her body is her armor. You can't equip her in any additional armor. The helmet, gauntlet, boots and cloak slots remain active. You should meet her at around 10-11 experience level. At that point she should have many skills focusing on dealing high damage to single enemies. It is wise to combine it with high stealth level for silently eliminating single strong enemies.
The rogue can be met at Galvino side in his office (M8,5) which can be found in the Workshop. To get there, first you must reach Durgan battery, find Galvino cabin (M4,2) there and from there go underground. Now you will have to journey for quite some time through the workshop. It is recommended to stick to the walkthrough for The recluse of the White March quest. Once you find Galvino, you can ask him for permission to add Devil to your party. He will agree if you pay him 700 pieces of gold or if your main character has 12 Perception points.
Devil of Caroc's personal quest is The one that got away. It activates automatically after she joins your party.
Below you can find a table representing all the main quests available in The White March expansion to the Pillars of Eternity. All quests are added to the journal automatically.
Quest name
Location
Questgiver
Durgan's Battery
First location after loading a game state.
Automatically added to the journal.
The recluse of the White March
Stalwart Village (M1)
Renengilda (M1,7)
The ogre matron
Stalwart Village (M1)
Renengilda (M1,7)
The White Forge
The Grand Hall (M9)
Automatically added to the journal.
In The White March expansion to the Pillars of Eternity, players are given the opportunity to complete over a dozen of different side quests. Below you can find a table representing all the available side quests, coupled with the location in which you will be able to start them, as well as the appropriate questgiver, from whom you will receive them. Each map of the location has been provided with a reference to the map, or to the specific location on the map. To learn more about an individual quest, find it by the reference number. Each quest has been described, in detail, further in this guide.
Quest Name
Location
Questgiver
Siege of Crgholdt
Caed Nua
Steward
A lovely drop
Stalwart Village (M1)
Reyfald (M1,2)
A good haul
Stalwart Village (M1)
Feara (M1,2)
Overstaying his welcome
Stalwart Village (M1)
Haeferic (M1,2)
The hunter's favour
Stalwart Village (M1)
Thyrsc (M1,3)
Regrets worth trading
Stalwart Village (M1)
Okrun (M1,5)
Sacred instruments
Stalwart Village (M1)
Ista (M1,5)
The thermal pearl
Stalwart Village (M1)
Tealdor (M1,7)
Bounty: The Gleaming Society
Stalwart Village (M1)
Tealdor (M1,7)
Bounty: Meztla
Stalwart Village (M1)
Tealdor (M1,7)
Bounty: Laenric
Stalwart Village (M1)
Tealdor (M1,7)
Bounty: Disciples of the True Flame
Stalwart Village (M1)
Tealdor (M1,7)
Garodh's Chorus
Flames-That-Whisper Lower Cavern (M6)
Garodh (M6,3)
His better half
Longwatch Falls (M3)
Examine the backpack (M3,1)
The grey sleeper
Longwatch Falls (M3)
Pull the sword out of the rock (M3,6)
The fisherman's penance
Galvino's Workshop (M8)
Galvino (M8,5)
The one that got away
Galvino's Workshop (M8)
Devil of Caroc (M8,5)
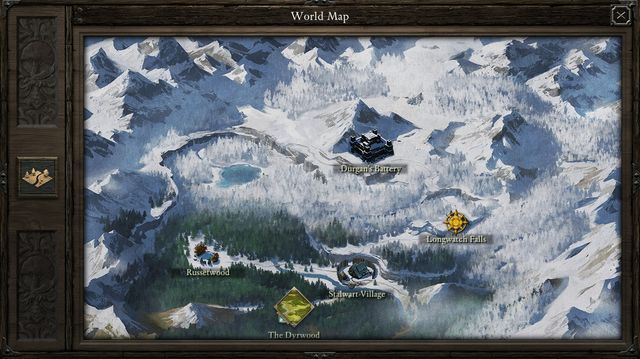
The game world of The White March expansion to the Pillars of Eternity was divided into two main sections. The first, as well as the largest and most important one is a completely separate map, to which you will gain access. There are several smaller and bigger location in here, in which you will be able to complete a number of main and about 15 side quests. Key locations in the White March are:
Stalwart Village (M1) - The biggest, as well as the only settlement in the White March. Most of the side quests available in the expansion starts here as well. Unfortunately, there's only a single merchant located in the village, meaning that you will have a very limited access to supplies. During your first entrance to the settlement, it's attacked by a clan of ogres - it's generally a good idea to advance your party to at least 7th or 8th level before entering it.
Russetwood (M2) - It's located to the West of Stalwart Village. A few stronger enemies, such as ogres and ice trolls can be found here. A number of side quests can be completed in Russetwood, provided that you accepted them beforehand in the village. In the North-Western section of the map there's an entrance to two secondary locations - Flames-That-Whisper upper Cavern (M5) and Flames-That-Whisper Lower Cavern (M6). In order to be able to fight the enemies encountered here on equal terms, your party should be at least at 10th or 11th level.
Longwatch Falls (M3) - A rather small, but filled with enemies location to the East of Stalwart Village. Enemies are quite strong here, and are found in large groups. If you don't want to fear for your life all the time, you should come here with at least 11th or 12th level of your party.
Durgan's Battery (M4) - It's the most important location of The White March expansion to the game, as the entrance to the dwarven stronghold can be found right here. Enemies are equally strong as those found in the Russetwood, but the packs are less numerous. Unfortunately, you will meet a lot stronger enemies in the battery itself, so it's generally a good idea to venture then only when your party is of 12th level at least. In the North-Eastern section of the location, in a small hut, there's an entrance to two secondary locations - Galvino's Cabin (M7) and Galvino's Workshop (M8). Three additional secondary locations, The Great Hall (M9), The Mines (M10) and The Foundry (M11) are located in the North-Western section of the map.
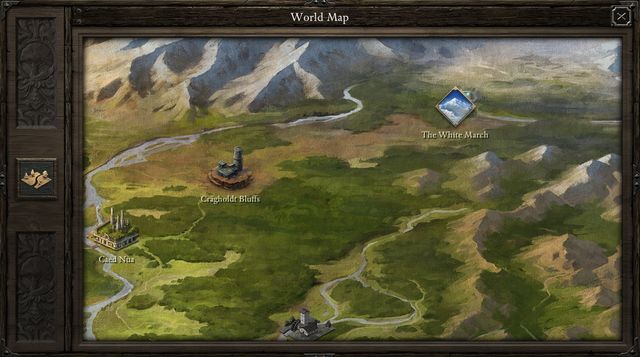
The White March expansion adds one more location, to the North-East of the Caed Nua stronghold - Crgholdt Bluffs (M12). It's a location in which you will meet the strongest enemies found in the game, so before venturing there you should advance your whole party to at least 13th or even 14th level. In the North-Eastern section of the map, there's an entrance to the secondary location, Crgholdt (M13), where you can find an immensely powerful mage called Concelhaut.
Alpine Dragon can be found in the Longwatch Falls location, or to be more specific in the cavern on the Southern section of it (M3,5). It's one of the strongest and most dangerous enemies in game, compared even to the dragon of the Caed Nua dungeons.
Before you decide to fight the enemy, you should prepare accordingly:
The whole encounter should proceed in an orderly manner. Keep your warriors as far from each other as possible, preferably on several sides of the dragon. Your ranged characters should be positioned as far as their attack range enables them to - additionally, distances between them should be considerable as well. At the beginning you should focus on defeating the smaller enemies accompanying the dragon - the best way to deal with them is to use area of effect spells, as well as those which do relatively low damage.
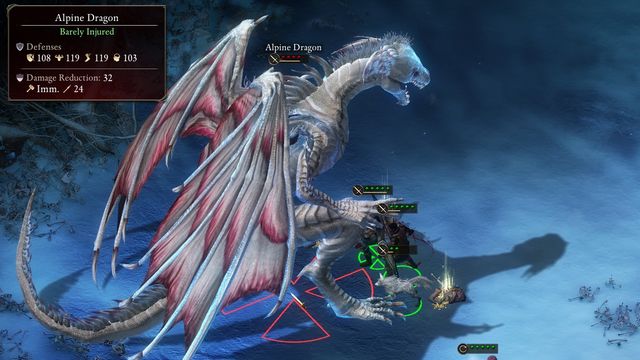 Alpine Dragon has immensely high defensive stats.
While battling the dragon itself, you should be aware of two things - it has an extremely high resistance to attacks, as well as an aura that decreases the accuracy of your characters. The solution for high defense is to deal slow, but powerful blows. In order to do so, you have to swap the weapons of your characters - one handed weapons to two handed, and ranged characters should wield guns instead of bows. While using your spell-wielding classes, focus on spells that deal the highest amount of damage to a single target. In order to reduce the effects of the dragon's aura, you should have a high-leveled druid (Durance, for instance) in your party. A druid has access to buffs which increase the accuracy of your party, as well as those which render your party members resistant to paralysis and knockdown.
One character, preferably a warrior, or a paladin, should be designed to block the attacks of the dragon. Equip him/her with the heaviest armor you possess. It must be a character with his/her own access to at least a few defense-increasing abilities. Don't forget to buff your tank with other spells from the rest of your party - the longer that character is able to survive, the higher the chance that you will be able to defeat the dragon.
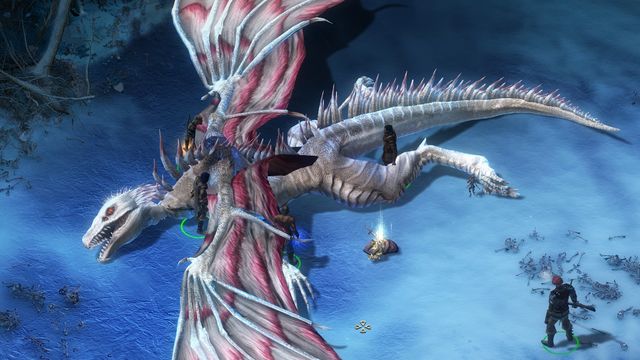 As you can see, the Alpine Dragon is not impossible to defeat.
The last advice - do not give up! After each attempt on defeating the dragon, you will know what to improve in order to succeed.
The story of the first part of The White March, the expansion pack to Pillars of Eternity, takes place in parallel to the events shown in the main game. Because of that, you can explore the add-on at any time of the game you want and stop it with no storyline consequences. However, it is worth mentioning that the new territories aren't available since the very beginning of the game. In order to unlock them you must reach the second act of the main storyline, become the owner of the Caed Nua stronghold and reach the Defiance Bay. You will also need to complete the Never Far from the Queen quest. After leaving the Woedica temple you should receive a message from the Steward.
 Receiving such information unlocks access to the new locations on the map.
If you continue the game with a previously created character and the story is progressed much further, you should receive this information immediately after loading the game. If that won't happen, then try to complete any main quest. After receiving the information from the Steward, a new quest related to the story of Pillars of Eternity: The White March Part I will be added to your journal - Durgan's battery.
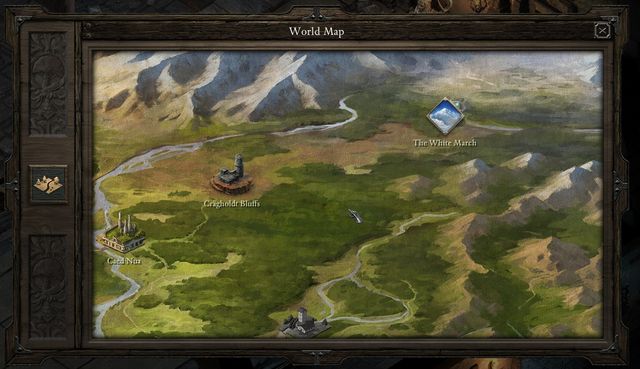 The White March Part I is adding one new location on the main map and an icon that transports you to a separate map with the territories added in the expansion.
To start the new adventure, you must go to your fortress - Caed Nua - and talk to the Steward. You will learn about the story background of the expansion and the main objectives that you must fulfill. At the same time you will be informed about the additional challenge that awaits on the main map. Your objective will be to explore the mysterious tower of the Concelhaut mage (there are few spells with his name on them found in the game) which can be found North from your headquarters. The quest is named Siege of Crgholdt.
The quest will be added automatically to your journal after receiving the message from the Steward. The only requirement is having The White March Part I expansion pack to Pillars of Eternity installed. The message can appear at two different times. If you continue the game with a high level character, it will happen immediately after loading the game. If you're starting the game from the beginning, it will happen after completing the Never Far from the Queen main quest.
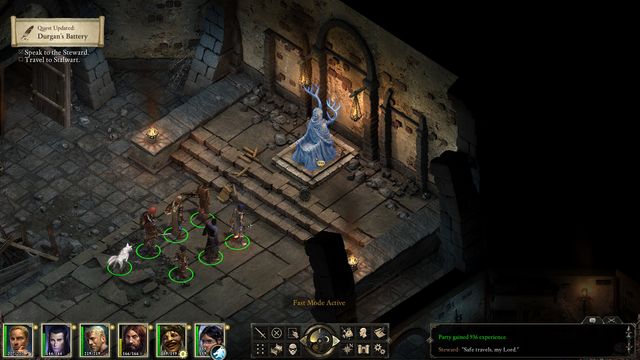 By talking to the Steward you will learn what the citizens of Stalwart village are up to.
Your first task will be to go to Caed Nua and talk with the Steward. You will have to help the citizens of some village on the North in finding the Durgan's battery - a closed since ages dwarf fortress hiding the secret of creating very valuable steel.
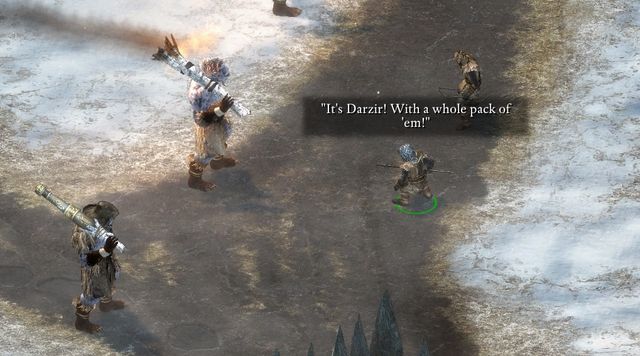 You will reach the Stalwart village at a bad time - during the attack of a nearby ogre clan.
Get to the new map through the world map (the icon can be found in the upper right corner of the location select screen) and go to the Stalwart village (M1). The situation will be complicated since the very beginning as the village will be attacked by an ogre clan. You and your team will have to deal with the enemies and thus help the villagers. The best solution will be to keep going to the West of the location. You will face 3-4 ogre groups on the way, but you shouldn't have trouble with eliminating them as long as you have a team on 8-9 level. At the crossroads to the West of the village you will find ogre woman named Darzir. Fighting her will be more challenging. In the first phase of the battle you should deal with her helpers, especially the ones attacking from a distance. Then, attack Darzir herself. Remember that during the battle you should keep watching out for your mages and shooters and control the health level of all your party members. Once you defeat the enemies, they will start retreating. One of the villagers will run towards you and thank you for the help. Your reputation in the village will increase. You will be asked to go to the main building in the village. Don't forget about looting the bodies of fallen enemies. You will find, among other things, the Ring of Changing Heart that adds +3 to resolve and adds an additional Dominate skill. The latter allows you to take control of the enemy for 10 seconds twice before having to rest.
Now go to Renengild's house and talk to the owner. She will tell you a short story of the village and will give you details about your task. You must go to Durgan's battery and find the White forge. It gives the ability to create special steel and is needed by the villagers to restore the old prosperity to their home.
 In order to open the door to Durgan's Battery, you have to use the previously learned incantation.
You have to find a way to get inside the stronghold. Before you can accomplish this, however, you must complete two separate quests: The Ogre Matron and The Recluse of the White March. After doing so, approach the stronghold's door (M4,9) and do the following:
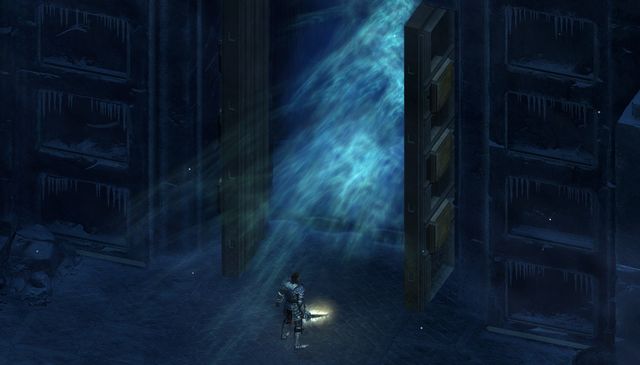 Before entering the battery, stock up on potions and Camp Supplies.
The passage will be unlocked, and you will be able to get inside. As soon as you do, the quest will be finished and a succeeding one will be automatically added: The White Forge.
You will be given this quest by the Steward of your stronghold - Caed Nua. It will happen during the conversation associated with the Durgan's Battery quest. From that you will learn that to the North of your stronghold there's a fortress of a powerful mage called Concelhaut - a name you should be familiar with from a number of (names of) spells at your mage's disposal.
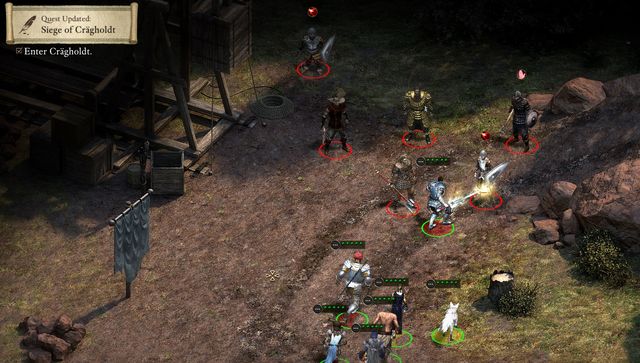 You should prepare before deciding to fight Baelorin.
At the beginning you have to travel to the Crgholdt Bluffs (M12). As soon as you enter the location, you will be approached by the mercenaries. Unfortunately, you won't be able to avoid combat and you will have to force your way through the whole encampment, until you reach the entrance to the fortress. The most difficult encounter awaits you at the castles' courtyard (M12,3). You will find Commander Baelorin there. As soon as you approach the group, a short conversation will begin, but regardless of your choices it will end in a fight. A good idea is to set your party accordingly, or even lay traps before approaching the commander. After you've dealt with the mercenaries, all you have to do is to cut your way through several groups of undead.
As soon as you enter the stronghold, approach Tanoss (M13,2) and speak with him. He will tell you that in order to get to Concelhaut you need to have a key composed of four parts. He will give you his own part if you agree to kill the three remaining disciples of the renown mage.
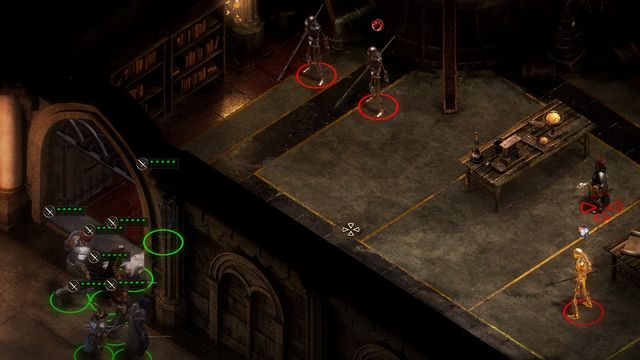 During the encounter with Sabel, try to use the narrow passageway to gain an upper hand.
First things first, head towards Sabel's Laboratory (M13,3) and defeat her. She is protected by a group of rather strong skeletons, so the task won't be easy. It's important to focus on Sabel first, and ignore the skeletons until she is down. Pick up the note from her body.
Afterwards, go to the Pelden's Laboratory (M13,4) and defeat the mage. This time the disciple will be accompanied by a group of alghuls, so the encounter should be a little easier this time. Don't forget to pick up the note from the body of the fallen Pelden.
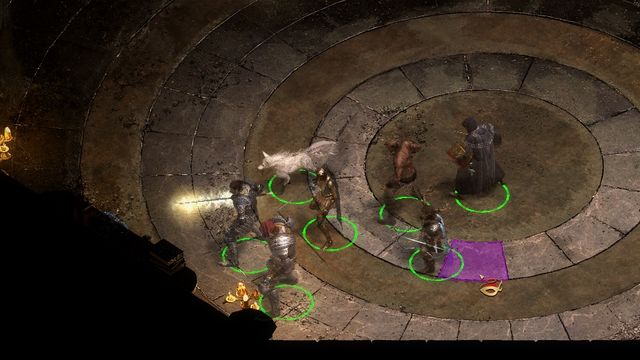 While in the Uariki's Laboratory don't forget to search the floor. Be wary, as picking up the items you find there will be considered as theft.
The last stop will be the Uariki's Laboratory (M13,5). Defeat the owner, as well as a number of animated weapons. Just like before, don't forget to pick up the note from her body.
Once you've collected all three notes, go back to Tanoss (M13,2). According to your deal, you will be given the last part of the key. Approach the doors to the Concelhaut chambers (M13,6). Before clicking on it, however, make sure that you read all the notes you've managed to accumulate. Click on the door and select the following answers:
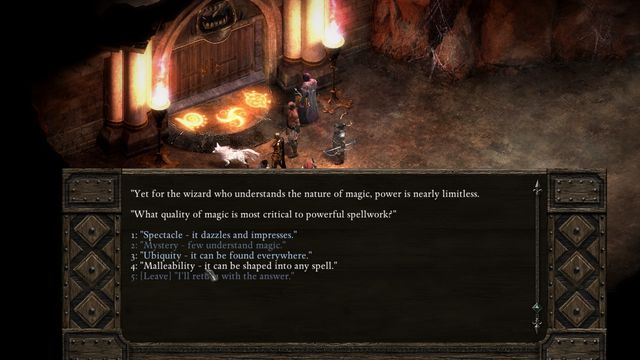 If you don't want to go with the method of "trial and error", use the tips above this screen.
The door to the chambers will be opened. Approach and start a conversation with Concelhaut. Unfortunately, you won't be able to avoid this fight. It will be one of the most difficult encounters in the whole game. There's no "guaranteed strategy" to use here, but the least you can do to prepare is to come here when your party is of 13th level at least. As soon as you kill the mage, the quest will be accomplished. You will be given a huge number of immensely valuable items. If you now decide to speak with Tanoss, the discussion will result in another encounter.
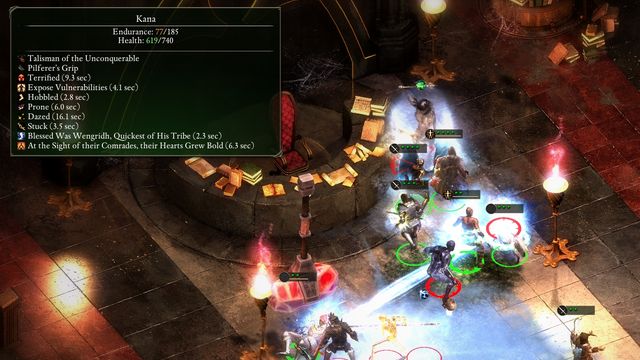 Concelhaut applies a huge amount of negative effects on your team. You should protect your party from that accordingly.
Alternative choices:
After the first conversation with Tanoss, you can go all the way to Uariki (M13,5). She will give you a counteroffer. You will receive her part of the key in return for killing the remaining disciples, including Tanoss. Head to all three mages - Tanoss (M13,2), Pelden (M13,4) and Sabel (M13,3) and take their notes. Afterwards, get back to Uariki and she will give you the last note and a couple of useful items. The rest of the quest remains the same.
The map above shows the Stalwart Village, the first location that you will visit during The White March expansion pack. It's a small settlement that dilapidated in the recent years. You will find only one merchant here. You will spend a lot of time here as this is where most of the quests start and end. During your first visit, the village will be under an ogre clan attack. Because of that, you will have to eliminate all the enemies before being able to talk to the villagers. Your party should be at least at the 8th experience level before going to the Stalwart village. You will be able to go to all other important locations on the new map from the village - the Russetwood, Durgan's Battery and the Longwatch Falls.
1. Burning house
The building has been set on fire and some people remained inside. You can try to help them escape from the house. You can send only one party member inside, so it is important to choose well.
The man on the left can be saved if you have one of the three abilities:
The woman on the right can be saved if you have Might on level 10. No matter if you save her or not, you can take a Frigrid Claim ring from her, it adds +5 to fire resistance and +10 to spell resistance.
Additionally the character you send should have survival skill at least at level 5 and as high the constitution as possible. This will help you avoid getting hurt or injured. Also, without it you won't be able to drag the saved person to the exit. Luckily, your companion cannot die in the fire.
2. The Gref's rest
Here you can rest, replenish your supplies or hire the adventurers.
In the inn you will meet Byrhtwen and Andred with whom you can play throwing knives. Starting the game will cost you 50 pieces of gold. Your aim is to hit the nose of the enemy on the shield. In the basement you will additionally find Teanleycg with whom you can play the dice for the same price.
6. Fishery
When you get close to the left wall of the building you will see one of the fishermen screaming while running away from one of the fish barrels. Walk close to it and click it. Choose to pull out the weird item. Your new companion, Zahua, will jump out from it.
7. Renengilda house
Inside you will meet Renengilda, the leader of Stalwart village. Talking to her is mandatory if you want to complete one of the main quests: Durgan's Battery. She will also give you two other quests: The recluse of the White March and The ogre matron.
Outside the building, on the right you will meet Tealdor, the commander of the nearby watch. He can give you few quests:
Main quest: The recluse of the White March - Talk to Renengilda (M1,7);
Main quest: The ogre matron - Talk to Renengilda (M1,7);
Side quest: A lovely drop - Talk to Reyfald (M1,2);
Side quest: A good haul - Talk to Feara (M1,2);
Side quest: Overstaying his welcome - Talk to Haeferic (M1,2);
Side quest: The hunter's favour - Talk to Thyrsc (M1,3);
Side quest: Regrets worth trading - Talk to Ocrun (M1,5);
Side quest: Sacred instruments - Talk to Ista (M1,5);
Side quest: The thermal pearl - Talk to Tealdor (M1,7);
Side quest: Bounty: The Gleaming Society - Talk to Tealdor (M1,7);
Side quest: Bounty: Meztla - Talk to Tealdor (M1,7);
Side quest: Bounty: Laenric - Speak with Tealdor (M1,7). You can accept it only if you have already finished two previous quests;
Side quest: Bounty: Disciples of the True Flame - Speak with Tealdor (M1,7). You can accept it only if you have already finished two previous quests;
Reyfald (M1,2) - You can receive a quest from him;
Feara (M1,2) - You can receive a quest to deliver few valuable items from the destroyed caravan;
Byrhtwen (M1,2) - You can play throwing knives with him and win some money;
Andred (M1,2) - Another person with whom you can play for money;
Haeferic (M1,2) - The inn owner, you can buy supplies from him, pay for a room or hire a companion. He will also give you a quest;
Teanleycg (M1,2) - You can play dice with him and win some money;
Ailef (M1,2) - You must eliminate him during one of the quests;
Thyrsc (M1,3) - An old hunter that can give you a quest in which you must kill a very strong beast;
Yduran (M1,4) - Merchant, he has many items and supplies;
Okrun (M1,5) - A dwarf whom you can help regain a medallion;
Ista (M1,5) - A dwarf female researcher that needs help in testing her newest invention;
Lafda (M1,5) - The leader of a priest group.
Zahua (M1,6) - A monk who can join your party;
Tealdor (M1,7) - The captain of the local guard, he can give you few quests;
Renengild (M1,7) - Stalwart mayor, she gives you two main quests;
Uldric (M1,7) - Son of the mayor, he wants to solve the ogre manner in peaceful way;
Taena (M1,8) - a female dwarf, who will tell you how to enter the Durgan's Battery.
Crag Ogre - A strong enemy that deals mostly physical damage. His only special attack is throwing few of your companions off balance. It doesn't deal a lot of damage, but makes you unable to attack for few seconds. Crag ogres are often found in groups of two or three. You should focus on a single enemy and defeat him as fast as possible.
Crag Ogre Cannoneer - An ogre that uses ranged weapon. You should eliminate him in first order. Despite the fact that his attacks are very slow, he can quickly kill your wizards.
Crag Ogre Chanter - a magic ogre class, the strongest one. In addition to physical attacks he uses basic spells.
Winter Wolf - A giant wolf that often accompanies the ogres. You should watch out for him as he is quite fast, has many attacks and can attack you from behind, thus becoming a threat to your magic and ranged warriors.
Warleader Darzir - The leader of the ogres that attacked the village.
When you enter the village for the first time, it will be attacked by a group of ogres. You must help with defeating them. If you want to do it as quickly as possible, go to the western edge of the map and kill their leader - Darzir.
Talk with each villager that has a unique name. Most of them will have a quest for you.
Don't forget to visit the fisher (M16) and talk to Zahua - the potential new member of your party.
You will receive this quest from Reyfald who is standing near The Gref's Rest (M1,2). He will ask you to steal a special drink - the Fennlan liquor. It is said to be hidden in the basement of the inn. You will require some thief skills to obtain it.
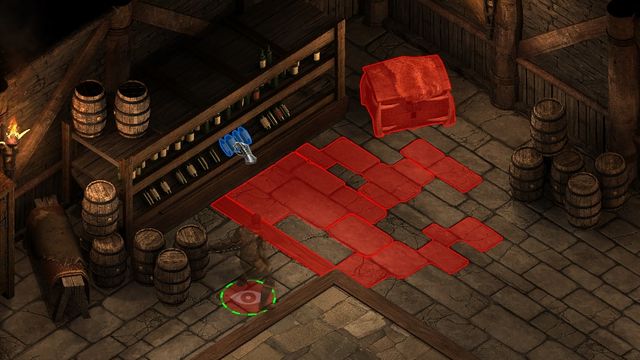 Make sure that you disarmed all the traps before taking the liquor.
Go to the inn, and then walk downstairs. The place you're looking for is at the top of the room and it's protected by various traps. Select a character with the highest sneaking level and walk in stealth mode towards the wines. You should be able to notice the traps on your way. Try to disarm them all. They are on 4 and 5 difficulty level. The alcohol that interests you is in the group of bottles, first from the left. You can also open the chest, inside you will find a potion and 50 silver coins.
Now go back to Reyfald. You will receive 100 coins for the alcohol. Sadly, once he drinks it, he will start feeling bad. Go to the inn owner - Haeferic and ask him about the bottle that you have stolen. He will tell you that he has poisoned the drink on purpose. Sadly, preparing the antidote won't be easy. You must go to the russetwood and obtain the river reeds and ice troll's heart.
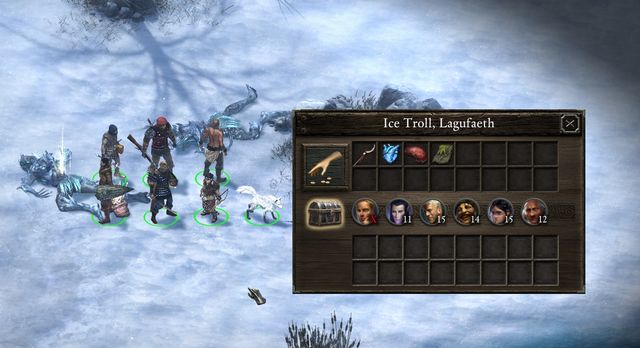 Obtaining the heart of the ice troll might prove to be very difficult.
Ice troll's heart can be found in the western part of the russetwood (M2,3). There you will find three ice trolls accompanied by three lagufaeths. Be careful when fighting them as you can die very easily. It is a good idea to start with eliminating the less dangerous enemies and then focusing on the trolls. The herbal you're looking for can be found near the frozen lakes. The ingredient is located at the western shore of the pond in the middle of the map and near the small pond to the South-East. It can be also found at the north-eastern edge of the location.
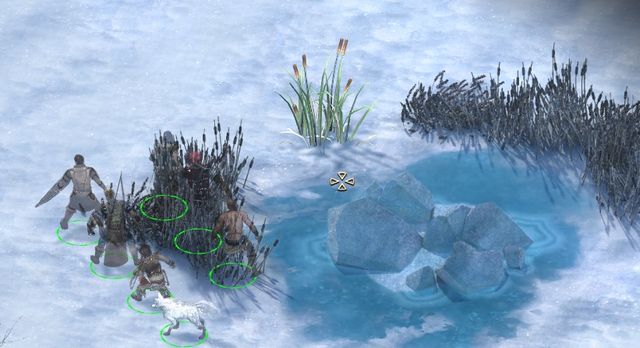 River Reeds is quite common in the Russetwood, you shouldn't have any trouble with finding it.
Once you obtain both the items, go back to Haeferic (M1,2) and receive the antidote from him. Leave the building, talk to Reyfald and give him the medicine. This will increase your reputation in the city. Additionally, you will receive the Pilferer's Grip - gloves that increase dexterity and reduce the armor limits.
Alternative choices:
You can simply tell Haeferic that Reyfald wants to steal his liquor. You will receive 200 coins from him, but the quest will end in failure.
North from Stalwart village you will find Thyrsc's house (M1,3). Inside you will meet its owner, the old hunter. He can give you a task of killing a very strong beast - a wolf that can be found near the lake in Russetwood.
Go to the Russetwood and find the Galawain shrine (M2,5) in its northern part. After examining it you will learn that something has been taken away from it and that it is the source of beast's aggression.
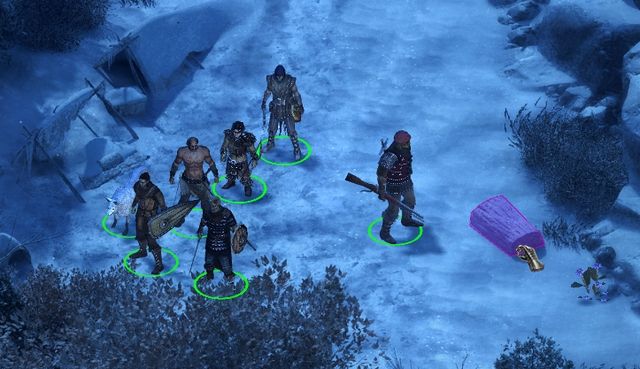 Take the hunter's totem from the chest on the right from the abandoned camp.
Now you must find the beast's hideout. West from the shrine you will find a wolf's lair (M2,7) protected by three weak enemies. Inside you will find an injured villager and Suldrun - a druid in wolf form. First reach for his soul and try to learn as much as possible. You will learn that the druid has been cursed into a wolf form and is unable to leave it. Once you have no more dialogue options except for combat, try to retreat peacefully. Now go to the hunter's camp (M2,8) and take the Hunter's totem from the chest. Once you do it, go again to the Galawain shrine (M2,5) on the North of the map and place the totem on the shrine. Now you can go back to the cave with the druid.
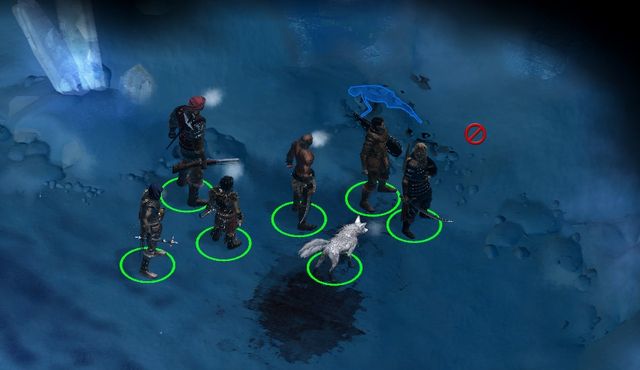 Don't forget to search the cave in which Suldrum was residing.
In the cave you will meet Suldrun the druid, this time in a normal, human form. Talk to him and advice him to go home. He will give you the Ancestor's pendant. At the end of the cave you will also find a unique staff. Now you must go back to Thyrsc (M1,3). You will receive the Cloak of frozen hunt and the quest will end. You will also increase your reputation in Stalwart.
Alternative choices:
During the conversation with Suldrun, you can suggest him not to go back to the village. The reward, both from Sulfrun and Thyrsc, won't change.
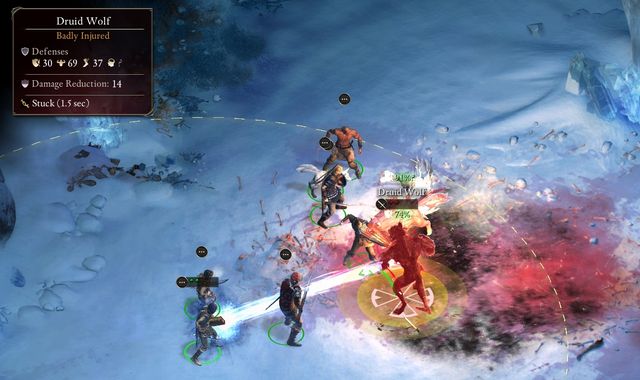 If you want to finish the quest quickly, just kill the druid.
Instead of helping Suldrun in returning to his human form, you can kill him during the first meeting. The duel shouldn't be hard, you should first focus on eliminating the two snow wolves accompanying him. Once you defeat all the opponents, go back to Thyrsc (M1,3). You won't obtain the amulet, but the rest of the rewards, including experience, will be the same.
You receive the quest during the conversation with Renengilda (M1,7) in Stalwart village. It should happen during another quest - Durgan's battery. You will have to find Galvino - an animant that is living in the shadow of the dwarven fortress since years. He can help you get inside.
To find Galvino, you must go to Durgan's battery, a location found north from Stalwart village. There, follow the road north until you reach Galvino's cabin (M4,2). Enter the building and use the hatch in the room on the right. You will enter a pretty large dungeon. Your task is to reach Galvino's office (M8,5). Since it won't be easy, you should use the map found in this guide that will help you in avoiding all the traps and finding the key (M8,1).
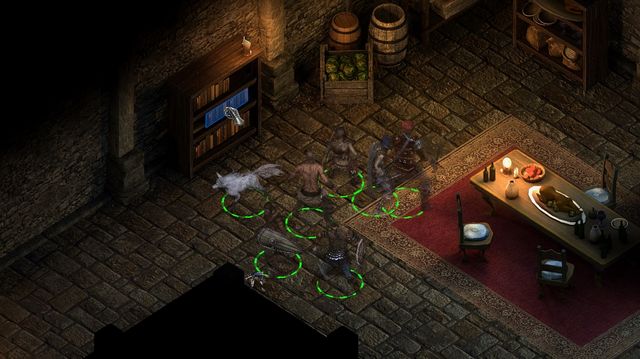 You need a key to open the door to Galvino's office. It can be found on the bookshelf.
Once you enter the room, Galvino will talk to you. A pretty long conversation is ahead of you. No matter what dialogue options you select, it should more or less go in the same way and with same consequences. First you will learn how to get into the dwarven stronghold, then you will have an opportunity to make Devil of Caroc join your party, finally you will receive a side quest - The fisherman's penance.
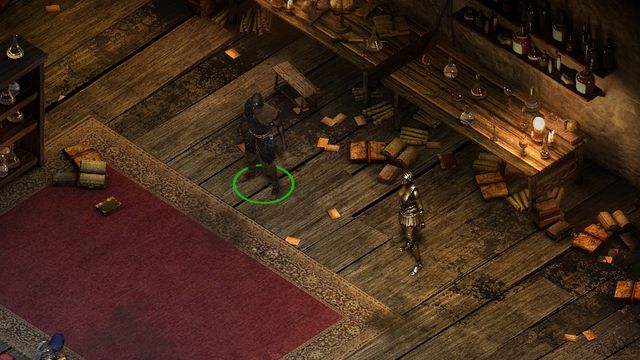 When talking with Galvino, don't forget about adding Devil of Caroc to your party.
Galvino will give you a special item that will help you find a person related to dwarf's ghost from the Durgan battery. That person is in Stalwart village. The ghost will tell you the incantation required for opening the door.
After acquiring the device, travel to Stalwart Village. There you will have to find the appropriate dwarf, Taena, who can be found in her house (M1,8). The easiest way is to provoke a fight with her - the encounter itself is trivial, you should have no problems at all. The quest will be finished.
Alternative Choices:
If you don't want to kill Taena, you need to have the Resolve attribute on the 17th level, or the Intelligence on the 16th. Before you decide to start the conversation, it's a good idea to save the game, as the conversation itself has a lot of different paths and you may accidentally provoke a fight - if that happens, load the game and try again.
Similarly to The recluse of the White March quest, you receive this task during the conversation with Renengilda (M1,7), the mayor of Stalwart village. The village is frequently attacked by ogres and you will be tasked with getting rid of that problem. The ogre clan is led by female ogre called Beregan. You will have to kill her or convince her to stop the attacks. At the same time you will obtain the equipment left after previous, unsuccessful expeditions to the Durgan's battery.
First you should visit the Russetwood. Go to its northwestern part and find the entrance to the Flames-That-Whisper Upper Cavern. It is protected by few ogres but you shouldn't have trouble dealing with them. Once you enter the cave, you must somehow reach the Scrying chamber (M5,2) - the place where Beregan can be found. You can do it in two ways:
Once you enter the room and walk towards Beregan, the conversation will start. You shouldn't have trouble avoiding battle. Depending on the dialogue options you pick, Resolve on 12 level or Intellect on 13 level might be required. She will give you the items that were left after previous expeditions to Durgan's battery, including the most important one - Battery relief tile. The quest will successfully end.
 If you decide to fight, try to block the enemies so that they won't have access to your ranged fighters.
Alternative choices:
During the conversation with Beregan you can also provoke a battle. The fight will be quite challenging, as the Matron is much stronger than common ogres and she will be backed up by few other enemies. Try to position your team just when you reach the stairs, before the battle starts, so that your mages won't lock your warriors on the narrow passage. After a won battle take all the items from the bodies of your enemies. The quest will be completed. However, don't forget to loot the chest in the upper part of the room. There are many valuable items, but you will need 10 lockpicking level to open it.
When you walk towards the Temple of Ondra (M1,5) in Stalwart village, you will meet Okrun. Talk to him and you will learn that he has given the medallion and armor to the priests and that now he is trying to get them back. Your job will be to help him.
Enter the temple, inside you will find few priests. Talk with Lafda. It won't solve the trouble and you won't receive any specific information. When you will leave the building, you will hear a conversation. Walk towards the window in the right side of the building and click it. You will be able to open it quietly. To hear the whole conversation you must have Stealth on at least level 7. After hearing the conversation you will notice one of the priests leaving the building.
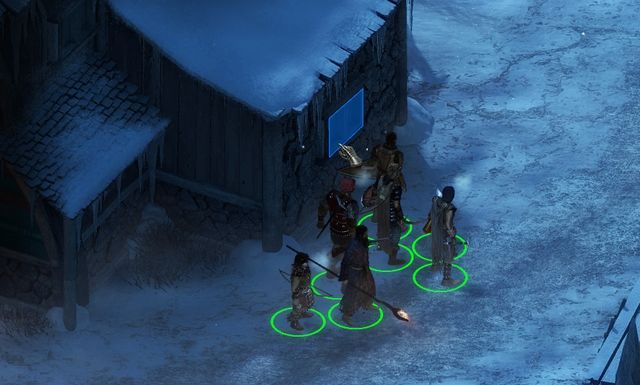 Walk towards the window and listen to the conversation between the priests.
Now go to the Russetwood, more specifically to the airhole on the lake (M2,4). Once you get close there, you will notice the priest who left the temple recently. He will be doing something at the hole and then he will leave. Walk towards the hole. You will have to dive. If you selected the wizard class, it is possible that you have the Bulwark against the elements spell that will increase your cold resistance. If not, then the character that will dive should have Constitution on level 16.
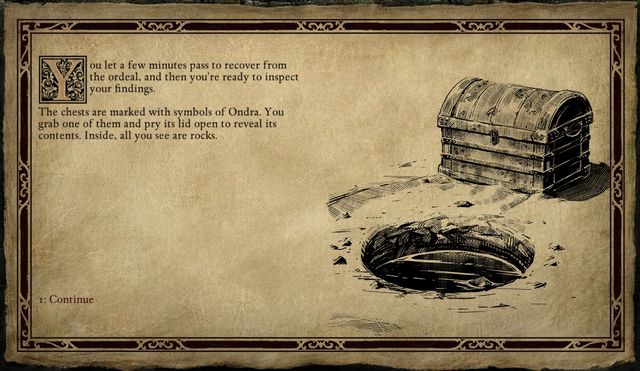 You will be surprised with the contents of the chest dragged from water.
Now go back to the Stalwart village and go to the Ondra temple (M1,5). Talk with Lafda. Agree not to give priests to Okrun. For that he will give you 6000 pieces of gold and a key that will be used to open the chest in the corner. Inside you will find the White Crest Armor, one of the better heavy armors, and Okrun's amulet. In the meantime the priests will leave the temple and the village. Walk outside and talk to the questgiver. You have two options: You tell him that the amulet sank in the water. You will keep the amulet, but won't receive any reward (the amulet adds +2 to Intellect or increases your focus, depending on your character's resistance points. Second option is giving the amulet back to Okrun. Depending on dialogue option you select during the conversation, you will receive various amount of gold from him:
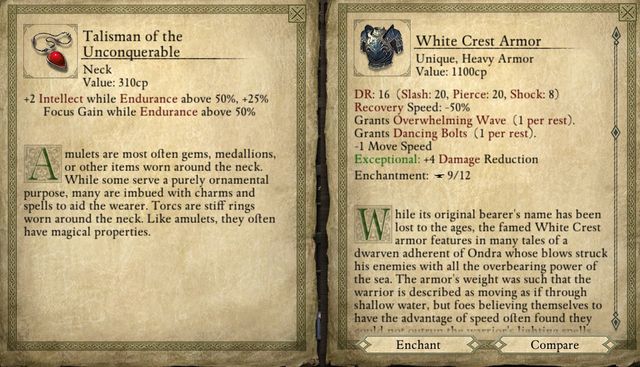 Before giving the medallion back think if it wouldn't be better to keep it for yourself.
Alternative choices:
When you will be returning from the Russetwood, you can immediately tell Okrun what you have learnt. You can also offer him your help in teaching the priests a lesson. Go with him to the temple. After you walk a while, the battle with priests will start. It shouldn't be too hard. Just remember to take care of Lafda in first order as she has few strong spells. Once you take care of the opponents, Okrun will walk towards the chest at the wall and will take his items. Further conversation will be similar to the one described previously. Depending on what you will say you will receive different amount of gold. Search the bodies of defeated enemies. Open the chest in the corner of the room, inside you will find a very good armor and around 1000 pieces of gold. The quest will end successfully. You will find a key at one of the bodies. It fits the chest in the corner, but since it is open anyway, the key is completely useless.
During the conversation with Lafda you can also select option in which you neither take money from the priests nor give them up to the village authorities. Except for the lack of 6000 pieces of gold it won't change anything.
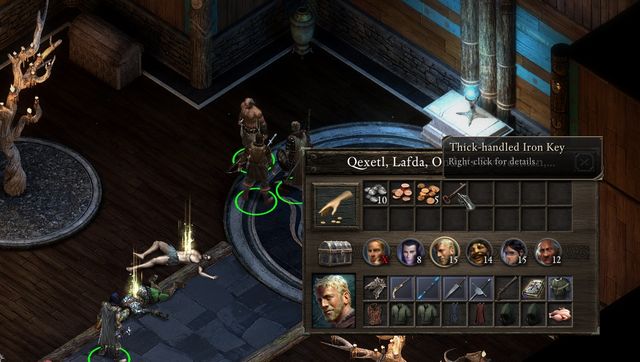 After possible defeating the priests don't forget to take the key and open the chest in the corner of the room.
During the same conversation you can also pick the option of giving the priests up to the local authorities. It won't happen as you will be attacked by the whole group. After defeating them take the key and open the chest with the armor and the amulet. You can give it back to Okrun and you will receive the reward from him, from zero to one thousand six hundred coins, depending on the selected dialogue option. In this case you can't keep the amulet for yourself.
During the conversation with Haeferic, the owner of the inn (M1,2), you will learn that he has some trouble with one of his clients. Go to the back and enter the last room in the corridor. There you will find Ailef. He will tell you that he is a slave that has escaped. Sadly, he can't run any further as there is a group of slave hunters nearby. Your task will be to get rid of someone called Defala.
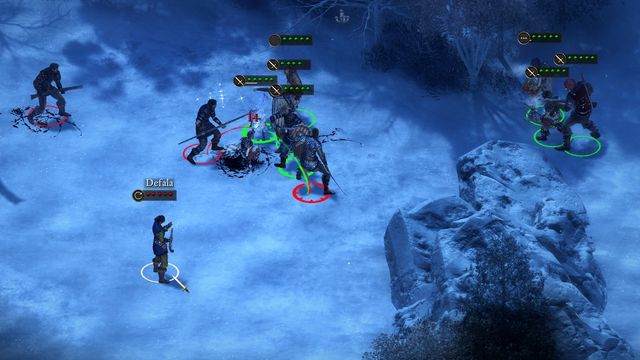 During the battle with the group of slave hunters you must watch out for enemy ranged fighters.
Go to the Russetwood and find the slave hunters' camp (M2,9). Defala will automatically start the conversation. If you will pick Ailef's side, you won't avoid fighting. The battle won't be hard, the only thing you must watch out for are the shooters. Now go back to Ailef. He will give you the Ring of Unschackling which adds a spell that dispells negative effects and a bracelet made from durganian iron. You will also receive a small gift from Haeferic. The quest will end.
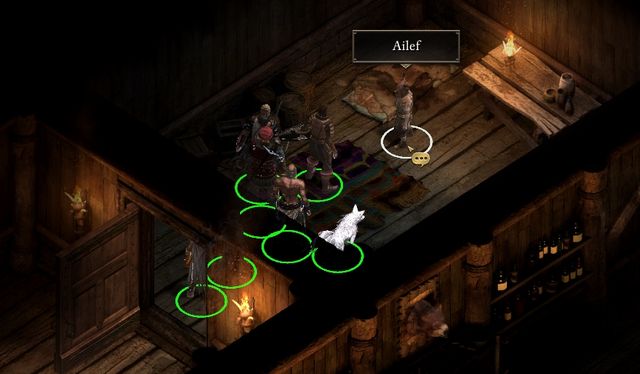 Selling Ailef is the least honorable but the most profitable choice.
Alternative choices:
During the conversation with Defala you can agree on tricking Ailef and selling him. In that case, you must go back to the inn and talk with him:
During the conversation with Tealdor (M1,7), the guard captain, you will learn that he is searching for thermal pearl. It is said to be located in the Longwatch Falls. You must go there and find it. The questgiver will also suggest you meet with an experienced hunter, Thyrsc, who can be found in his cabin (M1,3) in the same settlement. He will give you two Potions of Mirrored Image which adds +25 to deflection for 60 seconds.
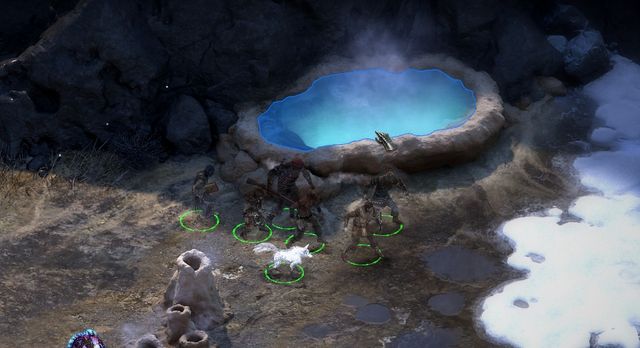 After defeating all enemies search through all three hot springs.
Move to Longwatch Falls and go in the northwest direction. After a while you will meet a pretty large group of lagufaeths and frozen ooze, so be careful and try avoiding fighting all of them at once. Once you reach the Hot Springs (M3,2), you will meet a very large group of enemies and their leader - the Lagufaeth Broodmother. It will be a pretty hard battle. Not only will you fight few enemies at once, but they will be also healed by their mother. The best tactic is to successive eliminate all enemies, starting with the weakest one. The mother should be left for the end.
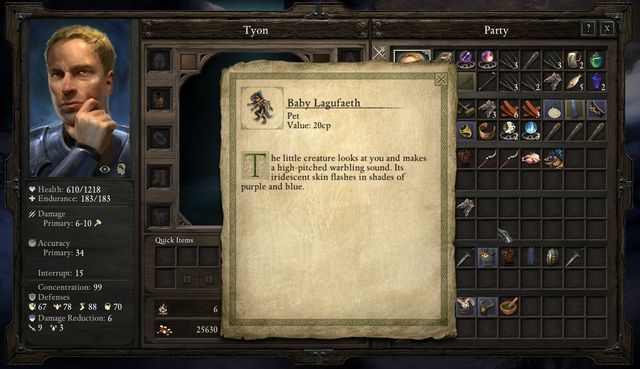 The pearl you found contains a surprise.
Now search through all the neighboring lakes. No matter in which order you check them, the Thermal pearl will be in the third of them. After a while a small lagufaeth will hatch from the pearl. He can be your pet now and travel with you through various locations. Go back to Tealdor in Stalwart village (M1,7). He will want to buy the pet from you for 500 pieces of gold. You can agree or keep the pet for yourself. The decision will have no additional consequences. The quest will end successfully.
In The Gref's Rest (M1,2) you will find Feara. From her you will learn that she and her team were in the Durgan's Battery, but her caravan was ambushed. During the attack, she lost a couple of valuable items and she will ask to reclaim them for her.
 There are a lot of containers surrounding the destroyed caravan - don't forget to search all of them for loot.
Go to the Durgan's Battery and head South-West (M4,5). There you will find a destroyed caravan and a group of Lagufaeth. They shouldn't pose a serious threat to your party. After taking care of them, search all of the nearby containers for loot, preferably with your TAB button pressed all the time. Take all the valuables. Return to Feara in The Gref's Rest (M1,2) in Stalwart Village. She will give you 500 pieces of gold upon completing the quest.
To the South of the Temple of Ondra (M1,5) you will stumble upon Ista, a female dwarf scientist. She has completed her newest prototype, but unfortunately for her, she won't be able to test it herself. That task goes to you.
Go to the Durgan's Battery. As soon as you arrive, your journal will be updated. The device will be leading you to the West. Go to the nearby Cavern (M4,4), but be careful, as there's a group of ogres and wolves at the entrance. As soon as you enter the cave, the device will start reacting. Venture further into the cave, until you stumble upon a group of Lagufaeth, which you must defeat. After you're done, approach the Northern wall of the grotto and look for a little cavity in the rock. The easiest way to do that is to simply press and hold the TAB button, which shows all the places and items with which you can interact. Take the White Adra Gems from the cavity. .
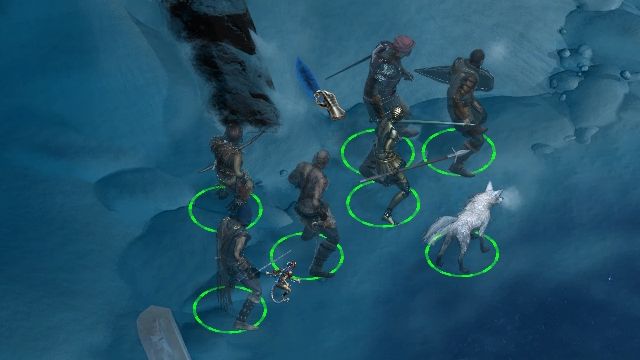 The cavity in the wall that you must find is extremely small and easy to miss.
All you have to do now is to get back to Ista (M1,5) and speak with her. You can:
You receive this quest from the guard captain in Stalwart village - Tealdor (M1,7). You will have to eliminate a group of political killers that have stopped for a while in the Longwatch Falls.
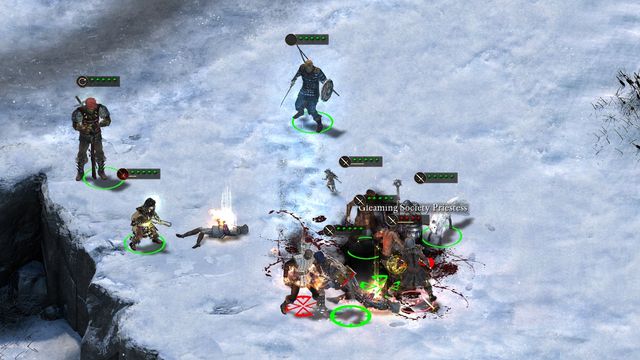 Fighting the members of the Gleaming Society shouldn't be hard. Utilize the open space to properly position your team.
Go to that location and walk on the rock ledge in the southern part of the map (M3,4). You won't be able to talk - the battle with enemy group will start immediately. As usually, first focus on ranged fighters, and leave their leader, Ulmar, for the end. Take all the items from the bodies of enemies, especially Ulmar's Head. Now go back to Tealdor in Stalwart village (M1,7) and take the reward - 3000 pieces of gold.
The bounty mission for Meztla, the leader of the followers of Berath can be taken from the captain of the guard in Stalwart Village, named Taeldor (M1,7). Her group was previously seen near the Durgan's Battery. Go there as soon as possible and find her camp (M4,7). You won't be able to talk with her - all you can do is to simply approach her and her team and defeat them all. You should prepare thoroughly, as you will be facing a group of 7 high-leveled characters. After defeating them, pick up all the items they have dropped - don't forget about the head of Metzla. Go back to Tealdor (M1,7) to complete the quest - unfortunately for you, you won't be given anything, aside from experience, from that.
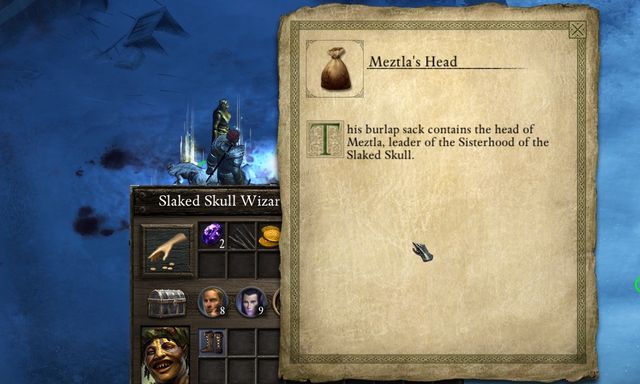 Aby mc wrcic do zleceniodawcy musisz zabrac glowe Meztli.
This quest will be given to you by the captain of the guard from the Stalwart Village, Taeldor (M1,7), but only after completing the two previous quests from the same man: Bounty: Meztla and Bounty: The Gleaming Society. This time you will have to defeat a character named Laenric, who can be found in the Russetwood. Go to the location and head straight towards the place in which you've previously found a group of Pale Elves (M2,6). As soon as you are seen, the encounter will begin. Afterwards, collect the head of Laenric and go back to Taeldora (M1,7). You will be given 4000 pieces of gold.
This quest will be given to you by the captain of the guard from the Stalwart Village, Taeldor (M1,7), but only after completing the two previous quests from the same man: Bounty: Meztla and Bounty: The Gleaming Society. You will have to take care of a group of murderers, who can be found in Longwatch Falls. As soon as you arrive, locate their encampment on the Eastern side of the map (M3,7). You won't be able to speak to them - you have to defeat them all. Collect the head of Firedorn, their leader, and get back to Taeldora (M1,7). You will be given 4000 pieces of gold.
The map above shows the Russetwood, location placed West from the Stalwart village. You won't find any settlements or merchants here, but you will complete here a few quests received in the recently visited village. In the Russetwood you will face many strong opponents, including ice trolls and ogres, often found in large groups. Be cautious when exploring this territory or you might die. The recommended party level for this location is 10. In the north-eastern part of the map you will find a passage to Durgan's battery.
1. Wounded wolf
Here you will find a wounded wolf with which you can "talk". If you try to remove the arrow from his body, he will attack you and you will be forced to kill the animal. The same will happen if you try to leave him alone.
In order to save the wolf, you must first calm him down. You can do it by meeting one of the four requirements
Additionally, at least one of your characters must have Survival skill on at least level 7. If you meet both of these conditions, you will be easily able to pull out a giant arrow from the body. It will be added to your inventory.
4. Pond in the Russetwood
Once you reach this place, you will notice a man who was doing something at the airhole and then walked away. It's the priest from the Regrets worth trading quest. Walk towards the hole. You will have to dive in it. If you have selected the wizard class and has the Bulwark against the elements second level spell, you should use it now. Otherwise, send a character with at least 16 constitution points to the water.
6. Group of pale elves
In this place you will meet a group of few pale elves who have imprisoned an ogre. Each dialogue option will end with a battle, even if you will try to peacefully walk away. During the battle, focus on eliminating one elf after another, leave the ogre for the end. You can take a pretty good Bittercut weapon from the body of the leader.
11. Flames-That-Whisper Upper Cavern
It's a sub-location of the Russetwood that consists of two cave levels. Most of all, you will find Beregan matron here, who is related to The ogre matron quest.
On the second, lower level of the cave you can take one additional quest - Garodh's chorus (M6,3).
Suldrun (M2,7) - A druid imprisoned in the body of a wolf;
Defala (M2,10)
Ice blight - Not too strong opponent which however has a strong spell with area of effect. Usually found in groups of three-four.
Ice troll - A very strong opponent, he deals high damage and has good defense. It can appear in groups.
Lagufaeth - a small opponent that is harmless unless he is a part of a larger group. Slightly stronger than a regular Xorip.
Bitter spirit - A weak enemy with a pretty troublesome ability - he can become inaccessible for your attacks. You must watch out for him not to get too close to your magic characters.
Ice beetle - This opponent is similar to rock beetle, you should use the same tactic when facing him. The ability that allows him to knock down part of your party is worth mentioning. Because of that, it is a good idea to keep a distance between the members of your team. The creature can be found in large groups.
Crag Ogre Cannoneer
Crag Ogre
Winter wolf
Menpwgra
If you have a team on more or less 8-10 experience level, try to get through the Russetwood in sneaking mode. It will allow you to avoid fighting the strongest opponents.
If you have a weak party, then avoid the western part of the map. The strongest opponents can be found there. Watch out especially for the group of undead and for the cave full of ogres.
The map above shows the Flames-That-Whisper Cavern. It's a sub location of the Russetwood. A headquarters of one of the ogre clans can be found here. You will visit this location during one of the main quests - The ogre matron. The cave is rather small, you will find only a few enemies, traps and chests here. There are three passages to the lower level of the cave here.
Matron Beregan (M5,2) - The leader of the Flames-That-Whisper clan.
Matron Beregan - Ogre clan leader. She has many hit points and pretty strong attacks. You can avoid fighting her.
Crag Ogre
Crag Ogre Cannoneer
Crag Ogre Chanter
Winter wolf
The map above shows the lower level of the Flames-That-Whisper Cavern, another part of the Russetwood sub location. You can get there only through the upper cavern floor (M5). You will find many ogres, few traps and groups of lagufaeths here. In the northwestern part of the map you will find stairs leading to Matron Beregan's room.
Side quest: Garodh's Chorus - Take the horn from the chest and talk with Garodh (M6,3);
Garodh (M6,3) - A ghost from whom you can receive a quest of finding all helmet parts;
Lagufaeth
Lagufaeth Redfin
Ice Blight
Crag Ogre
Crag Ogre Chanter
Crag Ogre Cannoneer
This quest can be started by going to the Flames-That-Whisper Lower Cavern. There you should search for a mine (M6,3). There's a chest here, from which you will be able to collect a horn. As soon as you do this, a ghost of a warrior named Garodh will appear. He will ask you to recover all the parts of his helmet.
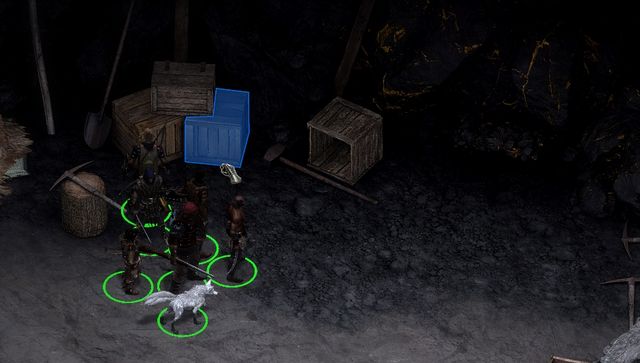 As soon as you collect the horn from the chest, Garodh will appear.
Afterwards, if you enter the Stalwart Village (M1), your journal will be automatically updated, and you will learn that another part of the helmet can be found here. Approach the Yduran's Wagon and speak with the owner. You will learn, that he has one of the pieces.
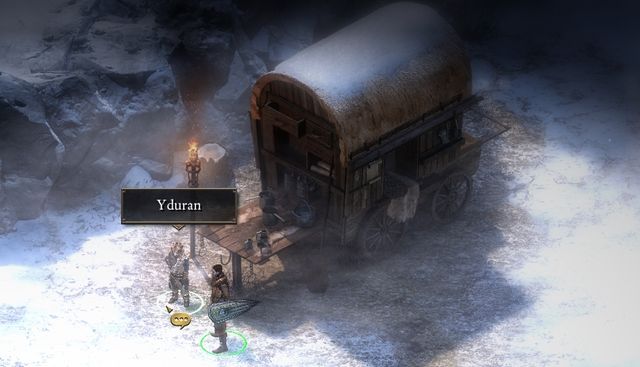 The least honorable, but at the same time the most profitable method is to simply lie to Yduran.
You have to collect the last part of the helmet. It can be found in The Great Hall, or to be more specific, in the Armory in the Northern section (M9,3). In order to get there, however, you have to complete the Durgan's Battery quest beforehand and acquire the appropriate key. It can be found in a hidden room (M9,2). As soon as you collect the piece, the ghost of Garodh will appear again. After a short conversation, you will be given a helmet with the same name as the quest name. It increases the Might of the character wearing it by 3, and gives +20 to defense if the character is unable to fight. The quest will then be finished.
Longwatch Falls is a location east from Stalwart village. You will complete few side quests here, including the quest for one of the best swords in the game. You must watch out, as there are many large enemy groups here. Recommended party level for this map is at least 11. On the north you will find passage to the Durgan's battery.
5. Cave
In the cave you will meet one of the strongest enemies in the game - the alpine dragon. You don't have to fight him. If you have the His better half quest activated, you can talk to him.
6. Dwarven ruins
Here you will find a sword that can be pulled from the rock. To do it, you will need a character with Might at level 16. However, if the same character has Intellect at level 11, 13 Might points will be enough. After pulling it out, the sword will connect to the person that pulled it and a new quest The grey sleeper will be added to the journal. Important! The sword will be connected to the owner forever, until you complete the quest you won't be even able to unequip it.
Side quest: His better half - Examine the backpack (M3,1);
Side quest: The grey sleeper - Pull the sword from the rock (M3,6);
Ulmar (M3,4) - The leader of the Gleaming Society;
Lagufaeth Sidewinder - This enemy is attacking from distance. Because of that, he has small amount of health points. However, he deals great damage. He doesn't use spells as frequently as other lagufaeths.
Lagufaeth Broodmother - The leader of the nearby lagufaeths. She has very large amount of health points and she deals more damage that regular lagufaeths. She can heal her companions. Because of that, you should focus the attacks of the whole team on a single enemy and eliminate them one after another.
Alpine dragon - A unique opponent, one of the strongest in the whole game. He has very high resistance and defense. It will be hard to defeat him without the party at level 14 and a very good equipment.
Lagufaeth
Lagufaeth Redfin
Frozen Ooze
Ice troll
Ice blight
Ice beetle
Bitter spirit
Spectre
Cean Gwla
Wraith
Be careful when traveling through the Longwatch Falls, especially through the western and central parts of the map. There are large groups of enemies there. Those enemies aren't dangerous when they are alone, but in larger group they might prove challenging even for a strong party. One of the solutions is moving in stealth mode, this will allow you to check the enemy strength before fighting.
You should take interest in the dwarven ruins on the north and in the sword in the rock (M3,6). If you have a character that fights with two-handed weapon you can easily obtain one of the best swords in the game. More details can be found in the description of The grey sleeper quest.
Avoid the cave on the south (M3,5). Go there only after meeting one of the two conditions: you have the His better half quest active and you have 17 Resolve points or you have the party at least at level 13.
The quest will start automatically after you examine the torn backpack (M3,1) in the Longwatch Falls. His owner has been murdered and your task will be to find the person responsible for that.
 Ygard's journal can be found near one of the hot springs.
Go towards the hot springs (M3,2) and find Ygard's journal near their western shore. After reading it you will learn that you should look for other clues in the cave behind the waterfall (M3,5). Once you walk inside, you will meet the Alpine Dragon.
If you want, you can attack and defeat the dragon. It won't be easy, as he is very powerful opponent, with a huge amount of health points, high defense and powerful attacks, and he is accompanied by few other strong allies. It's the strongest enemy you will meet in the whole The White March expansion pack. Once you manage to defeat him, don't forget about looting his body and his lair. There you will find large amount of very valuable items.
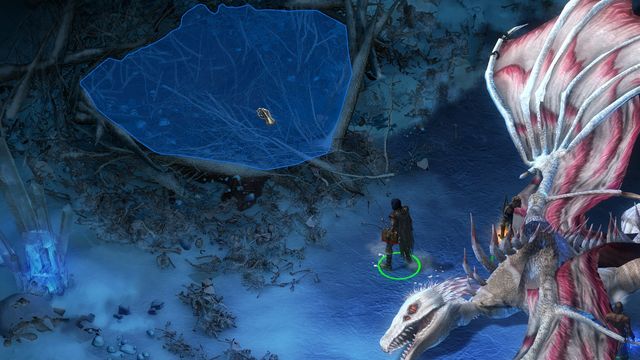 If you decide to kill the dragon, don't forget about looting his lair.
If you don't have a strong enough party, you can simply talk with the dragon. Keep selecting the first neutral dialogue option (the one that doesn't require any statistics) until you see the option to offer help in breaking the connection between his soul and the soul of Ygard. Finally you must select the option that requires 17 Resolve points. Only this option will let you avoid fighting. The quest will end successfully and the dragon will give you a very good hand protection.
To start the quest, go to dwarven ruins (M3,6) in the Longwatch Falls. You will find a sword in the rock there. You can pull it out with any character that has 16 Might points or 11 Intellect and 13 Might points at the same time. It is best to select a character that uses two-handed weapon - a warrior, a barbarian or a paladin. Once you pull the sword, it will connect permanently to the person that obtained it and a clue as to where you should go now will appear on its blade.
Important! Until the quest is over, the character must use that sword. You can't switch it to any other weapon!
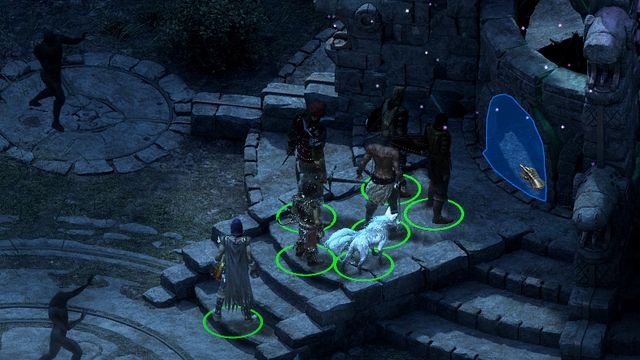 When you return to Cilant Lis, you will be able to interact with the adra machine.
Second verse of the poem will tell you to search for the place where adra, stone and the copper meets. You will have to leave the White March and return to the Dyrwood. Go to one of the first locations you visited in the game - the Cilant Lis and walk towards the adra obelisk. You will be able to interact with it. Another verse will appear on the sword.
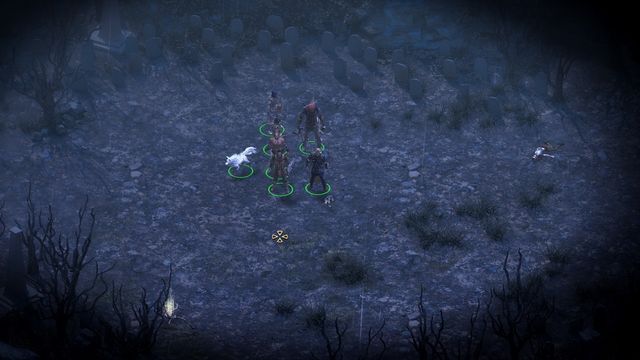 It won't matter where on the cemetery you set up the camp.
This time you will have to go to the Esternwood which can be found east from a Gilded Valley. There you must go to the cemetery located in the northwestern border of the map. Once you reach the middle of the field, simply use the camp materials and rest. After waking up the party member equipped with the sword should talk. The last verse will appear on the sword.
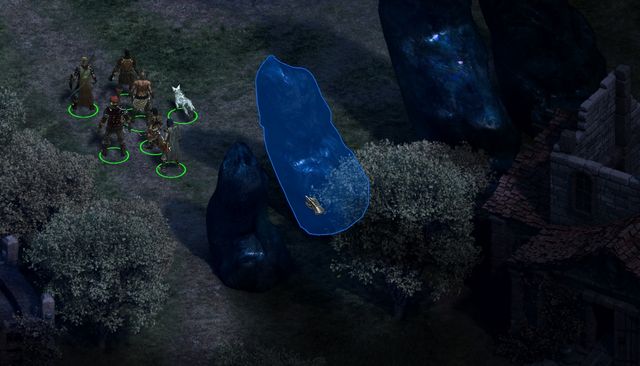 The last task will be touching the finger of the adra monument in your stronghold.
You must find the adra fingers. The only place where something like that can be found is your fortress - the Caed Nua. Once you get there, search for few rocks sticking from the ground. You will be able to interact with one of them. It can be found more or less in the center of the location. The quest will end successfully. Now you will be able to remove the sword from the hands of your character. However, only the person that pulled it from the rock will be able to use it. After all upgrades it will have many additional effects and can be used until the end of the game.
 The Grey Sleeper is one of the best two-handed swords in the game.
The map above shows the Durgan's battery, a location placed north from Stalwart village. It's one of the most important locations in The White March expansion pack. Most of the main quests take place here.
2. Galvino's cabin
This small building leads to the large Galvino's workshop (M8). It's full of enemy constructs. You will complete one of the main quests there - The recluse of the White March. Galvino will also give you one side quest - The fisherman's penance.
When you meet Galvino, you will be able to add Devil of Caroc to your party.
8. Battery watchtower
As soon as you arrive at the top, you will find a valuable, powerful bow. It won't, however, be as effective on its own. You have to find the second part of the weapon. It can be found in the Russetwood, inside the body of a dying wolf (M2,1). As soon as you acquire both items, they will be linked together in order to become the Stormcaller.
Stag - A weak enemy, who will not attack you unless you get really close to it.
Bitter spirit
Ice blight
Ice troll
Ice beetle
Frost ooze
Crag ogre
Crag ogre chanter
Crag ogre cannoneer
Winter wolf
Lagufaeth
Lagufaeth redfin
Stag - A weak enemy that won't attack you if you won't get very close to him.
Your first step in the Durgan's battery should be visiting Galvino's cabin (M4,2) and adding Devil of Caroc to your party. It's a very interesting and useful character.
The map above shows Galvino's cabin. It's a small location in which you will only find few containers and traps. However, it is an important link between the Durgan's battery and Galvino's workshop.
Galvino's workshop is Durgan's battery sub location. The road to it leads through the small location called Galvino's cabin. The workshop is a quite large complex of corridors and rooms filled with enemy constructs and traps. At the end of the road you will meet Galvino - an eccentric animant who lives under the dwarven fortress since years. You will complete one of the main quests here - The recluse of the White March. You will also add Devil of Caroc to your party here.
2. The cell
To get inside you will require 10 Mechanics points or the proper key. The latter can be found in a chest in the armory (M8,4).
Inside the room you will find a broken construct. You can give him 500 pieces of gold and he will leave you be. If you convince him to leave the room, he will explode after a while. You can also attack him, he is pretty weak. You won't gain anything from any of the above actions.
3. Laboratory
In the room you will find a container with a soul and few levers. First use the one in the upper left part of the laboratory, then the one on the left, near the container. A spirit named Baelsyr will appear, you will have to defeat him. It is best to retreat to some distance with the whole party and lure him to open space, so each character will be able to attack without blocking the others. Once you defeat him, you will be able to take a good pistol from the container - the Fellstroke.
5. Galvino's office
You can only enter Galvino's office if you have the key. It can be found on the bookshelf in the dining room (M8,1). After opening the door a conversation will start automatically. It will go the same no matter what dialogue options you choose.
Galvino will give you the fisherman's penance side quest. You will also receive an opportunity to add Devil of Caroc to your party. To do it, you will have to pay 700 pieces of gold or have Perception on level 12.
Side quest: The fisherman's penance - Talk to Galvino (M8,5);
Side quest: The one that got away - Add Devil of Caroc to your party (M8,5);
Galvino (M8,5) - An animant that can help you get inside the dwarven fortress;
Devil of Caroc (M8,5) - The soul of a killer woman locked in a mechanical body. She can join your party;
Flesh Construct
Unstable construct
Iron construct
Baelsyr
The map above presents The Great Hall, i.e. first floor of the Durgan's Battery. There aren't many interesting things around here. You have to move carefully, as there's a lot of traps and groups of stronger enemies scattered around the area. If you want to get to the lower level, read the description of the White Forge quest. While travelling through The Great Hall, you will be able to hear the conversations of its former residents.
2. Frozen dwarves
There's a group of frozen dwarves inside the room. If you want to collect a number of valuable items from their bodies, you will first have to thaw them. This can be accomplished by:
From their bodies, you will get, among others, a key to the armory (M9,3).
3. Amory
In order to get to the armory, you must first acquire the appropriate key. You will find it inside one of the frozen dwarves' (M9,2) bodies.
As soon as you enter the room, collect a helmet from the shelf located near the Northern wall. Thanks to that, you will finish the Garodh's Chorus quest.
4. Door
In order to open the door, you must accomplish one of the following:
Main quests: The White Forge - all you have to do is to enter The Great Hall.
Battery Defenders - Ghosts of dwarves, which protect the walls of the stronghold. They can be found as a ghost of almost every class, from warriors to rangers. They are encountered in groups of 2 to 3. They aren't the strongest foes you will face.
Ice blight
Shade
The above map presents The Mines, i.e. second floor of the Durgan's Battery. Similar to the previous location, your main goal here is to simply get to the lower floor. Unfortunately, it won't be so easy this time, as you will be encountering a lot stronger enemies in this location. If you want to get to the lower floor, you should read the description of The White Forge quest.
Important places in The Mines
7. Door
You can open it with the help of the seal, that can be found in the workshop (M10,1).
The seal must be placed in a special opening on the left side of the door. Afterwards, you must do the following:
8. Hall of Remembrance
There are three holes in the wall on the right side of the room. You have to place an appropriate sigil in each one of them. All of them can be found scattered on this level of the mine.
Afterwards, if you pick up the club from the table, you won't automatically activate a set of traps, which would otherwise kill you in seconds. You can now head towards the exit, where a small group of enemies will await you.
Battery siren - a strong variant of wraith. The enemy focuses on weakening your party.
Giant ice troll - Basically a stronger version of a regular troll, with larger health pool and higher damage.
Battery defenders
Frost ooze
Ice beetle
Bitter spirit
Wraith
Shade
Ice troll
Winter wolf
The Foundry is the last and the lowest floor of the Durgan's Battery. Here you will stumble upon even stronger enemies, and the encounter with the defenders of the foundry will be one of the most difficult in the whole expansion. The location itself is quite small, but it's literally flooded with dozens of chests containing valuable items, so it's worth to look around carefully, so you won't miss anything. If you want to swiftly activate the foundry, read the description of The White Forge quest.
5. White Forge
In order to activate the forge, you must first find the adra disc (M11,4) and two adra spheres (M11,6) (M11,1). After you've collected all the required items, place them inside the forge. It will be activated, and you will have to defeat its defenders.
Forge guardian - a powerful enemy, which is summoned as soon as you activate the White Forge. Not only that he possesses high defense and attack damage, he can also deal quite a lot of fire damage. Before the encounter starts, it's worth to equip artifacts, or consume some potions that increase resistances to that element.
Battery defenders
Bitter spirit
Wraith
Shade
Battery siren
The quest begins automatically upon entering the Great Hall, which in turn is associated with completion of the Durgan's Battery quest. Your first objective is to get to the lower floor of the stronghold. The only place in which you might have some problems are the closed doors (M9,4). In order to open them, you must do one of the following:
Each one of the above options will allow you to open the door and get to the lower floor. As soon as you do so, your journal will be updated and you will have to get to the lower floor yet again. It won't, however, be that simple.
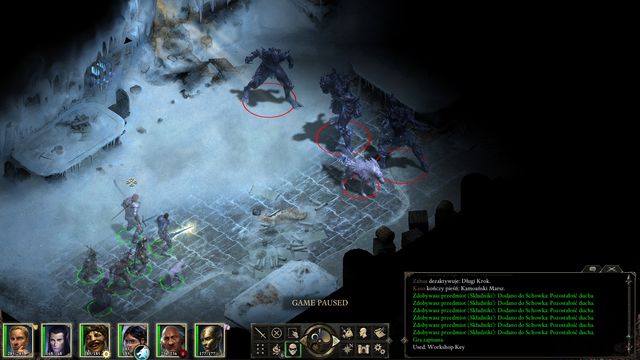 There's a number of difficult encounters awaiting you in the mines, including one with a group of Ice Trolls.
First things first, you have to acquire the key to the workshop (M10,1). It can be found on the body of a dwarf (M10,6). As soon as you collect it, a group of enemies will appear. You have to defeat them. During your journey to the workshop, a group of enemies, with a Battery Siren, will appear. A Battery Siren is a powerful enemy, so you should prepare for the encounter accordingly. Use the key you've just collected and open the door to the workshop. Inside, you will have to fight with a group of enormously powerful Ice Trolls. This time you should place your characters appropriately, by sending your warriors to the front line and keeping your long-ranged characters in the back - don't forget about using potions if the situation requires it. Additionally, you can lay a few traps, if you happen to have them at your disposal. During the encounter, use the active pause as much as possible. As soon as you defeat the trolls, pick up the loot they dropped and collect the seal from the table. Now you must approach the doors that block the access to the stairs. During your journey you will encounter another group of enemies, with a Battery Siren. Place the seal in the opening on the left side of the door. Now you must do the following:
After getting to the lower floor, the quest will be updated, and you will have to look for the White Forge itself now. Even here, on the lowest floor, you will have to complete a series of activities in order to advance. First things first, look for the elements needed to activate the forge. The first n, Adra Disc, can be found in the room in the middle of the map (M11,4). Approach the sphere and press The Old Vail, then the Living Earth, and at the end the Ruatai. You will be given the disc. Now you have to acquire two adra spheres. The first one can be found in the room in the Northern section of the location (M11,6). The second can be acquired from the chest in the warehouse (M11,1).
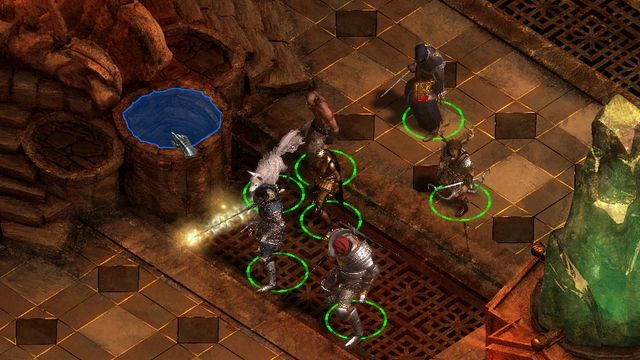 The first step to activate the forge is to place two adra spheres and an adra disc inside.
After acquiring all three items, head to the Forge (M11,5) and place two adra spheres and an adra disc inside. You will awaken all the nearby enemies and you will have to fight a group of 6 to 7 foes. The encounter is quite difficult and you should prepare for it accordingly. Place your mages and ranged classes far away from the forge, and your warriors on both sides of it. It's worth to place a few traps and prepare potions which add fire resistance.
After the battle approach a large adra obelisk and click on it. From the conversation you will learn a lot about the history and the destiny of this place. Selecting various dialogue options won't make a difference on the finale. After the conversation the quest will be finished, and you will complete the main storyline of the expansion.
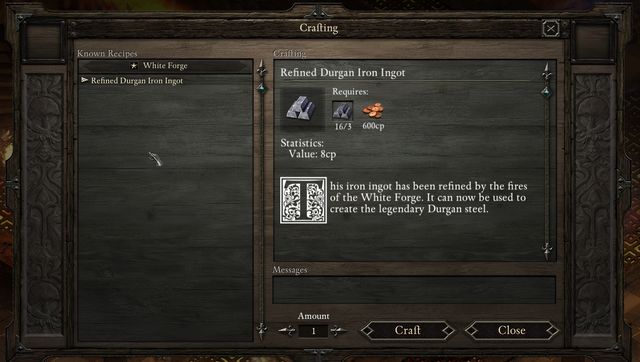 If you want to collect as much as Durgan Iron Ingots as possible, you should search all three levels of Durgan's Battery.
In the freshly activated forge, you will be able to smelt Durgan Iron Ingots, acquiring the material which can be used to upgrade weapons and armor. In the enchanting window an appropriate option will appear as soon as you acquire Durgan Iron Ingots.
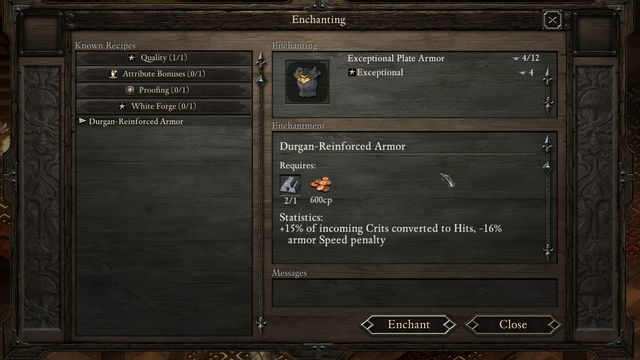 Thanks to the White Forge, you will be able to upgrade every weapon and armor. All you need is a little bit of gold and an ingot.
This quest can be acquired from Galvino (M8,5), after the conversation about the Durgan's Battery. He will ask you to uncover someone named Grynda.
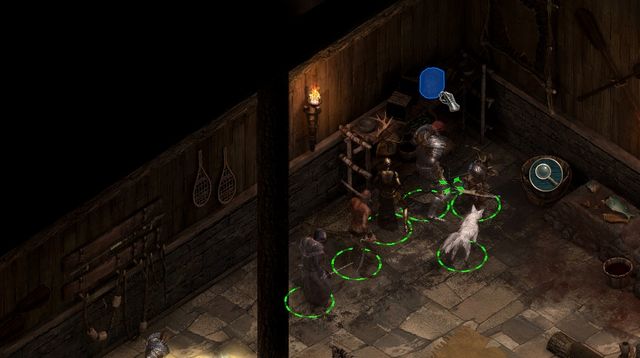 Take the bracelet from the chest in the corner of the room.
Go to the Stalwart Village and wait till the night (you can use the Inn to speed up the process) and enter the Fishery (M1,6). From the chest in the corner of the room you must collect the Adra's Bracelet. Read the whole history. Afterwards, Grynda with a follower will enter the room. During the conversation you will have a couple of choices:
The quest will be given to you automatically after accepting the Devil of Caroc to your party. All you have to do is to observe her during your journey - whenever an icon appears on her portrait, click on it in order to start a conversation. During them, you should focus on selecting options that require a certain level of a given statistic (like Might or Resolve) and keep the conversation for as long as possible. After a while she will confess that she wants to find and kill a woodcutter named Hermk.
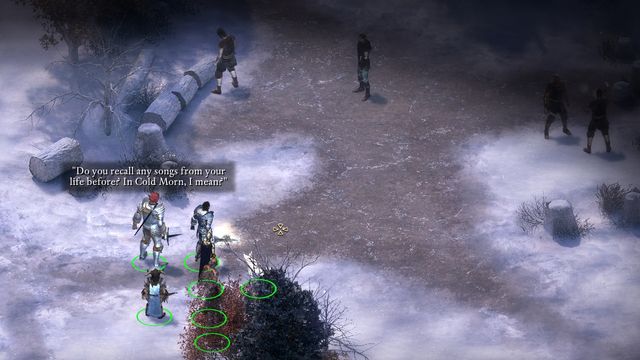 Woodcutters camp will appear only after the conversation with the Devil.
In order to find Hermke, you have to get to Russetwood. Head towards the Woodcutter's Grove (M2,12) and speak with the sought man. Reach for his soul. Tell the Devil of Caroc that he's not the one responsible for the house fire, and you will simply walk away, finishing the quest at the same time.
Alternative Choices:
By admitting that Hermke is the one responsible for the crimes you will force a fight with him and four additional woodcutters. They should pose no threat to your team. You will find a small amount of gold coins on them, but nothing more. The quest will be then finished.
The map above presents the Crgholdt Bluffs, the only main location of the expansion that is not a part of the White March. Practically the whole location is just an enormous military camp, filled with mercenaries. All of them are hostile towards you, so crossing even a small fraction of the area will be quite a challenge. Before venturing to this area, you should level up your entire party to at least 13th level. In the North-Eastern section of the location you will find ruins, and there an entrance to the Crgholdt stronghold.
2. Drunken Orlan
You can sneak on this warrior. If you have at least 17 points of Dexterity, you will be able to steal a key from him without even waking him up. On the other hand, if you have 17 points in Might, you will be able to kill him during sleep.
The key can be used to open the chest that is located a few meters to the left from your current position.
Mercenaries - a group of mercenaries, that besiege the fortress. They are quite strong, and you can find every class available in the game amongst them. Be wary, as they are encountered in quite large groups.
Ancient death guard - a powerful enemy, fighting in melee. Has enormously high amount of each type of defense.
Algul
The map above presents the Crgholdt stronghold, the headquarters of the powerful mage Concelhaut and his disciples. A few extremely difficult encounters await you here, including one with the master himself. Battle with Concelhaut is one of the most difficult encounters in the whole game, so it's crucial that you have your party properly equipped and developed. The whole area is filled with immensely powerful weapons and armors, as well as huge amounts of gold and gemstones.
Uariki (M13,5) - a mage specializing in reanimating weapons
Pelden (M13,4) - disciple of Concelhaut, engaged in researching alguls
Sabel (M13,3) - disciple of Concelhaut, which studies skeletons
Tanoss (M13,2) - disciple of Concelhaut, which asks you to get rid of all the remaining disciples
Concelhaut (M13,6) - a powerful mage and the lord of the Crgholdt
Steelspine Magus - A type of a skeleton, which fights using melee weapon. Not the most demanding enemy.
Void seer - a type of wraith, which attacks you by using powerful ranged spells. The paralysis spell is the deadliest one.
Ancient death guard
Algul


 Prince of Persia: The Two Thrones Game Guide & Walkthrough
 Prince of Persia: The Forgotten Sands Game Guide & Walkthrough
 Prince of Persia Game Guide & Walkthrough
 Pirates of the Caribbean: Legend of Jack Sparrow Game Guide & Walkthrough
 Prison Architect Game Guide & Walkthrough