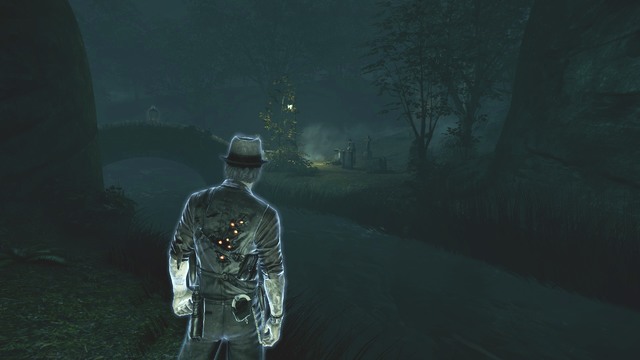
This guide for Murdered: An Investigation from Beyond the Grave will help you complete the game, in 100%, without any problems. It will lead you, step by step, to solving the mystery behind your death. In here, not only will you find hints concerned with solving the puzzles in the game. Also, it will help you get through the arcade sections of the game. You will find here, hints concerned with dealing with the demons that attack you. This text will also help you navigate around Salem. Places to go have been described here. Also, it takes into account side missions and the ways to complete them. It describes the items that you can find throughout your exploration of the town of Salem. Also, it includes the description of the RPG elements of the game. You will learn how to use a particular supernatural ability. Also, you will find here information concerned with how to read minds of the characters that you pass by, or even with how to possess them. A separate chapter includes general hints, which should make it easier to play Also, the list of achievements that can be obtained in the game, has been taken into account. Murdered: An Investigation from Beyond the Grave is a detective-adventure game with arcade elements. The game takes place in the town of Salem, which is famous, predominantly, for witch trials. You will be able to move freely around the town. You take control of Ronan O'Connor, a private eye, who dies at the beginning of the game and returns from beyond the grave as a ghost. It is a perfect opportunity for him to solve the mystery of his death. The game also includes the character development system. Along with your progress in the game, you can obtain supernatural abilities for your character.
This guide for "Murdered: An Investigation from Beyond the Grave" includes:
Przemyslaw "Imhotep" Dziecinski ()
The guide has been color-coded with four colors. Each one relates to a different thing. Orange relates to items that you can collect or posses. Brown symbolizes enemies. Green relates to characters or ghosts that you can encounter, during the exploration, which do not attack you. Blue relates to the first use of a supernatural ability in a given situation.
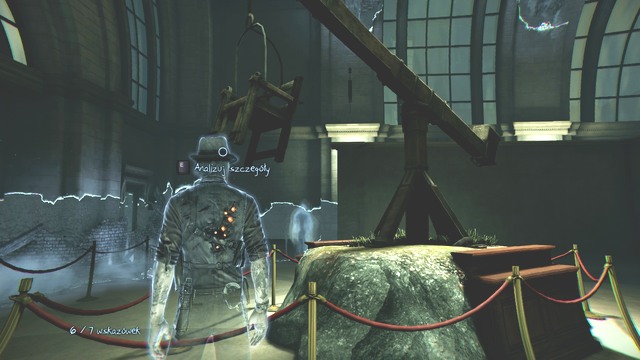
1. The game Murdered: An Investigation from Beyond the Grave as an adventure game with arcade elements. These consist in fighting demons. The protagonist is no superhero. In a direct clash with a demon, he dies. You can only defeat demons by getting them from behind and by pressing the appropriate sequence of buttons. If you fail to defeat the opponent, you can always hide in one of the white halos, around the locations where the demons lurk. The opponents will be searching these to find you. Therefore, you need to dash from one to another, effectively. All in all, they will give up. The monsters move around over pre-determined paths. The highest number that you will have to handle in a single combat is four - towards the end of the game. Do not attack demons when they are standing close to each other. You stand no chance against two opponents. What is very useful here, is the ability to see demons through walls. The yellow halo points towards the direction, in which they are currently moving.
2. The RPG elements in the game show in that your character obtains new abilities. The game does not provide you with the possibility to direct your character's development. You receive, a given ability, at a certain moment, e.g. in the graveyard, you receive the ability to regenerate.
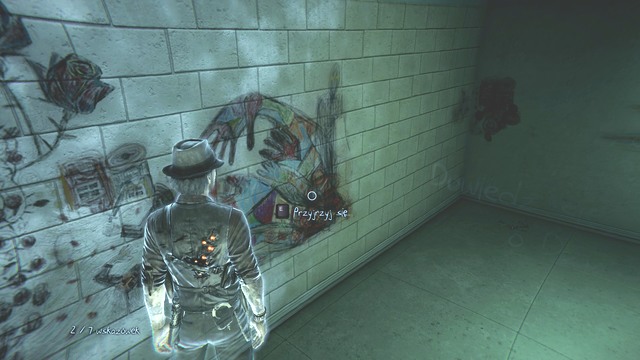
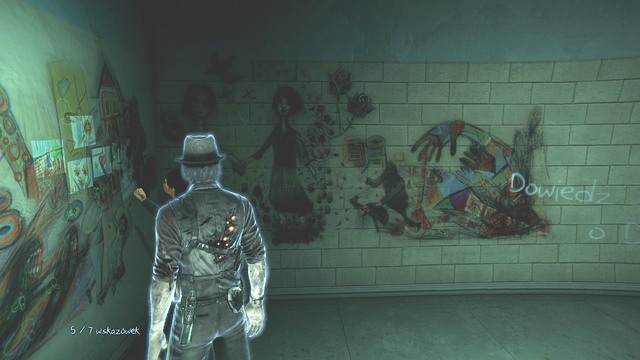
3. In the game, there are more than 200 collectibles to find. For collecting all of them, you receive an appropriate achievement. The messages from the dead appear on walls. You can view them only if your character is facing the wall at an angle. Due to that, some of the messages are difficult to discover.
4. You cannot save the game on your own. The game saves only at certain points. This does not concern collectibles; the game saves immediately after an item is collected.
5. Unfortunately, the game is not free from glitches. They have been mentioned in the appropriate section of this guide. They boil down to the impossibility to complete the investigation in the tenement house and the Judgment House. The way around it is to load the last checkpoint, or complete the investigation before you continue exploring the building.
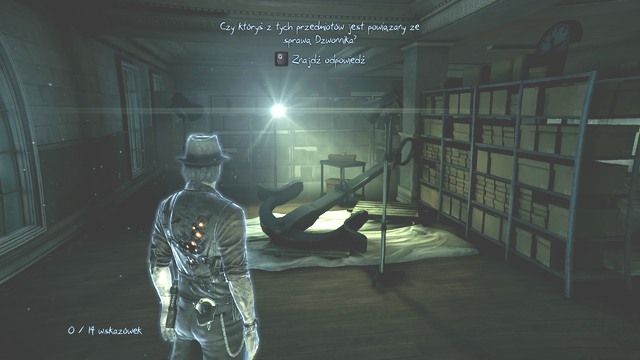
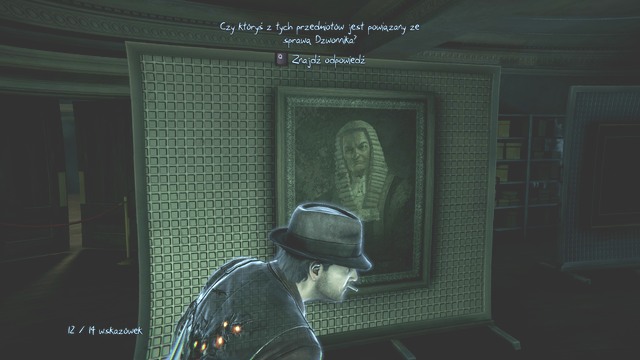
6. The quintessence of investigations is that you first collect clues and finally, sum up the investigation by giving pre-determined answers to questions.
7. The main storyline is not too long, but you can solve side missions: by helping the lost souls and finding collectibles.
8. The town of Salem is not too big, but you can lose your way around it. Fortunately enough, when you are supposed to reach a location, on the screen, there displays information on how far away from it you are. Visit every corner and you may find an item there.
9. The game gives you the opportunity to possess people. You can then read their minds to influence them to do something. You can then, e.g. see the computer screen that they are currently looking at. After you possess a character, you can use them to walk over a demon goo on the floor, as them. Without this trick, you would be unable to get past that obstacle. You can control the cat to reach inaccessible locations. You can also possess items and, e.g. distract policemen.
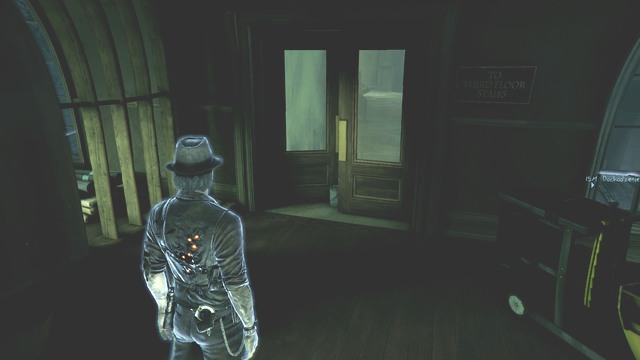
10. You can enter buildings only across opened door. Indoors, you can cross walls. Unfortunately, sometimes you will be unable to do that. After you learn the ability to teleport, you will be able to get to the other side, across, e.g. a hole in the planks. You cannot teleport across demon goo on the floor.
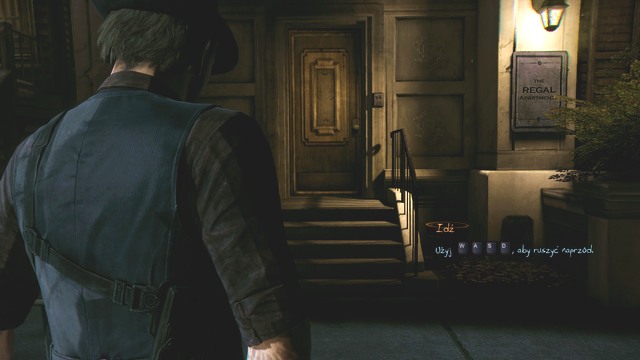
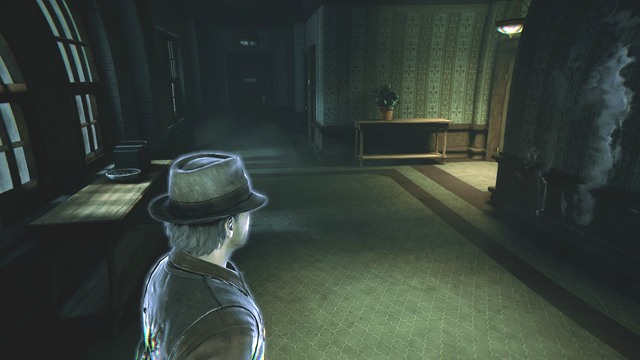
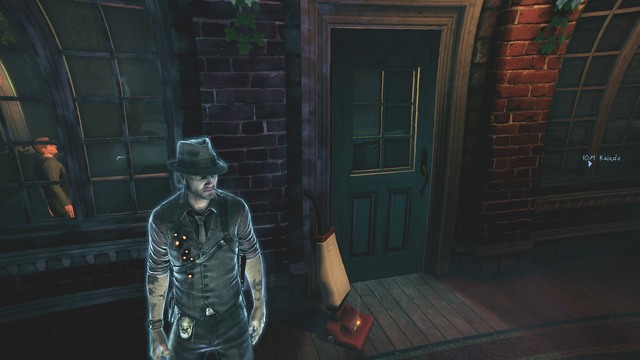
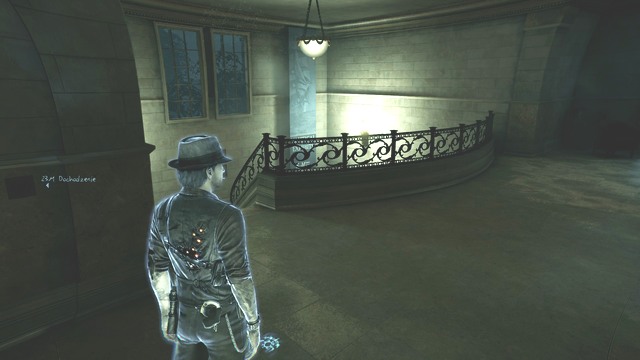
You start the adventure in front of the house where you fought with the criminal you had been chasing. Using the interaction button you interact with objects and people in the game. The game's beginning is actually a tutorial. It will allow you to easily learn the basics of the game. Get to the door and try to open it (the interaction button). Unfortunately, it is closed. Then, using the movement buttons, reach out for the door and press the interaction button.
 Unfortunately, you cannot enter the building just now.
After the cut-scene, you will see your dead body. Use the movement buttons in order to reach out for your face and press the interaction button. Now, using the movement buttons and camera buttons, you have to match your spiritual body with the physical one, which is lying on the ground. You start from a leg. By using the control buttons make your leg cover the material one. Then, with the camera button change the angle of the foot. Proceed this way with the hand and the head. A cut-scene will launch after which you will become a 100% ghost. The main mission starts.
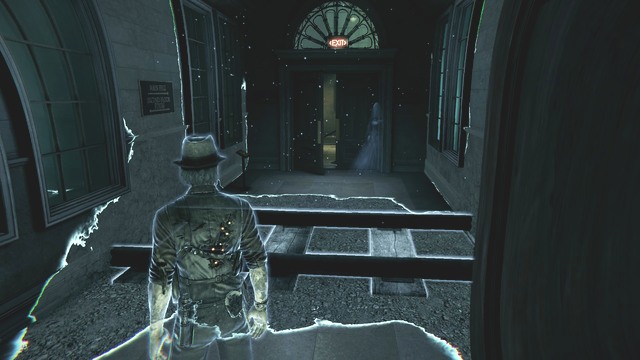
You must head towards the light. This task will start after properly aligning the spiritual body with the one lying on the street. After the cut-scene, get back on the street. Try talking to the man and the woman (interaction buttons). Unfortunately, they cannot hear you.
 You are invisible to other people.
You complete the objective "Head Towards the Light". The next main mission starts.
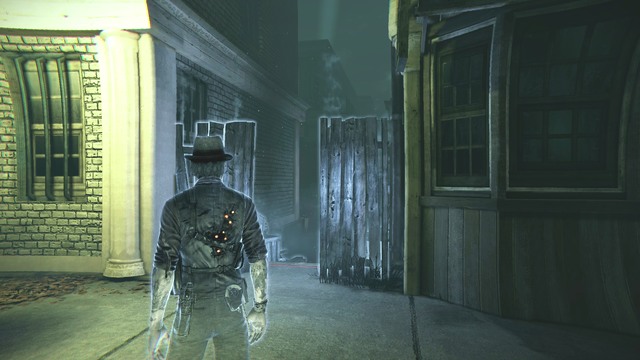
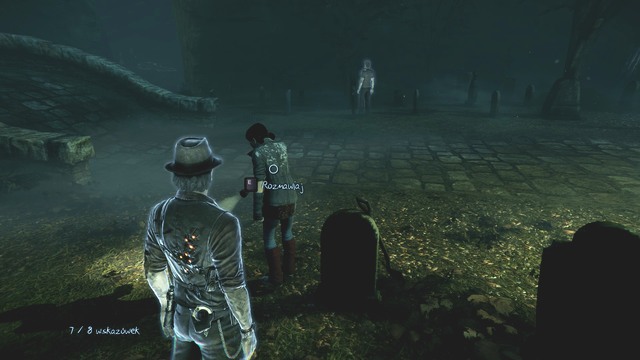
Your job is to follow the strange girl. This objective becomes available after you try to make contact with the couple who, after seeing the body on the street, are calling for help. Enter the alley in front of the house, where you tried to get in earlier. Remember that you can run. Approach the ghost girl. Once you manage to get close to her, she will flee through the fence on the left. Of course, go through it and then turn right. Again you will see the ghost, who will run from you. Follow her through the hole in the fence. Go straight and turn right into the alley with a dumpster and a cart.
 You can squeeze through the gap between the dumpster and the cart.
Finally, you will be able to talk with the ghost and find out many interesting things. Select the button that stands for the dialogue option: What do you mean by "gifts"? Note that questions that you have already asked are glowing in orange and are marked with ticks. Then ask: Why can't I pass through everything? You will learn that the objects through which you cannot pass are marked with blue. Then select: How could I get trapped here? Then ask: How could I rob my own future? Finally, the only thing left to ask is: Who are the "others"? After the conversation you complete the main objective "Follow the Ghost Girl". The next main mission starts.
You have to go back to the location where you started your adventure. This objective becomes available after the conversation with the ghost girl. Press the clues button - the first screen appears, where you can browse clues. Read the information about the ghost girl. You can switch between persons clues with the appropriate buttons. You can also access side cases.
 This is where you met the ghost girl.
Note that an alternative way out of this location (the square) is glowing in orange. This means that you cannot go there. If you walk into the orange glow the game will be over, unless you quickly press a combination of buttons that appear on the screen. Go back the same way you came here, i.e. straight (passing between the dumpster and the cart). Then take left and left again and pass through the fence. You have to confirm (the confirmation button) that you want to return to the town. You unlock the trophy: "The Death Wish of a Shady Man" - for turning into a spirit and meeting the ghost girl.
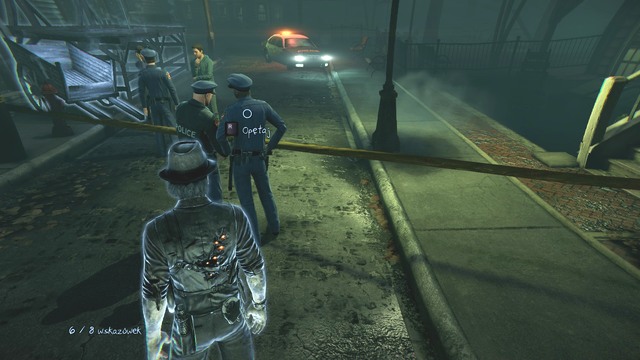
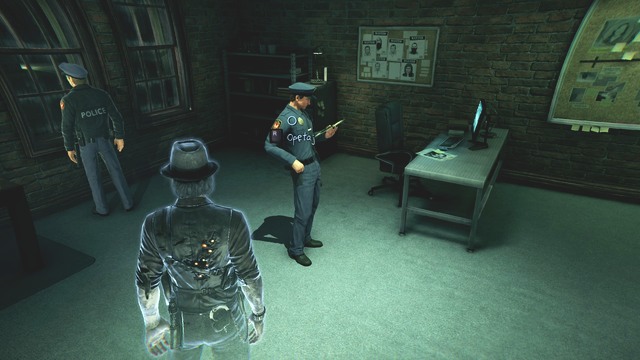
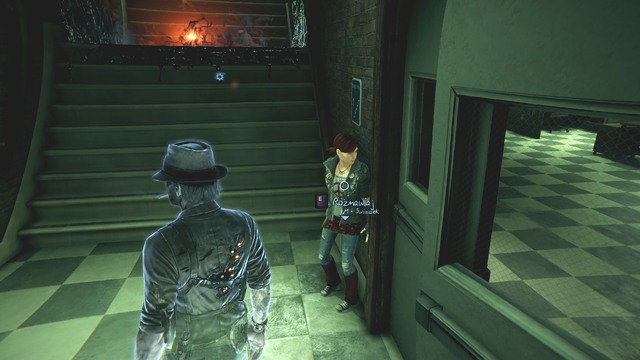
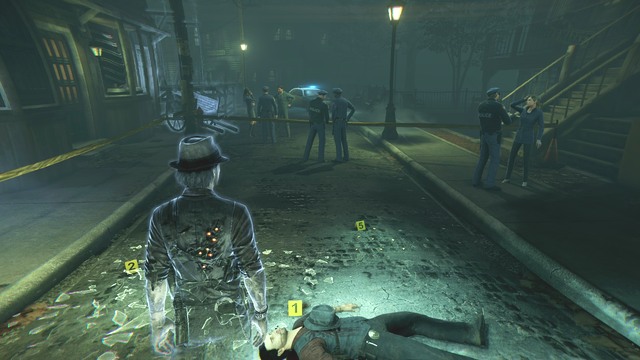 There is a lot of police officers at the crime scene.
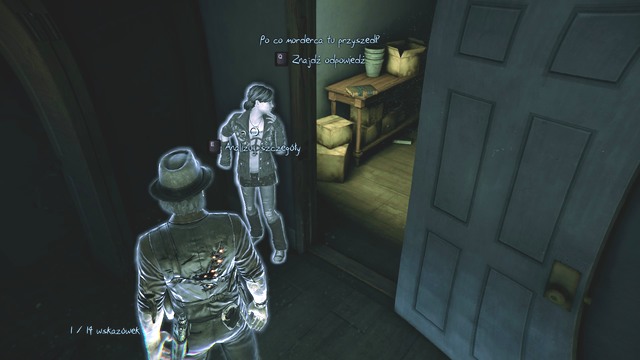
After the cut-scene, press the button (the confirmation button) to begin the first investigation. To successfully complete it you have to inspect items and take control over people. You complete the main objective "Return to the Scene of My Murder". The next main mission starts
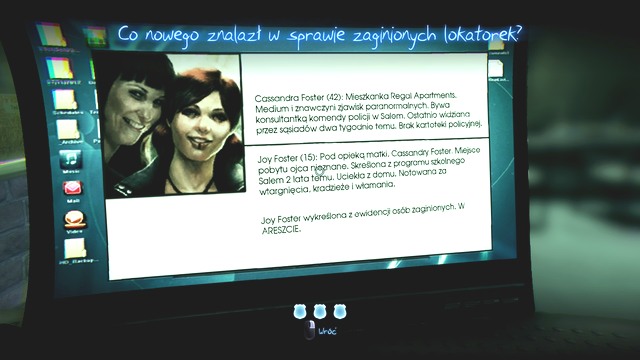
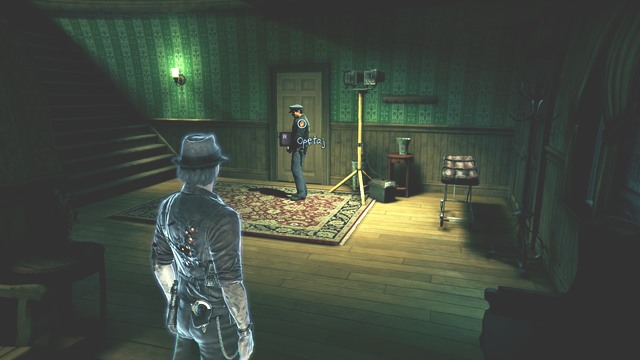
Your objective is to find out what the police knows about your murder. This objective becomes available after returning to the crime scene. During this investigation you have to find 8 clues.
Your first mission will involve not only a thorough examination of items at the crime scene. You will need to use your new abilities, which you did not have as a living man. These are: mind reading and influencing people's thought. As already mentioned, your objective is to find 8 clues.
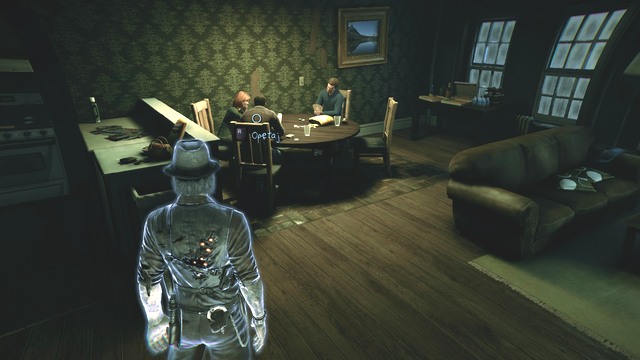
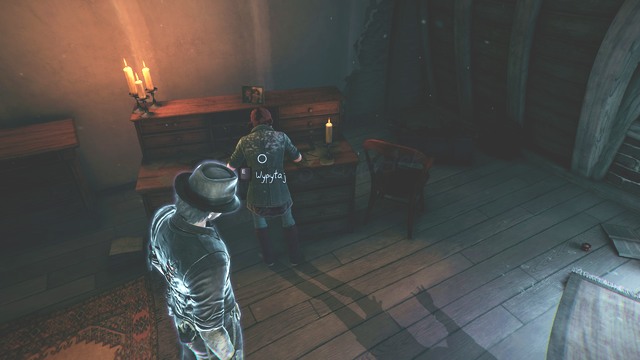
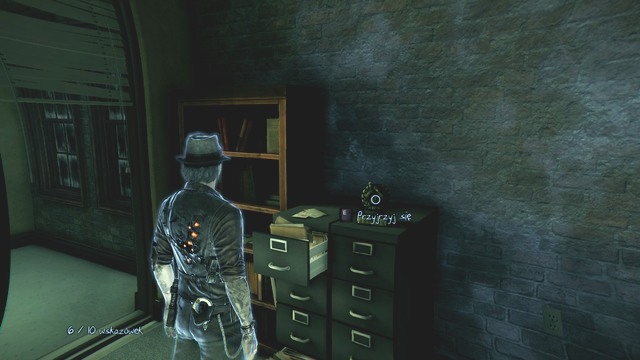
 The crime scene has already been secured.
First, take a look at your corpse, which is lying on the ground. You will get the first clue: My Death, to the Street case. You can read it in the Clues menu. Use Possess ability and enter into the mind of the police officer who is interrogating the woman on the south - he is holding a notebook in his hand. Select Mind Read from the available options. This way you will get "Mindreader" trophy - given for the first successful reading someone's mind. Dispossess (the return button) and then Possess the woman with whom the officer is talking. Select Influence option - you can select the topic that the woman, who is temporarily under your influence, should think about. For now you have discovered too few clues. Dispossess and proceed to collecting more evidence. Take a look at the exhibit that the police have marked with number 2 - Shattered Glass. You will get the clue: Shattered Glass. Go to the exhibit number 3 - this is a Gun. Take a look at it, and you get the clue number three: My Gun. Look at the exhibit 4 - this is a Cigarette. This way you discover a clue: Cigarette. Exhibit number 5 is Shell Casings. You discover a clue: Shell Casings.
 Looking into these people's minds is not a problem for you.
Possess the police officer standing on the east from the entrance to the building where you fell out from. Select Peek option. You will see three notes in a column in the officer's notebook. When you read the information about the weapon, decide that this is the most relevant information, so to unlock the 6th clue: Killer's Weapons. Eavesdrop the police officers talking on the west from the officer interrogating the woman. This is the way to get the clue: Bell Killer. Again Possess the woman who is being questioned by your colleague. Select the option: Influence, and then Bell Killer hint. You have collected all 8 clues. Conclude the investigation (the conclude investigation button) to get "Investigator" trophy. You get it for the first successful investigation. You complete the main mission "Investigate the Crime Scene". The next main mission starts.
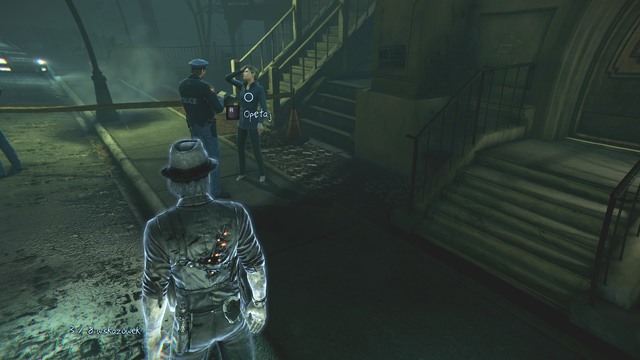
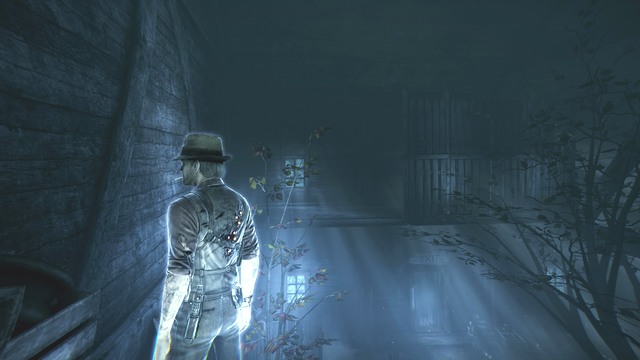
You must enter the buildingfrom where you were thrown out. This objective will become available after completing the first investigation. There will be an opportunity for that, because a man walks inside. When you get inside select: apartments. You are on the first floor of the building.
 You can pass through walls inside the building.
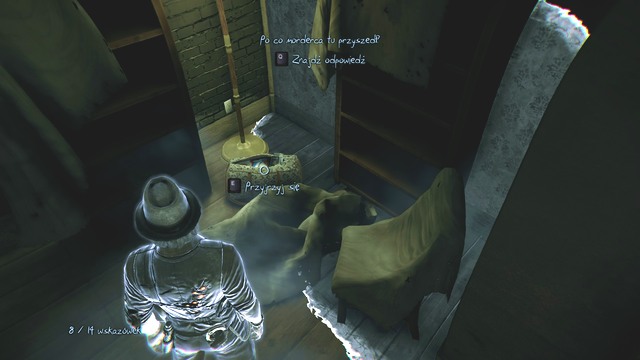
Note that a ghost came through the wall on the right. Follow it, passing through the wall. Approach him and talk. Pass the door on the left from the ghost. You can possess and read mind of the man watching TV and the woman standing by the window. Return to the corridor. Go north and walk through the door on the right, with the sign Laundry. Approach the Boiler in the corner of the room. This way you will activate a side case "A Watery Grave" in the "Ghost Stories" section. You need to collect 7 boilers to unlock the story. In the room in front of you there is a ghost woman. Talk to her (Help). You activate a side case "Apartment 1A". Do it immediately. Go now through the big door on the east from the entrance to the building. Approach the wall with a picture and focus your attention on the poster hanging there. This way you activate a side case "Info About My Killer". Down the hall you will see a woman and a man. Possess them and read their minds. Go straight down the corridor until you reach stairs. Climb up there and take the door 2F. You are on the second floor. Go through the wall on the right to the apartment 2A. You are in a bedroom. Go to the room where three people are playing cards at a table.
 Unfortunately, you will not find out what they are playing.
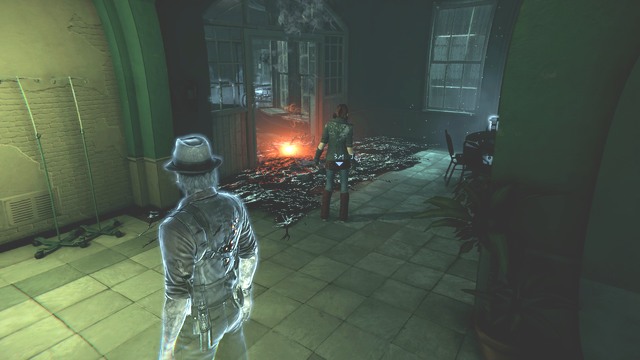
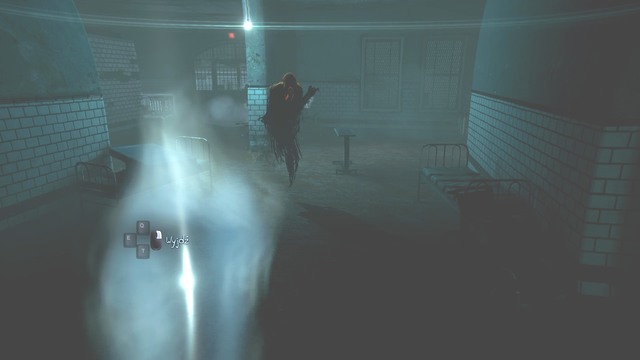
You can Possess them to read their minds. Return to the corridor and enter the apartment 2B (the number is on the door). In the first room there is a woman standing by the window. You can possess her and find out what she is thinking. Go to the room on the right and on its far end talk to the ghost man (standing by a rocking horse). Select the question: Do you like scaring children? You cannot do anything more here. Go up the stairs to the next floor. You will encounter a demon, from which you will escape into the room with the rocking horse. If you do not hide fast, you will die. You can hide in a white glow (the possess button). You can move between the glows. The monster is able to check the hiding spots - the only way out is to move to another glow. If the monster cannot find you, it will go away. You can use an ability that allows you to see demons through walls. The yellow light indicates the direction the demon is facing. If you want to get rid of it, you have to approach it from behind and while holding the possess button, simultaneously press two random buttons. An attempt to kill a demon may fail. You must then flee into a hiding spot (white glow). Note that the ghost man, whom you recently talked to, disappeared.
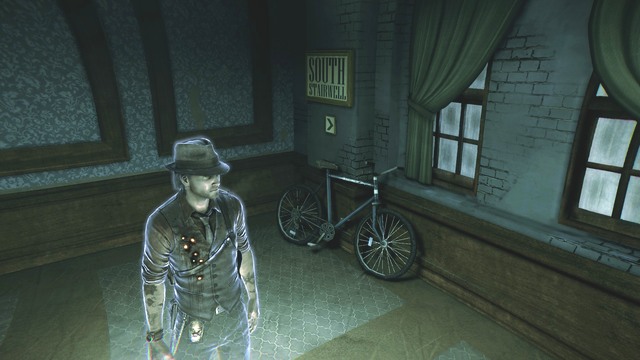 Unfortunately, the bicycle is only a decoration too.
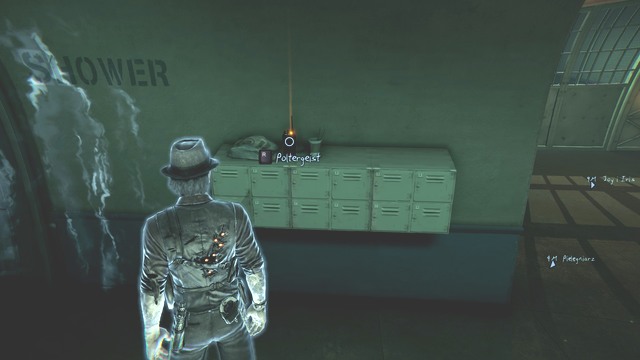
While looking through walls, wait until the monster turns its back at you. Approach it from behind and eliminate it. The way to the third floor is open. You get a trophy: "Exorcist". Go up the stairs to the third floor and go through the door marked 3F. On this floor two demons are prowling. Using demon vision mode (sensing mode) locate the first one. It is roaming in the corridor on the left from the entrance. When it turns around, approach him from behind and kill it. The second opponent is patrolling only the far end of the corridor, in front of the stairs that lead to the top floor. For now, do not worry about him. Enter the apartment 3B. Go to a small room and use Poltergeist to turn on the TV for a moment. You unlock "Poltergeist" achievement. Go into the next room and talk to the ghost sitting in front of a TV.
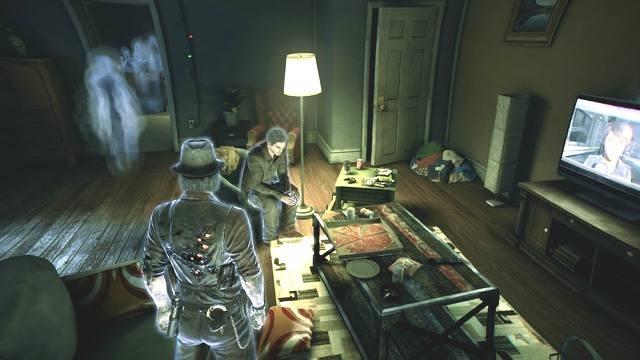 The ghost man is busy watching TV.
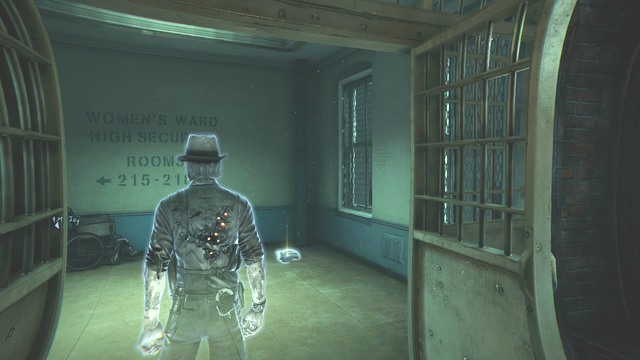
Leave the apartment. In the hallway, on the left from the staircase, there lies a sheet of paper on the floor. Pick it up and activate a side case: "Julia's Thoughts". Enter apartment 3A, where you can use Poltergeist to turn on the TV. In the bathroom there is a ghost in the tub. Talk to him and select the question: Why did you do this? Go to the bedroom, where you can possess a couple. However, this is of no use. In the bedroom, on the wall with a radiator, select Reveal. You activate a side case: "Ghost Girl Messages". Using sensing mode, wait until the demon near the staircase turns away. Then go through the wall on which you revealed the message, approach the demon from behind and kill it. You can now safely take the stairs to the fourth floor. You are on the top floor of the building. There are plenty of police officers and civilians here. Get closer to the two ghosts at the end of the corridor, by the window. When you approach, they disappear. Enter the apartment that is on the right when looking from the staircase - apartment 4A. The main mission "Get to the Fourth Floor Apartment" is complete. The next main mission starts.
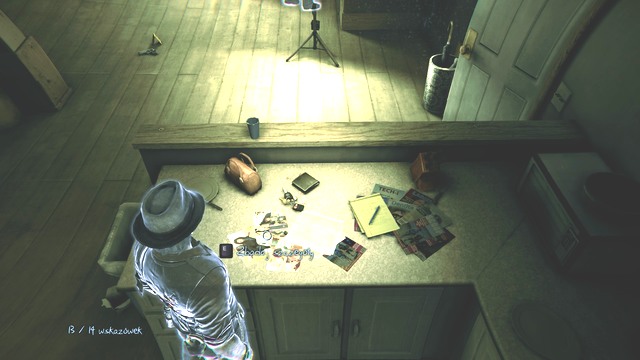
You need to learn as much as possible about the killer. This task becomes available on entering the apartment 4A, on the top floor of the building. For starters you have the task to find an answer to a question: Why was the killer here? To find the answer to this question you need 10 clues. To complete the main mission, you will need 4 more. In total, there are 14 of them. You will also be looking for clues to the case: Apartment 4A (16 clues to discover). The first one will be provided by officer Baxter. Namely, this is: Baxter Looking for the Girl. You just have to watch the cut-scene on entering the apartment.
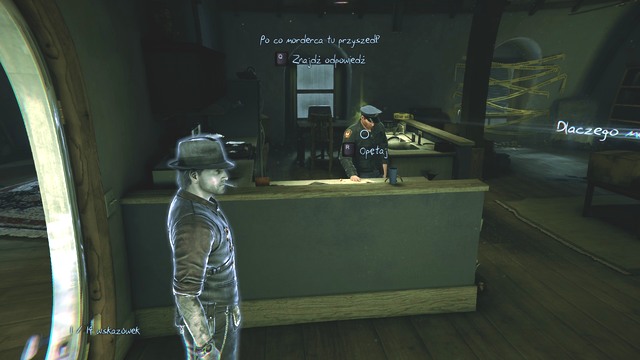 The policeman is busy watching photos.
On the right from the entrance select Reveal, and a silhouette of a man will appear. Click at: Analyze Details. From the information available you have to choose the pieces that will answer the question: What was the killer doing in the apartment. Select: Searching for someone/something and Purposeful. This is a way to get the clue: The Searching Killer, to the case: Apartment 4A. At the same time this is the first clue out of 10, which will bring you closer to finding the answer to the question: Why was the killer here. Other 9 will be counted toward the case: Apartment 4A and the answer to the aforementioned question. You can return to the hallway and Possess the onlookers and the police officers and read their minds. Go back to the apartment. Note that you can leave the building through a window, but first you have to conclude the investigation. You can Possess the policeman who is poring over the photos and read his mind. Go to the room north from the entrance. On the floor there is a guitar. On the right from the door select: Reveal and Analyze Details. You must answer the question: What was the girl doing? Select: Hiding, Frightened, Watching. You get the clue: Hiding Witness, to the case Apartment 4A, and to the answer for the question: Why was the killer here?
 The girl was obviously frightened.
Inspect the gun lying on the floor near the entrance to the apartment. It is marked as exhibit number 7. You will get the clue: Mom's Gift. North from the Policeman there is the exhibit number 8. You will get the clue: Signs of a Struggle. On the east there lies the exhibit marked as 9. You will gain a clue: Damaged Wall. Take a look at the tape wrapping the window through which you fell out - the exhibit number 6. You will gain a clue: Shattered Window. In the kitchen, on the countertop by the sink, you will find a Book. You activate side case: "Profiler's Memories". On the counter between the stove and the refrigerator look at the Form - select Analyze Details. You will get the clue: Missing Persons Request. In the north-east corner of the room, where you enter through the front door, there is a Book. Inspect it and you will find a clue: Book About Ghosts. In the corner of the room on the east from the entrance (near a lamp) there is a Travel Bag. Look at it for a clue: Packed Luggage.
 It is rude to look into someone else's bag, however, this is necessary for the investigation.
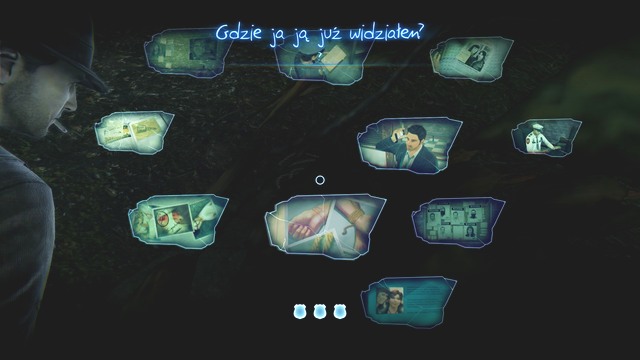
In the same room, next to a knocked stool, there are some Sketches scattered on the floor. Inspect them to get the clue: Mysterious Sketches. Conclude the investigation about: Why was the killer here? You have now 10 tips (11 for Apartment 4A case). From the available options choose: The Searching Killer and Hiding Witness. You get the clue: Possible Target, to case Apartment 4A, thus approaching the conclusion of the main objective "Find the Killer's Trail". You already have 11 out of 14 clues needed to complete the main objective. You have to find the answer to another question: Where did the girl go? Inspect the Photos the cop is watching. This is the way to get a hint: Obscured Photos. Possess him and select Influence. You have to decide what may make the Officer uncover the Obscure Photos. In the menu click at: Obscured Photos. The game has a bug that prevents launching a cut-scene after selecting: Obscured Photos. The only way is to play this investigation again (go back to the last checkpoint). Inspect the Photos on the table and select: Analyze Details.
 You are very close to concluding this investigation.
Remember that you can experience visions, when interacting with objects. You have to track down the source of the sound. Now from three possible answers you need to choose the true one. You can choose from: Files, Mother, Priest. Select the Priest. You will gain a clue: The Church. Your witness is in the church. You now have 14 out of 14 clues - conclude the investigation. This way you will get the clue: My Only Lead and Apartment 4A case will also be concluded. The main objective "Find the Killer's Trail" is complete. The next main mission starts.
This objective becomes available after finding all the clues in the apartment 4A, on the top floor of the building. You must leave the place. Enter the room with the guitar and approach the window. Select Exit. The main objective "Exit the Apartment" is complete. The next main mission starts.
This objective becomes available after exiting apartment 4A through the window. You have to find your way to the church. A new investigation starts: Find the Witness. Note that in the meantime you have unlocked a trophy: "One of Us" - you have discovered there was a witness at the crime scene.
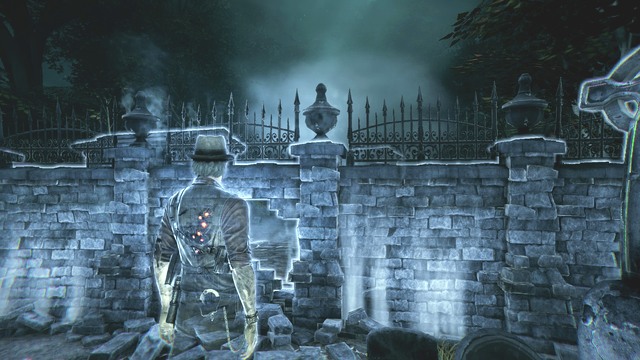
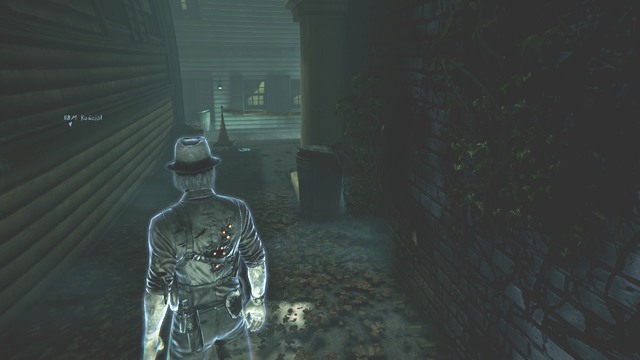 You find yourself in a shabby alley.
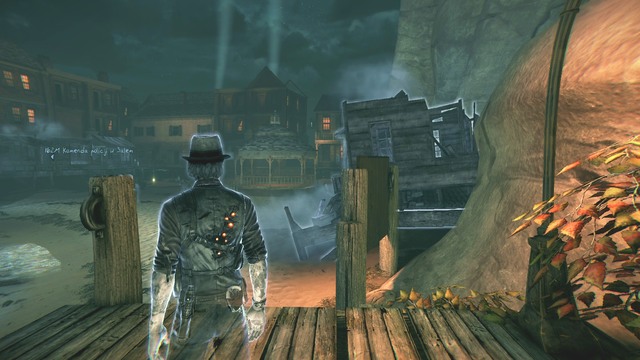
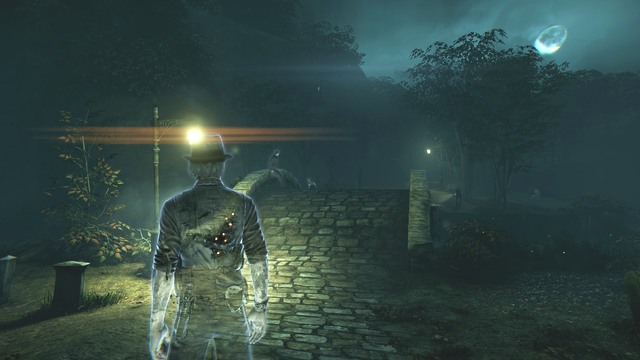
Time to explore Salem to collect a few items and take care of side cases. Go straight and leave the alley. The indicator on the left side of the screen tells you how many meters you are from the church. On the right you will see a hat, approach it and select Reveal, and then Analyze My Life. You activate a side case: "My Life". Eavesdrop two cops by the police car. You activate a side clue: "Truth About Baxter". Go back to the crime scene and go down the street on the left. Walk past the police cars and the van. At the next street turn left. There is a girl sitting on a bench. Go down the street, turn right to the square. There is a cannon in its center. Exit the square to the east. At the end of the street by a crashed car there is a ghost man. Select Help and activate a side case: "Near Gas Station". Do this task immediately. Nearby there is another square with a cannon. In its northern part there is a Plaque. Approach it and select: Collect. This way you activate "Salem's History" side case. Get to the gas station and head east and then walk through the burning house. Go to the cemetery, on your way you will walk past the girl sitting at the table, then turn right. Go down the street in front of the cemetery to return to the crime scene. Near the police car use the options Reveal and Collect. You activate a side case "Rex's Thoughts". Go to the alley where you got to after going out through the tenement window. Get toward the street and head left. Pass through the dumpster and the fence. Walk around the wooden boat and turn right. You should come to a sign that points toward the church.
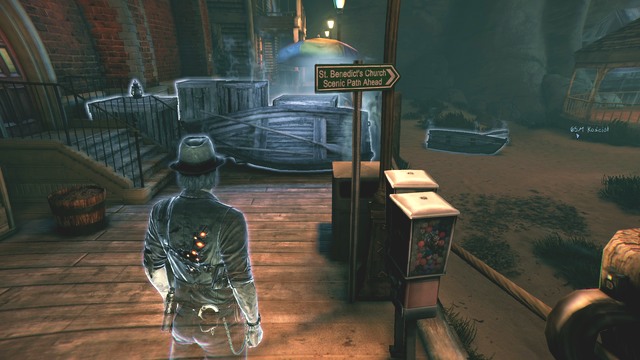 The church is nearby.
Approach the stairs leading to the church. Climb them and approach the church, then go inside. The main task "Find Your Way to the Church" is complete??. The next main mission starts.
This objective becomes available after walking into the church. You have to look around the church and find the Witness.
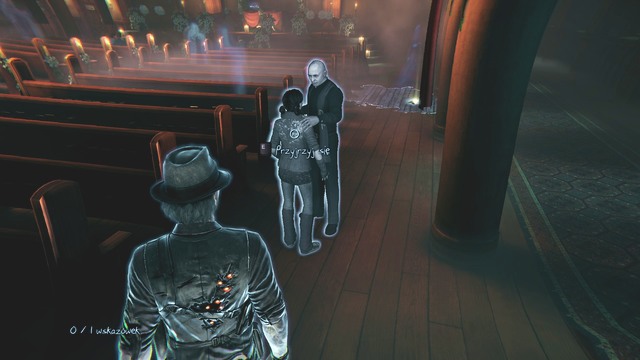
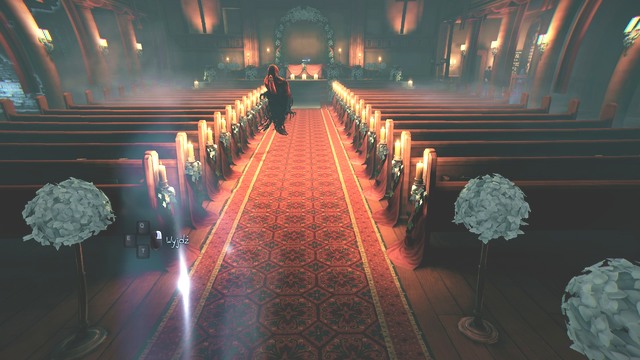
You are in the church. The first question is: Where is the witness? To the left of the entrance, underneath the stairs, use the option reveal and collect (Hand Saw). You will activate the "The Bell Tower Banshee" side case from the "Ghost Stories" section. Go further inside the church. Approach the man and the woman sitting on a bench, on the right, at the back. You can possess the woman and talk to the man. Choose the line: That can't smell good. You can also possess the couple sitting on the left, in the front, and the girl on the right. On the first floor, on the right, near the benches, use reveal and peek. Now you have to decide which of the clues that you've found in the apartment will help you in the investigation. Choose: the Church. You will complete the main objective - "Investigate the church to find the witness". Another quest begins.
You have to find a way to enter the attic. This quest will be active after answering the question - which of the clues from the apartment will help you find the witness.
 The priest have hidden the girl in the attic.
You will collect the Church Attic clue to the "Church" case. It is one of 8 clues, which you can get here. In the middle of the nave, left of the first row of benches (looking from the entrance), there is a ghost girl sitting on the floor. Talk to her. Nearby, there is a red field. If you step on it, you will die, unless you press a combination of two buttons (random). It's also blocking your way to the balcony. Fortunately, there are two ways (stairs nearby). To the left and to the right from the altar, there are doors with an sign saying - Rectory. In the corridor on the left, a floor Demon blocks your way. Notice the man cleaning the floor. He can serve as a way to get past the obstacle. Possess him when he gets near, wait until he passes the Demon and then dispossess.
 The man is thoroughly cleaning the whole corridor.
Go back (use the same way to get past the trap) to the entrance. Use the stairs that are not blocked and make your way to the balcony. At this stage, you are only interested in the side cases here. Possess the cleaning man and go past the dangerous field. Go forward as a cut-scene appears and you will complete the "Find a way to the attic" quest. A new quest begins.
This quest becomes active after walking past the floor Demon by possessing the cleaning man. Go back to the corridor where you've met the cleaning priest. Go through the door to the Rectory. Use reveal near the lift and a girl will appear. Click and look closely. You will see a rhetorical question on the screen. Go through the door (the cat is lying in the entrance) opposite the bathroom. You will find yourself in the kitchen. You can read minds of people sitting here. Head to the room on the left and observe a demon through a hole in the wall. When he turns his back at you, enter the dining room quickly and surprise him from behind. You should be able to deal with him rather fast.
 There is also dark energy in the dining room.
Walk through the door located in the east side of the room, next to the dark energy. You are in a corridor. Notice that the way up the stairs is blocked by a floor demon. The door located in the north side leads to the nave, but you can't go there. East of them, enter the room with a Television. You can use Poltergeist to switch the device on for a moment. Leave through the north door and you will find yourself in a room, where you have to possess two women. From here, you can go straight you can go straight to the churchyard. In the meantime, you should obtain the "Collector 50" achievement. You've manage to collect 50 items. Notice that you can go to the corridor with an elevator and the cat. Go there. The cat is resting near the entrance to the kitchen. Possess it and you will complete the "Find the cat" quest. A new objective begins.
This quest becomes active after you've found and possessed the cat. You will obtain the "Possess the cat" achievement. When you see a white light, it means that you can jump. The cat jumps automatically, you just have to speed up.
 When in cat form, you can even meow.
Enter the kitchen and notice the vent. Two men are standing next to it. After going through it, you will find yourself in the room where the Hand Saw was. Jump through the hole in the wall and you will get to the dining room. Jump onto the wardrobe, near the ladder, and then onto another piece of furniture. Enter the ventilation shaft. Go straight, turn right and jump down. You will be in a room with a wheelchair and a door leading to the churchyard. Jump onto a stack of bricks and use the boards to make your way to a wooden platform. Go to the left and jump onto a higher wall. Now, climb the plant on the wall. When on the top, head to the right and use the branches to go to another platform. Jump onto a metal cornice, walk to the end of it and jump onto an obstacle. Jump, approach the plant and climb up.
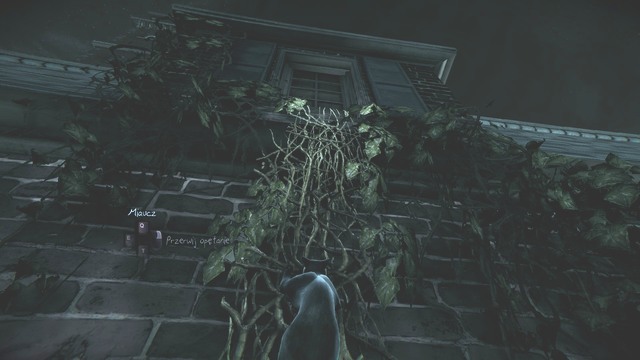 The cat is a very nimble animal.
Approach an ajar window and go through it. The "Get to the attic" quest will be completed. Dispossess the animal. You are in the attic, with a mysterious force to the left. Walk through the door on the right. You have to learn what the witness knows. A main quest begins.
This quest becomes active right after getting to the attic and finding the witness. You have 1 out of 8 clues to the case: Church. Possess the girl and choose: influence. You have the choose a clue that will make her think about the Bell Killer. Choose: Hiding Witness. You can now ask the witness, as she is a medium. Choose the following questions:
After the conversation, you will complete the "Learn what the witness knows" quest. Start the investigation: Look for the witness. You can't loose the witness, as only she can lead you to the Bell Killer. At the same time another quest begins.
This quest becomes active after talking to the witness. You have to find a way to leave the attic.
 The girl is a medium, so she can see and hear you.
In the meantime, you will obtain clues to the Church case.
Possess the cat and jump off the window in the next room, if you are still in the room where the witness was. You will find yourself in the churchyard. Escape the possession mode. You can only use the door leading to the room with two women and a wheelchair. Leave the rectory as a cut-scene appears and you will complete the "Exit the Attic" quest. Another quest begins.
It becomes active as you leave the rectory. You have to find the girl to whom you talked in the attic. Using Poltergeist, take control over the vacuum cleaner and a priest will approach you. Possess him and make your way to the other side of the trap.
 The vacuum cleaner is your way to leave this place.
When you enter the nave, you will encounter two demons. Hide in the white light, aim at the crow and select: distract. The demon will attack the crow. Leave the white light and backstab the demon. There's only one left, standing near the entrance to the church. Hide in the light, as close to him as you can, and aim at the bench with the crow. Distract the demon, leave the light and kill him. Now, nothing stops you from leaving the church. Select the clue: Witness's Mother's Note. You will get: The Witness's Destination. Now you have all the 8 clues. The "Chase the witness quest" is completed. Another quest begins.
This quest becomes active after learning where did the witness go. You have to reach the Police Station. You will earn the "Makeshift Sanctuary" achievement. You have found the witness and got the information.
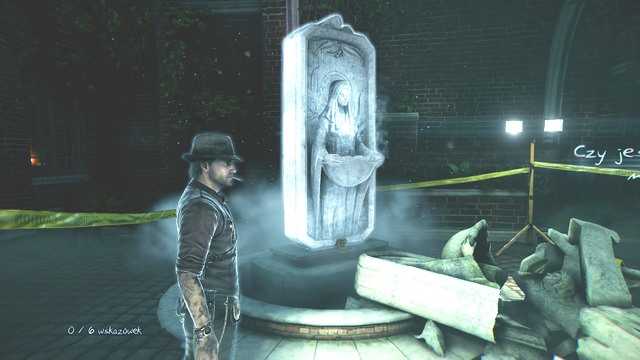
 You can again wander around the streets.
Walk the streets of Salem and collect items. You can now remove objects, which allows you to enter new places. When you collect 75 items, you will earn the "Collector 75" achievement. However, you still lack one ability and a few items cannot be reached yet. Don't worry about that as there will be time for doing it. Head to the place with the crashed car. Walk along the street with a green van parked alongside. Turn right near the wall. You will reach a square with a canon. Head in the north-west direction. This way you will reach a square with three cars parked. There is a trash can nearby. Here you will find a Plaque and activate the "Witch Trial History" quests.
 Witch trials have left their mark on the city.
You still have two side quests, given by ghosts. They can be completed during chapter 1. However, it is advisable to complete them now, as you have more powers. You activate the "Shipyard Park" side quest by talking to a woman on the beach, near the church. She is standing near a platform, which you can reveal using your powers. Head to the cemetery. Opposite the gate, you will find a ghost of a woman. Talk to her and activate the "Scorned" quest. Complete both cases. Now head to the Police Station. It is located near the gas station, where you were completing "Near gas station" quests. Make your way through the parking lot and go through the open door. You will complete the "Get to the Police Station" quest. The next quest begins.
This quest is activated by reaching the Police Station. You have to search the room. Your objective is to learn if there are any new clues to your investigation.
Start from searching the Station for collectibles. Start in the war room. After you have found all of them, return to this place. You have to learn what does the police know about the case. In the room, you will see a Policeman with a clipboard. Possess him and use the peek ability. There are three options in the notebook. Choose the one that will give you a new clue. It is the one at the bottom. It starts with the words: preliminary forensics. You will get a clue: Police Didn't Find Lead. It is 1 of 11 clues.
 The policeman is busy looking at his notes.
Notice a piece of paper on the table. Click examine details and you will see a poster with pictures of the missing persons. Peek, and you will get a new clue: Missing Persons Flyer. There is a large Board on the wall. Peek and get the clue: Links Between Murders. Approach the map behind the desk. You will obtain another clue: Map of The Bell Killer Murders. Facing the map, notice the photos on the left side of the table. Peek at them and you will get a clue: Crime Scene Signature. To the right of the table, there are some photos as well. When you peek at them, you will get yet another clue: Symbol Similarity.
 You have to search the desk thoroughly.
Possess the Policeman talking on the phone and eavesdrop on his conversation. You will obtain a clue: Rex's frustration. Approach the desk by the window and use Poltergeist to control a small fan. It will switch on and some of the papers will fall on the ground. Peek at the rest of the papers on the desk. You will notice an autopsy report. You obtain another clue: Pattern of victim deaths. Go to a smaller Board on the wall and select: examine details. You will see a description of the killer. The clue you obtain is: Bell Killer Suspects. A cop will enter the room and sit in front of the computer. Possess him and select: influence. You have to choose an option that will make the cop remember what he was about to do. Select: Missing Person Flyer. You get a clue: Missing persons file update. You now have 10 out of 11 clues to the "Bell Killer War Room" case. Do not yet dispossess and select: peek. Select the Amber Alert update. You will obtain the last clue: The Witness In Custody.
 Now you know where to find the witness.
Dispossess and end the investigation, as you now have all the 11 clues. The "Bell Killer War Room" case is completed. Also the "Investigate the War Room" quest is completed as well.
You have to find the witness. This quest becomes active after completing the investigation in the war room. Leave the war room and go left through the corridor. Go past the stairs and turn into a corridor to the right. Go to the end of it and enter a room on the left. There is an inscription saying "Holding Area". Enter through the first door on the right and you will find the witness. The "Find the Witness in the Holding Cell" objective is completed. The next quest will begin.
You have to rescue the girl. This objective activates after stepping into the interrogation room.
 Freeing the witness is a piece of cake for you.
Poltergeist will help you to deactivate the camera in the room. You complete the "Free the Witness from the Holding Cell" quest. The girl will hide behind the wall that says "exit". Talk to her and another quest will begin.
You have to safely escort the witness to the stairs blocked by a floor demon. This quest activates after you deactivate the camera and the girl escapes. You are in a big hall. To distract the cops, poltergeist the espresso machine standing opposite the vending machine. The girl will move on a bit and the hide again. There is a desktop printer near the three chairs by the window. Take control over it and your companion will get a bit closer to the stairs. You will see a copying machine. Poltergeist it as well and the girl finally reach her destination.
 The way is blocked by a floor demon.
You complete the "Distract the cops and usher the Witness to the door on the other side" quest. Talk to your companion. Another quest will begin.
You have to find a way to get past the mysterious force. This quest becomes active after talking to the witness near the stairs leading to the second floor. Possess the girl and get past the obstacle. After you've done that, dispossess. The "Get to the second floor" objective is completed. The next quest begins.
The Witness has to get to the Detective Offices. This quest activates after going past the dark force. There are two cops standing near the door to the offices.
 Your goal is to distract the cops.
North of them, you will see an espresso machine - take control over it. It will distract one of them. Do the same with the printer to the east. The way to the offices will now be clear. You complete the "Help the Witness get past the cops" objective. Talk to the witness. The new objective is:
You have to find the right room. This quest becomes active after talking to the girl, when the way to the office is clear. Go straight, turn right, again straight and then turn left. The office is located on the right, with the door open. Now you have to link the sound with the evidence. Choose Mug shot.
 Select Mug shot.
The "Get to Baxter's Office" objective is completed. Another task begins.
You have to find a notebook in the Baxter's office. This quest activates after you link the right evidence with the sound. After the cut-scene, you will obtain the first clue: Criminal Record. It is 1 of 11 clues to this case. There is a book on the drawer to the left from the sofa. Peek at it and you will get another clue: Salem History Buff.
 There is an interesting book on the drawer.
On the wall opposite the drawer, there are some photos hanging. Peek at them. First the one on the right. You will get a clue: Baxter's Promotion. After peeking at the left one, you will obtain the clue: Academy class photo. Notice the answering machine on Baxter's desk. You will get another clue: Phone message. Talk to the girl and ask her to listen to the message. After she's done that, you get a clue: Baxter Hid the Book. In the corner of the room, there is a bookshelf. Peek at it and you will obtain the next clue: Baxter's ticket. There is also a filing cabinet next to the bookshelf. Here you will find a trophy saying "champion". You obtain yet another clue: Bowling Champion.
 Baxter must have an interesting hobby.
There are some marks to the right from the gun rack. Click analyze details. Select Matches Gun Rack, Stain, Imprinted. You get a clue: Gun rack. Peek at the other side of the gun rack. You will get a clue: Latch. Talk to the girl. After the cut-scene, you will get another clue: Gala invitation. The "Find the Witness's Mother's Book" quest is completed. Another quest begins.
You have to help the girl get out of the Police Station. This quest activates after you talk to her in Baxter's Office. Take control over the printer in the center of the hall. Some sheets of paper will fall out of it. This will enable the witness to move on and you will reach the landing. Talk to the girl.
 You're getting closer to the exit.
After a cut-scene, you will find yourself on the first floor, near the stairs. Head left and enter through the ajar door to the war room, where your companion is. A cut-scene will appear. You will obtain the "Half-Truths and Whole Lies" achievement. You've helped the witness escape the police station and gained an ally. The "Help the Witness escape room the Police Station" objective is completed. A new task begins.
You have to get out of the Police Station. This quest becomes active after reaching the war room with the witness. Leave the station through the main door.
 Fortunately, The door is ajar.
Outside, you will catch up with the girl. You have to choose the option that will convince her to help you. Select: Witness's Mother's Note. You get a clue: Partnership. You complete the "Chase the Witness outside" quest. "Get to Ashland Hills Cemetery" is your new objective.
Go to the graveyard, close to where you have completed the "Scorned" side mission. The main mission "Find your Way to the Ashland Hills Cemetery" will be updated to completed. The next mission will start.
You need to find the crime site and Joy - your company. This mission becomes available after you reach the cemetery. To the North of you, there is a bridge that you can talk to the Ghost Man on. Cross the bridge and a cutscene will start. After that, the "Locate the crime scene" will be completed. The next main mission will start.
You need to find out if this place is in any way connected with the Bell Killer crimes. This mission becomes available after you cross the cemetery bridge.
 this is what the cemetery at night looks like.
Go to the river and use the reveal option. Then, subject the details to analysis. You need to answer the question of "What you can learn by investigating the corpse. Select: Tossed to the shore, Ragged, Dead. You will, this way obtain a clue: the Ghost Man saw the corpse for the "Shore" case - 1 of 10 clues. At the same time, you have 1 of 8 clues that you need to answer the question: Is this place connected with the Bell-Killer's crimes". Talk to the Ghost Girl, who is sitting nearby, at the tombstone. You will, this way, obtain a clue: Shoreline Thing . talk to the Ghost Man close to the bridge. You will obtain a clue: Hidden in the Bushes. See the stone on the path, now. You will obtain a clue: Dislodged Stone. Go to the shore, to the right of the corpse. There are bushes there, which you need to investigate. You will obtain a clue: Dark Bushes. Unfortunately, it is too dark there, to see anything.
 With the girl, you make a good duo.
Take a look at the police tape, on the tree to the South of the tree. You will obtain a clue: Police Tape. On the shore, to the right of the corpse, there are footprints in the mud. Take a look at them and you will obtain a clue: Footprints at shoreline. Next to Joy, there is a shovel, leaned against the grave. Once you take a careful look at it, you will obtain a clue: Gravedigger's Shovel. Talk to Joy, and the girl will retrieve the rope from the bushes. Take a look at it. You now need to select the clue that tells you where you have already seen this rope. Select: Pattern of Victim Deaths. You will obtain a clue: Bell Killer Victim Similarity.
 The right answer is the one with the hands bound.
The main mission "Investigate the crime scene" will be over. Another main mission will start.
Simply, talk to the girl. This mission activates, after you select the clue that helps you figure out, where you have already seen the rope. Once you end the conversation with the girl, the "Talk to Joy" mission will be over. Another main mission will start.
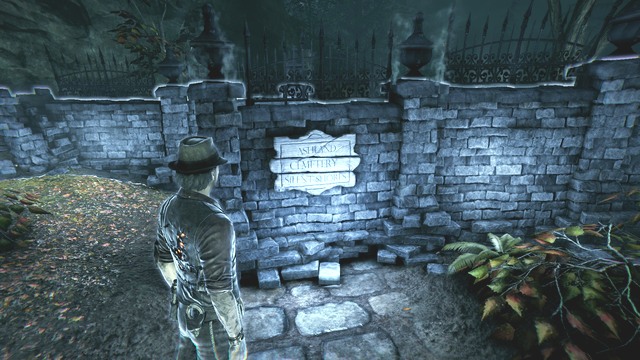
You need to catch up with the ghost and talk to it. This mission becomes active after you have talked to Joy. There is no other way to do that. You need to follow the ghost. Along your path, you will have to fight demons. At first, you will have to take up 3 demons. You encounter the first one at the path. Wait for it to turn away, sneak up from behind and kill it. To the left of you, there is a lamppost. Keep following the path, up until you reach the wall. There is another demon waiting there for you. There are white halos, in which you can hide. Next to the wall, there is a raven that can distract the monsters. You should be able to deal with the second monster, without any problems. If you fail to do that, hide in the halos and dash between them, quickly. After a while, the enemy will lose interest in you, and you will be able to sneak up, again, and deal with it. The last one is to the left. There also are protective fields there. Hide behind these and, when the monster is passing you by, deal with it. Approach the wall with the text: Ashland Cemetery Silent Shores on it.
 Nearby, you will be fighting more demons.
Cross the opening in the wall and you will reach a sign post. Go left and cross the hole in the wall. You will notice a ghost running up. Follow it and you will reach a group of people talking next to a signpost. Dash up the stairs on the left and you will reach a house with a table in it. Enter the building. Downstairs, there is the Ghost Man, who you can have a chat with. You can take a look at the items on the table, in front of him. Opposite the stairs, there is another table, with tools for amputation on. Behind the stairs, there is a bed with the Ghost Girl in. You can talk to her. climb up the stairs. You will see the ghost that you are after and, after the cutscene, you will learn the teleportation technique.. Teleport somewhere nearby and unlock an achievement: "Teleport".
 The only way to make it through is to teleport.
Teleport to the other side, reach the chasm and use that power again. You will reach a blocked-off passage. Teleport again and make it through the crack, to the other side. Climb down the stairs and take the only possible way. The way ahead will be blocked, but what is teleportation for. You will see Sophia's ghost again, who will disappear on the rooftop. Make it over onto the rooftop and then, onto the one ahead of you. Then, there is nothing else to do, than to move over to the left. Pass by the group of people, one of them has a camera on him and another one has a microphone. Climb up the stairs and teleport through the hole in the fence.
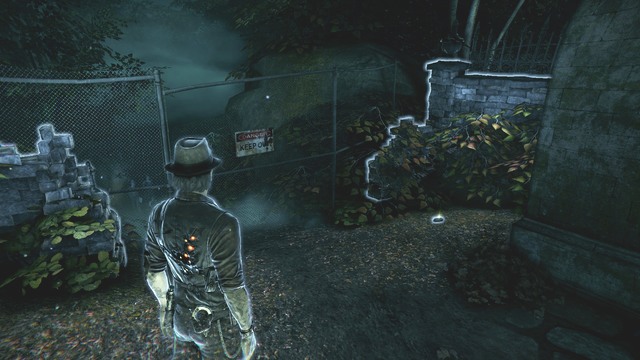
 There is a peril lurking past this fence.
There are 3 demons for you to defeat. It is the most difficult fight with them, so far. You need to adopt a special tactic. Fortunately enough, there are halos that you can hide in (the majority of them are next to the wall, through which you walked into this location). There also is a raven, thanks to which you can distract the nearest demon. It is the easiest to eliminate. Wait for him to turn away, get him from behind and eliminate him. The remaining two monsters are, most often, near to each other. Do not even attempt fighting both at a time, because you do not stand a chance.
 The white halo protects you from demons.
Close to the abovementioned two, there are few halos. Once they notice you, you will have to run away, towards the entrance to this location. There are, relatively many halos. The thing that makes most sense is to wait, until one of the enemies gets a bit further away and teleport
behind the back of the other one (the nearer one). Once you teleport towards the demon, eliminate it, as quickly as possible, and escape towards the beginning of the location. You will only have one opponent left. Once it goes Westwards (the demons move over predetermined paths), teleport behind it. Approach from behind and eliminate it. This way, you will have opened passage ahead, for yourself. Go towards the front of the place, where the raven is, until you reach the wall. Turn left and walk past the fence.
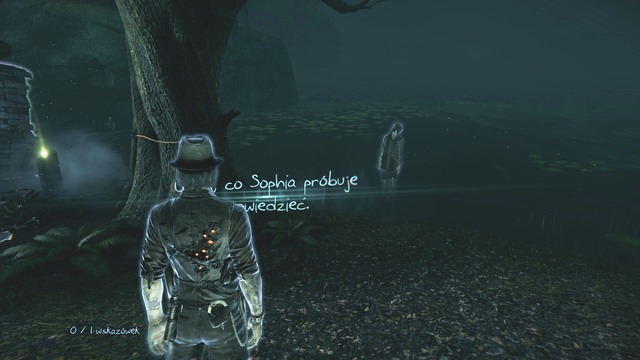
 On the fence, it reads: Danger- Keep Out.
Follow down the path, which turns left and then right. You will reach a tree, at the water. Talk to the ghost. The main mission "Follow Sophia's ghost" will be completed. Another main mission will start.
You need to find out what the ghost wants to tell you. This mission becomes available after the conversation with Sophia. You need to combine the clue with sound. Select: Crack. The mission "Investigate what Sophia's ghost is indicating" will complete. Another main mission will start.
You need to obtain information from the apparition. This mission becomes available after you have combined the clue with sound. You will obtain two clues for the Lake case, i.e.: Cemetery Bell Killer and Sophia's Ghost. Grab the apparition by her arm. You will obtain a clue: Contract. Once you do that again, you will obtain a clue: Bell Killer Symbol for the Lake case.
 The tree is the key to solving the puzzle.
The main mission: "Learn what Sophia's ghost knows" will be complete. Another main mission will start.
Your task is to find the way back to reach the beginning of the cemetery. This mission becomes available after you have grabbed Sophia's hand twice. Approach the gate and select the option: Remove. Thanks to this, the gate will disappear and you will be able to proceed. Teleport To the other bank. Follow the path of the white halos. You will reach the bank and teleport to the other side again. Go right, along the bank and teleport. As your destination, take the location close to the bridge, at the beginning of the cemetery. This will start a cutscene. After that, the main mission "Return to Joy" will be complete. You now need to go to the Mental Hospital to find the person that survived the encounter with the murderer.
 Your next destination is the Mental Hospital.
This will start another main mission
Your mission is to find the Mental Hospital entrance. This mission becomes available after you have teleported to the place, where there is Joy, after you have solved Sophia's case. In the meantime, you should have obtained an achievement: "Ashland". You discovered what happened to Sophia. It is now the time to find the collectibles on the cemetery. You have already learned the teleportation technique so, you will be able to reach the places that are inaccessible in any other way. Once you do that, leave the cemetery. You now need to find the last 5 artifacts on the streets of Salem. After you do that, go to the Mental Hospital. It is at the end of the street with the burning houses on both sides. Once you enter, the main mission "Get to Lux Aeterna Mental Hospital" will be complete. Another main mission will start
You need to find a way to make the woman at the reception desk, let Joy through. This mission becomes available after you enter the Salem Mental Hospital.
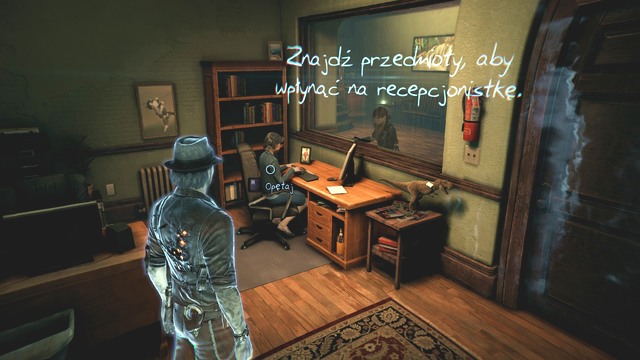 You need to make the woman change her mind.
You are now in the Mental Hospital. First of all, get all the collectibles, at the ground floor, and some of them at the upper floor. Unfortunately, you will not be able to find all of them, because the way ahead, at the upper level, has been blocked by some Ghost Wall. To pass through, you need the help of Joy. Unfortunately, the receptionist refuses to let her through. It is time to change it. Enter the reception office and take a look at the dinosaur, on the table to the right of the desk. You will obtain a clue: Get-Well-Gift for the Reception Office case. Take a look at the painting on the wall. Obtain a clue: Inspirational Poster. Next to the computer, there is a note. Once you take a look at it, you will find another clue: Visiting Hors Schedule
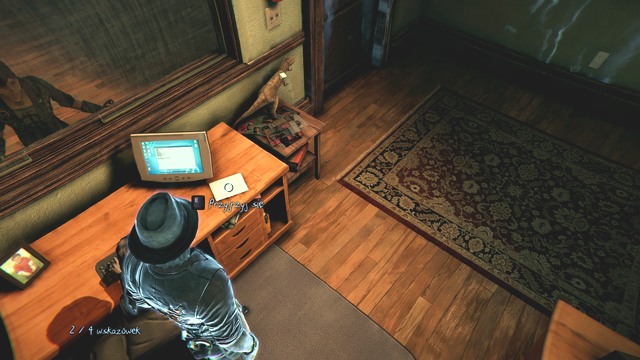 You will note the schedule, on the desk, without any problems.
Take a look at the boy's photo on the desk, on the left. You will obtain a clue: Photo of a Boy. You now have four clues that you need to complete the investigation. Possess the receptionist and select: influence. Your task is to select the clue that makes the woman help Joy. Point to: Photo of a Boy. You will obtain another clue for the Receptionist Office case: Loved One. You will then complete the mission: Learn What the Receptionist Cares About. Another main mission will start.
You need to learn where Iris is. This mission becomes available after you convince the woman at the reception office to help Joy. Possess her again and select: peek. n the computer screen, you need to choose the piece of information that helps you learn where Iris is. Click on that piece of information, at the top, with the room number 216. You will obtain a clue: Iris's Location, for the Receptionist's Office case.
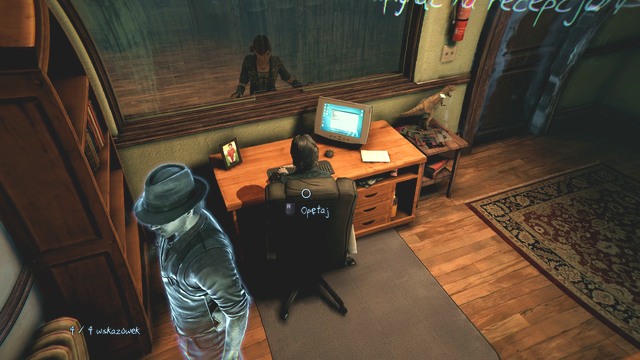 At first, the woman refuses to let Joy through.
You already have all the clues for the Receptionist's Office case. You will complete the "Find Iris's Room Number" case. Another main mission will start.
Your task is to reach Iris's room. This mission becomes available after you determine the room number, where the witness is. Together with Joy, climb to the upper level and approach the ajar door, with the: Women Ward plaque. Enter the first room and seize the camera (Poltergeist). This way, you will disable the camera. Enter the semi-circular corridor and approach the door at the end of it. The same way, take care of the electronic lock in the door. The door will open just for a moment. You need to disable the camera behind it, quickly. Past the adorned sign: Welcome to Lux Aeterna there is a TV set. Seize control over it to distract the guard. walk over to the left and disable the next camera, quickly, under the chest of drawers. With the girl reach the demon goo, which is blocking the path.
 Without Joy's help, you will not be able to proceed
Possess your companion and, once she walks through the trap, end the possession. You are now in the semi-circular corridor. Enter through the door that is open ajar at its end. The main mission " Get to Room 216 in High Security Ward" will be complete. Another main mission will start.
Unfortunately, your passage into the Women's Ward is being obstructed by the ghost wall. You need to find another way. This mission becomes available, after you walk past the door at the end of the corridor past the demon goo. Take a good look at the blocked door, and at the one on the left. Walk into the junk room and exit through the other door. You now need to run between the two demon goos, and make sure that you do not step into them. Your task is to approach the collapsed floor, at the end of the room. Below, on the beam, there is a cat. Possess it and run upstairs. Head towards the venting shaft. Run ahead, to the right, to the left and to the right again. Jump down and you will get above the patient rooms and three demons. You are up for an ordeal with the demons again. Jump down, into room 104 (the number has been written on the wall, next to the door). Interrupt the possession and leave the room. Turn right and keep ahead, a bit and hide in the white North-most halo. To the East, there are three demons, Two of them are next to each other and the last one, the nearest to you, is alone.
 What works in the fight is the ability to see demons through walls.
While in the white halo, turn right and wait until the monster turns away. Then, approach it from behind and deal with it. After that, go to room 107 and watch the remaining two, through the wall. Once the demon to the East is turned away, get the one that is closer to you, from behind and deal with it. You only have one more left. Exit the room and hide in the halo of the nearest monster. Once it turns away, approach it and eliminate it. In the case of a failed execution, hide in halos. Where you have fought the most recent demon, there is a raven that distracts the monsters. Go leftwards of it and past the gate. Climb up the stairs, to the very top. Go right until you reach the wall with a Commemorative Plate. Turn left and you will see the blocked-off path. Teleport to the other side. The main mission "Get past the Ghost Wall" will be complete. Another main mission will start.
You need to find Room 216. This mission becomes available after you teleport across the junk, close to the Commemorative Plate. Get across the door and walk through the semi-circular corridor. At the end, there is a room where, at the locked door, you will find Joy.
 You are now in the High Security Women's Ward.
Poltergeist into the door with the electronic lock and deactivate the camera past the door. Then, open the door to the North. You will only have to take care of the door to Room 216. A cutscene will start. After that, the "Go to room 216" mission will be complete. Another main mission will start.
You need to learn how much, about the Bell Killer, Iris knows. This mission becomes available after you open the door to room 216. Try to possess Iris. You will fail. This way, the main mission "Find out What Iris Knows " ends. Another main mission will start.
You need now to search through Iris's room. This mission becomes available after you have failed to possess the girl. Immediately, you obtain a clue: Iris Sees Me for the Iris Room case. it is 1 of 9 clue for this case. To complete the case: Learn What Iris Knows about the Bell Killer, you need 7 clues.
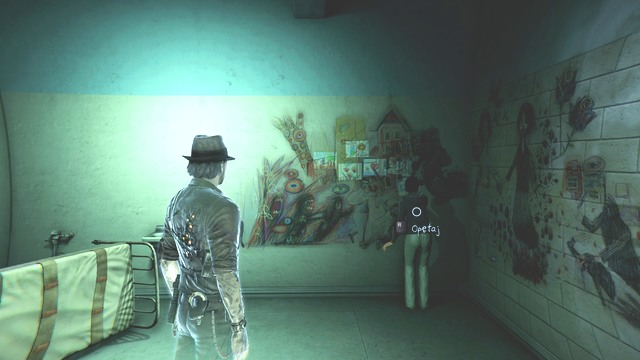 Iris is occupied with the paintings on the wall.
Take a look at the crayons next to the door. You will obtain a clue: Crayons. Take interest in the flipped bed. You will obtain another clue: Flopped Bed. Take a look at the painting further away, on the wall perpendicular to the one that Iris is painting on and you will obtain a clue: Blue Eyes. Analyze the details of the painting Iris that is working on. You need to decide what the girl is trying to tell with this picture. Select: Chased and Tormented.
 The wall is all covered in paintings.
You will obtain a clue: Iris Captured. Take a look at the other painting now, on the wall perpendicular to the one that Iris is working at (it depicts two people). You need to decide again, what the is girl telling with this one. Select: Two Girls and Linked. You will obtain a clue: Bound Twins for the Iris's Room case. It is time to analyze the painting on the wall, next to the door. Again, you need to answer the question of what Iris wanted to tell with this one. Choose Bell and Burned at the Stake. You will obtain a clue: Symbol in the Sand.
 The girl has quite a talent for drawing.
You already have 7 clues and you can end the investigation. After the cutscene, you will obtain a clue: Burned at the Stake, for the Iris's Room case. You have collected all the clues for the case. The main mission "Examine Iris's Room" will be complete. Another main mission will start.
You need to help the girls get out of the building. This mission becomes available after you end the investigation at Iris's room. Start by leaving the room. You need to distract the orderly. To the right of the entrance to the Shower Room, on the lockers, there is a radio. Take control over it and the man will go to see what happened. Quickly, open the door with the Exit sign above it.
 This is where the radio is.
You now only need to walk through the next door, marked as the Exit. After the cutscene, you will have to answer the question: Where have I already seen this stake before? Select Gala Invitation. You will end the investigation that consists in checking out the witness that survived the encounter with the Bell Killer. Another one will start: Investigate the Gala Exhibit for the connections with the Bell Killer. At the same time, you will complete the "Help Iris and Joy escape the Hospital" mission. Another main mission will start.
You need to visit the local museum. This mission becomes available after you answer the question: Where have I already seen this stake before?" The clue is Checked the Gala Invitation. You will obtain the "Lost Cases" achievement. You have managed o learn the story of Rose and you helped Iris escape the Mental Hospital.
Go to the Salem Museum near the restaurant, close to the petrol station. The main mission "Go to the Salem History Museum" will be complete. Another main mission will start.
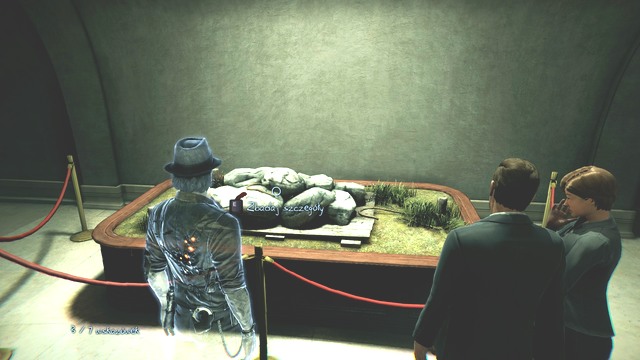
You need to find out if the Bell Killer has drawn inspiration from Witch executions. This mission becomes available after you reach the museum. Before you complete this mission, find some collectibles. The way to the upper floor is blocked off, as of now. Remember that the museum is a location where you cannot return to. Therefore, you need to collect all of the collectibles there, during your stay.
 There are many interesting exhibits here.
It is time to focus on the storyline. Enter the main hall and take a look at the stocks. You will obtain a clue: Stocks for the Museum Exhibit case. Approach the place, where the itch case is being reenacted. On the table, there are scrolls - take a look at them. You will obtain a clue: Witch Trail Records. Approach the gallows and examine the trapdoor (examine the details). You need to decide: what is making that sound? Select: Trap Door. You will obtain a clue: Actual Puritan Era Gallows for the Museum Exhibit case. Approach the stones and examine the stain on them. Again, you need to decide: what is making that sound? Select: Stain. You will obtain a clue: Demonic Contract. Take a look at the painting on the easel (examine details). You will obtain a clue: Judgment House. Go to the smaller room at the ground floor. You need to leave the main hall. Go to the corridor, where there is a painting, on the right, that presents a lighthouse. You can also reach it through the corridor, where there is door signed: To the Lobby.
 Examine the stones carefully.
Examine the stake for burning witches (analyze details). Now, you need to decide: Has the Bell Killer used something similar? Choose: Burned at the stake, Rose, Tortures. You will obtain a clue: Burned at the stake. Next to it, there is an exhibit with a dunking chair. Again, you need to answer the question of whether the Bell Killer used something similar for one of his crimes. Choose : Wet Chair, Sophia, Drown, Water. You already have all the clues that you need for the case. End the investigation and a new one will start: Restoration Room. Immediately, you will obtain 2 of 18 clues: Witch Trail Punishment Devices and Restoration Room Artifacts.
 This was a punishment tool.
The main mission "Examine the Exhibits" will be complete. Another main mission will start.
At the top floor, you need to find the restoration room. This mission becomes available after you complete the investigation into whether the Bell Killer drew his inspiration from witch trials. Now, find the rest of the collectibles at the ground floor. The way ahead has been unlocked. Go to the first floor. You need to enter through the door saying: To Second Floor Stairs, in the corridor, close to the hall with demon goos. Approach the ghost train and run leftwards of the recess. Make sure that you do not bump into the train. Teleport into the recess at the other side of the tracks. teleport again, to make it into the backstreet to the East, at the other side of the tracks. For the last time, use teleportation to make it over to the stairs, past the tracks. Climb up the stairs to the first floor. As you climb up the stairs, watch out for the ghost train, because it can run you over. Once upstairs, follow the corridor to the left and enter through the door at its end. You will walk into a big room, which you need to leave through the door with a can in it. Follow the corridor and you will find the stairs to the second floor, on the left. Once you climb up the stairs, you will find Joy.
 Take this door to reach the second floor.
After you get to the second floor, enter the only opened door. This will start a cutscene. The main mission "Get to the restoration Room" will be complete. Another main mission will start.
Your task is to search the entire restoration room, to find out if any of the exhibits is connected with the case of the Bell Killer. This mission becomes available after you reach the second floor and enter the restoration room. Collect all of the collectibles that you can find, on both the first and the second floor. You should be able to collect all of the collectibles that there are to find. You will not be able to reenter the museum, after you leave it. You can leave the restoration room through the other door, opposite the elevators. You will be continuing the collection of clues for the Restoration Room case. You have already obtained two of them. To complete this investigation, you need a total of 14 clues. To the left of the entrance from the stairs, there is a big anchor. Take a look at it and You will obtain a clue: Ship's Anchor for the Restoration Room case.
 The anchor is astonishing.
Next to the other entrance, opposite the elevators, there is a cannon. Examine it and you will obtain a clue: Antique Cannon. Nearer to the window, behind the pillar, there is a wine casket. Take a look at it and you will obtain a clue: Wine. Close to the cannon, next to the crate, there is a telegraph. After you examine it, you will obtain a clue: Ship's Telegraph. Close to the cannon, there is a compass cupboard. After you take a look at it, you will obtain a clue: compass cupboard. In the place, where there are benches, to the left of the board, there is a steering wheel. Take a look at it to obtain a clue: Steering wheel. Examine the newspaper strips on the board (examine details). A clue: Bell Killer's targets are mediums is yours. Take a look at the notebook on the bench, next to the hammer. You will receive a clue: Witch Trial Notebook.
 Take interest in this notebook.
On the second bench, adjacent to this one, there is judge's gavel, which you need to examine. You will obtain another clue: Judge's Gavel for the Restoration Room case. take a look at the scroll on the bench, at the window. You will, this way, obtain a clue "Witch Trial Public Summons". Nearby, on the bench, there is a painting. Take a look at it and obtain a clue "Witch Trial". On the adjacent bench, there are necklaces. You need to decide, which one of them is making a sound. Point to the crystal. You will obtain a clue: Puritan Witches. To the right of the cannon, there is the judge's portrait. Take a look at it and the clue " Witch Trial Authority" is as good as yours.
 The judge seems trustworthy.
As you look towards the painting, approach the wall and take a look at the painting partially hidden behind the cupboard. You will obtain two clues: Baxter in the Museum and Symbol on Painting. You can now complete the investigation. For the Restoration Room case, you only need one clue. After you complete the investigation, you first need to answer a question is any of the items connected with the Bell Killer's case"? Select: The target of the Bell Killer are Mediums, Puritan Witches and Symbol on Painting. Then, you need to find an answer to a question: What was suspicious about Baxter's behavior, during the case? Select Baxter in Museum, Baxter Looking for the Girl and Baxter Hid the Notebook. After the cutscene, you will obtain a clue: Suspicious Baxter. It is the last clue for the Restoration Room case. You will then end the case. The main mission "Examine the Restoration Room" will be complete. Another main mission will start.
You need to get out of the museum. This mission becomes available after you have solved the case on the second floor, next to stairs. Climb down, to the first floor and approach the door at the end of the corridor. Behind the door, there are 3 demons.
 You need to reach the lower floor, over the stairs.
After you cross the door, hide at the next white halo, closest to you. Wait for the demon the closest to you, turns away. Get it from behind, then, and kill it. In the case of a failure, keep moving between the halos quickly. After you have dealt with the first one, make it over to the halo to the West. As soon as the second enemy is passing you by, kill it also. There is only one left. Go to the grate at the window, now and hide in the cover behind it. You will now be close to the demon, as soon as it turns away, follow it. There is a raven nearby, which you can use to distract the enemy. Exit this room, through the door, with two guards next to it. Get down and note that the ghost train is gone. Additionally, the passage opposite is not blocked anymore.
 Fortunately, the train is gone.
Cross the tracks and approach the door with the Exit sign above it. Reach the museum's exit and leave. The main mission "Exit the museum" will be complete. Another main mission will start.
You need to visit the church once again. This mission becomes available after you leave the museum. You will also obtain the "Wicked Tempers" achievement - for discovering the connection between the Bell Killer and the Witch Trials.
Go to church. You have already been there. Just to remind you, it is next to the beach. Enter and confirm a new investigation: Find out what happened at the church. You need to find out if Joy and Iris are fine. The "Get to the church" main mission is completed. Another main mission will start.
You need to find out if Iris is fine. This mission becomes active after you reach the church.
 The police are already here.
Enter the nave. There are three demons waiting here for you. Hide in the halo immediately, to the right of the entrance. Nearby, there is a raven that can distract the nearest demon. Thanks to this, you will be able to deal with it. Hide in the halo, in the middle of the nave, and target the opponent, who is walking around to the North of you. Wait until the demon approaches and turns away. Then, deal with it. There is only one left to get rid of, to the left. While staying hidden in the same halo, wait for the demon to go West and then North. Approach it (you can even run up) and kill it. In the case of a failure to exterminate any of the monsters, hide in the halos close to the hall's entrance. You can dash between covers.
 You need to demons.
Enter the presbytery through the right door. Past the left door, there are two demon goos. Once inside, note that the path is blocked off with another demon goo. Use the walkie-talkie (Poltergeist), and the Police officer will approach you. Possess him and, as soon as he walks over to the other side of the trap, dispossess him. Exit to the yard through the door on the left. The "Find out if Iris is Safe" main quest will be completed. Another main mission will start.
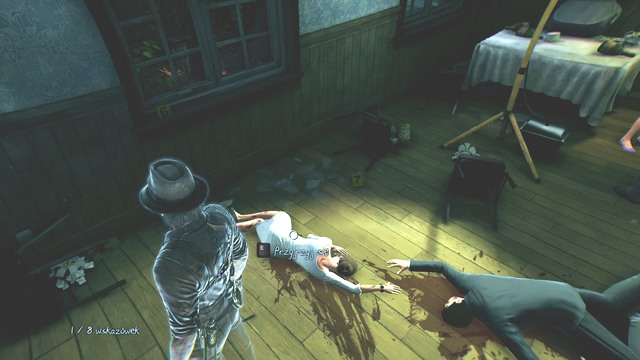
You need to find traces in the crime scene. This mission becomes active after you reach the courtyard. The Courtyard case will start. You already have the first clue for it: The police cannot find Baxter. You obtained it after you entered the church. You need to find, here, the answer to the question Is there a trace of the murderer here? Take a look at the dead Iris(analyze details). You need to answer the question of how exactly Iris died. Select: Crushed to death, Improvised Weapon, Statue Stones. You will obtain a clue: Bell Killer Chasing Iris, for the Courtyard case .
 Iris stood no chance.
Take a look at the evidence from case 2: traces of blood. You will obtain a clue: Iris's blood for the Courtyard case. Take a look at the broken glass (evidence marker 3). You will obtain a clue: Fallen Glass. Take a look at the smashed cobblestones (evidence marker 4). You will obtain a clue: Crushing Impact. On the statue's pedestal, there is evidence marker 5. Take a look at the original situation of the statue. It is possible thanks to the spiritual projection of the statues. Take a careful look at the smashed statue. Clue: Toppled over is yours. You already have all the clues for the Courtyard case. The only thing you need to do now is to conclude the investigation. The "Examine the Courtyard Crime Scene" is over. Another mission will start.
You need to explore the rectory in search for clues, for the case that you are conducting. This mission becomes active after the courtyard investigation ends. Return to the corridor, which you took to get here. Note that the passage to another part of the rectory is open. Find two hidden collectibles.
 The police officer cannot see you.
Climb up the stairs to the first floor. Cross the door guarded by the two Police officers, there is a strecher nearby. You need to find out if the murderer left any trace. To conclude this investigation, you need 8 clues. Use reveal at the two corpses on the floor. Then, choose: analyze details. You need to answer the question What is Iris Doing? Select: Needs Help, falling, fleeing. Thanks to this, you will obtain a clue: Iris Fleeing for the Rectory case. This is 1 of 9 clues for this investigation. Note the two corpses on the floor.
 The murderer killed innocents in this room.
Take a look at the woman's corpse and you will obtain a clue: Beaten Victim for the rectory case. Turn your attention to the dead man on the floor. You will obtain a clue: Twisted Victim. Take a look at the broken glass (evidence marker 7) close to the victims. The clue: Broken Glass is yours. Take a look at evidence marker 6. IT is a damaged window. You will obtain a clue: Smashed window for the Rectory case. Approach the window marked as 8 and examine the traces on the window sill. You will obtain a clue: Footprints on the window sill. Take a look at the victim on the table and you will obtain ac clue: Thrown Victim.
 The murdered killed them in cold blood.
Possess the woman, being interrogated by the Police Officer and select influence. You need to make the woman start wondering why the murdered killed so many people. Select: Iris Fleeing. You will obtain a clue: Massacre for the Rectory investigation. Conclude the case and you will obtain another clue for the Rectory case: Random Casualties. Exit the room and reach the end of the corridor. Where you have found the note for the Julia's Thoughts case, there is a staircase to the attic. Climb up the stairs and walk through the ajar door. The "Search for the Killer's Trail Upstairs" will be over. Another main mission will start.
You need to investigate the attic in search for any trails, for the case concerning the Bell Killer. This mission becomes active after you climb up to the attic.
 The priest stood no chance against the murderer.
The first thing that you need to do is take a look at the priest's corpse on the floor (examine details). You need to decide: What is Making that Sound? Select: wound. You will obtain a clue: Father McCauley's Death for the Attic case. It is 1 of 6 clues for this case. To conclude this case, you need 4 more clues. Examine the traces around the priest's body. You will obtain a clue: Cat Tracks. Walk over to the next room, now. Use the reveal ability on the rug, next to the window. You only need to select Inspect and you will obtain a clue: Hissing Cat Residue. Turn your attention to the photo on the floor, next to the desk. You will obtain a clue: Dropped Photo for the Attic case. Again, use reveal in front of the desk. After the silhouette of the Bell Killer appear, select: analyze details. You need to answer a question: What was the killer doing? Select Discovered, Staring. You will obtain a clue Killer Interrupted.
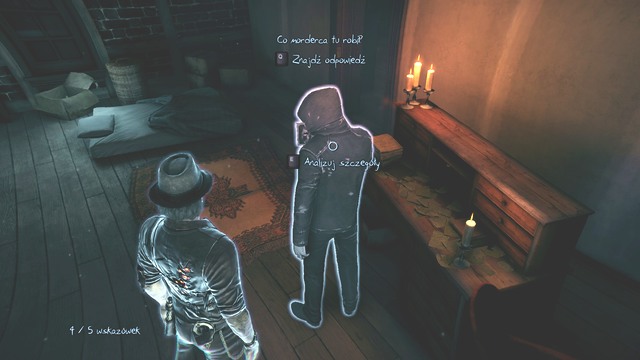 This is only a projection of the killer's body.
Conclude the case and you will have to answer a question: What was the murderer doing here? Select Killer Interrupted, Father McCauley's Death and Dropped Photo. This way, you will obtain another clue: Original Target Joy. The "Examine the Attic" main mission will be over. Another main mission will start.
You need to find out what the cat saw. This mission becomes active after You conclude the case in the attic. Follow the animal to the next room. Approach it, which will initiate a cutscene. After that, the "Find out what the cat saw" main quest will be completed. Another main mission will start.
You need to find the item that the killer dropped into the venting shaft. This mission becomes available after you approach the cat (this will start a cutscene). You will obtain the last clue: The Killer dropped something for the Attic case. You already have all the 7 clues for this case. Possess the cat and jump into the venting shaft. Keep ahead, until you get above the room, where the killer killed the couple. This will start a cutscene. After it ends, take a look at the key on the floor (examine details).
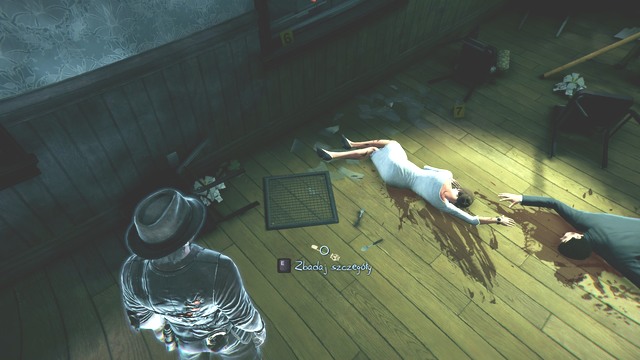 This key is very important.
You need to decide what is making those sounds. Select: Key. At the next screen, you need to point to where you have already seen this house. Click on: Judgment House. You will obtain a clue: Killer's Hideout for the Rectory case. The "Find the item that the killer dropped" mission will be over. Start another investigation: Investigate the killer's hideout. Another main mission will start
You need to find a way to leave the church safely. This mission becomes active after you investigate the key that the killer lost. You will obtain an achievement: "Ghosts Never Die" - for completing the investigation concerning Iris. Leave the room and carefully climb down the stairs, Downstairs, there is a demon waiting for you. Possess the Police Officer downstairs, at the staircase, when the demon is turned away from you. wait for the enemy to turn back and dispossess the policeman. Approach the demon and kill it. Then, follow the corridor and reach the demon goo and the door to the courtyard. There is a Police Officer standing nearby. Possess him. take control over the walkie-talkie, the policeman ill walk over the obstacle to see what happened. This way, you will get across the trap You can leave the church now.
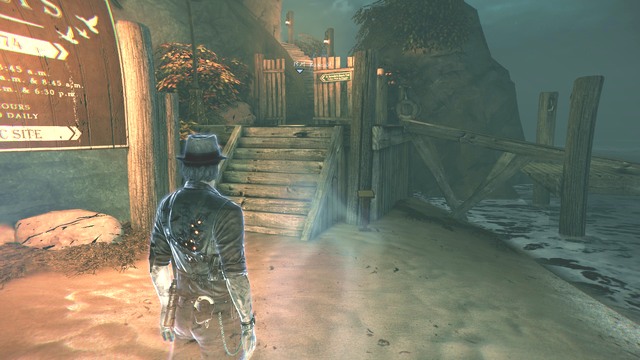 You will leave to the beach again.
The "Leave the Church" main quest will be completed. Another main mission will start.
You need to visit the Bell Killer's potential hideout. This mission becomes active after you leave the church. You will obtain a clue for the Outside thee Church case. It is: Joy is safe in custody.
Go to the Judgment house. To do that, return to the crime scene and go left, then turn left again. Go past the girl sitting on the bench. You will reach a square with cars parked on. To the right, you will notice a hedge. Your aim is to get to the backstreet on the left. There are trash containers there. Reach the fence with the Danger sign on it. Enter and after a cutscene, you will get into the Judgment house.
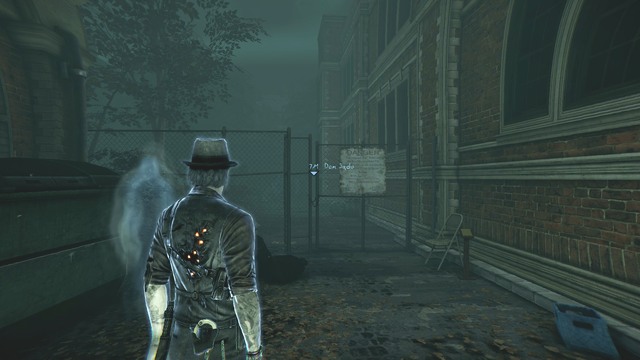 Past this fence, there is the Judgment House.
The "Get to Judgment House" main quest will be complete. Another main mission will start.
You need to find the room with the light on. This mission becomes active automatically after you enter the Judgment House. First of all, collect some of the collectibles. Climb up to the landing and reveal the stairs. Climb up them to the platform and, at its end, use reveal. This way, you will activate the side mission: "Ashes to Ashes" of the Ghost Stories section. Climb to the first floor and collect some of the collectibles again. Follow the corridor to its end and enter the last door on the right. Cross the bookshelf on the left, into the next room. The "Find the room with the light on" will be complete. Another main mission will start.
You need to find the traces of the murderer in the Judgment House. This mission becomes active after you cross the bookshelf into the secret chamber. You will obtain a clue: Joy's Verse for the Bell Killer's Hideout case. It is 1 of 7 clues for the case.
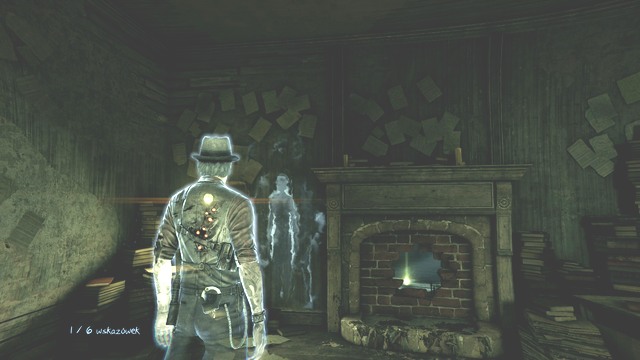 You need to get tricky again, to collect all the clues.
Remember to solve the case first, and then walk into the following rooms. In the game, there is a glitch that prevents you from completing the case, after you walk into the neighboring rooms. You will be able to collect the clues, but not to conclude the investigation and, at the same time, to obtain the last clue for the Bell Killer's case. It is time to solve this investigation. Take a look at the map on the wall. You will obtain a clue: Map of the previous crimes for Bell Killer's Hideout case. Take a look at the items on the table, below the map. You will obtain a clue: Trophies? for the Bell Killer's Hideout case. Take a look at the paper on the round table, next to the fireplace. You will obtain a clue: Old Salem Murders. Read the paper on the square table. You will obtain a clue: Witch Trial Similarity. Now, take a look at the photos on the wall, to the right of the map. You will obtain a clue: Execution Devices. Conclude the case and you will obtain a clue: Copycat Killers.
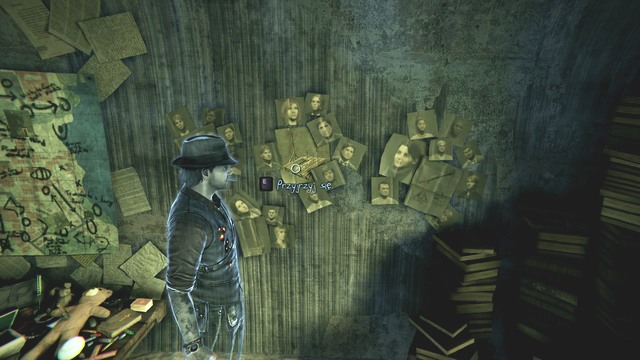 Someone put a lot of photos on the wall.
Deal with the two nearby demons. Cross the fireplace to the next room. Exit to the corridor and enter the room opposite. Leave the room through the opened door and cross into the next room. In the room that you are in, there is a raven. Use it to distract one of the monsters and you will be able to kill it. There is only one left now. Wait in the room with the raven, until one of the monsters turns away, follow it and kill it. After you eliminate the enemies, collect the rest of the collectibles at the ground floor and climb down the other stairs to the ground floor. They are marked 2F and Stairs. Next to it, you will find a note for Julia's Thoughts. The door to it is ajar. On the ground floor, you will walk into the colonial kitchen. It is the big room which you need to leave through the Western door. You will walk into the room, where there are halos to hide from demons in. Walk through the door on the right and you will notice, as many as, 4 demons. From this room, you can walk into the lounge, where there are enemies waiting for you. In the corner of the lounge, there is a waven. Use it to get rid of the first one of the enemies. Wait behind the wall until the opponent approaches the raven, after you activate it. While the enemy is occupied with the bird, approach it and simply kill it.
 You have not yet fought as many enemies yet.
The next opponent is to the North. wait for it to turn its back at you. Approach it then and kill it. There are still two monsters left in the room. In the case of a failure to eliminate them, escape into the room that you came from. There are halos there, where you can hide. (the second previous room). Cross the wall close to the raven that you used to eliminate the demon. In the next room, there is another raven. Use it to kill the third of the enemies. There is only one left. In the Northern part of the lounge (the big room with the raven that you used to kill the first of the enemies), cross the wall. You will get into a room with halos. Exit the room to the corridor and get the last of the demons from behind and kill it. Get all of the collectibles on the ground floor. While at the lounge, enter the corridor to the North-East and walk towards the first door to the right. Reach the door to the cellar and climb downstairs.
 In a moment, you will get into the cellar.
A cutscene will start. After that, talk to Baxter's ghost. Select the: who killed you? dialogue option. You will obtain a clue: the Bell Killer killed Baxter. Ask then: Where's the Killer? You will obtain another clue: Killer's Instrument of Death. Ask him: What did you do here? Ask another question: Where' Cassandra? You will obtain another clue: Cassandra is safe. Finally ask: Do you know Joy? You will obtain a clue: Baxter knows Joy. All f the clues belong to the Baxter case. After the conversation, the "Find out if the killer is still in the Judgment House will be complete. Another main mission will start.
You need to search the cellar to discover the killer's identity and predict his next move. This mission becomes active after the conversation in the cellar, with the Baxter's ghost. Walk through the cellar to reach the stairs downstairs, to the holding cells.
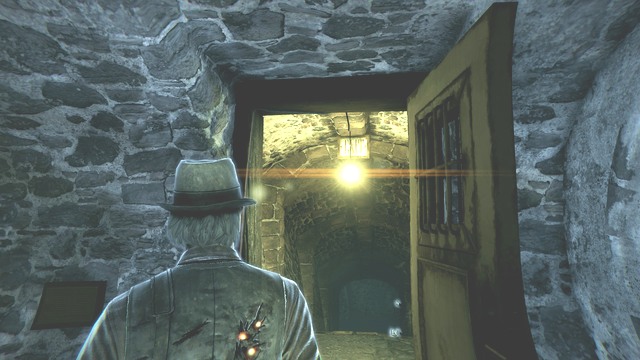 Soon, you will visit the holding cells.
Climb down and the "Search the Cellar for the Killer's Trail" mission will be over. Another main mission will start.
You need to search the holding cells carefully to find the trace. This mission becomes active after you descend to the holding cells. You need to find an answer to the a question: What happened? At the stairs, use reveal and analyze the details. You need to answer a question: What was he doing here? Select, Judging, Accusing, Stern. You will obtain a clue: A righteous man for the Cellar in the Judgment House case. Enter the cell that the projection, which you summoned, points to. First, take a look at the shackles. You will obtain a clue: Shackles for the Cellar in the Judgment House case. Reveal the symbol on the ground and take a look at it. You will obtain a clue: Symbol in the cell. Right next to it, use reveal on the hands. after the spiritual projection appears, - analyze the details. You need to answer a question: What was Abigail doing here? Select: Imprisoned, pleading. Clue: Imprisoned Abigail will be yours.
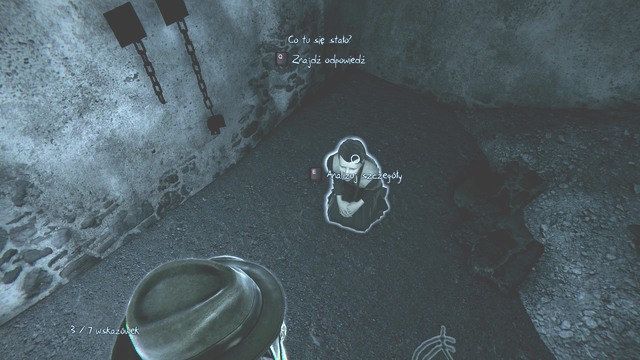 Abigail was being held here.
Use reveal on the object on the barrel and inspect it. You will obtain a clue: Candles. This is the end of the investigation in this cell. Walk into the next one. Take a look at the cage and you will obtain a clue: cage. Investigate the bed and you will obtain a clue: Prison Bed. You can now conclude the investigation, because you already have all the clues. You need to answer a question: What happened here? Select: Righteous Man, Imprisoned Abigail and Symbol in the cell. You will obtain a clue: Is Abigail the Bell Killer? These are all the clues for the Cellar in the Judgment House case. The main mission: "Investigate the holding cells" is over.
 One of the holding cells.
Return to Baxter's body. You need to answer a question: Where would Abigail take Joy? Select: Actual Puritan Era Gallows, Killer's Instrument of Death and Is Abigail the Bell Killer? You will receive a trophy: Judgment Day, for discovering the Bell Killer's secret. Start another investigation: Track Abigail. You will obtain a clue: Killer's Gallows at the museum, for the Abigail's True Identity. Another main mission will start.
You need to leave Judgment House. This mission becomes active after you find the answer to the question: where would Abigail take Joy. Take the stairs to the ground floor and enter the opened door with the Exit sign, on the right.
 You do not have anything else to do here.
You are now next to the stairs, next to the building entrance. Leave the Judgment House.
In this chapter, there are no side missions anymore. Go to the museum, located near the restaurant and the gas station (you have already been there). After you enter, you will not be able to get out to the town anymore. After you cross the door to the museum, the "Get to the museum" main mission will be completed. Another main mission will start.
You need to save the girl at any cost. This mission becomes active after you enter the museum.
 Saving Joy is your priority.
You need to get to the main hall and avoid the demon goos. Once you enter the hall, you will watch a cutscene. After that, you only have 20 seconds to reach the gallows and Joy. Watch out for the demon goos on the floor. Slalom around them and get to the girl. The only way to save her is to possess her. Next, you need to influence her. You need to answer a question: What may stop Abigail? Select: Powerful Scream.
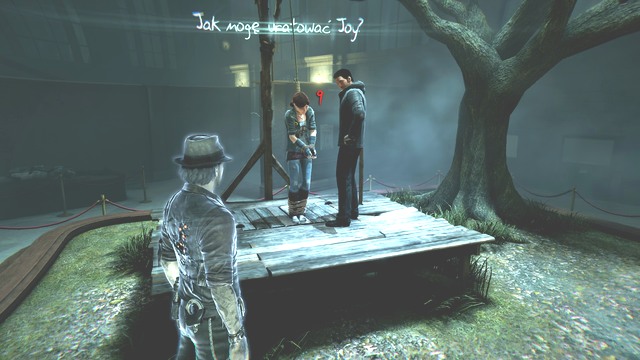 Joy is in a tough situation.
After the cutscene, you only have several seconds to act. Dart towards Abigail and grab her by the hand. After the next cutscene, talk to her. Select the question: Have you used Rex to kill me? Then ask How could Rex be the killer? You will obtain a clue: Baxter has been used as the killer. Ask another one: Why kill Baxter? You will obtain a clue: Abigail kills her puppet heads. Ask again: Why did you kill me?
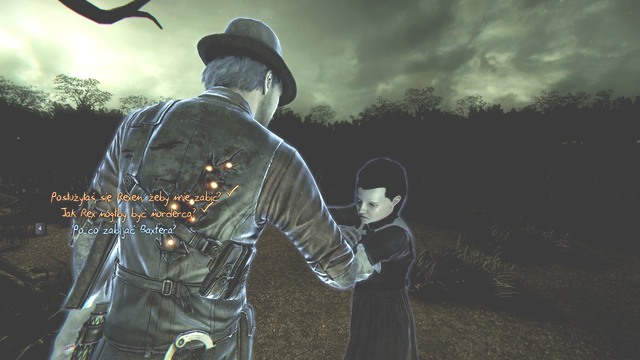 This is almost the end of the game.
After the conversation, you will obtain an achievement: Tightening the Noose. You will receive it for stopping Abigail, saving Rex and Joy. You only need to watch the final cutscene and the credits. Congratulations! You have completed the game in 100%. Abigail will not harm anymore. You have managed to save Salem from the terror of the Bell Killer. Finally, the protagonist will be able to meet up with his beloved Julia. He missed her so much and his dream was to meet her again. Joy's mother is safe. She was hidden in a safety. Joy was very concerned about her and could not wait until she could see her again. The protagonist ended his investigation and, together with his love, he will be able to drift away into a better world. Abigail got what she deserved and was sucked in by the demon goo, most probably to Hell.
"Apartment 1A" side case is activated during the main mission "Get to the Fourth Floor Apartment". You can do it while standing in the building where you fought with your killer. To do this, enter the Laundry and talk to the girl. The laundry is located on the right side at the end of the hallway on the first floor, on the opposite from the building exit. You must find out where her body lies. Go back to the apartment where an elderly couple lives. To solve this investigation, you need to discover 5 clues. Possess the man sitting in front of the TV and select Influence. From the available choices, click on A Mysterious Murder. You get the clue: The Old Man's Secret.
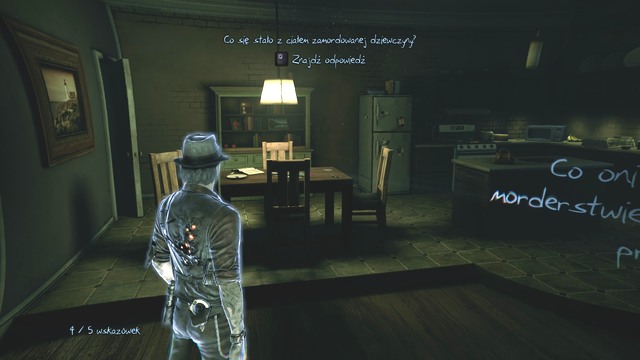 In the bottom left corner there is the information how many clues you have discovered so far.
Possess the woman and influence her by selecting the Mysterious Murder. You get a hint: The Old Woman's Secret. Go to the room on the left from the front door and select Reveal and Inspect. You get the clue: Gardening Tools. Nearby on the stool there is a flower - select Reveal and Inspect. You will receive a clue: Note from a Neighbor. On the table in the northern part of the room there is a newspaper - select Reveal and Inspect. Clue: A newspaper clip - it is now yours. You have now all the clues. Use the option: Find the Answer. You have to choose three clues that you think are the most relevant. These are: The Old Man's Secret, The Old Woman's Secret, A Mysterious Murder. You can now go back to the ghost girl.
 The girl was brutally murdered.
Talk to her to get "Missing Body" trophy. The ghost disappears and you complete the quest. This is the first completed side case.
Side case "Near Gas Station" can be activated while performing main mission "Find Your Way to the Church". You must approach the man by the crashed car and select Help. You must leave the square with the cannon by the eastern exit, before that you walked past the girl on the bench. You get 1 of 4 clues: Gruesome Car Crash. Find out who was driving the car. Inspect the Registration Plate near the car. You will get a hint B-RAD to the case Near Gas Station. On the left side from the car, inspect the Broken Bottle. You will get the clue: Scotch Whiskey. Behind the broken wall there is clue number 4: SOC Gas Station Receipt. Your objective is to check the nearby gas station. Near the crashed car there is a square, leave it heading east. There is a police station nearby, but the nearby gas station is of interest for you. When you get to the station, a question that you need to answer pops up: Is there a witness who saw who was driving? You have to get 5 clues. By the fuel dispenser use the Reveal option and then Inspect. You will get the clue: Laura Pumping Gas to case Near Gas Station.
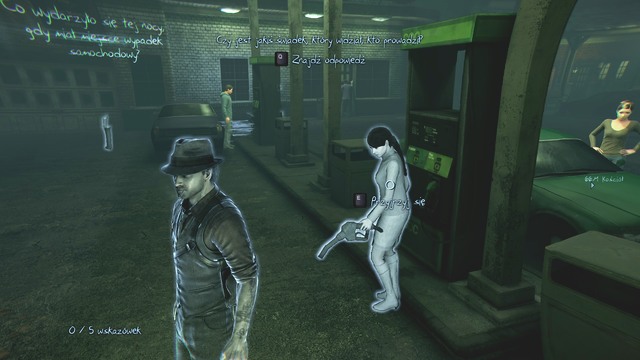 It is a self-service station.
Go north, use Reveal option on the object, then Inspect it. You will get the clue: Rick Puking, to the case Near Gas Station. Reveal and Inspect the object by the phone booth. You will get the clue: Brad Making a Call. Inspect Dented Trash Can by the station. You will gain a hint: Dented Trash Can. Nearby in the street there are Pieces of a Tail Light. Inspect them to get the clue: Pieces of a Tail Light. You can now answer the question: Is there a witness who saw who was driving? From among the available options choose: Brad Making a Call, Laura Pumping Gas, Rick Puking. You will get the clue: The Mysterious Bang to the case Near Gas Station. Influence the man messing with the gas station front door. Point to: Mysterious Bang. You will get the clue: Female Driver. Go back to the ghost man and talk to him. The ghost disappears, and you get the achievement: "Massacre". This way you complete the side case "Near Gas Station".
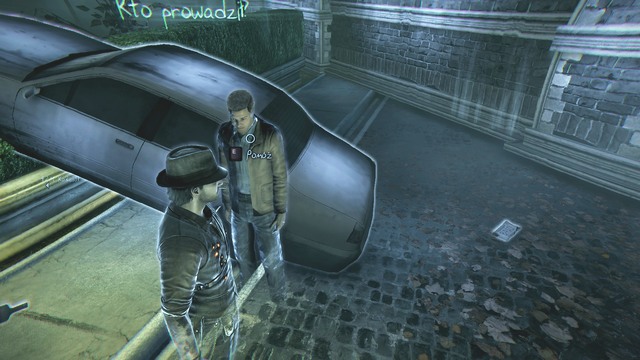 The ghost is extremely grateful for your help.
"Watery Grave" side case in the "Ghost Stories" section can be activated in the Laundry, on the first floor of the building you fell out from. This task can be activated while doing the main quest "Get to the Fourth Floor". Go to Clacking Device in the corner and select: Reveal. This way you will unlock the achievement: "Discover Reveal". Then use the option: Collect. You will gain an Old Boiler and unlock "Collector" trophy. You need 6 more to unlock the story. On the north from the building entrance there is one in the Pool Room. Here you will find the second Boiler.
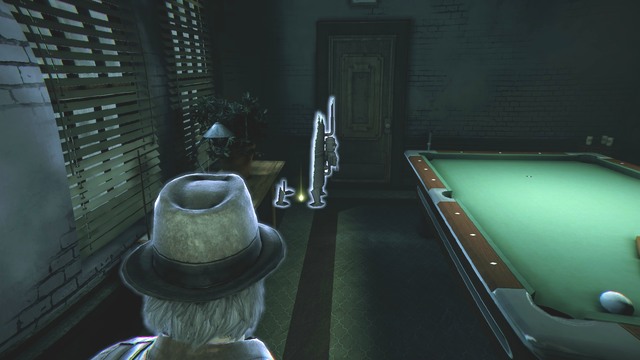 Unfortunately, the pool table is just a decoration.
You can find the third object in the niche on the left from the stairs to the second floor. The fourth Boiler is located on the second floor in apartment 2A. When you enter the apartment through the front door, there is a room on the right side. There you will find the object you are looking for. The fifth Boiler is on the third floor in the apartment 3B, in the room with a TV and a kitchen. It is located in the corner of the room. Another Boiler is on the top floor of the building, at the end of the corridor. It stands in the corner, by an old armchair. Collect it to unlock "Collector 10" trophy. The last Boiler is in the bathroom, in apartment 4A. The bathroom is on the north-east from the apartment entrance. You will get "Watery Grave" trophy. Open the menu and select Play Media to see the video which you got as a reward for finding the 7 Boilers.
"Eternal Flame" side case from Ghost Stories section can be activated while doing the main mission "Find Your Way to the Church". You need to leave the crime scene, passing the police cars and the van. Turn left, you will see the girl on the bench, walk past her. Go down the sidewalk and on the left you will notice a shape. Select Reveal and Collect. You need to collect 15 more.
 When you reveal the object, something that looks like a hat will appear.
Two more Flames can be found on the square, which is located on the right from where you found the clue: Salem Feels Dangerous to Julia's Thoughts case. There is a bicycle standing. There is a cannon in the center of the square. The fourth Flame is on the square, near the wrecked car from the quest "Near Gas Station". The fifth Flame can be found on the east from the gas station, by the burning house.
"Info About My Killer" side case can be activated while doing the main mission "Find Your Way to the Church". Go through the large door on the first floor and approach the wall with a picture. Click on the poster hanging there and you will get a note: Warning Poster. In the corner of the corridor look closely at the table - another piece of info about your killer. Namely, you will find: News Article 1. The next piece of info can be found at a pole near the gas station. This is: Baxter's Official Comment. News Article 4 can be found on the east from the gas station, by the burning house. Nearby, there is an Eternal Flame. Go through the burning house. Nearby, there is a note: Witness Trauma Report.
 This note is well-hidden.
Turn around, go straight and turn left, walk past the girl at the table, and between the two devices you will find the message: News Article 3. Near the cemetery there are people sitting on a bench. Next to them, you will find the message: K. Douglas - Family Photo.
"Julia's Thoughts" side case can be activated while doing the main task "Get to the Fourth Floor". On the left from the staircase, in the hallway, there lies a card. Pick it up to start the case. This is a note "Lillian and Lillian". The second note can be found on the top floor of the building, in apartment 4A. You need to go to the room on the east from the exit. By the walk-in closet you will find a note: Meeting Ronan's Parents.
 The sheet is barely visible.
The third note can be found in the street, by the exit from the street where you got to after going through the window. This is lying near the red cone. You will get a hint: Harassed by Baxter. The fourth note can be found when walking from the crime scene to the left. You have to walk past the police cars and the van. You will notice it on the right. You will get the clue: Ronan Pops the Question. The fifth note can be found when you turn left and walk past the girl sitting on the bench. On the right you will notice a card, by the bicycle. You will get the clue: Salem Feels Dangerous. Another message can be found at the police parking lot. Namely this is: Escorted by a Knight. The next message can be found on the jetty, near the church (Collect). You will get the clue: Day at the Beach.
"Ghost Girl's Messages" side case can be activated while doing the main mission "Get to the Fourth Floor". Go to apartment 3A, and on the bedroom wall - the one with the radiator - select: Reveal. Then just click Collect. Reveal the message: Coffins.
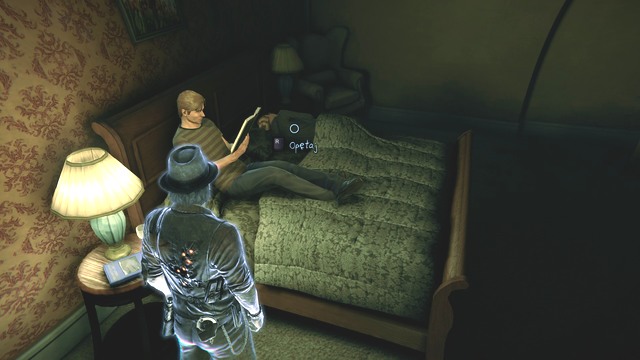 In the bedroom you can activate the side case.
Gallows message can be revealed on the second floor of the building. You have to walk past apartment 2B and get to the corner of the hallway. Inspect the wall, then select Reveal and Collect. Gallows message counts toward Ghost Girl's Message case.
"Profiler's Memories" side case can be activated while doing the main mission "Find the Killer's Trail". Head to the apartment 4A, and in the kitchen on the countertop by the sink, there is a book. You will get the clue: Concern for Joy's Safety.
"My Life" side case can be activated while doing the main mission "Find Your Way to the Church". After leaving the tenement, walk straight until you notice a hat lying on the right. Select Reveal and Analyze My Life. You will get the clue: "The End of Forever". On the jetty near the church select: Reveal and Analyze My Life. You will get the clue: The Picture on the Beach.
 The place is so romantic.
"Truth About Baxter" side case can be activated while doing the main mission "Find Your Way to the Church". There is a police car in the street, on the opposite from the alley where you got to after going out of the tenement window. Eavesdrop the two Police officers to get the clue: Baxter and Ronan's Mutual Animosity.
"Salem's History" side case can be activated while doing the main mission "Find Your Way to the Church". You have to look out for Plaques. The first can be found in the northern part of the square, near the crashed car from the side case "Near Gas Station". Walk up to it and click Collect. You will get a message: Armaments History Plaque.
 These plaques commemorate important events.
Another Plaque can be found in the restaurant, near the gas station. It is on the fountain: Fountain Dedication Plaque. In the alley behind the gas station there is: Gas Station History Plaque. Before the stairs that lead to the church, click on the Plaque (Collect) to get: Pirate History Plaque.
"Rex's Thoughts" side case can be activated while doing the main mission "Find Your Way to the Church". Near the crime scene there is a police car. Select Reveal and Collect. You will get the clue: Rex's Sense of Guilt.
You can activate the "Shipyard Park" case in the first chapter, during completing the "Find your way to the Church" quest. However, wait until the second chapter and activate it during the "Get to the Police Station" task. The game is slightly non-linear and you don't have to complete quests chronologically. You activate this objective by approaching a ghost of a woman. You can find her on the beach near the church. Talk to her and select: help. You will obtain a clue: Monohansett, which is 1 out of 7. In this case, you have to first learn how did the woman die. You can do this by gathering 5 clues. You will need the revealing power. Opposite the woman, there is an object - click reveal and peek. It is a Newspaper. You get a clue: Newspaper Obituary. Approach the table and use reveal at the object to the right. Peek at it. You obtain another clue: Framed picture. Left from the table, do the same with Candles. The next clue is: Various Candles. Head towards the boat and use the same powers on an object located on the boat. You will get a clue: Bouquet of Flowers.
 The ghost looks rather low-spirited.
You will find an object behind the crosses. Use the revealing power on it. It is a dinghy. Peek at it. You will get a clue: Beachside memorial. Now, having all 5 clues, you can finally answer the question. Select: Framed picture, Newspaper obituary, Bouquet of flowers. You will obtain the last clue. Now you have all 7 clues to this case. Talk to the ghost. You will earn the "Amnesia" achievement. The ghost will leave this world.
The "Scorned" case can be activated in the first chapter, during the "Find your way to the Church" task. Similarly as the last task, it is advisable to wait until chapter 2 and activate it during the "Get to the Police Station" quest. Head to the cemetery and talk to a female ghost opposite the entrance. Select: help. You have to find 4 clues. The first one is obtained right after activating the mission. It is: Broken Hearted. You have to find out if the woman was cheated on. There are two persons near the fence: a man and a woman. Possess the man and select: influence. You have to choose a clue that will make him remember his ex-girlfriend. It so happens that it is the ghost girl. You will obtain a new clue: Ex-Girlfriend's Suicide.
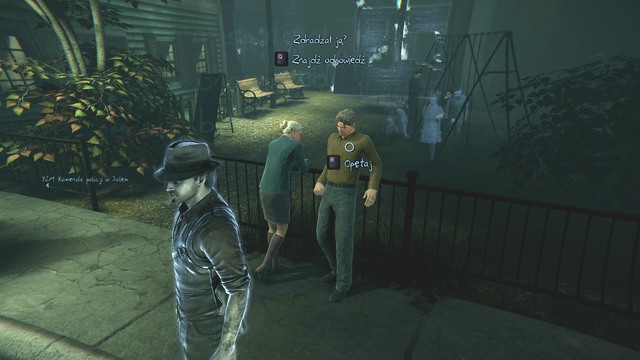 You have to find out whether the girl's fianc cheated on her.
Now, possess the woman and select: influence. She has to remember about her fianc's ex (it is the man's current partner). Select: Broken Hearted. You will get a clue: A Shoulder to Cry On. Now you can answer the question. Select: Broken Hearted, Ex-Girlfriend's Suicide and A Shoulder to Cry On. You obtain a clue: Bad News. Talk to the ghost once again. You will earn the "Scorned" achievement. The girl's soul will leave this place.
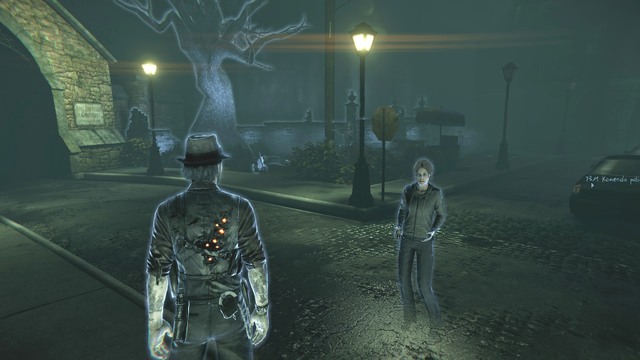 You've managed to find out the truth.
You can activate "The Bell Tower Banshee" side case during completing the "Investigate the Church to find the Witness" task. In order to do that, choose the option reveal and collect a Hand Saw located to the right from the entrance to the church, underneath the stairs. You can find the second Hand Saw north of the place where you had a vision about the witness. The third one is located in the corridor behind the door saying "Rectory" (on the right). The next tool is lying in the passage between two corridors of the Rectory. You will find another one when walking to the balcony. Go through the second door, where the mysterious force is blocking the stairs. It is located right behind the door, near the stairs.
 You can't go down the stairs.
When in the Rectory, walk towards the end of the corridor. You will go past the elevator. The next tool is lying to the right, next to a piece of furniture. Walk through the door opposite the place where you've found the last item. In the next room, in the corner, there is another Hand Saw. When in the kitchen, head to the door on the left. You will find one more Hand Saw in this room. When you leave the dining room through the east door, you will find yourself in a corridor. A mysterious force is blocking your way up. There is another Hand Saw in the corner. In the room with two women, the one from which you can go to the churchyard, you will find one more tool. It is located in the corner, near the wheelchair.
 You have almost all the Hand Saws.
After you've found the witness in the attic, walk through the north door. The last Hand Saw is in this room. You complete the "The Bell Tower Banshee" quest. You can watch a cut-scene as a reward.
In this chapter, you will continue to collect clues to the "Julia's Thoughts" quest, which you've activated in chapter 1. In the church, left from the first row of benches, you will find a note: Can't Stop Loving Him. The next one is lying on the floor, near the girl sitting in the front. You will get a clue: Ronan's Fedora. You will find the next note on the balcony. Head to the wall on the right, which is blocking your passage. Stand on the edge, turn towards the nave and aim your camera at the white light in such way, so that you would be able to hide. This way you will get past the wall. The next note is located at the end of the corridor. It is: Second Time's a Charm. Now, to obtain the next clue, you will need the revealing power. On the beach near the church, to the right from the table, there are some boards. Use reveal on them and a wooden platform will appear.
 Your paranormal powers are getting stronger.
Climb up and head left. You will find a clue: That Car Tattoo. Near the playground, which is close to the crime scene (the place where you've met the ghost of a girl at the beginning of the game), there is a clue: Beatdowns, to the "My Life" case. West of it, in an alley, you will collect another note (near the trash can). It is: Family of Three. You will obtain the next message by heading to the street where you've collected the clue: Rex's Sense of Guild, to the "Rex's Thoughts" case. On one of the buildings, there is a sign of the Bank of Salem. To the right, there is another playground. You will find a note there: The Day We Met. The next piece of paper with Julia's thoughts is can be obtained behind the playground (on the street with the bank), opposite the wall with the clue: Burning, to the "Ghost Girl's Messages" case. It is the clue: Ronan's Childhood. Near the police station parking lot, there is a square with a cannon. This is the place where you've found the clue: Armaments History Plaque. Reach the damaged wall and use the removing power.
 There is a secret corridor behind this wall.
In the corridor to the left, there is a note: Our Little Town.
In this chapter you will continue to collect clues to the "My Life" side quest, which you've activated in the first chapter, during completing the "Find your way to the Church" task. The next clue is located on the altar in the church. Select: reveal and analyze my life. You will get a clue: Marrying Julia.
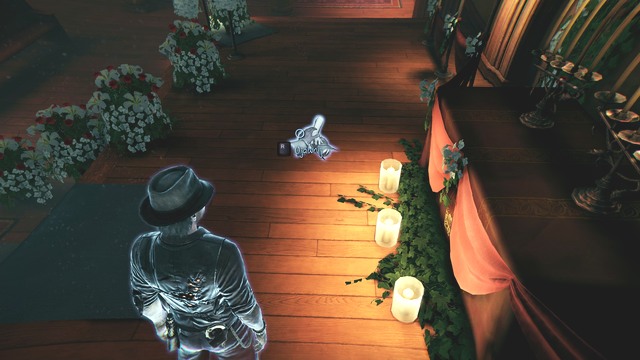 You have to use your revealing powers.
Return to the alley that you've discovered when leaving the apartment. Head towards the crime scene, cross the street and go through a hole in the fence. Turn right and walk until you reach some barrels that will block your way. Select: remove (if you haven't been here before). Turn around, go through the fence and turn left. Go through another fence. Turn right and reach an object. Select: reveal and analyze my life. You will obtain a clue: Beatdowns.
In this chapter you will continue to collect clues to the "Salem's History" side quest. You've activated it in the first chapter, during completing the quest "Find your way to the Church". The next Plaque is located in the church, on the balcony (near the organ). It is: Organ Dedication Plaque. You will find the next Plaque on the balcony as well. Approach the wall on the left and look through the hole in it, aiming your camera at the white light. Click hide. This way you will get to the other side. To the left, click collect and you will obtain: Burned Rectory Plaque. When walking out of the rectory's dining room, to the corridor with the stairs, there is a Plaque located in the north, to the right. Collect it and you will get: Rectory Dedication Plaque. On the playground near the cemetery, on a wall, you will find the next one:
In this chapter you will continue to collect clues to the "Ghost Girl's Messages" side case, which you've activated during chapter 1. The next clue is located in the bathroom. You have to go to the Rectory. Behind the elevator, to the left, you will find an ajar door. Use reveal above the bathtub and collect the clue: Dunking Chair.
 The bathtub is a bit neglected.
You will find another clue in the attic. Leave the room where you've found the witness, heading north. When in the next room, go through the ajar door to a room with a guitar in it. On the wall, next to a covered object, select: reveal and collect. You will get a clue: Demons. You will need your special powers to get the next clue. Head to the wooden platform, next to the beach. There is a board showing the way to the church. A woman is sitting in front of the house. Go past her and turn left. Turn right and you will see a scaffolding and an upturned boat. Aim the camera on the white light behind the obstacle and select: hide. This way you will get to the other side. Select: reveal on the north wall. You will find a clue: Darkness. Go past the boat again, turn right and you will see another boat. Go left to circle it. You will see a fence in the north, which you have to go through. On a wall opposite the fence select: reveal. The next clue is: Stone.
 These messages are very odd.
Make your way to the street with the playground and the bank of Salem. It is close to the crime scene. Go past the playground, heading towards the bank. There will be a fence on the right, with a clue on it: News Article #2 to the "Info About My Killer" case. Move on and you will see a wall between two windows with light shining from them. Use your revealing power on it. You will get a clue: Burning. Close to the place where you've found the last clue, east of the clue: Ronan's Childhood, there is a wall. Reveal and collect the next clue: In Her Hands.
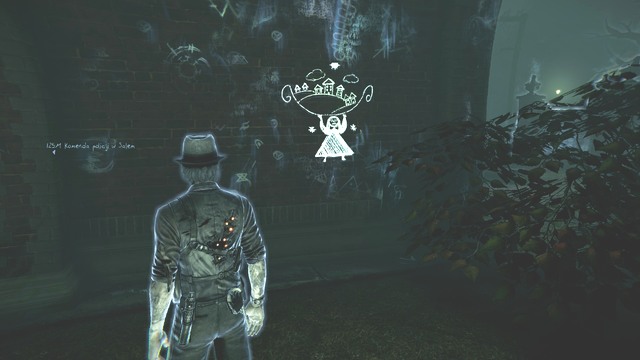 The girl's messages are spread over the whole town.
To the right from the wall, where you can find the clue: Chalk Bell Symbol, there is a place behind the trash can. Click reveal and you will find a message: Quest. Head to the restaurant, close to the gas station. Opposite the place from which you've collected: Fountain Dedication Plaque, notice an ajar gate in the fence. Go through it and reach a wall. Select: reveal. You will obtain another clue: Poppet. Now go to the square with the three cars parked. There is a fence nearby, with a sign saying "Danger". There you will find: Judgment House Plaque, to the "Witch Trials History" case. When looking at the cars, turn west. Go straight and go past the trash can. You will reach a wall, above which you should use: reveal. This way you will find the clue: Flowers.
 Dark and unpleasant.
In this chapter you will continue to collect clues to the "Info About My Killer" side case, which you have activated in chapter 1. You will find the next note on the beach close to the church. It is lying on the table, close to the boat and the crosses. It is: Witness View of Eyes. To collect the next clue, you will have to use your powers. Make your way to the wooden platform, near the beach. There is a board showing the way to the church and a woman sitting in front of the house. Go past her and turn left. Turn right and you will see a scaffolding and a boat. Aim your camera at the white light and hide. This way you will make it to the other side. Here you will find a clue: G. Soderberg Family Photo. Return to the alley that you've found when leaving the apartment. Head towards the crime scene, cross the street and go through a hole in the fence. Turn right and reach the barrels. Select: remove. Behind the obstacle, you will find a photo: C. Nelson Family Photo. Turn around and go through he fence, then turn left. Go through another fence, behind which you will find a clue: C. Nelson Cause of Death. The next piece of information can be obtained on the playground, close to the crime scene. You will get there by leaving the alley where you've found the Beatdowns clue. It will be a note: A. Grace Cause of Death.
 There are no children on this playground.
For the next clue, you have to look in the alley, where you've found the "Family of Three" clue, to the "Julia's Thoughts" quest. It is located near the abandoned playground, close to the crime scene. Go past the trash can and you will find: A. Grace Publicity Photo. You will find the next clue on the street with the bank. When heading towards the bank, you will see a playground o the right. Go past it and cross the square. There is a house on the right, with lights burning. Walk straight a bit and you will see a fence to the right. Behind it, there will be a clue: News Article #2. Now head to the cemetery. There is a fence nearby and a cat lying close to it. East of the fence, you will find a note: K. Douglas Cause of Death. At the end of the street with burning houses, there is a psychiatric hospital. To the right of the entrance to the hospital, you will find a shed. Close to it, on the wall, you will see a bell symbol. The clue is: Chalk Bell Symbol.
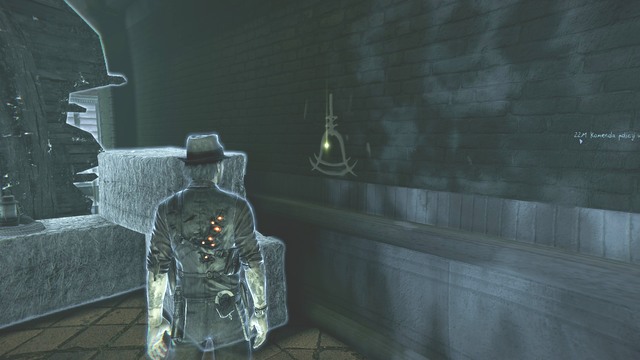 The murderer is called the Bell Killer.
In this chapter you will continue to collect Eternal Flames (gas cans) to the "Eternal Flame" side case from the "Ghost Stories" section. You've activated it in the first chapter, during the "Find your way to the Church" task. On the beach (near the church), after selecting: reveal, walk onto the wooden platform and head left towards the end. To the right, select: remove. The wooden wall will disappear and you will find a Flame behind it.
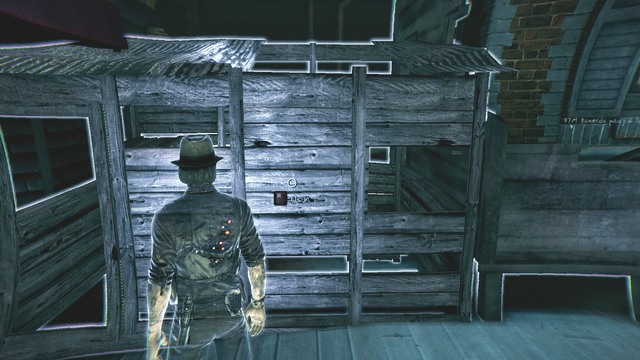 The power of removing turns out to be very useful.
If you've use the removing power for the first time, you will obtain the "Discover Remove" achievement. Turn around, cross the wooden platform and use: reveal on a piece of wood. A passage will appear and you will be able to collect another Flame. The next one is located on the street with the bank, behind the playground, to the left of the wall with the "Burning" message to the "Ghost Girl's Messages" case. You will see it in the corner of a building. For the next Flame head to the cemetery. You will see the fence with a cat nearby. Walk through it and possess the pet. Your first destination is the scaffolding to the right. Go straight and jump onto a stack of pallets. From there, make your way to the scaffolding. Jump onto the next platform and go up. Now you only have reach the wooden platform with the next Flame on it.
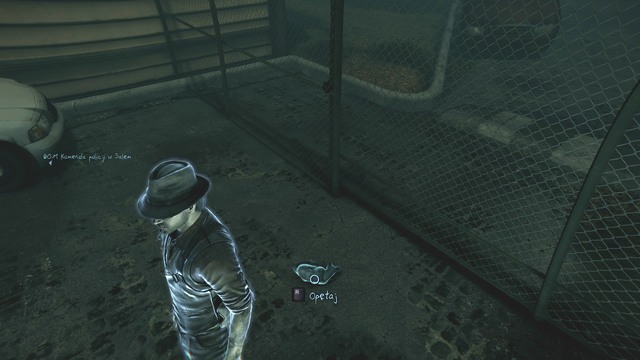 The cat will be helpful in completing the side quest.
The next Flame is located on the second scaffolding in this location. Jump down onto the pallets and head to the platform leading to the next scaffolding. From there, make your way to the next platform and jump onto the part of the construction where you can see some white material. Use it to climb up. Walking on the planks, you will get straight to the Flame. Now head to the street with buildings on fire. Look for a yellow taxi. When you reach it, turn right and go past a garden with a man sitting in it (on your left). Reach the corner of the location and select: reveal. A stairway will appear. Go up and collect the Flame which is lying there. Return to the taxi and go straight. You will reach the psychiatric hospital. Turn right and collect the next Flame from behind the bushes. Now head to the place where you've found the Judgment House Plaque, to the "Witch Trials History" case. There is a square nearby, with three cars parked. When facing the fence with the "Danger" sign, turn around. Go straight and go past the square. There will be a house to your left so walk along it. You will see a boat to the left. Turn right and go through the fence. There is a short alley to the right with a Flame in it.
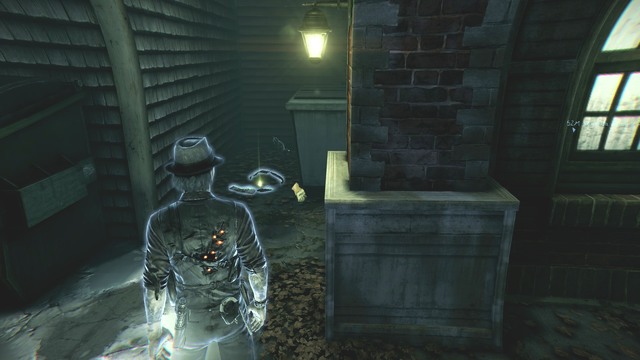 Notice the cat sitting behind the Gas Can.
Possess the cat sitting near the place where you've found the last Flame. It is the place close to the square with three cars and the fence with the "Danger" sign. Controlling the pet, go straight and turn right. Jump onto the obstacle, then another one and jump to the right onto a trash can. Turn around and jump off. Now use the plank to go up. Go straight and jump to the right. You will find yourself on the container. Turn left and climb up, using the plant. Walk straight to the end of the plank. Now hop onto a case and turn right. Jump onto the balcony. You just have to get onto the box, where another Flame is located.
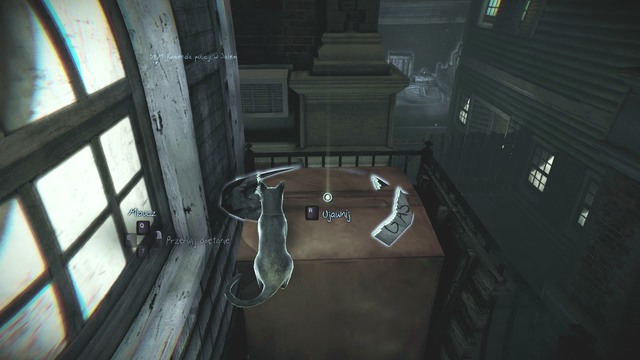 You can jump off after collecting the flame.
The "Witch Trials History" side cases are activated during the "Get to the Police Station" quest. Head to the plays with the crashed car (where you've activated the "Near Gas Station" side cases). Walk along the street with the green van. When you reach a wall, turn right. You will arrive to the square with the cannon. Cross the square heading in the north-west direction. This way you will find yourself on the square with the three cars. There is a trash can nearby and a blind alley. Here you will find the Judgment House Plaque.
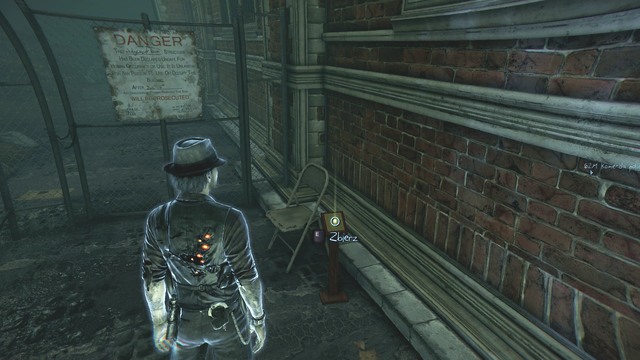 From Plaques like this, you can learn something about the history of Salem.
The "The Stalwart Specter" side case from the "Ghost Stories" section is activated during completing the "Investigate the War Room" quest. Enter the room opposite the main entrance to the building. You can get there either from the east or from the west. Choose the east way. Select: reveal on the wall to your right and collect the Rifle.
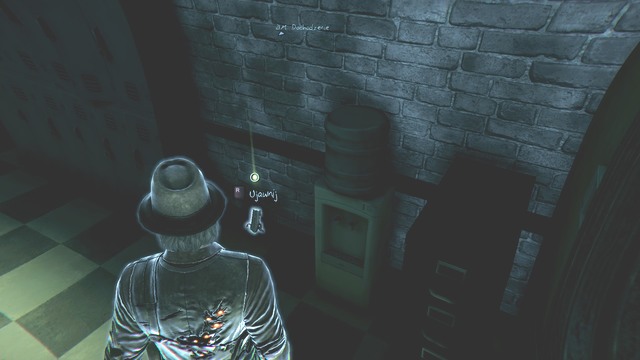 You have to use your supernatural powers once again.
Leave the war room and head left. Go past the stairs and you will reach an ajar WC door. Go through them and enter the first cabin (opposite the door). You will find another Rifle there. Go to the corridor with the Holding Area sign. Walk to the end of it. By the wall, near a chair, there is the next Rifle. To collect another one, head to the cell with the Judge message. You will get there by going through the walls, because the passage in the corridor is blocked by mysterious force. Leave by going through the bars. Notice that you're now on the other side of the trap. Walk through the door (the only one possible) and then take the door to the right. In this room, near the locker, there is another Rifle. Go to the second floor and find a ladder opposite the stairs. Go left from the ladder, then straight until you reach dining tables. The next Rifle is behind the column.
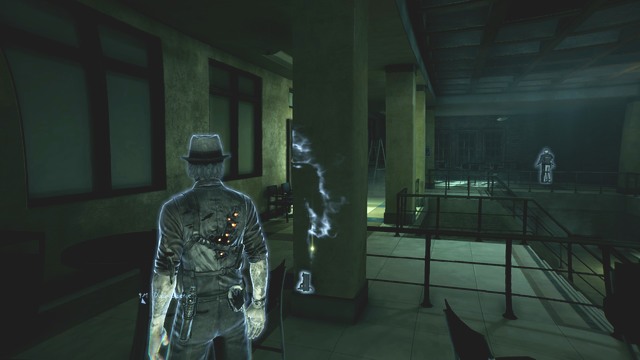 Use the revealing power and the Rifle will be yours.
On the first floor, head left from the ladder near the stairs. Enter the room to the right. In the corner, behind the board, there is another Rifle. The next one is in the Detective Offices. Go straight through the corridor near the entrance and turn left at the end of it. The next Rifle is leaning against the wall. Turn around and go through the door to the left, then head to the next room. You will find the last Rifle by the window. After collecting all the Rifles, you can watch a cut-scene. You also get the "The Stalwart Specter" achievement.
In this chapter you will continue to collect clues to the "Info About My Killer" side case. You've activated it during the first chapter. To the right of the entrance to the Police Station, on the wall, there is a Note. Collect it and you will obtain a clue: Suspect Released. Opposite the main entrance to the building there is a lodge. Enter from the left side. To the left, on the table, there is a note. Take it and another clue is yours: Missing Persons Report.
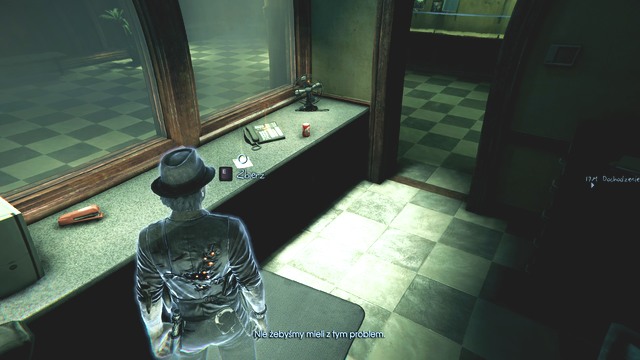 Make sure to read the note.
When leaving the war room, go left. Go past the stairs and reach the north-west wall. There is a note: Witness Description of Clothing. On the first floor, walk through the corridor where the toilet is. Go past two cops. You will reach a big hall. Look to your left and go through an ajar door, straight to the stairs. There is a note on the bin: G. Soderberg Personal Info. Return to the big hall and go through the door with a nameplate saying: H.C. Beger Chief Officer. There is a note lying on the desk. You will get: G. Soderberg Police Progress. Return to the corridor and walk straight until you reach a door with a nameplate saying: K. Kane Inspector. On the desk, near the phone, there is another note: A. Grace Police Progress. To the left of the 1777 Battle Plaque, there is an entrance. Go through it and you will find a note on the bench. You will get a clue: C. Nelson Police Progress. There is a wind rose above.
 More and more people become victims of the killer.
Now go to the corridor with the Holding Area sign and take the first door on the left. You will find a note on the desk: C. Nelson Personal Info. Go to the second floor. Go left from the ladder opposite the stairs. Walk straight and enter a room to your right. On the desk to the left, you will find a note: A. Grace Personal Info. Going left from the ladder, there is a room to your right, through which you can go to another corridor. You will see two cops and a door with a sign saying: Detective Offices. To the right of the door, there is a note on the wall: Killer's Profile. Enter the Detective Offices and go through the first door to the left. There is a desk and a note on it: K. Douglas Personal Info. You will find another note on the same desk: K. Douglas Police Progress.
 On this desk, you will find two notes about the killer.
Return to the corridor, go straight and enter the room next to Detective O'Connor's office. There is a map opposite the entrance, on which there is a clue: Map of Killings.
In this chapter you will be searching for clues to the "Truth About Baxter" side case. You've activated it in the first chapter, during the "Find your way to the Church" quest. There are only two clues to this case. One of them you've collected earlier. To the right of the Police Station's main entrance, opposite the bench, you can see a form. Use: reveal on it and collect. You will get a clue: Baxter's Relationship with the Witness's Mother.
In this chapter you will continue to collect clues to the "Salem's History" side quest. You've activated it in chapter one, during the "Find your way to the Church" task. Go right from the main entrance to the Police Station. You will reach a wall with a glass showcase. Collect the 1775 Fortress Plaque next to it.
 This corridor should be a bit brighter.
Walk along the corridor (first floor of the Police Station) where there are rooms with nameplates: H.C. Beger Chief Officer and K.Kane Inspector. There is also a WC. Go to the end of the corridor and you will find 1777 Battle Plaque on the wall. Now get to the Holding Area. Go through the bars and you will find 1776 Battle Plaque behind them. When leaving the room where you've found a Rifle next to a locker, go through the bars and you will find Forensic Facility Plaque in front of you.
In this chapter you will continue to collect clues to the 'Ghost Girl's Messages" side case. You've activated it in chapter 1. You will get the next message at the Police Station, in the Holding Area corridor. Walk to the end of it and enter through the last door to your right. Use your revealing power on the wall. You will discover a message: Cannon, to the "Ghost Girl's Messages" case. Head to the cell where you've found the My First Crimes clue to the "My Life" case. Go through the wall behind the bed, straight to a next cell. On the wall in front of you, use: reveal, so that you could obtain: Judge, to the "Ghost Girl's Messages" case.
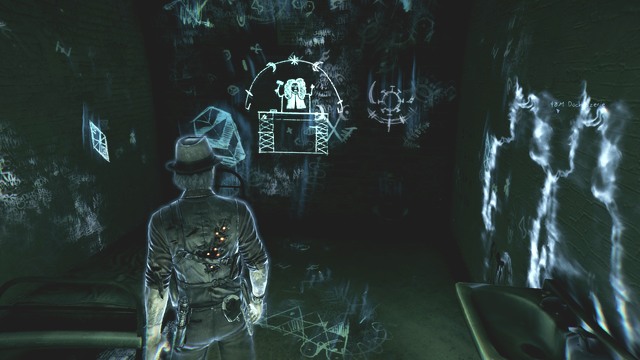 This message can be found at the Police Station's prison.
In this chapter you will continue to collect clues to the "My Life" side case. You've activated it in chapter 1, during the "Find your way to the Church" quest. You will get the next clues in the Holding Area. The corridor is blocked by mysterious force. You have to find a way to get past it. Enter the second cell to the right. Walk through the wall to the next cell (a ghost is standing there). Use your revealing power on the bed and select: analyze my life. You will get a clue: My First Crimes to the "My Life" case.
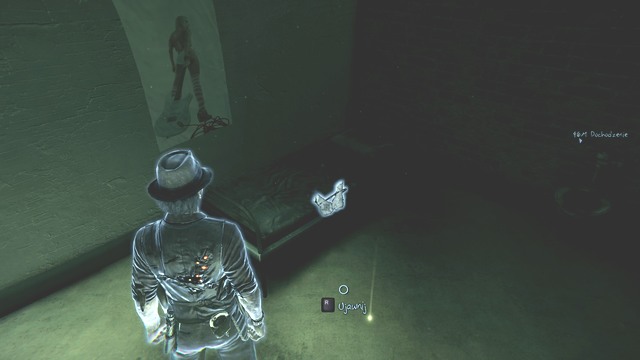 Use the revealing power here.
Head to the place where you've found the Forensic Facility Plaque. On your right, there is a door to the morgue. Enter and approach your body. Select: analyze my life. You will get a clue: Seeing My Own Corpse. From the war room, go left and you will reach a staircase. Go to the second floor. There is a ladder opposite the stairs and some tables to the right of the ladder. Next to the windows, in the corner, select: reveal and analyze my life. You will get a clue: When Baxter Tried to Threaten Me. You complete the "My Life" side case. You will earn the "Ronan's Story" achievement.
In this chapter you will continue to collect clues to the "Julia's Thoughts" side case. You've activated it in the first chapter. You will get the next note at the Police Station, on the second floor. Head to the Detective Offices and enter through the first door to your left. There is a note on the filing cabinet: Visit to the Station to the "Julia's Thoughts" case.
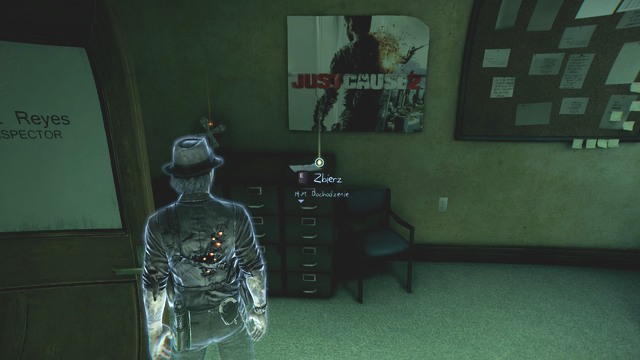 The note is lying on the cabinet, under the poster.
Leave the room, go straight to the end turn left. Enter through the door to your right. There is a sign saying: R. O'Connor Detective. You will find a note on the floor: Ronan Gets His Badge. In the same room, on a chair next to the sofa, there is another note: Ronan's Trouble with the Law. Go to the next room and take a note from the table. You will get a clue: Plain Clothes Cop.
In this chapter you will continue to collect clues to the "Rex's Thoughts" side case, which you've activated in the first chapter, during the "Find your way to the Church" quest. You will find the next (and the last) clue at the Police Station, in the Detectives Offices. Go through the first door to your left and use your revealing power near the desk. You will get a clue: Rex's Gratitude. You complete the "Rex's Thoughts" side case. You will earn the "Rex's Story" achievement.
In this chapter you will continue to collect clues to the "Profiler's Memories" side case, which you've activated in the first chapter. You will get the next clue on the second floor of the Police Station. Head to the Detective's Offices. Go straight to the end and turn right, then left. Enter through the door with a sign saying "Baxter". Behind the desk, on the floor, there is a note. You will get a clue: Insights on the Killer's Motives.
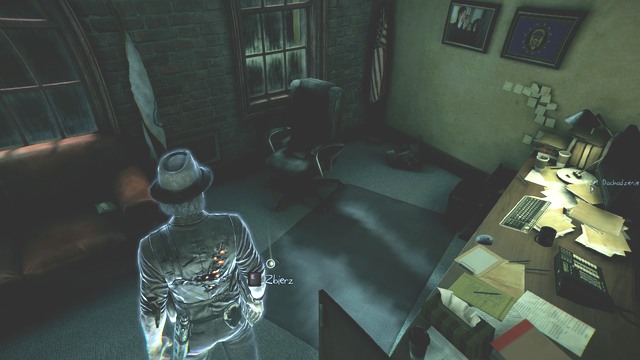 This office is rather impressive.
In this chapter, you will be continuing the collection of the clues for the "Julia's Thoughts" side case, which you activated in chapter 1: New skills, during the "Climb to the Top Floor" main mission. To the left of the graveyard entrance, between the graves, there is a note. Collect it and you will obtain: The Meaning behind the tattoo: "Cheated Death". Follow the path, get past the lamppost on the right and, before the lamppost n the left, turn into the path to the left. You only need now to climb the elevation on the right and you will see a note. Collect it and you will obtain a clue: A stroll through the graveyard. Follow the path in front of the cemetery gate. You will reach a wall, over which to climb. On the elevation to the right, there is a note, next to the tree "Reckless Ronan".
There are lots of Julia's thoughts on the graveyard.As you leave the grave, where you have obtained the clue Graffiti for the Information on the killer case, go right. Climb the elevation on the right. Nearby, there is a group of people and another sign post. You will obtain a clue: Why Ronan Became a cop. Go to the house on the graveyard, where you obtained the ability to teleport. Climb to the higher level and follow the wooden platform, to the very end. Jump down. Below, at the bed, there is a note: New Roses Tattoo. Return to the spot, where you have obtained the ability to teleport. Teleport to the other side, reach the end of the platform and teleport to the other side. Teleport across the narrow crack and again to the platform with barrels on it. Turn left and teleport to another platform. You will find a note there, next to the branch. You will obtain: New Justice Tattoo. Reach the location, where you have fought the three demons. At the end, there is a fence. Climb over it and go ahead. You will reach a note, on the ground, next to the rock. You will obtain a clue: Rex on Ronan's Record. You will obtain the last note on the cemetery, by teleporting to the other bank, next to the grate, which you removed. Follow the path of white halos. You will obtain a clue: Ronan and cigarettes.
 It is this cemetery that Ronan's love is buried.
After you leave the graveyard, go towards the street with the blazing houses. Nearby, there is a playground. Reach the red wall and teleport to the right, across the crack. You will find a note there. You will obtain a clue: Ronan's childhood. Go to the restaurant, close to the petrol station. Go to the railway car in the way and teleport across. You will obtain a clue: The meaning behind the dollar bill tattoo.
In this chapter, you continue the collection of clues for the "Info about my killer" side case. You have activated it in chapter 1: Ghost Abilities, while completing the "Get to the Top Floor" main quest. On the graveyard, approach the first signpost, there are two people in trench coats nearby, at the grave. As you look towards the grave, go left. Cross the hole in the fence and teleport into the grave on the right. Approach the symbol of the Bell Killer, in front of you, on the wall. After you choose: collect, you will obtain a clue: Graffiti.
 I wonder who made that symbol on the wall.
The "Heirloom" side mission, from the: Ghost Stories, is activated on the graveyard , during the "Get to the Lux Aeterna Mental Hospital". On the graveyard, next to the group of people(a guided tour) there is a sarcophagus. Use: reveal and collect. You will obtain the first Memorial Plaque for the Heirloom case. Nearby, you found a clue for the Julia's Thoughts case: Why Ronan became a cop. Another Plaque can be obtained after you go towards the grave, with two people next to it. To the left, there is a sign post and, to the right of the grave, there is a wall. Teleport past the wall, and the Plaque is yours. You will obtain the third Plaque by jumping off the platform, on which you found the note: New Tattoo with justice, for the Julia's Thoughts case. Approach the bed in the corner of the building. The Plaque that you are looking for is on the bed. Go towards the part of the building, where it reads Exit. The way ahead is blocked off and you need to teleport across the crack (there are two spades leaning next to it). Go ahead, a bit, and turn right. To the right, there is a gate in the fence. Use the "remove" ability. Past the door, there is the fourth Memorial Plaque.
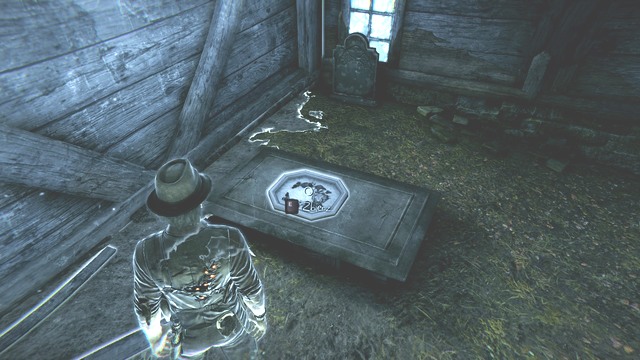 You already have some commemorative plaques.
Return to the alley and turn right. Then, keep going ahead and, to the right, you will notice dilapidating stairs. Use the reveal ability and climb up the stairs, which is revealed. At the top, there is the fifth Memorial Plaque. You will find the sixth one across the location, in which you fought the three demons. The more demanding one. Reach the fence with the sign: Danger, Keep Out. To the right of it, there is a grave, teleport through it and go ahead. Go past the girl and the boy, at the grave on the left. As you keep on your path, you will reach a barrier. Next to it, there is another Memorial Plaque. Turn away and go towards the tomb on the left. On the sarcophagus, there is another Memorial Plaque. The eighth and the ninth Plaque is at the fence with the: Danger, Keep Out plate. Ahead of the place, where you have found the note: Rex on Ronan's Record for the Julia's Thoughts case, there are tombstones on both sides. That is where you find another Plaque.
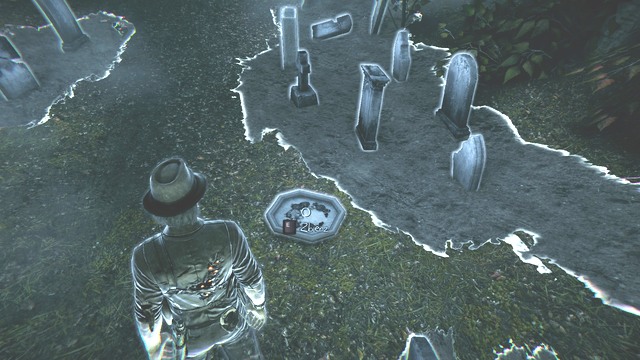 This one is well-visible.
Approach the tree that the Bell Killer tied the innocent girl to. It is at the water. Next to the tree,, there is a Memorial Plaque for your collection. Nearby, there also is a grate so, if you still have not done it, remove it. Follow the unlocked passage to the bank. Teleport to the other side. Close to the tree, there is the twelfth Memorial Plaque. Close to the place, where you have found the Ronan and Cigarettes clue, for the Julia's Thoughts case, you can teleport over to the other bank. Follow the bank towards the tombstones. Get past them and reach the last Memorial Plaque. This way, you complete the "Heirloom" side mission. You will obtain the "Heirloom" achievement - for unlocking the story Heirloom.
In this chapter, you will continue collecting clues for the "My Life". You have activated it in chapter 1: Ghost Abilities, During the "Get to the Top Floor" main quest. On the cemetery, to the left of the first signpost, where there are two people next to the grave, there is a wall. Teleport to the other side and enter the tomb on the left. On the wall, opposite the entrance, reveal the message: The victim.
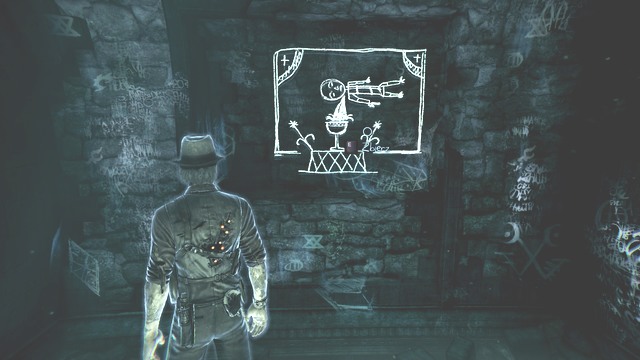 The drawing can be interpreted in various ways.
Go to the location on the graveyard, where you have fought the most difficult, as of yet, battle. It ends in a fence, with the sign: Danger, Keep Out. Teleport through it and go ahead, a bit. then, turn left and use: reveal on the rock, and collect. You will reveal a message: The ghost. Go to the restaurant, close to the gas station. Teleport past the old railway car, which is standing in the way. Approach the wall, where the tracks end and reveal another message on the wall on the left. I reads: Tempest.
 Close to the message, there also are disused tracks.
In this chapter, you will continue collecting clues "Salem's History" side mission. You have activated it in chapter 1: Ghost Abilities, during the main quest "Find your way to the church". Go to the group of people next to the signpost, at the graveyard. There also is the Ghost Man with a cleaver in his hand (a guided tour). Climb up the stairs. Upstairs, there is a Plaque. Collect it and you will obtain: Yellow fever Memorial Plaque. Another plaque is in the graveyard also. Go where you have fought the three demons (the more difficult fight). You can get there by teleporting (the incomplete wall). Go towards the next wall, at the end of the location. To the right, there is a staircase. Climb up the stairs and, in the thickets, you will find William Pynchon Memorial Plaque.
You do not have good memories, in connection with this place.Another Plaque can be obtained near the tree that Sophia has been bound to, by the Bell Killer. You will obtain: Graveyard Memorial Plaque.
In this chapter, you will continue collecting clues for the "Profiler's Memories" side mission, activated in chapter 1: "Ghost Abilities", during the main quest "Search for Bell Killer's traces at the apartment". At the cemetery, near the place where you made the new stairs to appear, with your ability, and you have found the fifth Memorial Plaque, there is a group of people. A report is being made there. from the stairs, go straight ahead, until you reach your destination. Next to it, there are stairs and a signpost. Locate the column and the note at its foot. You will obtain a clue: Fears of Murders to follow.
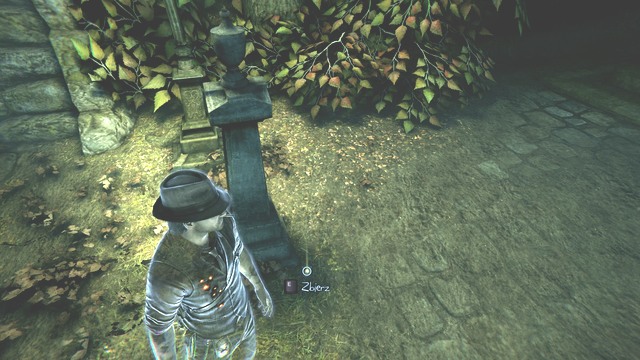 The profiler's memories shed a new light on the case.
In this chapter, you will continue collecting Eternal Flames (canisters) for the "Eternal Flame" side mission, from the Ghost Stories section. You have activated it in chapter 1: Ghost Abilities, during the main quest "Find your way to the church". You only have two Eternal Flames to collect. As you leave the graveyard, go left. You will reach a hole in the wall and the Ghost Man, who is standing next to it. Teleport over the wall and you will obtain the last-but-one Eternal Flame. Opposite the crack, through which you teleported, to collect the clue: Ronan's Childhood for the case Julia's Thoughts, there are destroyed stairs. Use: reveal and, as soon as the stairs appear, Use: remove and teleport over to the other side. You will receive the last canister for the case "Eternal Flame" from the Ghost Stories section. You will complete this side case and receive the "Eternal Flame" achievement. As a reward, you can watch a cutscene.

This is the last one of the canisters.
In this chapter, you will continue collecting clues for the "Info about my killer" side mission. You have activated it in chapter 1: Ghost Abilities, during the main quest "Get to the top floor" You obtain another piece of information at the mental hospital. On the table, to the right, of the building's entrance, there is a magazine. Collect it and you will obtain a clue: Tabloid article #1.
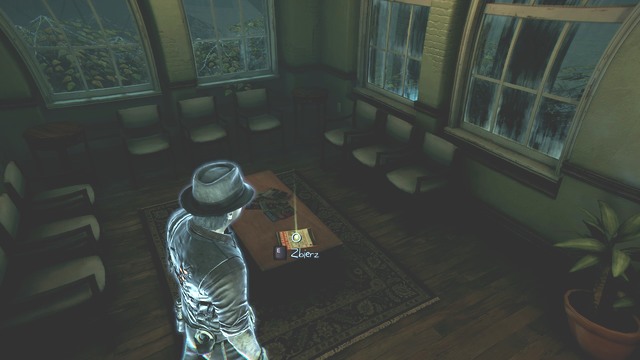 In the magazine, you find information about the Bell Killer
At the ground floor of the hospital, to the right of the stairs, there is a table. There is a magazine on it. Collect it and you will obtain a clue: Tabloid article #3. At the upper floor, close to the window, on the table next to the Spanish Flu Memorial Plaque, there is a magazine. Collect it and you will obtain: News- article 6. As you exit the laundry, on the upper floor, where you found the note: Baptism, follow the corridor and turn left. On the chest of drawers, under the camera, there is another note: Tabloid article #2. On the bench, to the left of room 217, there is a newspaper. Collect it and you will obtain a clue: News article # 5.You gain access to this part of the corridor after you complete the main mission: Get Past the Ghost Wall.
In this chapter, you will continue collecting clues for the "Salem's History" side mission. You have activated it in chapter 1: Ghost Abilities, during the main quest "Find your way to the church". To the left of the entrance to the mental hospital, next to the painting of a forest, there is a Plaque. You will obtain a clue: Asylum Memorial Plaque. Climb to the upper floor of the hospital. Once you reach the landing, you will notice that the stairs to the left are blocked by a demon goo. Climb up the stairs on the right and you will see opened door. Approach it and to the right, you will find a Plaque. It is the Spanish Flu Memorial Plaque.
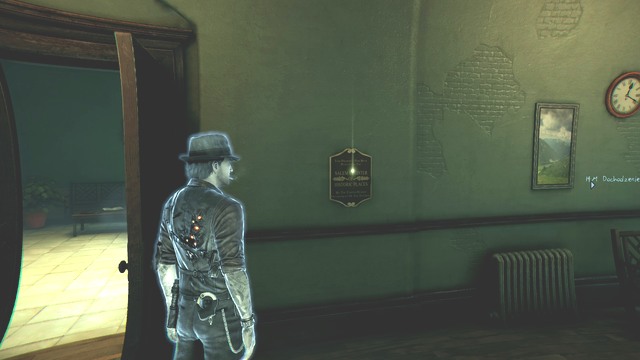 Close to the plaque, on the wall, there is a clock.
Exit the location, where you have fought demons, through the gate. Climb up the stairs, to the very top. Turn right and go towards the wall, where there is another Plaque - Lecture Room Memorial Plaque.
In this chapter, you will continue collecting clues for the "Profiler's Memories" side mission, activated in chapter 1: Ghost Abilities", during the main quest "Search for Bell Killer's traces at the apartment". In the hospital's reception office, opposite the entrance, there is a note on the table. Collect it and you will obtain a clue: The Killer's Delusions.
The "Man in the Box" side mission from the Ghost Stories section, activates at the mental hospital during the main quest "Learn whet the receptionist cares about". As you go ahead, from the hospital entrance, on the right, near the stairs, there is an opened door. Inside, between the desk and the radiator, you will find the first Straightjacket for the Man in the Box case.
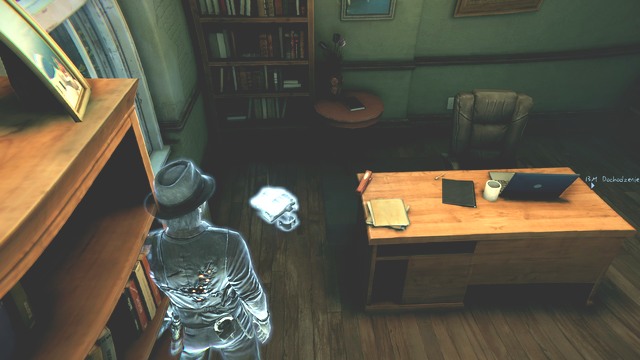 After you have collected all of the straightjackets, you will watch a cutscene
The second Straightjacket can be obtained on the upper floor, next to the demon goo that is blocking off the second section of the stairs to the ground level. To obtain the third Straightjacket, you need to go to the semi-circular corridor, where you have found the note: Hospital Support for Julia's Thoughts. Cross the door at the end of the corridor and behind it, there is what you are looking for. To get the fourth Straightjacket, you need to go to the upper floor, from the location, where you have found the Tabloid article #2 for Info About My Killer. Cross the wall, behind the chest of drawers, and you will find it. To get the fifth Straightjacket go to the semi-circular corridor, past the demon goo, that is blocking off the passage. You can cross it only with the help from Joy. The next one is in the room (the junk room), to the left of the door blocked off by the magic wall. It is in the corner of the room.
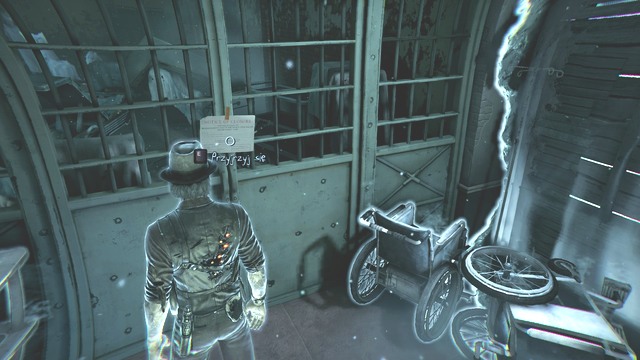 In the junk room, there is another Straightjacket.
In the room past the junk room, there is a crack. Jump in there and, at the very bottom, past the pole, there is the seventh Straightjacket. While controlling the cat, jump down from the venting shaft. You will get above three demons and the patient rooms. In the corner, there is the eighth Straightjacket. In the corner of the corridor, where you reunite with Joy(you have been separated by the magic barrier that you could not cross) there is the ninth Straightjacket. The final Straightjacket is in room 217. You gain access to it only after you complete the "Get past the Ghost Wall" mission. This way, you will complete the "Man On Fire" side mission. You will obtain the "Man on Fire" trophy. As a reward, you can watch the cutscene.
In this chapter, you will continue collecting clues for the "Julia's Thoughts" side mission, activated in chapter 1: Ghost Abilities, during the main quest "Get to the top floor". On the upper floor of the hospital, close to the stairs, there is an opened door. Cross two rooms and you will get into the semi-circular corridor. On the floor, there is a note. Collect it and you will obtain a clue: Hospital Support for the Julia's Thoughts case. You will find the next note as you walk through the gate of the location, where you fought the three demons. Climb up the first staircase, to the landing. It is on the ground. You will obtain a clue: Rex's thoughts.
 The note is close to the stairs.
In this chapter, you will continue collecting clues for the "My Life" side mission. You have activated it in chapter 1: Ghost Abilities, during the main quest "Get to the Top Floor". Close to the location, where you found the third Straightjacket, there is a chest of drawers, with a clock above it (on the upper floor). There is a door to the laundry there. Enter and reveal a message on the wall: Baptism.
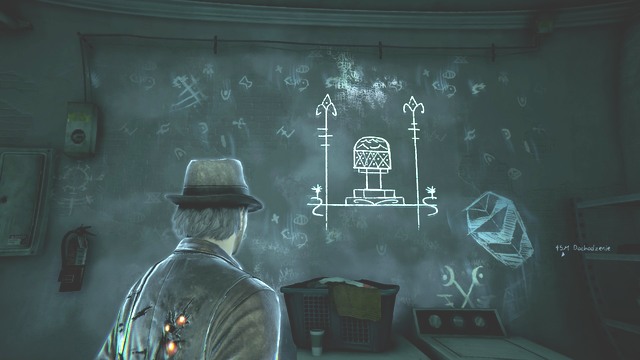 The next note from the outer world.
In the location, in which you fought demons, next to room 104, there is room 105. Enter there and use reveal on the wall. You will obtain a message: Accused. Go to the corridor, where you met up with Joy, after you have been separated by the magic barrier, which you could not cross. On the right, go past the door, which you need to open, to get to room 216. Approach the window and turn left. In the alcove, on the wall reveal another note: Stocks. As you exit room 217 (that is where you found the last Straightjacket) go right and turn right again. Twice. You will reach door marked: Shower. To the right of the door, on the wall, reveal a note: Twin Girls.
In this chapter, you will continue collecting clues for the "Salem's History" side mission. You have activated it in chapter 1: Ghost Abilities, during the main quest "Find your way to the church". Another Plaque is at the museum. After you enter, go through the door behind the cash counters, into the Main Hall. From the hall, there is a small corridor signed as: To Lobby. Past the door, get through the wall on the right. Then, follow ahead, until you reach the hall with the railway engine. You will easily notice the Plaque, which you need to collect. You will obtain the: Train Station Memorial Plaque.
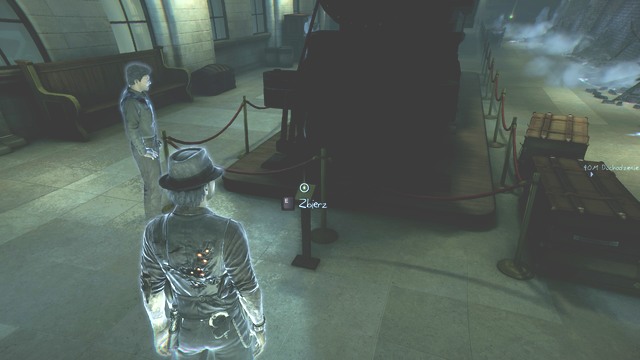 This Plaque will supply you with interesting information.
As you look towards the Plaque, in the North-Eastern corner of the hall, there is another Plaque. Collect it and you will obtain a clue: Dunking a Gossip. The next Plaque is in the room, where there is the: Museum Date for the Julia's Thoughts case and the Stone for the Terror on the tracks case. The room is adjacent to the hall, where there are many demon goos. this place is at the ground floor of the museum. It is: Baker in the Stocks Plaque. At the second floor, next to the Break Area room, there is another Plaque. Collect it and you will obtain a clue: Donor Memorial Plaque. It is close to the room where you found the clue Ghosts at the Museum, for the Profiler's Memories case. There are elevators nearby.
The "Terror on the tracks" from the Ghost Stories section, activates at the museum during the main quest "Investigate the Gala Exhibit". Go to the room with the railway engine, where you have found the: Train Station Memorial Plaque. Walk around the steam engine on the right. Between the engine and the railway car, on the floor, there is the first Stone for the Terror on the tracks case, from the Ghost Stories section. The second Stone is in the room, where there is the Museum Date clue, for the Julia's Thoughts case. In the neighboring room, there are many demon goos. As you leave that room, you will notice another Stone to the North. Unfortunately, the path to it is being blocked by demon goo. Return to the pedestal with carts and get across the wall with paintings. This way, you will reach the Stone.
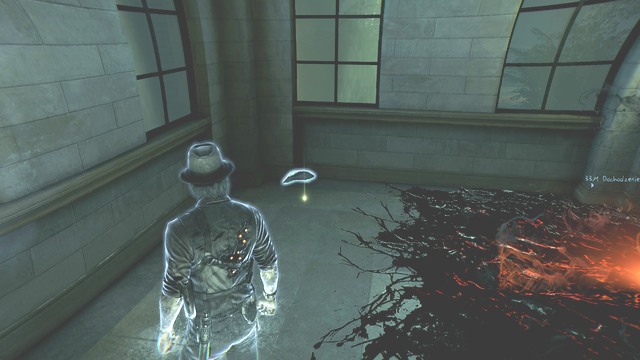 Use some brains and the Stone is yours.
Return to the starting point, in this hall and go the other way, along the wall and pass the successive entrances to the room, on the left. Reach the demon goo and cross the wall to the right. In the corner, there is the fourth Stone. The next Stone can be obtained after you complete the "Investigate the Gala Exhibit" mission. You will gain access to the next part of the museum. Leave the hall with the demon goos, go to the corridor, where the door marked: To Second Floor Stairs is. Go ahead, past the tracks and reach the next one, which the ghost train is rolling over. Turn right and you will find the fifth Stone in the toilet. Now, turn left (while looking at the train) and take the moment between the successive rides of the ghost train. Quickly, run towards the next alcove over the tracks. Teleport to the alcove opposite, past the tracks. Make sure that you do not get hit by the train. Here, you will find the sixth Stone. Teleport to the alcove to the East, across the tracks. Close to the train that is blocking the passage, there is the seventh Stone. Next to it, there is a "Witch Trials History".
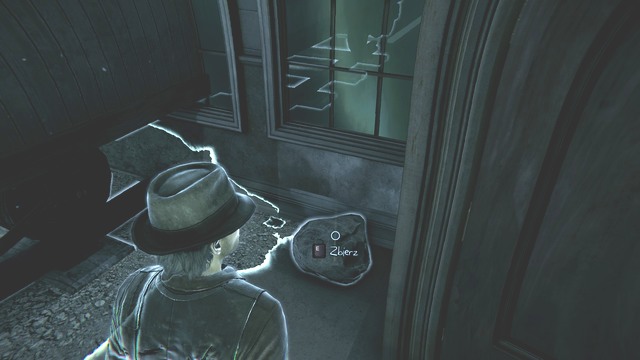 Unfortunately, the train is still in the way.
Teleport near the stairs to the first floor. Climb up the stairs and make sure that you are not run by the train. Then, go left and reach the end of the corridor. Cross the door to the room. The eighth Stone is close to the ladder. At the other end of the room, there is the ninth and, at the window, the tenth Stone. Exit the room, through the door with the can in. Past the door, there is another, eleventh, Stone. Reach the stairs to the second floor and climb up. Close to the stairs, there is the twelfth Stone. Enter the Restoration Room and approach the wall, where you have revealed a message: Estate for the My Life case. Go along the windows, to the next wall. On the left, there is the thirteenth Stone. Go to the room, where you found the clue: ghosts at the museum for the Profiler's Memories case. Exit through the opened door and turn right/ Go straight ahead, away from the wall. There are elevators nearby. Enter the Break Area on the right. In the corner of the room, there is the fourteenth Stone.
 In this room, you can rest at the table.
The final Stone is at the beginning of the corridor, next to the elevators. This way, you will complete the "Terror on the tracks" side mission. For this, you will obtain the "Terror on the tracks" achievement.
In this chapter, you will continue collecting clues for the "Witch Trials" side mission. You have activated it in chapter 2: The trail of the witness, during the main quest "Get to the Police Station". Another Plaque is in the museum. Enter through the door marked: To Lobby. Past the door, cross the wall on the right. There, you will find a clue: "Superstitions" for the Witch Trials case. Cross to the next room. walk through the door marked Tickets. On the bench, there is a note, which you should collect and you will obtain a clue: German Witch Trials, for the Witch Trials case.
 It is past this door that you find another clue.
Return to the main hall and enter the corridor ahead, where there are two paintings, hanging on the wall. One of them presents a lighthouse. Enter the room marked as To Second Floor Stairs. Here, you will find a Plaque reading: Plaque "The first Witch Execution". Go to the location where you found the sixth Stone, in the alcove next to the railway tracks. There is a ghost train rolling over it. While facing the train, teleport to the East-most alcove, across the tracks. There is a Plaque there. Collect it and you will obtain a clue: Plaque "History of Witch Trials" for the witch trials case. At the second floor, close to the Donor Memorial Plaque for the Salem's History case, there is a pot plant on a table. On the table, there is another clue: Medieval book of witches for the Witch Trials case.
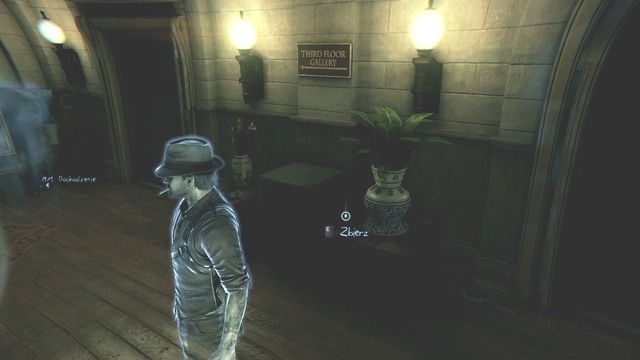 The book is right next to the elevators.
Follow the corridor past the elevators and enter through the door marked as Third Room Gallery. Behind the cabinet, in the corner of the room, there is a clue: Prayer Book. In the same room, in its other end, behind another cabinet, there is a clue: The book of engravings.
In this chapter, you will continue collecting clues for the "Julia's Thoughts" side mission, activated in chapter 1: Ghost Abilities, during the main quest "Get to the Top Floor". While in the main hall of the museum, enter the door that a waiter with drinks is standing next to. You will find a note on the floor: Ronan Meets Rex, for the Julia's Thoughts case.
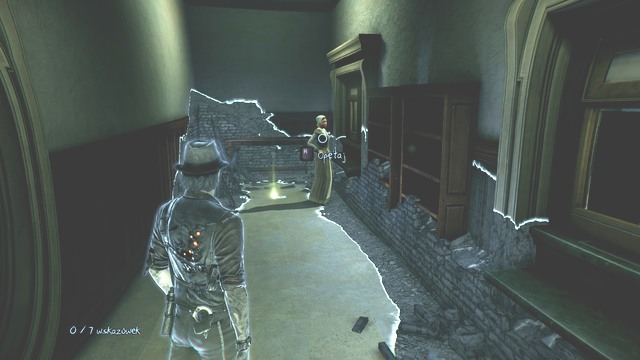 Thanks to the notes, you will get to know Julia better.
Return to the main hall and go to the room to the right of the main entrance. In the room, there are many demon goos. walk onto the pedestal with trailers and cross the wall fragment, thanks to which you will get past two of the demon goos. You will emerge past them. Enter the door next to you, on the left, in the room, you will find a note: Museum Date.
In this chapter, you will continue collecting clues for the "My Life" side mission. You have activated it in chapter 1: Ghost Abilities, during the main quest "Get to the Top Floor". After you reach the second floor of the museum, once you enter the restoration room, turn right. Go towards the wall and above the cabinet, reveal a message: Estate.
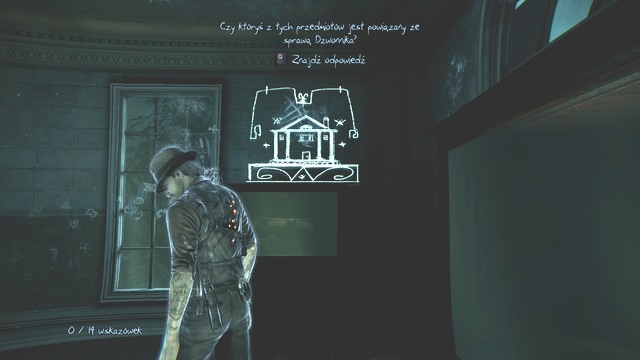 The restoration room houses many secrets.
At the second floor, enter the Third Room Gallery. As you are facing the exit, on the right wall, select reveal. You will receive a message: Trap for the My Life case.
In this chapter, you will continue collecting clues for the "Profiler's Memories" side quest, activated in chapter 1: Ghost Abilities", during the main quest "Search Bell Killer's tracks in the apartment". While in the restoration room, on the second floor of the museum, leave through the door close to the location, where you found the thirteenth Stone. Then, go along the windows and cross the wall, into the next room. On the desk, you will find another note. Collect it and you will obtain another clue: Ghosts at the museum.
 Someone left a mug on the desk.
In this chapter, you will continue gathering clues for the "Ghost Girl's Messages" side mission. You activated it in chapter 1: Ghost Abilities, while completing the main quest: "Climb to the Top Level". During your next visit to the church, you will find the last message. After you start the "Search the Upper Floor For More information", climb up the stairs to the first floor. It is at the end of the corridor, from which you walked into the courtyard. Climb upstairs and walk into the room located the closest to the window. Reach the wall and reveal the message. You will obtain a message: Staircase. This way, you will complete the "Ghost Girl's Messages" side mission. Also, you will unlock an achievement: "Codex".
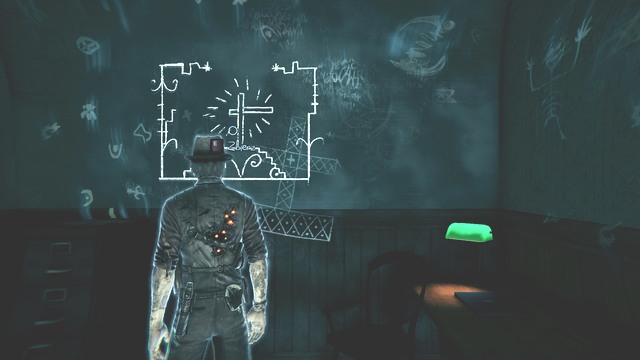 This is the last message from the outer world.
In this chapter, you will continue gathering clues for the "Julia's Thoughts" side mission, which you activated in chapter 1: Ghost Abilities, while completing the "Climb to the Top Level" main quest. You will find another note in the church, at the first floor. After you climb to the upper floor, follow the corridor. Go past the door on the left, which is being guarded by the Police Officers. There is a stretcher nearby. Then, turn left and approach the wall with a table at it. Collect the note: Sanctuary. There are stairs to the attic on the right.
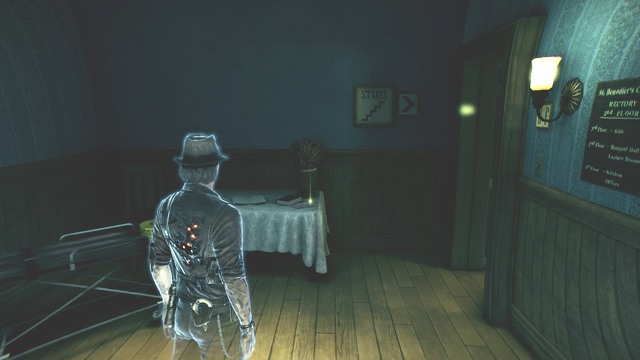 On the table, there also are some other items.
The "Ashes to Ashes" side mission, of the Ghost Stories section, is activated at the Judgment House while completing the main quest: "Find an upstairs room with light on". As you enter the Judgment House, climb up the stairs. On the left, reveal a staircase. Climb up the stairs to the platform and use reveal at its end. This way, you will obtain the 1st Spellbook. In total, there are 11 of them.
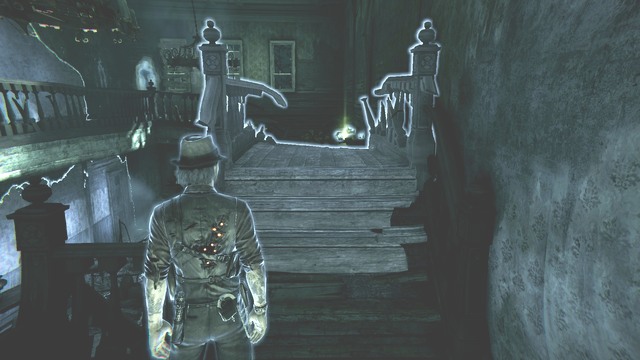 Judgment House is completely derelict.
Now, follow the corridor to the left of the stairs. This is the only possible way. Follow the path for a moment and teleport across the hole in the wall on the right. You will get to the other side where, at the window, on the desk, there is the second Spellbook. Teleport back to the corridor. Opposite, there is a room, where you can find the third Spellbook. Return to the main corridor on the upper floor. Enter the last-but-one door on the right, as seen from the direction of the stairs. Use the ability to remove, to get rid of the door on the right. Behind the door, there is the fourth Spellbook. From the room, in which you found the lest clue for the Profiler's Memories case (the upper floor) exit to the corridor. Turn left and enter the next doo r on the left. You will enter a toilet. Approach the window and cross the wall on the left. On the toilet seat, there is the fifth Spellbook.
 The toilet is in shambles.
Return to the room, where you have used the raven's help, while fighting demons. Enter the backstreet, through the ajar door. Cross the door ahead of you. You will get into a room with another raven, where there is the seventh Spellbook. Once you descend to the ground floor, over the other stairs, you will walk into the big hall (colonial kitchen). Find two small rooms located opposite each other. Inside, you will find two Spellbooks - the eighth and the ninth. One on the floor and the other on the table. For the tenth Book, walk in through the second door on the right, in the corridor in which you teleported for the last clue for the Julia's Thoughts case. Inside, there is a bathtub. Cross the wall that is perpendicular to the one that the bathtub is standing by. Do the same in the case of the next wall and you will find the Book. The last Book is in the holding cell with the cage. You get there after you enter the cellar and find the stairs to the holding cells. Cross the wall with the cage at. You will complete the "Ashes to Ashes" side mission. You will obtain the "Ashes to Ashes" and "Collector- All" achievement. You have completed all of the items.
 You can now see the cutscene.
In this chapter, you will continue gathering clues for the "Info About My Killer". You activated it in chapter 1: Ghost Abilities, while completing the main quest: "Climb to the Top Level". At the Judgment House, climb to the upper floor, turn left and you will see a red notice on the wall. This way you will find a clue. Verse 1 for the Info About My Killer case.
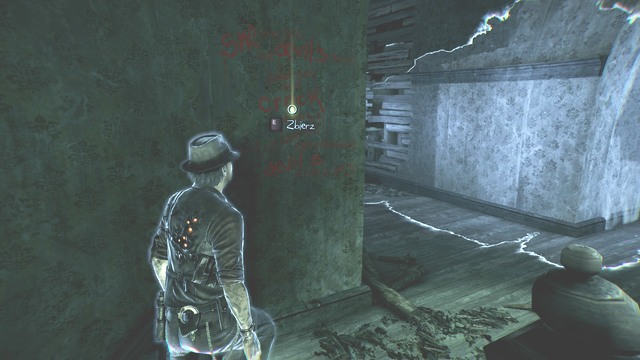 On the wall, there is a poem.
To obtain the next note, go to the room opposite the hole in the wall, across which you teleported (to find the second Spellbook). Walk through it, into the next room, where you find another red caption on the wall. This way, you will obtain a clue: Verse 2. Return to the corridor and follow it, until the very end. On the wall, on the right, there is another red caption. You will find a clue: Verse 3. Walk in through the ajar door, on the right of the previous caption. Inside the room, on the wall, you will notice another verse. You will obtain a clue: Verse 4. This way, you will complete the "Info About My Killer" side mission. You will obtain an achievement: "The Bell Killer's Story".
 You have collected all of the notes about the killer.
In this chapter, you will continue gathering clues for the "Julia's Thoughts" side mission, which you activated in chapter 1: Ghost Abilities, while completing the "Climb to the Top Level" main mission. Climb to the first floor, in the Judgment House, follow ahead, until you reach a window covered with boards. Cross the wall on the left and you will find the note: Life and After for the Julia's Thoughts case.
 Sometimes, you need to cross a wall to find something interesting.
Next to the door, behind which there are the other stairs to the ground floor, there is a note. Collect it and you will obtain a clue: Ronan the Stranger for the Julia's Thoughts case. The other stairs are behind the secret chamber, in which you conducted your investigation. Descend over the stairs, to the ground floor and you will walk into the colonial kitchen. Leave through the Western door. Cross the door on the left in the next room. You will walk into the room, where you need to teleport across the hole in the wall on the left. Behind it, you will find a note on the floor. It is a clue: Fight with Ronan. To the right of the location, where there is the Colonial Salon Memorial Plate, there is the exit to the corridor. Follow it, up to its end, until you reach the door. To the left, there is a hole in the boards. Teleport through the hole and, at the other side, you will find a note: Pondering the Proposal. This is the last clue for the case. This way, you will complete the "Julia's Thoughts" side mission and you will obtain an achievement: "Julia's Story".
 This is another location that you get to, thanks to your abilities.
In this chapter, you will continue gathering clues for the "Profiler's Memories" case, which you activated in chapter 1: Ghost Abilities", while completing the "Find the Killer's Trail at the apartment". For the last clue for this case, go to the secret chamber at the Judgment House, behind the bookshelf. Cross the fireplace into the next room. On the floor, there is a note Collect it and you will obtain a clue: Unrest at the Judgment House. This way, you will complete the "Profiler's Memories" side case and you will obtain an achievement: "Cassandra's Story".
 You will find the last note for the case, on the floor.
In this chapter, you will continue gathering clues for the "Salem's History" side case. You activated it in chapter 1: Ghost Abilities, while completing the main quest: "Find your way into the church". You will find the Plaque at the Judgment House at the ground floor. You can get there by climbing down the stairs behind the hidden passage on the first floor. Close to the stairs, at the ground floor, there is a big room. On the floor beam, you will find the Plaque: Colonial Kitchen Memorial Plaque.
 These plaques are a repository of knowledge about the town.
In the lounge, close to the table, on which there is the last clue for the Witch Trials case, there is a Plaque. Collect it and you will obtain a clue: Colonial Plaque. The final Plaque is in the attic, at the door to the holding cells. It is the Colonial Cellar Memorial Plaque. This way, you will complete the Salem's History side mission. Also, you will obtain an achievement: "Salem's History".
In this chapter, you will continue gathering clues for the "Witch Trials" side mission. You activated it in chapter 2: Chase the Witness, while completing the main quest: "Get to the Police Station". You will find the last note in the lounge, at the ground floor of the Judgment House. You still need to descend to the ground floor over the stairs and go past the kitchen. You will reach a big room - this is the lounge. Approach the table in the corner of the room. The final clue for this case is the judge's diary. This way, you will complete the "Witch Trials" side mission. You will obtain an achievement: "Witch Trials".
 This room is completely shrouded in darkness.
They are associated with the side case "Watery Grave". The first Boiler is located in the Laundry, on the first floor of the building where you fought with your killer.
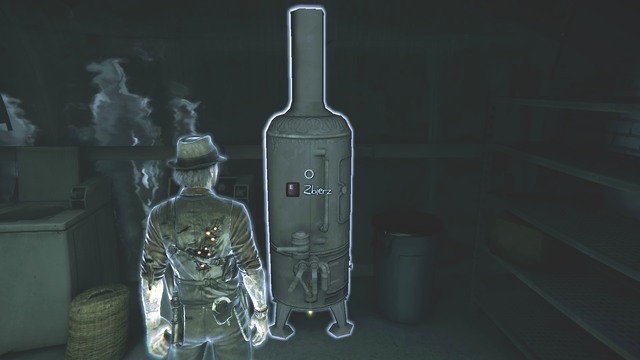 This is the first item you find in the game.
The second Boiler is in the Pool Room on the first floor of the building from which you were thrown out.
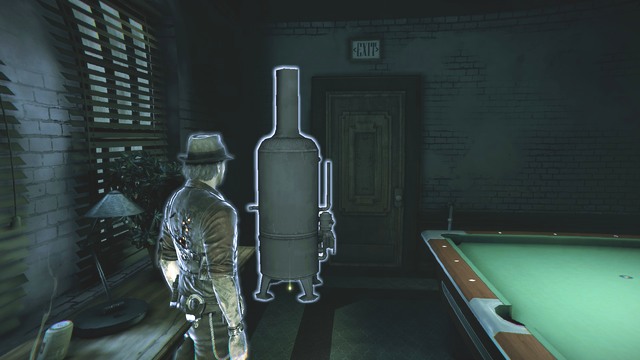 An unusual place for that kind of device.
The third Boiler is in the niche by the stairs to the first floor of the building where you fought with your killer.
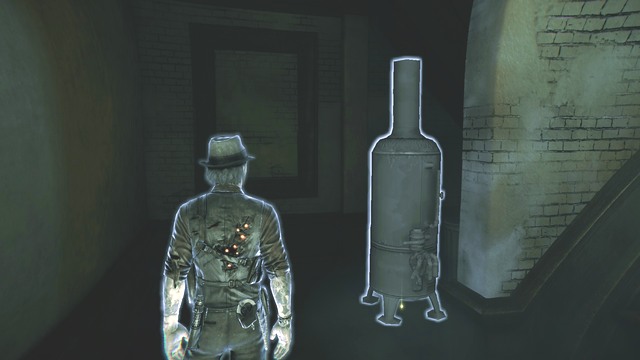 The tenement hides many secrets.
The fourth Boiler is on the second floor of the tenement, in apartment 2A. When you walk in through the door, this will be in the room on the right.
 The boiler is clearly visible.
The fifth Boiler can be found in the tenement, on the third floor. Look into apartment 3B, where it stands in the corner of the room with a kitchen and a TV.
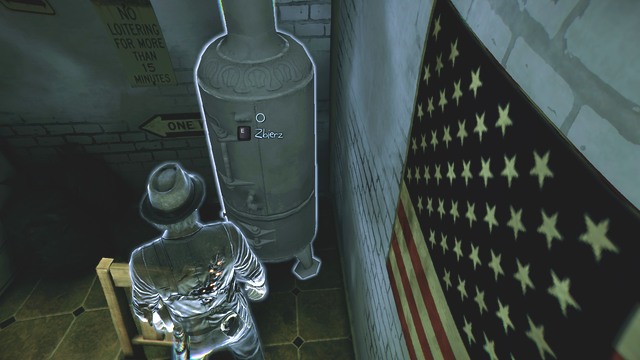 There are no more boilers on this floor.
The sixth Boiler can be found on the top floor of the tenement, at the end of the corridor. It stands in the corner, by an old armchair.
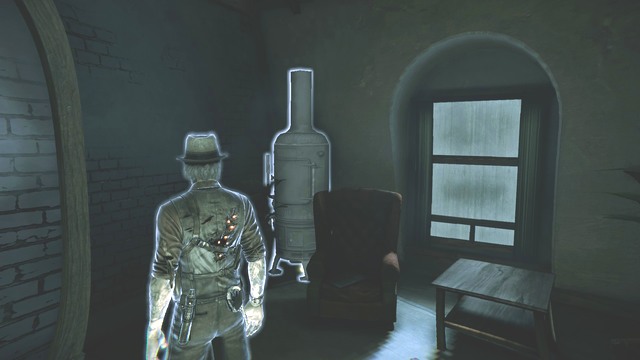 Unfortunately you cannot rest on the armchair.
The last Boiler is in apartment 4A, in the bathroom. It is located on the north-east from the apartment entrance.
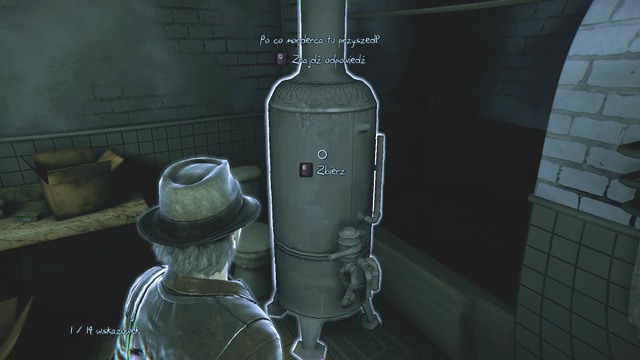 Once you have found it you can watch a short cut-scene.
The first piece of information (Warning Poster) can be obtained on the first floor of the building from which you were thrown out. You have to walk through a large door and get to the wall with a picture.
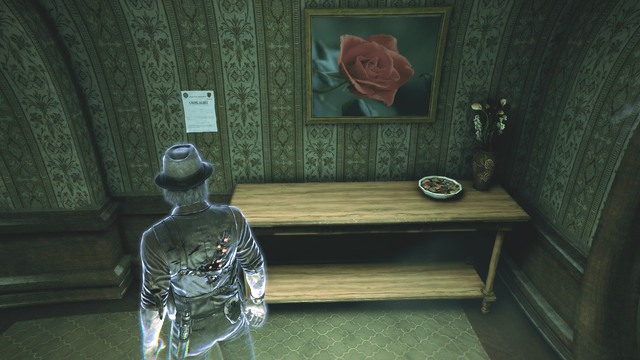 The picture is really nice.
The second piece of information: News Article 1, is nearby, on the table in the corner of the hallway.
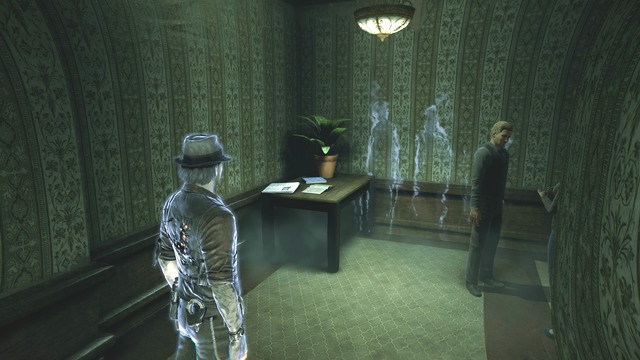 Next to you there are people talking unaware of your presence.
Another piece of information can be found at a pole, near the gas station. This is: Baxter's Official Comment.
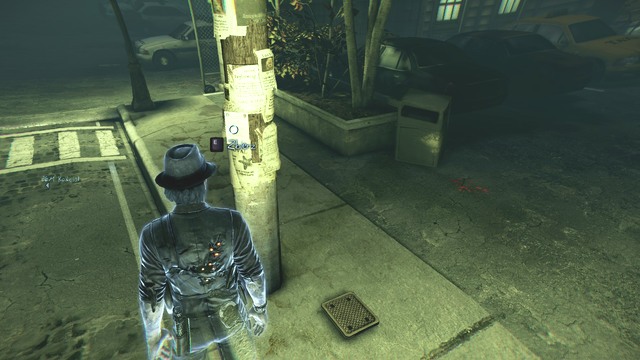 Any way is good to catch a killer.
News Article 4 can be found on the east from the gas station, by the burning house. There is Eternal Flame nearby.
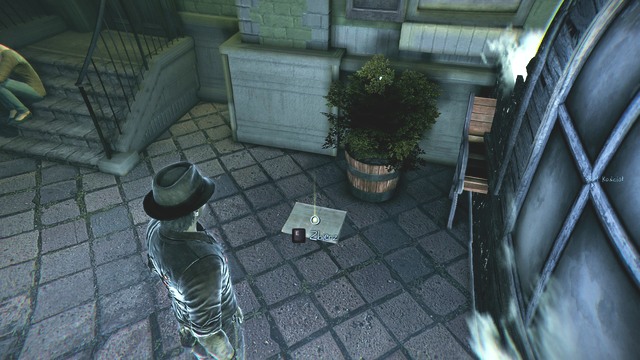 The pieces of information about the killer are scattered all over the town.
Go through the burning house. There is a note nearby: Witness Trauma Report.
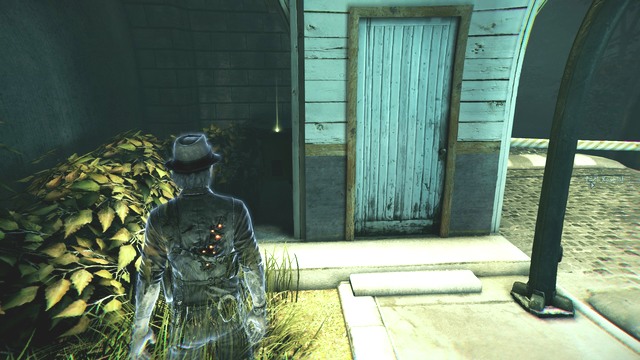 The killer spreads terror in the town.
Turn around, walk straight and turn left, walk past the girl at the table, and between the two devices you will find: News Article 3.
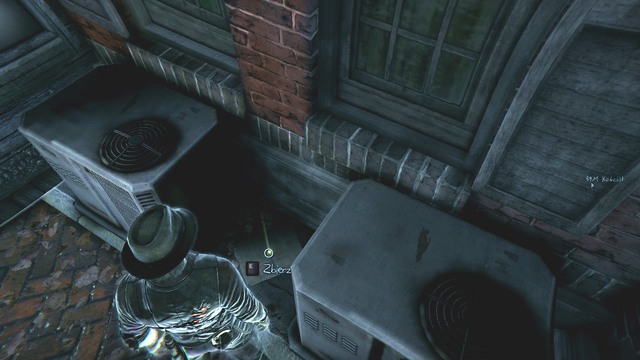 Only a trained eye can spot this clue.
Near the cemetery there are people sitting on a bench. Next to them there is K. Douglas Family Photo.
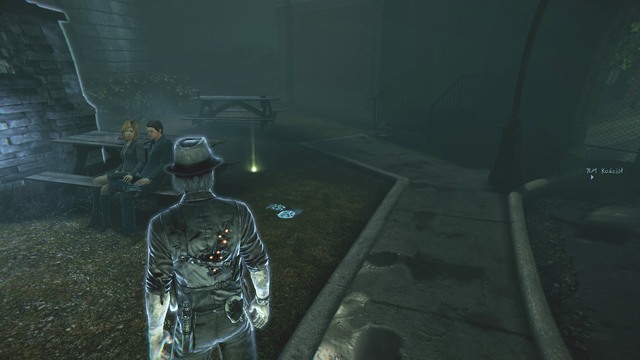 You have now collected some info about the killer.
The first note (Lillian and Lillian) can be found in the tenement on the third floor. You have to walk into the hallway on the left from the staircase. The sheet is lying on the floor.
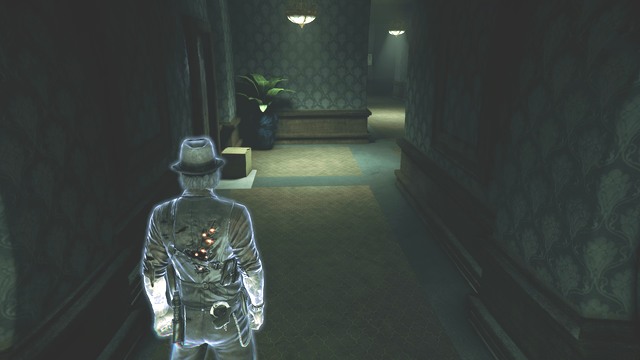 The note is lying in plain sight.
The second note can be found on the top floor of the tenement. Go to apartment 4A to the room on the east. By the walk-in closet you will find a note: Meeting Ronan's Parents.
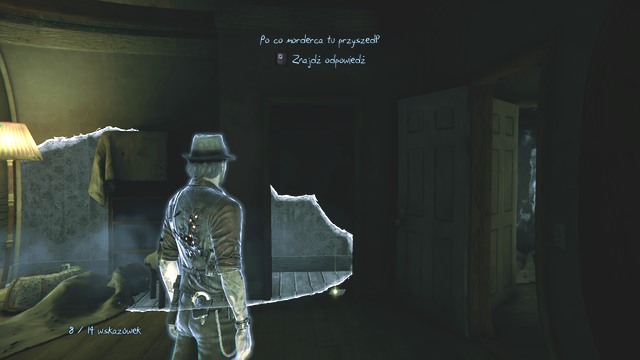 Always keep your eyes on the floor.
The third note can be found in the street, near the alley where you got to after going out through the tenement window. It is lying near the red cone. You will get the clue: Harassed by Baxter.
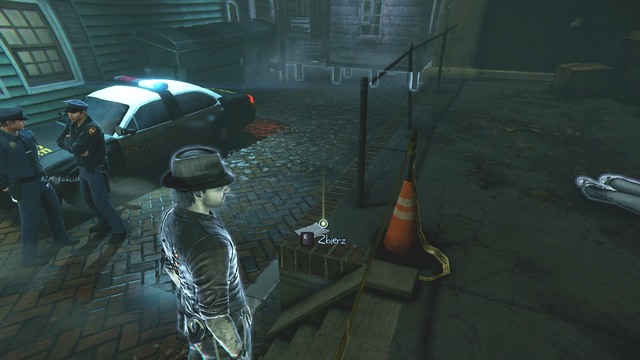 From this note you will learn more about officer Baxter.
The fourth note can be found after you go left from the crime scene; you have to walk past the police cars and the van. You will see it on the right.
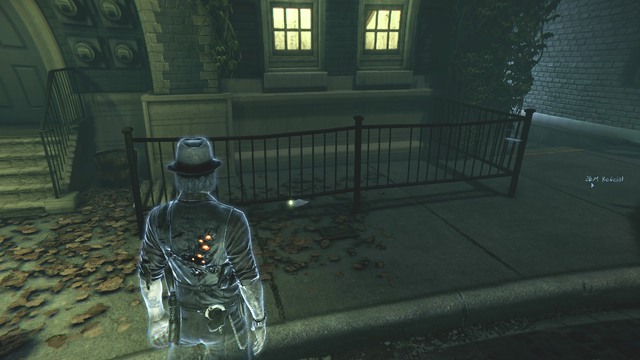 Your wife was very smart.
The fifth note can be found when you turn left and walk past the girl sitting on the bench. On the right you will notice the sheet lying by the bicycle. You will get the clue: Salem Feels Dangerous.
 Neither the bicycle is interactive.
Another note is on the police parking lot. This is: Escorted by a Knight.
 Even the police parking lot hides a lot of secrets.
The next note can be found on the jetty, near the church (Collect). You will get the clue: Day at the Beach.
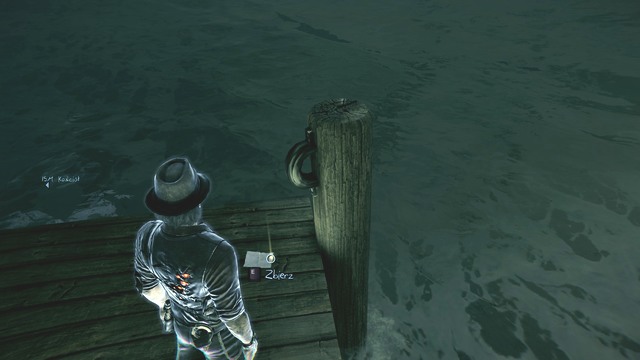 The sheet is on the very edge of the jetty.
The first message: Coffins, can be found on the third floor of the tenement. You have to walk into apartment 3A. On the bedroom wall - the one with the radiator - select: Reveal and Collect.
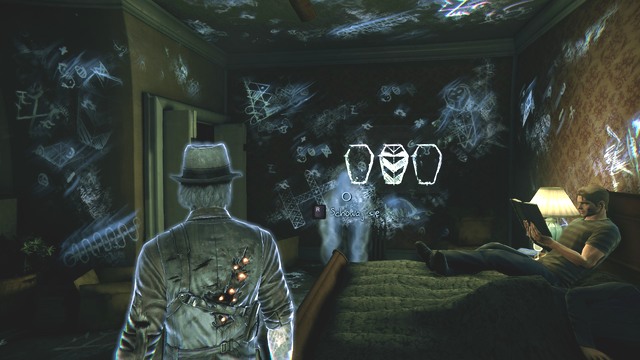 The man on the bed does not react to your presence.
The second message: Gallows, can be found on the second floor of the tenement. Walk past apartment 2B and go to the corner of the hallway. On the wall select Reveal and Collect. The Gallows note is yours.
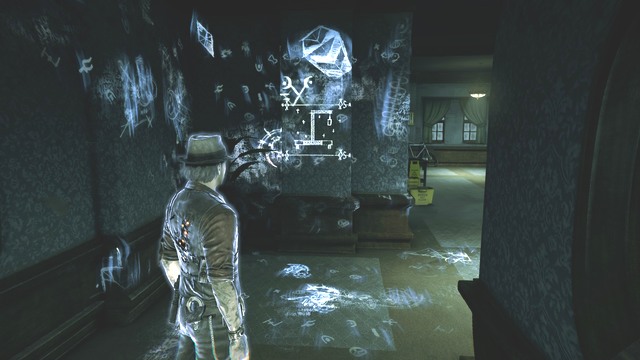 This secret is harder to discover.
The first Book can be found in the tenement on the top floor in apartment 4A. This is on the countertop in the kitchen, by the sink. You will get the clue: Concern for Joy's Safety.
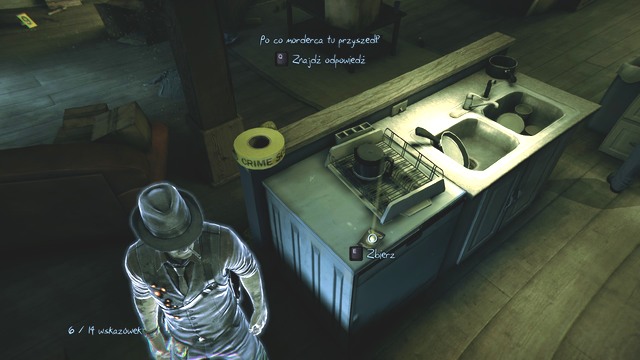 There is big mess in the apartment.
The first message: "The End of Forever", you will get after going out through the tenement window and walking straight. Once you leave the alley, you will notice a hat on the right. Select Reveal and Analyze My Life.
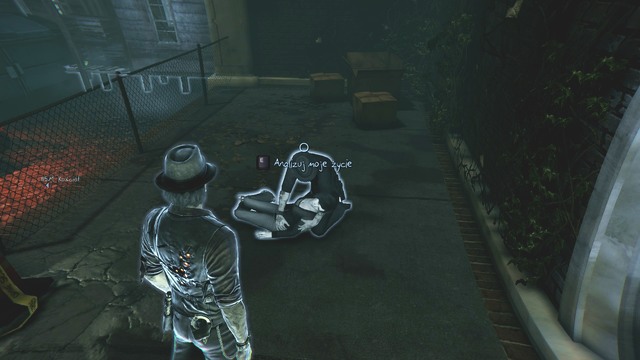 You often recall some moments from your life.
On the jetty by the church select: Reveal and Analyze My Life. You will get the clue: The Picture on the Beach.
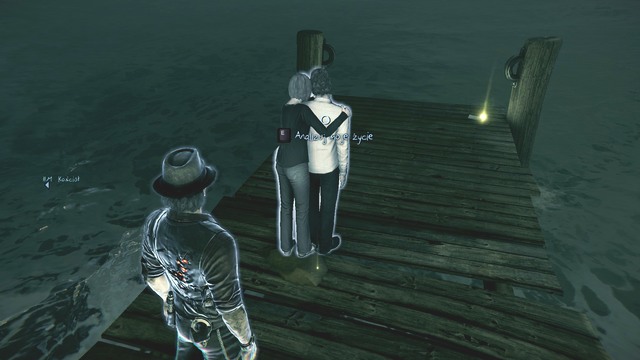 A perfect place for a romantic walk.
These items, and there are 16 of them, are collected for the side case "Eternal Flame" from "Ghost Stories" section. You have to leave the crime scene walking past the police cars and the van. Turn left. You will notice a girl sitting at a table, walk past her. Follow the pavement, and on the left you will see a shape. Select Reveal and Collect. 15 to go.
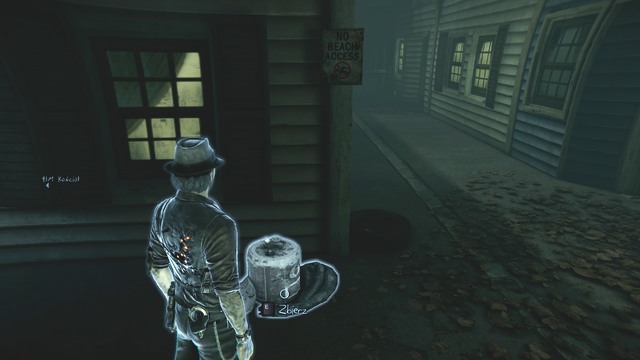 The collectible looks like a hat.
Two other Flames can be found on the square, which is located on the right from the place where you found Salem Feels Dangerous clue to Julia's Thoughts case. There is a bicycle. In the center of the square there is a cannon.
 You have to collect a lot of flames.
The fourth Flame is on the square, near the crashed car from "Near Gas Station" case.
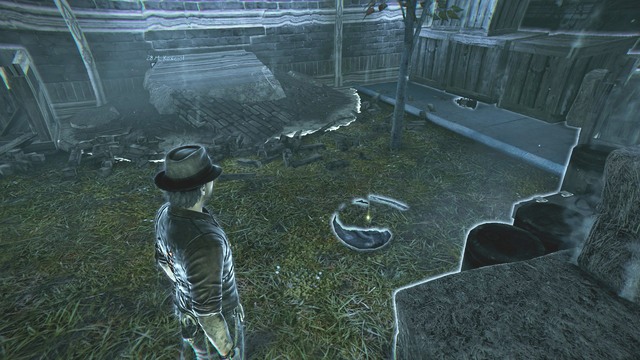 Your reveal ability is amazing.
The fifth Flame can be found on the east from the gas station, by the burning house.
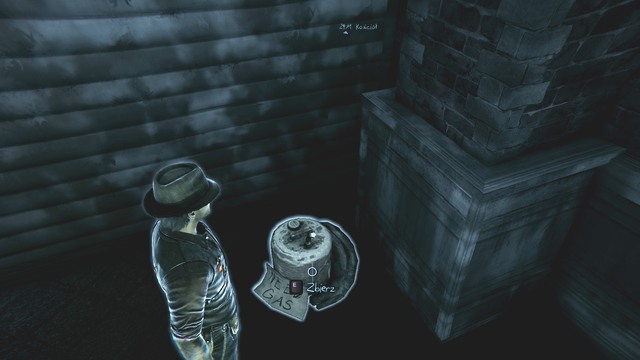 Who would have thought that an Eternal Flame may be here.
The first Plaque can be found in the north part of the square, near the crashed car from "Near Gas Station".
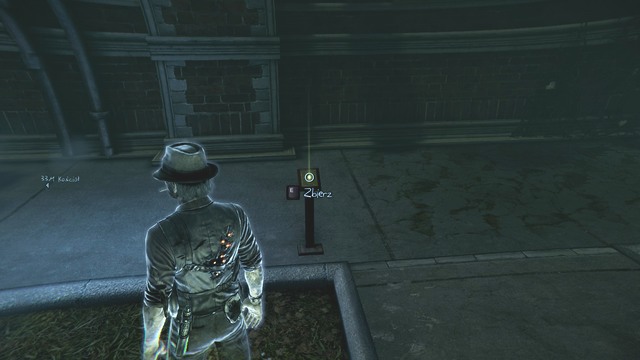 Armaments History Plaque.
Another Plaque is by the fountain in the restaurant, near the gas station.
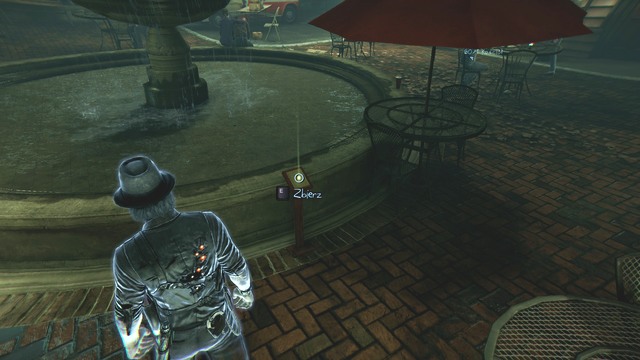 The fountain adds charm to the restaurant
In the alley behind the gas station there is: Gas Station History Plaque.
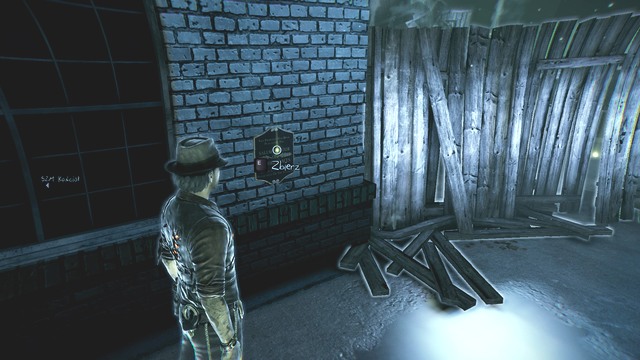 It is not safe in alleys like this.
In front of the stairs to the church, click at the Plaque (Collect) to obtain: Pirate History Plaque.
 The plaque is easy to miss.
Near the crime scene there is a police car. Select Reveal and Collect. You will get the clue: Rex's Sense of Guilt.
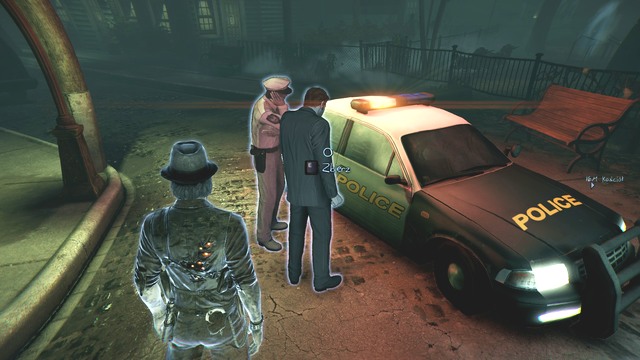 Your death was shocking for some of your colleagues.
You will find the first Hand Saw to the right of the entrance to the church, near the stairs.
 You will find various types of items in different places.
The second Hand Saw is located north (towards the altar) of the place where you've had a vision that showed you where the witness is.
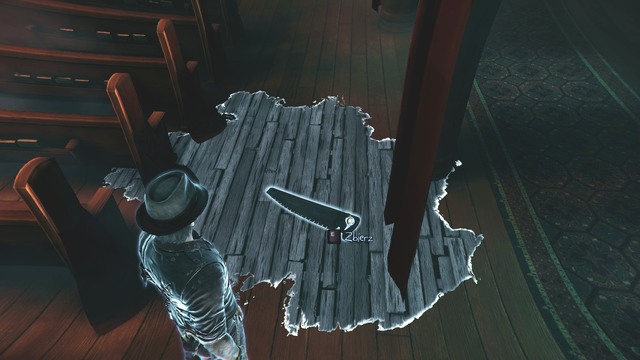 A hand saw is a dangerous tool.
The next two Hand Saws are close to each other. The third one is located in the corridor with the door saying "Rectory". Another one can be found in the passage between the two corridors of the Rectory.
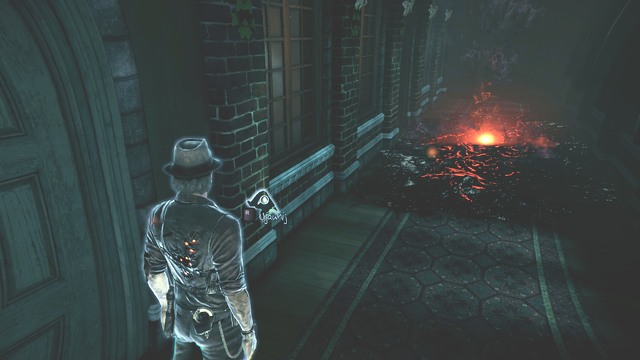 Besides taking the hand saw, you can't do much here.
You will find the next Hand Saw on the balcony. Go through the second door, where there is a mysterious force on the stairs, blocking your way. The tool is located right behind the door.
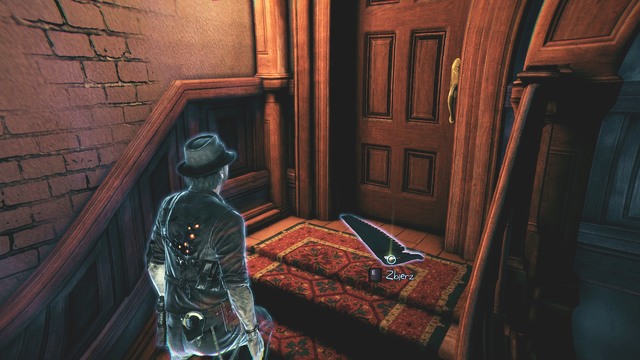 A hand saw in all its glory.
When in the Rectory, go to the end of the corridor. You will be passing the elevator. The next tool is lying your right, next to a piece of furniture.
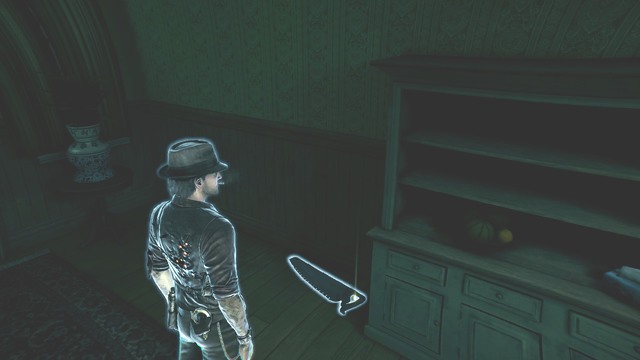 You have to search the corridors carefully.
There is a door opposite the place where you've found a Hand Saw a moment ago. Go through it and you will find another one.
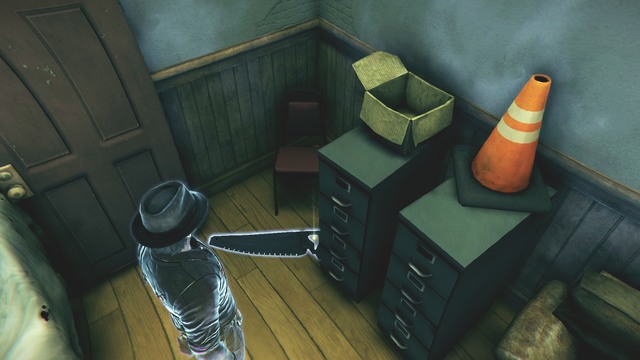 What a mess...
When in the kitchen (with the cat lying near the door), head to the door to your left. Enter the room and you will find another Hand Saw.
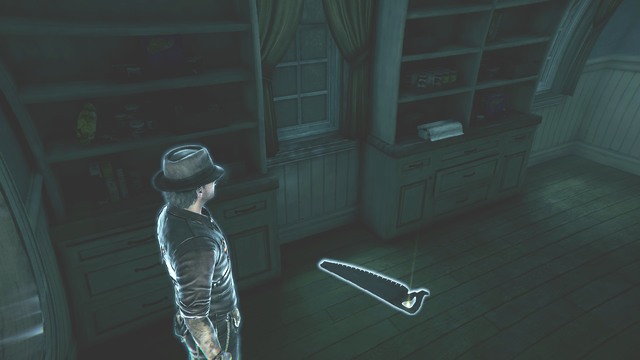 This time the tool is clearly visible.
When you leave the dining room through the east door, you will find yourself in a corridor, with a mysterious force blocking the stairs. There is another Hand Saw in the corner.
 There is a lamp next to the Hand Saw.
In the room with two women, from which you can go to the churchyard, you will find the next Hand Saw. It is lying in the corner of the room, next to the wheelchair.
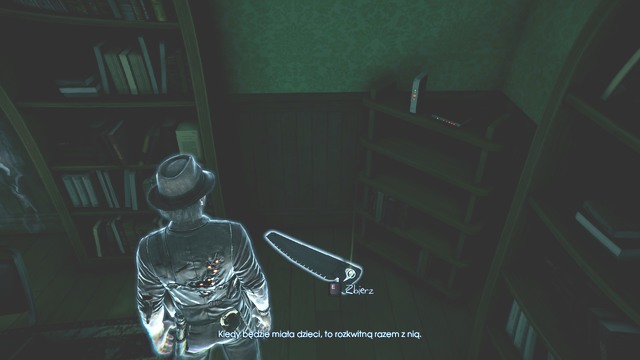 The Hand Saw is located between two pieces of furniture.
After you've found the witness in the attic, walk through the north door. The last Hand Saw is located in this room. You complete the "The Bell Tower Banshee" side case.
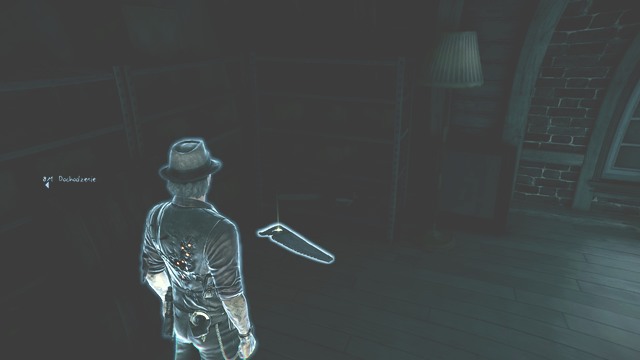 In the attic.
In the first row of benches, in the church, you will find the next note: Can't Stop Loving Him.
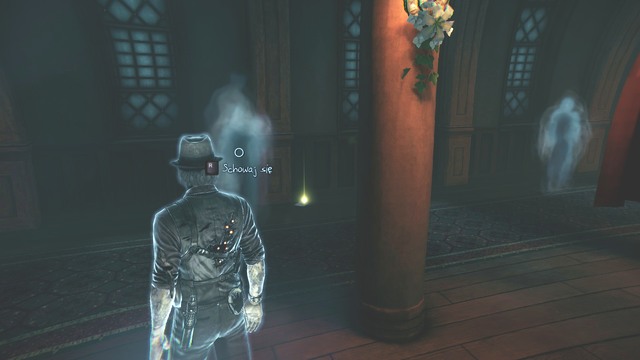 The note is located behind the column.
The next one is lying on the floor, near the girl sitting in the front (close to the flowers). You will get a clue: Ronan's Fedora.
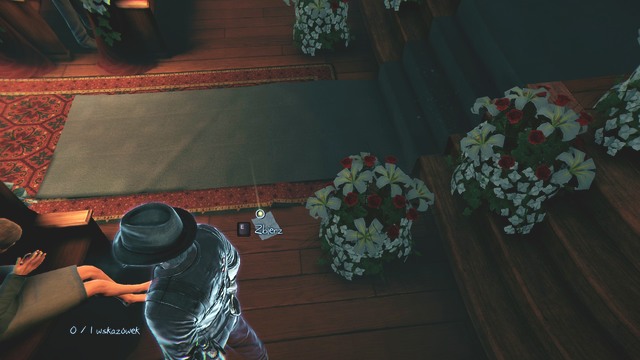 What lovely flowers.
You will find the next note on the church's balcony. Head to the wall to your right, which is blocking your passage. Stand on the edge, face the nave and aim the camera at the white light, so that you could hide. This way you will get to the other side of the wall. At the end of the corridor, behind a bench, you will find: Second Time's a Charm.
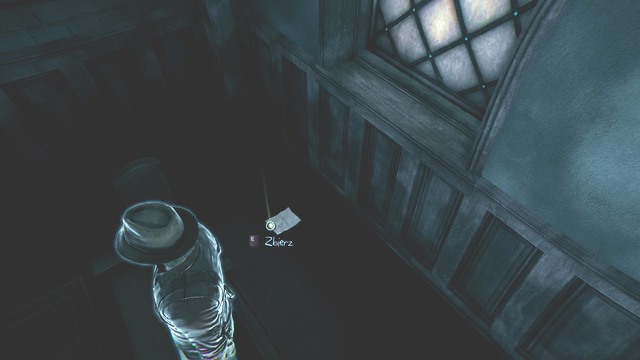 This note is rather difficult to notice.
You will need the revealing power to obtain the next message. On the beach near the church, to the right of the table on which you've found the Witness View of Eyes clue, there are some boards. Use: reveal on them and a wooden platform will appear. Go up and walk along the construction to the very end. You will find a clue: That Car Tattoo.
 The key to find this clue is the revealing power.
Close to the playground, which is near the crime scene (the place where you've met the ghost girl), there is a clue: Beatdowns to the "My Life" side case. West of it, in an alley, you will get another note (near the trash can). It will be: Family of Three.
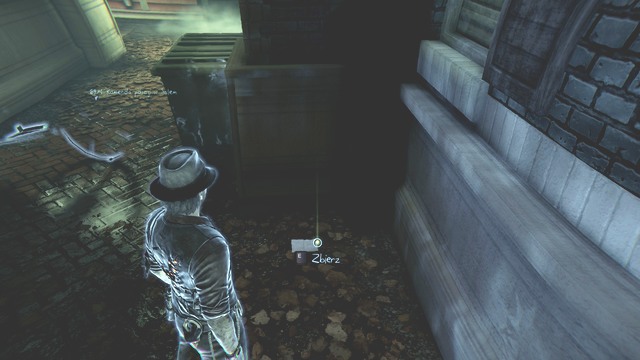 Another story concerning the relationship of Ronan and Julia.
You will obtain the next clue by going to the street where you've collected the Rex's Sense of Guilt clue, to the "Rex's Thoughts" case. There is a sign of the Bank of Salem on one of the buildings and a playground on the right. You will find: The Day We Met on it.
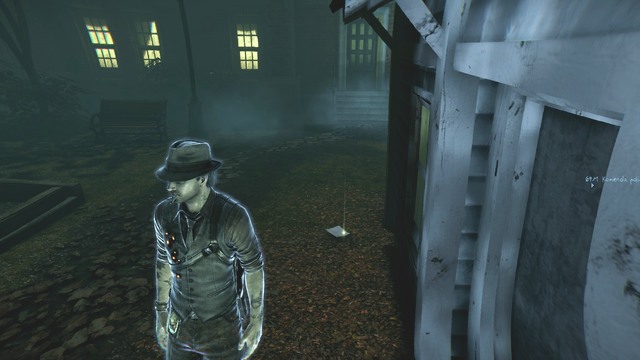 The relationship with Julia was everything to the protagonist.
The next piece of paper with Julia's thoughts can be found behind the playground, opposite the wall with the Burning clue, to the "Ghost Girl's Messages" case. It will be: Ronan's Childhood.
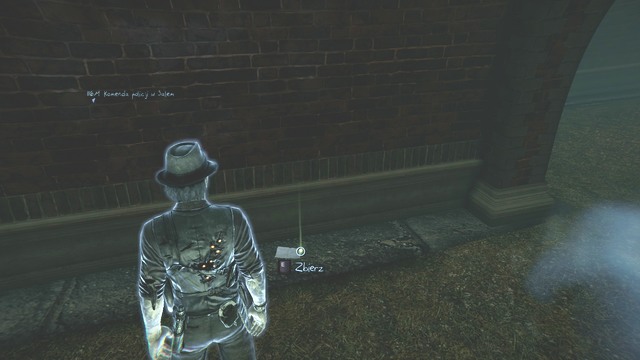 Julia was a very smart girl.
Close to the police parking lot, there is a square with a cannon. It is the place where you've found a Flame and the Armaments History Plaque. Reach the damaged wall and use: remove. Head left through the small corridor. At the end of it, you will find: Our Little Town.
 Besides Julia's thoughts, you won't find anything here.
The next clue is located on the altar in the church. Select: reveal and analyze my life. You will get a clue: Marrying Julia.
 Ronan is madly in love with Julia.
Return to the alley where you've found the abandoned tenement. Head towards the crime scene, cross the street and go through a hole in the fence. Turn right and reach the barrels. Select: remove (if you haven't been here already). Turn around, go through the fence and turn left. Walk through another fence. Turn right and reach a form. Select: reveal and analyze my life. You will obtain a clue: Beatdowns.
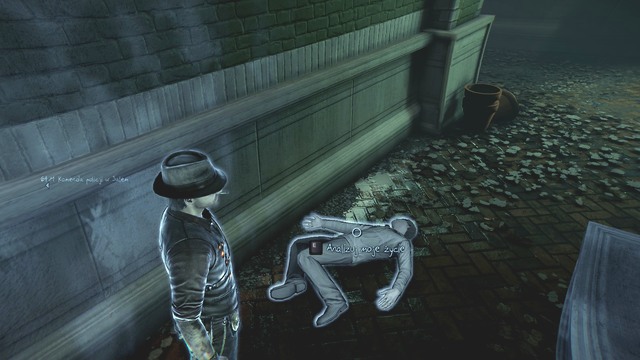 Ronan recollects various episodes from his life.
The next Plaque is located in the church, on the organ. It is: Organ Dedication Plaque.
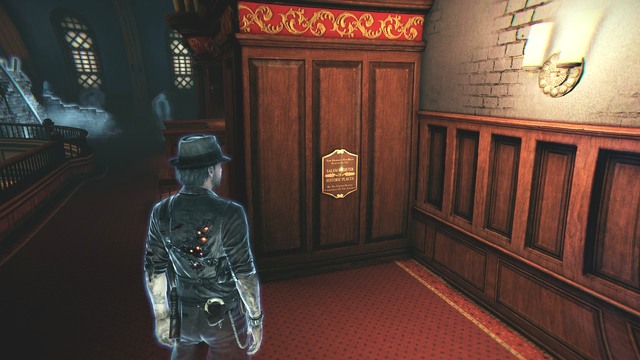 The organ have been here for quite some time.
Also on the balcony, you will find the next Plaque. Approach the wall to your left and look through the hole in it. Aim the camera at the white light and hide. This way you will get to the other side. To the left, click collect and you will be the owner of: Burned Rectory Plaque.
 The Plaque can be barely seen.
When walking out of the dining room in the Rectory, through the second door, you will find yourself in a corridor with stairs and a Plaque to your right. Collect it and you will obtain: Rectory Dedication Plaque.
 This one is well-lit.
On the playground near the cemetery, on a wall, you will find: Ashland Hills Cemetery Plaque.
 The Plaque is hiding in the darkness.
The next message is located in the bathroom. Head to the Rectory and find an ajar door behind the elevator, on the left. Use: reveal above the bathtub and collect. You will get a clue: Dunking Chair.
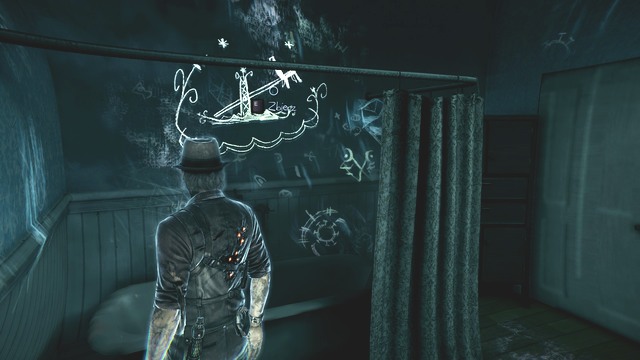 An interesting picture appears on the wall.
You will get the next message in the attic. Walk out of the room where you've met the witness, heading north. In the next room, go to the ajar door and enter the room with a guitar. On the wall, opposite the object covered with material, select: reveal and collect. You obtain a clue: Demons.
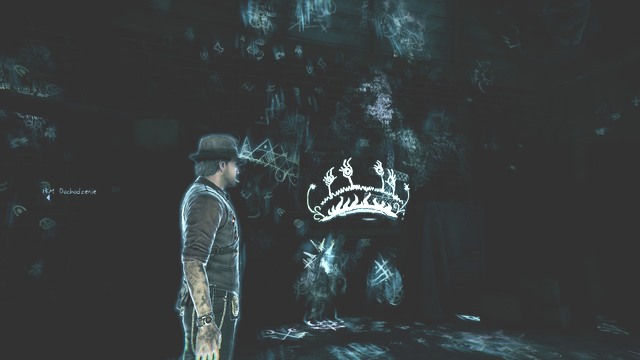 Once again a mysterious picture.
To obtain the next message, you will need to use your powers. Head to the wooden platform near the beach. There is a board showing the way to the church and a woman sitting in front of the house. Go past her and turn left. Turn right and you will see a scaffolding and a boat. Aim your camera at the white light behind the obstacle and hide. This way you will make it to the other side. Select: reveal on the northern wall and collect. You will obtain a message: Darkness.
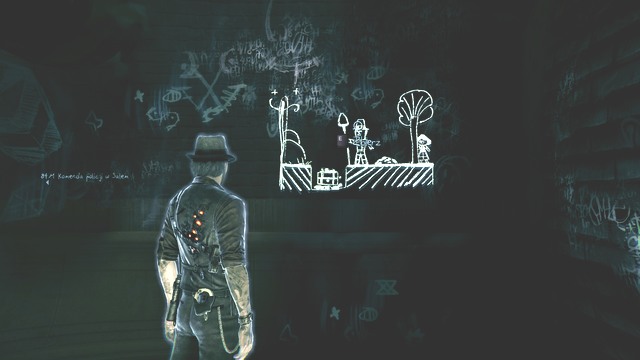 An encoded message from the other world.
Return to the other side of the boat, turn left and you will see another one. Go left to circle it. You will see a fence in the north - walk through it. On the wall opposite the fence, select: reveal and collect. You will discover a clue: Stone.
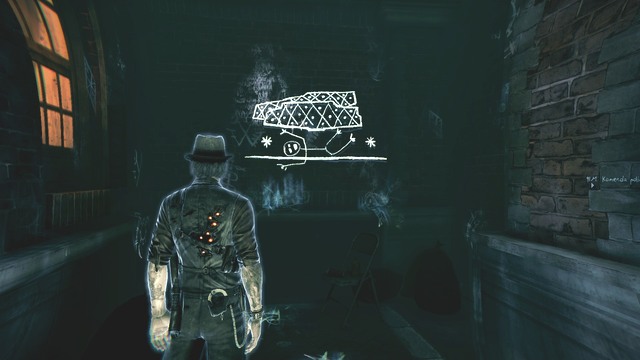 The picture doesn't look optimistically.
Make your way to the street with the playground and the bank. It is close to the crime scene. Go past the playground, heading towards the bank. There will be a fence on the right, where the News Article #2 clue, to the "Info About My Killer" case is. Walk along and use your revealing skill on a wall between two windows. Click collect and you will get a message: Burning.
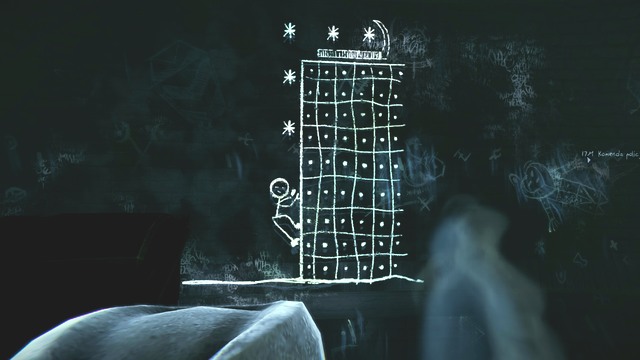 You can see flames on the drawing.
Close to the place where you've found the last message, east of the Ronan's Childhood clue, there is a wall. Select: reveal and collect. You will get a clue: In Her Hands.
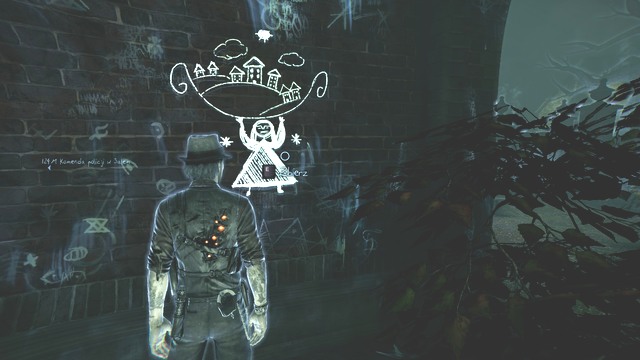 The main motive of this message is an unknown woman.
To the right of the wall, on which the Chalk Bell Symbol is, there is a blind alley. It is close to the psychiatric hospital. In the alley, behind a trash can, click: reveal on the wall. You will unlock a message: Quest.
There are a lot of dots on the drawing.Head to the restaurant, near the gas station. Opposite the place where you've collected the Fountain Dedication Plaque, notice an ajar gate in the fence. Walk through it and reach a wall. Use: reveal and collect. You will obtain a clue: Poppet.
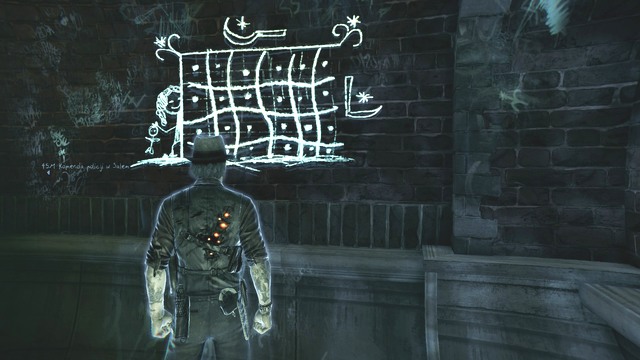 This message is similar to the last one.
Now make your way to the square with three cars parked and a fence with the "Danger" sign. It is the place where you've collected the Judgment House Plaque, to the "Witch Trials History" case. Looking at the cars, turn west. Go straight and walk through the trash cans. You will reach a wall, on which you should use your revealing power. Collect and you will obtain a message: Flowers.
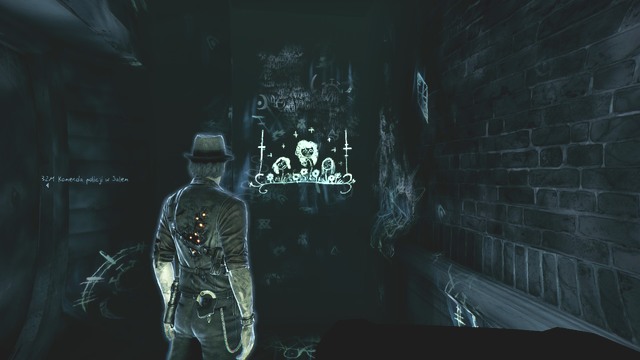 The flowers are not especially pretty.
You will find the next note on the beach, near the church. It is lying on the table, near the crosses and the boat. It is: Witness View of Eyes.
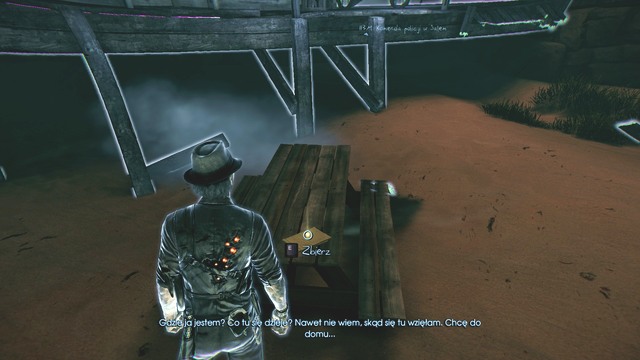 You won't find nothing besides the note on the table.
You will have to use your powers to obtain the next piece of info. Head to the wooden platform, near the beach. There is a board showing the way to the church and a woman sitting in front of the house. Go past here and head left. Turn right and you will see a scaffolding and a boat. Get to the other side by aiming at the white light and hiding. Here you will find the next clue: G. Soderberg family Photo.
 Information about the killer can be found in various, sometimes strange, places.
Return to the alley where you've found the abandoned tenement. Head towards the crime scene. Cross the street and walk through the hole in the fence. Turn right and reach the barrels. Use: remove. Behind the obstacle, you will find a picture. C. Nelson Family Photo.
 Before, you wouldn't be able to get past the barrels.
Turn around and walk through the fence, then turn left. Walk through another fence. You will find a clue behind it: C. Nelson Cause of Death.
 The note is located in the corner.
You will find the next piece of info on the playground close to the crime scene. You can get there by leaving the alley on which you've found the Beatdowns clue, to the "My Life" case. It will be: A. Grace Cause of Death.
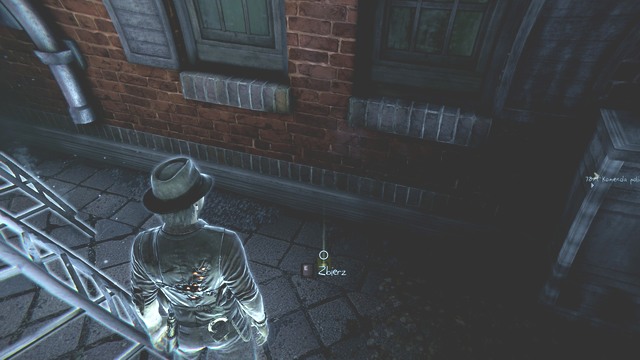 Thanks to the notes, you can learn more about the killer.
For the next clue, you have to look in the alley where you've found the Family of Three clue, to the "Julia's Thoughts" case. It is located near the abandoned playground, close to the crime scene. Go behind the trash can and in a blind alley you will find: A. Grace Publicity Photo
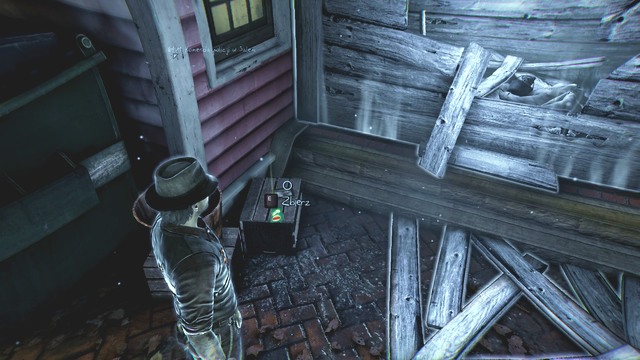 The killer is already famous
You will get the next clue on the street with the bank and a playground. Go past it and cross the square. You will see a house on your right, with lights glowing. If you walk a bit further, you will see a fence, behind which you will get: News Article #2.
 Look for the house with lights burning.
Now head to the cemetery. There is a fence nearby with a cat lying next to it. East of the fence, you will find another note: K. Douglas Cause of Death.
 The note is lying under a bush.
At the end of the street with burning houses, there is a psychiatric hospital. To the left of the entrance, there is a shed. Close to it, on the wall, you will find a bell symbol. You will get a clue: Chalk Bell Symbol.
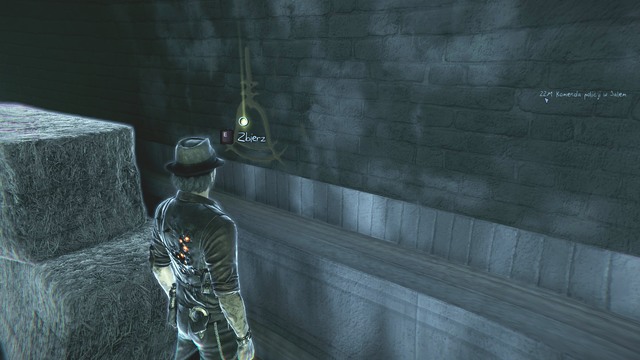 A bell is the killer's mark.
On the beach (near the church), after selecting: reveal, walk onto the wooden platform and head left towards the end of it. To your right, use: remove. The wooden wall will disappear and you will find a Flame.
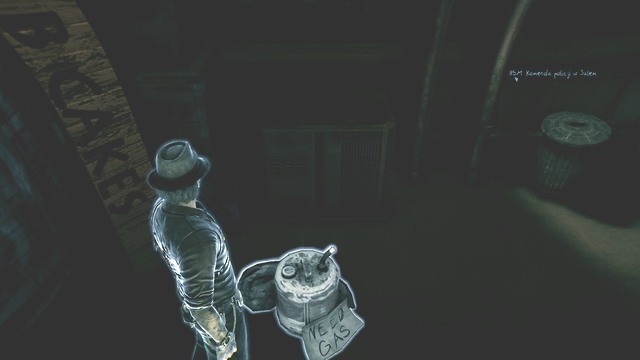 As usual, the flame is located in a dark place.
The next one is rather close to your position. Turn around, cross the wooden platform and use: reveal on a piece of wood. A passage will show up. You will find a Flame on your right.
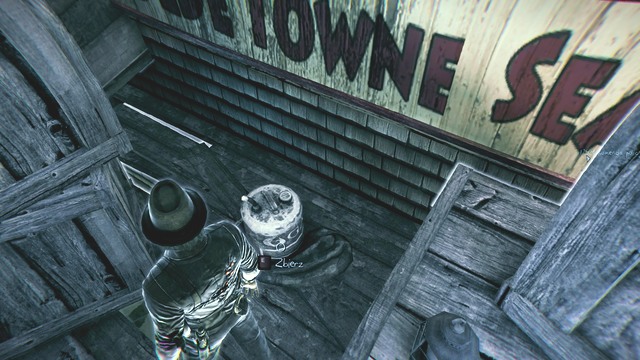 You have to think a bit in order to find all the Flames.
The next Flame is located on the street with the bank and a playground, to the left of the fence with the Burning message, to the "Ghost Girl's Messages" case. You will find it in the corner of a building.
The Flame is located right below the window.For the next Flame, head to the cemetery. Walk through the fence with the cat nearby and possess the creature. Your first goal is the scaffolding on your right. Go straight and jump onto a stack of pallets. From there, make your way to the scaffolding. Jump onto another platform and go up. Now you only have to make it to the next platform, on which you will find a Flame.
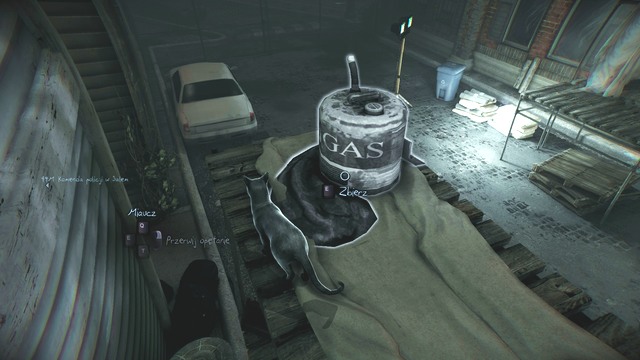 The cat is nimbler then you are.
You will find the next Flame on the second scaffolding, in the same location. Jump off the pallet and head to the platform leading to the scaffolding on the left. From there, make your way to where you can see some white material. Climb the material and get to the Flame.
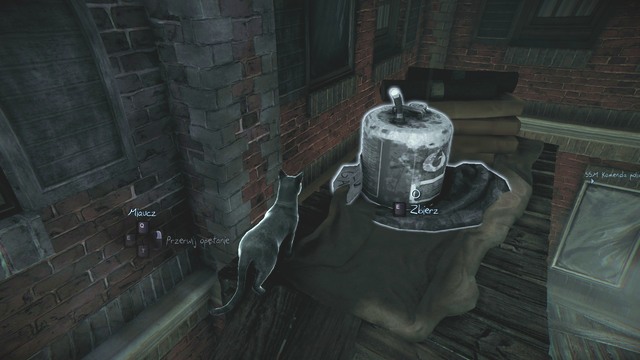 In a moment, you will have to dispossess.
Make your way to the street with burning houses. Look for a yellow taxi. Turn right next to it and go past a garden, where a man is sitting. Reach the corner of the location and select: reveal. A staircase will appear. Go up and collect the Flame located there.
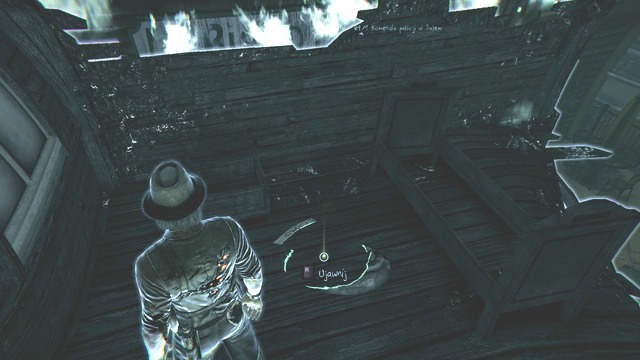 Below, there is a man sitting in a garden.
Return to the taxi and go straight. You will reach a psychiatric hospital. Turn right and you will find another Flame behind the bushes.
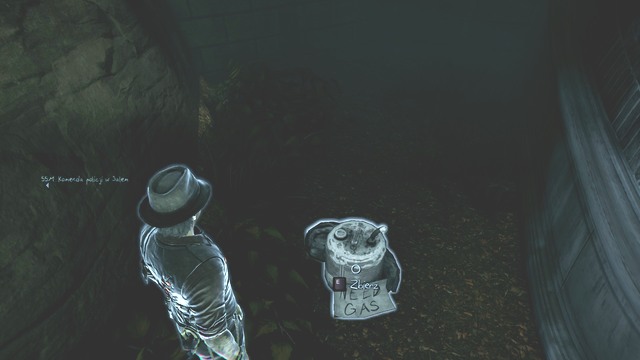 As you can see, something interesting can be found near the walls of the hospital.
Now head to the place where you've found the Judgment House Plaque, to the "Witch Trials History" case. There is a square nearby with three cars parked. Facing the fence, in a blind alley (there is a "Danger" sign), turn around and go straight. Go past the square. Walk along the house on your left. You will see a boat. Turn right and go through the fence. There is a blind alley on your right and a Flame in it.
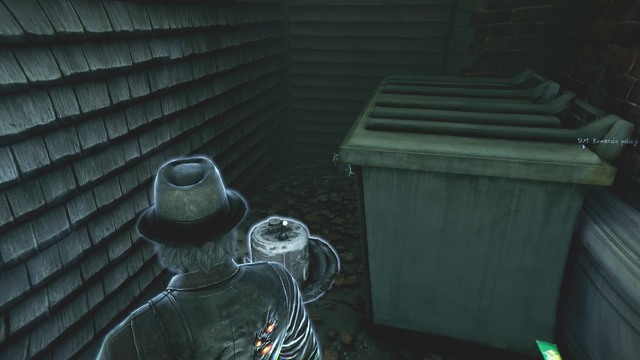 You have to search every nook and cranny of the house.
Possess the cat sitting close to the place where you've found the last Flame. It is near the square with the three cars. Controlling the pet, go straight and turn right. Jump onto the obstacle, then on another one and then onto the container. Turn right and jump off. Now go up using the boards. Go straight and jump to the right. You will find yourself on a container. Turn left and climb up, using a plant. Go to the end of the boards and jump onto a case. Turn right and jump onto the balcony. Now you only have to make it onto the box, where another Flame awaits you.
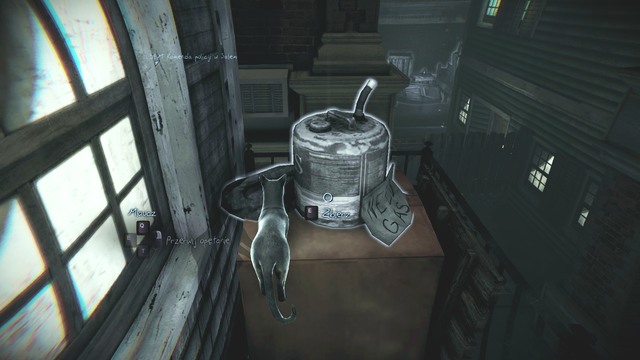 Cat always falls on its legs.
Head to the place where the crashed car is (where you've activated the "Near Gas Stations" cases). Walk along the street with a green van. Reach a wall and turn right. You will reach a square with a cannon. Cross the square heading north-west. This way you will get to another square, with three cars on it. There is a trash can and a blind alley nearby. You will find the Judgment House Plaque there.
 There are several such Plaques.
Go to the lodge, which is located opposite the main entrance to the building. You can enter either through the east or through the west door. Choose the east one. On the right, near the wall, use: reveal and collect a Rifle.
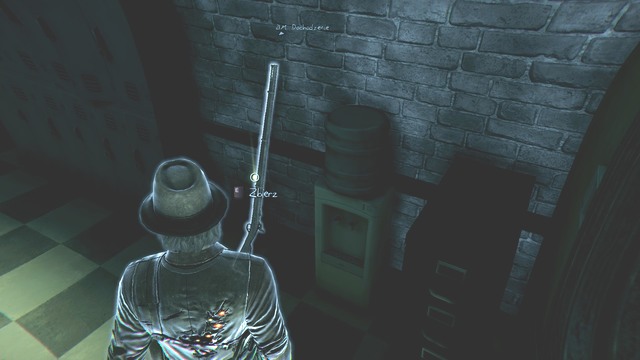 You will find the first rifle in the lodge.
Head left when leaving the war room. Go past the stairs and you will reach an ajar WC door. Go in there and enter the first cabin (opposite the entrance). You will find another Rifle. Go to the corridor with the Holding Area sign. Walk to the end of it. By the wall, next to a chair, you will find the next Rifle.
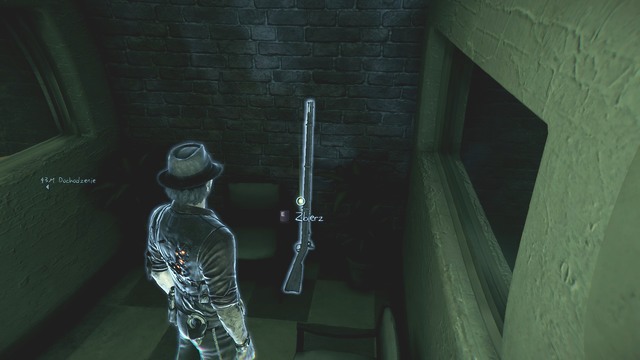 Another Rifle for you.
For the next one, head to the cell with the Judge clue on the wall. You will reach it by walking through the walls, because the passage is blocked by a mysterious force. Now leave the cell by walking through the bars. Notice that you're now on the other side of the force. Walk through the door (the only one possible) and then head right, through another door. You will find yourself in the lodge, with another Rifle standing near a cabinet.
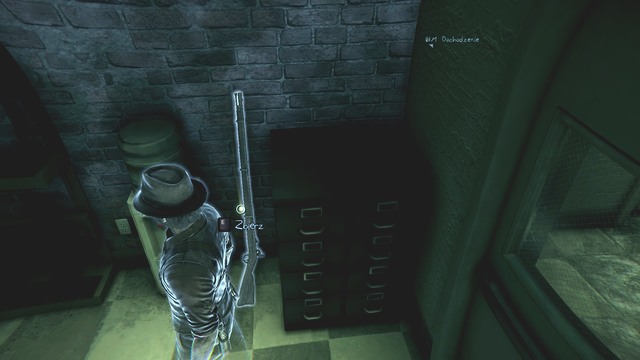 The Rifle isn't difficult to notice.
Go to the second floor, where there is ladder opposite the stairs. Go left from the ladder and walk straight until you reach some dining tables. You will find the next Rifle behind a column.
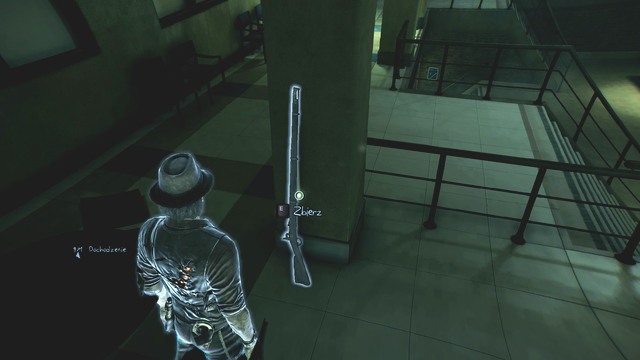 The Rifles are connected to another ghost story.
On the second floor, go left from the ladder near the stairs. Enter the room to your right. In the corner, behind a board, there is another Rifle.
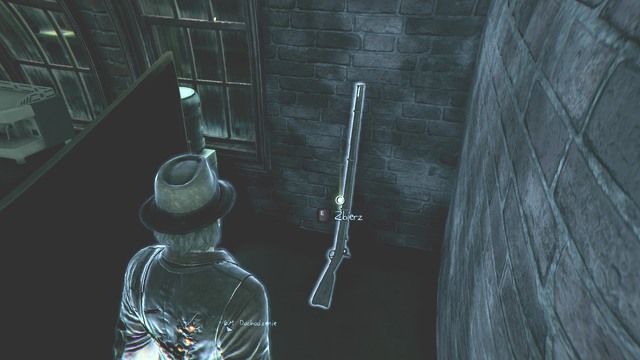 It's dark outside, which makes the Rifle more difficult to notice.
You will discover another Rifle in the Detective Offices. Go through the corridor opposite the entrance and turn left at the end of it. You will find a Rifle by the wall.
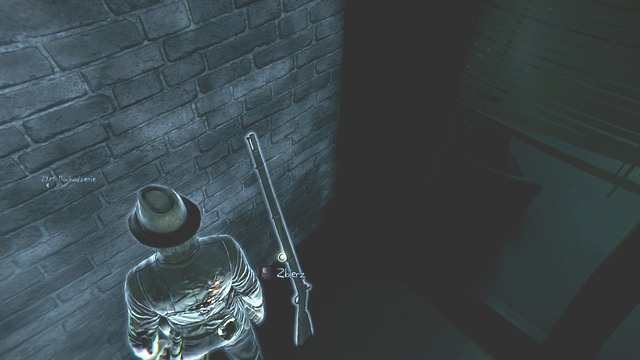 This one is located in a visible place.
Turn around and walk through the door on your left, then straight into another room. By the window, you will find the last Rifle.
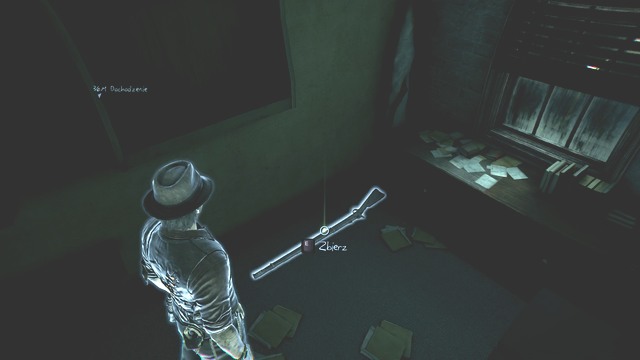 For completing the quest, you can watch a cut-scene.
To the left of the entrance to the Police Station, there is a Note on the wall. Take it and you will get a clue: Suspect Released.
 Notes about the killer are scattered around the Police Station.
Opposite the main entrance, there is a lodge. Enter from the left side. On the table to your left, there is a note. Collect it and you will obtain a clue: Missing Persons Report
 There's nothing more on the table that could interest you.
When leaving the war room, head left. Go past the stairs and reach the north-western wall. There you will find a note: Witness Description of Clothing, to the "Info About My Killer" case. Walk along the corridor on the first floor, where the toilet is. Go past the two cops. You will reach a big hall. Look to your left and walk through the ajar door, straight into a staircase. There is a note on the bin: G. Soderberg Personal Info.
 You can find something interesting even on a bin.
Return to the big hall and go through a door with a nameplate saying: H.C. Befer Chief Officer. There is a note on the desk. You will obtain: G. Soderberg Police Progress.
 Besides the note, you won't find anything else here.
Return to the corridor and walk until you reach a door saying: K. Kane Inspector. On the desk, next to the telephone, there is another clue: A. Grace Police Progress.
 Surely the phone has an answering machine.
To the left of the 1777 Battle Plaque, there is an entrance. Walk through it and you will find a note on a bench. You get a clue: C. Nelson Police Progress. There's a wind rose above.
 Near the cells.
Now go to the Holding Area corridor and walk through the first door to your left. On the desk, you will find a note: C. Nelson Personal Info.
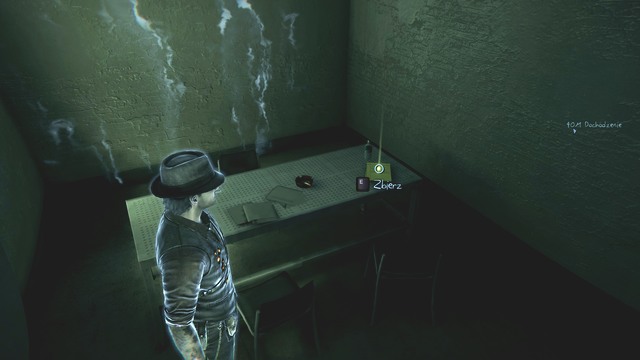 You won't find anything else on the desk.
Go to the second floor. Opposite the stairs, there is a ladder. Go left from it. You will reach a room on your right. Enter and approach the desk on the left. You will find a note on it: A. Grace Personal Info.
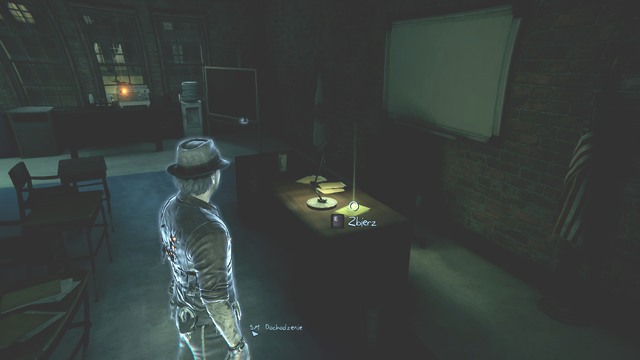 You will find an interesting note on the desk.
Go left from the ladder, enter the room on the right and walk straight until you reach another corridor. You will see two cops on the left and a door saying: Detective Offices. To the right of it, on the wall, there is a note: Killer's Profile.
 The policemen are not aware of your presence.
Head to the Detective Offices and walk through the first door on the left. There is a desk on the right and a note on it: K. Douglas Personal Info. On the same desk, you will find: K. Douglas Police Progress.
 There are a lot of things to collect in this room.
Return to the corridor, walk straight and go through the door next to Detective O'Connor's room. Opposite the entrance, on the wall, there is a map. Collect it and you will obtain: Map of Killings.
 This map can help you catch the killer.
To the left of the main entrance, opposite a bench, there is a form. Select: reveal on it and collect. You will get a clue: Baxter's Relationship with the Witness's Mother.
 Our protagonist is not spotless.
To the right of the entrance to the Police Station, go straight. You will reach a wall with a showcase and the next Plaque: 1775 Fortress Plaque.
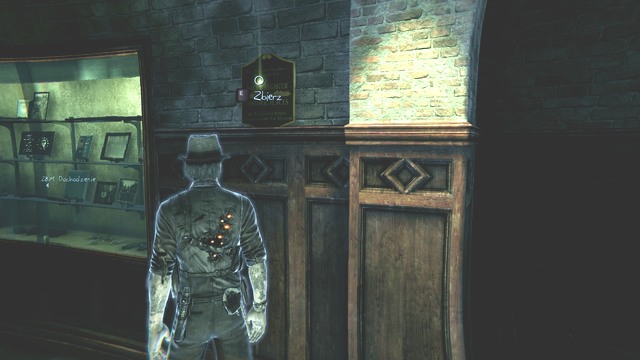 The Plaque is hanging next to the showcase.
Walk along the corridor (first floor) with H.C. Beger and K. Kane rooms. There is also a toilet. Reach the end of the corridor and you will find: 1777 Battle Plaque.
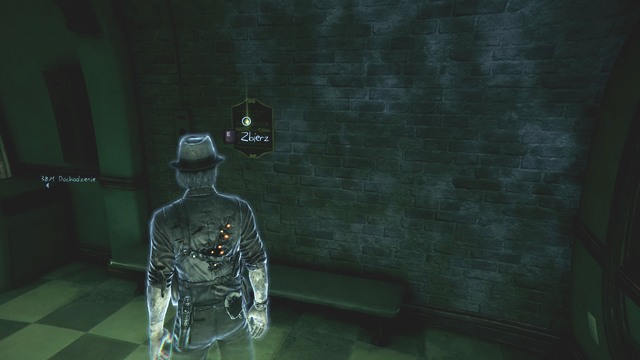 The Plaque is easily noticeable.
Make your way to the Holding Area. Walk through the bars behind which you will find: 1776 Battle Plaque.
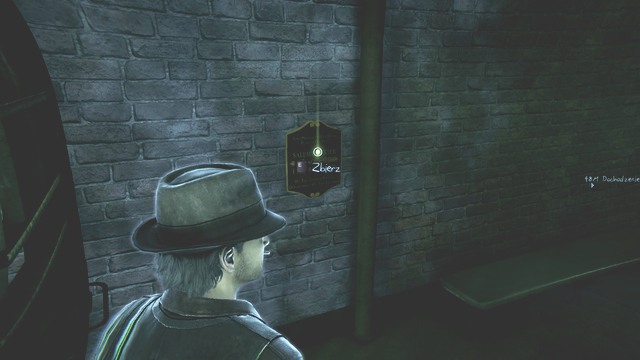 Not a pleasant place.
You will find the next Plaque also in the Holding Area. Leave the room where you've found a Rifle. Walk through the bars and you will find: Forensic Facility Plaque on the wall.
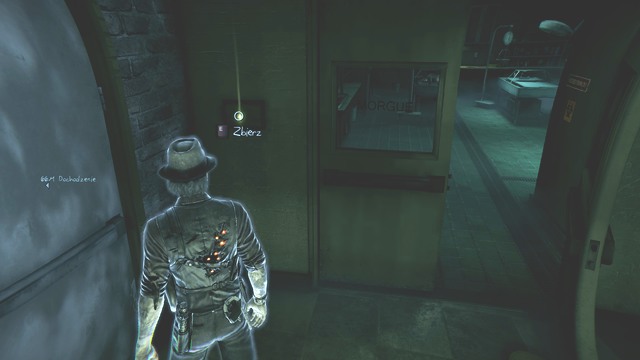 There is a morgue nearby.
You will find the next message at the Police Station, in the Holding Area. Go to the end of it and walk through the last door on the right. User: reveal on the wall. You will discover a message: Cannon.
 This message is called Cannon.
Make your way to the cell where you've found the My First Crimes clue, to the "My Life" case. Walk through the wall behind the bed, straight into another cell. On the wall in front of you, use your revealing power, so that you could obtain the next message: Judge, to the "Ghost Girl's Messages" case.
 These messages make you think.
You will find the next clue in the Holding Area as well. The passage is blocked by a mysterious force. You have to get past it. Go to the second cell on the left, counting from the entrance. Walk through the wall into another cell (there's ghost standing next to it). Use: reveal on the bed and select: analyze my life. This way you will get a clue: My First Crimes, to the "My Life" case.
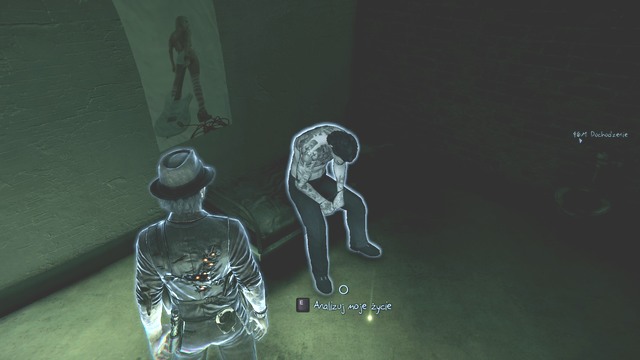 You were not innocent.
Now head to the morgue. It is located in the place where you've found the Forensic Facility Plaque. Get close to your body and select: analyze my life. You will get a clue: Seeing My Own Corpse.
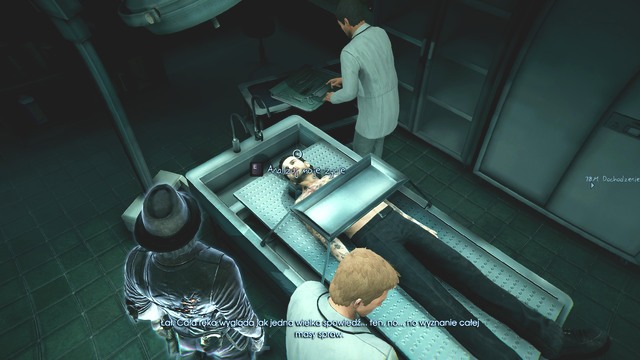 It is a rather unusual view to see one's own corpse.
Go left from the war room and reach the stairs. Go to the second floor. There is a ladder opposite the stairs and dining tables to the right of it. To the right of the windows, select: reveal and analyze my life. You will obtain a clue: When Baxter Tried to Threaten Me.
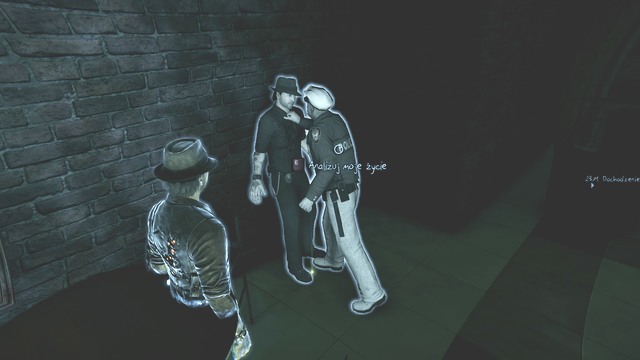 Thanks to this task, you've learned some details about Ronan's life.
You will obtain the next clue on the second floor as well. Get to the Detective Offices and walk through the first door on the right. There is a note on the filing cabinet. You will obtain a clue: Visit to the Station, to the "Julia's Thoughts" case.
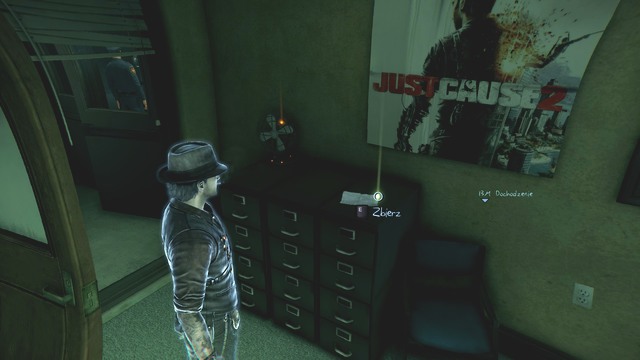 There must be some gamers at the Police Station.
Leave the room, walk straight until the end and turn left. Walk through the door on the right. There is a nameplate saying: R. O'Connor Detective. On the floor, you will find a note: Ronan Gets His Badge. In the same room, on a chair next to the sofa, there is another note: Ronan's Trouble with the Law.
 With these notes you will learn something about Julia.
Go to the second room and take a note from the table. You will get a clue: Plain Clothes Cop.
You will find the next and the last clue in the Detective Offices on the second floor. Walk through the first door on the left and use: reveal near the bed. You will get a clue: Rex's Gratitude. You complete the "Rex's Thoughts" side case.
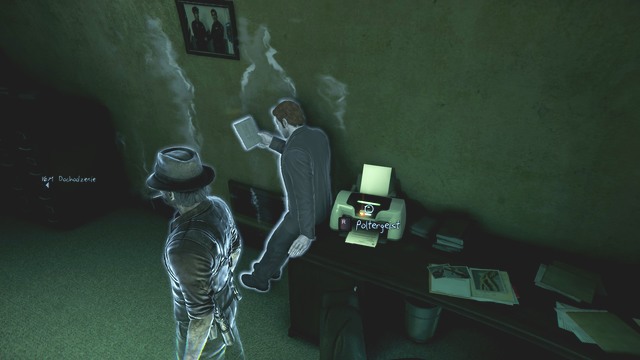 This way you complete another case.
You will find the next clue on the second floor of the Police Station. Head to the Detective Offices. Go straight to the end and turn right, then turn left. Go through the door saying "Baxter". Behind the desk, on the floor, there is a note: Insights on the Killer's Motives.
 There are a lot of papers on the desk.
To the left of the graveyard entrance, between graves, there is a note. Take it and you will obtain the Meaning behind the Tattoo "Cheated Death".
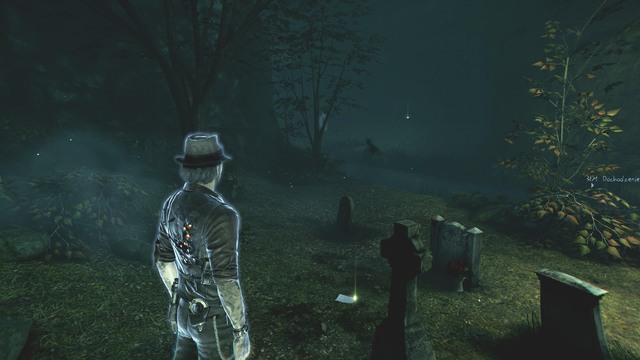 It is the first collectible that you find in the graveyard.
As you follow the path from the graveyard entrance, go ahead and cross the bridge. Follow the path ahead, go past the lamppost on the right and, before you reach the one on the left, take a turn to the left, into the path. You only need to climb onto the elevation now, on the right, and you will see a note. Collect it and you will obtain a clue: A stroll through the Graveyard.
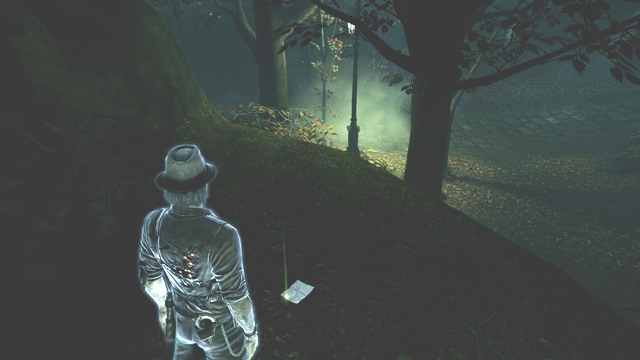 Even in the light of the lamppost, the note is barely visible.
Follow the path from the graveyard gate and keep going ahead. You will reach a wall, through which you need to cross. On the elevation, to the right, next to the tree, there is a note. Collect it and you will obtain a clue: Careless Ronan.
 Julia had feelings for your character.
As you exit the tomb, on the graveyard where you obtained clue Graffiti for the Info about my killer case, go right. Climb onto the elevation on the right. Nearby, there is a group of people and another signpost. You will obtain a clue: Why Ronan became a cop.
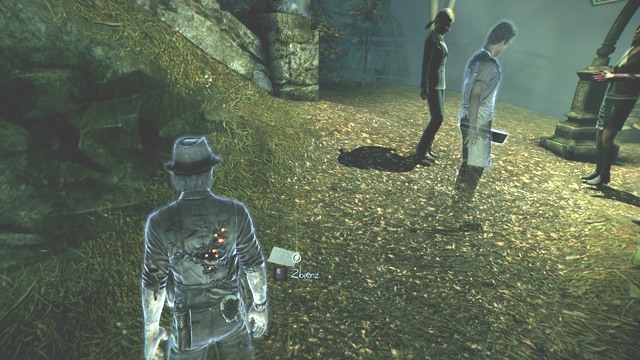 Nearby, there is a ghost with a cleaver.
Go to the house on the graveyard, where you learned the ability to teleport. Climb to the upper floor, follow the wooden platform, to the very end, and jump down. Below, next to the bed, there is a note: New Roses Tattoo
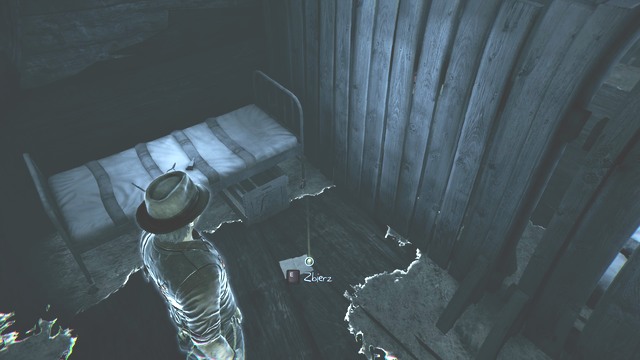 Julia did not like tattoos.
Return to the location, where you learned the ability to teleport. Teleport to the other side, reach the end of the platform and teleport to the other side. Make it through the narrow crack and teleport to the platform with barrels on it. Turn left and teleport to the next platform. You will find there a note, next to the branch. You will obtain New Tattoo with Justice.
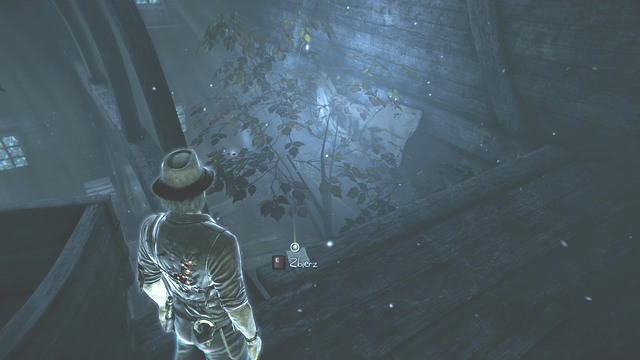 The view is obstructed by the tree.
Reach the location where you fought three demons. At the end, there is a fence. Cross the fence and follow ahead. You will reach a note, on the ground, next to a stone. You will obtain a clue: Rex on Ronan's Record. The final note on the graveyard, can be obtained by teleporting to the other bank, next to the grate that you removed. Follow the path of white halos. You will obtain a clue: Ronan and cigarettes. After you exit the graveyard, head towards the street with the blazing houses. Nearby, there is a playground. Reach the red wall and teleport to the right, across the crack. you will find a note there. You will obtain a clue: Ronan's Childhood.
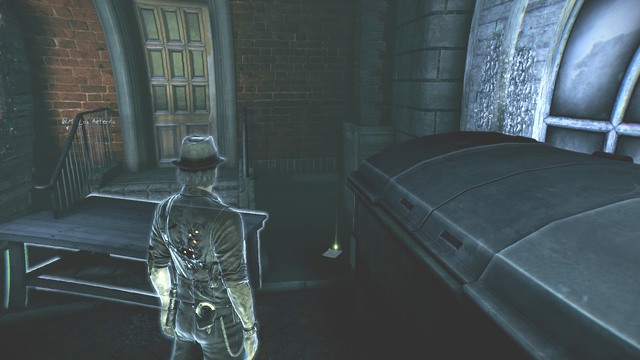 This clue is well hidden.
Go to the restaurant near the gas station. Reach the railway car that is standing in the way and teleport over to the other side. You will obtain a clue: The meaning behind the dollar bill tattoo.
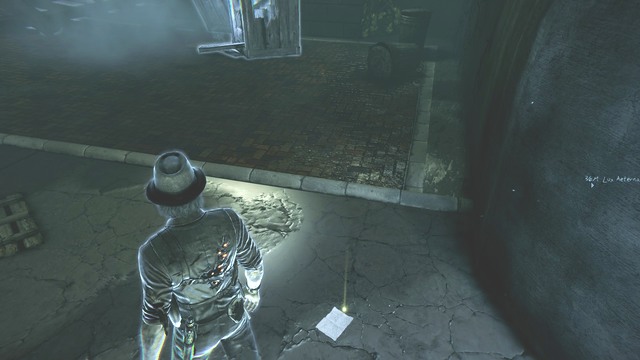 Had it not been for the ability to teleport, you would have never obtained this clue.
On the graveyard, approach the first signpost, there are two people in trench coats nearby, at the grave. As you look towards the grave, go left. Cross the hole in the fence and teleport into the grave on the right. Approach the symbol of the Bell Killer, in front of you, on the wall. After you choose: collect, you will obtain a clue: Graffiti.
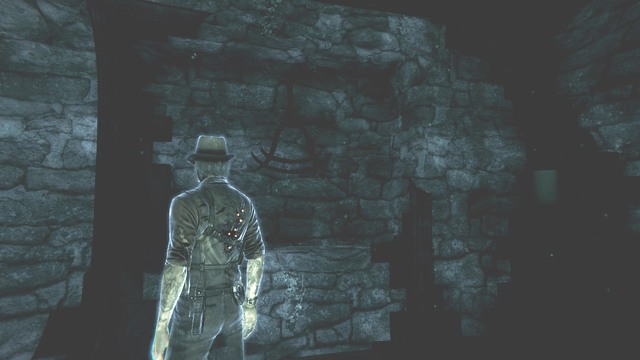 The symbol on the wall resembles a bell.
On the graveyard, next to the group of people(a guided tour) there is a sarcophagus. Use: reveal and collect. You will obtain the first Memorial Plaque for the Heirloom case. Nearby, you found a clue for the Julia's Thoughts case: Why Ronan became a cop.
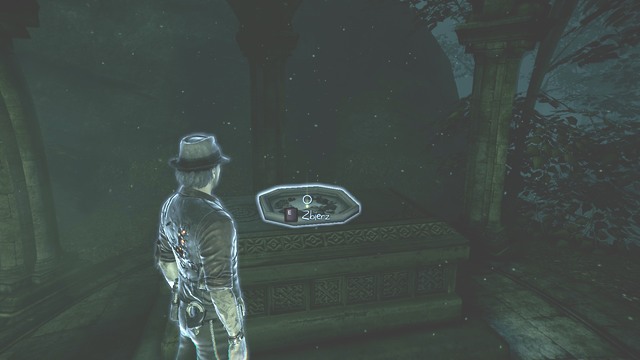 This is the first Memorial Plaque that you obtain.
You obtain the next Plaque after you reach near the tomb, with two people next to. to the left, there is a signpost and, to the right of the grave, there is a low wall. Teleport past the wall and the Plaque is yours.
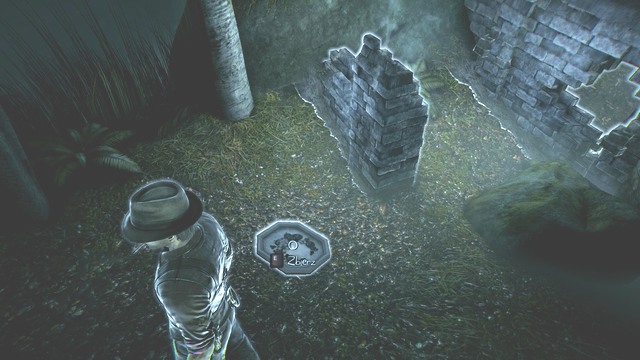 It would be really tough without the ability to teleport.
You obtain the third Plaque by jumping off the platform, where you found the note: New tattoo with justice, for the Julia's Thoughts case. Approach the bed in the corner. The Plaque is on the bed.
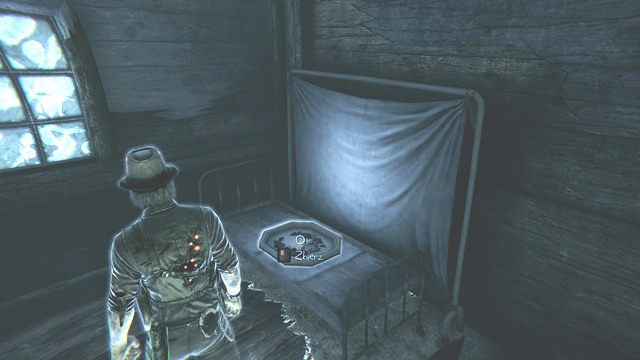 The bed looks rather Spartan.
Go to the part of the building marked as the Exit. The path ahead is blocked off so, teleport and make it through the slot (there are two spades on the left). Go ahead and turn right. To the right, you will notice a gate. Use remove. Behind the door, there is the fourth Memorial Plaque.
 There is nothing more to find here.
Return to the street and turn right. Then, go straight ahead, for a bit. To the right, you will notice destroyed stairs. Use reveal and climb up the stairs that appear. On top, there is the fifth Memorial Plaque.
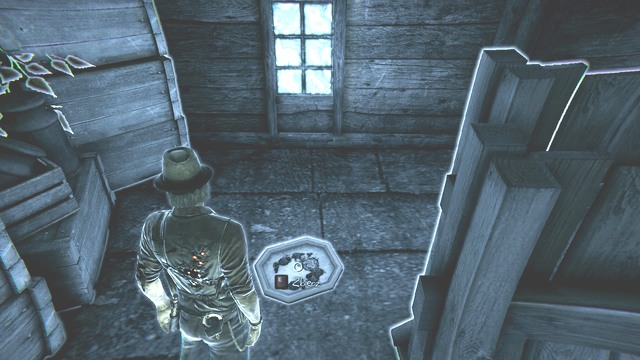 Thanks to your abilities, you find more and more items.
You can find the sixth one as you cross the location, where you fought the three demons. The more difficult one is what is meant here. Approach the fence with the sign: Danger, Keep Out. To the right, there is a tomb - cross it and go ahead. Pass the girl and the boy, at the tomb on the left. As you go ahead, you will reach a barrier. Next to it, there is another Memorial Plaque. Turn away and go left of the tomb. On the sarcophagus, there is another Memorial Plaque.
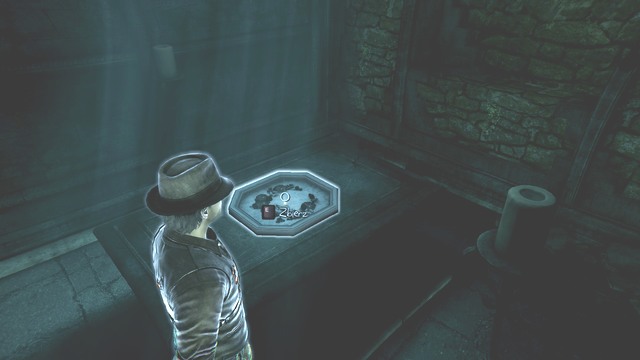 Less and less Plaques to collect.
You can find the eighth and the ninth Plaque next to the fence with the sign: Danger, Keep Out.
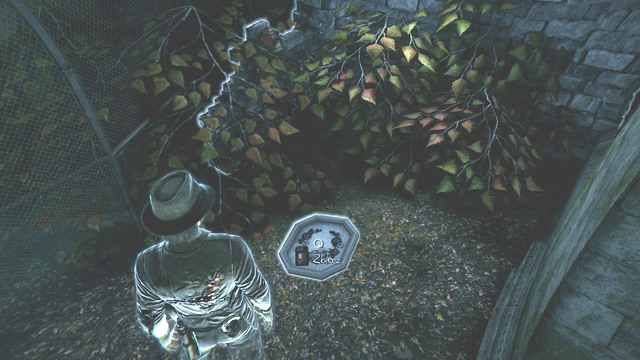 You can find interesting items, next to the fence.
Opposite the location where you found the note: Rex on Ronan's Record for the Julia's Thoughts case, there are tombs on both sides. That is where you find another Plaque.
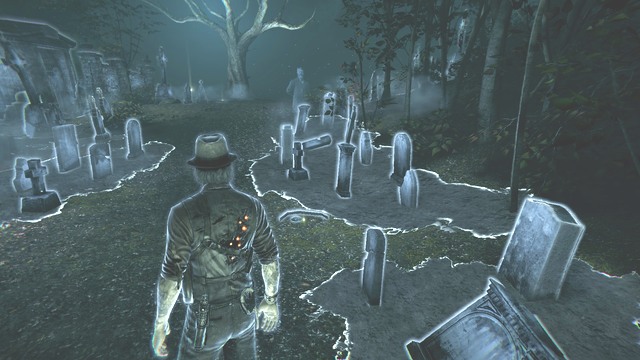 There are many tombs here.
Reach the tree that the Bell Killer tied the innocent girl to. It is at the water. Next to the tree, you can find a Memorial Plaque for your collection.
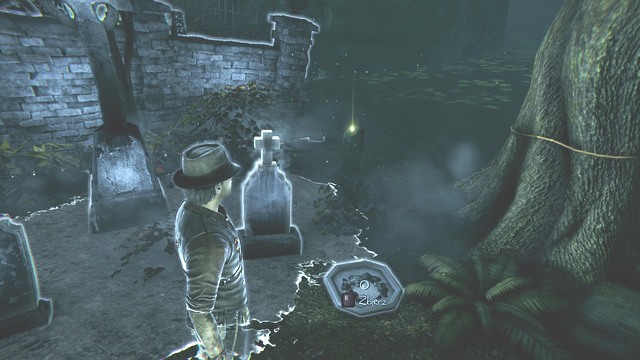 This is the 11th Memorial Plaque already.
There is a grate nearby. If you still haven't done that, remove it. Nearby, there also is a grate so, if you still have not done it, remove it. Follow the unlocked passage to the bank. Teleport to the other side. Close to the tree, there is the twelfth Memorial Plaque. Close to the place, where you have found the Ronan and Cigarettes clue, for the Julia's Thoughts case, you can teleport over to the other bank. Follow the bank towards the tombstones. Get past them and reach the last Memorial Plaque. This way, you complete the "Heirloom" side mission.
In the graveyard, to the left of the first signpost, where there are two people at the tomb, there are is a wall. Teleport over to its other side and enter the tomb on the left. On the wall, opposite the entrance, reveal a message: Victim.
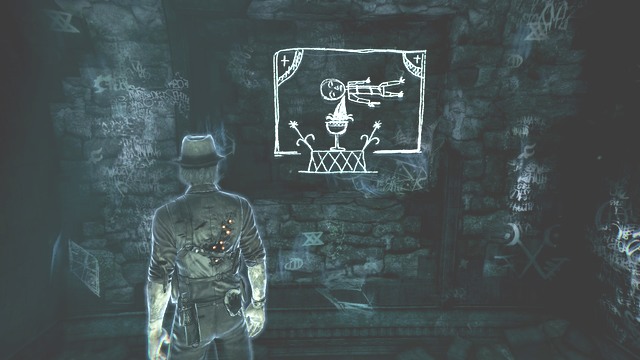 It is not nice inside the tomb.
Go to the location on the graveyard, where you have completed the most difficult, as of now, fight. It ends with a fence, with a sign on it: Danger, Keep Out. Cross it and go ahead a bit. Then, turn left . On the rock, use reveal and collect. You will discover a message: Ghost.
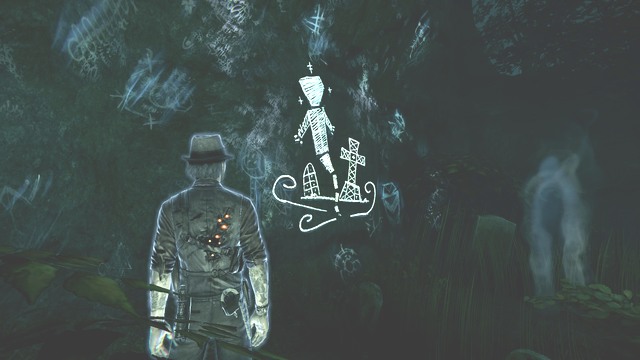 This message is supposed to communicate something to you.
Go to the restaurant, close to the gas station. Teleport past the old railway car in the way. Reach the wall, where the tracks end and reveal another message on the wall on the left. It is: Tempest.
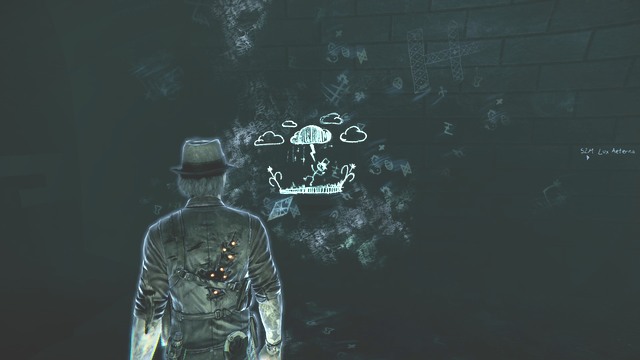 It is the last message in the streets of Salem.
Go to the group of people standing next to the signpost, in the graveyard. There also is the Ghost Man with cleaver in his hand (a guided tour). Climb up the stairs. On top, there is a Plaque, Collect it and you will get: Spanish Flu Memorial Plaque.
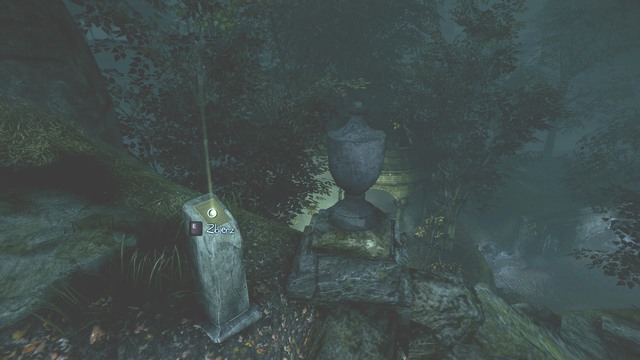 It is a good thing to read the plaques.
Another plaque is also in the graveyard. Go to the location where you have fought the three demons (the more difficult fight). You can access the premises only thanks to teleportation (the incomplete wall). Go towards the wall at the end of the location. To the right, along your path, you will see stairs. Climb up the stairs and in the thickets, you will find William Pynchon Memorial Plaque.
 You can easily jump down and you are going to be fine.
You will obtain another Plaque close to the tree that Sophia was bound to by Bell Killer. You will obtain: Graveyard Memorial Plaque.
 You can learn a lot, thanks to the Plaques.
In the graveyard, close to the location where you used your ability to make stairs appear, and replaced the destroyed ones, and you found the fifth Memorial Plaque, there is a group of people. A report is being made there. Go straight ahead, from the stairs and you will reach your destination. Next to it, there are stairs and a signpost. Locate the column and you will find the note at the foot of it. You will obtain a clue: Fears of Murders to follow.
 The item is hidden in the grass.
You only have two Eternal Flames to collect. As you leave the graveyard, go left. You will reach a hole in the wall and the Ghost Man, who is standing next to it. Teleport over the wall and you will obtain the last-but-one Eternal Flame.
 The Eternal Flame is hidden past the wall.
Opposite the crack, through which you teleported, to collect the clue: Ronan's Childhood for the case Julia's Thoughts, there are destroyed stairs. Use: reveal and, as soon as the stairs appear, Use: remove and teleport over to the other side. You will receive the last Canister.
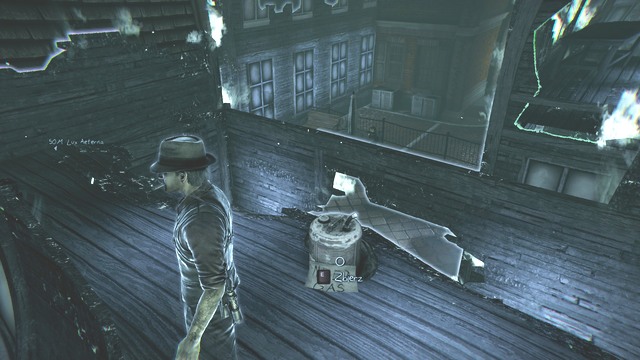 There is another Ghost Story in connection with the canisters.
You receive another piece of information at the mental hospital. On the table to the right of the entrance to the building, there is a magazine. Collect it and you will obtain a clue: Tabloid article #1.
 Nearby, on the wall, there is a painting.
At the ground floor of the hospital, to the right of the stairs, there is a table. There is a magazine on it. Collect it and you will obtain a clue: Tabloid article #3.
 In the magazine, there is a mention of the Bell Killer.
At the upper floor, close to the window, on the table next to the Spanish Flu Memorial Plaque, there is a magazine. Collect it and you will obtain: News- article 6.
 You will find a mention of the murderer at the upper floor of the building.
As you exit the laundry, on the upper floor, where you found the note: Baptism, follow the corridor and turn left. On the chest of drawers, under the camera, there is another note: Tabloid article #2.
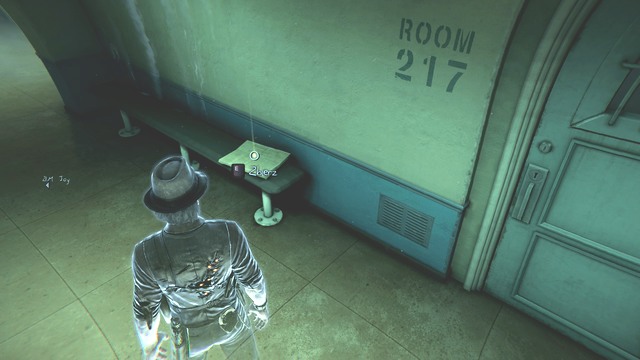 There is a Women's Ward here.
On the bench, to the left of room 217, there is a newspaper. Collect it and you will obtain a clue: News article # 5.You gain access to this part of the corridor after you complete the main mission: Get Past the Ghost Wall.
The newspaper contains information about the killer.
To the left of the entrance to the mental hospital, next to the painting of a forest, there is a Plaque. You will obtain a clue: Asylum Memorial Plaque.
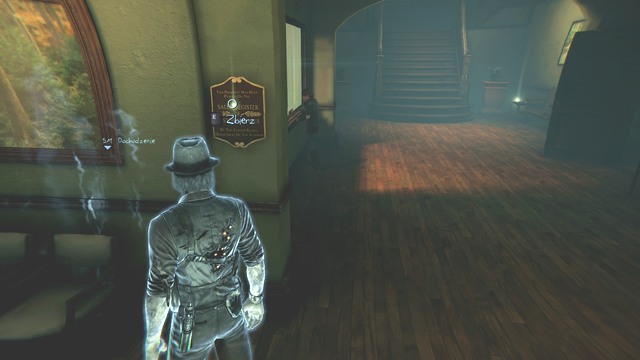 There is the reception office behind the wall.
Climb to the upper floor of the hospital. Once you reach the landing, you will notice that the stairs to the left are blocked by a demon goo. Climb up the stairs on the right and you will see opened door. Approach it and to the right, you will find a Plaque. It is the Spanish Flu Memorial Plaque.
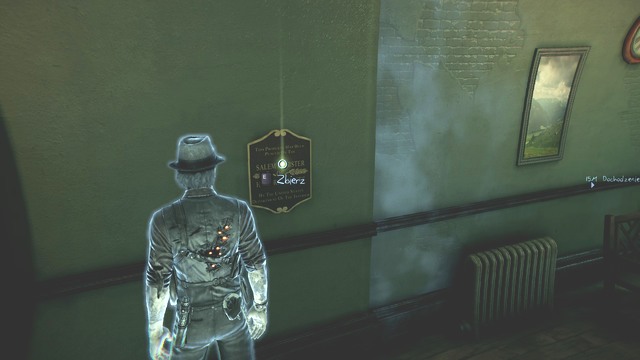 This Plaque commemorates the Spanish Flu victims.
Exit the location, where you have fought demons, through the gate. Climb up the stairs, to the very top. Turn right and go towards the wall, where there is another Plaque - Lecture Room Memorial Plaque.
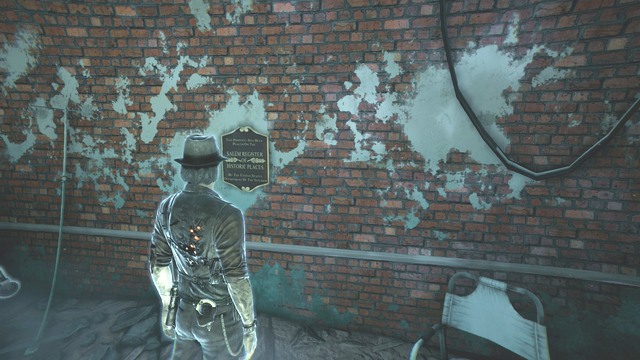 This Plaque is well visible.
In the hospital's reception office, opposite the entrance, there is a note on the table. Collect it and you will obtain a clue: The Killer's Delusions for the Profiler's Memories case.
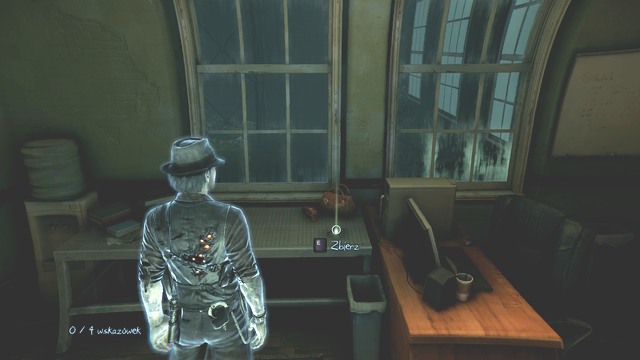 You will learn something new about the murderer.
As you go ahead, from the hospital entrance, on the right, near the stairs, there is an opened door. Inside, between the desk and the radiator, you will find the first Straightjacket for the Man in the Box case.
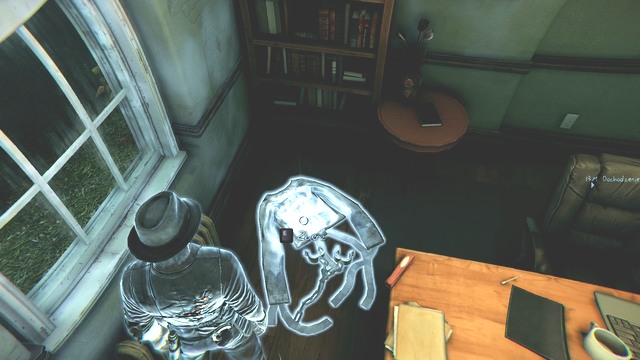 This is the first Straightjacket that you find at the hospital.
The second Straightjacket can be obtained on the upper floor, next to the demon goo that is blocking off the second section of the stairs to the ground level.
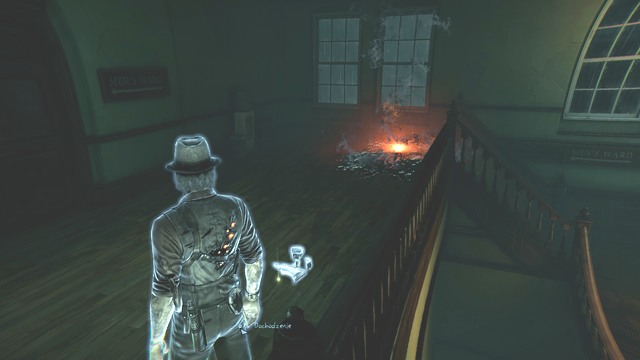 Unfortunately, you cannot teleport across demon goo.
To obtain the third Straightjacket, you need to go to the semi-circular corridor, where you have found the note: Hospital Support for Julia's Thoughts. Cross the door at the end of the corridor and behind it, there is what you are looking for.
 This Straightjacket is on the floor at the window.
To get the fourth Straightjacket, you need to go to the upper floor, from the location, where you have found the Tabloid article #2 for Info About My Killer. Cross the wall, behind the chest of drawers, and you will find it.
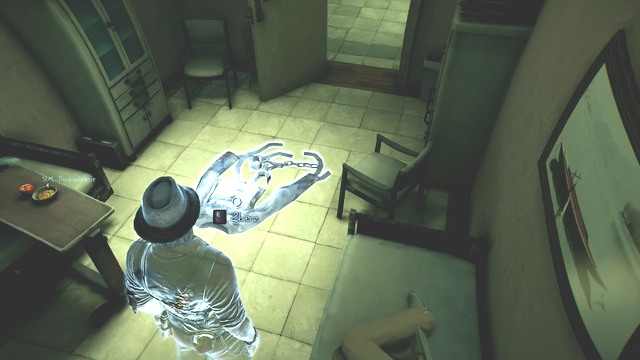 The Straightjacket is on the floor.
To get the fifth Straightjacket go to the semi-circular corridor, past the demon goo, that is blocking off the passage. You can cross it only with the help from Joy.
 This Straightjacket is on the floor, right behind the demon goo.
The next one is in the room (the junk room), to the left of the door blocked off by the magic wall. It is in the corner of the room.
 The room is veiled in darkness.
In the room past the junk room, there is a crack. Jump in there and, at the very bottom, past the pole, there is the seventh Straightjacket.
 There is nothing else downstairs to find.
While controlling the cat, jump down from the venting shaft. You will get above three demons and the patient rooms. In the corner, there is the eighth Straightjacket. In the corner of the corridor, where you reunite with Joy(you have been separated by the magic barrier that you could not cross) there is the ninth Straightjacket.
On the upper floor of the hospital, close to the stairs, there is an opened door. Cross two rooms and you will get into the semi-circular corridor. On the floor, there is a note. Collect it and you will obtain a clue: Hospital Support for the Julia's Thoughts case.
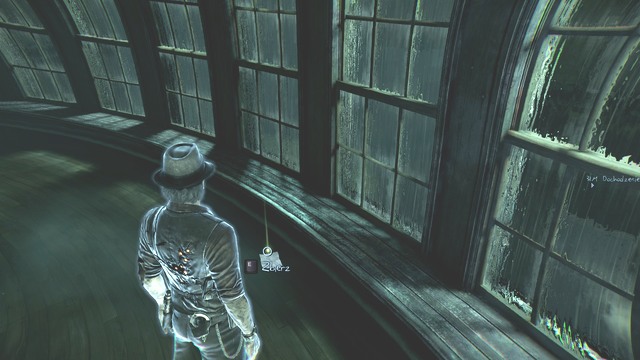 Outside, there is a storm ravaging.
You will find the next note as you walk through the gate of the location, where you fought the three demons. Climb up the first staircase, to the landing. It is on the ground. You will obtain a clue: Rex's thoughts.
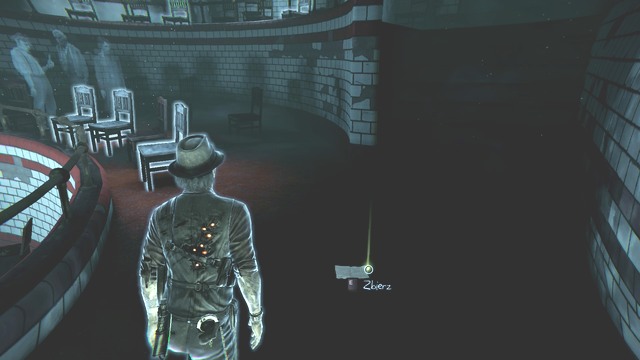 Close to the note, there are chairs.
Close to the location, where you found the third Straightjacket, there is a chest of drawers, with a clock above it (on the upper floor). There is a door to the laundry there. Enter and reveal a message on the wall: Baptism.
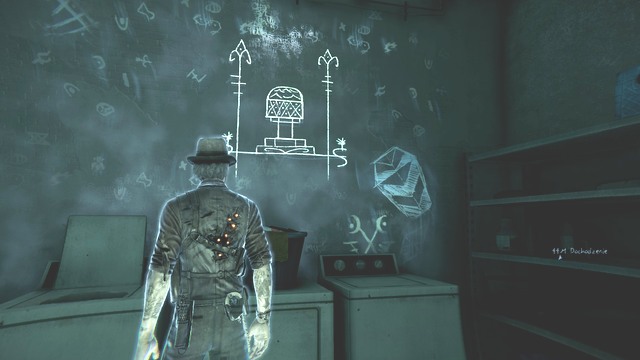 You keep getting messages from the outer world.
In the location, in which you fought demons, next to room 104, there is room 105. Enter there and use reveal on the wall. You will obtain a message: Accused.
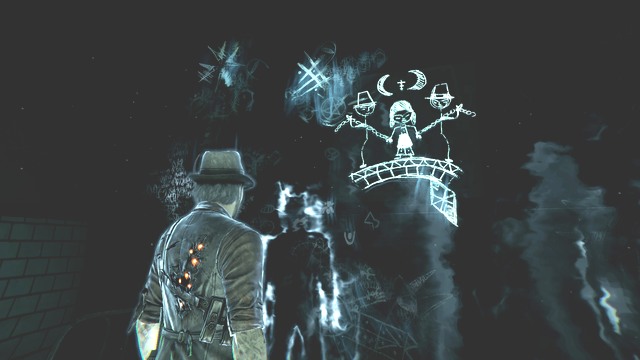 The messages contain various symbols.
Go to the corridor, where you met up with Joy, after you have been separated by the magic barrier, which you could not cross. On the right, go past the door, which you need to open, to get to room 216. Approach the window and turn left. In the alcove, on the wall reveal another note: Stocks.
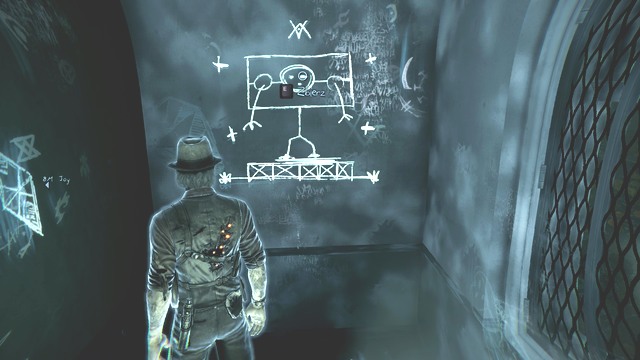 Even in the hospital backstreet, there is something interesting.
As you exit room 217 (that is where you found the last Straightjacket) go right and turn right again. Twice. You will reach door marked: Shower. To the right of the door, on the wall, reveal a note: Twin Girls.
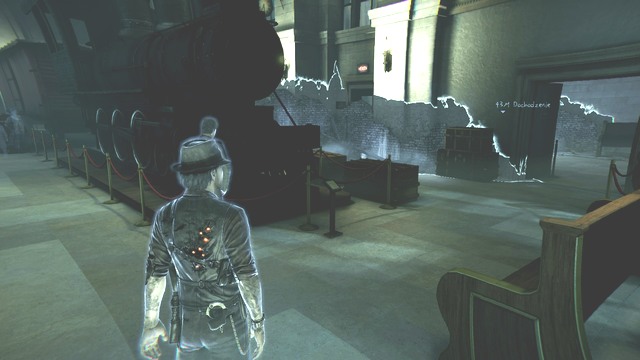
Another Plaque is at the museum. After you enter, go through the door behind the cash counters, into the Main Hall. From the hall, there is a small corridor signed as: To Lobby. Past the door, get through the wall on the right. Then, follow ahead, until you reach the hall with the railway engine. You will easily notice the Plaque, which you need to collect. You will obtain the: Train Station Memorial Plaque.
The steam engine looks splendid.As you look towards the Plaque, in the North-Eastern corner of the hall, there is another Plaque. Collect it and you will obtain a clue: Dunking a Gossip.
 There is a railway car close nearby.
The next Plaque is in the room, where there is the: Museum Date for the Julia's Thoughts case and the Stone for the Terror on the tracks case. The room is adjacent to the hall, where there are many demon goos. this place is at the ground floor of the museum. It is: Baker in the Stocks Plaque. At the second floor, next to the Break Area room, there is another Plaque. Collect it and you will obtain a clue: Donor Memorial Plaque. It is close to the room where you found the clue Ghosts at the Museum, for the Profiler's Memories case.
 At the museum, there are several plaques that it is worth reading.
Go to the room with the railway engine, where you have found the: Train Station Memorial Plaque. Walk around the steam engine on the right. Between the engine and the railway car, on the floor, there is the first Stone for the Terror on the tracks case, from the Ghost Stories section.
 There are several stones for you to collect.
The second Stone is in the room, where there is the Museum Date clue, for the Julia's Thoughts case. In the neighboring room, there are many demon goos.
 Close to the stones, there is a ladder.
As you leave that room, you will notice another Stone to the North. Unfortunately, the path to it is being blocked by demon goo. Return to the pedestal with carts and get across the wall with paintings. This way, you will reach the Stone.
 It is a bit more difficult to reach the stone.
Return to the starting point, in this hall and go the other way, along the wall and pass the successive entrances to the room, on the left. Reach the demon goo and cross the wall to the right. In the corner, there is the fourth Stone.
 Use some brains and the Stone is yours.
The next Stone can be obtained after you complete the "Investigate the Gala Exhibit" mission. You will gain access to the next part of the museum. Leave the hall with the demon goos, go to the corridor, where the door marked: To Second Floor Stairs is. Go ahead, past the tracks and reach the next one, which the ghost train is rolling over. Turn right and you will find the fifth Stone in the toilet.
 This is the train station toilet.
Now, turn left (while looking at the train) and take the moment between the successive rides of the ghost train. Quickly, run towards the next alcove over the tracks. Teleport to the alcove opposite, past the tracks. Make sure that you do not get hit by the train. Here, you will find the sixth Stone.
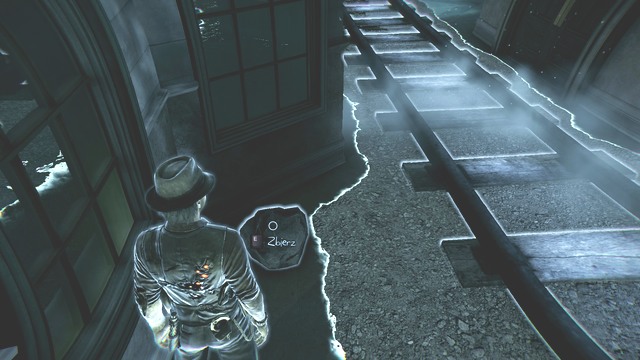 The stone is right next to the tracks.
Teleport to the alcove to the East, across the tracks. Close to the train that is blocking the passage, there is the seventh Stone. Next to it, there is a "Witch Trials History".
 In a moment, the Stone will be yours.
Teleport near the stairs to the first floor. Climb up the stairs and make sure that you are not run by the train. Then, go left and reach the end of the corridor. Cross the door to the room. The eighth Stone is close to the ladder.
The room is veiled in darkness.At the other end of the room, there is the ninth and, at the window, the tenth Stone.
 In this room, there is more than one Stone.
Exit the room, through the door with the can in. Past the door, there is another, eleventh, Stone.
 Past this door, there is a surprise for you, in the form of the next Stone.
Reach the stairs to the second floor and climb up. Close to the stairs, there is the twelfth Stone.
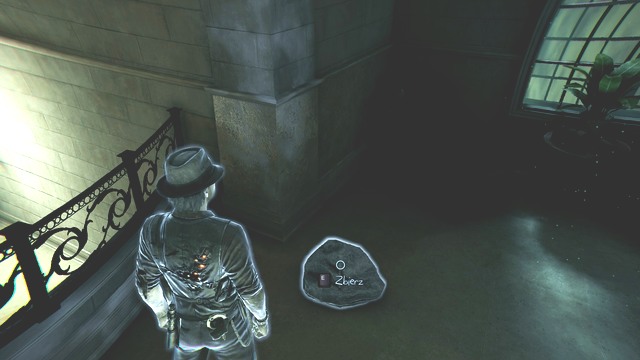 You are at the museum's top floor.
Enter the Restoration Room and approach the wall, where you have revealed a message: Estate for the My Life case. Go along the windows, to the next wall. On the left, there is the thirteenth Stone.
 You will find the Stone at the wall.
Go to the room, where you found the clue: ghosts at the museum for the Profiler's Memories case. Exit through the opened door and turn right/ Go straight ahead, away from the wall. There are elevators nearby. Enter the Break Area on the right. In the corner of the room, there is the fourteenth Stone.
 There is a white halo here.
The final Stone is at the beginning of the corridor, next to the elevators.
 You will be rewarded with a cutscene.
Another Plaque is in the museum. Enter through the door marked: To Lobby. Past the door, cross the wall on the right. There, you will find a clue: "Superstitions" for the Witch Trials case.
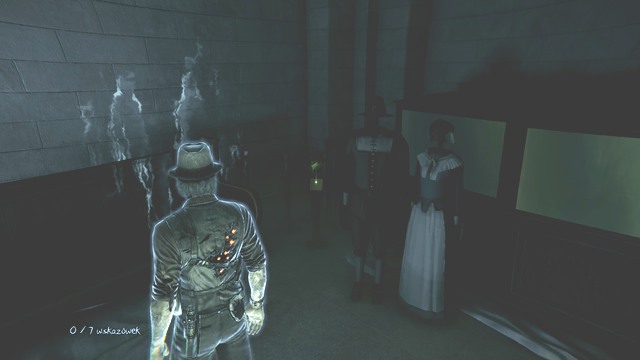 There are lots of dummies here.
Cross to the next room. walk through the door marked Tickets. On the bench, there is a note, which you should collect and you will obtain a clue: German Witch Trials, for the Witch Trials case.
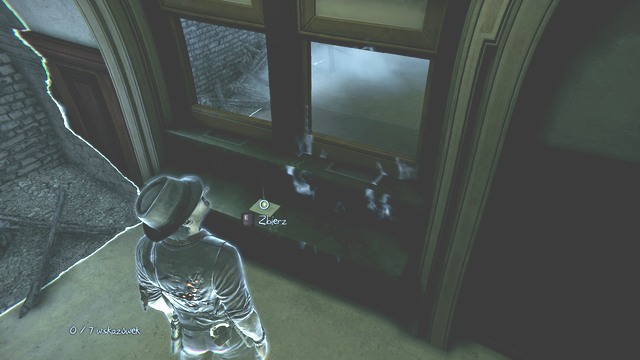 The clue for the case is well-visible.
Return to the main hall and enter the corridor ahead, where there are two paintings, hanging on the wall. One of them presents a lighthouse. Enter the room marked as To Second Floor Stairs. Here, you will find a Plaque reading: Plaque "The first Witch Execution".
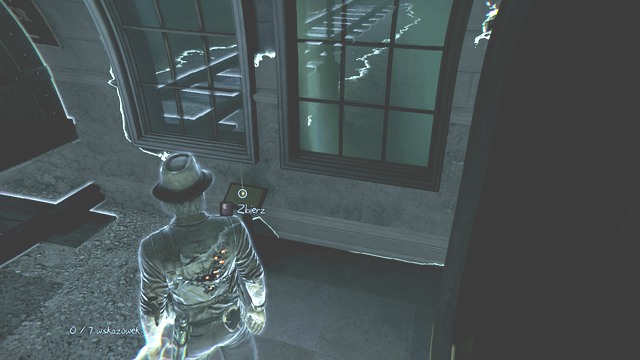 At the museum, there are several plaques for the witch trials case.
Go to the location where you found the sixth Stone, in the alcove next to the railway tracks. There is a ghost train rolling over it. While facing the train, teleport to the East-most alcove, across the tracks. There is a Plaque there. Collect it and you will obtain a clue: Plaque "History of Witch Trials" for the witch trials case. At the second floor, close to the Donor Memorial Plaque for the Salem's History case, there is a pot plant on a table. On the table, there is another clue: Medieval book of witches for the Witch Trials case.
 This Medieval book looks interesting.
Follow the corridor past the elevators and enter through the door marked as Third Room Gallery. Behind the cabinet, in the corner of the room, there is a clue: Prayer Book. In the same room, in its other end, behind another cabinet, there is a clue: The book of engravings.
While in the main hall of the museum, enter the door that a waiter with drinks is standing next to. You will find a note on the floor: Ronan Meets Rex, for the Julia's Thoughts case.
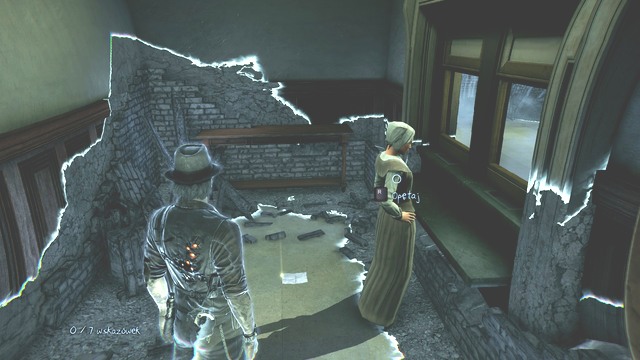 Julia's Thoughts can be found in all the locations that you have already visited.
Return to the main hall and go to the room to the right of the main entrance. In the room, there are many demon goos. walk onto the pedestal with trailers and cross the wall fragment, thanks to which you will get past two of the demon goos. You will emerge past them. Enter the door next to you, on the left, in the room, you will find a note: Museum Date.
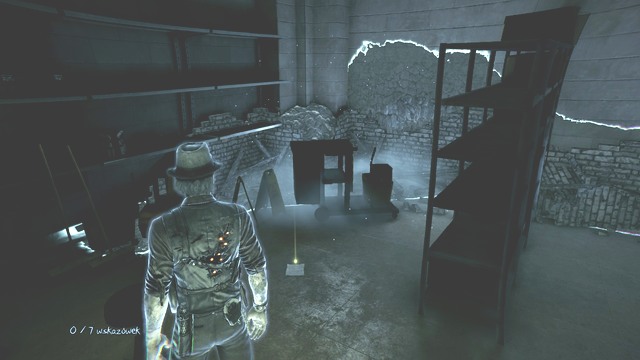 This room is dimly lit.
After you reach the second floor of the museum, once you enter the restoration room, turn right. Go towards the wall and above the cabinet, reveal a message: Estate.
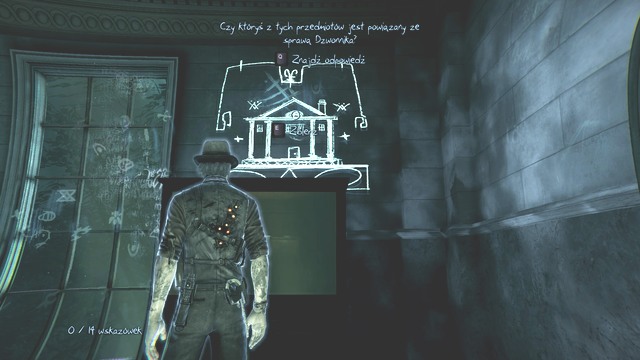 You can find this message at the museum, at the top floor.
At the second floor, enter the Third Room Gallery. As you are facing the exit, on the right wall, select reveal. You will receive a message: Trap for the My Life case.
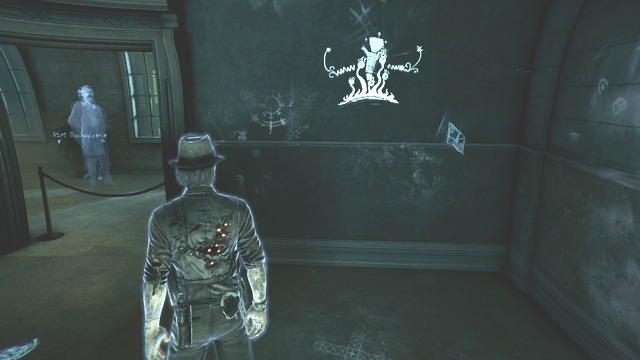 This is the last clue for this case, which you can find at the museum.
While in the restoration room, on the second floor of the museum, leave through the door close to the location, where you found the thirteenth Stone. Then, go along the windows and cross the wall, into the next room. On the desk, you will find another note. Collect it and you will obtain another clue: Ghosts at the museum.
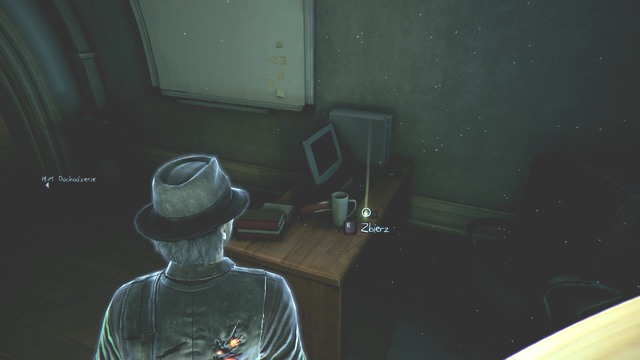 The next clue is on the desk.
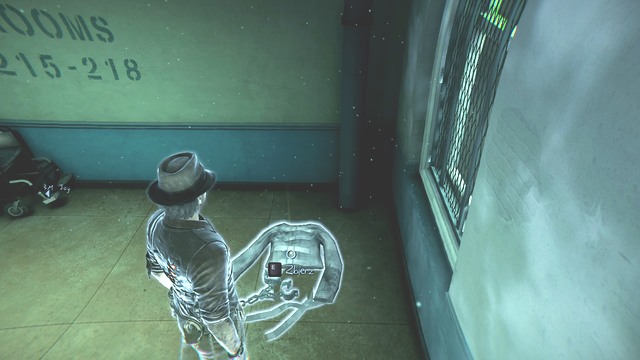 One more Straightjacket and you will learn another story.
You can obtain the last Straightjacket in room 217. You gain access to it only after you have completed the "Get Past the Ghost Wall" main mission.
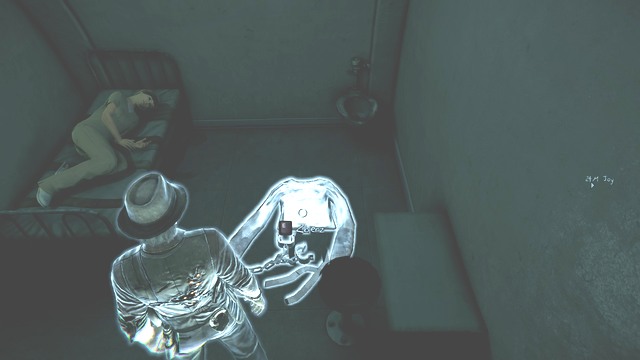 There is someone in the bed.
In this room, you can use the shower.
At the church, after you visit it for the next time, you will find the last message. After you start the "Search the Upper Floor For More information" main mission, climb up the floor, to the first floor. The stairs are at the end of the corridor, from which you walked out into the courtyard. Climb upstairs and enter the room the closest to the window. Approach the wall and reveal the message. You will obtain a message: Staircase.
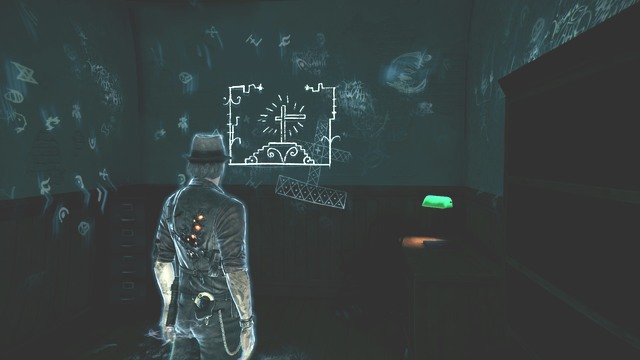 You have already revealed all of the messages.
You find the net note at the first floor of the church. After you get upstairs, follow the corridor. Go past the door on the left, guarded by the Police Officers. Nearby, there is a stretcher. Then, turn left and reach the wall with the table at it. Collect the note: Sanctuary. There are stairs to the attic on the right.
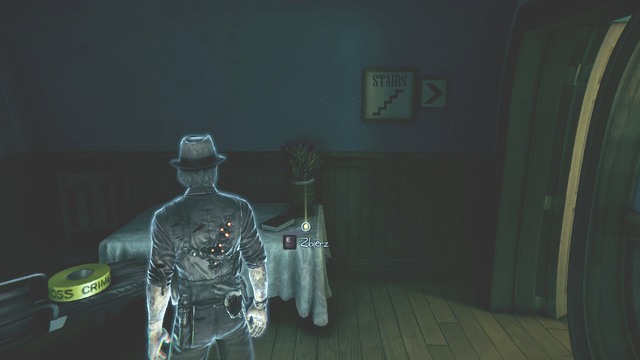 The evidence has been secured by the police.
After you enter the Judgment House, climb the stairs to the upper floor. On the left, reveal a staircase. Climb up the stairs to the platform and, reveal again, at its end. This way, you will obtain the first Spell Book.
 Often, the books are in poorly accessible locations.
Now, follow the corridor to the left of the stairs. This is the only way. Follow it a bit ahead and teleport through the hole in the wall, on the right. After you get to the other side, on the desk, at the window, you will find the second Spell Book.
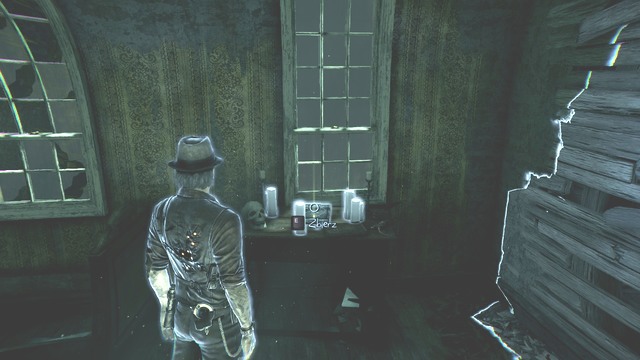 The book is on the desk.
Teleport back to the corridor. Opposite, there is a room, where you can find the third Spell Book.
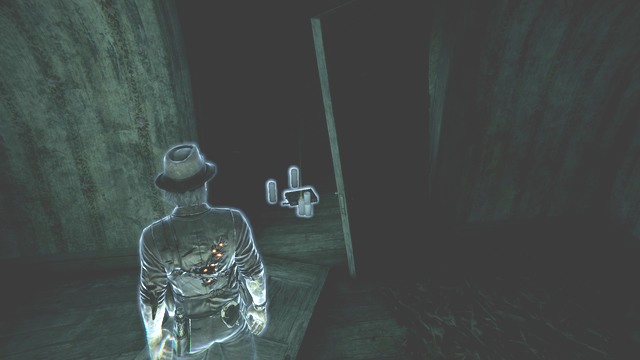 The book is well hidden.
Return to the main corridor on the upper floor. Enter the last-but-one door on the right, as seen from the direction of the stairs. Use the ability to remove, to get rid of the door on the right. Behind the door, there is the fourth Spell Book.
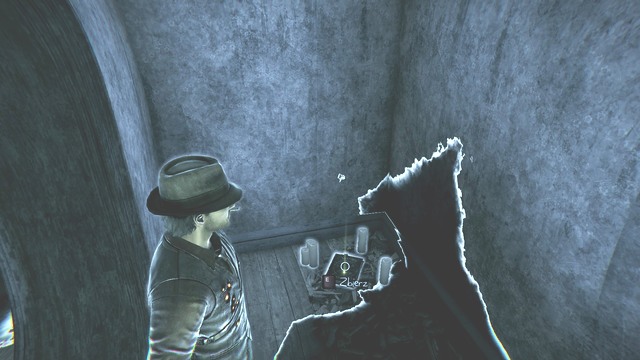 Who would have thought to search here for the book.
From the room, in which you found the lest clue for the Profiler's Memories case (the upper floor) exit to the corridor. Turn left and enter the next doo r on the left. You will enter a toilet. Approach the window and cross the wall on the left. On the toilet seat, there is the fifth Spell Book.
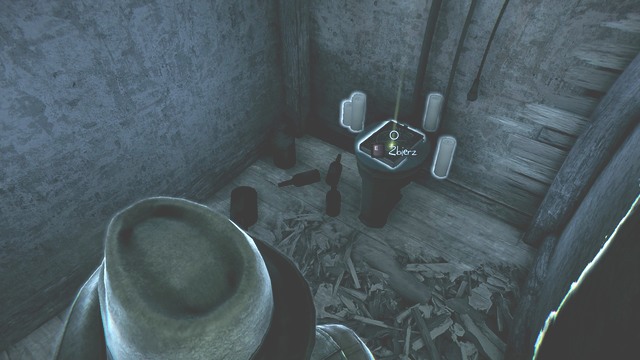 This toilet needs restoration.
Return to the room, where you have used the raven's help, while fighting demons. Enter the backstreet, through the ajar door. Cross the door ahead of you. You will get into a room with another raven, where there is the seventh Spell Book.
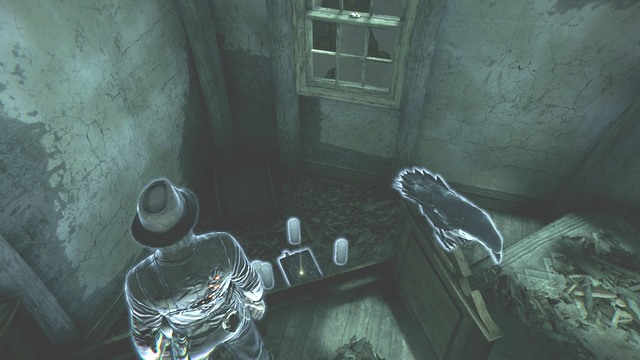 Next to the book, there is a raven sitting.
Once you descend to the ground floor, over the other stairs, you will walk into the big hall (colonial kitchen). Find two small rooms located opposite each other. Inside, you will find two Spell Books - the eighth and the ninth. One on the floor and the other on the table.
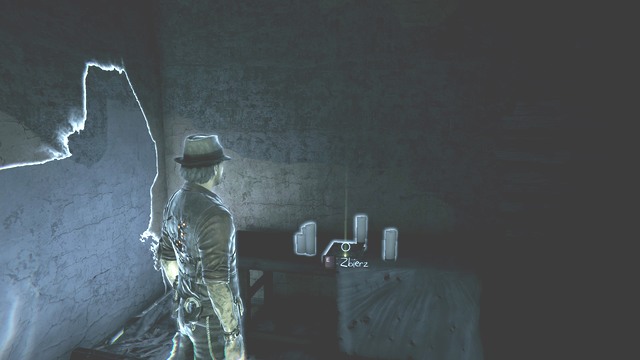 The Spell Book is on the table.
For the tenth Book, walk in through the second door on the right, in the corridor in which you teleported for the last clue for the Julia's Thoughts case. Inside, there is a bathtub. Cross the wall that is perpendicular to the one that the bathtub is standing by. Do the same in the case of the next wall and you will find the Book.
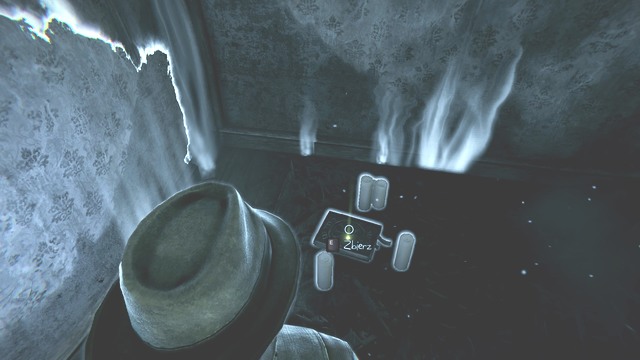 This is the last-but-one Spell Book.
The last Book is in the holding cell with the cage. You get there after you enter the cellar and find the stairs to the holding cells. Cross the wall with the cage at.
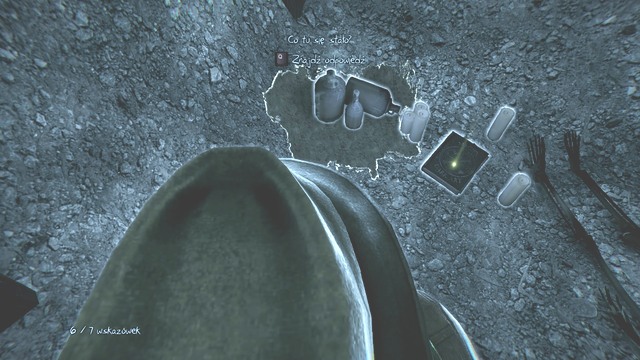 The story connected with this place is grim.
At Judgment House, climb to the upper floor, turn left and you will see a red notice on the wall. This way you will find a clue. Verse 1 for the Info About My Killer case.
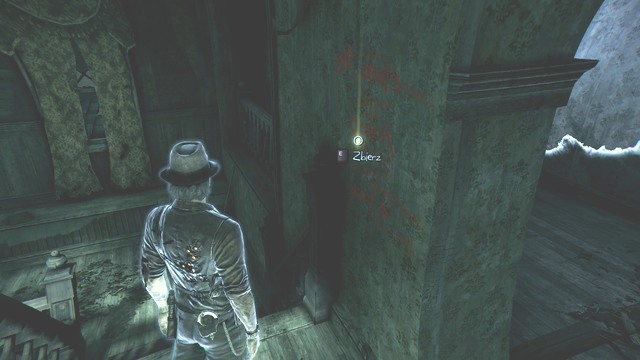 You are at the first floor of the Judgment House.
To obtain the next note, go to the room opposite the hole in the wall, across which you teleported (to find the second Spell Book). Walk through it, into the next room, where you find another red caption on the wall. This way, you will obtain a clue: Verse 2.
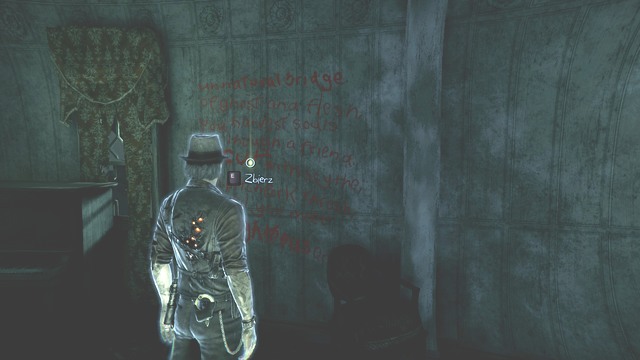 This is yet another verse that you discovered.
Return to the corridor and follow it, until the very end. On the wall, on the right, there is another red caption. You will find a clue: Verse 3.
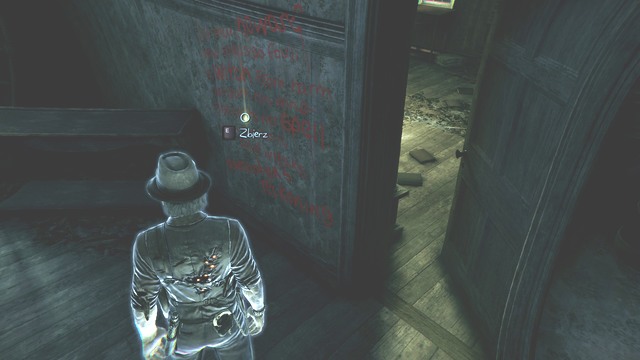 Again, you find a verse in red.
Walk in through the ajar door, on the right of the previous caption. Inside the room, on the wall, you will notice another verse. You will obtain a clue: Verse 4.
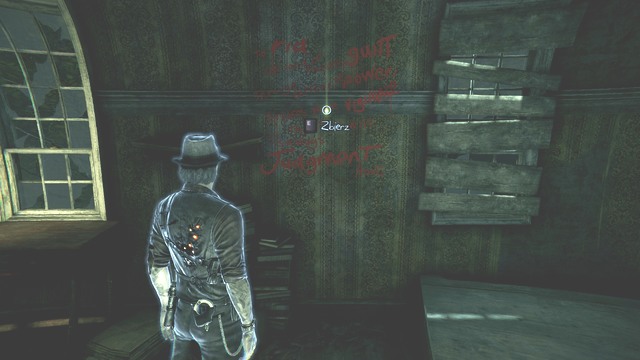 Some of the windows are covered with planks.
Climb to the first floor, in the Judgment House, follow ahead, until you reach a window covered with boards. Cross the wall on the left and you will find the note: Life and After for the Julia's Thoughts case.
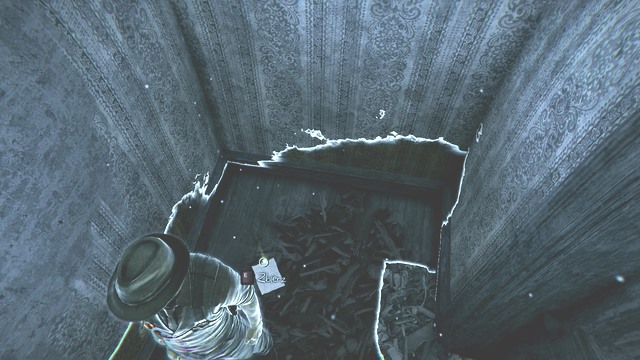 You already know a lot about Julia.
Next to the door, behind which there are the other stairs to the ground floor, there is a note. Collect it and you will obtain a clue: Ronan the Stranger for the Julia's Thoughts case. The other stairs are behind the secret chamber, in which you conducted your investigation.
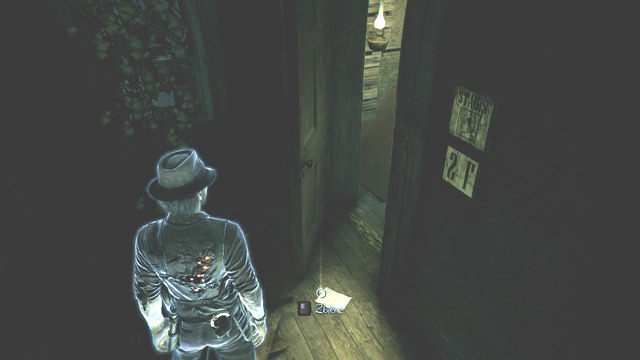 The notes are difficult to miss.
Descend over the stairs, to the ground floor and you will walk into the colonial kitchen. Leave through the Western door. Cross the door on the left in the next room. You will walk into the room, where you need to teleport across the hole in the wall on the left. Behind it, you will find a note on the floor. It is a clue: Fight with Ronan.
 This is the last-but-one clue for this case.
To the right of the location, where there is the Colonial Salon Memorial Plate, there is the exit to the corridor. Follow it, up to its end, until you reach the door. To the left, there is a hole in the boards. Teleport through the hole and, at the other side, you will find a note: Pondering the Proposal. This is the last clue for the case.
 It is such a mess.
For the last clue for this case, go to the secret chamber at the Judgment House, behind the bookshelf. Cross the fireplace into the next room. On the floor, there is a note Collect it and you will obtain a clue: Unrest at the Judgment House.
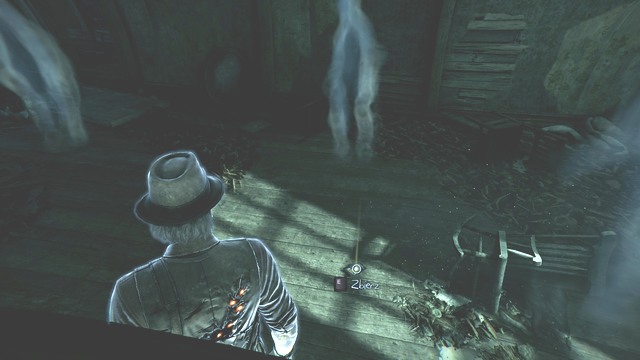 This is the last clue for this case.
You will find the Plaque at the Judgment House at the ground floor. You can get there by climbing down the stairs behind the hidden passage on the first floor. Close to the stairs, at the ground floor, there is a big room. On the floor beam, you will find the Plaque: Colonial Kitchen Memorial Plaque.
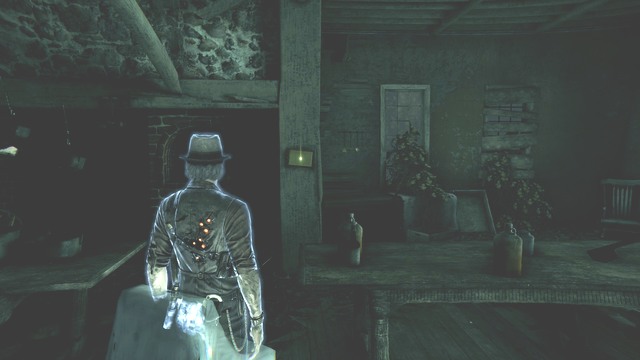 According to the plaque, you are in the kitchen.
In the lounge, close to the table, on which there is the last clue for the Witch Trials case, there is a Plaque. Collect it and you will obtain a clue: Colonial Parlor Plaque. The final Plaque is in the attic, at the door to the holding cells. It is the Colonial Cellar Memorial Plaque.
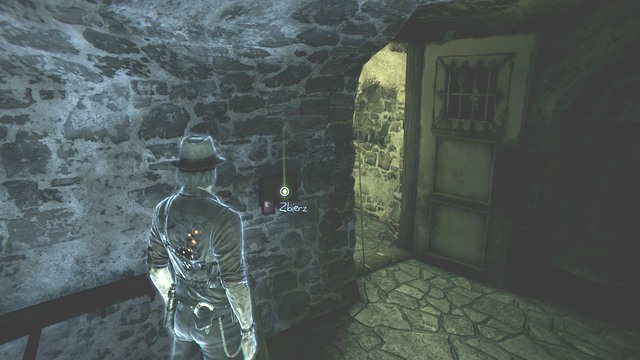 This is the last clue for this case
You will find the last note in the lounge, at the ground floor of the Judgment House. You still need to descend to the ground floor over the stairs and go past the kitchen. You will reach a big room - this is the lounge. Approach the table in the corner of the room. The final clue for this case is the judge's diary.
 It is so dark that you can barely see what is on the table.
The PC version "Murdered: Investigation From Beyond the Grave" is a game with high system requirements as for an action-adventure game. This guide has been drawn up on a PC computer with Intel i7 quad core 2.8 GHZ, 12 GB RAM, Amd Radeon 7970 and 3 GB. This configuration fully meets the requirements set by the recommended system requirements and there was not even a slightest problem with playing. The game is integrated with Steam. After you switch to Steam into the offline mode, it is possible to play the game without the Internet connection. The resolution that the game was ran in was, with high details.
Single player: Yes
Offline Co-op (Split screen/hot seat): No
Co-op over the Internet: No
Multiplayer: No
This guide has been drawn up on the PC version, of the below specifications:
With the above, the game ran smoothly.
Yes, playing the game on a laptop computer is possible, with AMD ATI Mobility Radeon HD 3870 or better.


 Men of War: Vietnam Game Guide & Walkthrough
 Might & Magic X: Legacy Game Guide & Walkthrough
 Metal Gear Solid V: The Phantom Pain Game Guide & WalkthroughMurdered: Soul Suspect Game Guide & Walkthrough
 Metro 2033 Game Guide & Walkthrough