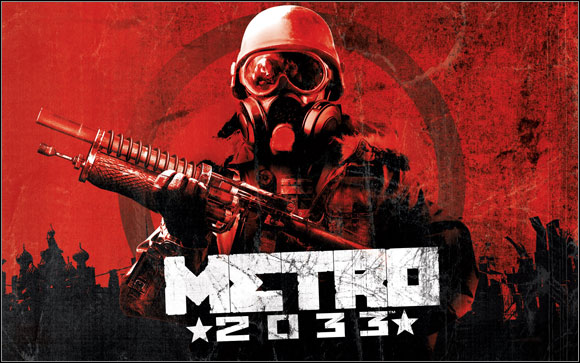
This guide to Metro 2033 PC video game contains a very detailed description of the prologue and of all seven chapters of the singleplayer campaign of the game, providing help in defeating enemy units, completing received mission objectives, collecting secret items and unlocking all available endings. Aside from the main walkthrough you can also find a lot of hints concerning some of the main aspects of the game, including combat, equipment and purchasing items from merchants.
Additional colors were used in the guide:
Green color was used to mark areas where you can find standard items, including weapons, ammunition, medkits and filters.
Orange color was used to mark areas where you can find special gold ammunition, used mostly as currency in the game.
Blue color was used to merge screenshots with the text. #1 means that a certain fragment of the walkthrough is tied to the first screenshot and #2 means a certain fragment of the walkthrough is tied to the second screenshot.
Stars (*) found next to level names means that you'll have a chance to make decision in that area that will affect the ending of the game. You can find out more about this by reading the Endings section. I would recommend doing this before starting the game (don't worry - it's spoiler-free).
Jacek "Stranger" Halas
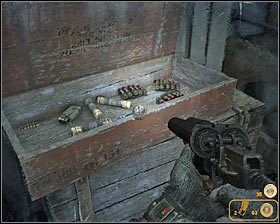
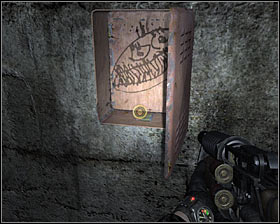
GOLDEN BULLETS
There's a special kind of ammunition available in the game and this guide calls it gold ammunition. You'll know when you've picked up golden rounds by hearing a distinctive coin sound and by seeing a number changing its value in the lower right corner of the screen (above the information about the number of normal bullets left).
Gold ammunition can be used in two different ways. A more obvious and a more interesting solution is to use it as currency. You'll meet a lot of merchants during the course of the game (they can only be found inside safe areas) and you'll be allowed to choose between several types of goods, including new guns, ammunition and additional equipment (medkits, filters etc.).
An alternative is to insert gold ammunition into automatic weapons. I would recommend considering this only if you're close to the end of the game, because you won't be making any other purchases.
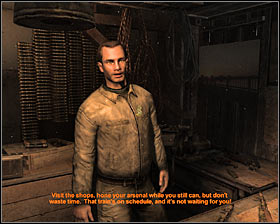
Most of the money you've gathered should be spent on buying ammunition to all the guns you use frequently. The main reason is that you will be spending a lot of ammo to kill your enemies and you won't be finding enough of it to meet your demands. This is even more important if you're after the alternative ending, because you'll be prevented from looting the bodies. I wouldn't recommend purchasing any weapons in the early stages of the game, because you'll find a lot of cool guns while exploring available areas. You should make some gun purchases close to the finish.
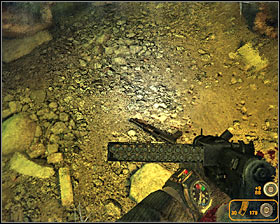
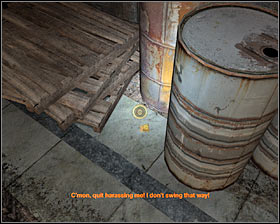
 Gold ammunition can be taken mostly from crates and lockers, however you may also receive it from other characters or find it hidden in dark areas.
STANDARD AMMUNITION
As I've mentioned before, you'll always be close to running out of ammunition, so it will be important to remember about a few things. Most of the opponents you meet in Metro 2033 are very resistant to the gunfire. This means you always have to aim for their heads, even when you're going after monsters. Doing this will allow you to spend only a few bullets on one opponent, instead of a dozen bullets or even an entire clip. As for the guns, I would recommend using revolvers whenever possible, because they're very effective at performing single, powerful and accurate attacks.
Don't forget to purchase ammunition before leaving a friendly station and always take your time to explore your surroundings, because you won't be punished for taking ammunition from supply crates.
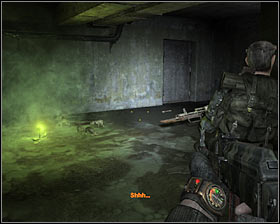
SNEAKING PAST ENEMIES
Staying in the shadows is possible only in a few missions of the game. To be more specific, you can count on it if you're going against human opponents and if you have a lot of dark areas at your disposal. Generally the whole mechanism works great if you use it only to sneak past enemy units instead of trying to attack them. I wouldn't recommend killing anyone while trying to remain hidden, because a single headshot may not be enough to kill an enemy soldier and silent knife attacks tend to be very risky.
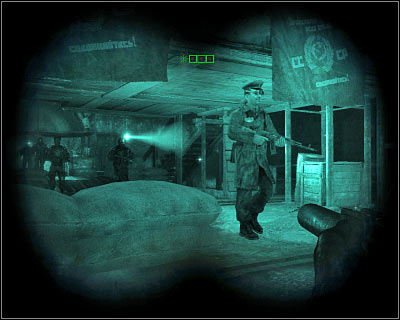
The only thing you should be worried about is to avoid detection. Notice that you will be allowed to make your game a little easier by destroying or disabling various sources of light. I would also recommend putting on nightvision goggles often, so you won't have to risk exposing your position when using a flashlight.
 You shouldn't attack enemies while trying to stay in the shadows, even if you have a chance to surprise them.
GAS MASKS
Using gas mask is required in all the missions taking place outside the metro system and in all the areas where you'll be dealing with deadly toxins. You must know that a gas mask will only work if you have proper filters. Thankfully finding new filters won't be a problem, so you shouldn't have to worry about running out of them. You can also purchase filters from the local merchants, however this shouldn't be necessary (the only purchase you'll have to make will take place in the Market station and it's tied to the main storyline).
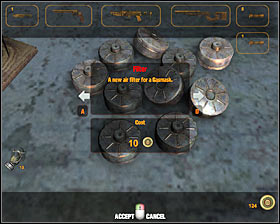
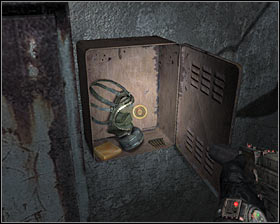
Aside from finding new filters you can also decide to exchange your current gas mask for a new one and you should consider doing this if your mask has scratches or cracks on its glass surface. New masks can be found mostly near supply crates, however some of them can also be taken from dead soldiers. Make sure to hold the action key each time to make the exchange.
HEALING ARTYOM
Metro 2033 uses a system which automatically heals the main character after he's been injured and this works great for most of the easier fights, however it won't be an effective method for difficult battles. If you're going against more powerful opponents or a group of enemies you must be prepared to manually use additional medical supplies (syringes) to prevent Artyom from dying. Thankfully you'll find a lot of medkits during the course of the game, so purchasing them won't be necessary.
TRAPS
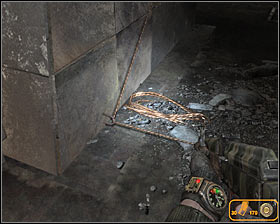
Some of the missions feature traps and generally these objects can be divided into two groups. The first group consists of traps which sole purpose is to alarm your opponents about your current position. You'll be mostly dealing here with small cans hanging on the ropes and glass shards located on the ground. Avoiding these traps is possible as long as you're careful and use a flashlight or nightvision goggles to guide your way. The second group consists of traps which can kill you if triggered and naturally it's going to be extremely important to prevent this from happening. Some of these traps can be disarmed. Thankfully you can avoid the rest by jumping over a rope or some other triggering mechanism.
 Some of the traps can be disabled, but sadly you'll have to avoid most of them.
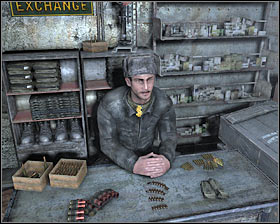
This section of the guide provides a list of all the merchants you can meet during the game. They can all be found only in safe areas. Notice that the last place where you'll have to spend gold ammunition on supplies is Polis (fifth chapter), because all the objects offered in Sparta (sixth chapter) can be taken for free.

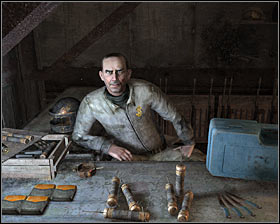
This person sells guns and medkits.
This person buys and sells ammunition.
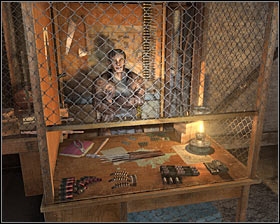
This person sells guns.
This person buys and sells ammunition.
This person sells gas mask filters, dynamite sticks, throwing knives and medkits.
This person buys and sells ammunition.
This person sells dynamite sticks, throwing knives, gas mask filters and medkits.
This person sells guns.
This person sells medkits, dynamite sticks and throwing knives.
This person sells guns.
This person sells guns.
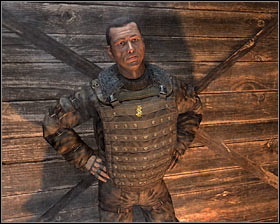
This person sells armor.
This person sells armor.
This person buys and sells ammunition.
This person buys and sells ammunition.
This person sells guns, throwing knives, dynamite sticks and medkits.
This person buys and sells ammunition.

This person sells guns, dynamite sticks, medkits and throwing knives.
This person sells armor.

This person offers various items for free.
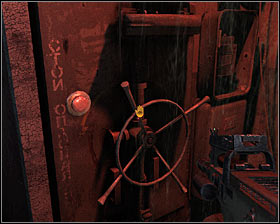
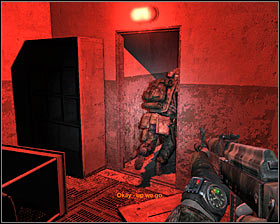
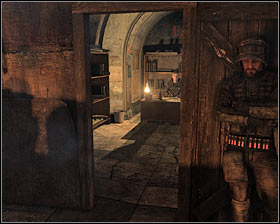
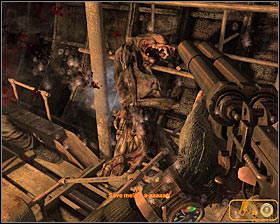
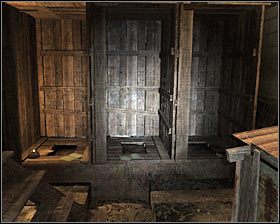
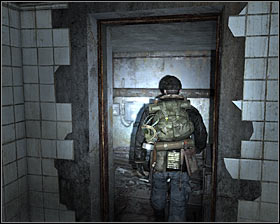
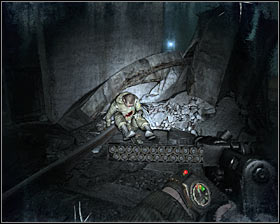
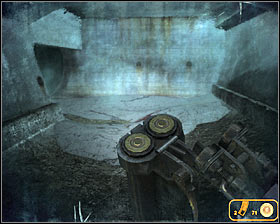
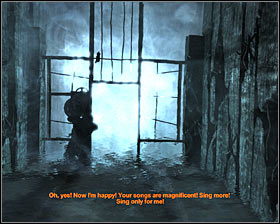
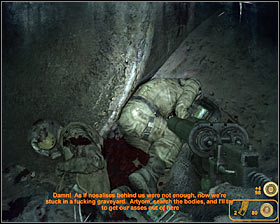
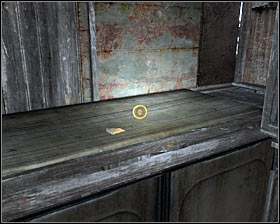
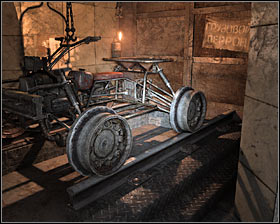
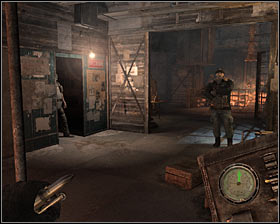
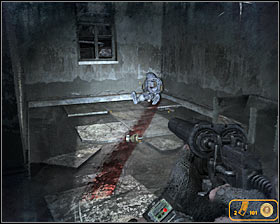
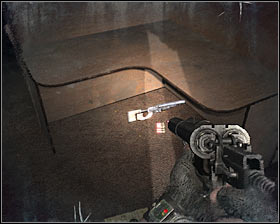
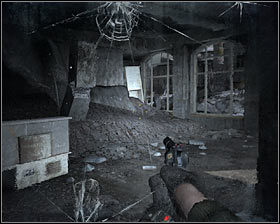
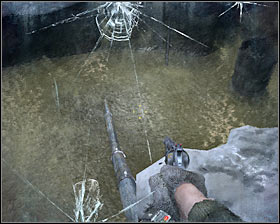
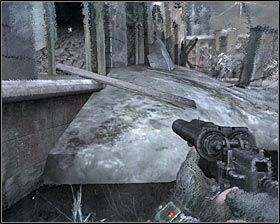
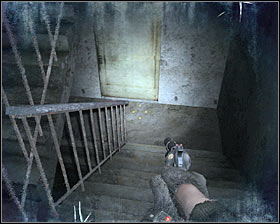
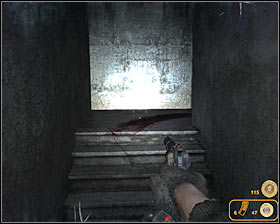
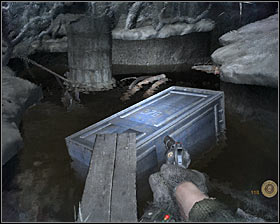
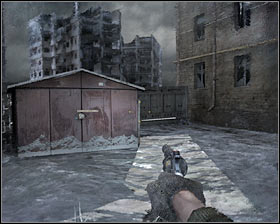
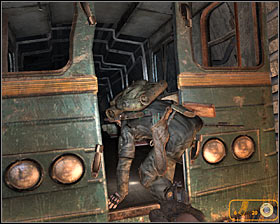
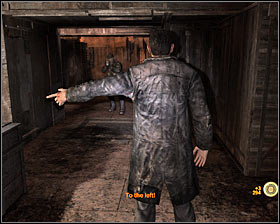
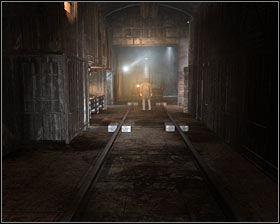
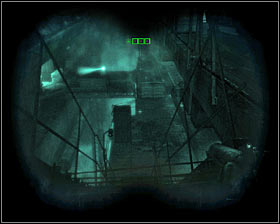
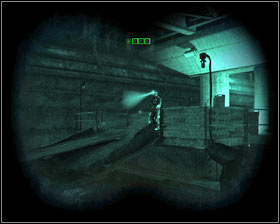
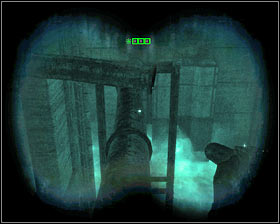
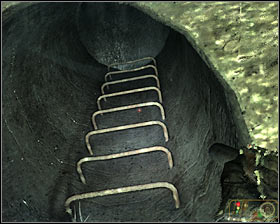
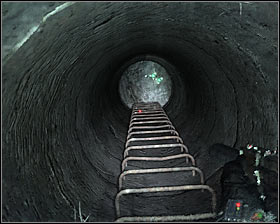
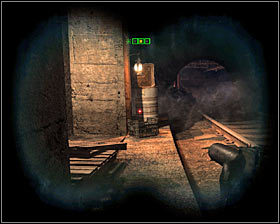
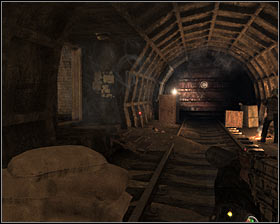
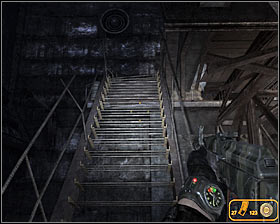
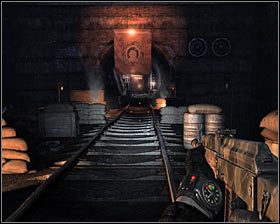
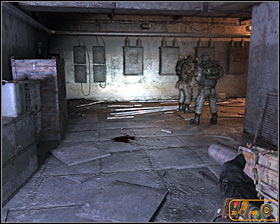
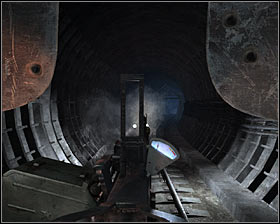
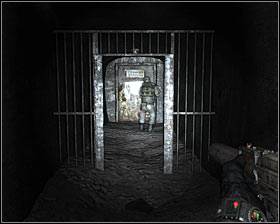
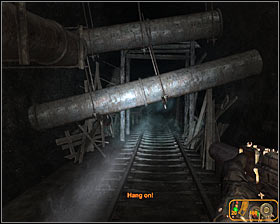
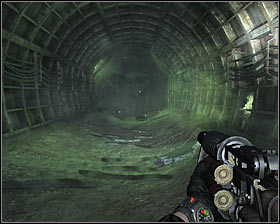
Walkthrough: Wait for the main character to use the ladder and move closer to a large gate found in front of you #1. Listen to a short conversation and then approach a valve found to your right #2. Start off by pressing the action key (E by default) once, however you'll soon have to hold it for a few seconds to raise the gate.
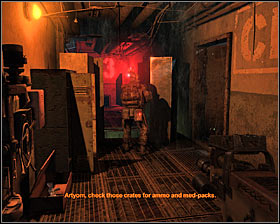
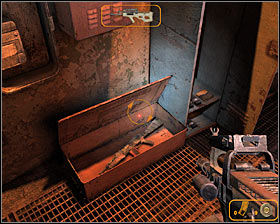
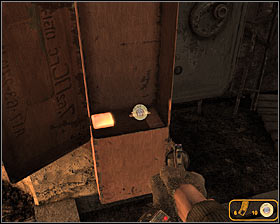
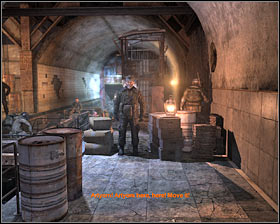
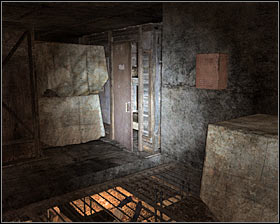
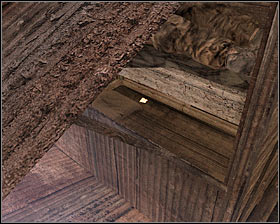
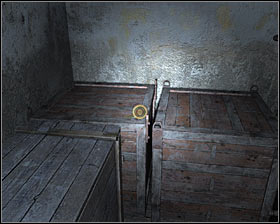
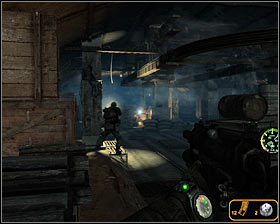
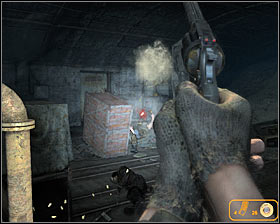
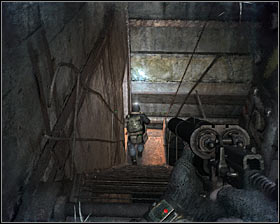
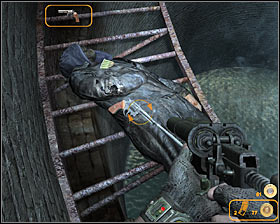
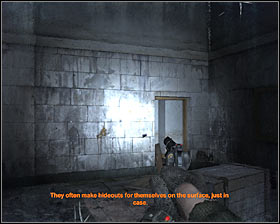
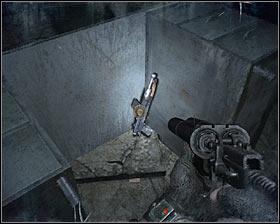
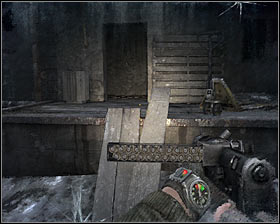
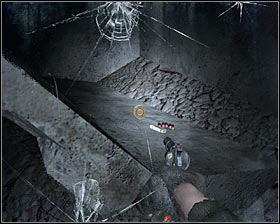
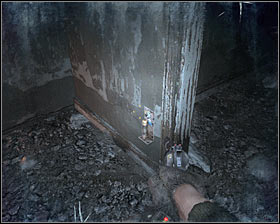
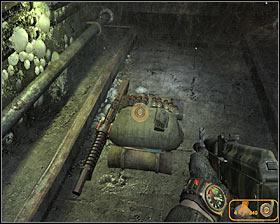
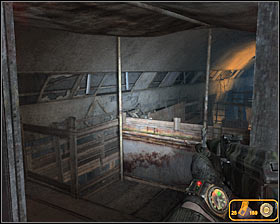
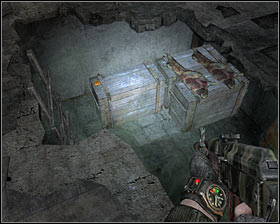
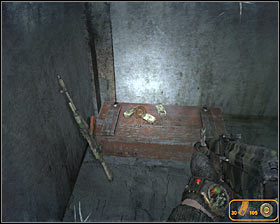
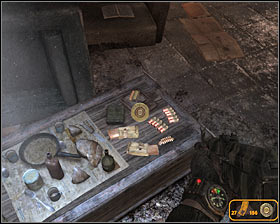
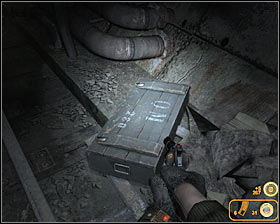
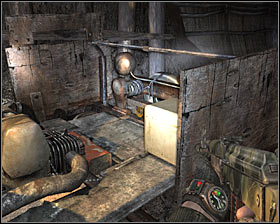
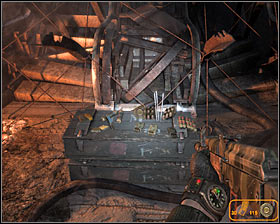
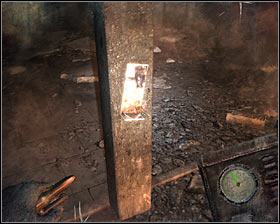
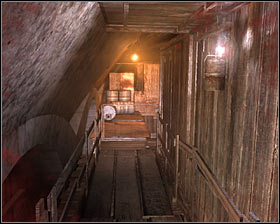
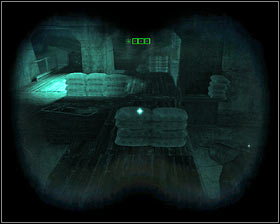
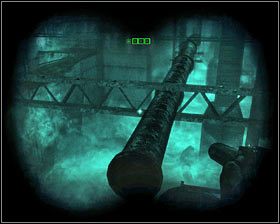
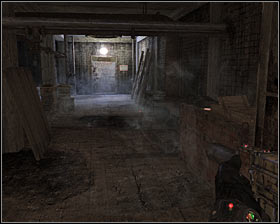
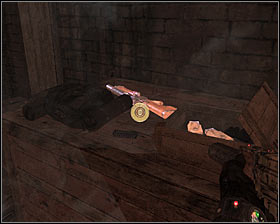
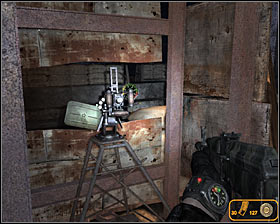
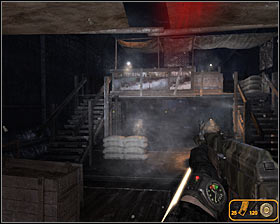
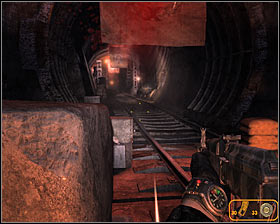
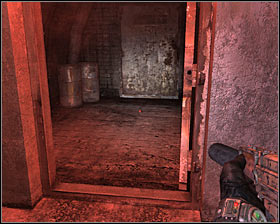
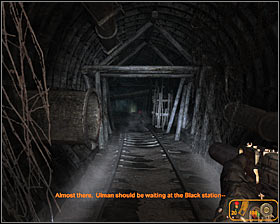
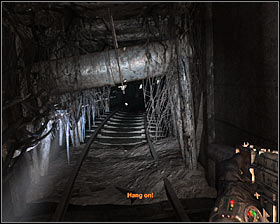
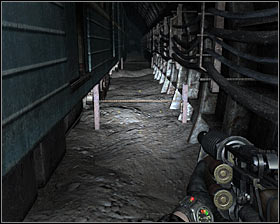
Press and hold the crouch key (CTRL by default) to get to the other side by crawling under the gate. You should find yourself standing in a long corridor #1 and I would recommend that you take your time to inspect objects found to the left. One of the crates contains a new gun #2 (press and hold the action key to make the swap - it's not mandatory) and the lockers contain gas mask filters, medkits and a lot of ammunition.
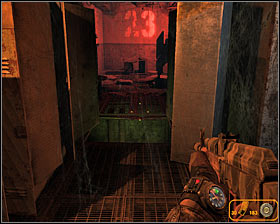
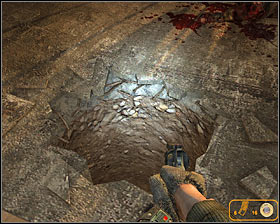
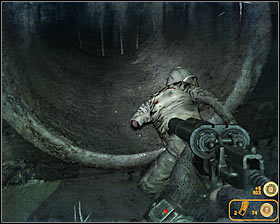
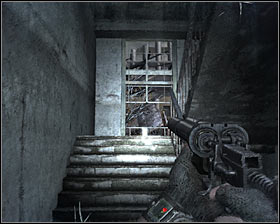
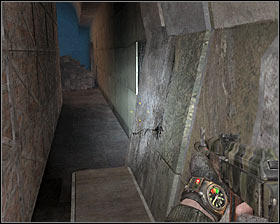
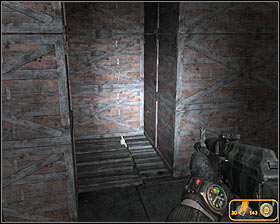
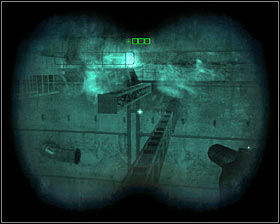
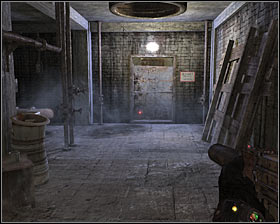
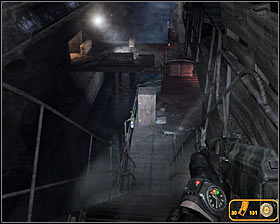
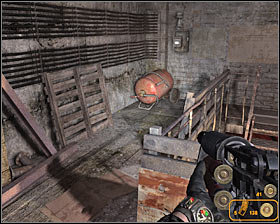
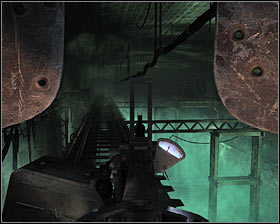
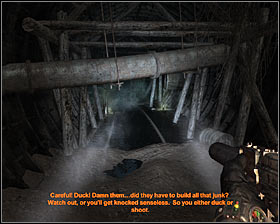
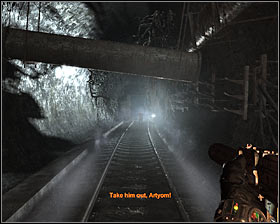
You may proceed forward. It shouldn't take long until you reach a small hole #1. Run forward and press the SPACE key to jump over to the other side safely. Thankfully even if you fail you won't die and you'll be allowed to use a ladder to retry. Proceed towards a narrow passageway #2 and use the stairs to get to an upper floor. Wait for your colleague here to open a new door.
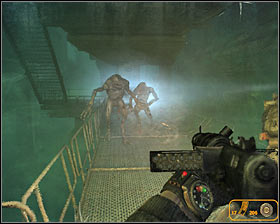
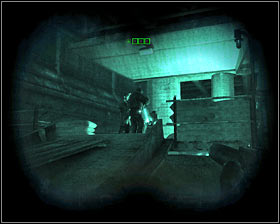
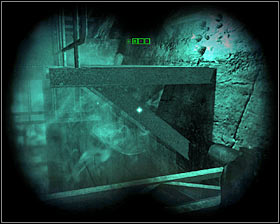
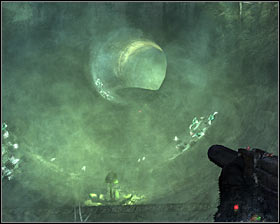
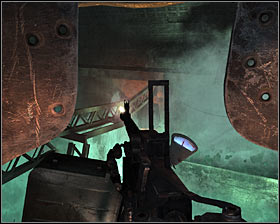
Follow the instructions by pressing the G key to put on a gas mask #1. Notice that you can press and hold the T key to find out how much time you've got left before the mask become useless, however it won't be a problem in this introductionary mission. Head up the stairs until you get to a brighter area #2. Wait here for the monsters to show up.
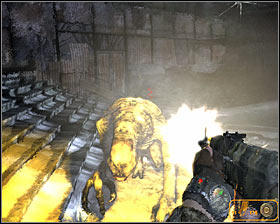
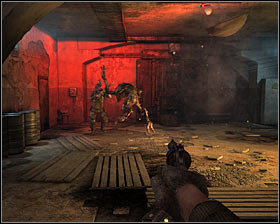
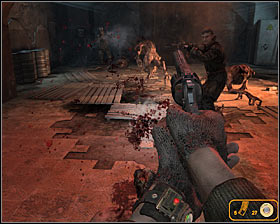
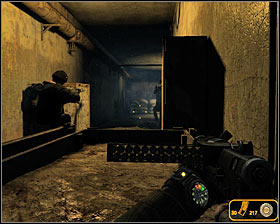
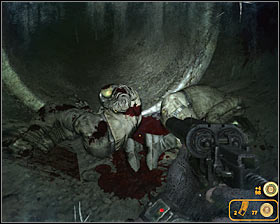
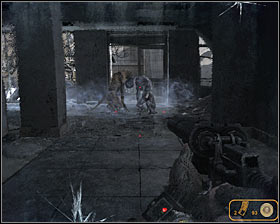
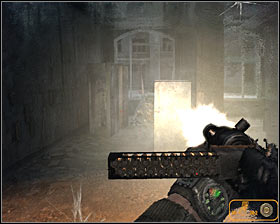
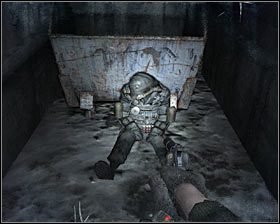
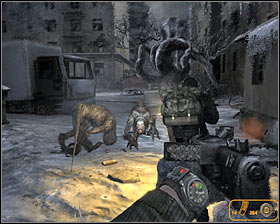
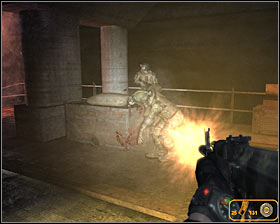
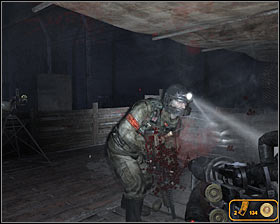
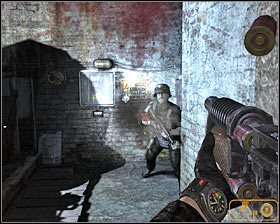
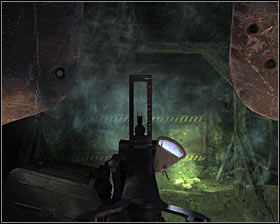
Start attacking the mutants showing up in the vicinity #1 #2. Thankfully you won't have to worry about losing your life here, because the monsters will be more interested in attacking your colleague. Fire longer bursts, because you won't have to conserve ammunition here and don't forget to stay on the move instead of staying in one spot.
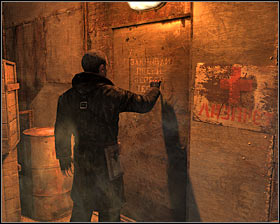
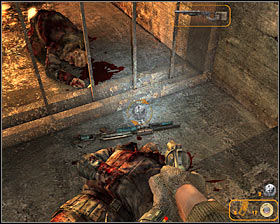
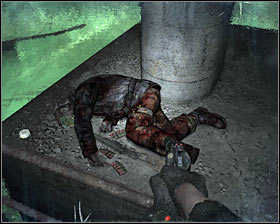
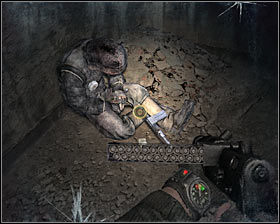
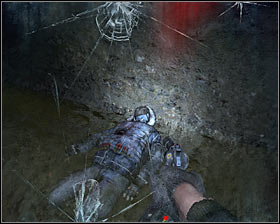
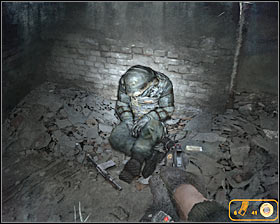
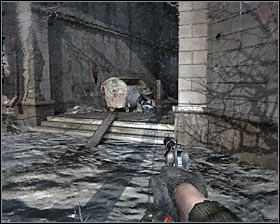
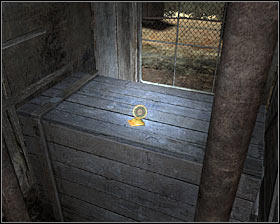
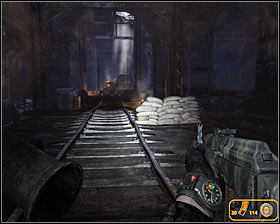
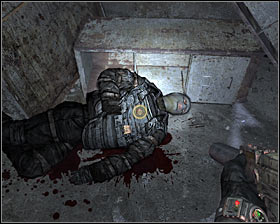
Explore the area a little after the battle. A filter and some ammunition can be found next to one of the bodies #1. Approach your partner when you're ready, target the grating and press the action key #2. Keep pressing the action key repeatedly so that you can unlock the passageway leading to the next area. Leave the building.
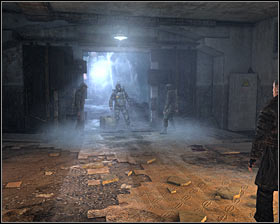
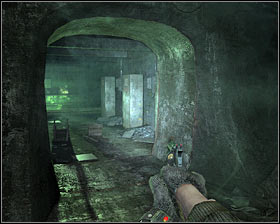
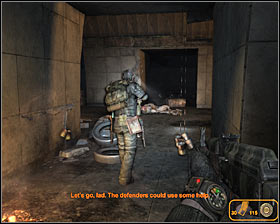
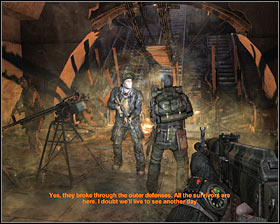
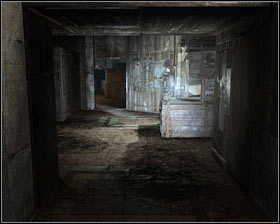
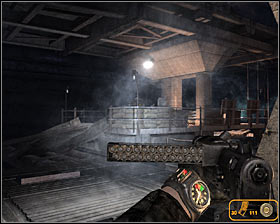
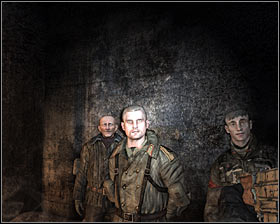
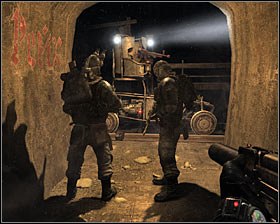
You won't have to explore this area, because you wouldn't find anything interesting. Instead keep following your colleague #1 and it shouldn't take long until you meet up with more allied units #2. Approach them to initiate a cut-scene.


Wait until you've regained control over the main character. Ignore the monsters for a few seconds and wait for one of the creatures to stop near your position #1. Once your team has been attacked start firing at the beasts. You'll have to get rid of several monsters #2, however you should be fine as long as you remain close to your allies. This mission will end with a cut-scene.
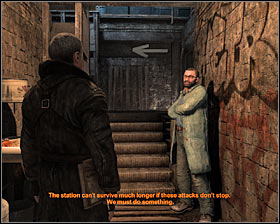
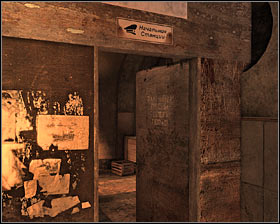
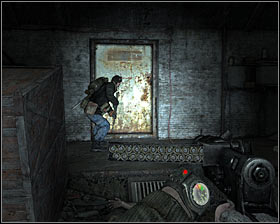
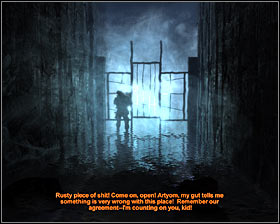
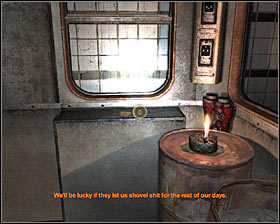
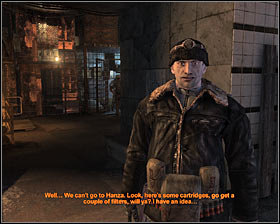
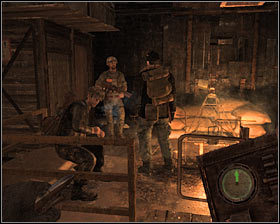
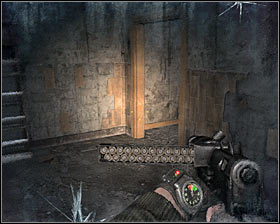
Walkthrough: Exit a small room and start following your friend Alex. You won't have to look around too much, although you may want to consider doing this if you're after all the achievements. Listen to a conversation with one of the scientists #1 and then use the stairs. You'll soon come across a closed door #2 and you'll have to wait until you're let inside.
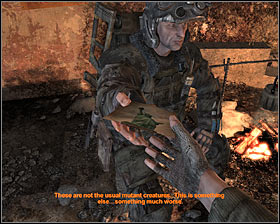
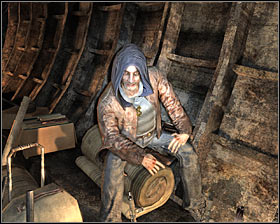
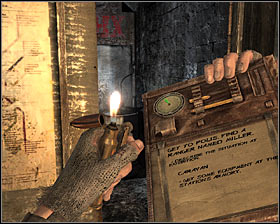
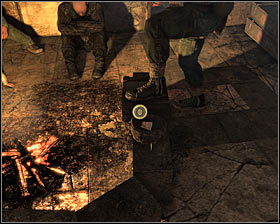
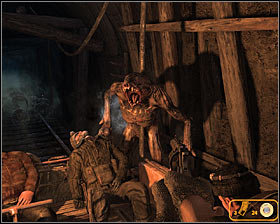
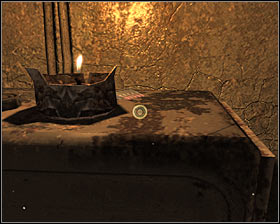
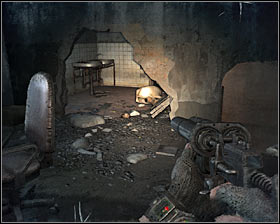
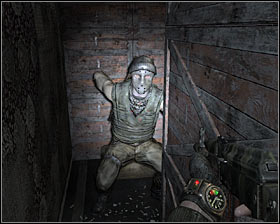
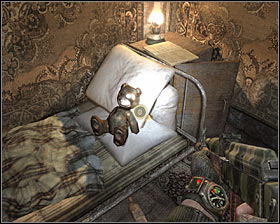
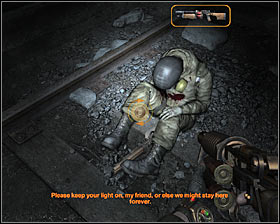
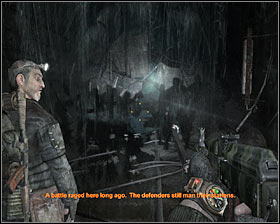
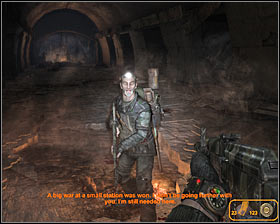
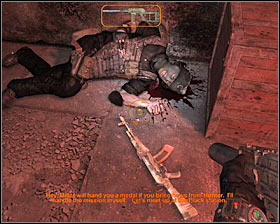
Two rooms of the clinic are up ahead and you won't find anything interesting here. Make a stop after you've reached a much larger gate and wait for Hunter to show up #1. Approach the fireplace to listen to a conversation between him and Alex. Notice that Hunter is offering you a postcard #2. Approach him to take it.
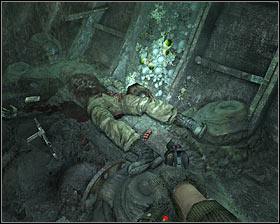
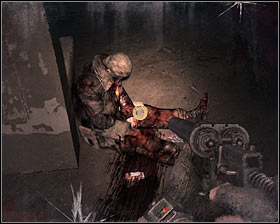
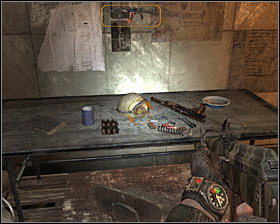
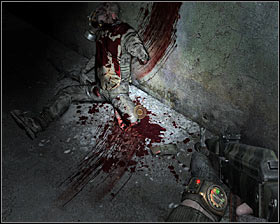
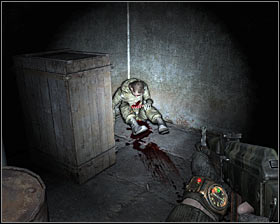
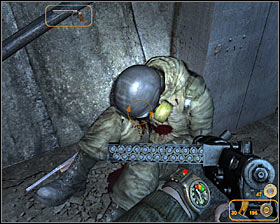
An alarm will soon kick off. Listen to what your allies have to say about this and then approach a side locker #1 to collect a med kit, a revolver and some ammunition. The first monster will enter the room through a hole in the roof, however Hunter should deal with this threat #2.

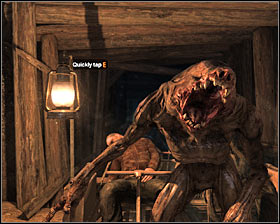
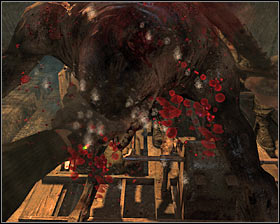
As for the second group of beasts, you'll probably have to eliminate at least one of the monsters on your own #1. Don't forget to aim for the creature's heads so that one or two bullets will do the job #2 instead of having to fire all six rounds.
Get ready to defend yourself against new monsters - this time the beasts will be using four ventilation shafts located in the corners of the room #1 #2. You should know that if you eliminate them quickly they won't have a chance to destroy the gratings to enter this room. You'll watch a new cut-scene after defeating the beasts and then this mission will come to an end.
Walkthrough: Notice that you've been awarded with a chance to use a journal and you can display it on your screen by pressing the M key #1. You've also received 10 rounds of gold ammunition (you can find out more about this special kind of ammunition from the USEFUL HINTS chapter). Start exploring the base #2 and notice that you can follow the arrows painted on some of the walls.
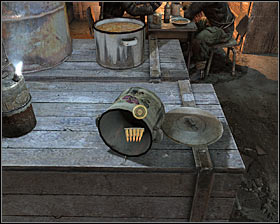
Make sure to examine a kitchen pot along the way #1 so that you'll have a chance to collect 3 rounds of gold ammunition. Use the stairs to get to an upper level and you'll soon arrive in a marketplace area #2.
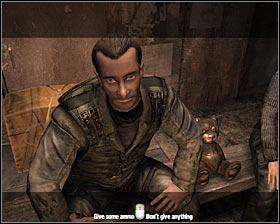
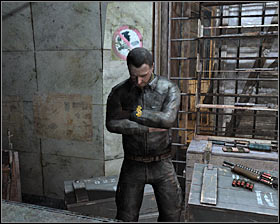
I would recommend that you take your time by talking to a man sitting on one of the benches #1. You can comply to his wish and spare two rounds of gold ammunition for his son (press the action key). Check the items being sold in two nearby shops #2 while you're here.
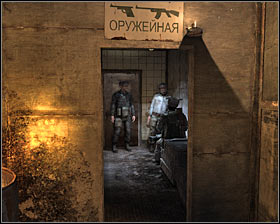
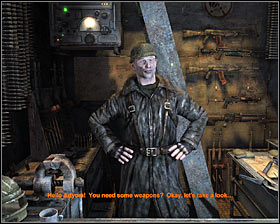
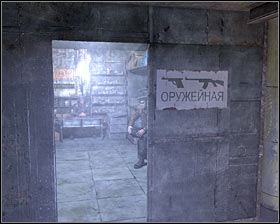
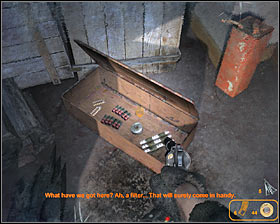
Your next area of interest should be the armory and you must choose a passageway with a gun sign located above it #1. It should only take a few seconds to find the armory #2. Remain here, because you'll receive several important items for free, including a submachine gun with ammunition, a charger for your flashlight (you must hold the F key to choose it from the inventory), a brand new gas mask with filters and several medkits. You can now test your new gun on a nearby shooting range or leave the armory right away.
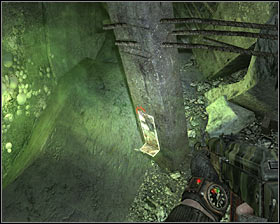
Return to one of the previous corridors and notice that you can now choose a new passageway #1. Enter a room with a man playing on a guitar and examine the area near his left foot #2 to collect 5 rounds of gold ammunition.
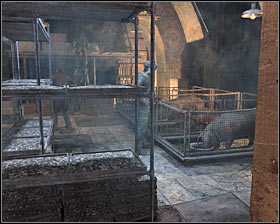
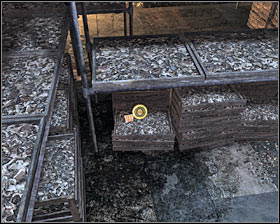
Continue exploring the base. The next room you'll have a chance to visit will contain several pig pens #1. Approach the pens and search the area to the left. Two rounds of gold ammunition can be found on one of the crates #2.
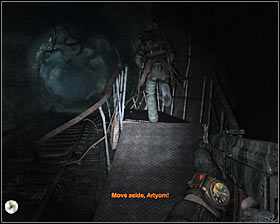
You should consider taking a break and entering a nearby room to talk to the main character's father #1. If you don't want to talk to him you may proceed directly to a train station. Approach a man seen to your right #2 and press the left mouse button to confirm that you want to leave this area by taking a seat on board of a trolley.
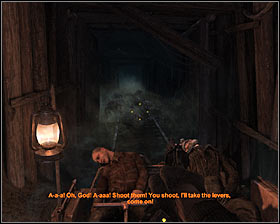
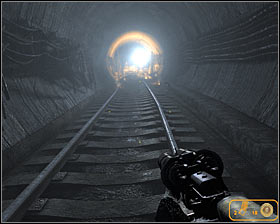
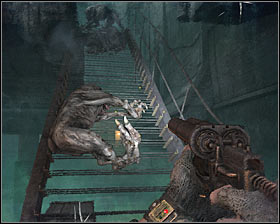
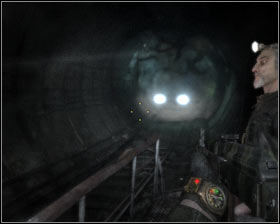
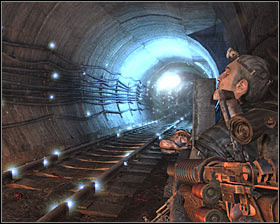
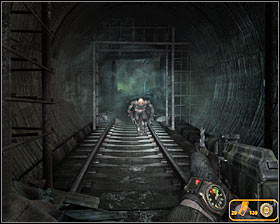
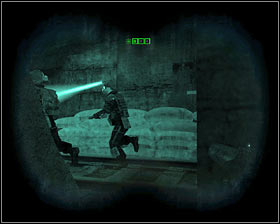
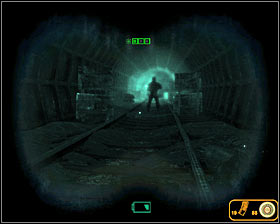
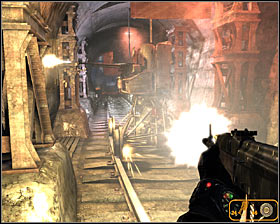
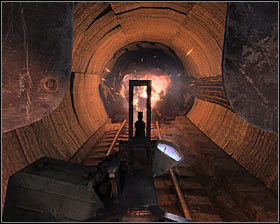
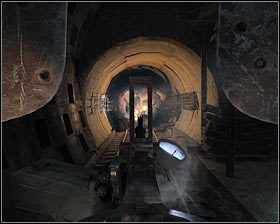
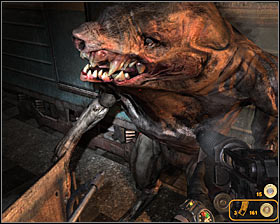
Walkthrough: You'll only be allowed to look around in the first part of this mission so you should focus on listening to what other characters have to say #1. It'll get more interesting after watching a new cut-scene, because monsters will appear inside the tunnel #2.
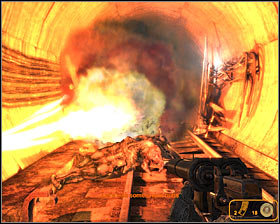
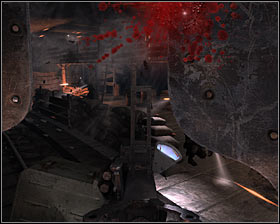
Generally this battle is going to be much easier than it looks, because you won't be fighting with more than one monster at a time #1 #2. You should be using one of the weapons acquired during your visit to the Exhibition station (a revolver will do just fine). Focus on firing single and precise shots, so you won't have to reload your weapon too often.
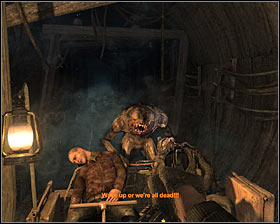
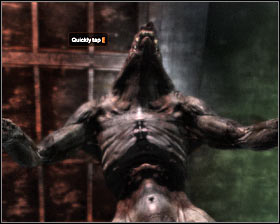
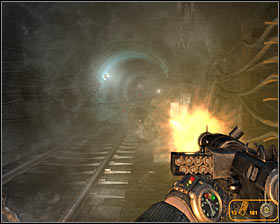
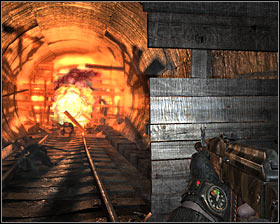
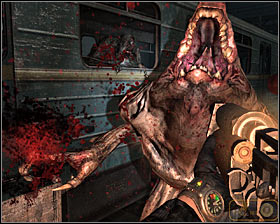
Get ready, because sooner or later one of the monsters will appear right in front of you #1, forcing you to solve a simple mini-game. All you have to do is to keep pressing the action key repeatedly so that you'll have a chance to kill the monster #2. Notice that you've received a sawed-off shotgun from one of your allies.
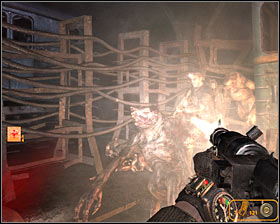
Keep attacking the monsters and don't forget to always wait for them to jump on the trolley #1 #2. If you're using a shotgun you should also know that both mouse buttons can be used to fire the weapon instead of only the left button.
One of the beasts will probably succeed in throwing you off the trolley. Watch a short cut-scene, wait until you've regained full control and start running towards your allies #1 (you must turn around). Ignore the creatures chasing after you, because as soon as you're close to the checkpoint they're going to be eliminated #2.
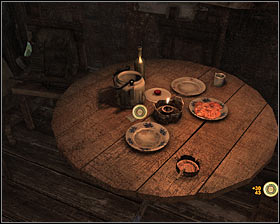
Walkthrough: This station contains only the friendly units, so you can feel safe here. Wait until the conversation has ended and collect 30 rounds of gold ammunition from the first table #1. A new gold ammo round can be found on a nearby table #2.
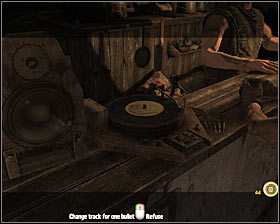
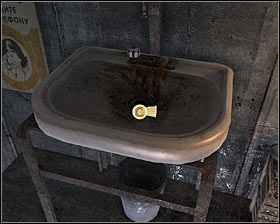
Notice that you can spend one round of gold ammunition to change the tune being played by a nearby jukebox #1. Proceed to the next area of the bar and make sure to collect a single round of gold ammunition from the dirty sink #2. Use the stairs to get to a lower level.
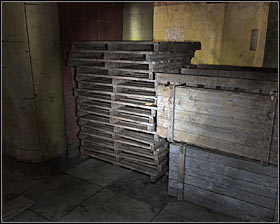

You should now spend some time exploring the station. Start off by checking the area under the stairs you've just used. There are some palettes located to your right and you'll have a chance to collect 1 round of gold ammunition #1. Turn left and search the area to the right of the door leading to the armory. You'll find a single round of gold ammunition here as well #2.
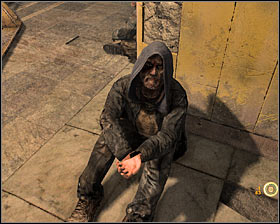
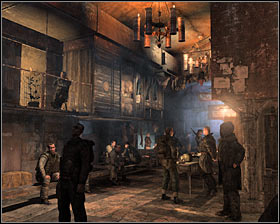
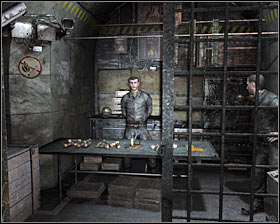
You may now enter a small armory and you'll come across three merchants here #1. Buy all the supplies you need and exit the room. Notice that there are beggars and children in the area #2 and you'll be allowed to give money to them (there are four of them here). It's not mandatory, however it may prove to be important if you want to unlock the best ending.
Check the passageway located to the left of the stairs. This corridor leads to a train station #1 which is going to be occupied by a lot of people. Turn right after you've entered a new area. Make a few steps forward, turn left and check the ground for a new round of gold ammunition #2.
This mission can be continued by choosing a passageway located to the right of the stairs leading from the bar. You'll encounter a young boy here #1. Giving him a single gold bullet is not mandatory, however doing this will get you closer to a better ending and he'll also guide you to your next destination. Ignore the lower passageway for the time being and instead head forward. Check a bunk to find 1 round of gold ammunition #2.
You may now proceed to a lower passageway which was used by the boy #1. Follow him (or head forward alone). Make sure to check the area where two people are sleeping #2 to collect a single round of gold ammunition.
Keep heading forward and eventually you should come across three toilets #1. Check the toilet found to your right and you'll be able to collect 1 round of gold ammunition. Head up and choose the bridge located close to your position to get to the other side #2. Find a stash there with some standard ammunition to your current guns.
Don't leave this area just yet. Instead locate a partially opened door #1 and take a peek inside to collect a single round of gold ammunition. Return to the bridge and explore the surrounding area to locate 1 round of gold ammunition #2.

You may continue following the boy (or exploring the upper balcony on your own). Ignore the second bridge for the time being and instead look around a little. Locate a new opened door #1 to collect a single round of gold ammunition. You can also climb on top of a structure located to the right of the bridge. Check one of the corners to find 1 round of gold ammunition #2.
Approach the bridge and get to the other side. Turn left here and notice a single round of gold ammunition #1. Press the crouch key, approach the bullet and pick it up. You may now proceed to the bar. Check one of the tables seen in the distance to collect 1 round of gold ammunition #2.
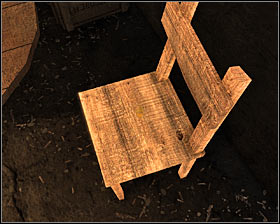
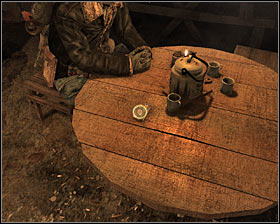
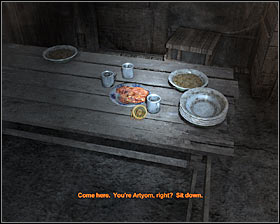
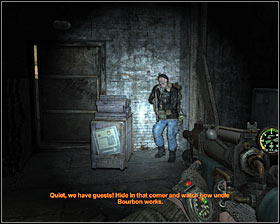
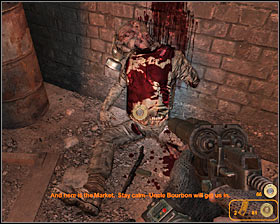
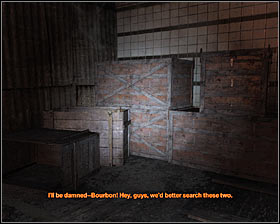
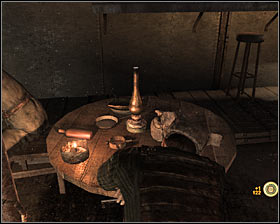
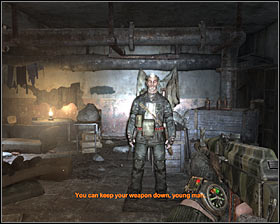
Approach a man sitting inside the bar. He's called Bourbon and after a short introduction you'll have to join him by sitting on a nearby wooden chair (press the action key) #1. Confirm that you're ready (left mouse button) and notice that Bourbon has left a payment on the table - 10 rounds of gold ammunition #2.
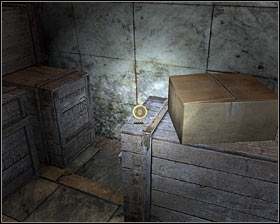
Exit the bar and start following Bourbon. Eventually you'll both get to an unexplored area of the map #1 (the entrance is located to the left of the toilets). Once you're inside a new room turn left and take a single round of gold ammunition from a large crate #2.
You may proceed to the next section of the room. This time focus on examining a small shelf with a candle #1 and you'll find the last round of gold ammunition. Wait for your colleague to move a nearby crate #2, unlocking the exit. Talk to him to end this mission.
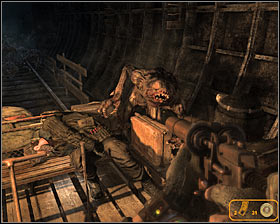
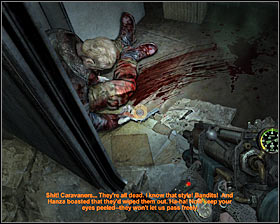
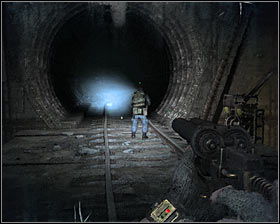
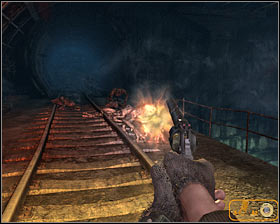
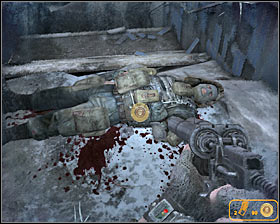
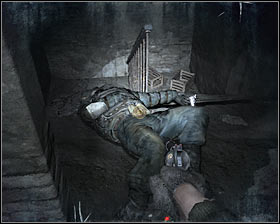
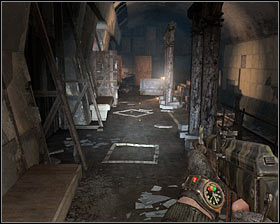
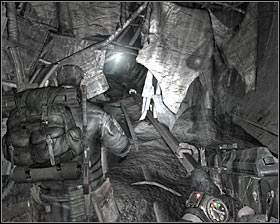
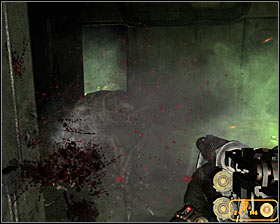
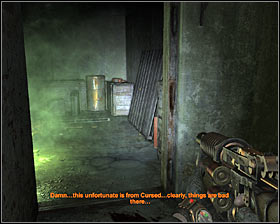
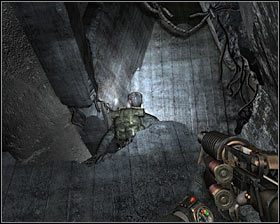
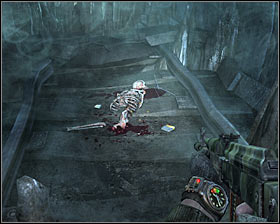
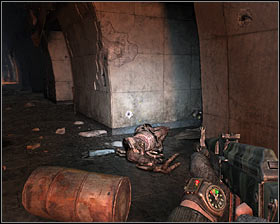
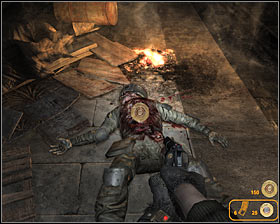
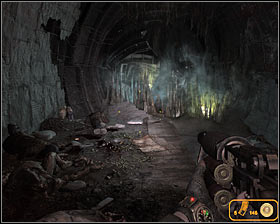
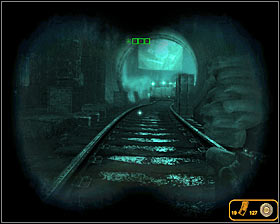
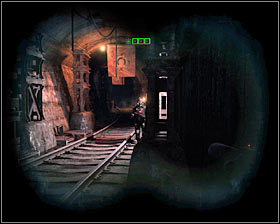
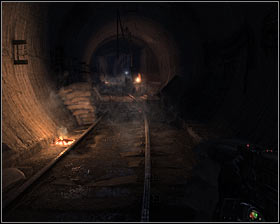
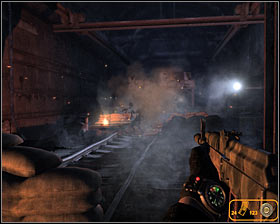
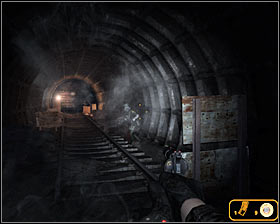
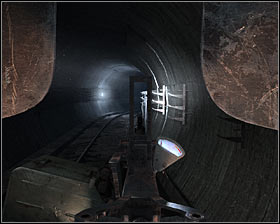
Walkthrough: Drop down to the train tracks and start moving forward. It would be a good idea to examine a human body along the way #1, because you'll find a lot of ammunition for all sorts of weapons. Turn left after you've reached a junction #2.

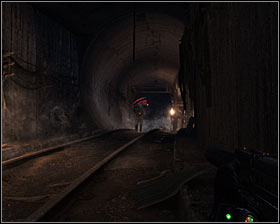
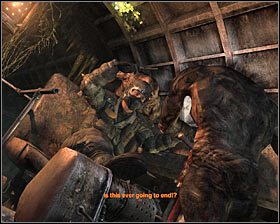
You're going to be attacked by two monsters just around the corner #1. Be careful, because they're very fast and they can use tunnels to perform surprise attacks. Aside from the beasts you'll also have to watch out for large holes in the ground #2. Dropping inside a hole will result in the death of the main character.

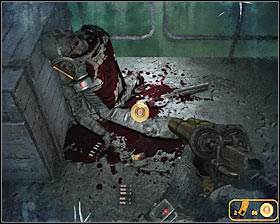
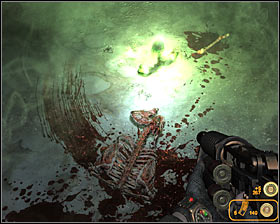
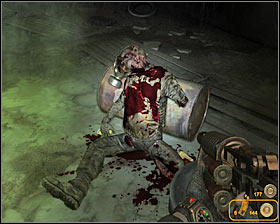
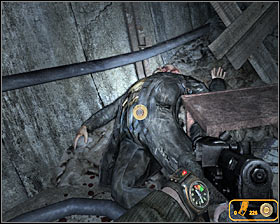
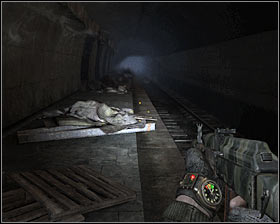
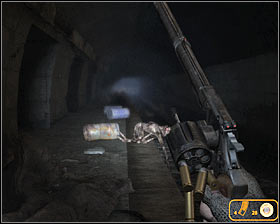
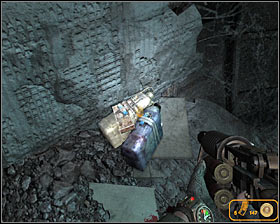
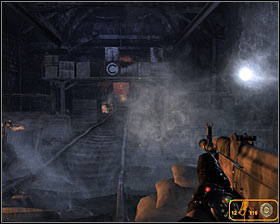
Make sure that you've eliminated both creatures and then look around to find a new body, as well as a lot of ammunition #1. Head to the area where you first saw one of the monsters. Examining a new body will allow you to collect ammunition and a pneumatic rifle #2. Remain here and examine the third body found on the other side of the grating. Doing this will allow you to collect 2 rounds of gold ammunition.
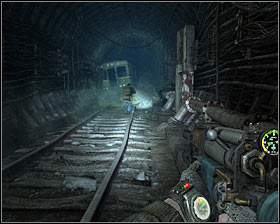
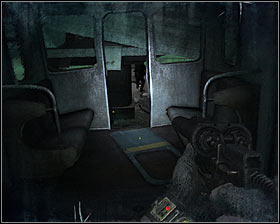
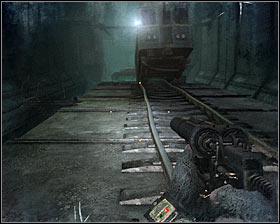
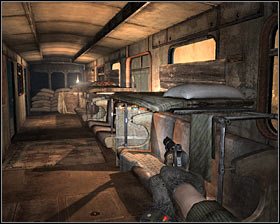
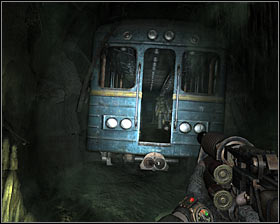
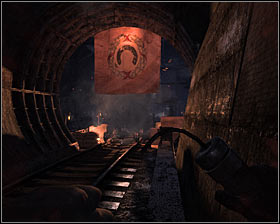
Return to the main tunnel (the one with the train tracks) and start heading towards a metro car seen in the distance #1. Enter the carriage and look around to find a new body. Pick up ammunition #2 before leaving the carriage.

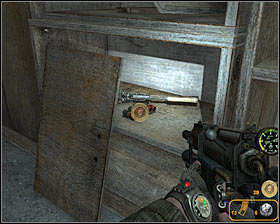
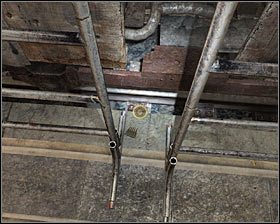
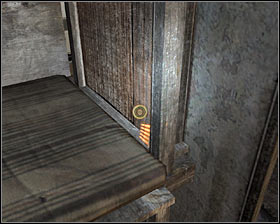
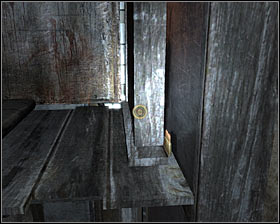
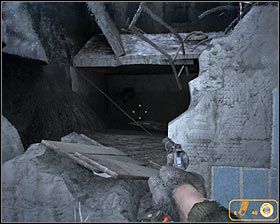
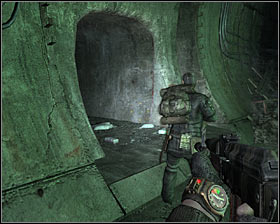
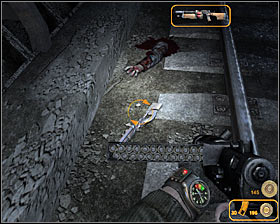
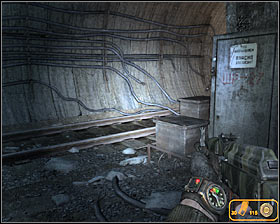
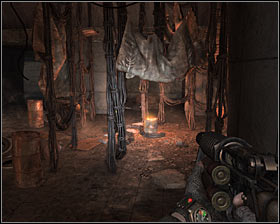
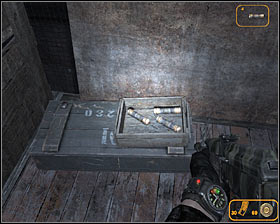
Continue exploring the area until you get to a new junction. Check the body, as well as backpack found nearby #1 to collect a lot of standard ammunition. Choose a corridor found to your right #2, BUT watch out for traps located in the area. Prevent the main character from touching the hanging cans by moving slowly and close to the left wall.
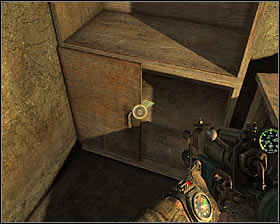
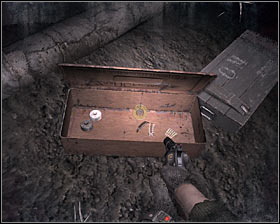
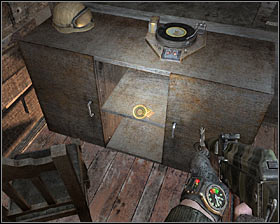
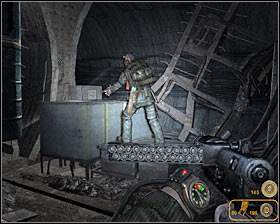
You may enter a new room. Check one of the nearby cupboards to find 3 rounds of gold ammunition #1. Other cupboards contain standard ammunition #2 and you shouldn't ignore them, because you'll need supplies for the next battle. Exit the room and wait for Bourbon to disarm one of the traps for you.
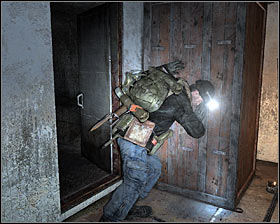
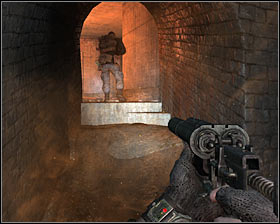
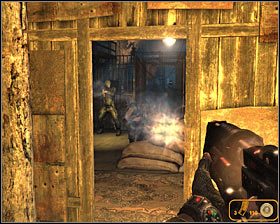
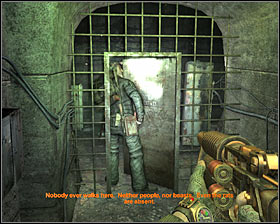
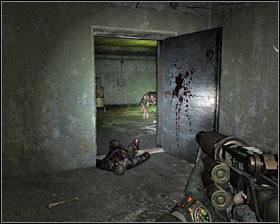
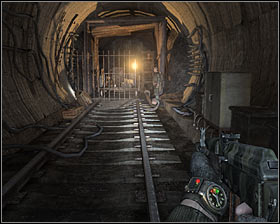
Proceed to the next section. Approach the door where your colleague should be waiting for you #1. Stand to the left of the door, turn off your flashlight and wait for one of the guards to enter this room #2. If you want to kill him yourself you should use a weapon with a silencer attached to it or a knife to prevent the alarm from being raised. If you don't want to kill him you can wait for Bourbon to deal with him for you.
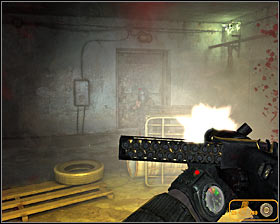
Enter the next room carefully and make sure that you're still not using a flashlight. The area is being patrolled by several soldiers and you should decide to eliminate at least a few of them #1 #2 using a pneumatic rifle or a silenced revolver.
Sooner or later your opponents will find out what is happening and this means you'll have to engage them in direct combat #1 #2. In this case you may want to consider using a normal submachine gun or a shotgun (assuming you can get closer to your enemies). You should also start throwing dynamite sticks to dispose of larger groups of enemy units.
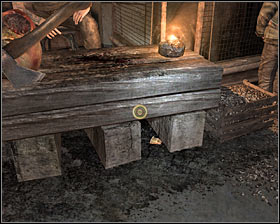
It would be a good idea to examine all bodies after the battle to collect much needed supplies. There's a small fireplace in the center of the room #1 and aside from standard ammunition you would also find 20 rounds of gold ammunition. Approach the next door #2 when you're ready to move on with the mission.
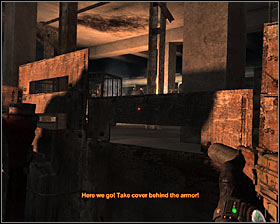
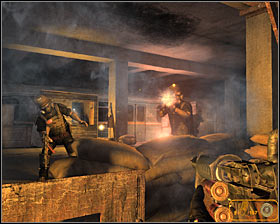
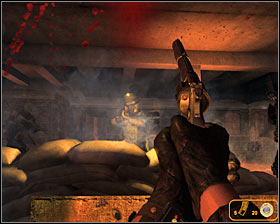
Take cover behind one of the larger objects as soon as you've entered a new corridor #1, because enemy troops will show up in the area. I would strongly recommend using dynamite here, especially since a large group of enemies will be taking cover behind sandbags #2.
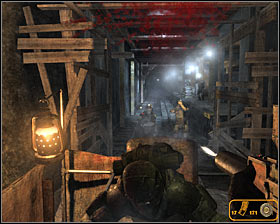
Proceed to the next area, however watch out for additional enemy units to your right #1. Make sure that all bandits have been eliminated and take your time to collects supplies (especially ammunition). Interact with a nearby door #2 to end this mission.
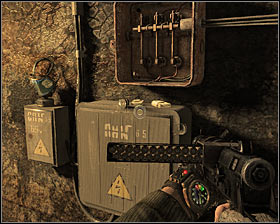

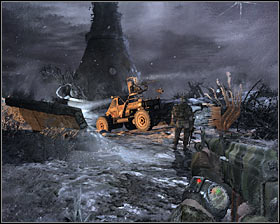
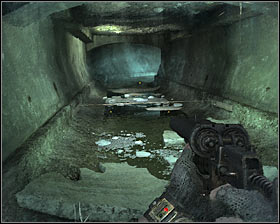
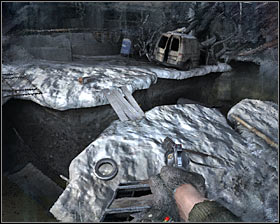
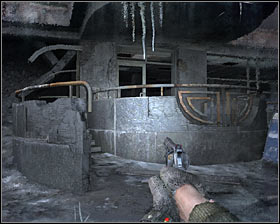
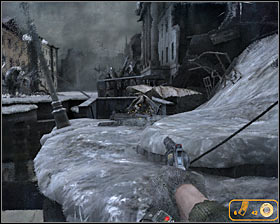
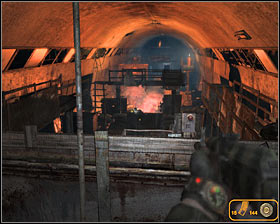
Walkthrough: Start off by heading forward. It would be a good idea to examine a fuse box along the way, because you'll find some extra ammunition on it #1. Head outside and approach a destroyed section of the bridge. Look around to find new supplies, including ammunition and gas mask filters #2.
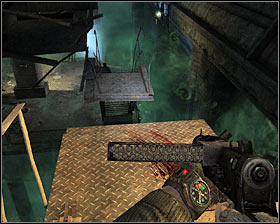
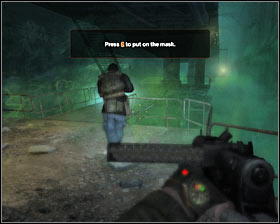
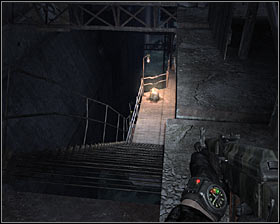
Find the stairs located to the right of the bridge. Notice that the staircase is damaged #1 so you'll have to make a successful jump to get to the other side. Head down to enter a contaminated area #2. Follow the instruction seen on the screen by pressing the G key to put on a gas mask.
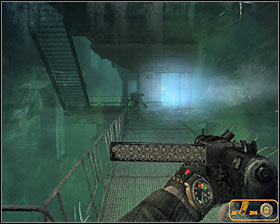
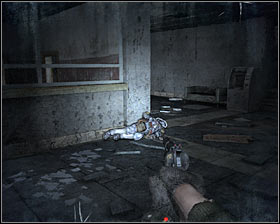
Be careful, because you and Bourbon are soon going to be attacked by the first group of monsters #1 #2. Attack the beasts from a larger distance if you can, because they're deadly in close combat. I would also recommend staying close to Bourbon so that the monsters can focus their attacks on him instead on you.
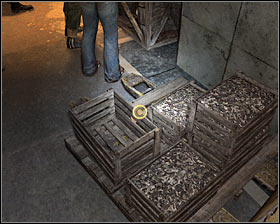
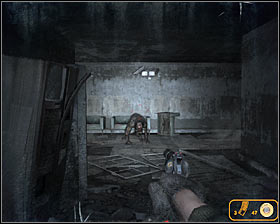
Make sure to check the area after the battle to find new filters, standard ammunition and 9 rounds of gold ammunition #1 and then use the stairs to get to an upper level. You'll find a metro car here and you should take some time to explore it. There are three crates inside the carriage and two of them are interesting. One of the crates will contain weapons and the other one ammunition #2. Notice that aside from standard ammunition you'll also collect 2 rounds of gold ammunition.
Remain on the upper level and head forward #1. Doing this will allow you to locate a new dead soldier #2 (the body can be found near the area patrolled by an enemy machine). Check the body to find standard ammunition and 15 rounds of gold ammunition.
Head down to a lower level, join Bourbon and continue exploring the surrounding area together #1. Sadly you will have to acknowledge the fact that you will be attacked by monsters quite often and it's always important to remain close to your ally. Use the stairs after reaching the last balcony and head towards a hanging metro car #2.
You won't find any interesting items inside the carriage so you may proceed directly towards the only available exit #1. Examine a body and then start running after Bourbon. Don't forget to stay close to him, because more monsters may show up in the area. Cross the bridge and find a new body #2 to collect much needed ammunition.
Deal with the monsters and then use the stairs to get to an upper level #1. You shouldn't be in a lot of hurry here, because a new metro car can be found nearby #2 and it would be a good idea to examine it. You can't enter the carriage so you'll just have to go around it, collecting standard ammunition and four rounds of gold ammunition.
Approach Bourbon #1 and listen to what he has to say about your current situation. QUICKLY use the stairs found to your right #2, because you are now being chased by a lot of monsters. You'll have to stay on the move from now on if you don't want them to catch up to you and kill you.
Keep heading forward, HOWEVER watch out for a trap found in one of the nearby tunnels #1. It would be best to jump over it, so you won't have to waste precious time. Reaching the next corridor #2 will allow you to end this mission.
Walkthrough: You should act quickly as soon as this mission has started, because you won't have much time to collect items from this section of the catacombs. The bodies found here contain a lot of standard ammunition but you should be more interested in collectibles - find 4 rounds of gold ammunition #1 and 5 rounds of gold ammunition #2.
You will witness visions featuring Bourbon in the meantime #1. Ignore the first and the second vision. The third vision is a different thing - you will have to complete it if you want to survive. Thankfully all you have to do is run towards your colleague (he's standing close to the gate) #2. Wait for the game to play a new cut-scene.
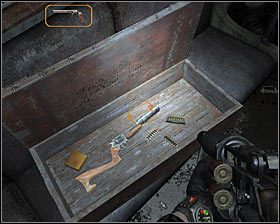
Start exploring a new area of the catacombs and be on a lookout for a passageway found to your right - it will lead you to a large round chamber #1. Use the balconies and ledges found here to get to the other side of the room safely. Find a body there #2 and examine it to find a unique revolver, standard ammunition and 3 rounds of gold ammunition.
Return to the main corridor and keep heading forward. Be careful when passing by large holes and don't forget to examine a new body #1 to find 20 rounds of gold ammunition. You can now choose between remaining on this level and choosing a nearby hole in the ground #2.
If you've decided to jump down the hole you will have to put on a gas mask to stay alive. Make sure to examine the surrounding area carefully to find 4 rounds of gold ammunition #1. Head down again and this time find a corpse containing gas mask filters and a lot of standard ammunition #2. You can go back up using a nearby ladder.
If you've decided to remain on the upper level you will have to keep following Bourbon #1. It shouldn't take long until you come across a large gate #2 (this will also occur after you've used the ladder). Wait for the conversation between Bourbon and the guards to end.
Make sure to choose a good weapon from your arsenal, because you're about to be attacked by a large group of monsters #1. Prevent the creatures from moving too close and be ready to solve mini-games in order to avoid certain death #2. Keep fighting until all the beasts have been defeated and wait for the gate to be raised. Entering the base will end this mission.
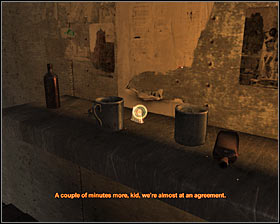
Walkthrough: This is going to be another safe zone and you should begin by examining large crates found to your left #1. Pick up a single round of gold ammunition and then proceed towards the checkpoint. You'll have to be patient here and wait for Bourbon to finish negotiations so that you are going to be let inside the station #2.
Go pass the checkpoint and then turn around. There are going to be several lockers in the area and you should examine the one to the right #1. Doing this will result in finding 1 round of gold ammunition. Proceed to your right and then locate yet another round of gold ammunition (it's to the left of the candle) #2.
You should now turn left and start exploring one of the carriages. Once you're inside the carriage turn right and collect a single round of gold ammunition #1 from the bed. Head forward and stop when you're about half way through. Check the area to your left and you should be able to find a new round of gold ammunition #2.
After you've collected an object mentioned above you should turn around and find another single round of gold ammunition #1. Exit the carriage and head forward to talk to Bourbon #2. He will give you 15 rounds of gold ammunition so that you can purchase supplies.
You may now start exploring a nearby marketplace #1. As soon as you've entered the first area you should turn right and examine crates found next to two soldiers. Doing this will allow you to acquire 1 round of gold ammunition #2.
Proceed to the next section. Find a single round of gold ammunition on a ladder located to your left #1. Another round of gold ammunition is lying on a table in the bar #2.
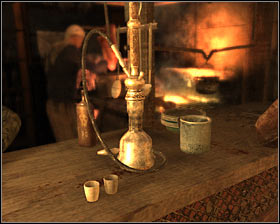
You can interact with a bong found on a bar table #1 if you want to which will result in interesting graphic effects. :-) Remain in the bar section for a little while longer. Check the area to your left and you'll find 1 round of gold ammunition behind a mug #2.
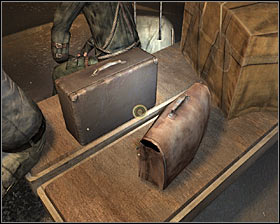
You may proceed to the next section of the marketplace. Start off by approaching a group of people found in the center of the room #1. Check the suitcases and you should be able to locate a single round of gold ammunition #2.
Head on to the next section. Make a stop near the butcher's store found to your left, because you'll have a chance to pick up a single round of gold ammunition from the ground #1. Turn around and examine a group of wooden crates found in the area to collect 1 round of gold ammunition #2.
Continue exploring the market station #1. Enter a new area, turn right and examine a trolley #2. Look on the ground under the vehicle. Aside from standard ammunition you'll also collect a single round of gold ammunition.
Proceed to the opposite end of this room and you should be able to find an incomplete trolley #1. Turn right here and collect 1 round of gold ammunition hidden behind a canister (upper shelf). You may now begin shopping. The only merchant you'll have to talk to in order to continue the mission is the left one standing behind the grating #2.
Check the items being sold by this merchant - you'll have to purchase at least one gas mask filter #1. I would recommend buying two or three, because you'll soon have to spend a lot of time exploring areas where using a mask will be mandatory. Return to one of the previous rooms and locate Bourbon #2.
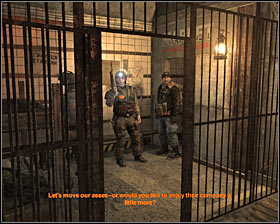
You must now follow your ally to a checkpoint located close to the exit from the market station #1. Wait for the guards to open the gate and step through it #2 to officially end this mission.

Walkthrough: Start off by putting on a gas mask (G key). Examine a body which also caught Bourbon's attention #1. You'll find a lot of ammo here and there's some extra clips in the backpack. Proceed to your right and check a small room in one of the corners to locate a new body #2. In this case you'll have a chance to collect 2 rounds of gold ammunition.
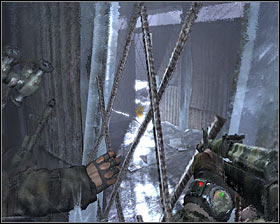
Remain in the area where you've started this mission. Find a passageway located in the left corner of the room #1. BE CAREFUL here, because there's a trap near the doorway #2. Avoid the trap and use the stairs to get to an upper floor.
Ignore the beast fleeing from this area, because you won't have to kill it. Instead focus on finding valuable supplies #1. Return to the ground floor using the stairs (I wouldn't recommend jumping down, because it may end badly). Proceed to the main exit from this building - Bourbon should be waiting for you here #2.
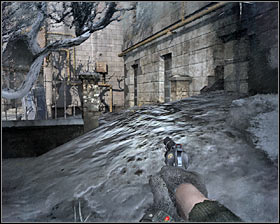
You may ignore what your colleague is saying, because the flying demons aren't a big threat to your safety at the moment. Notice that you'll be acting alone from now on, so you'll have to pay more attention to what's happening around you. Proceed to your right #1 and cross two wooden bridges. Eventually you should find an entrance to a new building #2.
Once you're inside the building take your time to find a dead soldier #1. Aside from standard ammunition you'll also have a chance to collect 5 rounds of gold ammunition. Choose a good weapon from your arsenal, because you're going to be attacked by a group of monsters in the next corridor #2. Don't forget that it's entirely up to you to defeat them. Stay on the move and prevent the beasts from surrounding the main character.
Explore the surrounding area after the battle to find a new body #1. Collect standard ammunition and 3 rounds of gold ammunition. You should also examine one of the desks to uncover a weapon with a lot of ammunition #2.
Return to the area where you've defeated the monsters and go right to get to a metal gate #1. Make sure to search the area under the stairs to find some extra ammunition. You can now use the stairs to reach the top floor #2.
Ignore image distortions and weird sounds after reaching the top level. Instead focus only on exploring surrounding rooms. Walk through a large hole in one of the walls #1 and check a nearby desk to find ammunition #2.

I wouldn't recommend exiting the building through a large hole. Instead explore the opposite end of the corridor #1 and you should notice a hole in the ground #2. Head down the hole to find yourself in a small elevator shaft.
You should end up in a small room. Make a few steps forward to find one of the ranger stashes #1. You can find standard ammunition here, as well as a shotgun and gas mask filters. Don't forget to pick up 6 rounds of gold ammunition #2 before leaving. Return to the elevator shaft, press the crouch key and jump down again.
You'll have to be extremely careful here, because you'll end up in the same room with two monsters #1 and other beasts will be waiting for you outside. I would recommend that you attack the creatures right away. Defeat all of them and then check the surrounding area to find a body with a lot of standard ammunition #2.
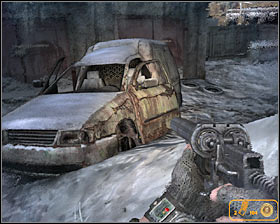
Exit the building for the second time and take your time to examine a white delivery van found in the area #1. Doing this will allow you to collect 2 rounds of gold ammunition. There's also a larger truck nearby #2 and if you check what's in the back you'll collect standard ammunition and 2 rounds of gold ammunition.
You may continue exploring the area. Don't forget to examine a new building found to your right - you'll be allowed to enter it through a destroyed window #1. There are some gas mask filters inside, as well as standard ammunition and 4 rounds of gold ammunition. Head back outside and proceed towards the playground #2 where you'll witness a new vision.
Get ready, because as soon as the vision has ended you'll have to take part in a new battle #1. Use the fact that the monsters are far away from you and attack them from a larger distance. Keep fighting until it's safe and then find a white container on the other side of the playground #2. There's a body inside with some ammunition.
You may proceed towards an entrance to a new building #1. Walk through several short corridors and don't forget to examine a body of a new soldier along the way #2, because you'll find 30 rounds of gold ammunition.

Once you're inside a bigger room you should go to your right. You'll soon come across a doorway #1 and you should enter a smaller room. Locate a chest here #2 containing much needed supplies and 2 rounds of gold ammunition.

Make sure to choose a good weapon from your inventory before leaving this room, because you are soon going to be attacked by new monsters #1 #2. Consider exiting the building for a few seconds, because you may get surrounded easily if you decide to stay inside.
Once you've eliminated all beasts continue exploring the building. This time you should check the room found to the left of the corridor you've used to get here #1. Examine a collapsed wall on the other side of the room and you'll uncover a small stash with ammunition #2.
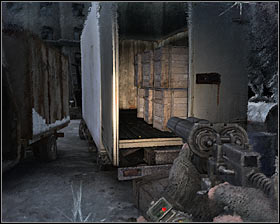
Exit the building and start off by going to your right #1. Make sure to remain close to the building wall and eventually you should locate two white trucks #2. Drop down to a lower platform located in front of you and check a new body to find some ammunition.
You should now move back a little so you'll be standing directly in front of the building you've just left. Locate a small pipe #1 and use it to head down. You'll have to act quickly here, because there's a lot of radiation and you would eventually die. Locate a body floating in the water #2 (it's to your right). Collect ammunition and return to the safe area using the pipe again.
You may now proceed to your left. Start off by choosing a path leading down #1. Ignore the radiation, because you won't stay here for more than a few seconds. Walk to the end of a path to find a body #2 with standard ammunition.
Go back up and face the area you haven't had a chance to visit yet. Make a jump towards a ledge seen in front of you #1. Head forward until you'll have a chance to drop down to a destroyed entrance to a metro tunnel #2.
Make sure to check your surroundings, because there's a new body here #1. Examining it will allow you to collect standard supplies and 2 rounds of gold ammunition. Proceed to your right while you're here, using a wooden bridge along the way. Find a new truck #2 and see what's in the back to locate dynamite sticks.
Return to the previous body and search the area to find the stairs #1. Notice that you're standing close to a flying demon #2 and it would be a good idea to scare it away with one of your guns. Sadly this means you'll have to avoid its attacks from now on, so it'll be important to stay on the move and indoors for most of the time.
Notice that you can use the opportunity to examine a body the flying demon was feeding on #1 to collect some ammunition. Head down and enter a destroyed building found to your right using a small hole #2. There's a new body in this area and aside from standard supplies you'll also find 5 rounds of gold ammunition.
Return to the area where you've attacked the flying demon and this time head upwards. Doing this should allow you to gain access to a new destroyed building #1. Once you're inside focus on disarming a nearby trap #2.
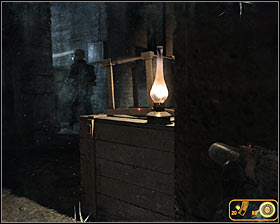
You may now proceed to your right #1. Notice that you'll have to jump over two ropes in order to prevent a new trap from being triggered. Eventually you should make your way to a room with a burning lamp #2. Listen to a recording and take your time collecting supplies, including 10 rounds of gold ammunition.
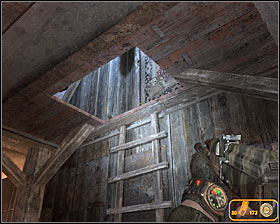
You can now return to the area where you've found and disabled the first trap. Choose the only unexplored passageway #1 which will lead you to a staircase. Head down the stairs #2 and wait until the game has finished loading a new map.

Walkthrough: Start off by examining a body found directly in front of you #1. Collect ammunition from this body and then turn left. You should be able to locate a small hole located under the stairs #2.
Go through the hole and it won't take long until you've discovered a new body #1. Take standard ammunition, as well as 15 rounds of gold ammunition. Return to the starting point and this time choose a passageway located to the right of the first body #2. You'll have to move quickly here, because the area is irradiated.

Continue moving forward until you come across a junction. Take the ammo found nearby and then head up the stairs #1. It shouldn't take long until you've discovered a new body. Check it to find supplies and 2 rounds of gold ammunition #2. Head back down and proceed towards the unexplored passageway.
Turn left as soon as you've entered a new area and crawl through a small crack in the concrete wall #1. You'll have to act quickly again so that your character won't be killed by large doses of radiation. Take gas mask filters, standard ammunition and 5 rounds of gold ammunition from the chest #2. Return to the main chamber through the hole.
Use wooden beams found in the area to get through this location safely and keep heading towards a new body seen in the distance #1. Collect supplies and 20 rounds of gold ammunition before moving on. Turn right and use a new wooden beam #2 to get to an upper ledge.
It would be a good idea to check the area to your left. There's a new body there #1, however you would have to slide down to get to it and to collect ammunition. If you're not interested in examining the body head forward right away. You must be moving towards buildings seen in the distance #2.
Start off by exploring a small alley found to your right #1. Head on to the opposite end and you'll discover a new body #2. Don't be frightened by the beast and don't waste ammo on it. Instead collect additional supplies from the body.
Head forward and you should notice a bigger alley to your right #1. This is where you'll meet Bourbon. Start off by examining a body located close to your ally (ammunition) and then head over to a dead soldier located close to the grating #2 (you might have noticed him in the previous mission). Take gas mask filters, ammunition and two rounds of gold ammunition.

You may start following Bourbon #1, however after you've both reached a new junction proceed alone to your right #2. Check the stairs located close to a new building and you should discover a dead body with 2 rounds of gold ammunition.

Rejoin with your teammate again and proceed towards the stairs #1. Notice that Bourbon has taken cover behind a bus. Leave him here and start running towards a red garage structure seen in the distance #2. Check the corner to the right of the garage to find a dead body with a unique revolver and some ammunition. Return to your ally. You may ignore a flying beast seen in the area to conserve ammunition.
Make sure to choose a good weapon from your inventory, because you're about to be attacked by a large group of monsters #1. Don't forget to attack the monsters from a larger distance, use medical supplies when needed and prevent the beasts from surrounding Artyom. Wait for Bourbon to give a retreat command and follow him to a new building #2 where you'll be rewarded with a new cut-scene.
Walkthrough: Be patient, because it'll take a while until you've regained full control. Take off your gas mask, turn around and move forward to collect an assault rifle #1. You should also examine Bourbon's backpack #2, collecting ammunition and a better shotgun.
You'll now have to decide how you want to proceed. You can:
1) act stealthy - you would have to remain in the shadows, observe enemy movements and use side passageways to avoid them
or
2) engage enemies in direct combat - you would have to be careful, because you would be dealing with large and well-armed groups
In both cases you'll have to pay a lot of attention to avoiding traps #1. Most of the traps can be found in side passageways and you won't be allowed to disarm all of them. Thankfully some of the traps are only meant to warn enemies instead of killing you. If you've chosen a stealthy approach don't forget to avoid glass shards #2, because stepping on them makes a lot of noise.

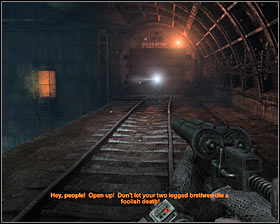
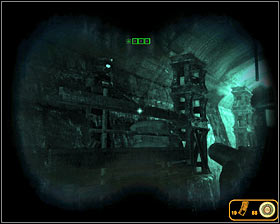
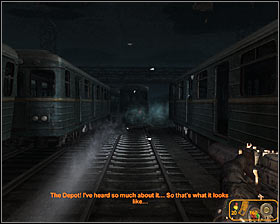
The first area of the train station consists of a larger middle passageway and two narrow side passageways. I would recommend leaving the ventilation shaft via the left exit #1, so you'll drop down far away from enemy units. It would be a good idea to explore a nearby metro car #2, collecting much needed ammunition.
There are four passageways leading to the next area. The left corridor #1 (the only you've landed in after leaving the shaft) is heavily defended - there's a machine gun post and it's patrolled by enemy units. The right corridor #2 leads to the kitchen and it's an interesting choice if you want to keep quiet. Sadly, instead of enemy guards you'll have to deal here with a lot of traps.

The third passageway is located close to the right corridor and it's also a good choice for a stealth approach. Instead of using the normal passageway you would have to find a tunnel near the train tracks #1. The final fourth passageway is the middle one and choosing it means having to fight a lot of enemy units #2.
There's a ladder near the fourth passageway #1 and you should consider using it if you want to have an advantage over enemy troops. Once you've made your way to the upper balconies take some time to collect supplies and four rounds of gold ammunition #2 hidden in the closet.
The second part of the train station is also going to be heavily defended by enemy soldiers. If you've chosen a direct approach you should consider surprising enemy units from an upper balcony #1. Deal with the snipers first and then with the guards seen below - dynamite sticks may come in handy here #2.
If you've chosen a stealth approach it'll be important to use the right corridor. Notice that you would have to deal with an electrified floor #1. The only solution would be to disable the power using a lever found near the fourth passageway #2 (on the ground level).
Explore the area if you can. Notice a large hole in the ground, located in the middle of the second part of the station #1. If you want to see what's down there you'll have to put on a gas mask, because otherwise it'll be impossible to breathe. This small stash will contain medkits and ammunition #2 among other interesting things.
You can also inspect the left corridor of the second part of the station #1 and you would come across a labyrinth #2 made of large wooden crates. Exploring the labyrinth shouldn't be a problem - you can't get lost and the only thing you'll have to do is to crouch several times to avoid obstacles.
Continue exploring the labyrinth and you'll encounter a single enemy soldier at the end of it #1. Kill your opponent before he draws his gun and make sure to examine his body so that you can take 4 rounds of gold ammunition. Explore both areas of the train station if you can, because you'll come across several stashes #2. It may be easy to do if everyone is dead or difficult if you've decided to stay in the shadows.
This mission can be continued by heading towards a bright metal gate located in the center of the second part of the station #1. Once you're inside you'll trigger a cut-scene showing Bourbon's death and your first encounter with your new ally Khan #2.
Ignore Khan for the time being and make sure to explore this room. There are some supplies in the middle #1, including 25 rounds of gold ammunition. You should also examine a bed - two rounds of gold ammunition are hidden behind a pillow #2. Exit this room. The mission will end after a short conversation with Khan.
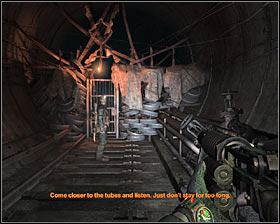
Walkthrough: Follow Khan through the first metal gate #1 and make sure to listen to his comments along the way. You won't encounter any "real" opponents during this mission, however it will be extremely important to follow his orders. Once you're inside a larger tunnel #2 you can follow his advice and listen to noises coming out of the pipes. An interesting thing is that if you stay there for more than a few seconds you'll lose health points.
Keep heading forward. You'll encounter a new dead body along the way #1 and you can examine it to find standard ammunition. Each time Khan orders you to stop #2 you'll have to do it, because otherwise you'll be risking your life. Ignore the ghosts seen in the area, because you'll be safe as long as you follow Khan's lead.
Be on a lookout for a dark wooden crate while going through the tunnel #1, because you'll have a chance to take 5 rounds of gold ammunition. Once you have the ammo proceed towards a blue metro car #2 and enter it to meet a ghost of a young boy.
Proceed to the next section of the tunnel. Wait for Khan to start running and quickly follow him to a destroyed balcony found to your right #1. Remain here for a few seconds and wait for a ghost train to pass by #2. You may continue moving forward.
You will soon get to a barricade where you'll be stopped by a larger group of ghosts #1. DON'T MOVE and wait for Khan to finish the exorcism. Start moving after him slowly #2 and eventually you'll both leave this area without a scratch.
Keep heading forward. Once you've reached the end of the tunnel choose a passageway located to your left #1. Make sure that you've charged batteries in your flashlight before entering a dark room. Find a mutilated body here #2 and collect standard ammunition.
A second dead body can also be found inside this room. Check one of the corners #1 and examine it to find extra ammo. You may proceed to the next room. Make a stop close to Khan and then approach a new door found to your right #2.
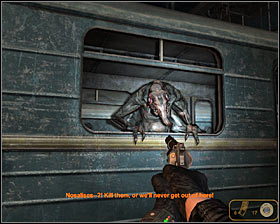
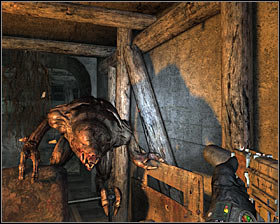
An attempt to open the door (pressing the action key) will result in you and Khan being attacked by a group of monsters. Aside from the beasts found on the other side #1 you'll also have to be ready to defeat a second group which will appear behind you #2 (the monsters will come out of a closed room).
Keep fighting until all the monsters have been defeated and then check the left room where some of the beasts were hiding #1. Move quickly here to avoid radiation - checking a skeleton will result in gathering 15 rounds of gold ammunition #2. You may return to Khan.
You'll have a chance to examine one more body #1 along the way (ammunition). Join Khan and follow him to a short corridor. Head down to a lower level #2 to end this fairly short mission.

Walkthrough: Turn right after you've reached the first junction. Check the surrounding area to locate a dead body #1. Collect ammunition here, as well as a new gun (optional). You may now choose the left corridor. Keep following Khan and MAKE SURE TO STOP once he's given you an order #2. Wait for a floating anomaly to leave this area. You'll have to stop for the second time in the near future - just as before, you'll have to wait for the anomaly to fly away.
Keep moving forward. It would be a good idea to check your surroundings, because you'll find a new gun and some ammunition near a torn off hand #1. Approach a metro car to collect additional ammunition and a medkit. You can now turn right and use objects from the environment #2 to reach the second tunnel (by jumping on them).
There are two dead bodies in the area - one of them can be found nearby #1 and the other one next to a metro car seen in the distance #2. I would recommend taking a machine gun from the second body (unless this is already your current weapon), because you'll have to take part in a difficult battle.
Turn around and wait for the monsters to start showing up in the vicinity #1 #2. You'll have to be extremely careful during this battle, because you won't have anywhere to run. Try attacking the beasts from a larger distance and prevent them from moving too close. I would recommend that you remain close to Khan, so that at least some of the monsters will start attacking him instead of you. Use medical syringes each time your character has been seriously injured.
Stand next to Khan after you've defeated the monsters #1 and DON'T MOVE. Notice that an anomaly has reappeared in the tunnel and you'll have to wait until it kills the last group of creatures. Turn around when it's safe and enter a new metro car #2.
Head through the metro car and then keep moving forward. Eventually you should come across a new skeleton #1. Check the area and aside from standard supplies you'll also find 4 rounds of gold ammunition. Choose the passageway leading to the second tunnel #2.
Approach Khan #1 and use this opportunity to explore the surrounding area - you'll find 20 rounds of gold ammunition. Finish this mission by approaching a small carriage #2 and pressing the action key.
Walkthrough: I would recommend that you keep following Khan so you should start off by moving forward and then turn right #1. Ignore the cans found in the area, because you won't have to avoid them. Make a second right turn and you should be able to reach a small outpost #2. Listen to a short conversation concerning your future mission objectives.
Once you've listened to the conversation you should find a chest with a lot of standard supplies and 5 rounds of gold ammunition #1. Turn around and wait for a group of monsters to be eliminated (you can help the defenders by using a stationary gun). Proceed to a corridor found to your right #2.
Turn right after you've reached a new tunnel and head forward. It shouldn't take long for you to locate a new body #1. Aside from standard ammunition you'll also find 3 rounds of gold ammunition here. Turn around and start moving towards the opposite end of this tunnel #2.
You'll have to be extremely careful, because you'll encounter a lot of monsters along the way #1. You won't have to attack all the beasts, because some of them will be moving towards the outpost you've had a chance to visit not long ago. Check a new body #2 to find ammunition.
Once you've reached the opposite end of the tunnel #1 you should look around to find a new body. Collect ammunition and two rounds of gold ammunition. You'll also have to pick up two bombs found next to the wall #2. Be careful, because picking up the bombs may result in new beasts appearing near your position.
Turn around, make a few steps forward and choose a corridor found to your right #1. Make sure to examine the right wall. Ignore the ghosts here and quickly examine a new body #2 so that you'll have a chance to collect 2 rounds of gold ammunition.
Continue moving forward until you've reached the left tunnel (the one where you've started the mission). Start by moving a few meters to your left so you'll find a dead body and 2 rounds of gold ammunition #1. Once you've taken the supplies proceed towards the unexplored (right) side of the tunnel #2.
Keep going straight #1. You'll soon have to leave the train platform and drop down directly onto the train tracks. Make sure to choose a good weapon from your arsenal along the way, because you'll soon notice that monsters have begun appearing in the area #2. Use the fact that you'll be allowed to attack most of them from a larger distance.
You must keep pushing forward until you come across a collapsed section of the tunnel. Approach one of the supports and press the action key to plant an explosive device #1. Turn around and start RUNNING towards the train platform. Make sure to leave the train tracks after reaching the platform to avoid a massive shockwave #2.
Return to the central area of the train station (the one with an allied outpost). This time you'll have to locate the stairs leading to an upper level #1. Choose a good weapon for close range combat, because you'll have to deal with new monsters here. Put on a gas mask and then locate a support where you'll have a chance to plant the second explosive device #2.
Move back to the stairs quickly and wait for the explosion to occur. Notice that the explosion has prevented new monsters from showing up in this area #1. Return to the ground floor to find Khan #2. Listen to a short conversation and then start following him.
You will soon arrive close to a wall where you've already seen the ghosts #1. Wait for Khan to unlock this passageway and then follow him to enter a small sanctuary. You'll have to wait here until Khan unlocks a passageway located in the floor #2. Head down the stairs to end this mission.
Walkthrough: Ignore the fact that your weapons are holstered, because you won't encounter any monsters here. Instead watch out for radiation. Enter the nearest ventilation shaft #1 and after you've made your way to the train tracks head left. Eventually you'll find a large gate #2. Wait until you're let inside the base.
It shouldn't take long for you to get to the train platform #1. Choose a narrow passageway found to your right and proceed to the opposite end of this corridor. Check the ground near one of the barrels to find 3 rounds of gold ammunition #2.
You may now return to the metal gate you've passed by a few seconds ago #1. Head inside and continue moving to your right. Ignore a carriage with closed windows and instead search the area to the right to find 3 rounds of gold ammunition #2.
Retrace your steps to find a passageway leading to a new area of the base #1. You'll automatically trigger a cut-scene after entering a small room. Get ready, because as soon as you've been given back control over the main character you'll have to start running #2.
Remember to keep holding the SHIFT key. Follow your ally by choosing the same passageways as he does #1. Don't stop at nothing and ignore all enemy units encountered along the way. You'll soon enter a bar and you'll have to press the crouch key #2 to avoid getting shot. Maintain a crouching stance while trying to get out of the bar.
Stand up when it's safe and keep following your colleague. Notice that before you make a left turn you'll have a chance to collect 3 rounds of gold ammunition from a wooden crate found to your right #1. Bear in mind that it has to be done quickly so you won't get shot. Enter a new room. Notice that your ally has stopped #2. Head left here to avoid getting caught.
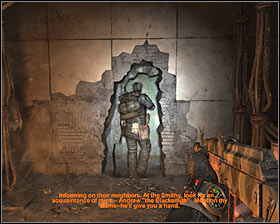
Use the stairs to get to the upper balconies #1 and keep heading forward. Don't worry after seeing a new cut-scene, because you can't avoid getting caught. You'll regain control in an entirely new area and you'll have a chance to talk to the Blacksmith. Exit the small room and proceed to your right to collect 3 rounds of gold ammunition from one of the crates #2.
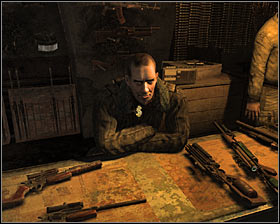
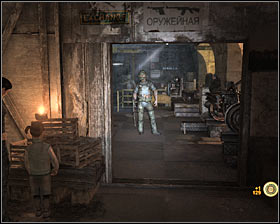
You must now choose the only available passageway leading to the next area of the map #1. Walk through several corridors to end up in a bigger area #2. I would recommend that you take your time to purchase objects from the local merchants (one of them is selling supplies, two are selling guns and one is selling ammunition). In addition to that you can also buy two armors - a combat armor or a stealth armor (this one will come in handy in the next mission).
Approach several characters encountered in the area. Listen to what they have to say and use a ladder to find yourself standing in a small hole. Take your time to locate 3 rounds of gold ammunition hidden behind the ladder #1 and wait for a carriage to be pushed here #2. Pressing the action key will allow you to hide inside the carriage. Watch a longer cut-scene after which this mission will come to an end.
There are two ways of finishing this mission:
1) you can decide to remain in the shadows
2) you can decide to defeat all encountered enemy units
In both cases you'll visit different locations of the base. If you choose the hostile approach it'll be more difficult to succeed, however if you choose the silent approach you won't have a chance to find and examine all the stashes.
If you've decided to remain in the shadows you should purchase a stealth armor (previous mission). Doing this will increase your chances of avoiding detection, mostly because the armor is already equipped with nightvision goggles. The lack of the goggles will make exploring some of the areas very difficult, because you won't be allowed to use the flashlight (otherwise you'll compromise your position).
If you've decided to engage enemy units in open combat you should purchase a combat armor (previous mission). Doing this will make it much easier for the main character to stay alive.
Silent approach: Start off by moving forward #1. Make sure to turn off your flashlight before leaving the tunnel, so you won't be noticed by anyone. Locate the stairs to the left of the train tracks and head down #2.
Press and hold the crouch key while using the stairs. There are two guards to your right, however as long as you play it safe you won't be spotted by them. Head forward and then turn left #1. Choose the right passageway after reaching a junction #2 so you won't have to get closer to a burning lamp.
Notice a group of characters standing to your right #1. You'll have to be patient here - wait for the interrogation to end with one of the officers killing a prisoner. Both enemies will leave this area soon after that #2. Proceed towards the balcony where the prisoner was being questioned a few moments ago.
Make a few steps forward to approach the ledge #1 and you should notice that you'll have a chance to drop down to a metal support seen below #2. Head left after you've safely landed on the support.
Approach the wall, turn right and make a jump towards a small ledge located directly in front of you #1. Perform a second jump to get to a balcony. Turn right and use the pipe #2 to get to the next area.
You'll soon reach a spot where you'll have to jump to an adjacent pipe #1. Proceed towards a concrete support and head right #2.
It shouldn't take long until you've reached a new wall. Turn left here and perform two small jumps #1 to get to an upper platform. Head on to your left #2 and you should end up standing above a small balcony. Check the area near the wall to find a dead soldier (ammunition).
Turn right and notice that you'll have a chance to drop down to a balcony mentioned before #1. Once you're standing on a balcony drop down to a larger pipe #2 and from there you should be able to reach the ground level without risking your life. Notice that you'll have to wear a gas mask here. Thankfully you can stop using the nightvision goggles (use a flashlight instead).
Start moving forward. You won't encounter any problems right away, however in a few moments you will find two traps #1. Make sure to jump over the traps to avoid getting killed. The last third trap can be found near the entrance to a new tunnel #2. Go past it and head inside.
Make a few steps forward and you should find a ladder to your right #1. Use the ladder to reach an upper level of the sewers. Keep going straight and the second ladder should be located to the left #2. Turn off your flashlight before using this ladder and don't forget to stop using a gas mask after you've left the sewers.
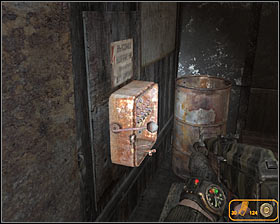
Start off by putting out a nearby lamp #1. You'll now have to wait until the soldier patrolling the left corridor returns to this area. If you don't mind taking additional risks you may consider trying to steal 5 rounds of gold ammunition from a locker located on the wall behind the lamp #2.
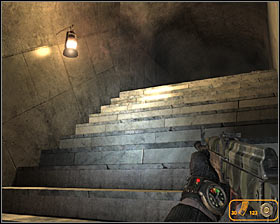
Wait for the soldier mentioned above to walk past you #1 and then proceed towards the left corridor. You'll soon reach a staircase #2 and you'll have to use the stairs to get to the top floor.
Once you're at the top you should perform two actions - destroy a nearby light source using a silenced weapon #1 and extinguish a lamp. Make a stop near the passageway leading to the tunnel. DON'T MOVE because there are glass shard nearby and you would make a lot of noise. Wait for an enemy patrol to pass by #2.
Enter the tunnel carefully. I would recommend that you wait for a single soldier heading your way to show up #1. Once he's gone past you turn left and find his colleague on an upper balcony #2. Wait for him to turn around and then start running forward.
AS SOON AS you hear some noises take cover near one of the walls of the tunnel. You should notice an armored trolley heading your way #1. Assuming you're not standing near a light source you should be fine. Proceed to the next section when it's safe. Don't forget to put out a new lamp along the way #2. Watch out for one more soldier before exiting this tunnel.
You should end up standing in a much larger area. Approach the ledge #1 and jump down. You'll now have to move under the train tracks #2. Remember to stay in the shadows. Don't run, because you would make too much noise.

Eventually you should be able to locate a ladder - it can be found to the right of the pillars #1. Use the ladder to go back up and to find yourself near an entrance to a new tunnel. Wait for one of the guards to turn around before heading inside the tunnel #2.
Thankfully it's going to be easier here. Slowly keep moving forward and eventually you'll find a passageway located to your left #1. Make sure that no one is looking in your direction before going there. Open the door to find yourself standing in a new room #2.
I would recommend that you take some time to check your surroundings. There are some supplies here #1, including 10 rounds of gold ammunition. Opening a nearby door #2 will result in ending this mission.
Direct approach: If you choose to fight enemy units instead of avoiding them you should begin by turning around. Check the tunnel from where the carriage has arrived #1. You'll encounter several soldiers here #2 and it would be a good idea to attack them from a larger distance.
Make sure that you've eliminated all nearby enemy units and open a locker found on a wall. You'll find 3 rounds of gold ammunition here, as well as nightvision goggles #1. Return to the start area and begin attacking enemies located close to the carriage #2. I would recommend using dynamite sticks often, especially since you'll find a lot of explosives during this mission.
Watch out for enemy units stationed to your left. Using standard weapons against them won't be effective, but thankfully you'll find a stationary gun in the area #1. Kill all the opponents you can see and then check your surroundings to find supplies and 4 rounds of gold ammunition #2.
Return to the start area for the second time and now find a staircase leading to a lower platform #1. Watch out for two opponents located to your right - you'll have to get rid of them before they fight back #2. Head forward once they're gone and then turn left.
Keep going straight and make sure to use a flashlight or nightvision goggles so you won't fall through one of the holes. New enemies are stationed to your right #1 and it would be a good idea to throw dynamite at them. Once they're gone use the stairs found to the left #2.
Once you've made your way to the upper level you'll have to turn right and start attacking remaining enemy units #1. Keep using the dynamite, especially if you see a larger group near your position. Additional soldiers may also be hiding on a nearby balcony #2.
Make sure that the surrounding area has been secured and start heading towards a large bridge #1. You won't encounter new enemies right away, however get ready to defend yourself when you're close to the opposite end of the bridge #2. Use cover and dynamite to your advantage.
You must acknowledge the fact that a lot of opponents will use the stairs to get to you from the lower platforms. Don't move too fast and make sure to secure a second upper balcony #1. It would be a good idea to check that balcony, because you'll find a lot of dynamite sticks #2.
Securing the lower platforms mentioned in the text is possible #1, however you wouldn't find anything interesting aside from several enemy units. If you want to focus on the mission you should proceed towards an entrance to a large tunnel #2.
Watch out for new enemy units - you are going to be attacked near the tunnel entrance #1. Kill your opponents from a larger distance if you can. Head forward and notice a passageway to your right. Enter a small area #2. I would recommend using the stairs to get to a lower level.

You should be using a shotgun here, because enemy soldiers will be appearing close to your position #1. Fight your way to the last room and deal with the remaining enemy troops. Find a locker on one of the walls #2 and open it to collect 5 rounds of gold ammunition. You may now return to the large tunnel.
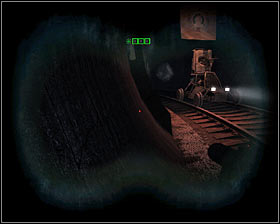
Head forward, HOWEVER watch out for an armored trolley heading your way #1. I would recommend hiding near the train tracks so that you won't be seen by the gunman right away. You can now either kill both guards sitting inside the trolley or ignore it and proceed towards the tunnel exit #2.
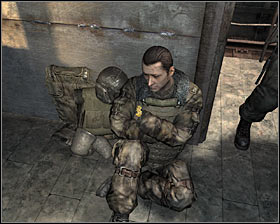
Once you've entered a larger area you should remain near the train tracks and eliminate guards standing in front of you #1. Other opponents can be found below your position - notice that they have three prisoners #2. You can either decide to help captured allies or focus only on completing the main objective.
You can help the captured soldiers if you want to, however you would have eliminate ALL enemy units. Start off by securing the ground level (area next to the prisoners) and then clear out a tunnel leading to the exit #1. You'll also have to destroy an armored trolley you've passed by not long ago and this can only be achieved by using dynamite #2.
Return to the prisoners AFTER you've secured the entire area. They should be standing #1 and you'll be allowed to talk to one of them. You may now return to the train tracks. Enter a new tunnel and eventually you'll come across a passageway located to your left #2. Open the door and enter the last room.


I would recommend that you take some time to check your surroundings. There are some supplies here #1, including 10 rounds of gold ammunition. Opening a nearby door #2 will result in ending this mission.
Walkthrough: Wait until you've regained control over the main character and start off by examining two dead bodies found in the area #1. In both cases you'll have a chance to collect standard ammunition. Enter a room located behind you #2 to find even more supplies, including ammunition, dynamite sticks and nightvision goggles.
Return to the start area and this time head forward. Enter a room located directly in front of you #1. Check the left wall and open a red box #2. Doing this will allow you to collect a medkit, a gas mask and 5 rounds of gold ammunition.
Return to the main corridor and follow your teammates to the next room #1. Thankfully you won't encounter any enemies here. Instead check one of the bodies found in the next room #2 to collect 5 rounds of gold ammunition.
It won't take long until you've reached a trolley #1 and you should familiarize yourself with the controls #2, because you'll spend most of the mission in the gunner's seat. Notice that you'll have to expand your line of fire by using the A and D key to move the turret left or right.
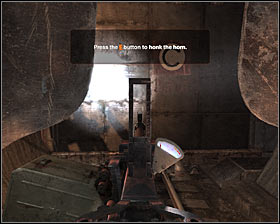
You won't have to do anything in particular until you've reached a large gate #1. Follow the verbal instructions by pressing the E key to sound the horn. Wait until the trolley has been stopped by one of the enemy officers and get ready for battle #2. Thankfully you won't have to eliminate everyone in your vicinity, because you'll soon leave this area.
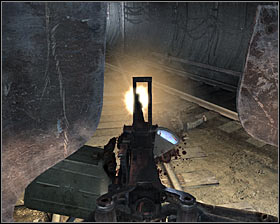
I would strongly recommend that you rotate the seat by 180 degrees, because enemy trolleys will soon appear behind yours #1. Focus mostly on destroying the trolley which uses the same tunnel as you do. Fire short bursts until it explodes #2. Make sure not to overheat the weapon, because you would have to wait for a few seconds until it cools down.
Use the same tactics with other trolleys appearing in the tunnel #1. Be careful, because it won't take long until you've reached a train platform and you'll have to rotate the turret 90 degrees clockwise #2. Once again - you won't have to eliminate all enemy units. Focus on killing only the closest targets.


Bear in mind that a new trolley may arrive while you're still near the train platform #1. This means you would have to destroy it and only then you'd be allowed to resume firing at enemy soldiers. Wait until you've received a proper request, turn the turret to its default position and destroy a small barricade located in front of your trolley #2.
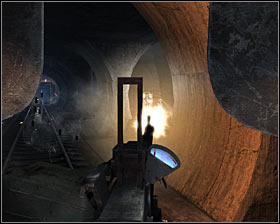
The next part of this mission will require you to destroy at least one more trolley #1. Thankfully you can ignore a warning about an enemy tank appearing in the area. Get ready to attack enemies occupying a new train station. This time they'll be stationed to your right #2.
Neutralize one more trolley after leaving the station #1 and ignore the fact that it will still be moving after you, because the tunnel will soon collapse and you'll have this problem out of the way. Eventually you should end up in a large cave #2.
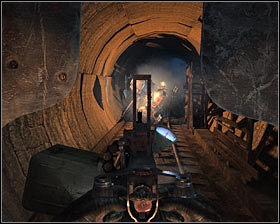
Wait until an enemy tank has appeared on the tracks to your right. Follow the advice you've been given by targeting metal elements #1. Destroying these objects will result in getting rid of the tank. Thankfully the final part of your trip won't have any dangerous moments and it won't take long until you've reached your destination #2.

Look around as soon as you can start moving again. You can pick up standard ammunition from one of the skeletons. Choose the only available passageway #1 and make sure to check a locker on the left wall after reaching a new room #2. Take a gas mask and 5 rounds of gold ammunition. Opening a nearby door will end this mission.
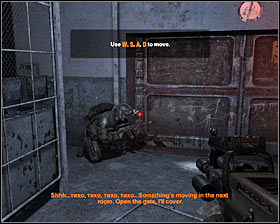
Walkthrough: This mission will also begin on board of a trolley, however in this case you'll be forced to use your own guns #1. Don't forget to duck under the first metal object #2 and naturally you'll have to be ready for similar actions later in the mission.
I would strongly recommend that you choose a silenced weapon from your inventory. You'll soon notice that a single guard is standing on the train tracks #1. It would be a good idea to kill him before he manages to inform his colleagues about your arrival. Thankfully you won't have to kill him with a single shot. You may use an entire clip on him, as long as he doesn't reach the train station. If you've succeeded press and hold the crouch key. Wait for the trolley to go past the train station unnoticed #2.
If you weren't successful in eliminating the guard or if you don't have a silenced weapon in your arsenal you'll raise an alarm and you'll have to eliminate a lot of enemy soldiers along the way #1 #2. Make sure to focus your attention on killing enemies standing close to the tracks or occupying a higher ground, because they'll pose a serious threat to your safety.
Wait for the trolley to leave the train station. If you kept quiet then your enemies will find out what's happening when it's already too late. Otherwise some of them will start chasing after the trolley #1. You can ignore them or kill a few of them. Watch out for new obstacles in this tunnel #2.

It shouldn't take long until you've reached a small checkpoint #1. Attacking enemies is possible, however it's not mandatory. Be careful while heading down #2, because you may hit another obstacle. It's best to keep a crouching stance all the time, so you won't be risking your life.
Expect new surprises after you've reached a train depot #1. It would be a good idea to keep crouching here, so you'll avoid most of the attacks of the beasts hiding in nearby carriages #2.
You'll have to be very careful here, because sooner or later new monsters will begin "attaching" themselves to the trolley #1 #2. Use the exact same tactics as in the previous missions so you should wait for the creatures to get on board the trolley before attacking them. Use a revolver or a shotgun and don't forget to aim for their heads.
The monsters will soon kill your ally #1 and this will result in the main character losing control over the trolley. Eliminate the last group of creatures #2 and wait for the trolley to start moving faster. Hold the crouch key to avoid new obstacles and wait until the trolley derails.
You'll regain control over the main character in a large tunnel and you should proceed towards metro cars seen in the distance #1. Choose a narrow passageway located to the right of the first carriage #2 and be careful, because there are going to be several traps here. Avoid them by jumping over them.
Eventually you should be able to reach an entrance to the metro car #1. Head inside and check a dead body found to the right. There's also a new chest to the left and you can take 10 rounds of gold ammunition from it #2. Find several other bodies in the car and examine them to collect new supplies. Exit the carriage once you're done exploring and return to the area where you've started the game after the trolley has derailed.
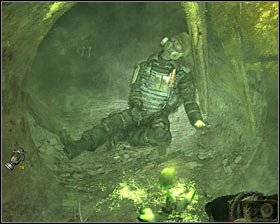
You must now find a hole in the ground #1. Start off by choosing the tunnel located to the right and it won't take long until you've found a dead body #2. Put on a gas mask before moving closer. Collect standard ammunition and 2 rounds of gold ammunition. Return to the junction and this time choose the left tunnel. This mission will soon come to an end.
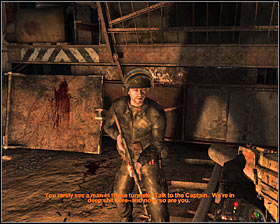
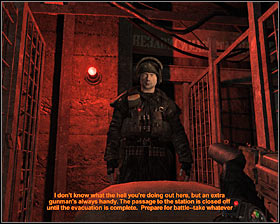
Walkthrough: Head forward and ignore the cans, because you won't have to avoid them. Enter the next area to meet a group of survivors. Start off by talking to one of the soldiers #1 and then head to your left to talk to the leader #2. You'll find out about an upcoming attack.
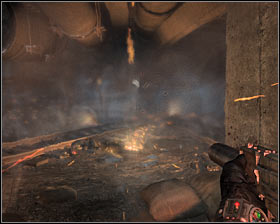
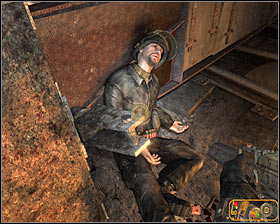
You won't have to do anything in particular in the first phase of this mission, because you won't be attacked by any monsters. Instead a weird shockwave will result in you and the rest of the survivors losing consciousness #1. Wait until you've regained full control and check bodies of fallen allies for extra ammunition #2.
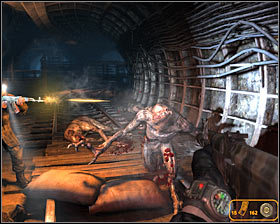
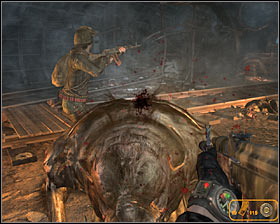
Get ready for a new battle. You can ignore the creatures using ceilings and other objects from the environment to get past the barricade, because you won't have to stop them. Instead focus only on attacking the creatures showing up near your position #1 #2. Make sure to stay on the move and to protect your allies so that they can assist you for a longer period of time.
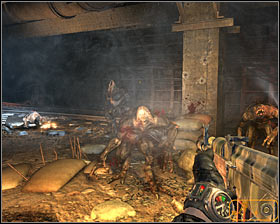
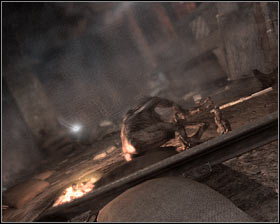
Sadly, even if you're very good at this, sooner or later you'll remain as the only defender on the battlefield #1. This means you'll still have to keep moving to prevent the beasts from surrounding the main character. This battle will end with a new shockwave #2. Wait until Artyom stands up and take your time to collect ammunition from the dead bodies.

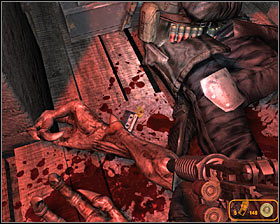
You may now choose a newly unlocked passageway #1 which will allow you to get to the injured commander. Talk to him and MAKE SURE to collect a tape left by him on the ground #2. You won't find this object useful right away, however it will help you in completing a side objective later in the game.
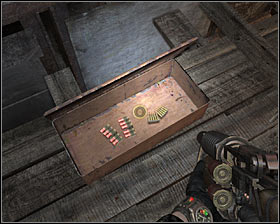
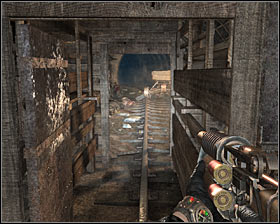
Start off by going to your right. Check the area near a stationary gun and you should be able to find a new chest #1. Take standard ammunition from the chest, as well as 5 rounds of gold ammunition. Head down and start moving towards a tunnel #2.
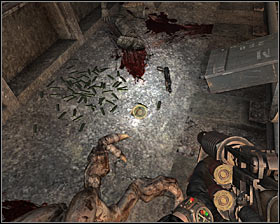
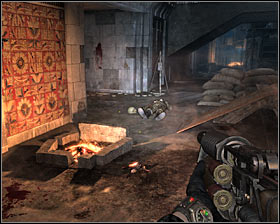
It shouldn't take long until you've approached a trolley. Check the nearby area to find 1 round of gold ammunition #1 and supplies (near an opened chest). Head forward. You'll soon reach a new train platform. Leave the tracks and keep going straight #2. Examine a new dead body located in front of you to collect 2 rounds of gold ammunition.
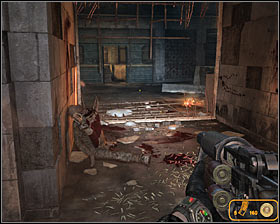
It would be a good idea to check the area to the right, because you'll have a chance to find a lot of standard ammunition #1. You may now choose a corridor located to the left of the last dead body #2.
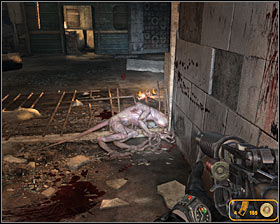

You'll have to be careful here, because you'll be attacked by smaller creatures regularly #1. It's not going to be easy to kill them, because they're quick and because they'll use tunnels to surprise you. Make sure to aim for their heads and to stay on the move so you won't be an easy target. Start off by going to your left #2. Find new dead bodies with a lot of ammunition.
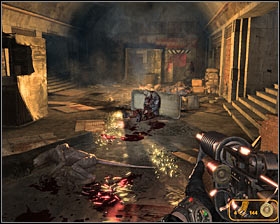
Return to the passageway you've used not long ago and this time proceed to your right #1. Keep checking new bodies along the way (ammunition) and you should also explore a small and dark room found to your left #2. Aside from standard ammunition you'll also find 3 rounds of gold ammunition inside this room.
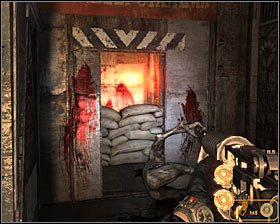
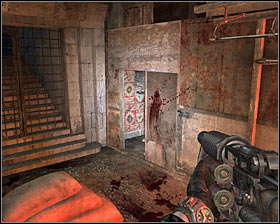
Proceed towards a passageway located on the opposite end of the large room #1 (the one with the blinking red light seen inside). Check the area to find a gas mask and ammunition and then proceed towards a new doorway located to your left #2.
Turn left after you've entered a new room #1 and use the stairs to get to an upper level. Notice that you'll have to put on a gas mask along the way which shouldn't be a problem. Make a second left turn and head towards a small balcony #2.
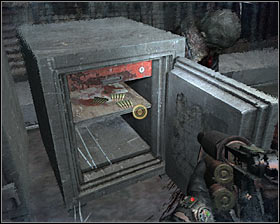
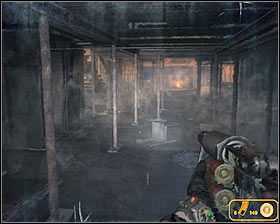
Eventually you should end up standing inside a small room. Look around to find standard ammunition and gas mask filters. You can also take 12 rounds of gold ammunition from a safe #1. Exit this room, return to the stairs and head back down. Turn left and start moving forward #2.
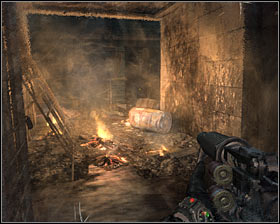
Watch out for new monsters in the vicinity. Proceed to the center of the room and then find a new passageway located to your left #1. Eliminate a group of creatures and then make a second left turn #2.
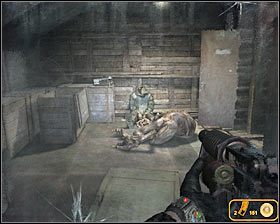
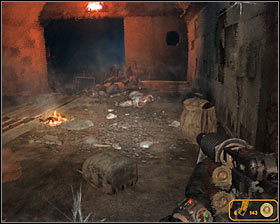
Start moving forward and eventually you'll get to a new body and a radio #1. Check the body to collect much needed ammunition and then the radio to find 4 rounds of gold ammunition. Deal with the last group of monsters, turn around and proceed to the opposite end of the train platform. Leave the platform #2 and head inside a new tunnel.
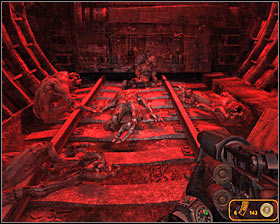
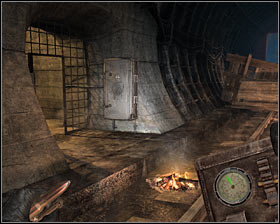
Keep heading forward and you'll soon get to the other end of the tunnel. Notice a lot of bodies in the area #1. Check the body of a dead soldier to collect supplies and 15 rounds of gold ammunition. You may now choose a side passageway #2 and it won't take long until you've reached the exit.
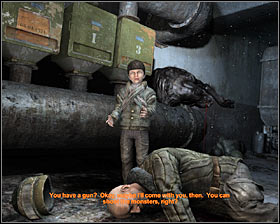
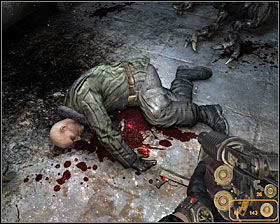
Walkthrough: This mission will begin with a cut-scene showing the main character talking to a young boy named Sasha #1. Notice that your new ally has climbed on your back and this will mean two things - you won't be allowed to run and all of your moves will occur with a small delay. Take your time to familiarize yourself with these restrictions and then check the body of Sasha's uncle #2 to collect standard ammunition.
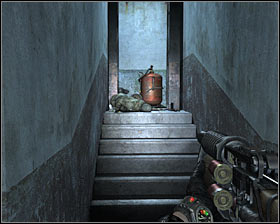
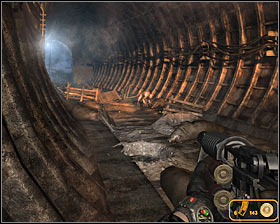
Start off by choosing the only available passageway #1. Make sure to examine all the bodies you encounter along the way to find new ammunition. Eventually you should make your way to a large tunnel #2. Choose a good weapon from your inventory.
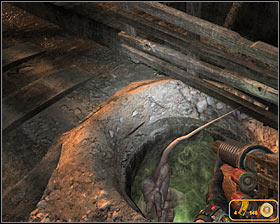
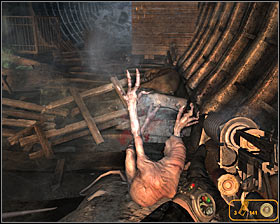
Get ready for your first battle with the monsters #1 #2. You'll be dealing with the smaller creatures again, so you'll have to be careful. Try attacking them when they're trying to use nearby holes (to get in or to get out) and prevent them from scratching you too often. I would recommend using a shotgun here, however a revolver will also do the trick.
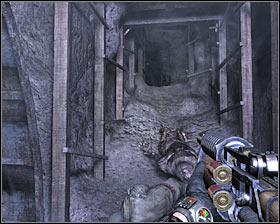
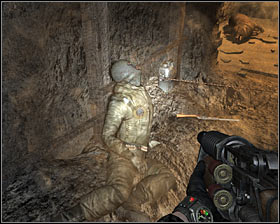
I wouldn't recommend leaving this area unless you've killed all the monsters. Proceed to the other end of the tunnel and choose a passageway found to your right #1. Don't forget to keep examining new bodies and to avoid a new trap found in one of the corridors #2.
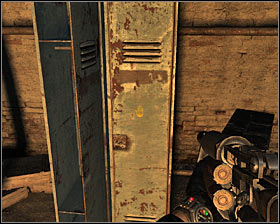
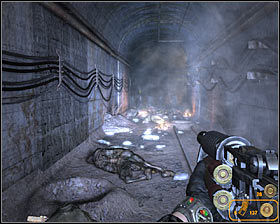
Once you're inside a new room you should spend some time looking around. Opening one of the lockers #1 will allow you to acquire standard ammunition and 10 rounds of gold ammunition. Proceed to the next section. Get ready to take part in a new battle after reaching a long tunnel #2. Once again you'll be dealing with smaller creatures.

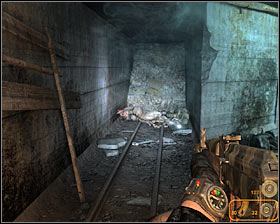
Head forward after the battle. Check the barrels located in front of you #1 after you've reached a new junction. You should be able to find a dead soldier here. Examine his body and you'll collect 5 rounds of gold ammunition. You may now choose the corridor found to your right. Keep moving forward until you've located a new body #2 and 2 rounds of gold ammunition.
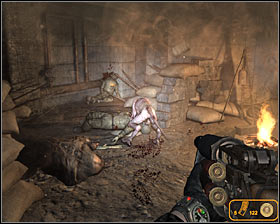
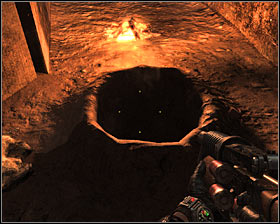
Continue exploring the area. Kill a single monster after reaching a new cave #1. You shouldn't be in a lot of hurry here, because you'll find a lot of dead bodies in the area. Listen to the boy's warning and make sure to avoid a large hole in the ground #2.

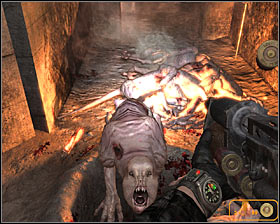
Get ready after you've reached the next area #1 and listened to a warning about not using any grenades, because you'll have to part in the largest battle of this mission. I would recommend that you retreat to the previous corridor and stand next to one of the holes #2. Keep attacking the beasts coming out of the hole or running towards you from a nearby room.
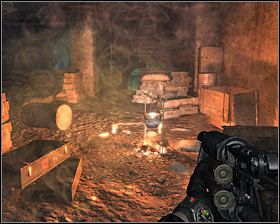
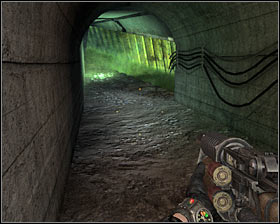
I would strongly suggest that you remain in one spot until you've dealt with all the monsters, because you aren't allowed to run. Proceed to the next section and don't forget to check the campsite to collect ammunition #1. Choose the right corridor #2 after reaching a new junction (the one leading to the sewers).
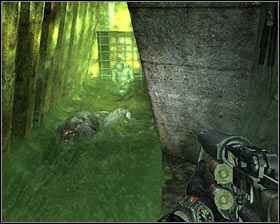
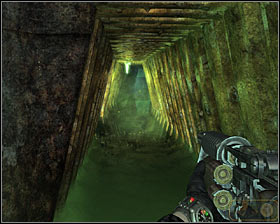
You may move forward without making any stops, because you won't have to deal with radiation here. Turn right after entering the sewers area, make a few steps forward and locate a body (2 rounds of gold ammunition) #1. You won't have to return to the junction, because the left corridor would only lead you to standard ammunition and you would also have to avoid several traps. Instead remain in the sewers and start moving forward #2.
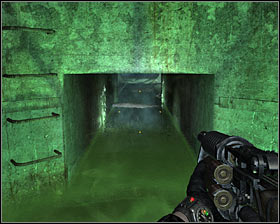
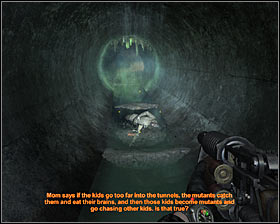
Don't be frightened when you see a monster, because you won't be attacked here. Approach a ladder #1 and instead of using it hold the crouch key to enter a small tunnel. Keep moving forward and it won't take long until you've discovered a new body #2. Examine it to collect standard ammunition and 5 rounds of gold ammunition.
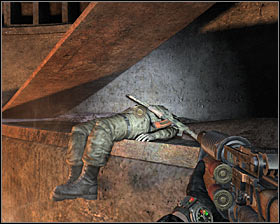
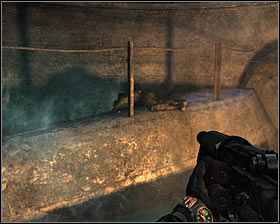
Continue exploring the tunnel system. Once you've entered a large area which looks like a well you'll find two bodies - one of them will be to your right #1 and the other one to your left #2. In both cases you'll find 4 rounds of gold ammunition.
You can now start using wooden footbridges #1. Keep heading upwards and make sure that you're not in a lot of hurry so you won't make any mistakes and fall. Choose a small ledge after you get to the top #2.
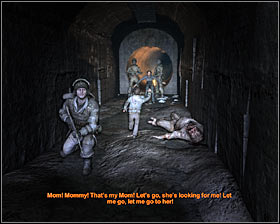
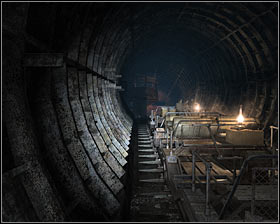
It shouldn't take long until you've encountered friendly units and Sasha will rejoin with his mom #1. You can now either accept the reward (20 rounds of gold ammunition) or refuse (better choice if you want to unlock a good ending). Watch a short cut-scene and then head upwards #2.

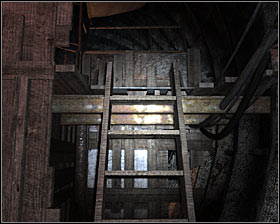
Notice that there are two merchants to your right #1 and it would be a good idea to check both stores to resupply. Keep heading forward and make sure to examine the left guard tower #2 (use the ladder) before leaving this area. Doing this will allow you to find 5 rounds of gold ammunition. This mission will end as soon as you've left the base.
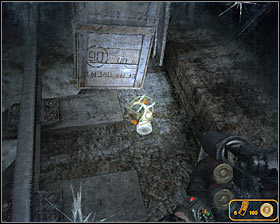
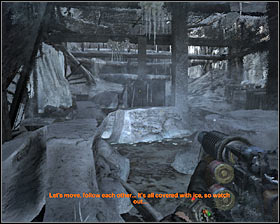
Walkthrough: Start off by putting on a gas mask. Thankfully even if your current mask is damaged you'll find a new one in the area #1. Proceed forward and it won't take long until you're standing inside a destroyed building #2.
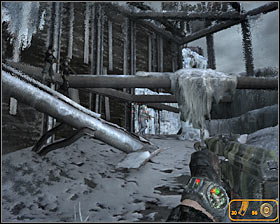
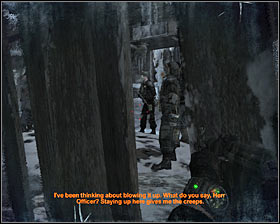
You should know that a large patrol is heading your way. Your opponents will use the left ramp to get here #1 and you'll have to decide how you to want to resolve this situation. You could fight them, however it won't be mandatory. If you want to avoid this patrol you'll have to hide somewhere to your right #2. Sadly you'll be forced to wait until the enemy officer finishes a debriefing before this patrol leaves the area for good.
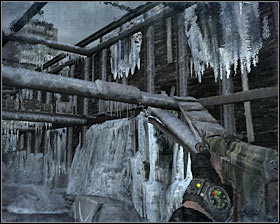
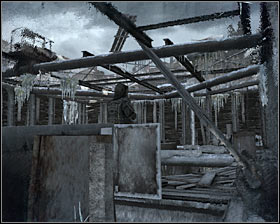
Use the ramp mentioned above to get to the upper balconies #1. You should notice a single enemy soldier patrolling a nearby area #2. I wouldn't recommend making too much noise here. Instead try doing a stealth kill or wait for the guard to start moving the other way. Use a second ramp to get to the top.
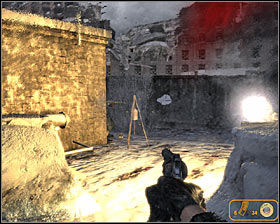
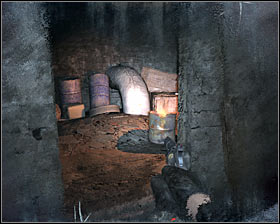
You'll encounter two more guards here #1 and sadly you won't be able to eliminate them without raising an alarm. Once they're gone check a small room where one of the guards was originally standing #2. You'll find gas mask filters here, as well as standard ammunition.
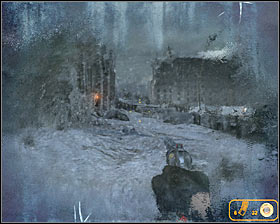
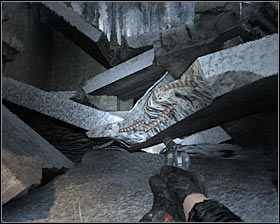
You may proceed forward #1. Bear in mind that you'll be dealing with flying demons from now on. I wouldn't recommend fighting all of them, especially since it's going to be relatively easy to avoid their attacks. Make sure to heal yourself if you receive massive injuries so you won't die. Eventually you'll have to reach a destroyed building #2 found to the left. Enter it.
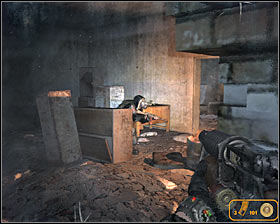
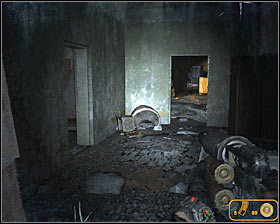
You'll have to be very careful here, because most of the nearby rooms will be occupied by one or more enemy soldiers #1. Each time you've defeated a new group check the nearby bodies to find ammunition. Proceed to the main corridor after you've secured all of the surrounding rooms #2.
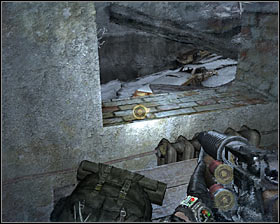
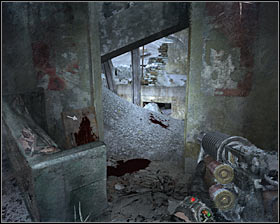
I would recommend that you check all rooms of this building, especially those found to your left. 4 rounds of gold ammunition can be found inside one of the rooms #1. Continue exploring this floor until you've found a passageway with a white arrow pointing the way #2.

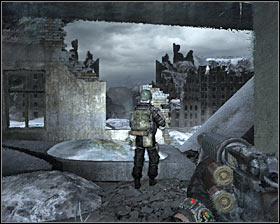
Enter an area with large concrete blocks #1 and use them to gain access to the upper floor of the building. You'll have to be cautious here again, because this floor will be patrolled by a few soldiers #2. Surprise at least one of them and then deal with the rest. There's also a new gas mask in the area if you need one.
Eventually you should be able to find a passageway leading to the roof of this building #1. Watch out for new flying demons here, especially since you'll be an easy target for them. Move forward. Notice that you can't get to the highest section of the roof so instead use a hole to your right #2 to gain access to an unexplored section of the building.
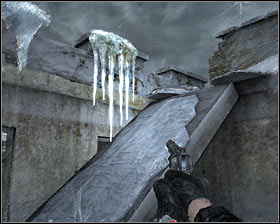
You should find yourself standing in front of a dark corridor #1 and you'll have to be extremely careful here, because there are A LOT of traps in the area. Avoid them and watch out for the flying demons at the same time. After you've successfully made your way through this corridor find a ramp leading to the roof #2.
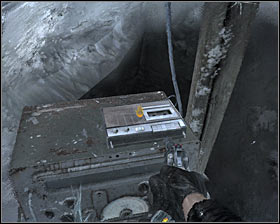
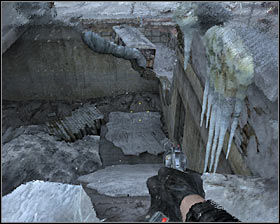
Start moving towards a large antenna seen in the distance. If you've collected a tape during the Defense mission you'll now have a chance to insert it into a player #1. Collect dynamite sticks from the same area and then return to the lower floor of the building #2.
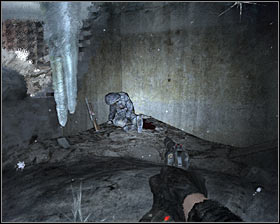
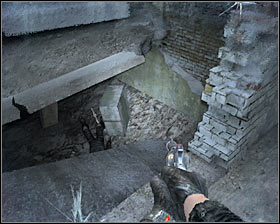
Check a nearby room and you should be able to find a body #1. Examining this body will allow you to collect standard ammunition, as well as 5 rounds of gold ammunition. You must now return to the area where you've used concrete blocks to get to an upper floor (and killed a few soldiers). Locate a ramp leading to a lower floor and head down there #2.
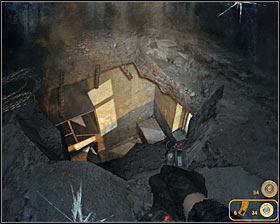
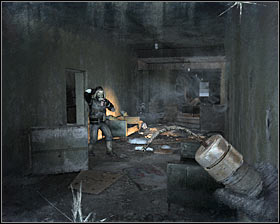
Examine a new dead body and then make a few steps forward to locate a large hole #1. Jump through the hole to get to the lower floor of the building and get ready to defeat a group of enemy soldiers. Check the left corner once they're gone #2 and you'll find 5 rounds of gold ammunition.
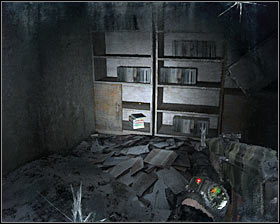
You'll have to be more careful from now on, because a nearby corridor is being defended by enemy troops #1. Use a revolver to eliminate closer targets and dynamite to deal with more distant foes. Make sure to check one of the rooms to the left and to look inside a closet #2. Doing this will allow you to pick up 5 rounds of gold ammunition.
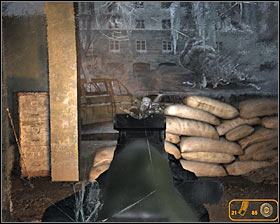
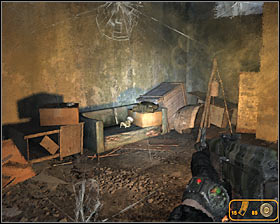
You dont' have to explore other rooms, so you may proceed directly towards the main exit #1. Eliminate the last group of enemies and check the area to your left before leaving this building #2. You can pick up a gas mask, several filters and 12 rounds of gold ammunition.
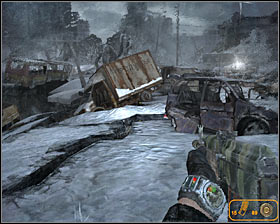
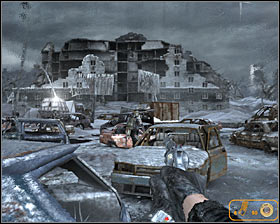
Proceed to your right after you've left the building #1. Ignore wrecked cars seen along the way, because you won't find anything interesting inside them. Keep moving forward until you reach an area where a group of enemy soldiers will be fighting the demons #2.
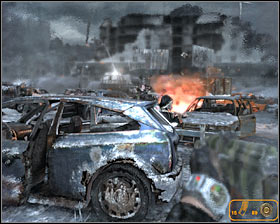
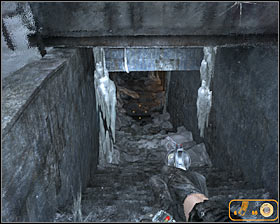
I would recommend that you ignore the flying demons again. Instead of wasting ammunition on them focus on eliminating all enemy soldiers #1. Make sure to use dynamite to your advantage and it shouldn't take long until you've succeeded. You may now locate an entrance to a new metro tunnel #2. Using it will allow you to end this mission.
There are two ways of finishing this mission:
1) you can decide to remain in the shadows
2) you can decide to defeat all encountered enemy units
Both options are equally challenging. If you decide to remain in the shadows you'll have to pay more attention to enemy movements and if you decide to kill everyone you meet you'll be dealing with large groups of trained and well-equipped soldiers.
An interesting to know about is that both options will have the same ending, however you will be able to choose between killing all of the remaining soldiers (hostile approach) and running towards the exit (silent approach).

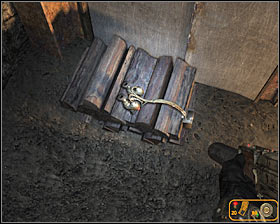
Silent approach: Start this mission by removing your gas mask and then approach a nearby grating. Pick up a silenced rifle provided by one of your allies #1, assuming of course that a similar weapon isn't already in your arsenal. You should also examine bodies and collect nightvision goggles #2.
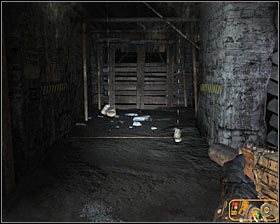
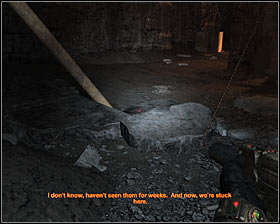
Choose the only available passageway #1 and notice that there are A LOT of traps in the area. Avoid touching the cans and stepping on the broken glass. You'll also have to avoid a trap triggered by a rope #2. I would recommend using nightvision goggles here, because a flashlight could alarm nearby hostiles.
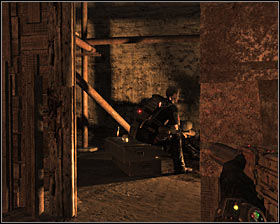
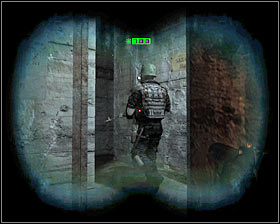
Two enemy soldiers are stationed to your right #1, but thankfully it'll be easy to avoid them. Proceed towards a nearby corridor and you'll soon reach a junction. Remain hidden and wait for one of the guards to pass by #2. Start following him by heading to your left.
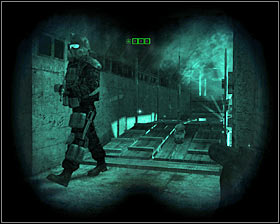
Remember to maintain a safe distance while following the guard. Stop near a burning lamp, wait for the soldier to move away and extinguish it #1. Make a few steps forward and wait for the same person to turn around #2 and start moving towards the corridor you've used a few seconds ago.
You may now safely enter a new area. Make sure that you're crouching to avoid being seen. I would recommend acting quickly here so that the generator mentioned at the beginning of the mission won't receive additional protection. Head forward #1 and then approach a large hole in the left wall #2.
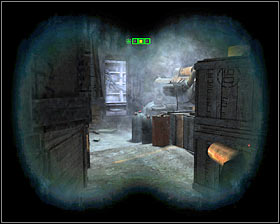
WATCH OUT for a can hanging on a rope here - you can't touch it if you don't want to raise an alarm. Drop down near the staircase #1 and proceed to your left so that you'll enter a generator room #2. Approach the generator and press the action key to turn it off. If you're too late and the generator already has protection you'll have to wait for a right moment to make a move.


Use this opportunity to explore the generator room - you'll have a chance to collect standard ammunition and 5 rounds of gold ammunition #1. Return to the previous room and check the area under the staircase to find a new body #2, as well as 3 rounds of gold ammunition.
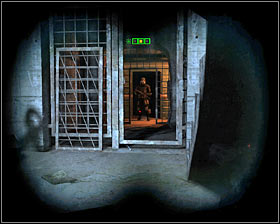

You should now face the corridor leading to the train station #1. Wait for a guard to show up here and as soon as he's turned around enter the area patrolled by him. If you want to find one more collectible you'll have to use a ladder located next to the metro car #2. There's a chest on the roof of the carriage, containing supplies and 4 rounds of gold ammunition.
If you don't want to take additional risks you should consider entering the carriage right away #1. Walk to the opposite end of the metro car and wait for the guard to turn around. Once he's gone past you exit the carriage and locate an entrance to a small tunnel #2.
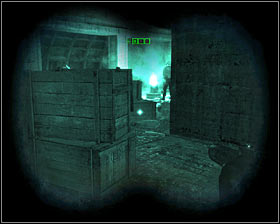
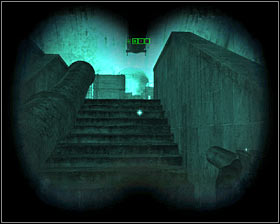
This tunnel will lead you to the main area of the black station #1. Notice that disabling the generator has been a good idea, because it's much darker in here. Approach enemy units, wait for a good moment and quickly use the stairs found to your left #2 to get to an upper level. Walk through an opened gate. You can find out what to do next from the Final part of the mission section.
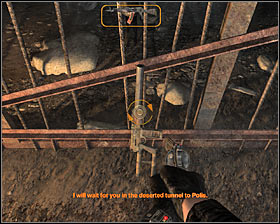

Direct approach: Start this mission by removing your gas mask and then approach a nearby grating. You won't have to pick up a silenced rifle offered by one of your allies #1. Instead collect only ammunition. Check the surrounding area to find several bodies and nightvision goggles #2.

Choose the only available passageway #1 and notice that there are A LOT of traps in the area. You won't have to act quietly here so you should focus only on avoiding a trap triggered by a rope #2, because stepping on it would result in a quick death.
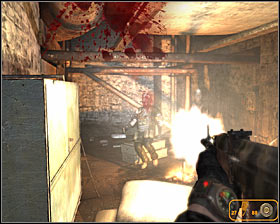
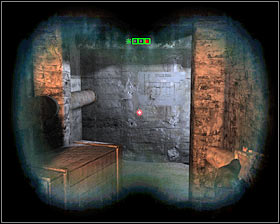
There's a small outpost in the area and you'll have to secure it by killing two enemy guards #1. Finishing them off shouldn't be a big problem. Don't forget to explore the outpost itself, as well as to check both bodies (ammunition). You may now choose a corridor leading to the next area of the station #2.
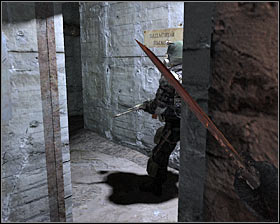

You'll soon reach a junction and you should wait here for one of the enemy soldiers to show up #1. Use a knife to kill him and then choose a corridor located to your right. You should end up standing in a dark room with two other soldiers #2. Get rid of them and be prepared to deal with other enemy units.
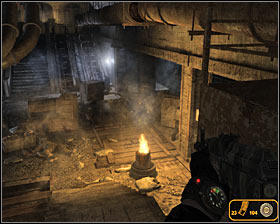
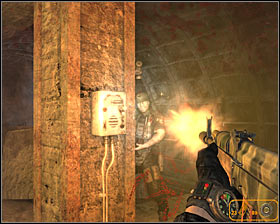
You're about to enter the biggest location of this map which is going to be guarded by about ten soldiers #1 #2. Try eliminating your opponents one by one, prevent them from making surprise attacks and use dynamite sticks to your advantage. You should also remember that if you use goggles instead of a flashlight you'll be harder to find.
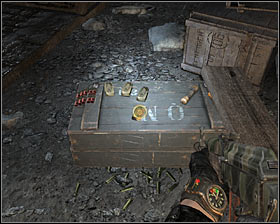
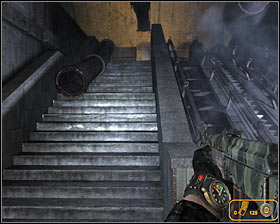
Keep fighting until you're the only standing and then explore the central area of the campsite. You'll find supplies here #1, including 15 rounds of gold ammunition. If you want to end this mission quickly you should use the nearby stairs #2 and walk through an opened gate (you can find out what to do next from the Final part of the mission section).
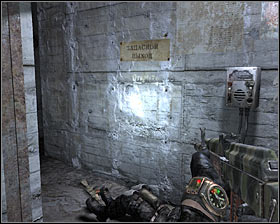
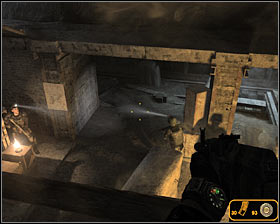
If you intend to find all secret items you should return to the junction where you've killed the first enemy soldier #1. This time choose the left corridor and after a short walk you'll end up on a balcony above a group of hostiles #2. Use dynamite sticks and then your guns to kill most of them from here.
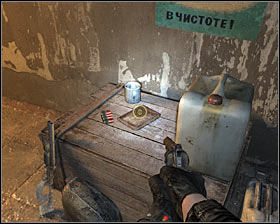
Head down, deal with the rest of the opponents and start exploring the area. It shouldn't take you long to find a room with a working generator #1. You won't have to turn off the generator. Instead search this room to find 5 rounds of gold ammunition #2.
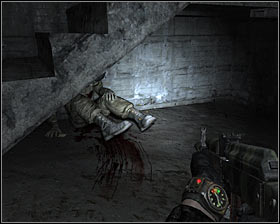
You should now find a passageway with the metal staircase #1. Once you're inside a new room check the area under a new staircase #2 and you'll uncover a dead body. Examine this body to find 3 rounds of gold ammunition.
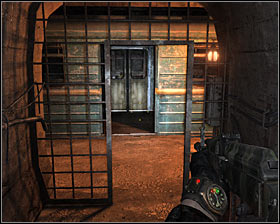
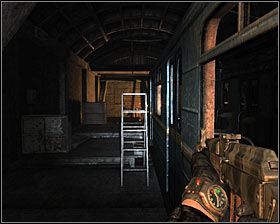
You may now proceed towards a nearby train platform which is going to be guarded by a single enemy unit #1. Kill your opponent and then use a ladder #2 to get to the roof of the metro car. Locate a crate here containing 4 rounds of gold ammunition.
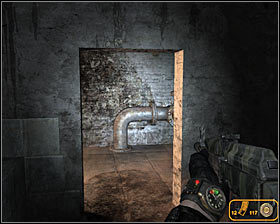
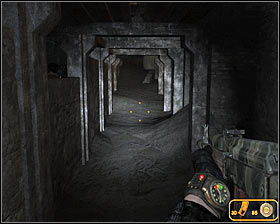
You may now return to the main area of the train station (where you've found 15 golden bullets) and this can be achieved by using a tunnel located close to the metro car #1. It shouldn't take long to find the exit from the tunnel #2 and then you should proceed to the stairs mentioned earlier.

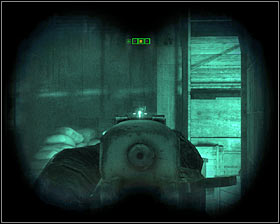
Final part of the mission: There's one more group of enemies in the area. If you've chosen a direct approach you should attack them with dynamite sticks #1. If you've chosen a stealth approach you should silently kill an opponent standing in front of you #2 or leave everyone alive.
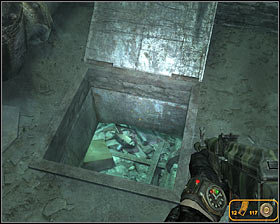
In both cases you'll have to choose a passageway located to the left #1 and then proceed to the next room. Here you'll have to locate an opened hatch #2 and head inside to find yourself standing in the sewers. Make sure to put on your gas mask!
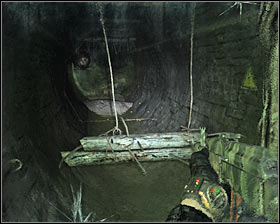
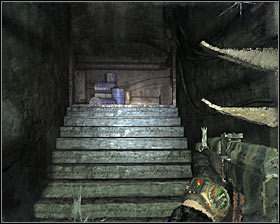
Start heading forward. Be careful, because you'll have to avoid a new trap here #1 and you'll die if you make a mistake. Keep going through tunnels and small rooms #2. There's only one path here, so you can't get lost.
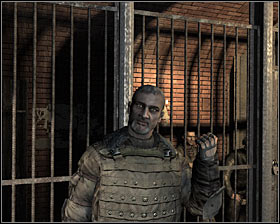
Eventually you should be able to get to the train tracks #1 where one of your allies will be waiting for you in a new trolley. You'll witness one new vision before this mission ends #2 and you should read the section named Endings to find out about the impact of the choices you make here.
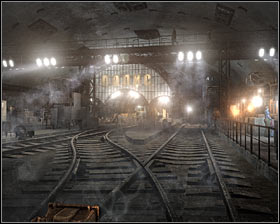
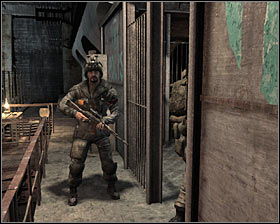
Walkthrough: This is going to be a very short level and you'll spend more time admiring the station than playing. Wait until the trolley has reached the Polis station #1. Start off by heading inside #2 where you'll have a chance to talk to captain Krasnov.
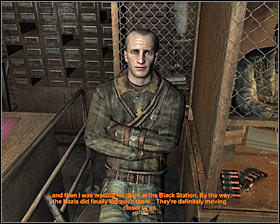
You should use this opportunity and purchase additional equipment from three of the local merchants #1 (they're selling guns, ammunition and a better armor). Exit this room #2 to be rewarded with the final set of cut-scenes.
Walkthrough: Naturally you should begin by putting on your gas mask. Proceed to your right and drop down to an area with a lot of pipes #1. Make sure not to stay in the water for too long, because you would be killed by radiation. Use one of the pipes to reach the next area #2.
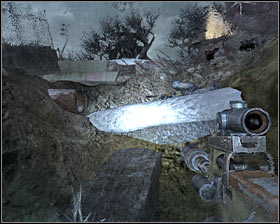
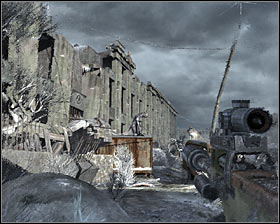
Eventually you should be able to find a dead soldier #1 and obviously it would be a good idea to examine the body. Doing this will allow you to collect 2 rounds of gold ammunition. Return to the start area and this time proceed to your left. Kill the first beast from a safe distance #2. It should be done quickly so that the creature won't attract any other monsters to your position.
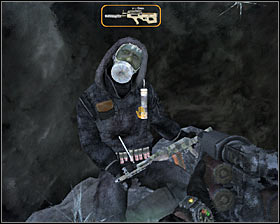
You should now check the area to your right and you'll notice a pathway leading to a new body #1. Drop down there and use the objects mentioned above to get to your destination #2. Examining the body will allow you to collect supplies, a new gas mask and 5 rounds of gold ammunition.
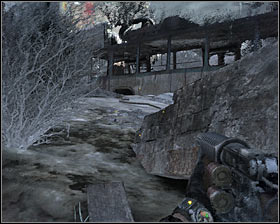
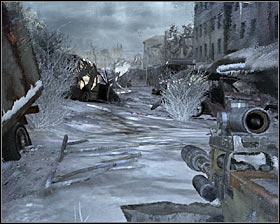
You may now return to a destroyed bridge located directly behind you. Turn left and make a jump towards a pipe seen in front of you #1. Head forward #2 and make sure to choose a good weapon from your arsenal, because you're about to take part in a new battle.
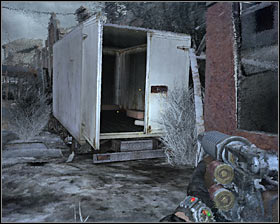
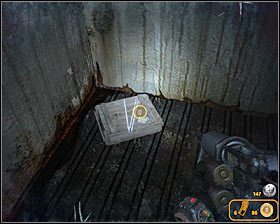
You shouldn't have any major problems eliminating the monsters. Once they're gone examine a white truck located to the right #1. You'll have a chance to collect 4 rounds of gold ammunition #2, as well as standard supplies. You may proceed to the next section.
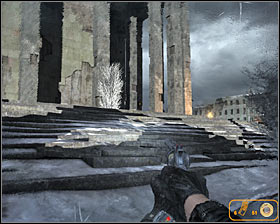
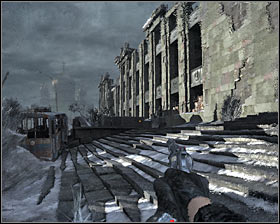
Watch out for flying demons in the area. I still wouldn't recommend attacking them - you should be fine as long as you keep moving. You'll soon approach the library building #1 and it would be a good idea to take some time to explore the area to your left #2.
You'll soon come across a large hole and you should consider heading down #1. Turn right, press the crouch key and get inside the cave through a small entrance #2. Proceed to your left and you'll soon find supplies (gas mask, ammunition), as well as 5 rounds of gold ammunition. Make sure to stay here only for a few seconds, because you'll be dealing with radiation.
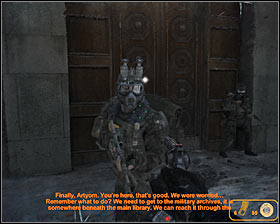
Return to the top, however you should still remain far away from the library building. Proceed forward to reach the opposite end of the square and locate a destroyed van #1. Open the chest found inside the van to collect 5 rounds of gold ammunition. You may finally get to the main entrance to the library where you'll team up with allied units #2. Wait until one of your colleagues has opened the door and this mission will soon come to an end.
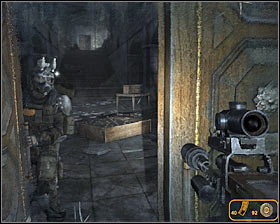
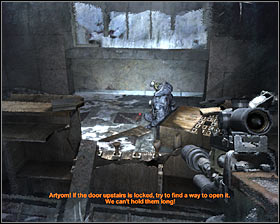
Walkthrough: Enter the library and wait for one of the allied soldiers to join you after he's left the main gate #1. You won't have to be in a lot of hurry here, however you won't find any interesting items in the vicinity. You should only examine one body #2 in hopes of collecting extra ammunition.

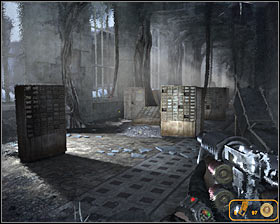
Use the stairs to get to the upper balconies #1 and notice that you won't be allowed to use the main gate to reach the next area. Instead turn right and proceed towards a new corridor #2, collecting a gas mask filter along the way.
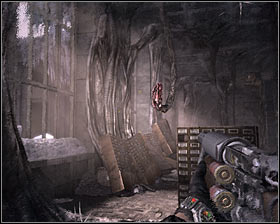
You'll have to be careful here, because you're going to be attacked by "tentacles" attached to the ceiling #1. The easiest way to avoid injuries is to stay away from them and to sprint often. You can examine a new body along the way #2, however you'll only find standard ammunition.
Proceed to the right where you'll have to go through a second corridor filled with tentacles #1. The rules are the same, so you'll have to start running and prevent the main character from moving too close to the tentacles. Examine a new body and then head through a small hole in the wall #2 (you'll have to press the crouch key).
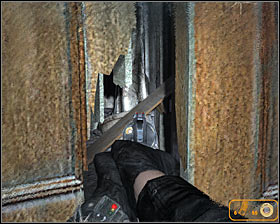
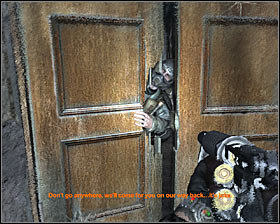
Once you're inside you should find a new body. Approach a small hole in the nearest door #1 and choose one of the weapons from your inventory. You'll have to fire a single bullet to destroy a wooden beam blocking the main gate. Wait until your allies have gained access to the next area and they will soon get you out of this room #2.
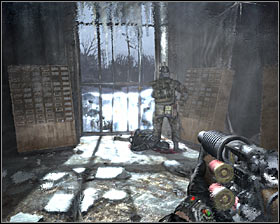
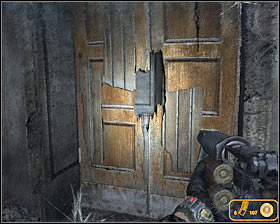
Find two other bodies. Be careful while standing near the window #1, because a flying demon may appear near your position. Use one of your guns to scare the creature away. Explore the surrounding area and you'll find a new damaged door #2.
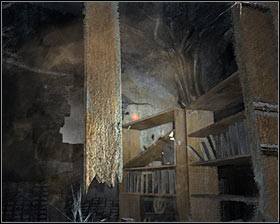
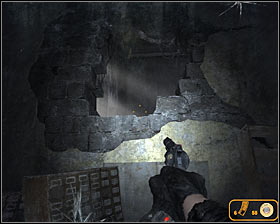
In this case you won't have to aim for anything in particular, because you'll want to destroy an entire door #1. Don't waste your ammunition, because you'll be allowed to do this using only a knife. Collect supplies from a new body and then locate a hole in a nearby wall #2.
Crawl through the hole to find yourself standing inside a much bigger room. Explore the area to locate two new bodies and then move on with the mission by firing at a chandelier found close to the ceiling #1. Wait for this object to break down a nearby door #2. You can now use the stairs to get to the next room along with the rest of your team.
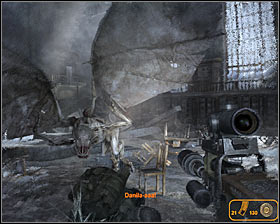
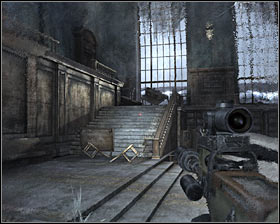
Get ready, because you're about to take part in a battle with a flying demon #1. Generally you shouldn't be wasting your ammo here, especially since you won't be able to prevent the beast from grabbing one of your colleagues and then leaving the building. Listen to new orders and choose a passageway leading to the upper balconies #2.
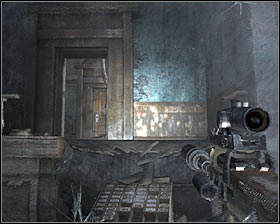
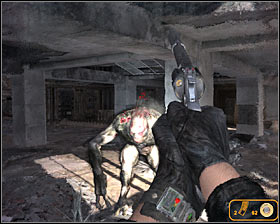
After you've made your way to the top you should proceed to your left #1. Search the area to find shotgun ammunition and then choose a passageway located nearby. Eventually you'll have to find a new closed door and use a knife or a standard weapon to destroy it #2. Entering the next room will allow you to end this mission.
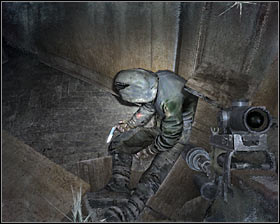
Walkthrough: Start off by going to your left. You shouldn't have any problems finding a body #1 and you can examine it to collect 5 rounds of gold ammunition. Choose a good weapon from your arsenal, because you're about to take part in a difficult duel. Head down #2 to a room where you've already seen one of the monsters.
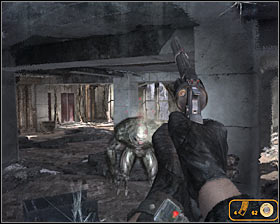
You're going to be attacked by a large mutant here #1 #2. Sadly the beast is going to be very resistant to the gunfire, so it won't be easy to kill it. I would recommend using a revolver and you should always remember about aiming for the creature's head. Don't forget to stay on the move and to prevent the monster from moving too close, because several hits will be enough to kill you. Don't be fooled by seeing the beast escape, because it'll return here after a short while and the duel will be resumed.
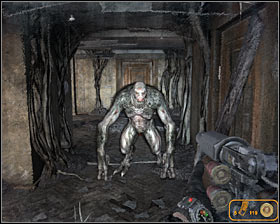
Keep fighting until you've succeeded and then check your surroundings to collect ammunition from a dead body. Find a new door and destroy it #1. Get ready for a new monster encounter after making a few steps #2. You should know that you will be allowed to skip some of these fights. You can always try moving back slowly and waiting for the monster to leave the area. Naturally this won't apply to all duels, but you will be able to avoid some of them, allowing you to conserve ammunition and medical supplies. If you have to fight the monster mentioned above make sure to move back to the previous room, so you'll have more space to move.

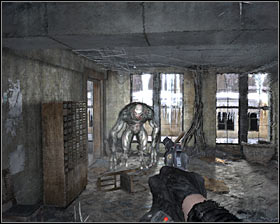
You may continue exploring nearby corridors, finding a dead body near the window #1 among other interesting things. Use a knife to destroy a nearby door and be prepared for a new monster encounter #2. I would recommend using a shotgun against this mutant (if it attacks you), because you'll be fighting in a small room.
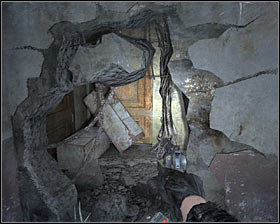

Make sure to collect a medkit along the way and then crawl through a large hole found in one of the walls #1. Destroy a new door to find yourself standing inside a public toilet. Take supplies from a new body and check the second room to locate 5 rounds of gold ammunition (on the ground to your right) #2.
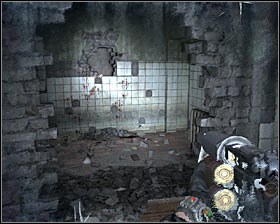
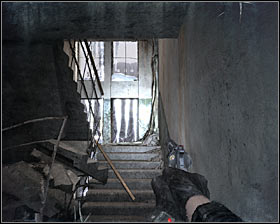
Return to the previous room and walk through a much larger hole #1. Approach a smaller hole located directly in front of you where you'll be delivered a cheap scare. Don't worry, because you're not in any danger here. Continue exploring nearby corridors and you should soon get to a staircase leading to the upper floor #2.
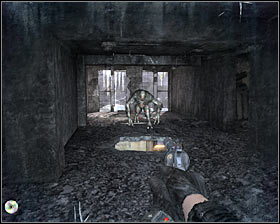

Be careful here, because a new mutant may appear near your position #1. You'll have to watch out for holes found in the ground while exploring this floor #2. Thankfully even if you make a mistake and fall through the hole you'll end up in a previously explored area and you'll only have to use the staircase again to resume the mission.
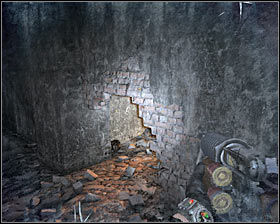
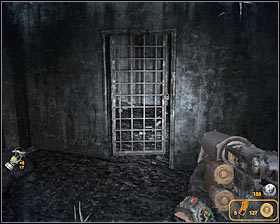
Be on a lookout for a much smaller hole #1 and make sure to use it to continue your mission. Take your time to examine a body found in the area, collecting ammunition and gas mask filters. You may proceed towards a metal gate #2.
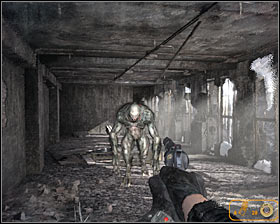
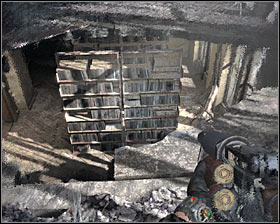
Don't be surprised to encounter a new mutant #1. You may able to skip this fight, however you would have to immediately proceed towards a nearby hole #2. If you're too late use the methods explained earlier to defeat the creature.
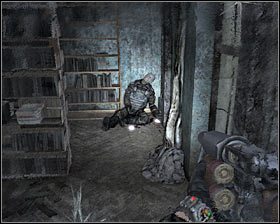
A nearby door is going to be destroyed by a new monster, however this mutant should leave the area without attacking you. Make sure to check a newly explored room to find a body #1 and 5 rounds of gold ammunition. You can return to the upper floor easily and without having to leave this room #2.
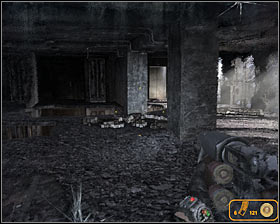
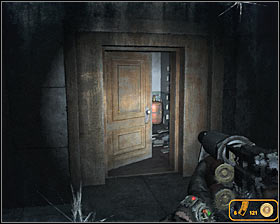
Return to the area where you've jumped down through a large hole, but this time remain on the upper floor #1 and continue moving forward. You'll soon watch an interesting cut-scene and you'll regain control inside a destroyed elevator. Take a medkit and proceed forward, ignoring a new monster along the way. Open a new door #2 and this mission will come to an end.
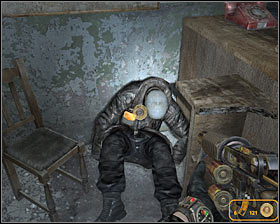
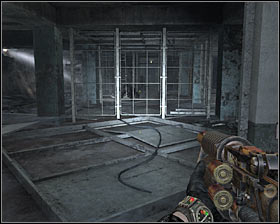
Walkthrough: Start this mission by putting on a gas mask. Check the area to your left and you'll have a chance to collect supplies from a dead body #1. You may now enter a large room with two black beasts #2. One of the monsters should eventually leave this area and the other one will remain close to the dead soldier.
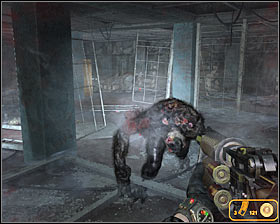
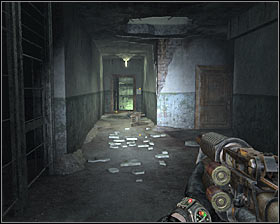
I wouldn't recommend fighting the black monster #1, because it will be more resistant than the beasts you've encountered in the previous mission. Instead you should avoid the central area and start running towards a corridor seen in the distance #2.
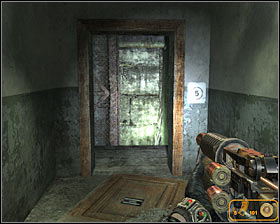
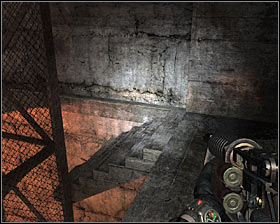
You'll have to be very careful once you've reached the staircase #1, because it will be incomplete and therefore you can fall down if you're not careful enough. This also applies to other steps - they will fall off if you stay in one spot for more than a second. Head down until you're allowed to catch a breath on a stable ledge #2.
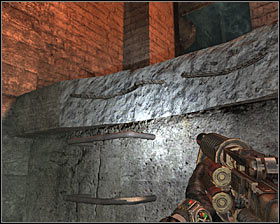

Continue heading towards the ground floor, making small jumps along the way. After you've reached the lowest level you'll have to use a ladder #1 to get to a new platform. Proceed forward. Once you're inside a new room you should remain on this level so that you won't have to fight a new creature. Make a jump towards a ledge seen directly in front of you #2.
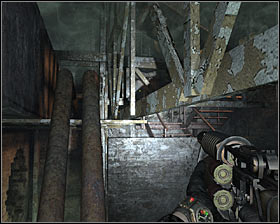
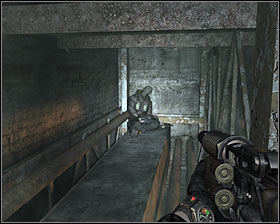
Start using wooden beams found to your right and then walk on a pipe #1 so that you'll have a chance to get to an upper level. Notice a new dead soldier in front of you #2. Check his body to find standard ammunition and 5 rounds of gold ammunition.
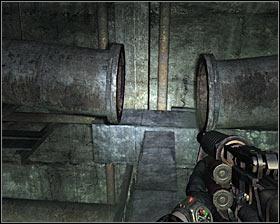
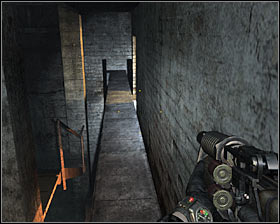
You can now focus on leaving this area safely. I would recommend staying on this level and proceeding towards larger pipes seen in the distance #1. Use other objects from the environment to make your way to a small ledge #2. Thankfully if you fall down you'll be allowed to get here using the stairs.
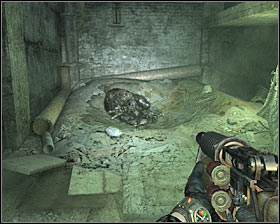
Head forward and then turn right to find an entrance to a ventilation shaft #1. Naturally you should head inside. Ignore a new monster along the way, because you won't have to fight back. Enter a new area #2, head down and proceed forward.
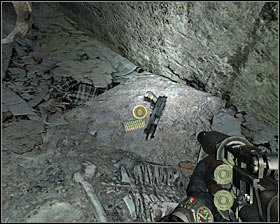
Use the stairs and then jump down to get to the lower level. Thankfully you won't have to use a gas mask here. Turn right and you should notice a sleeping monster #1. Approach the beast slowly and check the area to the right. Doing this will allow you to find 5 rounds of gold ammunition #2.

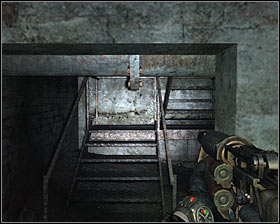
Proceed to the next section by choosing a small passageway found on the right wall #1. Go past a new sleeping monster slowly and prevent a second monster from making a surprise attack. Eventually you should be able to get to a staircase #2.
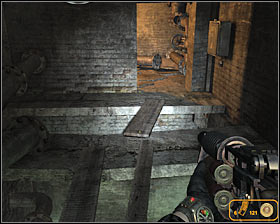
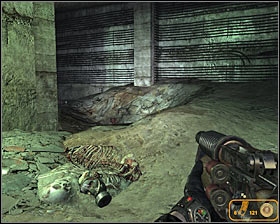
Use the stairs to reach the top floor and then proceed to your right. Walk slowly here #1 so you'll avoid falling down (you can also perform two jumps instead of using wooden boards). This time head down and once again you'll encounter a sleeping mutant. Choose the passageway located to your right #2 so that you won't have to get too close to the creature.
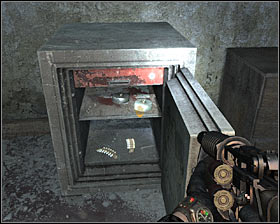
It shouldn't take long until you've reached a new staircase #1 and in this case you'll want to get to the upper floor. Look around a bit - one of the side rooms found to your right contains a safe #2 with a lot of valuable supplies.
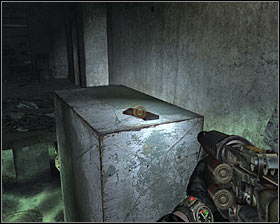

You can also collect an ammo clip from a nearby case #1. Notice that the case itself will fall on one of the monsters seen earlier, killing the creature on the spot. Enter a nearby room #2 where you'll be rewarded with the final cut-scene.
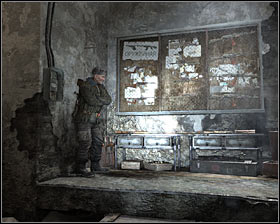
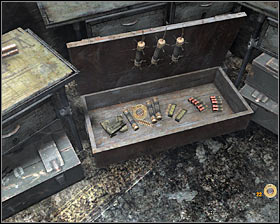
Walkthrough: This is a very short mission during which you won't encounter any hostile units. You should end up inside the Sparta base after watching several cut-scenes. Make a few steps forward and talk to a merchant #1. Notice that you'll be allowed to take whatever you need FOR FREE, including better guns. Make sure to take a look in the ammo case #2, collecting dynamite sticks, standard ammunition and 30 rounds of gold ammunition. Finish off by checking the area to your right - you can pick up a gas mask, filters and nightvision goggles.
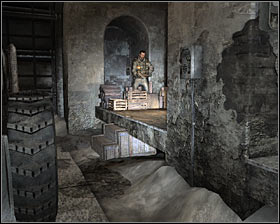
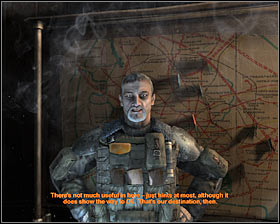
You may now proceed to your left, choosing a narrow passageway located near a parked vehicle #1. Get to the upper level where you'll have to talk to the commanding officer #2. This mission will end after a short debriefing (and after you've pressed the left mouse button).


Walkthrough: You'll begin this mission on board of a new carriage, however you'll only be allowed to look around. Get ready, because you're about to take part in a new vision. You can choose here between moving towards an alien creature #1 and moving towards one of your allies #2. Make sure to read the chapter named Endings (it's spoiler-free) to find out how this choice can affect the final scene of the game.
Wait for the carriage to stop #1, because this is the moment when you'll regain full control over the main character. I wouldn't recommend waiting - instead approach a stationary flamethrower right away #2. Notice a temperature indicator in the lower left corner - you won't be allowed to overheat the flamethrower, because it would then need a few seconds to cool down.
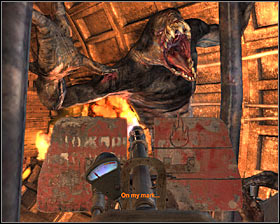
Wait for monsters to start showing up in the area. You should be aiming at the train tracks located directly in front of you #1, because this is where most of the mutants will land (even if they were performing a lot of jumps earlier on). Sadly, even if you're careful, some of the monsters will grab onto the carriage #2. Make sure to eliminate them as soon as possible. Naturally you'll have to prevent too many of them from getting through, because they would eventually kill you.
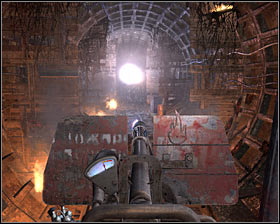
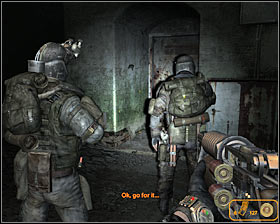
Keep defending yourself until your allies have fixed the carriage. You'll now watch a cut-scene featuring a well-known anomaly #1 and you'll soon leave the carriage. Proceed towards the nearest passageway #2 where this mission will come to an end.
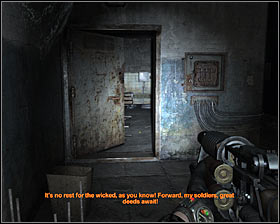
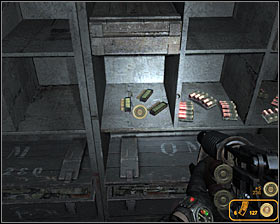
Walkthrough: You should start exploring this location by entering one of the rooms located to your left #1. Don't worry, because you're not in any hurry and your allies won't do anything important without you. Check this room to find 35 rounds of gold ammunition #2 (five clips), as well as standard ammunition and gas mask filters.
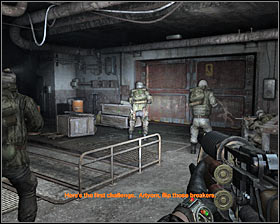
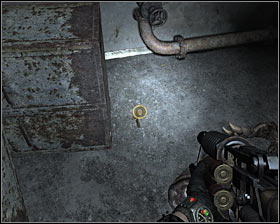
Return to your allies and continue moving forward. Once you're inside a new room #1 you should listen to a conversation and then explore a smaller room found to the left. Turn left after you've entered this room and collect 10 rounds of gold ammunition from the ground #2.
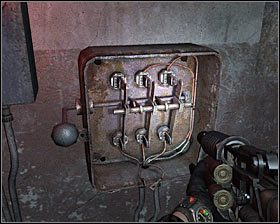
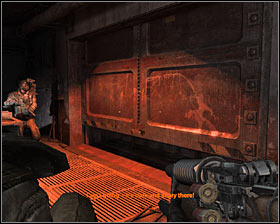
Go back to your allies again. You'll have to interact with four switches found inside this room #1. Two switches are located to the left of the large gate and the remaining two are to the right. Wait for the gate to be raised #2.

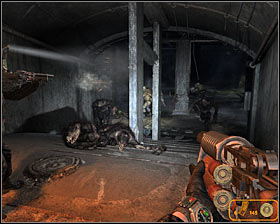
Head down and get ready to take part in the first monster battle #1 #2. Your allies should be able to handle most of the beasts, however you must know that they're not immortal and that the death of one of your companions will be equal to failing the mission. I would recommend that you only assist them, especially if you notice someone from your team surrounded by a larger group of monsters. You should also watch out for additional mutants which may appear in the area where you've came from.
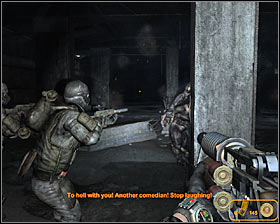
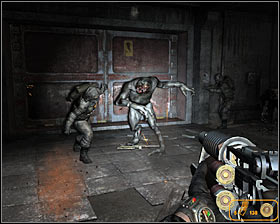
Keep heading forward and expect to encounter more beasts along the way #1. You should still be a passive member of the team, however you can't just stand in the back and do literally nothing. One of the monsters will soon kill your ally #2 and you can't prevent it from happening. Walk through the next gate to end this mission.
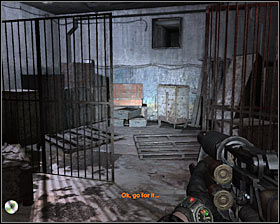
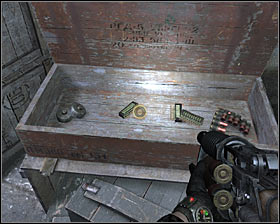
Walkthrough: Remember that you still don't have to be in a lot of hurry. Start this new mission by exploring the area to your right #1. One of the red crates will contain 30 rounds of gold ammunition #2, as well as standard ammunition and gas mask filters.
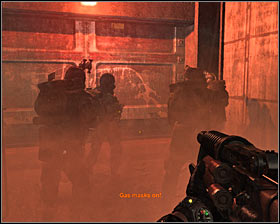
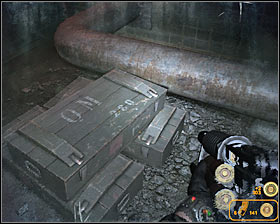
Rejoin with your allies, approach a new gate and wait until this new passageway has been unlocked #1. Make sure to put on your gas mask before heading inside. Check the area to your right again #2 - this time you can collect only two rounds of gold ammunition.
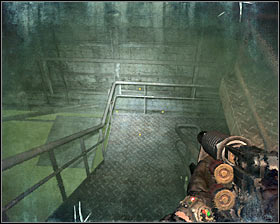
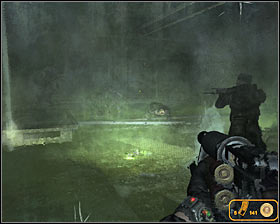
Continue exploring the area by using the stairs to get down from the balconies #1. You'll take part in a new monster battle here #2. Don't forget that you must assist some of your teammates so that they won't die.
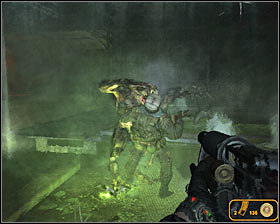
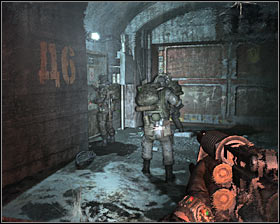
Don't be too ecstatic after you've dealt with the first group of monsters, because more of them will show up soon #1. This battle will be even longer than the last one, however as long as you protect your colleagues you should be fine. Head on towards a new gate #2 and listen to what your team has to say about the current situation.
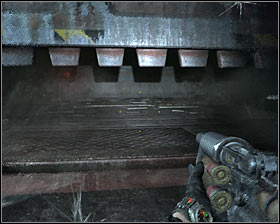
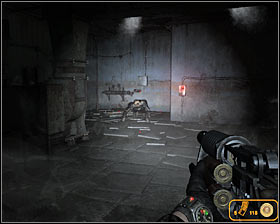
Approach the gate and hold the crouch key to crawl under it #1. Notice that the gate has closed behind you, separating your from your team (thankfully not for good). There's also a second problem - you'll have to take part in a battle with a red-eyed monster here #2.
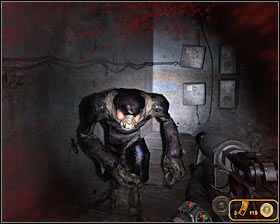
This duel will be very challenging, because the monster will be able to kill you with only a few hits and it will also avoid getting shot by escaping to the ventilation shafts #1. The most important thing you need to know about is that you have to keep moving. As soon as you've seen the monster leaving the vents attack it using a shotgun #2 or a revolver. Aim for the creature's head and keep firing until it escapes again. Don't forget to heal the main character if he's about to die. Keep repeating all the actions mentioned above until the mutant is dead.
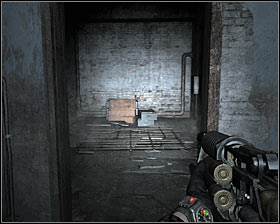
You may now start exploring some of the nearby rooms. The next room #1 contains a crate with standard ammunition and 15 rounds of gold ammunition. Exit this room and proceed to your left. Destroy a new door #2 using a knife or one of your primary weapons.
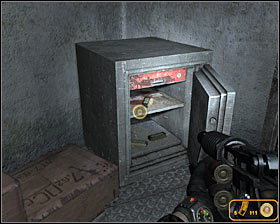
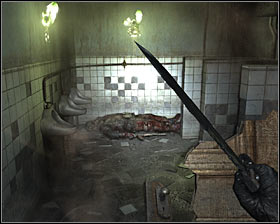
Once you're inside the room you should look around a bit to find supplies and a safe #1 with 44 rounds of gold ammunition. You can also check rooms found to the right if you have the time. Make sure to use a knife to destroy each door. One of the rooms will be a public toilet and you can examine a dead body here #2 to find a lot of ammunition.
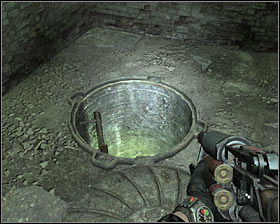
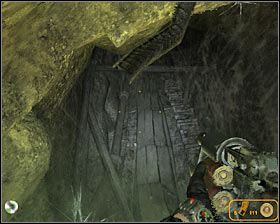
Continue exploring the area and eventually you should be able to find a small entrance to the sewers #1. Use a ladder and don't forget to put on a gas mask. Proceed to your left and then turn right to leave the sewers #2. You can remove your mask here.
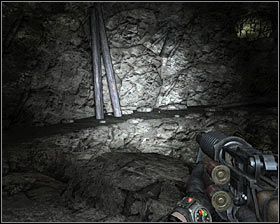
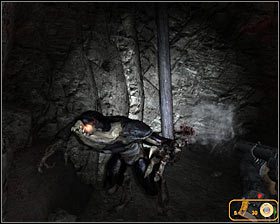
Once you're inside a new cave #1 you should notice that a new monster has appeared in the area. It's going to be almost identical to the creature you've fought not long ago #2. It would be possible to avoid this fight, however you wouldn't have a chance to find all the stashes. If you want to fight the creature you'll have to pay a lot of attention to not losing balance and falling. I would recommend that you keep using a shotgun. Notice that the creature will be using tunnels instead of vents, however the overall concept of the duel will remain the same.
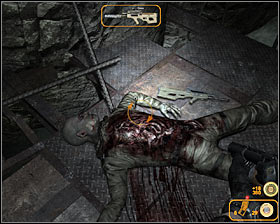
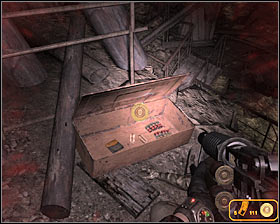
There are two interesting areas inside this cave. You can perform a jump to a platform located in front of the entrance to the cave (that's where you've seen the monster for the first time). Locate a dead body here #1 to collect a medkit, standard ammunition and 18 rounds of gold ammunition. As for the other location, an upper area of the cave contains a crate #2 with a lot of standard ammo.
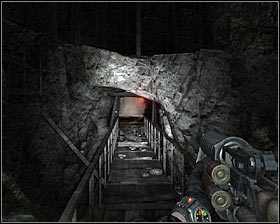
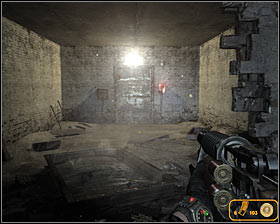
If you want to leave this area quickly (without fighting the monster) or if you've already explored the cave you'll have to drop down to a metal balcony (the one with a dead soldier) and choose a small tunnel located to your right #1. Eventually you should be able to find a door #2 and you'll have to interact with the left switch to unlock it.
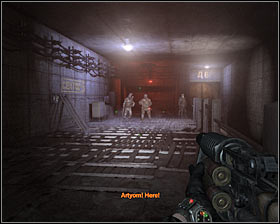
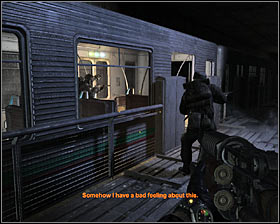
Head forward and it shouldn't take too long until you've reached a train platform and rejoined with the rest of your team #1. Check your surroundings to find a new gas mask and then enter one of the metro cars #2.
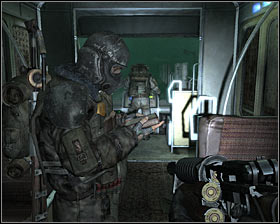

Walkthrough: You'll have to put on a gas mask while you're still on your way to a new train platform #1. Wait until the metro car has stopped, head outside and then proceed to your right. Take your time, because your colleagues will want to look around. Follow one of them to the stairs #2.
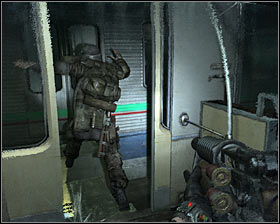
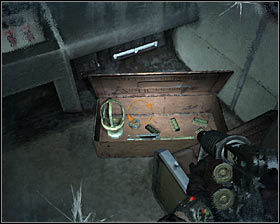
Enter a new metro car and wait for your partner to open one of the side doors #1. Perform a jump towards a second metro car, so that you'll avoid being electrified. Once you're inside the second carriage you should turn right and search the area. You can find a crate here #2 with 50 rounds of gold ammunition, a gas mask and several filters.
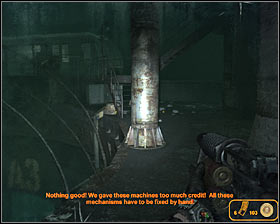
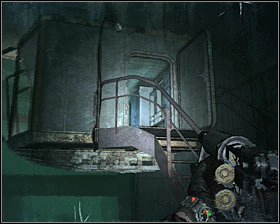
Exit the second carriage and start moving towards a new metro car seen in the distance #1. Turn right once you're close enough and use the stairs to get to the upper balconies. Eventually you should make your way to a small control room #2.
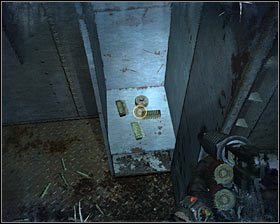
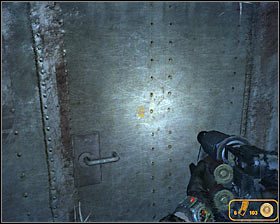
Once you're inside the control room you should open one of the lockers #1. Aside from a new gas mask and several filters you'll also find 30 rounds of gold ammunition here. Proceed towards the other door #2 and open it to leave the control room.
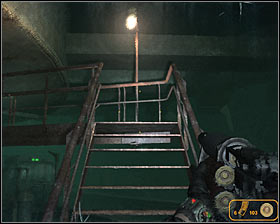
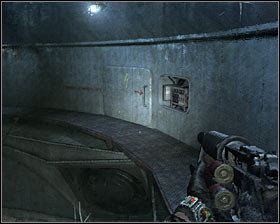
Start moving upwards, using new staircases along the way #1. I wouldn't recommend moving too fast, because it's easy to make a mistake here and you would have to restart from the last checkpoint. You'll soon get to the top #2. Listen to new orders before you do anything.
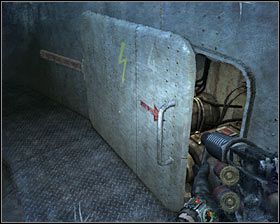
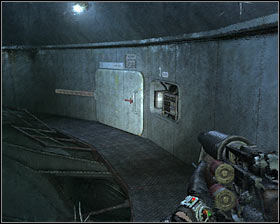
The first part of this assignment will require you to move four metal plates with numbers on them. Each time you must start by approaching a plate #1 and then press the action key to move it. Once you've uncovered a generator you'll be allowed to move on to the next plate #2. Wait for updated orders.
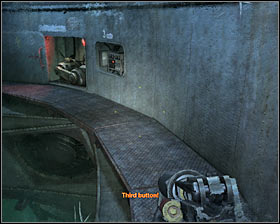
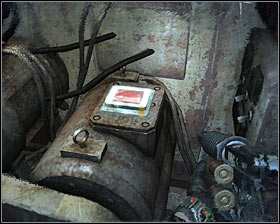
Your next objective will be to approach the plates by following instructions being shouted by your ally. Each time you've heard a number approach a corresponding generator #1. You'll have to find a red switch on the generator. Press and hold the action key #2 until you've heard a new number, forcing you to locate the next generator.
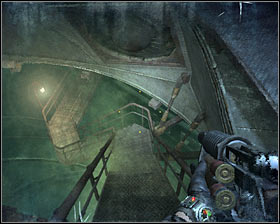
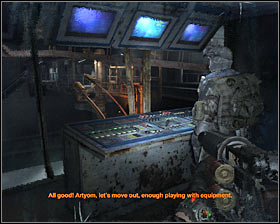
Keep doing the things explained above until all four generators have been restarted properly. Naturally it will be important here to move quickly so that some of them won't shut down in the meantime. You may now use the staircases again #1 to return to your ally standing inside the control room #2.
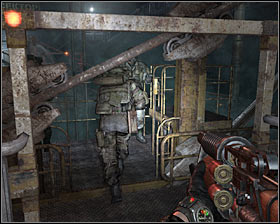
Wait until your colleague finishes his work and then follow him to a lower level of the compound. Eventually you should both be able to find an elevator #1 where you'll rejoin with the rest of the squad. Press the crouch key to enter the elevator and wait for it to transport you to a new area #2.
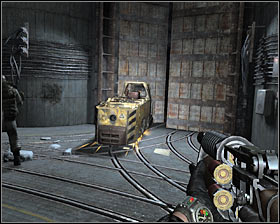
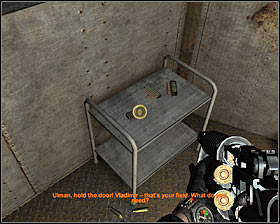
Exit the elevator and wait for one of your teammates to think of a plan of opening a large door seen right in front of you #1. Enter the next area and make sure to check a small control room seen before you. You can find 42 rounds of gold ammunition inside this room #2.
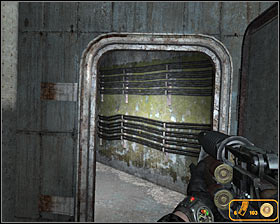
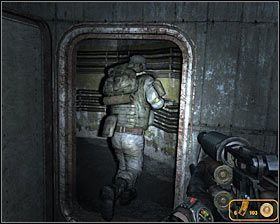
Choose a new passageway located nearby #1 and you will soon make your way to a much bigger control room. You won't have to do anything here - just sit back and listen to what your colleagues have to say. Follow one of them after receiving new orders #2.
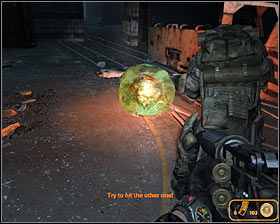
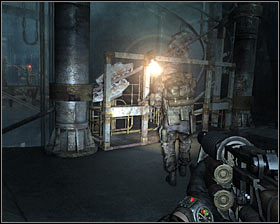
Be careful, because you're going to be attacked by an amoeba in the next area #1. Expect to encounter more of them in the future. Use a shotgun to destroy it from a safe distance and then follow your partner until you both reach a new elevator #2. Enter the elevator and wait until you're transported to a new level.
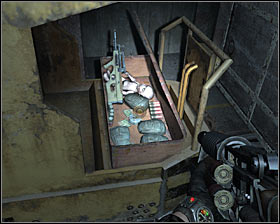
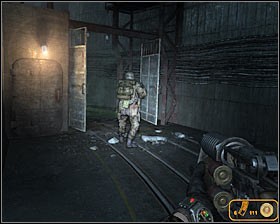
Exit the elevator once you've reached your current destination and examine a yellow carriage located to your right. You'll find a lot of supplies here #1, including standard ammunition, filters and 15 rounds of gold ammunition. You may now proceed towards the left corridor #2. Make sure to choose one of your rifles before heading in.
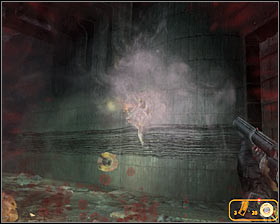
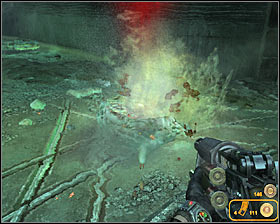
Get ready for a series of challenging fights with more amoeba. Generally the most important thing you need to know about is to destroy things that look like tanks as quickly as possible. Doing this will prevent more creatures from popping up. You can destroy more distant tanks using an assault rifle #1 and deal with closer threats using a shotgun #2.
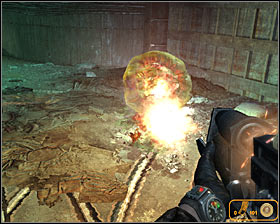
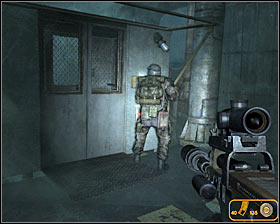
Naturally aside from destroying tanks you'll also have to be dealing with amoeba, preventing the creatures from moving too close #1. You can use a shotgun against them which seems to be the most effective weapon. Make your way to the opposite end of the corridor and enter the last elevator #2 to end this mission.
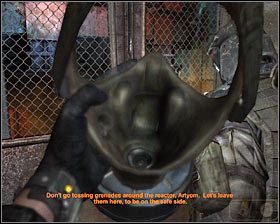
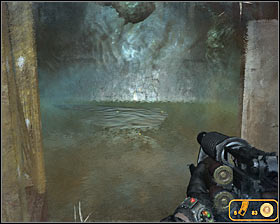
Walkthrough: Wait until the elevator has reached its destination and don't forget to wear a gas mask #1. Exit the elevator and choose a good weapon from your arsenal again #2, because you're about to take part in new battles.
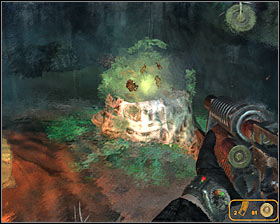
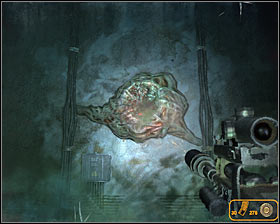
You must now fight your way through a long corridor where you'll be dealing with amoeba. Remember that it should still be your top priority to keep destroying the tanks found along the way. Some of them will be on the ground #1, but you should pay more attention to neutralizing all the tanks seen on nearby walls #2. Prevent the creatures from moving in too close during this battle, because you can die easily here.
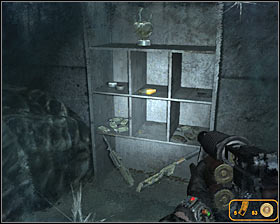
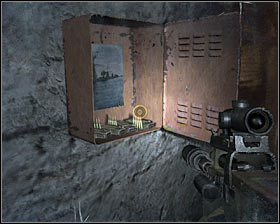
Thankfully you'll have a chance to restock during this battle. The first stash can be found after you've left the elevator #1. As for the other one, you will find in to your left in the middle of the corridor. It's going to be a red locker #2 and aside from standard ammunition you'll also have a chance to collect 30 rounds of gold ammunition.
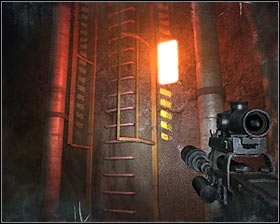
Eventually you'll have to locate a ladder #1 and use it to leave this area. The good news is that you shouldn't be attacked by anyone else in the meantime. Proceed towards a new control room #2. You won't have to do anything here - wait until you've received updated orders.
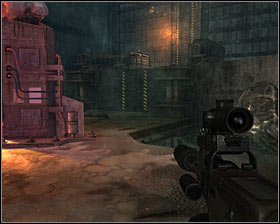
Choose a door located to the right of your partner and press a button located on the wall #1 to open it. Head down and start moving towards a ladder seen in the distance #2. Use this ladder to get to an upper balcony and then immediately approach a second ladder.
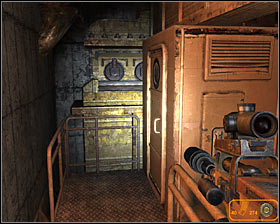
After you've made your way to the highest balcony you'll have to make a few steps forward and press the action key to access the crane #1. Notice that you've been given a chance to control the crane and this can be done by using movement keys (WSAD by default). Keep looking at the left monitor while moving the crane. You'll have to position it above one of three blue points #2.
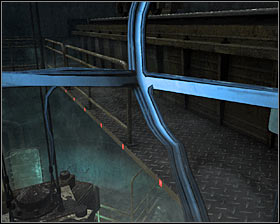
Wait for the icon to change its color from blue to green and then hold a mouse button to lower the crane's arm. If you've done everything correctly you're going to be rewarded with a short cut-scene #1. Follow these exact steps with two of the remaining blue steps. Once you've listened to new orders move the crane to the upper right corner #2 (two orange plates).

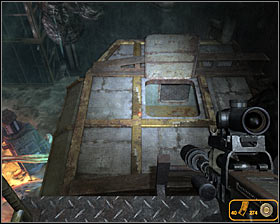
You may now exit the crane and if you "parked" it correctly you'll be allowed to enter a nearby balcony without having to make any jumps #1. Use this balcony and then jump down through a hole in the roof #2 to return to the control room.
You may now start following your teammate by heading inside a newly unlocked corridor #1. You'll soon find a new elevator #2 and naturally you'll have to enter it.
Walkthrough: You'll exit the elevator in a well-known location and you should continue following your teammate #1. Don't forget that it can be risky here if you try moving too fast. Return to the metro car #2 where you'll listen to a new conversation.
I would strongly recommend that you use this opportunity to collect much needed supplies from a nearby crate #1, including a new gas mask, better guns, standard ammo and 30 rounds of gold ammunition. You'll also have to pick up a guidance system #2 and once it's in your possession you can enter the metro car to finish the mission.

Walkthrough: Start off by putting on a gas mask #1. Notice that this mission will take place in the same area as the prologue. Use the few seconds of spare time you have to quickly locate a red chest #2. Aside from a new gas mask and a lot of standard ammunition you'll find 210 rounds (!!!) of gold ammunition here.

Get ready for a new monster battle #1 #2. I would strongly recommend that you change ammunition in your clips from standard to golden one, because you won't be making any purchases in the future (don't forget that gold bullets work only with automatic weapons). As for the battle itself, focus on attacking larger group of monsters, preventing them from hurting someone from your team.
Keep fighting until you've been knocked out by one of the flying beasts #1. You'll now start watching the same cut-scene which ended the prologue, however this one will be longer and will end with Artyom being saved by one of his colleagues. Follow your new teammate to the next area #2.
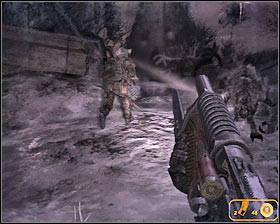
You'll have to make several stops along the way #1 and each time you'll be forced to take on a group of monsters. Keep fighting until your colleague has given an order to move. Once you've heard his command ignore the remaining beasts and start running after him #2.
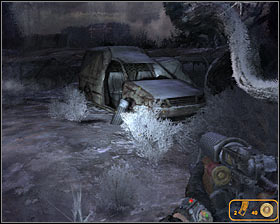
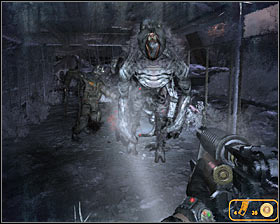
Be on a lookout for a white van - you'll find to your right shortly after making one of the stops #1. Approach the van if you can, because you'll be allowed to take 60 rounds of gold ammunition and gas mask filters from the passenger's seat. You should eventually reach several buildings #2. Enter the first one to escape the monsters.
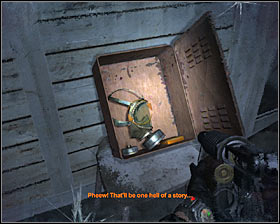
It would be a good idea to look around a bit. There's a red locker nearby #1 and you can examine it to find a gas mask, a filter and a medkit. You can also enter a small room with larger lockers #2 to collect standard ammo and 90 rounds of gold ammunition.

Proceed to the next section and be careful, because you're going to be attacked by new beasts soon #1. Kill only the closest targets and then start running after your ally. Eventually you should both make it to an entrance to the tower #2. Head inside and you'll be rewarded with several cut-scenes. Get ready for the last mission of the game!
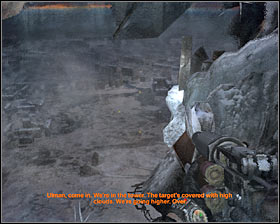
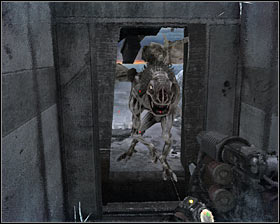
Walkthrough: You'll have to be very careful during this mission, because one false move will result in falling from the tower. Wait until you've regained full control #1 and listen to a warning about a flying monster heading your way. Take cover inside a very small room #2 and wait for the beast to leave (you could also attack it, because you won't have to conserve ammunition for later).
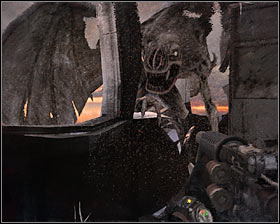
Proceed towards the only available passageway #1. I would recommend using a compass here often, so you'll always know where to go. Watch out for a second flying demon #2. It would be a good idea to wait for the beast to start ripping off a part of the wall and then run past it.
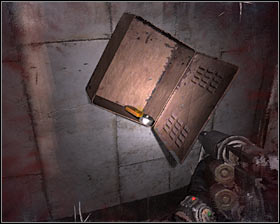
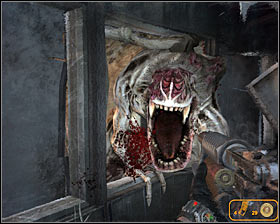
Continue exploring the tower. There's a box with a filter and a medkit nearby #1 and you can also pick up a brand new gas mask from the ground. Get ready to defend yourself against a flying demon - in this case you should consider firing at the beast #2 to scare it away.

Press a crouch key and crawl under metal objects located to the right of the window where the last demon appeared #1. Choose a passageway located to your left #2. This means you'll be moving close to the edge of the tower, so you must be careful.
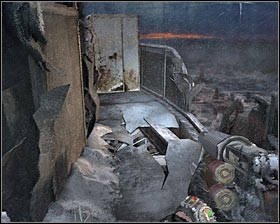
Remember that you shouldn't make any stops along the way, so you won't be an easy target for the monsters. Locate a broken staircase #1 and make your way to the upper level. Head forward here. Once again you'll have to choose a passageway found near the edge of the building #2.
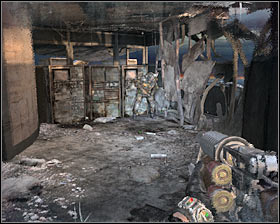
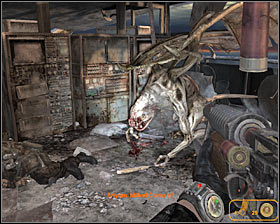
It shouldn't take long until you've located your partner #1. Sadly you won't be allowed to cooperate with him, because you're going to be attacked by a flying monster soon. Kill the beast #2 before it manages to finish off your colleague. Talk to your injured partner - he'll ask you to continue the mission on your own.
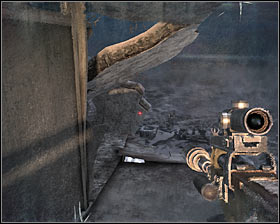
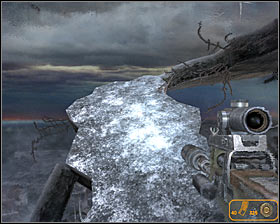
You must now choose a passageway located near the demon's body #1. There's an entrance to a ventilation shaft along the way, but you may as well ignore it. Instead keep heading forward and then turn around to get to the upper floor #2.
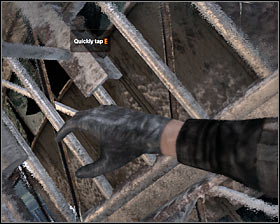
Approach a ladder found not far from here #1 and use it. You'll have to be careful, because the ladder will star falling apart soon and this means you'll have to keep pressing the action key rapidly #2 to save the main character from certain death. Repeat this a few more times.
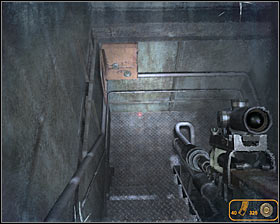
Get to the top and then start moving forward. Eventually you should be able to locate an entrance to the tower #1. Start off by heading towards a lower floor where you should locate a locker and pick up gas mask filters #2. Go back up and this time proceed towards upper floors.
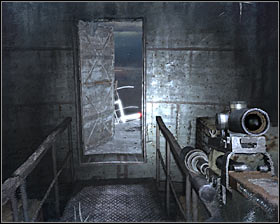
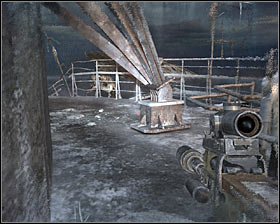
Ignore image distortions and head outside #1 to continue exploring the tower. There's only one passageway leading to your destination and you can always use a compass, so you shouldn't get lost. Ignore a new flying beast and instead hold the crouch key to crawl under several obstacles #2.
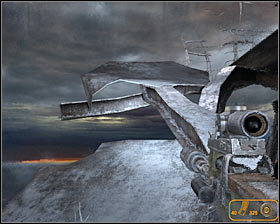
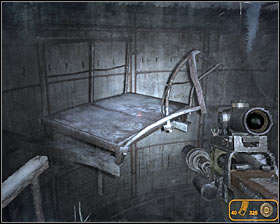
Proceed towards a small balcony #1 carefully and keep heading forward until you've found a new entrance to the tower. Once you're inside you'll have to start making jumps towards small platforms #2.
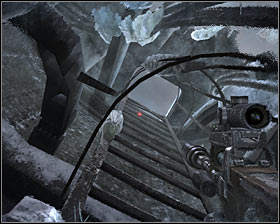
Be careful, because you'll have to take part in a mini-game after you've tried landing on the last platform #1. Keep pressing the action key repeatedly to save the main character from certain death. Repeat the mini-game several more times and then use a new ladder #2.
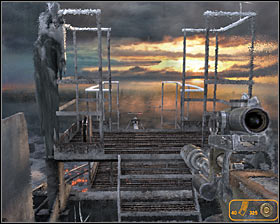
Ignore a new vision and use a ladder #1 to get to the top of the tower. You must now approach a small metal arm #2 where Artyom will automatically put down the guidance system. Watch several new cut-scenes.
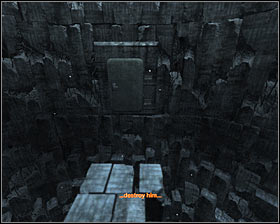
You'll regain control over the main character in a dark room. Start off by exploring four passageway which lead to small doors #1. Make sure to move in a straight line, because otherwise you may fall down and die. Opening two doors will uncover a wall and the remaining two will uncover bigger areas #2. Ignore them and go back to the starting point.
Approach one of the closed doors again and this time you should notice a weird looking creature in front of you #1. Go towards it and you should be transported to a new area. You'll have to start exploring something that looks like a huge labyrinth #2.

During this entire scene you'll have to be running away from the alien creature which will be surrounded by a red light #1, because approaching it would result in Artyom's death. You should know that this hostile won't always stay behind you, because sometimes you may be transported to a different area and you'll notice it standing directly in front of you. Make sure to act quickly in these types of situations. Always move towards a corridor surrounded by a blue light #2.
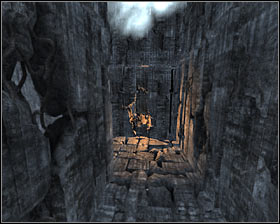
Eventually you'll get to an area where you'll notice a wall with a large crack on it #1. Turn left twice, so that you'll return to this wall. You must now turn around and start moving in the opposite direction, turning right at least twice. If you've done everything according to the plan you'll end up in a long corridor again #2.
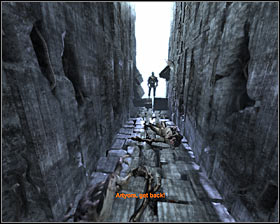
Keep moving forward until you've reached a junction. DON'T choose the left passageway #1, because this is a trap. Instead proceed to your right #2, heading towards one of your allies surrounded by blue light.
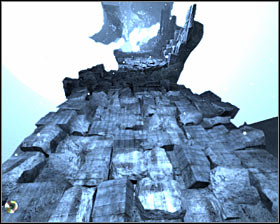
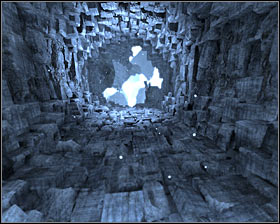
Wait until you're transported to an entirely new area. You still have to be moving forward here, however you will be forced to perform several jumps along the way #1. Enter the tunnel #2 and head straight.
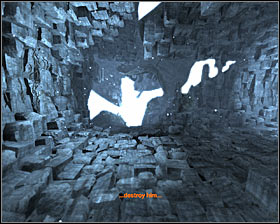
Remember about choosing correct corridors, so that you'll continue avoiding the alien creature. You'll soon reach a junction #1 and you should choose a passageway located to your right (the other one leads to an abyss). Get ready to perform several new jumps here #2.
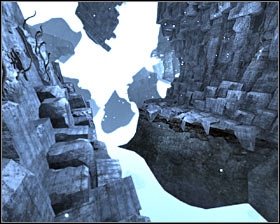
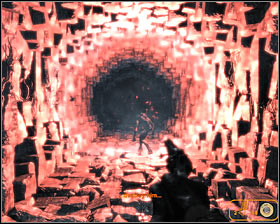
Remain close to the left wall after reaching an abyss #1. Head forward and you should be able to make a jump towards a ledge seen to your right. Keep going straight until you're rewarded with a new cut-scene. As soon as the cut-scene has ended use a revolver to kill an alien creature heading your way #2 (aim for the creature's head if you want to get rid of it faster).
Killing the creature will allow you to proceed with the ending. If you've chosen If it's hostile, you kill it ending you won't have do anything else and if you've chosen Enlightened ending you'll have to use a revolver to hit a guidance system device. Congratulations!
If it's hostile, you kill it is a default one and you won't have to perform any specific actions to unlock it.
Enlightened is an alternative one and you'll have to make some preparations (explained below) in order to unlock it.
You should know that meeting the requirements for the Enlightened ending doesn't necessarily mean that you'll have to choose it at the end of the game, because you will be allowed to make a choice between both endings (more in the description of the last mission named Top).
PROLOGUE:
Hunter level - Examine all objects from the environment (this also applies to closed doors) and talk to everyone you meet. Don't forget to take a postcard from Hunter (final moments of the prologue). You can also increase your chances of unlocking the alternative ending by ignoring a revolver found in a locker (you would have to rely on your comrades to deal with all the monsters without your help).
FIRST CHAPTER:
Exhibition level - Examine all objects from the environment (this also applies to closed doors) and talk to everyone you meet. Make sure to give gold to a man asking you to help him and his son.
SECOND CHAPTER:
Riga level - Examine all objects from the environment (this also applies to closed doors) and talk to everyone you meet. Make sure to give golden bullets to all the beggars asking for your help and to a boy in exchange for him guiding you to your next destination. Decline taking gold from Bourbon (leave the money on the table after the conversation).
Market level - Examine all objects from the environment (this also applies to closed doors) and talk to everyone you meet. Give one of the beggars a golden bullet.
Dead City 1 level - Find all hidden stashes. Listen to a recording using a device found in the last room (the one you can gain access to by choosing a corridor full of traps).
Dead City 2 level - Find all hidden stashes.
THIRD CHAPTER:
Ghosts level - Examine all objects from the environment (as long as it's safe - remember that you can die if you're not careful) and always remain close to Khan to listen to his orders and comments.
Cursed level - Examine a sanctuary found at the end of the mission by interacting with all objects from the environment (this has to be done before you decide to use a ladder).
Armory level - Examine all objects from the environment (this also applies to closed doors) and talk to everyone you meet.
FOURTH CHAPTER:
Front Line level - Listen to a speech you'll witness at the beginning of the mission (near the carriage you've used to get here). Find a body near two wounded soldiers and a generator (this is where you'll have to choose between proceeding towards the bridge and using the pipes for silent approach). Free the prisoners encountered near the end of the mission.
Depot level - Kill the first guard before he manages to raise an alarm, informing his colleagues about your arrival.
Defense level - Collect a tape from a wounded commander (this can be done after the first battle with the monsters). Check the train station occupied by the creatures, especially the upper balconies and the armory.
Child level - Refuse to take a reward for bringing Sasha back to his mother (final part of the mission). Talk to some of the characters you'll meet in a safe area.
Black Station level - Finish the entire level without killing anyone. Listen to several guard conversations, especially the ones in the beginning of the mission (outpost near the traps and the right corridor near the train platform). Choose to move towards the alien creature at the end of the mission (new vision), instead of going towards a gate.
FIFTH CHAPTER:
Polis level - Examine all objects from the environment (this also applies to closed doors) and talk to everyone you meet.
SIXTH CHAPTER:
Driving to Sparta level - Examine all objects from the environment (this also applies to closed doors) and talk to everyone you meet.
Dark Star - Wait until you're rewarded with a new vision (beginning of the mission) and start moving towards an alien creature surrounded by red light.
ADDITIONAL REQUIREMENTS:
In addition to all the things mentioned above you'll also have to remember about two things - you won't be allowed to loot dead bodies and you won't be allowed to take things belonging to someone else. The only exception is gold ammunition. This requirements doesn't apply to supply chests and you'll also have a chance to resupply by purchasing items from the local vendors.
You should know that not being allowed to take anything from the corpses doesn't mean you shouldn't bother finding them. On the contrary, this may prove to be helpful in your efforts, because in some cases you'll witness short visions.


 Memoria Game Guide & Walkthrough
 Max Payne 3 Game Guide & Walkthrough
 Men of War: Vietnam Game Guide & Walkthrough
 Might & Magic: Heroes VI Game Guide & Walkthrough
 Medal of Honor: Warfighter Game Guide & Walkthrough