
This guide to Medal of Honor contains a full walkthrough, together with useful tips of the harder fights and the well hidden enemies have been marked.
To make the guide more accessible, I've implemented the following symbols:
LMB - left mouse button
RMB - right mouse button
[1], [2] - symbols corresponding to the screens above the text. One is for the left screen and two for the right.
Michal "Kwisc" Chwistek
Translated to English by Jakub "cilgan" Lasota
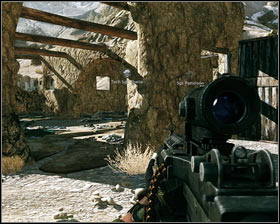
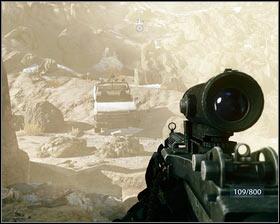
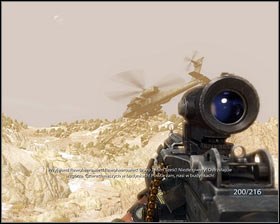
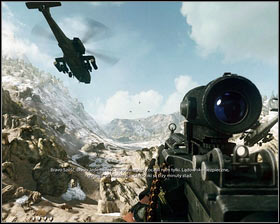
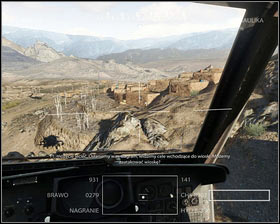
Location: Gardez, Afghanistan
Time: 3:20
Soldier: "Rabbit" - AFO Neptune
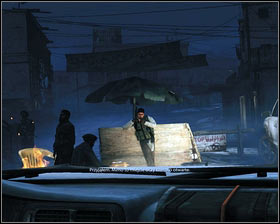
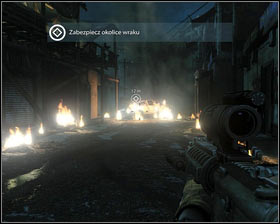
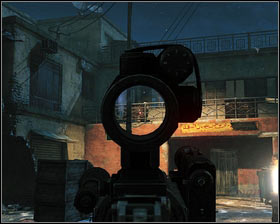
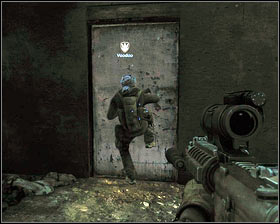
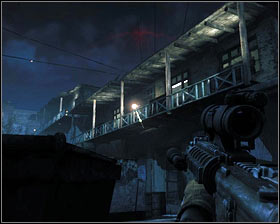
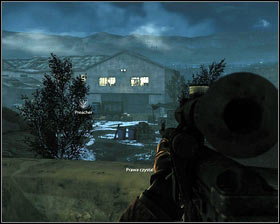
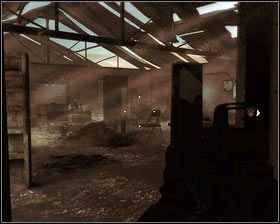
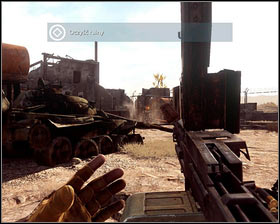
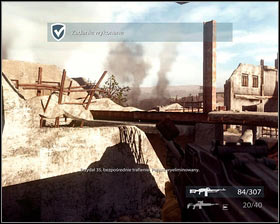
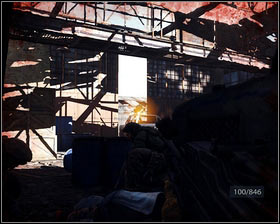
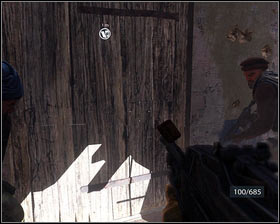
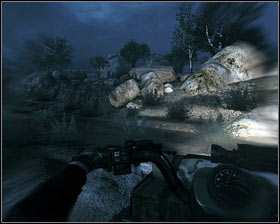
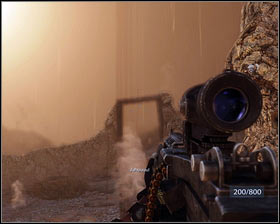
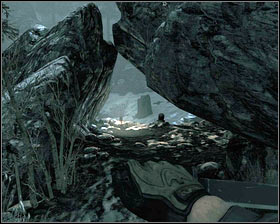
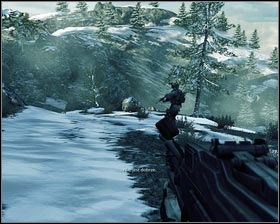
![You begin the first level in an abandoned village, where a trap has been set [1] - First In - p. 1 - Walkthrough - Medal of Honor - Game Guide and Walkthrough](https://game.lhg100.com/Article/UploadFiles/201512/2015121617440678.jpg)
You begin the first level in an abandoned village, where a trap has been set [1]. After getting out of the car, leave the building and run after Voodoo [2].
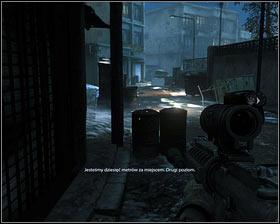
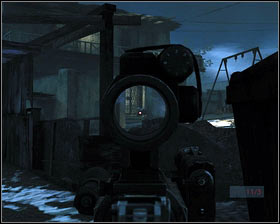
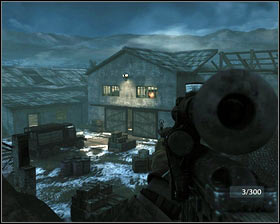
![Keep hiding behind environment and move on [1] until first enemies appear - First In - p. 1 - Walkthrough - Medal of Honor - Game Guide and Walkthrough](https://game.lhg100.com/Article/UploadFiles/201512/2015121617440603.jpg)
Keep hiding behind environment and move on [1] until first enemies appear. They will run out from the right side and start shooting you from behind a barricade [2].
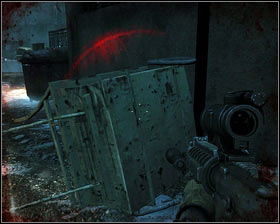
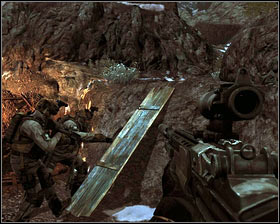
![To avoid the bullets, hide behind the nearby junk [1] - First In - p. 1 - Walkthrough - Medal of Honor - Game Guide and Walkthrough](https://game.lhg100.com/Article/UploadFiles/201512/2015121617440703.jpg)
To avoid the bullets, hide behind the nearby junk [1]. After you kill the enemies [2], move on.

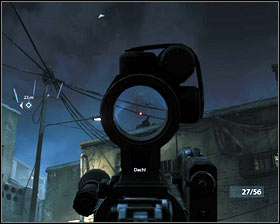
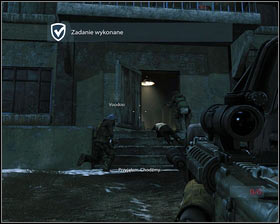
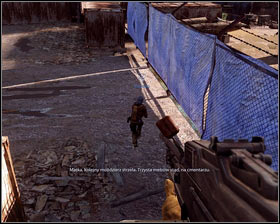
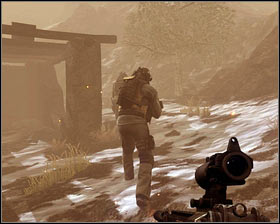
![More enemies will appear behind the corner [1] - First In - p. 1 - Walkthrough - Medal of Honor - Game Guide and Walkthrough](https://game.lhg100.com/Article/UploadFiles/201512/2015121617440747.jpg)
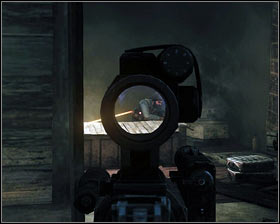
More enemies will appear behind the corner [1]. Quickly kill those which you can and carefully enter the building to the right of the cart [2]. There's one Taliban soldiers hidden inside.
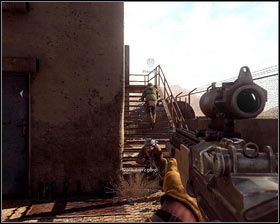
![Once he's dead, four more will appear on the balcony in front of you [1] - First In - p. 1 - Walkthrough - Medal of Honor - Game Guide and Walkthrough](https://game.lhg100.com/Article/UploadFiles/201512/2015121617440767.jpg)
Once he's dead, four more will appear on the balcony in front of you [1]. Especially look out for the enemy on the right, as he has a rocket launcher [2].
![After the fight, listen to the orders and afterwards enter the building to the right of the burning car [1] - First In - p. 1 - Walkthrough - Medal of Honor - Game Guide and Walkthrough](https://game.lhg100.com/Article/UploadFiles/201512/2015121617440741.jpg)
After the fight, listen to the orders and afterwards enter the building to the right of the burning car [1]. Hold Ctrl to crawl under the gate [2].
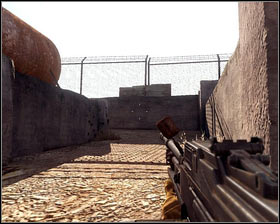
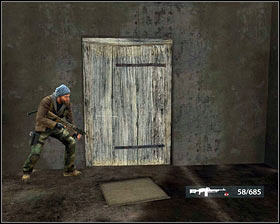
![Go along the corridor [1] and you will reach a locked door [2] - First In - p. 1 - Walkthrough - Medal of Honor - Game Guide and Walkthrough](https://game.lhg100.com/Article/UploadFiles/201512/2015121617440860.jpg)
Go along the corridor [1] and you will reach a locked door [2]. Wait for Voodoo to open them and go inside.
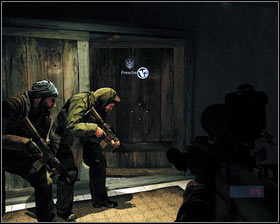
![A Taliban group is waiting right behind the corner [1] - First In - p. 1 - Walkthrough - Medal of Honor - Game Guide and Walkthrough](https://game.lhg100.com/Article/UploadFiles/201512/2015121617440892.jpg)
A Taliban group is waiting right behind the corner [1]. Hide behind the barricade, lean out by pressing E and kill them all [2].
![The first ones to die should be the enemies on the ground [1], followed by the enemy on the left [2] - First In - p. 1 - Walkthrough - Medal of Honor - Game Guide and Walkthrough](https://game.lhg100.com/Article/UploadFiles/201512/2015121617440833.jpg)
The first ones to die should be the enemies on the ground [1], followed by the enemy on the left [2].
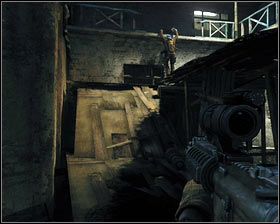
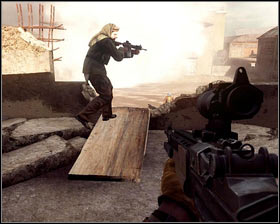
![Once you kill them, more will come in through the balcony in front of you [1] - First In - p. 1 - Walkthrough - Medal of Honor - Game Guide and Walkthrough](https://game.lhg100.com/Article/UploadFiles/201512/2015121617440868.jpg)
Once you kill them, more will come in through the balcony in front of you [1]. After the fight move on, break down the door by pressing F and go into the building [2].
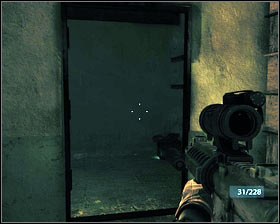
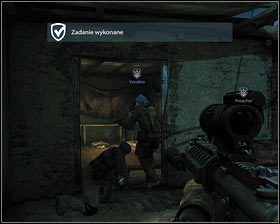
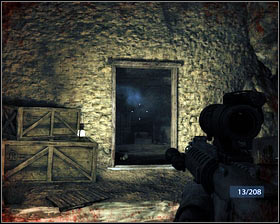
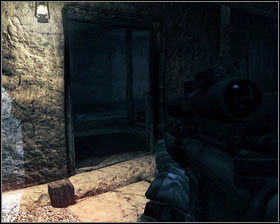
![Once the door is open, kill the enemy behind the cardboard boxes on the right [1] - First In - p. 1 - Walkthrough - Medal of Honor - Game Guide and Walkthrough](https://game.lhg100.com/Article/UploadFiles/201512/2015121617440931.jpg)
Once the door is open, kill the enemy behind the cardboard boxes on the right [1]. There are fuses inside the room [2].
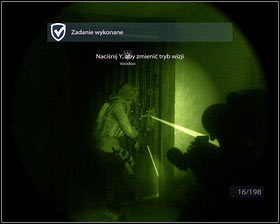
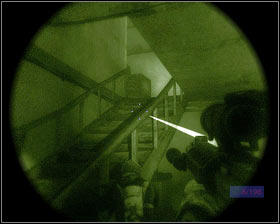
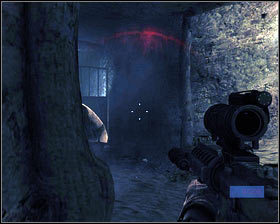
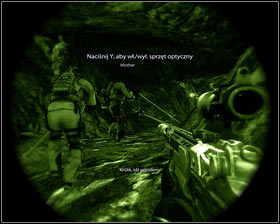
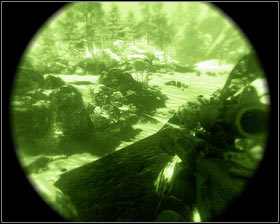
![Destroy them with and turn on the night vision (Y) [1] - First In - p. 1 - Walkthrough - Medal of Honor - Game Guide and Walkthrough](https://game.lhg100.com/Article/UploadFiles/201512/2015121617440939.jpg)
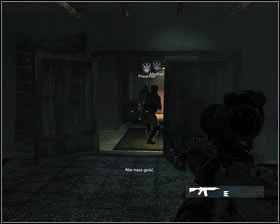
Destroy them with and turn on the night vision (Y) [1]. Go through the door and keep going forward, to the next room [2].
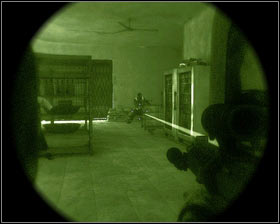
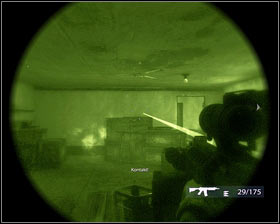
![Get rid of the enemies inside [1] using the knife - First In - p. 1 - Walkthrough - Medal of Honor - Game Guide and Walkthrough](https://game.lhg100.com/Article/UploadFiles/201512/2015121617440929.jpg)
Get rid of the enemies inside [1] using the knife. To do it, just approach an enemy and press X [2]. The others will start shooting in panic, so quickly move away behind the nearest cover and flank the enemies.

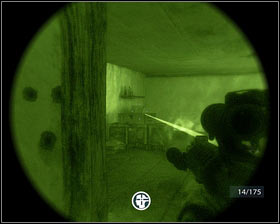
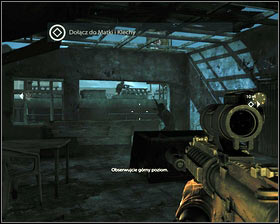
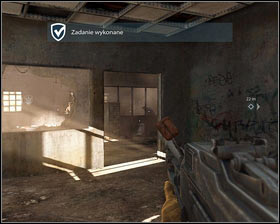
![Once they're all dead, head to the room on the left [1] - First In - p. 2 - Walkthrough - Medal of Honor - Game Guide and Walkthrough](https://game.lhg100.com/Article/UploadFiles/201512/2015121617440915.jpg)
Once they're all dead, head to the room on the left [1]. There's a bit more enemies in the room, so eliminate them with quick series [2].
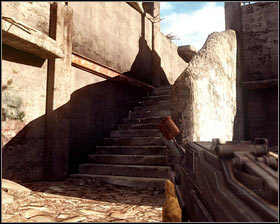
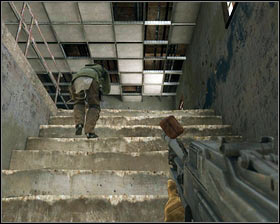
![After the fight, go up the stairs [1], where another enemy awaits you tight behind the corner - First In - p. 2 - Walkthrough - Medal of Honor - Game Guide and Walkthrough](https://game.lhg100.com/Article/UploadFiles/201512/2015121617441057.jpg)
After the fight, go up the stairs [1], where another enemy awaits you tight behind the corner. Kill him and break down the door at the end of the corridor [2].
There are two enemies hidden inside the room. Get rid of them before entering. The first one is behind the crates on the right [1] and the second one of the left [2].
![Having arrived at the balcony [1], deactivate the night vision and turn left [2] - First In - p. 2 - Walkthrough - Medal of Honor - Game Guide and Walkthrough](https://game.lhg100.com/Article/UploadFiles/201512/2015121617441049.jpg)
Having arrived at the balcony [1], deactivate the night vision and turn left [2].
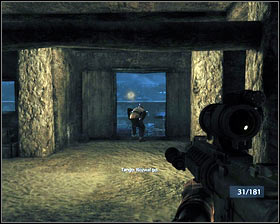
![There's another enemy in the next room [1] - First In - p. 2 - Walkthrough - Medal of Honor - Game Guide and Walkthrough](https://game.lhg100.com/Article/UploadFiles/201512/2015121617441155.jpg)
There's another enemy in the next room [1]. Once he's dead, get out through the door of the left and go up the stairs [2].
![Once outside, you should be able to easily get rid of the enemies [1] who are busy with fighting your companions - First In - p. 2 - Walkthrough - Medal of Honor - Game Guide and Walkthrough](https://game.lhg100.com/Article/UploadFiles/201512/2015121617441118.jpg)
Once outside, you should be able to easily get rid of the enemies [1] who are busy with fighting your companions. Kill them all and go right, following Voodoo all the time [2].
Once you reunite with the other members of your team, start moving forward [1] while hiding behind covers and sticking to the right side [2].
![This way you will approach the enemies from behind - quickly eliminate the two Taliban soldiers on the roof [1] - First In - p. 2 - Walkthrough - Medal of Honor - Game Guide and Walkthrough](https://game.lhg100.com/Article/UploadFiles/201512/2015121617441164.jpg)
This way you will approach the enemies from behind - quickly eliminate the two Taliban soldiers on the roof [1]. Afterwards a missile will hit the building next to you and you'll fall down [2].
![Listen to what your comrades have to say and go outside through the nearby door [1] - First In - p. 2 - Walkthrough - Medal of Honor - Game Guide and Walkthrough](https://game.lhg100.com/Article/UploadFiles/201512/2015121617441269.jpg)
Listen to what your comrades have to say and go outside through the nearby door [1]. Once downstairs, quickly turn to the right [2].
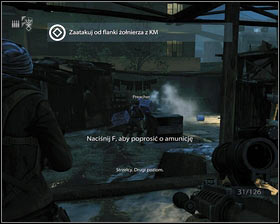
![Start off with killing the enemy on the roof [1], afterwards the two others below [2] - First In - p. 2 - Walkthrough - Medal of Honor - Game Guide and Walkthrough](https://game.lhg100.com/Article/UploadFiles/201512/2015121617441226.jpg)
Start off with killing the enemy on the roof [1], afterwards the two others below [2]. Once they're dead, run after Voodoo.
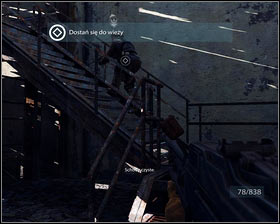
![To climb the wall [1], approach it and press F to catch your companion's hand [2] - First In - p. 2 - Walkthrough - Medal of Honor - Game Guide and Walkthrough](https://game.lhg100.com/Article/UploadFiles/201512/2015121617441282.jpg)
To climb the wall [1], approach it and press F to catch your companion's hand [2].
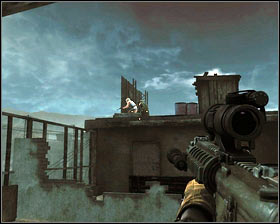
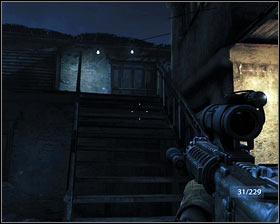
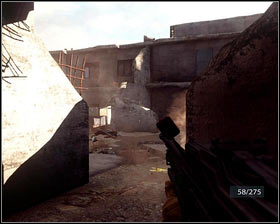
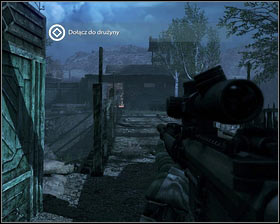
![Keep following the rest of the team [1] and you will reach a square [2] with lots of fighting waiting for you there - First In - p. 2 - Walkthrough - Medal of Honor - Game Guide and Walkthrough](https://game.lhg100.com/Article/UploadFiles/201512/2015121617441215.jpg)
Keep following the rest of the team [1] and you will reach a square [2] with lots of fighting waiting for you there.
Quickly hide behind the container. Begin with the enemy on the right balcony [1] and afterwards consecutively kill the other. Pay special attention to the left side, where an enemy with grenades will appear at some point [2]. If he manages to throw one at you, quickly move to behind the nearby wall.

![Once the last enemy - hidden behind the car on the left [1] - is dead, more will come onto the terrace in front of you - First In - p. 3 - Walkthrough - Medal of Honor - Game Guide and Walkthrough](https://game.lhg100.com/Article/UploadFiles/201512/2015121617441320.jpg)
Once the last enemy - hidden behind the car on the left [1] - is dead, more will come onto the terrace in front of you. Hide behind the truck [2] and wait for your companions to blow out the gate.
After the smoke falls, go through the gate and kill two enemies. One is to the right and the second to the left of the entrance. A couple second later more enemies will come out of the building [1]. Eliminate them all and enter the room. Keep following your companions to the room where Tariq was to be held [2]. Open the door by pressing F and watch a short cutscene.
![Once it ends, leave the building by following the rest of your team [1] - First In - p. 3 - Walkthrough - Medal of Honor - Game Guide and Walkthrough](https://game.lhg100.com/Article/UploadFiles/201512/2015121617441407.jpg)
Once it ends, leave the building by following the rest of your team [1]. If you run low on ammo, replenish it by approaching one of your companions and pressing F. once downstairs, keep turning right. First enemies will appear after crossing the metal ramp [2].
![Quickly kill those coming out of the wooden storage house [1] and then move on to the ones behind the corner on the right [2] - First In - p. 3 - Walkthrough - Medal of Honor - Game Guide and Walkthrough](https://game.lhg100.com/Article/UploadFiles/201512/2015121617441411.jpg)
Quickly kill those coming out of the wooden storage house [1] and then move on to the ones behind the corner on the right [2].
![After clearing the area move forward, go up the stairs [1] and follow your teammates to the locked gate [2] - First In - p. 3 - Walkthrough - Medal of Honor - Game Guide and Walkthrough](https://game.lhg100.com/Article/UploadFiles/201512/2015121617441484.jpg)
After clearing the area move forward, go up the stairs [1] and follow your teammates to the locked gate [2]. Don't approach it just yet, as it's going to be bombed by the air force.
![After the explosion [1], run to the other side - First In - p. 3 - Walkthrough - Medal of Honor - Game Guide and Walkthrough](https://game.lhg100.com/Article/UploadFiles/201512/2015121617441574.jpg)
After the explosion [1], run to the other side. Hide behind the car and eliminate the nearest enemies and afterwards move on, while avoiding the machinegun fire [2].
At some point you will receive an order to flank the enemies from the left. Do it when only your companions blow out the truck [1]. The bank entrance [2] is being protected by one enemy. Kill him quickly and go inside.
![The next enemy awaits for you at the upper floor [1] - First In - p. 3 - Walkthrough - Medal of Honor - Game Guide and Walkthrough](https://game.lhg100.com/Article/UploadFiles/201512/2015121617441549.jpg)
The next enemy awaits for you at the upper floor [1]. After reaching the end of the corridor, wait for your companion and climb up with his help [2].
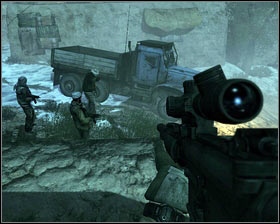
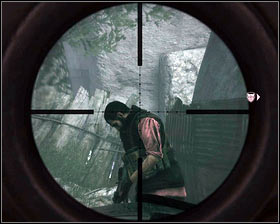
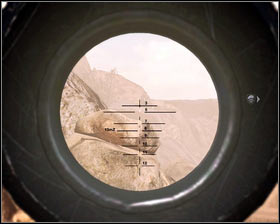
![Kill two more enemies there [1] and pick up the sniper rifle dropped by one of them (hold F) [2] - First In - p. 4 - Walkthrough - Medal of Honor - Game Guide and Walkthrough](https://game.lhg100.com/Article/UploadFiles/201512/2015121617441531.jpg)
Kill two more enemies there [1] and pick up the sniper rifle dropped by one of them (hold F) [2].
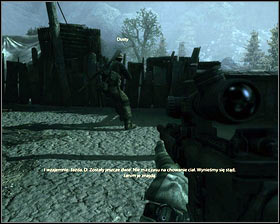
![Using it, kill the last enemy, hidden in the nearby trench [1] [2] - First In - p. 4 - Walkthrough - Medal of Honor - Game Guide and Walkthrough](https://game.lhg100.com/Article/UploadFiles/201512/2015121617441639.jpg)
Using it, kill the last enemy, hidden in the nearby trench [1] [2].
![Once he's dead, turn left [1] to clear the way for the rest of your team - First In - p. 4 - Walkthrough - Medal of Honor - Game Guide and Walkthrough](https://game.lhg100.com/Article/UploadFiles/201512/2015121617441642.jpg)
Once he's dead, turn left [1] to clear the way for the rest of your team. Firstly get rid of the enemies inside the building and then those hidden behind the car [2].
![After the fight move left, clear out the next square [1] and open the nearby door [2] - First In - p. 4 - Walkthrough - Medal of Honor - Game Guide and Walkthrough](https://game.lhg100.com/Article/UploadFiles/201512/2015121617441677.jpg)
After the fight move left, clear out the next square [1] and open the nearby door [2]. Reunite with the rest of the team.
![Follow your companions [1] to reach a big warehouse [2] - First In - p. 4 - Walkthrough - Medal of Honor - Game Guide and Walkthrough](https://game.lhg100.com/Article/UploadFiles/201512/2015121617441783.jpg)
Follow your companions [1] to reach a big warehouse [2].
![Inside you will find fragmentation grenades, pick them up by pressing F [1] - First In - p. 4 - Walkthrough - Medal of Honor - Game Guide and Walkthrough](https://game.lhg100.com/Article/UploadFiles/201512/2015121617441717.jpg)
Inside you will find fragmentation grenades, pick them up by pressing F [1]. Turn left behind the next door, where a group of enemies I waiting for you [2]. Kill them and enter the building at the end of the road
![Once inside [1], stick to the left side and you should be able to flank [2] and finish off the group of Arabs - First In - p. 4 - Walkthrough - Medal of Honor - Game Guide and Walkthrough](https://game.lhg100.com/Article/UploadFiles/201512/2015121617441793.jpg)
Once inside [1], stick to the left side and you should be able to flank [2] and finish off the group of Arabs.
![Once they're dead, go outside [1] and open the door on the left [2] - First In - p. 4 - Walkthrough - Medal of Honor - Game Guide and Walkthrough](https://game.lhg100.com/Article/UploadFiles/201512/2015121617441729.jpg)
Once they're dead, go outside [1] and open the door on the left [2].
![Inside time will slow down [1] and you will have to use the revolver to kill the terrorist holding Tariq - First In - p. 4 - Walkthrough - Medal of Honor - Game Guide and Walkthrough](https://game.lhg100.com/Article/UploadFiles/201512/2015121617441866.jpg)
Inside time will slow down [1] and you will have to use the revolver to kill the terrorist holding Tariq. Aim carefully, so you don't hurt the hostage [2].
![Afterwards approach the truck [1] and finish the level [2] - First In - p. 4 - Walkthrough - Medal of Honor - Game Guide and Walkthrough](https://game.lhg100.com/Article/UploadFiles/201512/2015121617441874.jpg)
Afterwards approach the truck [1] and finish the level [2].
Location: Bagram Airfield, Afghanistan
Time: 8:37
Soldier: "Rabbit" - AFO Neptune
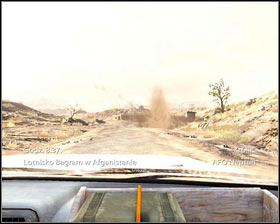
![You begin this level in a car [1] and your task is to protect it - Breaking Bagram - p. 1 - Walkthrough - Medal of Honor - Game Guide and Walkthrough](https://game.lhg100.com/Article/UploadFiles/201512/2015121617441801.jpg)
You begin this level in a car [1] and your task is to protect it. The first three enemy groups will be on the right side of the road, so aim the gun there [2].
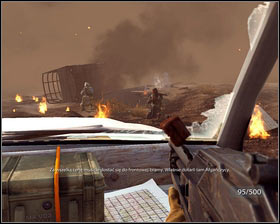
![After you kill the terrorists [1], a pickup will approach from the right [2] - Breaking Bagram - p. 1 - Walkthrough - Medal of Honor - Game Guide and Walkthrough](https://game.lhg100.com/Article/UploadFiles/201512/2015121617441886.jpg)
After you kill the terrorists [1], a pickup will approach from the right [2].
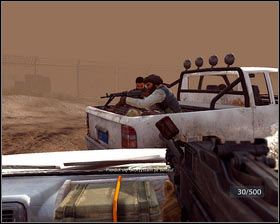
![Kill the enemies onboard [1] and quickly turn to the left, where another vehicle will appear [2] - Breaking Bagram - p. 1 - Walkthrough - Medal of Honor - Game Guide and Walkthrough](https://game.lhg100.com/Article/UploadFiles/201512/2015121617441981.jpg)
Kill the enemies onboard [1] and quickly turn to the left, where another vehicle will appear [2]. Destroy it and you will automatically switch to the roof gun.
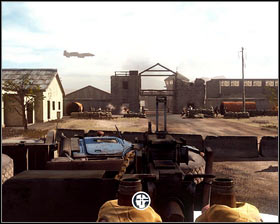
![Use it to kill the enemies by the gate [1], firstly taking care of the incoming truck [2] - Breaking Bagram - p. 1 - Walkthrough - Medal of Honor - Game Guide and Walkthrough](https://game.lhg100.com/Article/UploadFiles/201512/2015121617441903.jpg)
Use it to kill the enemies by the gate [1], firstly taking care of the incoming truck [2].
![Leave the vehicle and stick to the right side [1], while eliminating the enemies - Breaking Bagram - p. 1 - Walkthrough - Medal of Honor - Game Guide and Walkthrough](https://game.lhg100.com/Article/UploadFiles/201512/2015121617441972.jpg)
Leave the vehicle and stick to the right side [1], while eliminating the enemies. At some point two terrorists will appear on the first floor of the building in front of you [2]. Try to kill them as quickly as possible, as one of them has an RPG.
![Once they're dead, move on using the trenches on the right [1] - Breaking Bagram - p. 1 - Walkthrough - Medal of Honor - Game Guide and Walkthrough](https://game.lhg100.com/Article/UploadFiles/201512/2015121617442053.jpg)
Once they're dead, move on using the trenches on the right [1]. This way you will flank the enemies and killing them will be a piece of cake [2].
![After reuniting with the rest of the team move forward and hide between the ruins [1] - Breaking Bagram - p. 1 - Walkthrough - Medal of Honor - Game Guide and Walkthrough](https://game.lhg100.com/Article/UploadFiles/201512/2015121617442033.jpg)
After reuniting with the rest of the team move forward and hide between the ruins [1]. There are stairs behind the blue barrels [2].

![Climb them up and go through the door which Voodoo will break down [1] - Breaking Bagram - p. 1 - Walkthrough - Medal of Honor - Game Guide and Walkthrough](https://game.lhg100.com/Article/UploadFiles/201512/2015121617442046.jpg)
Climb them up and go through the door which Voodoo will break down [1]. Once on the other side, you will have to indicate the targets for the air force. Aim for the gate and hold down LMB [2].
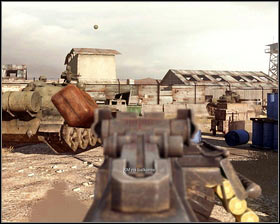
![Once the rocket hits the target [1], repeat the operation on the enemy vehicle [2] - Breaking Bagram - p. 1 - Walkthrough - Medal of Honor - Game Guide and Walkthrough](https://game.lhg100.com/Article/UploadFiles/201512/2015121617442119.jpg)
Once the rocket hits the target [1], repeat the operation on the enemy vehicle [2].
![Afterwards jump down [1], where more enemies await you [2] - Breaking Bagram - p. 1 - Walkthrough - Medal of Honor - Game Guide and Walkthrough](https://game.lhg100.com/Article/UploadFiles/201512/2015121617442167.jpg)
Afterwards jump down [1], where more enemies await you [2].
![Kill them and run up the stairs on the left [1] - Breaking Bagram - p. 1 - Walkthrough - Medal of Honor - Game Guide and Walkthrough](https://game.lhg100.com/Article/UploadFiles/201512/2015121617442159.jpg)
Kill them and run up the stairs on the left [1]. There will be more anomies behind the right corner [2]. Take them out quickly and move on to the ones below.
![Take care of those on buildings in the first place [1], as one of them has an RPG - Breaking Bagram - p. 2 - Walkthrough - Medal of Honor - Game Guide and Walkthrough](https://game.lhg100.com/Article/UploadFiles/201512/2015121617442262.jpg)
Take care of those on buildings in the first place [1], as one of them has an RPG. Once they're all dead, move on towards the enemy position, where you will find some frag grenades [2].
![Replenish your ammo and kill the enemies hidden behind the blue fence [1] - Breaking Bagram - p. 2 - Walkthrough - Medal of Honor - Game Guide and Walkthrough](https://game.lhg100.com/Article/UploadFiles/201512/2015121617442203.jpg)
Replenish your ammo and kill the enemies hidden behind the blue fence [1]. Don't forget about the mortar crew on the right [2].
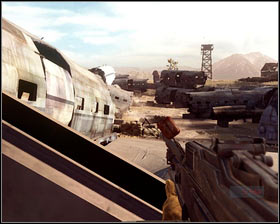
![After the fight jump down [1], go through the fence (it will be opened by one of the team members) [2] and run left, hiding behind the plane wrecks - Breaking Bagram - p. 2 - Walkthrough - Medal of Honor - Game Guide and Walkthrough](https://game.lhg100.com/Article/UploadFiles/201512/2015121617442280.jpg)
After the fight jump down [1], go through the fence (it will be opened by one of the team members) [2] and run left, hiding behind the plane wrecks.
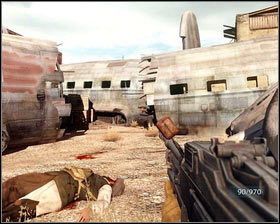
Your target is the last mortar [1]. Once you destroy it move on, keeping your eyes opened for any snipers lurking inside the wrecks [2].
![Follow the rest of the team to another square filled with terrorists [1] - Breaking Bagram - p. 2 - Walkthrough - Medal of Honor - Game Guide and Walkthrough](https://game.lhg100.com/Article/UploadFiles/201512/2015121617442321.jpg)
Follow the rest of the team to another square filled with terrorists [1]. Avoid the grenades, kill those on the ground and afterwards take care of the machinegun crew on the left [2].
![Sneak between the covers and head towards the building with the machinegun [1] - Breaking Bagram - p. 2 - Walkthrough - Medal of Honor - Game Guide and Walkthrough](https://game.lhg100.com/Article/UploadFiles/201512/2015121617442312.jpg)
Sneak between the covers and head towards the building with the machinegun [1]. Inside there's another group of enemies waiting to be killed. During the fight it's best to aim at the red barrels, the explosion of which should eliminate a few of them [2].
![At some point a machinegun-equipped car will drive into the room [1] - Breaking Bagram - p. 2 - Walkthrough - Medal of Honor - Game Guide and Walkthrough](https://game.lhg100.com/Article/UploadFiles/201512/2015121617442302.jpg)
At some point a machinegun-equipped car will drive into the room [1]. Quickly hide and kill the terrorist by flanking him or blow up the car with a couple series from your gun [2].
![Having killed all enemies, go upstairs [1] and listen to a short dialogue - Breaking Bagram - p. 2 - Walkthrough - Medal of Honor - Game Guide and Walkthrough](https://game.lhg100.com/Article/UploadFiles/201512/2015121617442377.jpg)
Having killed all enemies, go upstairs [1] and listen to a short dialogue. Once it ends, wait for the door to open [1] and go down.
![Enemies will start shooting you from the left [1] - Breaking Bagram - p. 2 - Walkthrough - Medal of Honor - Game Guide and Walkthrough](https://game.lhg100.com/Article/UploadFiles/201512/2015121617442410.jpg)
Enemies will start shooting you from the left [1]. Hide behind the nearby tank to avoid being hit [2].
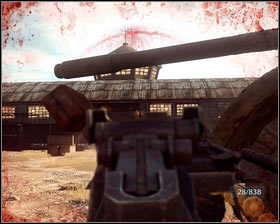
![Blow up the barrel beside the machinegun to destroy it [1] and then get rid of the other enemies [2] - Breaking Bagram - p. 2 - Walkthrough - Medal of Honor - Game Guide and Walkthrough](https://game.lhg100.com/Article/UploadFiles/201512/2015121617442469.jpg)
Blow up the barrel beside the machinegun to destroy it [1] and then get rid of the other enemies [2]. Keep shooting all the time and move towards the destroyed gun.
![After you reach the building [1], wait for the door to be opened [2] and run inside - Breaking Bagram - p. 3 - Walkthrough - Medal of Honor - Game Guide and Walkthrough](https://game.lhg100.com/Article/UploadFiles/201512/2015121617442485.jpg)
After you reach the building [1], wait for the door to be opened [2] and run inside.
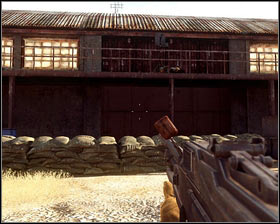
![There's going to be lots of enemies [1] but the covers are big [2], so you shouldn't have any problems - Breaking Bagram - p. 3 - Walkthrough - Medal of Honor - Game Guide and Walkthrough](https://game.lhg100.com/Article/UploadFiles/201512/2015121617442549.jpg)
There's going to be lots of enemies [1] but the covers are big [2], so you shouldn't have any problems.
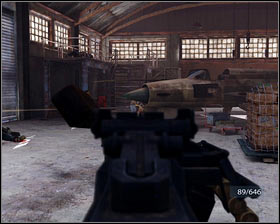
Kill everyone and move right. Eliminate the next group of enemies by shooting the red and yellow gas canisters [1]. Once you get to the other side of the hangar, wait for the door to be opened and leave the building [2].
![Snipers will start shooting at you behind the left corner [1] - Breaking Bagram - p. 3 - Walkthrough - Medal of Honor - Game Guide and Walkthrough](https://game.lhg100.com/Article/UploadFiles/201512/2015121617442533.jpg)
Snipers will start shooting at you behind the left corner [1]. Take out your own sniper rifle and get rid of them with a couple accurate shots [2], while keeping an eye on the rockets being fired in your direction.
![Once you're done, run up the nearby stairs [1] and kill more terrorists from there [2] - Breaking Bagram - p. 3 - Walkthrough - Medal of Honor - Game Guide and Walkthrough](https://game.lhg100.com/Article/UploadFiles/201512/2015121617442543.jpg)
Once you're done, run up the nearby stairs [1] and kill more terrorists from there [2].
![After clearing the area jump down [1], run towards the door in front of you and break it down with a kick [2] - Breaking Bagram - p. 3 - Walkthrough - Medal of Honor - Game Guide and Walkthrough](https://game.lhg100.com/Article/UploadFiles/201512/2015121617442607.jpg)
After clearing the area jump down [1], run towards the door in front of you and break it down with a kick [2].
![There's an enemy group waiting inside [1] - Breaking Bagram - p. 3 - Walkthrough - Medal of Honor - Game Guide and Walkthrough](https://game.lhg100.com/Article/UploadFiles/201512/2015121617442695.jpg)
There's an enemy group waiting inside [1]. Try sticking to the right side during the fight [2], which will allow you to avoid the grenades.
Follow the rest of the squad onto the upper floor. Hide behind the wall and get rid of the enemies. Once they're all dead, break down the door on the left [2].
Start shooting right after entering the room to kill the unsuspecting enemies. Your companion will open the next door [1] and show off an immediate execution. The stairs will lead you onto a tower, where you will have to manage an air strike [2].
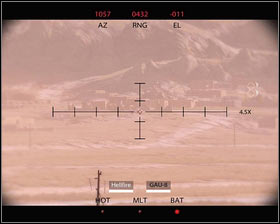
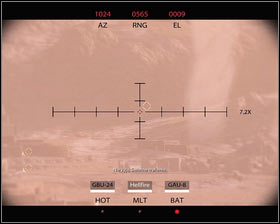
![Start with attacking the ruins in the middle [1] with the GAU-8 - Breaking Bagram - p. 3 - Walkthrough - Medal of Honor - Game Guide and Walkthrough](https://game.lhg100.com/Article/UploadFiles/201512/2015121617442759.jpg)
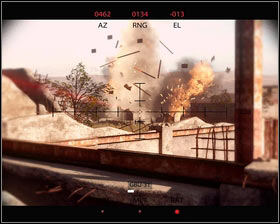
Start with attacking the ruins in the middle [1] with the GAU-8. Once the missiles hit the target, change the weapon (scroll) to the Hellfire missiles and use them to destroy the two trucks on the right and left [2]. To do that, aim at the vehicle and hold down the left mouse button. After the square appears, move on to the next target.
The last available weapon is the GBU-24. Aim it at the enemies with RPGs by pressing LMB [1]. The next section of the level consists of destroying the tanks incoming from the right. Use the Hellfire missions here [2]. Once you're done with that, all three types will start appearing at once. Use the appropriate weapons to deal with the tanks, trucks and RPG equipped enemies. Keep an eye on the whole area, so that no vehicle reaches the tower. Once you destroy all of them, the next level will begin.
Location: Gardez, Grid 15501000
Time: 3:23
Soldier: "Deuce" - AFO Wolfpack
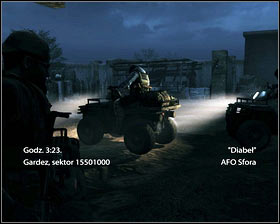
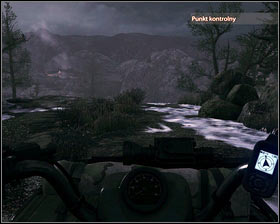
This time you will take control of "Deuce" from the "Wolfpack" group. You will begin the level behind the wheel of a quad [1]. Keep following your bearded companion, steering with WSAD and using the night vision - Y.
![The direction is being indicated by the arrow [1] on the right side of the wheel - Running with wolves... - p. 1 - Walkthrough - Medal of Honor - Game Guide and Walkthrough](https://game.lhg100.com/Article/UploadFiles/201512/2015121617442747.jpg)
The direction is being indicated by the arrow [1] on the right side of the wheel. Once your companion stops, do the same and move on after the trucks drive through [2].
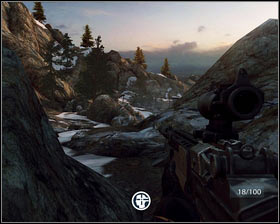
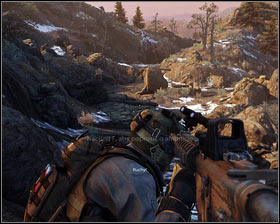
After a longer drive you will finally reach an abandoned village. Get off the vehicle and climb up the nearby hill [1]. Now your target is to provide cover for the rest of the team located on the other side of the village. Equip a sniper and start aiming in that direction [2].
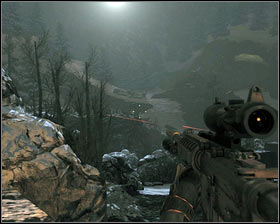
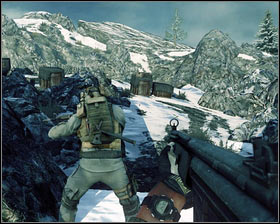
![Your first target is the terrorist on the tower [1] - Running with wolves... - p. 1 - Walkthrough - Medal of Honor - Game Guide and Walkthrough](https://game.lhg100.com/Article/UploadFiles/201512/2015121617442873.jpg)
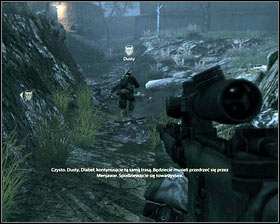
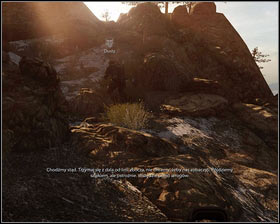
Your first target is the terrorist on the tower [1]. Take him out as fast as possible and follow Dusty to the village [2].
![There you will encounter a group of enemies [1] - Running with wolves... - p. 1 - Walkthrough - Medal of Honor - Game Guide and Walkthrough](https://game.lhg100.com/Article/UploadFiles/201512/2015121617442870.jpg)
There you will encounter a group of enemies [1]. Kill one of the enemies [2], allowing your companion to take care of the rest.
After getting to the gate, enter the building on the right [1]. Look out of the window and get rid of all the terrorists on the nearby towers [2].
Once they're dead, another group will come out. Eliminate them quickly as well [1] and join the rest of the team [2].
![After a short conversation follow Dusty [1], who will lead you back to the quads - Running with wolves... - p. 1 - Walkthrough - Medal of Honor - Game Guide and Walkthrough](https://game.lhg100.com/Article/UploadFiles/201512/2015121617442920.jpg)
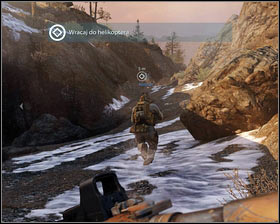
After a short conversation follow Dusty [1], who will lead you back to the quads. Get onto your vehicle by pressing F [2].
![Stop a couple hundred meters further [1] and begin the next sniping level [2] - Running with wolves... - p. 1 - Walkthrough - Medal of Honor - Game Guide and Walkthrough](https://game.lhg100.com/Article/UploadFiles/201512/2015121617442922.jpg)
Stop a couple hundred meters further [1] and begin the next sniping level [2].
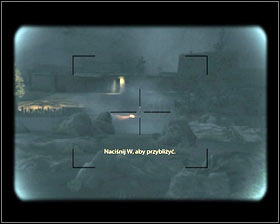
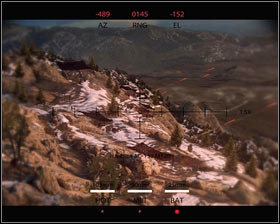
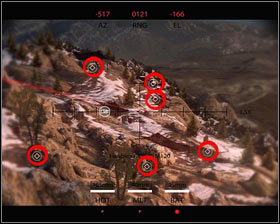
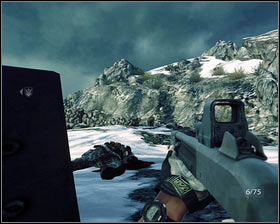
![Keep killing the enemies pointed by your companion, zooming in with W [1] and zooming out using S - Running with wolves... - p. 1 - Walkthrough - Medal of Honor - Game Guide and Walkthrough](https://game.lhg100.com/Article/UploadFiles/201512/2015121617442970.jpg)
Keep killing the enemies pointed by your companion, zooming in with W [1] and zooming out using S. If you won't be able to see the target, change the view by pressing Y [2]. Having killed all four, return onto the quad.

![After arriving at the next village [1], follow your companion [2] - Running with wolves... - p. 2 - Walkthrough - Medal of Honor - Game Guide and Walkthrough](https://game.lhg100.com/Article/UploadFiles/201512/2015121617443002.jpg)
After arriving at the next village [1], follow your companion [2].
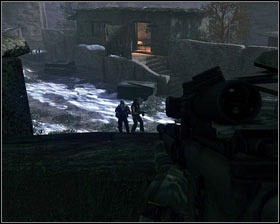
![Once you see the truck, wait for most of the guards to walk away [1] and kill the enemy standing in the door [2] - Running with wolves... - p. 2 - Walkthrough - Medal of Honor - Game Guide and Walkthrough](https://game.lhg100.com/Article/UploadFiles/201512/2015121617443041.jpg)
Once you see the truck, wait for most of the guards to walk away [1] and kill the enemy standing in the door [2].
![At the same time Dusty will mark the car and you will be able to follow him [1] while avoiding the enemies on your way [2] - Running with wolves... - p. 2 - Walkthrough - Medal of Honor - Game Guide and Walkthrough](https://game.lhg100.com/Article/UploadFiles/201512/2015121617443092.jpg)
At the same time Dusty will mark the car and you will be able to follow him [1] while avoiding the enemies on your way [2].
![Once you receive the proper order, take out one of the enemies in front of you [1] - Running with wolves... - p. 2 - Walkthrough - Medal of Honor - Game Guide and Walkthrough](https://game.lhg100.com/Article/UploadFiles/201512/2015121617443071.jpg)
Once you receive the proper order, take out one of the enemies in front of you [1]. After a short action, run to the truck on the left [2] and press F to stick a transmitter to it.

Once you're done, two enemies will approach. Take out one of them using the sniper rifle [1] and Dusty will take care of the other one. Follow your companion [2].
![At some point you will come across two more terrorists [1] - Running with wolves... - p. 2 - Walkthrough - Medal of Honor - Game Guide and Walkthrough](https://game.lhg100.com/Article/UploadFiles/201512/2015121617443180.jpg)
At some point you will come across two more terrorists [1]. Wait for them to split up and run to the building on the other side of the square on your companion's mark [2].
![Quickly kill the enemy standing there [1] and afterwards attach the transmitter to the vehicle on the left [2] - Running with wolves... - p. 2 - Walkthrough - Medal of Honor - Game Guide and Walkthrough](https://game.lhg100.com/Article/UploadFiles/201512/2015121617443119.jpg)
Quickly kill the enemy standing there [1] and afterwards attach the transmitter to the vehicle on the left [2]. Return following the same way you came here, eliminating another enemy in the building.
![While running through the path [1], once more wait for Dusty's signal and return with him to the quads [2] - Running with wolves... - p. 2 - Walkthrough - Medal of Honor - Game Guide and Walkthrough](https://game.lhg100.com/Article/UploadFiles/201512/2015121617443299.jpg)
While running through the path [1], once more wait for Dusty's signal and return with him to the quads [2].
![On your way back you will come across a group of terrorists [1] - Running with wolves... - p. 2 - Walkthrough - Medal of Honor - Game Guide and Walkthrough](https://game.lhg100.com/Article/UploadFiles/201512/2015121617443293.jpg)
On your way back you will come across a group of terrorists [1]. Take them all out as fast as possible and afterwards move left [2].
![Your companion will take care of the guard [1] and you will have to eliminate the three others a bit further [2] - Running with wolves... - p. 2 - Walkthrough - Medal of Honor - Game Guide and Walkthrough](https://game.lhg100.com/Article/UploadFiles/201512/2015121617443232.jpg)
Your companion will take care of the guard [1] and you will have to eliminate the three others a bit further [2].
![Afterwards return to your quads, climbing up with Dusty's help [1] - Running with wolves... - p. 2 - Walkthrough - Medal of Honor - Game Guide and Walkthrough](https://game.lhg100.com/Article/UploadFiles/201512/2015121617443290.jpg)
Afterwards return to your quads, climbing up with Dusty's help [1]. Drive forward all the time to reach the rest of the crew and end the mission [2].
Location: Shahikot Valley, Grid 19009210
Time: 4:38
Soldier: "Rabbit" - AFO Neptune
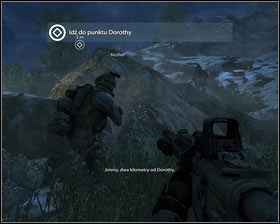
![After watching the cutscene, follow the rest of your team [1] until you see three terrorists in the distance [2] - Dorothy's a bitch - p. 1 - Walkthrough - Medal of Honor - Game Guide and Walkthrough](https://game.lhg100.com/Article/UploadFiles/201512/2015121617443309.jpg)
After watching the cutscene, follow the rest of your team [1] until you see three terrorists in the distance [2].
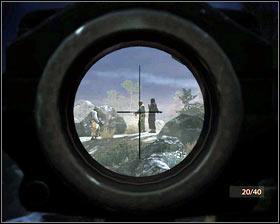
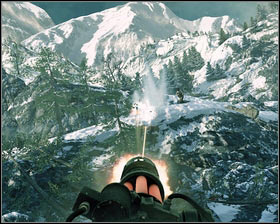
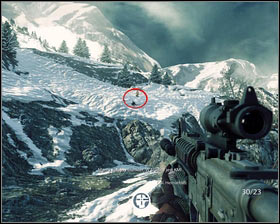
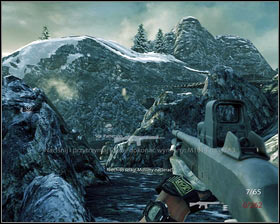
![Wit for the order and take them out with the sniper rifle [1] - Dorothy's a bitch - p. 1 - Walkthrough - Medal of Honor - Game Guide and Walkthrough](https://game.lhg100.com/Article/UploadFiles/201512/2015121617443388.jpg)
Wit for the order and take them out with the sniper rifle [1]. Once they're dead, move on while avoiding fights for the time being [2].
![Another shootout will begin by the campfire [1] - Dorothy's a bitch - p. 1 - Walkthrough - Medal of Honor - Game Guide and Walkthrough](https://game.lhg100.com/Article/UploadFiles/201512/2015121617443334.jpg)
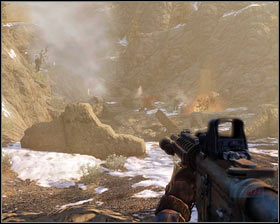
Another shootout will begin by the campfire [1]. The enemy forces are quite numerous, so remember their position to take them out as quickly as possible [2].
![A bit further there's another fight waiting for you [1], but this time on a larger distance - Dorothy's a bitch - p. 1 - Walkthrough - Medal of Honor - Game Guide and Walkthrough](https://game.lhg100.com/Article/UploadFiles/201512/2015121617443355.jpg)
A bit further there's another fight waiting for you [1], but this time on a larger distance. Kill all the enemies while hiding behind the nearby rock [2].
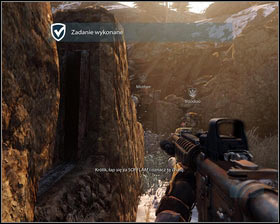
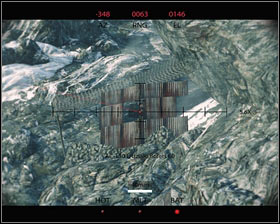
![Once the area's clear, approach the gun on the ill on the left [1] and plant the explosive by pressing F [2] - Dorothy's a bitch - p. 1 - Walkthrough - Medal of Honor - Game Guide and Walkthrough](https://game.lhg100.com/Article/UploadFiles/201512/2015121617443485.jpg)
Once the area's clear, approach the gun on the ill on the left [1] and plant the explosive by pressing F [2].
![Quickly move away, climb onto the ledge [1] and blow up the charge with the left mouse button [2] - Dorothy's a bitch - p. 1 - Walkthrough - Medal of Honor - Game Guide and Walkthrough](https://game.lhg100.com/Article/UploadFiles/201512/2015121617443497.jpg)
Quickly move away, climb onto the ledge [1] and blow up the charge with the left mouse button [2].

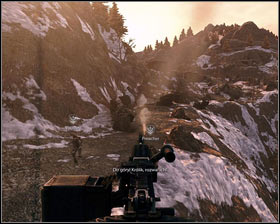
Now your task will be pointing targets for the air force. Destroy the incoming trucks this way [1]. You just need to mark one target and the rest will be destroyed together with it [2]. After the air raid, move on following your teammates.
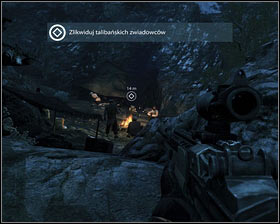
![In order to see the next enemies, turn on night vision [1] - Dorothy's a bitch - p. 1 - Walkthrough - Medal of Honor - Game Guide and Walkthrough](https://game.lhg100.com/Article/UploadFiles/201512/2015121617443589.jpg)
In order to see the next enemies, turn on night vision [1]. There are five of them [2]. Kill them as fast as possible after getting the order to not make too much noise.

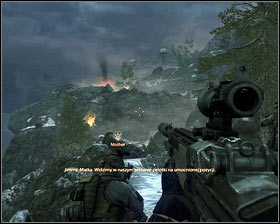
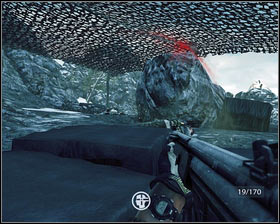
![Once they're all dead, hide behind the nearby shelter [1] and kill more incoming enemies [2] - Dorothy's a bitch - p. 2 - Walkthrough - Medal of Honor - Game Guide and Walkthrough](https://game.lhg100.com/Article/UploadFiles/201512/2015121617443562.jpg)
Once they're all dead, hide behind the nearby shelter [1] and kill more incoming enemies [2]. It'd be best to stick to the left side, as you can flank the enemies from inside the building there.
![After the fight keep moving forward, climbing up the wooden platform [1] - Dorothy's a bitch - p. 2 - Walkthrough - Medal of Honor - Game Guide and Walkthrough](https://game.lhg100.com/Article/UploadFiles/201512/2015121617443556.jpg)
After the fight keep moving forward, climbing up the wooden platform [1]. At some point you will be hit in the head by an enemy soldier [2], but luckily your companion will help you.
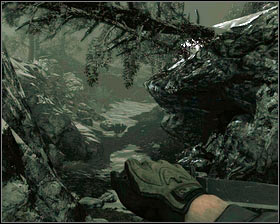
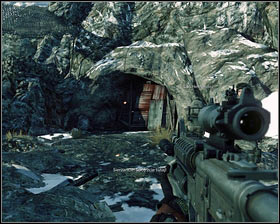
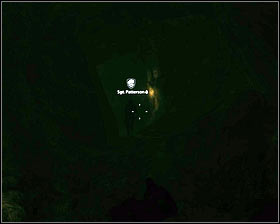
![Keep following the rest of the crew [1] and you will reach a cave [2] - Dorothy's a bitch - p. 2 - Walkthrough - Medal of Honor - Game Guide and Walkthrough](https://game.lhg100.com/Article/UploadFiles/201512/2015121617443512.jpg)
Keep following the rest of the crew [1] and you will reach a cave [2].
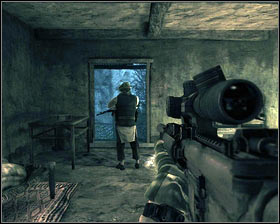
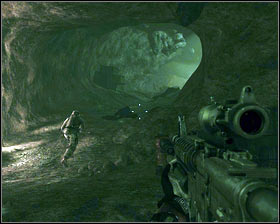
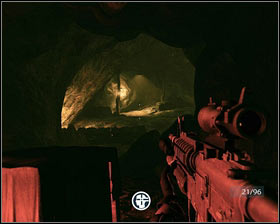
![Once inside, turn on your night vision [1] and move forward - Dorothy's a bitch - p. 2 - Walkthrough - Medal of Honor - Game Guide and Walkthrough](https://game.lhg100.com/Article/UploadFiles/201512/2015121617443584.jpg)
Once inside, turn on your night vision [1] and move forward. Right behind the corner you will come across a wounded, but armed terrorist. Kill him quickly and go outside [2].
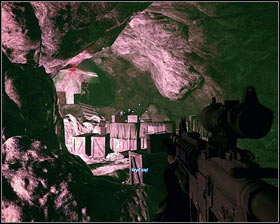
![You should now see the enemy camp [1] - Dorothy's a bitch - p. 2 - Walkthrough - Medal of Honor - Game Guide and Walkthrough](https://game.lhg100.com/Article/UploadFiles/201512/2015121617443646.jpg)
You should now see the enemy camp [1]. Shoot only after receiving the order [2].
![During the fight, you should stick to the left side [1], while checking the right one from time to time so that no one flanks you [2] - Dorothy's a bitch - p. 2 - Walkthrough - Medal of Honor - Game Guide and Walkthrough](https://game.lhg100.com/Article/UploadFiles/201512/2015121617443614.jpg)
During the fight, you should stick to the left side [1], while checking the right one from time to time so that no one flanks you [2].
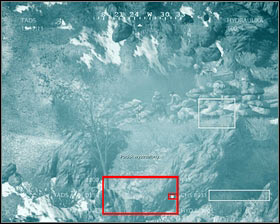
![After the fight, move on forward until you receive an order to mark the targets for the air force [1] - Dorothy's a bitch - p. 2 - Walkthrough - Medal of Honor - Game Guide and Walkthrough](https://game.lhg100.com/Article/UploadFiles/201512/2015121617443664.jpg)
After the fight, move on forward until you receive an order to mark the targets for the air force [1]. You will receive proper equipment after reaching the edge [2].
![Your targets will be shown only at the beginning, so try to memorize them more or less [1] - Dorothy's a bitch - p. 2 - Walkthrough - Medal of Honor - Game Guide and Walkthrough](https://game.lhg100.com/Article/UploadFiles/201512/2015121617443743.jpg)
Your targets will be shown only at the beginning, so try to memorize them more or less [1]. Also don't forget about the terrorists hidden on the far left [2].
![After destroying all the targets, run down and follow Voodoo [1] [2] - Dorothy's a bitch - p. 2 - Walkthrough - Medal of Honor - Game Guide and Walkthrough](https://game.lhg100.com/Article/UploadFiles/201512/2015121617443703.jpg)
After destroying all the targets, run down and follow Voodoo [1] [2].
![Upon leaving the cave [1], turn left, approach the gun [2] and kill all the terrorists on the rocks using it - Dorothy's a bitch - p. 2 - Walkthrough - Medal of Honor - Game Guide and Walkthrough](https://game.lhg100.com/Article/UploadFiles/201512/2015121617443797.jpg)
Upon leaving the cave [1], turn left, approach the gun [2] and kill all the terrorists on the rocks using it.
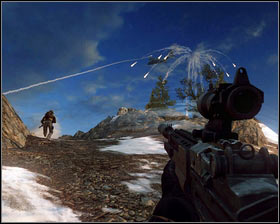
As always your first target should be the enemy with the RPG. To kill him, firstly destroy the crates protecting him [1]. You have to be quick, as otherwise he will shoot down the plane [2] and you will fail the mission.
Location: Shahikot Valley, Grid 17809020
Time: 13:10
Soldier: SPC. Dante Adams, 1st Bn 75th Ranger Regt.
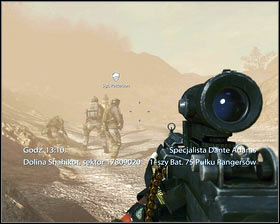
![After the level begins, keep following your companions [1] while staying near the rocks to avoid getting hit [2] - Belly of the Beast - p. 1 - Walkthrough - Medal of Honor - Game Guide and Walkthrough](https://game.lhg100.com/Article/UploadFiles/201512/2015121617443846.jpg)
After the level begins, keep following your companions [1] while staying near the rocks to avoid getting hit [2].
![Jump over the fallen tree and you will see a group of terrorists behind the corner - kill them quickly [1] - Belly of the Beast - p. 1 - Walkthrough - Medal of Honor - Game Guide and Walkthrough](https://game.lhg100.com/Article/UploadFiles/201512/2015121617443805.jpg)
Jump over the fallen tree and you will see a group of terrorists behind the corner - kill them quickly [1]. There's a big shootout waiting for you a bit later [2].
![Keep hiding behind the rocks [1] and keep moving forward, while looking out for the grenades - Belly of the Beast - p. 1 - Walkthrough - Medal of Honor - Game Guide and Walkthrough](https://game.lhg100.com/Article/UploadFiles/201512/2015121617443975.jpg)
Keep hiding behind the rocks [1] and keep moving forward, while looking out for the grenades. After receiving the signal, quickly run forward, hide behind the rock and kill the enemies on the left [2]. A few steps ahead an RPG-equipped terrorist will appear on the hill. Get rid of him first.
![Once the area is clear, follow your companions to the mountain village [1] - Belly of the Beast - p. 1 - Walkthrough - Medal of Honor - Game Guide and Walkthrough](https://game.lhg100.com/Article/UploadFiles/201512/2015121617443989.jpg)
Once the area is clear, follow your companions to the mountain village [1]. You will be welcomed by the terrorists hidden inside the bunkers on the left [2]. Kill them and head towards the fortifications.
![Wait for the others in front of the wooden door [1] [2] and move inside - Belly of the Beast - p. 1 - Walkthrough - Medal of Honor - Game Guide and Walkthrough](https://game.lhg100.com/Article/UploadFiles/201512/2015121617443960.jpg)
Wait for the others in front of the wooden door [1] [2] and move inside.
![Quickly eliminate the two terrorists hidden there [1] and leave the room through the other side - Belly of the Beast - p. 1 - Walkthrough - Medal of Honor - Game Guide and Walkthrough](https://game.lhg100.com/Article/UploadFiles/201512/2015121617443920.jpg)
Quickly eliminate the two terrorists hidden there [1] and leave the room through the other side. Another fight awaits you, after which you should all head out to the right [2].
![Break down the next door [1] and enter the warehouse - Belly of the Beast - p. 1 - Walkthrough - Medal of Honor - Game Guide and Walkthrough](https://game.lhg100.com/Article/UploadFiles/201512/2015121617444033.jpg)
Break down the next door [1] and enter the warehouse. Once inside, listen out to what your companion has to say [2].
Now your task will be to constantly keep shooting at the enemy, so that the others can mark the air raid target. Just shoot at the machine gun all the time [1], killing the enemies appearing on the roof on the right from time to time [2]. If you run low on ammo, replenish it by talking with Hernandez.
![After the raid [1], move forward after the rest of the crew [2] - Belly of the Beast - p. 2 - Walkthrough - Medal of Honor - Game Guide and Walkthrough](https://game.lhg100.com/Article/UploadFiles/201512/2015121617444098.jpg)
After the raid [1], move forward after the rest of the crew [2]. You will reach a small gulch.
![The first enemies will appear upstairs on the left [1] - Belly of the Beast - p. 2 - Walkthrough - Medal of Honor - Game Guide and Walkthrough](https://game.lhg100.com/Article/UploadFiles/201512/2015121617444009.jpg)
The first enemies will appear upstairs on the left [1]. There will be only three of them, so finish them off quickly. Move forward and you will be attacked again [2].
![First eliminate the terrorists below [1] and then move on to the ones on the hills [2] - Belly of the Beast - p. 2 - Walkthrough - Medal of Honor - Game Guide and Walkthrough](https://game.lhg100.com/Article/UploadFiles/201512/2015121617444166.jpg)
First eliminate the terrorists below [1] and then move on to the ones on the hills [2]. A bit further two more enemies will show up. Once they're dead, a third one will come out of the rock on the left (overhead) and throw a grenade. Dodge it and kill him.
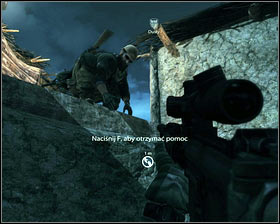
![After walking for a bit [1] you will reach a hut in which the terrorist have set a trap [2] - Belly of the Beast - p. 2 - Walkthrough - Medal of Honor - Game Guide and Walkthrough](https://game.lhg100.com/Article/UploadFiles/201512/2015121617444123.jpg)
After walking for a bit [1] you will reach a hut in which the terrorist have set a trap [2].
![Once you regain consciousness after the explosion [1], start covering your companions [2] - Belly of the Beast - p. 2 - Walkthrough - Medal of Honor - Game Guide and Walkthrough](https://game.lhg100.com/Article/UploadFiles/201512/2015121617444145.jpg)
Once you regain consciousness after the explosion [1], start covering your companions [2].
![After most of the enemies dies, head out to the ruins on the left [1] - Belly of the Beast - p. 2 - Walkthrough - Medal of Honor - Game Guide and Walkthrough](https://game.lhg100.com/Article/UploadFiles/201512/2015121617444269.jpg)
After most of the enemies dies, head out to the ruins on the left [1]. Kill the other terrorists by leaning out of the nearby windows [2].

At some point your cover will be destroyed by an RPG. Change your position by moving to the wall on the left. Kill more enemies and dodge the incoming truck [1] by jumping to the left [2].

![Hidden behind the last possible cover [1], try to survive a couple more minutes until the chopper arrives - Belly of the Beast - p. 2 - Walkthrough - Medal of Honor - Game Guide and Walkthrough](https://game.lhg100.com/Article/UploadFiles/201512/2015121617444293.jpg)
Hidden behind the last possible cover [1], try to survive a couple more minutes until the chopper arrives. To avoid getting surrounded, alternate between shooting the enemies coming from the left and right. The ones with RPGs are especially dangerous; most of them will be on the hills on the right [2].
Once the chopper appears, get onboard to end the level.
Location: Shahikot Valley
Time: 15:14
Soldier: Cpt. Brad "Hawk" Hawkins, 1st Battalion 2nd Aviation Regt.
![This time you will be behind the steers of a helicopter [1] and your first task will be to test the available weapons - Gunfighters - Walkthrough - Medal of Honor - Game Guide and Walkthrough](https://game.lhg100.com/Article/UploadFiles/201512/2015121617444371.jpg)
This time you will be behind the steers of a helicopter [1] and your first task will be to test the available weapons. Use the left mouse button to shoot the machine gun and the right to use launch rockets. Using one of the guns, destroy the trucks below [2].
![A couple second after the hit the view will change [1] and you will have to destroy three enemy posts using the Hellfire rockets - Gunfighters - Walkthrough - Medal of Honor - Game Guide and Walkthrough](https://game.lhg100.com/Article/UploadFiles/201512/2015121617444345.jpg)
A couple second after the hit the view will change [1] and you will have to destroy three enemy posts using the Hellfire rockets. Aim at the first target [2] and hold down 4.
![The second mortar can be found on the right [1] and the third one below [2] - Gunfighters - Walkthrough - Medal of Honor - Game Guide and Walkthrough](https://game.lhg100.com/Article/UploadFiles/201512/2015121617444302.jpg)
The second mortar can be found on the right [1] and the third one below [2]. Once you destroy everything, return to normal view again.
![After arriving at the village [1], wait for the gun to unblock and shoot the cars and anyone around [2] - Gunfighters - Walkthrough - Medal of Honor - Game Guide and Walkthrough](https://game.lhg100.com/Article/UploadFiles/201512/2015121617444324.jpg)
After arriving at the village [1], wait for the gun to unblock and shoot the cars and anyone around [2].
![Enemies with RPGs are of course priority [1] - Gunfighters - Walkthrough - Medal of Honor - Game Guide and Walkthrough](https://game.lhg100.com/Article/UploadFiles/201512/2015121617444485.jpg)
Enemies with RPGs are of course priority [1]. Their locations will be sent to you by the second chopper's crew, but you can easily locate them by following the trail of smoke left by the rocket [2]. To avoid having problems with visibility, you should probably destroy all the building beforehand with rockets (RMB).
After "clearing" the village, move on and kill an enemy on the way. All your targets will be marked with big rectangles [1], so you shouldn't have any problems with finding them. You however need to remember that the mortar posts [2] need to be destroyed with the Hellfire missiles (4), as they're the only thing that will damage them. Once the area is clear, the mission will end.
Location: Shahikot Valley, Grid 28509540
Time: 17:25
Soldier: "Deuce" - AFO "Wolfpack"
![In this level you once more step into the shoes of a sniper [1] - Friends from afar - Walkthrough - Medal of Honor - Game Guide and Walkthrough](https://game.lhg100.com/Article/UploadFiles/201512/2015121617444491.jpg)
In this level you once more step into the shoes of a sniper [1]. Your first target is a group of enemies in the north [2]. Zoom in by pressing W and zoom out with S. As for now, just keep watching them.
The next target is overhead, next to the stream. To find him, zoom out and wait for the game to mark him [1]. There are three terrorists there [2]. Once they're dead, a sniper will start shooting at you.
![Zoom out again and look for the burst of light [1], to the right of the previously killed enemies - Friends from afar - Walkthrough - Medal of Honor - Game Guide and Walkthrough](https://game.lhg100.com/Article/UploadFiles/201512/2015121617444569.jpg)
Zoom out again and look for the burst of light [1], to the right of the previously killed enemies. Quickly zoom in and kill him the enemy with an accurate shot [2].
More enemies are located in the camp on the left. They're easy to find thanks to the smoke coming out of the campfire [1]. Just like before, the game will show you the enemies after a few seconds [2].
Kill the three terrorists and then the sniper lying a couple meters beside [1]. Your next target is the mortar crew, hidden around the middle overhead. Eliminate them with a couple accurate shots [2].
The last enemy is yet another sniper. He's in the bushed on the left [1]. Once the area's clear, you will be able to move once again [2].
![Quickly change the weapon to a machine gun and kill the enemies on the left (lying all the time) [1] - Friends from afar - Walkthrough - Medal of Honor - Game Guide and Walkthrough](https://game.lhg100.com/Article/UploadFiles/201512/2015121617444621.jpg)
Quickly change the weapon to a machine gun and kill the enemies on the left (lying all the time) [1]. At some point Dusty will order to change position. Stand up and follow your companion to the right [2].
![Hide again on the top of the hill [1] and keep shooting at the incoming terrorists [2] - Friends from afar - Walkthrough - Medal of Honor - Game Guide and Walkthrough](https://game.lhg100.com/Article/UploadFiles/201512/2015121617444646.jpg)
Hide again on the top of the hill [1] and keep shooting at the incoming terrorists [2].
After clearing the area, move on after Dusty [1], who will lead you to the next enemy group [2]. Once you receive the proper order, eliminate the enemies, killing the man with an RPG in the first place.
![Once the shootout ends, move on after your companion [1] - Friends from afar - Walkthrough - Medal of Honor - Game Guide and Walkthrough](https://game.lhg100.com/Article/UploadFiles/201512/2015121617444756.jpg)
Once the shootout ends, move on after your companion [1]. Hold down Ctrl to squeeze below the rock [2].

![Avoid the branch [1] blocking the entrance to the village in a similar way - Friends from afar - Walkthrough - Medal of Honor - Game Guide and Walkthrough](https://game.lhg100.com/Article/UploadFiles/201512/2015121617444766.jpg)
Avoid the branch [1] blocking the entrance to the village in a similar way. As only you reach the edge of the [2], a sniper level during which you have to kill 4 terrorists will automatically begin.
![You will find the first three without any problems, but remember about the fourth one [1], hidden by the side-building on the left [2] - Friends from afar - Walkthrough - Medal of Honor - Game Guide and Walkthrough](https://game.lhg100.com/Article/UploadFiles/201512/2015121617444796.jpg)
You will find the first three without any problems, but remember about the fourth one [1], hidden by the side-building on the left [2].
![Having completed the task, follow your companion to the next observation point [1] - Friends from afar - Walkthrough - Medal of Honor - Game Guide and Walkthrough](https://game.lhg100.com/Article/UploadFiles/201512/2015121617444748.jpg)
Having completed the task, follow your companion to the next observation point [1]. Your goal will be to protect the Neptune unit, which's being attacked by an enemy group. Firstly locate your companions and then finish off the terrorists marked by the game [2].
Location: Shahikot Valley, Grid 20508890
Time: 18:00
Soldier: "Rabbit" - AFO Neptune
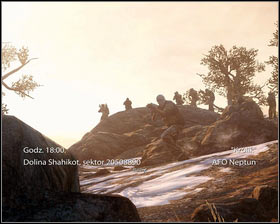
![You begin the level under enemy fire [1] - Compromised - Walkthrough - Medal of Honor - Game Guide and Walkthrough](https://game.lhg100.com/Article/UploadFiles/201512/2015121617444820.jpg)
You begin the level under enemy fire [1]. Quickly hide behind the nearest cover and defend your position [2]. The enemies will keep on coming from the right and left, so bend down if they start hitting you.
After some time you will receive an order to throw a smoke grenade. Do it by pressing G and afterwards go down the slope with the rest of the team [1]. Once you reach the ruined building, hide behind it and defend your position once again [2], killing the RPG-equipped enemies first. They will keep on appearing on the hills to the right.
After some time a helicopter will appear. Hold down Shift and run after your companions [1]. The chopper won't be able to land beside you [2], so head to the ruins on the right.
![Hide behind the nearest rock [1] and mark the target for the air force with RMB [2] - Compromised - Walkthrough - Medal of Honor - Game Guide and Walkthrough](https://game.lhg100.com/Article/UploadFiles/201512/2015121617444861.jpg)
Hide behind the nearest rock [1] and mark the target for the air force with RMB [2].
![After the raid, continue shooting the enemies [1] until receiving another order - Compromised - Walkthrough - Medal of Honor - Game Guide and Walkthrough](https://game.lhg100.com/Article/UploadFiles/201512/2015121617444954.jpg)
After the raid, continue shooting the enemies [1] until receiving another order. Turn around and cross get onto the other side with Voodoo's help [2].

![Follow the rest of the team and cover them with the newly gained gun [1] - Compromised - Walkthrough - Medal of Honor - Game Guide and Walkthrough](https://game.lhg100.com/Article/UploadFiles/201512/2015121617444939.jpg)
Follow the rest of the team and cover them with the newly gained gun [1]. This way you will reach the second landing field. Get into the helicopter after receiving the order [2].
![You'll be assigned to the machinegun, so provide cover for your companions on the ground [1], focusing on eliminating the enemies with RPGs first [2] - Compromised - Walkthrough - Medal of Honor - Game Guide and Walkthrough](https://game.lhg100.com/Article/UploadFiles/201512/2015121617444926.jpg)
You'll be assigned to the machinegun, so provide cover for your companions on the ground [1], focusing on eliminating the enemies with RPGs first [2].
Location: Takur Ghar, Grid 20108890
Time: 00:15
Soldier: "Rabbit" - AFO Neptune
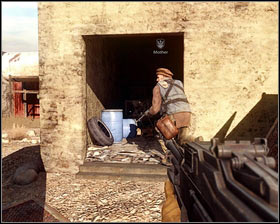
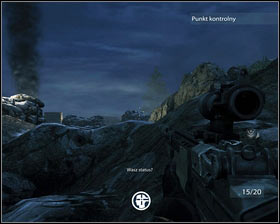
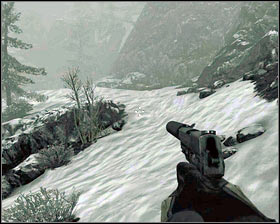
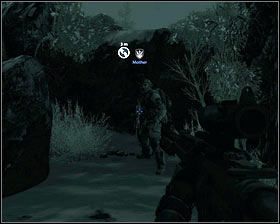
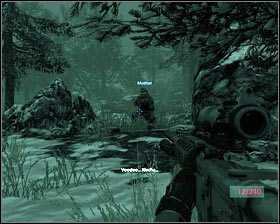
Your first task is finding Mother. Move forward [1] until you see the first enemy [2].
![Move below the rock by holding Ctrl [1] and kill the terrorist with a quick blow [2] - Neptune's Net - p. 1 - Walkthrough - Medal of Honor - Game Guide and Walkthrough](https://game.lhg100.com/Article/UploadFiles/201512/2015121617445038.jpg)
Move below the rock by holding Ctrl [1] and kill the terrorist with a quick blow [2].
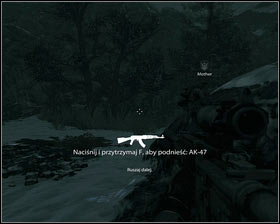
![Once he falls dead to the ground, pick up his AK [1] and change your gun to a silenced revolver - Neptune's Net - p. 1 - Walkthrough - Medal of Honor - Game Guide and Walkthrough](https://game.lhg100.com/Article/UploadFiles/201512/2015121617445028.jpg)
Once he falls dead to the ground, pick up his AK [1] and change your gun to a silenced revolver. Move on to the right [2].
![Quickly kill the two enemies [1] and take care of the enemy behind your back [2] - Neptune's Net - p. 1 - Walkthrough - Medal of Honor - Game Guide and Walkthrough](https://game.lhg100.com/Article/UploadFiles/201512/2015121617445015.jpg)
Quickly kill the two enemies [1] and take care of the enemy behind your back [2]. Having cleared the area, move on to the left.
![After receiving the information about an incoming patrol, head to the hill on the right [1] to avoid them [2] - Neptune's Net - p. 1 - Walkthrough - Medal of Honor - Game Guide and Walkthrough](https://game.lhg100.com/Article/UploadFiles/201512/2015121617445060.jpg)
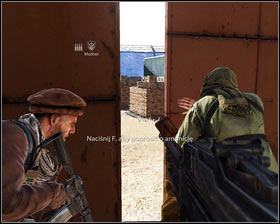
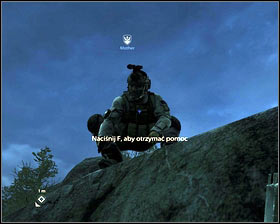
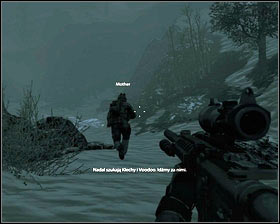
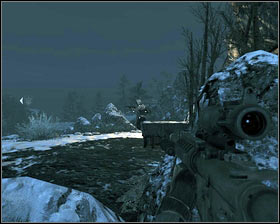
After receiving the information about an incoming patrol, head to the hill on the right [1] to avoid them [2]. Mother awaits you a couple steps ahead.
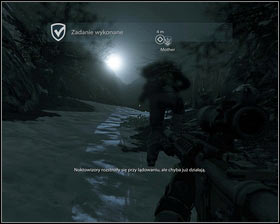
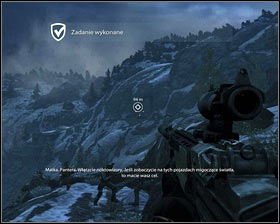
![Listen out to what he has to say and you will recover all your lost equipment [1] - Neptune's Net - p. 1 - Walkthrough - Medal of Honor - Game Guide and Walkthrough](https://game.lhg100.com/Article/UploadFiles/201512/2015121617445163.jpg)
Listen out to what he has to say and you will recover all your lost equipment [1]. Your companion will then lead you to a small camp [2], in which you will have to eliminate all the enemies.
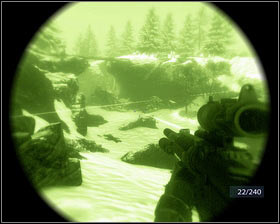
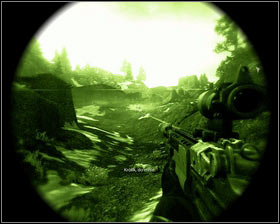
![Press Y to improve your field of vision [1] - Neptune's Net - p. 1 - Walkthrough - Medal of Honor - Game Guide and Walkthrough](https://game.lhg100.com/Article/UploadFiles/201512/2015121617445198.jpg)
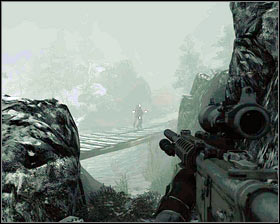
Press Y to improve your field of vision [1]. Firstly head onto the hill on the left, from where you will have a good view of your targets. Firstly take care of the terrorist on the left side of the bridge and then his companion on the right [2].
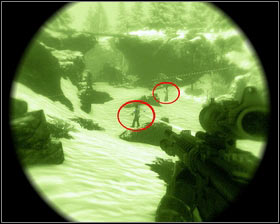
![Your next two victims will be the men below the bridge [1] - Neptune's Net - p. 1 - Walkthrough - Medal of Honor - Game Guide and Walkthrough](https://game.lhg100.com/Article/UploadFiles/201512/2015121617445105.jpg)
Your next two victims will be the men below the bridge [1]. The fourth is standing by the campfire and the fifth one on the hill above the camp [2].
![The last two can be found to the right of the others, nearby the place from which you came yourself [1] - Neptune's Net - p. 2 - Walkthrough - Medal of Honor - Game Guide and Walkthrough](https://game.lhg100.com/Article/UploadFiles/201512/2015121617445269.jpg)
The last two can be found to the right of the others, nearby the place from which you came yourself [1]. If you can't take out all of them quietly, take out your machinegun and shoot the enemies from behind the rocks. Having completed the mission, follow the path on the other side of the camp, where Mother went before [2].
![Hold down F and climb up [1] - Neptune's Net - p. 2 - Walkthrough - Medal of Honor - Game Guide and Walkthrough](https://game.lhg100.com/Article/UploadFiles/201512/2015121617445210.jpg)
Hold down F and climb up [1]. Keep following your companion and you will come across another enemy group [2]. Don't shoot, wait for them to split up.
A few steps ahead you will reach a fork in the toad. Choose the left one [1], which will reach you to another platforms with terrorists [2]. Wait for only two to remain and kill one of them. Mother will take care of the other.
![Once it's clear, move right across the bridge [1], repeating the previous operation on two more patrols (wait for a signal from Mother) [2] - Neptune's Net - p. 2 - Walkthrough - Medal of Honor - Game Guide and Walkthrough](https://game.lhg100.com/Article/UploadFiles/201512/2015121617445299.jpg)
Once it's clear, move right across the bridge [1], repeating the previous operation on two more patrols (wait for a signal from Mother) [2].
![A bit further you will split up [1] - Neptune's Net - p. 2 - Walkthrough - Medal of Honor - Game Guide and Walkthrough](https://game.lhg100.com/Article/UploadFiles/201512/2015121617445310.jpg)
A bit further you will split up [1]. Your companion will head right and you have to go left to the cave. On the other side of the cave [2] a cutscene will begin. As only it ends, quickly run forward while sticking to the rocks on the right.
![Once you get to the top, turn left and get rid of the enemies lurking there [1] - Neptune's Net - p. 2 - Walkthrough - Medal of Honor - Game Guide and Walkthrough](https://game.lhg100.com/Article/UploadFiles/201512/2015121617445373.jpg)
Once you get to the top, turn left and get rid of the enemies lurking there [1]. A big shootout will begin in just a while [2], so find yourself a safe cover.
![It'd be best to enter the cave on the right [1] - Neptune's Net - p. 2 - Walkthrough - Medal of Honor - Game Guide and Walkthrough](https://game.lhg100.com/Article/UploadFiles/201512/2015121617445346.jpg)
It'd be best to enter the cave on the right [1]. It's not only a good observation point, but you will also find a machinegun and sniper rifle there [2].
![Change the weapon from time to time and get rid of all the terrorists on the hills on the left [1] - Neptune's Net - p. 2 - Walkthrough - Medal of Honor - Game Guide and Walkthrough](https://game.lhg100.com/Article/UploadFiles/201512/2015121617445315.jpg)
Change the weapon from time to time and get rid of all the terrorists on the hills on the left [1]. Afterwards head after Mother [2] and end the level.
Location: Takur Ghar, Grid 20508890
Time: 7:32
Soldier: SPC. Dante Adams, 1st Bn 75th Ranger Regt.
You begin the level "behind the steers" of a machinegun [1] and your task is to defend the chopper. Shoot all the enemies in the area, especially looking out for those with RPGs [2]. Your companions will give you their locations. Try to do short pauses so that the gun doesn't overheat.
![Once you regain control, head out following the rest of the team [1] - Rescue the Rescuers - p. 1 - Walkthrough - Medal of Honor - Game Guide and Walkthrough](https://game.lhg100.com/Article/UploadFiles/201512/2015121617445481.jpg)
Once you regain control, head out following the rest of the team [1]. Right after leaving the chopper, turn left and hide behind the nearby rock [2].
Defend for a couple minutes and you will receive an order of marking the targets for the air force. Approach the marked spot [1] and aim at the machinegun posts while holding down LMB [2].

![After the raid move on after your squad [1], while looking out for the left side of the path - Rescue the Rescuers - p. 1 - Walkthrough - Medal of Honor - Game Guide and Walkthrough](https://game.lhg100.com/Article/UploadFiles/201512/2015121617445435.jpg)
After the raid move on after your squad [1], while looking out for the left side of the path. A group of terrorists will show up there [2], including one with an RPG. Kill all of them and return to your team.
![Behind the next corner, eliminate the two enemies on the hill on the escarpment on the left [1] and head towards the next machinegun - Rescue the Rescuers - p. 1 - Walkthrough - Medal of Honor - Game Guide and Walkthrough](https://game.lhg100.com/Article/UploadFiles/201512/2015121617445550.jpg)
Behind the next corner, eliminate the two enemies on the hill on the escarpment on the left [1] and head towards the next machinegun. Just like before, destroy it by targeting it for the air force [2].
![After the raid go clear the bunker [1] - Rescue the Rescuers - p. 1 - Walkthrough - Medal of Honor - Game Guide and Walkthrough](https://game.lhg100.com/Article/UploadFiles/201512/2015121617445520.jpg)
After the raid go clear the bunker [1]. Once inside the cave, move forward and quickly hide behind the nearby crates [2].
![From there aim at the tunnel on the right and shoot the running enemies in the back [1] - Rescue the Rescuers - p. 1 - Walkthrough - Medal of Honor - Game Guide and Walkthrough](https://game.lhg100.com/Article/UploadFiles/201512/2015121617445557.jpg)
From there aim at the tunnel on the right and shoot the running enemies in the back [1]. Once they're all dead, move into the same direction as they did. More terrorists will appear nearby the next crates [2]. Quickly eliminate them and follow your companion.
![At some point it will get very dark [1], but luckily you have night vision with you (Y) [2] - Rescue the Rescuers - p. 1 - Walkthrough - Medal of Honor - Game Guide and Walkthrough](https://game.lhg100.com/Article/UploadFiles/201512/2015121617445651.jpg)
At some point it will get very dark [1], but luckily you have night vision with you (Y) [2]. Don't use it for too long, as a bit further the terrorists will light up flares.
![Begin with taking out the two enemies in front of you [1] followed by the third one on the left [2] and take care of the rest afterwards - Rescue the Rescuers - p. 2 - Walkthrough - Medal of Honor - Game Guide and Walkthrough](https://game.lhg100.com/Article/UploadFiles/201512/2015121617445627.jpg)
Begin with taking out the two enemies in front of you [1] followed by the third one on the left [2] and take care of the rest afterwards.
![After the shootout head left, killing more enemies on your way [1] - Rescue the Rescuers - p. 2 - Walkthrough - Medal of Honor - Game Guide and Walkthrough](https://game.lhg100.com/Article/UploadFiles/201512/2015121617445697.jpg)
After the shootout head left, killing more enemies on your way [1]. At the end of the cave [2] you will reunite with Voodoo and Preacher.
![After a short conversation with them [1], head out to find the other two - Rescue the Rescuers - p. 2 - Walkthrough - Medal of Honor - Game Guide and Walkthrough](https://game.lhg100.com/Article/UploadFiles/201512/2015121617445670.jpg)
After a short conversation with them [1], head out to find the other two. The first enemies will appear right behind the corner [2].
Get rid of them and then move forward while trying to stick to the right side. This way you will reach a crate [1], from behind which you can easily eliminate the incoming enemies [2].
![Once they stop to appear, move on to their positions and eliminate the enemies overhead [1] - Rescue the Rescuers - p. 2 - Walkthrough - Medal of Honor - Game Guide and Walkthrough](https://game.lhg100.com/Article/UploadFiles/201512/2015121617445767.jpg)
Once they stop to appear, move on to their positions and eliminate the enemies overhead [1]. After killing a couple of them, go up the slope on the left [2].
![Quickly eliminate all the enemies there [1] and climb up to the top [2] - Rescue the Rescuers - p. 2 - Walkthrough - Medal of Honor - Game Guide and Walkthrough](https://game.lhg100.com/Article/UploadFiles/201512/2015121617445775.jpg)
Quickly eliminate all the enemies there [1] and climb up to the top [2]. After a few steps you will be attacked again.
![Firstly kill the two enemies on the left [1] and then the group above [2] - Rescue the Rescuers - p. 2 - Walkthrough - Medal of Honor - Game Guide and Walkthrough](https://game.lhg100.com/Article/UploadFiles/201512/2015121617445749.jpg)
Firstly kill the two enemies on the left [1] and then the group above [2]. Your first target should be of course the terrorist with the RPG.
![Similar groups will show up a bit further [1], but this time aided by a machinegun [2] - Rescue the Rescuers - p. 2 - Walkthrough - Medal of Honor - Game Guide and Walkthrough](https://game.lhg100.com/Article/UploadFiles/201512/2015121617445825.jpg)
Similar groups will show up a bit further [1], but this time aided by a machinegun [2]. Kill as much of them as you can, until a conversation about the Predator starts.
![You can then hide behind the rock and safely wait for the missiles [1] - Rescue the Rescuers - p. 2 - Walkthrough - Medal of Honor - Game Guide and Walkthrough](https://game.lhg100.com/Article/UploadFiles/201512/2015121617445874.jpg)
You can then hide behind the rock and safely wait for the missiles [1]. After the explosion, head to the cave in front of you. Break down the door at the end [2] and watch the final cutscene. Good job, soldier!


 Max Payne 3 Game Guide & Walkthrough
 Might & Magic: Heroes VII Game Guide & Walkthrough
 Magrunner: Dark Pulse Game Guide & Walkthrough
 Might & Magic: Heroes VI - Shades of Darkness Game Guide & Walkthrough
 Might & Magic: Clash of Heroes Game Guide & Walkthrough