Introduction

Welcome to the unofficial guide to "Lost: Via Domus" PC video game. This guide consists mostly of a very detailed walkthrough of the singleplayer mode of the game. You'll have to beat seven chapters in order to successfully reach the ending. My guide focuses mostly on explaining what to do in order to be able to move on to the next chapter of the game. You will be given certain quests and it'll be up to you to finish them. I've also explained how to find and complete all subquests. They will require you to use your camera in order to take photos of the surrounding objects. You shouldn't have any major problems with the game, as long as you follow the instructions from my guide. It's also important to read additional hints. They will pop up on your screen from time to time. Good luck and have fun playing the game!
Stranger
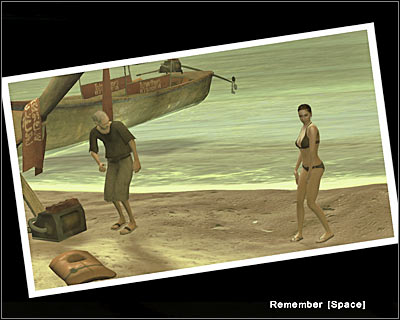
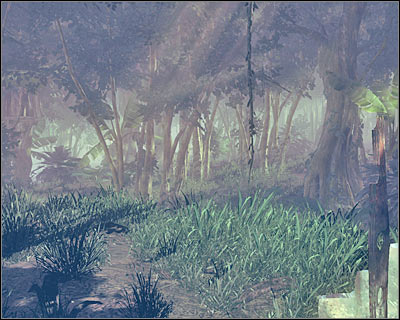
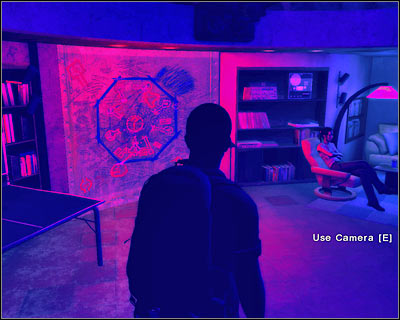
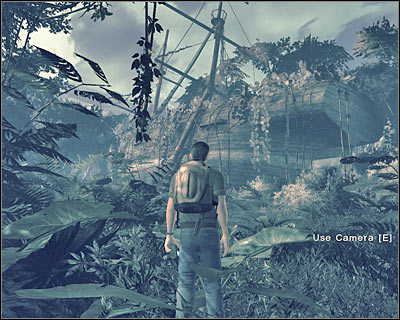
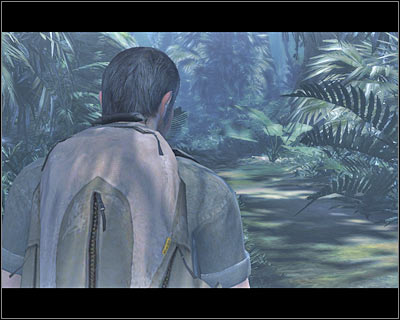
The first chapter of the game should be considered as a tutorial, especially while you're still in the jungle. Once you've talked to Kate and completed your first flashback scene, you will be allowed to go to the main crash site which will be located at the beach. You will have to assist some of the survivors there by completing your first mini-game. The main objective for this episode will be to find a backpack which belongs to the main character.
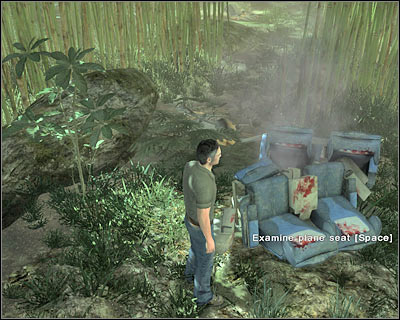
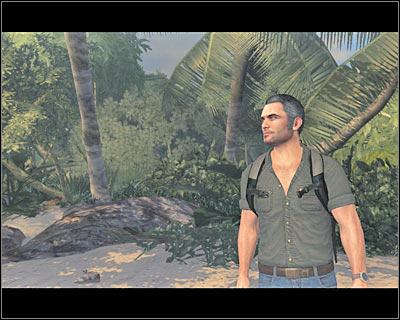
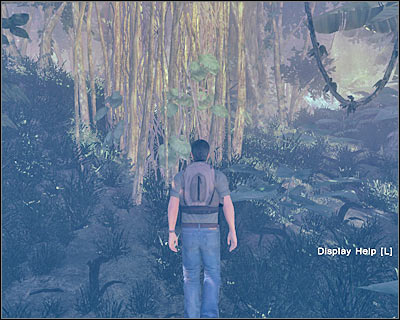
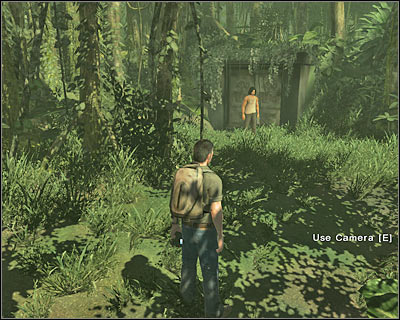
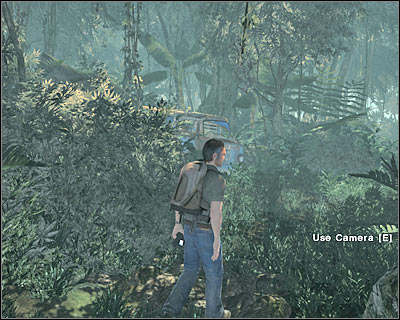
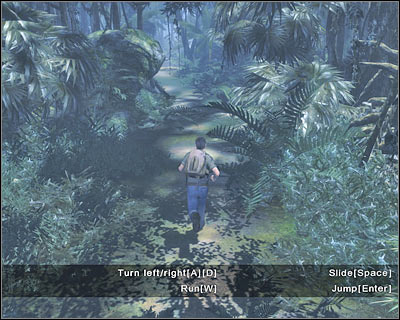
You will have to wait for the main character to regain consciousness. Once this is done, you should be able to notice that you're standing somewhere in the jungle. It would be a good idea to practice some of the basic moves here, including walking and examining objects. You can move by pressing the movements keys. Additionally, you can order your character to start running by holding the SHIFT key. You might want to consider examining a plane seat (screen). This can be done by pressing the SPACE key. Each time you will be given a short description of an object. I'll do my best to give you the exact locations of these types of objects later during the course of the game. Sadly, you won't be allowed to pick them up, so it's all optional.
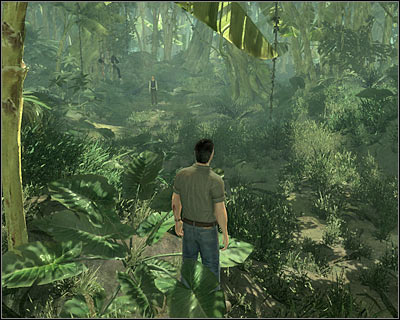
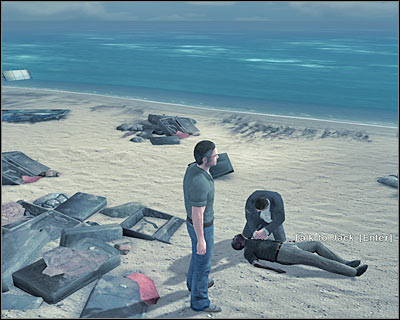
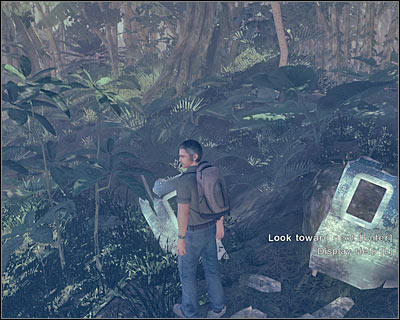
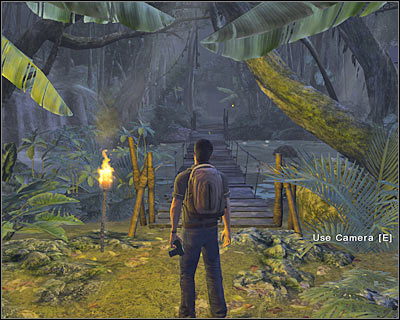
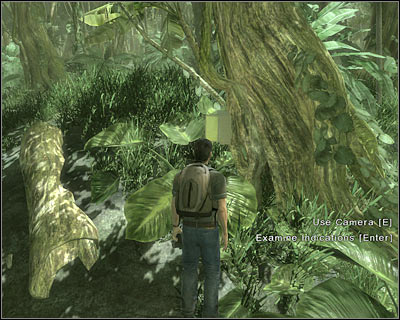
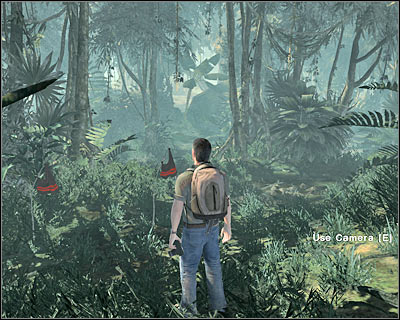
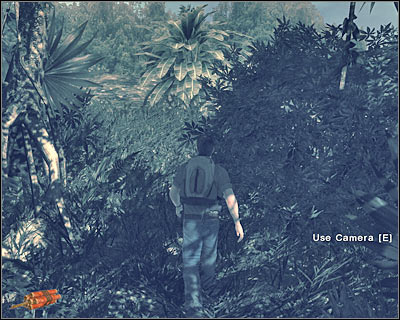
You may start moving forward, because you won't find anything of interest here. You'll also be surrounded by bushes and trees, so you won't be allowed to deviate from the main path. Once you've reached a new area, turn left and keep heading forward (screen). You will notice a dead passenger and the game will reward you with an interesting cut-scene. Also, here's where you'll be given your first quest.
QUEST 1: Find help!
Examine the body if you want to, however this is optional.
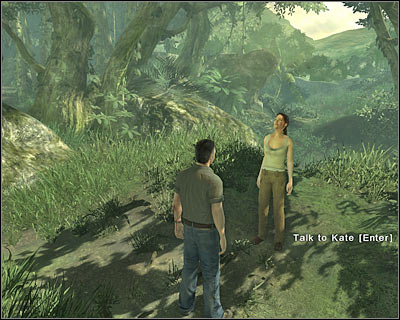
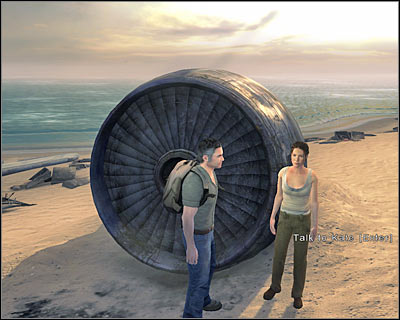
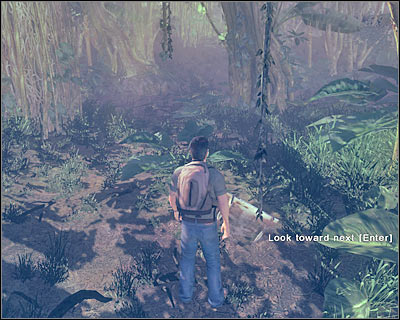
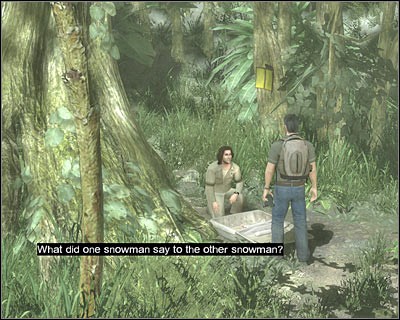
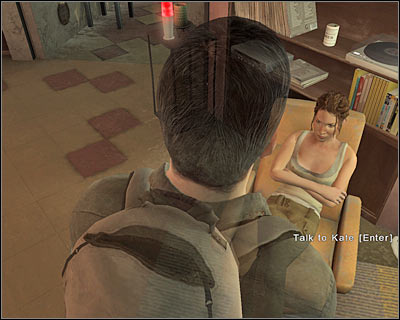
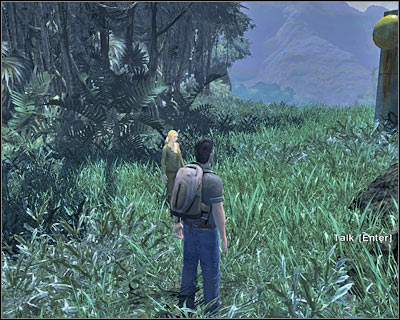
You may proceed to your right. You should be able to notice that an injured woman is standing here. Try talking to her by pressing the ENTER key. As a result, you will trigger a weird vision. Thankfully, you will find out more about her later during the course of the game. You might want to consider opening your inventory. Choose MY MEMORY and read the text. You can do this at any time and obviously the main character will add new thoughts to his diary each time he's discovered something important. Head on to a new location. You should be able to find a shoe along the way. Ignore it, because you won't have to examine it. Kate should be standing just around the corner (screen). Try talking to her by pressing the ENTER key (Talk to Kate action).
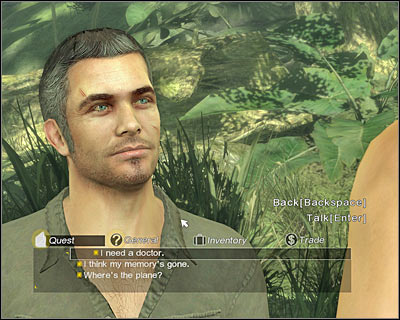
As you've probably noticed, you can choose between four main options, however only two of them are active at this time. You will be allowed to choose questions from two separate groups. General questions allow you to find out more about other survivors or the island itself and they won't help you to solve the main quests. You will be able to ask Kate several questions from this group:
- Are you okay?
- Who are you?
The Quest category is much more important. You will have to ask these questions in order to be able to move on. You can ask them in any order. Here are the questions:
- Where's the plane?
- I need a doctor.
- I think my memory's gone.
Kate will give you a water bottle. Once you've asked her all three questions, you will be given an opportunity to participate in your first flashback scene.
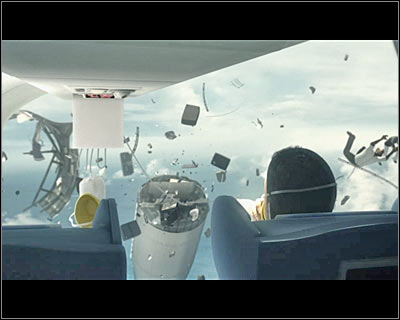
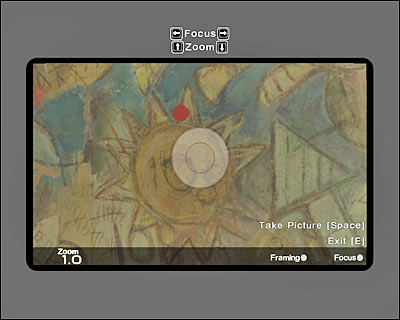
The sole purpose of having flashbacks is to remember important facts from your past. As you've probably noticed, the main character of the game is suffering from the effects of amnesia. The scene of the first flashback will take place on board of the plane, before the crash has even occurred. You will have to perform certain actions in order to bring back some important memories. Make sure that you've read a hint window, because you'll find out what has to be done in order to succeed. Start off by pressing the E key, so the main character will be able to choose the camera from his inventory. You will have to zoom the view on Kate by pressing the upper cursor. Kate should stop next to the stewardess and that's when you'll have to photograph her. You'll also have to adjust focus by pressing left and right cursor keys. Once you're ready (screen), take a photo by pressing the SPACE key.
Important! If you're too late or if you didn't adjust focus, the game will go back in time, so you'll be allowed to try again. Thankfully, you'll be given an unlimited amount of retries.
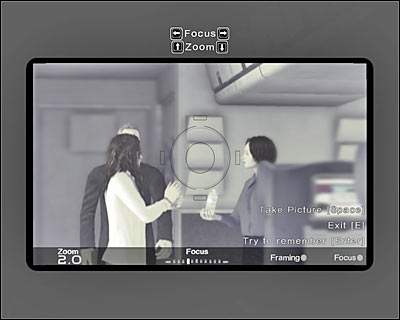
If you've taken a correct photo, you will be rewarded with a much longer cut-scene. As a result, you will find out that Kate is actually a convict. Once you've regained full control over your character, move the view to your right and press the ENTER key in order to talk to the flight attendant (screen). This flashback will come to an end and you'll be returned to the jungle.

You can listen to a short statement by the main character, but if you've paid attention to the flashback scene, you'll already know the same thing. Start off by talking to Kate again. It shouldn't come as a surprise to you that a new dialogue line has appeared on the list:
- You wore handcuffs.
Listen to the rest of the conversation. You'll find out from Kate that she has seen a dog nearby and that you should follow it to get back to the beach.
QUEST 2: Follow the dog
End the conversation and start moving forward. You will have to wait for the game to load a new location.

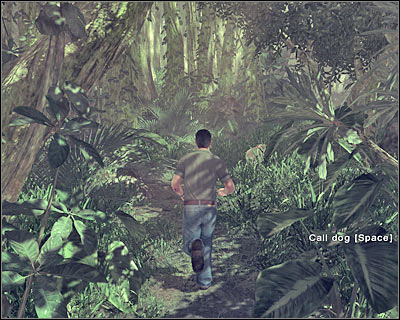
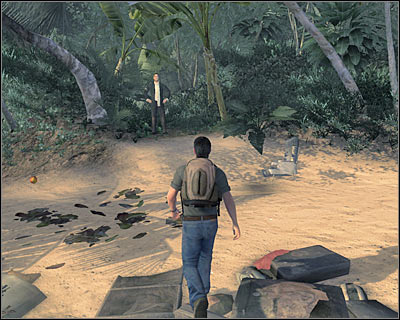
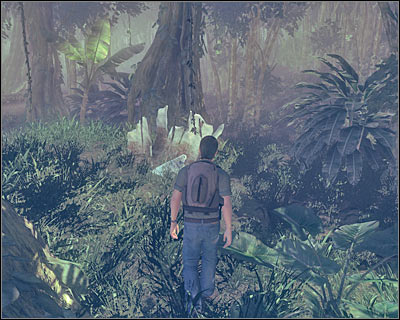
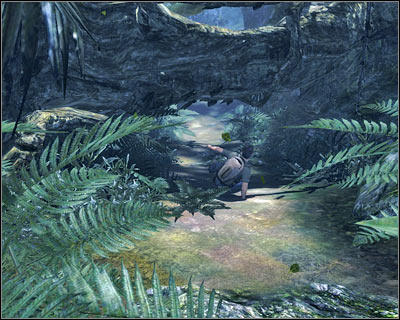
Once you've arrived at the new section of the jungle, try making a few steps forward. You should come across Vincent (Walt's dog). As you've probably suspected, you will have to start following the dog (screen). Just make sure that you're running and you should be fine. This isn't a difficult chase, however the camera might disorient you while taking sharper turns. Thankfully, if you get lost in the jungle, you'll be able to repeat the entire chase scene. Don't try exploring the jungle on your own, because you won't find anything of interest. You'll finally reach the exit. That's where the game will begin loading a new area of the island.
QUEST 3: See who needs help!
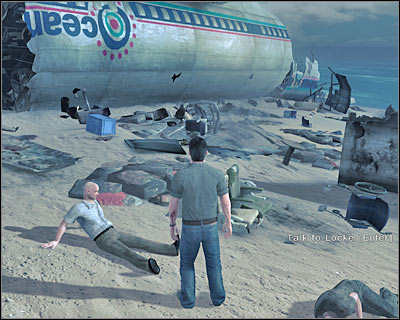
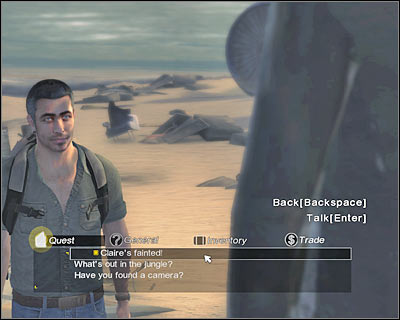
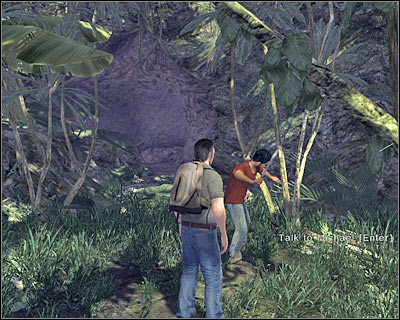
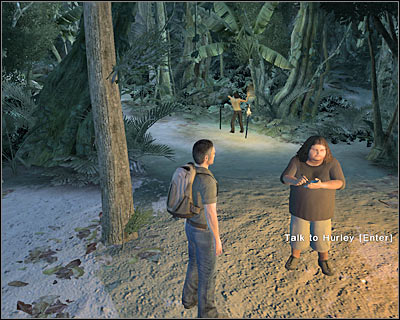
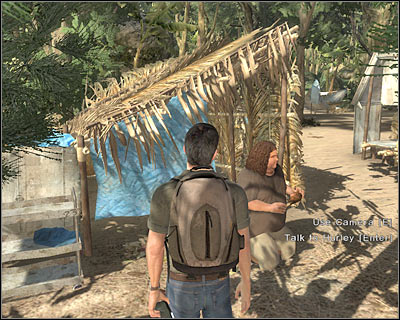
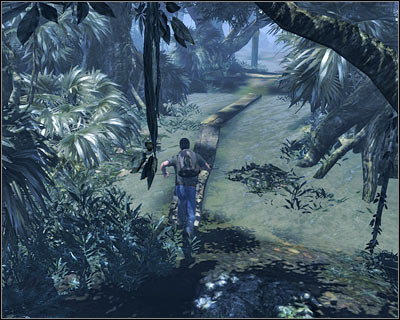
Start moving forward and you should be able to the reach the main crash site in just a few seconds. If you want to complete the main quest as soon as possible, you should start moving towards the shore. Otherwise you might want to consider talking to some of the visible survivors of the crash. You'll be allowed to talk to Michael, Locke (screen), Hurley and Claire.
You can ask three general questions while talking to the survivors:
- How did the plane crash?
- Where are we?
- Do you know me?
As for the main quest, you will be allowed to ask them one question (it's going to be the same for all of them):
- Do you need help?
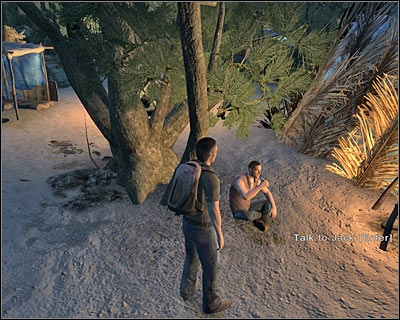
Don't try leaving this area and don't get too close to the working engine, because you would have died instantly. Don't worry, because you'll have plenty of time to explore the beach once you've dealt with the immediate crisis. Start moving forward and find Jack (screen). Obviously you will have to try talking to him. You won't be allowed to ask him any questions. Instead, listen to his request and end the conversation by pressing the BACKSPACE key.
QUEST 4: Stop the fuel leak
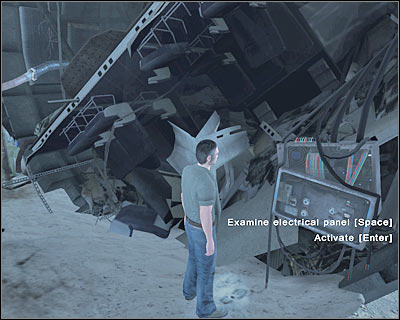
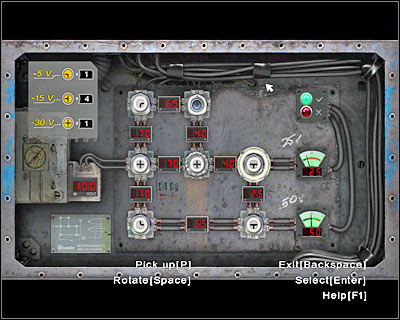
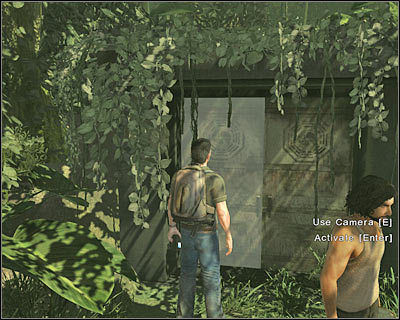
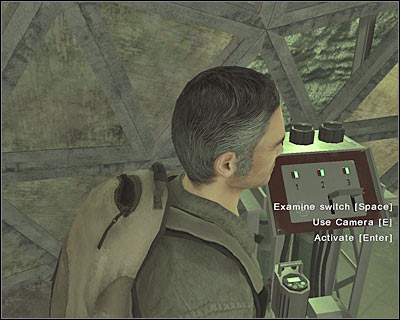
Turn around and start moving towards the biggest fragment of the plane which can be found to your right. Your objective will be to find an electrical panel. Look at the screen if you're having some difficulties locating it. Examine the panel if you want to, however it's more important to activate it by pressing the ENTER key. You'll have to solve a simple mini-game here.
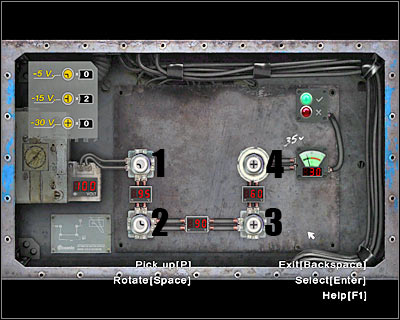
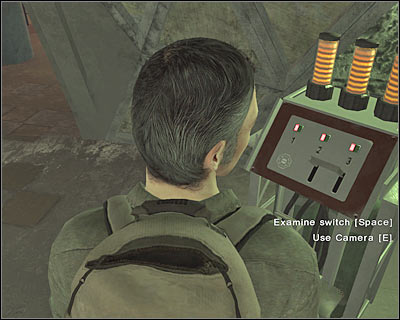
If you've played "Bioshock", you should find this mini-game to be very familiar. Your objective will be to place fuses inside the available slots. This is your first time, so start with the first slot (1 on the screen) and end with the fourth slot (4 on the screen). You won't have to worry about the order in which the fuses are being placed later during the game. Look at the screen if you want to receive the full solution to this problem. Important! Make sure that you've used the SPACE key in order to rotate some of the fuses. Otherwise you wouldn't be able to solve this mini-game. Once you've done everything according to the plan, you will be rewarded with a new cut-scene.
QUEST 5: Find anything of mine
Now you will finally have a lot of time to look around the beach and to explore the crash site. I would recommend that you start by talking to Jack. He should be sitting next to the fireplace. I'm sure that you're familiar with the previous general questions, so I won't repeat them. You can ask him one new question:
- Do you think rescue's coming?
The Quest category will also contain one question:
- Have you found anything that could be mine?
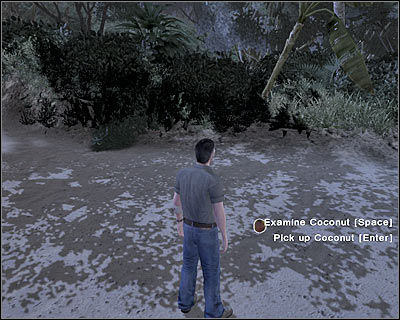
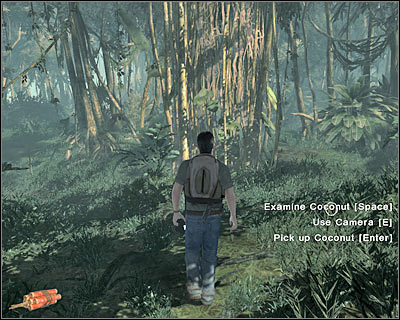
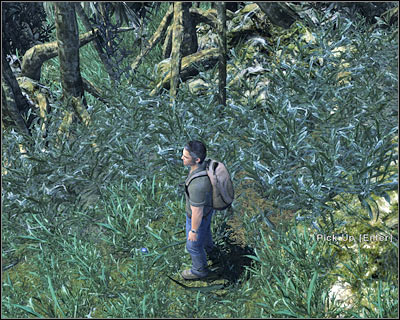
End the conversation with Jack and start looking around the beach. Thankfully, you won't have to worry about avoiding any other explosions. Just make sure that you stay away from the fire and you should be fine. There are a lot of coconuts in the area (screen). Start picking them up, because you'll use them for trade. You should also come across a second water bottle. It's more valuable than the coconuts, so make sure you've taken it.
This area of the beach contains several interactive objects. You will be allowed to examine a suitcase, a CD and a chessboard. Talk to Kate if you want to. She's also sitting next to the fireplace, near one of the big wings of the plane. The main (Quest) question is going to be the same for all of the survivors. The only difference are their responses. As for the general questions, there's going to be a new dialogue line:
- What happened to your Marshall?
Now you will have to go explore the next area of the crash site. Look at the screen, because that's the only passageway leading to your destination.
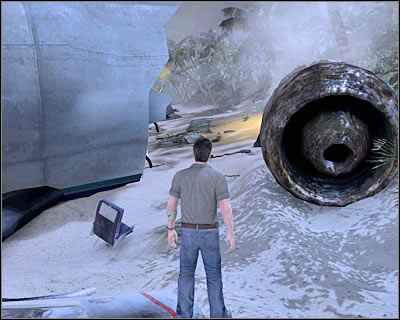
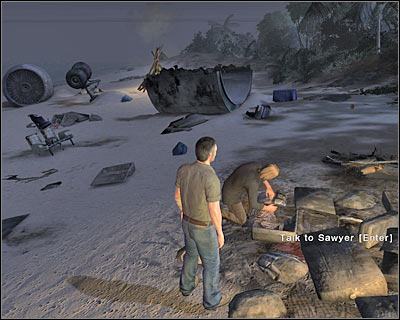
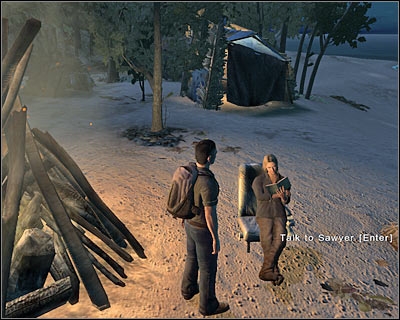
Before you decide to retrieve your backpack, I would recommend that you explore this section of the beach as well. As for the interactive objects, you'll find mostly other suitcases, however there's also a wheelchair here, as well as a comic book. Additionally, you will come across two other survivors - Sawyer (screen) and Sun. As for Sawyer, there are going to be two additional topics on your list:
- I forget everything.
- Where are you from?
Sadly, you won't be able to understand Sun, so ignore her for the time being.
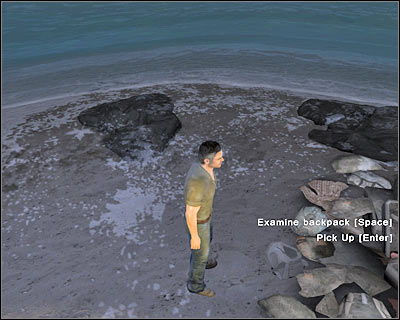
Once you feel you're ready, start moving to the much bigger fireplace. It can be found in front of the passageway which you've used before. I'm sure that you won't have any problems finding it, especially since the area isn't too big. Look at the screen - that's where you'll find your backpack. Try picking it up by pressing the ENTER key. This will trigger the final cut-scene for this chapter. Wait for a new episode to begin.

The second chapter of "Lost: Via Domus" is going to be a little more difficult. You'll have to enter a more dangerous section of the jungle later on during the course of this episode where you'll encounter the famous black smoke. Avoiding the smoke will prove to be quite challenging. As for your main objective, you will have to reach the cockpit of the plane in order to retrieve the camera.
QUEST 1: Find my camera
You'll start the game near the crash site. You've already been here before, however it's daytime now and you'll be allowed to perform several other activities. As you've probably noticed by now, new coconuts have appeared in the area. I would recommend that you start collecting them right away, because you'll have to trade things very soon. You can consider talking to Kate. She can be found to your left (screen). As for the general questions, you will be allowed to choose between two new topics:
- Who do you think attacked me?
- What can you tell me about the cockpit?
You can also switch to the first category in order to ask her several quest-related questions:
- Have you found a camera?
- What's out in the jungle?
QUEST 2: Reach the cockpit
You can also talk to Claire if you want to. You'll find her under the left wing of the plane. You'll be allowed to ask here one new general question:
- You think we'll be rescued?
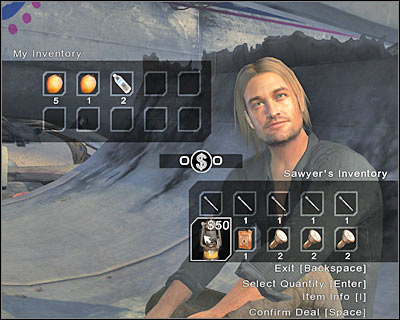
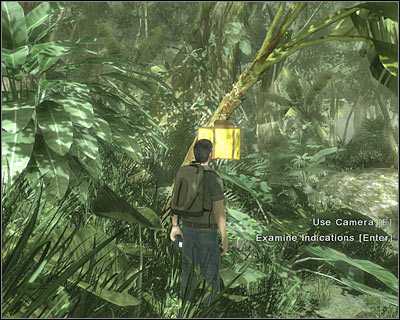
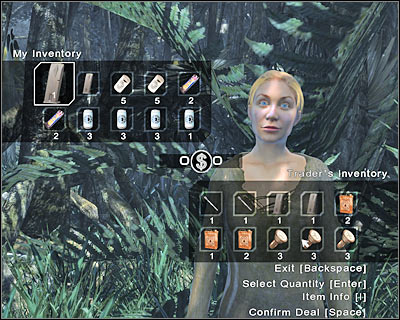
Next up, we've got Sawyer. He can be found to the right of where Kate is currently standing. Before you decide to proceed with the conversation, familiarize yourself with some new hints. You'll find out more about trading goods. You can activate this feature by choosing the final category from the menu - Trade (screen). The upper side of the screen displays your inventory, while the lower one will show you what's there for sale. Sawyer will offer you:
- torches - $10
- oil lanterns - $50
- jerry cans of oil - $20
- fuses - $10
You won't have to purchase any of these items at the moment, so instead of trading with Sawyer, try talking to him. You'll be given one new topic:
- What's that letter?
The questions from the Quest category will remain the same, however you should still consider choosing them in order to receive fresh answers from Sawyer.
Once you've talked to the available survivors (or not) and gathered all coconuts, proceed to the passageway which leads to the jungle. This path will be guarded by Jack (screen). Try talking to him and you'll find out that he won't let anyone get through. Make sure that you've asked him all quest-related questions. Doing this will trigger a new cut-scene. Head on to the shore and try talking to a woman who has appeared there. As a result, you will take part in a few flashback scene.
This flashback scene is going to be more complex this time, however there's nothing you should be worried about. Just as before, your primary objective will be to take a photo. If you've watched the hint movie, you shouldn't have any major difficulties figuring out what has to be done here. You will have to take a photo of two small objects, as well as a woman and a fisherman. Take a look at the screen if you're still having some problems. You should consider moving back a little and working on adjusting the focus if you can't get past this activity.
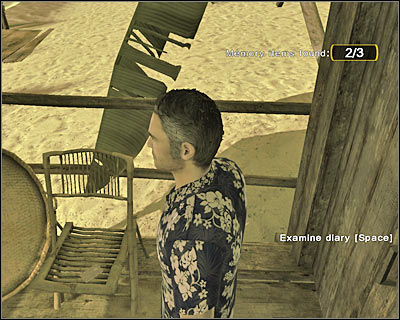
Taking a photo won't end this flashback scene right away, however you will be rewarded with a short movie. Don't talk to the woman just yet. Instead, inspect the surrounding area. You will have to perform three activities here. Start off by reading the newspaper, follow it by listening to a recording and finally pick up the diary (screen). Once this is all done, talk to the woman and the flashback scene will come to an end. Wait for the game to transport you back to the crash site.
QUEST 3: Get past Jack
Just as before, you should pay attention to what the main character is saying, because this is a hint on how to get past Jack. You could also try talking to Kate, Claire and Sawyer again, however it wouldn't allow you to solve this problem. As a result, go back to Jack and choose a new topic from the first category:
- Claire's fainted!
You'll finally be able to enter the jungle. Wait for the game to begin loading this new area.
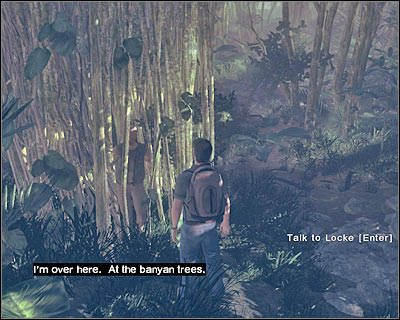
This is going to be the most difficult part of this mission. The area is being "patrolled" by the black smoke and it'll be up to avoid it all costs. Thankfully, you won't have to hide right away. As you've probably noticed, Locke is hiding inside the banyan trees. Approach him and begin the conversation (screen). You will be allowed to ask him a few questions. Start off by choosing the General category:
- What are these trees?
- Why are you here?
Now you can choose the quest-related topics. You'll find out how to reach the plane in order to be able to retrieve the camera.
QUEST 4: Follow the plane debris
Like I've already said, you will have to avoid being caught by the black smoke, because that would be equal to an instant death. You shouldn't be attacked right away, as long as you stay on a correct path. If you're attacked, start running towards the nearest banyan trees (screen). You'll only have to approach them and the main character will automatically hide. Once you're inside the trees, wait for AT LEAST 15-20 seconds before going back outside. You can also listen to the heart beat to stop, but it's best to be careful and to wait a little longer. Remember that you don't have to be in a lot of hurry.
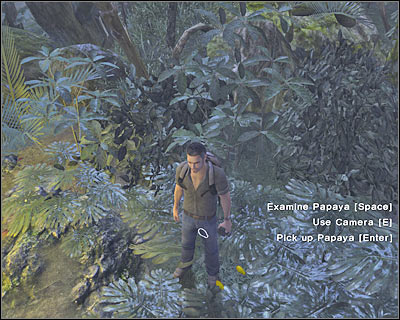
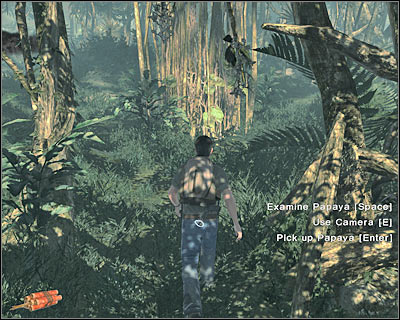
Thankfully, you shouldn't have any problems navigating through the jungle. You will have to approach some of the fragments of the plane. The first fragment can be found near Locke (screen). Don't click on the right object, because you don't want to go back to the beach. Instead, examine the left fragment. The game will switch to a FPP view in order to show you where to find the next metallic object. Exit the FPP view and start running there. Once you've arrived, hide inside the trees in order to avoid the black smoke. You'll also find some papayas along the way. You can pick them up if you want to, however try staying near the main path.
Once the black smoke has left, exit the hideout and examine the new fragment of the plane. The next object is nearby, so you shouldn't have any problems finding it (screen). Examine this fragment. Don't worry if you can't see your destination from here. Just make sure that you're running in a straight line. You will come across a large tree along the way, so you'll know that you've chosen a correct path.
You will probably have to hide inside the banyan trees here. The hideout is located in front of you, so you won't have to spend a lot of time searching for it. Once again, wait patiently for the black smoke to leave. Exit the hideout and examine the new object. You shouldn't have any problems finding it (screen and the black smoke won't return for at least a few seconds.
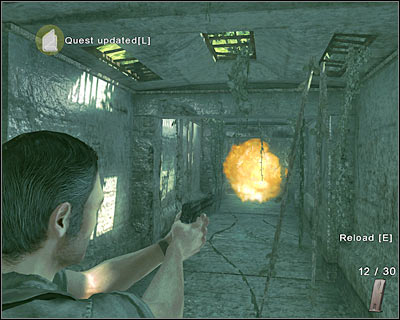
Look at the screen, because that's where you'll have to go right now and that is what the fragment should show you once you've examined it. Try making a few steps forward and you'll be rewarded with a new cut-scene. As you've probably noticed, you will have to avoid the attacks of an armed opponent. Thankfully, it won't be too difficult.
This is going to be an extremely simple action sequence. All you have to do is to start running forward and you should be fine. Even if you get shot somewhere along the way, you won't die and the main character will regain full strength shortly. Focus on moving in a straight line, so you won't get lost. You will have to reach a new fragment of the plane (screen). Examine this object quickly and adjust your bearings. Start moving towards the next fragment. The game should display a new cut-scene in the meantime. The shooter is going to be attacked by the black smoke, however (as you'll soon find out) he won't die. Approach the final fragment and examine it. The game will allow you to proceed to a new area. Choose this action by clicking on "Move to next area" button.

Once you've arrived at the new area, start moving forward. Try taking some coconuts, as well as a water bottle along the way. You should be able to come across Michael (screen). Talk to him for obvious reasons. As you've probably noticed, you will be allowed to choose between several new questions. Here are the new general topics:
- It looks pitch dark in the cave.
- I was attacked again.
- What's in the cave?
As for the main quest, you will have to ask him two questions:
- Have you seen the cockpit?
- Why are you out here?
QUEST 5: Navigate the cave
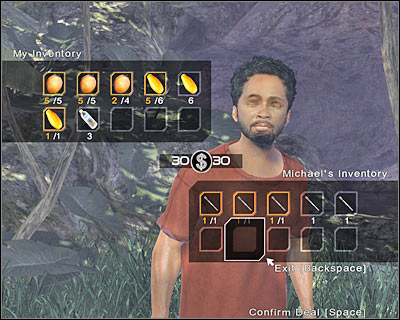
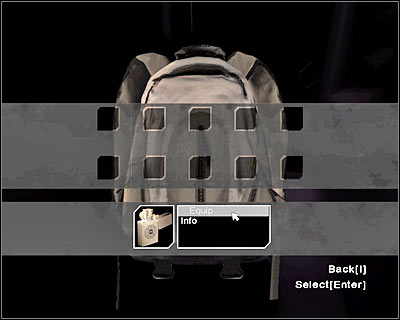
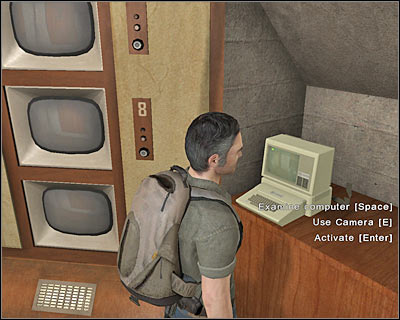
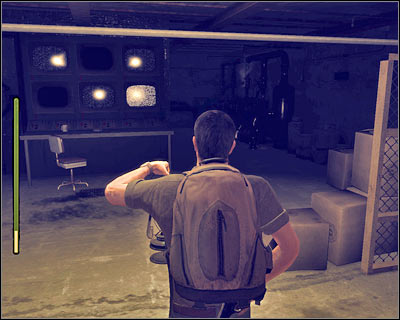
Michael should automatically give you his lighter. You could use this item to explore the cave, however I can assure you that it won't be efficient, mostly because you won't be able to see too far ahead. As a result, you should consider opening a Trade menu by choosing the fourth option. Look at an example of a transaction with Michael (screen). I would recommend purchasing AT LEAST two torches from him, especially if you plan on moving slowly through the cave system, instead of using the run button. Once you've bought the new items, open your inventory by pressing the I key. Click on the lighter and choose Unequip. Once this is done, choose one of the torches.
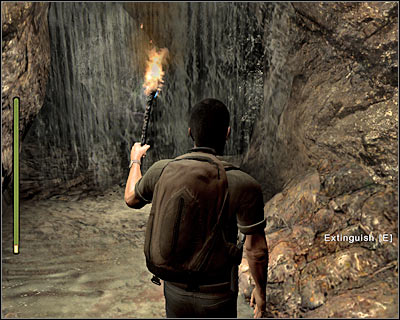
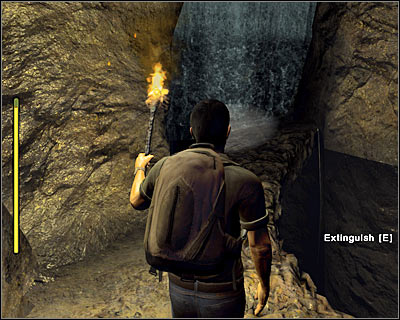
The entrance to the caves can be found to your left, so you won't have to waste any of your precious time looking for it. Once you're inside, head on to your right. You will have to light up your torch here by pressing the E key. The game will suggest that you avoid the bats and the water, so the torch will last longer. Thankfully, you won't have to deal with any of these problems right away. For now focus only on moving forward.
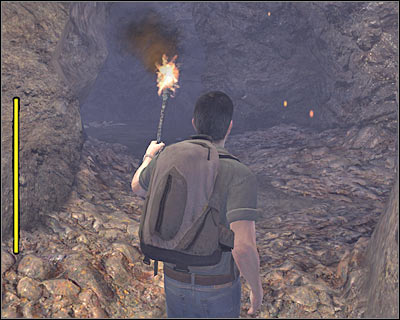
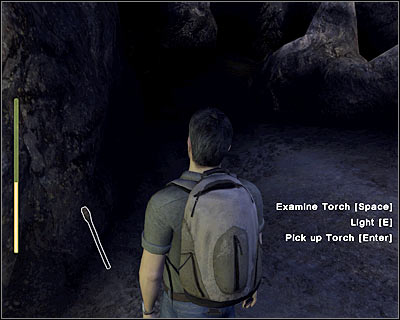
There's only one passageway leading to your current destination, so you really can't get lost while going through the caves. You will have to reach a small bridge (screen). Be careful here, so you won't fall down. If you've lost your torch, ignite the next one. Don't worry if you've bought only two torches, because you'll find a new one very soon.

Don't worry about the bats, however you may consider extinguishing your torch as soon as you hear them. Focus most of you attention on protecting the torch from the water, so you won't lose it too early. Keep moving forward.
Your objective will be to find a new torch. Look at the screen in order to find out where to look for it. Obviously you will have to pick up this new torch, even if you have some of these objects in your inventory. Ignore the dead polar bear and proceed to the next section of the cave.
You should be able to reach a small junction very soon. Don't worry, because you can't get lost here. The cave system isn't too big, so eventually you'll end up heading towards your target. I would recommend going left, because it's the shorter way. Look at the screen, because this corridor leads to an exit. Keep moving forward. Exit the cave and wait for the game to begin loading a new area of the jungle.
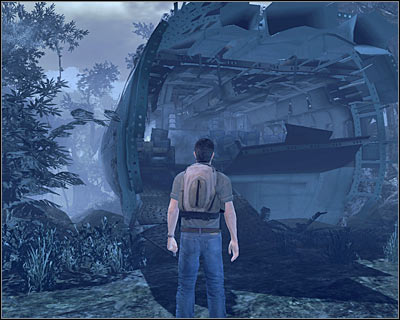
Start off by moving forward. Once you've reached a larger area, you should be rewarded with a shot cut-scene during which you'll be presented with the wreckage of the plane. That's your final destination, so go ahead and choose the nearest passageway. Reaching the plane should only take you a few seconds. Enter the plane by moving forward (screen).
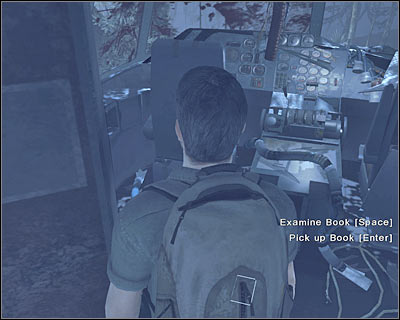
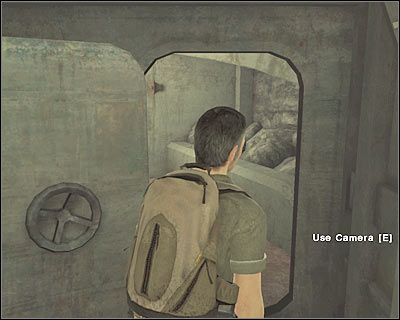
Obviously you should take your time to explore the inside of the plane. You'll come across a closed compartment, so you'll have to figure out how to open it in order to retrieve the camera. Pick up a water bottle and proceed to the main cockpit. You should be able to find a book here (screen). You can also examine the blood stains on the front windows. Turn around and approach two electrical panels.
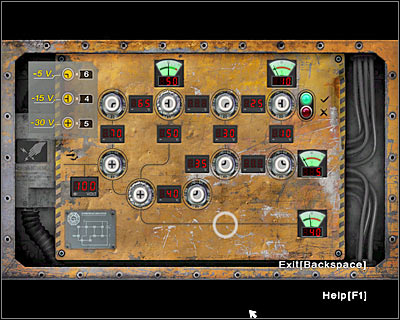
Start off by examining the panel which can be found to your right. You won't be able to perform any activities here. Instead, collect all nine fuses (screen) by clicking on them and pressing the P key. Once this is done, close this view by pressing the BACKSPACE key. Turn left and approach the second electrical panel.
Try activating the panel to your left. You will have to solve a well-known mini-game here which will require you to place some of the collected fuses in correct slots. This time it's going to be a little more challenging, however you should be fine on your own. Look at my screen for a full solution to this problem. Remember that you can place the fuses in any order you want to. Once you've placed them correctly, you will be rewarded with a short cut-scene.
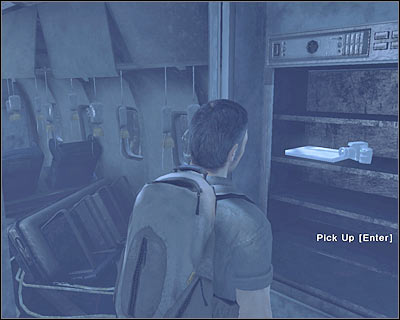
Go back to the small compartment which can be found to your left. You will be able to take a digital camera from the compartment (screen). You won't have to take any photos here, so leave the camera in your inventory for the time being. Go back to the left panel and pick up all fuses. Once this is done, exit the wreckage. This will trigger a new FMV sequence and this episode will also come to an end.
The third chapter of the game will require you to take care of a large number of smaller tasks. You'll also spend a lot of time exploring the island. Once again, you will have to enter the jungle, however this time you'll only be going against armed hostiles, not the deadly black smoke. Once you've found the hatch, you will be allowed to proceed to a new cave system where you'll have to collect an important item.
QUEST 1: Get my laptop working
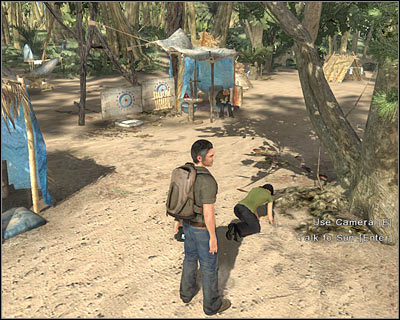
You'll start the game near a completely new campsite. You haven't been here before, so you should consider spending a lot of time exploring the beach. Obviously you should focus mostly on collecting water bottles and coconuts. There are going to be a lot of these objects in the area. You should also consider talking to some of the present survivors. Start off by talking to Hurley (screen). Ask him a few general questions:
- Why were you on Flight 815?
- Who do you think attacked us?
- What do you know about Kate?
As for the quest-related topics, you will have three choices:
- I was attacked.
- I found my camera.
- I found my laptop but it's busted.
Locke should be standing next to Hurley. Examine the backgammon board before you decide to talk to Locke. As for the conversation, you should start by asking him questions from the first category (Quest), however the second category will also include some new topics:
- I met some people out there.
- What do you know about Charlie?
Make sure that you've used up all available dialogue lines, so you'll find out everything. You may proceed to the main area of the campsite. It would be a good idea to find Jack (screen). Talk to him. Just as before, you'll be rewarded with some new general topics:
- I think I've been seeing a ghost from my past.
- What do you know about Locke?
End this conversation once you've chosen all quest-related questions.
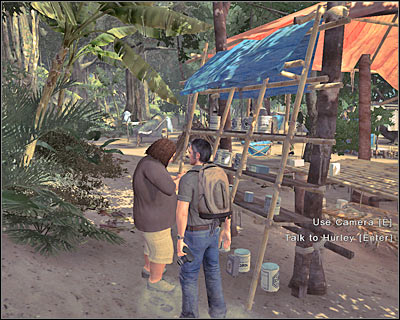
The next survivor in line is Sawyer (screen). You will have to ask him some of the previously added questions, as well as a new one:
- What do you know about Jack?
Don't close the conversation window just yet. As you probably remember, you are allowed to trade goods with Sawyer. I assume you've used up most of the slots in your inventory, so you'll have to free up some space before proceeding to the jungle. I would recommend selling coconuts and papayas, because they're not too valuable. Sawyer will offer you two new things:
- a gun - $110
- a gun clip - $30
You probably don't have enough goods to acquire a gun, so you should consider buying the ammunition. Make sure to sell some of the cheapest items, because you won't have any problems collecting more of them later during the course of the game.
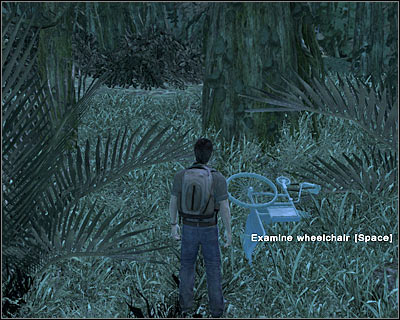
Take your time and explore the entire campsite. You should be able to find a lot of coconuts here. Additionally, there's a wheelchair near the jungle entrance. Look at the screen if you're having some difficulties finding it. Move back and take a picture of an entire wheelchair. You should receive a confirmation that you've started one of the subquests. Don't worry, because you'll find two remaining items later. You can't photograph them here and now.
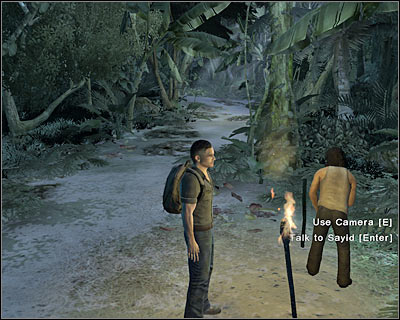
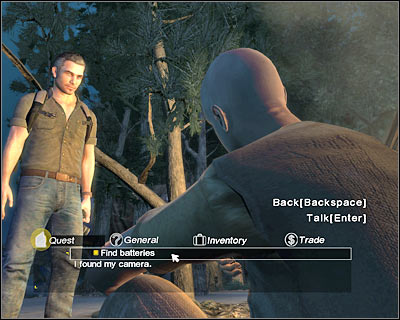
Once you've explored the area and talked to some of the survivors, proceed to the main road leading to the jungle. Sayid should be standing here and you must to talk to him (screen). The general questions will remain the same, so make sure that you've focused on quest-related topics. You'll find out that Sayid needs a battery in order to repair the laptop. He will direct you to talk to Locke.
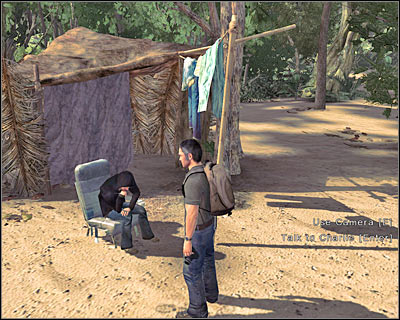
QUEST 2: Find Locke for a new battery
I'm sure that you still remember where to look for Locke. He should be sitting near a fireplace. Talk to him and choose a new topic from the list:
- Find batteries.
Locke won't cooperate with you, but it's not a major problem, because you'll have to participate in a new flashback scene.
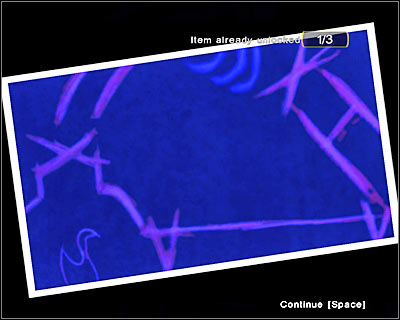
This flashback will focus the attention around Locke, because the main character thinks he's met him before. Just as before, your main concern will be to take a photo of some of the high value objects. Make sure that you've seen the hint movie, so you'll know where to look. You will have to take a photo of two people. A woman should be visible on the photo, as well as the owner of the shop - Rico. Additionally, you will have to photograph a large sign. You'll probably have some problems adjusting the focus, but you'll be allowed to repeat the scene as many times as you want to. Look at the screen if you want to see an example of a good location for a photo.
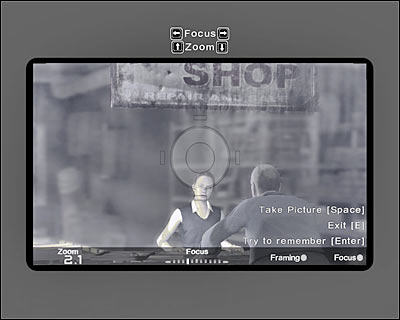
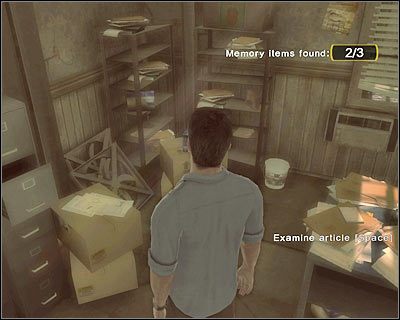
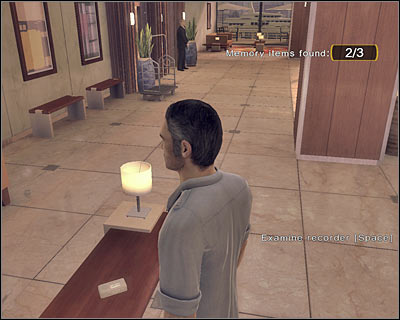
Once you've taken a correct photo, you will be rewarded with a longer cut-scene during which you'll see Locke. Wait for the game to allow you to regain full control over the main character. You should take your time and explore this room, especially since it's rather small. Listen to a recording, read a note and take a closer look at the article (screen). Once this is all done, go back to Rico (shop owner) and talk to him. This scene will come to an end. Wait for the game to transport you back to the beach.
QUEST 3: Coerce Locke to help me
You shouldn't have any problems here. Talk to Locke and choose some of the new topics:
- My memory's returning. I remember Savo.
- Ever heard of Lisa Gellhorn?
- I remember you were in a wheelchair.
QUEST 4: Meet Locke at the tree line
Locke will finally agree to help you in finding the battery for the laptop, however you will have to go on a journey with him. Thankfully, you won't have to take any additional supplies from Sawyer, so proceed forward right away. Approach Locke (screen) and talk to him.
QUEST 5: Follow the tree markings
You may finally leave this area. The exit is located next to Locke, so all you have to do is to make a few steps forward. Choose "Enter the Jungle" option from the menu.
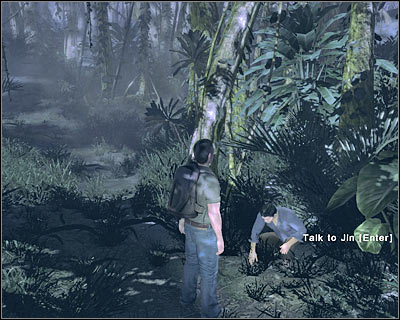
Once again, you won't have to worry about being attacked by the black smoke while exploring the jungle. You'll be dealing with tree marking in order to navigate your way to the final destination. Before you leave this area, you might want to consider approaching Jin (screen), however he won't understand a thing you're saying (maybe except 'the others' ;-)). As a result, you may ignore him.
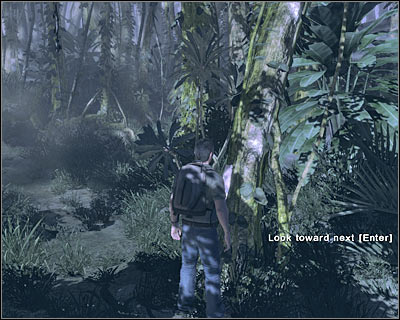
The first tree marking is located nearby, so you won't have to spend a lot of time searching for it (screen). Once you've examined the tree marking, you'll be rewarded with a location of a new sign. The most important thing here is to travel in a straight line. Otherwise you might get lost. Distract from the main path only if there's a large tree blocking your way.
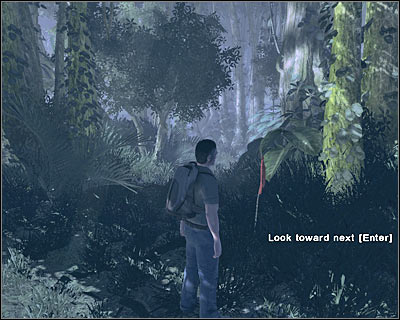
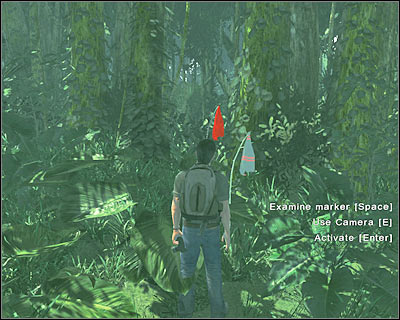
You shouldn't have any major problems with the first group of markings. The problems will begin once you've found a fourth clue, because you are going to be attacked by some armed enemies. You won't have to fight back, however you won't be allowed to make any unnecessary stops. From now on you'll navigate by examining red flags (screen). This should allow you to get to the final marking. Examine it and you'll receive an information that you're allowed to leave this area.
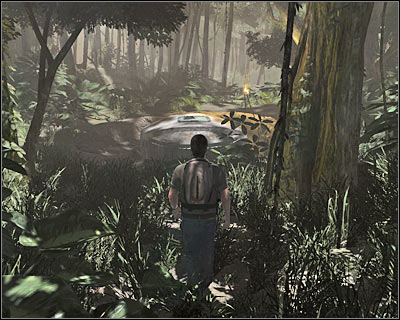
Start off by moving forward. There's only one passageway here, so you can't get lost. You should be able to approach a closed hatch (screen). Don't worry, because you'll see what's inside soon enough. Examine this area before performing other activities. Don't talk to Locke just yet. Instead, pick up some of the visible coconuts. There's also a water bottle here.
Approach the hatch and find the numbers engraved on it. You may examine them if you want to, but it's even more important to move back and to use the digital camera. Choose this object from the inventory if you haven't done that already. Take the photo of the numbers (screen) and you'll automatically solve a subquest. Proceed to Locke and talk to him. Start with the general category:
- Who has shooting at me?
- How can we open it?
- Where did this come from?
- I think I've been seeing a ghost from my past.
- How can you suddenly walk?
Now you must choose some of the available quest-related topics:
- What is this place?
- I thought you were gonna give me the batteries.
- Just give me the battery.
Locke will automatically take you to a new location.
You might want to consider looking around a little, especially since there are a lot of fruits here (screen). Take them if you want to, especially if you've sold your other goods. If you want to focus only on the main quest, you should move on forward. If you want to solve another subquest, turn around and go back to the previous location, because you'll have to examine the hatch more closely.
Make a few steps forward. As you've probably noticed, there's a beam of light coming out of the hatch (screen). Choose a digital camera from your inventory and photograph this phenomenon. As a result, you will be able to complete a new subquest. Head back to the caves, because you won't be allowed to open the hatch.
You may proceed forward. Head on towards the drawbridge. Thankfully, you won't have to worry about losing your life here. All you have to do is to keep moving forward. Eventually you'll come across Locke. He's carrying a torch, so you can see him from a larger distance.
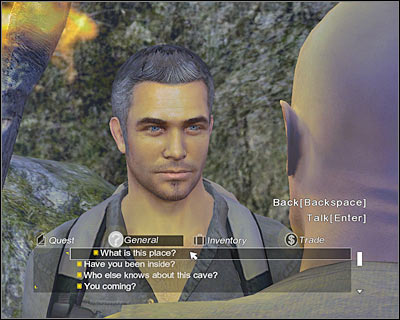
Obviously you will have to talk to Locke before moving on towards the cave system. Start off by choosing some of the available general questions (screen):
- What is this place?
- Have you been inside?
- Who else knows about this cave?
- You coming?
- What do you know about the Others?
Finally choose a quest-related topic:
- What's in the cave?
Before you decide to end the conversation with Locke, it would be a good idea to trade goods with him. Make sure that you have purchased at least two torches from Locke. You should also free up some slots by selling coconuts and papaya fruits.
QUEST 6: Explore the cave
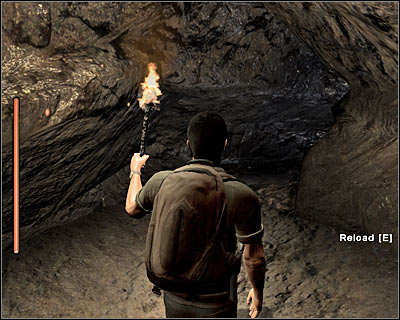
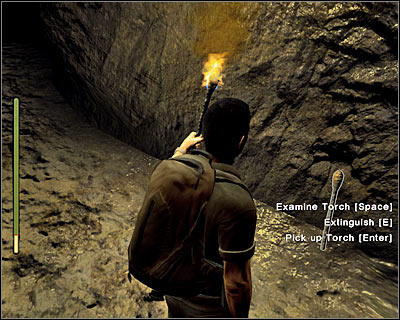
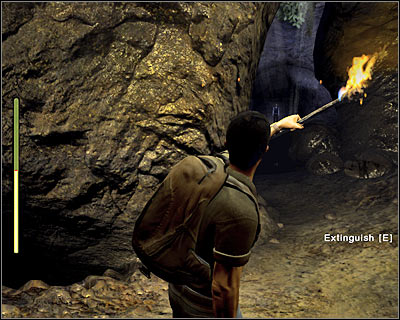
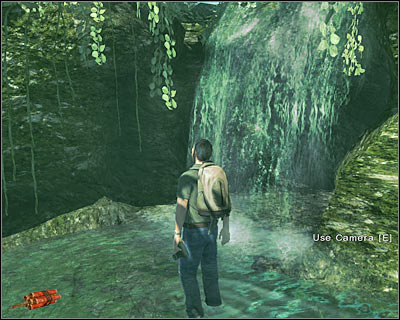
Obviously the first thing you have to do here is to choose one of the purchased torches from the inventory, however you won't have to light it up right away. Proceed towards the nearest entrance which leads to a much bigger cave system. As you've probably noticed, you will have to follow a strange woman. Start off by going to your right. Light up your torch, because it's going to get dark here. Start moving forward and watch out for bigger holes (screen). I wouldn't recommend running here, especially since you won't have to worry about running out of torches.
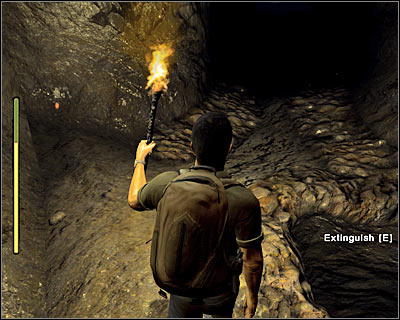
Remember to extinguish your torch each time you hear bats flying towards you. This isn't a necessary thing to do, but it'll allow the torch to last longer. Otherwise you would have to replace it with a new one sooner than you've expected. You should be able to enter a much larger cave very soon. There's a new torch to your left (screen), so you should consider picking it up right away. You'll also find a food box here. Take it, because this object is worth 10 dollars. Head on to your right. Extinguish the torch and walk through the waterfall.
Once you're inside a new corridor, I would recommend that you go to your right. Be careful, though. It's very easy to die here, so stay on the main path. Find and collect a second torch. Look at the screen if you're having some difficulties finding it. You may proceed to the next section. There's only one passageway leading to the next area of the caves, so it shouldn't take too long for you to find it.
Once you've reached a small junction, DON'T go left, because you would have died there. Instead, turn right and start moving forward. The path hear is very dangerous (screen), so you should be moving very slowly. It's also a good idea to make a stop each time you have to light up the torch.
Now you will have to turn left, because that's where you'll see a woman (screen). You can also keep listening to her voice in order to navigate through the caves. Eventually you'll end up standing inside a larger cave. Extinguish your torch and head on towards the water. You don't have to go right, but take your time to explore the surroundings. There should be a second food box here. Once you've taken it, light up the torch and move forward.
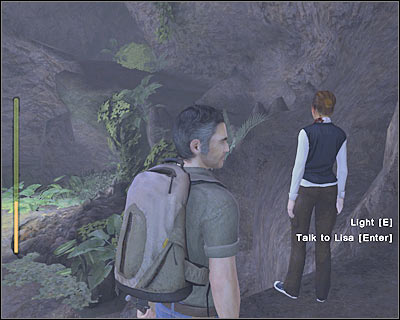
Reaching the final area of the caves shouldn't take you more than a few seconds. Extinguish your torch here, because you won't need it anymore. Approach a woman and try talking to her by pressing the ENTER key ("Talk to Lisa" action; screen). You will be rewarded with a new vision. Approach the ledge and press the ENTER key once again. This will allow the main character to jump down. Wait for the game to display a short cut-scene.
You won't have to explore this area, because you wouldn't find anything of interest here. As a result, turn right and approach the body of a dead woman. You should be able to find a compass here. Obviously you will have to take this item by pressing the ENTER key. This will trigger a longer cut-scene and this episode will come to an end.


The action of the fourth chapter will take place mostly inside one of the Dharma stations, however you will have to gain access to the station in the first place. Once inside, you will have to solve a few problems. Some of these riddles may prove to be quite challenging. Also, you won't be allowed to save your progress there.
QUEST 1: Give the battery to Sayid
QUEST 2: Follow your compass
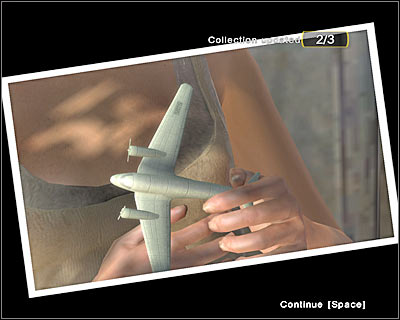
Just as before, you should start this chapter by performing some basic activities. There are some new objects in the area, including coconuts and water bottles. Pick them up if you want to. You can also consider talking to some of the survivors. Kate can be found nearby, however before you decide to talk to her, choose a digital camera from your inventory. Try taking a photo of her toy plane (screen). Once this is done, proceed with the conversation. Here are the new general topics:
- Can I trust Sayid?
- I think I'm seeing ghosts.
- What's inside the hatch?
As for the quest-related questions, you will be allowed to choose between two new topics:
- What was that explosion?
- Where's Sayid?
Now you should try talking to Locke. You will be allowed to ask him one new question:
- Do you believe in fate?
Also, don't forget to exploit all main topics (Quest category). Next up, we've got Hurley. Just as before, you will be given one new dialogue line:
- What do you know about the numbers?
You should also ask him a quest-related question. Once this is done, end the conversation and find Sun (screen). You weren't able to talk to her before, but now's your chance. Once again, you will be given one new entry in the general category:
- Where's your husband, Jin?
You can also consider asking her quest-related questions.
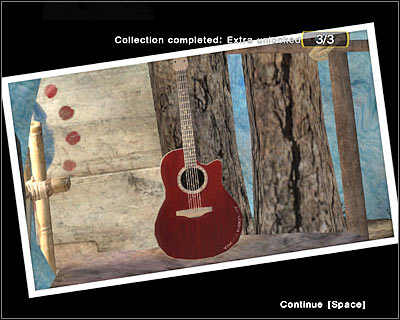
The last survivor you'll be allowed to talk to is Charlie. You can find him near Sun, so you won't have to explore the entire campsite looking for him. Just as with Kate, before you decide to talk to Charlie, you should try taking a photo. Your objective here will be to obtain a photograph of Charlie's guitar (screen). This object can be found behind him, however he may also be using it at the moment. Once you've obtained the photograph and solved this miniquest, begin the conversation. Here are the new general topics:
- You look familiar.
- Who are you calling the A-team?
Don't forget to choose the quest-related statements as well. Additionally, you will be allowed to trade items with Charlie, because Sawyer isn't here. I assume you don't have a lot of free slots in your inventory, so you should consider selling some of the cheaper items. You should be able to purchase a gun from Charlie, especially if you've collected a lot of water bottles and food boxes.
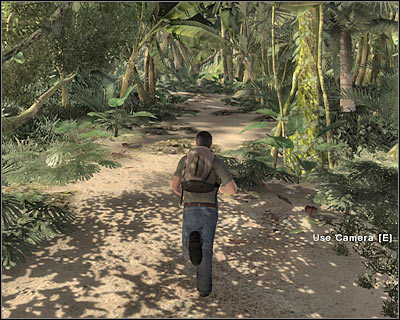
Before you decide to leave the beach, make sure that you have a lot of free slots in your inventory, so you will be able to pick up all interesting objects you'll find during your journey. There are two passageways leading into the jungle (screen). Once you've arrived at the exit, choose the only available option from the menu - Enter the jungle.
Once again, you shouldn't encounter any major obstacles while exploring the jungle. You will have to follow a correct path and you're going to be attacked by some enemies once you're close enough to the exit. This time you will have to be on a look out for yellow objects which will indicate where to go next. The only difference is that you'll have to use your compass. Your task will be to turn the main character, so he'll be facing a proper direction. Remember that you can always activate the FPP view manually by pressing the C key.
Here are the bearings from the yellow signs: 215 degrees, 185 degrees, 280 degrees, 330 degrees (you will also find a lot of fruits here), 105 degrees, 0 degrees (you may have some problems finding the next yellow sign - check the screen), 335 degrees. Eventually you should be able to enter a new area where the game will reward you with a cut-scene.
You will encounter Desmond here. Obviously you will be allowed to talk to him. Start the conversation by choosing some of the available general questions:
- Are you an Other?
- What do you know about the hatch?
You may now proceed with the topics from the Quest category:
- Who are you?
- You must be from the hatch.
- What are you doing out here?
- What are the numbers?
End the conversation by pressing the BACKSPACE key. The exit is located near Desmond. Examine the last yellow sign and choose the only available action from the menu - Move to next area.
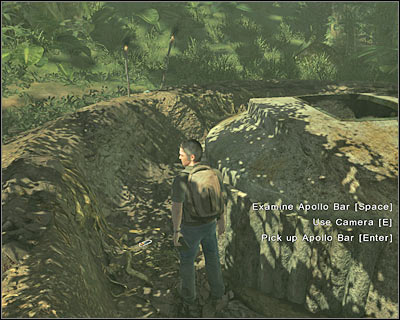
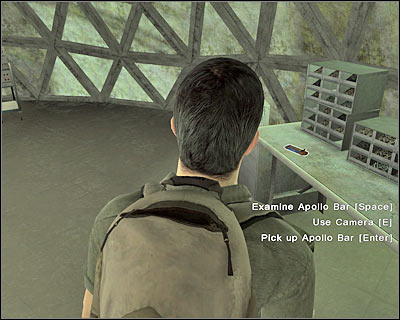
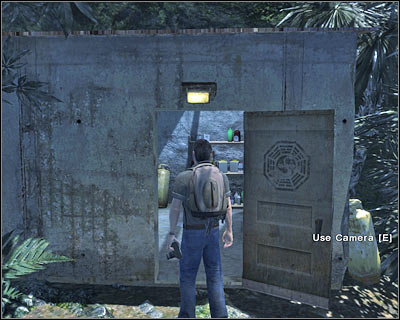
You may ignore the fact that the hatch has been destroyed, because you won't be able to enter the station from here. There's an Apollo Bar near the hatch (screen). Take it, because it's worth 50 dollars (!!). You may proceed towards a small passageway which leads to a new area of the jungle. A stream flows through here. Ignore it and start moving left.
Eventually you should be able to reach a small bunker. Sadly, the entrance to the bunker is going to be guarded by Sayid (screen). Approach him and begin the conversation. You will be allowed to ask him one new general question:
- Do you know Desmond?
It's very important that you ask him all quest-related questions:
- Here's the battery for my laptop.
- What's inside the hatch?
- My compass points to the hatch.
Sayid won't let you inside the bunker. Thankfully, you will be given a new assignment.
QUEST 3: Learn your name to enter the Hatch
You can't convince Sayid to let you through, so you will have to go back to the hatch. Once you're there, move forward in order to leave this area of the jungle. Choose "Jump to the beach" option from the menu.
You might want to consider talking to the survivors about your problem with Sayid, however it won't be necessary and it won't get you any closer to receiving a clearance to enter the bunker. I would recommend that you focus on completing one of the side missions. Doing this will unlock you access to the Staff Station. Your task will be to examine various objects, however you must do this in a certain order. Your first object of interest is a suitcase. Look at the screen if you want to find out where to look for it.
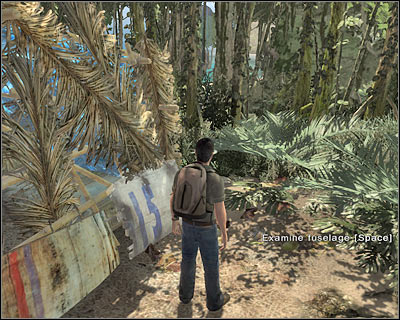
Now you must turn around. Start running forward. There are some shells on the beach. Examine them. Once this is done, turn right and start running towards the opposite end of the campsite. You will have to find fuselage (screen). Once you've examined it, turn right and examine a large crate.
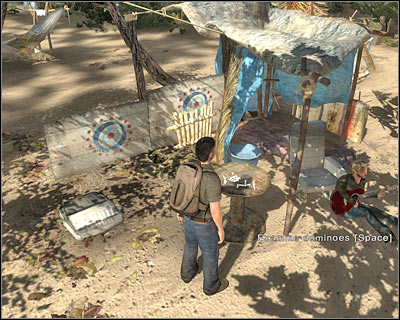
Your next object of interest is a food cart. You can find it next to Hurley, so it shouldn't take you too long to get there. Finally, head over to Charlie's tent. There are some dominoes in front of him (screen) and it'll be up to you to examine them. If you've done everything according to the plan, you should notice that a menu has been displayed on your screen. Choose Medical station for your next destination.
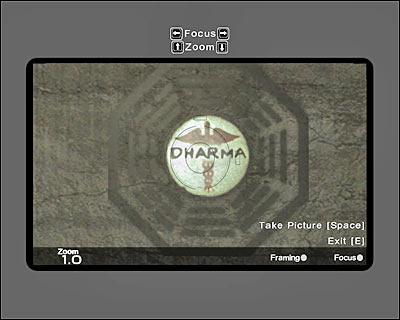
You will find yourself standing inside the Dharma medical station. Start off by running forward, because you will have to reach the lower level of this structure. Open your inventory and choose a digital camera. Now you must take a photo of the logo of the medical station (screen). This will allow you to complete one of the subquests. You may also inspect some of the nearby rooms in order to pick up Apollo bars. Once this is done, head back up.
Once you're ready to move on with the main quest, talk to Hurley (screen). You will have to ask him two questions:
- What's the manifest?
- I gotta learn my name. Found anything that might be mine?
Get ready, because you'll take part in a new flashback scene.
Thankfully, this time you shouldn't have any problems completing the flashback scene, especially since you'll be able to repeat it almost immediately. You will have to start off by moving to your left. Try taking a photo of a document. Look at the screen if you're having some problems figuring out which one it's going to be. Make sure to adjust focus, because otherwise you won't be able to move on. It shouldn't take you too long to take a correct photo.

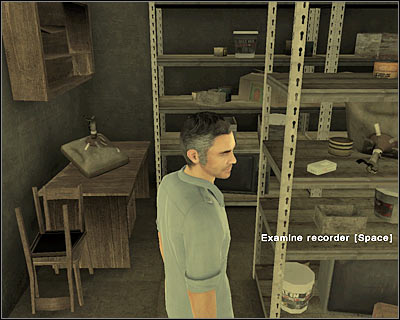
Just as before, you will be allowed to examine some important objects. Head on forward. Your first object of interest should be a recorder (screen). There's also a letter nearby and it'll be up to you to read it. Finally, head back to the counter and open a folder. Once this is all done, talk to Rico. You'll be rewarded with a longer cut-scene and you'll also be transported back to the campsite.
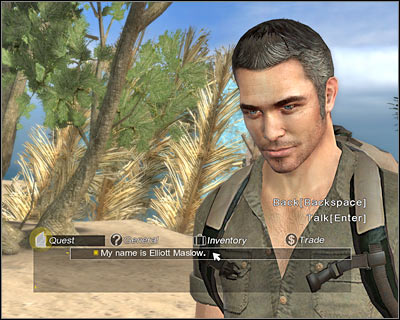
You can go back to Sayid right now if you want to, however you can also talk about your new discovery with some of the survivors (screen). Each time you'll talk to someone you'll be given one new sentence:
- My name is Elliott Maslow.
Sell some of your goods to Charlie while you're still at the beach. It's very important, because you'll come across A LOT of new objects in the near future and it would be a good idea to be capable of collecting them. Once you're ready, go back to the jungle exit and choose "Jump to the hatch" from the menu.
You won't have to discover anything new around the blown up hatch, so you may proceed to the bunker right away. Talk to Sayid and choose new dialogue lines from the list:
- I need to get in the hatch.
- My name is Elliott Maslow.
- What's inside the hatch?
QUEST 4: Enter the numbers
The entrance to the bunker is located behind Sayid (screen). You must press the ENTER key. Choose "Enter the Swan Station" action from the menu.
Start off by moving forward. Use the stairs to get down to a lower level of the complex. After that, turn right. You will have to enter the station (screen). The game will display a short cut-scene here. As you've probably noticed, you're trapped inside the Dharma station and your priority will be to get out.
QUEST 5: Find a way to open the door
You can examine the blast door if you want to, however it's not necessary. You will find A LOT of fuses inside the Swan station (screen). It's very important that you start collecting them, because you're going to need these objects in the near future. Take your time to explore some of the nearby corridors.

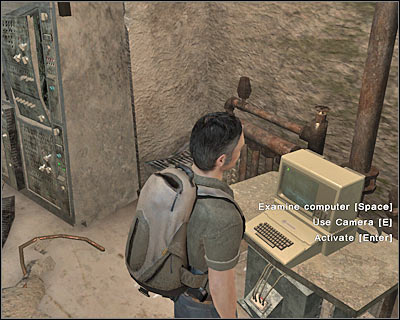
Before you decide to explore the station more thoroughly, you should take care of the main quest - entering the numbers into the computer. The moment you entered the station, you still had a few minutes left, so you'll have to wait for the device to open all interior blast doors. Ignore the alarm sound and head on to a room with the computer (screen).
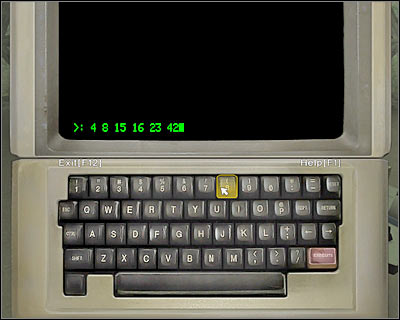
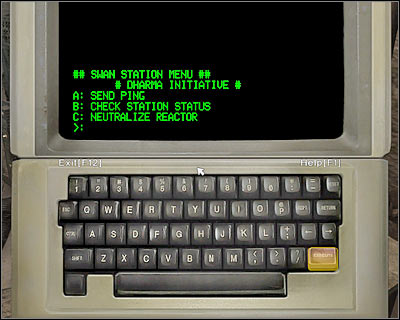
Approach the computer and press the ENTER key in order to activate it. Wait for the game to switch views. Now you will have to input the code with the keyboard - 4 8 15 16 23 42 (screen). Also, make sure to press the SPACE key after each number. Once you've completed the sequence, press the ENTER key or click on EXECUTE (lower right corner). The countdown clock should reset itself to 108 minutes, so you won't have to worry about the numbers ever again (you'll only spend about 15-25 minutes here).
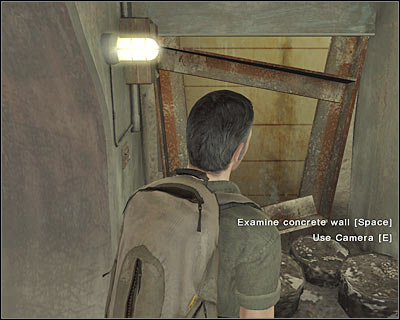
Go back to the main corridor of the station. There's a large concrete wall here. Examine it by pressing the SPACE key (screen) and listen to a short statement by the main character. You'll also be rewarded with a new quest.
QUEST 6: Find a way behind the concrete wall
Now you may finally focus your attention on exploring this base. Make sure to pick up fuses along the way!
I'd strongly recommend that you follow my exact instructions, so you won't miss anything important. It would be wise to leave the main quest for later, because you won't have to fulfill it right away. Start off by exploring the main corridor. You should be able to notice Desmond's mural here (screen). Open your inventory and choose a digital camera. After that, take a photo of the mural (screen). There's also a long tunnel nearby. It would be a good idea to go there, because you would find a new fuse.
Go back to the room with the computer. You should be able to find a lot of fuses here, as well as a new device (screen). As you've probably noticed, you will have to ignite three green lamps in order to be able to pull the switch. We'll deal with that problem later on during the course of this mission. Head on to the main area of the Swan station and explore the kitchen.
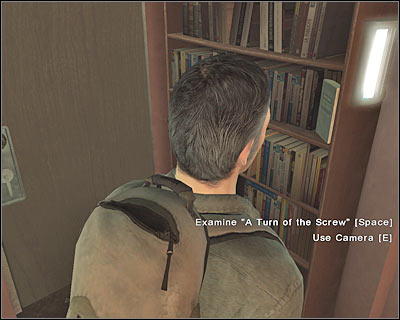
I guess you won't be surprised by the fact that there are a lot of valuable objects here. Aside from new fuses, you will be allowed to take food boxes and Apollo bars. You should also find several beer cans. I'd strongly recommend picking them up, because each can is worth 25 dollars. Examine the lava lamp if you want to. You can also examine some gym equipment. Once this is done, head over to the bookcase. Examine "A Turn of the Screw" book (screen) and take a photo of the book to fulfill one of the sidequests. You will also find a journal here.
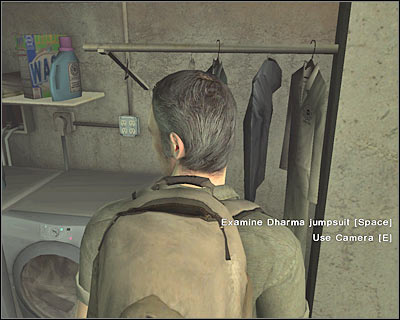
Head on to the right corridor. You should be able to encounter several washing machines here. Ignore them. Instead, focus your attention on the Dharma jumpsuit (screen). You will have to take a photo of this object, because it's a part of Desmond's collection. Head over to the bathroom and pick up new objects, including a beer can. You can also inspect a bedroom. Ignore the electrical panels for the time being.
Go back to the main area of the Swan station. A store room can be found to your left. As you've probably suspected, you will be able to find a lot of interesting objects inside, including fuses, beer cans and food boxes. Exit the store room and inspect a medicine cabinet (screen). Move back a little and take a photo of this object. This should allow you to fulfill one of the sidequests. There's a small table nearby. Approach it and examine the backgammon board.
Your final task here will be to find some blood stains. Look at the screen if you're having some difficulties finding them on your own. Once again, you will have to use your camera here. Take a photo of the blood stains in order to fulfill yet another sub-mission. You may proceed to the bedroom area.
I think it's about time you should start thinking about getting out of here. Your main concern will be to lift the blast door, but this can only be done if you've used the main device. Your objective is to interact with three electrical panels. The first panel can be found near the bed. Approach it and press the ENTER key. Look at the screen if you're having problems placing the fuses on your own. I wouldn't recommend experimenting here, because you won't be allowed to pick up the fuses once you've completed this mini-game. If you've done everything correctly, you should notice that the first green lamp has lit up.
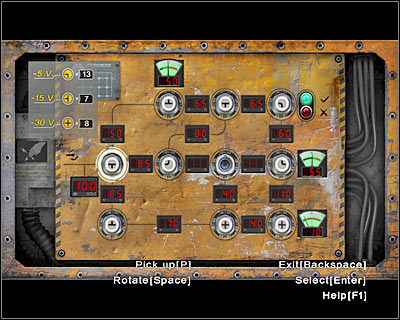
The second electrical panel can be found near the dishwashers (that's where you've photographed the jumpsuit). Once again, you can check my screen for a full solution to this problem. Also, make sure to leave the fuses where they are.
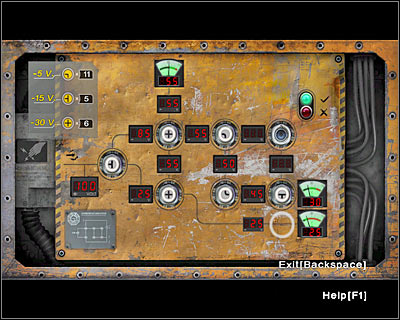
The final third panel can be found near the blast door. That's where you've started the game and received this quest. You'll probably have some major problems with this mini-game. Check the screen for a full solution. If you ran out of fuses, it means you didn't collect enough of these objects. Wait for a final cut-scene to be displayed on your screen.
You may go back to the room with the computer. Approach the device (screen) which can be found to the left. Your only task here will be to pull the switch by pressing the ENTER key. You will witness a new cut-scene.
As you've probably noticed, the lights will change, making it harder for you to move around. You will have four minutes before it's too late to escape, however if you plan on staying here longer, you can always use the computer to input the numbers. The only difference is that the counter will revert itself to four minutes (not 108!).
QUEST 7: Find hidden door
Head on to your right. You should notice that there's a drawing on one of the blast doors. It shouldn't come as a surprise that you have to take a photo of the drawing (screen). Once this is done, go back to the computer.
Approach the computer and use it by pressing the ENTER key. Start off by entering the numbers, so you'll have four minutes to perform other activities. Here's a complete list of actions you must perform (remember to press EXECUTE each time you've used the keyboard to input something!!):
1) Use your keyboard to type VIA DOMUS (screen)
2) Press D in order to choose BLACK LIGHT MENU option from the main menu
3) You will have to pass a simple intelligence test. The correct answer to the first question is 63 and to the second question - L.
4) Press A in order to choose ON/OFF BLACK LIGHT 1 and then press B in order to choose ON/OFF BLACK LIGHT 2. Finally, press C to go back to the BLAST DOOR MENU.
5) Keep pressing A, B and C, so you will be able to start three different commands - OPEN/CLOSE DOOR 1, OPEN/CLOSE DOOR 2, OPEN/CLOSE DOOR 3. Each time you've pressed a letter, you will be rewarded with a short cut-scene.
6) Finally, you can input the numbers again, so you'll have plenty of time to leave the station. Press F12 in order to close this window.

You can go back to the electrical panels to collect the fuses, however you won't need them to succeed. As a result, you may proceed to the blast door in order to try to leave the station. A new cut-scene is going to be displayed on your screen and this chapter will come to an end.


The fifth chapter of the game is by far the most difficult one. First of all, you will have to avoid the black smoke TWICE. The most difficult section of this episode will require you to transport the dynamite through a dangerous territory. You will also have an opportunity to use your gun for the very first time.
QUEST 1: Follow your compass
QUEST 2: Find a way out of the cell
The first part of this chapter is going to be very simple. All you have to do here is to make a few steps forward. Once this is done, open your inventory and choose the only available object. Obviously it's going to be a lighter. You will have to choose "Equip" from the list (screen). As you've probably suspected, you will witness a new vision.
Now you must approach the nearest door. Kate is standing on the other side and you will be allowed to talk to her by pressing the ENTER key (screen). Start off with a general question:
- How long have I been locked up?
Now you must choose both questions from the Quest category:
- What about Jack?
- Let me out.
Kate doesn't want to let you out, but you don't have to worry about that. Wait for the game to load a new flashback sequence.
This flashback scene is also going to be quite simple, so you shouldn't have any problems finishing it. All you have to do here is to go to your left. Place your main character near some of the large windows. Don't worry if the scene reverses itself in the meantime, because you'll stay in the exact same spot. Turn right. You will have to take a photo of Lisa, however you will also have to photograph a few additional objects. The most important thing here is to that you see what's on the screen of her laptop. Look at my screen for an example of a good location for a photo. Adjust the focus if you can't get it right for the first time.

Just as before, you will be allowed to perform other activities during the course of the flashback scene. You will have an opportunity to inspect some of the nearby objects. Two of them are located near Lisa. Examine the folder, as well as a letter. Finally, proceed to the reception area and find a recorder (screen). Once this is all done, go back to Lisa and talk to her. You will be rewarded with a new cut-scene and this flashback will come to an end.
You'll be transported back to a small room. Press the ENTER key once again in order to talk to Kate. You will have to choose a new topic from the list:
- I was a journalist.
Kate will let you out of the holding area and you'll also receive a new main quest.
QUEST 3: Find hidden door
You might want to consider talking to Kate again (screen). This time you should focus on choosing questions from the General category:
- What about the numbers?
- You believe me?
- My past is a mess.
I would recommend that you explore the entire Swan station for the second time, because you'll be allowed to pick up new items of high value, including food boxes, beer cans and Apollo bars (in the bathroom and near the computer - screen). Make sure that you've been to all rooms, so you won't miss anything important. You can take the fuses from the electrical panels if you forgot about this the last time you were here. You should also be able to find Kate's toy plane on the sofa. Take a picture of it if you haven't done this while you were on the beach. Once you're ready, head on to the room with the main computer.
Obviously you will have to use the computer. Don't worry about entering the numbers, because that's Kate's job. Instead focus on other things:
1) Press A in order to move one of the doors (OPEN/CLOSE DOOR 1). You should be rewarded with a short cut-scene.
2) Press D to enter a new menu (BLACK LIGHT MENU)
3) Press A and then B. This will allow you to change the lights (ON/OFF BLACK LIGHT 1 and ON/OFF BLACK LIGHT 2).
Close this window and go back to where Kate's sitting. Turn left and take a picture of a new map (screen). You won't have to revert the lights, so you may as well go back to the exit. Leave the Swan station.
You will have to perform only one activity here. Proceed to your left. You probably weren't here before, because you only wanted to gain access to the Swan station. Head on to a larger waterfall (screen). Go through the waterfall and turn right. There's a small tunnel here. It will lead you to a closed door. Wait for the game to add a new objective to your list of assignments.
QUEST 4: Find a way to open the sealed door
Go back the same way you came before. You will have to go to the hatch. After that, leave this location and decide to go to the beach.
I guess I won't have to remind you that there's a possibility of collecting new items from the beach, however you probably have a lot of valuable objects in your inventory, so you may as well ignore the coconuts. The first thing you should decide to do is to get rid of unwanted items. As a result, you will have to return to Charlie (screen). Start off by having a conversation with him. Choose the following topics from the list:
- The Swan Station.
- What do you know about Hurley?
- You All Everybody - Charlie will sing one of his songs. :-)
Finally, choose the only available quest-related topic:
- Where can I find dynamite?
Once this is done, choose Trade category from the main menu. I would recommend that you free up at least four slots. You MUST acquire a gun, so purchase it right now if you haven't done that before. You can also purchase a gun clip, however I'm sure that you won't need it. If you don't have enough money to buy the gun, go back to the Swan station to pick up most valuable items. You don't have to choose a gun from your inventory. It'll become active once you've entered a dangerous area.
The person you need to talk to about acquiring dynamite is Hurley (screen). Start off by asking him a few general questions:
- What's the Dark territory?
- Why are you cursed?
- What's the Dharma Initiative?
The most important thing is that you choose the only available question from the Quest category. You'll find out that you can obtain some dynamite at the Black Rock.
QUEST 5: Get dynamite at the Black Rock
Before you decide to leave the campsite, you can try talking to some of the other survivors. This isn't necessary, so you may skip this segment if you want to. You should be able to find Locke (screen) and Sun. As for Locke, you'll be rewarded with only one new topic:
- The Others.
The conversation with Sun should be a lot longer:
- Fate?
- Rescue?
- Trust?
Obviously I'm talking about general questions. You won't have to ask anyone else about the dynamite, because you already know where to find it. Go back to the exit and choose "Jump to the hatch" option from the menu.

You'll only spend a few seconds here. Start off by moving forward, so you'll find yourself near the hatch. Don't go to the Swan station. Instead, turn left and approach the red flag. Look at my screen if you're having some difficulties finding the flag. Press the ENTER key and choose a new option from the list - Enter the Dark Territory. Wait for the game to transport you to that location.
I have to warn you, because this is going to be an extremely difficult journey. You will have to avoid being caught by the black smoke. The main difference is that you'll have less time to hide, because the attacks are going to be unexpected. You will encounter four hideouts along the way, however you will probably use only three of them. As for navigation, you will be examining other flags, similar to the ones on the screen.
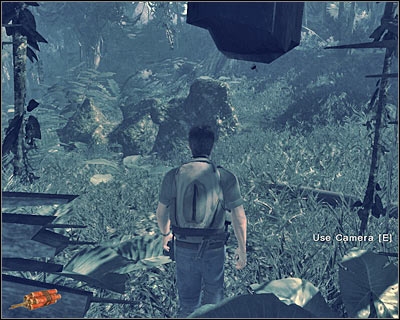
Your first task here will be to go to your left. You will have to be moving in a straight line. I would also recommend pressing the run button, because you are going to be attacked by the black smoke. DON'T stop at nothing. Keep running forward and eventually you'll be allowed to hide inside the banyan trees. I would recommend staying there for at least 30 seconds, so the black smoke will leave this area of the map. Don't leave the hideout too early.
Now you will be given an opportunity to find one of the hidden objects. You would have to leave the hideout and go to your left (don't change the camera angle). Look at my screen carefully, so you'll know that you're heading in the right direction.
You should be able to find your reward in just a few seconds. It turns out that there's a van here! Enter the inventory and choose your digital camera. Obviously you will have to take a photo of the vehicle (screen). Once this is done, go back the same way you came before. Hide inside the trees before the black smoke gets here. Once again, wait for the black smoke to leave you alone.
You may proceed with your journey through the Dark Territory. Make sure that you're using the flags to navigate your way to your final destination. I wouldn't recommend leaving the main path. It's also very important to use the run feature, so it won't take too long for the main character to reach new objects of interest. Use other banyan trees for cover. You can only ignore the fourth hideout, because there's a flag nearby (screen). Approach it and choose "Go to next area" action from the list.
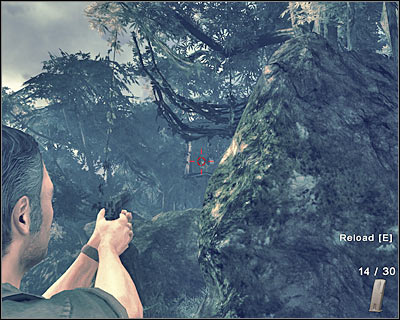
You will be allowed to rest here, because the black smoke won't appear near the Black Rock. Instead, you will have to defeat a single opponent. Make a few steps forward and draw your weapon by holding the CTRL key. I would recommend hiding behind one of the nearby boulders (screen). Wait for your opponent to start reloading his weapon. He should do this once he has fired two shots at your main character.
Now you will have to lean out quickly. Aim at your opponent, so the target changes to red (screen). Remember that you don't have too many bullets at your disposal. I would recommend that you go for a precise shot. You will have to fire two rounds before you'll be able to get rid of him.
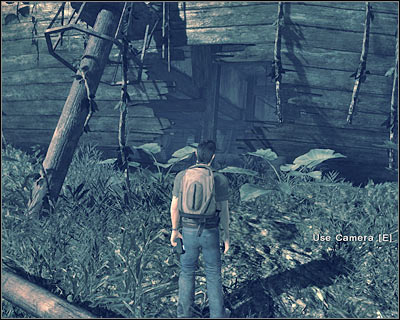
There aren't any other hostile units in the area, so you may as well holster your weapon. Start moving forward. You won't encounter any valuable objects along the way, so you should focus only on getting closer to your destination. You might want to consider taking a closer look at the anchor. It can be found to your right. Eventually you'll come across your main objective - the Black Rock (screen).
You won't have to explore this area more carefully, because the ship is surrounded by bushes and trees, so you wouldn't be allowed to travel too far. I would recommend that you find a hole (screen) and enter the ship as soon as possible. There's a food box to your right and you'll also find a second box later on.
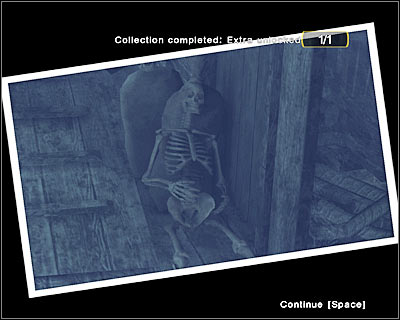
Your main objective will be to find the dynamite, so you have to go to your left. Before you decide to pick up the dynamite, choose a digital camera from your inventory. You will have to take a photo of a skeleton (screen). This will allow you to fulfill one of the sidequests. Once this is done, turn left and pick up the dynamite.
As you've probably suspected, you will have to travel all the way back to the closed door. Sadly, the game won't make your life any easier than it already is. The most important thing here is to avoid running. Otherwise you would have triggered an explosion and your main character would have died. Thankfully, there's an icon in the lower left corner of the screen, so you'll know whether the dynamite is becoming unstable or not. Start off by leaving the ship.
Head on to your left. It shouldn't come as a surprise to you that you'll have to go back to the starting area (screen). Remember that you aren't allowed to move faster and you should be fine. Thankfully, you won't encounter any hostiles along the way. Approach the exit and choose "Enter the Dark Territory" option from the list.
This is going to be the MOST difficult section of this episode. You will have to avoid the black smoke and transport the dynamite AT THE SAME TIME. You won't be allowed to run, so you'll have to memorize the path and use banyan trees for cover. The first hideout can be found near the starting area (screen), so you should decide to use it right away.
You could try and use the signs again, however I assume that you still remember the correct path. Additionally, you shouldn't have any problems spotting the hideouts. The second hideout can be found to your left (screen). Like I've already said, you shouldn't try running. Press the run key only if you're being pursued by the smoke, however release the button after about a second.
Keep heading towards some of the other hideouts. Remember to stay inside each set of banyan trees for at least 25-30 seconds, so the black smoke will leave you alone (you won't hear any strange noises). Thankfully, the fourth hideout is located near the exit (screen). Once you've used it, you will be allowed to proceed directly to the last flag. Choose "Go to next area" action from the list.
Thankfully, the final part of your journey is going to be a lot easier. You will only have to make sure that you're not running. Start off by going to your left. Eventually you will have to return to the waterfall (screen). Enter the cave and use the small tunnel to go back to the secret entrance. You've already been here before, so you shouldn't get lost along the way.
Approach the steel door and press the E key. This will allow Elliott to place the dynamite on the door. Obviously you will have to move back to a safe distance. The opposite end of this corridor should do the trick. Hold the CTRL key in order to use your weapon. Aim for the dynamite (screen).
QUEST 6: Neutralize the magnetic interference
Once the explosion has occurred, enter the new area and use the stairs. Wait for the game to begin loading a new location.
Start off by moving forward. You should be able to reach a much larger area in just a few seconds. Turn left and keep heading straight. You will probably encounter a few interactive objects along the way, including beer cans. Pick them up if you want to. Your main objective will be to find and use a new computer (screen).
Click on EXECUTE or press the ENTER key. Once again, you will have to pass an intelligence test. This time you will have to answer to three questions. Here are the correct answers: 8 (first question), R (second question), 493 (third question). Press EXECUTE in order to end the test. You will have to wait for the computer to load the main menu (screen). Pressing the A key would give you a funny response and pressing the B key would result in displaying the current status of the station. Press the C key in order to shut down the reactor. You are going to be rewarded with a new cut-scene and this chapter will come to an end.

I guess you might be surprised by the fact that the first part of this episode is going to be the most difficult one. Your objective will be to escape the black smoke. Once you're in a safe area, you will have to explore TWO Dharma stations. Your final objective will be to use a gun, but don't worry, because it's going to be very simple to win.
Ignore the fact that you haven't received any new quests, because they'll appear on your list later during the course of the game. As you've probably noticed by now, you will have to start running in order to avoid being caught by the black smoke (screen). Look at the lower part of the screen in order to familiarize yourself with the controls. You won't have to hold the usual run button. Instead, you must press and hold the W key. Additionally, you must avoid certain obstacles and you won't be allowed to make more than one mistake.
As for the obstacles, you will be dealing with two types of objects. Your primary concern will be to jump over fallen trees (screen). You can perform this action by pressing the ENTER key. Just make sure that you don't press it too early nor too late. Thankfully, the game will grant you with a large margin for error.

You will also have to press the SPACE key from time to time. This will allow Elliott to slide (screen). You'll only have to press it a couple of times, so it's not a big deal. Just make sure that you don't make any mistakes and you will be fine.
Well, that's it. You won't have to perform any other activities. Your only concern will be to press either the jump button or the slide button. You will be dealing with a few narrower segments (screen), however it's going to be very easy to stay on the right track. Once you've reached a clearing, keep running forward and ignore the fact that there are some trees in front of you. Once you're close enough to them, you should be rewarded with a longer cut-scene.
QUEST 1: Follow your compass
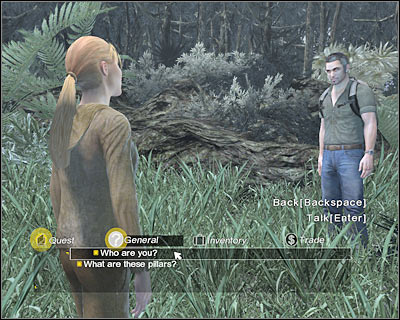
You won't have to explore this area, because you wouldn't be able to find any interesting objects. Instead, try approaching one of the wooden pillars and you'll trigger a new cut-scene. Elliott will come across Juliet (screen). Obviously you will have to talk to her by pressing the ENTER key. Start off by asking her one general question:
- What are these pillars?
Now you will have to choose all topics from the Quest category:
- You stuck me with a needle.
- Why should I trust you?
- How do you know my name?
QUEST 2: Access the other side of the fence
Ignore the fact that Juliet doesn't want to help you. Wait for the game to load a new flashback scene.
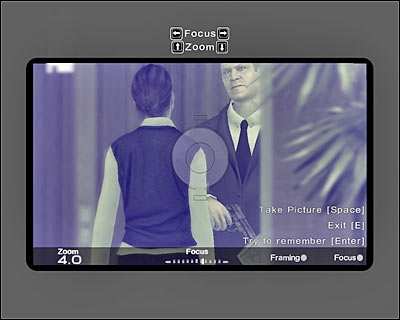
This is going to be a much longer flashback scene, mostly because you'll have to perform several actions. I guess you may have some problems with taking a good photo. You will have to photograph Lisa and the bodyguard. Additionally, you will have to wait for the bodyguard to show Lisa his gun. If you can't take a good picture, try adjusting the focus, because this is a common cause of the problem. Don't leave this area and ignore a second woman. She will be blocking your view for a few seconds, but once she's left, you have to be ready to use your camera. Look at the screen for an example of a good photo.
Now you will have to examine three items. The first object can be found near Lisa. It's going to be a diary, so make sure you've read it. Now you should proceed to the reception desk. Locate a guestbook (screen) and examine it. Finally, you will have to approach one of the nearby tables. You will find a newspaper there.

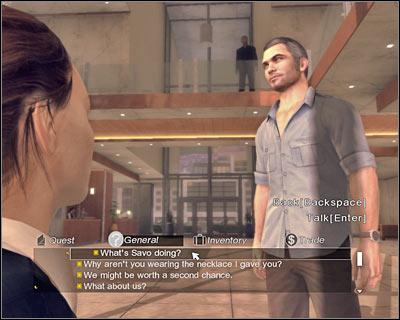
You may go back to Lisa. Try talking to her again. I guess you might be a little surprised by the fact that the flashback won't come to an end. Instead, you'll be allowed to ask her a few questions on your own (screen). Start by choosing topics from the General category:
- What's Savo doing?
- Why aren't you wearing the necklace I gave you?
- We might be worth a second chance.
- What about us?
- How was your sister involved?
- You speak French?
Finally, choose a statement from the Quest category:
- I'll talk to him.
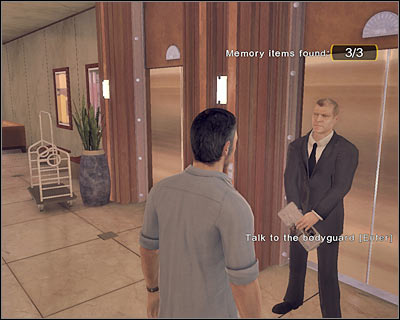
As you've probably suspected, your next assignment will be to gain an access to the elevator. As a result, you will have to distract one of Savo's bodyguards (screen). Try talking to him. Obviously you will be choosing topics from the Quest category. Start off by clicking on:
- 100 bucks to use the elevator.
Now you may proceed with:
- That woman over there? She's a journalist.
You'll be rewarded with a much longer cut-scene and finally you'll be allowed to go back to the island.
Obviously you will have to talk to Juliet again in order to discuss your new memories with her. Just make sure that you don't move too close too her, because you can't enter the inner perimeter just yet. Choose a new general question:
- Why are you helping me?
Now you must switch to the Quest category:
- I didn't kill her.
Wait for Juliet to approach one of the wooden pillars. She will disable the security system, so you'll be allowed to get inside. Wait for her to turn on the security system back on.
QUEST 3: Follow the underground passage
First of all, I would recommend approaching Juliet in order to talk to her. You'll be allowed to ask her two additional questions:
- Who is Ben?
- What does Ben want with me?
Now it would be a good idea to trade items with her (screen). It's very important that you acquire a lantern from Juliet, but only if you don't have this object in your inventory. Get rid of torches and other smaller objects. You should also purchase at least four cans of oil. You're going to need the oil for the lamp, especially since you'll be exploring darker corridors very soon. You could use the torches, however the lantern is more efficient and I assume that you don't have any problems with having valuable items for sale.
Turn around and start moving towards a larger clearing. Look around if you want to, but it's more important to find a secret entrance to one of the Dharma stations. Take a closer look at my screen if you're having some difficulties finding the entrance. You will have to approach a small object. Press the ENTER key and wait for the game to transport you to a new location.
I guess I should tell you that you don't have to explore this station in order to proceed with the main quest, however if you're a fan of the show, I'm sure that you'll enjoy being here. You can perform several actions. Take a photo of the logo (screen). You can find it in the main corridor. Doing this will allow you to fulfill one of the subquests. Enter the main room and start off by taking a few Apollo bars.
You should also be able to find an active computer here (screen). It's being used to communicate with other Dharma stations. Access the main menu. You can press A-F buttons in order to try to receive a response from six other stations. Once you're done, exit the main menu and go back to the surface.
First of all, you will have to go back to Juliet. Don't forget to acquire an oil lantern from her, as well as several cans of oil. You can also consider selling some of the less valuable objects, however it's not necessary, because you won't trade with anyone else in the future. Proceed to the top of a nearby hill. Once you're at the top, enter a new station (screen). Proceed to the stairs and head on to a new corridor. Approach the steel door and choose "Enter the building" action from the list.
QUEST 4: Reach an exit
Now you will have to explore a much larger Dharma station. There's only one passageway leading to your current destination, however you will have an opportunity to inspect smaller rooms along the way. You won't encounter any enemies here and you won't have to worry about any security measures. I would recommend using the lantern only while trying to explore darker areas of the base. You will have to be on a look out for new fuses (screen). They're scattered throughout the entire station, so I'd recommend that you explore each room and corridor carefully before proceeding to the next area. Don't waste your time trying to pick up beer cans or food boxes. You won't need these items anymore.

Start off by moving forward (screen). A small room is going to be located to your left. Make sure that you've been there, because it contains more fuses, as well as an instruction manual. There's also a small room to your right, however you'll only find one fuse there. Go back to the main corridor and keep heading straight. Once you've reached a corner, turn right and proceed forward.
You will encounter a junction here. Proceed to your right and inspect this corridor. You will have to find two fuses. You'll come across a dead end, so you must go back the same way you came before. This time try moving in a straight line. You'll have to pick up two new fuses along the way. Once you're done exploring, enter a small room (screen).
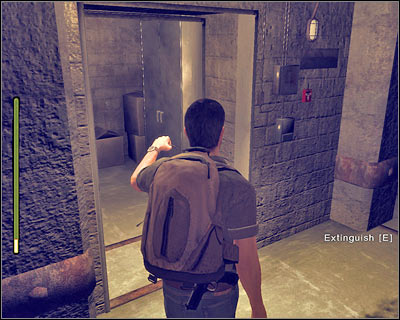
You'll find yourself standing inside a small room. Obviously it would be a good idea to explore it. Make sure that you've been to the bathroom, because you'll find one of the fuses there. Proceed towards an opposite exit (screen). Turn right and start moving forward. There's going to be a fuse to your right. Take it and keep heading straight.
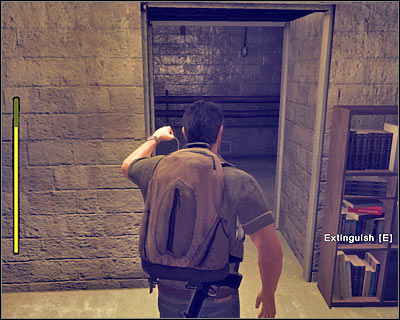
Don't forget to pick up other fuses along the way, because you're going to need them to solve a puzzle. Once you've entered a new location, go to your right and get closer to the monitors (screen). I would recommend that you start off by going to your left. You'll come across several dead ends there, however you'll also find a new fuse. Go back to the main room and go to your right.
You should be able to get to a new corridor. Look at the screen, because that's where you'll have an opportunity to get down to a lower level. I would recommend that you go there, because you'll be allowed to pick up a new fuse. Go back up and proceed to the exit. You will have to find a well-known electrical panel. Extinguish your lamp, because you won't need it anymore.
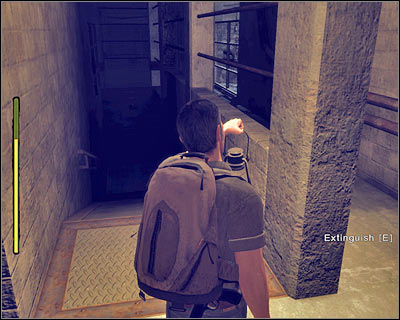
Approach the panel and press the ENTER key in order to activate it. This will allow you to proceed with the mini-game. Look at my screen for a full solution to this problem. Placing the fuses in correct slots will allow you to open a nearby gate. You don't have to pick up the fuses from the panel, because you wouldn't be able to use them later on. Proceed to the ladder and choose "Climb to the main floor" action from the list.
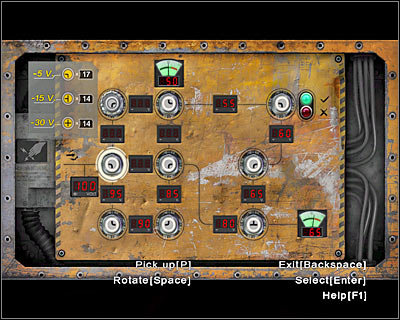
You'll find yourself inside a large building. If you're a fan of the TV show, I'm sure that you'll be familiar with these surroundings. Ignore the voices, because you won't be attacked by anyone. Also, you don't have to be in a lot of hurry. Proceed to the first room (screen). You might want to consider exploring it, however you should still ignore tradeable items. The only exception is the gun clip, but only if you've used up your ammunition supplies.
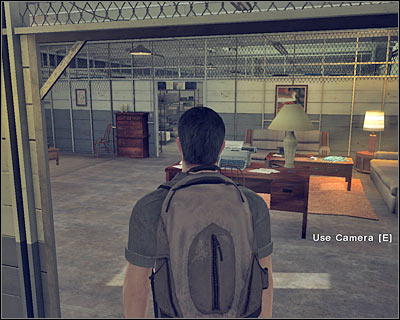
You may proceed towards the second room. Ignore the storage area, because there are only a few beer cans out there. Instead, it would be a good idea to activate one of the computers (screen). This is optional, so if you want to proceed with the main quest, you can leave this room right away. Wait for the game to load the main menu. You are allowed to enter 24, 32 and 38. If you chose 38, you will also have to type 56. DON'T type 77, unless you want to witness your character being killed. :-) Close this window and leave the room.

Head on towards the third room. Once again, you may ignore the conversation in the background, because you won't encounter anyone right away. Approach the large table (screen) and use your camera to take a photo of the map. If you've photographed two other maps while exploring the Swan station, you will be allowed to fulfill one of the additional quests. You'll also find a second gunclip in this room.
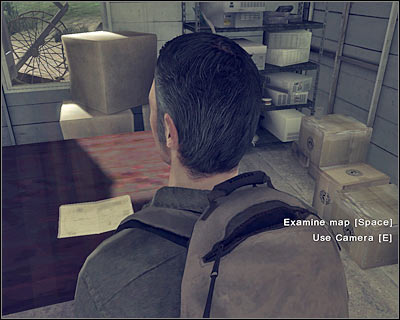
Make sure that you've explored all three rooms. Once you're ready, approach a small door (screen) and press the ENTER key in order to open it. Press and hold the CTRL key quickly. Use your gun to kill a histole in a dark suit. Doing this will allow you to trigger a longer cut-scene. The game will also proceed with the final episode. Get ready for the big finale!
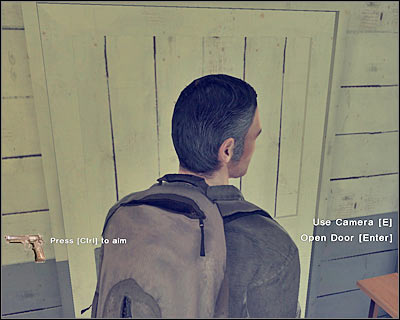

I guess you might be surprised by the fact that the final seventh chapter of the game isn't going to be too difficult. You'll spend most of your time trying to get out of a Dharma station, so the game will focus mostly on you trying to explore your surroundings. The final chase scene is going to be a little more challenging, because you'll have to get to a target area on time. Nevertheless, there's nothing you should be worried about.
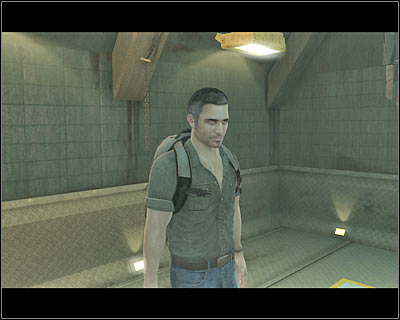
You'll start the game inside a small room. Turn around and approach a woman (Lisa). Doing this will trigger a new vision. You won't find anything of interest inside this room, so you may as well get closer to the glass wall. You must talk to Tom (screen). Obviously you should start the conversation by asking him a few general questions:
- How do you know all about me?
- What is this place?
- Where do you people come from?
- Why should I help you?
Now you should choose two questions from the Quest category:
- Where am I?
- Why am I locked up?
End the conversation and wait for the game to load a new flashback scene.
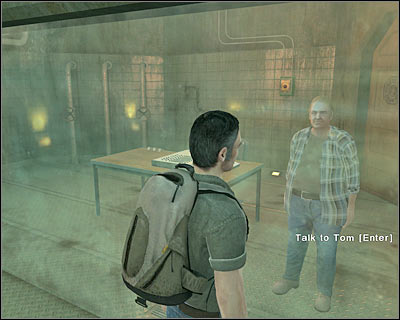
This is going to be a rather simple flashback sequence and it will only take you about one minute to finish it, because you won't have to examine any additional objects. Instead, you will have to focus your attention on getting to a hideout where you'll be allowed to take a picture. This room is going to be located to your left, but start off by moving forward (screen).
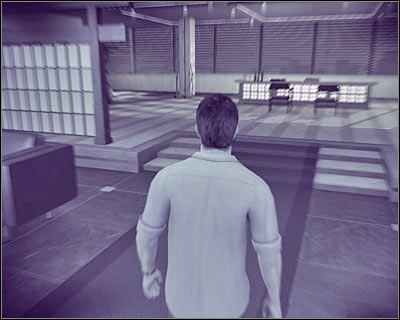
Once you're in a new section of the room, turn left. Ignore the surrounding objects, because you don't have to examine them. There's going to be a small alcove to your left (screen). Enter the dark area and press the ENTER key to hide there. This should be done automatically, so you won't have to worry about anything else. Wait for the game to display a new cut-scene.
Now for the hard part. You will have to wait for two men to show up inside the room. Ignore them at first, because you must wait for a right moment. Focus your attention only on the briefcase. They should trade this object between themselves and that's your only chance for a good photo. Look at the screen for a example of a job well done. Taking the photo will allow you to end the scene. You'll also be rewarded with an interesting cut-scene. Wait for the game to transport you back to the Hydra station.

Once you've listened to a short statement by Elliott, approach the glass wall once again and talk to Tom. There's going to be a new topic on your list:
- I photographed a deal - but I saw Lisa there.
QUEST 1: Find a way out
Wait patiently for Tom to let you out. As a result, you will be allowed to explore the inside of the Hydra station (screen).
Important! You will have to explore the entire station (including rooms and corridors) very thoroughly, because you've lost all your items as a result of being kidnapped by the Others. It's crucial that you collect all fuses, because you're going to need these objects to solve one of the riddles. Obviously I'll do my best in telling you where to look for the fuses. Start off by leaving this room. Head on to your left (screen).
There's a logo of this station nearby, but you may ignore it, because you won't have to take a photo of it. Head on to the left room, so you'll end up standing on the other side of the glass wall (screen). You should be able to find three fuses here. They are lying on the table, near the recorder. Pick up the fuses and go back to the main corridor.
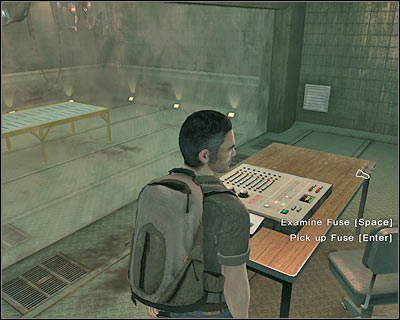
You won't have to go left, because you would only encounter a closed hatch. Instead, you will have to go straight, so you'll end up inside the monitoring station (screen). There are two fuses here and it's your job to take them. You will also find a beer can, however you may ignore it.
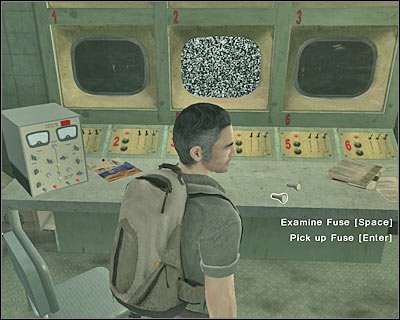
Go back to the main corridor and go to your left. There's a small room near the place where you've started the game (screen). It's very important that you go inside, because you would find a new fuse there. Ignore the food boxes. Exit this room and go to your left. Proceed to the next section of the Hydra station.
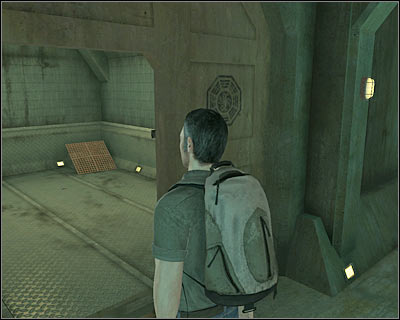
The hatch to your right is unaccessible, so you may as well ignore it. Keep heading forward. Enter the second room to your right. You'll end up standing inside the laboratory (screen). You might want to consider taking a closer look at the cages, but it's optional. Instead, pick up two fuses. They can be found in front of the entrance.
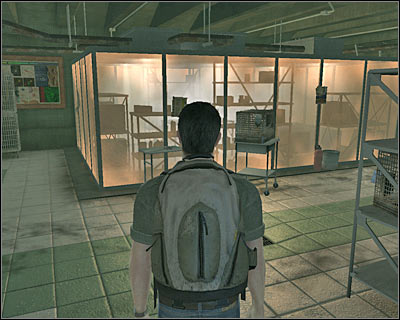
You've got two choices here - you can use a second exit (it's to your left) or you can go back to the main corridor the same way you came before. You would also be able to inspect a flooded corridor, but you wouldn't find anything of interest there. Proceed to a new area using the main corridor (screen).
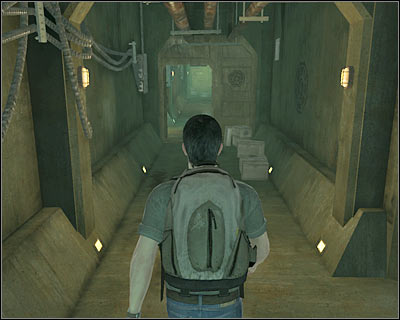
Once you've reached a new area of the station, you will be allowed to choose between three corridors. Thankfully, there aren't any fuses outside the main rooms, so you don't have to inspect all available corridors. I would recommend that you start off by going left. You should be able to reach an entrance (screen) which leads to a large storage room.
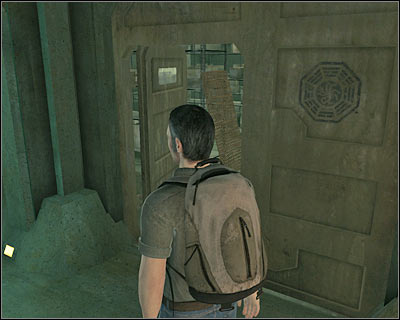
Obviously you will have to explore the storage room, because you will be able to find a couple of fuses here. Two of them are lying on the table (screen), while the third fuse can be found to the left of the entrance. You will also come across several food boxes, but you should still ignore these objects. Go back to the starting area for this section of the base (three corridors).
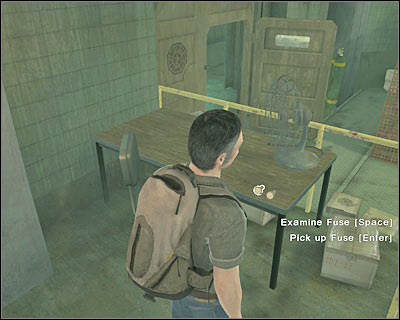
Ignore the electrical panel for the time being, because you don't have enough fuses to solve the riddle. Instead, try finding a passageway which leads to the upper level (screen). Go there now and you'll end up standing inside a much larger room that's filled with water.
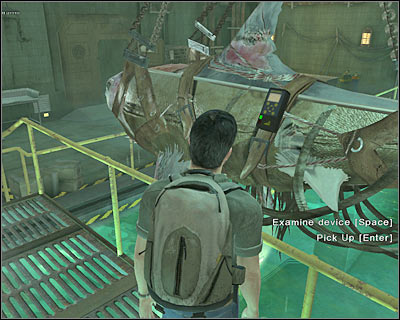
You won't find any fuses right away, however you will encounter additional objects, including food boxes and beer cans. I'm sure that you remember by now that taking them is only a waste of your precious time. Don't leave this area just yet, because you will have to find a computer (screen). Obviously your task will be to interact with it.
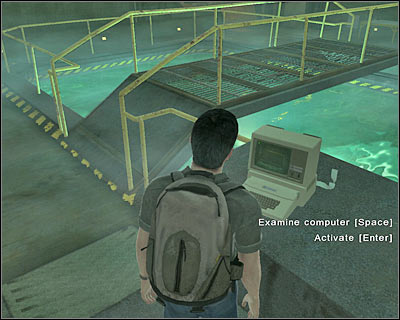
Start off by reading a short note which has been left by one of the scientists. It can also be considered as a hint on how you should react to the current situation. Press EXECUTE. Doing this will trigger a new intelligence test and it'll be up to you to pass it. The correct answers are: 44, H and B. Once you've answered to all three questions, press EXECUTE again. If you've done everything correctly, you will open the main menu (screen). Here are the available commands:
1) Pressing the A key allows you to read a report about Lisa Gellhorn.
2) Pressing the B key plays a short recording.
3) Pressing the C key will lift a platform with a shark and that is your main objective. You may ignore the fourth option (D), because it would only display the note you've read before.
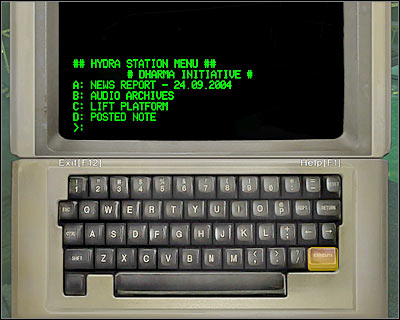
You may head over to a metal bridge (screen). Examine the shark and you should come across a device. Obviously your task will be to pick it up. As a result, Elliott will automatically add some new fuses to his inventory. Once this is done, go back to the main corridor and turn right. Start moving forward and eventually you'll find the electrical panel.
Before you decide to use the panel, make sure that you have all the fuses in your inventory: -5V - 5 fuses, -15V - 6 fuses, -30V - 3 fuses. Look at the screen for a full solution to this problem. Activating the panel will allow you to enter a new room. Go there now. You won't have to pick up the fuses, because you won't need them anymore.
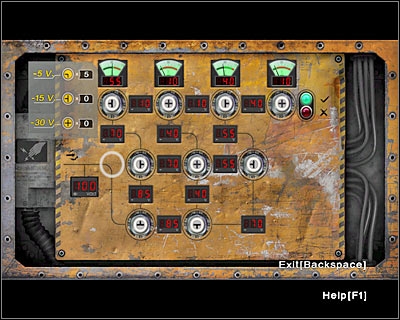
You won't have to explore this room thoroughly, however you can find a folder amongst interactive objects. Read its content, because it concerns Jack. Approach the large table. You'll encounter Ben and Juliet (screen). Start off by having a conversation with Juliet. You will have to ask her a few general questions:
- Where is my stuff?
- I thought I could trust you?
- What the hell is going on?
Finally, choose a topic from the Quest category:
- What do you want from me?
End the conversation with Juliet and talk to Ben. You will have to ask him similar questions from both categories. The only new topic is going to be:
- How do I bring Jack to you?
QUEST 2: Bring Jack to the Black Rock
End this conversation and wait for the game to transport you back to the campsite at the beach.

You can talk to the survivors if you want to, however it's optional. The questions will always remain the same. Obviously the only difference is how each survivor responds to your question. You will be allowed to choose one topic from the General category:
- My memory's returning.
The second question will represent the Quest category:
- Where is Jack?
You can skip these actions if you want to, including trading items with Sawyer. You could purchase some gun clips from him (screen), but you wouldn't have to use them and you will receive a fully loaded gun when the time is right.
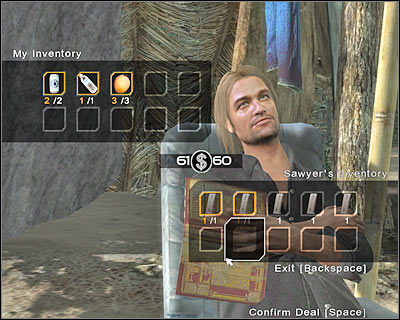
Proceed to the opposite end of the beach, because that's where you'll find Jack (screen). Obviously you will have to talk to him. Ask him all available general questions if you want to, however it's even more important to choose a statement from the Quest category:
- I found a way off the island.
End the conversation with Jack and proceed towards one of two available exits. You must go to Black Rock, so choose "Jump to the Black Rock" action from the menu.
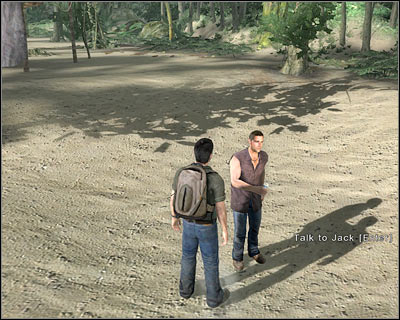
You won't encounter any additional hostiles on your way to the ship, so you won't have to look around carefully nor use any objects for cover. I assume that you still remember how to get to the ship. Just as before, you will have to approach a large hole. Jack should be standing there (screen), so you must press the ENTER key to begin having a new conversation with him. Start off by choosing a single question from the General category:
- You think we'll ever get home?
Now choose a topic from the Quest category:
- Are you ready?
Jack will give you a gun (pistol).
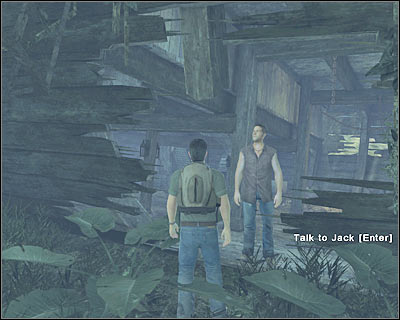
Your first assignment will be to go left. Ignore the fact that you're travelling alone, because Jack will join you when the moment is right. Go to where you've found the dynamite the last time you were here. Use the platforms to get to the upper levels (screen). You won't have to inspect the area for any additional objects, so focus only on getting to the upper deck of the ship. You should be able to reach this new area very soon and that's when you'll be presented with a cut-scene. The game will begin loading the final flashback scene.
I guess you may be a little surprised by the fact that you won't have to perform any activities here. You will have an opportunity to witness the last cut-scene during which you'll find out what has happened to Lisa. You'll also know why Elliott's picture is so important. You will return to Black Rock shortly, so get ready for some action.
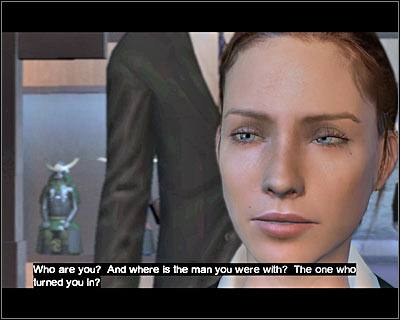
QUEST 3: Save Kate and Jack
It's VERY IMPORTANT that you follow my instructions. Otherwise you will have to repeat this scene, because there's only one way for you to succeed. Once you've regained full control over Elliott, move him forward and make sure that he's standing IN FRONT OF Kate. Draw your weapon and aim at the dynamite. Fire a single shot and you'll be rewarded with a cut-scene.
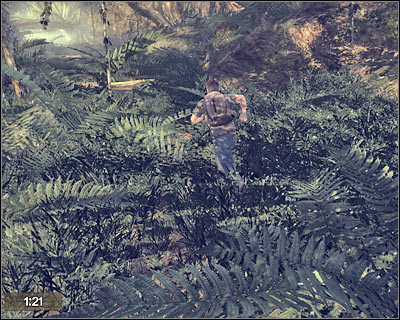
This scene will begin with a short conversation. You'll be allowed to listen to what Juliet has to say to the main character. You'll find out that there's little time to get to the boat. Get ready, because you'll have to participate in a new action sequence (screen). This time you won't be chased by the black smoke, however you can't make too many mistakes, because otherwise you wouldn't be able to get there in time.
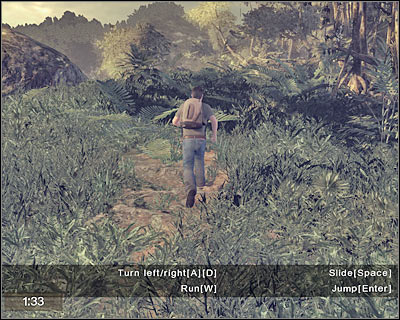
This is going to be a very similar action sequence, so you still have to avoid certain obstacles, mostly trees and boulders. You'll be using two keys. One of them will allow you to perform jumps while the other one is used to slide. You will be presented with a short movie at about half way through. It'll inform you that an enemy vessel is heading towards the boat.
Be careful, because you will have to go through several narrow spots. Make sure that you're running in the middle, so you won't die as a result of losing balance. The final part of this chase sequence will also require you to make a few turns, especially after encountering a new cave system (screen). It shouldn't be a major problem. Head on to the pier where you'll meet Locke. You should be there at least 5-10 seconds before the time limit runs out.
Now you will be given a unique opportunity to have the final conversation with Locke (screen). Just as before, you should start by asking him a few general questions:
- How did you find the boat?
- Heard any more about the Others?
- Do you want to be rescued?
- You're staying?
Finally, choose the only available topic from the Quest category:
- It's time to go...
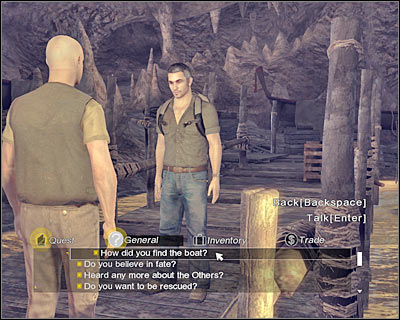
You can inspect a smaller boat which can be found to your left, however you wouldn't find anything of interest there. Instead, head on to the opposite end of the pier. Try getting on board of a larger boat (screen).
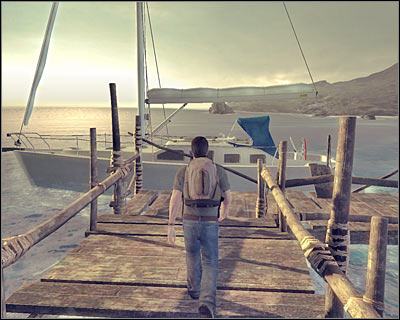
Congratulations! You've just finished the game! Sit back and enjoy the final FMV sequence... and prepare yourself for a shocking ending! :-)

Important! The PC version of "Lost: Via Domus" rewards player only for taking photos of certain objects scattered throughout the island. Doing this allows you to unlock certain bonuses which then are accessible from the Extras menu.
Here's the list of photo-related achievements:
4 8 15 16 23 42 - take a photo of the numbers (they can be found on the hatch) - episode 1x03 (Jungle - The Hatch)
A Turn of the Screw - take a photo of "A Turn of the Screw" book - episode 1x04 (The Swan Station)
Beam of Light - take a photo of a beam of light coming out of a closed hatch - episode 1x03 (Jungle - The Hatch #2)
Castaways' Treasures - take photos of three items (these objects belong to some of the survivors): 1) Kate's toy plane - episode 1x04 (Beach - Starting Area), 2) Charlie's guitar - episode 1x04 (Beach - Starting Area), 3) Locke's wheelchair - episode 1x03 (Beach - Starting Area)
Desmond's Past - take photos of three objects (they are connected to Desmond): 1) Dharma jumpsuit - episode 1x04 (The Swan Station), 2) medicine cabinet - episode 1x04 (The Swan Station), 3) mural - episode 1x04 (The Swan Station)
Dharma Ride - take a photo of the van - episode 1x05 (The Dark Territory)
Mapping the Island - take photos of three different maps: 1) map from the door - episode 1x04 (The Swan Station), 2) map of the hidden entrance - episode 1x05 (The Swan Station), 3) map from the Flame Station - episode 1x06 (The Flame Station - Surface)
Pearl Station - take a photo of the logo of Pearl Station - episode 1x06 (The Pearl Station)
Radzinsky - take a photo of blood stains - episode 1x04 (The Swan Station)
Slave - take a photo of a skeleton - episode 1x05 (Black Rock)
Staff Station - take a photo of the logo of Staff Station - episode 1x04 (The Staff Station)
These achievements are accessible only if you're playing on Xbox 360, however even if you're using the PC version of the game, I'd still recommend taking a look at them, because you'll know whether you've missed something important or not.
ACHIEVEMENTS - FLASHBACKS:
815 - find out everything from the first flashback of the game
Sweet Memory - find out everything from the second flashback of the game (including examining three objects)
Behind the Glass - find out everything from the third flashback of the game (including examining three objects)
Identity Crisis - find out everything from the fourth flashback of the game (including examining three objects)
Persephone - find out everything from the fifth flashback of the game (including examining three objects)
Whatever It Takes - find out everything from the sixth flashback of the game (including examining three objects and talking to bodyguard)
ACHIEVEMNTS - IMPORTANT EVENTS:
Blackmailer - convince Locke, so he'll help you acquire new batteries for the laptop - episode 1x03 (Beach - Campsite)
Boom Boom - blow up the secret entrance to the Swan station - episode 1x05 (Jungle - The Hatch #3)
Button Pusher - enter the numbers - episode 1x04 (The Swan Station)
Hero's Hero - save Jack and Kate from the Others - episode 1x07 (Black Rock #2)
Save the Castaways - stop the fuel leak to prevent a large explosion - episode 1x01 (Beach - Crash Site)
Showdown - kill Beady Eyes (he's the guy in the dark suit) - episode 1x06 (The Flame Station - Surface)
ACHIEVEMENTS - CHAPTERS:
Crash Survivor - finish the first episode of the game
Locate the Cockpit - finish the second episode of the game
Via Domus - finish the third episode of the game
Into the Hatch - finish the fourth episode of the game
Behind the Wall - finish the fifth episode of the game
Through the Flame - finish the sixth episode of the game
The Way Home - finish the seventh episode of the game


 Legend of Grimrock Game Guide & Walkthrough
 LEGO Harry Potter: Years 1-4 Game Guide & Walkthrough
 Lord of the Rings Online: Traits Game Guide & Walkthrough
 Lost Planet 3 Game Guide & Walkthrough
 LEGO Indiana Jones: The Original Adventures Game Guide & Walkthrough