
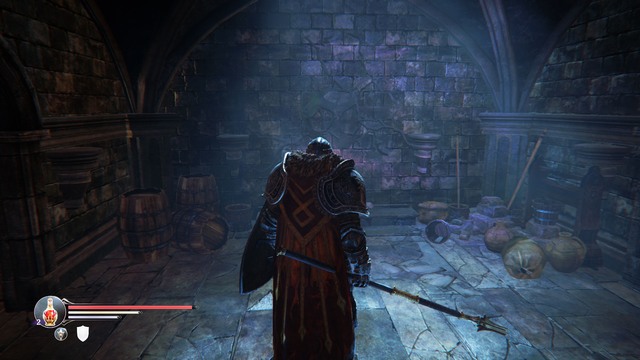
Lords of the Fallen guide is essential for every player that wants to play as Harkyn. It will help you lengthen your character's life while exploring ancient ruins and other dangerous locations full of enemies that need just a single mistake to dispatch Harkyn. We'll show you strong and weak points of every enemy and how to fight to get rid of them. You'll also see a comparison of classes, equipment and development paths, so you'll be able to plan your quest to get the head of the fallen god.
List of content:
This guide for the Lords of the Fallen, is a comprehensive description of all the key elements of the game, which explains their functioning in a simple way. In the first part of this guide,, you can find information concerning the character that you are going to control - Harkyn. You will learn about the character creation process, how to develop your character's attributes and you will get to know about the consequences of dying. The next chapter describes the spells available in the game. You will get to know about the functioning of each and you will learn which ones are worth developing. The chapter entitled "The Inventory" explains the functioning of each of the elements of equipment: weapons, armors, shields and quick items. Also, you can find here information on the combat system and a number of hints concerning this aspect of the game. You will learn what are the upsides and downsides of blocking and dodging, as well as how to perform the backstab correctly. Lords of the Fallen offers lots of collectibles. Their types have also been described in this guide. There is a separate chapter devoted to runes and their functioning, and towards the end of this guide, you will find detailed descriptions of each type of enemies, including information on how to defeat them. Lords of the Fallen is a dynamic action RPG, addressed to mature players. The game revolves around combat, development of the character's features, gathering of equipment and exploration of the game world. A lot of emphasis has been placed on matching the mechanics and the storyline to your individual playing style.
Michal "Kwisc" Chwistek ()
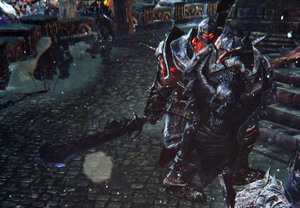
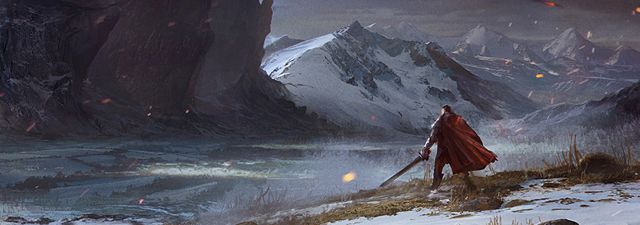 The landscape does not indicate pervasive danger
Lords of the Fallen is often described as a Polish Dark Souls. The developers themselves frequently said that they were drawing inspiration from games by From Software Studio. The major difference between the two titles, is story presentation. In Dark Souls players had to figure many things out on themselves, and the story was presented in a form of small pieces of information. In Lords of the Fallen this is going to be completely different. Players will decide, if they want to delve into the story or simply go ahead and focus on facing new challenges. Blazej Zywiczynski, one of CI Games producers, said in an interview given during this year's Gamescom, that each dialogue box has an option that allows to instantly terminate the conversation and continue the journey. On the other hand, talking to the same characters again, may result in getting new quests or revealing more information about the story.
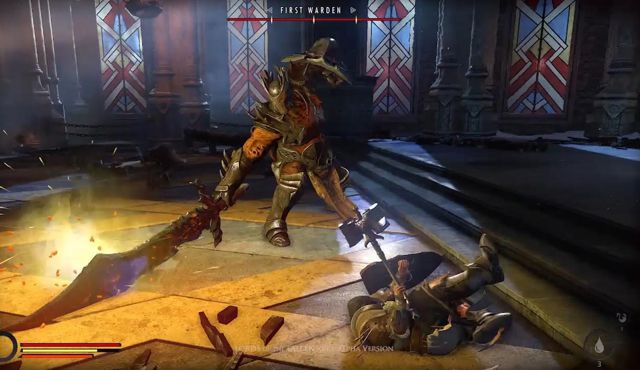
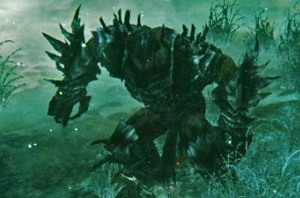
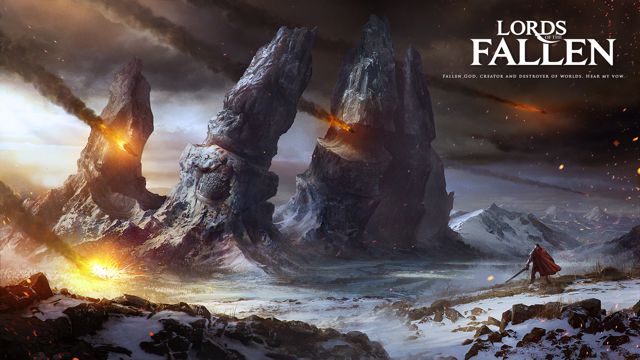 Hand Of God Mountains
The whole story started when the humanity rebelled against their god - using a trap, a man managed to kill him. With his last breath the god managed to raise his hand. Thus, a mountain range appeared, later called Hand of God Mountains. Humans thought that if they were able to kill a god, they could do anything. They planned to change the very human nature and create a world without violence. Even the worst crimes were not punished by death.
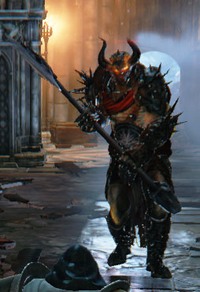
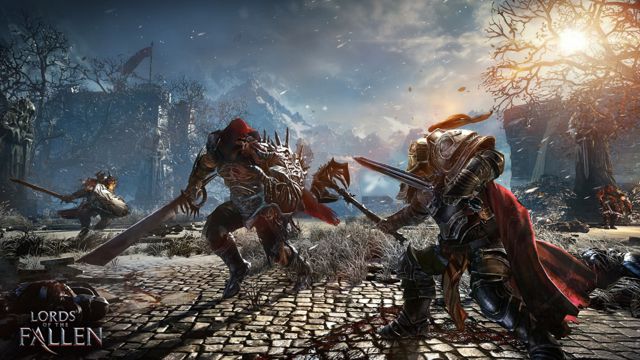 Harkyn will have to face dangerous opponents
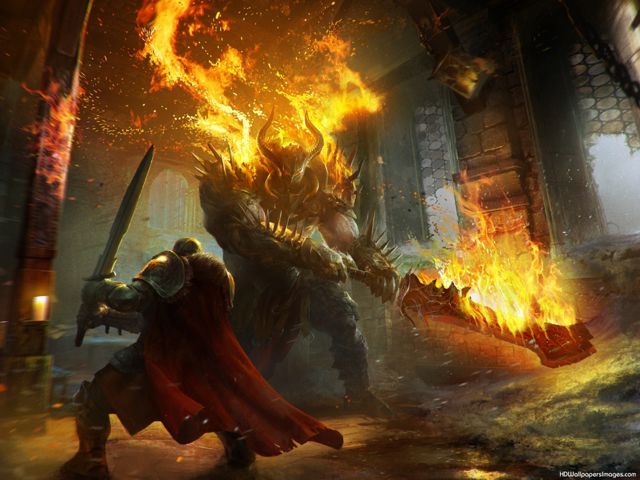
Eight thousand years later, the god raised from the dead and returned to the world of humans, with an army of demons. Unfortunately, mere humans are not able to put up an equal fight against this mighty enemy. In order to even the odds rulers of this world decided to release the most dangerous convicts, so they stood against demons and got a chance to, at least partly, redeem their crimes. One of the "chosen ones" is Harkyn, a man who probably committed every last crime he could. This is made shown by the fact his entire face is covered with tattoos that were made to criminals. Harkyn arrives to the monastery (one of three main locations in the game) together with his mentor and guide. The main goal of the protagonist is to defend this world. On his journey he will discover why the Fallen God raised from the dead, and will prevent the world from destruction.
 The tattoos on Harkyn's face stand for crimes he committed
In the game's universe, nothing, not even the worst crimes, was punished by death. Criminals used to be sent to jail for their crimes. However, even after leaving prison, everyone could know about a former convict's dubious past. Each criminal has had a tattoo made on his face. Although in this world you can be released from prison or escape it, as the developers explain, but you cannot hide your face from everyone. One such man is Harkyn, who gets released from jail during the so-called recruitment. It is because the humanity needs protection from a demonic army of the Fallen God.
 From the very beginning Harkyn is an experienced warrior
Harkyn arrives to the monastery with his mentor. The developers have been saying all along that the main hero is not going to be someone who has to prove himself. From the very beginning he is to be an experienced warrior, ready for any challenge. The creators have also been saying that Harkyn looks at the world in a different way than other people, which makes him not only a great protection from demons, but also someone who can discover the mystery behind the return of the Fallen God.
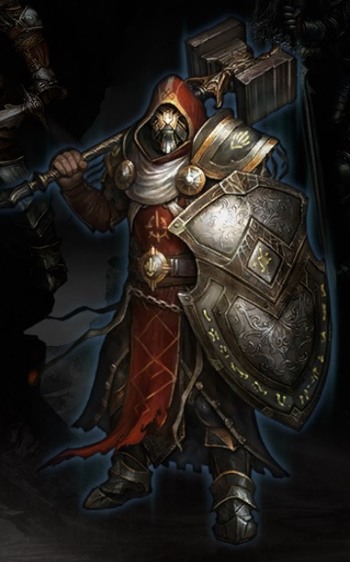
 You will be able to choose one of three character classes
There will be three character classes available in the game. Warrior, mage, and rogue. Similarly to Darks Souls 2, class selection will not be as significant as in other cRPG-s. It will have an impact on basic statistics of the hero and his gear. Along with character progression, the player will be able to unlock any statistics. There is no problem to turn a mage into a warrior (and the other way round). As for limitations, when it comes to character creation, is sex. In Lords of the Fallen it will only be possible to play as a male.
 You will be able to upgrade weapons with runes
Apart from character progression, it will also be possible to upgrade weapons. The basic element of crafting system are going to be runes, which may be removed from particular items at any moment. There is another thing that many players surely will like. No matter how many items Harkyn is carrying, his movement speed will only be influenced by those he is currently using.

Movement

Camera controls

Locking Target

Light attack

Heavy attack

Block

Use shield (fortify/knock out of balance/counter)/Use magic gauntlet

Dodge (push)/Sprint and jump (hold down)

Interaction/Swap the weapon set

Swap the quick item (push)/Use the quick item (hold down)

Change the spell (push)/Use the ability (hold down)

Character screen

Game menu

Change gauntlet mode

Favorite weapon swap

Movement

Camera controls

Locking Target

Light attack

Heavy attack

Block

Use shield (fortify/knock out of balance/counter)/Use magic gauntlet

Dodge (push)/Sprint and jump (hold down)
Interaction/Swap the weapon set

Swap the quick item (push)/Use the quick item (hold down)

Change the spell (push)/Use the ability (hold down)

Character screen

Game menu

Change gauntlet mode

Favorite weapon swap

Movement
Camera controls

Locking Target

Changing locked target

Light attack

Heavy attack

Block

Use shield (fortify/knock out of balance/counter)/Use magic gauntlet

Dodge (push)/ Jump (push during sprint)

Sprint

Slow walk

Interaction

Swap the weapon set

Swap the quick item

Use the quick item

Change the spell

Use the ability

Change gauntlet mode

Character screen

Game menu
After you start the new game, you will access the character creation screen, where you can make important choices. The first one is to pick one of the three magic types: solace, brawl and deception. They correspond to the three types of characters: the cleric, the fighter and the rogue. Although this choice influences the special abilities that are available in the game, there is nothing standing in your way, if you want to play as the battleaxe-wielding cleric or rogue, or as a fighter with daggers. How many points you invest into developing spells, and how often you are going to use them depends on you and you only. In the Lords of the Fallen, however, their significance has been reduced. They play more of a supportive role and the first one of the available spells is very similar for all three sets. It is worth knowing, also, that only if you choose the Solace school, will you have access to one of the four spells from the very beginning.
NOTE! After you complete the game for the first time, you will be able to start over as the same character, in the "New Game +" mode. The difficulty level goes up, then, but you can use all of the gear that you have obtained earlier, you retain your experience level and, apart from that, you can unlock another set of spells. The third set becomes available, for the same character,. after you start the game for the third time, in the "New Game ++" mode.
The second choice that you make is even less important. It is about picking your starting gear, i.e. your weapon and your armor. The type of gear that you are using is important in combat, but you will be allowed to change it freely, at the very beginning of the game, thanks to the items hidden in chests. If you want to, you can pick heavy armor, at the beginning, but you can change it after some time of playing, into light armor. What is more important, than the choices made at the very beginning, are the statistics that you develop throughout the game, because it is them that determine, if you can use the gear that you obtain. To learn more, see the chapter entitled "Character development"
Armor: medium
Weapon: hammer
Shield: almond
Notes: A well-balanced gear that is very good to start with. The medium armor ensures you with quite a protection, while being light enough not to limit your movements to drastically. You can perform quite swift dodges and, if they fail, you can always block with the shield. The hammer is not too fast a weapon, but it deals the highest damage, of the weapons available at the very beginning.
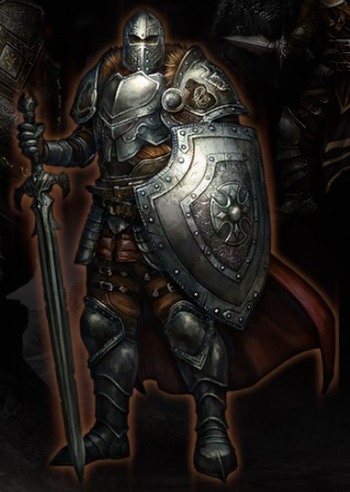
Armor: heavy
Weapon: sword
Shield: almond (heavy)
Notes: By choosing this set, you focus mainly on blocking and exchange of blows. Your character will be resistant, but you cannot expect to perform swift dodges. Remember that you take slight damage, while blocking blows, which is why you should invest several attribute points in Vitality. All of that is rounded up with the sword, whose speed is moderate and deals moderate damage.
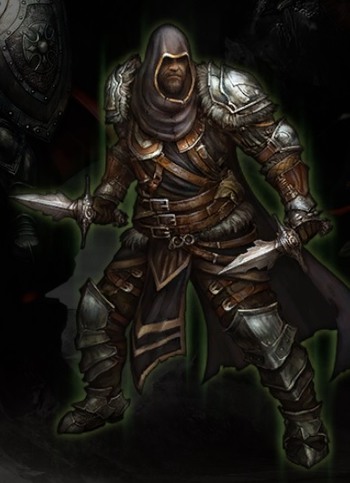
Armor: light
Weapon: daggers
Shield: buckler
Notes: The rogue's set allows you to move around swiftly and land swift blows. At the same time, it is the least forbearing. One careless step is enough to lose lots of health points. The small buckler is better for countering attacks, than it is at blocking. This set is rather recommended against, in the case of beginner players, due to the necessity of practicing movements and to a small health pool.
Damage: the average amount of damage dealt to the opponent
Armor: the higher4 the armor value, the less damage you Take from physical attacks. In the case of the Rather types of attacks, check out the armor's characteristics.
Health: your health level. Once it reaches 0, Harkyn dies. Does not regenerate spontaneously.
Magic: this asset's points are required for the magic gauntlet to be used. Regenerates very slowly.
Energy: a very import ant value that determines how many attacks you can perform, how many blows you can block, how long yo9u can run or how many dodges you can perform. Nearly each action, apart from walking and casting spells, consumes energy. It regenerates very fast, provided you do nothing and you do not hold your shield raised. Attacks by some of the opponents immediately drain the energy.
Weight: indicates how much encumbered you are. Depends on the shield that you carry, the armor and the weapon. It affects the character's movements. The movements of the character depend on the weight status:
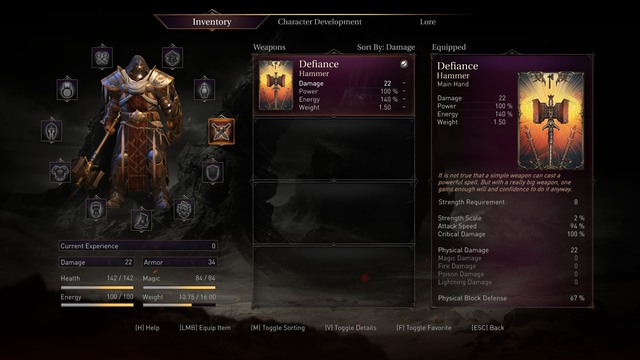
Character development, in the Lords of the Fallen, is based on gathering experience points, for the enemies that you kill, which you then spend on attributes and abilities. To progress to the next experience level, you need to head towards the red crystal, which is also used for saving the game and regenerating health. Once you stand near the crystal, you simply need to press the appropriate button, displayed on the screen, and you will access the character menu. In its bottom part, you can see the number of experience points that you need to develop an attribute and ability. Both of the values are independent of each other but, they go up each time that you obtain another attribute or spell point. To spend the points that you already have, you need to hold down one of the two buttons: the button of the shield's special ability allows you to develop your attributes, whereas the heavy attack button allows you to develop an attribute. You can also obtain these points, thanks to the special disposable items (attribute point shard, spell point shard) that you find while playing.
As soon as there displays information that you have an attribute, or spell, point available, select the appropriate tab (the block, or attack button), lean the analog stick to the right and accept your choice with the dodge button. Later in this chapter, you can find a list of all the attributes and spells, along with hints on their development.
Attributes are the most important features of your character and they have an immense effect on your fighting style. Apart from the basic statistics, they also determine what gear you can use. Indirectly, by determining the maximum permissible weight and directly, due to the requirements of various elements of gear.
Increases damage dealt by weapon that relies on strength for being used and (slightly) the maximum weight that you can carry.
Notes: The Basic attribute for each fighter. Determines the value of damage that you deal and, thanks to the increased maximum weight, you will be able to carry the heaviest of armors, weapons and shields. You should strive to reach, around 26 points, at experience level 50, i.e. towards the end of the game. It is the value that is required by some of powerful weapons. Some of the items may even require 30 points but, if you want to wield them, you will have to restrict the number of points that you invest in faith and spells.
Determines the number of your health points and slightly raises the potency of healing potions.
Notes: An import ant attribute for each character. Allows you to make more mistakes in combat, which provides you with more time to learn the opponent's attacks and to arrive at an appropriate strategy. It is worthwhile to develop this attribute to 17-18 points.
Raises the magic supplies and damage from magic weapons.
Notes: An import ant attribute for everyone who wants to use lots of magic and use the magic gauntlet often. It is also useful for fighters and rogues, because spells of higher tiers require higher faith. Clerics should strive to reach level 20, due to the requirements of the spells and items they use. The rest of the classes will do with, around 15th level of this attribute (it unlocks the spells of the 2nd tier). If you do not play on developing spells, you can ignore development of faith.
Affects the energy level and increases the maximum load, considerably.
Notes: One of the key attributes for the fighter and the rogue. Allows you to carry heavier gear without loss in mobility. Apart from that, it allows you to dodge and block more often. Thanks to high energy value, you will also be able to land longer combos. While completing the game for the first time, it is a good idea to develop this attribute to level 16-18, depending on your requirements. The rogue needs a bit less constitution, because he wears lighter armors and what influences his energy levels is also agility.
Increases damage dealt with quick weapons and raises the energy level, slightly.
Notes: The most important attribute for each rogue. Increases damage dealt and raises energy level, which you use up in big amounts. Just like in the case of strength for the fighter, and faith for the cleric, the optimal value, at experience level 50 is, around, 20 points. This allows you to deal lots of damage and not bother about energy, while carrying the best of items.
Raises your chances of obtaining a better reward, after you kill opponents, and helps you obtain better crafting materials.
Notes: The attributes for those who like challenges. It does not raise any combat statistics, thanks to which the game becomes more difficult. Instead, you can expect to obtain better, and more frequent, loot.
In Lords of the Fallen the option to quick save is absent. To save your progress in the game, you use the red crystals all around the map. After you approach one, you have two options to choose from: character development and health regeneration/replenishing healing potions. After you choose one, the game saves automatically and you respawn in that point automatically, after you die, or load the game. In most cases, it is a good idea to use each crystal that you find, but there are exceptions. First of all, it may happen that you come back to the locations that you have already visited, to find an item or a character. You can lose your directions, though, and get to a different part of the game world, than you actually wanted to. If you do not use any crystals, along your path, you can have yourself killed and respawn in the point that you originally left. This method also works, when you take a long journey, to find an item only, because even after you die, the item that you have found stays in your inventory. You only need to save the game before you turn leave it.
Another reason not to use the saving points is gaining more experience. Each opponent that you kill raises your points. If you kill an opponent for 30 experience points, each opponent, of the same type, that you kill afterwards, provides you with 31 experience points. Using the crystal resets the conversion factor to the initial value. If you do not want to take too much risk, though, you do not need to worry. The game has been designed in the way that allows you to reach an appropriate experience level without raising the conversion factor. It is a form of challenge that the conversion factor rises and the more experienced players may undertake. How about completing the game, from the beginning to the end, without using a crystal once?
At some points, the game saves automatically, e.g. after you enter a New main location, or before a boss battle.
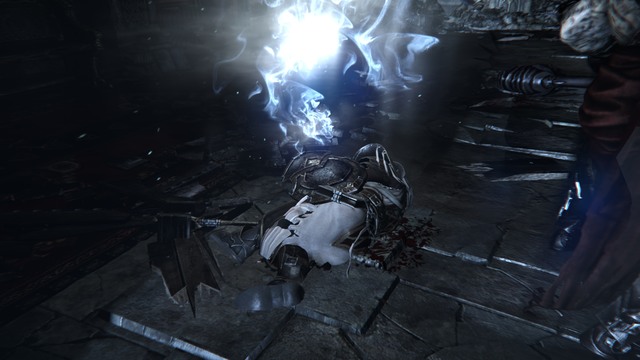
In Lords of the Fallen, you will die a lot and, unfortunately, this will have some repercussions. First of all, each time you die, you get back to the crystal that you have most recently used, or to the beginning of the most recently loaded location. Secondly, all of the enemies that you have already killed, respawn. The exception are bosses and Tyrants, who disappear from the game for good, once killed. Thirdly, you lose all of the unused experience points. They remain in your dying place, as spirits and they will fade away, gradually. Also, your experience multiplier returns to its initial value (x1.0), even if you pick up the lost experience points. The value of the spirit is displayed in the lower-left corner of the screen. However, you need to know that, if you die again, before you pick up the lost points, you lose them forever. An additional function of the spirit is to regenerate the basic assets of the nearby character. If you have problems defeating an opponent, you do not need to pick up the spirit straight away and use it to heal your character. This way, however, you risk losing all of the experience points in the spirit, if you die. each next death, in the same spot, speeds up the dwindling of the experience points in the spirit - if you die for the first time, after you return to the spot, you can be nearly sure that the amount of the experience points in the spirit will be 100%. Each time, however, the factor plummets faster and faster. As you can see, there are many repercussions that follow the death so, it is better to avoid it. At the same time, it is worth remembering that an item that you have once obtained, and the quest that you have once completed, saves up, even in the case of death. If, therefore, you are venturing out to a location to obtain a weapon, and you manage to obtain it, you will not have to go for it again, after you die.
At some point into the game, you may realize that the build of your character does not satisfy you. Probably, you may decide that you do not want to start the game over, but you would like to test another character in action. This is where you can use the option to reset the attributes/class, but you can do that only once per entire game. Apart from that, you need to have the Shard of Heroes. You can use this item earlier, while fighting the Commander, but you then lose the opportunity to reset the attributes (and in exchange, you receive a very good weapon).
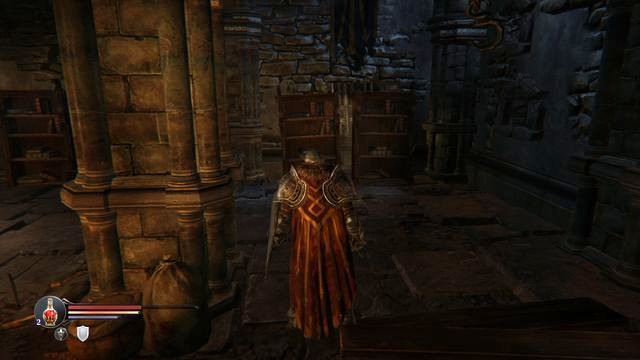
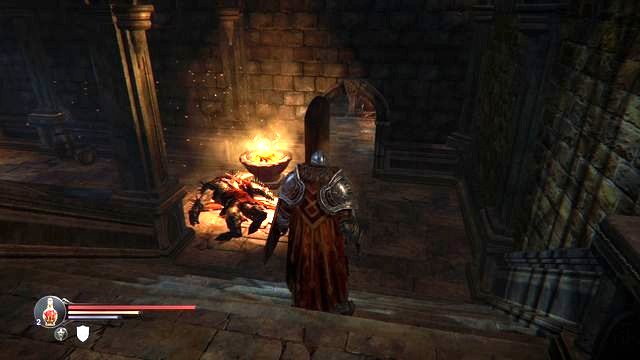
 After the battle, the weapon appers in the place of the smashed statue.
To obtain interesting gear, put (before the battle) the Shard of Heroes in one of the statues (you receive different weapons, depending on the statue; from the left to the right: for the Rogue, Fighter or the Cleric). The Commander, after his health drops by, around a quarter, approaches the statue and smashes it, which allows you to pick the weapon, after the battle.

Obtaining the Shard itself is not too difficult. You can do this already, at the beginning of the game, after you have dealt with the first boss. To do that you need to exit the Initiation Chamber, through the newly-opened door. Climb down the stairs. In the spot presented in the above screenshot, you will notice the key that was required earlier (the key to the door in the Northern cloister wing). You will hop over the barrier, without any problems, if you run up, down from the stairs.
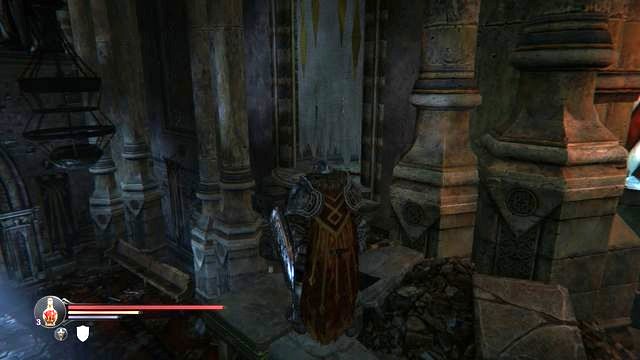
 To find the hidden corridor, climb onto the balcony.
Return now, to the spot where you started the game. On one side of the stairs, (not the one, where you found the note), jump onto the railing and over to the balcony. At the end of the path, there is a hidden door (watch out, jump over the chasm in the first place), which you an open with the key to the door in the Northern cloister wing. Collect the Shard of Heroes.
 To reset attributes/class, put the shard in a statue, outside of combat
You can use the Shard of Heroes in two ways. The way to use it is before the battle, thanks to which you receive a special weapon. You can also use the Shard right after you defeat the Commander. In both cases, pick the statue, in Square of the Judges that you are interested in (from the left to the right: the rogue, the fighter, the cleric) to reset the attributes and change your class. In the case, in which you play, e.g. as the fighter, and pick the statue in the middle, you will not be able to change your class, but the attributes will reset. The same goes for the weapon - the item you receive depends on the judge that you pick.
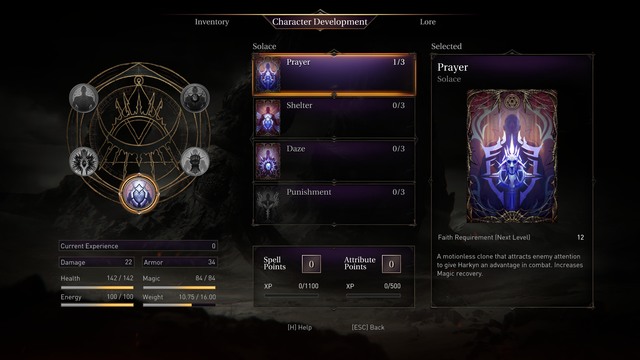
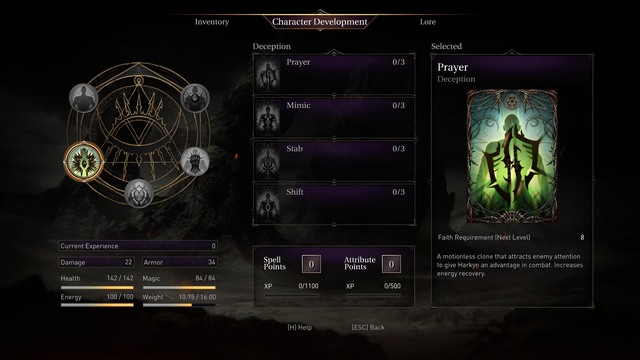
A motionless clone attracts the attention of the opponent to provides Harkyn with advantage. Speeds up mana regeneration.
Notes: There is a similar spell in each spell set. The only difference is that different assets regenerate. After you pick the Solace school, you will have access to this spell from the very beginning, and it proves useful in many situations. Apart from the increased rate of mana regeneration, it will also allow you to distract the enemies, which provides your character with quite an advantage . It is especially useful, in the case of fighting an enemy that is good at protecting himself with the shield, because it allows you to attack his back with impunity. Prayer is also useful against bosses but you need to remember that the summoned clone does not live for too long, if it takes damage from a powerful Lord.
A protective barrier that raises all types of defense, considerably and reflects damage.
Notes: A useful supporting spell that allows you to wear a lighter armor and still have your protection level high. Useful for each type of character.
A power to stun the opponents which slows them down and weakens them.
Notes: Another support spell that affects the opponent's behavior. The stunned opponent will be an easier target and the slowing-down effect allows you to find a weak point, in his defense, faster.
Eye for an eye, Harkyn takes vengeance for the enemy attacks and stuns the opponent.
Notes: The effect similar to "Daze" but this time, instead of stunning the opponent, you make him even more vulnerable to attacks, for a short period of time.
The motionless clone attracts the opponent's attention and provides Harkyn with advantage. With time, replenishes some health.
Notes: A similar spell is in each spell set. The only difference is that it regenerates different assets. As much as health regenerates slowly, from this spell, and not that useful, it provides your character with quite an advantage, to distract the enemy. the shield, because it allows you to attack his back with impunity. Prayer is also useful against bosses but you need to remember that the summoned clone does not live for too long, if it takes damage from a powerful Lord
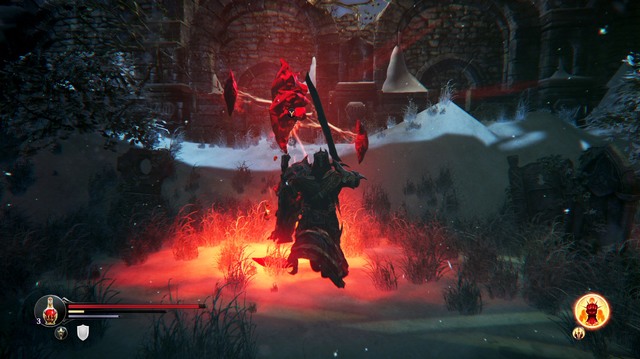
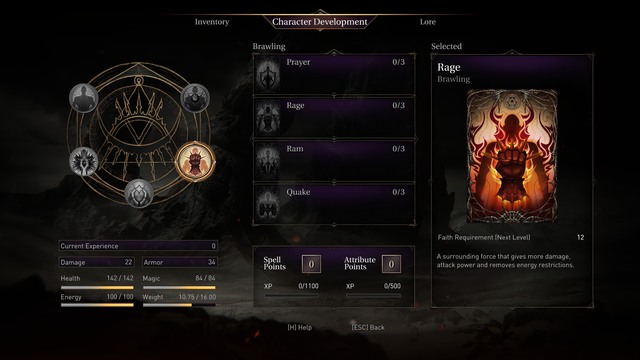
A powerful aura reinforces Harkyn's attack and temporarily provides him with unlimited energy.
Notes: Definitely, the most powerful spell in for the fighter. Not only does it increase damage dealt, thanks to unlimited energy, it also enables really long combos. If properly used against a boss, you can drain a tremendous amount of his health points, quickly. The problem however, is the casting time, which is quite long, as well as the fact that the duration of the spell is shot. To use the Rage properly, you need to be acquainted with the attacks of your opponent and find an appropriate moment to launch the deadly attack.
A tremendous power that deals lots of damage to opponents. Apart from that, it is capable of knocking them off balance, or knocking them down.
Notes: Not too useful a ranged spell, which is especially weak against bosses, because they are impossible to knock down. If you invest one point in the spell, you will not be capable of stunning too many enemies and further development requires, not only, additional points, but also high level of the Faith attribute. You can put your experience to a better use.
The most powerful of Harkyn's allies comes to his aid and knocks down the enemies with a powerful hammer.
Notes: This spell becomes available, as late as, towards the end of the game, when your character reaches a sufficiently high experience level. It is a short-range version of the Battering Ram which, in spite of what may be expected, does not summon an ally. It is, simply, a fire clone that performs one powerful attack and disappears. Not useful against bosses. You can develop it only if you find the regular shielded opponents problematic.
A motionless clone attracts the attention of the opponent to provides Harkyn with advantage. Speeds up energy regeneration.
Notes: There is a similar spell in each spell set. The only difference is that different assets regenerate. An additional distraction of the opponent provides Harkyn with quite an advantage. It is especially useful, in the case of fighting an enemy that is good at protecting himself with the shield, because it allows you to attack his back with impunity. Prayer is also useful against bosses but you need to remember that the summoned clone does not live for too long, if it takes damage from a powerful Lord.
You are followed by a magic aura that copies your moves and deals as much damage.
Notes: A useful support spell that allows you to eliminate enemies faster. Twice as much damage is something rogues like most.
A bloodthirsty magic assassin dashes at the opponent to kill him, or at least, to inflict wounds.
Notes: A quick long-range attack with medium damage. Not too useful, due to the fact that you spend most of the time fighting at close range. A similar role is performed by the magic gauntlet and it does not require experience points.
Harkyn is transferred to the dimension of shadows. Each of his attacks deals tremendous damage, but makes him more visible.
Notes: This spell becomes available, as late as towards the end of the game, when your experience level is sufficiently high. Just like the Mimic, it allows you to deal lots of damage with your standard weapon. Additionally, you are temporarily invisible to the opponents. An ideal ability for the rogue.
In Lords of the Fallen, equipment has been divided into several categories:
There are three types of armor: light, medium and heavy. They are different in terms of their protective values (defense, handling) and in terms of weight. The heavier the armor, the slower and more sluggish you are.
There are 4 pieces of each armor: helmet, gauntlets, shoes and breastplate. With all four elements, you can expect to receive a bonus, with time which helps you in battle.
Shields allow you to block the enemy blows and, depending on your type, fortify, stun or counter.
A) Buckler - a light shield used by rogues. It provides poor protection, but it allows you to riposte, if you time its special function well.
B) Kite Shield- a versatile chunk of metal that does not weight much, but it allows you to block the majority of blows and perform an attack that knocks the opponent off balance.
C) Tower shield - a very heavy shield that is difficult to break. You can use it to fortify yourself, which means that you stick the shield into the ground and block many of the incoming attacks.
Which weapon you have, matters the most for damage that you deal. Regardless of the weight of your weapons, each type has a different set of moves. Some of them are fast, whereas the other ones are slow, Some deal lots of damage, with one blow, but the other ones require a longer combo. In the game, there are the following types of weapons: swords, short swords, greatswords, axes, greataxes, hammers, greathammers, claws, daggers, staffs and polearms.
Each weapon has several standard attacks:
You also need to remember that the majority of weapons behaves a bit differently, when you hold it in both hands and when you are holding a shield. This is not all, though. Some of the weapons also have attacks that you perform by tapping the attack button rhythmically. The great weapons have attacks that allow you to swing them around, whereas staffs allow you to land combos of quick attacks. To learn more about combos, see the chapter devoted to combat.
The magic gauntlet is the only long-range weapon available in the Lords of the Fallen. It can be used in three modes that you can switch between in combat: along-range attack, a short range attack and firing an explosive, grenade-like projectile. Each of the attacks uses magic, instead of the standard ammo. In the game, there only is one gauntlet, but it can be modified with runes. More about this, in this chapter.
Adornments is a small item that buffs your character in a variety of ways. For example,, they can increase your self-control or drain the enemies for magic.
Quick items, in the Lords of the Fallen, are predominantly potions and various shards. The former heal your character and they replenish each time you use the game-save crystal. You can increase the maximum supply of potions permanently, if you manage to obtain an empty bottle or receive it from Kaslo. Shards, on the other hand, have many different effects. They can buff your resistance to fire or speed up the health-regeneration ratio, temporarily. Just like the weapons, you can add them to the quick menu and switch between them in combat.
Combat in Lords of the Fallen is strongly tactical. It requires you to learn the opponent's attack and to be well versed in the attacks that you can perform. Swinging the sword around, mindlessly, does no good, because the majority of opponents can block your attacks with the shield, or counter them with painful combos.
Apart from waiting patiently for a gap, in the opponent's defense to appear, it is important to remember about several key elements.
Each time, before you land an attack, you should check out your energy level. It is energy that is responsible for the ability to perform several attacks in the row, blocking or dodging. If you attack without sufficient energy, right after the first strike, you give the opponent the opportunity to counter. Blocking without energy, on the other hand, knocks you off balance and you take damage. Also, you cannot perform several quick dodges, if your energy bar drops to zero. You should also get out of the habit of holding the shield in the defensive stance for the whole time, because this is what blocks energy regeneration. If your opponent is away from you and he has already performed an attack, stay away from him and wait for the orange bar to reach its maximum level.
Combat system in the Lords of the Fallen is based, predominantly, on combos. Each successive attack, landed within a short time, deals much higher damage than the same attack, landed 2-3 seconds later. Unfortunately, attacks consume lots of energy and, after 3-4 strikes, you need to take a break. How to deal with that? Well, there is a way. If, before the end of the first swing, with the weapon, you press the attack button again,. your strike uses up 50% energy less. You are notified about that, with the flash on the orange bar, in the lower-left corner of the screen. This way, the same amount of energy may last for several additional swings. If you want to grasp the Idea, I recommend that you test it with the slowest of weapons. Why? Because it allows you the most time to press the attack button again, before the swing ends and you will be able to perform another quick attack. In the case of quick weapons, strikes are so fast that sometimes, it is enough to mash the button mindlessly., to perform a combo.
Apart from decreasing energy cost, combos have another advantage. In the case of some weapons, they allow you to perform special attacks. For example, the second attack, with the sledgehammer, starts a powerful attack, similar to the tornado of the barbarian in Diablo. Your character starts to swing the hammer around quickly and deals immense damage to everybody around. Most of the times, however, one such combo is enough to eliminate a very tough opponent. Staffs, daggers or claws have similar attacks. It is worthwhile to experiment and learn the technique on weaker enemies.
There are two ways of escaping damage, in the game: dodge and block. There are upsides and downsides to both and it is a good idea to keep them in mind.
First of all, it is very easy to block with the shield. You simply need to hold down the blocking button and wait for the opponent to strike. Unfortunately, this causes several problems. First of all, if you hold the shield in the defending position, you block the regeneration of energy. Secondly, each block consumes an additional amount of energy. If you do not have enough of it, before you block a strike, not only do you lose some of your health, but also you are knocked off balance, which makes you vulnerable to enemy attacks. They land quick attacks that may take up your entire health bar. In such situations, each time you want to block, you will take some damage. You need to remember that not all attacks can be blocked! this is true, especially in the case of the Lords Although the block is faulty, in many ways, it is unwise to ignore it completely, because it may be effective against some opponents. It also plays an excellent safety role. Often, while waiting for a good moment to attack, you will try to keep the opponent at bay, slightly farther than the range of his attacks. If you already have the maximum energy level, it is a good idea to hold the shield up. This way, you lose nothing and the shield always protects you against possible damage.
Dodges are more risky but, if you time them well, they save you from taking any damage. Just like blocking, they consume some energy so, if you use them too often, you run out of steam to perform combos. The key thing is to keep your balance. In the majority of cases, I recommend against performing two quick dodges at a time. If the opponent performs slow strikes, it is always better to take a short break between the individual rolls, to regenerate energy and be prepared to strike. The exception are the situations, where you have already dealt some damage to the opponent and you simply want to retreat to a safe distance. What is also effective is the attack right after the roll. Usually, it is quite strong and quick, even in the case of slower weapons. If your opponent performs a combo of 2-3 strikes, I recommend that you avoid the first two, by keeping outside of the range, and in the case of the third strike, perform a quick stab. The upside of this method is that you lose energy only on one roll, you avoid taking damage and decrease the distance, while still retaining energy to land a combo.
Although not too honorable, it is worthwhile to perform this attack as often as possible. Not only do you maximize damage dealt, but you can also start a special sequence of attacks, which eliminates the opponent quickly. You can use the backstab in three ways. If you are outside of combat and your opponent has not yet spotted you, it is a good idea to sneak up behind his back. If you are lucky, your opponent will not hear you and the fight ends in a matter of split seconds. Another situation is when you have already started the fight. After you lock the camera on your target, you try to circle around the opponent. Many of the opponents can land long and sluggish attacks that make them face one direction only, for a long time. You can exploit that, get him from behind and perform the backstab. The last method is even easier. Regardless of your spell set, you can always summon a clone that attracts the attention of the opponent. After your opponent starts attacking the clone, you will have lots of time to get him from behind and finish him off.
The crafting system, in the Lords of the Fallen, is quite easy. At the first stage of the game, you meet a mysterious blacksmith that allows you to unseal magical runes and place them on your gear. The sealed runes have been hidden all around the game world and you can obtain them for defeating some of the opponents. How do you unseal them? You simply need to go to the smith, select the rune and hold down the button specified by the game. If you want to increase your chances of obtaining a better item, you can spend some of your experience on that. Its amount is specified on the bar below the rune card. The unsealed runes come in 4 variations, specified by the color of the font that their name has been written in. The weakest ones are white, blue are more powerful and violet ones are even more powerful. The most powerful ones are in orange. Only in the case of the runes dropped by the slain boss, can you stand the chance of unsealing a better one. You increase the chance of obtaining a better one by spending some of your experience points on it - it is better not to be stingy, in the case of the ones that you loot from bosses, because you can then receive a better bonus. The type of the bonus from the rune depends on two factors:
1. The item that you place the rune into:
2. The type of the rune:
You can place runes only on the items that have the special rune sockets. It is also good to know that it is free to remove the runes from the items and you can do that as many times as you want.
There are minor and major runes in the game. The former can be found all around the game world and they, sometimes, are dropped by the opponents that you defeat. The latter can be obtained from bosses only. Of course, they provide better effects.
While exploring the game world, you can find many interesting collectibles which are, sometimes, connected with side quests and, sometimes, allow you to obtain some valuable items. Locations of all the collectibles have been presented on maps, which can be found in another guide for the Lords of the Fallen. In here, you learn about the most popular types of collectibles and puzzles, which you will have to solve on your own.
1. The passage behind the barricades.
While visiting the chambers, it is a good idea to smash the furniture at the walls. Sometimes, behind such barricades, there are secret passages or half-opened grates that you can roll under.
2. Chests and doors with runes
It is a good idea to have less useful runes in your inventory, because some doors and chests require such items to be opened.
3. Crumbling walls
In the game, there are several walls that stand out, in one way or another. Their characteristic feature is that you can destroy them. To do that, stand several meters away from the wall, put your shield on and run towards it. Then, tap the blocking button. Behind the walls, there often are hidden chests or some other collectibles. The walls that you can destroy are not always identical so, if you spot a characteristic wall fragment, test this method. You may succeed.
4. Floor buttons
If you notice, on the floor, a tile with a glowing rune etched in it, stand on it. It is highly probable that it is a pressure plate that opens a passage, for several seconds. You will recognize this by the characteristic noise. Unfortunately, the secret passage remains open for very short so, after you press the plate, you need to start running. It is a good idea to examine the nearby rooms beforehand, to find the probable location of the loot. Sometimes, it is going to be an exposed grate and, another time, this may be a well-hidden passage behind a bookshelf. You can press the button as many times as you want so, do not worry if you find nothing, the first time around. After you get into the hidden room, find the lever that removes the blockade at the other side.
5. Quest items
In the world of the Lords of the Fallen you will find many items and elements of the surroundings whose meaningfulness you do not understand, at first. It is highly probable that they are connected with quests that you receive later on. Among such items are: human skulls, human tattoos, Tyrant hearts or tablets with unintelligible inscriptions. Keep them, because they may come in handy. Apart from that, remember the walls with runes of unclear meaning and of statues of the Rhogar. You will be able to decipher the former, later on and destroy the latter.
6. Challenge portals
During the exploration, you may encounter stone pillars that, after you meet certain requirements, turn into portals. The requirement to meet is, most usually, the death of the nearest Lord. Each portal takes you somewhere else and the locations can be divided into three types:
1. Try to change and test new weapons often. It may be much easier to defeat some opponents, if you pick the appropriate type of weapon. This is especially true in the case of bosses. Pay attention, especially, to the speed of the weapon, damage dealt and the required attribute (e.g. strength). Sometimes, the faster weapons that deal less damage are better than the slow ones, with which you perform attacks that are easy to break.
2. The spots, in which you fight bosses, are always separated from the rest of the map, with a special barrier that do not let the rest of the opponents through. If you die, during the battle, you can walk the distance between the save-crystal and the Lord, without bothering about the opponents. They will not enter the arena anyways. Just try to dodge their attacks properly.
3. If you find fighting problematic, from the very beginning, try to change the armor that you are wearing and the weapon. It is the most challenging, to play as the rogue wearing a light armor, for the beginners. The cleric should be the easiest to handle.
4. While developing your character, pick one attribute that you are going to invest the most points in. In the case of the fighter, this should be strength, for the rogue, pick dexterity and for the cleric, faith.
5. Do not invest your experience into spell points, if you lack the faith to unlock a new spell.
6. Be patient. You can be killed, by most of the opponents, really quickly, if you are careless and attack at the wrong moment. Try not to engage in an open exchange of blows and avoid mashing the attack button mindlessly.
7. Map your weapons to your favorites list to be able to switch between quickly, in combat.
8. Always try to avoid fighting more than one opponent, at a time. If you are jumped by a group of opponents, try to lure one of them into the location that you have already cleared and kill him before the rest arrive.
9. If you are fighting against a group of opponents, eliminate the one with ranged attacks, in the first place. Usually, they are not as resistant as the rest and they can be really annoying, if left alone.
10. Try not to use up the shards of protection from fire! You are going to need them in the final boss battle.
11. Watch your step! In several spots, there are holes that it is easy to fall into and die. You can also exploit them to your own advantage and push an opponent into one - he dies on the spot, then.
12. Walk into new areas with your shield up. Often, there may be an opponent behind the wall.
13. While fighting, try to eliminate the weakest enemy first - it is going to make things easier and if left alone, they can be a nuisance and damage you painfully.
14. Never engage in an open exchange of blows. You will fare off much better if you use the shield, blocking, the gauntlet and dodges wisely. Also, diversify your attacks - use dashing attacks, after a successful dodge, if possible, charge the strong attack.
15. If possible, get your enemies from behind - you then stand a chance of killing them instantly.
16. Use diversified gear, thanks to which you will personalize your character. Some of the weapons are better for the Fighter, due to the strength that they need, whereas the Rogue will find some other ones more useful. Each weapon has its own damage dealt and speed, thanks to which you will be able to decide which gear is better. Some also require you to use both hands, which makes it impossible to use the shield.
17. Keep looking around, because getting off the beaten track often results in finding interesting items and various collectibles.
18. You fight each boss in a bit different way, but there is one thing that the fights have in common - you need to remain in constant movement and learn your opponent's attack, which allows you to match your tactic and find gaps in defenses.
19. Use shards with consideration. It is best to use them while fighting bosses that prove to be the most problematic.
20. Some of the doors cannot be opened, up until you push the storyline forward. Some others require a specific key and still other can only be opened at the other side.
This opponent wields a two-handed axe that deals a lot of damage. At the same time, due to the lack of the shield, he is easy to wound. Keep away from him and wait for him to swing his axe. Then, dash towards him and land 2-3 quick blows. Repeat several times and you will defeat him without problems. Later into the game, you will only need one powerful dashing attack.
An annoying opponent that fires fire bolts. Even if you block the bolts with the shield, you take damage from fire. Dash towards the opponent, while dodging the bolts and land 2-3 bl9ows. You should then walk around him, to avoid taking on a series of quick attacks, or the grenade. Always kill the crossbowmen in the first place, or get away from them far enough, to have a wall block the bolts.
One of the weakest enemies that can give you a good beating, though, if neglected. He performs one slow attack or a combo of four quick and painful ones. In both cases, it is better to get him from behind (with the shield up) and kill him from behind. With a quick weapon equipped, one that deals lots of damage, you can also precede his attacks and kill him from the front. Note! The infected sometimes respawn. He is much less resistant then, but he can surprise you with an attack. Note that the Infected are deaf and attack, usually, blindly - if you dash away, to an appropriate distance, they will probably leave you alone, for the time being. This will allow you to land your own attack. In groups, the infected may be a threat, due to the fast attacks.
He is almost identical with the crossbowman, but instead of the crossbow, he uses daggers. It is best to block his attacks with the shield and counter the attack quickly. The creature is not too resistant. Another option is to precede his attack with your own daggers, or claws. watch out for attacks from the side or from behind, because the rogue may get around you.
The shieldmaster is one of two demons that hide behind a large shield. His attacks are not too difficult to dodge, but he is difficult to hit it is best to circle around him and wait for him to fortify himself, or perform a combo of quick stabs. He is then, turned away for a short moment, which makes it possible to get him from behind and land several strikes. Just like your character, the shieldmaster loses some of his health, while blocking attacks. If you feel strong enough, you can try to smash his defenses with several quick strikes to the shield. Another good method is to attack at the moment at which he attacks. If you are faster, you break his attack and you can land your own combo. You should especially watch out for this opponent in narrow passages, where it is impossible to get him from behind. In such a case, lure him into a bigger room.
the knights are the tougher version of the shieldmaster. He also blocks all of the attacks with a large shield and additionally, it is difficult to find an opportunity to strike at his back. It is best to start the fight, by getting behind him, before he notices you, but not always is this an option. After the fight starts, you need to learn well all three of his attacking patterns. The first one is a combo of three powerful swings, where there is no point in blocking. Right after the first blow, you can lose your entire health and be knocked off balance. It is best to stay out of the range of his attacks and, during the second, or the third swing, dodge towards the opponent. Attack after the knight takes the third swing. While keeping the distance, you cannot get too far away, because the opponent will then charge at you and you will have to perform a quick roll to dodge it. Otherwise, you will be knocked down. On the other hand, approaching the opponent too close is also dangerous. You then expose yourself to a quick shield bash that stuns you. This is followed by a quick stab that deals tremendous damage. You can perform a pre-emptive strike while the opponent is dashing at you 0 it is best to start running and land a dashing attack yourself.

An opponent that fights in exactly the same way as one of the Lords - the First Warden. The difference is that he is not as tough. Kill him in the very same way as the boss, first by dodging the powerful slam into the ground and the lethal whirl. A good tactic for this fight is to equip yourself with a powerful two-handed weapon that enables you to launch a long combo. The guardian stops attacking, for a moment, after you smash his shield or armor. He then changes his attacking pattern and pushes your character away, if close. If you get away, a bit, before the change, and land a strong-enough combo, you can kill him before the shift is over.
This opponent also fights like a Lord. In this case, it is the commander. The fight, against him is quite easy. His favored attack is the stab followed by an attack from below. While performing both of the attacks, the opponent is facing one direction, for a longer moment. It suffices if you dodge the first blow and you will have the opportunity to mash the opponent's back or side, with impunity. Some sort of a handicap is the fact that the opponent respawns for as long, as you take his heart, from a vessel somewhere in the area. While searching for the heart, you can take advantage of the read beam between the Tyrant and the Heart. However, it becomes visible only as soon as the opponent starts to respawn.
Hounds are very quick and very aggressive. The most annoying thing about them is that they can dash away from your attacks. To kill the beast quickly, it is best to wait until he attacks, block the attacks and attack yourself. Then, the hound does not manage to dodge.

Mages are the opponents that appear somewhere mid-way through the game, who can really vex you, if you do not know them yet. Their basic attack is a ranged spell that takes on the form of a single bolt, or a cluster of bolts. To avoid it, you need to time your dodge well, or run to the left or to the right, fast enough. As soon as you run up to the mage, deal to him as much damage as possible and hop back, to avoid the magic explosion. The explosion knocks off balance everyone around the monster After the opponent loses lots of health, he can start healing, by draining your character for health. At this point, there a0ppears a red mist between your character and the opponent. To break the spell, you simply need to land a strong attack. Still, you need to be careful with that, because the mage may raise a shield (the blue halo around the opponent), which reflects half of the damage dealt back to you (e.g. you deal 100 dmg and receive 50). The final danger appears after the mage dies. After you deal the final blow, you will only have a short moment to roll away, from the damaging explosion. The safest way to finish off the mage is at a distance, with the magic gauntlet.
From their looks, they resemble flaming turtles. Still, they are really fast. As soon as they notice your character, they start running, or rolling your way to explode, finally. The most effective defense, against them, is a regular block with the shield. If you have enough energy, you should take no damage.
The spirit is a bit tougher version of the mage. Just like the mage, they can fire several magic bolts that you should quickly dodge. Apart from that, they summon three traps around themselves, which then drop to the ground and become invisible. If you step on one, you will be blinded temporarily and knocked off balance so, it is a good idea to change your position to lure the opponent away. Another solution is to step into the trap, as quickly as possible. Right after the spell is cast, the opponent stays put, for a moment, and lands no blows. Definitely, the most dangerous are the dagger quick blows , by the spirit. To avoid them, do not remain close to the opponent for too long. After you land 2-3 attacks, it is a good idea to get away to a safe distance.
Midgets are not as slow as it may seem, but you can recognize them by their stooping, for the whole time. You encounter them for the first time, at the cemetery, while fighting the Follower. Although they are not too tough, they strike very quickly and often come in pairs. Blocking their attacks is not too effective, because you quickly lose your energy and two opponents will quickly take advantage of that and give you a sound beating. The best weapons for such fights are quick, long-range, two-handed weapons. As soon as you spot the beasts running your way, you can quickly start powerful swings. If you time them well, you can kill both of them at a time.
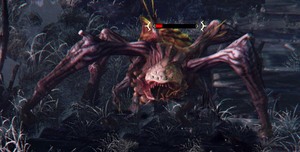
At the very beginning, the spider is a tough opponent, if you do not learn its behavior well. The basic two of its attacks are a jumping attack and an acid spit. To avoid taking damage, keep at a distance and dodge quickly. A good moment to attack is when the beast's gland grows. It then becomes defenseless and,. above all, it lays an egg. If you do not stop this process, soon the egg hatches and a small spider appears. Another way to stop it bear its offspring is to destroy the cocoon on the ground. You then become vulnerable to attacks, though. Although the small spiders are not too demanding, thanks to their speed, they can obstruct you from destroying the rest of the eggs, and fighting the whole swarm is a challenge. Spiders have the preference from coming down from under the ceiling, into the room that you have just entered.
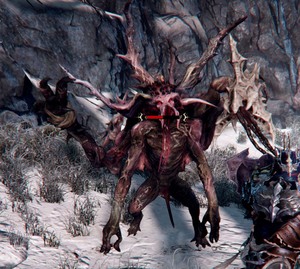
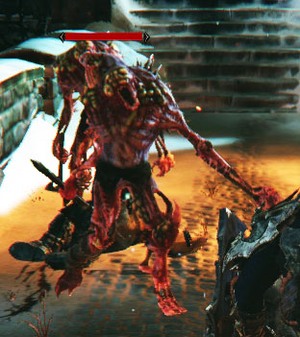
The mutant is a powerful beast that looks like the crazy experiment from Doctor Frankenstein. Fighting it may be a nightmare, if you are too passive during the battle. The attacks of the monster are as follows: claw attack into the ground, jumping attack, fire belch and bite. Apart from that, at some point, it can lay down on the ground and start to heal. If you break the process, the monster sets the ground on fire and deals considerable damage to you. How to kill it? First of all, try not to stand in front of the beast, because you are then vulnerable to bites and fire belching. It is best to attack during the other of his attacks. Land full combos with some powerful weapon and you should be able to kill the beast, before it starts to heal. If you fail to do that, retreat to a safe distance and wait for an opportune moment.
There are four types of guardsmen: the archer, the rogue, the shieldmaster and the knight. The first one keeps shooting arrows at you and, after you approach, he lands a quick attack, or dodges yours. To defeat him, it is best to approach him, dodge his attack and then attack yourself. The rogue is a bit more problematic. He performs a quick series of strikes and is capable of disappearing in the shadows, after which he appears next to you. I recommend that you keep at a distance from him, by walking back, or by performing quick dodges. You also dodge, whenever the opponent disappears in the shadows. You then strike after the opponent ends his combo, or right before he starts another one. The shieldmaster is a real walking fortress. TO defeat him, keep at a distance and after he starts his combo, try to get him from the side and land 2-3 blows. A more risky method is to guess the moment, at which the opponent attacks, and launch a pre-emptive attack. While lifting his weapon, the shieldmaster is vulnerable to your attacks. A similar tactic works against the knight. The difference is that his attacks are faster and stronger, but he does not have a shield to protect himself with.
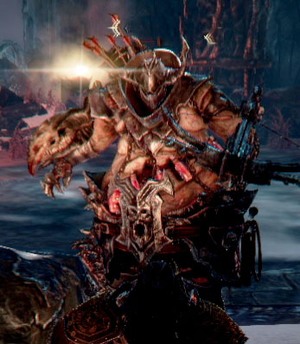
The fatman is a stronger version of the crossbowman. He also has a long-range weapon, but he is tougher and his array of attacks is wider. Apart from shooting bolts, he can throw incendiary grenades on the ground and place traps on the ground, which pin you in place. Avoid both and try to shorten the distance, at the same time. After you come close enough, have the opponent attack you in melee or dodge, while taking the latter onto your shield. This way, you will win several seconds to maul the opponent with impunity. While fighting the fatman, you should also remember that the beast heals itself with health potions, if it loses too much health. Be prepared for that and strike with a deadly combo, then. The greatest problem, in the case of this opponent, is that he often comes with some bodyguards. Always eliminate the weaker opponents in the first place, by luring them behind a wall or any other blockade that covers you from bolts.
Lords of the Fallen is one of the first games that attempts to squeeze as much power from the new generation consoles as possible. For this reason, system requirements of the game are quite high. If you want to enjoy the full extent of what has been prepared by the developers, you need to obtain a high, or middle end graphic card. What you also are going to need is 6GB RAM and an operating system better than XP.
This guide has been drawn up for the PC version, on the computer of the below specification:
The above specifications allowed a smooth gameplay on high graphics settings and resolution of 1920x1080.
Guide 'Quests, maps and secrets' for the game Lords of the Fallen, is a complex solution for solving every quest and finding every collectible in this title. You will find here detailed maps of every location, on which secrets, enemies, riddles and important quest items are marked. You will also find there our richly illustrated walkthrough, which will make your gaming experience much easier. With this guidebook you won't be having any problems whatsoever with any trap or enemy that will stand on your way. You will also be given a special chapter depicting every boss that you will encounter in the Lords of the Fallen, with all of their ways of attacking. This includes the special tactics and tips on defeating them.Also every collectible, portal, scroll and side quest is described, so that you won't be stuck in any place. The scrolls are reported in order of location to make them easier to find in the book. 'Lords of the Fallen' is a fantasy based, Action - RPG title. Its story is placed, in a world, where the people rose in revolt against the tyranny of a cruel god. They have managed to imprison him within a mountain range where the god began to grow stronger. Now only our hero is able to confront him. Controlled by a player protagonist is a member of one of three classes and can follow the way either of a sword or magic.
Guide 'Quests, maps and secrets' for the game Lords of the Fallen consists of:
Norbert "Norek" Jedrychowski ()
 The beautiful and the beast - almost like in the fairy tale.
This guide for the Lords of the Fallen has been prepared basing on the basic version of the game. The walkthrough concerns the first time to complete the journey. After you start a new game (New Game+, and New Game ++), you may gain the opportunity to obtain items that were unavailable at the first beating. The main plot, whereabouts of quest items and side quests do not change. Some of the notes, however, can only be found while continuing the game, after you have completed it. Also, in the chests, you can find a bit different items (the differences mainly concern Shards), depends on the level of your Luck. By the same token, the locations of the armors and weapons do not change.
To make things easier, this guide has been color coded in the following manner:
- orange - marks non-hostile characters and heroes, who are, usually connected with a quest
- green - marks items and collectibles
- brown - marks opponents and bosses
- bold+ italics - names of minor locations within a bigger one
- bold - important places (checkpoint, portal, names of main locations)
- [M1,1] - references to maps
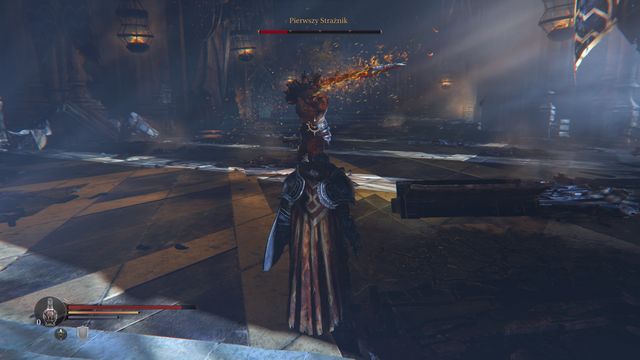
 The Judge determines if you have completed he game fast enough.
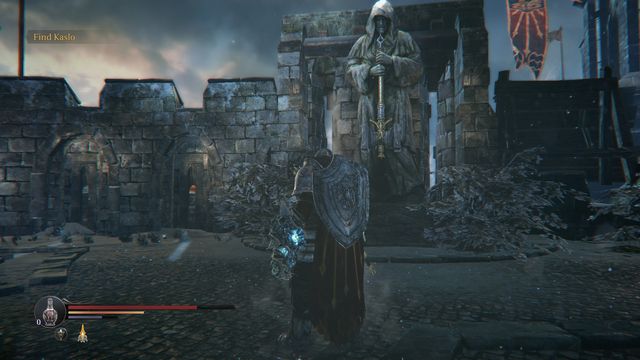
1. Talk to Kaslo, find the Huge Key [M1,3]. Open the door to the Initiation Chamber [M1,5] and defeat the First Warden. Leave the Citadel [M1,6].
2. Open the gate with the lever [M2,2], go ahead through the Main Wall. after you pick up the gauntlet, go left and activate the checkpoint. Here, you encounter Yetka [M2,4]. Open the gate and enter the Square of the Judges, where you need to defeat the Commander.
3. Go towards the Cemetery (straight ahead over the stairs, then right, go right at the checkpoint and climb down the stairs). Talk to Kaslo [M2,9] and walk into the Cemetery, where you need to defeat the Worshipper. Return to Kaslo and walk through the portal to the Temple
4. Approach the gate [M3,4], next to which you need to talk to Yetka. Then, in both Antechambers, activate the levers below [M3,3]. Walk through the Eternal Flame to the Panorama, through the Abandoned Fields [M3,5] to the side entrance to the Temple.
5. Inside, go left, down the stairs and through another passage to the checkpoint. Over the stairs, you will reach the Portal - where you need to defeat the Infiltrator [M3,6].
6. Return to Keystone, through the Cemetery enter the Catacombs[M2,A].
7. At the Catacombs enter the Hollow, then up. Activate the lever [M4,3], descend to the Monster Prison, where you need to activate another lever. Enter the arena and defeat the Champion [M3,5]. Enter the Citadel [M3,A].
8. From the Flooded Chambers go right to the Main Hall. Then, ahead, up until you pass by the Captain [M5,1]. Then, take the lift (at the top of the spiral stairs) to the top,. After you talk to Kaslo descend to the Planetarium and clear it of the monsters. Talk to Antanas [M5,5].
9. Through the main entrance, exit to the Square of the Judges and defeat the Beast. GO now to the Temple.
10. At the gate [M3,4], you encounter Yetka. You can either follow her [M3,37] or enter the arena ahead and defeat the Protector. Enter the Chamber of Lies.
11. Inside you need to activate two levers at the higher level of the location [M6;2,3]. Then, get downstairs to the Fat Lord [M6,4], where to activate another chamber. Now, go upstairs to meet the Annihilator [M6,5]. After the fight walk to the portal [M6,6].
12. After the conversation with Adyr you will get back to the Citadel. Open the grate ahead and defeat the Lost Brothers. Then, through the Main Hall, reach the top of the Citadel (along your path, you will be attacked by the Captain [M5,9]).
13. Climb up the spiral stairs. Here, you encounter the Blacksmith - depending on how you use the Adyr's Rune, you will see an alternative ending.
14. Enter the lift to the top to square off against the Judge, whose defeat ends the game.
 The moment at which you start your journey.
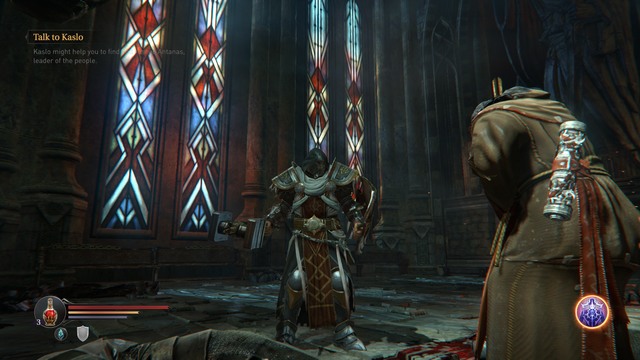
After the game starts, you can see a short introduction and kill the first opponent, without any effort. After you do that, climb up the stairs to talk to Kaslo [M1.2](ask him how to open the door). On the right, there is a note.
 If you sneak in, you will avoid that attack and will remain unspotted.
After that, return downstairs and open the door to the left of the stairs. As you enter, it is better that you do that silently (slow walk), because there is a deaf opponent waiting for you inside. Thanks to this, you will have the advantage of surprise (it is very easy to defeat such opponents- several blows are enough).
After a while, you will reach the locations shown in the above screenshot - downstairs, you will encounter two opponents and in the corner, there is a small room ( smash the shelves that cover it and dodge forward - jump while running). Walk inside [M1.10] and open the chest, where you find an Empty Bottle - an additional slot for health potions). Then, climb back up the stairs and you will note an opponent, and receive a piece of information that sneaking up on the opponents provides you with an advantage. Kill the Infested in the way suggested by the game and collect the note [M1.#2]. Then, keep going ahead. In the next room, there are two more opponents. Once you destroy the shelves on the left, there will drop a Shard of Energy from them [M1,15].
In the location shown in the screenshot, go off the path, down the stairs to the basement and you will obtain the Huge Key [M1.3].
 It is a good idea to get the Marauder that you meet upstairs, down
Return to Kaslo [M1.2], with the key, but take a different path. After you climb up the stairs, keep going ahead and go right (collect another note along your path). You will run into a portal [M1.#1] that is inactive yet (remember its location and return here after you defeat the first boss). Upstairs, you run into a Marauder - watch his attacks; either dodge them or block them. It is a bit inconvenient to fight on the stairs so, get him downstairs, where you will have more room mo maneuver. After you kill the opponent, get upstairs and jump down to Kaslo (at the corpse of the knight, there is a Shard of Energy [M1,14]). talk to him about the help that you need and you will obtain an additional health potion. After you open the door you will have to fight the first actual battle.
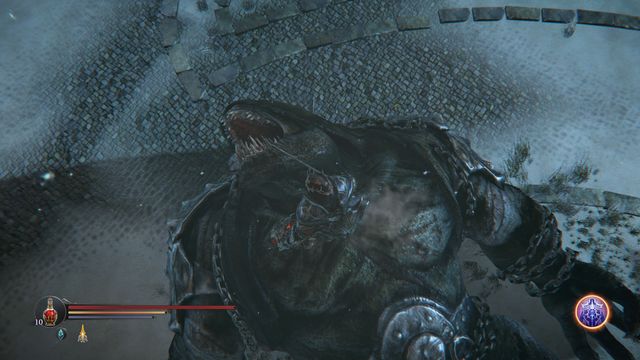
 In the last phase, avoid the whirling boss.
The battle is not too demanding, if you keep several important things in mind. First of all, do not attack blindly, by mashing the attack button - the opponent has a shield so you will deal no damage, whereas the battle will end quickly, if you take several strong blows. Try to keep the distance of the boss and watch out for the attacks. Dodge from them early enough. Start attacking only after the boss finishes his sequence - the best idea is to dash forward, quickly (sprint) and land a strong jumping attack (the strong blow), after which you should dodge and dash away, because he will try to attack immediately. An excellent moment to attack with swift blows, into the opponent's back, is when he, after the strong attack, drives his sword into the ground and will take a moment to pull it off. This will leave him exposed for a moment. Towards the end of the battle, also watch out for the lethal whirl - do not clock it and remain out of range. All in all: keep the appropriate distance and attack when the boss is done landing his own attacks. You should especially watch out for the horizontal downwards swing and the lethal whirl. As the priest, you can also use the spell that summons Harkyn's clone, to your aid. Thanks to this, you will distract the boss for a moment, which will allow you to attack his back safely, or drink a potion.
 At the foot of the stairs, you run into a Marauder. Behind the door, there are two Infested, a note, a weapons chest and a hidden passage.
After the battle you can replenish your potions, by activating the checkpoint, and also buy several attribute points, for the experience that you got, which you distribute. Also, remember to return to the teleporter [M1.#1], to claim your reward. Then, go to the Initiation Chamber and walk through the door (the one on the right). After you defeat the two Infested, climb downstairs (before that, you will find a note), and open the first door (watch out for the Marauder on the stairs), behind which there are two more Infested, a weapons chest (Monk's Staff) [M1.12] and a note.
 The wall that you can smash by charging (opposite the chest).
Note: while facing the wall, opposite the chest, you can use the shield charge (sprinting towards the wall, while holding the shield up (block)) thanks to which you will smash the wall and find a secret chamber [M1.13], with a Small Cellar Key inside. Deeper inside, there also is a Spider that may be somewhat problematic to kill (first of all, watch out for its jumps and poison attack). Then: in the path to the right, at the end of the corridor, there also is a door, where there is a Key to the chest in the main hall and a checkpoint. And more Spiders - if they are too strong for you, sprint ahead for the items and escape from here. In the left corner of the secret chamber, there also is a Human Skull.

After you exit, hop over the barrier and, in the area in the screenshot, find the Key to the door in the Northern Monastery Wing [M1.7]. Go downstairs and you will find one more note and the Citadel exit [M1.6], and an armor set in the chest (Priest/Rogue/Fighter; depending on the class that you have initially picked).
 To find the hidden passage, climb to the balcony.
Return to the starting point. On one side of the stairs (the other one from where you found the note) jump onto the railing and jump over onto the balcony [M1.8]. At the end of the path, there is a hidden door (watch out, hop over the chasm beforehand), which you can open with the Key to the door in the Northern Monastery Wing. Collect The Shard of Heroes and return to the Citadel Exit [M1.6].
 The Citadel Exit.
After you exit the Citadel [M2.A], you will still have to find Kaslo. Activate the checkpoint on the left and head towards the small yard, where you will have to defeat a Marauder and two Infested.
 The lever for the gate.
In front of the gate, you can both go to the left and to the right, to the small platforms. In both cases, you will encounter enemies and find levers [M2.2] that open the internal and the external gate, respectively. Talk to the Wounded Monk [M2.1] - you can cut his palm off and offer a medicine (you will lose one health potion slot, but you will gain 500 EXP and receive a Slaughterer axe, you will also encounter him later into the game - if only you help him).
 Ahead, there is a wall and a chest, with an armor set inside; on the left and on the right, there is a door to the secret passage.
Before you climb downstairs, examine the doors on both sides - in the room on the left in the chest, there are armor elements (a helmet and an armor, Hot Blood), and at the very bottom of the room, there is a door that you need to take. You will get to the Northern Wall. Watch out for the Crossbowman at the end of the path.
Then, after you take the stairs, you will walk into the location shown in the above screenshot (Southern Watchtower). Watch out, because there is a Rogue behind the wall. Collect the note, and open the chest in the room, with the rune [M1,24] (inside Shard of Attribute Point and Harnessed Elements (braces, boots, helmet), and climb up the stairs. There, you will encounter a Marauder, who you need to defeat (he drops the Marauder Great Axe), and return to the gate, over the wall (several Infested and a chest [M2.11] with an armor set, Symmetry).
 The view on the main wall, where you find the gauntlet.
As you go ahead, you run up into the Main Wall, where you receive a Mysterious Gauntlet after a short cutscene [M2.3] (at the corpse of the knight here, a note) - there are variety of ways,, in which you can use it, what is necessary is appropriate positioning. After a while, there appears the first opponent, where the second one will shoot crossbow at you. deal with the first one and walk around the second one, for the time being. Run up to the checkpoint. After another cutscene, you can cross the gate but, it is better to stay around, for a moment more. After you talk to Yetka [M2.4] for the second time, you will be allowed to find her dagger for her.
 On the tower, there is a crossbowman, who has been shooting at you earlier. The stairs down takes you to more opponents.
Return to the Crossbowman (Southern Watchtower), and climb down the stairs. Here, you will find a note and a Marauder (in the chest [M1,26] Shard of Resistance to Fire and the Lethal Secret (a shortsword)). On the left, there is a small room with an opponent and a chest in the center [M1,27] (you can use the lever here to gain access onto the Main Wall).
 To jump down to the platform, you need to lean out. Watch out not to fall down!
At the stairs itself, you can also jump down to the platform below [M2.12] where, on a wooden platform, there is a Tower Key. As you go down, on the right, there is a room with a Spider inside. Watch out because he can deal quite damage, with one quick leap. Remain in constant movement and, as soon as it gets tight, return upstairs and drink a potion. Also, watch out for being poisoned, which cause a slow decline in your health points (to some point, not completely). After you defeat the opponent, open the chest.
 You can get the opponent from behind, After the fight, remember to collect Yetka's dagger.
Return to the External Passage. As you head down, you will get to the door that you open with the key that you have found (there is a note inside). Then, exit through the other door and head onwards, along the External Passage (make sure to jump over the chasm). Right behind the exit, watch out for the Marauder, and also open the chest [M1,17]. After a while, turn right and you will get to the Northern Watchtower - there, you encounter a Marauder upstairs and you find the Yetka's Dagger [M2.13]. As you follow to the end of the passage, you encounter one more Crossbowman and a chest [M1,16] (a rune, a Prejudice staff). You can now return to the gate (for finding the dagger, you receive 800 EXP and a Catacomb Key - you can now go to the catacombs [M2.B], or do that a bit later, after the fight in the Cemetery).
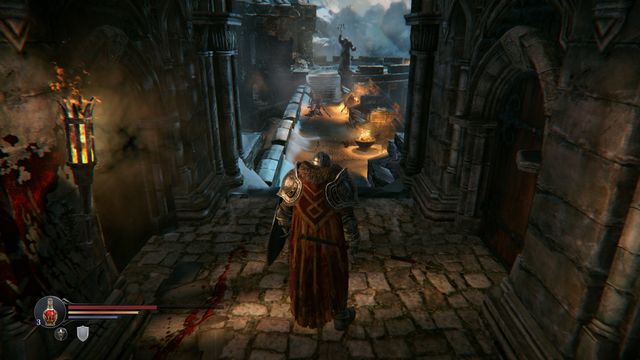
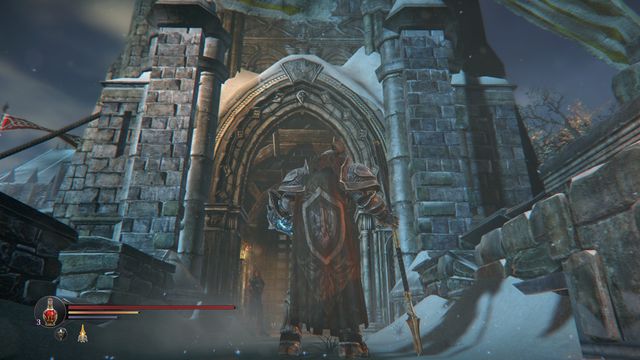 A gate, behind which you fight the Commander.
Past the gate, you will first fight two opponents, and then the boss [M2.5].
 The weapon appears after the battle, in the place of the smashed statue.
Note: To obtain an interesting weapon, place (before the battle) The Shard of Heroes inside one of the statues [M2.14] (the type of the weapon depends on the statue that you put it into: for the rogue, the fighter or the cleric). The Commander, after his health runs down, by around a quarter, approaches the statue and smashes it, which will allow you to collect the weapon, after the battle (you can learn how to obtain the item that you need, from the chapter entitled Resetting of the character).
 It is a piece of cake, to get the boss from the side, while he is kneeling with the shield and it is a perfect opportunity to land several quick blows.
Commander is a boss with quite a wide array of attacks. All of the phases of this battle are identical - after he loses some of his health, the boss summons opponents and become invulnerable to attacks, until you defeat them. Try to remain in movement, for the whole time and keep a safe distance, thanks to which you will be out of the range of the attacks (a combo and a jab). The boss will then be using the "wave" mainly and the lethal forward attack- this is an ideal moment to land your own attacks, because he will then remain motionless, for a moment. This will allow you to get him from behind and land several blows. To sum up: thanks to staying in constant motion and keeping your distance, you will avoid taking damage from the sword. Most of the times, the boss will be trying to hit you over distance but, in spite of high damage that they deal, the attacks are marked beforehand and, therefore, easy to dodge. Also, they provide you with the opportunity to attack the opponent from behind or from the side, or to drink a health potion.
 In the narrow passage you find a Blood Flintstone and a bit ahead, a note.
After you defeat the boss, head up the stairs (opposite the gate that you entered through) and after a short conversation with the Captain [M2.6] take the path to the right. After you take another turn, as far to the right as possible, you will note an active portal. On the left, there is a narrow passage with an opponent behind a shield (watch out for his quick jabs from behind the shield). You will find a Blood Flintstone here [M2.7] (and there is a note a bit ahead, next to the Crossbowman).
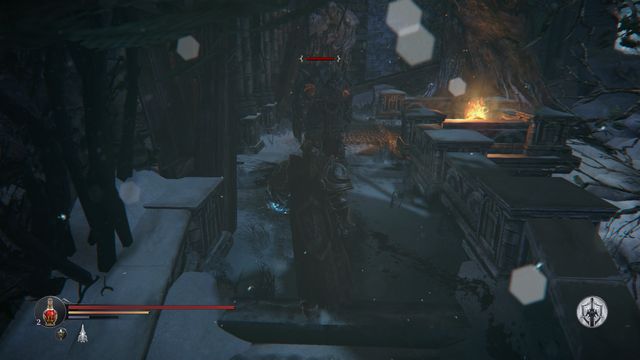 A balcony with Crossbowmen.
Return to the main path and head towards the opponents (again, watch out for jabs from behind the shield). On the left, you find a note. After a while, you run into two Crossbowmen, and a bit ahead, a checkpoint.
Attract the attention of one of the opponent, deal with him and take on the Rhogar.For a moment now, it is a good idea to get off the main path and go left of the checkpoint (Back entrance, towards [M2.15]). Watch out though - you find really powerful opponents here, who are capable of bringing your health down, by a half, with one attack. Still, it is a quite profitable to take on them, because you earn lots of experience from them. First, deal with the big Knight, then the Crossbowman and the Infested (these are the tougher ones). Also, open the chest (requires a rune) where you find a weapon (the Guard Great Axe) and an additional health potion slot. Over the stairs, you will walk into the area, where there are two strong opponents - try to take on them one-by-one, because they are nearly impossible to defeat together. Land your attacks at the moment at which the opponent takes a swing, because this will break the attack and enable you to land yours.

At the end of the path, there is a door that is locked, as of now. Ignore it at the moment - to the left, there is a wall shown on the screenshot [M2.15]. You can smash it with your charge (sprint towards the wall, while blocking). In the secret chamber, there is a chest and a weapon inside (the hammer, Blindman).
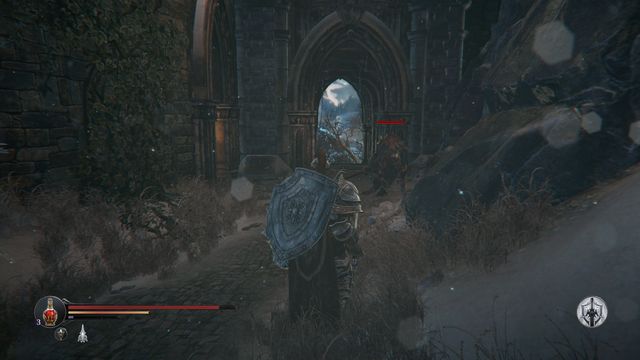 The gate that you can turn left, in front of and set the stack on fire. If you go ahead, you will find Kaslo.
Return to the checkpoint. On the right, there is a passage to the External Walls (and a note at the entrance), go there. As you go down the path, you encounter more opponents with shields (you can get one of them from behind), and you will be able to go left, at the smaller passage before the gate. On top, defeat the Crossbowmen, and set the wooden stack on fire [M2.8] (1000 EXP, you need to own a Blood Flintstone, thanks to which you will receive backup later on, while fighting at the Citadel).
 The stack that you can set on fire. On the left side of the tower, there is a path downwards.
Note: as you go ahead, you will have to cross the Cemetery and fight a boss. If you do not want that, you need to return to the gate, at which you took the turn. If you dropped off the ledge, by accident, and you do not feel like fighting the Worshipper right now, you need to come to terms with losing some of your experience, or having to use the Ghost Merge Shard.
As you go downwards, you will encounter another Marauder (there is a chest in one of the rooms [M2,29]), and below, after you jump down, a chest [M2,30] (Empty Bottle, Shard of Resistance to Magic, Warden's Great Sword). Follow the only path and you will also find a note [M2.#8]. At the end of the path, you run into the Worshipper.
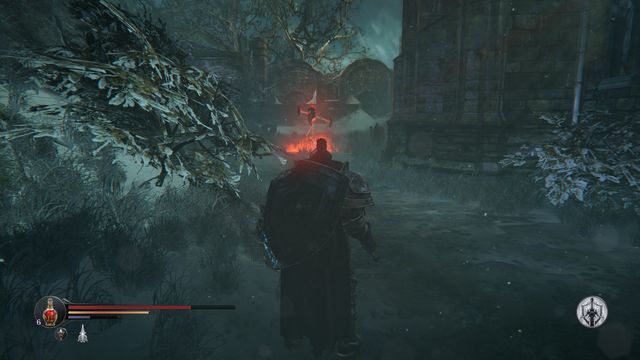 At the end of the path, there is Kaslo waiting and a checkpoint.
As you go down the path (from the point, where you turned towards the Burnt-down Watchtower, at the gate) you will encounter new opponents (Dwarfs) and a Crossbowman (along your path, you will also pass by a portal [M2.#3], it will be opened after you defeat the Worshipper). Try to fight alone, do not haste to go down. Past the gate, there is a checkpoint, and Kaslo [M2.9], and there is a chest at the teleporter [M2,31].
 Abandon all hope, ye who enter here.
Around, there also is a Human Skull (to the right of the checkpoint). After you collect it, the only thing that you still need to do is enter the Cemetery.
 The spell-casting boss. After a while, an explosion will take place, which is why you need to hide in the well-lit chapel
Fighting the Worshipper is identical, throughout nearly all the stages. First, the boss will be throwing explosive skulls at you (if you keep your distance) or try wide swings with the axe (ac short range). Both of these attacks are easy to dodge and marked beforehand. Still, there is something else that you need to watch out for - as soon as the Worshipper raises the axe, to slam its handle against the ground, you had better stay out of range. It cannot be blocked and it stuns you temporarily (and after a while, you take a strong blow). As soon as the boss' health bar drops by a quarter, he starts summoning a violet aura around the arena (the Worshipper then stops attacking, kneels and traces his hand around). It is an important moment - you cannot block this attack, but know that it is lethal and encompasses the entire arena with its effect. You have several moments to hide inside one of the chapels. There is no point in attacking the boss, then, because the damage that he takes then is negligible. It is better to hide beforehand. Watch out for the monsters that he summons, which may push you out of the chapel, which means the necessity to start the battle over. After the powerful explosion, you can continue the battle. The situation will take place two more times. To sum up: watch out, mainly, for the stunning hits with the axe, to the ground, which are followed by a strong slash. You should be even more careful of the boss's special attacks, make sure that you are standing in the chapel, thanks to which you will not have to start over. Also, watch out for the minions that the Worshipper summons. They may push you out of safety.
During the fight, you can also utilize two tricks. The first one concerns the summoned opponents - for a moment before they appear, they are locked in a blue bone cage; if you reach it fast enough, you can destroy it in one strike, after which the Dwarf does not appear. The other one concerns the chapl. If you manage to lure the Worshipper near it, he may destroy it, inadvertently, with his weapon (he will be trying to hit you and will destroy the chapel instead) - you then lose one point of cover, but this leaves the Worshipper stunned for several seconds. It would be a sin not to take the opportunity.
After the battle, explore the Cemetery to find 4x Human Skull, and two notes. Also, remember to visit the portal [M2.#3] to claim your reward.
 After you meet the blacksmith, it is a good idea to take his services and unseal some of the runes that you have.
After you enter the portal, you will teleport to another location (you start on the Interdimensional Bridge). As you walk ahead, you encounter the Blacksmith [M3.1], who can unseal your runes that you can then use to upgrade your weapons (to learn more, see the chapter entitled Runes). Go ahead and you will reach a locked gate with Yetka at [M3.2] (to the left of the checkpoint).
 The entrance to the Eastern Antechamber.
As you backtrack a little, to the right (and to the left also) of the gate, there is a passage to the Eastern Antechamber. After you climb onto the platform on the right, you will find a Shard of Magic.
Your task is to find an area below, which has been shown in the screenshot (the room is behind the metal gate). Inside, you should watch out for a Forger with a crossbow and two Rogues. Then, pull the lever and collect the Ancient Tablet, lying on the side.
Also, locate another stairs in the room (more or less, ahead of the ones that you have taken to get here). At the top, you enter the location shown in the above screenshot. Jump over the part in the center and then, onto the "platform". There, you find an opponent and, inside the chest, a weapon- the Lost pike [M3,18]. You can now return to the gate and take the passage on the left - it takes you to the Western Antechamber. After you enter, open the chest [M3,31] (a chestplate and a helmet, Wisdom), and jump down. .
 The tattoo is well-hidden in the crack.
You can backtrack now, through the gate, and take the entrance on its left side - you will get to the Western Antechamber. After you enter, open the chest (the chest plate and helmet, Wisdom), and jump down (upstairs, there also is a Human Tattoo- go towards the far end of the room, to the left of the location of the chest. It is well hidden in the crack at the wall, in the very corner).
 Just like earlier, you need to pull the lever
Downstairs, you need to find a similar room as previously (with lever). Just like before, it is behind a similar metal gate. You can now return to the main gate.
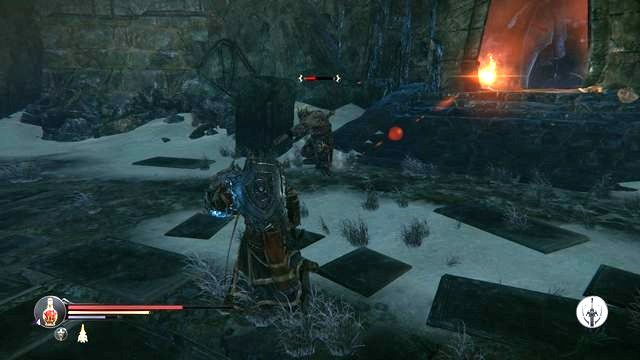 The battle against the tyrant is not the easiest one.
After you cross the gate, destroy the small "urn" on the left. Inside, there is a Tyrant Heart, and the owner is in front of you. Watch out, because he is some sort of a miniboss - wields the spear surprisingly well and his attacks deal quite a damage. The weapon of the Tyrant also has a long range so, keep a safe distance.

After you win the fight, pick up the Small key to the Western Antechamber. Return to that location, locate the other door (i.e. the other one than the one you have taken) and ahead, you will see a metal gate, which you can now open (see the screenshot). Inside, you will find an Ancient Tablet, and shoes in the chest [M3,20] (light) Cunning and Shard of attribute Point.
 The passage to the Panorama.
Return to the Eternal Flame. At the grate to the right (around, there should be a Hell Hound) you will find an Empty Bottle, that adds a health potion slot. Now, you should take interest in the passage at the other side, to the far left of the gate, which you have taken (Panorama). At the top, watch out for the opponents. After you have dealt with them, go to the left of Panorama until you reach the end.
 Watch out for the opponents. On the right, there is a chest, a note and stairs on the left.
You encounter the Forger with a crossbow, there, and a strange Mutant, with things sticking out of its back. You should especially watch out while he is belching fire, because you would be taking damage as a result of being engulfed in the flames. In the chest on the right [M3,23] you find the Hitten Jab (great sword). Locate the stairs (close to a pile of rocks and a note, to the left of the direction from which you came), and climb down (the Western Antechamber). Inside, there is a Rhogar Knight, and a Mage (his magic attacks that deal quite a lot of damage so, watch out for the bolts) You can open, here, the passages to the Eternal Flame (there is a portal behind one of the grates), and find an Ancient Tablet (in the middle of the corridor).
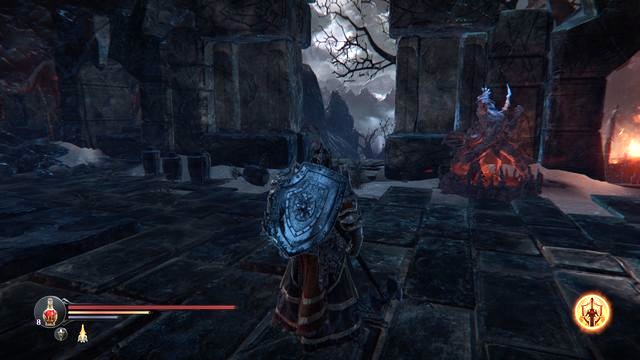 The way to the Abandoned Field.
Return to Panorama and go towards the Abandoned field ([M3.5] nest to the mysterious statue). After you turn right at the bottom, you will get to a checkpoint. Follow it into the cave (watch out while jumping over the ledges), keep to the right side. You will reach the location, where there is a Spider and an Ancient Tablet. Inside, there are two more chests ([M3,9], [M3,26]). Then, return where you found the checkpoint and go the opposite direction.
 The passage to the Temple's side door.
As you go ahead, climb onto the ledges above. Watch out for the horde of opponents here - Hell Hounds, Forger and Crossbowmen (you can also go towards the end of the location to find a chest [M3,27]). Along your path, you will find a note and a Tyrant Heart (in the chest at the campfire [M3.10] helmet and bracers, Griffin). Then, jump down, towards the stairs. Below, there is none else than a Tyrant. As you climb the stairs (take a look around to find two Shards [M3,12]) you will reach the side door of the Temple [M3.C]. To open it, use the lever. After you enter, watch out for the shielded opponent and a Knight (in the corridor on the right).
 After you climb onto the platform, dash towards the gate. The opened grate is on the right.
Then, turn right, defeat the opponent and walk onto the platform with the highlighted symbol (on the ground). Now, sprint ahead and turn right (the grate opposite the entrance gate is opened only for a moment). Inside, there is a chest with a set element (Cunning - bracers, helmet and a chest plate). Jump down onto the stairs to get out of here. At the bottom, there is another Ancient Tablet.
After you climb down the stairs, watch out for the Tyrant. Right behind him, there is an urn with his heart.As you climb lower, you will enter a room with a Tyrant (right behind him, there is an urn with the Tyrant Heart). Try to destroy the urn, as quickly as possible, and fight the Tyrant. Watch out, because another opponent will soon arrive - to catch a breath, you can escape onto the stairs. At the end of the room, open the gate (the lever) - inside, there is a note and a chest [M3,14] (a chest plate Griffin, shards: merge ghost , resistance to poison). Head back towards the stairs and, to the right, you will notice a checkpoint. Then, follow the corridor and climb up the stairs (you will pass by a Crossbowman and a portal).
 The portal will be closed shut after you defeat the Infiltrator.
Enter the arena to fight the boss [M3.6].
 A swipe followed by a slash.
Infiltrator is not too demanding, if only you remain in constant movement and keep an eye on his actions. His attacks are, most usually, marked only for a brief moment so, it is easy to miss it. Fortunately, they are not that difficult to dodge - the projectiles need a moment to reach the target and also, after he jumps, the boss takes some time to land. You should especially watch out when close to the boss, for his physical attacks, because they deal quite a lot of damage (i.e. the pinning thrust that ends the combo). As soon as the boss's health drops by a third, he will start attacking with his abdomen. Watch out, because the attack is swift and strong and, virtually, impossible to dodge. Additionally, the Infiltrator will start healing from the remains of the corpses. Try to destroy them to prevent excessive effectiveness of that. As soon as he bends over the corpses, his health bar will start to regenerate. Take advantage of this moment and land several blows to his back, to make him lose what he has just regenerated. To sum up: it becomes even more crucial, than in the case of the other battles, to remain in movement and to keep an eye on the marked attacks. Quite a lot of running around and some dodges and the opponent will not be too problematic.
After the battle, talk to Yetka, and then, to the Wounded Rhogar (do not kill him!). You can head towards the exit, over the stairs, to the room on Rhogar's left, and then up (the gates on the right lead to the caves that you have already been to. If not, go there to find an Ancient Tablet and open two chests).
 The Tyrant is waiting at the top of the stairs. Get around him and enter the room quickly. Then, climb another stairs, where you find his heart.
Watch out for the Tyrant here and it is best if you get around him quickly. Head towards the stairs on the right side of the chamber. At the top, you will find a Crossbowman. Behind him, among urns, there is one with the Tyrant Heart inside. After you collect it, you can start the fight and cross the gate [M3.B] (open it by pulling the lever).
 After you exit, talk to the Deserters.
Behind the door, you will find Deserters. While talking to them, you can give a health potion to one of them (decreases the maximum amount by 1, 500 EXP) and promise him that you help them clear the tower (this means the Western Antechamber). You are going there anyways so, you could take a look at that location (along your path, watch out for the Eternal Flame opponents). Inside the antechamber, you will have to defeat a Mutant, a Hell Hound and a Forger with a crossbow.
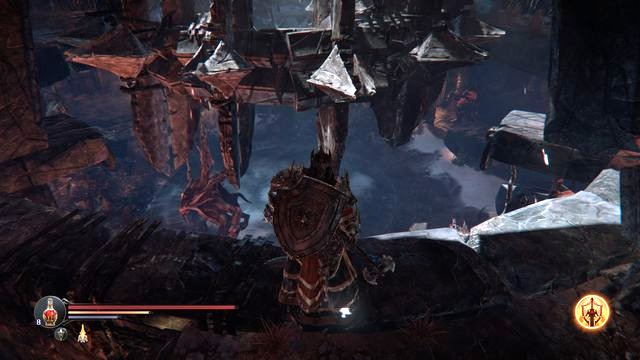 Inside the antechamber, there are several opponents.
After you have done that, return to the Deserters (you receive 500 EXP and the Defender dagger). Now, you can leave this location through the portal at the end of the Interdimensional bridge. Along your path, see the Blacksmith (2000 EXP, from now on, you will be capable of crafting runes at each anvil).
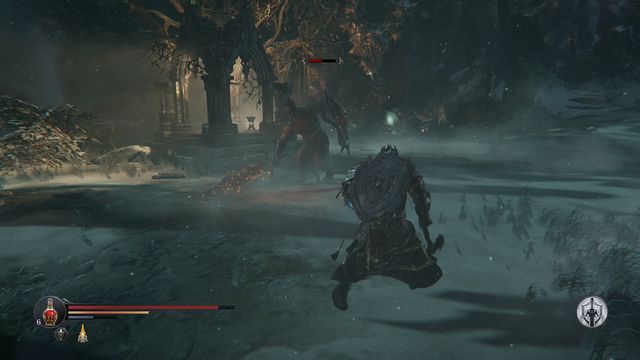 The wounded soldier suggests that you go to the Catacombs.
After you return to Keystone, you will meet a dying soldier (after his death, collect the Human Tattoo). Across the Cemetery, head towards the entrance to the Catacombs [M2.A]. It is located on its left. Along your path, you only need to watch out at the Cemetery - in front of the entrance, you will have to fight two quick Dwarves, and a Forger with a crossbow.
As soon as the Guard drives his sword into the ground, attack. Just make sure that he does not drive it into you, which results in your death.It is not them that are the trouble, though - in front of the entrance, there also is a Guard, which is a bit weaker version of the First Warden , the boss. Also this time, watch out for the charges, sword blows and, especially for the deadly whirl towards the end of the battle, and the powerful sword swipe that can even kill you (the swing and raising the sword over the head).
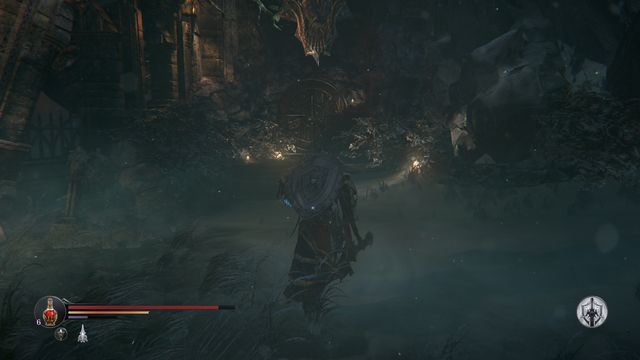 The main entrance to the Catacombs.
After the fight, there is nothing more in your way so, enter the Catacombs.
Catacombs is a vast and, somewhat, complicated location. Your main objective here is to reach the boss [M4.5], after you use the lever that will allow you to walk into the arena [M4.3]. By following the below walkthrough, you will not miss any of the important rooms in this location. However, if you'd rather end the main part of the quest quickly, go towards the lever and to the Prison of monsters, where to walk into the arena from.
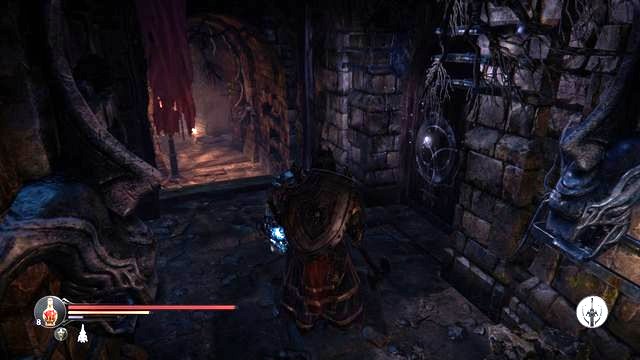 Close to the entrance, there is a door that you can open with a rune.
At the beginning, next to the entrance, you can find a checkpoint. Then, follow the corridor to the right. Along your path, you will encounter a Knight Rhogar (watch out because in the narrow passage, there is no room for dodges). On the right, you can open a door (requires a rune; inside, there is a chest [M4.6], with an axe - My Axe).
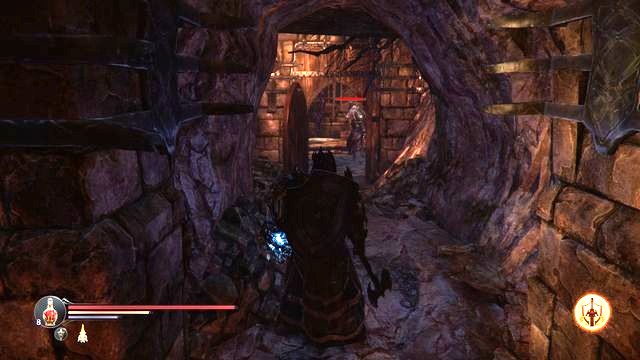 Follow deeper into the corridor.
Along your path, turn right and open the door on the left (here, you will find a portal and a Human Skull). Keep following the corridor. In a small room, on the left, there is a dagger - Grip. A bit ahead, there also is a door. Inside, there is a helmet, chest plate, and shoes of the Living Legend set (after you open the chest [M4.8] watch out for a Spider).
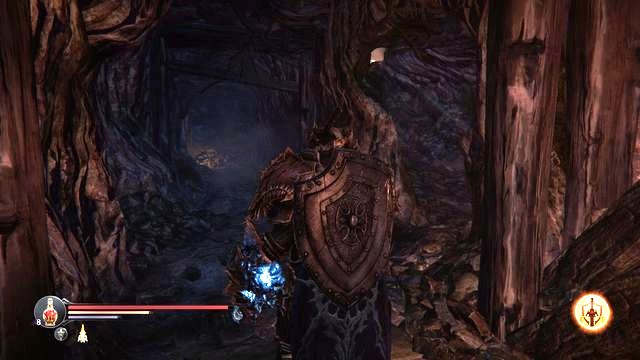 The location from which you access several other chambers
At the end of the corridor, climb down the stairs into a quite big room, where you will fight the Infested and a Crossbowman. In here, you also find a Human Skull (another one around the corner, on the left, before the stairs). Take the path to the right, climb down the stairs (two Infested). A bit ahead, you descend into the Mine. Right in the first room, on the left, there is a note and a grave next to it [M4,9]. As you go ahead, locate the chest and a grave next to it, with a mysterious symbol on (remember this location, you will come back here with the Heritage hammer, which you find later in the Catacombs [M4.15]). At the end, there is nothing interesting but, it is a good idea to walk into the last room to defeat the Knight and the Crossbowman. Also, you can find an exit there (The burnt-down watchtower).
Do not leave yet and return to the location shown in the screenshot. Then, go ahead. Along your path, watch out for several Infested. In the room at the very end (New Burial Chambers) there is a note and a chest [M4.10] (requires a rune, inside, there is the Cold Blood - bracers, shoes and a chest plate). Open the gate with the lever and activate the checkpoint.
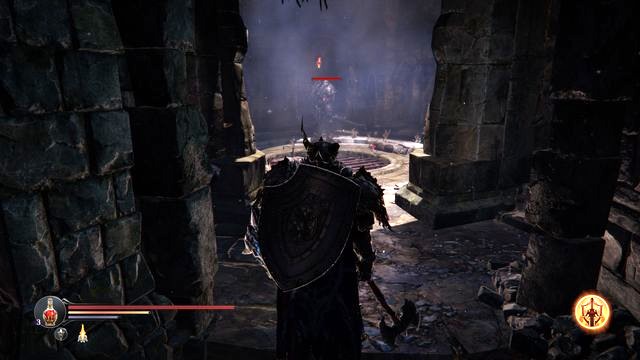 Make sure that the Well of Death is not the last place that you visit.
Now, go straight ahead and do not take any turns. You will reach the location called the Well of Death. Defeat the Knight and the Crossbowman, and take the path to the left (on the same side, behind the wall, there also is a note). You will walk into the Royal Tomb (a Human Skull at the entrance). watch out and do not walk over the plank because it breaks under your weight - hop over the chasm and walk into the room on the right (inside, there is a note and a Forger with a crossbow). In the room ahead, there is a Human Skull. Leave and climb down the stairs.
The passage that used to be boarded over.Smash the wooden barricade (the regular attack). As you follow the Collapsed tunnel, remain on the lower level, at the end of the path, there is a door and inside, there is a chest with a short sword Bloodsick.
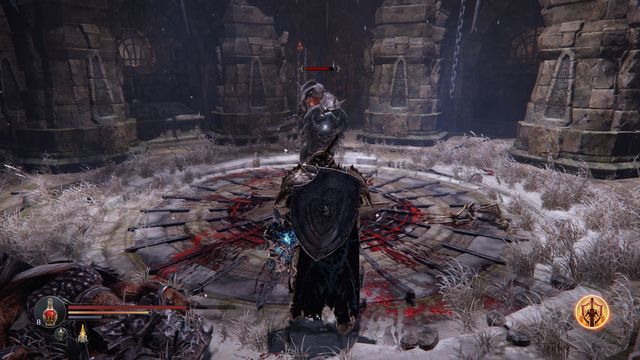 After you press the symbol (next to the locked gate, at the end of the hallway) dash ahead and to the right. There, you will find another grate, opened for a moment.
Backtrack a bit and go up (after you exit, behind you, there will be a small platform with a Human Skull). At the end you will find a locked gate and a Human Skull. Step on the symbol on the ground and dash ahead, then slightly to the right - on the right, there is a grate that is opened, for now. Inside, there is a chest and a Human Skull. Return to the Well of Death. Ahead, there is a chest [M4.12], with an armor set (Harmony). Take the other small corridor in this room (on the left of where you came from)
You can use the hole for your own ends and push an enemy in thereOver the stairs, you enter the Burrow (watch out for the Crossbowman, and collect the Human Skull). In the round room, watch out because you will be jumped by several Dwarves (also, stay away from the center, unless you want to fall into a chasm). In the chest that you open with a rune, you will find the Scab (a staff).
Exit the Burrow along the corridor ahead. In the door on the right, you find a note (beware the Spider). As you go ahead, you walk into the Cell Circle. Atop the stairs, watch out for the Infested. On the left, there is a note. Then, climb down, where you find a checkpoint. Walk over to the next room (The Monster Prison). Inside, there is a shielded opponent and a Spider. Use the lever, pick up the note and the Human Skull And return to the Well of Death.
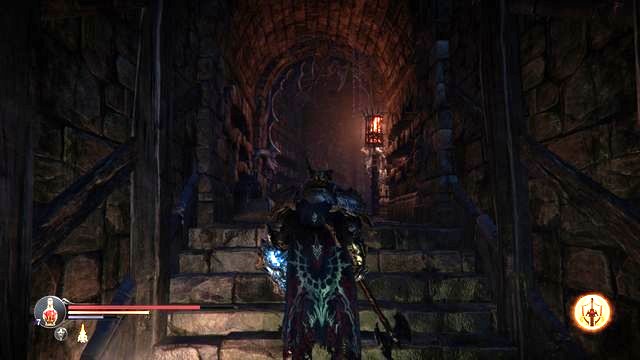 The stairs to the upper level of the Catacombs.
Climb the stairs to either of the balconies on the sides. Where you met the first Knight on the right, there is a half-raised grate - you can enter after you destroy the barrel (there is an anvil [M4.13] there, you can craft runes here). Leave this room and turn right (watch out here: there are two Forgers with crossbows and a Hell Hound around. Pick up the note from the ground).
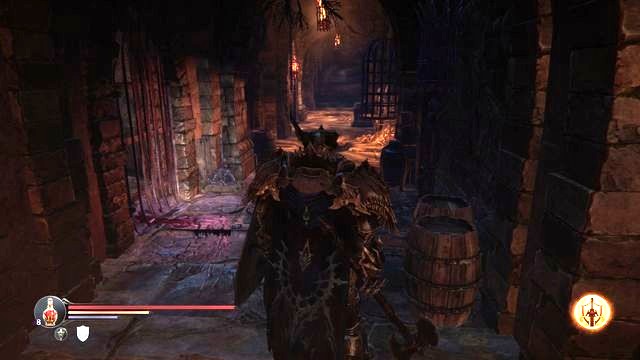 Examine all of the cells carefully, because there are many interesting items and collectibles inside.
Deeper in the corridor, there is a checkpoint. As you climb up the stairs, you will find a chest (Attribute Point Shard, Cold Blood (a light helmet), a Living Legend (bracers)). Climb down and walk through the grates (Human Skull on the ground). Then, go left. A bit ahead, use the lever to open the cells (inside, there are a note and a Human Skull). Then, repeat (Vanguard Blade, Human Skull). Walk ahead, a bit and, collect Human Skulls along your path, and you will run into an imprisoned Infested monk [M4.1] (you can open it with a lever that you need to find first - it is in this location, behind the wooden door, behind the grates to the right of the checkpoint [M4.3]).
 The lever that opens the arena entrance.
Keep moving and explore the cells, collect the notes and Human Skulls. After a while, you will find the lever that you are looking for (required to open the entrance to the arena). Pull the lever and go ahead, a bit, to open the rest of the cells (a note, and a Lever Handle). You can now return to the Infested monk and open his cell. For killing him, you receive a Spell Point Shard and 1500 EXP (simply, attack him). In the rest of the cells, you can find the Blocker buckler shield and a Human Skull.
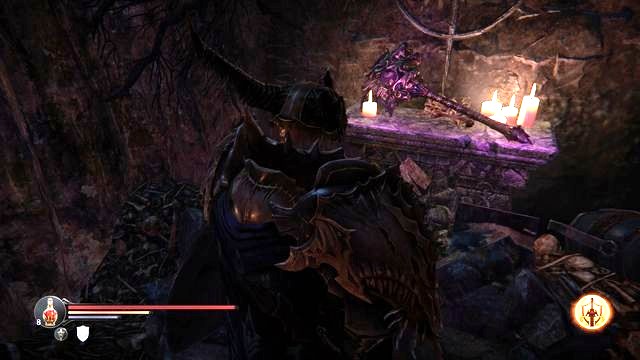 You can find the hammer in the secret room, in one of the cells.
In one of the cells, ([M4.15]) near the Infested Monk, you can ram through the wall. Inside, you wind a hammer (Heritage). You can upgrade it by going to Sven's grave [M4.9] (close to the entrance to the Burnt-down watchtower). Thanks to this, you will obtain a very good weapon.
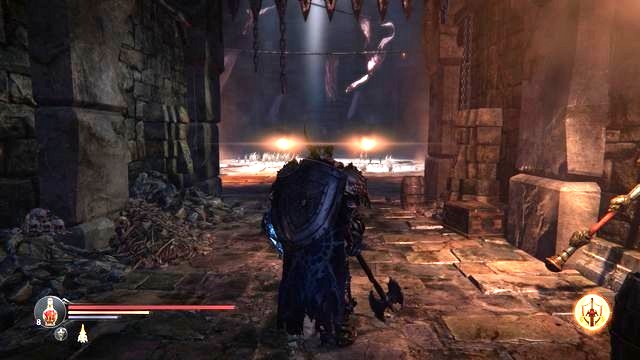 Makes you want to enter!
Then, the only thing you need to do is enter the arena (The entrance through the Monster Prison).
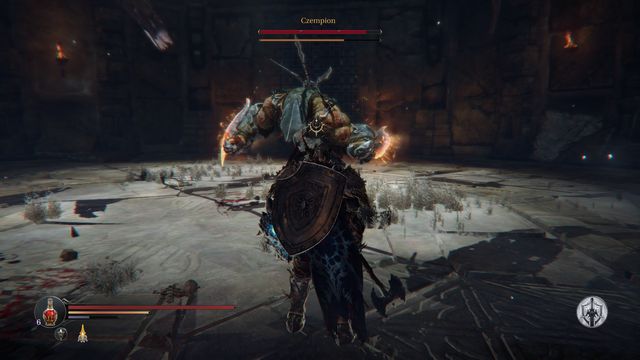 An Enraged boss is a more dangerous boss.
The Champion is a tough an agile beast. The first attack (on the he welcomes you with so, watch out) is the charge. It deals lots of damage but, it is not too difficult to dodge, if you dodge early enough. Then, the boss hits the wall, which wins you several moments to drink a health potion or to use a spell. However, this moment is too short to attack the opponent - a better moment is when the Champion jabs his claws into the ground and launches an attack over the ground. It is best to approach the boss, in circles (you will avoid taking damage) and ram into him. At close quarters, make sure that the boss does not grab you or land a combo, because this may cost you dearly. Also, note the bar under his health bar - this lets you know about his fury. Once the boss gets mad (the bar fills up as he attacks or takes damage), his blades burst in flames and his attacks become stronger. Sometimes, therefore, it is better not to land any blows and let the opponent let off some steam Towards the end of the battle, you also need to watch out for the discs that the opponent shoots, which speed towards you over the ground. It is difficult to dodge them, but you can block them (much lower damage). To sum up: first of all, pay attention to the boss's charges and do not come too close to avoid a combo of deadly attacks. In the final phase of the battle, block (or dodge) the speeding discs. Attack the boss mainly when he jabs his blades into the ground - approach quickly in circles and attack from behind.
 The door to the Citadel is in the corridor behind the guard that has just shown up.
After the battle, the guard shows you the entrance to the Citadel. Collect the Human Skull and climb up the stairs (you find a note there). Also, you can return to the portal, at the entrance to the Catacombs. Then, walk over to the Citadel.
 Before you walk into the main hall, you can use the anvil.
Head up the stairs, up until you walk into a big chamber (Flooded Chambers; at the entrance, on the right, there is a note). There is a Warden waiting there - watch out for his sword attack, charges and the swirl. As you walk on (the passage next to the anvil, near the Human Skull) you will reach the Main Hall. There, you will encounter two more opponents and find a note. Climb up the stairs and enter the first door on the left (two notes). Towards the end, behind the next door on the left (you need to open it with a rune), there is a shield - Cocoon.
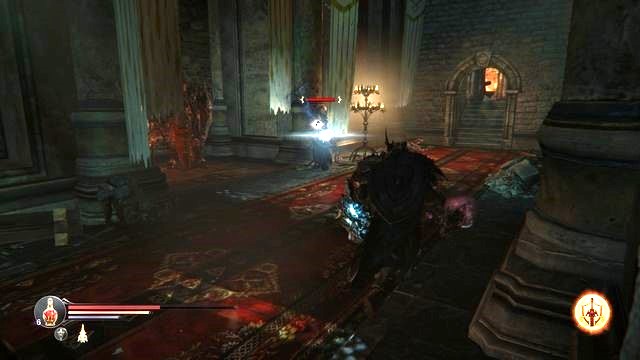 Fighting the Warden and the Wraith, all at the same time, is quite a challenge - it is better to take on them one-by-one.
And now, the most difficult part - walk over to the next chamber and, exit it immediately. This way (most probably) you will lure the Warden in. And that is a god thing 0 otherwise, you would have to fight him and a Mage that is just as dangerous. This is why, you should try to lure one of them outside of that chamber, deal with him and attack the other one afterwards.
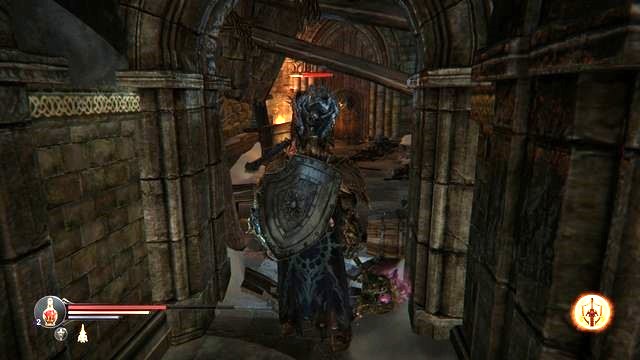 It is more difficult to maneuver in the tight room.
In the next room (Internal Chambers) a Knight will appear from behind a wall. After a while, you will see your opponent - a Rhogar Knight. After the fight at the monument, on the left, you will find an axe - Gargoyle and Hawk [M5.16].
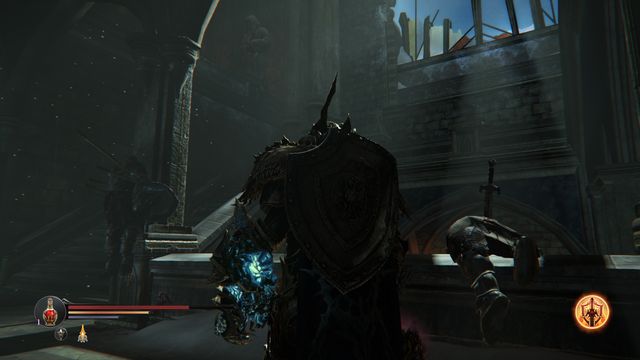 There is a Captain upstairs.
Keep along your path, up the stairs and past the fighting knights. At the top, you will encounter a Captain again [M5.1]. After the conversation, follow him as far to the right as possible, where there is a at the note glowing coals. Then, enter the next room and walk into the chamber on the right.

Inside, on the left of the entrance, there is a wall that you can smash (see the screenshot). In the secret room, there is a chest with an armor set [M5.14] Will. In the room on the left, on the other hand, there is a Wounded Monk (Only if you cut his hand off and have him the potion, at the beginning of the game, after you exited the Citadel). He gives you a side mission that requires you to go to his workshop (The Southern Watchtower). In that room, there also is a note.
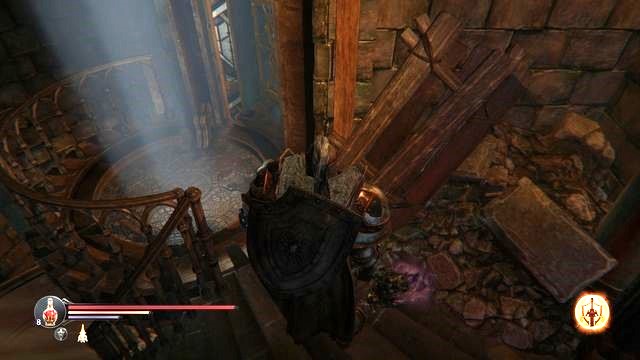 The lift to the top of the Citadel.
Then, take the stairs (there is another note next to them). At the top, there is a checkpoint and a lift [M5.3] (it takes you to the top of the Citadel). Take the lift.
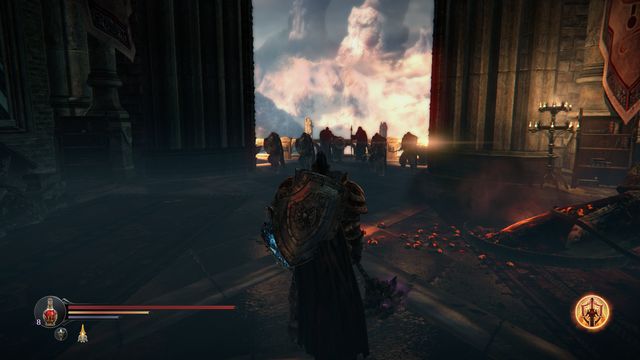 Kaslo and Antanas waiting for you.
Atop the Citadel, talk to Kaslo (at the opposite side, on a small balcony, there is a note next to the statue).
Now, climb the stairs to the lower level (the grate, at which he knight used to stand, is open now) and enter the Planetarium.
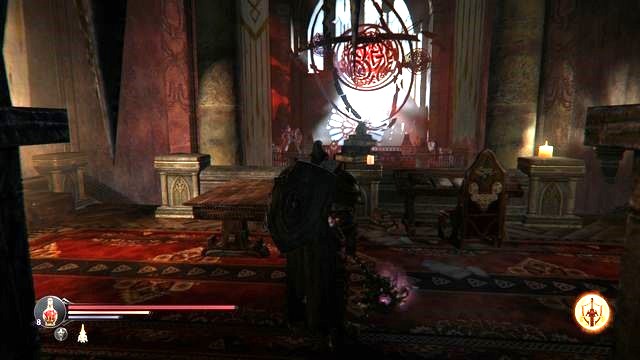 In the Planetarium, you need to defeat all of the opponents to push the storyline forward.
Inside, there are several opponents waiting for you. In the first room, there is a Rhogar Knight and a Crossbowman (in the chest, there is the Harmony buckler). Take the corridor on the right and enter the location with a Rogue and a Rhogar Shieldmaster in (watch out in the narrow corridor). On the left, behind the huge chunk of rock, there is an Energy Shard, and an armor set in the chest- Dimensions [M5.22].
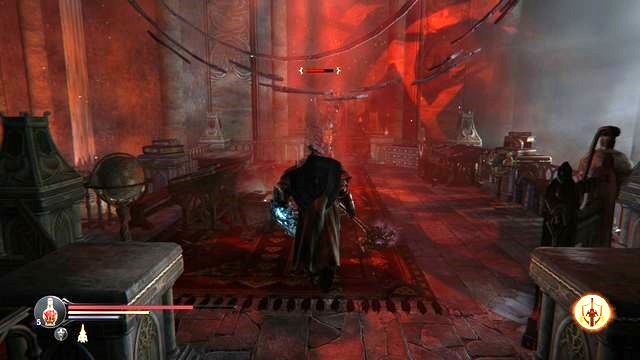 The guard is the last opponent that you need to defeat here. After you do, Kaslo and Antanas appear.
Then, walk over to the small room on the right, where you need to watch out for the Marauder and a Mage. Over the stairs, you will make it onto a small balcony. There, you are going to fight a Warden (watch out for his sword attack). After you defeat him, Kaslo and Antanas enter the Planetarium [M5.5], from whom you receive new objectives. Now, you need to head back to the Temple, to face the rest of the Lords and Adyr. After you talk to Kaslo for the second time, you can ask him for help (an additional health potion).
While leaving the Planetarium, on the right, you can talk to the Concerned Monk [M5.6], who asks you to find his brother. Along your path, you also run into Captain, who asks you to kill Deserters (as your proof, you need Human Tattoos). Along your path to the exit, you will also meet two talking knights [M5.7] (if you use the Blood Flint t set on fire the stack, as a result of which reinforcements arrived. Talking to them will earn you 500 EXP).
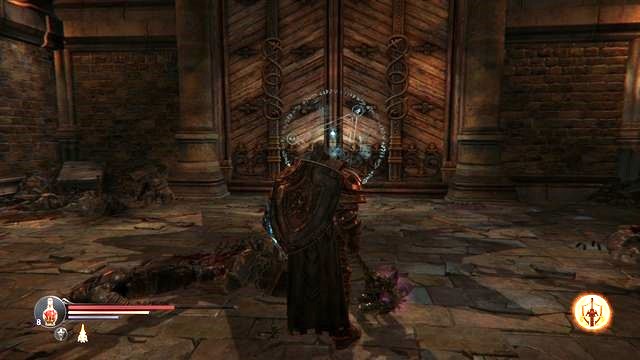 While standing in front of it, simply fire the gauntlet at the door..
Head towards the main exit (the big gate, you can open it by firing the gauntlet at it), behind which, there is a surprise for you.
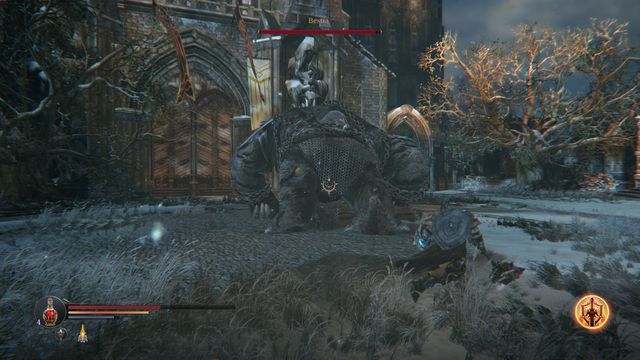 As soon as the Beast's yellow bar disappears, land as many blows as you can.
Due to the size of the opponent fighting the Beast is a bit different from a standard battle. First of all, remain vigilant, because the boss's attacks deal an awful lot of damage (especially the club attack). Note that the opponent, apart from the health bar, also has a yellow one. If you land regular attack at his feet, you deal a rather scanty amount of damage but, this charges the yellow bar. As soon as the bar fills up and disappears temporarily, the boss kneels for a moment, which leaves him defenseless. This is the moment at which you should strike with strong blows - for a moment, the damage that you deal will be higher, and it is this way that you should drain the Beast's health bar. Land the strikes, which charge the yellow bar, mainly when the boss ends his charge and after the jumping attacks, at the moment at which he raises the club above his head. As for defense, it is necessary that you keep moving, at all times, and do not let the boss approach you too much and hit you. Also, dodge whenever the Beast jumps to hit you. Later into the battle, make sure that you do not step into the poison goo. All in all, keep circling around the boss and attack mainly after his charge, and after the jumping sword attack. As soon as the yellow bar fills up, land several strong blows at the opponent's back, because it is this way that you deal most of the damage.
 The knight tells you about the mission that you now need to perform.
After the battle, talk to the knight, collect the to the right of the main entrance Planetarium Element [M2.20].
Note: At this point, you can either go to the Temple (the portal at the Cemetery), to follow the main storyline, or remain at the Citadel and in Keystone, in order to explore some more and complete side missions.
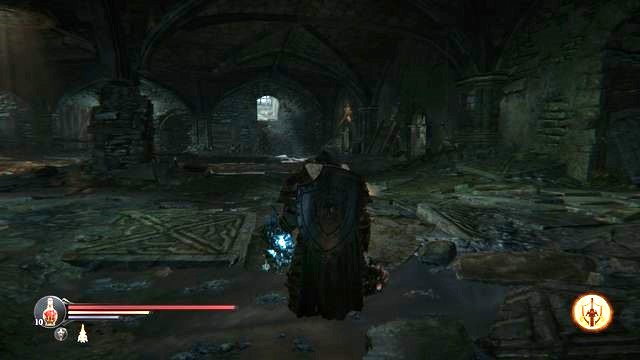 In the room, which you enter into the from the Catacombs, walk over to the room on the right.
If you decide to stay at the Citadel for more exploration, start by returning to the big chamber, where you encountered the Warden (right next to the Catacomb exit). There, on the right, you will note that a grate has been opened. This way, you will get to the chamber, where you will have to defeat two Rhogar Knights (inside, a Human Skull, on the left side of the chamber).
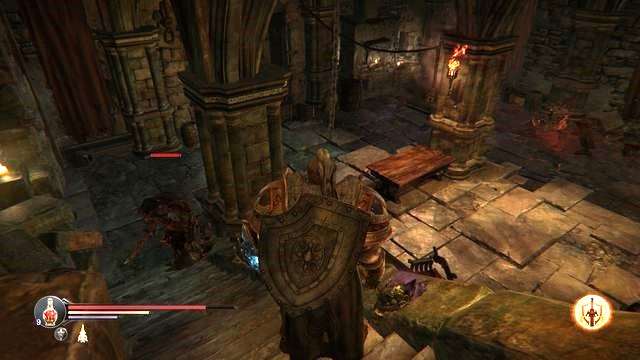 At the wall, next to the corpse, there is the Curse sword.
Then, follow the corridor into the next chamber (here, you encounter a Rogue and a Crossbowman). Next to the corpse, there is a sword - Curse [M5.26] (shortsword). To the right of the corpse, there is a corridor back to Keystone, where you have encountered the Captain for the first time.
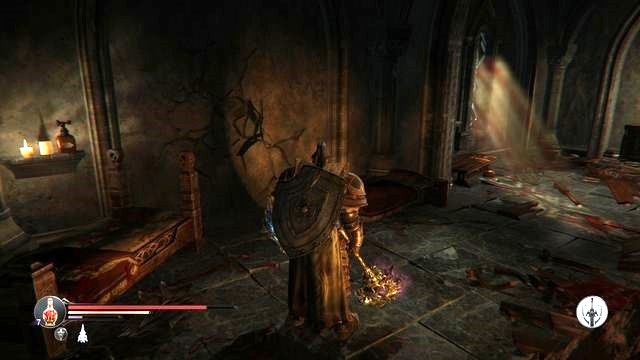
Return now to the chamber where you have fought the two Rhogar Knights and climb up the stairs. Walk into the corridor ahead, where you need to watch out for the three Infested and a Rogue. After you defeat, on the left, locate the wall that you can smash (the screenshot) [M5.27].
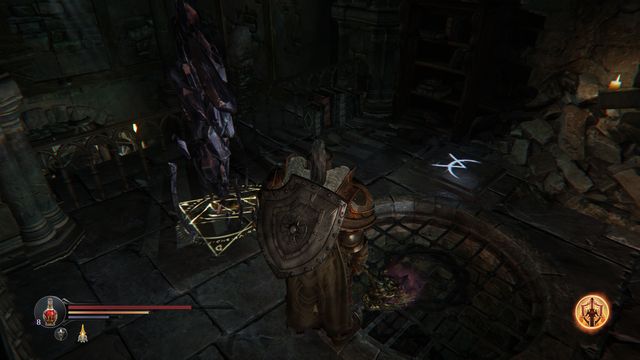 After you walk onto the mysterious symbol, run ahead quickly, to make it before the door shuts.
Then, return to the stairs and walk onto the mysterious symbol on the ground, next to the portal. Now, Dart ahead towards the wall that you have just smashed and open the door [M5.28] (by default, it is locked, but now it will be accessible for a moment, after you have stepped on the symbol; that is why you need to hurry). In the chest, there are Shards: of resistance to poison and of Spell Point.
 The knight that tasks you with killing the monster.
After you exit, head right, deeper into the Citadel. Along your path, you encounter knight [M5.8], who tasked you with killing the monster (if you have talked to him after having battled the Beast). He is staying on your left, at the Initiation Chamber. Get ready for a tough fight.
 The opponent at the Initiation Chamber deals quite a lot of damage with his attacks, which is why you should dodge them.
The beast that you need to defeat has two powerful attacks - he curdles up and rolls towards you, and also one that deals even more damage - a simple paw swipe (additionally, it poisons you). Try to perform dashing attacks and, when the opponent attacks with the paw, dodge. The monster is stronger than the regular opponents, which is why he has more health points - do not engage it into direct exchange of blows and hope for killing it quickly. Be patient, because several strong dashing attacks get the job done. After the battle, talk to the knight and you will gain, as many as, 7500 EXP.
 The monk's brother enshrouded in a cocoon.
Now, go to the secret chamber #1, to find the brother of the Concerned Monk. Locate the mysterious symbol on the ground and dart ahead, a bit, to enter the room behind the unlocked door. defeat the Spider there and interact with the hanging cocoon. [M5.10]. You will obtain the Key to the Citadel basement. Take the key to the Planetarium and talk to the Concerned Monk, which gains you 4500 EXP.
 Antanas is one mysterious character.
Finally, go to Antanas, return the Planetarium Element to him. Thanks to this, you will receive some nebulous hints on two last opponents, and also 1500 EXP.
 After the fight with the Spirit take your weapon.
At the Cemetery, along your path, you can find a dug-up grave [M2.32]. Interact with it to learn a story. You need to find a cursed weapon - Curse (a shortsword) that you have found at the Citadel ([M5.26]). Bury the sword in the grave. After you do that, there appears a spirit here. For defeating him, you receive an additional 1500 EXP, and you will be able to take the improved weapon from the grave.
You can now head towards the portal next to the Cemetery, thanks to which you will get to the Temple. Then, also use the portal of challenges, which you pass by.
 Definitely, the Tyrant that you encounter right after you enter, will be happy to see you.
After you enter the Temple, head towards the gate. Along your path, you encounter one more Tyrant. After you defeat him, pick up the Small key to the Western Antechamber (it opens the gate to the right of the stairs, at the bottom level [M3.34] - inside, a note and a chest (Eternal Legend - bracers, boots; Burden - a polearm)). A bit ahead (where there used to be the Blacksmith), watch out for the Mage.
In front of the gate, you will see a short cutscene and Yetka recommends you against walking into the arena (Eternal Flame) and suggests that you enter the Chamber of Lies. It is up to you, which path into the location you take - there is nothing in your way that would prevent you from defeating the boss in the first place and go to Yetka afterwards.
If you decide to fight the Protector, you can ask the Deserters to help you [M3.35] (as long as you helped them in the first place). They are staying at the Western Antechamber. If you encourage them to kill the beast, you will find their corpses in the arena (t is possible to collect the Human Tattoos then; otherwise you receive them also). You can then, give the tattoos to the Captain). The boss also has a bit more health points.
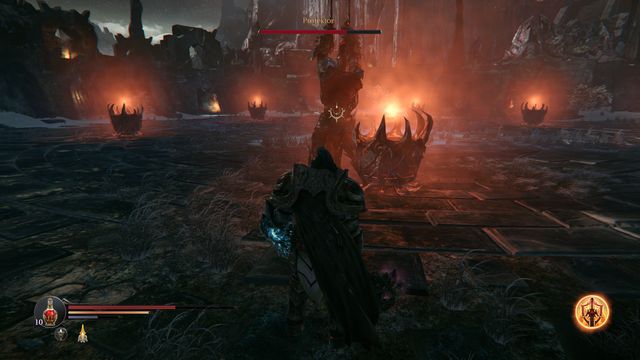 Keep moving, because the opponent sends fireballs at you.
Protector is a strong and quick, but often also sluggish opponent that has quite vide gaps in his defenses. After you enter the arena, watch out for the fireballs that he throws immediately. Right afterwards, the boss also performs a slide towards you. This is why you need to be watchful to avoid taking damage right at the beginning. Also, dodge often, because the opponent has the tendency to attack n one direction (even if you change your position, he is reluctant towards changing the direction of the attack and turning towards you). In the case of a successful dodge, you gain an opportunity to land your attacks with impunity, against the opponent's back, who takes long to perform the last attack (a sweeping spreading of the arms)/ The same goes for the boss's kick - you can easily encircle him and attack from behind. You especially need to watch out for the slide, because the Protector covers quite a distance with this attack, which breaks your defense and makes you vulnerable to his next attack. Remember that it takes only one attack from the boss, to knock Harkyn off balance, which usually results in taking more damage. To sum up: try not to block the opponent's attacks and dodge them instead. This will allow you to attack his back, after he ends his combo. You should especially watch out for the slide )you can hide behind one of the vessels, with the boss in front of you), and also avoid the fireballs. Also, do not let Harkyn get within the boss's attacks, without any protection- there is a high probability that you take all of the attacks on and take quite a lot of damage.
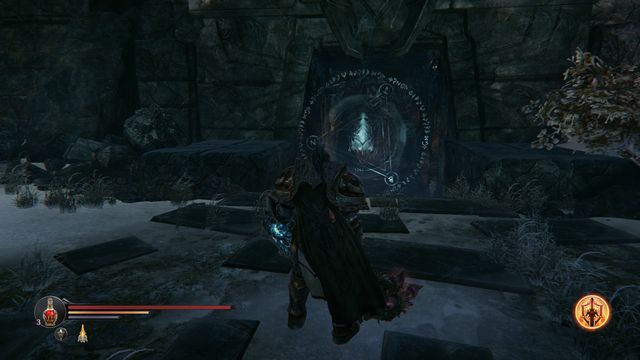 With the gauntlet, "unseal" the gate, take a look into the chest and enter the Chamber of Lies.
After you defeat the opponent, you can head towards the nearby portal, ahead of the entrance to the Chamber of Lies (you open the gate by shooting the gauntlet at it, there is a chest along your path [M3.36] - a helmet and chest plate of the Faith set) or go to meet up with Yetka.
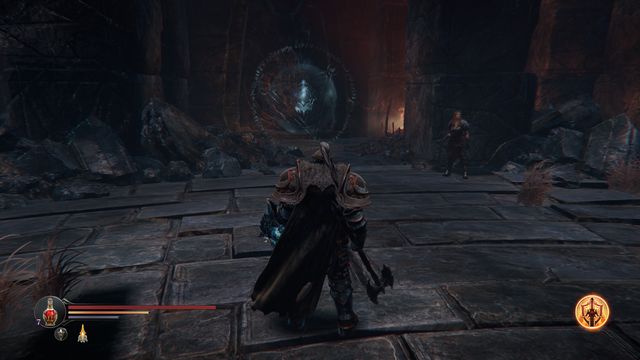 Yetka is waiting at the location of the Portal.
You encounter Yetka where you have fought the Infiltrator previously ([M3.37] head towards the side entrance, through the Abandoned Field). Talk to her and open the gate (use the gauntlet first and pull the lever).
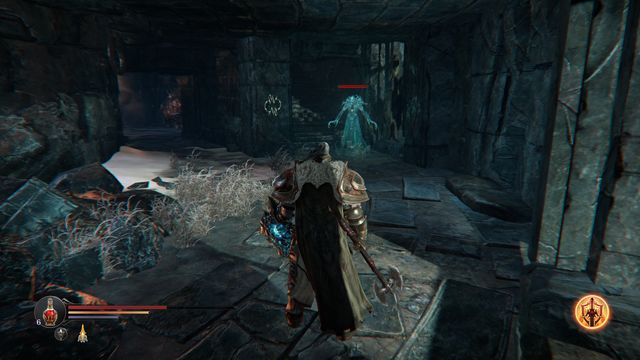 The spirit is a bit stronger version of the Mage. An additional handicap is that you cannot lock the camera on this opponent.
In the corridor, you encounter the Mage, and a bit ahead, a Spirit (there is a chest in the passage - Effect chest plate). Enter the room on the left. You will be followed in by Yetka, who will tell you to open the gate into the Chamber of Lies.
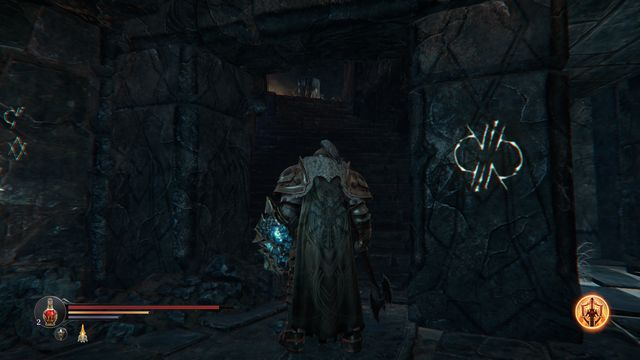 The location of mysterious writings - good to remember. Soon, you will be capable of reading them, thanks to Yetka.
To do that, climb up the stairs (next to the "hieroglyphs" on the wall). There, head towards the end of the location and you will find a chest [M3.39] (inside, there are Effect bracers) and, next to it, a note. Climb to the next level, to the top of the tower.
 The beast can pack quite a punch. Additionally, he poisons Harkyn.
On the top, there is a monster that spits poison. Watch out for the strong physical attacks and also for his roll towards your character. If you dodge correctly, you will easily get the beast from behind. After the battle, open the chest [M3.40], with a rune and collect the boots and a helmet (Effect).
Then, pull the lever (the screenshot), thanks to which you open the passage to the Chamber of Lies. Return downstairs now (along your path, on the first level, do not descend yet - go ahead (past the Spirit). He will drop a Key for the Blacksmith's chest, past him, there is a checkpoint).
 You open the gate by shooting the gauntlet at it.
You can now enter the Chamber of Lies [M3.C]. To do that, you need to open the gate by firing the gauntlet at it.
There are two ways to enter the Chamber of Lies- be defeating the Protector, or by following Yetka to the side entrance. This does not matter that much but, keep in mind that you start exploration in different locations. This part of the walkthrough assumes the main entrance, i.e. the one that takes you to the Eternal Flame location.
 Right after you enter, you can talk to Yetka, and decipher the inscription on the wall, with the item that you receive.
At the very beginning, talk to Yetka, who is standing to the left of the entrance. She will give you several notes and also the Stone of Divine Understanding. from now on, you can read the "hieroglyphs" on the walls of various locations, at the Temple and the Chamber of Lies. Deciphering the inscriptions results in you receiving notes. In the chest to the right of the entrance, there is the Flame Cover (almond shield) and the Lat Will (a great sword). Deeper into this location, watch out for two Mages and a Tyrant (you can find the urn with his heart in the first chamber, behind the door, on the left- several steps behind Yetka).
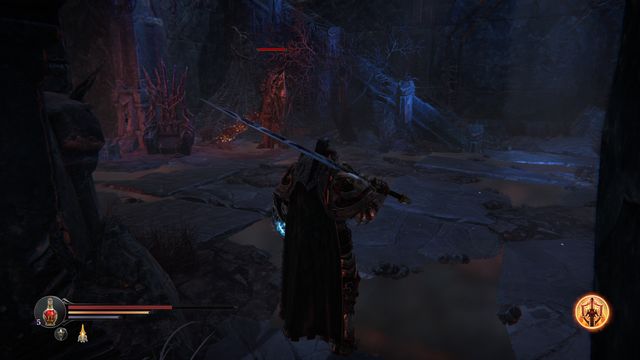 As usually, watch out for the Warden. At the same time, save the game, using the checkpoint.
Inside, you need to watch out for the Warden, a Hell Hound and a Forger with a crossbow. You can also use the checkpoint here. At the top, in the chest, there is a helmet (Eternal Legend).
 You can now open the passage but, as of now, head into the corridor on the right.
Return to the big chamber now and deal with all the opponents, then follow the narrow corridor into a big room. There, you encounter Dwarves and more Mages (on the left, next to the chasm, there is a note). Go as far to the right as possible (while behind the gate that you can open with the gauntlet, turn to the right even more).
In the corridor, you will be attacked by a Mage. After you defeat him, turn right, before the collapsed passage, climb up the stairs. In the next corridors, watch out, especially, for the round holes (chasms) and Spiders. Climb up the stairs, where you will be attacked by another Mage (there is a note in the room).
 On both sides of the balcony, you encounter Forgers. The opponent on the left gas the key to the locked door that you passed by (the room with the spiders).
As you walk ahead, over the balconies, you can also defeat two Forgers on both sides. The one on the left has the Key to the Right Wing. You can take the key back to the room, where you have fought Spiders, and open the locked door. Inside, there is a chest with a chest plate (Eternal Legend) and Crusher (a great axe).
 Fighting the Tyrant and the Spirit, at the same time, is not too easy. Try to destroy the urn quickly and collect the Heart.
As you head towards the end of the corridor, you enter the room, where you are attacked by a Spirit and a Tyrant. Try to deal with one of them ,and take on the other (by darting through the passage, you can also approach and collect the Tyrant heart, the urn is near the lever). On the right, you also find the hammer on the ground - Thor (you can use it to destroy the Rhogar Statuettes). After the fight, pull the lever (you receive 2000 EXP).
In the room, there are lots of "fat cats".Return to the spot, where you can jump over to the next balcony. Then, open the grates at the end, on the left. Inside, there is a Tyrant, try to walk around him, because right past the passage, there is an urn with his heart. As you follow the corridor, watch out after you reach the fork, because you will be jumped by another Knight, out of the left path, and he will join the one at the end of the corridor.
After the fight, enter that corridor (the one on the left). There, you find (at the very end also on the left) a chest plate Demonic Assassin. Then, return to the main corridor and head towards another lever.
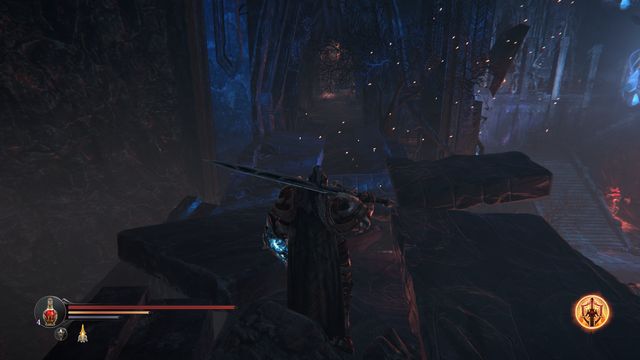 At the bridge, watch out for the chasm.
Behind the demolished "bridge" (watch out for the chasm), at the end of the corridor, you will be attacked by a Mage (in the chest, there is a Demonic Assassin (bracers), Reminder (an axe)).
Then, backtrack to the demolished plank (the screenshot). It is time to play a little "trick" here - at the end of the corridor, where you found the blocked door, you need to make it to the other side. To save yourself some running around, simply jump down. If only you do it correctly, you will end up in the right place (below, you can use a checkpoint).
 Below, make sure that the opponents do not push you off.
Watch out for the opponents here. On the left side of the stairs, there is an urn with a Tyrant Heart (the owner is above). Go towards the top of the stairs (or try to lure the Tyrant where you are, because on the balcony, he is accompanied by a Mutant). You can smash the statuette that you pass by, if you have collected the Thor hammer (you will receive the Last Traitor chest plate).
 The passage that you open with the gauntlet takes you to the second lever.
Along your path, in front of the gate that you open with the gauntlet, on the left, there is a note. Then, follow the corridor to the left, until you reach the end (ahead, the Glitter dagger), where you pass the anvil and the "hieroglyph" (note). Then, pull the lever (and unlock the door to the Temple). Now, head downstairs (do not take the suicidal jump here, to make your path shorter).
 Watch your step here - if you are not careful, you can easily fall down.
Head towards the fat lord that you can see in the distance and be careful. Unseal the gate and walk into the next room, carefully (a fire-spitting Mutant around the corner). Then, defeat the Spirit and (carefully) walk down, where you need to use the lever on the right.
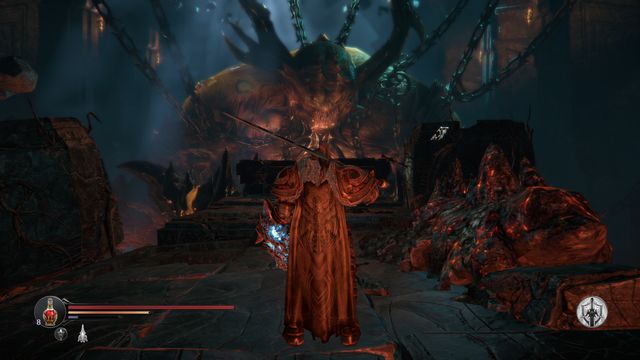 To kill or not to kill? The choice is tough.
Out of a sudden, Yetka appears here. You now need to choose, which affects the ending of the game (the cutscene that you see, to be exact).
 The passage to the arena.
Now, it is time to fight the boss. Return to the big stairs, close to the entrance to the Chamber of Lies which you followed Yetka across. Above, in the very center, there is a passage to the arena. Along your path, also pick up the note.
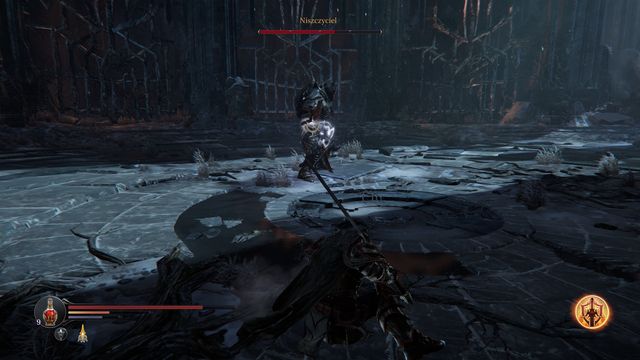 When the opponent throws his hammer your way, dodge the attack and run up to him.
The Annihilator's attacks are very powerful but, they are easy to dodge. Especially the moment, at which he throws his hammer towards you, which creates a perfect opportunity to land several strikes. The easiest way to fight him is over the range. This means that, for the majority of the battle, you should remain at a certain distance of the boss and circle him. This way, you will avoid his powerful attacks that are quite fast and encompass quite an area. The boss will then attempt, mostly, ranged attacks and you should await the moment, at which he throws the hammer, and waits for it to return. More or less, halfway into the battle, he will also attempt a stunning attack and then, attacks with lightning. Again, remain at a safe distance, thanks to which you will still have a moment to avoid his attack, after the stunning one (move around the semicircle, while escaping from the lightning bolt). Additionally, you can improve this process, by wearing a lighter armor, thanks to which your speed becomes even greater and avoiding the attacks, and dashing towards the boss, becomes a piece of cake. Do not even attempt to fight at close quarters, because you will, most probably, be incapable of blocking (and also dodging) all of the attacks. To sum up: throw off some of the gear that you are wearing and remain in constant movement, circle the Annihilator. The best moment to attack is when he is waiting for his hammer to return to his hand, after he throws it. When his health drops to a half of the initial value, so watch out for the lightning - the damage dealt by this attack is not as high as that from physical attacks, but you can lose quite a few health points, if you stay within range for too long.
 The portal to Adyr appears after you defeat the Annihilator.
After the battle, return to the portal at the stairs, which is now active. Enter the main portal, at the end of the chamber (it appears after you defeat the Annihilator).
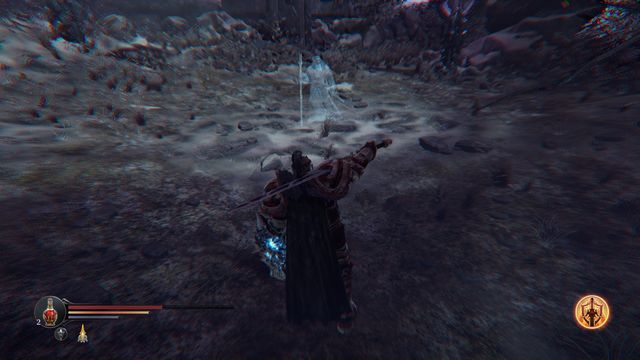 The conversation with Kaslo sheds some more light on certain matters.
Inside, you get to know about all of your battles with bosses: how long they took, how many attempts you needed to defeat a particular opponent and which weapon you used to do that. To continue, attack the spirits of the bosses (some of them drop armor elements, you will assemble the entire Fallen/Effect/Demonic assassin set depending on which class you have chosen). At the same time, you will learn some things and will be presented with a "choice" - what you do towards the end of the game, will affect the ending (the most important thing is how you use the rune that you receive from Adyr). After that, Kaslo appears. Talk to him and you will be transferred to the Citadel.
After the conversation with Adyr, you start at the Citadel right next to the portal (on its left, there also is a note). In the chest behind you, there are two Shards: of resistance to poison and of spell point. The Portal next to it, takes you to Portal #8. In the location ahead(Flooded Chambers), you will have to face two bosses at a time.
 The fire belch is the attack that deals the most damage. However, it creates the opportunity, for you, to circle the enemy and deal damage to him, from behind.
Fighting the Brothers may terrify you, at first, but they come in three turns and remain in the arena, together, for a short moment. At first, one of them jumps up and hangs himself under the ceiling - this is the one of the opponents that you hit in the first place. Then, for a moment, you will be fighting only one of the bosses, after which they take turns again (a jump towards the ceiling and a drop with an attack). Then, for a short moment, the opponents fight hand-in-hand so, it is best to refrain from attacking, so you are not caught between the two. A much better solution is to circle the arena, briefly, and wait for one of the bosses to hang himself under the ceiling. Fighting only one of them is a bit easier, but remember that the brother are a bit different from each other. It seems that the one that keeps casting lightning spells is a bit easier to defeat - they deal less damage and are easier to dodge. Additionally, after you avoid the first claw attack, it is very easy to attack his back, because he continues his attacks ahead, and not towards you. The brother with the fire attacks is much more demanding, due to his attacks that are difficult to dodge. They also deal more damage. You should try to attack after you dodge the claw attack, of while he is belching fire (try to run around the opponent and get him from behind). After you defeat one of the brothers, the one that stays alive, takes over the entire repertoire of the other one's attacks. That is why you should watch out for the entire array of these. To sum up: first of all, pay attention to the "fire" brother, because his attacks deal more damage. When they take turns, (both of them hanging down the ceiling), they will be fighting together, temporarily. Do not try to attack then and run a bit around the arena. While fighting, it is a good idea to use a shard, which decreases your vulnerability to fire. Thanks to this, the fight becomes much easier.
 Several opponents, attacking at a time, may get on your nerves.
After the battle, walk over to the Old Quarters (the exit from the Flooded Chambers, in the left part). Inside, watch out for the opponents - a Knight and a Rogue (these are human opponents, a bit more powerful than Rhogars). Go up (along your path, collect the note), reach portal which you can now use.
 The opponents below are tough guys.
Head towards the Main Hall (in the corridor, watch out for the Knight). Then, go left towards the main door. Downstairs, you are going to fight a tough fight with three Knights at a time (it is a good idea to cast your clone here). After the fight, pick up the Cellar key and the note.
 Along your path, you will be attacked by a dozen-or-so more opponents - try to deal with them one-by-one and do not dash ahead, with them chasing you.
As you go ahead, watch out for the Knight that jumps you from the room on the left and then, for a Crossbowman and a Rogue. From the Initiation Chamber go to the Basement. Along your path, try to defeat the opponents, on a regular basis, because they are exceptionally strong, in spite of your experience and your items (it may prove to be especially lethal, if you take a series of strikes from the Rogues).
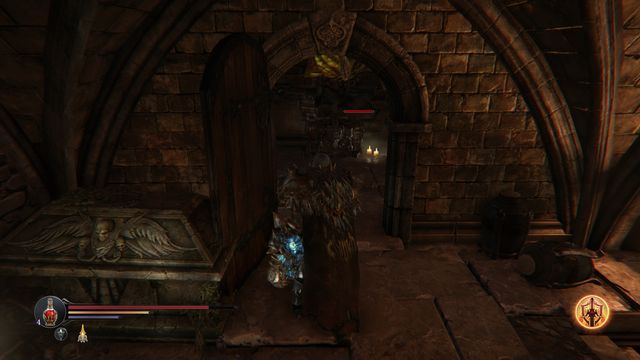 The Spider must be hoping to surprise Harkyn.
In the basement, at the very end (near the wall that you can smash) you can open the door, with the key that you have just obtained. Inside, watch out for the Infested and Spiders. Near the stairs, next to the statue, there is a door that you can open now. Inside, there is a chest and Law (the great hammer) inside. Return to the Main Hall.
In the next room, there is a Captain waiting. His style is the same as that of the rest of the Knights (without the shield).With the Initiation Chamber behind you, turn left, towards the stairs to the top of the Citadel. In the next chamber, you will be attacked by the Captain. After the fight, you can either kill him or spare his life (this will affect the ending).
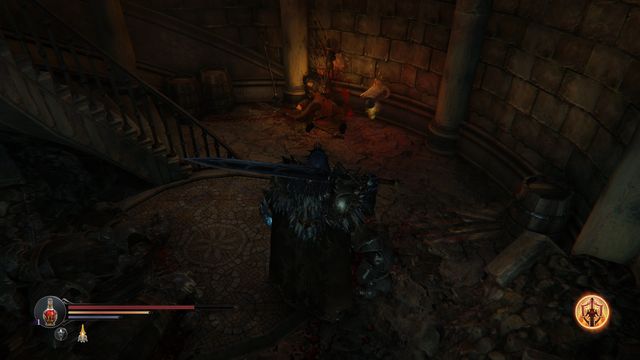 Kaslo met his end...
Then, climb up the stairs and go towards the next, spiral, stairs towards the top of the Citadel (the Knight that you defeat here drops the Key to the chest at the planetarium). At the foot of the stairs, you meet Kaslo, and a note on him.
 At the Planetarium there are several more opponents - you do not need to attack the "weepers".
Along your path, have a look into the Planetarium. With the key that you received, you will open the chest in the room on the right, which you get to along a narrow corridor. Inside, you will find the Warden's Sword. Head up the stairs, save the game and use the Blacksmith's services to use Adyr's Rune. Then, use the lift, because the last opponent is waiting for you above.
 While summoning the Infested, the opponent is defenseless, for a moment and vulnerable to attacks.
The battle with The Judge is quite demanding but, at this stage of the game (i.e. at the very end) you should already have sufficient weapons, armor, and quite a few shards and health potions. All of these can aid you in the battle but, before you start it, remember to place runes in your gear (mainly the ones that increase your resistance to fire). The battle itself has been divided into two phases - one short and another one that is a bit longer. In the first phase, atop the Citadel, especially watch out for The Judge's strikes at close range. This phase lasts until you deprive the boss of the predetermined amount of health (it has been separated with a line). Then, the fight moves over outside of the Citadel, to the yard. There, the array of the boss's attacks is enriched by the summoning of the Infested and by attacking from the balcony. During this attack, try to kill as many of the summons as possible because otherwise, the boss uses them to regenerate some of his health (after he drops back to the arena). Also, watch out for the fire attack that the boss summons and it is best if you stay in movement, and combine your attacks with blocks, into lethal sequences. During the battle proper, use the moment at which the boss slams into the ground. Dodging the claw attack gives you the opportunity to attack his back, at the moment at which he jumps. To sum up: try to run around, when the boss summons the Infested, kill as many of them as possible. At the moment, at which The Judge jumps down on you, especially use the moment when he hits the ground, and attack his back. Watch out for the red "sphere" that he throws - if this projectile connects, you lose some of your health points. This means that no health potion can regenerate it.
 Harkyn, what have you done?
The only thing that you need to do now is sit back, in your armchair, and enjoy the short, final cutscene that sums up your choices and the path that Harkyn has chosen. After the end credits, you can start the game over, hope for new abilities to unlock and items to obtain (the ones that you have obtained the first time around, remain in your inventory).
In Lords of the Fallen there are three possible endings. They are not too different from each other - the game ending, itself, is identical in all three cases and the only thing that is different is the cutscene that you see at the end (it showcases the choices and decisions that you have made throughout the game). Depending on the choice, you also receive a different achievement.
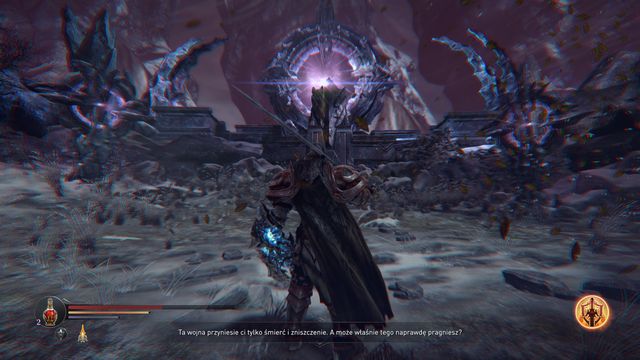 The powerful rune that you receive from Adyr rune, the way you use it determines the ending
The "main" ending depends on the way you use Adyr's Rune, that you receive from the god, after you defeat the Annihilator and enter the portal into the unknown (???).
The available options are:
- Lead people to victory (use the rune on your armor)
- Lead the Rhogars to victory (use the rune on your weapon)
- Bring balance to the world (give the rune to the Blacksmith)
Other factors that affect the ending choice:
- killing/sparing the life of the Forger Lord at the, connected with Yetka's quest (at the Chamber of Lies, [M6,4])
- Kill/spare the life of the Captain (during your last visit to the Citadel)
- give back, to Antanas, the Element of the Planetarium
- visit the cage of the Beast at the Catacombs, right after you kill it
- the way of killing bosses (finisher moves, magic or physical), which somewhat sum up your playing style
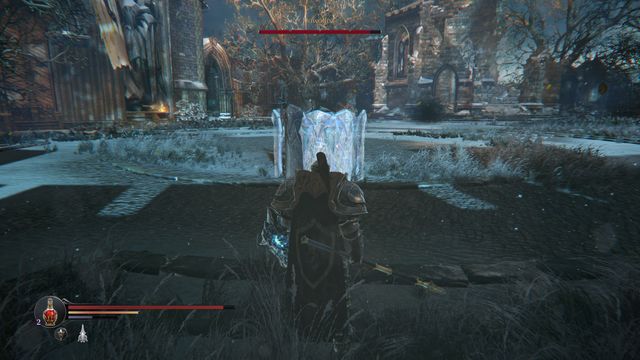
In the game Lords of the Fallen all of the boss fights has hidden challenges included. Completing them gives you special rewards. These challenges are no more than defeating the boss in a specific manner that you will have to enforce on yourself, by yourself i.e. not using the shield, not taking any damage or killing the opponent within a certain amount of time. Completing a challenge will cause your loot to have a special effect; it can then create a special zone of healing, or create a powerful shock whilst attacking. The table below shows each challenge for each boss but also the rewards you will get for completing them.
Boss's Name
Challenge Type
Item Enhancement (reward)
First Warden
Do not take any damage while fighting the boss.
The Legendary Perseverance Greatsword - A one-handed, strong attack will cause a shock.
Commander
Do not use your shield for blocking.
The Legendary Commander Shield - a special attack will be enhanced by the projectiles.
Worshiper
Make the Worshiper kill with an axe at least two of his summoned enemies.
The Legendary Clawfinger Greataxe - A one-handed strong attack will summon a demonic scythe.
Infiltrator
Defeat the boss, before all of the goblets are lit.
The Legendary Uras - A strong attack forms a healing sphere
Champion
Do not let the enemy charge his entire rage bar.
The Legendary Sting Fists- Your weapon will start to burn if you are low on health.
The Beast
Dodge all of the poisonous goo that is spit by the boss.
The Legendary Stain Hammer - Hitting the ground with it, will poison the enemies.
Protector
Do not let any of the goblets knock down.
The Legendary Firewalker Sword - Turns the most of the damage, to a fire damage
Annihilator
Defeat the Annihilator using a weapon with lightning damage.
The Legendary Lightning Hammer - Enhanced jumping attack.
The Lost Brothers
Your reward will depend on the order of killing the Brothers.
The Legendary Defender Buckler - blocked attacks will result with dealing a fire/lightning damage.
The Judge
Do not let your opponent kill any of the summons by a fire attack performed from the balcony.
TBA
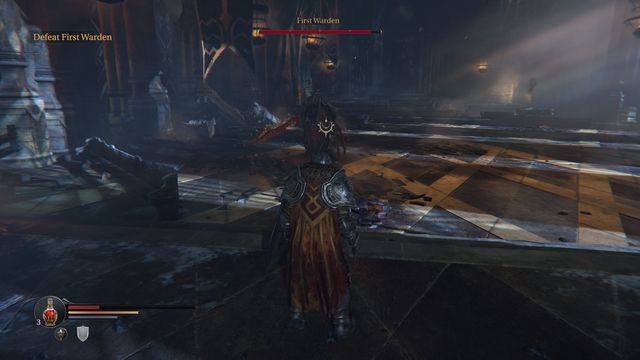 The Guardian about to charge.
You encounter the first boss soon after you start the game. You can find them in the Initiation Chamber, right after the conversation with Kaslo [M1.5]. The opponent is using physical attacks, has a greatsword and a big shield. To receive the special reward, you need to defeat the opponent, without taking any damage.
Loot:
- Perseverance (great sword)
- Sealed Rune (big)
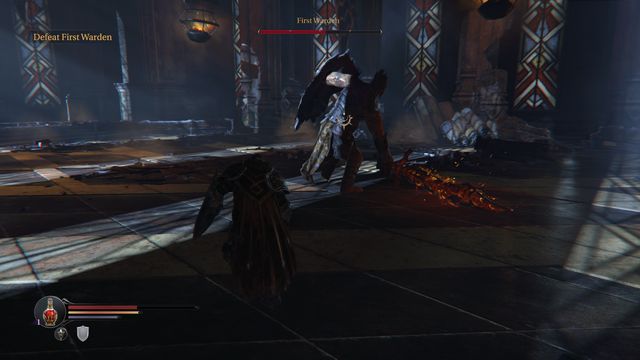 An ideal moment to dash in and land a blow.
- charge and shield bash - the opponent crouches and hides behind the shield. Then, dashes towards you and, in case you do not dodge, he bashes with the shield. This does not inflict damage, but brings the entire energy bar down. Fortunately, it is easy to dodge the attack and it is marked beforehand.
- quick shield bash and sword swipe - the opponent bashes you with the shield quickly, which breaks your defenses, and swings the sword, for a good measure. It is unblockable, which is why you need to watch out, if you are too close.
- a series of slashes - marked, but also unblockable (the first two slashes, at best). It is best to stand aside and let the boss end the streak.
- overhead vertical slash - also marked (he raises the sword), but it is unblockable. Watch out because this is the attack that deal the most damage and it is east to dodge prematurely. Try to dash to the side, or roll to the side, at the appropriate moment. As a result of the attack, the boss drives the sword into the ground, at which point you can land your own blows.
- whirl - in the last phase of the battle, after you have smashed the armor and the shield, the boss starts whirling towards you. Don't even try to block it and it is best to escape to the other corner of the room. After the whirl ends, attack.
Avoid the whirling boss towards the end of the battle.The battle is not too demanding, if you keep several important things in mind. First of all, do not attack blindly, by mashing the attack button - the opponent has a shield so, you will deal no damage, whereas the battle will end quickly, if you take several strong blows. Try to keep the distance of the boss and watch out for the attacks. Dodge from them early enough. Start attacking only after the boss finishes his sequence - the best idea is to dash forward, quickly (sprint) and land a strong jumping attack (the strong blow), after which you should dodge and dash away, because he will try to attack immediately. An excellent moment to attack with swift blows, into the opponent's back, is when he, after the strong attack, drives his sword into the ground and will take a moment to pull it off. This will leave him exposed for a moment. Towards the end of the battle, also watch out for the lethal whirl - do not clock it and remain out of range. All in all: keep the appropriate distance and attack when the boss is done landing his own attacks. You should especially watch out for the horizontal downwards swing and the lethal whirl. As the Priest, you can also use the spell that summons Harkyn's clone, to your aid. This will distract the opponent for a moment, thanks to which you will be able to attack his back, or drink a potion.
Bonus: The Legendary Perseverance Greatsword - A one-handed strong attack causes a shock.
Condition to obtain the bonus: Take no damage.
Hints:
After he summons his minions, the boss becomes invulnerable to attacks, up until the moment in which you defeat all of them.The second boss is awaiting you right past the gate, where you meet Yetka (Square of Judges). The battle is similar to the one with the first boss, and it gives you the opportunity to obtain an additional weapon (you need The Shard of Heroes for that, you can learn how to obtain it, from the chapter entitled Resetting of the Character). To receive a weapon of a better kind, do not use the shield to block, during the battle.
Loot:
- Commander's Shield (a pavise)
- Point (arm weapon)
- A sealed Rune (big)
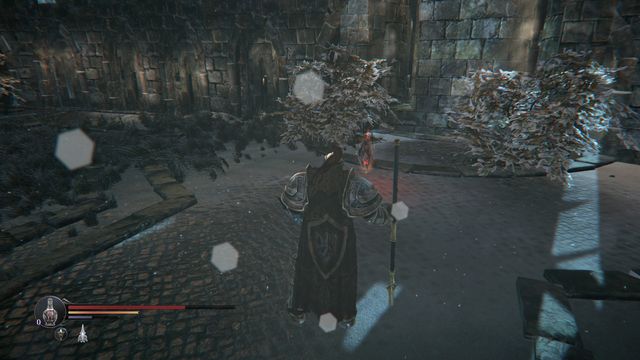 The weapon appears after the battle, in the place of the smashed statue.
To obtain an interesting weapon, place (before the battle) The Shard of Heroes inside one of the statues [M2.14] (the type of the weapon depends on the statue that you put it into: for the rogue, the fighter or the cleric). The Commander, after his health runs down, by around a quarter, approaches the statue and smashes it, which will allow you to collect the weapon, after the battle.
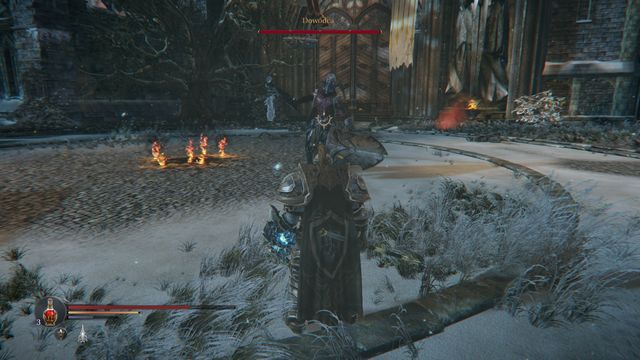 The wave marked by weapon swings above Commander's head.
- shield attack - the boss bashes you with the shield, which drains your energy.
- a series of blows - after you get too close to the opponent, he will perform slashes, which are not too difficult to dodge.
- jab - a non-marked jab, difficult to block and, additionally, one that deals lots of damage. Keep your distance and try to get away from the boss, which will prevent him from performing this attack.
- sword "wave"- something that resembles a wave speeding towards you. It is marked with swings over the head, which makes it easy to avoid (you simply need to keep moving around)
- summoning - the Commander becomes invulnerable (the boss kneeling, hidden behind a magical barrier). Up until you defeat the summoned opponents (a Marauder and a faster variant, also in pairs), you will deal no damage to the boss.
- forward wave (the boss kneeling, hidden behind the shield) - easy to avoid and marked beforehand yet, lethal. Make sure that you are on one side of the opponent, thanks to which the wave will miss you. An ideal opportunity to land your own attack.
- "a lightning bolt" from the sword - the boss
throws the sword out and fires a bolt. It deals lots of damage, but you can step to the side, which is worth using for your own attack.
- ground slam with the shield and a rain of bolts - the opponent slams the shield against the ground and summons a rain of projectiles. It is best to stay within close proximity of the boss, then, and land several blows.
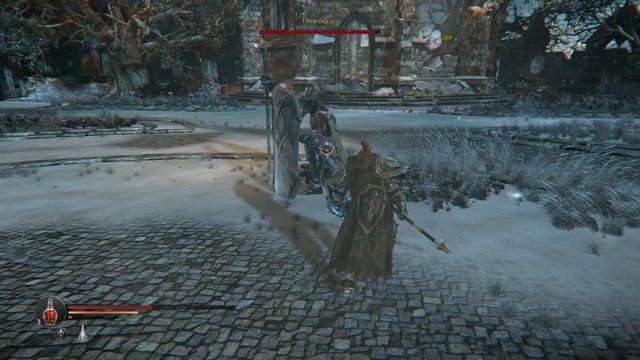 It is a piece of cake, to get the boss from the side, while he is kneeling with the shield and it is a perfect opportunity to land several quick blows.
Commander is a boss with quite a wide array of attacks. All of the phases of this battle are identical - after he loses some of his health, the boss summons opponents and become invulnerable to attacks, until you defeat them. Try to remain in movement, for the whole time and keep a safe distance, thanks to which you will be out of the range of the attacks (a combo and a jab). The boss will then be using the "wave" mainly and the lethal forward attack- this is an ideal moment to land your own attacks, because he will then remain motionless, for a moment. These will allow you to get him from behind and land several blows. To sum up: thanks to staying in constant motion and keeping your distance, you will avoid taking damage from the sword. Most of the times, the boss will be trying to hit you over distance but, in spite of high damage that they deal, the attacks are marked beforehand and, therefore, easy to dodge. Also, they provide you with the opportunity to attack the opponent from behind or from the side, or to drink a health potion.
Bonus: The Legendary Commander Shield - a special attack reinforced with projectiles.
Condition to obtain the bonus: Do not use the shield to block.
Hints:
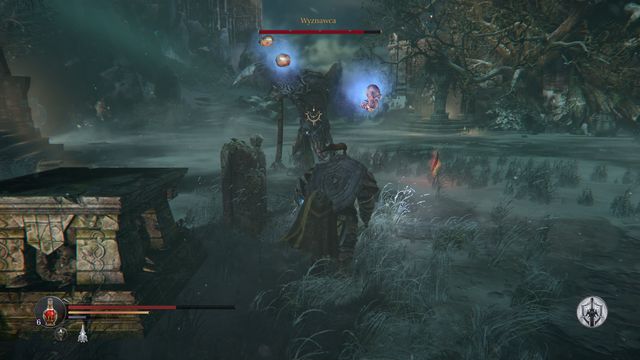 The skulls thrown at you explode, after a moment.
You find this boss at the Cemetery. You can get there, sill before you talk to Kaslo, or a moment afterwards- this does not matter but, note the, if you go to Kaslo first, you will be able to save the game before the battle. (a checkpoint close to the Cemetery gate). If you have the boss kill the two summoned opponents, you receive a better weapon.
Loot:
- Claw (a great axe)
- A Sealed Rune (big)
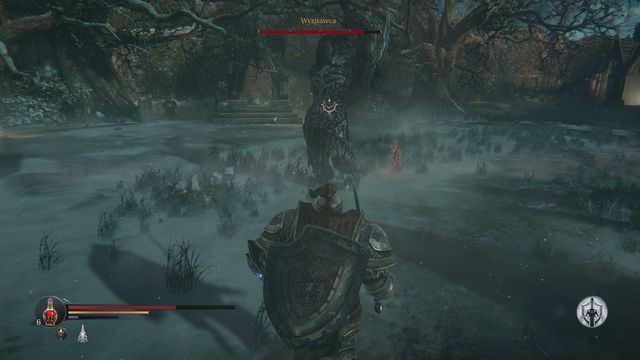 The stunning blow.
- explosive skulls - the boss throws four skulls at you, which explode after they touch to the ground. Take the moment, at which they are in mid-air, and dodge or dash back.
- driving of the blade into the ground - the Worshipper hits the ground with the axe and, for some time, up until he pulls the weapon out, there will appear spikes on the ground around him. Exploit the moment, at which the boss is attempting to pull the axe out, and attack him from behind.
- two axe swings - while you are staying near the opponent, there is quite a chance that he wants to hit you with the axe. There are two consecutive slashes, which is why you should dash away, beforehand, and block the attack.
- axe handle knock - the boss hits the axe handle against the ground (around, there appears a violet aura), which stuns you. For a moment, you will be incapable of moving and you will, surely, be hit, at least once. the attack cannot be blocked - you need to get out of range. It is marked by the Worshipper raising the axe slightly, above the ground.
- summoned minions- after the boss raises the axe over his head, this means that ha is summoning his minions. After a while,, two opponents appear. You can ignore them though (there is quite a chance that the Worshipper swipes them away himself).
- "explosion" - after the boss's health bar drops by, around a quarter, he stops his attacks and summons a violet aura, while waving his hand. It is not a good idea to attack the boss then, because the attacks do not deal too much damage. What you need to do is hide, quickly, in one of the lit chapels, around the Cemetery, to wait through the explosion. Make sure that you do not get elsewhere, because you will have to start the battle over, if you get within range. Also, make sure that the Worshipper's minions do not push you outside of the safe zone.
 The spell-casting boss. After a while, an explosion will take place, which is why you need to hide in the well-lit chapel
The fight with the Worshipper is identical, throughout nearly all the stages. First, the boss will be throwing explosive skulls at you (if you keep your distance) or try wide swings with the axe (ac short range). Both of these attacks are easy to dodge and marked beforehand. Still, there is something else that you need to watch out for - as soon as the Worshipper raises the axe, to slam its handle against the ground, you had better stay out of range. It cannot be blocked and it stuns you temporarily (and after a while, you take a strong blow). As soon as the boss' health bar drops by a quarter, he starts summoning a violet aura around the arena (the Worshipper then stops attacking, kneels and traces his hand around). It is an important moment - you cannot block this attack, but know that it is lethal and encompasses the entire arena with its effect. You have several moments to hide inside one of the chapels. There is no point in attacking the boss, then, because the damage that he takes then is negligible. It is better to hide beforehand. Watch out for the monsters that he summons, which may push you out of the chapel, which means the necessity to start the battle over. After the powerful explosion, you can continue the battle. The situation will take place two more times. To sum up: watch out, mainly, for the stunning hits with the axe, to the ground, which are followed by a strong slash. You should be even more careful of the boss's special attacks, make sure that you are standing in the chapel, thanks to which you will not have to start over. Also, watch out for the minions that the Worshipper summons. They may push you out of safety.
During the fight, you can utilize two tricks. The first one concerns the summoned opponents - for a moment before they appear, they are locked in a blue bone cage; if you reach it fast enough, you can destroy it in one strike, after which the Dwarf does not appear. The other one concerns the chapl. If you manage to lure the Worshipper near it, he may destroy it, inadvertently, with his weapon (he will be trying to hit you and will destroy the chapel instead) - you then lose one point of cover, but this leaves the Worshipper stunned for several seconds. It would be a sin not to take the opportunity.
Bonus: The Legendary Clawfinger Greataxe - an one-handed strong attack forms a demonic scythe.
Condition to obtain the bonus: Make the Worshipper kill two of his summons, with his axe.
Hints:
 The Infiltrator prepares his jump just for a moment, but you can change positions, while he is in mid-air.
You find this opponent at the Temple, in the Portal location. You can get there from the Abandoned Field. The boss himself is a bit different than the rest of the opponents, in his shape and speed. Still, he is not too demanding an opponent. It gets more difficult, if you are trying to get some better equipment - you then need to defeat the boss, before all the spells above the arena burst in flames.
Loot:
- Wanderer's crystal (at the first opportunity, you return it to the blacksmith)
- Uras (a polearm)
- A sealed Rune (big)
 The lying boss.
- jump - the boss prepares his jump only for a moment, which is why you should keep an eye on him. Fortunately, while he is in mid-air, you can easily escape into safety. If you fail, the Infiltrator drops on you.
- "boomerang" - the boss fires glowing, boomerang-shaped, projectiles at you. The projectiles themselves may not deal much damage, but they stun Harkyn, which makes him vulnerable to a short-range attack or a jump. Also this attack is marked just for a moment, when the boss spreads his limbs a bit backwards.
- regular blow - while you are close to the Infiltrator, he will attempt a physical attack. This means that he will be trying to hit you with his weapon. If you block the blows, they do not deal too much damage, but you need to watch out for the third one - the finishing one - pinning you to the ground means more serious damage to you.
- abdomen push-back - the boss starts using this attack after his health drops by, around, a third of the initial value. It is difficult to avoid it, because it is very quick and it is marked only for a moment, when the boss lowers his abdomen. It repels you to a certain distance.
- throwing off of corpse fragments - just like above, the boss starts using this attack after his health drops by a third. The rejected corpses drain your health so, it is a good idea to destroy them quickly. Additionally, the hands may grab you and make you motionless, for a moment. Also, the boss may regenerate his health by "bending" over the bodies - it is a perfect moment to attack him, to make hi healing ineffective.
 A swipe followed by a slash.
Infiltrator is not too demanding, if only you remain in constant movement and keep an eye on his actions. His attacks are, most usually, signaled only for a brief moment so, it is easy to miss it. Fortunately, they are not that difficult to dodge - the projectiles need a moment to reach the target and also, after he jumps, the boss takes some time to land. You should especially watch out when close to the boss, for his physical attacks, because they deal quite a lot of damage (i.e. the pinning thrust that ends the combo). As soon as the boss's health drops by a third, he will start attacking with his abdomen. Watch out, because the attack is swift and strong and, virtually, impossible to dodge. Additionally, the Infiltrator will start healing from the remains of the corpses. Try to destroy them to prevent excessive effectiveness of that. As soon as he bends over the corpses, his health bar will start to regenerate. Take advantage of this moment and land several blows to his back, to make him lose what he has just regenerated. To sum up: it becomes even more crucial, than in the case of the other battles, to remain in movement and to keep an eye on the signaled attacks. Quite a lot of running around and some dodges and the opponent will not be too problematic. If you use the gauntlet and spells often, fight away from the center of the arena, because the portal keeps draining you, gradually, for magical energy.
Bonus: The Legendary Uras - The strong attack forms a healing sphere.
Condition to obtain the bonus: Defeat the boss before all four braziers on the arena are lit with fire.
Hints:
 A welcoming (and not only) charge.
Fighting this boss becomes possible only after you open the entrance to the arena. You can do that with the lever in the upper part of the Catacombs. Then, across the Monster prison, enter the big chamber, where you will fight the Champion. After the battle, you will be able to enter the Citadel. To obtain a better weapon, do not let the boss enter the fury mode.
Loot:
- Sting (arm weapon)
- A Sealed Rune (big)
 In the last phase, watch out for the fast "discs"
- charge - the boss takes a run-up and charges towards you. Remember to dodge early enough because the Champion runs fast and too late a dodge results in taking quite a damage. If you succeed, the opponent slams into the wall, which wins you a moment to catch your breath.
- grab and pound - the boss grabs you (with the left hand), hits you several times and throws you away. After you are grabbed, there is no way for you to defend yourself so, watch out for his attempts to grab you, however rare they are.
- underground attack - the opponent drives the blades, on his arms, into the ground, which sends an underground wave towards you. The wave heads towards you, regardless of your position, which is why it is recommended that you perform a dodge beforehand. An even better solution is to run in circles, around the boss and a quick dash towards him. This way you avoid the wave and deal damage.
- single push - the Champion performs a back-hand strike, which pushes you away. One of the weaker attack, but it is followed by more.
- a combo of hits and a finishing uppercut - two fast and a strong one. This attack is difficult to dodge (when it comes to the first two hits). It is easier to block them or dash away from the opponent. You need to be careful, because the sequence deprives you of quite an amount of health and also charges the boss's fury bar.
- "Down-press" - starting with the second phase of the battle, the boss will also attack by slamming the ground with both hands. Watch out and, at the moment, at which he raises his hands, jump away to a safe distance.
- discs drilling the ground - in the last phase, the boss starts sending very fast discs towards you. Due to their speed, it is difficult to dodge them, which is why blocking is better here (you do take damage, but not as much).
 An Enraged boss is a more dangerous boss.
The Champion is a tough an agile beast. The first attack (on the he welcomes you with so, watch out) is the charge. It deals lots of damage but, it is not too difficult to dodge, if you dodge early enough. Then, the boss hits the wall, which wins you several moments to drink a health potion or to use a spell. However, this moment is too short to attack the opponent - a better moment is when the Champion jabs his claws into the ground and launches an attack over the ground. It is best to approach the boss, in circles (you will avoid taking damage) and ram into him. At close quarters, make sure that the boss does not grab you or land a combo, because this may cost you dearly. Also, note the bar under his health bar - this lets you know about his fury. Once the boss gets mad (the bar fills up as he attacks or takes damage), his blades burst in flames and his attacks become stronger. Sometimes, therefore, it is better not to land any blows and let the opponent let off some steam Towards the end of the battle, you also need to watch out for the discs that the opponent shoots, which speed towards you over the ground. It is difficult to dodge them, but you can block them (much lower damage). To sum up: first of all, pay attention to the boss's charges and do not come too close to avoid a combo of deadly attacks. In the final phase of the battle, block (or dodge) the speeding discs. Attack the boss mainly when he jabs his blades into the ground - approach quickly in circles and attack from behind.
Bonus: The legendary Sting Fists - with your health low, your weapon bursts in fire.
Condition to obtain the bonus: You cannot let the boss charge his entire Rage bar.
Hints:
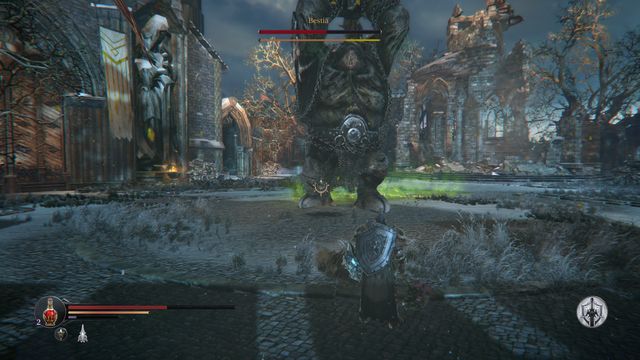 The Boss a moment before the powerful strike.
The battle against the Beast takes in the same place as against the Commander, i.e. in the Judges Square. The battle takes place at the moment, at which you leave the Temple, after the conversation with Kaslo and Antanas. The Beast is big and strong, which translates into quite high damage dealt. You obtain a better weapon if you avoid the puddles of poison that the boss spits .
Reward:
- Stain (a hammer)
- A sealed rune (big)
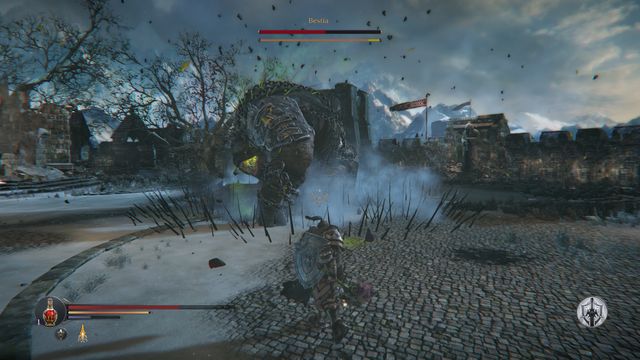 The spikes appear over a bigger area, with each consecutive jump.
- jump and club - the boss hops a little and raises his club above his head. Then, he drops and hits the ground with a swing. The effect of this attack spreads over the ground. This means that not only do you have to dodge the attack itself but also, you need to be standing within appropriate distance, or completely get off the line of the attack. The best idea is to, at the moment, wt which the Beast hops, dodge or get a way to a quite a distance.
- swing and a blow - the standard attack, the boss takes a swing (so you know, what to expect), and hits with his club. Just like the above attack, it deals quite a damage.
- a dashing charge - the Beast charges at you and dashes a little. A quick and lethal attack. When the boss is preparing to take the leap, it is best to move away.
- jump and spikes from the ground - the opponent takes a slight jump and after he touches to the ground, damaging spikes appear all around him. With each consecutive jump, the area over which the radius of the attack is larger, which is why it is better to wait and let the opponent let off his steam.
- poison spit - more or less, after the boss's health bar drops by a half, the boss starts spitting poison. The spit flies over a distance and drops to the ground. Entering the puddle of poison results in you being poisoned. The best solution is to stay outside of the range when the boss is preparing this attack.
 As soon as the Beast's yellow bar disappears, deal as much damage as possible.
Due to the size of the opponent, fighting the Beast is a bit different, than in the case of the other bosses. First of all, remain vigilant for the whole time, because the opponent's attacks deal an awful lot of damage. (especially the club attack). Note that the opponent, apart from the health bar, also has a yellow one. If you land regular attack at his feet, you deal a rather scanty amount of damage but, this charges the yellow bar. As soon as the bar fills up and disappears temporarily, the boss kneels for a moment, which leaves him defenseless. This is the moment at which you should strike with strong blows - for a moment, the damage that you deal will be higher, and it is this way that you should drain the Beast's health bar. Land the strikes, which charge the yellow bar, mainly when the boss ends his charge and after the jumping attacks, at the moment at which he raises the club above his head. As for defense, it is necessary that you keep moving, at all times, and do not let the boss approach you too much and hit you. Also, dodge whenever the Beast jumps to hit you. Later into the battle, make sure that you do not step into the poison goo. All in all, keep circling around the boss and attack mainly after his charge, and after the jumping sword attack. As soon as the yellow bar fills up, land several strong blows at the opponent's back, because it is this way that you deal most of the damage.
Bonus: The Legendary Stain Hammer - Hammer the ground to poison your opponents.
Condition to obtain the bonus: Avoid the stains of poison spit by the boss.
Hints:
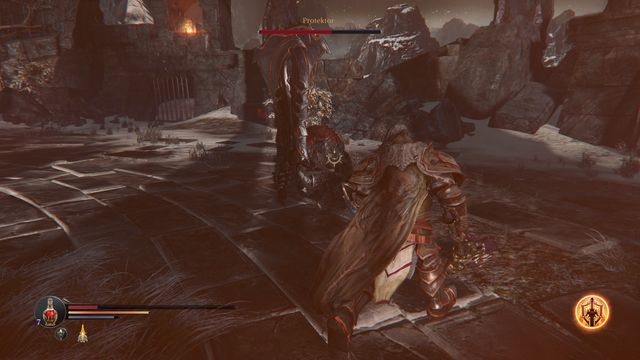 The boss preparing to summon the projectiles.
After you visit the Citadel, Kaslo and Antanas have Harkyn return to the Temple, in order to find the Chamber of Lies. You can either do that by following Yetka, whom you meet right after you cross the Interdimensional Bridge, or by going to the Eternal Flame location, where you first need to defeat the Protector. The Boss is agile (although a bit sluggish) and lands lethal streaks of blows. Still, he often exposes himself, which makes him vulnerable to your attacks. If you have not spared the Deserters, the boss starts the battle with a bit lower amount of health points. You receive better gear if you do not tip over any of the vessels in the arena.
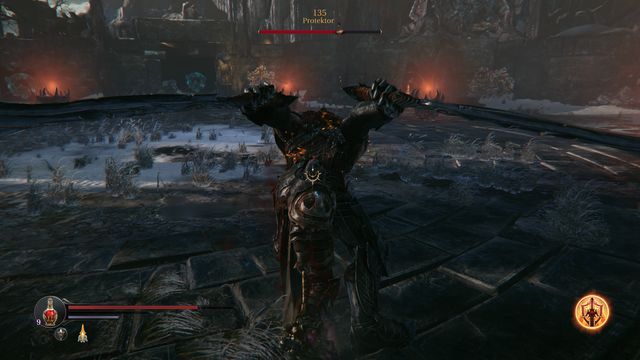 After the combo, it is easy to sneak up to the boss and attack him from behind.
- slide towards your character and a series of blows - the Protector performs a quick slide that knocks you off balance, which is followed by a series of deadly blows. It is very difficult to dodge after the first strike connects, which is why you should try to dodge or run away, after the opponent attempts the attack.
- series of strikes - the boss performs 2-3 swings with his swords, which is followed by a finishing blow (he uses both of his swords, simultaneously, for that). Do not even think to block, because even the first strike breaks your defenses - the blows are very strong, but even the fighter should find it easy to dodge. The Protector tends to perform this attack "headlong", which is why an effective dodge provides you with an opportunity to attack his back. Also, an appropriate moment is when the boss takes a break after the finishing blow - he boasts with the blows that he landed, for a moment, and regains his strengths slowly. At this moment, his back becomes a morsel.
- driving the swords into the ground, a kick and a slash - this attack starts at the moment, at which the Protector kneels a little and drives his swords into the sand. This is followed by a strong kick and, if it connects, you can be sure that you will also take on the swift slash. On the other hand, this is a perfect moment to circle the opponent and land a blow to the back.
- projectile summoning - this attack is signaled by the boss ,by means of raising both of the swords over the head. After a while, the Protector sends fire projectiles your way (from the vessels in the arena). Damage dealt is quite high, do not block the projectiles (you will only be capable of blocking one), and dodging allows you to avoid only one of the fireballs. The easiest way is to run in circles, thanks to which all of the projectiles should fly by. watch out, because one such fireball may knock you out of your rhythm for a moment, which undoubtedly will result in taking on all of the remaining fireballs. And this may be painful.
 Keep moving, because the opponent sends fireballs at you.
Protector is a strong and quick, but often also sluggish opponent that has quite vide gaps in his defenses. After you enter the arena, watch out for the fireballs that he throws immediately. Right afterwards, the boss also performs a slide towards you. This is why you need to be watchful to avoid taking damage right at the beginning. Also, dodge often, because the opponent has the tendency to attack n one direction (even if you change your position, he is reluctant towards changing the direction of the attack and turning towards you). In the case of a successful dodge, you gain an opportunity to land your attacks with impunity, against the opponent's back, who takes long to perform the last attack (a sweeping spreading of the arms). The same goes for the boss's kick - you can easily encircle him and attack from behind. You especially need to watch out for the slide, because the Protector covers quite a distance with this attack, which breaks your defenses and makes you vulnerable to his next attack. Remember that it takes only one attack from the boss, to knock Harkyn off balance, which usually results in taking more damage. To sum up: try not to block the opponent's attacks and dodge them instead. This will allow you to attack his back, after he ends his combo. You should especially watch out for the slide) you can hide behind one of the vessels, with the boss in front of you), and also avoid the fireballs. Also, do not let Harkyn get within the boss's attacks, without any protection- there is a high probability that you take all of the attacks on and take quite a lot of damage.
Bonus: The Legendary Firewalker Sword- the majority of damage is the damage from fire.
Condition to obtain the bonus: You cannot destroy any of the braziers around the arena.
Hints:
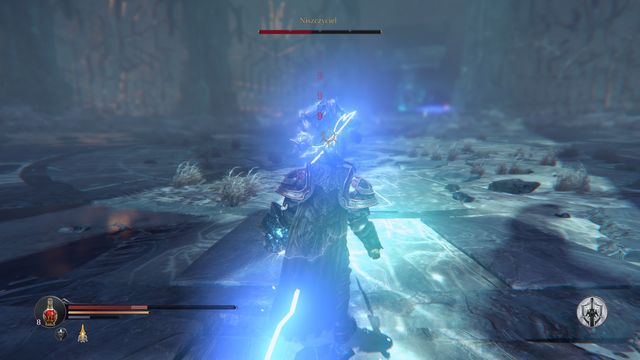 When you stand too close to the boss, he will start preparing his attack, you will not manage to escape the beam of lightning.
After you enter the Chamber of Lies, it becomes your main priority to find this opponent. This is the last one of the bosses that you are going to fight on the Rhogar ground. Fighting against this opponent is one of the easiest tasks of all, if only you utilize a schematic tactic. Before the battle itself, it is a good idea to put on a light or a medium armor, thanks to which you will avoid the boss's attacks with ease. To obtain better gear, you need to defeat the Annihilator with a weapon that deals damage from lightning.
 The entire battle hinges on around dodging at the appropriate moments.
- dash and hammer slam - if you stay within a certain distance of the opponent, you may be sure that he will attempt to dash towards you, occasionally. The dash is concluded with a powerful hammer slam. Fortunately, while he is in mid-air, you can easily dodge or run away to a safe distance.
- hammer throw - the most important attack, as for you. And not due to high damage, but rather due to the ease with which it can be avoided, which wins you several seconds to pound on the enemy with impunity. This attack is signaled by the boss projecting the weapon forward, which is followed by the hammer darting towards you (it flies like a bullet). At the moment, at which the boss is preparing this attack, it is best for you to run around over arch path, thanks to which you are sure to avoid getting hit. When the Annihilator is waiting for the weapon to return to his hand, he is defenseless, which is why you should exploit this moment (the best opportunity throughout the entire fight) and land several powerful blows. You do not even need to worry that the returning weapon will damage you.
- forward slam and hammer swinging - the boss slams forward and takes a swing. Then, he rolls the hammer over the ground and performs a finishing strike. Do not even think about blocking it, and remain at a safe distance, because taking on this succession of strikes results in high damage.
- hammer slams - the regular hammer hits. They are easy to avoid, which is why you should dash under the Annihilator's hand swiftly. Watch out because, if you are hit, you lose quite a lot of health (especially that the first strike is followed by some more).
- beam of lightning - the Annihilator starts performing this attack after he loses a half of his health points. While staying put, he raises his hands, crouches and directs a bundle of lightning towards you. At the moment, at which he starts performing his attack, make sure that you are as far away, from him, as possible. You will be stunned anyways, but you will still have enough time to dodge the lightning - simply, keep running around and escape the lightning. If, during the attack, you are standing too close to the boss, the stunning effect will be so strong that you will be unable to escape and you will be electrocuted, for a moment.
 When the opponent throws his hammer your way, dodge the attack and run up to him.
The Annihilator's attacks are very powerful but, they are easy to dodge. Especially the moment, at which he throws his hammer towards you, which creates a perfect opportunity to land several strikes. The easiest way to fight him is over the range. This means that, for the majority of the battle, you should remain at a certain distance of the boss and circle him. This way, you will avoid his powerful attacks that are quite fast and encompass quite an area. The boss will then attempt, mostly, ranged attacks and you should await the moment, at which he throws the hammer, and waits for it to return. More or less, halfway into the battle, he will also attempt a stunning attack and then, attacks with lightning. Again, remain at a safe distance, thanks to which you will still have a moment to avoid his attack, after the stunning one (move around the semicircle, while escaping from the lightning bolt). Additionally, you can improve this process, by wearing a lighter armor, thanks to which your speed becomes even greater and avoiding the attacks, and dashing towards the boss, becomes a piece of cake. Do not even attempt to fight at close quarters, because you will, most probably, be incapable of blocking (and also dodging) all of the attacks. To sum up: throw off some of the gear that you are wearing and remain in constant movement, circle the Annihilator. The best moment to attack is when he is waiting for his hammer to return to his hand, after he throws it. When his health drops to a half of the initial value, also watch out for the lightning - the damage dealt by this attack is not as high as that from physical attacks, but you can lose quite a few health points, if you stay within range for too long.
Bonus: The Legendary Lighting Hammer - A charged jumping attack.
Condition to obtain the bonus: Defeat the boss with a weapon that deals damage from lightning.
Hints:
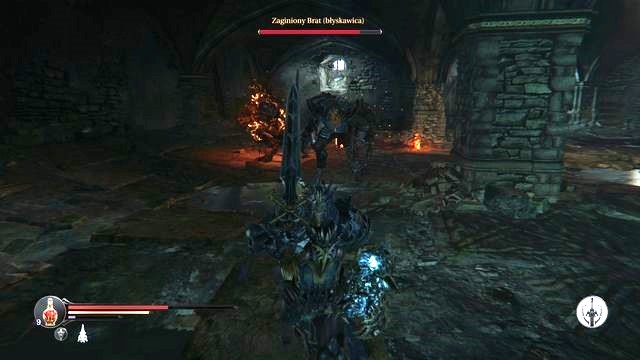 When the Brothers are, temporarily, fighting side-by-side, it is better to stay away.
After you return from the Temple (after you talk to Adyr), you will be automatically carried over to the Citadel. After you enter the first bigger chamber (Flooded Chambers) you will be attacked by the boss. Or two, to be exact - in theory, at least, because the brothers take turns while fighting and they both remain in the battlefield together, only for a short moment. However, this means that you need to defeat two opponents, which is going to make the battle tougher and longer. The weapon that you receive is different, depending on the order, in which you defeated the brothers.
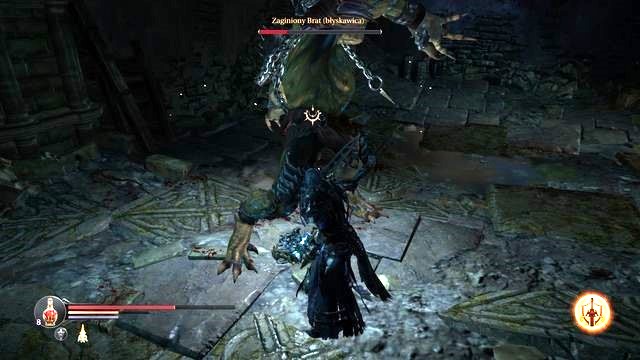 Avoiding the first attack in the chain (the attack of the "lightning" brother) gives you a perfect opportunity to attack the back of the opponent.
- paw attack - both of the brothers take a swing and they attack with the talons. In the case of the fire brother, it is a single attack, which usually is followed by fire-belching. As for the other boss, he performs these blows a bit differently, in small series. Avoiding the first blow provides you with a perfect opportunity to land several blows into the back, because the opponent pushes ahead, in his rage and he pays no attention to where you are.
- fire belching - only in the case of the fire brother. It usually occurs after the paw attack. The boss either belches fire towards you, which deals quite a lot of damage, or spits fire onto the ground around himself, which makes his attack easier to avoid.
- lightning bolt - a piece of cake to avoid, the boss shoots charged electric sphere, towards you. The attack is signaled beforehand and it is used only if you are within a considerable distance of the opponent, thanks to which you will easily dodge the attack.
- jump up towards the ceiling and a drop attack (flames or electrocution) - this attack takes place when the brothers switch. One of them is hanging down from the ceiling, whereas the other one jumps in and hangs down in a different spot. Then, both of them drop and deal AoE damage (flames or lightning). After the switch takes place, the opponents fight together, which is why it is better to steer clear of the, for a moment.
- forward jump and AoE attack (flames or electrocution) - this attack is similar to the one above, but the difference is that it is performed by one opponent, at a time. While you are staying at a certain distance of the boss, he jumps towards you and, while dropping, he strikes with an AoE attack, which affects the ground around him.
 The fire belch is the attack that deals the most damage. However, it creates the opportunity, for you, to circle the enemy and deal damage to him, from behind.
Fighting the Brothers may terrify you, at first, but they come in three turns and remain in the arena, together, for a short moment. At first, one of them jumps up and hangs himself under the ceiling - this is the one of the opponents that you hit in the first place. Then, for a moment, you will be fighting only one of the bosses, after which they take turns again (a jump towards the ceiling and a drop with an attack). Then, for a short moment, the opponents fight hand-in-hand so, it is best to refrain from attacking, so you are not caught between the two. A much better solution is to circle the arena, briefly, and wait for one of the bosses to hang himself under the ceiling. Fighting only one of them is a bit easier, but remember that the brother are a bit different from each other. It seems that the one that keeps casting lightning spells is a bit easier to defeat - they deal less damage and are easier to dodge. Additionally, after you avoid the first claw attack, it is very easy to attack his back, because he continues his attacks ahead, and not towards you. The brother with the fire attacks is much more demanding, due to his attacks that are difficult to dodge. They also deal more damage. You should try to attack after you dodge the claw attack, of while he is belching fire (try to run around the opponent and get him from behind). After you defeat one of the brothers, the one that stays alive, takes over the entire repertoire of the other one's attacks. That is why you should watch out for the entire array of these. To sum up: first of all, pay attention to the "fire" brother, because his attacks deal more damage. When they take turns, (both of them hanging down the ceiling), they will be fighting together, temporarily. Do not try to attack then and run a bit around the arena. While fighting, it is a good idea to use a shard, which decreases your vulnerability to fire. Thanks to this, the fight becomes much easier.
Bonus: The legendary Defender Buckler - the blocked attacks deal damage from fire/lightning.
Condition to obtain the bonus: The gear that you receive, depends on which one of the brothers you kill as the last one.
Hints:
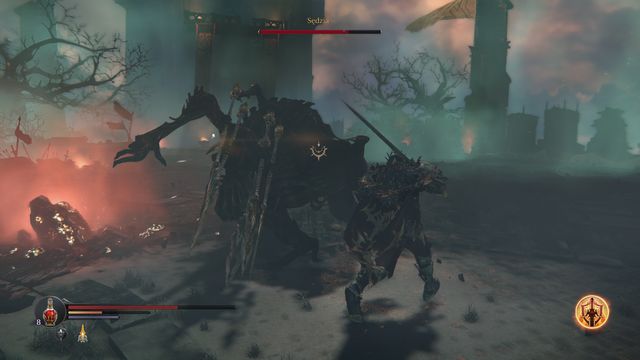 Avoiding two of the claw attacks allows you to strike at the opponent's back.
The final boss. The fight with him ends the game, it is also after this one that you see the final cutscene that reviews the choices that you made. You meet the opponent himself at the top of the Citadel (where you have talked to Antanas for the first time). You get to the location of the lift at the top of the long, winding stairs. Before the battle, see the Blacksmith to use the rune that you received from Adyr. Preventing the boss from killing any of the summoned Infested with a fire attack from the balcony, results in receiving better gear.
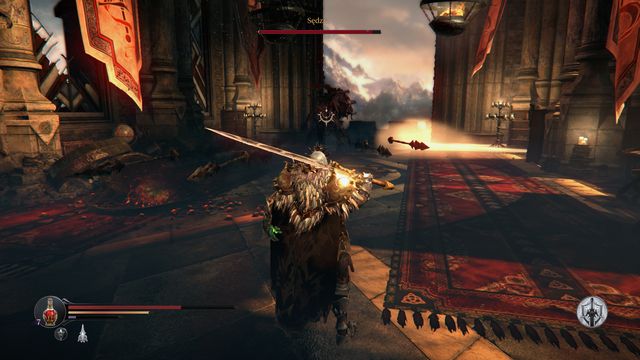 You can dodge the spikes coming towards Harkyn, by performing a roll in any direction.
- spike projectiles - the opponent stoops a little and fires several spikes at you, which spread in mid-flight. Dodging the attack in any direction is enough to avoid it.
- two strikes and a crush - The Judge performs a short series of strikes and jumps into the air, after which he drops on the ground with impetus, which tosses Harkyn away, to a certain distance. You should use this attack to your own advantage - dodging the first attack provides you with a good threshold for attacking the opponent's back, when he is following it with the jump.
- charge and a jump - the fastest way that he can get to you, after you move away, to a certain distance, is a charge and a jump that ends in crushing to the ground. As soon as The Judge starts running your way, get ready to dodge to avoid taking damage and to get into a good position to counter.
- summoning of the Infested, attacking in fire stripes - after the fight moves outside of the Citadel (after the boss loses some of his health) The Judge starts summoning the Infested to the arena. This is signaled by the boss's standing still and the appearance of green "fumes" that start to surround him (a perfect moment to attack). After a while, the opponent jumps up to the balcony and there appear the Infested in the arena. An additional handicap is that there appear several fire stripes, in the battlefield. Try to remain in constant movement and do not worry about the attacks of the Infested. This does not mean that you should not attack them - you do not need to, but The Judge regenerates some of his health points, after he jumps off the balcony, per each Infested standing. Therefore, you need to kill as many of them as possible. Otherwise, the battle may get considerably longer. The key is to swing your weapon effectively, and not stop.
- red orb - the boss raises his and shoots out an orb (the gesture resembles the bowling-ball throw). The attack is highly dangerous, mainly due to the fact that it permanently lowers your maximum health points. This means that, with each attack that you take, the amount of health points that you will be capable of regenerating, with health potions, drops. Additionally, if the orb hits a nearby Infested, he explodes and deals additional damage, which is quite high.
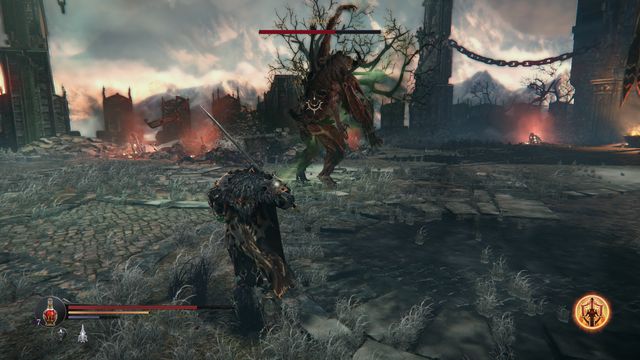 While summoning the Infested, the opponent is defenseless, for a moment and vulnerable to attacks.
The battle with The Judge is quite demanding but, at this stage of the game (i.e. at the very end) you should already have sufficient weapons, armor, and quite a few shards and health potions. All of these can aid you in the battle but, before you start it, remember to place runes in your gear (mainly the ones that increase your resistance to fire). The battle itself has been divided into two phases - one short and another one that is a bit longer. In the first phase, atop the Citadel, especially watch out for The Judge's strikes at close range. This phase lasts until you deprive the boss of the predetermined amount of health (it has been separated with a line). Then, the fight moves over outside of the Citadel, to the yard. There, the array of the boss's attacks is enriched by the summoning of the Infested and by attacking from the balcony. During this attack, try to kill as many of the summons as possible because otherwise, the boss uses them to regenerate some of his health (after he drops back to the arena). Also, watch out for the fire attack that the boss summons and it is best if you stay in movement, and combine your attacks with blocks, into lethal sequences. During the battle proper, use the moment at which the boss slams into the ground. Dodging the claw attack gives you the opportunity to attack his back, at the moment at which he jumps. To sum up: try to run around, when the boss summons the Infested, kill as many of them as possible. At the moment, at which The Judge jumps down on you, especially use the moment when he hits the ground, and attack his back. Watch out for the red "sphere" that he throws - if this projectile connects, you lose some of your health points. This means that no health potion can regenerate it.
Condition to obtain the bonus: Make sure that the boss does not kill any of the summons with the fire attack from the balcony.
Hints:
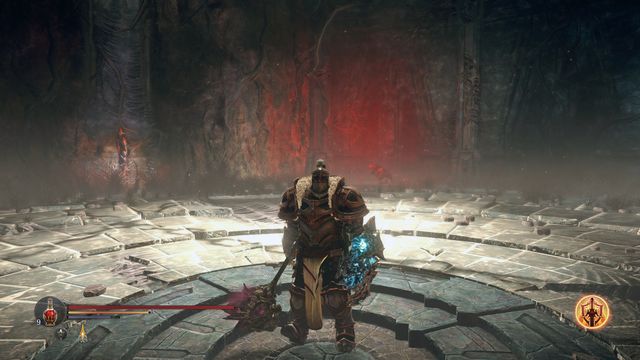 Arena battles are one of the three types of portals.
Portals are the places that activate after you kill a boss (there is only one exception to that) and they allow you to teleport to a different dimension, to obtain rewards. In general, there are three types of portals - a treasure chamber, where you can obtain items without additional fighting or additional condition, the void, i.e. a dark mysterious place, where enemies appear and where you can, sometimes get lost, as well as the arena, where you need to withstand the successive waves of enemies, to claim the reward. Portals are not located where you fight the bosses, sometimes, you run into a portal before you do into a boss, which is why it pays off to remember their locations and go there after you win the boss battle.
Note: the loot that you obtain may be different from the one provided here.
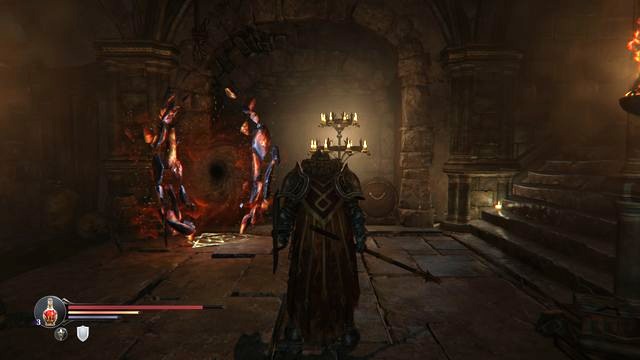
You activate the first portal after you defeat the First Warden. You find the portal while looking for the key for Kaslo, in the Citadel Northern Wing, where you could run into a Marauder atop the stairs. In the portal, there are no opponents, and only chests with loot.
Loot:
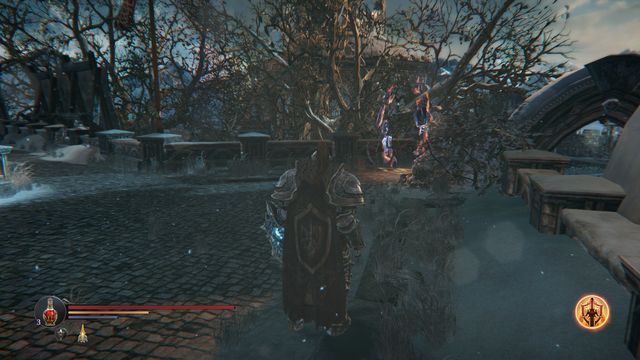
After you defeat the Commander, climb up the stairs. Then, turn right, as far as possible (right after the conversation with the Captain), where you find an active portal.
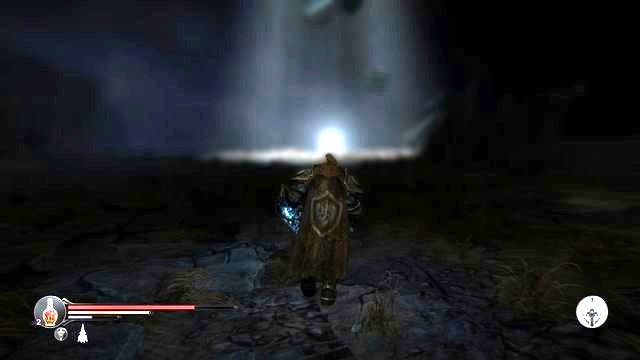 Inside the portal, you need to follow the glowing orb.
Inside, at the very beginning, there is a chest. Open it and you will be led to another one by a glowing orb - watch out for opponents here. They do not have their health bars, but you can kill them in the regular way. Another glowing orb takes you to the location, where you walk onto a small podium with a mysterious symbol etched into it. Now, follow the orb - it will take you to the location with an opened chest (quickly, collect its contents). If you are not fast enough, the chest slams shut. You can now leave the portal.
Loot:
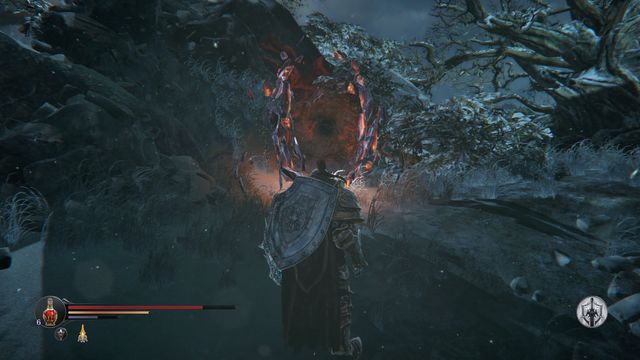
You can get to the portal, while walking away from the Burnt watchtower, towards the Cemetery. It activates after you defeat the Worshipper.
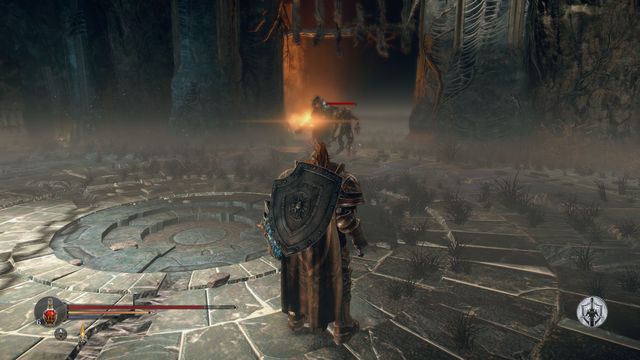 The last opponent is the strongest. First, deal with the Infested.
Inside, you are going to fight in an arena (three waves). After each consecutive wave, you can regenerate your potions and save the game (the checkpoint is on the left, after you enter through the portal). To start the battle (and each next wave) walk into the center of the arena.
Your opponents are:
1. Rhogar Shieldmaster accompanied by a Marauder
2. Infested, a quick Rogue and a Crossbowman
3. Knight and an Infested
After the battle, walk into the center of the arena - there will appear a chest, where you can claim your reward from.
Loot:
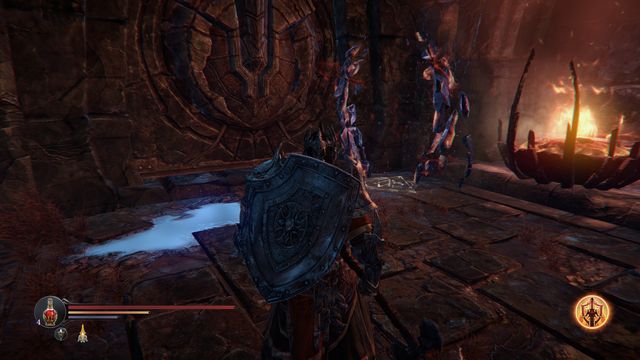
You can find it next to the entrance to the arena, where you fight the Infiltrator (right before the Portal location). It activates after you beat the boss.
 You find your rewards in the three chests in the portal.
Inside there are no monsters. At the very entrance, you can open three chests, where you find items.
Loot:
This portal is close to the entrance to the Catacombs (the main gate that you get to from the Cemetery) - from the checkpoint you only need to go downwards and go left, at the first fork. Then, enter through the door on the left. Before you enter the portal, you need to defeat the Champion.
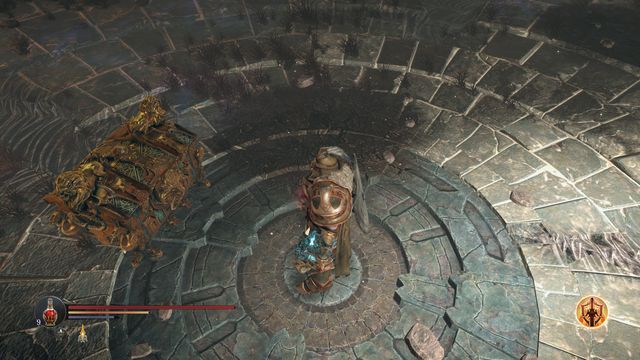 At the end, remember to claim your reward.
Inside, there is an arena. You can save the game beforehand and replenish your potions. The successive waves of opponents appear after you walk into the center of the arena.
Your opponents are:
1. 4x Infested, 1x Rogue
2. Forger with a crossbow and two Hell Hounds
3. Rhogar Knight accompanied by an Infested
You can claim your reward after you walk into the center of the arena, after the battle, where the chest appear.
Loot:
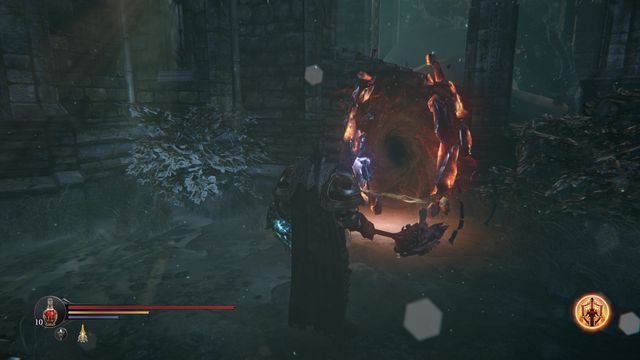
Portal opens after you defeat the Beast and you can find it near the main portal, which leads to the Temple.
 The light will show you the way and protect you from losing your health points, a loss that you can experience while staying in the dark.
Inside, keep following the orb of light because, if you lose it off your sight, you also start losing your health points. Along your path, make sure that you do not step on the slabs with green rims - this makes you lose your health. The light will take you to a chest. Along your path, you will also encounter two Rogues.
Loot:
- Shard of resistance to poison
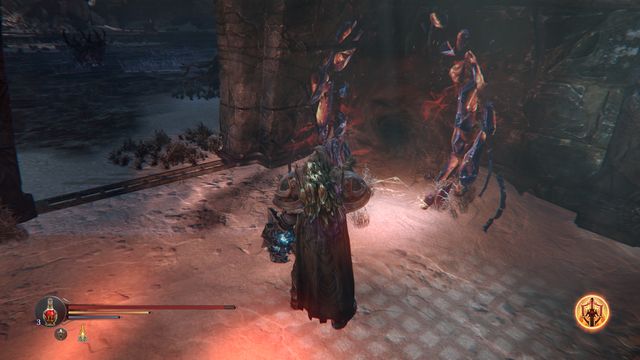
You find this portal inside one of the small cells that are attached to the arena (Eternal Flame). It opens after you defeat the Protector.
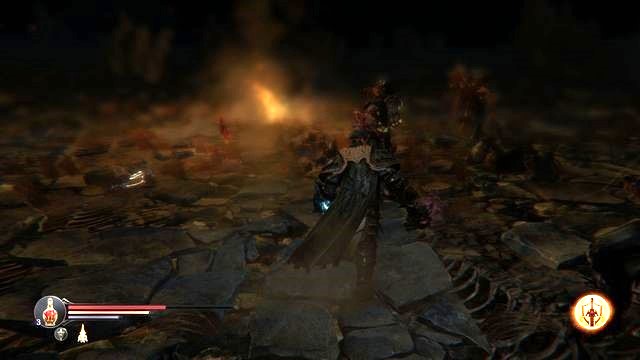 At the campfire, watch out for the numerous group of the Infested that may cause some trouble.
It is one of the most extensive portals. Inside, head towards the campfire that you can see in the distance, where you will have to deal with several Infested.
 While fighting, try to eliminate the Mage in the first place. Also, make sure that you do not step outside of the burning circle.
As soon as you do that, note the glowing ruins on the right (on the ground). Follow them, for a moment and you will reach the location that blinks in red. As soon as you enter the area, you will step into a mini-arena, which will then be rimmed with fire (note, stepping across the fire means death to you). To open the circle again, you need o defeat a Mage and two Shieldmasters. After that, there appears a chest.
Then, return to the campfire and similarly, past the magic ruins, go ahead. You will reach the location shown in the screenshot, where a fire beast appears, after you open the chest. Watch out for its attacks, rolls and dashing towards you. After you defeat the opponent, return to the campfire again.
 Try to fight the Knights one-on-one and then, defeat the Tyrant.
Here, there are two Knights waiting for you, and a Tyrant (his heart is a bit away from the campfire, you can easily spot it, after you defeat the opponent for the first time - head towards the red thread between the heart and the owner. After you defeat these opponent, you can open another chest and leave this place.
Loot:
- Fly (a hammer)
- Homage (a sword)
- Shards: of magic, of attribute point
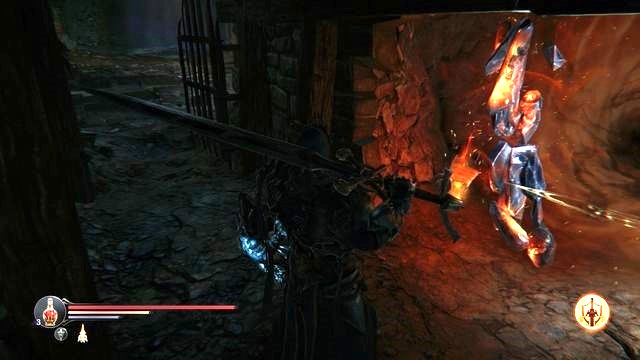
The only portal not connected with any boss. You can enter it right after you talk to Adyr and move to the Citadel. You can easily find it, because you resume your exploration, of this location, with the portal on your right.
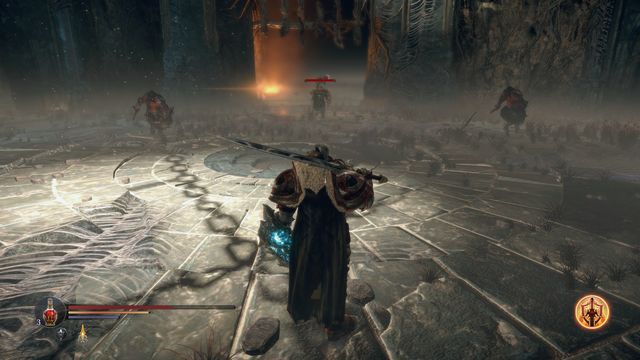
Inside, you fight in an arena. Your opponents are:
1. Tyrant, Archer, Crossbowman
2. 2x Rogue, Knight
3. Fire monster, Rogue
After the battle, walk into the center of the arena and next to Harkyn there appears the chest with loot.
Loot:
- Ceremonial (great axe)
- Shards: of spell point, of attribute point
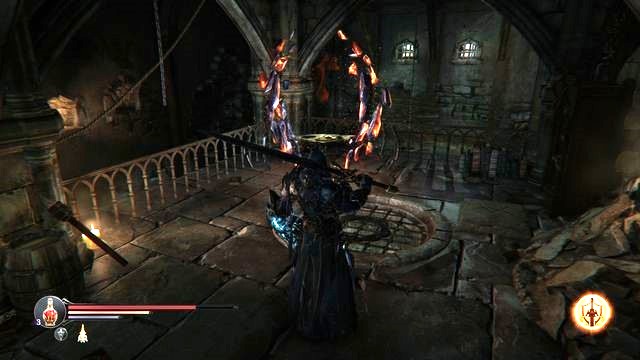
This portal opens after the fight with the Lost Brothers. You can find it, after you head towards the Main Hall, at the top of the stairs to the Old Quarters.
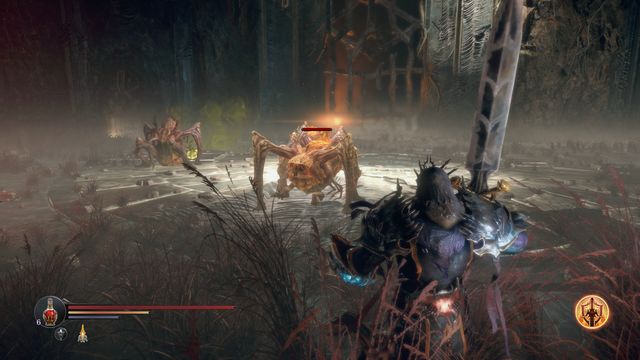 Spiders. Used to be a problem. Now they die after one blow.
Inside, you fight in an arena:
1. 3x Spider
2. Spirit, Rogue
3. 2x Mage, Knight
You claim your reward, by walking into the center of the arena (next to Harkyn, there appears the chest with the loot).
Loot:
- Glance (hammer)
- Lord (entire armor set)
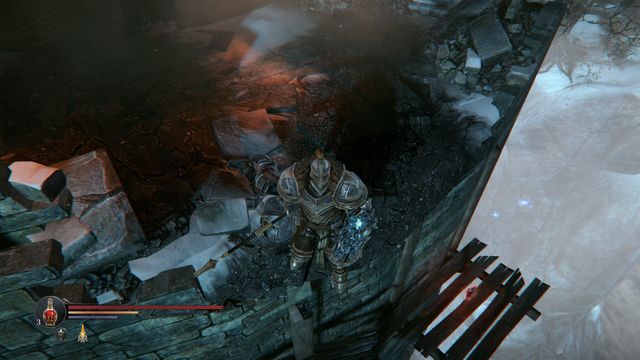 To jump down to the platform, you need to lean forward. Be careful not to fall down!
After you meet Yetka for the first time, at the gate, you can talk to her and learn about the dagger she lost. To retrieve it, turn towards the Crossbowman (Southern Watchtower) and climb down the stairs. You will find a note and a Marauder here. At the stairs, you can jump down [M2.12], where you find the Tower Key on the wooden platform.
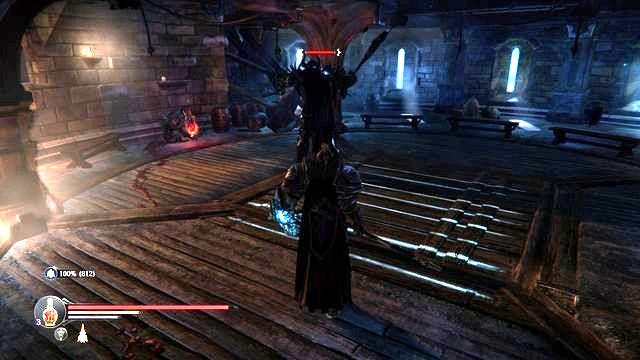 You can get the opponent from behind, After the fight, remember to collect Yetka's dagger.
Take the External Passage. As you head down, you will get to the door that you open with the key that you have found (there is a note inside). Then, exit through the other door and head onwards, along the External Passage (make sure to jump over the chasm). After a while, turn right and you will get to the Northern Watchtower - there, you encounter a Marauder upstairs and you find the Yetka's Dagger [M2.13]. As you follow to the end of the passage, you encounter one more Crossbowman and a chest (a rune, a Prejudice staff). You can now return to the gate (for finding the dagger, you receive 800 EXP and a Catacomb Key - you can now go to the catacombs [M2.B], or do that a bit later, after the fight in the Cemetery).
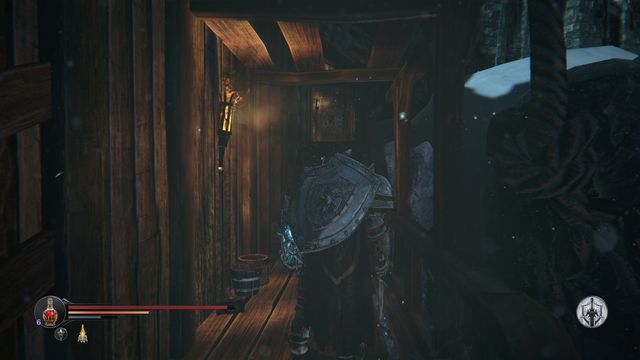 The entrance to the Catacombs, which you open with the key from Yetka.
You find the entrance to the Catacombs after you head back to the Southern Watchtower. inside, climb down and defeat the Marauder, and climb to an even lower level (watch out - a Spider). Find the door and follow the corridor to the wooden balcony (two Infested). At the end of the path, you will be able to walk into the Catacombs [M2.B].
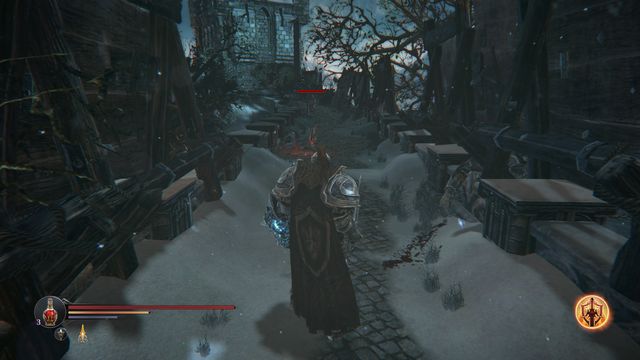 In the narrow passage, you find a Blood Flintstone.
After you complete this side quest, at the Citadel, there appear reinforcements that help you fight Rhogars.
After you defeat the Commander, head up the stairs (opposite the gate that you entered through) and after a short conversation with the Captain [M2.6] take the path to the right. After you take another turn, as far to the right as possible, you will note an active portal. On the left, there is a narrow passage with an opponent behind a shield (watch out for his quick jabs from behind the shield). You will find a Blood Flintstone here [M2.7], which you are going to need later in this quest.
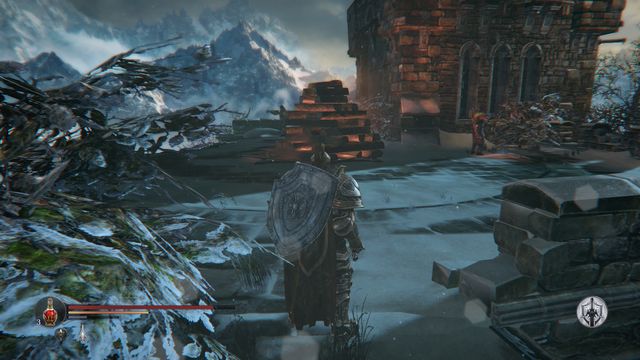 A stack that you can set on fire.
As you head on, you will reach a checkpoint. On the right, there is a passage to the External Walls, go there. As you go down the path, you encounter more opponents with shields (you can get one of them from behind), and you will be able to go left, at the smaller passage before the gate. On top, defeat the Crossbowmen, and set the wooden stack on fire [M2.8] (1000 EXP, you need to own a Blood Flintstone).
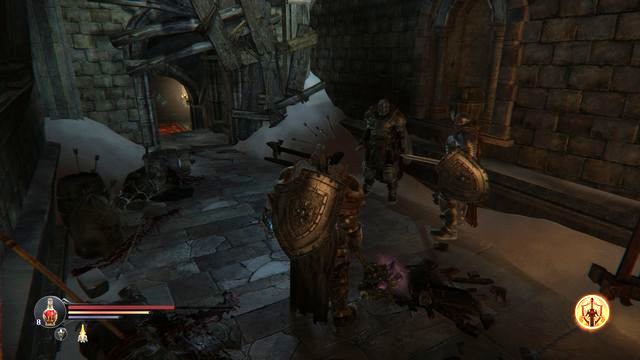 Knights that you can talk to, at the Citadel, after you leave the Catacombs and clear the Planetarium beforehand.
Later into the game, from the Catacombs, you will have to make it to the Citadel. Then, you will have to make it to the very top and talk to Kaslo (along your path, you will be passing by fighting knights). Finally, after you have cleared the Planetarium, climb down the stairs and before the entrance to the Main Hall, you will see (and hear) two soldiers talking about what they have seen. Talk to one of them and you will earn 500 EXP.
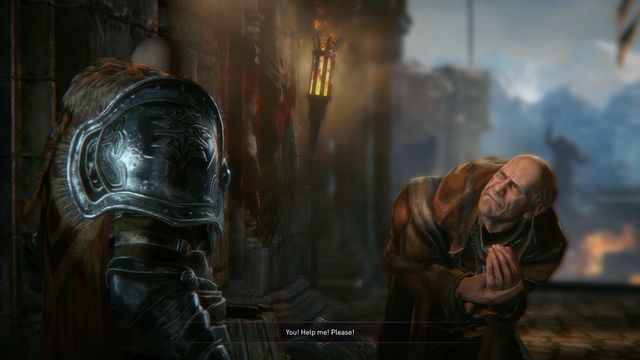 It is really worthwhile to help the monk.
After you exit the Citadel for the first time, you will see a gate ahead of you. After you use the levers on its both sides, you can talk to the Wounded Monk [M2,1]. He will ask you to cut his hand odd (you will receive the Butcher axe), and after you talk to him again, you will be able to give a potion to him (you lose one slot, but you obtain 500EXP).
 You meet the monk later on, at the Citadel.
If you rendered help, on to the monk, you encounter him again, at the Citadel; after the conversation with the Captain walk ahead a bit, and enter the room on the left [M5,2]. Now, the Wounded Monk asks you to clear his works ([M2,21]), in the Southern Watchtower (you need to kill the Spider there, and let the monk know about it).
 Bring the Tyrant Hearts to the workshop to increase the potency of your health potions.
The last part of the quest is to find the Tyrant Harts (four, at least). Take the items back to the monk's works, for which he upgrades your health potions (they replenish more health). After you bring all 12 hearts, the quest will be completed, you will receive the potions upgraded to a maximum and, additionally, 2000EXP.
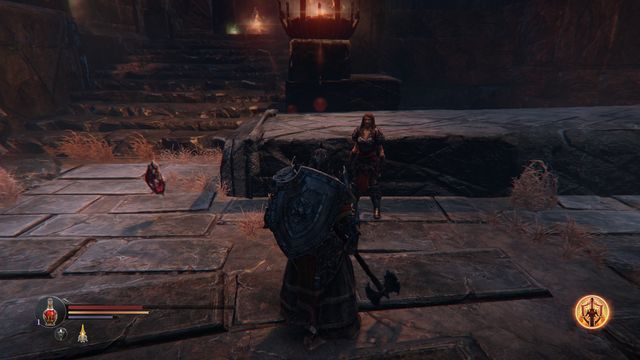 You receive the quest, and the reward, from Yetka.
After you walk into the portal to the Temple at the first gate (that is initially closed), you encounter Yetka [M3.2]. She asks you to find Ancient Tablets scattered all around the Temple. You need to find five of them and take them back to Yetka. You find her after the battle with the Infiltrator (until then, you should have collected all of them) or later in the same location, after you return from the Citadel. You will be rewarded with 1500 EXP and Shards: resistance to poison, resistance to magic, resistance lightning, of energy and of magic.
You can find the whereabouts of the plates in the chapter entitled Collectibles and items->Ancient Tablets.
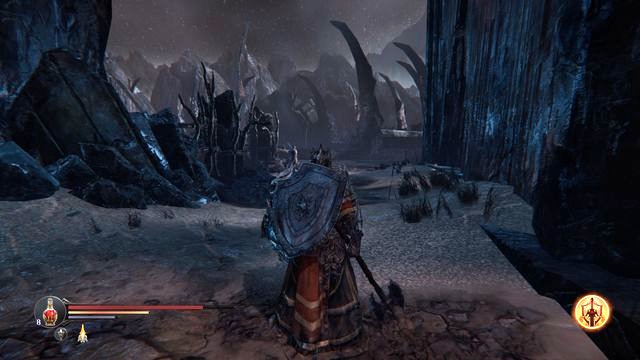 After you exit the Temple talk to the deserters.
You encounter the Deserters [M3,8] during your initial stay at the Temple, After you defeat the Infiltrator. Talk to them and give a health potion to one of them (500EXP, the maximum capacity decreased by 1). Also, promise that you clear the tower (Western Antechamber). Inside there, you are going to fight a Mutant, Hell Hound and a Forger with a crossbow. After you do that, return to the deserters - you will receive 500EXP more and the Defender dagger.
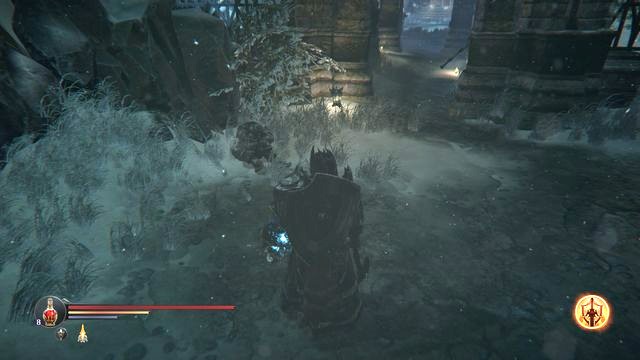 After the conversation, the wounded soldier drops a Human Tattoo.
At the portal exit (the return to Keystone) you will encounter a wounded soldier [M3,32] - after the conversation with him, remember to collect the Human Tattoo. You continue the quest after you visit the Citadel - there, the Captain [M3,1] asks you to kill the Deserters.
 You encounter the Deserters again in the Western Antechamber.
After you visit the Temple again, go to the Western Antechamber, to talk to the Deserters again [M3,35]. You can do either of two things:
Send the Deserters out to the arena - the Deserters attack the Protector, but they die in battle. You will be able to pick up the two tattoos, from the arena, later on and the boss starts the battle with a lower supply of health. You receive 2000EXP.
Have the Deserters flee for their lives - you receive 2 Human Tattoos, 2000EXP and the Amulet of the Traitor (stronger attacks that, sometimes, drain your health).
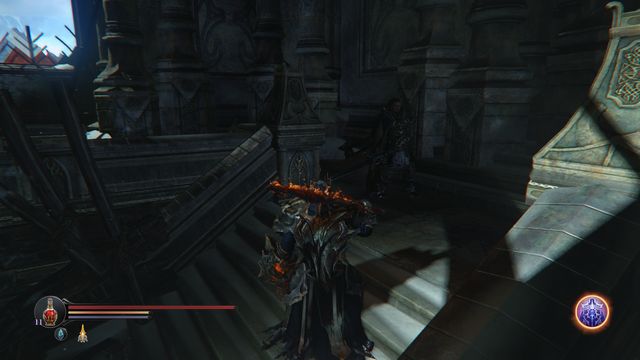 The Captain gives you the final reward.
Regardless of your choice, and of whether the Deserters flee the tower, you will pick up the two Tattoos from the ground. With 5 Human Tattoos, you can return to the Captain [M3,1] - after you return to him the proof of the Deserters' death, you receive 1000EXP and the Great Burden (an trinket, charges of some of the opponents do not stun Harkyn).
 Although you can kill the Rhogar at the first opportunity you get, this is not a profitable option.
You encounter this harmless (as of now) demon, after you defeat the Infiltrator [M3,7]. After you talk to him, you learn that you need to find Human Skulls, or which you will be rewarded. To learn about the whereabouts of Human Skulls, see Collectibles and items -> Human Skulls.
 The Rhogar turns out not to be especially honest.
As for the Crippled Rhogar you can later find him near the side entrance to the Temple [M3,42]. The possible actions:
- kill the Rhogar during the first encounter - you cannot focus the camera on him, as it is the case with the regular opponents but, it will do if you strike in his direction. You can then pick up the almond shield - Stance.
- after you return 15 Human Skulls to the Rhogar you receive an almond shield Stance and 2000EXP.
- After you find 30 skulls and return them - a bit of a twist. The Rhogar also demands your skull and the two opponents that attack you will attempt to claim it (2 Knights and a Mage). After you have dealt with the opponents, kill the treacherous Crippled Rhogar. This way, you will obtain 2000EXP, and almond shield Stance and Leech (a trinket, to some extent, the damage dealt replenishes energy and health points).
 The Infested monk.
At the Catacombs, in the upper area, above the arena (the location, where there are many cells and a lever for the gate to the boss) in a locked cell, there is an Infested monk [M4.1]. He asks you to free him and kill him, thanks to which you put him out of his misery. You open the cell with the lever, but you need, for that, the Lever Handle [M4.2].
To get the lever, go to the other side of the location, close to the lever that opens the door to the arena. Behind the door, you find the item. Return to the monk, open the cell and kill him (the regular attack). For this, you will receive 1500 EXP and a Shard of Spell Point.
 You can find the hammer in one of the cells, in a secret chamber.
At the Catacombs, you can find a very interesting weapon. To find it, go to the upper part of the location [M4.15] (the location, where there are many cells and a lever for the gate to the boss). In one of the cells, there is a wall that can be smashed (on the screenshot; you simply need to run towards it (sprint) with your shield raised). Inside, there is the hammer (you can upgrade it).
 The grave with a mysterious symbol.
To do that, go to the other end of the Catacombs, near the entrance to the Burnt watchtower. Locate the Mines - in the second room on the left (as you walk from the direction of the Catacombs) you will find a chest, and a grave at the wall on the left [M4.9] (there is a mysterious symbol above it). Interact and the grave will crack to reveal a better version of the weapon.
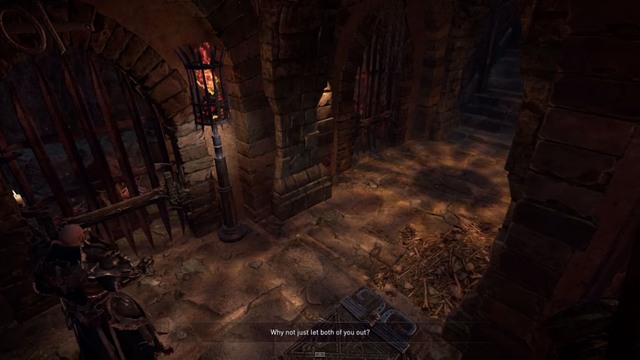 Both of the prisoners will try to convince you of their innocence.
While you are exploring the Catacombs, you find two imprisoned monks [M4.4]. Both of them will be trying to convince you that they are innocent and they deserve to be freed. The catch is that behind each cell, there is an Infested. If you try to open one of the cells, you wake up both of the demons and the man, in the other one, dies because he will not be able to get out. Therefore, you can save only one of them. To open the cells, you can use the key from the nearby chest. Whom to save? If you want to be just, free the monk on the left, (the one closer to the circle of cells). He is an innocent merchant. The monk on the right is a thief, who stole a valuable artifact. After the thief's death, enter his cell and pick up the item from the ground.
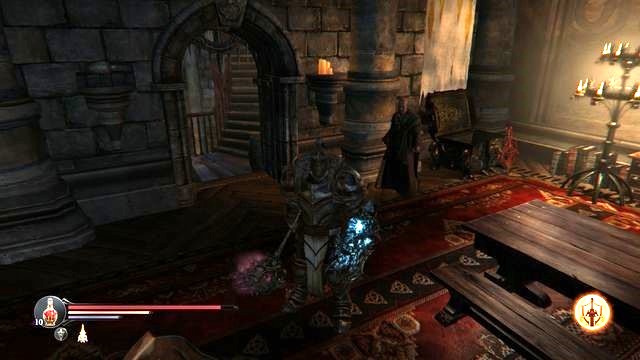 After the fight with the Spirit, claim your weapon.
At the Cemetery, along your path, you can find a dug-up grave [M2.32]. Interact with it to learn a story. You need to find a cursed weapon - Curse (a shortsword) that you have found at the Citadel ([M5.26]). Bury the sword in the grave. After you do that, there appears a spirit here. For defeating him, you receive an additional 1500 EXP, and you will be able to take the improved weapon from the grave.
 The opponents are waiting past several campfires.
After you visit the Citadel and return to the Temple, while passing by the statuette next to the passage to the Abandoned Field, you encounter a single Hell Hound. After you attack it, it starts to run. You will find it, then, at the edge of the Abandoned Field - after you climb down the big stairs, go to the left as far as you can [M3.33]. There, you fall into a trap (three Hell Hounds and a Forger with a crossbow). After the battle, you can claim your reward - an adornment Keep.
The Concerned Monk.After you clear the Planetarium, right next to the entrance to that location, on the right, you can talk to the Concerned Monk [M5.6]. He asks you to find his brother.
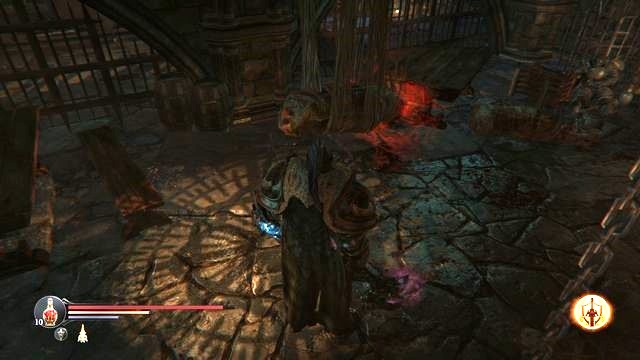 The monk's brother enclosed in a cocoon.
Go towards the secret room #1, to find the missing brother. Locate the mysterious symbol on the floor and run ahead, for a moment, to enter the door that is temporarily unlocked. Defeat a Spider, and interact with the hanging cocoon [M5.10]. This way, you will obtain the Key to the Citadel basement. Take the key to the Planetarium and talk to the Concerned Monk again, and you will receive 4500 EXP.
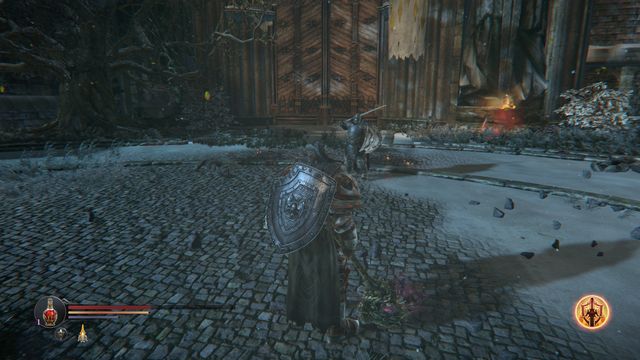 The Knight tells you about the task that you may now take up.
At the Judges Square, after you defeat the Beast there appears a knight that tasks you with killing a venom-spitting monster. It is at the Initiation Chamber.
 The Knight that tasks you with killing the monster waits late inside the Citadel, in front of the Initiation Chamber.
Enter the Citadel. Along your path, in front of the Initiation Chamber, you meet the knight again[M5.8]. Prepare for a tough fight.
 The opponent at the Initiation Chamber deals quite a lot of damage with his attack so, dodge with diligence.
The beast that you need to defeat has two powerful attacks - curling up and rolling towards you, and one which deals even more damage, a single swing with the paw (additionally, it poisons you). Try to perform dashing attacks mainly and, when the opponent attacks with the claws, dodge. The monster is stronger than a regular opponent and that is why it has more health points - do not engage in an open exchange of blows, while expecting to kill it quickly. Be patient because several strong dashing attacks gets the job done. After the battle, talk to the knight and you will receive 7500 EXP.
 Antanas is one mysterious man.
After the fight with the Beast collect the Planetarium Element [M2.20], which you find to the right of the main entrance to the Citadel. Then, head towards the Planetarium, to talk to Antanas [M5.5]. Return the item, thanks to which you receive several nebulous hints on the last two opponents, as well as 1500 EXP.
 The lever that opens the grate at the other side.
At the Chamber of Lies, you can find an interesting weapon but, you need two parts to put it together. You can find the first one without any problems, as soon as from the main chamber (the entrance from the direction of the Eternal Flame), walk into the room, where there are two holes in the ground and lots of Spiders. Then, you need to open the door in the room on the right (you need a rune) and collect the Poles from the chest [M6,11], apart from the weapon.
 The passage that you open with the lever and where you find the Head of the staff.
Then, you need to reach the other end, near the wide staircase, which you stumble across, after you enter the Chamber of Lies through the door that Yetka shows you. There, approach the rightmost edge of the location - by default, you need to locate and pull the lever [M6,21], which opens the grate at the other side, almost opposite [M6,22]. Go there, jump over the chasm inside and collect the Staff's Head from the chest.
 Hold the head like a weapon to open the grate on the balcony.
Equipped with the head, go towards the upper balconies, where you have fought the two Forgers. You are interested in the one on the left, as seen from the direction of the balcony entrance and the first grate that you pass by [M6,23]. To open the grate, you need to hold the Staff's Head in your hand (from the inventory, select the quest items), and stand close to the grate. If you have both parts of the staff, the grate opens and in the chest, you find your weapon put together - a very good staff Unity.
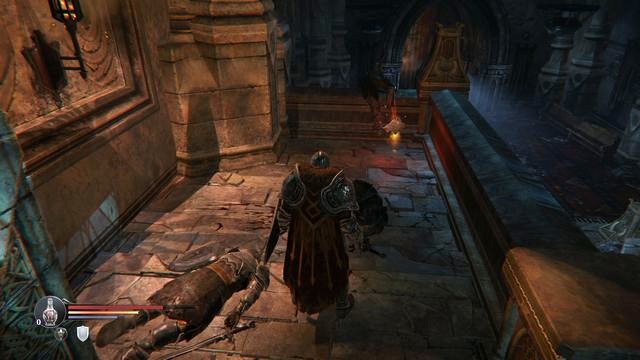
Infested - Guard (2/2)
At the very beginning of the game, after you climb up the stairs, on the right, close to Kaslo.
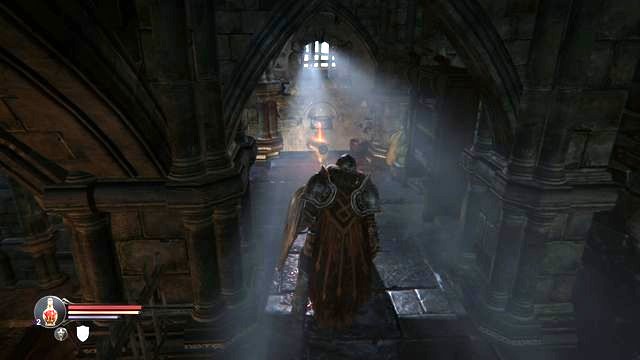
Infested - The ill (1/2)
You can find the Note after you set out to find the key, where you get informed by the game about stealth killing (an Infested with his back at you).
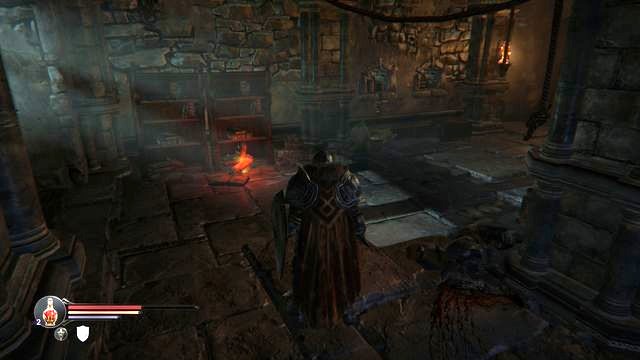
Rhogars - Monk's Notes (2/3)
After you obtain the main key and climb up the stairs, close to the first portal.
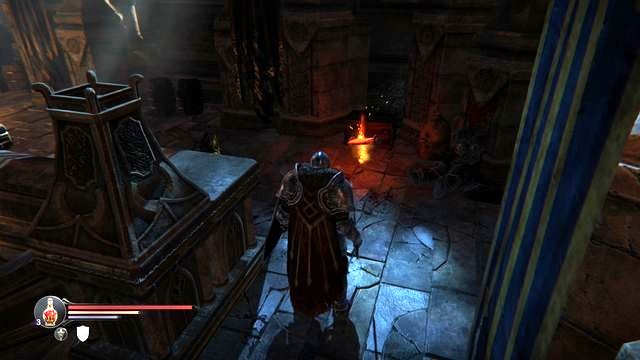
Ancient tales- The Three Heroes (1/7)
After you defeat the First Warden and exit the large Initiation Chamber, on the right side of the small yard (Northern Wing).
Rhogars- Notes from the Backcountry (1/3)
After you defeat the First Warden and exit the Initiation Chamber to a small yard, head down the stairs. Then, behind the first door, in one of the rooms, you find the note (where there are two Infested and a chest with a weapon - Monk's Staff).
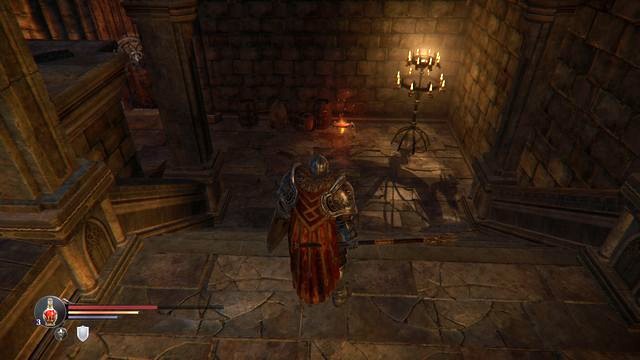
Adyra Lords- Their Goal (1/2)
It is impossible to miss it - it is at the foot of the stairs, along your path to the exit from the Citadel, right next to the door.
![Higher Powers - The Assassin Judge (3/4) [M1,#7] - Notes - The Keystone Citadel - Collectibles, items - Lords of the Fallen - Game Guide and Walkthrough](https://game.lhg100.com/Article/UploadFiles/201512/2015121617270567.jpg)
Higher Powers - The Assassin Judge (3/4) [M1,#7]
New Game+ only. You find the note in the room, where there are two Infested below. As you search for the key, go to the door and, in the next room, climb down the stairs and turn left, as far as you can.
![Higher Powers - The Priest Judge (2/4) [M1,#8] - Notes - The Keystone Citadel - Collectibles, items - Lords of the Fallen - Game Guide and Walkthrough](https://game.lhg100.com/Article/UploadFiles/201512/2015121617270525.jpg)
Higher Powers - The Priest Judge (2/4) [M1,#8]
New Game+ only. As you go to the first portal, you will climb up the stairs, to a small balcony, from which to jump down, to Kaslo. You find the note behind the statue, which is located behind your back, when you are standing on the balcony.
![Higher Powers -Warrior Judge (4/4) [M1,#9] - Notes - The Keystone Citadel - Collectibles, items - Lords of the Fallen - Game Guide and Walkthrough](https://game.lhg100.com/Article/UploadFiles/201512/2015121617270596.jpg)
Higher Powers -Warrior Judge (4/4) [M1,#9]
Only in the New Game Plus. The Note lies behind a curtain leading to a hidden passage. You can get there by scorching before a balcony, on the right side of the staircase, and jumping onto a ledge fragment. [M1,#8].
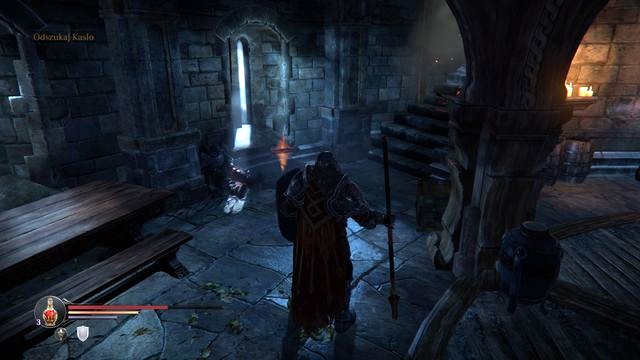
Night Watch - The ninth night (3/4)
You can find it in the round room - in front of the gate, where you encounter the Wounded Monk, whose hand you can cut off. Take the door on the left or on the right. Then, at the very bottom, you will find a passage to the Northern Wall, and another room at the end (along your path, you will be attacked by a Crossbowman), which takes you to the round room (there is a fast Rogue behind the door). The Note is at the window.
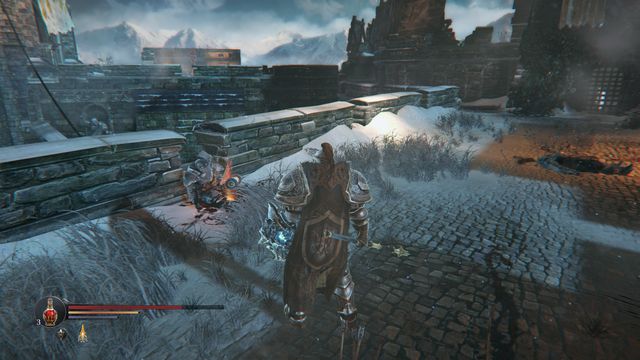
Higher power - Bracer (1/4)
After you obtain the Mysterious Gauntlet (on the wall, at the corpse of one of the soldiers).
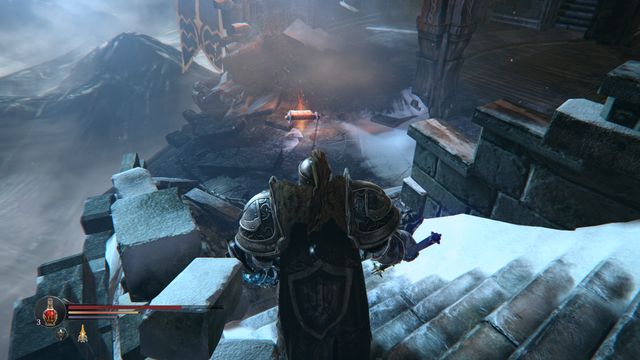
Gloomy places - Dandy (1/7)
After you encounter Yetka return in the direction opposite to the gate, to the spot that the Crossbowman was shooting from (Southern Watchtower). Climb down the stairs, the note is right at the foot of the stairs.
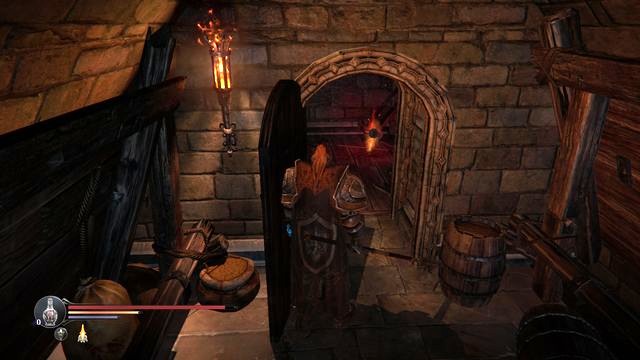
Night Watch - Sixth Night (2/4)
After you find Yetka go in the direction away from the gate (Southern Watchtower). Where you found the previous note, jump down (at the edge) and collect the Tower Key. Then, walk deeper, across the External passage. After you open the first door (near the Crossbowman, requires the key), you find the note.
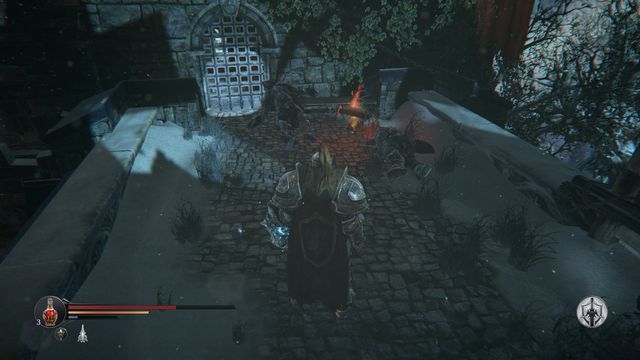
Night Watch - Fourth Night (1/4)
After you defeat the Commander climb up the stairs and go to the right, as far as possible. You will reach a portal - on its left, there is a narrow passage, where there is an opponent with a pavise. As you follow the corridor, you find one more Crossbowman. The note is next to him.

Night Watch - The Last Night (4/4)
As you climb up the stairs (after you defeat the Commander) head towards the Cemetery. The Note is on the ground, at the wall on the left (close to where you talk to the Captain).
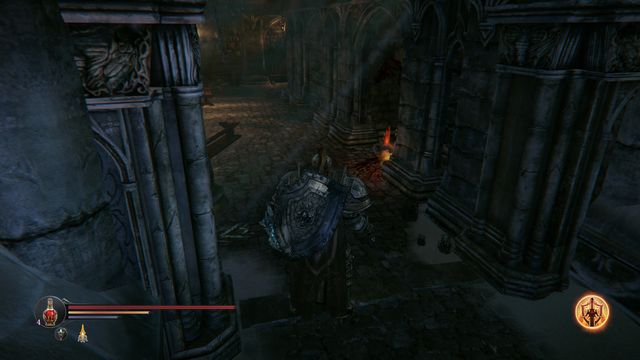
Rhogars - Watch Notes(3/3)
After you defeat the Commander, climb up the stairs and over a small balcony, where you encounter Crossbowmen (to the right of where you talk to the Captain). You will reach a fork, where there is a checkpoint, if you go straight ahead, and there is an entrance to a small room, on the right (it leads to the External Walls). The Note is at the wall, in front of the door, to the right of that passage.
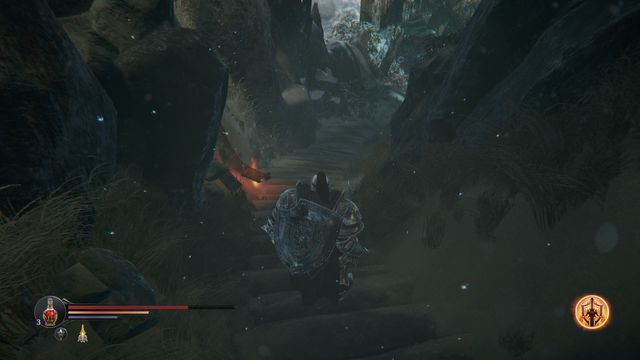
Gloomy Places - Gloomy Graves (2/7)
As you head towards the Cemetery, you can go left, before a small gate, in the spot where you find a stack to set fire to. After you go down the stairs, to the bottom of the Burnt watchtower, a and jump down even lower, you will find a chest. As you follow the only path, you will find the note on the ground.
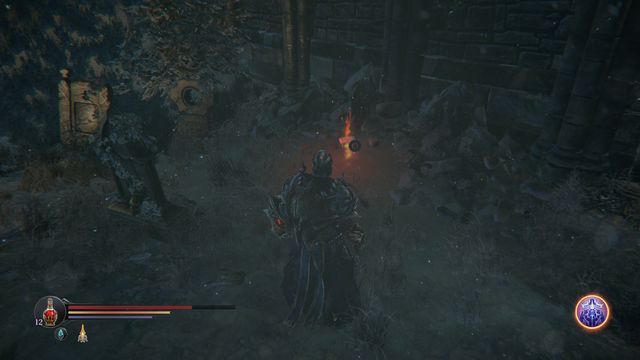
Ancient tales -Kyle's Grave (2/7)
At the Cemetery, after you defeat the Worshipper. You can find it at one of the graves, close to the chapel on the left of the main gate.
Dimensions - The Temple (1/5)
At the Cemetery, under a big tree, across of the main gate.
Prisons - Another chance (1/4) [M2,#11]
At the Penance location (you get the key after you kill the Captain, towards the end of the game - you will be able to pick up the Key to the Southern Entrenchment). You find the note next to the tombs and the first chest that you pass by.
![Our New Home - Keystone (1/3) [M2,#12] - Notes - Keystone - Collectibles, items - Lords of the Fallen - Game Guide and Walkthrough](https://game.lhg100.com/Article/UploadFiles/201512/2015121617270662.jpg)
Our New Home - Keystone (1/3) [M2,#12]
New Game+ only. At the Monk's Lab [M2,21] turn right, the note is next to the corpses and the wooden table.
Dimensions - The Ravine (4/5) [M3.#1]
After you open the gate, go towards the Panorama (the left side of the Eternal Flame). After you climb up the stairs, go left, as far as possible (a Mutant with things sticking out of its back). Under a heap of stones, there is the note.
Dimensions - My Treasure (5/5) [M3.#2]
On the Abandoned Field, as you go towards the Temple's side entrance (across the checkpoint that is hidden in the cave, on the upper ledges). Along your path, you pass a pack of Hell Hounds and several campfires. The Note is next to the rocks and shriveled trees.
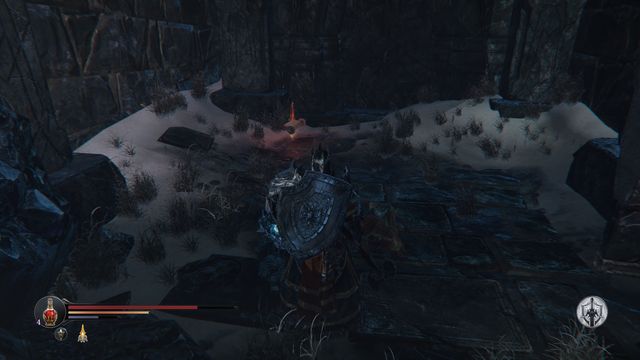
Gloomy Places - Heinous species (3/7) [M3.#3]
Once you enter the temple from the Abandoned Fields (The sacred Corridors) go left, over the stairs to the bottom. You encounter a Tyrant there and a semi-circular gate that you open with the lever next to it. Inside, watch out for the Spiders. The Note is on the right.

Dimensions - Shards (2/5) [M3.#4]
After you return to the Temple and defeat the first Tyrant, you receive the Small key to the Western Antechamber. Once there, jump down and, to the right of the stairs, which you took to enter, you will find a gate that you can open with the key. There is a note inside.
Dimensions - Runes (3/5) [M3.#5]
After you follow Yetka into the Tower of Wisdom, climb to the first level (the stairs next to the strange "hieroglyphs"). There, walk over to the end of the level (ignore the stairs, for the time being) and defeat the Shieldmaster. Along your path, you pass a chest and, at the grate, there is the note.
![Glomy Places - Ravaging Fires (6/7) [M3,#9] - Notes - The Temple - Collectibles, items - Lords of the Fallen - Game Guide and Walkthrough](https://game.lhg100.com/Article/UploadFiles/201512/2015121617270706.jpg)
Glomy Places - Ravaging Fires (6/7) [M3,#9]
In the Eastern Vestibule locate the second staircase (basically ahead from those you have just climbed on). Move to a middle part of the floor and then jump onto a 'platform'. You will find yourself in a room, in which you will be attacked by a rogue. Note lies at the end of the chamber, in front of a goblet.
![Tales of Old- Crafters Pet (4/7) [M3,#10] - Notes - The Temple - Collectibles, items - Lords of the Fallen - Game Guide and Walkthrough](https://game.lhg100.com/Article/UploadFiles/201512/2015121617270793.jpg)
Tales of Old- Crafter's Pet (4/7) [M3,#10]
Only in New Game Plus Plus. In the Eastern Vestibule find the second staircase (basically ahead from those you have just climbed on). Move to a middle part of the floor and then jump onto a 'platform'. You will find yourself in a room, in which you will be attacked by a rogue. Note lies at the end of the chamber, on the left side, by the urns.
Ancient tales -Kyle's Sword (3/7) [M4.#1]
After you enter the Catacombs go down a bit, and then right at the first fork. Follow the long corridor, where you encounter an Infested and a Crossbowman. Then, take the path to the right again and you will enter the Mines. There, walk ahead a bit and in the first room on the left, there is the note.
Research - Purification (2/3) [M4.#2]
After you enter the Catacombs from the Cemetery go down and then, at the first fork, go right. Follow the corridor to encounter the Infested and a Crossbowman. Turn left here (New Burial Chambers), and at the end of the path, you find a chest and the note.
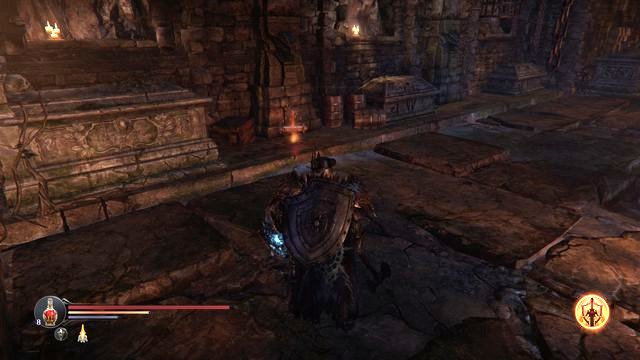
Dark Deeds - Mutations (2/4) [M4.#3]
After you enter the Catacombs from the Cemetery, climb down to the Well of Death, and then to the right into the Royal Tomb. Jump over the plank and into the first room to the right (inside, there is a Forger with a crossbow). The Note is at the wall on the left, next to one of the tombs.
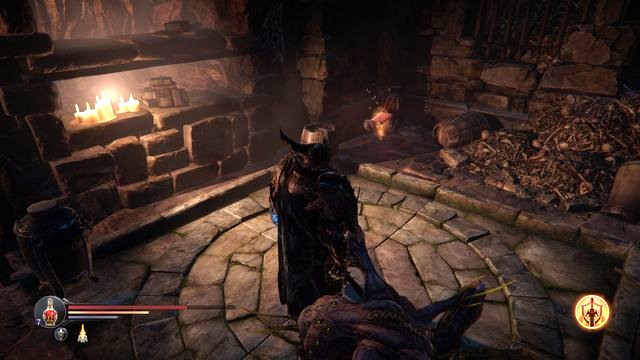
Our New Home - The end of the road (3/3) [M4.#4]
Had downwards, to the Well of Death, and follow the corridor into the Burrow. take the corridor ahead and, behind the first door on the right, there is the note.

Our New Home - Deep inside (2/3) [M4.#5]
Just like the previous note - first go to the Well of Death, and take the corridor ahead, to the Burrow. Take the corridor ahead, again, and you will reach the cell Circle. Atop the stairs, on the left, you will see the note.
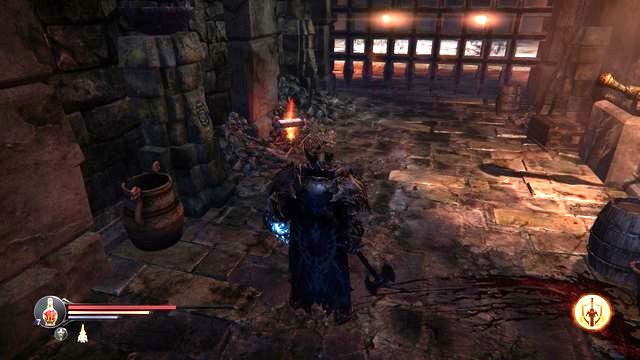
Ancient tales - Adventurers (6/7) [M4.#6]
Close to the checkpoint, at the bottom of the Catacombs, you can find the entrance to the Monster Prison. This is where the note is.
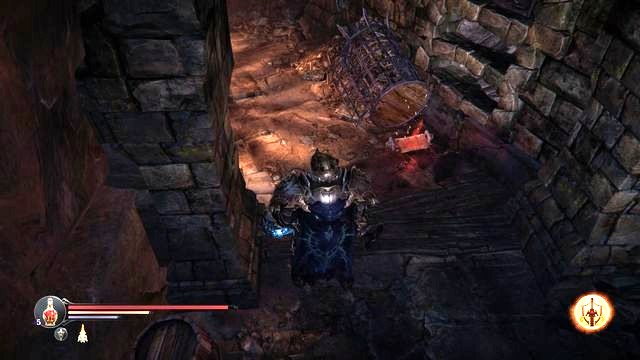
Research - Doubts (3/3) [M4.#7]
from the Well of Death climb up the stairs on the sides. There, you will encounter a Knight, and a bit ahead (behind the smashed cage) there is the note.
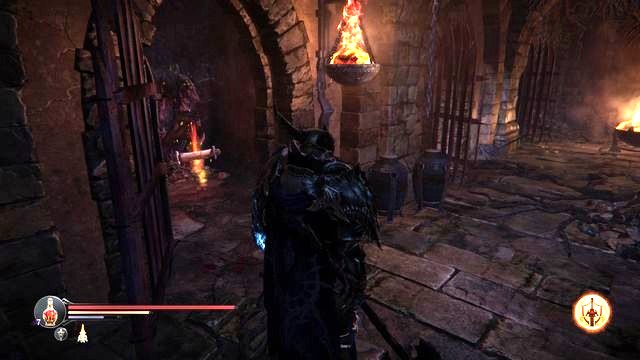
Gloomy Places - Blind Fury (4/7) [M4.#8]
from the Well of Death climb up the stairs on the sides. At the end of the corridor, there is a checkpoint. Then, through the grate and to the left. You can open the cell doors with the nearby lever. In one of the cells, there is the note.
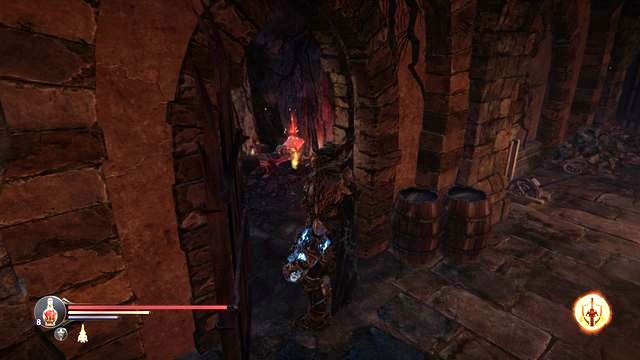
Prisons - Political Prisoners (4/4) [M4.#9]
From the Well of Death climb up the stairs on the sides. At the end of the corridor, there is a checkpoint. Then, through the grate and to the left. Just like the previous note, you can find this one in a cell, which you open with the lever (a bit past the one with the Infested Monk).
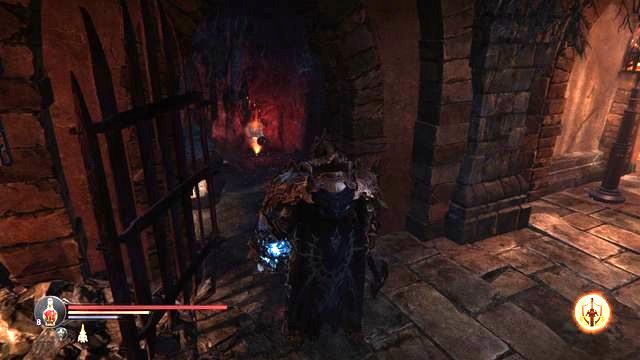
Prisons - The branded (3/4) [M4.#10]
Just like the previous one, you find this note in a cell, an opened one, this time. It is close to the leer that opens the passage to the boss.
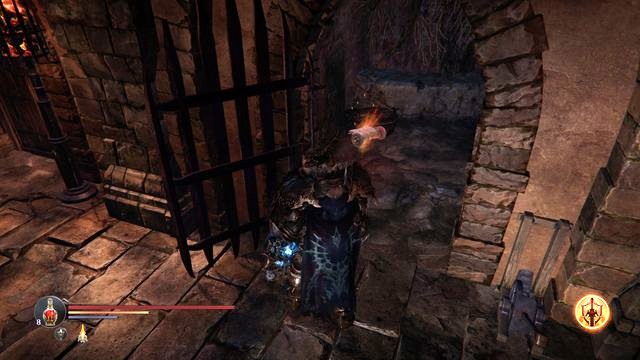
Ancient tales -Sven's Hammer (5/7) [M4.#11]
from Well of Death climb up the stairs on the sides. At the end of the corridor, there is a checkpoint. Then, go right and open the cell with the lever. The note is inside.
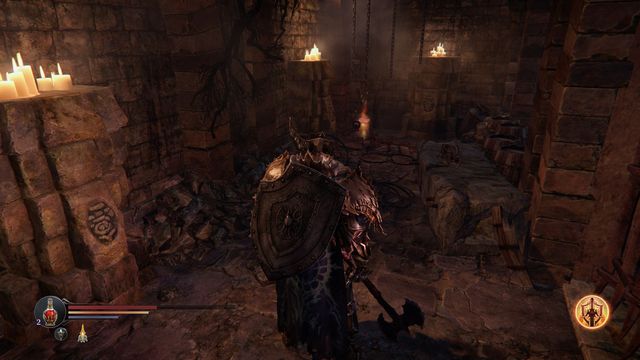
Ancient tales - Adventurer (7/7) [M4.#12]
After the battle with the Champion, you will be able to walk into the Citadel. If, in front of the door pointed to by the guard, you turn left and climb up the stairs, you will find the note.
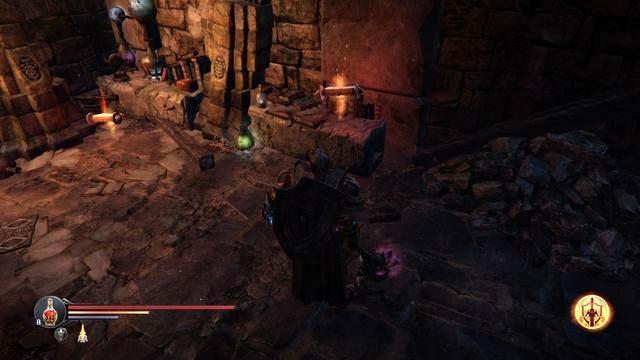
Dark Deeds - Superhuman (1/4) [M4.#13]
After you defeat the Beast (right after you exit the Citadel to the Square of Judges) you can return to the Catacombs, where you fight another boss, the Champion. You will find, here, the room that used to be locked (you could see it during the cutscene that introduced the boss). Inside, there are three notes.
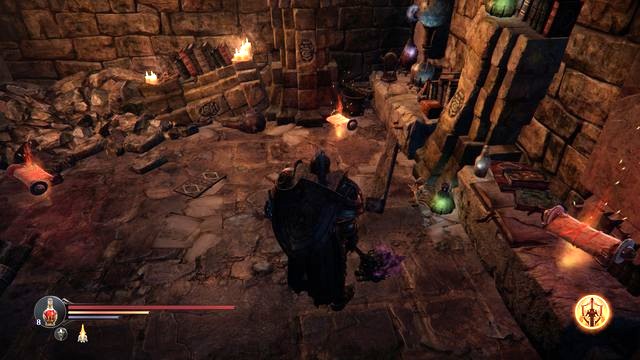
Gloomy Places - Potent Poison (5/5) [M4.#14]
Just like the above note - in the cage of the Beast, which is open after you defeat it in the Square of Judges.
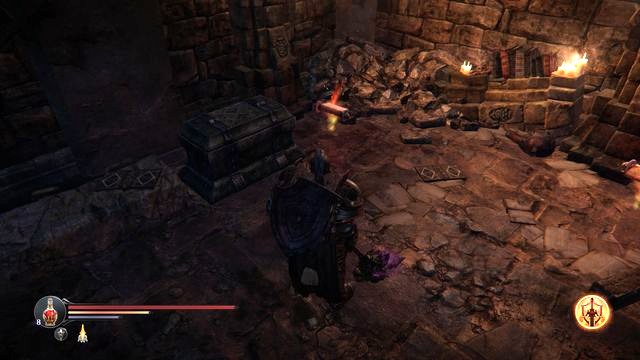
My Oath - I swear to Him(2/2) [M4.#15]
Just like the above two - in the location, where you fight the Champion, in the cage of the Beast.

Prisons - Care (2/5) [M4.#16]
The Note is in the Well of Death location, in the recess on the left (as you stand in front of the entrance to the Royal Tomb walk to the left, as close to the wall as possible ).
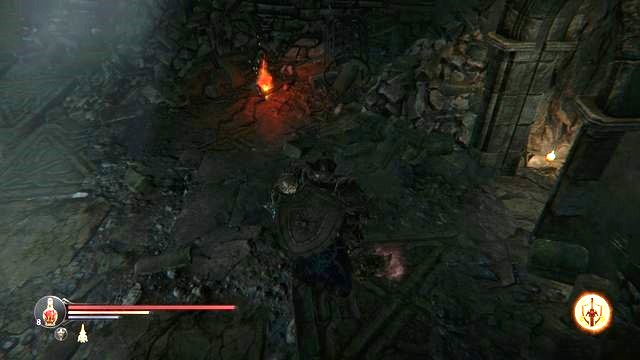
After the War - New Apprentice (1/5) [M5.#1]
After you enter the Citadel and you make it into the first chamber (the one, where you encounter the Warden). The Note is to the right of the entrance to the chamber.
After the War - The Future Judge (2/5) [M5.#2]
Right at the main entrance (from the Square of the Judges), to the left of the big gate.

Plot - Join Us (1/3) [M5.#3]
After you enter the Main Hall walk over to the corridor, opposite the entrance to the Judges Square. The Note is in the first room on the left.
After the War - An Old Priest (3/5) [M5.#4]
In the same location as the above note - after you enter the Main Hall walk into the corridor opposite the entrance from the Judges Square. The Note is in the first room on the left.
After the War - The mad priest (4/5) [M5.#5]
As you go to the top of the Citadel turn right from the location, where you spoke to the Captain. The Note is on the glowing coals.
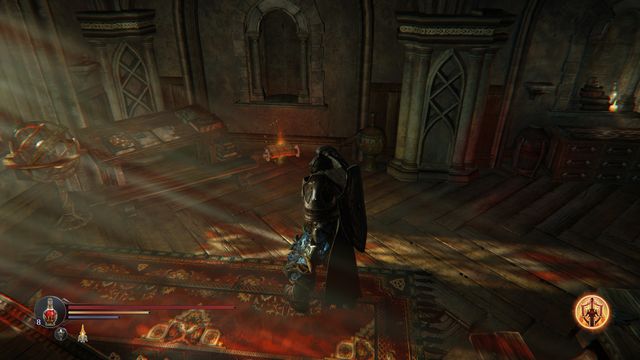
After the War - Rebel (5/5) [M5.#6]
After you meet up with the Captain, at the top of the stairs, enter the first corridor, from which you can go either to the room on the left or right stairs opposite that take you to the very top of the Citadel). Enter the room on the left (the one where you meet the Wounded Monk, if you cut off his hand and given him the potion, during the first meeting in Keystone). The Note is at the window.
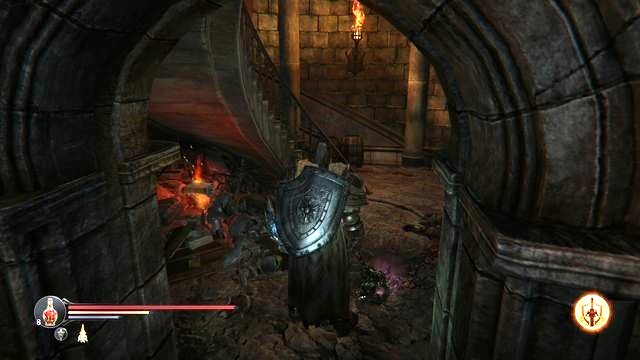
Research - Volumes (1/3) [M5.#7]
After you meet the Captain, head towards the stairs, at the top of which, there is a lift that you take to reach Kaslo and Antanas. The note is at the foot of the stairs, next to the pile of rubble, on the left.
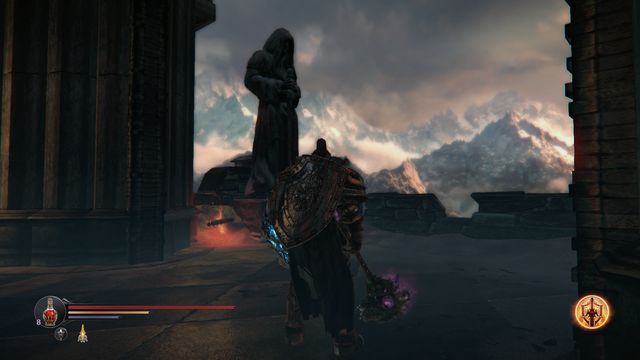
My Oath - I Swear to Her (1/2) [M5.#8]
At the top of the Citadel, which you reach on the lift (at the very top of the long, spiral stairs). The Note is next to the statue, at the other end of the room (the balcony opposite the one, where Kaslo and Antanas stood).
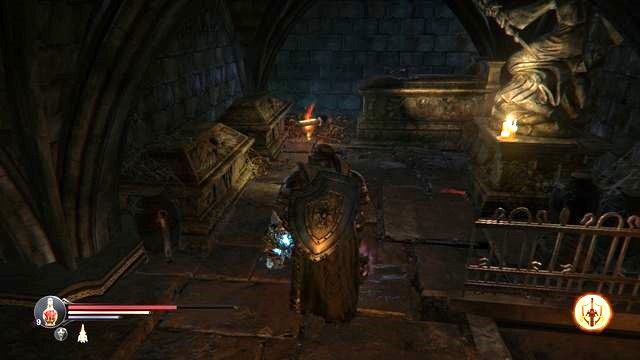
Plot - Point Three (2/3) [M5.#9]
After you fight the Beast you can freely explore the Citadel. The Note is in the secret room that is swarming with Spiders and Infested. The scroll is in the side recess, next to the statue (next to one of the Infested).
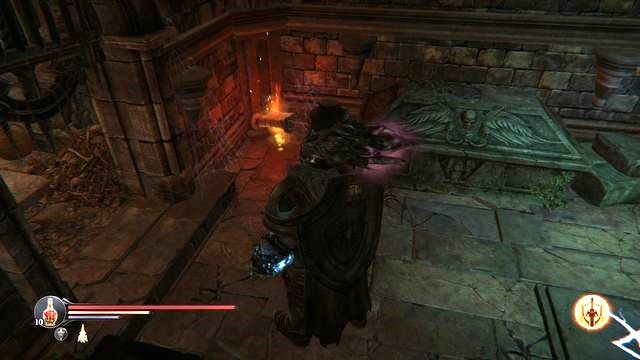
Plot - Wet Job (3/3) [M5.#10]
Just like the above note, you also find this one in the secret room, swarming with Spiders and Infested. You need to find the mysterious symbol (behind the half-raised grate) - the note is in the center of that small room.
![Book of Justice - Revenge (5/5) [M5,#15] - Notes - The Keystone Citadel (after you visit the Catacombs) - Collectibles, items - Lords of the Fallen - Game Guide and Walkthrough](https://game.lhg100.com/Article/UploadFiles/201512/2015121617271161.jpg)
Book of Justice - Revenge (5/5) [M5,#15]
New Game+ only. At the Planetarium, next to the passage on the left.
![Book of Justice - Hand (2/5) [M5,#16] - Notes - The Keystone Citadel (after you visit the Catacombs) - Collectibles, items - Lords of the Fallen - Game Guide and Walkthrough](https://game.lhg100.com/Article/UploadFiles/201512/2015121617271113.jpg)
Book of Justice - Hand (2/5) [M5,#16]
New Game+ only. Under the shelves, nearly at the center of the Planetarium.
![Book of Justice - Father (4/5) [M5,#17] - Notes - The Keystone Citadel (after you visit the Catacombs) - Collectibles, items - Lords of the Fallen - Game Guide and Walkthrough](https://game.lhg100.com/Article/UploadFiles/201512/2015121617271165.jpg)
Book of Justice - Father (4/5) [M5,#17]
New Game+ only. At the Planetarium, go to the balcony with Kaslo and Antanas on, atop the stairs.
![Book of Justice - Books of Law (3/5) [M5,#18] - Notes - The Keystone Citadel (after you visit the Catacombs) - Collectibles, items - Lords of the Fallen - Game Guide and Walkthrough](https://game.lhg100.com/Article/UploadFiles/201512/2015121617271181.jpg)
Book of Justice - Books of Law (3/5) [M5,#18]
New Game+ only. Also at the Planetarium, at the end of the balcony with Kaslo and Antanas on.
![Book of Justice - Trinity (1/5) [M5,#19] - Notes - The Keystone Citadel (after you visit the Catacombs) - Collectibles, items - Lords of the Fallen - Game Guide and Walkthrough](https://game.lhg100.com/Article/UploadFiles/201512/2015121617271182.jpg)
Book of Justice - Trinity (1/5) [M5,#19]
While in the Main Hall with the door to the Square of the Judges behind your back, go deeper into the Citadel. Past the main stairs, walk into the first room on the right - the note is behind the shelves, in the right corner of the room.
![New Faith -all 5 notes [M6,1] - Notes - The Chamber of Lies - Collectibles, items - Lords of the Fallen - Game Guide and Walkthrough](https://game.lhg100.com/Article/UploadFiles/201512/2015121617271176.jpg)
New Faith -all 5 notes [M6,1]
You find the set of the notes right after you enter the Chamber of Lies, you simply need to talk to Yetka.
![Adyra Lords - Their picture (2/2) [M6,#1] - Notes - The Chamber of Lies - Collectibles, items - Lords of the Fallen - Game Guide and Walkthrough](https://game.lhg100.com/Article/UploadFiles/201512/2015121617271204.jpg)
Adyra Lords - Their picture (2/2) [M6,#1]
Right after you enter the Eternal Flame, in the first room, you encounter a Mage and a Tyrant. Head towards the exit, through the narrow passage into a big room (you are attacked by the Dwarves here). You find the note near the chasm.
![Trust in god - Safety (2/3) [M6,#2] - Notes - The Chamber of Lies - Collectibles, items - Lords of the Fallen - Game Guide and Walkthrough](https://game.lhg100.com/Article/UploadFiles/201512/2015121617271293.jpg)
Trust in god - Safety (2/3) [M6,#2]
After you enter the main chamber, go ahead, through a narrow corridor and turn to the right, as far as possible (before the gate that you open with the gauntlet). Inside, go towards the end of the corridor and climb up the stairs, to the very top. In one of the rooms, at the upper level, you encounter a Mage, and you find a note at the wall.
![Trust in god - Gods plan (1/3) [M6,#3] - Notes - The Chamber of Lies - Collectibles, items - Lords of the Fallen - Game Guide and Walkthrough](https://game.lhg100.com/Article/UploadFiles/201512/2015121617271275.jpg)
Trust in god - God's plan (1/3) [M6,#3]
Head towards the exit to the Chamber of Lies while following Yetka, climb up the big stairs. There, turn right and before the gate that you open with the gauntlet, on the left, (among the rubble) there is the note.
![Gloomy places - Memory Loss (7/7) [M6,#4] - Notes - The Chamber of Lies - Collectibles, items - Lords of the Fallen - Game Guide and Walkthrough](https://game.lhg100.com/Article/UploadFiles/201512/2015121617271229.jpg)
Gloomy places - Memory Loss (7/7) [M6,#4]
While on your way to the arena of the Annihilator, as soon as you walk through the narrow corridor, (you will be attacked by two Suicides) you will see the note on the right (several meters before the actual fight arena).
![Wanderer - Fate (4/5) [M6,#7] - Notes - The Chamber of Lies - Collectibles, items - Lords of the Fallen - Game Guide and Walkthrough](https://game.lhg100.com/Article/UploadFiles/201512/2015121617271217.jpg)
Wanderer - Fate (4/5) [M6,#7]
New Game+ only. As you go towards the passage that Yetka shows you, approach the ledge, on the far left. Then, jump over to the next one and, next to the chest to your left, there is the note.
![Wanderer - Trapped (3/5) [M6,#8] - Notes - The Chamber of Lies - Collectibles, items - Lords of the Fallen - Game Guide and Walkthrough](https://game.lhg100.com/Article/UploadFiles/201512/2015121617271230.jpg)
Wanderer - Trapped (3/5) [M6,#8]
New Game+ only. The note is on the bridge that connects both parts of the Chamber of Lies.
![Wanderer - Time (1/5) [M6,#9] - Notes - The Chamber of Lies - Collectibles, items - Lords of the Fallen - Game Guide and Walkthrough](https://game.lhg100.com/Article/UploadFiles/201512/2015121617271223.jpg)
Wanderer - Time (1/5) [M6,#9]
New Game+ only. The note is close to the entrance from the direction of the Eternal Flame, next to the Rhogar.
![Wanderer - Chaos (2/5) [M6,#10] - Notes - The Chamber of Lies - Collectibles, items - Lords of the Fallen - Game Guide and Walkthrough](https://game.lhg100.com/Article/UploadFiles/201512/2015121617271358.jpg)
Wanderer - Chaos (2/5) [M6,#10]
New Game+ only. As you go to the room with Yetka inside, turn left (the room with the checkpoint). The note is atop the stairs, in that chamber.
![Trust in god - Light (3/3) [M6,#11] - Notes - The Chamber of Lies - Collectibles, items - Lords of the Fallen - Game Guide and Walkthrough](https://game.lhg100.com/Article/UploadFiles/201512/2015121617271344.jpg)
Trust in god - Light (3/3) [M6,#11]
New Game+ only. On one of the two ledges, which connect the balconies, at the upper level (where you encounter the Forger with a crossbow).
![Wanderer - The observer (5/5) [M6,#12] - Notes - The Chamber of Lies - Collectibles, items - Lords of the Fallen - Game Guide and Walkthrough](https://game.lhg100.com/Article/UploadFiles/201512/2015121617271305.jpg)
Wanderer - The observer (5/5) [M6,#12]
New Game+ only. You can find the note in the place where, from behind a wall, you are attacked by a Mutant (as you go towards the lord connected with Yetka). For collecting the last note of the Wanderer series, you are also rewarded with 5000 EXP.
![Research goal -Antanass will (1/2) [M5,9] - Notes - The Keystone Citadel (last visit) - Collectibles, items - Lords of the Fallen - Game Guide and Walkthrough](https://game.lhg100.com/Article/UploadFiles/201512/2015121617271377.jpg)
Research goal -Antanas's will (1/2) [M5,9]
You find the note after you kill the Captain.
![Dark deeds - Patients (3/4 ) [M5,#11] - Notes - The Keystone Citadel (last visit) - Collectibles, items - Lords of the Fallen - Game Guide and Walkthrough](https://game.lhg100.com/Article/UploadFiles/201512/2015121617271352.jpg)
Dark deeds - Patients (3/4 ) [M5,#11]
After you talk to Adyr, you will be teleported to the Citadel. On the right, you find a portal and right in front of it, a note (after you defeat the Brothers you need to return here to get it).
![Dark deeds - Results (4/4) [M5,#12] - Notes - The Keystone Citadel (last visit) - Collectibles, items - Lords of the Fallen - Game Guide and Walkthrough](https://game.lhg100.com/Article/UploadFiles/201512/2015121617271374.jpg)
Dark deeds - Results (4/4) [M5,#12]
After you defeat the Lost Brothers, go towards the room on the left (Old Quarters). Inside, watch out for the human opponents - a Knight and a Rogue. At the end of the chamber, next to the flaming candles, there is the note.
![Research goal - The Guards orders (2/2) [M5,#13] - Notes - The Keystone Citadel (last visit) - Collectibles, items - Lords of the Fallen - Game Guide and Walkthrough](https://game.lhg100.com/Article/UploadFiles/201512/2015121617271335.jpg)
Research goal - The Guards' orders (2/2) [M5,#13]
After you walk over to the Main Hall go towards the main entrance to the Citadel (the one to the Square of the Judges). At the bottom of the stairs, there are three knights and the note near them.
![Monks purpose - Ive found him (1/1) [M5,#14] - Notes - The Keystone Citadel (last visit) - Collectibles, items - Lords of the Fallen - Game Guide and Walkthrough](https://game.lhg100.com/Article/UploadFiles/201512/2015121617271407.jpg)
Monk's purpose - I've found him (1/1) [M5,#14]
As you go towards the Planetarium, after the fight with the Captain, climb up the stairs. Then, go ahead and ad the bottom of the spiral stairs, you find the dead Kaslo, with the note next to him.
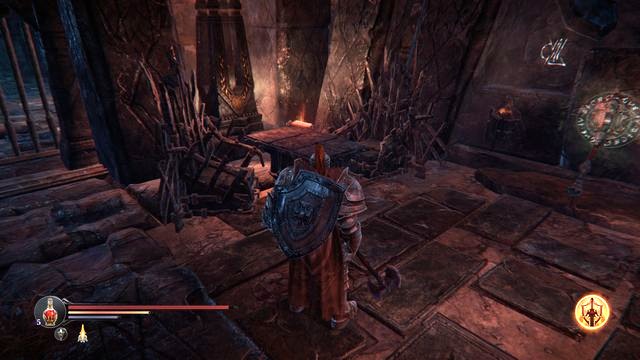
Plate #1
After you enter the Temple for the first time, you will reach a closed gate (behind the Blacksmith). A bit past the gate, go right and you will enter the Eastern Antechamber. Downstairs, where you had to pull the lever to the gate, you will find the first plate.
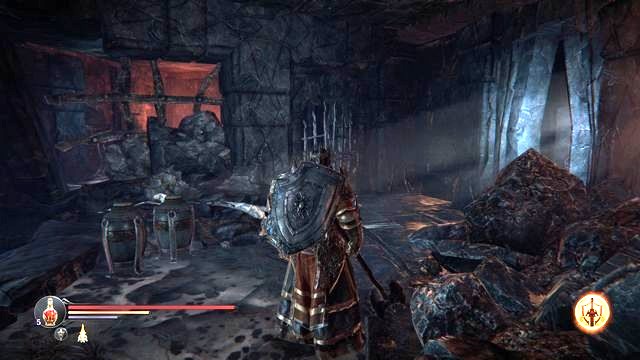
Plate #2
After the battle with the first Tyrant (after you open the gate, location Eternal Flame) pick up the Small key to the Western Antechamber. Return to the Antechamber and locate another stairs (i.e. not the ones that you took to enter) and up the stairs, ahead of you, there is a metal gate (see the screenshot) that you can open. The plate is inside.
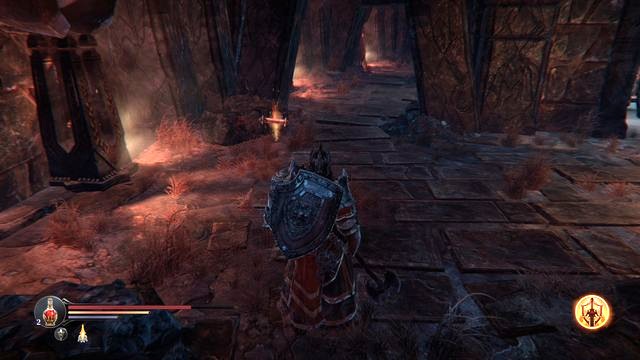
Plate #3
After you reach Panorama, go left, as far as possible and reach the end of the path. There, climb down the stairs to the Western Antechamber (in a spot different than previously). The plate is in the middle of the corridor.
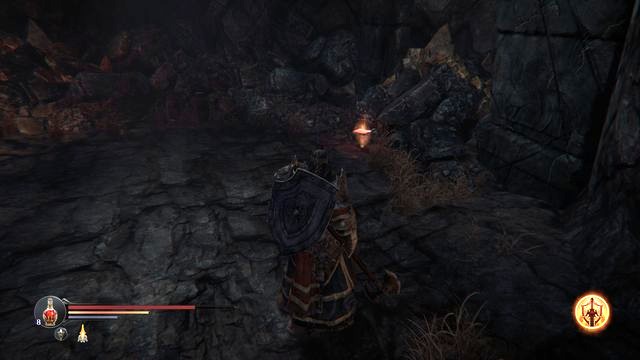
Plate #4
After you enter the Abandoned Field (right next to the mysterious statuette) at the very bottom, after you turn right, you will find a checkpoint. Enter the cave behind the checkpoint (watch out as you jump over the ledges) and keep to the right. You will reach a place, where there is a Spider and the plate.
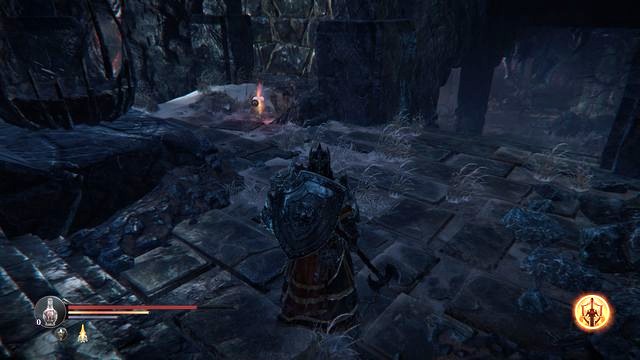
Plate #5
As you enter the Temple from the Abandoned Field, go left and climb down the stairs, to meet the Tyrant. Along your path, still before you descend to the opponent, you pass by the plate, on the left side of the stairs.
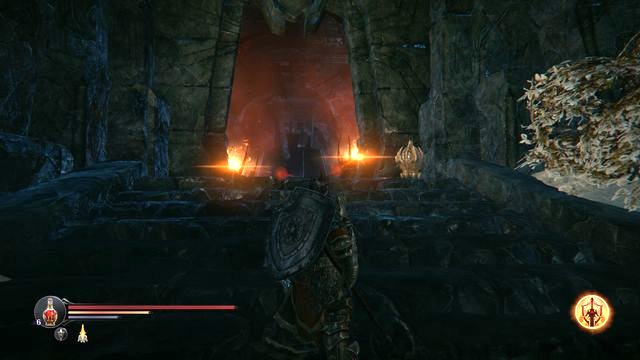
Heart #1
It is right past the gate, after you walk over the Interdimensional bridge towards Eternal Flame. The urn is on the left.
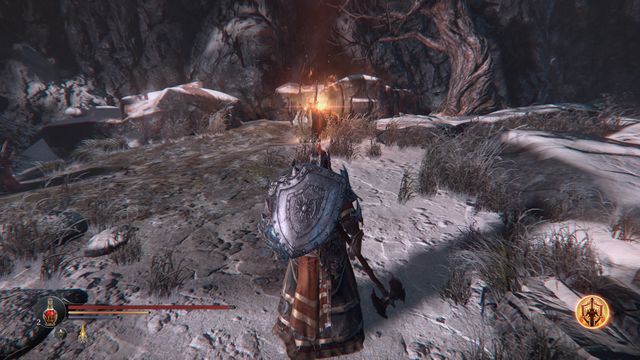
Heart #2
Go to the Abandoned Field. As you walk towards the side entrance to the Temple, you would have to turn right (watch out for the Tyrant), but take the path a bit to the left and upwards. There, near the end, around the campfires, you will find the urn with the heart.
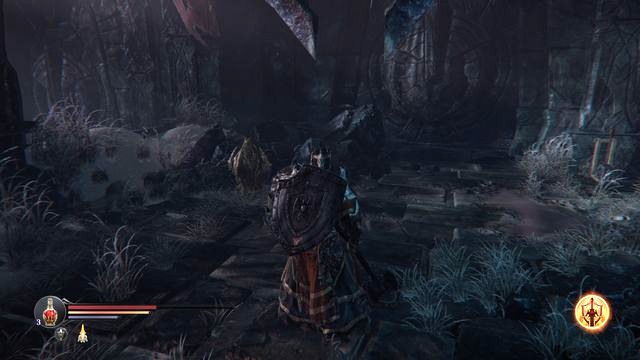
Heart #3
After you enter the Temple through the side entrance (from the Abandoned Field) go left and you will find yourself atop long stairs. At the end of the stairs, you get into the room with a Tyrant. The urn is right behind him, on the ground.
Heart #4
After the fight with the Infiltrator you can talk to the Wounded Rhogar, across the arena (Portal). Then, after you turn left, climb up the stairs. In the room, there is a Tyrant. Walk around him and get higher, this time by climbing the stairs on the right. There, behind the Crossbowman, among the other urns, there is the correct one with the heart.
Heart #5
After the conversation with Kaslo and Antanas at the Citadel, head back to the Temple. The Tyrant is a bit ahead, after you cross the portal, on the Interdimensional Bridge. The urn with his heart is right behind him.

Heart #6
You find the Tyrant in the portal that you open, after you defeat the Protector. Inside, you first need to defeat the Infested at the campfire, then the Mage and Shieldmasters on the right side of the location (the ring of fire). Then, you need to defeat the fire beast, at the chests, and finally, two Knights and finally, the Tyrant. His heart is in the urn a bit past the campfire, which becomes distinctive after you cross the portal (to learn more, see the description for Portal #7).
Heart #7
After you exit the Chamber of Lies, where you have previously fought the Infiltrator (Temple, Portal) you will find two Tyrants, and at the edges of the arena, there are the urns with their hearts.
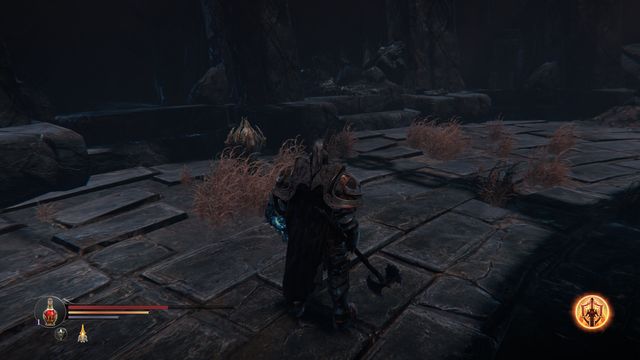
Heart #8
Just like the above heart - where you have earlier fought the Infiltrator (Temple, Portal), at the edges of the arena.
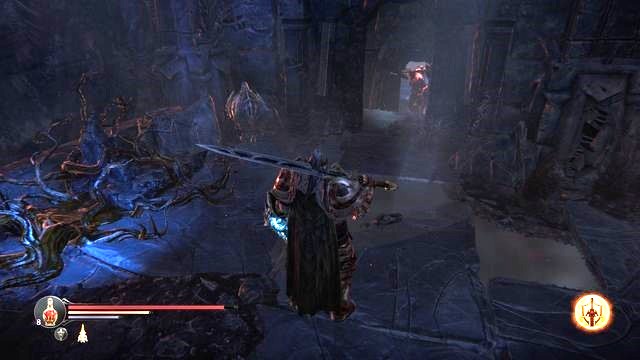
Heart #9
After you enter the Chamber of Lies through the main door, (from the Eternal Flame location), you will enter a big. On its left side, right at the entrance, you encounter Yetka, and a bit past her, there is a passage to the next room. Here (there is a checkpoint here) the urn with the heart is right around the corner, on the right.
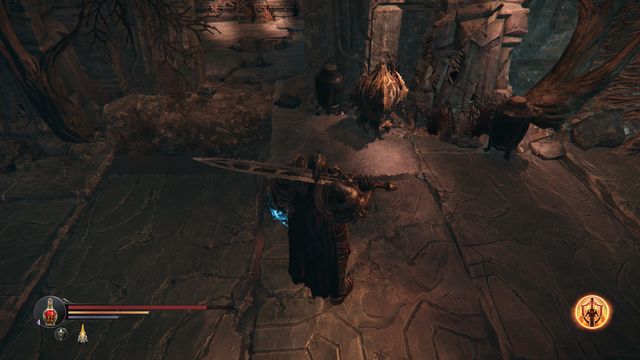
Heart #10
This heart is also at the Chamber of Lies. Go to the upper level of the chamber and go towards the lever that you need to pull. The Heart is in that room (the same place, where you find the Thor hammer), to the left of that lever.
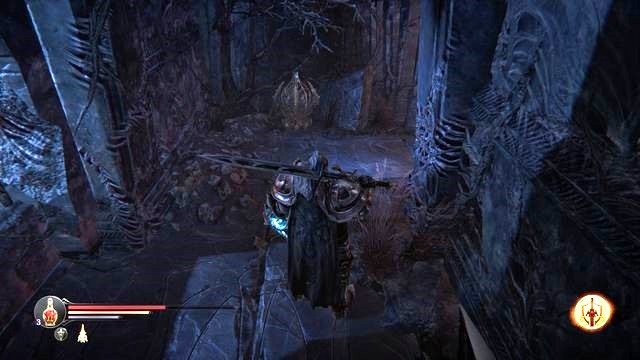
Heart #11
While in the upper part of the Chamber of Lies, backtrack a little from the place where there is one of the levers and jump over the concrete ledges to the other balcony. There, defeat the Forger with a crossbow, and open the door at the end of the balcony on the left. After you open the door, you run into a Tyrant, and right behind him, there is a corridor, where there is the urn with his heart.

Heart #12
After you enter the Chamber of Lies from the side that Yetka shows you, at the first floor, you stand in front of a wide staircase. At the top of the stairs, there is a Tyrant. Look for the urn with his heart at the base of the abovementioned stairs, near the portal.
Skull ##1 [M5.##1]
In the (initially) secret chamber, in one of the corners (opposite the entrance to the Cellars, there is a Spider hanging down from under the ceiling).
Skull ##2 [M5.##2]
In the first chamber, after you enter the Catacombs (Flooded Chambers), in front of the anvil, at the wall on the left.

Skull ##3 [M5.##3]
After you talk to Kaslo and Antanas you will be able to walk over, from the Flooded chambers to the Old Quarters (there are two Rhogar Knights there). The skull is at the wall, to the left of the entrance.
Skull ##4 [M5.##4]
In the secret chamber (after you exit the Catacombs), in the upper part (past the first dropping Spider).
Skull ##1 [M2.##1]
At the checkpoint, in front of the gate to the Cemetery, on Kaslo's left.
Skull ##2 [M2.##2]
On the left of the main gate to the Cemetery.
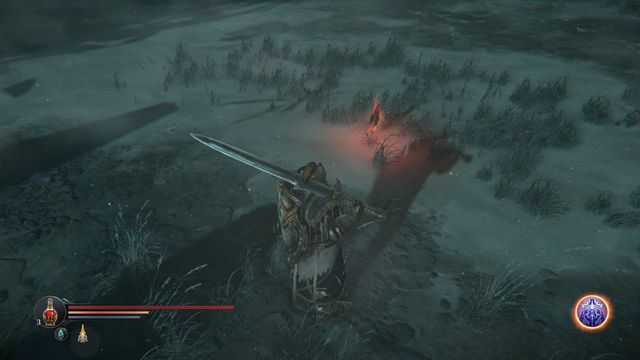
Skull ##3 [M2.##3]
In the center of the Cemetery.

Skull ##4 [M2.##4]
To the left of the tree, right next to one of the chapels, where you have been hiding from the Worshipper.
Skull ##5 [M2.##5]
Close to the entrance to the Catacombs, on the left, between the two tombs.

Skull ##1 [M4.##1]
In the same room, where there is the portal.
Skull ##2 [M4.##2]
As you head away from the main entrance, you need to go right on the first fork, and follow up to the end of the corridor (down the stairs) to the room, where there is a Crossbowman and an Infested. The skull is next to the Crossbowman.
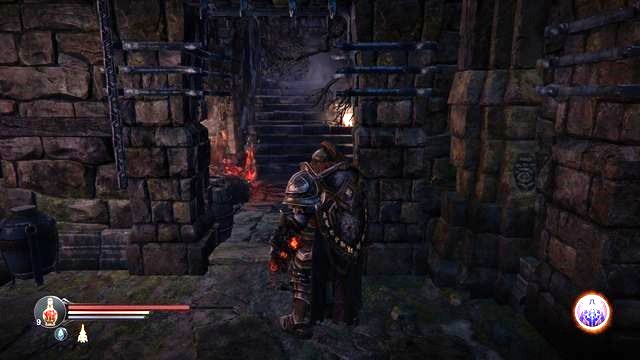
Skull ##3 [M4.##3]
Just like the above one - reach the big chamber with the Crossbowman and the Infested, which you can exit through three passages. The skull is at the end of the passage on the left.
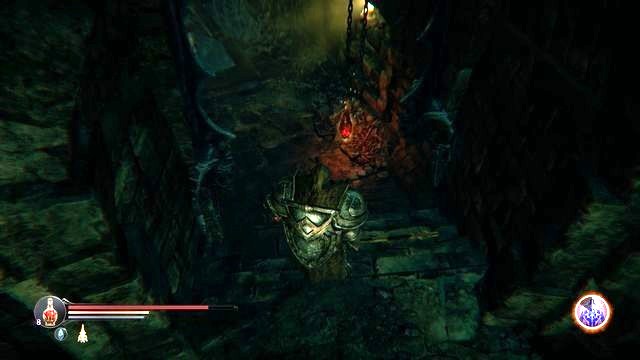
Skull ##4 [M4.##4]
At the entrance to the Royal Tomb (to the left at the Well of Death), before the plank.
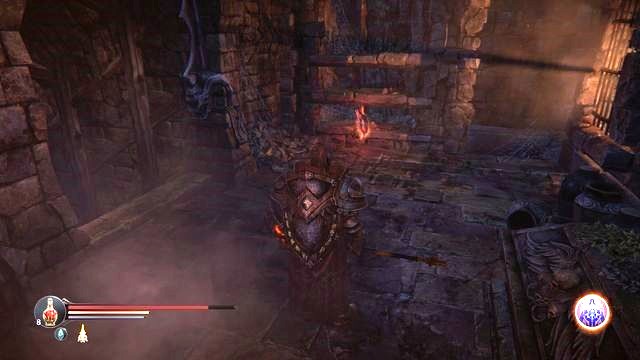
Skull ##5 [M4.##5]
Past the plank at the Royal Tomb turn left, into a small room, where you find the skull.
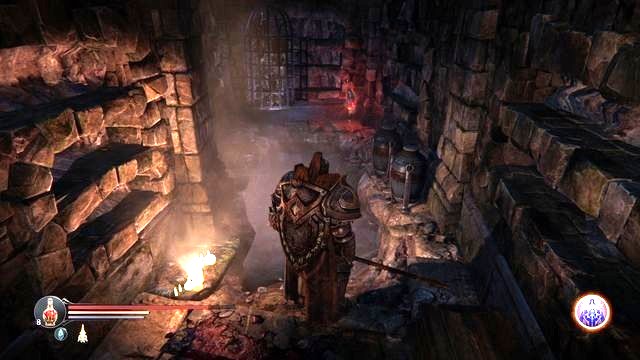
Skull ##6 [M4.##6]
As you go towards one of the entrances to the arena, (follow the Collapsed Corridor) you reach the place, where there is a mysterious symbol on the ground. The skull is at the end of the corridor opposite that symbol.
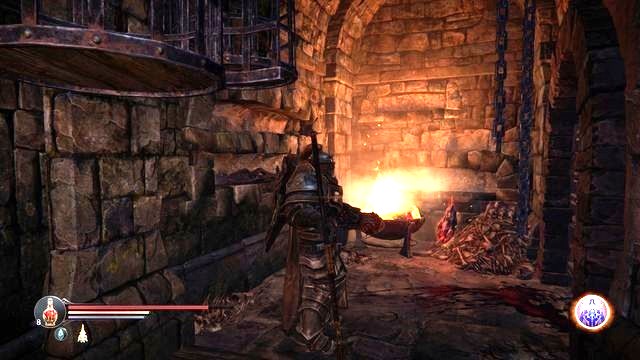
Skull ##7 [M4.##7]
Just like above. The difference is that the skull is on the mysterious symbol itself.
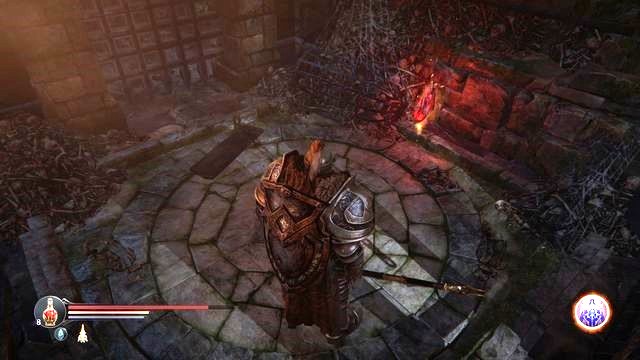
Skull ##8 [M4.##8]
After you use the abovementioned mysterious symbol (near the entrance to the arena) you open the grate to the chest [M4.19]. The skull is in the same room.
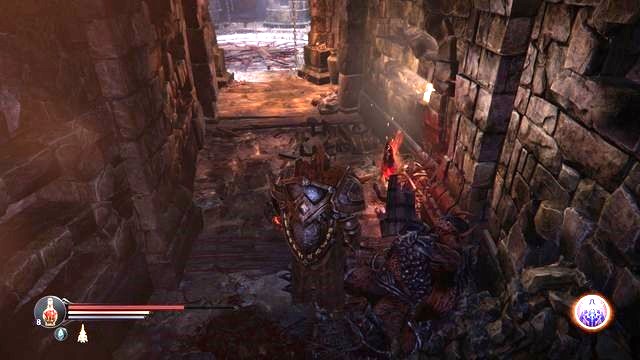
Skull ##9 [M4.##9]
Right after you enter the Hollow.
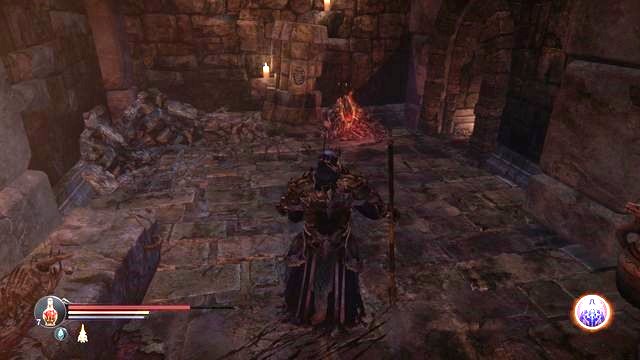
Skull ##10 [M4.##10]
At the bottom, at the Monster Prison.
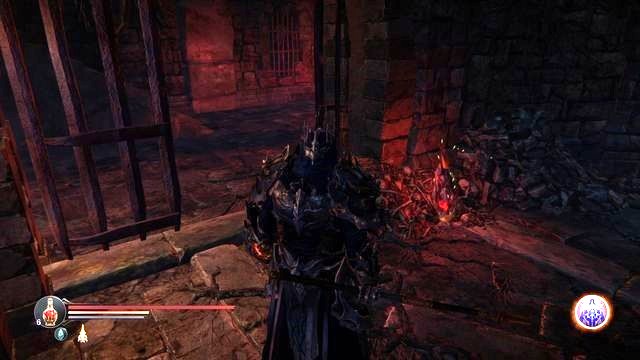
Skull ##11 [M4.##11]
Next to the checkpoint, right after you enter the location, where there are cells arranged in a circle.
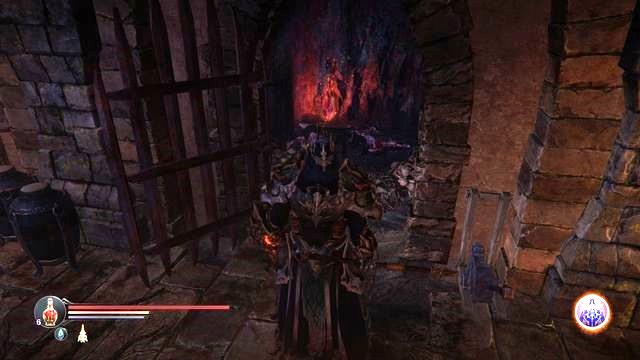
Skull ##12 [M4.##12]
While going from the left, in the second cell.
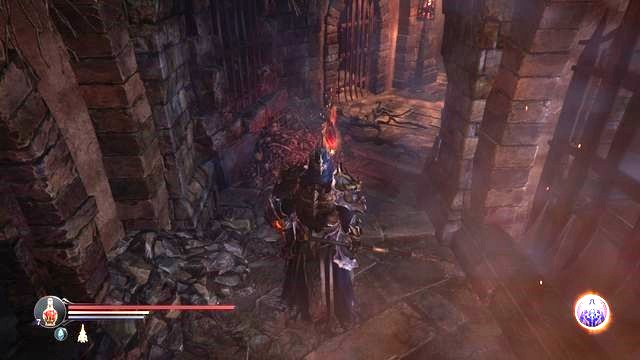
Skull ##13 [M4.##13]
As you continue exploring the upper regions, before you reach the fourth cell.
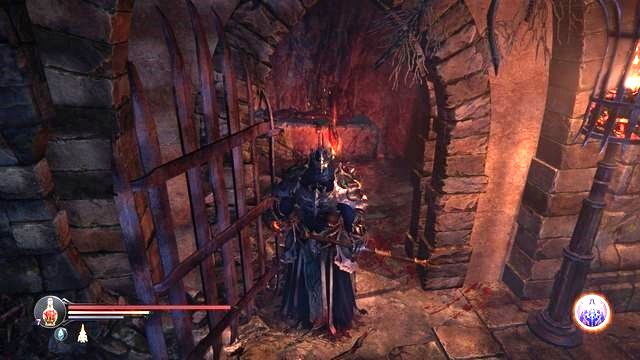
Skull ##14 [M4.##14]
In the fifth cell in a row.
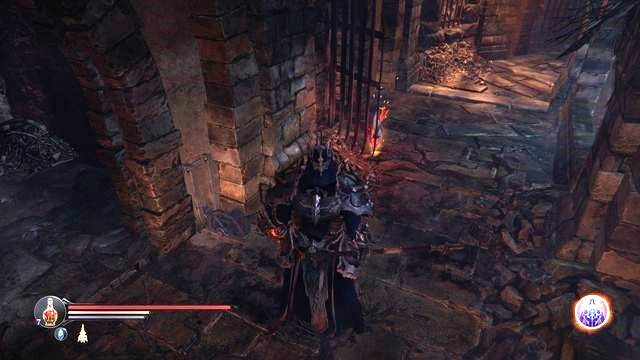
Skull ##15 [M4.##15]
Again, along your path, in the sixth cell.
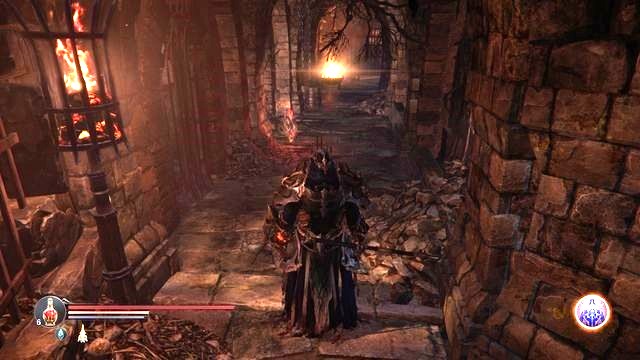
Skull ##16 [M4.##16]
Next to the cell of the Infested Monk.
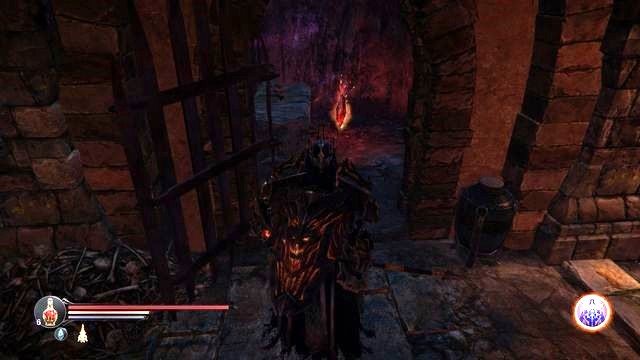
Skull ##17 [M4.##17]
In one of the cells, near the lever that opens the passage to the arena.
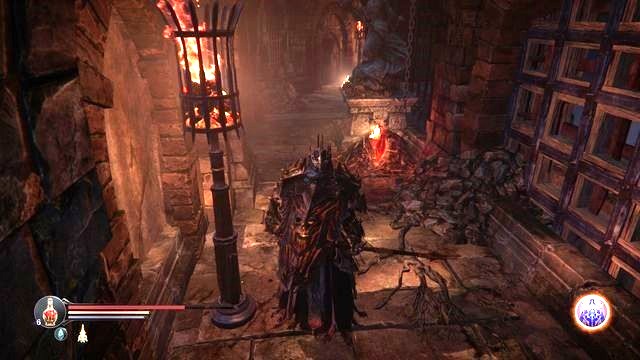
Skull ##18 [M4.##18]
Next to the abovementioned lever.
Skull ##19 [M4.##19]
As you go away from the checkpoint, on the upper level, turn right and you will find the skull along your path, before you reach the cells.
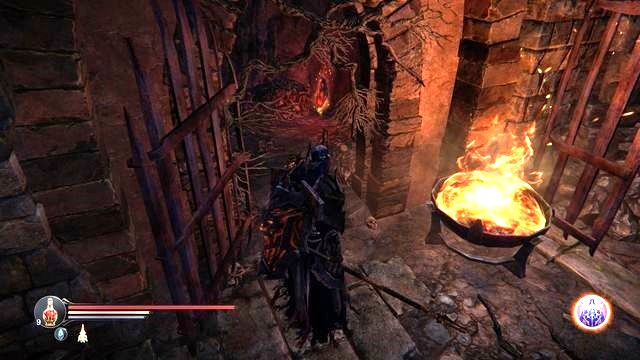
Skull ##20 [M4.##20]
Inside one of the cells that you open along with the cell of the Infested Monk (you need the Lever handle [M4.2]).
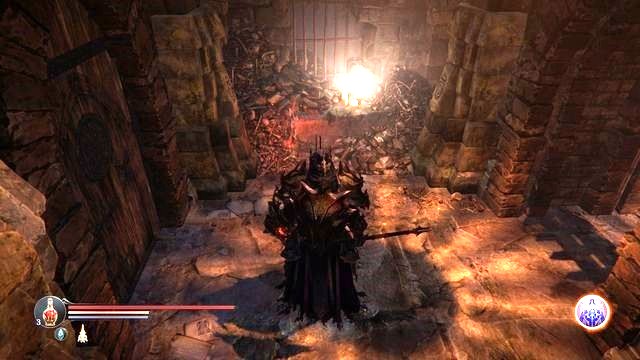
Skull ##21 [M4.##21]
After you defeat the Champion, before you enter the Citadel.
While exploring the locations, sometimes you will run into a crumbling wall that display crumbling points in their centers, which form a "cobweb" pattern. Past such walls, there are hidden rooms that house items, sometimes monsters and other collectibles. You can ram through such a wall, by standing in front of it and charging with the shield up (sprint and block).
 A wall that you can smash with your charge (opposite the chest).
You can enter here during the initial exploration of the Citadel, but also later on. You find this room behind wall [M1.13]. Right after you enter, pick up the Small Cellar Key. Later: at the end of the corridor on the right, there is a door with the Key for the chest in the Main Hall behind, as well as a checkpoint. And there are more Spiders - if you cannot defeat them, dash ahead for the items and escape from here. In the left corner on the room, there also is a Human Skull [M5.##1].
Locate a mysterious symbol behind the grate, to the left of the entrance (the screenshot; it opens the door in the corridor ahead, right on the left). Inside, you find Needles (an arm weapon), and during your second visit to the Citadel, the brother of the Concerned Monk [M5.10]. During that visit, you also find two notes.
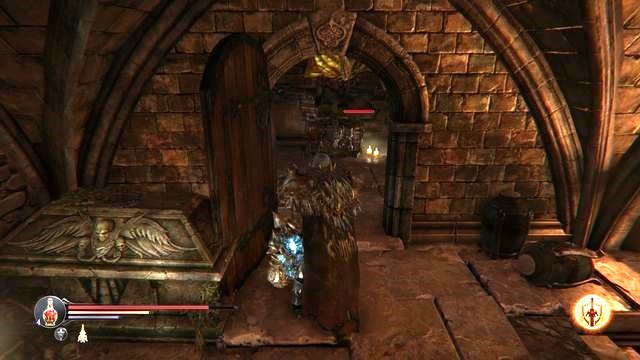 The Spider must be thinking that it can surprise Harkyn.
After you talk to Adyr and after the last visit to the Citadel it becomes possible to open the door that used to be locked [M5.12] - the key is dropped by one of the Knights that you defeat along your path [M5.11]. Inside, Law (a great hammer).
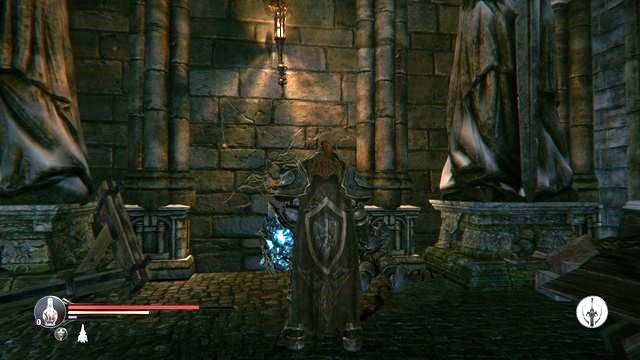
At the end of the road (to the left of the checkpoint, which you run into after you defeat the Commander and after the first conversation with Captain) there are, temporarily, locked door. You should not take interest in it, though - on the left, there is a wall shown in the screenshot [M2.15]. You can destroy it with your charge (dash towards it with your shield raised). In the secret room, there is a chest with a weapon inside (Blindman hammer).
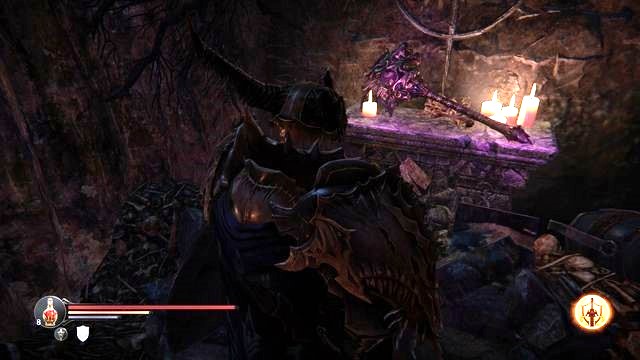 The hammer is in a secret room, inside one of the cells.
In one of the cells ([M4.15]) near the Infested Monk, you can cut through the wall. Inside, you find a hammer (Heritage). You can upgrade it, if you add it to Sven's grave [M4.9] (close to the entrance to the Burnt-down watchtower). Thanks to this, you will obtain a very good weapon.
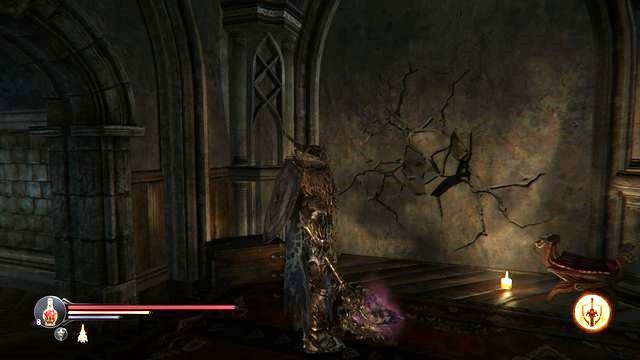
You find the wall in the room to the right of the stairs, opposite the staying place of the Wounded Monk. Inside the secret room, there is a chest [M5.14] with an armor set - Will.

Walk over from the Flooded Chambers to the Old Quarters, and then, up, towards the portal. In the next room on the left, locate a wall that you can smash (the screenshot) [M5.27].
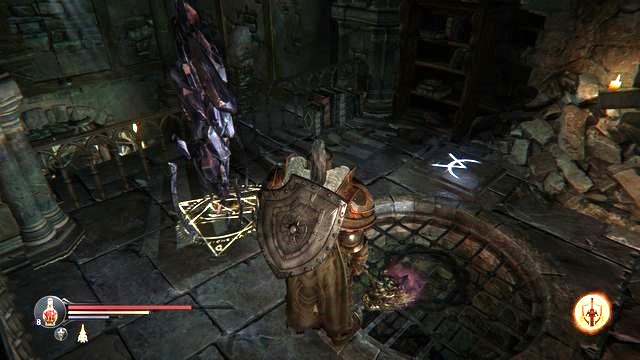 After you walk onto the mysterious symbol, dash ahead to make it before the door locks.
Then, return to the stairs and walk onto the mysterious symbol on the ground, next to the portal. Now, dash ahead towards the wall that you have just smashed and open the door [M5.28] (it is usually locked, but now it is opened for a short moment, after you step on the symbol, which is why you need to hurry). In the chest there are Shards: of resistance to poison and of spell point.
 You cannot spare the Captain.
To get to the location, with the room, in the first place, you need to kill the Captain [M5,9]. You can do that only during your last visit to the Citadel, towards the end of the game. The dead Captain drops Key to the Southern Entrenchment, which you need to take to the entrance to the Old Gardens [M2,33].
There, climb down the stairs and take a turn to the right, as much as possible, to end up near the crumbling wall that you can see in the screenshot ([M2,37]).
 Cut through the air to convince the ghost that...he is a ghost
Inside, you find a ghost. You can talk to him but, he is not going to believe you that he is an astral being. To prove your point, cut through the air with the sword - the blade cuts through the ghost, he disappears and leaves the chest inside open. Inside, you can find an trinket New Dawn.
During your visit to the Chamber of Lies you can talk to Yetka [M6,1]. From her, you will receive a special stone that allows you to read the inscription, in the Rhogar language, written on walls (The Stone of Divine Understanding). there are five inscriptions that you need to read, three out of which are at the Temple and two at the Chamber of Lies. For reading each, you will receive a note. For reading all of them, you will be rewarded (3500EXP).
New Faith - Judges (1/5)
This inscription is at the first level of the Western Antechamber, right after you climb up the stairs, next to the grate.
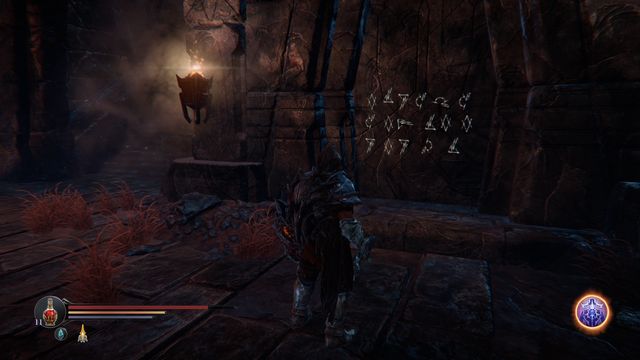
New Faith - Lords (2/5)
The Hieroglyph is to the left of the place, where you talked to the Crippled Rhogar. The inscription is in the next chamber.
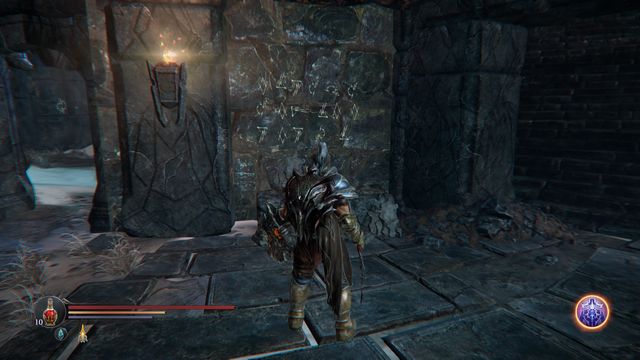
New Faith - War (3/5)
The inscription is at the Tower of Wisdom, at the "zero" level, right at the exit from the room, where there are tablets floating. The inscription is under the stairs, on the left.
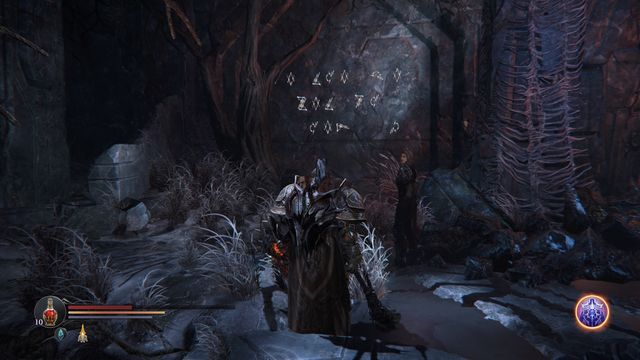
New Faith - Triumph (4/5)
Right after you enter the Chamber of Lies from Eternal Flame, on the left, next to Yetka.
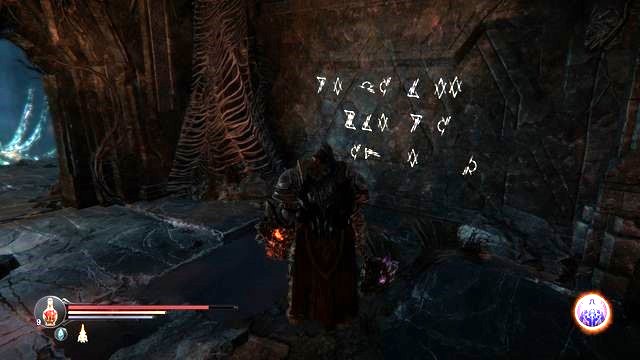
New Faith - Await Life (5/5)
Near one of the levers that you need to pull at the upper level of the location.
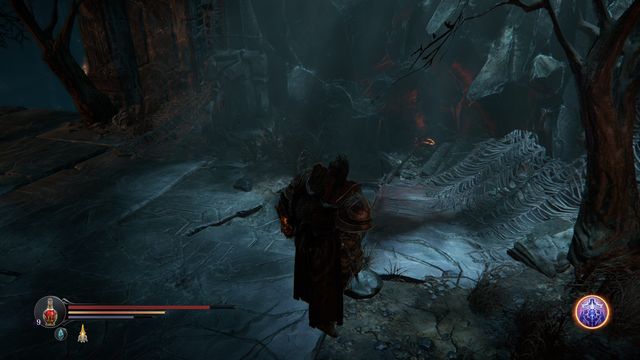 The hammer that you need for smashing the statuettes.
With the Thor hammer, which you find near one of the levers, at the Chamber of Lies [M6,13] you can destroy 4 Rhogar statuettes (2 of them are at the Chamber of Lies, 2 at the Temple). To smash a statuette, you need to perform a forward attack, while holding the hammer in both hands. For smashing each, you are rewarded with an element of The Last Traitor set, therefore after you smash all of them, you receive the entire set.
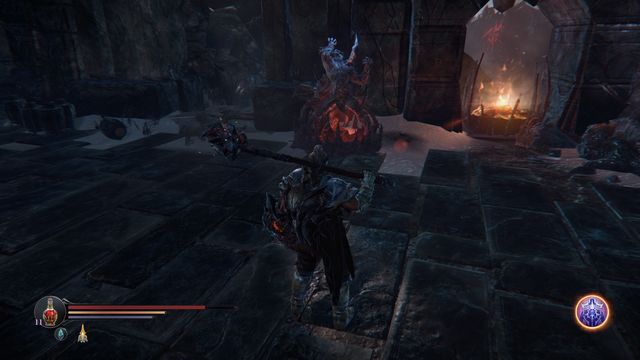
You find the first one at the entrance to the Abandoned Field. For destroying it, you receive the helmet from The Last Traitor set.
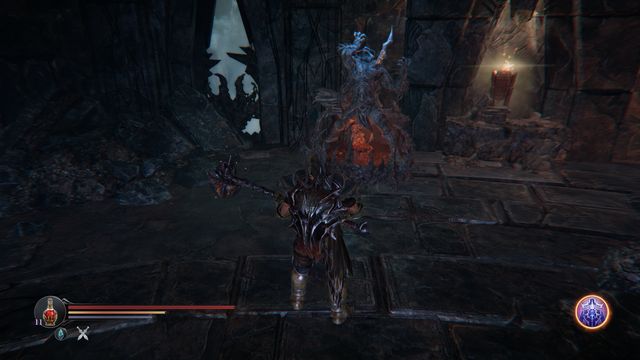
The second one is also at the Temple, in the Tower of Wisdom. GO there and climb to the first level. Past the narrow passage, next to the stairs, there is the statuette. For smashing it, you receive the boots from The Last Traitor set.
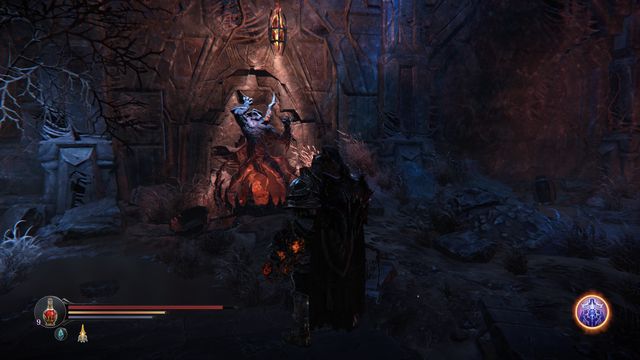
As you go towards the main entrance (from the Eternal Flame) you find the statuette a bit behind Yetka, also on the left. For destroying it, you are rewarded with the bracers from The Last Traitor set.
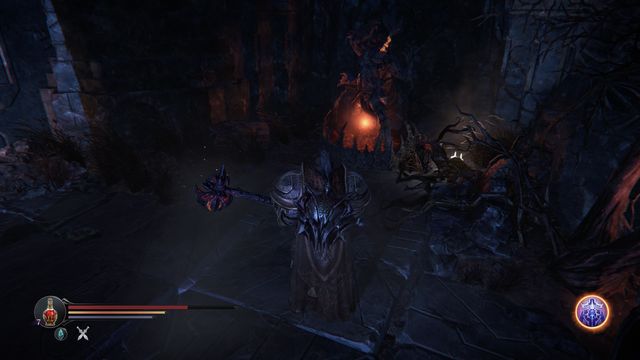
The last statuette is near the stairs, which take you to the arena with the Annihilator (close to the entrance that you follow Yetka to). For smashing it, you will be rewarded with the last element of The Last Traitor set- a chestplate.


 Landmark Game Guide & Walkthrough
 LEGO Pirates of the Caribbean: The Video Game Game Guide & Walkthrough
 LEGO Jurassic World Game Guide & WalkthroughLittleBigPlanet Game Guide & Walkthrough
 LEGO The Lord of the Rings Game Guide & Walkthrough