
LittleBigPlanet 2 is a game in which you can fulfill your childhood dreams by creating your own levels. However in order to do that, you will need a considerable amount of items, stickers, materials and functions. You can learn how to get all of them and complete the campaign in 100% from this guide.
This guide contains a throughout description of each main level and hints on the bonus levels. Obtaining all the hidden and hard to get items should be easy thanks to it. In addition to the guide and screenshots, you can also find movies with hints on some of the more difficult moments.
Have fun and see you in the game!
Szymon "hed" Liebert
Translated to English by Jakub "cilgan" Lasota
You will come across items and prizes over and over in LittleBigPlanet 2. You can gain many of them in almost every level of the campaign and enrich your collection. In order to complete the game in 100%, you will need to collect every prize on the main levels of each chapter.
There are three types of important collectibles in the game:

Da Vinci's Hideout - Main levels: Rookie Test, Grab and Swing, Gripple Grapple, Bravery Test. Mini levels: Hedge Hopping, Da Vinci's Hideout - Tower of Whoop.


Victoria's Laboratory - Main levels: Runaway Train, Brainy Cakes, The Cakeinator, Currant Affairs. Bonus levels: Attack of the Mutant Marshmallows, Death by Shockolate.

The Factory of a Better Tomorrow - Main levels: Maximum Security, Pipe Dreams, Bang for Buck, Waste Disposal, Fowl Play. Mini levels: Split Paths, Sackbot Bounce.


Avalon - Main levels: Avalon's Advanced Armaments Academy, Got the Hump, The Sackbot Redemption, Flying in the Face of Danger. Mini levels: On Burrowed Time, Gobotron.
Eve's Asylum - Main levels: Up and At 'Em, Fireflies When You're Having Fun, Patients Are a Virtue, Casa Del Higginbotham, Invasion of the Body Invaders. Mini levels: Mind Control, Root Canal.
The Cosmos - Main levels: Set the Controls for the Heart of the Negativitron, Full Metal Rabbit, Where in the World is Avalon Centrifuge, Fight of the Bumblebees.
The above items available in the campaign level aren't everything you can collect in LittleBigPlanet 2.
You can gain more objects by:
Collectibles: 43 items
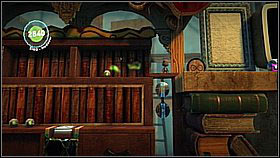
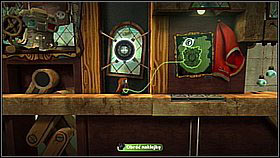
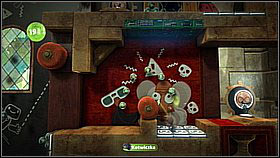
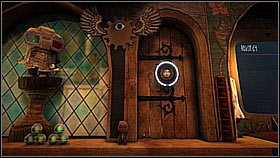
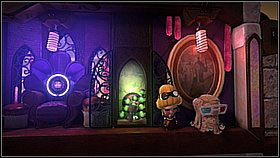
On this level you need to follow Da Vinci's orders. At the very beginning there's a place to which you will need to return later on - you can place a glasses sticker on the painting (on the empty spot on the painting), [1] which will unlock some items (you can get the sticker during Grab and Swing) [2]. Thanks to the sticker you will be able to max out the level without problems.
Now run right and cross more obstacle courses.
At some point you will collect your first items. [1] A bit further you will fall into an improvised trap - you need to "detonate" your sackboy in order to reset. [2]
Move further to the right and you will reach another screen and two stickers - a hand and a leg. Stick them onto the painting [1] and move right. A bit further there's a ledge and a book below - backtrack to the left and collect the items (beside there's a mouse with yellow cheese). [2]
Behind the book there's launch pad - jump and collect the items. [1] Do the same with the launch pads below the bookshelf - don't forget to collect the two bubbles below the wooden bridge (jump down from it). [2]
Go beside the TV (collecting more bubbles) and climb up the books. [1] Use the launch pad in the niche behind the books to collect three bubbles. [2]
While approaching the score board, don't forget about the bubble right behind the shelf - just jump up to reach it. [1] You will gain bonus items for finishing the level [2]
Collectibles: 43 items
You will get the chance to play with new features on this level - you can get the first item by placing a sponge below it and jumping from it. [1] Repeat the manoeuvre a bit further - this time using a sponge and a cart. [2]
In the next section you need to grab one of the boxes from the tower and this way drop down the bubble. [1] Use the sponges to move on. The next item can be obtained by jumping off the ledge (it's right above it). [2]

Behind the stairs made of books, use the cart to gain the item and move on. [1] You will reach an even bigger object on tires - Da Vinci is sitting on it. You need to pull the "vehicle" towards the slope on the right and once it's right beside it, jump onto it and hold onto the left side. You will get the item below only if you're at the highest spot. [2]
Below, don't go right but turn back and head left - once by the ramp, you will see a path leading down. [1] Take it to the secret part of the level - use the sponges to get higher and collect the items hidden in the tubes above the launch pads. [2]

Now you can continue your moving right - you will reach a pit, with a sponge above. Jump down to collect the item - a launch pad will appear. [1] Jump off it and grab the sponge - swing on it and jump further. The next pit has three hanging sponges - swing on it and jump from one onto the other to collect the key (it unlocks a bonus level). [2] Don't continue to the right, instead fall down.
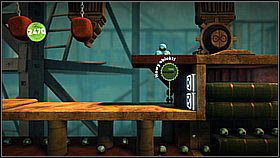
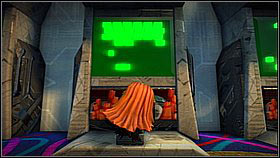
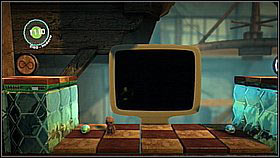
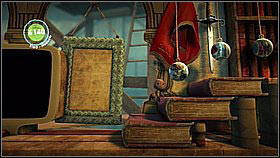
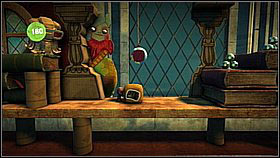
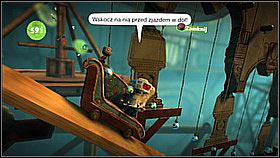
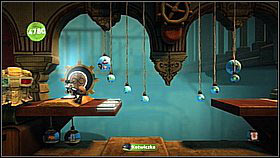
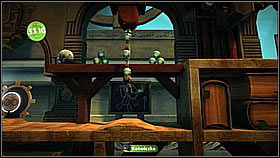
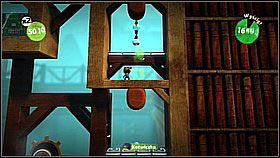
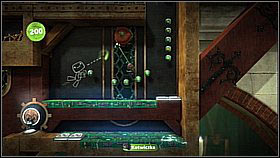
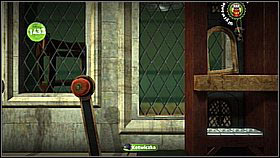
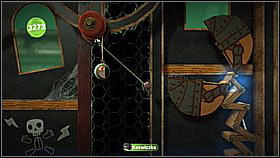
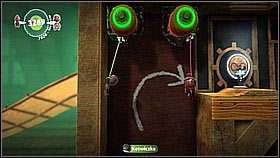
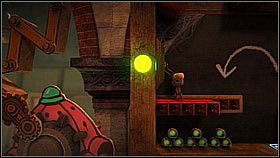
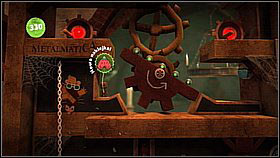
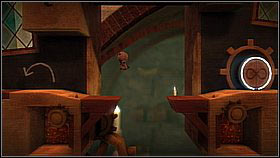
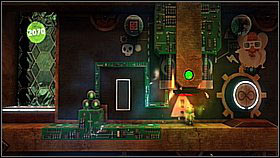
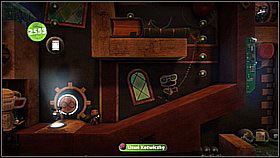
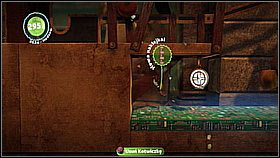
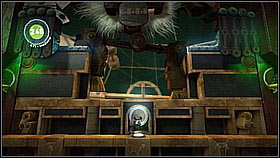
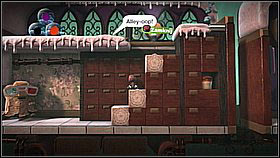
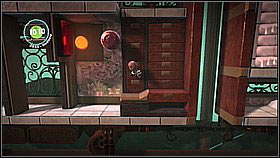
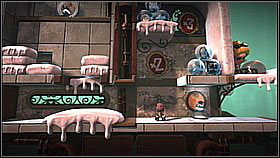
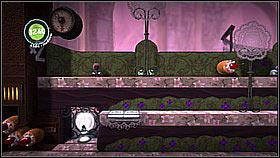
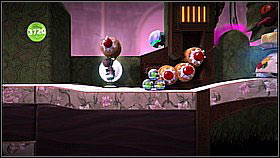
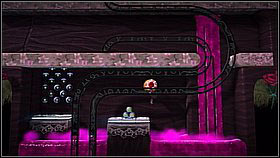
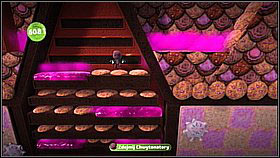
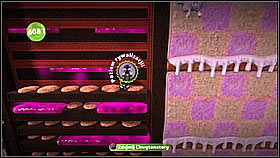
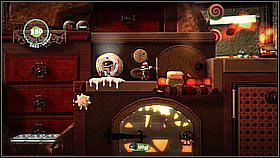
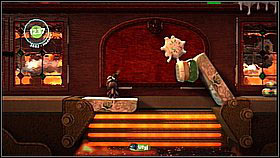
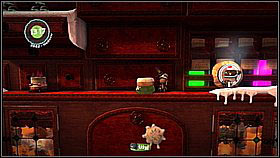
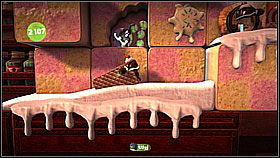
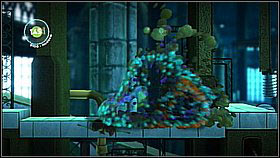
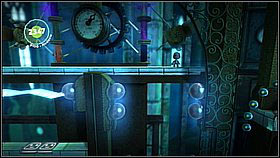
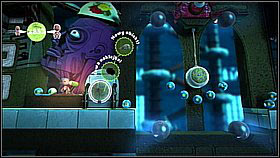
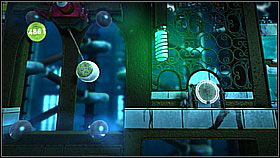
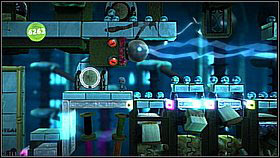
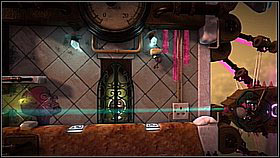
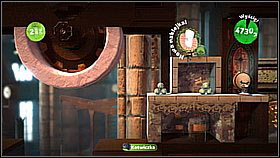
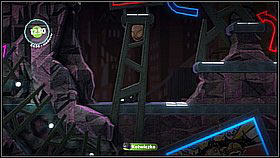
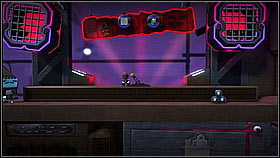
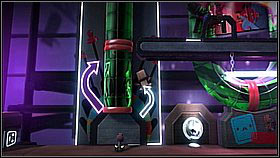
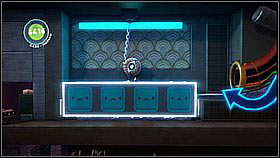
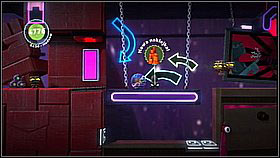
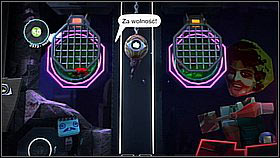
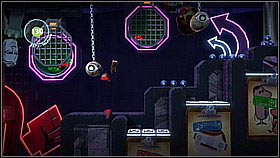
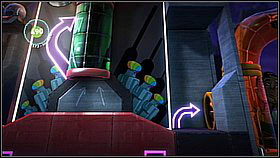
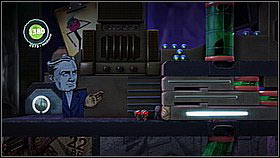
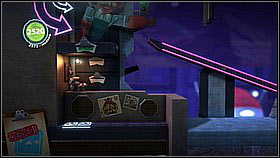
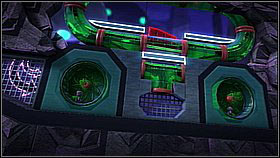
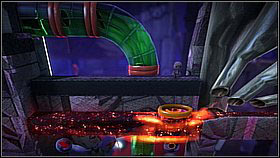
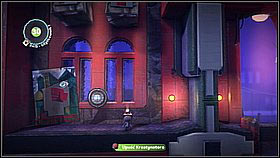
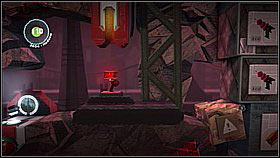
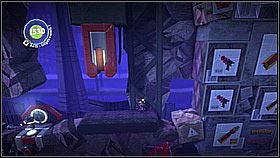
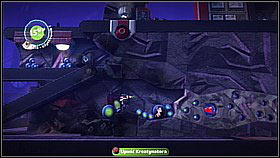
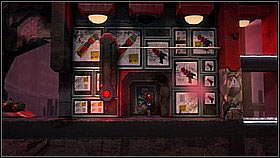
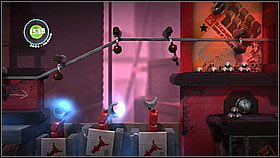
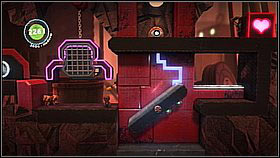
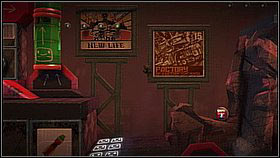
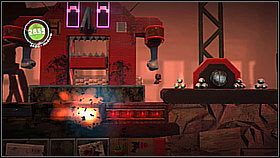
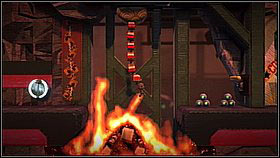
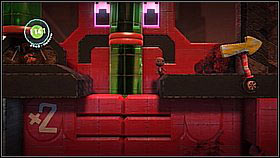
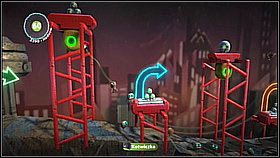
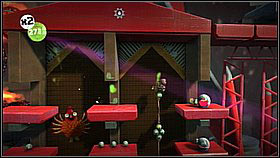
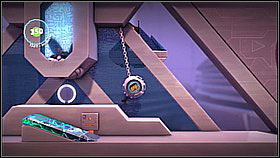
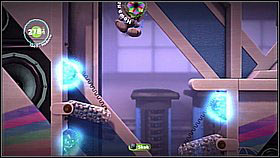
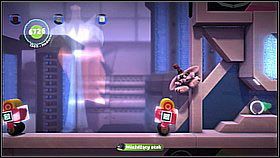
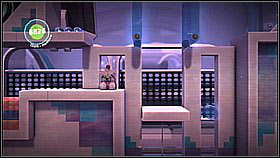
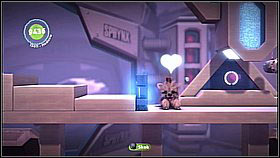
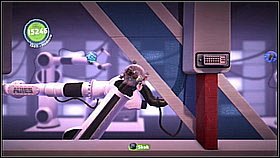
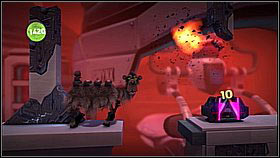
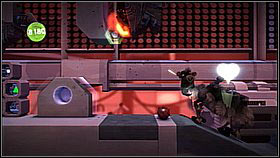
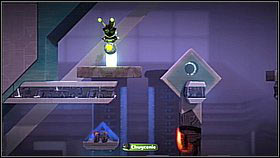
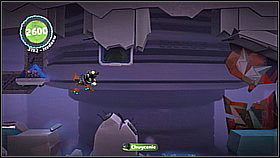
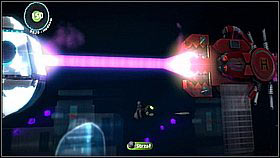
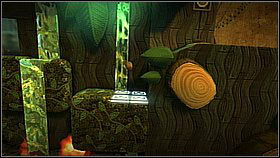
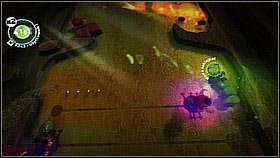
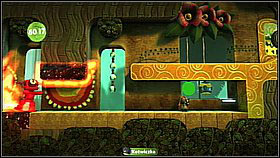
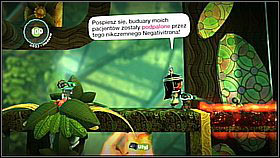
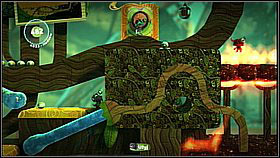
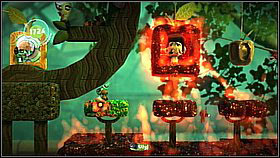
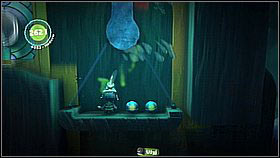
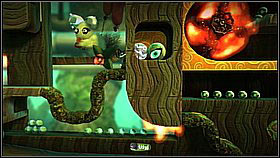
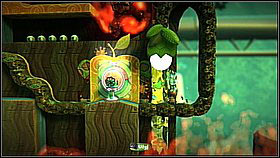
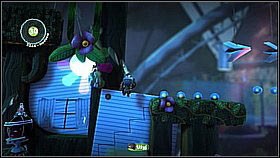
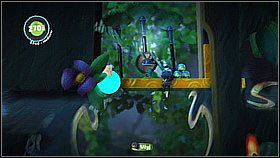
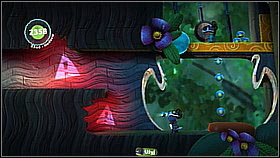
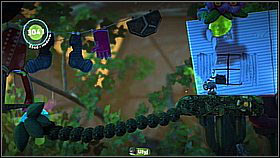
![Below the three sponges on the right there's an item - take it [1] and move on to the right - Grab and Swing - Da Vinci's Hideout - LittleBigPlanet 2 - Game Guide and Walkthrough](https://game.lhg100.com/Article/UploadFiles/201512/2015121617240107.jpg)
Below the three sponges on the right there's an item - take it [1] and move on to the right. [2] This way you will reach a secret spot with more bubbles. You can go back following the previous path or by using the launch pad on the wall.
You can continue moving on - jump between the three sponges which led you to the key. Jump down from the books - don't go the level link just yet, instead go behind the books and collect the bubble. [2]
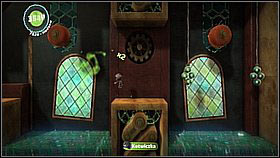
After collecting the secret bubble go into the level link. [1] You will wake up in... well, not the best of places. Jump down from the toilet and go towards the background on the right. Behind the fragment of a wall there's a button which will open the door. [2]
Move on and Da Vinci will give you a grappling hook. [1] Return to the toiler - use the grappling hook to "flush the water" (the switch by the container), which will give you a new item. Additionally, use the hook to grab the toilet paper to make the bubble fall down. [2]
Having those items, you can move on. You will reach more bubbles hanging from the ceiling - swing on them and collect the items. [1] Also don't forget about the bubbles below. [2] Get through the next sets of obstacles in a similar way.

A bit further you will have to climb up the rope - don't forget about the bubble on the left. [1] By the next sponge, you have to do the opposite - go down the rope. [2]
After getting to the lowest platform, go to the furthest layer and move left - here you will find a secret passage and a bubble with glasses (hidden behind the books) - needed to activate the image on the first level. [1] Once you jump even lower - onto the starting gate level - collect the two bubbles below the platform on the left. [2]
Time to participate in a race - if you're playing for the first time and want to collect all the items, you should ignore trying to get the highest score and instead focus on collecting he bubbles. In the first part of the track, swing above the electrified ground - the bubble is in the middle [1] Further, pull up with the hook and use the launch pad. [2]
Here, on the high platform, there are three items - in order to reach them, grab the sponge and lower yourself onto the launch pads on the wall. [1] Launch yourself and quickly let go of R1 - your sackboy will let go of the rope and fly up. [2]
A bit further you will reach a rotating wheel - high above it there's an item bubble. [1] In order to get it, you need to grab the wheel with the hook and let go when your sackboy is on the left side - you should then fly up. [2] After collecting the item, go through the gate/flags, collecting the last bubbles on your way.
Collectibles: 63 items
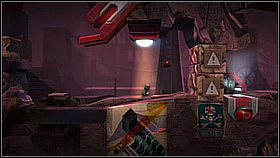
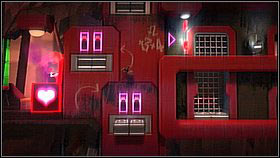
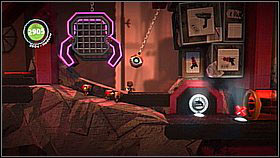
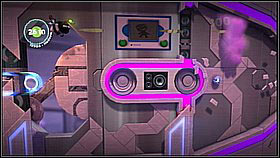
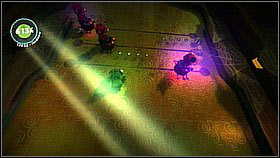
At the very beginning of the level there's a place for a sticker - Da Vinci Crest (you will get it in the further part of the level). [1] After using it, a special race will begin, during which you will have to chase three running item bubbles. You have to get them quick - gaining speed by using the grappling hook on the various sponges. [2]
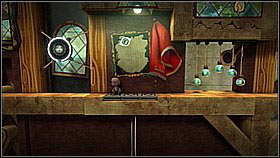
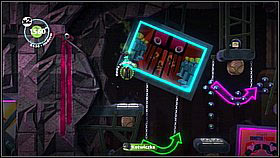
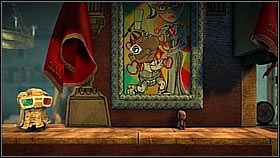
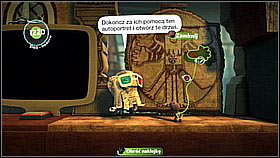
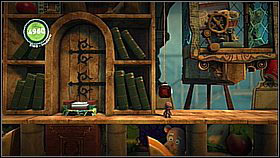
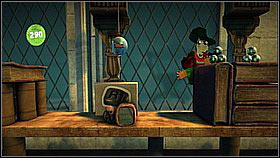
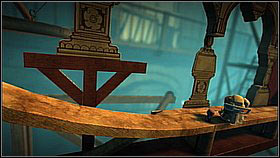
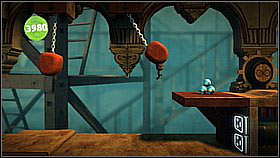
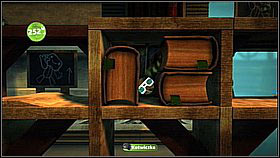
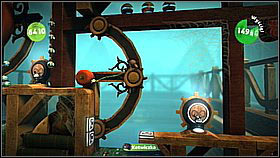
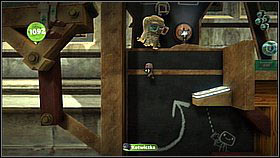
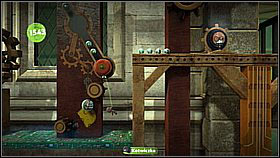
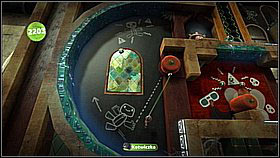
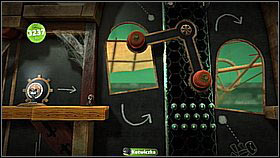
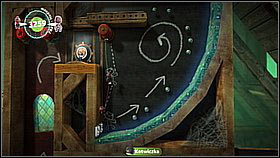
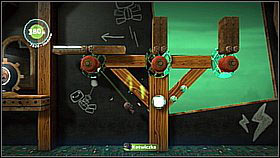
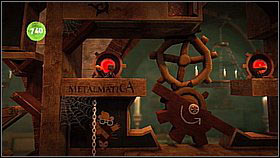
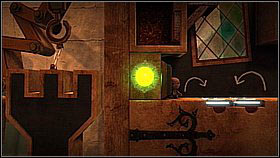
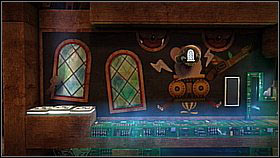
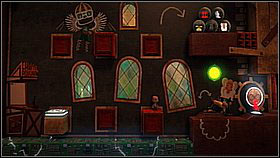
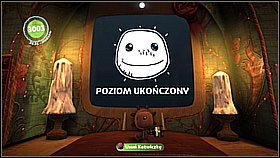
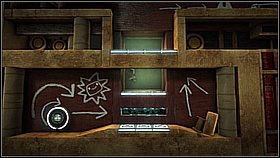
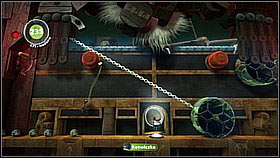
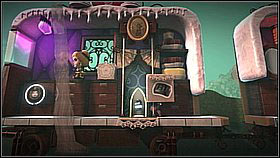
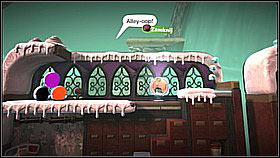
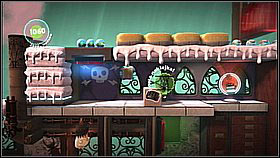
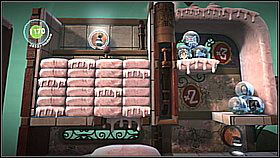
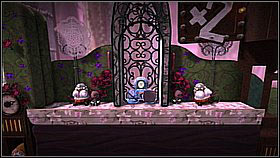
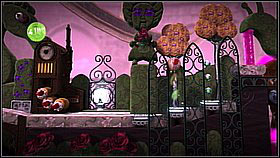
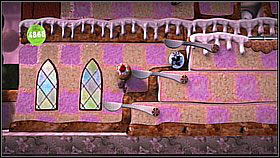
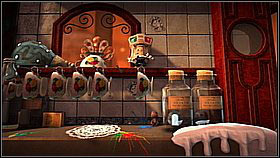
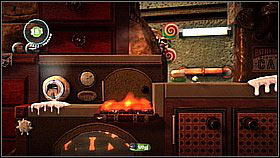
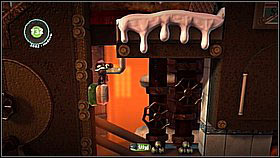
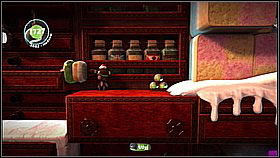
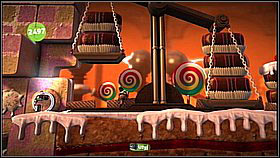
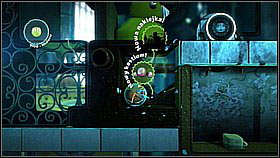
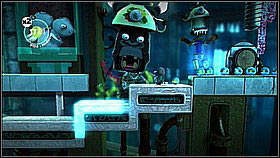
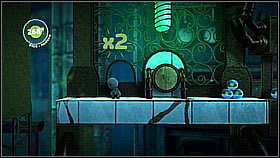
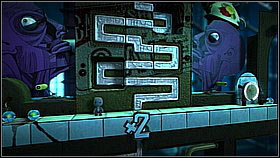
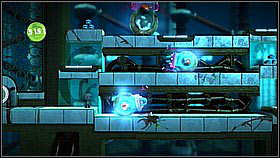
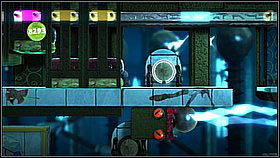
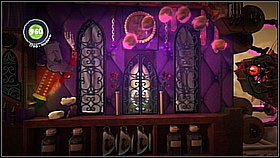
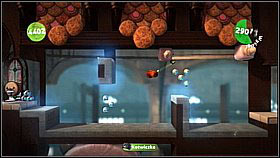
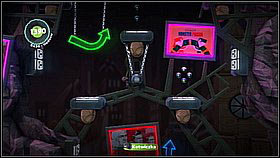
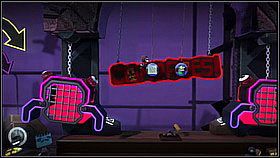
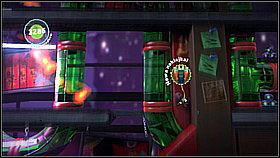
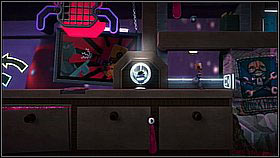
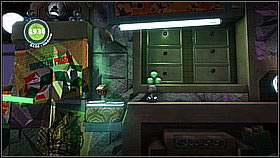
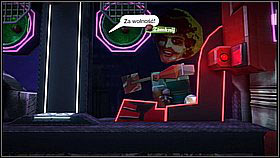
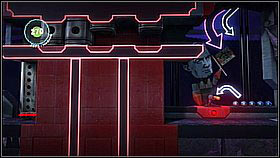
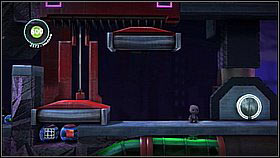
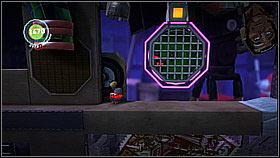
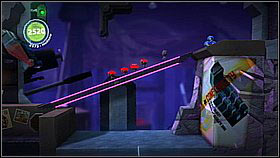
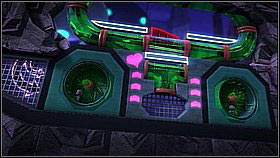
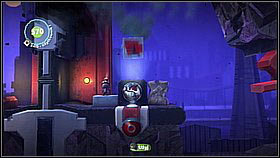
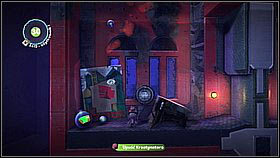
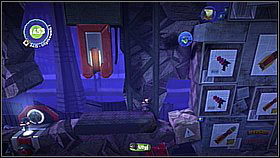
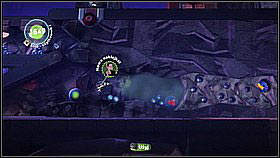
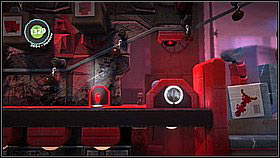
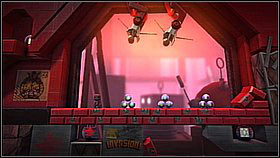
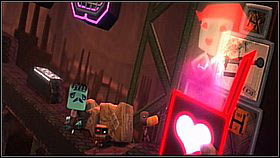
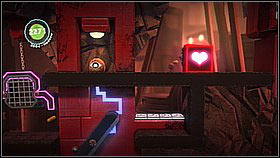
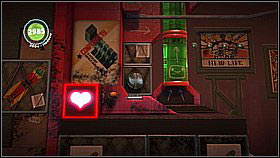
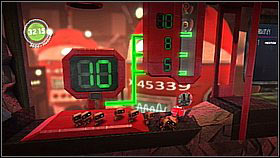
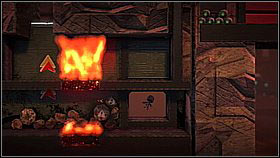
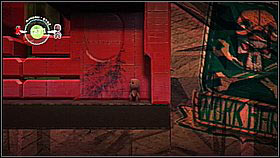
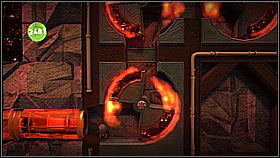
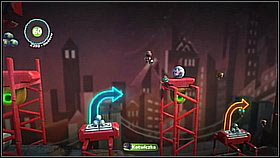
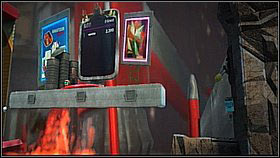
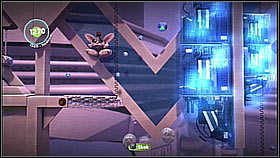
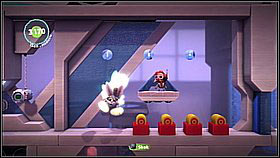
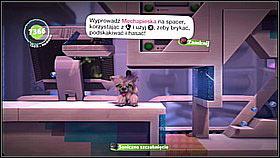
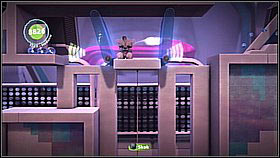
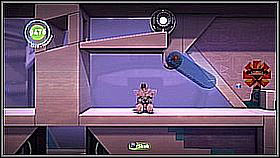
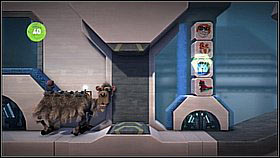
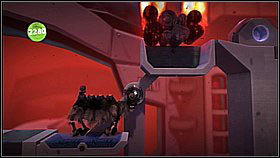
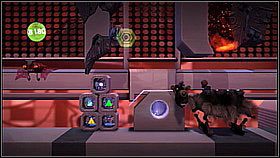
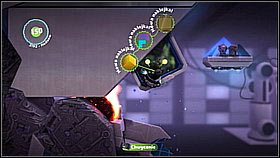
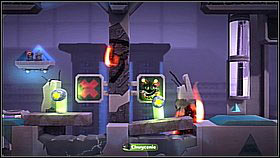
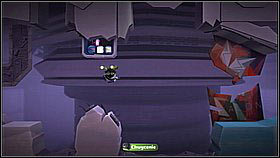
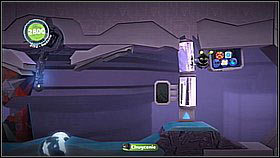
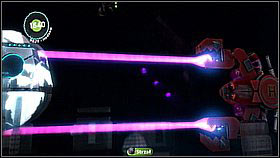
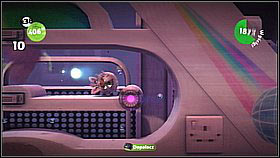
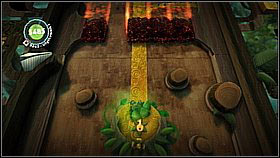
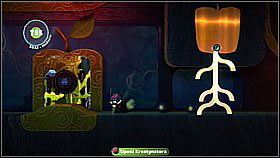
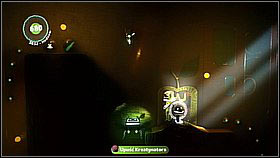
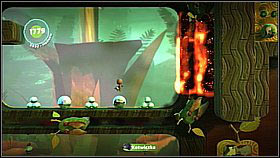
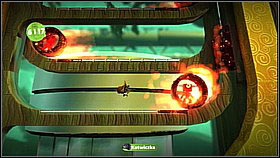
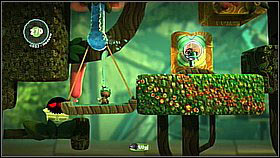
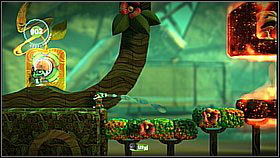
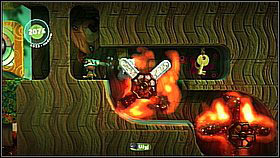
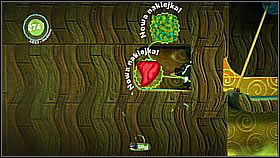
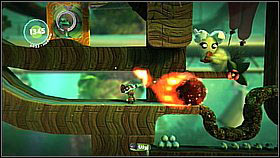
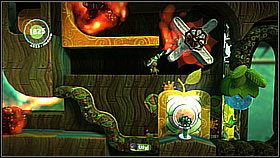
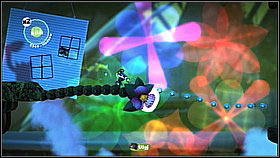
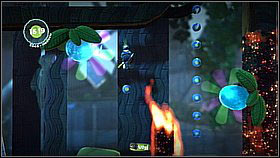
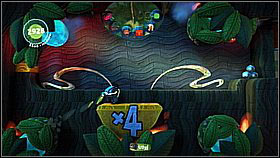
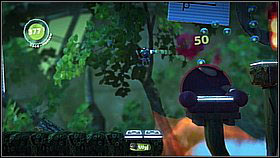
![Without the sticker [1], you can explore the level and collect the other items - Gripple Grapple - Da Vinci's Hideout - LittleBigPlanet 2 - Game Guide and Walkthrough](https://game.lhg100.com/Article/UploadFiles/201512/2015121617240498.jpg)
Without the sticker [1], you can explore the level and collect the other items. Move to the right, swinging on sponges and catching items. [2]

A bit further, use the launch pad to get higher and look out for the electrified ground. [1] Behind the next checkpoint there are more sponges - you can grab two bubbles attached to the wooden platforms by swinging on them. [2]

The items on the left side of the pit can be collected in a similar way. [1] Now get to the upper part by using the launch pads. [2]
More items can be found above the moving sponges - you have to swing on them and jump up. It does however require a quite peculiar technique (see the movie) - you have to jump on the left sponge once it's on the right, and let go and turn around on it when it's on the left. Such manoeuvres will let you gain speed and height. [1] After collecting the floating bubbles, jump to the right - collect the items behind the launch pad (you have to jump on the further part of the launch pad in order to land on the bubbles and not above). [2]
Jump up and grab the key by pulling up on the grappling hook. [1] Run to the right. You will reach a spinning wheel with two sponges - grab one of them and wait until you reach the bottom - more bubbles await you here. [2]
Further on there are three big gears sticking from the wall - there are 2 items on each of them and they come out of the wall from time to time. Make sure you've got them all and go up. [1] Grab the upper sponge, which will take you to the left and jump to get the item in the air. [2]
Behind the next checkpoint there's a launch pad and a turning sponge - grab it and jump onto the platforms. This way you won't get launched onto the deadly ceiling. [1] Proceed similarly further - grab the roll and launch yourself up. You should be able to grab the prize bubble. [2]
Upstairs, move right using the rolls which you can hook to. In one of the niches behind the big turning wheel there are 2 items (they're pretty easy to spot). [1] Continue your journey with the help of the grappling hook - the next prize bubble is beside the moving platforms - you can reach it easily from the one moving vertically. [2]
A bit further there are some more turnstiles - this time in the ceiling. Swing on the rolls and grab three bubbles. [1] The next toy is a pendulum with two sponges - you can launch up from them to reach three items. [2]
Behind the pendulum and another big wheel there's a checkpoint - behind it, on a platform there are three items (one hidden, you need to get onto the platform on the further layer). [1] A few platforms ahead you will need to go through a level link. In the further part of the level there are three vertically-moving platforms with rolls - use the grappling hook to grab the items right above the electrified floor and move towards Da Vinci. [2]

A two players zone can be found here. [1] Players must grapple both rolls - this way you will activate the elevator. [2]
Upstairs, one player has to grapple the roll and lower himself as low as possible. The second player has to jump down, grab the other and lower himself as well, [1] in order to launch from the pad on the wall. This way one of the players will be launched onto the upper platform with four items. [2]
You can move on - go right using the tricks you have learned so far. Grab another bubble above the narrow electrified part. [1] Further you need to grab the rolls to avoid the electric parts of the environment. More items can be found on the wall before the sponges attached to the ceiling. [2]
Swing on the ropes, avoiding the traps. [1] In the further part you have to grab the three rolls and this way open the platforms - below them there's a bubble with a white item. [2]
Another prize can be found by the wall, inside the turnstile through which you can get to the open platforms. [1] Go up using the elevators - once on top, make sure you've collected the prize bubbles attached to the ceiling and by the beam. [2]
Collectibles: 40 items
At the beginning of the level there's a place for a sticker which you will obtain in a couple minutes (thanks to it you will gain a couple bonus levels - description below!). [1] For now move left and climb up the platforms. Before you move higher, grab the sticker floating in the air. [2]
Go past the red button to pick up the prize bubble hidden in the web. [1] Now stand on the button and pull up using the sponge which will be lowered. Turn left and jump on the moving platforms in order to activate the switch on the left. [2]
Go even higher and collect two items beside the half of a big gear (one is in the corner on the right, you need to jump). [1] Now climb the gear to the left side and turn it with the switch. [2]
Use the switch on the right - launch pads will appear in the further window. [1] Firstly jump down to grab the prize bubble and then go up. [2]
Run to the left and you will have to jump over a pit - jump before the wooden arm (if you step on it, it will close and throw you down). [1] On the far left you will find a button on the wall - press it and jump up using the launch pads (collecting the bubbles). [2]
Upstairs, jump over the pit to collect the bubble. [1] Jump down - right before the electrified floor a platform will appear and save you. [2] Follow it right and climb up.
This time you will have to play with electricity - pressing the button (by jumping) will switch off the power for a moment and thanks to that you will be able to move on. [1] As for now, ignore the bubbles below the ceiling - you can get them only after sticking a wooden gear sticker at the beginning of the level. Use the launch pad in the niche to get higher. [2]
Above the situation repeats - here however you can get two bubbles after switching off the power. [1] In order to move on, you have to also press the button on your way and end your run on the launch pads in the niche. [2]
One more run through electrified ground awaits you - of course first turn the power off. [1] Upstairs you will find a cannon and Da Vinci inviting you to step inside. Before jumping inside, stand below the cannon and go deeper in - you can find items by jumping in two places. [2]
After being launched from the cannon and landing, firstly head right, collect the key and items hidden behind the books. [1] Now head left and go down - jump above the electrical parts using the launch pads. [2]

Avoid the next traps with the grappling hook - don't let go at once, but check if you can get an item by swinging on the sponge. [1] The hardest collectible to get is the bubble at the end of this short track - you can get it by falling down through the middle part of the "vent". [2]
On the left there's a 2 players zone - the entrance activates with two players present in the game. [1] Overall it's easy, but requires good synchronization - one player activates the platforms with the switch and the other has to jump between them onto the upper platform with items (see the movie). [2]
Bravery Test - 2 players zone. One player switches the synchronized platforms. The other jumps between them.
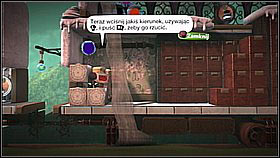
###1,6###

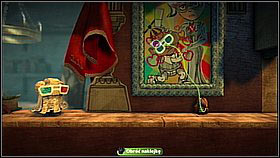
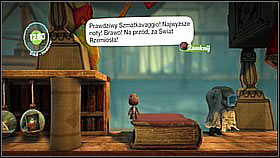
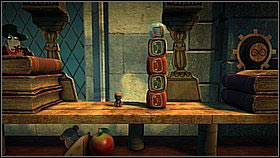
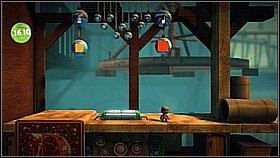
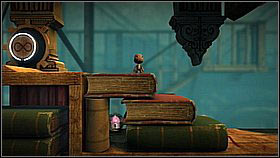
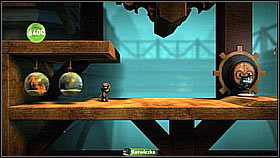
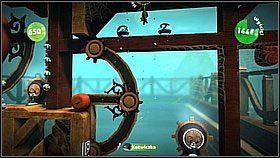
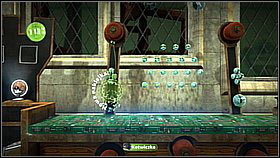
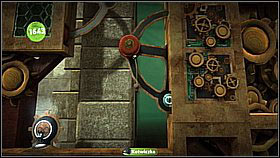
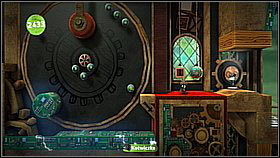
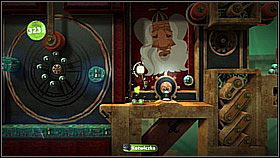
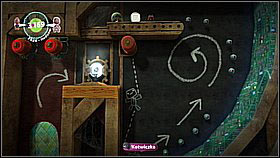
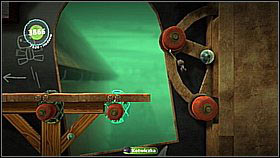
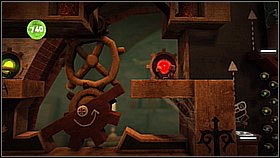
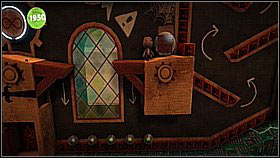
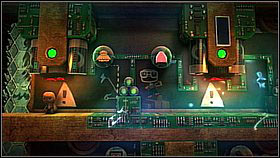
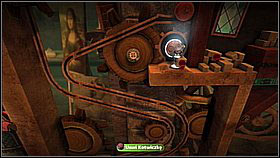
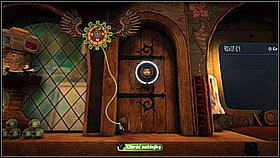
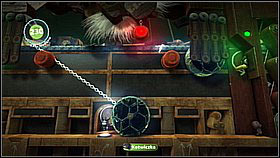
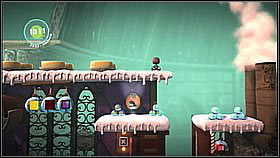
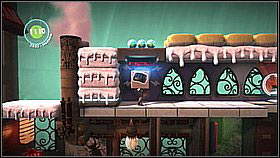
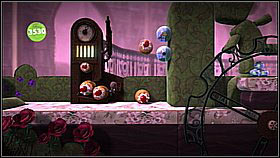
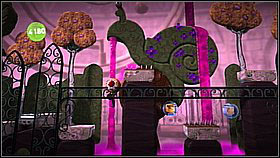
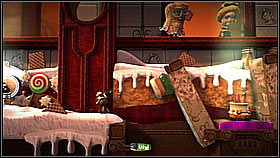
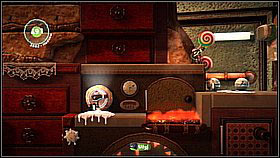
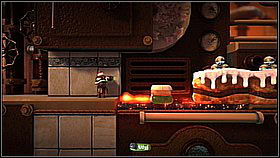
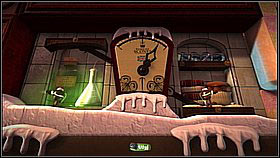
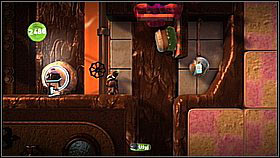
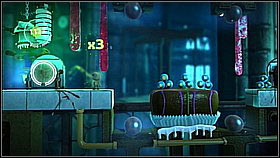
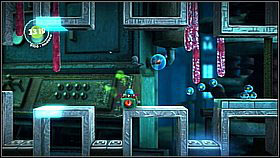
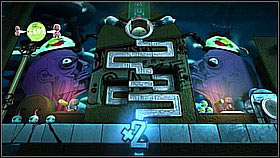
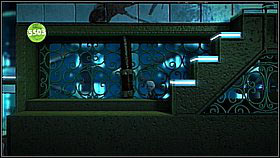
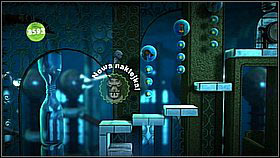
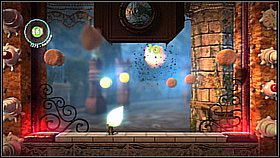
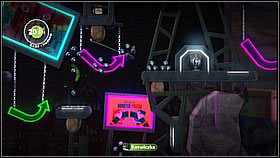
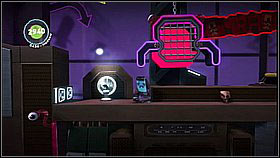
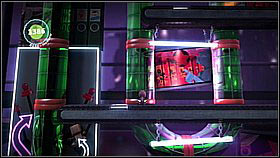
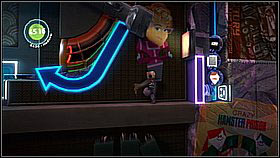
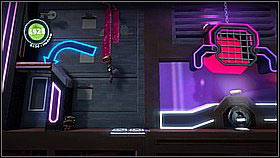
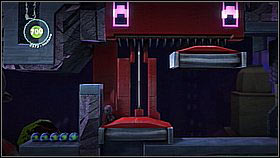
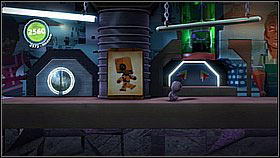
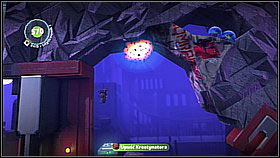
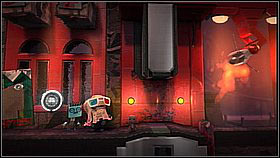
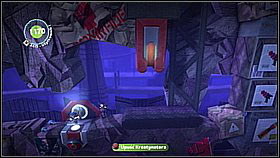
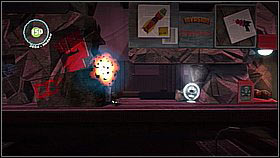
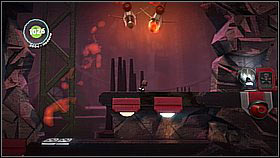
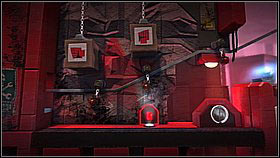
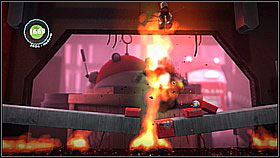
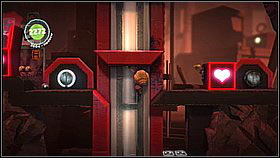
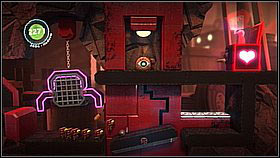
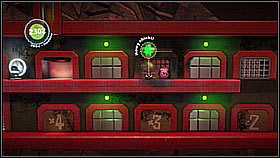
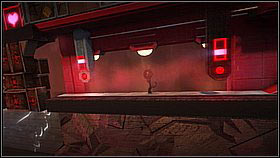
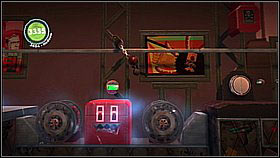
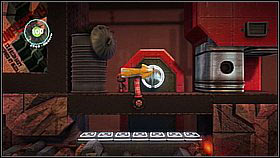
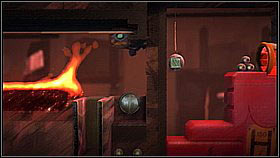
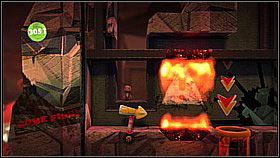
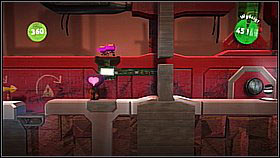
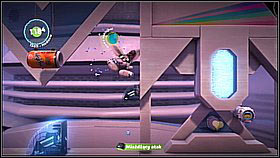
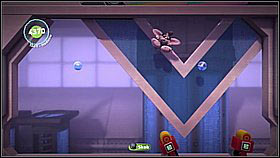
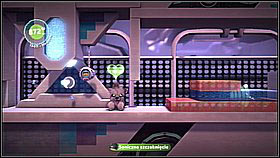
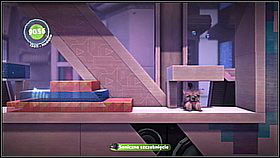
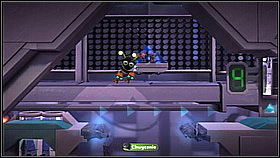
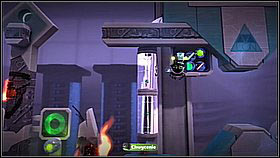
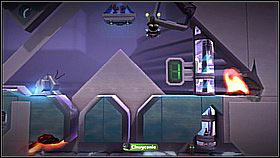
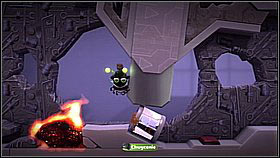
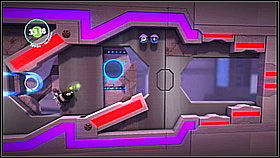
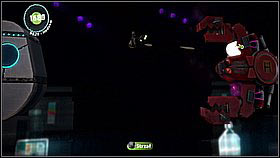
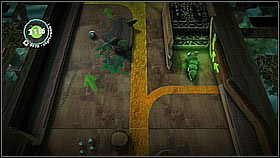
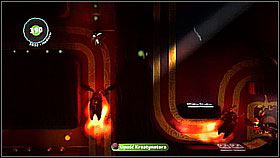
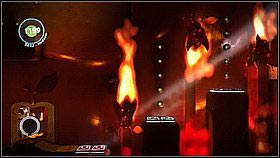
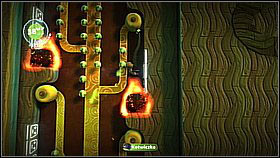
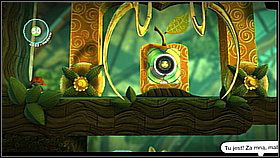
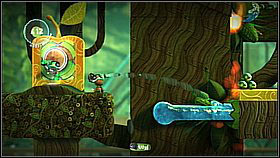
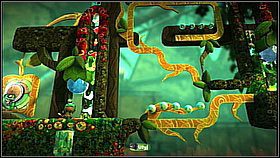
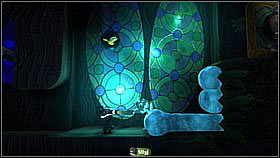
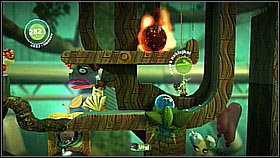
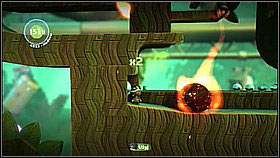
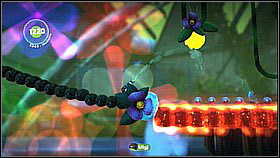
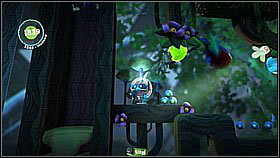
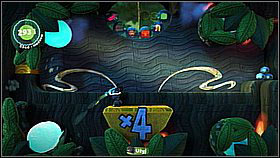
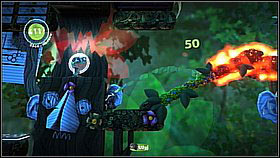
![Move on right and up using the grappling hook, [1] and afterwards down again - Bravery Test - Da Vinci's Hideout - LittleBigPlanet 2 - Game Guide and Walkthrough](https://game.lhg100.com/Article/UploadFiles/201512/2015121617241006.jpg)
Move on right and up using the grappling hook, [1] and afterwards down again. This time you have to grab the sponges and lower yourself carefully to avoid getting electrocuted. Collect the item bubbles and move on. [2]
You will reach a big slope and a sponge placed on a twisted rail. [1] Grab with the grappling hook and ride down - not to the very bottom, jump left onto the platform to get the bubble. [2]
At this spot it's best to jump onto the electricity - you will return to the last checkpoint and will be able to ride down the sponge again. This time stretch the line to the maximum - this way you will find yourself below the corridor and grab more items. [1] From here you can pull yourself up to the exit. [2] This is not the end of the level - we will complete it again to collect the rest of the items.
During the level you will get the Wooden Gear 1 sticker - thanks to it you can activate the marked spot at the beginning of the level. [1] It will completely change the level - you will receive a grappling hook and a race which start, allowing you to max out the stage. [2]
While moving through the transformed level, use the grappling hook to catch previously inaccessible items. [1] Most of them can be found in visible and obvious places. [2]

The area with stars is rather peculiar - right after being shot from the cannon, grab the highlighted stars. [1] You can collect the missing items here. [2]
Collectibles: 0 items
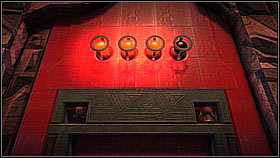
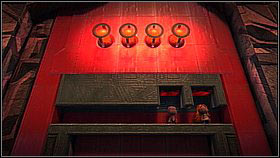
On this level you will have to face Da Vinci's machine. Firstly head up using the launch pads and then turn right. [1] The fight will begin soon - first you have to press the switches on both sides (the light will change from red to green). [2]
After pressing both switches, a platform will move out - jump onto it and press the switch in the niche. [1] In the next phase, press the two switches again - this time avoiding the cylinders moving in two levels. [2]

In order to press the switch, you will have to use the launch pads which will appear (keeping an eye on the cylinders). [1] Pull the switches on both sides once again - the launch pads will disappear, but a grappling hook will appear [2]
Apart from the grappling hook, two sponges will appear and the switched will move up. Of course you need to press them once again. [1] It's best to give up on swinging on the sponges and use the niche by the respawn point in the middle of the level (you can enter the background). [2]
While hiding inside, wait for the path to the switch to be clear. Once you're below it, you're safe - just jump and grapple the switch. [1] Do the same on the both sides - a red stick will move out. Get to it using the grappling hook and grab it. [2]
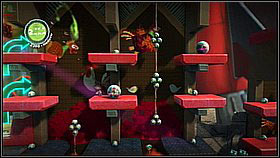
Collectibles: 9 items
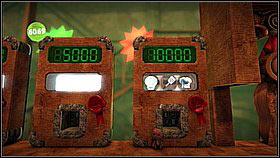
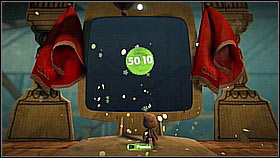
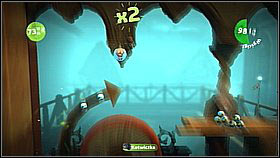
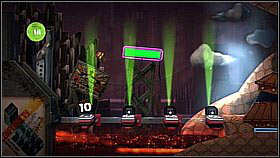
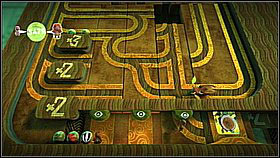
In this level you have to properly jump on the launch pads and avoid the obstacles. [1] In order to collect all the items, you have to get 10 thousand points. [2] The key to a high score is collecting the bubbles in groups - this way you will boost the multiplier!
Collectibles: 23 items

A short pointed level. [1] In order to collect everything it has to offer, you will need a couple attempts. In the first, collect the items. Most of them are well visible. The bubbles in the further part of the level, when you are pushed along the slopes by the launch pads can be more problematic - the items are right below the ceiling in the corner (you have to jump for them). [2]
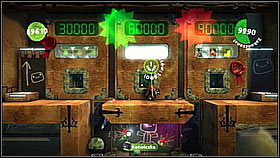
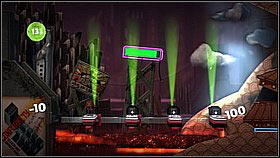
During the following attempts, focus on gaining points - you have to get 90000. [1] In order to make it, memorize the track to successively collect point bubbles - you need to get your multiplier to over a dozen. Especially before the middle of the level, when you will reach big groups of bubbles. [2]
Collectibles: 36 items
In this level you will get a new toy - the Grabbinator - which allows you to pick up and throw items. Pick up the chest to clear a way to the second cart. [1] Inside, collect prize bubbles. [2]
In the third cart, make "stairs" from the three chests in order to reach the item in the upper left corner. [1] Afterwards use the two boxes to climb up to the right. [2]
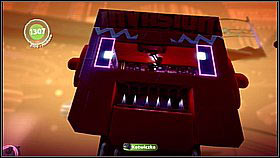
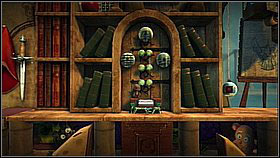
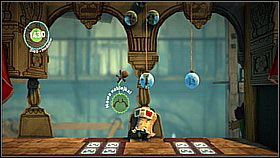
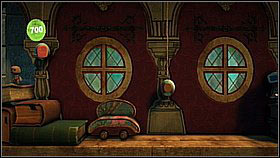
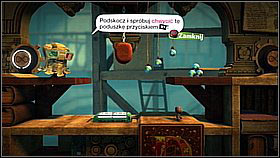
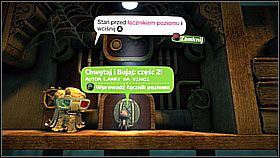
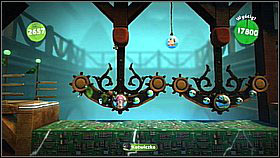
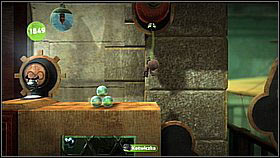
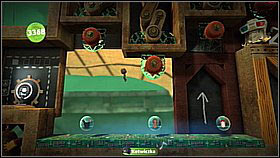
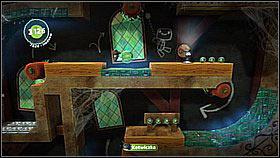
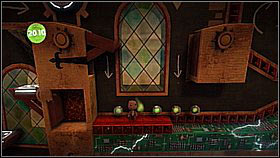
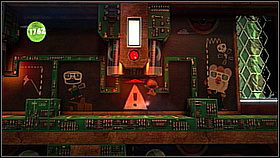
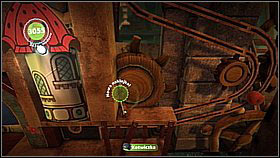
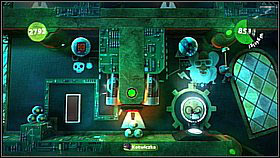
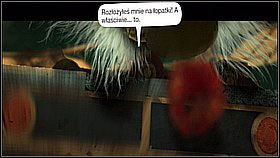
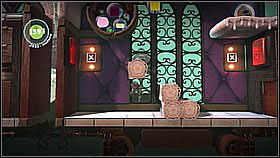
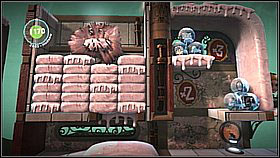
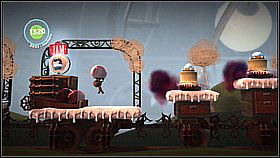
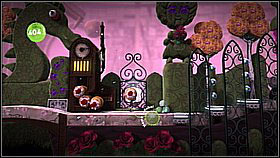
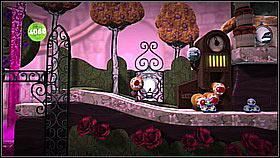
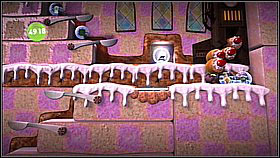
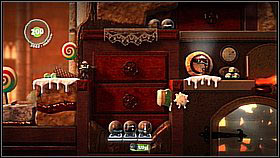
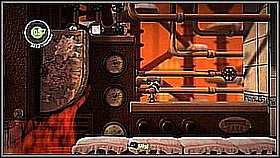
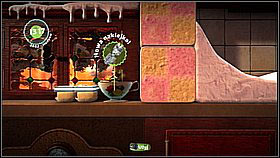
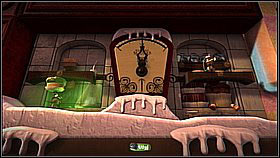
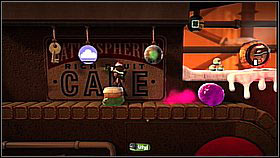
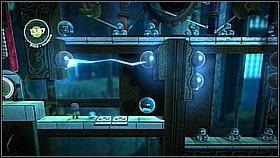
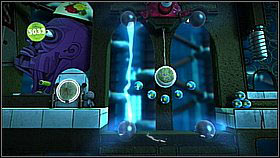
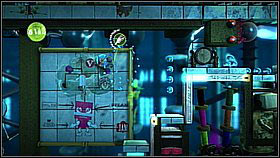
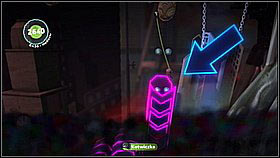
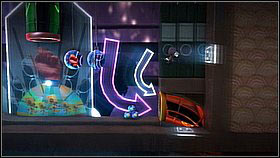
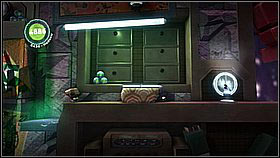
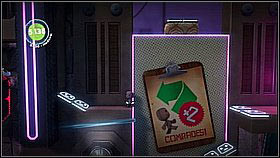
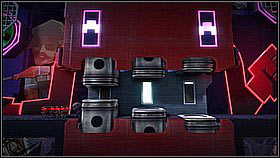
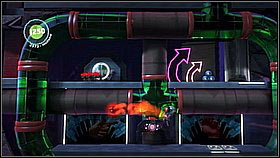
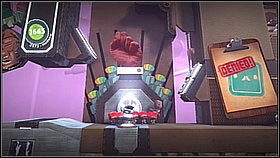
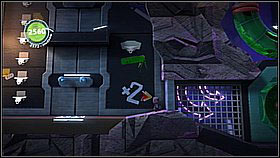
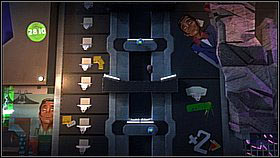
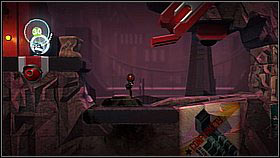
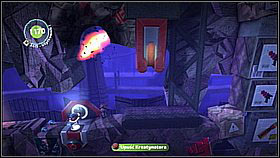
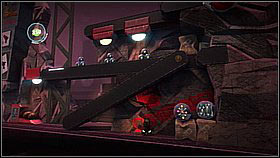
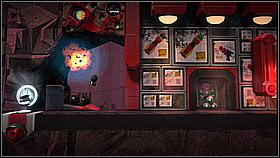
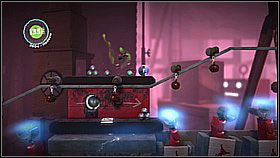
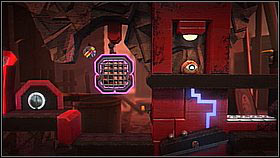
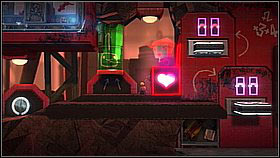
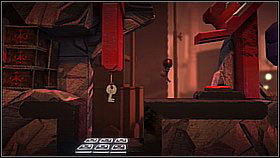
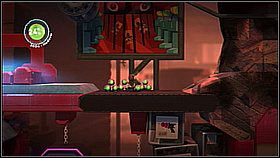
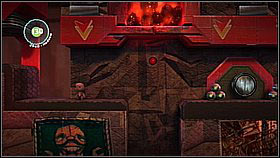
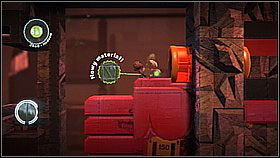
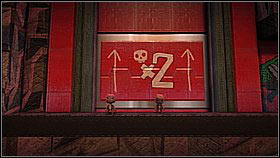
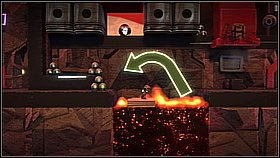
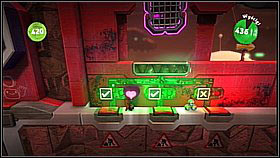
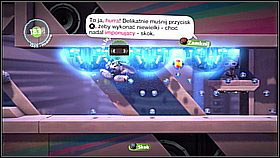
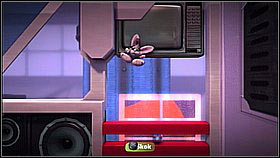
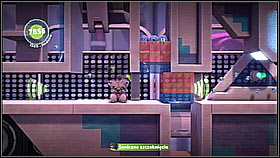
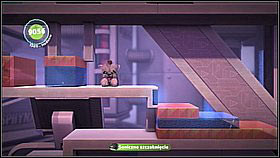
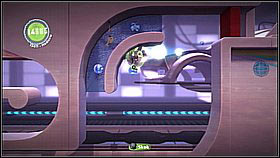
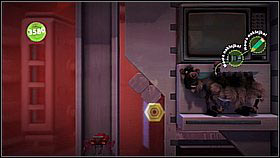
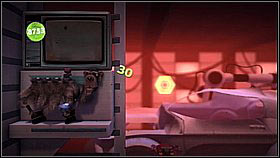
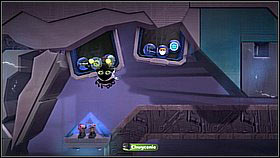
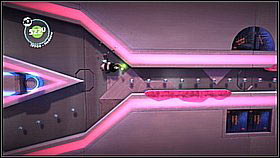
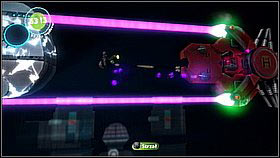
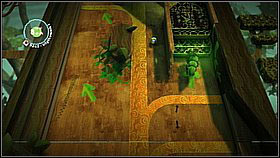
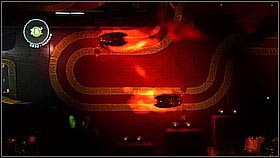
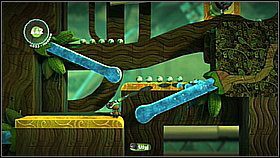
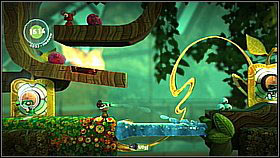
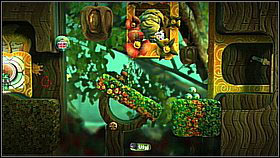
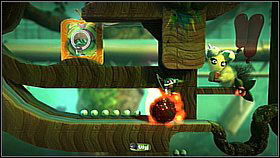
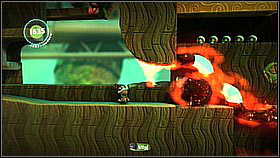
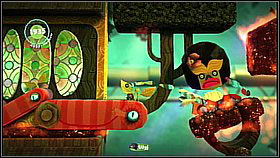
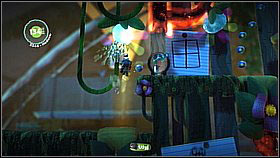
![Upstairs, collect three bubbles on the left [1] and afterwards use the launch pad to get onto the roof of the fourth cart - Runaway Train - Victoria's Laboratory - LittleBigPlanet 2 - Game Guide and Walkthrough](https://game.lhg100.com/Article/UploadFiles/201512/2015121617241494.jpg)
Upstairs, collect three bubbles on the left [1] and afterwards use the launch pad to get onto the roof of the fourth cart. While on the roof, you have to look out for the signs - they will hit you in the head if you jump. [2]
Cross the roof to the other side of the cart and go inside. [1] Once inside, jump down so that you grab the three bubbles attached in a row to the ceiling (if you miss any of them, you can get it later on by repeating the level). Afterwards throw the lacey blocks into the switches on the wall. [2] This way you will free the items and open the passage to the right.


In the next cart you will come across jam - using it you can collect items (just throw a jam bubble into the prize bubbles). [1] Collect the objects in this part of the train using that way. [2]
After collecting the bubbles, take one more piece of jam and throw it into the switch in the last compartment. [1] Once above, make sure you've collected all the bubbles. [2]
Now grab the box and use it to hit the switch on the ceiling (it's electrified, so activating it without an insulator would mean death). This way you will destroy a part of the cake and get to the roof. [1] Cross it to yet another cart and here destroy the sweet blockade (by picking up and throwing away the cakes). Be sure to destroy the two left columns (two bubbles are hidden behind them). [2]
Getting the items overhead is easy - you need two friends. [1] Player 1 throws the other two onto the first platform. There player 2 throws player 3 onto the highest level. [2]
Behind the co-op zone you will come across enemies - just jump on their heads. [1] Throw jam at the next ones. [2]
Once you make it through the enemies, you will get to a cart with three launch pads and a button at the upper level. You have to pick up the jam and jump over the two launch pads - otherwise you will be launched into the air and the jam will shatter. Launch off the third pad and throw the jam left to activate the switch. [1] Move on - you will encounter a miniboss. Just jump on the launch pad holding some jam and hit him in his two vulnerable points - on his hat and head. [2]
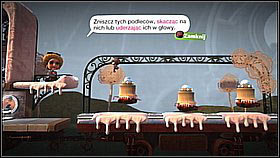
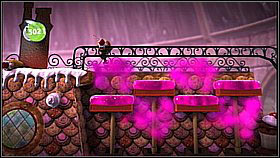
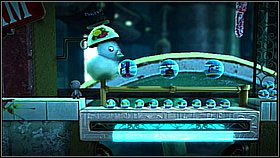
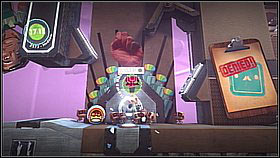
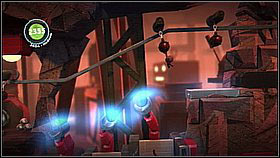
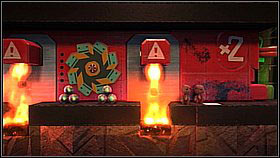
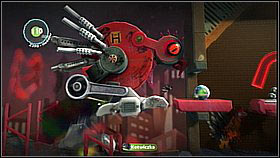
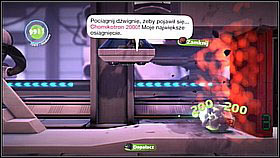
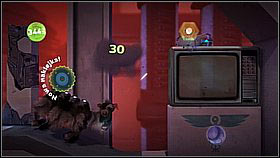
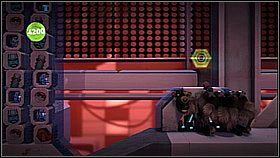
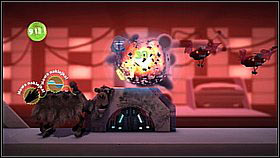
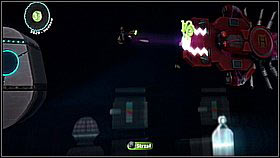
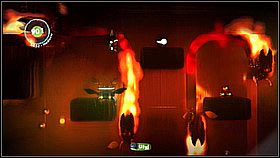
![After defeating the enemy, launch yourself to the basket with z bubbles [1] and pull the brake - Runaway Train - Victoria's Laboratory - LittleBigPlanet 2 - Game Guide and Walkthrough](https://game.lhg100.com/Article/UploadFiles/201512/2015121617241606.jpg)
After defeating the enemy, launch yourself to the basket with z bubbles [1] and pull the brake. [2]
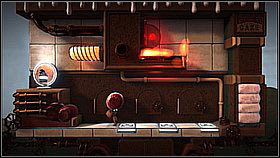
Collectibles: 53 items
At the beginning of the level head left - there are two items inside the demolished locomotive. [1] Now move right and after the cutscene get onto the wall beside Victoria and afterwards onto the green background fragment. Take it back towards the gate - you will get two items (one below and one high up, you can reach it using the launch pads). [2]
Get onto the green background element once again and this time go right - this way you can collect two more items (behind the cakes stove). [1] Now you can move on - grab a cake and jump onto the rail to ride it down. [2]

Collect the prize bubbles behind the first rail by throwing cakes at them. [1] Repeat this at other spots as well. You can also use the cakes to destroy enemies - you have to hit their heads when the weak point is facing you. [2] After killing the first enemy, jump over the launch pad - there's an item behind it.
Jump onto the heads of the little enemies while holding a cake and get to the next rail, collecting items on your way. [1] Further you will come across rails with moveable platforms - while holding a cake, you can move across them and jump up (pressing the jump button when the platform moves up). Collect the prize bubbles and move further. [2]
Tall enemies with moveable heads will cross your way again - destroy them with cake (hitting the weak point around the occiput) and climb up. [1] On the left there's a 2 players zone. [2]
In this co-op zone, there's a machine with buttons on both sides and two defenceless enemies. [1] In order to get the prizes, players have to stand on both sides and throw the enemies in the buttons together. [2]
Behind the next cakes stove you'll have a chance to get more bubbles - they're floating beside the hedge. This time throwing cakes won't be enough - you also need to stand on the proper layer. [1] You can move on by grappling the wheel, of course using Victoria's cakes. [2]

After a short ride, collect the bubbles and attack the enemies. [1] The next wheel will be a bit different - you need to pay attention to which ratchet you grapple. The pink ones are deadly. [2]
Beside the next stove, catch another item bubble. [1] Grab the cake and launch off the pad - this way you can avoid the fence. [2]
Move on along the rail so that you avoid the platforms with spikes. [1] Afterwards collect another bubble by the stove. [2]

Before riding the rail, go right and jump for the two bubbles. [1] While riding down, use the first launch pad and jump onto the one on the left. [2]

Upstairs, make sure to throw a cake at the items "held" by the figures. [1] Now you can jump up the spoons using the cakes. [2]
Beside the stove, collect two bubbles on the right. [1] Get higher using the launch pad. Use the cakes once again and move above the hot platforms (one at a time). [2]
While "jumping down" from the rails, make sure you've collected the items (one on each level). [1] Destroy the monster and jump onto the platform which will appear. [2]

You will find yourself even higher - on the roof of a house. Collect three bubbles and run right to do some jumping on launch pads. [1] Before jumping into the chimney, make sure you've collected the items (the object on the left can be reached from the higher platform). [2]
In the chimney you will encounter a trap - platforms will keep on disappearing and you have to arrange yourself so that you avoid the pink jam. [1] At the beginning, stick to the right side of the chimney - you will find a key here. [2] If you happen to miss it, consider killing yourself - you will be able to repeat this stage.
Collectibles: 32 items
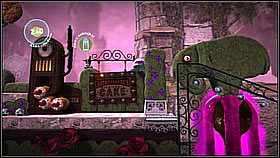
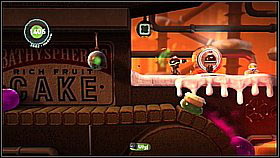
Start off by going to the right. After hearing out the conversation, take a peek behind the two bottles - there are items to be found there. [1] A bit further, use The Cakeinator to lower the bridge (shoot the branches) and eliminating the enemy. [2]

If the place you want to reach is too high, you can use The Cakeinator to create a platform. [1] In order to collect the items below the cupboard, you have to block the middle drawer - shoot a cake into the opposite wall (at the height of the shaking drawer). [2]
Use your gun to avoid the fire. [1] Before moving on, collect the two items from the upper platform on the left (marked with two lollipops). Jump onto it using a cake fired from the Cakeinator (on your way to the items you have to block another drawer). [2]
Don't move on yet, as there's still one secret left here - stand on the edge of the highest level (with the lollipops mentioned before in the background) and from here, shoot diagonally, to the upper right. You will open a secret box and bubbles will fall out of it. [1] Move on and use the device once again to lower the bridge and on the round object. [2] Jump up.
On the other side you will come across a vertical conveyor belt - before riding down, you need to grab the item on the lower platform. It's hidden behind a waffle. [1] Now stick a cake to the conveyor belt and ride it down. Once you're below, just to the right. [2]
Move on by jumping over the flames using the cakes - place them in the middle of the flaming areas. [1] Jump onto the platform with the enemy. Above him you will see items. You can reach them by shooting a cake into the wall on the left - this way a platform will appear. In order to get onto it, you have to use The Cakeinator to make a step. [2]
Move on to the right and create one more bridge. [1] Before jumping up, look into the cap behind the launch pad (item). [2]
A bit higher you will have to tame one more drawer. [1] Afterwards you will come across an equally naughty cupboard, this time you have to use it to collect the items. Jump to the right and destroy the enemy. From here you can block the drawer (you need to be in the background) and reach the bubbles from it. [2]
To the left of the unruly cupboard is a 2 players zone, consisting of a balance. One person has to stand on the right side, [1] and the other attach a cake to the left. [2]
Moving on to the right, don't forget about the sticker in the niche. [1] Eventually you will reach a large balance - attach a cake to the left side. [2]

The next use of the cake machine will be blocking the machine - you have to do it so that you create a path. [1] Another danger are fragments of pink jam - firstly block the place from where they fall with your gun and jump over the pit to get the item. [2]
After collecting the bubbles, fall down and shoot a cake below - try to collect the key and items attached to the ceiling (look out for the jam, is it can be annoying - remember you can destroy it with cakes, which makes things easier). [1] Once you collect the items, jump onto the platform on the right and collect all the bubbles here as well [2]
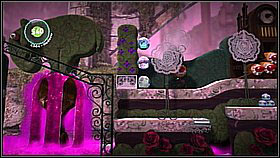
Further you will come across waterfalls of the pink junk - make things easier by blocking the source with a cake. [1] Between them, high up, there are two objects - of course pull them down using Victoria' machine. [2]
Behind the waterfall, use another balance/catapult. Just lower the left side (with a cake) and stand on it. [1] Now shoot a cake at the other side and once you're up, jump - you should reach three item bubbles. [2]
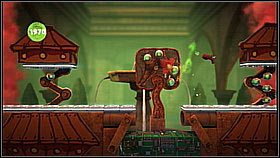
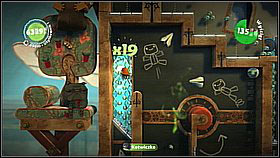
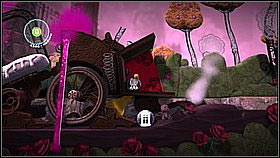
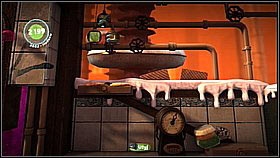
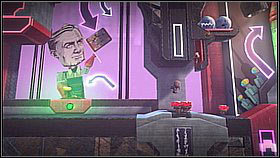
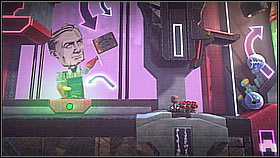
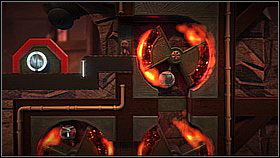
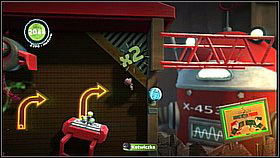
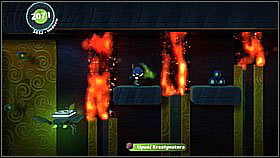
Collectibles: 45 items
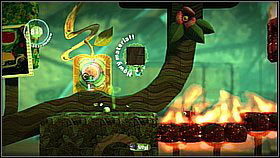
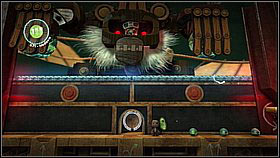
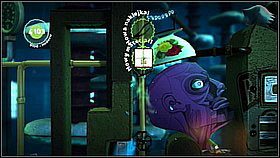
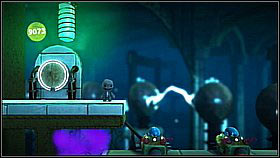
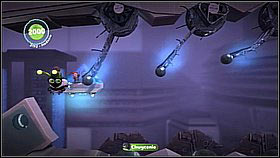
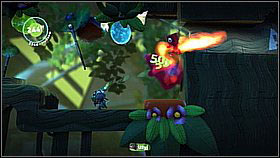
A nice duck, right? Plus, some items below it! [1] Run right - you will reach a live circuit. Jump below it, grabbing the bubbles and looking out for the electricity. [2]
Jump over the electrified surface by grabbing the sponge. [1] You can destroy the enemies once they turn their backs on you (while they're moving away). [2]
A few steps further you will come across more electrified surfaces - this time the electricity follows a pattern. [1] Another kind of trap is lightning. [2] Jump once it disappears.
Before using the launch pad, collect the item below. [1] Of course you have to launch so that you avoid the lightning. Upstairs, grab the two bubbles and move on. [2]
Once you get pass a few lightning bolts, you will reach a respawn point, with a fence behind it. To the left there's a hole in it - this way you will reach a launch pad, using which you can grab five items. [1] In the next part of the level there's a big electrified area - you have to make use of the launch pads, keeping an eye if they're not under voltage (touching them when they are will kill you). [2] Go right, collecting bubbles on your way.
Behind the next checkpoint, you will have to use two elevators - jump off the higher one to catch a few items. [1] To the right of the two players zone there is another checkpoint and prize bubbles behind it. [2]
In this puzzle, players have to switch the elements of the track along which the current goes. [1] First check which levers correspond to which elements and then synchronize with the other player. [2]
Jump over the next trap with lightning bolts (by swinging on the sponge). [1] Beside the save point, once more go through the hole in the fence behind it - collect some items and a key. [2]

Fight off more enemies and keep climbing up. [1] Here you will need to jump on the neck of a bigger enemy - you have to hit him three times. [2] Be sure to collect the three prize bubbles above. [2]
Beside the save point behind the enemy on who you had to jump three times, you can go down (along the three launch pads). Here you will find four items - two on the left and two on the right. [1] Keep going right until you come across "elevators" activated by the floating current - jump off them to collect the prize bubbles. [2]
Move on while keeping an eye on the traps - first you will have to run through the elevators once they're without power. [1] A bit further, jump through the elevator once it's down and run below the pressure plates. [2]
Jump onto the outer edge of the object which was trying to crush you and bounce off it - collect the items while moving this way. [1] Eventually you will reach the heart of the factory, where you need to jump to the right along the enemies' heads. [2] Listen to Da Vinci's request and pull out the plug.
Collectibles: 0 items
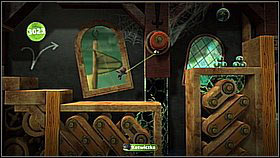
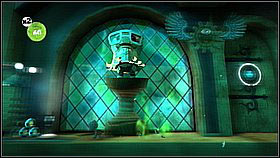
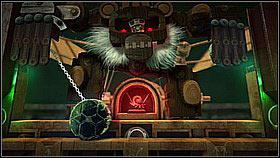
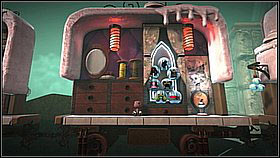
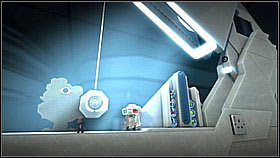
![Get into the elevator [1] and ride it up - Kling Klong - Victoria's Laboratory - LittleBigPlanet 2 - Game Guide and Walkthrough](https://game.lhg100.com/Article/UploadFiles/201512/2015121617242652.jpg)
Get into the elevator [1] and ride it up. [2]

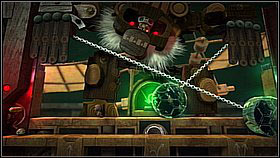
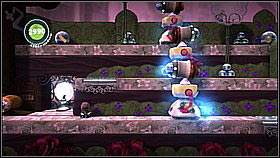
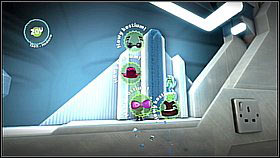
On the first floor, grab the cake on the left and jump over the electric missiles going along the floor. [1] After each series, the monster will open its mouth - throw a cake inside (they will keep on dropping from the left side). [2] Ride the elevator up.

The second level bring a change to the monster's attach pattern - now he will be throwing balls of jam at you. Pick up the cake on the left and hold it above your head - this way you will deflect the incoming pieces. [1] After each attack the monster will open its mouth, throw a cake inside once it does. [2] Keep repeating this and afterwards take the elevator.
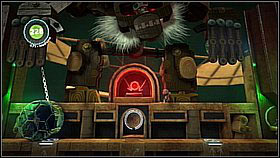
On the third floor, the monster will attack with electricity - in three levels: high, middle and low - and signal it with a blue laser. Grab the cake on the left and stand between the launch pads - beside the one on the right. Once the laser comes down, jump onto the platform. [1] This way you will avoid being electrocuted. After the jump, the monster will open its mouth - time to throw the cake. [2] Keep repeating this pattern.
Collectibles: 9 items

A short level in which you shoot marshmallows - you can't get touched. [1] Stand in the middle and focus on eliminating the ones going your way. [2] In order to unlock all items, you need to get 3000 points.
Collectibles: 28 items
A race through a dangerous obstacle course. [1] You will need two approaches to max it out - during the first time focus on collecting items and during the second on getting points. [2] You need a score of 50000 points.
Collectibles: 39 items

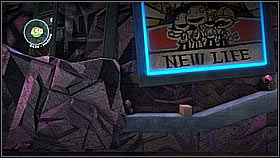
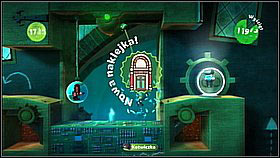
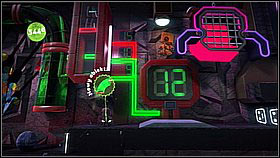
After beginning the level, jump onto the edge behind the first respawn point - there's an item here. [1] Run to the right and along the way collect the bubbles floating by the launch pad. After going down the slope, turn left below the New Life sign and enter the hidden cave. [2]
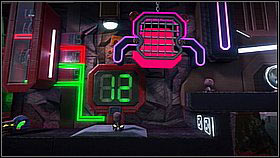
Now run beneath the New Life sign to the right - until you reach a small entrance marked with red (another hidden item). [1] Continue your journey and collect the grappling hook. Bounce off a couple launch pads and fall down to the very bottom on the other side - you will find another bubble. [2]

Climb up using the grappling hook and launch pad and collect the item attached to one of the platforms in the middle. [1] On top, go to the left side of the group of launch pads - grab the sponge and jump off the platform on the wall to get higher. [2] Collect the bubble and get ready for another risky stunt.
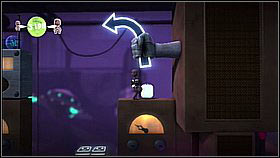
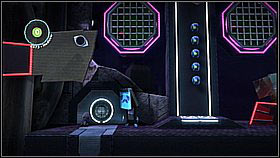
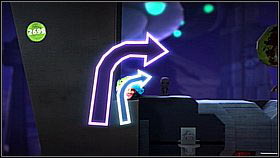
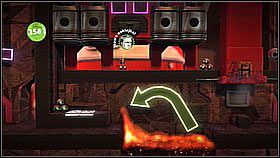
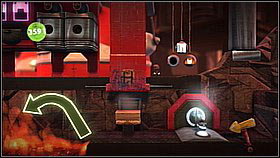
Launch off the launch pad on the upper left platform to the right and grab onto the middle sponge while falling - you should be able manoeuvre in such a way to get the upper surface and reach the item bubble. [1] Having all the items, you can move on to the right. Jump over the pit and go into the neon "chimney" (pointed by the arrow). [2]

Below, jump onto the launch pad and open the door with the button on the wall. [1] Enter the room on the left to collect two bubbles. [2]
Go with your buddy to the right and take the elevator. You will reach some hanging cages - free the Sackbots using the switch. [1] Afterwards collect the bubbles hanging above (using the launch pad). [2]
From now you will have to keep an eye on the Sackbots - make sure not to leave any of them behind, as you need them to unlock all the bonuses. The Sackbots in general are quite resourceful, but they do need help from time to time.
Herd all of the bots to the right - in order to do it, run maximally to the left so that they go past you. [1] Make sure all of them have jumped into the pipe. [2]
A bit further you will come across a door and a button in the air - catch a Sackbot (by driving him into a corner) and throw him twice into the button. [1] You can deal with the next obstacle in two ways - either throw each robot onto the platform and from there to the further part of the level [2] or jump first yourself and activate the switch to the right of the hanging cage.
After leaving the elevator, step onto the red button to release more subordinates. Herd them all to the right and make sure they've jumped into pipe. [2]
Behind the green pipe jump up and collect the bubble. [1] Afterwards defeat the enemies - just run beneath them and jump (to hit their weak points). [2]
Before you enter the orange pipe leading down (Sackbots will jump into it), you have to collect two bubbles before it - just enter the plane closer to the screen and use the launch pad on the right (from it, land on the launch pad on the wall, which will shoot you to the left). [1] Go down the pipe - here you have to grab the sponge to push your buddies to a different track [2] and at the same time catch one of the Sackbots (you will need it to activate the button on the right, which will give you more items). Don't worry if you don't make it, because...
By going left, you will fall onto the lower platform - here you can grab a Sackbot and return upstairs thanks to the launch pad in the background (to the right of the respawn point). [1] Carry the robot to the right and throw it at the button (if you haven't done it before) - you will receive prizes. [2]
Continue going left until you reach a hole, in which the Sackbots will stop. Grab one of them, jump up and throw it into the niche on the left - jumping, it will activate the switch. [1] A platform will come down - collect the items and get your buddies across it. [2]
A bit further you will find a panel with launch pads, which can be raised. Get it out of the background and place closer - jump up for the item. [1] Now use the panel to "patch" the hole on the left (above the electrified surface) - the Sackbots will jump up. [2]
Head further along the pipe and free more bots. You will reach a place in which you have to grab three Sackbots and throw them into the "basket" on the left. It will unlock an elevator thanks to which you can reach the key. [1] Moving further to the left, you will come across a 2 players zone - one player can collect a single bubble in it. With the help of a friend, you can get three bonus items. [2]
Both players must jump as high as they can - onto the platform on the right (there's one item there). [1] At this post one person must grab the other and jump together to the left, throwing the other player towards the upper platform. [2] Another method is using the platform with launch pads which can be moved - one player can control it and enable the other to reach the bubbles.
At the end of the level it will come clear whether you did save all the Sackbots - you must have 15 to get every prize. [1] In order to finish the level, lead all the robots into the left pipe. [2]
Collectibles: 23 items
Right above the starting zone, there's a place for a sticker - you will get it at the next level and in return for placing it, you will receive at the next level and in return for using it you will be rewarded with Grabbinators. Repeat the level after you obtain the sticker - places in which you can use it have been mentioned in the description below (as an "alternative version"). [1] Launch off the pad to grab the switch above. [2]
Before you go right, collect the item found behind the decorative element (below the face of a laughing man). [1] Place yourself by the first stamper machine - run to the right once the path opens and continue to the other side (by not stopping, you will save the Sackbots). [2]

Alternative version - if you have the Grabbinators, you can activate the two switches on both sides on the stamping machine. [1] Just throw a Sackbot at them. [2]
Behind the stamping machines, go up using the launch pads and free more buddies. [1] Once you reach a wall, grab the sponge which will take you up. Once there, go under the stampers and switch the lever on the other side. [2]
Alternative version - Right behind the second stamper machine and the figure of a man in the background, slow down - you have to use the Sackbots to collect two items before they jump into the pipe (a bit further). Notice the L-shaped platform by the ceiling. [1] Throw a Sackbot at it and the items will fall down (you have to be standing at the proper layer). [2]
Move on and make sure the Sackbots jump into the pipe. [1] Afterwards enter the passage on the right yourself. Behind the next respawn point you will see two stamper machines - there are two items behind the left one. Collect them. [2]
Jump on the stampers once they're lowered and move on. [1] A few platforms lower you will have to face two enemies. [2]
Behind one of the respawn points you will have to pull out a horizontal platform and create stairs this way. [1] A bit further you will free more Sackbots from a cage by using a switch. [2]
Alternative version - right behind the Sackbot cage you will see two aslant launchpads above you. [1] Throw one of the Sackbots onto the one on the right - he will hit the platform above and drop down two items. [2]
Once you reach a wide slope, you will have to make use of another lever. [1] Afterwards climb up together with the Sackbots. [2]

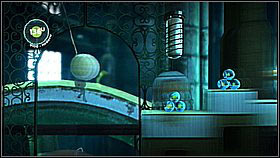
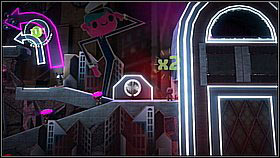
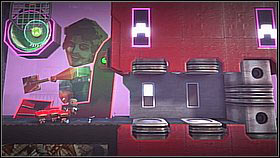
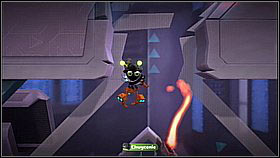
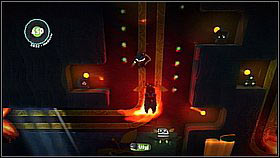
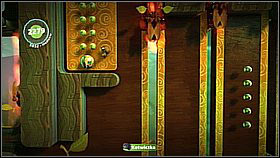
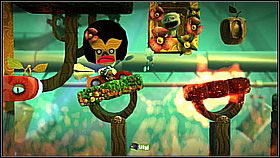
![Alternative version - being able to pick up the Sackbots, you can get an item on the slope [1] - Pipe Dreams - The Factory of a Better Tomorrow - LittleBigPlanet 2 - Game Guide and Walkthrough](https://game.lhg100.com/Article/UploadFiles/201512/2015121617243523.jpg)
Alternative version - being able to pick up the Sackbots, you can get an item on the slope [1]. Just throw one of the bots at the L-shaped platform above. [2]
At some point the Sackbots will enter another pipe and you will be able to travel on using the launch pad. [1] To the right there is a 2 players zone. [2]
This puzzle is trivial - each player has to enter one of two wheels. [1] Now just run in one direction and wait for the items to fall. [2]
The further road leads up along the launch pads - you have to look out where you land, as the background keeps closing and opening. [1] Upstairs, collect the items on the left (behind the neon). You should also grab the key (hanging right above the launch pads). [2]
Once you reach a riddle with a hand and four levers, switch two outer fingers to arrange them in the symbol showed by the sign. [1] By the end of the level, you will have to jump through the moving pipe - you have to do it twice to collect both items (on the left and right). The easiest way is placing yourself over one of it, jump down and then blow up your Sackboy and collect the other one. [2]
In order to collect all the items, you need to save 10 Sackbots.
Collectibles: 44 items
At the beginning of this level, there's place for a red fist sticker - you will get it only in a few minutes. Once you do, be sure to repeat this level - points at which you can use the Creatinator, which you get for placing the sticker, have been marked in the guide ("Alternative version").
Alternative version - if you have the mentioned sticker, you will get the Creatinator right beside the respawn point, behind the flamethrower. Using it you can smash various items - boxes with the mark of the red fist should interest you the most. One of them is right above you. Smash it. [1] In return a launch pad will appear - jump up using it and smash the wall blocking the items on the right. [2]
Alternative version - before you move on, you have to return to the beginning (by the way - the flamethrower can be smashed as well). There are two boxes where you began the level - destroy them [1] and collect the bubbles. [2]
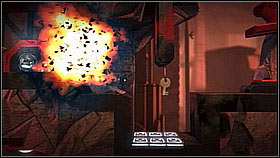
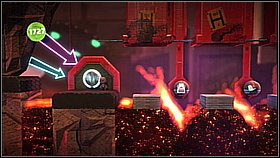
After beginning the level, go right and avoid the flamethrower. [1] In the next room, jump on the button and grab the bomb which will fall from above. [2]
Throw the bomb into the boxes on the right to create a passage. [1] Further on proceed the same with mines, blowing up the passage leading below. [2]
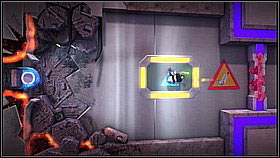
Alternative version - behind the first bomb distributor you can destroy the mortar in the ceiling. [1] That way you will get two bonus items. [2]
Alternative version - right behind the ceiling hole mentioned above and beside the second bomb distributor there is another secret. Once you stand as shown on the screenshot, [1] you should see an explosive box on top a pile of others. Shoot it and items will fall out. [2]
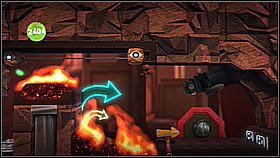
Below, take a bomb from the distributor and backtrack left - you can collect a couple items here, but you need to blow up the passage leading to them. [1] In order to go up the slope, blow up the support by using the bomb. Before you go up, look below the footbridge - there are bubbles there. [2]
Alternative version - having the Creatinator, you can "dig" a small tunnel below the sloping footbridge. Go below it, collect the bubbles and destroy the mass on the right. [1] This way you will be able to go far to the right, collecting a couple bubbles on your way. [2]
Overhead, avoid the two flamethrowers. [1] Beside the next bomb distributor, try to smash the mortar with items in the ceiling with a bomb. [2]
Take a bomb and avoid the moving platform by hiding in the hole. Destroy the blockade with a bomb. [1] Jump up the platforms and collect the items hidden behind the respawn point. [2]
Now grab onto (carefully!) one of the moving bombs. [1] Jump down onto the first tower - use the launch pads to get onto the roof and collect the item. [2]
Move further on the bombs - by the end you have to let go early enough to avoid the flamethrower. Don't jump down just yet - instead run to the right and jump over the pit. You will find one item here. [1] Further on you have to use two flamethrowers to get rid of the red blocks - starting with the outer ones (to get two item bubbles. [2]
One more flamethrower to go - this time it has to hit the red blocks between the concrete platforms. [1] Run right and enter the level link. [2]
In order to free the Sackbots from the cages, jump onto the launch pad and grab the sponge. From it you can jump onto the left cage and wait until it goes up. Now jump onto the ledge on the left to get two bubbles. [1] Activate the switch on the right - it's a hologram which calls in robots. [2]
You have to herd the Sackbots once again, making them move by using the holograms. Before you activate the next device, make sure the road ahead is clear.

Before you activate the second hologram box, lower the footbridge by grabbing the sponge below it. [1] For now avoid the next Sackbots cage and jump along the non-electrified surface of the turning platform. [2]
Upstairs, return to the left and jump onto the purple footbridge - from it you can reach an item. [1] Now jump down and free the Sackbots using the switch. [2]
Go back up and activate the hologram. [1] The Sackbots will arrange themselves in front of the turning platform - stop it at a safe position with the switch. [2]
After activating the next hologram, the Sackbots will jump into the pipe. [1] You should move on using the launch pads. [2] Jumping to the right off the first one, you will reach a 2/3/4-player zone.

Solving this puzzle on your own, you will only get two out of six items. [1] Having four players, you have to arrange yourselves like this:
- player 1 - below the red button
- player 2 - behind the first concrete block (and light)
- player 3 - on the x2 sign (lower right)
- player 4 - on the x3 sign (lower, in the middle)
Player 1 activates the button, grabs the timed bomb and quickly throws it to the right. Other players keep throwing the bomb further - it has to fall onto the spot marked with the x4 sign. It requires coordination and dexterity, as you have to act very fast. You grab the bomb by holding R1 and throw while standing - just push the right analog stick and let go of R1. [2]
Above the multiplayer zone there's a shelf with bars - items have been hidden here as well. [1] Move on upstairs and grab one of the bombs going left. [2]

Behind the next checkpoint you will come across another cage. Before grabbing the sponge to free the Sackbots, take a peek into one of the boxes to the right of it (item). [1] Free the robots and move further to the left to clear the path for them. [2]
In order to destroy the explosive material on the left you have to use a bomb. Jump onto the button and fly left to catch it. [1] Now gently fall down - you need to land beside the launch pad. From here, jump onto the left part of the launch pad and throw the bomb into the boxes. [2] Of course collect the key as well.
Call in the Sackbots with the hologram. In the next part you have to avoid two platforms moving horizontally on two layers of the stage while holding a bomb. [1] Once you're on the left, detonate more explosives and use the device to call in the robots. [2]
Above the next respawn point there's an item (on the rock). You will reach it after launching off the left launch pad. [1] Activate another hologram for the Sackbots to jump into the pipe. [2]
Move on by grabbing the bomb - you have to avoid the electrified objects. [1] Once you pass by two pendulums, jump down - otherwise you will hit a wall of explosives. [2]
At the last part of the level, you will have to quickly run through an exploding surface - jump over obstacles and don't stop. [1] If you managed to save 10 Sackbots, you will receive all the precious prizes - including the red fist sticker, with which you should repeat this level (assuming you want to collect all the items). [2]
Collectibles: 25 items
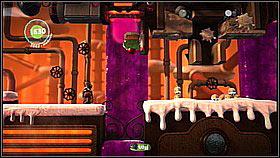
Start off by jumping onto the conveyor belt and collecting the bubbles. A bit further jump up. [1] Move below the stamping machines and afterwards jump over the pits, while keeping an eye on the waste falling from the ceiling. [2]
Grab the arm of the bigger machine - it will transport you over the flames. [1] You will reach a trash compactor - you need to run into it once the platform is raised. On your way jump over the flaming fragment and hide in the depression. [2]
Wait for the compactor's platform to go down - once it does, jump onto it and run left to reach a hole in the ceiling with a launch pad in the background. You will be thrown up - grab the sponge. [1] The next trap are three red platforms moving out of the wall. Jump on them in order and grab the bubble at the top. [2] Go through the pipe on the right.
Free the Sackbots by pulling two levers. [1] Jump to the right. Wait for the robots to create a rope - use it to get to the right and use the switch (which will provide your robots a safe landing). [2]
A bit further you will have to face the hardest part involving Sackbots - a conveyor belt with stamping machines. Jump onto the belt and stick to the left side to wait for all the robots. [1] Run to the right once the first stamping machine starts rising. Stop at the end of this part. [2]

Step a bit away from the lava tank and once the second stamping machine starts going up, jump onto the upper part of the conveyor belt and quickly run right. [1] At the end, jump down to the barred hole. [2] After a short ride the Sackbots will jump into the pipe.
The bit with moving red platforms leads to the 2 players zone and two items, which can be collected by one player alone. [1] The bubbles are below on the right. [2]
In order to reach the two players zone, you have to jump along the footbridges once the flamethrowers retreat into the wall. [1] Now both players have to stand in the middle of the elevator going up (back and forth). [2]
While riding the elevator up, players will have to activate two randomly appearing buttons - standing in the wrong place ends up with death. [1] The best way is to stand in the middle and divide so that player 1 runs for the button more to the left, while players 2 goes for the button on the right. [2] You need to repeat this three more times.
Go out of the 2 players zone and head right. You will have to jump along burning platforms and catch the items hanging above them. [1] Afterwards use the launch pad and grab the sponge to ride above the burning stuff. [2]
Once you reach rotating elements, you have to make sure to collect all items around them. Of course at the same time you have to avoid the incandescent parts. [1] Enter the pipe below. [2]


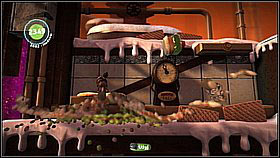
Below there's another trash compactor - first collect the items at the upper right. To do it, stand on the vertical wall of the machine and ride it up. [1] Jump off onto the horizontal platform and run left once the compactor is below (jumping over the burning part). [2] Ride up and collect the items.
In order to reach the pipe below the trash compactor, you have to hide in the niche on the left and wait for the platform to go up. [1] Behind the next respawn point grab the planks, which will fall down and create a platform on the lava using them. [2]
Before you move on, use the launch pad to jump onto the upper platform once the stampers and up. Collect one bubble here. [1] Moving right, behind one of the stampers and a red chimney you will find three more items. [2]
The further road leads left - here you will find more robotic arms. Grab the sponge which will fall out of the disposer and place yourself below the robot while holding it above your head. It should pick you up and transport. [1] Repeat this with the next machine. Once you reach the cage, free the Sackbots [2] and afterwards jump over the pits with their help. In the end, switch the lever so that the robots can go down.
In order to get all four prize items, you will need to save 12 Sackbots.
Collectibles: 13 items
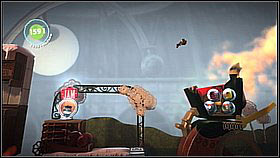
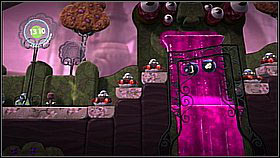
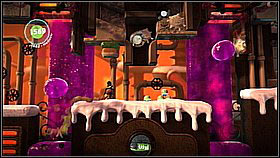
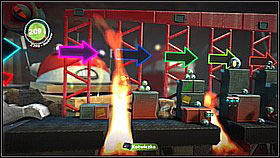
Collecting all the prize bubbles on this level will require a couple approaches and quite some skills. First try to catch the first item found on one of the first towers - after beginning the level, jump off the platform and grab the green sponge [1] in order to bounce off the right side of the launch pad. [2]
The second item can be accessed by following the upper path - it's on a platform by the wall which will be destroyed by the chicken (you can catch speed by swinging on the fat sponge and jump from the platform behind it, but large momentum is required). [1] The third item is hidden nearby the second - on the bottom path with boxes (you need to jump over them). [1]
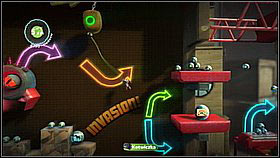
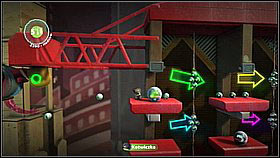
In the early phase of the level, some of the items are placed very high - you need to move along the highest platforms and swing on sponges. The fourth item is at the lower of the two red platforms (beside three arrows - orange, green and blue). [1] The fifth item is on the next "building" - in the first row of the red platforms (at the very top). You can reach it by following the upper track and strongly jumping off the sponge before it. [2]
The sixth item is easiest accessible from where the fifth was - jump below, from one platform onto another. [1] Unfortunately, in order to collect the seventh item, you need to be up high again, so that means restarting the level. Instead of jumping for "number six", hop across two platforms to the right. [2]
The eighth item is behind two bridges which you can lower by grabbing onto the sponges. You need to jump along the piles of boxes. [1] The item is on the fourth column. [2]
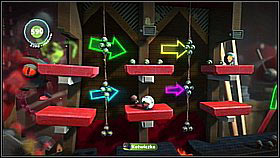
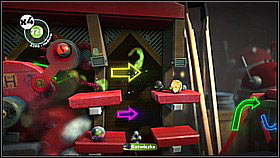
The ninth item can be reached by jumping along the boxes - eventually they will turn into launch pads and you can launch off the second for a bubble. [1] Once the chicken falls down, you will reach a TV - this however isn't the end. Soon another chase will begin. Jump on the launch pads. In the first three rows of platforms there is item number ten (middle column, lower row) and eleven (last column, upper row). Of course you can't collect them during the same run. [2]
The last two items are at another set of red platforms - number twelve (right column, upper row) and thirteen (right column, middle row). [1] From here you only need to go right to finish the level. [2]
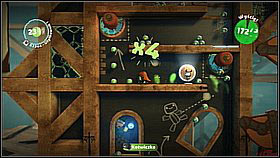
Collectibles: 9 items
In this level you move along the bottom platform and control the Sackbots on the upper - you also need to protect them. The robots will follow you once you pick up a heart (falls out of the distributor). [1] Use this to open passages and solve easy puzzles. [2]
In order to collect all the items, you need to get 20 Sackbots to safety.
Collectibles: 9 items
An easy mini-game, in which you control a few launch pads and need to bounce the Sackbots. [1] The robots need to fall into the hole on the right. [2]
In order to collect all the prizes, you need 3000 points.
Collectibles: 50 items
At the beginning of the level you can place a sticker, which you will receive only around the middle of this campaign - it will change the level into a race, which however won't bring any new items. [1] Move forward and collect the bubbles before getting into the elevator. [2]
Below, pull the switch and enter the RoboBun. [1] It moves with jumps (X) and can perform an air attack (R1). Hop to the right and collect two bubbles over the cans. [2]
Once you jump over the electrified device, leap from the small ledge and bounce off the cans attached to the wall (to collect more items). [1] Jump for the next prize bubble from the transparent footbridge. [2]
Keep hopping further. Perform small jumps in the little tunnel (by gently pressing X) but also collect the items placed between the electrified devices. [1] Get up by using the platforms on springs - there's an item by the ceiling. [2]
Attack the targets marked with red by pressing R1 (in the air). Also collect the bubbles above them. [1] Before you destroy the moving enemies, bounce off their "heads" to collect items. [2] The bunny can climb walls, so you can reach them even if you jump on the enemies prematurely.
Smash the red platforms blocking the passage leading down - collect the items hidden between them. [1] Once you reach the electric robots, jump on their heads once again to get the prize bubbles. [2] Afterwards destroy them and continue the trial.
Ride the elevator down and switch to the MechaPup, armed with a sonic beam which can move objects (R1). Use it to move the red block away. [1] Use the same method to push the next cube and jump after it to push it even lower. [2]
Hit the column with the sonic beam - items will fall down and you will also unlock the passage. [1] Using the sonic beam again, create a set of stairs. [2] Jump up them while avoiding the blue electrified part.
In order to use the elevator, you need to push down the blue ball. [1] Afterwards you will be able to ride up and push the electrical platforms. [2] Before you move to the right, collect the items on the left (you need to jump over the dangerous floor fragment).
Once you reach a three-layer platforms set, move them to the right and jump above them. Being on the other side, use the sonic blast once again - you will create stairs. [1] Upstairs, remove the blocks from your path. [2]
Do the same with the groups of blue platforms - move them and jump along the stairs. [1] The blue icicle hanging from the pendulum has to be pushed so it touches the engine - approach it from the left and push. [2]

Jump out of the puppy, collect the item and enter the elevator. The next vehicle you're going to check out is the Hamster, armed with the ability to boost charge (R1). Use it to break the red blocks [1] and ride up the twisted tunnels. At the bottom part you will come across items - jump up to collect them. [2]
After the crazy ride, you will reach a big room with three items and a key - collect them (it shouldn't be too hard with the Hamster, as it can literally fly - just point the direction while using the boost, works even in air). [1] In the last part of the stage there are a few rooms divided by red doors - collect all items in each of them (most of them are by the ceiling). [2]
Collectibles: 84 items
This time you move on top of an equally extraordinary vehicle as before - a camel armed with missiles. Using it you can smash your enemies and also collect items.

In the first room, shoot the targets. [1] Afterward begin destroying the boxes. Above all those which contain items (you can fight for points during another playthrough). [2]

There will be lots of items - try to shoot as many as you can (they're not only inside the piles of boxes, but also, for example, in the spinning wheels). [1] At some point you will ride down a small elevator - keep an eye for an item waiting to be shot in the second cabin. [2]
After a while enemies will show up - still try to "aim" at the items located on top of columns and inside boxes here and there. [1] The stationary guns can be damaged only while they're shooting missiles - of course at the same time you have to make sure the camel doesn't get damaged too much. [2]
A bit further you will have to hit the shining square above you - this will you will pour out the rubble and be able to move on. [1] Destroy the oncoming waves of enemies and collect items - don't forget about those above the TV. [2]
Ride the elevator down, fight off the bats and shoot the items. [1] Below you will reach a giant pile of boxes with bubbles - focus your fire on it, as inside there's also the key to one of the mini levels. [2]
Once you reach the spot where bombs are falling, try to destroy them as fast as you can. [1] Pay attention to the second damaged column - you can destroy it and collect the nearby items. Note that apart from the rubble, an additional prize bubble will fall down! [2]
A bit further you will ride down another elevator. [1] Below you will come across a column with items - once its fragments crumble, a hidden prize bubble fall down [2]

At the end of the level you will come across a boss - you have to shoot its red eye and at the same time shoot down the incoming bombs and rockets. [1] Once the monster jumps up, focus your fire on the rockets coming out of his bum - they are hard to shoot down. [2] After a few minutes the enemy should explode and leave two items behind.
Collectibles: 41 items
It's time for bees - fly on board this robot and pick up objects with R1. First collect three bubbles on the left and fly up. [1] Now you have to make courses with Sackbots from the left to the right - after each of them, take the prizes (they will fall out on the right side). [2]
In the further part of the level, pick up three Sackbots at once (they're on the left and right) and fly with them up the tunnel. [1] Put away the robots on the left and collect the prizes (above). [2]
In order to repair the floor, head up (looking out for electricity) and throw down two platforms. [1] Patch the holes using them. [2]
Before you move on, collect the prizes. [1] Get through the swinging cables. [2]
Behind them you will have to throw down three Sackbots onto the conveyor belt through the holes - throw them onto the green fragments. [1] Collect the items and fly up. [2] Stick to the left side - you will find three more bubbles there.

This time you have to pull the Sackbot boxes to the middle position. [1] Once you do that, fly up to the ceiling - you will find prizes for completing the task there. [2]
Another transport mission - move a total of three Sackbots to the right, while keeping an eye for the hazards (falling rubble and electricity). You can do it all at once or in segments. [1] After completing the task, return left - an additional prize will appear between the holes from which the rubble was falling (item bubbles). [2]
Don't' forget about the items by the tube. [1] During the last phase, you have to move three Sackbots to the last pipe - firstly dropping one of them so that he activates the button. [2]
Collectibles: 28 items
Another stage with a bee - this one a battle type one. During it, you will have to destroy the enemies, avoid obstacles and of course collect items. In order to get all of them, you need to play this stage at least twice.

Blast the door (X) and head forward. [1] Eliminate the enemies. At some point ships emitting a red force field will appear - eliminate them first. [2]
Eventually you will reach a fork - here you have to destroy one more door. Collect the item behind them, in the middle. [1] In the further part of the level you have to fly through a series of traps and moving platforms. Avoid the obstacles (including the pink grease) and try to collect as many prize bubbles as you can. You will probably need another flight to collect all of them. [2]
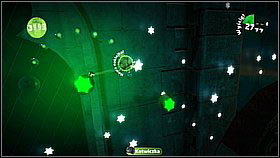
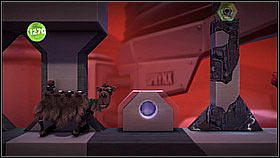
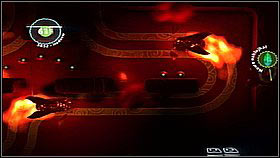
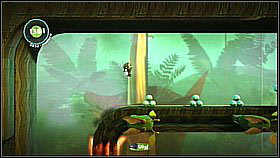
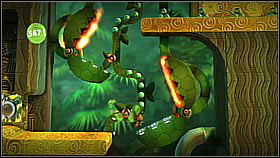
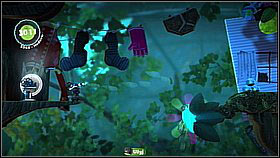
![Later on the bee will speed up [1] and the perspective will change (you will be flying up, not to the right) [2] - the case is easier with this part, as the obstacles won't be as complicated as before and you don't need to worry about items (there are none to collect) - Flying in the Face of Danger - Avalon - LittleBigPlanet 2 - Game Guide and Walkthrough](https://game.lhg100.com/Article/UploadFiles/201512/2015121617245609.jpg)
Later on the bee will speed up [1] and the perspective will change (you will be flying up, not to the right) [2] - the case is easier with this part, as the obstacles won't be as complicated as before and you don't need to worry about items (there are none to collect).
Collectibles: 0 items
During the boss fight, first shoot the central part of his body when he's charging his main weapon - the laser. [1] Once the laser is charged (the beam will start getting clearer), get out of its reach. Also avoid the small purple projectiles (luckily they're rather slow). [2]
Once the hulk of the enemy ship explodes, the boss will change his attack pattern. This time he will shoot two beams. You can avoid them by flying to the top or bottom of the screen. [1] When the lasers start charging, shoot the middle of the enemy ship (dark-purple outgrowth). [2]

After some more explosions, the final phase of the battle will begin - this time the enemy will alternate between shooting lasers which move up and down from the middle (like in the second phase) and ones which move to the middle (hide in the middle). [1] After each series of the first type, you will have a chance to shoot the ship's weak point - the cockpit. [2]
Collectibles: 9 items
A race with the hamster. [1] It's one of the easiest level - in fact all you have to do is keep rapidly boosting (R1) and catching the bubbles to get a high multiplier. [2]
In order to get all the items, you need to score 99000 points.
Collectibles: 9 items
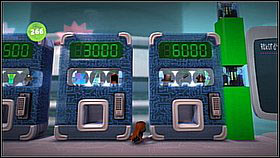
An easy shooter in which you control the ship with the left analog and shoot with the right. [1] During the fight for points [2], be sure to use the upgrades (they appear on four circles): life, armour, speed and double missiles.
In order to get all the items, you need to score 6000 points.
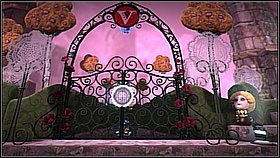
Collectibles: 40 items
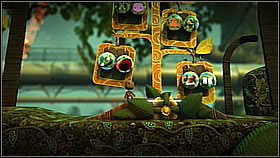
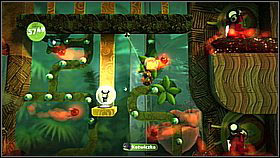
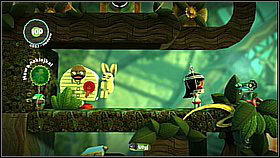
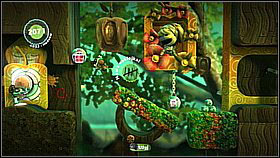
Start off by using the launch pad to collect a few items on the tree. [1] Afterwards jump by the waterfalls until you reach a caterpillar. [2]

While climbing up the tree, you will have to avoid traps and obstacles and in the further part also enemies. [1] In order to collect all the items you will need to repeat the level - during the first run, try to focus on the items on the left side and leave those on the right for the second run. [2]
The whole journey is divided into three unofficial stages (with the camera moving closer between them). During the first you can find one item on the ramp on which you can get from the right side. [1] In the second there are enemies - you can grab a few difficult bubbles here - for example behind the fireballs or by the wall beside the rows of spiders. [2]
In the third part of the tree you can collect a key - it's in a circle surrounded by leaves (you need to go round them from the top). [1] Right beside this spot there's another ramp (items can be found both on it as beneath it). [2]
Collectibles: 38 items
At the beginning of the level, you can place a sticker of a golden apple, which you will get during the next level. In return you will receive the Platform Cannon. Every spot in which you can use it have been marked in the guide as "Alternative version".
Jump across the platforms to the right - look out for the fireflies. On one hand they do light your way, however touching them will toast you. [1] Once you reach the end jump up, firstly collecting the item hidden in the niche on the right. [2]
Alternative version - Once you receive the Platform Cannon in return for placing the sticker, return to the beginning of the level. [1] From here, proceed as follows - shoot a launch pad below yourself and repeat it in the air. This way you can get very high - there items hidden in the branches of this secret area. [2]
Alternative version - you can get bonus items by jumping to the left of the spot where you got the Platform Cannon. [1] Jump up beyond the vertical fireflies route. [2]
Go left on the upper level and behind the respawn point jump up the platforms, checking out another niche with a bubble on your way (this time on the left). [1] Keep climbing up until you reach a moving platform - you have to rock it to reach the item on the left and afterwards climb onto the ledge on the right. [2]
At some point you will have to jump over a firefly onto the next platform. [1] A bit further you will need to jump off launch pads and avoid the insects. [2]
Alternative version - you can use the Platform Cannon in this part of the stage as well. Get up and collect the hidden items. [1] Jump further to the right and up. [2] To be continued...
Alternative version - ...following the upper part of the building's interior you will eventually get outside. [1] Once you move on along the fireflies routes you will reach more bubbles. [2]
You will get outside and receive the grappling hook - you use it grab the fireflies. Use this method to reach the branch and collect the items. [1] The grappling hook will prove useful also a bit further - you can get to the other side of the chasm by grappling the insects and before doing that, collect the item in the upper left. [2]
Behind the next checkpoint you will have to swing on sponges - bounce off the platforms and keep climbing up. [1] Afterwards go through the level link. [2]
The next obstacle are moving launch pads - use one of them to jump over the hot surface. [1] Afterwards jump up and wait for the next launch pads to move out. [2] You will also come across a multiplayer zone here.
In this zone you will have to lead the fireflies to one of the three targets - two of them can be unlocked by 2 players and one only by 3. [1] The first 2 players combination is grabbing two buttons on the right. The second is grabbing the two outer switches. The third, for 3 players, is grabbing all of them. [2]
Behind the next respawn point you will reach carnivorous flowers - there are launch pads in their mouth which you can use to get up. [1] The further road leads up - grab the green material with the grappling hook. In the elevator, you have to dodge the fireballs and be sure to collect the items (they will appear from time to time on both sides of the track). [2]
You will once more go outside and meet fireflies. In order to move on, you have to use the grappling hook to grab the sponges which aren't on fire and jump right this way. [1] A bit further you will encounter patrolling fire men. Wait for them to go right and follow them, peeping into each niche on your way. Pull up on the line to get items. [2]
In the middle niche, wait for the fire man to go left and head right. Collect two items at the end and jump up on the launch pad. [1] During the last part, jump up while avoiding the fire men and burning objects. [2]
Collectibles: 28 items
After beginning the level, run to the left to collect a new material. [1] Now jump lower and head left again - beside the patient with a rabbit there's another item. [2]
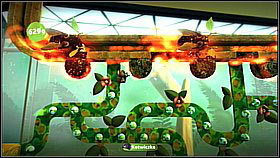
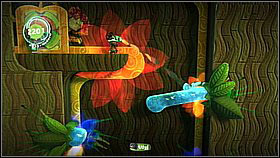
![Extinguish the burning fragments of the jungle using the right analog stick and R1 [1] and afterwards ride down the elevator - Patients Are a Virtue - Eve's Asylum - LittleBigPlanet 2 - Game Guide and Walkthrough](https://game.lhg100.com/Article/UploadFiles/201512/2015121617250267.jpg)
Extinguish the burning fragments of the jungle using the right analog stick and R1 [1] and afterwards ride down the elevator. Save the patient in the burning cell. [2]

In order to ride down the elevator, shoot the water bubble above you. [1] Afterwards extinguish the platforms and jump down along them to the right (looking out for the burning enemies which will jump out from the left). [2]
In order to extend the bridge, aim the water stream onto the cape on the other side of the pit. [1] Proceed the same with the two next drops - this time they will create sloping platforms. [2]
Before you move on, look behind the drop on the right - there's an item in the hollow. [1] Another prize bubble is floating in the air right behind the respawn point shaped like an apple. [2]
Move on to the right, extinguishing everything on your way and killing the burning enemies. Free two more patients from the flames (each will reward you with 2 items). [1] Once you reach another drop, water it and you will create a footbridge leading right. Repeat this process on the other side. [2]

Before heading right, jump from the upper part of the branch to the left - here you will come across a launch pads which will throw you up onto an item. [1] The next water bridge has to be crossed fast - a burning enemy will be dropping fireballs from above, which will destroy it. [2]
Free the patient, extinguish the flames and destroy two burning enemies who will jump out from the lava. [1] Afterwards cool down the turnstile and use it to jump for the key (if you fail, you will start again from the respawn point). [2]
In order to get up, pull the platforms out of the water - also collect the item (jumping off the middle water stream). [1] Extinguish the swinging platform and the patient's cell (take the bubbles which he will give you in return). [2]
Don't forget about the item hanging to the left of the swinging platform. Jump from its left side once it is in the upper position. [1] In the downward tunnel, extend water bridges. Look out for the burning enemies which will attack you from above by surprise. [2]
Below, jump to the left above the pit - there are three items in the hollow. [1] Use water on the turnstiles and run below them. [2]
Activate the elevator by shooting water at its upper part. [1] Below, turn left to collect two hidden prize bubbles. [2]
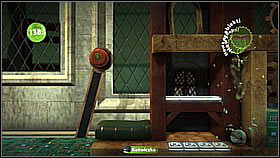
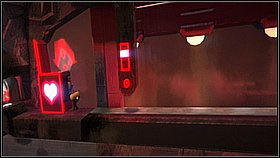
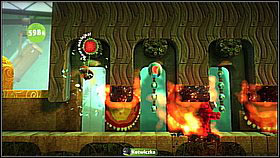
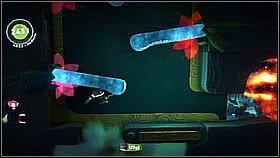
![A bit further collect the item hidden behind the drop [1] and afterwards fill it up to drop down the burning boulder - Patients Are a Virtue - Eve's Asylum - LittleBigPlanet 2 - Game Guide and Walkthrough](https://game.lhg100.com/Article/UploadFiles/201512/2015121617250532.jpg)
A bit further collect the item hidden behind the drop [1] and afterwards fill it up to drop down the burning boulder. [2]
Don't jump to the burning boulder level at once - if you do it properly, you can earn a bonus items. You need to jump down to the right of the boulder. [1] From there run to the right and hop into the hollow. [2]
Now push the boulder down (to the right). [1] Jump down there and collect the bubble hidden in the hole on the left. [1]
Once more push the boulder to the right. [1] Jump over the pit and fill up the drop with water. [2]

Go up along the turnstiles - of course after extinguishing them. [1] Get rid of the flames from the obstacles - they will create bridges. [2]
At the end, extinguish the swinging platform and jump onto it. [1] Deal with the flames on the next platform and patient's cell. Take his present and jump to the right. [2] On the way, collect the golden apple sticker, usable in the previous level.
Collectibles: 23 items
Jump up using the bouncing pad which you can create by filling up the drop with water. [1] Create bridges using the water cannon. [2]
Once you come across burning enemies, shoot the yellow-green bud above - thank to it two items will fall down. [1] Afterwards extinguish the burning ground and move on to the right. Get up using the launch pads activated by water drops. [2]
After launching off the third launch pad, stick to the left - you will grab a key. [1] Afterwards move further - jump over the burning element. [2]
Once you reach the respawn point, you will see three items inside an empty tree trunk on the left. You can collect them by shooting the green bud above you. [1] A bit further you will come across another launch pad - get rid of the enemies before using it. [2]
On the other side, cool down the enemies which will come out of the marked holes. [1] Jump onto the platform with another respawn point and collect the item to the left of it. [2]
You will need 4 players for this zone - in return you can collect 6 items. Each player will have to pick up a drop and shoot water at it (holding down the button until items fall out). [1] That way you will open the buds - all three have to be powered at the same time. [2]
Move on - you will a pit and a burning enemy on a line. Throw him down and afterwards pull out the bridge out of the water while standing on the edge (you have to pit the drop on the other side). [1] Right across the bridge shoot the green bud - three items will fall down. [2]
Clear the way by extinguishing the flames. Shoot the burning enemies on the launch pads. [1] Afterwards go up the slippery slope. [2]
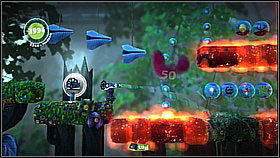
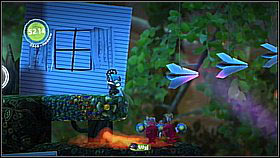
At some point you will reach a spot with launch pads and burning platforms - the flames are difficult to put out with the burning enemies above. Try to collect the items from the bottom and middle part and afterwards go above (shoot water below yourself to avoid getting burned). [1] Move right while attacking the devils and crossing the platforms. [2]
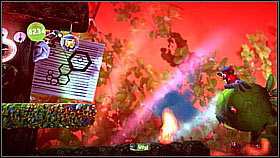
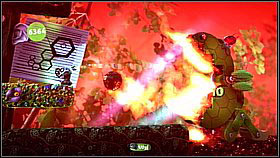
Once you reach a bloodthirsty plant, jump off the upper platform for the item hanging above. [1] The boss can be defeated in two ways - you can stand on the rather safe upper platforms and shoot from there (slower method) or get closer to the enemy (a faster but also more dangerous way). The plant's weak point is its open mouth. [2] After the fight go right.
Collectibles: 20 items
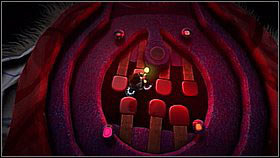
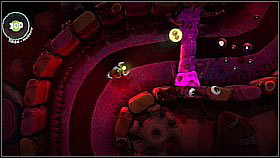
Collect three items - they will run from you (you can use tongs on them - R1). [1] Afterwards grab the white blood cell (hold R1) and smash the blockades (let go of R1). [2]
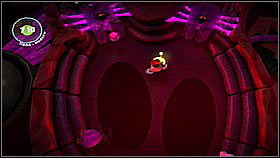
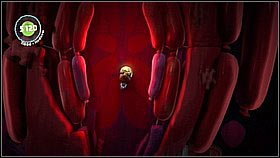
Once you reach the defence mechanisms, destroy them while avoiding the projectiles. [1] First go left to collect items and afterwards go right. [2]
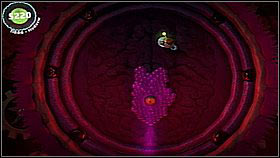

You will reach the boss. First shoot a white cell in the eye protected by purple elements (avoid them). [1] Dodge the purple beam - once it's aimed at you, run. [2]
Once you defeat the protection (purple elements), the eye will call in new sidekicks - run to the bottom of the screen. [1] Afterwards the enemy will start multiplying - it's best to attack once all the parts meet in the middle. [2]
Collectibles: 7 items
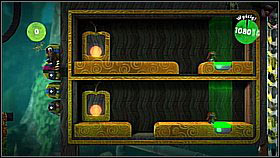
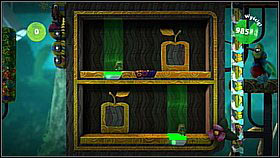
In this mini game you will control two characters at the same time - you must get both of them to the marked zone. [1] You do it by intentionally blocking one of them against a wall or for example grabbing the rugs. [2]
In order to get all the items, you need to score 90000 points.
Collectibles: 9 items
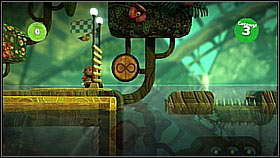
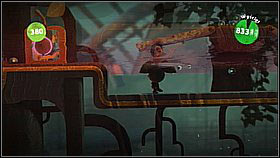
This time you need to go underwater and solve a few easy puzzles. [1] You can stay underwater only 30 seconds, unless you collect oxygen (bubbles) or swim up to catch a breath. Get momentum while diving with X. The puzzles mainly consist of moving items - including fish. [2]
In order to get all the items, you need to score 70000 points.
Collectibles: 54 items
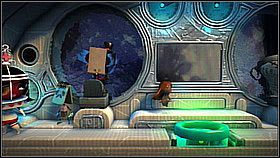
![Jump into the pipe [1] and collect items in the niche - Set the Controls for the Heart of the Negativitron - p. 1 - The Cosmos - LittleBigPlanet 2 - Game Guide and Walkthrough](https://game.lhg100.com/Article/UploadFiles/201512/2015121617251086.jpg)
Jump into the pipe [1] and collect items in the niche. [2]
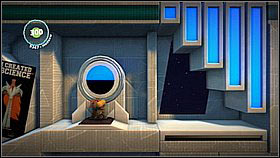
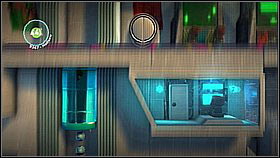
Move on using the lever. [1] Jump into the pipe leading up. [2]


Use the Cosmos Invasion arcade machine. [1] You just need to knock down all the bricks. [2] In return you will get a key.
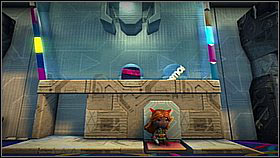
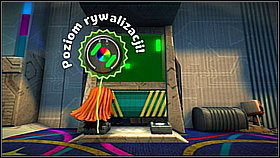
There are two items in the claw machine - stand on one of the buttons to move the mechanical arm. Go down (or better jump) once the arm is above the prize bubble. Collect your prizes. [1] Play the Science Diner - bounce off the ball like in classic Pong. In return you will receive another key. [2]
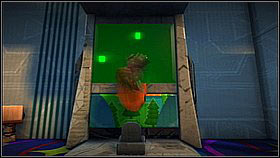
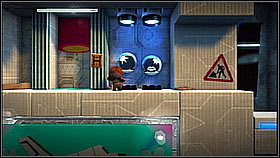
Don't miss Parmesan - in return for grabbing a few falling bricks you will receive a third key. [1] Behind the arcades, go through the level link. Collect the items found on the other side. [2]
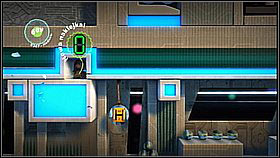
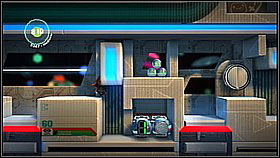
Gravitation is going wild in this part of the stage. One the boxes are below, jump onto the bigger one and stand on its right side - after the gravity changes again you will hit a hole in the ceiling with an item. [1] From here jump down to the right to collect another bubble. Jump over the pits and beside the next crazy cube jump down for the items. [2]
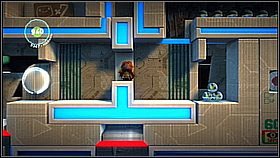

Jump into the crack between the moving blocks - you will get an item. [1] From here you can get to the 2 players zone. If you want to move on, go the right side of the block once it's below and use it as an elevator. [2]
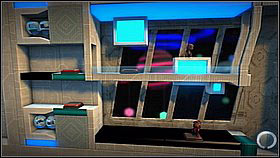

Player 1 stands on the block, while player 2 on the button. The block will go up - there, 1 must jump down onto the platform. [1] Above, player 2 steps onto the button on the left and player 1 get off the lower button. This way you will create platforms which player 1 can use to jump to the left, to one more red switch. [2] Now the upper Sackboy take the bubbles on the left and stands on the button to unlock the lower items.
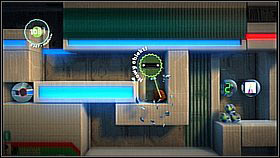
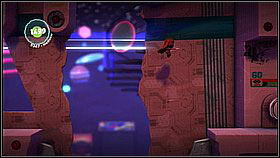
Jump down onto the long block and run right once it's in the lower position. [1] Collect the item and once the platform goes up, run left and jump to for another bubble. [2]
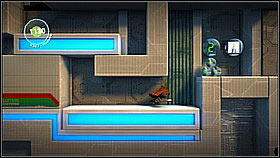
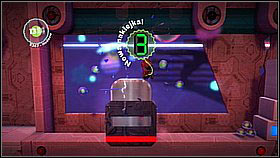
Use the long platform to get to the right - collect the items in the niche. [1] A bit further things will get more complicated and the gravity level will fall, thanks to which you will be able to perform big jumps. Use this to jump above the electrified device, grabbing a bubble on your way. [2]
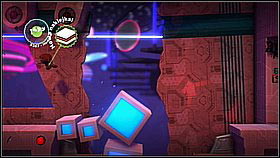
Use the chests to jump for the next item. [1] Afterwards perform a big leap above the pit. [2]

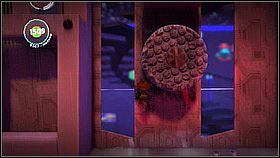
Jump down so that you stay nearby the wall - this way you will grab two bubbles. [1] Grab the wheel while falling down - you need to collect the item below. [2]
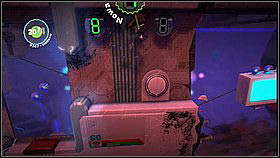
Let go on the other side of the wheel - towards the two items above you. If you won't be able to catch them, you can jump onto the platform on the right and reach the objects from it. [1] Grab the switch high on the wall. [2]

Jump up along the platforms going from one wall to the other. [1] Above, use the launch pad to collect the items. [2]
Jump across the moving electrified platforms so that you catch the item attached to them (just slightly press X not to jump too high). [1] By the second wheel you have to at once jump off on the other side - keeping twisting on it will end up with dying. [2]
Press the buttons freeing the Sackbots and jump further. [1] Beside the respawn point, collect the digit sticker hanging below the ceiling. [2]
Once you reach a room with boxes floating in the air, search for a launch pad - bounce off it to the left to collect the items. [1] Afterwards jump right and "go down" while nearby the wall (more bubbles to collect). [2]
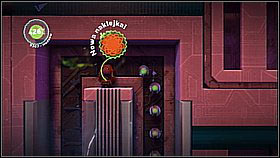
One more trap await you - jump above (just slightly pressing X) the electrified cape and grab the wheel. On the other side let go and avoid the obstacles. [1] Afterwards bounce off the platform and fly vertically up. Grab the item above and fall down with equal care. [2]
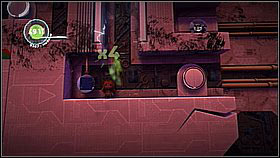
Collect the item on the left. [1] Bounce off the launch pad on the wall to reach two ledges with bubbles. [2]
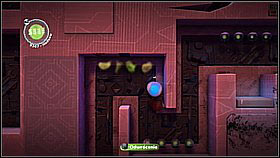
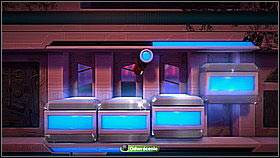
By the end of the level you will receive a curious vehicle - by pressing X you can change the surface to which it's attracted. This way you can avoid the obstacles - switching between the ceiling and floor. [1] The long rows of cylinders need to be avoided along the ceiling. [2]

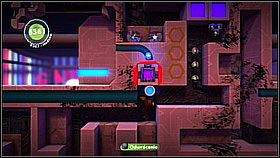
Act similarly with the moving devices - head along the ceiling after the right one and afterwards fall down. [1] In order to ride up the elevator, stick to its ceiling. [2]
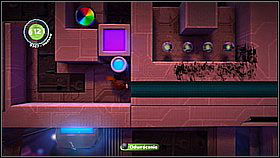
Once you come across a purple block, push it up [1] and collect the item. [2
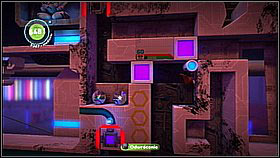
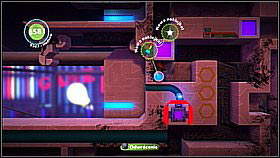
You will reach two more blocks - the one on the right needs to be pushed one square up and afterwards push the other to the left. [1] Collect the items here and push the cube up again. [2]
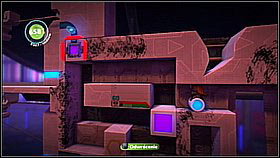
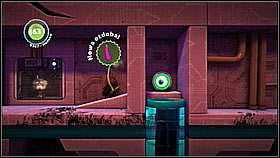
The further road can be unblocked by pushing the remaining block down. [1] Collect the items and jump into the emergency capsule. [2]
Collectibles: 16 items
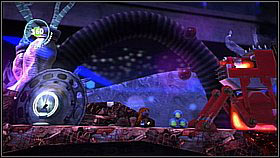
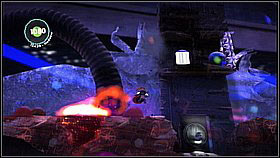
Go down through the cave. You will reach a bomb-tossing enemy - grab one of them and wait (just hold down R1). Once the enemy shoots out bomb number 2, throw the one you already have at him and grab the other one. [1] The enemy will explode and you will have a bomb. Use it to destroy the door of the cage with the item (upper right) - you have to jump above the burning surface throw it as far as you need. [2]
Another method is grabbing the bomb, backtracking with it and leaving it on the floor - letting go of R1 without pointing any direction.
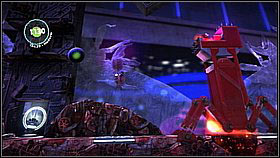
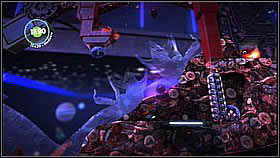
A bit further you will come across another enemy. Jump onto the launch pad and grab the bomb in the air - throw the first into the second cage with an item (upper left). [1] Afterwards destroy the enemy. The next enemy is sitting high up and throws bombs down at you. Grab one of them and smash the door leading to prize bubbles on the right. [2] The next projectiles needs to be thrown into the enemy himself.
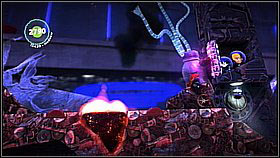
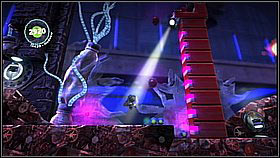
Behind the fourth bomb-tossing enemy there's another cage with items - repeat the above techniques for saving an extra bomb and smash the door. [1] The enemy on top of a high tower till be throwing explosives at the spots - grab them and smash his stronghold. [2]
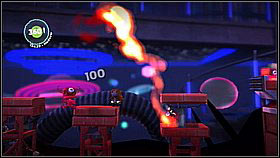
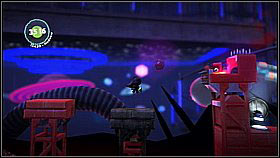
Jumping along the platforms, dodge the flames - jump a moment before the flamethrowers turn off. [1] Grab a bomb on the last footbridge and kill the enemy. [2]
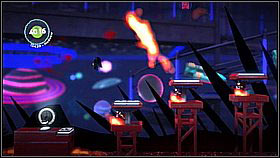
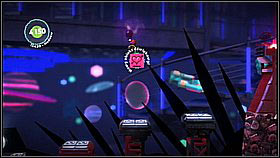
During the next fragment you will need to avoid the flamethrowers again, this time bouncing off launch pads. High above the middle one there's an item. [1] If you won't catch it at once, you can grab it while holding a bomb above your head (the next enemy on the right throws them). [2]
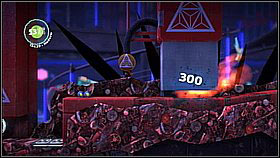

Lure two robots to the squeezer and pull the sponge. [1] Move one after the freed buddy [2] and go through the level link.


On the other side, pull the lever and mount the bunny. [1] Smash through the floor on the right. [2]
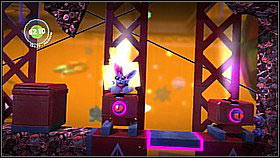
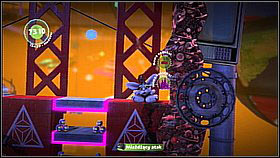
The enemies hiding in the towers can be also treated with the bunny's attack. On the right you will come across battle towers - destroy them while they're charging shots. [1] Collect the bubbles to the right [2] and afterwards go below.
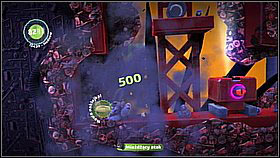
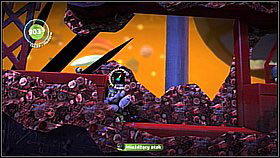
Below you will come across two more towers - there are items behind the left one. [1] The next prize bubble in the left side of the depression in which the cannon is moving. [2]
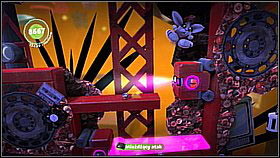
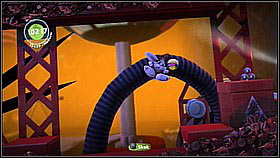
Destroy the cannon attached to the walls to get down. [1] On one of the cannons shooting on bias there's an item. [2]

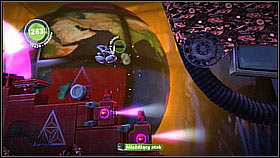
Avoid the cannon projectiles and smash them. Remember that there's always some time between aiming and the shot itself. [1] On you reach three towers arranged like stairs, destroy only the lowest of them. Jump up between the two next ones to collect bubbles. [2]
Collectibles: 41 items

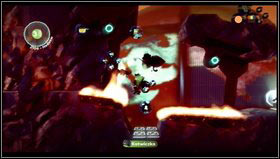
Run to the left and use the bee (grabbing it with the grappling hook). From the bee you can get onto the rocks above to collect the items (don't worry if you won't make it, you can also get there from the other side). [1] Fly over the fire to the left and collect the items on the launch pads. [2]
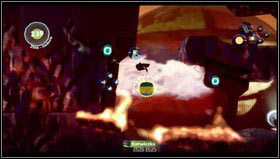
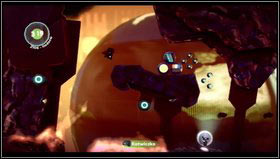
Grab the sponge on the left and collect the items around it. [1] By swinging fast from here you will be able to jump onto the upper ledge on the right (if you haven't collected the items before). [2]
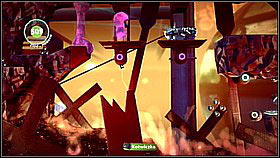
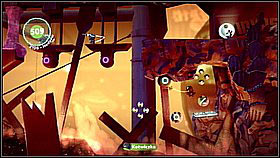
Once Sackbots join you, grab the two sponges above the pit to lower the platforms. [1] Jump from there to the right to the next sponge - there are two items there. [2]
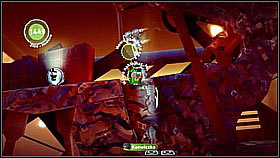
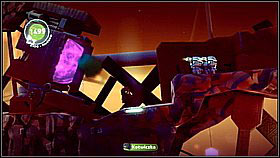
Jump further and collect the bubbles. [1] Pull the switch at the back of the enemy - the hatch will open and Sackbots will attack. [2]
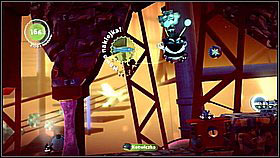
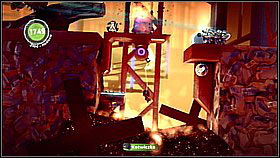
You will see the enemy going left and right - grab onto the bee and collect the bubbles floating in the air. Afterwards jump down onto the enemy's weak point (or touch it while swinging). [1] Pull down another platform for the Sackbots. Below you will have to collect the item on the right - you can even sacrifice yourself in order to reach it. [2]
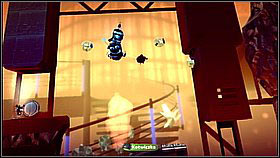
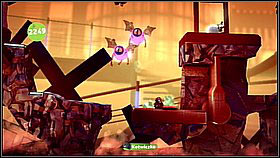
Go past the enemy hitting the ground and climb up the boulders in the background. A bee will appear - jump to it along the launch pads and swing to collect the items (let go and grab again to get momentum). Afterward jump down onto the enemy's head. [1] Move left and repeat the process with the two enemies (and bubbles in the air!). In order to let in the Sackbots, activate the button below. [2]
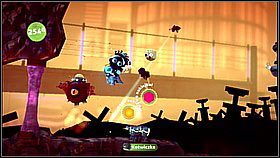
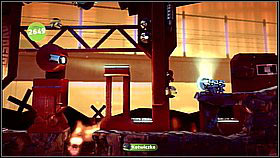
Bee swinging isn't quite yet over - deal with the next enemies and collect the bubbles. [1] You will reach a vertical machine - jump to the left behind it to grab an item. [2]
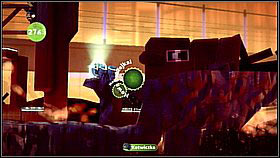
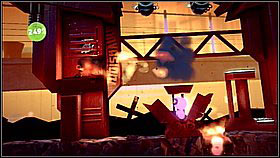
Go back towards the machine - below it in the background there's a hidden launch pad and an item. [1] On the left there's a flame thrower. You have to act quickly: jump up the two platforms and swing using the bees to the left. Press the switch. [2]

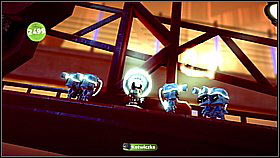
Don't forget about the items to the right of the destroyed flame thrower (you can reach them from the launch pad) and above it (you should reach them using the bees). [1] Run left and use the level link.
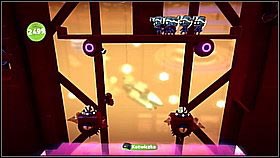
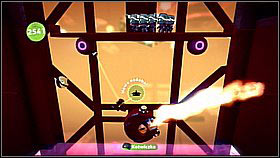
Head left again and grab the sponge. The elevator will start going down - you will have to deprive the enemies of armour by hitting their weak spots. [1] After taking down the armour, the enemies can hurt you for a while, so don't touch them. The second pair of enemies will attack with spikes (upwards charge). Below you will come across a flame thrower - collect the two items on the left and right before destroying it. In order to hit the tower's weak spots, you have to make it shoot one side and quickly jump over to the other. [2]
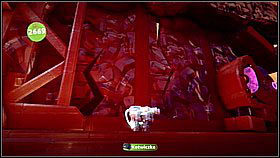
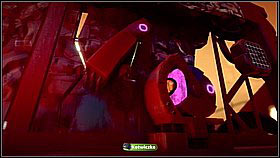
Below jump right along the launch pads. Before you go to the big red robot, check behind the column on the left (item). [1] In order to destroy the monster you need to run to its body once it raises its hand. Once the robots attack, grab the handle on the arm and fly to the back of the enemy. Here you have to grab another sponge. [2]
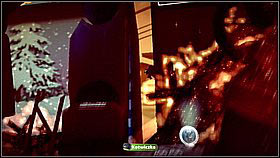
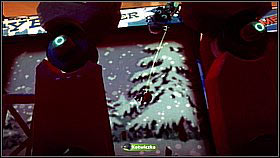
Time to climb up the big robot. Start off by running below its legs (jumping over the flames and grappling onto the bee sticking to the sole) and use the launch pad on the right. [1] Jump to the left and use the handles and bees to reach the enemy's left knee. [2]
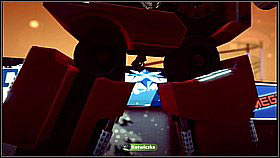
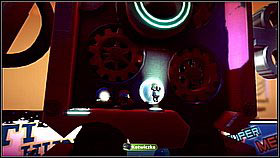
Jump between the legs and bounce off to the platform above. [1] Collect the item inside. [2]
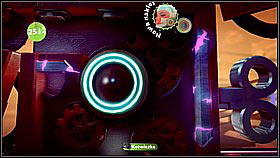
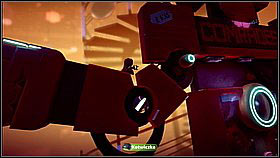
Grab the spinning wheel and get up. You have to also collect the items in the upper right corner of the robot's body, which isn't easy because of the electrified walls. [1] Climb up the arm and try to reach the elbow (item). [2]
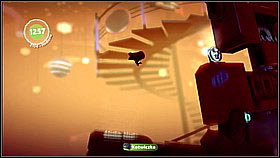
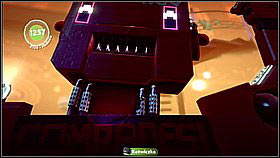
Run up the forearm and bounce off the launch pads on the fist. [1] Jump over the electrified trap in the neck (when the jaw goes up). [2]

![Eventually bounce off the platform by the second shoulder [1] and pull the switch in the head - Where in the World is Avalon Centrifuge - The Cosmos - LittleBigPlanet 2 - Game Guide and Walkthrough](https://game.lhg100.com/Article/UploadFiles/201512/2015121617252344.jpg)
Eventually bounce off the platform by the second shoulder [1] and pull the switch in the head. [2]
Collectibles: 31 items
During this level you will be controlling a bee - shoot the enemies and pink blocks (X). You can also use the cannon to collect items.
Smash the lower part of the pink blockade - there's an item behind it. [1] More bubbles will fall down after destroying a few more blocks. [2]
Avoid and destroy the obstacles. Fly down behind one of it to grab three items. [1] Next two can be found in the group of moving blocks. [2]
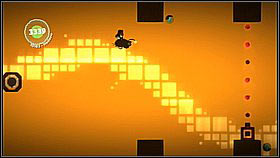
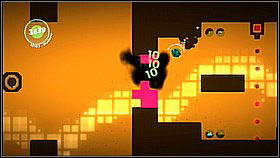
Two items are behind the cannons - one behind the upper and one behind the lower. [1] Right before the two close towers you will find three more items - both above and below. [2]
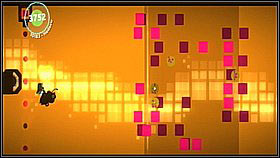
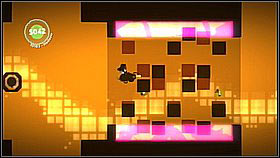
Collecting four bubbles in the swarm of pink squares can be difficult with one attempt - try to shoot them as fast as you can. [1] Two more bubbles are flying up and down between the pink surfaces. [2] Once you reach the dark surface on the right, fly into it.
Two bubbles are beside the upper and lower corner of the platform (behind the blocks that were trying to block us). [1] Smash through the blockade and collect another pair of items. [2]
There are two bubbles before the pink blockade. [1] In order to deactivate the force field, shoot the middle square. There are two bubbles above the second field. [2]
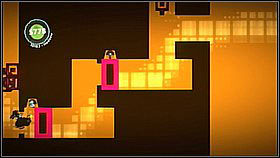
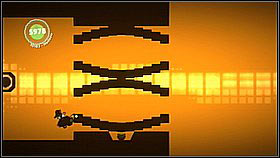
Push the pink objects to the right by shooting them. There are items beside two of them. [1] In order to obtain one of the items, you will have to fly under the lower square "snake". [2]
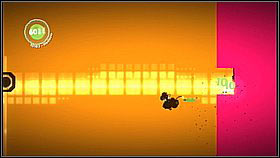
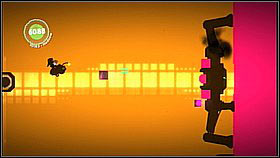
Once you reach a pink wall, destroy its first layer. [1] An enemy will appear - shoot the pink elements and avoid the fast projectiles he'll fire. [2]
Collectibles: 0 items
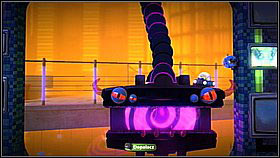
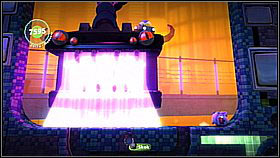
In the first phase of the battle you will steer the RoboBun - you can freely move thanks to its boost (point the analog stick in the desired direction and press R1). The task is easy - climb up the walls on the sides and jump off of them into the boss' weak point. [1] Of course you have to avoid his powerful attack, which fortunately damages only the area beneath him. [2]
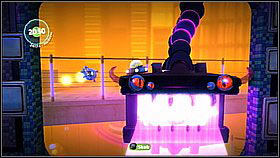
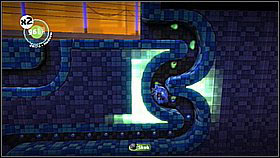
The bubbles/weak points of the enemy can appear on either side. [1] After landing a few hits, ride down one of the tunnel below (both on the left and on the right). [2]
In the second phase you have to jump using the launch pads or grab the sponges, continuously being sucked in by the enemy. [1] At some point a bee will fly up and fire a projectile. The enemy will close its mouth and the platforms will form into a row - get onto Negativitron's s head and hit the weak point (bubble). [2]
If you find a rhythm, you can in jump along the platform pretty much all the time. [1] This way you will earn a higher score. [2] Repeat the process four times.
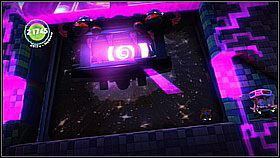
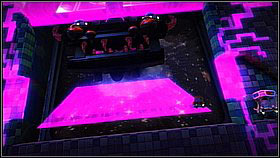
In the third phase the enemy will be shooting purple projectiles - they're easiest to dodge by just jumping, as the beam will damage you only when touching the ground (explosion). Stick to the middle of the arena and keep jumping across it. [1] Each series will consists of a couple kinds of attack - the last one will cover the whole width of the stage - just jump up once the beam gets near the ground. [2]
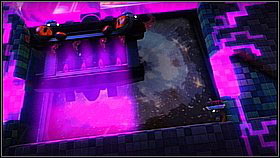
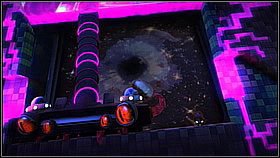
After a series ended by the wide attack, the enemy will go either to the left or the right - run to the opposite part of the stage. [1] One of your friends will throw you a cake from behind the wall. Take it and wait for Negativitron to hit the ground. Throw the cake into his weak point (bubble). You will need to jump to hit the target. [2]
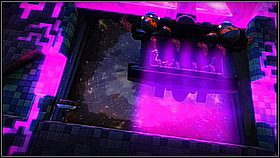
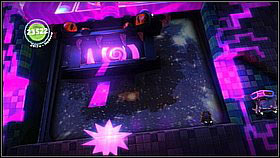
After the throw, run to the other side and repeat the activity. [1] You don't need to throw down both bubbles - the number of hits counts. In total you will have to ht Negativitron about 4-5 times. In the later part the enemy will increase his speed, but the overall tactic doesn't change - just try to get ahead of his shots. [2] In the end jump on the bubble placed on the platform.
Pins are special challenges concerning different aspects of the game - collecting items, finishing level and even your online activity. A few of them are secret - below a list from the English version. They don't count to any achievement and getting some of them is really hard. For example the Molecule pin is reserves only for the employees of the studio.
Some of the pins can be obtained only during selected days, which of course can be bypassed by changing the console's date.
Special costumes are rewarded for acing (finishing without any death) the final levels of each campaign.
Sackbot - complete story mode
Larry Da Vinci - ace Final Test
Victoria von Bathysphere - ace Kling Klong
Clive Handforth - ace Fowl Play
Avalon Centrifuge - ace Huge Peril for Huge Spaceship
Eve Silva Paragorica - ace Invasion of the Body Invaders
Dr. Herbert Higginbotham - ace Into the Heart of the Negativitron
100% Complete - Earn all LittleBigPlanet 2 trophies to unlock this platinum trophy
Complete Da Vinci's Hideout - Complete the main path of Da Vinci's hideout
Complete Victoria's Lab - Complete the main path of Victoria's Lab
Complete The Factory Of A Better Tomorrow - Complete the main path of The Factory Of A Better Tomorrow
Complete Avalonia - Complete the main path of Avalonia
Complete Eve's Asylum For The Mentally Alternative - Complete the main path of Eve's Asylum For The Mentally Alternative
Complete Story Mode - Complete the main path of the story mode
Ace Story Mode - Ace every level in the story mode
Aces in Spades - Ace 10 different Story levels in a row
Prize Collector - Collect 50% of Story prize bubbles
10 Story Versus Wins - Win 10 Story mode Versus games against at least one other player offline
Multiplier x5 - Score a 5x multiplier in a Story level
Multiplier x10 - Score a 10x multiplier in a Story level
Scoreboard 50% - Place in the top 50% of players in the online scoreboard for a Story level
Scoreboard 25% - Place in the top 25% of players in the online scoreboard for a Story level
Monster Masher - Kill 20 monsters in Story levels
Mortal Coil Shuffler Extraordinaire - Accumulate 20 deaths in one Story level
Dive In 25 - Dive in and play 25 random levels with other players, and don't immediately leave!
Play 25 Community Levels - Play 25 unique cooperative community levels
Play 75 Community Levels - Play 75 unique cooperative community levels
Actually Quite Good - Place in the top 25% of players in 5 community level scoreboards (with at least 50 other players in them)
Play 5 Versus Levels - Play 5 unique community Versus levels
25 Online Versus Wins - Win 25 Versus mode community levels against at least 1 other player
U Know U A Playa - Spend 5 hours playing community levels
A Game A Day Keeps The Doctor Away - Play LittleBigPlanet 2 on every day of the week
Who Needs Breakfast? - Play LittleBigPlanet 2 before 9am
Just... One... More... Go... - Play LittleBigPlanet 2 after 9pm
Grapple Hooked - Create a chain of 4 players grappling each other
Turbo Slapper - Slap more than one player at once
Snappy Dresser - Change your costume
10 Minutes of Create - Spend 10 active minutes in Create mode
1440 Minutes of Create - Spend 24 active hours in Create mode
Community Spirit - Publish a level to the community
50 Unique Players - level you published was played by 50 unique players
Long Term Publisher - A level you published has been published for 7 days
A Series of Tubes - Use a Level Link to link two of your published levels together
Custom Badger - Create a custom badge for your level from a PlayStation Eye photo or an in-game photo
Step into my Arena - Publish a Versus mode level
Teacher's Pet - You watched all the tutorials! Take a gold star, go to the top of the class.
40 Yays or Boos - Give 40 positive or negative votes on community levels
160 Yays or Boos - Give 160 positive or negative votes on community levels
Journalistical - Write a review
Paparazzo - Upload a photo
The Votarator 5 - Rate 5 brand new community levels (less than 10 plays)
The Votarator 50 - Rate 50 brand new community levels (less than 10 plays)
A Dip In The Stream - Play a level from your Recent Activity
Uber Prize Collector - Collect 100% of Story prize bubbles
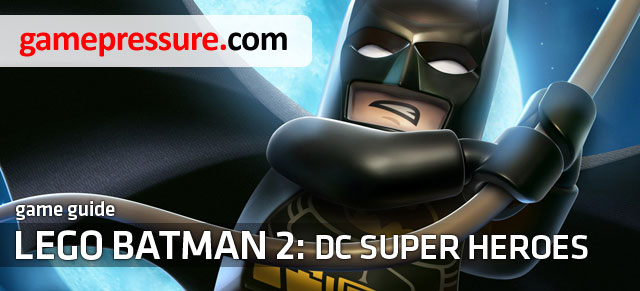
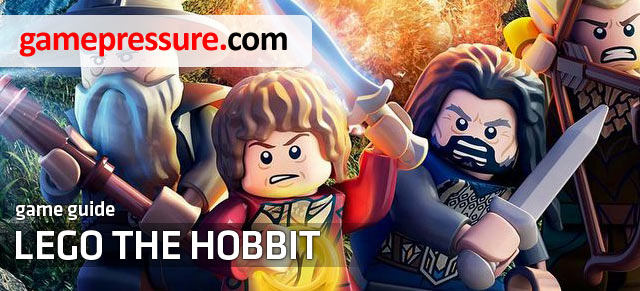
 LittleBigPlanet Game Guide & Walkthrough
 Legends Of Dawn Game Guide & Walkthrough
 Lost Planet 3 Game Guide & WalkthroughLEGO Batman 3: Beyond Gotham Game Guide & Walkthrough
 Lost Planet: Extreme Condition Game Guide & Walkthrough