The guide to LEGO: The Lord of the Rings contains a complete solution richly illustrated with screenshots, as well as aids you in finding all the secret collectibles and complete the game in 100%.
Guide contains:
Slawomir "Asmodeusz" Michniewski
Translated to English by Jakub "cilgan" Lasota
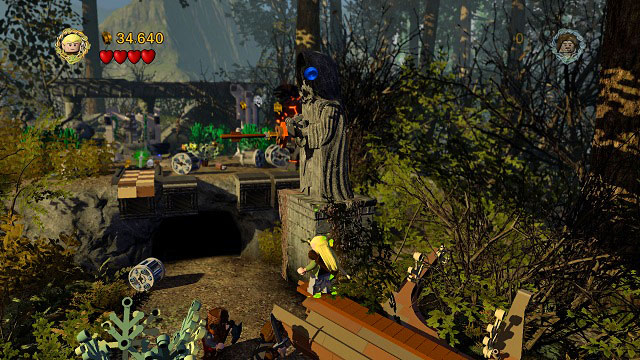
First of all I recommend completing the main story mode - that way you will unlock characters and part of the items required during the further exploration of Middle-Earth. As you can (and will have to should you want to reach 100%) return to missions later on, you don't have to worry about missing an item on the way.
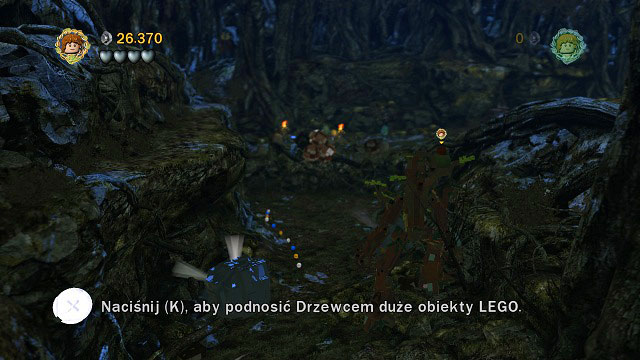
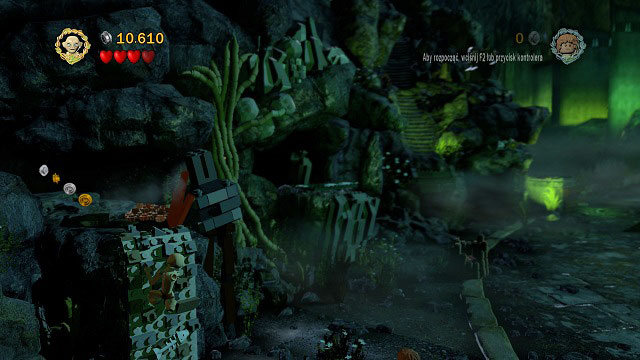
Destroy all bricks, trees, bushes, rocks and other items that you come across. In return you will receive studs which you will need to buy red LEGO bricks. Additionally collecting enough studs during a mission will give you the title of a True Adventurer and therefore a mithril LEGO block.
Take a look into each niche, check behind every pillar and go inside every cave. That way you will find not only studs, but also minikits and new designs.
Minikits let you build item connected with Middle-Earth. You can later on view them in Rivendell treasury. In return for completing one kit you will receive 50 000 studs and for collecting all of them - 500000.

All minikits you gather will be placed here.
Between missions, you are able to freely explore Middle-Earth. You can come across and buy new characters, complete missions, obtain mithril bricks and new designs. Just like with missions, you won't always have the right equipment at hand, though remember that you can always return to previously visited locations.
There is a fast travel option in the game. Open the map and you will be able to travel to any map stone available. It makes travelling between distant locations much faster.

Move

Quick character change
(hold down) Character circle

Attack

Action
(hold down) Change equipment

Jump/Roll
Change character up

Change character down

Start/Pause

Menu

Move

Quick character change
(hold down) Character circle

Attack

Action
(hold down) Change equipment

Jump/Roll

Change character up
Change character down

Start/Pause

Menu

Move

Camera control

Quick character change
(hold down) Character circle

Attack

Action
(hold down) Change equipment

Jump / Roll

Change character up

Change character down

Map

Menu
Characters: Elrond (Second Age), Elendil, Isildur
Real Adventurer requirements: 30000 studs
New characters: Elendil, Isildur
New characters to buy: Elrond (Second Age), Gil-galad, Bilbo Baggins
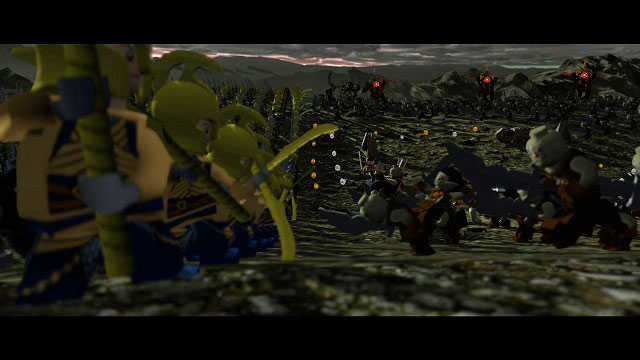
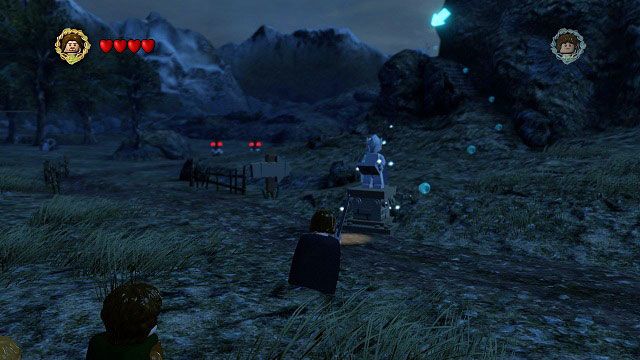
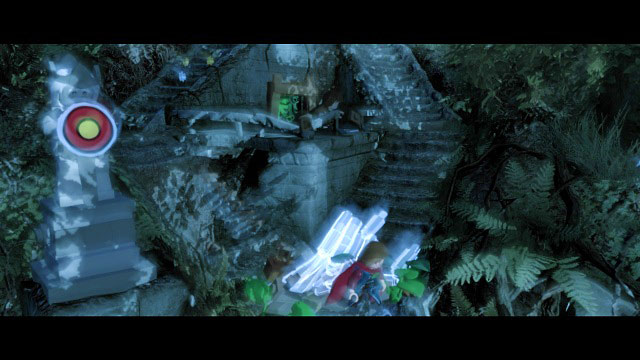
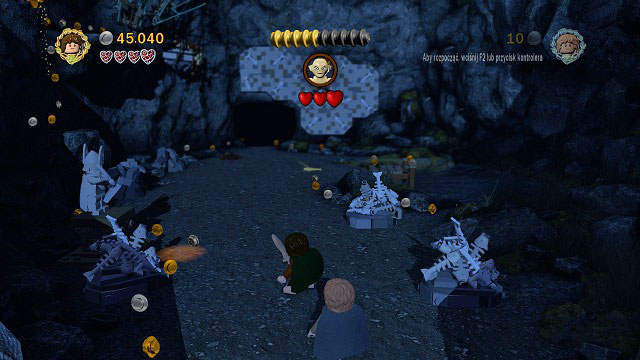
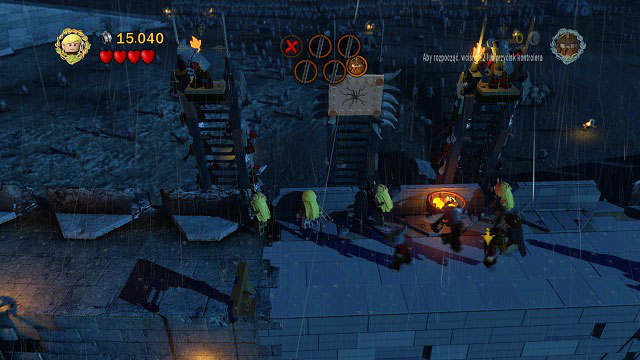
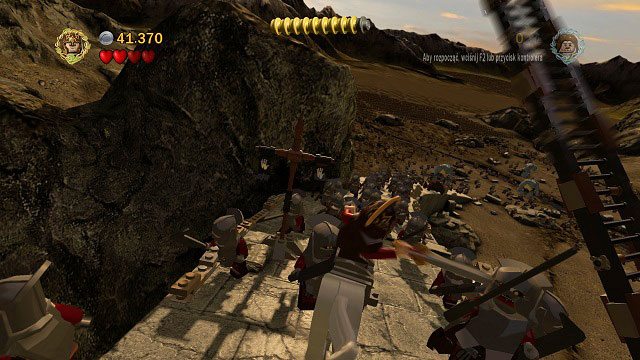
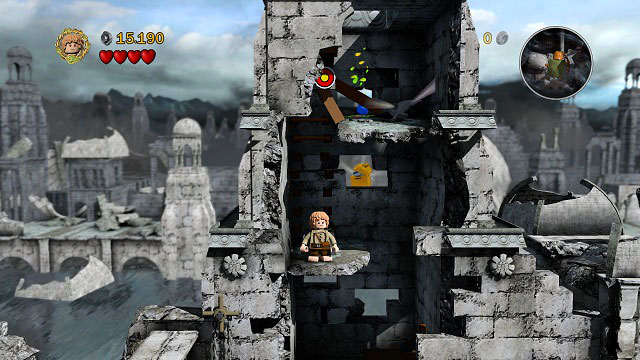
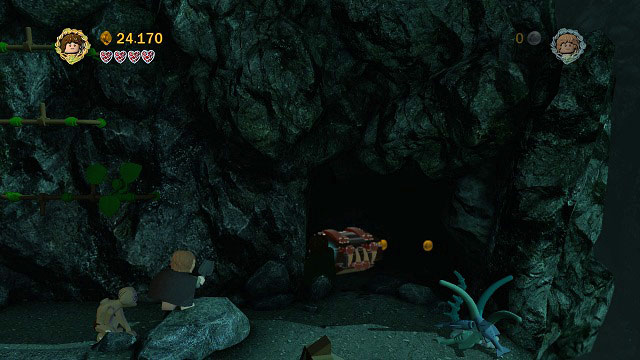
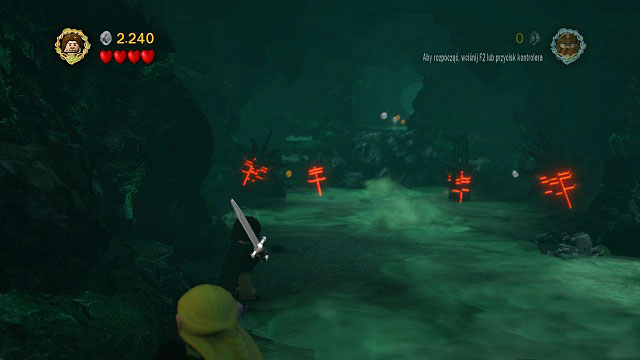
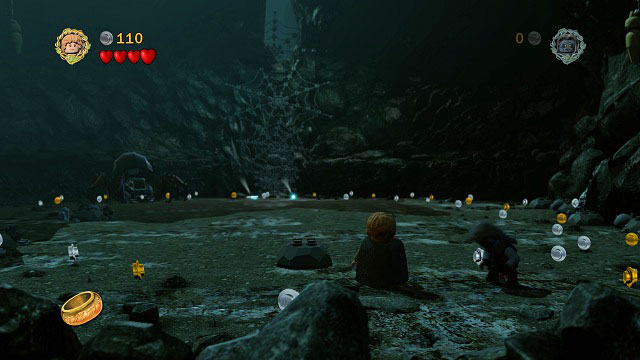
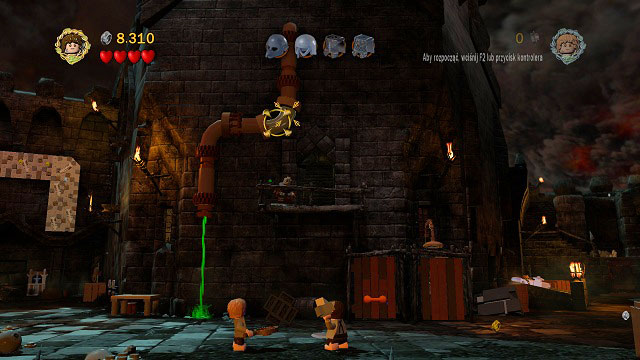
The game will start by throwing you right into the middle of the battle between the Last Alliance and Sauron's army on the plain of Dagorlad. This level will let you familiarize with the controls of LEGO characters, fighting and interacting with the environment. As you take control over your character, ignore the battle around you and focus on the incoming Orcs.
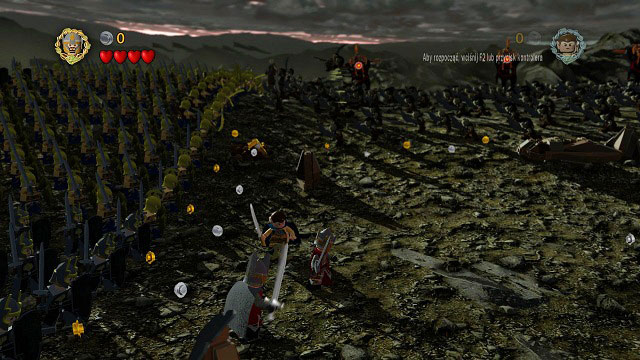
Your first task will be defeating the incoming enemies, particularly five Orcs with banners attached to their backs. Just move onto them and press the attack button (H). After defeating the first wave, you will have to fight a second one, this time equipped with shields.
To defeat a shielded enemy, you have to keep attacking him until he lets go off his shield and afterwards attack him once again to finish him off. After you defeat three bannered enemies, Mount Doom will erupt and pillars built from Morgul LEGO blocks will appear on the battlefield.
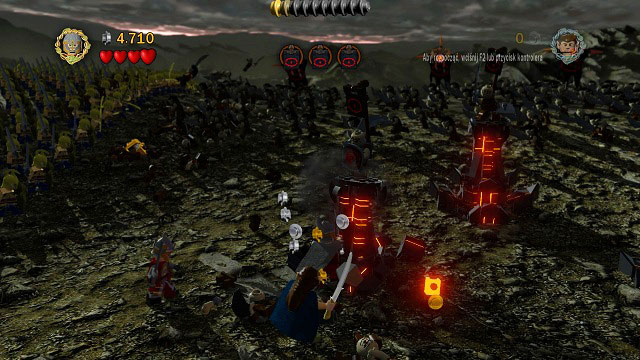
To destroy them and get your hands on the shielded enemies on top, you need to change your character by pressing (U) and choosing Elendil. A couple simple attacks with him should take care of the pillars. After defeating three more bannered Orcs another cinematic will play - this time you will have to face Sauron himself.
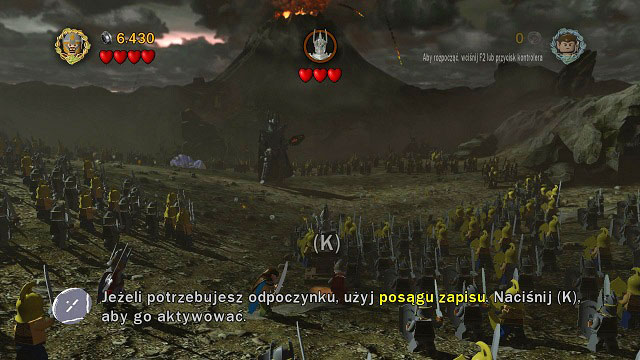
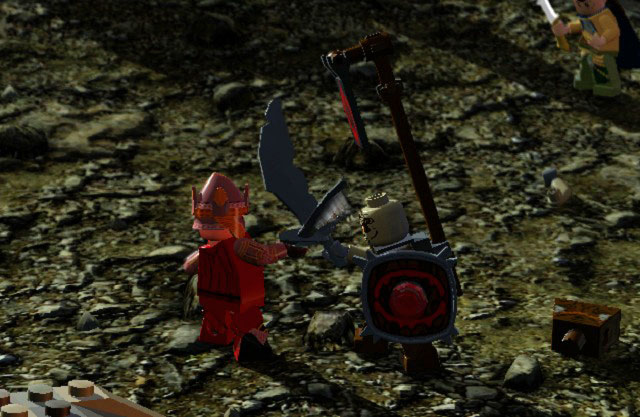
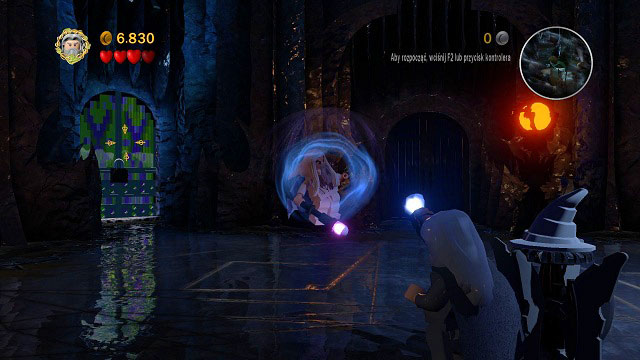
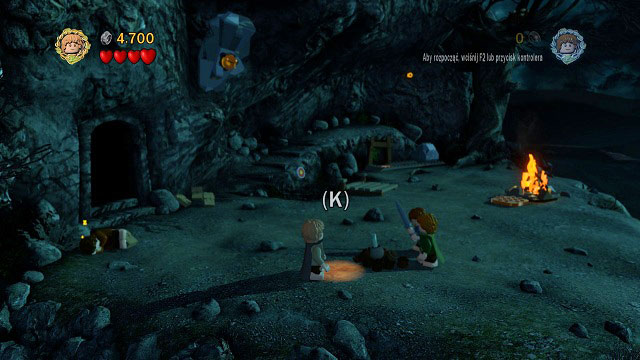
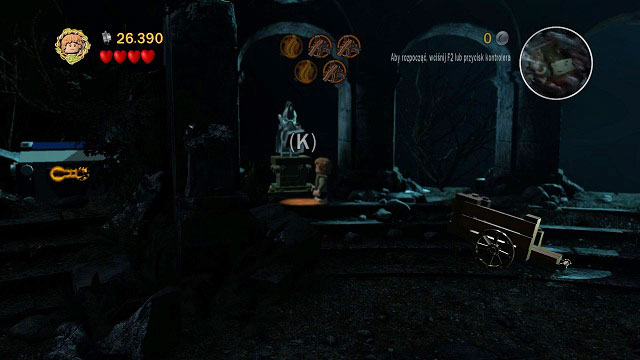
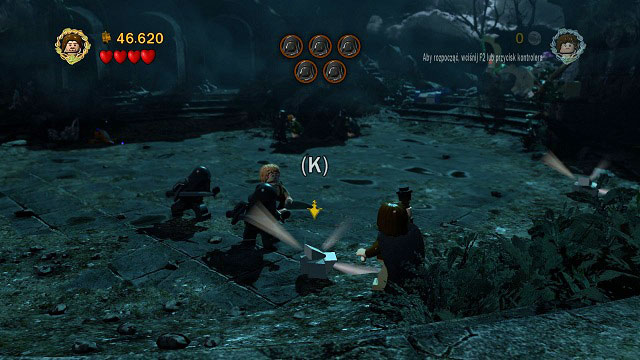
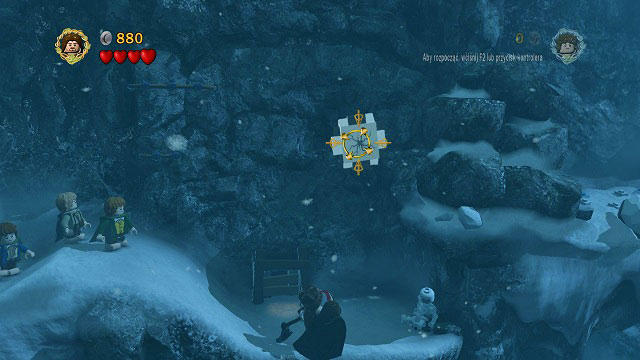
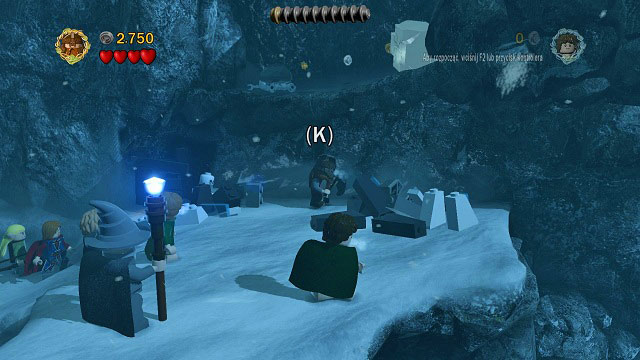
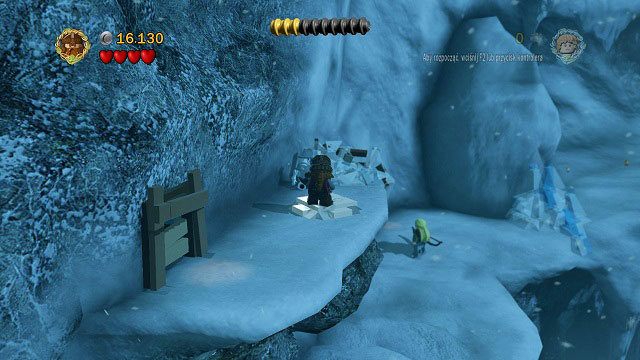
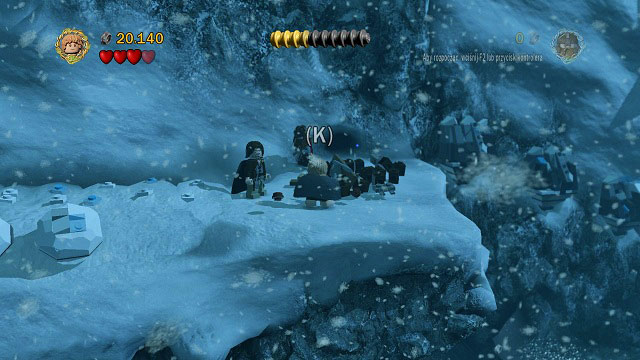
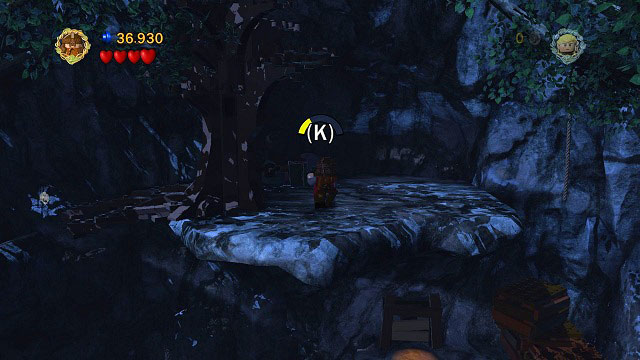
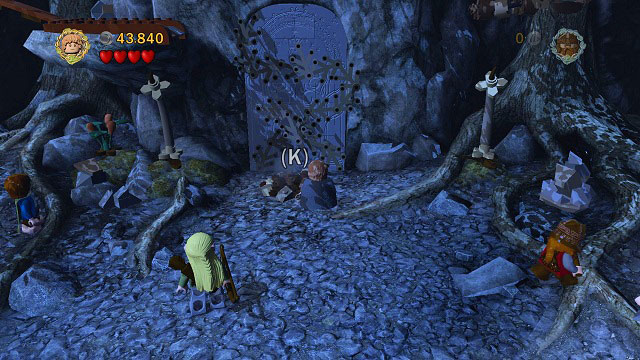
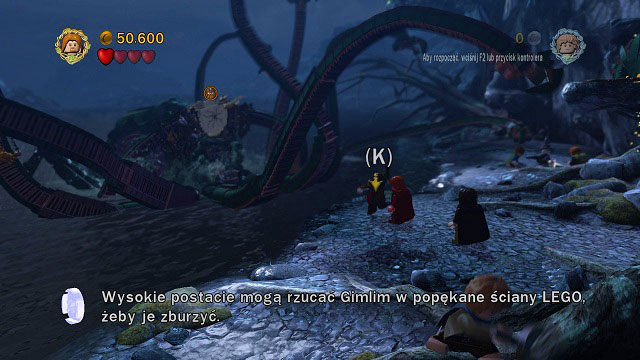
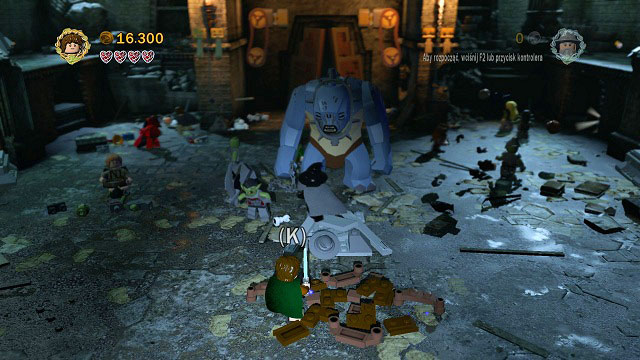
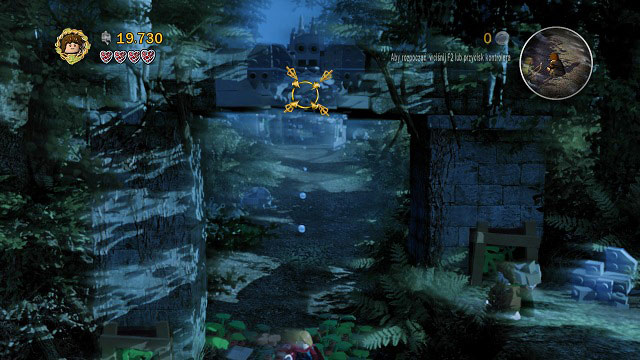
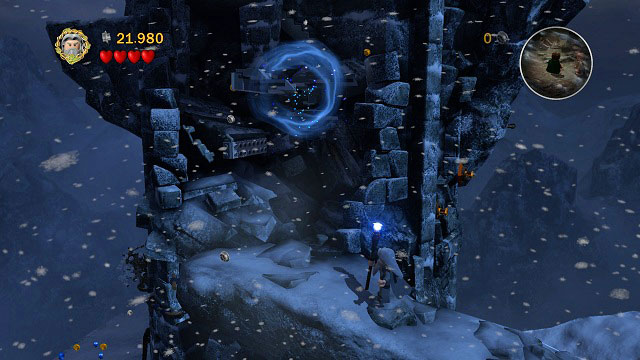
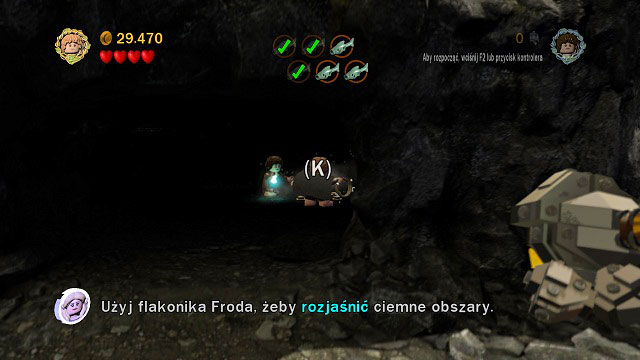
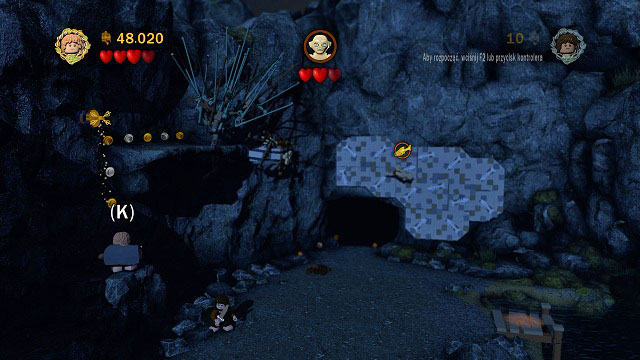
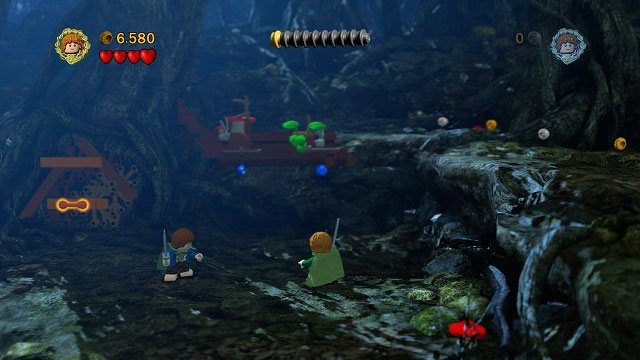
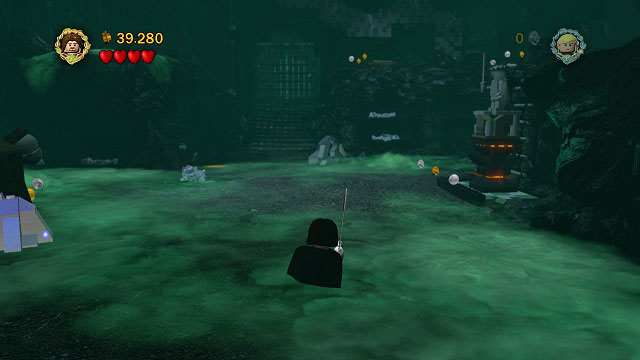
Before you head to face the Dark Lord, you can use the nearby the save statue (K). The fight with Sauron is one of the many boss fight included in Lego Lord of the Rings. Your task will be destroying his mace while fighting off the Orc attacks. The whole fight will consist of avoiding Sauron's attacks and waiting until he attacks hard enough for his mace to get stuck in the ground.
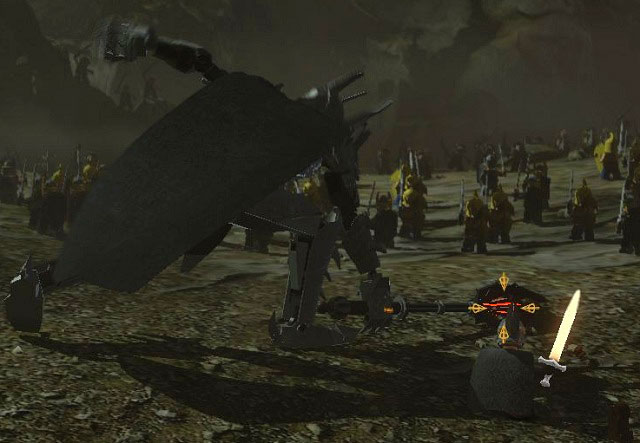
You will then have to use Elendil's sword - Narsil - and slash at the mace a couple times. Sauron will soon recover, but his health (hearts at the top of the screen) will be reduced by one. Just repeat this process two more times and the Dark Lord will be defeated. Now all you have to do is throw the Ring into Mount Doom.
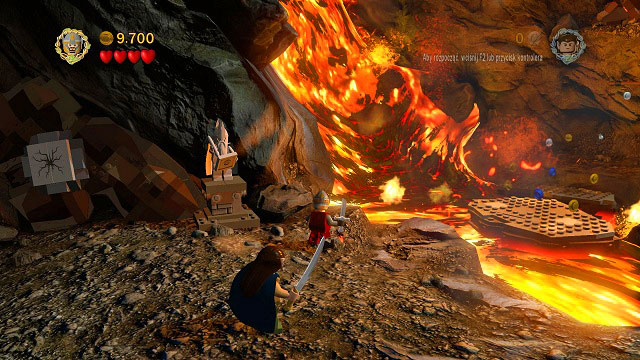
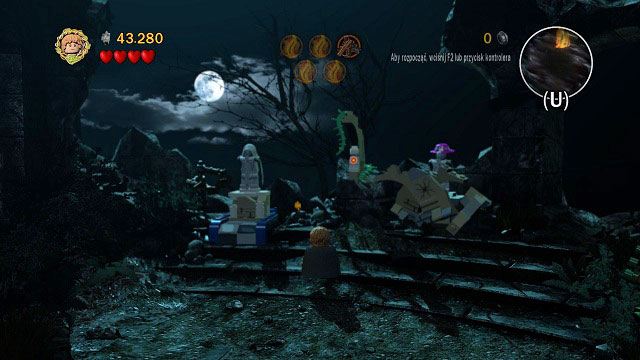
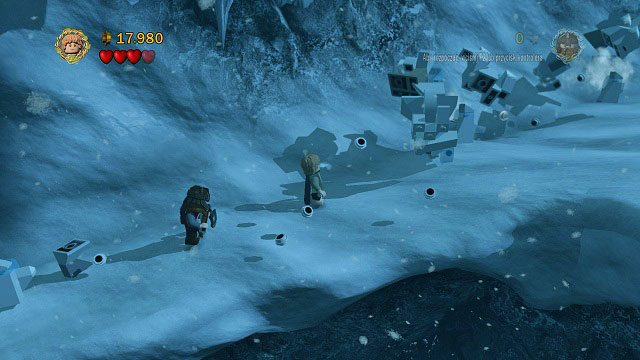
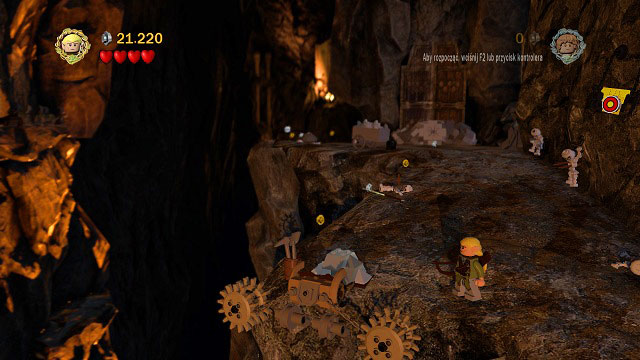
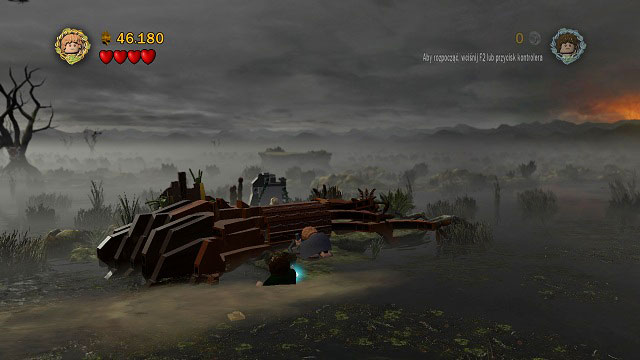
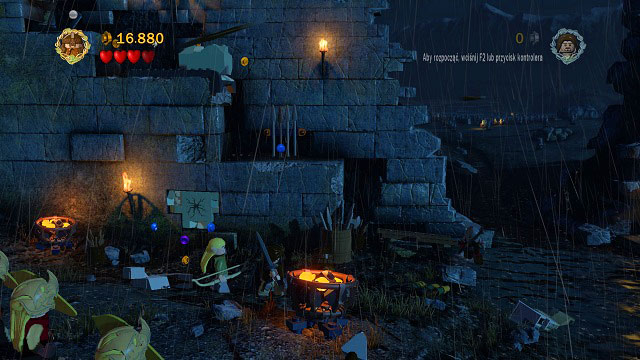
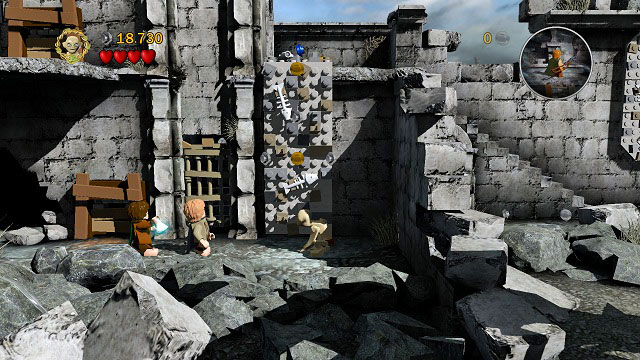
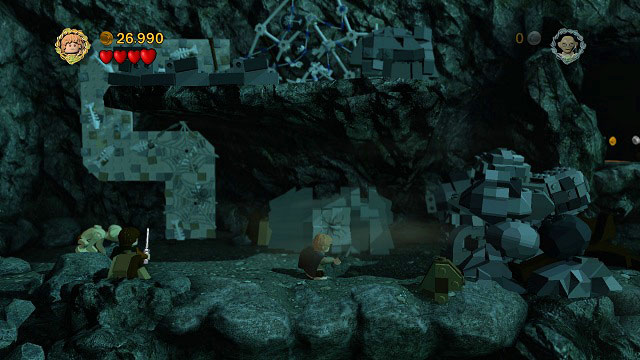
The further part of the Prologue mainly consists of platforming and some mini-games with Orc fights in the mean time. You can save the game right away using the statue beside the lava. Firstly head right and cross the lava by jumping between the platforms.

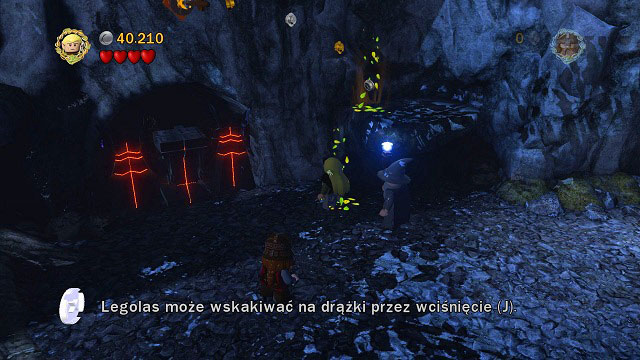
To move onwards, you need to use the rails - just jump onto them (J) and you character will automatically grab onto it. Start moving to the right and you will reach a place from where you will be able to get higher. By using the broken Narsil (now in hands of Isildur) you will be able to destroy the Morgul blocks blocking your way.
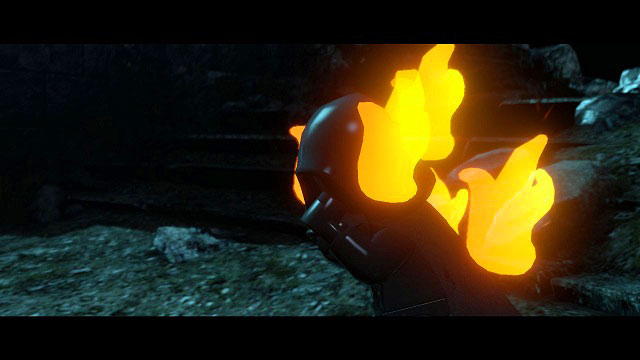
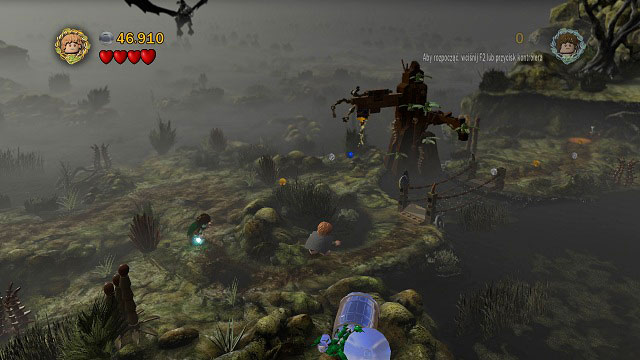
Further road will once again require you to jump above lava and use rails. Around the middle of the road you will have to fight around a fire trap. If you place your character properly, you might be able to burn the incoming Orcs and therefore make the fight easier. Afterwards wait for the fire to temporarily disappear and run to the other side.
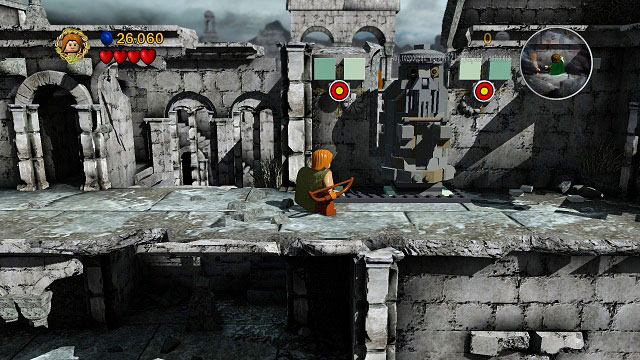
Soon enough you should reach the first puzzle, a stream of lava which is too wide to pass by and is therefore blocking your way. Luckily there are floating leaves beside - these points can be used by elves to perform very long jumps. To head further, you will have to switch to Elrond (U) and jump onto the upper platform by using the mentioned leaf and afterwards push the rock into the lava to create a path for Isildur. Cross the stream and destroy the LEGO block to head further to the right.
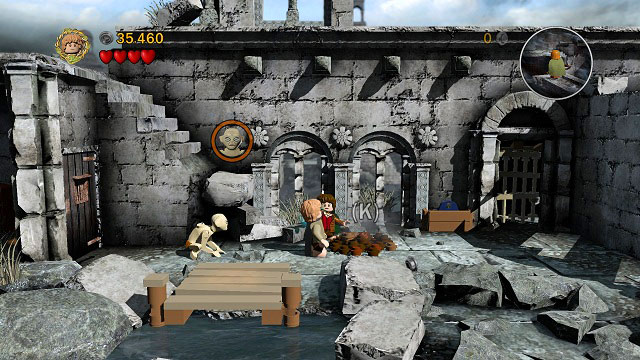
After a short walk you will stand before a door leading deeper into Mount Doom. Defeat the Orcs and head inside. You will need to fight some more incoming enemies and afterwards head right. As you reach the edge of the big platform, you will complete the first mission.
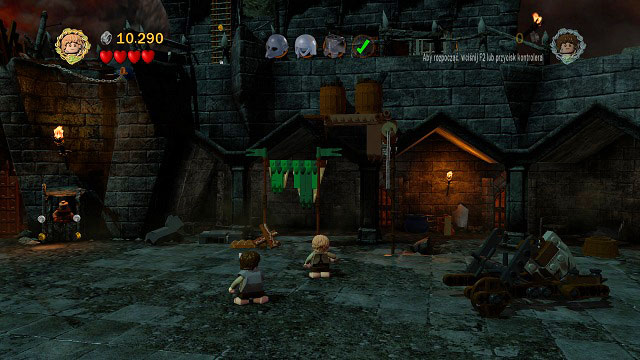
Characters: Frodo, Sam
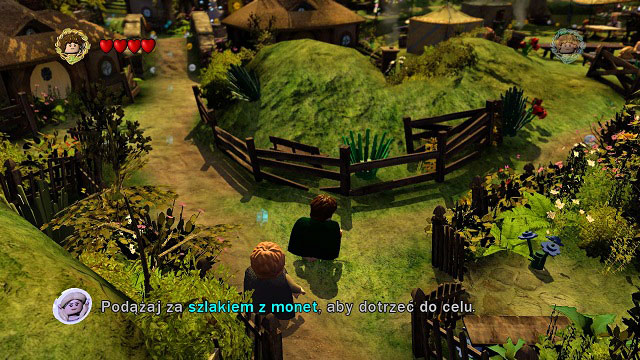
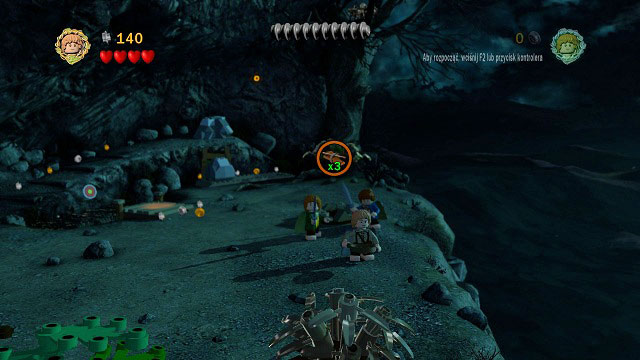
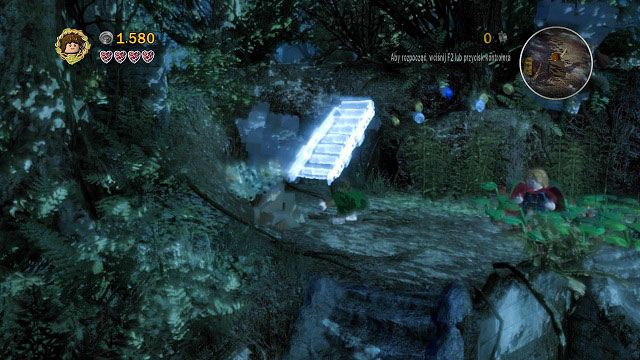
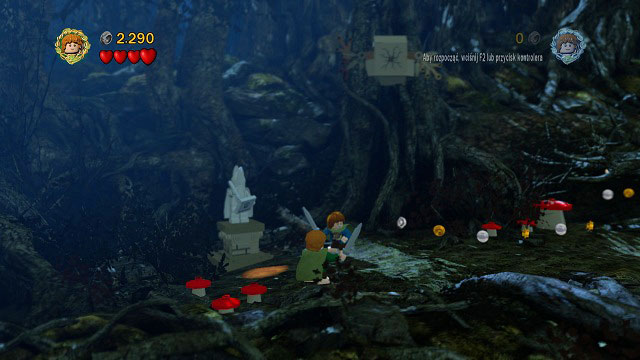
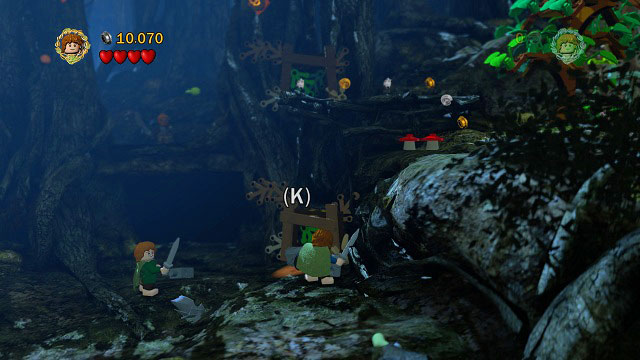
After the prologue, you will be moved to Hobbiton and take control of Frodo and Sam. Open locations such at this will let you complete various side missions, solve puzzles to obtain additional mithril blocks, build special items or unlock new characters. As you're only starting your adventure, not many options will be available, so after having a look around you will have to follow the stud path towards the next story mission.
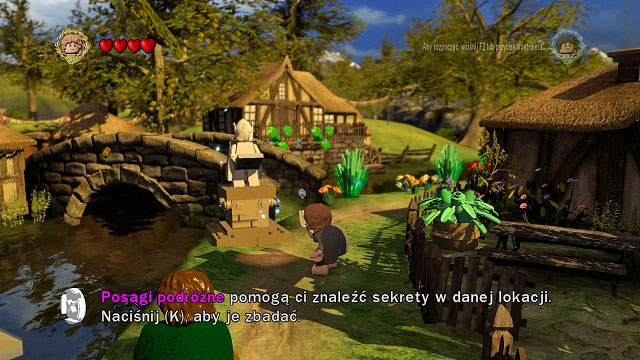
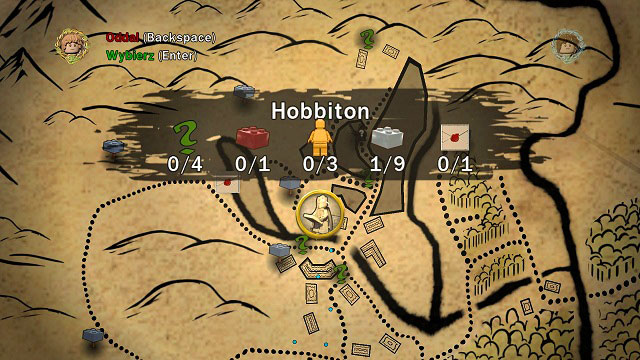
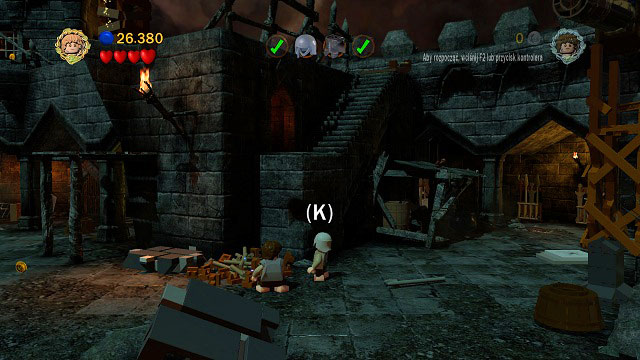
Around the middle of town you will find one of many map stones. Activating it (K) will unveil all missions on the map (ESC - Map) and point the locations of all mithril blocks in the area. Apart from that, if you point your cursor onto a stone, you will learn in what degree you have completed a given location. The screenshots below shows the map after using the statue:
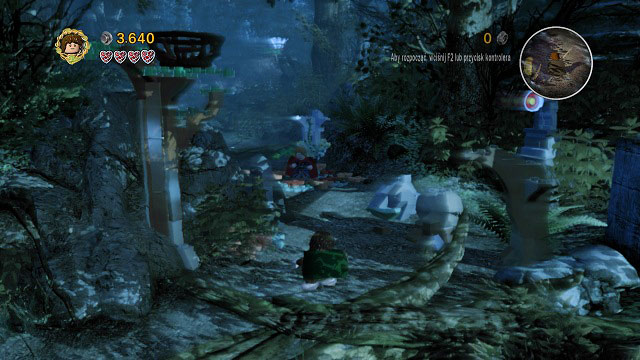
As you're done looking around Hobbiton, you can head further. Continue your trip along the path of studs and you will reach Maggot's Farm - there, head to the shining point to begin the next mission.

Characters: Frodo, Sam, Merry, Pippin, Gandalf the Grey
Real Adventurer requirements: 16000 studs
New characters: Frodo (Shire), Merry, Pippin
New characters to buy: Tom Bombadil, Rose
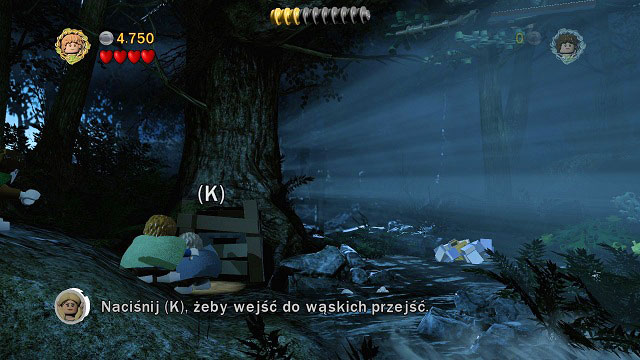
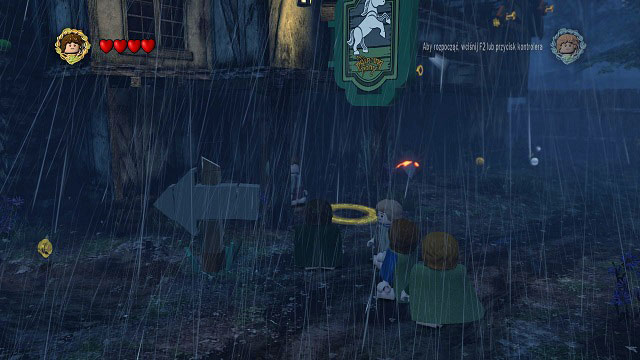
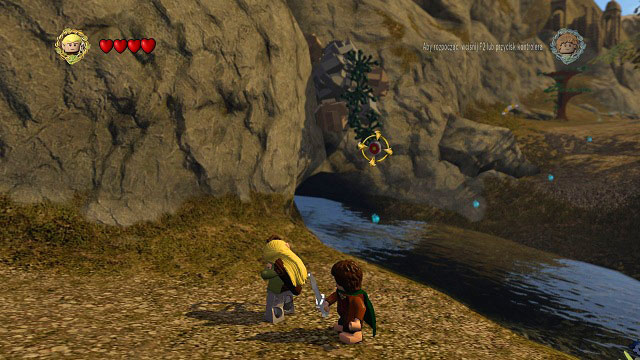
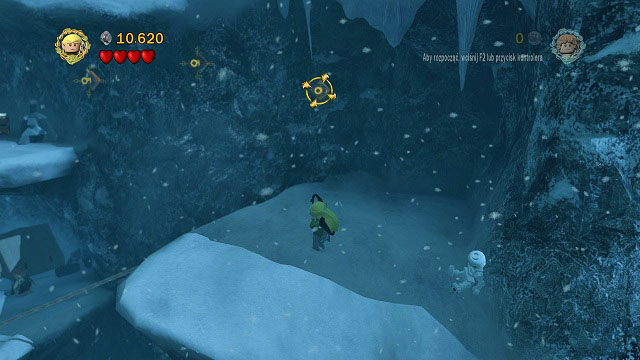
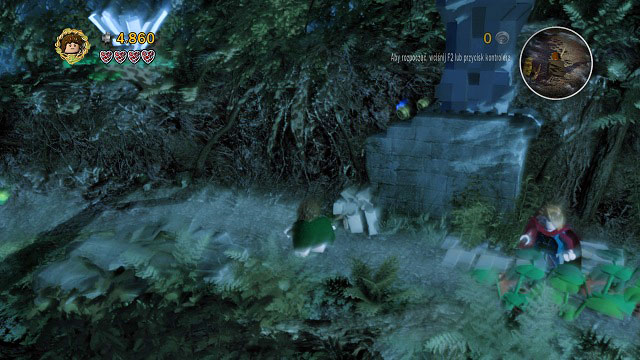
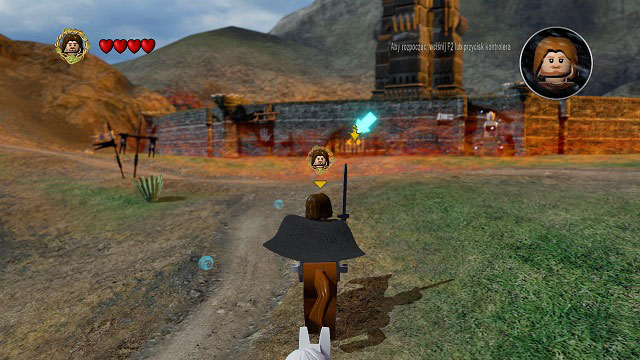
The Black Rider is the first story mission during which you will have avoid enemies rather that fighting them. The controls have been changed - jump (J) is now used to dive-roll forward. As the mission begins, you will have to move right until you see the Black Rider.
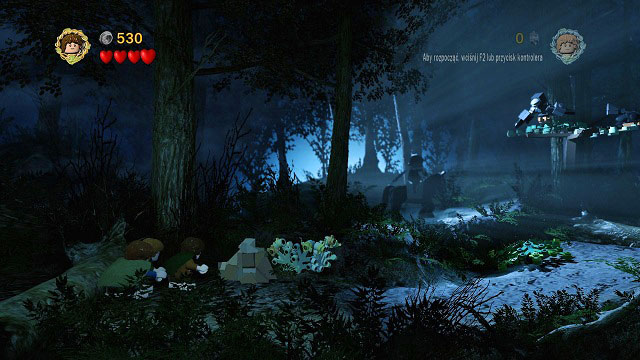
You will need to reach the ferryboat while remaining unnoticed by the enemy. That means staying out of the shining area - first you will have to draw away the Nazgul's attention so that it moves away from you.
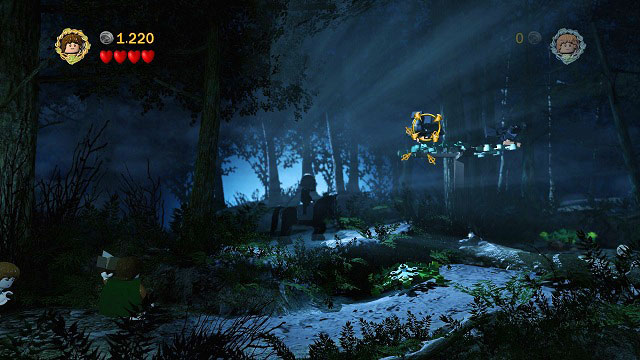
The first step is destroying the nearby rocks (H) - a small rock will fall out of them. You can afterwards pick it up (K) and throw at the nearby bird sitting on a branch of a tree (hold down H and aim at the bird). The scared animal will cause The Black Rider to move away and therefore create a path further to the right for you.
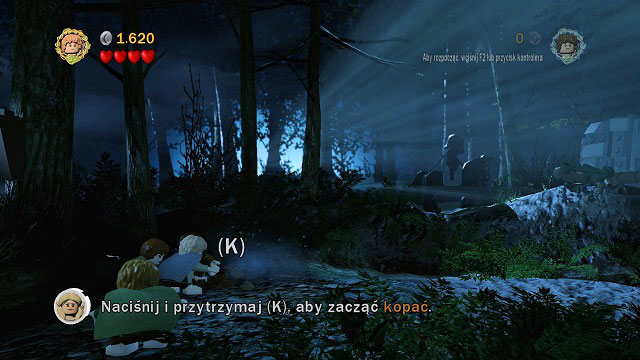
During your next meeting with the Nazgul you will have to use Sam's equipment. Switch to him (U) and approach the blocks on the ground - it's a point where you will be able to use the shovel. Hold down (K) and you will be able to dig out a hidden item. In this case it will be another rock which you will be able to throw at the boulder on the other side which will create a further path.
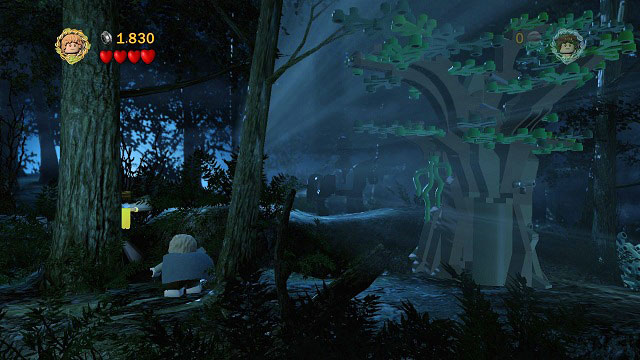
This time The Black Rider won't be idle, instead he will be patrolling the area. To avoid him, you need to wait for him to move away and hide behind a LEGO tree. When the Nazgul returns to his original position, you will have to leave your hideout and head further to the right.
The next obstacle you will be able to pass by using the Hobbit's growth. Just use the narrow passage (K) and you will reach the branch above. Move along it and you will scare another bird which will create a further path.
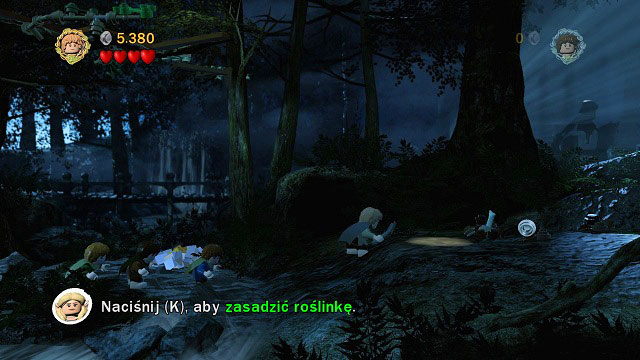
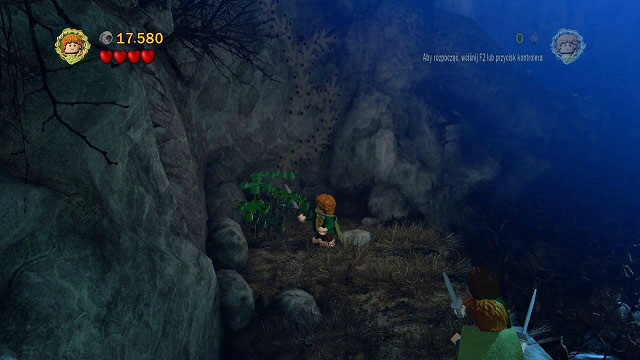
The last obstacle in this part of the game can be avoided by using Sam's skills. This time you will need to place a plant in the designated spot - just stand in the shining circle and press (K). the vast plant will protect you from the Black Rider's sight and let you continue your journey.
The game will then move to Orthank - Saruman's base. This time you will be able to control Gandalf the grey himself. If you're playing in two players mode, the other player will be in control of the Hobbits in the mean time, but you can always switch between them if you're playing solo. Regardless of your preferences, you will still have to complete Gandalf's story to continue the game.
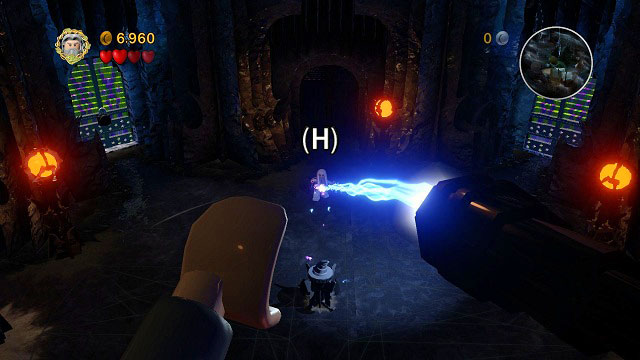
You will begin the fight with Saruman while hanging in the air - keep pressing (H) to protect yourself from the wizard's lightning attacks. After you regain control of Gandalf, you will have to focus on avoiding other of Saruman's attacks - you can dodge the fireballs by running left or right and the lightning by jumping over it.
When Saruman becomes tired, you will be able to raise him into the aim (K) and throw into a piece of the environment. Repeat this process two more times to finish the episode.
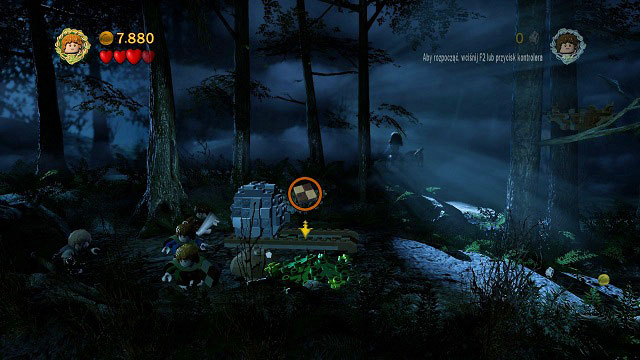
Once again you will take control of the group of Hobbits. You will have to start off by moving the nearby stone so that The Black Rider stops blocking your path. For that, you need to find three LEGO bricks under the nearby bushes and stones and place them in the designated spot (K). after constructing the floor you will be able to push the stone and move onwards to the right. On your way you will have to throw a fruit at the designated target twice (firstly some branches and then an owl) and place another plant to create a bridge from it.
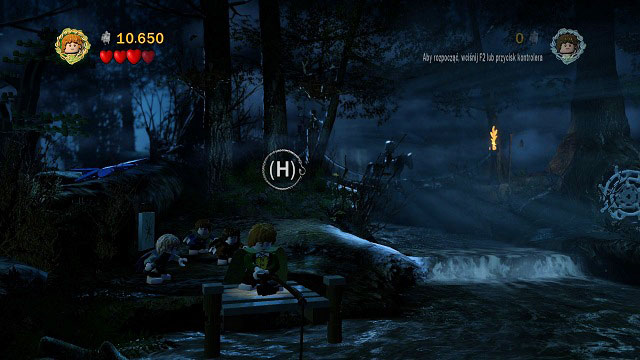
Eventually you will reach a stream where you will find a bridge from which Merry can fish. Switch to him (U), stand on the edge and take out your fishing rod (K). Fishing consists of pressing the button prompts - if you press the button at the last moment (when the symbol shines), you will receive additional studs at the end of the mini-game. This time, instead of fish, Merry will pull a crab out of the water. Just pick it up and throw at the torch. The burning Nazgul will run away and therefore create a new path for you.
You're almost at your destination. You will have to dig out another stone from the ground which you afterwards have to throw at the nearby bee hive. Afterwards go through the newly unlocked passage to get past the Nazgul. The last trick will consist of throwing an apple into the marked spot - this time you will get rid of The Black Rider for good... at least until the next sequence.
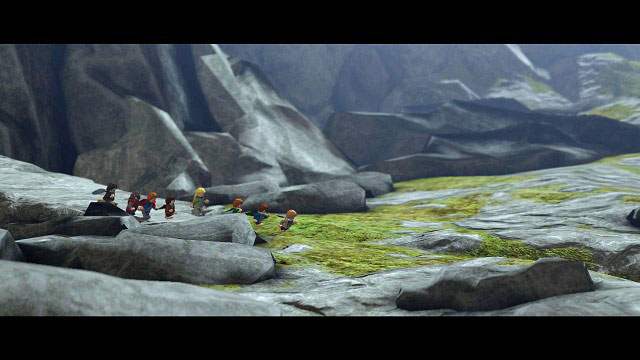
Running away from the Nazguls is trivial - just control the Hobbits so that the Riders can't touch you and try breaking all nearby items to increase the amount of studs that you have. The chase will end by the ferryboat passage, where you will finally lose Sauron's forces.
Characters: Frodo, Sam, Merry, Pippin
Follow the trail of studs and you will reach Bree. Inside, you should pay a visit to the map stone and head to the Prancing Pony tavern. Unfortunately the entrance is protected by a Hobbit which will let you pass only when you bring him a mithril trowel.
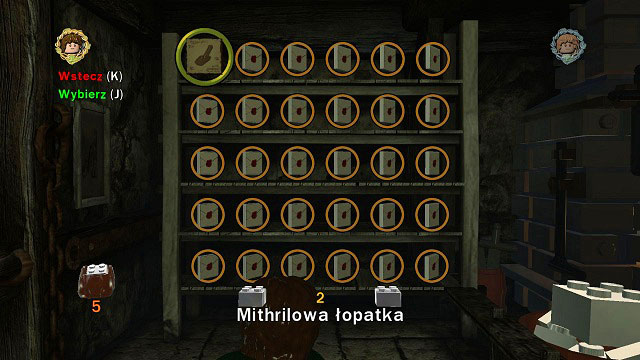
You can create the item at the blacksmith - just follow the blue arrow and enter the workshop. There you will find a design of the mithril trowel - just approach the list and choose the item of interest.
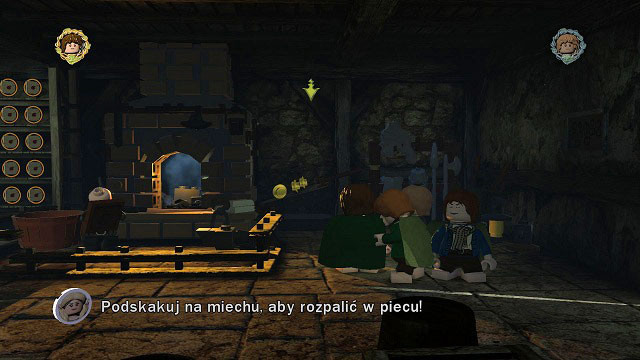
To create the item, you have to jump a couple times on the bellows and let the blacksmith complete his work. The trowel has to be afterwards taken out of the chest and brought to the Hobbit which will let you enter the tavern.
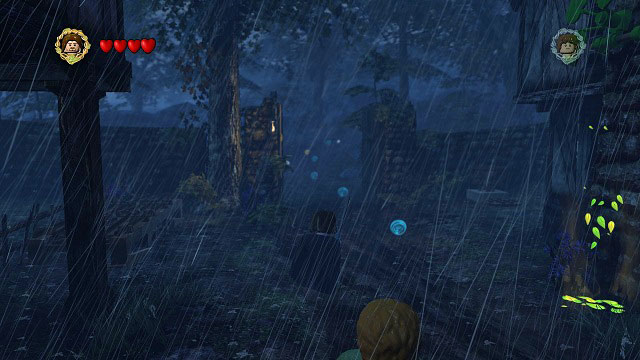
Watch the short cinematic and Aragorn will join the team. Your next destination is the Weathertop - you will get there by following the studs trail.
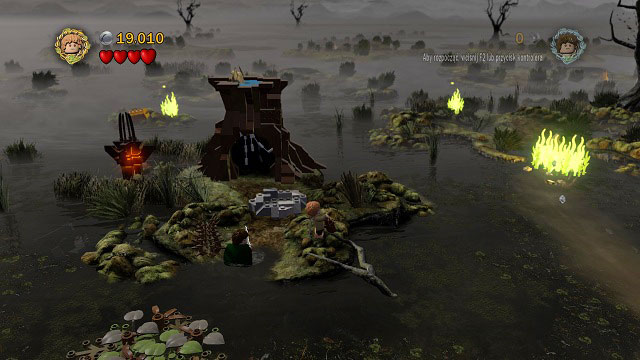
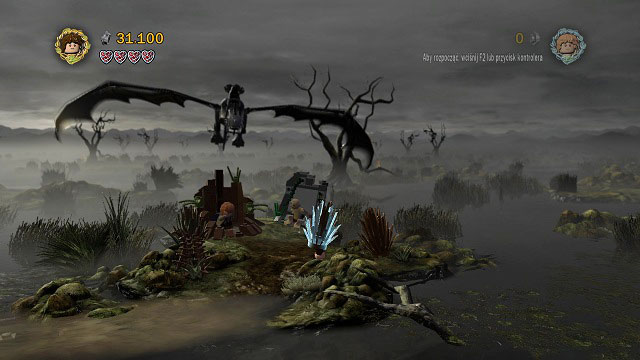
On your way you will pass by a swamp and right beside the destination you will find another map stone. Fill up your map and head towards the arrow which will begin the next story mission.
Characters: Frodo, Sam, Merry, Pippin, Aragorn
Real Adventurer requirements: 46000 studs
New characters: Aragorn
New characters to buy: Ringwraith, Ringwraith (Twilight)
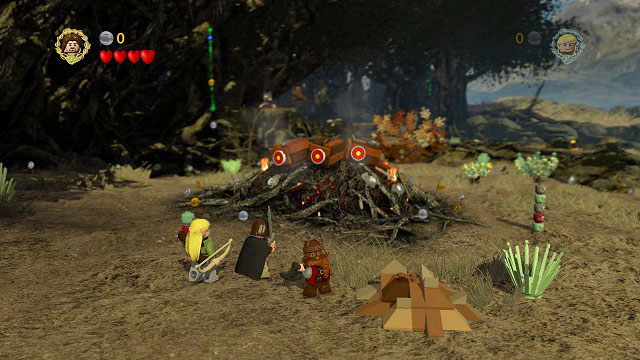
Time for some dinner! You will have to use skills of all party members for that. The first step is starting a fire - you will need three pieces of wood for that. You can find them hidden below the shining bushes (visible in the lower part of the above screenshot) - just hit them a couple times and place the obtained wood in the designated spot. The second bush can be found above the bonfire. To reach the third bush, you will have to try a bit harder.

Firstly you will have to build a floor from the nearby LEGO tiles. Just stand beside them and hold down the (K) button and you character will build the floor. Push the stone to unveil a corridor. Enter it and you will end up on the above rock ledge.
Now just hit the last bush a couple times and take the wood. You can also use the nearby rail and get to the bird nest - an egg will fall out of it, which is a port of the Hobbits' meal. Head back down and place all the wood pieces in the designated spot.
To start the fire, switch to Sam and press (K) while beside the wood. The Hobbits will take out a flint and start the fire. Remember about this skill as you will need it a few more times on the Weathertop. Now you will have to gather ingredients needed for a proper meal, once again with help of Sam's skills. This time you will have to combine items: just place the Hobbit beside the egg that you have knocked down before, press (K) and choose the frying pan to combine the items.
Now you have to obtain a fish and a tomato. As for the first ingredient, choose Merry and catch a fish using the fishing rod on the nearby bridge. The second one is a job for Sam: put the plant into the designated place, hit it a couple times and you will receive a ripe fruit. If you picked up one of the items with and improper character, just throw it to the ground with (K). To finish this mission, use the pan on the bonfire to prepare a meal.

Time to reach the top of the hill. Save your game by the map stone and head further to the left - unfortunately the road will be blocked by a chasm. To cross it, you will have to collect various LEGO bricks by breaking up the nearby items. When you get enough of them, you will be able to hold down (K) to build a bridge.
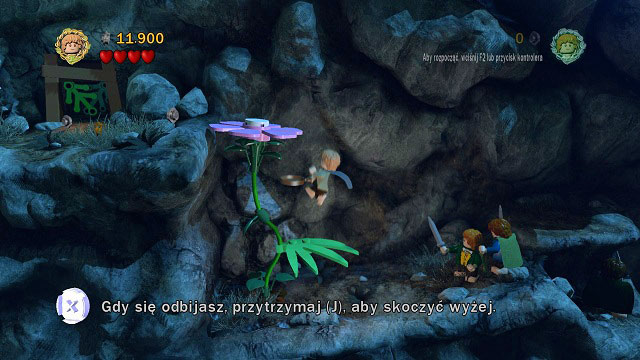
After crossing the chasm, Sam will have to place a plant thanks to which you will receive two stones. You can use them to knock down the two nearby bushes which will let you move onwards. Another plant placed by Sam will give you a big flower with a leaf which you can use as a spring-board. Just hold down the jump button (J) to jump higher. After reaching the ledge above, choose Sam and head inside the narrow tunnel. Below you will have to start a fire which will unlock the further path.
After reaching another dead end, you should look out not to step on any thorns. You should use the rock stairs on the left and grab onto one of the vines. After choosing the next Hobbit, grab onto the other vine and build a bridge below with the LEGO tiles.
Another rock wall and another dead end. This time you just have to cut the nearby bushes, build a campfire from the branches and set fire which will burn the nearby leaves and unlock a further path. Move onwards while grabbing onto the rails until you reach a place where Sam can place a plant. After getting past the gulf by using the newly grown plant, you can head to the top of the hill - just climb the rock stairs in the background.
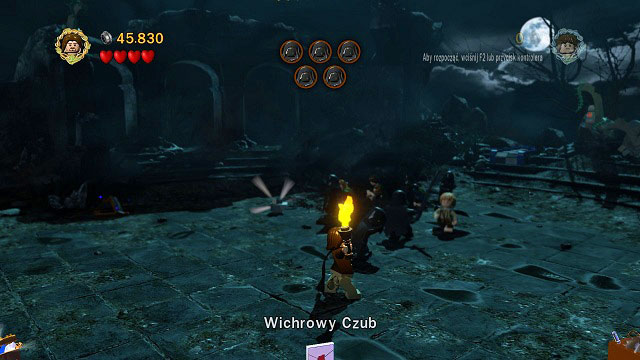
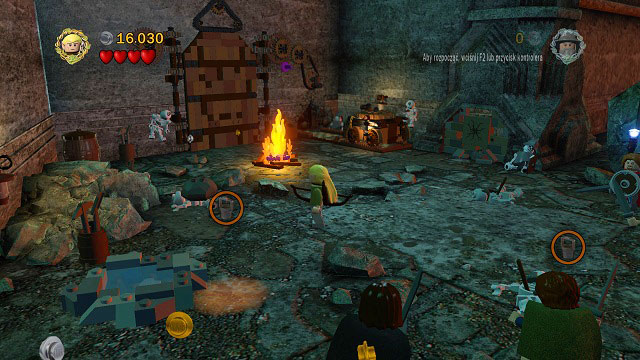
You will reach a location known as Amon Sul. This time you will have to fight off Nazguls in a direct fight. In the first part of the battle you will be in control of Sam and Frodo, who has put on his ring, thanks to which he can see otherwise invisible items built of phantom LEGO bricks. I'd recommend starting off by switching to Sam (U) and save your game with the stone in the northern part of the map.
Your first task will be light five fires. For that, you will have to firstly gather five stacks of wood. The first can be found in the middle of the stage, whereas in order to start the second one you will have to destroy the carriage nearby the save stone. The third bonfire can be stated only after placing a plant in the left part of the location and then smashing it to pieces. To gather materials for the fourth one, you need to throw the statue from the pedestal (visible on the above screenshot). Unfortunately the bricks will be transparent so you will have to switch to Frodo (U) to use them.
The Hobbits won't have too much to do - you just need to use him to build a bonfire form the hallow LEGO bricks. Just approach them and hold down (K) for a while. There are two groups of materials which you need to work on: one of them - remains of the statue knocked down by Sam - is in the back part of the stage. The second pile is in the right side of the location and should easily notice it. If Nazguls happen to catch you, you need to free yourself by pressing (K). after building two bonfires, switch back to Sam.

This time you have to light the bonfires (K). Unfortunately the Nazguls will be constantly disturbing you in this and they will often destroy a lit bonfire, forcing you to create another once. To gain some time, you can move away from the pile which you want to light - Sauron's minion should follow you. When you draw the Nazgul away from the bonfire, run back to it, create a pile and light it. With five bonfires lit, the next part of the fight will begin.
This time Aragorn will join the team. You will have to get rid of the Nazguls once and for all, which can be done by using the torch - hitting an enemy with it will eliminate him for good. You should hit the first enemy right at the beginning of the battle to gain some more place to maneuver. The next torch is in possession of Sam - switch to him and light another bonfire (it's visible in the left part of the above screenshot) and use it to set fire to a stick. Hit a Nazgul with it and there will be only three left.
You need to obtain new torches to eliminate the enemies. Use the rocks lying on the ground - pick one up and run around the location in search of a point which you need to throw it at to gain another torch. Afterwards you will have to set fire to it and attack a Nazgul. Repeat this two more times and a cinematic will start.
Characters: Arwen, Frodo and Sam, the Fellowship of the Ring
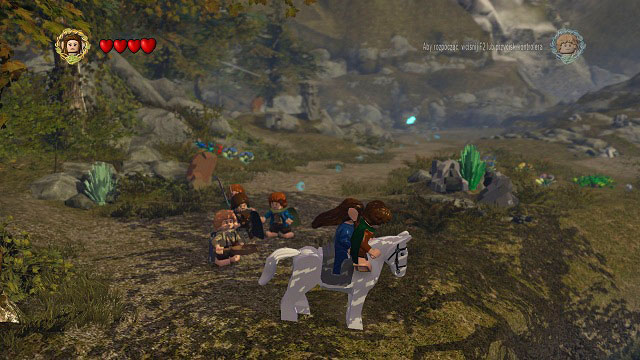
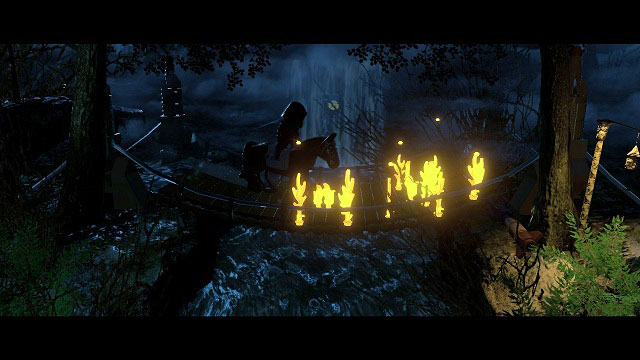
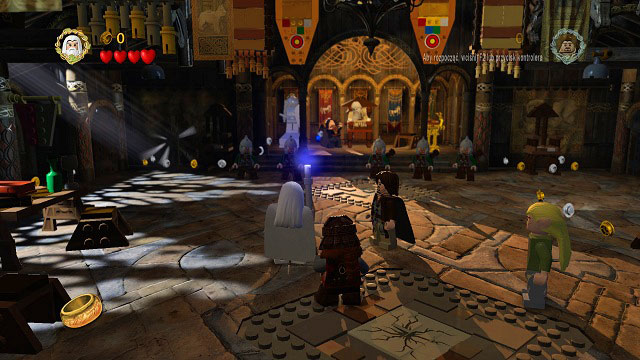
Frodo is dying and you have to get him to Rivendell as fast as possible. This time you will be in control of Arwen on a horseback, thanks to which you will be able to travel at a considerable speed. Move along the trail of studs and you will reach a point where a cinematic will begin. After regaining control over you character you should move further along the road until you reach the Elven city.
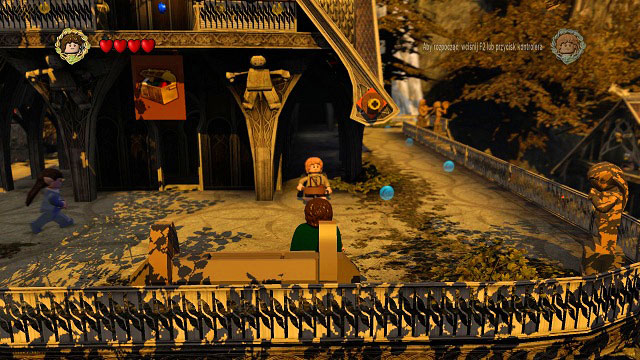
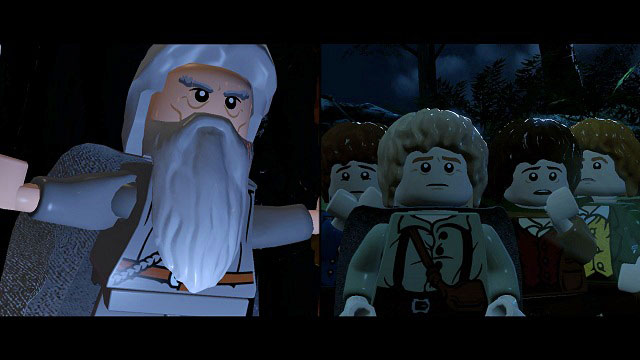
After watching another cutscene you will take control of Frodo and Sam and will have to head to a council. Follow the trail of studs once again, going past the minikits room on the right. After reaching your destination, you will see another cutscene during which the Fellowship of the Ring will be formed.
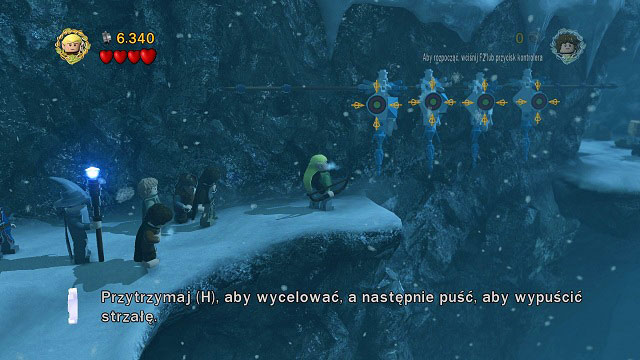
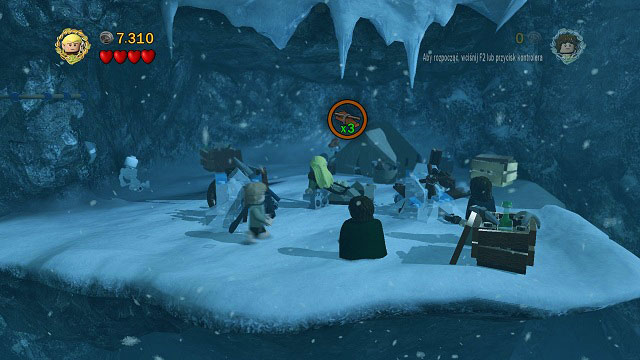
Time to return to Mordor. Leave Rivendell along the trail of studs. At some point a river will block your way, therefore fiving you the first chance to use Legolas' special abilities. Switch to the Elf (U) and make sure you're equipped with the bow - hold down (K) for that. If you have the proper weapon equipped, you can hold down (H) and point the sight onto the shooting target in front of you. Shoot two more targets and the further path will be unlocked. Continue onwards to the Pass of Caradhras.
Characters: The Fellowship of the Ring
Real Adventurer requirements: 52000 studs
New characters: Gandalf the Grey, Gimli, Legolas, Boromir
New characters to buy: Elrond (Third Age), Gloin
The Pass of Caradhras is a very inhospitable place full of gusty wind and deep snow which makes it impossible for smaller characters like the hobbits or dwarves to get past. In order to help them, you have to choose a taller character (a human or Elf), approach the character you want to help and press (K). You can then either throw (by holding down H) or take your companion through the snow and place down on the other side (K). Regardless of which method you choose, you should help Gimli get past the first obstacle.
On the other side of the deep snow you will find a broken LEGO tile which Gimli can break to pieces with his axe. Just approach it and press (H). That way you will gain access to a narrow corridor which once again can be entered with Gimli.
You will reach a small cave with another cracked LEGO tile - this time it's on the ground. In order to destroy it and therefore unlock the further path, just jump above it (J) and press (H) in the air. Use the passage and join your team.
You will need to destroy one more tile. Start off by selecting a tall character, pick up Gimli (K) and throw him at the target. The Dwarf will break the tile in mid-air, unveiling yet another cave entrance. Get onto the rock ledge using the unveiled rails and push down the rock so that you can move onwards.
You will have to carry Gimli above the deep snow again. On the other side you need to follow the well-known pattern: enter the narrow tunnel with the Dwarf, destroy the cracked tile, head back above and break another LEGO piece. From the received elements you will be able to build a bridge which will take you to a rock ledge, where Gimli's axe will once again let you clear the further path.
Travel to the right and you will come across four elements which are blocking your way. Just switch to Legolas and hit all the targets and cross the precipice by using the rails.
You will reach en encampment. To make things easier, I'd suggest breaking all the possible items in the area firstly. That way you will receive three pieces of wood which can be put into the bonfire and then lit with Sam. It will unlock further bricks which can be used to construct a ballista. Press (U) to get behind it and (K) to shoot.
Change to Legolas and walk along the line to the other side. there, shoot arrows into three holes and leaves which allow elves to jump higher will appear. Jump off them and grab onto the first handle sticking out of the wall. Keep jumping further alongside them (J) until you reach the other side. There you have to shoot an arrow into the target to lower a rope and let the other team members join Legolas.
Right beside the rope there's a cracked brick. Pick up Gimli and throw him at it to open the path above. Once again pick him up, walk through the deep snow and enter the narrow tunnel. Destroy the cracked LEGO brick on the rock ledge to open the path for the rest of the team and also gain materials needed for the bonfire. Build and set fire to it with Sam's skill and the further path will become clear.
Saruman will try to stop you by sending down an avalanche. It's very easy to avoid - jut look for shadows on the snow and use them to avoid the falling boulders. Break the next brick (throw Gimli) and you will reach another pile of deep snow.
This time you will have to move Gimli as well as Sam to the other side. Use the shovel carried by the Hobbit to dig out loose LEGO bricks which can be used to build another tunnel. Switch to Gimli, use the newly created passage and destroy the cracked brick below so that the rest of you team can join the Dwarf. Unfortunately that still leaves the further path blocked. Switch back to Sam, enter the narrow tunnel and dig up LEGO bricks to build a bridge with them.
Jump across the precipice and keep jumping up along the rocks until you reach another camp. Once again break all the elements in the area to gather three pieces of wood and start a bonfire. The fire will melt the ice and therefore allow Sam to place a plant which will create a bridge for the rest of the team.
This is the last obstacle on the Pass. Legolas has to shoot an arrow into two targets, afterwards you have to build a cracked brick from the received elements and throw Gimli at it. Now cross the deep snow with any character to end this part of the level. The avalanche sent by Saruman will force our heroes to change their plans and head towards Moria.
Your task will be rebuilding the door to Moria by using the skills of Legolas, Gimli and Sam. I'd recommend beginning by choosing the Dwarf. On the right side of the destroyed gate you will find a cracked LEGO brick, breaking which will unveil a hidden passage. Head inside with Gimli.
After reaching the rock ledge you have to hit the pile of chests to create yourself a path above. Destroy the carriage at the top and build a handle using the pieces from it. Now by pressing (K) you can turn the whole tree and therefore create a path left. There you will find pieces of a door which you can rebuild by holding down (K). Time to switch to Legolas.
The first thing that you need to do is shoot at the holes above the Morgul bricks. Afterwards use the leaves to jump onto the upper ledge and from there grab onto the handle. Jump to the other side and jump higher once again using the leaves.
After using the rails you will have to once again use the bow to shoot at the holes in the wall and jump to the other side afterwards. There, cross the bridge and you will reach a rock which can be pushed down and broken. From the received fragment you can fill up the holes in the door (K).
The last task belongs to Sam. You need to create a bonfire place, gather wood and set fire to it. Two pieces can be found by breaking the nearby carriages and the third by destroying a small bridge south of the gate. Now just gather some wood and light it. The path to Moria will open.
...almost. Unfortunately the guardian has awoken, so you will have to deal with him before heading inside. Your task will be cutting off the monsters' tentacles. As you're running around the area, the monster will attack you from time to time. Eventually his tentacle might get stuck in the sand, creating an opportunity for you to attack. After you cut off four of them, the monster will show its hideous head.
In order to deal with it once and for all, pick up Gimli and throw him and the cracked brick. It will unveil the monster's head, which will let you switch to Legolas and shoot an arrow into its eye. The monster will eventually cover itself with another mace - you will have to repeat the above actions to finally defeat the guard.
Characters: The Fellowship of the Ring
It's a very short episode which lets you catch a breath before heading inside Moria. The most important thing you should do here is activate the map stone. Before heading inside, you can use fast travel to complete various other mission available in Middle-Earth. After collecting new items and buying new characters, you can return here by using the stone at the Pass of Caradhras. When you're ready to move onwards, head through the gate into the mines.
Characters: The Fellowship of the Ring
Real Adventurer requirements: 70000 studs
New characters to buy: Moria Orc

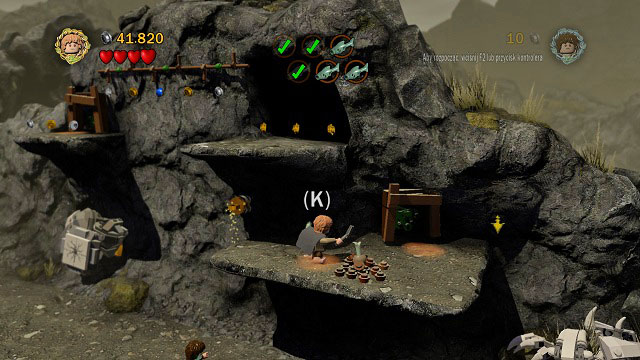
Your first task will be pulling Pippin out of the well. Begin with opening (by hitting them) the chests on both sides of the construction. Afterwards rebuild the well from the received pieces. Now you will need a cog and a crank.
To obtain the cog, you have to head to the right side of the room. Legolas should shoot the target to knock down the chest while Sam start a fire and therefore obtain a key which perfectly fits the recently discovered chest. Open it to obtain the cog which you can mount by the well.

To obtain the crank, you need to go to the right and destroy the cracked LEGO brick with Gimli's axe. Place the missing element and you will be able to start the mechanism by quickly pressing (K) and pull Pippin out of the well. Unfortunately it doesn't mean the end of problems, as there are Orcs coming from the depth of the mine.
You need to prepare yourself for a fight - start off by strengthening the door by using the weapons lying on both sides. Afterwards Legolas should shoot an arrow into the elements on both sides of the corridor. In the end grab both chains with your characters - when of them hangs on it, press (U) and jump onto the other one. The door will be reinforced by a beam which unfortunately won't endure the Orcs' attack. You will have to face the incoming enemies.
Your next enemy will be a troll. Unlike the Orcs, it doesn't only take a few hits to eliminate him - you will have to use a series of traps. Start the fight by building a platform from the nearby bricks. Afterwards you have to stand on it and wait for the troll to roar. When you hear his voice, quickly run from the platform. The enemy will hit it and therefore hurt himself.
Now you need to switch to Legolas. Head to the right side of the chamber and use leaves to reach the ledge. There, destroy the rock and stand on the platform. When you hear the roar, avoid the troll's attack, jump onto the chain and shoot at the enemy's head. Do the same thing on the left side of the room.
One of the hobbits will jump on the troll's back - after a couple hits (H) the troll will be stunned - you can use this chance to change to Legolas and shoot an arrow at him. Afterwards use the LEGO bricks on the left or right side of the chamber to build a narrow tunnel and head inside with one of the hobbits. When on the highest ledge, stand on the circle and press (K) when the troll approaches to jump on his back. Start hitting him again and attack with Legolas while he's stunned. Afterwards repeat the whole process on the other side of the room.
Now you will have to protect Gandalf from the horde of Orcs. His barrier will stop most enemies, but those of them who manage to break through must be taken care of. Defeat three such groups and you should reach the end of the corridor. Afterwards turn left to find another puzzle.
This will require the cooperation of the whole team. Pippin should fill up the previously obtained bucket with water from the pond and extinguish the fire, while Gandalf uses magic to put the purple cog into the right place. Gimli should break the cracked LEGO brick, rebuild the floor from the received pieces and push the cart. The last thing you need to do is find the crank - it's in the barrel in the left corner of the room. After opening the door - by pressing (K) - you can move onwards.
Run down the stairs and you will pass by a statue which you can use to save your game. As you enter the Khazad-Dum bridge, part of the location will crumble and therefore split your team. Start off by throwing Gimli towards the cracked LEGO brick. Afterwards enter the narrow tunnel with Sam, grab onto the chain, make it across to the right side and start a fire (you will return above using the new chain). The last step will be switching to Legolas and shooting twice to lower the footbridge.
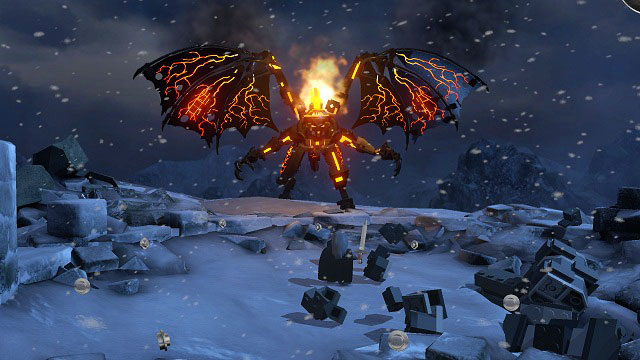
Now you will have to control Gandalf the Grey during his fight with Balrog. You will firstly have to dive (J) and grab the sword in the air. The next fall will get you nearer to the demon. When Gandalf lands on it, start pressing (H) to attack it with the sword.
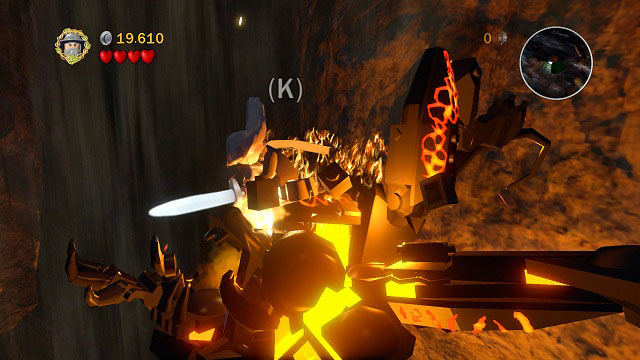
After a couple hits you will have to press (K) to lead out a more powerful attack, after which you will be thrown into the air. You will have to repeat this two more times, however now you will have to look out for the demon trying to knock you down with his fire breath. To avoid Balrog's attacks, you need to jump sideways when you see that light start gathering in his mouth. The fight is rather short and shouldn't cause you much trouble.
After regaining control over your team, you should head to the right. The path is blocked by a precipice, but why not make use of the team acrobat? Switch to Legolas, shoot the target, stick an arrow into the wall and use the newly created handle to jump to the other side. Hit the rock by the machine (visible in the above screenshot) to lower the ladder. After defeating a couple Orcs and opening the gate with Gimli, you will be able to leave this inhospitable place.
Characters: The Fellowship of the Ring
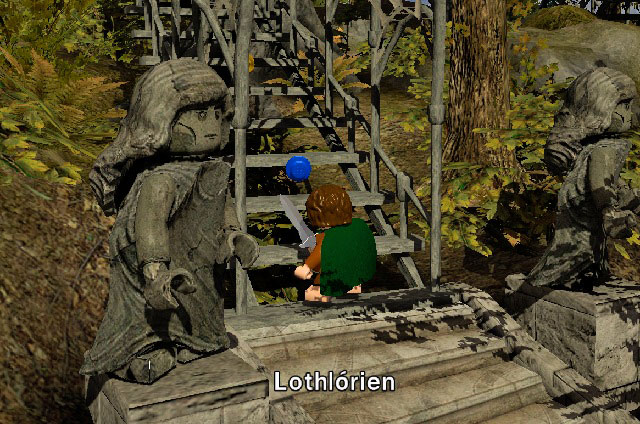
Lothlorien is the next stop between the main story missions. After meeting with Galadriel and Celeborn, Frodo will receive the Elven Cloak and the Phial of Galadriel, Sam will receive an Elven Rope while Legolas a new bow (which unfortunately isn't more effective than the last one - it just looks differently). After you receive the gifts, it's time to move on - just keep pressing (H) and the boat will set the right course itself. After reaching the destination, you will begin the last story mission connected with the Fellowship of the Ring.
Characters: Frodo, Aragorn, Boromir, Gimli, Legolas, Merry, Pippin
Real Adventurer requirements: 45000 studs
New characters to buy: Uruk-hai, Lurtz, Galadriel, Celeborn
You are once again in control of two different groups of characters. I'd recommend completing Frodo's part first, as it determines how far you can get with the other team. Just like during your first encounter with the Black Rider, you will have to trick your enemy once again. Despite the fact that Frodo's invisible, he will still be noticed if he steps onto a bush beside Boromir. Start off by picking up the stone beside you and throwing it into the highlighted bush to create a further path.
The next obstacle can be avoided by going through the narrow tunnel and pushing down the pillar. When Boromir runs further, you will be able to build stairs from the pillar's remains and use them to go around him.
After breaking the boulder, you will receive a small rock which you can throw at the stone hand in the background. More phantom LEGO bricks will fall out of it - you can use them to build stairs which will take you around Boromir. On the rock ledge, hit the statue in front of you to open the further path.
In this location you will have to break everything around you to gather enough phantom bricks to build a catapult. After assembling it, press (H) to hit the support and the catapult will create you a path. On your way you should pick up a stone from the road; you will you it to trick Boromir once again.
Hit the small boulder by your feet and you will obtain a small rock - use it to knock the phantom LEGO bricks from the branches. Use them to build a ladder and use it to push down a large pillar which will let you move on.
It's the last part of Frodo's trip. Use the narrow tunnel to reach the opposite rock ledge, break the boulder and take the small rock. One throw above Boromir will open a path to the end of the level. Just take off your ring and the rest of your team will be able to look for the Hobbit.
Time to search for the missing Hobbit. Start off by destroying the paddles on the ground to get a torch. Set fire to it from the bonfire in the left part of the location and use it to burn the logs blocking your way.
The next obstacle can be passed by using Legolas' skills. Use the leave to jump onto the higher platform and follow the vines onto the tree branch. From its highest point, you will have to shoot a target and therefore knock down a bird nest. From the bricks left you will be able to build a springboard thanks to which the whole team can get higher. A bit further you will have to use Gimli's axe to create a passage.
Time for a more complicated task. Pick up Gimli and throw him and the cracked LEGO brick which will unveil leaves and let Legolas get onto the top of the statue. Afterwards shoot an arrow to create a handle using which you can reach the next platform. There you just need to push down the pillar. Gimli should once again use his axe to destroy the cracked brick and build a smaller pillar from its remains. Afterwards switch both elements so that you can jump from the smaller onto the bigger nod from there onto the rock ledge in the background.
You will once again have to use Gimli's skills and destroy the two cracked bricks. Assemble the bricks on the ground and shoot an arrow. Leaves will appear, letting Legolas reach the handle and jump to the other side. There, from the bricks on the ground, build a small pillar and push it down so that the other characters can join the Elf.
Time to show what Aragorn is capable of. Take out Frodo's sword from the ground and move along the traces on the ground in search of the Hobbit. You will know you're close when Aragorn start searching on his knees. You will know you found him when he starts digging in the ground.
Now it's time to look for Boromir. Firstly you will need to eliminate all Uruk-hai, especially those on the pillars as they're using bows. You can kill them by destroying the pillars they're standing on or attacking with Legolas' bow. Clear the location and do the same in the next one. On the last glade you will have to throw Gimli at a cracked brick to open a path to shielded Uruk-hai. Clear the area and a boss battle will begin.
As you don't have ranged characters, you will have to use whatever you're left with. Choose one of the hobbits, enter the narrow tunnel and attack Lurtz (the boss). Uruk-hai reinforcements will block the tunnel, but a couple hits will make it accessible once again. Another trip to Lurtz will leave the boss with only one heart. Unfortunately the tunnel will be once again blocked, however a group of Orcs will knock down a tree on the right side of the arena - use its remains to build a spring-board and end this part of the fight. If any of the Uruk-hai manages to grab a Hobbit, change your character and hit the enemy so that he drops him.
I'd recommend saving your game by the nearby statue. This time Aragorn will have to protect Boromir. This stage is even simpler than the last one, as you only have to avoid Lurtz's attacks and wit for the angry enemy to throw his shield. When he jumps down to regain his equipment, you can hit him and decrease his life. After a few hits Lurtz will decide to fight with you directly - nothing easier for experienced warriors. Should the enemy manage to grab one of your characters, switch to the other one and attack the boss. After a couple well-aimed attacks the boss will be defeated and you will end you adventure with the Fellowship of the Ring.
Characters: Frodo, Sam
Amon Hen was the last location where you could control the whole Fellowship of the Ring. From now on, Frodo and Sam will be heading to Mount Doom on their own, while Aragorn, Legolas and Gimli will focus on saving Middle-Earth from the incoming forces of Isengard and Mordor. The second chapter will begin with a small location in Middle-Earth: Emyn Muil. Begin by activating the map stone and afterwards head along the path of studs to the next story mission.
Characters: Frodo, Sam, Gandalf the Grey
Real Adventurer requirements: 90000 studs
Just like with some of the previous missions, you will have two groups of travels at your disposal. Firstly I'd recommend choosing Gandalf the Grey and finishing off Balrog once and for all. Save your game by the nearby statue and head left.
It's time for the first puzzle. Destroy the ice surrounding the bricks and use Gandalf's magic to place them so that you can reach the rock ledge. If you want the prize, you should build the stairs in accordance with the pictogram on the rock - in return you will receive some studs and one minikit. Regardless of which option you choose, you need to continue climbing to the top of the tower.
Repair the broken stairs with Gandalf's magic. It's the last obstacle on the path to Balrog.
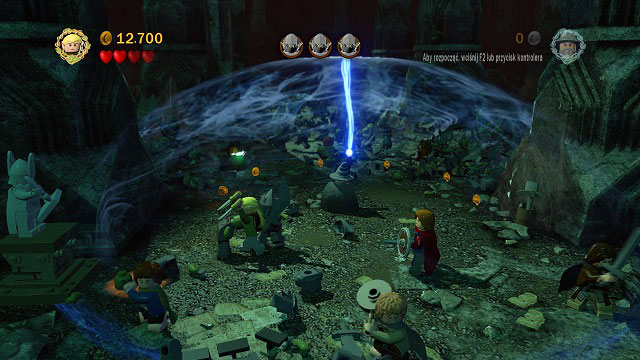
After reaching the top of the tower, the final battle with the demon will begin. The task is easy: you need to avoid Balrog's attacks (you can jump above both the whip and sword attacks) waiting for lightning to hit. When the storm starts, stand in the shining circle, press (K) and aim the electricity beam at one of the bricks on the demon's wings. The whole cycle has to be repeated two more times - you need to hit the second wing and afterwards the body. This will be the last time you see Balrog during your adventure.
After the battle, the game will automatically move you to the hobbits. Gollum will take the basket's contents and run way blocking your path. To reach him, you will have to fill up the basket with as much as six fish. The first two can be found at the very beginning of the location (the second one will appear after you complete Gandalf's storyline). You can place them inside the basket at once by selecting them in the inventory and pressing (K) while standing on the stone by the gate (K).
The third fish can be found high above, on a rock ledge. Select Sam, stand below the hook and press (K) to attach the rope, so that the Hobbit can pull himself up. Now just destroy the bushes beside you and build a ladder from the remains to reach the fish. You can head further to the right, you will return to the basket later on.
The fourth fish is inside the dark cave. Choose Frodo, equip the Phial of Galadriel and head inside. Sam will follow you - he will have to use his shovel and dig up the fish. Continue to the right.
Sam will have to place a plant and move the pillar so that you can use it as a platform. Jump along the leaves onto the rock ledge and onto the other side.
It's time for the fifth fish. You will need to start a bonfire - wood can be found behind the big stones in the background and beneath the nearby bushes. After collecting three pieces, Sam will be able to light them up which will open a passage to the fish.
The last one is inside the dark cave above you. You will have to do the following: Sam has to dig up the ground and build a hook from the obtained bricks. Afterwards he has to attached the rope to it and climb up to place a plant. Switch to Frodo and jump up along the leaves. Head inside the narrow tunnel and cross the precipice by holding onto the rail. The last step is taking out the Phial of Galadriel and picking up the fish inside the cave.
After you collect all the fish, you can head to the right and push the boulder to reach the starting point. Now just fill up the basket and the further road will be opened - time to meet with Gollum.
Gollum will be constantly moving along the opposite wall - to make him come down, you need to throw a fish at him. One is lying right in front of you - pick it up and throw at the enemy. When Gollum gets down onto the ground, switch to Sam and throw his rope at him. That will make Gollum angry and he will attack the Hobbit; in order to damage him, switch to Frodo and attack with his sword. Gollum will head back onto the wall and you don't have any fish left to make him come down.
Time to build yourself a fishing rod. A line can be found in the dark cave by the wall on which Gollum is. Light up the path with the phial and pick up the item with Sam. Dig up the nearby ground to find a hook which can be attached (K) onto the wall above. one accurate rope throw and you will obtain the fishhook. Now you just need a pole. Climb onto the rock ledge with Sam and destroy the bush there to obtain it. Combine all three elements to obtain a fishing rod which you can use to obtain more fish from the nearby pond. Repeat the process from the previous paragraph two more times and Gollum will be defeated.
Characters: Frodo, Sam
You're once again in Emyn Muil. In the upper right corner you will see an icon of the second group - Aragorn, Legolas and Gimli - who are following your kidnapped friends. You can press (U) to switch to them, however in this guide the first described mission will be the one of the hobbits and Gollum.
If you haven't unlocked the map stone here (just check the map), you should head back a bit along the road and activate it. Afterwards just follow the trail of studs to begin the next mission.
Characters: Frodo, Sam, Faramir, Madril
Real Adventurer requirements: 65000 studs
New characters: Faramir, Madril
New characters to buy: Gondor Ranger, Easterling
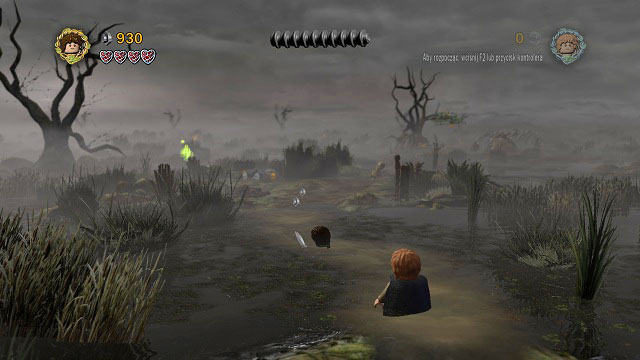
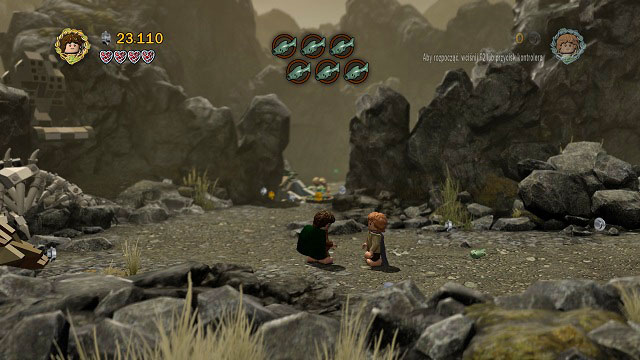
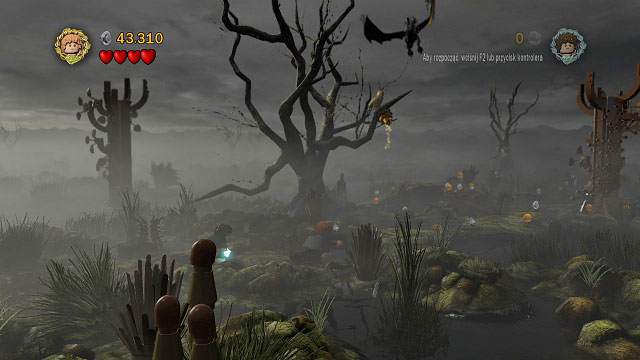
You begin the mission on dry land, but soon enough you will have to travel through marshes. Move onwards and a short cinematic will show you Gollum running across the marshes - he will lead a brown trail behind him. You will have to follow it - both now going along it and going too slow will result in your character drowning.
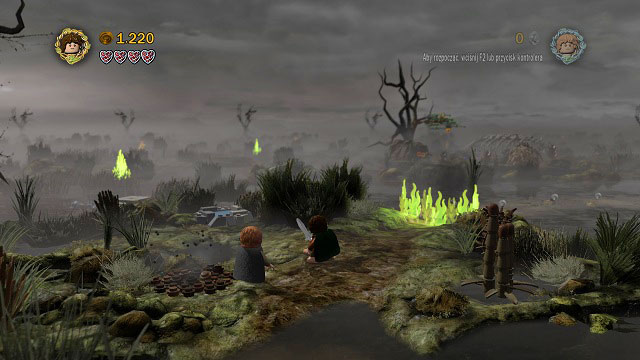
After crossing the marshes onto the next island, Gollum will show you a safe path, but unfortunately fire will block it. The first puzzle is really easy: switch to Sam and dig up the ground beside you to obtain a bucket (it will be automatically added to your items). Afterwards fill it up with water from the nearby pond and extinguish the fire - now you can head onwards through the next part of the marshes.

Another island, more fire and another task for Sam. This time you have to place a plant and jump onto to upper ground by using the leaves as a springboard. Above, start a fire in the marked place and cross the footbridge to fill up the bucket at the pond. You need to be fast, as the plants won't be able to hold you for too long and you might end up in the water.
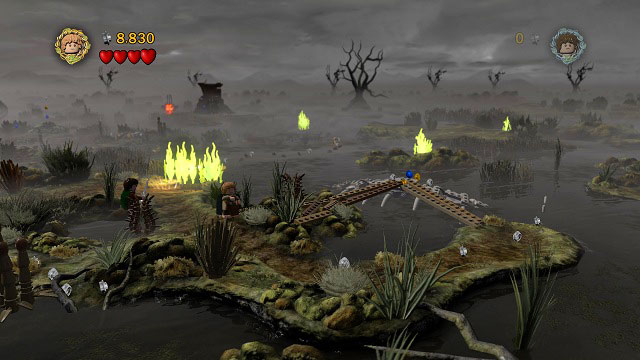
You need to find another pond. Head to the intersection of the footbridges on the right (they're leaning against a giant skeleton) and the further path will open. Go along it, fill up the bucket and extinguish the fire. Another puzzle solved. Head onwards through the marshes - note that your first step will make you fall into deep water, so you need to jump onto the brown trail from the island itself. You should also jump as you're heading along the path, as it will make things faster.
Extinguishing this fire will require the two hobbits to cooperate. Choose Frodo, jump along the leaves onto a small island and press the button there. It will activate a nearby pond - now just switch back to Sam, fill up the bucket and extinguish the fire. You need to be fast here, as if you will hesitate with pressing (K) for too long, you Hobbit will drown. After you extinguish the fire, you will be able to move on.
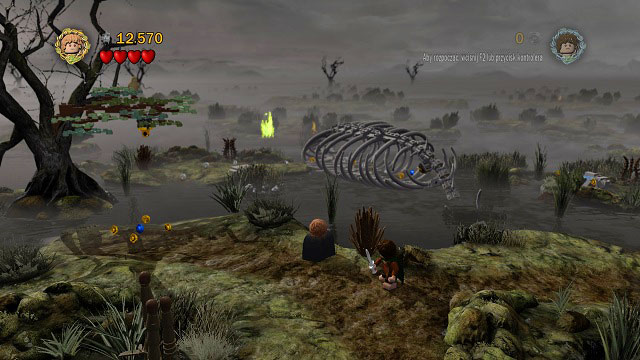
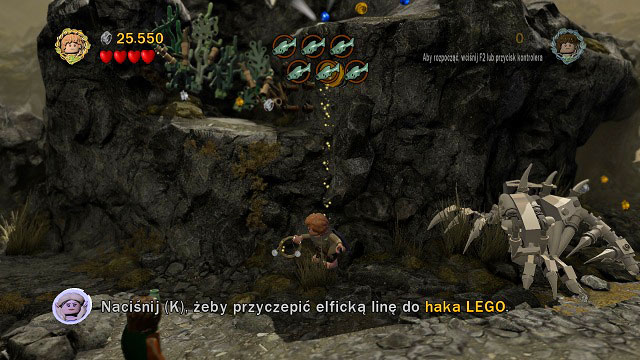
Another obstacle. This time begin with choosing Sam and using the elven rope to grab onto the hook placed on the tree on the left side (visible in the above screenshot). It will open a path north, from where you will be able to get inside the bone cage. After reaching its end, Sam will be able to use the rope to pick up another "bridge". Return to the starting point, use the new bridge, fill up the bucket with water and extinguish the fire. The path is open.
The last fire to extinguish. Switch to Frodo, choose phial and enter the hole in the tree. It will cause a hook to fall out, which you can mount onto the tree (K). afterwards choose Sam, throw the rope onto the hook, fill up the bucket with the freshly filled pond and extinguish the flames. After reaching dry land you will see another cinematic.

In this part of the level you will have to hide from the sight of the Black Rider. When Gollum shouts that you need to hide, choose Sam and hide inside the empty tree trunk ((K), visible in the middle of the screenshot) and afterwards switch to Frodo and choose the elven cloak - the Hobbit will resemble the local flora from afar.
Now you need to wait for the Nazgul to end his search and fly away. A short cinematic and Gollum's shouts will let you know when it's free to head out. As you reach the next island, the Black Rider will return and you will have to hide once again. You will repeat this a couple more times before finishing this stage.
On the last island you will come across a big cave - it will serve as your hideout this time. You need to switch to Frodo, choose the phial and quickly hide inside. After the Nazgul flies away and Gollum confirms that it's safe, you can move on to the further part of the level.
The game will once again require you to sneak. Just like in previous levels like this, you won't be able to jump - instead your character will make a forward roll. Start off by using Sam's rope on the hook on the tree. Hold down "up" (W) and swing so that you're able to jump across the water. There you just need to stand on the piece of wood so that the kind of swing opens up the path for Frodo. The Hobbit should approach the nearby tree and knock it down with a single hit. Thanks to that the whole team will be able to move on.
Follow Gollum's trail and you will reach a tree blocking your way. In order to move one, Sam will burn the tree which will unfortunately draw the attention of the Nazgul - you will have to once again hide Sam inside a trunk (K) and Frodo under the elven cloak. When the area's clear, head to the right across the marshes.
It's the last task on the swamps. Use Sam's rope on the nearby hook, build a bridge from the received bricks and cross it to the other side. There Sam will have to place a plant and use its leaves to reach the upper level. It's high time you leave the swamps...
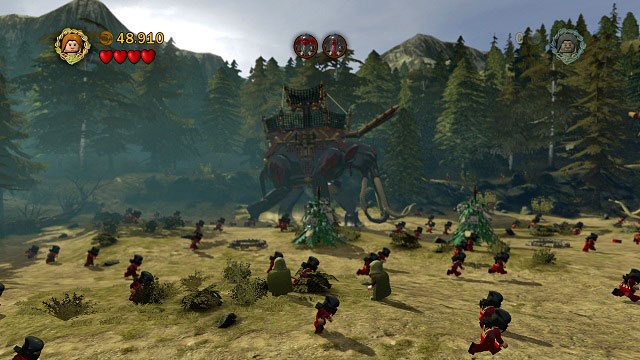
After watching all the cutscenes, you will take control of two new characters: Faramir and Mardil. Your task will be defeating two Mumakils, that is the overgrown mammoths in the background. For that, you will have to run to one of them while avoiding the warriors in the area and grab onto the lines hanging down from it.
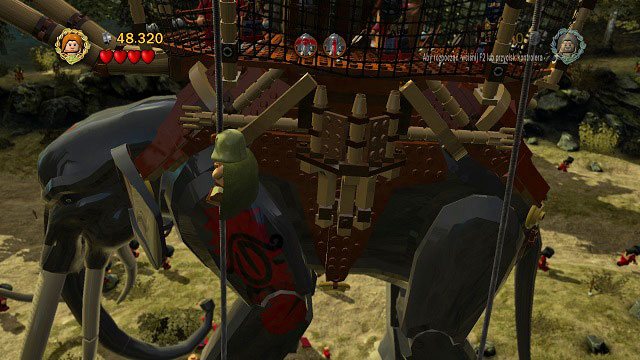
Use them to climb onto the construction and get rid of all the enemies and objects. One of the barrels will be containing a rope which you can use to reach the upper level - defeat the last enemy there to make the Mumakil run away from the battlefield. Now you head onto the second animal and to exactly the same to end this long missions.
Characters: Frodo, Sam, Faramir, Madril
Watch the ending cutscene of the previous mission and you will once again be in control of the hobbits. The team will be also temporarily joined by Faramir and Madril. Follow the trail of studs to reach the city of Osgiliath. Unfortunately you won't be able to begin this mission, as the city is covered with a red haze - it means that Sauron's gaze is upon this city and it's temporarily blocked for you. The only option you have left is to switch (U) onto Aragorn's team and complete his tasks.
Characters: Aragorn, Legolas, Gimli, Merry, Pippin
Real Adventurer requirements: 50000 studs
New characters to buy: Grishnkh, Radagast the Brown
Watch the intro cinematic and you will take control of Aragorn, Legolas and Gimli. You will be beside the ashes of the Uruk-hai defeated by the Rohan warriors. Start off by shooting the three targets with Legolas. Use the obtained bricks to build a set of stairs (K) which will let Gimli reach the cracked LEGO brick and destroy it (jump attack). The belt of one of the hobbits will fall out of the pile.
You will have to use Aragorn's skills. Pick up the belt and follow the green tracks until you learn what happened with the hobbits. You will find another item and the next goal of your searches. This time it will be blocks which you will be able to use to build a hook. The camera will show you a tree with a target on the left side of the location. Head there with Legolas to obtain a rope in return for a accurate shot. Use the lien of the hook to find another item for Aragorn.
Follow the footprints to reach the edge of the forest. Watch what the hobbits did and you will find yet another green item which will lead you to a log blocking your path. Destroy it with Gimli's axe and you will find the last item for Aragorn - follow the trail and the game will move to the Fangorn Forest.
This time you will be in control of Merry and Pippin who are running away from a hunt. Start off by saving your game using the nearby statue and afterwards move to the right. Destroy the rocks blocking your path and go down the slope where you will have to fight Orcs.
When you're done with the enemies, you will have to grab onto the log with both hobbits (press (U) after grabbing it) and build a ladder from the obtained bricks. Move on to the right.
After a few fights with Orcs you will reach a glade. There you will have to unblock a narrow tunnel (in the screenshot) - the shielded enemy will do most of the work for you. Defeat him and use the newly unveiled corridor to move onwards to the right.
You will reach a spot which might seem like a dead end. Luckily you just have to destroy the bushes in the middle of the location beside the big tree and build a rail from them. Use them to get above.
This time you will be able to control the powerful Treebeard. Time for a short walk: head to the right while smashing both LEGO objects and incoming enemies. If you have troubles hitting them, press the attack button (H) and the Treebeard will swing its arm. After reaching the end of the path, you will have to move onwards to the north.
After as short fight with Orcs, you will need to defeat some archers. Approach the boulder on the ground and press (K) in order to pick it up and aim at the nearby boulders by holding down (H). it will unblock a path onto the upper level - head there and afterwards further to the right. As you reach a stream, you will need to help Merry with crossing it - just approach him, press (K) and then press it again on the other side to put him down.
As the Ents are afraid of fire, you will have to make use of the hobbits. Switch to Merry (U) and use the narrow tunnel. Above, just grab onto the liana to extinguish the flames. Switch back to the Ent and head further to the north to finish the mission.
Characters: Aragorn, Legolas, Gimli, Gandalf the White
Once again you can choose between two team, though Osgiliath is still blocked. Therefore you need to spend some time on exploring the foregrounds of Edoras. It shouldn't take you too much time considering you're riding on a horse. You can find a big amount of objects which you can destroy to receive studs and a couple mithril LEGO bricks. After a short exploration of the nearby fields, you can head to Edors to meet with Theoden. Entering the city will begin the next story mission - Warg Attack.
Characters: Aragorn, Gimli, Legolas, Gandalf the White
Real Adventurer requirements: 34000 studs
New characters: Gandalf the White
New characters to buy: King Thoden (Cursed), owyn, Hma, Gamling, Grima Wormtongue
The mission begin in King Theoden's chamber. Your main task will be freeing him from Saruman's influence. Begin by beating the royal guards and hitting Grima with Gandalf's stick. When the path to Theoden is clear, just approach him and hold down (K). Unfortunately Grima will hit you and therefore interrupt the ritual. He will also call in more guards.
You will once again have to defeat the king's guards, hit Grima and begin the ritual. Unfortunately it will be interrupted this time as well, so it's time to get rid of Grima for good. Build a cage from the bricks found in the right side of the room and fight off the enemy once again. This time however, instead of beginning the ritual once again, start chasing Grima around. He will be eventually caught into the trap and you will be able to free Theoden from Saruman's charm. Repeat this cycle one more time to free him completely.
Unfortunately Rohan doesn't intent to fight with Sauron - they rather hide in Helm's Deep. You will regain control of your character only after Wargs attack you and will have to protect the caravan. There are two ways to defeat them: simply attack them if you're riding a horse or grab onto their sides and throw down the rider You need to defeat four groups of enemies before the level ends.
Characters: Gimli, Legolas
Another Middle-Earth interlude before you can begin the proper mission. It's still impossible to head further to Osgiliath with the other members of the Fellowship, so Helm's Deep is your target for now. This time you have an easily accessible map stone - it's worth activating it, as you will be returning to this area more than once in order to collect all mithril bricks, complete missions and buy characters. Once you're done looking around the area, you can head into Helm's Deep.
Characters: Aragorn, Gimli, Legolas, King Thoden (Armor)
Real Adventurer requirements: 44000 studs
New characters: King Thoden (Armor)
New characters to buy: Haldir, Lothlrien Elf, Berserker, omer
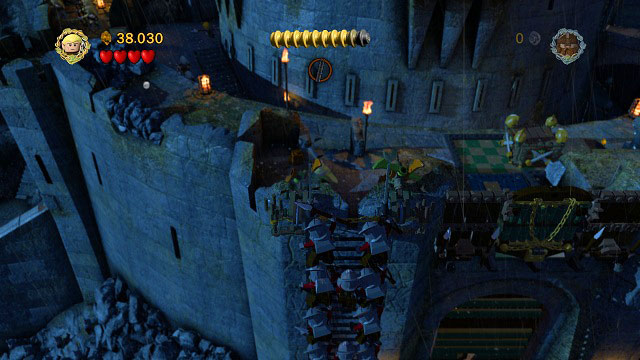
Before the real battle begins, you will have to reach the wall itself. Choose Legolas and shoot the target on the left side of the grate and build a mechanism from the received cogs (K). Afterwards use Gimli to break the cracked brick on the ground, pick up the crank and connect it with the rest of the machine. After attaching the crank, use the broken chests to build a platform and use it to get onto the wall. The last obstacle can be once again destroyed by Gimli.
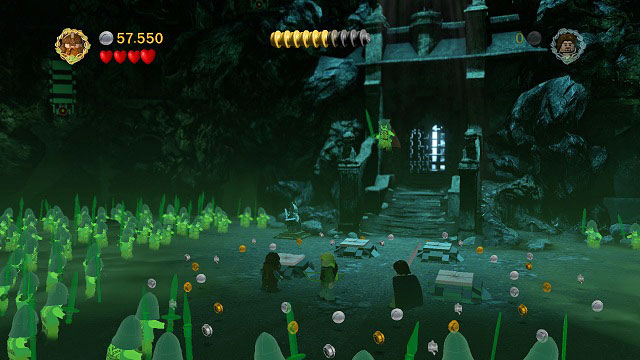
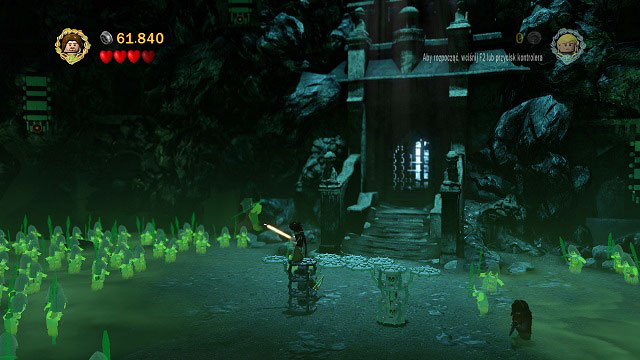
So it begins. You will have to start by protecting the walls from the ladder. You can destroy them in three ways: use Legolas to shoot an Orc on tall ladders, the ones with a cracked brick can be destroyed by Gimli, while the small ones can be destroyed by any character - just hit the hooks. There are three waves, each with one more siege machines than the previous one. When four ladders appear, you will have to use the narrow tunnel on the right side of the wall: choose the Dwarf and head inside it. Push down the chest, build a cracked brick from the elements and hit it with your axe.
During the last wave you will have to throw Gimli at the cracked brick and shoot down two Orcs with Legolas' bow. Unfortunately the wall will be broken and you will an up by its base.
Use Gimli's help to break the cracked brick found on the wall. Build a platform from the received elements, thanks to which you will be able to reach the upper one. Destroy the spears by the wall and build a target from their remains. Time for Legolas: place an arrow in the hole and leaves making it possible for you to reach the bar will appear. Swing on it, jump to the left and push down the boulder which will let you the team reach the top of the wall. Break the cracked brick with Gimli and you will be able to head further to the left, inside the fortress.
You need to give the defenders inside the fortress some time to prepare for the battle. Pick up Gimli and throw him at the broken Uruk-hai shield. Aragorn will be afterwards able to join the fight by jumping across the cracked floor. Defeat the enemies, destroy the ram and reinforce the gate with the LEGO bricks on the ground.
The action will move to the wall above the gate. Controlling Legolas, you will have to show down three ladders - a fourth, bigger one will appear once you do. Use the elf's daggers to destroy both hooks and unhook it from the wall. Use the remaining pieces to build a floor and push down the chest. There, after switching to Aragorn or Gimli you have to build a platform and use it the reach the rope which can be used to climb the castle.
The gate has fallen - time to face Saruman's forces. You control King Theoden and you have to kill as many Uruk-hai as possible while collecting studs as well. You can also admire the views:) It's the last stage of Helm's Deep defense.
Characters: Aragorn, Legolas, Gimli, Gandalf the White, Frodo, Sam, Faramir, Madril
This time you need to reach the gates of Isengard - Saruman's seat. On your you can buy missing characters (I'd recommend the Berserker who you will be able to use mithril bricks and gain more treasures). Unfortunately, after the battle of Helm's Deep, Saruman's gaze will be pointed here and therefore blocks your path. However every cloud has a silver lining - thanks to this you can switch to the group of Hobbits and enter Osgiliath, which you should do now.
Characters: Frodo, Sam, Faramir, Gollum, Merry, Pippin
Real Adventurer requirements: 85000 studs
New characters: Gollum
New characters to buy: Gondor Soldier, Saruman the White
Your team will once again be divided into two groups. Frodo, Sam and Gollum are in one part of the ruined city, while Faramir in the other. Both groups will have to cooperate in order to complete this mission. Start off with Frodo - the Hobbit has to enter the narrow tunnel in the left, after which you should switch to Faramir and shoot an arrow into the target in the background. Once again return to Frodo and jump to the other side using the newly created platform. Switch to Sam, go down and use the elven rope on the hook.
Choose Faramir and head to the right. There, create a floor from the LEGO bricks on the ground and switch the pillars so that you can climb onto the upper level. Above, shoot at the target in the distance. Switch back to Frodo's group and go through the gate. Return to Faramir and once again shoot the target to open a further path for the Hobbits.

On the tower you should see an Orc with a sword which you will be able to use to free Gollum's hands. Choose Frodo, use his phial to light up the dark backstreet. Destroy the door there and build a narrow tunnel from its pieces. Change back to Sam and use the newly created passage. After a short cutscene, use the elven rope on the hook hanging from the roof.
Build a springboard from the LEGO bricks on the ground and use it to reach the first floor of the tower. In order to get higher, switch to Faramir, kill the attacking Orcs and head to the right. There you have o build a ladder, climb it and shoot the target with an arrow. Switch back to Sam, finish building the ladder and pick up the sword. Get back down and use the sword to free Gollum.
Your newly gained team member can climb walls marked with fish bones. The first chance to use this skill will come right up. Go up, open the gate with the crank and head further to the right. Now you can switch to Faramir. Go down from your platform and head right as well. The rocks blocking your way will be destroyed by attacking Orcs - get rid of them and move on.
Go up the stairs and shoot the two targets. Use the tiles to rebuild the floor and push the pillar to the left. Stand in the breach and shoot two Orcs in the distance, therefore creating a path for the Hobbits. Choose Gollum and climb onto the platform to push down the statue. It will destroy the stone block and therefore allow Sam to place a plant. Use the left as a springboard and get onto the platform. Have Sam start a fire in the designated spot.

You will once again encounter a flying Nazgul. Switch to Faramir and head to the right. Another group of Orcs will destroy the door blocking your way. Deal with them and break the supports by the wall to create a breach through which you can shoot the Black Rider. Jump onto the pillar lying beside, shoot the phantom and switch back to Sam.
Go down the stairs and use the shovel to dig up a cog. Use it to complete the mechanism. In order to obtain the crank, you will have to fish it up from the water. For that, destroy the rocks blocking our path to the footbridge and switch to Gollum - he can catch fish without using a fishing rod. After obtaining the crank, add it to the rest of the mechanism and open the gate. Head through it to the other side - the Nazgul will appear once again.
Head with Faramir to the right and down the stairs. A couple Orcs will break through the wall and therefore allow your for a clean shot at the Wraith - use this chance. Afterwards head further to the right, build a ladder from the bricks on the ground and climb up onto the upper level. Switch to Frodo and destroy three pillars to build stairs from them. Climb them and fight off the temptation to put on the ring (keep pressing (K)). Switch back to Faramir and shoot at the Nazgul.
Ents versus Isengard! You can destroy pretty much everything on your way. Keep heading to the right and you will reach a precipice which you will be able to pass only after knocking down the nearby tower.
Keep going further to the right and you should reach a wall of fire. Extinguish it with the nearby water containers - pick them up (K) and throw at the flames (H). Afterwards you will be able to move further to the north.
Directly by the dam you will find a few boulders on the ground. Use them to destroy the towers in the distance, thanks to which you will be able to move towards the dam. Pull out the suspensions and destroy the dam to end the mission as well as the next chapter of your adventure.
Characters: Frodo, Sam, Gollum
You return to the path to Osgiliath. If you want to visit the previous locations and use Gollum's kills, now you have some time for that. I'd also recommend visiting the Dead Marshes and activate the map stone there. In case you have problems returning to the road to Osgiliath, just save your game and head to the main menu (ESC, exit, save and exit) and then reload your game - our team will be placed in front of the next mission. when you're ready to resume your quest, just make Gollum climb onto the nearby wall to the very top.
Characters: Frodo, Sam, Gollum
Real Adventurer requirements: 88000 studs
New characters to buy: Mordor Orc
Your begin on the path to Minas Morgul. This time you have to look out for Frodo, as the will from time to time head towards the fortress on his own. If you control him on your own, he will never fall in the trance, so consider having him as your "main" character. Start off by visiting the dark cave (you will need the phial) on the left side of the road. Frodo will provide light, while Sam will dig up the ground. From the received bricks, build a lever by the left statue.
Now just push it (K) to make the hook appear. Sam can attach the rope to it and make it fall down. The lying bricks can be used to build a campfire by the second statue. Start a fire with Sam and use the rest of the elements to build the first fragment of the stairs.
In order to obtain the pieces needed to finish the structure, you need to head as far to the left as possible. There you will find a wall which Gollum can climb and knock down the boulder there (H). Afterwards use it to jump to above with Sam, dig up the ground, pick up the rock and throw it at the plant. A hook will appear - a great target for Sam's elven rope. A strong pull will create a platform which you stand on.
This time you will need Frodo. Jump to the other side (where the tile is) and take out the phial to light the cave. Break the item there and finish the floor using the tiles found there. Afterwards push the stone down and build the second part of the stairs from its remains. Now you can use them to get up.
Watch the cutscene and you team will end up high above the ground. Go to the right, jump across the first precipice and cross the second using the rail. On the other side you can save your game and head up the stairs.
Use the phial of Galadriel to light the dark area in front of you, unveiling a wall which can be climbed by Gollum. Climb up and push down a stone from there. Pieces needed to build the tile can be found buried in the ground - the loose ground itself is hidden beneath various, destroyable pieces of the environment. After assembling the tile, push the rock to the right and use it to jump onto the next piece of stairs.
At the top of the stairs you will first of all need to visit the cave on the right side. light it up with the phial and find a breakable chest. Destroy it and a stone will fall out. It can be used to pull down a spider-web on the left side. Doing so will unveil a hook onto which you can attach Sam's elven rope. Afterwards use the rail to cross the precipice to the left and go up the stairs.
As Gollum, destroy the spider-webs on the wall and climb onto the rock ledge above you. There you have to break the skeleton on the wall and build a lever from its pieces. After jumping onto the shield, push the boulder down to unlock a narrow tunnel. Switch back to Sam and use the corridor to reach a small cave where you can place a plant. It will burst through the stone and you will be able to build the missing stairs using the bricks from the ground. This time the stairs will take you to the very top.
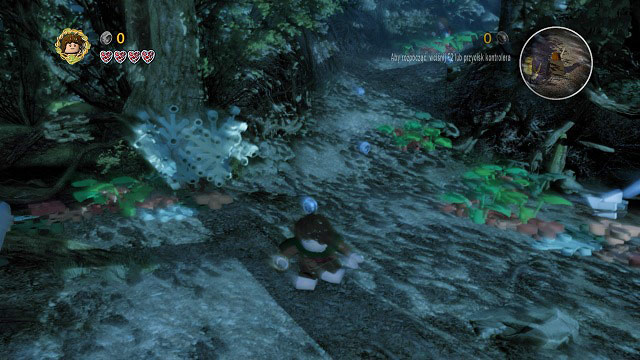
In this part of the level you will be navigating through a cave with the Phial of Galadriel giving you light. You should control Frodo, as his light can scare away small spiders. It's also impossible to get lots - there's only one path leading to the destination. If it gets blocked by items lying on the ground, just destroy them (H).
After a short walk you should reach a bigger cave. Switch to Gollum and use his ability to climb up walls. Push down the stone which will unveil an entrance to a narrow tunnel. Now just switch back to Frodo and use the newly created passage to move onwards.
Destroy a few spider-webs and chase away the little spiders with the phial and you will reach another dead end. Nothing hard here: just break the bones in front of you and build rails with them. Above you will have to break all the objects around you - bones can be used to build a bucket, into which you have to put three stones (just throw them at it). It will rip the web and open a path for you.
Watch a short cutscene during which the Frodo will start running away from the giant spider Shelob. Throughout the chase, break as many objects as possible to collect studs. Stick to the left side of the screen to collect those which are worth the most.
Characters: Aragorn, Legolas, Gimli, Gandalf the White
Let's give the Hobbits a break and go to Isengard, where the second part of your Fellowship awaits you after Saruman's defeat. Go to Edoras. After reaching the town, you team will split: Gandalf and Pippin will head to Minas Tirith, while Aragorn, Legolas and Gimli will stay under your control. Watch a cutscene and take a look around the area: activate the map stone an obtain various collectibles. When you're ready, head on to Dunharrow.
After reaching the top you will watch another cutscene introducing you to the current situation. Aragorn will receive the Anduril sword, forged from the broken Narsil and head out to Dunharrow to gather the army of the Dead.
Characters: Aragorn, Gimli, Legolas
Real Adventurer requirements: 90000 studs
New characters to buy: King of the Dead, Soldier of the Dead, Rohirrim Soldier
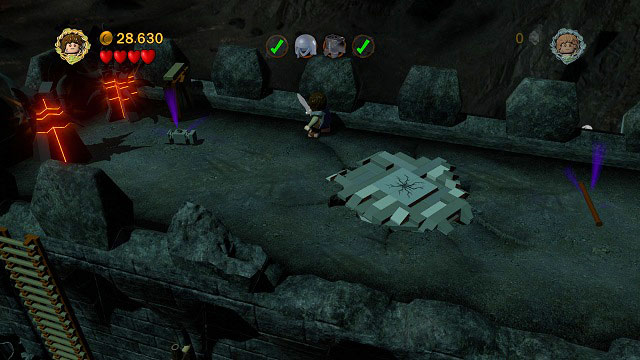
As mentioned before, Aragorn is now in possession of the Anduril sword, capable of destroying Morgul LEGO bricks. Head further into the cave. You will be moving along a corridor filled with mist and will have to look out for any traps on your way. If you step onto the area where the mist forms a kind of a whirlpool (visible in the above screenshot), your character will be grabbed by phantom hands and you will have to free yourself by pressing (H) a couple times.
In the further part of the corridor you will come across "geysers" of mist. Approaching them will cause a ghost warrior which Aragorn will have to defeat to appear. I'd recommend avoiding these obstacles if possible. Your first task will be destroying the LEGO Morgul bricks visible in front of you and building a ramp which will allow you to move onwards.
Soon enough you should reach a vast chamber. Gimli should destroy a cracked brick, use the pieces to build a door and use the narrow tunnel, while Legolas should use the leaves to jump onto the rock ledge. There he will shoot a target on the wall and use the bar to jump onto the upper floor. Push the crate down and Gimli will be able to build a ladder and join the Elf. Move deeper into the cave and you will have to use a rail mounted on the wall to avoid a trap in the mist. At the very end of the corridor you will find another cracked brick which can be destroyed with Gimli's axe to create a further path.
In the corridor you will find two targets which you need to shoot with Legolas' bow. The bricks that you receive can be used to build a bridge and get across the precipice.
The next big room will involve a more complicated task. On the left side you will find a cracked brick: break it with Gimli and build a rail from its remains. Afterwards switch to Legolas and grab onto the rail to get onto the upper level. There, shoot the target on the wall and use the bar to jump above the traps. push down the crate, switch to Aragorn and destroy the Morgul brick. By the end of the corridor you will have to use Gimli's help once again and destroy the cracked brick.
It's the last big chamber in this mission. Have Aragorn destroy the Morgul brick under the statue, push it and climb the unveiled ladder up. Legolas should cross the rope to the other side, while Aragorn pick Gimli up and throw him to the Elf. On the other side, the Dwarf has to break the cracked LEGO brick and build a narrow tunnel from its remains. Head through and use the spinning wheel to open the gate. Go through the gate and the battle with the King of the Dead will begin.
Start with breaking four cracked bricks on the ground with Gimli. In the meantime Aragorn should defend the team from the attacks of the Dead, so switch to him from time to time and clean the area. After having enough bricks on the ground, you can switch to him permanently and build a platform from the elements. Jump on it and wait for the King of the Dead to approach you and hit him three times with your sword. The angered ghost will destroy your platform.
Luckily there are more bricks on the ground from which you can build another platform. Once again jump onto it and hit the King of the Dead three times. Your construction will get destroyed once again. Now for the last stage of the fight: build not one but four platforms and jump onto that beside which the King will be and hit him with a sword. Hit him four times to defeat him.
Characters: King Thoden (Armor), owyn (Dernhelm), Merry (Rohirrin Squire), Frodo, Sam
You will be able to choose between two paths once again: Theoden's riders and the Hobbits. The first group will be rescuing the besieged Minas Tirith, while the second will continue their trip deeper into Mordor, towards Mount Doom. Complete any side missions and try out Aragorn's sword in free play if you want and switch back to the Hobbits to finish the mission of Frodo and Sam.
Characters: Frodo, Sam, Shagrat
Real Adventurer requirements: 54000 studs
New characters to buy: Frodo (Orc Disguise), Sam (Orc Disguise), Shagrat
You will begin the level controlling Sam and one of the Uruk-hai from Cirith Ungol: Shagrat. Frodo is paralyzed by Shelob, so your first task will be protecting him from the spider. Start off by picking up the Phial of Galadriel and the sword. Run after Shelob and she will stop - stand in the yellow circle, press (K) and afterwards (H) when she grabs the sword. The wounded spider will run onto the wall.
Now you have to quickly throw the phial at her by holding down (H) - it will knock her down to the ground. If you won't make it in time, Shelob will start shooting web at you, while a smaller spider will appear on the ground and keep attacking you. You need to wound it three times before you can chase it away. Frodo will be captured by the Orcs and brought to the tower.
Time to escape. Save your game by the statue in the background, throw Sam's rope onto the hook in the middle of the room and pick up the stone to throw it at the chain. Go down the rope onto the lower level.
Deal with the Orcs stationed here, switch to Frodo and use his phial to light the portal on the left side of the room. Pick up the cog and use it to repair the mechanism by the door. Have each of the Hobbits grab one chain to open the passage. There will be some fighting: you will have to defeat both the Orcs on the stairs and those at the bottom of the tower, after which you will be able to head out.
You can save your game here. In order to leave Cirith Ungol, you will have to find a disguise for Frodo and Sam: two pieces of armor and two helmets. Let's begin with the armour: head to the right and pick up a small stone which you will have to throw at the bend pipe above the Orc - the dirty enemy will head to take a shower and leave his equipment for you.
Head further to the right, passing by the entrance gate. Here you will find green flags which you have to burn - start the fire in the designated spot with Sam. Grab onto the rope beside so that the fire can spread to other elements and destroy them. Use the received bricks to finish the catapult. Keep controlling Sam and use the siege machine to reach the ledge on the right side. There, use the rope and climb to the very top. Now just hit the barrels to the right of you and they will hit the Orc, knocking his helmet off.
Switch to Frodo. Build a ladder form the pieces on the ground and climb to the very top. There, put on the Elven Cloak (a chest will be your new camouflage) and head past the guard behind the grate. Reach the ladder and climb it to the very top.
At the top, destroy all the barrels and build a hammer from the received pieces. You can afterward use it to destroy the cracked brick, just like Gimli does with his axe. Behind the grate, get rid of the Orc and take his helmet. Turn the crank to open the door and head further to the left.
On your way you will come across a barricade which can be burned by Sam. Head further to the left and you will come across two chests. Push them to the ground, go down yourself and assemble the bricks. Push the platform to reach the windows, break them and gather the items inside. The armor you're looking for can be found in the niche on the right. Now just place the Hobbits in front of the guards and the gate will be opened.
Characters: King Thoden (Armor), owyn (Dernhelm), Merry (Rohirrin Squire), Frodo, Sam
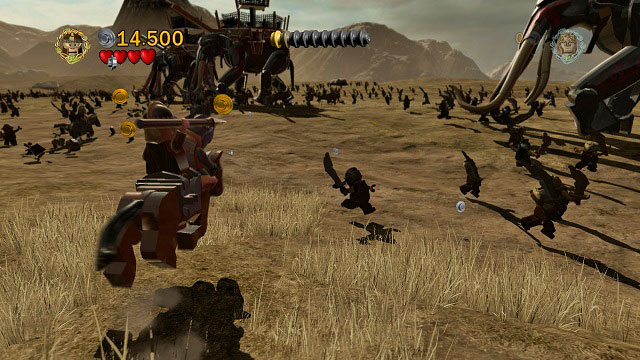
Sauron's gaze is on Mount Doom, blocking the Hobbits from moving onwards. You will have to draw away his attention so let them finish their mission. Switch to the group commander by Theoden and head towards the lands of Gondor - straight to Minas Tirith. Travel along the trail of studs to reach your destination and therefore begin one of the most important battles of Middle-Earth: the battle of Pelennor Fields.
Characters: King Thoden (Armor), owyn (Dernhelm), Merry (Rohirrin Squire), Aragorn, Legolas, Gimli
Real Adventurer requirements: 95000 studs
New characters: King Thoden (Armor), owyn (Dernhelm), Merry (Rohirrin Squire)
New characters to buy: Witch-king, Denethor, Gothmog, Citadel Guard, Corsair, Haradrim
Your part in the battle will begin with the arrival of Rohirrin reinforcements. You will control Eowyn riding a horse and will have to destroy as much environment elements and kill as many enemies as possible. You can throw your spear by pressing (H), which makes breaking items in front of you much easier. The charge will begin with the arrival of the Witch-King of Angmar.
Avoid the beast's attacks and wait until it hits the ground with its head and therefore become stunned. Approach it then and attack its neck three times. You have to repeat the whole process until the Witch-King falls down and stand against you.
Fighting him might resemble the fight with the Troll in the depth of Moria. You have to stand on a tile and dodge when you hear the enemy's shout. His mace will get stuck in the ground and you will have a chance to damage him. The second tile can be built from the bricks on the right side, while the third can be found after destroying the bushes on the left side of the arena. After disarming the boss, keep slashing him with your sword to launch the last sequence. When the Witch-King grabs you, switch to Merry and hit him in the back (just stand in the designated spot). Afterwards once again switch to Eowyn and make the final blow.
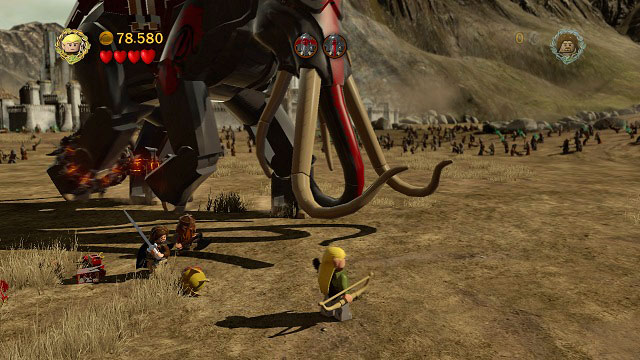
Reinforcements consisting of Aragorn, Legolas and Gimli (and of course the whole undead army which will be fighting in the background with Sauron's forces) will arrive. Your task will be to take care of the Mumakils roaming the battlefield. It can be done in two ways: the ones which have Morgul LEGO bricks on their legs should be attacked with Aragorn - after destroying the bracelets you just have to press (H) and he will finish off automatically.
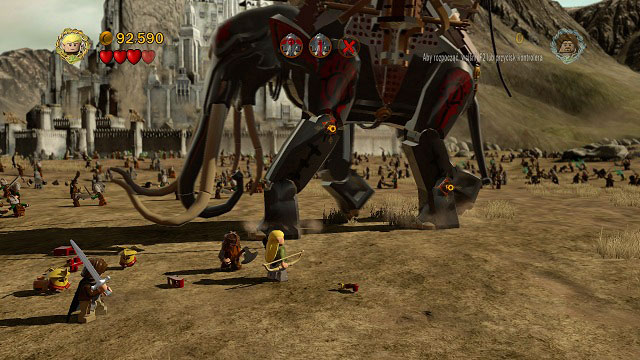
The second Mumakil type is far more difficult to take care of. You need to switch to Legolas and start off by hitting the two moving targets on the animal's legs. Afterwards you have to grab onto the lower bar and jump onto the higher one. There, turn into the other direction and jump towards the rope hanging from the construction of the animal's back. After getting above, get rid of the whole crew and jump to the very top. Press (H) to defeat the rider and afterwards stand in the designated place and press (K) to make the Mumakil run from the battlefield. After getting rid of these two, you will have to take care of three more. Chasing them away will end the battle.
Characters: Aragorn, Legolas, Gimli, Gandalf the White, Frodo, Sam
Time to draw Sauron's gaze away from Mount Doom - you're heading towards the Black Gate! Before getting there, you will have to open a couple passages. Follow the trail of studs and you will reach the corsair ship - shoot an arrow with Legolas and you will be able to move on.
Continue through the ruins of Osgiliath and move onwards until you reach the Dead Marshes. There you will once again use Legolas' skills - you have to shoot a few targets to open a path across the depths.
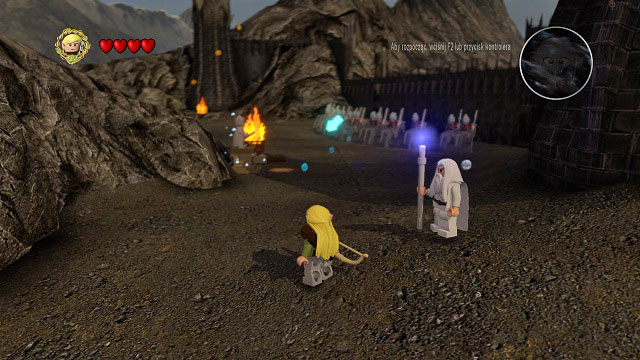
After getting across the marshes, you will be very close to the Gate. Stop the attacking Easterling and reach the meeting point right beside the map statue. The last battle with the forces of Sauron is about to begin.
Characters: Aragorn (Gondor Armor), Gimli, Legolas, Gandalf the White, Merry (Rohirrim Squire), Pippin (Gondor Armor)
Real Adventurer requirements: 12000 studs
New characters: Aragorn (Gondor Armor)), Pippin (Gondor Armor)
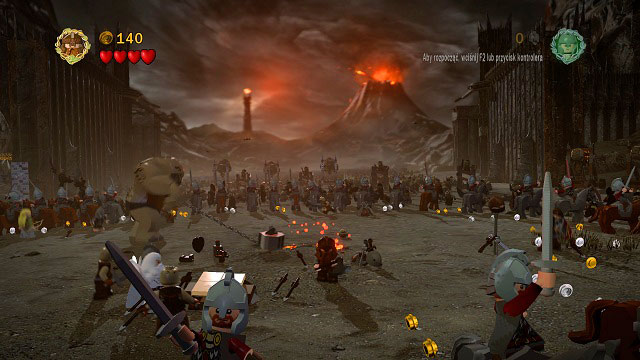
You will be attacked by a Troll at the very beginning. Just like before, you need to prepare a tile and make the enemy hit it. The first trap can be prepared from the pieces from the cracked LEGO brick smashes by Gimli. Stand on it and wait for the Troll to roar and attack you. The second one can be built of bricks which you will receive after breaking the stones from the catapults, while the third one of LEGO Morgul bricks destroyed with Aragorn's sword. The last attack will kill the Troll.
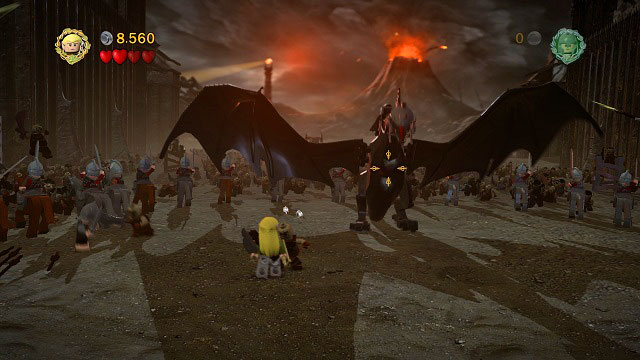
Now you will have to face a Nazgul on its beast. Just keep dodging attacks and later on hit the exposed belly of the beast with Legolas' bow. In order to defeat the Black Rider, you will just need one hit. The battle will move to the left of the gate.
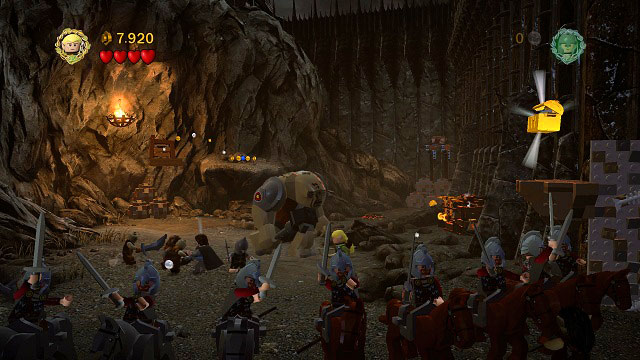
You will have to defeat another Troll, however this time equipped with armlets. Your first task will be hitting his shoulders with Legolas' bow. The angry enemy will break the stones on the left side. Use them to build a narrow tunnel and head inside with one of the small characters. Above, stand in the circle, press (K) and keep hitting the Troll until it gets stunned. Choose Legolas and shoot the enemy in the head.
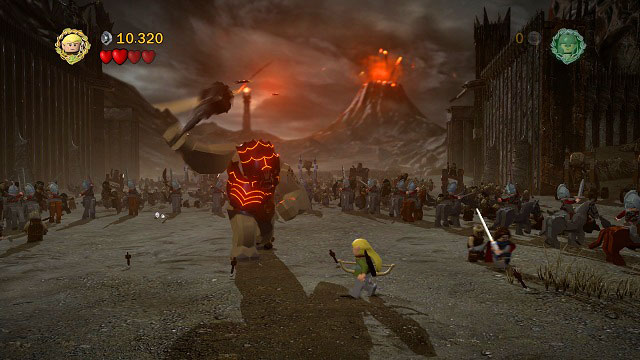
After returning to the gate you will have to face another Nazgul - the fight is identical to the previous one. One good shot and you will move to fighting a Troll in Morgul armor. Unfortunately it's resistant to your attacks, so all you can do it wait for it to get tired. Instead of letting it rest, switch to Aragorn and attack the tired enemy (K) to take down his armor. Without it, the Troll will run away.
Once again head to the left of the gate along the trail of studs. You will have to face yet another Troll. Start off by building targets for Legolas from the bricks by the wall and use his acrobatic skills to reach the rock ledge. There, break the rock and build a trap from its pieces. Just stand on it, make the enemy attack and when his mace gets stuck, jump onto the chain and shoot an arrow into his head. It's the last enemy you will have to defeat in this stage.
Characters: Frodo, Sam
Welcome to Mordor. This is the last mission taking place in Middle-Earth, as the next one will end the story of the ring bearer. Your friends are fighting by the Black Gate and therefore drawing Sauron's attention, thanks to which the Hobbits can head directly to Mount Doom. Before beginning the story mission, you can use the nearby statue and unlock any missing characters. When you're ready, head to meet your faith.
Characters: Frodo (Weary), Sam (Weary)
Real Adventurer requirements: 85000 studs
New characters: Frodo (Weary), Sam (Weary), Aragorn (Royal Armor)
New characters to buy: Boromir (Captain), Bilbo Baggins (Old)
Frodo is exhausted with the travel and cannot jump or dive roll anymore. Unfortunately there's still one climbing waiting for him. First you have to head to the right and break two crates found there. Build a footbridge from their pieces which will let you move onwards.
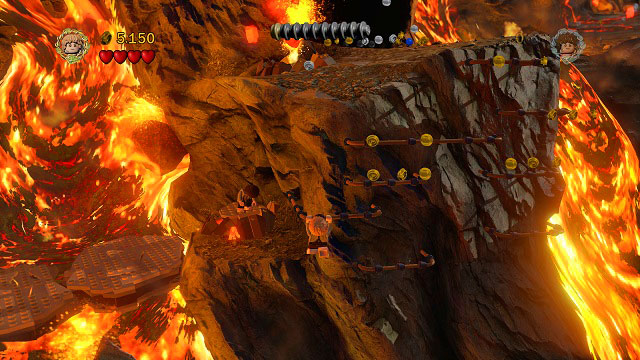
As Frodo cannot jump, you will have to clear your path with Sam. Jump onto the platform in the middle of the lava river and use the elven rope to loosen the other rocks - that way you will create a bridge which the tired Hobbit can use. Stand with Frodo on the slightly floating platform (in the screenshot) and with Sam, go up the rails. After reaching the upper level, use the rope on the hook and jump onto the second floating platform. The "elevator" that you created will take Frodo up.
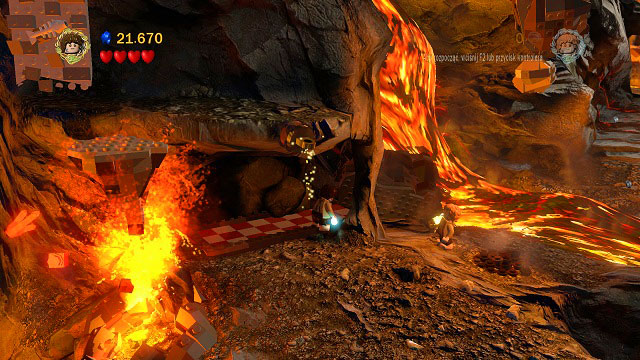
Take out the Phial of Galadriel and light the nearby cave. Afterwards push the stone towards the river of lava and dig up the ground with Sam. You will obtain a rock which you can throw into the support on the other side of the lava river, completely blocking it. Now you can move further to the right.
Avoid the fire traps from the prologue and you will reach a rail. Trying to use them to cross the river will fail, though thanks to moving the stone wall, platforms will appear from time to tie on the river. You need to time your movements right and use them to get to the other side.
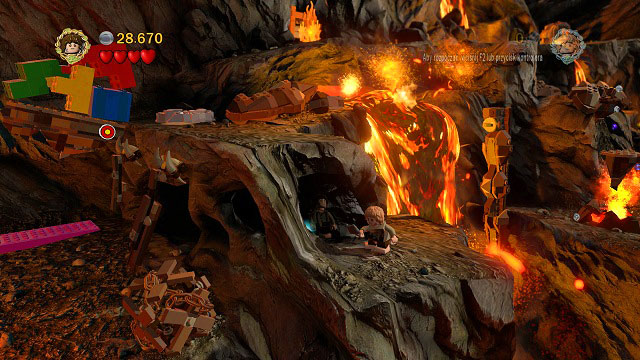
Break the gate in front of you, switch to Frodo and enter the darkness. After getting to the other side of the cave, Sam should use his rope to turn over the pillar and therefore create a bridge.
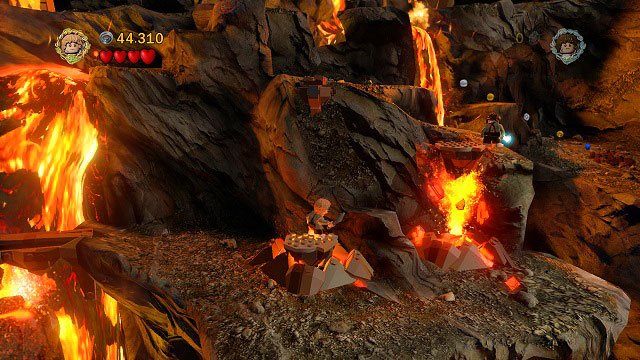
Once again use the "elevator": Frodo should stand on the lower (right) platform, while Sam jump onto the upper (left) one. Switch to Frodo and destroy the stone above to create a bridge. Now place Sam on the right platform and Frodo on the left. Switch back to Sam (he should be above), jump across the chasm above the river on the right, dig up LEGO bricks and build a bridge for Frodo.
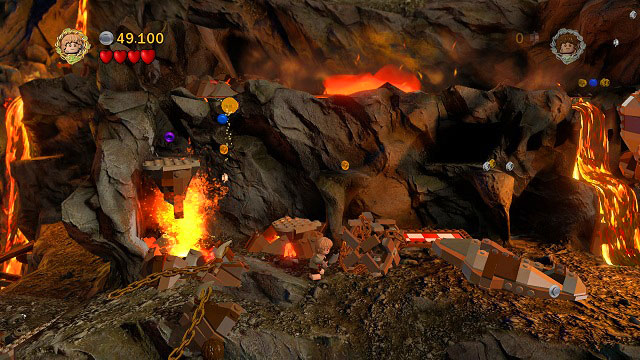
Use the elven rope on the hook and move to the right, therefore reaching another "elevator". Frodo should stand on the right side and Sam use the rope to reach the left platform. Break the pieces beside Sam and build another pillar form them. When Frodo gets onto it, push it to the other side. Switch back to him and use the dark cave behind your back to move to the right while avoiding the river of lava. On the other side, hit the stones so that the Hobbits can use the narrow tunnel.

You will have to fight with Gollum once again. In order to defeat him, you will have to keep switching between the Hobbits and throw rock at him. Five accurate throws should let you get inside Mount Doom.

Driven with temptation, Frodo puts the ring onto his finger. Unfortunately Gollum is wary enough to predict where the Hobbits is and jumps onto him. Knock him down from your back (H), switch to Sam (U) and hit him. Gollum will lose some health, but at the same time he will jump onto your character and knock him down to the lower platform.
Build rails from the bricks found here and return up. Repeat the action - this time Gollum will throw you down to a different place, from which you can get back by creating a hook from LEGO bricks, using the rope and building a platform from the pieces on the ground.
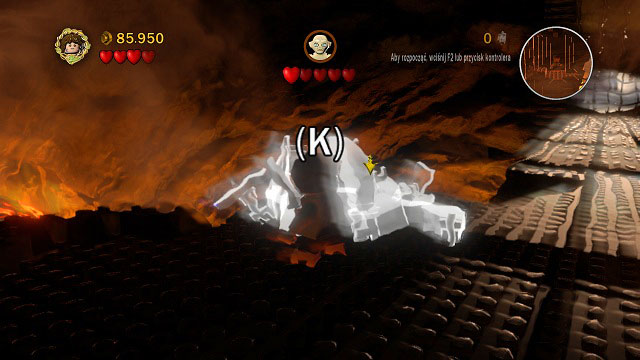
Switch back to Frodo, knock Gollum down and hit him with Sam. This time Gollum will throw you down as well - in order to get back, you will need some help. Switch back to Frodo, knock Gollum down and quickly build a platform from the phantom bricks. Now Sam can join the fight and inflict the final blow on Gollum.
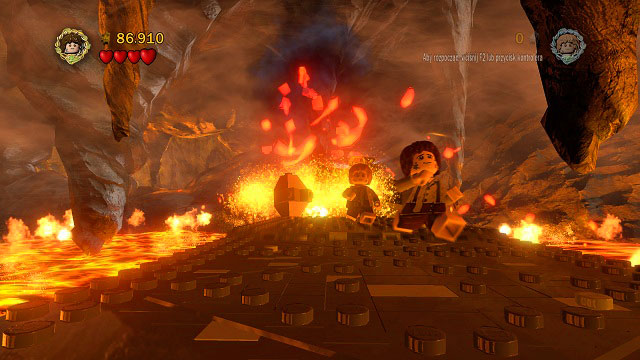
Now you have to escape from the volcano eruption and watch the ending cutscene. From now on you will be able to freely explore Middle-Earth, play with whoever you like and collect the missing characters and items.
In this chapter you will find a description covering all the Minikits, Treasures and Designs in particular missions. Before moving to collecting them, you have to make sure you have the right set of characters and items. You will need:
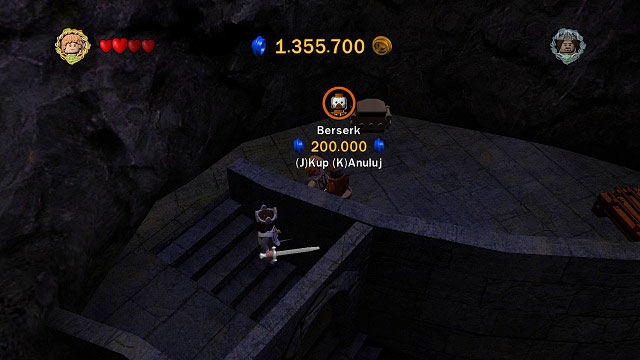
Treasures will be described in the order in which you can come across them during story missions, thanks to which you can collect them during one playthrough.
Needed: spade
The minikit is in the upper left corner of the map on which you fight with Orcs. Just dig it up.
Needed: bow
During the first fight with Orcs, you will see three targets in the distance. Just hit them with the bow and you will receive the Minikit when the last one is destroyed.
Needed: explosive
During the fight with Sauron you will have to change to the Berserker and head to the upper left corner of the battlefield. The mithril stones there can be destroyed with a couple well-placed explosives (H). Pick up the sword and place it in the inventory.
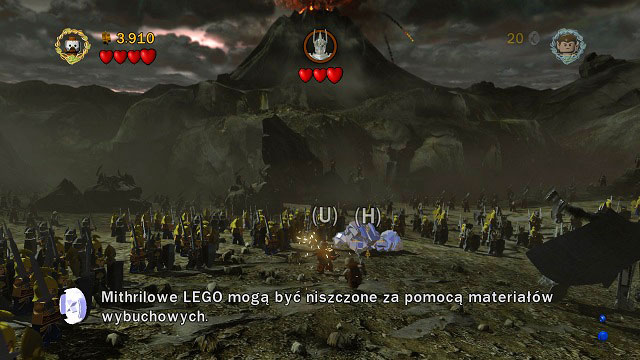
Needed: spade
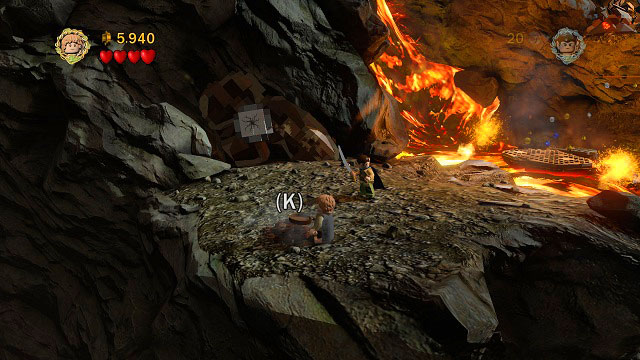
At the very beginning of climbing Mount Doom, you will find a small lava source. Destroy it to unveil a loose ground which you can dig up with the spade. Hide the armor into the inventory.
Needed: axe, elven rope, climb walls, sword
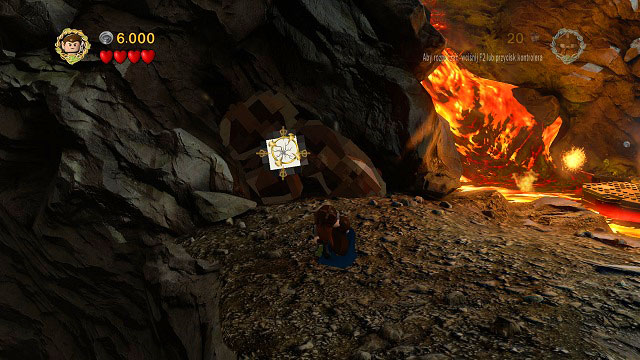
In the same location in which you obtained the Magma Armor, you will also find a cracked tile. Throw Gimli at it and enter the cave - you will therefore reach a sauna. Use the elven rope on the hook in the distance and switch characters so that Sam is below: you will need both on the rock ledge.
Pick up Gimli and throw him at the cracked tiles. Afterwards use Gollum's skills to climb up the wall. Change to Aragorn and break the Morgul brick. The treasure will appear under the water in the middle of the location.
Needed: strength
On the right side of the location you will find an orange handle. Change to Shagrat and pull it (K). after a few button presses you will obtain the Armor.

It can be found in the niche behind the wooden door which was previously covered by the crate with the handle from the previous point.
Needed: sword
To obtain this Minikit, you have to destroy 5 statues of Sauron located throughout Mount Doom. They can be found in:
#1 - In the sauna directly before the lava stream.

#2 - On a spit beside the lava river which you can cross using the rail.
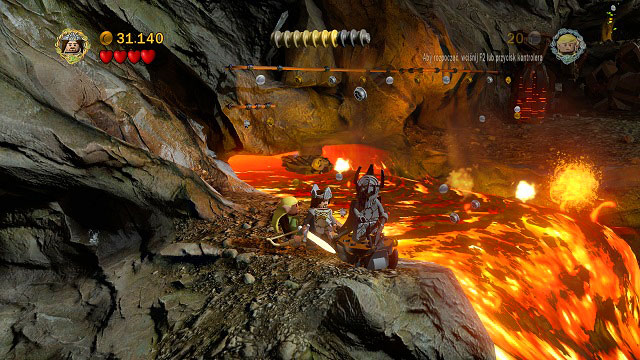
#3 - Right below the leaves which Elves can use.
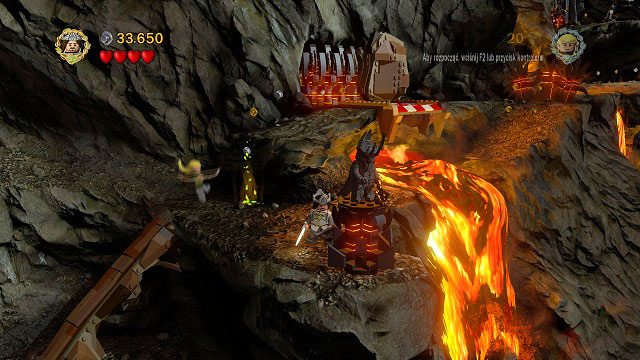
#4/#5 - on both sides of the gate before the entrance the interior of the volcano.
Needed: axe, bow
This Minikit can be found nearby the fire trap. Throw Gimli at the broken tile and shoot the target with Legolas. The trap will be blocked and the rising pressure will push out parts of the kit. Assemble them (K) and pick it up.
Needed: elven rope
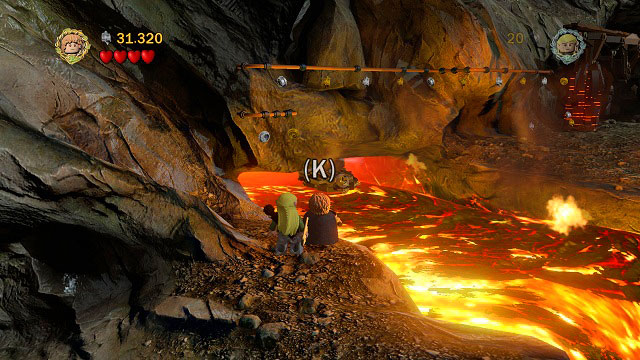
The Minikit is below the rail which you can use to avoid the lava river. Approach the river with Sam and press (K) to draw the chest.
Needed: phial
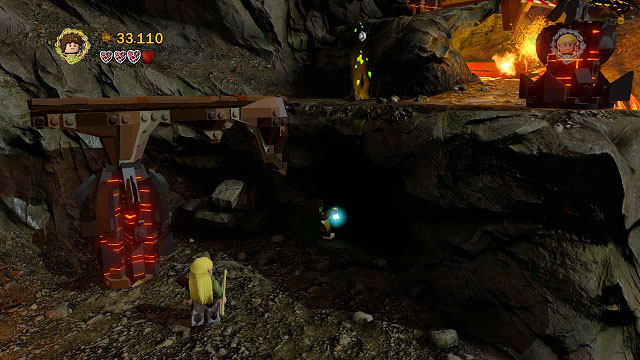
The Minikit is in a cave from which a couple Orcs went out. Just use the Phial of Galadriel and pick up the chest.
Needed: sword
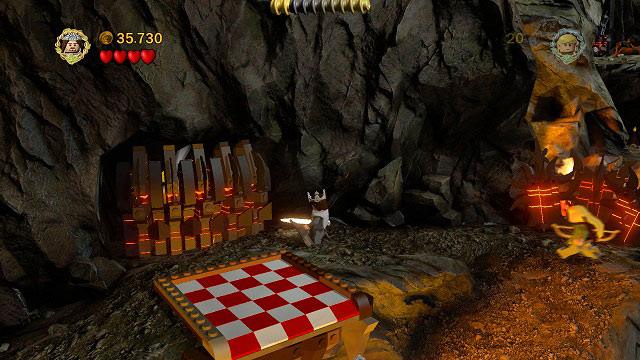
Drop the rock into the lava river, stand beside the tile and destroy the Morgul bricks there with Aragorn's sword. The Minikit is inside the cave.
Needed: explosive, small character
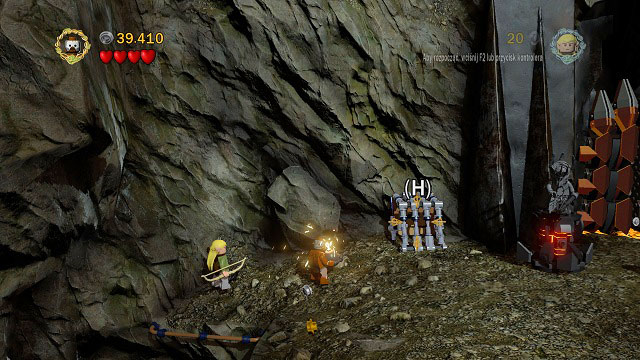
Use the Berserker's bombs to destroy the mithril cage and go through the unlocked narrow tunnel with a small character. The treasure can be found on the other side of the corridor, on a rock ledge high above you.
Needed: bow
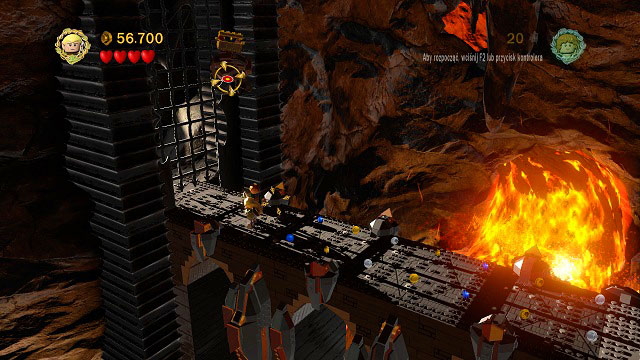
Right after heading inside the volcano; just shoot the target above you and you will find the last Minikit.
Needed: strength, light fire, bow, acrobatics, axe, phial
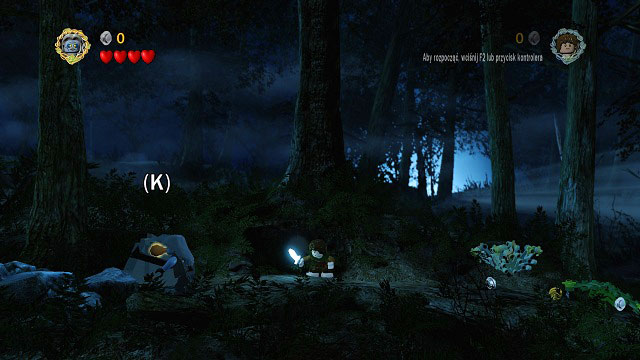
Right after the beginning of the mission, choose Shagrat and use the lever to the left of you afterwards jump inside the unveiled cave. You will have to make the mole give you the Minikit by blocking all mounds but one.
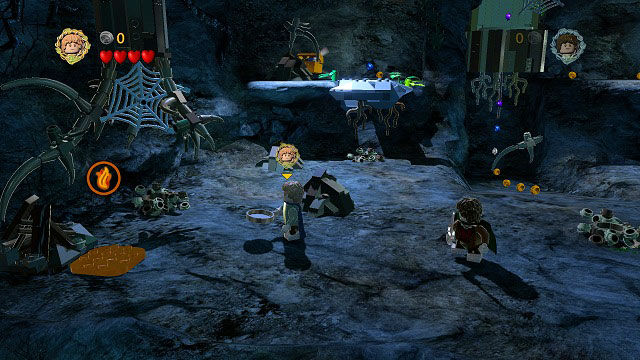
Have Sam start a fire on the left side of the cave and Legolas shoot the target on the right side of the ceiling. Afterwards grab the rope which can be seen in the back part of the cave (keep holding onto it until the brick blocks). With Legolas, jump onto the rock ledge and go to the left. There, choose Gimli and break the cracked brick to block another mound.
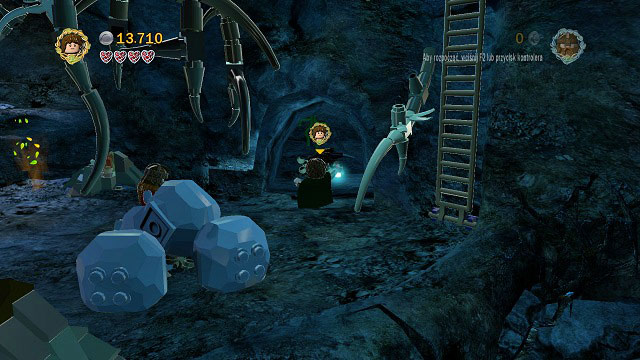
In the end choose Frodo and use the Phial of Galadriel to take a look around the dark part of the cave in the right part of the location. The frightened mole will show you the Minikit. Now just pick up the treasure from the middle of the room.
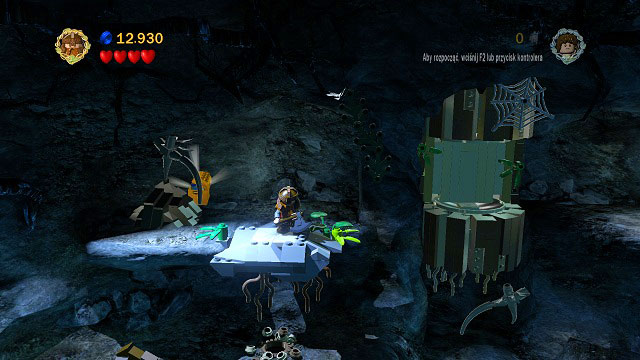
This Minikit can be found in the same location as the last one. It's beside a cracked brick which can be broken with Gimli's axe.
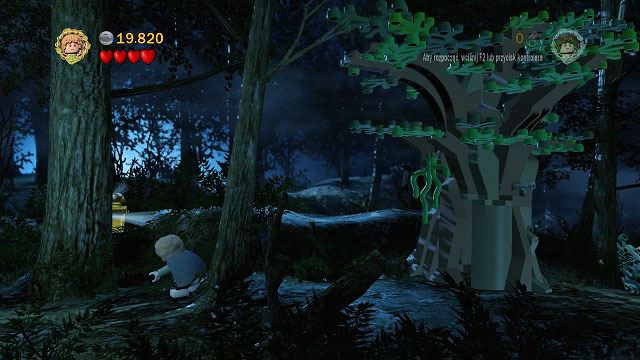
It's very easy to notice, behind a tree to the left of where you have to get past the patrolling Nazgul.
Needed: sword
After reaching the first river, instead of crossing it, head along it (towards the camera) and afterwards to the left. Break the Morgul brick, build a scarecrow (or rather mole?) and pick up the hat.
Needed: explosive

Just use the Berserker to destroy the mithril rocks in the first river and pick up the chest.
Needed: phial
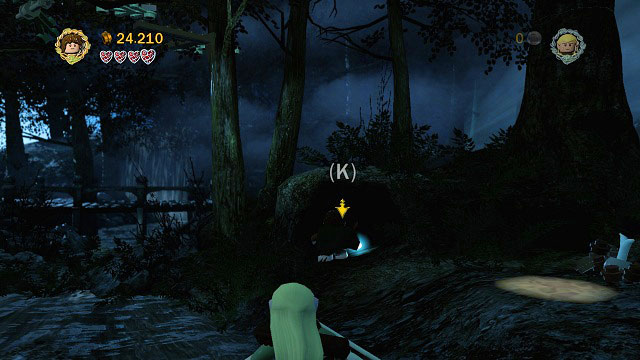
Right after crossing the first river, destroy the nearby bushes and enter the cave before you. The treasure is inside it, on the ground.

It can be found during the fight with Saruman. After weakening him and picking up from the ground with Gandalf's magic, you need to thrust him at the door locked with a padlock and the treasure will appear in the middle of the room. NOTICE! You need to collect the treasure during the first or second weakening, as the fight will end with the third thrust.
Needed: bow
As you're making your way through the level, you will find five bird nests high in trees. You need to shoot down all of them to obtain the Minikit. The location of the nests are as follows:
#1 - Beside an incomplete tile
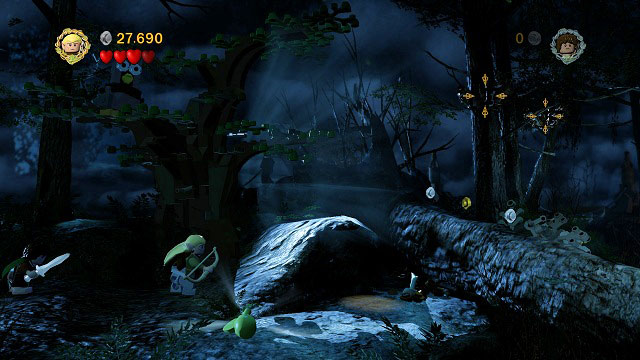
#2/#3 - As you're throwing apples, right above the branch
#4/#5 - In the location with the spider-web and bee hive

Needed: axe
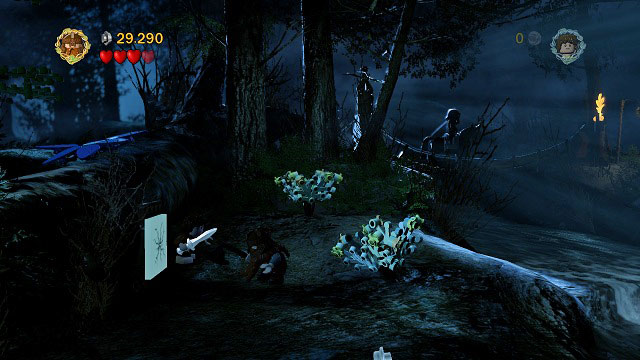
Right before the second river you have to destroy all of the local plants and break the cracked tile to the left of you. now just pick up the chest.
Needed: elven rope
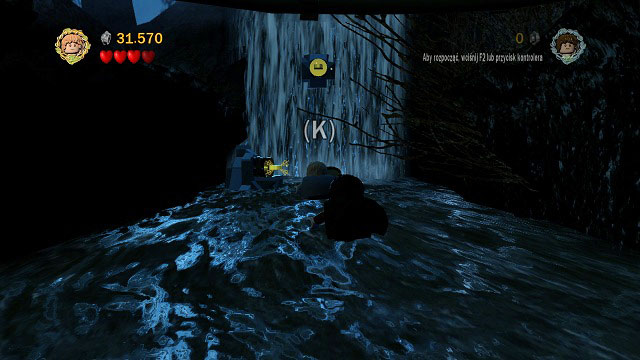
After burning down the bridge, head up along the river (you will need to destroy the rest of it). There you will find two hooks - use the rope on the one on the left and you will receive a Minikit.
Needed: elven rope, Aragorn
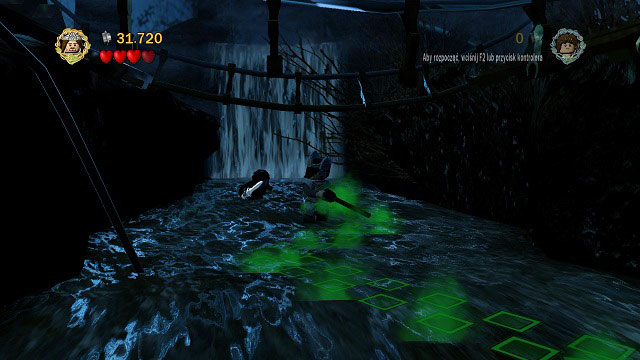
In the same place where you found Minikit #9, use the rope on the hook above you. afterwards pick up the green item with Aragorn and follow the trails. At it end you will find another item and another goal.
In order to reach the treasure, you will have to chase away the Nazgul.
Needed: climb walls
The climbing spot can be found in the drilled trunk which was previously blocked by a spider-web. Go to the very top with Gollum to find the chest.
Needed: spade
In the same location as Minikit number 8. After chasing away the Nazgul, destroy the bushes beside the overturned hallow trunk and use the spade to dig up the loose ground. Pick up the chest.
 Just keep your character maximally to the right and you will obtain the last Minikit.
It can be found as you're running away from Nazguls. Just stick to the right side of the screen and the chest will fall into your hands.
Needed: phial
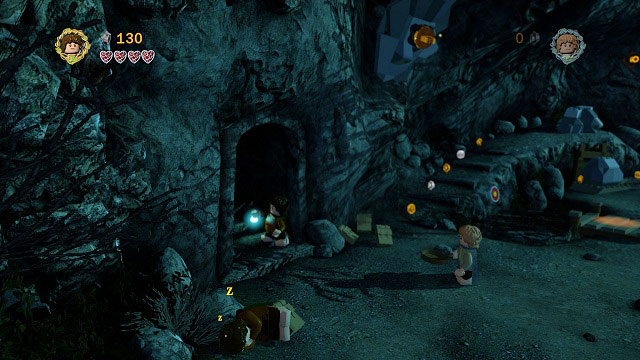
On the right side of the first location, beside the sleeping Hobbit you can find a dark cave. Just light it up and head inside.
Needed: elven rope
Right beside the cave you will find a hook which you can attach the rope onto. The chest will fall right into your hands.
Needed: bow

Just hit the target nearby the pond and pick up the item.
Needed: bow, acrobatics

Shoot the target on the wall and use the handle created that way to jump to the chest.
Needed: phial
Right after entering the second area, turn around and go back to the dark cave.
This time you have to destroy purple flowers. On your way to the top you will find three plants:
#1 - Right after pushing down the rocks by using two stones.

#2 - after crossing the gulf by using the plant placed by Sam
#3 - Right before the stairs leading to the top of the Weathertop
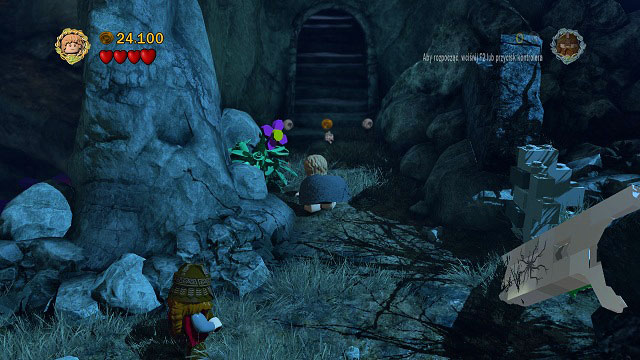
Needed: acrobatics
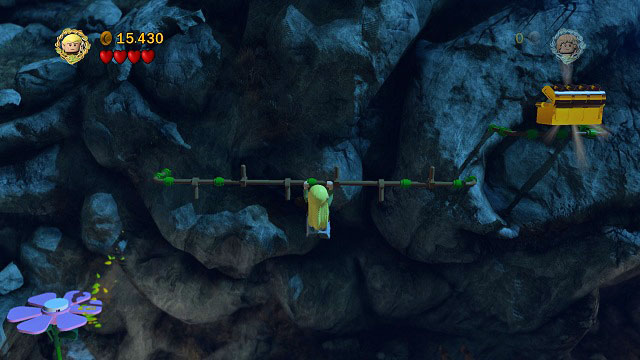
After placing a plant yourself, use its leaves with Legolas to reach the rail and afterwards head right and collect the chest.
Needed: strength
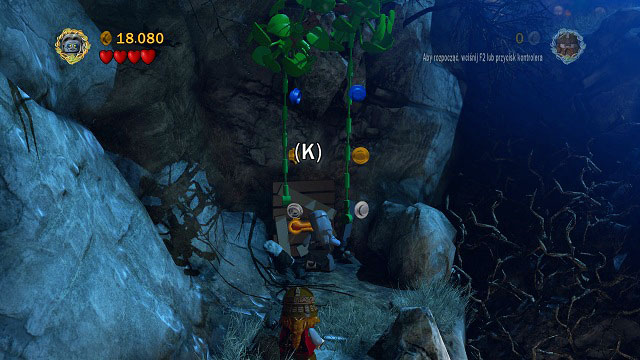
The handle you need to pull with a strong character can be found below the lianas used to open the further road.
Needed: axe
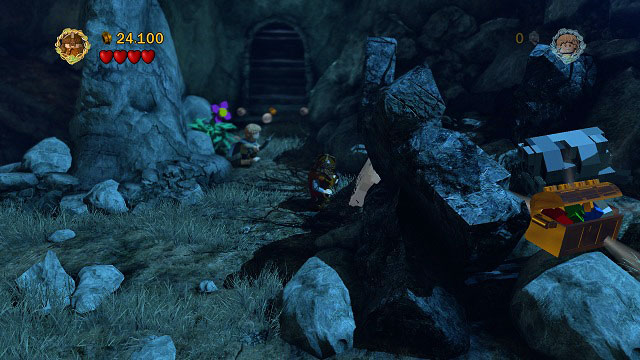
Right before the stairs leading to the top of the Weathertop, on the right side of the path there is a cracked brick. Break it with Gimli's axe, enter the newly open area and collect the chest.
Needed: sword, Aragorn
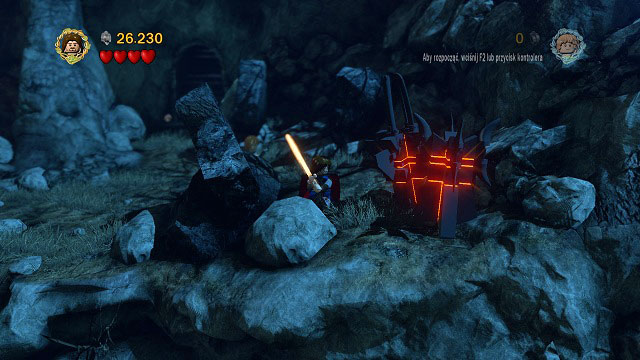
Right beside Minikit 7 you will find some LEGO Morgul bricks. Destroy them with Aragorn's sword and afterwards pick up the item to follow the its trails - they will lead you to another item.
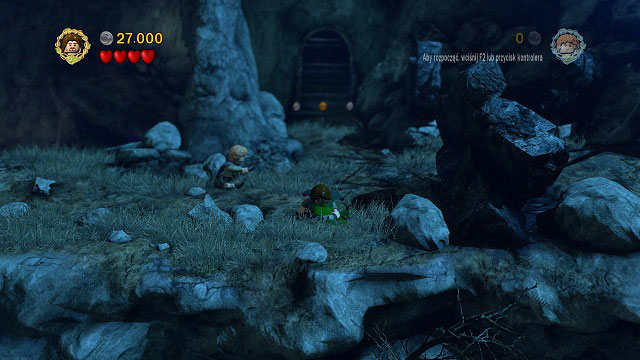
The trail will leady you to the treasure.
Needed: axe
During the fight with Nazguls, switch to Gimli and head to the northern part of the arena (beside a statue which you can push down to the ground). You should see a cracked tile, breaking which will unveil yet another cracked tile. One attack with Gimli and you will receive the treasure.
Needed: bow
During the fight with Nazguls, you need to use your bow to hit three targets within the arena. The first target can be found beside the chest, the second on the right beside a handle and the third high above in the middle of the location\.
Needed: strength
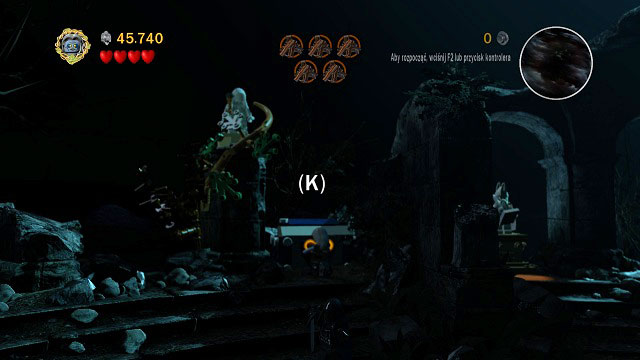
Just choose Shagrat and pull the handle.
Needed: explosive
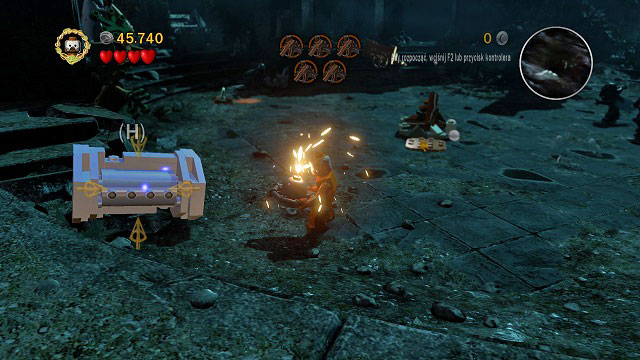
On the left side of the location you will find a mithril pillar. Destroy it with a bomb, have Frodo build a pump from its pieces and another character use the valve.
You will have to once again destroy a couple items during the mission. This time it will be skeletons with bronze helms.
#1 - To the left of the starting point
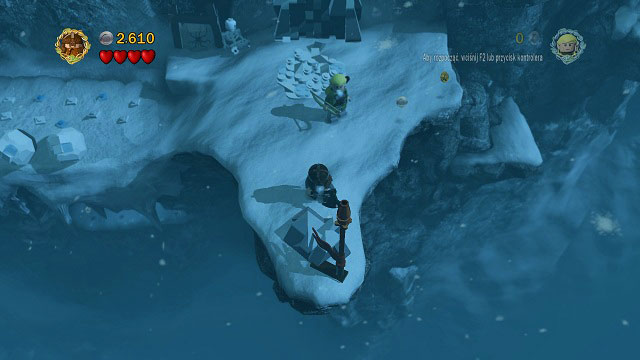
#2 - Inside a cave in which you need to push down a rock
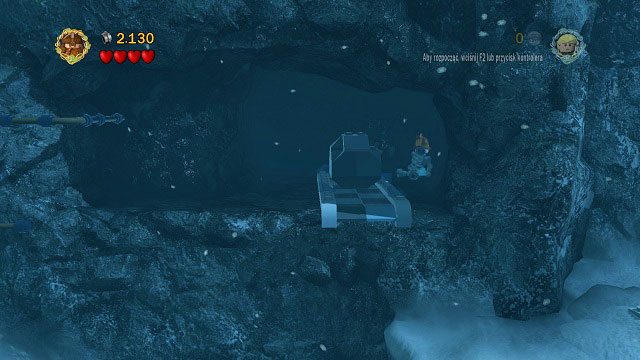
#3 - At the back of the first camp, right beside a tent
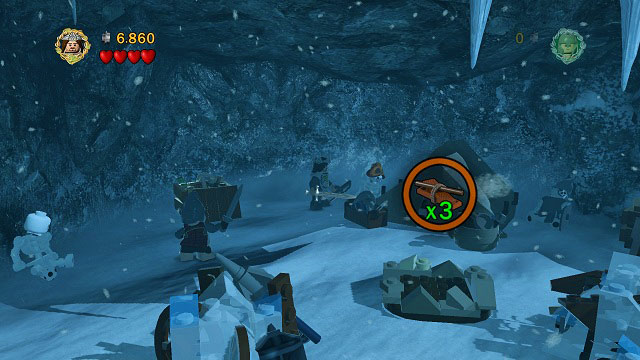
#4 - Directly behind the location in which you obtain Minikit #3
#5 - Beyond the avalanche, after crossing the deep snow and building a narrow tunnel. It can be found in the left part of the cave.
You will need to hit a few things here as well. This time they will be pennants.
#1 - After crossing the second deep snow part
#2 - After going past the first camp and collecting your team, you will have to head left along the wall
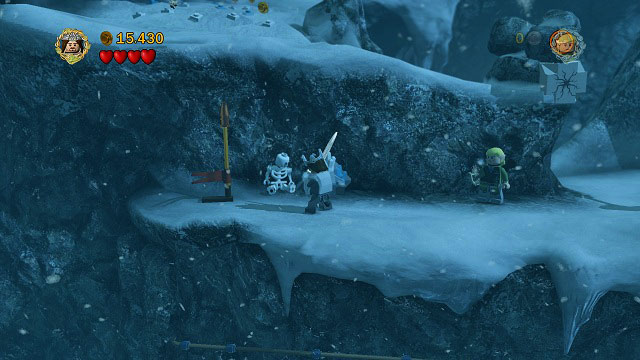
#3 - During the avalanche; just move closer to the camera
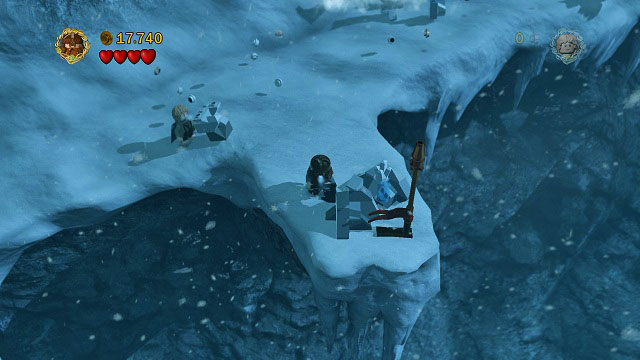
#4 - After crossing the bridge, avoid the strong winds and instead of going up the stairs, move closer to the camera.
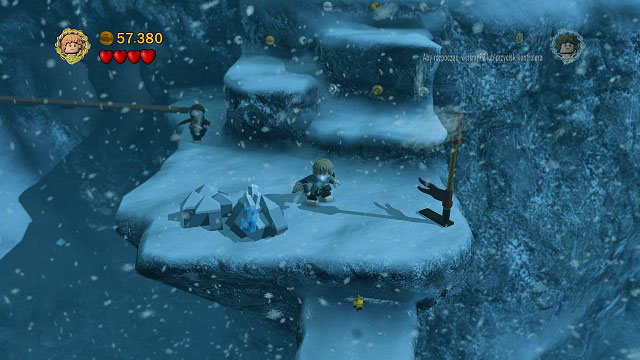
Needed: axe, bow
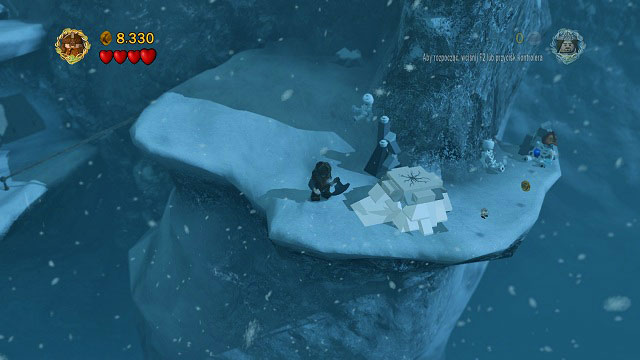
Build a ballista, cross the line with Legolas and head to the right. There Gimli should break a cracked brick and create a snowman, while Legolas shoot it with his bow.
Needed: explosive
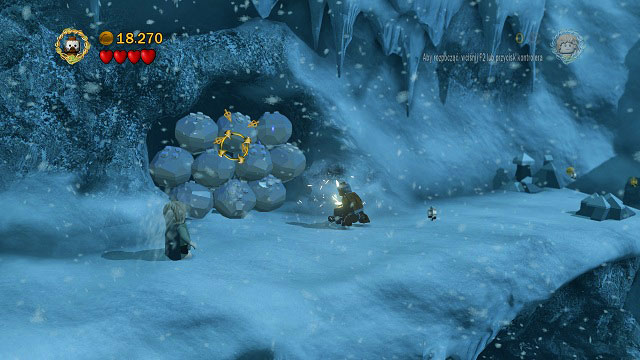
After passing by the avalanche, you will find mithril rocks by the wall. Blow them up with the Berserker's bombs.
Needed: elven rope, strength
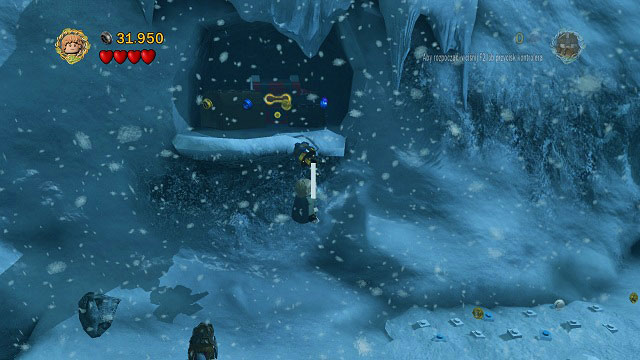
A bit behind the avalanche, after jumping across the gulf, you should see a hook on the wall. You need to climb up and change your character to Shagrat there.
Needed: explosive, phial
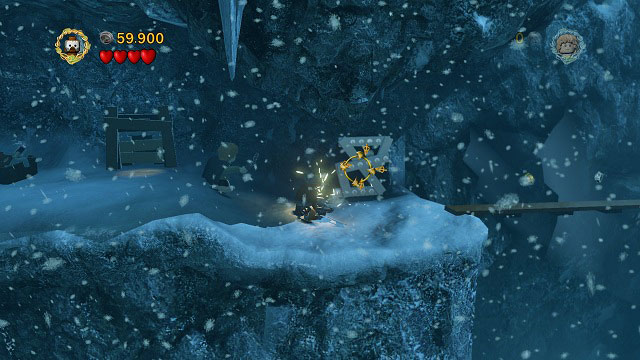
In the area where you get inside a narrow tunnel with Sam to dig up boards for a bridge. In the background you should see a cave blocked by mithril boards - blow up the obstacle and head inside while holding the Phial of Galadriel.
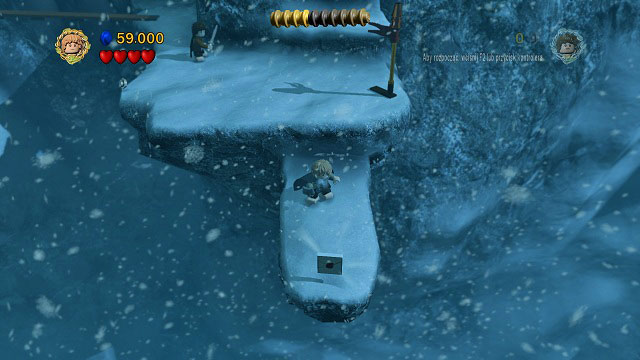
After crossing the bridge, avoid the strong winds and instead of going up the stairs, move towards the camera. It can be found beside pennant #4.
Needed: sword
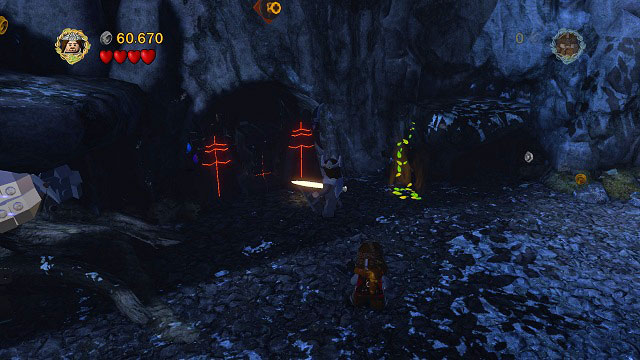
Destroy the nearby LEGO Morgul bricks and break the rock in the cave. Now just pick up the treasure.
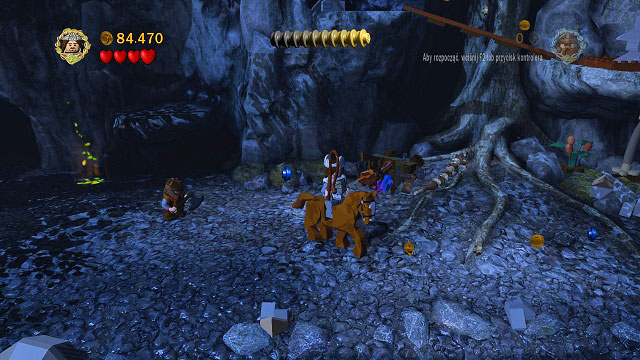
You need to get on a horse and move along the trail of coins. At its end you will find a chest.
Needed: explosive, Aragorn
In the left part of the location you will find a mithril rock which can be destroyed with the Berserker's bomb. Pick up the item with Aragorn and head along the green trails.
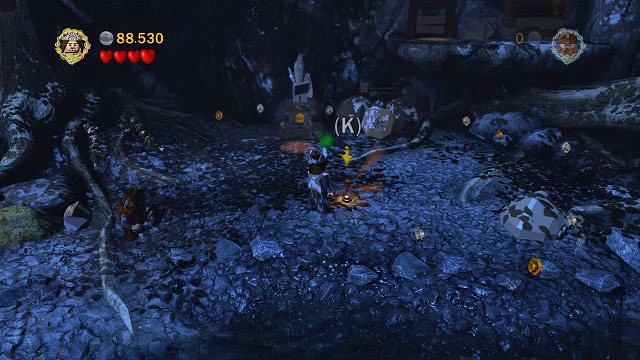
You will need to do it three times and at the end you should find the treasure you're looking for.
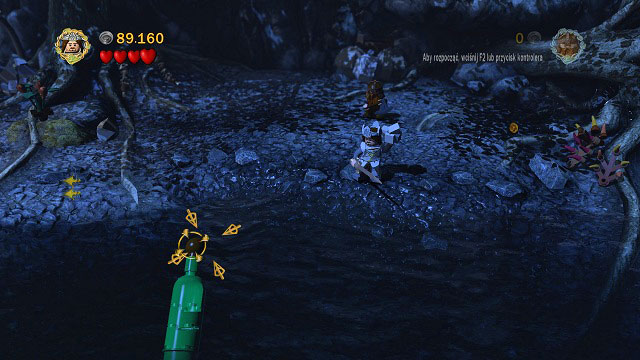
Beneath three big rocks you will find three small stones. Pick them up and throw them at the bottles floating in the water.
Needed: climb walls, phial, light fire, axe, fishing
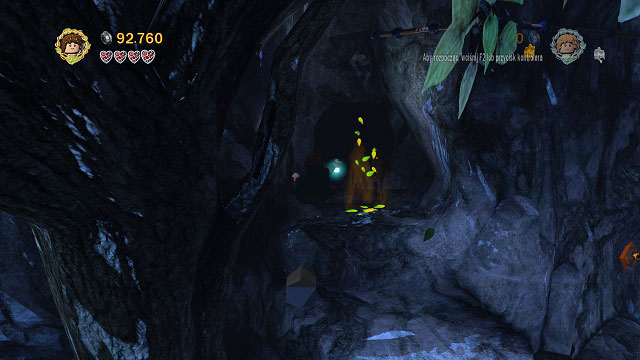
In the left part of the map, around the middle of climbing with Legolas, you will find a dark cave. Change to Frodo and head inside it while lighting up the path with the Phial.
Inside you will have to approach a wall which can be climbed by Gollum. Climb it and change to Sam to start a fire. Now you will need to feed the Troll: Gimli has to break the ice and Gollum fish.
Take the fish to the Troll and the monster will spit the chest onto you.
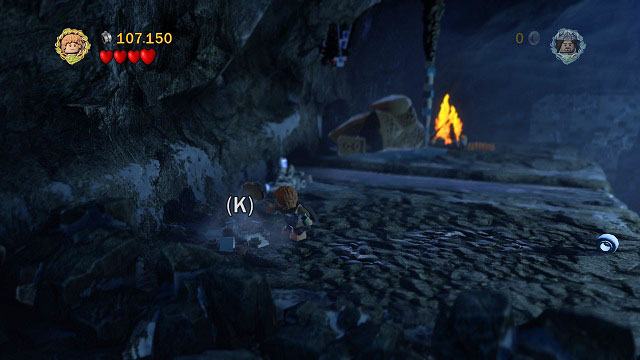
From where you fed the Troll, you have to move towards the camera, break the rocks and dig up the ground to pick up the treasure.
Needed: elven rope
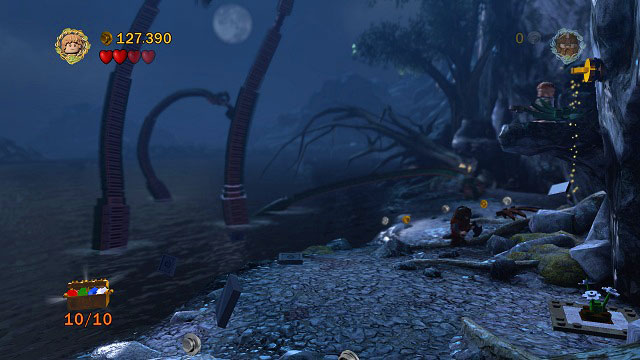
As you're fighting the monster, use the rope on the hook in the right side of the arena, climb up and destroy the plant. Now just pick up the chest.
Needed: strength
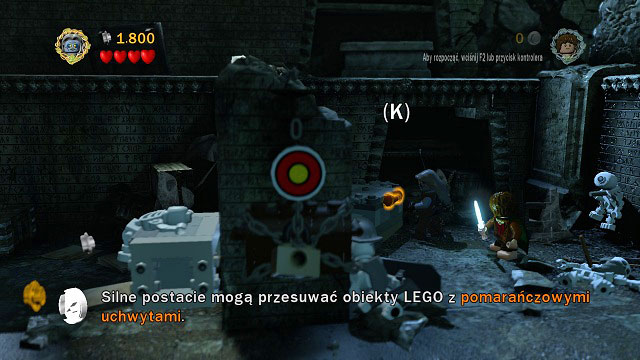
Use Shagrat to pull the orange handle in the upper right corner of the location to receive the Minikit.
Needed: strength
This time you need to find three Dwarf statues.
#1 - In the first location, in the left part of the room
#2 - During the fight with Orcs and the Troll, in the left part of the room
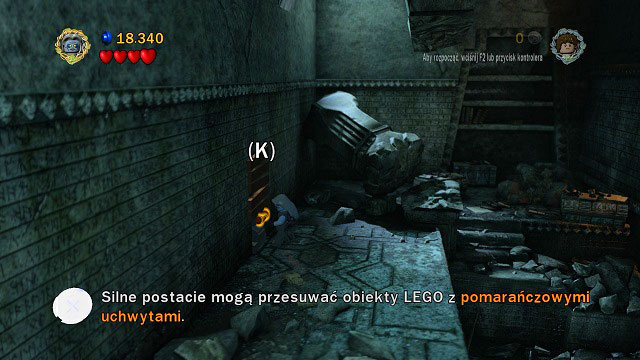
#3 - During the fight with Orcs and the Troll, in the right part of the room
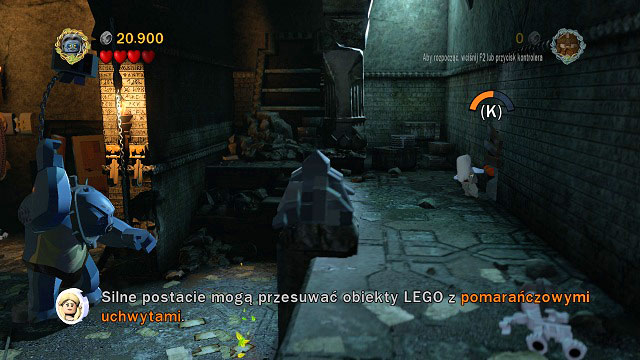
 In the left part of the screen there is a fire - that's where you will find the design.
As you're strengthening the door, you need to go right and enter the small hole to gain the design.
Needed: sword, explosive
In the location where Balrog is slowly approaching you. To obtain it, you have to destroy three pillars made of LEGO Morgul.
#1 - In the right part of the room
#2 - Behind the mithril pillar, where Minikit #4 is
#3 - As you're going towards the left side of the room
Needed: explosive, elven rope
In the location where Balrog is slowly approaching you, you have to destroy a mithril pillar and use the rope on the hook in the ground.
Needed: explosive, strength
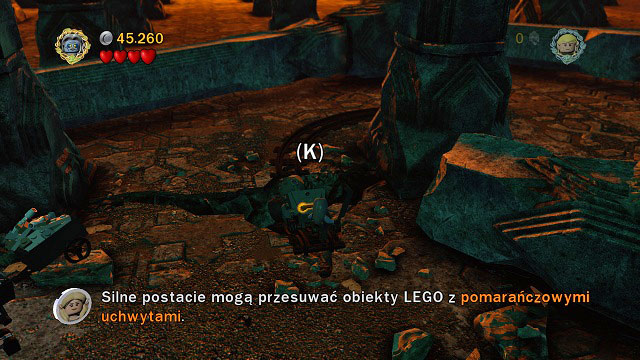
In the same location as Minikit #4. You need to change to Shagrat and pull the handle.
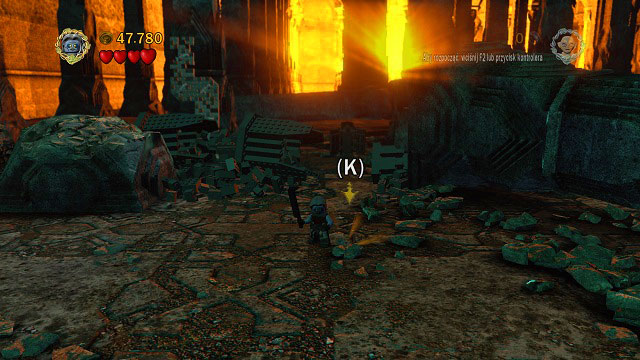
The treasure will land outside this lane. Picking it up is all that's left.
Needed: explosive, climb walls
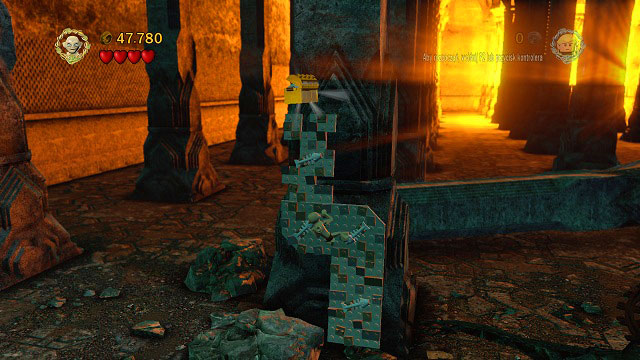
In the same location as Minikit #4. Destroy the carts and use their parts to finish building a wall. Afterwards climb it with Gollum to the very top. NOTICE! You need to place yourself perfectly, or else Gollum will fall off the wall - unfortunately, it's trial and error here.
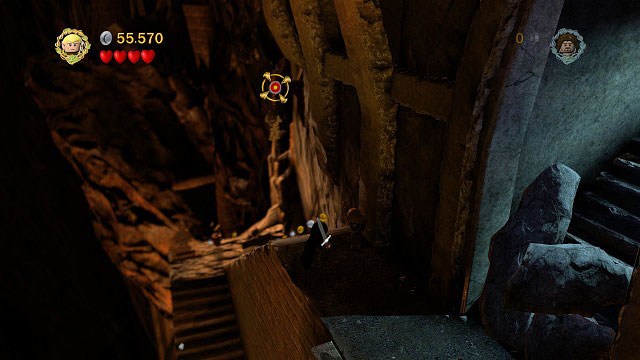
As you're beginning to climb the stairs, you will see a target in front of you. Shoot it and pick up the treasure.
Needed: explosive, bow
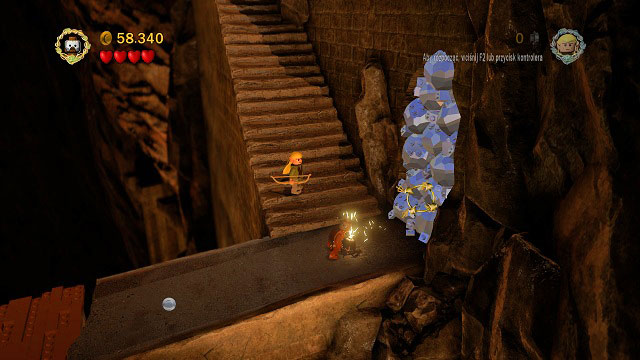
As you're going down the stairs, you will come across a wall built of mithril rocks. Use the Berserker's bombs to blow it up and enter the newly unlocked room.
Inside, shoot each target twice and collect the Minikit.
Approach the machine and begin a game. Your task will be pressing the button on the ground precisely when the highlighted bricks pass through the window. After blocking three sets of bricks, the gate on the right side of the room will partially unlock.
You will need to play this game three times: each time the bricks will move higher. After winning for the third time, the gate will be opened completely and inside you will find the Minikit.
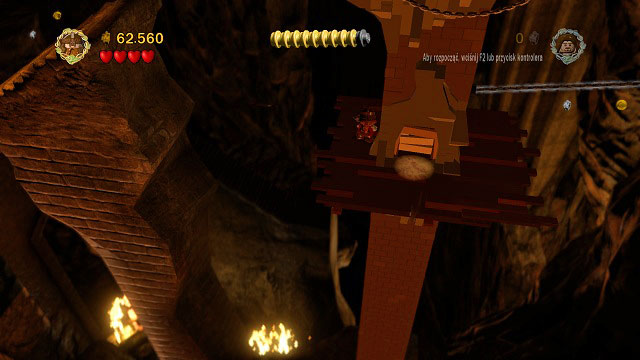 Invisible in this screenshot, the Minikit is directly behind this pillar.
It can be found on a broken bridge. Use the narrow tunnel and get behind the pillar.
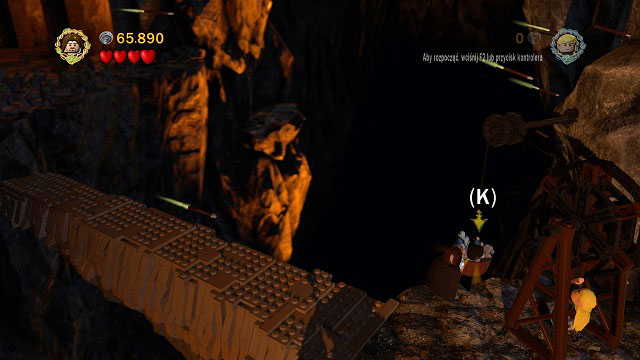
Right after Gandalf's fight with Balrog, you will end up beside a crane - one character should grab onto the handle and pull out a bucker with the item, while the second pick up the treasure.
Needed: phial
Before using the stairs, you should switch to Frodo and use the Phial of Galadriel to light up and cave on the right. Inside you will find the Minikit.
Needed: bow
Right before leaving Moria, on the wall on the right you will see two targets. Shoot them to obtain the last Minikit.
This level stands out because of one factor: as you're controlling Frodo, you will have to shoot down a few targets with the bow, use the rope and the axe. As you cannot change the Hobbit to a different character, you will need to prepare these items at the blacksmith. If you followed this guide, you should already have the designs which let you build the Mithril Cluster Bow and Mithril Shockwave Axe - head to Bree and ask the blacksmith to prepare these items for you. That however still leave the rope - you can obtain one during the mission in Amon Hen and the second can be found in The Dead Marshes - the Toy Snake. Therefore, if you want to finish this mission during the first attempt, you should begin with the marshes. After collecting all three items, you can head back to Amon Hen.
Needed: bow
This time you have to hit as much as six targets, three on Frodo's and three on Aragorn's path the statues which you have to break are:
#1 - Beside the first stairs
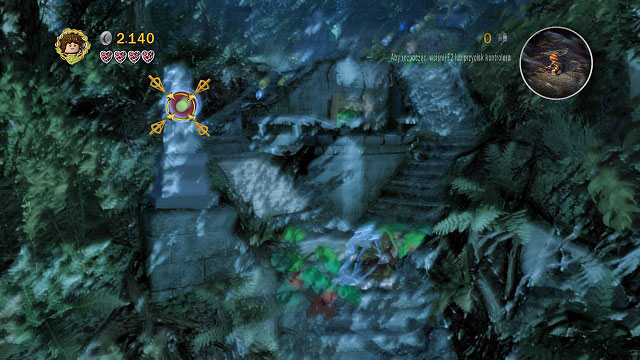
#2 - In the location in which you have to construct a catapult
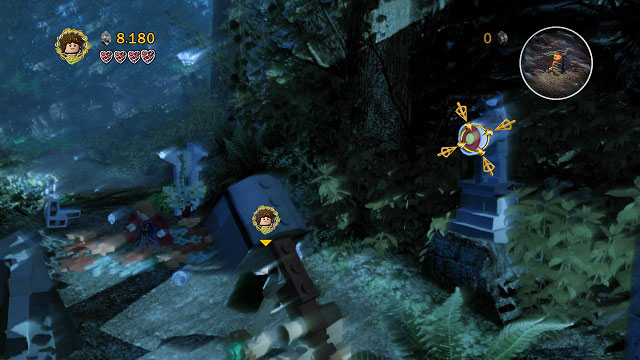
#3 - Where you enter a narrow tunnel with Frodo. This time, destroy the statue in the right part of the rock ledge with a sword.
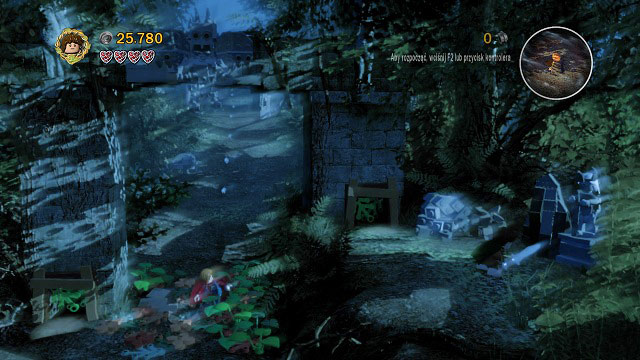
#4 - Aragorn's team; to the left of the starting position.
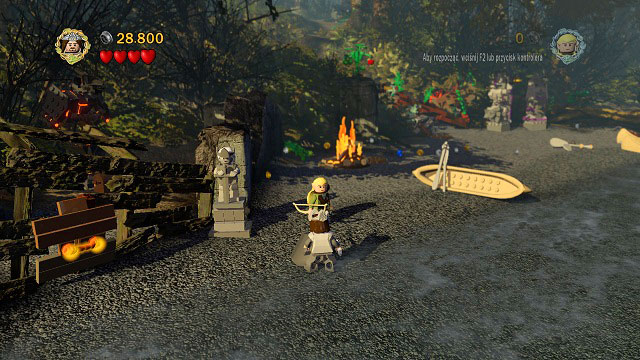
#5 - After leaving the camp and destroying the cracked brick with Gimli.
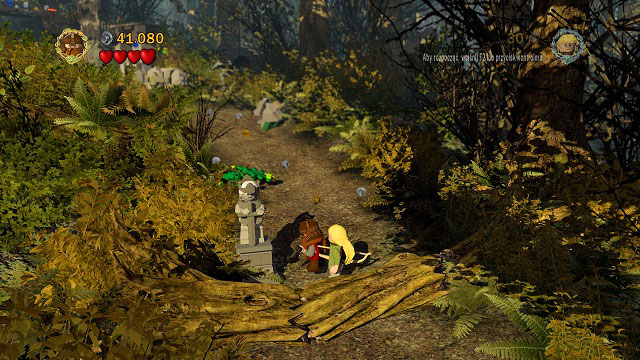
#6 - At the end of Aragorn's path, in the ruins.
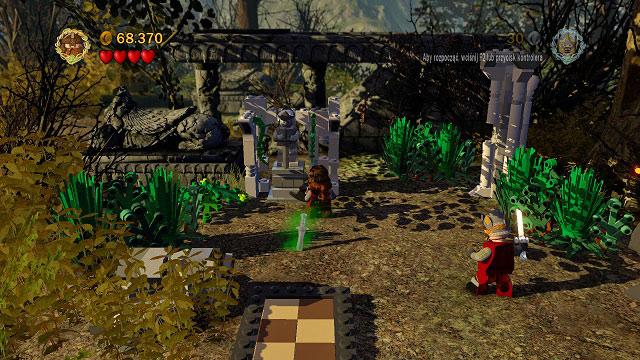
After pushing the stone hand down to the ground, break whatever remains of it and take the chest out of the niche.

A bit behind the location with the catapult, after tricking Boromir. Shoot the target with your bow, head back to the catapult and repair it. Afterwards use it and collect the chest.
Needed: elven rope, axe
In the location where Frodo throws a statuette on Boromir's head. Equip a rope (it can be the Toy Snake), stand where Boromir was previously and press (K).

When you're above, move a bit from the middle to change your weapon to an axe (it can be the Mithril Shockwave Axe). Destroy the cracked LEGO brick and pick up the treasure.
Needed: strength, sword
This time you will have to destroy 4 pillars built of LEGO Morgul bricks:
#1 - On the right side of the starting location, behind the boats.
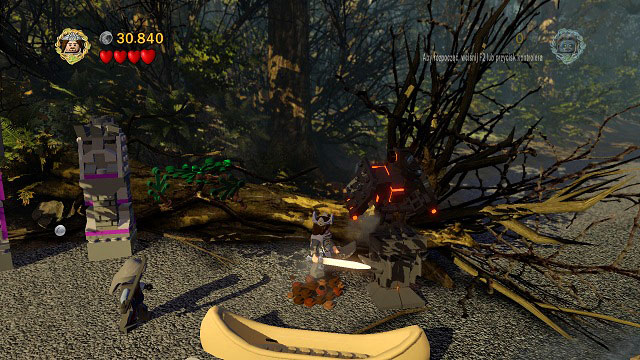
#2 - On the left side of the starting location; you need to use Shagrat to open a passage to it.
#3 - After pushing down the pillar from the platform on which Legolas was standing.
#4 - In the ruins at the end of Aragorn's path.
Needed: elven rope, magic
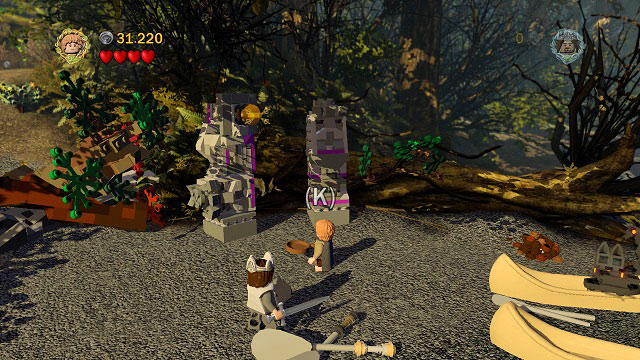
On the right side of the starting location there are two pillars, out of which once has a hook.

Pull it down to the ground and use Gandalf's magic to build a statue identical to the one on the right. As a reward you will receive the Minikit.
Needed: strength, spade, elven rope, Sam's pan
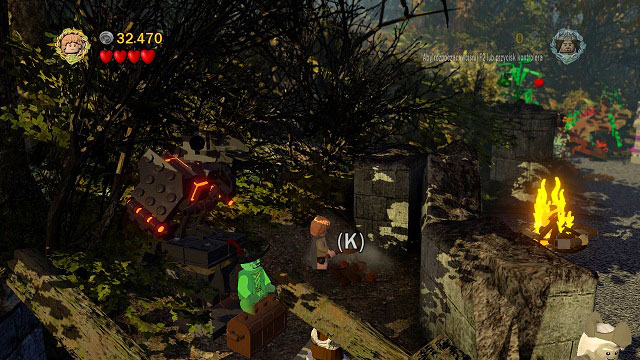
Open the passage in the left part of the starting location using Shagrat's strength and you will be welcomed by a ghost. You have to prepare a meal for it. Dig up the loose ground beside the ghost to find a fish.
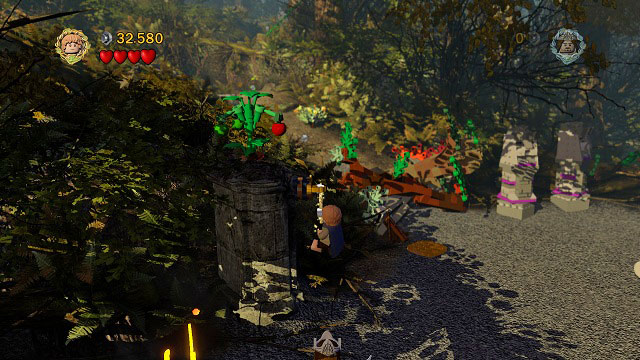
Tomatoes can be gathered by using the rope on the hook beside the bush and afterwards hitting the plant.
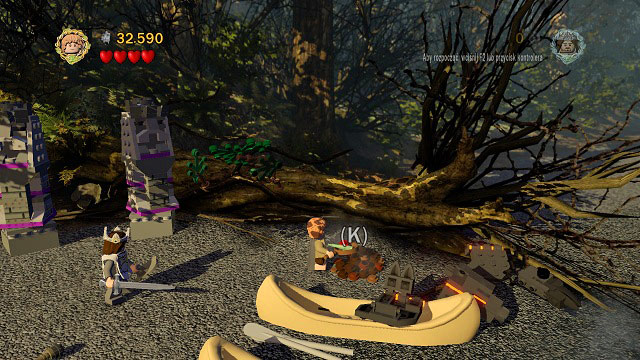
The egg is buried beside the boats. After collecting all ingredients, place them on the fire - the ghost will take your pan, but leave behind a treasure.
Needed: acrobatics
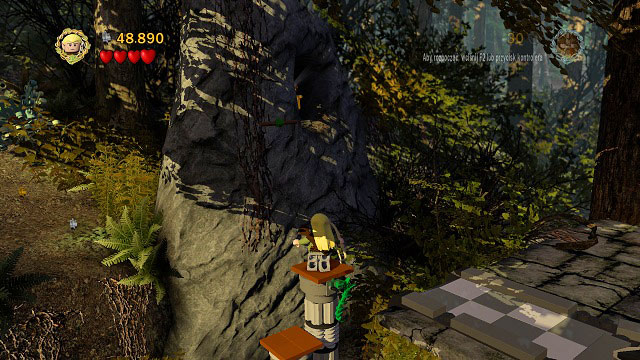
Instead of placing the pillars on the left side, place them on the right and jump onto them with Legolas. Grab onto the rail on the wall and jump towards the treasure.
Needed: phial
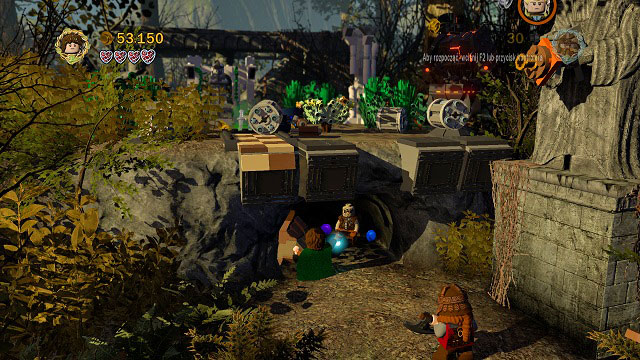
At the end of the hill, where the hook was, there is a dark cave. Illuminate it with the Phial of Galadriel and break the stone inside to get the Minikit.
Needed: explosive
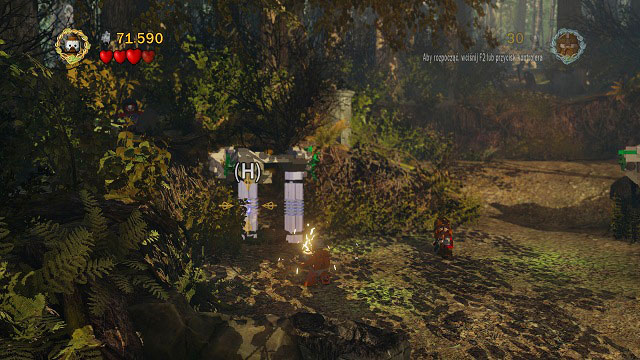
During the fight with Uruk-hai in the second location to the left you will find two mithril pillars. Just destroy them with the Berserker's bomb and pick up the treasure.
Needed: spade
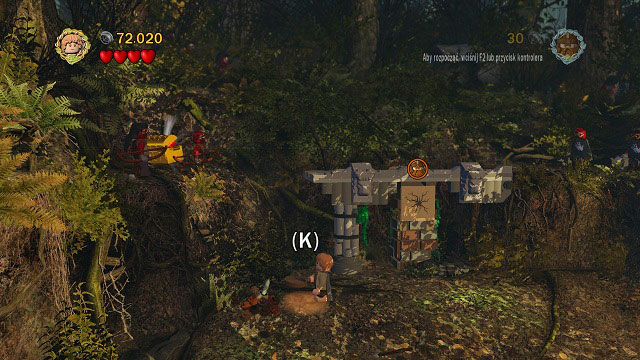
In the upper left corner of the third location during the fight with Uruk-hai you will find a place where you can place a plant. It will let you reach the Minikit.
Needed: explosive, elven rope, bow, acrobatics
In the third location during the fight with Uruk-hai you have to go to the lower right corner - there you will find a passage leading to a mithril gate. Destroy it with the Berserker's bomb and head inside.
Attach rope to the hook and head up along the platform. There, use your bow and build another step. Use the leaves to jump onto the new platform and afterwards to the next ledge.
Grab onto the rail and jump to the very top where you can light a fire. It will unlock a narrow tunnel which you can use. Afterwards bounce off the mushroom to reach the Minikit. Other points in this location can only get you more studs.
Needed: elven rope, bow
On the right side of the arena you should notice a hook to which you can attach a rope. 6 targets which you need to shoot from the bow should appear around the location. Hitting the last of them will give you the Minikit.
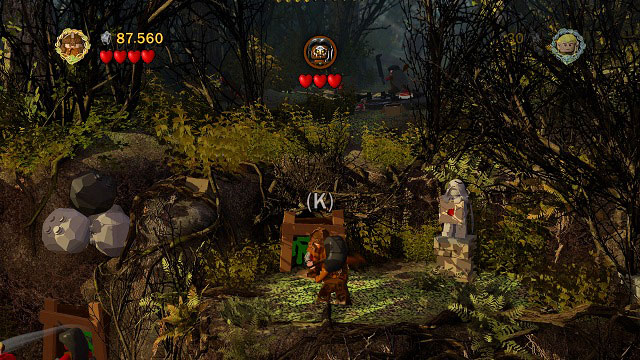
During the fight with Lurtz, just shoot the statue on the right an pick up the Diagram.
Needed: magic
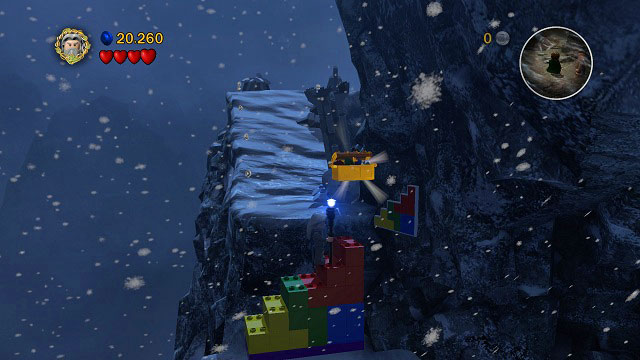
In the spot where you build a ramp from coloured bricks, at first you should construct it in accordance with the pictogram on the wall and a chest will appear on top. The proper construction can be seen in the above screenshot.
Needed: explosive
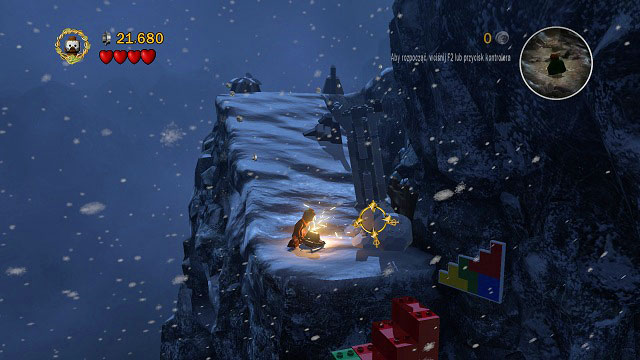
Use the coloured steps, change to Berserker and blow up the mithril stones to the right. Now just head through the narrow tunnel and collect the chest.
Needed: bow, acrobatics, phial
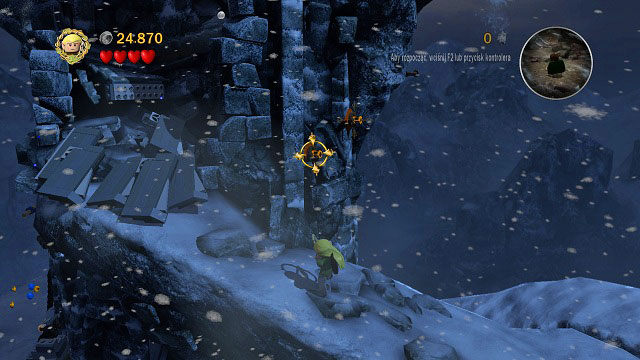
As you reach the bottom of the tower, on its outer wall on the right you should see some targets. Choose Legolas, create handles and follow them to the rail. From there, jump to the rock ledge above you.

In the end chance to Frodo (or use the previously collected Luminous Stone) and head to the dark cave. The Design should be right in front of you.
Needed: strength
While by the bottom of the tower, jump to the left (at the edge of the screen you should see rails which will let you head back up). Below, use Shagrat to pull the orange handle and hit the snowman to get the treasure.
Needed: sword, spade
 The LEGO Morgul brick can be found to the left - it's behind one of the tower's walls.
In the middle of the tower you should see LEGO Morgul brick on your left. Destroy them with the sword and go through the gate. There you just have to place a plant using the spade and use it to jump up and reach the chest.
On the path where you search for six fish, you need to destroy 4 skeletons:
#1 - To the left of where you begun as Frodo and Sam.
#2 - to the right of the first hook, right before a dark cave in which you find a fish
#3 - Beside the tile along which you move the pillar.
#4 - At the very end of the path, right before a tile and a movable stone.
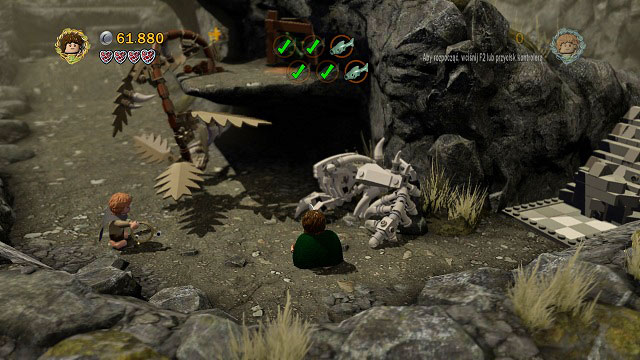
Needed: elven rope
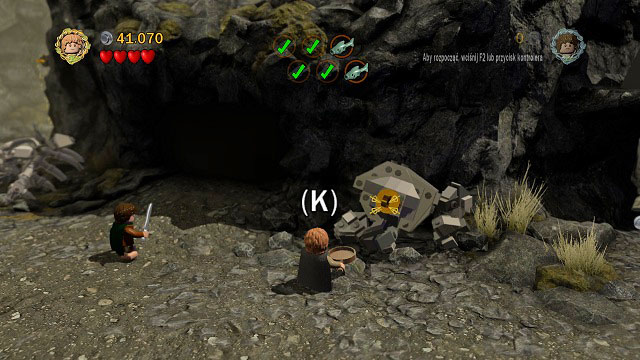
Right after the first cave in which you found a fish you should see a hook on the ground. Just use a rope on it and take the chest.
Needed: sword, phial
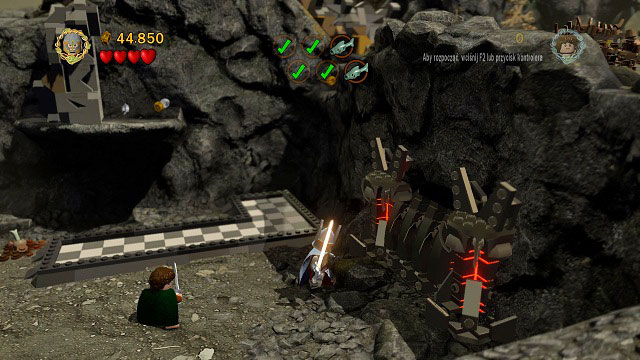
Beside the tile along which you push a pillar you should find LEGO Morgul bricks. Destroy them with a sword and illuminate the cave. The chest is inside.
Needed: bow
This time you have to hit two targets:
#1 - Inside the flower which bloomed at top of the plant which you placed.
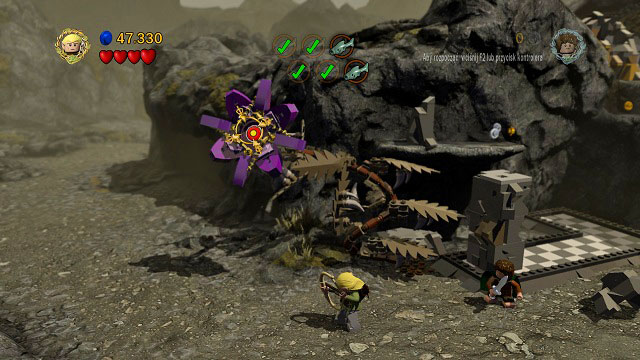
#2 - As you're solving the puzzle in order to obtain the last fish.
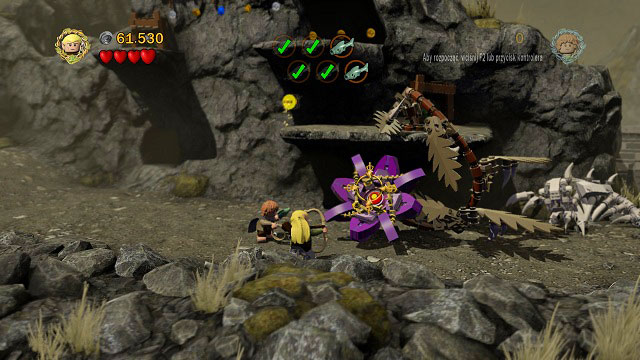
Needed: axe
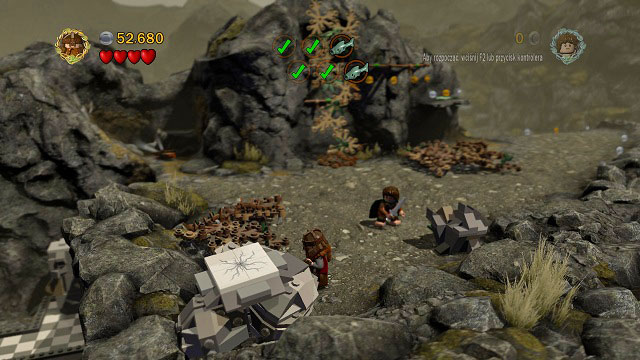
After jumping from the pillar onto the rock ledge, keep heading towards the camera. When you find a cracked tile, just break it with Gimli's axe and collect the treasure.
Needed: axe
Keep moving to the right and you should find a cracked LEGO brick on the wall. Just throw Gimli at it and pick up the Minikit inside.
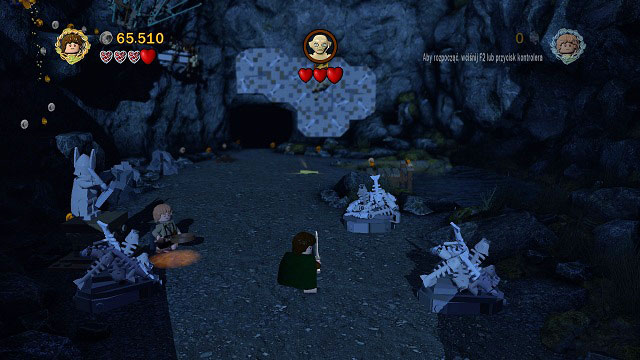
During the fight with Gollum, you have to destroy three piles of fish-bones beside the save point and afterwards build a chest from their remains. Pick it up to obtain the next Minikit.
Needed: phial, explosive, climb walls
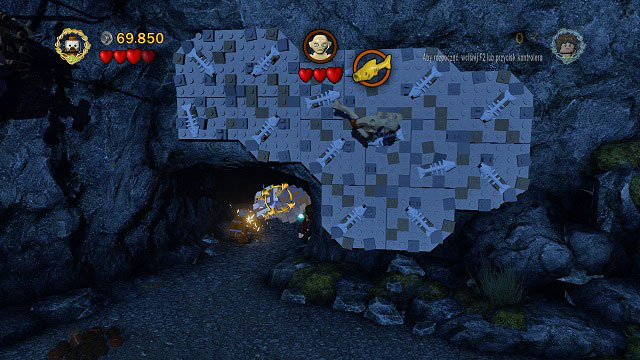
During the fight with Gollum, enter the dark cave below him, change the second character to the Berserker and destroy the mithril bricks. Now you need to head to the next location.
Choose Gollum and start climbing the wall. As you reach the end of the path (stop so that the arrows don't hit you), the second character should use the windlass on the left and change the arrangement of the crossing. Once again choose Gollum and head to the middle of the path, where you will obtain the crank. Return onto the wall and go to the very middle (screenshot below).
The second character should turn the right windlass and therefore let Gollum reach the chests on the rock ledge. Destroy them, build a mechanism from its remains, attach the crank and use it to open the gate. You just earned the last Minikit.
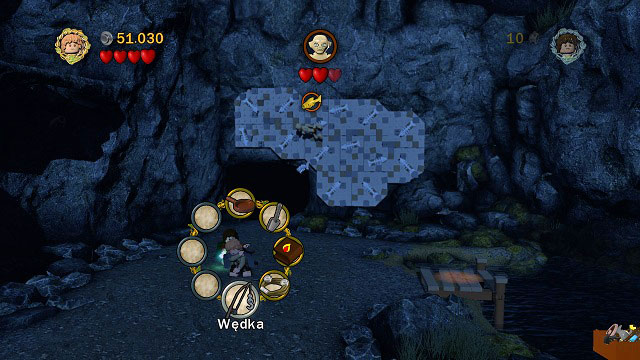
You will receive this treasure automatically as you're playing the story mode.
Needed: axe, fishing
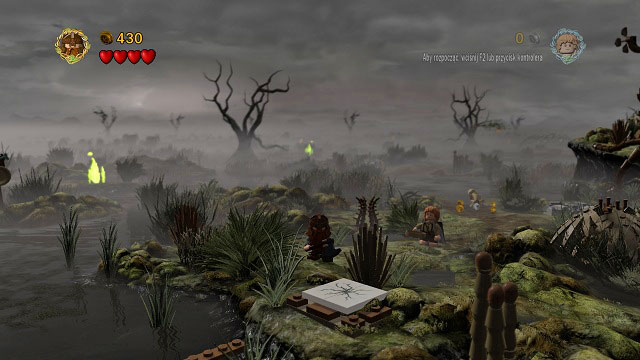
Start off by heading down towards the camera. Destroy the cracked tile using Gimli's axe and build a bridge from its parts.
Now you need to catch a fish and throw it at the sign in the north-west. That will cause a path leading through the marshes and to the Minikit to appear.
Needed: axe
Once again you will have to hit a couple bricks. This time they are broken tiles:
#1 - At the very beginning of the level; you need to head to the lower-right corner of the island.
#2 - By the first wall of fire in the upper left part of the island.
#3 - By the third wall of fire, to the right of the pond.
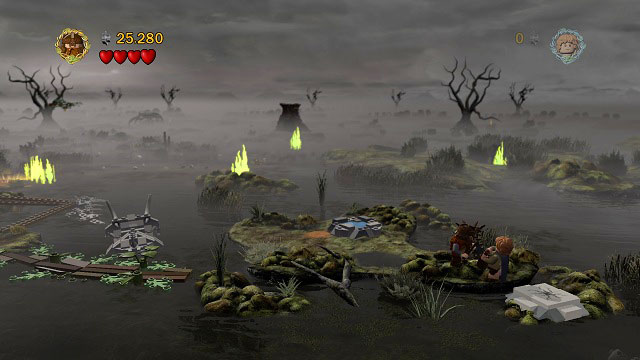
#4 - To the left of the road leading to the fourth wall of fire.
#5 - On the road leading to the large skeleton.

This item is needed to finish the mission and you will receive it automatically during the story mode. It's buried at the very beginning, before the first wall of fire.
Needed: elven rope
By the third wall of fire you have to head to the southern part of the island, towards the camera. There you will find leaves floating on the water - just jump onto them and keep following the path. At its end you have to use the rope and pick up the chest.
Needed: strength
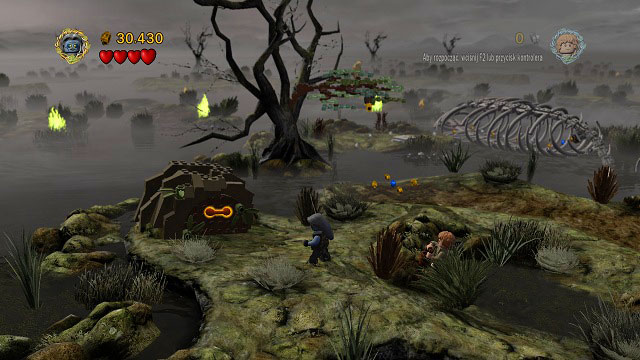
On the island before the first wall of fire, to the left of the giant skeleton you should see a cage with an orange handle. Use Shagrat's strength to open it and head further to the left to get the chest.
Needed: sword
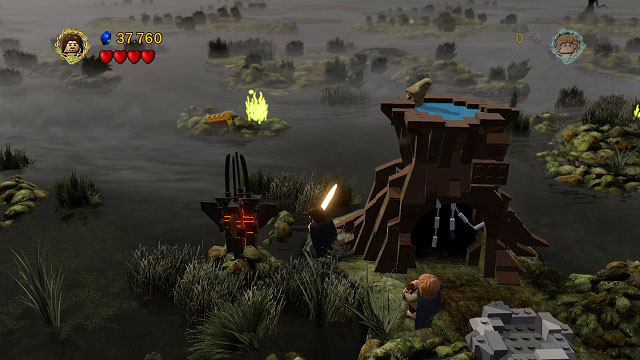
By the sixth wall of flame. To the left of the pond you should see LEGO Morgul bricks - destroy them using the sword and a boat will appear. You will need to backtrack a bit and collect two bones to build a bone wheel. Hand it over to the ghost to receive the chest.
Needed: bow
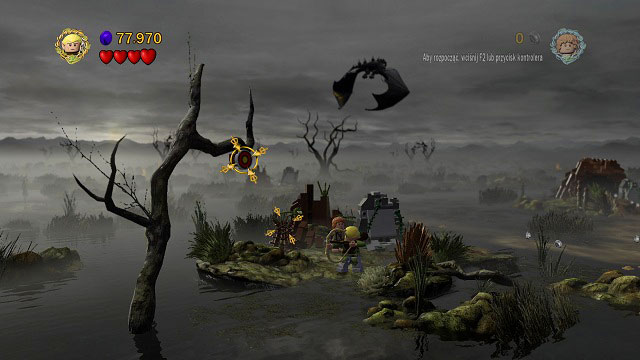
On one of the islands on which you hide from the Nazgul, you will see a target on the tree. Shoot it and pick up the treasure.
Needed: bow
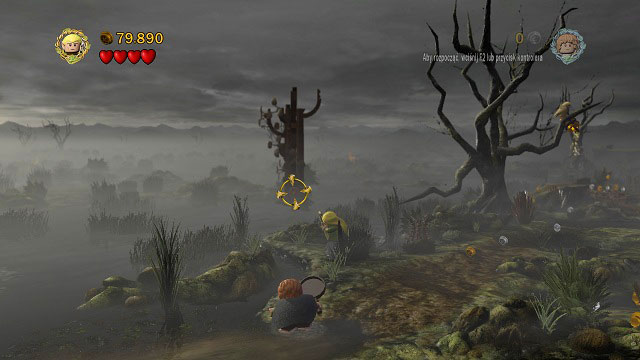
After another game of hide and seek with the Nazgul, in the distance you should see a tree built of LEGO bricks with a target on it. One shot and another Minikit will be yours.
Needed: bow
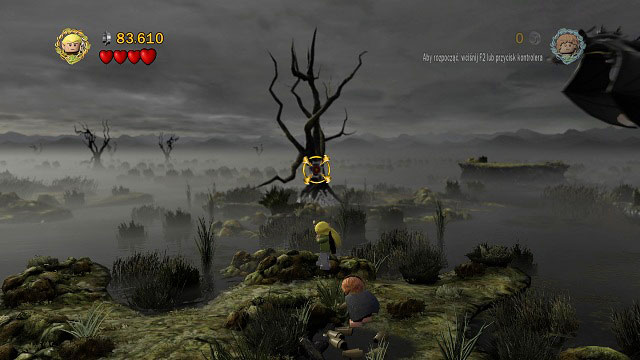
After getting past the "swing", in the distance you will see another tree with a target. Hit it and ghosts with targets will start appearing to the left of you. Shoot at them all (three in total) to receive the chest.
Needed: explosive
As you reach the section with the bridge and rope hook, you will have to move a bit towards the camera. You should see a mithril barrel which you have to blow up with the Berserker's bombs. Pick up the treasure afterwards.
Needed: strength
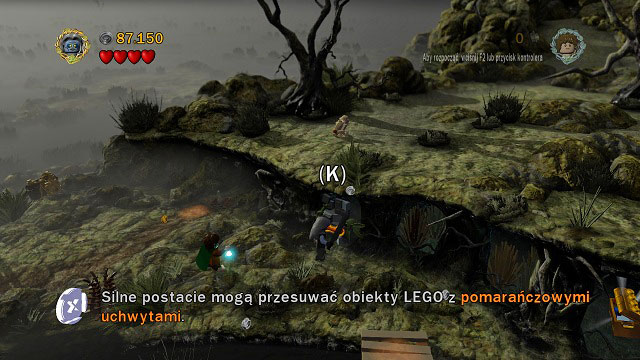
By the end of the escape from the Nazgul you will have to approach the wall and destroy some bushes there. Afterwards grab the handle with Shagrat and open the passage to the chest found further to the right.
Needed: fishing
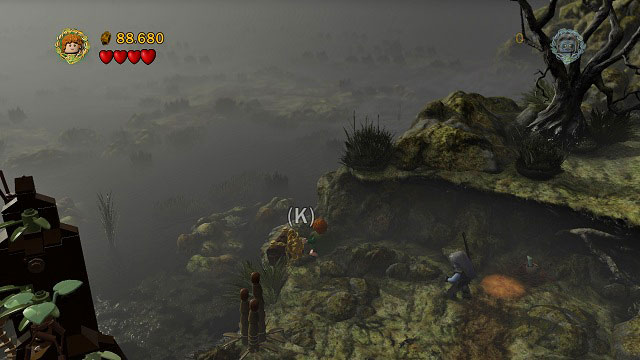
You need to start fishing on the bridge beside Minikit #8. That way you will receive a key with which you need to go left of the place where you need to put a plant. Open the chest and pick up the Design.
Needed: spade
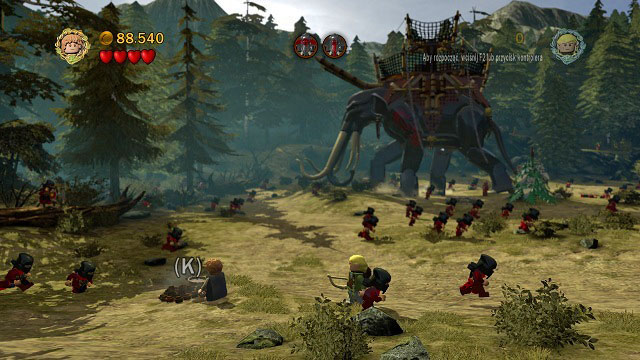
During the fight with the Mumakils, you need to head to the lower left corner of the map. Just dig up the loose ground to receive the Minikit.
Needed: bow
Also during the fight with the Mumakils; you need to choose a character armed with a bow and destroy 5 targets appearing around the location. I'd recommend getting as close to them as possible before shooting to increase your chances of hitting. After destroying the last target, you will receive the chest.
Needed: spade
At the very beginning of the mission; head towards the camera and dig up the treasure from the ground.
Needed: explosive
When Aragorn's group heads to the second location, in its upper right corner you should find a flag inside a rock. Blow it up and collect the chest.
Needed: spade, magic
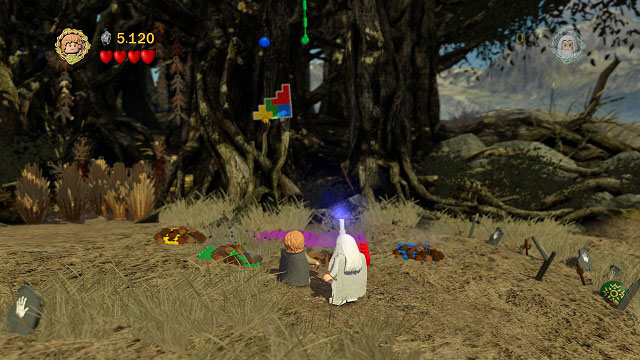
Right beside Minikit #1. You need to clear the purple brick of leaves and dig up other pieces. Afterwards use Gandalf's skills to arrange them into stairs in accordance with the pictogram in the distance.
Head to the top, grab onto the liana and climb up to the chest.
Needed: bow
You need to shoot three targets found high above you and build a chest. Afterwards just pick up the Minikit.
Needed: axe
In the first section of the woods, throw Gimli at the cracked brick to receive the Minikit.
Needed: strength
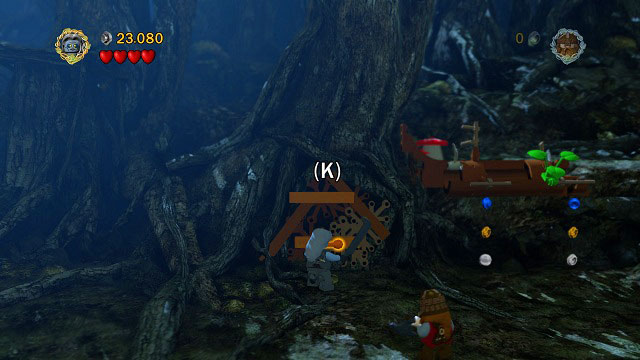
After destroying the rocks blocking the path and dealing with the attacking Orcs, you should see an orange handle in the distance. Pull it with Shagrat and enter the therefore opened passage.
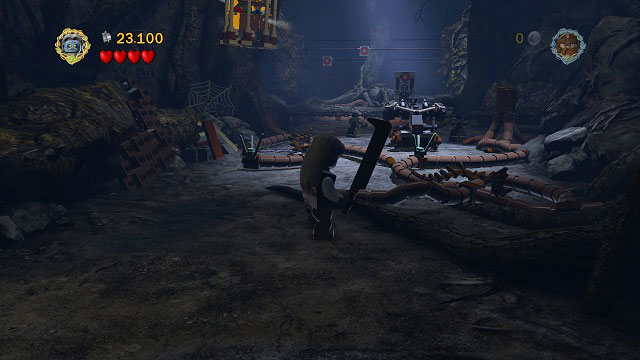
Inside you have to take control of the ballista and destroy as many moving targets a s possible. after a few accurate shots you will receive the Minikit.
In the same location as Minikit #5; head to the lower right corner of the room and destroy the chest there. A Design will fall out - pick it up.
Needed: phial
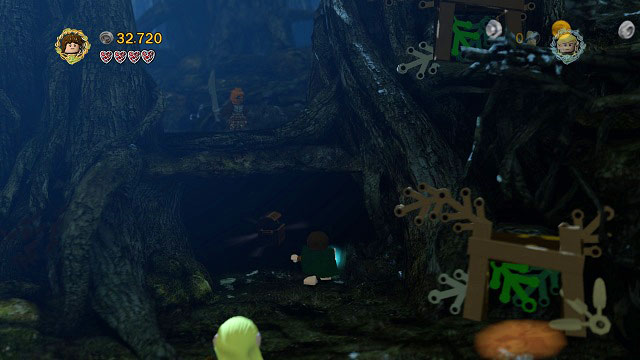
Right before the first narrow tunnel you can find a dark area. Head inside while illuminating the path with the Phial of Galadriel and pick up the chest.
Needed: bow
Directly behind the narrow tunnel on the left side of the location you will find a few targets. Shoot them with the bow and create handles, get to the other side with Legolas and collect the chest.
In the location where you wake up the Ent; head to the right side and destroy the small wooden totem. Pick up the treasure.
Needed: spade
Right beside the savepoint there is some loose ground, digging up which will unveil a picnic basket. Hit it and you will receive the Minikit.
After getting past the location in which you threw rocks as the Ent, turn right and you should see a chest high between the leaves. Head back a little, pick up one of the large stones and throw it at the owl to make it change its position.
You will need to head back and throw a stone at the owl two more times. The third hit will cause the chest to fall down on the ground.
Needed: spade
To the left of the waterfall you should find a location where you have to put a plant.
To the right of the burning log there are three cardboard Orcs. Destroy them and pick up the Minikit.
Needed: axe
Break the cracked tile on the floor, build an icon of a horse and destroy it as well. Repeat this with the second cracked tile closer to the king.
Needed: explosive
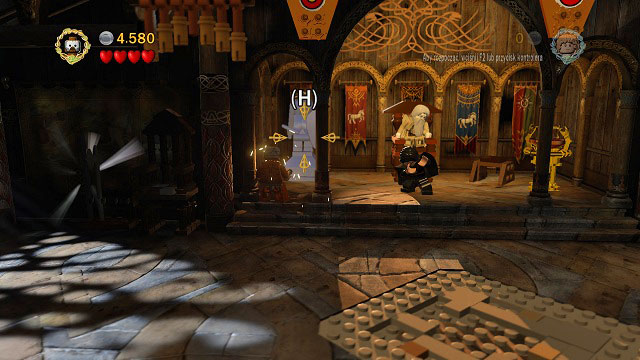
On the left side of the throne you will find a mithril statue. Blow it up and pick up the treasure.
Needed: light fire
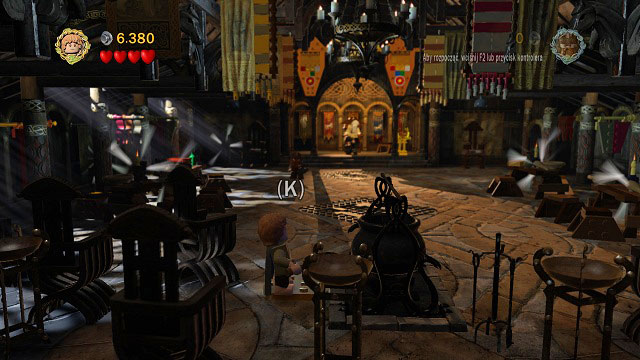
Head towards the camera and you should see a kettle in the middle of the room. You need to light a fire below it and build a chest from the received elements.
Needed: elven rope
Use the rope on the hook on the left side of the throne room and you will gain access to another Minikit.
Needed: bow
Shoot two targets on both sides of the throne and build a chest from the received bricks.
Needed: bow
Around the arena you will find five flowers with targets. You need to shoot them all to receive the Minikit.
Needed: strength
On the left side of the arena you will find a stone with an orange handle. Pull it with Shagrat and pick up the chest.
Needed: sword, Aragorn
On the left side of the battlefield, a bit below Minikit #6 you will find a LEGO Morgul brick. Destroy it and you will receive an item which will let you follow trails.
You will need to find three more pieces to eventually obtain the treasure.
Needed: phial
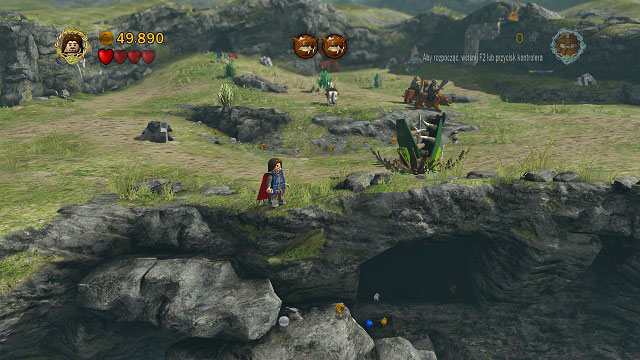
Head towards the camera and you should find a dark cave in the middle of the map, below the cliff.

Illuminate it with the Phial of Galadriel and use the second character to pick up the treasure from inside the large sundew.
Needed: axe, climb walls
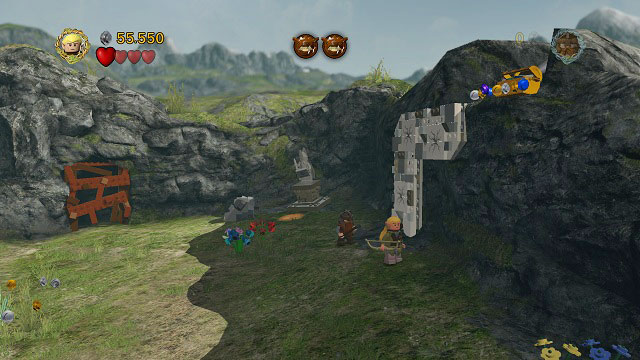
Nearby the savepoint there is a wall which can be climbed by Gollum. The path is blocked only by three cracked tiles: just throw Gimli at them, head to the top and collect the Minikit.
Needed: explosive
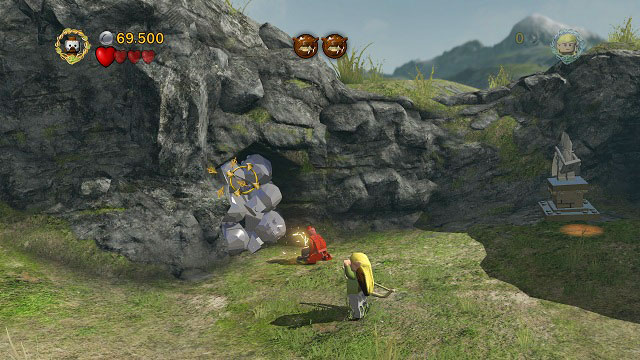
To the left of the savepoint you should see a boarded cave entrance. Blow up the boards and collect the treasure.
Needed: spade
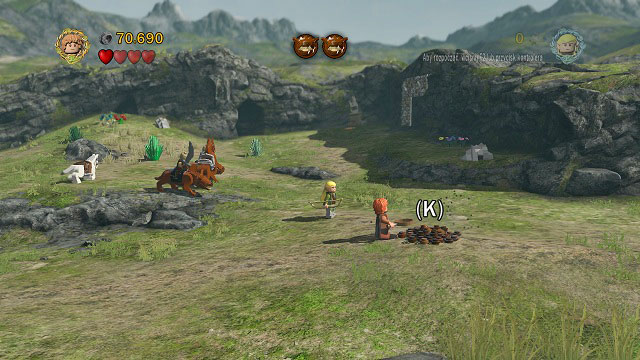
To the right of the middle of the battlefield there is some loose ground. Dig it up to unveil a scarecrow. Hit it and afterwards hit four other in the given time. I'd recommend switching to Legolas and mount a horse to make the task easier. You can also destroy all other items in the area for accurate shots.
Needed: spade, magic
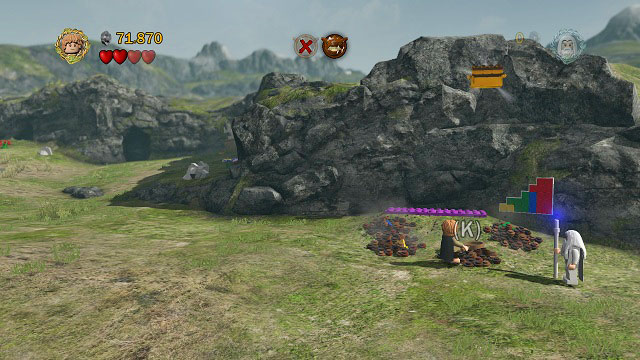
On the right side of the arena there are coloured bricks. You need to dig it up and reassemble into stairs in accordance with the pictogram beside.
Now just climb them and collect the chest.
Needed: explosive, spade, bow
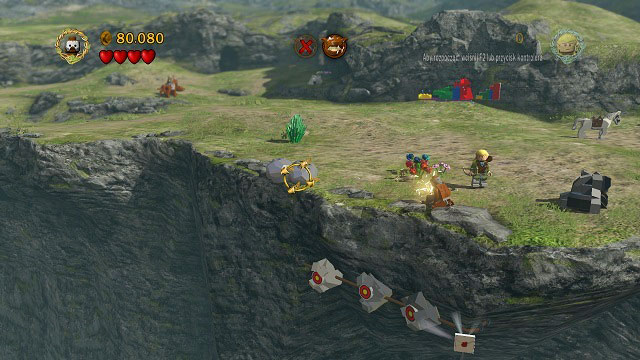
From where you gained Minikit #10, head towards the camera to the edge of the cliff to find mithril rocks - blow them up with Berserker's bombs. Afterward place a plant using the spade and grab onto the therefore created rope with Legolas. Shoot at three targets, jump onto the rail and collect the Design.
Needed: explosive, axe
Right after the beginning of the mission, approach the wall and blow up the mithril grate using Berserker's bombs. Head to the other side. You have reached an Uruk-hai carnival! To obtain the first Minikit, you will have to participate in four events:
#1 - Test of strength. Choose Gimli and destroy the cracked tile.
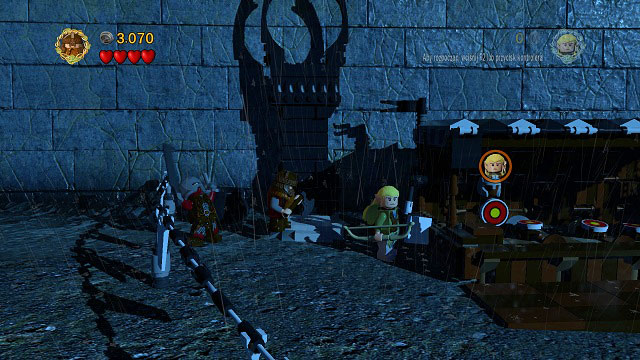
#2 - Shooting targets. You need to hit all targets in front of you using the bow.
#3 - Throwing coconuts. Place a plant, knock down coconuts and throw them at the cans.
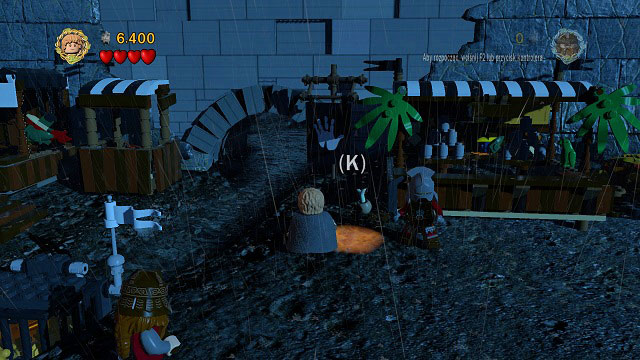
#4 - "Sink the Orc". You need to hit the target to make the Uruk-hai fall into the water.
Needed: elven rope
In the same place as Minikit #1. In the right side of the location, use the rope on the hook and destroy the chest. Pick up the treasure.
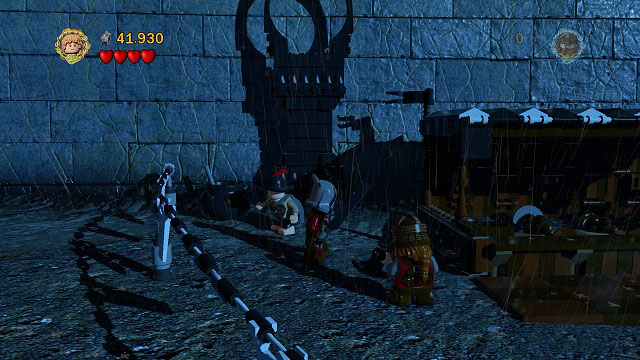
In the same place as Minikit #1. In the left side of the location, destroy the pot and pick up the treasure.
Needed: Aragorn, acrobatics
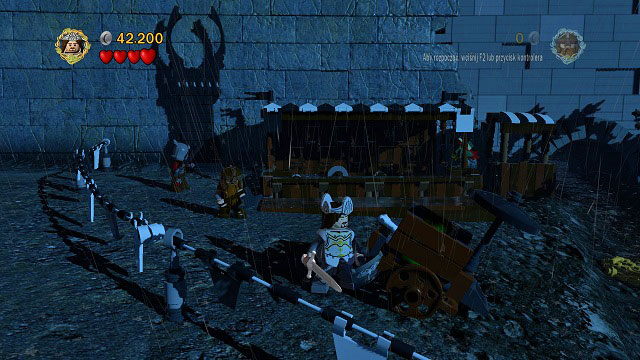
In the same place as Minikit #1. Destroy the cart with a green glimmer, pick up the item with Aragorn and follow the trail. When you find the bricks, build a platform using them and jump onto it with Legolas. The chest is yours.
Needed: sword, spade
In the same place as Minikit #1. Destroy the LEGO Morgul brick and dig up the pieces from the ground. Build a ballista and shoot at all the targets to obtain the Minikit.
Needed: axe

In the starting location, head right and throw Gimli at the cracked brick in the wall (you need to unveil it beforehand by destroying LEGO elements).
Needed: strength
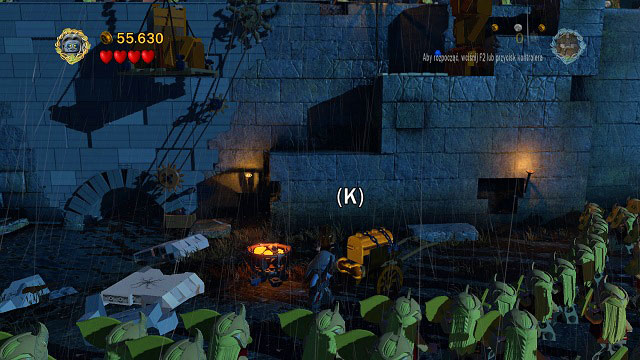
In the starting location, on the right side you have to pull the orange handle with Shagrat.
Needed: spade
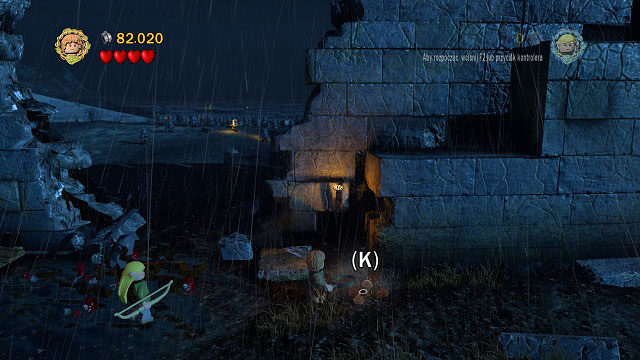
When the wall gets destroyed, to the right of the breach you will find loose ground. Dig it up to obtain the treasure.
Needed: explosive
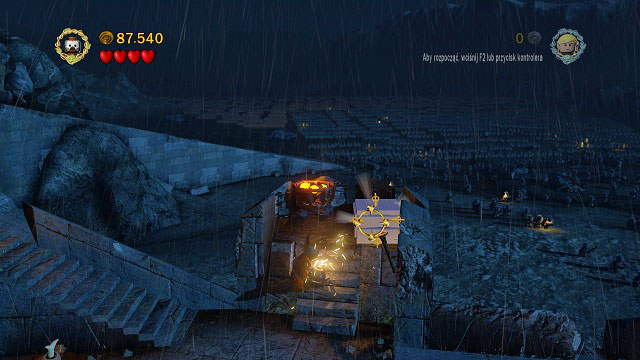
During the battle by the destroyed wall. As you reach its top, you will see a mithril chest - blow it up and pick up the Design.
Needed: spade
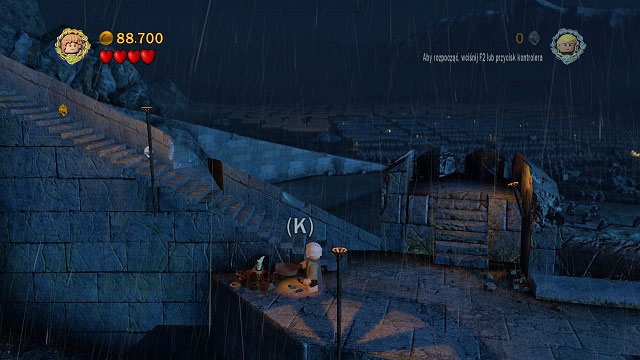
Right beside the area where you found the Design there's a place where you can place a plant. Hit it two times afterwards (at first the flower will close and then open again) to obtain the Minikit.
Needed: climb walls
As you're heading to stop the ram, on the right you should see a wall which you can climb with Gollum. Head to the top and collect the Minikit.
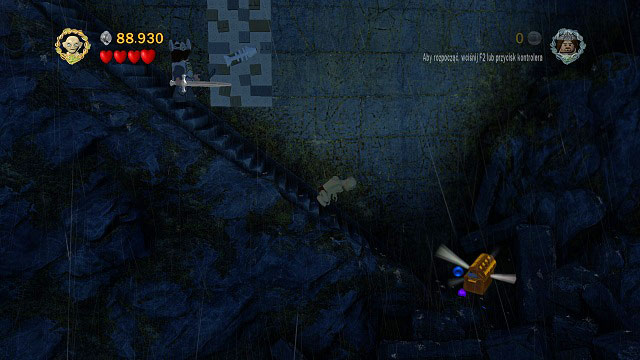
In the same place as Minikit #7 - just follow the stairs down and to the right.
During the horse ride, when you're controlling Theoden - in the entrance gate, you need to jump to it.
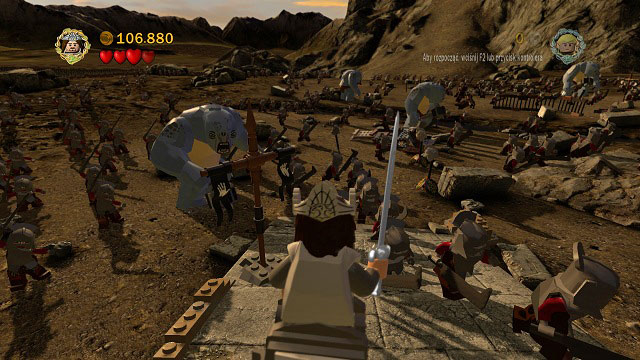 The white hand banner to the left of your character. You need to destroy five of them.
During the horse ride; you need to destroy 5 white hand banners. The first is right behind the entrance gate, the second at the end of the bridge and the others in the foreground.
Needed: explosive
The location closer to the camera. Go up the stairs and head left - there you have to blow up five mithril bricks blocking your way. Afterwards build stairs form the received pieces, climb them and collect the treasure.
You need to obtain and connect two elements:
#1 - A stick which can be found in the background location, after jumping from the first pillar.

#2 - A flag which can be obtained after the second climb with Gollum, pushing down the pillar and placing a plant. It's in the background and can be reached by going along the wall fragments.
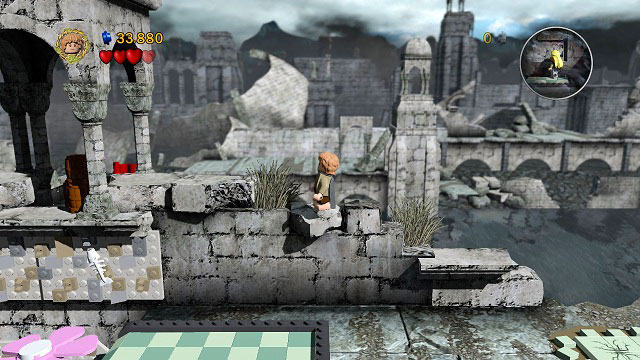 The flag can be found behind the barrels, to the left of your character.
Hand over the complete flag to the nearby soldier.
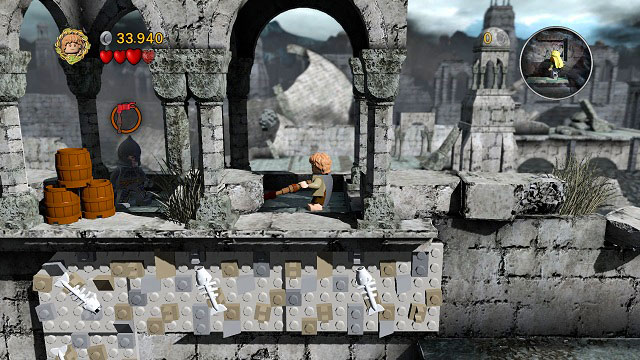
Needed: sword
The location closer to the camera. After completing the pillar puzzle and defeating the first group of Orcs, on the ground floor you will see a gate built of LEGO Morgul bricks. Destroy it, head inside the cellar and pick up the chest. To get out, you will have to build a ladder from the pieces lying on the ground.
The location in the background. As you're climbing the tower, you will see a Minikit behind the window. Just do a precise jump from the platform with the sword onto the edge of the building (above screenshot), go round the building and pick it up.
Needed: acrobatics
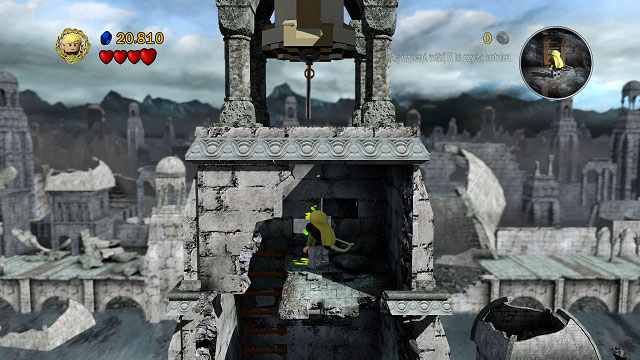
In the place where you found the sword. Just jump up using the laves and grab onto the rope hanging from the bell to obtain the Minikit.
Needed: phial
Right after freeing Gollum, below the stairs on the right you will find a dark room. Head inside to obtain the Design.
Needed: axe, magic
In the area where you defeated the Nazgul for the first time there's a cracked tile. Break it with Gimli's axe. Destroy all chests below but three which you have to properly arrange using Gandalf's magic. In return you will receive the treasure.
 The Minikit is visible in the window to the right of Legolas.
After the fight with the Nazgul you have to jump through the breach in the wall and head further to the right. The chest will fall into your hands on its own.
Needed: explosive
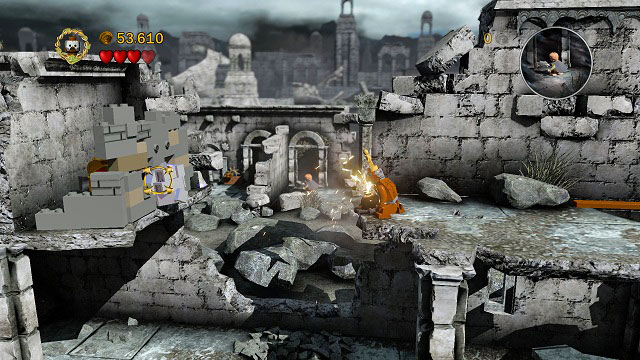
After the second Nazgul fight, build a ladder, climb it and head left. You should a mithril brick - destroy the with a bomb and jump to the chest.
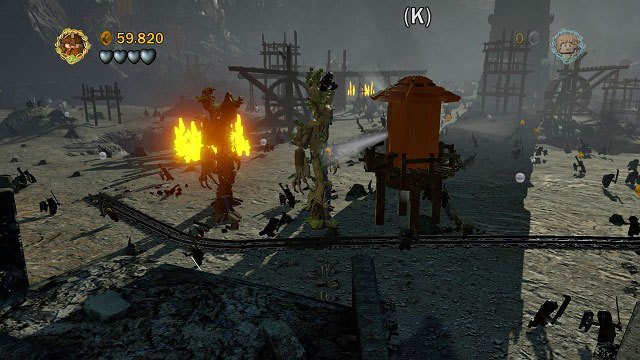
Head towards the camera - you should find a water tower which you can use to extinguish the nearby fire. Now just pick up the Minikit.
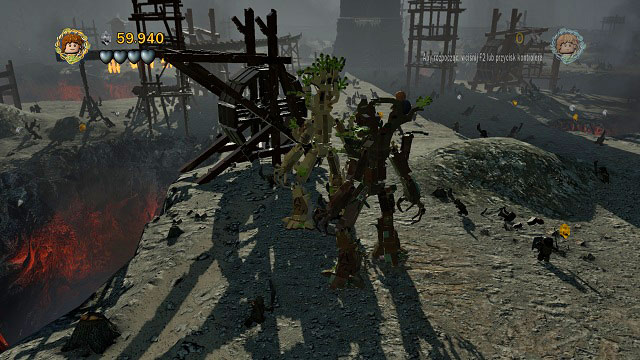 One of five water wheels which you have to destroy.
You need to destroy five water wheels. Three can be found in the first area of Isengard, one in the second (after crossing the bridge) right before the wall of fire and the last one to the left of the dam.
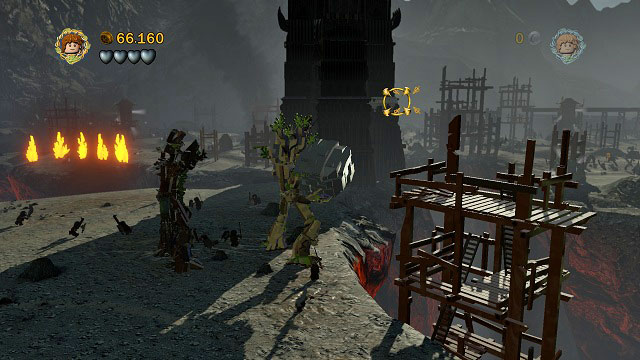
This time you have to destroy three fragments of Saruman's tower using the rocks. Two pieces can be hit from the beginning location, while the third after crossing the bridge.
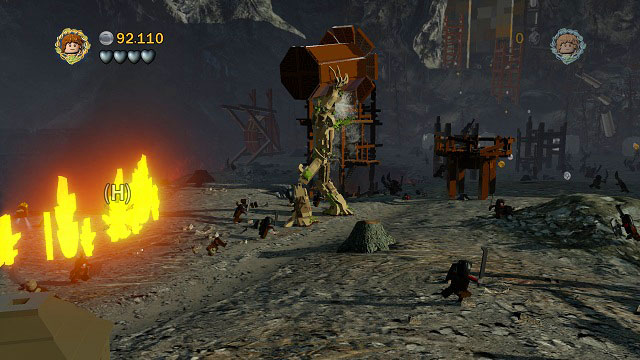
After getting through the wall of fire you will find a small fire with the chest inside. Once again extinguish it with the water tower.
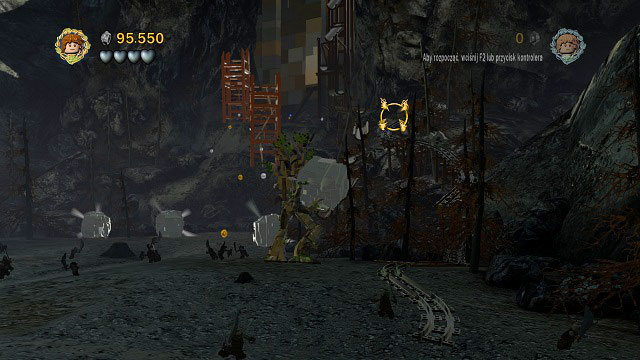
As you're moving towards the dam, on the right you will see train rails and at the very top a car. You need to clear a path for it by throwing rocks at the stones blocking the rails. When the car reached the very bottom, a Minikit will fall out of it.
Needed: bow, Aragorn
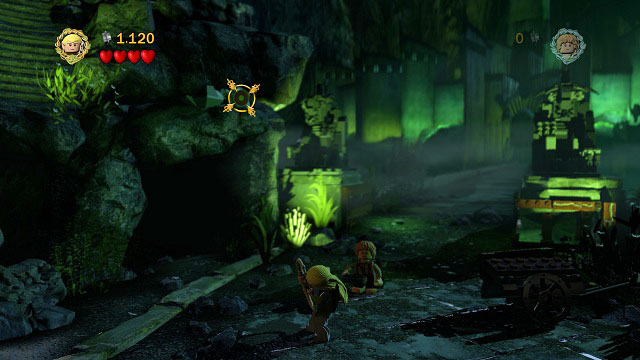
Shoot the target above you at the beginning of the level and afterwards use Aragorn to pick up the item.
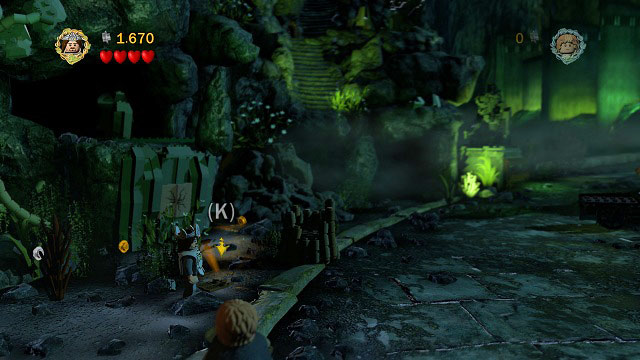
You need to search for three more item before reaching the location where the treasure is buried.
Needed: axe
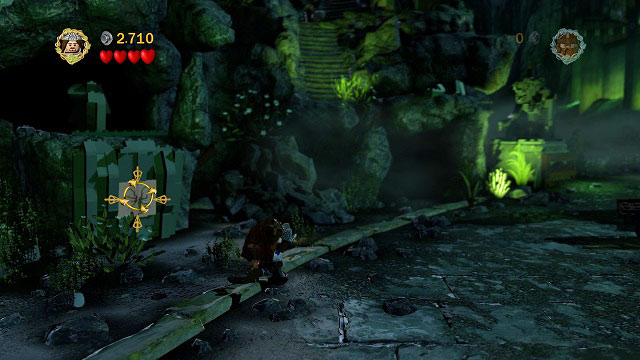
To receive the Minikit, you have to throw Gimli at the cracked LEGO brick in the left part of the location.
Needed: spade

Assemble the stairs and before leaving the location, you should see a few rocks on the right side of the stairs. Break the first one, place the plant and collect the Minikit.
Needed: bow, acrobatics

Head into the second location and shoot an arrow in to the target on the left side. Afterwards use the bar to jump further and collect the chest.
This time you have to destroy 5 plants:
#1 At the very beginning of the second location
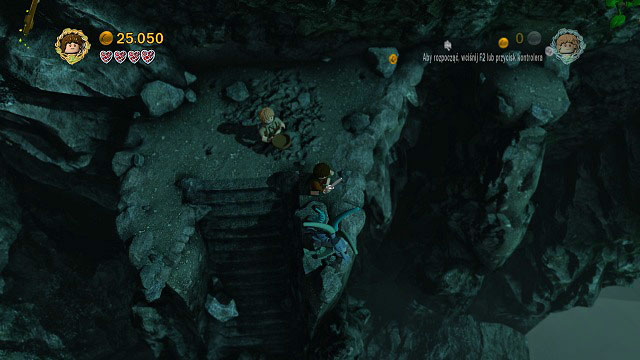
#2 In the dark cave by the climbable wall
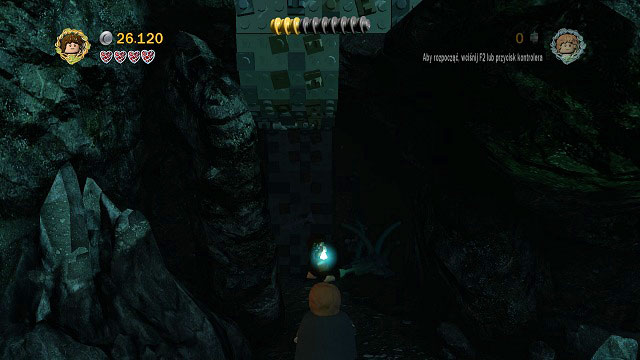
#3 Outside the second dark cave
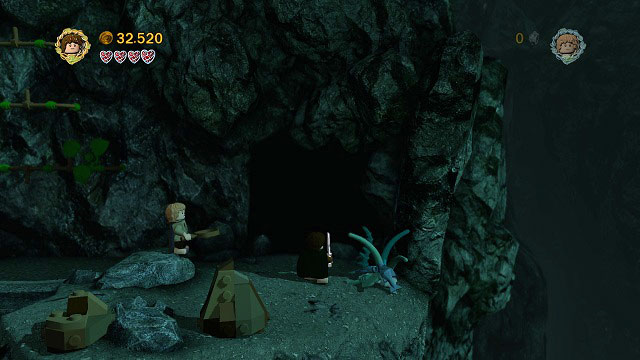
#4 After the second climbable wall and using the narrow tunnel
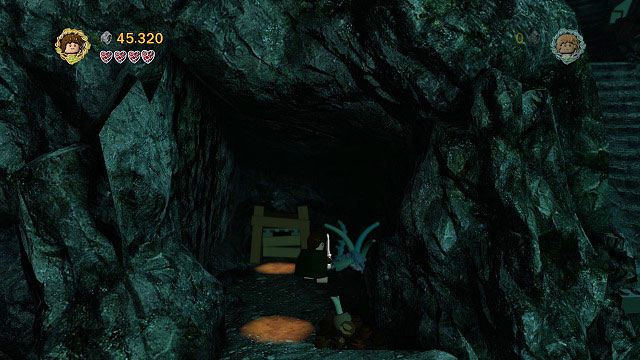
#5 Below the rock ledge where you found the previous bush

Needed: bomb
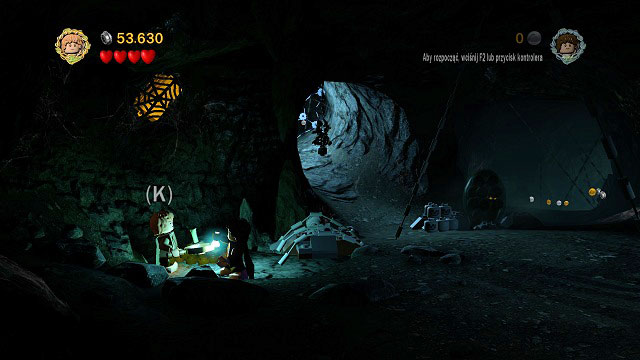
Avoid the precipice using the rail mounted to the wall and you should see a mithril chest. Blow it up and build a movable chair from its remains. Now just ride it to the very top.
Needed: axe
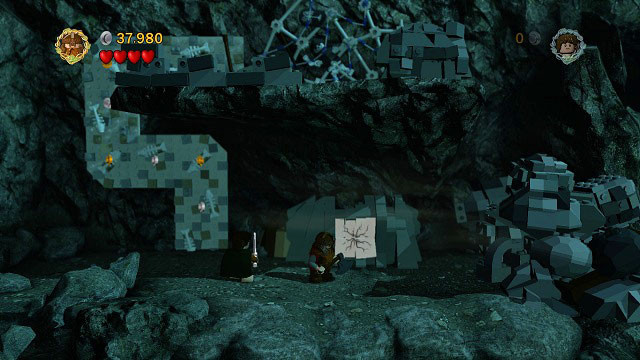
To the right of the second climbable wall you will find a cracked LEGO brick. Break it with Gimli's axe, build a crane and pull up the treasure.
Needed: spade
As you're going through the tunnels, in the first bigger room on the left you should see a Minikit behind a spider-web on the wall. Place a plant beneath and collect the chest.
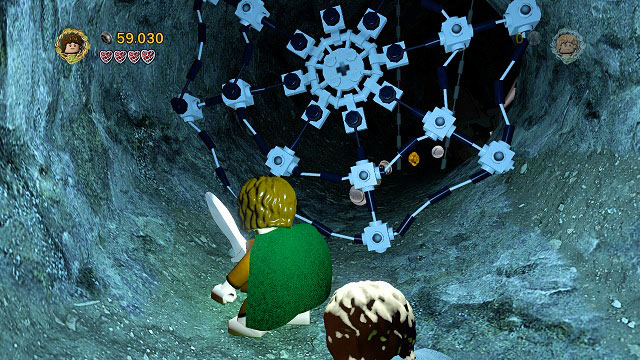
On the left side of the cave in which you found Minikit #6 there's a bright tunnel blocked by spider-web. Make your way to its end to obtain the Design.
Needed: strength
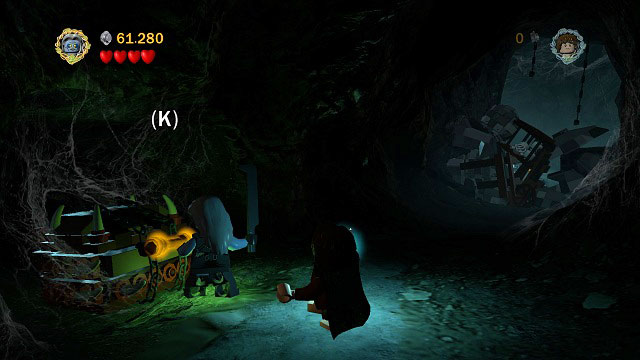
Head further into the tunnel and on its left side you should see an orange handle. Choose Shagrat, pull it and pick up the treasure.
Needed: bomb
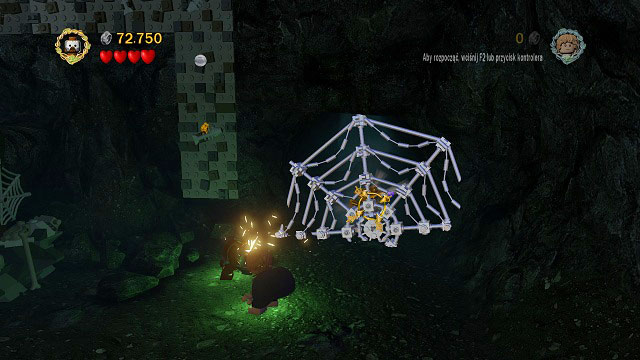
In the next big room which you come across, right beside the climbing wall you should see a mithril spider-web. Blow it up and collect the Minikit behind it.
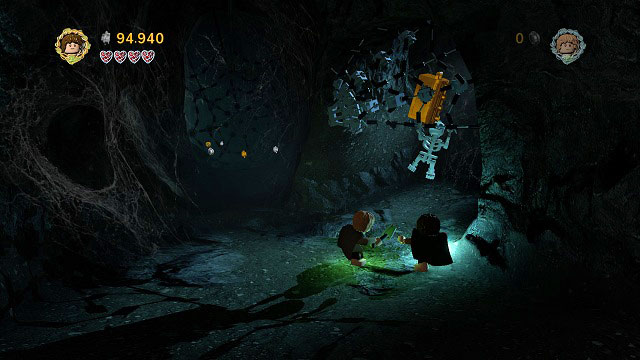
Use the climbing wall and cross the narrow tunnel to see a chest in a spider-web above you. cut it off and pick up the Minikit.
Needed: sword, spade, magic
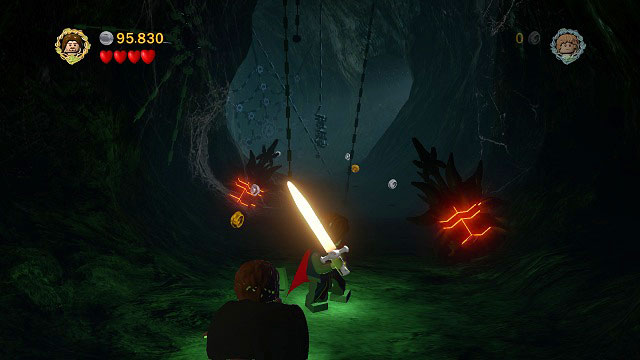
Look for LEGO Morgul bricks in the cave and destroy it with the sword - that way you will uncover loose ground. Dig it up with the spade and build a fly from the fragments. Use Gandalf's magic to place it above you on the left wall, where the purple symbol is. The Minikit will fall right into your hands.
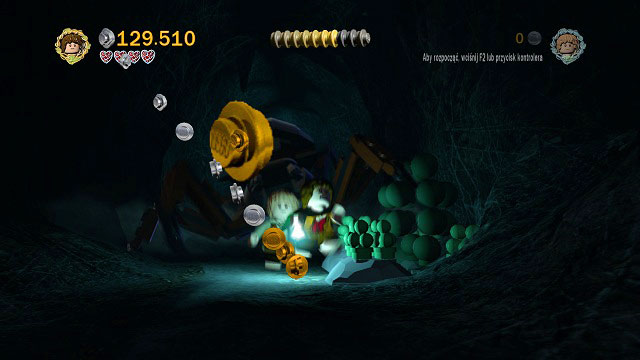
As you're running away from Shelob, you need to follow the trail of studs and break three piles of skulls (just do the following: go maximally to the right, to the left and back to the right side of the screen). When you break the last one, the Minikit will be yours/
Needed: spade
You need to place five plants during your travel through the corridors:
#1 In the first tunnel on the left.
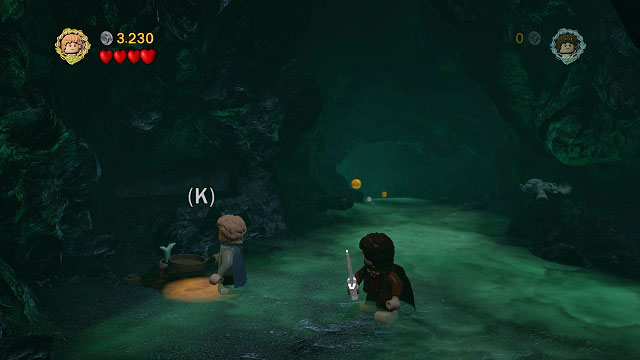
#2 In the location where you come across the LEGO Morgul for the first time; directly above the rock ledge.
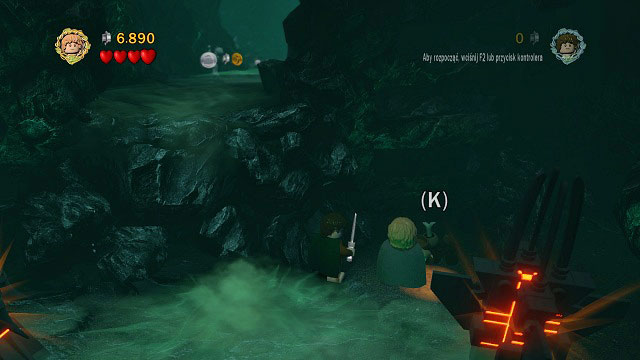
#3 In the second big cave, by the right wall.
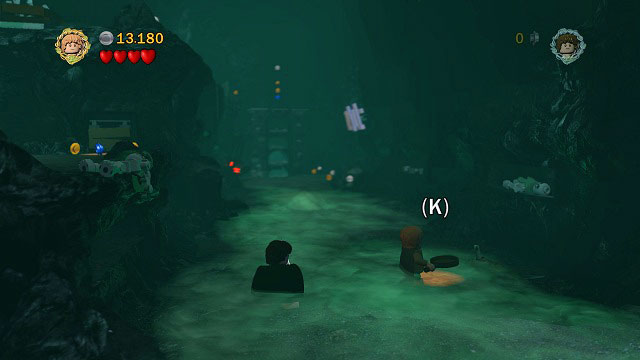
#4 In the cave with the pillar, right beside the support.
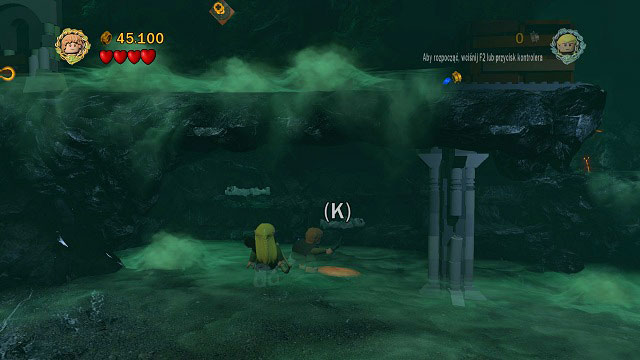
#5 In the last big cave, right beside a locked gate.

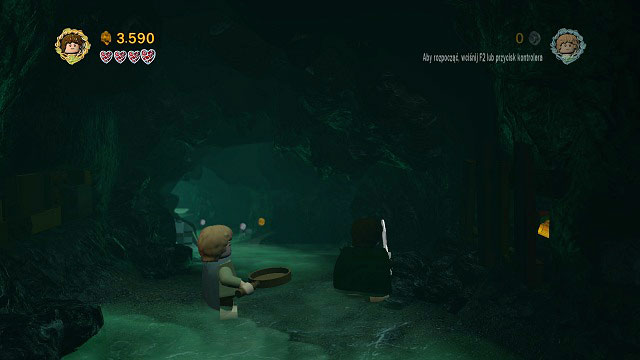
Right after you pass by the first whirl on the left and right sides of the corridor, you should see brick on the walls. You need to destroy them and afterwards built a Minikit from the pieces on the ground.
Needed: spade
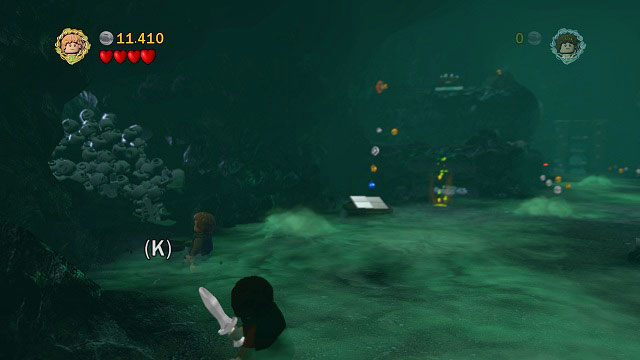
In the second big cave, on the left side there is some loose ground beside a pile of skulls. Dig it up and pick up the treasure.
Needed: bomb
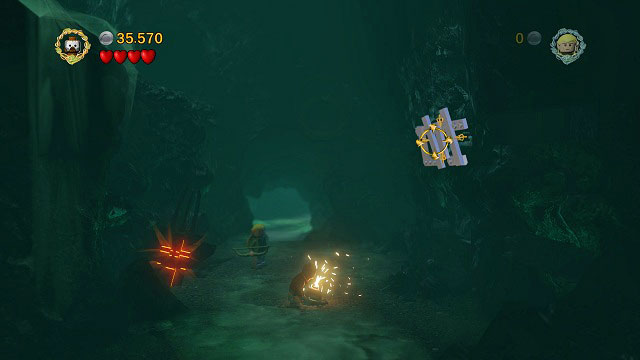
In the right part of the second cave you should find Mithril LEGO bricks on the wall. Blow them up and pick up the treasure.
Needed: Phial
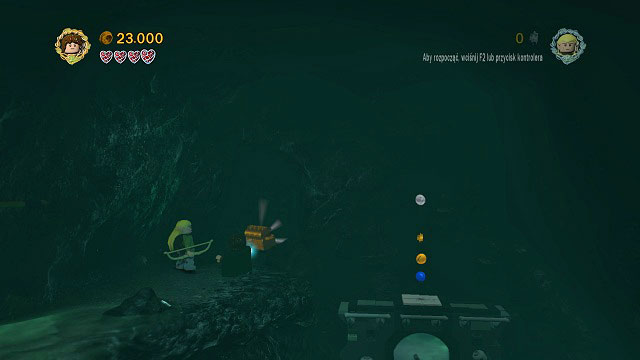
At the end of the second cave, as you're moving along a rock ledge on its right side. At the very end you will find a dark cave, illuminating which will let you find the chest.
Needed: strength
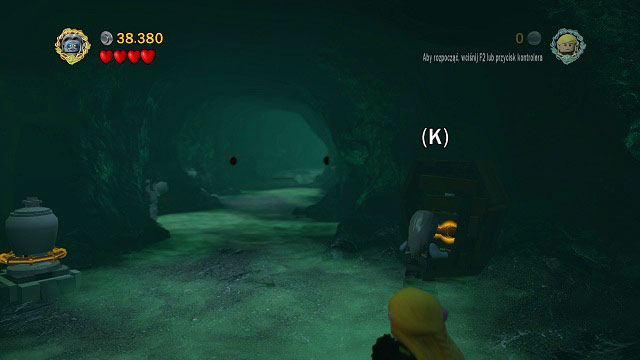
After leaving the second big cave, as you're going deeper into the corridor, on the right side you should see an orange handle. Just pull it with Shagrat and collect the treasure.
Needed: rope, strength
This time you will have to collect a few elements and combine them together:
#1 On the other side of the corridor, right beside an orange handle you will see an urn on a pedestal. Turn it over and use the rope on it. That way you will obtain the vase.
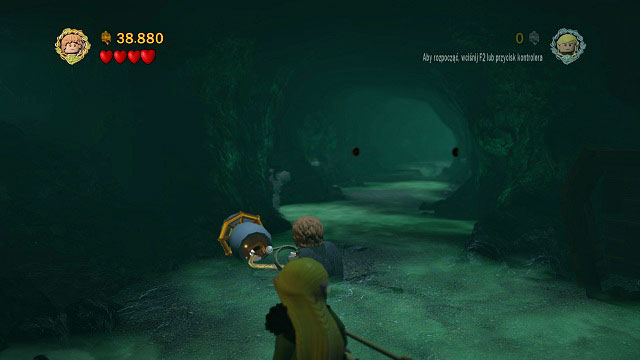
#2 After entering the room with the pillar; on the left side you will see another urn. Turn it over, open with the rope and combine the flower with the vase.
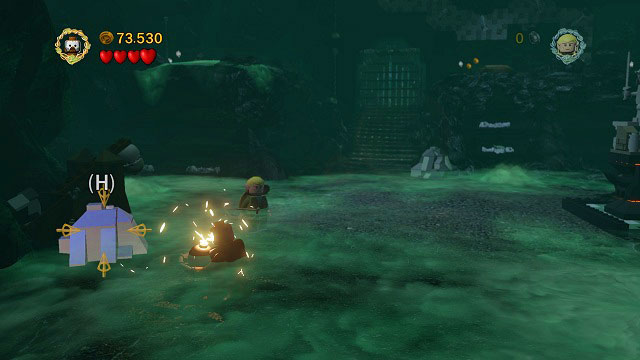
The obtained sacrifice has to be placed on the altar which you can receive after pulling the orange handle on a rock ledge in the same room.
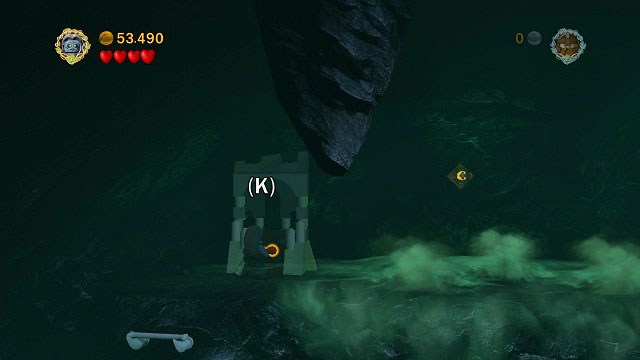
Needed: sword
In the cave with the pillar, on the right side of the room. Destroy the LEGO Morgul and pick up the chest.
Needed: bow
Right above where Minikit #5 was, you can see a target with a rope attached to it. Shoot the target, jump onto the rope and grab the Minikit.

The chest is in the niche in which my character is. You need to run around the area to pick it up.
In the right part of the last big chamber, in a place which the camera doesn't cover.
Needed: bomb, climbing
In the last big room, on the left side you should find a mithril stone. Blow it up with Berserker's bomb and the catapult beside you will launch a stone, destroying the cage in which the Minikit is.
Now just climb the wall with Gollum and collect the chest.
Needed: light fire, magic
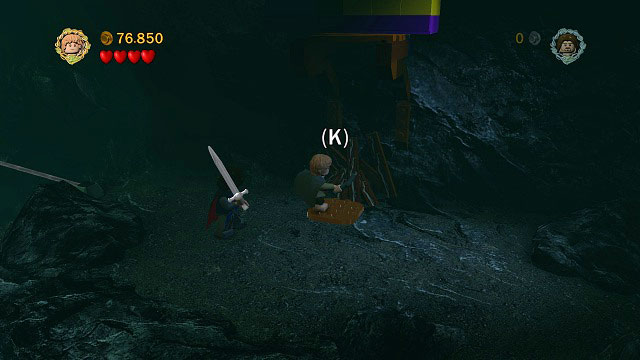
Push the pillar and head onto the right rock ledge to see a campfire place. Light a fire and use Gandalf to arrange the bricks.
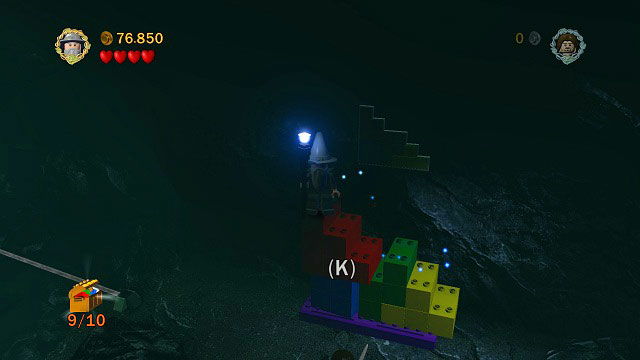
Now just go up the "stairs" and collect the chest.
Needed: acrobatics (not mandatory, but helpful)
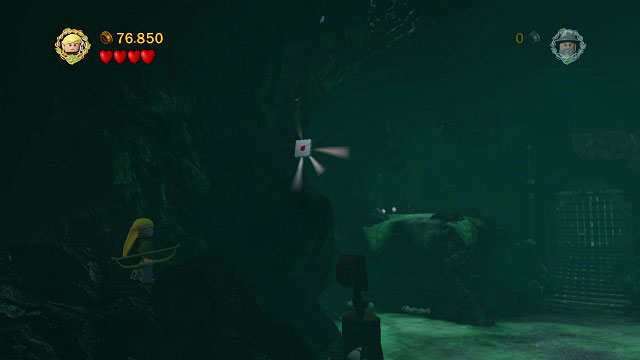
On the left side of the last cave, on the rock ledge high above you will see the Design. Just choose an Elf and jump there from the nearby boulders.
Needed: bow
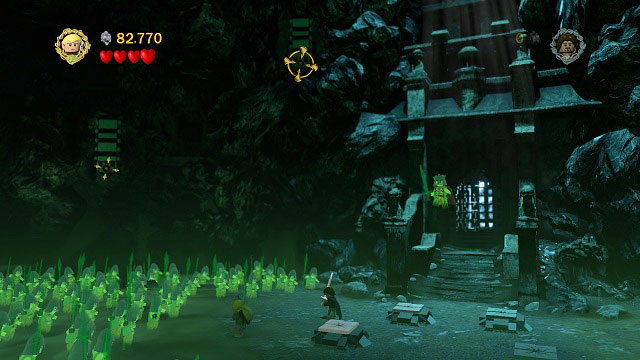
As you're fighting the King of the Dead, you have to shoot down the targets. Two are on the left and one on the right side of the arena. The treasure will fall into your hands on its own.
Needed: bomb
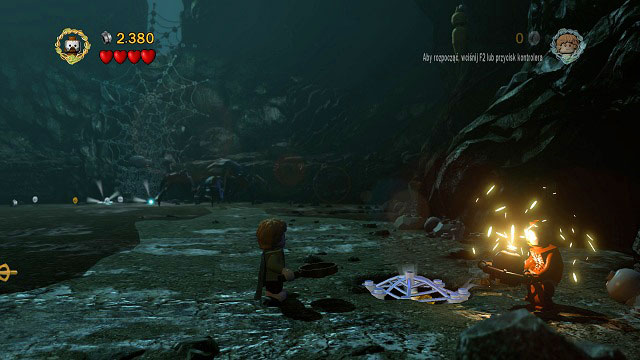
As you're fighting Shelob, on the right side of the arena you can find a mithril spider-web covering the bottom of the chest - blow it up and collect the Minikit.
Needed: axe
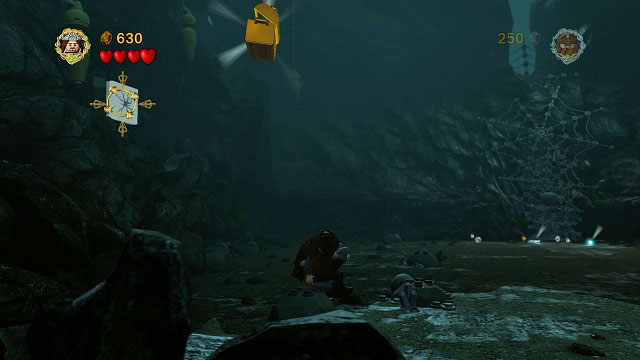
As you're fighting Shelob, on the right side of the arena, high above you should see a cracked LEGO brick. Throw Gimli at it, build a spring-board from the received elements and jump off it towards the chest.
Needed: bow
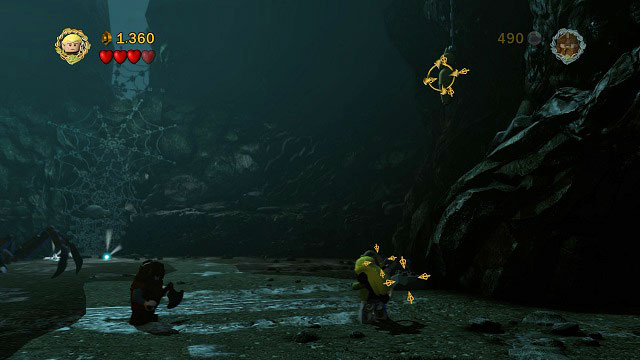
As you're fighting Shelob, you can find 5 cocoons hanging from the ceiling. You have to shoot them all down to receive the Minikit. Three are on the left side of the arena and two on the right. The last one of them will require you to move as close to the camera as possible and aim the bow up.
Needed: axe
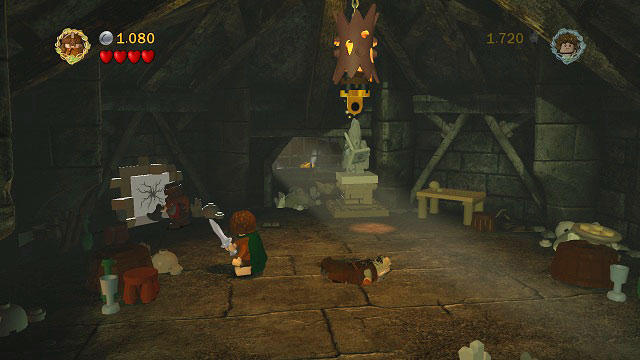
In the first location of the tower you have to destroy the cracked brick in the background and enter the breach in the wall. Afterwards head to the right and pick up the Minikit.
Needed: acrobatics
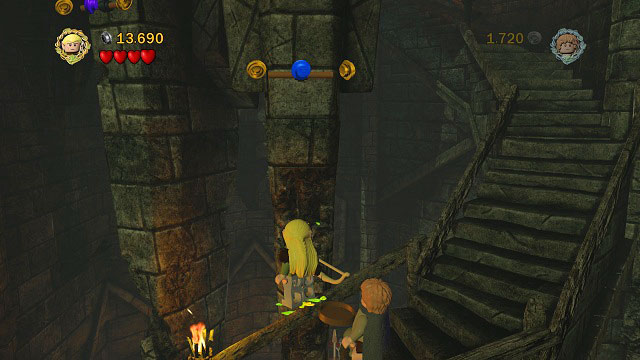
As you're going down the twisting stairs, you should notice a chest above you. use the leaved to reach the rail, jump to the next one on the left side and in the end grab the Minikit.
Needed: bow, axe, bomb, Sam's pan
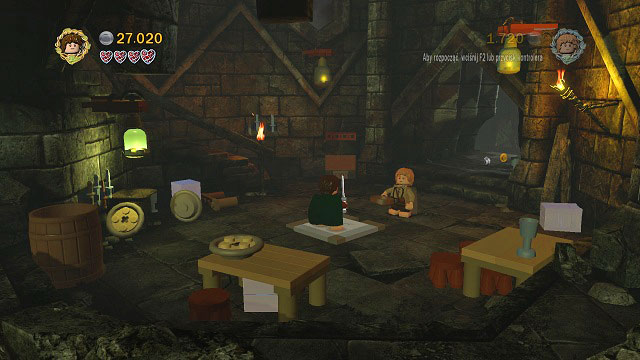
At the very bottom on the tower you will to prepare a dinner for your team. It's best to begin by destroy all possible elements on the ground floor. Break the floor with Gimli and build a bonfire, while Legolas should shoot the lantern to collect wood. Now light a fire, blow up the mithril bricks with bombs, pick up and connect all ingredients and fry them on the pan. A few Orcs will jump down - defeat them and the treasure will be yours.
You need to free 5 spiders, left them weave a web and afterwards destroy it:
#1 Right after getting out of the tower; directly beneath the climbable wall you need to destroy the bucket.
#2 To the right of the save points there are some LEGO pieces - just destroy them.
#3 Behind the basement entrance locked with a mithril padlock, in the very corner of the location.
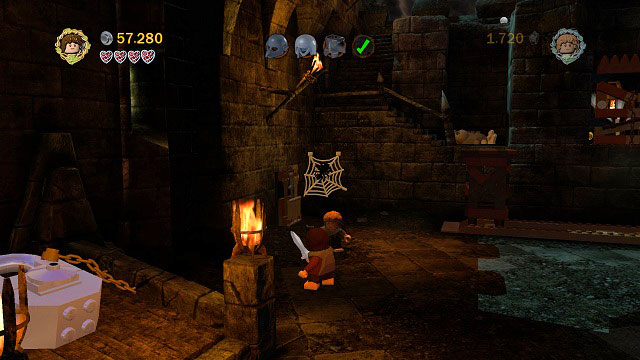
#4 In the upper part of the courtyard, to the left of the Orc controlling the gate mechanism.
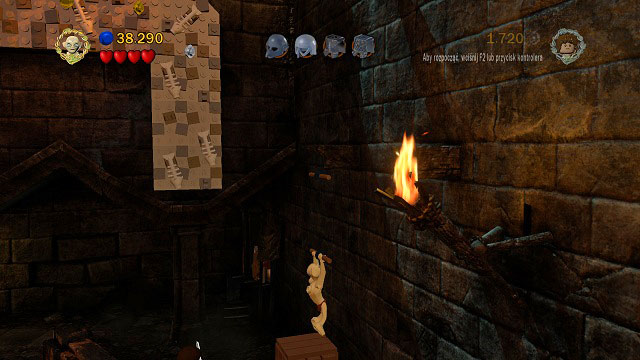
#5 after pushing down two chests, as you're going down the stairs, in a niche you will see a few stones. Break them.
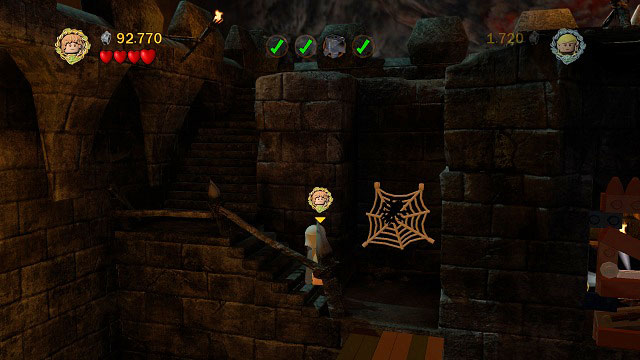
Needed: bomb, fishing
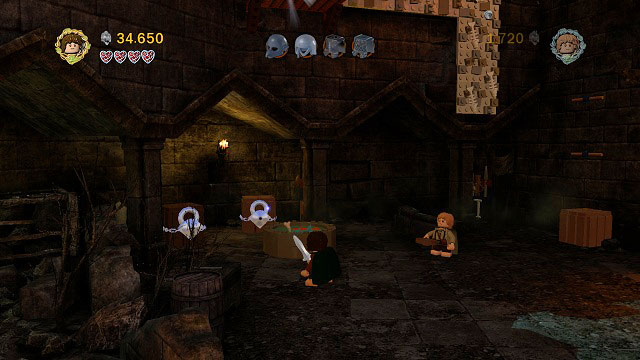
After getting out of the tower; to the left of the starting location you should see two chests with mithril padlocks. Blow up the chains with Berserker's bombs, build a platform and fish in the barrel to obtain the treasure.
Needed: climbing
To the left of the starting location you will find a chest and rails above it. Grab onto the with Gollum and jump onto the climbable wall - the Minikit is at its end.
Needed: strength
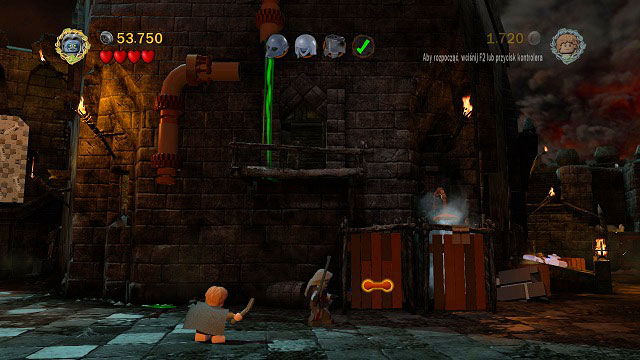
One of the two showers has an orange handle. Pull it with Shagrat and pick up the treasure.
Needed: bomb, rope, light fire, Frodo
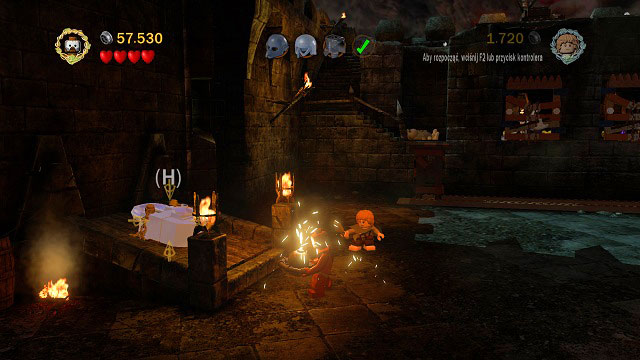
After passing by the showers, in the background you should see a basements entrance locked with a mithril padlock. Blow it up with Berserker's bombs and go down.

This time you will have to use Frodo's elven cloak. Turn into a chest and head straight, left and up again. There will be a step here - wait for the light to stop pointing at you, press (K) to take off the cloak and jump up.
The watchtower blocking your path can be burned down - just pull the hook with the rope, build a bonfire and light it. Now you have to head to the lower left corner of the room to find a key.
Your target is in the upper-right corner of the location. You will have to destroy one more watchtower to create a path to the chest. Use the key on it and pick up the Minikit.
Needed: axe, spade, acrobatics
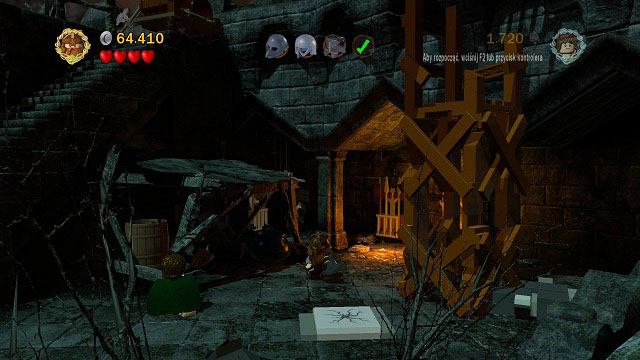
In the right side of the location, behind and Orc throwing barrels you will find a cracked tile. Destroy it with Gimli's axe and place a plant there. Jump onto the palm with Legolas and jump off it towards the rope on the left.
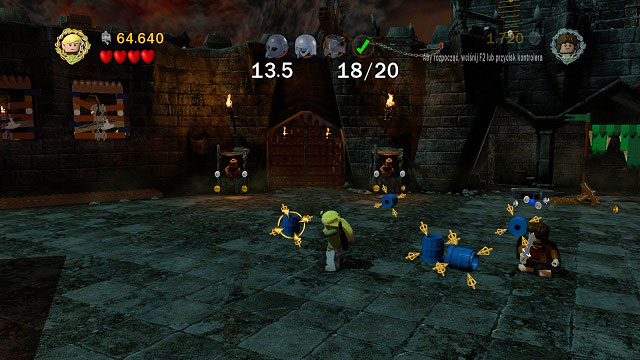
Now you will have to destroy 20 barrels in the designated time (I recommend using Legolas) to obtain the Minikit.
Needed: sword, acrobatics
Above the Orc controlling the gate, in the location where you assemble the hammer, there are two LEGO Morgul bricks. Destroy them with the sword and build a ballista from their remains.
Shoot it, jump onto the rope with Legolas and cross it to the very end. There, jump onto the ledge and pick up the Minikit.
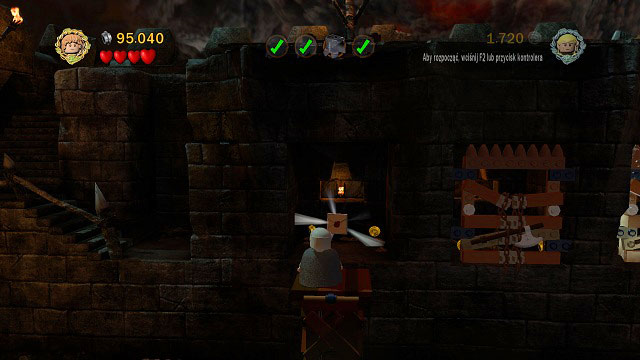
As you're pulling the pillar; the Design is behind the left boarded window.
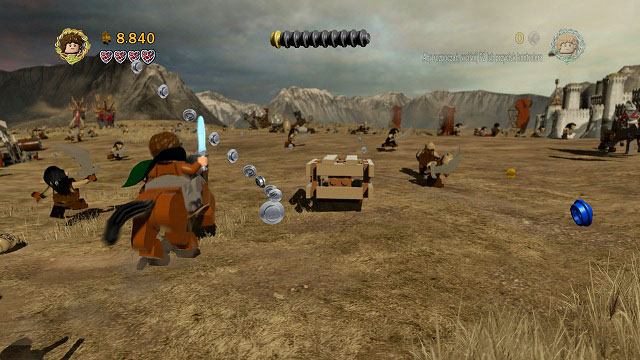
You have to destroy three chests during the horse charge to receive the Minikit. At the beginning of the level, immediately move your character maximally to the right and quickly to the left after destroying the first one (the second chest will be there).
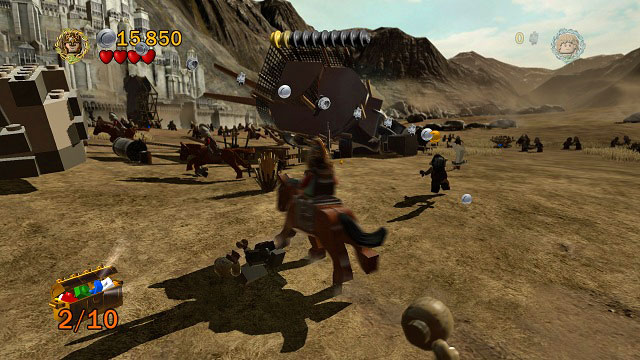
Afterwards stay in the middle - as you head through the ramp with Minikit #2, keep staying in the middle and you should hit the third and last chest soon enough. This fragment is rather hard, but luckily it can be easily repeated by heading back to Middle-earth.
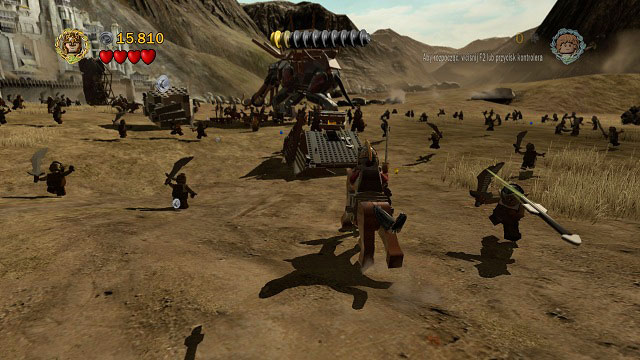
During the charge, when the Mumakil appear, after passing by a group of four of them you should see a ramp in the middle of the road - ride across it to collect the Minikit.
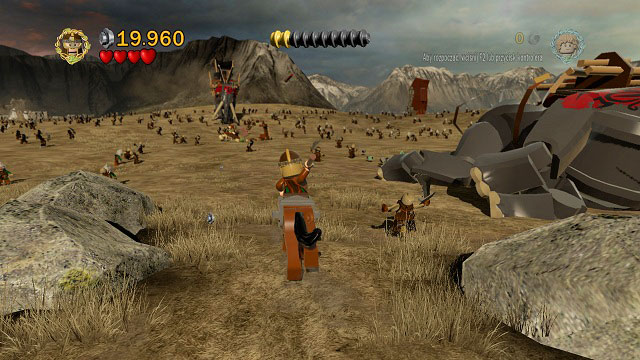
During the charge, from the moment you see a falling Mumakil, you have to keep throwing spears - the third Minikit is in a chest at the very end and should automatically fall into your hands.
Needed: bow
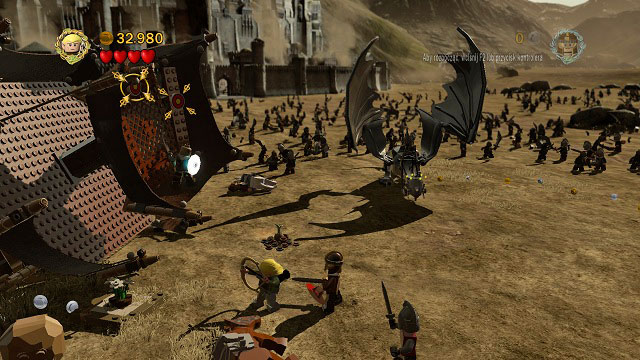
As you're fighting the Nazgul on a beast, you need to hit a couple targets high above the left side of the arena. An Orc will join the fight, after defeating whom you will be able to pick up the treasure. To be able to choose any character you want, you first need to change to someone else than Eowyn or Merry. Only afterwards by holding down (U) you will gain access to the full range.
During the fight with the Nazgul on a beast. Move towards the camera and you should see a brown horse on the ground. You need to destroy the local objects (including the beam in the very corner of the location), build a lever from them and stand on its end with two characters to lift the animal and receive the Minikit.
Needed: axe
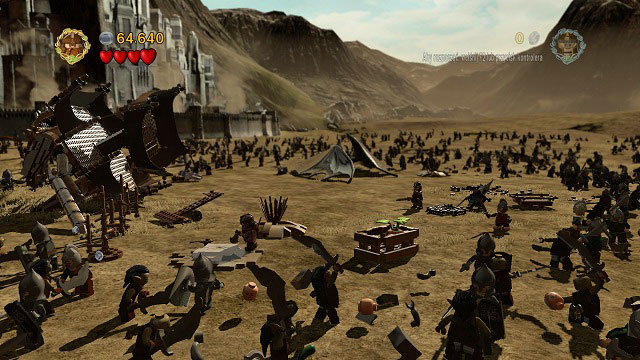
As you're fighting the Witch-King; move towards the camera and on the left side of the arena you will find a cracked LEGO brick. Destroy it with Gimli's axe and pick up the chest.
Needed: spade, strength
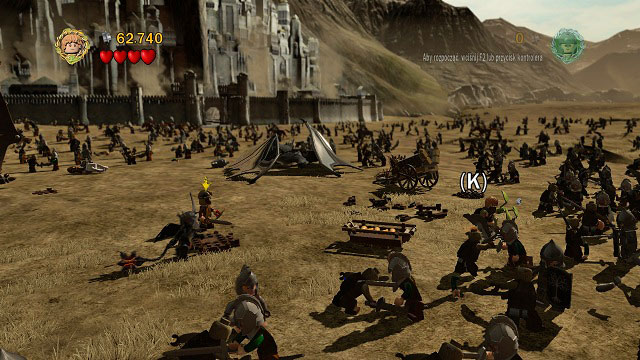
As you're fighting the Witch-King; on the arena, there are two places where you can place a plant (on the left and right side of the location).
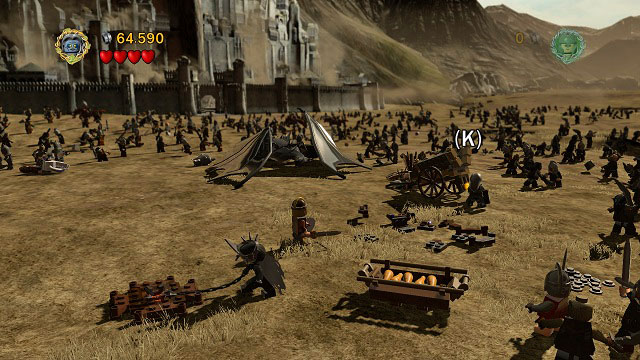
They will give you green and red herbs - you need to combine them into a first-aid kit, head to the right side of the arena, dig up bricks and create an orange handle. Switch to Shagrat, pull the handle and give the first-aid kit to the wounded soldier.
Needed: spade, light fire
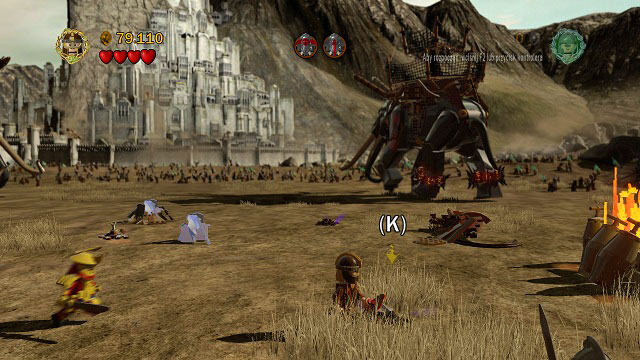
During the fight with the Mumakil; on the ground you will find two points with a purple glimmer. One of them is a broken spear which you have to pick up and the second is loose ground. Dig it up and combine the obtained material with the first item. Afterwards light a fire by the nearby bonfire place and give the crutches to the soldier.
Needed: spade
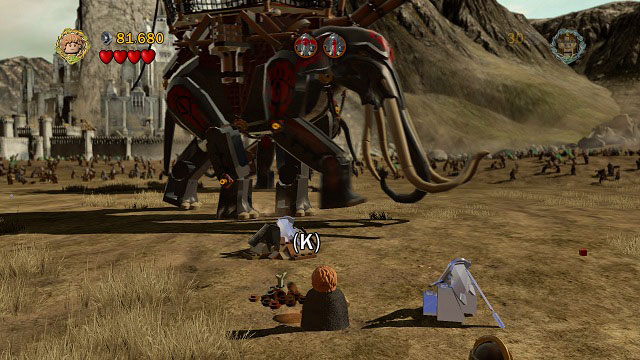
During the fight with the Mumakil; between two mithril bricks you will find a place to put a plant. Plant it and pick up the treasure.
Needed: axe
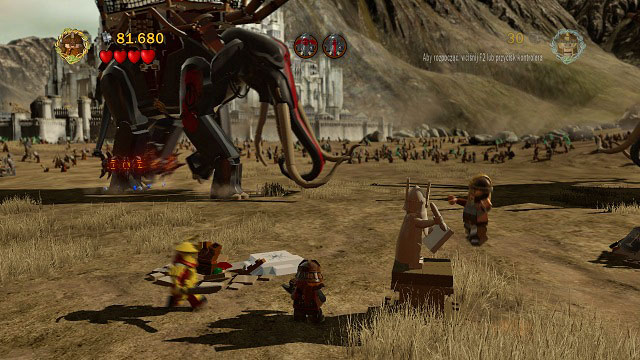
To the left of the save point there is a cracked LEGO brick. Destroy it with Gimli's axe and collect another Minikit.
Needed: bomb, Pippin's bucket
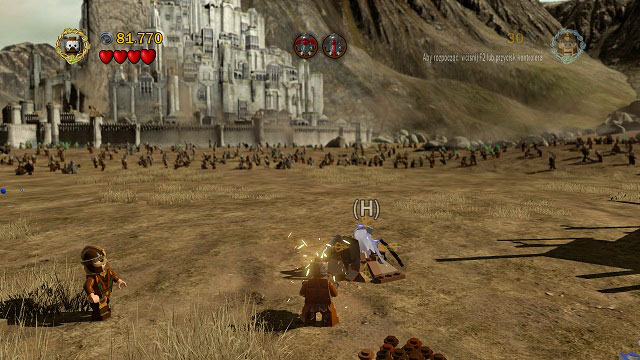
To the right of the save point you will find two mithril bricks. Destroy the higher one, switch to Pippin and fill his bucket with water. Afterwards head to the right and extinguish the fire.
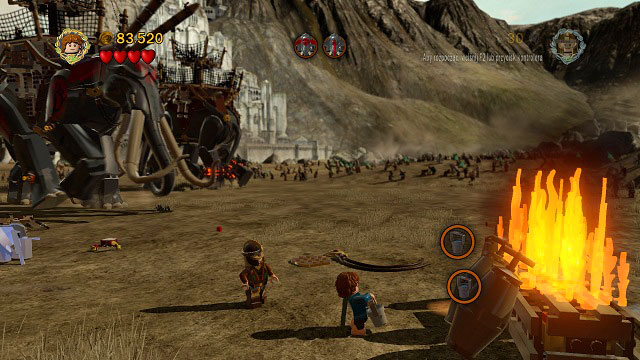
You will have to go get water once again in order to suppress the fire completely. Now just break the crates and pick up the Minikit.
Needed: Pippin's bucket
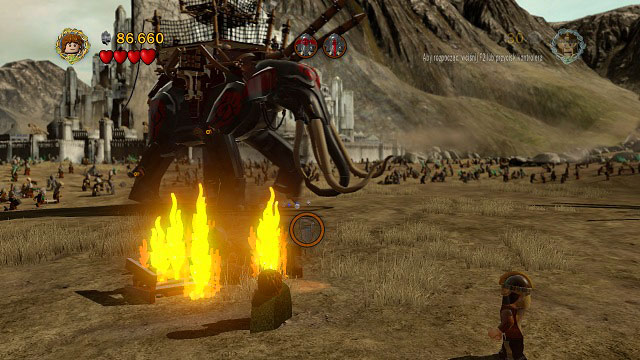
Once again fill up the bucket with water from the pond (unlocked during Minikit #9) and head to the left. There you will find yet another fire - extinguish it to get the reward.
Needed: Pippin's bucket
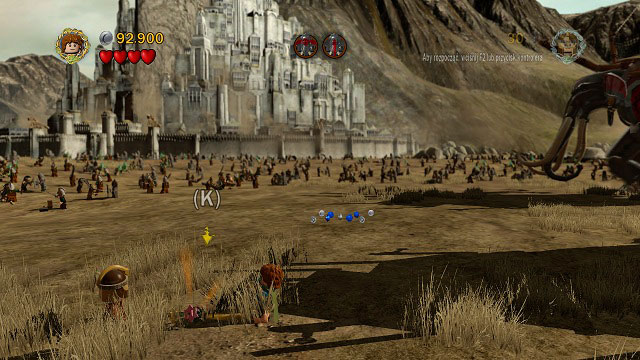
You can collect the treasure together with Minikit #10. Head back a bit and pick it up from the ground.
Needed: bomb
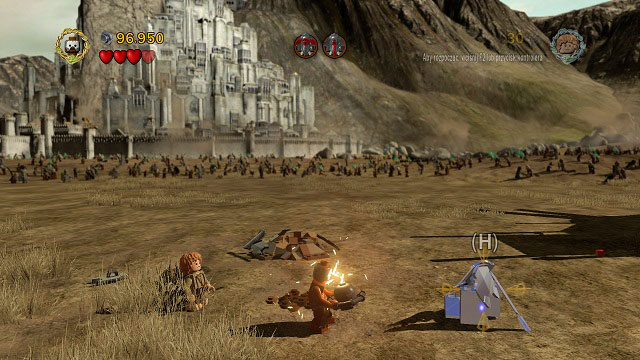
In order to obtain the Design, you have to blow up the mithril brick (to the left of the save point) with Berserker's bombs.
Needed: bow
In the background of the arena you will find 5 towers with Orc archers - you need to hit them all to receive the Minikit.
Needed: climbing
When the fight moves to the left of the gate you will see a climbable wall, at the top of which there's a chest. Just switch to Gollum and pick it up.
Needed: strength
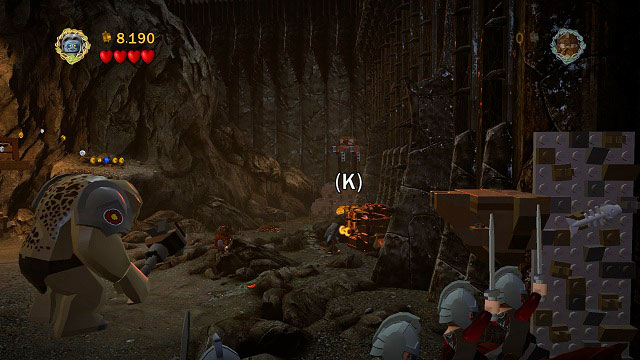
When the fight moves to the left, just pull the orange handle with Shagrat and the chest will be yours.
Needed: rope
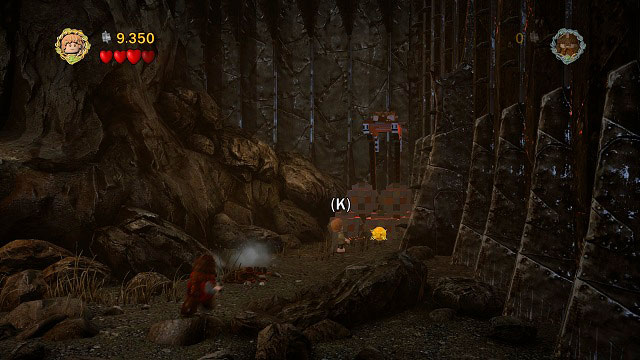
In the same location as Minikit #3, you need to head north to find a hook attached to boulders.
Use the rope on it to unlock a passage - head to the left and search for the Design (it's in the area showed in the above screenshot).
Needed: rope, light fire, spade
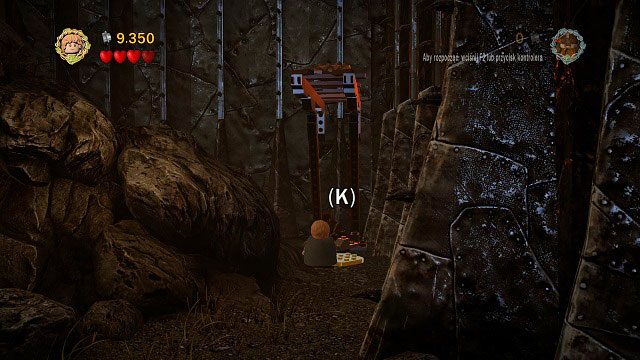
It can be found in the same place as the Design. Get the boulders out of the way with the rope, light a fire and the chest will fall down.
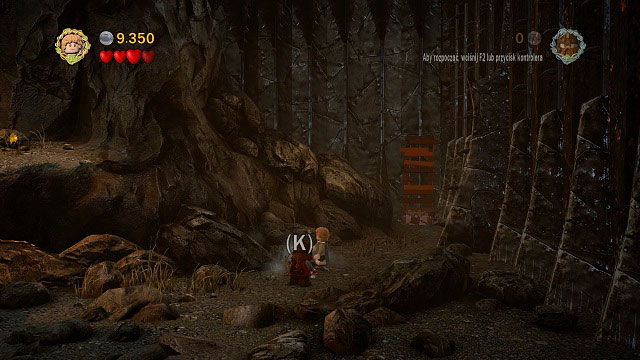
The key to the chest can be found a bit further to the south, buried in the ground.
Needed: rope
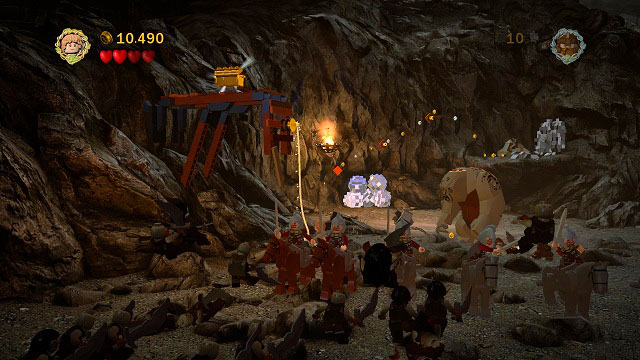
When the fight once again move to the left of the gate, you will have to head to the very edge of the arena and use the rope on the hook there. Afterwards jump up once and collect the chest.
Needed: spade
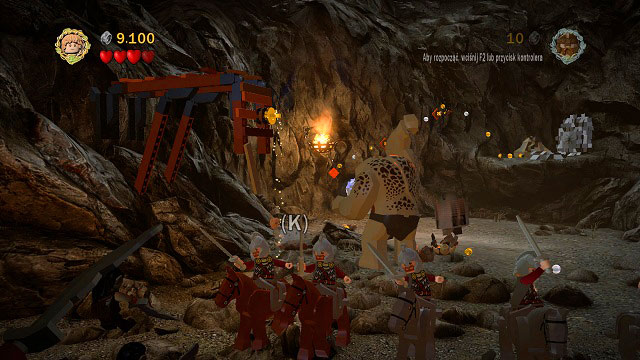
Right beside the place where you attached the rope while collecting Minikit #4, there is some loose ground - dig it up and pick up the chest.
Needed: bomb
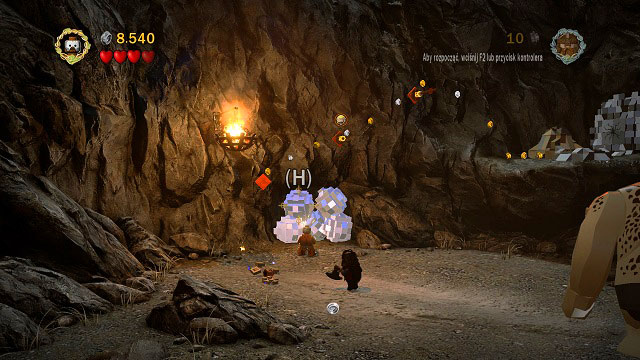
During the second battle to the left of the gate, in the distance you should see mithril boulders. Blow them up with Berserker's bombs and head into the cave.
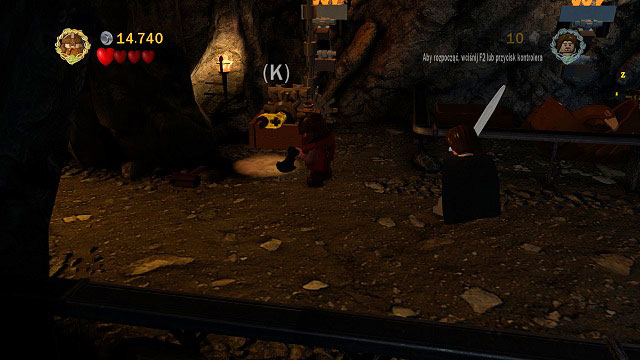
Inside, destroy all the chests and barrels on the left side of the cave and use the crank. Pick up the Minikit.
Needed: sword
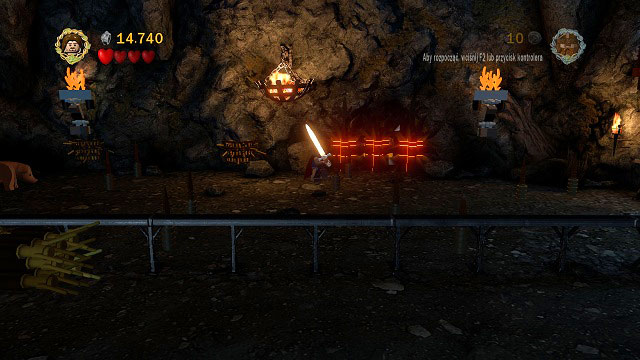
In the same location as Minikit #5; just destroy all LEGO Morgul bricks to open the path to the chest.
Needed: bow
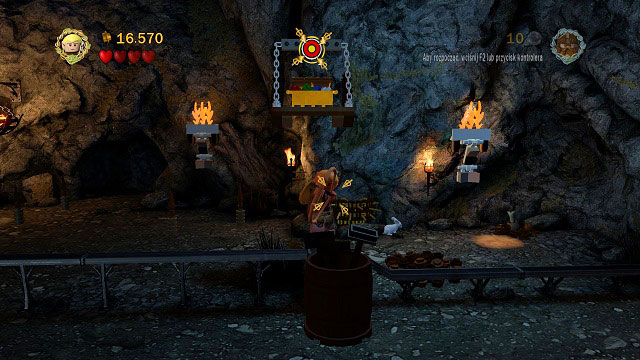
In the same location as Minikit #5; you need to shoot the target above you.
Needed: strength
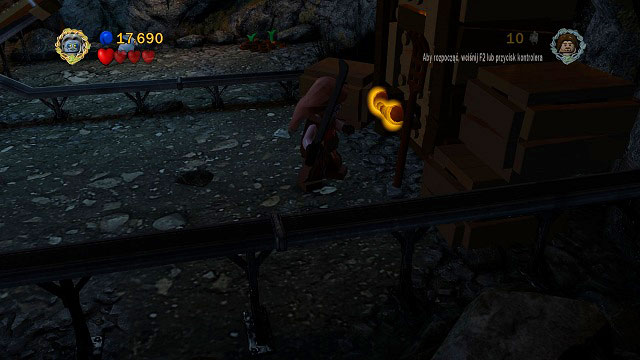
In the same location as Minikit #5; pull the orange handle with Shagrat and pick up the treasure.
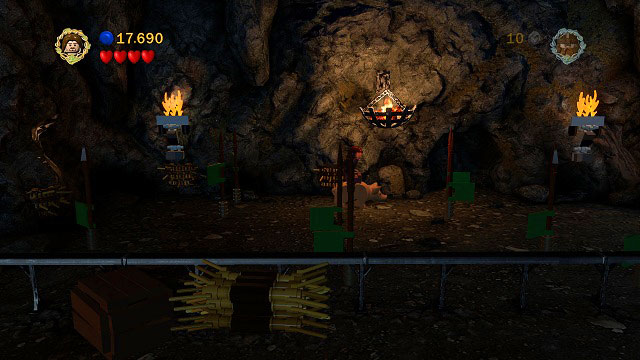
In the same location as Minikit #5; jump onto the pig and ride it through all the gates.
Needed: spade
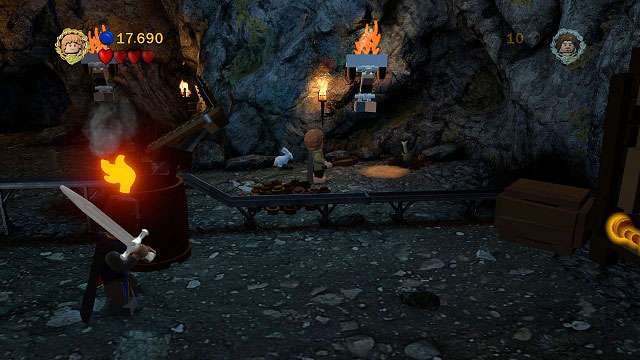
In the same location as Minikit #5; on the right side of the location you need to place a plant and wait for the rabbit to dig up the chest.
Needed: acrobatics, axe
During the second fight to the left of the gate you have to get onto the rock ledge with Legolas, change to Gimli and break the cracked tile with Gimli. The last Minikit will be yours.
Needed: bomb
Right after crossing the first ramp you will see a pile of boulders with a skeleton hanging from them. Destroy the outer layer to unveil a mithril boulder, change to Berserker and blow it up. now just pick up the Minikit.
Needed: fishing
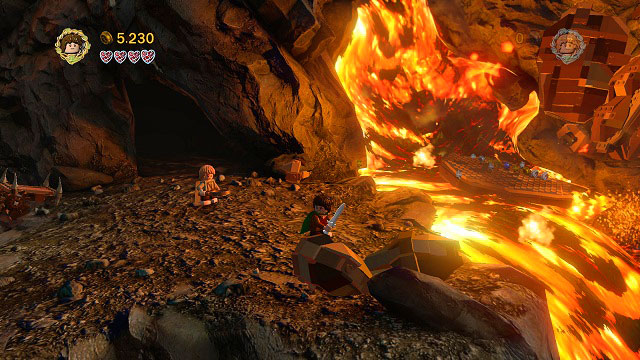
Right before the first lake of fire; destroy the nearby boulders and build a platform from its remains. Afterwards fish up the treasure from the lave.
Needed: rope, climbing, acrobatics
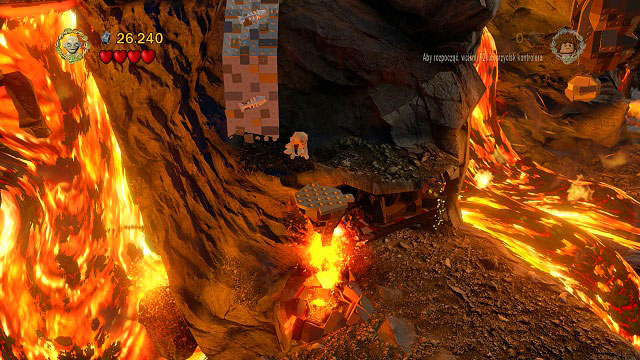
Beside the first "elevator", head onto the rock ledge using the rope, change to Gollum and climb up the wall. There, grab onto the rail and head left towards the river of lava.
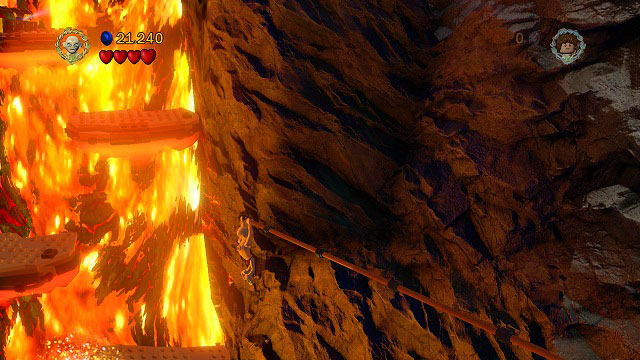
In the upper left corner of the screen you should see a chest - your target.
The tricky part begins here. You need to jump onto the falling rock, change to Legolas and jump between the rocks fast enough to reach the Minikit in the upper-left corner of the location. You should make it after a couple attempts.
Needed: spade
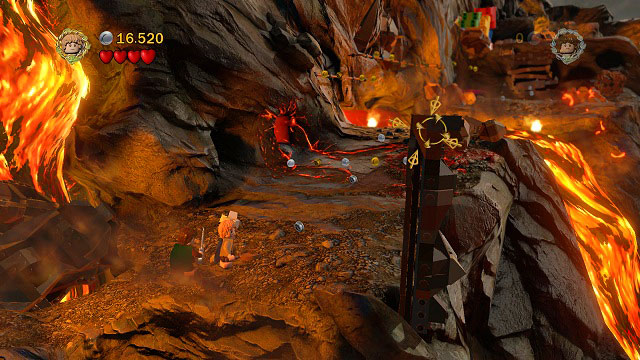
After stopping the river of lave, dig up another stone from the loose ground beneath you and throw it at the pillar on the right. Now just cross it and pick up the chest.
Needed: axe
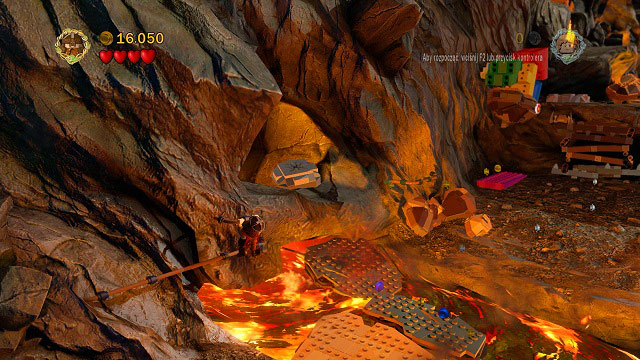
In the place where the rocks are falling down, as you're crossing the river of fire while holding onto the rail, you will see a cracked LEGO tile. Just destroy it with Gimli's axe to receive a Minikit.
Needed: bow, magic
After crossing the river of fire where you found Minikit #4, you will find a few colorful bricks above you. Shoot the target and use Gandalf's spells to build stairs which you can climb to the treasure.
Needed: Pippin's bucket
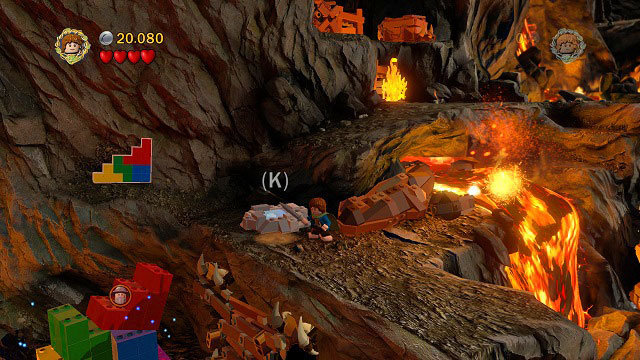
After obtaining Minikit #5, fill up the bucket in the nearby pond and extinguish the fire. Now enter the unveiled narrow tunnel and destroy the chest on the rock ledge.
Needed: strength, spade
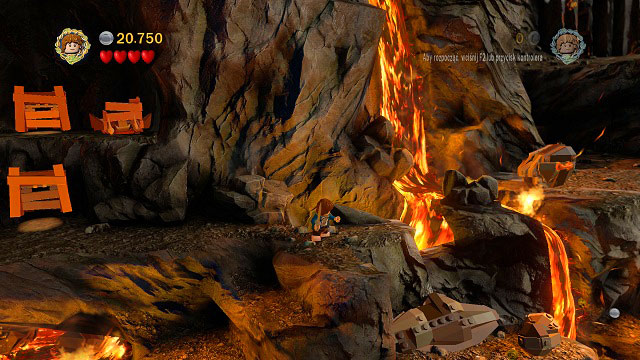
The rock with the orange handle is visible far on the right side.
From the place where you obtained Minikit #6 you need to head to the right. Jump over two precipice and you will reach a stone with an orange handle. Pull it with Shagrat and dig up the ground with the spade. Pick up the treasure.
Needed: bow
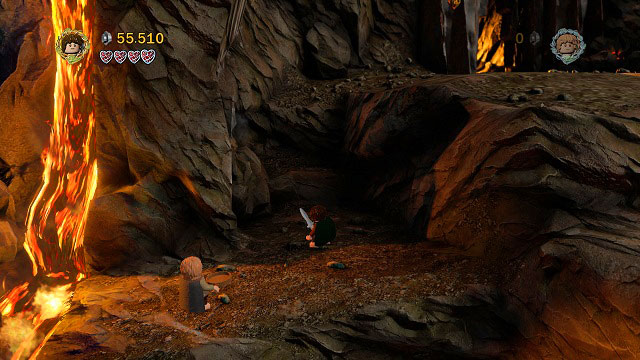
From the place where you found the treasure, head further to the right and north - climb up the rock ledges (start with the lower one, jump to the left to the one with a stream of steam and from there to the very top) towards the door to Mount Doom.
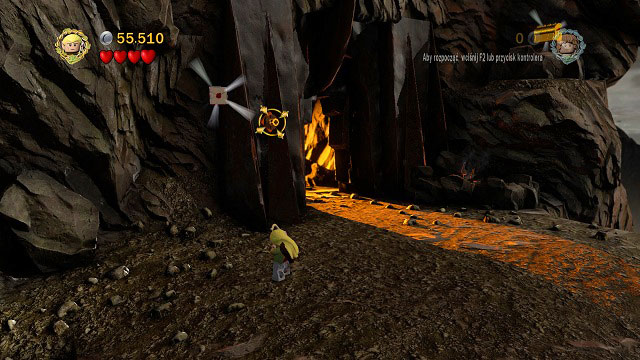
Beside the gate you will find a target for Legolas - shoot it with his bow and jump to the Design using the therefore created bar.
Needed: sword
To the right of the Design you will find a small LEGO Morgul brick. Destroy it and use the platform to get onto the rock ledge to pick up the chest.
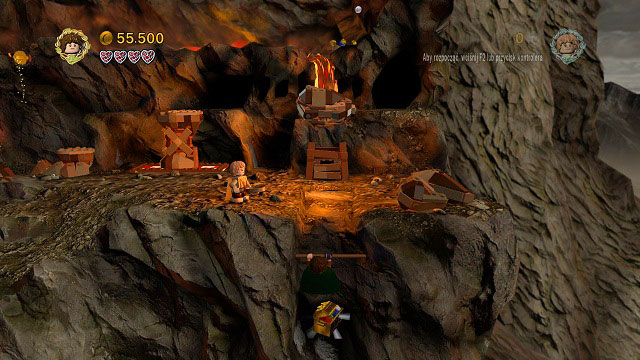
After blocking the lava flow, right before the first fight with Gollum (to the south of the door to Mount Doom); just enter the river-bed and approach the camera. Jump down the grab the Minikit.
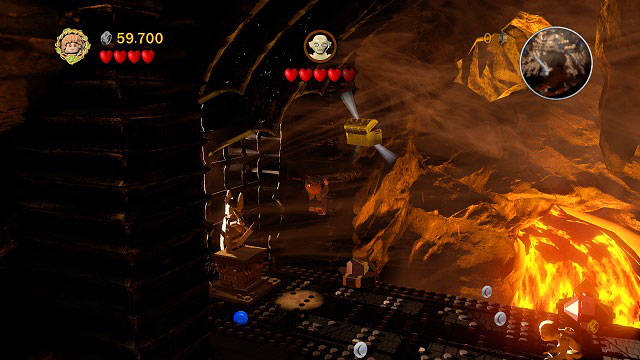
Inside Mount Doom; jump onto the rail behind you and grab the chest.
Needed: Mithril Boxing Gloves or Calcium Armor
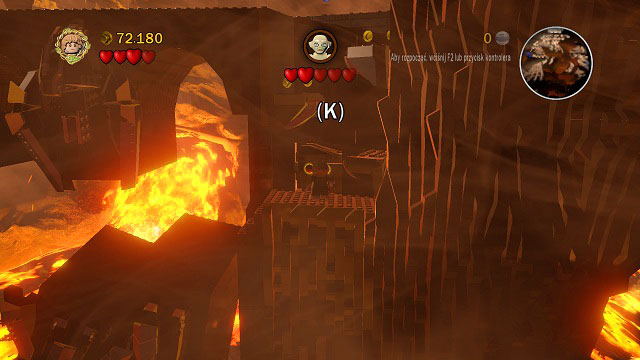
Inside Mount Doom; when Gollum throws you down for the second time, throw the rope onto the hook you will find an orange handle. As you can't change characters in this location, you need to use one of the items mentioned above. Equip one of them, pull the handle and pick up the treasure.
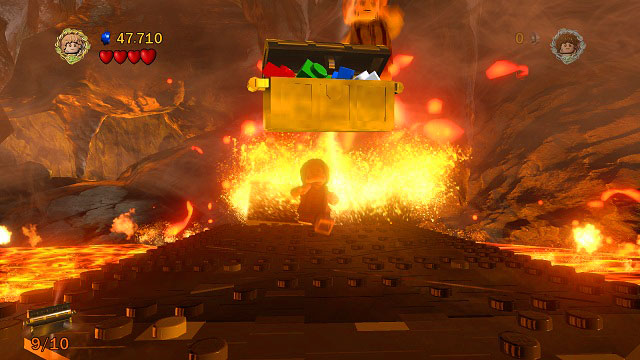
As you're escaping Mount Doom, just place yourself in the middle of the road and keep jumping to automatically pick up the chest. It's inside the cave, so if you happen to miss it, press ESC and return to Middle-earth (there choose to leave the level). Afterwards choose Free Play in Mount Doom once again. That way you won't have to repeat the whole level from the beginning, which will let you focus on grabbing the treasure.
This chapter contains a description of all the treasures and characters which you can obtain throughout Middle-earth. Each map shows collectibles unveiled by each Map Stone, while the additional descriptions of given points will make the gameplay easier.
The colour of give points depends on the type of collectible:
The list of items or skills required to obtain given treasures is identical as during the story missions, so you can use it in this case as well. By default, the exploration is done during daytime. If a given item can be obtained only during the night, a proper comment will be included in the text. In order to switch between day and night, just choose the proper Map Stone and mark the desired option.
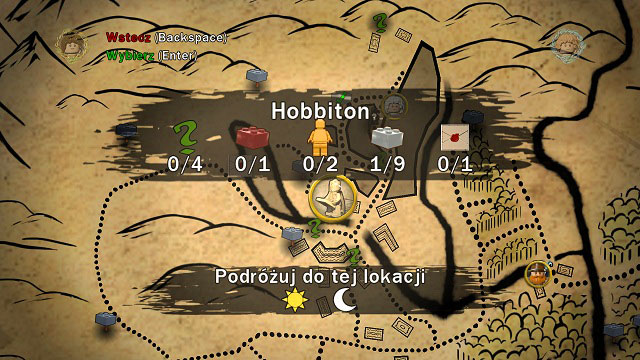
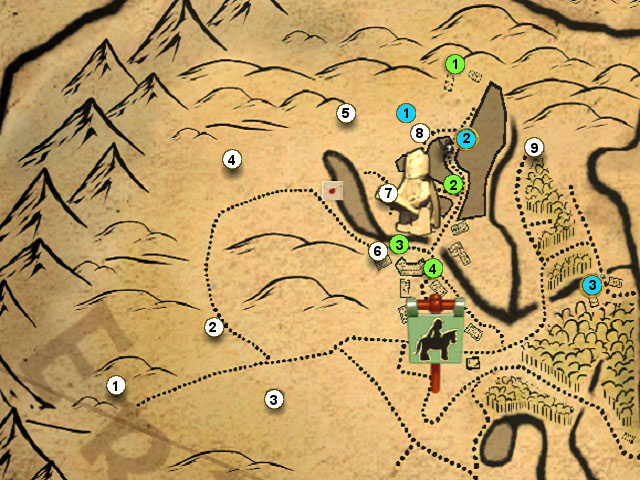
Bag End. Inside the building there's a creator which let you combine various pieces in order to create your own, unique characters.
Needed: fishing
Just stand on the bridge and fish it up.
#1
Needed: sword
Break the LEGO Morgul padlock and afterwards hit the chest.
#2
Needed: NIGHT, light fire
Light a fire.
#3
Get on the pig and ride through the gates.
#4
Needed: bow
Stand on the platform and shoot the appearing targets.
#5
Needed: axe
Break the cracked brick.
#6
Needed: bow, acrobatics
You need to head south of the LEGO brick visible on the map. Go around the houses and you should find a few platforms with targets on top of them. Hit both of them, jump up along the bars and follow the ropes to the Mithril LEGO brick.
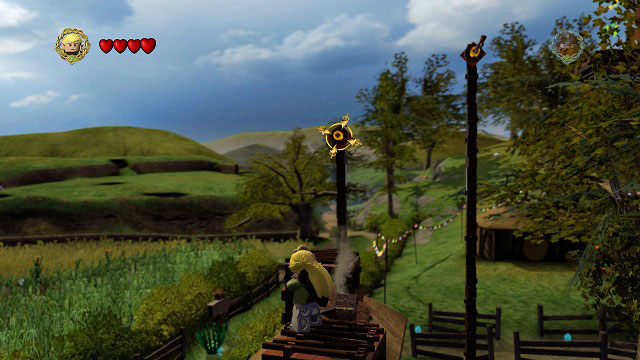
#7
Needed: NIGHT, light fire
Launch the gathered fireworks.
#8
Needed: spade
You need to place a plant.
#9
You need to hit 10 moles in the given amount of time.
#1
Rosie, 20000 studs
She usually walks along the road south of her icon on the map.
#2
Bilbo Baggins (Old), 125000 studs
In Bag End.
#3
Tom Bombadil, 125000 studs
Between the houses east of Hobbiton.
#1
Needed: sword, Mithril Rope (Design: Amon Hen)
Prize: Red LEGO Brick (Poo studs), 25000 studs
Break the LEGO Morgul padlock with Aragorn's sword and ask the blacksmith in Bree to forge a mithril rope for you. Bring it back here.
#2
Needed: bomb, Golden Carrot (Battle of Pelennor Fields)
Prize: Mithril LEGO brick
Blow up the mithril padlock and return the item.
#3
Needed: rope, Stop Wand (Amon Hen)
Prize: Mithril LEGO brick
Open the yellow door with the rope and give back the item.
#4
Needed: bow, House Key (The Mines of Moria)
Prize: Mithril LEGO brick
Shoot the target with the bow and give back the item to the owner.
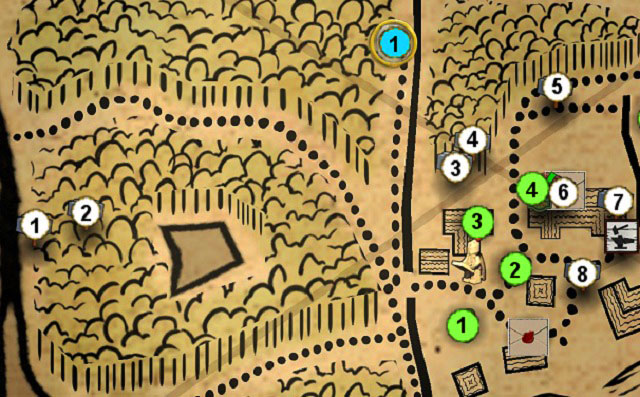
The blacksmith. Here you can use Mithril LEGO bricks to forge equipment for your characters.
Needed: sword
In the southern part of Bree. You need to destroy a LEGO Morgul padlock and find the Design inside the building.
Needed: sword
Beside the entrance to Prancing Pony. You need to destroy a LEGO Morgul padlock; the Design is inside the building.
#1
Push the small pillar to the designated spot and jump along the new bricks to the very top. Hit the chest and pick up the Mithril LEGO brick.
#2
Needed: axe, fishing, sword
You need to find a cracked LEGO tile beside the lake. Break it with the axe and fish from the bridge. Pick up the fished up key and jump along the pole towards the cave. There, open the door with the key and head inside. Destroy the LEGO Morgul brick and pick up the Mithril LEGO brick.
#3
Needed: acrobatics
Jump off the leaves and grab the rail. Move further up until you reach the roof. There continue along the lines and platforms until you reach a Mithril LEGO brick.
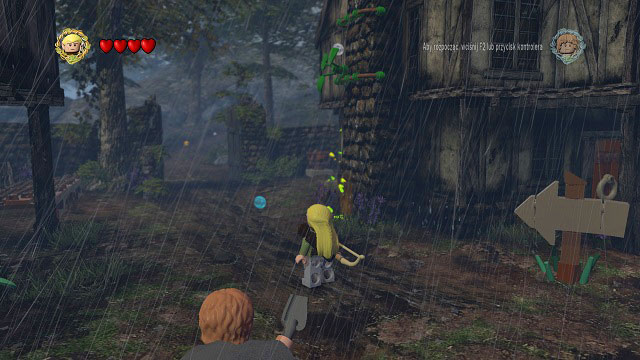
#4
Needed: bow
Hit all the targets with your bow.
#5
Needed: spade
Dig up three sets of bones and build three skeletons.
#6
Needed: small character
In the wall of the Prancing Pony, from the side of the gate you will find a narrow tunnel. Head inside and pick up the Mithril LEGO brick.
#7
Needed: bow
On the front wall of the Prancing Pony there are three arrow holes. Shoot them with the bow and jump along the bars to the Mithril LEGO brick.
#8
Turn the crank by the stove.
#1
Radagast the Brown, 500000 studs
#1
Needed: bomb, Mithril Boxing Gloves (Design: Osgiliath)
Prize: Red LEGO Brick (Mithril Brick Finder), 75000 studs
Blow up the Mithril padlock, forge the item at the blacksmith and return it to the quest giver.
#2
Needed: Soup Pot (The Black Rider)
Prize: Mithril LEGO brick
Give back the item to the owner.
#3
Needed: rope, Fancy umbrella (Dead Marshes)
Prize: Mithril LEGO brick
Give back the item to its owner.
#4
Needed: Mithril Trowel (Design: Bree, at the blacksmith)
Prize: Red LEGO Brick (Quest Finder), 50000 studs
It's one of the story missions.
#5
NOTICE! This point can be found at the map of Weathertop (Quest #3) and was described there as well, even though the quest and red brick classify within the Bree region.
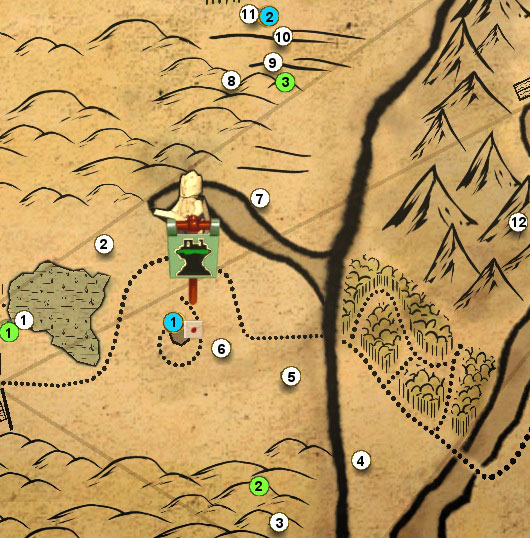
The barrows. It can be found in the northern part of the map (bricks #8-11, quest #3, character #2); in order to get inside, you will have to use Shagrat to pull the orange handle nearby brick #7.
It can be found by the hill; just destroy the stones blocking access to the cave.
#1
You need to climb onto the tree along the handles attached to it and afterwards jump between the lianas.
#2
Needed: spade
The chest containing the brick can be found in the cave behind a couple stones. The key can be dug up on the nearby marshes.
#3
Needed: bomb, rope, bow, axe
In order to reach the area with the brick you have to use the Berserker's bombs and gain access to the cave. Inside, use the rope on the hook and shoot the target form the bow. Jump on the pillar in the middle of the lake with Gimli an break the tile. On the other shore, place arrows in the proper places with Legolas, jump along the bars onto the liana and from there to the brick.
#4
Needed: Phial, Mithril Bottomless Bucket (Design: Edoras)
The Mithril Bottomless Bucket will let you extinguish the fire with ease. Afterwards just use the Phial of Galadriel and pick up the Mithril LEGO brick.
#5
Needed: fishing
In order to reach this brick, Merry has to fish up a crank in the nearby river (in the north).
#6
In the cave in which you obtained the Design there is a goat. Get on it, cross the red gate and head on a race around the Weathertop.
#7
Needed: spade, axe
Throw Gimli at the cracked brick high above you and place a plant in the designated place. Jump off the leaf and grab the LEGO brick.
#8
Inside the barrows. In the first room, you should see rails on the walls. Jump higher along them, grab onto the liana and towards the LEGO brick.
#9
Needed: spade
Inside the barrows. In the room with the scorpions there's a place where you can place a plant. Bounce off the leaf, grab onto the liana and jump to the rail on the wall. From there head onto the platform and to the chain. The brick is right beside.
#10
Needed: NIGHT
Inside the barrows. You need to defeat 10 scorpions in the designated time.
#11
Needed: bomb
Inside the barrows. In one of the cells you will find a chest with a mithril padlock. Blow it up and pick up the LEGO brick.
#12
Needed: spade
The brick can be found inside the cave nearby a few campfires and places to dig. Head a bit to the left towards the camera.
#1
Needed: NIGHT
Ringwraith, 200000 studs
#2
Ringwraith (Twilight), 200000 studs
#1
Needed: Mushroom crown (The Black Rider)
Prize: Mithril LEGO brick
Can be gained in a cave outside of Bree. Return the item to its owner.
#2
Needed: bomb, Mithril Ice Bow (Design: Cirith Ungol)
Prize: Red LEGO Brick (Regenerate Hearts), 100000 studs
In order to receive this mission, you will have to use Berserker's bombs and unlock the cave entrance. The needed item can be forged at the blacksmith in Bree.
#3
NOTICE! This is one of the series of quests from the area of Bree.
Needed: Mithril Stud Mallet (Design: Dead Marshes)
Prize: Red LEGO Brick (Minikit Detector), 50000 studs
The needed item can be forged at the blacksmith in Bree.
Needed: magic
As Gandalf, assemble "stairs" which will let you get above the gate, head to the left and jump down between the pillars standing by the passage.
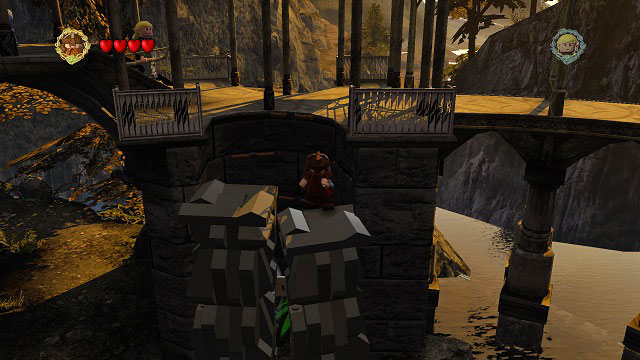
#1
Needed: axe, bow
Throw Gimli at the cracked brick at the top of the tower and shoot the target with a bow. Jump along the platforms and collect the brick.
#2
Needed: bow, acrobatics, small character
In order to get to this LEGO brick, you will have to firstly shoot down all the stones on the steep wall and afterwards shoot arrows in all the unlocked holes. You can hit the top holes only after standing on the pillars in the water. Destroy the stone and head inside the narrow tunnel.
In order to obtain the LEGO brick, you will have to destroy six statues with lutes in the designated time.
#3
Needed: bucket, small character, rope
Firstly extinguish the fire on the head of the statue on the left and take out the crank from the chest. Use it on the machine and head across the narrow tunnel beneath the statue on the right. There, attach the rope to the hook and open the middle chest to pick up the LEGO brick.
#4
Needed: axe, bow
At the bottom of the hill, Gimli should break the cracked tile; halfway through, Legolas has to shoot the targets to create a bridge. Break the chest and take out the LEGO brick.
#5
Needed: sword
Break the LEGO Morgul padlock and pick up the mithril brick.
#6
Needed: rope, acrobatics
Attach the rope to the hook, pull yourself up and enter the tower. Switch to Legolas and move along the platform, in the end jumping between the bars to reach the LEGO brick.
#7
Needed: climbing, spade, axe
Head inside the cave hidden behind the waterfall and up the ramp. Use Gollum's skills, afterwards the spade, head outside and jump off the leaf. Break the tile with Gimli and pick up the LEGO brick.
#8
Needed: bow, climbing, acrobatics
In the cave hidden behind the waterfall; create a handle with Legolas by shooting at the target and afterwards climb the wall with Gollum. Form the wall, get onto the rope and the rock ledge. Change to Legolas, return onto the rope and head to the end - from there, jump between the bars onto the liana, swing and grab the LEGO brick.
#1
Bilbo Baggins, 125000 studs
#2
Needed: NIGHT, magic
Elrond (Second Age), 200000 studs
The character can be found on the gate; you can get there just like for the Design.
#3
Elrond (Second Age), 200000 studs
In order to reach it, you have to follow exactly the same steps as with the mithril brick #2.
#4
Needed: bomb
Gloin, 25000
This character can be found behind the wall of mithril bricks. Blow it up with Berserker's bombs.
#1
Needed: magic, Luminous Stone (Pass of Caradhras)
Prize: Mithril LEGO brick
In order to reach the quest giver, you will have to use Gandalf to create stairs letting you get above the gate. Now just return the item.
#2
Needed: Quill (Weathertop)
Prize: Mithril LEGO brick
In order to reach the quest giver, you have to clear the tile, push the small pillar to the narrow tunnel and use the passage.
#3
Needed: Mithril Gloves (Pass of Caradhras)
Prize: Red LEGO Brick (Studs x2), 250000 studs
You can reach the quest giver by jumping between a couple platforms on the water and moving along a rail.
#1
Needed: strength, bow, acrobatics
Enter the ruins by using Shagrat's strength, shoot the arrow holes at its end and jump along the bars to the Mithril LEGO brick.
#2
Needed: strength, rope
Enter the ruins by using Shagrat's strength. Attach the rope to the hook, climb up and head towards the brick using the rails.
#3
Needed: sword
Break the LEGO Morgul padlock.
#4
Needed: rope, bow, axe
Use the rope and bow to get to the other side of the lake along the platforms. There, use Gimli's axe to break a cracked tile.
#5
Needed: sword, Phial
Approach from the location of Mithril brick #4. After reaching the destination, break the LEGO Morgul with your sword and illuminate the cave.
#6
Needed: bomb
Blow up the mithril grate.
#7
Grab the wheel and control the miniature ship. Your task is destroying all enemy units by using your cannons.
#8
Needed: acrobatics, sword
Beside the entrance to Moria; cross the line to the other side of the lake and destroy the LEGO Morgul brick there.
#1
Moria Orc, 25000 studs
#1
Needed: strength, Beard Comb (Cirith Ungol)
Prize: Mithril LEGO brick
Just open the gate to the ruins with Shagrat.
#2
Needed: strength, Magma Rock (Mount Doom)
Prize: Mithril LEGO brick
Open the door with Shagrat strength and return the item.
#3
Needed: bomb, Mithril Music Horn (Design: The Black Rider)
Prize: Red LEGO Brick (Boss Disguises), 100 000 studs
Open the cell with explosives. You can forge the item at the blacksmith in Bree.
#4
Needed: fishing, Sun Hat (Weathertop)
Prize: Mithril LEGO brick
The crank needed to open the cell can be fished up from the bridge nearby Mithril LEGO brick #7. Just return the item to its owner.
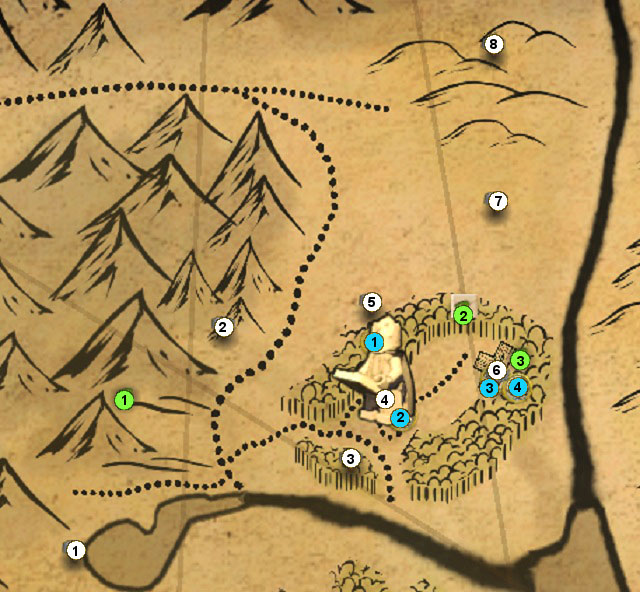
Needed: strength
Open the cellar with Shagrat. The Design can be found in the chest behind the Elf.
#1
Needed: bow, acrobatics
Alternate between creating handles with the bow and jumping between platforms to eventually reach the chest with the brick inside.
#2
Needed: climbing, axe
To the left of the symbol on the map you will find a small tower with a climbable wall. Climb it with Gollum, cross the narrow tunnel, change to Gimli and destroy the cracked LEGO brick.
#3
Needed: Phial
The brick can be found in the dark niche.
#4
Needed: bow, acrobatics
The brick can be found directly above Haldir. In order to reach it, you will have to go round from the place where Galadriel and Celeborn are standing.
#5
You need to destroy 5 plants in the given amount of time.
#6
Needed: axe
Throw Gimli at the cracked tile and pick up the brick.
#7
Needed: spade
Place a plant and climb it to the rope. From there you're just a couple jumps away from the LEGO brick.
#8
Needed: bomb
Blow up the mithril padlock and pick up the brick.
#1
Lothlrien Elf, 25000 studs
#2
Haldir, 200000 studs
The Elf is above the gate.
#3
Galadriel, 200000 studs
#4
Celeborn, 200000 studs
#1
Needed: rope, Mithril Carrot Bow (Design: Taming Gollum)
Prize: Red LEGO Brick (Attract Studs), 100 000 studs
You can open the path to the quest giver with the rope. The item can be forged at the blacksmith in Bree.
#2
Needed: strength, Golden Axe (The Paths of the Dead)
Prize: Mithril LEGO brick
The path to the quest giver can be unlocked with Shagrat.
#3
Needed: Mithril Shockwave Axe (Design: Prologue)
Prize: Red LEGO Brick (Fall Rescue), 75 000 studs
You can forge the item at the blacksmith in Bree.
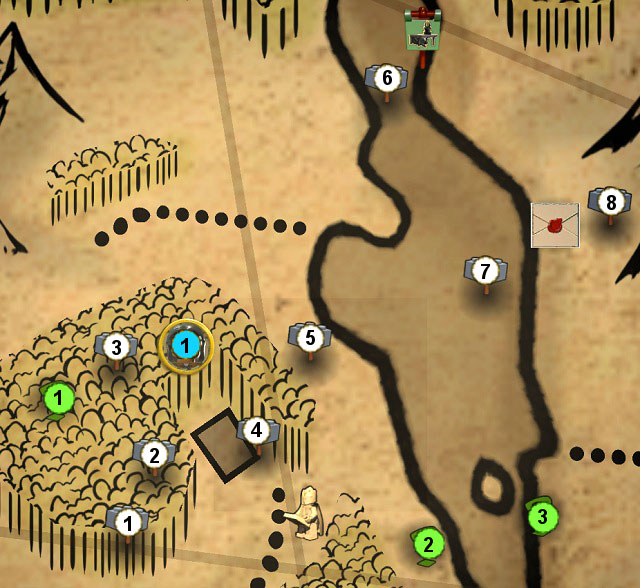
Needed: NIGHT
After crossing the river with the boat, just hit the Orc holding the Design.
#1
Needed: bomb, axe
Blow up the Mithril rocks with a bomb and break the cracked tile with an axe.
#2
Needed: fishing, axe, bow, bomb
Fish up the crank from the river and use it to open the nearby cave. Inside, shoot the targets, break the cracked tile and blow up the Mithril rocks. Afterwards push three pillar to their proper places.
#3
You need to hit 10 moles in the designated time.
#4
You need to destroy 7 statues in the designated time.
#5
Needed: bow
Shoot the targets above the grate and open the chest.
#6
Needed: climbing
Head up the river to find a climbing spot. Switch to Gollum, head to the rock ledge and use the narrow tunnel. On the other side, keep climbing up, shoot the ballista (jut hit it) and cross the line to the other side.
#7
Needed: bow
Shoot the three targets on the river and jump to the target along the platforms.
#8
Needed: NIGHT
In the corner of the camp you can find a small chest - the brick is inside.
#1
Lurtz, 200 000 studs
You need to defeat him first.
#1
Needed: Toy Snake (Dead Marshes)
Prize: Mithril LEGO brick
In order to open the cage, you have to hit the bell beside it.
#2
Needed: Mithril Fishing Rod (Design: Track Hobbits)
Prize: Red LEGO Brick (Studs x4), 1 000 000 studs
The item can be forged at the blacksmith in Bree.
#3
Needed: Feathered Cap (Helm's Deep)
Prize: Mithril LEGO brick
The quest giver is in the middle of the river; you can reach him by jumping between the platforms.
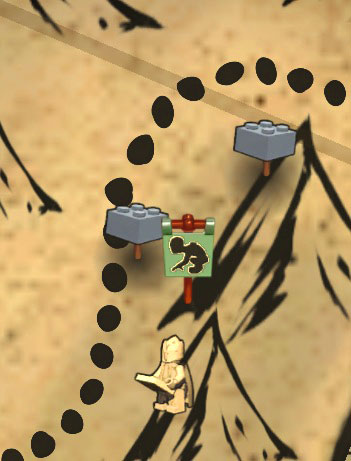
Even during the exploration of Middle-earth, Emyn Muil isn't impressive. The location is small and there are only two Mithril LEGO bricks here.
#1
Needed: rope
The brick can be found at the northern edge of the location; you need to use the rope on the hook to scatter the boulders in the area. The Mithril LEGO brick can be found beneath them - now just pick it up.
#2
Needed: Phial
The brick can be found in the south, nearby Taming Gollum; take out the Phial of Galadriel and enter the small, dark niche. The Mithril LEGO brick is inside.
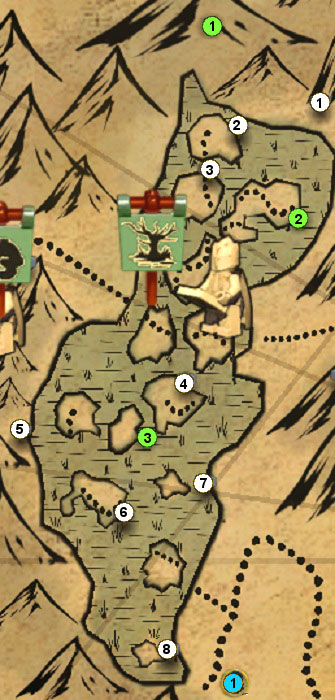
#1
You need to jump between the moving platforms.
#2
Needed: light fire
Light a fire.
#3
Needed: sword
Destroy the LEGO Morgul brick.
#4
Needed: NIGHT, sword
In the distance you will see three dancing ghosts. Defeat them all with Aragorn's sword.
#5
Jump between platforms towards the LEGO brick.
#6
Needed: Phial
The LEGO brick can be found in the dark niche.
#7
Needed: spade
Place a plant and wait for the flower to bloom.
#8
Destroy 7 plants in the designated time.
#1
Haradrim, 25 000 studs
You need to defeat him.
#1
Needed: climbing, Mithril Headdress (Design: Moria)
Prize: Red LEGO Brick (Mithril Hearts), 75 000 studs
The item can be forged at the blacksmith in Bree.
#2
Needed: Muddy Armor (The Secret Stairs)
Prize: Mithril LEGO brick
Just return the item to the quest giver.
#3
Needed: Skeleton Key (The Paths of the Dead)
Prize: Mithril LEGO brick
Just return the item to the quest giver.

The Fangorn Forest. It can be found in the northern part of the map and it contains one mission and two character to buy.
Needed: bomb
Blow up the mithril padlock blocking access to the room and pick up the Design.
#1
You need to destroy five piles of heads in the designated time.
#2
Needed: axe
Destroy the cracked brick.
#3
Needed: spade
You need to head onto a small farm south of the city entrance. Dig up the loose ground to obtain the crank.
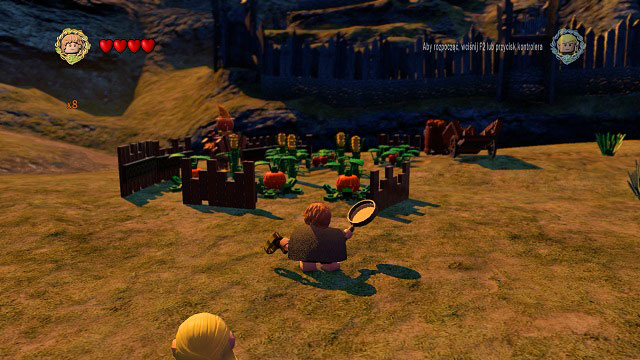
Afterwards head east of the entrance to Edoras and look for a stone tower. Head to its top, destroy the rocks and use the crank. You will receive a key with which you can head for the mithril brick.
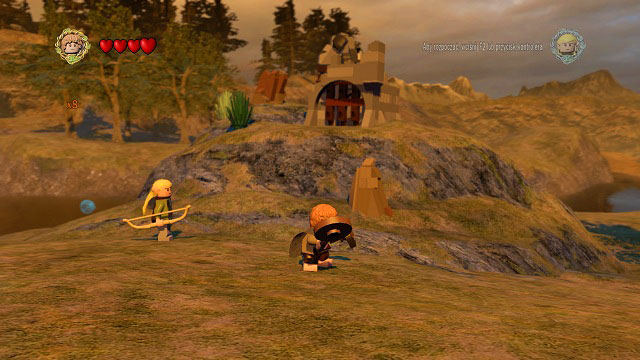
#4
Needed: light fire
Light up the wood blocking the passage and pick up the LEGO brick.
#5
Needed: bow, acrobatics
The LEGO brick can be found above King Theden's head.
#6
Needed: Phial
Illuminate the dark cellar and pick up the LEGO brick.
#7
Needed: NIGHT, sword
You need to defeat 15 undead soldiers in the designated time.
#8
Hit 7 moles in the designated time.
#1
Needed: NIGHT
Grishnakh, 125 000 studs
You need to defeat him.
#2
Gamling, 125000 studs
#3
Hma, 125000 studs
#4
King Theden (Cursed), 200000 studs
#5
owyn, 125000 studs
#6
Corsair, 25000 studs
#1
Needed: Chef's Hat (Cirith Ungol)
Prize: Mithril LEGO brick
Just return the item to the quest giver.
#2
Needed: rope, Bandages (Helm's Deep)
Prize: Mithril LEGO brick
Use the rope on the hook to get inside the watchtower. Just return the item to the quest giver.
#3
Needed: Mithril Bottomless Bucket, Mithril Cluster Bow (Design: Pass of Caradhras)
Prize: Red LEGO Brick (Disguises), 50 000 studs
In order to create a path for the quest giver, extinguish the fire in front of the building. The item can be forged at the blacksmith in Bree.
#4
Needed: spade, Ent Draught (Track Hobbits)
Prize: Mithril LEGO brick
You need to place three plants in front of the house for the quest giver to appear. Just give him back the item.
#5
Needed: Mithril Top Hat (Design: Battle of Pelennor Fields)
Prize: Red LEGO Brick (Studs x6), 4 000 000 studs
The item can be forged at the blacksmith in Bree.
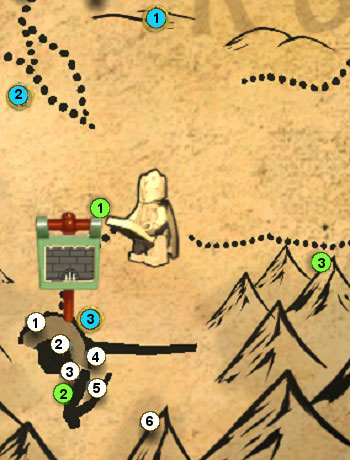
#1
Needed: sword
Visible from the Helm's Deep entrance. Destroy the Morgul brick with Aragorn's sword.
#2
You need to destroy 7 statues in the designated time.
#3
Needed: strength, small character
Open the door with the orange handle using Shagrat, push the pillar and head into the narrow tunnel.
#4
Needed: bomb
Blow up the mithril gate.
#5
Needed: rope, bow, climbing, acrobatics, light fire
You need to reach the very top of the tower. Head to the Helms' Deep courtyard and up the stairs. Now you will have to alternate between using you characters' skills to climb to the very top and light the fire.
#6
Needed: bow
On the wall you will find a giant wooden cross. Shoot the target to begin a mini-game: you need to shoot down all moving targets.
#1
Eomer, 200 000 studs
#2
Needed: NIGHT
Rohirrim Soldier, 25000 studs
#3
Uruk-hai, 25000 studs
Can be found be the wall of Helm's Deep. You need to defeat him first.
#1
Needed: Uruk Sword (Amon Hen)
Prize: Mithril LEGO brick
Just return the item to the quest giver.
#2
Needed: Decorative Horseshoes (Warg Attack)
Prize: Mithril LEGO brick
Just return the item to the quest giver.
#3
Needed: Mithril Shield (Design: The Paths of the Dead)
Prize: Red LEGO Brick (Studs x8), 8 000 000 studs
The item can be forged at the blacksmith in Bree.
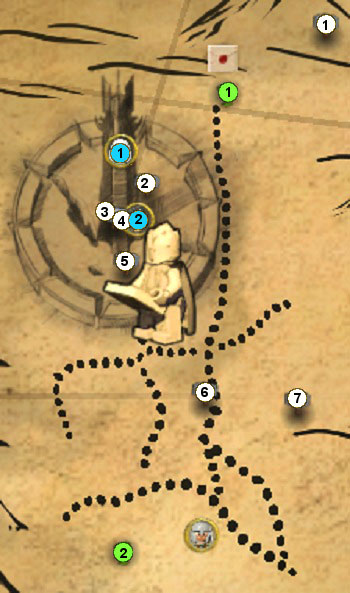
Isengard. In order to get beyond its walls, you have to use a strong character to open the gate. Just choose Shagrat and pull the orange handle.
The Design is inside the chest. Just open it and pick up the item.
#1
Needed: Phial
It's easiest to reach this place from where you found the Design. Destroy the stones and illuminate the niche.
#2
Needed: sword, rope, Mithril Bottomless Bucket, spade
You need to turn all five cranks within Isengard. The missing one can be found buried in the ground.
#3
Needed: bow, climbing, acrobatics, small character
As you're climbing the tower and reach the second narrow tunnel, you will be able to either go up or jump to the right where some studs are - that's where you will find the LEGO brick.
#4
Needed: bow, climbing, acrobatics, small character
As you're climbing the tower and reach the second narrow tunnel, you will be able to either go up or jump to the right where some studs are. The LEGO brick is above you (path though the narrow tunnel).
#5
Needed: NIGHT
You need to kill 10 Uruk-hai in the designated time.
#6
The race begins nearby Helm's Deep. Get on the horse and ride through the red gates.
#7
Needed: fishing
The crank needed to open the cellar can be fished up by the waterfall, to the left of mission #2.
#1
Saruman the White, 500 000 studs
He's at the very top of the tower, above the Mithril Brick #4.
#2
Grima Wormtongue, 200000 studs
You need to defeat him.
#1
Needed: Handprint Breastplate (The Black Gate)
Prize: Mithril LEGO brick
Just return the item to the quest giver.
#2
Needed: Mithril Music Boots (Design: Weathertop)
Prize: Red LEGO Brick (Fast Build), 100 000 studs
The item can be forged at the blacksmith in Bree.
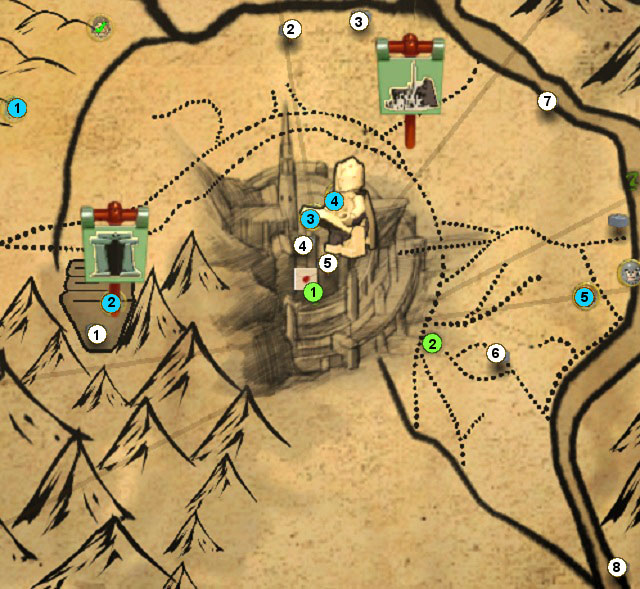
Needed: bow, acrobatics
At the top of the citadel there are 7 targets. You need to hit all of them and afterwards get to the Design along the rails.
#1
Needed: bow, acrobatics
Get on the pillars, shoot the holes and jump along the bars to the LEGO brick.
#2
To the south of the gates of Minas Tirith there's a horse cart. Get on it and ride through the red gates.
#3
Needed: bow
Stand on the platform and shoot all the moving targets.
#4
Needed: spade, light fire
At the top of the citadel you need to place a plant, jump off it to reach the rails and climb to the very top of the tower. Light a fire there.
#5
You need to hit the white tree in the very middle of the citadel.
#6
You need to hit 10 moles in the designated time.
#7
Needed: NIGHT
Defeat three Orcs.
#8
Needed: rope, Phial, bow
Attach the rope to the hook and you will obtain the crank. Use it on the mechanism to open the dark cellar. Illuminate it with the Phial of Galadriel to receive the key and use it to unlock the target. Now just shoot it with the bow and climb to the top of the pillar where you will find the chest with the LEGO brick.
#1
Needed: NIGHT, sword
Soldier of the Dead, 25000 studs
You need to defeat him.
#2
King of the Dead, 500000 studs
#3
Needed: spade
Citadel Guard, 25000 studs
At the top of the citadel you need to place a plant, jump off its leaves to reach the rail and climb onto the tower.
#4
Denethor, 125000 studs
#5
Boromir (Captain), 200000 studs
#1
Needed: Statue Hat (Osgiliath)
Prize: Mithril LEGO brick
Just return the item to the quest giver.
#2
Needed: Surefooted Greaves (Secret Stairs)
Prize: Mithril LEGO brick
In order to reach this character you have to hit the bell and return the item to its owner.
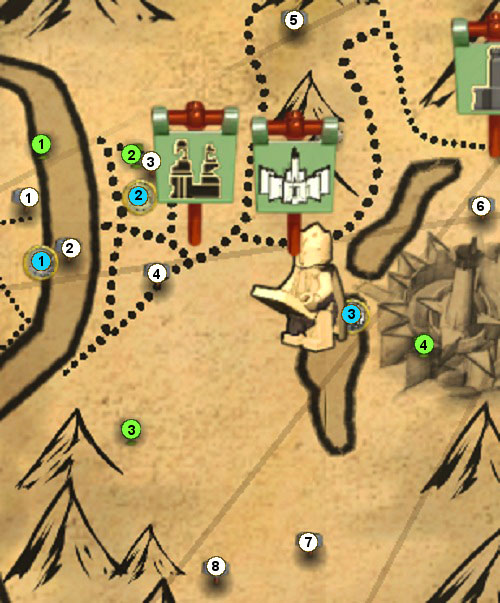
#1
Needed: Mithril Bottomless Bucket, bow, spade, fishing, acrobatics
Start off by fishing up the key from the river on its right side (have Legolas pick it up). Afterwards hit the holes with arrows to create handles, extinguish the fire and put a plant in its place. Bounce off it, jump between the bars towards the platform and open the chest containing the LEGO brick.
#2
Needed: Mithril Bottomless Bucket, spade
Proceed just like with the Mithril LEGO brick #1, but instead of jumping from the flower and onto the bar, jump forwards onto the platform. From there, jump onto the rail right beside the LEGO brick.
#3
You need to destroy 5 statues in the designated time.
#4
Needed: magic
Use Gandalf to arrange the pillars so that they create stairs, head to the top and jump to the left towards the bars. There, climb up and head for the LEGO brick.
#5
Jump off the leaf and destroy the chest.
#6
Needed: acrobatics, rope
Head to the left of the entrance to Minas Morgul by jumping between the platforms and bars and using the rope. The brick is at the very end.
#7
You need to defeat 10 Orcs in the designated time.
#8
Needed: axe
You need to break the cracked tile.
#1
Gondor Soldier, 25000 studs
#2
Gondor Ranger, 25000 studs
#3
The Witch-King, 500000 studs
Right beside the Mithril LEGO brick #6. You need to defeat him first.
#1
Needed: Elven Lute (The Black Gate)
Prize: Mithril LEGO brick
Just return the item to the quest giver.
#2
Needed: Glowing Shield (Battle of Pelennor Fields)
Prize: Mithril LEGO brick
Just return the item to the quest giver.
#3
Needed: Mithril Fire Bow (Design: Helm's Deep)
Prize: Red LEGO Brick (Character Studs), 25 000 studs
The item can be forged at the blacksmith in Bree.
#4
Needed: Artist Hat (The Mines of Moria)
Prize: Mithril LEGO brick
Just return the item to the quest giver.
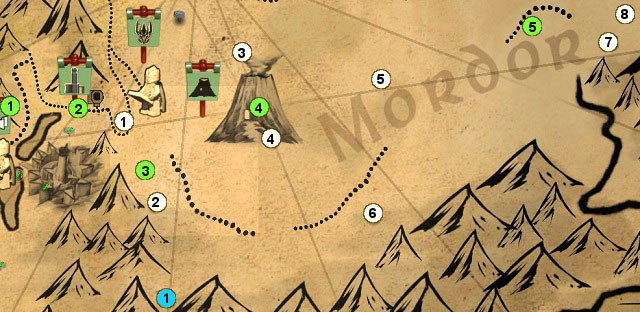
#1
Needed: climbing
The brick can be found beneath the stone bridge. Just climb the wall with Gollum.
#2
Needed: spade
The key can be found in the ground nearby the entrance to Shelob's cave from the side of Cirith Ungol. If you don't want to miss it, use the Map Stone beside Minas Morgul, head up the Secret Stairs and through the cave. Jump down on the path and look for loose ground.
#3
Get onto the nearby goat and ride it through the red gates.
#4
Needed: rope, acrobatics, climbing
Head left of the entrance to Mount Doom. Use Legolas' (I'd recommend using the Mithril Rope) and Gollum's skills to keep climbing up - at the end of the path there's the LEGO brick.
#5
Keep jumping between the pillars while avoiding the blazing fire.
#6
You need to hit 6 moles in the designated time.
#7
Needed: sword, bomb, strength
You need to: destroy the LEGO Morgul brick, blow up the mithril chest and pull the orange handle with Shagrat.
#8
Needed: NIGHT
You need to defeat 35 Orcs in the designated time.
#1
Needed: spade, bomb, fishing
Gil-galad, 125000 studs
In order to free the Elf, you will need a crank. One of such items can be found directly to the north-west of Quest #5. There you will see a mithril stone on a high platform - you need to place a plant beside it and jump up off the leaf. There you will have to blow up the boulder and fish in the pond. Pick up the crank and head with it to the Elf.
#1
Needed: Mithril Tinderbox (Design: The Black Gate)
Prize: Red LEGO Brick (Invincibility), 500 000 studs
The item can be forged at the blacksmith in Bree.
#2
Needed: Mithril Whistle Sword (Design: Bree)
Prize: Red LEGO Brick (Action Assist), 25 000 studs
The item can be forged at the blacksmith in Bree.
#3
Needed: Shimmering Armor (Prologue)
Prize: Mithril LEGO brick
Just return the item to the quest giver.
#4
Needed: Ice Lolly (Pass of Caradhras)
Prize: Mithril LEGO brick
Just return the item to the quest giver.
#5
Needed: Mithril Squeak Sword (Design: The Secret Stairs)
Prize: Red LEGO Brick (Studs x10), 10 000 000 studs
The item can be forged at the blacksmith in Bree.
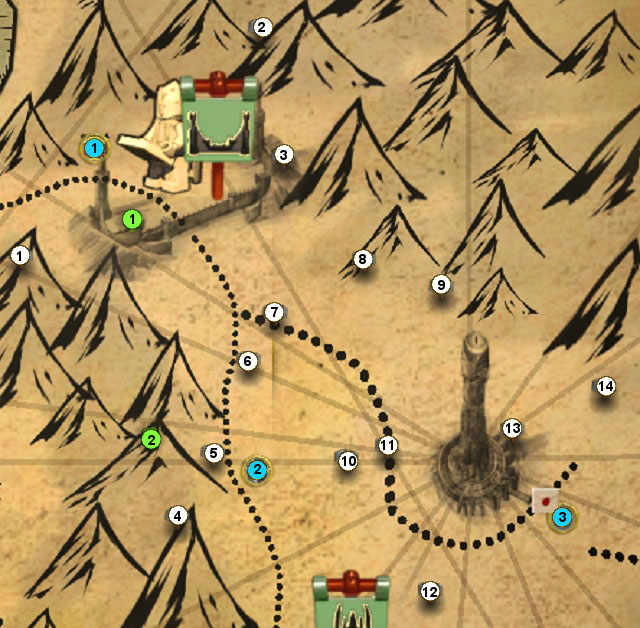
Above the entrance gate to Barad-dur. Just grab onto the rail and walk along the platform.
#1
Needed: climbing, axe
Head onto the tower with Gollum, switch to Gimli and destroy the cracked tile.
#2
Needed: bomb, acrobatics, sword
Destroy the mithril boulders, push the pillars to the designated place, jump up with Legolas, switch to Aragorn and break the LEGO Morgul brick.
#3
Needed: rope
Keep climbing up using the rope.
#4
Needed: strength, rope
Open the cave entrance with Shagrat and use the rope on the hook inside.
#5
Needed: strength, rope
In the same cave as the Mithril LEGO brick #4; head further up and open the next passage with the rope.
#6
Needed: bomb
Just blow up the mithril boulder.
#7
You need to defeat 20 Orcs in the designated time.
#8
Needed: small character
Destroy the rocks on the floor and push the pillar to the designated place.
#9
Needed: bomb, climbing
Blow up the mithril grates. Inside the cave, climb up the wall with Gollum.
#10
Needed: sword
Destroy the LEGO Morgul brick.
#11
Needed: sword
Destroy the LEGO Morgul padlock and jump along the platforms to the very end. There you have to destroy a Morgul chest and pick up the Mithril LEGO brick.
#12
Needed: acrobatics
The crank can be found beneath the black boulders nearby.
#13
Needed: bomb, Mithril Bottomless Bucket
Blow up the mithril grates. Inside the cave, extinguish the fire with the Bottomless Bucket (if you want to use a normal one, there's a pond right beside the entrance).
#14
You need to jump between the moving platforms.
#1
Easterling, 25000 studs
You need to defeat him.
#2
Mordor Orc, 25000
You need to defeat him.
#3
Gothmog, 125 000 studs
You need to defeat him.
#1
Needed: bow, acrobatics, Mithril Climbing Shoes (Design: Mount Doom)
Prize: Red LEGO Brick (8-Bit Music), 200 000 studs
Shoot an arrow into the hole and head to the very top of the tower using the bars and ladders. The item can be forged at the blacksmith in Bree.
#2
Needed: axe, Bubble Pipe (Osgiliath)
Prize: Mithril LEGO brick
Open the cave entrance with an axe (jump attack). Just return the item to the quest giver.
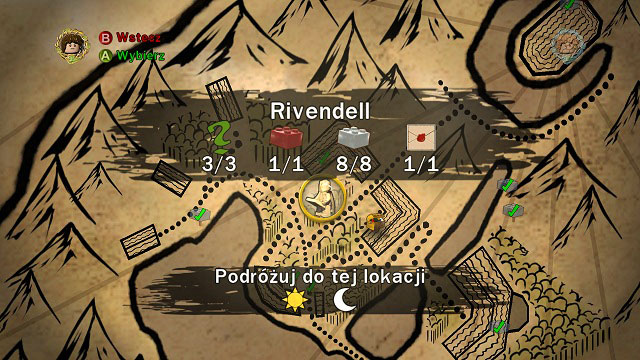
After completing all story mission you will gain access to a bonus level. It can be found in Rivendell, behind the waterfall where you pick up two mithril bricks (marked as 7 and 8 on the map).
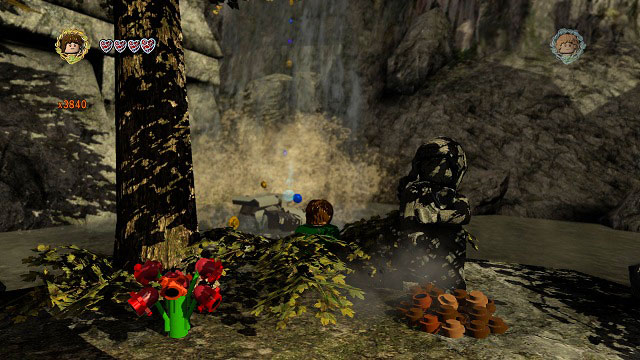
Just pick up the banner in the middle of the room and activate it.
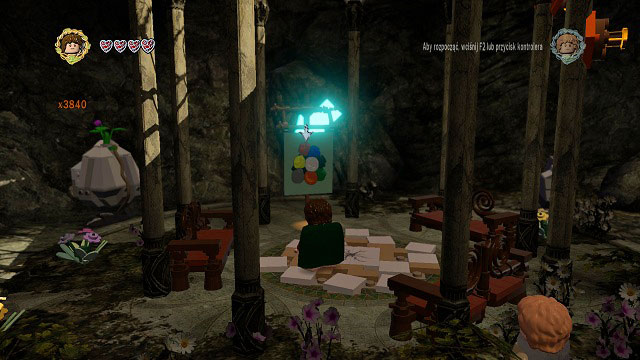
This time you will bet the "evil one". You will control Sauron, accompanied by the Mouth of Sauron, his moth faithful servant. Your task? Collect 1.000.000 studs by wrecking everything around.
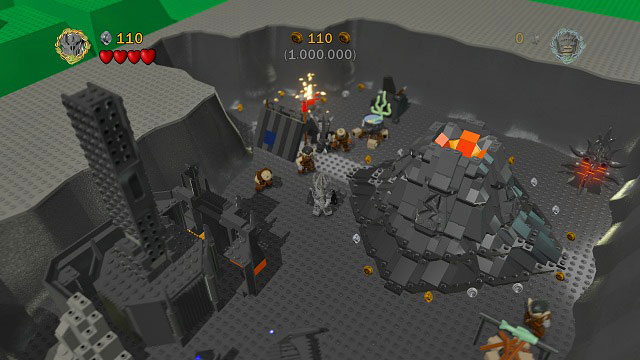
Some of the more interesting places worth mentioning are:
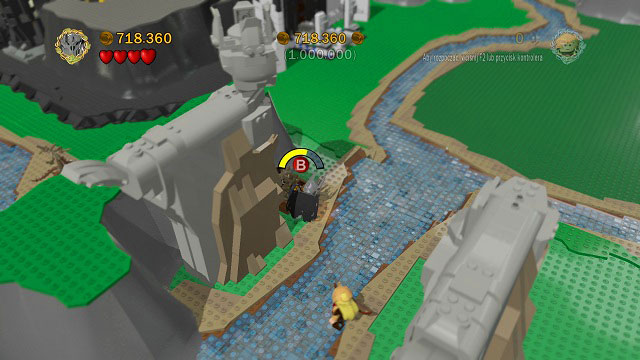
Other places wan be just destroyed. When you reach Shire, you should have enough studs to finish the level. The prize? From now on you will be able to play as Sauron and the Mouth of Sauron.
The last thing worth mentioning is how to reach 100% game completion. You will need to:
In return you will receive yet another character: Lurtz (Newborn) and the possibility to play any level with the chosen equipment. Good luck!


 LEGO Batman 3: Beyond Gotham Game Guide & Walkthrough
 LEGO Indiana Jones: The Original Adventures Game Guide & Walkthrough
 League of Legends Game Guide & Walkthrough
 LittleBigPlanet 2 Game Guide & Walkthrough
 LEGO Batman 2: DC Super Heroes Game Guide & Walkthrough