
Behold, a complete source of everything you'll ever want to know about LEGO Star Wars II. The game is quite simple when you just want to go through all the episodes and see all the cut-scenes, but things can get really tricky when it comes to secrets. We'll start with guiding you through the Story Mode, just to get rid of any problems you might have with the game's puzzles. For practical reasons, hints concerning True Jedi status in Story mode have been moved to the Freeplay section of the guide. At the end you'll find hints for all the bonus levels and minigames you'll unlock.
A few hints just to get you started:
- Always keep in mind that in LSW it's best to use everything, destroy everything, collect everything you possibly can. Always keep your eyes open. Always, I say!
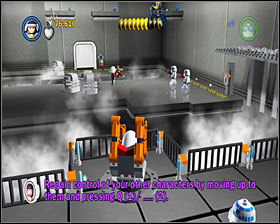
- Try to control a Jedi-type character most of the time, as therefore you'll be able to catch more stud-collecting opportunities.
- Don't bother looking for Minikits in the Story Mode. You won't be able to get 90% of them before Freeplay anyway. Before you start Minikit-hunting in freeplay, though, make sure you have a Bounty Hunter and a Dark Jedi among your characters.
 Yup, we did it. Now it's your turn.
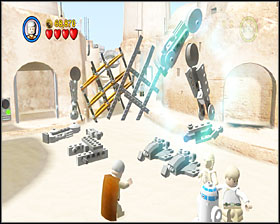
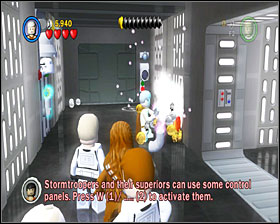
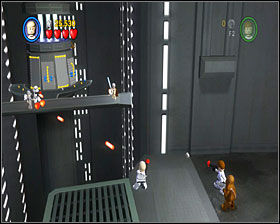
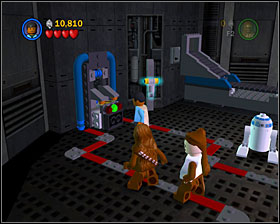
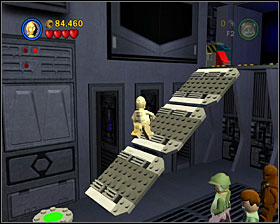
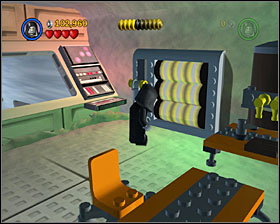
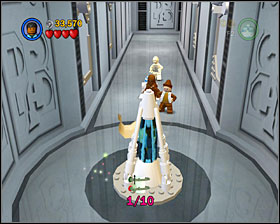
Build the two panels using the loose bricks in front of you. Go through the corridor and use the two lever on both sides of the door. Defeat a few waves of stormtroopers and follow the rest of the rebels. Use your grapple hook twice to get to the top level and use the bricks in there. A platform will appear, use it to reach the opposite end of the room.
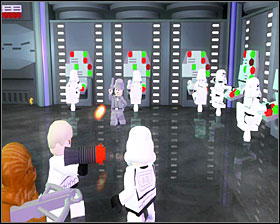
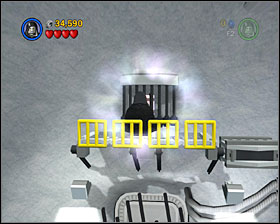
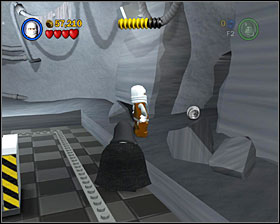
Here comes Vader. You can't harm him now. Avoid the stormtroopers' fire and use four levers on both sides of the corridor, then destroy one of the containers that appeared near the Dark Jedi. Move further and defeat some more stormies. Open the window to the right to see the infamous Force Choke scene.
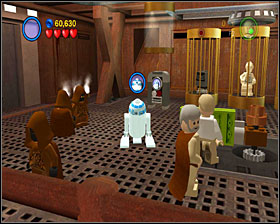
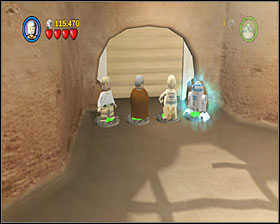
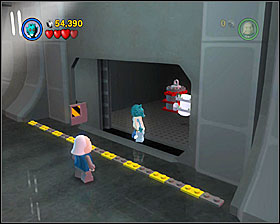
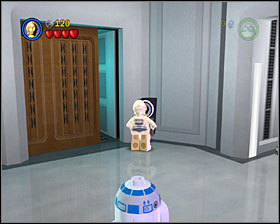
When you reach the dark room, move the two crates into the carvings on the floor. A few stormtroopers will come out of the door. Defeat them and join the droids inside. Switch to 3PO and use the panel on the wall. Now switch to R2 and use the next panel.
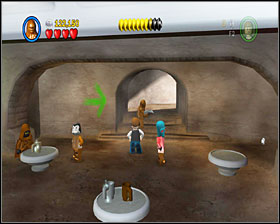
Switch to Antilles and use the crane (notice its arm's shadow to help you orientate) to get rid of all the stormies here. The rebel soldier will open a path for you. Let the droids go but stay in the crane - grab 3PO and move him to the door on the far end of the room. Switch to him and use the panel to open the door.
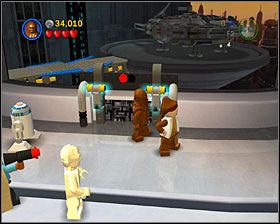
Defeat some more stormies and when you're further into the corridor, use the bricks on the floor to form a path for the droids. Do the same again a bit further and you'll eventually reach the escape pods. Switch to R2 and open the door to the left. Use the lever, again switch to R2 and open the center door. Defeat the bathing stormies and use the next lever. Now switch to 3PO and use the panel near the right door. Switch back to R2 and go through the right door, then activate the final panel.
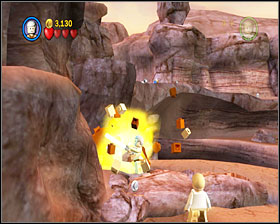
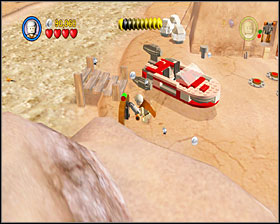
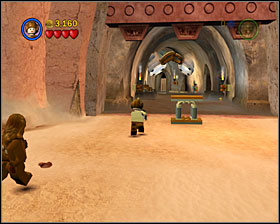
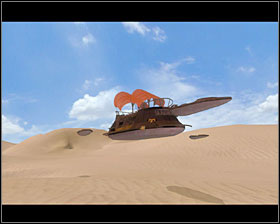
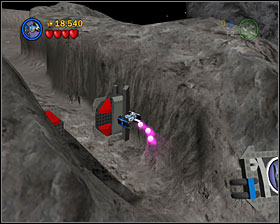
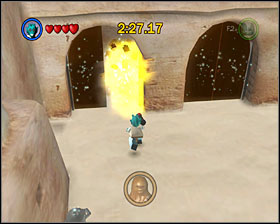
Head right. Destroy a pile of brown bricks to form a passage. Use the ramp and go through the valley until you reach a sand "slide", from which Tuskens will drop and attack you. Switch to Ben and use the Force on the escape pod nearby to be able to go further.
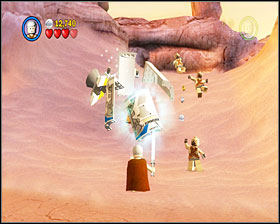
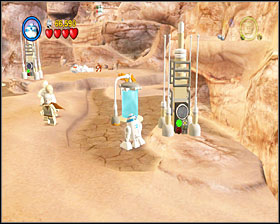
When you're in the next section, eliminate three Tusken Riders and use the loose bricks on the ground. Move the crate so you can use it to jump up to the platform. You'll reach the Sandcrawler, a giant desert vehicle. Destroy everything around to get some studs and then use the bricks to build a grapple point near the back of the vehicle. Switch to Luke and use it, then switch to Ben and use Force on the sandcrawler's side so the young Skywalker can grapple up. Use the lever and do the same thing with the upper platform. You'll eventually reach the top of the vehicle.

Let both characters use the levers and you'll see the entrance opening up down at the ground level. Jump down and stand below the pipe to get in. Now you're inside the Sandcrawler. Go forth until you reach a corridor with 5 valves on each side. Destroy the ladder that protect them and use the Force on each of the valves.

In the next room use the lever and you'll see a crate coming out of the conveyor belt. Place it in front of the door that obviously leads to R2. You can take time to place crates to open other door and get some goodies - you can always get a new one by using the lever once more.
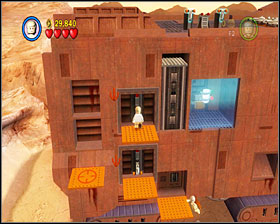
When you free R2, switch to him and use the panel on the wall, then use the elevator to go up. Press all the 8 buttons on the floor and then use both levers that appear. Use the turnstile to place the machine over 3PO's cage and use the panel to free him. Switch to him and use the panel on the next door. Once there, use the Force to destroy all 4 supports for the door. You're now free to leave.

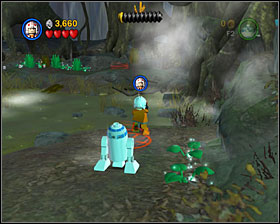
When you're near the large area with swamps in it, switch to 3PO to activate the panel to the right. You'll dry the first swamp. Use the brown bricks to form a footbridge and use it to reach the second panel as 3PO. Now you're free to go further. Defeat the Tuskens and switch to Ben to jump to the upper level. Now use the Force on white bricks ahead to form a bridge. Jump up and push the crate down. Use its remains to build another bridge. Use it as 3PO and use yet another panel. Go forth until you find a Sandspeeder.
Use the bricks to build an engine for the Sandspeeder and jump in it to ride to the right. Repair the lever in there and use it to form a bridge for the rest of the party. Now stand on four buttons in front of Ben's shack and you're done.
Leave the Speeder where it is and look around on foot. There's plenty of studs around here. Go up the screen until you reach the gate. Use the Force on the Grey bricks to the right to form stairs that'll let you reach 3PO's panel that will open the gate. If you want to, go back for your Speeder now and cross it.
When you reach the square, you'll have to use the parts around to build an AT-ST walker. First switch to R2 and open the door to the left of the blocked passage. Destroy the two barrel to the right and switch to 3PO to open the door near them (first you have to make a footbridge for him). Use the Force on all of the walker's fragment to complete it. You can't go wrong with it, so don't worry.
When you're done with the walker, a stormie will enter it (now that's just rude). Switch to Ben and Force-pull him outta there. Enter the AT-ST yourself and use it to destroy the blockade. Go further, defeating the stormies. Jump out of the vehicle and go through the door.
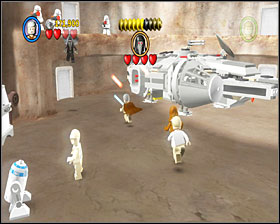
You're in the Cantina now. Switch to Luke and shoot all 4 force field generators. Stand on 4 buttons near the entrance. You'll see a cut-scene now. When it comes to an end, you'll be controlling Han and Chewie. Go to the right and use the passage marked with the greek arrow. Grapple up to reach the upper level. Use the bricks to build another grapple point and use it.
Go to the left, grapple across the street. Use the lever to get a crate, push it down and to the end of the track. Shoot it a few times and you'll be able to go further. Defeat the stormies and mount one of the Dewbacks. Place it near the arcades and jump off it - it boosts your jumping height so you can reach the upper level. Go forth to the next section.
Now you're at the Millenium Falcon's hangar. You'll face a boss fight here - this time it's the imperial spy. He'll summon waves of stormtroopers to his side. At first you won't be able to get to him, so just get rid of the stormies. By the third wave he'll make himself available, slash him a few times and you're done. Board the Falcon.
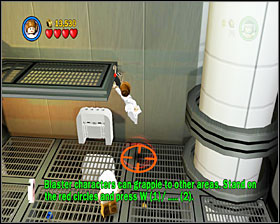
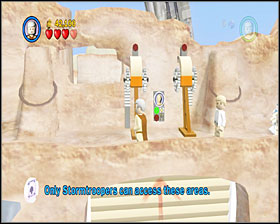
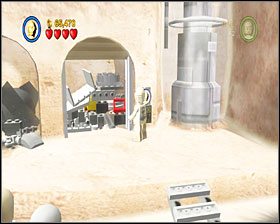
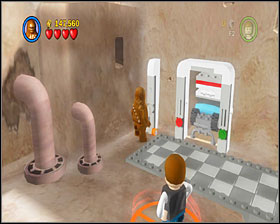
Use the Force on the door to get to the next corridor. You'll see a helmet dispenser here - it'll give your characters stormtrooper helmets so they are able to access stormtrooper-only areas. Each time when you're hit the helmet will fall off and you'll have to go back to the dispenser and get a new one.
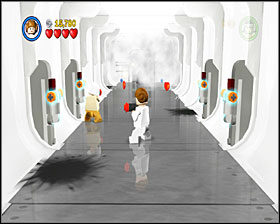
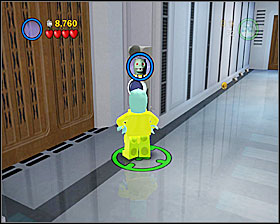
Use the dispenser and go through the door. Repair the computer and watch a cut-scene. You'll end up with Han, Chewie and Luke. Go through the door up the screen. Defeat the enemies and turn left. Go forth until you see Obi-Wan in the back, fighting off a large group of stormies. Help him with your blasters, and he'll create a bridge for you. Use the helmet dispenser here and go to the end of the corridor, then turn right.
If you lost your helmet, you'll have to go back for it. Open the door and go forth. Go to the center of the room and use the turnstile to place the bridge so you can go further. Use the grapple hook to reach the helmet dispenser and a passage.
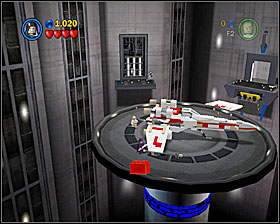
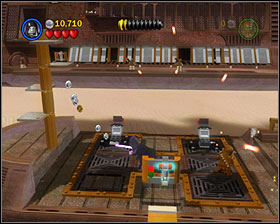
Defeat a large group of stormies and use the panel by the door - you'll need a helmet once again. Go to the next room and use the left elevator. Get rid of the enemies and rebuild the two panels using the bricks in the center of the room. Use them both and go along the prison cells. The one you want is near the grid to the right. Use the levers on both sides of the cell to get in there.
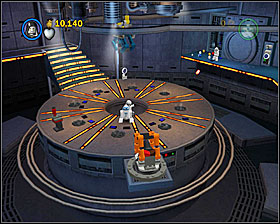
Use the loose bricks by the door to build a footbridge, jump on it and use the lever to open the exit. Go through the corridor and use the helmet dispenser. When you're in the big hangar, jump down and defeat all the stormies. Move the blue platform on the left so it touches the turnstile in the middle. Use it to extend the platform as high as possible. Use the grapple point to the right to get back to the upper level. Use the switch at the back of the platform in there so that the orange marker is to the far right. Now grapple up across the room to reach the lever to the left.
Use the lever to make a crate appear. Push it down and along the track. You'll be able to access a scooter - jump on it and use it to ride along the red markers in the middle of the room, turning them all green. You'll have to aim carefully to have it done. When you manage to do it, go back to the upper level. If you don't have a helmet, get back to the helmet dispenser and reach the door you opened by lighting the markers on the floor.
Go to the right and open the door, using the bricks to form a panel. Open the next gate and defeat the soldiers in there, then push the crate along the track to place it in the mechanism in the next room. Go further. You must use all three levers at once - AI will help you with that. Go through the moving platform and grapple up. Use the lever and build a panel out of the junk that fell out. It'll turn on the elevator. You'll have to get a helmet at the middle level. It's not easy as you're being constantly attacked by stormies. When you manage to get it, go to the top level and use the door.
This part can be tricky - you must act fast. Build a grapple point on the floor and use the hook. Get a helmet and build another grapple point. Quickly get to the next platform and use the door here. If you're lucky and quick enough, you won't get hit and won't have to go back for the helmet.
Destroy the panels near the doors to get through. Defeat a huge group of stormies and close the doors that they're using to get in here. You now have a brief moment before they start coming again, use it to build a gate out of blue and grey bricks on the floor. Destroy it when you're done and you'll reach the hangar.
Use the lever to the right of the entrance to turn on the air vent. Go across the platform to the other side and build a handle on the right wall, then push it to free the droids. Let R2 use the panel at the bottom-left corner of the room and you'll get another scooter - once again use it to light all the markers on the floor. Switch to 3PO and use the air vent you turned on at the beginning to get to the upper platform, then use the panel.
Now back to R2. Use him to operate the panel to the right of the fighting Jedi (left screenshot below). Move the blue crate to the right and use the bricks to construct a grapple point. Grapple up and turn the lever there. The Falcon is safe. Defeat the rest of the stormtroopers and board it.
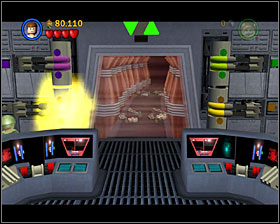
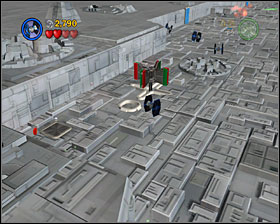
You'll be piloting an X-Wing on this one. Notice the two distinctive elements of the background: violet energy balls - torpedoes - fly above these to be able to shoot them; also violet shield generators - use the former to destroy these. It might sound complicated but in fact is quite simple and you'll get it as soon as you're out there.
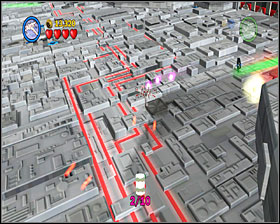
Get a torpedo to blast the generator, then go up the screen. Do the same with the four generators to the right of the next shield (notice the red veins that point you to the generators you have to disable). Blast through the gate and go up to the next section.
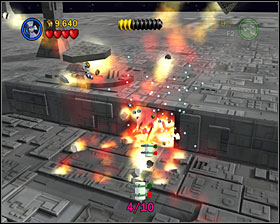
Fly along the right valley, destroying the 4 generators in there. You'll find another four a little bit ahead. Blast through another gate and continue to the North. Another section, another 8 generators to destroy, another gate to smash. You'll see a short cut-scene after you're done with that, after which you'll be in the legendary tunnel.

Go forth, destroying the turrets (for studs) and avoiding TIE Fighters' fire. When you reach the end, destroy the 12 turrets guarding the vent (they appear when you fly above them) and use the torpedo on the vent itself. If you don't have one, you'll have to go back to the very beginning of the tunnel. A good hit will end this episode.
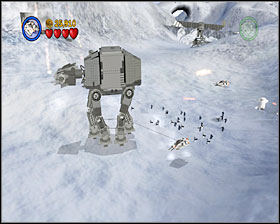
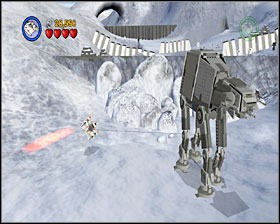
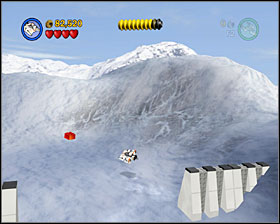
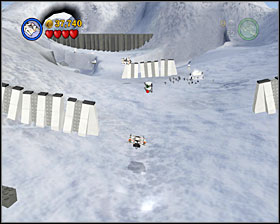
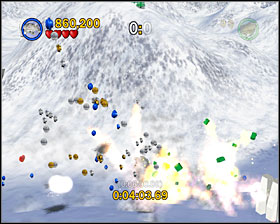
This time you'll be handling a Snowspeeder during the Hoth battle. You special ability is to use the tow cable to grab bombs and throw them into enemies and obstacles. You can also use the cable to bring down the mighty AT-ATs and smaller AT-STs.

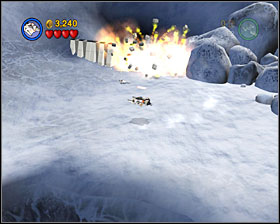
Go up and grab a bomb by the way. Throw it into a crate that's blocking the way to the next section. Some imperial probe droids will try to disturb you - use your main weapon to deal with them.
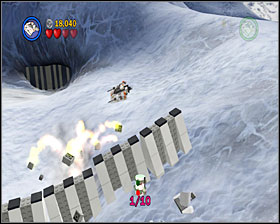
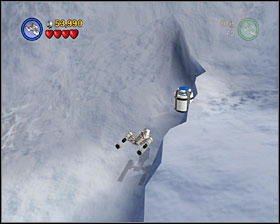
There are two AT-ATs before you. In order to destroy them, you first have to bring them down using the tow cable, and when they're on the ground throw a bomb at them. It's not easy as there are some chicken walkers trying to hit you meanwhile, but you'll get the hang of it sooner or later. When you destroy both machines, grab another bomb and smash it into the barrier a little bit ahead. Do the same with the next barrier, only this time you'll also have to destroy the wall that's blocking access to it.
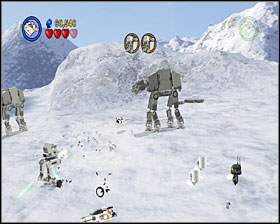
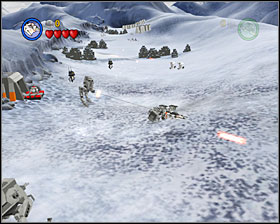
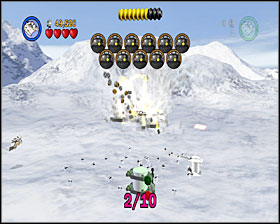
The last section is a battlefield similar to the one on Geonosis in the first game. You see a list of enemies you have to destroy in the middle of the screen. First you'll deal with a unit of probes, then some AT-STs, then AT-ATs, and eventually a mixed legion of them all. Completing this task ends the level.
You're controlling Han and Leia on this one. Go right and build a bomb out of the rubble, and the door will open. Go through the corridor, defeating some minor stormies, and build a heater in the next room. Shoot it a few times and you'll be able to go further.
In the next room move the heater towards the door, then go forth to the right. Defeat some stormtroopers, including the one manning the stationary gun. Rebuild the gun and use it to destroy the grid that is blocking the way. Now go right at the junction and destroy the barrels there. Enter the room and rebuild the track vehicle there, then use the turnstile. The explosion will free 3PO. Switch to him and open the door that you've unblocked with the gun.
In this big room first get rid of all the enemies - most importantly the ones in the stationary guns. Rebuild one of them, man it and unblock the door. Now you have to find a way to get 3PO near it. Use the orange bricks in the middle of the room to build a slider, then place the two crates on either side of the room in their appropriate positions (indicated by carvings on the floor). Get near the fan that you've turned on, and 3PO will "jump" on your slider's carrying rack. Go towards the door and use the slider's special ability - it will throw 3PO near the panel. Switch to him and use it.
Be careful not to fall down here. Use the loose bricks at the end to rebuild another door. Go to the left - slide down the ice to push all the buttons here. You don't have to push them all at once. In the next room move the two crates so that they push some of the buttons on the floor, and use your characters to push the rest of them.

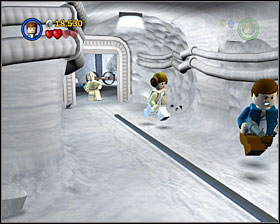
Now you're in a hangar with the Falcon in it. Defeat the stormies and open the door to the right, using the levers on both sides of it. Push the two containers to the opposite side of the room. It will open a door that'll reveal two Tauntauns. Rebuild the two stationary guns in here to destroy the force field generators on both sides of the room. Now use the bricks to form a manhole, then mount one of the animals and jump off it (just like you did with Dewback in EIV) to the top of the ship. Once there, rebuild the turret. Now you can enter the Falcon.
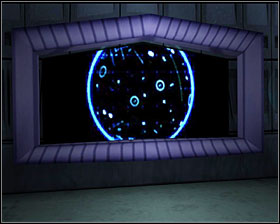
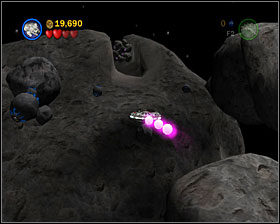
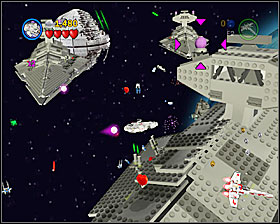
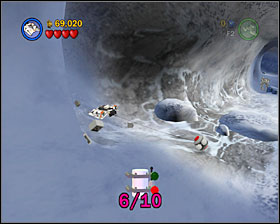
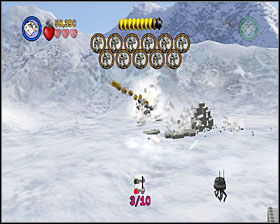
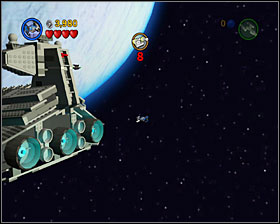
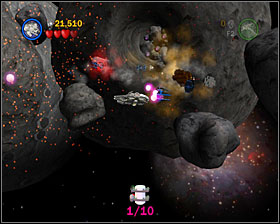
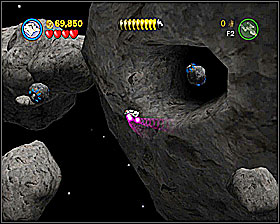
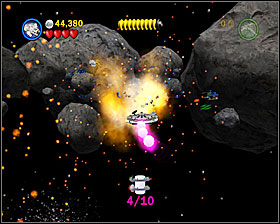
Your first task it to disarm 4 star destroyers, piece of cake. Just destroy 4 turrets on each of them. When you're done with that, you'll be automatically moved to the asteroid field. Fly through it, destroying the blue stones for studs and torpedoes. Use the latter to unblock the passage at the end of the section. You'll need 4 projectiles for it.

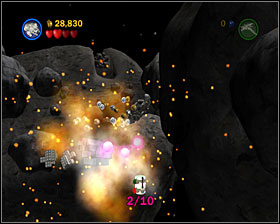
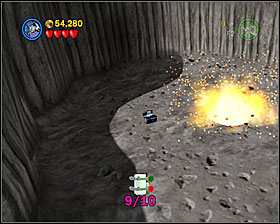
Do the same thing with the next stone barrier, and you'll reach the surface of a huge asteroid. You can enter the crater here (you know what you'll find there, don't you?) or just destroy one more barrier to go further (you'll have to go back for the torpedoes, though).
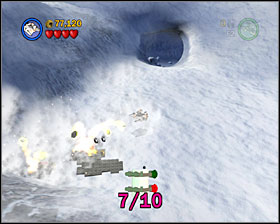
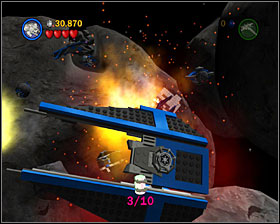
In the last section you'll see a large asteroid with violet targets all over it. You have to strike them all with your torpedoes. When you destroy it, you'll end this level.
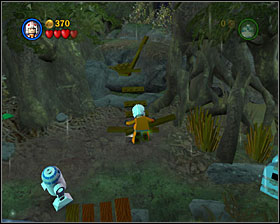
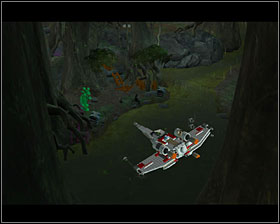
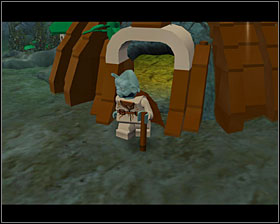
Use the brown bricks to form footbridges for R2 and go through the pass. Destroying one of the bushes near the shore of the puddle will reveal a grapple point that you can use. Notice that R2 can just swim across the swamp. Switch to the little guy and float to the platform to the left. Use the panel there. When Luke joins you, blast through the bushes to the next section.
Fix a button with some loose bricks and press it. Use R2 to float to the platform that appeared. Continue pushing the buttons with R2 until you're on the other side of the lake. A cut-scene will occur now.
Approach Yoda and push the character switch button to have Luke carry him piggyback. Now you can use the Force. Tear out all the flowers around and use the lightsaber to destroy the flowerbeds. Build the bridge of what's left of them. Move to the central isle and jump on the button sticking out of the swamp. Use the next buttons to reach the other side.
Use the Force (if you've lost Yoda, you'll have to get him by returning to the central isle) to lower the two "mushrooms" and then immediately switch to R2 and enter the lower one. When it raises, float to the other one. You'll have to be quick here. Use the panel that you reached and go through the door.

From now on Luke can use the Force on his own, and Yoda is playable just as any other character (and is still kicking but just like he did in the previous Lego Star Wars). It's worth noticing that if you go down the screen from here, you'll be back to Yoda's shack - it's good to pay a visit there to get the studs, especially if you're running for True Jedi. Use the Force on the bricks and you'll build a tractor (sic!). You can use its trailer to form a drive for R2. Switch to him and float to the left to reach the panel - use it to allow other characters to cross. Smash through the wooden grid and go forth.

Jump through some platforms across the abyss. At the end you'll have to fight Vader. When you hit him a few times, he'll jump to the left platform. Stand on one of the blue crates in there and use the Force on the other one. Yoda will do the same and you'll both reach the upper level. Cut Vader a few times more and he'll escape again, this time to the right. Use the crates to build stairs for yourself. Now finish the job and go through the newly opened passage.
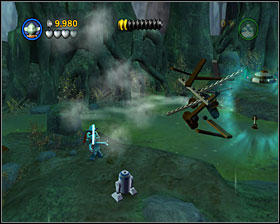
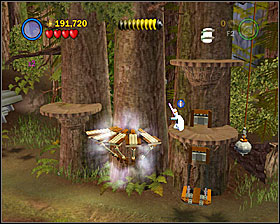
Use the Force to tear out the flowers and build a turnstile. There are two crates to the right that you can use together with Yoda to elevate yourselves higher. When you're up there, push the crate down and build a motorcycle of its remains. Now pull out the laundry machine (this game is just sick) of the swamp nearby. Put the motorcycle into the laundry machine and use the Force to turn it on. Now build a panel for R2 from the loose bricks that appeared. Use it and you'll see your X-Wing. Switch to Yoda and pull it out of the swamp.
Defeat the two stormies reflecting their blasters, and then use the Force on one of the ship's wings to form a bridge. Switch to R2 and float to the platform where the stormies were and use the panel. Now you can jump across as Luke. Build another panel there and use it as R2.
Destroy the thing on the wall and build a stationary gun. Open the door using R2 and push the crate to the marking on the floor. Use the Force to join the gun with its base, and then blast the grid blocking the door. Go through the next corridor and as R2 open the door.
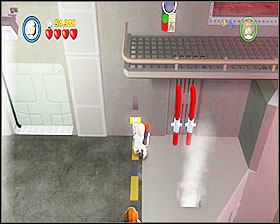
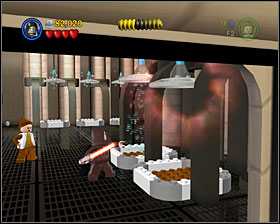
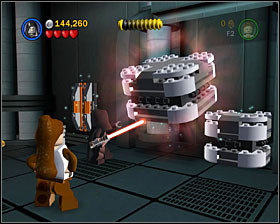
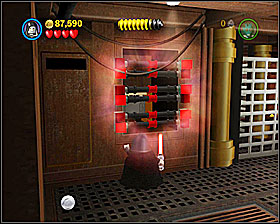
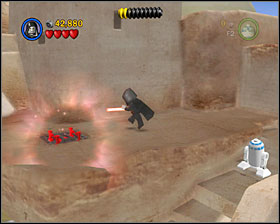
You'll have to fight Vader once more. When you cut him a few times, he'll back off and jump away from you whenever you come close. To deal with that switch to R2 and use the nearby panel, and the gases from the floor will make him choke. Then is your chance. Repeat the whole thing a few times and he'll run away from the room. Now build a crane out of orange bricks that fell from the ceiling and use it to get R2 across to the other side. He'll automatically use the panel that will allow you to reach the other platform. Oh, and you'd want to go back for a stormtrooper helmet to the dispenser you've come by earlier.
Follow Vader, using the Force on the bricks, to build a fan. As R2 use the panel and you'll turn on the elevator. Twist another fan and stand on the platform on its left to allow the droid to join you. There's another of R2's panels to the right - use it and go through the door.
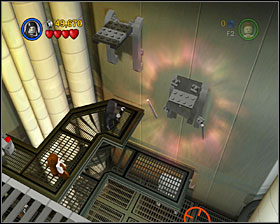
Another boss fight. Slash Vader a bit and he'll jump to the platform beyond your reach. Use the Force on the two bricks in the wall to create a passage for R2. Switch to him and use a panel here - Vader will be back to get his butt kicked. After a while he'll escape once more. First rebuild a turnstile and elevate R2 to the right platform. Repeat the whole procedure until you defeat the Sith.
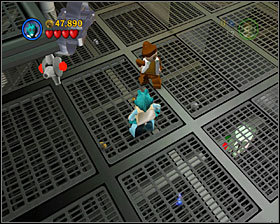
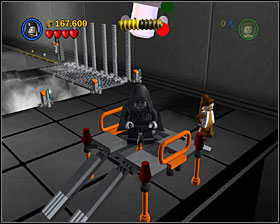
In the next room switch to R2 and use the two panels to cut off the stormtroopers. When Vader starts to throw some metal pieces at Luke, switch back to the young Jedi and take over one of his projectiles. Now you can deal some damage to Vader. Repeat the whole process. When he jumps out of the windows, use the Force on the broken glass to create a bridge, then jump after him.

Follow Vader through the whole section, using the Force and R2's panels wherever needed. When you ultimately defeat your enemy, the level will come to an end.
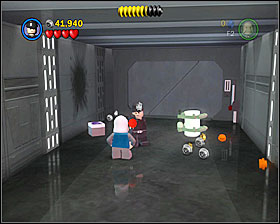
Follow Boba Fett. He'll use a lever to block your way. Destroy a part of the wall to the left. You'll find a switch there - it will enable you to pursue Fett. Follow him to the room with white furniture in it and fight him. Chase him further, fighting off the stormies. Turn left at the junction. You'll reach a landing pod and watch Slave One take off. R2 will join you afterwards. Go back to the junction.
Use R2's panel on the wall to cut off the poison gas. When you're back at the junction, use another R2-panel. Move the metal crate to its station to the left, and then fix 3PO using the parts around. Switch to him and open the last door at the junction. Defeat the stormies and use the helmet dispenser. Go left to reach a room with two elevators in it. Enter the one to the right.
After defeating a large group of stormtroopers build a grapple point and jump to the other side. Use the magnet to transport the droids. Use the grapple hook again, this time to get to the higher level, fix a lever there and use it to send an elevator down for the droids. Jump over the conveyor belt and push the button to let the other character go through. Now switch to R2 and fly to the right to use the panel. Switch to one of the blaster characters and use the grapple hook to get to the higher level, go left and shoot the device that's sticking out of the wall. This way 3PO will also be able to join the rest. Switch to him and use the panel on the wall.
Defeat some more enemies and go ahead until you reach a big room with a cloud of gas in it. Cross it with R2 and use the panel to turn off the fumes. A little bit further you'll find a control room. Repair the device that draws out the bridge by standing on buttons around the room. Use the two levers to extend it.
Approach the Falcon and defeat the stormtroopers. A manhole will open when you're done with them. Enter it to finish this episode.
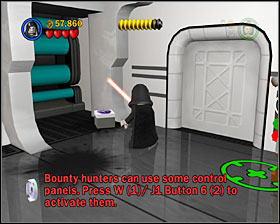
Approach the palace door. When you approach the motion detectors, three turrets will appear (to "wake up" the upper one, you have to build a platform from the bricks laying around). Destroy they and the gate will be opened. Reach the end of the starting corridor, fighting off the guards, and then turn left. Use the helmet dispenser (this time it's the bounty hunter's helmet) and approach the door. In the next room close all the pipes that the pig-guards are coming out of, and then open the next door. It you need to, go back for the helmet.
When you're in the next room, destroy the device to the right and make a platform out of its remains. As Luke use the Force to move one of the other characters up, and then go through the door he opened. You'll destroy the junk that's blocking the way by using the detonator (all characters can throw them while wearing bounty hunter helmets).
Destroy the orange weights that keep the gate closed. Go forth, watching not to fall down through one of the holes in the bridge. Now you have to free the droids. Use both levers to the right and build buttons from the bricks that fell out of the mechanism. Use the Force on the bricks to the left and use the bricks you pulled out of the wall to construct a moving platform. Use the buttons you created to steer its movement. Place it near 3PO cell and switch to Luke to jump into it, that will free the droid. Do the same with R2 and then use both droids to open the door.
Go up the stairs. If you build a jukebox along the way, you'll disable the guards. Up there there's a panel for R2. In the next room start with blocking the pipes that guards come out of, and then push the three platforms so that they form stairs. Use the Force on them to create a footbridge. Destroy the crate and build a bridge of what's left of it. You can now close the final pipe. Switch to R2 and hover to the left, then using the panel. Construct another panel for 3PO and use it.
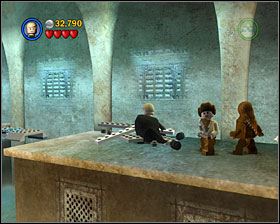
Close all the pipes again. Kill all the guards that remain alive and approach frozen Han Solo. Go back for a Bounty Hunter helmet and use the panel near him. Time to fight Rancor.
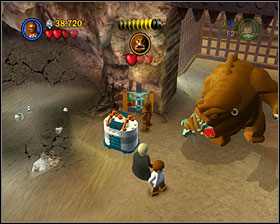
The procedure is quite clear. There are droid-operable panels on both sides of the cave that summon Gamorrean guards. Whenever you summon one of them, Rancor will stop the fight and decide to eat him. Take advantage of it and smash one of the explosive crates laying around (the one that the beast is standing near to). Repeat the thing once more. When Rancor eats the third guard, he stands under the metal gate - use levers on both sides of it to kill him.
Go towards the stern of the skiff and fix a lever. Use it and you'll gain access to another ship. You'll be joined by Han and Chewie. Go to the bow and use the Force on the white bricks. That will make two levers appear - use them both and you'll be able to go further to the right. You now have to fight Boba Fett. When you defeat him, go further. Use the Force to pull the brown bricks out of the side of Jabba's barge to form a platform. Use it to jump to the right. Behind the grey curtains at the back you'll find two levers, use them both. Use the Force on the curtain furthest to the left to make a step for Luke - jump on it to reach the upper platform, then push down the crate. Build a grapple point. Use it to reach the third lever - you can now go further to the left. Open the two parts of the mechanism there. Use the Force to set the middle element of the right pattern to yellow, then use the turnstile to set the bottom one to blue. Enter the ship.

By destroying the machines on either side of the room you'll get some bricks that can be formed into a gun - use it to smash through the door. 3PO will join you now. Use the bricks to the left to build a panel for him. In order to turn it on, use the Force to grab the turbine from the right, then use the Force on some loose bricks to the left. As a droid use the panel and use the elevator.
Go right. Use the bricks to the left to form decks and a speaker, also use the Force on the spheres to the right. Use the hook on the grapple point. Once you're up there, build a crate and push it down. Now build a second speaker from the rubble. Use the Force on the spheres laying on the floor. Now stand on the highlighted circles on the floor until you complete the whole pattern. And let the disco begin.
Go forwards until you reach the deck. Destroy the blue box at the back and push it all the way to the rotating target in a force field. Now switch to 3PO and use the panel near the second target. Go to the right. As Luke access the hatch at the bottom of the screen and going under the floor move to the right, behind the grid. At the junction turn left and when you're up use the lever. Destroy the blue grid blocking another crate and push it outside. Also, use the brown bricks at the back. Move the box near the door that you formed, and you'll finally be able to go up.

Destroy the protections on the ladders on both sides of the deck and in the middle. Use the Force on all of them and you'll create a passage to the stern. As R2 use the panel to load the gun, then man it with another character and shoot the two rotating targets.
Smash all the plants around and build a platform of the bricks that fell out of them. Switch to Leia and stand on it, and Luke will lift you up. Use the bricks on the other side to build a grapple point. Use it and go through the lawn back towards Luke, jumping on the hanging platform along the way. Go further and as Luke use the Force at the crate to form a step out of it. Defeat the stormies and hop on their speeders. You have to chase the other two. When someone tails you, use the ability to hoop (jump button).
When you shoot down the two enemies, you'll be back on your feet. Defeat the stormies and their AT-ST, then board the walker and use it to destroy the rotating shield generator. Mount the speeder again - another chase. Notice that these sequences take place in a very large ring, so don't worry that you'll miss something important. When you're back on your feet again, defeat some more enemies and switch to Luke to build a platform to the left from two brown crates (one of the is on the upper level). Now as Leia use grapple up to use the lever. Another chase is upon you.
After taking down 4 speeders, you'll end up struggling against AT-ST again. When you get rid of the stormtrooper inside it, enter the machine and use it to destroy another generator. Mount the speeder one last time to take care of 5 more enemies. Once you're done, you'll be back to where you started the level. Move through the bridge down the screen, destroy some plants, build a turnstile and use it to gain access to AT-ST parts. Build it with Luke and use it to shoot the two crates hanging from the tree to the left. Use their contents to build a bridge for the walker to cross. Destroy the final generator with it and go through the now open passage.
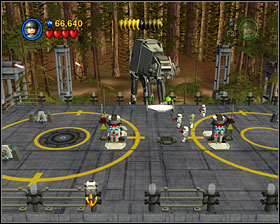
Use the two levers to gain access to the installation. Go through the bridge to the left and use another elevator. Now you're on the roof, and an AT-AT is shooting at you. First use all 4 levers in 4 corners of the roof in order to disable the force fields protecting the 4 towers around the AT-AT. Now switch to Luke and use the "diving platform" in the middle to take control of the walker. Destroy all 4 towers and then turn both levers that appeared in the middle of the roof.
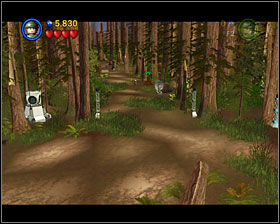
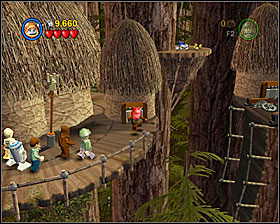
Switch to Wicket and go right to crawl through the tunnel. Repair the bridge so that the rest can join you. Go further and destroy the planks that are blocking the entrance to the shack that contains a 3PO panel. Use it and build a grapple point. Go further to the right and down the stairs.

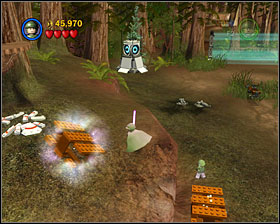
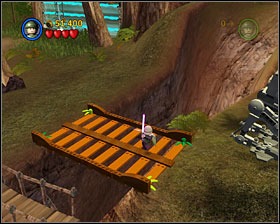
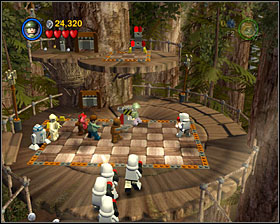
When you reach the chessboard, destroy everything that is on it and build a crate of the rubble. Push it towards the handle to the left. Now as Wicket use the nearby tunnel and use the lever. Go down the screen and stand on the buttons. When all your characters are in place, the elevator will go down. Build a turnstile on the right and use it to enable Wicket to enter the tunnel. When he's up, stand on the button. The passage is open. Go right and cross the river. Shoot the mechanism between the two wooden gates. Fix a panel and use it as 3PO.

Stand on one of the buttons and the rest of the characters will join you. Now approach the right gate and use the planks to make a footbridge for the droids. Near the left gate use the tunnel as Wicket and pull the lever. Build a grapple point. Now stand on one of the buttons and the second pair of gates will be open.
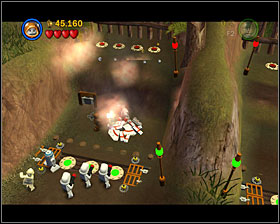
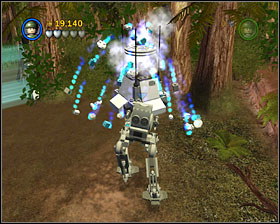
Use the catapult - destroy the gate and shoot AT-ST. Take over the walker and go forth to deal with all the enemies. When the battle is over use AT-ST to reach the button in the right side of the clearing - that will let some other character use the lever. Build the grapple point and use the hook twice to reach the bunker's roof. Destroy the devices there and complete a track for the crate. Push the crate down and use its remains to construct a panel for R2. Also, build a footbridge for the droid from the planks nearby. Enter the bunker.
Blast through the door with flashing, red diodes. Use the blue lever to the left and you'll disable the first lock. Now destroy the door to the left and go to the next room. Defeat the stormtroopers and find the three buttons on the floor. Jump up the stairs and push the crate into its station. Now you can use 3PO to go up there and use the panel - it will give you access to a lever that will turn off the second lock.
Go back to the previous room and this time go right. Use R2's panel and use the elevator. Build a little bridge out of the bricks there and as 3PO use another panel. Pull the lever and the third lock will be disabled. Go to the left end of the upper platform and as R2 hover across even further, along the glass wall. Use the panel and form a tunnel for Wicket of the loose bricks. Use it to get to the other side, where you'll find the control lever for the last lock. Get back to the central room and enter the power supply room to build 4 bombs in there.
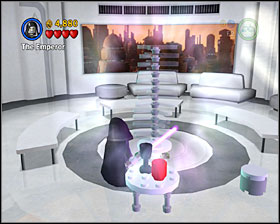
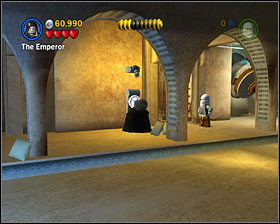
This level is all about battling the Emperor, in which you control both Luke and Vader. Palpatine will try to attack you with his electrocution ability - when it happens and he blocks one of your characters, switch to the other one and slash the old timer. When you wound him a few times, he'll run away and two royal guards will enter. It's easiest to get rid of them using Vader's force-choke.
Go down the screen and left to build a fan. Use it to get to the higher level and go towards the Emperor. You must cross the electrocuted floor, avoiding the segments that are lit in a given moment. When you reach the other side, you'll be able to wound the Emperor some more.
When he runs away again, follow him. He'll jump to a higher platform. Build an elevator to the left and use the Force on the circles on the wall. Now just finish off Palpatine - he'll run away some more, but chasing him won't require solving any puzzles.
First you are to destroy 4 star destroyers (hey, nothing's too hard for you). You'll do that by shooting torpedoes at violet spheres near their bridges. You'll get some torpedoes by shooting down TIE Bombers flying around.

The next section takes place inside the Death Star. Gather torpedoes from the dispensers and use it to destroy the blockades and shield generators. Shoot all the time, destroying all the scaffolds and turrets for studs. When you're in the core room, destroy the panels on the walls. They open when you approach them - don't get too close, though, or you'll get electrocuted. When you destroy them all, the core's shield will go down. Shoot it a few times (you have to squeeze your lasers between the rotating metal barriers), and finally shoot a torpedo in it.
All that's left is to get the heck out of here - just keep flying and shooting, destroying everything that stands in your way. You shouldn't have any problems managing to escape.
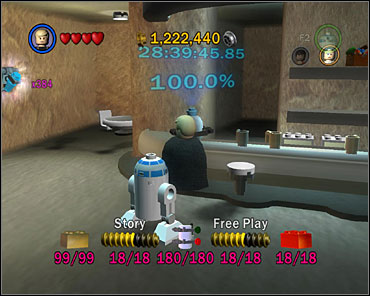
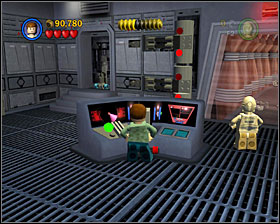
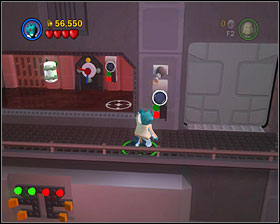
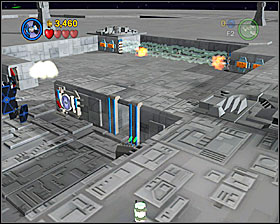
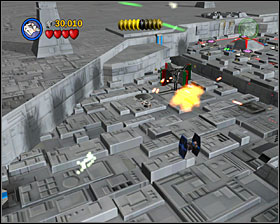
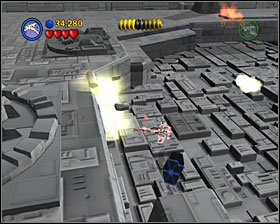
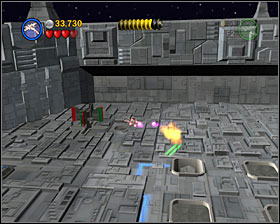
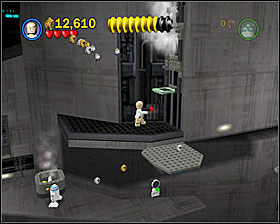
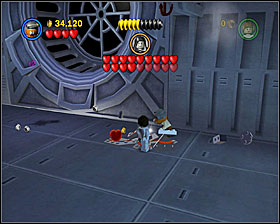
True Jedi Story - 40000. Notice that you can destroy most of the computer wall around here. Remember that and you won't have any problems.
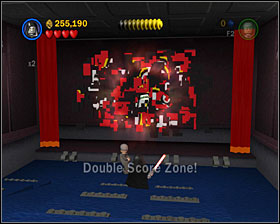
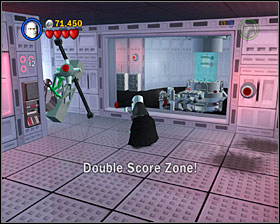
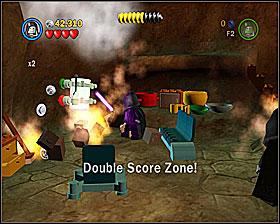
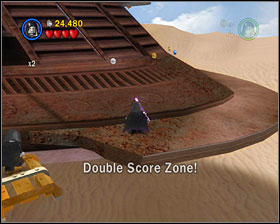
True Jedi Freeplay - 80000. A lot more studs to collect, but the possibilities are also wider. This time remember to use the Force on the walls before you destroy them. Notice the Double Score Zone by Minikit #1.
Power Brick. In the bounty hunter area where you find Minikits #4 and #5 use the Force on the shower shown below.
Minikit
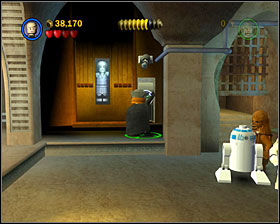
#1
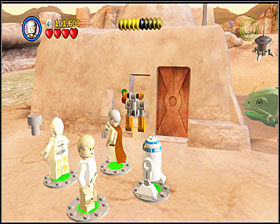
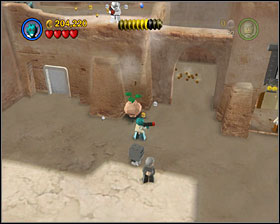
When you see the rebel soldiers for the first time, look to the right to see a Dark Force door. There's a minikit and a double score zone behind it.
#2
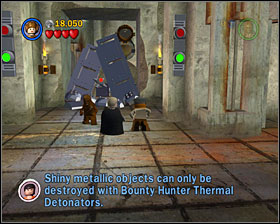
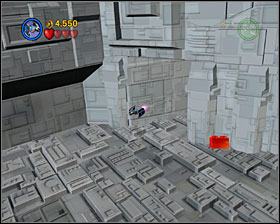
In the room shown on the screenshot use the detonator to blow up a shiny metal object. You'll reach the minikit which is below the floor.
#3
In the same room as #2, use the Force on the platforms on the wall. Jump on them to get another minikit part.
#4
To make this minikit appear, you have to find 3 bricks with a violet face drawn on them. Screenshots to the left show their localizations. The first one is behind the corridor where you've fought Vader, and the other two are in the bounty hunter area a bit further.
Minikit will appear near #5.
#5
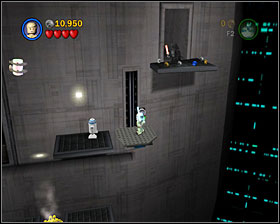
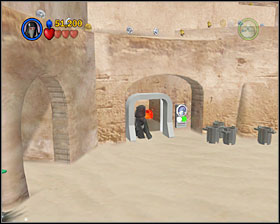
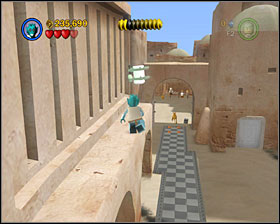
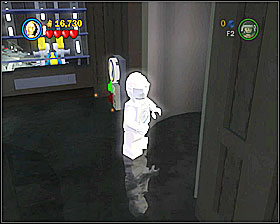
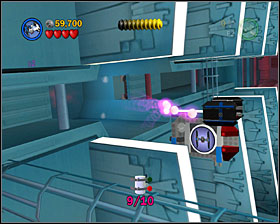
In the bounty hunter area enter the corridor shown on the screenshot and then use all the pod-entrances to make white bricks fall out of them. Build a door out of them.
#6
In the room where you position the two crates on the floor, use the Force on the two metal boxes to the right, then jump on them.
#7
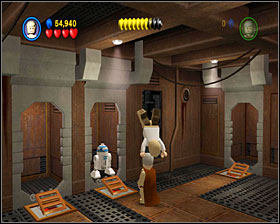
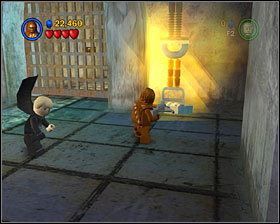
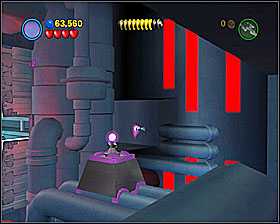
Use the Force on the switch shown on the screen in the corridor where you meet the droids in Story Mode.
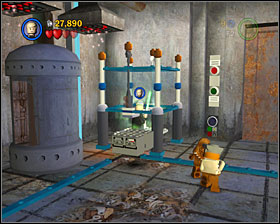
#8
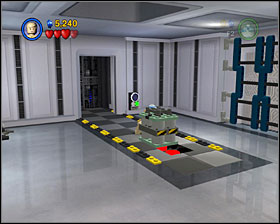
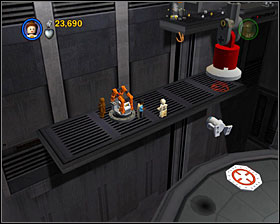
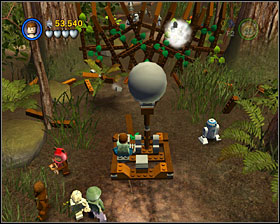
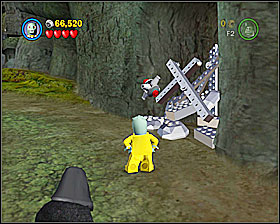
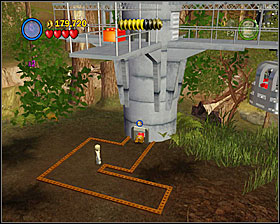
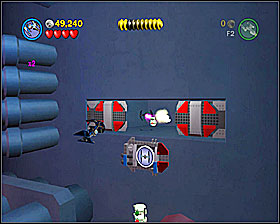
In the bounty hunter area use the detonator to destroy a shiny metal object and you'll get some bricks that can be made into a car. Enter the vehicle and place it on the platform shown on the screenshot.
#9
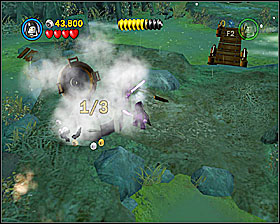
To find this minikit, you'll have to destroy 3 objects, which locations are shown on the screenshots. Minikit will show itself near #10.
#10
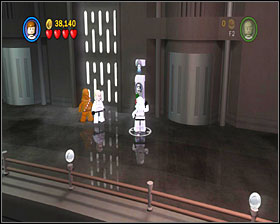
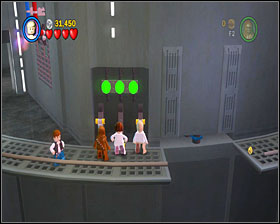
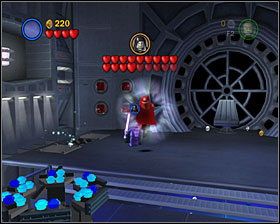
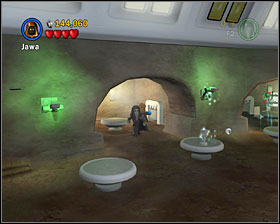
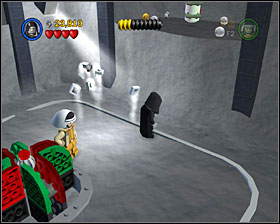
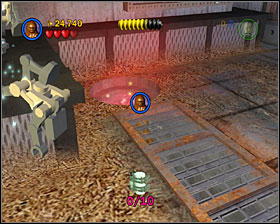
In a capsule with bathing stormies, use the Force on the water.
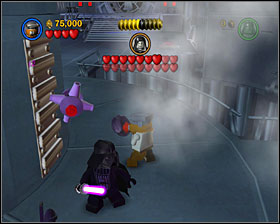
True Jedi Story - 75000. As you have a Jedi in your party, you shouldn't have too much problem here. Just try to control Ben most of the time and you'll be able to see more stud-collecting opportunities. Notice that you can destroy the swamp-drying devices once you turn them on with 3PO, and then use the Force on the flowers that appear.
True Jedi Freeplay - 120000. Don't skip any secret areas mentioned by the minikit descriptions. Besides, there's an interesting room just by the entrance to the Sandcrawler - you'll need 3PO to access it. You can play with a TV in there and build a yellow device to the right. All pays well.
Power Brick. Do the following.
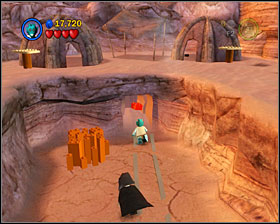
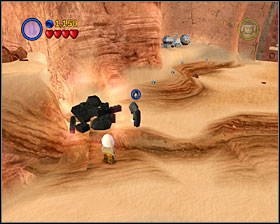
At the very beginning of the level, find a passage shown to the left. It's near the Banthas, you just have to head down the screen. Float across the hole as R2, and then blow up the junk with a detonator.

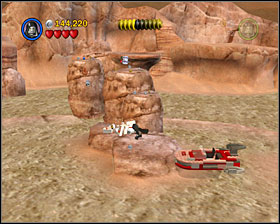
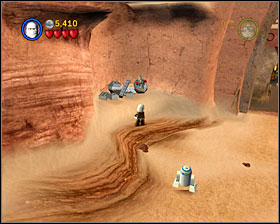
Form the three metal bricks into a tower and use it to reach the platform shown on the screenshot. It's difficult, but can be done. Now switch to R2 and hover to the left. Push the wagon.
The wagon destroyed the door blocking the way to the power brick. You can now easily get it after following the tracks.
Minikit
#1
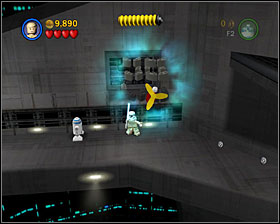
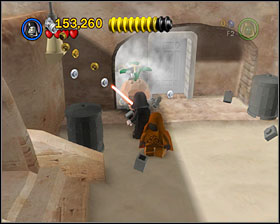
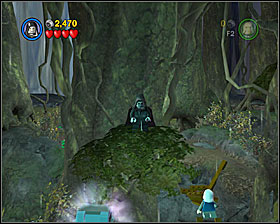
Use the Dark Side on the door at the beginning of the level, just after crossing the first abyss. When you're behind it, use the Force on the bomb in the wall, then shoot and force-detonate another one. Now you can reach the minikit.
#2
As a blaster character climb to the upper level of the ravine near the door to #1, and then as R2 hover to the left. Now switch to a small character (ex. Java) and use the tunnel.
#3
Head to the secret area where you got the power brick and stand at the spot shown on the screenshot. You now have to hover to the minikit - it's not easy, you'll have to be very accurate.
#4
When you get on the roof of Sandcrawler use Detonators to destroy silver things on the back of vehicle. Then two players must stand on the two spots. Entrance to the tunnel will appear. You can enter it with small person.
#5
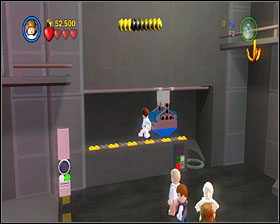
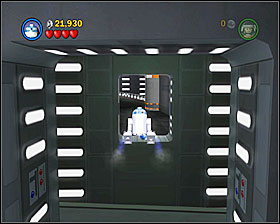
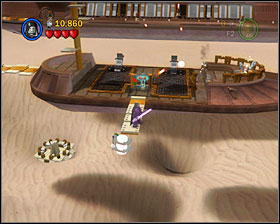
This minikit is fairly easy to get even in Story Mode - it's in the room where you've found R2. Just push one of the crates into a marking in front of the minikit.
#6
In a room with a furnace use the Dark Side on the grid shown on the screenshot. Switch to a small character and use the tunnel, then use the Force on the valve. Now you can use R2 to hover across the lava.
#7
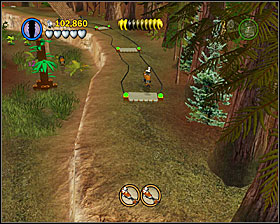
This one can be noticed easily near the swamp-dryers. Just use any blaster character to grapple up to it.
#8
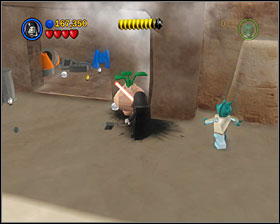
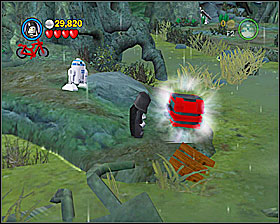
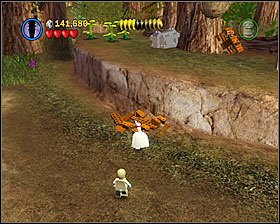
Near where you found #7, use the Dark Side on the object shown on the screenshot. You'll see two buttons there. Place a Bantha on the bigger one and stand on the smaller one. Minikit will be yours. Also, there's a lot of studs around here.
#9
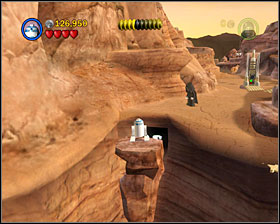
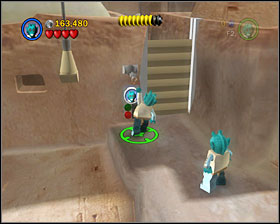
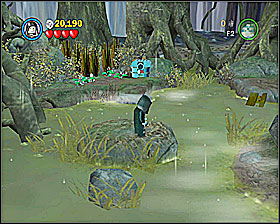
You have to jump on a platform shown on the screenshot. It's a little bit further from the bridge you built. To get there, you'll have to jump from the higher level of the ravine ahead.
#10
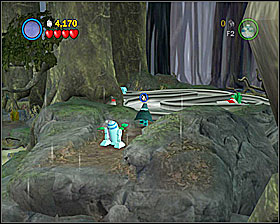
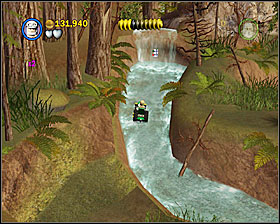
In the last area of the level you'll see a minikit on the rock in the middle of the swamp. Just go there with your speeder and build a grapple point, then use it.
True Jedi Story - 165000. Seems to be a lot but in fact it's not nearly as much as you can find around here. Remember to take care of all the trash cans - first use the Force on them, then smash them. Do the same to all the crates and such. When you build your AT-ST, you can go back a bit and access a car-wash area. Go there with your sandspeeder for some extra credits.
True Jedi Freeplay - 200000. I've found approximately 300'000 studs on this level, so 200k doesn't seep to be a lot. The most important things are 3 Double Score Zones and a cinema at the end of the level (it alone holds about 50k).
Power Brick. In the first section, in front of the first gate, there are a few trash cans to the left. Draw out some bricks from each of them and then use them to build a door and a R2 panel. Use it and grab the power brick.
Minikit
#1
Access the stormtrooper area to the right of your starting location. In there, use the Force on both showers.
#2

First you have to find 3 carrots that appear after destroying certain objects around the first area. Check out the screenshots for their locations. The fourth screen shows the Bounty Hunter access door that you have to reach next. When you do that, a bunch of loose brick will fall to the center of the street. Use them to build a fan that'll allow you to grab the minikit.
#3
On the roof of one of the buildings on the right side of the street there's a Dark Side grid. Enter through it and a minikit will be yours.
#4
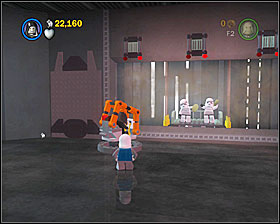
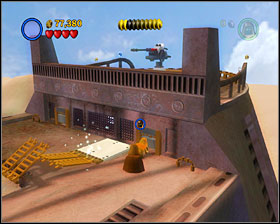
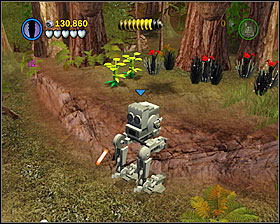
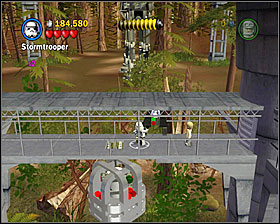
At the upper level of the stormtrooper-guarded gate use the stormtrooper access door. As R2 hover to the other side and build one of the stationary guns here. You have to shoot down 10 creatures.
#5
Use the Force on the 3 metal crates and then use them to reach the roof of the nearby shack.
#6
As a Bounty Hunter use the detonator to destroy the shiny metal object shown on the screenshot. Now build a turnstile from what's left of it. Turn it to straighten the nearby wreckage. Now build a grapple point and use it.
#7
In the Cantina use the tunnel shown on the screenshot.
#8

When you leave the Cantina, you'll come by a bounty hunter area. Enter it and look around. You'll see orange grids at the end. Use the Force on them.
#9
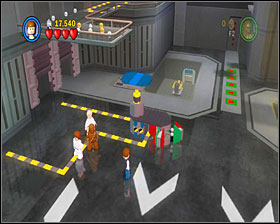
Once again you have to collect 3 objects in order for the minikit to appear. This time they're overgrown apples. The first one is just by the Cantina's exit, the second is in the bounty hunter area where you found #8, and the third is where you fight the stormies on Dewbacks. The last screenshot shows the spot where the minikit finally appears.
#10
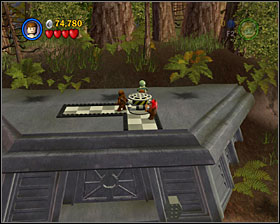
As R2 open the door to the cinema near the Dewbacks. When you destroy all the lights and seats, use the Force on the screen. Destroy it once the movie is rolling.
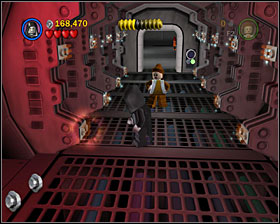
True Jedi Story - 60000. It's one of the harder levels when it comes to Story Mode True Jedi. The most important stud source is the minigame that has you shooting TIE Fighters while manning a Death Star turret. In order to get to it, you have to enter one of the elevators that the stormies are using at the very end of the levels (near the cells).
Another good thing to find is a Double Score Zone that you access using the elevator near the one that takes you to the prison cells. You must have a stormie helmet to have it.
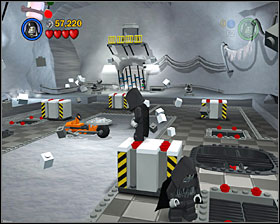
Don't miss a large amount of studs in the room where you start the level - you can smash almost everything in there. Also, keep destroying all the pipes and machines in every corridor.
True Jedi Freeplay - 85 000. This time it's easier. Just remember that sometimes you can choose between two different paths and it's good to go back and go through the second one to get the studs.
Power Brick. When you leave the cut-scene room, follow the same path that you did in the Story Mode and you'll see an R2 door. Behind it, hover to the left platform and grapple up for the brick.
Minikit
#1
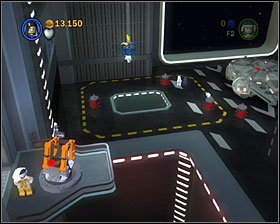
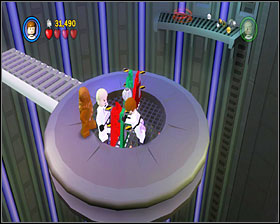
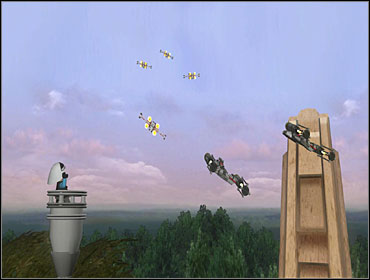
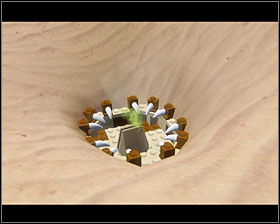
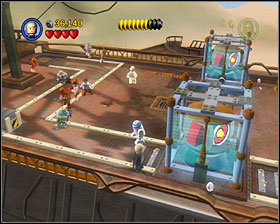
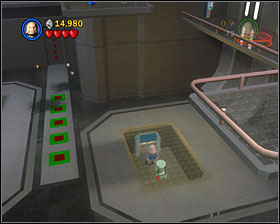
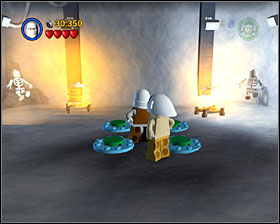
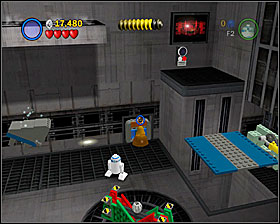
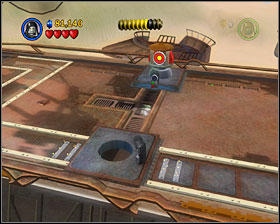
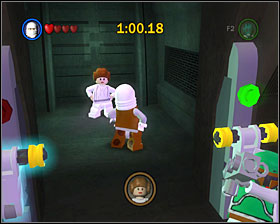
When you leave the first room, take the first right and you'll see a crane. In this minigame your goal is to drop 10 stormies into the hole in the middle. When you do this, grab the minikit with the crane.
#2
Before you use the main computer as R2, look around the room to find a 3PO panel - use it.
#3
As R2 hover across the abyss just after the main computer room, then turn left.
#4
Near where you found #3, hover to the right as R2 and then switch to a small character to use the tunnel.
#5
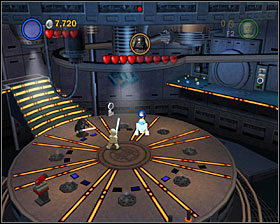
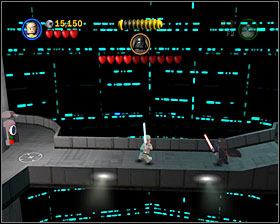
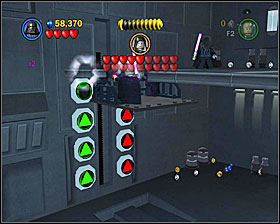
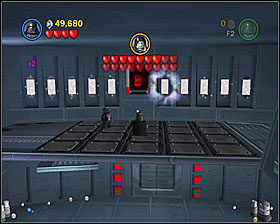
Following the path from #3 and #4, turn off Death Star's shield (the thing Ben did in the background in Story Mode) using the three levers near the generator. A minikit will appear, you'll reach it using your grapple hook.
#6
Still following the same path as before, use the Force on the grid shown on the screenshot. It will form stairs that you can use to reach another minikit.
#7
In the area shown on the screenshot hover to the right as R2.
#8
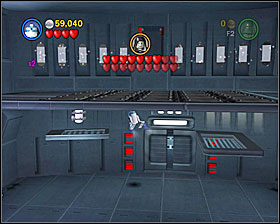
In the room shown on the screenshot destroy all the computers.
#9
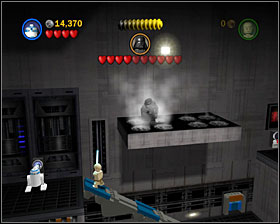
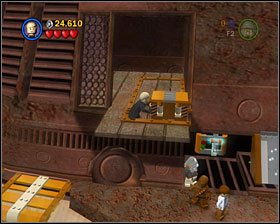
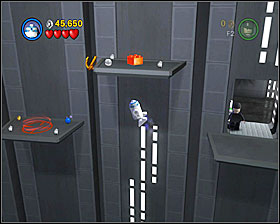
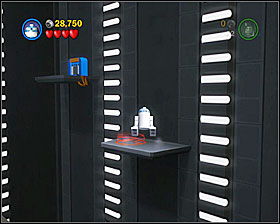
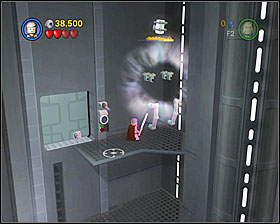
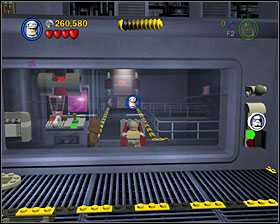
Just before you enter the elevator to reach the prison, use the Force on the crates so you can jump on the shelf shown on the screenshot. Push the device to the right, and it will blow up the shield that kept you off the minikit.
#10

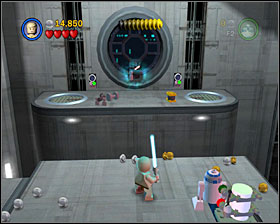
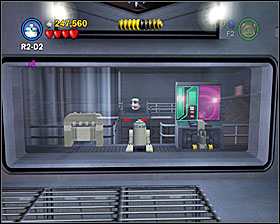
At the end of the level there's a door that can be opened by R2. Behind it there's a minikit.
True Jedi Story - 55000. Piece of cake - a lot easier than Freeplay challenge.
True Jedi Freeplay - 75000. This can be troublesome, as there're no stud-rich secrets on this level. Just keep your eyes open and try to destroy absolutely everything that can be smashed.
Power Brick. At the beginning of the level have 3PO open the door to the left (just as you leave the garbage crusher). Once in there, use the Force on the loose bricks laying around to build some sort of a cooker. Open it for a power brick.
Minikit
#1
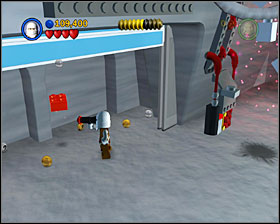
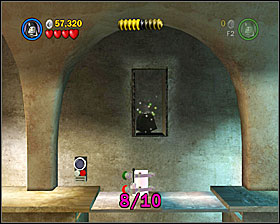
Just behind the first helmet dispenser you'll see a shiny metal object that can be destroyed by a detonator. Doing so will reveal a minikit.
#2
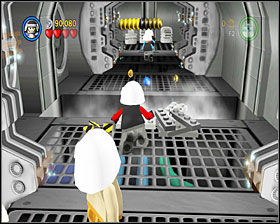
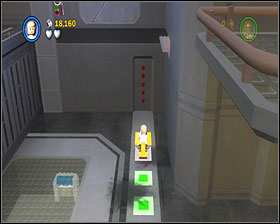
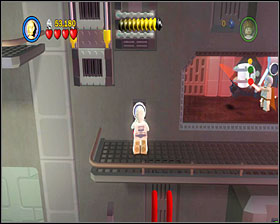
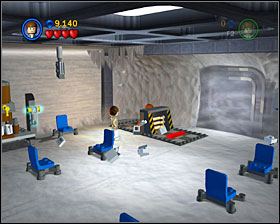
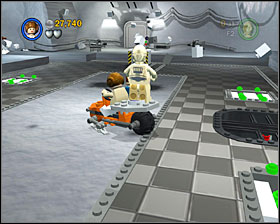
Just where you get your scooter in the hangar, there's a tunnel for a small frame character.
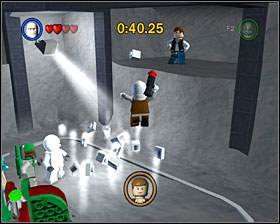
#3
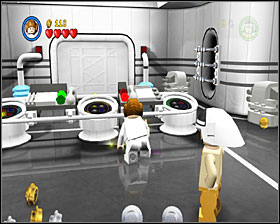
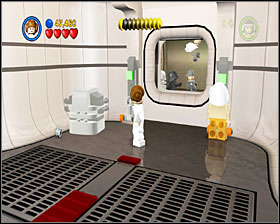
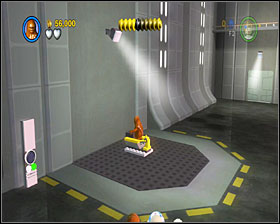
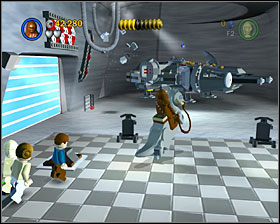
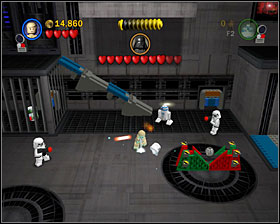
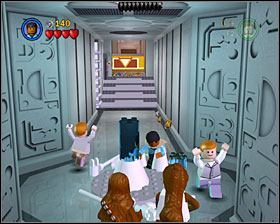
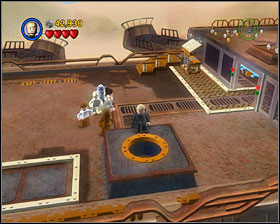
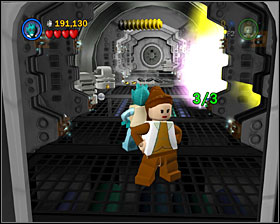
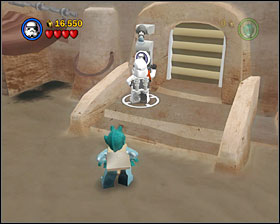
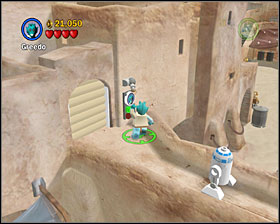
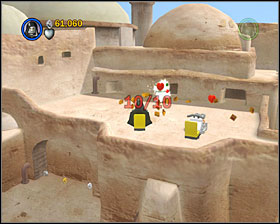
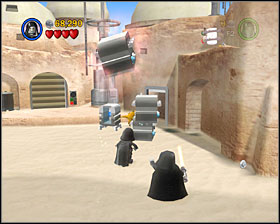
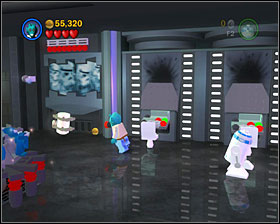
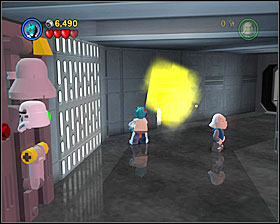
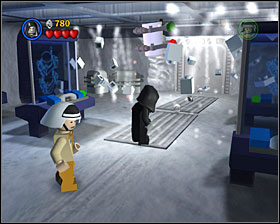
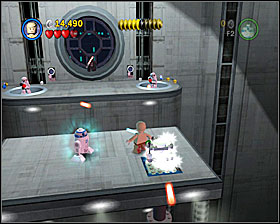
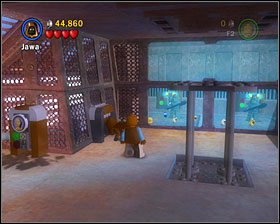
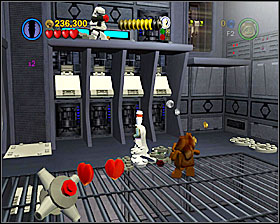
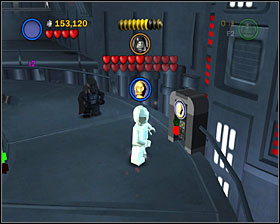
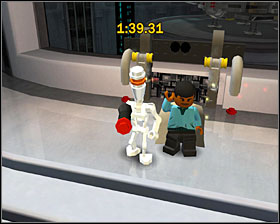
Use the crane and move the window-washing stormies until the glass is clean. A fight will break out, and a minikit will appear.
#4
At the end of the corridor shown on the screenshot there's a Dark Side door, and behind it - a minikit.
#5
Use the Force on the object shown on the screenshot to be able to access another minikit.
#6
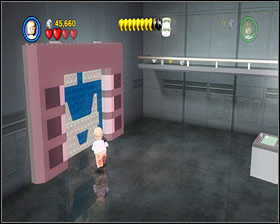
In the corridor that leads to a room with lots of stormies in it, destroy everything you can to reveal three bricks with violet faces on them. A minikit will appear nearby.
#7
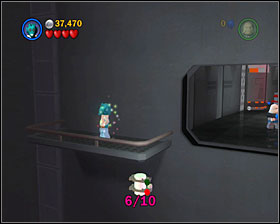
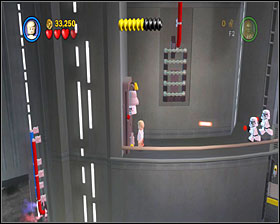
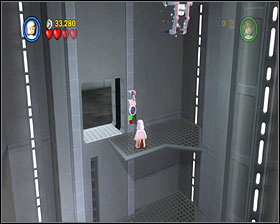
In the same corridor where you found #6, go down the screen and jump to a platform to the left.
#8
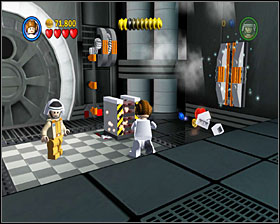
In a room where you fight off a large number of stormies, place the two crates so you can access the upper platform.
#9
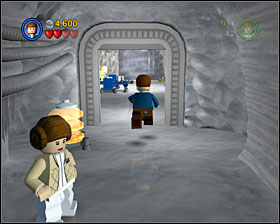
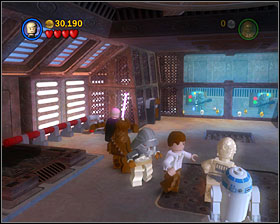
Minikit is behind the door where you find the droids in Story Mode.
#10
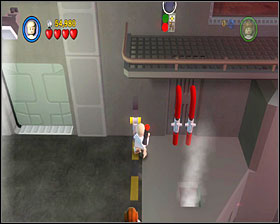
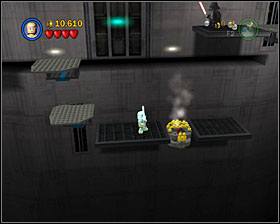
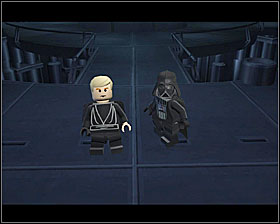
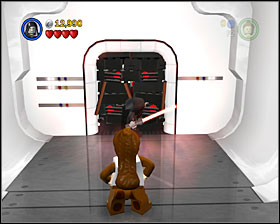
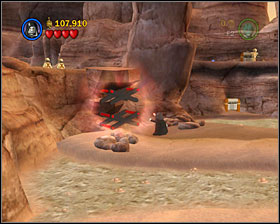
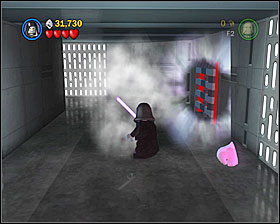
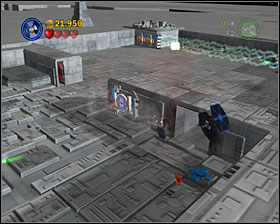
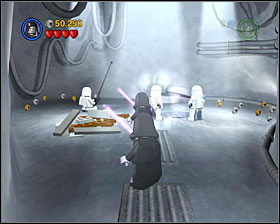
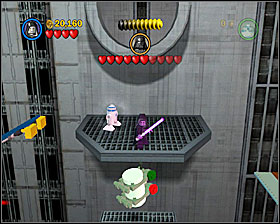
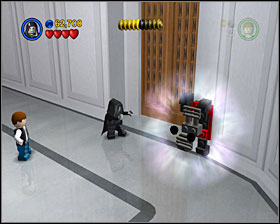
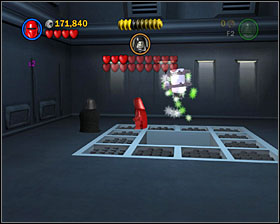
As a bounty hunter access the area where Vader was fighting Ben in Story Mode and defeat the former.
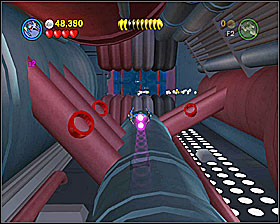
True Jedi Story - 20000. Vehicle-based levels don't require a lot of skill to get the thing done. Just keep shooting everything that can be destroyed - all the violet turrets, blue silos and all wall installations.
True Jedi Freeplay - 30000. It's quite the same as in the Story Mode. You have to get a little bit more cash, but also have access to some bonus areas.
Power Brick. At the end of the level, near the vent, check out the niche in the upper-right corner of the area.
Minikit
#1
Just after the beginning of the level you'll see a cross-shaped marking on the surface of the Star - a turnstile will raise when you approach. Turn it by shooting the green sides.
#2
Destroy the blue wall on the right side of the first section.
#3
In the first TIE Fighter area there's a vent - use a torpedo on it.
#4
In the second TIE Fighter area you'll have to fly over the green squares quickly so that they are all lit simultaneously. It takes some practice.
#5
Near the second TIE Fighter door there's another turnstile.
#6
In the third TIE Fighter area there's a force field that has to be disabled using the Snowspeeder bomb. Go a little bit to the South and grab it with a tow cable, then smash it into the generators on both sides of the shield.
#7
Near the #6 door there's a blue wall that can be destroyed. Minikit is right behind it.
#8
At the beginning of the second to last section there's another turnstile.
#9
Near the last shield you bring down on this level, just before the ravine entrance, have a look at the wall shown on the screenshot. There's a piece that can be destroyed.
#10
Near the vent at the end of the level there's the last turnstile.
True Jedi Story - 70000. Can be done only if you destroy all the white walls by smashing bombs into them.
True Jedi Freeplay - 100000. It's easier than in Story Mode, as you now have access to some stud-rich hidden areas.
Power Brick. At the beginning of the second section (the one with AT-AT) go through the TIE Fighter gate, grab a bomb and take it to the other side of the tunnel. There smash it into the white wall. The power brick is right behind it.
Minikit
#1

To the left of your starting location there's a TIE Fighter area. You'll find a minikit in a pile of snow to the right.
#2
Smash a bomb into a white wall in the first TIE Fighter area and go through the tunnel that turned out to be there. You'll reach a Double Score Zone. To make the minikit appear, you have to eliminate all the imperial forces.
#3
At the end of the first section, just behind the white wall.
#4
In the first section use the tow cable to bring down 10 AT-STs.
#5
At the beginning of the second section there's a TIE Fighter gate. Go through the tunnel behind it - a minikit is waiting by its left wall.
#6
In the same area as #6 reach the other end of the tunnel and destroy a pile of snow in there.
#7
The same as #4, bring down 10 walkers in the second area.
#8
At the end of the second section, on the right side - just before the barrier.
#9
On the battlefield at the end of the level destroy the grey piles of bricks shown on the screenshot.
#10
The same as #9.
True Jedi Story - 70000. Shouldn't be too hard, just keep destroying everything.
True Jedi Freeplay - 100000. There's about 120'000 studs to get on this level, so it can be done with some reserve. Don't skip on any hidden areas.
Power Brick. You'll find it in a similar way as minikit #10 - check out its description below. This time use the machine on the left side of the room, it will open another door in the hangar below. You might have to try to use it a few times before it does its thing.
Minikit
#1
Use the Force on all computers in the first room of the level.
#2
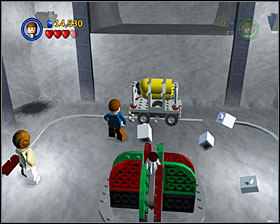
In the room with a carriage, just double jump toward the right wall.
#3
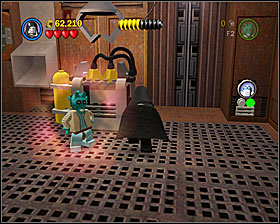
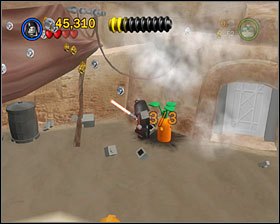
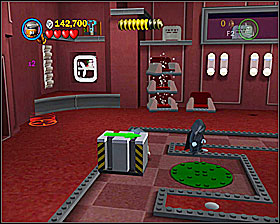
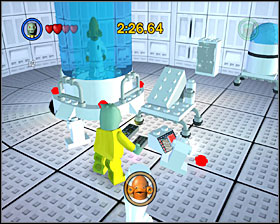
In the room where you found 3PO in Story Mode use the detonators to destroy the two shiny metal objects, then build heaters out of their remains. Use blaster fire to turn them on. Fix both skeletons now and press the buttons on the floor.
#4
As a Sith jump on one of the platforms near the door in the room with snow-slider. The second character will lift you up. Now use the Dark Side on the grid.
#5
Use the R2 panel to the right of the entrance to the slider room. Defeat the stormies in there and use the Force on one of air-holes. Now fix the minikit.
#6
Use the detonators to destroy the shiny object on the right side of the slider room.
#7
Place one of the movable crates in a spot shown on the screenshot, then double jump for a minikit.
#8
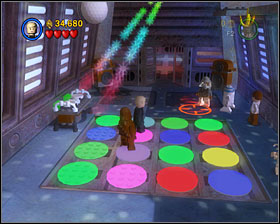
In a room with 4 buttons on the floor, use 3PO panel on the left to get into a Double Score Zone. Use the detonators to blow up the junk that's blocking the way. In the next room fix the panel and use the Force on it.
#9

Use the Dark Side on the windows shown on the screenshot, then jump up the platforms (takes a few tries).
At the junction turn left and grapple up. Switch to a small frame character and go through the tunnel to the right.
#10
Go back to the junction from #9, and this time head right. You'll reach a control room. Use the lever by the strange mechanism to the right. That will open a door down in the hangar. The minikit is right behind it.
True Jedi Story - 50000. It's surely the easiest level to get that, as the blue asteroids keep respawning in here for an infinite amount of studs.
True Jedi Freeplay - 60000. Hardly any difference from the Story Mode.
Power Brick. It's at the beginning of the level, near the stern of the star destroyer furthest to the right.
Minikit
#1
It's behind the bridge of the first star destroyer to the right. To get it, you'll have to shoot it from afar.
#2
Go through the TIE Fighter gate at the beginning of the second section and use the Snowspeeder to grab two bombs and smash them into two red markings.
#3
Same as #2.
#4
In one of the asteroid in the second section, before the first barrier.
#5
In one of the asteroid in the third section.
#6
In one of the asteroid in the third section.
#7
Use the torpedo on the violet target behind the second TIE Fighter gate.
#8
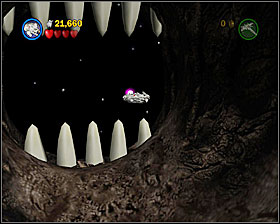
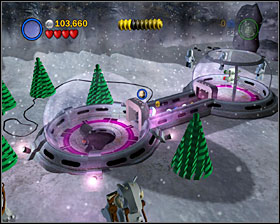
Enter the big crater on the surface of the huge asteroid and look around for a Double Score Zone and a minikit.
#9
At the beginning of the last section, on the right - shoot the blue spot in the crater.
#10
In one of the asteroid in the last section.
True Jedi Story - 50000. It's not hard as long as you remember to go back to Yoda's shack when Luke is able to use the Force on his own. Check out the Story Mode walkthrough to know where that is.
True Jedi Freeplay - 70000. The same as Story Mode.
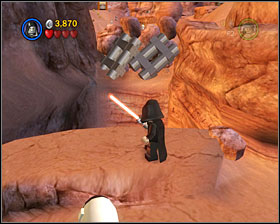
Power Brick. After jumping up at the very beginning of the level, you'll see some black bushes to the right. Use the Dark Side on them and you'll reach a race track. Build a tractor on it and take it for a ride - do a full lap and a power brick will appear.
Minikit
#1
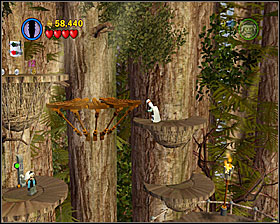
At the beginning of the level build a column out of 3 crates and use them to reach a branch. From it, jump to the right to get the first minikit.
#2
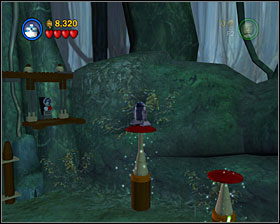
In the first section, when you're near the R2 panel by the swamp, jump to the isle shown on the screenshot, then jump right. The minikit is in the blue crate.
#3
To the right of Yoda's shack there's a red box that can be treated with the Dark Side. Once you change it into a raft, use it to get to the other side of the puddle. Use a detonator to blow up the shiny metal object there.
#4
In the area where Luke was training with Yoda on his back, open up the three manholes.
#5
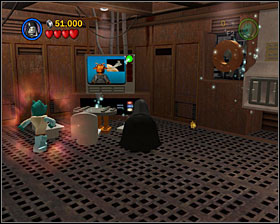
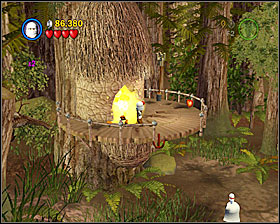
Inside Yoda's shack, use the Dark Side on his plasma TV.
#6

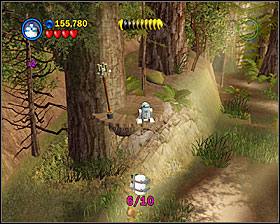
Near the place where you built a tractor in Story Mode, grapple up for the minikit.
#7
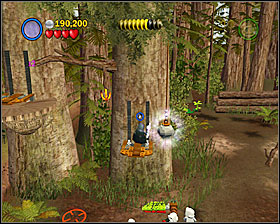
Use the Dark Side to build a bridge at the beginning of the next section. When you're on the right side, use the detonators to blow up the crates, and then grapple up.
#8
Use the 3PO panel on the left side of the ravine, then shoot the cage where the minikit is.
#9
Just before the Vader fight area, use the detonator on the junk shown on the screenshot, then jump to the other side of the room.
#10

Use a small frame character to go through the tunnel in the last section of the level. Jump left and then up.
True Jedi Story - 11000. Not an overwhelming amount, should be no problem. Just try not to die too much.
True Jedi Freeplay - 16000. It's even easier than the Story Mode.
Power Brick. Just behind your X-Wing at the beginning.
Minikit
#1
Use the detonator to blow up the grid at the right side of the first room (you can reach it as R2).
#2
Use the bounty hunter access door just after the stationary gun room.
#3
In the first Vader fight area, use the Dark Side on the control lever to the left, and then use the crane to throw one of the stormtroopers into the freezing chamber.
#4
Shoot the wall shown on the screenshot, and use the step to reach another minikit.
#5

At the end of the same section as #4, use R2 to reach the next one.
#6
In the second Vader fight area, there's a tunnel that can be used by a small character. The minikit is on the other side.
#7
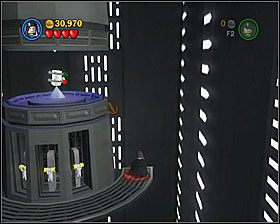
Hit the corner of the platform you're standing on when fighting Vader for the third time.
#8

At the beginning of the last section.
#9
A little bit further from #8, jump towards the screen to get it.
#10

Use the bounty hunter door at the end of the level.
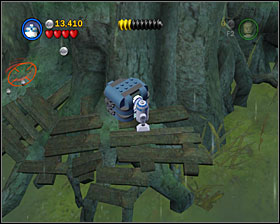
True Jedi Story - 45000. It's quite difficult actually, you have to be very strict when it comes to collecting studs and careful when fighting the stormies. The key to success it to destroy all the wall sculptures, such as shown on the screenshot below. Each of them consists of 3 separate elements. To shoot the upper ones, you have to jump and aim from a distance.
True Jedi Freeplay - 60000. When maxing out the level I've found about 70'000 studs, and that means you don't have much to spare. Remember the walls!
Power Brick. It's above the Slave One, which stays in place in Freeplay. Just jump for it.
Minikit
#1
Just where you start the level, there's a 3PO access door. The first minikit is right behind it.
#2
In the first corridor there's a blue and white mechanism that you can fix. To get a minikit, you'll have to find two more of these - they're not hidden in any way so no problems here.
#3
Use the Force on the sculpture in the room where you fought Boba Fett.
#4
Near the bounty hunter access door that Fett opens up in Freeplay, there's an R2 panel. Behind it there's a minikit. To get it, switch to R2 and hover to the left, then jump up.
#5
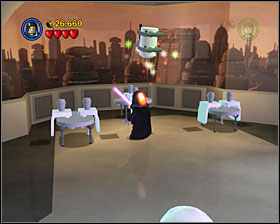
In the restaurant use the Force on all the tables.
#6
Use the bounty hunter elevator near #5, then destroy all the plants. To get the palm trees, you have to jump and shoot. Now use the Force on the bowls.
#7
From the #5 area go down using the stormtrooper elevator, and when you're in the next section, go 'towards the screen'.
#8

Switch to R2 in a spot shown on the screenshot and hover across.
#9
Use the Dark Side on the mechanism in a room with poison gas. Shoot the chandelier in there.
#10
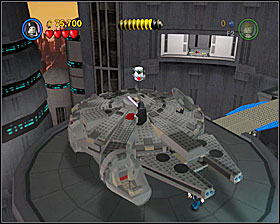
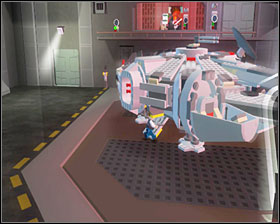
The last minikit is on the Millenium Falcon.
True Jedi Story - 38000. It's simple. Remember to destroy all the torches - they hold a lot of studs, don't miss any of them.
True Jedi Freeplay - 45000. It's even easier, just keep your eyes open.
Power Brick. In a room where Luke joined you in Story Mode build a crate on the right and push it towards a button. Grapple up and you'll be able to grab a power brick.

Minikit
#1
Use the Dark Side on a pile of black bricks left of your starting location. A grapple point will appear, use it and the first minikit will be yours.
#2
As a bounty hunter blow up a pile of junk left of your starting location. Build a grapple point and use it.
#3
At the end of the first corridor, before the first bounty hunter door, turn right and use the 3PO panel.
#4
On the left side of the room where Luke joined you in Story Mode there's a R2 panel. Use it and grab a minikit.
#5
In a room with prison cells use the 3PO panel on the right.
#6
In a room with orange weights build a bomb on the left and shoot it a few times.
#7
In the room where the droids were being held, smash the floor and go through the tunnel that's under it.
#8
In a room where you made way for 3PO, extend the bridge as R2 and use the Dark Side to get the minikit above it.
#9
Just where frozen Solo is on display, there's a stormtrooper access door on the left. Use it and grab a minikit.
#10

While fighting Rancor build a grapple point and use it to reach the minikit.
True Jedi Story - 50000. Be careful not to die too much, there're lots of enemies here. Huge amounts of studs can be found by blowing everything on the skiffs at the beginning of the level.
True Jedi Freeplay - 65000. This time it's a lot easier in Freeplay than in Story - you can gain access to some really stud-rich areas.
Power Brick. Near the end of the level, just before you enter the stationary gun area, find some bricks to build a grapple point. Use it to get on one of the masts, then jump for a power brick.
Minikit
#1
On the first the and the second skiff you'll find stationary guns that can be fixed. Fix all 4 and a minikit will appear floating above the second ship. In order to get it, you have to use the Force on the bricks on its stern.
To make these bricks appear, you first have to use the lever to make the two crates appear, and then move them towards the markings on the floor.
#2
On the second skiff you'll see a plank pointing down - walk it and as R2 hover for the minikit.
#3
When you're at the last Skiff, use the Dark Side to create a platform that'll let you jump to the right. There's a Double Score Zone here.
Grapple up a bit further and you'll see two levers - use them both and then smash through the wall.
#4
Near where you found #3, go further to find the three panels (2 for R2 and 1 for 3PO). Use them all and then grapple up and use the detonator to destroy the final barrier.
#5

When you're by the mechanism at the front of the barge, use the Dark Side on the crate to create a grapple point. Use it and you'll end up near three levers - pull them all.
#6
In a room where you turned on the elevator, switch to a small character and go through a tunnel nearby.
#7
When you go past the disco room, destroy all the windows on the left.
#8

Once on the deck, find some bricks to build a grapple point and use it. When you're up there, switch to R2 to get to the platform with a minikit.
#9
At the end of the level enter the tunnel using a small character.
#10
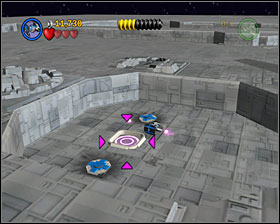
When you shoot the gun at the end of the level, destroy just one target and jump into the hole that was left of it.
True Jedi Story - 55000. The trick is to penetrate the speeder area carefully. There's no rush in eliminating the stormies - take your time to destroy all the bushes and trees and you won't have any problems here.
True Jedi Freeplay - 70000. Pretty much the same as in the Story Mode. No Freeplay bonuses here, so you just have to be more careful.
Power Brick. Near the imperial base by the end of the level push the crate to the station and then use the tunnel as a small character.
Minikit
#1,
#2,
#3,
#4,
#5,
#6
6 initial minikits are scattered around the speeder area. They are placed in cages that you have to get rid of by flying above the red panels. Remember that you can turn around here, you don't have to repeat the whole lap when you miss something.
#7
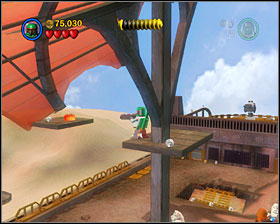
Before destroying the first shield generator use the AT-ST to get to the high shelf to the right. Use the Dark Side on the dark bushes there and then use the tunnel as a small character. As R2 hover to the other tree and use a lever to lower the cage with a minikit. You can smash it using the walker's lasers.
#8
Before destroying the second generator build a platform of the bricks on the right. Blow up the metal crates using the detonators and build crates out of them. Next, use the Force to place them on top of each other. Use the lever to lower the next cage.
#9
Before destroying the third generator go right, build a platform and destroy a metal crate with a detonator. Grapple up and use the lever.
#10
On the upper level of the imperial base use the stormtrooper panel and go back down to smash the cage with your detonator.
True Jedi Story - 90000. It's quite simple - there's a lot of studs all around the place, just keep looking for them. Notice there's a lot of studs in the corridor you're in just after entering the bunker.
True Jedi Freeplay - 110000. Same as Story Mode. Not many Freeplay hidden areas, but still it's pretty easy to get enough.
Power Brick. In the room to the left of the bunker control room destroy the hatch near the stormtrooper panel. Use the panel and use the Dark Side on the black triangle on the floor. Push the crate towards the opening. Now get to the higher level (where you used the C3PO panel in Story Mode) and as R2 hover to the right. In there, use another 3PO panel. A tunnel will be open - go through it and push the crate to the end of the track. A power brick is yours.
Minikit
#1
Stand on the throne and the other character will lift you up. Switch to R2 and hover towards the minikit.
#2
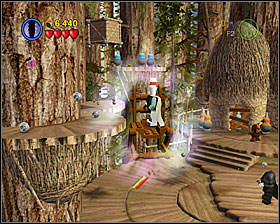
Use the small lift next to the shack with 3PO panel in it and use the lever there. As R2 hover to the left and then use the Force on the hanging stone. Quickly jump onto the lowered platform and use another lever to open the door below. A minikit is right there.
#3
A little bit further from #2, after the next bridge, use the Force on the wooden platform to lower it. Jump across it and use the Force on it again, it will let you get to the minikit.
#4
When you're on the ground level, destroy the violet crate to the left and build a grapple point. Use it and blow up the shack's door.
#5
When you cross the river, destroy some crates in there and assemble a tractor. Use it to go up the stream.
#6
After going through the two wooden gates, use the tunnel (behind the bushes) and as R2 fly to the minikit nearby.
#7
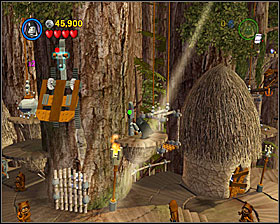
On a big clearing with a bunker, destroy the violet crates and build a turnstile of their remains. Use it to lower the platform nearby. Grapple up to get to it (the grapple point is below the bush to the left). Use the Force on the hanging stone, and then jump to the left. Use the Force on the Stone again, switch to R2 and fly left.
#8
Use the detonator to blow up a metal crate to the right. Use the Force on a hanging stone and quickly switch to a small frame character to get into the tunnel. Now use the Force on the platform twice to get to the minikit.
#9
Use the Force on the 4 panels shown on the screenshot in a room right of the control center. Build a minikit of the loose bricks that fell out.
#10
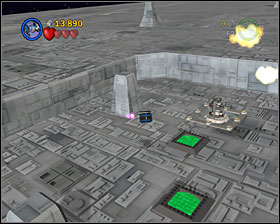
Right where you used the lever to turn off one of the locks as Wicket switch to R2 and fly towards the minikit.
True Jedi Story - 30000. Most importantly, try not to get killed too often. Take your time and don't be disturbed with the fact that the Emperor is waiting for you to come and fight. Look around.
True Jedi Freeplay - 40000. It's a lot easier than the Story Mode, mostly due to some cool stud-rich bonus areas.
Power Brick. Use the Force on 8 squares on the back wall near where you fought the Emperor for the first time.

Minikit
#1
Use the Force to build a platform near the first battle area.
#2
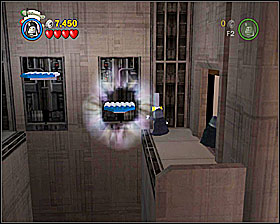
Go rightwards from the starting location and blow up a shiny metal object with a detonator. Build a grapple point and use it.
#3
Right where you fight the Emperor for the second time use the Force on 10 glowing panels on the back wall.
#4
Below the second battle area use the Dark Side on the air vent and build a platform of what's left of it. Now destroy the parts to the right and build a bounty hunter panel. Use it and you'll be able to hover to the minikit as R2.
#5
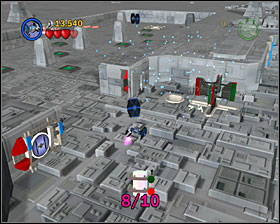
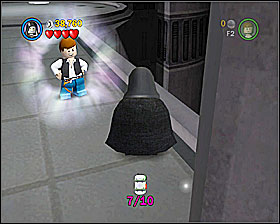
Go through the door near #4 and light up all 12 panels on the floor by quickly walking over them.
#6
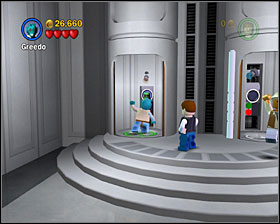
Near the elevators by the center of the level use the detonator to blow up a metal fragment of the wall.
#7
Use the bounty hunter panel in the center of the level, and build a 3PO panel of the loose bricks that came out. Use it and you'll see the next minikit.
#8
Below the third battle area use the tunnel and push down the crate, then shoot its remains. You'll access a hidden room. Place the three armchairs on top of each other and use the tunnel.
#9

In the same area as #8, use the Dark Side on the fan at the back, then use the detonator on its cover.
#10
In the same room as #8 and #9, build a panel for 3PO on the left and use it. Now use the detonator on the metal piece of equipment nearby and grapple up. Use the lever and build a crate. Push it to a green circle on the floor. Destroy the two armchairs nearby and fix a turnstile of their remains. Use it to rotate the box 90 degrees. Push it towards the station to the right. An elevator will turn on - it'll take you to the last minikit.
True Jedi Story - 55000. Pay attention to all installations inside the Death Star, most of the money is hidden in there. Don't hurry, you don't have any time limits here.
True Jedi Freeplay - 65000. The same thing as in the Story Mode, only harder. No real bonus areas here.
Power Brick. In the Death Star core room you'll see two targets on the left wall. Strike them with torpedoes and a power brick will be yours.

Minikit
#1
Near one of the star destroyers (screen).
#2
Near one of the star destroyers (screen).
#3
Use the torpedoes to destroy the three turrets.
#4
Behind the first TIE Fighter gate.
#5
Behind the torpedo dispensed in a barely seen niche.
#6
Behind the second TIE Fighter door.
#7
Fly towards the screen in the core room.
#8,
#9,
#10
The 3 remaining parts can be found when firing blindly your way out of the Death Star. No real strategy here - just keep shooting and you'll probably get them.
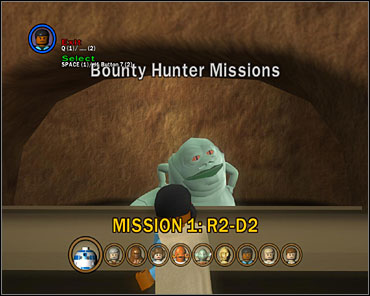
When you're done with all the Story Mode levels, there will be a new door open in the Cantina, leading to Jabba's bar. In there, you can access 10 quick missions in which you take control of a squad of Bounty Hunters and your goal is to find some rebel leaders. The faster you manage to do that, the more you will earn. You also get a Gold Brick for completing each one of these.
Next to the sought character's name is the name of the level you're wandering around. Not to complicate things unnecessarily, I'm trying to relate to minikit locations in below descriptions. Just check the Freeplay section for details.
HINT: You must have either 4-LOM or IG-88 in your team on these levels, as they can use both R2 and C3PO panels. Buy them at the shop before you kick off.
R2D2 (Secret Plans)
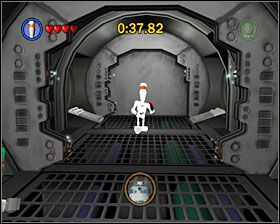 R2 is where you've found minikit #5.
Obi-Wan (Through the Jundland Wastes)
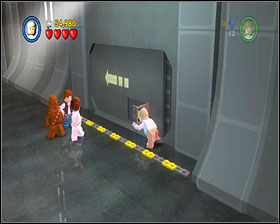
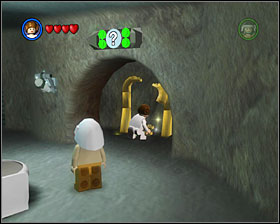
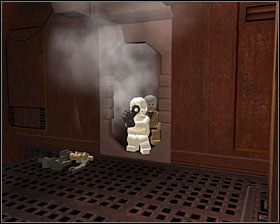 In the last room of the Sandcrawler, just where you opened the exit as Obi-Wan in the Story Mode. Destroy the barrels to the right, Ben is right behind them.
Chewbacca (Mos Eisley Spaceport)
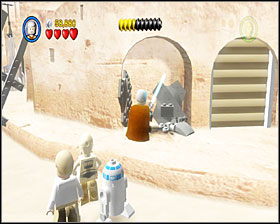
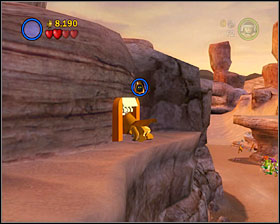
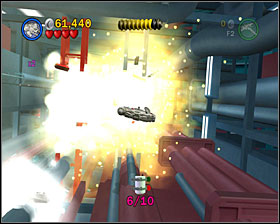
 He's behind the left door near the Dewback fight arena. The door to this section can be blown up by a detonator.
Leia (Rescue the Princess)
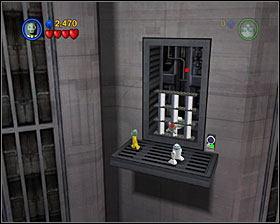
 She's in the second to last cell on the left in the prison block.
Ackbar (Escape from Echo Base)
 Right where you've found minikit #8.
Yoda (The Battle of Endor)
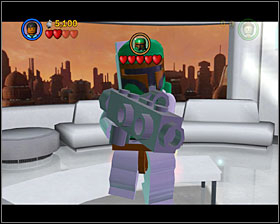
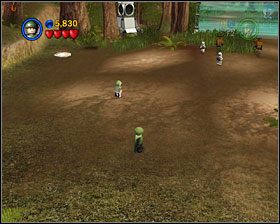
 Go to the left and use the turnstile, then use Boba Fett's jetpack to reach him.
C-3PO (Betrayal Over Bespin)
 Right where minikit #6 was.
Lando (Betrayal Over Bespin)
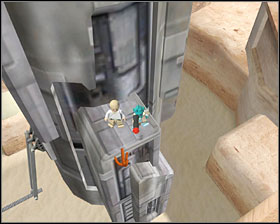
At the control room at the end of the level (where you operate the bridge).Luke (Mos Eisley Spaceport)
Right where minikit #6.Han (Escape from Echo Base)
 Right where minikit #2. In order to get to him, you have to turn on the carriage.
Access to bonus levels in LEGO Star Wars is gained by gathering the so called Gold Bricks. You can collect 4 of them on each level: for completing the Story Mode, for getting all 10 minikit parts, and for getting True Jedi status in Both Story Mode and Freeplay. 8 of them can be bought in the shop, 10 are awarded for completing the bounty hunter missions, and 9 are related to episode-specific bonus levels. To sum up, you have 99 Gold Bricks to find. When you do that, you'll be almost done with the game. The only thing left will be to buy everything in the shop.

Required Gold Bricks number
Reward
8
Episode IV bonus.
16
Episode V bonus.
32
Episode VI bonus.
60
LEGO City access.
99
LEGO Spigot.
 Episode bonuses can be accessed through Gold doors.
Power Bricks
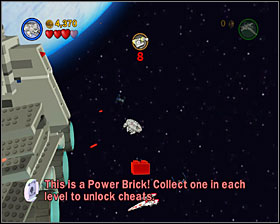
Collecting power bricks allows you to buy cheats in the Cantina. On each level there's one power brick to be found. Their locations are described in the Freeplay section of the guide. Here's the list of all the cheat codes.
Level
Cheat
Secret Plans
Super Blasters
Through the Jundland Wastes
Fast Force
Mos Eisley Spaceport
Super Lightsabers
Rescue the Princess
Tractor Beam
Death Star Escape
Invincibility
Rebel Attaca
Score x2
Hoth Battle
Self Destruct
Escape From Echo Base
Fast Build
Falcon Flight
Score x4
Dagobah
Regenerate Hearts
Cloud City Trap
Minikit Detector
Betrayal Over Bespin
Score x6
Jabba's Palace
Super Zapper
The Great Pit of Carkoon
Bounty Hunter Rockets
Speeder Showdown
Score x8
The Battle of Endor
Super Ewok Catapult
Jedi Destiny
Infinite Torpedoes
Into the Death Star
Score x10
Cheats worth using:
Super Blasters/Super Lightsabers - it's always good to have greater firepower;
Fast Force/Fast Build - you build and use things faster;
Invincibility - great way to make your True Jedi hunt easier (when you are invincible, you can't loose any studs);
Infinite Torpedoes - a great feature for all the starship levels.
Score x2/x4/x8/x10 - they are extremely expensive, but make your life a lot easier.
Episode IV
Super Story. You have to complete all 6 levels of this episode within an hour and collect 100 '000 studs meanwhile. It's not difficult provided you've already beaten these levels at least twice. Just remember not to focus too much on the studs, 100k is a really small amount and you'll surely get it by default.
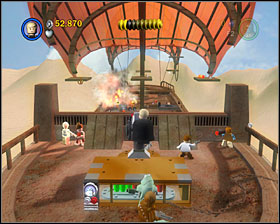
Character Bonus - Mos Eisley. You have 5 minutes to collect one million studs. As in any other level of this kind, invincibility is a great thing to have. It's good to use a Bounty Hunter in this one. Use his detonators to blow up the respawning shiny metal objects.
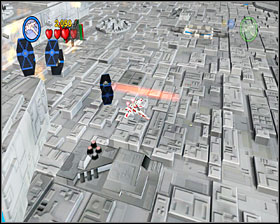
Minikit Bonus - Death Star. Another million stud in 5 minutes, only this time you're piloting a ship (one of the minikit models). Choose something fast and agile. Millenium Falcon is a cool choice, as it's bigger than some other ships and therefore it's easier to collect studs when controlling it.
Episode V
Super Story. Just as in E4: 6 chapters, 60 minutes, 100'000 studs. It's a bit harder than the previous episode, but still can be done without real problem as long as you don't waste time on wondering how to solve a certain puzzle. Again, no point in paying too much attention to studs.
Character Bonus - Bespin. 5 minutes to get 1'000'000 studs. It's good to find two large groups of respawning stud sources (such as boxes or shiny metal objects) and cycle between them. Use Bounty Hunters.
Minikit Bonus - Hoth. It's good to have a snowspeeder here (you have to collect all the minikit parts on Escape from Echo Base to get it), as you can use its tow cable to blow up the best stud sources around.

Episode VI
Super Story. You have an hour to complete the whole episode and get 100'000 studs. It's definitely the hardest one of all the bonus challenges. Don't resign when the first two levels take too much time to complete, the second half of this episode is a lot simpler and quicker (the last two levels can be done in less than 10 minutes).
Character Bonus - Endor. You now have 7 minutes to get a million studs - no problem at all, can be done in about 3 or 4.
Minikit Bonus - Endor. It's identical to the Death Star and Hoth bonuses. You can't go wrong with the Millenium Falcon.
Slave One
For completing all the minikits (18 ships, each made of 10 parts) you gain access to a hidden ship you can use in Freeplay - Boba Fett's Slave 1.

LEGO City
LEGO City's entrance is outside the Cantina and to open it up you have to collect 60 Gold Bricks and complete the whole Story Mode. When you are done with that, just build the large question mark shown on the screenshot below.
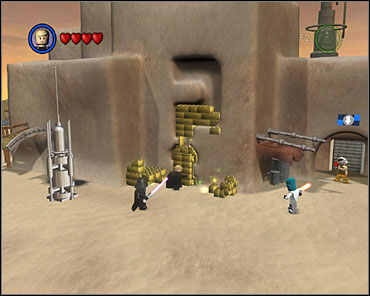
LEGO City is a world where Star Wars universe mixes with classic LEGO toys. Our goal in this place is to collect one million studs. Although you can see the timer on the screen, you don't have to hurry, there's no time limit. There's exactly one million studs around here, so you can't miss anything. Below I point out some of the more troublesome puzzles.
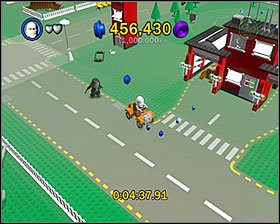
Take a ride in every vehicle you can find. Some of them are available from the spot, and some need to be built from loose bricks. When you mount a vehicle, you see a trail of blue studs - collect them all.
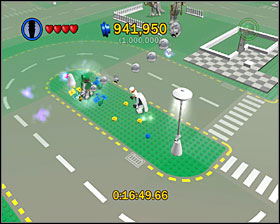
You can use the small bricks laying on the lawns to create flowers.
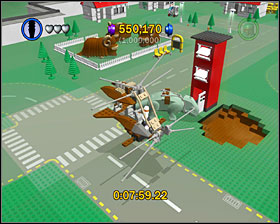
Around the place shown on the screenshot you'll find parts of a flying machine that you need to build. Use the antennas of the nearby tower to complete it (you can access it by jumping off a Dewback).
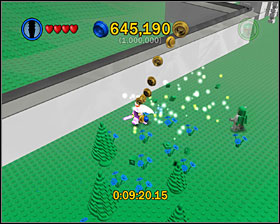
By walking around the lawn near the left end of the map you make flowers appear. Also, destroy all the trees in there.
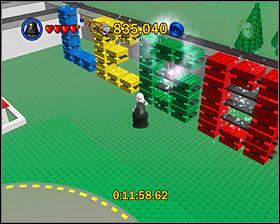
Use the Force to complete a LEGO sign in the right side of the city.
Besides all that, destroy everything you can. Remember that it's better to use the Force on everything first. If you destroy a building before using the Force on its windows, you'll loose the chance of getting all the studs. Also, remember to throw a detonator here and there.
HINT: LEGO City is a cool bonus feature, but completing it doesn't seem to be giving you anything in particular. The money you collect in here doesn't stay on your account.
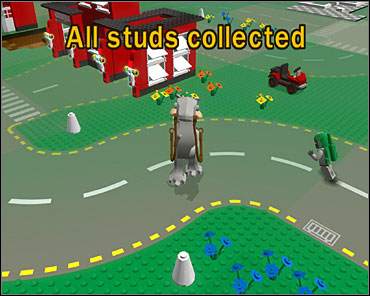
LEGO Spigot
LEGO Spigot is the ultimate unlockable in the game, one that requires all 99 Gold Bricks to be collected. When you have them all, you can built the spigot outside the Cantina. To achieve 100% completion of the game, you now have to buy everything from the shop, including very expensive stud multipliers. To get the money for that, place your character under the Spigot and just wait for the cash to flow. You can also turn on the second player character and place him on the other side of the Spigot, that will speed things up.

Hundreds of millions of studs are a matter of seconds when you have x3840 multiplier.


 Lost Planet: Extreme Condition Game Guide & Walkthrough
 LEGO Indiana Jones: The Original Adventures Game Guide & Walkthrough
 Lord of the Rings Online: First Steps Game Guide & Walkthrough
 Landmark Game Guide & Walkthrough
 Life is Strange Game Guide & Walkthrough