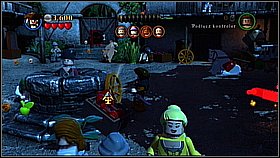
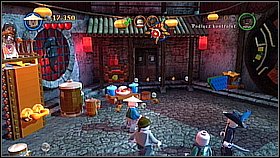
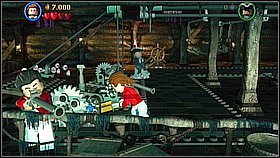
A pirate's life is full of adventures, crazy journeys, treasure hunting and fighting. Each aspect mentioned above can be found in LEGO Pirates of the Caribbean: The Video Game. The Traveler's Tales product is stuffed with entertaining elements, puzzles, challenges and last but not least, secret objects. How to find them all? This guide will help you.
You will find here information about the main characters and their skills as well as about the gold bricks, which give you the access to the hidden places. We did not forget about the red hats, special modifiers giving you essential bonuses and cheats to unlock difficult to find characters.
The most important part of this text is of course the walkthrough. You will find here detailed description of all puzzles and the localization of all two hundred minikit bottles. Therefore learning all the pirates' secrets will be a piece of cake. Let your adventure begin and enjoy it.
Szymon "Hed" Liebert (guides.gamepressure.com)
The characters can be unblocked only by finishing the given level. In order to find them we need to complete the whole campaign.
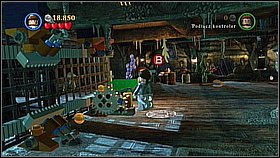
Pay attention that many characters must be bought in the Port even after being unblocked. Most of them just wander in our headquarters. We run towards them and use the indicated button (default: B).
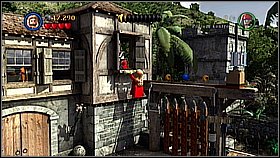
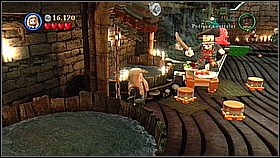
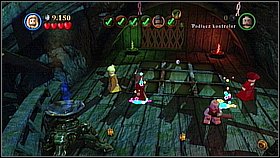
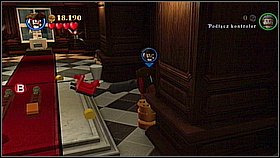
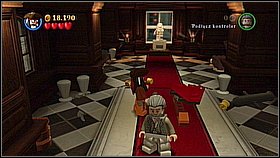
It is a good idea to unblock Blackbeard (description below) and use him to smash the tavern's door (in the left part of the Port, where we can find him). Many characters which you can buy will appear in that room, you only need to destroy the tables. On the wall you can find an interesting item - browser of graphic materials taken from the game.
In order to buy all the characters you need to have loads of money. Becoming rich will be easier with the multipliers which you will get for discovering and buying one of the Red Hats.
The characters who do not want to be bought must be challenged to a duel - attack them with your sword and fight. Unfortunately it is sometimes difficult and annoying as the opponents have the tendency to run away.
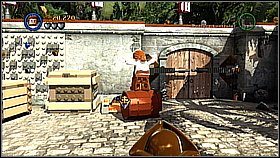
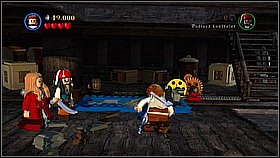
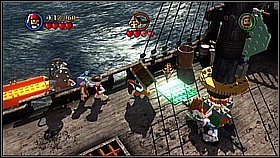
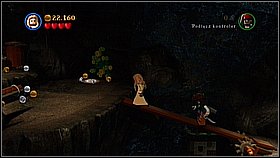
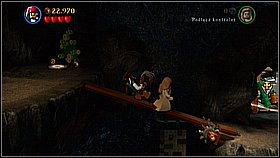
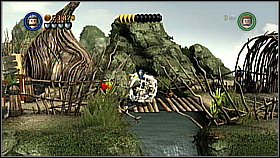
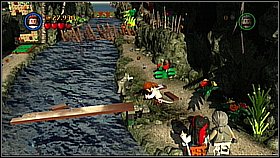
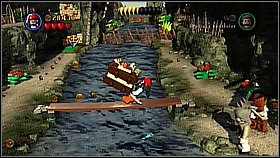
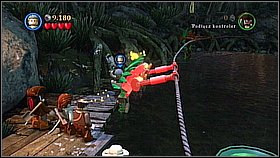
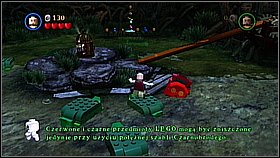
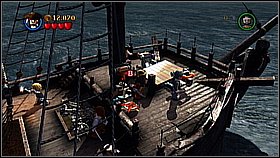
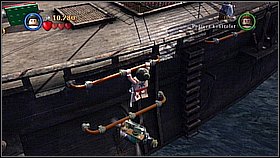
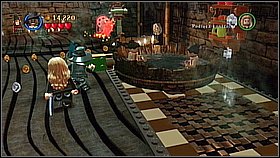
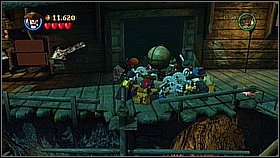
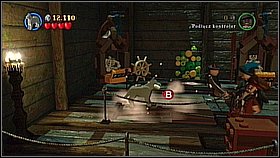
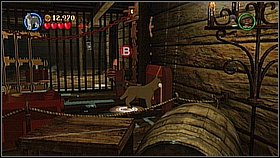
You can create your own character in the left part of the Port, behind the usual place where Blackbeard wanders. First you need to lift the bridge in front of the puddle - build a span using the golden elements. Then with a little help of a barrel lift up the bridge. Next you need another barrel to get on the other side of it and you need to activate the other mechanism (in front of the building, at a pier).[1] Run inside and look for the way up - grab the two ropes simultaneously. [2]
Below you can find the list of the characters required to find all the hidden objects at each level. Treat it as a "dream team" for Free Play where you can collect points and minikit bottles.
The gold bricks are special kind of award which you can get in different manner. They are required to unblock certain achievements/trophies. The most interesting is that they provide access to many bonuses in the Port including secret level.
After paying certain amount of the gold bricks you can unblock the left and the right part of the Port (new locations!) and build fancy objects (including the machine to create your own characters in the left part of the Port). If you want to buy every character you need to unblock all parts of the Port.
You can find 85 gold bricks. Each brick you can get for:
Additional bricks can be found:
The Red Hats are the special modifiers, cheats, tiny tricks and bonuses. Each can be found in the Port for a certain price. The hats must be found in the various parts of the Port and bought. In return you will get the useful boosters.
Here you have the list of 20 items of that type.
The cheats should be written in menu Extras->Enter the code:
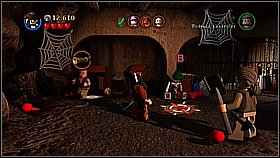
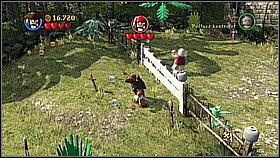
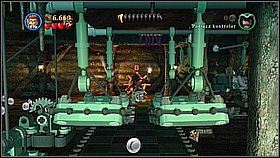
Switch to Mr. Brown and repair the broken wheel. Next build the machine using the smoking red parts. Then use the switch next to the machine. [1] Now pick up the carrot from the bucket and give it to the donkey.[2]
Get on the donkey and ride it to pull the mechanism on the left.[1] When Sparrow appears hit him with your sword.[2]
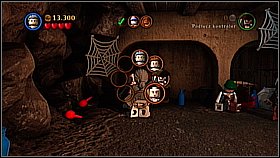
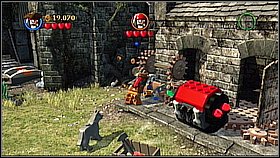
The pirate will escape up. Use the bricks from the smashed wagon to rebuild the wall which you can climb. [1] When you climb up fight with Sparrow - run after him and hit him with your sword.[2]
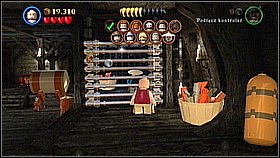
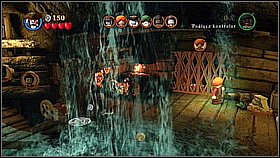
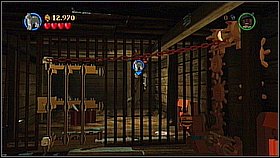
Go to the last cell on the right. When the grille falls down, pick up the bone. [1] Give it to the dog and enter the vent in the wall on the left side. Push down the beam on the other side.[2]
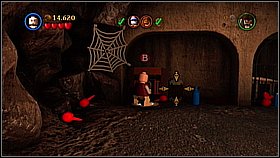
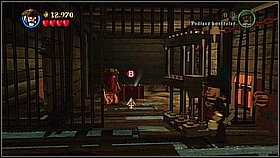
Put the object on the green floor panel in front of Jack's cell and release him. [1] Use the dog to dig up the mechanism's element - it is hidden in the last cell.[2] Put the mechanism in the right place and simultaneously activate two winches.
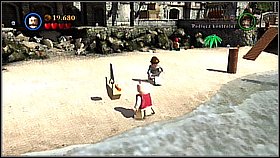
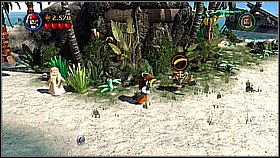
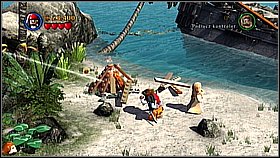
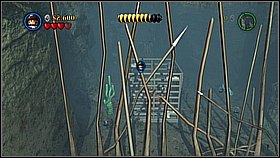
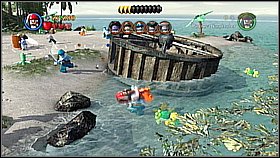
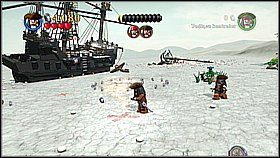
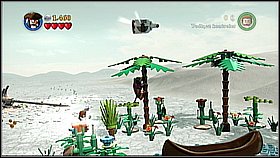
Outside look for the barrel lying upside down. Jump on it and go towards the door. Here put the barrel on the mechanism and roll it till you unblock the passage. [1] On the beach use Jack's compass to find the treasure.[2]
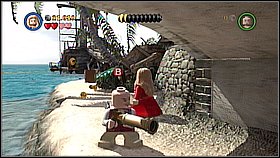
The treasure is hidden under the wall. You need to use the dog to dig it up and rebuild. [1] Go left for the barrel and roll it through the just built bridge above the heaps of rubble.[2]
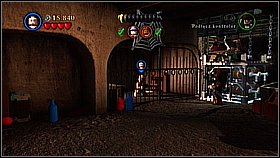
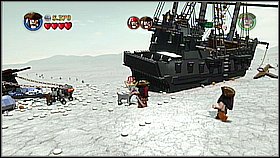
Put the barrel on the mechanism in front of the gate in the courtyard.[1] Go to the wharf and get inside one of the barrels standing there. Head into the water and go towards the cage. [2]
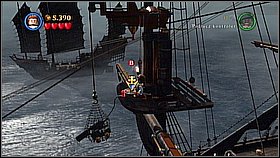
Next go to the most protruding pier and lift the winch. [1] Put it a bit higher in the right mechanism and use it.[2]

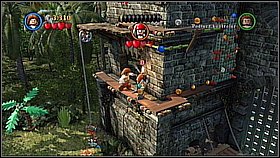
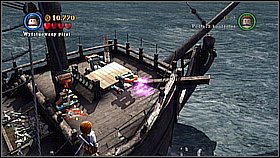
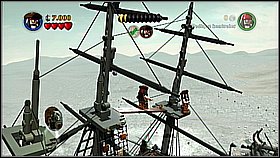
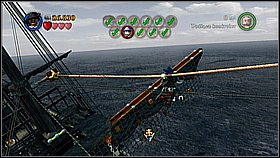
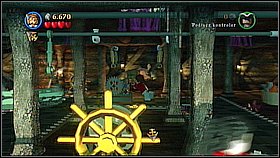
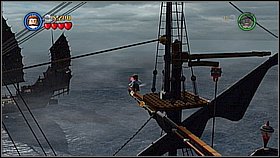
Jump on the platform and grab the rope. [1] Activate another mechanism with a character who uses the sword and slide down at the ship's deck. Spin the helm. [2]
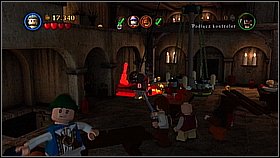
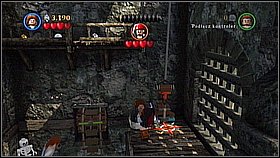
Bottle 1 - At the Smithy when you climb up grab the orange bar next to the wide window (using strong character like the Tattoo Pirate).The bottle is on the balcony. [1] Bottle 2 - In the cell grab the bars on the ceiling hanging near the lamp. You need to swing on the 7 objects to get the bottle. [2]
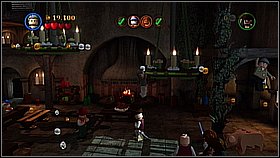
Bottle 3 - In the cells you can find skeletons with some targets above them. You need to shoot four of them and assemble them on the ground (one of the cells is protected by the silver grille - you can destroy it using a heavy gun or a bomb - the best choice will be Marty). [1] Bottle 4 - One of the cells has silver grille - destroy it using a heavy gun or a bomb (Marty). [2] You will open a passage outside (a hole in the wall). You need to:
- jump down, get to the brown object and push in to the right
- get on the planks and shoot at the target on the wall (Marty)
- jump into the alcove with the walls in the white and red pattern and climb up (bouncing from the walls)
- when you climb up rebuild the ladder using the gray elements and go left
- move the green switch and grab the bar on the wall performing a double jump (as any female character)
- at the end jump on the gray platforms, push the green button on the wall and get the bottle
Bottle 5 - On the beach use Jack's compass to find a wooden post. Dig it up (dog) and use it to get higher - the bottle is one the highest element.[1] Bottle 6 - In the courtyard full of soldiers switch to any female character and perform a double jump to get to the window with the shooter. The bottle is inside on the left.[2]
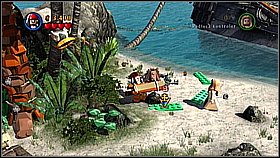
Bottle 7 - In the courtyard on the right from the gate to the docks you can find many silver barrels. Destroy them using bombs or a gun (Marty). [1] You will enter a new area. Destroy the stall with fruit and go through the seaweed using the Sea Walker (like Bootstrap Bill Turner). Up grab the sausage and go back down again through the seaweed.[2] Give the snack to the pirate sitting on the stairs.

Bottle 8 - On this map you can find three blue flags which you can unfurl. First one you will find when you leave the prison (on the molding on the right). The second one is on the roof of the highest building at the beach (climb the palm tree). The third one is above the gate to the docks (in the courtyard) - use female character (double jump). [1] Bottle 9 - you can find it underwater in the docks. Use the Sea Walker (like Bootstrap Bill Turner) and release the crab from the cage. [2]
Bottle 10 - This level contains five ships which you can assemble. Three of them are on the beach.[1] The fourth one in on the way to the docks and the last one is in the docks. [2]
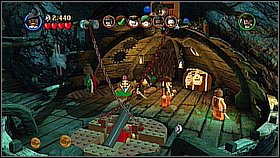
Enter the port and grab the torch (it is next to the gate).[1] Go back to the pier and use the torch and the cannon. Shoot at the gate in front of you. [2]
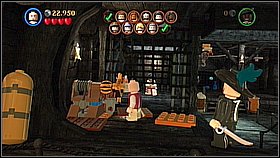
At the market look for two wheels and assemble them to the cart (one is near the well, the other near the wall). [1] Feed the horse with the fruit (you can find it next to the well) and use the animal's strength to move away the cart. [2] Move on to the right.
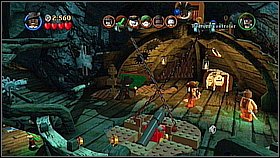
Come towards sleeping Mr. Gibbs and destroy big bright chest.[1] Build a shelf out of it and wait till the objects fall down. Lift the winch, connect it with the mechanism and use it. [2]
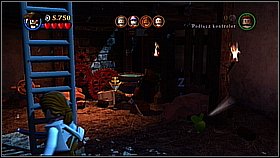
![Lower the ladder grabbing the green bar, [1] climb - Tortuga - walkthrough - The Curse of the Black Pearl - LEGO Pirates of the Caribbean: The Video Game - Game Guide and Walkthrough](https://game.lhg100.com/Article/UploadFiles/201512/2015121617112053.jpg)
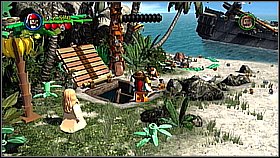
Lower the ladder grabbing the green bar, [1] climb. Take the wooden bowl and put it on the green floor panel next to the pool with water.[2] Use the nearby switch (you need a character with the sword).
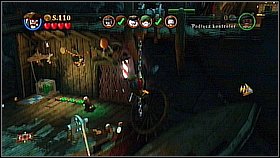
Take the bowl full with water and jump down. Spill it over the sleeping character. [1] Use Mr. Gibbs's hammer to repair the mechanism next to the gate leading to the previous map. [2]
Use Mr. Gibbs to repair the stove on the market. [1] Take the torch and use the explosives on the road to the wharf. [2]
Go to the basement and at the end of the tunnel use Jack's compass to find the treasure (the pistol). [1] You can dig it up using the spade which lies nearby and give the pistol to the pirate on the left.[2].
Use Marty to enter the vent in the wall. [1] On the other side shoot at the silver bricks. [2]

Go back to the main room and use the pistol once again - aim at the silver junk which falls down on the right. [1] Use the ladder to enter the room full of people having a good time. Use Mr. Gibbs to repair the machine which stands by the wall (red bricks).[2]
You can climb up using the chandeliers - start with the one on the very right and jump to the others grabbing the green bars. [1] Take the passage in front of you. Anamaria will agree to join you if you give her the object which falls down from the big, brown sideboard. [2]
Anamaria can perform the double jump - therefore you can roll down two blinds (the places are indicated by the colorful elements on the floor). [1] Go outside and using the green bars jump over the roofs. Go to the end of the balcony and throw down the rectangular chest. [2]
Jump down at the market and take the music box to the given place (green floor panel). [1] Get inside the building. Move the chest on the left and climb up on the balcony.[2]
Attack the character fighting the parrot. [1] Follow the bird and get on the other side (using the plank). Eventually you will have to jump on the chandelier.[2]
When the parrot comes back to Cotton you need to come back to the first map and get into the boat.


Bottle 1 - At the beginning of the level turn right and remove the grille with the orange bar as the strong character (like Tattoo Pirate). [1] Enter the new map. You need to:
- get to the pier and repair the mechanism (Mr. Gibbs)
- built the switch using the bricks
- take it to the green floor panel [2]
- activate it using the character with the sword (Jack Sparrow)

Bottle 2 - In order to get the bottle number 1 you had to launch the small boat. Get into it and go on the left along the seaweed in water. [1] On the island use the dog to dig up three elements which you need to assemble.[2] Next:
- destroy the objects on the left to find the torch and use it to scare the tentacles which hold the cannon
- move the cannon to the platform and shoot at the targets with x
Bottle 3 - In the part of the map where you found bottle number 2 blow up the rocks blocking the entrance to the cave on the left (Marty). [1] Bottle 4 - In the courtyard use the female character to jump on the green bars and get to the left. On the balcony go left and climb the ladder to get to the roof. [2]
Bottle 5 - In the sequence with waking up Mr. Gibbs kick the dog on the right (next to the pig). [1] Bottle 6 - On the main courtyard open the door in front of you using Blackbeard's sword (the door with a particular seal). [2] Behind it you need to use Sparrow's hook and swing on the rope.
Bottle 7 - On this map you can find three sets of fireworks to fire. The first one is in the room on the left side of the main courtyard (you need to open the door as the strong character or using a horse). [1] The second one is behind the door on the courtyard which Blackbeard will open (see the description of the Bottle number 6). The third one is in the right part of the courtyard - behind the silver chest near the pigs (use Marty to destroy the chest). [2]
Bottle 8 - You can find it in the underground tunnel (you blew up the entrance to it). At the beginning of the tunnel use the strong character (like Tattoo Pirate) to pull the orange bar. Go down using the rope and dive. [1] Bottle 9 - It is in the building to which leads the tunnel. Jump on the three chandeliers and look for the small cell on the left - destroy the silver grille using a bomb or a heavy gun (Marty). [2]
Bottle 10 - In the building where you met the pirate with the parrot[1] use Syrena's power to destroy the glass shelf on the right (it glows). [2]

Use Mr. Gibbs to repair the cannon on the left. [1] Activate the cannon using the torch which is fixed to the mast and shoot at the silver grille in the windows. [2]
After hitting two grilles you will open the access to the cargo hold - jump there. [1] Use another cannon and destroy another grille. [2]

Look for a place with colorful bricks in the ceiling - jump to throw them down. [1] Lift the winch and put it in the mechanism on the right. [2]

Use the winch to open the hatch. Shoot at the grille.[1] Use one more cannon which you can find on the right side.[2]
Lift the central cannon and put it on the green swing. [1] Go back to the bricks on the left which fell from the ceiling. Assemble the white and blue cube and take it to the green floor panel with a blue frame next to the swing. Destroy the brick and make a floor out of it which you will use to move the part of a mechanism. [2]

Repeat the sequence with the second part of the machine with the swing. The bricks to build the floor you will find in the chest in front of one of the cannons. [1] Separate the elements of the mechanism. [2] Then use the ladder.
When you are on deck move the cannon to the last hatch. [1] Then shoot at the last grille. [2]

Destroy the chest next to the surface with the check. Use the bricks to build a path. Move the mechanism till it falls down through the hole in the floor. [1] Go on the lower deck and again put the bricks on the path.[2]
Get inside the barrel standing on the right and dive. [1] Step on the first and the second button (the second one is on the left). [2]
In the cargo hold put the mechanism into the blockade. [1] Dive and get to the half open grille - you will find the treasure there. [2]
Get to the other ship using the plank. [1] Go to the bridge and hit the monkey. [2]
As Sparrow use his hook near the helm. [1] Get on the mast and hit the monkey again. [2]

From the mast jump on the chain and throw down the gray cube. [1] Move it to the one of the green floor panels and assemble it. [2]
As Mr. Gibbs repair the mechanism on the ship's side. [1] Now get on it jumping on the barrel standing on the right. [2]
Move the chest on the green floor panel and assemble the bricks. [1] Move the green mechanism around the mast. [2]
Use the female character to get on the mast using the double jump (with a little help of a green plank and a chain). [1] When you get there attack the monkey. [2] The last hit must take place on the deck - you only need to catch the monkey.
Bottle 1 - As Blackbeard destroy the seal on the mast on the right (the skull). Climb to get the bottle. [1] Bottle 2 - On the left side of the deck there is a chest with a silver lock - destroy it using a bomb or a gun (Marty). [2]

Bottle 3 and 4 - Under the deck on the right you will find another seal which can be destroyed by Blackbeard. Go downstairs. You will find two bottles in the room. [1] Bottle 5 - When you destroy all silver grilles you will get on the other deck. Near the left wall you will find an object which only Blackbeard can destroy. Go on the lower deck and shoot at the 5 buoys using the cannon. [2]
Bottle 6 and 7 - On the Black Pearl there is glass gap - destroy it using Syrena's scream. Use Sparrow's compass to find a chest with the treasure. Then go do on the lower deck for another bottle. [1] Bottle 8 - Use Sparrow to get on the left mast. Use his compass to find the bottle. It will be on one of the sails. [2]
Bottle 9 - The bottle is on the central platform of the left mast. The easiest way to get it is to freefall (you can get at the top as Sparrow). [1] Bottle 10 - The whole level contains 5 buckets with blue crystals which must be destroyed by Syrena's scream. The first two of them are under the deck (in the first scene). The rest is on the lower decks (including the one which you unblock as Blackbeard). The last one is under the deck where you destroy 5 silver grilles. [2]
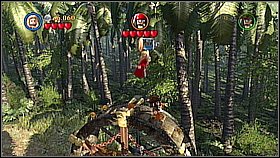
At the beginning use Jack's compass and pick the upper treasure (the one with the skull). [1] Follow the tracks till you reach the banana tree. Hit the trunk to get a banana. [2]
Give the banana to the monkey (it will run away at the beginning) and take the spade. [1] Look for another object - the bonfire (the object on the right on the compass). Put the wood lying nearby on the green panels and put the bricks. [2]
Go underground by destroying the padlock at the hatch next to the banana tree. [1] Jump on the barrel and roll it onto the mechanism at the edge. [2]

Grab the chain as Elisabeth. The other person needs to grab the other chain. [1] Jump on the green bars to the right. [2]
On the other side of the chasm go right and destroy the sarcophagi with skeletons. You will find a winch in one of them. [1] Put it in the mechanism next to the bridge. [2]
Go right across the bridge as Sparrow and activate the mechanism using his sword. [1] Climb the ladder and chase the monkey. While on the shore use the spyglass. [2] Observe the soldier in a blue uniform.
In the morning go to the beach, destroy the golden wheel standing in water and rebuild it. [1] Destroy also other elements near the wheel - the wooden bricks. [2]
When you build the catapult the monkey will destroy the wooden hatch - put it in bales and take to the catapult. [1] Use the golden helm to fire the missile. [2]
Go again underground and watch the cut scene with the ray of light. Build a mirror using the scattered bricks. [1] Get to the bridge and jump on the platform with helms. Move each 3 times to reflect the ray further on the left. [2]
Go to the left and arrange the pile of blown bricks. [1] Move the mechanism to blow up one more explosive. [2]
Go left and assemble another object - a narrow bridge this time. [1] At the escarpment on the left lift the wood and carefully take it on the right using the planks. [2]

Put the wood in the elevator. [1] When the materials go up lift the mirror lying under the elevator and put it near the exit to the surface. [2]
Move the mechanism to light the new mirror (the ray of light will escape the cave). [1] When you go back to the surface take the wood from the elevator to the bonfire. Put the blocks on the green floor panels and put them into fire. [2]
Bottle 1 - At the very beginning dig up the bottle using the dog. [1] Bottle 2 - On the second island (at the beginning of the level) look for the castle-treasure as Jack (use the compass). Later use the dog to dig up two castles and build them using different character. Again use the dog to enter the sand stronghold and take one bottle after another. [2]
Bottle 3 - When you enter the cave use the Sea Walker (Bootstrap Bill fits) and look for a big starfish and a chest. Destroy the chest and build a new object out of it. Pull the bar to take away the bottle from the starfish. [1] Bottle 4 - After the night climb the palm tree near the entrance to the underground. The bottle is up there. [2]
Bottle 5 - The fifth bottle is on the top of the sunk ship. To get it you need to shoot at the long silver object using a long gun (Marty). [1] Bottle 6 - Again in the underground go to the bridge and shoot at the silver bricks on the wall using a long gun (Marty). Now the ray of light needs to hit water - move the right helm twice and the left one three times. [2] Dive as the Sea Walker (Billy) and drag the mirror. Turn it so the ray hits the purple tentacle in the corner. This will unblock the access to the bottle.
Bottle 7 - When you take the wood to the elevator and it goes up, you will notice a wall with an orange bar. Pull it as the strong character (Tattoo Pirate). [1] Bottle 8 - You can notice seaweed in the place where you found wood. Go through it as pirate-ghost (Billy). [2]
Bottle 9 - There is a passage blocked by the silver grille on the left from the place where you found wood (in the cave). Destroy it using a long gun or a bomb (Marty). Go up. On the beach on the left you will find cannons. Destroy the targets to get the bottle. [1] Bottle 10 - On the same beach where you found bottle number 9 you will find ice floe. You can destroy it using Siren's scream. [2]
At the beginning use Sparrow and Elisabeth's skills. First Jack needs to activate the mechanism with his sword. [1] Lizzy uses the spread bridge to get on the rock shelf. [2]
As Elisabeth get on the bridge on the left and lift the winch. [1] Put it in the mechanism and use it. This will open the passage for Jack. [2]

As Elisabeth get to the other side using the green bars. [1] Jack can use his hook to follow. [2]

When the characters meet jump to grab the chains above their heads. [1] Move along to the place lightened with moonlight. Draw the enemies here and defeat them (only when they are lightened!). [2]
![Build the helm using the bones of your enemies [1] and use it - Isla de Muerta - walkthrough - The Curse of the Black Pearl - LEGO Pirates of the Caribbean: The Video Game - Game Guide and Walkthrough](https://game.lhg100.com/Article/UploadFiles/201512/2015121617113244.jpg)
Build the helm using the bones of your enemies [1] and use it. [2]
As a default character go across the bridge to get on the rock shelf and take the torch. [1] Switch to the second character and use the helm once again. [2]
Go back to the first character and turn left behind the bridge. Fire up the cannon. [1] Shoot at the three pairs of steel pillars. [2]

In the corridor use Jack's compass to find the upper object. [1] Use the spade to dig it up. [2]

Put the object in the given place on the left. [1] You need to put two mirrors into the moving mechanisms. The first one is against the wall. [2]
The second one is in the chest on the left (you need to hit it). [1] Move the pillars so the light hits the skull. [2]
While fighting Barbossa you need to hit him few times when he is lightened. [1] When he starts running away chase him and hit him in the darkness (it is the only way to hurt him). [2]
The main opponent will escape and you will be attacked by his companions. You must kill them when they are lightened so you can get their bones. [1] After eliminating all pirates create a barrel using their bones and use it to roll onto a mechanism. [2]
Barbossa will come back. Repeat the fighting scheme waiting for him on an small island on the left.
While you are on that island wait for the rest of the pirates. Fight them again in the full light. After killing all of them create a climbing wall out of their bones. [1] Climb the wall and ceiling and get to the shelf where you will press two switches. [2]
Fight Barbossa for the third time. This time on an island on the right. Hit him when he escapes into the darkness.
Fight the pirates on the island on the right. [1] When you eliminate all of them use their bones. [2]
Throw the ax at the target above you. [1] Jump on the rock and get to the other mechanism in the wall. Press two elements. [2]
![Chase the opponent omitting [1] or jumping over the holes - Isla de Muerta - walkthrough - The Curse of the Black Pearl - LEGO Pirates of the Caribbean: The Video Game - Game Guide and Walkthrough](https://game.lhg100.com/Article/UploadFiles/201512/2015121617113428.jpg)
Chase the opponent omitting [1] or jumping over the holes. [2]
At the end of the way you need to hit Barbossa few times. Pick up the coconuts and throw them at the pirate. [1] Switch to the other character and attack.[2] Repeat as long as needed.

Bottle 1 - Destroy the chain which holds the boat (you can shoot as Marty or any other character using a long gun), then jump in and get the bottle on the right. Jump up to get it. [1] Bottle 2 - Before fighting Barbossa you need to find three parrots and shoot at them. The first one is at the beginning of the level on the right (near the bridges). The second one is next to the cannon which you use to shoot the steel pillars. The third one is near the place where you direct the ray of light at the golden skull. [2]
Bottle 3 - In the place where you found the winch used to move the bridge switch into a character with a long ranged weapon (Marty) and shoot at the target high on the left. A platform will fall down to water - get on it as the female character and perform a double jump. [1] Bottle 4-10 - While fighting Barbossa you need to defeat three waves of enemies (striking three hits) and change to Siren. You can leave the main arena using two paths - destroying blue crystals between the rocks on the left and on the right. [2]
Bottle 4 - Go to the secret cave and switch into cursed Jack (he is the Sea Walker). Look for the treasure - the golden mask and take it to the statue on the left. [1] Bottle 5 - Leave the cave and look for the golden dog. When you find it switch into the female character and jump to the given place. [2]
Bottle 6 - In the same cave there is a minigame kit on the right. You need to match the colors of the skulls with the colors of the particular elements. [1] From the secret cave you can get to the secret bay - by leaving the cave which is on the left from the underwater statue. [2]
Bottle 7 - In the secret bay (check the description of bottles number 4-6) as the Sea Walker get to the indicated object. Pull the bar as the strong character (Bo'Sun). [1] Bottle 8 - In the same bay go at the shore on the right and use Blackbeard's power on the chest. Create the cannon and shoot at the yellow ducks. [2]
Bottle 9 - In the secret bay climb the ship and slide down on the chain from the right mast. [1] Bottle 10 - From the main arena use the right underground passage. You will get to another cave with a small island. The character you meet there will ask for the spyglass. You will find it in the second secret cave. [2]

First you need to swing. [1] Use the lower path and jump to the right. [2]
On the other side get to the right wall and put the ball in a bowl (the second character must do the same with the second object). [1] This will open the tunnel in the wall - roll in beneath and destroy the chests.[2]
Go up and climb the wall. [1] While up activate the next switch in the bowl in the ground. [2]
Climb the cliff and another wall. [1] The path will turn right eventually and you will see a spherical cage - jump in it and roll as long as you can. [2]
![Jump over the lifted bridges [1] and land near the big machines - Pelegosto - walkthrough - Dead Man's Chest - LEGO Pirates of the Caribbean: The Video Game - Game Guide and Walkthrough](https://game.lhg100.com/Article/UploadFiles/201512/2015121617113749.jpg)
Jump over the lifted bridges [1] and land near the big machines. [2]
While inside the spherical cage get into the hole in the big wheel - you need to get to the "background". [1] Go up using more elevators of that kind. [2]
In a certain moment one character will have to move the mechanism in order to help the other one travel in the big wheels (when you get to the first of them the AI will deal with the rolling). [1] Get through the rest of the machine's parts. [2]

![While up destroy the brown elements in front of the cave [1] and go down to the right - Pelegosto - walkthrough - Dead Man's Chest - LEGO Pirates of the Caribbean: The Video Game - Game Guide and Walkthrough](https://game.lhg100.com/Article/UploadFiles/201512/2015121617113769.jpg)
While up destroy the brown elements in front of the cave [1] and go down to the right. You have just unblocked the passage for the other character. [2]
Go back using the tunnel and roll through the village till you find space for two spheres. [1] Open the passage and roll on to the right. [2]
Go down the twisty path paying attention to the traps in the wall and on the ground. [1] Roll on the brown bridge. [2]
Use Jack's compass to find the bone. [1] Give it to the dog. [2]
Use Jack's compass again to find the chest. [1] The dog will dig it up. [2]
As the dog swim to the other bank and look for the buried objects. Dig them up [1] and use them to build a bridge. [2]
Move the chest which is on the right bank behind the tree across the bridge. [1] Put two chests on the green floor panels. [2]
Use the bricks from the chest to build a wall to climb. Climb as Mr. Gibbs and repair the mechanism which is up. [1] Jump on the rope above to slide to the other side. [2]

Grab the liana against the wall. [1] The big rock will unblock the passage. Go down the river and destroy the dam. [2]
Bottle 1 - After climbing the first wall turn right to the hole in the wall. You will find another passage - blocked with silver bricks. Destroy them using a bomb or a long gun (Marty). In the tunnel go right - the bottle will be behind the waterfall. [1] Bottle 2 - Stop behind the wooden bridge and leave the sphere. Shoot at or blow up the pile of the silver bricks (Marty). Use this path to get to the wheel and a puzzle. Move the wheel so the ball will leave the labyrinth. [2]
Bottle 3 - Behind the wooden bridge climb another wall. On the left you will see a big pile of the silver objects. [1] Destroy them using a shotgun or a bomb (Marty) and go up. In the village destroy all the objects with Blackbeard's power. [2]
Bottle 4 - In the same location where you found bottle number 3 in the small village on the hill look for the spyglass using Jack's compass. When you find it use it and follow the native till he gives you the bottle. [1] Bottle 5 - Going down the twisty path look for the cave blocked by the black and red bricks. Only Blackbeard can destroy them. [2]
Bottle 6 - Just behind the place where you found bottle number 5 you will find the long hole with thorns. On the wall you will see bricks with an orange bar. Pull it as the strong character (Tattoo Pirate). A bridge will come out. When you cross it you will be in a village. Using Jack's compass find the spyglass and watch the crab on the bridge. [1] Bottle 7 - In the same village (bottle number 6) you will find a palm tree. The bottle is on its top. [2]
Bottle 8 - Just below the island with bottles number 6 and 7 you will find another path. You can get on it using Jack's hook. Look for the bottle from the list using Jack's compass. [1] Bottle 9 - In the village (bottle number 8) you can find some cannons. Use them to shoot at the targets. [2]
Bottle 10 - The last bottle is in the river. Use a character who can breathe underwater (Billy) and release the crab from the cage. [1] Ride it along the corridor and find the reward. [2]
First use Jack's compass to find the eye and the pistol. The first object is on the island on the right (dig it up using the spade lying nearby). [1] The second one is in the chests on the left. [2]
Take the cage with the monkey and put it on the raft. [1] Use the mechanism to sail the first part of the river. When the tentacles will wrap around jump on the platform with the boxes. Hit the one on the left and use the dynamite (the torch lies nearby). [2]
Move on.
When you get to the second obstacle shoot at the three targets on water. [1] Grab the torch and jump to the left. [2] Remember that you can jump from the leaves (press A when you land on them). You can pick the torch from the shore (even when it is wet) so the last jump does not have to be perfect. Use the dynamite.

Repair the traction as Mr. Gibbs [1] and sail along. When you reach the other building you need to repair the helm. Get to it as Mr. Gibbs by going around the platform and jumping on the chests. [2]
Use the helm three times until the monkey will get on the platform. [1] Take the animal to the closest catapult. [2]
To fire the cage use Jack's sword to activate the mechanism near the machine. Shoot at the target that will appear above. [1] To travel along grab the rope which is lower (with the green bricks). [2]

Get across the bridges to the right and move the cage on the further platform. The monkey will be kidnapped by an alligator. [1] Jump left on the chests. [2]
On the left side of the river use Jack's hook to climb up. [1] Draw aside two chests. [2]

Run to the right across the narrow bridges. [1] Shoot at the target to lower the bridge. [2]
You will face the alligator. Dodge its attacks running to the left and right. Pay attention to what the natives throw at you - expect bombs. Pick them up and throw them at the alligator when it will show up with its jaws open. [1] Repeat the scheme three times. [2]
![Use the pieces of the alligator to get on the island [1] Take the cage and walk the narrow plank - A Touch of Destiny - walkthrough - Dead Man's Chest - LEGO Pirates of the Caribbean: The Video Game - Game Guide and Walkthrough](https://game.lhg100.com/Article/UploadFiles/201512/2015121617114329.jpg)
Use the pieces of the alligator to get on the island [1] Take the cage and walk the narrow plank. [2] Put the cage on the green floor panel.
The bridges will take you to the right side of the map. You have here two mechanisms which can be activated by the sword. Activate them and pick the winch that will fall from the net. [1] Go back and use it on the mechanism to lift another bridge. [2]
![Roll the cage across the bridge [1] and put it in the mechanism that opens the door - A Touch of Destiny - walkthrough - Dead Man's Chest - LEGO Pirates of the Caribbean: The Video Game - Game Guide and Walkthrough](https://game.lhg100.com/Article/UploadFiles/201512/2015121617114344.jpg)
Roll the cage across the bridge [1] and put it in the mechanism that opens the door. [2]
In the hut grab the two ropes to open the door upstairs. [1] Upstairs destroy the table's legs (on the right) to throw down the chest. [2]
Climb the wall and throw down all blue and white bricks. [1] Use them to build a path and move the chest. Activate the mechanism under the wall (using character with the sword). [2]
Go downstairs and assemble the pieces on the table. Later assemble the chair. [1] Use the spyglass. You need to find the ship in the south-west part of the map and follow it. [2]
Bottle 1 - You will find five frogs on the map which you need to destroy. The first one is on the island with the eye (at the beginning on the right). [1] The second one is where the tentacles will leave water for the second time (on the left). The third one is near the catapult - you need to shoot at it. [2] The fourth one is in the hut on the left, where you slide on the rope as Jack. The last one is in the hut right behind the place where you finish the slide as Jack (close to the forth one).
Bottle 2 - When the raft stops for the first time destroy silver objects (use character with a bomb or a long gun like Marty) and perform a double jump as a default female character to catch the liana. [1] Bottle 3 - Where the tentacles will leave water for the second time you will find another liana.[2]
Bottle 4 - In the place where you need to separate two green chests jump down on the platform on the right. [1] Use Jack's compass to find the beach ball. Take it to the man who stands on one of the previous platforms. You can get there using the stumps in water. [2]
Bottle 5 - While fighting with the alligator throw to its jaws 3 portion of food instead of bombs. [1] Bottle 6 - After the fight jump on an little island and use Blackbeard's power on the red bricks. [2]
Bottle 7 - The place where you found bottle number 6. After the fight with the alligator jump on the little island and even further up on the screen. Perform a double jump there as the female character. [1] Bottle 8 - When you reach the hut with the red button turn down and right. You will see a chest with a handle (behind the net where you find the winch) - push it down as the strong character (like Tattoo Pirate). [2] The predator will show up. Throw it fish and follow it under the barrier (use the Sea Walker like Billy). On the other side jump at the pier to get the bottle.
Bottle 9 - In Tia's house shoot at the silver planks or blow them up (use Marty). [1] Bottle 10 - look for the red handle upstairs - use it as Blackbeard. [2]
Lift the lantern and cast the light on the purple tentacles next to you. When they will reveal the mechanism, activate it with the sword. [1] Seaweed will be everywhere - use them to build the "passage" for the undead characters. [2]
Switch to a pirate-ghost and go through the seaweed in the ground. On the other side destroy the bowl with bricks and use them to build another character. [1] Go back at the main deck and head to the bridge. Scare the tentacles near the entrance to the cabins[2] and go through another seaweed.
Upstairs scare the tentacles with light and rebuild the stairs. [1] As Will climb the mast and go to the right beam. Throw the ax at the target behind you. [2] Use the bricks that falls down to build another character.
Go back to the middle part of the deck and move the green button. [1] Jump down and rebuild the pirate using the bricks that fell down. [2] Give him the broom that stands nearby.
Under the deck switch to the zombie pirate and jump down. [1] Go through the seaweed in the wall on the right. [2]

On the other side use the helm and go back. [1] Pick up the lamp (near the column) and scare the tentacles in the barrel on the left. [2]
Jump on the barrel and use it in the mechanism on the left. [1] Take the lantern and go upstairs and turn left. Remove the tentacle that blocks the green brick behind the mechanism. [2]
As Will activate the mechanism with the sword and switch to the other character to take away the green element. This will open the gate. [1] Leave that place and follow Davy Jones to the cabins. [2]
![As Bootstrap Bill enter the seaweed on the left [1] and switch the mechanism on the other side - The Dutchman's Secret - walkthrough - Dead Man's Chest - LEGO Pirates of the Caribbean: The Video Game - Game Guide and Walkthrough](https://game.lhg100.com/Article/UploadFiles/201512/2015121617114784.jpg)
As Bootstrap Bill enter the seaweed on the left [1] and switch the mechanism on the other side. [2]
Go back where you started and push the wheel to the external side. [1] Now one character moves the wheel and the other one tries to get to the other bank (with each turn different platforms will pull out). [2]

On the other side go left - you will find another mechanism activated by the sword. Activate it, push the second wheel and use it. [1] The platforms will pull out - walk on them holding the music box. [2] Put it in the given place.
It is time for the last puzzle - you need to jump on the lightened platforms. First the blue one, [1] where you wait for your partner. Then on the purple one, closer to the screen. [2]

Then jump on the brighter platform in the last row. [1] Finally jump on Jones. [2]
Bottle 1 - At the begging of the level scare the tentacles under the stairs and activate the mechanism with the sword. Above the board a net will appear - use it to jump higher to get the bottle. [1] Bottle 2 - At the end of the ship (forward and right) behind Jones there is a red and gray chest hold by the tentacles. Scare them with light and use Blackbeard's power. [2]
Bottle 3 - On the mast near Davy Jones you will find the glass element. Destroy it as Siren. [1] Bottle 4 - When you get under the deck go right. Scare the tentacles using light. They will release the chests. Jump behind them. [2]
Bottle 5 - Under the deck go downstairs and look for the element with an orange bar (in the center). Pull it as the strong character (Tattoo Pirate) and jump down. Use Blackbeard to deal with the bricks on the left. [1] Bottle 6 - On the lower part of the deck where you get to collect the bottle number 5 activate the mechanism using the sword (next to the ladder) and go through the seaweed in the background as the pirate-ghost (like Billy). On the other side activate one more mechanism with your sword. Some rubbish will fall down - use it to build a snail and wait. [2]

Bottle 7 - In the room with Jones's pipe organs and puzzles on the ground you need to get to the central part and shoot at the mucus on the left. [1] You will get to the new room. On the right you will see the cabinet. Destroy it with Syrena's scream. [2]
Bottle 8 - In the room with the bottle number 7 move the chest to the end of the path. Shoot at the cage with the bottle. [1] Bottle 9 - Leave the place with the bottle number 7 through the door. [2] Outside as the female character jump to catch the bar above your head.
Bottle 10 - In the room with Davy Jones make sure that the mechanisms before the first puzzle are on their places. [1] Turn the winch on the right 4 times and the one on the left 3 times. The bottle will show up in the middle of the ramp where water falls. [2]
Use Jack's compass and the spade to become the treasure hunter. [1] Dig up the banana and umbrella and give them to the characters standing near the boat. [2]
Dig up and build the catapult. [1] Load it with the coconut which hangs on the palm tree on the right (you need to jump from the tree on the green bar to throw the coconut down). [2] Aim at the ship and use the mechanism activated by the sword.
Enter the ship as Jack and use his hook to get higher. [1] Walk the wooden plank to get to the further part of the map. [2]
Dig up the last treasure - the gigantic crab. [1] Shoot at it using the catapult - turn the catapult with the helm, load the coconuts and activate is using the sword. [2]
![Jump over the shifting sand on the crabs pieces [1] and dig up the chest in the place where the beast was - Isla Cruces - walkthrough - Dead Man's Chest - LEGO Pirates of the Caribbean: The Video Game - Game Guide and Walkthrough](https://game.lhg100.com/Article/UploadFiles/201512/2015121617115099.jpg)
Jump over the shifting sand on the crab's pieces [1] and dig up the chest in the place where the beast was. [2]
Chase Jack and fight him - when you hit him he will escape. [1] Built a gear using bricks that you will find when the pirate ran away. [2]
![Put the element into the machine on the right, use it, [1] and take the hammer from the basket - Isla Cruces - walkthrough - Dead Man's Chest - LEGO Pirates of the Caribbean: The Video Game - Game Guide and Walkthrough](https://game.lhg100.com/Article/UploadFiles/201512/2015121617115158.jpg)
Put the element into the machine on the right, use it, [1] and take the hammer from the basket. [2]
Use the hammer to repair the mechanism opening the door to the tower. [1] Inside throw the ax at the target above the entrance. [2]
Go up using the narrow plank and activate the mechanism with the sword. [1] Switch to the other character and go up. [2]
On the second floor you need to jump to get to the window with the bar. [1] Unroll the ladder. Climb it to find Jack and attack him. [2]
Go outside and take the torch. [1] Get higher and fire a fuse. [2]
Go back inside and throw Will's ax at the target. [1] Go outside the ladder and chase Jack on the narrow planks. Fight him. [2]
In the scene with the wheel you need to hit the brown beam which shows up in every turn - the best way is to do it using Will's ax (repeat as long as you need). [1] When you damage that element jump down on one of the platforms and jump into the wheel to smack the pirate. [2] Repeat as long as needed.
When the fight will come to its end Jack will jump up on the wheel - do not stop to attack him.
In the last part of the level (on the beach again) you need do eliminate five types of pirates and you need to do it fast.
Bottle 1 - You can dig up one bottle in the first part of the map - it is the treasure which you can see on the right on Jack's compass. [1] Bottle 2 - One of the bottles is in water, up and on the left from the starting map. Get it as the Sea Walker or dive. [2]
Bottle 3 - Near the starfish leaning against the ship you can find an orange handle. Pull it as the strong character (Tattoo Pirate). [1] Bottle 4 - In the first scene in which you fight Jack destroy the silver corral [2] and dig up the bones at the graveyard. Make a barrel out of them and roll it on to the right to activate the mechanism in the ground (near the wall). This will open the passage where you get the bottle.
Bottle 5 - In the first part of the fight with Jack you need to put together the bricks that fall down when he will run away after the hit. Take the gear to the right to start the machine. Activate it with the sword three times - after the third time a red and black chest will appear. Destroy it as Blackbeard. [1] Bottle 6 - At the top of the tower where you fight Jack you will find black and red skull. Destroy it as Blackbeard. [2]
Bottle 7 - In the scene with the big wheel you need to jump to get the bottle. It will appear every few seconds above you. [1] Bottle 8 - On the last beach (where you fought the pirates) go to the right till you reach the lying big wheel. You will find seaweed here through which a pirate-ghost may go through (like Billy). On the other side (at the ship wreck) take the bottle by jumping for it using the female character. [2] Take the winch as well.
Bottle 9 - On the ship wreck where you found the bottle number 8 pick up the winch. Go back to the beach and put it in the mechanism on the left. This allows you to lift the planks above the shifting sand. [1] Bottle 10 - On the secret part of the beach where you found the bottle number 9 use Jack's compass to find and assemble the crab. [2] Then as the female character jump on the bars near the jungle and jump up to knock down the parts you will use to build another crab. Assemble it and watch the scene.
Go left till you reach the cannon and fire a fuse using the torch. [1] Shoot at the 4 purple pieces of a tentacle. [2]
Go downstairs like you would like to reach the screen and destroy the shelf on the left. [1] Use it to build a chest with dynamite and take it to the one of the green floor panels in the center of the map. [2] Put the other chest there as well (is stands nearby).
Go to the right omitting the tentacle near the stairs and use another cannon - again shoot at the purple pieces of a tentacle. [1] Switch to Marty and shoot at the cage hanging under the ceiling. [2]
Take the third chest to the green floor panel. [1] The tentacle will destroy the elements near the left column. Repair them. [2]
Assembly two parts with the green elements - Mr. Gibbs can take care of it. [1] Now in pair move the mechanism by pushing the green bricks. [2]
Go to the upper deck. [1] Go to the very left and as Marty shoot at the target next to the shining bar. [2] The cannon will fall on the tentacle.
Take the chest with dynamite to the elevator (the green place). [1] Move the helm which is in front of the chests twice. [2]

As Marty get into the hole in the wall which is on the left from the elevator. [1] When you are on the other side move the chest to the right. [2] Put in the last available place.
Go to the stairs on the left - they will crumble. Use the bricks to build the elements of the mechanism, [1] then turn it. [2] Eventually you will get out using the stairs on the right.
As Jack turn the mast on the left pushing two elements as pair. [1] Now go to the right mast and use the hook to climb. [2]
At the top of the mast use the narrow path where the rope leads - destroy the handle to get down. [1] Climb and get to the other mast using the rope stretched along the deck. [2] Destroy the other handle on the other mast.
Now other characters can climb the masts. As Mr. Gibbs climb the left one. [1] Repair the red bricks. [2]
Down in pair turn the mast as much as you can. [1] Shoot at the chests on the bridge using the cannon. [2]
In the first part of the fight Kraken will spit out various objects and will try to suck you up. To defend from the sucking up attack take cover on the ship's sides - you need to grab the wooden bars. [1] When the monster will spit out objects grab the silver bricks and throw them to its jaws. [2]
After the three attacks of that kind Kraken will change its tactics. It will hit the deck with its tentacles - you need to stay in the center and jump in the moment of the hit. After two attacks of that kind one of the tentacles will stay on the deck. Grab the torch (on the left and on the right). [1] Climb and set fire to the chest. [2]
By the end of the fight the beast will hit with the tentacles, suck up and spit out objects. [1] One of the objects turns out to be a chest with bombs. Grab them and throw them to the monster's jaws. [2]
Bottle 1 - In the first map on the very right use the strong character (like Tattoo Pirate). [1] Bottle 2 and 3 - In the first map on the very left play as Blackbeard to open the passage down. [2] Downstairs destroy two chests then throw the bottom of one of it at the other. You will get the second bottle when you destroy the valves on the right (starting with the left one).
Bottle 4 - When you get to the upper deck go left and destroy the glass as Siren. [1] Bottle 5 - On the main deck pull two orange bars on the right. [2]
Bottle 6 - You will find it on the side of the ship - you can get it jumping down from the bars. [1] Bottle 7 - Use Jack to climb the mast on the right. The bottle is on the one of the sails. [2]
Bottle 8 - It is on the sail of the another mast (the one on the left). Only female characters can grab it. [1] Bottle 9 and 10 - You will get two bottles during the fight with Kraken. The first one - get through the seaweed on the left as the pirate-ghost (like Billy). Set fire to the dynamite on the other side. [2] The second one - when the fight comes to an end grab the bomb and throw it at the chest on the left.
Go upstairs and turn left. In the courtyard destroy the fish stand [1] And give one of them to the merchant. [2]
Use Elisabeth's double jump to get to the roof and go right. [1] Then use the rope to slide. [2]
Go across the bridges till you reach the mechanism which Barbossa can activate using his sword. [1] As Elisabeth jump using the green bars. [2]
On the other side still as Elisabeth run to the right and destroy the chain that blocks the bridge. [1] Destroy the sealed door behind the bridge and go upstairs. [2]

Up activate the two mechanism simultaneously. [1] Run through the open passage. On the next map use the boat to get to the pier leading to the courtyard. [2]
Move towards the wheel on the wall - it is a puzzle. Using the helm pull out and hide blue or green elements, [1] And use the blue and green bar to turn the wheel. [2]
The ball needs to get on the colorful element and then remove the element using the helm. It has to get to the hole beneath.
Enter the room and destroy the seal on the door. [1] Move the washtubs with the clients. [2]
Grab the two chains on both sides of the bathhouse (closer to the entrance). [1] The way to Sao Feng is free now. [2]
You need to recruit three people. One of them wants the pistol - give it to him (it is on the stand next to you). [1] Switch to the new crew member and shoot at the target in the background. [2]
Pick up the carrot and give it to the other character. [1] Switch to him and grab the golden handle to stretch the stairs. [2]
The gate will open and the soldiers will attack - fight them (you will not defeat all of them, because they will come back in small groups). [1] Go behind the gate and use the strength of Tattoo Pirate to move the bridge (the handle is above water). [2]
On the other side shoot at the target on the left to throw down the object (Tai has the gun). [1] As Tattoo Pirate move the chest to the other bank. [2] Put it on the green surface.
![Build the cart using the destroyed chest [1] and move it towards the gate - Singapore - walkthrough - At World's End - LEGO Pirates of the Caribbean: The Video Game - Game Guide and Walkthrough](https://game.lhg100.com/Article/UploadFiles/201512/2015121617120099.jpg)
Build the cart using the destroyed chest [1] and move it towards the gate. [2]
Behind the gate you will reach a bridge with a green brick - put the rocket which is on the right on it and fire the fuse using the torch. [1] Stick to the wharf and fight the soldiers. You will reach the ship. To enter it you need to shoot at the target using Tai's gun. [2]
Bottle 1 - At the beginning switch to the pirate with bombs or a long gun (like Marty) and blow off the bar on the left. On the other side you will get to the room where you need to take the bricks to the green platform and set it on fire. Then jump on the blower three times. [1] Bottle 2 - When you leave the room go left and you will reach the room with machines. Push two bathtubs in, grab the chains and turn the winches. [2]
Bottle 3 - At the beginning of the level turn left and pass the fish seller. Drag the bar there as the strong character (like the Tattoo Pirate). Take the gained object to the green platform near the seller. [1] Bottle 4 and 5 - On the right from the fish seller you will see a performance and a silver grille. Destroy the bar using a bomb or a long gun (Marty) and climb the ladder. [2] Up there behind the red and black bar which can be destroyed only by Blackbeard you will find the bottle. When you will turn both of the winches a performance will start and a passage on the right will open. You will find another bottle there.
Bottle 6 - On the first map go across the bridge and turn right and move backwards a bit in the screen direction. You will find a hut there, but only Jack can enter it using the hook. [1] Bottle 7 and 8 - When you will unfold the first bridge and reach the further part of the docks use Siren to break the crystals on the right. Thanks to the gained helm and mechanism on the left you will get to the right side of the docks. Here you find two bottles. The first one - after shooting at the targets on the building on the left. The second one - by pulling the chains on the right.[2]
Bottle 9 - Behind the first unfolded bridge turn left and go till the end of the path. You fill find a building and chests in front of it. A passage in the wall is hidden behind them The dog and few other characters can go through it. [1] Bottle 10 - In the last section go right - you will see two hanging objects here. Throw down both. Fish will dive in water and above the channel a bottle will appear. [2]
Use the compass and indicate the boat (the object up). [1] Follow the trail and find the treasure. [2]
Look for the yellow duck and a purple element. [1] Give the toy to Jack's copy in the oasis and a snack to the goat on the left. [2]
One of the Jacks will have a gun. Use it to shoot at the target on the ship to unfold the ladder. [1] Climb the mast and throw down another Jack. [2]
Use the compass and find the peanut. Dig it up with the imaginary Jack (the one with a spade) and take it to the character next to the ship. [1] The new crew member will have bombs. Use them to destroy the silver elements blocking the dug cart. Then repair the tracks both sides. [2]
Jump on the donkey and pull the orange rod of the cart. [1] Dig up the front of the ship (with Jack with a spade) till the crabs will appear to finish the job. [2]
Enter the deck and turn the mast using the green brick. [1] Jump on the rope at the front of the ship. [2]
![Get to the lower deck [1] and put the bricks against the wall - Davy Jones Locker - walkthrough - At World's End - LEGO Pirates of the Caribbean: The Video Game - Game Guide and Walkthrough](https://game.lhg100.com/Article/UploadFiles/201512/2015121617120226.jpg)
Get to the lower deck [1] and put the bricks against the wall. [2]
A chest will come out - throw it down shooting at it as Marty. [1] Put the object it in front of the cell on the left and assemble it. [2]
As Marty go to the right and destroy the silver grilles using the pistol. [1] You will find the golden winch behind them which you need to put in the mechanism in front of the cell and release the pirate. [2]
Go lower and turn right. As Marty go through the door in the grille. [1] Inside blow up the red barrel and push the brown one on the left. [2]
Outside get rid of another red and black barrels and roll your barrel to the boiler. [1] Activate it with the sword (the mechanism is on the left). [2]
Go on the main deck and release the pirates tied to the mast (shoot at the chain with Marty's gun). [1] Set fire to the dynamite next to the purple octopus - the torch is near the entrance to the cabins. [2]
Go on the deck and hit the helm three times to release Will. [1] On the main deck hit once every cannon - another pirates will join the team. [2]
As Barbossa climb the mast using the chain and use the rope to get on the other side. [1] Use the mechanism activated by the sword there to open the grille. [2]
Destroy the grille using the gun (Marty). [1] Jump on the chain and swing. [2]
Bottle 1 - When you find the oasis climb the tree. [1] Bottle 2 - In the first scene use the compass to find the buried chests. Destroy it. [2]
Bottle 3 - The third one is on the top of the mast. [1] Bottle 4 - On the first deck use Siren to destroy the glass bottle. [2]
Bottle 5 - On the lowest deck use Jack's compass to discover red and black box. Destroy it using the power of Blackbeard. [1] Bottle 6 - On the upper deck climb the mast using the chain and slide down using the rope. The bottle is on the left side of the mast - only female characters can get it. [2]
Bottle 7 - On the lower mast there is a switch to activate it with the sword. It will lower the silver chest. Destroy it (Marty). [1] Bottle 8 - At the back of the ship destroy two hinges and jump down to get the bottle. [2]
Bottle 9 - From the back of the ship jump down and repair the mechanism as the character with a hammer (Mr. Gibbs). Turn the wheel. [1] Bottle 10 - As Jack look for the winch (use the compass) and put it near the door. In the captain's cabin throw down the food from the table. [2]

Get on the deck on the left and use the switch activated by the sword. [1] As soldier shoot at the target on the mast. [2]
In pair grab the chains. [1] Jump down and go to the lower deck. Take the torch from the column in the middle. [2]
Scare the tentacles on the right and use the ladder to get down. [1] Go left and turn the golden helm to move the platform. [2]
Push the mechanism on the floor in the check pattern. [1] To move aside the hammock use the wooden wheel. [2]
When you take the object to the left, again use the golden helm to remove the platforms. [1] Push the mechanism to the end and on the left. [2]
Go to the very left with the torch and scare the tentacles on the column. As soldier grab the sword from it [1] and activate in pair the mechanisms which required that weapon. [2]
Go lower and take the torch from the middle column in the center of the room. [1] Set fire to the dynamite in front of the cell on the left. [2] Enter it.
Switch to the Tattoo Pirate and go up - on the left you will find an orange bar which he can pull. [1] This will reveal the cannons. You need to set fire to them using the torch (it is on the right on the column). [2]

Go outside through the cannon hatches. Go right and use Elisabeth's double jump. [1] Go right jumping on the bars and opening the cannon hatches.[2]
Eventually you will get to the bigger platform. Perform the double jump to get to the other window. A platform with a helm will open. Use the helm. [1] As Tai get to the abandoned lifeboat. You need his pistol to shoot at the target and lower the chain. [2]
Jump forward to the wooden balcony. Scare the tentacles with the torch. [1] At the end of the ship slide down on the rope. [2]
You will find another ship. [1] As the Tattoo Pirate rip off the hooks - pull the orange bars. [2]
Bottle 1 - On the first ship (under the deck) there are hidden 4 barrels with purple tentacles. You need to scare them with light from the torch or lamp. [1] Bottle 2 - On this level you will find 5 jumping oysters. You need to hit them. The first one is on the beginning of the level. The second one is below the deck (under the roof). [2] The third one is even lower in the corner. The fourth one is on the lowest level. The fifth is on the second ship.
Bottle 3 - At the beginning climb and destroy the silver bricks (Marty). Destroy the object in the middle of the deck and jump to the water stream to catch the bottle. [1] Bottle 4 - On the right side of the ship you will find seaweed which pirates-ghosts can get through (Billy). On the other side you will find the bottle (at the end of the ship). [2]

Bottle 5 - During your first visit under the deck shoot at the dynamite floating in water using the cannon. [1] Bottle 6 - On the lowest level below the deck blow up the doors to all cells and go through the small hole in the wall (Dog). [2]
Bottle 7 - On the third level destroy the glass piece as Siren. [1] Bottle 8 - Before you get on the other ship using the rope catch the green bar as the female character which is next to the rope. [2]
Bottle 9 - On the other ship destroy the silver bricks (Marty) which block the way to the stairs. Slide down on the rope to throw down the golden winch. Assemble it in the mechanism near the door and use it. In the cabin hit the desk. [1] Bottle 10 - On the other ship repair the red bricks using a character with a hammer (Mr. Gibbs). [2]

Enter the port and use two switches which need sword to be activated. [1] Destroy the chest which falls down and use it to build the armor. [2]
Use the platform to go left and get to the top. You will find a character standing next to the cannon and the chest. First put the gear on the green space. [1] Now turn the cannon and push the green brick. [2]
Use Jack's compass to find the torch. [1] Use it near the cannon and shoot at the padlock on the chest. [2]
Use the chain to get down. [1] You need to find three wigs here. The first one is the treasure which Jack can find thanks to his compass. [2]
You will find the second wig when you press the chest which stands in the corner to the wall. [1] The third one is behind the balustrade on the narrow molding. [2] Put the objects in the green places.
Go back to the crossroad. This time use the platform on the right then up. You will see some strange alcoves with red and white stripes on the walls. You can bounce from those walls by pressing the jump button (other words: climb the wall). [1] Climb two walls this way till you reach a character wearing a turban standing in front of the game field. [2]
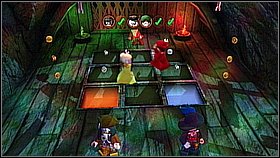
To activate the puzzle pull two chains. You need to observe the two women's jumps. [1] Each player (when we play in pair) must repeat their route jumping on the same fields. [2] After three rounds the man will enter the elevator.
Jump down and go right. You will reach another puzzle on the wall. [1] Use the helm to turn the board. The chain changes the direction of the turns. [2] You need to free the object from the labyrinth.
![Next take the cylinder to the mechanism to the right [1] and twist it using the sword - The Brethren Court - walkthrough - At World's End - LEGO Pirates of the Caribbean: The Video Game - Game Guide and Walkthrough](https://game.lhg100.com/Article/UploadFiles/201512/2015121617121183.jpg)
Next take the cylinder to the mechanism to the right [1] and twist it using the sword. [2]
Go back a little bit to the left and use the silver elevator. [1] Climb on the right through the ship wrecks. [2]
Near one of the wreck you will see the mark of the treasure on the ground. Use the compass and indicate the golden winch. [1] Assemble it in the mechanism that lift the lifeboat. [2] Lift the boat with the pirate (you need to turn two wheels simultaneously).
Go up using the elevator with the pirate and climb upstairs. [1] Near the table use the sword to activate the mechanism and open the secret passage. [2]
Jump above the table and choose the path on the left. [1] Hits the skeletons till one of them will drop the bone. [2]
Take the bone to the dog - it is near the table in the main room. [1] As the dog go back to the room where you found the bone and dig in the place surrounded by the ropes. [2]
As the dog go through the hole in the wall on the right. [1] In the cell grab the lamp. [2]
![Take the suitcase from the cell [1] and take it to the main room and put it on the table - The Brethren Court - walkthrough - At World's End - LEGO Pirates of the Caribbean: The Video Game - Game Guide and Walkthrough](https://game.lhg100.com/Article/UploadFiles/201512/2015121617121276.jpg)
Take the suitcase from the cell [1] and take it to the main room and put it on the table. [2]
Bottle 1 - When you rebuild the statue/armor for the pirate in the orange turban destroy it (Marty). [1] Bottle 2 - On the platform with the pirate who likes wigs shoot at the target above the elevator and jump there as the female character. [2]
Bottle 3 - When you solve the puzzle with a labyrinth use the compass to discover an orange handle. Pull it as the strong character (Tattoo Pirate) and solve the puzzle once more. [1] Bottle 4 - On the lowest level of the map on the right you will find a backstreet and a bottle. [2]
Bottle 5 - In the lower part of the level you will find a bridge with a target. Shoot at it and move on. Use the cannons to shoot at the targets. [1] Bottle 6 - When you solve the puzzle with colorful boards on the ground grab the two chains above you (as female characters). [2]
Bottle 7 - In the puzzle in which the pirate looks for the hat destroy the padlock on the chest and then the chest. As a dog walk through the hole in the wall. [1] Bottle 8 - At the very top of the level, in a place where the pirates meet around the globe, use Jack's compass to find a barrel. Roll on it down the path. [2]

Bottle 9 - On the pirates' meting and after the entrance to the building choose the left corridor. As the pirate-ghost go through the seaweed on the wall. [1] Bottle 10 - In the central room destroy the silver elements. [2] Use the compass in the secret place to find the bottle.
The first thing you need to do is to throw few objects to the bucket standing in the middle of the deck. Go left and destroy the chests next to the mast. [1] Pick up the trumpet and put it in the bucket. [2]
Go behind the mast to which a woman is tied and destroy the boxes. [1] Give an umbrella to a pirate and put the eye which he gives into the bucket. [2]
Switch to Will and go to the bridge. Throw the ax to the target on the mast. [1] Climb and take the black diamond. It is in one of the sails. [2] Put it in the bucket.
![Climb on the mast on the right[1] and use the rope to get down - Maelstrom - walkthrough - At World's End - LEGO Pirates of the Caribbean: The Video Game - Game Guide and Walkthrough](https://game.lhg100.com/Article/UploadFiles/201512/2015121617121452.jpg)
Climb on the mast on the right[1] and use the rope to get down. [2]
Set fire to a cannon using the torch and shoot. [1] Jump down and put the sausage into the bucket. [2]
Use the spyglass on the ship's side. [1] Find a woman on the other ship and follow her for a moment. [2] She will shoot the lifebelt at you. Put it in the bucket.
Take the torch and jump to the lifeboat stuck to the ship. [1] Scare the tentacle and take the croissant (do not leave the boat). [2] Go back on the deck using the net on the left and put the snack into the bucket.
Go left - watch the cut-scene in which the lighting strikes the mast and a cannon falls down on the deck. [1] Repair it and grab the torch and shoot. You need to hit the ship's weak point - the yellow patches. [2]
Go right and turn the helm near the mast (three times). [1] Another cannon will fall down - repair it and shoot at the patched part of the ship on the right. [2]
![Repair the bricks between the two cannons[1] turn the helm which they will create - Maelstrom - walkthrough - At World's End - LEGO Pirates of the Caribbean: The Video Game - Game Guide and Walkthrough](https://game.lhg100.com/Article/UploadFiles/201512/2015121617121645.jpg)
Repair the bricks between the two cannons[1] turn the helm which they will create. [2] A new cannon will appear. Shoot at the last weak point.
Fight the pirate-ghost. [1] Then rebuild him. [2]
Switch to Bill and go through the seaweed on the deck. [1] Go right and grab the lamp. [2]
With the lamp go right - on the lower deck - and scare the purple tentacles which hold the chest. [1] Move the chest to the mast. [2]

Jack's hook will help you to get on the upper mast (stand on the chest to grab it). [1] Jump down from the nest to the planks on the left - fight Davy Jones. [2]
When Davy will jump down chase him and hit him. [1] Eventually he will escape through the seaweed. Chase him as Billy and while you are on the other side take away another heart from him. [2]
Jones will escape to the right. Chase him as Jack. Use the mechanism activated by the hook to scare the opponent from the upper side of the ship. [1] Jump down and hit him. [2]
When he will escape up climb the rope. [1] Fight him on the mast. [2]
In the last scene Davy will run to the left on the highest mast. Jump on the rope built from the planks on the left and climb. [1] Hit him for the last time. [2]
Bottle 1 - Five silver barrels are hidden on this level. Destroy them using bombs or a long gun (Marty). The first one is on the right side of the ship from the first scene. The second one you will find during the storm. The third and fourth are on the Flying Dutchman. The fifth one is on the right side of that ship. [1] Bottle 2 - On the second level five oysters are hidden. The first one is in the first phase of the level, on the very right. The second one is again on the right. The third and the fourth are on the left side of the Flying Dutchman (behind the seaweed). The last one is behind one of the masts. [2]

Bottle 3 - In the first part of the level look through the spyglass for the second time and look for the pirate girl. [1] Bottle 4 - On the right side of the ship use Siren to destroy the glass bricks. [2]
Bottle 5 - On the right side of the ship use Blackbeard's power to set the lamps on fire. [1] Bottle 6 - During the storm go on the right side of the ship and use Blackbeard's power. [2]
Bottle 7 - You need to take the apple from the mast to the pirate on the left side of the ship. You will get to him through the seaweed (any pirate-ghost can get through it, like Billy). [1] Bottle 8 - After dealing with the cannon near the helm use the helm again. Pull out the chest. Open it as the strong character (Tattoo Pirate). [2]
Bottle 9 - Use the cannon on the right to shoot at the cage hanging on the other side of the ship. The ducks will fall down - destroy them using different cannons. [1] Bottle 10 - On the left side of the Flying Dutchman use Blackbeard to destroy red elements. Then blow up the hatch as a character with a gun (Marty). Use Siren's power and repair the damage. [2]
Go to the fireplace on the left and pick up the shotgun. Shoot at the target on the window. [1] Build the mechanism using the bricks that will fall apart and climb (using Jack's hook). [2]
While up push down the golden statue. [1] Then grab the rope near the window. [2]
Get on the table and move the piece of the statue towards the swinging chandelier. [1] Jump on the chandelier. [2]
![From the chandelier jump on the balcony on the right [1] and go further using the rope till you reach the passage - London Town - walkthrough - On Stranger Tides - LEGO Pirates of the Caribbean: The Video Game - Game Guide and Walkthrough](https://game.lhg100.com/Article/UploadFiles/201512/2015121617122011.jpg)
From the chandelier jump on the balcony on the right [1] and go further using the rope till you reach the passage. [2]
Enter the corridor and go to the center of it. Destroy the furniture on the left and right - the cupboard and the cabinet. [1] Destroy it. [2]
Assemble the cannon in the center. [1] Set it on fire using the torch (it is in the corridor) and shoot at the statue. [2]
![Go left on the molding and climb the gutter [1] and to the right using the wall - London Town - walkthrough - On Stranger Tides - LEGO Pirates of the Caribbean: The Video Game - Game Guide and Walkthrough](https://game.lhg100.com/Article/UploadFiles/201512/2015121617122069.jpg)
Go left on the molding and climb the gutter [1] and to the right using the wall. [2]

Climb, go right and get to the other side of the street using the rope. [1] Go back (on the beam) as Mr. Gibbs. [2]

Repair the mechanism (Mr. Gibbs) [1] and activate it with Jack's sword. [2]
As Mr. Gibbs hit the folded ladder to make way for Jack. [1] Jump on the right side of the street using the ropes and make sure you will lift another beam using them. [2]
Use the beam to get on the left side [1] and climb the gutter. [2] Jump on the rope.
Jump on the carts. [1] When you get to the one with a soldier holding a shotgun eliminate him and shoot at the target on the right. [2] This will open the further passage.
After few jumps you will get to the cart with coffins. [1] Destroy all the objects and use the bricks to build a bridge for the other cart. [2]
Eventually you will get to the first cart - repair the mechanism as Mr. Gibbs. [1] Then switch it using Jack's sword. [2] Take the driver's seat. At the end throw stones at the two targets which will appear behind.
Go around and fight the impostor. [1] Destroy the door through which the impostor will escape. [2]
Hit the impostor in the next room. [1] Jump on the barrel on the right and roll onto the mechanism in the ground. [2]
Go up using the elevator [1] and again fight the impostor. [2]
Eventually the opponent will roll on the barrel. To push him down jump on the blower to increase the fire. [1] After few jumps you will be able to strike the final hit. [2]
Bottle 1 - In the first part blow up six sets of armor (use Marty's cannon or bombs or a different character). One of the sets you will have to assemble. [1] Bottle 2 - In the right part of the first chamber the female characters can jump up to get the bottle. [2]
Bottle 3 - In the left part of the first chamber on the platform destroy the glass as Siren. [1] Bottle 4 - In the corridor destroy the silver desk (Marty) and rebuild it to a button. Then take it to the given platform and use. [2]

Bottle 5 - When you slide right on the rope for the first time look for the panes which Siren can destroy (go to the right on the molding). In the center solve a simple puzzle with the armors. [1] Bottle 6 - During the chase use Blackbeard's power on the cart with the red and black bricks. [2]
Bottle 7 - On the another cart (the one with the coffins) shoot at the silver chest on the nearby cart (Marty). [1] Bottle 8 - Next vehicle has a glass roof - destroy it as Siren. [2]
Bottle 9 - In the first room of the last zone go up and to the left where you will see the target in the air. Destroy it and use the mechanisms one after one so the ball falls down. Take the object to the table. [1] Bottle 10 - During the last fight use the elevator and shoot (as Marty) at the barrel hanging on the silver hook. Push it down on the ground. [2]
Use Jack's compass to find the chest with bombs. [1] Throw a bomb at the cook sleeping in the hammock (on the left side of the deck). He will demand an egg from you. You will find it behind the stairs in one of the chests (you may use the compass to locate the object). [2]
Now go right and activate the switch using the sword. Various objects will fall down. [1] Rebuild the path and push the chest to the right. [2]
Go back for another bomb and throw it at a man sleeping in the hammock on the right side of the deck. [1] To win his trust play the instrument. [2]
As Garheng remove the grilles. [1] Give the fried egg to the pirate (he will appear in the place where the cook slept in the hammock). [2]
The pirate wearing the green beret will repair the machine near the cage with explosives. [1] Set fire to the explosives using the torch (it is on the right). [2] Use the bricks to build a ladder.
Go upstairs and turn left - hit the barrel in front of the grilles. [1] Set fire to the dynamite using the torch (it is on the right). [2]
Go left and remove the barrels with the bar (Garheng should cope with that). [1] Go right for the barrel and roll to a small cell. [2]
In the cell roll onto the mechanism in the floor and turn it. [1] Then light a fuse of the dynamite which will appear on the window (the torch is on the right). [2]
Enter the deck.
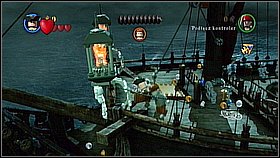
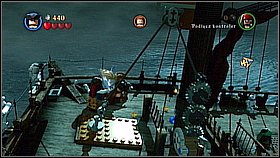
Go to the bridge on the left and destroy two pillars with the lanterns. [1] Use them to build the gears used in the mechanism. [2]
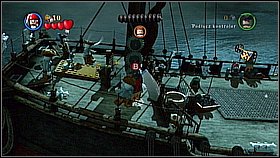
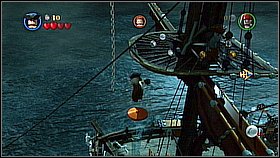
Use Jack's sword to activate the switch. [1] The second character must jump into the fountain and go up. Grab the chain. [2]
While up grab the shotgun and shoot at the hanging target. [1] Jump over the swinging platforms. [2]
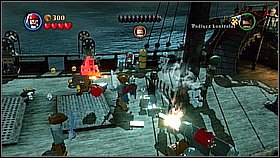
On the another mast hit the clasp holding the chest. [1] Switch to Jack and repair the spilled bricks. [2]
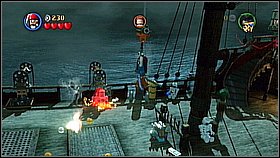
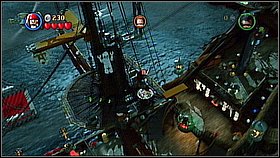
Use the hook to climb. [1] Activate the mechanism using the sword. [2]
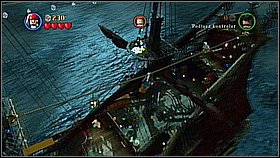
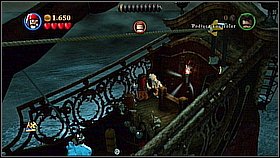
Slide using the rope on the right. [1] On the other side hit the skeleton lying in the corner. It will give you the winch. [2]
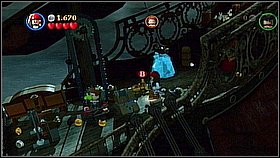
![Put the winch in the mechanism on the left [1] and use it to lower Will - Queen Annes Revenge - walkthrough - On Stranger Tides - LEGO Pirates of the Caribbean: The Video Game - Game Guide and Walkthrough](https://game.lhg100.com/Article/UploadFiles/201512/2015121617122734.jpg)
Put the winch in the mechanism on the left [1] and use it to lower Will. [2] Hit with your sword and release him.
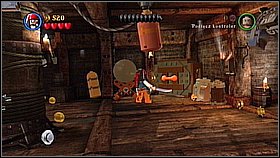
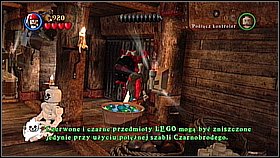
Bottle 1 - At the beginning of the level go on the lowest deck and on the right look for the chest with an orange bar. Pull it as the strong character (Tattoo Pirate). [1] Bottle 2 and 3 - On the right side of the lower deck you will find red and black door. Blackbeard can open it. [2] Inside you need to blow up the silver elements (Marty). You will find three bottles:
- Bottle 2 - go upstairs and take away the golden winch from the skeleton. Use it downstairs to activate the mechanism. This will remove the grille next to you and give you the access to the bottle.
- Bottle 3 - you will find it up on the right behind the crystals. Destroy them as Siren or Fillip.
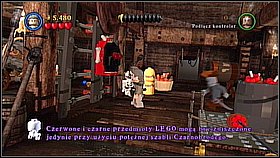
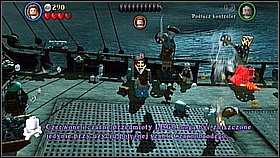
Bottle 4 - When you build a ladder and climb go left. At the end you will find another door which Blackbeard can open. Inside you need to pull the handles as the strong character (Tattoo Pirate). [1] Bottle 5 - There are 4 cannons on the deck which shoot at you. Hit the skeletons near them to take away the skulls and put them into the cannons. [2]
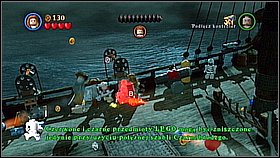
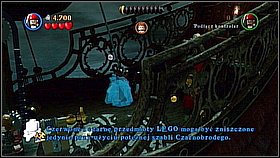
Bottle 6 - On the deck repair the mechanism as a character with a hammer (Mr. Gibbs). As Blackbeard open the chest. [1] Bottle 7 - On the right end of the ship you will find crystals which Siren can destroy. Thanks to them you will get to the mast as Jack and use the rope to get even higher. Jump as the female character to get the bottle. [2]

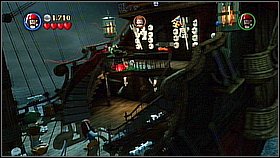
Bottle 8 - On the main deck look for the bottle using Jack's compass. [1] Bottle 9 and 10 - On the main deck choose Blackbeard and pass the other Blackbeard (the opponent). You can enter the room under him (Bottle number 9) or behind him (bottle number 10). In the latter case pull the orange bar to get to the hidden level. [2] You will find two bottles there:
- Bottle 9 - destroy the chest on the right (it has silver elements which you need to blow up as Marty) and pick up the diamond. Put it next to the similar object in front. Use the character with an instrument.
- Bottle 10 - climb the wall using the bright bricks and push down the elements under the ceiling.
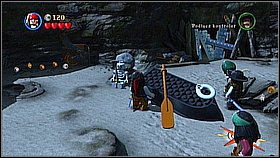
![Destroy the boat lying upside down [1] and build a new object using the bricks - Whitecap Bay - walkthrough - On Stranger Tides - LEGO Pirates of the Caribbean: The Video Game - Game Guide and Walkthrough](https://game.lhg100.com/Article/UploadFiles/201512/2015121617122833.jpg)
Destroy the boat lying upside down [1] and build a new object using the bricks. [2]
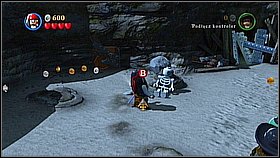
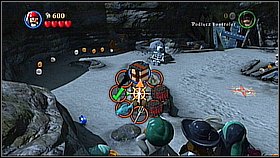
Take the spade hitting the skeleton lying near the rock. [1] Now look for the upper object on Jack's compass. [2]
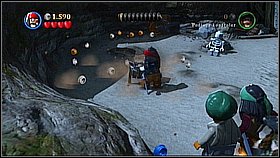
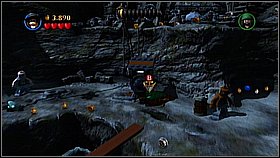
Dig up the object and destroy the lock. [1] Inside there is a chest. Take it to the right to the path in check pattern. Put aside the box for a moment and push the object previously assembled into water (to make way). [2]
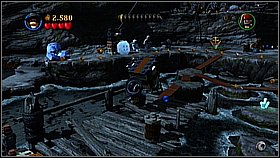
As a character with the sword activate the mechanism that lifts the bridge. [1] Use the second character to move the chest along through the islands and put it in the given place. [2] Use the bricks to build a new object.

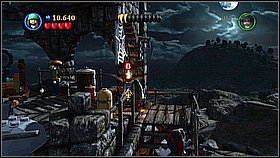
Switch to Angelika and go right. You will find a place to perform a double jump. [1] When you are up turn the winch on the left to lift the ladder for your companions. [2]
Go upstairs and open the door as Garheng.
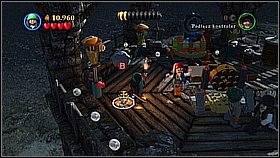
In the tower go upstairs and take the torch. [1] Set on fire the object on the left (on the upper floor). [2]
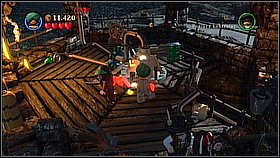
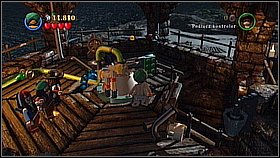
Go downstairs and repair the mechanism (Salaman). [1] Next turn the mechanism in the center (pushing the green or blue side of the brick) to place it in the pipe in the ground on the left. [2]
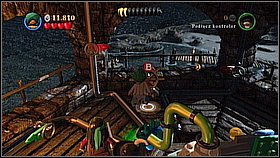
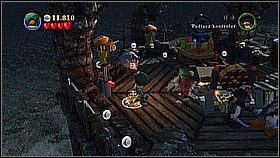
Use the helm so the arrow indicating up above the given pipe was green. [1] When the setup is ok run upstairs and set on fire the mechanism using the torch. [2]
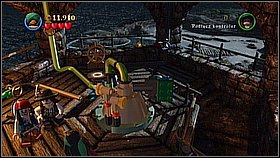
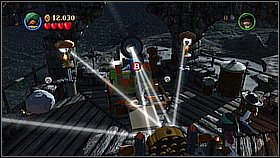
Repeat the action with the two other pipes. [1] Go back upstairs and use the lens with the spyglass. [2] Observe the swimming mermaid.
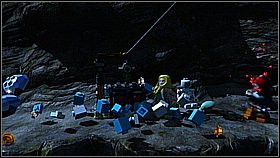

Jump down and go left - you will see how the mermaid destroys the crystal. [1] Go back and turn right and climb the tower using Jack's hook. [2]
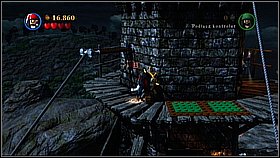
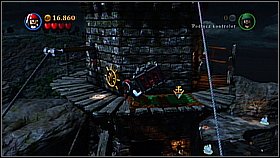
When you are up move the wheel to pick up the dynamite. [1] Put it on the green floor panel. [2]
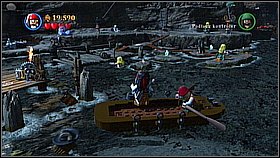
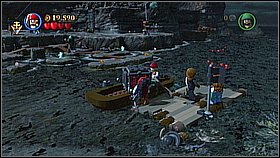
Go back at the very beginning of the level and look for the boat on the shore. [1] Jump in it and sail with the pirate to the platform. Pick up the dynamite and get to the shore. [2]
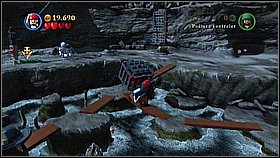
![Move the dynamite using the planks [1] and put it on the elevator - Whitecap Bay - walkthrough - On Stranger Tides - LEGO Pirates of the Caribbean: The Video Game - Game Guide and Walkthrough](https://game.lhg100.com/Article/UploadFiles/201512/2015121617123179.jpg)
Move the dynamite using the planks [1] and put it on the elevator. [2]
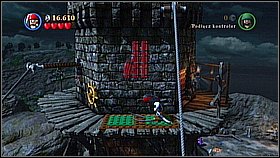
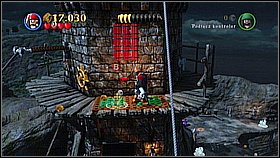
Get to the tower and repeat the action with pulling out the dynamite. Put the chest on the other green floor panel and then put the explosives on the wall. [1] At the end set everything on fire using the torch. [2]
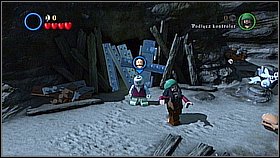
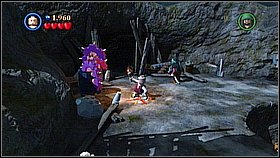
Bottle 1 - At the beginning blow up the silver elements in front of the cave (Marty). [1] Bottle 2 - Enter the cave to which access you unblocked while looking for the bottle number 1. You will get to the hidden cliff. Take the torch and scare the purple tentacle lying on the barrel. Then destroy the barrel. [2]
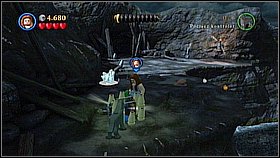
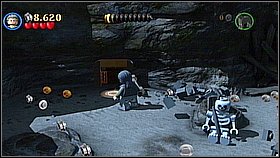
Bottle 3 - In the place where you found bottles number 1 and 2 (the hidden cliff behind the cave) use Jack's compass to discover the bottle. The treasure will be protected by the glass - Siren can destroy it. [1] Bottle 4 - In the same place where you found three previous bottles jump down from the cliff and repair the mechanism using a character with a hammer. [2]
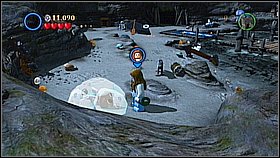
Bottle 5 - On the left from the starting place you will find a hole in the wall which is hidden behind few bricks. Destroy them and go further as the dog. Get on the rock which is up - the bottle is right there. [1] Bottle 6 - From the starting location go down and left. You will find a big crystal - destroy it as Siren. [2]
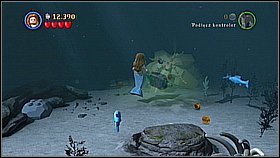
Bottle 7 - Dive as Siren and swim towards the bubbles. Repair some bricks there and hit the chest. [1] Bottle 8 - As Sparrow get to the high tower - go around it. The bottle is on the hardly visible side. [2]
Bottle 9 - In the tower use Blackbeard's power to open the red and black door on the side. Inside you need to assemble the pomp and use the switches activated by the sword. [1] Bottle 10 - Enter the part of the tower with the equipment. Go upstairs. On the left there is a place to perform a double jump as the female character. [2]
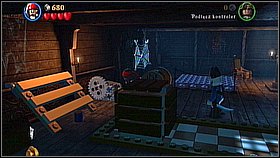
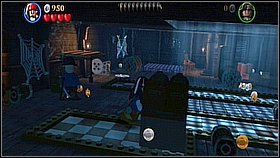
Use the switch activated by the sword which is on the left and push the chest that will fall down on the right. [1] Repeat the action with the second chest (on the lower path). [2]
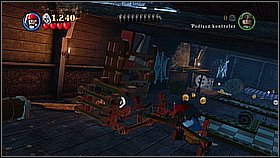
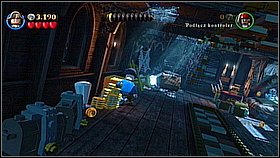
Build a ladder using the spilled bricks on the left. [1] Go up and destroy the gold bricks on the left. [2] Rebuild the harp.
Climb the wall and throw down the square bricks from the ceiling. [1] Use them to build a path for the harp. [2]
Go right and destroy the chest to find the barrel like mechanism. [1] Roll onto it with a barrel which is on the left.[2]
Build the path for the piano - the brick are in the rectangle chest (near the barrel like mechanism). [1] Push the piano. [2]
Hit the chest that will stick out from beneath the bed and put the chest on the green panel. [1] Assemble the spyglass and observe the soldier riding the horse. [2]
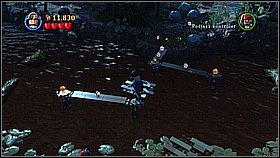
Get to the other bank of the river jumping over the platforms (water is full of the alligators). [1] On the other bank throw the poison (Barbossa) at the man on the wall. [2]
Behind the gate go left and destroy the rectangle object - use it build the chairs. [1] Then destroy the objects under the tent. [2]
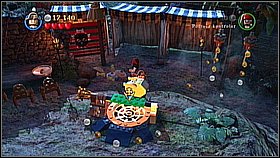
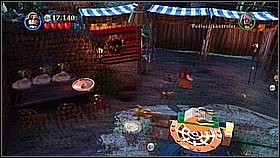
In one of the tents you will find chicken - roast it. [1] Use the bricks from the other tent to build crockery. [2]
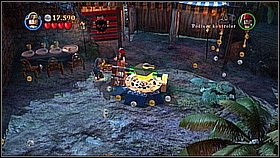
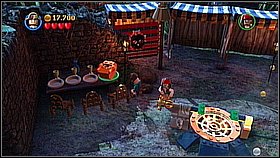
Grill the chicken. [1] When it is ready put it in the bowl. [2]
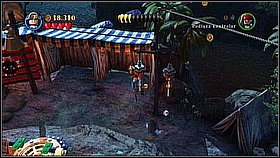
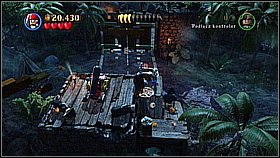
Pull the two ropes simultaneously to alarm the soldiers. [1] Use the passage on the left. Jump on the platform with the cannon. With one character stick the sword into the mechanism and the cannon will turn around. [2]
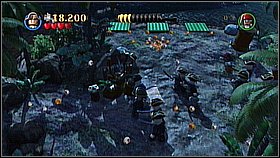
The other character has to set the cannon on fire to and shoot at the 4 silver hinges in the gate. [1] Destroy the objects which are in the center and on the right behind the gate. You will find two chests under them which you need to place on the green bricks near the river. [2]
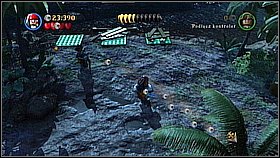

To find the third chest you need to use Jack's compass. Dig it up with a spade and take to the right place. [1] Build the bridge. [2]
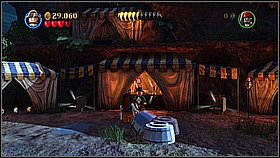
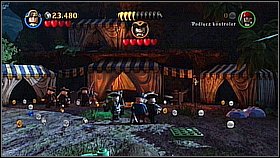
When you reach the tents grab the beer mug. [1] Many soldiers will attack you - focus only on hitting those with the green aura. [2]
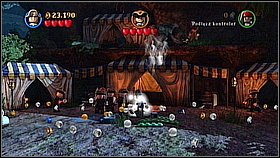
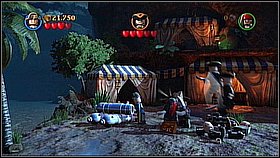
After being hit the enemy will run away. Stand near one of the three groups of the silver bricks and wait. The soldier will throw a bomb at you which will destroy the object. [1] Repeat the action with all three groups - one is on the left, second in the middle and the third on the right. When the enemy will blow up all the elements build new parts using the bricks. [2]
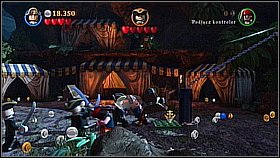
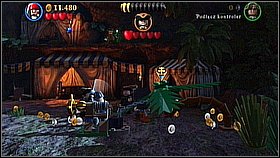
When you build all elements you need to move the mechanism from the left to the green panel on the right. [1] Use the mechanism to stretch the chain on the palm tree. Put two chairs on the palm tree - they are near the tents. [2] Sit on the chairs.
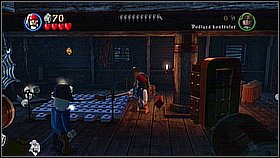
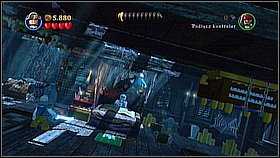
Bottle 1 - On the first deck blow up the silver grille (using a long gun or a bomb like Marty does). Move on till you find the bottle. [1] Bottle 2 - in the room with the instruments (the harp and the piano) hit the skeleton lying on the bed 4 times. [2]
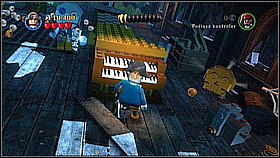
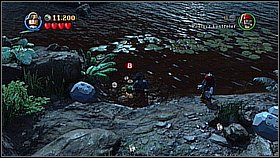
Bottle 3 - Play the piano when you push it to its final destination. [1] Bottle 4 - When you leave the ship turn left. There is seaweed near water through which any pirate-ghost can get through (Billy). [2]
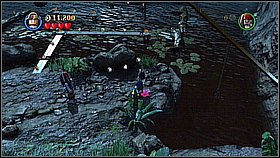
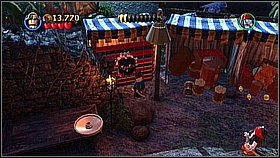
Bottle 5 - When you leave the ship go right. You will see a place where you need to perform a double jump (any female character). The bottle is at the end of this path. [1] Bottle 6 - In the village (behind the gate) look for the big red and black skull. Blackbeard can destroy it. [2]
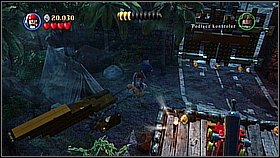
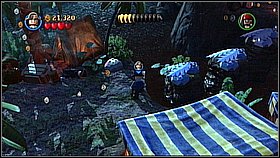
Bottle 7 and 8 - After preparing the meal for the soldiers go on the very left. You will see planks with the bar. Pull it as strong character (Tattoo Pirate). Get to the small island. One bottle is on the tree. The other you will get when you destroy all flowers (you need to act fast, do not let them to regenerate). [1] Bottle 9 - Behind the gate which you destroyed using the cannon go right and go along the wall. Behind the escarpment you will find the silver plants. Shoot at them as any character with a long gun (Marty). Then jump on the right. [2]

![Bottle 10 - When you reach the lighten tens [1] use Jack's compass to find the last bottle - A Spanish Legacy - bottles - On Stranger Tides - LEGO Pirates of the Caribbean: The Video Game - Game Guide and Walkthrough](https://game.lhg100.com/Article/UploadFiles/201512/2015121617123790.jpg)
Bottle 10 - When you reach the lighten tens [1] use Jack's compass to find the last bottle. [2] Use the dog to dig it up.

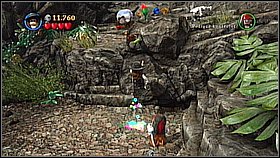
Get through the plants to get into the open space. [1] As the female character jump on the rocky shelf grabbing the green bar. When you are up hit the skeleton and take the spade. [2]
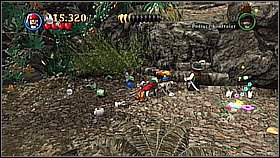
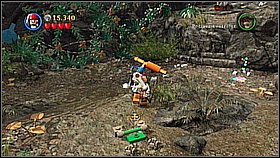
Use Jack's compass to find the treasure - the spyglass. [1] Destroy the box, assemble the object and take it to the green panel. [2]
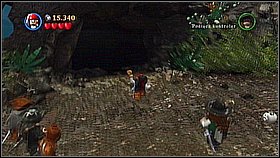
Use the spyglass and follow the trickle of water. [1] Enter the cave. [2]
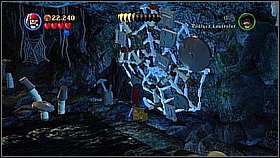
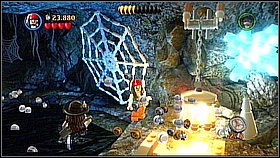
In the cave go on the right till you reach a huge spiderweb. Hit it few times till the bricks fall down. [1] Use them to build a lantern. [2]

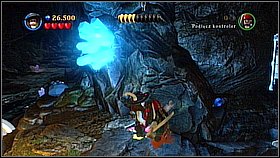
Look for the barrel on the right and use it to turn the mechanism near the lantern. [1] Go to the right behind the corridor leading straight into the cave and grab the chain (Angelika). [2]

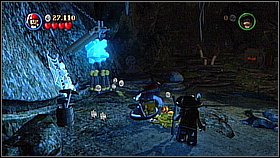
Move along the corridor and use Jack's compass to find the third lamp. [1] Use the spade to dig it up (it is on the left) and assemble it. [2]
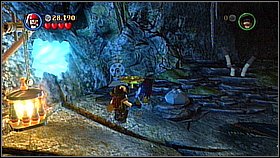

Take the wheel to the mechanism and activate it. [1] Jump into the puddle with no gravity. [2]
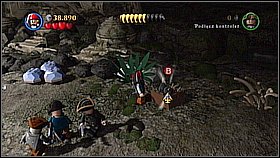
Explore the cave with the Fountain. Against the opposite wall you will find the brown objects lying on the path in the check pattern. Push one of them to the wall and the other one push into water on the left. [1] Go on the right and use Jack's compass to find the chest with the bombs. [2]
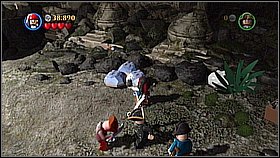
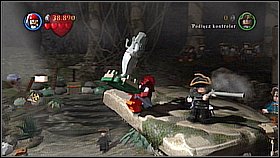
Throw the bomb at the silver bricks. [1] Rebuild a ladder out of them and climb. Take the mermaid's statue. [2]
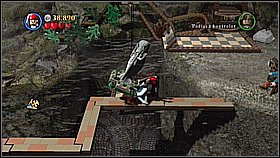
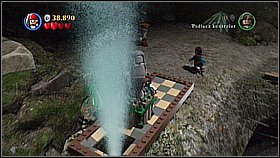
Take the mermaid's statue through the lake using the wooden planks and put it on the green platform on the left. [1] Push the statue straight on the geyser. [2]
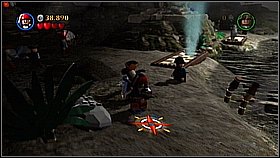
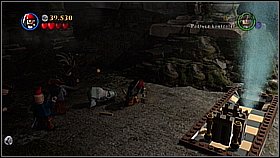
Go to the left part of the map and use the compass to find the other statue. [1] Dig it up and assemble. [2] Push the statue on the other geyser.
When the pillar falls down head to the central island.
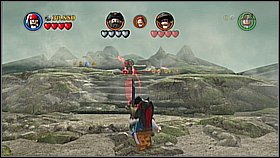
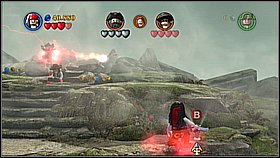
Blackbeard attacks with red bolts that reverse the steering for a moment. Dodge them and wait till he jumps down. Attack him with the sword. [1] Siren will jump from water. After the cut scene give her the goblet which stands on the right. [2]

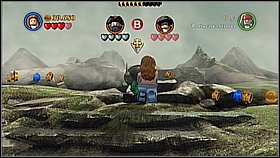
Avoid Blackbeard's bolts and wait till he jumps down to fight. Again attack him. When you hit him with the sword you will stun him. [1] When that happens quickly take the goblet to Angelika who sits at the top of the stairs. [2] You need to repeat that action 4 times.
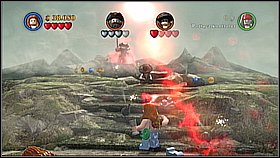
Eventually the opponent will throw the chests at you. Wait till a bomb will fall from one of them. Grab it and throw it at him. [1] He will come down and you will be able to stun him again (and give another goblet to Angelika).
Bottle 1 - At the beginning of the level you will find five orange and brown plants which look like mushrooms. Use gun to destroy them (they hide underground). One is near Blackbeard on the left. The others are behind the thick flora on the glade. The last one is on the rock where only female character can get. [1] Bottle 2 - At the end of the glade there is a target to shoot at on the left. When you hit it the parrot will lose the frog. You need to take it to the character who stands on the left at the begging of the level behind Blackbeard. [2]
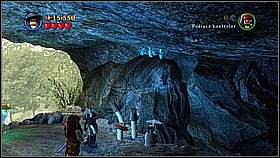
Bottle 3 - The whole level contains 5 silver barrels which you need to blow up or shoot at (character with a long gun like Marty). The first one is near Blackbeard (at the very beginning on the left). The second one is on the rock on the glade. The third one is in the last cave near the entrance. The fourth one is on the right side of the cave behind the junk. The last one is on the left side of the cave. [1] Bottle 4 - In the cave you need to find 3 groups of the bats and shoot at them (Marty). The first one is very close to the entrance. The second one is at the end of the corridor on the right (near the skull and spiderweb). The third one is under the ceiling deep inside the cave. [2]
Bottle 5 and 6 - On the right side of the cave you will find two skulls and a passage between them. Siren can remove the bricks that block it. You will enter a separate cave where you get two bottles. One for destroying 6 statues of the mermaids and the second one for blocking the geysers (first the one on the left then the one which is up and the one on the right at the end). [1] Bottle 7 - On the right side of the cave you will find an object which you can fix using a hammer (Mr. Gibbs). Then jump on it to destroy the spider. Rebuild it, ride it and fight other spiders. [2]
Bottle 8 - In the remote part of the cave to which leads the middle corridor you will find a chest with an orange bar. Pull it as the strong character (Tattoo Pirate). [1] Bottle 9 - In the Fountain go right. Between the rocks you will find red and black skull that only Blackbeard can deal with. [1]
Bottle 10 - Deep inside the map with the Fountain you will find the chest with the orange bar. Pull it as the strong character (Tattoo Pirate). [1] As Siren destroy the aquarium and rebuild it. [2] Use the helm to take the control over the ship - destroy other ships.

 Landmark Game Guide & WalkthroughLEGO Indiana Jones: The Original Adventures Game Guide & Walkthrough
 Lord of the Rings Online: Traits Game Guide & Walkthrough
 Life is Strange Game Guide & Walkthrough
 LEGO The Lord of the Rings Game Guide & Walkthrough