
This guide to LEGO Marvel Super Heroes contains complete walkthrough, describing every single mission in the main (and bonus) campaign, with specific solution to all important fights and riddles. Text is reader-friendly: players, who are not common with the LEGO genre should look to the Overall hints part, created especially for them. Nevertheless, more hard-core users can read chapters Finishing the game in 100% and Deadpool bonus missions, which are more advanced. Notice that separate chapters of the text focuses on the duels with the bosses and fighting tactics! Furthermore, guide contains description of all collectibles: minikits, comic books, gold bricks, character tokens and Deadpool red bricks. In this compendium you can also find useful information about every Stan Lee in Peril location - both in campaign missions and in the New York city area. Every playable character in the game was described in detail - which applies not only for superheroes, but for arch villains and common people too. Separate parts of the text focuses on the vehicles and different ways to seize them. In this guide you will also find a lot of interesting, useful and transparent maps, which are referring to every significant part of the game (eg. collectables, characters, locations). We hope you will enjoy them!
To sum up, this guide contains to LEGO Marvel Super Heroes :
Katarzyna Grobelska & Maciej "Czarny" Kozlowski
The guide is divided between several chapters, arranged to suit specific topics. You can navigate them by using a table of content. Every part of this guide contains a dozen of screens, facilitating understanding of the text and illustrating following footsteps.
Notice that some information in this compendium are doubled - e.g. description of the specific boss fights are placed not only in the chapters about struggling, but also in walkthrough part. This solution prevents you from unnecessary searching and makes whole guide more comfortable to use.
Finally: pay attention to maps, because they reveal a lot of important content - not only location of the collectables, but also different ways to unlock them. To read an instruction, just point on the specific number using your cursor - pop-up will appear immediately.
Colors:
To help readers find themselves in this guide and distinguish some particular elements, we have introduced few colors into this guide. They are as following:
Brown - enemies and characters;
Green - interactive objects;
Blue - abilities;
Orange - collectibles.
Key
Effect

Move

Quick character change (hold down to open character circle)

Attack (hold down to aim)

Jump/Fly

Interaction

Next character

Previous character

Start/Pause

Menu
Key
Effect

Move

Quick character change (hold down to open character circle)

Attack (hold down to aim)

Jump/Fly

Interaction

Next character

Previous character

Start/Pause

Menu
Key
Effect

Move

Rotate camera

Quick character change (hold down to open character circle)

Attack (hold down to aim)

Jump/Fly
Interaction
Next character

Previous character

Map

Menu
Operating system: Windows XP, Vista, Windows 7, Windows 8 (32 or 64-bit)
Internet Activation: No
There is no need of Internet connection during single player gameplay
Hardrive space: 8 GB
Processor: Core 2 Duo 2 GHz
RAM: 4 GB
Graphic card: 1 GB - GeForce GTX 480 or better
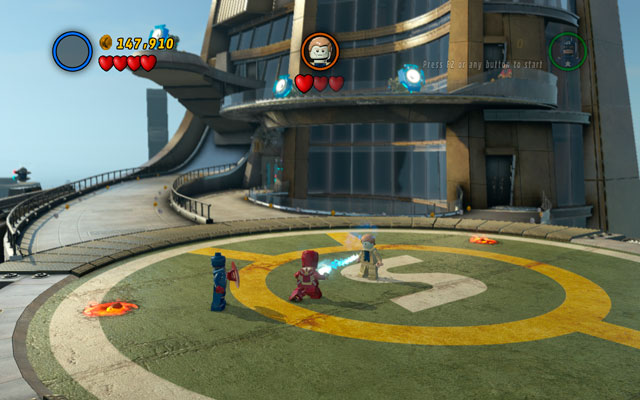
Characters: Iron Man, Hulk, Spider-Man
True Believer Status: 70000 studs
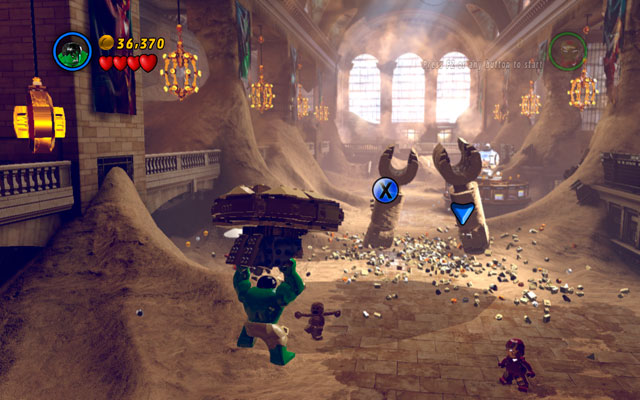
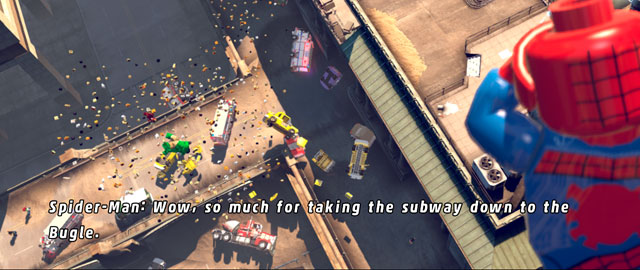
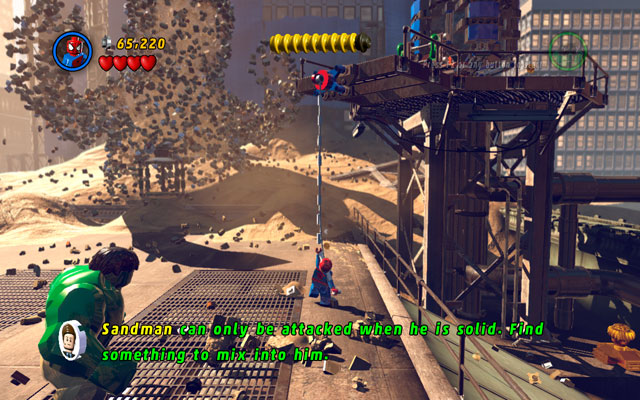
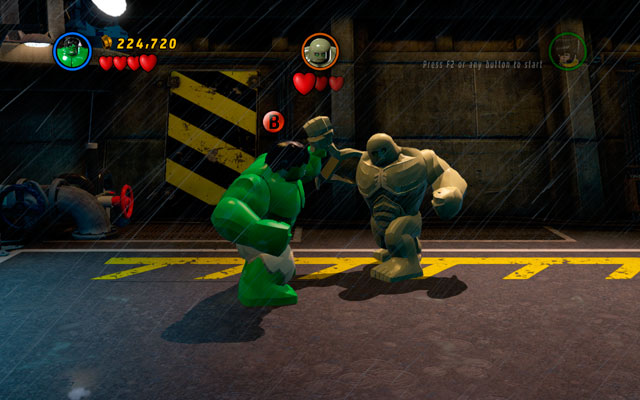
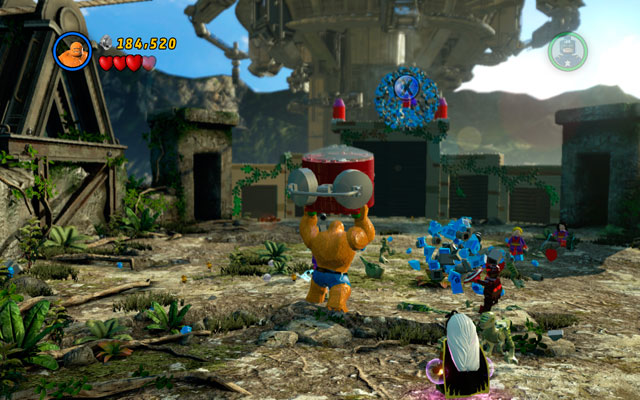
After beginning of the game, you will control two superheroes: Hulk and Iron Man. The green one is a perfect fighter, especially effective during huge battles with multiple enemies (use area smash attack: first jump and then press attack button). Second hero is more sophisticated: he prefers modern technology, which grants him ability to fly and shoot rockets. Both characters must cooperate to beat the level.
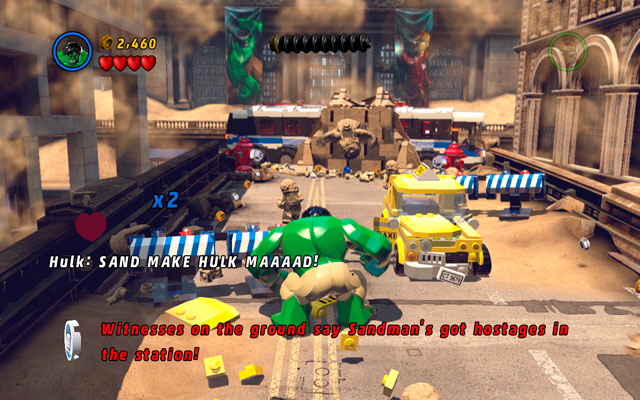
Beginning of the stage is pretty simple - destroy all obstacles standing on your way and then reach the wall with two hydrants on both sides of the street. You will be attacked by infinite wave of enemies - they aren't very dangerous, so you can ignore them (killing them is a waste of time).
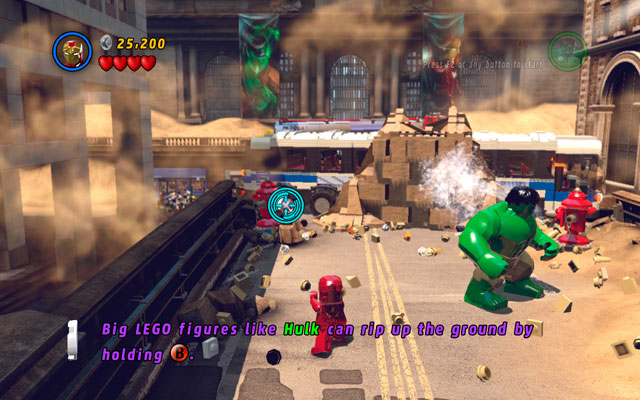
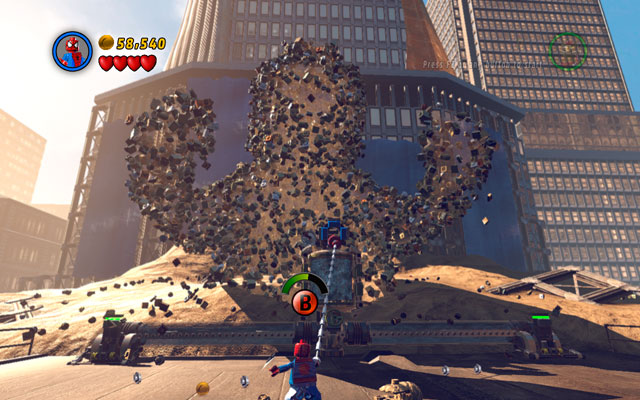
When you reach to the place with red hydrants, use Iron Man's ability to shoot at the silver valves (notice that only characters with missile attack can destroy silver bricks!). By doing so, you will wet the sand wall.
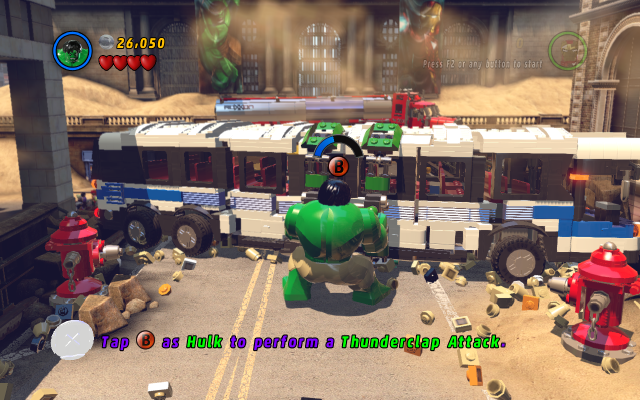
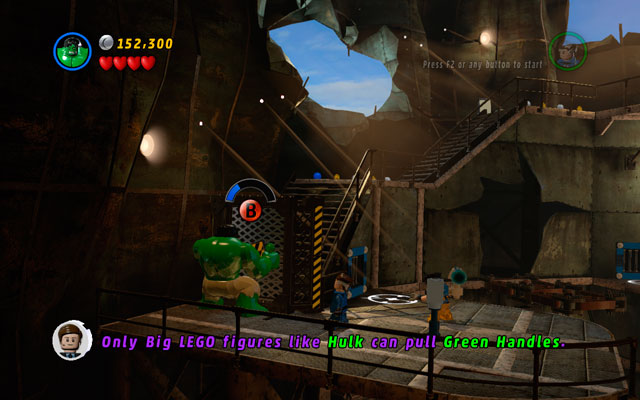
Approach to the wall as Hulk and smash it with your bare hands. Try to catch green handles and pull them, so you can lift the whole bus (only character as strong as Hulk can do that!). Throw it away and continue your trip.
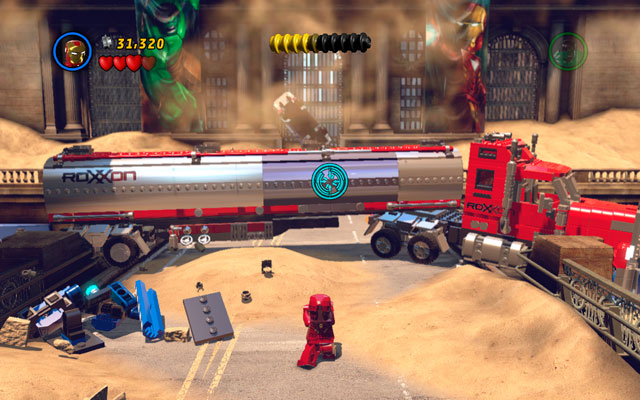
Approach to the next truck and use Iron Man's rocket attack - aim on the silver part of the vehicle and release the missiles. When bricks are scattered, build another green handle from them and use Hulk in the same way as earlier (to clear the way).
Notice that big characters like Hulk cannot build any things from bricks!
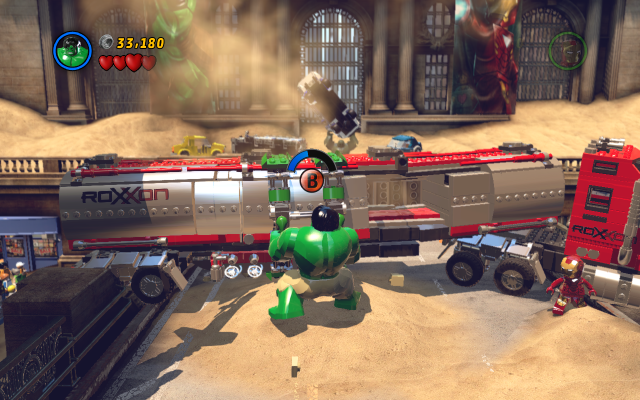
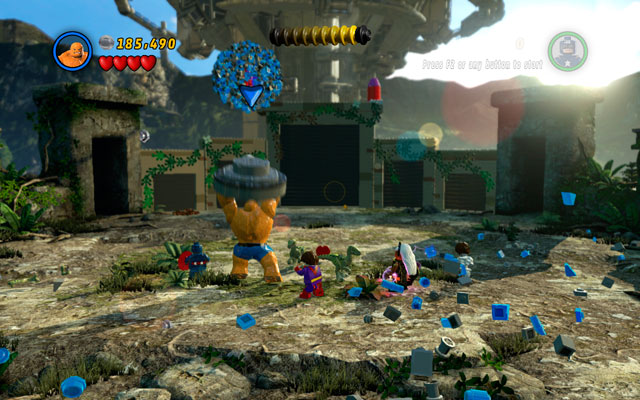
Lift the truck with Hulk and throw it away. Approach to the Abomination and fight with him during simple QTE sequence.
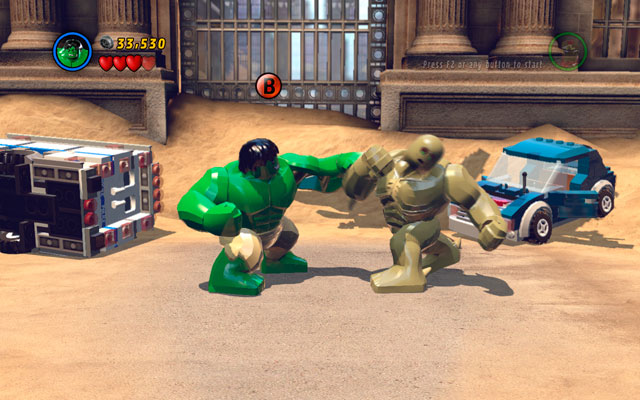
Duel is very easy - constantly mash attack button and when characters change their position, hit interaction button as fast as you can. Repeat this combination two more times to finish the struggle.
In next location choose Hulk. Approach to the object on the left and lift it using green handles. Hurl it at the sand hand on the opposite.
Now it's time for Iron Man - steady your aim and shoot at the silver barriers on the right. When another green handle appear, use Hulk strength to pull them out. Afterwards, throw furniture at the second hand.
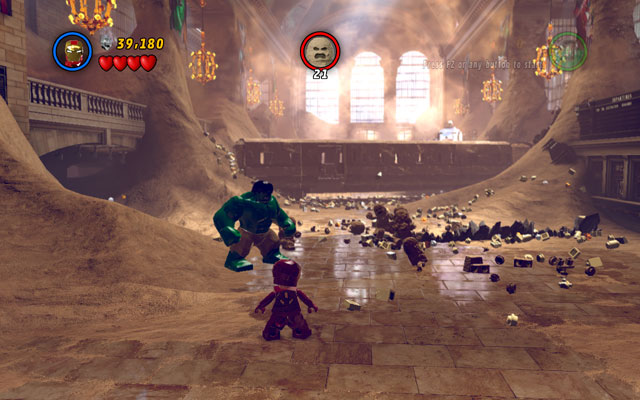
When you move further, you will face a train with 21 sand creeps on it. To move forward, simply kill all of the enemies. Notice that they can't shoot, so Iron Man can easily fly away and target them with his rockets. When playing Hulk, just smash every enemy in the area.

After finishing struggle, move forward and use Iron Man's rockets to shoot at the silver ball placed on the right. Build a water cannon from debris (hold down interaction button) and use it to wet the blockade. Now smash it with Hulk to make a passage.
Use Iron Man's rockets once again, destroying balustrade on the right. Build a rock with green handles from the debris, and lift it with Hulk. Now hurl an object at the green gate - you will be blown outside, to the last part of this level.
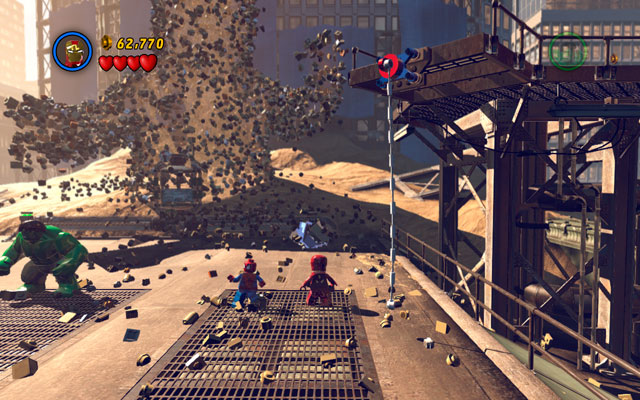
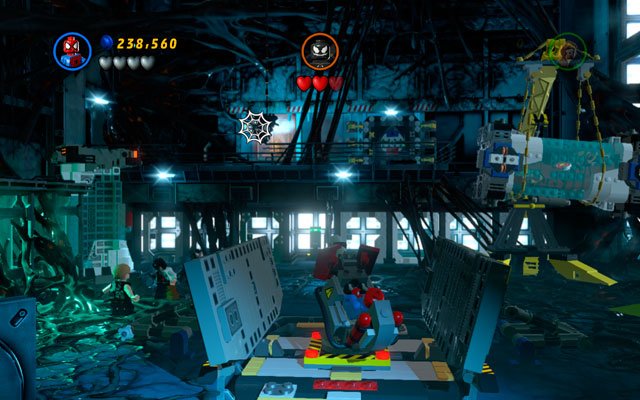
Now you will meet a new character: Spider-Man. Thanks to spider's web he can move very fast (both vertical and horizontal), and spider sense grants him an ability to detect hidden objects. He can also climb on the specific walls, marked red and blue.

Choose Spider-Man character and go to the right part of the location. Use spider sense to reveal a hidden passage on the wall and then climb on it. Standing on the platform, use web to pull out nearby panel (which is colored in red and blue).
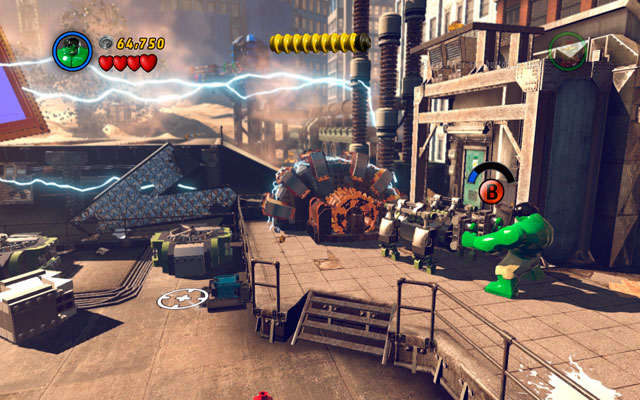
When satellite goes down and turn into pieces, build another device with green handles from adjacent debris. Use it with Hulk, destroying first generator.
Turn yourself into Iron Man and destroy silver barriers on the left. Use Spider-Man's spider sense to detect hidden panel and pull it out, like you have done it before.
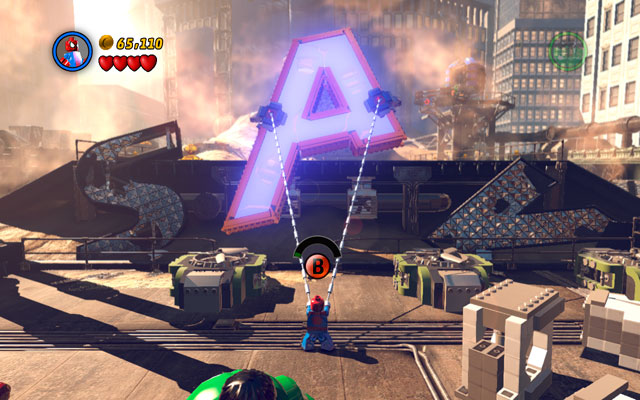
Finally go to the central part of the location and use spider's web at the big A letter. When it falls, the way to the boss will stand open.
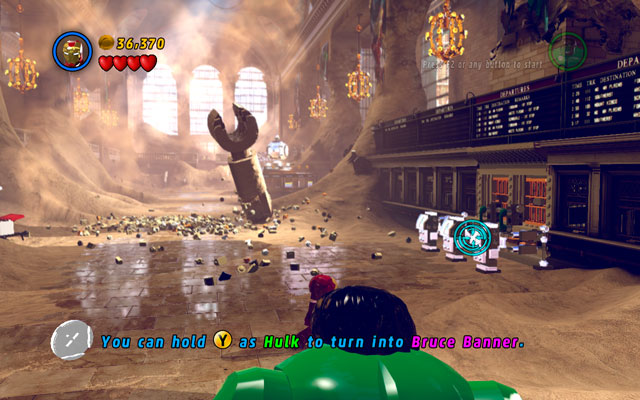
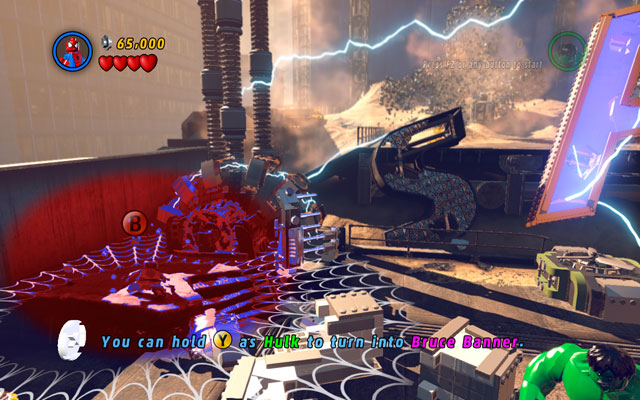
On the right side of the location you will find a blue-red panel - use it with Spider-Man, to make a rope. Now choose Hulk and transform him into Bruce Banner (hold down change character button).
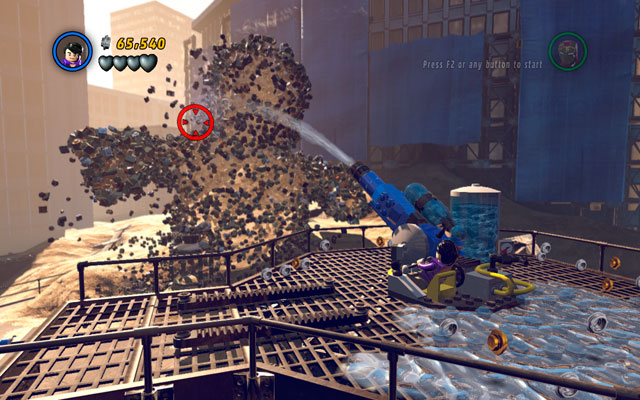
Climb on the rope and once more turn Bruce into a savage monster. Pull out green handles, destroying silo and scatter it into pieces. Build water cannon from debris and shoot at the enemy. Face him with Hulk and strike green wall with attack button.
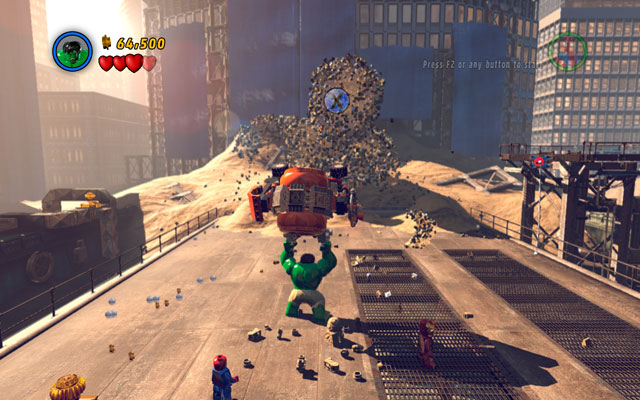
Turn away and go to the central part of the arena. Find a pile of sand on the left and destroy it with Hulk's smash attack (simply press jump and attack buttons). Build concrete mixer from the debris and throw it at the enemy. When giant falls, hit him as before.

Approach blue-red panel on the left with Spider-Man and use spider's web to unlock a switch. Now pull it.
On the right side of the sand giant you will find silver obstacle, which only Iron Man can destroy. When it is done, use second switch to unlock the water tank.
When both switches are turned on, stand face-to-face with huge Sandman and use spider sense. When another blue-red panel appears, hit it with the web and pull out. In the end, knock down your enemy with Hulk.
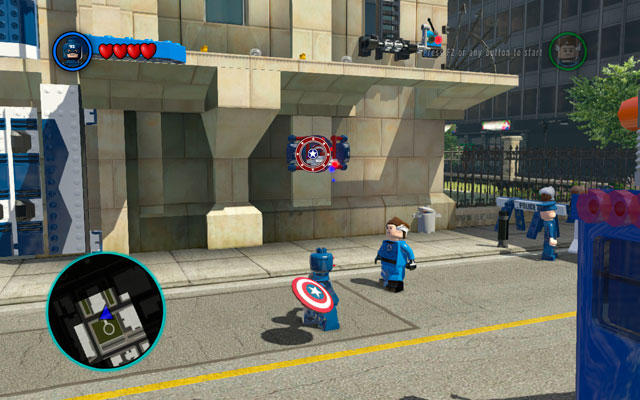
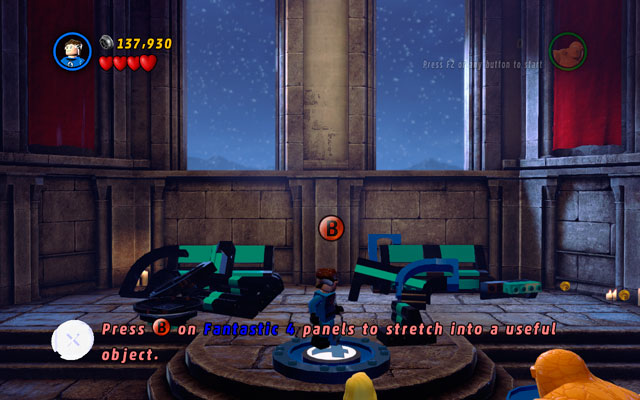
Characters: Captain America, Mr. Fantastic
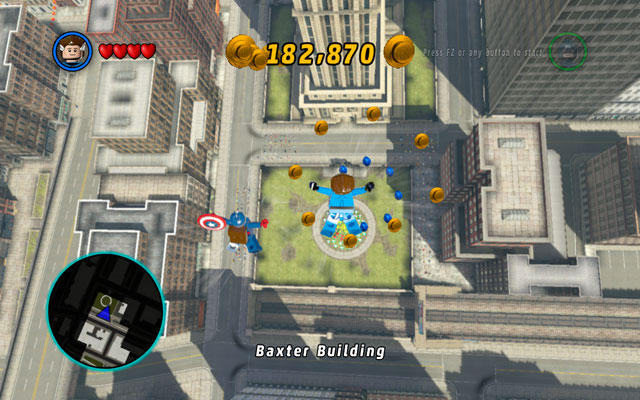
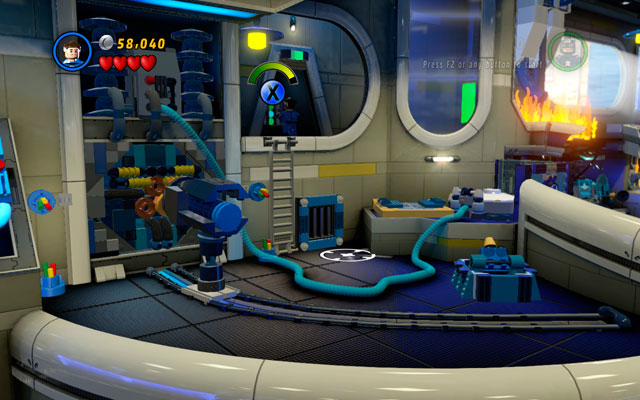
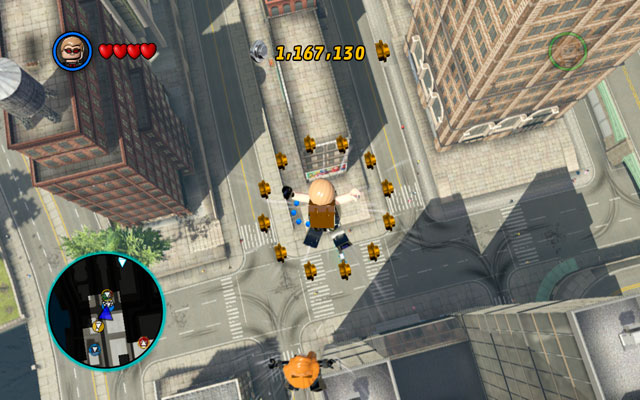
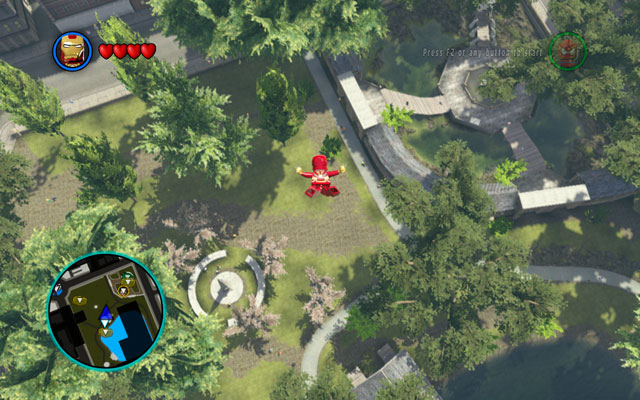
Mission starts on the S.H.I.E.L.D. Helicarrier, on which you can collect more than 50000 studs. When your hunger for richness is satisfied, jump from the ramp on the left, as phantom-character shows. Your fall will end in the park next to Baxter Building (remember to collect studs during your flight!).
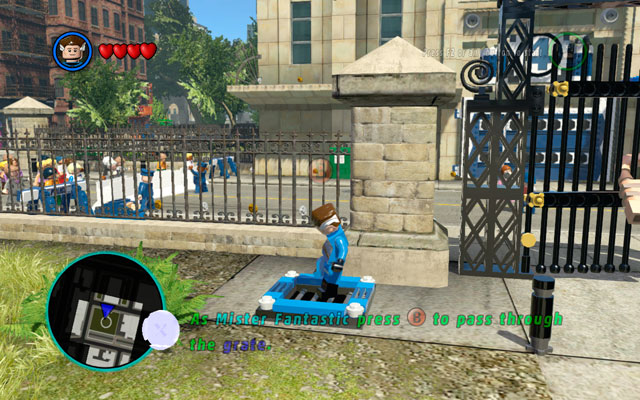
Approach to the lantern, standing close to the iron gate. Demolish the lamp and build a manhole to sewers. Now choose Mr. Fantastic and use his changing shape ability to get through to the other side of the wall (interaction button).
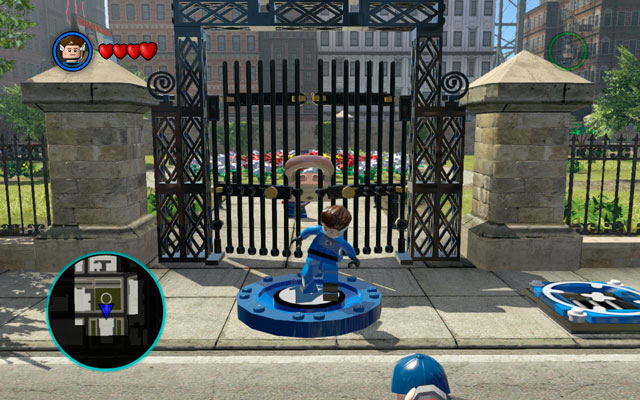
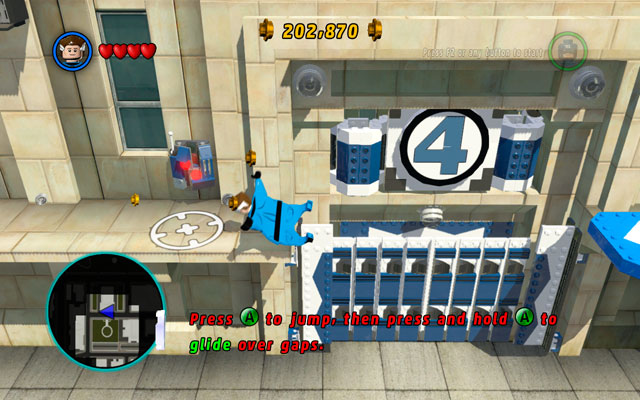
Destroy the satellite antenna standing next to the TV Van and build Fantastic Four panel from debris. Stand on the pad and then push the interaction button. In this moment, the gate will stand open.
Change to Captain America and toss your shield at the color device on the right. Climb on the ladder as Mr. Fantastic and glide over the gap using jump button and holding it down.
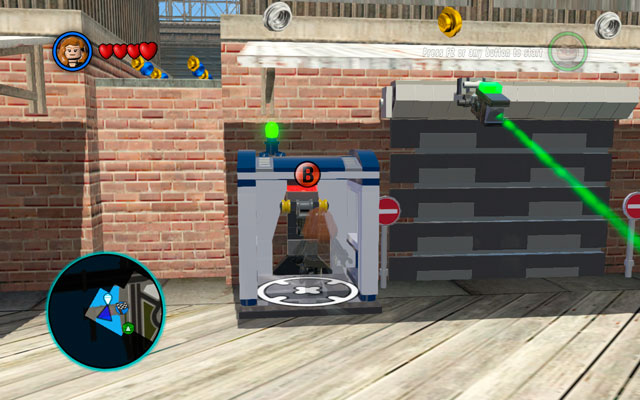
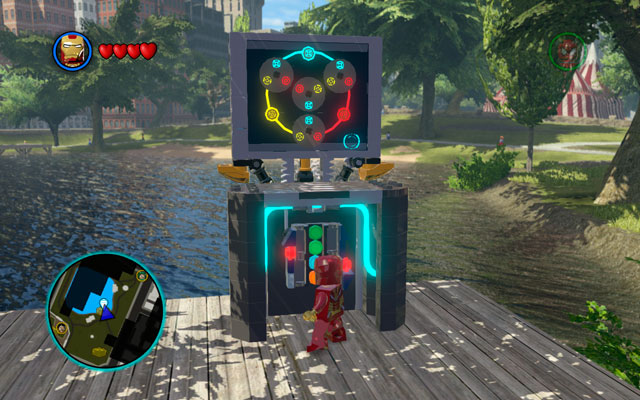
Use the computer with Mr. Fantastic to hack the system - push the interaction button and then mash the attack button. On that moment siren will ring out and two automatic laser cannons will shoot you.
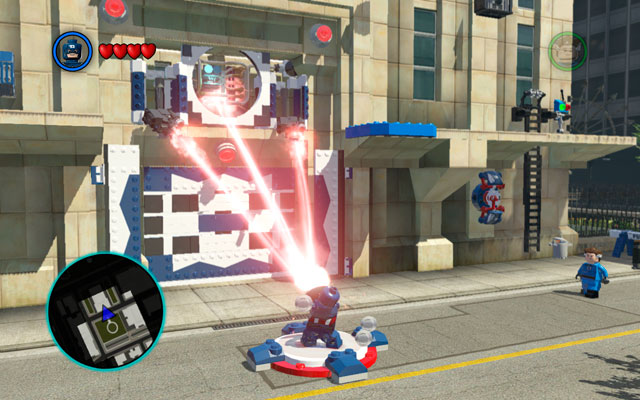
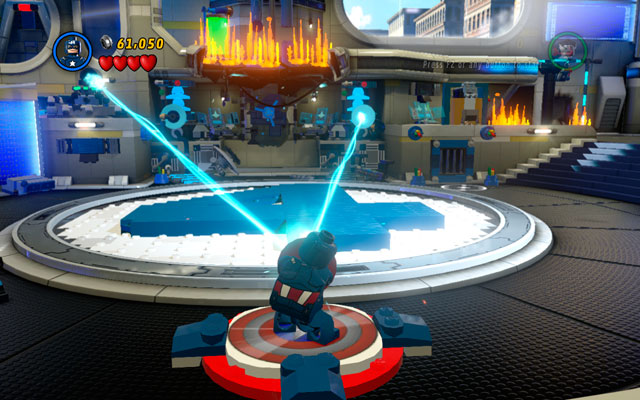
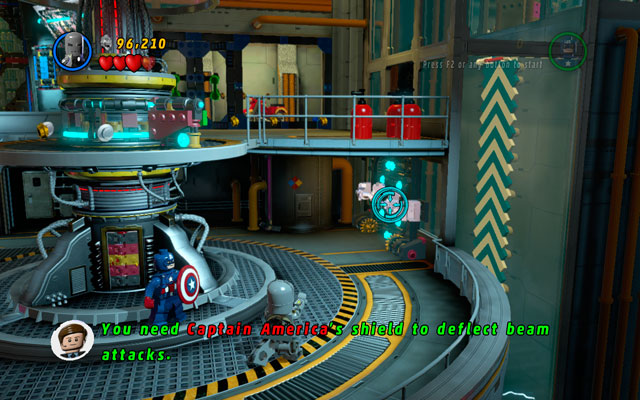
Move to the safe area and use Captain's shield to defend yourself (interaction button). Stand on the American platform located on the centre of the square and reflect deadly beam into electric cables (they are hidden between cannons). Now enter the building.
Characters: Captain America, Mr. Fantastic, Spider-Man
True Believer Status: 170000 studs
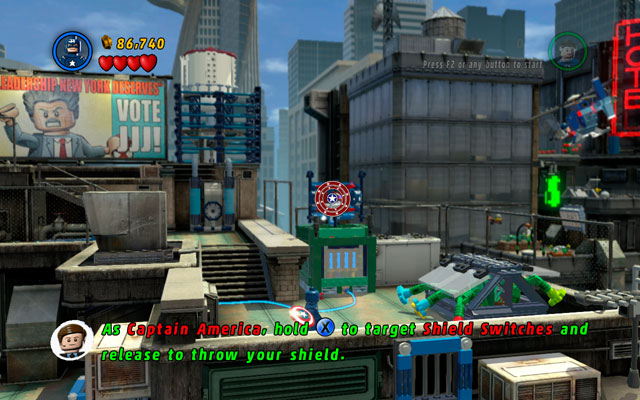
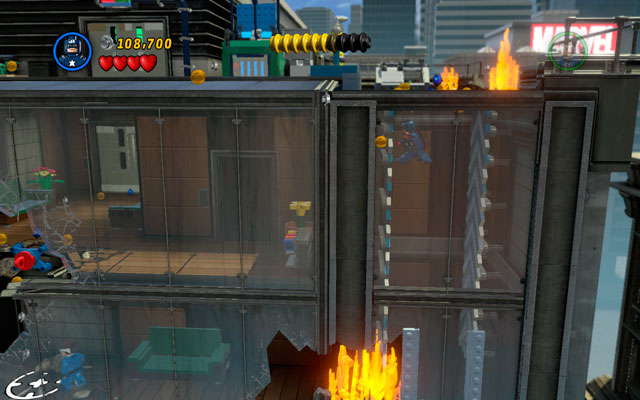
At the beginning of the level prepare for a fight with two groups of octobots sent by Doctor Octopus. Handle them, so you can chase the arch villain.
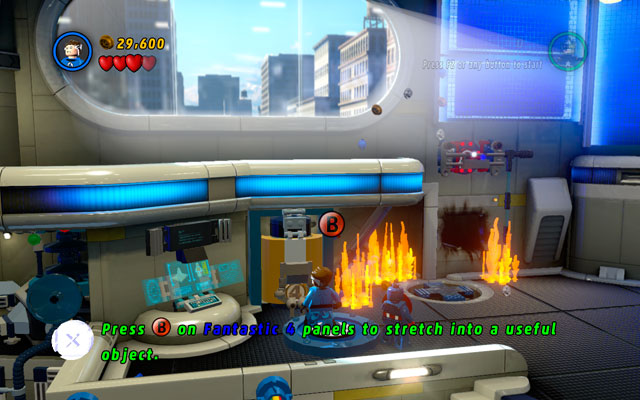
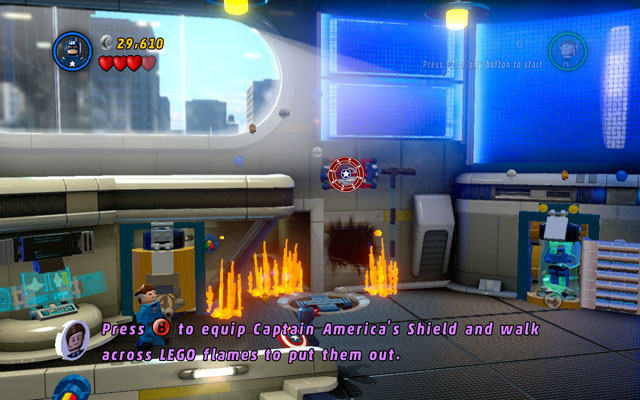
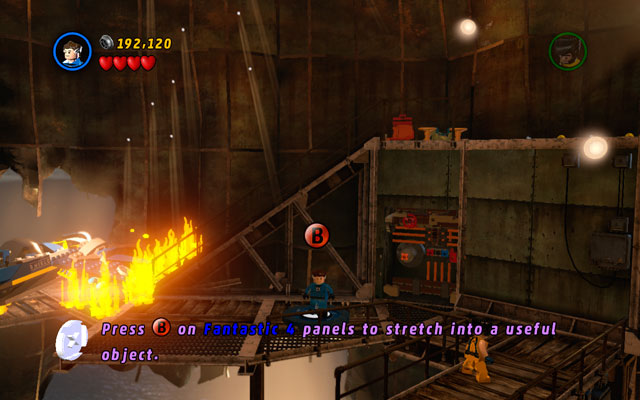
During fight with second wave of the enemies, the fire will broke up on the floor. To extinguish it, approach to the flames and build a Fantastic Four platform from the bricks. Use it with Mr. Fantastic and click on the interaction button to unlock a shield switch on the right.
Toss Captain America's shield at the target, fixing the lift. Go to the upper floor and wait for Doctor Octopus to escape - new enemies will appear at this moment. Defeat them and move on.
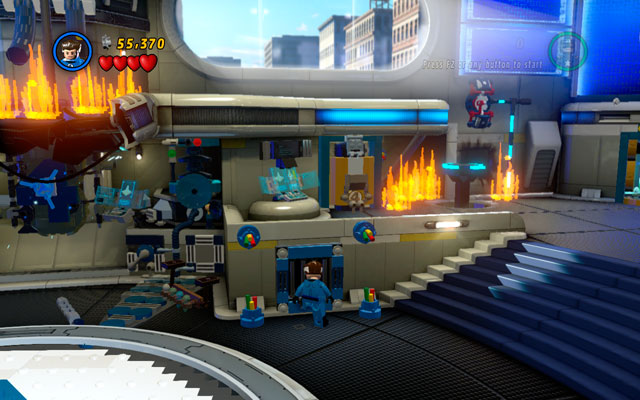
Choose Mr. Fantastic in the first stage and build a ventilation shaft from the debris (it can be created in the central-right part of the area). Then pass through it using your elastic abilities.
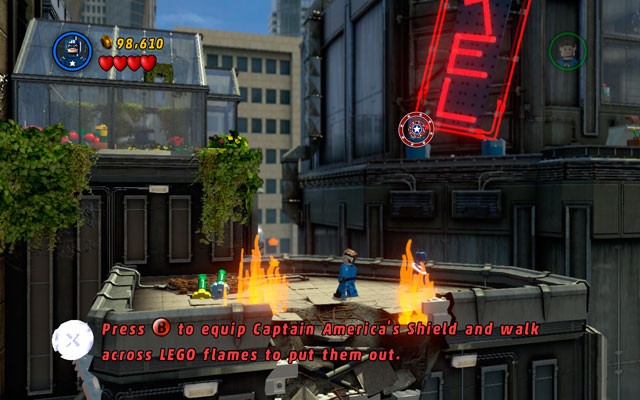
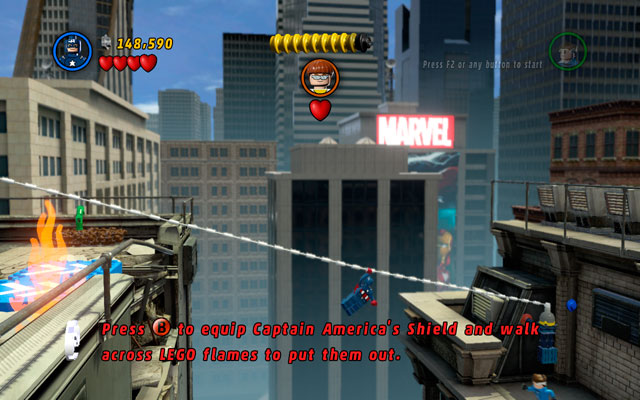
The case with Captain America is more complicated - he must get through the flames to the another side of the room. Use defensive stance (interaction button) to protect yourself, so you can pass through the dangerous area unharmed.
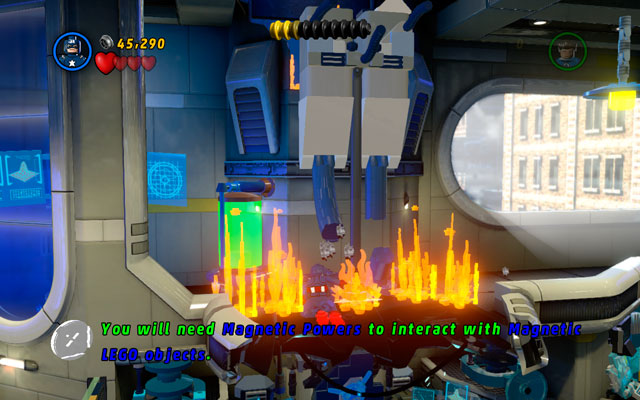
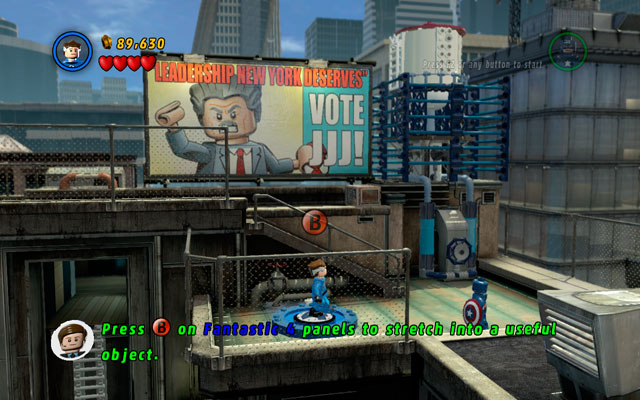
On the second part of the area Mr. Fantastic should yank a red attachable point to damage the wall. Then build a patriotic panel from the debris and toss a shield at it (as Captain America).
Turn on the machine and climb a ladder using Mr. Fantastic, so you can approach to the computer. Hack it (interaction button, then attack button) and wait for a plug to connect to the power point. Then jump down on the red platform on the right, switching the laser beam on. After that you can return to the first area.
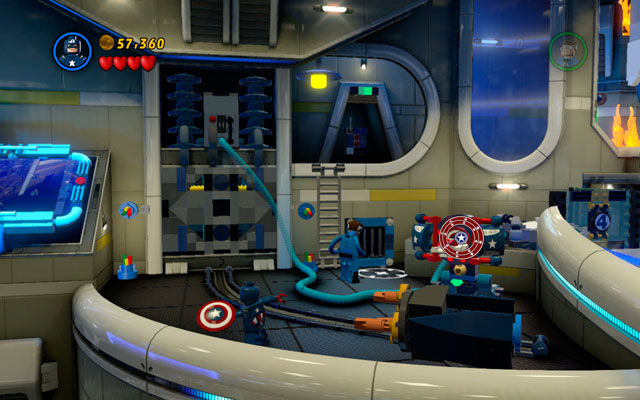
Build a platform for Captain America from the debris and use it. Reflect the beam using your shield to charge both blue plates - special lift to the next area will appear shortly after that.
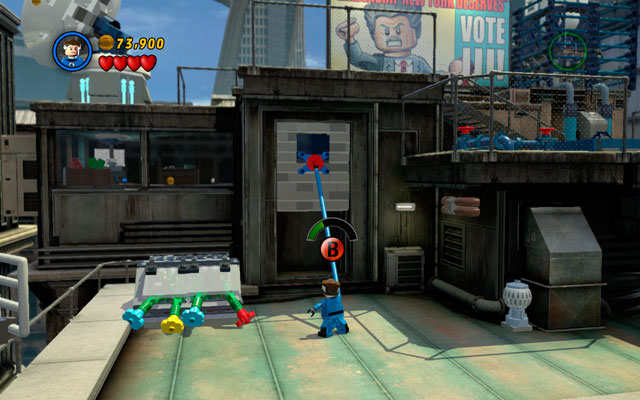
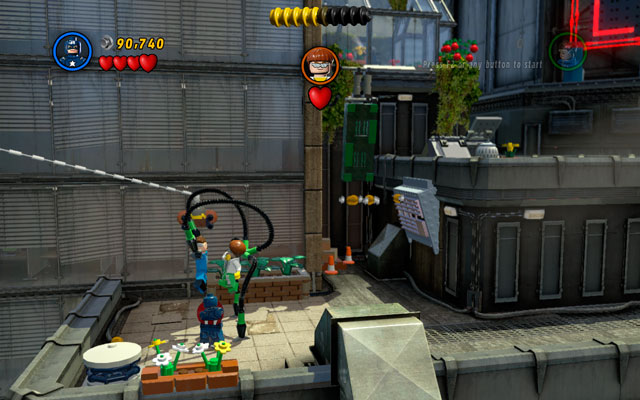
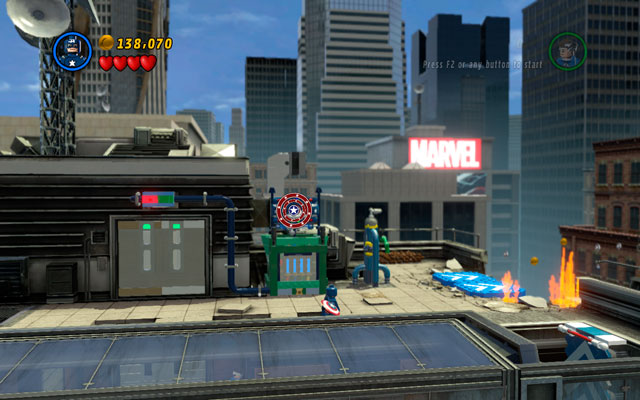
On the roof turn right and jump down as Mr. Fantastic, heading to the blue platform. Glide over the gap to the next building and fight some enemies standing there. After that yank the red attachable point on the wall and build a ladder from the debris.
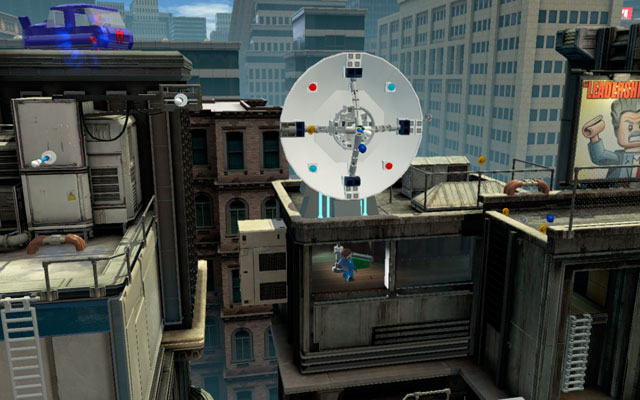
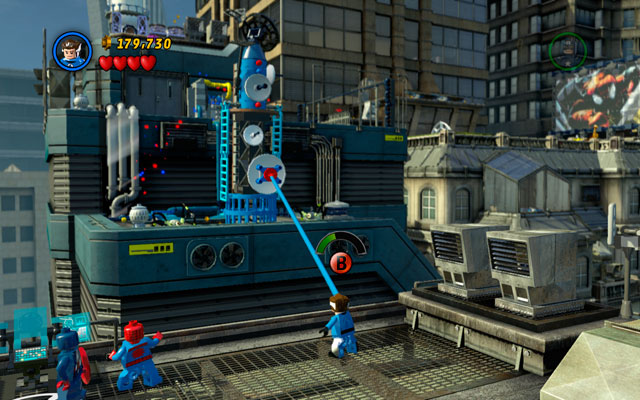
Climb to the control room and destroy all obstacles hidden there. Build a lever from the bricks and use it to rotate a satellite dish (the right position is showed above).
Choose Captain America and go right, jumping between several antennas - finally you will reach to the second roof. Go downstairs and toss a shield at the mechanism - in this way you will switch of a ventilation system that is interfering Mr. Fantastic. Now you can choose second character and pass through the iron bars on the right.
Assemble the team in the one location and go to the middle floor of the roof (between silo and flowerbed). Destroy all obstacles in the area and build a Fantastic Four panel from the debris. Use it with Mr. Fantastic to break down the silo.
Build a rope from the silo's debris and use it to go to the next roof. In that moment one hero will be caught by Doctor Octopus, so second one must rescue him by hitting the enemy.
The arch villain will escape, calling some octobots - defeat them and then head right, climbing on the upper level of the building. Toss Captain's shield at the column under the HOTEL neon for two times to create a passage between two skyscrapers.
Pass to the other building and kill all octobots in the area. Then choose Captain America and enter the block. Turn right and jump between two white-and-blue walls to climb on the roof.
Standing there destroy all obstacles in the area, building a lift control machine from the debris. Toss a shield on it to unlock a passage for Mr. Fantastic. As aforementioned use a red attachable point on the highest floor of the skyscraper, then defeat an enemy and enter the lift.
Go to the right edge of the building and glide over the gap as Mr. Fantastic. Kill all enemies and destroy nearby obstacles, building a rope for Captain America.

Toss Captain's shield at Doctor Octopus to make him run. Then choose Mr. Fantastic and use his abilities to pass through the iron bars on the right. Standing on the upper platform, yank a red attachable point to drop some bricks down. Build a Fantastic Four panel from them and use it to hit an enemy.
In the next sequence you will be supported by Spider-Man. Use his web to yank an attachable point at the opposite side of the roof to create a passage.

Defeat all enemies and go forth. Kill another group of octobots and use a spider sense to uncover a sticky wall. Climb to the top of the building and use Spider-Man's web to yank two attachable points. In this way you will switch ventilators on, so the other members of the party can get through to the next location.

Choose Mr. Fantastic and head right, approaching to the fence. Destroy all objects in the area and build a computer from the debris. Use it to open the gate, so you can go further.
Defeat all opponents and go to the right side of the location. Use a Fantastic Four panel as Mr. Fantastic to create two attachable points for Spider-Man. Yank them with your web, opening the passage to the next roof. Defeat all enemies and enter the arena with final battle.

The final battle with Doctor Octopus is quite demanding. Escape all attacks performed by enemy, being as agile and mobile as it is possible. If you have been caught by enemy, simply change the character - in this way you will avoid losing studs.
The pattern of the fight isn't complicated: approach to the enemy and wait for the killing blow, then dodge all the hits. Archvillain's tentacle will get stuck, so you can easily break it down (hit an attack button). Repeat this action for three times, finally defeating the "armless" Doctor Octopus.
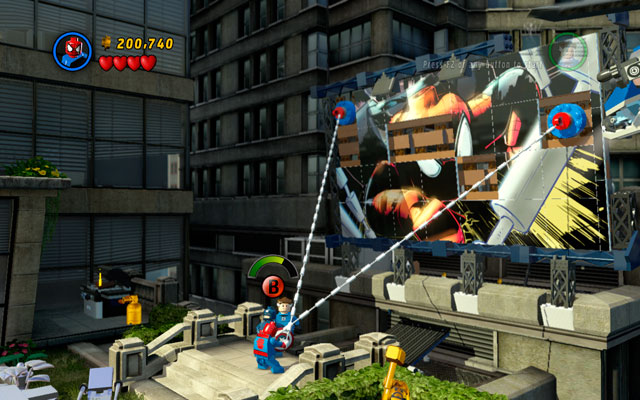
Characters: Black Widow, Hawkeye
After the Times Square Off mission you will take control over the two new characters: Hawkeye and Black Widow. The man is a brilliant archer, able to fire at the long range and detonate his arrows. Charming woman - on the other hand - is preferring two pistols and can turn herself invisible, so she can avoid being noticed (by cameras too).

At the beginning of the stage approach to the balustrade as Hawkeye and detonate all silver elements surrounding a billboard at the opposite side of the huge hole. In this way you will uncover some attachable points, at which you should fire some arrows.
Turn right and go round the hole. Approach to the billboard that you have already detonated and jump through the arrows and poles to the other side of the street. You must do that with both characters.
The way to the next location is blocked by the electrified, deadly surface on the ground. To solve the problem, switch into Black Widow and jump between two white-and-blue walls on the right to climb on the roof. Then use a computer on the left and turn electricity off (to do that you must disconnect all wires by clicking on the every arrow showed on the screen). After that you can jump down.
Use Hawkeye's "rope arrow" to yank the closed gate, so the passage could be open. On the other side of the area choose Black Widow and switch her invisibility skill on to avoid being noticed by the camera. Then hack the computer on the right to turn all securities down. Now you can enter Oscorp building!
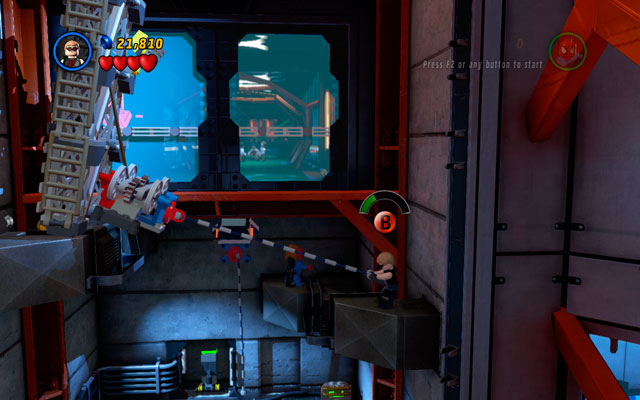
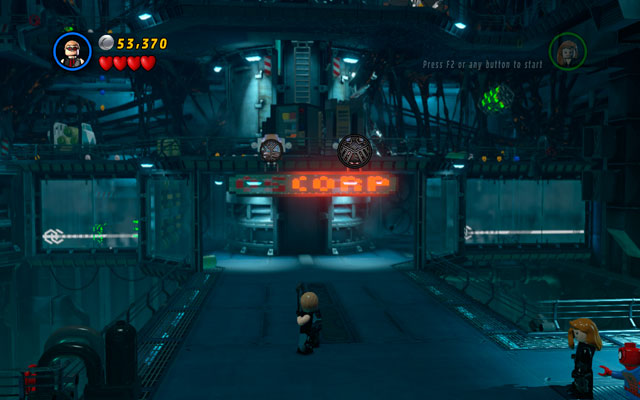
Characters: Black Widow, Hawkeye, Spider-Man
True Believer Status: 100000 studs
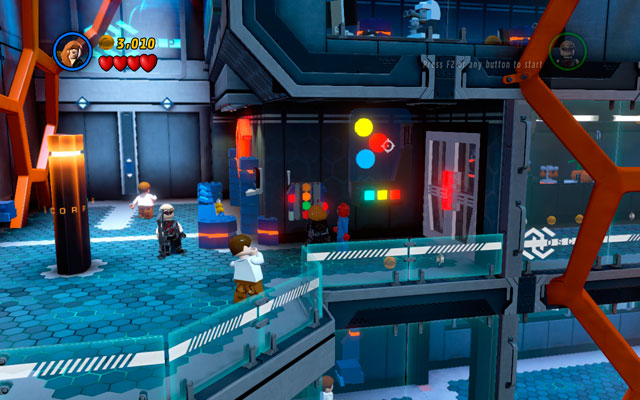
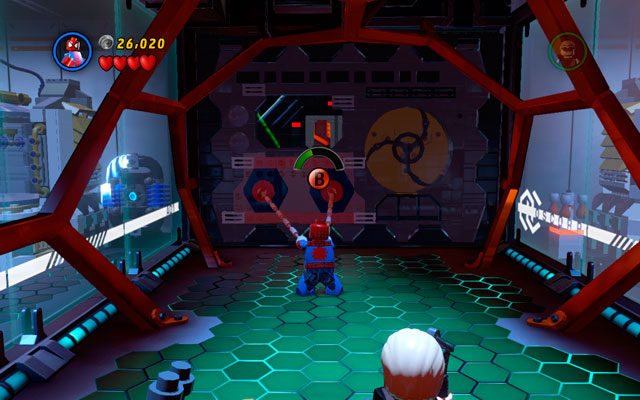
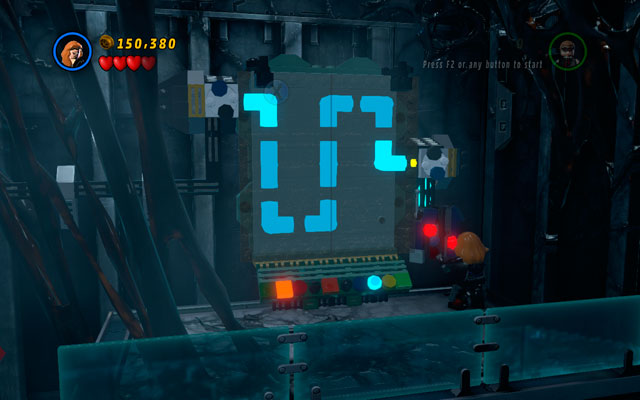
In Oscorp Laboratory choose Black Widow and approach to the computer on the right. To hack it, you must click on the colored circles in the right order, showed above. As you can see, the correct combination is: down, up and the middle.
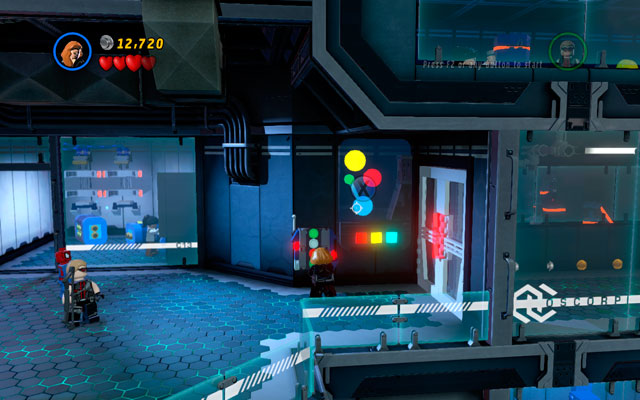
Go to the next corridor and switch into Hawkeye. Shoot an arrow at the silver container on the right side of the room, then build a computer from the debris and use it as Black Widow. This time, the right combination for the circles is: central, up and down (as you can see above).
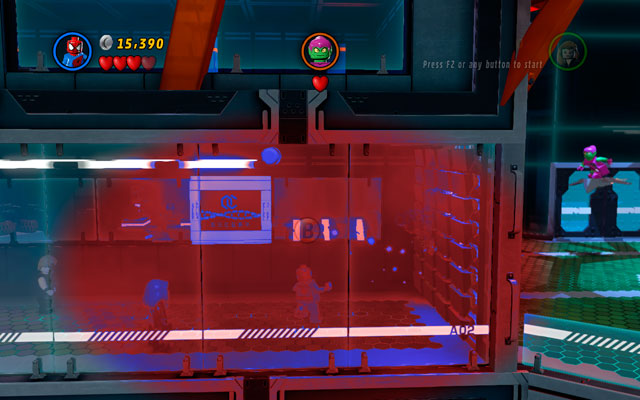
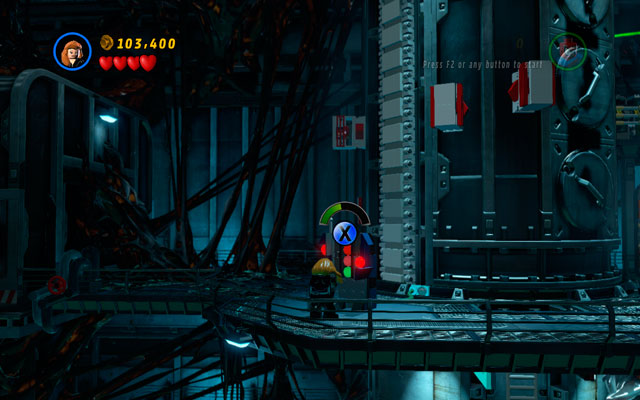
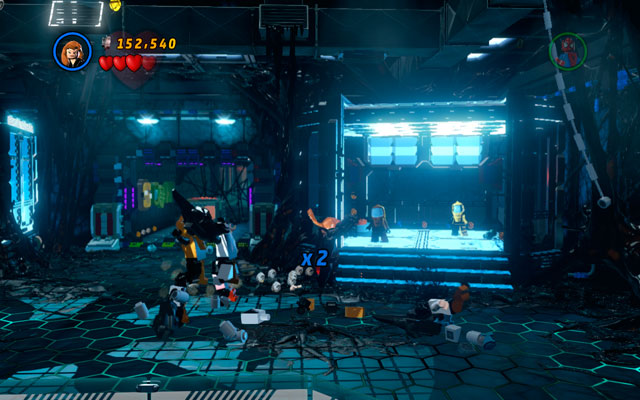
Pass through the corridor and fight you way among the enemies. When they are defeated, choose Spider-Man - you must use your spider sense to uncover two attachable points on the right. Yank them to break into next room.
Dodge Green Goblin's bombs and try to shoot at him - he will escape after the first hit. Go to the collapsed lift pit and use a spider sense to uncover a sticky wall. Climb on it as Spider-Man and then destroy the panel located in the middle of the floor. Finally use a switch that unlocks the ladder.
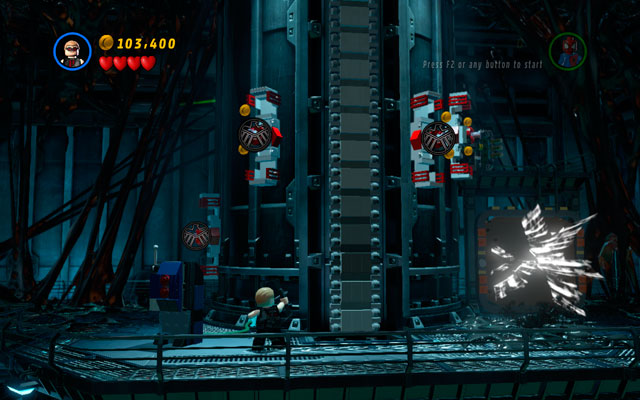
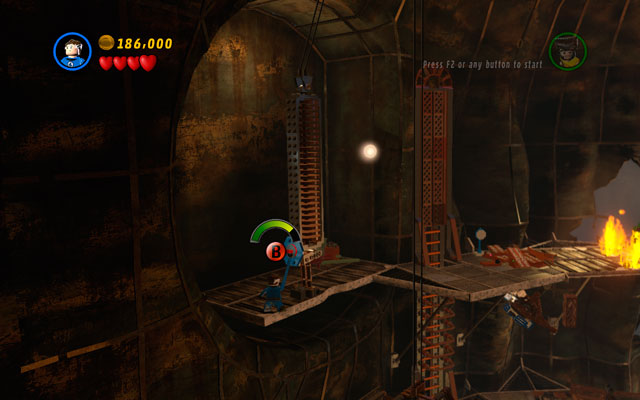
Choose Hawkeye and shoot an arrow at the silver vent at the top of the location - you will create a rope-passage for other characters. Go up and stand on the right platform, so you can easily shoot another arrow at the attachable point. Yank it to create a footbridge, so you can go further.
Pass through the corridor and use Spider-Man's spider sense to uncover two attachable points. Yank them to unlock a silver plate hidden behind. Choose Hawkeye and shoot an arrow at the uncovered target - you will blow it up, creating a passage.
In next corridor some cameras are located, so you should use Black Widow's invisibility skill to avoid them. Go to the interior and turn right - hung on a switch and wait for two attachable points to appear. Then use Spider-Man's web to open the door.
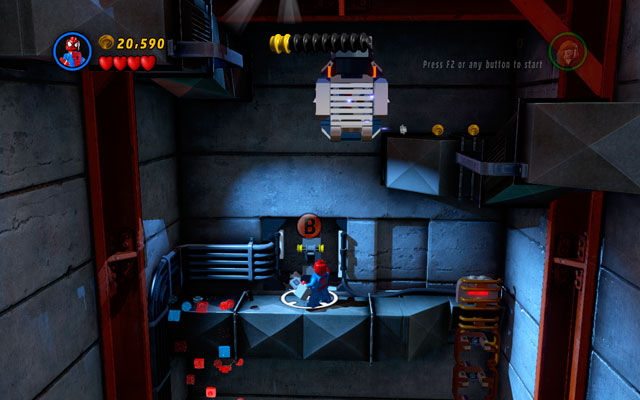
At the moment you will be transferred to a new location. There is no need to hurry - against all appearances, you won't be crushed. Stay calm and destroy an object on the right, then shoot an arrow at the silver box on the opposite side. Build a ladder from the debris and climb to the upper floor.
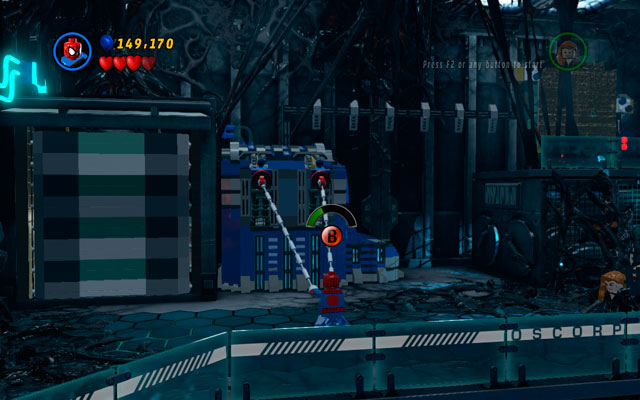
Head right, killing all enemies in the area. When the location is cleared, choose Hawkeye to shoot two arrows on the both silver handles over the Oscorp neon. Then approach to them as Spider-Man and use your spider sense ability to uncover two attachable points. Yank them with your web to unlock another ladder.
Climb to the upper floor and fight the enemies, killing as much as you can (studs are very useful!). Then go to the highest floor (using the same ladder) and turn left. Use a computer as Black Widow to turn a column on the right in the proper direction.
Shoot some arrows at four attachable points to create poles. Then switch back into Black Widow and jump through them, so you can approach to the computer on the right. Turn your invisibility power on to avoid the camera and hack nearby device - you will open the ladder to the next stage.
In a new location head to the right so you can approach to the huge boxes. Destroy them and yank two attachable points with Spider-Man or Hawkeye. Then use scattered debris to build a shooting panel for Hawkeye. After that use a bow to shoot an arrow at the target.
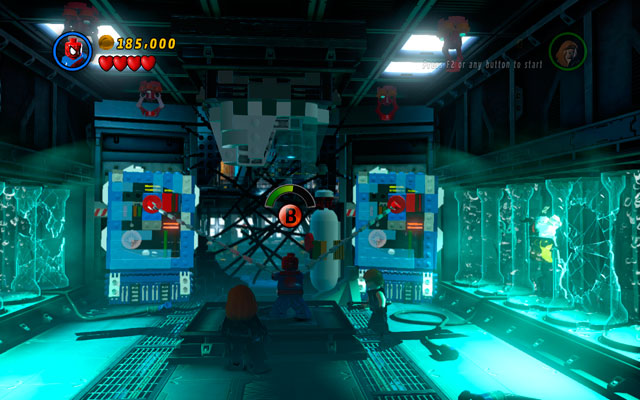
Switch into Black Widow and jump through the poles heading to the computer on the right. Now you must solve a riddle - your goal is to create a connection between two pumps. The right combination is showed above.
When Venom appears, turn left and return to the one of the previous corridors. Prepare for a tough fight with multiple enemies - try to keep them at a range, because they can be quite demanding during melee combat. Change your position often and avoid being surrounded -then everything should be okay.

After the fight enter to the frozen, blue room on the right and step on the red button. Then use another character to stand on the similar button located in the room at the opposite side of the location. Because both switches are turned on, the door will become open.

Enter to the corridor and destroy anything you will find there. Build a huge speaker from the debris and turn it on using spider's web on the attachable point. Then enter to the new area.
Move forward and wait for a cut-scene. When it ends, fight the enemies and then shoot Hawkeye's arrows at two silver levers to destroy them. After that use spider web to yank two attachable points - the gate to the final arena will stand open.
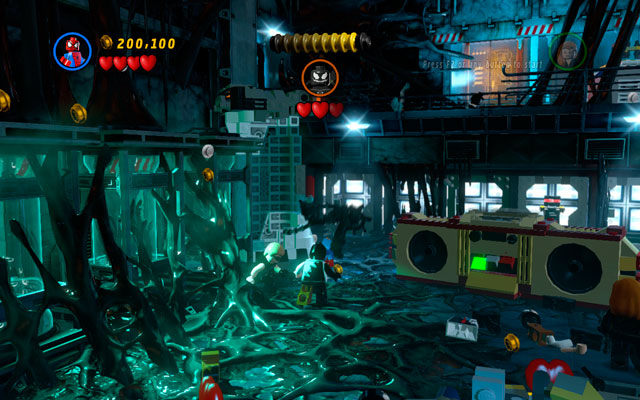
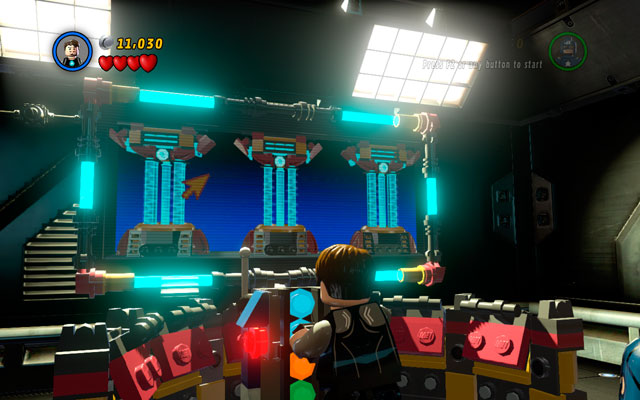
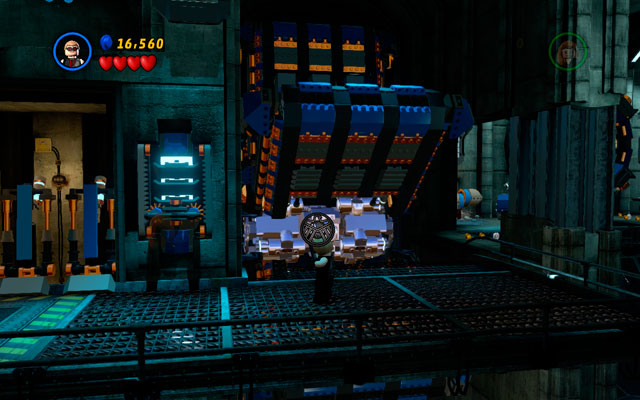
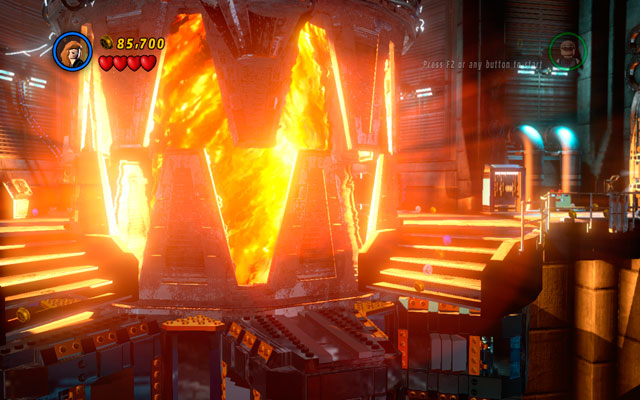
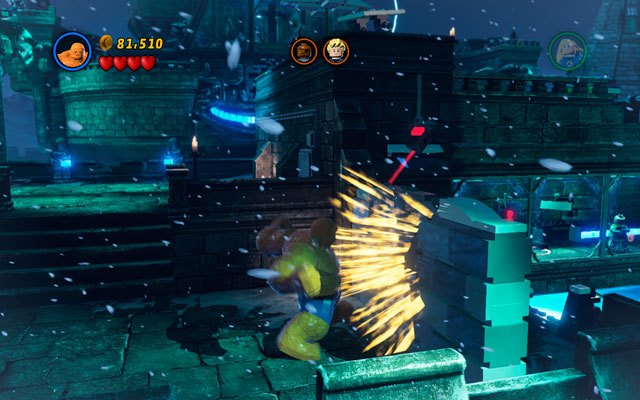
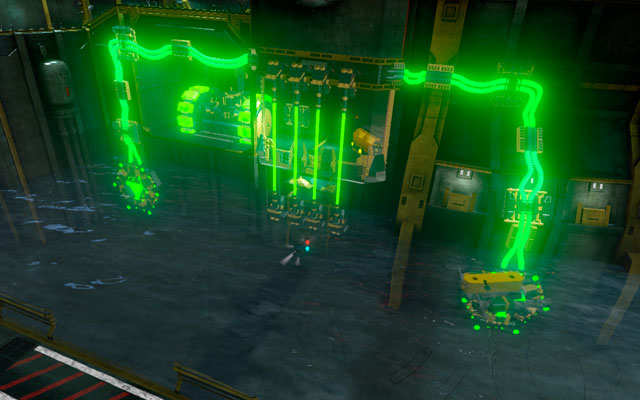
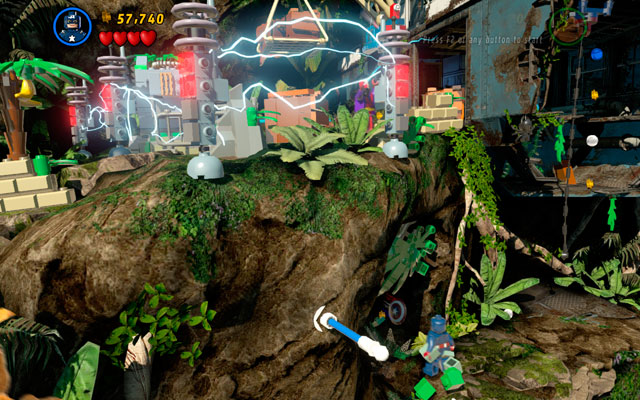
Duel with Venom is quite tough. Villain will summon enemies endlessly, so you shouldn't bother with them - just focus on the main problem. The boss is immortal for some reason: you must weaken him first to strike a crushing blow. To do that, destroy all objects standing on the left side of the arena and build radio from the debris. When it is working, run towards Venom and punch him in the face. The first stage of fight is over now.
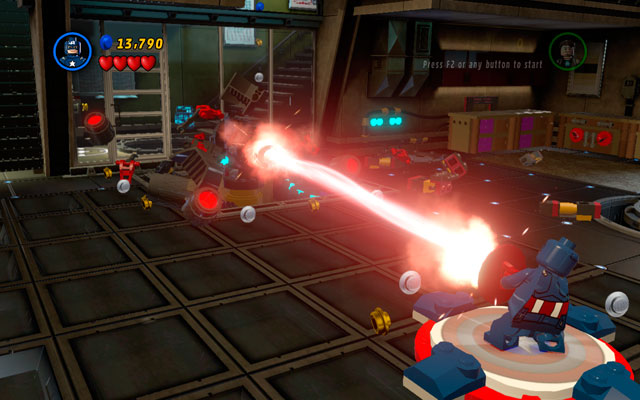
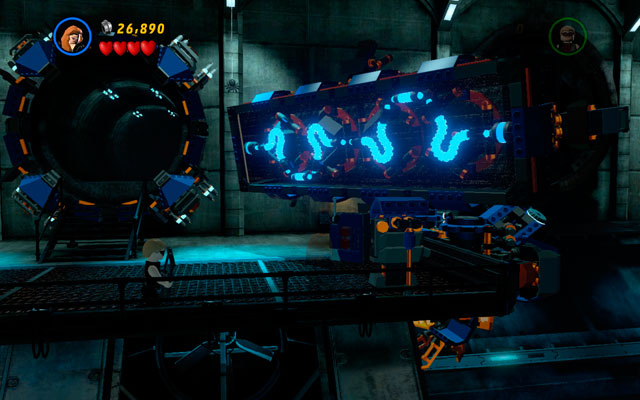
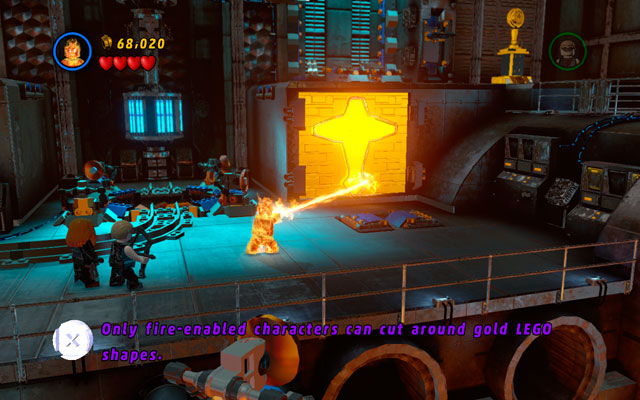
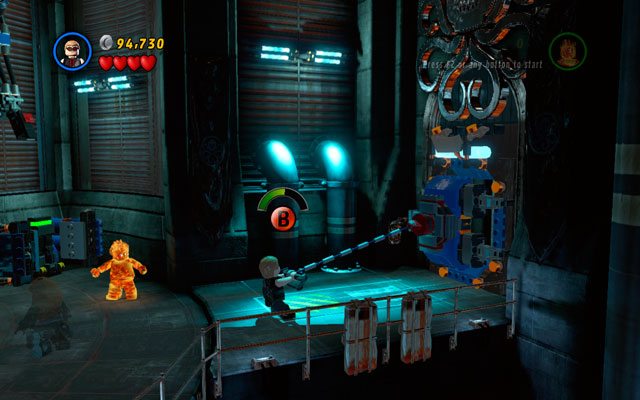
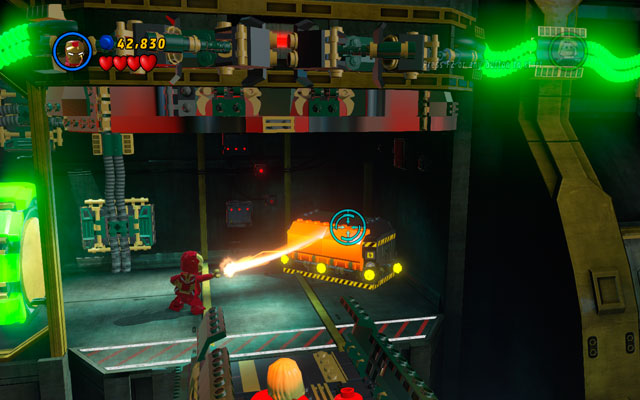
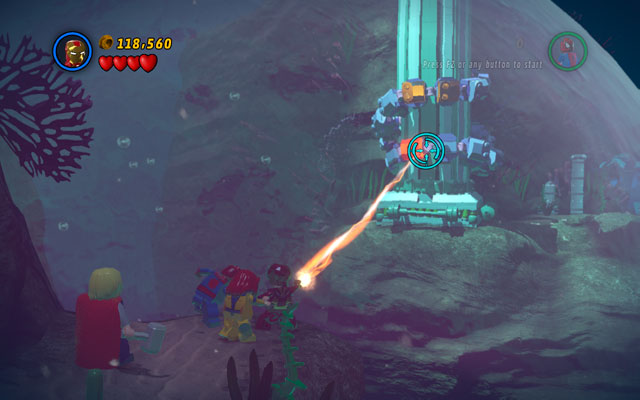
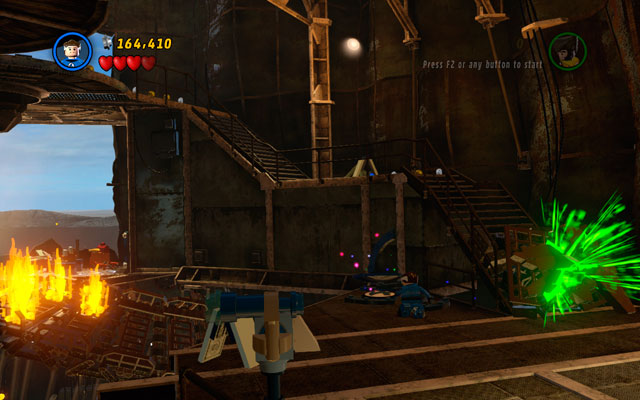
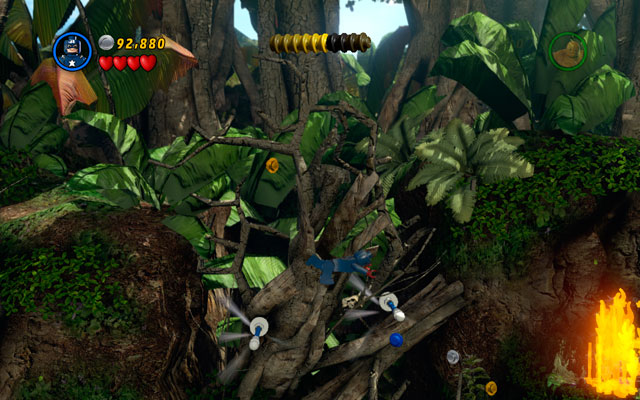
Wait for some time struggling with infinite group of minions - you need to survive long enough to see a computer appearing on the central wall. Use it to unlock huge fire thrower, then climb on it and shoot at Venom. When he's burning, you can hit him in a conventional way.

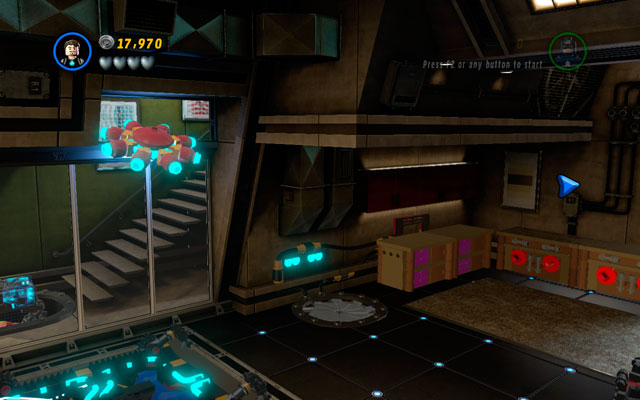
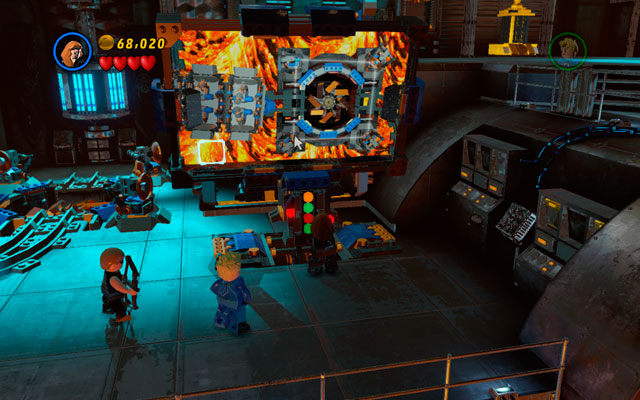
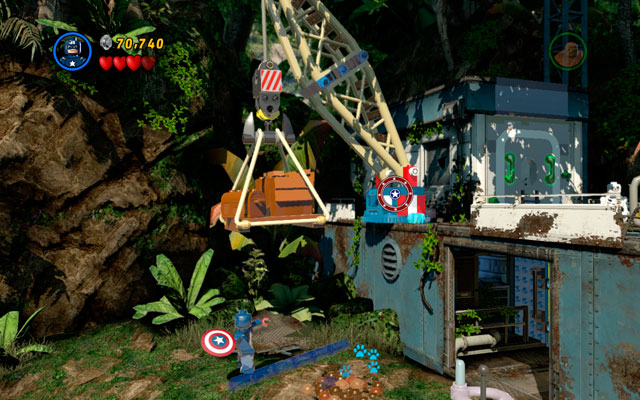
When the enemy is hardly alive, turn right and approach to the crane. Use spider sense to uncover two attachable points and yank them, scattering some bricks. Build a bell from the debris and switch your character into Hawkeye to shoot an arrow at the constructed object. After that approach to Venom and strike him with the final blow.
Characters: Iron Man (Mark 6), Hulk
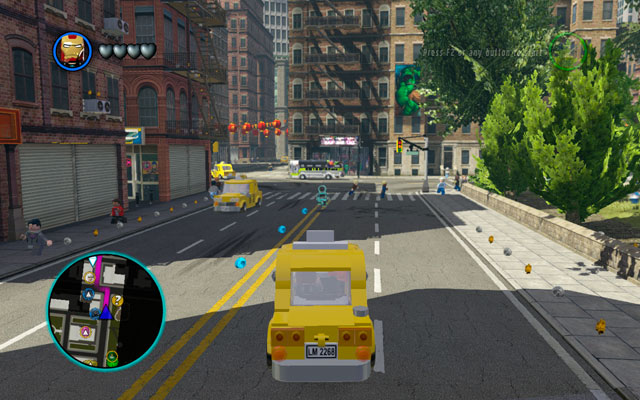
After the Exploratory Laboratory mission you will be moved to the New York City area. For the first time you will have an opportunity to go around the area freely. You can fulfill some quests, collect new vehicles, unlock new characters or just explore the whole city.
Nevertheless, the main goal remains the same - you must go to the Raft Ferry Port. The right way will be shown by: phantom LEGO character, passage created from the blue studs, purple trace (showed on the minimap) and a blue arrow pointing the proper course. With such help it is hardly possible to get lost.
Remember that using Iron Man's flying ability you can move across the city very fast - Hulk is much slower.
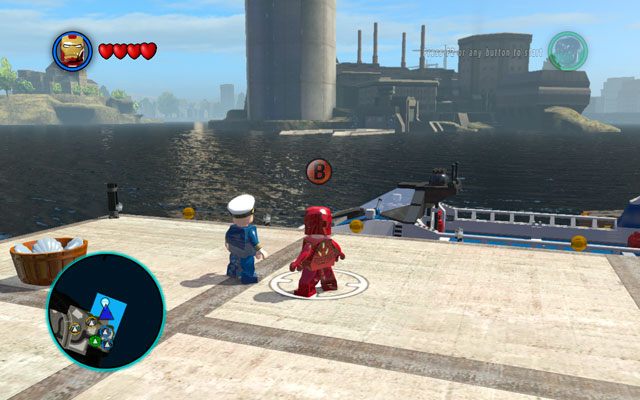
Go to the Raft Ferry Port and destroy a silver container using Iron Man's rockets. Then talk to the captain - you will hear that you need a ticket to sail a ferry.
Move back and fly to the opened storage on the left. Arrange silver bricks and build a ticket machine from them. Pick up the ticket and return to the captain. Sail to the other bank of the bay and disembark your team at the gangway.
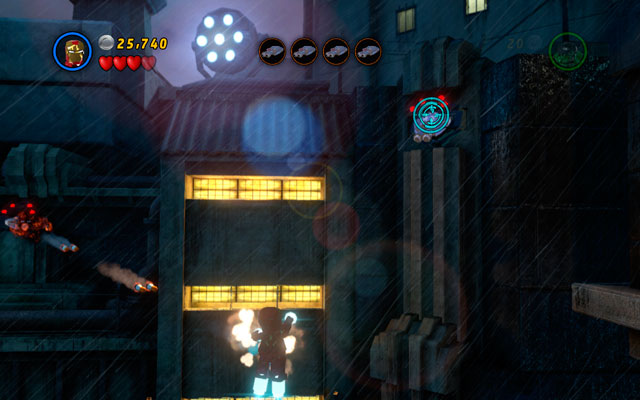
Being on the Raft, approach to the entrance and use Hulk's extraordinary strength to yank the green handles. Then shoot Iron Man's rockets at the silver plate to open the entrance.
Characters: Iron Man (Mark 6), Hulk, Wolverine
True Believer Status: 150000 studs
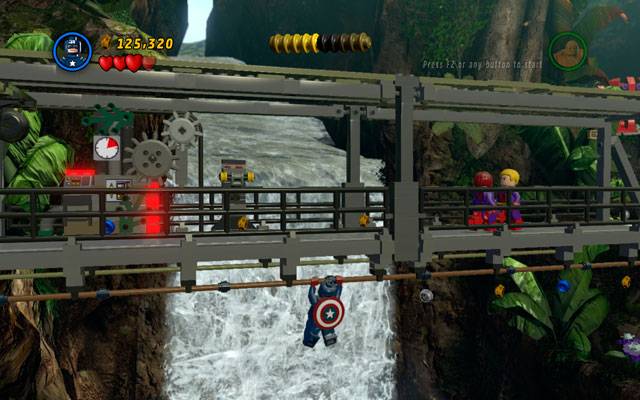
At the beginning of the mission Wolverine will join your party - he is quite effective during all melee fights, has a great smell sense, helpful regeneration ability and is able to dig in the sand. This skills will be very useful during this quest.
The beginning is very easy: go forward, and turn right every time it is possible. Don't bother yourself with the prisoners - they will appear endlessly, so fighting them is a waste of time.
If you approach to the rope bridge, it will collapse to the sea. The only way to solve this problem is to fly to the other bank of the island as Iron Man - there you can rebuilt a passage. Remember to defeat nearby enemies first, because they can interfere your actions!
When the whole party is standing on the main island, choose Wolverine and dig up some bricks from the sand pile. Build an overlay with green handles for Hulk and yank it, creating the passage to the building.
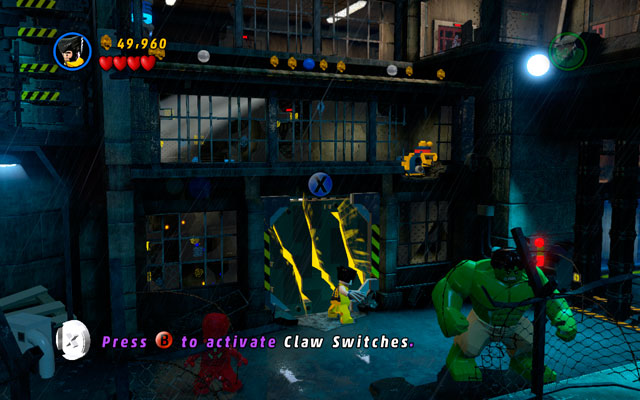
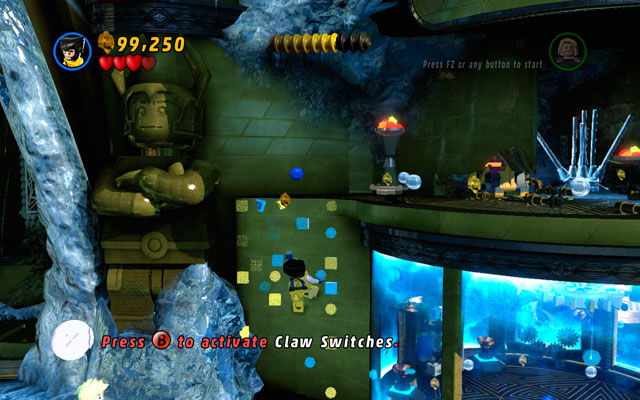
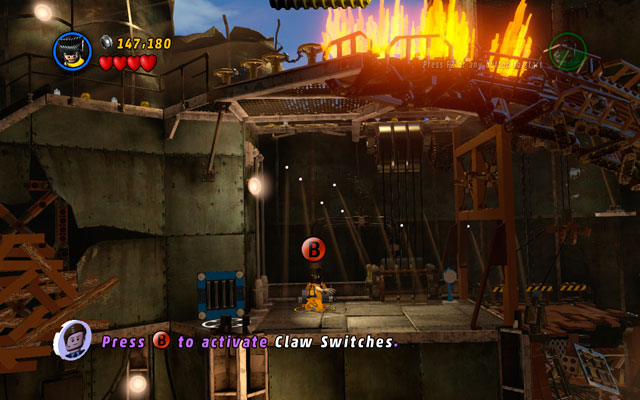
Switch into Wolverine and approach to the window, sniffing around (interaction button). In that way you will uncover a sticky wall, on which Logan can climb. On the upper floor head to the right corner of the location and destroy all objects in the area, then use a claw switch (notice that only clawed characters like Wolverine can use it!).
When the lift is ready, stand in it as Hulk. Green giant will unfortunately switch all alarms on, so you will be flooded by the endless tide of enemies. Choose Iron Man and fly up, shooting at four silver cannons - that's the only way to survive the battle. If the cannons are destroyed, the flow of the enemies would be stopped.
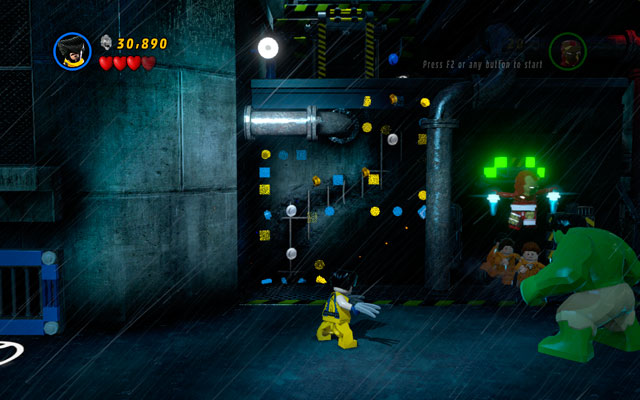
Switch to Hulk and go to the left, yanking two green handles. Fight your way through the enemies (appearing endlessly) and use Wolverine's smell sense to uncover a sticky wall. Climb on it, then use a ladder and go to the top of the roof.
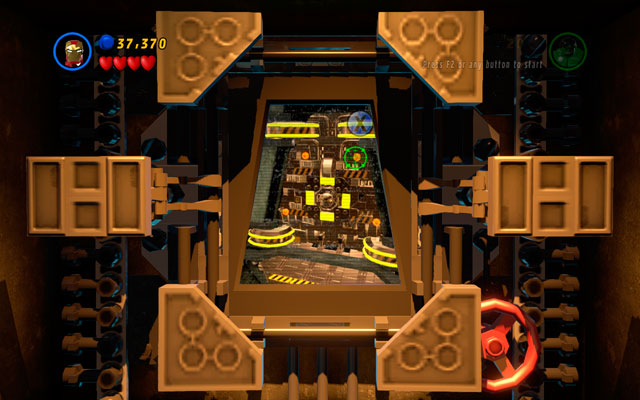
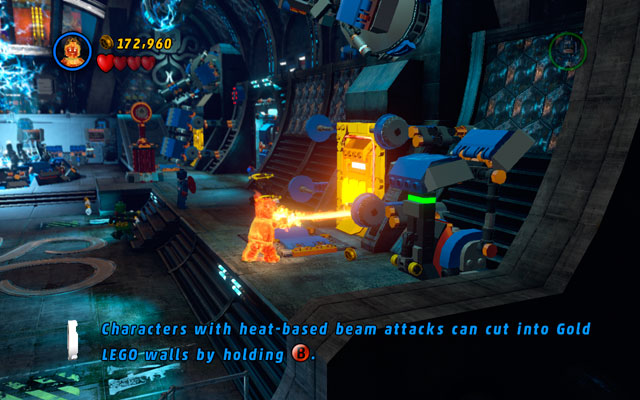
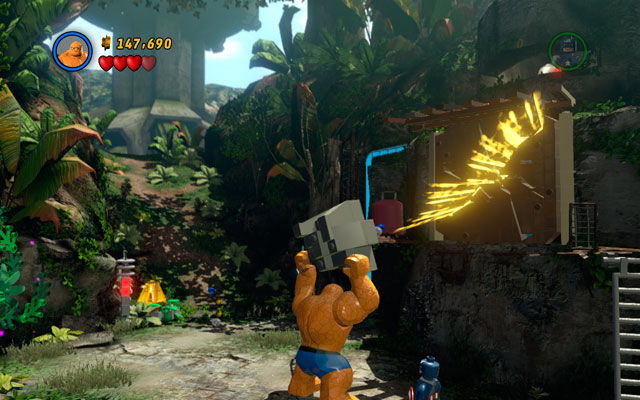
Approach to the yellow wall and slice it using your claws. Then switch into Iron Man and use a computer that you have unlocked short moment before. Your goal is to open all four latches - it can be done by clicking on the four orange points at the gates (see screen above).
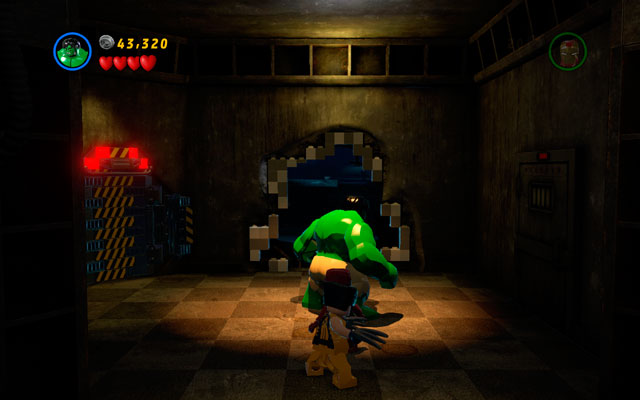
When the gate is open, pass through it and defeat all the enemies. Move forward, destroying all obstacles on your way and finally reach to the brick wall. Then break it and enter to the new location.
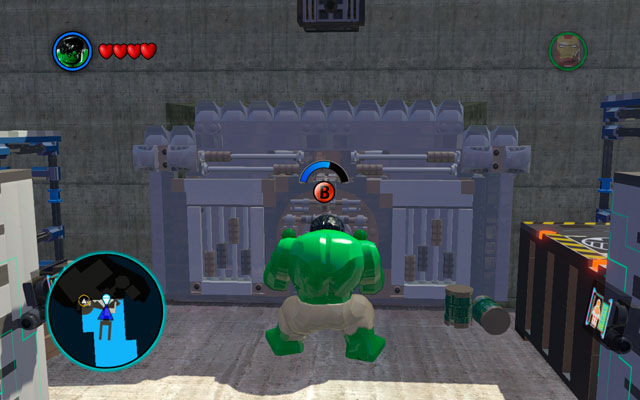
In the interior of the prison you will meet an arch villain - The Leader. Fly up as Iron Man and shoot your rockets at three silver containers, that your enemy is juggling. When they are broken, power field created by the opponent will fall down, so you can crush him now.
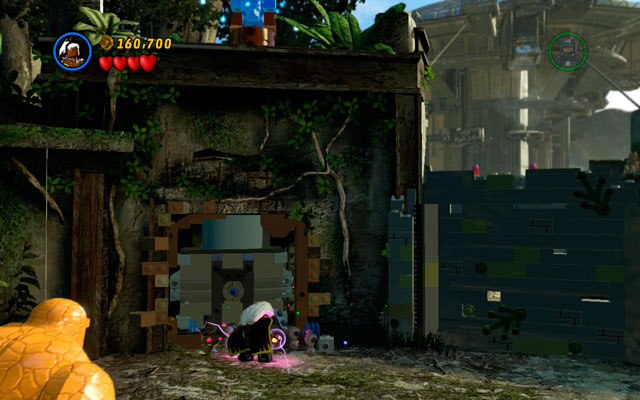
Choose Wolverine and head to the right - when your hero is sniffing something, then use his smell sense to uncover a yellow wall. Destroy it and enter the building, using your sense once more. Climb on the sticky wall using claws, so you can go to the first floor. There use a claw switch to open the door to the further part of the building.
Defeat all opponents and head to the right - under the wall you will find some objects, that should be destroyed. Build a computer from the debris and use it with Iron Man (hit attack button as fast as you can). I this way you will defeat Whiplash.
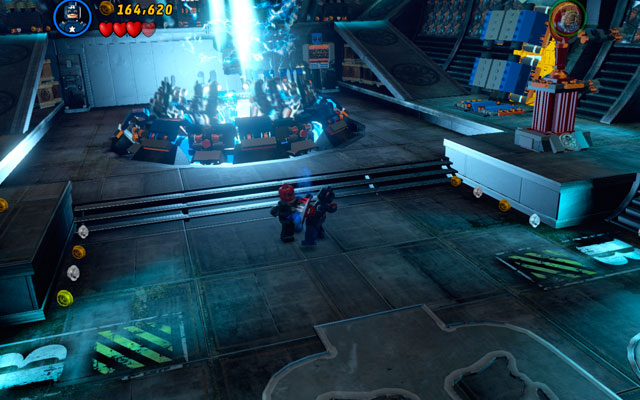
Choose Wolverine and approach to the cage with Abomination, sniffing around. When the green handles appears, yank them with Hulk - in this way you will eliminate the danger. Then switch into Iron Man and fly to the upper floor on the left, shooting at the silver padlocks. Enter to the small room, kill all the enemies hidden inside and destroy all objects standing on the left. Then build a claw switch from the debris.
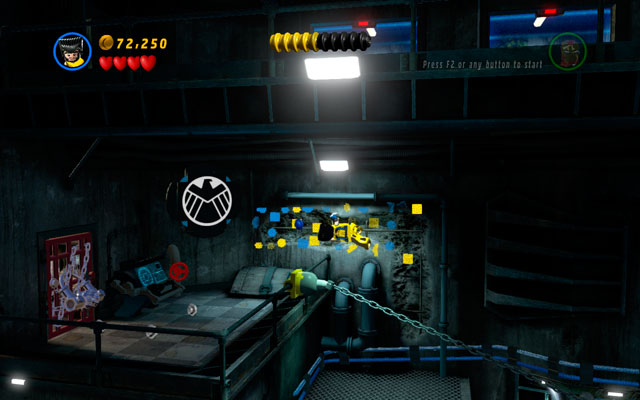
Switch into Wolverine and pass to the upper floor using the chain. Then sniff an area and climb on the sticky wall, heading to the room on the left. Use claw switch to open the main gate and return to the starting location (you must be prepared for some fight).
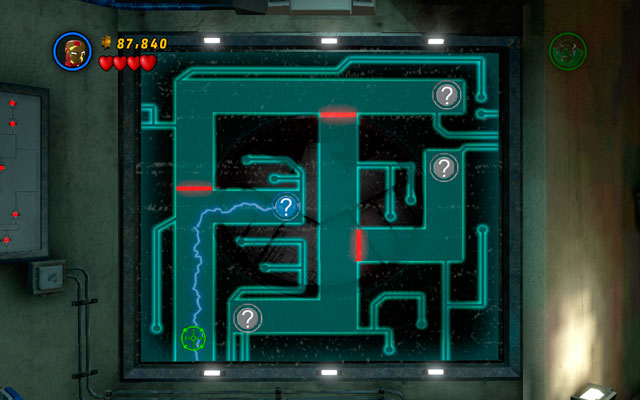
In the newly unlocked room defeat all enemies and approach to the computer as Iron Man. You will see the overview of the security system - search all question marks on your way to call a lift leading to the next location.

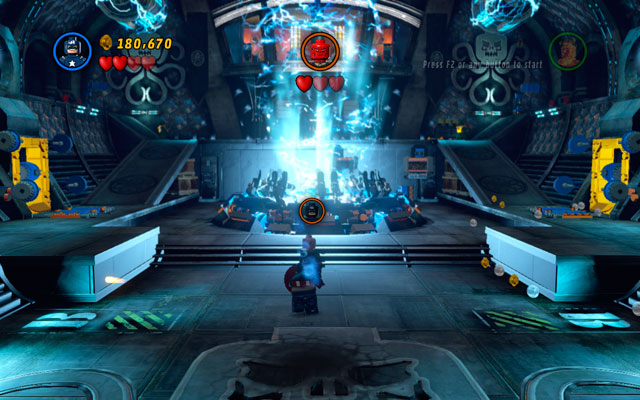
On this stage you will fight with Magneto and Sabertooth. Iron Man is disarmed, so you can rely only on Hulk and Wolverine.
Defeat all prisoners to open up another chapter of the fight - that's your chance. Choose Wolverine and approach to the pile of bricks located on the right, then build a green handle from the debris. Lift object using Hulk and throw it at Sabertooth. That's the end of the first round.

Second sequence is quite similar - defeat all minions, then build another missile, throwing it at the target.

The last sequence looks nearly the same - but this time you must build not one, but two objects and throw them at Sabertooth. Notice that arch villain will jump from the destroyed platform to the other one - that's the reason for two missiles.
After that, the fight is over.
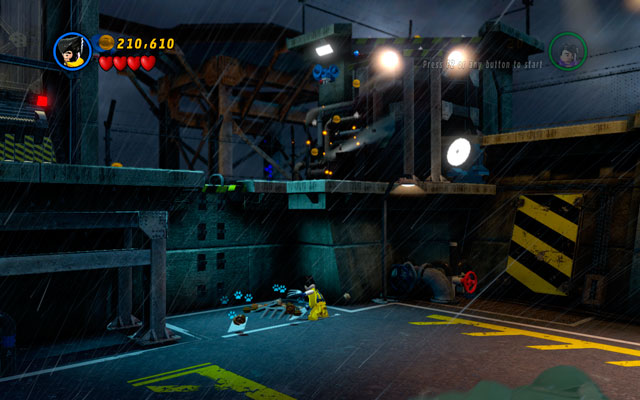
Struggle with Abomination demands some cunning, not brutal force. Choose Wolverine and straight to the right, until you'll get to the sniffing area. Uncover fragile point on the nearby pile of boxes and switch your character into Hulk. Now lift a container and throw it at the shining breach.
Climb on the wall as Wolverine, jumping between two white-and-blue walls to get to the top of the tower. Defeat some enemies and turn left, using spotlight to blind Abomination for some time. Then switch into Hulk and hit an enemy during easy QTE sequence.
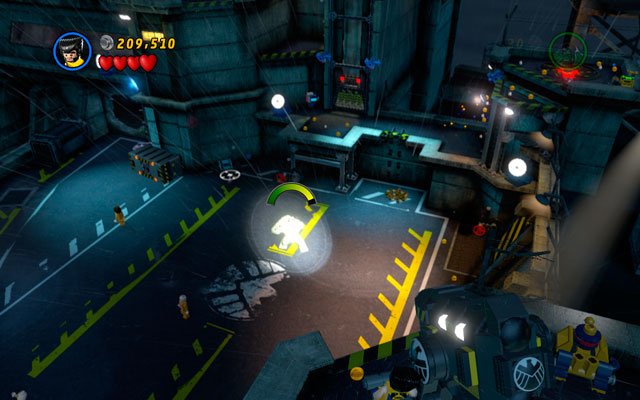
The first part of the fight is behind you - now it's the time for the second one. Choose Wolverine and approach to the pile of sand located on the left side of the location and unearth a ladder from it (you must construct it first from the debris). Climb on the first floor, sniffing the sticky wall on the right and get to the tower on the right. Then use a claw switch to unlock another spotlight - you have already know what to do with it.
To strike a final blow, you must switch to Wolverine once more. Use a lift located on the first floor and go to the left platform, fighting your way among prisoners. Destroy a pile of junk located there and build another claw switch from the debris. Use spotlight to blind Abomination for the last time and defeat him as Hulk. That's the end of this mission!
Characters: Tony Stark (Underwear), Captain America
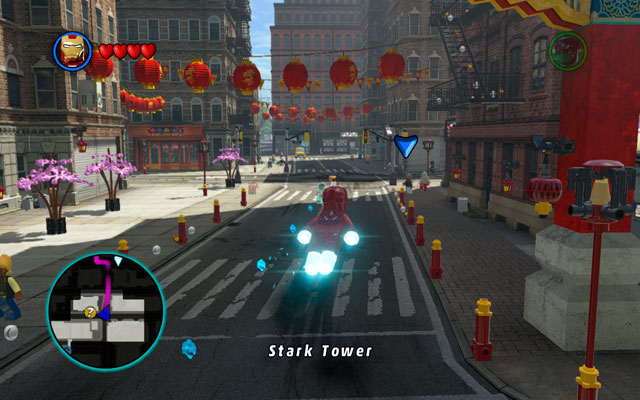
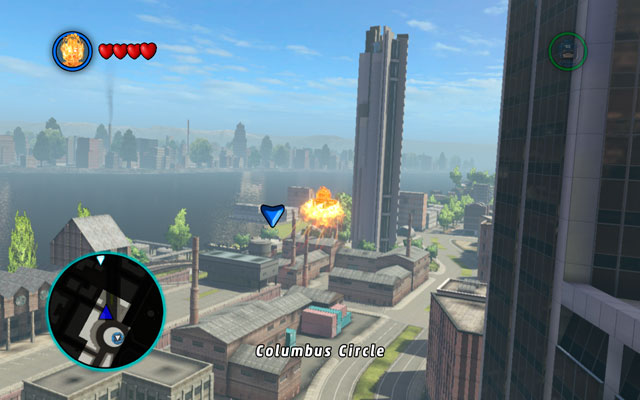
After Rock Up at Lock Up mission head to the Stark Tower to put on your armor. Notice that you can't fly without it, so all the way must be travelled by the foot or car. Remember that you can complete some missions and collect character tokens during your trip.
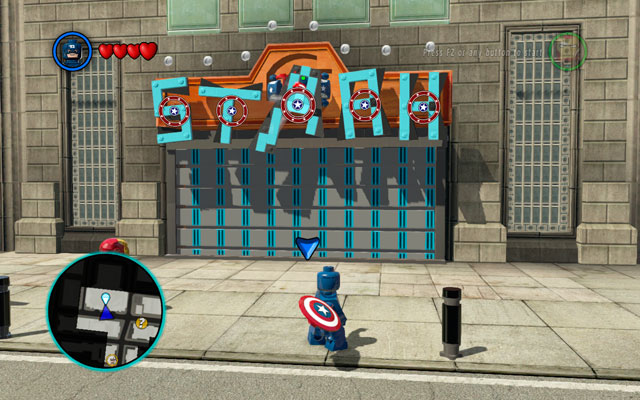
Go to the destination point - an arrow viewed on the screen and a route showed on the minimap won't allow you to get lost. Stand at the entrance and toss Captain America's shield at the STARK letters. Then build a switch from the debris and throw your shield once more.
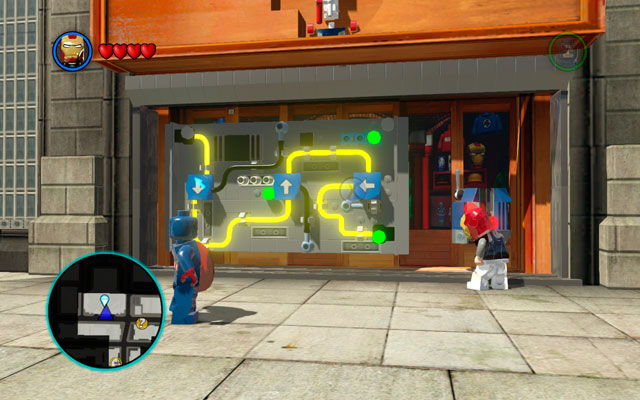
Approach to the panel on the right as Tony Stark and switch the device on. Your goal is to rotate all wires in the proper direction to connect both power points. The right combination is showed on the screen above.
After that, enter the building.
Characters: Tony Stark (Underwear), Iron Man (Mark 1), Iron Man (Mark 42), Captain America
True Believer Status: 145000 studs

After the beginning of the mission toss Captain America's shield at the patriotic panel located above. In this way you will unlock next mechanism - throw at it once more. When the power field is down, enter next room and destroy everything hidden inside.
Build a computer from the debris and use it with Tony Stark (simply click on all three cores). The power fields will be still switched on, but you will have a chance to pass by them.
On the other side of the corridor, concentrate enemy's fire on Captain America - cover yourself behind the shield and stand on the panel on the right. Now reflect deadly beam to the cannon, so you can break it easily. After some explosions, the device will explode and you will be rewarded by some useful bricks. Build a computer for Tony and use it.
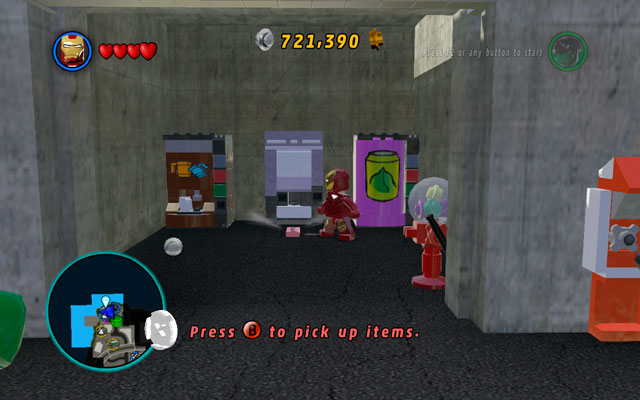
Take control over the disk and fly up, passing through the gap located above the window. Then steer to the right, heading to the blue panel. After the landing, cabinet with Iron Man armor (Mark 1) will be opened. Suit up and continue your travel.
The old armor has the same advantages that mark 6 had, but without flying ability. However, you can still use it to break some silver bricks - shoot your rockets at the silver cage located in the central part of the corridor, above from the power field. In that way you will uncover a switch for Captain America - toss a shield at it to open next room.
Enter to the new location and defeat all enemies. When they are gone, use both superheroes to stand on two red buttons located in the lift. You will be moved to the next stage.

In new area defeat all enemies, then turn right and use a computer located in the corridor. Wait for a green light to appear, then use another device as Iron Man to move electrified container on the proper spot on the left side. Now wait for Captain America to jump on it, then return object to the starting location.
Warning! If you are playing alone, Captain America will do his job alone. If you are playing in co-op mode, second player must jump on the container manually.

As Captain America cover yourself with a shield and pass through the flames - then head to the object located near to the wall and destroy it. When the passage is clear, go further. Defeat all enemies in the area and approach to the silver hinges, destroying them with Iron Man's rockets.
Use Captain America's agility to jump through some poles located in the balustrade, so you can climb on the second floor. Kill all enemies hidden there and enter the building from the roof. Jump on the switch placed on the wall to start a ventilator - now Iron Man can join you.
Head to the right, looking for the second ventilator. Turn the device off, by shooting your rockets at the silver plate located above the fan. Then go down and defeat another group of enemies. When they are gone, turn right and destroy a silver blockade located on the door.
Use Captain America to jump between two white-and-blue walls on the right, climbing up in that way. Go to the next floor (on the left) and approach to the rotary switch. Turn it clockwise to open a panel with wires, then destroy it with Iron Man's rockets.
In this moment two laser beams will be turned on. Approach to them with Captain America and stand on the platform, reflecting the beam at two blue panels located on the both sides of the gate.
When the door is open, run towards the corridor and cover yourself with a shield - you will be targeted by another cannon. Reflect the laser to its source, eliminating the danger in that way (notice that you can also fry some enemies using this trick!). Build a switch from the debris of the machine and open next door, hanging on both levers.
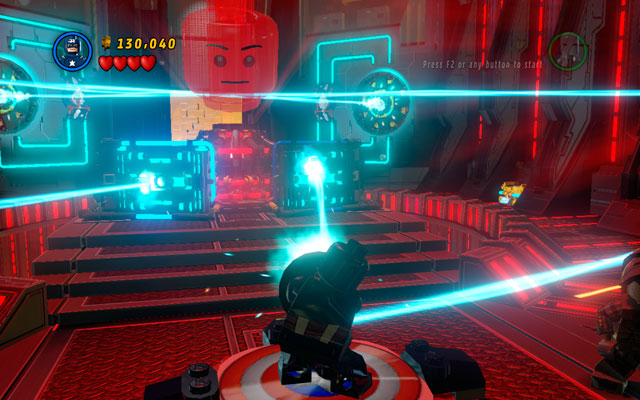
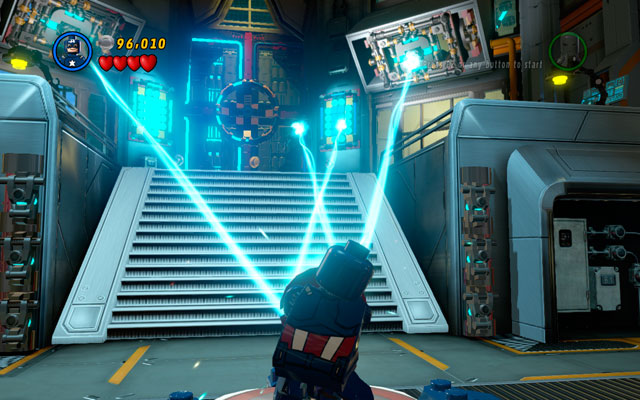
In new location defeat all enemies, then approach to two panels located at the end of the room and toss a shield at them. You have just turned on some lasers - now reflect them using patriotic panel placed on the floor, aiming at the cube located on the right side of the podium. When the system is overloaded, Jarvis can return to it's normal "mood".
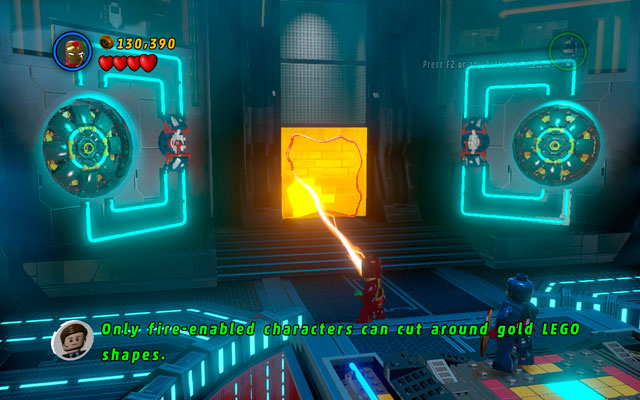
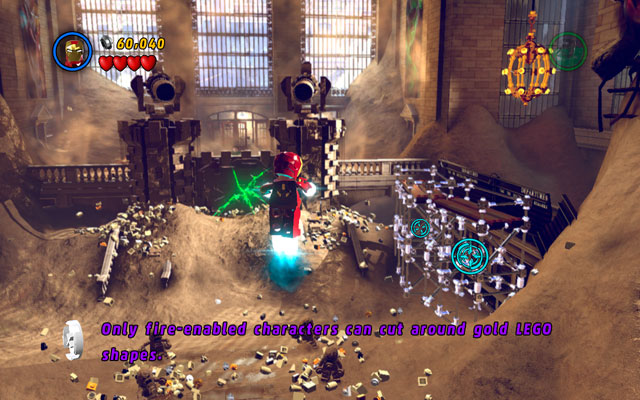
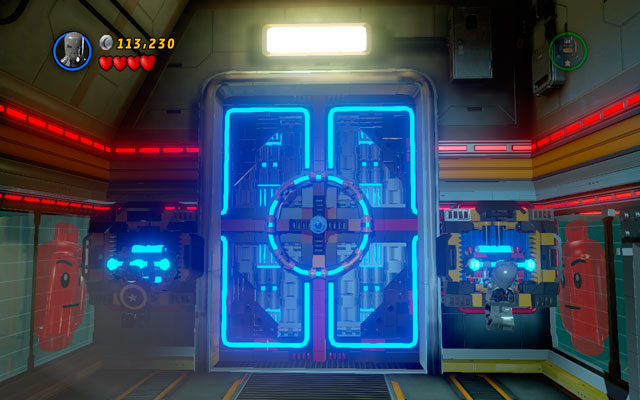
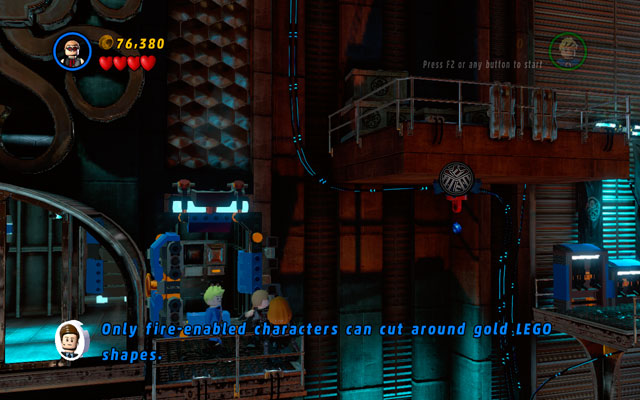
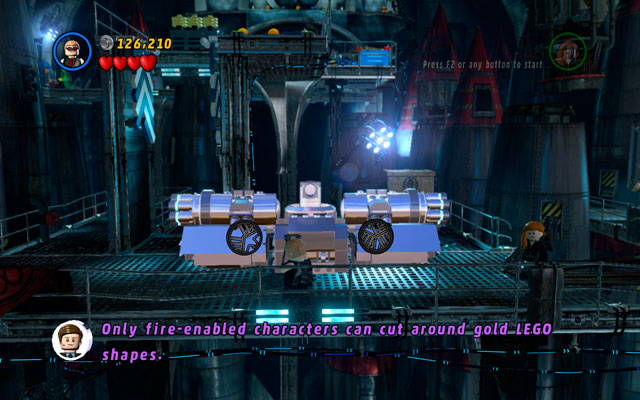
Switch into Iron Man and stand on the central platform - you will be resuited with a new armor. Mark 42 is able to slice through some golden objects, melting them down. Use this ability to destroy golden wall at the opposite side of the room and enter the lift, so you can finally confront Mandarin and Aldrich Killian.
The struggle is very schematic - defeat all minions first, then wait for Mandarin to take control over your character. Punch him with second hero, then fight Aldrich (who appears suddenly from nowhere), trying to hit him as fast as it is possible. Repeat this pattern for three times to open up another stage of the duel.

When the first boss is defeated, second one will enter to the Terminator Armor. Notice that your enemy is invincible now - you must defeat all 40 minions to make him vulnerable again. Kill all the enemies and try to dodge missiles fired by your enemy - stay focused and run around the arena constantly.

Duel with armored Mandarin is quite simply - you must fire at him constantly. When he has no more than 10% of his health, he will become invulnerable again, so wait patiently for the course of events. When all other armors are destroyed, build a panel from them and toss Captain's shield at it.
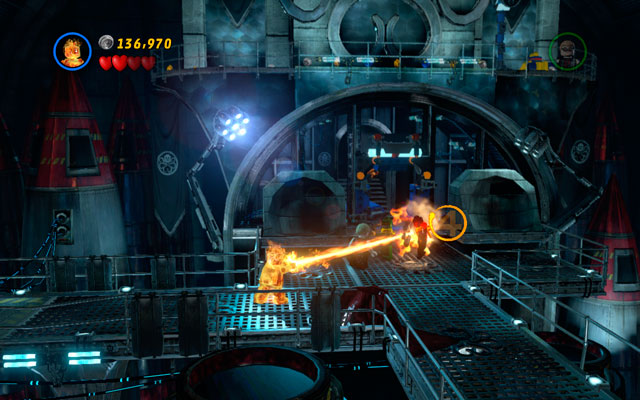
When the device is charged, huge explosion will occur, overloading some systems of Mandarin's Terminator. After that, approach to the enemy as Iron Man and melt golden plate on the villain's back. The fight is over!
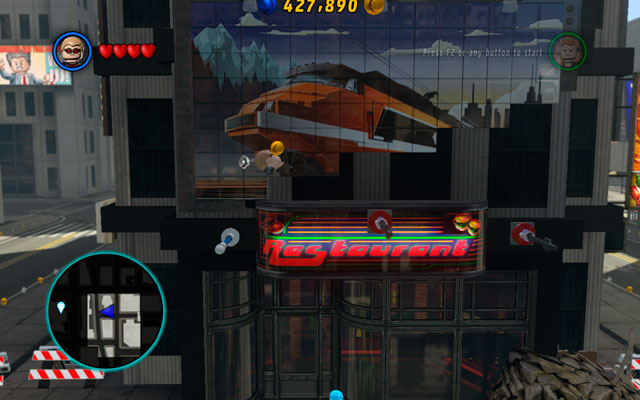
Characters: Hawkeye, Black Widow
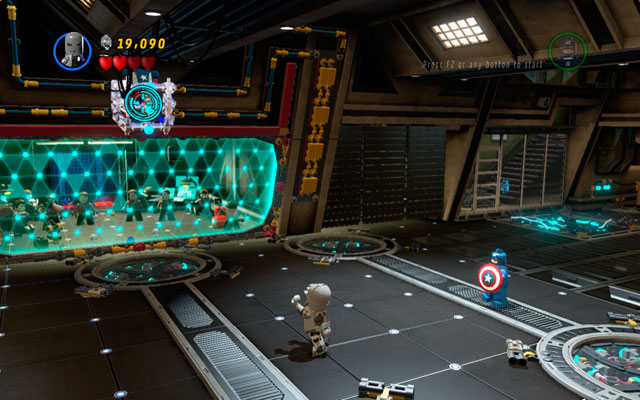
Jump from the S.H.I.E.L.D. Helicarrier using any of the gangway, trying to collect as much studs as it is possible. Then land on the ground and follow the trace showed on the minimap - you will reach Financial District.
Go to the destination point and use Black Widow's invisibility power to avoid cameras. Open the garage using computer on the left and enter to the building, destroying all things hidden in there. After some time you will be informed, that previous trail was wrong and you must go to the Empire State Building instead of actual location.
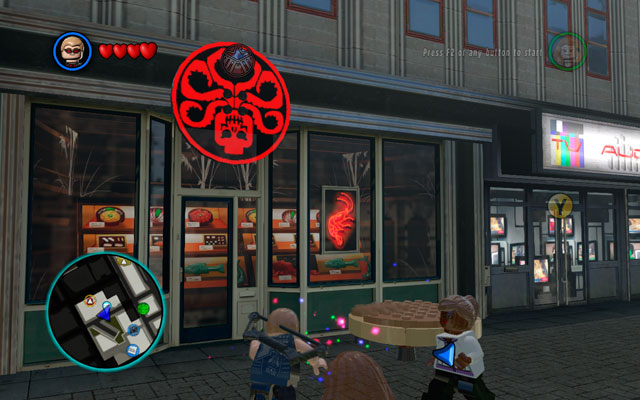
Go to the right place (showed on the minimap). Use Hawkeye's bow to shoot an arrow at the sign hung above the entrance - you will uncover an emblem of Hydra. Shoot at it once more and build a trampoline from the debris. Use it to jump to the arrow that you have already sticked into the sign. After some swings, the entrance will become open.
Characters: Hawkeye, Black Widow, Human Torch, Captain America
True Believer Status: 95000 studs

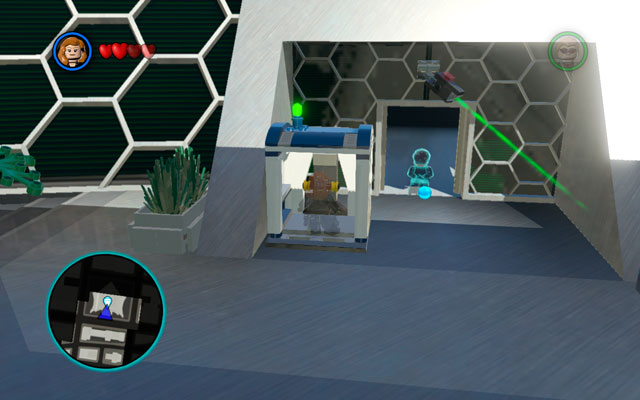
At the beginning of the mission, choose Black Widow and use her invisibility ability to avoid cameras. Then go to the right, heading to the lift. Stand on the red button to move up, then turn left and jump between two white-and-blue walls to climb on the wall. Now destroy everything in the area (including two batteries showed above), so Hawkeye can join you.
Build platform from the debris and jump on it as Black Widow. Switch into Hawkeye and try to stop the cogwheel on the right - just shoot an arrow at the silver element to break it. When it is done, the passage to the next part of the building will stand open.
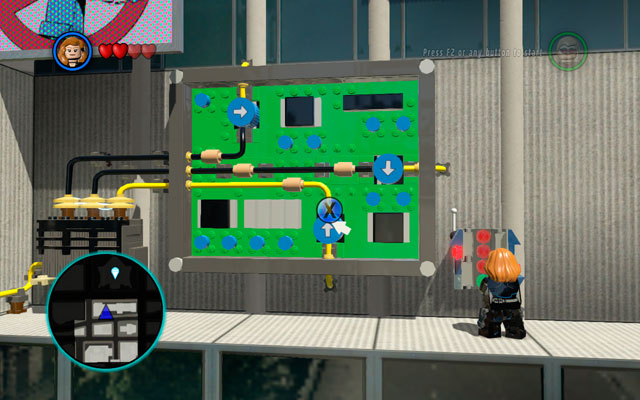
Approach to the boxes located on the right and break them, building a control panel from the debris. Use it with Black Widow and arrange the wires to connect two power points (the right combination is showed above). Then walk to the next location.
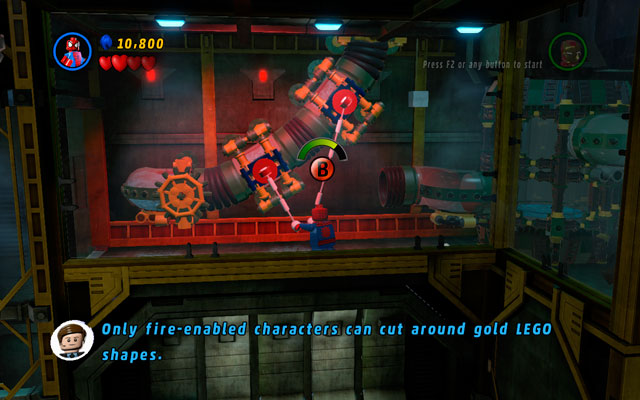
In a new stage you will be supported by Human Torch. He is a very useful character, because of his flight ability and powerful melting attack, able to destroy golden objects and frozen things. You can test his powers immediately, during first fight - you will be attacked by the group of A.I.M. Agents. Defeat them and move to the central part of location, looking for the golden wall. Destroy it with fire, then use a computer with Black Widow.
Now you must solve a riddle - turn mirrors with laser rays to reflect patterns showed in the down-left corner of the screen. The right combination is: triangle, square and overturn hour-glass. When it is done, go to the platform that you have already created.
Use Black Widow again to switch a lever on the right - you will unlock a red button, located in the lift. Stand on it to go up, then use your invisibility power to avoid cameras. Destroy all objects in the area and you will turn "nasty observers" off.
Switch into Hawkeye and shoot an arrow at the red attachable point, located on the platform on the right. Move Black Widow to this spot and prepare yourself for some cooperation.
Next action demands some coordination. Choose Hawkeye and jump on the rope, then switch into Black Widow and rotate the whole construction to move your archer to the platform on the right. Defeat nearby enemies and then use a rope on the attachable point on the left. Wait for the span to appear, then jump on it uncovering golden ball.
Melt the ball using Human Torch's fire beam, then switch back to Hawkeye and shoot an arrow at the uncovered gap. Now all characters can go further.
Jump over the crack as Black Widow, then use your invisibility power. Pass between the cameras, then jump over the next gap (use cogwheel to make this easier). After that approach to the computer and turn all securities off.
Switch into Hawkeye and go to the right side of the room. Shoot an arrow at the door, so you can yank them using the rope. Then defeat all enemies and go to the next stage.
Choose Human Torch and melt golden wall at the opposite side of the area, so all of the characters can move to the upper floor. Defeat all enemies hidden there and shoot two arrows at the silver machine. Then build two white-and-blue walls from the debris and switch to Black Widow to climb on the next platform.
Turn invisibility on and run between two cannons, heading to the right. Then use computer to move both weapons, so you can destroy them by each other. After that, fight with two enemies equipped with golden vests - to defeat them, you must melt the cloth first. When this part is over, you can go to the Red Skull arena.
During the fight with red Skull you will control two characters: Human Torch and Captain America. At the beginning of the duel, cover yourself with Captain's shield and approach to the enemy, so you can punch him for the first time. Then return to the central part of the arena and fight with some minions.

When the stage is partially clear (notice that enemies will appear endlessly), turn to the left and search for some bricks scattered under the cannon. Build a shield switch from them, then toss a shield at it. Because a golden wall is uncovered now, you can melt it with a fire beam and destroy a gas cylinder hidden inside. In this way you will damage the first gun.
Go to the wall at the opposite side of the arena and look for a lever. Use it, then melt another golden wall, blowing up another gas cylinder. When the second cannon is broken, you can switch into Captain America and hit Red Skull in the face (remember to take cover behind your shield!).
Third stage of the fight looks very similar - the only difference is a reversal of the sides of the arena. That means you should destroy two new cannons, acting in the same way as it was described above, but at the opposite sides of the room.
Finally, you can strike the final blow on the enemy.
After the fight with Red Skull in mission Red Head Detention, go to the passage to the Bifrost - you will find it at the seaside near to Fisk Tower. The fastest way to go there is by air: you can use Human Torch flight ability to make your way very quickly. Nevertheless, remember that in the meantime you can collect some character tokens and make plenty of side quests (they are optional of course).
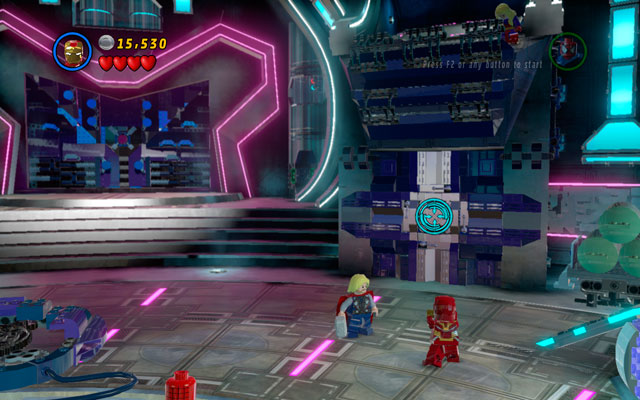
Characters: Thor, Captain America, Human Torch
True Believer Status: 95 000 studs

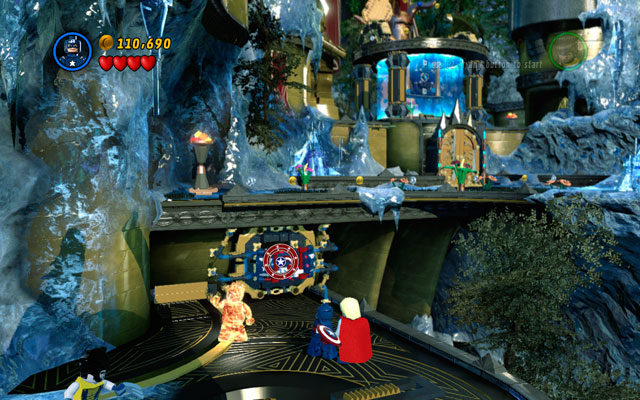
After reaching to the right location, you will be teleported to Bifrost (the vestibule of Asgard). Your trip will be very fast and lucrative - try to catch as many studs as you can (you can also obtain a minikit hidden here).
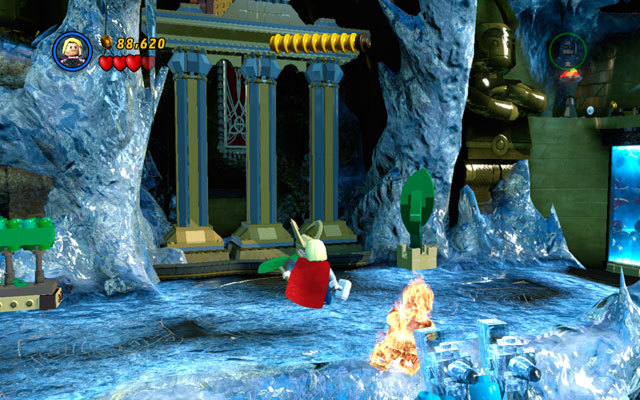
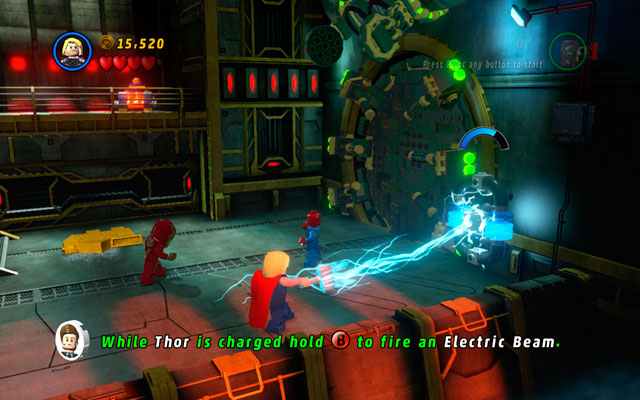
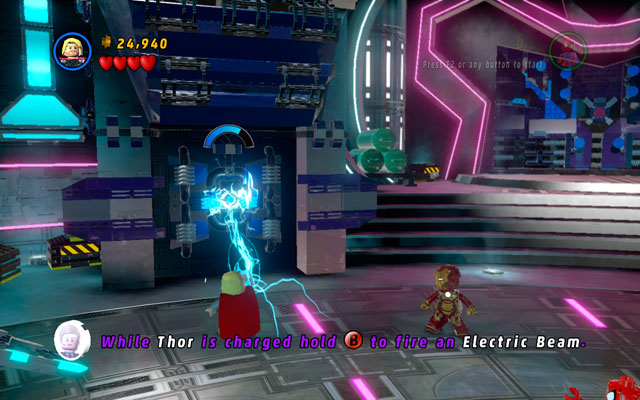
Enter the next room and use Human Torch's flame beam to melt an ice block located on the machine standing in the central part of the arena. Then destroy all objects lying around and build a battery from the debris. Switch into Thor and charge your hammer (interaction button) to electrocute the machine that you have already constructed. After that, fight with the enemies and go forward.
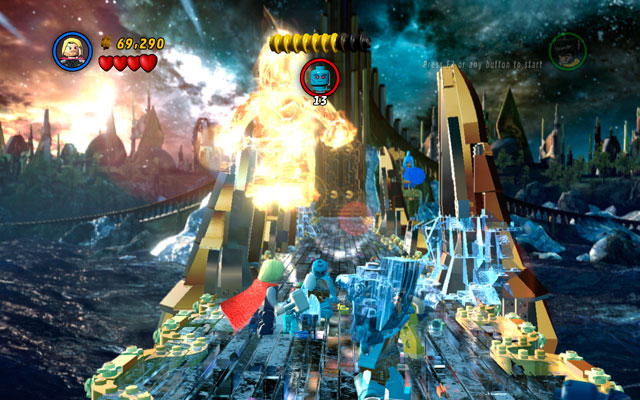
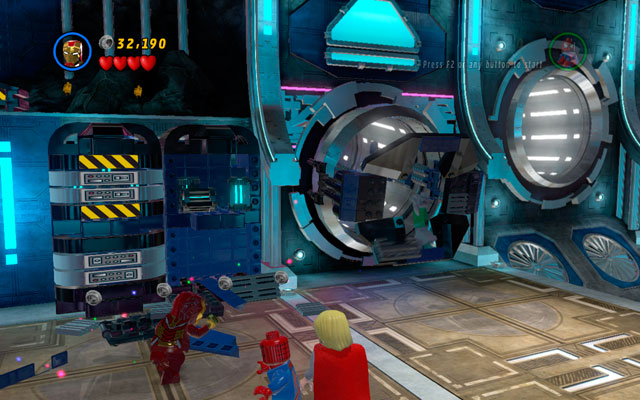
On the bridge you must defeat 20 frost giants, heading straight. When all the monsters are lying down, Loki will appear, stunning your superhero. Switch into another character and punch an enemy, so you can break the spell.
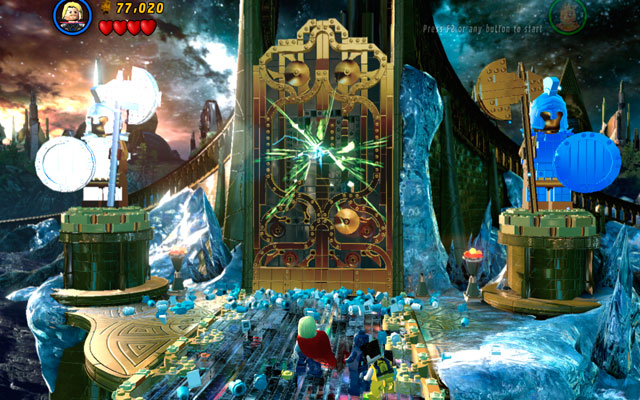
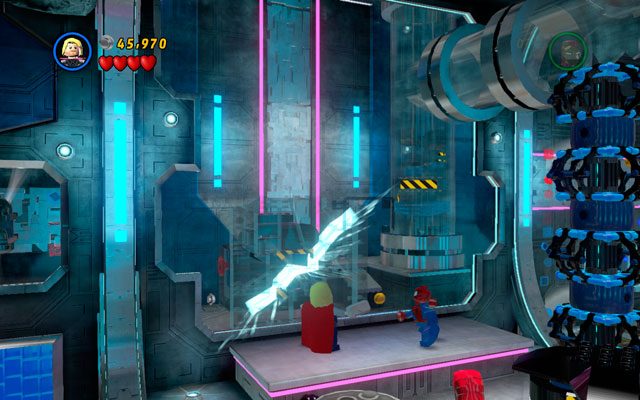
When villain is gone, use Human Torch abilities to melt an ice blockade located in front of you. When the gap on the gate is visible, throw Thor's hammer at it - in this way you will open the way to Asgard.
In new location you must fight with endless group of frost giants - they will appear very fast. The only way to stop them is to hurt Loki, standing at the slope behind the battlefield. Fly to him, so he can stun you - then choose another flying character and hit an enemy.
Wait for columns to collapse, then destroy all debris and build a stairs for the rest of the party. After that switch into Wolverine and turn right, sniffing around - you will uncover a sticky wall. Climb on the platform and use a claw switch to unlock a lift located right under it. Enter it and use Thor's electric powers to charge the battery, so you can move along.
In next location defeat all frost giants, then melt a golden monument with a fire beam. After that, build a shield switch from the debris and toss Captain's shield at it. When a lever appears, use it to uncover stairs to the upper floor.
Defeat a group of frost giants, then approach to Loki. When you are stunned again, switch into another character and punch an enemy to break the spell (as always). After that choose Wolverine and head to the gangway on the left, so you can smell it - you will uncover a pile of sand. Dig up some bricks from it, then build a claw switch from the debris and use it.
Switch to Thor and fly to the battery located above, then charge it with electricity - in this way you will turn the lift on.
Choose Wolverine and go to the upper floor, so you can sniff an area on the right side. Uncover the chip on the one of the monuments, then throw Thor's hammer at it. After that switch into Human Torch and melt golden head with your fire beam. Now you can build a fountain from the debris, allowing you to move forward.
Defeat all giants, then head to the right side of the location, jumping from the one flower to the another. Loki will appear in the new location, summoning some doppelgangers - use Wolverine's smell sense to uncover the real enemy, so you can hurt him (you will be stunned first, as always).
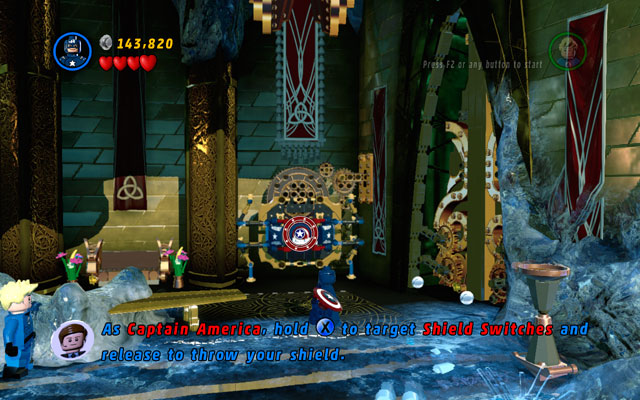
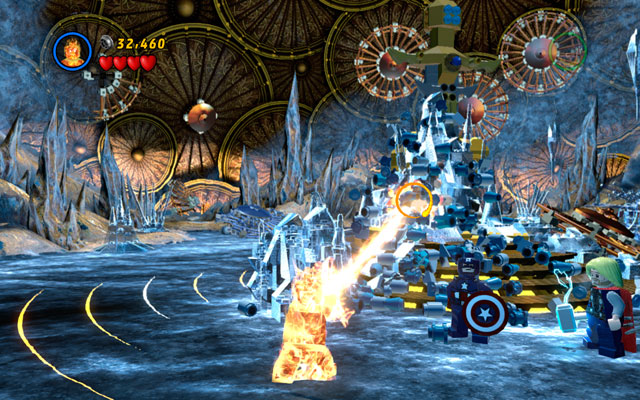
Wait for Loki to escape, then build a shield switch and toss Captain's shield at it. After that you can go to the arena, on which you will fight the God of Lies for the last time.

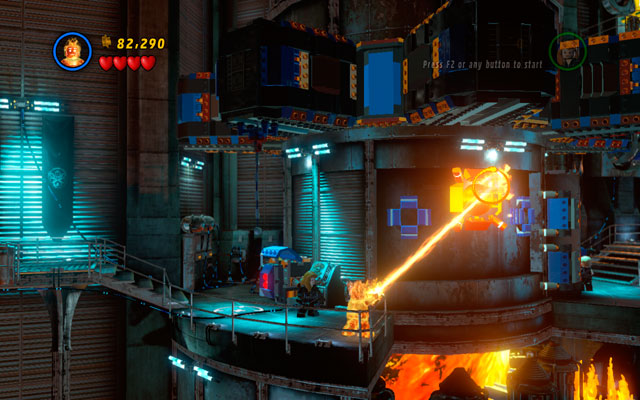
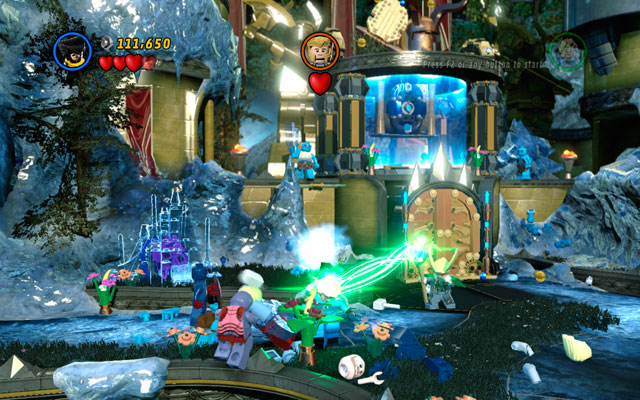
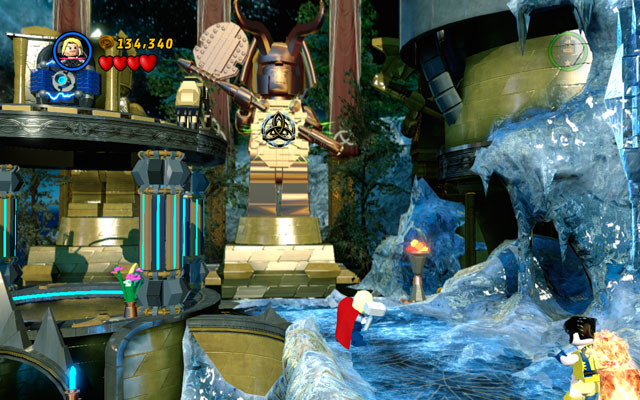
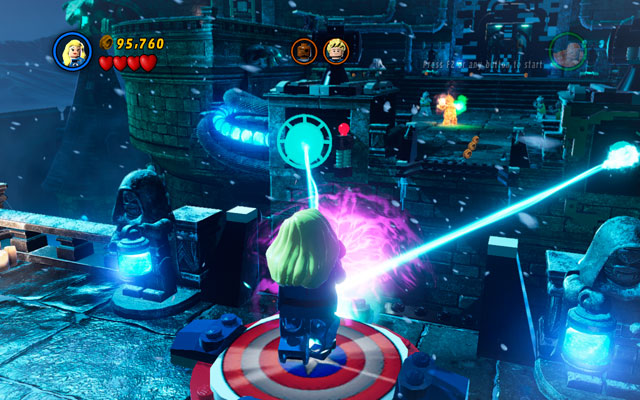
During the fight with Loki you shouldn't bother yourself with frost giants - they will appear endlessly, so killing them will be a waste of time. What is much more important, you must break all objects in the area to gain bricks - they are necessary for building Captain America's panel in the centre of the room. Use it to reflect the fire beam from the Destroyer to Loki (see screen above).
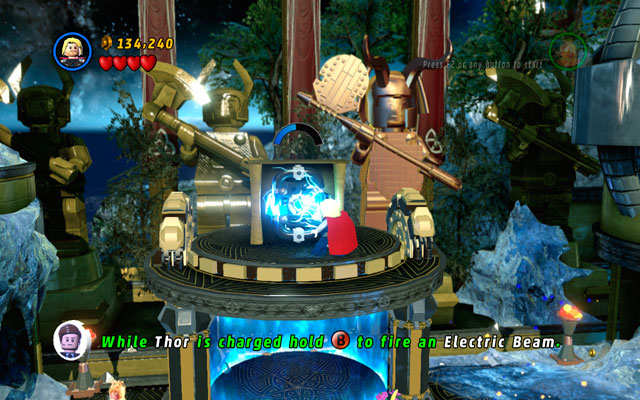
When the God of Lies is burning, the Destroyer loses his invincibility powers, so you can easily hurt him. Use Thor to do that - only this hero has the proper strength.
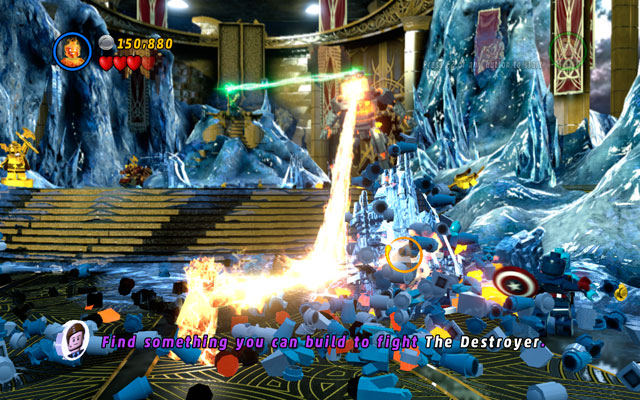
Wait for an ice block to appear, then melt it with Human Torch and build another platform for Captain America from the debris. After that act in the same way as before - you must repeat all sequence for three times (in total).

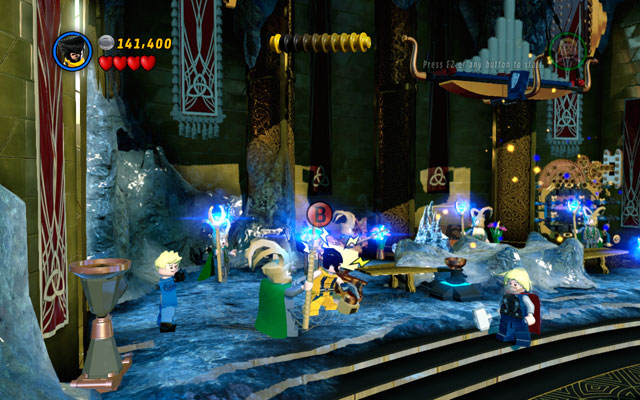
In the last round, Loki will summon some doppelgangers - switch into Wolverine and sniff for the true enemy, then hit him. Now the fight is over.
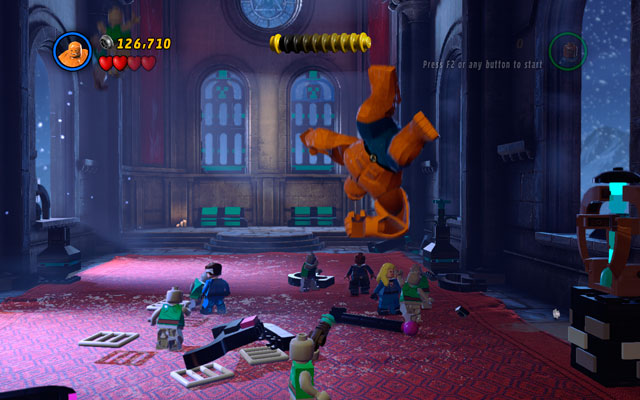
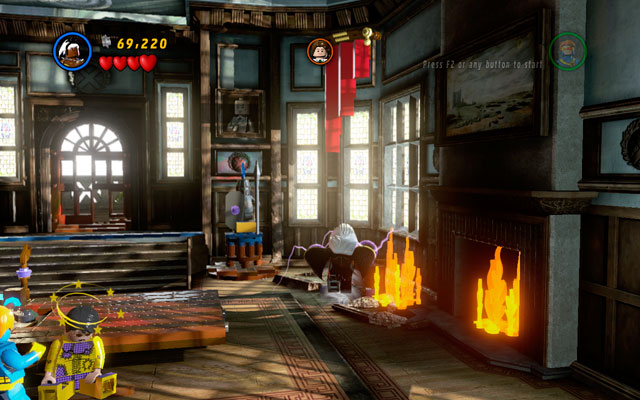
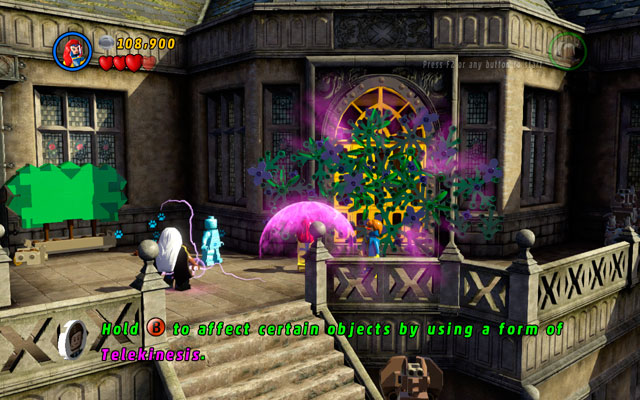
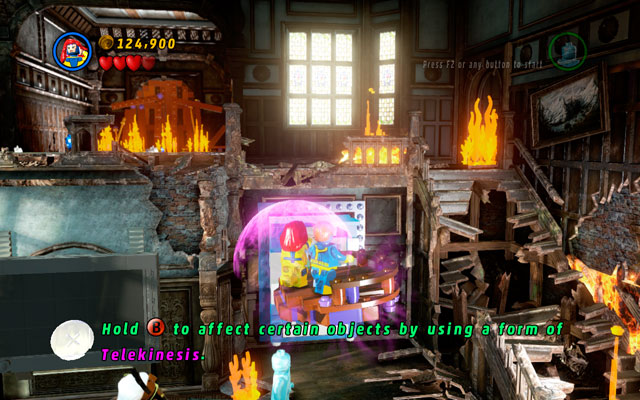
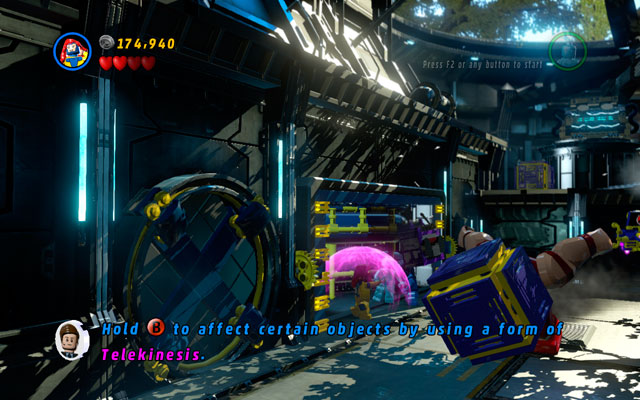
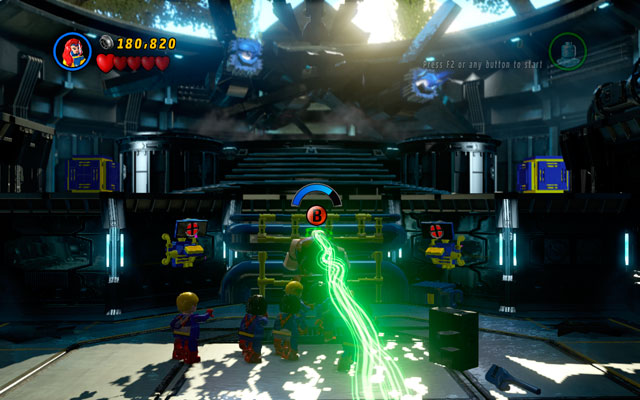
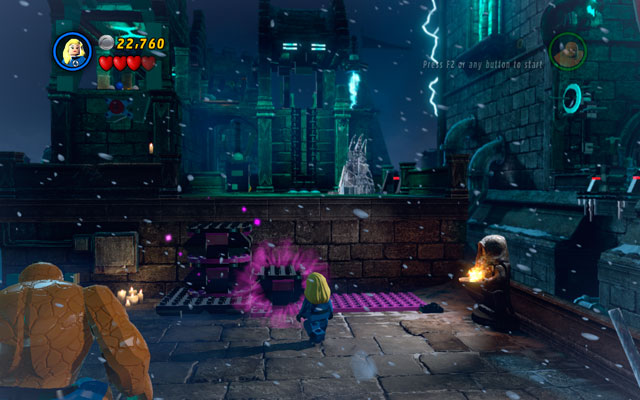
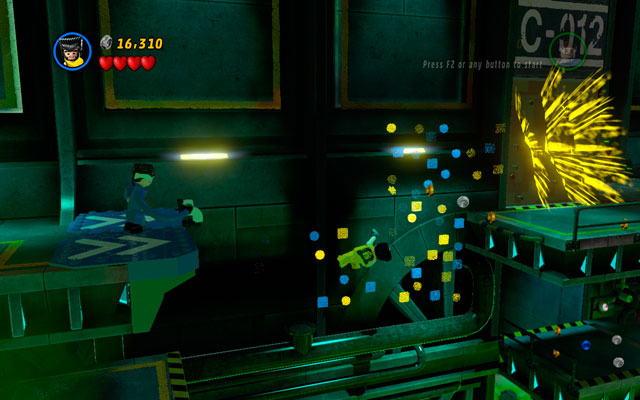
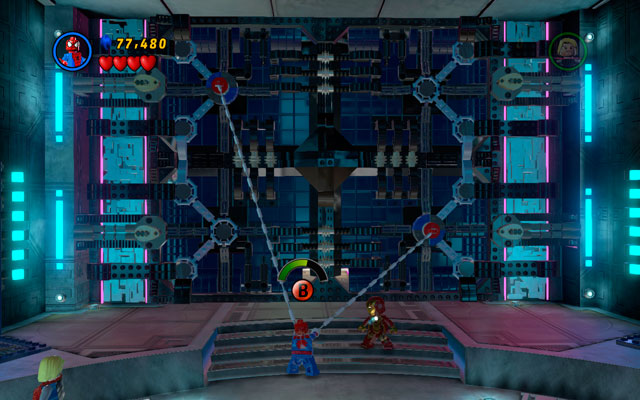
Characters: Jean Grey, Cyclops

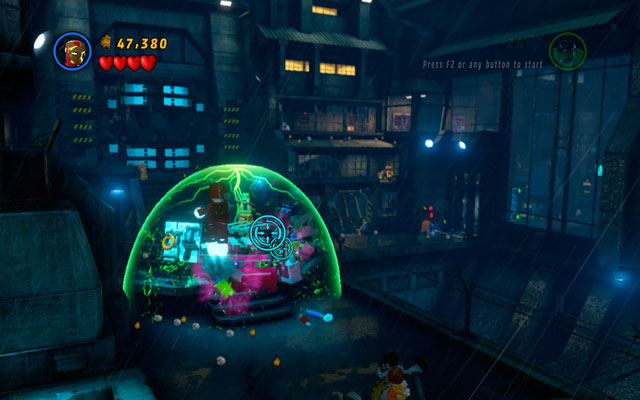
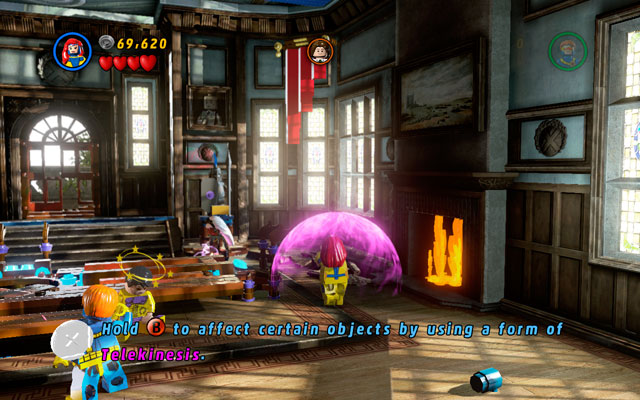
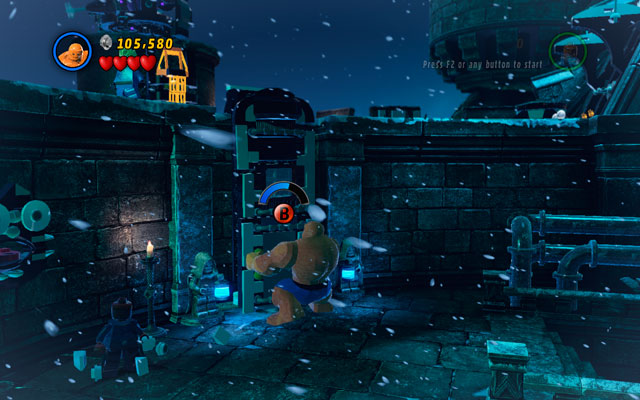
After the beginning of the mission, approach to the fires - then you will see that Stan Lee is surrounded by the flames. Switch into Jean Grey and take control over his mind, so you can build a device from nearby bricks. When it is done, return to the main character and move violet valve using your telekinetic skills (interaction button). In this way you will extinguish all fires.
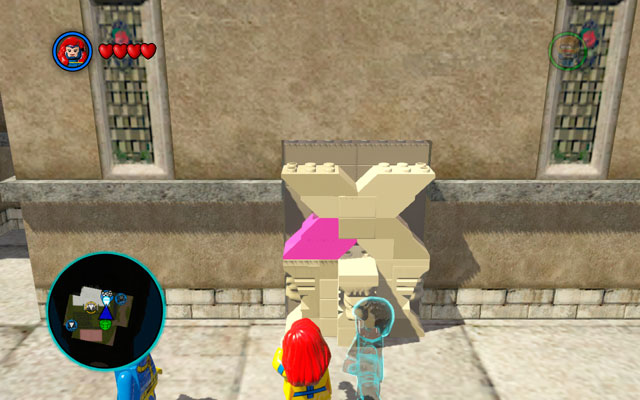
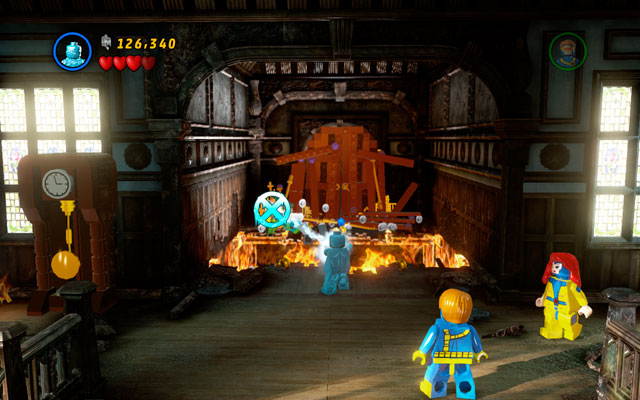
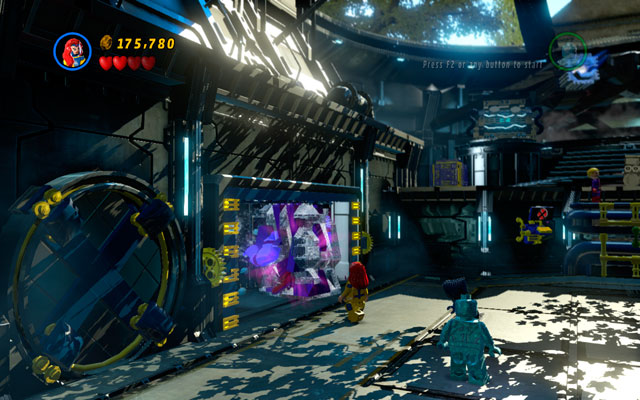
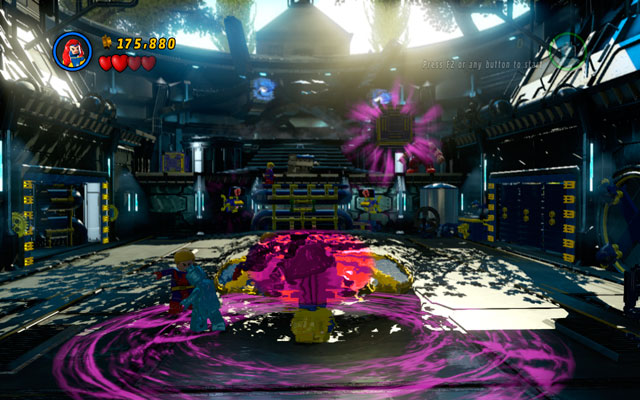
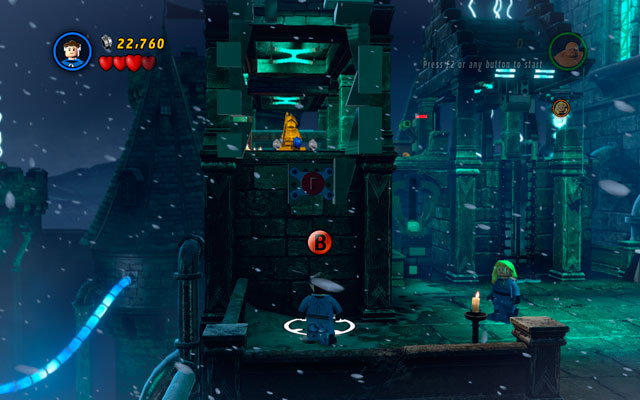
Turn right and approach to the violet bricks. Pick them up using telekinesis, then arrange them into the X letter (on the right). When the hidden entrance is open, enter the building.
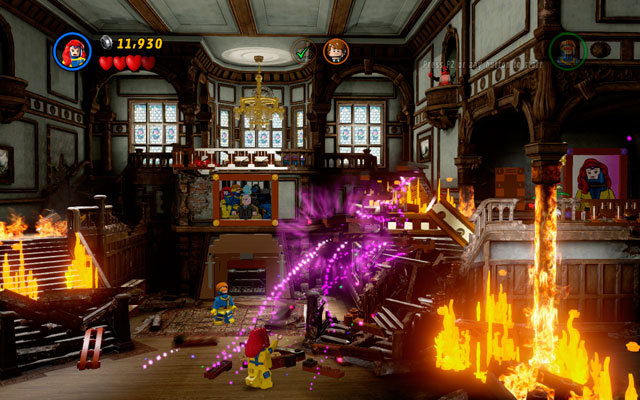
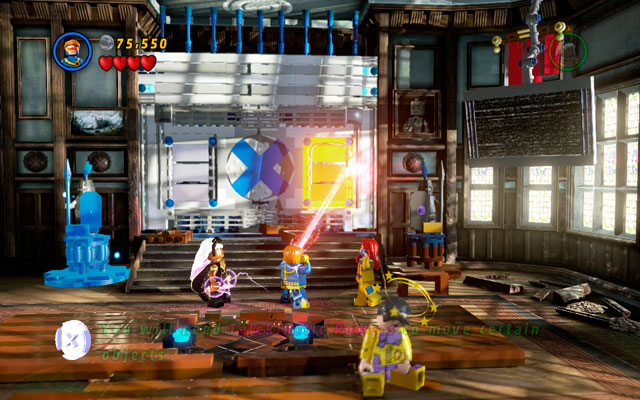
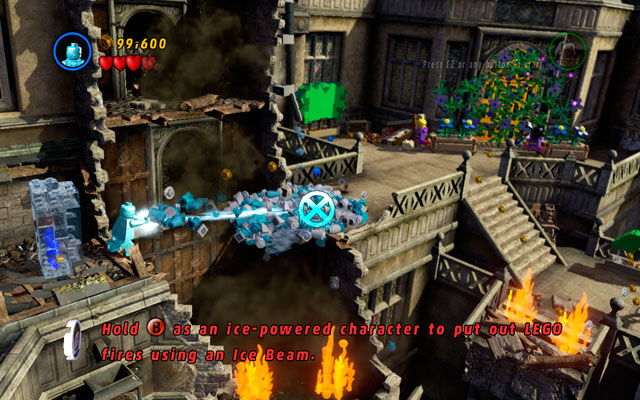
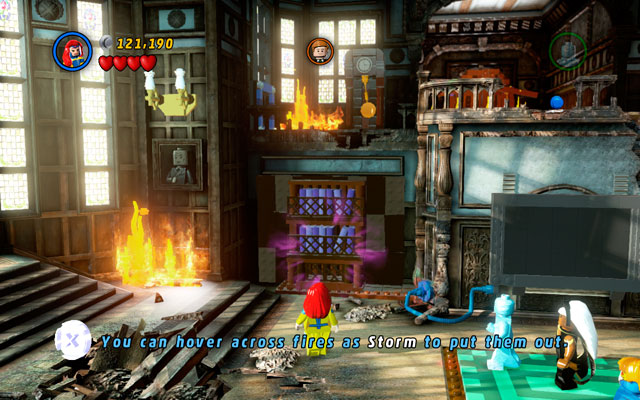
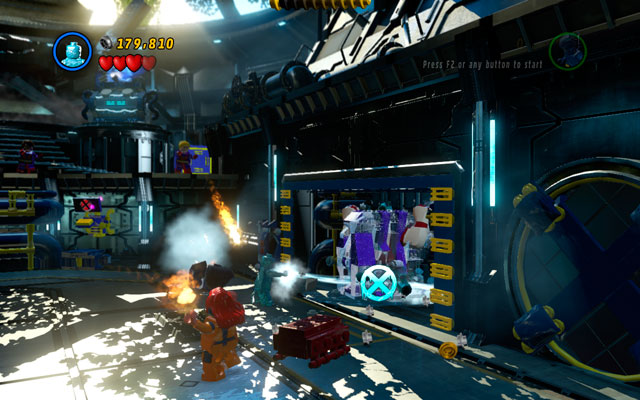
Characters: Jean Grey, Cyclops, Storm, Iceman, The Beast
True Believer Status: 105 000 studs

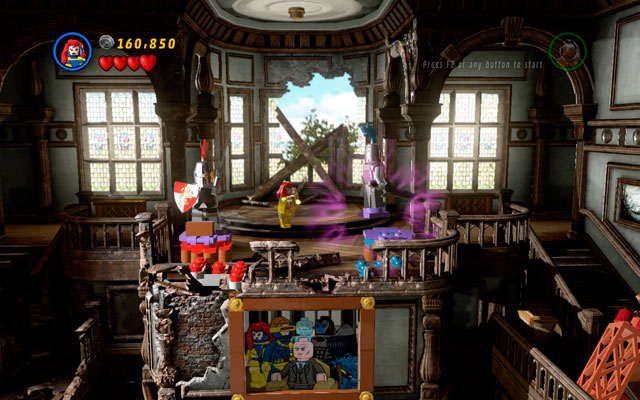
The main goal of this mission is to rescue all students terrorized by Magneto's thugs. After entering the X-Mansion, defeat all enemies in the area, then turn to the left side of the room. Use Cyclop's laser ray to melt a golden statue standing under the wall, then switch into Jean Grey and rearrange violet books in the right order (you must use your telekinesis power). When the computer appears, switch it on, rescuing the first group of students in that way.
Approach to the central part of the area and destroy all objects lying there. Then build stairs from the debris (only Jean can do that!) and go to the upper floor. Standing there, use telekinesis ability to move the painting from the wall, then melt a golden wall hidden behind it. Use another computer to release the next group of students.
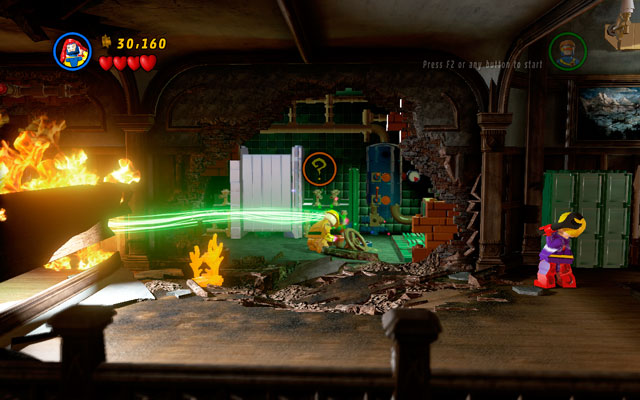
Pass through the door on the right, entering to the next location. Then switch into Jean Grey and take control over the worker (standing on the other side of the burning garbage pile) so you can build a pump from the nearby bricks. When it is done, force open the door and continue your travel.
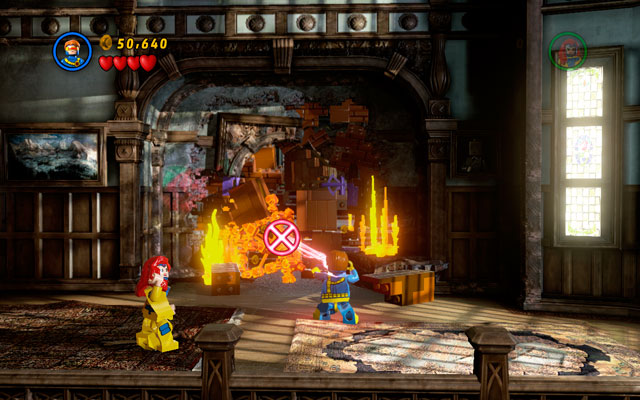
Defeat all enemies and approach to the another pile of garbage. Use Cyclop's laser ray to melt the golden chandelier, then choose Jean and clear the way using her telekinetic skills. After that you can enter to the next room.
After short cut-scene switch into Storm and mash an attack button to release yourself from Toad's grip. Then approach to the piano standing on the left side of the room and destroy it. Build a chair from the debris and soar up into the air (you must hit jump button twice to do that). Fly to the flames burning on the right, so you can extinguish them with your little tornado - in this way you will also unlock another chair.
Choose Jean Grey and use all three chairs with your telekinetic powers (notice that one of them is already on the right place). Wait for battery to appear, then charge it with electricity using Storm. Turn the machine on to rescue another group of students.
Defeat all enemies, then use Cyclop's laser ray to melt golden plate on the right side of the gate. Then switch into Jean and move a wire to the power point. After that you can choose Storm and charge the battery on the left, opening the passage to the another stage.
Head to the right side of the location struggling with enemies, so you can meet Iceman who is fighting with Pyro. Switch into "cool" X-man and defeat an opponent, mashing an interaction button. After that approach to the fountain standing in the central part of the location and freeze it, creating a stairway to the roof.
Climb on the roof, then switch into Cyclops and melt a golden brick lying on the other side of the balustrade. Then switch back to Iceman and create an ice bridge from the pool of water. Defeat another group of opponents, then approach to the golden gate.
Take flowers off the gate, using Jean telekinesis, then melt an entrance with Cyclop's laser ray. Now you can enter the building.
In new location defeat all enemies, then approach to the bookshelves located on the right side of the building. Use telekinesis on it, uncovering the hidden worker - take control over him, so you can turn the computer on.
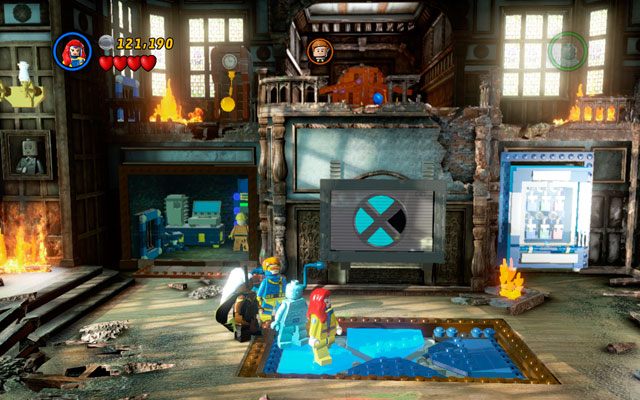
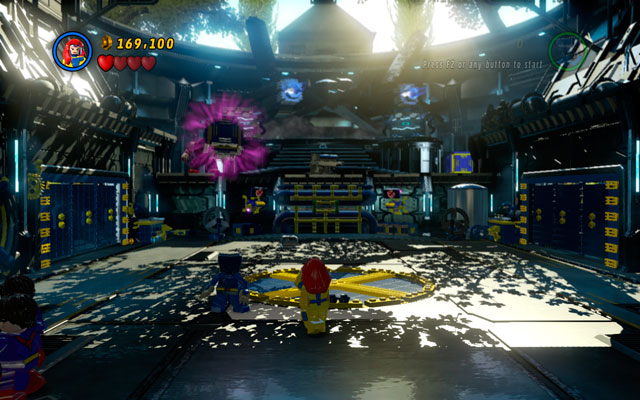
When strange touchpad appears on the floor, stand on it walking from the left to the right side (anticlockwise). When all four squares are highlighted, nearby students will be saved.
Defeat all opponents, then approach to the right side of the room, building stairs from the scattered bricks (use telekinesis to do that). When it is ready, put all characters into it and move whole construction to the upper floor (you must rely on Jean Grey again).
When all superheroes are ready, switch into Iceman and put out all the fires burning near to the exit. Then choose Jean and create a footbridge to the other side of the gap. Finally you can use Cyclop's laser ray to melt two golden hinges on the door - the way is open.
In the next room defeat all thugs, then switch into Storm and fly on the stairs on the right side of the room, extinguishing the fire in that way. After that you can go to the upper floor. The goal is simply: you must fix two armors first, and then put them on the proper postuments (red one on the left, blue one on the right). In this way you will unlock the battery, which should be recharged by Storm. Now you can enter the final arena with Juggernaut.
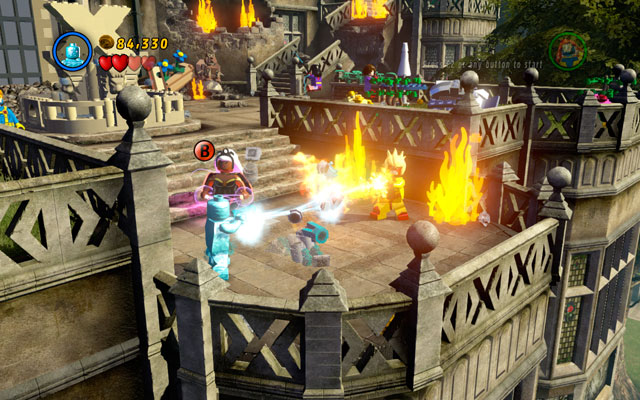
Struggle with Juggernaut is quite complicated and divided into few smaller sequences. During first you should choose Jean Grey - defeat some enemies (they numbers are infinite) and stand in the centre of the room. Wait for villain to throw a crate at you, then catch it with telekinesis and push it back to the enemy. This will demand some accuracy and reflex, so be patient!
Second round is more sophisticated - the enemy will run around the arena, making your task much harder to carry. Nevertheless, you should turn to the left and extinguish the fire with Iceman - now you can build a lever from the debris. After that jump on it, simultaneously doing the same thing with second character (notice that levers are placed on both sides of the gate). When the room is opened, use Jean's abilities twice to create a radio (which will distract an enemy).
Wait for Juggernaut to block himself, then freeze him with Iceman. After that you can catch frozen villain with Jean's telekinesis and throw him up to the upper platform. In this way you will reset the whole sequence.
Villain will throw some crates at you again - catch them with your telekinetic skills, then return this "gift" to the Juggernaut.
When the enemy is blinded, switch into Iceman and approach to the wall on the right so you can extinguish all fires. Build a computer from the debris, then switch it on as The Beast. After that destroy all objects hidden in the hangar and build an alarm clock from the bricks. Now you should know what to do - wait for enemy to block himself, then freeze him and throw an iceblock away.

When Juggernaut throws another crate at you, build a computer from its debris, finally using it with The Beast (notice that only Jean Grey can build this device!). Your goal is to conduct the machine to the enemy - to do that, you must pass through the simply maze (simply click on the proper arrows on the right side of the screen).
The last sequence is quite simply. When Juggernaut charges at Jean, take control over his mind, then use his unnatural strength to yank two green handles on the central wall, uncovering the water pipes. After that switch into Iceman and freeze an enemy for the last time. Now you can catch him with Jean's telekinetic grip and throw him away. The struggle is over!
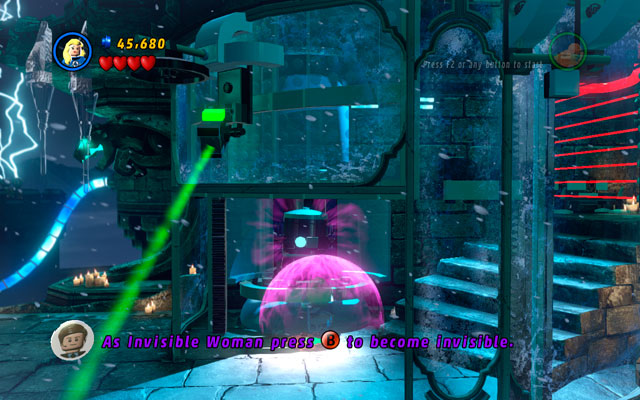
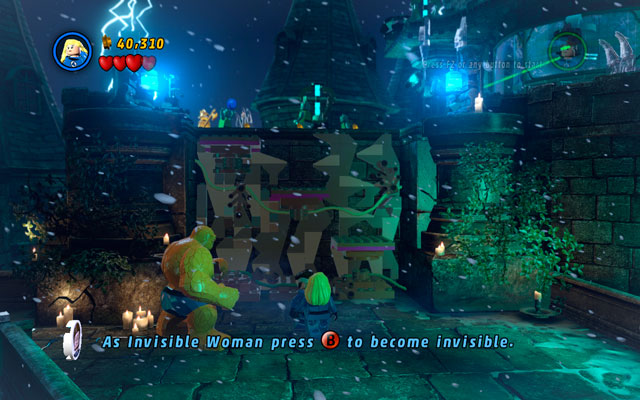
Characters: Mr. Fantastic, Invisible Woman
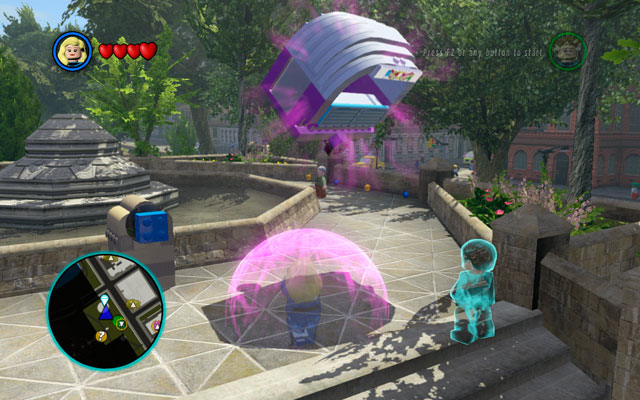
After ending the mission Juggernauts and Crosses you should turn right and head to the Central Park, searching for the circus tent (look at the depicting arrow, your minimap suggestions and a phantom lego character to find the right way). When you reach to the objective, approach to the fountain as Invisible Woman and lift up an ice box to scatter some bricks. Build a Fantastic Four panel from them, then switch into Mr. Fantastic and use an item you've already created. Wait for vehicle to appear, then use it to begin next mission - Doctor in the House.
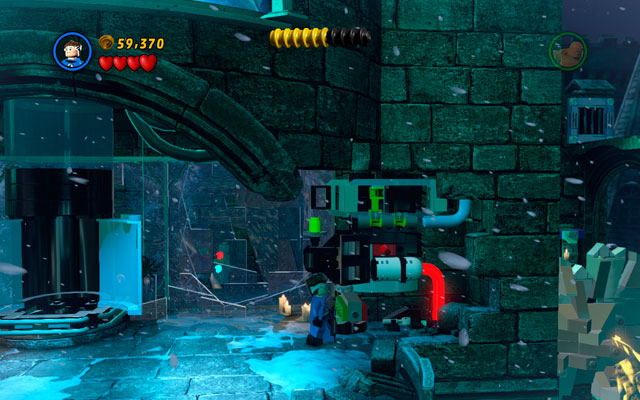
Character: Mr. Fantastic, Invisible Woman, the Thing, Human Torch, Nick Fury
True Believer Status: 100 000 studs
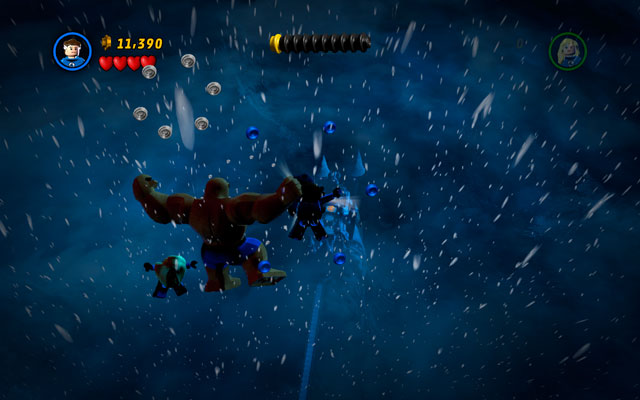
After the beginning of the mission you will fall down - it is a perfect occasion to gain some studs, and even a minikit.
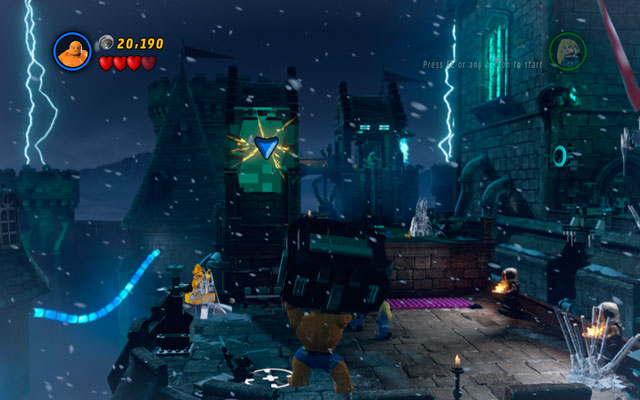
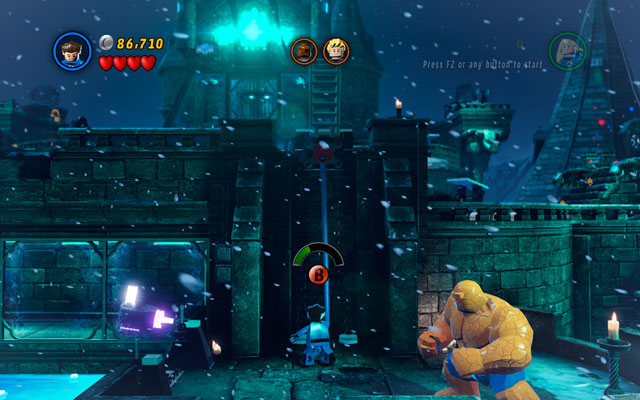
Land at the one of the castle towers, then fight the enemies crowded nearby. After that you should destroy all objects standing on the left side, building a huge container from the debris. Then switch into the Thing and lift the box using green handles, so you can throw it at the fragile part of the tower.
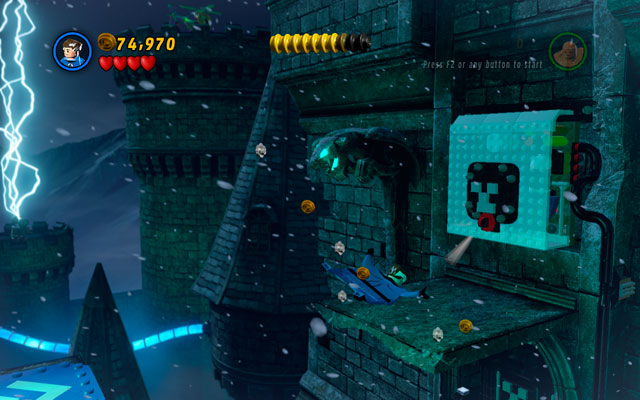
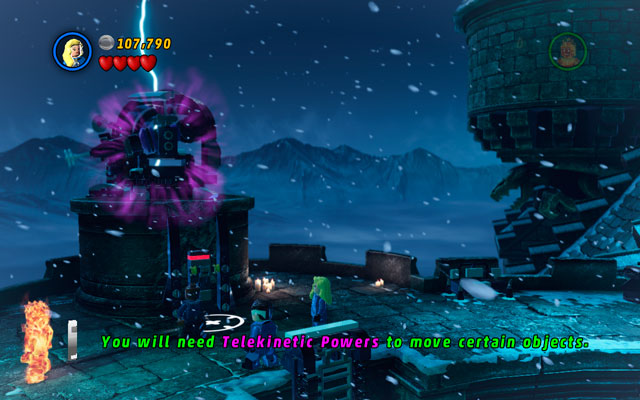
When it is done, destroy other objects lying in the area, then switch into Invisible Woman to build some violet bricks from them. Now you must use her telekinetic skills to arrange columns into a stairway to the next floor (see screen above).
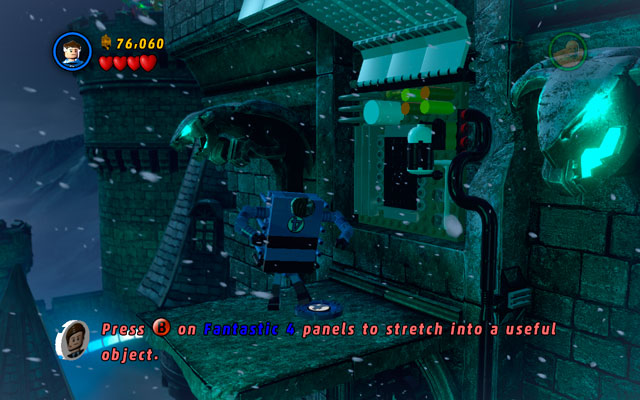
Go to the upper level, then turn left and choose Mr. Fantastic. Grab an attachable point using your elastic skills to climb on the tower, then head to the right, so you can switch the computer on. In this way you will create a ladder - climb it with Invisible Woman to go further.
Approach to the lightning on the right and reflect the beam to the plate on the opposite side of the gap (use an interaction button while standing on the Captain America's panel). Now you can pass through the bridge.
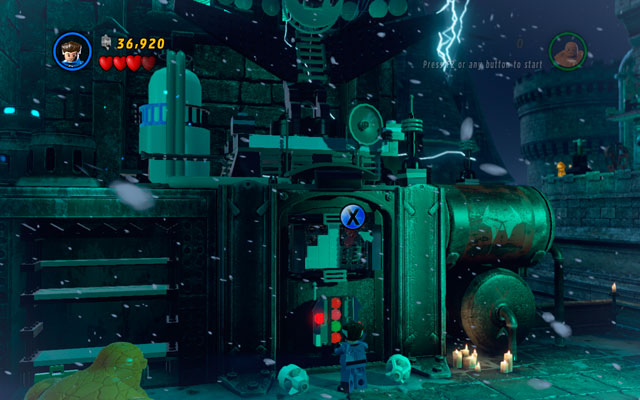
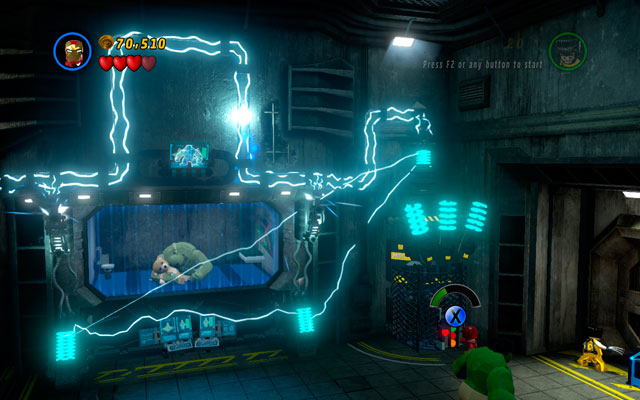
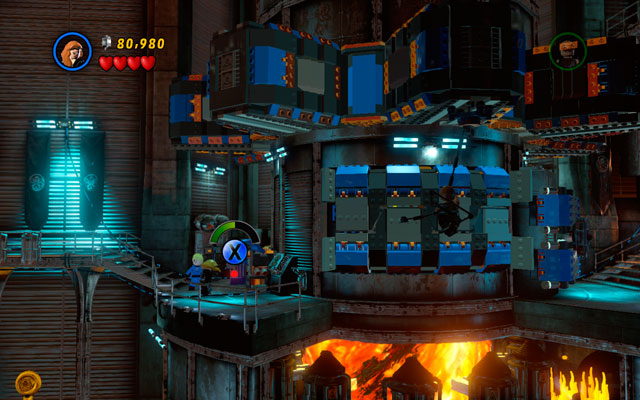
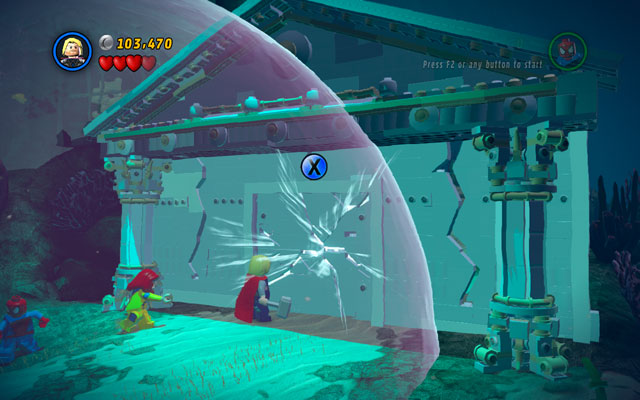
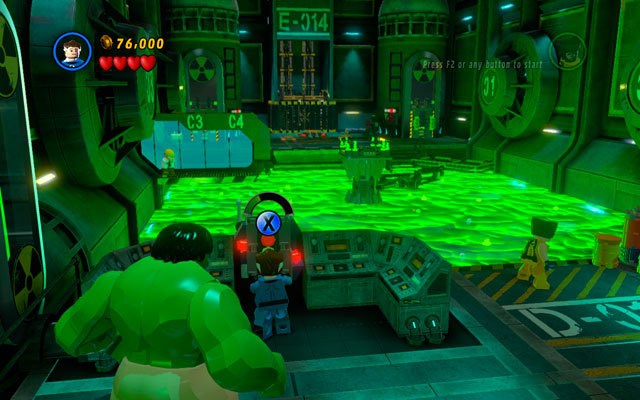
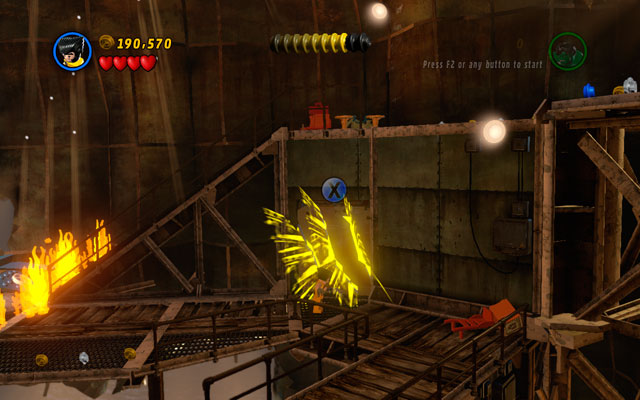
On the new location defeat all enemies, then choose the Thing and yank two green handles placed on the wall. Scatter the bricks, then build a Fantastic Four panel from them, so you can use it with Mr. Fantastic. After that switch on the computer and disconnect the jamming machine - to do that, you must click on the X symbol at the top of the screen.
After that approach to the wall glowing in yellow and break it with the Thing. Then switch into Invisible Woman and use her telekinetic skills to arrange three columns into a stairway to the next floor (see screen above).
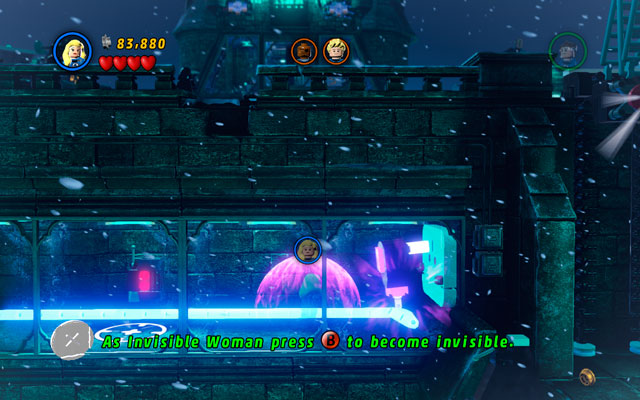
Defeat all opponents, then switch your invisibility skill on to pass through the gate covered by cameras. After that use telekinesis to move a gas cylinder from the lower to the upper floor - you will receive some useful bricks in that way.
Choose Mr. Fantastic and approach to the front of the building, then climb on it using an attachable point. Kill all enemies, then build a lever from the bricks that you've already scattered. When it is done, push it, so you can go to the further part of the castle.
Switch into the Thing and break through the yellow wall. When it is shattered, move indestructible barrel as Invisible Woman to clear the way. After that choose Mr. Fantastic and pass through the window with iron bars, so you can approach to the gap and glide over it.
Yank an attachable point to scatter some bricks. Then build a Fantastic Four panel, so you can use it. When the way is cleared, you can go to the next part of the castle.
Defeat all opponents, then switch into the Thing and collapse the wall on the right. In this moment Doctor Doom's minion will turn the bridge off - you must choose Invisible Woman and use her invisibility power to avoid the camera.
Enter to the control room and kill an enemy, so you can put a plug out from the socket - in this way you will turn the camera off. After that you can switch into Mr. Fantastic, who should use a computer to bring the power supply back to the bridge.
Stand on the other side of the gap and extend your arm, so you can pull an attachable point on the ladder, lowering it down. Now go to the higher level and crush all enemies. When it is done, approach to the huge rock lying in the centre of the tower and destroy it. After that you can build a Captain America's panel from the debris.
Choose the Thing and lift up a crate with green handles (it is standing on the right side of the roof), then throw it at the pillar on the opposite side of the gap. Wait for laser ray to appear, then switch into Invisible Woman and stand on the Captain America's panel to reflect a beam to the plate placed on the left. In this way you will create a passage to the further part of the castle.
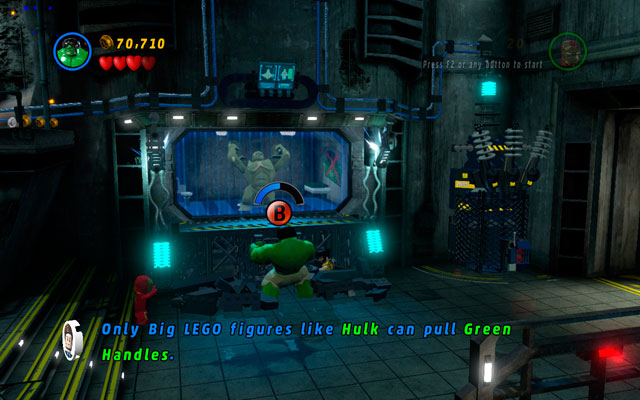
Go to Human Torch, then switch into him - only then he will be considered as "rescued" by the game. After that turn to the left, and lift up the wall with green handles, using Thing's unnatural strength. When the ladder appears, climb on the wall and meet with Nick Fury.
Melt golden gate using Human Torch, then switch the lever on. When the laser beam appears on the top of the tower, rotate it with telekinesis - then use a switch once more to clear up an entrance.
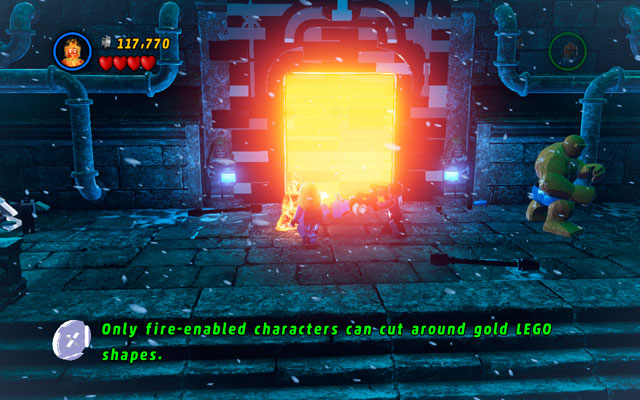
Defeat all enemies and approach to the golden wall. Melt it with a fire beam and go to the arena with Green Goblin hidden inside.

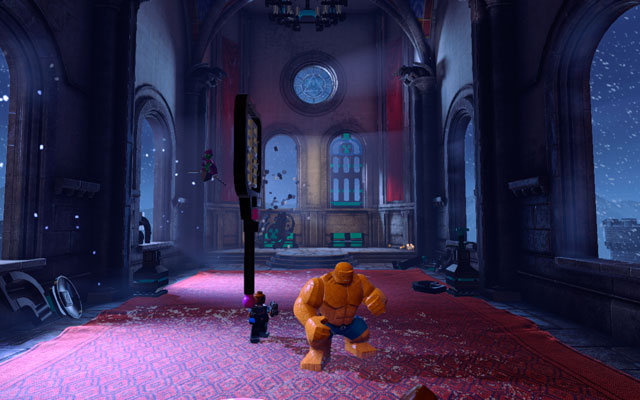
Kill all minions, then go to the central part of the arena and turn to the left. Build a huge rock with green handles from the debris, then lift it with the Thing and throw it at Green Goblin. Wait for him to go down, so you can easily make some boxing exercise.
In the second round you will be flooded by the ocean of the enemies - defeat them all, dodging Green Goblin's bombs in the same time. Wait for the stained-glass window on the right to become shattered, then build a huge swat from the debris. Now lift it with Invisible Woman - in this way you will force an enemy to fall on the ground, so you can hit him easily.
In the final round defeat all minions (as always), then approach to the shattered stained-glass window lying at the end of the arena. Build a Fantastic Four panel from the debris, then use it with Mr. Fantastic to catch Green Goblin for the last time. Strike him with the final blow, and the mission will be over.
Characters: Iron Man (Mark 42), Thor

Your goal is simply - you must jump down from S.H.I.E.L.D. Helicarrier (collecting as many studs as it is possible), then fly to the small vessel swimming on the ocean. The proper localization will be shown of you minimap, you should also rely on the blue depicting arrow. Nevertheless, remember about numerous side missions, which can be done on your way.
Characters: Iron Man (Mark 42), Thor, Spider-Man
True Believer Status: 90000 studs

Enter the boat, then kill all enemies stationed in the area. Demolish all objects lying on the left side of the room, then build a computer from the debris. Use it as Iron Man, so you can arrange the pipes in the pattern showed above (you must create a connection between two power points).
When it is done, approach to the golden wall and slice it with your fire beam - in this way you will create a proper passage to the next room. Enter it and switch into Spider-Man to use his spider sense. Climb up, then use your instincts once more, uncovering two attachable points. Now just yank them.
Jump down and approach to the burning barrels. Use spider sense to unlock an attachable point, then pull it with your web. Wait for flames to become extinguished, then destroy all barrels and build a battery from the debris. Charge it with Thor's hammer (interaction button) and go to the next room.
Defeat another group of enemies, heading to the right side of the hangar. Approach to the boat with silver boxes lying at it, then destroy them using Iron Man's rockets. After that charge Thor's hammer once more and electrocute uncovered battery. Now switch into Spider-Man and use his spider sense to uncover two attachable points placed on the container. Yank them and build a computer from the scattered bricks.
Use the device as Iron Man to take control over the submarine-robot. Now you must touch two buttons located on both sides of the laser gate. When it is done, you can go to the room that you've just unlocked.
Melt golden box on the right side of the location, then build a battery from the debris. Charge it as usual and wait for explosion to occur. After that you can go to the corridor on the left. Notice that in the following location you will fight with M.O.D.O.K. - so prepare yourself.

At the beginning of the duel M.O.D.O.K. is invincible - so fight with his minions for some time and wait for the malfunction of the enemy's shield. When it occurs, switch into Thor and throw your hammer at the villain, so you can hit him during conventional melee fight. After first hit, the criminal will jump to the water - so you must spend some time struggling with his troops.
Notice that the whole sequence described above must be repeated for three times - only then the talking head will be finally vanquished.
After the fight you will be moved to the next location - underwater. At the beginning destroy the vessel lying on the left side, then build a lock from the debris (only Thor can do that!). Then approach to the gates and use spider sense to uncover an attachable point. Yank it and you can go to the further part of the stage.
Go forth, reaching to the sunken building. Use spider sense once more, uncovering an attachable point. Pull it with your web, so you can see a crack on the construction. Smash it with Thor's hammer to clear the way, then defeat some enemies.
The way to the next part of the location will be blocked by the wall with a silver manhole. Blow it up using Iron Man's rockets, then hit another crack on the building with Thor's hammer. After that you can approach to the tentacle and melt golden chains attached to it. Now you should use spider sense to uncover two attachable points and yank them, so you can go forth.

Reach to Doctor Doom's submarine and defeat all enemies hidden there, so you can finally smash the crack located on the vessels surface. Hit it with Thor's hammer to end this level.
Characters: Hulk, Mr. Fantastic, Wolverine

The only goal in this intersection is to jump down from S.H.I.E.L.D. Helicarrier and reach to the destination point showed on the minimap - so head to the right location, then use a jet to start the next mission.
Remember that you can collect some character tokens and complete multiple side missions during your trip - it is always profitable.
Characters: Mr. Fantastic, Hulk, Wolverine
True Believer Status: 95000 studs
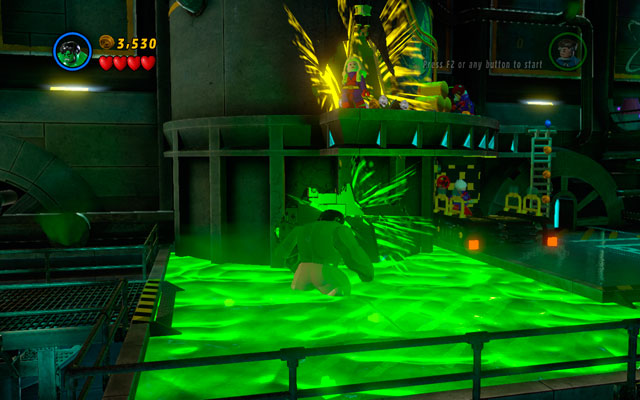
Right after the mission start, you must get out from the crashed jet - use an interaction button to break free from the wreckage. Then choose Hulk and get into the green acid pool located on the right side (notice that only a big guy can do that!), smashing all enemies in the area. After that approach to the green crack placed on the silo and hit it, creating a footbridge in this way.
Switch into Wolverine and jump to the other bank of the gap, then slice yellow passage located on the top of the container - you will receive some bricks. Build a Fantastic Four panel and use it with Mr. Fantastic to clear the way.
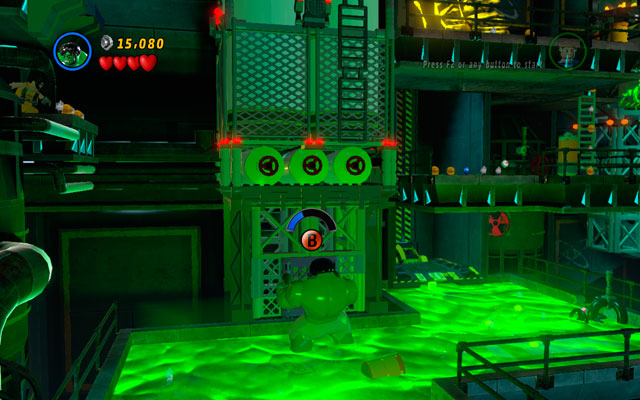
Switch back to Hulk, then smash all nearby enemies and get into another acid pool. Approach to the wall and yank two green handles to collapse the whole construction. Now other characters can go further.
Choose Mr. Fantastic and extend your arms to climb on the next floor, using an attachable point located above. Then turn right and slide over the gap. Then switch into Wolverine and sniff a sticky wall, by which you can climb to the upper level. After that you can destroy yellow wall, uncovering the computer for Mr. Fantastic. Now the lift is working, so you can move Hulk into it.
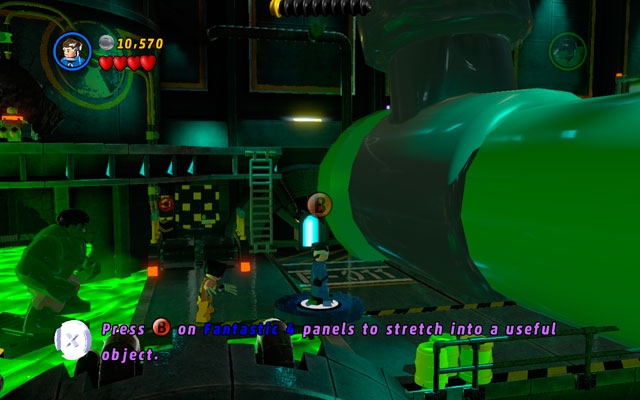
Head to the right, looking for the huge tank of acid - Hulk can pass through it, but other characters must find another way. Choose Mr. Fantastic and use a computer standing on the left side to move the footbridge. Jump on it as Wolverine, then move the platform back to the opposite side of the pool. Now you can switch into Mr. Fantastic and pass through the window with iron bars, which is hidden on the right side of the room.

When all your heroes are standing at the opposite side of the acid container, you can use three panels to call a lift. Then enter it and move to the next location.
In new location choose Hulk and yank the green handles. At this part of the stage you must avoid an electrified device, so pass it by, running as fast as you can. At the other side of the location use a claw switch (Wolverine) to turn on the machine which is standing on the left. Pass it in the same way as before and move along.

Defeat all opponents standing on the next platform, then break open the wall with green handles. Sniff around as Wolverine, then climb on the wall using sticky passage. Kill another group of enemies, then head to the right and use a claw switch, slowing the lower trap in this way. Now other superheroes can go further, so you can switch into Mr. Fantastic and yank the door to the next stage.
After short cut-scene you will be transported to the Statue of Liberty. Being in there, defeat all enemies in the area, then sniff around as Wolverine to uncover a passage to the upper level. Climb on it and use a switch to turn the lift on. Now you can go further.
Choose Mr. Fantastic and pass through the window with iron bars, then destroy the metal roll and build a proper platform from it. Now switch into Hulk and jump to the other side of the gap, so you can yank two green handles (clearing the way).
Head to the right and pass through the iron bars as Mr. Fantastic. Defeat all opponents, then destroy the box which is lying at the edge of the gap. Build a Fantastic Four panel from the debris and use it to create a passage. After that switch into Hulk and smash the fragile part of the blockade to clear the way.
Go forth and pass through another window with iron bars, then go to the other side of the gap and destroy all objects lying in the area. Build a bridge from the debris and switch into Hulk to yank the green handles, placed on the obstacle. Then choose Mr. Fantastic and climb a ladder to the next floor, then turn left and demolish all nearby junk. Now you should build a counterbalance from the debris, so lift can be useful again.
Assemble your team, then turn right and destroy all objects lying in the area. Build a footbridge from the scattered bricks, then pass through it. On the other side slice the wall using Wolverine's claws, then build a Fantastic Four panel. Now use it as Mr. Fantastic to extinguish nearby fire.
Choose Hulk and approach to the jet, yanking green handles as hard as you can. When the way is clear, defeat all enemies and go to the upper level. After that find a claw switch and use it as Wolverine to open the way to the arena with Mastermind hidden inside.

Mastermind's specialization is... mind control (surprisingly, right?). He will choose Wolverine as his first target - now Logan will fight against your team. Defeat your ex-ally in conventional melee fight (in which Hulk is especially effective), then switch into Wolverine himself. Now mash an interaction button as fast as you can to break the spell. After that, the first round is behind you.

Second encounter is a bit more complicated - possessed Mr. Fantastic will immobilize Hulk, so you must beat him as Wolverine. Wait for the elastic man to release your green friend, then beat him up (notice that your ex-teammate is invincible during "wrestling"). Repeat this sequence three times, then switch into Mr. Fantastic and break the spell as you've done it before (interaction button).

In the last round you must defeat Hulk - hit him hard, finally making him unconscious. Notice that Mr. Fantastic is especially effective during fight, because he can knock over the enemy.

Right after the struggle with Hulk, switch into Wolverine and sniff around, looking for the hidden Mastermind. When he is uncovered, punch him. That's all!
Characters: The Thing, Captain America
As always - to start next mission, you must jump from the S.H.I.E.L.D. Helicarrier and go to the destination point. Follow the trace showed on the minimap and depicted by the blue arrow, and you won't get lost. When you've reached to the jet, use it with Captain America.
Remember that you can collect some character tokens and complete multiple side quests during your trip.
Characters: The Thing, Captain America, Storm
True Believer Status: 85000 studs
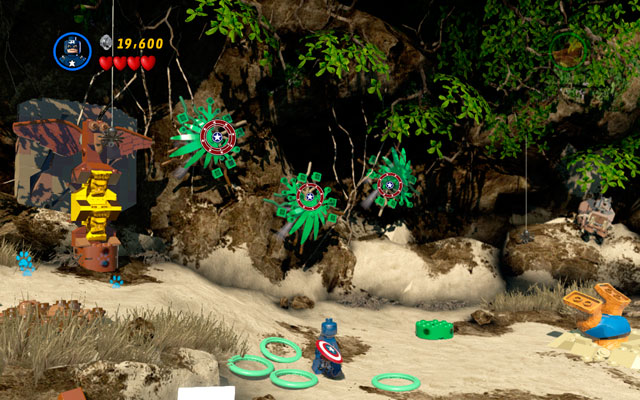
After the beginning of the mission choose Captain America and destroy a bush growing on the left side, then toss your shield at three plants located on the cliff. Now build a pump from the debris and jump on it, so you can release the Thing from the sand trap. After that defeat all enemies.
Switch into the Thing and approach to the wall on the right, destroying all bushes and the wall itself. Then choose Captain America and cover yourself with a shield, reflecting the rockets to its source. Then lift a rock as the Thing and throw it at yellow wall located at the opposite side of the bridge.

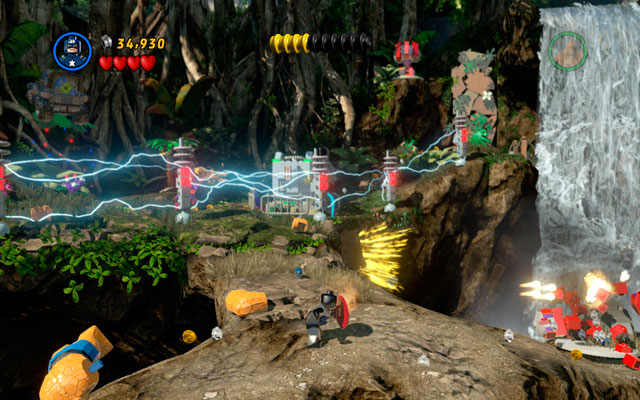
Defeat all opponents, and watch out for the cannons placed on the both sides of the clearing - destroy them using Captain America's shield. After that approach to the rock on the right and take some bushes from it - you will uncover green handles. Yank them as the Thing, then build a lever from the bricks. In this way you should create a bridge to the other side of the waterfall.
Move forth, fighting with the enemies, and turn right as Captain America. Jump over the gap using the pole, then destroy all bushes growing nearby. After that toss a shield at the mechanism (you've already uncovered it) and climb on the next floor, so you can beat another group of enemies.
Toss a shield at the crane and climb on the platform using newly created passage. Switch into the Thing and yank two green handles to clear the way to the jungle.

Head to the right, looking for the fallen tree - clean it from the bushes, uncovering two handles in that way. Yank them with the Thing and move forth. When dinosaurs (!) appears, smash them up, and approach to the plane wreckage (so you can remove it).
Switch into Captain America and climb on the rock placed above, so you can jump to the other side of the gap (using poles). Cover yourself with a shield to avoid flames, then defeat a dinosaur and use a switch standing behind it. In this way you will clear the way for the Thing.
Destroy all objects in the area and build a wall with green handles from the debris. Yank them with the Thing, then enter the clearing and defeat some opponents. Smash all junk lying on the battlefield and build an engine placed on the wheels. Now jump on it as Captain America to open the way to the further stage.
Go to the guarded bridge, then choose Captain America and turn to the right. Jump to the pipe placed under the bridge and move forward, heading to the other bank. Defeat all enemies waiting there (you must reflect some missiles to the cannon) and clear the way for the Thing - remember to use a switch placed on the bridge!
Choose the Thing and lift a rock with green handles attached to it, then throw it at the enemies. Turn right and lift up another stone, aiming at yellow part of the wall. When it is destroyed, switch into Captain America and climb up, then build a shield switch from the bricks. Use it and you will open the passage to the next stage.
Kill nearby opponents and smash all objects lying in the area. Build a battery from the bricks then charge the device using Storm's lightning attack.

Move forward and defeat another group of enemies. After that switch into Captain America and stand on the patriotic panel, so you can reflect a deadly beam to the cannons standing on the both sides of the clearance. Build another battery from the debris and charge it using Storm's powers. Now you will face the Rhino and Magneto.
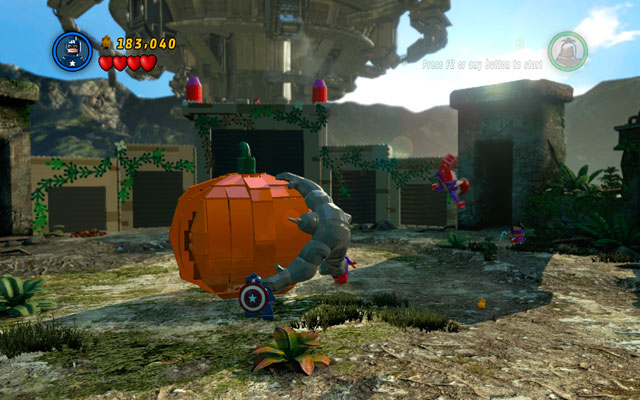
Struggle with Rhino is quite fun. You shouldn't bother yourself with nearby minions - they will appear endlessly, so fighting with them can be considered as a clear nonsense.
Search the arena for orange bushes, and destroy them all - then you can build a huge pumpkin from the debris. When it is done, direct an enemy into it: he will crush himself.

When villain is stunned, punch him as the Thing. After that hit an attack button as fast as you can, finally removing an enemy from the arena.

Now it is time to fight with Magneto. Dodge his attacks, simply running around the area and waiting for the bricks to appear. Build an anvil from them, then lift it as the Thing, so you can throw it at Magneto's metal fist. Wait for villain to fall, then smash him during melee fight.
In second round act in the same way - the only difference is that you will have to use an alarm clock instead of anvil.
The final round looks the same as the previous ones. When fight is over, approach to the enemy and hit him for the last time, so you can end this mission.
Characters: Iron Man (Mark 42), Spider-Man
After mission Rapturous Rise you will be send back to New York. To reach to the destination point (Stark Jet), you must fly across the city - use Iron Man's flight ability and head to the Central Park (the right way will be shown on the minimap). Remember that you can complete some side missions during your trip!
At the objective approach to the platform standing at the lake and use Spider-Man's spider sense to uncover a computer. Switch back into Iron Man and arrange three panels to suit them with colors showed in the centre (see screen above for right combination). Now you can use a vehicle to begin next mission.
Characters: Spider-Man, Iron Man (Mark 42), Thor
True Believer Status: 100000 studs
At the beginning of the mission you will be forced to fight with huge army of Magneto Acolytes. They will flow in endlessly - you must stop them in some way. To do that, switch into Spider-Man and use his spider sense on the wall located on the right side of the room. Uncover two attachable points, then yank them with your web, uncovering a silver plate in this way. Destroy it using Iron Man's rockets, then choose Thor and charge the battery.
Turn left and look for the another silver wall. Blow it up, then charge second battery as Thor. After that build a lever from the debris and rotate it to open the door.
In next room defeat all opponents, then destroy all objects lying in the area. Build a stopper from the scattered bricks, then place it on the canal - you will partially stop the flow of enemies. After that you should jump over the gap on the right side.
Kill all minions, then jump to the platform located above. Use spider sense to uncover a crack on the glass window, then smash it as Thor. After that switch back to Spider-Man and yank two attachable points to scatter some bricks. Build a battery from them and charge it with electricity.
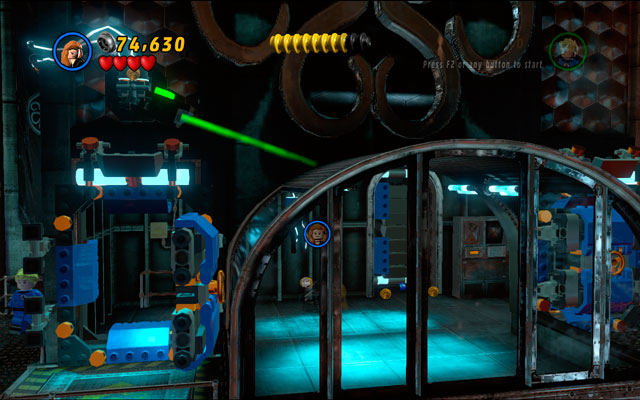
Move further, fighting with another group of enemies, then use spider sense to uncover the passage to the upper level. Go there, then turn right and destroy all things lying nearby, so you can build a lever from the debris. Now hung on the pole with character other than Spider-Man and leave it alone for a while.
Move to the wall on the opposite side of the room and jump on another lever. When both switches are turned on, choose Spider-Man and shoot his web at two attachable points - you will open the door to next stage.
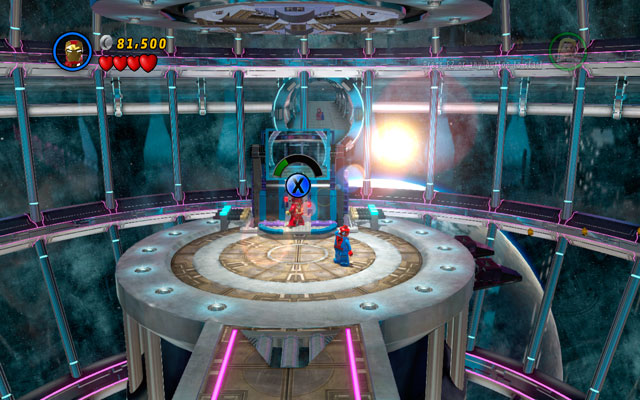
Defeat all enemies, then approach to the panel with two attachable points. Yank them, then build a computer from the debris. Use it as Iron Man to rotate the machine, so you can create a passage. Now it is time for the final battle with Magneto!

In first round try to dodge all attacks, running around the arena and waiting for enemy's mistake (notice that minions will flow in endlessly). Magneto will throw some bricks at you - avoid them for some time, then build a huge iron from the debris. Use it with Iron Man, so you can beat up the weakened villain.

Second round is quite the same - dodge enemy's attack, waiting for the proper quantity of the bricks to appear. After short time you will have an opportunity to build a pumpkin from them and hit it with Thor's hammer. Now you can smash Magneto.
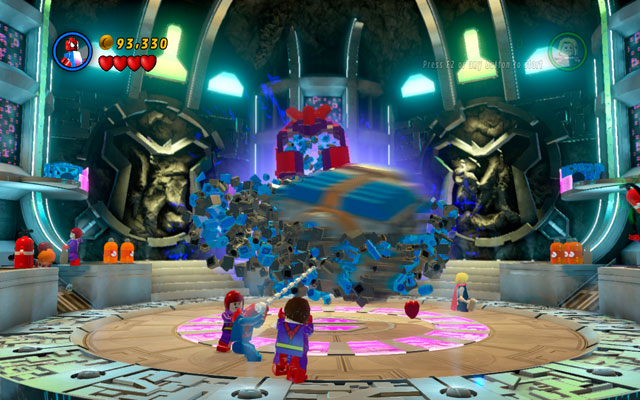
The final round is very similar - wait for bricks, then build a battery from them and charge it with electricity. When it is done, switch into Spider-Man and shoot his web at the attachable point, so you can finally defeat an enemy.
Characters: Invisible Woman, Mr. Fantastic
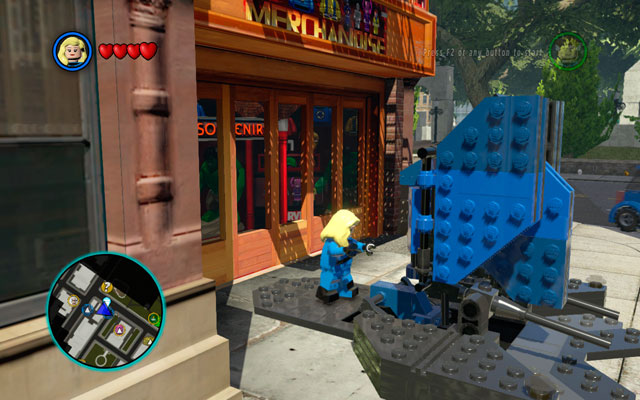
In this intersection the previous order of acting will be reversed - you will start in New York, heading to the S.H.I.E.L.D. Helicarrier. To get to the destination point, approach to any blue vehicle machines in the vicinity and use it to summon a jet. Notice that the nearest device will be shown on your minimap.
Standing on the Helicarrier's board use the computer to move to the bridge. Now talk to Nick Fury, so you can start next mission.
Characters: Spider-Man, The Thing, Storm, Captain America
True Believer Status: 85000 studs
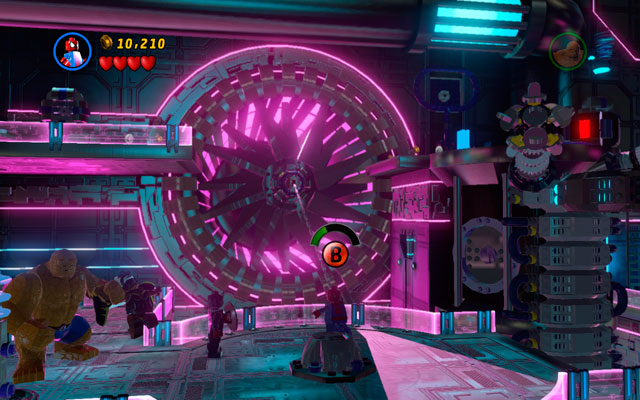
At the beginning of the mission defeat all nearby enemies (very numerous), then go to the interior part of the room and turn right. Use spider sense to uncover an attachable point on the ventilator, then yank it to create a bridge.
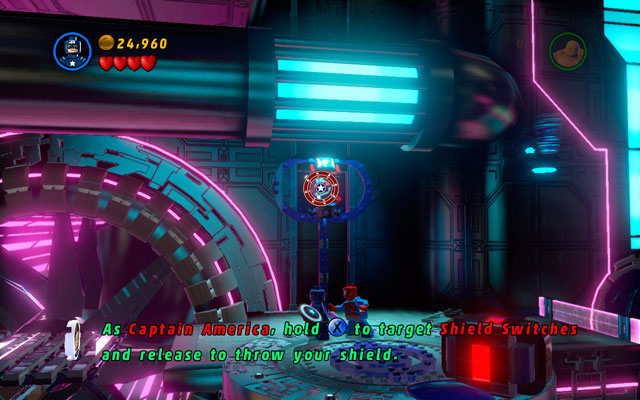
Switch into Captain America and go to the left side of the room, approaching to two blue-and-white walls. Jump between them to climb on the platform, then turn right and jump over the gap. Demolish the box lying under the wall, then build a shield switch from the debris. Now toss your shield at it to unlock a battery. After that you can choose Storm and charge the device with electricity.
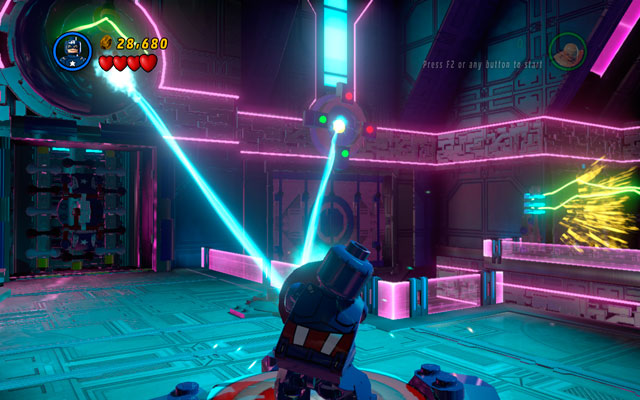
Defeat next group of enemies, then switch into the Thing and yank two green handles placed on the wall. After that choose Spider-Man and shoot his web at the attachable points to turn the laser ray on. Now build a patriotic panel from the debris and enter it as Captain America, so you can reflect the beam to the color plate on the right side.
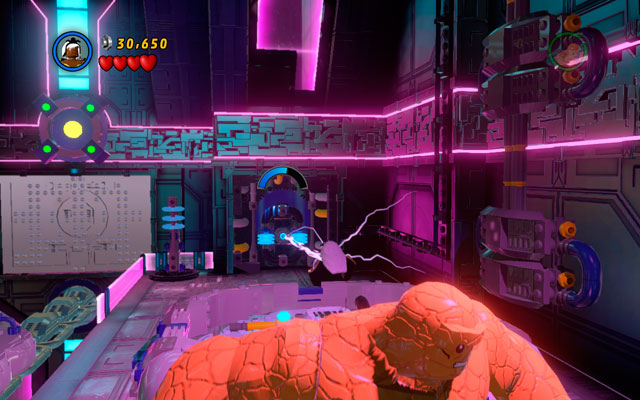
Break fragile fragment of the wall with the Thing, then charge the battery as Storm. Wait for the lift to appear, then defeat all opponents. After that you can yank two green handles with the Thing (to break the first gate) and shoot a web at attachable points as Spider-Man (second gate).
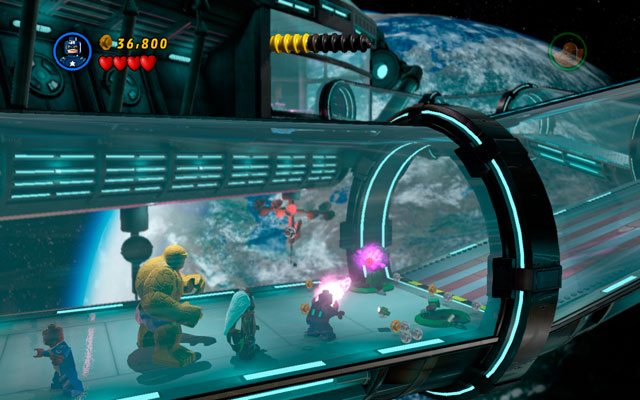
In new location switch into Captain America and cover yourself with a shield - in this way you will reflect the missiles to two deadly cannons, destroying them.
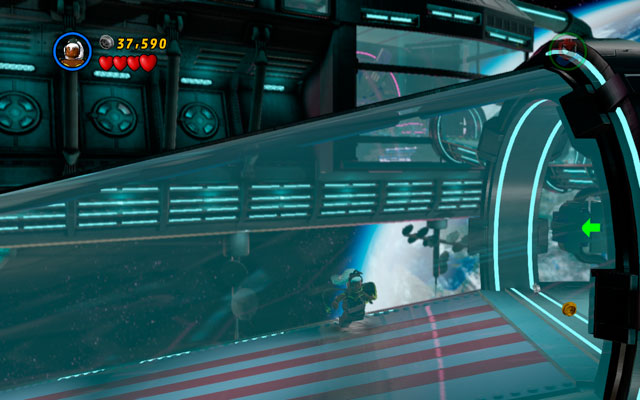
Choose Storm and soar into the air (hit jump button twice to do that), then go forth. Now charge the battery placed in the corridor, so other members of the party can join you. After that you should repeat the trick with Captain America's shield to destroy two another cannons.
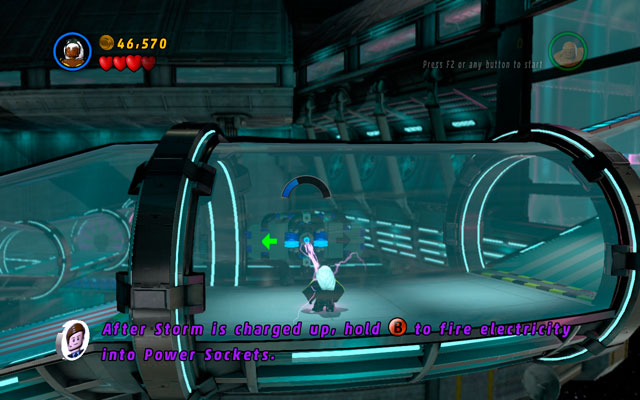
Switch into Spider-Man and use spider sense to uncover an attachable point - yank it to scatter some bricks, then build a shield switch. Toss Captain's shield at it and choose Storm again to fly to the next part of the corridor. Now destroy a box and build another battery from the debris, so you can charge it with electricity.
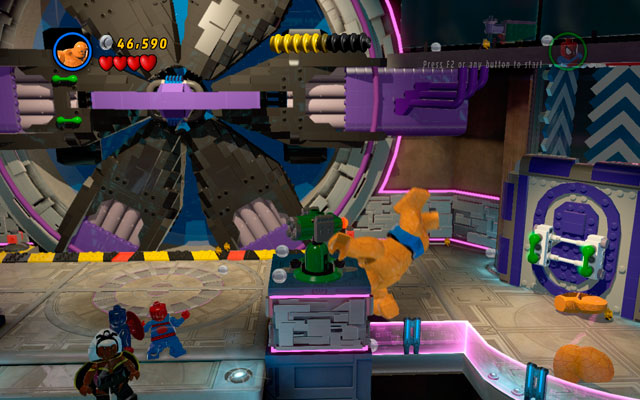
Use spider sense to uncover a yellow crack on the wall, then crash it with the Thing. Enter to next room and reflect all incoming missiles as Captain America.
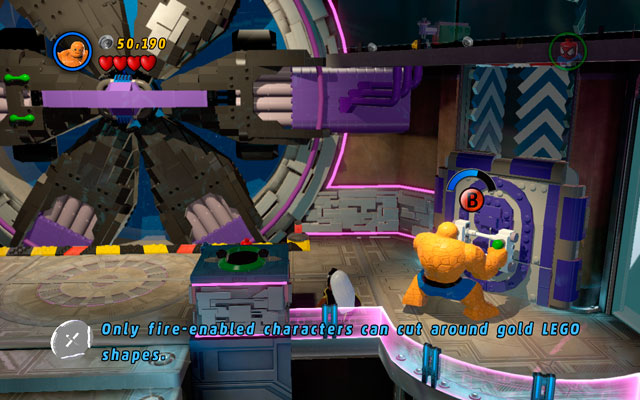
Switch into the Thing and yank two green handles on the right side of the location. Enter to the tube tunnel and climb up to the platform placed above, then rotate the lever to unlock the first part of the gate.
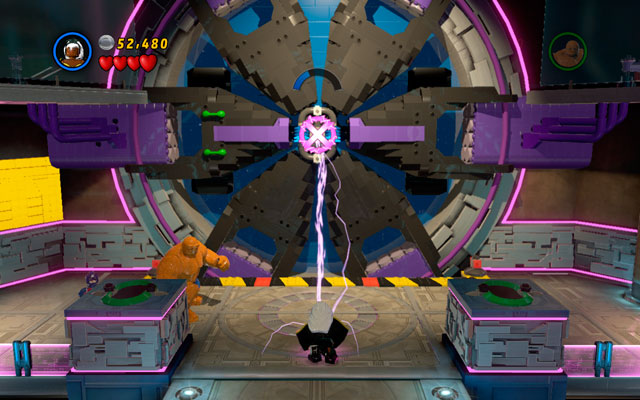
Turn left and use spider sense - now you can climb up to the platform and destroy a computer standing in the corner of the small room. Build a lever from the debris, then use it to uncover a battery. Charge it with Storm and finally yank two green handles with the Thing. Now it's time for a short trip!
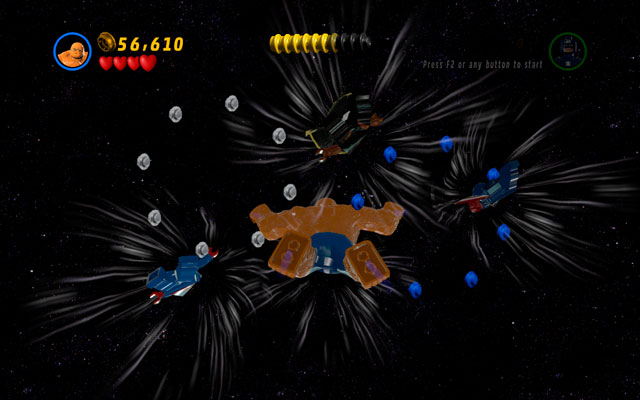
During your flight don't panic, but try to collect as many studs as you can (the most valuable are placed on the right side). Remember to avoid meteors, because they can hurt you hard. After that you will be facing Doctor Doom.

First round is quite simply - you must defeat 20 Doombots. Enemies are very squishy, so you can easily smash them with the Thing (notice that jump attack is especially effective).
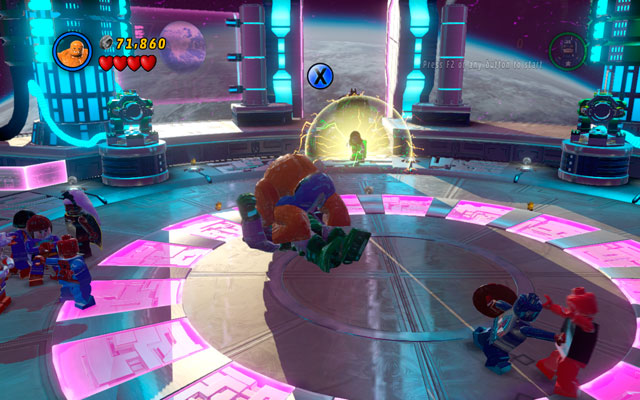
To defeat greater minion of Doctor Doom, you must knock him over. To do that, wait for him to start charging at you, then jump aside. When enemy is stunned, smash his face with the Thing, taking his mask off. Now you can use Spider-Man's web to throw dangerous monster away.
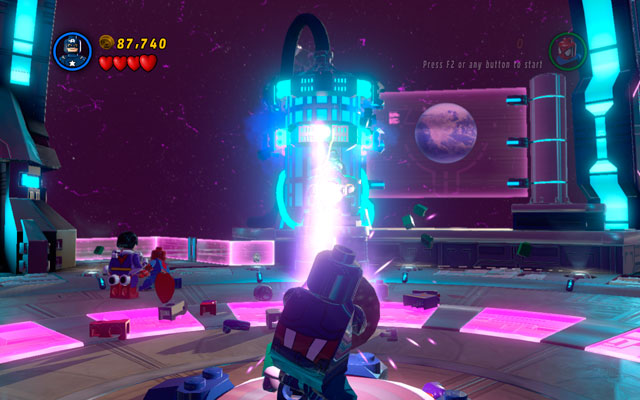
Go to the central part of the arena, then build a patriotic panel for Captain America. Use it to reflect the beam to the glowing device standing behind Doctor Doom's cannon. Wait for machine to explode, then punch an enemy.
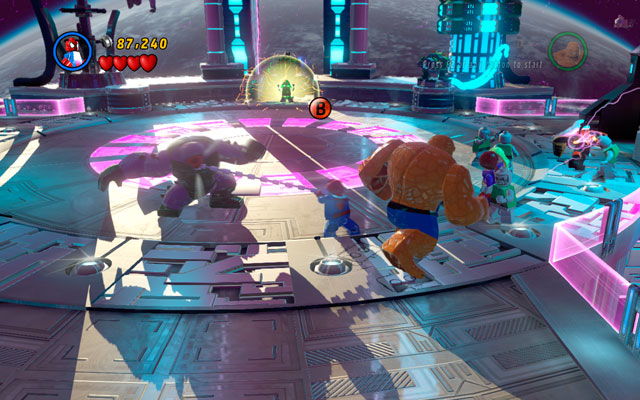
In this moment your fight will become very schematic. To win the battle, simply repeat all previous operations - that is: defeat huge minion, then break down second cannon.

Final round looks very similar - throw big monster away, then defeat Doctor Doom in melee fight. If your character was possessed by the enemy, hit him with another superhero. Now the struggle is over.
Characters: Iron Man (Mark 42), Thor, Magneto, Abomination
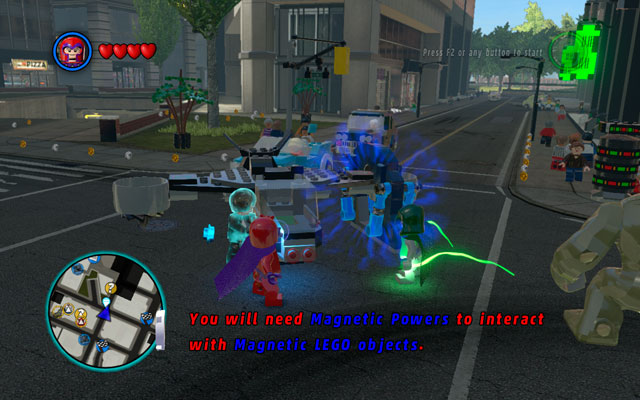
Jump from S.H.I.E.L.D. Helicarrier, heading to the Central Park. Meet with Magneto and Abomination, then go to the new destination point. Follow the trace showed on the minimap to reach Doctor Doom's location - as you will see, the NYPD has set up a blockade on Doctor's vehicle. Use Magneto to take it off, so you can start the last mission in the main campaign.
Characters: Spider-Man, The Thing, Mystique, Green Goblin, Iron Man (Mark 42), Human Torch, Venom, Abomination, Mr. Fantastic, Doctor Octopus, Captain America, Nick Fury, Magneto, Doctor Doom, Storm, Cyclops
True Believer Status: 75000 studs

Choose the Thing and approach to the device with green handles lying on the left - throw it at the yellow rock. After that switch into Green Goblin and destroy silver obstacle which is blocking the fan.

Choose the Thing again and approach to the jet crushed on the right side, then throw it away. Now build an attachable point from the debris and yank it as Spider-Man. Switch into Mystique and use a computer that you've already unlocked.
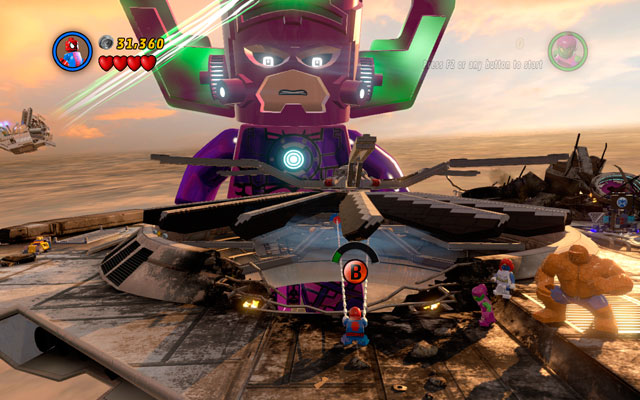
Choose Spider-Man and use his spider sense to see an attachable point located on the engine fan. Shoot your web at it and pull as hard as you can - the first part of this mission is behind you.

At the second wing of Helicarrier use Iron Man's fire beam to melt the golden brick lying on the left side. Then build a computer from the debris and use it.

Turn right and melt golden boiler, then switch into Venom and jump over the flames, so you can use a spider sense near to the rotors. When two attachable points appears, shoot your web at them and hit an interaction button as fast as you can.

Third sequence is more sophisticated. Choose Mr. Fantastic and approach to the helicopter standing on the left side, then yank two attachable points located on it. Wait for Fantastic Four panel to appear, then use it to scatter some bricks. Now you can fix the machine on the right.
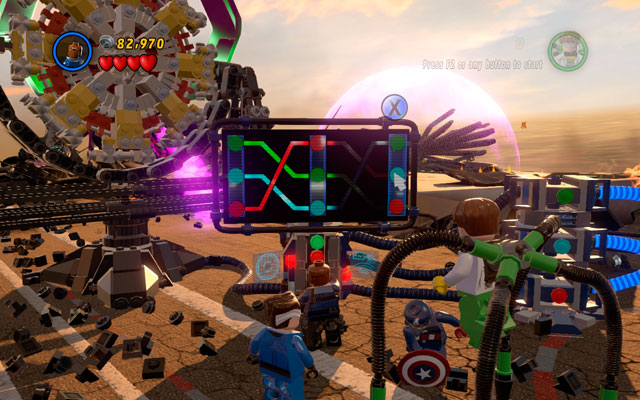
Use a computer to resolve the riddle - you must arrange all buttons to fit each other (click on every column two times to do that). Now build a Captain America's panel from the scattered bricks, so you can reflect the laser beam to the black hole located on the sky.

On the last wing choose Magneto to move metal elements to the central part of the location. Then charge the battery as Storm and switch back to Magneto, so you can destroy a crane standing on the left side and scatter some bricks from it. Now just build a part of the planet from the debris.
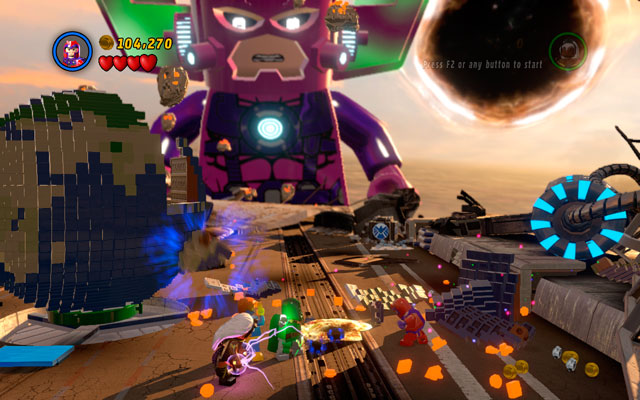
Use Cyclops laser ray to melt golden bricks lying on the left side, then build another part of the planet from the remains. Soar to the sky as Storm to extinguish the fire blazing on the right and destroy all objects standing there. Now build the last part of the planet and the mission will be over.
Congratulations, you have just beat the game!

On the right side of the location you will find a blue-red panel - use it with Spider-Man, to make a rope. Now choose Hulk and transform him into Bruce Banner (hold down change character button).

Climb on the rope and once more turn Bruce into a savage monster. Pull out green handles, destroying silo and scatter it into pieces. Build water cannon from debris and shoot at the enemy. Face him with Hulk and strike green wall with attack button.

Turn away and go to the central part of the arena. Find a pile of sand on the left and destroy it with Hulk's smash attack (simply press jump and attack buttons). Build concrete mixer from the debris and throw it at the enemy. When giant falls, hit him as before.
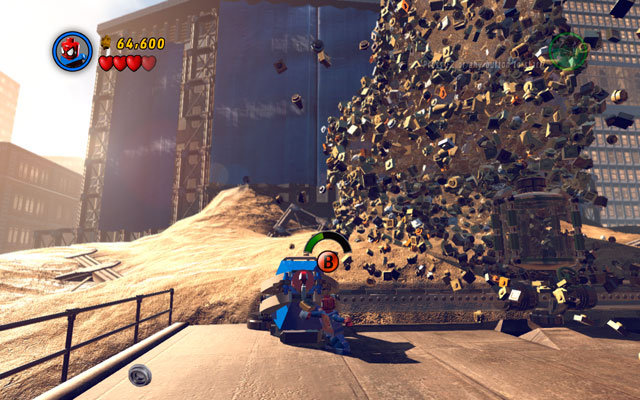
Approach blue-red panel on the left with Spider-Man and use spider's web to unlock a switch. Now pull it.

On the right side of the sand giant you will find silver obstacle, which only Iron Man can destroy. When it is done, use second switch to unlock the water tank.

When both switches are turned on, stand face-to-face with huge Sandman and use spider sense. When another blue-red panel appears, hit it with the web and pull out. In the end, knock down your enemy with Hulk.
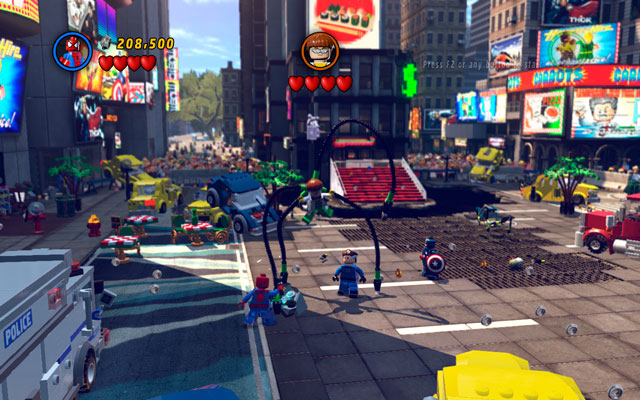
The final battle with Doctor Octopus is quite demanding. Escape all attacks performed by enemy, being as agile and mobile as it is possible. If you have been caught by enemy, simply change the character - in this way you will avoid losing studs.
The pattern of the fight isn't complicated: approach to the enemy and wait for the killing blow, then dodge all the hits. Archvillain's tentacle will get stuck, so you can easily break it down (hit an attack button). Repeat this action for three times, finally defeating the "armless" Doctor Octopus.

Duel with Venom is quite tough. Villain will summon enemies endlessly, so you shouldn't bother with them - just focus on the main problem. The boss is immortal for some reason: you must weaken him first to strike a crushing blow. To do that, destroy all objects standing on the left side of the arena and build radio from the debris. When it is working, run towards Venom and punch him in the face. The first stage of fight is over now.

Wait for some time struggling with infinite group of minions - you need to survive long enough to see a computer appearing on the central wall. Use it to unlock huge fire thrower, then climb on it and shoot at Venom. When he's burning, you can hit him in a conventional way.

When the enemy is hardly alive, turn right and approach to the crane. Use spider sense to uncover two attachable points and yank them, scattering some bricks. Build a bell from the debris and switch your character into Hawkeye to shoot an arrow at the constructed object. After that approach to Venom and strike him with the final blow.
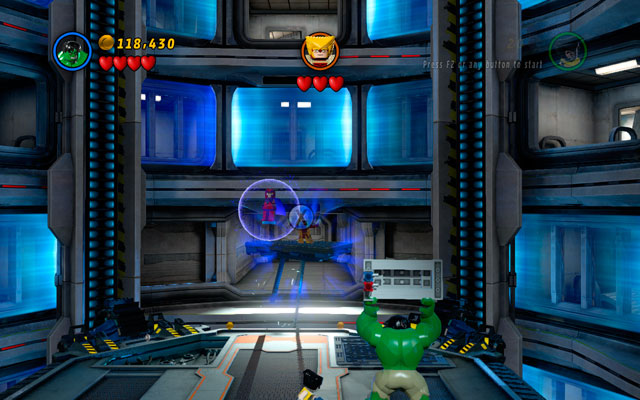
On this stage you will fight with Magneto and Sabertooth. Iron Man is disarmed, so you can rely only on Hulk and Wolverine.
Defeat all prisoners to open up another chapter of the fight - that's your chance. Choose Wolverine and approach to the pile of bricks located on the right, then build a green handle from the debris. Lift object using Hulk and throw it at Sabertooth. That's the end of the first round.
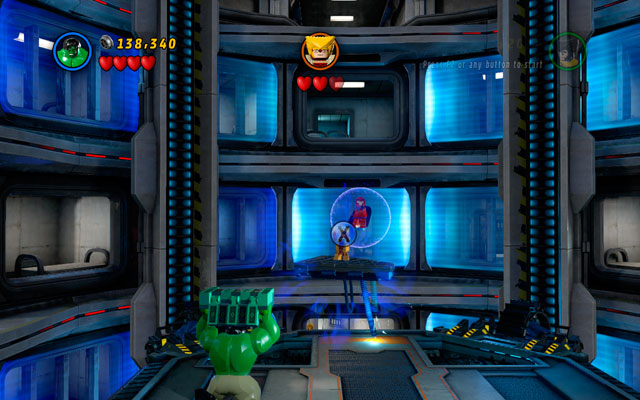
Second sequence is quite similar - defeat all minions, then build another missile, throwing it at the target.
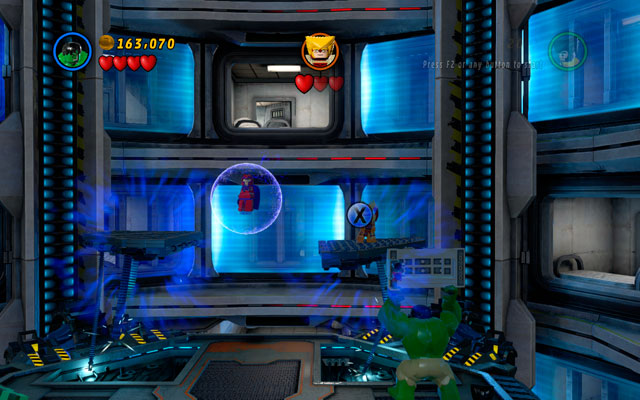
The last sequence looks nearly the same - but this time you must build not one, but two objects and throw them at Sabertooth. Notice that arch villain will jump from the destroyed platform to the other one - that's the reason for two missiles.
After that, the fight is over.
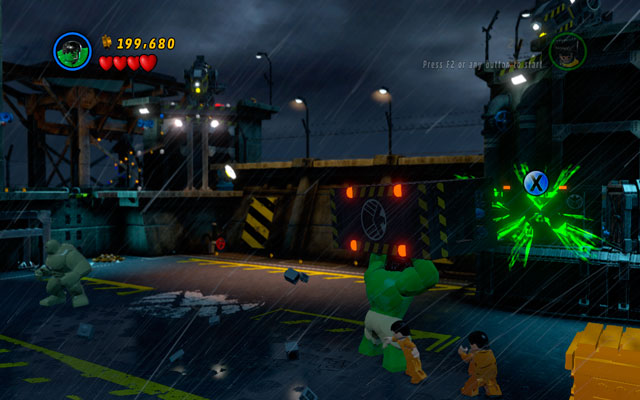
Struggle with Abomination demands some cunning, not brutal force. Choose Wolverine and straight to the right, until you'll get to the sniffing area. Uncover fragile point on the nearby pile of boxes and switch your character into Hulk. Now lift a container and throw it at the shining breach.

Climb on the wall as Wolverine, jumping between two white-and-blue walls to get to the top of the tower. Defeat some enemies and turn left, using spotlight to blind Abomination for some time. Then switch into Hulk and hit an enemy during easy QTE sequence.

The first part of the fight is behind you - now it's the time for the second one. Choose Wolverine and approach to the pile of sand located on the left side of the location and unearth a ladder from it (you must construct it first from the debris). Climb on the first floor, sniffing the sticky wall on the right and get to the tower on the right. Then use a claw switch to unlock another spotlight - you have already know what to do with it.

To strike a final blow, you must switch to Wolverine once more. Use a lift located on the first floor and go to the left platform, fighting your way among prisoners. Destroy a pile of junk located there and build another claw switch from the debris. Use spotlight to blind Abomination for the last time and defeat him as Hulk. That's the end of this mission!

The struggle is very schematic - defeat all minions first, then wait for Mandarin to take control over your character. Punch him with second hero, then fight Aldrich (who appears suddenly from nowhere), trying to hit him as fast as it is possible. Repeat this pattern for three times to open up another stage of the duel.
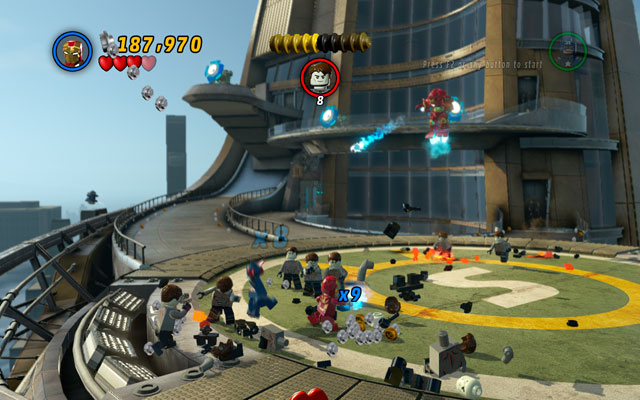
When the first boss is defeated, second one will enter to the Terminator Armor. Notice that your enemy is invincible now - you must defeat all 40 minions to make him vulnerable again. Kill all the enemies and try to dodge missiles fired by your enemy - stay focused and run around the arena constantly.
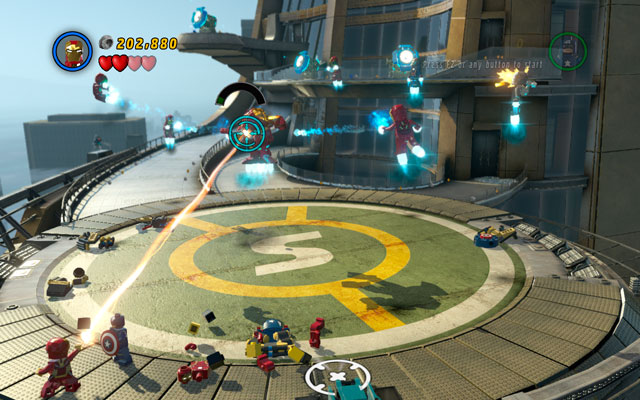
Duel with armored Mandarin is quite simply - you must fire at him constantly. When he has no more than 10% of his health, he will become invulnerable again, so wait patiently for the course of events. When all other armors are destroyed, build a panel from them and toss Captain's shield at it.
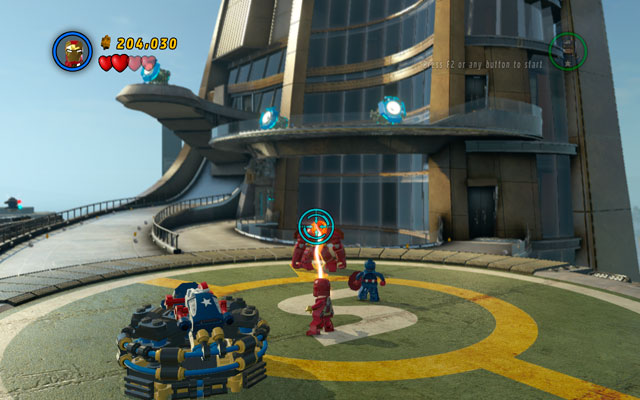
When the device is charged, huge explosion will occur, overloading some systems of Mandarin's Terminator. After that, approach to the enemy as Iron Man and melt golden plate on the villain's back. The fight is over!

During the fight with red Skull you will control two characters: Human Torch and Captain America. At the beginning of the duel, cover yourself with Captain's shield and approach to the enemy, so you can punch him for the first time. Then return to the central part of the arena and fight with some minions.
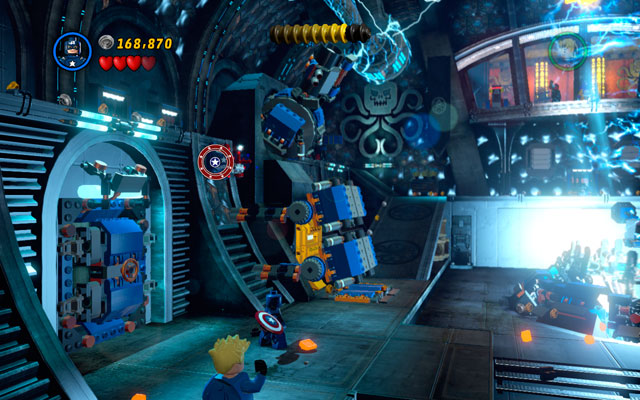
When the stage is partially clear (notice that enemies will appear endlessly), turn to the left and search for some bricks scattered under the cannon. Build a shield switch from them, then toss a shield at it. Because a golden wall is uncovered now, you can melt it with a fire beam and destroy a gas cylinder hidden inside. In this way you will damage the first gun.

Go to the wall at the opposite side of the arena and look for a lever. Use it, then melt another golden wall, blowing up another gas cylinder. When the second cannon is broken, you can switch into Captain America and hit Red Skull in the face (remember to take cover behind your shield!).

Third stage of the fight looks very similar - the only difference is a reversal of the sides of the arena. That means you should destroy two new cannons, acting in the same way as it was described above, but at the opposite sides of the room.
Finally, you can strike the final blow on the enemy.
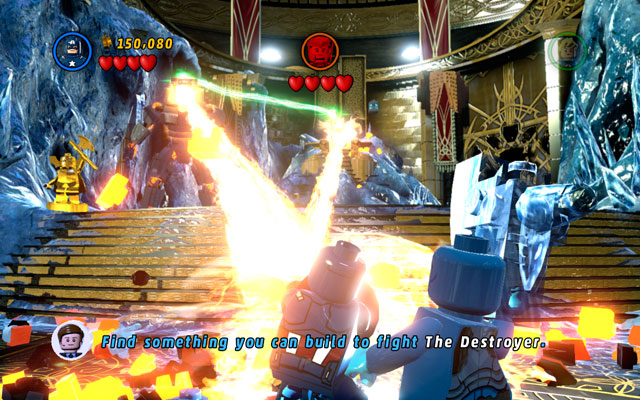
During the fight with Loki you shouldn't bother yourself with frost giants - they will appear endlessly, so killing them will be a waste of time. What is much more important, you must break all objects in the area to gain bricks - they are necessary for building Captain America's panel in the centre of the room. Use it to reflect the fire beam from the Destroyer to Loki (see screen above).
When the God of Lies is burning, the Destroyer loses his invincibility powers, so you can easily hurt him. Use Thor to do that - only this hero has the proper strength.

Wait for an ice block to appear, then melt it with Human Torch and build another platform for Captain America from the debris. After that act in the same way as before - you must repeat all sequence for three times (in total).
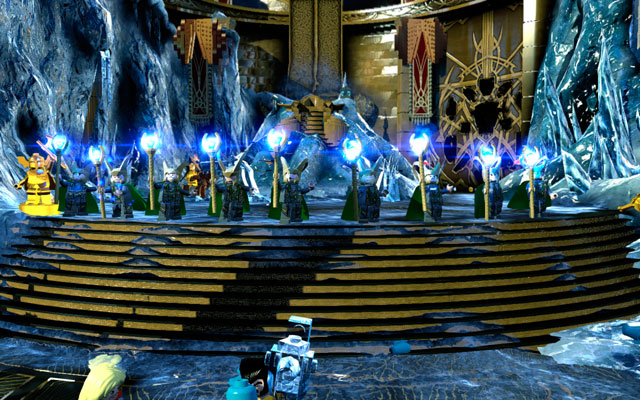
In the last round, Loki will summon some doppelgangers - switch into Wolverine and sniff for the true enemy, then hit him. Now the fight is over.

Struggle with Juggernaut is quite complicated and divided into few smaller sequences. During first you should choose Jean Grey - defeat some enemies (they numbers are infinite) and stand in the centre of the room. Wait for villain to throw a crate at you, then catch it with telekinesis and push it back to the enemy. This will demand some accuracy and reflex, so be patient!

Second round is more sophisticated - the enemy will run around the arena, making your task much harder to carry. Nevertheless, you should turn to the left and extinguish the fire with Iceman - now you can build a lever from the debris. After that jump on it, simultaneously doing the same thing with second character (notice that levers are placed on both sides of the gate). When the room is opened, use Jean's abilities twice to create a radio (which will distract an enemy).

Wait for Juggernaut to block himself, then freeze him with Iceman. After that you can catch frozen villain with Jean's telekinesis and throw him up to the upper platform. In this way you will reset the whole sequence.

Villain will throw some crates at you again - catch them with your telekinetic skills, then return this "gift" to the Juggernaut.

When the enemy is blinded, switch into Iceman and approach to the wall on the right so you can extinguish all fires. Build a computer from the debris, then switch it on as The Beast. After that destroy all objects hidden in the hangar and build an alarm clock from the bricks. Now you should know what to do - wait for enemy to block himself, then freeze him and throw an iceblock away.
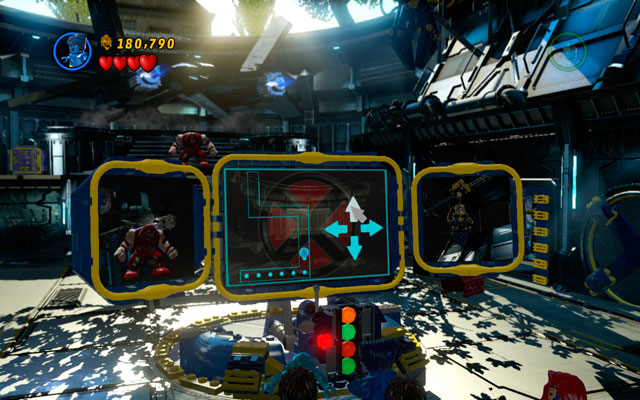
When Juggernaut throws another crate at you, build a computer from its debris, finally using it with The Beast (notice that only Jean Grey can build this device!). Your goal is to conduct the machine to the enemy - to do that, you must pass through the simply maze (simply click on the proper arrows on the right side of the screen).

The last sequence is quite simply. When Juggernaut charges at Jean, take control over his mind, then use his unnatural strength to yank two green handles on the central wall, uncovering the water pipes. After that switch into Iceman and freeze an enemy for the last time. Now you can catch him with Jean's telekinetic grip and throw him away. The struggle is over!
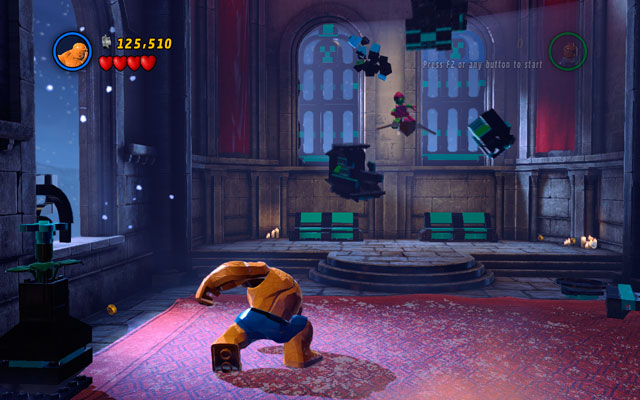
Kill all minions, then go to the central part of the arena and turn to the left. Build a huge rock with green handles from the debris, then lift it with the Thing and throw it at Green Goblin. Wait for him to go down, so you can easily make some boxing exercise.

In the second round you will be flooded by the ocean of the enemies - defeat them all, dodging Green Goblin's bombs in the same time. Wait for the stained-glass window on the right to become shattered, then build a huge swat from the debris. Now lift it with Invisible Woman - in this way you will force an enemy to fall on the ground, so you can hit him easily.

In the final round defeat all minions (as always), then approach to the shattered stained-glass window lying at the end of the arena. Build a Fantastic Four panel from the debris, then use it with Mr. Fantastic to catch Green Goblin for the last time. Strike him with the final blow, and the mission will be over.
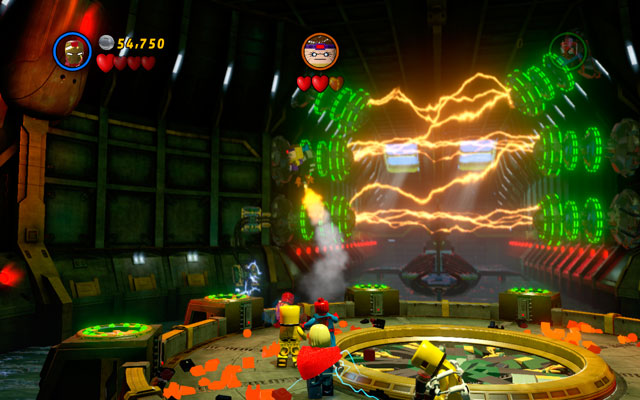
At the beginning of the duel M.O.D.O.K. is invincible - so fight with his minions for some time and wait for the malfunction of the enemy's shield. When it occurs, switch into Thor and throw your hammer at the villain, so you can hit him during conventional melee fight. After first hit, the criminal will jump to the water - so you must spend some time struggling with his troops.
Notice that the whole sequence described above must be repeated for three times - only then the talking head will be finally vanquished.
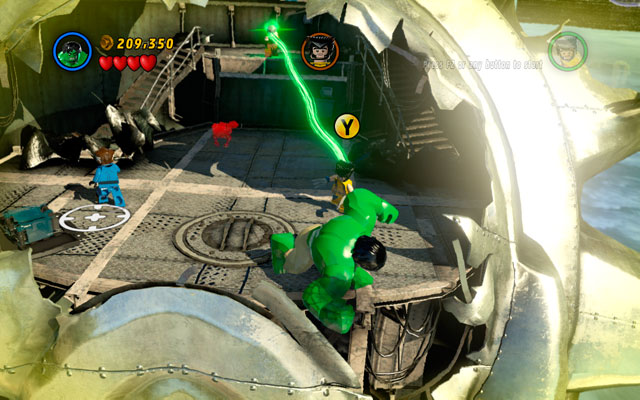
Mastermind's specialization is... mind control (surprisingly, right?). He will choose Wolverine as his first target - now Logan will fight against your team. Defeat your ex-ally in conventional melee fight (in which Hulk is especially effective), then switch into Wolverine himself. Now mash an interaction button as fast as you can to break the spell. After that, the first round is behind you.
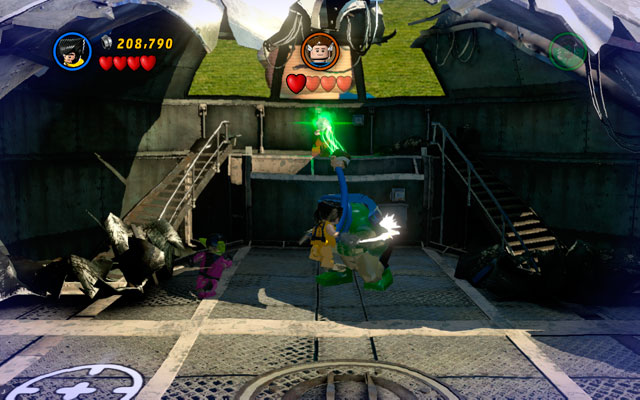
Second encounter is a bit more complicated - possessed Mr. Fantastic will immobilize Hulk, so you must beat him as Wolverine. Wait for the elastic man to release your green friend, then beat him up (notice that your ex-teammate is invincible during "wrestling"). Repeat this sequence three times, then switch into Mr. Fantastic and break the spell as you've done it before (interaction button).
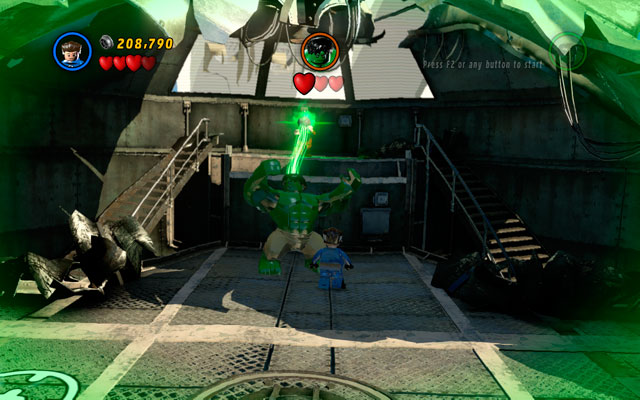
In the last round you must defeat Hulk - hit him hard, finally making him unconscious. Notice that Mr. Fantastic is especially effective during fight, because he can knock over the enemy.
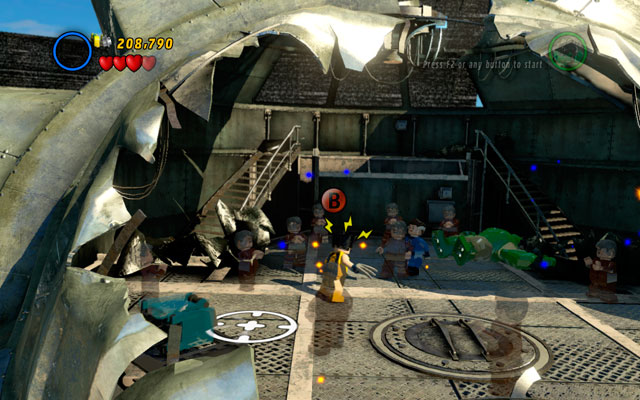
Right after the struggle with Hulk, switch into Wolverine and sniff around, looking for the hidden Mastermind. When he is uncovered, punch him. That's all!

Struggle with Rhino is quite fun. You shouldn't bother yourself with nearby minions - they will appear endlessly, so fighting with them can be considered as a clear nonsense.
Search the arena for orange bushes, and destroy them all - then you can build a huge pumpkin from the debris. When it is done, direct an enemy into it: he will crush himself.
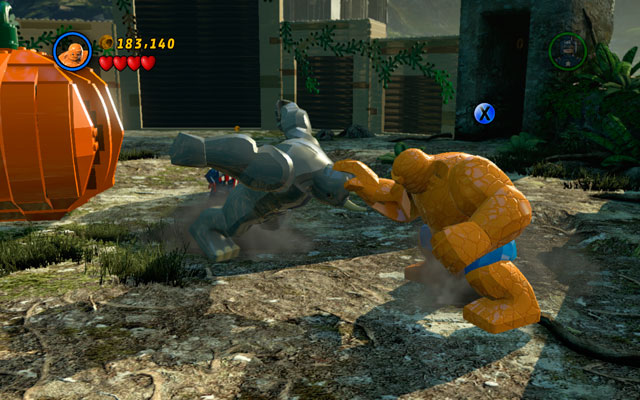
When villain is stunned, punch him as the Thing. After that hit an attack button as fast as you can, finally removing an enemy from the arena.
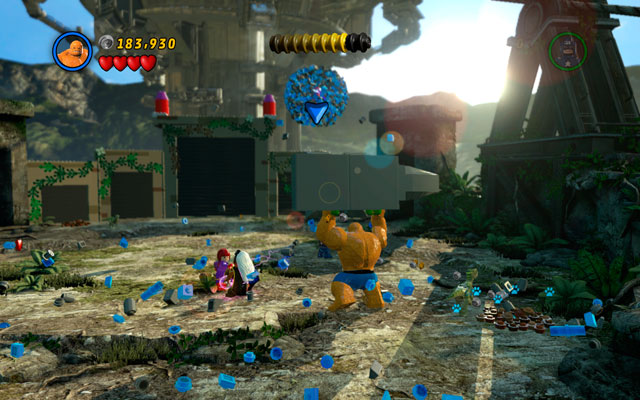
Now it is time to fight with Magneto. Dodge his attacks, simply running around the area and waiting for the bricks to appear. Build an anvil from them, then lift it as the Thing, so you can throw it at Magneto's metal fist. Wait for villain to fall, then smash him during melee fight.

In second round act in the same way - the only difference is that you will have to use an alarm clock instead of anvil.

The final round looks the same as the previous ones. When fight is over, approach to the enemy and hit him for the last time, so you can end this mission.
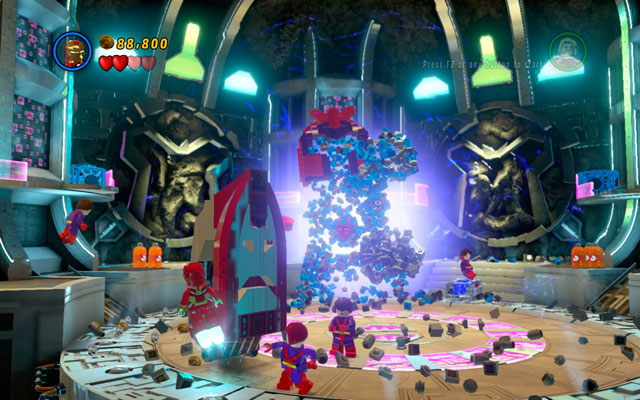
In first round try to dodge all attacks, running around the arena and waiting for enemy's mistake (notice that minions will flow in endlessly). Magneto will throw some bricks at you - avoid them for some time, then build a huge iron from the debris. Use it with Iron Man, so you can beat up the weakened villain.

Second round is quite the same - dodge enemy's attack, waiting for the proper quantity of the bricks to appear. After short time you will have an opportunity to build a pumpkin from them and hit it with Thor's hammer. Now you can smash Magneto.

The final round is very similar - wait for bricks, then build a battery from them and charge it with electricity. When it is done, switch into Spider-Man and shoot his web at the attachable point, so you can finally defeat an enemy.
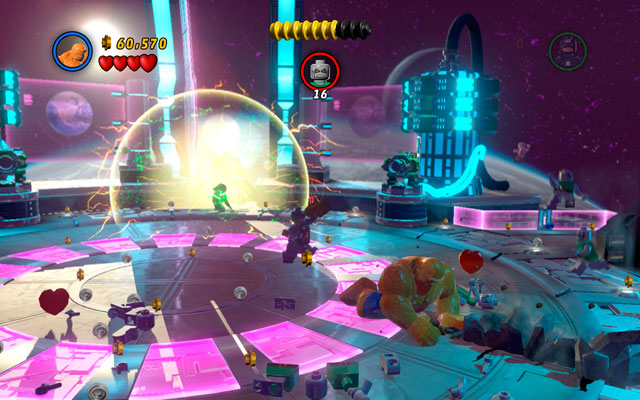
First round is quite simply - you must defeat 20 Doombots. Enemies are very squishy, so you can easily smash them with the Thing (notice that jump attack is especially effective).

To defeat greater minion of Doctor Doom, you must knock him over. To do that, wait for him to start charging at you, then jump aside. When enemy is stunned, smash his face with the Thing, taking his mask off. Now you can use Spider-Man's web to throw dangerous monster away.

Go to the central part of the arena, then build a patriotic panel for Captain America. Use it to reflect the beam to the glowing device standing behind Doctor Doom's cannon. Wait for machine to explode, then punch an enemy.

In this moment your fight will become very schematic. To win the battle, simply repeat all previous operations - that is: defeat huge minion, then break down second cannon.
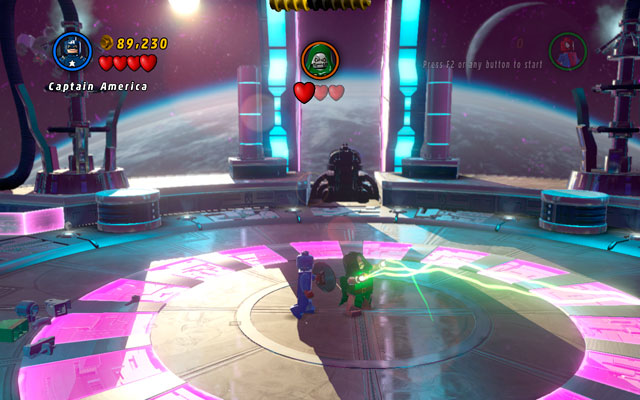
Final round looks very similar - throw big monster away, then defeat Doctor Doom in melee fight. If your character was possessed by the enemy, hit him with another superhero. Now the struggle is over.
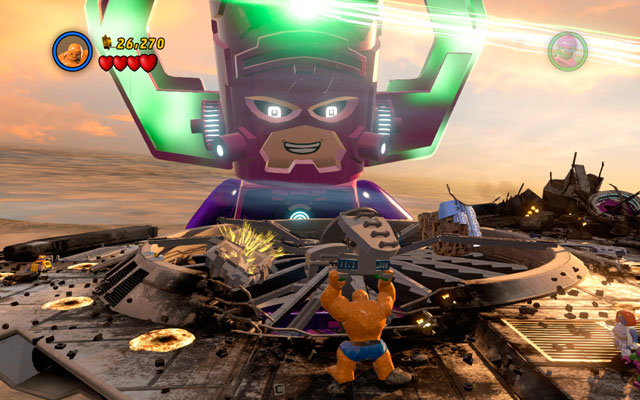
Choose the Thing and approach to the device with green handles lying on the left - throw it at the yellow rock. After that switch into Green Goblin and destroy silver obstacle which is blocking the fan.
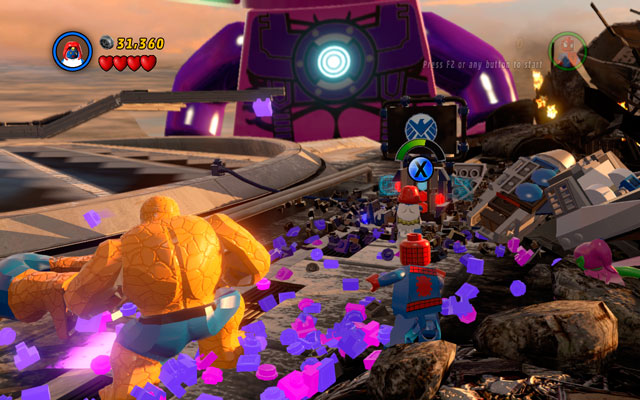
Choose the Thing again and approach to the jet crushed on the right side, then throw it away. Now build an attachable point from the debris and yank it as Spider-Man. Switch into Mystique and use a computer that you've already unlocked.
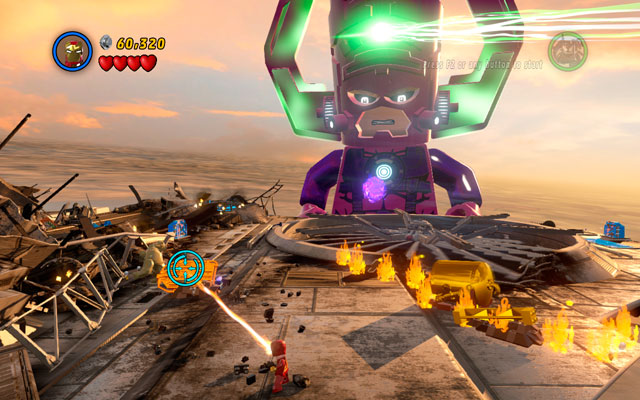
Choose Spider-Man and use his spider sense to see an attachable point located on the engine fan. Shoot your web at it and pull as hard as you can - the first part of this mission is behind you.
At the second wing of Helicarrier use Iron Man's fire beam to melt the golden brick lying on the left side. Then build a computer from the debris and use it.
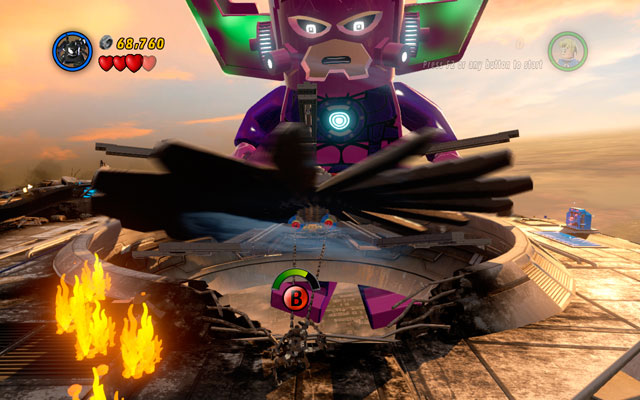
Turn right and melt golden boiler, then switch into Venom and jump over the flames, so you can use a spider sense near to the rotors. When two attachable points appears, shoot your web at them and hit an interaction button as fast as you can.
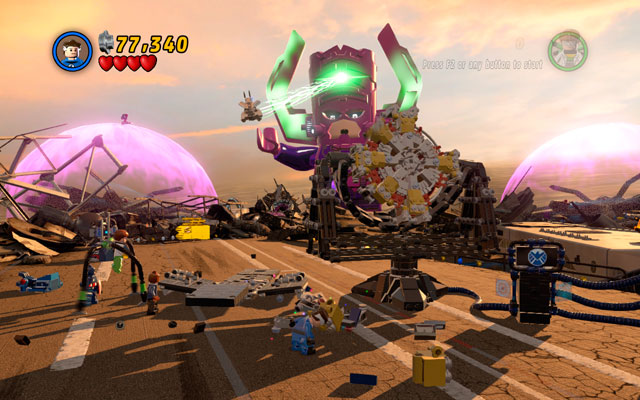
Third sequence is more sophisticated. Choose Mr. Fantastic and approach to the helicopter standing on the left side, then yank two attachable points located on it. Wait for Fantastic Four panel to appear, then use it to scatter some bricks. Now you can fix the machine on the right.

Use a computer to resolve the riddle - you must arrange all buttons to fit each other (click on every column two times to do that). Now build a Captain America's panel from the scattered bricks, so you can reflect the laser beam to the black hole located on the sky.

On the last wing choose Magneto to move metal elements to the central part of the location. Then charge the battery as Storm and switch back to Magneto, so you can destroy a crane standing on the left side and scatter some bricks from it. Now just build a part of the planet from the debris.
Use Cyclops laser ray to melt golden bricks lying on the left side, then build another part of the planet from the remains. Soar to the sky as Storm to extinguish the fire blazing on the right and destroy all objects standing there. Now build the last part of the planet and the mission will be over.
In LEGO Marvel Super Heroes you can find dozens of collectibles, divided into five categories. Let's take a look:
Icon
Quantity
Name
How to unlock
Rewards

150
Minikits
They are placed on every level from main campaign, usually in hidden, hardly accessible locations (10 on each stage).
You gain special comic book for every completed set (to read it, go to the Deadpool's room on S.H.I.E.L.D. Helicarrier).
Completing every full set grants you one gold brick.

250
Gold bricks
You can obtain them from:
- ending every mission (26)
- achieving True Believer status (once per level - 26)
- rescuing Stan Lee in Peril (50)
- collecting every minikit on the stage (15)
- fulfilling various quests in New York city (133)
You need gold bricks to unlock some of the Deadpool's bonus missions:
Feeling Fisky - 50
Put Up Your Dukes - 75
Stunt Show Surprise - 100
Reptilian Ruckus - 125
Stranger Danger - 150
Thrill of the Chess - 175
Bro-Tunheim - 200

50
Stan Lee in Peril
You can help him during every mission (both in main campaign and Deadpool's bonus stages) and in the New York city area.
Gold brick for every Stan Lee rescued.
After solving all 50 cameos, you will be rewarded by getting Stan Lee as playable character.

11
Red bricks
Find and unlock them during Deadpool's bonus missions.
Each of them grants different powers.

115
Character or vehicle token
Search for them during Deadpool's bonus missions and in the New York city area (you will need to complete some minor quests).
Every token unlock new character or vehicle.
All collectibles are described in detail - just search for appropriate chapter in this guide.
They are 10 minikits per every stage of the main campaign, hidden in (almost) inaccessible places or related to specific tasks. During gameplay you can collect 150 minikits in total (15 missions x 10 collectibles). To obtain them, you must unlock free play mode first and choose the right hero with appropriate skills - they are some riddles, that only specific characters can resolve. If you have some problems with that, don't be worry: this guide explains everything very precisely.
To unlock free play mode, you must complete every mission in the main campaign - only then you will get access to extended character reel. To open it, hold down a change character button. Remember, that some characters must be bought first or even unlocked in the New York city area (for more information read the appropriate chapters of this guide).
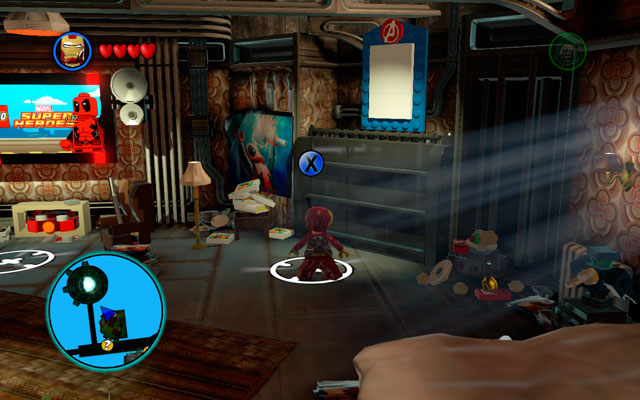
Finding every minikit in the game does not provide you any specific reward, but you will get one gold brick and one comic book after collecting all minikits on the stage. Obtaining all collectables is also required to finish the game in 100%.
If you want to see your comic books, go to the Deadpool's chamber on the S.H.I.E.L.D. Helicarrier and use the white sheet hung on the right. To get there, you must exit the main room of the vehicle, using the door located on the left side. You will get access to this place after finishing the main campaign.

At the beginning of the stage jump down from the street and turn right, looking for the pizza motorcycle - dig it up with Wolverine. Now return to the ramp and destroy all obstacles using Iron Man's rockets (you must wet a sand wall using two hydrants). Go to the motorcycle once more and drive to the location showed by studs - restaurant. First minikit is hidden inside.
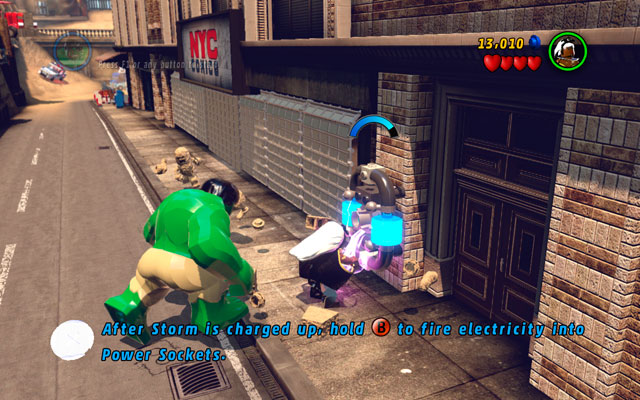
Approach to the battery on the right side of the location as Storm and charge it with electricity. Now switch into Spider-Man and yank the door using your spider-web.
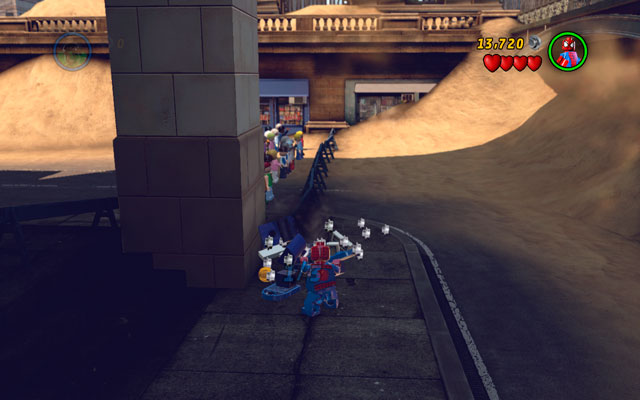
Demolish three mailboxes - two of them are located on the left, but the final one is hidden behind the restaurant on the right.
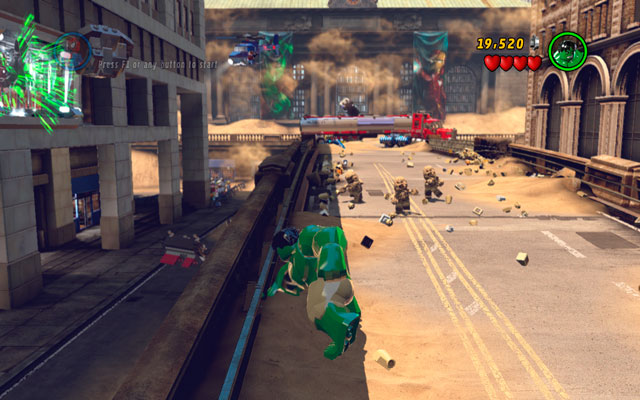
Use Hulk superstrength to pull out a stone from the ground (hold an interaction button to do that). Now throw it at the green wall on the left. When it's broken, choose a flying character and pick up a minikit hidden in the hole.
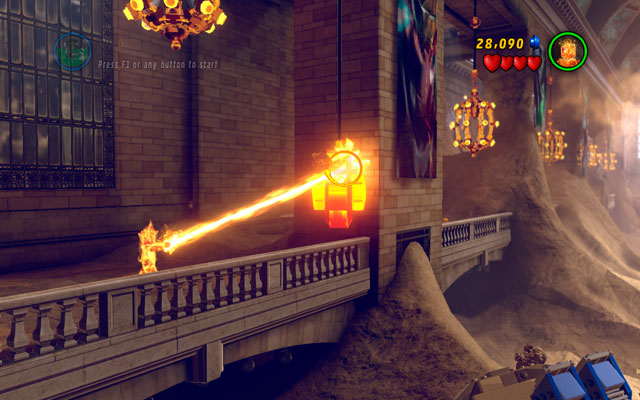
Enter to the station and then choose Human Torch - fly to the balcony on the left side of the building and melt the golden device attached to the pillar, using fire beam.
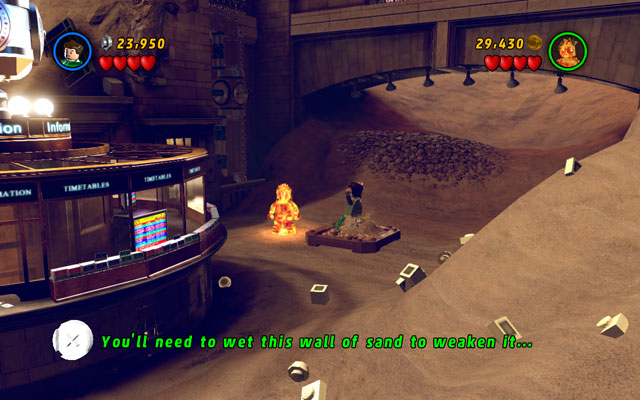
Standing next to the silver globe turn right and switch into Spider-Man. Use your spider senses to uncover an attachable point, then yank it with a web. Now melt golden valve with Human Torch. After that choose Sandman and pass through the sandbox.
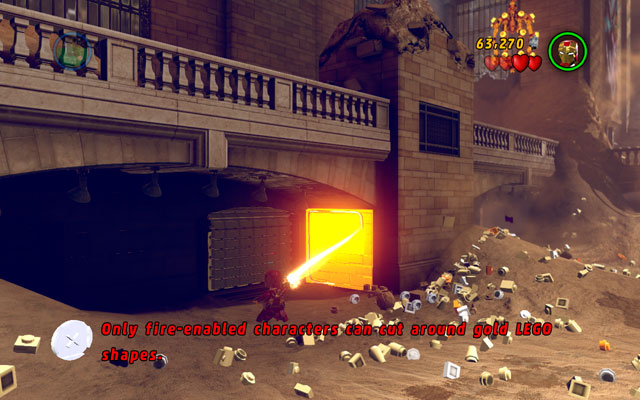
During the fight with two sand cannons turn left and approach to the golden wall. Melt it as a Human Torch to uncover a claw switch. Use Wolverine's claws to unlock it and then change your hero into Jean Grey. Take control over a man standing behind the window to get a minikit.
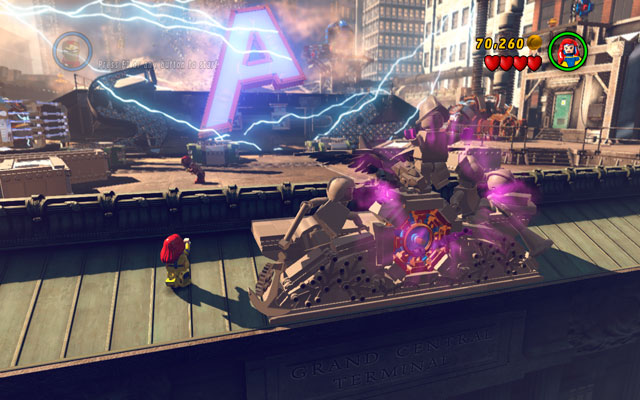
During the first stage of the boss fight turn your character back and approach to the big clock, located on the top of the building. Use Jean Grey's telekinetic abilities to move it, so you can get a minikit.
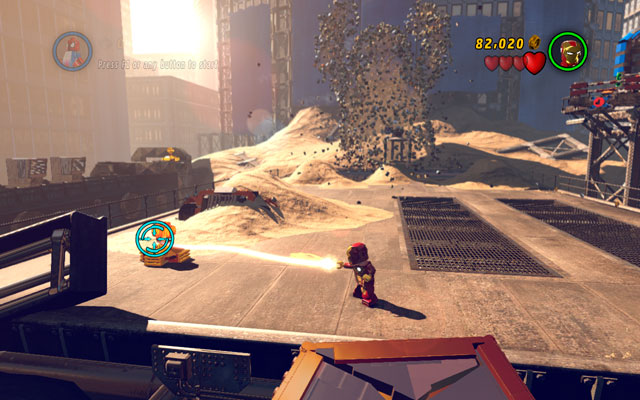
To collect this minikit you must melt five gold ventilators. You will find them at the corners and in the middle of the stage. To destroy them, use Human Torch or Iron Man (Mark 42) beam attack.
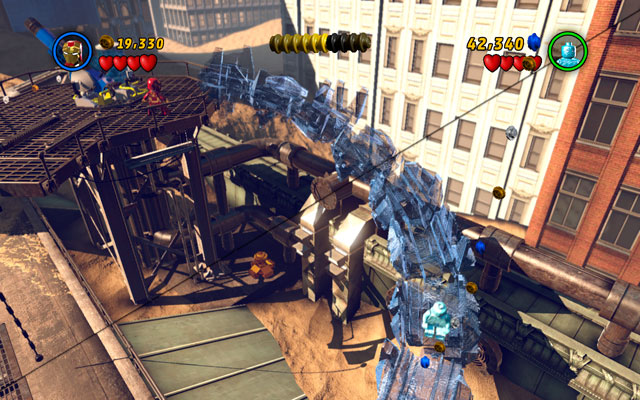
The final minikit can be obtained after destroying a silo and building a water pump. Approach to the pool and freeze it using Iceman ability. Now just slide down through the chute that you have just created.
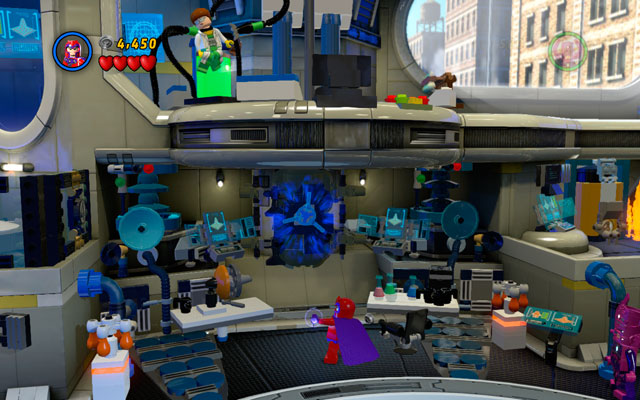
On the beginning of the stage choose Magneto and turn the valve located on the wall. First minikit is hidden behind it.

In the same room turn right and use Iron Man's rockets to destroy silver bars located there. Then choose Storm and charge the battery hidden inside.
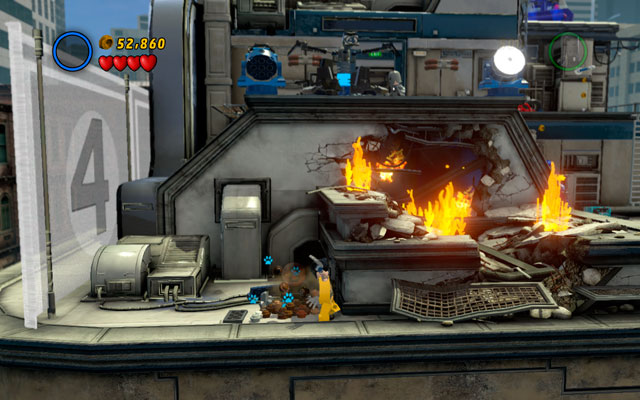
When standing on the roof, descend to the lower floor and break all crates laying on the left. Then dig into the sand as Wolverine, uncovering black cosmic bricks in this way. Now switch to Galactus and build a rocket.
To obtain this collectible, you must destroy five flowerbeds located on the building's roofs. They are as follows:
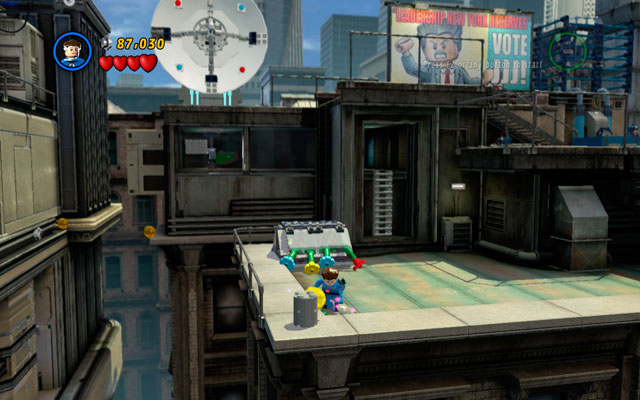
First is standing under the satellite dish.
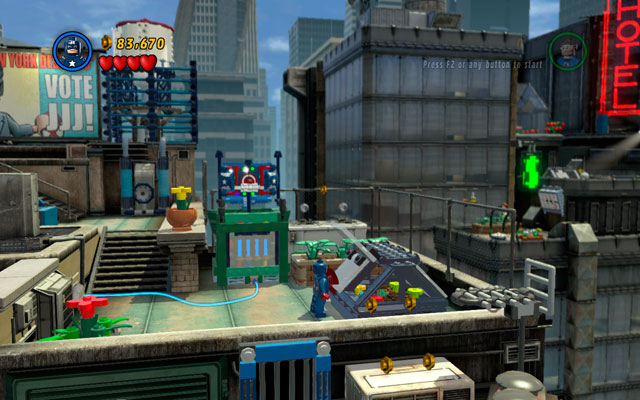
Second is located further, on the right side from the water silo, on the lower floor of the roof.
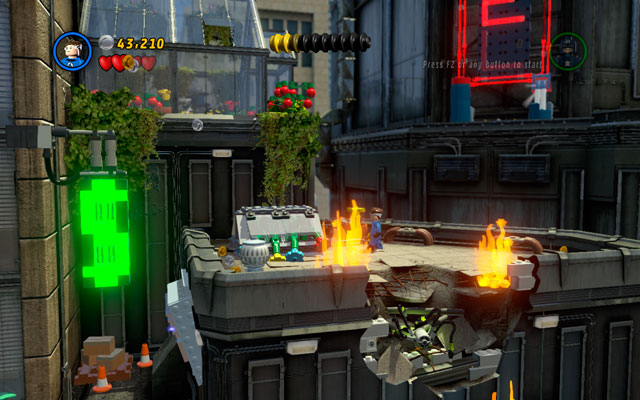
Third can be found vis-a-vis to the HOTEL neon, in the greenhouse.
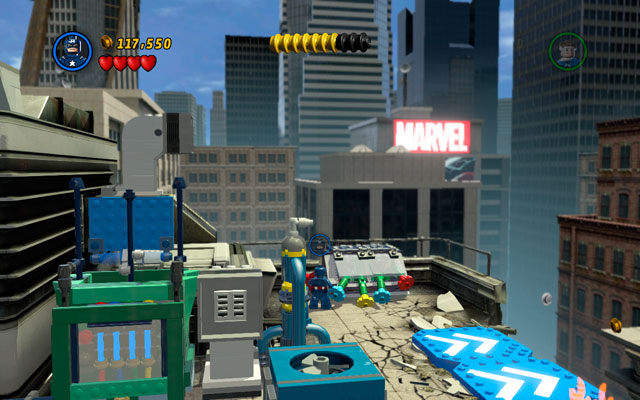
Fourth is located on the roof of the building, in which Captain America had to jump between two walls (colored in white and blue).
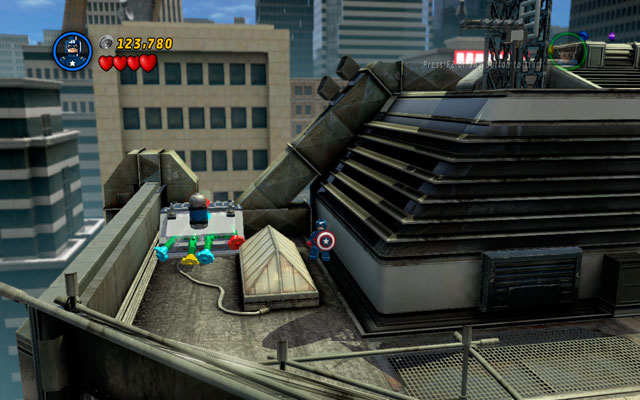
The last one can be found on the same roof, but on the opposite side of it.
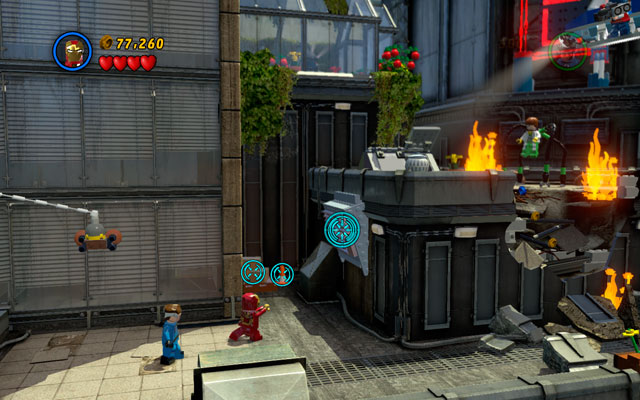
Standing vis-a-vis to the HOTEL neon choose Iron Man and shoot the rockets at the silver bar. Approach to the strange liquid on the floor and then use Venom to pass through it.
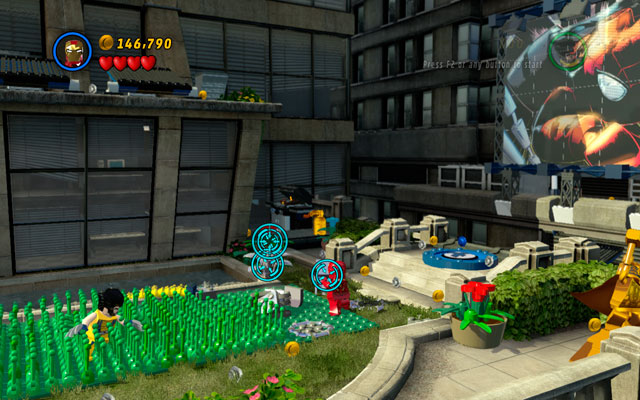
Standing near to the Spider-Man's billboard use Iron Man's rockets to detonate silver flowerbed. Now build a pump from the debris. Jump on it multiple times, so you can see Fantastic Four panel. Use it with Mr. Fantastic to obtain a minikit.
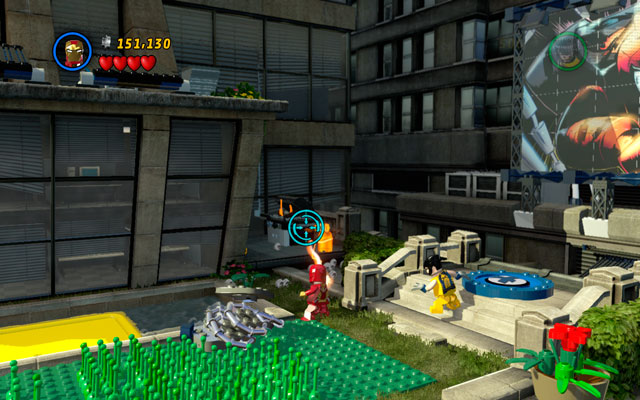
On the same place choose Human Torch to melt golden fire extinguisher standing nearby.
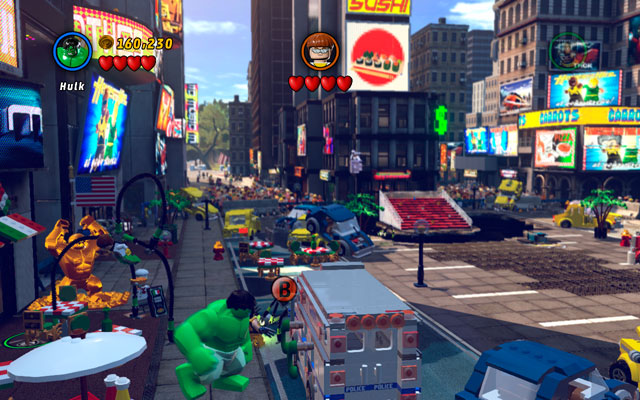
During the fight with Doctor Octopus choose a big character (like Hulk) and lift up the police van standing on the left.
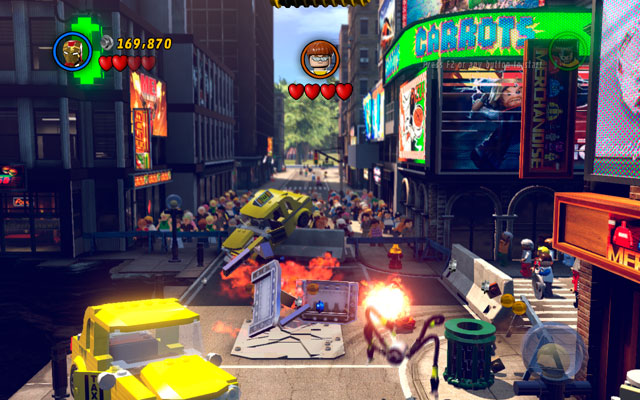
Go to the opposite corner of the arena and look for the silver car. Destroy it using Iron Man's rockets and pick up a minikit.
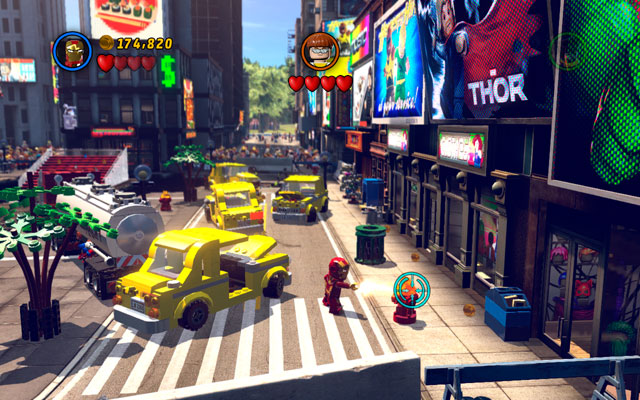
To receive the last minikit, you must melt all five red-and-gold hydrants, located on the opposite parts of the location (four can be found on the corners and fifth is located near to the centre). You can melt them with fire beam.
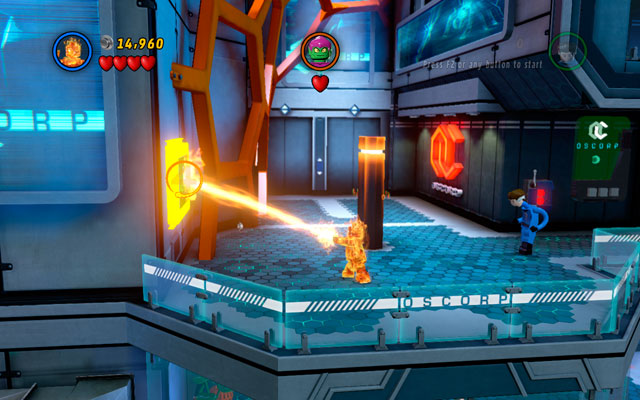
To receive this minikit, you must melt four golden boards placed on the first stage. First can be found at the beginning - right behind you.
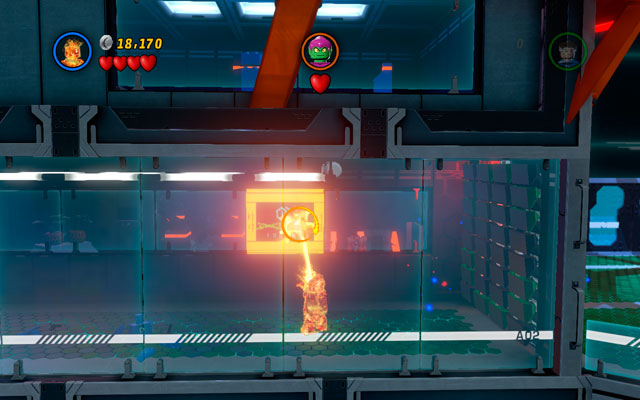
Second is hanged on the wall in the passage on the right.
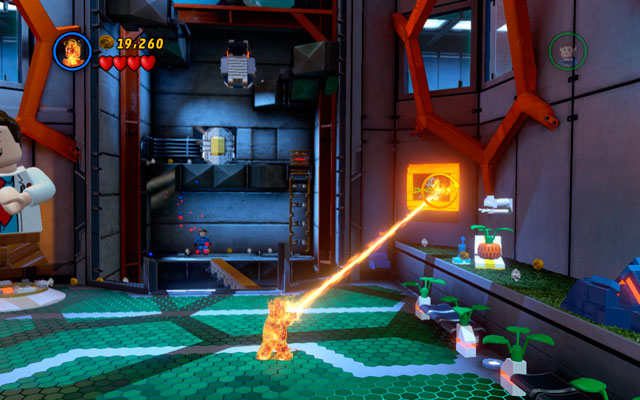
Third can be found near to the lift pit, on the right wall.

The last golden board is located in the lab, opposite to the next lift. To go there, you must use Jean Grey's power to take control over the scientist standing on the right. Use him to switch the computer on. When the sewer appears, pass through it using Mr. Fantastic superpower.
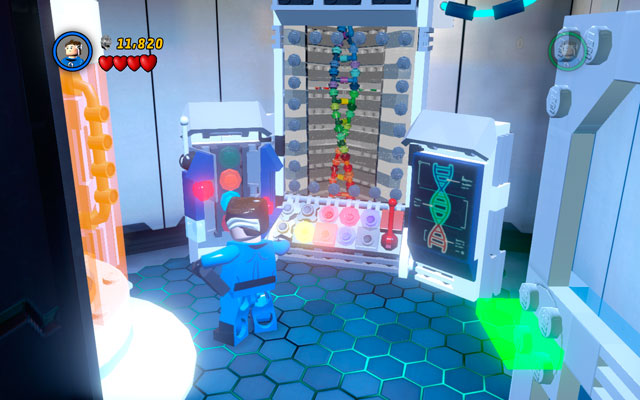
Choose Magneto and enter to the one of the first laboratories, looking for the big batteries. Lift them to the power point to open the door.
Enter to the newly opened room and use Mr. Fantastic to arrange the DNA code in the right order (showed above).
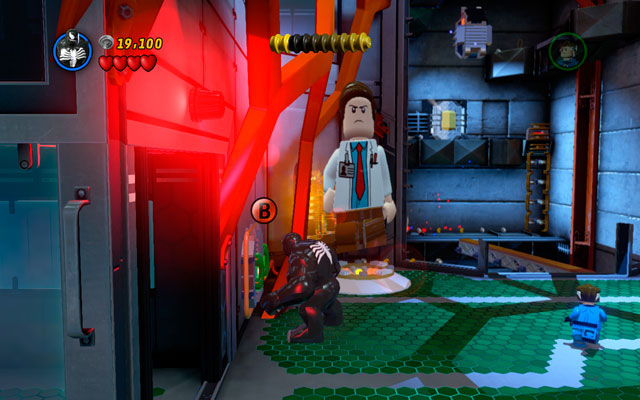
Standing near to the lift pit choose any big character (like Hulk) and yank two green handles located on the left. Now toss Captain America's shield at the patriotic panel, so you can unlock the next minikit.
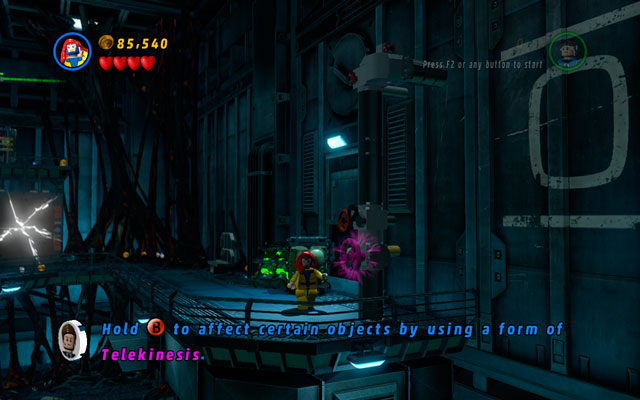
In the corridor located after the lift pit use Jean Grey's telepathic abilities to take control over the scientist hidden on the right. Go to the computer as him and switch it on.
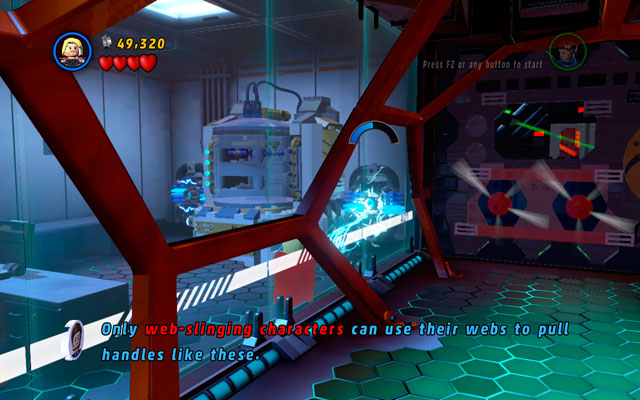
When the sewer appears, pass through it using Mr. Fantastic superpower. After that charge both batteries using Thor or Storm to unlock the next minikit.
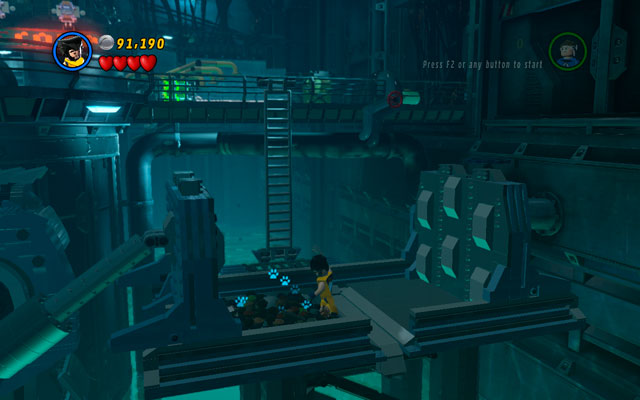
In the underground of the building choose Wolverine and go to the right corner of the location. Climb down using the ladder and then dig up a minikit from the sandbox.
The way to obtain this minikit is a bit complicated. First of all, go to the highest floor of the building and turn right. There use Jean Grey's ability to telekinetically turn the violet valve. After that jump down and build the first spider.
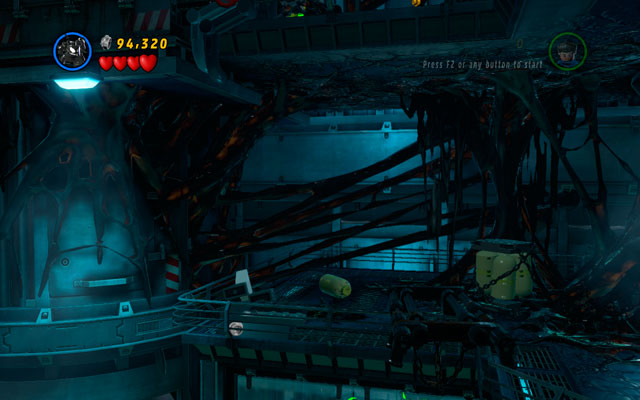
Choose Venom and go to the middle floor, turning left. Destroy all boxes, uncovering black pool. Pass through it (do not mistake it with similar, but deadly pools!) destroying all objects in the new area. Now build second spider from the debris.

Climb to the highest floor and turn right, using any big character to destroy the shining wall. After that build the last spider and finally receive a minikit.
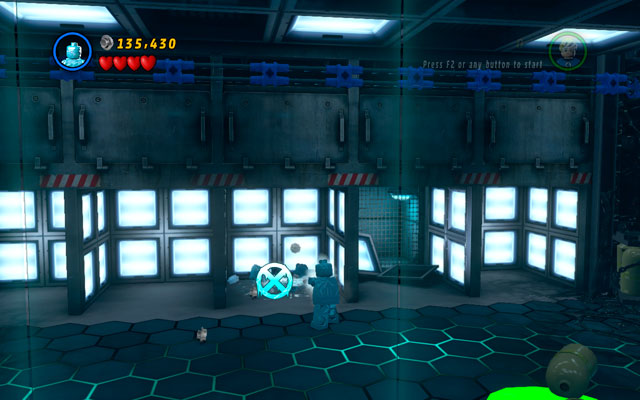
In the further area go to the corridor filled by cages. Wait for the enemies to break from inside and then look for a pool of water. Freeze it using Iceman abilities, so you can melt newly created ice block as Human Torch.

On the same floor turn left and enter the big shining room with the red button hidden inside. Melt golden vent using Human Torch fire beam and pick up a minikit.

After a short play with the huge speaker you will be moved to the long corridor. Choose Magneto and lift up the metal box standing on the left. When the claw switch appears, use Wolverine's talons to unlock the mechanism - you will receive a minikit and rescue Stan Lee at the same time.
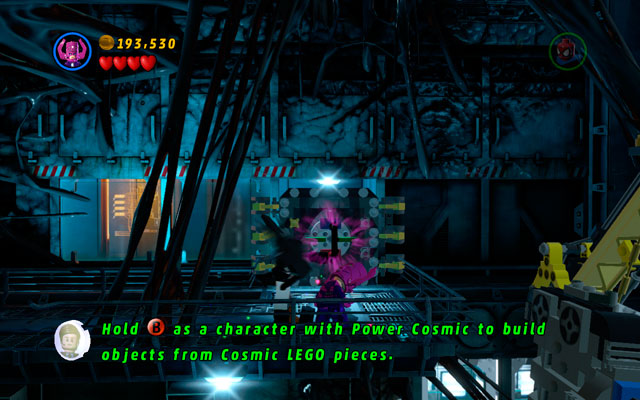
During the fight with Venom fly to the upper floor and destroy all obstacles found there. Then use Galactus to construct a special lock - open it to uncover the last minikit.
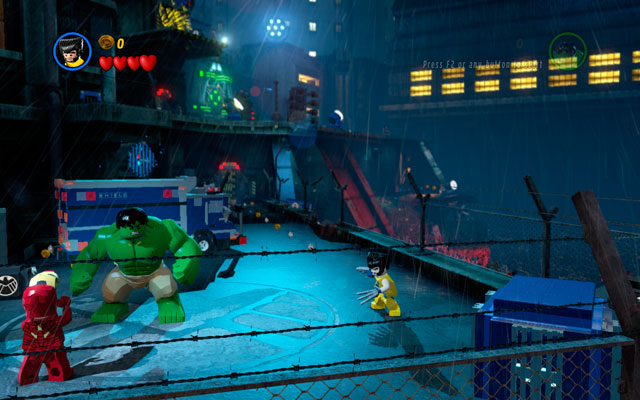
To receive this minikit, you must destroy five lifebelts hidden in the area. First of them can be found at the very beginning of the stage - break blue-and-silver crate on the right side to uncover it.
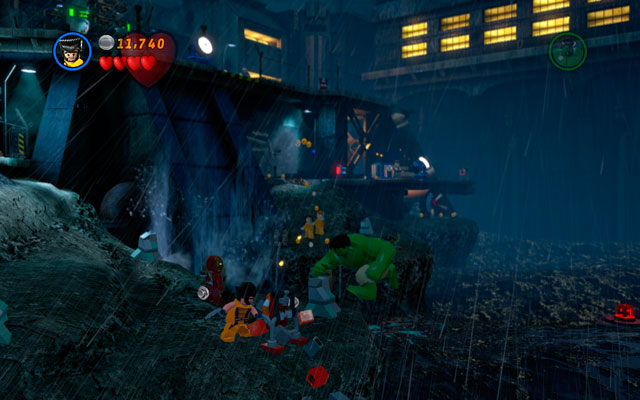
Second lifebelt is located on the right, at the seaside, near to the suspension bridge.
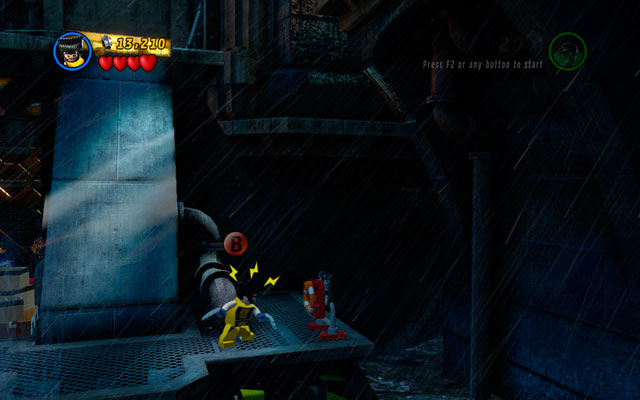
Next lifebelt can be found near the entrance to the prison, on the right side of the platform.
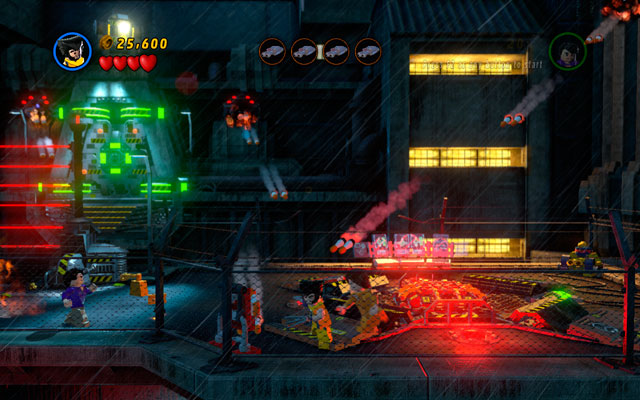
Fourth lifebelt is placed on the roof of the building (near to the lift).
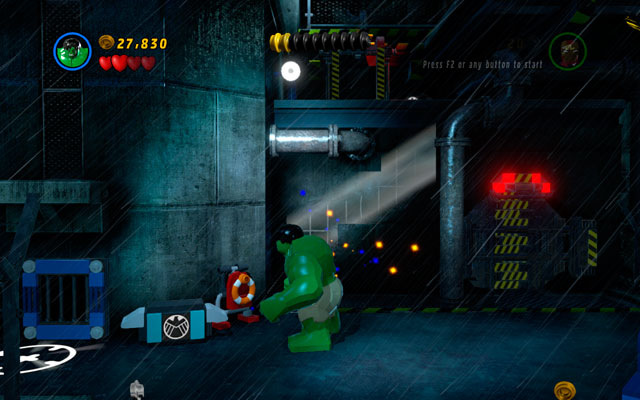
The last lifebuoy can be found on the roof of the same building, but on the left side.
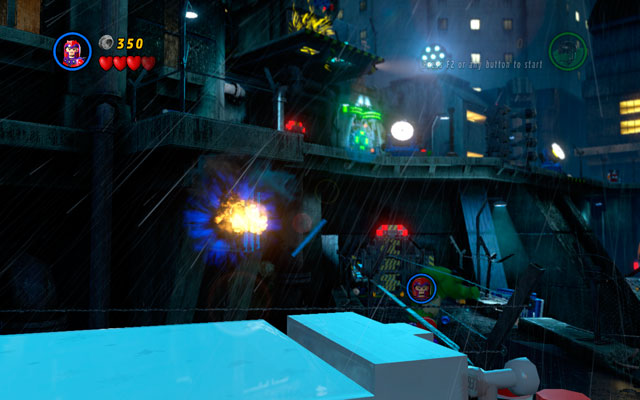
On the left from the starting location some metal bars are placed. Yank them using Magneto magnetic powers, and then pick up a minikit as flying character.

Choose Iron Man and fly to the right corner of the area (above the sea). Destroy silver box floating on the water and wait for the fish with minikit.
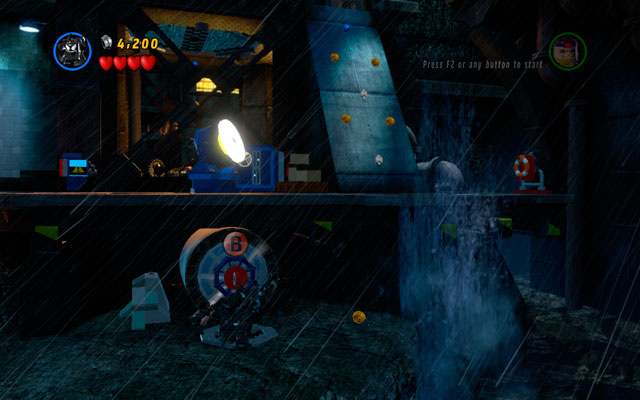
Stand on the seaside under the lift and search for a valve. Use a character with web attack (e.g. Spider-Man or Venom) to yank an attachable point. Wait for water to spill and freeze it using Iceman special ability. Now destroy the ice block to receive a minikit.
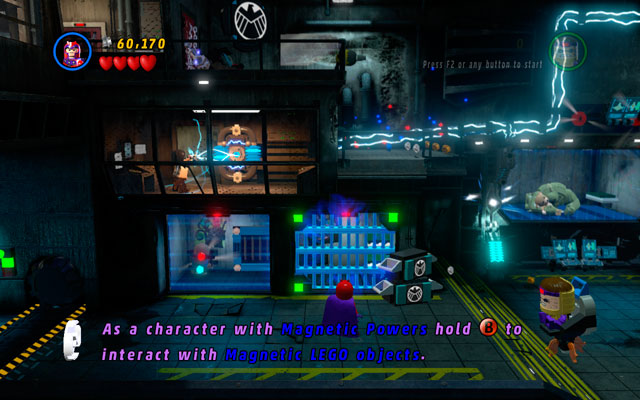
Enter the prison and approach to the metal bar. Destroy it using Magneto abilities, so you can go inside and pick up the next minikit.
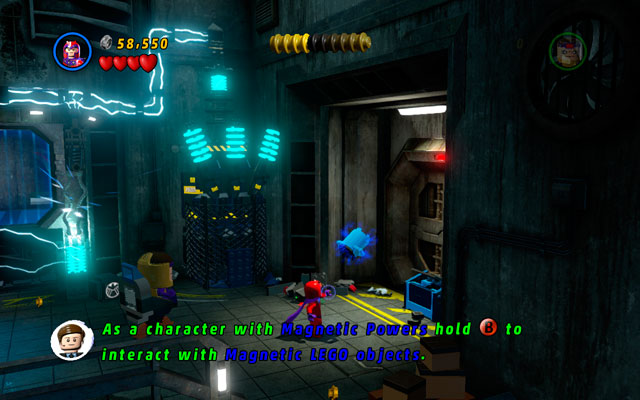
In the same location go to the right, finally approaching to the wall. Use Magneto's magnetic powers to operate an object for free times, so you can unlock a minikit.
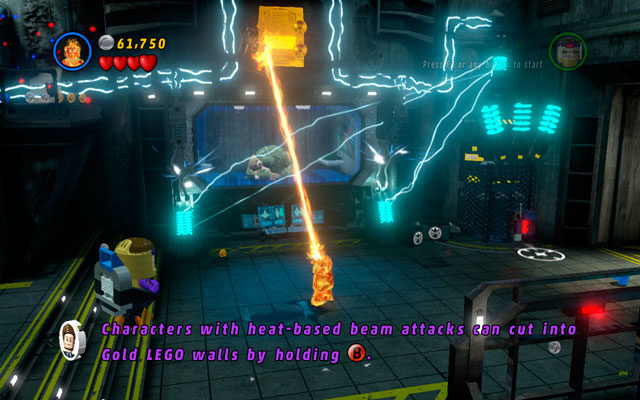
Somewhere above the cage with Abomination locked inside you can find a golden wall - melt it using Human Torch.
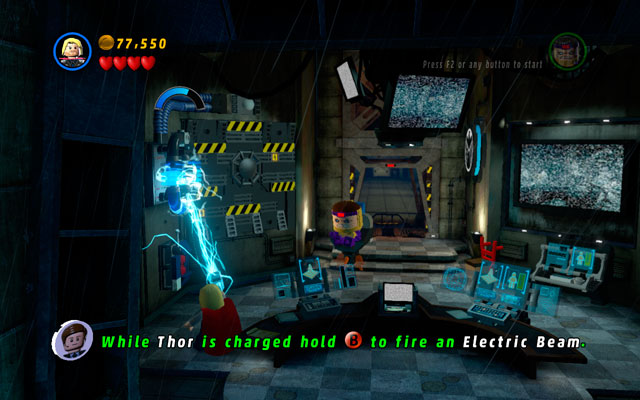
Right before prison exit, but after unlocking the lift, destroy all obstacles in the area. Build a battery from the debris and charge it with electricity using Thor or Storm. Switch the computer on (once more) and find your way in the simple maze.

During the fight with Abomination approach to the silver box on the left and destroy it using Hawkeye or Iron Man. Build a blue box from the debris and approach to the computer hidden in the nearby corridor. In this way you will unlock the first chopper-toy - they are two other to go.
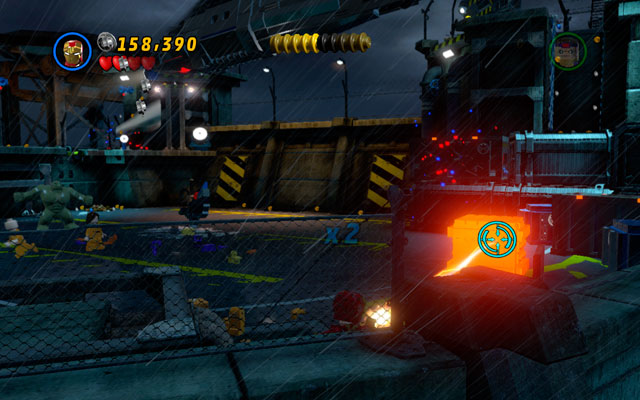
Turn right and use Iron Man or Human Torch to melt golden box. After that choose Sandman and dig out second toy.
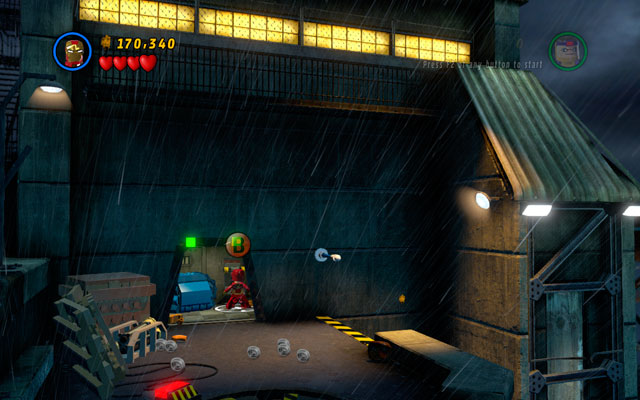
Jump to the tower on the left, destroying all objects in the area. Now go to the room with computer and switch it on to release the last helicopter.
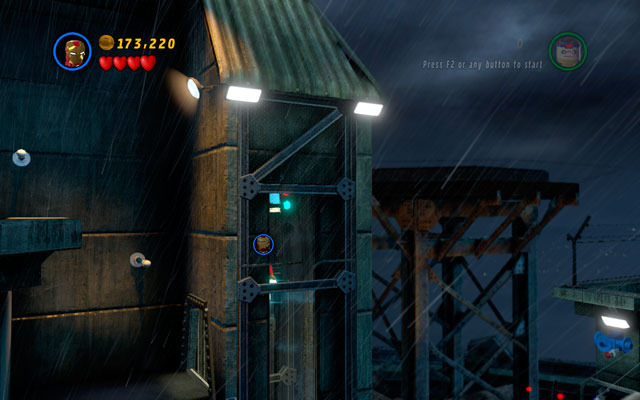
Turn right and fly to the lift pit - minikit is hidden at the top of it.
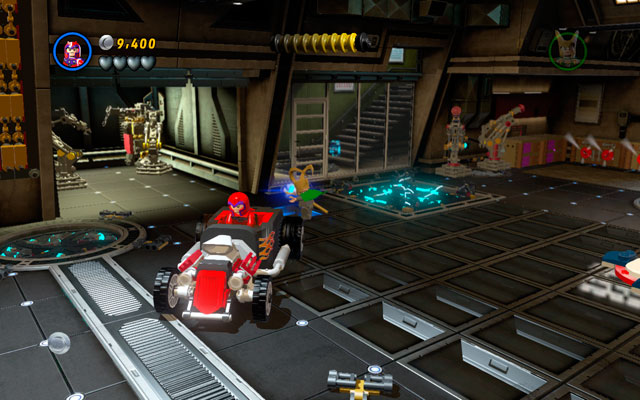
After the beginning of the mission choose any flying character and fly to the right part of the location. Stand vis-a-vis to the glass wall and use Jean Grey's ability to take control over the man hidden on the other side. Then switch the computer on and return to your heroine - switch her into Magneto and break a blockade from the garage gate on the right.
Unlock the car and enter it. Follow the trace marked by studs to receive a minikit.
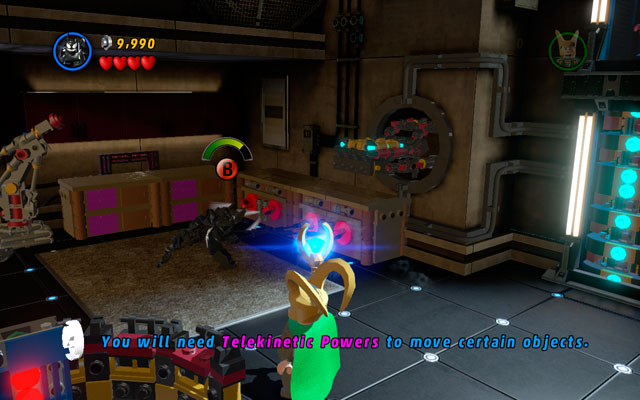
Stand in front to the wall on the right and choose Spider-Man. Pull out attachable points with your web and use Jean Grey to yank violet drawers on the left.
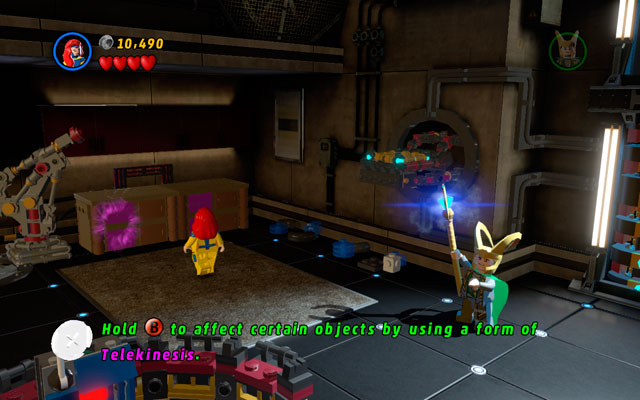
Now build a battery from the debris and charge it using Thor.
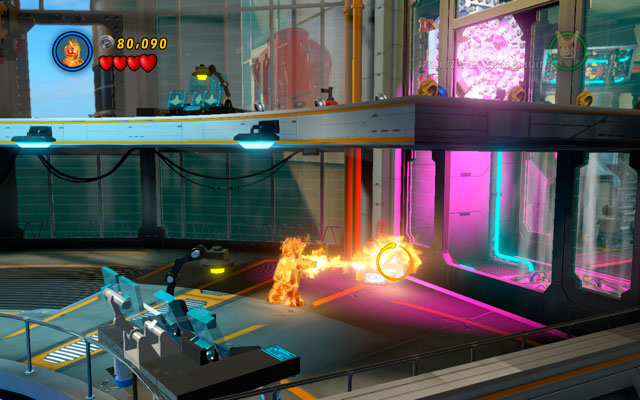
To receive this minikit, you must melt five gold pedestals with superheroes. Choose Human Torch and (on the second stage) head to the right. First target can be found near to the exit from this room.
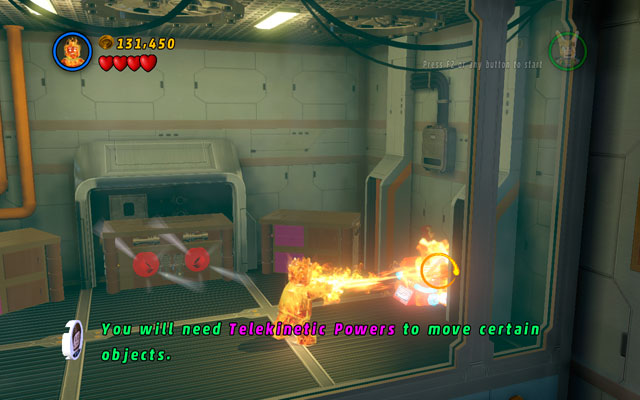
Second is located on the other side of the same lift pit - in the room behind two blue-and-white walls.
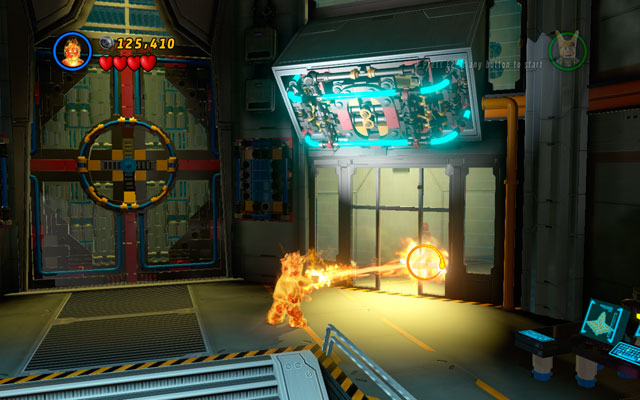
Standing vis-a-vis to the locked gate turn right - next statuette can be found in the small room.
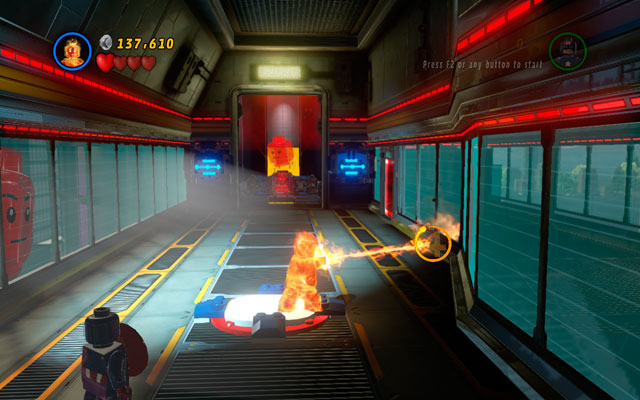
Open the gate mentioned before and enter the corridor. Next pedestal is standing on the right side.
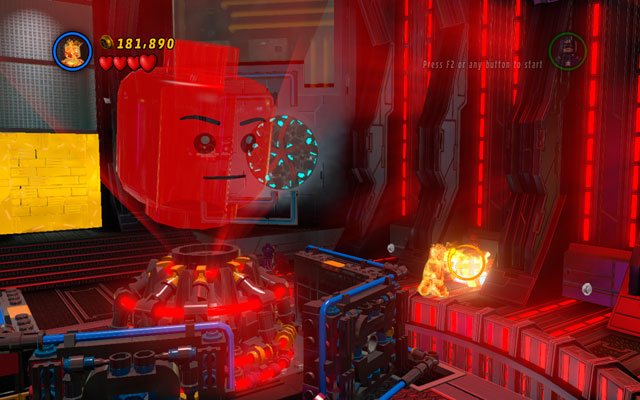
The last statue is located in the room with Jarvis head. Look between two columns on the right side of the arena and melt your target.
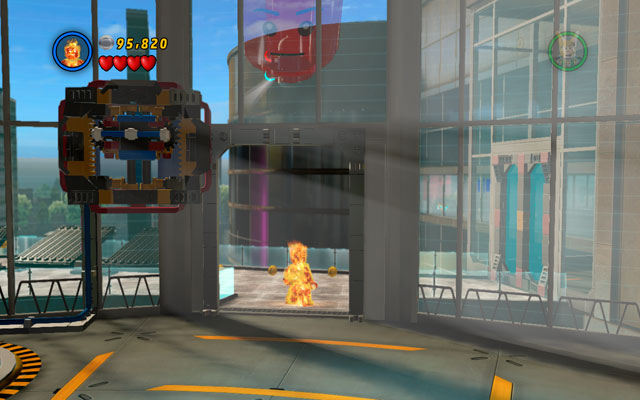
Far before mentioned location go to the balustrade and choose any flying character. Fly up, so you can find a minikit hidden behind Jarvis red head.
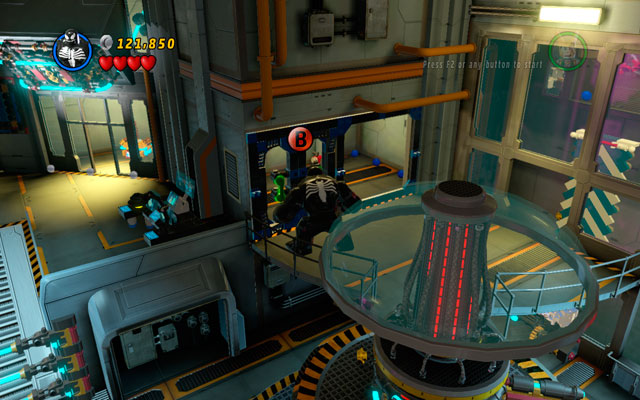
In the room with strange, rotary machine (on the left from the blue-and-white wall) choose any big character and yank the door located on the first floor, using green handles.
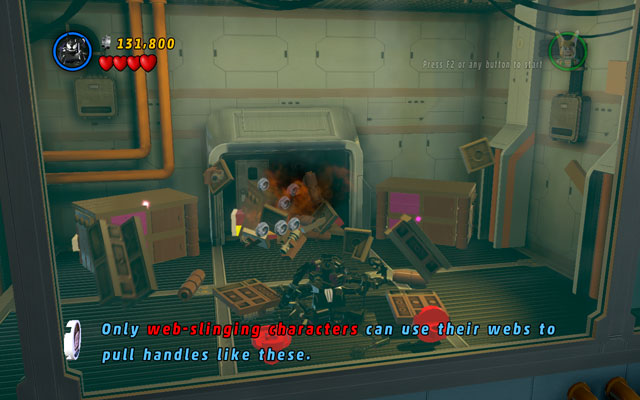
In the room hidden behind the blue-and-white wall choose a character with a web attack and yank two attachable points hanged on the wall. Switch into Jean Grey and demolish violet shelves with her powers. Build a jukebox from the debris and pick up a minikit.
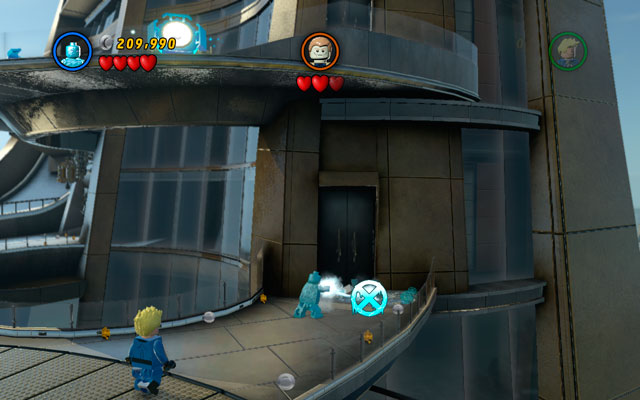
During final battle turn right and approach to the pool as Iceman. Freeze it and recover a minikit from the ice block.
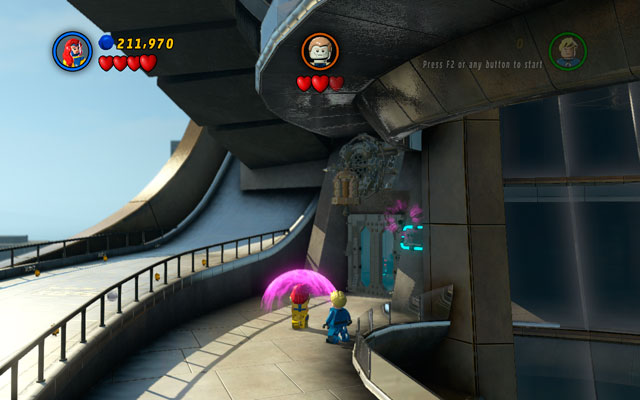
During the same fight turn left, approaching to the locked door. Open it using Jean Grey's telekinetic abilities and pick up a minikit.
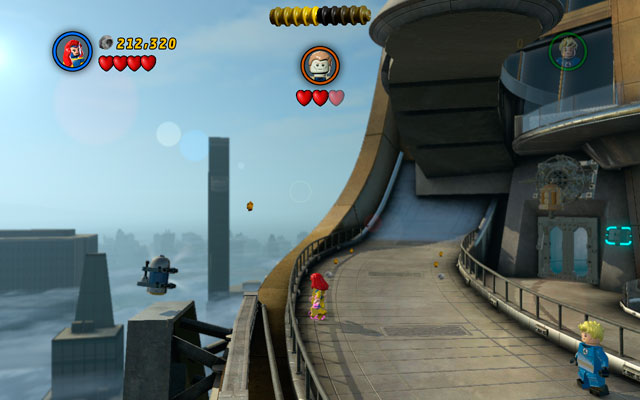
Turn to the left once more, so you can see a minikit floating above the abyss.
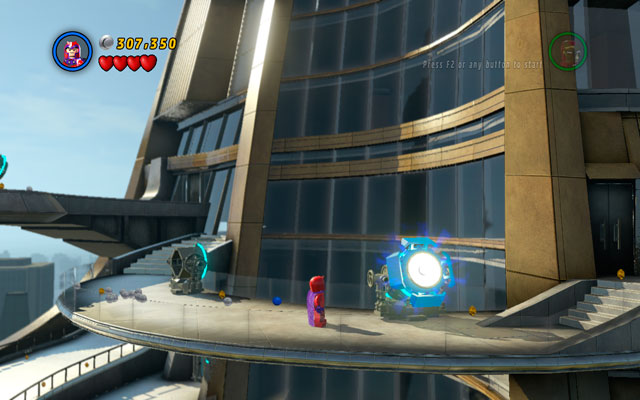
Kill Killian and wait for Mandarin to destroy all Iron Man's armors, so you can fly to the top floor of the building. Now switch into Magneto and break all three reflectors located on the balustrade.
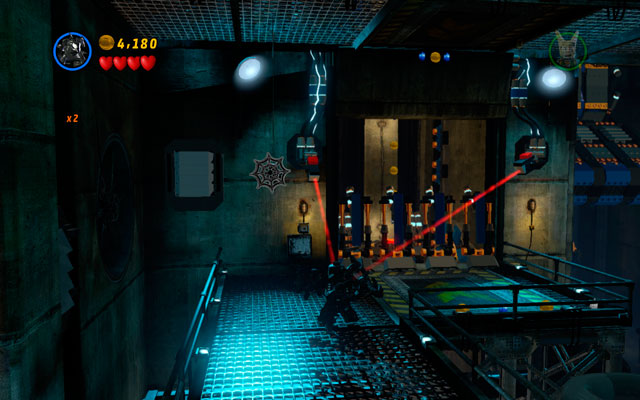
To receive this minikit, you must kill three spiders hidden on the stage. First of them can be found near to the starting location, on the left to the cameras.
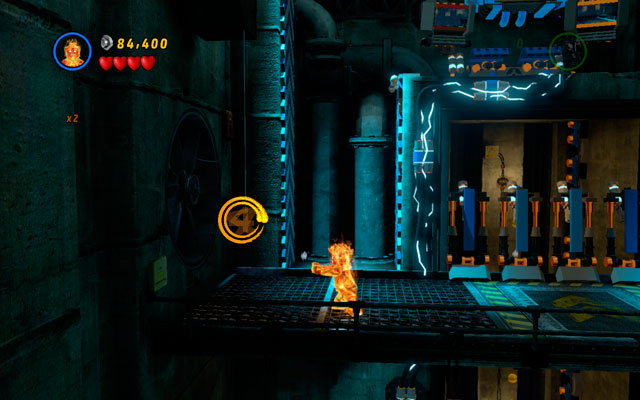
Second is hidden on the floor above, in the dark corner of the room.
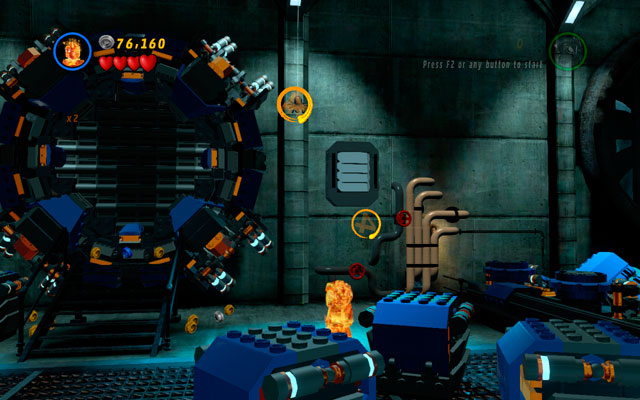
Third can be found on the right side of the entrance to the building.
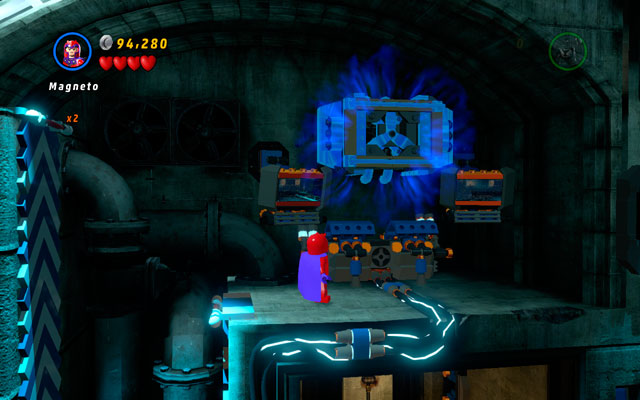
Jump between two blue-and-white walls to climb on the ramp. Then use Magneto to rotate huge metal vent.
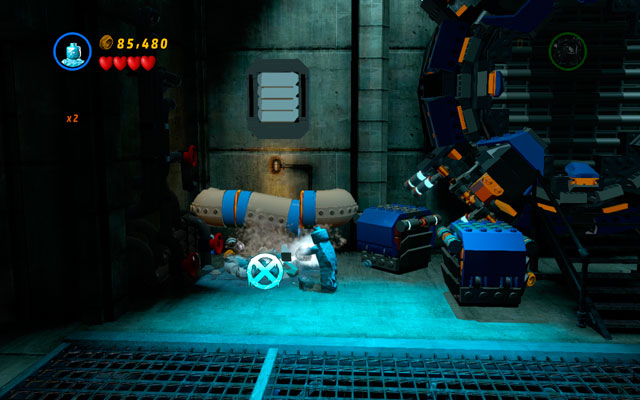
Head to the exit and look left - you will see small pool of water. Freeze it using Iceman and then melt an ice block (that you have just created) with Human Torch.
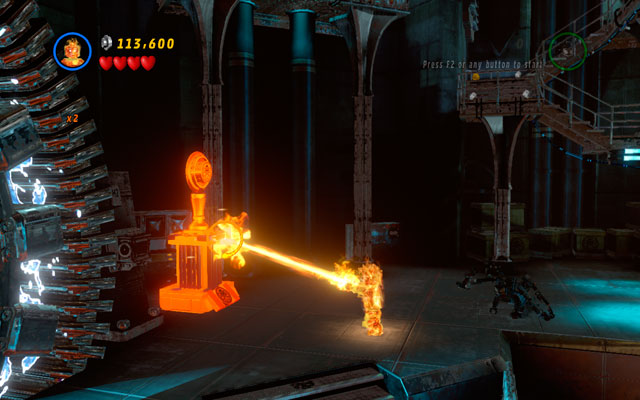
To obtain this minikit, you must melt five golden altars of Hydra, located in the interior of the building. First of them is standing in front from you, on the left side.
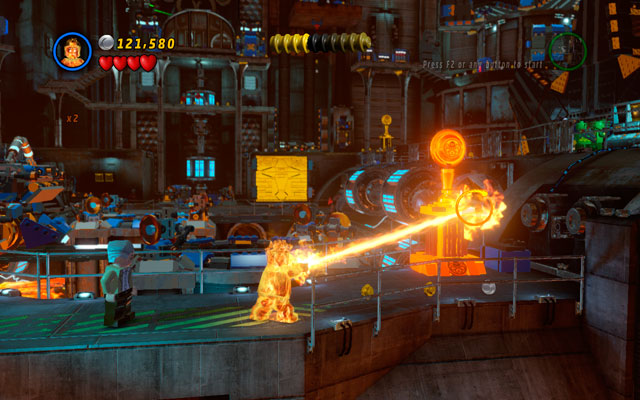
Second can be found on the right, face to face with golden wall, at the farthest platform.
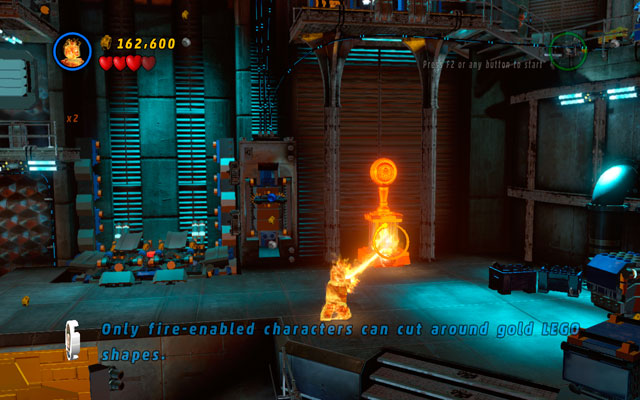
Third is located on the right from the golden wall, on the upper floor.
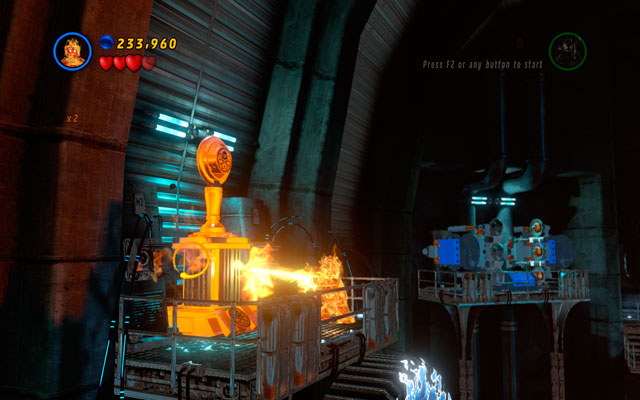
Fourth is hidden right under the ceiling, on the left side of the room (near to the machine, in which Stan Lee was imprisoned).
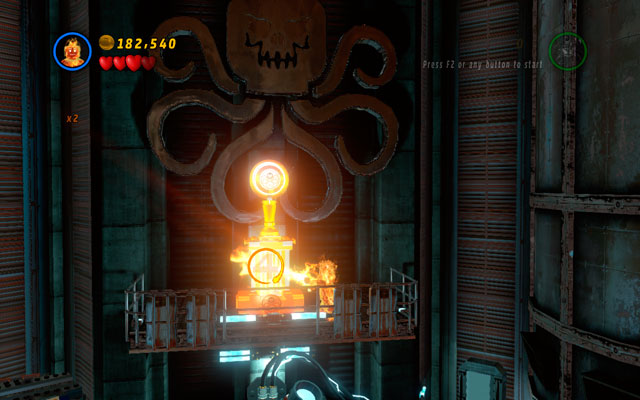
The last altar is located on the right, at the podium near to the deadly laser machine.
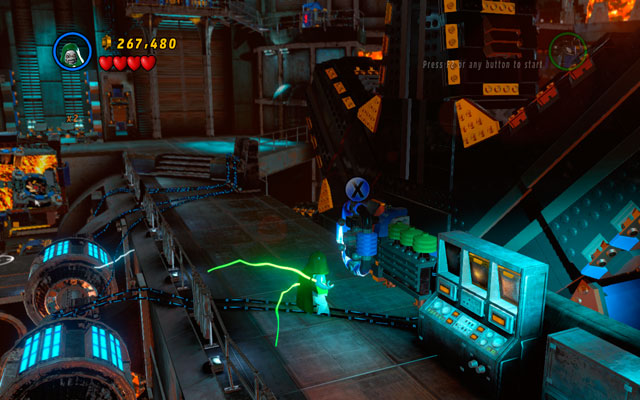
Choose a character with electric powers and approach to the battery located near to the huge cogwheel. Charge mechanism with electricity and pick up a minikit, which is sticked to the device.
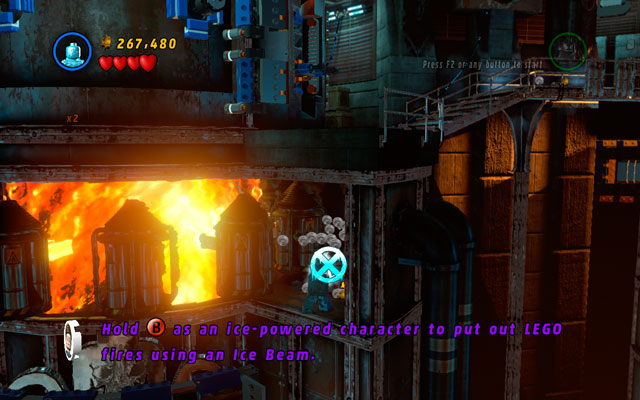
Go to the one of the infernal machines (choose this one, which require Hawkeye attention) and fly down to the lower floor. Enter the room on the right and then extinguish all fires.
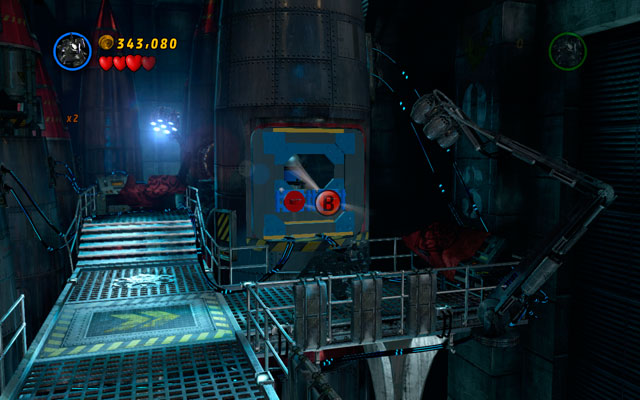
In the new area head right, reaching to the two attaching point. Yank them with a web (you can use Spider-Man or Venom) to unlock next minikit.
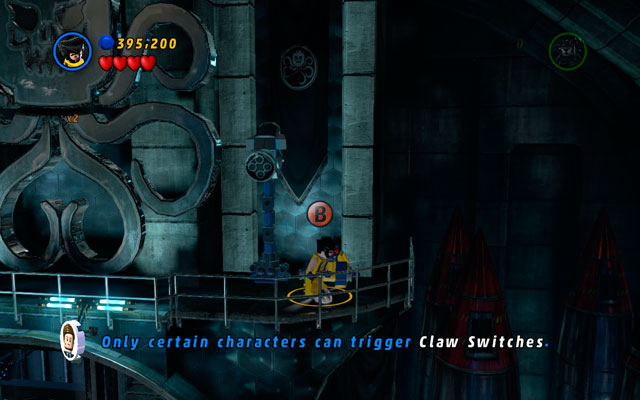
In the same location fly to the platform located above the entrance to the arena. Choose Wolverine and destroy all obstacles in the area, uncovering claw switch. Use it and you will receive new minikit.
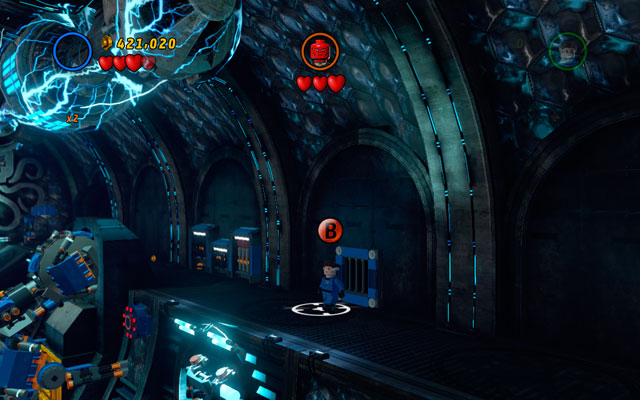
During final fight head right, go to the upper floor. After that, just use Mr. Fantastic to pass through the bars.
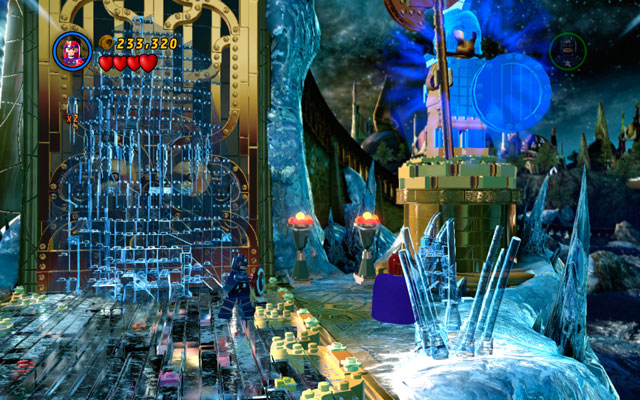
To receive last minikit you must destroy all four pennants located in the corners of the arena.
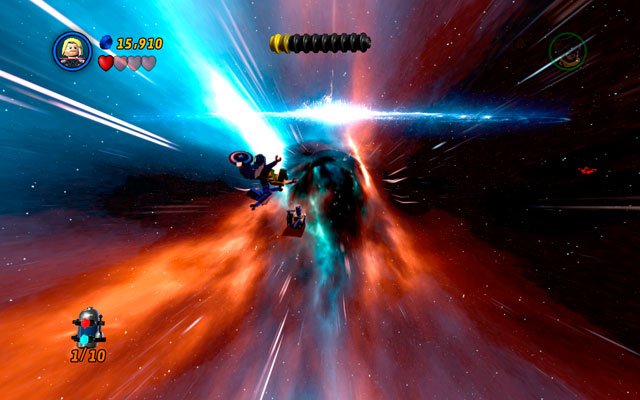
First minikit is located in the passage to Bifrost. To catch it, stay in the upper-left part of the tunnel.

Second minikit is hidden behind the huge sword in the central part of observatory. Defrost mechanism and jump up to obtain it.
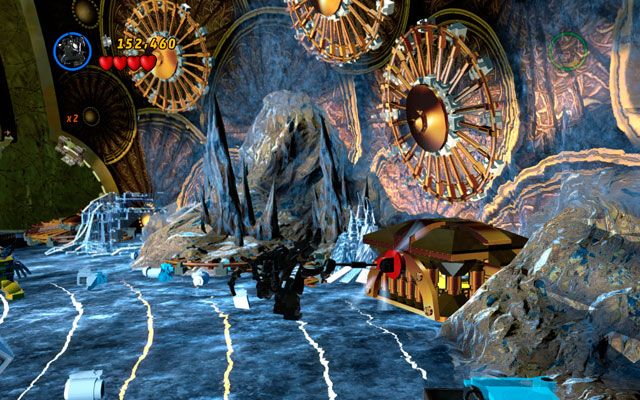
In the same room turn right and approach to the chest with an attachable point. Choose character with a web attack to yank the crate and pick up a minikit.
On the bridge leading to Asgard choose Magneto and approach to the statue on the right. Turn it using your magnetic abilities to uncover the next minikit.
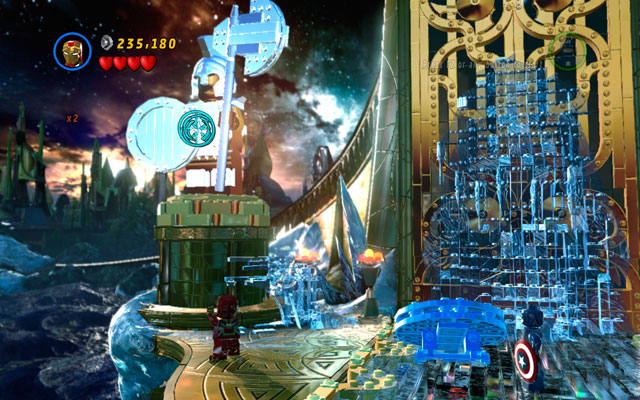
Switch into Iron Man and head to the second statue, destroying it with your rockets. When an attachable point appears, yank it with Spider-Man or Venom.
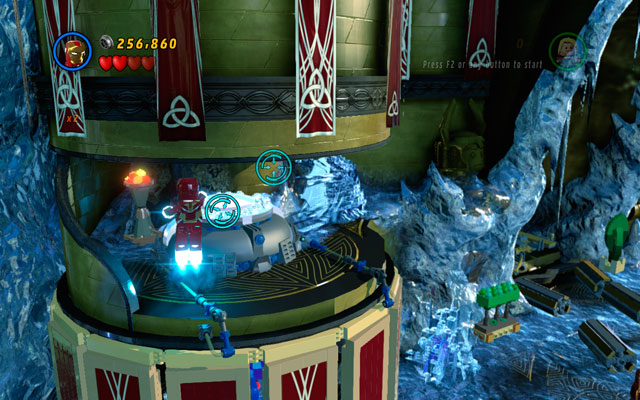
After the second fight with Loki fly up and turn left. Land on the column and fire your rockets at the silver lid.
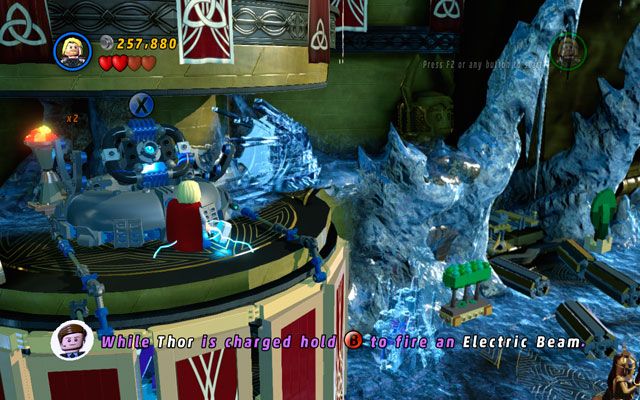
Wait for battery to appear and charge it with electricity. Then jump down.
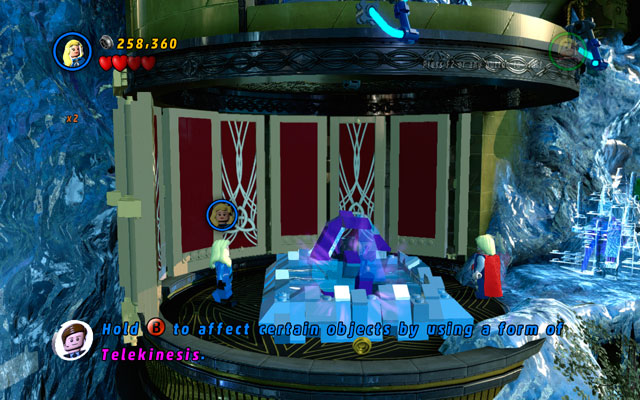
Choose a character with telekinetic skills (like Jean Grey or Invisible Woman) to draw your minikit from the frozen spring.
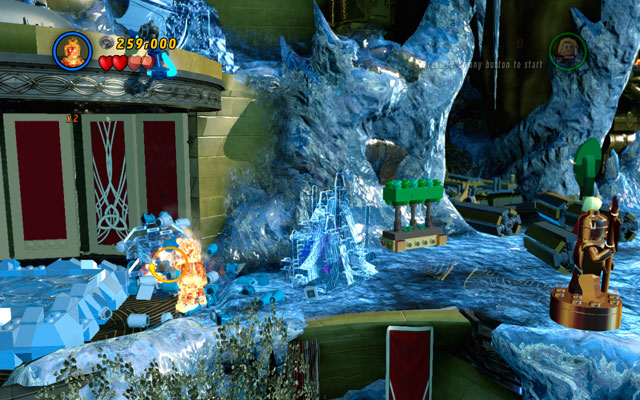
Switch into Human Torch and melt an ice block to finally recover this collectable.
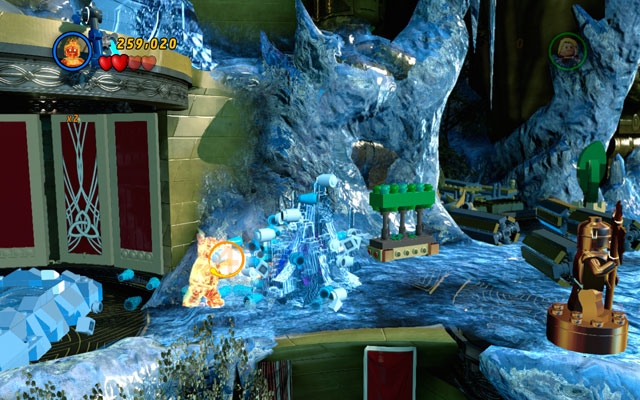
To receive this minikit, you must melt three icicles with frozen flowers hidden inside. First of them can be found on the left from the location on which you fought Loki for the second time.
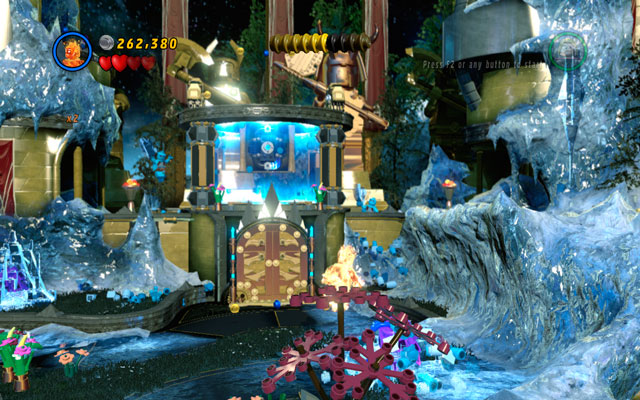
Second icicle is located in front of the gate (the one with power field) - just look behind the flowerbed.
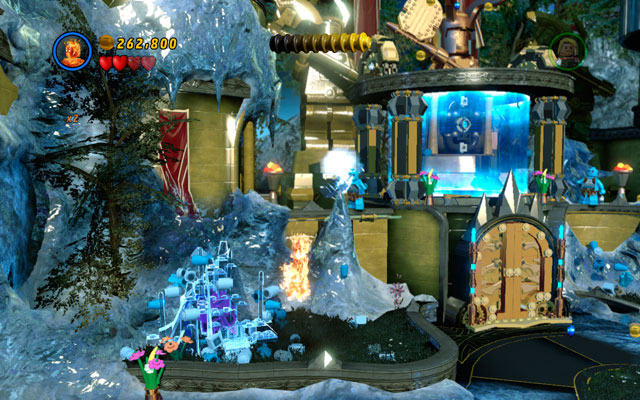
The last target is standing on the left from the same gate.
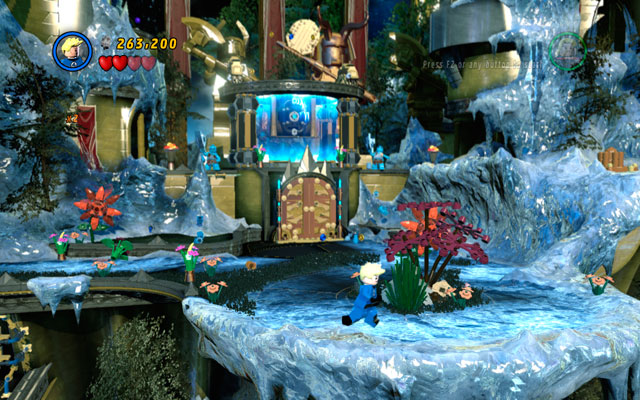
Find a flowerbed on the opposite side of the same gate. Destroy it, then switch into Wolverine, digging out few bricks. Now just build minikit from them.
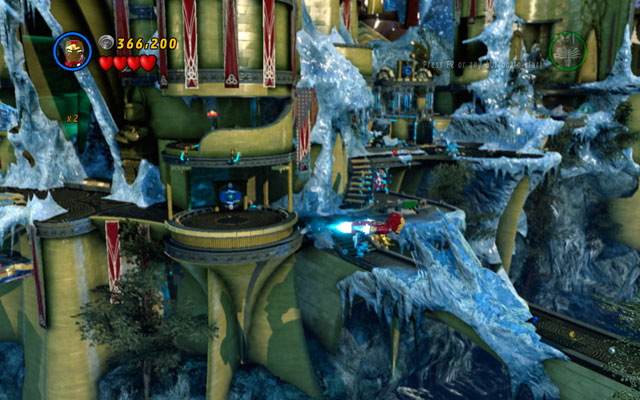
Choose any flying character and fly through the frozen bridge located in the central area of the map. Then use Iron Man's rockets to destroy the silver statue. Build a lever from the debris and turn it.

Turn right, destroying all obstacles on your way. Build second statue from the debris and wait for new bricks to appear. Build a handle for a big character from it (e.g. Hulk) and yank it.
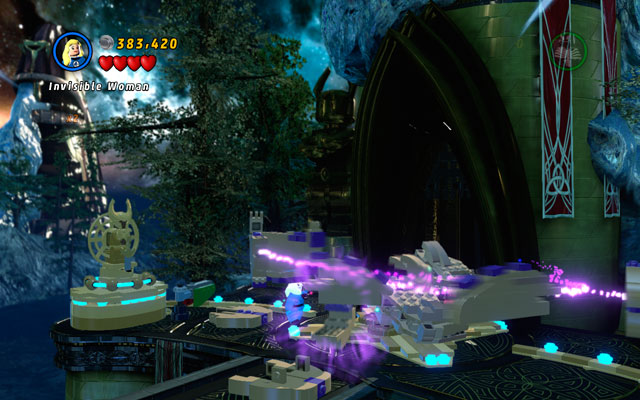
Choose Jean Grey or Invisible Woman to create a huge hand from the scattered bricks. Use it with interaction button to receive a minikit.
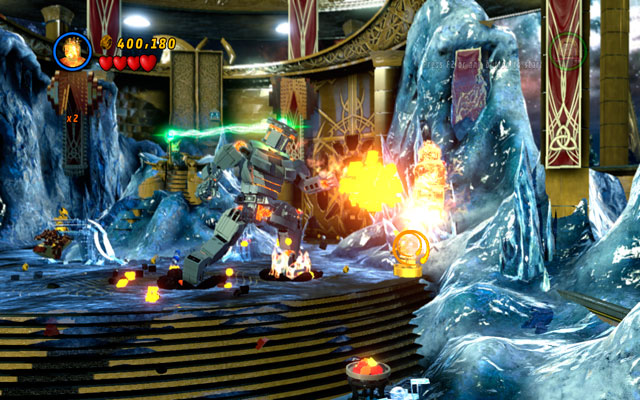
To obtain the last minikit, choose Human Torch during the last fight and melt three gold statues located in the arena (two of them can be found on the left, and one on the right).
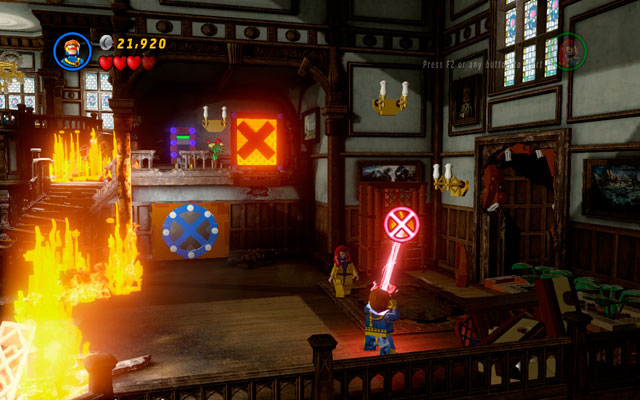
Enter the X-Mansion and rescue two groups of students as it is described in the walkthrough part of this guide. After that use Cyclops laser eyes to melt a gold padlock hanged on the shelf on the right. Then build some books from the debris and obtain a minikit.
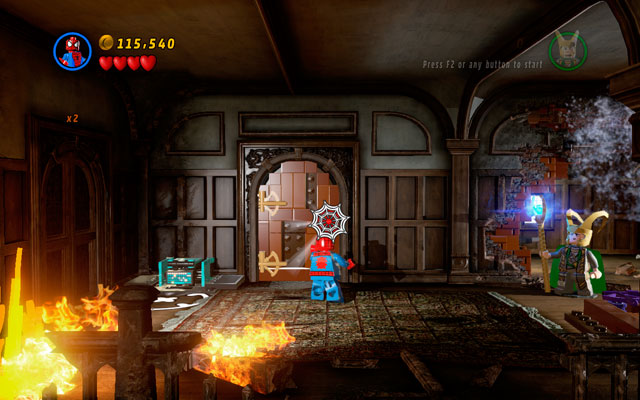
In new room choose Spider-Man and shoot your web at attachable point located on the door. Yank it and enter to the chamber, collecting a minikit.
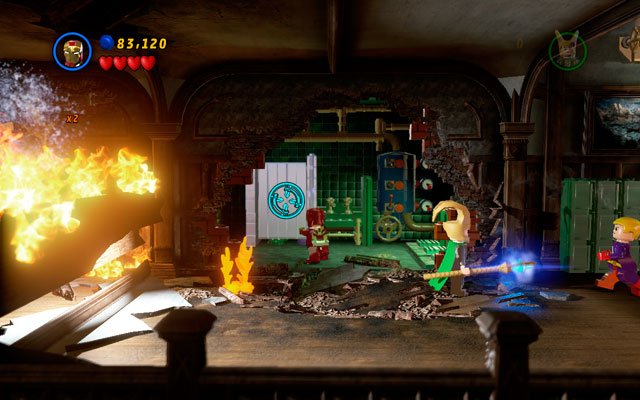
Head right and choose Iron Man to shoot your rockets at the silver toilet (in the bathroom behind the flames). Then use a character with telekinetic skills (like Loki) to clean a lavatory pan.
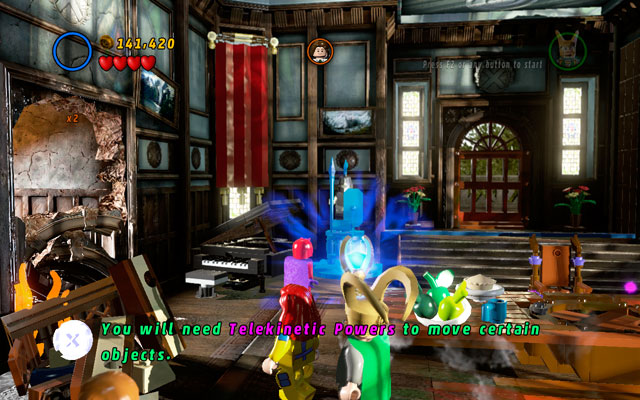
Meet with Storm in the next room and choose Magneto to move metallic armor standing on the left.

Go outside and head right, looking for the silver gargoyle. Destroy it using Iron Man's rockets and switch into Wolverine, so you can dig into the sand. When sandbox appears, use it with Sandman.
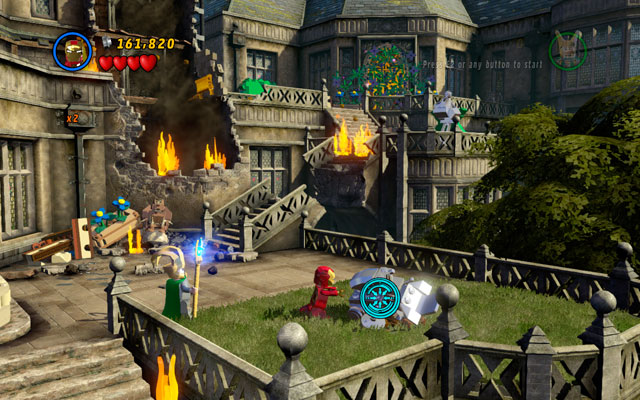
To obtain this minikit, you must destroy all five gargoyles hidden on the X-Mansion building. First of them - covered with silver - you have already damaged, looking for the previous collectible.
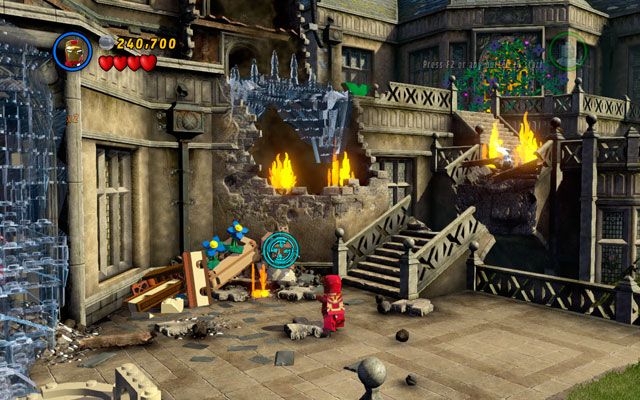
Turn back and look for the next gargoyle - it is hidden near to the ruined stairs.
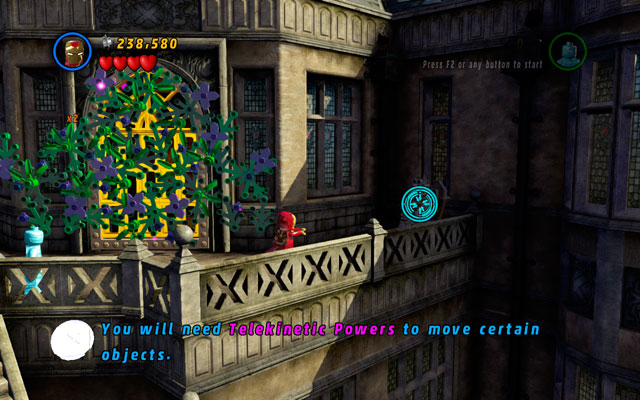
Third one can be found near to the golden gate leading to the next location - search a balustrade on the right.

Fourth gargoyle is located near to the entrance door to this location, next to the green X-bush.

The last statue is standing at the edge of the roof, above the X-bush that we have already mentioned.
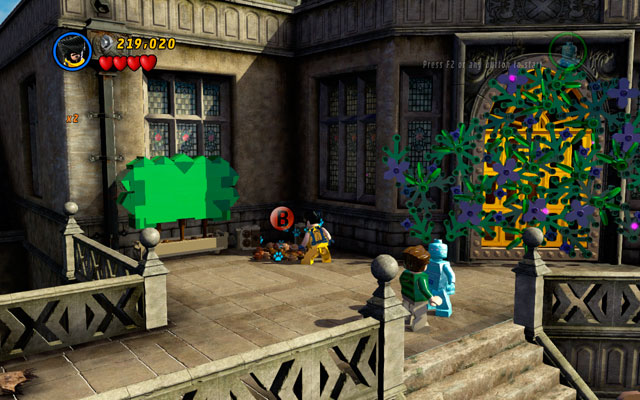
Stand near to the golden gate and switch into Wolverine to destroy all obstacles scattered on the left. Then dig up a chain saw from the sand and repair it. Then choose Jean Grey to trim the shrub into the X symbol.
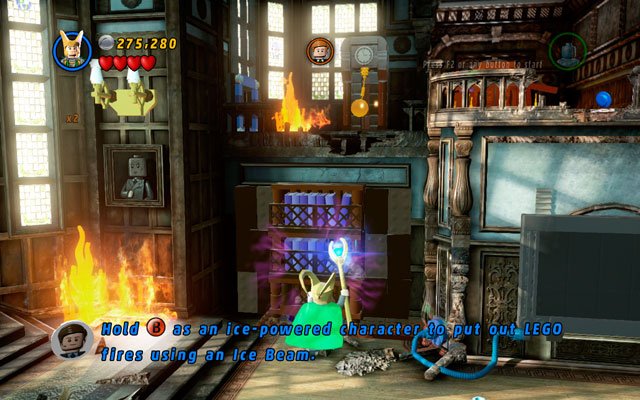
Obtaining this minikit is a bit complicated. Go to the room with huge TV and move a shelf with the violet books (to do that you must use a character with telekinetic skills, like Loki or Jean Grey). In this way you will uncover a worker hidden behind the window.
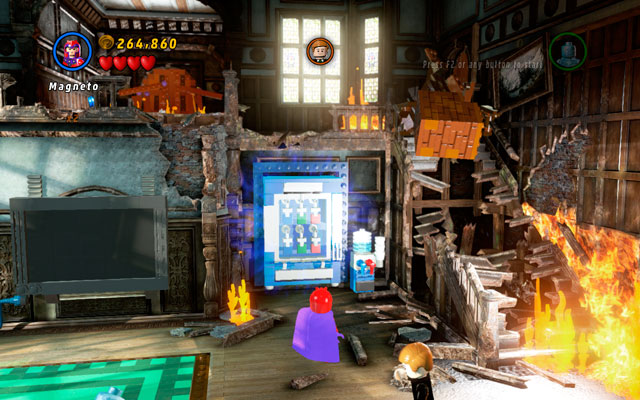
Turn right and approach to the machine with colorful ice-creams. Destroy it using Magneto's magnetic powers and then build a patriotic panel for Captain America. Toss a shield at it to open a passage to the worker.
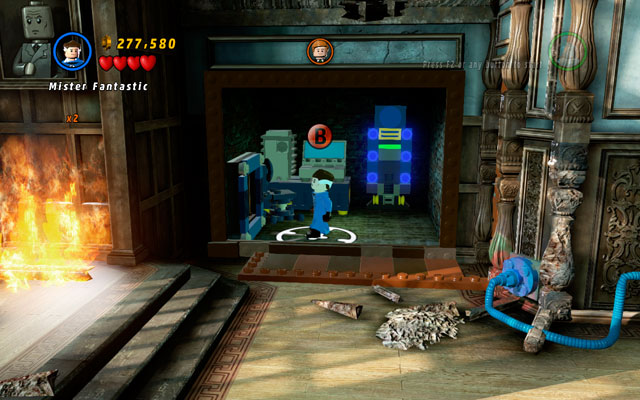
Meet with him and use Mr. Fantastic to pass through the iron bars.
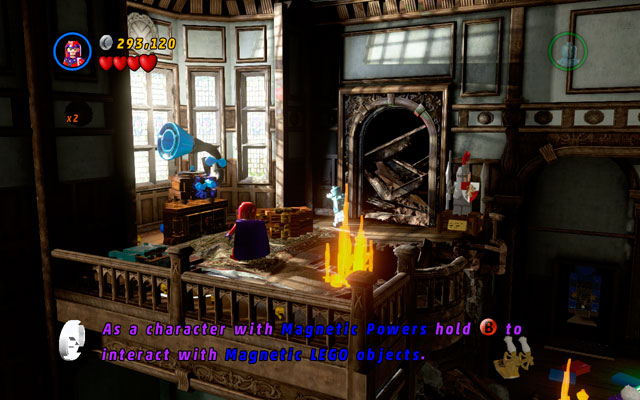
Return to the first location through the door and choose Magneto - then use his magnetic abilities on the metal gramophone.
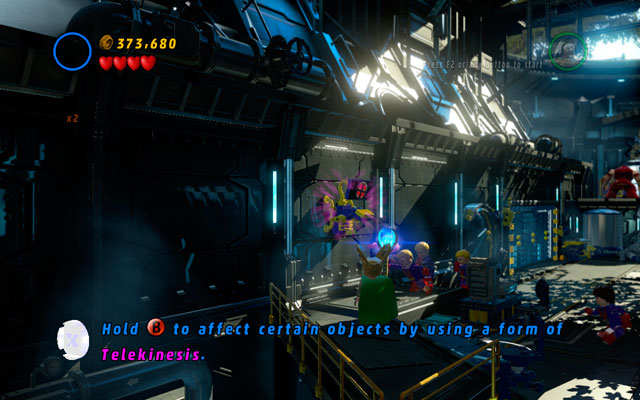
To obtain this minikit, you must destroy all four computers during the last fight with Juggernaut (they are located in the corners of the room). To do that, you must use telekinesis - so remember to choose Jean Grey or Loki.
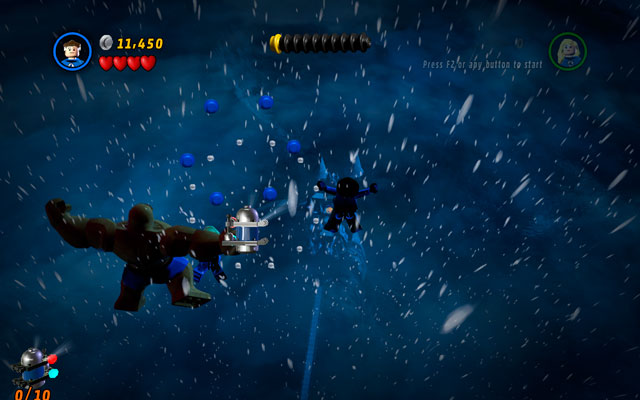
First minikit can be obtained during a flight to the Doctor Doom's castle - to catch it, just keep to the middle of the tunnel.
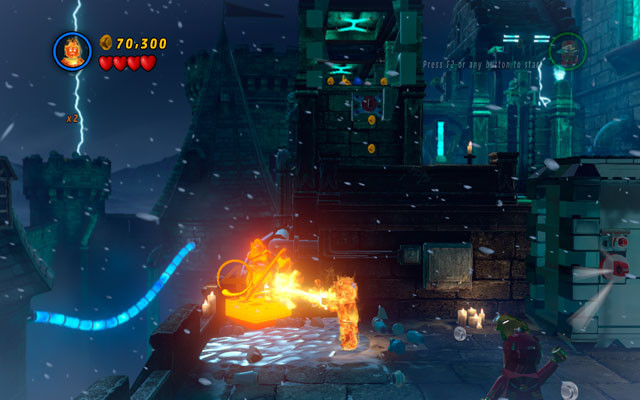
To receive this minikit, you must melt five golden monuments. First of them can be found at the beginning of the stage, on the right, hidden behind some obstacles.
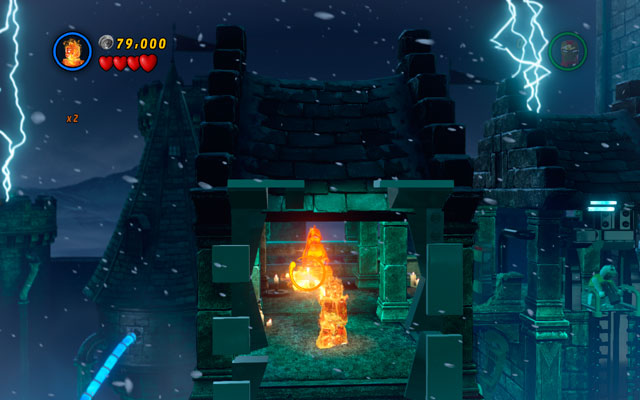
Second is located in the tower (above).
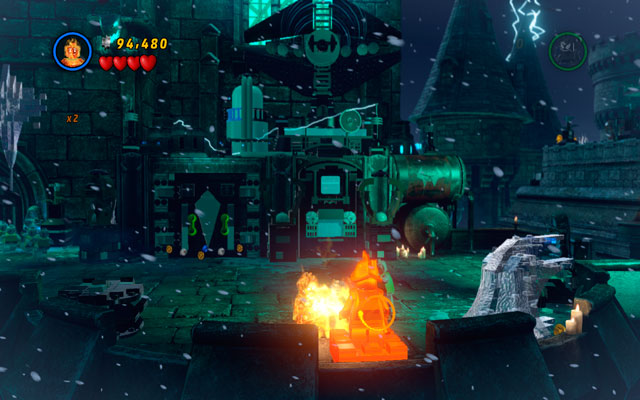
Third is standing behind the bridge on the right, next to the lightning machine.
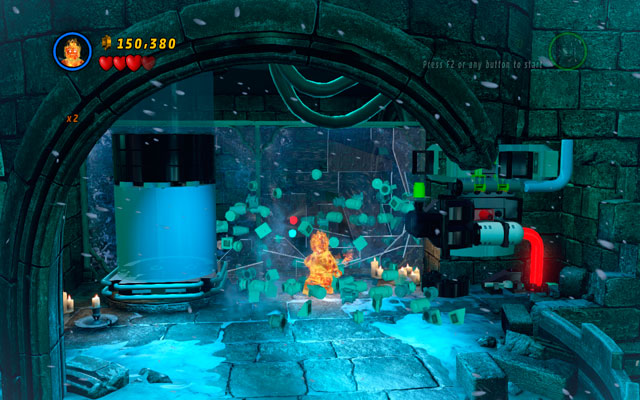
Fourth can be founded on the next roof, in the left corner. To reach there, you must pass through the energetic bridge on the right.
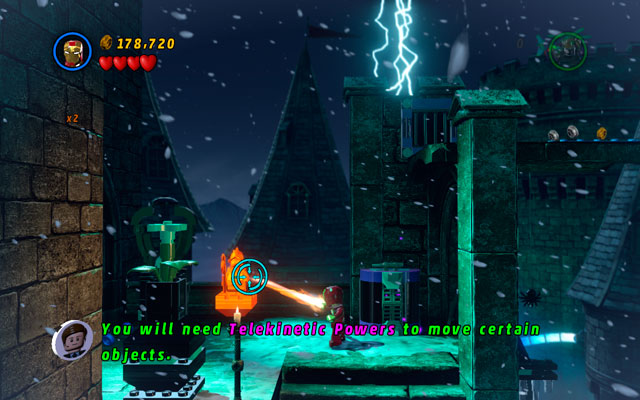
The last monument is located on the next tower, near to the exit from this stage.
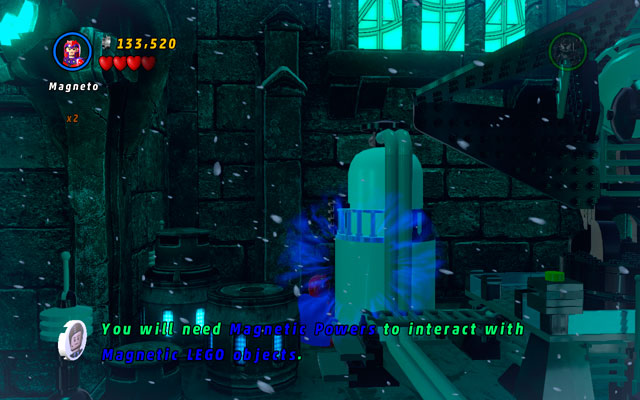
Turn back and use Magneto magnetic skills to manipulate a metal element of the lightning machine.
At the top of the tower "guarded" by cameras it is an ice wall. Melt it with fire and then switch into Jean Grey to take control over the enemy on the other side. Now just jump up to catch a minikit.
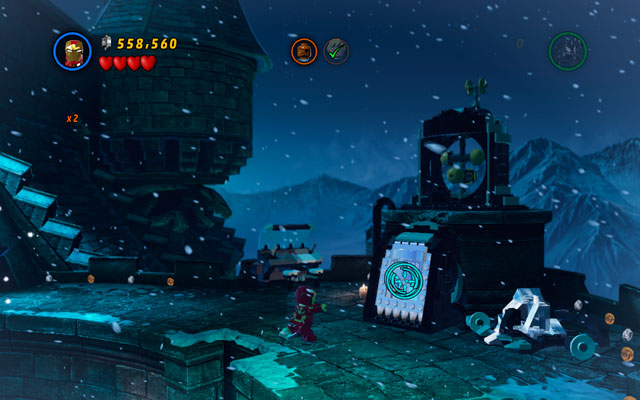
In the location with Human Torch and Nick Fury head right, climbing on the wall. Use Iron Man's rockets to destroy a silver cover. Charge a battery with electricity (use Thor or Storm) to obtain some studs and a minikit.

Rescue Human Torch and then turn right, approaching to the golden statue. Melt it using fire beam and recover a minikit from the debris.
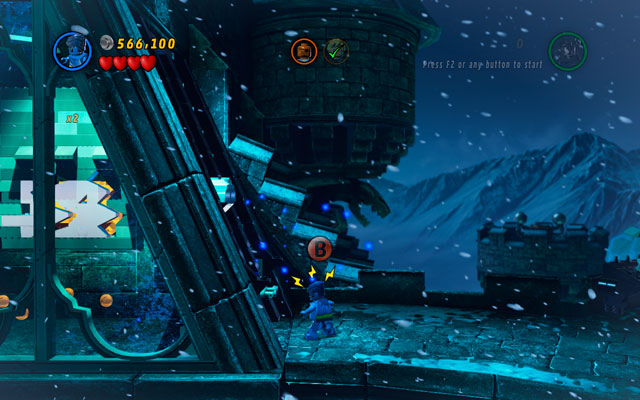
In the same location choose a character with spider or sixth sense to approach to the central tower from the right side (use the wall on the right to do that). Search the area, uncovering two attachable points. Yank it with a spider's web to open the door (choose Spider-Man or Venom to do that).
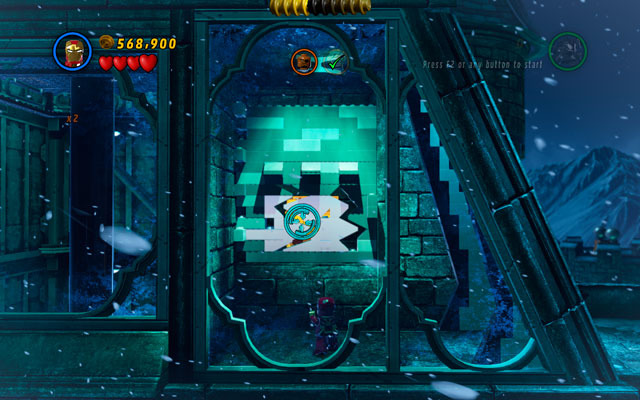
Enter the chamber and shoot Iron Man's rockets at the silver plate located next to you. Then melt a golden plate with a fire beam and pick up a minikit.
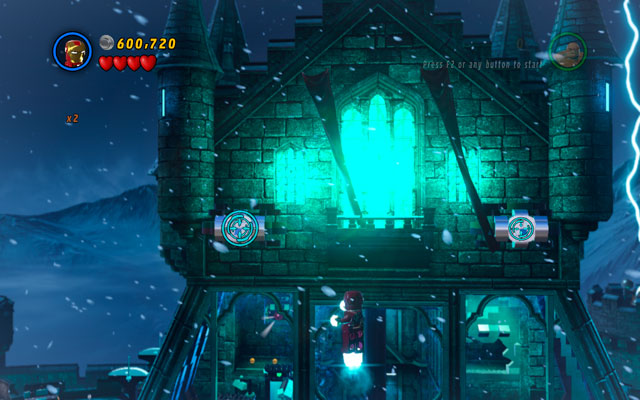
Fly up as Iron Man and shoot your rockets at two silver plates located on the tower of the castle.
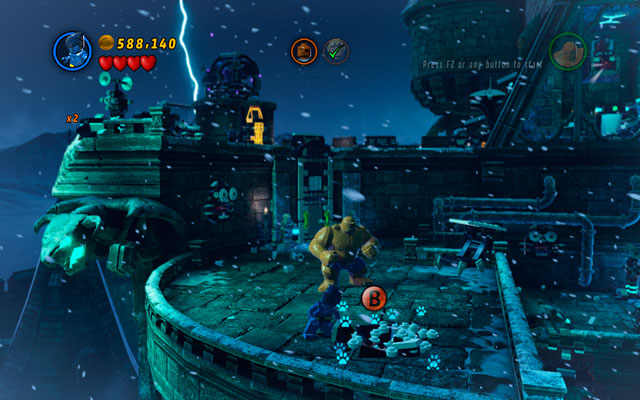
Choose The Beast or Wolverine and head to the left part of the castle, searching for the sand pile. Dig up some bricks from it, so you can build a trampoline from them. Now just jump on it to catch a minikit.
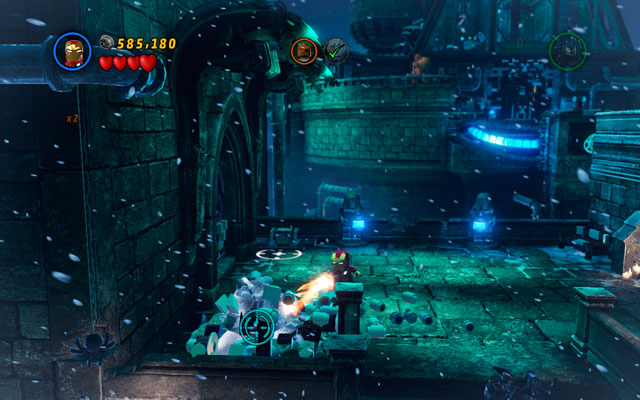
To obtain the last minikit, you must melt five icicles and build five cat-clocks from the debris. First "frozen kitty" can be found at the entrance to this part of the castle, on the left.
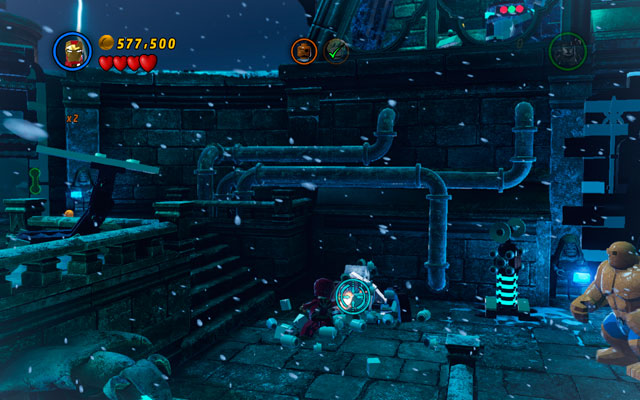
Second is located on the left part of the arena, on which Human Torch is fighting the enemies.
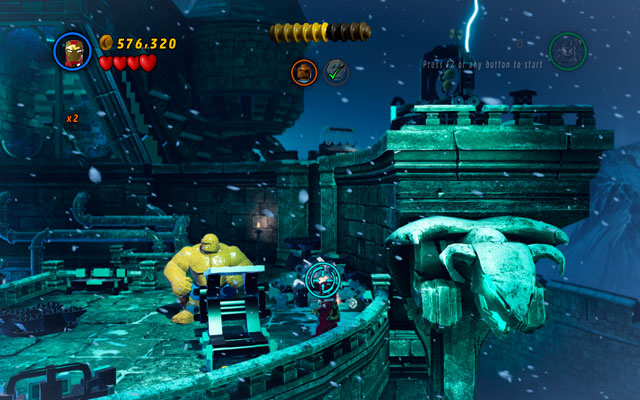
Third one is hidden on the right side of the same arena, near to the wall.
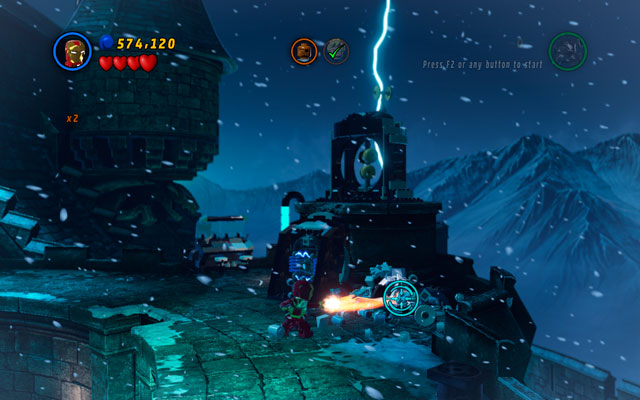
Fourth one can be founded on the tower on the right, near to the battery.
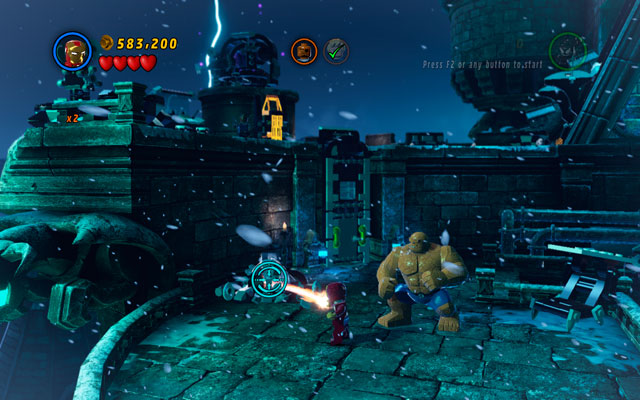
The last icicle is located right under the tower on which you have met Nick Fury.
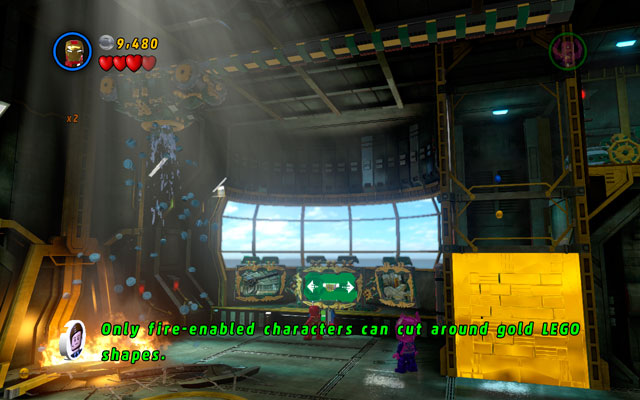
After the first use of the computer (at the beginning of the stage) use it once more to move a fire extinguisher to the left side of the room (click on the left arrow on the monitor). Then choose it to extinguish the fire and pick up a minikit.
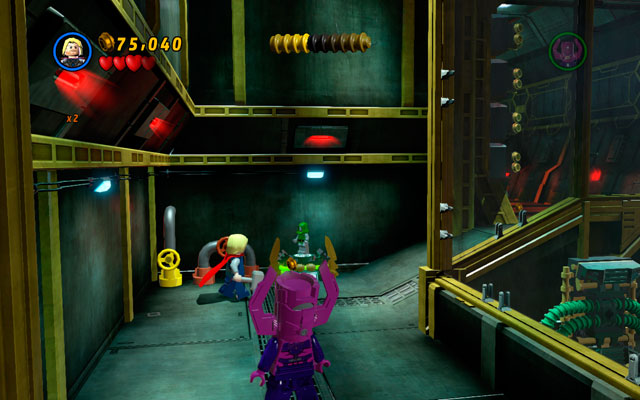
Turn right and use a claw switch as Wolverine or The Beast to unlock a next minikit.
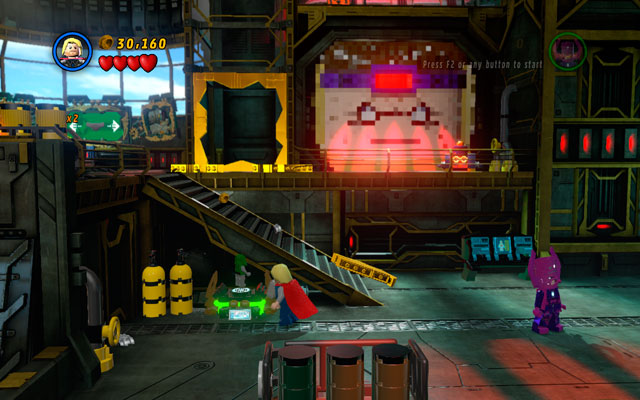
To receive third minikit, you must destroy all three Doctor Dooms statuettes. First of them can be found at the starting location, under the stairs.
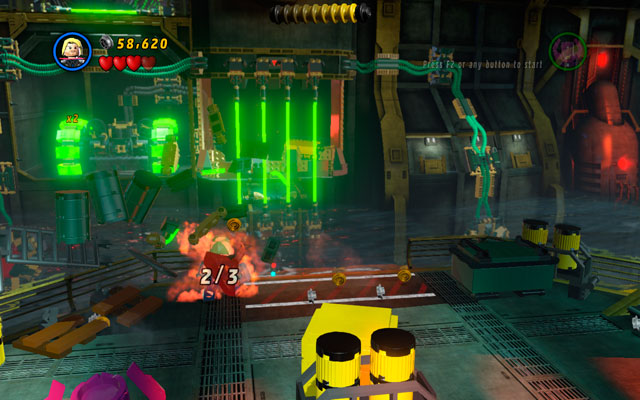
Second one is hidden in the next room, next to the green machine and laser gate.
Third can be found in the corridor leading to the arena with M.O.D.O.K.
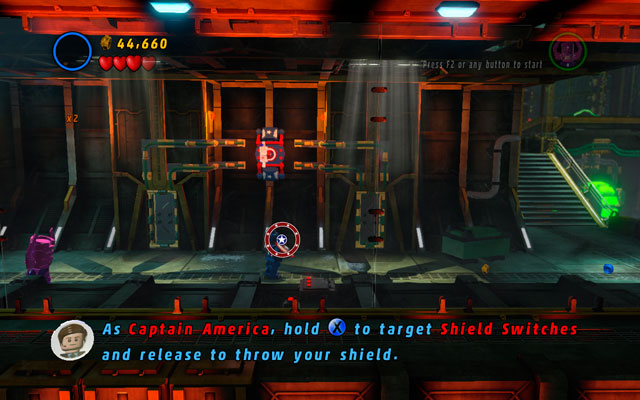
Turn back and return to the passage connecting two first locations. Search for the patriotic panel and toss a shield at it, using Captain America's ability.
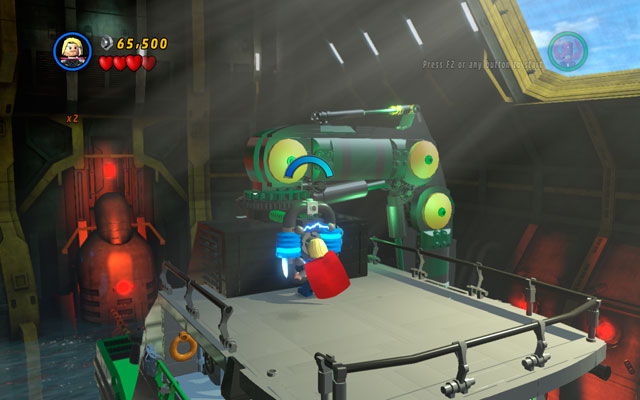
This minikit is hidden very well. To obtain it, you must charge a battery lying on the boat (in the hangar) for TWO TIMES. When golden box appears, melt it with fire beam and pick up a collectable.
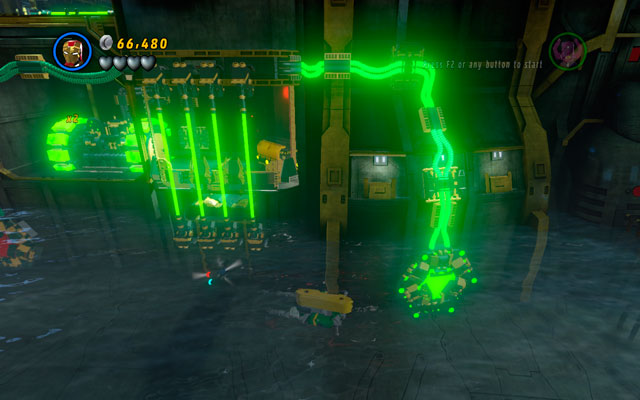
Steer small submarine to switch on two buttons under the water - a minikit is hidden between two columns under the laser rays.
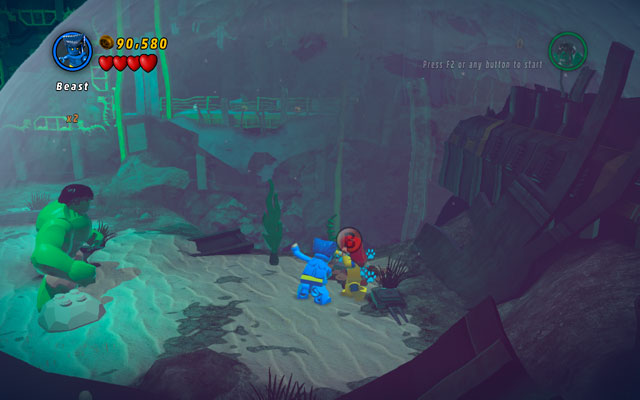
To obtain this minikit, you must dig three sand piles under the water (on the last stage). First of them is located on the right corner of the crush site. Use clawed character to excavate the target.
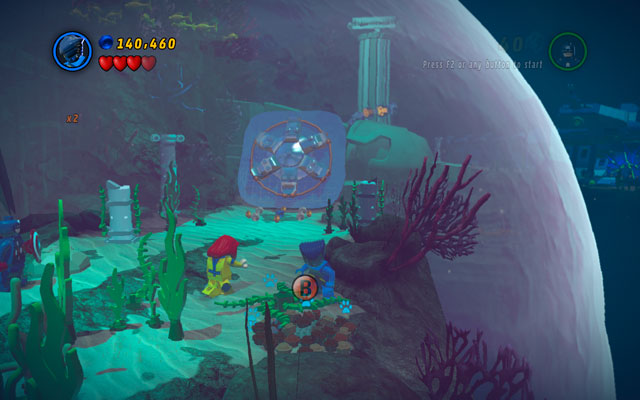
Second mound can be found near to the huge silver gates on the far right.
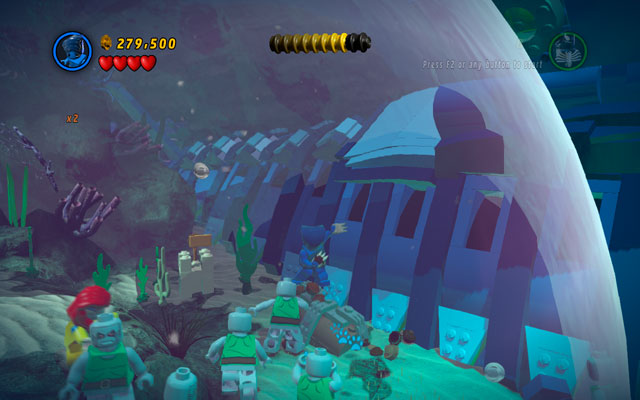
The last one is hidden at the end of the location, near to the Doctor Doom's submarine.
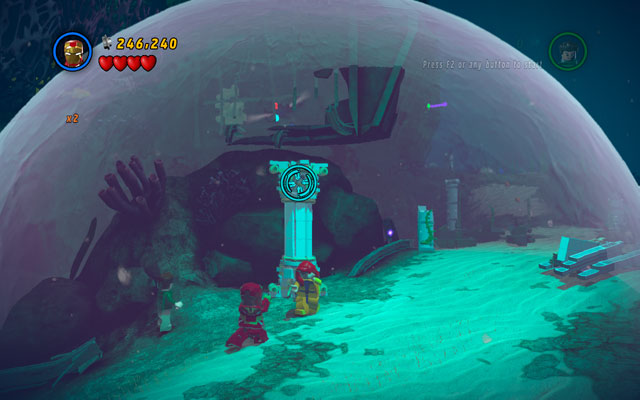
Turn back and destroy a column standing on the right side of the ancient gate (destroyed some time ago). This location is hardly recognizable, so we illustrated it on the screen above.
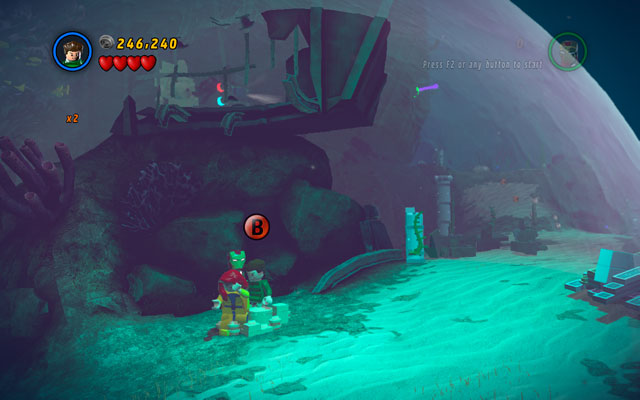
When the column is collapsed, switch into Sandman and pass through the sandbox to catch a minikit.
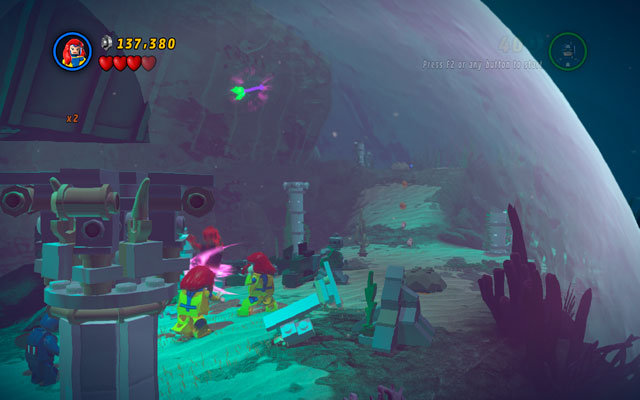
Right behind this location it is advisable to use Jean Grey's ability to yank a green-and-violet tentacle sticking out from the building above. Next minikit will appear shortly.
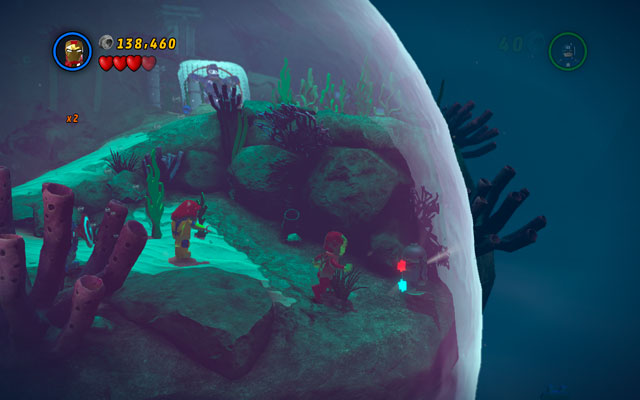
The last minikit is hidden very closely - just turn right and approach to the precipice.
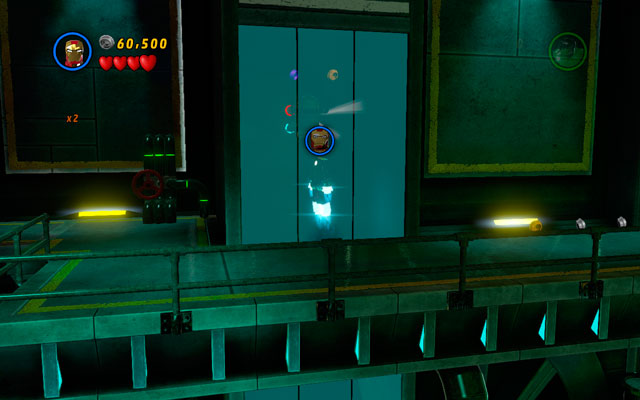
Right after the beginning choose a flying character and fly to the left to uncover a hidden location. Then use Mr. Fantastic abilities to pass through the iron bars located on the lowest floor, so you can enter the lift pit. Now just fly up and catch a minikit.
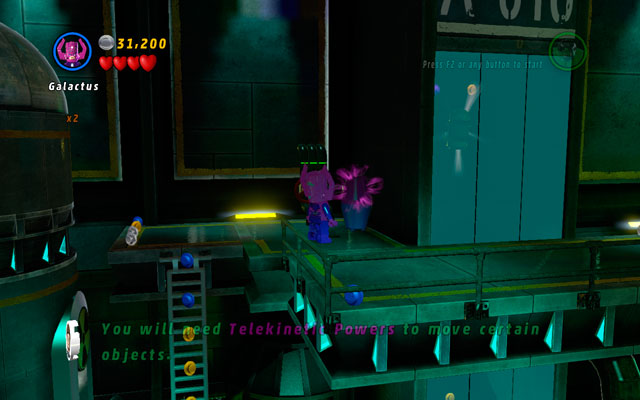
To obtain this minikit, you must destroy all three violet containers usable only for characters with telekinesis ability. First target can be found on the left from the lift pit.
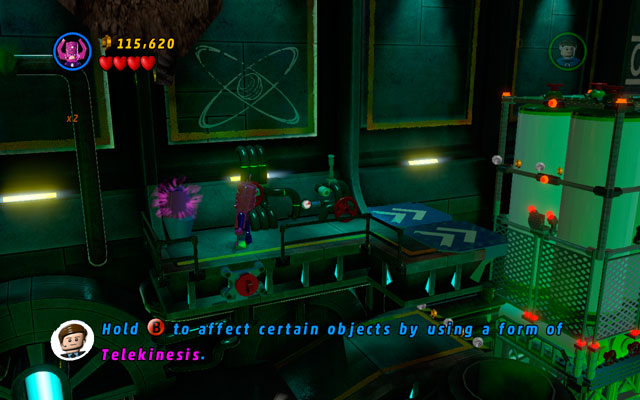
Two other containers can be found in the far further part of the stage. The closer one is located on the platform, near to the Mr. Fantastic's glide gap.
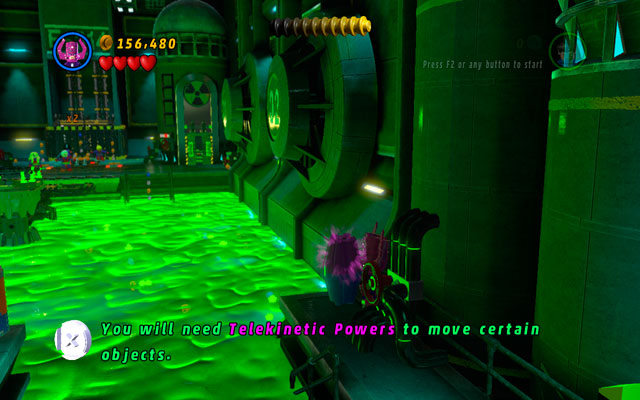
The further one is hidden at the huge green acid puddle. Destroy it to obtain next minikit.
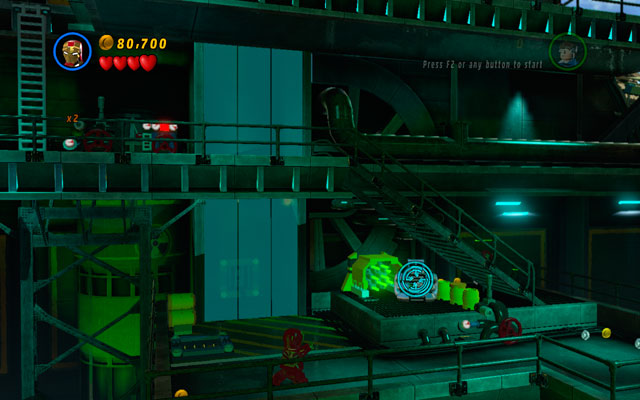
Turn back to the beginning of the stage and go to the left, returning to the hidden location. Then shoot Iron Man's rockets at the silver box standing near to the lift pit to receive third minikit.
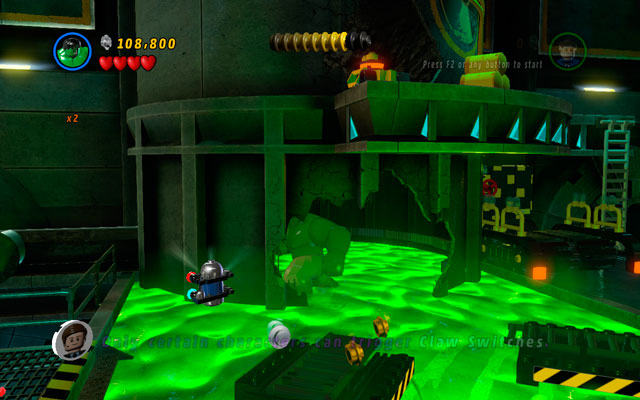
Go to the right, heading to the first pool of acid - pierce a silo wall using Hulk and enter it. Minikit is hidden on the right side of the premises.
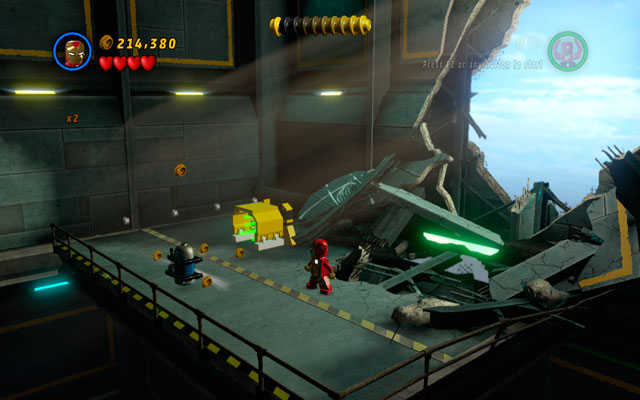
Go to the next location and fly up, then turn to the interior-left part of the stage (head to the "inside" of it). After that land on the hidden platform and pick up a minikit.
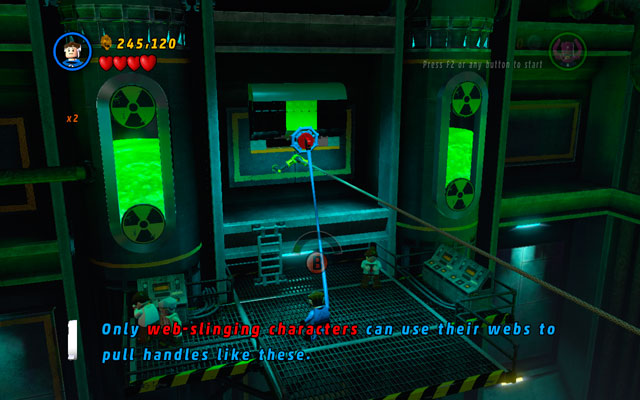
Stand between two rotating, electric machines, then fly up and head to the interior of the stage (as the rope in the middle shows). Stand on the platform and choose a character with a web attack or Mr. Fantastic. Then yank an attachable point from the wall.
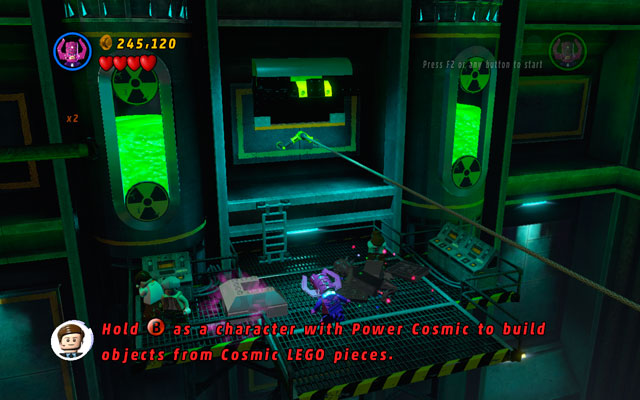
Choose Galactus to arrange a Statue of Liberty from the black cosmic bricks, then pick up the minikit.
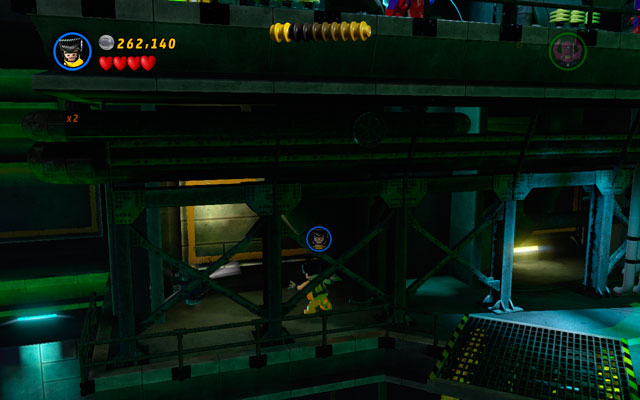
Go a bit further and destroy the shining wall using Wolverine's claws. Enter the room and turn left, catching a minikit.
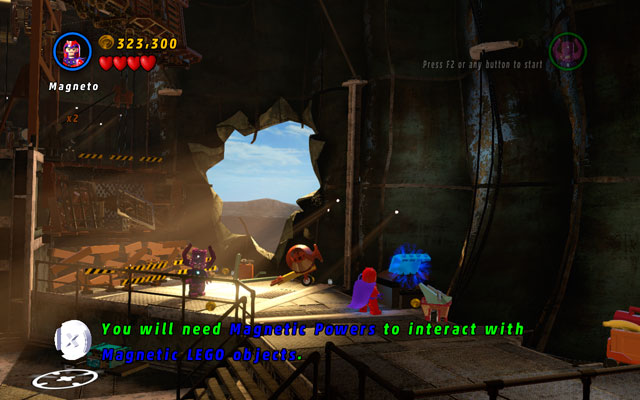
In the interior of the Statue of Liberty choose Magneto and approach to the metal container on the left. Open it with your magnetic abilities to pick up a minikit.
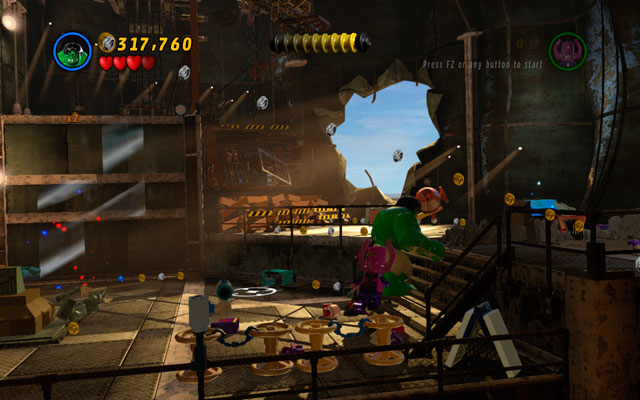
To obtain this minikit you must destroy all five blue traffic signs. First of them is located in the starting location, on the right side.
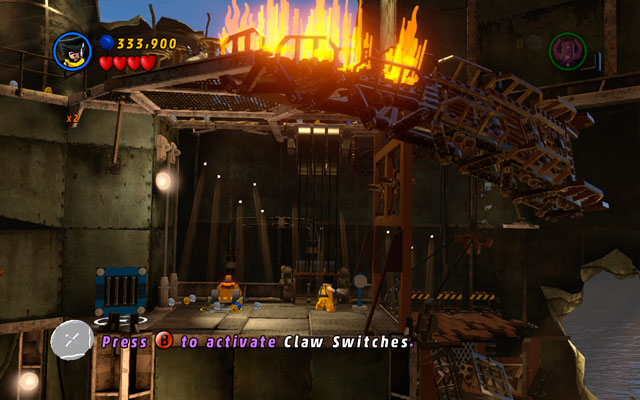
Second one is hidden a bit higher, on the right from the iron bars.
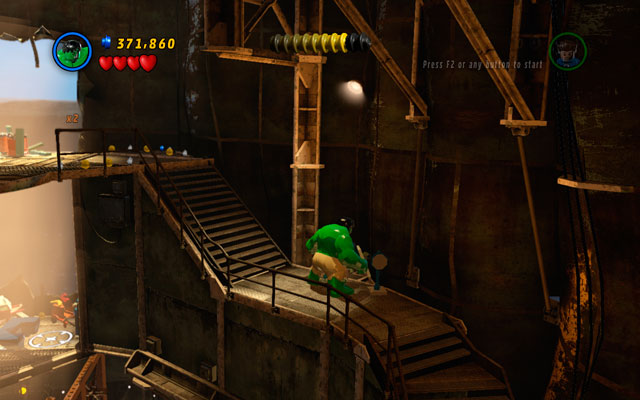
Third one is located much higher, at the stairs on the right.
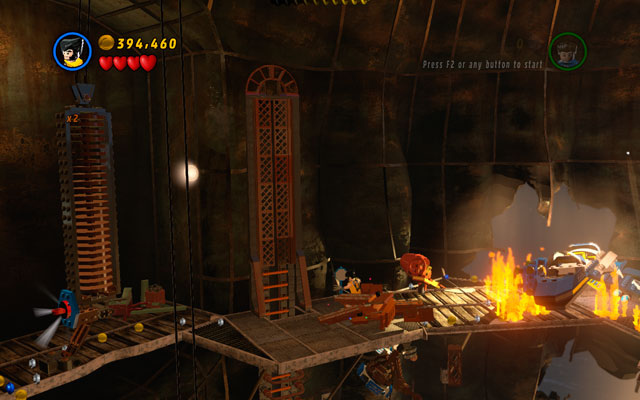
Fourth one is hidden behind the crates, on the left side from the burning jet.
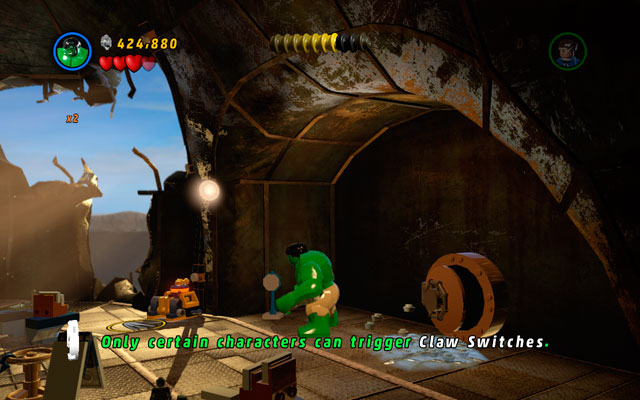
The last one can be found at the end of the location, on the right side from the stairs leading to the boss arena.
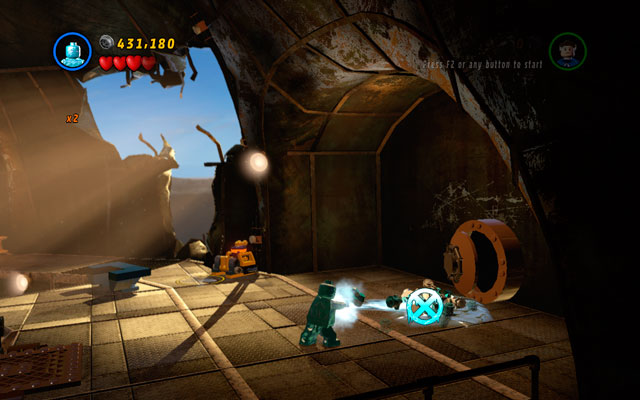
The last minikit on this level can be obtained near to the entrance to the arena. Approach to the pipe on the right and freeze a pool using Iceman special ability. Then melt an icicle with Human Torch's fire beam and pick up a minikit.
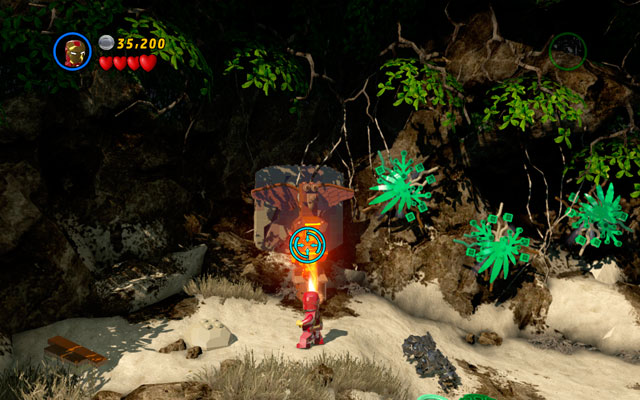
On the beginning of the stage turn left and choose a character with claws (like Wolverine or The Beast). Dig three sand piles arranged in the triangle shape and build a crab from the debris.
Turn right and head to the rock wall in the interior, approaching to the gold statuette. Melt it with a fire beam, so you can destroy a fragile slab standing behind it. Then build a sandbox from the debris.
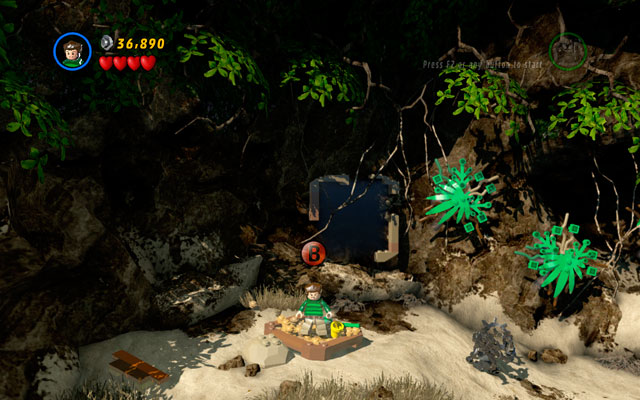
Choose Sandman to pass through the sand and obtain a minikit.
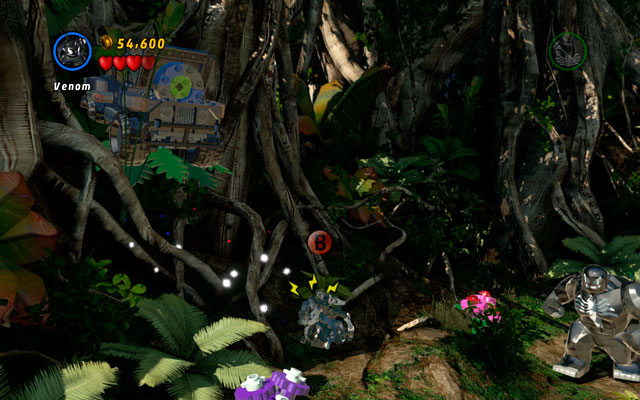
Go through the first electric gate and kill all enemies in the area. Then approach to the trees growing on the left side of the glade. Choose Spider-Man or Venom and use your spider sense to uncover an attachable point. Yank it with a web and pick up a minikit.
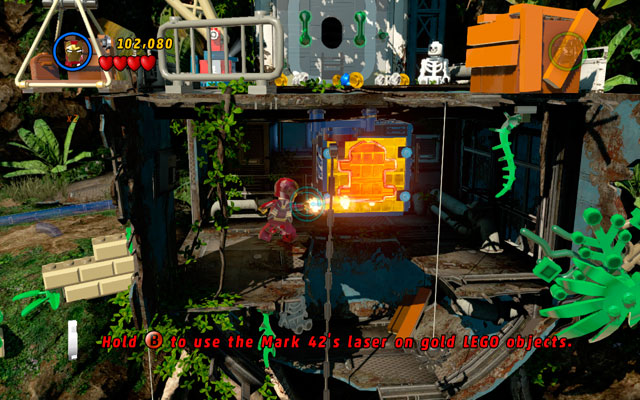
Turn right and go onward. Approach to the building with a crane and search it for a golden gate. Melt it with a fire beam to uncover next minikit.
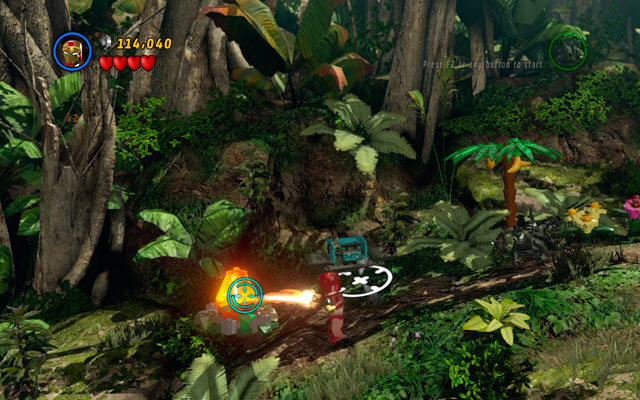
To get this minikit, you must melt five golden eggs. First of them is located at the starting point of the second location, on the left side of the jungle.
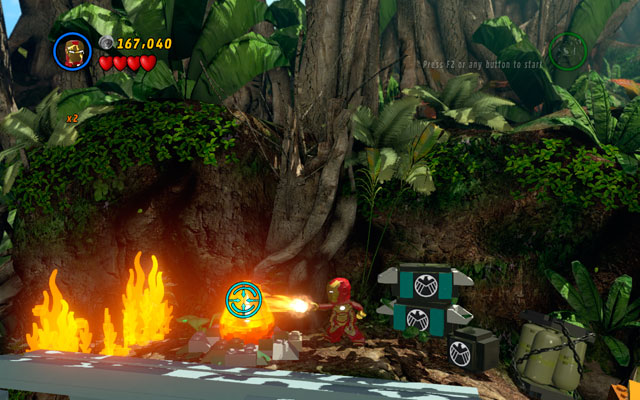
Second one is hidden on the right, near to the S.H.I.E.L.D. boxes and some flames.
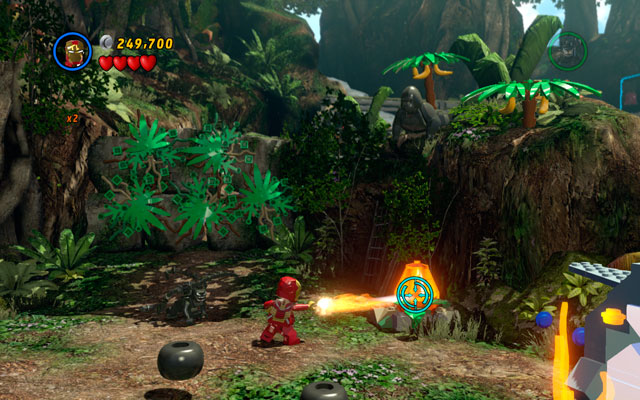
Third one can be found under the gorilla, near to the place with constructible engine.
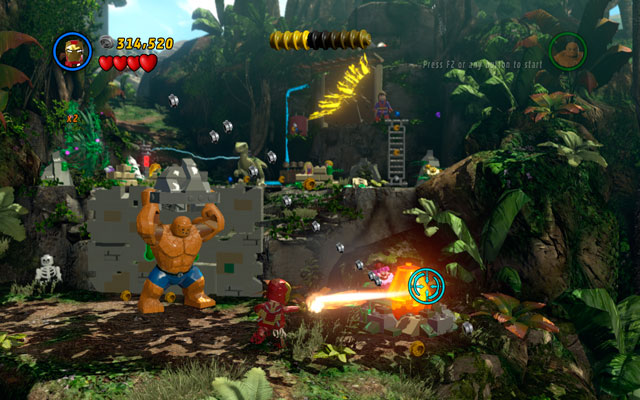
Fourth egg is located a little bit on the right, just under the wall.
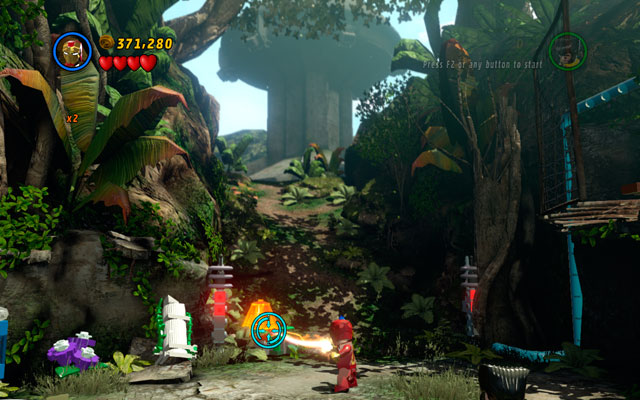
Final, fifth egg can be found near to the exit from this stage, vis-a-vis to the bunker.
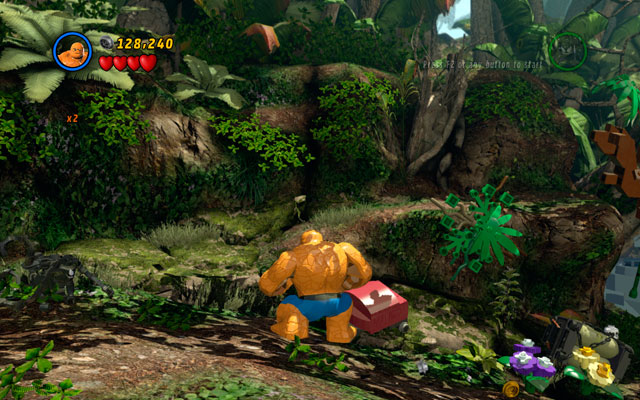
To obtain this minikit, you must destroy four red trunks. First of them is lying at the path at the beginning of the second stage.
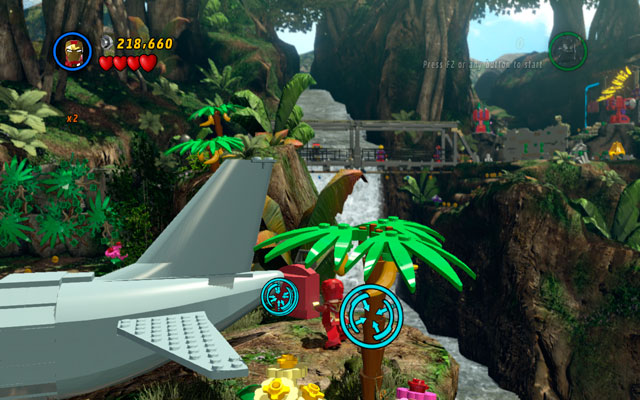
Second one is hidden behind the aeroplane's tail, at the slope.
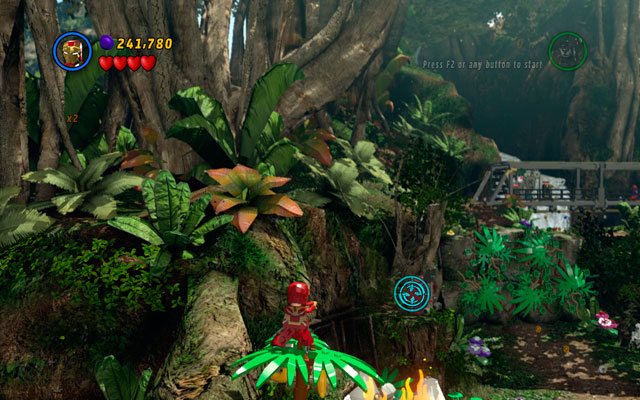
Third one is located at the rock platform, little above from the flames and eggs (you will find Stan Lee there).
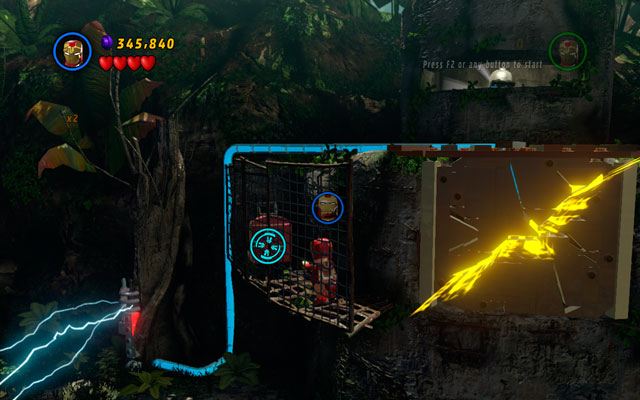
The last trunk is hidden in the bunker at the end of this stage, on the left.
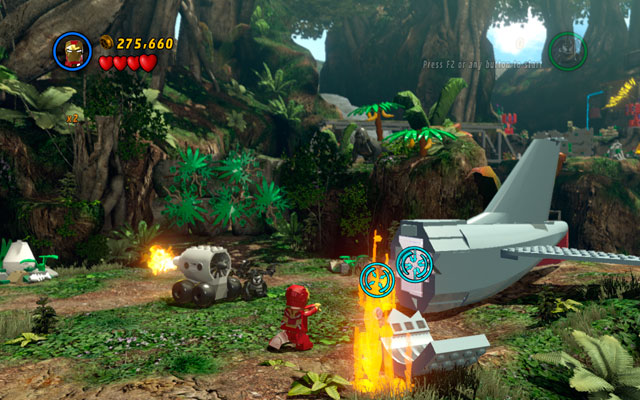
Go to the shattered aeroplane and use Iron Man's rockets to destroy silver plate on the tail - that's the only way to uncover this minikit.
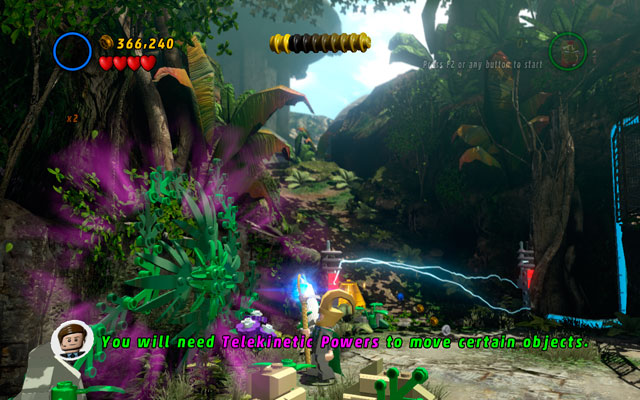
Vis-a-vis from the bunker you can find a huge shrub. Manipulate it using Loki's telekinetic skills to obtain some bricks. Then build iron bars from the debris and pass through the passage using Mr. Fantastic ability.
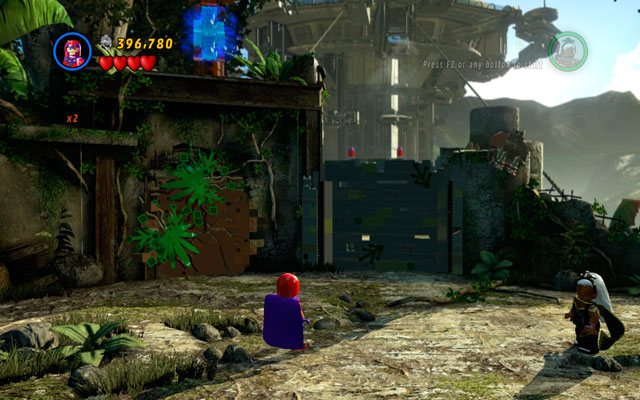
Reach to the final, third stage and choose Magneto. Approach to the metal sculpture located above and manipulate it to obtain next collectible.
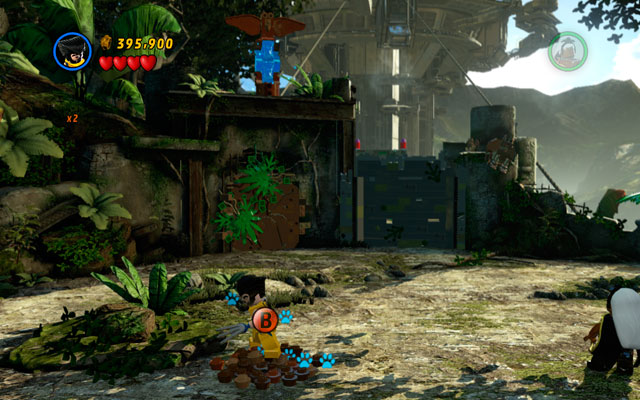
To obtain the last minikit, you need to unearth five pumpkins hidden in the sand piles. First of them can be found at the very beginning of the stage, on the left - use Wolverine's claws to dig priceless vegetable out.
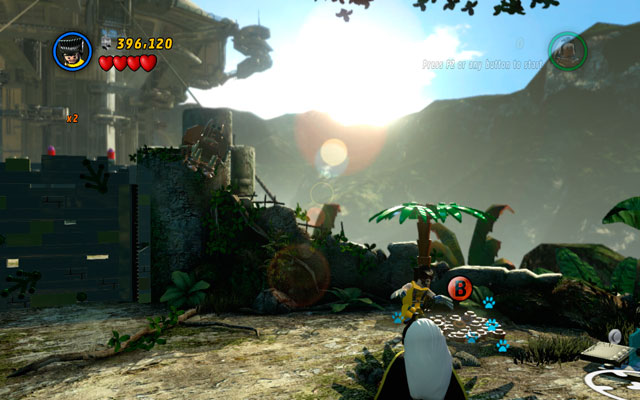
Second one is hidden very close, several steps to the right.
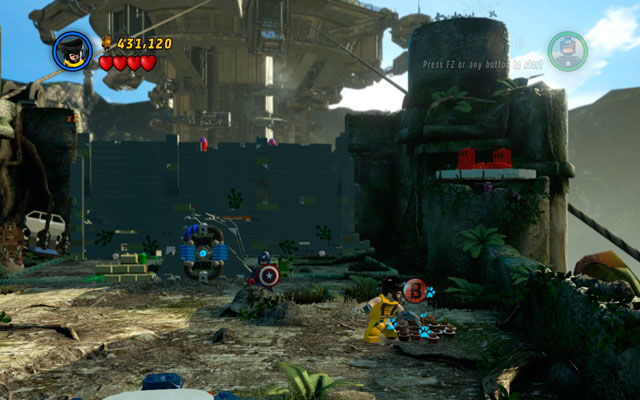
Third sand pile can be reached after destroying the first wall. It is located on the right side, under the cannon.
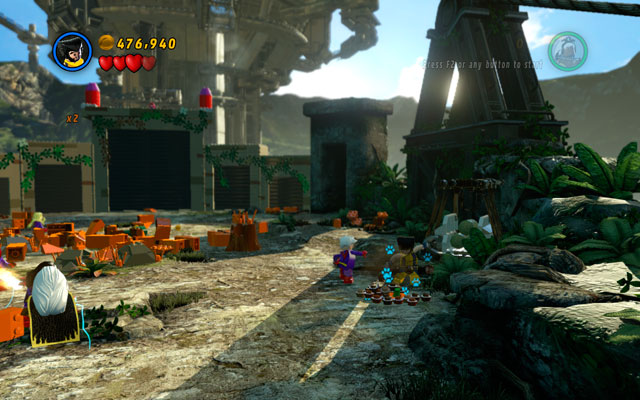
Fourth one can be found during the boss fight. Pumpkin is buried on the right side of the arena.
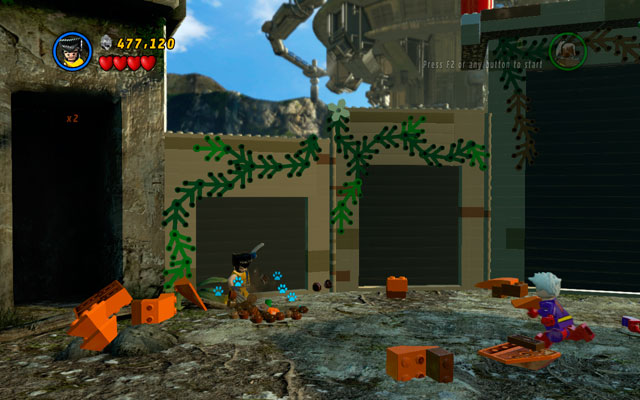
The last pumpkin can be found on the same stage, in the upper-left corner.
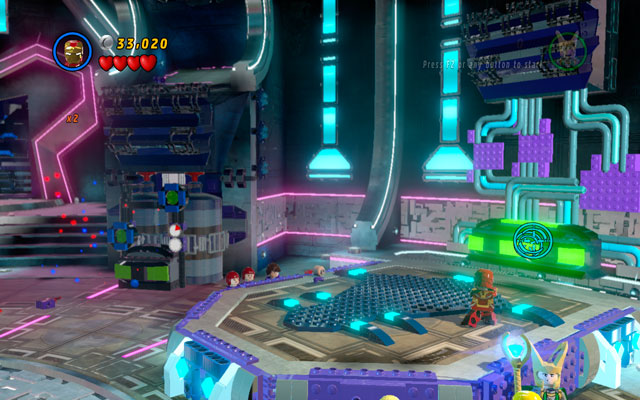
At the beginning of the mission turn right, approaching to the green box. Destroy it and manipulate violet bricks with telekinetic abilities (e.g. Jean Grey's) to create a proper connection for the cables.
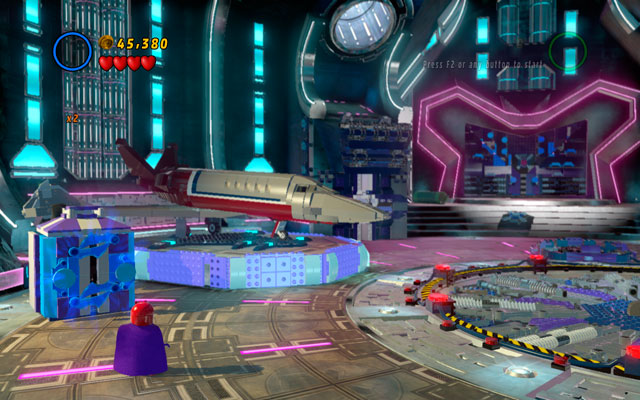
Choose Magneto and turn left, approaching to the metal box. Open it to unlock some black cosmic bricks. Manipulate them using Galactus powers to build a toy. Drive it for a while and you will receive a minikit.
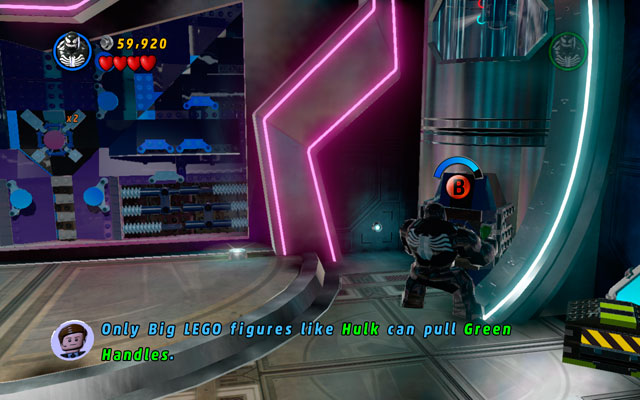
Choose any big character and head to the upper-right corner of the location. Yank two green handles and then extinguish a fire using Storm or Iceman. After that fly to the top of the shaft using flying hero to catch a minikit.
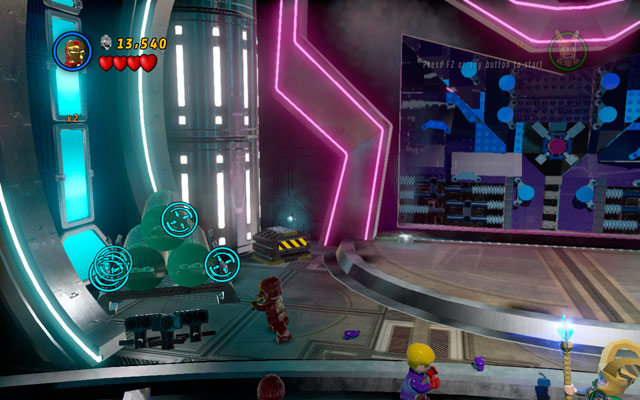
In the same location three barrel racks are hidden (one on the left, two on the right) - destroy them to obtain a minikit.
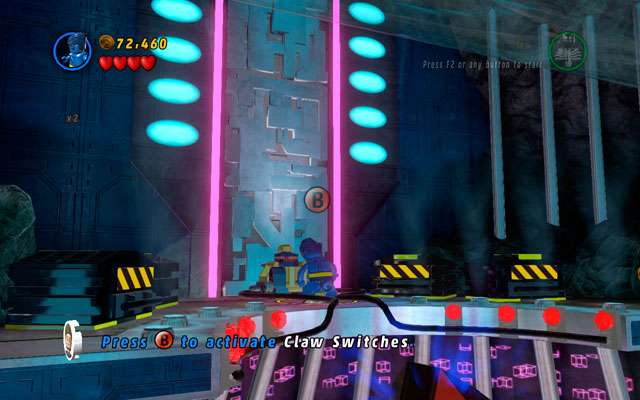
Go to the next stage and fly to the podium (located right at the beginning) and choose a character with claws. Use them to turn the claw switch on, so you can jump down and dig out a minikit from the sand pile.
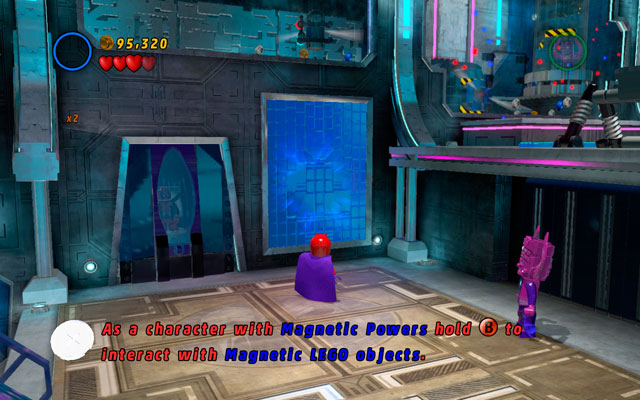
Head left, looking for the blue metal wall. Destroy it using Magneto and construct a throne from the debris. Then turn left and freeze a pool of water using Iceman special abilities.
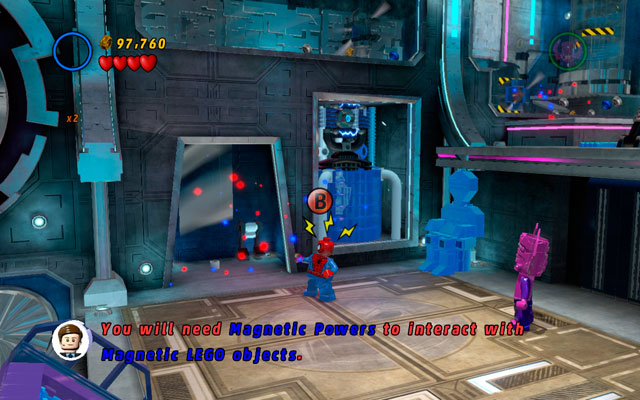
In the same place choose Spider-Man and use spider sense to uncover a passage to the upper floor. A minikit is hidden at the end of it.
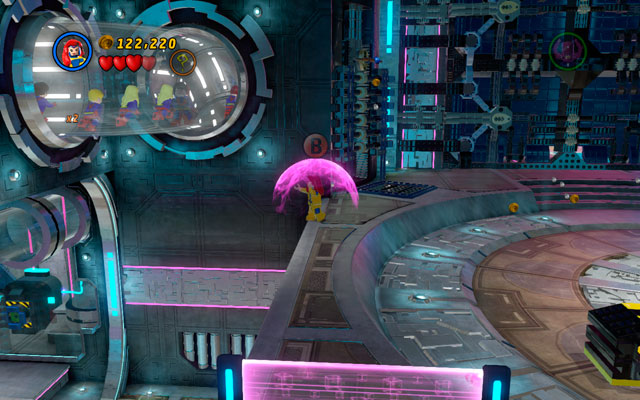
Fly to the higher level and stand at the edge of the platform. Use Jean Grey to take control over the Magneto Acolyte and jump up, so you can catch a minikit.
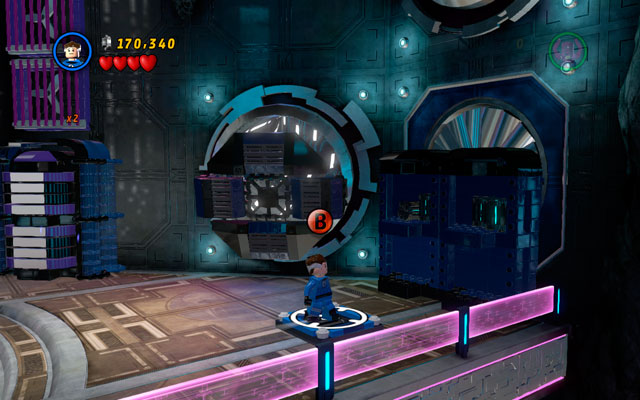
On the right side of the same location search for the iron bars and pass through them as Mr. Fantastic.
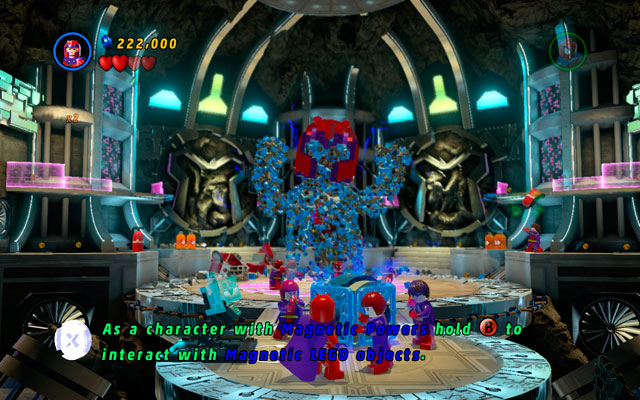
The last minikit can be obtained during the boss fight. Switch into Magneto and open three metal cages using your magnetic skills (they are located on the left, on the right and at the bottom of the arena).
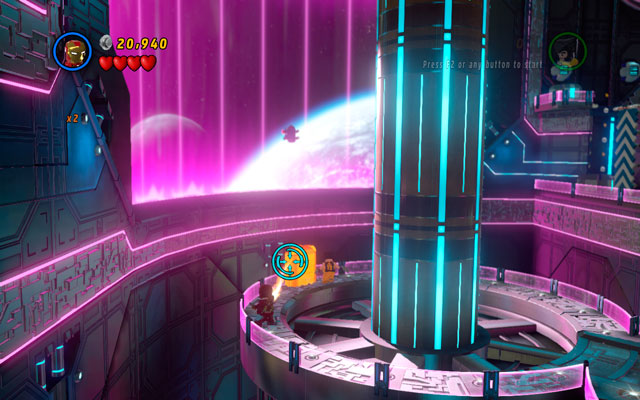
After the beginning turn left and approach to the golden box. Melt it using a fire beam (Human Torch have something like it) and then use a computer.
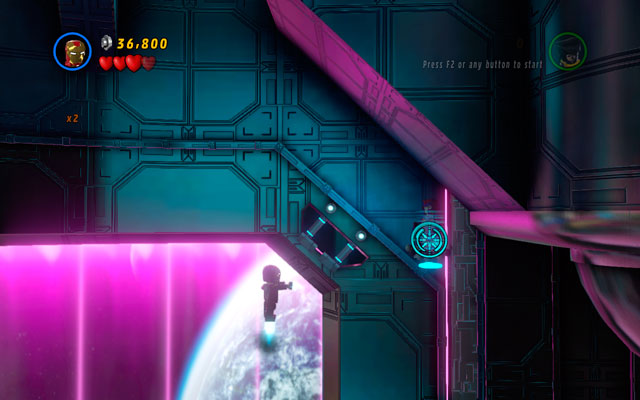
To obtain next minikit, you must destroy five Magneto statuettes located in this room. First of them can be found on the wall near to the violet power field.
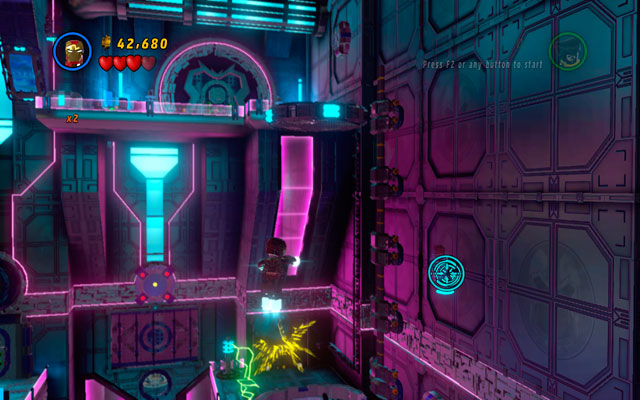
Second one is attached to the wall on the far right.
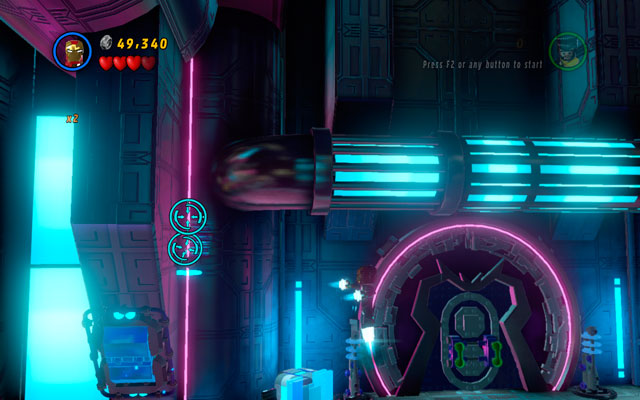
Third is hidden on the left from the exit, in the upper corner.
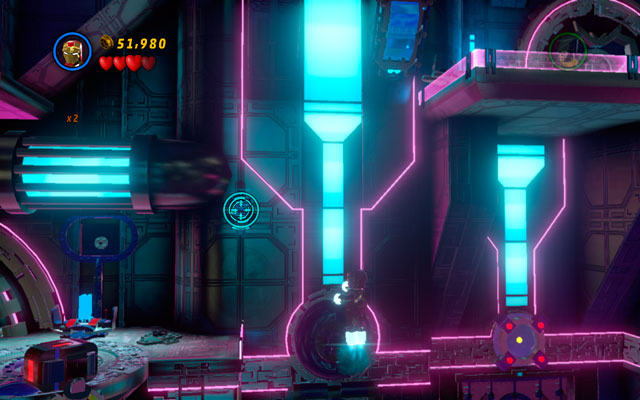
Fourth statuette can be found on the right from the strange machine that should be destroyed during the walkthrough to the next part of the level.

The last Magneto figure is placed in the platform on the right from the huge turbine.
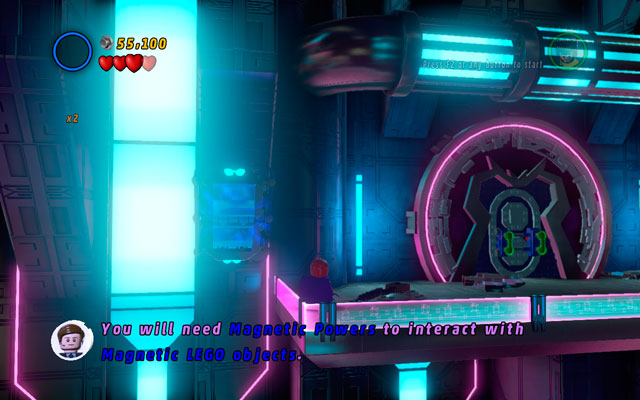
Go to the exit door from the first stage and turn left. Choose Magneto to manipulate a metal box, so you can uncover a minikit.
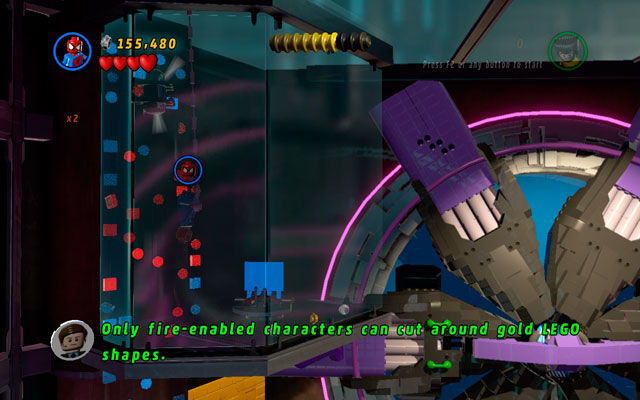
After starting the fire at the highest floor of the stage (see chapter: Walkthrough: A Doom With a View) approach to the flames with Iceman and extinguish them. Now you can pick up a minikit.
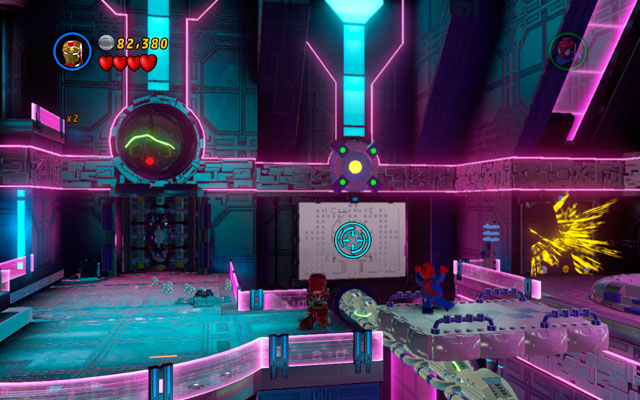
To obtain the last minikit in this room you must start a fire on the highest floor first. After that, defeat all enemies and destroy a silver plate using Iron Man's rockets.

In the room with a huge gate (with the space abyss hidden "inside") turn left and yank two green handles using a big character.
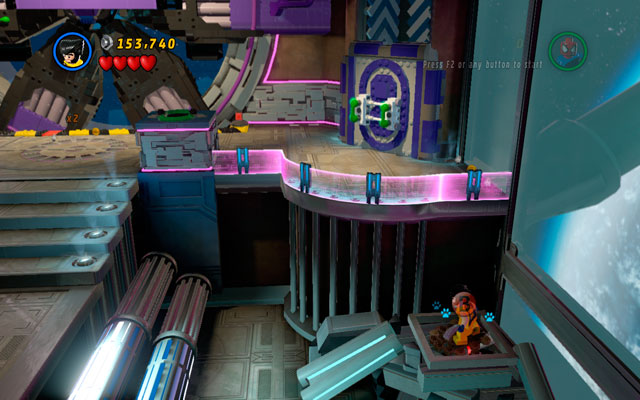
On the opposite side of the same room a pile of sand is hidden. Dig up a minikit from it, using Wolverine or other clawed character.
Go to the left side of the room and fly to the windowed room located above - a minikit is floating there.
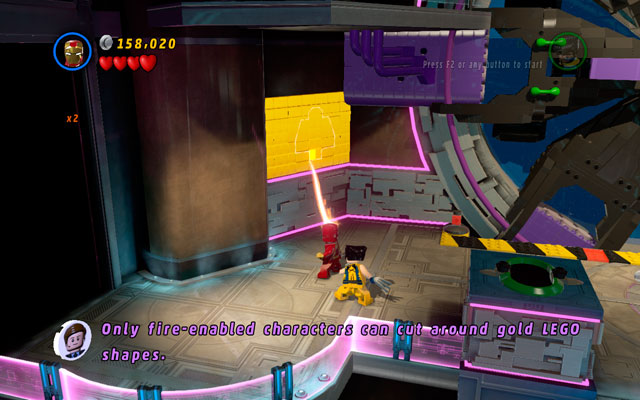
Melt a golden wall under mentioned room using a fire beam and then melt a golden monument.
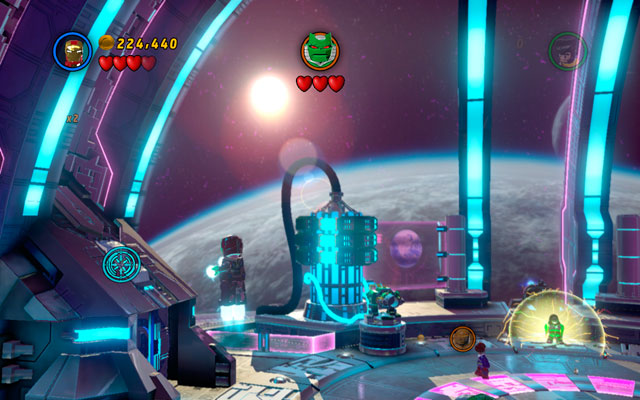
During last fight with Doctor Doom turn left and fly to the silver plate as Iron Man. Shoot at it using your rockets to unlock some black cosmic bricks. Construct a box from them, using Galactus super powers, and wait for minikit to appear.
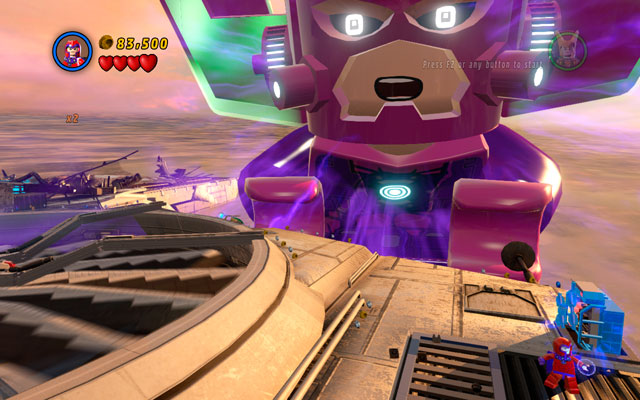
First minikit can be obtained at the beginning of the fight with Galactus. Choose a character capable to extinguish fires (e.g. Storm or Iceman) and put out all flames on the right.
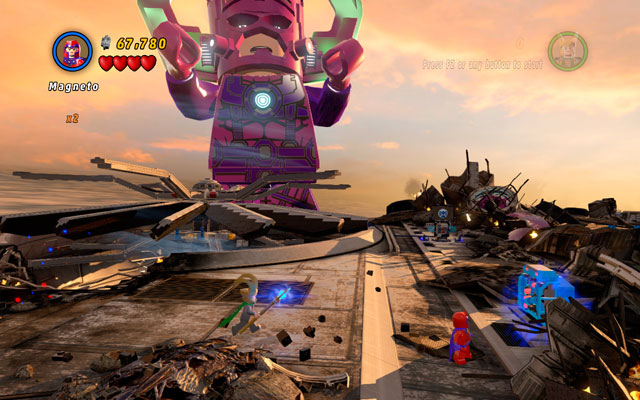
Second minikit is hidden on the left - just use a claw switch with Wolverine or The Beast.
To obtain this minikit, you must break all three metal containers. Choose Magneto and turn right, looking for a target to destroy.
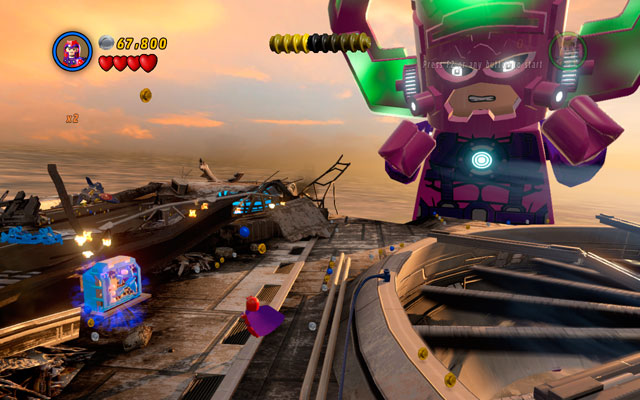
Second box is hidden on the right wing of the Helicarrier - you must fix an engine first to go there. Then you can destroy a container.
Third target is located on the same wing, on the right edge of it.
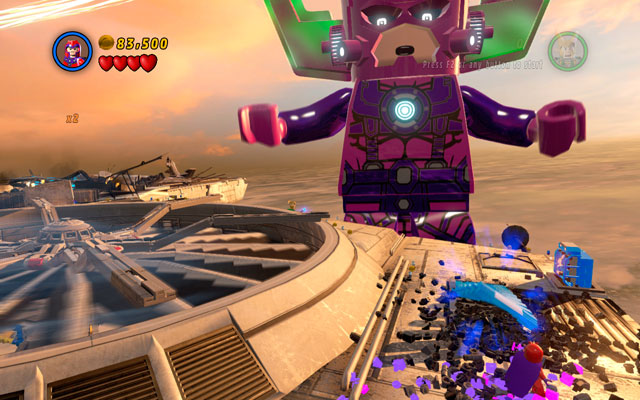
Close to the metal box mentioned above it is a metal plate attached to the wing. Break it using Magneto to uncover new minikit.
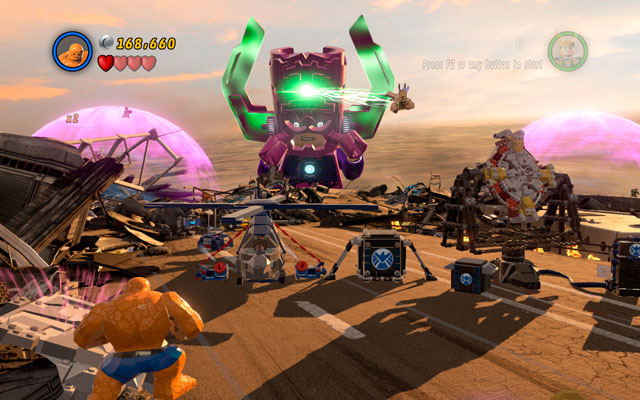
On the third wing choose a big character and destroy a pile of junk located on the left.
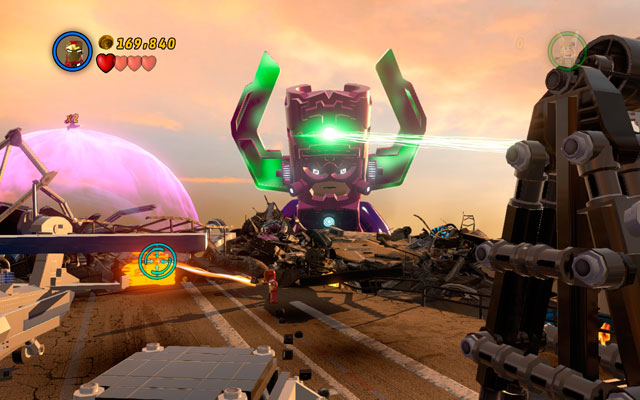
In the same location avoid S.H.I.E.L.D. Helicopter and approach to the golden plate placed next to it. Melt target using a fire beam and pick up a minikit.
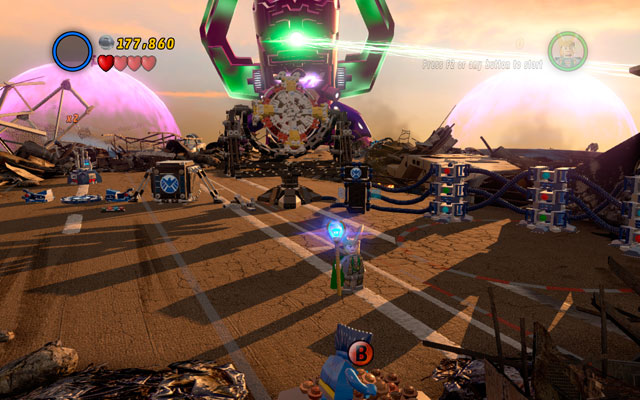
On the same wing choose The Beast or Wolverine and approach to the "surface" of your monitor/TV. Find a pile of sand and dig up some bricks from it. Then build a minikit from them.
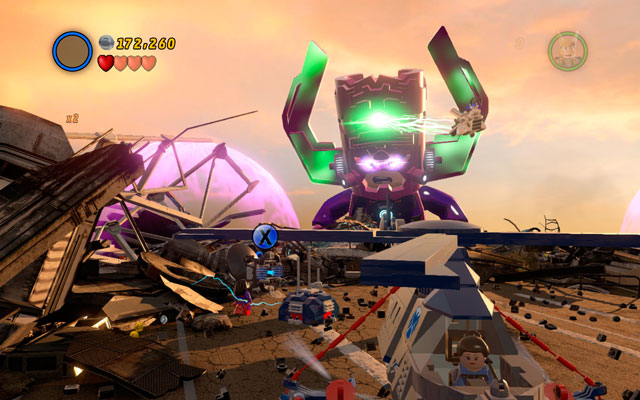
Go to the location where a golden wall was standing (you have already destroyed it - see minikit 6) and turn left. Charge battery with electricity and obtain a minikit.
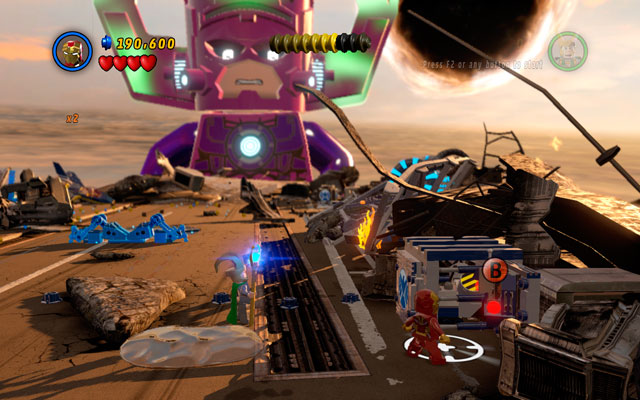
During the last sequence of the fight, choose Iron Man and approach to the computer on the right. Switch it on to take control over the digger. Clean an area from the sand to receive a minikit.
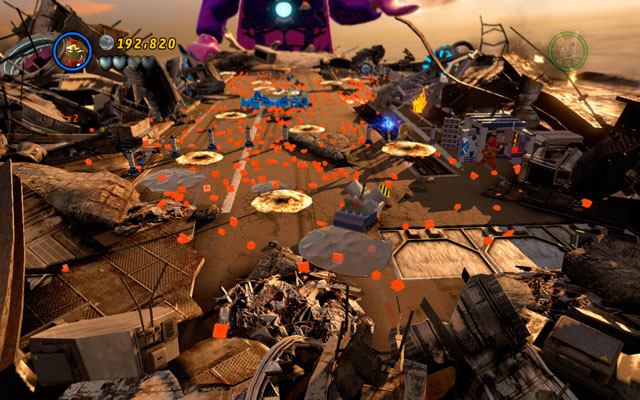
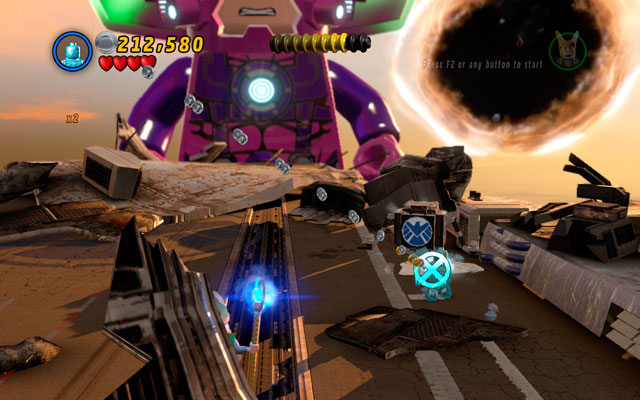
The last minikit can be found in the same location. Turn right and approach to the pool of water with Iceman. Freeze it and pick up collectible - that's all!
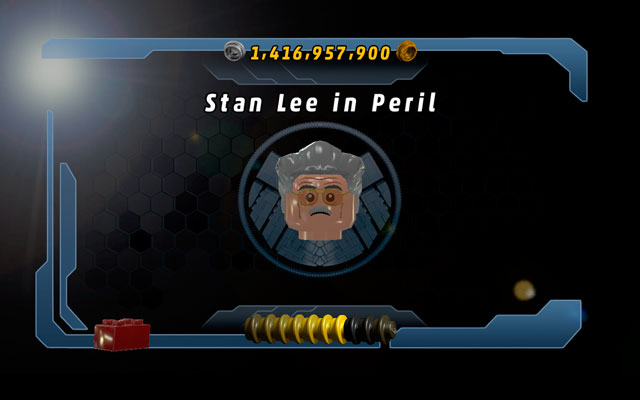
Stan Lee is having a very bad luck - he constantly puts himself into dangerous situations. During gameplay, you must rescue him fifty times to finally obtain him as a playable character. In some way he is a kind of collectible, hidden in the hard-accessible areas.
You can help him:
Rescuing every Stan Lee in Peril is required to beat the game in 100%.
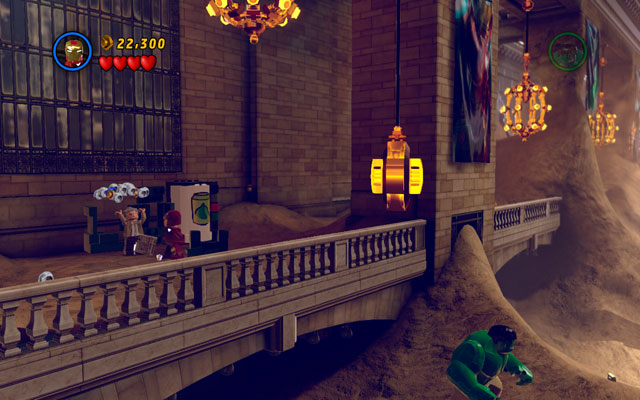
Stan Lee can be rescued for the first time in the mission Sand Central Station.
After the fight with Abomination you will be transferred to the station - then choose Iron Man and fly to the balustrade on the left. Comic book writer can be found under the coffee machine - destroy it to release a poor man.
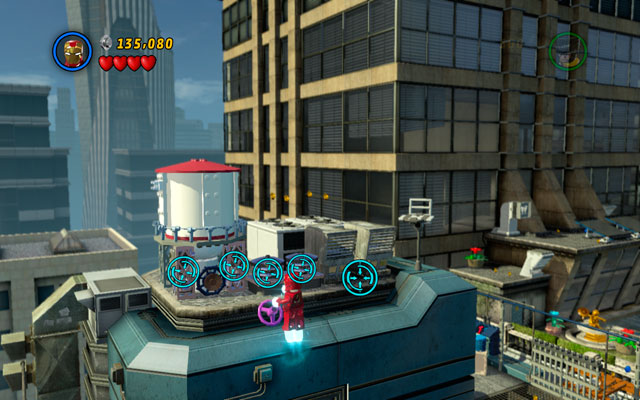
At the end of the stage, but before the final fight with Doctor Octopus, fly to the silo located on the roof of the skyscraper. Use Iron Man's rockets to destroy all silver bricks and build a pump from the debris.
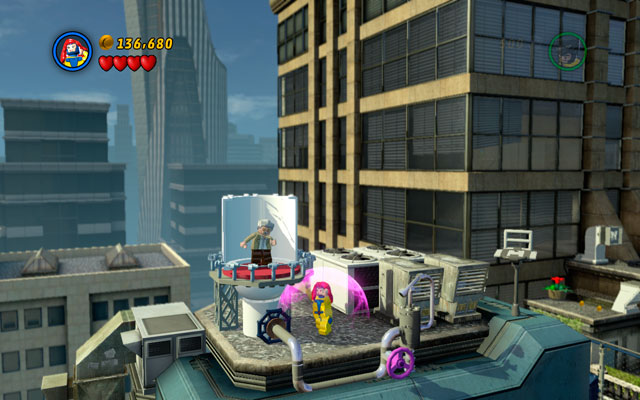
Switch to Jean Grey and use her telekinetic abilities to turn a violet valve. Stan Lee will be saved.
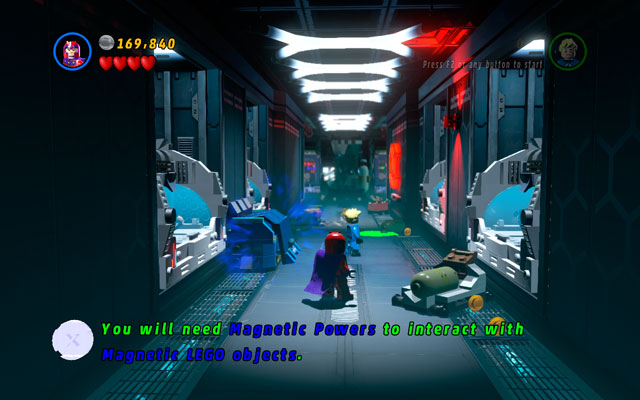
After a short play with the huge speaker you will be moved to the long corridor. Choose Magneto and lift up the metal box standing on the left. When the claw switch appears, use Wolverine's talons to unlock the mechanism - you will receive a minikit and rescue Stan Lee at the same time.
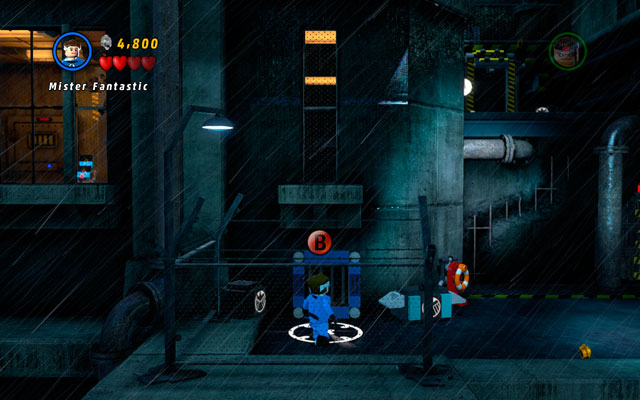
In the first location fly up and head to the interior part of the building, steering to the left side. Destroy all boxes on the upper floor (behind the fence). Build iron bars from the debris and switch into Mr. Fantastic to pass through them.
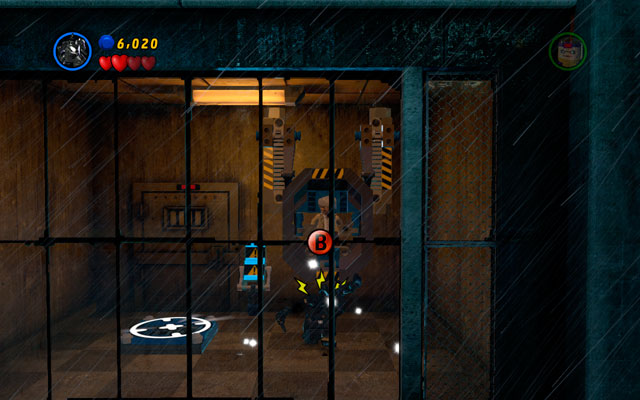
On the other side choose Venom or Spider-Man and use spider sense to uncover attachable points. Yank them with your web to release Stan Lee.
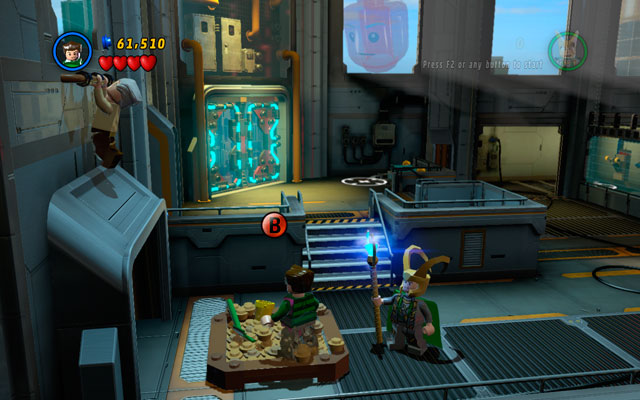
In the second location go down and turn left. Switch into Sandman and use a sandbox to create a trampoline.
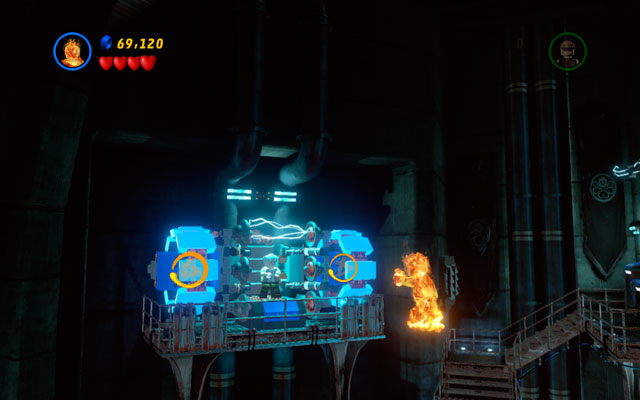
Enter to the factory part of the building (where you have met Human Torch for the first time) and fly up, heading to the upper-left corner of the room. Stan Lee is imprisoned in the strange blue machine - destroy it to rescue the writer.
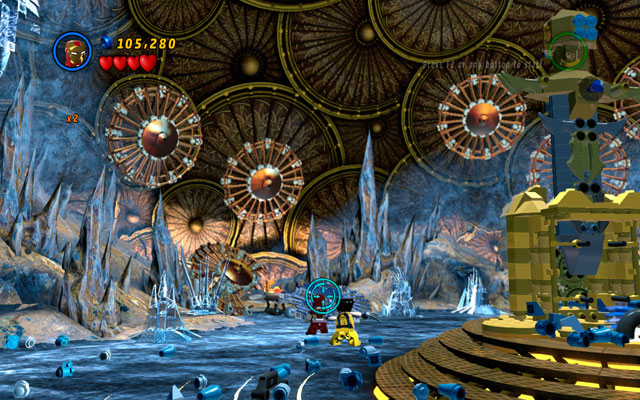
In the observatory (first location) choose Iron Man and shoot your rockets at the silver shield in the central part of the area.
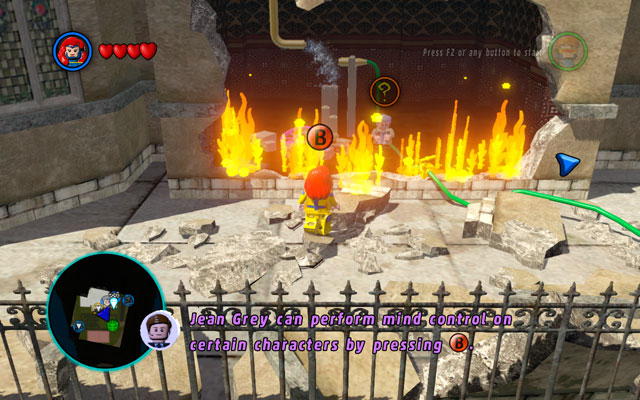
Warning! This location is available after the Bifrosty Reception mission, but before the Juggernauts and Crosses quest.
Stan Lee is surrounded by flames - approach to him as Jean Grey and take control over him. Use an old writer to build a device from the bricks. When it is done, return to the main character and turn violet valve with your telekinetic skills (interaction button). In that moment, all fires will be extinguished.
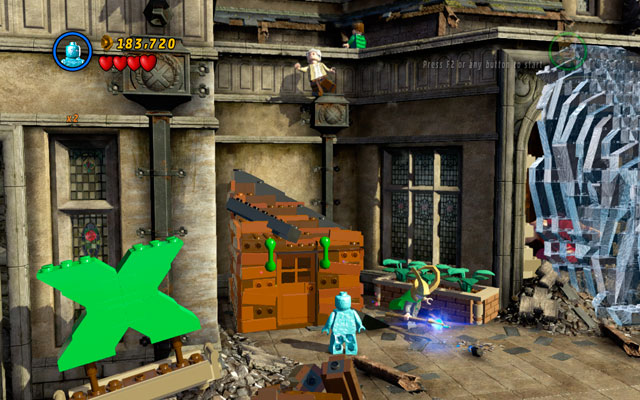
Go to the balcony of the X-Man school and turn right, heading to the burning box. Put all fires down using Iceman and then use some bricks to create green handles. Yank them using any big character to destroy the whole object.
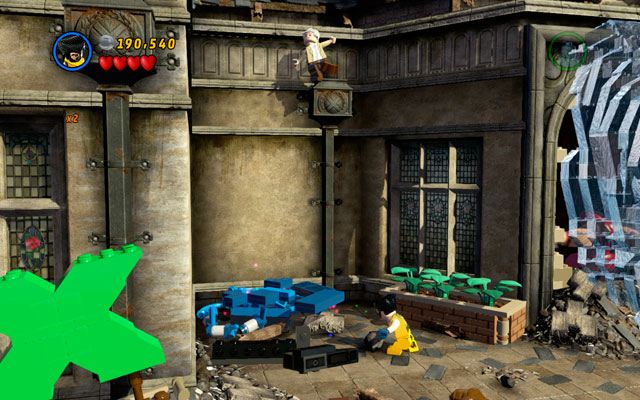
Build a trampoline from the bricks, so Stan Lee can fall safely.
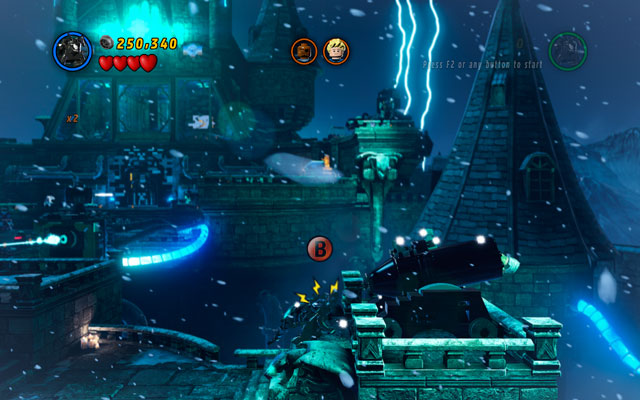
In the location, on which you must save Human Torch and Nick Fury, go to the right part of the castle, so you can see a cannon. Choose Spider-Man or Venom and use spider sense to uncover an attachable point. Yank it with your web, so you can arrange the right arc for the shot.
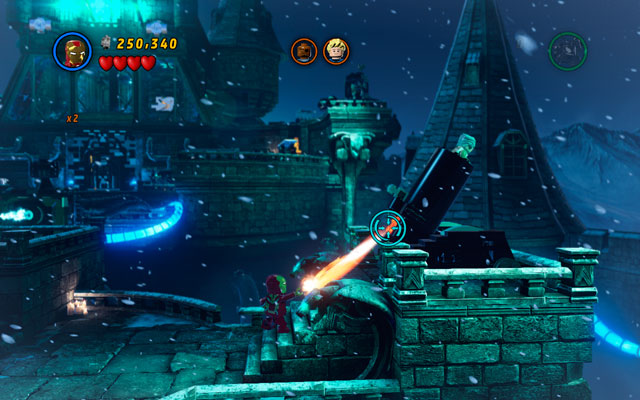
After that switch into Human Torch and fire a flame on the fuse.
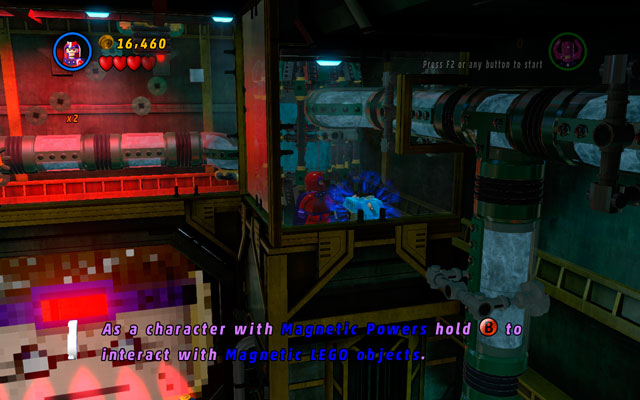
Stan Lee can be rescued at the beginning of the stage - go to the upper floor on the right and switch into Magneto to move a metal box, under which the writer is lying.
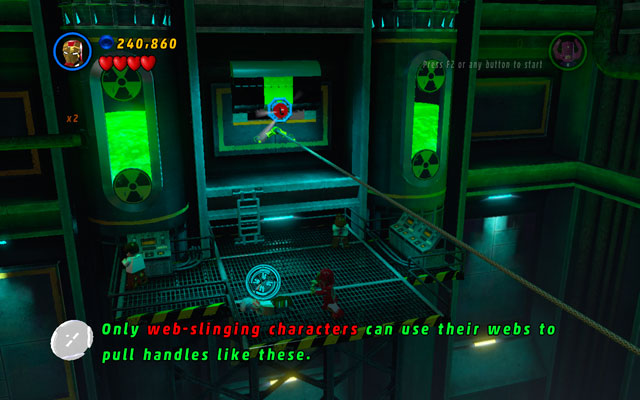
Stan Lee can be found in the second laboratory. Stand between two rotating, electric machines, then fly up and head to the interior of the stage (as the rope in the middle shows). Land on the platform and shoot at the knocked writer to save him.
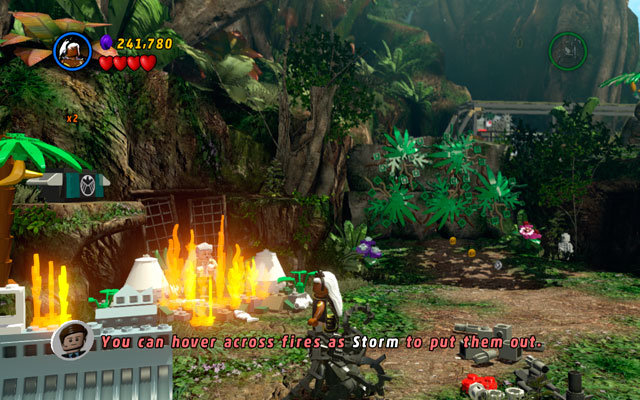
This time Stan Lee can be found in the location with aeroplane - poor man is surrounded by the flames. Extinguish the fire using Storm or Iceman and the problem will be solved.
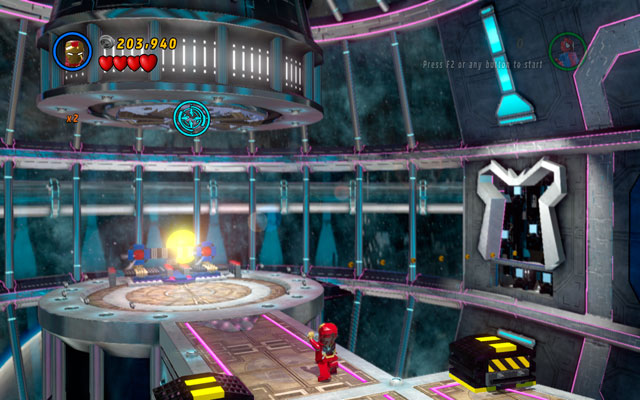
Go to the huge, round hall with the galaxy visible behind the window and look upward. Fire Iron Man's rockets at the silver plate located in the centre of the ceiling to rescue Stan Lee.
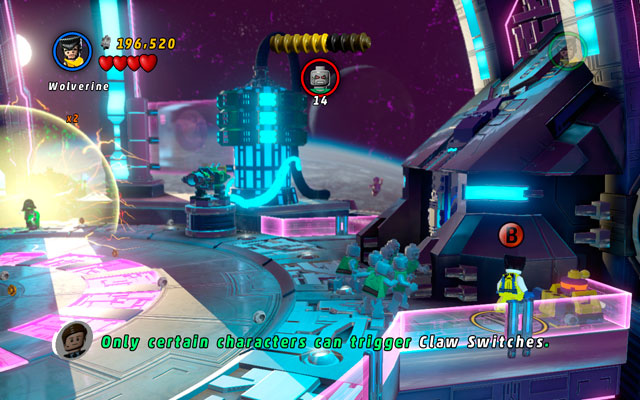
This time Stan Lee can be rescued during the boss fight. Use claw switch on the right with Wolverine to unlock some bricks. Build a computer from them and hack it as Iron Man. That's all!
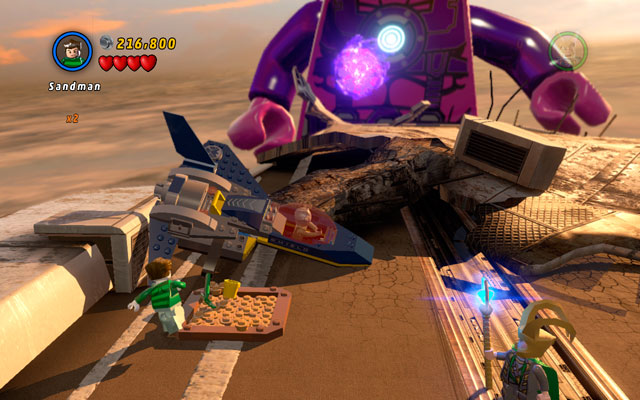
Stan Lee can be saved during the last part of the fight with Galactus. Approach to the jet crushed on the left and switch into Sandman. Now just use sandbox to rescue an old writer.

You will find Stan Lee under the pile of sand in the right side of the room. Choose Wolverine or any other character with claws and dig a hole in that pile. This will set Stan Lee free.

After luring Shocker out from the vault, enter it and switch into Magneto. Open the metal cage with Stan Lee trapped inside and let him find the way out.
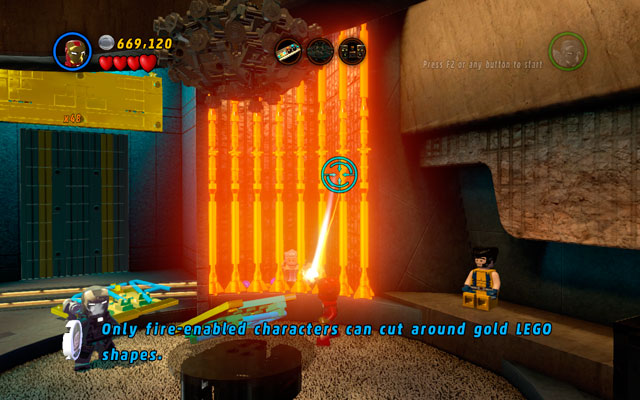
To rescue Stan Lee, walk to the right side of the room and melt the gold bars with a fire beam.

Finally go to the big door placed between the stairs. Choose Magneto to break the door open and release Stan Lee.

You may rescue Stan Lee with an Iceman - simply go to the fireplace and put out the fire.

Turn right in the back of the room. Choose Magneto and lift off the metal weight to rescue Stan Lee.
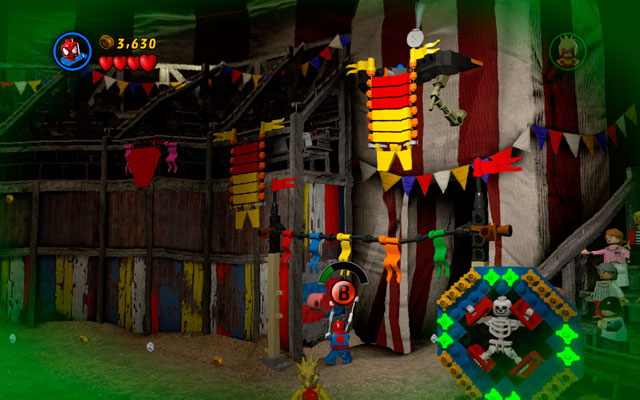
Switch into Spider-Man and go to the right side of the arena using your sixth sense. You will find two attachable points - pulling them will reveal a golden wall. Melt it using any character with a fire beam.

Choose Galactus or other character with telekinesis power and pull out Stan Lee from the giant black hat.
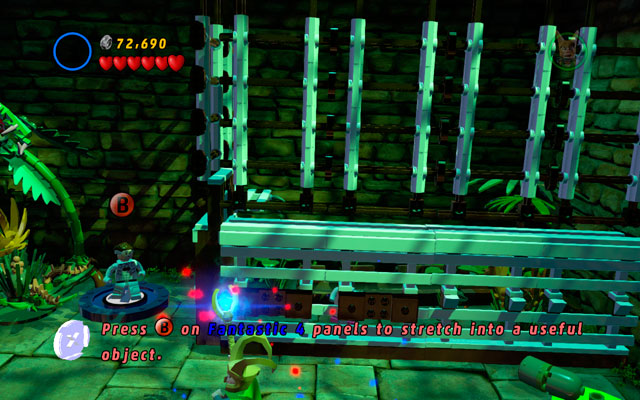
On the last stage turn left as a character with claws (e.g. Wolverine), then dig out the elements of F.F. Panel from the sand pile. Put them together into one object and - as Mr. Fantastic - use it to rescue Stan Lee.

After you scare away Dormammu from the shower, switch into Spider-Man or Venom and use the sixth sense. Now find the web handles - pulling them will create a hole in the ceiling. Go through it to the upper level.
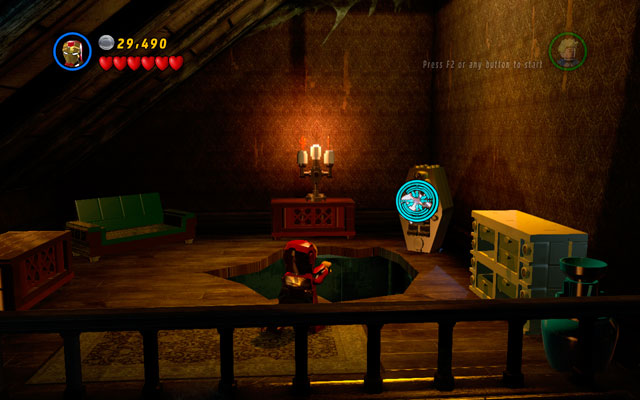
To rescue Stan Lee, choose character with rocket attack and shoot at the silver padlock on the coffin.
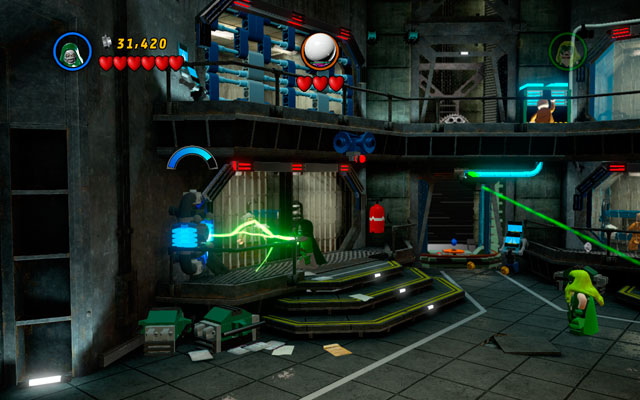
Choose any character with electric powers and charge up the battery placed near to the cell on the left. You will set Stan Lee free in this way.

To rescue Stan Lee, choose Magneto or Polaris and - with their special powers - open the metal jaws placed on the right side of the gate.
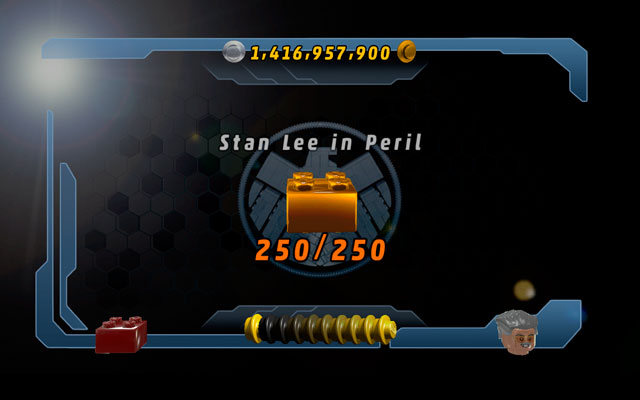
Gold Bricks is a kind of reward, granted for spectacular acts of heroism. You can obtain them through:
During whole gameplay you can collect 250 Gold Bricks, which are required to unlock some of the Deadpool Bonus Missions (see Deadpool Bonus Mission chapter for more information). Remember that you need to collect all of the Gold Bricks to complete the game in 100%. If you missed some of them, just look to the appropriate parts of this guide (we think that our maps are especially helpful in this case).
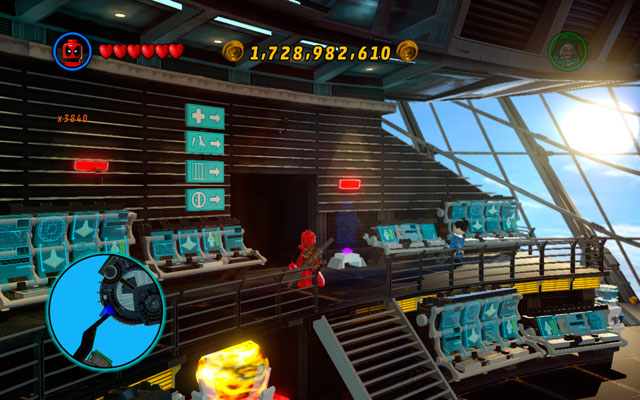
Red Bricks (or Deadpool Bricks) are collectibles obtainable during Deadpool's bonus missions. To get access to them, complete the stage for the first time - that's the way to unlock the free play mode, which grants you an option to control more characters with different abilities (during first play you will not have an access to full character reel). Only specific heroes can reach areas, on which Red Bricks are hidden.
Each of the Red Brick grants you different bonuses, unlockable at Extras section - pause the game to reach it. Remember that you must bought them first in Deadpool's room, hidden in S.H.I.E.L.D. Helicarrier. To go there, exit the main room using the door on the left and then enter the chamber located on the right (as screen shows).
Collecting all Red Bricks is required to complete the game in 100%.

This is the overview of all Red Bricks:
Name
Deadpool Mission
Location
Gold Bricks Required
Cost
Disguises
---
Available from the start
0
300000
Festive hats
---
Available from the start
0
100000
Extra hearts
---
Available from the start
0
100000
Studs X2
---
Available from the start
0
1000000
Studs X4
Tabloid Tidy Up
Daily Bugle (Map of Important Locations [16])
0
2000000
Collect Ghost Studs
A Shock Withdrawal
Bank in Financial District (Map of Important Locations [17])
0
100000
Studs X10
House Party Protocol
Stark Tower Balcony (Map of Important Locations [18])
0
5000000
Gold Brick Detector
Nuff Said
Marvel building (Map of Important Locations [19])
0
200000
Studs X6
Feeling Fisky
Fisk Tower (Map of Important Locations [20])
50
3000000
Minikit Detector
Put Up Your Dukes
Fogwell Gym (Map of Important Locations [21])
75
200000
Attract Studs
Stunt Show Surprise
Circus in Central Park (Map of Important Locations [22])
100
600000
Studs X8
Reptilian Ruckus
Reptilian Cave in Central Park (Map of Important Locations [23])
125
4000000
Fast Build
Stranger Danger
Sanctum Sanctorum (Map of Important Locations [24])
150
100000
Character Token Detector
Thrill of the Chess
Hidden cell on the Ramp Island (Map of Important Locations [25])
175
800000
Mini Characters
Bro-Tunheim
Teleport at the lake (Map of Important Locations [26])
200
100000
They are 152 characters in the game - some of them are automatically obtained after completing specific mission from the main (or bonus) campaign, but majority must be unlocked in the other way.
Several heroes and villains can be get in the New York City area (look: Map of the Characters) - usually you must resolve some riddles to obtain them. 11 other characters can be found in Deadpool's Bonus Missions, during exploration in free play mode. Three final heroes appear at the end of the game, when all other quests are completed.
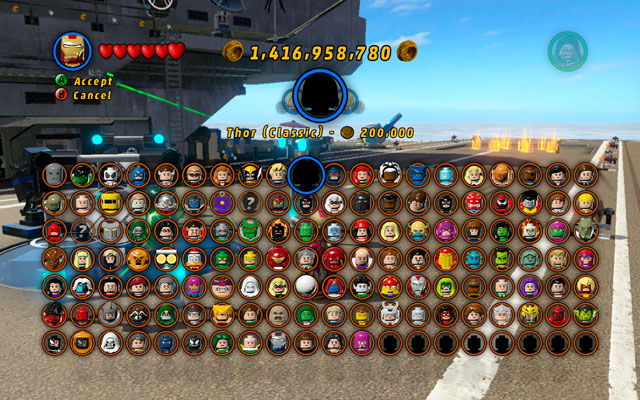
Some characters must be bought to become playable. To buy specific hero, open character reel after completing the main campaign (Y button on Xbox) and choose your favorite, paying studs.
Name
How to unlock
Abilities

Iron Man
(Mark 6)
Finish mission Sand Central Station
Rockets (damage Silver Bricks), Flying, Chest Cannon
Intelligent - can use advanced computers

Hulk
Finish mission Sand Central Station
Powerful Punch, Jump, Use Unnatural Strength/Lift an Object, Change into Bruce Banner
Can't build anything from bricks

Spider-Man
Finish mission Sand Central Station
Web-shot, Jump/Web, Spider sense (detect hidden objects)
Roxxon Guard
Finish mission Sand Central Station
Price: 150000
Shot, Jump

Sandman
Finish mission Sand Central Station
Price: 175 000
Punch, Jump, Use the sand

Captain America
Finish mission Times Square Off
Punch/Shield Toss, Jump, Hide Behind the Shield (allow to temporally extinguish fire and reflect beam attacks)

Mr. Fantastic
Finish mission Times Square Off
Long Range Punch/Extended Arms, Jump/Glide, Make a Way Through Iron Bars/Change Shape
Intelligent - can use advanced computers

Doctor Octopus
Finish mission Times Square Off
Long Range Punch/Extended Arms, Jump, Sixth Sense (detect hidden objects)
Intelligent - can use advanced computers

H.E.R.B.I.E.
Finish mission Times Square Off
Price: 200000
Punch, Jump
Intelligent - can use advanced computers

Black Widow
Finish mission Exploratory Laboratory
Fire the Gun, Jump, Invisibility (hide you from cameras)
Intelligent - can use advanced computers

Hawkeye
Finish mission Exploratory Laboratory
Explosive Arrow/Arrow with Rope, Jump, Shoot Three Arrows in the Same Time

Symbiote Scientist
(Hazmat)
Finish mission Exploratory Laboratory
Price: 150000
Punch, Jump, Create a Sword

Venom
Finish mission Exploratory Laboratory
Web-shot, Jump/Web, Spider Sense (detect hidden objects), Big Form (turns Venom into huge beast)

Tony Stark (Underwear)
Finish mission Rock Up at the Lock Up
Punch, Jump
Intelligent - can use advanced computers

Wolverine
Finish mission Rock Up at the Lock Up
Claw Attack, Jump, Sniffing/Digging (detect and dig out hidden objects)

Abomination
Finish mission Rock Up at the Lock Up
Price: 250 000
Powerful Punch, Jump, Use Unnatural Strength/Lift an Object
Can't build anything from bricks

Sabretooth
Finish mission Rock Up at the Lock Up
Price: 250000
Claw Attack, Jump, Sniffing/Digging (detect and dig out hidden objects)

Iron Man (Mark 1)
Finish mission Rebooted, Resuited
Rockets (damage Silver Bricks), Jump, Chest Cannon
Intelligent - can use advanced computers

Iron Man (Mark 42)
Finish mission Rebooted, Resuited
Rockets (damage Silver Bricks), Flying, Beam Attack (cuts Golden Objects)
Intelligent - can use advanced computers

Tony Stark
Finish mission Rebooted, Resuited
Punch, Jump
Intelligent - can use advanced computers

Aldrich Killian
Finish mission Rebooted, Resuited
Price: 150 000
Punch, Jump, Fire Shot

Mandarin
Finish mission Rebooted, Resuited
Price: 100000
Shot, Jump, Fire Beam (cuts Golden Objects)
Intelligent - can use advanced computers

Human Torch
Finish mission Red Head Detention
Fire Punch/Fire Shot, Flight, Fire Beam (cuts Golden Objects)
Arnim Zola
Finish mission Red Head Detention
Price: 200000
Punch, Jump, Electric Beam
Intelligent - can use advanced computers

Red Skull
Finish mission Red Head Detention
Price: 200000
Fire a Gun, Jump

Thor
Finish mission Bifrosty Reception
Hammer Smash/Hammer Throw, Jump/Flight, Charge Hammer/Electric Beam

Destroyer (MiniFig)
Finish mission Bifrosty Reception
Price: 250000
Fireball, Jump, Fire Beam (cuts Golden Objects)

Frost Giant
Finish mission Bifrosty Reception
Price: 250000
Shot, Jump

Jean Grey
Finish mission X-Mansion
Shot, Jump/Float, Force Barrier/Mind Control/Telekinesis (allow you to move violet bricks)
Intelligent - can use advanced computers

Cyclops
Finish mission X-Mansion
Shot, Jump, Beam Attack (cuts Golden Objects)

Storm
Finish mission Juggernauts and Crosses
Punch, Jump/Float (allow to extinguish flames), Charge Lightning/Electric Beam
Beast
Finish mission Juggernauts and Crosses
Punch, Jump, Animal Instinct (detect hidden objects)
Intelligent - can use advanced computers
Iceman
Finish mission Juggernauts and Crosses
Punch, Jump/Ice-surfing, Ice Beam (extinguishes fire and turns water or enemies into solid ice blocks)

Juggernaut
Finish mission Juggernauts and Crosses
Price: 250000
Powerful Punch, Jump, Use Unnatural Strength/Lift an Object
Can't build anything from bricks

Pyro
Finish mission Juggernauts and Crosses
Price: 150000
Fireball, Jump, Fire Beam (cuts Golden Objects)

Invisible Woman
Finish mission Doctor in the House
Shot, Jump, Invisibility + Barrier/Telekinesis/Reflect Beam

The Thing
Finish mission Doctor in the House
Powerful Punch, Jump, Use Unnatural Strength/Lift an Object
Can't build anything from bricks

Nick Fury
Finish mission Doctor in the House
Fire a Gun, Jump, Invisibility (hide you from cameras)
Doombot
Finish mission Doctor in the House
Price: 250000
Shot, Jump

Green Goblin
Finish mission Doctor in the House
Throw a Bomb (damage Silver Bricks), Jump/Flight, Throw a Bomb

A.I.M. Agent
Finish mission That Sinking Feeling
Price: 250000
Shot, Jump

M.O.D.O.K.
Finish mission That Sinking Feeling
Price: 250000
Shot/Deadly Beam, Jump/Floating, Fire from the Snout
Intelligent - can use advanced computers

Liberty
Finish mission Taking Liberties
Price: 250000
Punch, Jump

Mastermind
Finish mission Taking Liberties
Price: 250000
Punch, Jump, Mind Control/Telekinesis (allow you to move violet bricks)

Mystique
Finish mission Rapturous Rise
Shot a Gun, Jump, Change a Shape (hide you from cameras)

Rhino
Finish mission Rapturous Rise
Price: 250000
Powerful Punch, Jump, Use Unnatural Strength/Lift an Object
Can't build anything from bricks

Magneto
Finish mission Magnetic Personality
Price: 150000
Shot, Floating, Manipulate Metal Objects

Magneto Acolyte
Finish mission Magnetic Personality
Price: 15000
Shot, Jump, Electric Beam

Doctor Doom
Finish mission A Doom With a View
Shot, Jump, Electric Beam.

Doombot (V Series)
Finish mission A Doom With a View
Price: 175000
Powerful Punch, Jump, Use Unnatural Strength/Lift an Object
Can't build anything from bricks
Galactus
Finish mission The Good, the Bad and the Hungry
Shot, Jump/Flying, Deadly Beam/Telekinesis
The only character that can manipulate cosmic bricks

Loki
Finish mission The Good, the Bad and the Hungry
Punch/Shot, Jump, Freezing/Telekinesis
Name
How to unlock
Abilities

Agent Coulson
Finish mission Tabloid Tidy Up
Punch/Fire Rocket (damage Silver Bricks), Jump

J. Jonah Jameson
Finish mission Tabloid Tidy Up
Price: 150000
Punch, Jump, Throw a Newspaper

Doctor Octopus (Ultimate)
Token is obtainable during Tabloid Tidy Up mission
Price: 150000
Long Range Punch/Extended Arms, Jump, Sixth Sense (detect hidden objects)
Intelligent - can use advanced computers

Daredevil
Finish mission Feeling Fisky
Punch/Staff Toss, Jump, Sixth Sense (detect hidden objects)

Kingpin
Finish mission Feeling Fisky
Price: 150000
Shot, Jump, Use Unnatural Strength/Lift an Object
Can't build anything from bricks

Kingpin Henchman
Token is obtainable during Tabloid Tidy Up mission
Price: 150000
Shot, Jump

Howard the Duck
Finish mission Nuff Said
Price: 25000
Rocket Shot, Jump

Vulture
Finish mission Nuff Said
Price: 150000
Shot, Jump/Flight

Ms. Marvel
Token is obtainable during Tabloid Tidy Up mission
Price: 200000
Fire Punch/Shot, Flight, Fire Beam (cuts Golden Objects)

Electro
Finish mission A Shock Withdrawal
Price: 150000
Shot, Jump/Flight, Electric Beam

Shocker
Finish mission A Shock Withdrawal
Price: 150000
Shot, Jump, Beam

Moon Knight
Token is obtainable during Tabloid Tidy Up mission
Price: 150000
Boomerang Toss, Jump

Iron Man (Mark 7)
Finish mission House Party Protocol
Price: 150000
Rockets (damage Silver Bricks), Flying, Chest Cannon
Intelligent - can use advanced computers

War Machine
Finish mission House Party Protocol
Price: 150000
Rockets (damage Silver Bricks), Flying, Shot a Cannon

Iron Man (Heartbreaker)
Token is obtainable during House Party Protocol mission
Rockets (damage Silver Bricks), Flying, Beam Attack (cuts Golden Objects)
Intelligent - can use advanced computers.

Phoenix
Finish mission Put Up Your Dukes
Price: 200000
Fire Shot, Jump/Flight, Fire Barrier

Blob
Finish mission Put Up Your Dukes
Price: 250000
Powerful Punch, Jump, Use Unnatural Strength/Lift an Object
Can't build anything from bricks

Wolverine (Cowl)
Token is obtainable during Put Up Your Dukes mission
Price: 250000
Claw Attack, Jump, Sniffing/Digging (detect and dig out hidden objects)

Ghost Rider
Finish mission Stunt Show Surprise
Price: 150000
Long Range Punch, Jump, Fire Beam (cuts Golden Objects)

Nightmare
Finish mission Stunt Show Surprise
Price: 250000
Shot, Jump, Deadly Beam

Mandarin (Film)
Token is obtainable during Stunt Show Surprise mission
Price: 150000
Punch, Jump

Curt Connors
Finish mission Reptilian Ruckus
Price: 200000
Punch/Throw a Bottle, Jump, Turn into Giant Reptile

Symbiote Scientist
Finish mission Reptilian Ruckus
Price: 150000
Punch, Jump, Create Sword

The Thing (F.F.)
Token is obtainable during Reptilian Ruckus mission
Price: 250000
Powerful Punch, Jump, Use Unnatural Strength/Lift an Object
Can't build anything from bricks

Doctor Strange
Finish mission Stranger Danger
Price: 150000
Shot, Jump/Flight, Deadly Beam

Dormammu
Finish mission Stranger Danger
Price: 250000
Shot, Jump, Deadly Beam

Invisible Woman (F.F.)
Token is obtainable during Stranger Danger mission
Price: 200000
Shot, Jump, Invisibility + Barrier/Telekinesis/Reflect Beam

Mysterio
Finish mission The Thrill of the Chess
Price: 150000
Shot, Jump, Beam

Polaris
Finish mission The Thrill of the Chess
Price: 150000
Shot, Jump/Floating, Manipulate Metal Objects

Green Goblin (Ultimate)
Token is obtainable during The Thrill of the Chess mission
Price: 175000
Powerful Punch, Jump, Use Unnatural Strength/Lift an Object
Can't build anything from bricks
Laufey
Finish mission Bro-tunheim
Price: 250000
Punch, Jump, Ice Beam (extinguishes fire and turns water or enemies into solid ice blocks)

Malekith
Finish mission Bro-tunheim
Price: 250000
Shot, Jump

Thor (Classic)
Token is obtainable during Bro-tunheim mission
Price: 200000
Hammer Smash/Hammer Throw, Jump/Flight, Charge Hammer/Electric Beam
Name
How to unlock
Abilities

Captain America (Classic)
Finish mission The Brick Apple?
Price: 150000
Punch/Shield Toss, Jump, Hide Behind the Shield (allow to temporally extinguish fire and reflect beam attacks)

Union Jack
Finish mission The Brick Apple?
Price: 150000
Shot, Jump
Name
How to unlock
Location
Abilities

Damage Control
Extinguish fire on the S.H.I.E.L.D. Helicarrier
Price: 150000
Characters Map [1]
Punch, Jump

Agent S.H.I.E.L.D.
Shoot every target in the area using Helicarrier cannon (located underneath most rear part of the vehicle)
Price: 150000
Characters Map [2]
Shot, Jump
Maria Hill
To get her, complete three missions:
Win the race (Vehicles Map [2])
Defeat all A.I.M. Agents (Vehicles Map [3])
Win second race (Characters Map [3])
Price: 150000
Characters Map [3]
Shot, Jump, Invisibility (hide you from cameras)

Emma Frost
Warning! This character won't appear on the map until the first quest for Professor Xavier is finished (Vehicles Map [4])!
Approach to Professor Xavier and talk to him. Then take control over the distressed student (use hero with telepathic abilities) and take him across the maze.
Price: 150000
Characters Map [4]
Punch, Jump, Diamond Form (reflect all beams)

Professor X
Warning! This character won't be obtainable until finishing the quest referring to Emma Frost (Characters Map [4])!
Use hero with telekinetic abilities and arrange nearby bricks to create the X shape.
Price: 150000
Characters Map [5]
Punch, Jump, Area Attack/ Telekinesis/ Telepathy

Colossus
Go to the target location and defeat the enemy:
Break silver cover using rocket attack (e.g. Iron Man's)
Slice golden shield using fire beam (Human Torch)
Throw a rock at the chest of the giant droid (Hulk)
Price: 150000
Characters Map [6]
Powerful Punch, Jump, Use Unnatural Strength/Lift an Object
Can't build anything from bricks
Groot
Warning! This character won't appear on the map until two other quest are finished (Vehicles Map [15] and [35])
After meeting with Groot you must kill all nearby moles in designated time
Price: 150000
Characters Map [7]
Powerful Punch, Jump, Use Unnatural Strength/Lift an Object
Can't build anything from bricks

Archangel
Destroy all drain-pipes in designated time (the easiest way to do that is using beam attack)
Price: 150 000
Characters Map [8]
Punch/shot, jump/flying, fast shot

Hydra Agent
Token with this character is hidden on the roof of the building. To reach it, you must destroy the container and a wall standing behind it.
Price: 12 500
Characters Map [9]
Shot, Jump

Havok
Climb on the building and stand on the Captain's America panel, reflecting deadly beam into fan located nearby. Toss a shield at the switch and take precious token.
Price: 150 000
Characters Map [10]
Shot, Jump, Electric Beam

Red Hulk
Defeat Red Hulk
Price: 150000
Characters Map [11]
Powerful Punch, Jump, Use Unnatural Strength/Lift an Object, Change into human
Can't build anything from bricks

Silver Samurai
Approach the maze with Spider-Man and use spider sense to detect all entrances. Then choose Jean Grey and shift violet brick to the finishing line.
Price: 150000
Characters Map [12]
Slash a Katana, Jump

Bullseye
The goal is simple: you must break all of the walls in designated time. Choose Hulk and use interaction button to chip off the rocks and throw them at the following targets.
Price: 150000
Characters Map [13]
Shot, Jump, Fast Shot

She-Hulk
Destroy all seven walls in designated time.
Price: 150000
Characters Map [14]
Punch, Jump, Use Unnatural Strength

Iron Man (Heroic Era)
After meeting with Heimdall defeat all Frost Giants in the area.
Price: 200000
Characters Map [15]
Rockets (damage Silver Bricks), Flying, Chest Cannon
Intelligent - can use advanced computers
Power Man
Defeat 20 opponents in designated time. The easiest way to accomplish that is using one of the big characters (e.g. Hulk).
Price: 150000
Characters Map [16]
Punch, Jump, Use Unnatural Strength

Elektra
Climb on the roof (in meantime destroying ventilation system) and then use the claw switch. Go back to the ground and break the wall standing next to you. Character token is hidden inside.
Price: 150000
Characters Map [17]
Punch/Shot, Jump

Ant-Man
Destroy a car and try to dig out a token from the mound.
Price: 150000
Characters Map [18]
Punch, Jump, Shrink

Sandman Goon
Look beneath the bridge, located at the sea. On the one of pillars you may see damaged wall - break it and get your token.
Price: 150000
Characters Map [19]
Punch/Shot, Jump

Mary Jane Watson
Use spider sense near S.H.I.E.L.D. box located between two buildings. Now open it with your web.
Price: 150000
Characters Map [20]
Punch, Jump

Nova
Travel through all checkpoints in designated time, and you will gain a character token. The easiest way to accomplish that is to use a hero with web ability (e.g. Spider-Man).
Price: 150000
Characters Map [21]
Punch/Shot, Jump/flight, Fire Beam
Kraven the Hunter
Destroy all targets hanging upon a pond.
Price: 150000
Characters Map [22]
Punch/Rope, Jump, Sixth Sense

Leader
Jump between two blue and white walls, climbing on the token location.
Price: 150000
Characters Map [23]
Shot, Jump

Star-Lord
Warning! This character won't appear on the map until the first quest for Rocket Raccoon is accomplished (Vehicles Map [12])!
Defeat all Rocket Raccoon's opponents.
Price: 150000
Characters Map [24]
Shot, Jump/Flying
Carnage
Freeze all wet ventilation shafts with Ice Man (they aren't blocked until ice cubes are standing out!). Change your hero into Mr. Fantastic and use his ability to reach a token -enter to the central, unblocked passage.
Price: 150000
Characters Map [25]
Web-shot, Jump/Web, Spider sense (detect hidden objects)

Beetle
Just take a token from the web.
Price: 150000
Characters Map [26]
Shot (damage Silver Bricks), Flying, Beam Attack (cuts Golden Objects)

Pepper Potts
Defeat all Black Panther's opponents.
Price: 150000
Characters Map [27]
Punch, Jump
Intelligent - can use advanced computers

Rescue
Warning! This mission won't appear on the map until Pepper Potts is rescued (Characters Map [27])!
Firstly: meet with Black Panther and then climb upon the silo, which stands on the right. Move metal bars with Magneto and toss Captain America's shield at the lock. Approach to the bay and throw your shield once more to the second mechanism. When computer appears, use an intelligent character to resolve a simple riddle.
Price: 150000
Characters Map [28]
Rockets (damage Silver Bricks), Flying, Beam Attack (cuts Golden Objects)
Intelligent - can use advanced computers

Absorbing Man
Destroy a well standing on the building site. Token is placed upon a fountain that you have just created.
Price: 150000
Characters Map [29]
Punch, Jump

Viper
Find a box hidden in the bushes and use beam attack to break a lock.
Price: 150000
Characters Map [30]
Shot, Jump

Whiplash
Take control over the clerk (use character with telepathic abilities - e.g. Jean Grey) and turn the computer on. You will find it behind the window, on the left.
Price: 150000
Characters Map [31]
Punch, Jump, Electric Beam

Black Bolt
Defeat Gambit in a simple game - choose the barrel with hidden pumplin for three times. Correct combination is: central, left, right. You will need a character with telepathic abilities to participate in this game.
Price: 150000
Characters Map [32]
Punch/Shot, Jump/Flight, Gust of Wind
Ronan the Accuser
Go to underground, using passage hidden in the leafs. Destroy two walls (silver and gold) and then charge all three batteries.
Price: 150000
Characters Map [33]
Shot, Jump

Wizard
Stand on the one of the highest floors and use Magneto to take a metal bar from mechanism standing on the left.
Price: 150000
Characters Map [34]
Punch/Shot, Jump/Flight, Fast Shot

Spider-Man (F.F.)
Warning! This character won't appear on the map until Deadpool mission Stunt Show Surprise is accomplished!
Beat Ghost Rider in the race (take a vehicle first).
Price: 150000
Characters Map [35]
Web-shot, Jump/Web, Spider sense (detect hidden objects)

Mr. Fantastic (F.F.)
Warning! This mission won't appear on the map until the first race with Ghost Rider is over (Characters Map [35])!
Beat Ghost Rider in second race.
Price: 150000
Characters Map [36]
Long Range Punch/Extended Arms, Jump/Glide, Make a Way Through Iron Bars/Change Shape
Intelligent - can use advanced computers

Squirrel Girl
Destroy a car and dig into a mound. Now take a metal bar from the sentry box with Magneto - in this way you will open the box with a token.
Price: 150000
Characters Map [37]
Punch/Shot, Jump/Glide, Shot/Digging

Punisher
Warning! This quest won't appear on the map until two first missions for Punisher are accomplished (Vehicles Map [11] and [18])!
Destroy target vehicles.
Price: 150000
Characters Map [38]
Shot, Jump

Gambit
Warning! This mission won't appear on the map until two other quests are finished (Vehicles Map [34] and Characters Map [32])!
Go to the designated area and pick up a card hidden in the bushes. Now give it back to the quest giver.
Price: 150000
Characters Map [39]
Punch/Shot, Jump, Shot

Super-Skrull
Melt an ice block located under silo - use a fire beam to do that.
Price: 150000
Characters Map [40]
Shot, Jump/Flight, Fire Beam

Mini Sentinel
Go to the target location and defeat an enemy:
Break silver cover using rocket attack (e.g. Iron Man's)
Slice golden shield using fire beam (Human Torch)
Throw a rock at the chest of the giant droid (Hulk)
Price: 150000
Characters Map [41]
Punch/Shot, Jump, Deadly Beam

Black Cat
Use spider web to target two attachment points and yank them out. Enter the building and use spider sense to detect a computer. Use it to take a token.
Price: 150000
Characters Map [42]
Punch/Rope, Jump

Black Panther
Warning! This mission won't appear on the map until two other quests are finished (Characters Map [27] and [28])!
Escort a cat to Black Panther, in meantime defeating all opponents.
Price: 150000
Characters Map [43]
Punch, Jump, Sixth Sense

Iron Fist
Warning! This mission won't appear on the map until the first mission for Blade is accomplished (Vehicles Map [33])!
Defeat all opponents.
Price: 150000
Characters Map [44]
Punch, Jump, Fire Explosion

Blade
Warning! This mission won't appear on the map until two other quests are completed (Characters Map [44] and Vehicles Map [33])!
Destroy target vehicles.
Price: 150000
Characters Map [45]
Punch/Sword Throw, Jump

Iron Man (Hulkbuster)
Destroy all ventilators in designated time. The easiest way to do that is to use a beam attack.
Price: 150000
Characters Map [46]
Shot, Jump/Slow Fall, Use Unnatural Strength/Lift an Object
Can't build anything from bricks

Gamora
Go to target location and climb upon the building. Now solve the riddle using computer - it's easy memo game. Use a switch hidden on the balustrade located next to you and pick up the saxophone. Give it to the quest giver and receive a character token.
Price: 150000
Characters Map [47]
Punch/Sword Throw, Jump

Gwen Stacy
Warning! This mission won't appear on the map until quest [33] from Vehicles Map is accomplished.
Defeat all opponents.
Price: 150000
Characters Map [48]
Punch, Jump

Drax
Warning! This mission won't appear on the map until previous quest ([48] from Vehicle Map) is accomplished.
Go to the circus and steal a lion. Ride him to the skyscraper and climb upon the building (platforms are located nearby).
Price: 150000
Characters Map [49]
Punch/Throw, Jump

Wasp
Use Ant-Man shrink ability to pass through the maze.
Price: 150000
Characters Map [50]
Punch/Shot, Jump/Flight + Shrink, Shot

Superior Spider-Man
Jump from the Empire State Building following studs - token is at the end of the route.
Price: 150000
Characters Map [51]
Web-shot, Jump/Web, Spider sense (detect hidden objects)

Iron Patriot
Go to the top of Empire State Building and turn three computers on: first with Wolverine's claws and two others with Spider-Man's web (use sixth sense to detect hidden objects).
Price: 150000
Characters Map [52]
Shot (damage silver bricks), Flight, Shot a Cannon

Psylocke
Warning! This character won't appear on the map until the first quest for Captain Britain is accomplished (Vehicles Map [34])!
Win the race.
Price: 150000
Characters Map [53]
Punch, Jump, Telekinesis/ Telepathy

Rocket Raccoon
Warning! This mission won't appear on the map until two other quests are completed (Characters Map [24] and Vehicles Map [12])!
Go to target location with Spider-Man and hold on change character button to turn into Peter Parker. Take a photo of a giraffe and return to the quest giver.
Price: 150000
Characters Map [54]
Shot, Jump

Captain Britain
Warning! This mission won't appear on the map until two other quests are completed (Characters Map [53] and Vehicles Map [34])!
Defeat all enemies.
Price: 150000
Characters Map [55]
Shot, Jump/Flight, Sixth Sense

Spider-Woman
Destroy the web hanging at the bottom of the building and turn computer on. Now take a token from the crate.
Price: 150000
Characters Map [56]
Rockets (damage silver bricks), Jump/Flight, Sixth Sense (detect hidden objects)

Taskmaster
Go to the platform hidden in the clouds and destroy silver padlock blocking a box with token inside.
Price: 150000
Characters Map [57]
Punch/Shoot with a Bow, Jump, Hide Behind the Shield (allow to temporally extinguish fire and reflect beam attacks)

Toad
Warning! This mission won't appear on the map until two other quests are completed (Events Map [13] and Vehicles Map [37])!
Jump through water lily leafs, trying to fit into designated time. The easiest way to do that is to use a Spider-Man's web abilities.
Price: 150000
Characters Map [58]
Punch, Jump, Sixth Sense

Cyclops (Astonishing)
Warning! This mission won't appear on the map until quest [16] from Events Map is accomplished.
Talk to the man standing on the street and steal a taxi cab. Now give quest giver a lift to the target location and receive a token as a reward.
Price: 150000
Characters Map [59]
Shot, Jump, Beam Attack (cuts Golden Objects)
Electro (Ultimate)
Warning! This mission won't appear on the map until three other quests are completed (Characters Map [58], Vehicles Map [37] and Events Map [13])!
Steal a taxi cab and drive a woman to the target location.
Price: 150000
Characters Map [60]
Shot, Jump/Flying, Electric Beam
Heimdall
Warning! This mission won't appear on the map until three other quests are completed (Characters Map [15], Vehicles Map [25] and Events Map [21])!
First of all: find a man with a fashionable hat (minimap will show you a proper direction). He is hiding at the side of the building, in a narrow passage. Bring him back to Heimdall and receive a token as a reward.
Price: 150000
Characters Map [61]
Sword Slash, Jump
Kurse
Warning! This mission won't appear on the map until all workers from the power station (Events Map [41]) are rescued!
Go to the target location and win a duel with a Kurse.
Price: 150000
Characters Map [62]
Powerful Punch, Jump, Use Unnatural Strength/Lift an Object
Can't build anything from bricks

Silver Surfer
Warning! This mission won't appear on the map until three other quests are completed (Events Map [3], [45] and [49])!
Go to the target location and defeat a thug wielding a cosmic brick. Now return to Silver Surfer with the brick.
Price: 1000000
Characters Map [63]
Punch/Shot, Jump/Flight, Fast Shot
Name
How to unlock
Abilities

Deadpool
Obtain and unlock all 11 red bricks
Sword Slash/Fire a Weapon, Jump

Stan Lee
Rescue Stan Lee 50 times
Web-shot, Jump/Web, Spider sense (detect hidden objects), change into Hulk

Aunt May
Complete all quests in the game (see: Character Map [64]). After obtaining this character, you will finish the game in 100%.
Punch, Jump

They are 61 vehicles in the game - some of them are accessible from the beginning, but most are unlockable during exploration of New York City by completing quests.
To use your favorite vehicle, you must go to the one of blue control stations (arranged in a whole city - screen above) and choose a proper option. Some of them are adjusted for land machines, but other suits for air or water means of transport.

Simple unlocking the vehicle does not give you an access to it. To use your newly obtained humdinger you must buy it, paying studs. To do that, use one of blue control stations.
Remember that unlocking and buying all vehicles is requested for finishing the game in 100%.
Icon
Name and Price
Location
How to Unlock
Quinjet
Available from the beginning
---
S.H.I.E.L.D. Jetfighter
Price: 150000
Vehicles Map [1]
Destroy all crates lying near the wall and use Spider-Man's web at the attachment point. Go through ventilation shaft with Mr. Fantastic and take a token.

S.H.I.E.L.D. Minicarrier
Price: 150000
Vehicles Map [3]
Warning! This mission won't appear on the map until quest for Go-kart (point [2] on Vehicle Map) is accomplished.
Talk to Maria Hill and defeat all A.I.M. agents attacking S.H.I.E.L.D. Helicarrier.
X-Jet
Price: 150000
Vehicles Map [5]
Go to cave hidden beneath X-Man school. Now recharge three batteries with Thor: one on the left wall, one on the ceiling and one in the right pillar (behind silver wall).

Mandarin's Helicopter
Price: 150000
Vehicles Map [6]
Warning! This mission won't appear on the map until quest for Black Bolt (Character Map [32]) is accomplished.
Firstly talk to the quest giver, then defeat all enemies.
Raft Helicopter
Price: 150000
Vehicles Map [8]
Climb upon the rooftop of the prison and switch into a big character, breaking the gate open.

Stark Jet
Price: 150000
Vehicles Map [16]
Token is floating upon the lake.

Fantasticar
Price: 150000
Vehicles Map [20]
Token is hidden on the top of the fountain in Central Park.

Police Helicopter
Price: 150000
Vehicles Map [22]
Destroy five targets located on the roof.

News Helicopter
Price: 150000
Vehicles Map [23]
Go to park located nearby and switch into a big character, destroying a wall. Turn the computer on using Mr. Fantastic intelligence and take a token from the crate..
Chitauri Chariot
Price: 150000
Vehicles Map [25]
Warning! This mission won't appear on the map until quest for Iron Man (Heroic Era) (Characters Map [15]) is accomplished.
Defrost four characters for Heimdall: two of them are imprisoned at the surface of the streets and two others are located at the buildings standing nearby.
Pumpkin Chopper
Price: 150000
Vehicles Map [26]
Fly to the top of Oscorp Tower and destroy silver wall using rocket attack. Switch into Venom and drop through black pool located nearby.
Spider-copter
Price: 150000
Vehicles Map [27]
Destroy three spider webs hanged on the rooftop wall and take a token from inside.
Doom Jet
Price: 150000
Vehicles Map [31]
Token is hidden above the crossroad - just jump a little to obtain it.
Deadpool's Helicopter
Price: 150000
Vehicles Map [40]
Warning! To unlock this vehicle you must collect all: Gold Bricks, Red Bricks, Minikits, characters, "Stan Lee in Peril", vehicles and True Believer Statuses. Besides, you must also finish all main and bonus missions concluded in the game. This quest appears on the map after winning the race for Deadpool's Scooter (see Vehicles Map [39]).
Talk to Deadpool and go to the location pointed on the minimap. Destroy pink container and pick up the machine gun hidden inside. Now return to the quest giver.
In this very moment you will unlock the last mission in the game - see Character Map [64].
Icon
Name and Price
Location
How to Unlock
Bus
Available from the beginning
---
School Bus
Available from the beginning
---

Saloon
Available from the beginning
---
Small Car
Available from the beginning
---

Sedan
Available from the beginning
---

Limousine
Available from the beginning
---
Van
Available from the beginning
---

Ambulance
Available from the beginning
---
Fire Engine
Available from the beginning
---

Police Car
Available from the beginning
---
News Van
Available from the beginning
---

Tanker
Available from the beginning
---
Taxi
Available from the beginning
---
Bicycle
Available from the beginning
---
Stark's Motorcycle
Price: 150000
Available from the beginning
---

Stark's Sportscar
Price: 150000
Available from the beginning
---
Hot Rod
Price: 150000
Available from the beginning
---
Avenging Cycle
Price: 150000
Available from the beginning
---
Go-kart
Price: 150000
Vehicles Map [2]
Defeat Maria Hill in a race - you will find her on the top of the metal tower.
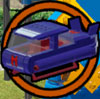
Magneto-mobile
Price: 150000
Vehicles Map [4]
Cut a X-shape on the golden wall using fire beam.
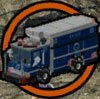
Raft Truck
Price: 150000
Vehicles Map [7]
Go to the beach and switch character to Wolverine. Now unearth token from the mound.
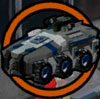
S.H.I.E.L.D. APC
Price: 150000
Vehicles Map [9]
Toss Captain America's shield at the shield switch to open a crate with a token.
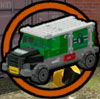
Raid Truck
Price: 150000
Vehicles Map [10]
Destroy a plate lying on the ground and kill 15 moles in the designated time.
Punisher's Truck
Price: 150000
Vehicles Map [11]
Take a truck from Punisher and ram target vehicle destroying it.
Garbage Truck
Price: 150000
Vehicles Map [12]
After meeting with Rocket Raccoon go to the target location. Wanted knife is hidden in the one of containers in a barred lane (near yellow rubbish container). Now just return it to the quest giver and receive a token as a reward.
Mandarin's Buggy
Price: 150000
Vehicles Map [13]
Take control over the guard with character with telepathic skills (e.g. Jean Grey) and use the computer standing nearby, unlocking token in that way.
S.H.I.E.L.D. 4x4
Price: 150000
Vehicles Map [14]
Climb on the tower and destroy it with a large character. Descend to the surface and switch your character to Wolverine. Now just dig out a token from the mound.

Flower Car
Price: 150000
Vehicles Map [15]
Kill seven moles in the designated time.
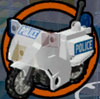
Police Motorcycle
Price: 150000
Vehicles Map [17]
Go to target location and turn to the right, entering building site. Switch into big character, destroying four blocks of concrete. In the last of them you can find the grate portal - across it with Mr. Fantastic.
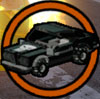
Punisher's Car
Price: 150000
Vehicles Map [18]
Warning! This mission won't appear on the map until quest for Punisher's Truck (point [11] on Vehicles Map) is accomplished.
Destroy target vehicles in any way.

Spider-Trike
Price: 150000
Vehicles Map [19]
Descend to the basement of the building with a greenhouse. Among bushes you will find a battery for Thor to recharge. When it is done, climb upon the wall and pick up a token.
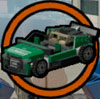
Police Truck
Price: 150000
Vehicles Map [21]
Firstly descend beneath the bridge, and then fly upwards - token is hidden between two white and blue walls.

Spider-Cycle
Price: 150000
Vehicles Map [24]
Destroy silver sculpture standing on the top of the building.
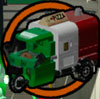
Pizza Van
Price: 150 000
Vehicles Map [28]
Fly to the rooftop of pizza restaurant and unfreeze claw switch with Human Torch. Change hero into Wolverine and use the switch. Go one floor down and use Spider-Man's web at the attachment point, unlocking another device for Wolverine. Standing on the ground activate final switch.
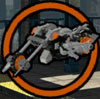
Ghost Rider's Motorcycle
Price: 150000
Vehicles Map [29]
Warning! This mission won't appear on the map until quest for Mr. Fantastic (F.F.) (point [36] on Characters Map) is accomplished.
Defeat Ghost Rider in a race to win his motorcycle.
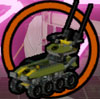
Hydra Tank
Price: 150 000
Vehicles Map [30]
Go to the top of the building and switch character to Magneto. Take off metal padlock and descend to the ground. Recharge two batteries with Thor or Storm to unlock a token.
S.H.I.E.L.D. Staff Car
Price: 150 000
Vehicles Map [32]
Stand on the roof and choose any character with invisibility power. Avoid all cameras and approach to the computer. Turn it on to open the crate.
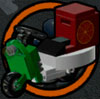
Pizza Bike
Price: 150 000
Vehicles Map [33]
Find Blade in the underground and defeat him in a race.

The Britmobile
Price: 150 000
Vehicles Map [34]
After meeting with Captain Britain you will receive a new quest - bringing back Britmobile. Precious vehicle is located in a place showed on the minimap. Bring it back to the quest giver and receive a token as a reward.

Golf Cart
Price: 150 000
Vehicles Map [36]
Unlock vehicle with Magneto - just put metal blockade away.

Wolverine's Motorcycle
Price: 150000
Vehicles Map [37]
Warning! This mission won't appear on the map until first quest given by Toad (point [13] on Events Map) is accomplished.
Jump through water lily leafs, trying to fit into designated time. The easiest way to do that is to use a Spider-Man's web abilities.
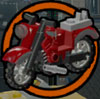
Captain America's Bike
Price: 150000
Vehicles Map [38]
Warning! This mission won't appear on the map until two other quests are accomplished (Events Map [16] Characters Map [59]).
Talk to the man standing on the street and steal a taxi cab. Now give quest giver a lift to the target location and receive a token as a reward.
Deadpool's Scooter
Price: 150000
Vehicles Map [39]
Warning! To unlock this vehicle you must collect all: Gold Bricks, Red Bricks, Minikits, characters, "Stan Lee in Peril", vehicles (except Deadpool's Helicopter) and True Believer Statuses. Besides, you must also finish all main and bonus missions concluded in the game.
Go to the target location and defeat Deadpool in a race. Before that, get really good vehicle- enemy is very fast and cheats a lot.
After the race you will unlock next mission - see Vehicles Map [40].
Icon
Name and price
Location
How to Unlock
Speedboat
Available from the beginning
---
Mandarin's Boat
Price: 150000
Vehicles Map [35]
Warning! This mission won't appear until quest for Flower Car (point [15] on the Vehicles Map) is accomplished.
Firstly talk to Groot, and then kill all moles in the designated time.
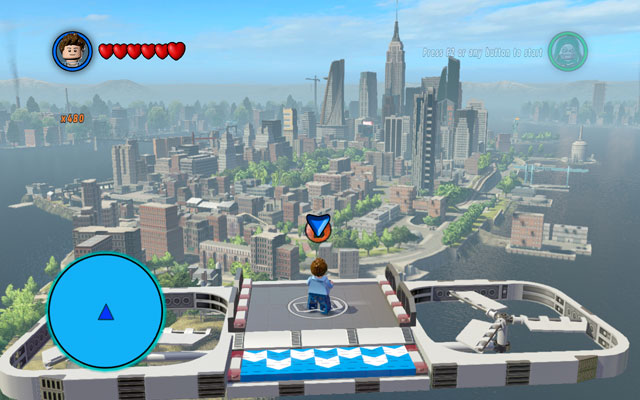
As Spider-Man's photos we consider a set of 10 side quests, which can be assigned from J. Jonah Jameson, who is standing behind Daily Bugle building. For every photo you will receive one Gold Brick - they are 10 to obtain in this way.
To make o photo, go to the designated place and choose Spider-Man. Hold down a change character button to turn into Peter Parker and stand in a spot with camera symbol. Use interaction button to perform a snapshot and return to the quest giver. Now just repeat all pattern for 10 times with new objects and assignments.
We have marked all targets on the map - they are numbered as they occur in the game.
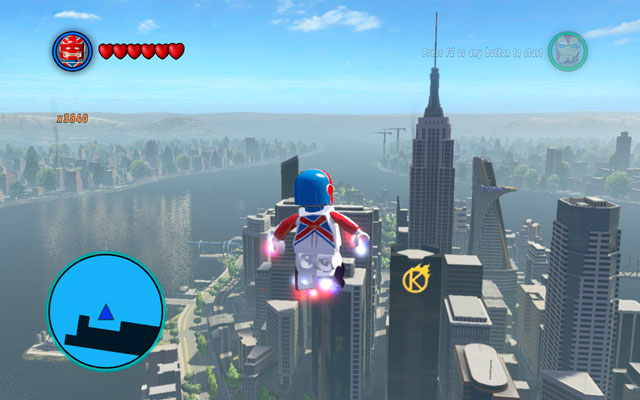
This chapter depicts the most important locations in the game - that is: places referring to the main and bonus missions. We have introduced a color distinction on the map to clarify some things from the others:
Green - quests from the main storyline;
Red - Deadpool's bonus missions;
Blue - hidden stage The Brick Apple? unlockable after finishing the main campaign.
In this guide you can find specific chapters dedicated to mentioned quests and missions.
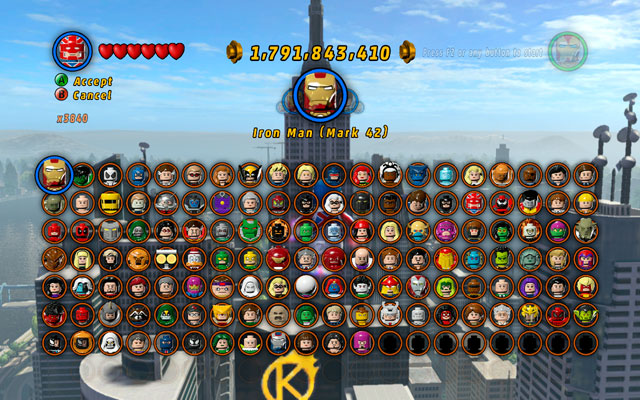
They are 152 characters in the game. Some of them can be unlocked during main storyline and Deadpool's bonus missions (which is occurring automatically after finishing the stage), but others are obtainable in more sophisticated way.
Several heroes and villains can be discovered during exploration of the New York City (see: Characters Map above) and 11 others could be additionally unlocked during Deadpool's bonus missions (see: Deadpool's Bonus Missions). Three final characters are uncovered at the very end of the game - that is: Aunt May, Deadpool and Stan Lee. To learn more, look to the Superheroes and Archvillains - Characters to Unlock chapter.
All characters which can be unlocked in the New York City area hub are shown on the map above.
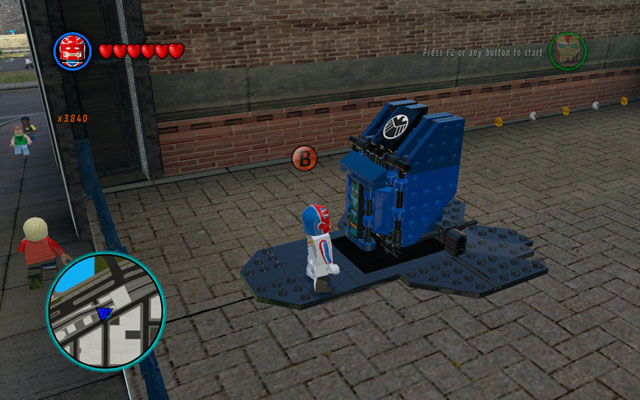
They are 61 vehicles in the game - majority of them can be unlocked during exploration of the New York City hub. They are quite easy to obtain: you must complete referred quest first and then go to the one of the blue vehicle stations (located in large numbers in a whole area) to finish transaction - as screen above shows. After all, remember that vehicles can be very costly!
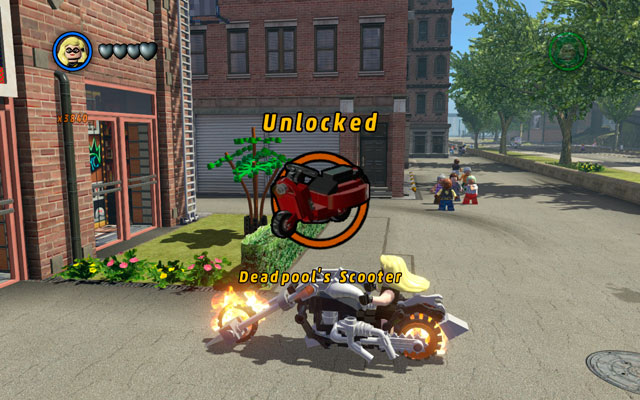
Unlocking and buying all vehicles are required to finish the game in 100%.

Stan Lee is having a very bad luck - he constantly puts himself into dangerous situations. During gameplay, you must rescue him fifty times to finally obtain him as a playable character. In some way he is a kind of collectible, hidden in the hard-accessible areas.
You can help him:

Gold Bricks is a kind of reward, granted for spectacular acts of heroism. You can obtain them through:
During whole gameplay you can collect 250 Gold Bricks, which are required to unlock some of the Deadpool Bonus Missions (see Deadpool Bonus Mission chapter for more information). Remember that you need to collect all of the Gold Bricks to complete the game in 100%. If you missed some of them, just look to the appropriate parts of this guide (we think that map showed above is especially helpful in this case).
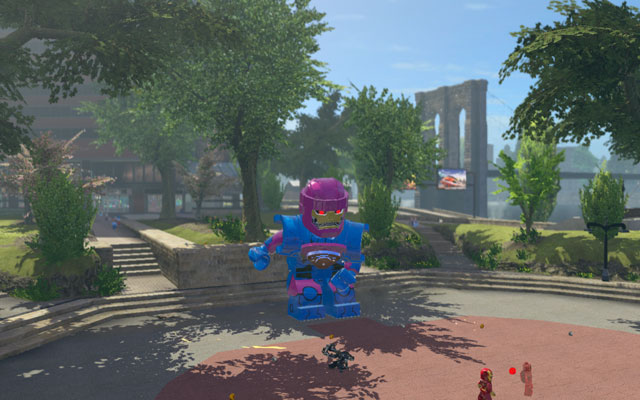
Events are considered as non-standard miniquests, which can be found in New York City hub (they are marked with question mark on the map). Some of them are creating causal nexus and can be completed in a specific order only.
For each event completed, you will be rewarded with one gold brick. Remember that completing all events is required for finishing the game in 100%.
On the map (showed above) we have marked all of the events occurring in the game. Specific numbers are generally arranged from the bottom to the top side of the map, but nonlinear structure of the gameplay disturbed this order in some cases (we are really sorry for that!).
In this chapter you will find a specification of all 21 races included in the game (they are marked with a race flag on the main map). Some challenges requires specific vehicles, but others can be completed with every mean of transport (or even without them). Description of specific races can be found in the map above - to view them, just point particular number with a cursor.
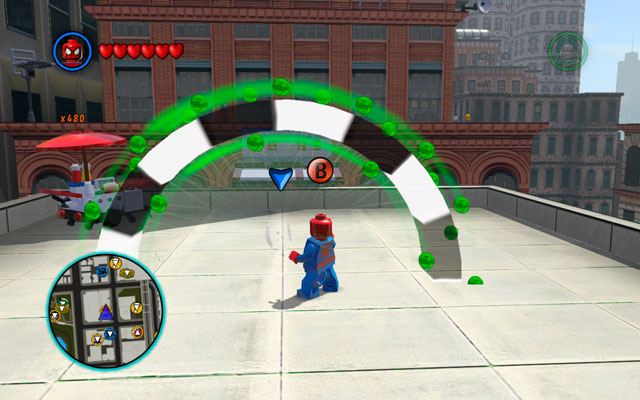
To win a race, you must complete whole route in designated time (you can't miss any checkpoint!). For each race finished, you will be rewarded with one Gold Brick, which can be used to unlock Deadpool's bonus missions. Winning all challenges is required to finish the game in 100%.
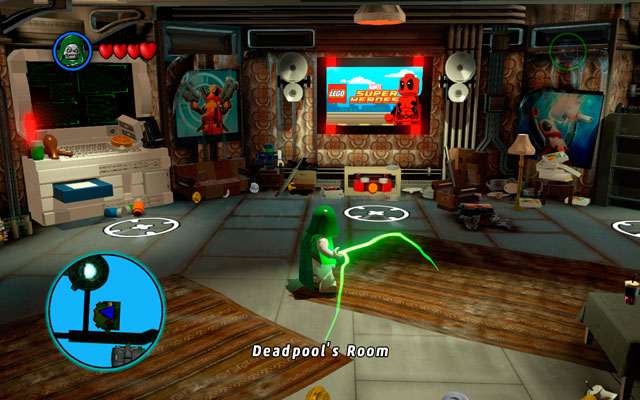
Deadpool's missions are unlocked automatically after completing the main storyline. During each quest you can obtain a True Believer status, collect some character tokens, rescue Stan Lee in Peril and - finally! - get one of the Deadpool's Red Bricks. They are eleven Deadpool's missions in total.

Red Bricks (or Deadpool Bricks) are collectibles obtainable only during Deadpool's bonus missions. To get access to them, complete the stage for the first time - that's the way to unlock the free play mode, which grants you an option to control more characters with different abilities (during first play you will not have an access to full character reel). Only specific heroes can reach areas, on which Red Bricks are hidden.
Each of the Red Brick grants you different bonuses, unlockable at Extras section - pause the game to reach it. Remember that you must bought them first in Deadpool's room, hidden in S.H.I.E.L.D. Helicarrier. To go there, exit the main room using the door on the left and then enter the chamber located on the right (as screen shows).
Collecting all Red Bricks is required to complete the game in 100%.
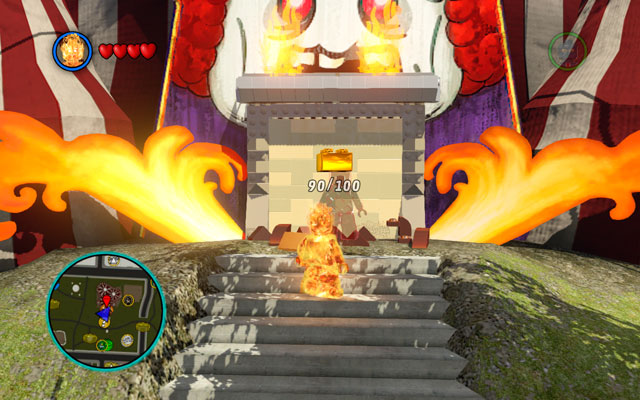
Some of bonus missions are locked at the first time and require specific quantity of Gold Bricks to become available. Chart below explains all requirements and depicts some useful information, which should be very helpful during gameplay. If you are searching for a description of a specific mission, just go to the referring chapters of this guide.
Name
Location
Gold Bricks required
Red Brick
Tabloid Tidy Up
Daily Bugle (Map of Important Locations [16])
0
Studs X4
A Shock Withdrawal
Bank in Financial District (Map of Important Locations [17])
0
Collect Ghost Studs
House Party Protocol
Stark Tower Balcony (Map of Important Locations [18])
0
Studs X10
Nuff Said
Marvel building (Map of Important Locations [19])
0
Gold Brick Detector
Feeling Fisky
Fisk Tower (Map of Important Locations [20])
50
Studs X6
Put Up Your Dukes
Fogwell Gym (Map of Important Locations [21])
75
Minikit Detector
Stunt Show Surprise
Circus in the Central Park (Map of Important Locations [22])
100
Attract Studs
Reptilian Ruckus
Reptilian Cave in the Central Park (Map of Important Locations [23])
125
Studs X8
Stranger Danger
Sanctum Sanctorum (Map of Important Locations [24])
150
Fast Build
Thrill of the Chess
Hidden cell on the Ramp Island (Map of Important Locations [25])
175
Character Token Detector
Bro-Tunheim
Teleport at the lake (Map of Important Locations [26])
200
Mini Characters
Characters: Agent Coulson, Doctor Octopus
True Believer Status: 25000 studs
Location: Daily Bugle building (Map of Important Locations [16])
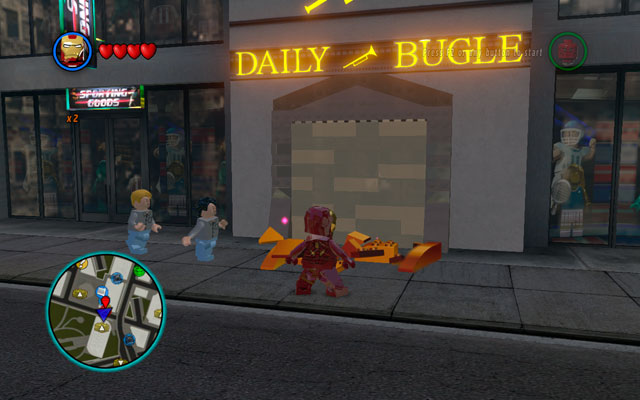
First bonus mission begins after entering to the Daily Bugle building. To get inside, you must build the gate from the bricks scattered on the street.
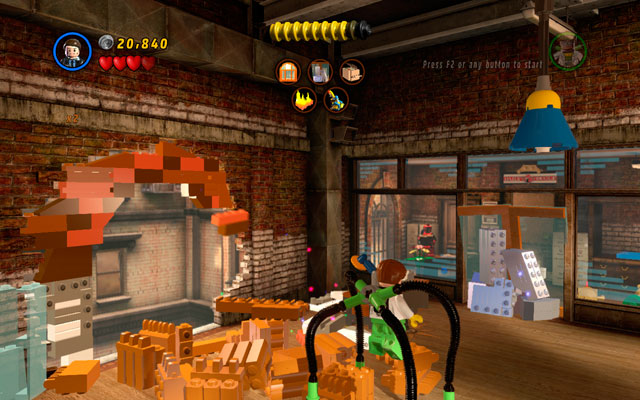
Your goal is to tidy up Daily Bugle building. Start from blowing up everything on your sight, then choose Agent Coulson and shoot his rocket launcher at the silver bricks. Destroy them and from debris construct a new door-frame.
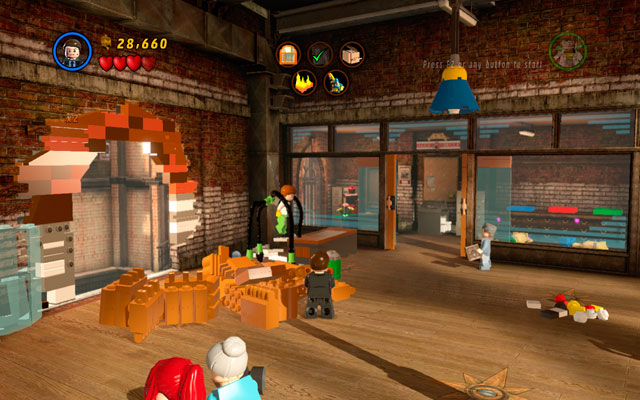
After that, you can build a window frame from the bricks that you have already received. Approach to the orange elements, which are lying on the floor and use them to construct the window.
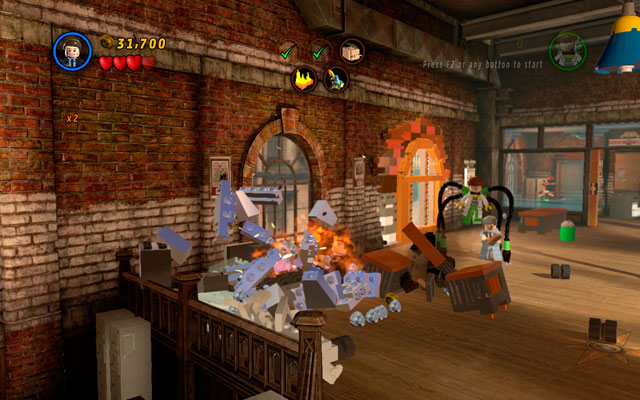
Now turn left and find a silver commode. Destroy it with Agent Coulson's rocket launcher and construct a copy machine from the debris.
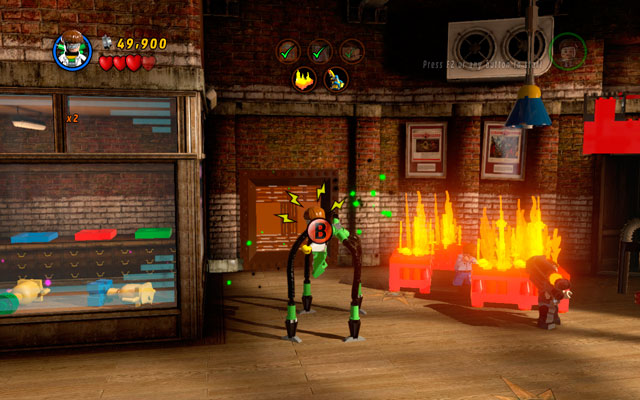
Choose Doctor Octopus and go to the central part of the room. Use sixth sense to find two handles located on the door. Pull them (with pressed attack key) and you will see a computer.
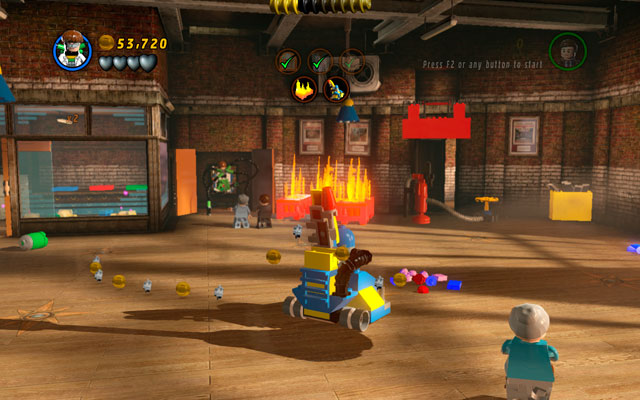
Use the computer to take control over the vacuum cleaner and clean up all three piles of garbage.
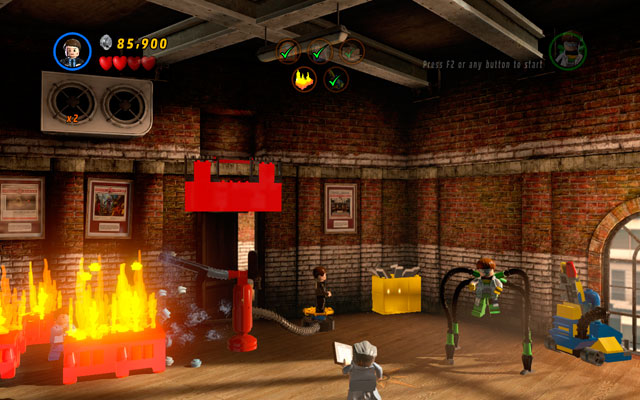
Finally, choose Agent Coulson and use his rocket launcher to destroy a silver valve placed on the right side of the room. Build a pump from the received bricks and jump on the gold valve to put out the fire.
Characters: Spider-Man, Captain America, Iron Man (Mark 6)
True Believer Status: 35000 studs
Location: Bank in Financial District (Map of Important Locations [17])
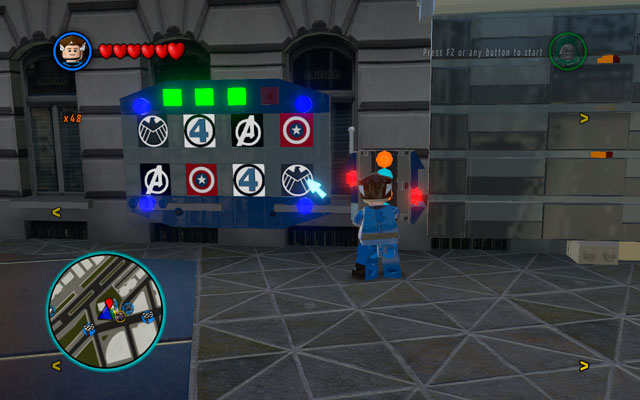
To unlock this mission you must find a Bank building in the Financial District. Choose any intelligent character (e.g. Iron Man) and use the computer standing near to the door. Solve a riddle, connecting two identical symbols (memo game). The right combination is showed on the screen above.
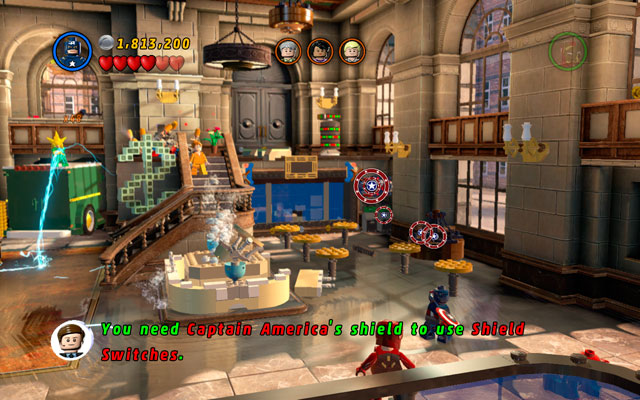
Enter the bank and choose Captain America. On the right side of the room you will find a shield switch. Toss a shield at it and jump over the water to get closer to the imprisoned banker, so you can destroy all objects which is lying around him. Now you can build a trampoline and save an innocent man.
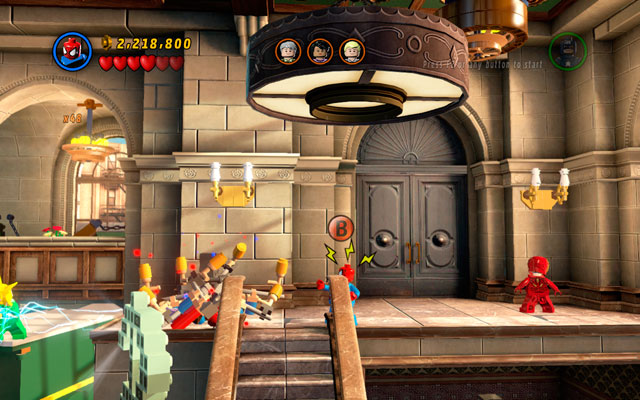
Jump on the balustrade as Spider-Man and use your spider sense to find two handles. Yank them with your web to save second hostage from the peril.
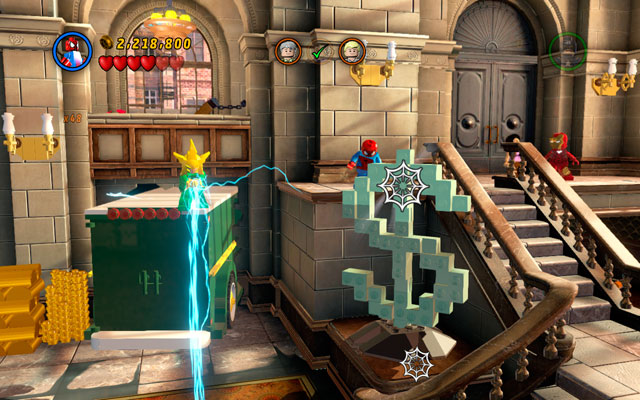
Now you must build a path for the third worker. Begin with destroying dollar symbol standing next to the stairs. Now construct the first part of the footbridge from the received bricks.
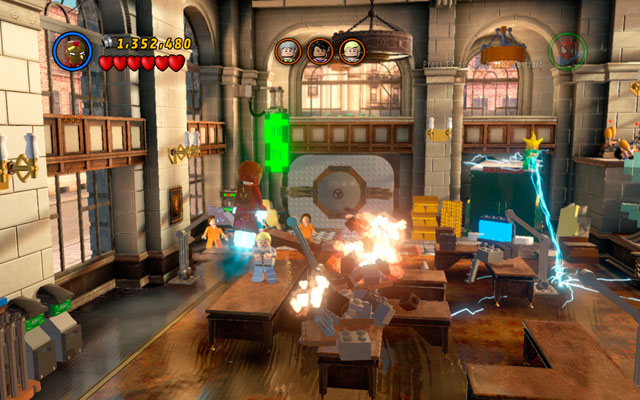
Choose Iron Man and fly to the middle of the room. Destroy all elements lying on the desks and build two another parts of the footbridge from the received bricks. In this way you will rescue third civilian.
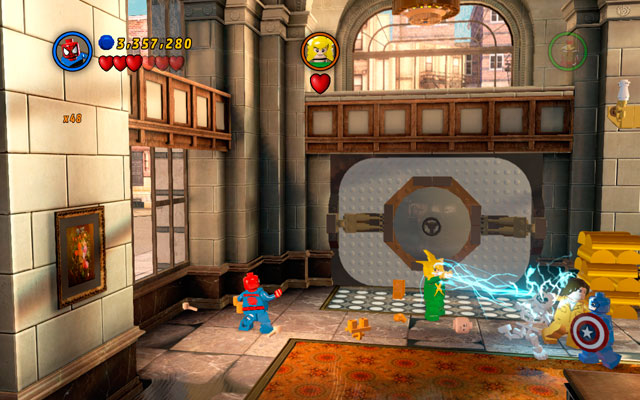
When civilians are safe, you must get to Electro. Try to hit him during melee fight - he will stun you, so you should switch into another character and hit an enemy from the behind. After that switch into Iron Man and shoot your rockets at the silver vault. In this way you will release The Shocker, who should be beaten for three times.
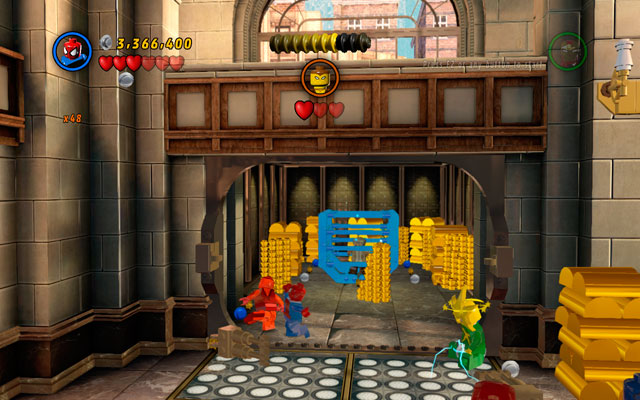
Struggle with The Shocker until he escapes to the truck - then hit him for the last time, finishing the level.
Characters: Iron Man (Mark 42), War Machine
True Believer Status: 90000 studs
Location: Stark Tower Balcony (Map of Important Locations [18])
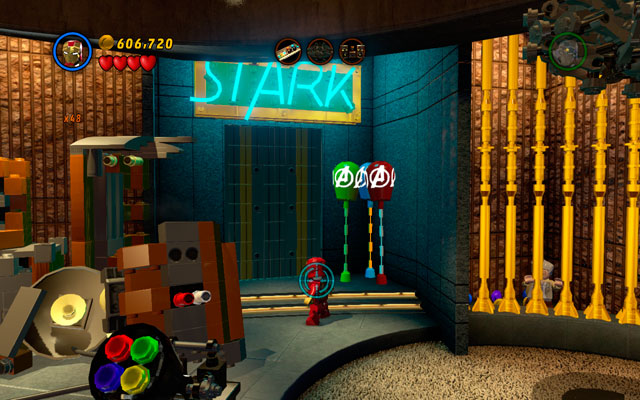
Turn right and look for the STARK neon, then destroy it. In this way you will uncover a gold plate, which should be melted with your fire beam.
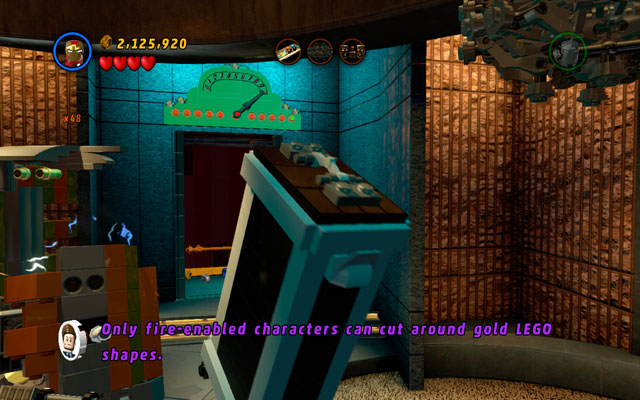
From received bricks construct an elevator and wait for the giant box. Destroy it and build a speaker set from the debris. The first part of the mission is behind you.
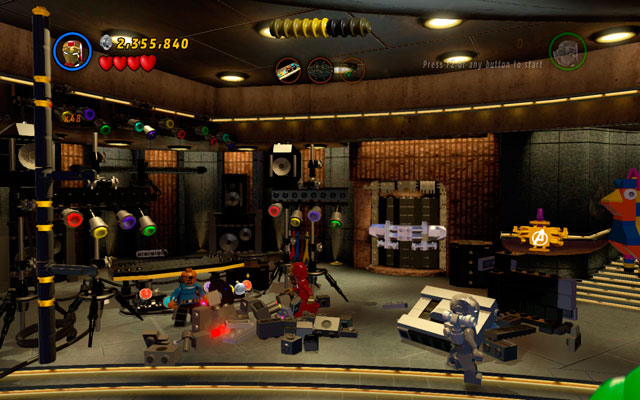
Turn left, destroying all objects in the area, then build a DJ's set from the debris.

Go to the nearest door and destroy a silver blockade witch your rockets. When computer appears, use it to uncover a panel with colorful lights. Now you must repeat the combination showed by the system - just click on the right colors to do that.
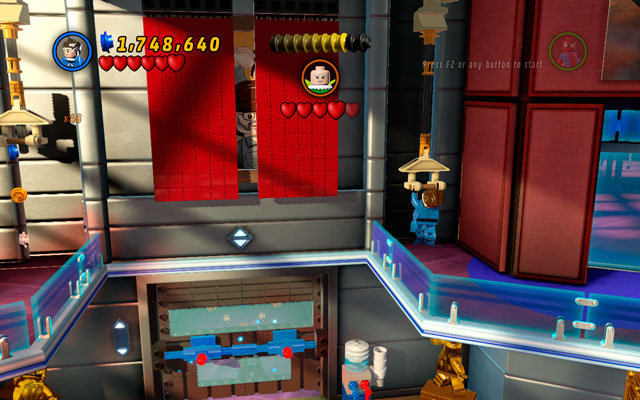
When all three stages of arrangements are completed, go to the dance-floor and beat your friends at the dance competition. During it you must step on the highlighted squares of the floor: the right order for your steeps will be shown by the computer. After that the mission will be over.
Characters: Spider-Man, Mr. Fantastic
True Believer Status: 40000 studs
Location: Marvel building (Map of Important Locations [19])
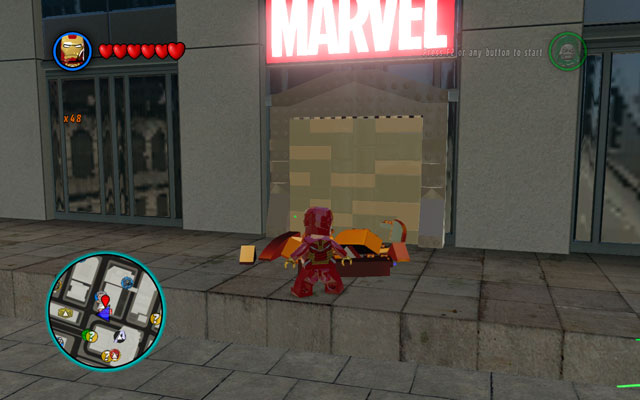
To begin this mission, you must go to the Marvel building. Build an entrance from the scattered bricks, so you can get inside.
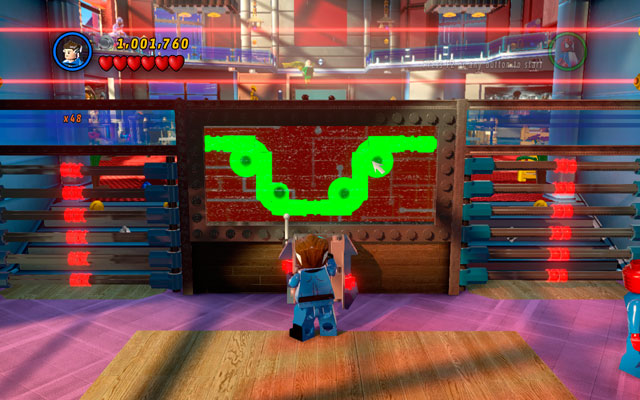
After the beginning of the mission, go to the desk located the in front of you and destroy it. Then build a computer from the debris and choose Mr. Fantastic to use the machine. Now you must arrange the pipes showed on the monitor in the order showed on the screen above.
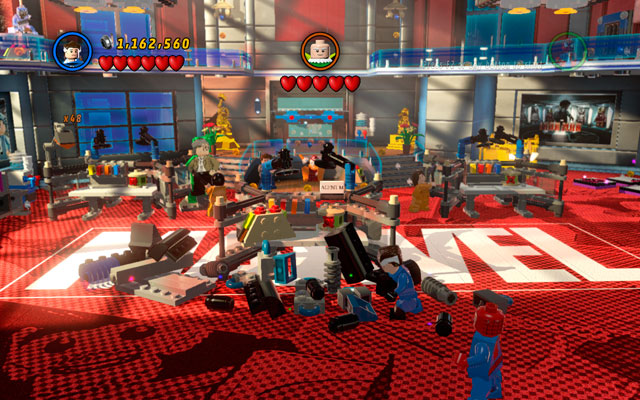
In the second room destroy all the nearby furniture and use the debris to create a bird house for Vulture. Wait for him to sit on it - he will get electrocuted. Now you can use rest of the debris to build a portal for Mr. Fantastic. Pass through it and find yourself on the upper floor of the building.
Go to the left to find the lever and pull it.
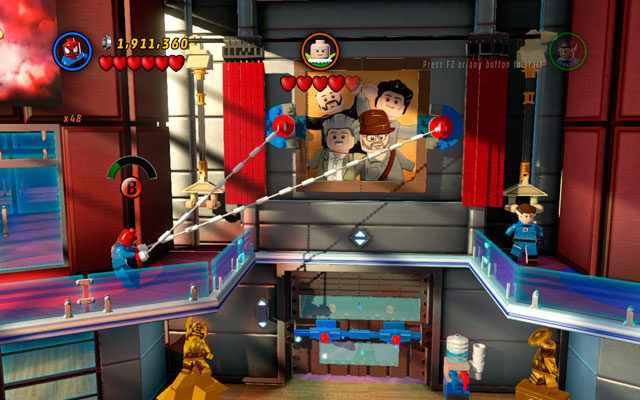
Now choose Spider-Man and approach the left side of the curtain. Use your spider sense to uncover two attachable points for a web, then yank them. Now jump down to the lower floor, so you can build an Iron Man Model from the obtained bricks. Vulture will nosedive on it, loosing another life.
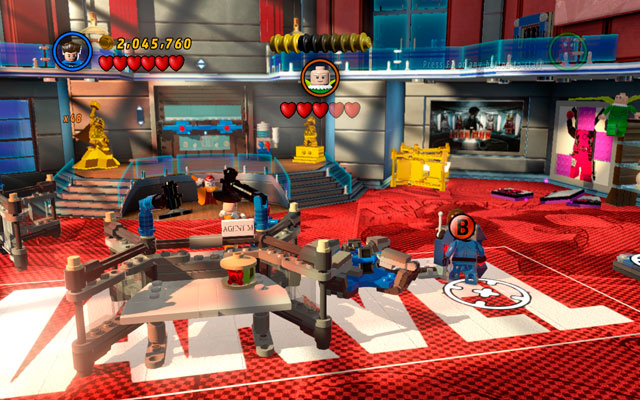
Turn right. From the next bricks create a computer for Mr. Fantastic and use it to take a third life from your opponent.
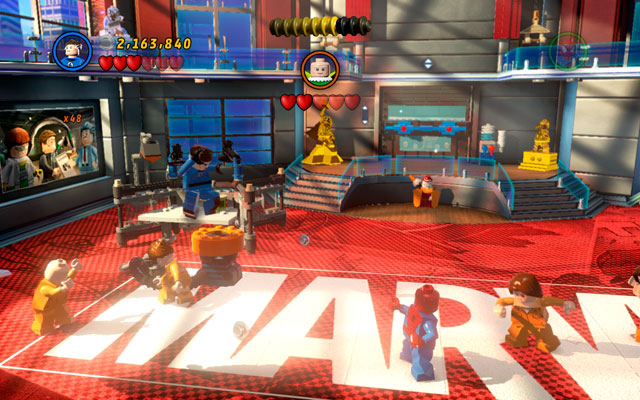
Turn left and construct a small pump from the debris. Jump up several times on an orange button to hit an enemy one more time.
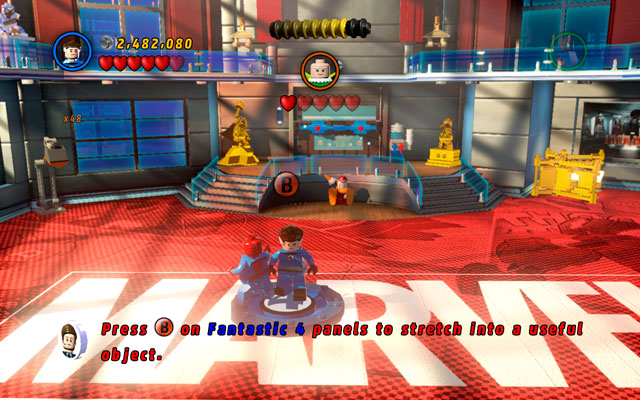
From the last pile of the bricks build a Fantastic Four emblem. Choose Mr. Fantastic to use it and finally defeat Vulture.
Characters: Spider-Man, Captain America
True Believer Status: 50000 studs
Location: Fisk Tower (Map of Important Locations [20])
Gold bricks required: 50

To unlock this mission, you must collect 50 gold bricks. If you have them, you may find Fisk Tower and build the golden entrance to start the level.
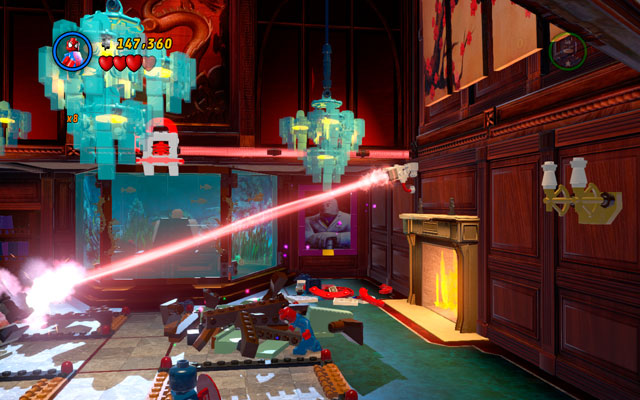
Begin this mission by destroying all objects placed on the right side of the room. Then build a billiards table from the part of the obtained bricks, and the Captain America panel from the other part. Now stand in the middle of the created structure and use your shield to cover yourself from the laser beam.
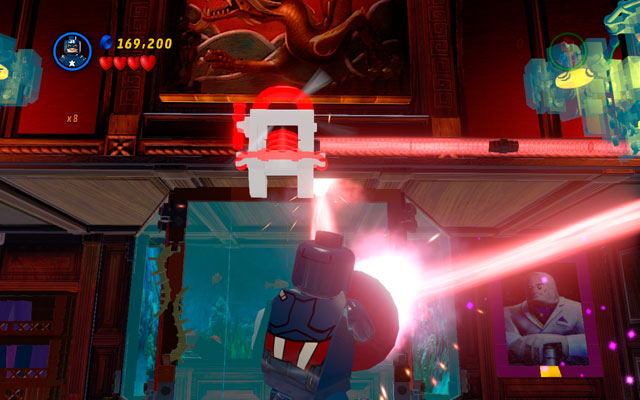
Rotate yourself to direct the laser beam on the red generator placed above the aquarium (with Kingpin hidden inside).
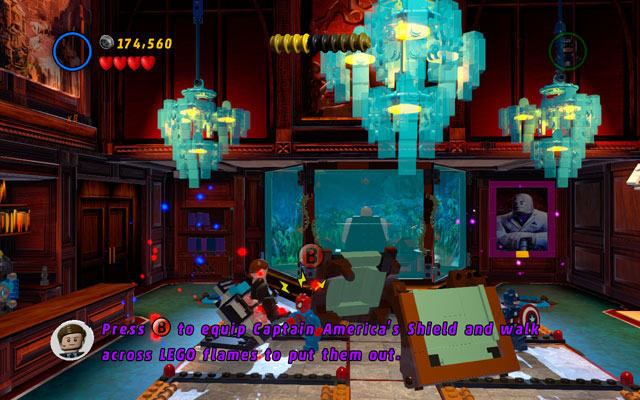
Turn left and find imprisoned man. Choose Spider-Man and use spider senses to find two attachable points for your web. Yank them to release the prisoner.
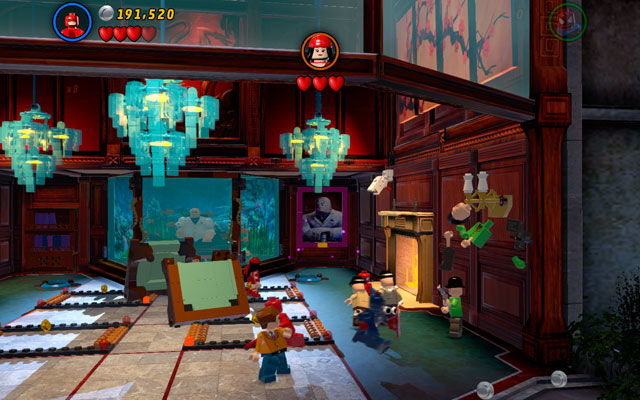
When the Daredevil appears, switch into him and confront the criminals (which will turn up endlessly) - after few seconds you will see Electra. Defeat her, avoiding all traps placed in the middle of the room.
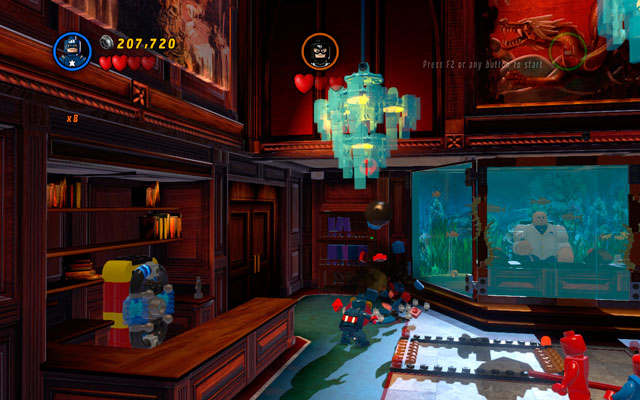
After defeating Electra, you will meet Bullseye. Choose Captain America and cover yourself with a shield, approaching to the shooting turret to ricochet the missiles, destroying the turret in that way. From the received bricks build a red handle and place it on the aquarium. Then repeat all situation on the other side of the room, overcoming your enemy for the last time.
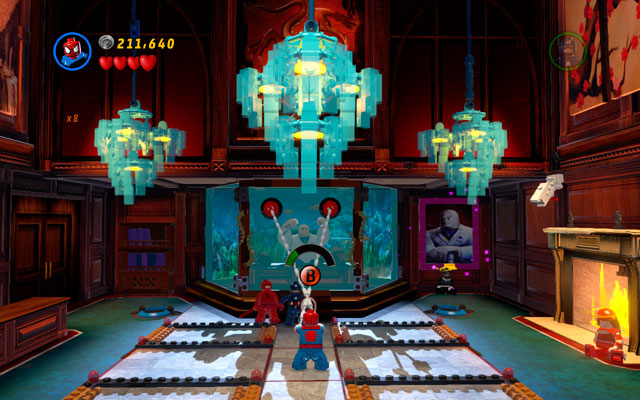
Switch into Spider-Man. Stand in the middle of the room, in front to the two attachable points, then yank them - now you're able to fight Kingpin.
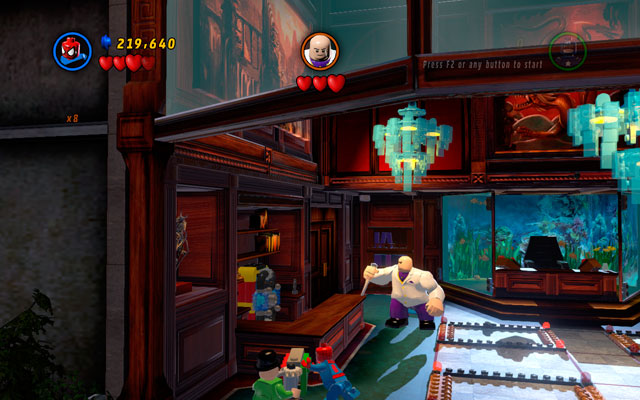
Firstly, you must find colored bricks on the left side of the room. Use them to build a push-switch. If you push hard enough, it will drop first chandelier on Kingpin's head.
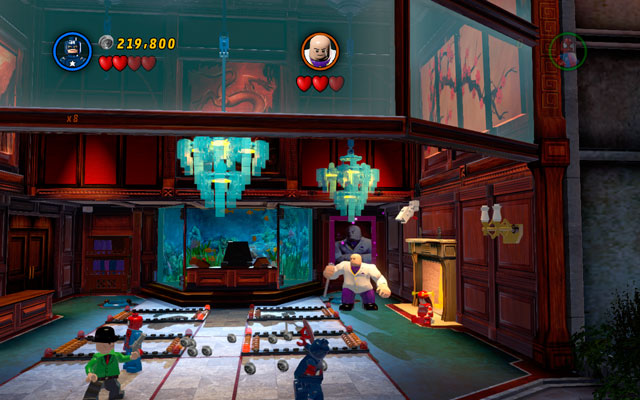
Secondly, wait until your enemy stops on the other site of the room. Toss Captain America's shield at the other chandelier. When it falls, Kingpin will have only one life left.
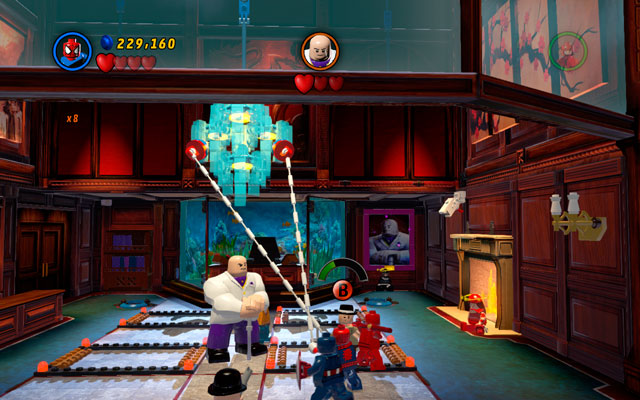
At the end, pick up Spider-Man and put him in the middle of the room. Yank two attachable points placed on the third chandelier to throw it at the enemy. This will end your mission.
Characters: Wolverine, Jean Grey
True Believer Status: 25000 studs
Location: Fogwell's Gym (Map of Important Locations [21])
Gold bricks required: 75
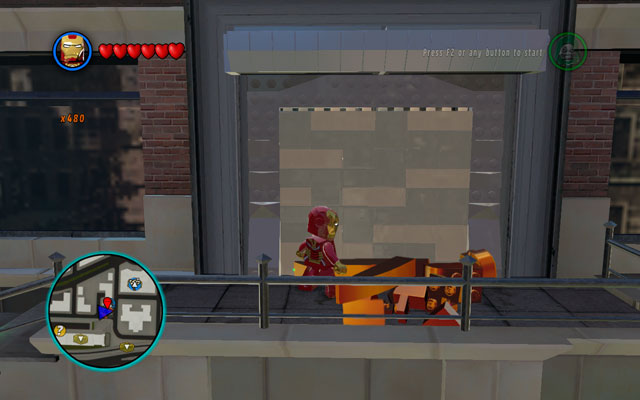
This mission is located at Fogwell's Gym. You may start it only if you have collected 75 gold bricks and if you have build a golden gate leading to the building.

Your mission is to feed Blob - fat guy from the gym. For pass the first stage, choose Wolverine. Turn left and use your sixth sense ability. Then climb on the sticky wall located near to the water dispenser and dump all objects from the higher floor to the ground.
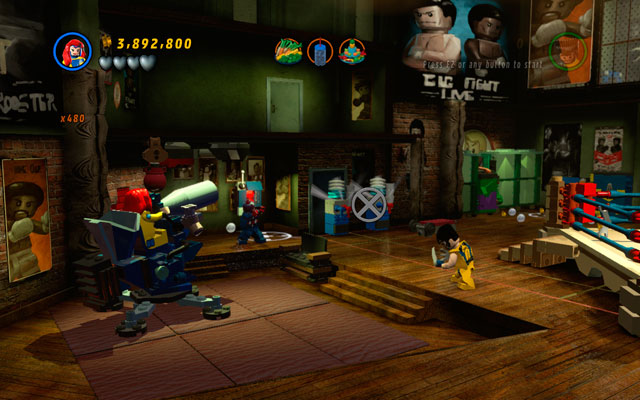
Build a water gun from the debris, then jump on it and destroy two water machines placed on the left side. From their pieces create a giant drink cup.
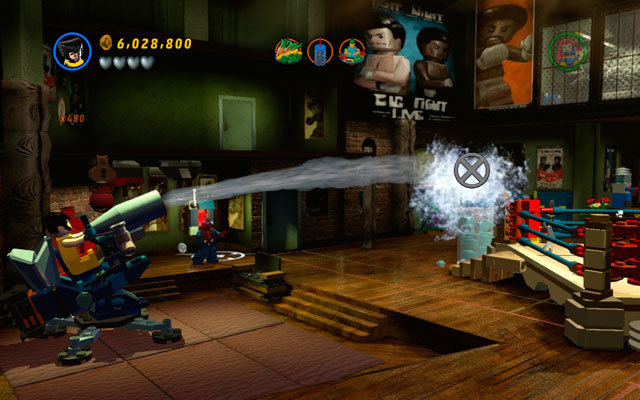
Jump on the water gun and aim your stream at the cup. Fill it up with water, then use Jean Grey's telekinetic skills to put the cup on the boxing ring.

Now turn right, destroying all objects placed near to the wall. With Jean Grey's telekinetic powers use small treadmill and destroy it into pieces. Use it to build an oven, and after few seconds also a giant plate. Once again use Jean's powers and put the meal on the ring.
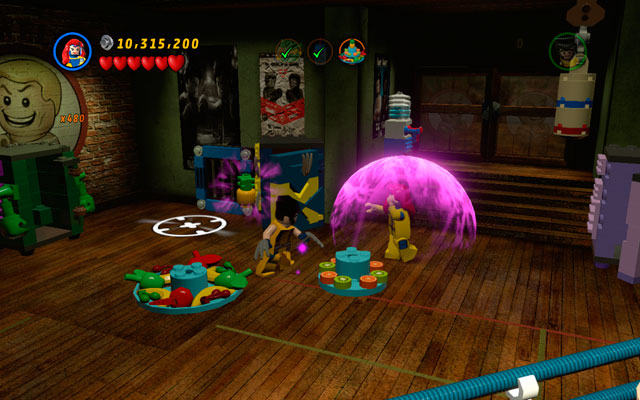
Turn left to find refrigerator and the other kitchen stuff. Smash them, scattering the food around. Then use telekinesis power to compose three plates into a pyramid shape. Finally put them on the ring for the last time. Now your task is completed.
Characters: Iceman, Black Widow, Hawkeye
True Believer Status: 25000 studs
Location: Circus in the Central Park (Map of Important Locations [22])
Gold bricks required: 100
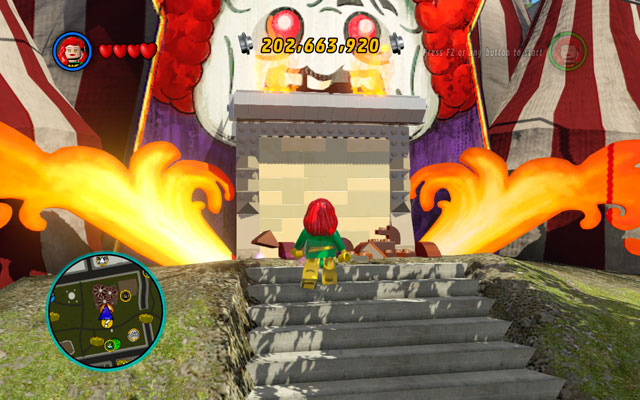
For unlock this mission you must have no less than 100 gold bricks. If you have them, you should find big Circus tent placed in the Central Park and build an entrance to get inside.
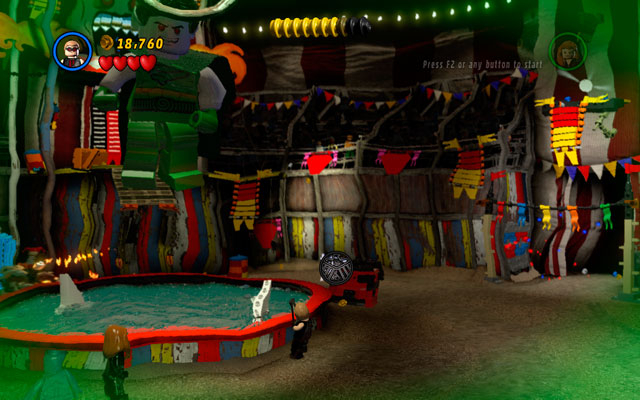
Begin this mission choosing Hawkeye, then turn right. Aim at the silver padlock placed on the box, which is standing near to the shark-infested pool. After that action, terrifying Nightmare will appear - now you must punch him and wait for a course of events.

As Iceman you must use your ice beam ability to put out all fires. Then build a fishing pool and wait, until it gets filled with water - then freeze it. Now you can create a ramp for Ghost Rider, so he could attack Nightmare. Give him few seconds and turn on the left side of the circus.
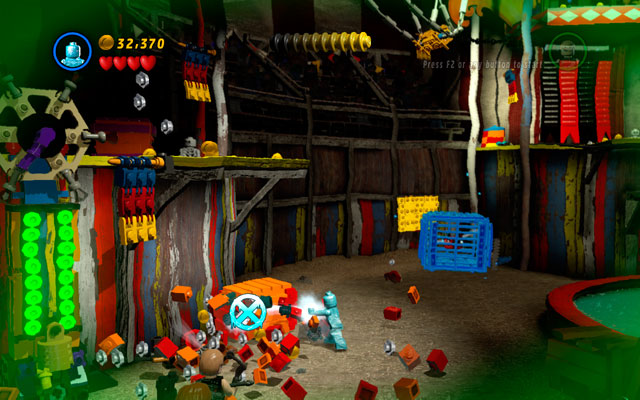
Find orange cartons and destroy them with an ice beam. From the debris you can build self-destructing device. When it explodes, new bricks will appear. Use them to construct a trampoline to the upper platform and jump on it.
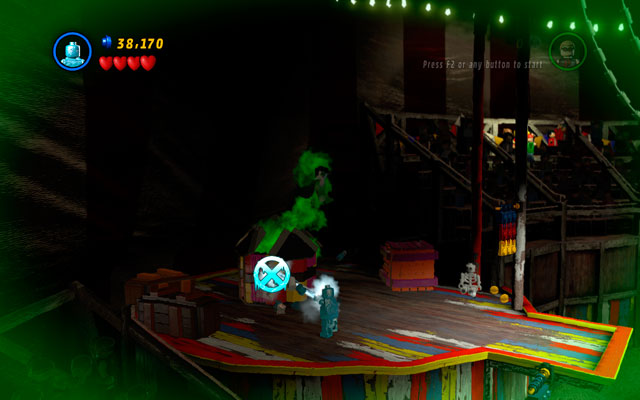
Go to the box in which Nightmare is hidden. Smash it and - when your enemy appears - hit him one more time. Then put out the Nightmare's fires, so you could use bricks to create a new ramp for Ghost Rider.
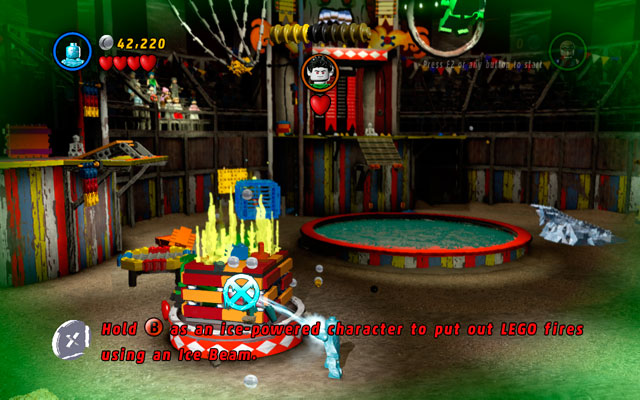
Now jump down and find a big colored box standing near to the pool. Put out all the fires burning on the box and build an attachable points for Hawkeye to yank. Shoot an arrow at it - this will open the crate, so green car with Nightmare could appear on the stage. Your task is to hit the car until it crashes.
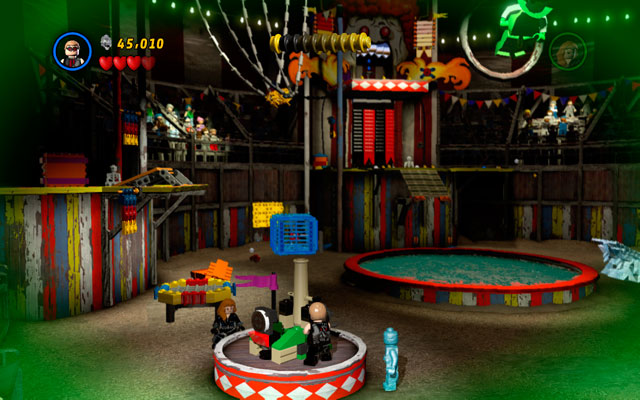
After you destroy Nightmare's car, new bricks will appear. Use them to build a cannon and use it to fire at the far wall. Go to that wall and shoot an arrow at attachable points as Hawkeye. Now use them to create a path up to the next platform.
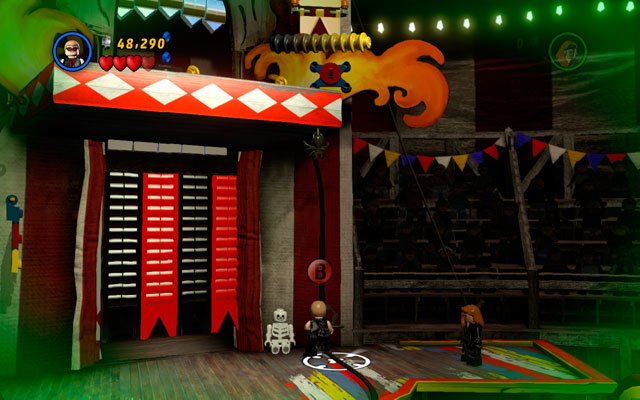
Go upstairs, then aim Hawkeye's weapon at the attachable point above - this will create a path up for you and your friend. Climb on the top of the tower, then choose Hawkeye's weapon to shoot an arrow at monster's silver teeth. When they disappear, jump on the pump standing in front of you, making the last ramp for Ghost Rider.

In the final part of this mission jump down to Nightmare and punch him for the last time.
Characters: Spider-Man, The Thing
True Believer Status: 45000 studs
Location: Reptilian Cave in the Central Park (Map of Important Locations [23])
Gold bricks required: 125
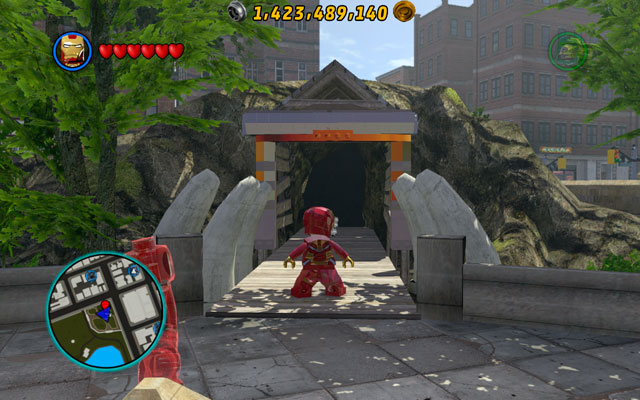
To unlock this mission, you must collect 125 gold bricks. If you have them, go to the Central Park, find Reptilian Cave and go inside - in this way you will start another level.

Firstly, choose The Thing. Head down to the right side of the room and destroy cracked wall. Then switch into Spider-Man and create a ladder from the broken pieces.
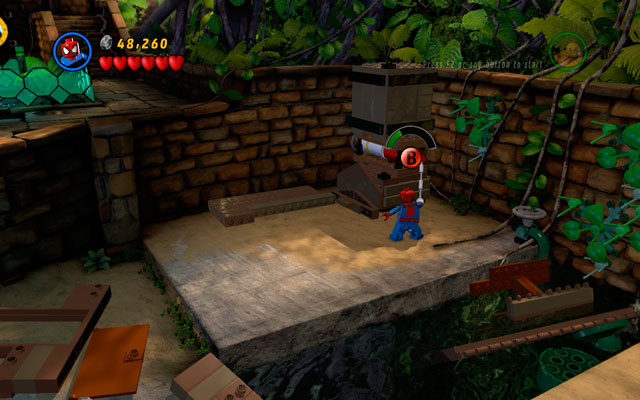
Now use your spider senses to find an attachable point for your web. Pull it and you will scatter the bricks. Build a pump from those pieces and use it to drain the pond in the foreground.
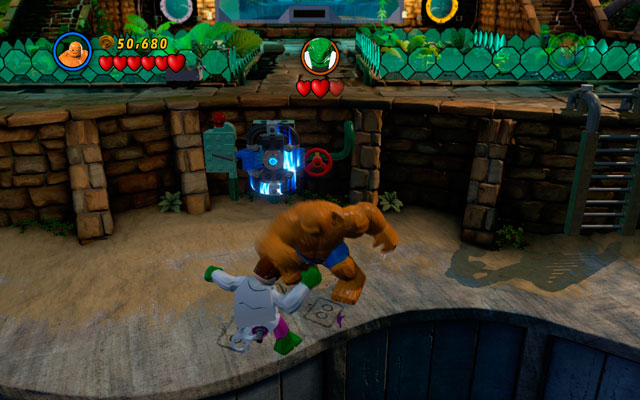
Reptile will get angry, so he will try to attack you. Choose The Thing and hit green lizard for a few times. After that your enemy will change into Doctor Connors and run away.
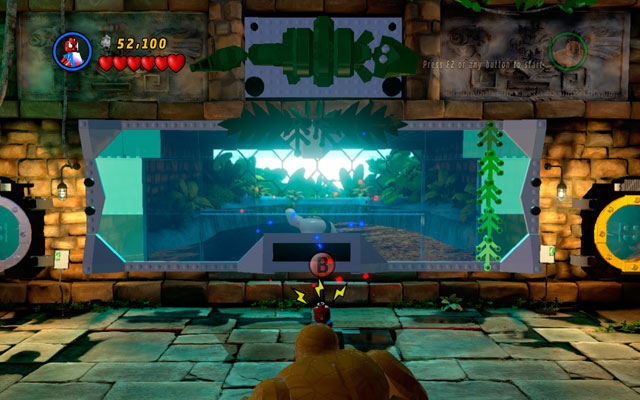
Now switch into Spider-Man, then find a big glass window in the interior and use your spider senses. Two attachable points will appear near to the stuffed crocodile hung above you. Yank them and knock off a croc. Build two green handles from the broken pieces and use them with The Thing.
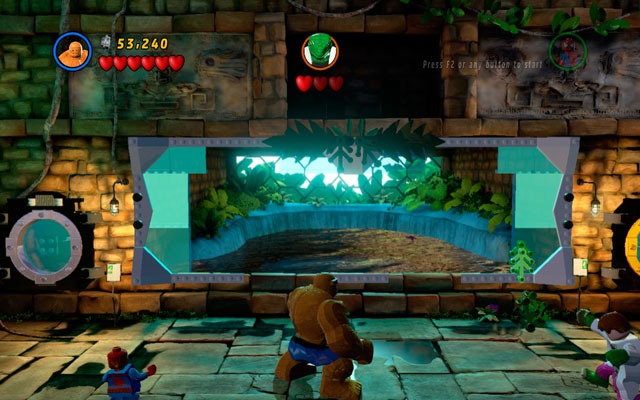
Now it's time for the second round - beat Reptile so hard, so he is forced to escape to the cage on the left side of the room.
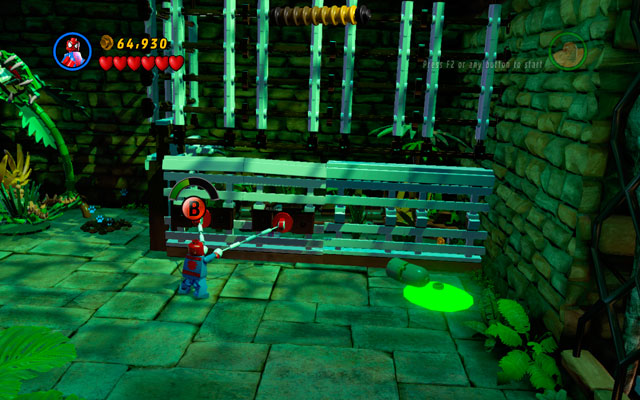
Go after your enemy. Use spider senses to find out two attachable points for your web, placed on the cage. Pull them and wait for the creature. When Reptile appears, hit him for the last time and your task will be over.
Characters: Invisible Woman, Human Torch, Doctor Strange
True Believer Status: 45000 studs
Location: Sanctum Sanctorum (Map of Important Locations [24])
Gold bricks required: 150
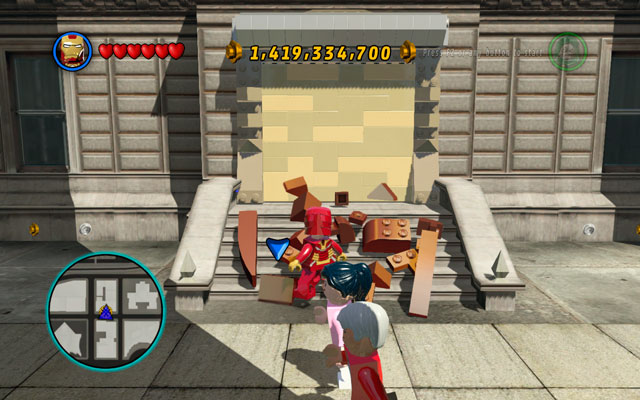
You must have collected 150 gold bricks to unlock this mission. If you have them, you can go to the Santum Sanctorum building and create an entrance for the next location.
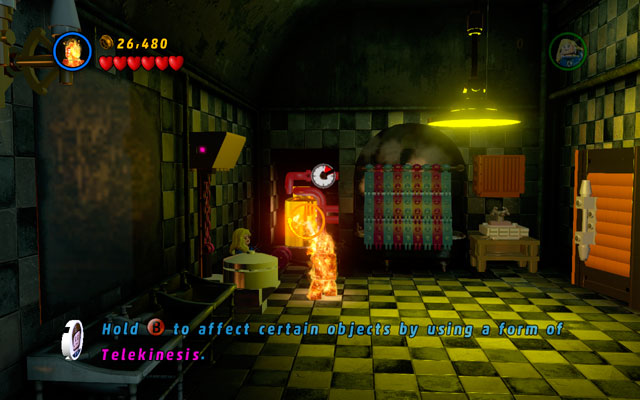
Choose Invisible Woman and go to the big clock placed on the left side of the room. Use telekinesis power to pull the hands of the clock twice. Wait for bricks to scatter, then use them to construct a door handle for the nearest door. Now you can visit second room.
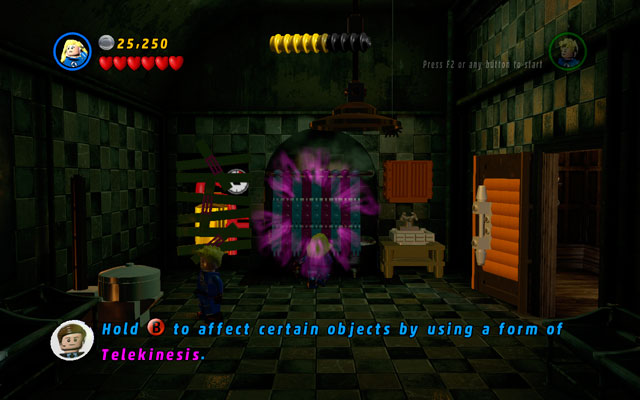
Pull the curtain, discovering Dornammu location in that way - he will try to hurt you with some bricks. Destroy them and use broken pieces to build a pump. Then choose Invisible Woman, leading her to the pot standing on the left. Behind the pot, there is some chain, which you have to pull. After you do that, you will find a hammer on the floor. Use telekinesis ability to pick it up and smash wooden planks nailed to the wall.
Now you will see a boiler - melt it with a fire beam. In this moment Dornammu will quickly finish his bath and you will be able to see a room at the opposite part of the house.
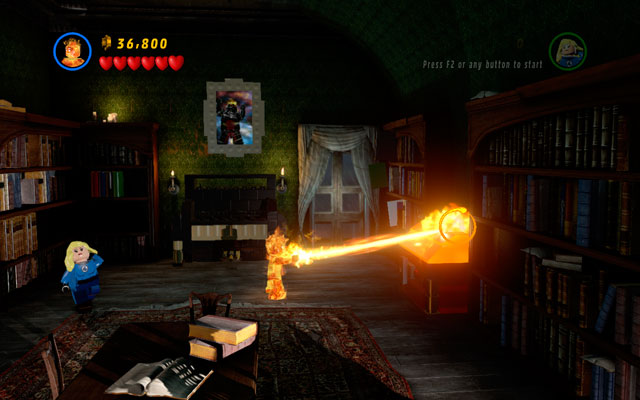
Go to the door placed on the right side of the hall - they will lead you to the library. Choose Human Torch to melt golden box standing on the cupboard on the right-side of the room. Then turn into Invisible Woman and put the piano keys on the right places. Then play piano to unlock a switch, which helps you to drive the demon out.
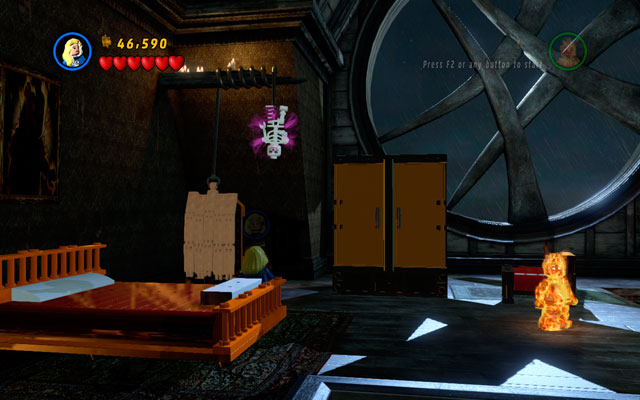
Go back to the hall and use stairs to go to the upper level. Choose Invisible Woman to pull the skeleton - when Doctor Strange appears, search the location for three golden balls (placed on the left, right and central part of the room).
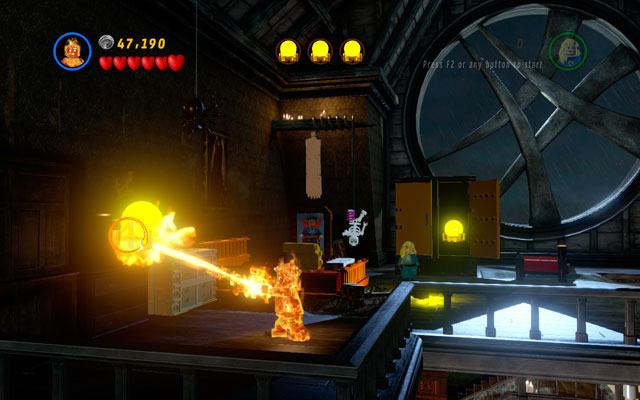
Use Human Torch to melt three targets - now you can go downstairs and face the enemy.
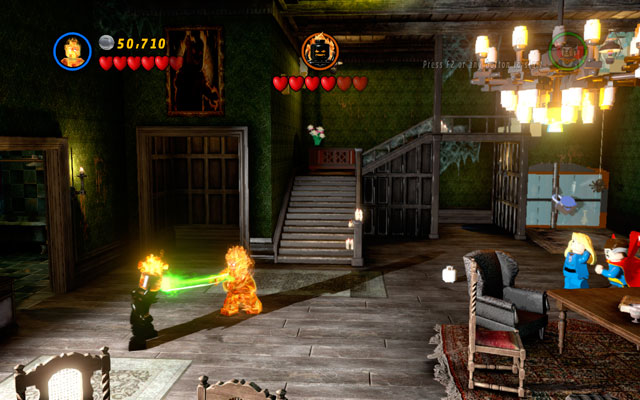
It's time for conventional duel with Dornammu. Hit demon, and when he disappear, defeat all his skeletons. This scheme will be repeated six times, so be patient.
Hint: Dornammu can be hurt only during melee fight!
Characters: Magneto, Mystique
True Believer Status: 35000 studs
Location: Hidden Cell at the Raft (Map of Important Locations [25])
Gold bricks required : 175
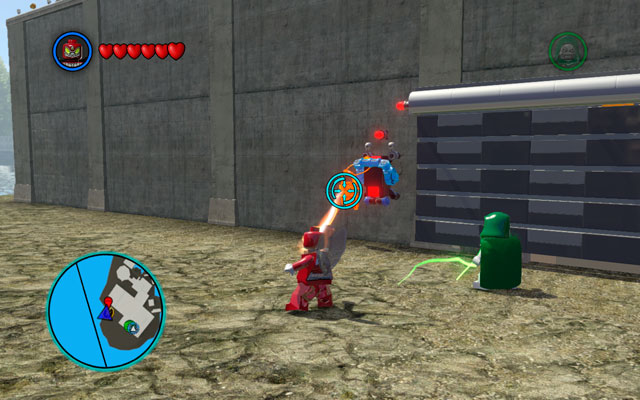
To unlock this mission you must collect minimum 175 gold bricks and open the gate to Hidden Cell at the Raft. The gate won't be open until you have destroyed two silver and gold padlocks placed on the both sides of the door. When it is done switch into Magneto and remove metal bolts from the gate. Wait for metal roller blinds to go up, so you can receive some bricks. Use them to build an entrance and go inside the building.
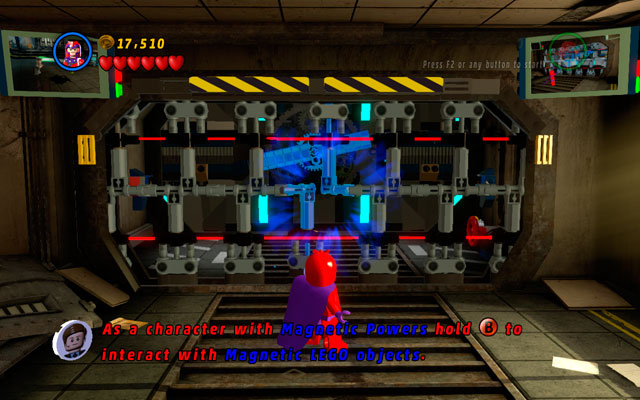
Turn right and interact with metal elements blocking your way as a character with magnetic powers. Remove a big bolt from the door, so they will stand open for you. Now you can go to the Hidden Cell, where Mysterio is locked.
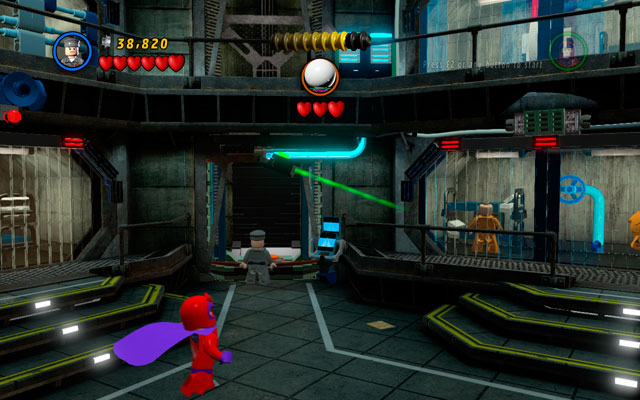
Use Mystique powers to turn into guard and cheat the camera. Stand in the middle of the elevator to activate lifting up button. On the upper floor you must find blue box placed on the right side. Destroy the fuses hidden inside to open a free way for Magneto.
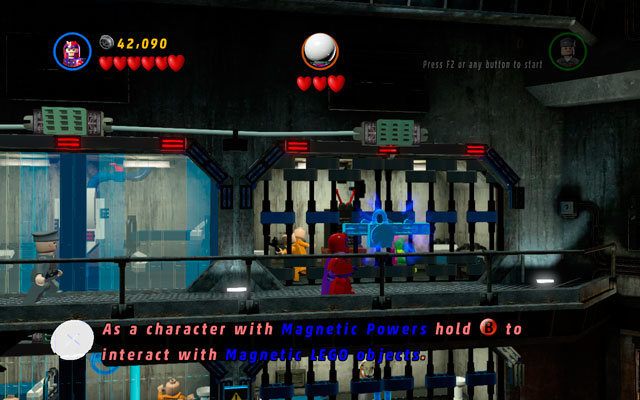
Choose Magneto and go upstairs - then turn right, smashing every object on your way. When you see iron bars, squeeze them, making an entrance to the cell. Go inside and punch Mysterio: the duel will officially begin.
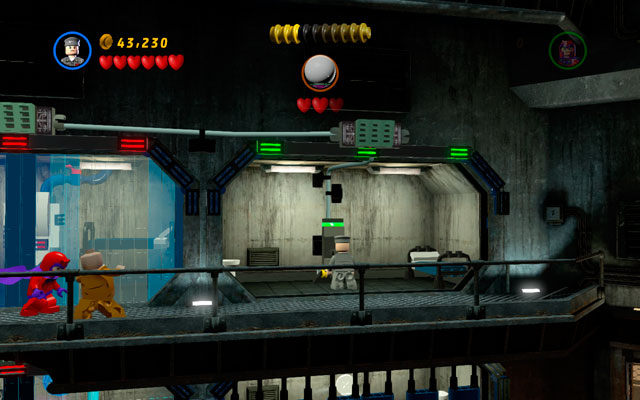
Destroy everything what you could see in Mysterio's cell, then build a switch from the broken pieces. Pull it, and you will see the target-shield on the lower location.
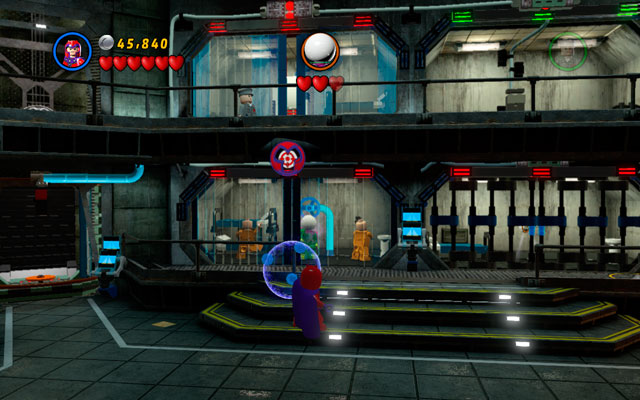
As Magneto aim at the target and fire. After that go to the cell where your enemy is hiding, striking him as hard as you can. When he escapes, use your magnetic powers to turn the metal valve - some bricks will appear on the upper floor.
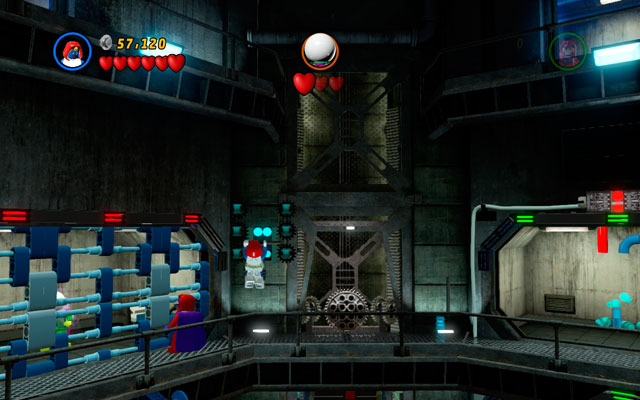
Finally build another switch from the broken bricks. Choose Mystique to jump on it - the door will open. Now you can hit Mysterio for the last time.
Characters: Thor, Loki
True Believer Status: 25000 studs
Location: Teleport near Thor's mansion (Map of Important Locations [26])
Gold bricks required: 200
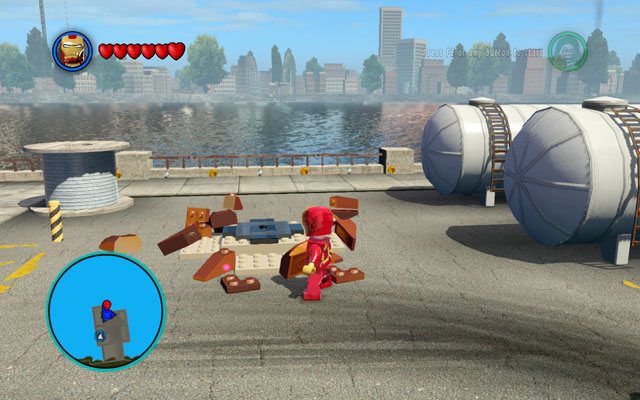
You will need 200 gold bricks to unlock this mission - if you have them, go to the Thor teleportation place. There you must find some scattered bricks - they are necessary for you to build a teleport into the land of the gods.
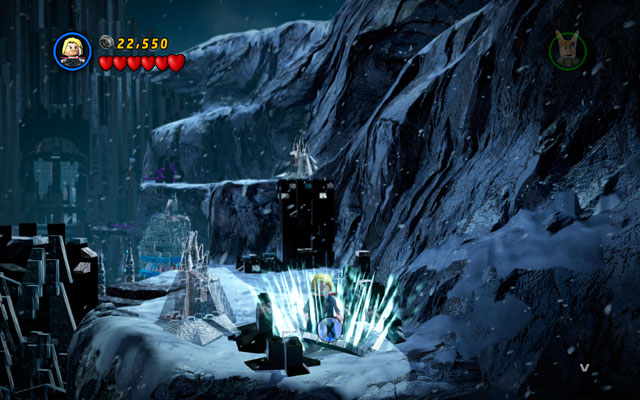
Firstly turn right and fly up with Thor, heading to the first bank. Destroy the ice tile using your hammer, then fall into the cave located below. Now find the span and pull it to make an entrance for Loki.
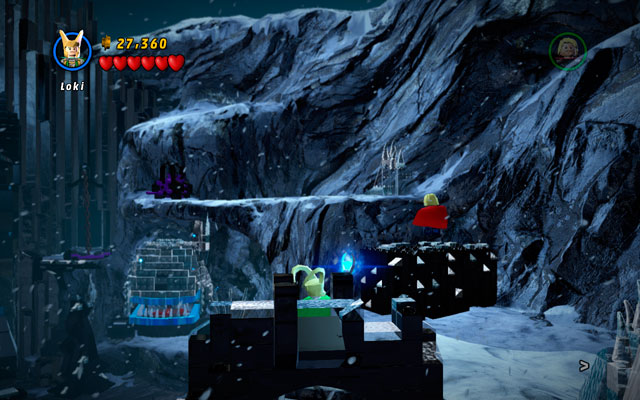
Choose Thor and fly to the dark platform placed on your right - this will raise stair steps on the left. After that switch into Loki and jump on those steps (notice that if you play with AI, computer character may go down from mechanism, so you must take care of him!).
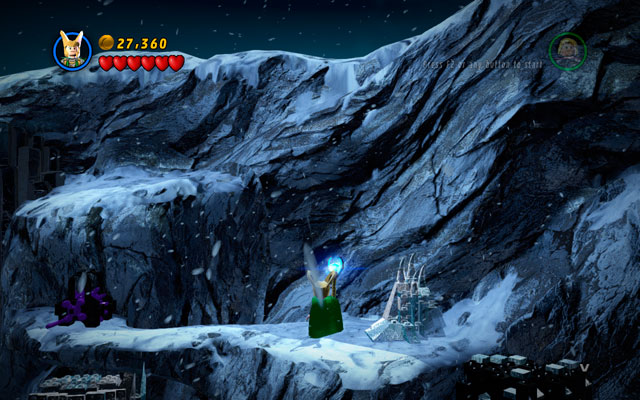
Standing on next bank, use Loki's powers to move a windlass placed on the left. In this way you will open one side of the gate.
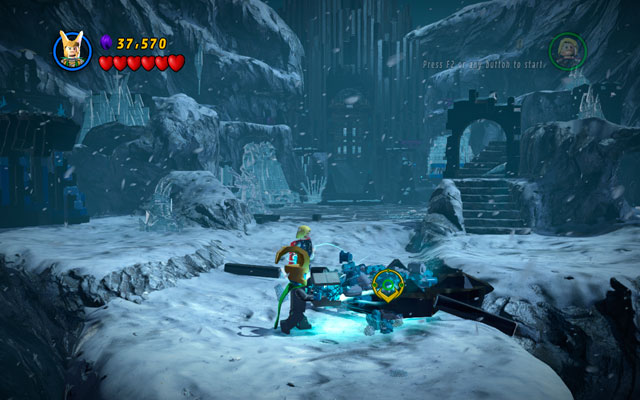
Go to the black stone, placed in the middle of the location. Destroy it, and when the pond appears, freeze it using Loki's powers. Now you can use a catapult, which was hidden in the pool.
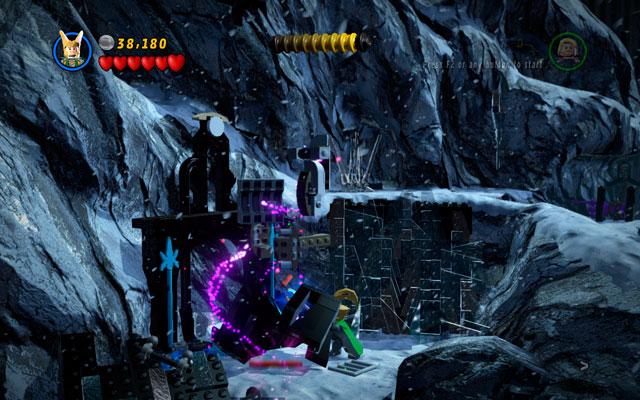
Go to the position that you have already unlocked and build a battery for Thor with Loki's powers. Now use Thor to charge this battery.
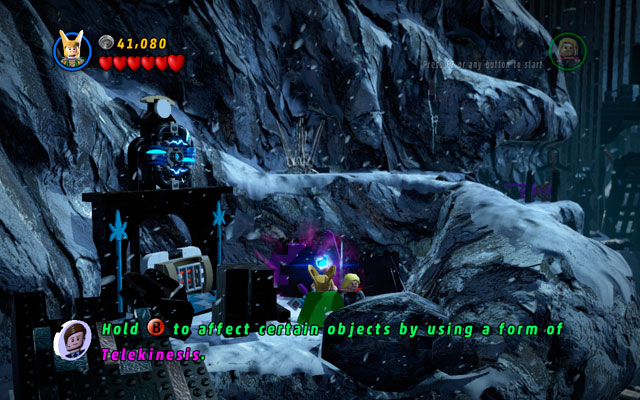
After that put the fires down, using Loki's freezing powers once again. Then break the wall, using Thor's hammer. Now build stairs from the broken pieces.
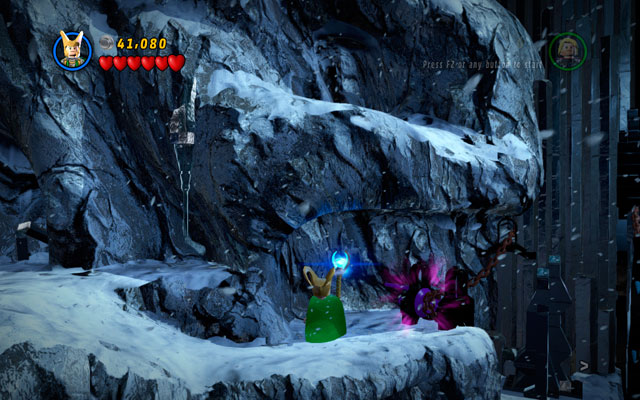
As Loki turn the windlass, which is located at the end of the bank. Then jump down and fight with Malekith.
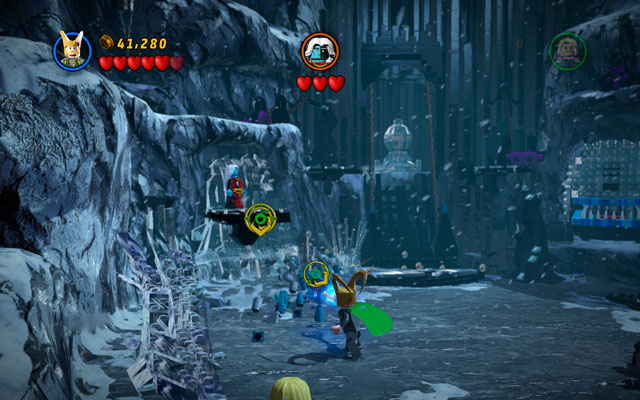
The pattern is simple - you mast shoot at the platform, on witch your enemy is standing. When the platform goes down, you can attack your arch villain. Repeat this sequence for three times, and your mission will be over. During this fight don't bother yourself with frost giants, because their number is literally infinite.
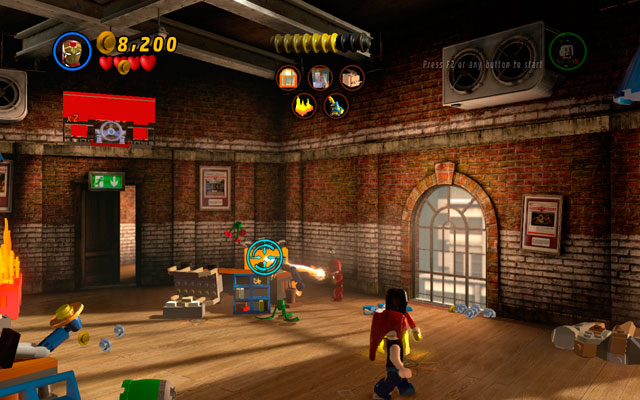
To obtain a character token, you have to find and arrange three special newspapers. The first one is hidden on the back-right corner of the room -to get it, melt the golden radiator and construct the newspaper from the debris.
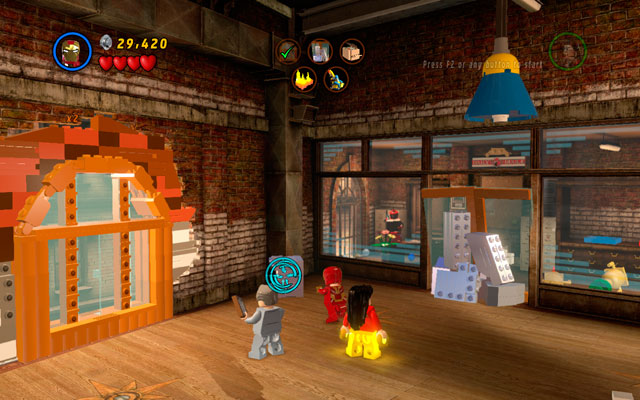
Walk to the opposite side of the room and destroy a silver cardboard box placed in the corner. Now create the second newspaper.
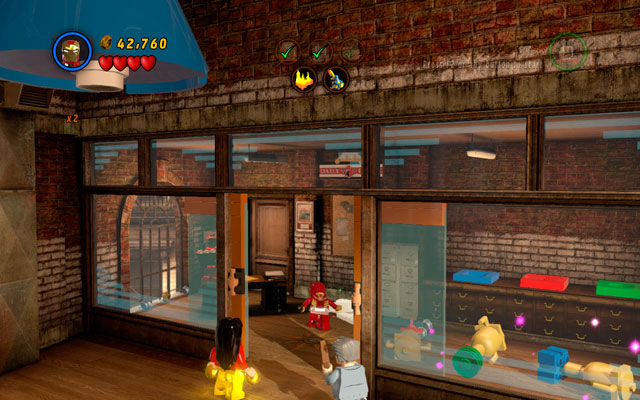
Finally walk to the office in the front of you and build the last newspaper. The character token for Doctor Octopus (Ultimate) will appear in the middle of the bureau.
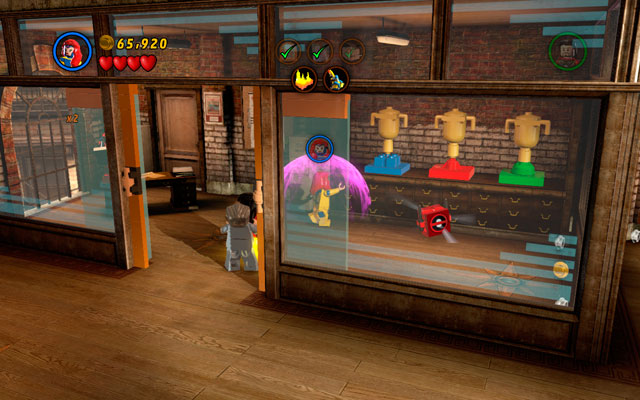
In order to find Deadpool brick, enter the office with Deadpool hidden inside and use Jean's telekinesis power to put nearby chalices in to the right places (the color of basis should be the same as on chalice). Now You will receive the "Studs x4" Deadpool Brick.
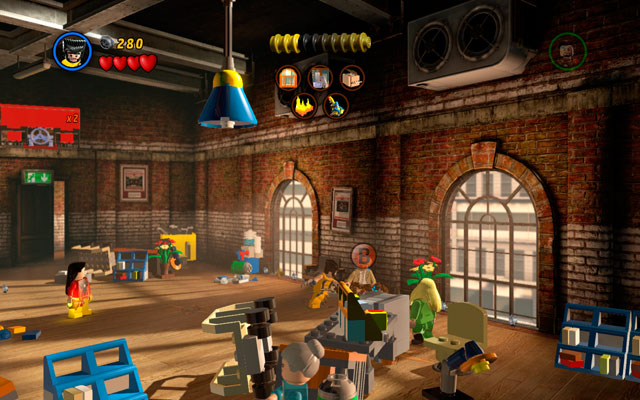
You will find Stan Lee under the pile of sand in the right side of the room. Choose Wolverine or any other character with claws and dig a hole in that pile. This will set Stan Lee free.
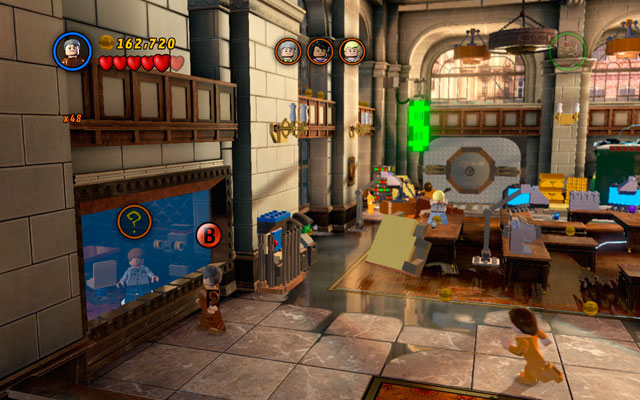
After the mission's start, turn left and choose Jean Grey or Mastermind. Take control over the office worker hidden behind the glass window and turn on the computer next to him. When the access to the ATM will be granted, bash it with few missiles (notice that machine is quite resistant). Now you can pick up the Moon Knight character token.
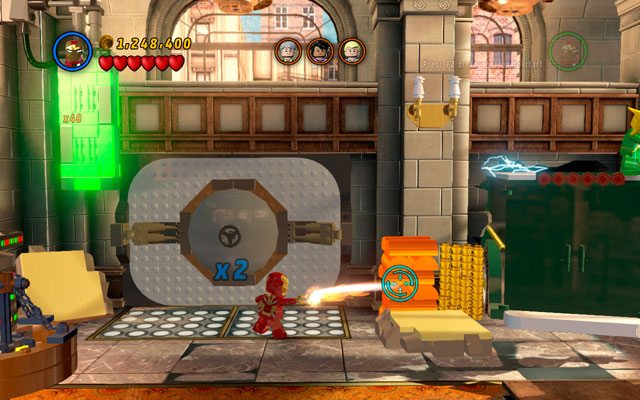
Go to the vault in the back side of the room. Melt golden bricks with fire beam, then collect the Deadpool Brick for "Ghost Studs".

After luring Shocker out from the vault, enter it and switch into Magneto. Open the metal cage with Stan Lee trapped inside and let him find the way out.
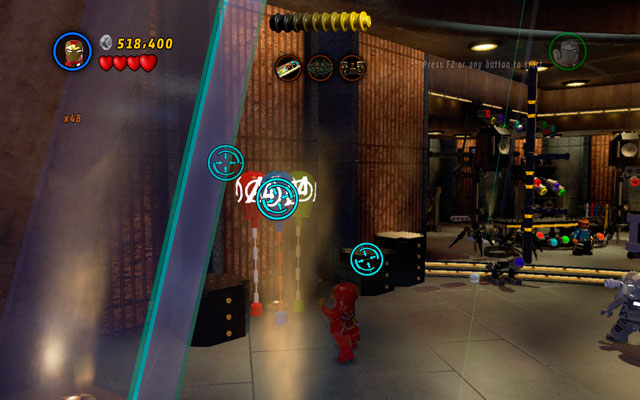
To collect the Iron Man (Heartbreaker) character token, you will have to destroy three bunches of balloons. The first one is standing between cupboards on the left side of the room.
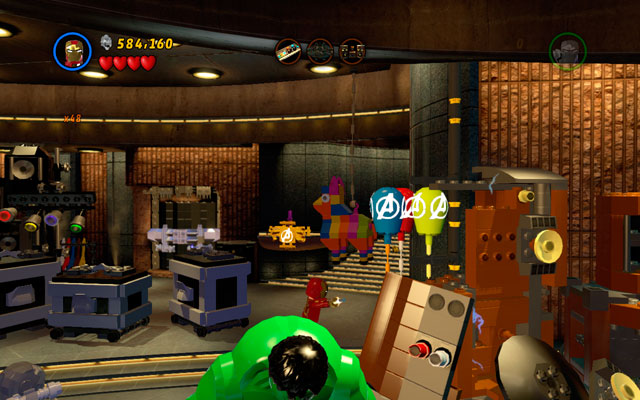
Second bunch is located behind Hulk, in the middle of the room.

The last bunch of balloons is placed under the STARK neon, next to golden cage with Stan Lee closed inside.
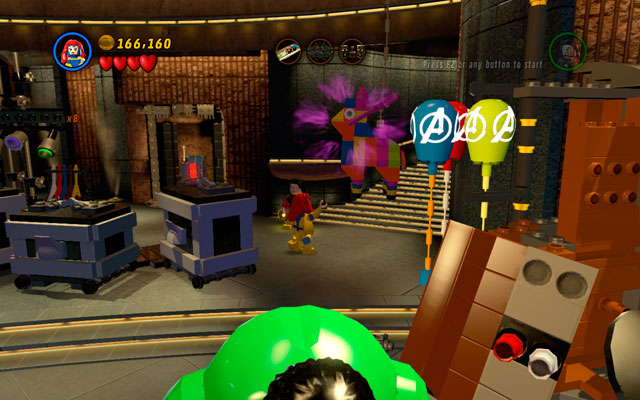
You will find the "Studs x10" Deadpool brick in the back of the room. Look for the golden statue standing near to the silver latch and destroy it. The statue will drop the purple stick. Pick it up with Jean Grey (or another character with telekinetic abilities) and smash the pinata which is hanging near to the stairs. Now you can collect studs and the Deadpool brick.

To rescue Stan Lee, walk to the right side of the room and melt the gold bars with a fire beam.
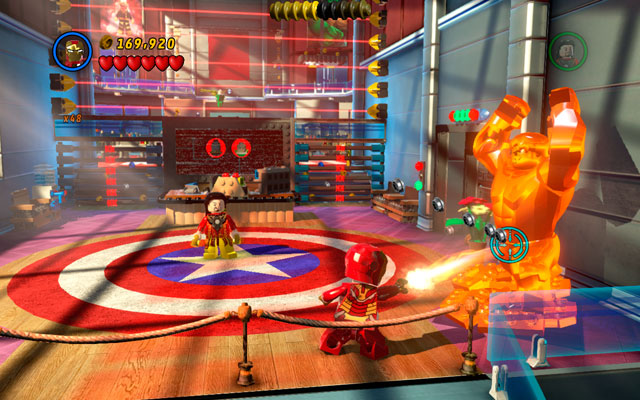
At the beginning of the mission choose the character with fire beam (e.g. Human Torch) and melt the golden Hulk statue. Now pick up Ms. Marvel Character Token.

Go to the back-right side of the next room. Find the jigsaw on the wall and choose character witch telekinesis power to compose image of Deadpool from the puzzles. As a reward, you will obtain the "Gold Brick Detector" Deadpool Brick.
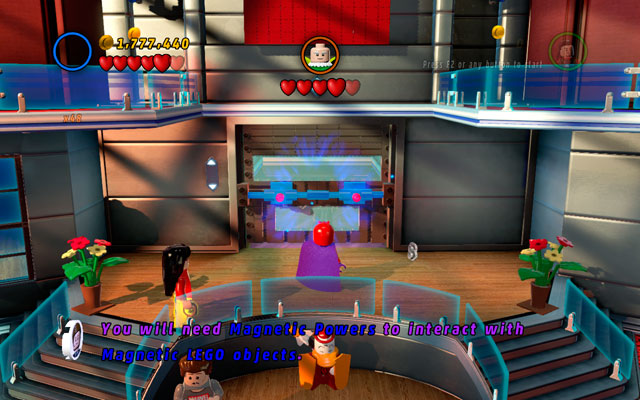
Finally go to the big door placed between the stairs. Choose Magneto to break the door open and release Stan Lee.
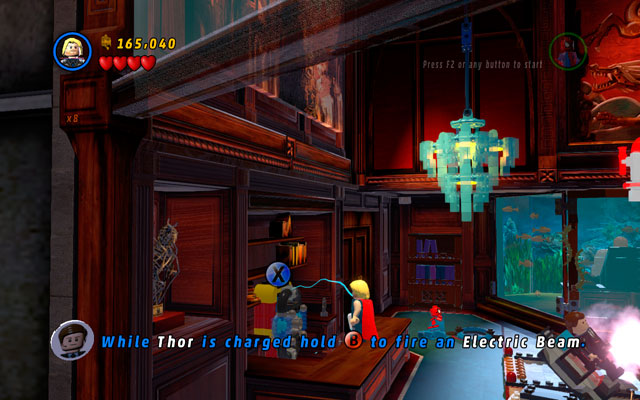
Turn left and find a battery placed behind the counter. Charge it up (choosing Thor or Storm) and wait a few seconds. This will unlock the Kingpin Goon Character Token.
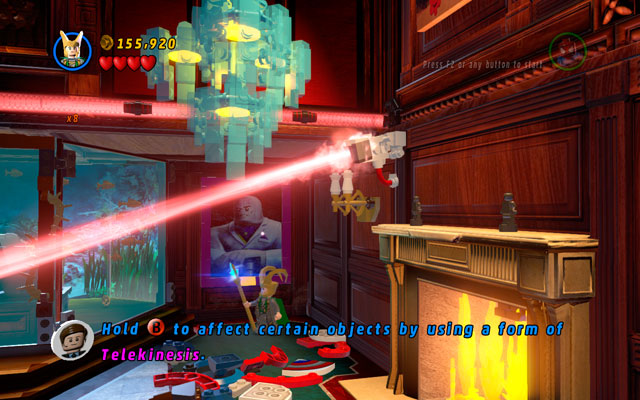
Choose a character with telekinesis power (e.g. Loki or Jean Grey), then head to the painting located on the right corner of the room, so you can move it down. Now switch into character with a fire beam (e.g. Human Torch or Iron Man (Mark 42)) and slice through the golden vault to find the "Studs x6" Deadpool Brick.
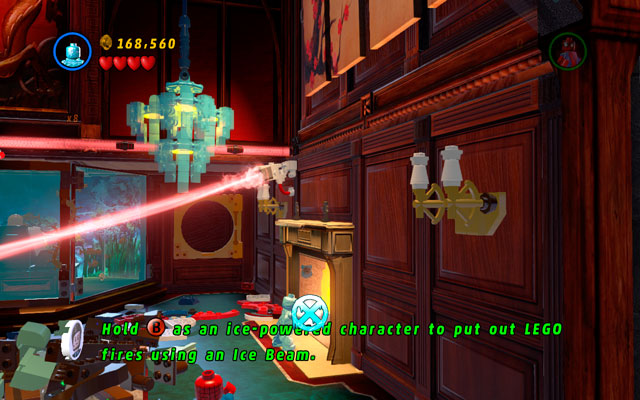
You may rescue Stan Lee with an Iceman - simply go to the fireplace and put out the fire.
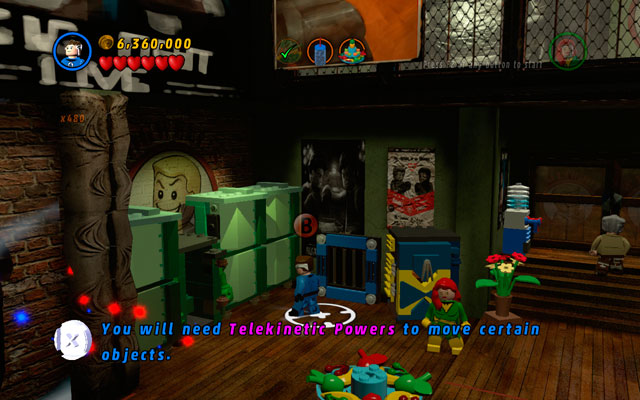
Choose Mr. Fantastic and go to the fair-left corner of the room. Find iron bars between the refrigerators and pass through it to the second level. There will be waiting Wolverine (Cowl) Character Token.
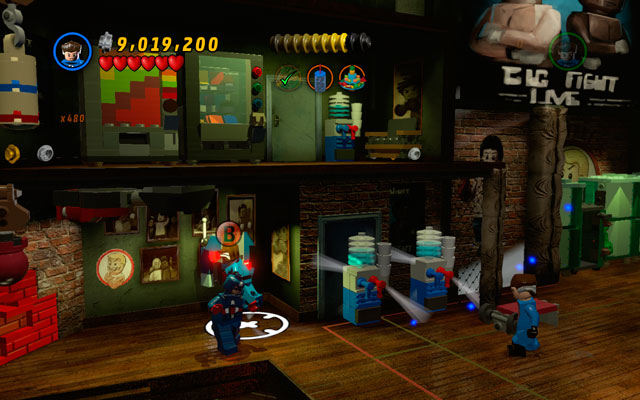
Choose intelligent character (e.g. Mr. Fantastic or Tony Stark) and approach to the computer on the left. Use it to unlock the "Minikit Detector" Deadpool Red Brick.
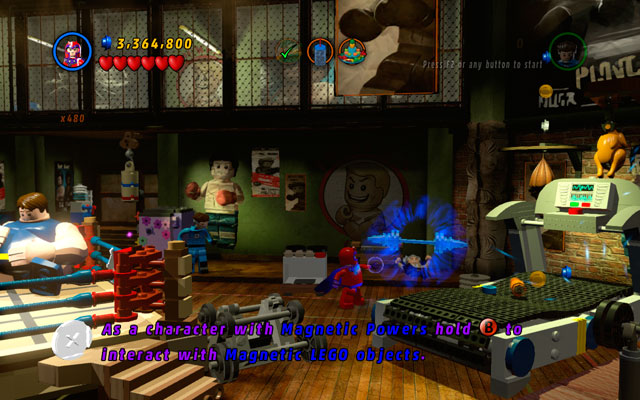
Turn right in the back of the room. Choose Magneto and lift off the metal weight to rescue Stan Lee.
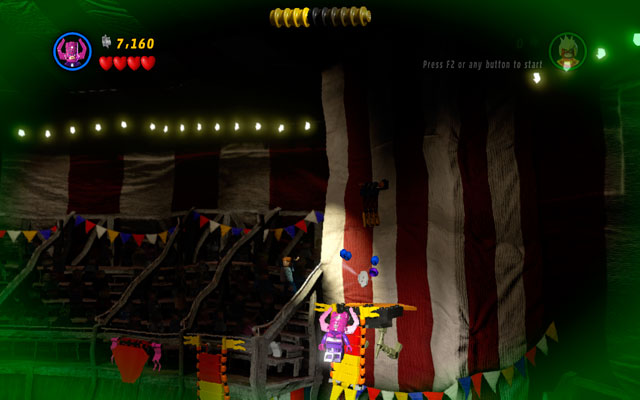
Choose any character with flying skills and go to the right part of the arena. Then fly up on the platform to find the Mandarin (Film) Character Token.
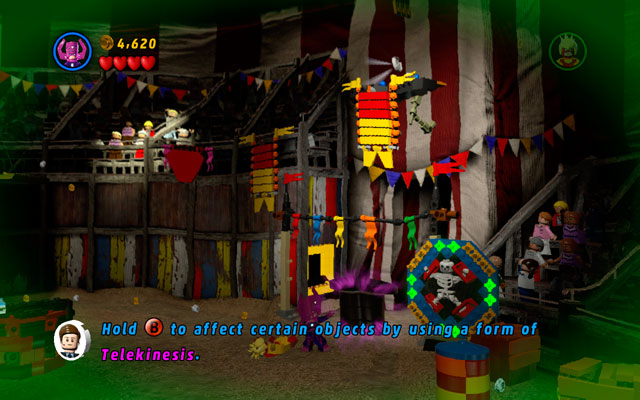
Choose Magneto to decompose the blue metal cage on the left side of the arena, then take the "Attract Studs" Deadpool Brick to collect coins.

Switch into Spider-Man and go to the right side of the arena using your sixth sense. You will find two attachable points - pulling them will reveal a golden wall. Melt it using any character with a fire beam.
Choose Galactus or other character with telekinesis power and pull out Stan Lee from the giant black hat.

In order to find the Thing (F.F.) Character Token, you must open three hatches. Two of them are hidden in the main room - first on the left and second on the right side. Choose Iron Man to melt the golden one and blow up the silver one.
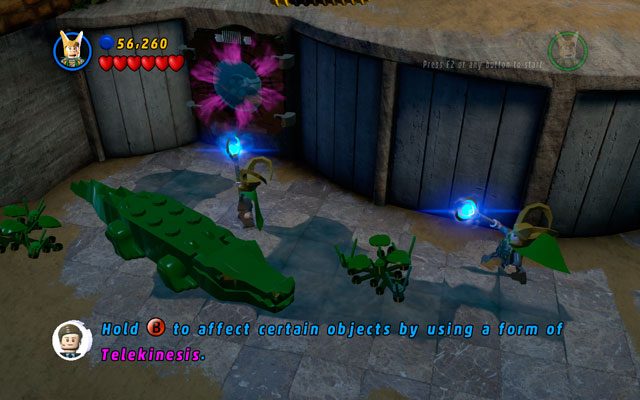
After pumping out water from the pond, choose any character with telekinesis power (e.g. Loki) and open the last hatch hidden near to the crocodile and pick up the Token.
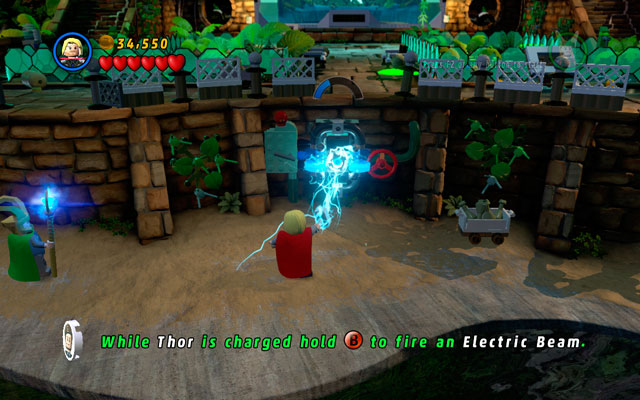
Choose Thor and jump down. Charge up the battery and wait for the metal cage with "Studs x8" Deadpool Brick. Now open it with Magneto and take the reward.
On the last stage turn left as a character with claws (e.g. Wolverine), then dig out the elements of F.F. Panel from the sand pile. Put them together into one object and - as Mr. Fantastic - use it to rescue Stan Lee.
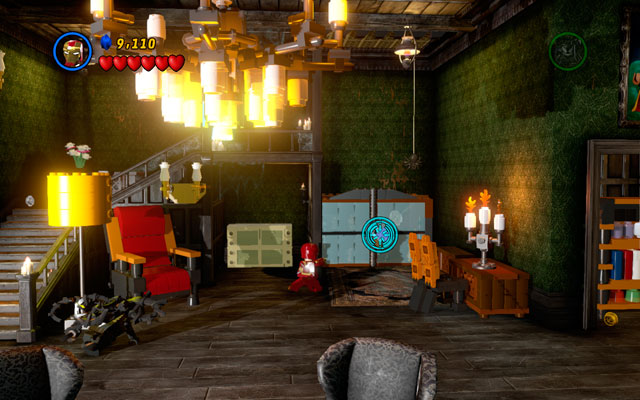
In order to unlock the Character Token for the Invisible Woman (F.F.) destroy silver padlock on the cupboard in first room. That's all!
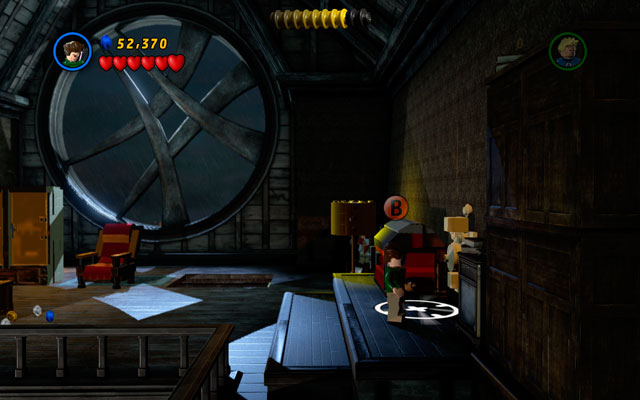
Find the room with Dr. Strange, then switch into Sandman and pass through the sand-wall on the right side. After that choose any character with telekinesis power to open the chest. Destroy all the objects in this area and build the Christmas tree from the remains.
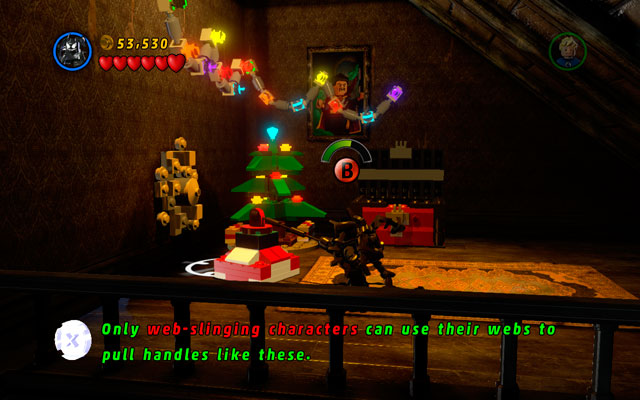
Choose any character with a web attack, then pull the attachable point to obtain the "Fast Build" Deadpool Brick.
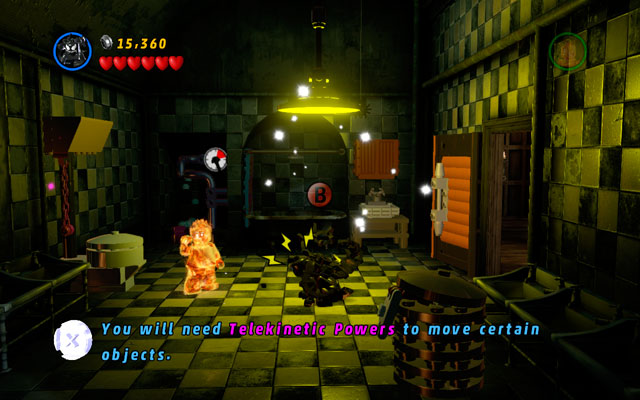
After you scare away Dormammu from the shower, switch into Spider-Man or Venom and use the sixth sense. Now find the web handles - pulling them will create a hole in the ceiling. Go through it to the upper level.

To rescue Stan Lee, choose character with rocket attack and shoot at the silver padlock on the coffin.
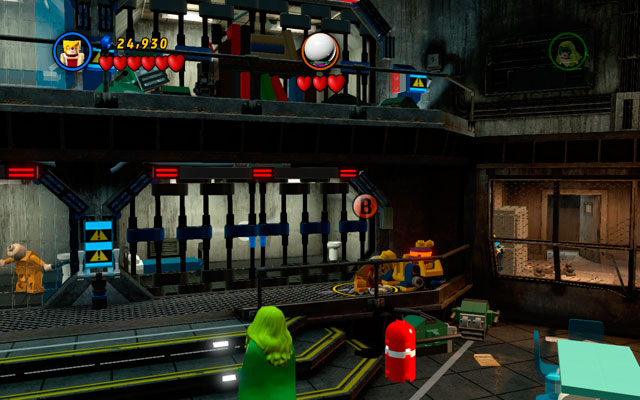
After entering the prison block (where Mysterio is hiding), choose any character with claws. Hitting the yellow-blue switch will open the door - behind them you will find the Green Goblin (Ultimate) character token.
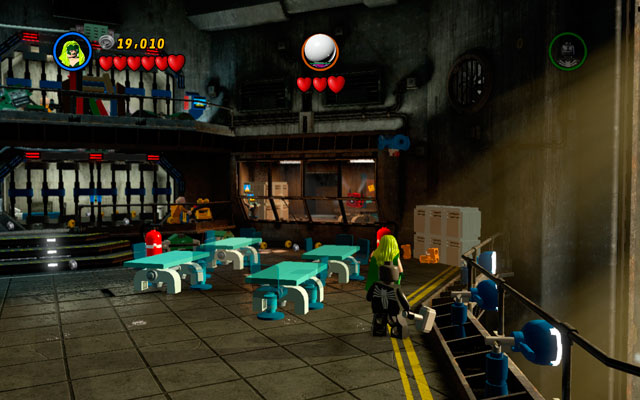
In the same location turn right and walk to the cupboard standing near the wall - smash it and then switch your character into Venom. Pass through the symbiotic wall to the next room -you will find the "Token Detector" Deadpool Brick there.

Choose any character with electric powers and charge up the battery placed near to the cell on the left. You will set Stan Lee free in this way.
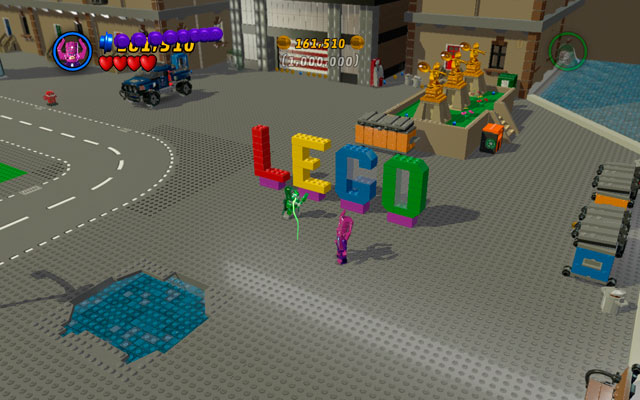
On the right side of the area you will find the Thor (Classic) Character Token. To get it, switch into Iron Man (Mark 42) and use your rockets to smash the silver rock.
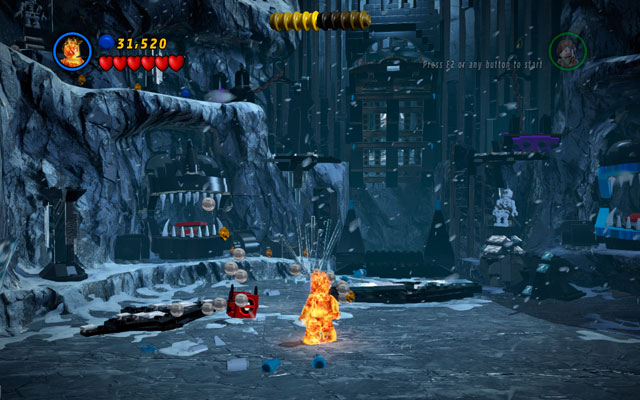
To find "Mini Characters" Deadpool Brick, you must melt down the wall placed in the centre of the location (near to the gate where Heimdall is imprisoned). You can use any character with fire powers, e.g. Human Torch to do that.
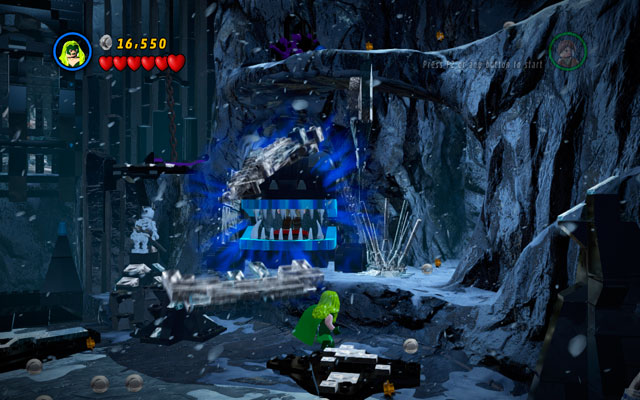
To rescue Stan Lee, choose Magneto or Polaris and - with their special powers - open the metal jaws placed on the right side of the gate.
Characters: Doctor Doom, Galactus
Location: Statue of Liberty on Liberty Island (map of Important Locations [27])
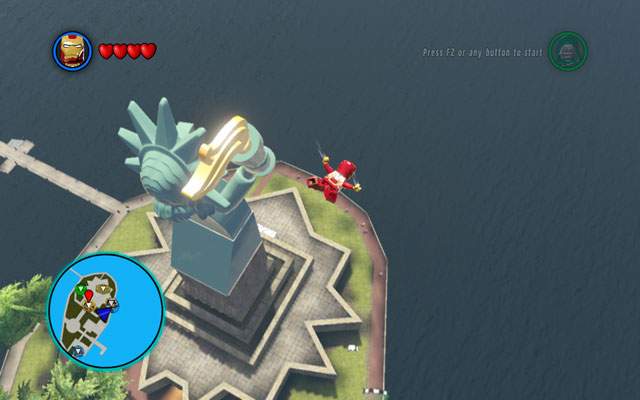
To unlock this mission, you must finish the main campaign and go to the Liberty Island. Now go inside the Statue of Liberty and start a task.
The goal is clear - you must collect 1000000 studs. Completing this task isn't very hard - on the stage you can find many occasions to become a rich person. Some of them are specified below:

When million studs are already collected, the mission will automatically end. From that moment two new characters will be obtainable - Captain America (Classic) and Union Jack.
To finish the game in 100% you have to:
When game is finished in approximately 99% (meaning that you completed practically everything), look at the map of New York City. If everything went okay, new mission for Deadpool's Scooter will pop up on the bridge (see Vehicles Map [39]).
![Finish a task to unlock next quest - for Deadpool's Helicopter (Vehicles Map [40]) - Finishing the game in 100% - LEGO Marvel Super Heroes - Game Guide and Walkthrough](https://game.lhg100.com/Article/UploadFiles/201512/2015121617110785.jpg)
Finish a task to unlock next quest - for Deadpool's Helicopter (Vehicles Map [40]). When it's done, go to the aunt May location (Characters Map [65]) and complete the last mission, simply defeating all enemies.
Handle all of the following and the game should be finished in 100%.


 LEGO Batman 2: DC Super Heroes Game Guide & Walkthrough
 LEGO The Lord of the Rings Game Guide & Walkthrough
 Lost Planet: Extreme Condition Game Guide & Walkthrough
 Lost: Via Domus Game Guide & Walkthrough
 Leisure Suit Larry: Reloaded Game Guide & Walkthrough