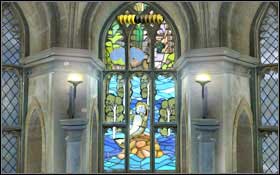
This guide to LEGO Harry Potter: Years 1-4 contains a complete set of information that each young magician needs in order to finish the game in 100%. Apart from some basic information on the gameplay mechanics, Hogwarts, spells and The Leaky Cauldron you will find a description of all the mission you have to complete during each year spent in the castle as well as a detailed description of the bonus items - Red and Gold Bricks, Character Tokens and Crests. Additionally you will find a map of Hogwarts which will prevent you from getting lost in this castle, full of passages and corridors. There's also a list of bonus locations and characters in a convenient form.
Orange colour represents the characters you need to use in a certain situation, green shows the right moment to use a spell while blue is used to mark locations in Hogwarts. Brown is used to mark screenshot recalls, #1 - the screen on the left, #2 - the screen on the right.
Artur "Arxel" Justynski
Translated to English by Jakub "cilgan" Lasota
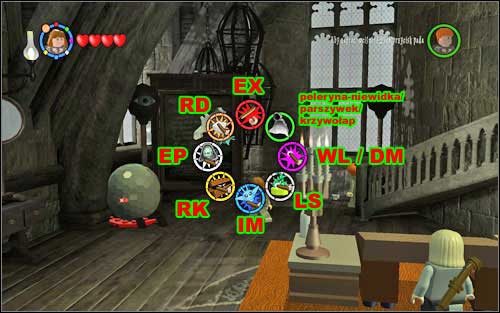
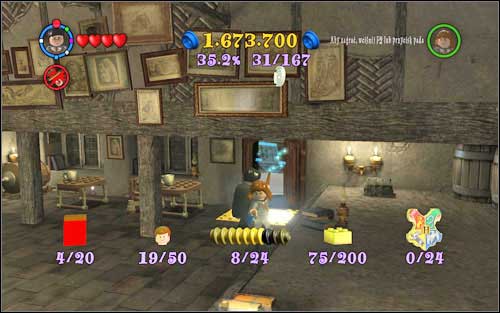
In the guide, spells are referred to by shortcuts - take a look at the table to learn which shortcut corresponds to which spell. They are group in order in which you will obtain them in the game. Each learnt spell/ability will give you a Gold Brick.
NOTICE: You don't get a Gold Brick for mastering the Time Turner ability.
Name
Shortcut
Effect/usage
Wingardium Leviosa / Dark Magic
(WL) / (DM)
The most commonly used spell - it lifts up objects. / Dark Magic - the equivalent of (WL) for bad character.
Lumos
(L)
It creates a stream of light - use it against the Devil's Snare.
Strengthening Potion
none
Temporarily increases strength. Used to pull chains.
Lumos Solem
(LS)
Lumos upgrade - allows to attack from a distance.
Broomstick Riding
none
A passive ability, you can fly on a broom after learning it.
Immobilus
(IM)
Slows down the target or freezes an object. Eliminates Cornish pixies.
Expelliarmus
(EX)
Disarms (knocks away) an enemy.
Parseltongue
none
A passive ability, it allows to talk with snakes.
Polyjuice Potion
none
Allows you to change the character to one of the other available.
Mandrake Handling
none
You learn that you have to wear earmuffs and place the creature in a pot.
Riddikulus
(RK)
Changes a Boggart into something funny.
Buckbeak
none
You learn how to handle Buckbeak and how to ride it.
Divination
none
A passive ability. You are able to read the future from tea dregs.
Expecto Patronum
(EP)
A defensive spell, used to eliminate Dementors.
Time Turner
none
A passive ability. You are able to turn back time - you will find clocks in specific rooms.
Ageing Potion
none
It ages you and gives you a beard, thanks to which you can cross through barriers requiring such persons.
Reducto
(RD)
Destroys silver objects, turning them into dust.
Studs
Just like in the previous LEGO games, the studs have given values:
Silver - 10
Yellow - 100
Blue - 1,000
Purple - 10,000
Hogwarts Crests
In each level, during each year, you will find Hogwarts Crests - each consisting of four parts: Gryffindor (red), Slytherin (green), Hufflepuff (yellow), Ravenclaw (blue). You get a Gold Brick for completing each Crest.
Character Tokens
There are 167 Tokens in total in the game. After collecting each, you have to then buy the character at Madam Malkin's in order to be able to use them in the Free Play mode. In the [Characters] section, you will find a list of all the characters in the order from the shop.
Students in Peril
There are 50 students in total to save in the game. You get a Gold Brick for helping each of them.
Red Bricks
In total, there are 20 Red Bricks in the game (plus 4 available from the very beginning). Each time you find a Red Brick, you have to send it using an owl to the Eeyelops Owl Emporium, where, after buying them, you can unlock various bonuses. Below you will find a list of Red Bricks, their cost (in brackets) and the locations where you can get them.
1. Singing Mandrake (75,000) - Greenhouse 2 (M3.31)
2. Character Token Detector (250,000) - Dungeon (M4.41)
3. Fall Rescue (125,000) - Harry's Dorm (M2.16)
4. Character Studs (75,000) - Great Hall (M1.3)
5. Score x2 (200,000) - Clock Tower (M3.33)
6. Score x4 (400,000) - Slytherin Dorm (M2.14)
7. Score x6 (600,000) - Muggle Artifacts Room (M2.9)
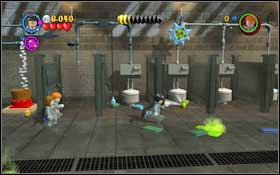
8. Score x8 (800,000) - Boys' Restroom (M1.5)
9. Score x10 (1,000,000) - Potions Class 2 (M4.43)
10. Character Token Detector (250,000) - Quidditch Gate (M3.26)
11. Regenerate Hearts (50,000) - Gear Room (M4.50)
12. Extra Hearts (75,000) - Charms Class Basement 1 (M4.40)
13. Invincibility (500,000) - Dumbledore's Office (M2.10)
14. Red Brick Detector (250,000) - Restricted Section (M1.7)
15. Hogwarts Crest Detector (250,000) - Ravenclaw Common Room (M2.21)
16. Gold Brick Detector (250,000) - Owlery Tower (M3.35)
17. Christmas (80,000) - Hufflepuff Dorm (M2.19)
18. Collect Ghost Studs (99,000) - Clock Tower Courtyard (M3.28)
19. Fast Magic (75,000) - DADA Class 2 (M4.46)
20. Fast Dig (60,000) - Forest Path (M3.24)
Gold Bricks
There are 200 Gold Bricks in total:
24 Gold Bricks - for finishing each level
24 Gold Bricks - for getting the True Wizard title on each level
24 Gold Bricks - for completing the Hogwarts Crest on each level
50 Gold Bricks - for saving the Students in
34 Gold Bricks - scattered throughout Hogwarts
16 Gold Bricks - for completing each class in Hogwarts
12 Gold Bricks - available at the Eeylops Owl Emporium
10 Gold Bricks - for finishing each level at Gringott's
4 Gold Bricks - in the basement of the Leaky Cauldron
1 Gold Brick - at Diagon Alley
1 Gold Brick - at Knockturn Alley
True Wizard bar
At each level, during each year, you can get the True Wizard status for collecting enough studs. Just destroy everything you come across. The score multipliers will make things easier, which you can get obtaining appropriate Red Bricks. In return for filling up the studs bar, you will receive an additional Gold.
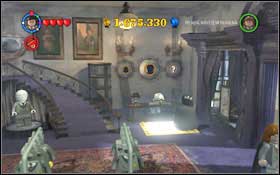
The door leads to Hogwarts - you will move to the castle, where you can freely move throughout the rooms or go to the marked spot in order to complete a story mission.

The board allows you to replay levels - also in Free Play mode, where you can choose which character you want to play with.
Go up the stairs to reach a room in which you can watch all the movies you've seen up until now.
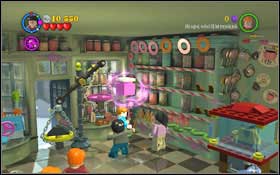
In the store, you can buy bonus character collected during the game #1. In the changing room #2 you can change into a created suit.
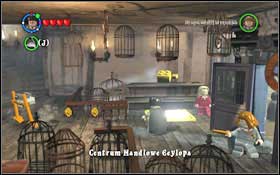
In the store you can buy 12 Gold Bricks #1 for 6,600,000 in total. In the upper part you will find Red Bricks #2, which - after finding them - you can buy and get various bonuses. Activate them in Menu -> Bonuses.
In the shop you can find some additional spells #1 and input codes on the board #2.
Borgin and Burkes - all the Gold Bricks you've collected are stored in this shop. After getting all 200, come to the shop to play a bonus level.
In Gringott's Bank, you can play 10 bonus levels, mixing all the abilities you've learned throughout the game. You can access the Vaults after collecting 5 Gold Bricks. Each next level requires 5 more Bricks to unlock.
Input the codes at Wiseacre's Wizarding Supplies on Diagonal Alley.
Spells:
U6EE8X - Slugulus Eructo
JK6QRM - Multicorfors
2UCA3M - Rictusempra
MYN3NB - Entomorphis
KWWQ44 - Tarentallegra
2M2XJ6 - Locomotor Mortis
UW8LRH - Redactum Skullus
9GJ442 - Colovaria
6DNR6L - Calvorio
QFB6NR - Anteoculatia
H8FTHL - Herbifors
ERA9DR - Glacius
YEB9Q9 - Incarcerous
ND2L7W - Flipendo
YZNRF6 - Trip Jinx
UWDJ4Y - Stupefy
CD4JLX - Engorgio Skullus
VE9VV7 - Accio
Gold Bricks:
QE4VC7 - Gold Brick 1
FY8H97 - Gold Brick 2
3MQT4P - Gold Brick 3
PQPM7Z - Gold Brick 4
ZY2CPA - Gold Brick 5
3GMTP6 - Gold Brick 6
XY6VYZ - Gold Brick 7
TUNC4W - Gold Brick 8
EJ42Q6 - Gold Brick 9
GFJCV9 - Gold Brick 10
DZCY6G - Gold Brick 11
Others:
BMEU6X - Singing Mandrake
HA79V8 - Stud Magnet
ZEX7MV - Fall Rescue
H27KGC - Character Studs
74YKR7 - Score x2
J3WHNK - Score x4
XK9ANE - Score x6
HUFV2H - Score x8
H8X69Y - Score x10
67FKWZ - Character Token Detector
89ML2W - Regenerate Hearts
J9U6Z9 - Extra Hearts
QQWC6B - Invincibility
7AD7HE - Red Brick Detector
TTMC6D - Hogwarts Crest Detector
84QNQN - Gold Brick Detector
T7PVVN - Christmas
FA3GQA - Fast Magic
Z9BFAD - Fast Dig
HZBVX7 - Silhouettes
F88VUW - Ice Rink
4DMK2R - Disguise
AUC8EH - Carrot Wands
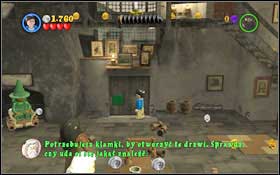
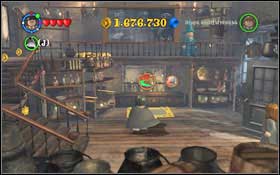
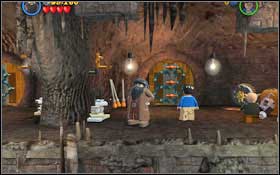
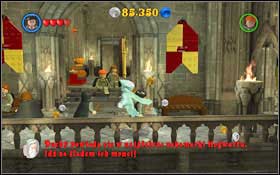
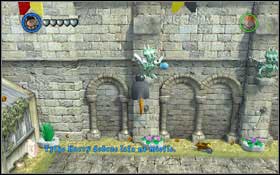
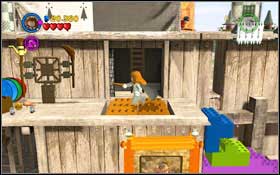
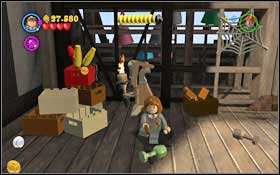
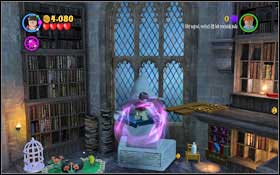
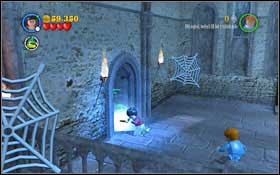
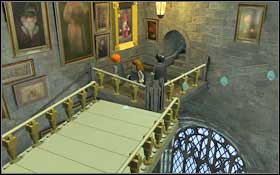
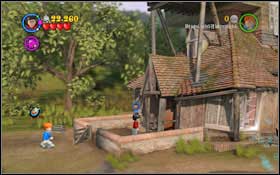
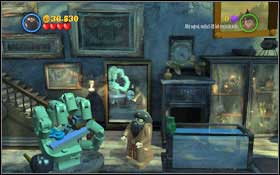
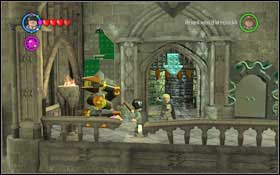
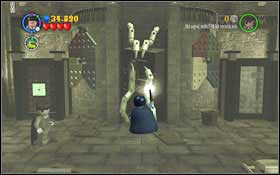
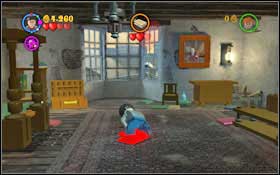
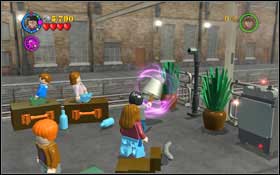
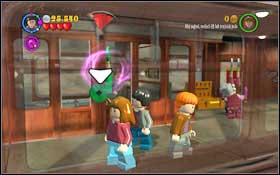
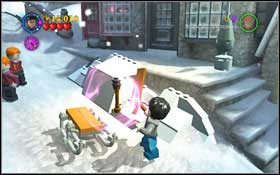
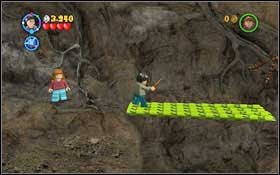
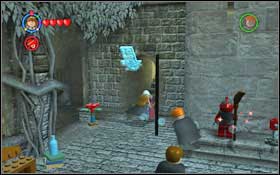
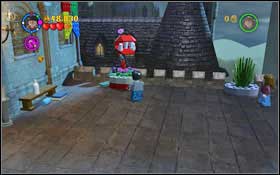
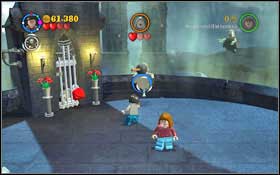
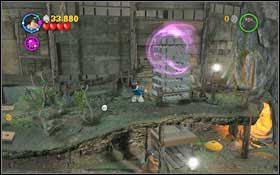
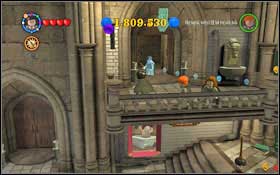
You begin the game at the Leaky Cauldron. Approach the door #1 with no handle. Switch to Hagrid (by default - [K]), aim the Wingardium Leviosa at the platform, wait for Harry to stand on it #2 and push him up.
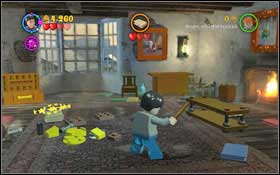
Switch back to Harry, go up the stairs onto the balcony and take the handle #1. Jump down and attach the handle to the door. Once again switch to Hagrid and use Wingardium Leviosa to open the door. Place the bricks lying on the ground #2 into the wall using Wingardium Leviosa and enter Diagonal Alley.
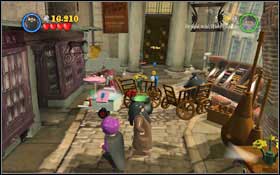

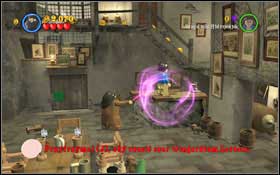
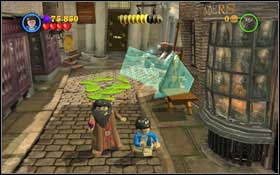
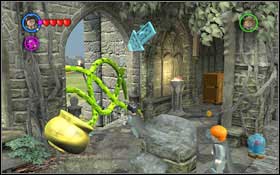
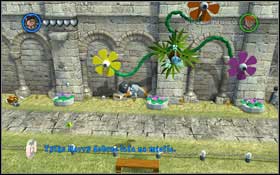
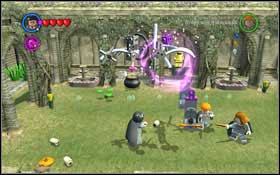
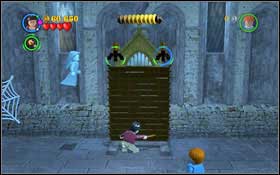
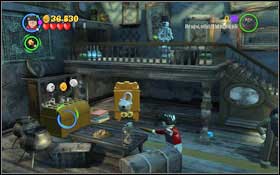
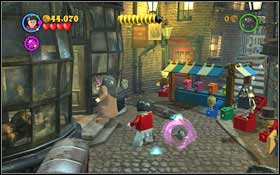
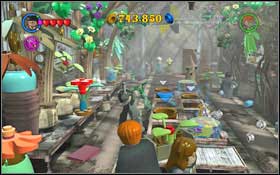
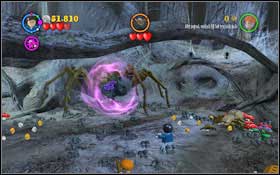
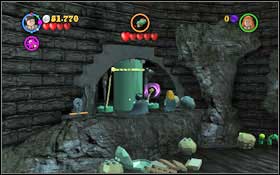
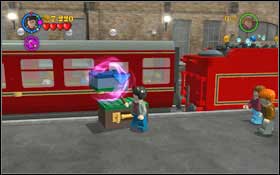
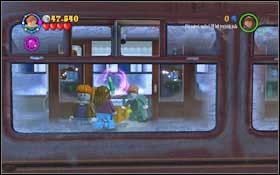
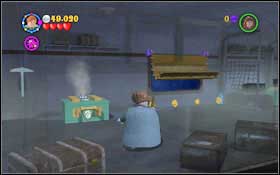
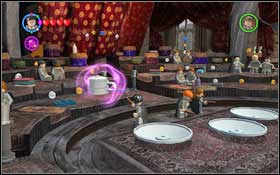
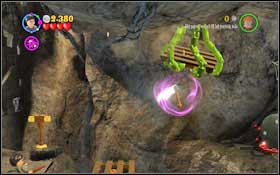
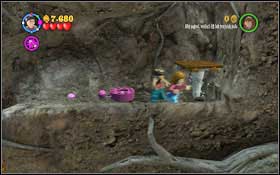
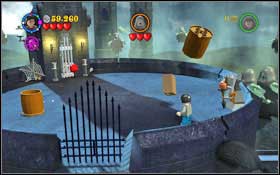
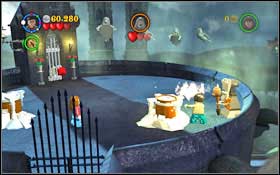
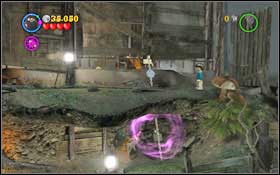
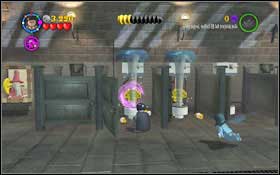
Head to the very end of the street. You will come across a barricade #1 and a cauldron with three objects circling above it. They are the components you need. The flower can be found on the table to the right, the spider on the door to the left. To get the ice cream, you need to use Wingardium Leviosa (Hagrid) on the ice cream machine - once it spits out once, throw in into the cauldron. The explosion will destroy the barricade. Approach the chain by the door #2 and use Hagrid to pull it, which will open the door.
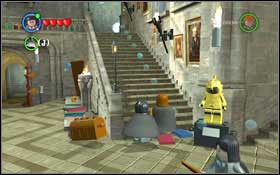
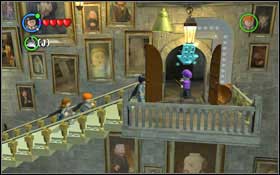
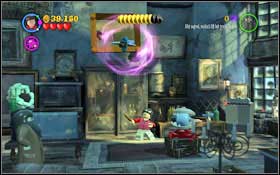
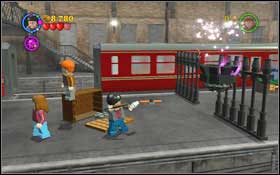
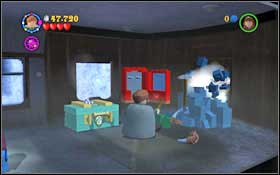
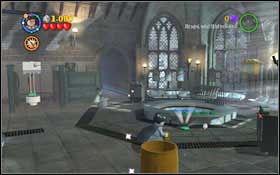
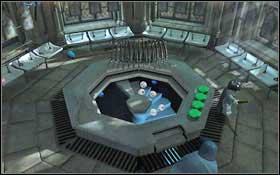
Approach the goblin stationed in the middle of the Gringott's Bank #1. Wave in front of him (by default [J] while standing in the designated spot). After a short cutscene, you will take control of the goblin. Open the first lock #2.
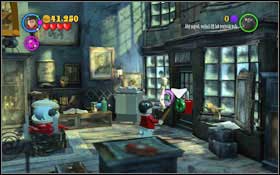
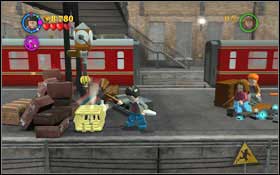
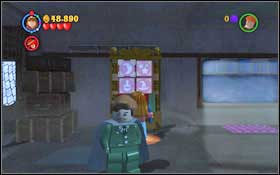
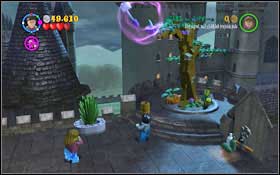
Open the big gate using Hagrid and his great strength - pull the chain by the wall. Switch to the goblin and open the vault. Bricks will fall out of it - put the pieces together using Hagrid and Wingardium Leviosa #1. Wave to the goblin on the painting - he will open the passage. You will get to the vault #2.
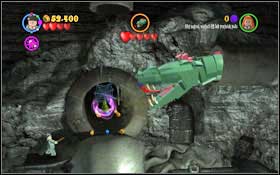
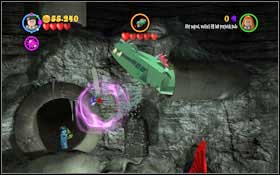
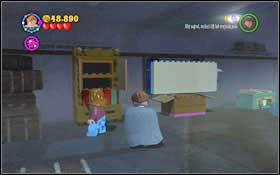
On the left side, the lock is being protected by a fire-breathing dragon. Chase him away by pulling the chain using Hagrid #1. Use the goblin to open the vault and step inside. Having the money you can afford a new wand #2.
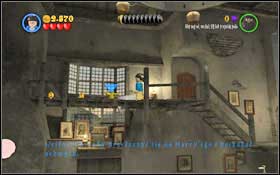
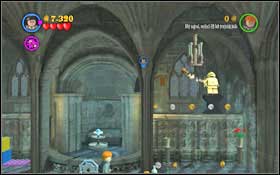
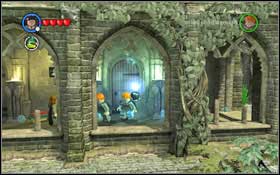
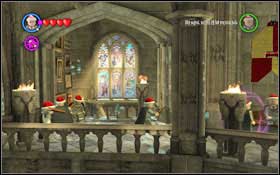
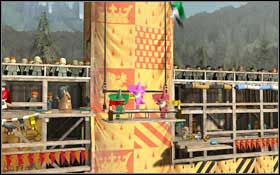
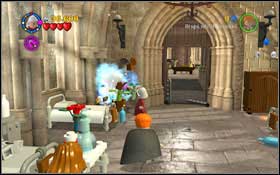
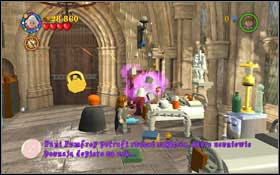
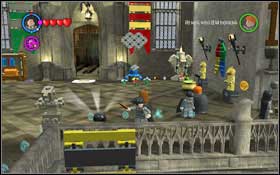
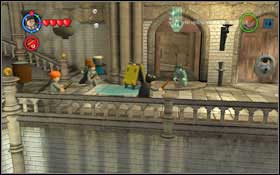
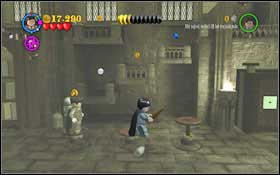
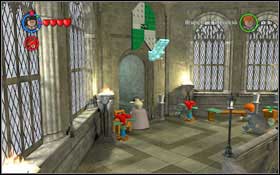
You will begin at the Gryffindor Dormitory (M2.16). Keep following the arrow. At the next room, you will be faced by a clothes-eating drawer. Shoot the painting on the right two times so that the wizard loses his pants - the drawer will move away #1. At the Upper Hallway (M2.11), you will meet Nearly Headless Nick #2. Follow the trail of coins that he leaves behind him.
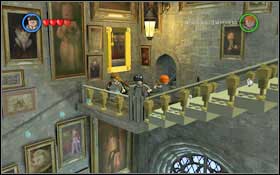
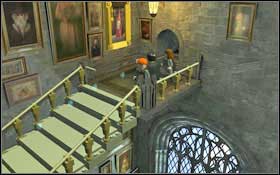
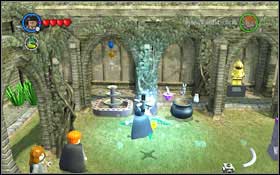
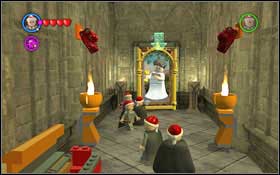
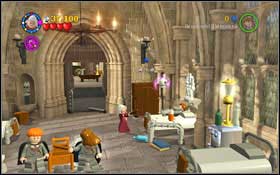
You will get to the Grand Staircase (M2.8) #1. Go up, switch to Ron and use Scabbers ([J]). Go into the pipe and press the switch which will activate the bell. The wizard from the next painting will run away. Run down and wave to the wizard #2. He will move the staircase for you.
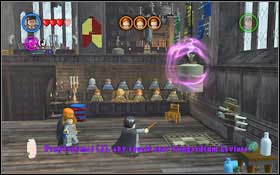
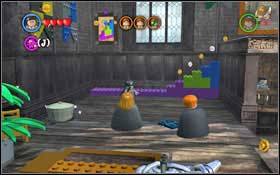
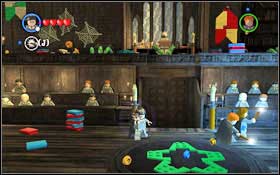
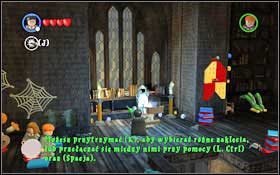
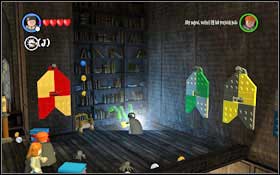
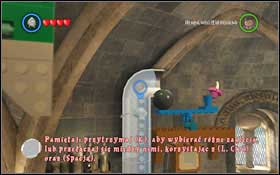
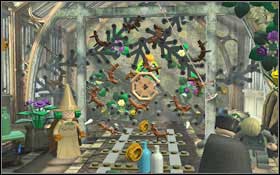
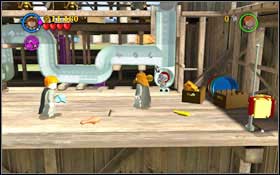
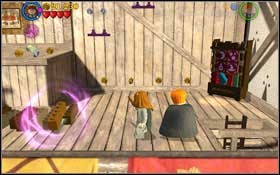
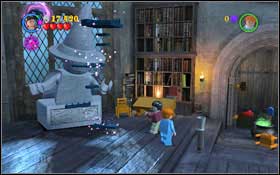
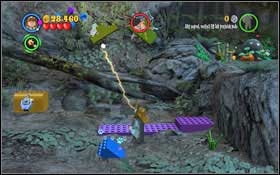
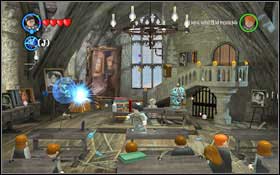
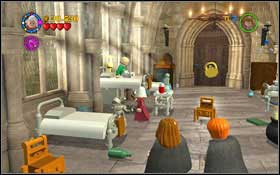
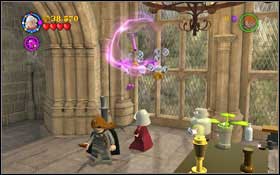
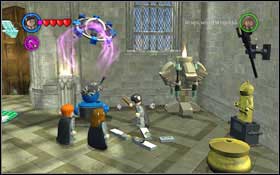
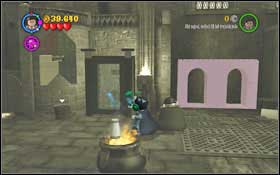
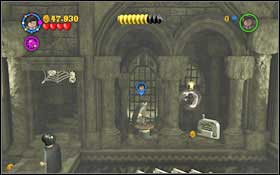
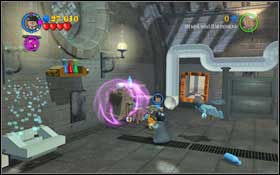
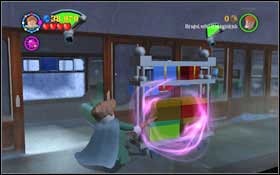
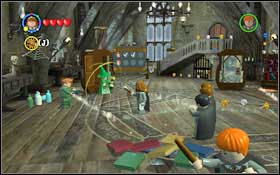
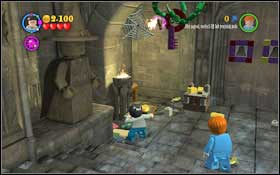
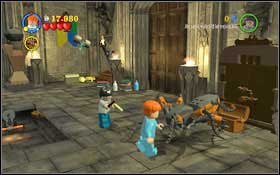
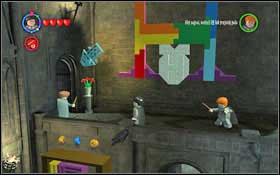
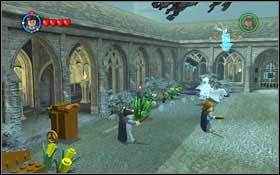
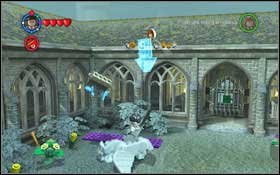
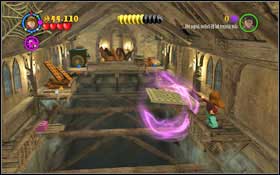
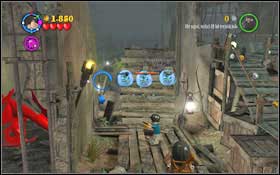
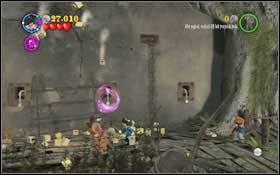
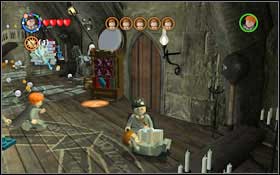
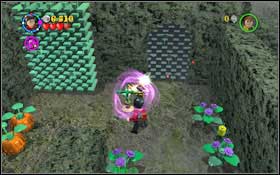
Keep following the ghost and you will eventually reach the Charms Class (M4.38). You will learn the Wingardium Leviosa spell. You task is to save three students hanging from chandeliers. Use the spell on the weight by the right wall #1 - first one saved. Go to the left side - you have to set the bricks so that you can get upstairs. The way in which you should place them (also using WL) is shown in the game, as well as on the second screen #2.
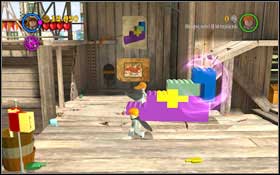
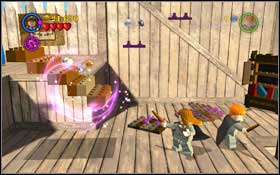
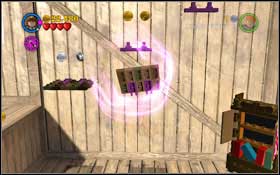
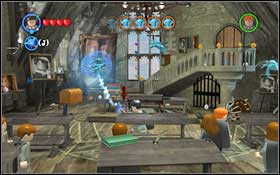
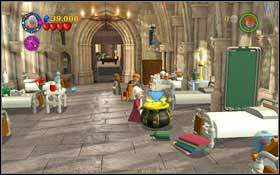
Before you raise the second weight, cast a spell on the painting #1 - place the claws which will come out on the hand, which will support the weight (WL). The second student is saved. Move right and you will find scattered pieces of armour. First pick up (WL) the body, then the head and in the end place the spear in the left hand. After picking up the weight (WL), the armour will throw the spear, which will stick into the wall and support the weight #2. The last student is saved.
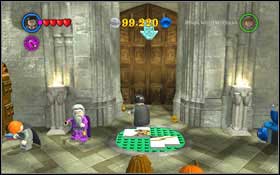
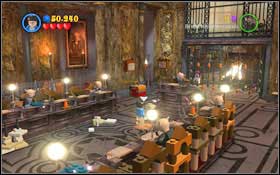
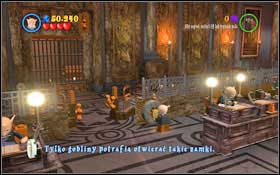
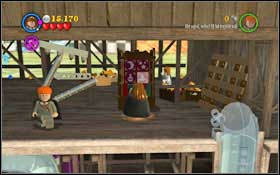
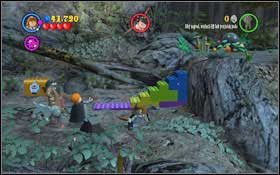
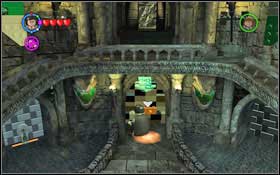
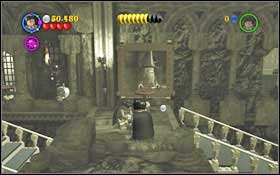
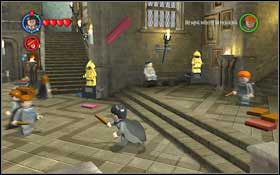
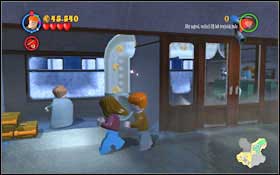
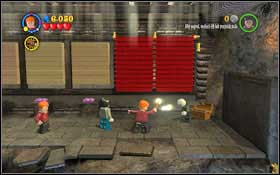
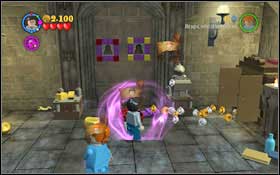
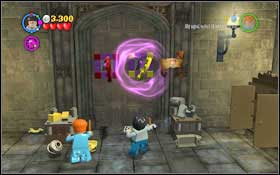
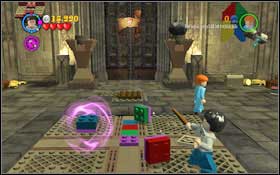
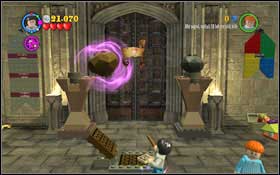
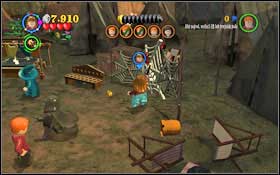
Follow Nearly Headless Nick. Once in the Main Hallway (M1.1), you have to set the bricks in the right order to get to the Entrance Hall (M1.2). The painting on the wall shows the exact order of the bricks #1 - blue, green, yellow. To open the door to the Great Hall (M1.3), you have to complete the other parts of the crest located on the floor by the entrance #2.
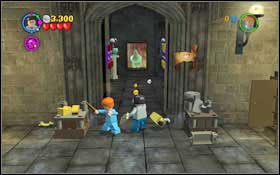
You will find the first part of the bricks under the torch in the right corner of the room #1 - use (WL). The other bricks can be found on the left, in the chest #2 (WL). Eventually merge all the bricks and place them into the crest (WL). The Great Hall is opened.
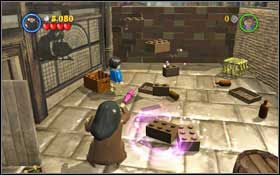
Switch to Ron and use Scabbers to cut off poisonous gas #1. You can find the button of the left and right side. Place the scattered bricks on each other so you can climb onto the ledge #2.
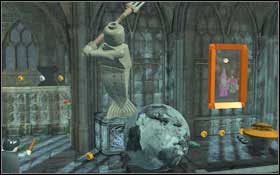
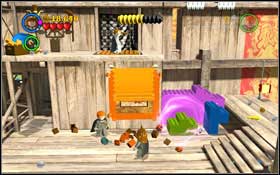
Jump over the fountain and use (WL) to light up the armour with the torch #1. Use the broken chandelier to form a trident (WL) and take it (WL) to the statue #2.

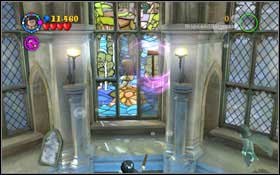
Assemble the lamp (WL) #1 and place it onto the painting. Shoot the wizard twice and you will receive a girl's disguise. Don't waste time and approach the marked place by the door #2 and wave - the door leading to the girls' bathroom will open.
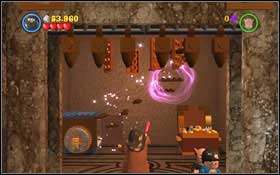
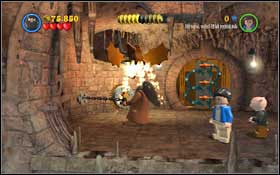
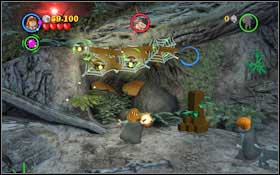
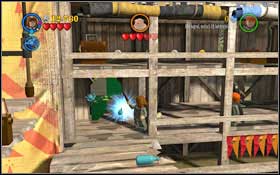
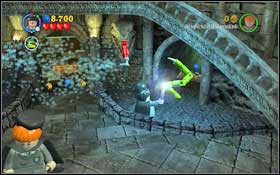
The fight with the boss is very easy. Wait for the small fragments which you can pick up with (WL) #1 to fall off the ceiling. After some time the enemy will start to throw bricks at you - take them over using the spell and throw them back. Once the troll gets hit two times, he will fall to the ground, dropping his club. Pick it up (WL) rather high #2 and then let it go.

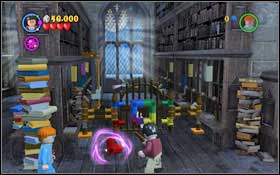
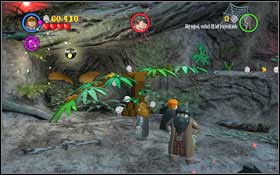
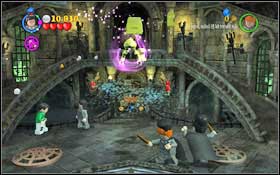
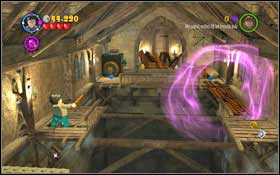
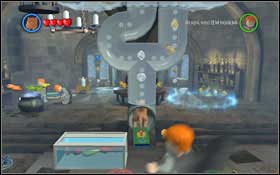
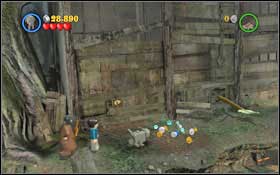
You will begin in the Entrance Hall (M1.2). Follow Nearly Headless Nick to the Charms Class (M4.39). You will learn the Lumos spell. Your task is to collecting five yellow bricks and placing them in the middle of the room in the correct form #1. By using the spell, you light up the end of your wand and chase away the Devil's Snare which is holding the bricks. You can find the first one on the right, next to the benches #1.
The second brick lies freely on the left side of the room #1. Place the bricks (WL) #2 in the pattern shown in the game and on the screen to get to the upper part of the room.
The third brick can be found by the wall with spider webs #1, use (L) once more to chase away the Devil's Snare. The fourth one is by the chest #2 (L).

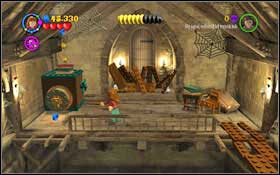
The last one is by the bookshelf on the right side #1 (L). Leave the classroom and head after the ghost. Unlock the passage to Lessons Hallway (M4.36) using the (L) spell on the Devil's Snare #2. Use it once more to unlock the door leading to Potions Classroom (M4.42).
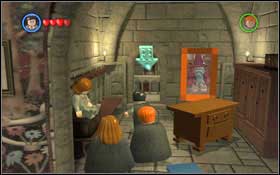
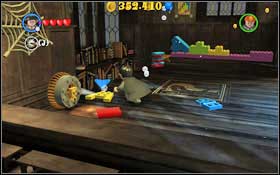
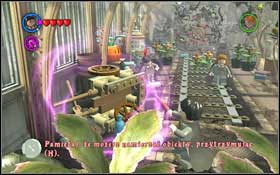
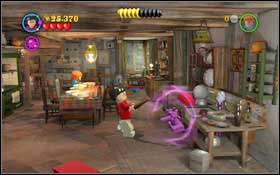
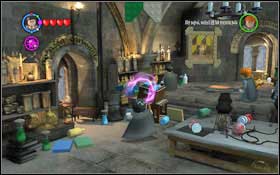
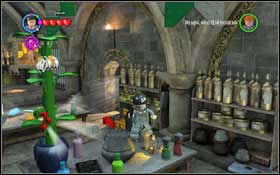
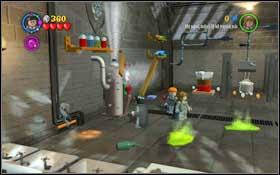
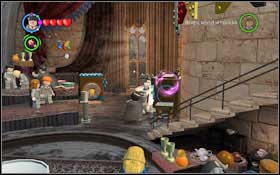
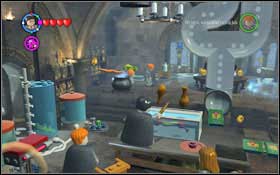
You will learn how to prepare the Strengthening Potion. Use (WL) on the bricked door on the left #1 and you will discover a hanging skeleton. Use (WL) on him as well and eventually his hand will come off - your first potion component. Put it into the cauldron #2.
Complete the other parts of the pipe #1 using (WL) and then switch to Ron and use Scabbers to knock down the second potion component. The last component is the fang of a snake, wrapped around the column in the middle of the room #2. Use (WL) on him. Eventually drink the potion and pull the chain by the door on the right - you will raise the bars blocking the door.
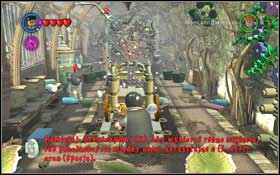
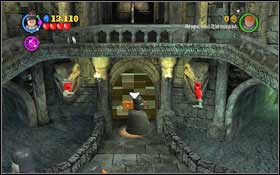
Leave the room and head towards the Main Hall (M1.1), from where you will get to the Corridor (M3.23). To unlock the passage, jump onto the two brick ledges #1, on which you will find a chest with some chicken #2. Place it on the animal's tongue (WL) and you will unveil the passage.
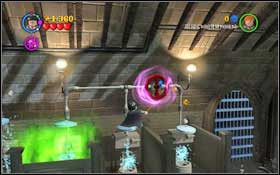
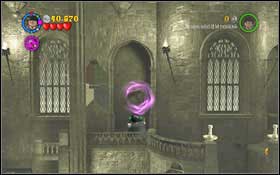
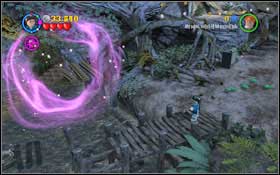
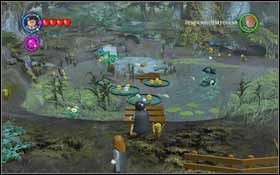
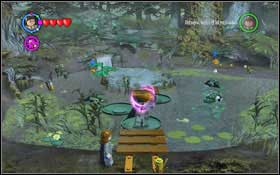
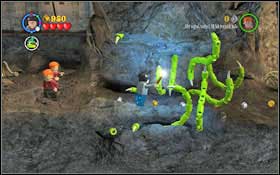
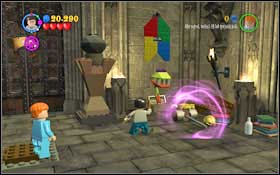
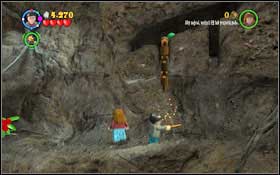
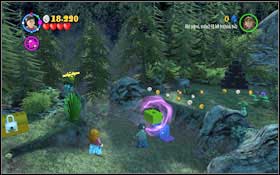
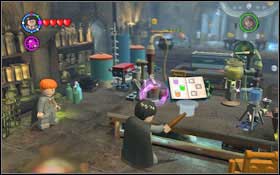
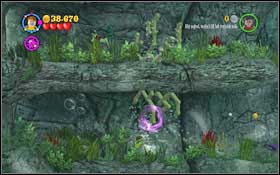
Pass through the Fountain Courtyard (M3.28) by using (L) on the Devil's Snare to open the passage #1. You will get to the Herbology Class (M3.30) and learn the Lumos Solem spell. It works just like Lumos, but you can use it to attack from a distance. Your task is to free Ron from the Devil's Snare #2.
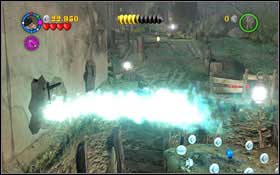
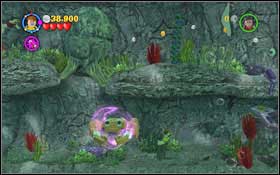
Begin with destroying all the vines (LS) in the room. Remember about all the walls and nooks. Afterwards destroy the cart (left side) and the valves (right side) at the back of the room (WL) #1. Use all those elements to create a new (WL) which will ride along the tracks as soon as you jump on it #2, destroying the barricade separating you from Ron. Cast (LS) on the last Devil's Snare which are holding your friend.
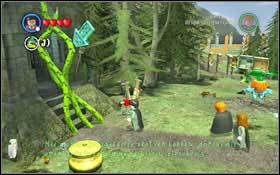
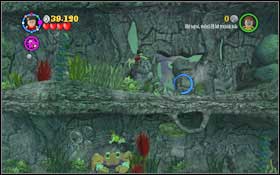
Leave the classroom and head to the Quidditch Grounds (M3.29). You will learn how to ride on a broom. Your task is to recover the glass sphere from the dragon statue #1. After using a spell, the dragon will throw the sphere to another statue. It will fly away after a while - you have to hit it three times #2. It's quite troublesome, as steering the broom and shooting at the same time can be hard at times.
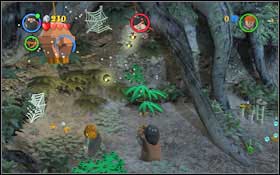
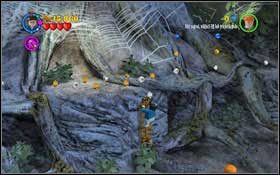
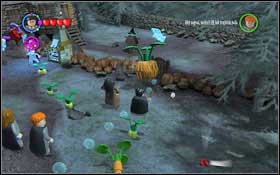
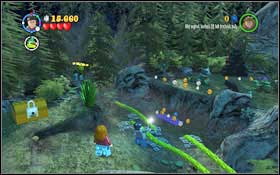
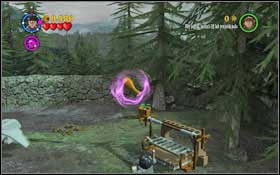
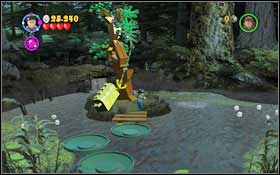
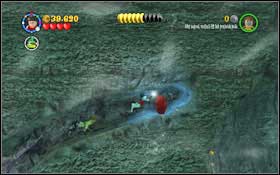
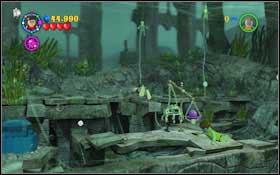
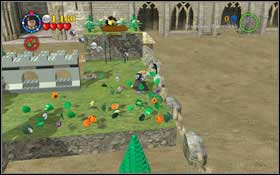
Eventually you have to hit three colourful flowers #1 - this task is easier. The flowers do change positions, but they stay in one place for a long time. Follow the ghost towards Hagrid's Hut (M3.24). Unlock the passage using (LS) #2.
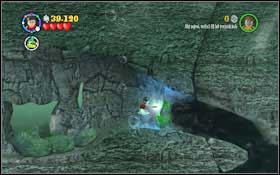
You will arrive at a small square, where you will have to prepare a Strengthening Potion and completing the pieces of a mechanism which you will use to destroy the gate. Destroy all three Devil's Snare #1 using the (LS) spall and then assemble the mechanism (WL) #2. Place it on the hooks.
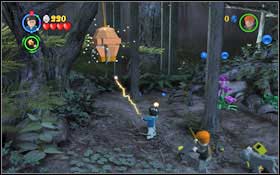
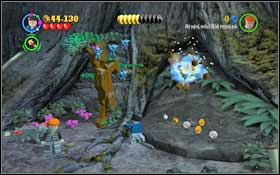
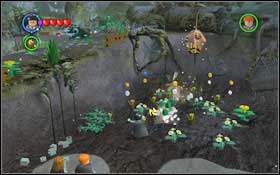
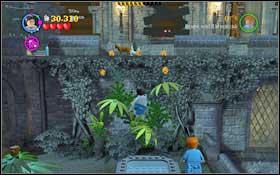
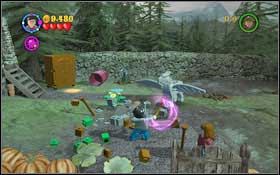
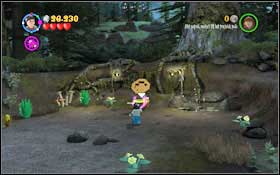
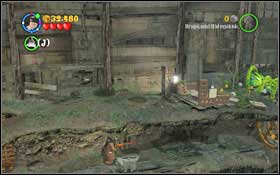
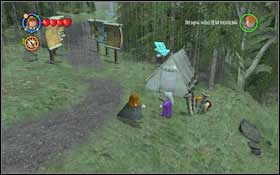
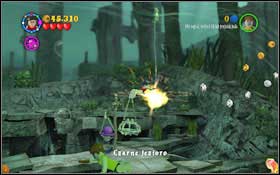
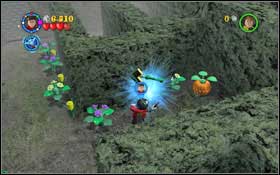
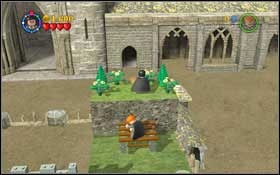
![You will the ingredients for the Strengthening Potion in the bushes #1 - aim at shoot a spell at them (hold [H]) - Walkthrough - Year 1 Part 1 - Walkthrough - LEGO Harry Potter: Years 1-4 - Game Guide and Walkthrough](https://game.lhg100.com/Article/UploadFiles/201512/2015121617030456.jpg)
You will the ingredients for the Strengthening Potion in the bushes #1 - aim at shoot a spell at them (hold [H]). Drink the potion and pull the chain to destroy the barricade and move on. Use the broom to fly above the broken bridge #2. Head along the path towards the Quidditch Gate (M3.26). You will begin the next mission upon entering the tent.
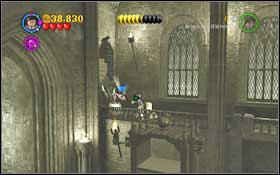
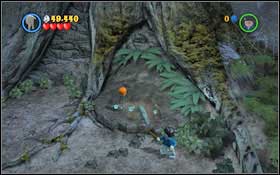
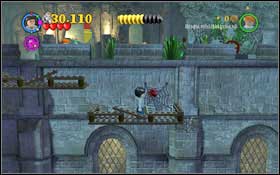
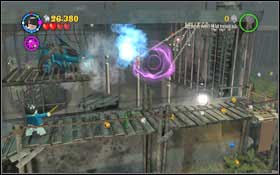
Go down the stairs and use (WL) on the wall to unlock a passage #1. The further part of the map will eventually crumble - jump on the broom and fly above the pit #2.
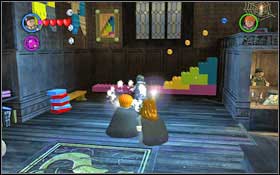
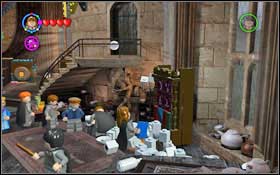
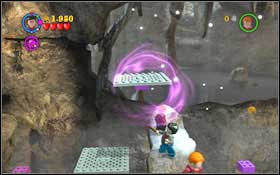
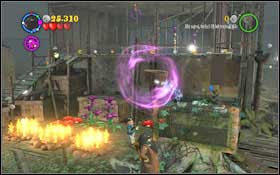
Go right until you reach a smashed pipe #1. Put it back together (WL) by placing the correct elements in the right places. Switch to Ron, use Scabbers and go into the pipe. Scare the student standing by the chest - spheres will fly out and smash a part of the map. Return to the knocked down bricks. You have to arrange them properly (as shown on the picture in the game) using the (WL) spell #2.
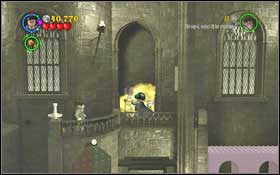
Go up, compose (WL) a shelf from the bricks #1 and use Hermione to read it. Push in the plates in the order shown on screen. After unlocking the passage, keep heading right. Shoot the covered #2 twice - the character on it will pull the lever and open a trapdoor below the student upstairs.
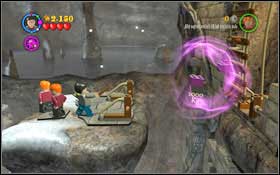
Arrange the bricks (WL) so you can get upstairs #1. Go up the ladder. Approach the shelf and read the signs using Hermione #2.
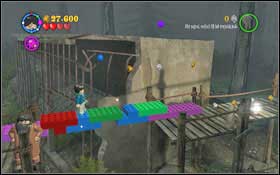
Use the bricks on the left and arrange (WL) a staircase #1; use the bricks gained from the shelf and attach (WL) them to the wall, creating more stairs this way #2.
Jump to the very top and destroy the chests on the left #1, which will unlock a passage #2.
Return to Hogwarts and follow Nearly Headless Nick. Use (LS) to chase away the Devil's Snare from the door #1. Once on the bridge, repair it using (WL) #2.
You will end up in the House Hallway (M2.11) #1. Go to the Gryffindor Dormitory - wave to the painting to open the passage #2.
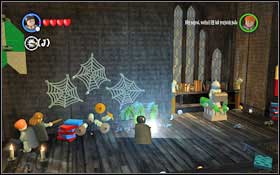
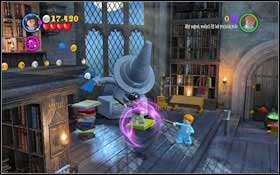
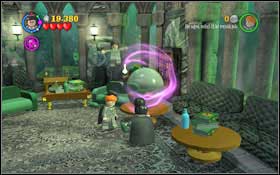
Put on the Invisibility Cloak and approach the books jumping round the room. Once you get close enough to one of them, jump onto it #1. Get rid of both of them this way. Go to the end of the room - a female ghost will knock down a book and a small garden will appear - dig up the cauldron (WL) #2.
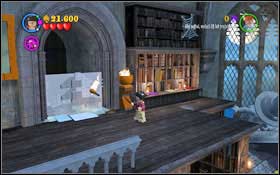
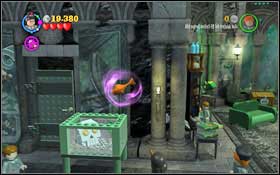
You need a couple ingredients in order to prepare the potion. The flower can be found on the balcony on the right. Jump onto the book held by the statue #1 - Ron will eventually use his magic and push you upwards. Pull out the flower from the middle pot\ #2.
Get onto the right balcony once more- destroy the shelf by the wall #1 - a part of the wall will fall down and a spider will appear behind it. The last ingredient can be found on the left balcony. To get on it, you first have to knock down the books. Use magic on the desk by the left statue #2 and then (WL) to put together the big book - the statue will knock down the books.
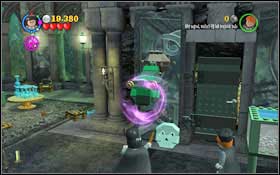
Jump on the yellow book #1 and Ron will once more use (WL) for you to be able to jump on the next books - use jump to get higher. Use (WL) to get fire and melt down the door #2 - behind them you will find an ice cream.
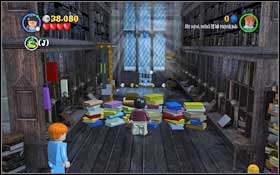
After throwing all the ingredients in, the gate will explode - move on. Above all, look out for the guard - if he does catch you, switch to Ron and use (LS) to chase him away. Use magic on the books right next to the entrance between the bookshelves #1. Right behind them you will find a green piece, which you have to put into the door between the other bookshelves #2.
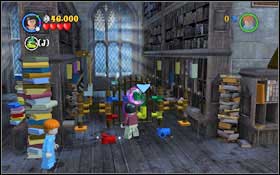
The two other missing fragments can be found right next to the door - use (WL) on them and aim them at the correct spots (so that the colours match up) #1. Take the key lying at the end and use it to open the gate leading further #2.
Move the books by the pipe entrance using magic, switch to Ron and use Scabbers to get up #1. Knock down the missing part of the gate handle down and pick it up using (WL) #2.
Use (LS) to get rid of the Devil's Snare from the nooks #1. A female ghost and two bats will come out. Knock them down using magic - you can find them right above the mirror #2.
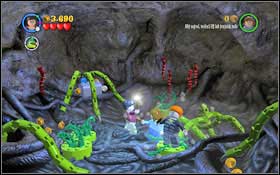
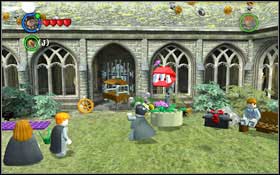
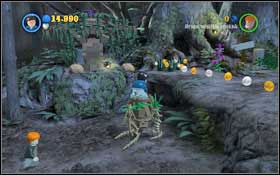
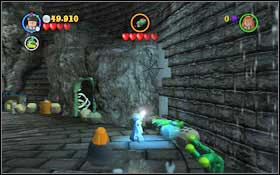
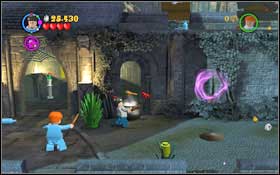
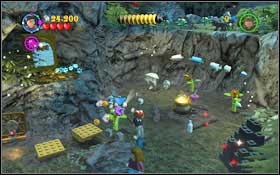
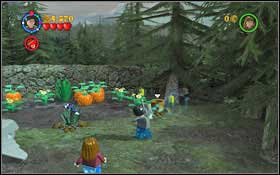
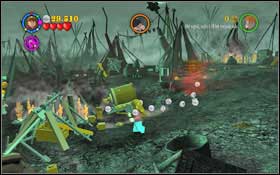
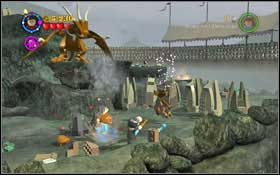
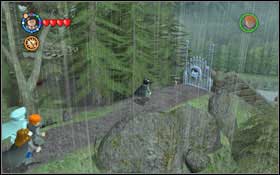
You will begin at the Main Hallway (M1.1) #1. Follow Nearly Headless Nick towards Hagrid's Hut (M3.24), to the garden to be precise #2.
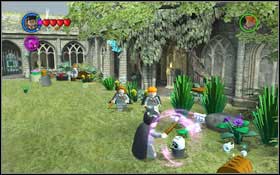
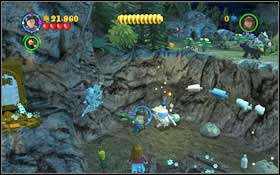
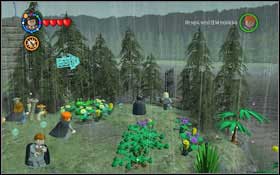
Right after the mission begins, you will get attacked by a giant hornet. Quickly destroy the nest #1, or else the hornets will keep coming out. Move right - you will find round bricks lying on the ground. Put them together (WL) creating a cloud #2, which will water the tree, causing a ladder to appear.
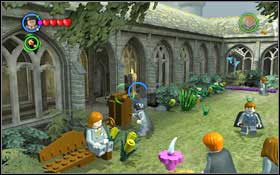
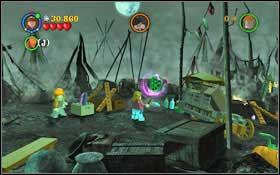
Switch to Fang and climb up. You will find a digging spot there #1 with another ladder to dig up. Climb it and move right. You will once more be attacked by a hornet. Don't forget to destroy the nest. You will get to a digging spot #2. Use Fang's abilities once more and dig up a big hole - head into it.
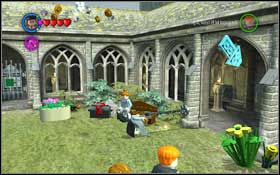
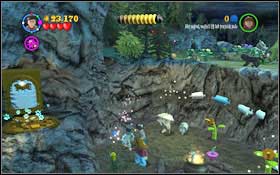
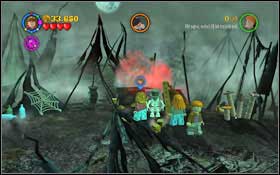
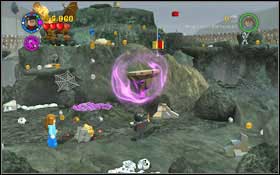
Deal with a hornet nest once again. To unlock the further path, use (LS) on the Devil's Snare #1 and then get rid of the blocking bricks with Hagrid's crossbow #2.
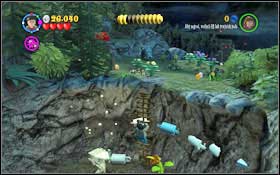
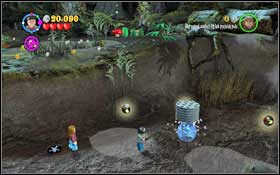
Move right and swim to the island, where you will find a digging spot - use Fang #1. Get rid of the Devil's Snare (LS) #2 and then pull the chain with Hagrid to raise the passage. Return left.
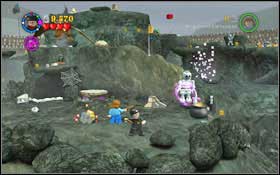
Dig up the blue brick sticking out of the ground with Fang #1 and then use whichever character to knock down the yellow and blue bricks attached to the wall. Arrange them so that they create a staircase, like in the second screen #2.
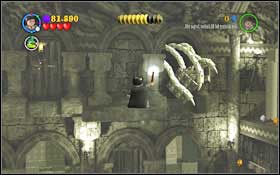
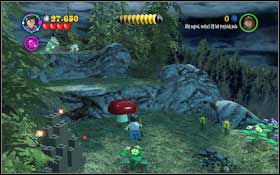
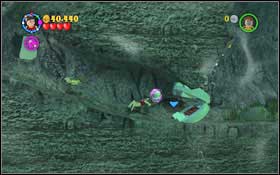
Upstairs, keep on heading right. You will get to the last rock ledge by creating a ramp. Knock down the bricks stuck in the spider webs by using magic #1. Use (WL) twice to connect the bricks to create a construction and widen the arms #2. Get rid of another Wriggling Vine in front of the cave (LS).
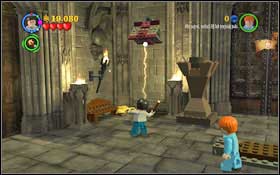
You begin at the Grand Staircase (M2.8). After getting up the first set of stairs, wave to the wizard on the painting #1 and he will move the staircase for you. Go up and follow professor Quirrell into the room #2.
You will face Fluff - Hagrid's three-headed dog. Use magic on the painting showing a bathing wizard. He will throw out a rubber duck - use magic on it as well and it will increase #1. Throw it to Fluff (WL) - the dog will move away and you will be able to put together the destroyed harp #2. Jump through the opened hatch.
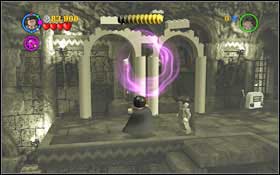
Use (LS) to get rid of tall the Devil's Snare #1 and jump into the hole on the right. Keep using (LS) and head right, to the room with the flying keys. Place (WL) the barrel onto the armour's head and he will let go a flying broom #2.


Jump onto the broom and begin shooting the large gold key with magic. After a couple shots #1 (after you shoot down all the small keys flying round the big one), it will fall down to the ground. Use it to open the door (WL) #2.
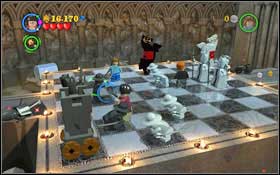
You will end up on a chess board. You have to move the particular chess pieces - each time you can shoot only one piece, so there's not too much of a choice here. You play with the black. Use magic to find the next pieces #1. At some point, when you won't be able to shoot any of the pieces, jump onto the tower #2 - you will make another move.
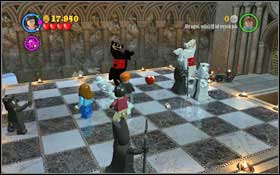
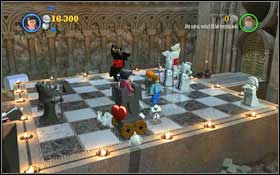
After making a move with the Bishop and destroying the white queen, assemble (WL) your own queen from the blocks and then attack - checkmate #1, the gate will open. Now you will have to fight Voldemort. He'll be throwing fireballs at you - try to avoid them #2.
Once he throws his poisoned head, use (WL) to catch it and throw away #1. Voldemort won't be able to attack for a bit - use this, jump over the pit and approach the enemy #2 - you will attack it automatically. After a while you will be pushed back. You have to repeat this process two more times - at first another pit will appear and in the end only two little platforms will be left.
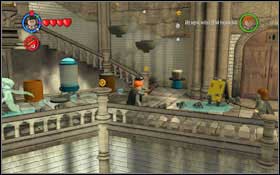
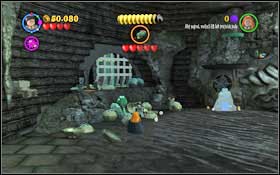
You begin at a farm; go into the house #1. You will find yourself in a kitchen. There's a broken tap right by the sink - attach it using (WL) #2. The pans blocking the passage will fly into the sink.

There's a painting above the chimney - you can wave to it #1, but you need a ginger girl. Search the door - use (WL) on the sofa on the left, shoot the purple chair and use (WL) on the blue chair. Eventually you will find the hidden girl #2.

Now wave by the painting and throw the pot (WL) into the chimney #1. Hagrid will join you. Use the broom on the mirror #2 to clear it off of dust.
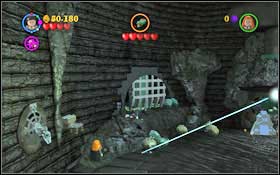
In the reflection, you will see a chain now visible in reality. Switch to Hagrid, approach the designed spot and pull the chain #1 - a few bricks will fall out of the hand. On the left you will find a big chest, which attacks you as only you approach it. Shoot it from a distance #2. You will get a couple more bricks.
Use all the bricks to create (WL) a sword, which you should then send (WL) to the wizard running from the dragon on the painting #1. He will throw you a key - use it to open the padlock on the door on the right #2.
Once on the alley, shoot the colourful boxes - chain pieces will fall out of the red one. Attach them to the wall (WL) #1 and then use Hagrid to pull them #2. The road will be unlocked.
A bit further a big spider will attack you - treat him with magic twice #1. At the end of the alley you will another chain - use Hagrid to pull it once more #2.
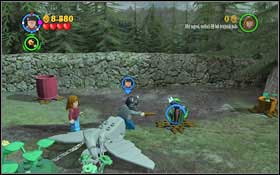
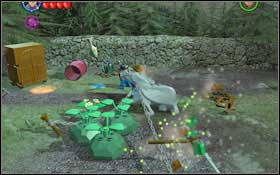
You will begin at the Grassy Courtyard (M3.34). In order to open the gate, you have to first create a Strengthening Potion, which will allow you to pull the chain. The snake's fang can be found in the flowers #1, use magic two twice (once on the flowers and then on the snake). On the right, in the flowers, you will find a piece of a skeleton. Use magic on every bush and then put it back together (WL) #2. You will receive another ingredient - the skeleton hand.
On the left there's a cleaning machine #1, use magic on it. Once it finishes cleaning, it will spit out the last ingredient. Drink the strengthening potion and pull the chain #2. Leave the courtyard.
Follow Nearly Headless Nick to the Herbology Class (M3.30). You will learn how to act with Mandrakes. Approach the shelf at the end of the room and use it - you will put on the earmuffs #1. Now grab one of the three Mandrakes and put it into the pot #2. Do the same with the other two.

Leave the class and head to the Fountain Courtyard (M3.28). There's a Mandrake blocking the path. In the left part of the courtyard you will find a wardrobe #1 - put on the earmuffs. Pick up the flower and put it into the pot #2.
Follow the ghost to the Lessons Hallway (M4.35). On the left, right next to the entrance to the Transfiguration Classroom, you will find a wardrobe #1. Put on the earmuffs and pick up the Mandrake shouting by the glass passage to the Defense Against the Dark Arts Classroom. Break the passage #2, put the Mandrake into the pot and go into the classroom\.
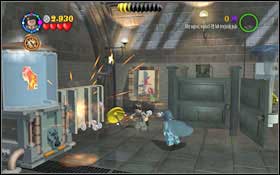
You will be acquainted with the Immobilus spell (IM). There are three Cornish pixies flying round the classroom #1. Use (IM) twice on each of them - first to and then to finish each off. After a short cutscene, five more pixies will appear - eliminate them in the same way, by using (IM) twice on each of them #2. Leave the classroom and head to Quidditch Grounds (M3.26).
Open the hatch #1 and jump down. After a while a ball will appear - in the chest you will find a bat, which will hit it into the blockade on the left, once you use magic on it #2.

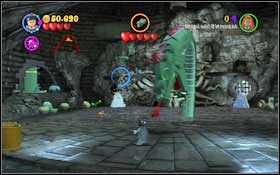
Assemble a trampoline from the scattered bricks (WL), jump off of it and jump higher up. Use magic on Dobby #1. Switch to Hagrid, pull the chain and move on #2. Attack Dobby a second time.
Use (IM) on the two pixies holding the door #1 and afterwards (LS) on the Devil's Snare. After a while the snitch will fly out and a part of the stand will crumble. Create a staircase from the scattered bricks #2. Dobby will manage to escape.

Go up the ladder onto the second platform. Use (WL) to lift up the big purple brick #1 and attach it to the chain - the gate will open. Go up the left ladder and attack Dobby #2. Use Hagrid to pull the chain - you will free the dragon and two bricks from the cage.
Set the bricks so that you can get upstairs #1. Dobby has hidden inside the middle wardrobe #2 - chase him out and attack.
Jump down and eliminate two pixies holding the bridge using (IM) #1. Afterwards use (WL) on the barrel, to throw Dobby out and attack it for the last time #2.
You have to prepare medicine for Harry. You will take control of Madam Pomfrey, who knows all the spells. The first ingredient can be found behind the glass showcase - you have to use a Mandrake to break it. You can just pick it up using Madam Pomfrey #1, or wear earmuffs with any student - first you have to destroy the padlock in the wardrobe #2. Do it using Madam Pomfrey, casting Reducto.
By the bed of one of the patients on the right, you will find a skull. Connect it with the body using (WL) #1 and eventually the student will destroy the skeleton - you will get the second ingredient. Pick up the bed on the left (WL) and afterwards assemble the armour below the bed (WL) #2. The armour will destroy the big padlock, opening the passage to the next room.
Right after entering the second room, you will find a purple spider web on the wall. Use the broom (WL) to sweep up the webs #1. After a while a spider will shot up. Knock him down using magic and bring the ingredients to the cauldron #2.
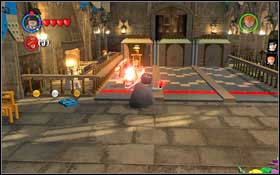
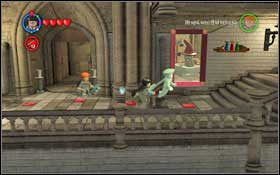
Follow the ghost to the Great Hall (M1.3). You will learn the Expelliarmus spell (EX). You need to destroy five dummies appearing from behind one of the three doors with both Harry and Ron #1. A duel will begin; try to hit the enemy five times using (EX) #2. You also have to look out for his spells - dodge them. Be aware that he will also try to dodge your attacks.

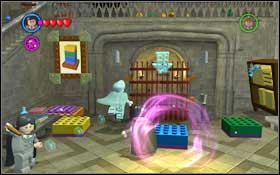
You will also learn to speak Parseltongue. Follow the ghost to the House Hallway (M2.11), to the Slytherin Dormitory entrance to be precise. Talk with the snake #1 and he will throw out three bricks. Place them on the platform on the left in the right order #2, beginning with the tail and ending on the head.
Go into the Slytherin Dungeon (M2.12). Approach the entrance #1 which won't let you in. Leave the dungeon and head after the ghost to the Potions Classroom (M4.42). You will learn how to prepare the Polyjuice Potion. Approach the bricked up wall on the left and use (WL). Inside you will find a pixie holding an apple #2. Get rid of it with (IM) and throw the apple into the cauldron.
Pick up the chest using (WL) #1 and a snake will creep from the basket, kidnapping one of the students - he will leave behind some hair, another ingredient of the potion. On the table on the right you will find a pot and three bottles - use magic on them to pour their content into the pot. After a while a flower will grow out #2 - take the cherry and throw it into the cauldron.

Drink the potion - now you can freely choose a character into which you want to change #1. Just be sure to choose a Hufflepuff house member. If you haven't unlocked/bought any yet, use the newly gained Justin Flinch-Fletchley. Wave to the painting #2
Leave the classroom and head to the Main Hall (M1.1). Use the Polyjuice Potion once more. Use magic on the yellow and blue flag by the stairs - you will find some hair and an apple #1. To get the cherry, use the (WL) on the blue mechanism #2. Once more choose a character representing the Hufflepuff House, for example Justin Flinch-Fletchley.
Use the broom twice (WL) #1, first cleaning the trophies and then the painting. Wave to the painting. Go up the stairs to the Bathroom Hallway (M1.4). Head after the ghost right, block the pipe using (WL) #2 on the pieces standing on the shelf. Move on and after a short cutscene; go through the door to the bathroom.

Your main task is to create the Polyjuice Potion. The cauldron can be found on the right side. Head towards the left corner of the room, where you will find the broom #1. Use it (WL) to knock down the valve from the shelf and attach it to the machine #2. Turn the valve (WL). You will break down the shelf and knock down the cherries - throw them into the cauldron.
Jump onto the toilet bowl and use (WL) to turn the valve #1 - it will lift you up. Jump two bowls left, closing the first one which was in the air in the beginning #2.
The toilet next door will explode. Place the pipe piece above the container on the left #1 and water will start falling into it. Once the flower blooms, destroy it (WL), afterwards assemble (WL) a freshener from the scattered bricks and place it in the toilet filled with bad scent. Pick up the apple lying in the middle #2 and throw it into the cauldron.

Use (WL) to pick up hair from the heads of both sleeping students #1 and you will get the last ingredient of your potions - drink it. You will end up in the Slytherin Dungeon - go down. Use the (LS) on the Devil's Snare on the right #2 and (WL) on the chest. Put the bricks together (WL).

A snake will appear and start to lean out of the four sewages. You have to hit it four times - as he leans out of each sewer #1. You will gain a piece of armour - put it back together using (WL) #2.
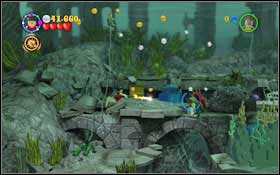
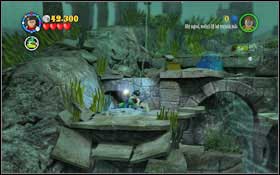
Now you can head to the entrance #1 - you will be let into Slytherin Common Room. Go right and you will find a spherical aquarium #2. Use (WL) on it.
Once the fish creeps to the second aquarium (with a skull), once more use the (WL) on the fish #1. Act similarly with the skull which got to the surface - use (WL) on it twice, first to get it out of the water and then to put the eyes #2 into the snake.
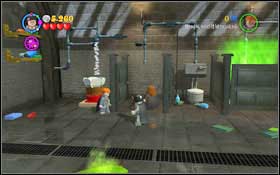
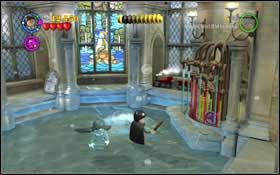
You begin in the Bathroom Hallway (M1.4) #1. Head right to the very end and follow Moaning Myrtle into the bathroom #2.
Moaning Myrtle will start throwing stuff at you, while hiding inside one of the cabins #1. Use (WL) to throw back the items and open the doors. Once you get to Myrtle, attack her with magic #2. You have to do this four times in total.
Your first task is to create the Strengthening Potion. Use (WL) on the bookshelf right next to the location entrance #1 - you will get the hand. Jump on the three buttons on the ground #2 and platforms will come out of the wall.
Firstly go right, take the circle off the wall (WL) #1 and then jump onto the button - the platforms will stop moving back into the wall. Jump to the left side and use magic on the pot - weapons will come out of it #2. Collect another ingredient and put it into the cauldron.
Jump onto the platforms once again, move right and use magic to destroy the chest #1. Finish the potion. Now you have to get to the chain. Chase away the Devil's Snare (LS) which are holding the wardrobe #2 and then use (WL) to attach the door. Go inside and put on the earmuffs.

Grab the Mandrake and break the glass #1 with the chain behind it. Drink the Strengthening Potion and pull the chain. Don't forget to put the shouter into the pot on the left. A few brick will appear. Arrange them so that you can get past the little pit #2.
Move right and use (IM) to get rid of the Cornish pixies holding two bricks #1. Place them one onto another to create a passage #2.

Return to the beginning, while creating a bit of the Strengthening Potion on your way. Jump onto the platforms and then head to the right end. Another chain awaits you there #1. Jump down and move on right to the next room. You will get to a staircase, which isn't facing the right direction. There's a button at the back - jump on it and the staircase will move #2.
Use magic on the painting - the wizard will give you a circle, which you should then mount (WL) #1 and jump onto it - the second staircase will change position. Use (WL) on the valve #2, so that the second character can move on through the rotating bookcase. Afterwards switch to the second character and also use (WL) on the valve.
Use (WL) twice on the banner on the left and you will create a small trampoline #1. Jump onto it and then to the rocky ledge. Use (LS) to chase away the Devil's Snare, which will leave behind a couple bricks #2.

Place the bricks on the wall using (WL) and you will create two platforms #1, thanks to which you will be able to jump upstairs. Push away the two columns #2 using (WL).
You begin at the Bathroom Hallway (M1.4) #1. Follow Nearly Headless Nick towards Hagrid's Hut (M3.24) #2.
A while after the mission begins, you will be attacked by a hornet. Get rid of the nest #1. Dig up the machine from the ground using (WL), jump onto it and head towards the ledge #2.
Destroy the grass by the tree, create a cloud #1 from the round blocks (WL) and move it right, above the withered tree. Go up the ladder with the other characters and switch to Fang. Dig a bit by the tree on the right, causing it to collapse and create a passage #2.
You will find two brooms on the bridge #1. Get rid of the Devil's Snare using (LS) and then cast (WL) on the brooms. Jump onto the brooms and fly to the other side of the lake, destroying the nest above the water. On the second bridge, connect the bricks creating a staircase #2, so that the other characters can get out of the water.
Once the pixies destroy the bridge, a ladder will be made - climb up #1. Destroy another nest and then eliminate the pixies from the tree using (IM) #2.
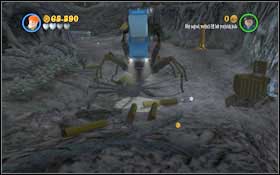
Switch to Fang and dig up a hole #1. You will have to fight a large spider. Apart from him, small ones will also attack you - try to dodge the boss' attacks and shoot the small ones. Purple spiders don't explode - they flip over. Once they do, use (WL) on the twice to raise them, twist and throw #2. Do this three times.
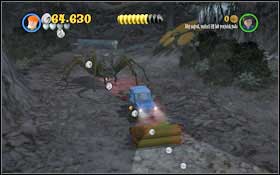
The next task is very simple - drive the car all the way down, running away from the spider #1. If you drive too slow or stay close to the spider for too long, you'll get caught #2.
You will begin in the Main Hallway (M1.1) #1. Head to the Defense Against the Dark Arts Classroom (M4.49) #2.
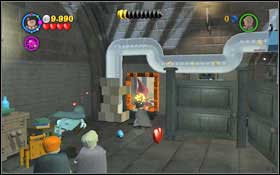
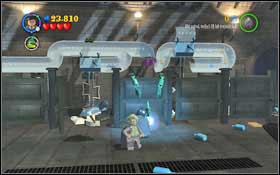
Approach the painting in the left part of the bathroom and use magic on it #1. The wizard will destroy the tiles blocking the entrance to the pipe. Switch to Ron and enter the tunnel with Scabbers. After getting to around the middle, switch to another character and use (WL) to unlock the further path. Return to Scabbers, press the red button and Devil's Snare will appear in the next cabin #2. Switch to another character once again and use (LS) on them.
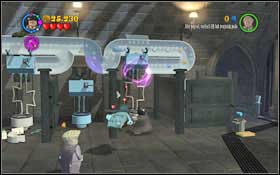
Fit the missing tunnel piece using (WL) and lower the flush to unblock the passage (WL) #1. Switch to Scabbers and move on, pressing the red button. Head to the cabinet and chase out the frog using (WL) #2.
Connect the bricks into a plunger, fitted with a chair (WL) #1. Get on it and jump into the clogged toilet. You will get more blocks - connect them all (WL) #2.
Talk with the snake #1 and jump down. Head left and use the plunger (WL) on the creature which has appeared #2.


Use the bricks left and create a platform (WL). After you get on it, the second character will lift you up #1. Go to the very end and put together the skeleton, which will start fishing and will catch the creature. This time it will be blowing upwards. Jump to the ledge on the right #2, assemble the bricks and create a bridge (WL).
Summon the snake #1 using (WL), jump into his mouth and enter the pipe. You will bump into the Basilisk. Run to the pile of rocks #2 and wait until the rays coming out of his eyes stop shining - jump off and the Basilisk will hit the rocks. Repeat this with the other two piles.
Each time you will find one ingredient of the Strengthening Potion behind the rocks. You will receive another one after speaking with the snake #1. To get the next one, use (LS) on the Devil's Snare #2 and then (WL) on the box.
The last one can be found in the chest - use (WL) on it and then smash up the snake #1. After drinking the Strengthening Potion, approach the chain on the left and pull it #2.
Free the Phoenix, which will poke out the Basilisk's eyes. Now attack the Basilisk with magic #1. Attach the chains of the mechanism on the left (WL) #2 and jump inside.
You will end up near the enemy. Use (WL) on the Sorting Hat #1 and it will spit out a large sword. Wait for the Basilisk to stop attacking and quickly jump into the tunnel. Grab the sword with (WL) and aim it at the Basilisk #2.
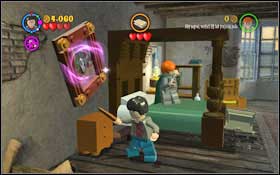
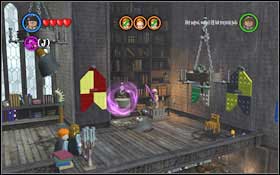
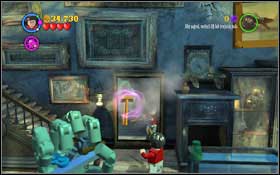
You will begin in a room, where a book will attack you. By the bed you will find a bended painting #1. Cast (WL) on it - you can do it with whichever character - and the wizard will move to the other painting. Run to him and use magic. The wizard will drop his hat and the book will start chasing it. After a while both items will be swallowed by the cabinet. Once it spits out the book, approach it and jump onto it #2.

Once more approach the bended painting by the bed - this time the second wizard will move o the second painting. Use magic on him. Throw the wood into the chimney (WL) and light it up (WL) #1. Jump onto the book again. Approach the painting by the bed for the last time - this time use magic on it right away. The wizard will throw a duck, which will explode - jump onto the book #2.
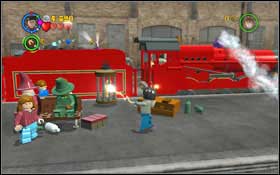
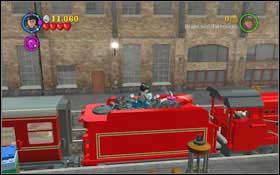
Once on the station, move right - steam will start coming out of the locomotive. Use magic on the owl cage #1 - it will pick up the suitcase and a flower will fall out of it. Put the flower (WL) into the locomotive's chimney #2.
Go to the end and it one of the plants you will find a megaphone - use magic on the plant and then (WL) on the megaphone to attach it #1. It will scare the two students sitting on some baggage. You will find some bricks in the right one - assemble them using (WL) and take it to the train #2.
Jump onto the train and move left. Jump down onto the platform and look out for the revolving door. Create a cauldron (WL) from the bricks which came out of the suitcase #1. You will find the first ingredient of the potion on the left, in the box #2.
The second can be found on the train #1. The last one is inside a suitcase at the end of the platform on the right #2.
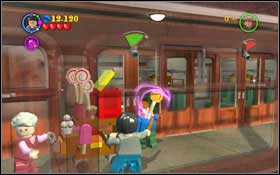
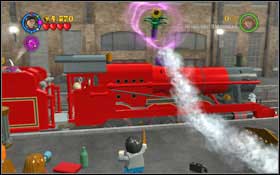
Break the black baggage on the left. Create a chain mechanism from the bricks - use the Strengthening Potion and pull it #1. After the second car is attached, go inside. Follow the woman selling candy. Give a lollipop to the first passenger (WL) #2.
Do the same with the second passenger - give her a lollipop (WL). Once the woman approaches the closed door, take a key from the cart (WL) and use it on the door leading to the next compartment (WL) #1. Switch to Professor Lupin. Choose the Patronus and aim at the Dementor #2.
Head to the left side of the car, taking care of more Dementors on your way. In one compartment, you will find a suitcase - open it (WL) and take out the pickaxe (WL) which you will use to crush the ice blocking the way to the next compartment #1. Assemble the cart (WL) and put the presents onto it (WL) #2.
Push the cart - you will unlock the entrance to the next compartment and cover the window. Head right while getting rid of Dementors. After getting to the tunnel, push away the suitcase using (WL) #1, switch to Ron and use Scabbers. Follow the tunnel to the closed compartment and push the luggage onto the passenger - the door will open. Switch to professor Lupin, open the suitcase (WL) and take out a key #2.
Use the key to open the display case with an axe and use it (WL) to break the next obstacle #1. Hermione will read the signs on the shelf in the next car #2.
Switch to Professor Lupin and assemble a giant suitcase from the bricks (WL), Place it right under the window - you will block the light coming into the car #1. Use the axe by the window to break the beam (WL) and place it above the window (WL) #2. You will block more light. Deal with three Dementors keeping an eye on Harry.
You begin in the Lessons Hallway (M4.36) and follow the ghost to the Defense Against the Dark Arts classroom (M4.49). You will learn the Riddikulus spell (RK). Approach the wardrobe and wait for the Boggart to jump out - attack it with the spell (RK) #1. Complete this task three times with both Hermione and Ron. Leave the classroom and head right, towards the Courtyard (M4.47). There's a padlock on the door. Approach the chest - a Boggart will jump out of it. Once you get rid of it using (RK) it will leave behind a key, which you will use to open the padlock #2. What's important - complete this task with either Hermione or Ron as Harry didn't attend the class and didn't learn the spell!
Hang the flowers (WL) #1 on the hook next to the passage - you will get rid of the plants blocking the entrance to the Herbology classroom. You have to place three cups on saucers - the first one is right next to you. Use (WL) on it #2.
You can get the second cup using magic on the pile of cups by the cupboard and then opening it (WL) #1. Assemble to cup also using (WL). Similarly in case of the third cup - get rid of the pile of cups covering the cupboard and Hermione will read the signs #2. Assemble the cup (WL).
To get through the gate, hang the flowers on the second hook #1. You will get to the Fountain Courtyard (M3.28). Follow the ghost to Hagrid's Garden (M3.25) - you will get inside by destroying the pumpkins by the entrance #2.
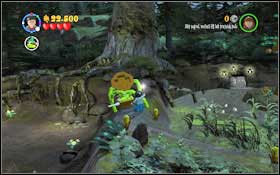
You will learn to handle Buckbeak. Your task is to find and move three chicken pieces. Go right, to the very end. You will reach a nest - destroy it #1. The first piece can be found between the bushes - take it to the table by Hagrid. The second is by a tree with a pixie running beside it #2 - treat him with (IM).

Use magic on the plants by the tree, switch to Hermione and use Crookshanks to make an excavation #1. Get rid of the Devil's Snare (LS) and pick up the second chicken piece. Head right, pick up the large boulder (WL) #2 and use Hermione and Crookshanks to dig again. After a while a ladder will be made - climb up.
Use (WL) on the lily pads to enlarge them #1. Jump onto the island and pick up the third chicken piece. Carefully jump from one pad to another #2 and take the meat onto Hagrid's table. Head towards the Fountain Courtyard (M3.28).
You will split up and meat Fred and George who will give you the Marauder's Map. Follow them to the Main Hallway (M1.1). Approach the cauldron on the right, drink the Polyjuice Potion and change into Ron. On the left you will find a gold curtain #1. Attach the arms to the armour (WL) and use Crookshanks to enter the tunnel and drop down the head - attach it as well. As only you reach the Hogsmeade entrance, the statue will move away #2.
Head right and use (LS) on the Devil's Snare on the way #1. Eliminate the pixie with (IM) and place the platform (WL) in the correct spot. Jump onto it and use (WL) again to set the second platform #2.
Jump onto the snowy ledge and move both platforms to the right (WL) #1. Lift the 1 ton weight and attach it to the chain fastened to the bridge #2.
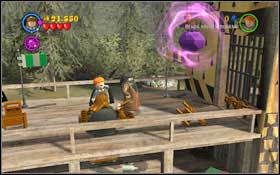
Lift the torch #1 (WL) towards the Devil's Snare so that they drop the platform and move on using them. Switch to Fred or George and approach the chest, from which a Boggart will come out #2. Get rid of him using (RK).

Lift up the large, red blind using (WL) and the string on the right. You will discover three items - a cake, flower and a picture. You have to place them in the proper places by the faces on the left #1. Starting from the left: the first face has a very big nose (smell) - flower. The second face has a very big mouth (taste) - cake. The third face has very big eyes (sight) - picture #2.

Stairs will arise on the right - go up them and then up the ladder. You will end up in the shop - approach the door. On the shelf on the right you will find a weight - place it onto the scale (WL) #1 and you will be able to leave the shop. Once outside, approach the large snowman in the upper part of the alley #2
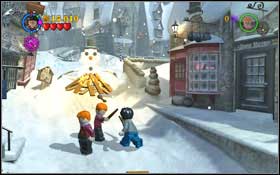
The wizard will leave behind a torch. Use it (WL) on the frozen snow #1. Connect the planks and then the torch as well (WL) - you will start a fire under the snowman, melting it #2. Move to the alley on the right.
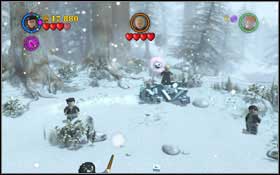

A snow-ball fight with Draco will start. He will be throwing small snow-balls, as well as big ones - wait for him throw a big and use (WL) to intercept it and throw it back at Draco #1. Repeat this action four times - you enemy will then build a tank and start to shoot large snow-balls. Intercept the missile with (WL) and throw it back. Once Draco leans out, a large snow-ball will be thrown at you - throw it back with (WL) as well #2. Repeat this three times.
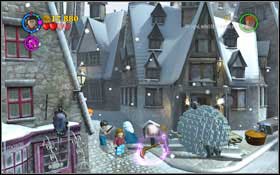
You will once more find yourself in the town. There's a broom next to the giant snow-ball - place it in the hands of one of the students (WL) #1. Place the cage with the dragon on the sledge (WL) and you will unveil another broom #2 - give it (WL) to a student as well.
You will gain the third broom by destroying one of the Christmas trees #1. The snow-ball will eventually unveil the entrance to the Three Broomsticks #2.

You begin in the Main Hallway (M1.1) #1. Follow Nearby Headless Nick to the Gryffindor dormitory and enter it by waving to the large female painting #2.
Use the small torch (WL) held by the statue on the left on the Devil's Snare which are holding the key #1. Take some bricks out of the wardrobe on the right and assemble an armour from it (WL) #2. It will be holding a chest - use magic on it to get the second key.
Place both keys (WL) in the proper holes - the red key in the red hole and the yellow key in the yellow hole #1. Turn one of them and the second character will automatically turn the other #2. Go inside the next room.
Switch to Ron and approach the chest on the right - a Boggart will jump out, so slay it with (RK) #1. Open the wardrobe using magic and assemble (WL) a cauldron from the bricks #2.
In the middle of the room you will find three bricks, place them (WL) in the right order. According to what's on the floor - first the green one, then red and in the end - blue #1. Inside you will find a skeleton #2 - use magic on it and you will get the first potion ingredient.
In the right corner of the room, eliminate a hammer-holding pixie (IM). Use magic on the chest and a snake will come out. Lift up the hammer (WL) and hit the snake to get the next ingredient #1. To the left of the entrance there's a rolled up flag - use magic on it and an ingredient will come out #2.

Drink the Strengthening Potion and pull the chain in the middle #1. Place the large boulder (WL) on the left column #2 - the gate will open.

Chase away the Devil's Snare (LS) surrounding the cauldron #1. Use the shovel on the right (WL) to dig up the plant - use magic on it and you will receive a potion ingredient #2.
Approach the chest on the left with Ron and slay the Boggart (RK) #1. Switch back to Harry and speak with the snake - you will receive some bricks. They will create a platform (WL) #2, thanks to which you will be able to reach the next ingredient - first use magic on it.

Destroy all four statues by the fountain on the right, assemble the valve (WL), with which you will fill up the fountain - after a while plants will grow up and create a trampoline - jump upstairs #1. Look out for the teacher with a lantern. Around the middle on the passage you will find an open window, Inside the room, on a table, there's another ingredient #2.

Drink the invisibility potion - with both Harry and Ron. Once more go upstairs and sneak by the teacher. Use (WL) to open the gate - the second character will automatically help you #1. Use magic on the two silver chests #2 - a few blocks will fall out of them.
Assemble the bricks, create a cello (WL) #1 and begin playing on it (WL) - the wizard will throw you a key. Use it on the door #2.
You begin inside the Gryffindor Common Room (M2.15). Together with Nearly Headless Nick, head to the 2nd Defense Against the Dark Arts Classroom (M4.46) #1. The professor will teach out the Expecto Patronum spell (EP) used to destroy Dementors. Your task is to destroy five Dementors. Switch to professor Lupin and use Reducto on two chests lying on the ground #2.

You will find the next chest on the left - a pixie is holding it. Firstly use (IM) on it and then (RD) on the chest #1. Use magic on the wardrobe on the right - bricks will fly out of it. Use them to assemble a camera (WL). Attack the displayed wizard #2 and he will throw you another chest - use (RD) on it.
The last chest can be found on the window on the left - chase away the Devil's Snare (LS) and disarm the chest (RD) #1. Switch to Harry, approach each chest and use (EP) once a Dementor appears #2. Leave the classroom and head to Hagrid's Hut (M3.24).
You begin with a fight with Whomping Willow. Avoid all the attacks until it attacks the central field with its hand, onto which you can jump #1. Once you're in the air, attack the tentacles #2.
Repeat this action three times - you will unlock a passage to the underground. Create a bridge from the Devil's Snare using (LS) #1. Go right and attack the brown vines sticking out of the ceiling #2. First the ones on the right, then the ones on the left.
Once the green orb fall down, approach the flower on the left and use magic on it - you will create a staircase from the leaves #1 - climb up. Jump onto the first platform and onto the upper ledge on the left. Destroy the blockade set on the vines #2.
Jump right and once on the last platform, head down and destroy the blockade #1. Once you're upstairs, on a wooden platform held by water, use magic on two purple spheres sticking out of the wall and then block the holes with each of them (WL) #2.
You can get even higher - firstly head left and destroy the third Devil's Snare blockade, unlocking the further path - to the right, onto the stairs #1. Now you have to catch Wormtail. The rat will keep on running between the furniture in the room. Use magic on the piece of furniture he's under - it will begin to shake #2. You have to eliminate the chair, pot, piano, sofa and chimney.
Assemble a giant rat-trap from the gained bricks (WL) #1. Once in the forest, head right while casting spells (LS) on the Devil's Snare #2.

Build a big cube from the bricks lying around (WL) and two bricks will fall out of it. Arrange them (WL) so that you can get onto the upper ledge #1. Move on, switch Hermione and use Crookshanks to dig up the cauldron #2.
In the ground behind the cauldron you will find a snake skeleton - shoot off his head to gain an ingredient #1. There's a skeleton in the spider-web nearby - firstly use magic and then (WL) to put him back together. After a while you will gain the second ingredient #2.
You will find three black boulders round the cauldron - treat every with magic and eventually a plant with another ingredient will grow from below one of them #1. Drink the Strengthening Potion and pull the chain by the two yellow platforms #2.
Use Hermione and Crookshanks to jump upstairs - dig there to make a ladder appear #1. Push away the attack of the six spiders and assemble the red mushroom (WL) #2. Jump onto the upper rock ledge.

You begin at the Fountain Courtyard (M3.28) #1. Follow Nearly Headless Nick to the Hospital Wing #2.
Approach the wardrobe on the left side of the garden and put on the earmuffs. Afterwards take the Mandrake and put it into the pot #1. Once a predacious plant leans out, treat it with your wand #2.
In consequence, the barrel will roll over and a fish will fall out of it. Give it to Buckbeak (WL) #1. Create a small grill from the bricks, on which a piece of chicken will scorch #2 - once more give the food to the imprisoned creature (WL).
Cut the chain with the axe #1. Once you're in the forest, firstly take care of the hornet and the nest. Head right, to the nook - two pixies are holding a couple of round bricks. Get rid of them using (IM) #2 and use the bricks to create a cloud (WL), which will fill up the dried out pond with water.
Jump upstairs and head left - chase away the Devil's Snare using (LS) to free the gramophone #1. Jump downstairs and assemble it (WL). Return to the second pond once again. Draw the hook out of the water (WL) and use normal magic on it - it will pull out a chest from the water #2.
Open the chest and take out a yellow vinyl record. Carefully jump between the leaves, return to the gramophone and place the record on it #1. You will find yourself in the further part of the woods, with a frozen pond. On the left there are some colourful leaves - shoot them and shape (WL) into a bridge #2.

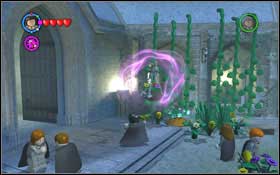
Cross the bridge to the other side and eliminate the Devil's Snare with (LS) #1. A giant snow-ball will destroy the iceberg and Dementors will appear. Your task is to kill all six Dementors using (EP) #2.
You will begin at the Grassy Courtyard (M3.34) #1. Mount Buckbeak to begin the next mission #2.

Make sure you're controlling Harry. Go right and you will bump into the first Dementor - eliminate him with (EP) #1. Use magic on the gold chest to take out an axe, which you can use to crush the ice (WL) #2.
Break through the Devil's Snare with (LS) and eliminate the Dementor using (EP) #1. By the fountain, you will find a frozen lamp - melt the ice with (WL) and once the barrel fills up, water (WL) the nearby flowers with it #2.

Use magic on the pink and purple flower - they will begin to rotate and create a whirl, which will take you up #1. Eliminate the Dementors with (EP). In the chest at the end you will find bricks, from which you can create (WL) an identical statue to the one on the left side of the door. Use magic on them to melt the ice on the door #2.
In the next room, you will have to cooperate with both characters. It doesn't matter which one is on which side. Head to the right side, jump onto the bridge and use (WL) to lift up the platform and fit It to the other side #1. Switch to the character on the left and move on. Use the torch on the nearby Devil's Snare (WL) #2 so that they lower the platform.
Switch to the character on the right and move on - once more move the platform (WL) to the other side #1. Use the character on the left to assemble the planks (WL) into a passage leading to the end on the room #2.
Use the planks blocking the passage with the character on the right (WL) and create a passage for the other one #1 - go through the door. Switch to Harry and eliminate the three Dementors with (EP) #2.

Pull down the cauldron from the statue on the right #1. You will find one of the ingredients in the left corner - use magic on the flower in the pot #2 and a snake will appear - attack it.
Move right, under the tree. Take out the saw (WL) from the barrel and cut off one of the branches (WL) - you will get another ingredient #1. Below on the left you will find a ladder - go downstairs. Raise the pink chimera above the window (WL) and it will break it #2. Go inside with Hermione and read the signs by the shelf - take another ingredient.

Once you're upstairs, switch to Harry and get rid of the three Dementors (EP) which appeared by the door #1. Drink the Strengthening Potion and pull the chain by the bridge #2. A Dementor is waiting by the tower - kill it (EP) and go up the stairs.
The boss fight isn't easy. Make sure you're controlling Harry. Firstly you will be attacked with a few Dementors #1 - get rid of them using (EP). Before you kill everyone, you have to use (WL) on the barrels #2.
After clearing the tower, you will be attacked by the boss - he will start pulling you towards him - save yourself with (WL) #1. The enemy should get hit with the plunger (found in one of the barrels). Once he's stunned, hit him with magic #2.
Once the barrels get frozen, use magic on the nearby statues and they will melt the ice #1. Remember about the Dementors all the time - fight them off with (EP). After melting the ice, empty the barrels (WL). Once the boss begins to pull you in, use (WL) to hit him with the plunger and then attack him. Repeat this action three times #2.
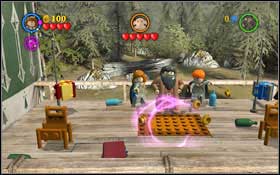
You have to save five friends from the hooded wizard. George is on the right side of the camping site. Destroy the rockets flying round him #1. The other Weasley brother is lying under the table - attack the wizard twice #2 and pick up the table with (WL).

Head to the right side of the field and you will find Mr Weasley next to the cauldron. Use the large frying Mr. (WL) to hit the wizard #1. It's time to create the Invisibility Potion. You can find one of the ingredients on the grill #2 - use magic and you will light a fire.
On the right you will find a spider-web - use magic on it and a spider will fall down #1. In order to get the third ingredient, switch to Hermione and use Crookshanks to dig the bush #2 which will give you a cherry.
Drink the Invisibility Potion, approach the red book #1 and jump onto it. Push (WL) the car to unlock the passage. Use (WL) again on the tent to save Fred #2.

You need to get to Harry. Destroy the white banner and construct (WL) a trampoline from the bricks, thanks to which you will be able to jump over the flames #1. Destroy the chest blocking the water barrel #2 so that it can put out the fire.
Approach the chest and use (WL) on it - the second character will get a water barrel out of it #1. Use it (WL) to extinguish the fire by the tent. Switch to Hermione and use Crookshanks to dig up a wheel. Install it to the car #2 and push it lightly with (WL).

Go right - turn round the knocked over cauldron #1 with (WL). In the orange chest you can find an axe - use it (WL) to chop off the brick blocking the passage. Destroy the chest and the barrel - a skeleton will appear #2 and after a while you will receive a potion ingredient.
Eliminate the pixie with (IM) - pick up the tap and place it into the barrel, which will fill up the bucket with water. Extinguish (WL) the flames #1. You will find another ingredient in the hole. A bit further there are planks and boxes lying on the ground - destroy them and pick up the potion ingredient #2.
Drink the Strengthening Potion and pull the chain by the gate #1. You will have to face the hooded wizards. The task is easy - you have to fight off three waves of enemies. Eliminate the targets with a plain spell #2. If you get caught by a snake, switch to the other character and kill the reptile. First wave: six hooded wizards. Second wave: eight hooded wizards and three snakes. Third wave: six hooded wizards and five snakes.
You begin in the Entrance Hall (M1.2). Follow Nearly Headless Nick to the Potions Classroom (M4.42). Inside you will learn how to create the Aging Potion which will allow you to cross magical barriers. Use (WL) on the books by the pipe entrance - you will create a passage between the tables. Switch to Hermione or Ron and use Crookshanks / Scabbers to get inside the pipe #1. At its end you will activate a mechanism which will lower the cage. Once the bird flies down, use magic on it - you will create two pieces of meat. Place them on the aquarium (WL) #2 and the fish will eventually jump out for it. Take (WL) the potion ingredients and throw them into the cauldron.
On the left you will find a head - use (WL) on the horns and once the wall opens, use Hermione to read the signs on the shelf #1. Place the bricks (WL) on the empty table. Open the book - it contains three differently coloured beakers. On the table, apart from an empty vessel, you will also find beakers filled with three fluids - red, yellow and blue #2.
To create specific colours, you have to mix:
Red + Yellow = Orange
Red + Blue = Green
Yellow + Blue = Green
You will receive another potion ingredient.
On the right side of the room you will find a locked chest - use magic on it and then place the brick in the empty spot by the two water containers #1. Jump on one of the platforms - the second character will jump onto the other one. Wait a bit for the water to be pumped through and you will get the next ingredient. Drink the Aging potion and go through the barrier #2. Head back to the Great Hall (M1.3) and then to Hagrid's Hut (M3.24).
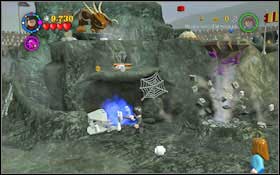
Go right - a red dragon is blocking your way. In the bowl by the cage you will find a purple egg - move it up (WL) #1. Afterwards destroy the padlock and go inside. Steer the egg (WL) so that is gets to the dragon cage #2. Eventually a small dragon will hatch and the path will be unlocked.
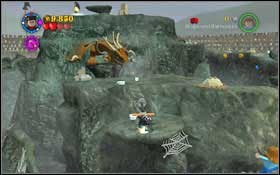
Eliminate (IM) the three pixies holding the parts of the chain #1. Afterwards put it back together (WL) and pull with Hagrid - you will open the bridge. While crossing it, look out for the flames coming out of the wall on the right #2.
Use (LS) to chase away the Devil's Snare and use magic of the leaves - assemble a mushroom (WL) #1. Jump up, make a chain from the bricks (WL) and pull it with Hagrid to lower the bridge. You will end up by a green dragon. Unroll (WL) the xylophone on the left #2. Colourful notes will start appearing from the dragon's mouth - hit the proper keys with the mallet (WL).
1. Red, yellow.
2. Green, yellow, blue.
3. Red, yellow, blue, green.
The dragon will fall asleep - you can move on. Jump between the flames #1. On your way you will come across four groups of flames. Use the bowl (WL) on the aquarium to gather some water and then pour it onto the flame #2. Make a staircase from the planks (WL).
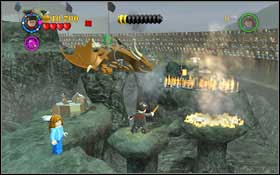
You will come across a blue dragon. Grab the purple ring (WL) and direct is so that the dragon starts breathing fire at the attachments. With the first and last one, set the ring so that the attachment is in the centre. As for the middle one, place the ring between the first and second attachment #1. After unlocking the path, move on - you have to create a bridge from the bricks (WL) #2.
In the next location, use (WL) on one of the chains #1. Hagrid and the dragon handler will take care of the other ones. At the next location, use Fang to dig up a hole in the ground #2.
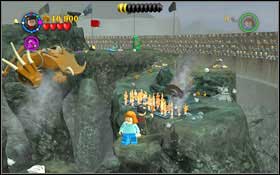
Go down with Hagrid and pull the chain - you will unlock the upper passage. With Harry upstairs, put on the Invisibility Cloak and go past the dragon #1. Remove the vines from the road (LS) and use magic on the plant - you will unlock a passage below #2.
Pick up large brick pile (WL) so that Hagrid can move on #1. Once by the tree, pick up the pile again (WL) - Hagrid will use the mushroom and this way you will be able to go through the tree, so move on right. Dig up the chain with Fang, pull it out using Hagrid (WL) and eventually destroy the lock with Harry #2.
You begin in the Gryffindor Dormitory (M2.16). Follow the ghost to the 2nd Defense Against the Dark Arts Classroom (M4.46). You will learn the Reducto spell (RD). Your task is to save five students crushed by silver items #1 using the (RD) spell. You shouldn't have problems with locating all five in this small room. Lower the cage and head towards Hagrid's Hut (M3.24) where you will find a tent and professor Dumbledore beside it #2.
Run right and look out for the dragon. Once you get to the blockade, destroy a few brown stones lying on the ground and create a (WL) dog #1. At the very end on the right you will find a purple platform - place it in the caving between the bricks #2. A few black ones will fall out - create a cauldron from them (WL).
Assemble the skeleton (WL) #1a and you will get an ingredient. The second one is right beside, covered with vines - use (LS) #2.
The third one can be gained from the snake body on the left side #1 - use magic on it. Drink the Strengthening Potion, jump onto the platform and pull the chain #2.
Jump up and place the platform (WL) in the middle of the pit #1. You need to pass through the next couple rock platforms quickly, as the dragon breaths fire onto them #2.
Once you're on the last one, use the water barrel (WL) to extinguish the flames #1. Switch to Hermione and use Crookshanks to dig out the blue brick #2.
The red one is being held by a pixie - eliminate it with (IM), while the green one is on the right side - destroy the construction using magic. Set the bricks on the right spots (WL), the bricks colour has to match up with the skeleton helmets #1. Jump up to get the egg. The nest phase is running away. Jump run straight (in the direction of the screen), while avoiding the obstacles and jumping over the holes in the floor #2.
You will begin in the Gryffindor Common Room (M2.15). Go outside and follow the ghost to Hagrid's Hut (M3.24) - you will come across another student on your way. Head towards the Bathroom Hallway (M1.4), head onto the upper floor and destroy the blockade with (RD) #1. At the end you will find Moaning Myrtle - follow her into the bathroom #2.

You have to collect four green shells and place them on the wall. The first is right next to you #1. Head left - there are three leaking sinks there. Use magic on them #2 and eventually the shell in will fall out of the container beside.
Approach the wizard painting - in one of the cabinets on the right you will find a couple bricks - assemble (WL) an umbrella from them #1. Hand it over to the Wizard - he will clog the hole and give you a shell. In the barrel, right next to the chest with a Boggart, you will find a couple bricks (WL) #2. Assemble a toilet seat (WL) from them.
Use (WL) on one of the planks #1 - the ghost will do the same with the other one. You will receive a shell; go down the stairs #2.
There's a broom by the pool - clean (WL) the stained-glass window using it #1. The siren will throw out a box with crabs - destroy them all and make a small railway from the bricks (WL) #2.
Use the cloud (WL) by the column on the siren to fill the stained-glass windows with water #1. In return you will receive a valve - place it on the right side and turn (WL) #2.
You begin in the Main Hall (M1.1). Follow Nearly Headless Nick to the Black Lake (M3.27). Destroy the entrance gate with (RD) #1. Go down the stairs and towards the gate behind one of the professors #2.
NOTICE: The construction of this level is somewhat different from the other ones.
Swim to the right and you will reach a pipe #1, thanks to which you will get closer to the screen. Keep swimming right. The next pipe will be blocked - use magic on the rocks #2.
You can either swim to the other side or to the right. Whichever option you choose, you will reach an octopus #1. Unfasten a tentacle with (WL) - the second character will do the same with the other one. Continue swimming right. You will eventually reach a blocked passage - on two rock ledges you will find two big bricks - attach them (WL) to the middle one #2. You will create a fish which will make the big boulder fall.
Just like before, swim right in the next location. One character will take the lower route and the other one the upper. Switch to the lower character, lift (WL) the door blockade and swim below it #1. Place the giant crab (WL) on the purple bricks on the left #2.
Switch to the upper character and use magic on the octopus' eye #1. Get rid of the Devil's Snare (LS) blocking your way #2.
Up you will find a red bush - after using magic on it, a pearl will fall out #1. Place it by the shellfish blocking the passage below #2.
In the last part you will come across sirens - look out for them. Destroy the rocks surrounding the pipe entrance #1. Before you swim through, there's an anchor on the right and left - use (WL) on them. Additionally you need to chase away the Devil's Snare on the left with (LS) #2. Swim through the pipe.
Place the violet pearl on the scale #1. Afterwards use (WL) on the anchor. Once you have a blockade by every chain, use magic on them and they will break #2.
You begin at the Grand Staircase (M2.8). Wave to the wizard on the picture #1 and he will move the stairs. Go up and wait a bit for the further stairs to appear. Destroy the chest and throw the wheel (WL) #2 to the wizard in the picture. Afterwards use magic on him and to switch the stairs.
Wait a bit again. Eliminate two pixies (IM) holding the painting #1 and place it on the wall (WL). Use magic on it and the wizard will switch the stairs. Enter the Dumbledore's Office (M2.10) #2.
Use magic on the four bushes round the base of the statue and then assemble (WL) the gold armour #1. Use magic on it and keep a track of its sword movements #2. The order of passages you have to take is being shown. The statue keeps on moving all the time - you have a limited amount of time to get out of this part of the labyrinth.
Exit route: right, left.

In the further part, eliminate the pixies holding a part of the armour with (IM) #1. Assemble the armour (WL), use magic on it again and it will show you the proper way.
Exit route: left, right, down.
In the third part, chase away the Devil's Snare (LS) and put together (WL) the armour #2.
Exit route: right, left, down, up.
You will find yourself in a labyrinth. Go forward - you will come across moving walls #1. Wait for the passage to be clean, head forward and try not to be pushed. This situation will repeat three more times #2.
You will eventually reach a spot with a pixie holding an arrow on the right #1. Eliminate him (IM), place the arrow on the pole and use (WL) to turn it #2.
By doing this, you will move the wall on the left - move on. You will reach a sphinx #1 - head left and use (WL) on the big, green book #2. Bricks will fall out of it and an image of a sphinx running away from a spider will appear.
Assemble the bricks (WL) into a trampoline and jump behind the fence. Chase away the Devil's Snare (LS) and place the fly (WL) on the spider-web #1. A spider will show up and destroy the fence. Assemble the fly (WL) and place it onto the sphinx #2.
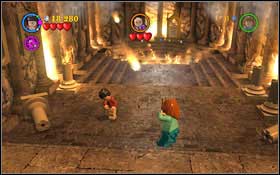
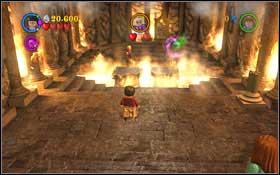
You will have to fight Lord Voldemort. Keep eliminating the Death Eaters as they appear #1. Once you face Voldemort himself #2 keep on pressing [H] to cast a stronger spell. Repeat it three times.

Your task is to get rid of all five balloons. Approach each of them, press [H] and then choose the red cross #1. In case of balloons which are out of your reach, keep the button pressed for longer - it will allow you to aim at the object #2.
![Approach the tree, press [J] and then choose the copy option - Gringotts Bonuses - Walkthrough - LEGO Harry Potter: Years 1-4 - Game Guide and Walkthrough](https://game.lhg100.com/Article/UploadFiles/201512/2015121617035640.jpg)
Approach the tree, press [J] and then choose the copy option. Plant the new tree beside #1. Plant five trees in the same way. Now choose to test the level - from the menu, or by holding down [K]. You have to collect 2,000 studs. Mere trees won't be enough. Return to build mode, press [K] and choose studs - place two blue ones anywhere and choose the test mode. Collect both coins which will give you the needed 2,000 and walk into the opened cabin #2.
![Use [J] to raise the water level and [H] to lower them - Gringotts Bonuses - Walkthrough - LEGO Harry Potter: Years 1-4 - Game Guide and Walkthrough](https://game.lhg100.com/Article/UploadFiles/201512/2015121617035757.jpg)
Use [J] to raise the water level and [H] to lower them. Your task is to shape the terrain so that all fish are in the water #1 and cats on land #2.
![Open the menu with [K] and choose whichever vehicle - Gringotts Bonuses - Walkthrough - LEGO Harry Potter: Years 1-4 - Game Guide and Walkthrough](https://game.lhg100.com/Article/UploadFiles/201512/2015121617035706.jpg)
Open the menu with [K] and choose whichever vehicle. Place at least one vehicle in each of the four depressions #1. Switch to test mode. Enter each vehicle and ride onto the pressure platforms #2 which will light up the bulbs.

First you have to finish the road - place four adequate parts. Choose a proper plate from the [K] menu #1 and place it in the empty place. If the plate isn't facing the right direction, you can turn it using [H] while standing in the middle. Eventually enter test mode and ride to the pressure platform on the other side #2 - of course you don't have to stick to the road.


Your task is getting 100,000 studs. You can collect them on foot #1 or by entering one of the vehicles #2 running over everything in sight. The second option is of course the faster one. In the area of the field you will also find violet studs which will give you 10,000. After collecting enough, head to the upper part of the level where you will find a Gold Brick behind the previously locked gate.
You have to enable Ron to reach you. Stand on the buttons #1 starting from the right side. The next platforms will start moving and the second character will be able to jump onto the further islands. Once it gets to you, switch to Ron and use Scabbers. Enter the tunnel and press the button at the end #2.
Once the gate opens, move on and stand on one of the button #1 - the second character will stand on the other one. Jump on the platform and you will get to the Gold Brick #2.
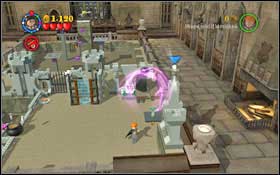
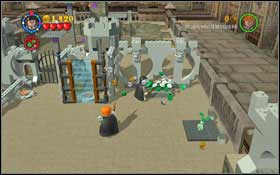
You have to prepare the Strengthening Potion. Jump onto the bench on the right - you will be lifted into the air, from where you can take the first ingredient #1. The second is in the flowers #2.
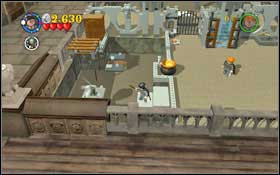
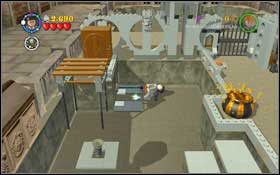
The last one can be found on the left #1. Drink the Strengthening Potion and pull the chain #2.
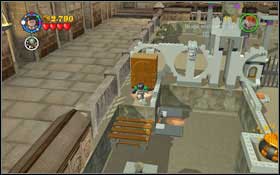
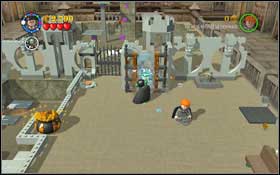
Jump onto the platform and use the wardrobe to put earmuffs on #1. On the right you will find a Mandrake, thanks to which you will break the glass window with a button behind it #2 - step onto it. The second character will stand on the other button.
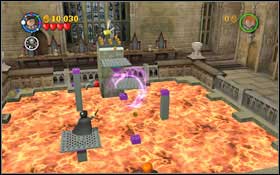
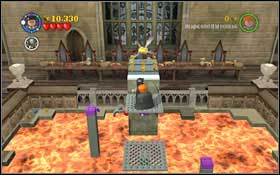
Move the platforms #1 to the middle with (WL), so that you can easily get to the Gold Brick #2.
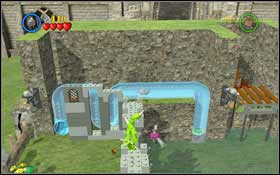
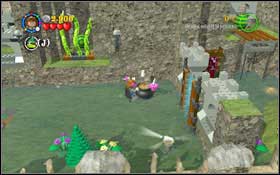
Use Scabbers to enter the tunnel, on the end of which there's a button #1 which will lower the platform. Use (LS) on the Devil's Snare to unlock a passage and jump into the water. Get onto the surface and get into the wardrobe to put earmuffs on. You will find the first potion ingredient in the left corner and the second one in the lower right #2.
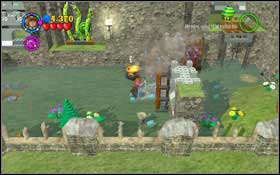
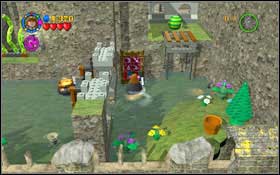
Grab the Mandrake and break the window by the cauldron #1. Approach the wardrobe with signs with Hermione and press them in the order in which they were lightened #2. You will get the last ingredient.
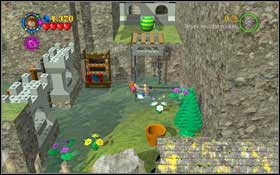
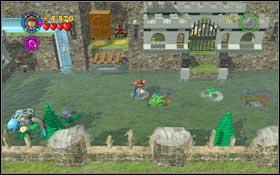
Drink the Strengthening Potion and pull the chain in the wall on the right #1. Jump onto the platform and roll down the ball. Roll it into one of the two holes in the water #2.
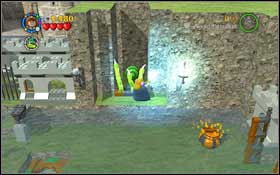
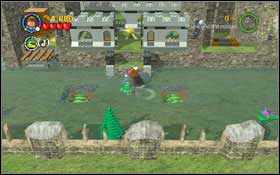
There's a crank by the wardrobe - turning it will increase the water level. Swim to the right edge and use (LS) to get rid of the Devil's Snare #1. Roll the ball into the water and lower its level. Roll it into the second hole. The gate will open - there's a Gold Brick behind it #2.
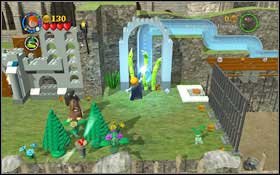
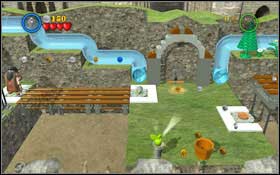
Head left and get rid of the Devil's Snare with (LS) #1. Use Scabbers to get through the tunnel to the other side, stand on the button and wait for the second character to stand on the button on the opposite side #2.
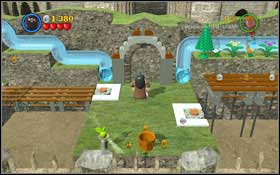

Move on and enter the next tunnel - it's blocked in the middle. Switch to Hagrid, pull the chain #1, switch back to Scabbers and go to the end of the tunnel. Once more stand on the button and wait for the other character to stand on the second one. You will reach a cauldron - you have to create a potion. All the ingredients can be found on the pillars - collect them #2.
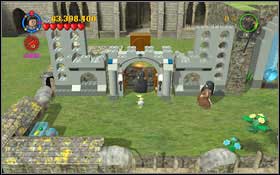

Drink the Polyjuice Potion and choose one of the Ravenclaw students. Return to the very beginning of the location and wave by the gate #1. Right behind it you will find a wardrobe, in which you can put earmuffs on. Pick up the mandrake and take it to the very end, to the cauldron and destroy the glass window blocking the pipe. Switch to Ron and use Scabbers to get to the brick #2.
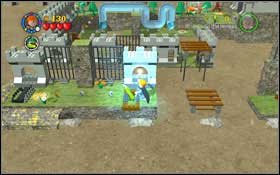
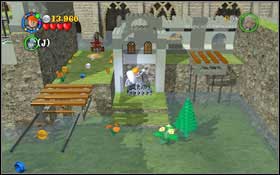
NOTICE: You're surrounded with quicksand, falling down will end with death. Approach the crank on the left - you will lower the first platform. Jump to the left and use (LS) to chase away the Devil's Snare #1. In the corner you will find a teleport - it will transport you to a different spot. Turn the second crank #2 - you will lower another platform.
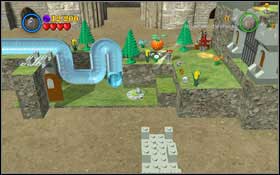
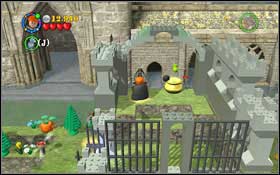
Use Scabbers to get through the tunnel to the other side and stand on one of the buttons #1. The other character will automatically stand on the other one - the door will open. The crank by the gate opens it and the one inside turns the quicksand into water #2.
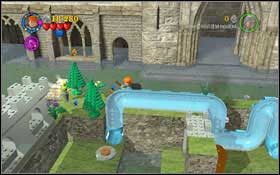
You will find the first potion ingredient right in front of the gate. To get the second, cross the narrow passage behind the tunnel #1. Jump into the water and swim to the right. There you will find another teleport #2.
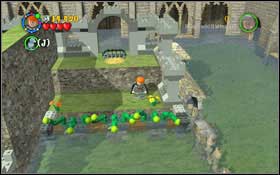
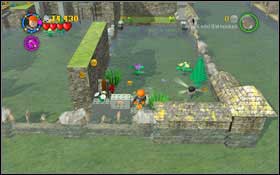
Chase away the Devil's Snare using (LS) #1. Swim to the other side and turn the crank - you will lower another platform. Also take the last potion ingredient #2.
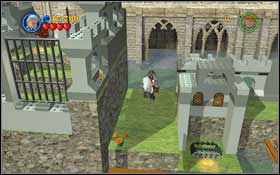
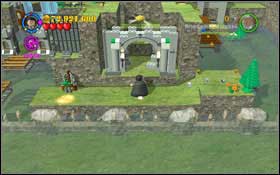
Switch to the second character, jump onto the lowered platform and turn the crank #1. Return to controlling Ron and place the last ingredient into the cauldron. Change your character to one of the Slytherin students and return to when you begun. Wave by the gate and collect the Gold Brick #2.
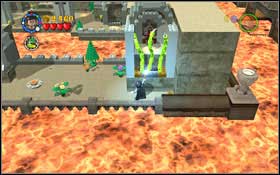
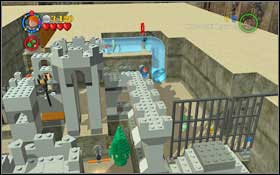
Go right with Harry - eliminate the Dementor (EP), get rid of the Devil's Snare (LS) #1 and turn the crank - you will unlock the passage in the tunnel. Switch to Rona and enter the tunnel with Scabbers #2 - you will activate the platform.
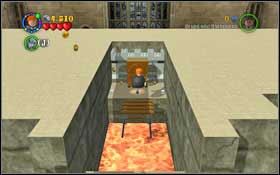
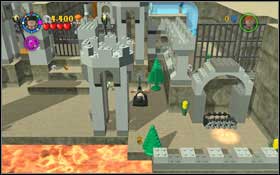
Jump onto the platform on the left with Harry and teleport to the second part, taking a potion ingredient from the pillar on your way. Get rid of the Dementor (EP) #1 and throw the ingredients into the cauldron. The second one can be found on the ground on the right. The last one is behind the tree, in the corner. Drink the Strengthening Potion and pull the chain on the right #2.
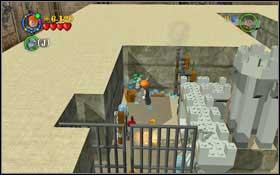
Switch to Ron and jump across the platform #1 to the wardrobe, where you will put earmuffs on. Return, grab the Mandrake on the right, next to the pipe. Take it to the other side, where you will break the window #2. Turn the crank to open the door.
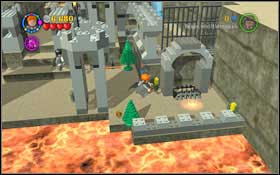
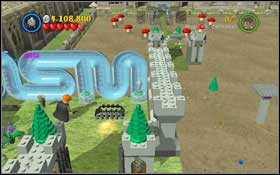
Return with both characters #1 and stand on the buttons by the gate, with a brick behind it #2.
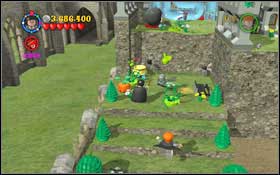
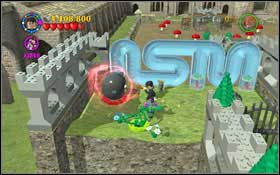
Go straight and defeat the Dementor (EP) by the cauldron #1. Once you kill him, you will receive a potion ingredient. On the right you will find another ingredient. Walk into the teleport - the last one is upstairs. Drink the Polyjuice Potion and change to one of the evil characters which use (DM). Head up once more and destroy the black sphere (DM) #2 to unlock the tunnel entrance.
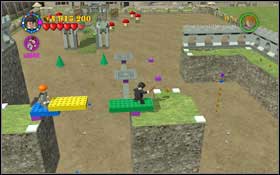
Switch to Rona and enter the tunnel with Scabbers - press both buttons on the right side and you will open the gate #1. Move on and create a bridge from the bricks (WL) #2.
Afterwards move (WL) both platforms to the right, so that you can move on #1. Jump further so that you can reach the next gate - stand on the buttons with both characters and eliminate the Dementor afterwards (EP) #2.
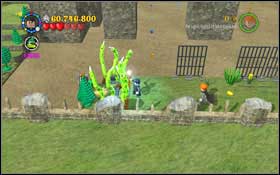
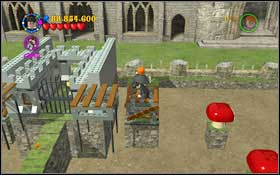
Move to the left - on your way you will come across another Dementor (EP). Get rid of the Devil's Snare (LS) and turn the crank #1. Jump through the platforms up, until you reach the gate. Jump along the mushrooms #2 onto one of the buttons - the second character will do the same on the other side. In effect, you will open the gate and find a brick.
Stand on one of the buttons #1 and the second character will stand on the other one. You have to create an Aging Potion. Use the bricks (WL) to construct two more buttons - you will unlock the gates on the left and right side. On the left you will find a teleport #2 - turn the valve, return and pick up the ingredient.
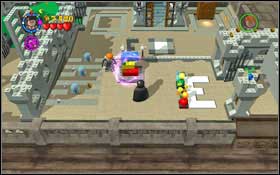
Switch to Ron and use Scabbers to enter the tunnel #1 at the end of which you will find a button which will open the door - jump onto the platform and take another ingredient. On the right you will find three colourful bricks, from which you have to arrange (WL) the "E" letter #2.

A bit higher you will find a wardrobe - put on the earmuffs and grab the Mandrake. Break the window with the next ingredient behind it #1. After completing the Aging Potion, drink it and go through the barrier. Reach the cauldron #2.
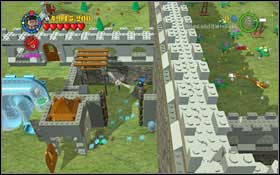
You will find the first ingredient right next to the cauldron. Head left while jumping across the moving platforms. Use Scabbers to press the button at the end of the tunnel #1. Put on the earmuffs in the wardrobe on the right, pick up the Mandrake and break the right window - you will find another ingredient #2.
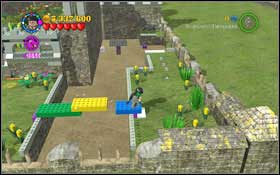

Construct a bridge from the bricks (WL) on the right #1. Go up, destroy the spider and move the platform (WL) onto the brick on the right, so that you can jump and get the next ingredient #2.
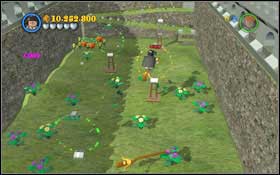
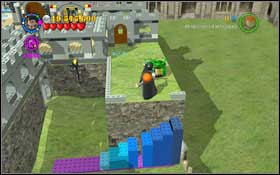
Drink the Strengthening Potion and pull the chain by the door on the right. Chase away the Devil's Snare with (LS) and jump onto the broom. You have to fly through four circles #1 to open the door at the end. Create a staircase from the bricks (WL) #2, one of the ingredients is on the pillar.
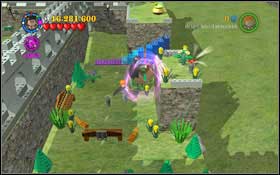
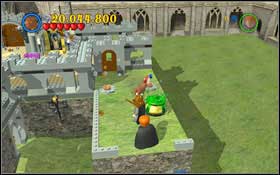
Jump onto the bench - the second character will use (WL) to lift you into the air and collect the second ingredient #1. Destroy the tree on the left - another ingredient of the Polyjuice Potion will appear. Chance into a character with an animal or just into Fang and then dig out the two buttons #2.
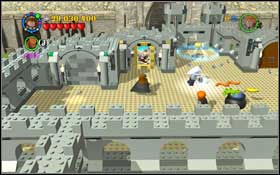
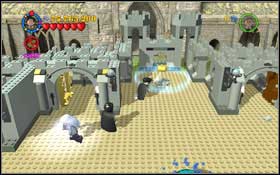
The Aging Potion ingredients can be found behind the paintings and walls #1. Use, starting from the left side: a Slytherin student, Hufflepuff student and Ravenclaw student. Drink the potion and go through the barrier to get the brick #2.
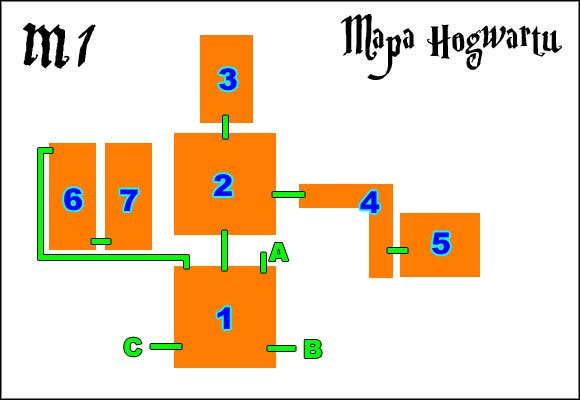
1. Main Hall
2. Entrance Hall
3. Great Hall
4. Bathroom Hallway
5. Boys' Bathroom
6. Library
7. Library (side room)
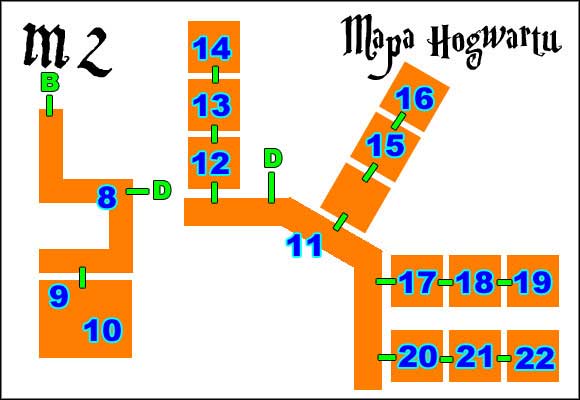
8. The Grand Staircase
9. Muggle Artifacts Room
10. Dumbledore's Office
11. House Hallway
12. Slytherin Dungeon
13. Slytherin Common Room
14. Slytherin Dormitory
15. Gryffindor Common Room
16. Gryffindor Dormitory
17. Hufflepuff Tower
18. Hufflepuff Common Room
19. Hufflepuff Dormitory
20. Ravenclaw Tower
21. Ravenclaw Common Room
22. Ravenclaw Dormitory
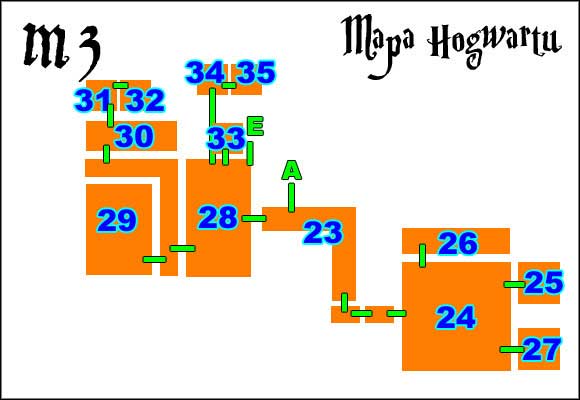
23. Corridor
24. Hagrid's Hut
25. Hagrid's Garden
26. Quidditch Gate
27. Lake
28. Fountain Courtyard
29. Quidditch Grounds
30. Herbology Classroom
31. Herbology Classroom (side room)
32. Greenhouse
33. Clocktower
34. Grassy Courtyard
35. Owlery
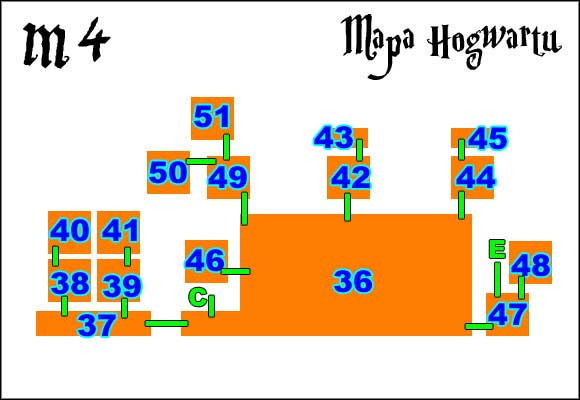
36. Charms Hallway
37. Charms Hallway
38. Charms Classroom (left)
39. Charms Classroom (right)
40. Charms Classroom (left basement)
41. Charms Classroom (right basement)
42. Potions Classroom
43. Potions Classroom (side room)
44. Transfiguration Classroom
45. Transfiguration Classroom (side room)
46. 2nd Defense Against the Dark Arts Classroom
47. Courtyard
48. Divination Classroom
49. Defense Against the Dark Arts Classroom
50. Gear Basement
51. Pendulum Basement
Harry (blue shirt) - Entrance Hall (M1.2)
Harry (Sweater) - Year 2: Floo Powder!
Harry (Hogwarts) - Year 1: Out of the Dungeon
Harry (Dragon Task) - Year 4: The First Task
Harry (Lake Task) - Year 4: The Black Lake
Harry (Maze Task) - Gear Basement (M4.50)
Harry (Quidditch) - Quidditch Grounds (M3.29)
Harry (Girl Disguise) - Year 1: A Jinxed Broom
Harry (Slytherin Disguise) - Year 1: Face of the Enemy
Harry (Pyjamas) - Year 1: The Restricted Section
Harry (Tuxedo) - Diagon Alley
Hermione (Hogwarts) - Owlery (M3.35)
Hermione (Red Hooded Top) - Year 3: The Shrieking Shack
Hermione (Blue Top) - Divination Classroom (M4.48)
Hermione (Grey Hooded Top) - Owlery (M3.35)
Hermione (Cat) - Bathroom Hallway (M1.4)
Hermione (Ballgown) - Diagon Alley
Ron (Hogwarts) - Gryffindor Dormitory (M2.16)
Ron (Pyjamas) - 2nd Defense Against the Dark Arts Classroom (M4.46)
Ron (Sweater) - Year 2: Follow the Spiders
Ron (Brown Jacket) - Hagrid's Garden (M3.25)
Ron (Slytherin Disguise) - Year 2: Crabbe and Goyle
Ron (Girl Disguise) - Year 1: Out of the Dungeon
Ron (Tuxedo) - Lake (M3.27)
Ron (Cardigan) - Year 1: Face of the Enemy
Professor Dumbledore - Dumbledore's Office (M2.10)
Professor Dumbledore (Grey) - Dumbledore's Office (M2.10)
Professor McGonagall - Transfiguration Classroom (side room) (M4.45)
Hagrid - Year 1: The Forbidden Forest
Professor Flitwick - Charms Classroom (right basement) (M4.41)
Professor Snape - Potions Classroom (side room) (M4.43)
Mad-Eye Moody - Charms Classroom (left basement) (M4.40)
Professor Quirrell - Pendulum Basement (M4.51)
Professor Lupin - Year 3: Dementor's Kiss
Madam Hooch - Boys' Bathroom (M1.5)
Gilderoy Lockhart (Green Jacket) - Hagrid's Garden (M3.25)
Gilderoy Lockhart - Year 2: The Basilisk
Madam Pomfrey - Year 2: Dobby's Plan
Madam Pince - Corridor (M3.23)
Professor Sprout - Greenhouse (M3.32)
Professor Trelawney - Divination Classroom (M4.48)
Professor Binns - The Grand Staircase (M2.8)
Professor Sinistra - Year 2: Follow the Spiders
Professor Vector - Year 2: Tom Riddle's Diary
Katie Bell - Quidditch Gate (M3.26)
Seamus Finnigan - Gryffindor Dormitory (M2.16)
Percy Weasley - Hagrid's Hut (M3.24)
Percy (Sweater) - The Grand Staircase (M2.8)
Fred Weasley - Transfiguration Classroom (side room) (M4.45)
Fred (Quidditch) - Year 3: Mischief Managed
Fred (Sweater) - Year 1: A Jinxed Broom
Neville Longbottom - Hufflepuff Tower (M2.17)
Neville (Pyjamas) - Year 1: The Forbidden Forest
George Weasley - Year 2: Floo Powder!
George (Quidditch) - Quidditch Gate (M3.26)
George (Sweater) - Year 3: Mischief Managed
Oliver Wood - Courtyard (M4.47)
Ginny Weasley - Defense Against the Dark Arts Classroom (M4.49)
Ginny (Hooded Top) - Year 4: The Quidditch World Cup
Ginny (Cardigan) - Hagrid's Hut (M3.24)
Colin Creevey - Great Hall (M1.3)
Parvati Patil - Defense Against the Dark Arts Classroom (M4.49)
Parvati (Ballgown) - 2nd Defense Against the Dark Arts Classroom (M4.46)
Dean Thomas - Gryffindor Dormitory (M2.16)
Angelina Johnson - Grassy Courtyard (M3.34)
Lee Jordan - Charms Hallway (M4.36)
Alicia Spinnet - Library (side room) (M1.7)
Gryffindor Boy - Gryffindor Common Room (M2.15)
Gryffindor Girl - Charms Hallway (M4.36)
Draco Malfoy - Pendulum Basement (M4.51)
Draco (Quidditch) - Year 2: Dobby's Plan
Draco (Sweater) - Year 3: Hogsmeade
Draco (Hogwarts) - Year 1: The Forbidden Forest
Vincent Crabbe - Year 2: Crabbe and Goyle
Crabbe (Sweater) - Year 3: Hogsmeade
Gregory Goyle - Year 2: Crabbe and Goyle
Goyle (Sweater) - Year 3: Hogsmeade
Marcus Flint - Year 1: A Jinxed Broom
Milicent Bulstrode - Charms Hallway (M4.36)
Slytherin Prefect- Grassy Courtyard (M3.34)
Slytherin Boy- Slytherin Common Room (M2.13)
Slytherin Girl - Slytherin Common Room (M2.13)
Padma Patil - Quidditch Gate (M3.26)
Padma (Ballgown) - Ravenclaw Dormitory (M2.22)
Cho Chang - Owlery (M3.35)
Penelope Clearwater - Ravenclaw Tower (M2.20)
Ravenclaw Prefect - Fountain Courtyard (M3.28)
Ravenclaw Boy - Quidditch Gate (M3.26)
Ravenclaw Girl - Library (M1.6)
Justin Finch-Fletchley - Potions Classroom (M4.42)
Cedric Diggory - Year 4: Secret of the Egg
Cedric (Dragon Task) - Year 4: The First Task
Cedric (Lake Task) - Hagrid's Hut (M3.24)
Cedric (Maze Task) - Year 4: The Dark Lord Returns
Cedric (Sweater) - Year 4: Dragons
Susan Bones - Library (M1.6)
Ernie Macmillan - Charms Hallway (M4.36)
Hannah Abbott - Charms Hallway (M4.36)
Hufflepuff Prefect - Grassy Courtyard (M3.34)
Hufflepuff Boy - Fountain Courtyard (M3.28)
Hufflepuff Girl - Hufflepuff Dormitory (M2.19)
Arthur Weasley - Year 2: Floo Powder!
Molly Weasley - Great Hall (M1.3)
Witch (Grey) - Year 3: The Shrieking Shack
Sirius Black - Year 3: The Dark Tower
Lily Potter (Ghost) - Year 3: The Dark Tower
James Potter (Ghost) - Year 3: The Dark Tower
Lord Voldemort - Knockturn Alley
Professor Quirrell (Voldemort) - Year 1: Face of the Enemy
Lucius Malfoy - Year 2: Follow the Spiders
Tom Riddle - Year 2: The Basilisk
Peter Pettigrew - Year 3: The Shrieking Shack
Igor Karkaroff - Knockturn Alley
Barty Crouch Junior - Year 4: The Quidditch World Cup
Death Eater - Year 4: The Quidditch World Cup
The Bloody Baron - Knockturn Alley
The Fat Friar - Hufflepuff Common Room (M2.18)
The Grey Lady - Year 3: Mischief Managed
Nearly Headless Nick - Dumbledore's Office (M2.10)
Moaning Myrtle - Year 2: Tom Riddle's Diary
Moaning Myrtle (Swimsuit) - Year 4: Secret of the Egg
Fang - Year 1: The Forbidden Forest
Dobby - Year 2: Dobby's Plan
Griphook - Year 1: The Magic Begins
Amos Diggory - Hagrid's Garden (M3.25)
Barty Crouch Senior - Owlery (M3.35)
Doris Crockford - Main Hall (M1.1) / Corridor (M3.23)
Wizard (red) - Library (side room) (M1.7)
Witch (white) - Entrance Hall (M1.2)
Mr. Ollivander - Year 1: The Magic Begins
Tom the Innkeeper - Year 1: The Magic Begins
Filch - Year 1: The Restricted Section
Madam Malkin - Year 1: Out of the Dungeon
Madam Rosmerta - Clocktower (M3.33)
Stan Shunpike - Year 3: News from Azkaban
Rita Skeeter - Slytherin Dungeon (M2.12)
Cornelius Fudge - Year 3: Dementor's Kiss
Ernie Prang - Year 3: News from Azkaban
Macnair - Year 3: Dementor's Kiss
Boy - Charms Classroom (left) (M4.38)
Girl - Charms Classroom (right) (M4.39)
Vocalist - Year 2: Tom Riddle's Diary
Guitarist - Year 4: The Black Lake
Bassist - Lake (M3.27)
Drummer - Greenhouse (M3.32)
Wizard (green) - Year 2: The Basilisk
Dragon Handler - Year 4: Dragons
Shifty Wizard - Knockturn Alley
Trolley Witch - Year 3: News from Azkaban
Station Guard - Defense Against the Dark Arts Classroom (M4.49)
Fleur Delacour - Herbology Classroom (side room) (M3.31)
Fleur (Dragon Task) - Year 4: The First Task
Fleur (Lake Task) - Year 4: Secret of the Egg
Fleur (Maze Task) - Year 4: The Dark Lord Returns
Krum (Shark) - Year 4: The Black Lake
Victor Krum - Hagrid's Hut (M3.24)
Victor (Dragon Task) - Quidditch Grounds (M3.29)
Victor (Lake Task) - Year 4: The Dark Lord Returns
Victor (Tuxedo) - Gear Basement (M4.50)
Gabrielle Delacour - Ravenclaw Tower (M2.20)
Durmstrang Student - Year 4: Dragons
Vernon Dursley - Clocktower (M3.33)
Petunia Dursley - Hagrid's Garden (M3.25)
Dudley Dursley - Muggle Artifacts Room (M2.9)
Milkman - Clocktower (M3.33)
Mrs. Mason - Muggle Artifacts Room (M2.9)
Mr. Mason - Muggle Artifacts Room (M2.9)

Gryffindor (red): Use (WL) on the two candles #1 afterwards once again (WL) on the pile of bricks to create the paintings. Once the crest appears, create (WL) a small ramp from the tables #2.
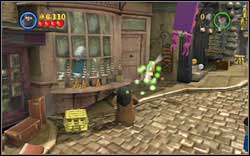
Slytherin (green): Right after getting onto the Diagon Alley, approach the first window on the left and wave to the woman behind the window.
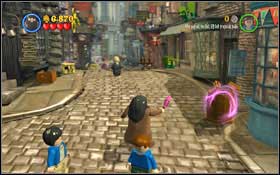
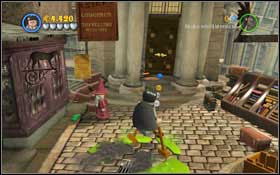
Hufflepuff (yellow): Use (WL) on the barrel on the right by the entrance to Diagon Alley #1 and afterwards create (WL) a small cleaning machine. After destroying the barricade (collecting all the ingredients), jump onto the cleaner and clean the dirt off of the street #2.

Ravenclaw (blue): In Gringott's Bank, you will find a silver padlock on the far right - destroy it with (RD) and pull the chain with a strong character.
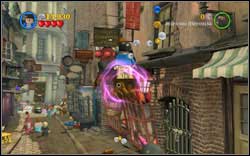
Around the middle of the Diagon Alley you will see a table - jump onto it and the second character will use (WL) to lift you. The student is upstairs.
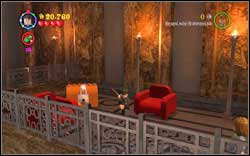
Mr. Ollivander: After opening the first passage with the goblin, head left - you will find a chest which can be opened with (RD).
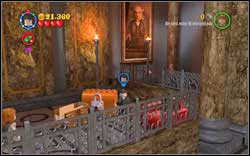
Tom the Innkeeper: After opening the first passage with the goblin, head right - you will find a chest which can be opened with (RD).
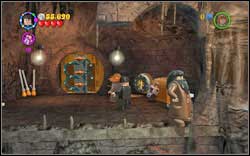
Griphook: After riding the cart, you will find a chest in the vault - open it (RD).
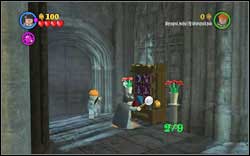
Gryffindor (red): In the corridor leading to the bathroom, you will find nine vases - use magic on them and flowers will appear.
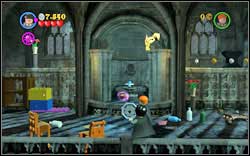
Slytherin (green): Around the middle of the road, once you reach the fountain, throw (WL) three chicken pieces into the fountain.
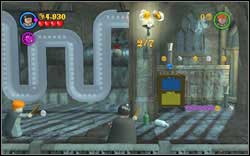
Ravenclaw (blue): You will find deactivated round lamps on the wall. Four in the corridor, three in the bathroom, all together seven lamps to turn on with (WL).
Hufflepuff (yellow): Use (RD) on the silver handle by the fountain and turn on the water (WL).
In the bathroom, in one of the toilets destroyed by the troll.
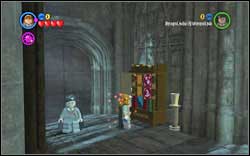
Ron (Girl Disguise): read the signs on the shelf at the beginning of the corridor. You can do it only with a character holding a book.
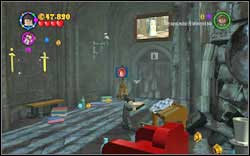
Harry (Hogwarts): Right before entering the ladies' bathroom, you will find a desk with a silver lock - use (RD).

Madam Malkin: In the bathroom on the shelf on the left you will find a blockade - remove it with (RD).
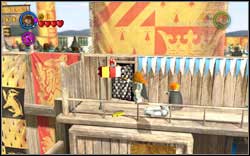
Gryffindor (red): You will find seven poles throughout the level. Use (WL) on each to raise the flag. They're really hard to miss.
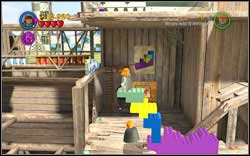
Ravenclaw (blue): Once you will have to set the bricks to move on, place them the other way round so that you can jump to the second part of the crest.
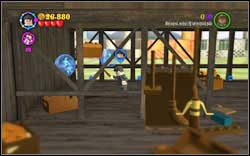
Hufflepuff (yellow): After going up the brick stairs you will find a blockade which you can destroy with (RD). On the left you will find pixies holding a chest - use (IM).
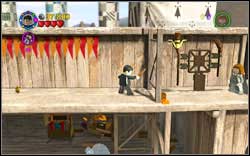
Slytherin (green): After opening the trapdoor, before you go up the ladder, jump over the gate on the left (sideways) and use (DM) on the barrel at the end.
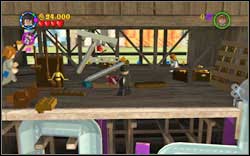
Right after the tunnel and getting up the brick stairs you will find a blockade which you can destroy with (RD).

Harry (Girl Disguise): after getting to the trapdoor, switch to Ron and use Scabbers. The token is below the stairs - it's covered.
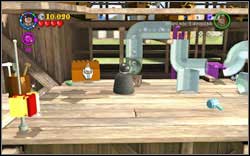
Fred (Quidditch): You will find a chest right next to the tunnel, use (RD).
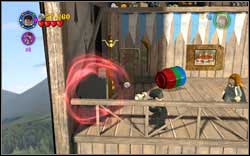
Marcus Flint: Right after creating the staircase from bricks, you will find a closet on the left - use (DM) on it.
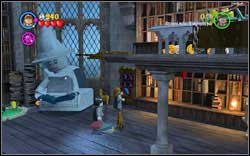
Gryffindor (red): Read the signs on the shelf in the corner of the first room (by the statue on the right side). You can do it only with a character holding a book.
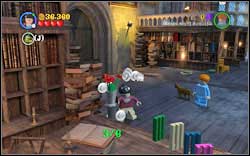
Hufflepuff (yellow): Use magic on six vases - lowers will pop out. Four can be found in the first room, two in the next.
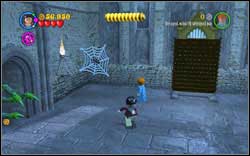
Slytherin (green): In the last room with the mirror you will find three spider-webs - knock down the spider with magic.
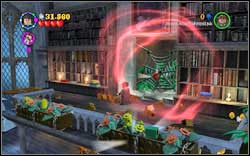
Ravenclaw (blue): After getting the spider-ingredient, use (DM) on the spider-web and destroy all the plants.
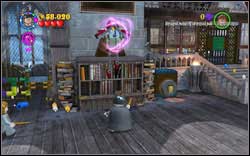
In the second room, use (RD) on the cage and then (WL) to get some bricks. Assemble (WL) a clock from them. Turn on the clock (WL) and the student will be saved.
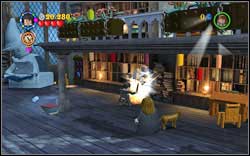
Harry (pyjamas): Use (RD) on the showcase under the right part of the terrace.
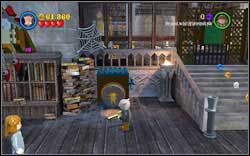
Filch: In the second room you will find a safe, use a character with a key.
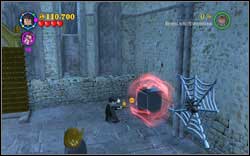
Neville (pyjamas): In the last room, use (DM) on the showcase on the right.
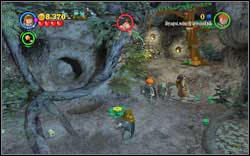
Hufflepuff (yellow): Use magic on three yellow flowers. The first one is right next to the student in peril, the second can be found after climbing up the second ladder and the third one is next to the second, below a hive.
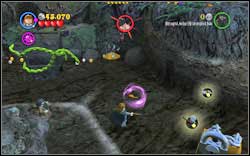
Gryffindor (red): After drilling a hole in the lake, throw all six fish into the water with (WL).
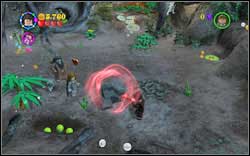
Slytherin (green): Destroy ten black rocks using (DM).
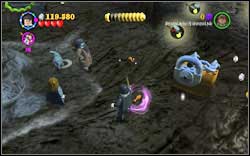
Ravenclaw (blue): After drilling the hole in the lake, use (RD) on the chest.
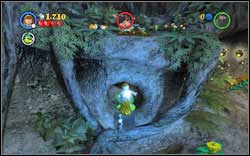
Right at the beginning, trapped inside the Devil's Snare, use (LS).
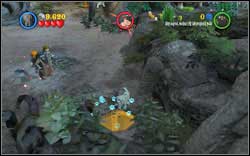
Fang: The digging spot is in the lower right corner of the location.
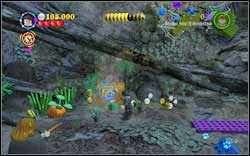
Hagrid: Right next to the pile of bricks you have to arrange there's a chest - open it with a spell (RD).
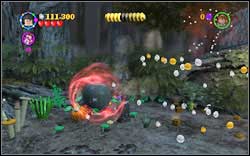
Draco (Hogwarts): After making the brick staircase you will find a black sphere - use (DM) on it.
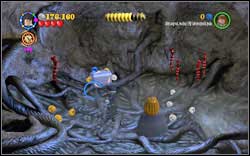
Gryffindor (red): After jumping into the underground, you will find a chest in the back. Firstly get rid of the Devil's Snare (LS) and then open the chest (RD).
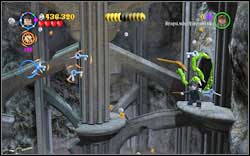
Slytherin (green): In the room with the flying keys, destroy all the small, silver keys. There are ten of them in total - use (RD).
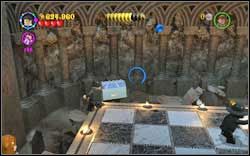
Ravenclaw (blue): At the back of the chessboard you will find a chest - open it with (RD). Get onto the horse once it jumps out.
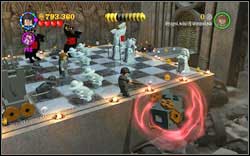
Hufflepuff (yellow): On the chessboard, on the part closer to the screen, you will see a destroyed tower - use (DM) on it.
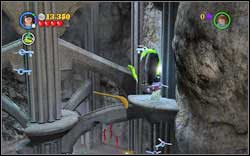
In the room with the flying keys, fly up using a broom and on the right you will find a stone ledge. Right behind it there's a hole covered with Devil's Snare - use (LS) to free the student.
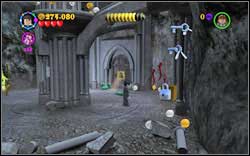
Harry (Slytherin Disguise): In the room with the flying keys you will find a blocked closet on the right - use (RD).
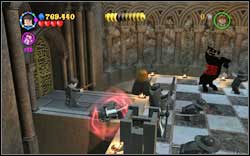
Professor Quirrell (Voldemort): On the chessboard, right by the entrance, you will find a destroyed Queen - use (DM) on it.
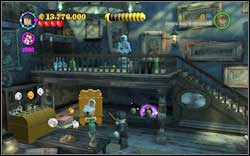
Ron (cardigan): On the chessboard, by the exit, you will find a piece on which you can use (DM).
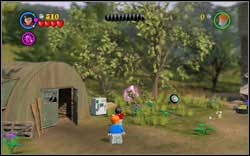
Gryffindor (red): In the yard you can find six gnomes. Lift it with (WL), keep holding them in the air, let go and once more press and hold (WL). Once the gnomes spin, let go of the button. Repeat this with all the gnomes.
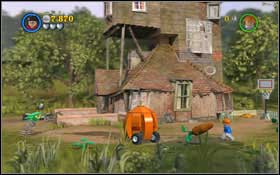
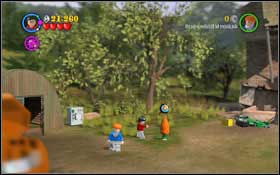
Hufflepuff (yellow): On the right side, right under the bin, you will find some bricks - assemble them (WL) into a pumpkin vehicle and use it to ride over the planted carrots #1 (seven in total). Afterwards use (WL) on each carrot #2.
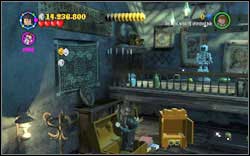
Slytherin (green): In the shop, on the left, you will find a hungry chest. Use magic on it and jump inside - you will find a black sphere, use (DM) on it.
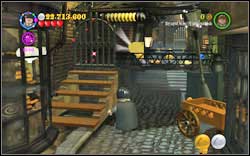
Ravenclaw (blue): Once you're on the alley, the part of the crest will be clearly visible. Use (WL) on the planks to create a staircase and then use (DM) on the gate.
Once you're inside the shop, you will find a closed locker on the left - open it with (RD).
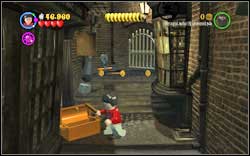
Harry (Sweater): Right before the end of the alley, right next the chain in the chest.
George Weasley: Right next to the basketball basket you will find a digging spot - use an animal which can dig.
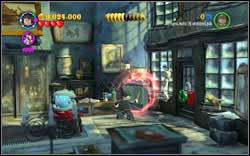
Arthur Weasley: Once you're in the shop, you will find a black showcase on the right - use (DM) on it.
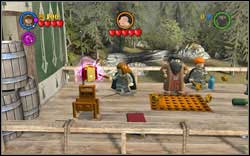
Hufflepuff (yellow): Use (WL) on the four poles - two can be found at the beginning ant the two others a bit further, during the next meeting with Dobby on the second platform.
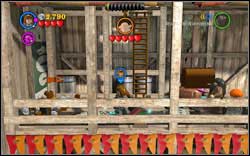
Ravenclaw (blue): Use magic on the four barrels with flags. The first can be found right after jumping down (in the chest you can find a bat, which will hit the ball and unlock the passage); the second next to the first Dobby meeting point; the third next to the pixies; the fourth next to the ladder leading to the second platform.
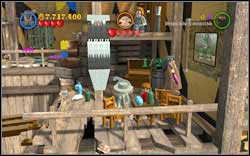
Slytherin (green): Next to the bridge you will find two scrolls, which unrolled (WL) will show the Slytherin team. Wave to them with a Slytherin house character.
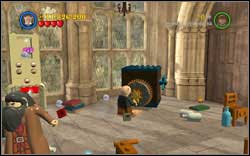
Gryffindor (red): At the back of the second room there's a safe - use a character with a key.
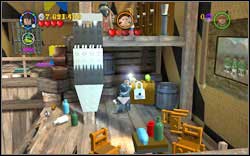
Next to the bridge held by pixies you will find a chest. Chase away the Devil's Snare (LS) and then destroy the lock (RD).
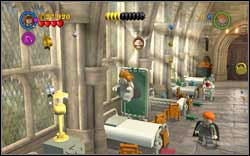
Dobby: The token is above one of the beds in the Hospital wing, jump off one of the beds to reach it.
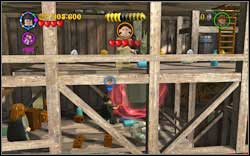
Draco (Quidditch): As you free the snitch, you will create a staircase - go under it to the right and you will find a black showcase - use (DM) on it.
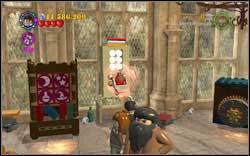
Madam Pomfrey: In the second room of the Hospital Wing you will find a machine. Firstly destroy the padlock (DM) and then cast a spell.

Hufflepuff (yellow): In the Slytherin Dungeon, throw three fish into the water using (WL).
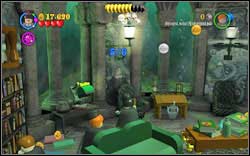
Ravenclaw (blue): Inside the Slytherin common room, use (WL) on the six lamps.
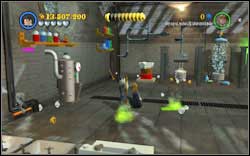
Gryffindor (red): Pull the chain on the left, assemble the plunger (WL), jump onto it and clean six stains on the floor.
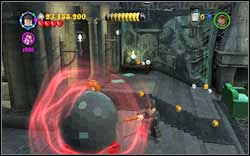
Slytherin (green): Right after entering the Slytherin common room, right next to the entrance you will find a black sphere - use (DM) on it.
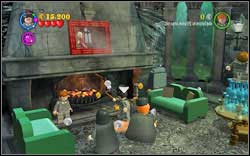
Use (WL) on the broom by the chimney to clean it - assemble the painting (WL) and clean it.
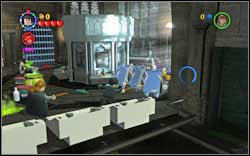
Vincent Crabbe: In the right part of the bathroom, first destroy the blockade with (RD).
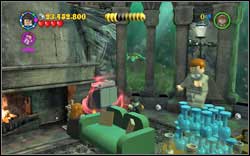
Gregory Goyle: On the right side of the chimney you will find a black showcase, destroy it with (DM).
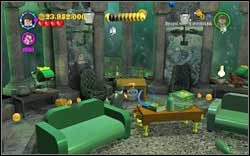
Ron (Slytherin Disguise): in the second part of the common room you will find a locked desk - open it with (RD).
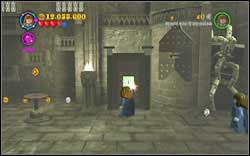
Gryffindor (red): During the flashback, you will find six armours in the first room - use on it (WL).
Ravenclaw (blue): During the retrospection, in the second room you will find a chest with w padlock. Use (RD) and then normal magic to open it.
Slytherin (green): During the flashback, in the second room you can find three radios - use magic on each of them. The first is by the first staircase; the second next to the rotating shelf; the third at end of the location.
Hufflepuff (yellow): On the left side of the cabins in the bathroom, you will find a chest- open it with (RD). Inside you will find a plunger - jump onto it and clean five wet stains on the floor.
During the flashback, head to the very end of the first room. Use a character with a book on the shelf and use the gained key on the shelf in the middle on the corridor.
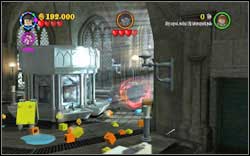
Moaning Myrtle: On the right side of the bathroom you will find a showcase - destroy it (DM).

Vocalist: During the retrospection, in the second room you will find a safe - use a character with a key.
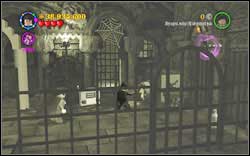
Professor Vector: Right at the end of the second level of the flashback you will find a safe - use a character with a key.
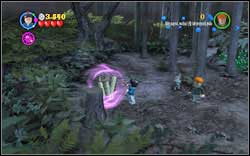
Slytherin (green): There are ten brown mushrooms in this level, you can't probably miss them. Use (WL) on them.

Gryffindor (red): During the car drive you will come across five chests - just drive into them. Two can be found in the first part of the location; two more after the cutscene and the last one after jumping off the cliff, right on the left side.
![Ravenclaw (blue): After crossing the river and creating a ramp from the planks (WL), stand on the edge and manually (by holding down [H]) aim the (RD) spell onto the silver gate #1 - Bonuses - Year 2 - Walkthrough - LEGO Harry Potter: Years 1-4 - Game Guide and Walkthrough](https://game.lhg100.com/Article/UploadFiles/201512/2015121617041681.jpg)
Ravenclaw (blue): After crossing the river and creating a ramp from the planks (WL), stand on the edge and manually (by holding down [H]) aim the (RD) spell onto the silver gate #1. Two frogs will appear - jump onto one and swim through the control gates #2.
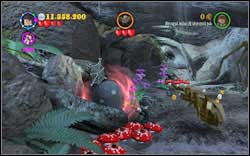
Hufflepuff (yellow): During the fight with the large spider, you will find a black sphere on the left - destroy it with (DM).

During the fight with the large spider, the student is trapped in a spider-web on the right. Use magic to free him.
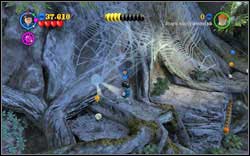
Ron (Sweater): Once the pixies destroy the bridge and the ladder is created, climb it and turn left.
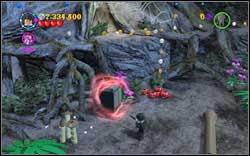
Professor Sinistra: After crossing the pond you will find a black showcase - destroy it with (DM).
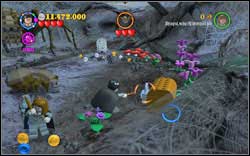
Lucius Malfoy: During the fight with the giant spider, you will find a chest on the right - open it with (RD).
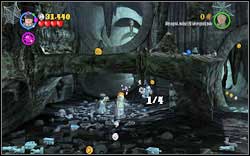
Gryffindor (red): After jumping down from the bathroom, you will find four skeletons scattered throughout the room - assemble them with (WL). The first one is right behind you after you fall down; the second on the left next to the digging spot; the third one is on the right next to the broken bridge; the last one can be found on the upper ledge, at the very end.
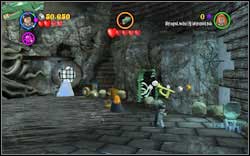
Slytherin (green): After freeing the Phoenix and hitting the Basilisk, two instruments will appear - on the right a trumpet and violin and on the left an accordion. Use (WL) on them to assemble them and once more for them to play.
Hufflepuff (yellow): You will find four digging spots in the underground. Use a character with an animal.
Ravenclaw (blue): during the fight with the Basilisk, you will find a closed sewer on the left. Destroy the padlock with (RD) and assemble the feeding tray (WL).
In the bathroom, as you cross the tunnel with the rat, get rid of the Devil's Snare as they appear on the cabin beside with (LS).
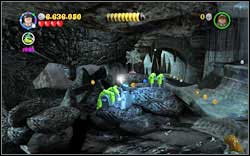
Gilderoy Lockhart: In the underground on the left you will find a chest - get rid of the Devil's Snare and then use (DM).
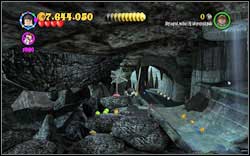
Wizard (green): In the underground on the left you will find a chest - get rid of the Devil's Snare and then use (DM).
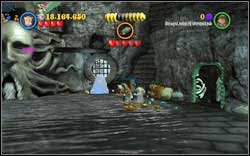
Tom Riddle: Once you free the Phoenix and attack the Basilisk head to the right where you will find a safe - use a character with a key to open it.
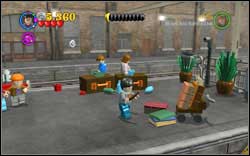
Hufflepuff (yellow): Once you're at the station, destroy five red boxes. Four of them are on the right side and the last one to the left of the turnstile.
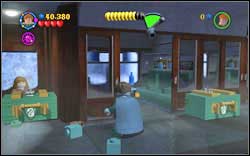
Ravenclaw (blue): In the second car you will find three of five green Slytherin suitcases. Use magic on them, you can't miss them. Two more can be found in the next car.
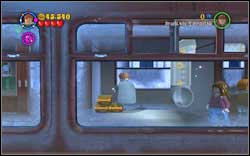
Slytherin (green): After pushing the suitcases away from the tunnel, jump onto them and then jump again - you will reach the next part of the crest.
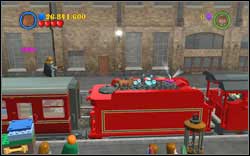
Gryffindor (red): Dig up the box on the top of the train and then use magic on it. Use a character with an animal.
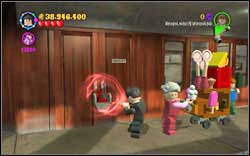
Destroy the padlock (DM) on the toilet at the beginning of the car.
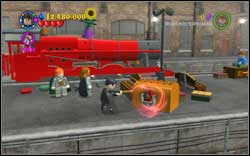
Stan Shunpike: At the station you will find a big chest with a padlock - use (DM) on it.
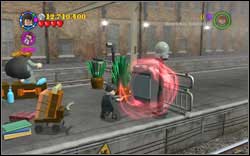
Ernie Prang: At the station, at the very end of the platform on the right you will find a black showcase - destroy it with (DM).
Trolley Witch: Destroy the padlock (DM) on the toilet at the beginning of the car.
Hufflepuff (yellow): There are ten spider-webs in the tunnel on which you can use magic. The first two are by the entrance, the third one can after getting rid of the Devil's Snare, the fourth one on the snowy passage during assembling the platforms, the fifth one by the bridge on the right wall, two more after crossing the bridge, the next one by the wooden platform on the wall and the two last ones next to the ladder by the end of the tunnel.
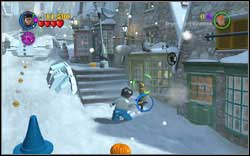
Ravenclaw (blue): After getting out of the tunnel, you can find three owls - treat them with magic, assemble a snowman (WL) and attack him with magic as well.
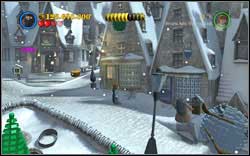
Gryffindor (red): After melting the big snowman, you will find a digging spot on the left. Dig out a giant snowball and get onto it. Roll down the alley and hit the three bowling pins.
Slytherin (green): After getting rid of the snowball, move right and pull the chain.
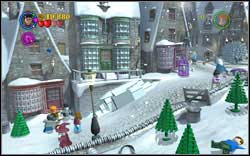
After the snowball fight, head left and use magic on the snowman.
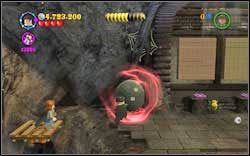
Crabbe (Sweater): Right after getting through the wooden platforms, destroy the black sphere with (DM).
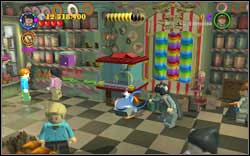
Goyle (Sweater): While you're in the shop, destroy the padlock with (RD) and then shake the booth (WL).
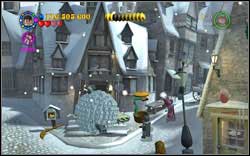
Draco (Sweater): Shoot the wizard twice. Once you're on the bin, destroy he padlock (RD) and lift the lid (WL).
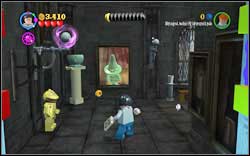
Ravenclaw (blue): Use magic on all five gold armours.
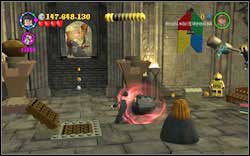
Hufflepuff (yellow): After opening the second big door, a black rock will fall down - use (DM) on it.
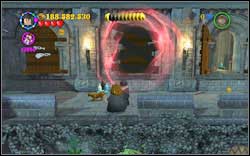
Gryffindor (red): In the corridor, you will find a window covered with planks, destroy them with (DM).
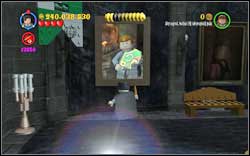
Slytherin (green): In one of the corridors you will see a painting with a student holding the piece - wave to the painting with one of the Slytherin students.

In the corridor with Flintch, on the left you will find a window padlocked - destroy it with (RD).
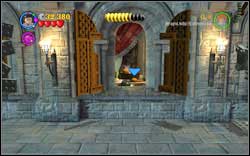
Fred (Sweater): In the room, enter through the window, behind the table.
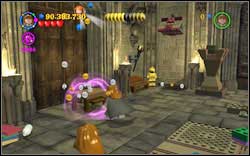
George (Sweater): In the second big room on the left you will find a cabinet, use a character with a book on it. Assemble (WL) a bench and jump onto it - the second character will use (WL) to raise you.
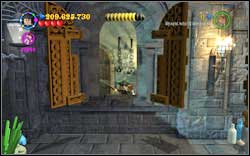
The Grey Lady: In the corridor with Flintch, on the left side, you will find a window padlocked - destroy it with (RD).
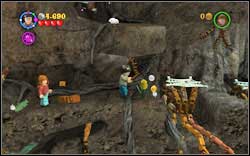
Hufflepuff (yellow): After defeating the tree, you must find five corn cobs. The first one is right at the beginning, the second one on the right after you jump down, the third right before the platforms, the fourth one behind the platform - jump down. The last one is right behind the next wooden platform.

Gryffindor (red): During the fight with the tree, you will find a digging spot on the left - dig up a black box and use (DM) on it.
Slytherin (green): There are five black rocks on the glade - destroy them with (DM). They're impossible to miss.
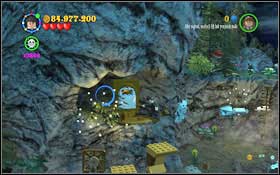
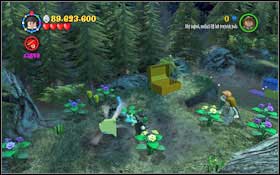
Ravenclaw (blue): After leaving the Shrieking Shack, you will find a digging spot behind - dig up the glass showcase. After getting to the potion and pulling the chain, you will find a cabinet with a padlock - unlock it with (RD) #1. Put on the earmuffs and back up a little - you will find a Mandrake. Pick it up and return to the glass showcase #2.

In the spot where you fight the spiders, there's a student caught into a spider-web. Use magic on it.
Witch (Grey): During the fight with the tree on the right you will find a digging spot - dig up a black chest and use (DM) on it.
Peter Pettigrew: Inside the Shack, you will find a black showcase on the left - destroy it with (DM).
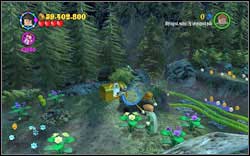
Hermione (Red Hooded Top): After finishing the Shrieking Shack, you will find a locked chest right next to you - use (RD) on it.
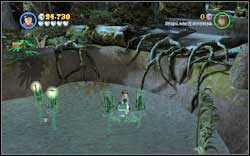
Slytherin (green): After filling the pond with water, jump onto the frog and swim through all the control gates.
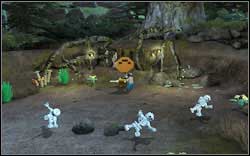
Gryffindor (red): After assembling the gramophone, pick up the two vinyl records - one of them is right next to you on the left and the second is inside a hole which you have to dig - in the spot where the frog were.
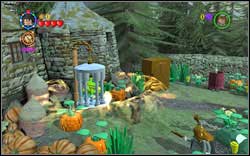
Ravenclaw (blue): In the garden on the left you will find a bird cage - destroy it with (RD).
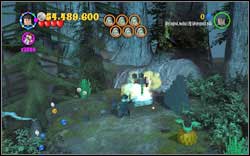
Hufflepuff (yellow): After destroying the iceberg, head right. Create a staircase (WL) from the bricks, destroy the colourful leafs and the second character will lift you with (WL). Destroy the black rock in the centre with (DM).
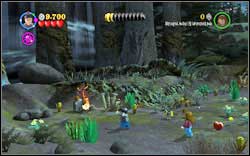
After a short cutscene, head left and defend the student from the hornets.
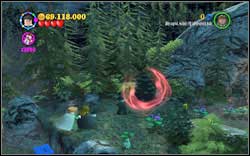
Professor Lupin: In the upper part of the garden, on the right side behind the bushes you will find a chest with a padlock - open it with (RD).
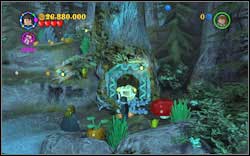
Cornelius Fudge: In the location with the frozen pond head right - destroy the silver leafs with (RD) and then speak with the snake with Harry.
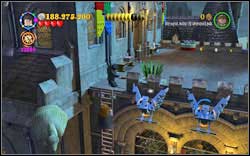
Macnair: After destroying the iceberg, head right and assemble a staircase (WL) using the bricks. Afterwards destroy the colourful leafs - the second character will lift you with (WL). Destroy the black rock with (DM).
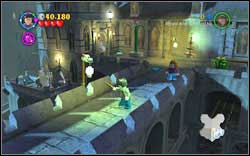
Ravenclaw (blue): Use magic on the five lamps. You will find the first at the start, the second by the gold chest (get rid of the ice with (WL)), the third on the bridge, the fourth one by the fountain and the fifth one after climbing up the flowers.
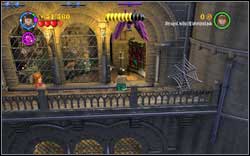
Gryffindor (red): Once the purple spout break the window, a part of the crest can be found on the right, next to the wardrobe.
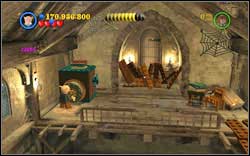
Slytherin (green): After getting through the leaky floor, you will find a safe on the other side - use a character with a key.
Hufflepuff (yellow): You can find six silver chimeras on the terrace - they can be destroyed with (RD). Two are next to the ladder; the third is above the entrance, the fourth one by the bridge, the fifth on the opposite side and the last one before the spiral staircase.
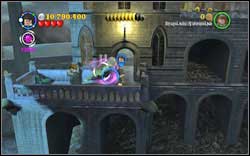
On the left side of the fountain you will find a padlocked door - destroy it with (RD). Go inside and eliminate the Dementor with (EP).
James Potter (Ghost): On the left side of the fountain you will find a padlocked door - destroy it with (RD). Inside you will find a token.
Lily Potter (Ghost): Right after entering the cellar, you will find a padlocked chest - destroy it (RD).
Sirius Black: Break the window and jump into the room. On the left you will find a black showcase which can be destroyed with (DM).
Gryffindor (red): Find eight flames which you can extinguish with the water from the barrel (WL).
Hufflepuff (yellow): Once everything is burned down, you have to find five wizards and save them.
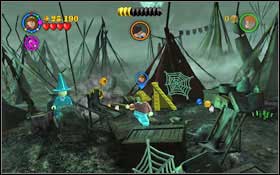 Right after jumping over the fire, head up and extinguish the flames.
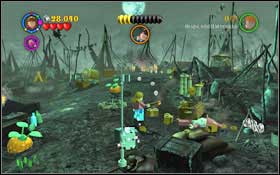 On the right, covered with some planks and a chest.
 After getting rid of the car, head down - the next one is buried under some planks.
 After getting rid of the car head up - get the axe out of the chest and extinguish the fire.
 Beside the cauldron - head down and extinguish the fire.
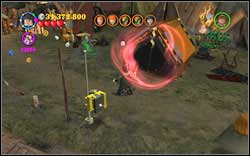
Slytherin (green): To the north of the hungry book you will find a locked tent which you can open with (DM).
Ravenclaw (blue): After fixing the car, head down - you will find a pile of silver chests. Destroy them with (RD) and dig up the painting. Wave to it with a Ravenclaw student.
Right next to the location where you begin, on the right, you will find a locked booth. Remove the padlock with (RD).
Ginny (Hooded Top): After jumping over the flames, head down and use magic on some planks and chests.
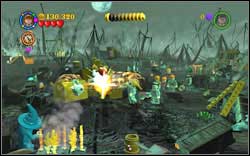
Barty Crouch Junior: By one of the ingredients there's a chest - get rid of the padlock with (RD).
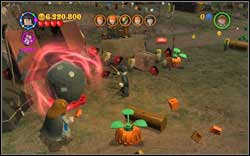
Death Eater: Right beside and below the hungry book you will find a black sphere - destroy it with (DM).
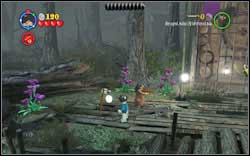
Gryffindor (red): You have to use magic on nine lamps. They're very hard to miss. The first one can be found at the very beginning; the second after passing next to the red dragon; the third one behind the blue flames; the fourth one by the green dragon; two more by the second blue flames; the seventh by the blue dragon; the eight before the brick bridge and the last one after getting off the bridge
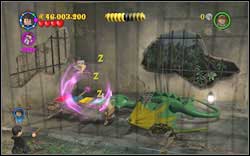
Hufflepuff (yellow): Once you put the green dragon to sleep, hit the yellow key a couple times.
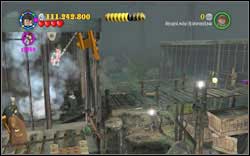
Ravenclaw (blue): Right next to the blue dragon cage you will find a skeleton - use (DM) on it.
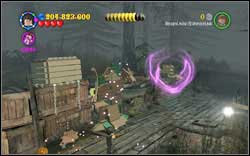
Slytherin (green): A bit further after getting across the bridge you will find a chest with two locks - destroy them with (RD), use (WL) on the chest and then (WL) once more to assemble a dragon which will melt the wall with the crest behind it.
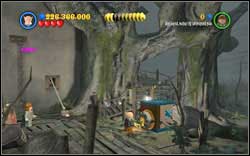
In the second location, after unlocking the chains, you will find a safe on the right. Use a character with a key to free the student.
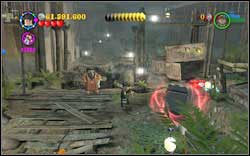
Durmstrang Student: After crossing the second blue flames you will find a black showcase - use (DM) o it.
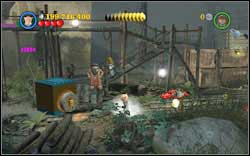
Cedric (Sweater): Right after crossing the brick bridge, you will find a safe - use a character with a key.
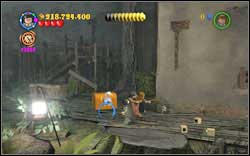
Dragon Handler: In the second location, right at the beginning, you will find a padlocked chest - destroy it with (RD).
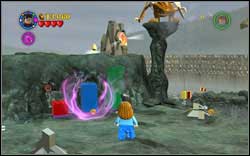
Gryffindor (red): After assembling a staircase from the three colourful bricks, a part of the crest will appear at the upper part.
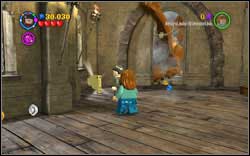
Ravenclaw (blue): During the dragon escape scene, in the third room on the left side.
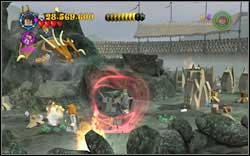
Hufflepuff (yellow): At the very start you will find three large rocks - stand behind them and wait for the dragon to destroy them with his tail. Afterwards use (DM) on the leftovers.
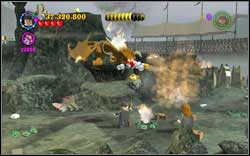
Slytherin (green): At the beginning, as you're going to the right, three rocks will be thrown onto the path - they're easy to notice - use (DM) to destroy it with the dragon.
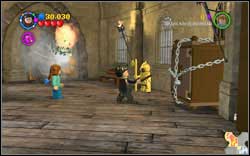
During the dragon escape scene, inside the locked wardrobe on the right in the third room. Use (RD) on the padlock.
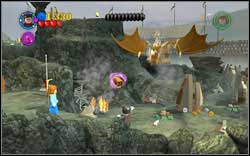
Cedric (Dragon Task): Right at the beginning, extinguish the flame using the water barrel (WL).
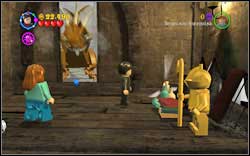
Fleur (Dragon Task): During the dragon escape scene, in the first room on the right side of the door.
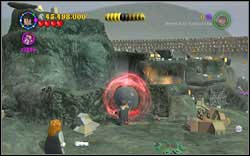
Harry (Dragon Task): Right after using the dog and unlocking the door, you will find a black sphere which you can destroy with (DM).

Hufflepuff (yellow): Use (WL) on the three torches in the bathroom.
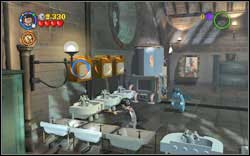
Slytherin (green): You can find four shelves in the bathroom - use normal magic on them. Three on the left above the sink, one on the right.
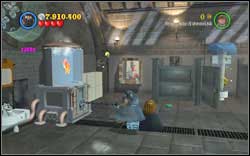
Gryffindor (red): After getting the shellfish from the tank, pull the chain to get the crest.
Ravenclaw (blue): After getting down, you will find a cabinet on the right side - use a character with a book.
On the opposite side of the entrance you will find a black cabinet - destroy it with (DM) and you will find the student inside.
Cedric Diggory: Eliminate the Dementor lurking in the chest using (EP).
Fleur (Lake Task): In the second location, right on the left you will find a padlocked cabinet - get rid of it with (RD).
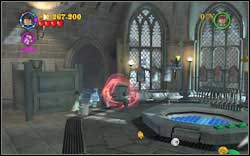
Moaning Myrtle (Swimsuit): Right beside after beginning the mission you will find a black showcase - destroy it with (DM).
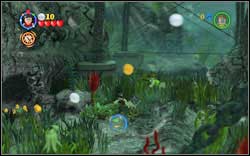
Ravenclaw (blue): Use normal magic on the nine shellfish. The crest detector is very useful here.
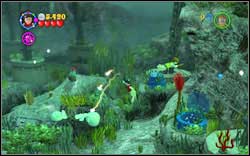
Gryffindor (red): There are three big rocks on which you can use (WL) to pull out two worms. Sea creatures will then arrive - use normal magic on them. The first one is at the beginning, by the first pipe; the second a bit further after defeating the octopus; once you're in the third part, after unlocking the anchors on both sides, put the (WL) into the rock.
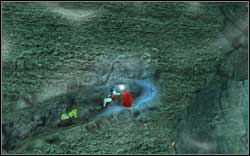
Hufflepuff (yellow): Get rid of the ink released by the octopus using (LS).
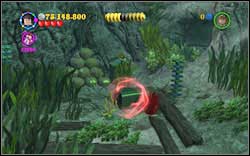
Slytherin (green): In the second location, dive to the bottom - you will find a black chest there - open it with (DM) and assemble the skeleton (WL).
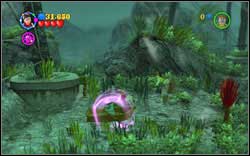
After swimming through the second pipe, head left. You will find a boat with a skeleton there. Put in both paddles (WL) and swim away with the boat (WL).
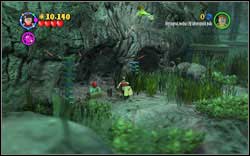
Harry (Lake Task): After swimming through the first pipe, head left. At the end you will find a skeleton with a chest - eliminate him.
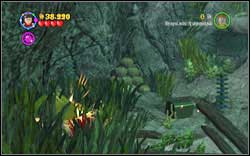
Guitarist: In the second part of the level, swim down and in the bushes on the left you will find a chest - use magic on it.
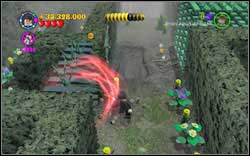
Krum (Shark): After beginning the third part of the level, open the chest in the distance.
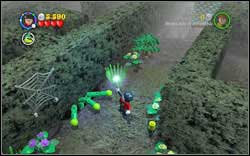
Hufflepuff (yellow): As you cross the labyrinth, Devil's Snare will appear five times - eliminate them with (LS).
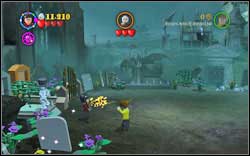
Slytherin (green): During the fight with the last boss, use (WL) on three skeletons lying on the graves. The first one is in the lower left corner, the second in the lower right and the third one in the upper right.
Ravenclaw (blue): Right after you begin the labyrinth, on the left you will find a wall which can be destroyed with (DM). Go inside and you will find a digging spot.
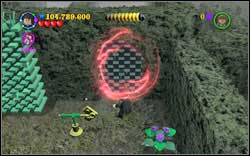
Gryffindor (red): Right next to the spot where you place the arrow, you will find a wall - destroy it with (DM). You will go into another part of the labyrinth.
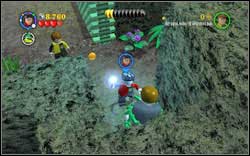
Once you enter the third part of the labyrinth, go in between the two green walls - a distinctive colour. Free him from the Devil's Snare (LS).
Cedric (Maze Task): Use magic on eight plants which are very easy to find. They let out yellow flowers. Nearly impossible to miss.
Fleur (Maze Task): After going through the first wall, turn into the alley on the left - at its end you will find a chest (which isn't visible) from which a Dementor will jump out. Treat him with (EP).
Victor (Lake Task): Right next to the spot where you place the arrow, you will find a wall - destroy it with (DM). You will pass to the other part of the labyrinth. You will find a digging spot there.
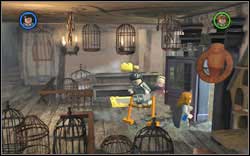
Four Gold Bricks can be found in the Leaky Cauldron basement. To get there, destroy the padlock with (RD).
NOTICE: You have to complete all 24 Hogwarts Crests before being able to begin this task.
Once you're inside, just build four statues (WL) for each completed game year.
Destroy the cage with magic and then use (WL) to create a small cleaning machine. Mount it and clean the whole store out of dust. The brick will appear by the seller.
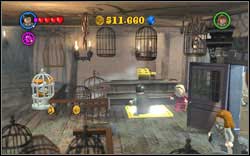
12 Gold Bricks can be bought at Eeylops Owl Emporium. The total amount of studs required is 6600000.
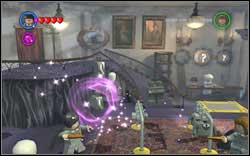
Hermione (Ballgown): Madam Malkin's - use (WL) on the clothes scattered throughout the floor.
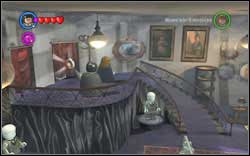
Harry (Tuxedo): Madam Malkin's - go up the stairs to the changing room and choose the one on the right (the occupied one).
In order to get to Knockturn Alley, you will have to use (RD) on the gate opposite to the Eeylops Owl Emporium.
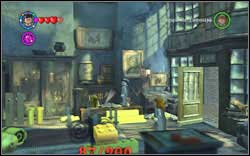
Right behind the corner at Borgin and Burkes.
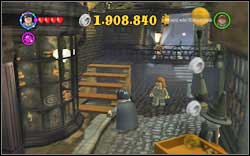
Igor Karkaroff: The token is very visible, build a staircase using the planks (WL),
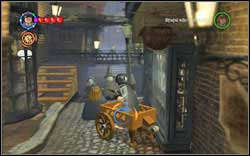
The Bloody Baron: Jump onto the cart, aim at it and shoot yourself into the air.
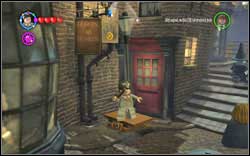
Shifty Wizard: Destroy the chest on the table and then stand on it. You will be thrown into the air eventually.
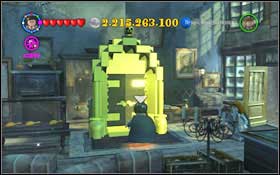
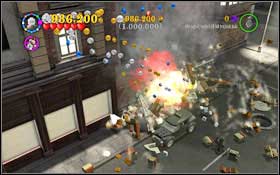
Lord Voldemort: After collecting all 200 Gold Bricks, create (WL) golden door #1 and play the bonus level - Harry's Destiny. Your task is to collect one million (1,000,000) studs #2. You can't use multipliers. Smash everything you come across - get into the vehicle to speed things up.
You will find purple studs in the sewages - you will also get one for destroying a hydrant.
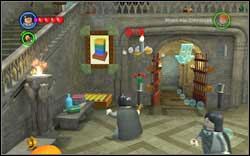
There are six candlesticks in the room. Use magic to light them up and the brick will appear in the middle.
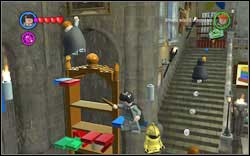
Use (WL) on the bookshelf and jump to the very top, where you will help a student.
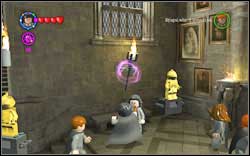
Doris Crockford: There are six torches in the room - use (WL) on them. The other three can be found in the Corridor (M3.23) - there's a padlock on one of them, so use (RD).
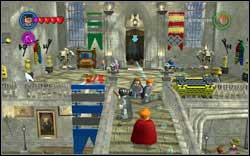
You will find four folded home banners in the room. Two by the stairs and two on the wall high above the Great Hall entrance. Use magic to unfold them.
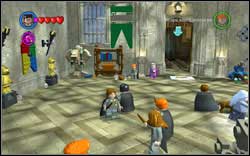
Use magic on the green banner above the door to the Great Hall, the student is inside.
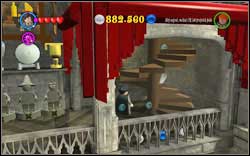
Harry (blue shirt): Right under the staircase leading to the Bathroom Corridor.
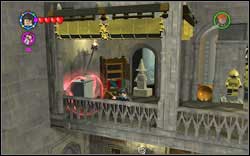
Witch (white): On the left you will find a showcase, use (DM) on it.
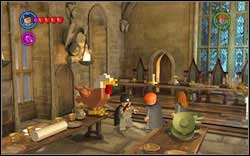
Character Studs: at the end of the left table there's a big brick - once you use magic on it, it will turn into a chicken. After a bit of running it will eventually explode and a red brick will appear. The owl can be found on the right, next to the prefects' table.
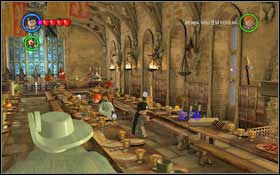
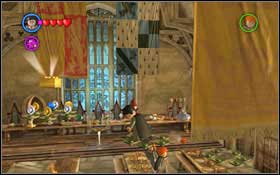
You can find green jugs #1 (together with two green glasses) on the table. Use magic on them so that the glasses get filled. One set is at the prefects' table, six jugs in total. Once the gold brick shows up, shoot the plates on the tables to create platforms, using which you can get to the brick #2.
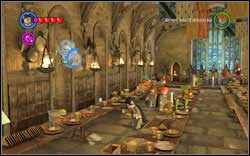
On the left side of the room, there's a student in a spider-web. Use magic to free him.
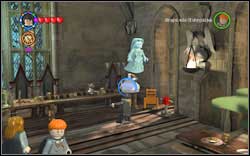
Colin Creevey: On the prefects' table, on the right side, you will find a food tray - use (RD) on it.
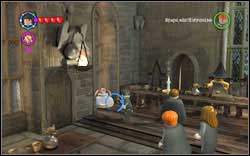
Molly Weasley: Next to the prefects' table, on the left, you will find a food tray - use (RD) on it.
Head upstairs - unblock the passage with (RD). Behind the window you will find an item which you have to guide (WL) through the labyrinth - the second character will move away the bricks blocking the way with (WL). Once the item fall out, use magic on it - a slime will appear. Follow it until he leaves behind a brick.
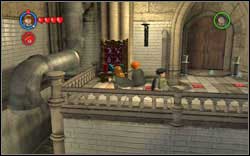
Hermione (Cat): Use a character with a book on the shelf next to the entrance, then (WL) to assemble a small closet - use magic on it.
In order to get into the bathroom, use (RD) on the padlock.
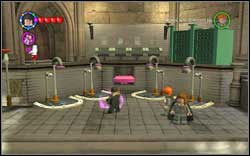
Score x8: Using (WL), place the two missing showers and then turn on the water in all four showers using normal magic.
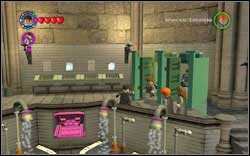
Open the left toilet cabin.
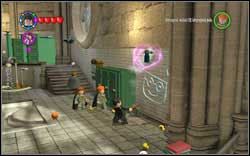
Madam Hooch: Next to the green cabinets you will find a trash bin - take out a spray and paint a graffiti on the wall using it (WL).
You will find the key at the bottom of the Main Hallway (M1.1), after getting rid of the Boggart (RK).
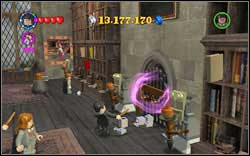
Ravenclaw Girl: Get rid of the padlock on the gate on the right (RD) and push away the plank (WL). Assemble a radio (WL) and use magic on it.
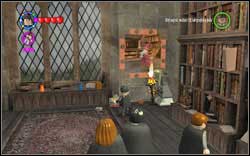
Susan Bones: Use magic on the third roller blind and then (WL) on the window - a book will fly out and a torch from it. Use it (WL) to light the flames on the statues and then attack the statue by the painting. The wizard will run towards the second painting, go there and jump onto the yellow flower - the second character will use (WL) on it.
To get to the back room, you have to create an Aging Potion in the library.
Unroll the middle roller blind and open the window (WL) - you will receive the first ingredient.
Use magic on the third roller blind and then (WL) on the window - a book will fly out and a torch from it. Use it (WL) to light the flames on the statues and then attack the statue by the painting. The wizard will run towards the second painting, where you will also find the next ingredient.
On the right, by the barrier you will find a chest - chase away the Devil's Snare. Inside you will find a potion ingredient.
Chase away the Devil's Snare (LS) from the chest and glasses will fall out of it - give it to the character on the painting (WL). Put the crest into the door.
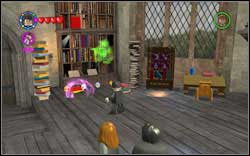
Red Brick Detector: Head to the back of the room, place three colourful books (WL) into the right spots. The owl is at the bottom of the room on the right.
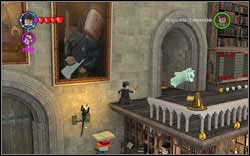
Use magic on the three Sorting Hats - the first one can be found on the terrace on the left, on the balustrade; the second one is being held by pixies (IM) at the back of the room; the third one is on the terrace on the right.
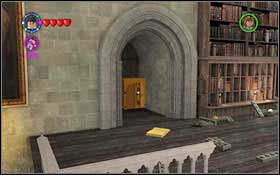
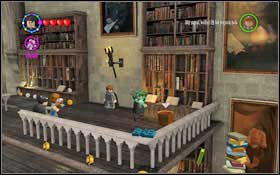
Use magic on the red book under the right terrace and then (WL). Use Crookshanks to dig up the ladder. Head onto the left terrace, get rid of the ghost and use the wardrobe to put earmuffs on #1. Return to the right terrace, pick up the Mandrake and put it into the pot #2.
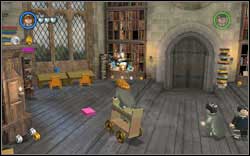
Alicia Spinnet: Use a character with a book on the cabinet at the back of the room and then assemble a cart (WL). Jump onto it and collect five pink books scattered throughout the room.
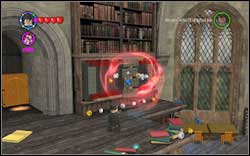
Wizard (red): Jump onto the left terrace (firstly on the yellow book, then on the next ones) and use (DM) on the locked shelf. Eliminate, in succession: a spider, Dementor - (EP) and a hornet.
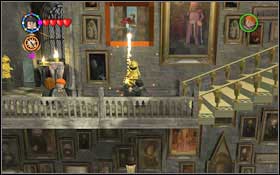
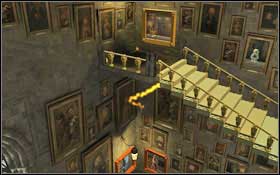
Use magic on the painting with a player holding a ball #1. He will throw it to the next person - head upstairs, pass by another painting and keep heading up. The next player will send the ball back o the lower one - turn around. Once more hit the painting with a spell and the ball will head to the very top, to a dog which will throw out a bone #2. A brick will appear once you approach.
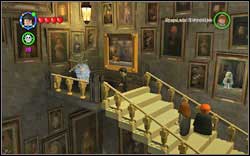
At the very top of the staircase, tangled in the spider-web - use normal magic on her.
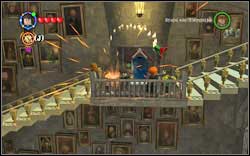
Percy (Sweater): Before the entrance to the Muggle Artifacts Room (M2.9) you will find two pots - use magic twice on each. Firstly flowers will grow out and then they will be thrown into the air.
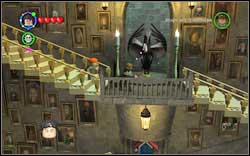
Professor Binns: In front of the Dumbledore's Office (M2.10) entrance you can find candlesticks - light them up with (WL).
In order to get to the room, press the button by the blue door.

Score x6: Use magic on the printer - it should print a card with a Red Brick, which will then appear. Bring it to the owl on the left b the door.
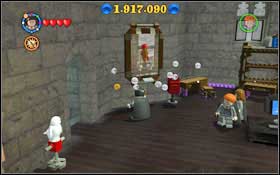

Use magic on the painting by the door and put the letter (WL) into the box #1 - a rabbit will jump out. Arrange the desks so that you can get onto the shelf - get the second rabbit out #2.
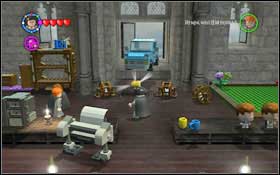
Press the buttons on the TV on the right and use magic on the screen itself #1. Once the car starts up, the Golden Brick will appear #2.
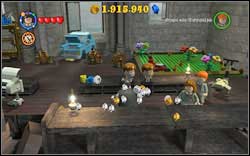
Mr. Mason: Use magic on the statuette with a waving head and another one will appear - repeat the operation once again.
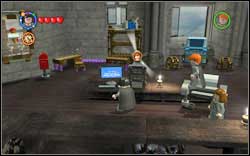
Dudley Dursley: Use magic on the screen twice.
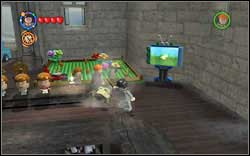
Mrs. Mason: Use magic on the vacuum cleaner.
You can enter the office only after finishing the main story mode!
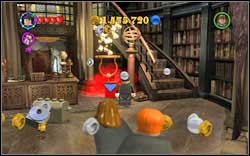
Invincibility: Just approach the Phoenix. The owl is by the door on the left.
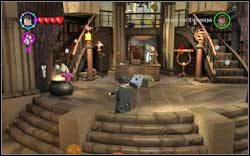
There's a padlocked chest by the table, use (RD).
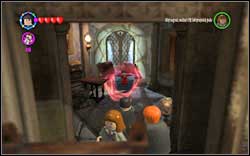
Professor Dumbledore: Go behind the desk and into the room and use (DM) on the chest.
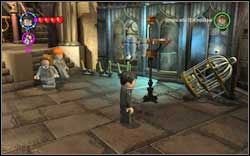
Nearly Headless Nick: Use magic on the hanger on the right side of the room.
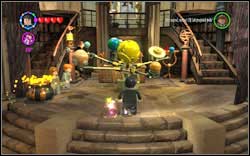
Professor Dumbledore (Grey): After preparing the Strengthening Potion, go upstairs and pull the chain. Go down and destroy all the planets - the Sorting Hat will appear. Hang it on the chair with (WL).
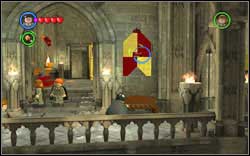
Hit all the five house banners in the corridor with a spell.
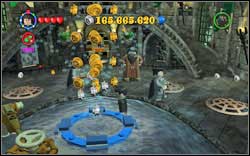
Rita Skeeter: Use (RD) on the four padlocks, assemble a chain (WL) and then pull both of them. Jump onto the gushing water.
In order to get inside, you need a Slytherin student.
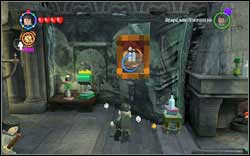
Slytherin Boy: Use magic on the painting by the entrance and then destroy the luggage which will appear by the couch.
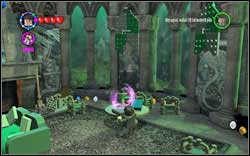
Slytherin Girl: There are five green lamps in the room, you can use (WL) on them. Two are on the left and three more on the right side of the room.
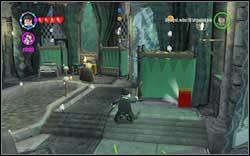
Score x4: On the right side of the room. The owl is by the entrance, on the left.
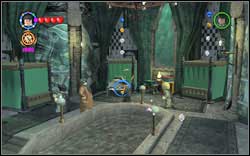
On the back of the bedroom there is a chest - open it with a spell and the brick will then appear on the water.

Right beside the entrance, use magic on the bookshelf to free the student.
You need a Gryffindor student to enter.
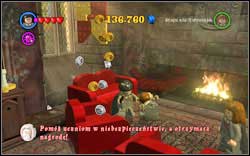
Use a spell on the sofa on the left side of the room and the sleeping student will fall inside. He will fall out as a cube - use magic once more to save him.
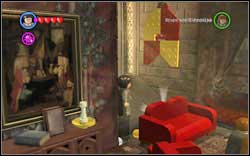
Gryffindor Boy: Right behind the couch on the left side of the room.
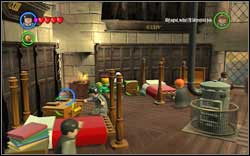
Fall Rescue: In the chest on the left. Use (WL) to move the flower. The owl is right beside.

Destroy all upper parts of the four beds using magic and the brick will appear on one of them. Jump off a mattress to get it.
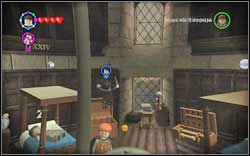
(Time Travel) open the large chest by one of the beds and jump inside.
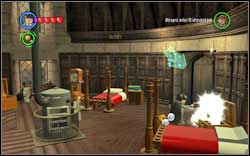
Ron (Hogwarts): In the chest on the right, beside the entrance door.
Seamus Finnigan: (Time Travel) in the spot where the clock was, there us a padlocked chest - use (RD).
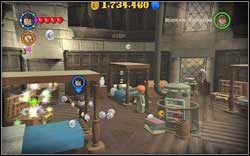
Dean Thomas: (Time Travel) open the suitcase on the left, by the bed - where the Red Brick was.
In order to enter, eliminate the pixie (IM) holding the handle, place it in its place and open (WL).
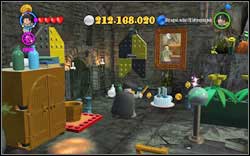
Put earmuffs on in the wardrobe, pick up the Mandrake and put it into the pot.
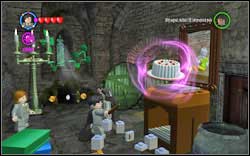
Neville Longbottom: Put in earmuffs in the wardrobe, pick up the Mandrake and break three glass showcases in the room.
In order to get inside, you need a Hufflepuff student.
Right by the entrance, use (RD) on the chest and move the cake (WL) onto the painting.
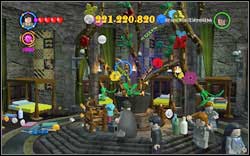
Attack the plant inside the chimney twice and the student will fall out eventually.
The Fat Friar: Use magic on the painting on the left and then use magic twice on the cake.
In order to get inside, activate the candlestick in the common room (WL), put earmuffs on in the wardrobe, pick up the Mandrake and put it into the pot by the wardrobe and door on the left.
Christmas: Use magic on the barrel in the middle of the room and then destroy all the flowers which will appear. The owl is on the left side.
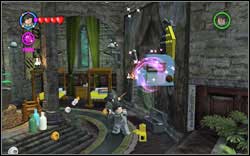
Hufflepuff Girl: You will find a chest by the door - inside there's a few bricks, from which you can assemble (WL) a radio.
In order to get inside, get rid of the Boggart (RK) lurking in the chest on the right, by the entrance.
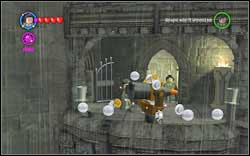
Penelope Clearwater: Right after entering, use magic on the gate on the left and then assemble the bricks (WL) into a whole.
In order to get inside, you need a Ravenclaw student.
Hogwarts Crest Detector: At the bottom of the room you will find a few bricks - bigger and smaller ones, on which you can use (WL). After creating a giant bird, use magic and it will fly away. The owl is on the left.
Inside the room, you will find three out of five gold books - use magic on them. The other two can be found in the Revenclaw Dormitory (M2.22).
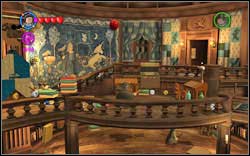
Gabrielle Delacour: use magic on the chest in the middle and a red ball will fall out - the token will eventually appear on the left side.
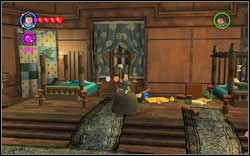
Inside the room, you will find two out of five gold books - use magic on them. They are under the beds. The three other ones can be found in the Revenclaw Common Room (M2.21).
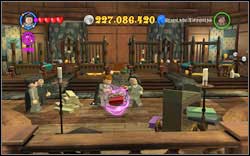
In the middle of the room you will find a student and a red book. Beside there's a chain - use magic on it and place (WL) the wrapped book on the cart.
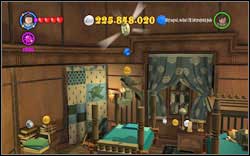
Padma (Ballgown): Destroy the upper part of the bed on the left and jump onto it to reach the token.
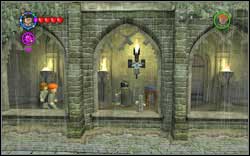
Doris Crockford: In the room you will find three torches - use (WL) on them. There's a padlock on one of them, so use (RD). The other six can be found in the Main Hallway (M1.1)
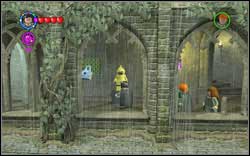
Madam Pince: There are three panels in the corridor, on which you can use a spell. There's a padlock on one of them - use (RD).
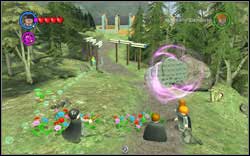
Fast Dig: By the path there's some round bricks. Use (WL) to create a cloud from them. Firstly, move the cloud to the left and right while using (WL) to discover four groups of flowers. Use (WL) on each group and you will unlock a brick. The owl is on the left, by the entrance through which you came.
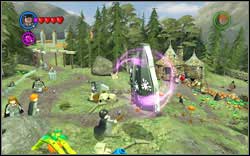
Use (LS) and (WL) on the three large boards buried in the ground. Afterwards use (WL) on the broom to clean them. The brick will appear in the middle, on a stone platform.
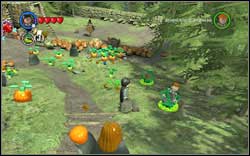
On the right, by the path, you will find the student trapped inside the Devil's Snare. Use (LS) to save it.
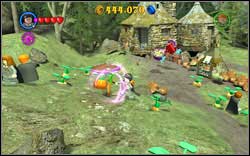
Percy Weasley: Pull out four carrots out of the ground with (WL)
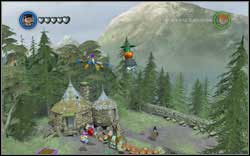
Ginny (Cardigan): Use (IM) on the pixie holding the pumpkin and on the one holding the rocket. Light up the fuse - it will explode in the air. Use the pumpkin helicopter to get to the token.
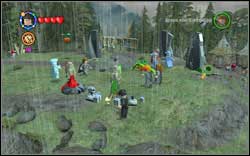
Cedric (Lake Task): After gaining the last token, return to the location and you will find another rocket, but his time with a padlock - get rid of it with (RD). Use the pumpkin helicopter to get to the token.

Victor Krum: Beside you will find a rocket, on which you can use only (DM). Act just like in the previous cases - use the pumpkin helicopter.
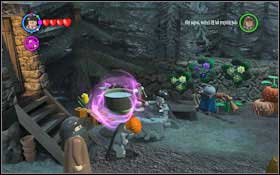
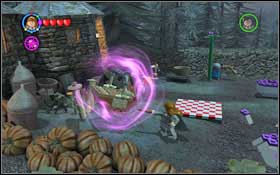
Turn over the cauldron by the door. Fill up the bowl on the back of the garden with water and pour the content into the cauldron (WL) #1. Spread the blanket (WL) resting by the basket and then throw out some food and bricks out of it #2. Put the ingredients into the cauldron (WL).
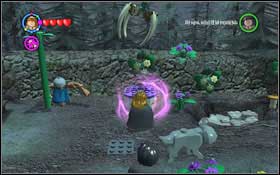
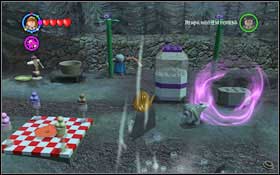
By the pump you will find a watering can and some seeds beside - plant (WL) and water them (WL) - you will receive a part of the salt shaker #1. Dig up a hole in the upper right part. Once you have all the bricks, connect them into a large shaker #2.
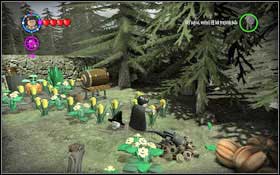
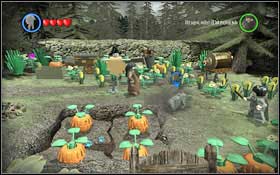
(Time Travel) Use Fang to dig up the head and put it onto the scarecrow with Harry (WL) #1. Dig in another spot with Fang, switch to Harry, destroy all the pumpkins #2 and create a chain (WL).
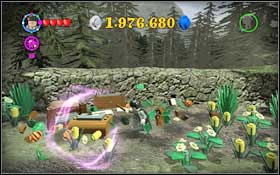
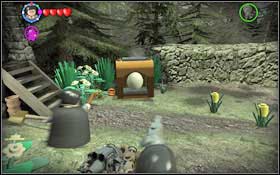
Switch to Hagrid and pull the chain. Assemble the grill #1 and place the dragon egg (WL) into it #2.
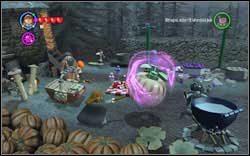
Once you take the food, once more use (WL) on the basket - the student will throw out some grain. Use magic on the grain and a pumpkin will appear - use (WL) on it to save the student.
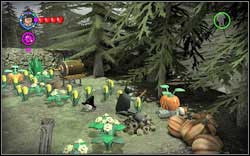
(Time Travel) On the right, the student is crushed by a pumpkin - use a normal spell on it.
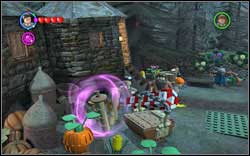
Ron (Brown Jacket): Use (WL) on the three brown mushrooms.
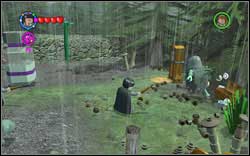
Amos Diggory: (Time Travel) use (RD) on the chest on the right and then get rid of the Boggart (RK)/(EP).
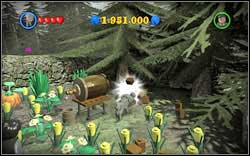
Petunia Dursley: (Time Travel) Digging spot in the upper right corner of the garden.
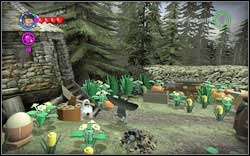
Gilderoy Lockhart (Green Jacket): (Time Travel) use (RD) on the padlock by the axe.

Stud Magnet: (Time Travel) Head right, pick up the hammer chisel (WL) and chip away the block to get the Brick.
Jump onto the bench by the tent and the second character will use (WL) to lift you up. Use the same spell (WL) on the red sphere blockade - it will roll down to the very bottom and fall into the chest.
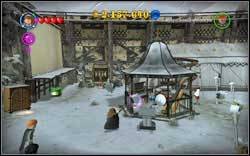
(Time Travel) Next to the tent you will find a digging spot - switch to Hermione and use Crookshanks to dig up the stand. Assemble it (WL) and afterwards place the notes (WL). Begin conducting (WL).
Right at the beginning, there's a student on the billboard. Use (WL) on the folded material in order to create a trampoline, onto which he will be able to jump down.
(Time Travel) The student is in a locked chest next to the tent, use (RD).
Padma Patil: Use (WL) on the four green Slytherin flags.
Katie Bell: Use (WL) on the five green Gryffindor flags.
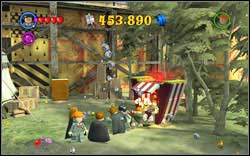
Ravenclaw Boy: On the right you will find a popcorn stand. Throw all four corn cobs into it and apart from the studs, the token will also fly out.
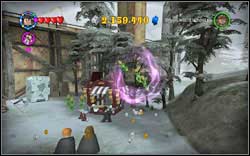
George (Quidditch): (Time Travel) On the right, next to the stand, you will find a digging spot. Switch to Hermione and dig up the bricks with Crookshanks. Assemble a cloud with sun (WL) and throw both corn piles (WL) into the stand.
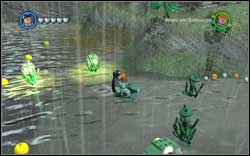
Use the fishing rod (WL) to catch some bricks. Assemble two frogs using them - jump onto one of them and swim through all the control gates.
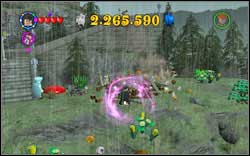
Destroy three big chests using normal magic and then use (WL) to assemble a bridge, thanks to which you will save the student.
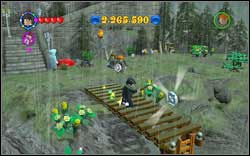
Ron (Tuxedo): Destroy three big chests with normal magic and then use (WL) to assemble a bridge, on which's end the token will appear.
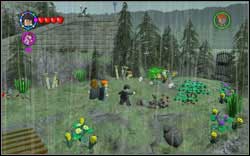
Bassist: Get rid of the mole, which after scaring him off with normal magic, will appear three more times.
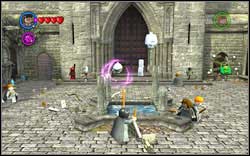
Collect Ghost Studs: Destroy all four statues by the fountain. Afterwards assemble (WL) a silver knight armour. The owl is next to the large gate.
Use (DM) on the red armour by the gate and jump onto the broom. Collect the appearing studs (the blue one is the most important) and the brick will appear at the end.
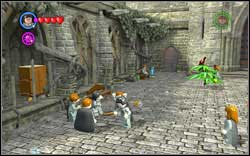
On the left side of the courtyard, you will find three students using magic on another one - hit each of them with your magic and they should run away.
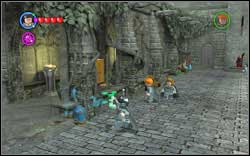
Hufflepuff Boy: After learning how to handle Mandrakes, use the screamer to break five glass showcases. One of them is a bit more hidden inside the passage on the right.
Ravenclaw Prefect: Use (RD) on the silver armour (after getting the Red Brick), jump onto the plunger and clean five yellow stains.
Collect both Character Tokens and the Gold Brick will appear.
Harry (Quidditch): Use Hermione and Crookshanks to dig in the five marked spots.
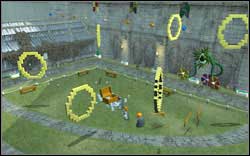
Victor (Dragon Task): Use (RD) on the locked chest. Afterwards jump onto the broom and fly through the rings.
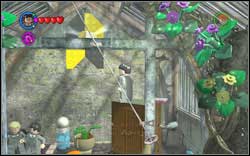
Go to the end of the room, jump onto the flower and from it onto the wardrobe. You will reach the Brick with no problems.
Use (RD) at the back of the Herbology Classroom to enter.
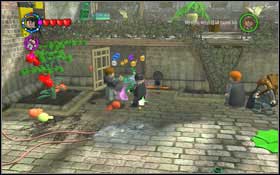
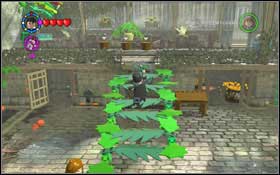
Singing Mandrake: collect the potion ingredients - the first one is inside the pots by the edge; the second to the right, behind the Mandrake (use the wardrobe to put earmuffs on); the third one is on the plant by the cell - use magic on it to make fruits grow out. Afterwards drink the Strengthening Potion and pull the chain #1 - a few leaves will fall out. Approach the large plant on the right and use a spell on it - it will throw out some more leaves. Create a staircase using (WL) #2, take all the Mandrakes upstairs and put them into the pots. A red brick will appear - the owl is downstairs.
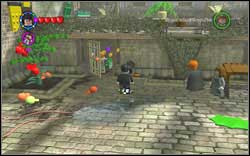
After collection the potion ingredients, pull the chain and free the student.
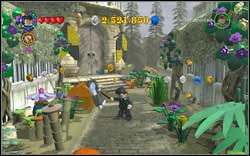
Fleur Delacour: Use (RD) on the big, locked chest and then open it with normal magic.
The entrance to the Greenhouse is at the back of the Herbology Classroom - a very big door, hard to miss.
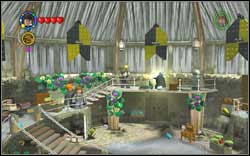
Drummer: Upstairs you will find a chest, from which a Boggart will jump out - get rid of it with (RK).
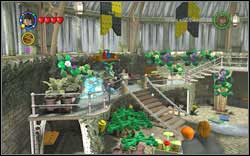
Professor Sprout: Put earmuffs on and grab the Mandrake - break five glass windows.
You will get the key by defeating the Boggart (RK) - the chest is right beside the entrance.

Score x2: There are two chests in the room and four clocks inside of them. Set them with (WL) on four columns - match the colours. Afterwards eliminate the pixie (IM) by stopping the rotating wheels and creating a staircase. The owl is on the upper level.
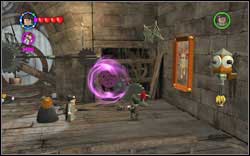
Approach the painting on the right and use magic on it. A gear will appear - place it in the proper spot with (WL) and the brick will eventually appear.
(Time Travel) Use magic on the painting on the left - you will receive some bricks and a hint after assembling (WL) them. The bricks for the second hint are in the wardrobe on the right - first use (RD) and then a character with a book. Set the clock (WL).
The student is stuck in a spider-web at the very beginning - destroy the web.
Vernon Dursley: Speak with the snake on the left - an egg will appear and will be eaten by the second snake. Attack its tail and the token will appear.
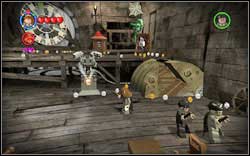
Milkman: (Time Travel) you will find him beside, right after turning back time.
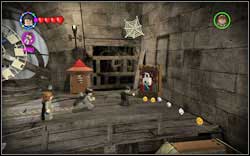
Madam Rosmerta: (Time Travel) On the right you will find a wardrobe - first use (RD) and then a character with a book.
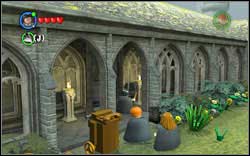
Angelina Johnson: There are ten torches on the courtyard. Use magic on them and you will unlock the token.
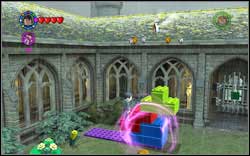
Hufflepuff Prefect: Get rid of the pixies with (IM) and open the chest. Arrange the bricks so you can get to the token.
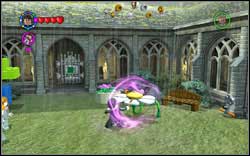
Slytherin Prefect: Use (DM) on the black chest, plant the seeds (WL) and water them (WL). Jump onto the flower - the second character will use (WL) and you will fly up.
The key to the entrance is inside the Boggart chest on the Grassy Courtyard (M3.34).
To create a lift, throw out the grain (WL) from the chest, assemble a platform (WL), move the egg through the labyrinth (WL) and crack it with magic.
In order to make the lift after turning back time, use a spell on the owl on the painting on the left.
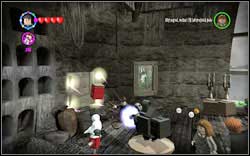
Gold Brick Detector: (Time Travel) repair the camera on the second floor (WL) and take the Red Brick out of the screen (WL).
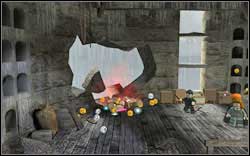
On the second floor, use the feather (WL) lying on the shelf on the painting and assemble the scattered bricks (WL).
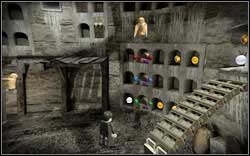
(Time Travel) Put the letter boxes into the right places - you will find adequately coloured bricks on them.
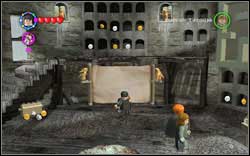
Approach the two owls holding the large scroll. As soon as you get close, the owls will unroll the scroll and free the student.
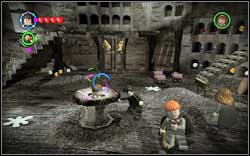
(Time Travel) The student is stuck in the middle of the room, inside the owl feeder - use normal magic on.
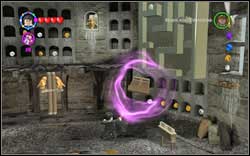
Hermione (Grey Hooded Top): Use (WL) on the folder bridge.
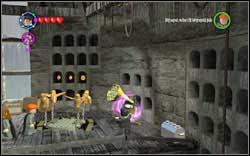
Cho Chang: On the second floor you will find a gramophone - play three vinyl records on it (WL). The first one is right beside, the second is in the silver chest and the third inside one of the wardrobes.
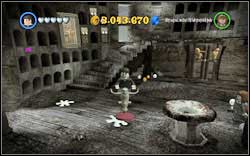
Barty Crouch Senior: (Time Travel) Use (RD) on the wardrobe on the right, afterwards (WL) to throw out the bricks and (WL) again to assemble a plunger. Jump onto it and clean five white stains on the floor.
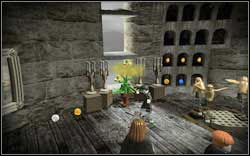
Hermione (Hogwarts): (Time Travel) On the second floor, use normal magic on the green plant and repeat the gramophone (WL).
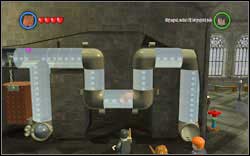
Right next to the entrance to the 2nd Defense Against the Dark Arts Classroom you will find some bricks - make a huge "H" letter out of them (WL) - the bricks automatically insert themselves after pointing at the right spot. Afterwards use (RD) on the plate and send Scabbers/Crookshanks inside the tunnel. Repair the tunnel beforehand (WL).

Gryffindor Girl: One of the students is holding a token - use magic on him twice. As he runs towards the basket, use (WL) on it - a snake will come out and the student will get frightened.
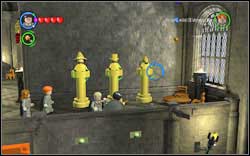
Lee Jordan: In the upper part of the room, passing by the Transfiguration Classroom, use magic on the three gold statues.
Hannah Abbott: There are eight torches in the room, use (WL) on each of them.
Ernie Macmillan: After putting on earmuffs in the wardrobe next to the Transfiguration Classroom, pick up the Mandrake and break six glass showcases using it.
Milicent Bulstrode: Use (DM) on the chest by the Defense Against the Dark Arts Classroom.
Use (WL) to give the apple from the high shelf to the student.
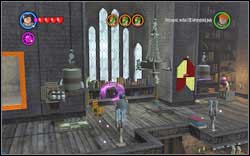
Boy: Use (WL) on the books by the window in the upper part of the room.
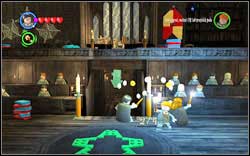
Girl: Use magic on four candles (two by the entrance, two in the upper part of the room).
You will get here by destroying the massive padlock with on the left side on the Charms Classroom with (RD).
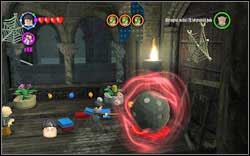
Extra Hearts: At the end of the room on the right you will find a black sphere - use (DM) on it. The owl is on the left side of the room.
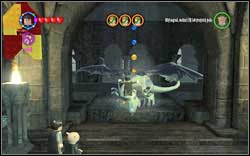
Destroy the two spheres in front of the dragon and then assemble him. Jump onto him to get out of the room - you will receive the brick.
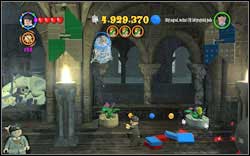
On the right side of the room, in the corner, you will find a student trapped in a spider-web - destroy it.
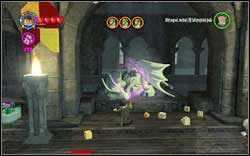
Mad-Eye Moody: Destroy the two spheres in front of the dragon and then put him back together (WL).
You will get here by using a character with a key on the left side of the Charms Hallway.
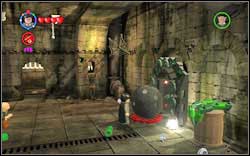
Character Token Detector: In the second room, start off with speaking with the snake using Harry, afterwards use (DM) on the black sphere which will appear. The owl can be found nearby.
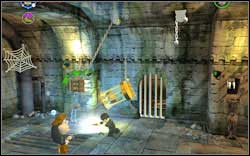
In the second room, firstly chase away the Devil's Snare from the right and then from the left hand to get the brick.
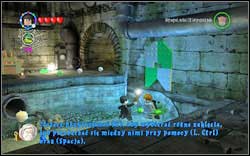
Right after exiting, you will find a student caught in the Devil's Snare - use (LS) to free him.
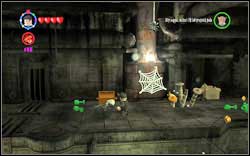
Professor Flitwick: Go right until you reach a chest out of which a Boggart will jump out - use (RK) on it.
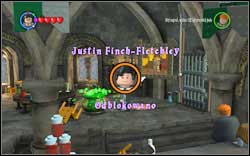
Justin Finch-Fletchley: Once you create the Polyjuice Potion, you will receive the Token as a reward (during the main story line)
You need: a character with a key, a character with a book and a Hufflepuff student.
Wave to the painting on the left with a Hufflepuff student.
Use the character with a book to read the signs on the cabinet on the right.
Use (WL) on the bird statues on the balustrade and then assemble a lock (WL) which you can open using a character with a key.
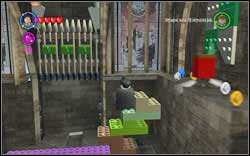
Score x10: On the right side of the edge. The owl is down below.
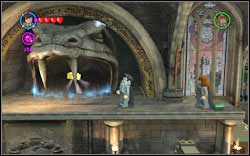
Right behind the age barrier - you can find the Aging Potion in the Potions Classroom (M4.42).
Professor Snape: In the chest on the left, upstairs. Use (RD).
You will learn the Transfiguration spell - change the dummies into frogs twice #1. Complete the task with Harry, Hermione and Ron #2.
Use (RD) on the door inside the Transfiguration Classroom.
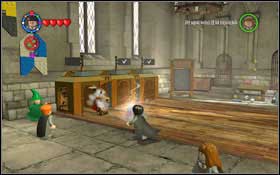
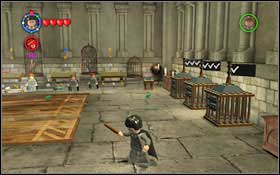
Use the Transfiguration spell on the dummies #1 - you have to change three dummies on each path #2. The brick will appear in the centre.

Professor McGonagall: After getting the Gold Brick, the Token will appear on the left.
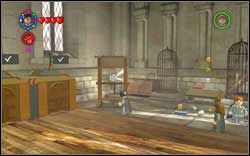
Fred Weasley: Right behind the blackboard at the back of the classroom.
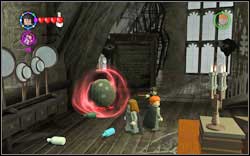
Fast Magic: Use (DM) on the black sphere at the back of the room. The owl is at the lower part of the room.
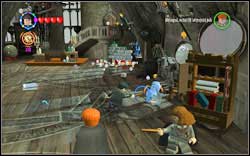
Use (RD) on seven silver items found in the room. Some of them are being held by pixies - get rid of them using (IM).
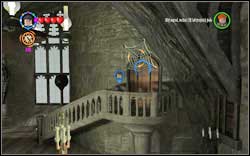
Parvati (Ballgown): Destroy three spider-webs on the walls of the room - two on the right and one on the left.
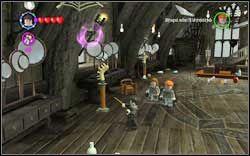
Ron (Pyjamas): Use (WL) on the four torches in this room.
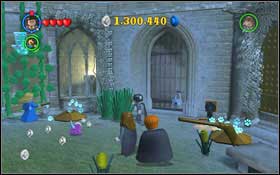
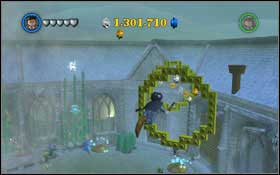
Oliver Wood: Prepare the Strengthening Potion - the ingredients can be found in the bushes #1. Afterwards pull the chain by the gate on the right. Jump onto the broom and fly through all the circles #2.
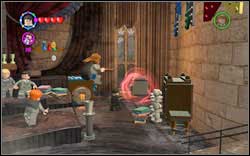
Hermione (Blue Top): In the corner of the classroom you will find a cabinet, use (DM) on it.
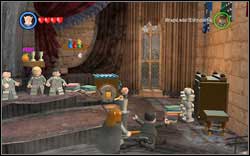
Professor Trelawney: In the corner of the classroom you will find a safe - use a character with a key to open it.
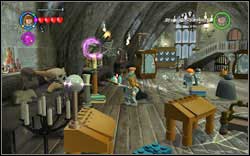
Station Guard: Use (WL) on the four torches found in the classroom.
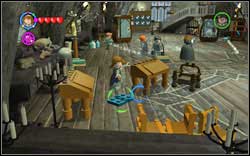
Pavarti Pavil: In the classroom, there are four blue books, on which you can use magic. The first is on the bookshelf - use a character with a book; the second can be found in the lower left corner of the room; the third one by the left cabinet; the fourth one is the hardest to find - it's on the stairs at the end of the classroom.
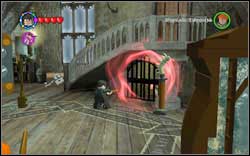
Ginny Weasley: Use (DM) on the gate at the back of the classroom.
Use (RD) on the chest at the back of the Defense Against the Dark Arts Classroom and afterwards assemble (WL) a door from the bricks.
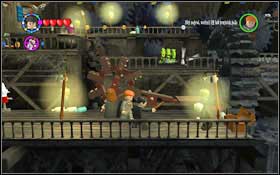
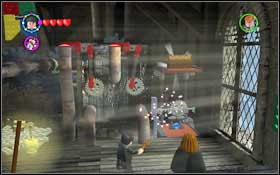
Regenerate Hearts: You have to get rid of five Boggarts - use (RK). The first one can be found at the very beginning on the right #1. Assemble a gear (WL) to get upstairs. There you will find the second chest - chase away the Devil's Snare (LS). You will also find a potion ingredient there. Head right along the cranks. Jump upstairs, use magic on the silver circle and create a small robot (WL) #2 - another chest and a potion ingredient.
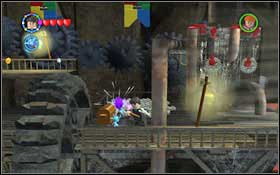
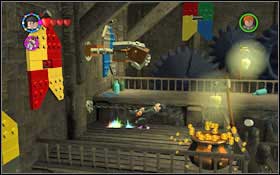
The next chest is being held by a pixie - use (IM) #1. You will gain another ingredient. Create (WL) a staircase and go left. Drink the Strengthening Potion and pull the chain #2. The last Boggart chest will appear. The Owl can be found right by the door.
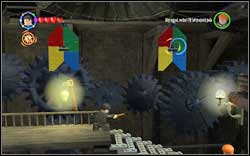
He's trapped in a spider-web, use a simple spell to save him.
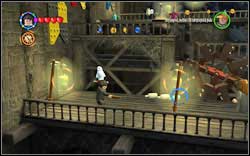
Victor (Tuxedo): Use magic on the seven lamps. They're impossible to miss.
Harry (Maze Task): Being upstairs, hit three colourful banners.
Use (DM) on the gate at the back of the Defense Against the Dark Arts Classroom.
After going down to the lower level and reaching its end, use (IM) on the pixies holding the pillars.
Draco Malfoy: Use (IM) on the four pixies holding the Pendulum.
Professor Quirrell: After going down to the lower level, go to the very end, while beating overcoming obstacles - eliminate the pixies with (IM). The Token is at the end.


 Legend of Grimrock II Game Guide & Walkthrough
 Lord of the Rings Online: Traits Game Guide & Walkthrough
 LEGO Star Wars III: The Clone Wars Game Guide & Walkthrough
 LEGO Jurassic World Game Guide & Walkthrough
 Life is Strange Game Guide & Walkthrough