Welcome all of you, keen to participate in the adventure created by Guerrilla Games - Killzone 2. Thanks to this guide you will get the primary facts about the main modes, a full solution, info about the Trophies and you will find all the items hidden by the creators.
Killzone 2 is the third instalment in the series, but to fully enjoy it and understand the plot you don't need to know the previous games. Below there is an overview of the scenario for those of you who want to enjoy one of the best looking game in history without getting to know all of the past events.
In Killzone 2 you will get into the shoes of the Alpha team sergeant, nickname Sev (Tomas Sevchenko). The action begins a couple of years after the Helghast attack on the main hero's home planet - Vecta. You can get to know these events in the first game, originally made for the PlayStation 2.
This time ISA (Interplanetary Strategic Alliance), the military forces designed to defend the colonies of UCN (United Colonial Nations) decided to take revenge on the invaders and attack planet Helghan, the capital of Helghasts. The main objective is to capture the enemy's charismatic leader, Visari, who lives in a palace in the capital of the county, Pyrrus.
Despite the preparations it turns out that the Helghast won't take them lightly and produced a powerful weapon capable of stopping the Vectan fleet. Sev and his team will be thrown right in the middle of the battlefield, on a road leading to discovering the secret behind the weapon.
Przemek "g40st" Zamecki
Translated to English by Jakub "cilgan" Lasota
Killzone 2 isn't an easy shooter and even on the lowest difficulty settings there are locations that a less experienced gamer will have to repeat several times because of dying. I would recommend Normal for people experienced with shooters and accustomed with playing using the PlayStation 3 controller. The highest difficulty setting is only available after finishing the game on any other.
You can't save your game at any moment. The game automatically saves after reaching a checkpoint - in most cases after completing a mission or reaching a new location. It's extremely important when it comes to secrets. If you find z suitcase with data or shoot down a Helghast symbol and quit the game without reaching the next checkpoint, it won't be saved.
The authors prepared a couple of predefined control schemes. So if a given one doesn't suit you, go to the menu and choose an alternative one. You can also adjust the sensitivity of the analog stick.
Although Killzone 2 is a typical FPS shooter, it offers something that we usually meet in Third Person Shooters. It's the ability to take cover and automatically duck if the cover isn't high enough to keep standing. It's a really important element of the game and it's used throughout the whole game, helping the player to survive. Unfortunately, no cover gives perfect protection from being shot. So it's very important to choose the path leading to the enemy wisely and not expose yourself. While being in cover you can also shoot enemy while slightly leaning out.
You will find some secrets in the game. Those are suitcases with intelligence data and Helghast symbols. If you manage to find them all, you will be given access to exclusive content on the game's website, www.killzone.com.
Name: M4 Revolver
Maximum ammo capacity: 6
Description: Basic ISA soldier gun. It's quite powerful, but has a very small clip and it's quite slow.
Name: StA18 Pistol
Maximum ammo capacity: 12
Description: Helghast snipers equipment. Not as powerful as the M4, but its speed and clip size make it a better choice for fighting.
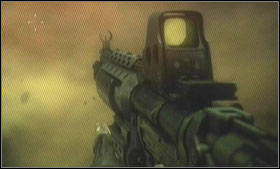
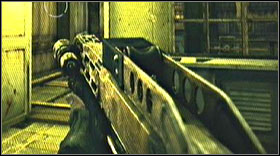
Name: M82 Machine-gun
Maximum ammo capacity: 256
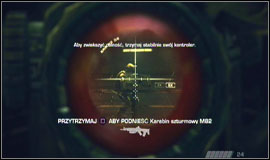
Description: A basic ISA weapon. Not so fast, but quite accurate. It has a mounted sight, so it's easier to aim in zoom mode.
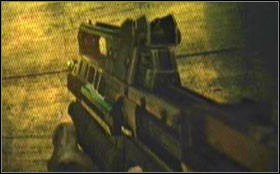
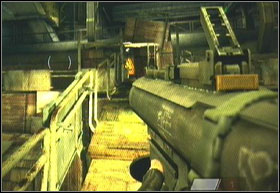
Name: StA52 Machine-gun
Maximum ammo capacity: 320
Description: A basic Helghast weapon. Similar to the M82, but without the sight.
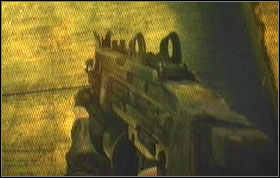
Name: PM StA11
Maximum ammo capacity: 384
Description: Fast and very effective on small and medium distance machine gun. A great alternative for the slow M82 and StA52. A good, all-around weapon.

Name: StA14 Machine-gun
Maximum ammo capacity: 40
Description: It shoots single bullets, but two of those are enough to kill an enemy. It's great if you can aim well using the PS3 controller.
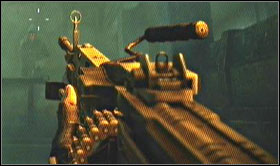
Name: M224 - A1 LKM
Maximum ammo capacity: 280
Description: = A powerful, sub-machine gun and a big clip. A great weapon for both small and big distances. Its biggest flaw is the long time needed to reload.
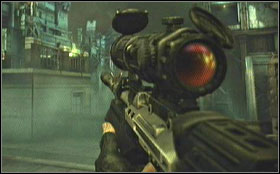
Name: VC32 Sniper Rifle
Maximum ammo capacity: 24
Description: This weapon is definitely those who are used to playing using the analog sticks. It's great on big distances, but can be also used on shorter, thanks to its speed.
Name: VC1 Flame-thrower
Maximum ammo capacity: 200
Description: Very good in small rooms. A rather short ranged weapon. It uses up the fuel quite fast.
Name: LS13 Rifle
Maximum ammo capacity: 24
Description: A self-loading rifle, massacring enemies on short distances. Very useful in dark rooms because of the light mounted on its end.
Name: VC9 Rocket Launcher
Maximum ammo capacity: 3
Description: A must-have when facing armoured vehicles, but not only. It's also good against big groups of enemies. Unfortunately it only has got three rockets and after using them you have to find another weapon (or more ammo).
Name: M327 Grenade Launcher
Maximum ammo capacity: 12
Description: Not a very useful weapon, firing grenades into enemies. A direct hit causes an explosion, but in other cases the grenade just rolls forward hitting all obstacles, so the precision isn't all that great.
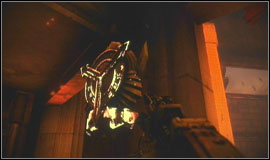
Name: VC21 Boltgun
Maximum ammo capacity: 20
Description: one shot from this baby, and you have a dead Helghast. Or to nail him to the wall, if you like. It's quite slow and you can only carry 20 bolts at one, but shooting from it gives lots of satisfaction and it's very spectacular.
Name: VC5 Energy Gun
Maximum ammo capacity: infinite
Description: Available only at the Tharsis Refinery. The VC5 using the energy that's collected there and after using up all the cylinders you just have to open the barrel for a couple of second for it to reload. A very useful gun, medium-ranged weapon. It shoots a constant energy ray, so you can hit multiple enemies without taking your finger off the trigger.
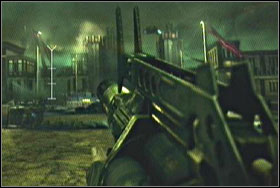
Name: StA3 LKM
Maximum ammo capacity: 288
Description: A very fast and useful at nearly all distances machine gun. One of the best guns in the game, capable of killing a whole horde of enemies.
Number of suitcases: 2
Number of Helghast symbols: 3
The New Sun
Additional missions:
Follow Garza to start station

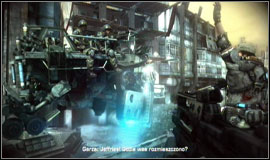
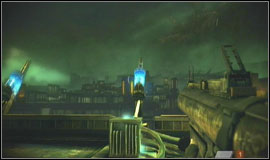
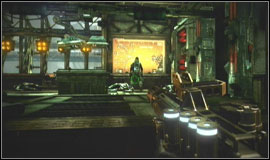
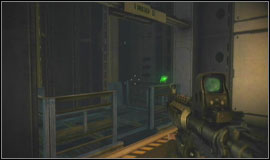
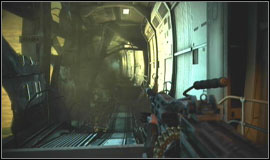
After two weeks the Vectan fleet finally arrives at the Helghast planet. The soldiers are attacking the capital city, Pyrrus. The objective is to bring down Visari - the leader of Helghasts. You are a member of team Alpha. Follow Garza while completing the orders that show up on the screen. In the hall you can listen to some technicians talking in groups about some interesting things.
Afterwards walk up to the door above which a green indicator is flashing and you will find yourself on the bridge of one of the invasion ships. After a short talk between Rico and colonel Templar the air drop will begin.
Corinth Sands
Additional missions:
Meet Echo team
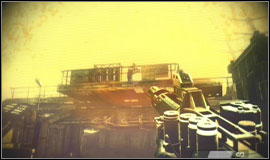
Destroy the bridge
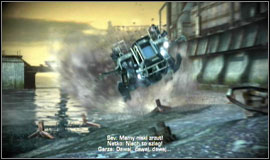
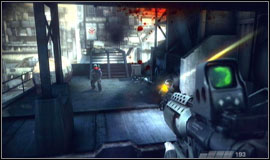
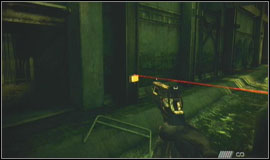
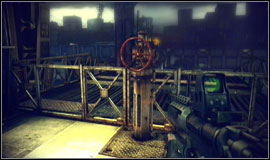
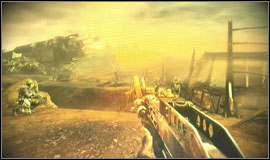
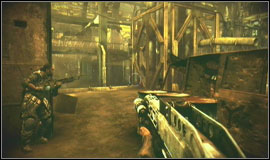
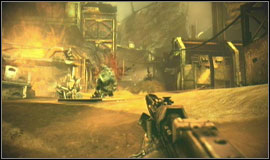
The unexpected resistance forces team Alpha and the Nemesis convoy to drop far from the landing zone. After jumping out of the Intruder follow your teammates. When you will be close to the bridge, a soldier holding a rocket launcher should be killed right before your eyes. Pick it up and shoot at the bridge, aiming at the yellow packages. You can also destroy the bridge without the help of the launcher, using a normal gun. Look out for the rifleman on the left. On lower difficulty settings you can kill them all, but on higher ones you should just ignore them and run to the beach as fast as you can.
Additional missions:
Protect a beach
On the beach, hide behind one of the concrete barriers and throw grenades at the Helghast coming out of their transporters. Shoot the rest. There are some exploding barrels at the beach; they're useful when it comes to eliminating the foes. After cleaning up the perimeter approach the wall and let Garza help you get up to the elevator platform. Press the switch and ride up.
Stahl Arms Warehouse
Additional missions:
Secure the dam control room
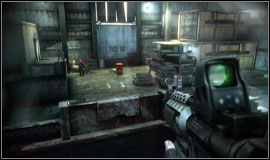
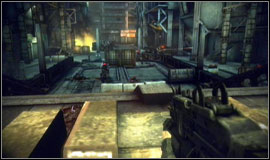
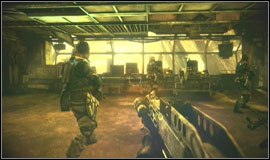
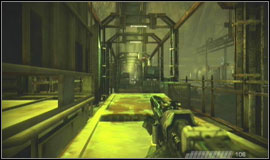
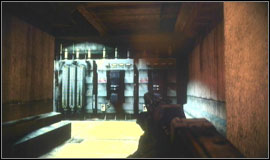
The convoy is stuck, so together with Garza you must eliminate the defenders in the dam control room, so that the vehicles can pass. Slowly enter the storehouse and hide behind the metal barrier. Listen to the Helghast talking and then shoot the solders below. Go to the lower level and another wave will appear. Follow Garza and defend him until he doesn't manage to open the door leading to the next section. Look out for the left side, as an enemy may manage to approach you from there.
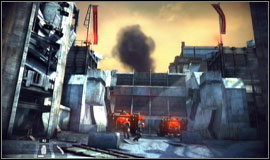
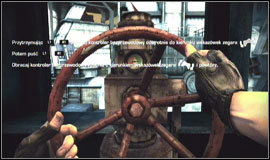
When you get to the control room, eliminate the Helghast that are shooting in your direction from the other side of the dam and afterwards grab the valve and follow the commands to turn it.
Verdran Overlook East
Additional missions:
Protect the convoy
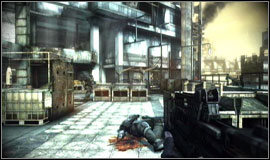
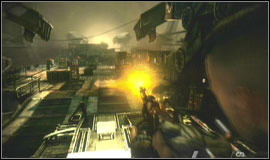
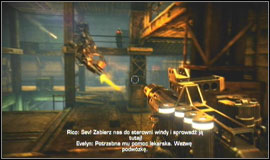
The convoy is moving forward. After getting out of the control room, you will have to deal with some more enemies. Follow Garza, who will open the door blocking the way with a solid kick. Be cautious, as some of the enemies will be equipped with rocket launchers. You can also be shot from the machine guns located on the balcony on the higher floor. After cleaning the terrain, grab one of the guns yourself and help eliminate the Helghasts attacking the convoy.
Storm Drain 11-34C
Additional missions:
Protect the convoy

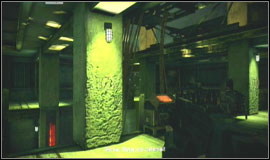
The convoy is safe for now, but you will still have to protect it together with Garza. This time you will have to go through a storm drain. Eliminate the enemies while hiding behind the columns and barrels.
Verdran Overlook West
Additional missions:
Protect the convoy
Kill all foes
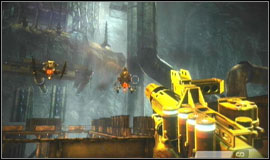
Investigate the disaster zone
Meet Alfa team
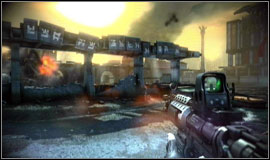
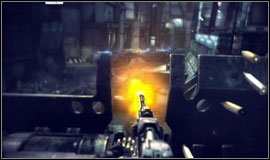
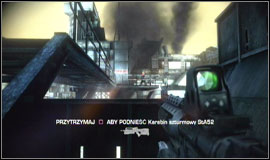
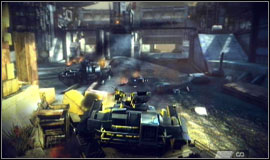
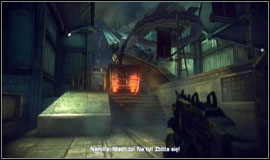
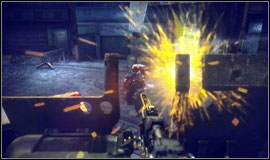
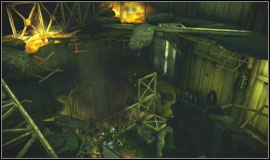
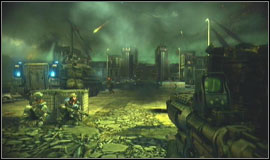
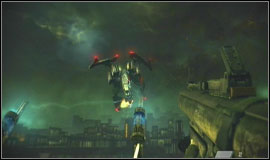
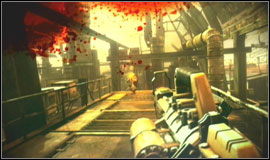
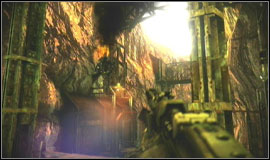
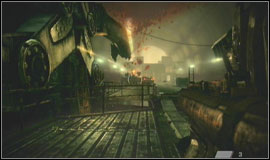
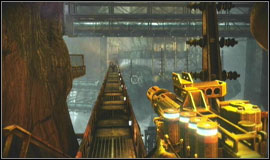
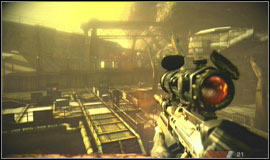
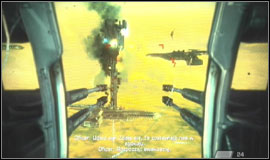
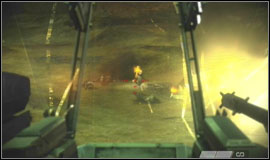
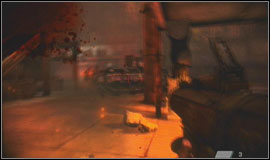
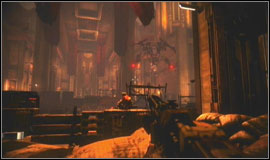
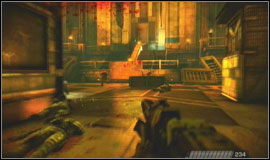
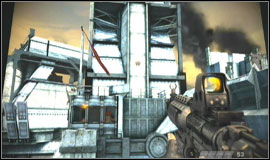
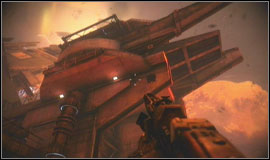
After getting out of the drain you will find yourself on an elevation. Vectan troops are being transported by Intruders. You will see one of the machines being shot down. The road ahead is narrow and the convoy stops because of the heavy fire. You have to kill all foes and destroy their fortifications. In order to do that, run to the machine-gun and mount it. Shoot at the opposite building, taking out the soldiers with rocket launchers as fast as you can. After some time the building should collapse.
Near the crash site you will encounter heavy enemy resistance. Use grenades to get Helghasts from behind the columns and kill them. Afterwards pick up the rocket launcher located near the centre and shoot at the half-destroyed metal door.
Korovis Dam
Additional missions:
Protect the convoy
Meet Alfa team
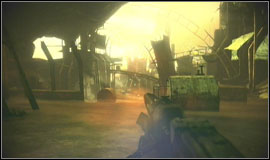
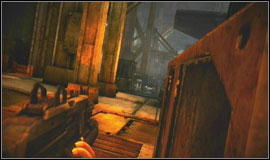
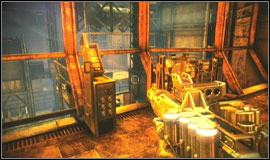
Team Alpha must help the Nemesis convoy in fighting off the Helghast counterattack. In order to do that you must secure the dam. Don't go down - shoot the enemies from behind the balustrade located above them. You must, however, look out, as one of them can approach you from the stairs on the right. Next duck at the right side of the bridge and take out the soldier with a rocket launcher. Get on the bridge and cross it while keeping an eye on the machine-gun on the other side. Take out the Helghast and clear out the first and after that, second bunker. Go down the ladder and run to the convoy. Use the concrete tunnels on the right.
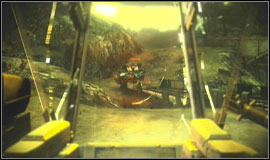
After getting there you will receive a report about a killed driver and tank operator. Run to the tank using the concrete barrier and enter the vehicle.
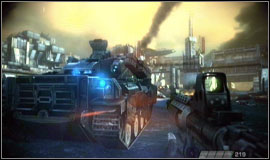
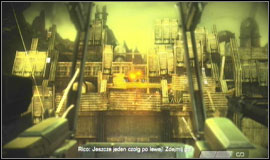
Eliminate the enemies with rocket launchers and the tanks while manoeuvring between the concrete pillars in the centre. From time to time send a rocket into the bunkers you crossed before.
Number of suitcases: 3
Number of Helghast symbols: 5
Landing zone 23
Additional missions:
Meet Narville
Destroy the tower

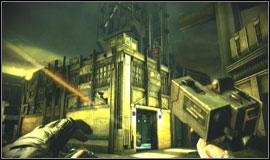
Team Alpha supports the attacking troops and at the same time searches for the atomic warheads stolen from ISA. The team lands near the Vasari Square and is to report to captain Narville for further orders. Approach him and listen to the commands. On the right side there is the door you must blow up. Approach it and set the explosives according to the commands appearing on the screen. Step backwards quite a bit, wait for Garza to get away and detonate the charge. After that, follow Garza.
Dakurol Alley
Additional missions:
Destroy the tower
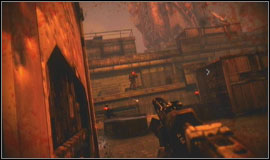
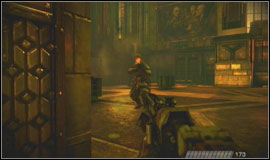
Team Alpha splits up. Together with Garza you must cross the alleys. You will have to deal with a powerful enemy here, so regret to use grenades. Also look out for the soldiers with caps, that will attack you with knifes. On the higher difficulty settings they kill you in just one hit, so make them your priority. After you clean up the square, you will have to defeat some enemies defending one of the houses, through which you will reach the higher levels.
Heavy Canal
Additional missions:
Destroy the tower

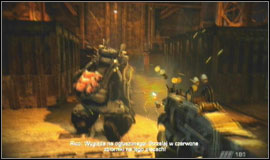
You must defeat the heavily armoured soldier who's blocking the further road. There are two ways to get rid of him. You can wait with the team, aim at his head and when he turns around - shoot the container on his back. You can also approach him and hide near the car wreck on the right side. By doing so you will be behind the enemy for the most time and you will be able to shoot at his back. Just look out for the Helghasts around there. After dealing with him, turn off the valve by the gate.
Wollan's View
Additional missions:
Destroy the tower

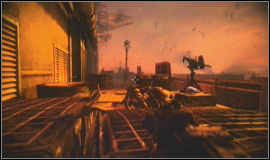
The ISA and Helghast troops meet face to face. Run up to the 1st floor of the building on the left and use the gun mounted there to get rid of the enemies. Afterwards cross the footbridge and eliminate the defenders on the upper floor.
Verudan Alley
Additional missions:
Destroy the tower
The Helghasts are defending the entrance to the tower. Firstly, you will have to deal with waves of enemies. You should especially look out for those with knives. When they start to show up individually, you have to sense the moment and run forward, thanks to which you will gain the terrain and stop the enemies from respawning.
Cableway Rooftops
Additional missions:
Destroy the tower

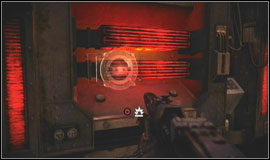
The tower stands right before you. You have to destroy it and secure the terrain before the final attack. Clean up the terrain surrounding the base of the tower. Use the doors on the right to attack the Helghasts from behind. After getting to the tower press the switch and two batteries will be exposed. Shoot them. After a couple seconds the cover will close and you will have to deal with some enemies. After around 20 seconds the cover will open up again, so continue to shoot at the batteries. The mission will end once you destroy both of them.
Number of suitcases: 2
Number of Helghast symbols: 5
Prefect's Office
Additional missions:
Meet Alpha team
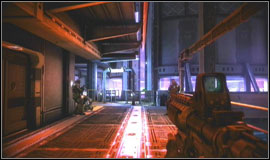
Rico and Natko went to check the destroyed Intruder. The tower at Visaris Square is neutralised. Help's on its way. While Garza sets off to meet with Narville, you must help the ISA soldiers get to Rico and Natko. Jump down to the street through the holes in the roof and eliminate the enemies while hiding behind the transporters. After you pass by the freezer you have to look out, as Helghasts will shoot at you from the destroyed roof ahead.
Malik Back Alleys
Additional missions:
Meet Alpha team
The back alley behind the prefect's office leads to the Intruder's crash site. After defeating some enemies, go to the next level. The road is blocked by some destroyed electrical installation, so you have to destroy it even more. Shoot the generator on the left side of the door and continue forward.
Ostoja End
Additional missions:
Meet Alpha team
Rico and Natko are under fire near the Intruder's crash site. You have to reach them before it's too late. You will have to face a dangerous group of enemy soldiers. Try not to stay in one place for too long as they can throw grenades pretty well. After the fight find a ladder and go down to the street.
Union Storage Yard
Additional missions:
Kill all foes
You finally reach Rico and Natko. You will see them jumping behind some bags with sand. Don't go to them, but move to the left side of the square and hide next to the door through which you entered. You will have a great shooting spot, as the Helghast counterattack will begin soon. There's also a weapon depot in which you will find the M244 - A1. Kill the four enemies coming out of the alley. When you will hear engines, run to the terrace on the upper level. After a while a transporter with soldiers will arrive. You can kill some of them while they still are in the vehicle and throw grenades at the rest. Unfortunately it requires some precision for them not to fall down.
The third wave will come out of the hole on your right. They shouldn't pose too much of a threat. The last attack will begin once a transporter breaks through the wall. Shoot the Helghasts from the upper level and don't hesitate from using grenades. After eliminating all of them get down and go through the door that your squad mates opened.
The Square
Additional missions:
Secure the Visari Square

Tem Alpha reaches the Visari Square just in time for the ISA assault. While in cover, shoot the Helghasts defending the posts and prepare for the counterattack which will soon start. You can use one of the stationary guns, or get up the building in the centre of the fortifications. There you will find a sniper rifle.
After two waves from the front, the third one will be from behind. Find yourself a spot behind one of the covers on the left side and greet the enemy soldiers with some bullets. After you eliminate them, the hardest part will begin. From the city's side a group of Helghasts, including two heavy armoured will show up. Quickly run to one of the stationary guns and try to hit the armoured enemy. After that, shoot at the container on his back. If you manage to kill him, try to kill the second one who's attacking from the other side.
Number of suitcases: 3
Number of Helghast symbols: 4
Canal Bank
Additional missions:
Return to the convoy
Alpha team is escorting the convoy through the Salamun district. The piece of the tower was send to the ISA command for tests. Going through the sewers and alleys you must reach the Salamun district and goin the convoy on the northern bridge. Destroy the generator above the pipe, which will allow you to enter. While inside listen to the Helghast talking and then kill them. Afterwards jump down and reach the other side using the ladder.
Dushan Tower Courtyard
Additional missions:
Return to the convoy
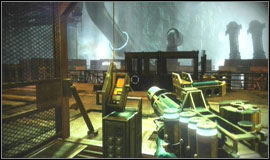
Meet Garza
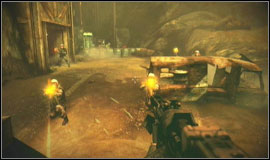
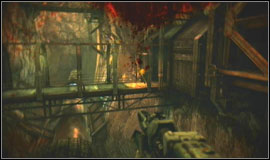
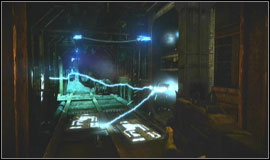
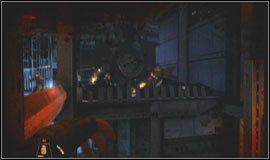
You will meet up with Garza. They only thing between you and him are some steps and lots of Helghasts. You will have to take a small walk along the platforms above the inner courtyard. Slowly capture the rooms until you reach the flamethrower. Take it; it will be useful in the next, heavily guarded room. Set the enemies on fire. After a while more foes will break through the wall. Treat them with fire, retreat for a while and attack once more. After clearing this building go forward all the time while eliminating the enemies, until you reach Garza.
Dushan Loading Bay
Additional missions:
Return to the convoy
Destroy 2 artillery posts
You stop to neutralise the Helghast mortars before they destroy the convoy. The first mortar crew is right in front of you. Prepare a grenade and throw it at the right moment. Kill the rest. Get rid of the Helghast in the corridor and go up to the next floor. Here Garza will have to unlock the door, so use his gun to kill the oncoming enemies.
At the further part of the station you will encounter a strong resistance, but the pistol should do the job. Destroy the second mortar and jump after Garza into the hole in the floor.
Corinth Shanties
Additional missions:
Return to the convoy
Meet with ISA squaw AT the shanties
Kill all foes
After getting rid of the mortars Riko suggests to team up with the special ISA team searching the nearby slums. The road is blocked by some explosive materials. Keep a distance and shoot them for them do explode.
Substation Strongpoint
Additional missions:
Secure the power station
Plant 4 explosives
Detonate the substation
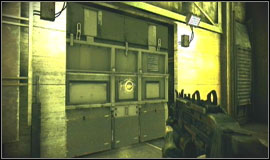
You're catching up with captain Narville's convoy. It's blocked by enemy fire coming from the fortifications. Cross the tunnel, eliminate some Helghasts on the other side and run to the big door leading into the building. Plant an explosive and detonate it after getting away from the door. Enter and eliminate the enemies. Look out for the fire coming from the roof.
At some point Garza will tell you to plant some explosives under the columns. Approach each, set a mine and get out of the building. Now detonate the mines.
Number of suitcases: 2
Number of Helghast symbols: 3
Bridge East
Additional missions:
Secure the bridge
Leave the bridge
Colonel Radec commanded to destroy the road that the convoy is using. Thanks to the wire-tapping you get info on Radec's location. The bridge is defended by Helghasts, as expected. You have to eliminate so that the convoy can continue. Move slowly forward using the covers. Rather use the left side of the bridge, as you will find cover behind a big barrier there. If there will be foes there, shoot the barrel between the cover and the car wreck.

While leaning out, target the head of the Helghast behind the stationary gun, kill him and rush forward. If you won't do this, he will be replaced by another one. Then deal with the second gun and kill the other Helghasts. Afterwards use the side exit and go under the bridge.
Air defense 22-12ILC
Additional missions:
Leave the bridge
Secure the anti-aircraft gun
The Helghasts have raised the bridge, so you have to lower it so that the convoy can move forward. The road to the bunkers leading to the other side is defended by an anti-air gun. When you reach the foreground, kill the enemies and then aim the gun operator's head. After that, kill the remaining Helghasts and run to the wooden platform and head to the gun right away. Use it to stop the enemy counterattack. Look out for the higher parts of the bunkers, because soldiers with rocket launchers will try to shoot you from there. Once you hear that the attack has been suppressed, run to the bridge, through the bunkers that you've been shooting at.
Bridge West
Additional missions:
Leave the bridge
Secure the bridge
Meet Alpha team
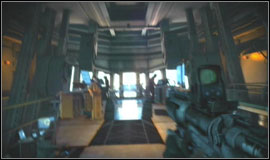
. You will be in the bridge control room. Use the bridge lowering mechanism and afterwards continue the attack with the others (rather use the left side, where you will be protected from some of the rockets). You will also find some weapons along the way. Use the rocket launcher and the sniper rifle to eliminate the defenders on the wall. After getting through the bridge the convoy continues forward to secure the road to Visari palace. Approach Garza, who is at the front of the convoy.
Radec Academy
Additional missions:
Secure the academy
Kill all the foes
Radec is supposed to be at the academy. Inside, in the second chamber team Alpha will be ambushed. Eliminate the enemy soldiers on the ground floor. At the end of the chamber there are stairs leading up. Climb them and eliminate the other defenders while watching out for the soldiers with rocket launchers. Caution and decisiveness are very important in this room, so before you come out of any corner check how much enemy soldiers there are before you and think how you can eliminate them as fast as possible. You can also make things easier by climbing the stairs in the first chamber. That way you will ambush the enemy from behind. After the fight, wait for your companions to open the door leading to Radec's office.
Academy Rooftop
Additional missions:
You will have to fight a boss - the ATAC Type machine. There should be a rocket launcher next to the column. Quickly pick it up and jump to the lower level. Here you will find a safe cover in the short corridor. Choose a pistol and wait at the corridor's end. When ATAC will be close to the generators shoot one of the coils, equip the rocket launcher and shoot at the boss. Repeat this couple of times and ATAC will be destroyed.
Number of suitcases: 3
Number of Helghast symbols: 5
Badlands
Additional missions:
Secure the village
Activate the antenna
The Avenger convoy is being attacked by a defence system powered by an unknown energy substance that is transported from the wastes by pipes. You are sent to the spot, where you must help Evelyn, who will take care of the analysis of the substance. Escort her to the main control room of the facility. Follow the rest of the squad and you will reach the room. Afterwards follow Rico to the elevator and use it.
Suljeva North
Additional missions:
Activate the antenna

Together with Rico you're searching the ruined facility for the lost ISA members. At the very beginning you will bump into an Intruder's wreckage. Continue forward and turn left near the end. Follow Rico. You won't be able to open the door, so you'll have to follow the cables.

Follow Rico the whole time. Don't worry, there are no threats here. You will reach a room with dead marines and a switch. Press it and a door at the other side of the settlement will open. Stand in front of the door and greet the intruders with lead.
Maintenance Office
Additional missions:
Activate the antenna
After the tragic discovery it becomes clear, that Alpha is not alone here. You must rush through a large group of Helghasts. There are so many of them that there is no sense in killing them all. Run to the platform surrounding the settlement, climb up using the ladder and while eliminating the enemies, run to the back of the building in which the door opened after pressing the switch. Go inside and after a while the Helghasts will be cut off. You're almost safe; you just have to look out for spiders.
Vojislav Mining Facility
Additional missions:
Activate the antenna
Join Alpha team
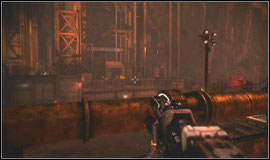
The resistance is high, but you move forward in order to activate the antennas which Evelyn wants to use in order to find traces of petruzyte. You're in the open again and there are enemy snipers in the area. You can't let them hit you, as on the higher difficulty levels you'll die from just one hit. Hide behind the white barrel and cautiously lean to the right. You should see a kneeling sniper. Kill him and another one should show up, so kill him too.
Now lean out to the left. In the building on the left there are two more snipers. Run below the curved bridge and turn left to reach the back of those buildings. Go below the conveyor belt to the next level and you should see an enemy right before you. Kill him and immediately turn right as the other one may start to shoot at you. IF he doesn't, slowly approach and kill him. The third sniper will be in the last building in this row. You will be noticed by the soldiers defending the entrance to the corridor leading to the antenna. Eliminate them from distance (you can use the sniper rifle) or go down and get rid of them in close combat. Look out for the machine guns on the higher floor. It's best to eliminate the Helghasts there with grenades.
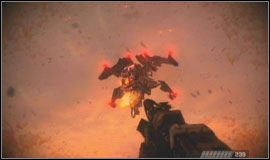
You will have to climb the antenna and turn on the valve there. Kill the two Helghasts and run through the last fragment because you can be hit by the two ATAC machines. Fortunately they're quite damaged, so you should destroy them easily. Afterwards turn the valve and go back to Rico. You will receive a report saying that Evelyn and the rest of the squad are under Helghast fire. You have to go back to the settlement using the same road you used before. This time there will be lots of enemies there, so don't hesitate in using grenades and ammo.
Suljeva North
Additional missions:
Join Alpha team
Save Alpha team
When you reach your destination you will discover, that the rest of the squad has been captured by the Helghasts and is now being taken to the train station. You have to follow the prisoners in order to free them. Before that you will have to deal with the back guards. Instead of charging forward, search for stairs leading to a platform on the right. Go up and hide behind the metal barrier. From here you should be able to eliminate the enemies.
Waystation 14
Additional missions:
Save Alpha team
Secure the train
The train will leave shortly; you have to make it in time. Kill the enemies on the second platform and two flying machines, while hiding behind the packages and in a hole near the door. Afterwards step back from the door and greet the enemies that will come through it with some lead.
Take the sniper rifle and eliminate all the enemies on the right side. It will be quite tricky, because there are lots of Helghasts around and those who you shoot at are attacking you with rockets. Although when you kill them, finishing the rest should be easy. Go down and up the stairs on the other side, from which you were attacked. Now just continue to eliminate the enemies on the platform. The sniper rifle can prove useful, but a normal machine gun will also do the job.
Number of suitcases: 2
Number of Helghast symbols: 3
Suljeva Minetrain
Additional missions:
Secure the train
The blue substance powering the Helghasts' weapons appears to be petruzyte. Three members of team Alpha are being held hostage. Unfortunately you didn't manage to catch the train with the prisoners and you got on the next one. You have to take over the Helghast train if you want to find your friends alive. Firstly you have to find a gun. After a while you will bump into the first enemy. You can approach him from behind and stun him, or just shoot. Pick up his gun and continue forward. There will be more enemies appearing from time to time. When you reach the first wagon you can attack the Helghasts there from below or use the ladder to reach the higher level. You should choose the first option, as you will be covered better. Look out for the grenades. If you see an enemy throwing a shiny ball in your direction better run from there at once. You can take advantage of the fact that there's lots of petruzyte being transported. If you see a group of enemies standing next to a shining container, shoot it instead of them.
In the further part of the train you will be able to use a gun mounted on a tank. Don't hesitate to use it as the Helghasts will be tough here. But the hardest part will await you right before reaching the locomotive. In the place where the tank starts to shoot at you there will be an unlimited number of enemies. While hiding from the tank's fire, you have to get rid of a wave of enemies, run to the gun stack, take a rocket launcher and shoot at the armoured vehicle. After four, maybe five times there should be an explosion. Slowly continue forward (you can take the rocket launcher if you still have some ammo) and get rid of all the Helghasts on the next wagon. Especially look out for those standing on the higher level, because they have rocket launchers. After you eliminate all of them go to the control room and you will reach a checkpoint.
Tharsis station
Additional missions:
Localize Alpha team
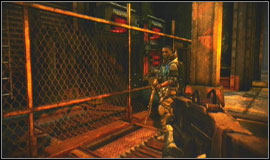
After taking over the train you have to infiltrate the refinery. Listen to the Helghasts talking and then kill everyone on the platform. You will split up with Rico. Help him get over the fence and hide behind the column, as a new group of enemies will appear. After you kill them use the same door through which they entered.
Lower Refinery Complex
Additional missions:
Localize Alpha team
You split up in order to find you friends. Enter the newly opened door. Suddenly the floor will collapse and you will fall to the lower level. Look out for spiders. Destroy the coil at the end of the corridor and you will be able to continue. There you will once again meet a Helghasts with an energy gun. Notice that above him there is a transport line. When he will be under it, shoot the petruzyte and you will stun him for a couple of second. Use this time to shoot the containers on his back. Do this over and over again until he falls. Go up the ladder to the control room and press the switch.
Processing Complex
Additional missions:
Localize Alpha team
You have to ride untypical vehicle to get through the refinery. Before that, be sure to take the energy gun. During the ride you can shoot if you want. When you see a barrier ahead of you, shoot the coil.
Cross-Facility Shipping
Additional missions:
Localize Alpha team
While trying to get to Rico you will be surprised by a new kind of attack. You're being attacked from small, flying machines, which isn't the most pleasant thing at the moment. However, the energy gun that you took will be great for taking them out. Hide behind the packages and take down the enemies. Walk round the complex until you reach an elevator. Activate it.
Transportation control
Additional missions:
Localize Alpha team
Meet with Rico
You meet up with Rico in the control room. Listen to what he has to say and run through the bridge with him.
Central Observatory
Additional missions:
Secure the landing field
Garza is wounded, while you and Rico have to capture Radec. Begin the chase. You have a great gun, so eliminating the enemies shouldn't be too hard. Press the switch at the end.
Tharsis Aerial dock
Additional missions:
Secure the landing field
Secure the communications tower
Team Alpha has to survive until the evacuation. You will be attacked the whole time by enemies on the platforms. After a while you will receive an order to help Evelyn on the way to one of the shelters. Clear the way there and pick up the sniper rifle. Now you will be able to eliminate the other enemies.
Number of suitcases: 1
Number of Helghast symbols: 0
Landing Bay
Additional missions:
Report at the bridge
Radec was unable to get the codec and activate the warheads stolen from ISA, but he did manage to escape. Garza, Alpha team member has been fatally wounded. Team Alpha splits up. You have to ride the lift to the bridge, while Rico and Natko will be keeping an eye on the Intruder's station.
Bridge
Additional missions:
Report at the bridge
Report at the gundeck
Helghast attack beats the hell out of colonel Templar's team. You have to give the New Sun some time. Enter the bridge, listen to the commands and use the elevator.
Power room
Additional missions:
Report at the gundeck
Kill all the foes

You have to get to the anti-aircraft guns, but firstly you will have to fight off the invaders. There will be a lot of fighting in the section. You should use something stronger than a normal gun, so take the tommy-gun. When you will meet a heavily armoured Helghast, firstly get rid of his companions and take the flamethrower. With it you will be able to easily defeat the enemy in these tight corridors.
Air Traffic Control
Additional missions:
Fill the anti-aircraft cannon
Eliminate enemies
While the crew evacuates, you must do everything to defend the ship. Get behind the gun and deal with the enemies. The controls will be displayed on the screen. You will have to take down a couple of fast Helghast ships, so shoot at them when they're still far away. Ignore the report about the ammo.
Core Elevator
Additional missions:
Escape from the cruiser
Colonel Templar commands everyone to get out of the ship, but it seems that all invaders have already abandoned the cruiser.
Emergency Stairwell C
Additional missions:
Escape from the cruiser
After the power supply failure you have to get to the last Intruder on foot. There's lot of fighting waiting for you in the tight corridors of the ship. Go forward all the time.
Launch Bay
Additional missions:
Escape from the cruiser
Alpha team cleans up the central station and initiates the Intruder manually in order to escape the New Sun. Go forward the whole time. Look out for the enemies with flamethrowers. When you reach the demolished section, jump below using the twisted parts of the ship.
Number of suitcases: 0
Number of Helghast symbols: 0
Cargo Impact Site
Additional missions:
Secure the disaster zone

After escaping the New Sun, the Intruder's autopilot takes the remaining members of the Alpha team to an abandoned airstrip. Follow the rest of the team and you will come across another team with an Exoskeleton equipped with a machine-gun and a rocket launcher. It's controlled similarly to a normal character. Any vital information regarding the controls and the fighting will be displayed on the screen.
Industrial Ghost Town
Additional missions:
Secure the disaster zone
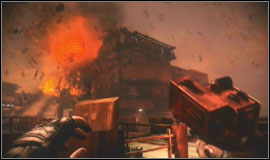
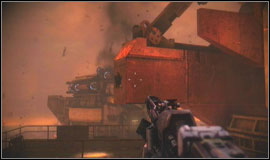
The way through the valley was easy, but now the Helghast infantry won't let go off their loot easily. Go after the leading car. Don't hurry and carefully, from a distance, eliminate the resistance points. Try to move in such a way to prevent the possibility of being attacked from two sides. Be sure to eliminate all the enemies with rocket launchers before you move forward. You will have to destroy a tank near the town exit.
Grave of the New Sun
Additional missions:
Destroy Helghast's tanks

Alpha joins up with Narville and begins to fight with the remaining Helghasts in the huge refinery complex. There are lots of tanks and infantry units around. Firstly take care of the tanks and then concentrate on the centre, killing the enemies with rocket launchers.
Number of suitcases: 2
Number of Helghast symbols: 4
Lazar Highway
Additional missions:
Destroy enemies towers
Visari detonated and atomic bomb in his city, killing most of the ISA forces. Captain Narville and team Alpha are preparing for the final assault on the palace. Take over the foregrounds, while hiding behind the large containers. Go along the left side. Kill the enemy by the machine-gun and quickly run there. This way you will flank the rest of them. Kill them using the packages as cover.
Outer Defenses
Additional missions:
Destroy enemies towers
Secure the courtyard
The battery is preventing the ISA reinforcements from gathering and team Alpha has to destroy the four towers before they can go further. Before you enter the square, take the rocket launcher and destroy the tank there. Then equip the machine-gun again and go in the direction of one of the four towers located in the corners of the square.
The battery is preventing the ISA reinforcements from gathering and team Alpha has to destroy the four towers before they can go further. Before you enter any of the bunkers, throw some grenades at it. Don't worry, there's plenty of ammo everywhere, so you don't have to be greedy. Throw the grenades through the main doors and the machine-gun posts. After that, slowly go inside, while killing the defenders. Place the explosives, go outside and detonate them. You have to repeat this four times.

There will be two heavily armoured Helghasts neat the battery. Eliminate them just like before - shoot them in the head and then attack the container on their back. There will be a small counterattack from the lifts side after you destroy all four towers. After killing the enemies approach that place and use one of the lifts.
Inner Courtyard
Additional missions:
Secure the courtyard
The Helghasts will defend their leaders till the last breath. Expect heavy resistance while you try to reach the palace. Ignore the ATAC machines completely, focus on the troops instead.
Instead of rushing, use the corridor system leading to the back of the palace defenders. Right before the palace hide behind the sand bags and eliminate the ATAC machine firstly. Then run inside. There will be lots of Helghasts here. On the left you will find a path through the entanglements. Afterwards eliminate the defenders in the central part of the chamber by throwing grenades and finishing them with a gun. Find a way through the second line of entanglements and kill the Helghast behind the gun. This battle is one of the hardest in the game, so don't get discouraged - the end of the game is very near, there's only one boss battle left.
Autarch's Sanctum
Additional missions:
Secure the palace
Repulse Radec's support
Reach the balcony at the second floor
Kill Radec
After fighting your way into the palace you and Rico have to try and capture Visari. During the first segment of the fight you have to survive for a couple of minutes while defending on the ground floor of the sanctuary. The attack will occur from the front and back, so it's best to hide in the central part and look out for enemies.
After a couple of minutes the gates leading up will be opened. Go up, kill some Helghasts and go to the back of the sanctuary, next to the two weapon stands. Shoot the enemies below but keep an eye on your sides, as some of them probably will get through and attack you from there. When soldiers with rocket launchers will appear, take the sniper rifle and eliminate the enemies from a distance while moving between the pillars.
It's time for the final showdown with Radec, who is equipped with a masking device, and will often disappear and appear somewhere else - in most cases behind you. In this segment it's best to use the shotgun and run backwards all the time. This way you will able to quickly react to any oncoming danger. After a couple of hits Radec will move to the upper level and will begin to shoot at you with a machine-gun. Go there using the side stairs and flank him. Now you only need to shoot at him using a machine-gun until he dies.
After a short cutscene go to Visari's chamber, through the opened door. This is the end of the game. The only thing that's left is to wait for the next chapter in the war between Vectans and Helghasts.
Suitcases
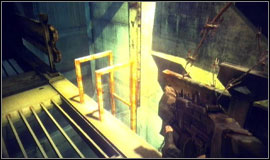
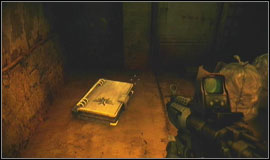
Mission: Corinth River - Verdran Overlook West
Localization: After getting to the other side of the dam, in the centre of the corridor. You can't miss it because of the info regarding the suitcases displaying on the screen in this spot.
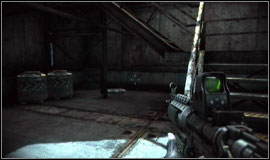
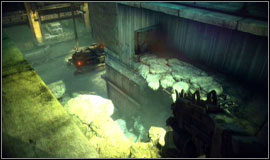
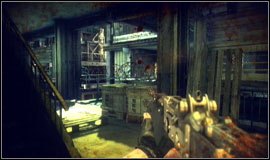
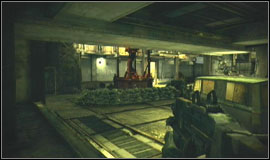
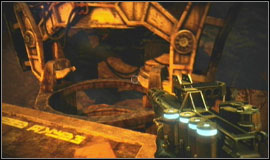
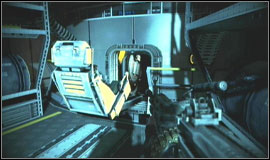
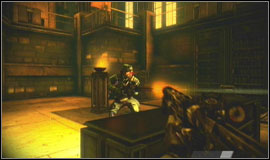
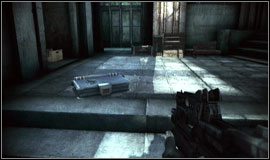
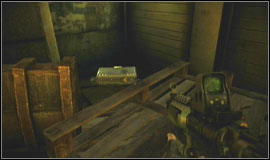
Mission: Corinth River - Verdran Overlook East
Localization: After entering the warehouse, behind the Intruder wreck. Under the stairs leading up.
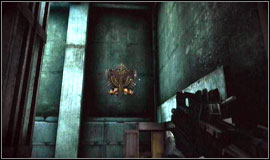
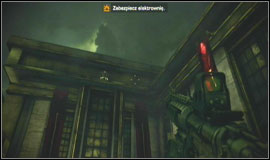
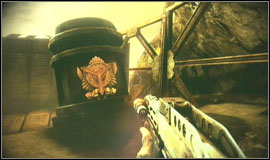
Helghast symbols
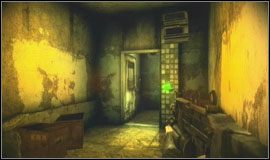
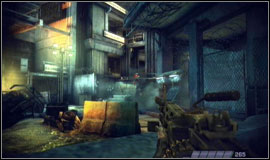
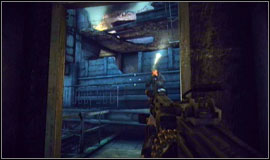
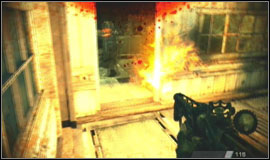
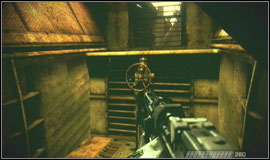
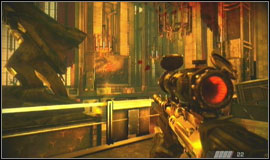
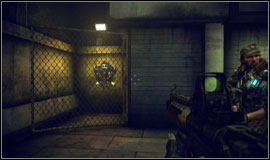
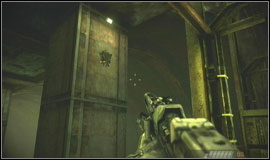
Mission: Corinth River - Stahl Arms Warehouse
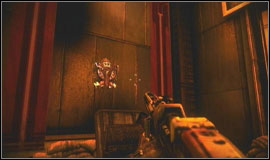
Localization: When you get to the dam's steering room, look out of the window in the direction of the steering room on the other side (the one with Helghasts).
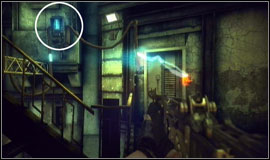
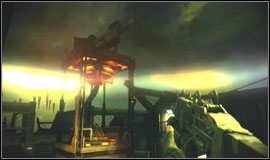
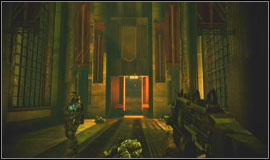
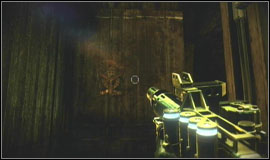
Mission: Corinth River - Verdran Overlook West
Localization: Down the stairs. When you will get an information about the Helghast symbols.
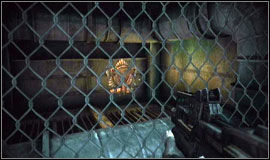
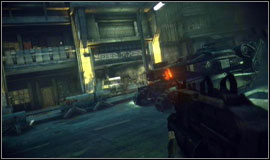
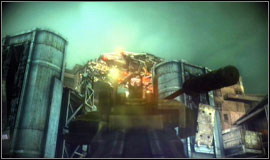
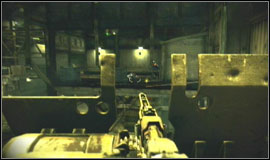
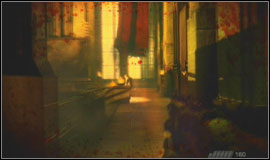
Mission: Corinth River - Verdran Overlook East
Localization: In the corridor which you will pass after defeating some enemies in a big room. Behind the fence.
Suitcases
Mission: Blood Meridian - Landing Zone 33
Localization: The corridor behind the door you blew up.
Mission: Blood Meridian - Verudan Alley
Localization: After getting up, go into the building and turn left. The case is on the left.
Mission: Blood Meridian - Cableway Rooftops
Localization: After clearing the base of the tower, in the building leading to the next level of platforms.
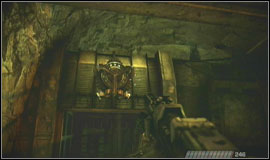
Helghast symbols
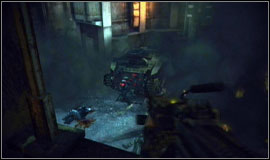
Mission: Blood Meridian - Landing Zone 33
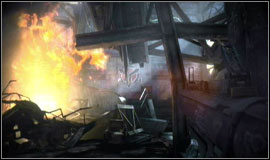
Localization: Right after landing, go along the buildings on the left. Near the burning tank you will find an entrance to one of the houses, where the symbol is.
Mission: Blood Meridian - Dakurol Alley
Localization: In the back alley, behind the barrier that one of the Helghasts jumped over.
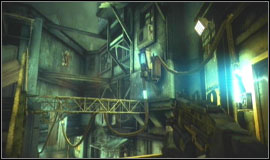
Mission: Blood Meridian -Wollan's View
Localization: After you exit the storm drain you will find yourself in a place in which the ISA and Helghasts are shooting at each other from two building. Enter the building on the left and on the floor, to the left from the gun, there is the symbol.
Mission: Blood Meridian - Verudan Alley
Localization: After reaching the top level go forward and you will see the symbol on the right, behind a fence.
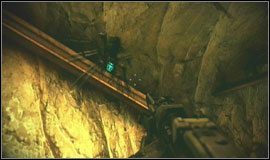
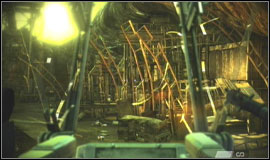
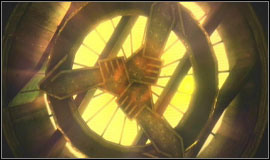
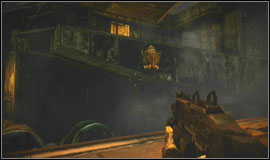
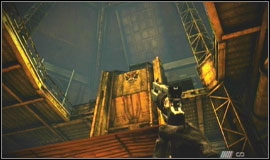
Mission: Blood Meridian - Cableway Heights
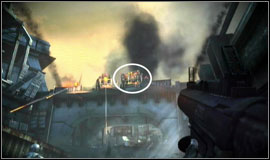
Localization: Stand on the platform under the two railway arches, look up and slightly to the left.
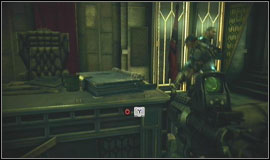
Suitcases
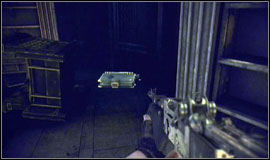
Mission: Visari Square - Malik Back Alleys
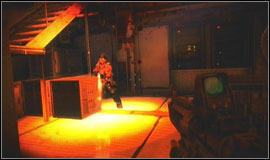
Localization: At the very beginning in the room you jumped into behind the cooler.
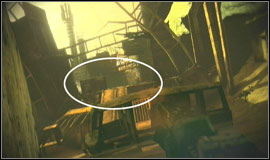
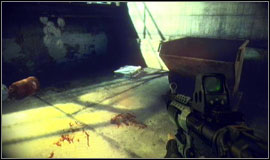
Mission: Visari Square - Union Storage Yard
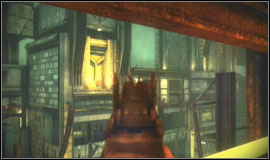
Localization: On the floor in the kitchen to which you will arrive after Garza opens the door leading out of the square which a transporter entered by driving through the wall.
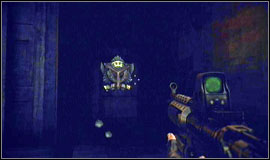
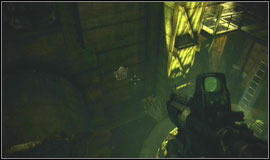
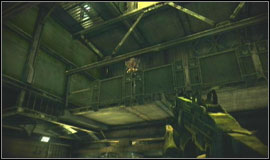
Helghast symbols
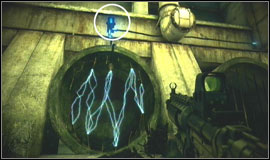
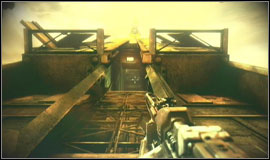
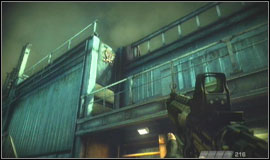
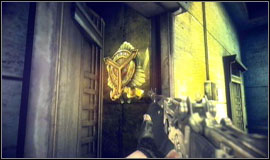
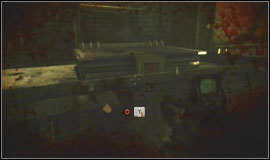
Mission: Visari Square - Prefect's Office
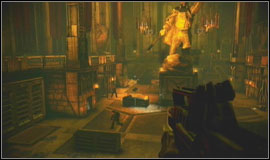
Localization: At the very beginning of the level when you cross a bridge, look to the left. There is a building with a shining Y symbol on it. The symbol is right next to it.
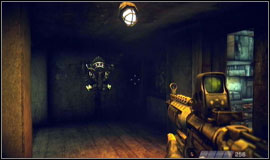
Mission: Visari Square - Prefect's Office
Localization: After taking control over the building on the other side of the street go to the upper floor and find a terrace. The symbol is behind one of the half-opened doors.
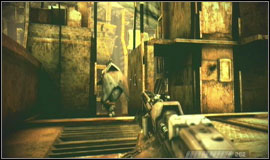
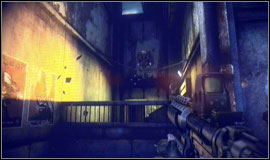
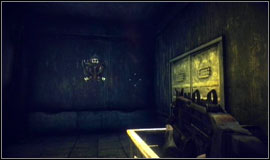
Mission: Visari Square - Malik Back Alleys
Localization: When you will be near the door near which you have to shoot the generator look to the left and you will see the symbol on a building.
Mission: Visari Square - Ostoja End
Localization: After reaching the floor, behind the stairs on the right side.
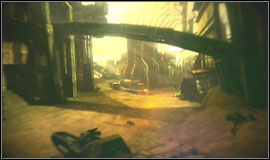
Mission: Visari Square - Union Storage Yard
Localization: At the place where Garza opens the door, look high up and a little to the left. The symbol is on the buildings.
Suitcases
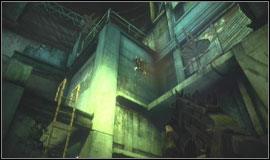
Mission: Salamun District - Dushan Tower Courtyard
Localization: the room on the first floor, in which some Helghasts breaches through a wall.
Mission: Salamun District - Dushan Loading Bay
Localization: In the control room, on the first level of the warehouse.
Mission: Salamun District - Substation Strongpoint
Localization: On the ground floor of the building in which you place the explosives on the four pillars holding the ceiling.
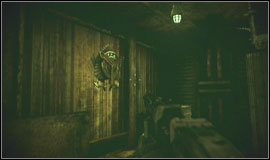
Helghast symbols
Mission: Salamun District - Canal Bank
Localization: After getting out of the pipe, on the wall.
Mission: Salamun District - Dushan Loading Bay
Localization: On the first level of the warehouse. The symbol is also visible from the very bottom, near the exit with a red barrel standing next to it.
Mission: Salamun District - Corinth Shanties
Localization: Right before the entrance to the village look on the higher parts of the walls surrounding the place.
Mission: Salamun District - Substation Strongpoint
Localization: At the place in which you are asked to help from behind a fence. Turn left and look high up.
Suitcases
Mission: Salamun Bridge -
Localization:
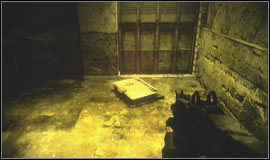
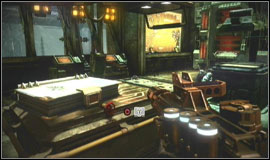
Mission: Salamun Bridge - Radec Academy
Localization: On the desk in Radec's office.
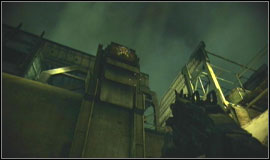
Helghast symbols
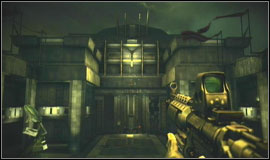
Mission: Salamun Bridge - Bridge West
Localization: After capturing the bridge and a short cutscene you will find yourself in front of Radec academy. Look up and you should see the symbol.
Mission: Salamun Bridge - Radec Academy
Localization: After killing all the enemies that set up a trap in the palace, look above the door leading to Radec's office.
Suitcases
Mission: Suljeva Village - Badlands
Localization: At the very beginning, after crossing the bridge, go lest. The suitcase is behind a barrier.
Mission: Suljeva Village - Suljeva North
Localization: In the room in which you find the dead marines.
Helghast symbols
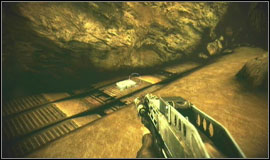
Mission: Suljeva Village - Badlands
Localization: At the beginning of the mission, on the left side there is a path leading to a small canyon under the first bridge. There you will find the first Helghast symbol.
Mission: Suljeva Village - Suljeva North
Localization: Go along the path with the destroyed Intruder next to it. You will find yourself near a gun rack. Look behind you, on the smokestack on the left of the path.
Mission: Suljeva Village - Maintenance Office
Localization: After entering the newly opened room, turn left right after the first fork of the road. You will see the symbol above.
Mission: Suljeva Village - Vojislav Mining Facility
Localization: In the building on the first floor, which you enter after you get rid of the snipers and soldiers defending the road to the antenna.
Mission: Suljeva Village - Waystation 14
Localization: On the concrete pillar. It's easiest to notice right before you jump onto the train with Rico.
Suitcases
 l
l
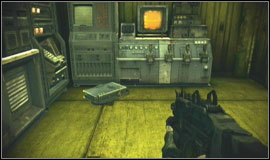
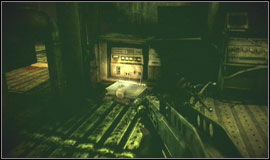
Mission: Tharsis Refinery - Processing Complex
Localization: In the steering room, after you jump out of the dredge.
Mission: Tharsis Refinery - Transportation Control
Localization: In the control room in which you meet with Rico.
Helghast symbols
Mission: Tharsis Refinery - Tharsis Station
Localization: After getting rid of the Helghasts on the station go in the direction of the locomotive. The symbol is on the train.
Mission: Tharsis Refinery - Processing Complex
Localization: After jumping out of the dredge, to the right of the control room.
Mission: Tharsis Refinery - Central Observatory
Localization: Look above Garza, once he is wounded.
Suitcases
 l
l
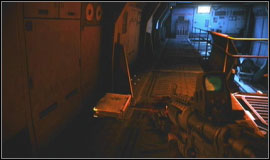
Mission: The Cruiser - Emergency Stairwell C
Localization: After you get a report about the petruzyte gathered below Visari palace, search the pavements below the corridor.
Suitcases
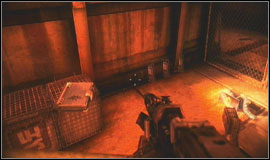
Mission: Visari Palace - Outer Defenses
Localization: On the big square, between the four towers there is a large building with lots of Helghasts around. You should see some stairs leading down next to it. Go down and take the suitcase.
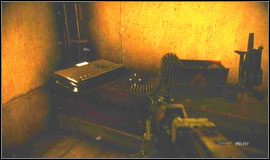
Mission: Visari Palace - Inner Courtyard
Localization: Right before entering the palace, on the left there is a bunker with some stationary guns. The suitcase is inside, on a table.
Helghast symbols
Mission: Visari Palace - Lazar Highway
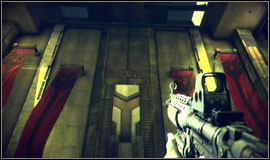
Localization: = On the right tower of the complex.
Mission: Visari Palace - Outer Defenses
Localization: On the central tower. Visible only when looking from the central building area.
Mission: Visari Palace - Inner Courtyard
Localization: Right at the beginning of the level, after crossing the bridge, in an annex.
Mission: Visari Palace - Inner Courtyard
Localization: When you will be standing before the doors leading to the palace, look left. There is a corridor there, with a stationary gun at its end. The symbol is on the opposite side.

Type: Platinum
Name: War Hero
Description: Collect all Killzone2 trophies
Type: Gold
Name: Heroic Survivor
Description: Complete all missions on Elite difficulty level

Type: Gold
Name: Career Ribbon
Description: Achieve an online rank of General
Type: Gold
Name: Valor Grand Cross
Description: Achieve weekly online honor rank #4
Type: Silver
Name: Maelstra Ribbon
Description: Complete Maelstra Barrens on any difficulty level
Type: Silver
Name: Survivor
Description: Complete all missions on any difficulty level

Type: Silver
Name: Untouchable
Description: Complete all missions on any difficulty level without dying

Type: Silver
Name: Valor Cross
Description: Achieve weekly online honor rank #3
Type: Brown
Name: Corinth Ribbon
Description: Complete Corinth River on any difficulty level
Type: Brown
Name: Blond Ribbon
Description: Complete Blood Meridian on any difficulty level
Type: Brown
Name: Visari Ribbon
Description: Complete Visari Square on any difficulty level
Type: Brown
Name: Salamun Ribbon
Description: Complete Salamun District on any difficulty level
Type: Brown
Name: Bridge Ribbon
Description: Complete Salamun Bridge on any difficulty level
Type: Brown
Name: Suljeva Ribbon
Description: Complete Suljeva Village on any difficulty level

Type: Brown
Name: Tharsis Ribbon
Description: Complete Tharsis Refinery on any difficulty level
Type: Brown
Name: Cruiser Ribbon
Description: Complete The Cruiser on any difficulty level
Type: Brown
Name: Pallbearer
Description: Kill 500 Helghast Soldiers
Type: Brown
Name: Undertaker
Description: Kill 1000 Helghast soldiers
Type: Brown
Name: Reaper
Description: Kill 1500 Helghast soldiers

Type: Brown
Name: Field Agent
Description: Collect all intel within the game.
Type: Brown
Name: Iconoclast
Description: Destroy all Helghast symbols within the game
Type: Brown
Name: Babysitter
Description: Revive your buddies a total of 25 times
Type: Brown
Name: Elementalslayer
Description: Kill the Tharsis Refinery ArcTrooper in under 1 minute 30 seconds

Type: Brown
Name: Giantslayer - Kill the Heavy within 1 minute
Description: Kill the Blood Meridian heavy in under 1 minute
Type: Brown
Name: Dragonslayer
Description: Destroy the Salamun Bridge ATAC in under 1 minute 30 seconds
Type: Brown
Name: Demonslayer
Description: Kill Radec at Visari Palace within 20 minute.
Type: Brown
Name: Safari Hunter
Description: Kill one of each enemy infantry type with a melee attack
Type: Brown
Name: Kipling Spree
Description: Kill 5 Helghast in 15 seconds whilst on foot and maintaining at least 85% health

Type: Brown
Name: Bullet Counter
Description: Manually reload your weapon 150 times
Type: Brown
Name: Safety First
Description: Shoot off 100 Helghast helmets during battle
Type: Brown
Name: Berserker
Description: Kill 25 Helghast using melee attacks
Type: Brown
Name: Barrel of Death
Description: Kill 3 Helghast at once using the surrounding environment
Type: Brown
Name: Professional
Description: Get 3 headshots in a row using the same clip of M4 Revolver ammunition
Type: Brown
Name: Fragmerchant
Description: Kill 5 Helghast at once using a single frag grenade
Type: Brown
Name: Fragmartyr
Description: Kill 2 Helghast at once and take your own life using a single frag grenade
Type: Brown
Name: Melonpopper
Description: Get 15 headshots using the VC32 Sniper Rifle
Type: Brown
Name: Blade Runner
Description: Kill 75 Helghast using the knife
Type: Brown
Name: Stick Around
Description: Nail 20 Helghast to a wall using the Boltgun VC-21
Type: Brown
Name: Master Conductor
Description: Electrocute 3 Helghast with a single burst from the VC5 Electricity Gun
Type: Brown
Name: Run and Gunner
Description: Kill 3 Helghast using an M82 or StA52 assault rifle without releasing the trigger
Type: Brown
Name: Defensive Fighter
Description: Kill 30 Helghast using the StA3 fixed gun emplacement
Type: Brown
Name: Can Opener
Description: Destroy any Helghast APC during battle

Type: Brown
Name: Spare Parts
Description: Destroy all Leech Pods in The Cruiser
Type: Brown
Name: Treadhead
Description: Take 30 Helghast lives whilst using the ISA tank
Type: Brown
Name: Mechspert
Description: Stomp 10 Helghast with your Exoskeleton in Maelstra Barrens

Type: Brown
Name: Valor Medal
Description: Achieve weekly online honor rank #2

Type: Brown
Name: Valor Citation
Description: Achieve weekly online honor rank #1

Type: Brown
Name: Cross-Training Ribbon
Description: Acquire all badge specific medals
Type: Brown
Name: Veteran Ribbon
Description: Acquire all mission specific medals
Type: Brown
Name: Export Ribbon
Description: Acquire all combat specific medals
Type: Brown
Name: Wargod Ribbon
Description: Acquire all remaining medals
Type: Brown
Name: Blitzkrieg Ribbon
Description: Win 50 online matches


 Killzone 3 Game Guide & Walkthrough
 Kane & Lynch: Dead Men Game Guide & WalkthroughKings Quest Game Guide & WalkthroughKillzone 2 Game Guide & WalkthroughKingdoms of Amalur: Reckoning Game Guide & Walkthrough