
In the inFamous: Second Son guide you will find all the most important information about the game, which will make it easier for you and allow you to find all the secrets. The guide consists of two parts. The first one is called inFamous: Second Son in 10 Easy Steps. This part explains the most important aspects of the game in a clear, easy to understand way. After reading it, you will know how the karma system works, how to fight with various types of enemies, what are the additional activities in the game, how to develop your character, as well as how to take control over various parts of the city. The second part of the guide was entitled inFamous: Second Son - game guide, walkthrough, the city. According to the name, the guide contains a very accurate and detailed game walkthrough. Here you will find the information about all the main and subquests, and tips on how to tackle more challenging tasks. Additionally, every boss fight in the game is discussed separately, which should allow you to deal with them without any problems. Also, you will learn on how the player's choices affect the story and the events happening on the screen. In this guide you will also find a very detailed map of Seattle, which should ease the process of moving around the city. A fact worth noting, is that the makers of the game decided to allocate the story in an actual city, existing in the USA.
Jacek "Stranger" Halas ()
The inFamous: Second Son in 10 Easy Steps is a guide discussing the most important aspects of the game. Knowledge over them can be very beneficial, especially in the early game of exploring the city of the virtual Seattle. The First Section of the guide concentrates on the topic of area exploration, explaining how it can be improved by the proper usage of Delsin's powers. The theme of the Second Section are fights, including hints on powers and their application method, depending on the actual situation on the battlefield. The Third Section contains the collation of all the enemies appearing in the game. The Fourth Section discusses the types of tasks awaiting for you in the game and the ways to solve them. The Fifth Section is extremely important, as it explains how the karma system works in the game and the ways of accumulating both good and bad karma. The theme of the Sixth Section is the smoke, Delsin's primary power. This part contains information about the effective usage of smoke powers and how to replenish its supply. The Seventh Section concentrates on unlocking new powers and abilities, showing how it can be done and which abilities are especially worth unlocking early in the game. The two subsequent sections are about your city adventures. The Eight Section focuses purely on the additional activities available to you during your adventures in Seattle, and the Ninth Section on retrieving succeeding districts of the city, formerly under the command of the enemy forces. From the last, Tenth Section, you can learn more about the death of the character and the means to avoid it. inFamous: Second Son is a game from the Sucked Punch studio, in which we take control over a young man wielding supernatural powers. The main character is Delsin Rowe, who is able to control the power of smoke and fire, and the place of action is the rainy city of Seattle.
This chapter is fully dedicated to environment exploration, assisted by with a skillful usage of the main character's powers and selected elements of your surroundings (ventilation shafts, railway lines, cars, etc.).
In this chapter you will find all the fundamental information about fighting, as well as hints about the effective usage of the main character's equipment and powers to ensure victory in subsequent challenges.
This chapter contains a collection of all of the most important types of enemies - soldiers, other, power-wielding characters, enemies using various means of transport (armored vehicles, tanks, helicopters, etc.) and bosses.
A chapter describing the division into main quests and sidequests, as well as informing about the methods to approach them (reaching a specified starting point, free exploration, etc.).
A vast chapter, explaining the way in which the Karma functions in the game and how it influences the further course of the game. In addition, this chapter contains the information about all the possible ways of gaining good or bad karma.
This chapter contains a detailed description of the main character's prime power - it's advantages and disadvantages, as well as its proper usage. In addition, this chapter contains information about the possible ways of replenishing your smoke reserves (without it, some of your powers are unusable).
This chapter is devoted to the main character's range of skills. In text contains information about various ways of unlocking them (core relays or purchase in exchange for the shards you've found), as well as the collation of the most useful abilities.
In this chapter you will find the information concerning all the additional activities related to the districts of the city, such as finding the shards and security cameras, exposure of hostile agents, graffiti painting and the acquisition of audio logs.
By reading this chapter, you will learn how Delsin can assume complete control over the successive districts, getting rid of the enemies stationed there in the process.
This chapter discusses the circumstances of the main character's death, and contains suggestions on how to avoid it. Besides that, this section contains the information about the process of saving the game and differences in gameplay based on the selected difficulty level.
Jacek "Stranger" Halas ()
The exploration of game world in the Second Son, in comparison to the earlier installments, works in quite a different way, due to the fact that Delsin Rowe has a different array of skills from his predecessors. To make the journey more effective and convenient, the hero uses the power of smoke, which has been widely described in the "Step 6" section. I would especially recommend a regular usage of the power allowing you to turn into smoke, for it increases the process of movement, shortening the time needed to reach a given place in the process. Additionally, it allows you to phase through obstacles (barricades, metal gates, parked cars, etc.) or to get to a currently pursed person faster. Another advantage of travelling in this manner is that you won't be using any of your smoke reserves, meaning that this method can be used infinitely.
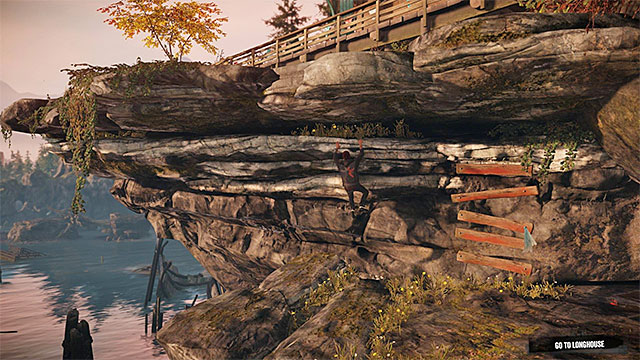
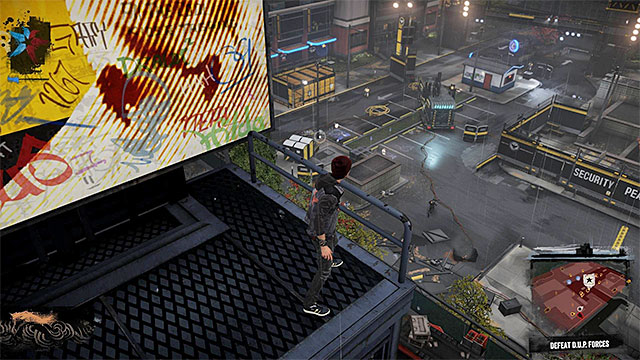
During your exploration of the Seattle, you don't have cling to the surface, especially that the game clearly encourages a more effective (and showy) course of action. A good idea is to bounce off of the nearby cars - doing so thrusts Delsin up in the air. Also, the main character is constantly encouraged to visit ledges located above the ground, as well as rooftops of the buildings. Despite the fact, that Delsin can climb them up in a traditional manner (by grabbing subsequent edges and interactive shelves), it's a rather arduous process, that makes reaching a roof of a building of a moderate height go into dozens of seconds. Instead, you can look around for red ventilation shafts, which you can enter after turning yourself into smoke (a sample shaft is shown on the screen above). Depending on the type of the shaft, Delsin will be transported on a higher ground or all the way to the roof, skipping the laborious process of climbing and taking care of not to lose your balance.
 Running through the rooftops and railroad tracks is another efficient travelling method around the city.
Getting on the rooftops, by using "normal" climbing method, or via ventilation shafts, has a number of advantages. Firstly, you can move around the city in this manner, while using the power to turn into smoke and to float above ground will help you to get to other rooftops. I would recommend to improve the former one, which will allow Delsin to use two jumps before he will have to land on a solid ground. Travelling through the rooftops allows you to shorten the amount of time need to reach a certain place immensely, because you won't have to look for a proper course around the streets or obstacles. What is more, it's a good way to avoid confrontation with a large number of D.U.P. soldiers, because most of them are stationed on the streets, only some of them can be found above the ground, on rooftops or on observation towers.
Rooftops aren't the only above-ground means of transport around the Seattle. I would recommend to pay attention to the railroad tracks, going through many of the districts of the city you will visit, as Delsin can jump on and travel along them. This method has two major drawbacks - the railroads limit the freedom of movement, and you have to watch out not to run into a subway wagon, which will result in falling of the rails.
 The main character, unfortunately, cannot swim.
As far as Delsin doesn't have to be worried about falling to the ground, even from high altitudes, he must, however, avoid getting into water at all cost, as he lacks the ability to swim. This is even more bothersome, as you will be spending a lot of time in a near vicinity of water reservoirs, for instance when exploring the docks or traveling between north and south parts of the city. You have to remember about it all the time, trying to carefully execute your moves and use powers available to you (especially the ability to float above ground) to avoid a sudden drop into water. Fortunately, contact with the water doesn't mean an instant death, but your character will be defenseless until you get back on solid ground. Additionally, it means losing some time, which can be precious, especially in those missions, in which the time is of the essence.
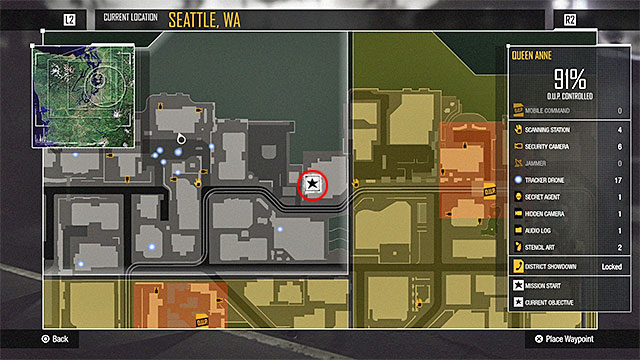
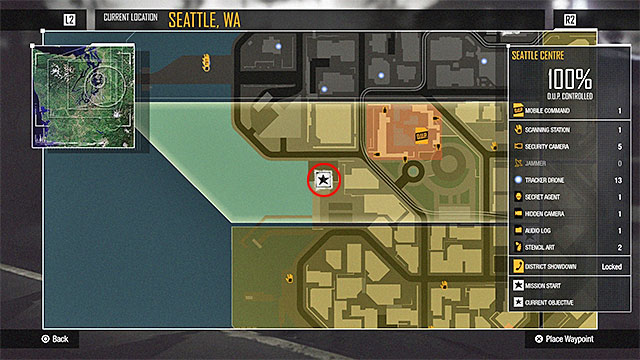
 You can use the global Seattle map or rely on the indications given by the mini-map (bottom right corner of the screen).
The virtual Seattle isn't an especially vast city, but despite that, the game tries to easy you with the navigation around the area. I would recommend to summon up the world map regularly (by pressing the OPTIONS button), especially given the fact, that there are places of interest (mission location and additional activities) marked on it. The city is divided into a dozen or so districts, and by hovering your cursor on any of them, you will be given specific information about it (who controls it at the moment, what secrets are yet to discover, etc.). Besides the world map, you should also pay attention to the indications of the mini-map, which is located in the bottom right corner of the screen. This solution is strengthened by the fact, that you can find various interactive places on the mini-map, which aren't marked on the global one (for instance, ventilation shaft entries marked with the orange).
Another worth noting information, is that in the inFamous: Second Son, there's also an option of quick travel, which can be done between districts. This can only be used on the districts, which have been reclaimed from the D.U.P. hands (more on this matter in the "Step 9" section in this guide) - you will be able to use it as soon as you seize control over at least 2 districts.
 Plan your attack ahead, especially when Delsin is going to challenge substantial enemy forces.
Despite the fact, that Delsin, almost from the beginning of the game, has a range of useful and powerful abilities at his disposal, he is not invincible and this fact becomes especially clear while playing on the highest difficulty level. I would recommend planning your skirmishes ahead, especially when you're expecting to be going against a substantial enemy force - as long as the game allows you to prepare for it (frequently the enemy forces appear from thin air and you won't have the time needed to prepare yourself).
Getting onto a roof of a building adjacent to your current goal is generally a good idea, as you can get a glimpse of the area, where you have to go and how well the region is protected. Also, you should establish a "list of priorities" (taking out the observation towers at first, for instance) and try to hold onto it after the fighting begins. Furthermore, you can try to attack the enemies by surprise - Comet Drop or Orbital Drop powers come in handy here. It will allow you to take out part of the enemies before the actual encounter begins, or demolish a barricade or other object, which otherwise could be a burden.
 Hand to hand combat is risky, but it allows you to preserve your smoke reservoir.
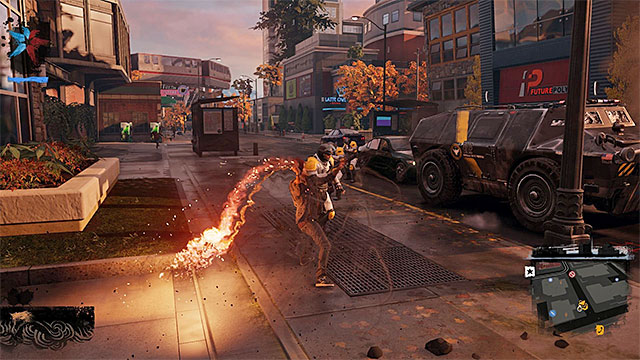
Fights in inFamous: Second Son can take various forms, but common sense would advise to divide them into those performed in close combat and those, in which you try to keep your distance and attack the enemies from afar. Close combat is recommended while fighting enemies which can't deal effectively with this type of combat, for instance the most regular soldiers of D.U.P., equipped with firearms. Your chain should be able to deal with them without much effort - another advantage of using it is that it doesn't use your smoke reservoirs. If you want to launch some stronger, short-ranged attack, like Cinder Blast (hold down the R2), you should also do it while fighting them in close combat.
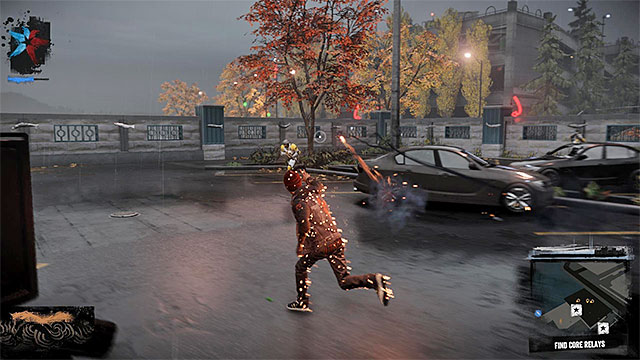
 Attacking enemies from afar is generally safer, but you must demonstrate a higher degree of accuracy.
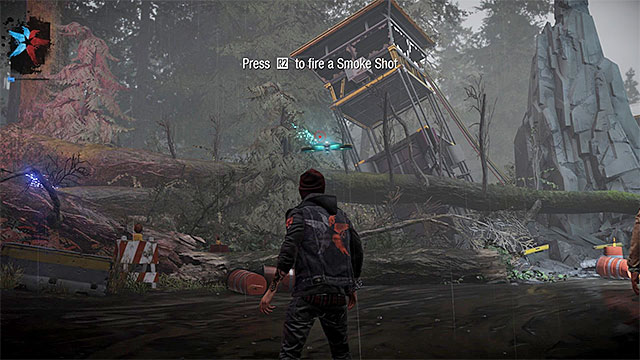
Ranged combat is recommended, if you don't want to take unnecessary risk and/or if you're fighting with enemy soldiers or machines, that cannot be hurt with direct attacks (because they can block them, for instance). In this case, your main weapon should be the Smoke Shot, unlocked at the beginning of the game, although you shouldn't forget about other powers (unlocked later in the game), highly effective against enemies located further away (for instance, a Cinder Missile, effective against enemy tanks and helicopters).
Note - a very important aspect of both melee and ranged combat, is that you should try to be on the move all the time, which will make you harder to track for your enemies. The benefits of such a fighting style can be seen practically from the first mission in the Seattle. Remaining in motion will allow you to avoid taking damage from enemy's ranged attacks (especially from snipers),as well as grenades and projectiles fired by enemy vehicles.
 Destroying the elements of the environment is frequently beneficial while dealing with the enemy.
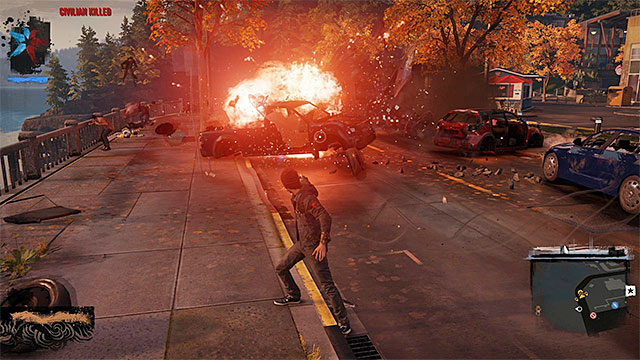
The environment in the game inFamous: Second Son is destructible to a degree, as Delsin cannot level entire skyscrapers or bigger objects. You shouldn't, however, have any problems with distinguishing the object, that can be destroyed, and, unless you have your smoke reservoir running on fumes, you should always opt for an aggressive approach. Demolishing a certain object can automatically take out a group of nearby enemies, hinder their attacks, or prevent them from reaching you (when a construction crashes on the street, blocking it entirely).
 Standard D.U.P. soldiers are the most frequent sight in the game.
The enemies in the inFamous: Second Son can be divided into four different groups. The first one are the standard D.U.P. soldiers, appearing in a few different "variants", with different armor and armament. Generally speaking, those enemies pose the lowest risk from all of the enemies described in this section, and you should be careful when dealing with them only if they are in a bigger group, which can begin a massive barrage and literally cover Delsin with grenades (effectively preventing escape and elimination of threats). While being in this situation, you should concentrate on individual foes, to successively reduce the numbers of enemy troops.
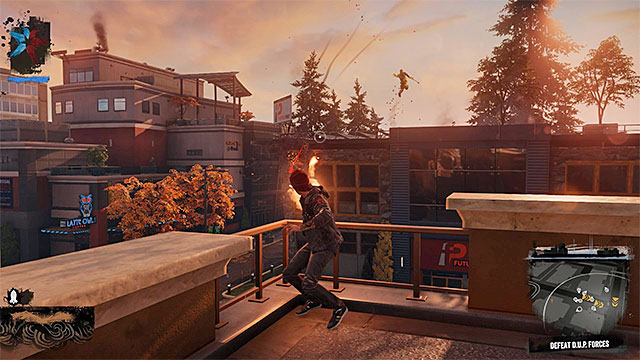
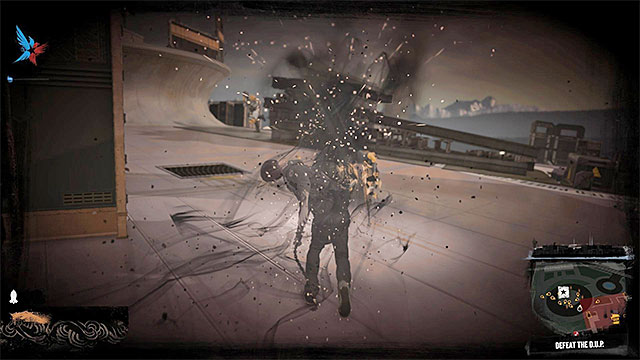
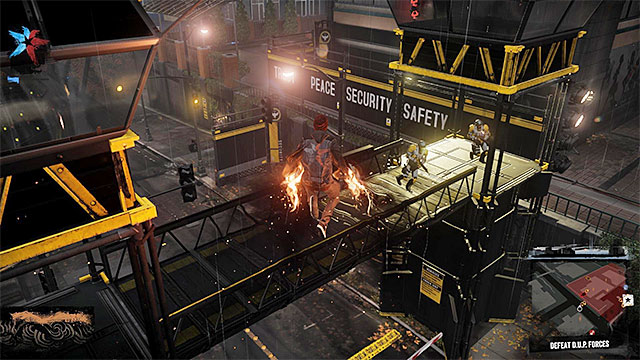
The second group are the enemies endowed with supernatural powers (an example is visible on the above screenshot). Like in the case of the standard soldiers, enemies in this group differ from each other, as they can wield different powers and use various types of firearms (a minigun or a rocket launcher, for instance). Regardless of the encountered enemy, you shouldn't underestimate him, for enemies in this group deal more damage, can move around faster (as well as run away from Delsin, if needed) and they are harder to kill (it could be necessary to get rid of the enemy's shield or to finish him off after dealing a substantial amount of damage).
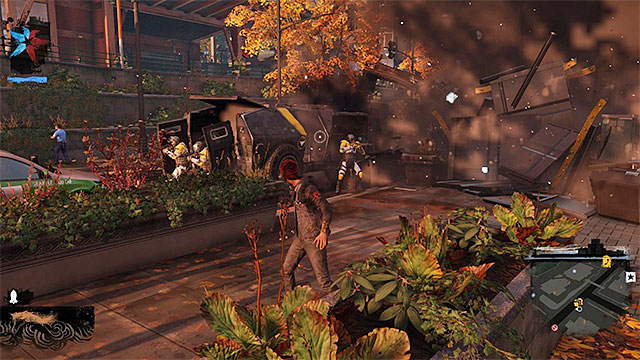
The third group are the enemies using various means of transportation (for instance, an armored vehicle, like in the above screenshot). In the beginning of the game, you will encounter as much as an armored vehicle, but further into the game you will stumble upon tanks and / or helicopters. An effective way to deal with them is a priority, because in most cases they have huge firepower, and can bring you on the brink of death in seconds. Don't forget to use the proper power versus a certain threat, like a Cinder Missile to blow up the enemy vehicles.
 Hank is the first boss you will encounter and he's definitely the easiest one to take down.
The last, fourth group, are the bosses. They appear solely in defined, scripted places of the single player campaign and every encounter with a boss is unique. Detailed information about defeating each and every one of the bosses in the game can be found in the walkthrough part of the guide.
 A typical beginning of a mission.
Just like in any case of an action game, with an open world, in the inFamous: Second Son you can deal with main (story) quests, as well as sidequests, although the latter are much less important that it might seem. The main quests are form single, solid series, but as soon as you finish the first stage, after reaching the city (Welcome to Seattle), you won't have to rush with other main quests. In the meantime, you can take on some minor errands, or additional activities, which are thoroughly described in the "Step 8" section. If you want to start another main quest, you will have to find the marker on the map, get to it and confirm it.
Two things related to main quests are worth mentioning:
1) Read the information displayed after completing every main task very carefully. The next main mission isn't always available from the start - sometimes the game forces you to take on some of the additional activities, or to roam around the city a little more.
2) Some of the main missions can be "altered", according to your karma - it will be different for a hero (good karma) and a villain (bad karma). More on this correlations can be found in the "Step 5" section. The walkthrough takes into account both playstyles.

As it was mentioned before, the sidequests are marginal for the story, as they are a number of random events, which Delsin can be a witness of during free roaming (an example can be seen on the above screenshot). This events are connected with the acquisition of good (blue icons) and bad (red icons) karma. They appear randomly and you don't have to take them on the moment you stumble upon them, as they won't disappear with time if you ignore them. What is more, a great number of them can be accomplished more than once, accumulating a bigger pool of good / bad karma in the process.
 Following a given "karma path" determines the advancement in hero / villain levels.
Like in the previous installments of the inFamous series, karma is one of the most important elements of gameplay, influencing the course of certain missions, types of powers wielded by the character, or the way the NPC characters act around him. Delsin can accumulate both good and bad karma, and their current state is always visible in the upper left corner of the screen. You should decide whether you want to be a superhero or a vile criminal at the beginning of the game and stick to it throughout it. This is further emphasized by the fact, that different attractions are intended for a hero and different for a villain, which can be inaccessible to you if you decide to "change the camp" frequently. A taken "karma path" influences the course of some of the missions, and powers acquired by the character - some are only available to the good / bad archetype. It would be advised to complete the game at least two times - especially because there are different trophies prepared for a hero / villain.
The actual karma level is mostly influenced by hey decisions, like the one from the above screenshot (the final part of the prologue). Those decisions can impact the way the story develops and if you will gain access to certain quests.
Karma selections isn't naturally limited only to the "main decisions", because it evaluates a whole number of different activities performed by the character. Generally, you must pay attention in all the areas where there are blue / red icons symbolizing good / bad karma respectively. Rescuing (good karma) or finishing off (bad karma) injured citizens, subduing (good karma) or executing (bad karma) of enemies, which have been stunned or have surrendered (example decision can be seen on the above screenshot).
 Doing sidequests is a good method of acquiring a larger pool of good / bad karma.
The next component of the game connected with karma are the minor sidequests, which were mentioned in the "Step 5" section. Each one of those tasks are connected with good or bad karma, which means that you shouldn't be doing all of them. Focus on doing those random encounters (even doing them more than once), which are consistent with your "karma path".
Typical, good-karma quests are:
Typical, bad-karma quests are:
Definitely most of the Delsin's powers and abilities (offensive as well as defensive ones), is connected with the usage of the Smoke power. The Smoke allows you to move around the area easier and faster ("teleportation", red ventilation shaft usage, floating above the ground), which was thoroughly described in the "Step 1" section. In the case of the offensive actions, the fire element takes some attention, because some of the projectiles you shoot deal fire damage or explode on contact.
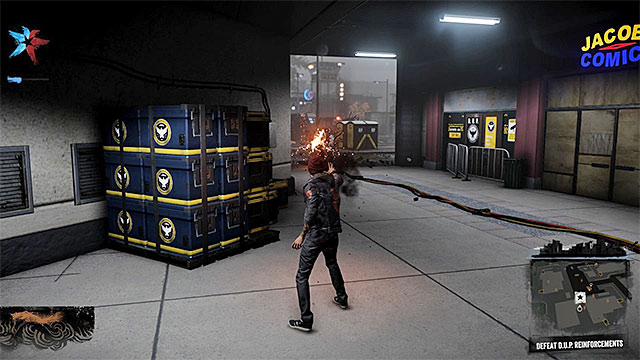
 You can collect Smoke from car wreckages.
As far as exploration-like abilities doesn't consume Delsin's smoke supply, launching offensive abilities requires you to have a certain amount of smoke collected beforehand, which acts as a resource in the game. The current supply of smoke is displayed on a bar, in the bottom left corner of the screen and after depleting it, Delsin will be left with only the basic attacks (his chain, for instance), with which he won't be able to do much. It is crucial to observe the reserves of smoke and react accordingly.
The game world has a number of smoke sources, but as the action of the game takes place in a city, you will be acquiring it mostly from car wreckages. You don't have to look around for wreckages, as you can simply destroy the nearby "fine" cars - they will emit smoke after doing so.
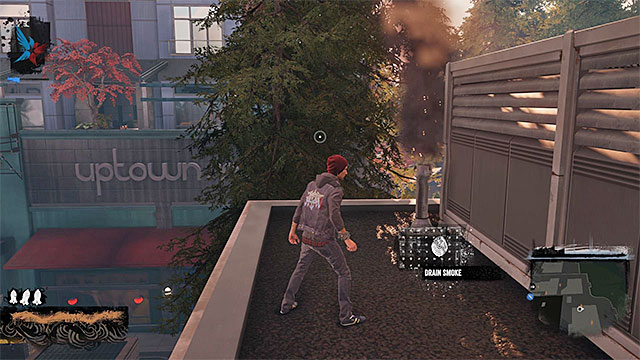
Car wreckages aren't the only source of smoke. Another good idea is getting on building rooftops (by using the red ventilation shaft, if possible). On most of the rooftops, you will encounter chimneys, from where a smoke will be emitted (the above screenshot show such a chimney). An advantage to that, is that most enemies won't be able to continue chasing you on rooftops - besides replenishing your smoke supply, you can regenerate your health and get back into the fight refreshed.
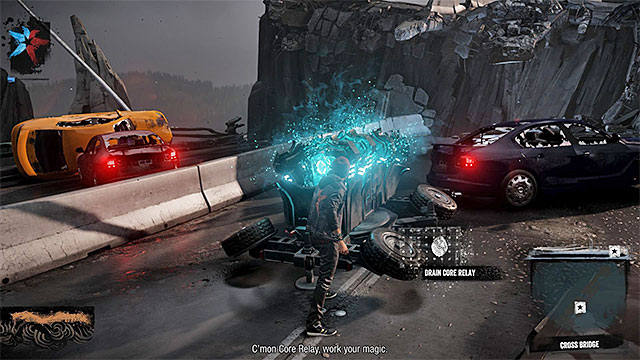
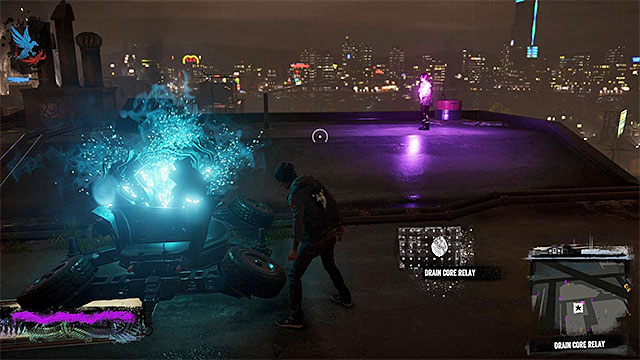
At the beginning of the game, Delsin Rowe has a very limited array of skills, but he gains access to more of them as the game progresses - this is done in two ways. The first category are the skills which are awarded "automatically", while completing the main story of the game. They are connected with Core Relays found by Delsin (an example Core Relay can be seen on the above screenshot) and "sucking" energy from such a relay awards you with a specific, scripted power.
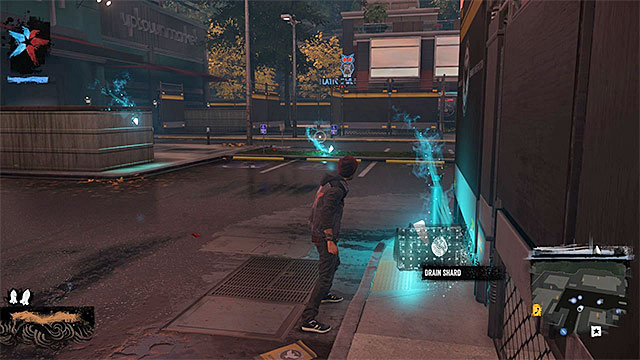
The second category of skills must be acquired on your own and before you "go shopping", you need to have at least one (or more) Blast Shards (it can be seen on the above screenshot). They can be collected by traveling through the game world and from shot down Tracking Drones - more information can be found in the "Step 8" section.
 Some of the abilities are reserved solely for hero / villain type of character.
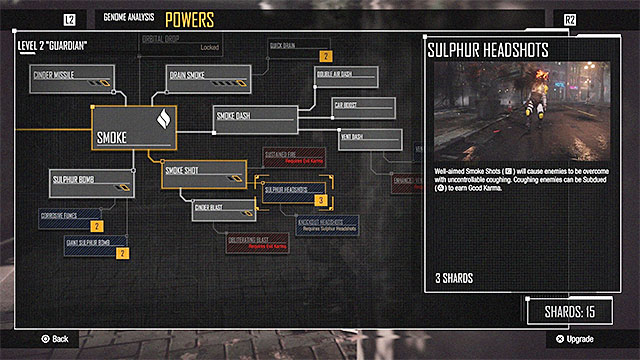
After acquiring at least one Blast Shard, you can press the Options button, and after that L2 or R2 to get into the screen with character's skill tree. I would recommend to study this tree thoroughly, reading through all the descriptions of each ability. The abilities are divided into three groups. The first are the primary abilities, which unlock a new skill after purchasing them. The second group are the upgrades to already acquired skills - there can be one or more upgrades to a certain skill, depending on the skill type. Each subsequent upgrade improves the ability, by increasing the damage dealt or decreasing the amount of smoke needed, for instance. The third group are the abilities reserved for a good karma (blue ones) or a bad karma (red ones) character. What is more, it may be required to advance to a higher level / type of a hero / villain.
Here's a list of "universal" powers, which should be bought early (the list does not contain the skills unlocked by completing the storyline):
If you are playing a hero (good karma), you should unlock those skills early:
If you are playing a villain (bad karma), you should unlock those skills early:
Additional activities should be tackled between main story missions - each district of the city has a several dozen of such activities, which are divided into several groups (described below). Completing the activities allows you to earn secrets and to unlock new abilities, but it is also needed to weaken the D.U.P. influence in the area. More on this topic can be read in the "Step 9" section.
 Tracking Drones should be shot down, because only then you can acquire Blast Shards from them.
In the "Step 7" it was mentioned, that Blast Shards are used to acquire new powers and finding them is one of the additional activities in the game. The shards appear in two "forms", and it's easier to acquire them in their "passive form", because all you have to do is to get close to them and simply collect them. Some of the shards are harder to get - by destroying environmental obstacles hiding them from you or by shooting down Tracking Drones. In the case of the latter, you have to track him down (climbing up a roof will surely help), bring him down to the ground with your ranged attacks (Smoke Shot is best suited for it) and examine the wreckage afterwards.
Collecting as many of those shards as possible should be your priority, as each one of them guarantees you one skill point, which means, that the faster you collect them, the sooner you will be able to purchase all of the most important abilities.
 A security camera.
Destroying Security Cameras is yet another available activity. You won't get any special reward for doing so, but you will be one step closer to assuming control over the given district and you won't have to be careful not to get seen by the camera.
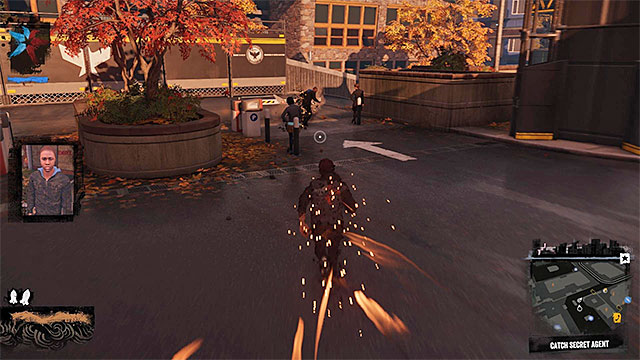 You have to chase and catch the fleeing agent.
Another activity available to you is the exposure of the enemy Secret Agents. You have to locate the enemy agent based on the provided photography, and as far as things go, this is the easiest part of the task, because the virtual streets of the Seattle aren't flooded with thousands of civilians and the search area is narrowed to a small portion of the city. The uncovered agent will start running away from you, and here's where things take a nasty turn. You can't let the escapee get too far away from you and you have to continuously fire at him, because the pursuit ends after the agent is neutralized. Because of that, those activities should be taken on only after you've invested some points into Delsin's firepower and/or have upgraded his mobility, allowing him to move around the city smoother.
 Security camera's point of view allows you to determine its location.
The next item on the list is the search for the Hidden Cameras. After you've started the activity, the game will allow you to use the character's phone to get a glimpse of the camera's point of view - it's a very useful tip, as you can determine its location based on objects in its surroundings (if you have problems with locating the camera, stand with Delsin in some visible place and search for him via the camera view).
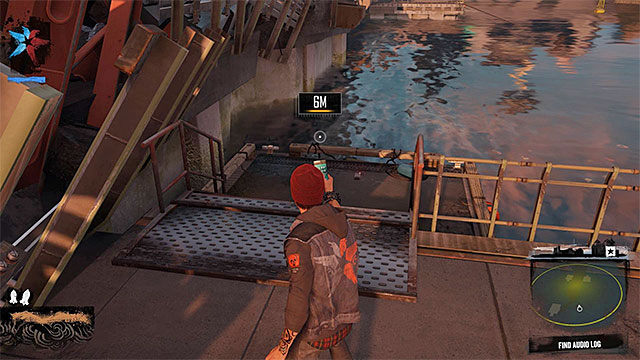
In the inFamous: Second Son, you will also stumble upon the most classic game collectibles - Audio Logs. After arriving near the destination of the hiding place, you must start your search. Fortunately for you, they are almost always easy to find, because the search area is narrowed - if that's not enough, Delsin can use his phone to measure the current distance from the Audio Log (as can be seen on the above screenshot).
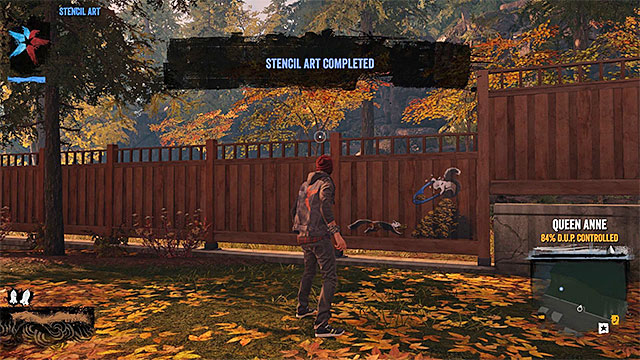 You can decide whether to paint a hero- or a villain-promoting graffiti.
The last group of activities are the places where you can paint graffiti (Stencil Art). After reaching the destination, the game forces a choice on you, whether you want to print a graffiti promoting your good or bad karma, so you should decide about it beforehand, based on your "path". The process of printing is trivial, because all you have to do is to move your controller in a particular motion, to paint over succeeding areas.
 Your first step on the road to take over a district should be destroying the enemy base in the area.
Assuming control over districts is a complex, most time-consuming, as well as the most difficult from all the activities present in the game. The hole mechanism of recapturing consecutive sections of Seattle resembles in many ways that of the game Red Faction: Guerilla, because it implies retrieving the districts formerly in the D.U.P.'s hands. The first step should be destroying the enemy base in your selected district, and an example of this process can be the ending part of the first main mission after arriving in Seattle (Welcome to Seattle). You have to locate and blow up the mobile command center, as well as get rid of all the enemy soldiers in the area.
After taking care of the enemy base, you should start doing additional activities in that district, which was described thoroughly in the "Step 8" section. You don't have to complete 100 percent of the activities, but you shouldn't skip them, because more than once you will receive rewards after completing them.

Activities mentioned above (destroying the base, doing additional tasks) have to be done until the percentage showing the influence of the D.U.P. forces falls below 30% - the current progress can be checked from the world map. Afterwards, you have to get to a place marked by a phone on the map (as can be seen on the above screenshot) and after making a call get ready for an encounter for the control over the district (District Showdown).
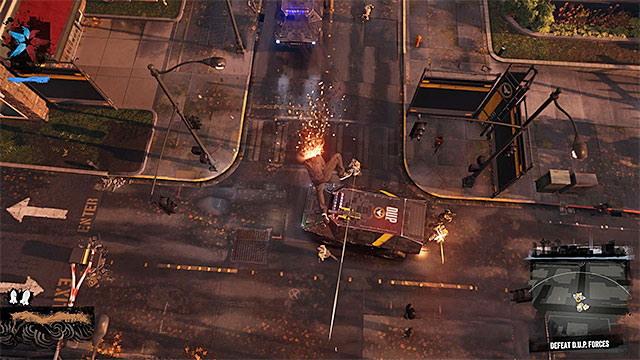
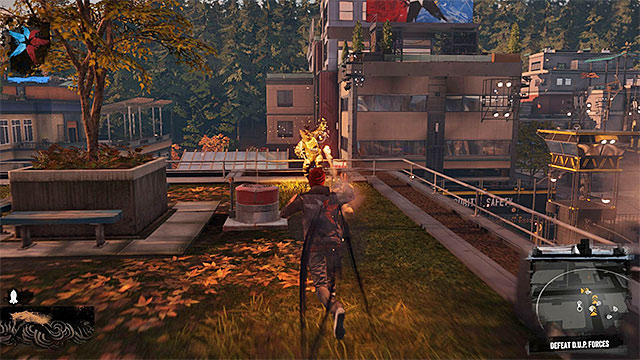
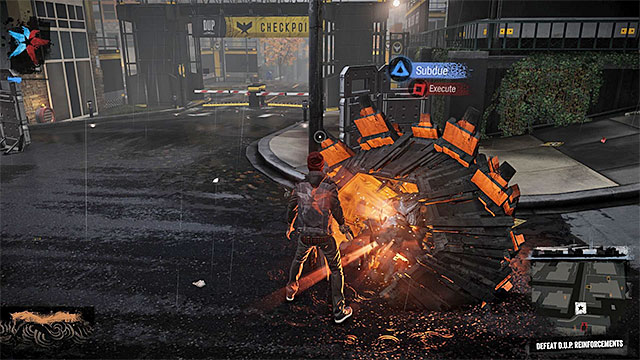
 You have to get rid of all the D.U.P. forces in the area.
All the fights connected with the retrieval of the district are quite challenging, because the surrounding area will be literally flooded with the D.U.P. forces. I would recommend to look into the "Step 2" and "Step 3" beforehand. First, you should get rid of the enemy armored forces (tanks, armored vehicles, helicopters) and supernatural-endowed troops - don't bother with the regular enemies before doing it. During the fights, you can retreat a little from the battlefield (to regenerate your smoke supplies, for instance), but pay attention not to get outside the area marked on map, because you will fail your mission.
Eliminating all the enemy forces in the area is equivalent to retrieving the district, and it's awarded in two ways. First, the game allows you to use fast travel system in all retrieved districts. Secondly, you won't run into enemy forces in those areas, so you can explore the area freely.
 Retreat from combat if Delsin has suffered critical injuries.
Although the health bar of the main character in the inFamous: Second Son is never shown on the screen, the game still informs you if it reaches critical levels. After Delsin has suffered enough injuries, an appropriate information will be shown on the screen and you should consider retreating. Suffering critical injuries will make the screen to fade and it's the last warming and information that you should run. I would recommend hiding behind large, indestructible obstacles (excluding cars, of course), or on rooftops, which will additionally allow you to replenish your smoke reserves.
If you were unable to get away and Delsin died, you will be resurrected at the last control point - they are densely distributed around the map, so generally you won't waste a lot of time getting back to the place where you have died. Manual saves should be done frequently - they won't give Delsin any additional protection, but they can be crucial in the case of a wrong karma decision.
The last things worth mentioning is the difficulty level. I would recommend playing the game for the first time on the normal difficulty level, even though some parts may seem too simple. However, it will allow you to seamlessly familiarize yourself with the crucial elements of the game. You should take the game on the highest difficulty level only on your second playthrough, when you are doing the "second karma path" - the game, while playing on the hardest possible difficulty, is A LOT harder and more challenging, rewarding vast knowledge of Delsin's abilities and the ability to move around the city smoothly.

inFamous: Second Son - guide, walkthrough, city is a complete guide to virtual Seattle, shown from behind of the Delsin Rowe, who possesses supernatural powers. Definitely most important of this guide is a detailed walkthrough of main game plot. It contains description of quests' objectives, as well as fights (including boss fights). In addition you'll find here differences between play styles of a hero (Good Karma) and villain (Bad Karma). The second large section of this guide describes exploration of the city, additional activities and taking over city districts. You can also find there a high quality map of Seattle which can help you to navigate in the city. In the City chapter you'll get some tips on more difficult activates. The whole has been supplemented with chapters on trophies and the powers available in the game (along with the highlights of the most useful ones. Second Son is a third installment in the popular inFamous series and same as previous installments it was developed by Sucker Punch studio. There are plenty of changes comparing the game to its predecessors. First of all, there is a new main character - Delsin Rowe, who can control smoke. Also the main location is new - for the first time it is a real city and game producers chose Seattle to be the game background.
inFamous: Second Son guide contains:
Jacek "Stranger" Halas ()
This inFamous: Second Son guide takes into account differences in missions' plot and assignment of some new quests resulting from playing the game as a hero (Good Karma) or a villain (Bad Karma).
Important technical note: Further information on all these quests and events which are associated with Bad Karma, will be added during the course of work! These pages are not published in final version and many of them will have major modifications!
The following markings are used in this guide:

Move

Turn

Jump

Sprint/ Dodge (dash)
Melee

Karmic actions

Special power

Zoom

Heavy attack

Main attack
 Use controller properly and paint over the billboard
The game beginning is a cleverly built-in tutorial on using the controller gyroscopic functions. Start with deflecting the controller to the left and then shake it. The next task is to paint over the billboard and it has two parts. Each time you have to hold R2 and move the controller sideways until you cover the whole area. Once you do all these actions, you'll watch the cutscene introducing Betty.
 Even if you jump really badly you'll be quickly restored to the land
Wait until you can fully control Delsin for the first time and head towards the EXIT door visible in a distance. Once you get inside and jump down on the wooden catwalk - after that go left. Use the ladder to get to the top of the first tank and then run and jump towards the second tank. Fortunately even if you make a mistake and land in the water, pressing the touchpad will restore you to a safe place.
 Keep moving to the left in order to get to the destination
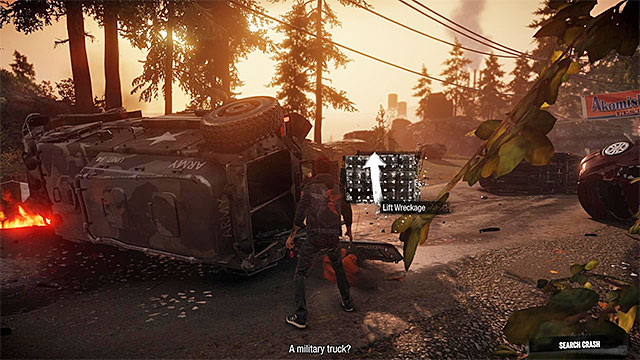
Keep quite linear walk over the beach, jumping when needed and climbing up the ledges. In several places Delsin will have to catch interactive edges and in such situations move to the left or to the right. Once you get near a building which is your current target, jump towards new edge, move left to the very end and only then climb up. Move to the building entrance door and swipe the touchpad to open it. The game will show a new cutscene, where you'll meet Reggie and witness the truck accident.
 Use touchpad to lift the heavy element
Walk towards the overturned truck and move to its back, approaching the orange dressed prisoner under the heavy element. According instructions you have to swipe the touchpad in order to move the heavy element and help Hank. Unfortunately the man will capture the main character and (unintentionally) will give him Smoke Dash.
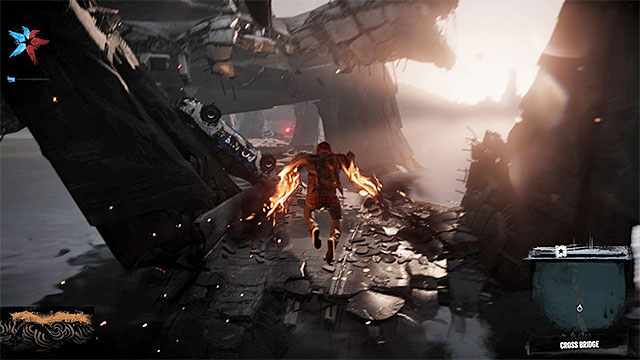
 Use Smoke Dash to avoid fallen trees
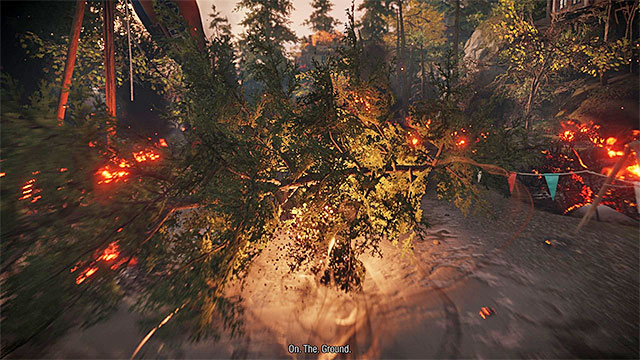
Wait until Delsin wakes up. Any attempt to move will result in uncontrolled transformation into smoke and you do not have to worry about quite chaotic movement of your character because after few such transformations the situation will calm down. You can start your walk now and in order to avoid fallen trees you have to use Smoke Dash. By default this power is activated by pressing circle button on the controller.
 Press touchpad
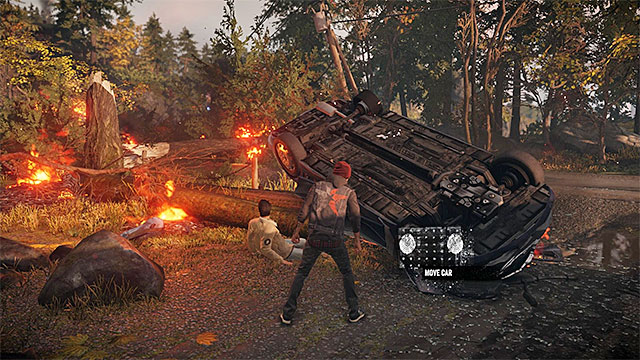
Keep avoiding fallen trees until you reach the place where Hank attacked Reggie. Run towards main character's brother and after short conversation position yourself near the overturned police car. You have to use the touchpad again, this time with pressing it and holding for few seconds with two thumbs. After that brothers will push the car off of Reggie.
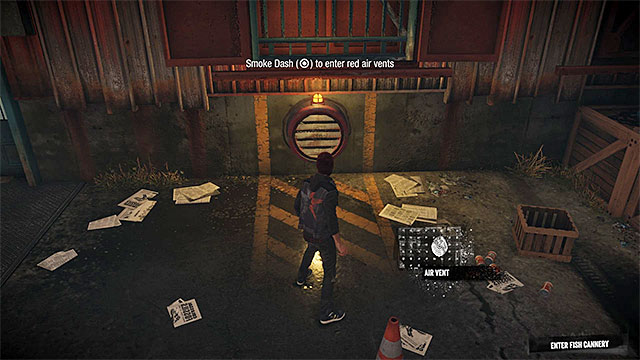
Move towards the cannery gate and after you realize that it is close, listen to the local characters. As you probably guessed you can use Smoke Dash in order to get to the courtyard adjacent to the cannery. Locate there a red vent shown on the above screen and use the Smoke Dash again to use the vent. Once Delsin gets to the cannery roof, head towards next vent and once again press circle button.
 The chain will allow you to destroy burning obstacles
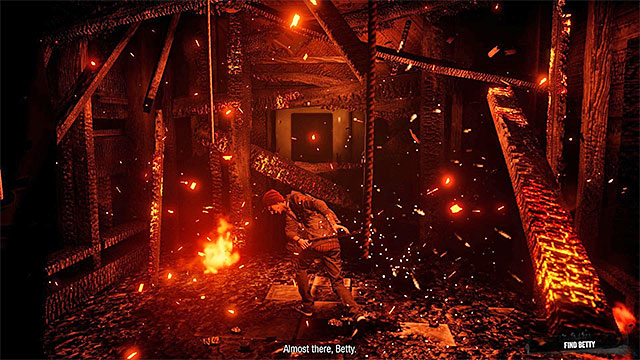
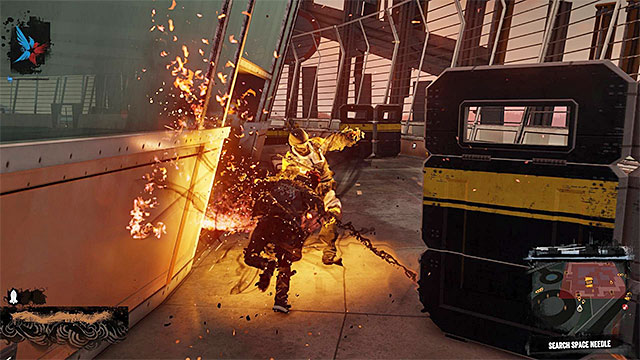
Move to the burning passage and try to use Smoke Dash, ignoring the fact that this action fails and Delsin suffers minor burns. The main character will pick up the chain, unlocking the option of main attack (square button). Once again move to the blocked passage and start pressing square button to unlock your way. Do the same with other obstacles finally reaching the room where you'll watch one more cutscene with Betty and Hank.
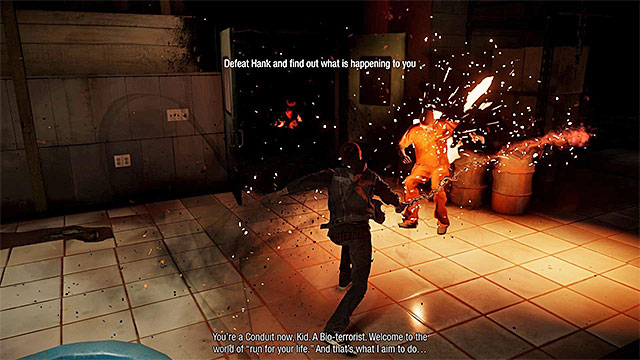 Attack Hank using the chain
After watching the cutscene you'll find yourself in the main room and you'll have to defeat Hank, which is quite easy. Start with using Smoke Dash and use near covers to avoid projectiles shot by him. In the meantime try to get closer to him. Once you get close enough to the convict use the main attack with your chain. Do not count on defeating him with one series of attacks because he will try to move away from you. Fortunately you do not have to worry that he will flee but be ready to overcome various obstacles (closed gate among other things). After Hank leaves the building, move to the exit door and use the touchpad.

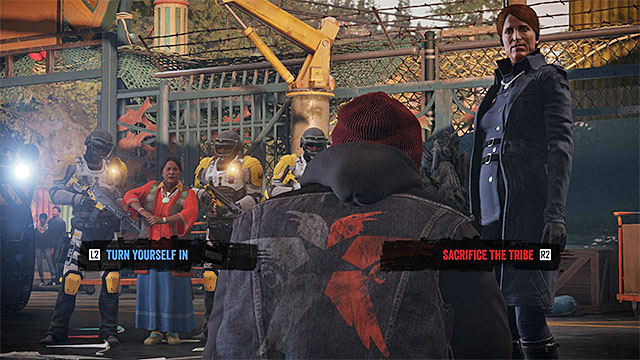
It is here that you run into Augustine for the first time and you will have to take an important decision, towards the end of the meeting (the above screenshot). If you want to gain good karma you need to Turn Yourself In (the blue option). If you want to gain bad karma, you need to mind your own business and Sacrifice the Tribe (the red option).
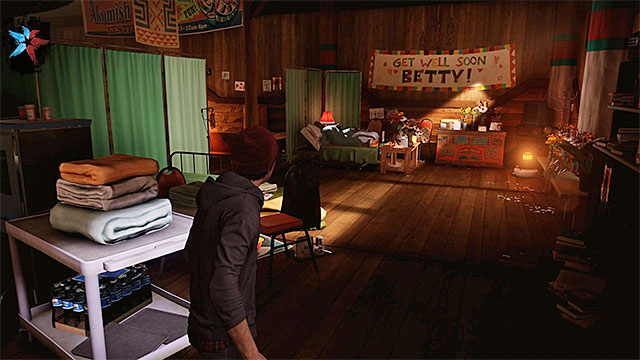 Betty
BettyDelsin will wake up in one of buildings, which is turned into a hospital. Start a walk through quite linear path - it is worth to stop from time to time and watch some TV news. At the end of your walk you'll meet heavily wounded Betty and course of the meeting is slightly different depending on your decision in the previous stage. The final of this very short level is identical for both variants - you'll accompany Reggie to Seattle.
 Use new power to shoot down the drone
You'll regain the control over the main character only after reaching a blockade and getting out of the car. Do not try to explore the area because it may end with failing the mission. Instead of that follow Reggie towards the blockade. When the main character approaches Core Relay he will get a new power - Smoke Shot. Thanks to it you'll be able to shot projectiles similar to those Hank was attacking Delsin with. Aim at the Tracking Drone flying around and try to shoot it down (remember to target in advance because projectiles are not very fast). Shooting down the drone will result in new cutscene where you'll talk to Reggie.
 Absorb some smoke to refill your powers
Approach the destroyed drone and press touchpad to collect firs Blast Shard. Shards are used to develop Delsin's powers and there are four of them in this area. Unfortunately shooting three more drones is not possible right now and that's because Delsin has used his smoke. The game will teach you now a very important gameplay action - absorbing smoke to regenerate main character's powers. Just look for places with visible smoke. Look around and approach one of nearest wreckages to absorb the smoke (press touchpad).
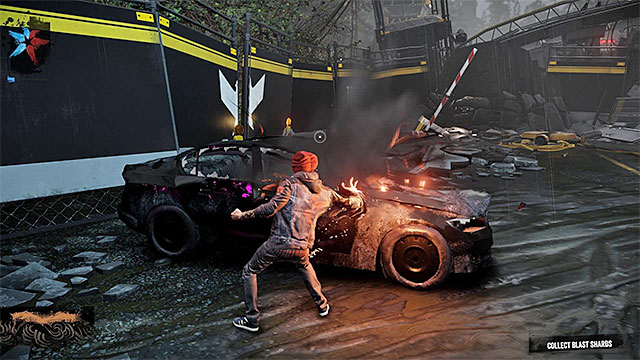
 You have to acquire Cinder Blast
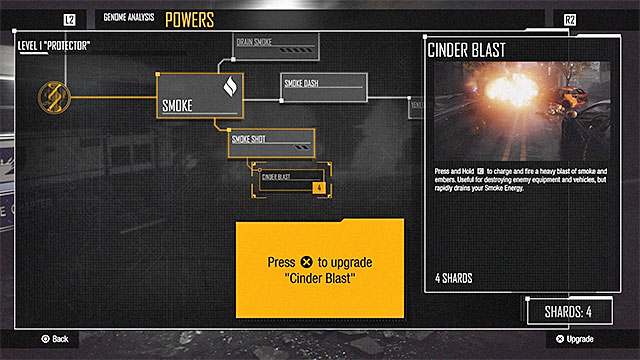
Now you can start attacking three other drones - two of them should fly over the yard and the last one should be attached to the destroyed fragment of the barricade. If you use your smoke in the meantime (Smoke Meter in the left bottom corner) approach one of wreckages to refill it. Make sure to examine each destroyed drone and get Blast Shard. Leave the location only after getting all four shards. Move to the bus and try to use Smoke Shot on concrete barriers. You'll fail so press Options button in order to open the Powers window for the first time. In this particular case you have to spend four shards on unlocking Cinder Blast.
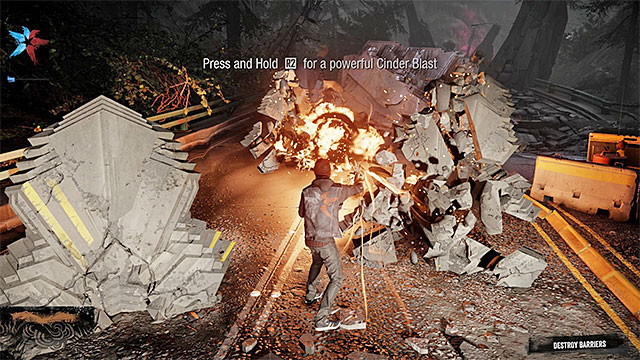 Cinder Blast is very effective in destroying environment elements
Position yourself near one of concrete barriers and hold R2 to perform Cinder Blast attack. Once you destroy the barrier go to other concrete elements and use Cinder Blast on them. In the meantime do not forget about regenerating your smoke (nearby car wrecks). After destroying first group of concrete elements wait until bus drives to a new place and destroy a larger barrier. The game will show a cutscene with Delsin and Reggie - brothers will decide to split up for some time (the mini-map of the area will be also unlocked in the right bottom corner).
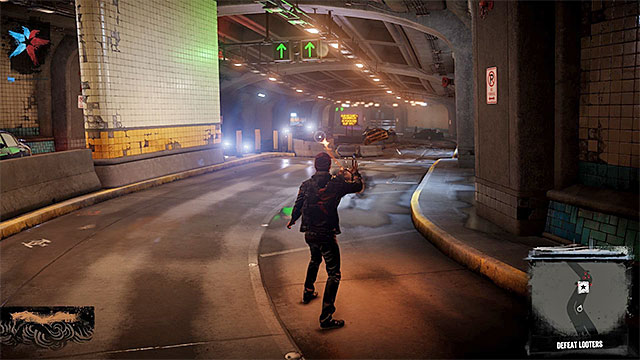 You can attack bandits also from a distance
Use the previously destroyed passage and after a while you'll get to the tunnel entrance. There are several armed bandits here and you'll have to fight a battle with them. You can mainly use the Smoke Shot against them, which allows you to keep enemies at the safe distance from you.
Note - if you use your smoke you can attack one of cars in the tunnel with your chain - smoke will begin to float out. The advantage of this method is that you do not have to look around for car wrecks.
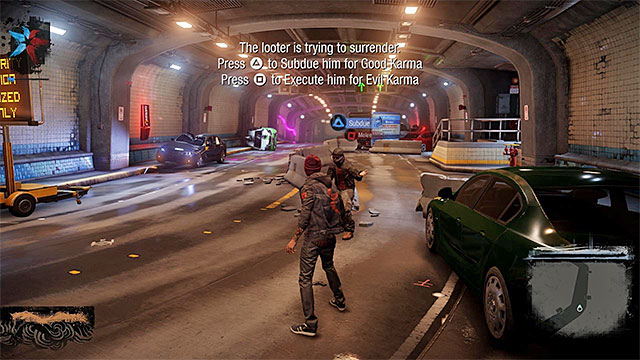
 Karma moment
Alternative method of eliminating bandits is getting close to them with usage of Smoke Dash and using the chain on them. The last enemy will try to surrender and once again you'll have to make a decision associated with karma. If you want to get Good Karma you'll have to subdue him (triangle button). But if you want to get Bad Karma, you have to kill him (square).
Note- Throughout the game, you will be encountering many of the enemies that will also try to turn themselves in (especially if they are the last on standing in the battlefield). Each time, you will be allowed to decide whether you just want to kill or immobilize them (you can ignore taking such decisions, which are concerned with karma, but you will then receive neither good or bad karma points).
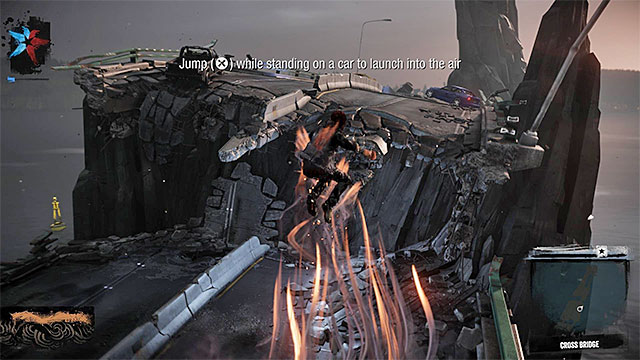 You have to bounce from the car roof and after a successful flight to land on the higher shelf
Regardless of your decision, go to the tunnel exit coping with limited visibility. Once you get outside the game will show a short cutscene and you'll have to make your way over the heavily damaged bridge. Move forwards and stop at the new Core Relay. Press touchpad in order to unlock new Delsin's power - Car Boost. The game will force you to use it right now. Jump over the car roof and press X to bounce from it to get to the higher level of the bridge.
 You can use newly acquired power to avoid water for example
Keep going, using Car Boost in places where you have to reach higher bridge levels. After few moments you'll find one more Core Relay. Press touchpad to absorb its energy and unlock new power which allows you to float above the ground for a moment. It is done by holding X button and you have to use it in order to pass by first water reservoir. Keep going and use the newly acquired power when needed.
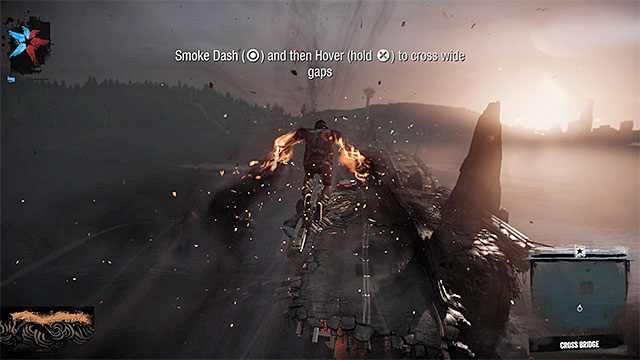 Use Smoke Dash and start flying
Stop at the end of the current bridge fragment - there is bigger water reservoir in front of you. You have to use all unlocked powers here in order to safely get to the new section of the bridge visible in a distance. Start with jumping over the car roof and bouncing from it (X). Once you're in the air press circle button (Smoke Dash) and start flying by holding X. If you do this combination properly, you'll be able to get to the new bridge section and continue your march.
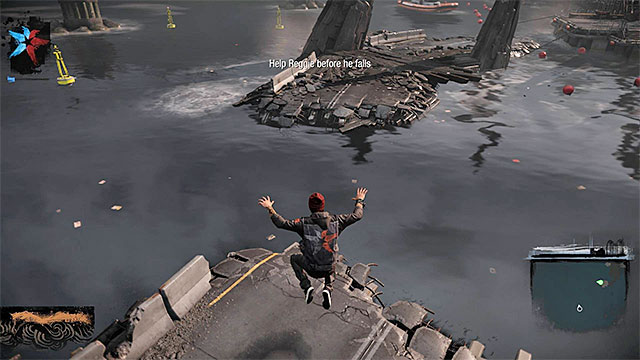 Use left platforms to get to Reggie
Once you land on the bridge quickly repeat two last steps of the action combination (you do not have to bounce from the car roof), because the current bridge fragment will soon fall down. Reach subsequent platform using bouncing from car roofs and floating over the ground. Soon the game will show a short cutscene where you'll see that Reggie needs help. Turn left and get to platforms right there, so you can approach Delsin's brother and save him. Watch longer cutscene which ends this stage.
 Use touchpad to hit the red circle
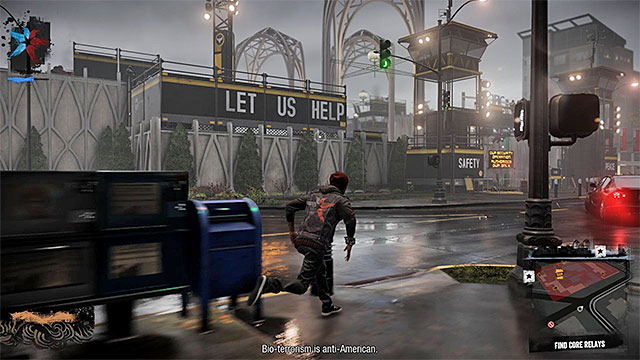
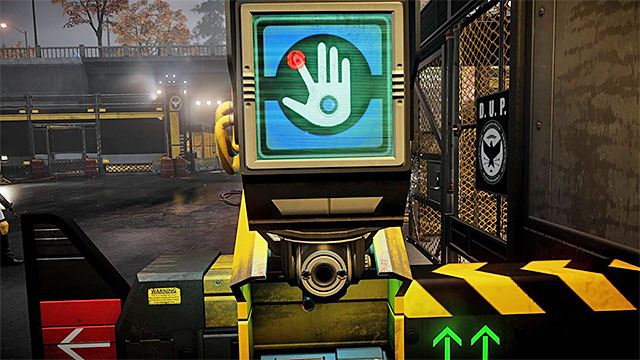
You start exploring Seattle in Queen Anne district and do not worry that initially you can't use any powers. Follow Reggie to the east, reaching D.U.P. Scanning Station after a while. Go through the gate, wait until Reggie gets checked and position yourself at the scanner. Press touchpad and move your finger to hit the red circle. Unfortunately you won't be able to enter Seattle even if you succeed in this mini-game because you'll be recognized as a bio-terrorist.
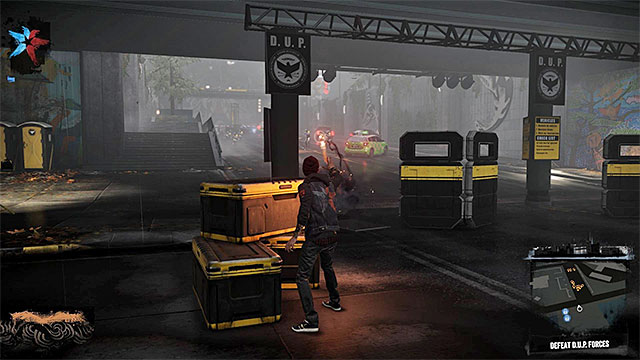 You can attack enemies from a distance or fight them in a melee
Right after the fight begins jump over the gate and start attacking nearby D.U.P. soldiers. I recommend using mainly standard projectiles (Smoke Shots), although if you find yourself close to the enemy, then consider using the chain or melee. In the same time do not overdo with aggressive behavior and as soon as you get a warning about serious injuries use Smoke Dash to get away to some safe place and regenerate health. On the other side try not to stop in the same place for a longer period of time because enemies throw grenades and you can get seriously injured.
 Depending on your preferences you can save or kill civilians
During the fights near scanning station you'll get a possibility of getting Karma points. If you want to acquire Good Karma then you can free prisoners kept in cages (use touchpad when you get close to the cage), as well as overpower defeated enemies and save injured civilians. If you want to get Bad Karma, you can finish off defeated D.U.P. soldiers and murder innocent civilians.
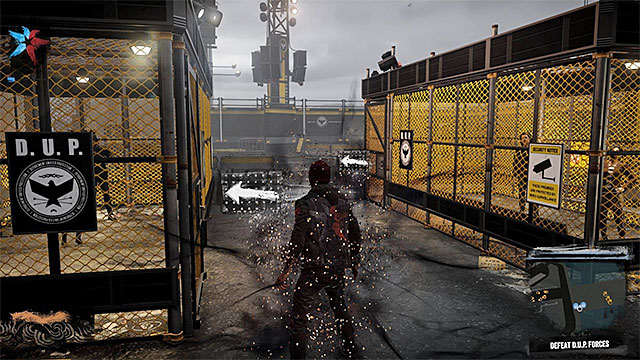
 You may try to destroy watchtowers
Keep moving to the east and prepare to face new enemies occupying watchtowers visible in the distance and a catwalk between them. You can still try to use standard projectiles here (destroy parked cars and absorb smoke when needed) but this is not the most efficient method. I recommend bouncing from one of the cars in order to get to one of towers or (even better idea) destroy both towers thanks to Cinder Blast power.
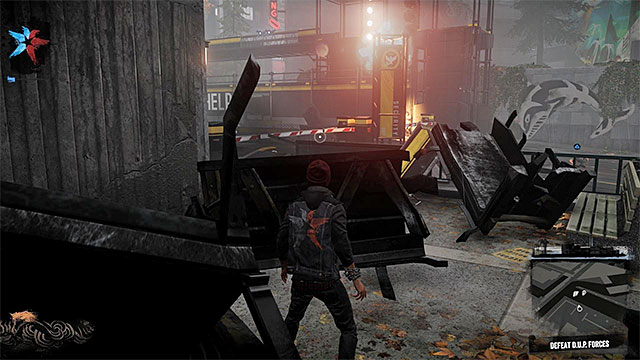
 Enemy base overview
After eliminating all enemies listen to the radio conversation with Reggie and choose the street leading north. Watch out for the single sniper observing this area. Since there are no places to hide here, it is best to eliminate the opponent with perfectly aimed projectiles. Keep moving north and then turn east again. After few moments the man hero will approach enemy base. I recommend using Smoke Dash when you get close to one of ventilation shafts, so after moving to the roof you can familiarize yourself with enemy base settings. This is quite helpful because the area is restricted and entering it will result in alarming enemies.
 There are several enemy soldiers inside the base
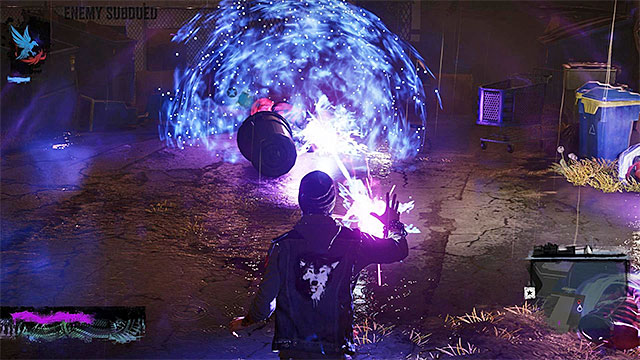
Try to attack enemies from the air if possible, so you can initially get rid of at least one of them. When the main part of the battle begins, watch out for enemies on watchtowers (you can destroy them). In addition try to rely on Smoke Dash attack, running between obstacles and looking for good places to attack enemies. When you run out of smoke use red ventilation shafts to get to base roofs - on majority of them you can find kind of chimneys where you can regenerate your supplies.

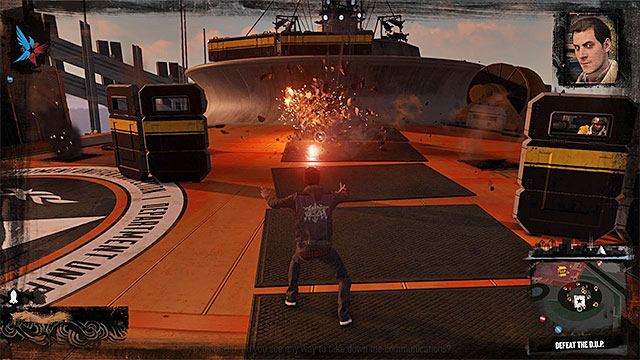
Once you eliminate all enemies in the base go towards the Mobile Command Centre. Start using standard projectiles to destroy side grilles and generator behind them. After destroying a sufficient number of generators jump to the vehicle roof and position yourself next to the large core. Press and hold touchpad and then start rhythmically pressing R2, blowing the mobile command centre up.
 Attack the elite soldier from a safe distance
Prepare for a new group of D.U.P. soldiers appearing in the area, with a single elite opponent who uses minigun. I recommend avoiding this character initially and get rid of all standard soldiers first. After that you can deal with the elite one. Do not try to weaken him down in a melee because you can get pushed off easily. Instead of that attack him from a distance with standard Smoke Shots or more powerful Cinder Blast. Do not forget about possibility of smoke regeneration on rooftops.
After taking some damage the elite soldier will create some king of a shield. Run towards him from behind (screen above) and depending on your preferences subdue him (triangle button) or kill him (square). That's not all yet because Delsin has to absorb his power - you can do this by standing next to the defeated soldier and pressing touchpad.
Soon, you will be informed that the first main mission in Seattle has just been completed. As a reward for its completion:
Note - To find more information on the activities to be performed in the city and on capturing districts, see the chapter entitled The City and the inFamous: Second Son in 10 easy steps guide.
 First core location
Listen to the conversation with Reggie who will tell you about three new Core Relays (you got their locations on the map). You have to get to each of them in order to get new powers. Of course you can reach them in any order but I suggest to start with one located nearest you. You can find it in the eastern part of Queen Anne district, where you completed previous main quest Welcome to Seattle.
 Shaft which can allow you to get to the building with the first core
On your way to the first Core Relay keep in mind that if you get close to any group of D.U.P. soldiers you'll be automatically attacked. You can of course use such situations to acquire Good or Bad Karma or just avoid confrontation. In the latter case I recommend using Smoke Dash and move over rooftops and railroad tracks. Your target is located on the building rooftop and in order to get there you have to locate a red ventilation shaft at the building base (use Smoke Dash there).
 Deal with guards first and then get to the core
When you get through the first shaft, jump into another one so you can get to the highest part of the rooftop. Be careful because there are three enemy soldiers in the area - get rid of them. Due to the fact that enemies are located on a small balcony, you can attack them with Cinder Blast or the chain. After the fight approach Core Relay which has a metal casing and destroy the shield with any offensive power (you can also shoot at ammo stash and the explosion will destroy the casing). Now you can absorb the energy from the core (press touchpad) and unlock Comet Drop.
 A strong hit on the ground is a good way to start most battles
Thanks to newly unlocked Comet Drop you can hit the ground with great force, thus injuring nearby enemies and destroying nearby objects. It would be good to test it right now on enemies who appear in front of the building. Bounce from the roof (you can also fly a bit) and then press square button. If you aimed properly, your hit should eliminate or seriously injure all D.U.P. soldiers.
 Second core location
You can now head to the second Core Relay. It is located in Seattle Centre district. The district can be found south from the Queen Anne district. Your target is abandoned ferry port - watch out for the enemy base located on the north-east from it (assuming of course that it is still active).
 Eliminate all enemies on the yard and only then acquire a new power
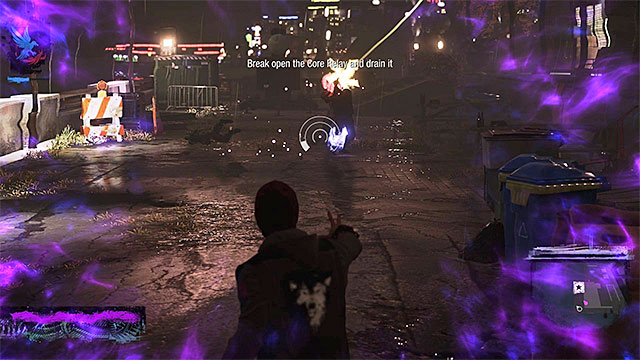
There are some D.U.P. soldiers gathered on the courtyard in front of the ferry port. You can deal with them in traditional way or by using newly unlocked Comet Drop. In the latter case you should get to the rooftop of one of the highest buildings in the area and then bounce from it and hit the ground in the right place. Regardless of your behavior get rid of all enemies, destroy core casing and then absorb its energy (press touchpad). This time you'll get Sulphur Bomb.
 Subdue stunned soldiers
Just like earlier, the game will allow you to test the newly acquired power, because there will appear more enemies in the square that you have just cleared. The Sulphur Bomb attack (the L1 bumper) is about throwing the enemies a stunning bomb. You can then stun them without any problems (acquisition of good karma) or take advantage of the fact that they are harmless now and execute them (acquisition of bad karma). Get rid of all of the enemies, or escape them (it is not necessary to eliminate them).
 Enemies guarding the last core
It is time to move to the last Core Relay. It is located in Market District, south from the Queen Anne district. You have to get to the narrow alleys between buildings. In one of them you'll find few D.U.P. soldiers guarding the core. Eliminate enemies, destroy core casing and absorb the energy (press touchpad). After a moment you'll gain Cinder Missile.
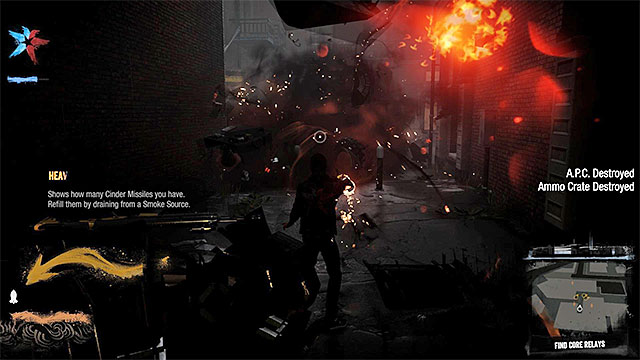 Use Cinder Missile to destroy enemy APC
Cinder Missile attack is very impressive, because it allows you to fire missiles which can destroy enemy armored vehicles. Aim at the enemy machine which appears near the alley and press R1 button to blow it up. It is worth noting that this power uses Heavy Ammo, which can be obtained in the process of acquiring smoke to regenerate energy bar. Listen to the conversation with Reggie which ends this main quest. Rewards for completing it are listed below:
 Starting point
In contrast to all previous main quests, this one is the first one which is not activated automatically. This means that if you want to start it, you have to go to the marker on your own - it is located in Seattle Central district. There is enemy base located near the starting point of the quest, so be careful if you didn't destroy it yet. Move to the marker and accept starting new quest.
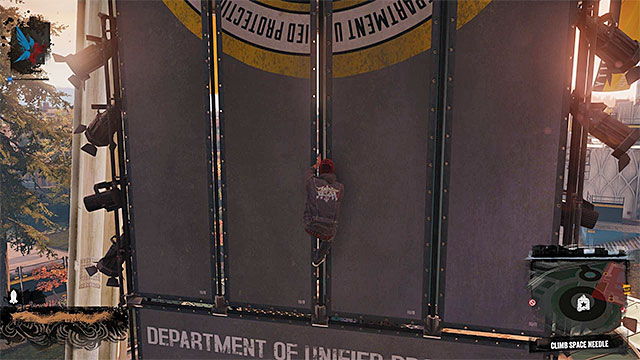 You have to climb up metal elements of the tower
In the first stage of the quest you have to climb to the top of the Space Needle tower. Contrary to what you may think, it won't be difficult, although getting to the top will take some time, even with help of special powers. Start with climbing up the nearby container and then use the yellow ladder. After getting to the higher shelf use Smoke Dash to "jump in" to the nearby shaft. Wait until shaft "catapults" Delsin and catch metal objects to continue climbing.
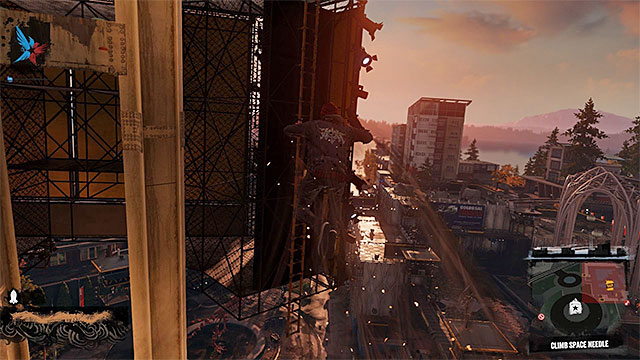
After reaching larger platform located higher, locate another ventilation shaft and use it as a "catapult" (Smoke Dash). This time you have to aim Delsin during the flight towards yellow ladder shown on the above screen. After you catch the ladder, start climbing up. Carefully walk over the metal balcony and find a place where you can climb higher to the platform. In this place you have to use another yellow ladder.
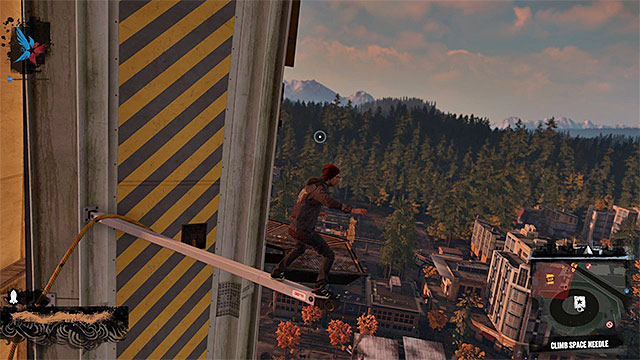 You have to jump to a small platform
When climbing up the ladder look for big bright wire located on the left and jump towards it. Resume climbing and do not get frightened by an elevator that suddenly starts to get down, because it won't collide with you. Keep climbing until you get to the small horizontal bar extending from the main construction. Rotate your camera so you can see a small balcony located on the left and jump towards it. Now you can start more traditional climbing, catching and jumping towards subsequent interactive edges.
 You have to hold X button in order to safely fly to the ladder
You'll end up the climbing in a new small balcony. Turn you character towards a ladder visible in a distance, perform a jump and while you are in the air hold the X button to start the flight. In such a way you have to get to the ladder and use it to get to higher level. After climbing up the ladder catch a wire located over Delsin and use it to get to the tiny balcony (you have to jump at the end).
 Eliminate enemy soldiers
Jump into the shaft which will allow you to get to the main tower observation deck. Eliminate all D.U.P. soldiers along your way - it should be a piece of cake. Eventually you have to locate a red ventilation shaft leading to the large tower rooftop. Watch a short cutscene showing an anchor which is your new target and prepare to fight much more difficult battle.
 Try to eliminate enemy possessing powers as fast as possible
Right after fight beginning start running over the rooftop, avoiding mainly the enemy with powers, who was shown on the previous cutscene. Avoid his distant attacks (one of them can stop you in place) and try to counterattack from a distance. Once you eliminate the elite opponent, deal with common soldiers, avoiding their fire and grenades. Do not forget about hiding behind metal covers when Delsin get seriously injured and locating smoke holes when you running out of smoke. In addition you can look around for generators and use them to create small explosions.
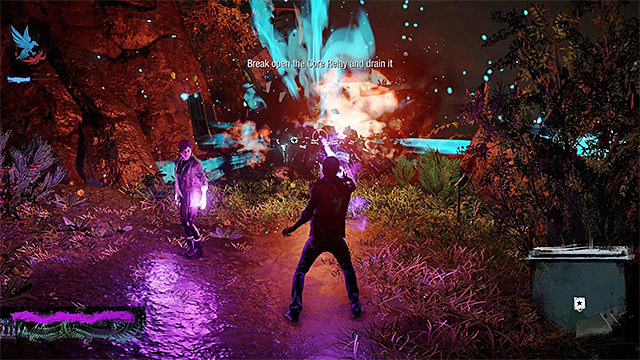
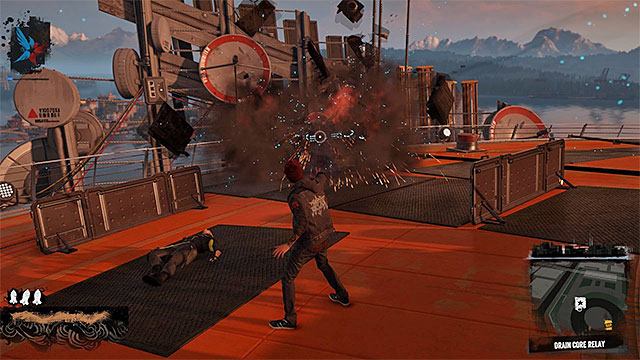 Core is hidden inside metal casing
After the fights end, approach the anchor and try to destroy it, thanks to which you will learn that you need to unlock a new power first. Find a metal housing around, which contains a Core Relay. Destroy the housing, thanks to which Delsin obtain power named Orbital Drop. This attack requires you to charge a separate bar, before you can use it (the top-left corner of the screen) so, run up to the nearby enemies and stun them (if you play as the hero) or finish them off (if you play as the villain).
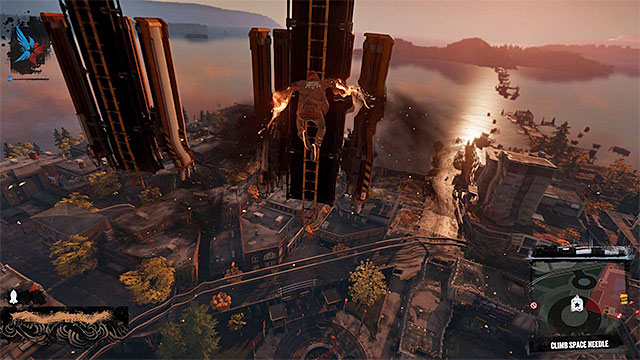
 Orbital Drop is very spectacular
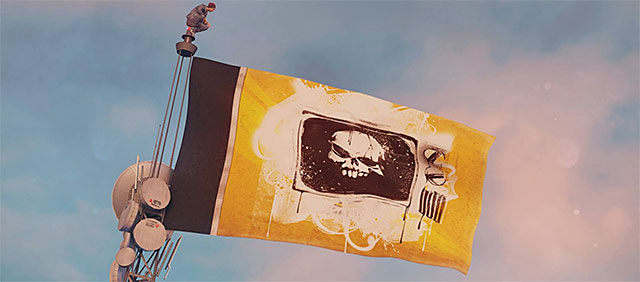
Once you sufficiently charge Orbital Drop, press Down on the D-Pad to activate it. The game will allow you to control Delsin's flight (left analog) but you do not have to hit the anchor directly, because the radius of this power is HUGE. At the end of the quest you'll have to choose which flag will be hung on the Space Needle tower (your choice is irrelevant). As a reward you will unlock main quest Chasing the Light.
The game probably won't let you start this quest after completing the previous one (The Gauntlet). First of all you have to wait until Reggie contacts Delsin and listen to the conversation. Second - you have to destroy Mobile Command Centre in Pioneer Square district and this is described in City chapter. Only after fulfilling all those conditions go to the marker in the district mentioned above and interact with it.
 Crime scene
After watching TV reportage and listen to the conversation with Reggie, head to the first crime scene located north-east from the start. It would be good to move over buildings' rooftops because that would allow you to avoid policemen patrolling the area (you can also kill them, if you play as the villain, which will gain you some quick bad karma points).. Once you get very close to the crime scene, jump down and move to the camera marker located next to the huge purple neon.
Now you have to finish a mini-game which is about taking photos. Each time you have to aim at the place where camera slider fills up to 100% (as seen on the above screen). Then you have to press R2 button to take a photo and send it to Reggie. In this particular case you have to take two photos of two parts of victim's body.
 In the initial phase it is worth to fight on the rooftops
Listen to the conversation with Reggie and head to the second crime scene located in the north-east corner of Georgetown district. Along your way you'll probably see D.U.P. forces heading to the same place, but I suggest not attacking them yet because in this case you would have to deal with armored vehicles among others. Instead of that try to get as close as possible to your destination and only then start attacking enemy soldiers. During fights try to eliminate opponents with powers first and use rooftops to regenerate smoke. Try also to avoid larger groups of common soldiers.
 A bag you're looking for
Get down only after you eliminate all enemies that are capable to climb buildings. During next fights watch out mainly for the elite enemy with minigun, trying to attack him from a distance and using more powerful powers. At the end you have to finish him off after he creates a shield around him. Now you can deal with "standard" soldiers but they are not a big challenge. Fight until the entire area is secured and then approach the crime scene. Same as previously you have to get the camera and take photo of the victim. But that's not all because you also have to examine the bag of the murdered person - it can be found near the stairs (use the touchpad to look into the bag).
 Often use covers on your way to the billboard
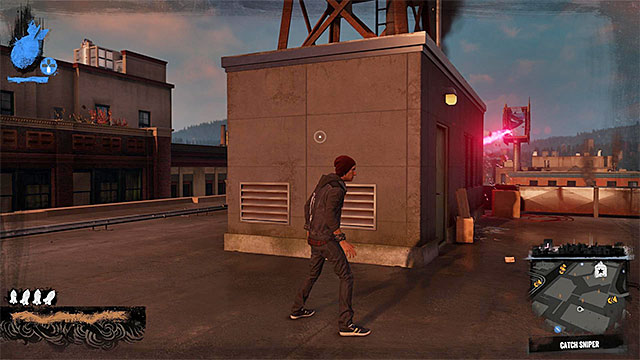
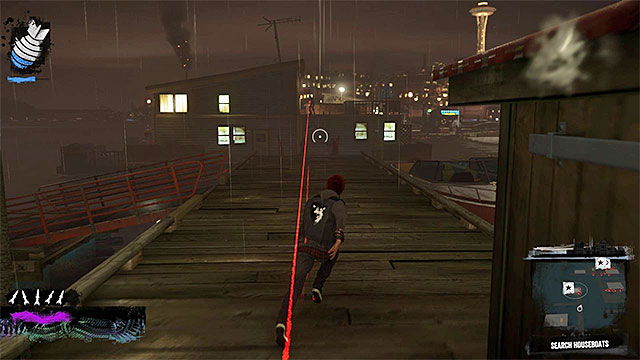
After you examine the bag you'll be attacked by a sniper who is responsible for last murders. Cover behind the wall and when sniper stops shooting, head towards a balcony behind large neon. Keep using Smoke Dash and hide behind covers along your way, although one hit from a sniper rifle won't kill you at once. Once you get close to the destination go to the rooftops and use the ladder to get to the narrow balcony. Sniper will start fleeing so run after him (purple trace). You do not have to try hard here because your opponent will get away soon and you won't be able to make anything with it.
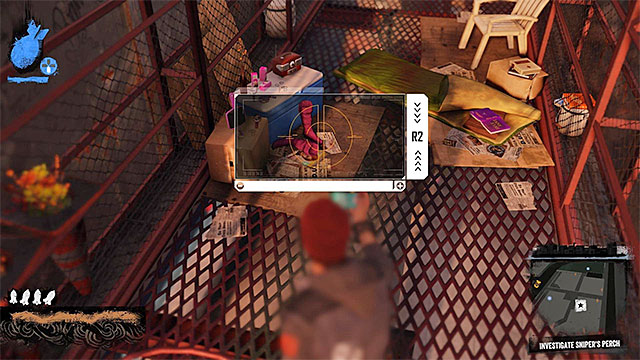 Take a photo of selected objects
Now you have to get back to the balcony located behind the billboard, which was one of sniper's hideouts. Once you get there, you'll realize that the sniper is probably a woman. Take out your camera and start taking photos. The objects you have to photograph are: purple shoes, Jane Eyre book, clothes on a rope and Brent neon. Now go to a new place and take the last photo, aiming at the neon which symbolizes man's face - it is located on the right.

Wait until Reggie manages to prove who the man from neon is (Brent Walker) and then go to the flat where he was murdered - it is located in the western part of Paramount district. Once you get there you'll have an opportunity to acquire Good Karma. If you follow hero's path then get rid of a group of drug dealers. It is not difficult, because they do not possess any powers. If you follow villain's path then do not do it of course. Regardless of your behavior approach the entrance gate shown on the above screen and use Smoke Dash to get inside.
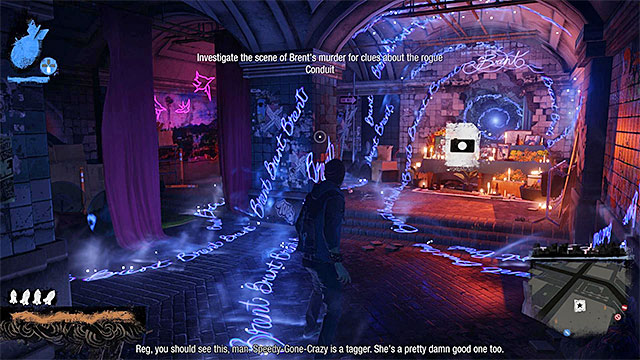 Impressive altar
Start exploring the building. For the last time during this quest you have to be a photographer. First go to the altar and take a photo of a central photo showing a woman with a man, a left photo with a man only and a central vortex. Turn left and move to the table. You have to take photo of neon symbolizing sitting man. Now you can leave the building (use Smoke Dash again), finishing this quest and unlocking the next one - Go Fetch.
The start point of this quest is located on the building's rooftop in the northern part of the Market District and before starting it you can be asked to perform some additional activities (if it is like this, you should check information in the City chapter).
 Cartons
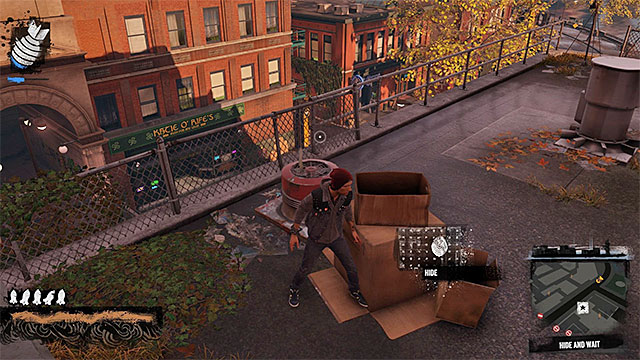
After starting the quest jump off the rooftop and approach of people protesting against bio-terrorist. Now you will have opportunity to get Bad Karma. If you follow hero's path then ignore them but if you follow villain's path then murder all protesters. Regardless of your behavior listen to the conversation with Reggie and get to the rooftop of the Olaf's Sea Shack building located south from here. Now you have to approach cartons and press touchpad to take cover.
 Light Speed in action
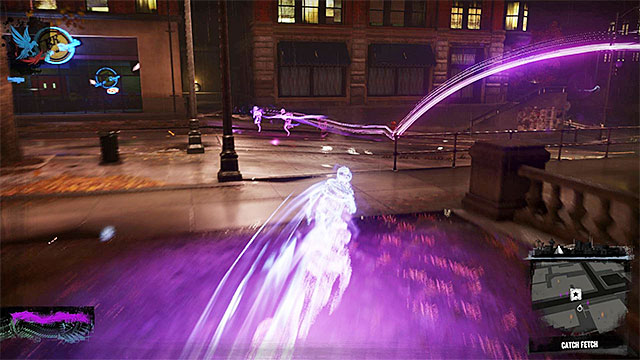
Wait for a cutscene presenting Fetch. Delsin will absorb a basic power (Neon) of the girl and she will start to flee. Try out the new power. Press and hold circle button to activate Light Speed which allows you to move faster. Unfortunately this power works only for few seconds and when you slow down you have to hold the circle button again.
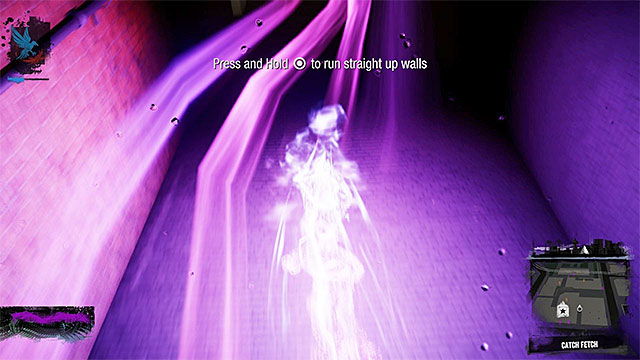 You can now run over walls!
Use Light Speed to follow Fetch (purple trace) and do not worry if you slightly go off the route because you'll be re-routed in a subtle way. During the chase you'll find out that Light Speed can be used also to run over walls in order to get to rooftops. Use it wisely and no not lose Fetch. Keep chasing her.
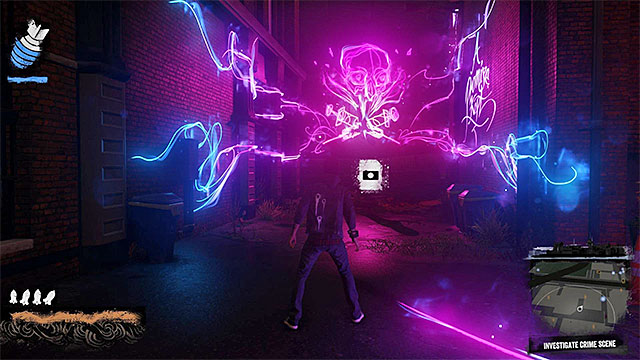
 Avoid Fetch's laser attacks
Once you get to the theater rooftop the chase will be over and the game will show you a new cutscene. After that you'll have to face Fetch (she is one of game bosses). At the beginning try to familiarize yourself with her two standard attacks. She will try to deal you damage with a laser and you can avoid it by using Light Speed and by hiding behind covers.
 The energy explosion inflicts huge damage
Do not try to approach Fetch because she could then use energy explosion and such attack can strongly weaken or even kill you (if you are already wounded). It is worth mentioning that you do not have to fight with her in a melee to win this duel, so keep your distance from her.
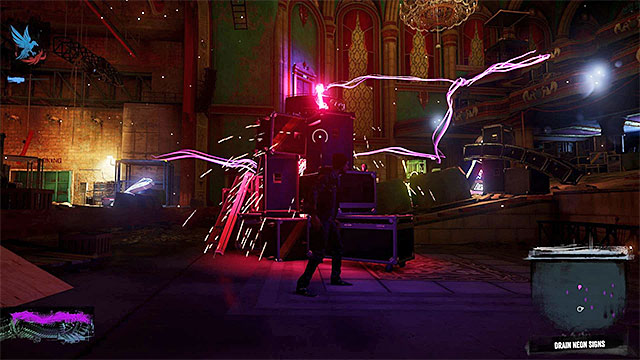
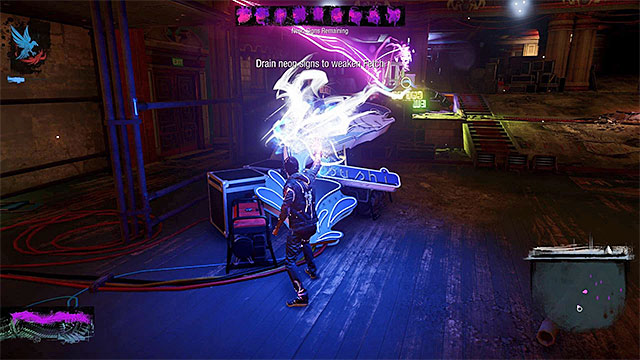 Absorb energy from neons
The fight with Fetch is divided into two parts. In the first one you have to absorb energy from nine neons located in the building (this is also a way to refill Neon energy). Each time you approach neon position yourself in such place that Fetch can't hit you and then start absorbing energy (press touchpad).
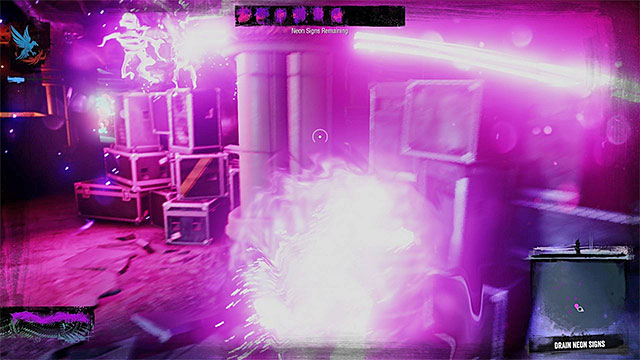
Clear out the entire ground floor, finding all neons and absorbing their energy. But this is not all, because there are some neons on upper balcony. To reach them run over walls, watching out for Fetch. When you absorb energy from all neons, the second part of the fight begins.
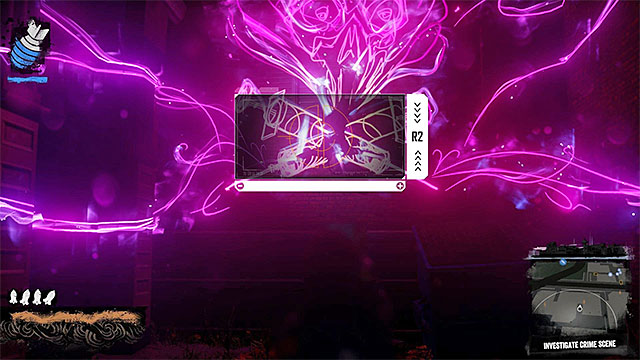
 Attack Fetch from a distance to weaken her
In the second part of fight you'll be able to use basic distant attack of Neon power. It is Neon Beam which can be activated by R2 button (it is equivalent of Smoke Shot from smoke attacks category). Start using this attack to weaken Fetch but be aware that she will also use it, so keep moving and/or use covers. The girl can hide from time to time and in such situations track her down by following her traces.
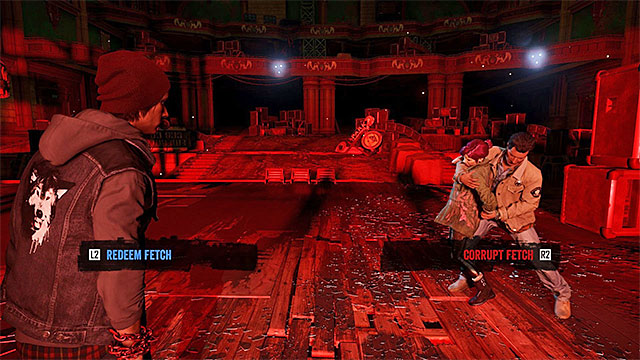
You need to keep fighting, until you deprive Fetch of her entire health bar, which will start another cutscene. Towards the end of that cutscene, you will have to make another important choice (the above screenshot). If you want to gain good karma you need to promise Reggie, that you will bring Fetch back to good path (the blue option - Redeem Fetch). If you want to gain bad karma, you need to select the variant that allows you to train Fetch to be a ruthless killer (the red option - Corrupt Fetch).
Regardless of your decision this quest will be over and you'll unlock the next one - Light It Up.
 The first core is on the roof
You now have to do a similar mission to the second one, as its objective is to get to the Core Relays, which give you new powers, this time the ones from Neon category. The first Core Relay is located in the southern part of Pioneer Square district. Once there, use a melee weapon or basic Neon Beam attack to destroy the Core shield, then absorb its energy. As a reward, Delsin will gain Laser Insight power.
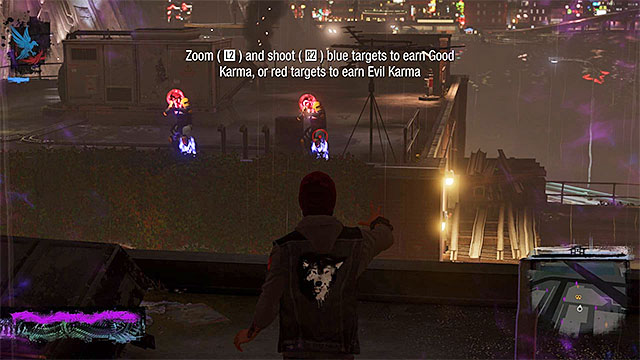 Aim at the body parts associated with the karma path you have taken
Using Laser Insight power is somewhat similar to using weapons with sights. You can zoom in while aiming (hold down L2 button) and then carefully point at a given enemy and take a shot (R2). A very important massage pops out which says that hitting opponents in their lower limbs (blue areas) is rewarded with Good Karma, whereas eliminating them with headshots (red areas) results in getting Evil Karma. Get rid of the guards on the neighboring roof whichever way you choose.
Note: It is a good idea to develop Laser Insight power so to, e.g. be able to combine zooming in with slow motion (Laser Focus), which will make shooting significantly easier.
 The whereabouts of the second core may be guarded by enemy soldiers
You must now head to the second Core Relay, following the well-known purple trail. Do not hurry so as not to get lost along the way, and besides, you do not have to race against time. The second Core Relay is located on the eastern end of the Pioneer Square district and may be guarded by some hostiles. While fighting I suggest you get to know new Delsin's powers even better. Once you win the battle, destroy the cover and absorb the energy of the core, which will unlock the power called Stasis Bubble.
 Stasis Bubble power temporarily stops enemies
Stasis Bubble power (press L1) creates a bubble whose effect is similar to Sulphur Bomb power from the Smoke skill category. Throw the explosive surprise at your new opponents to temporarily immobilize them. Depending on the chosen karma path you can then incapacitate them (good karma) or finish them off (evil karma), preferably with previously unlocked Laser Insight power (accurate aiming). However you do that, clean the surroundings of enemy forces.
 The location of the third Core Relay
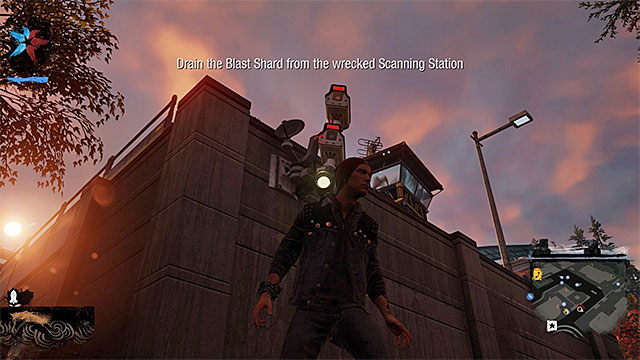
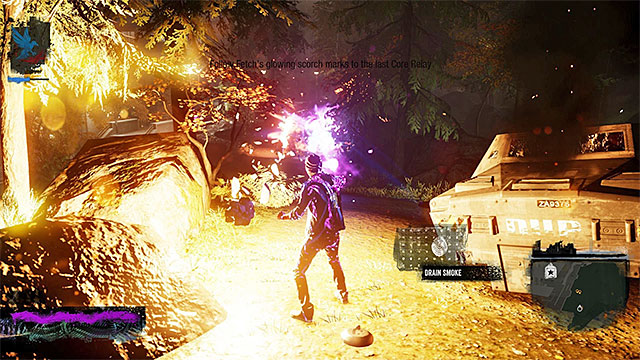
It is time to head to the third Core Relay, again by following the purple trail. The core is located on a cliff north of Belltown district. Just like with the previous cores, start by destroying the core shield and then proceed to absorbing its energy. The reward for draining this core is access to power called Phosphor Beam.
 Destroy the armored vehicles
Phosphor Beam power is similar to Cinder Missile attack that you already know - using it (hold R1) launches a powerful missile, which is perfect for destroying enemy machines. Use this ability to blow up two armored vehicles in the park and dispose another group of D.U.P. soldiers by the way.
Note: Phosphor Beam attack requires Heavy Ammo, which is obtained on absorbing energy from Neons.
 It is best to attack the enemies gathered around the core with a powerful blast in the ground
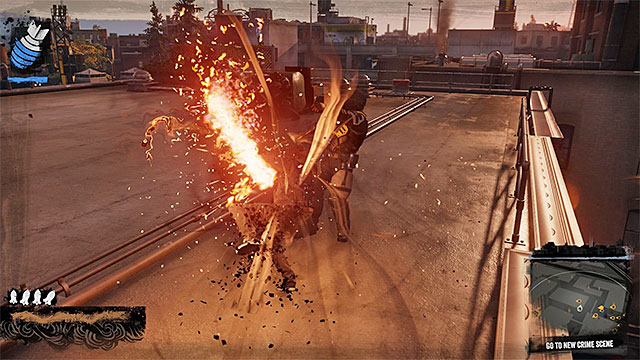
It is high time to head to the last, fourth Core Relay. It is located in Belltown district. On the way to the place you will most likely have to climb up the tower block (fortunately, thanks to Light Speed power, ??it is very easy to do). When you reach the roof of the skyscraper, you should notice enemies gathered in the north parking lot - it is a good idea to attack them from above, using the equivalent of the already known Comet Drop power, that is by holding Square button in mid-air. Deal with the survivors, destroy the Core shield, and absorb Radiant Sweep Power.
 Radiant Sweep attack is very powerful and quite effective at the same time
Radiant Power Sweep is also an equivalent of one of the actions used in the earlier stages of the game. To launch it, it is required to gather the proper amount of karma in a short period of time (Karma Streak), whereas this should not be a problem at this point. Press down on the D-pad and Delsin effectively wipe out enemy forces. This is the end of this mission.
You can now choose the next main mission; the choice should depend on the karma path you took:
Note: This mission is advisable, if you play as hero, that is, if you strive to accumulate Good Karma. Besides, it is good to know that accepting it locks access to mission 7b (Fight Intolerants), designed for the villain.
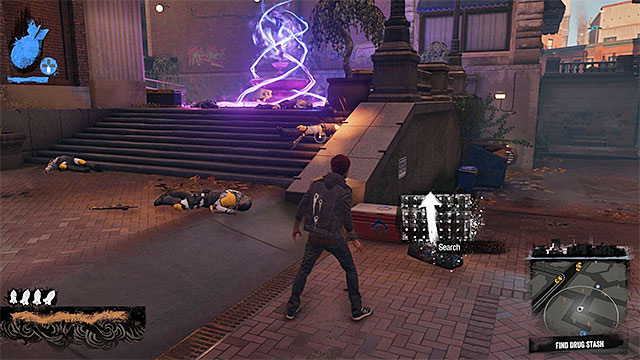
 Eliminate drug traffickers
The starting point of this mission is on the roof of one of the buildings in the western part of the Pioneer Square district. After hearing a brief conversation, head to the docks located south of there. The docks are crowded with drug traffickers, so start by attacking the closest ones. It is good to use basic Neon Beam to eliminate enemies, however, while going across the main walkway you should also often perform Light Speed dash??, as enemies can be easily neutralized on contact with rushing Delsin.
 The first drug stash
The mission described involves destroying three drug stashes at the docks, and the first one is located in the eastern part of the harbor. Locate the containers and run your finger tip on the touchpad to open one of them. Once you make sure that these are drugs, reach the upper balcony of the nearby building and press the touchpad again, this time to pain a graffiti.
 Watch out for enemy snipers
Two other stashes are located west of here. The main walkways lead to them - you can reach them in any order. No matter which path you choose, you have to watch out for enemy snipers in addition to standard drug traffickers. Here it is good to aid yourself with Light Speed dash, in order to significantly reduce the risk of taking a serious injury and to get there more quickly. Also all the time be careful not to fall into water, although this will not automatically result in failing the mission.
 Open the door to free hostage women
Just as before, you must locate and examine red boxes with a dolphin logo. The only difference is that before painting a graffiti, it is necessary to release the prostitutes held captive in the huts in the docks. Luckily, this is a very simple task, as in both cases it is enough to approach the marked door and use touchpad in the right way. Proceed fighting until you get rid of all enemies in sight and destroy the three drug stashes.
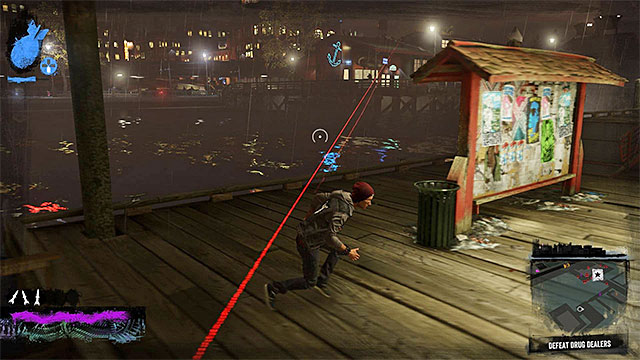 Avoid fire from snipers who are standing on the roof of the northern building
Head back toward the harbor exit (do not try to fly over the water, because you are bound to fail to safely make it to the main part of the district) taking under consideration the fact that you will encounter more drug traffickers. Be extra careful of the enemies gathered on the roof of the northern building, because they are using sniper rifles. Try to use Light Speed ?? power often in order to reach the roof they occupy and deal with them. Get rid of all drug traffickers. The area will soon be invaded by D.U.P. forces. You can eliminate them as well (first, you should destroy the armored vehicle), although it is not required in order to complete the mission.
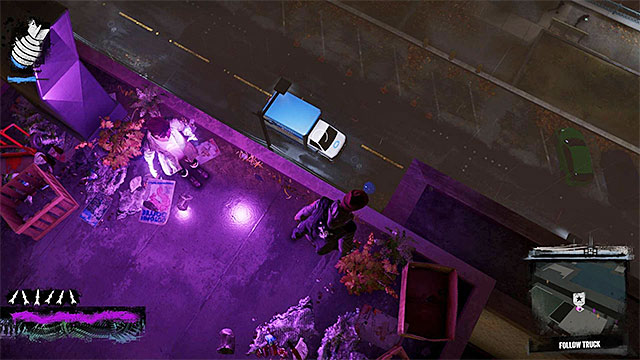 All the time remain on rooftops, so that the driver of the van did not notice you
Return now to the roof of the building where you started the mission in question, and after watching the "fireworks" listen to another dialogue. The next part of the mission involves following the van that belongs to the drug traffickers, and since you must not be noticed, you need to stay on the rooftops all the time (often look at the mini-map where you can see the current position of the vehicle). You should obviously aid yourself with Light Speed?? ability, whereas it is also advisable to have Photon Jump improvement installed (it does not require many shards). This power allows you to perform long jumps by pushing X button while dashing in order to make it easier to jump from one rooftop to another.
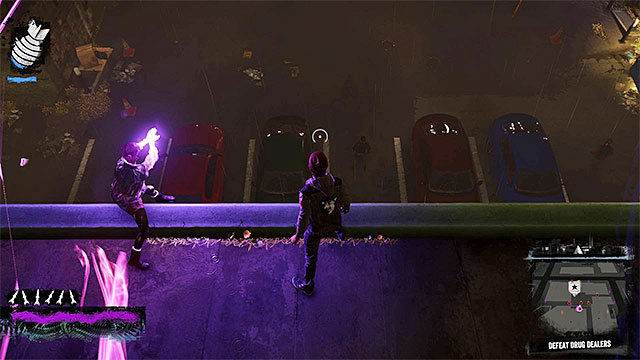 You should ambush your enemies by attacking them from above
If you did not make any mistakes while following the van, it will lead you to the main hideout of drug traffickers located in an alley in the southern part of the Paramount district. Of course, you have to deal with all enemies in that place. Since initially they are not aware of Delsin's presence, it is advisable to ambush them by attacking from the air (e.g. a powerful blast in the ground) or from one of the roofs. Those enemies will not be a big challenge for you, but you should obviously avoid their collective fire.
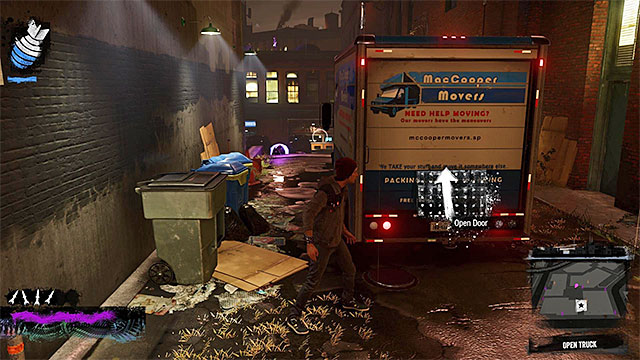 The van
Once you win the battle, approach the van that you have recently followed and open its rear door (run your finger across the touchpad). Doing so will result in saving the last group of prostitutes and complete the mission. Watch another, a bit longer cut-scene and get ready for the next main mission - The Test.
Note! Selecting this mission is recommended only if you follow the evil path, i.e. you strive for amassing Bad Karma. It is worth knowing that starting this mission lock access to mission 7a (Trash the Stash), which has been prepared with playing, as the main character, in mind.
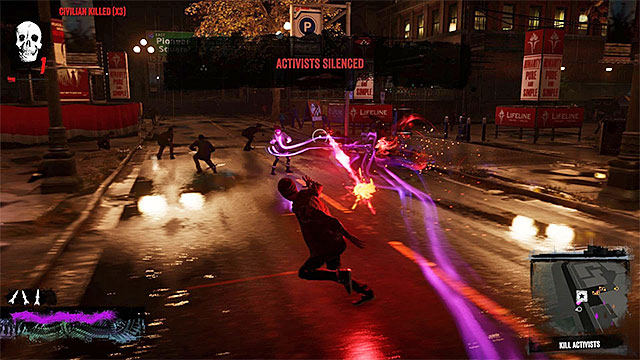 The first group of protesters
The starting point, for this mission is on one of the rooftops in the central part of the Market District and you need to be careful here, because there is a D.U.P. base in the vicinity (as long as you have not destroyed it). After you reach the rooftop, listen to the conversation with Fetch, which concerns attacking the successive groups of protesters, who are voicing up against bio-terrorists. The first group is to the West of here and that is where you need to go. After you get there, use e.g. the Cinder Blast (R2) to attack the protesters (you do not need to kill all of them, it is enough to stop the protest).
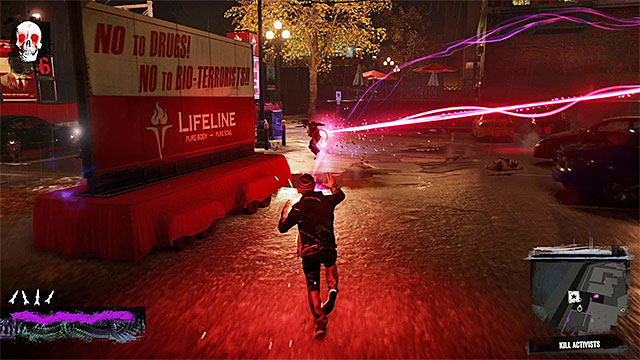 watch out for D.U.P. soldiers
You need to, keep in mind that, by attacking the activists you will attract attention of the nearby D.U.P. soldiers so, try to start eliminating them as soon as possible. What makes things much easier is the help from Fetch but, in spite of that, it is a good idea to watch out, retreat whenever Delsin sustains heavier injuries and replenish power level on a regular basis (you can rely on either Smoke or Neon).
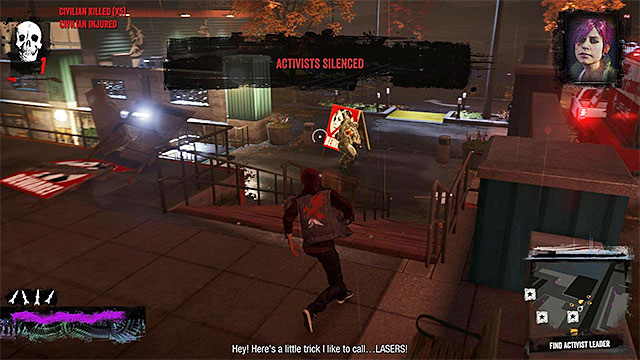 Attack the protesters and defeat a new wave of D.U.P. soldiers
The second phase of the plan assumes that you attack the three group of protesters and the purpose of this is to smoke the leader of the activists out. You can reach the protest sites in any order that you want but, to keep things orderly, I recommend that you first go to the Seattle Centre district. Just like earlier, murder at least several activists, thanks to which the protest will end. You should to expect a more resolute reaction, on the part of the D.U.P. soldiers, because you will have to defeat here, among others, an elite opponent with a minigun (remember to use the best of your attacks and to finish out the enemy soldier, after you finally weaken him).
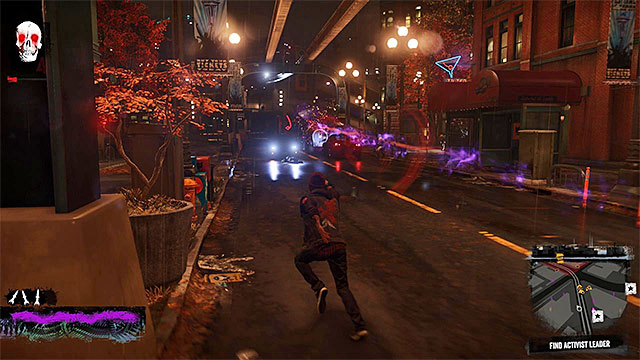 The location where you fight again
Now, you need to get to the manifestation site in the Eastern part of the Georgetown district. Deal with the activists and start attacking the enemy units. In this particular case, you need to watch out for, at least, one elite enemy that resembles a scientist, because one of his powers is immobilizing Delsin, which exposes him to attacks by the remaining opponents. A good piece of news is that you can still count on Fetch's support.
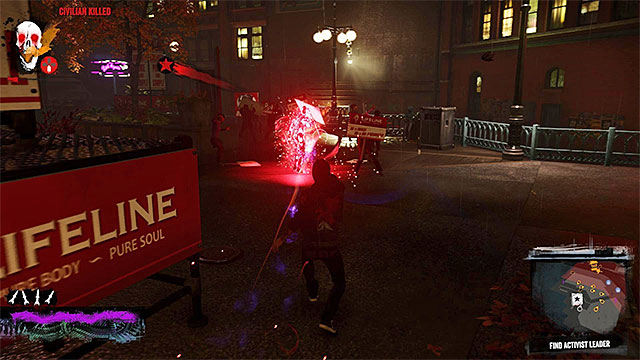 The location where you stop the last protest
The final manifest is in the South-Eastern part of the Market District and, if you still have not destroyed the base in the vicinity, the safest way to reach the site is by taking the route alongside the water. During the fights, you should, again, focus on the elite opponents and do not come too close to the D.U.P. base, to prevent encouraging more soldiers to arrive. You need to be very careful here, because Delsin cannot, unfortunately, count on Fetch to help him and, as a result, all the attention will center around him.
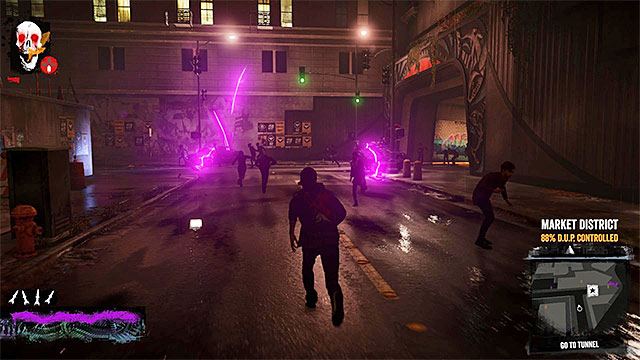
After the fights end, replenish your powers. Also, listen to the conversation with Fetch, who will inform Delsin about new cues of the activist leader and she will ask you to reach the Pioneer tunnel. The entrance to the tunnel is located on the border between the Market District and Georgetown and it has been shown in the above screenshot.
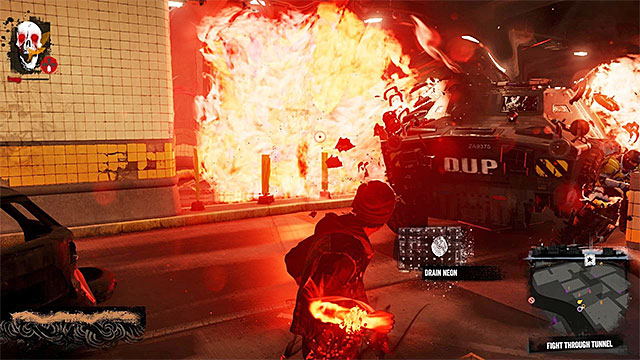 Follow the tunnel and keep eliminating the soldiers
Enter the tunnel and go East. Along your way, it is going to be necessary to eliminate more enemy soldiers. I recommend that, in this part of the mission, you switch to Smoke power because, although there are several neons in the area, it is going to be much easier to you to regenerate Delsin's powers by running up to blazing cars. This will also allow you to launch the most powerful attack (R1), which will prove useful for the elimination of the better-armored enemies (a new elite opponent with a minigun, among others).
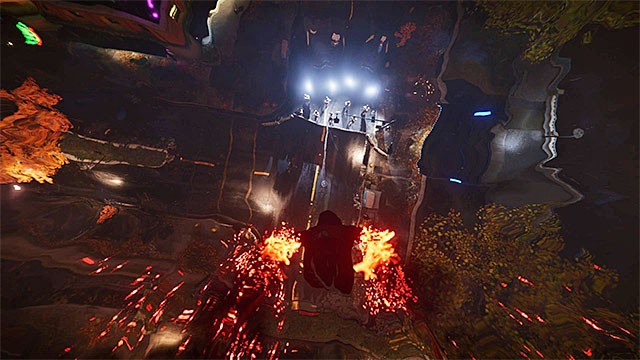 The Orbital Drop attacks will let you deal easily with the opponents closest to you
After you reach the barricaded tunnel exit, wait for Fetch to unlock access for you. Exit the tunnel and allow the main character pretend that he gives up. Wait for a good moment now, and launch the Orbital Drop attack (the down button on the d-pad), thanks to which you will attack them by surprise and get rid of them, without any problems.
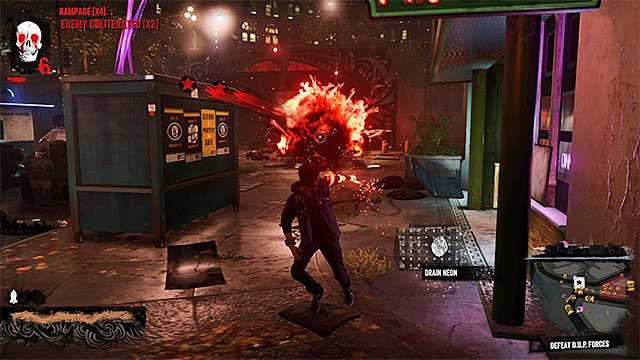 Again, you should keep an eye on the elite opponents
You can now start the final battle of this mission. At the beginning, try to blow up the incoming APCs and later on, focus on the successive elite opponents and snipers up on the rooftops. You can use any power that you want to but, you should keep an eye on your health. After you win the fight, watch the cutscene of the execution on the activist leader, which will end this mission. You can now focus on another main mission - The Test.
You can start this mission after completing the mission 7a (Trash the Stash), which is prepared for hero, or mission 7b (Fight Intolerants), designated for villain.
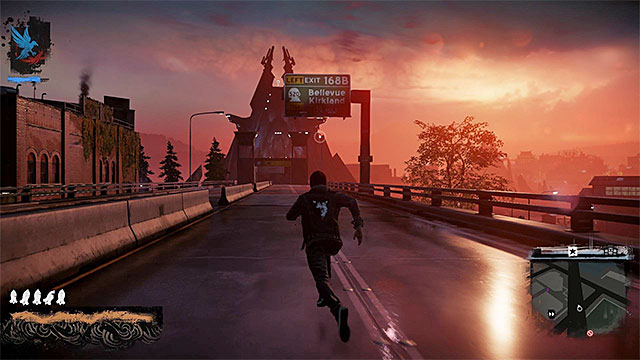 The road that leads to the bridge
Wait until the main hero is contacted by his allies and listen to the conversation between the characters. You can now head to the bridge that links the northern and southern part of Seattle. It is located in the eastern part of the map, specifically in the south-eastern part of the Pioneer Square district.
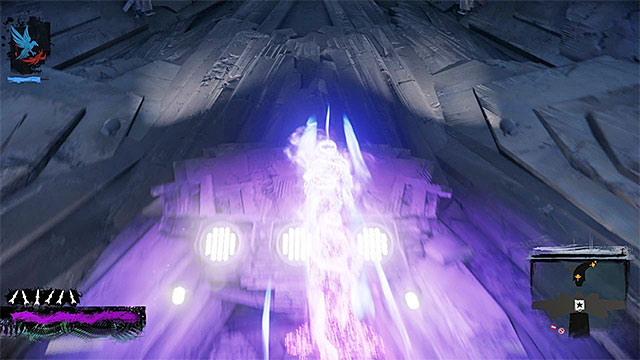 Start running up the wall to reach to the top of the barricade
Of course, make sure that you are running down the highway and pass by abandoned watchtowers. Once you reach a huge concrete barricade, make sure that Delsin is currently using a power from Neon category. If not (i.e. if Smoke category is selected), drain fluorescence from a nearby neon light (that will automatically switch power category). As you have probably guessed, you need to use Light Speed ability ??(hold Wheel on the pad) to start running vertically and thus be able to reach the very top of the barricade.
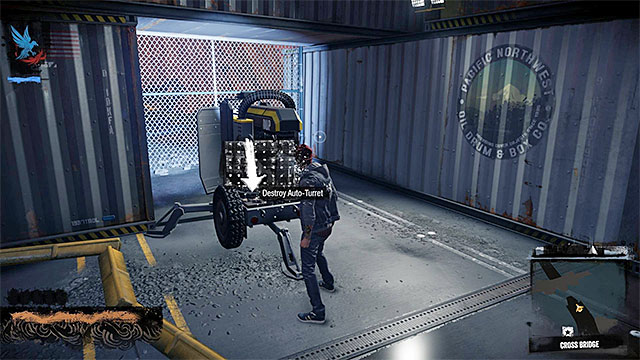 You can easily sabotage Auto-Turrets
Watch a cut-scene, during which Delsin again starts using Smoke power. While crossing the bridge, the main character has to avoid Auto-Turrets. If you have previously fought for control over the city districts, this is nothing new for you. Otherwise, know that you should be very careful, because the Turrets have huge fire power. Their main weakness is that they do not rotate a full 360 degrees. Bypass the first Turret from the right. Depending on your preference, either destroy (press the touchpad when standing on the back side of a Turret), or ignore it and immediately head on.
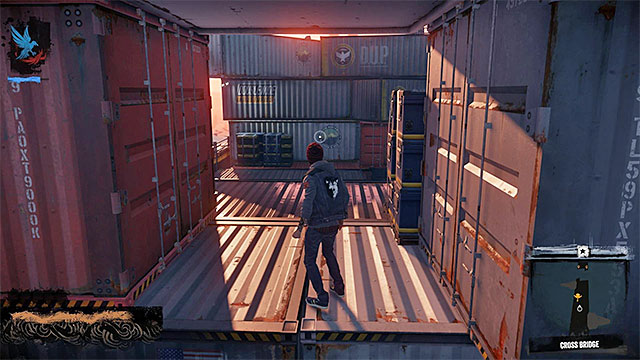 Use Smoke Dash ability to help yourself out
Jump at the containers located on the left side, thus avoiding fire from another Turret located far south of Delsin's current position. Choose the right pathway through containers and help yourself out with Smoke Dash ability to quickly pass by the small area where the main character would be in range of one of the Turrets. As before, you can approach the Auto-Turrets that you pass along the way and blow them up or focus solely on pressing forward.
There is another Turret nearbyGo across the bridge along its right side, thus passing by two more Auto-Turrets (the one deployed at the highest container and that which is on one of lower containers). Stay alert after you get to the narrow passage surrounded by containers. On the left there is the last Auto-Turret - if you want to safely pass by it, you should again use Smoke Dash power.
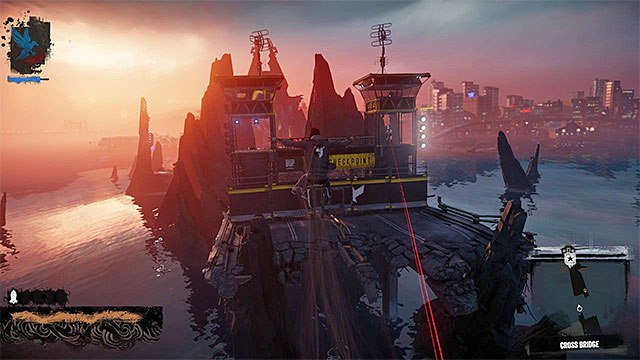 You can attack the soldiers from a distance or take care of them when you get to the next part of the bridge
Move further south, taking an undemanding climb on the way and, in a few moments, getting to the damaged part of the bridge. There are snipers on the remote towers, and if you have some smoke left (unfortunately, you cannot regenerate it here), attack them from a distance. Otherwise immediately bounce off from the wrecked car (it is the only safe way to reach the other part of the bridge) and use Smoke Dash ability as well as floating in order to get to the place where the D.U.P. soldiers are stationed.
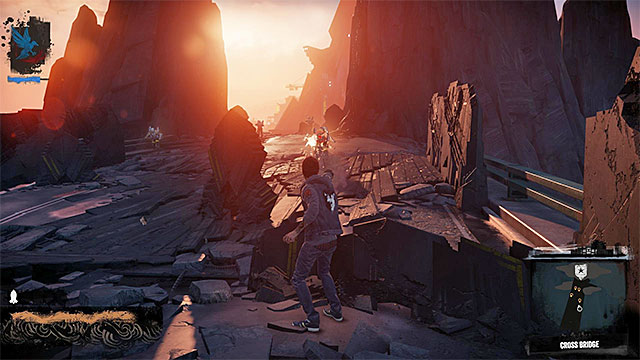 Take on the opponents one by one and often change your position
Eliminate the enemies and head further south. A group of slightly better armored opponents will soon stand on the main hero's way. At this point it is good to use all the remaining smoke. Only after having that used up, start performing melee attacks (Square). Unfortunately, you must be in constant move during the fight, so as not to get under heavy fire. After eliminating the enemies, jump down on an even bigger "arena", where, after a brief conversation with Augustine, a new boss awaits you - a Department of Unified Protection Agent.
 Ranged attacks can be avoided by running or taking covers
Let us traditionally start with a few words about the boss's attacks, which is because these are quite diversified and they inflict considerable damage, so you really need to make effort to avoid them. One of the main attacks that the elite D.U.P. agent has, is casting massive cement blocks at the main hero, which you can avoid by running or taking appropriately big covers.
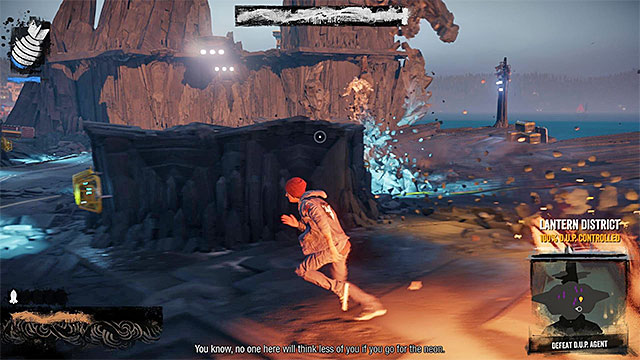 Try to avoid contact with auto-targeting missiles
Another major attack the boss has is firing auto-targeting missiles that move under the ground and inflict damage upon contact with the main hero. In this case, it is highly advisable to often perform dodges and run around all the time, hoping that an enemy missile will miss Delsin. Otherwise, the main hero may be seriously injured and temporarily dazed, thus getting exposed for further attacks from the boss.
 Melee attacks performed by the boss are very strong
The last attack D.U.P. agent has, is used in the later phase of the duel. The distinguishing feature of it is that the boss temporarily ceases fighting at a distance. Namely, he will try to perform a single melee attack. As with the previously described auto-targeting missiles, the key to keeping Delsin alive is to avoid such charges by dodging and running, as they may inflict serious injuries.
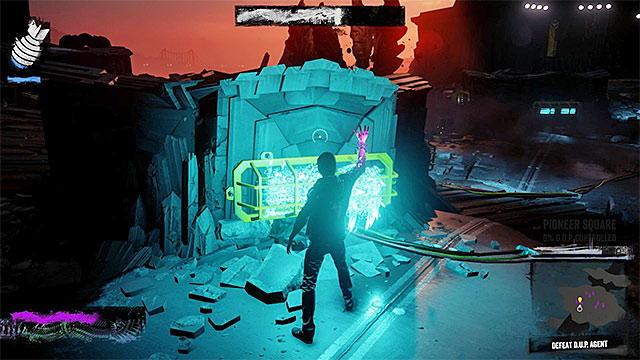 Do not absorb energy from neon lights while you are exposed for the boss's attacks
So much for the boss's abilities, now some information on how to deal with him. The first thing you need to do is to switch Smoke power to Neon power by absorbing energy from one of the neon lights in the area. But do not rush into this (that also applies to regenerating the energy bar later in the fight), but first make sure that the boss is not currently in a position from where he could easily interrupt the charging process and weaken Delsin at the same time. By the way, I recommend getting the improvement that shortens energy absorption time, although you can handle even without that.

Theoretically, you can attack the boss with all available ranged attacks (do not try to get near it - melee combat is not an option), but the best result comes from using a combination of Laser Insight and Phosphor Beam. Start by holding L2 button and right after that hold R1 (Phosphor Beam attack needs a moment to charge up). Now try to aim directly at the boss while in slow motion mode (as in the picture above), waiting for the moment when the missile launches.
 Use Phosphor Beam attack, but remember to regularly refill heavy ammunition supply
Using Phosphor Beam power will only prove successful and take away a lot of hit points from the boss, if the energy beam hits directly at him and not at the concrete elements floating around. From now on, keep repeating all the steps as described above and be sure to frequently regenerate power by absorbing energy from neon lamps, because Phosphor Beam attack requires Heavy Ammo. Reducing the D.U.P. agent's health bar to zero will terminate the duel as well as the eighth mission.
Wait until you are transferred to Lantern District in the southern part of the city. The game will give you access to another main quest, called The Fan.
Game won't let you begin this mission until you don't destroy the Mobile Command Centre in Lantern District. The latter is described in the City chapter. I recommend to take control over this or other District whatsoever, so you unlock the quick travel option between northern and southern part of Seattle.
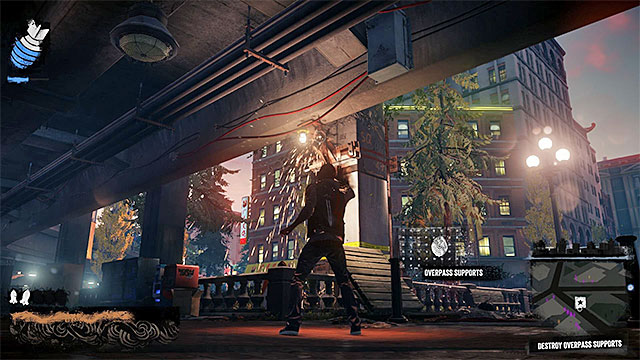
Approach the marker in the northern part of the Lantern District and begin from listening to Eugene, who is a big fan of Delsin. After the conversation, head for the Waterfront. But, simultaneously, be careful because there is a DUP Force base nearby. When you get to the place, notice the steel supports of the highway. Start aiming at the supports (screen above) and destroy them with distance attacks - even the simplest powers of Delsin are ok.
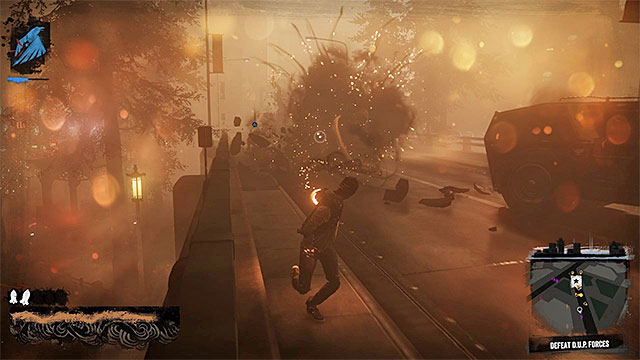 Attack enemies guarding the convoy.
Wait for the cut scene showing arrival of the convoy and collapsing of the road. When you regain control, head for the convoy and start attacking DUP soldiers gathered around. Here you should use the Smoke power, because you can easily regenerate it by sucking the power from vehicles. Ignore the helicopter which may appear over the highway - Delsin won't be attacked by it.
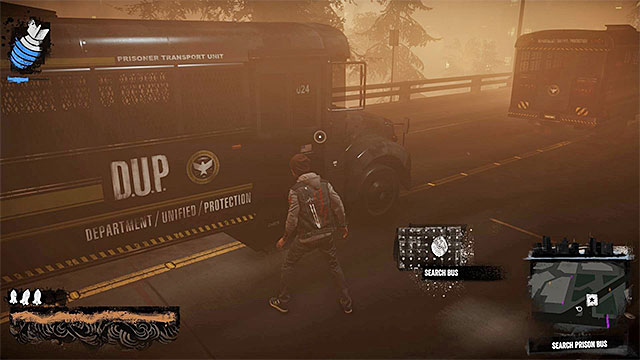 One of prison buses.
Move forward slowly and don't hurry, because you'll run also at enemies with powerful powers. Remember to cover when Delsin gets hurt more seriously and draining the smoke from wrecks so you can use the better attacks and heavy ammo (Cinder Missile power). When you get to the prison buses, approach one of it and check it (press the touchpad). It launches the new cut-scene with helicopter landing on.
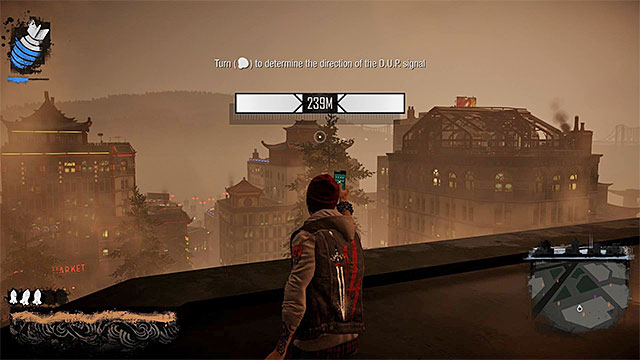
When Delsin regains consciousness, listen to the conversation with Eugene. It concerns using the tracking device. Now it's good to switch onto Neon category, as you'll benefit from the Light Speed power to get quickly onto roofs. When you are on one, launch the tracking device and set the direction of movement (screen above). You don't have to listen to all DUP agents' conversations and have the number chosen for the all time. Remember to move in a straight line and launch the tracking thing from time to time, to make sure, that you run in a right direction.
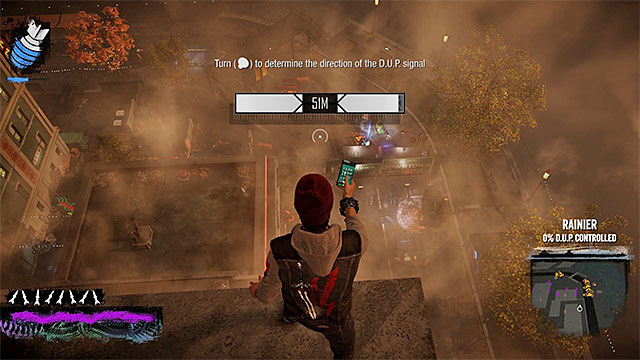 Vicinity of the first found bus
Tracking device will take you to the eastern part of the city, between the Lantern District and the Rainier. Here you find a first prison bus wreck. As there are enemy soldiers nearby, it's recommended to attack from the air. During the encounter be careful and aware of enemies who can use power to destroy barricades. Attack them from sides and destroy their covers.
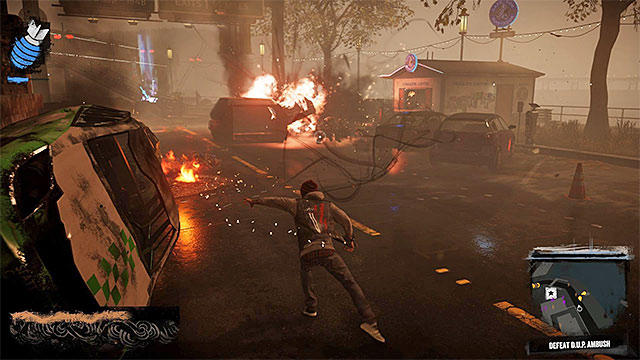 Attack strong armed enemies from a distance
After securing the vicinity, approach the wreck and search it by pressing the touchpad. This will make well armored enemies to appear here. If you didn't take over the southern districts of Seattle, that'll be your first meeting with them. Try to keep them at bay, because you have no chances at the short distance. Avoid also their strongest attacks - kind of a shockwaves (use covers or jump over it). To eliminate them, you should use the best distance power and deal with them one after another.
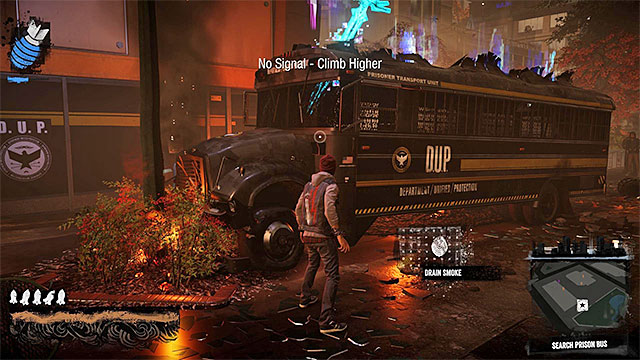 Second bus
After cleaning the vicinity, get onto the roof of any building and use the tracking device again. Application will lead Delsin to the second bus wreck in the southern west part of the Rainier. This time, you can be relaxed, you won't be attacked. Check the bus (touchpad). You won't find here anything.
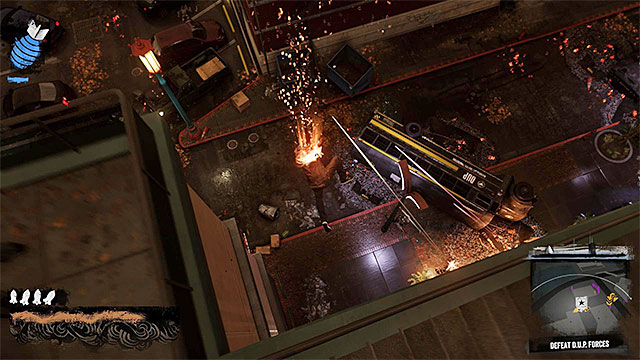 Focus on attacking DUP soldiers
Use the tracking device for the last time. It takes you to the third bus wreck in the eastern part of the Waterfront. As you probably noticed already, DUP is fighting angels here. You don't have to attack angels (but it's possible, each hit makes them disappear), because they are no danger for Delsin and they may be even helpful at eliminating enemy soldiers. Focus on DUP troops and, again, beware of the armored enemies, who are not easy to defeat. You have to eliminate all enemy characters and search the last bus (press touchpad). This mission ends and you get an access to another one - Reggie takes Flight.
Remark - game won't let you begin this mission until you don't destroy the Mobile Command Centre in the Rainier. Marker for this mission is in the alley in the northern part of the mentioned district.
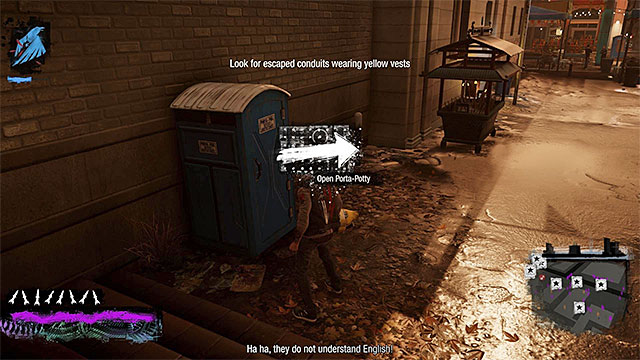 Open toilets
When you begin the mission and listen to the conversation, start looking into the toilets on the marketplace. In each case you need to approach the toilet (they are all marked on the minimap) and move the finger right over the touchpad to open its door. Very probably that a bio-terrorist you're looking for is in one of the last toilets.
 You won't chase the angel down even with the maxed Light Speed
Start chasing a refugee, who'll be kidnapped by an angel after a while. Don't try to fire at the angel and chase him down. He'll run away no matter what you do, you can't prevent it to happen.
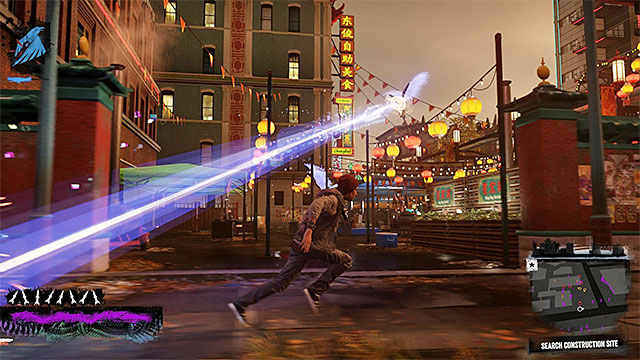 Keep fighting the gangsters and the angels, while checking on the successive marked areas
Return to the main part of the market and start exploring the four areas marked on the minimap. Focus on the part of this location where there are the remaining angels and the Akurans. Expect to be attacked by them. The good news is that the gangsters do not use powers and that angels disappear after a single hit. The bad news is that the blue rays that the angels shoot, deal quite a lot of damage. I strongly recommend that you remain in constant movement and hide behind covers, as soon as Delsin is severely wounded, in order to regenerate the health that you lose.
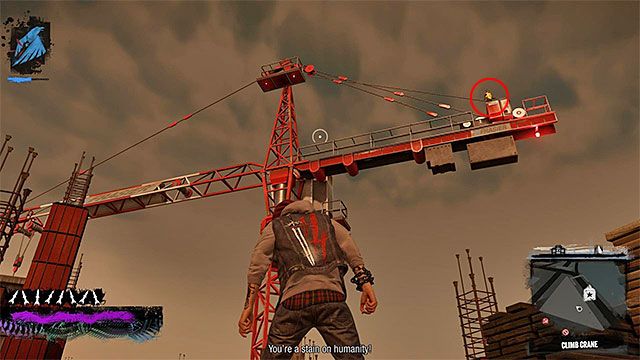 Crane onto which you have to climb
When the encounter ends, head for the construction site in the northern-east part of the Lantern District, nearby the bridge through which you get to the southern Seattle. Get onto the higher level of the site and then start climbing to get on the very top of the crane. Depending on your preferences, you can climb with Light Speed power or in a traditional way (grabbing the following interactive edges). When you are on the top, try to approach the second bio-terrorist, who'll also get caught by the angel.
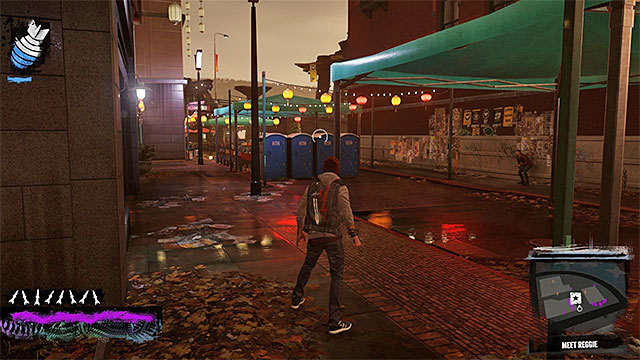 Where you meet Reggie
As previously, you have no chances for catching up the angel whatever you do. Listen to what Reggie has to say and then head for the center of Rainier. Approach the toilets and when you see Reggie, listen what he tells about finding the angels' hideout.
 During the pursuit, Reggie will be overactive
When you regain full control, start running after Reggie dressed in the bio-terrorist suit. Plan consist on pursuit him, but you don't have to play to hard or use any particular powers. Just keep nearby the running away Reggie, who, after several dozens of seconds, will be caught by the angel. Just as it was planned.
 Building on which top, angel stops
During this final chase after the angel, paradoxically, you do not need to attach too much attention to that because, whenever the angel leaves you too much behind, the marker that signifies its position on the map will not disappear. Still, it is a good idea to use Light Speed to move around the area efficiently. Ignore simultaneously other angels you'll pass by, because attacking them won't give you anything. Chase ends next to the building in the southern-east part of the Waterfront and you have to use Delsin's power (again: best is Light Speed) to reach its roof.
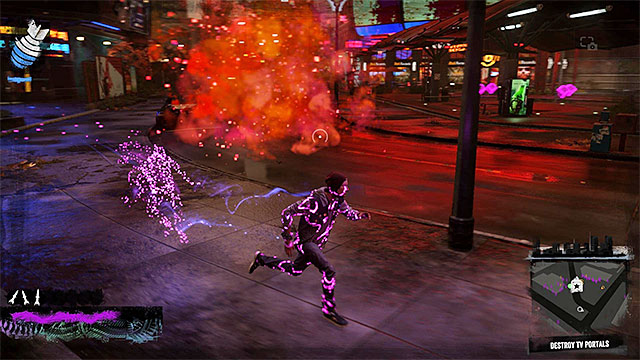 Get away from the red marks on the ground which symbolize the places of upcoming demons' attacks.
After a short cut-scene, jump at the very bottom and begin the final battle of this mission. During this battle, you have, first of all, beware of angels again. Don't stop anywhere for a longer time and don't let them hit Delsin their strong distance attack too often. Besides, demons will appear there. Their attacks are also hurtful. Keep away from places on the ground, where you notice the red marks.
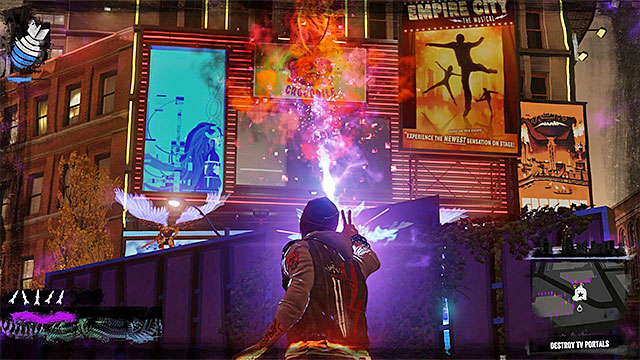 Destroy those LED displays used as portals
This battle cannot be won by eliminating angels and demons, as more will come at their place. Instead of that, focus on destroying those of nearby LED displays that work as portals (angels and demons come through them). To explode the displays you should use the best attacks of Delsin (Cinder Missile or Phosphor Beam). Don't forget also to regenerate health behind covers and picking up heavy ammo. Destroying all LED displays ends this mission and unlocks another one - Heaven's Hellfire.
 Beginning of the mission
You begin this mission where the previous one ended, in the northern-west corner of the Rainier. Approach the open hatch and wait until Delsin goes to the nearby cellar. Look around and begin the first encounter with the main boss of this mission - He Who Dwells.
 Avoid lava
At first, several words about this encounter in general. It's divided onto several parts, where your primary task is to get rid of huge amount of angel's health and avoid all his attacks and other dangers. The last category is lava, filling the whole arena. Falling into lava doesn't mean you're dead, but you have to hurry onto the dry land. In such a case, changing into smoke or Light Speed power will be useful.

Another important thing is moving around the arena. You should, in majority, rely on energy pillars like the one shown on the screen above. Getting into the energy torrent will jump out Delsin. For getting onto shelves safely, you should also use the option of floating. Use this skill when you want to get closer to the boss and fire at him while remaining mobile.
 You won't be safe behind pillars, because they can be easily destroyed
At the beginning, boss will have only one attack - a strong beam of energy fired at Delsin. Stay mobile and jump between shelves and wait for angel to finish his current attack. I don't recommend hiding behind pillars, as they'd be destroyed. You can try to grab the outer edges of shelves, on which you should remain safe.
You can use both Smoke and Neon powers to attack angel. There are nearby points to regenerate energy used for offensive powers. One of them is shown on the screen above. Use these points mostly to replenish Heavy Ammo.
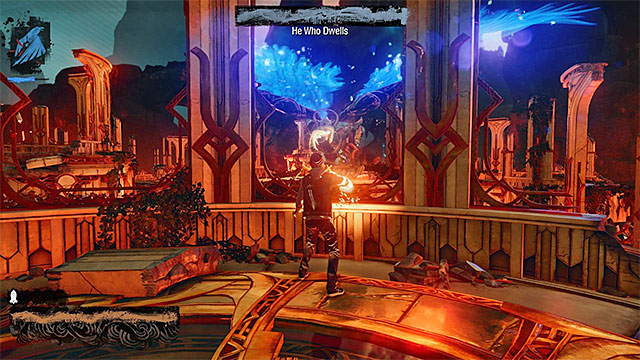 Make distance attacks to weaken the boss
As you probably figure out, the best attacks you use with R1 button are the best one to decrease angel's health bar. I recommend to mostly use them and the standard distance attacks (R2 button) between the first ones.
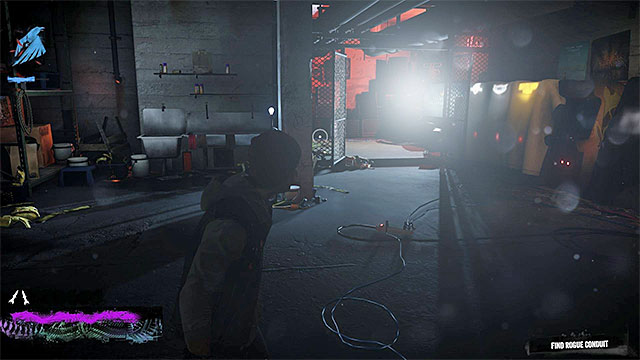 Approach the TV to move to the next stage of the battle
First part of the encounter ends after several successful hits. After that, you're again in the cellar. Approach the TV you see to get to the second stage of the battle.
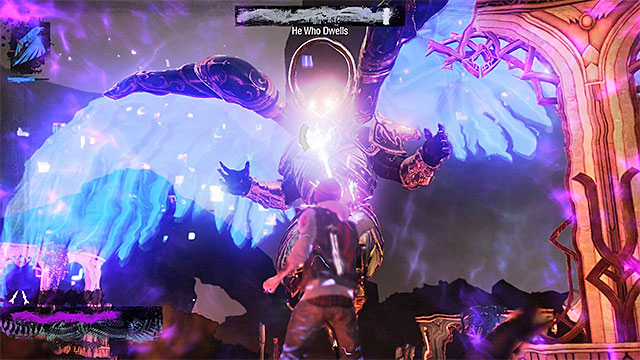 Use the strongest attacks again
Second part of the encounter brings two important changes. First, is a boss attack, Besides firing an energy beam, he'll also fire explosive missiles at Delsin from time to time. When you see angel preparing to this attack, jump onto other shelves to avoid damage. Attack angel the same way you did previously, using the strongest abilities (R1 button).
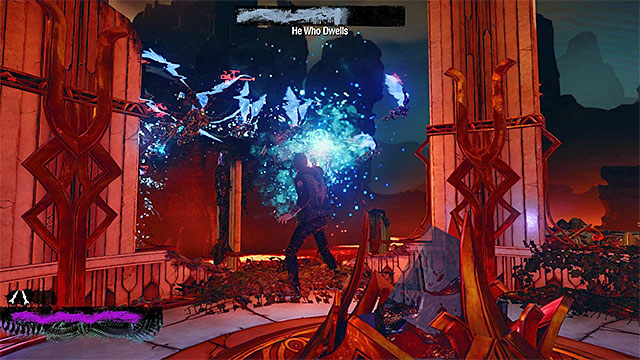 You can additionally, lay fire down on the smaller angels, for more damage but, do not forget to reach a safe ledge
The other new thing is the boss moving around. When only you notice that he changes into a group of angels, fire at them to lower the boss' health bar. The more important is what will happen in a moment. The part of shelves will lower. You have to act quick to not get into the lava. You should start floating in the air and reach one of the shelves with the vertical pillar of light. After landing, use the mentioned "elevator" to get onto the new arena and resume the boss fight.
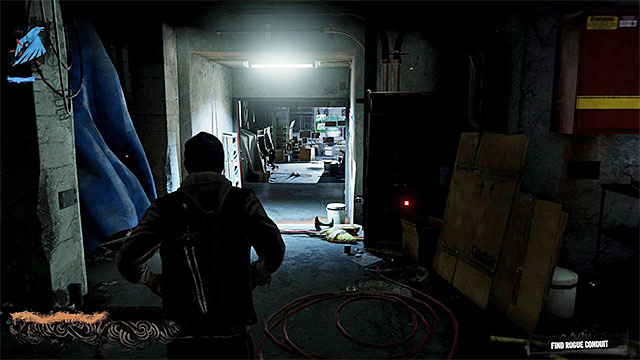 Another visit in the cellar
Continue attacking from distance, remember to keep Delsin alive (start jumping around when heavily wounded) and run away from platforms falling into lava. You return to the cellar when boss' health drops below the half. Get to the another part of the building to move to the third stage of the battle.

In this part, the only new thing is that boss will be supported by the smaller angels (screen above). ALWAYS focus on eliminating them firstly, because until that, the main boss will be immortal. The rest of the encounter has no more changes, so you have to beware of two types of boss' attacks and platforms falling in lava.
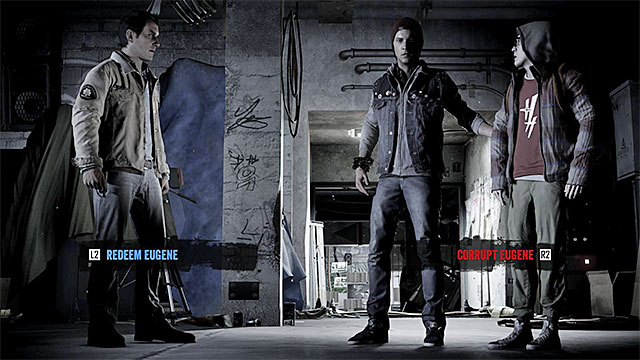
Methodically, keep depriving the boss of health points and try keeping Delsin alive. The fight ends at the moment, at which the boss's health runs down. After a while, a new cutscene will start and you will have to take another important decision (the above screenshot). If you want to gain good karma you need to reassure Reggie that you want to restore Eugene to the right path (the blue option - Redeem Eugene). If you want to gain bad karma, you need to show Eugene the power within him and tell him what he needs to do (the red option - Corrupt Eugene).
Whatever you choose, the mission ends and you unlock the another one - Zero to Hero.
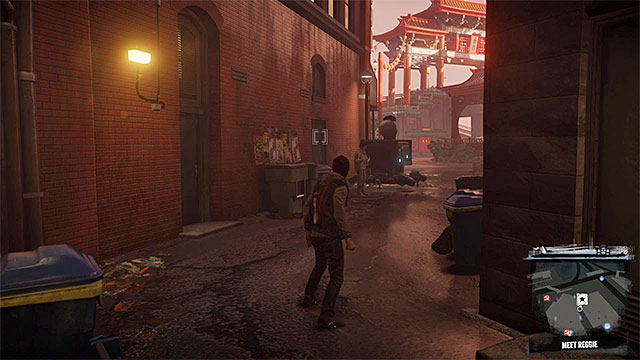 First Core Relay
It's almost obligatory to take this mission after finishing the previous one, because Delsin, despite unlocking a Video category, doesn't have any skills in it and can't switch onto different categories. Head for the first Core Relay in the northern part of the Lantern District. When you get there, watch a cut scene and wait for Reggie to unlock the access to the core. Draining energy from the core gives you the first Video power: Shroud of Invisibility. This power makes you temporarily invisible (L1 button). Check it out.
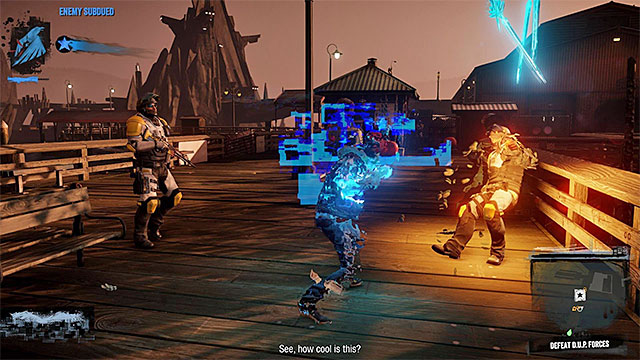 Approach the enemies while being invisible and attack from surprise
Follow Reggie who takes you to the haven in the northern west part of the Lantern District. Gain the energy from the core, so you unlock the melee attacks (Square). Notice that a group of DUP soldiers appear so you can test out your new powers. Launch the invisibility to approach enemies and then attack them using the melee attacks.
Remark: using the invisibility (and powers described later on) drains the power bar of Video. You can regenerate them by draining the energy from TVs, antennas and computers (blue dots on the minimap).
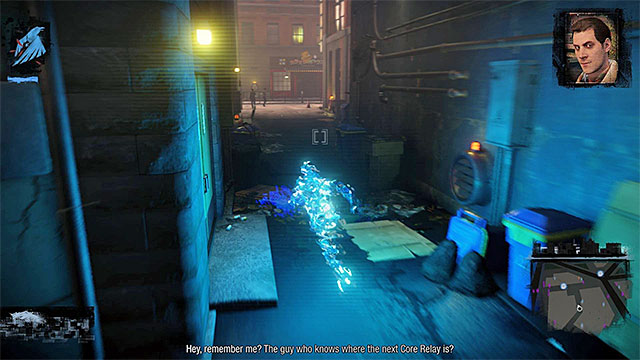 You have to lose Reggie and only then head for the third Core
Delsin wants to head for the next Core alone, so you have to get rid of Reggie. Launch invisibility (L1) and then head off your brother. Try to hide somewhere after using the invisibility. After that Reggie should resign. When the conversation ends, head for the southern west part of Lantern District. Use attack to destroy the core's cover and drain energy to obtain Video Surge.
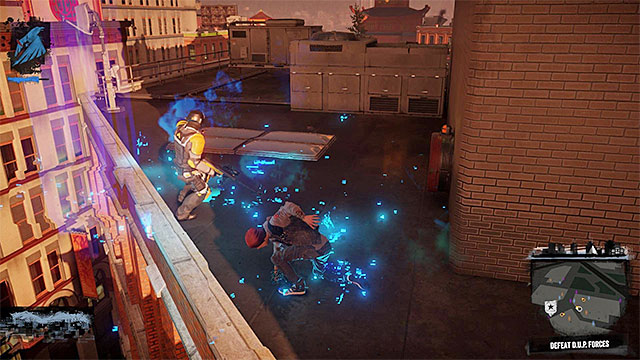 Get onto roofs and deal with the snipers
Video Surge is used for quick moving around. You have to use it for the first time in a moment because Delsin will be hunted down by several snipers. Use the wheel to launch it. Using it, you can easily get on the roofs, get high up in the air while next to the small antennas and fly in the air. For the time being, focus on using your new power to reach and eliminate each sniper.
 Fourth Relay is on the roof of the high building
Listen to the conversation and head for the northern part of Downtown, where you can find the fourth Core Relay. Use the latest power from Video Surge to get onto the skyscraper's roof (the one with flying demons) and destroy the cover of the Core Relay. Draining power from this Core gives you Bloodthirsty Blades.
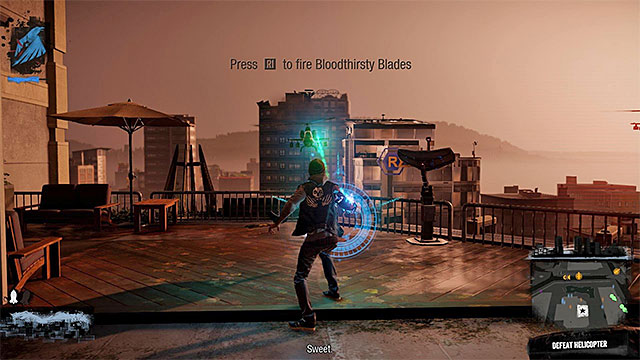 Fire down enemy helicopters
This power activates after pressing R1. It requires Heavy Ammo. While using it, you summon three blades firing at the chosen target and dealing huge damage (if you miss, you waste ammo). Use it to take down helicopters. Try also be mobile to avoid rockets and, in case of need, get to the blue dots on the map to regenerate Video energy.
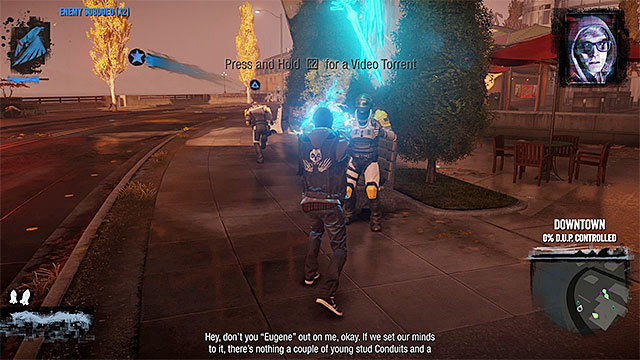 Eliminate enemies
It's high time to head for another Core Relay which is in the southern west part of the Uptown. After draining energy, you unlock the standard attack (R2) Video Torrent. This power is identical with angel's attack which you know from the previous missions. But remember that you have to hold R2. Use this power and other offensive ones to deal with a group of DUP soldiers.
 You can't use Hellfire Swarm too often, so leave it for the most difficult battles.
The last, sixth Core Delay is in the southern west part of the Rainier. When you get there, join demons fighting DUP soldiers and eliminate them. You can blow out the cover of Core and drain its energy. This gives you a special Video attack - Hellfire Swarm. To use it, you need proper Karma Streak, but it shouldn't be a problem for now on. Press the down on the D-pad and relax as all enemies will be eliminated without your activity.
Now you have another choice to make:
Remark! This mission is recommended if you play as a hero and collect Good Karma. You should also know that beginning this mission blocks access to the mission 13b which is meant to be for a villain (Hunting the Hunters)
 Construction Site
The starting point for this mission is right next to Eugene's hideout, in the Rainier district. Make sure, however, that you approach the correct marker, because the bad karma mission marker is right next to it. After you watch the cutscene of the meeting with Eugene, you will go towards the construction site, which is located in the North-Eastern part of the Lantern District. You will have to eliminate here a group of armed Akurans, who are staying inside the parking garage.
 Secure next level of the construction site
You can begin securing the parking lot from the roof or the cellar, however you like. You shouldn't have bigger problems with eliminating next gangsters because they don't have any superpowers. But be careful while facing bigger groups to avoid being under the massive fire. You can use this mission as a training ground for Video powers. But there are no interactive objects to regenerate it so you may have need to switch onto Smoke or Neon.
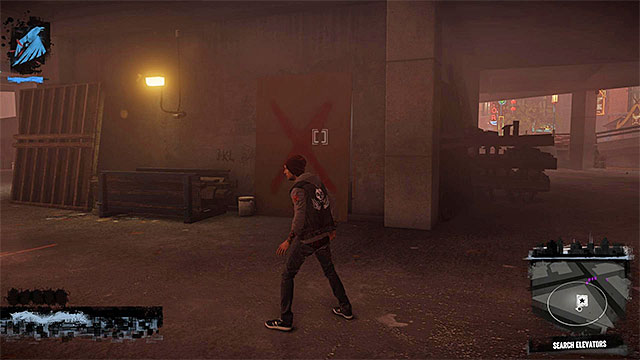
After clearing out the vicinity, start searching the areas where you're lead by the markers on the minimap (like on the screen above). Go through the big red Xs and listen to Delsin's comments. When you search all areas inside the parking lot, you'll have to get onto its roof.
 Transport Helicopter
Listen to what Eugene has to say. Now you know that your new plan is to jump onto containers with imprisoned terrorists which are attached to the transport helicopters of DUP. One of them is already flying over the construction site and you should focus on it. Get onto one of the highest shelve on the roof, wait for the helicopter to get closer and jump onto the container (of course, floating in the air is a good help).
After landing on the container, don't try to attack the helicopter as it'd have end in death of terrorists. Instead, aim at the shown on the screen catch and use basic distance attack (R2) to destroy it.
 Use proper powers to get to the next containers
Now you have to detach remaining containers in the some way. They fly in the southern Seattle and their current position is shown on the world map. You can reach helicopters in the random order. Beware of enemies set up on the roofs next to the patrolling routes of helicopters. You can ignore or kill them (focus on the snipers). Use the Video or Neon powers to get onto roofs and then jump onto containers.
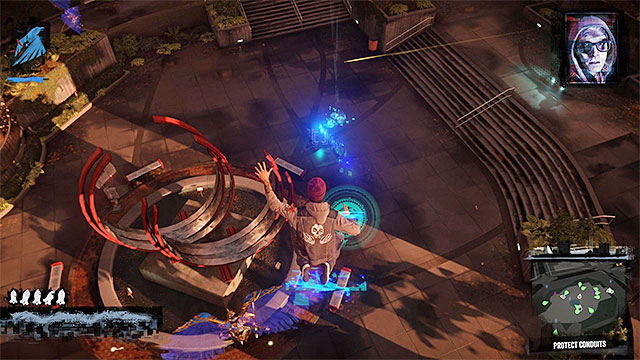 Battlefield in the Denny Park
When you detach all containers, one of them should land in the Denny Park. Head there immediately, because big forces of DUP will appear there and they'll try to take over the terrorists. Good news is that you can count on support from angels and demons.
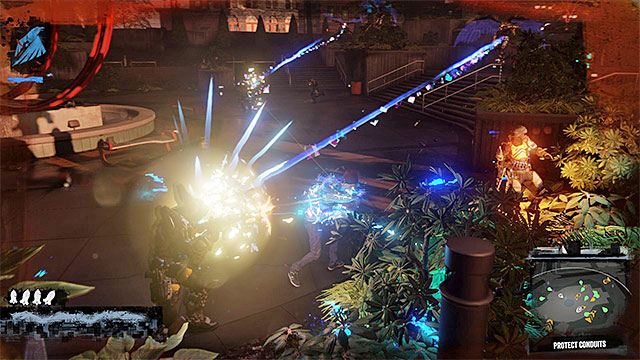 Look for elite enemies and try to eliminate them
Make sure you're well prepared for a new battle (full health, lot of ammo etc) because there are many enemies with superpowers. First of all, aim for the elite enemies who look like scientists, because they are the biggest threat for Delsin. Also, when Delsin is seriously hurt or has no more energy, move away from the central part of the park to regenerate.
 Appearance of the big angel makes battle easier
After some time, two elite agents of DUP will appear on the battlefield. They are similar to the boss from the eighth mission. You don't have to care about them too much, because game won't force you to eliminate them singlehanded. Avoid their attacks you already know (especially when they throw concrete at you) and eliminate weaker enemies. You have to defend until Eugene summons a huge angel. Only now help your allies in eliminating elite DUP agents (remember to hit directly them, not the flying around objects) and remaining enemies. This mission ends soon and unlocks a new one - The Return.
Note! Selecting this mission is recommended only if you follow the evil path, i.e. you strive for amassing Bad Karma. It is worth knowing that starting this mission lock access to mission 13a (Flight of Angels), which has been prepared with playing, as the main character, in mind.
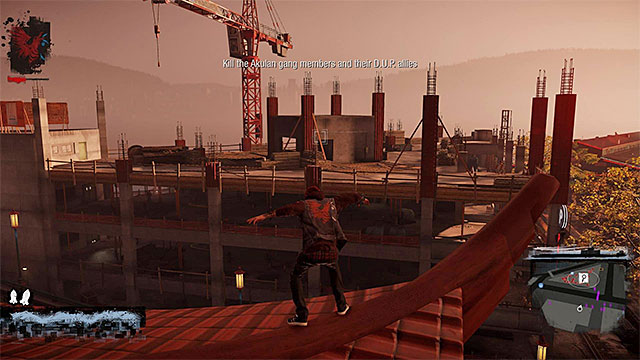 The view on the building site
The starting point is right next to Eugene's hideout, i.e. in the Rainier district. Make sure that you approach the correct marker, because the one for the mission with good karma is right next to it. After you watch the cutscene of the meeting with Eugene, go towards the building site in the North-Eastern part of the Lantern District. You will have to eliminate here a group of armed members of the Akurans, who are staying inside a multi-storey parking.
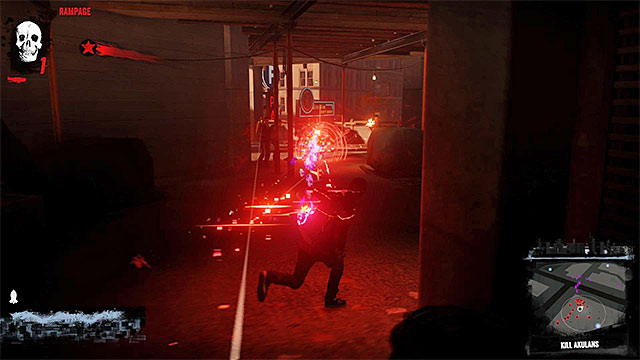 Keep securing the successive levels of the building site
Depending on your preferences, you can start securing the parking lot from the rooftop or from the ground level. You should not experience too many problems here, because the gangsters do not wield any super-human powers. Still, you should be careful while attacking larger groups of opponents, and avoid extensive fire from them. If you want to, you can use this mission to conduct further tests of your Video powers, but there are no interactive objects here, which you could use to regenerate so, you can just as well switch to Smoke or Neon.
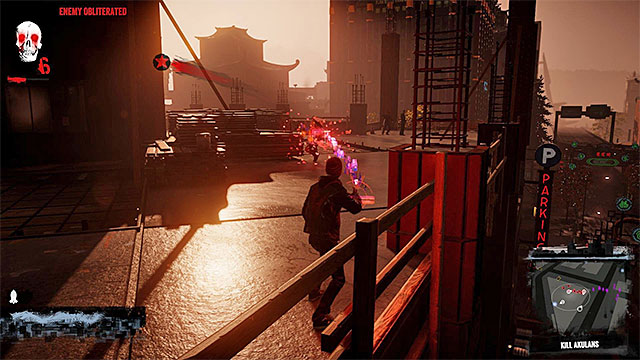 It is best to eliminate the rest of the gangsters at the top level of the parking lot
During the fights, wait for Eugene to confirm and, after he does, consider reaching the top level in the parking lot, i.e. the one under the naked sky. The gangsters should follow you and they will be additionally surprised when they are attacked by demons summoned by Eugene. The monsters will be picking up single opponents, which will make it easier for you to win.
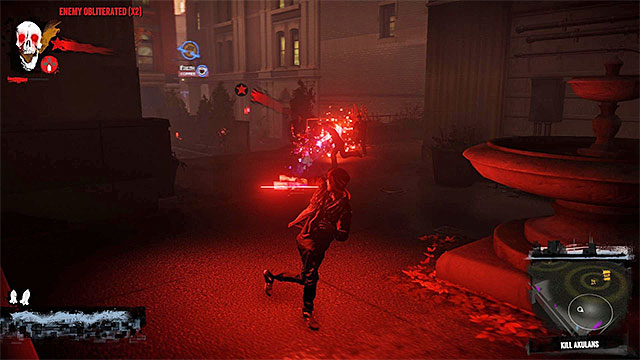 The hideout of the Akurans
Follow Eugene's suggestion and get to the rooftop of one of the tallest buildings and press the up button on the d-pad to produce the phone from your inventory and activate the tracking app. Turn to face the correct direction and go towards the destination. Your first stop is the Salmon Lake building, located in the Northern part of the Waterfront district. Jump down and find the narrow corridor guarded by some gangsters. Take this passage to reach the hideout of the Akurans and deal with the armed opponents.

Again, reach one of the rooftops and use the tracking app to find another place of staying of the gangsters. Your current destination is the greenhouse on the rooftop of the building in the South-Western part of the Lantern District. You need to watch out here, because the site is small and the fights will soon be joined by additional D.U.P. soldiers. Use the strong AoE attacks and, in the first place, eliminate those of the soldiers that also use special powers. (you can, at the same time, kill several snipers occupying rooftops in the area).
 The fighting site in the Denny Park district
It is high time that you used the tracking device for the last time (you should, of course make sure that you position yourself on a rooftop, or a high ledge, beforehand). Your destination is the quite big park in the central part of the Denny Park district. You are up for a big fight here, during which you will be supported by angels and demons.
 Search out the elite enemies and try to eliminate them quickly
Make sure that you are well-prepared for the fight (regenerate your health, replenish heavy artillery, etc), because there are many hostiles around here. tart attacking the gangsters and the soldiers. In the first place, target the elite opponents that resemble scientists, because it is their attacks that may threaten Delsin. Also, keep walking away from the center of the park always when Delsin takes heavy damage, or whenever he has depleted his supplies of power (the type of the special abilities that you use here does not matter - it is best to choose the most developed one).
 The appearance of the huge angel will help you win the battle quickly
In the park, there will appear two elite D.U.P. agents, who are similar to the boss that you have fought during the eighth mission of the game. You do not need to worry too much, because the game does not make you deal with them by yourself only. Avoid their attacks (especially the huge concrete fragments that they hurl) and eliminate the weaker enemies at the same time. You need to keep defending until Eugene summons a big angel. Only then help the allied creatures with the D.U.P agents (remember to hit them directly, instead of focusing on the levitating objects that surround the remaining enemies. This mission - The Return - will soon end and the next one will be unlocked.
Remark: you can begin this mission only after completing the mission 13a (Flight of Angels) or the mission 13b (Hunting the Hunters). Remark - game may won't let you begin this mission until you don't destroy the Mobile Command Centre in the Denny Park.
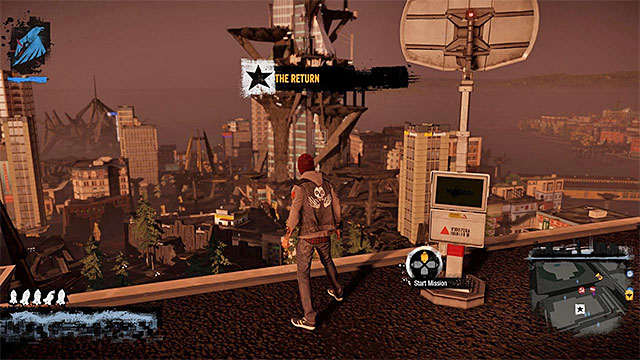 Beginning of the mission
Marker of the new mission won't appear at once after finishing the previous one. You have to patiently wait for Reggie to call. Head for the northern-west part of the Denny Park and get onto the roof of one of the biggest building there. Listen to what Reggie has to say. You obtain new objectives.
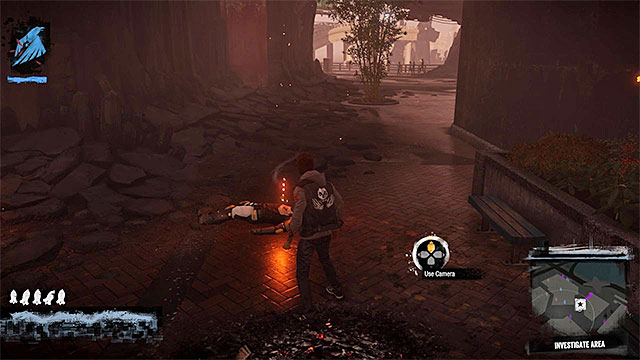 First crime scene
Your new target is in the northern part of Uptown and you have to head there, listening to Betty on your way. When you get there, it turns out to be a crime scene. Approach the killed DUP soldier, take out camera and take a photo of the corpse. Be ready to get rid of enemy soldiers who'll suddenly appear nearby (it's good to return on roofs while fighting).
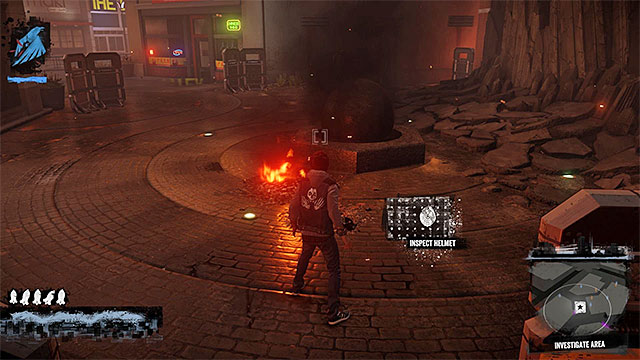 Helmet
Stay nearby the crime scene and find a helmet, which you have to examine (press touchpad). Listening to the statement makes clear that it's Hank who have murdered this person (Hank gave Smoke power to Delsin at the beginning of the game). Prepare to defend against one more strong attack from DUP. This time you have to be more careful, because enemies will have various superpowers. There is also an armored carrier parked nearby (destroy it with R1 attack).
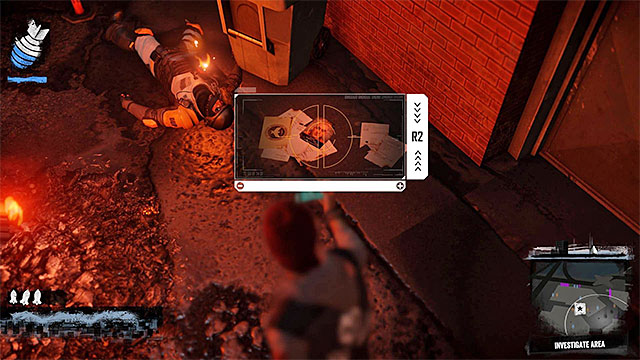 Hank's files, which you have to photograph
Continuance, you'll have to examine the crime scene. This time you have to find an area to which a narrow alley leads. There you can use the camera again. Make a photo of Hank's flies on the ground and listen to the new conversation. You get new objective.
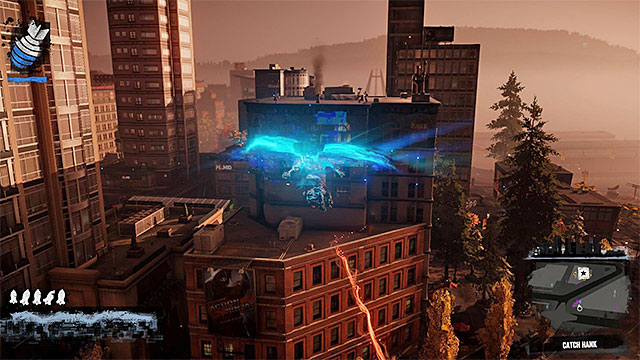 Roof where Hank fights DUP soldiers
You can head to the meeting place with, which is on the skyscraper's roof in the western part of the Uptown. When you get there, listen to the conversation and start flying to the southern-east, to the Downtown where Hank fights DUP soldiers. Get to the roof of the building in the northern-east corner of the mentioned district and eliminate DUP soldiers. You don't have to destroy helicopters flying over the building but try to get rid of normal soldiers rather quickly to not get hit by their rockets.
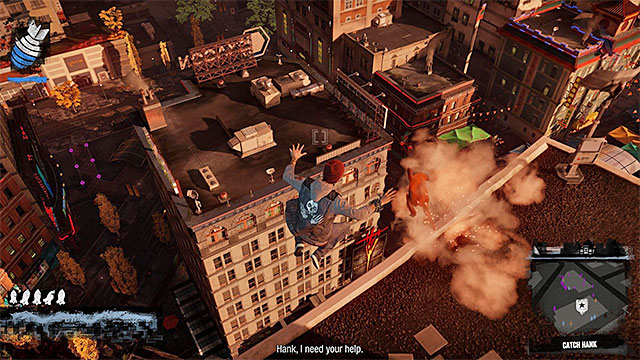 Keep close to Hank, using his traces and minimap to navigate
As I said, you don't have to take down helicopters, so when you only see a marker, head for the Rainier. Try to get close to the Hank, who'll start running. During this chase, you have to try very hard to not get far away from this man. Be careful especially where Hank uses shafts, quickly getting on the roofs. When it comes to choice of power, you don't have to rely only on Smoke, cause you can move quickly also with the Light Speed (Neon) and Video Surge (Video). Chase lasts several dozens of seconds. Its end is also a final of this mission. Another main quest on your list is Quid pro Quo.
Remark - game won't let you begin this mission until you don't destroy the Mobile Command Centre in the Downtown. Before you decide to begin it, you should upgrade your Smoke power, as it'll be very useful.
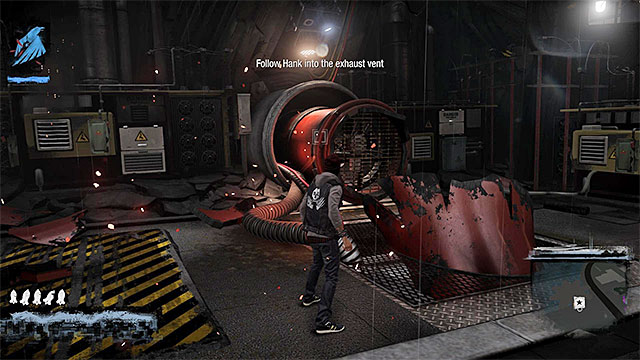 You can use shaft when you switch onto Smoke power.
Get onto the roof in the central part of Downtown and confirm beginning of the mission. Game will display several longer cut scene with Hank and Reggie. When you regain control, you're in the western part of the district. Follow Hank, jumping onto next platforms. When you get to the big red pipe, wait until Hank blows it up and approach the place from where smoke is coming and activate this category of power. You can place yourself at the newly unlocked shaft and press Circle to change into smoke.
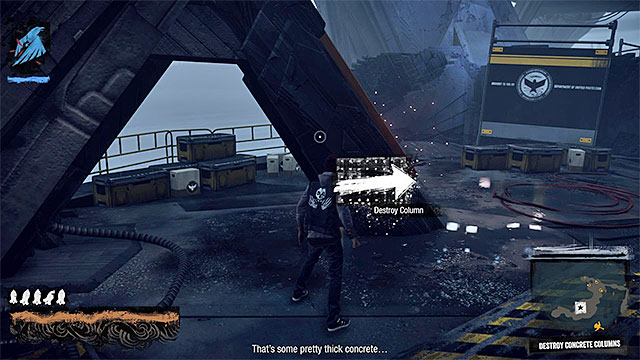 Use the touchpad
When you use the shaft, you're in the first part of the western island, which is a prison. Approach the first concrete column, pointed out by the game. You have to slide your finger on the touchpad, so Delsin and Hank destroy the support. You can move on.
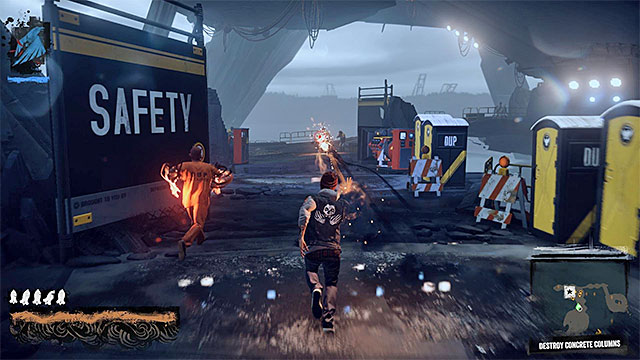 Move forward and eliminate enemies on your way.
From now on, you'll have to fight enemies. At the beginning, it'd be only the weakest DUP soldiers so you don't have to make any more complicated attacks. Move forward and destroy the second column as the first one.
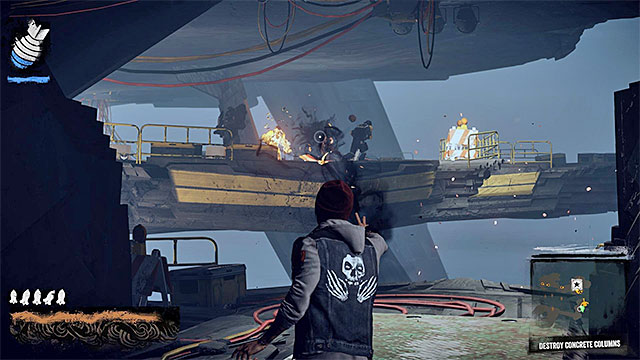 Enemy with a minigun can deal huge damage, so be careful
Along your path to the third and the fourth column, you have to take into consideration that you'll meet enemies with superpowers, like an elite soldier with a minigun. You should focus on the latter one and remember not to get onto the verge of death or be pushed into the water. It's best to use the Cinder Missile (R1) to eliminate the more armored enemies, as you'll find smoke sources and heavy ammo on your way. Locate the remaining columns and destroy them (touchpad).
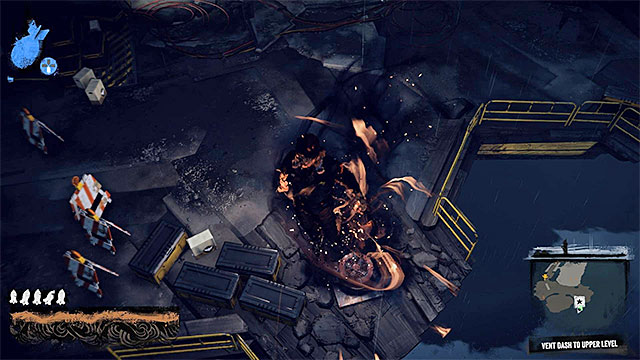 Shaft will let you get onto the higher level
Make sure that you've eliminated all enemies and follow Hank. After a while an entrance to the shaft is unlocked. Press Circle after getting next to the shaft what catapults Delsin in the air and then land properly on the ledge above (you can turn into smoke to make that easier for you). Game will display important cut scene, from which you get to know that Hank betrayed Delsin. What is more, because of Augustine's intervention your character is totally helpless. You can't even use defensive powers.
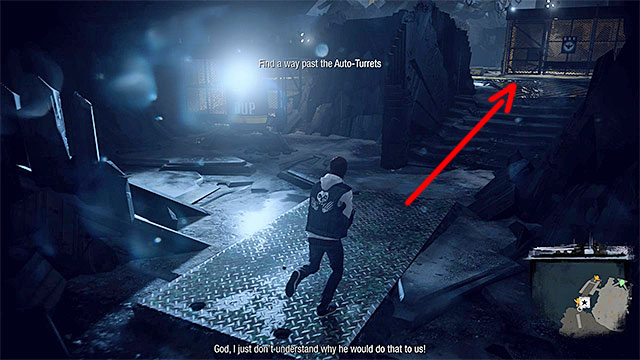
When you regain control over Delsin, move away from the enemies who'll rush at you. Reggie will use a rocket launcher to eliminate them and if you stand too close, you may get hurt. Move up via the ramp and stand at the left cage. Behind rocks you can notice the first automatic cannon. Wait until it stops firing and then quickly run right (screen above). You may be slightly hurt.
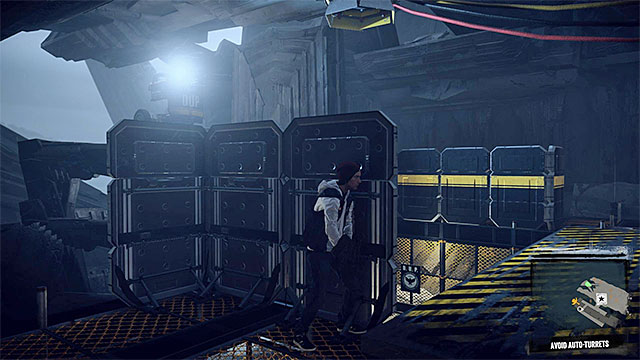 Staying at the big covers let you avoid the majority of damage
When you pass the second empty cage, choose the left (higher) path. There is also a second automatic cannon here, so be careful. Move between next covers and place yourself in a way to be protected against its fire.
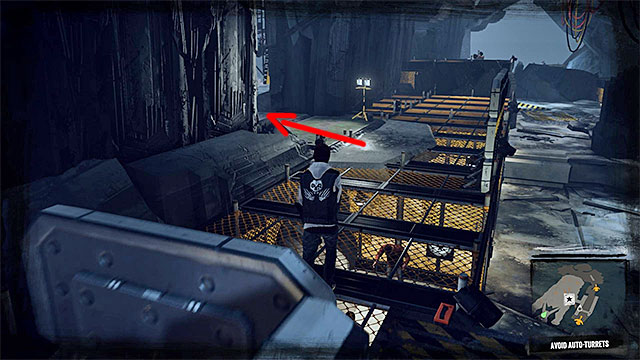
Stop at the bridge next to the cannon, wait for it to stop and then run to the other side. Quickly hide behind a good cover. When the situation calms, head right and then turn left (screen above). Walk into the huge arena and go left. After Delsin is stopped for a moment, wait for Reggie to move into action and approach your brother, after you free yourself.
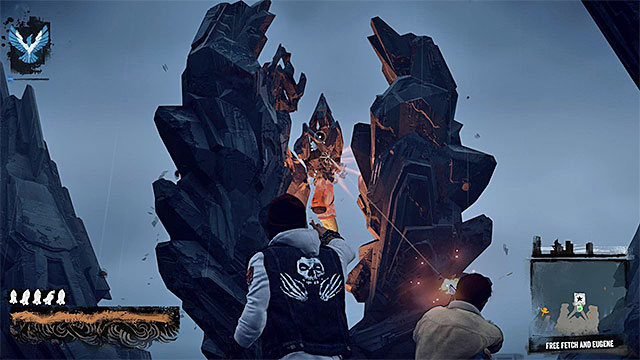 Use the standard distance attacks (R2 button)
After talk with Reggie, start helping him with freeing Eugene and Fetch. To do so, use the Smoke Shots on the concrete objects which are holding your allies. After releasing them, you'll another cut scene with a surprising final. It's not an end of the important things, as you proceed to first full encounter with Augustine.
 Avoid objects threw by Augustine
Encounter with Brooke Augustine takes place on the big arena where you can move freely. As like in previous boss fights, try to keep Augustine at bay and don't get closer for melee attacks. Important is also to keep being mobile and/or hiding behind covers while Augustine throws things at you.
 Fire rockets to destroy Augustine's cover
The best is to use the strongest Smoke Attack, which is Cinder Missile (R1), to attack Augustine. Notice that each hit destroy part of her cover.
 Regenerate the Smoke and heavy ammo often
Important thing about attacking your opponent is that you can't stop it for a longer period of time, as she will regenerate. So you should have a lot of heavy ammo (try to increase its limit with upgrades) and replenish it regularly. In this area you can find a lot of places to regenerate Smoke, but use them only when Augustine finishes her attack. Otherwise, your action may be interrupted (here an upgrade which decreases the time of draining the smoke may be handy).
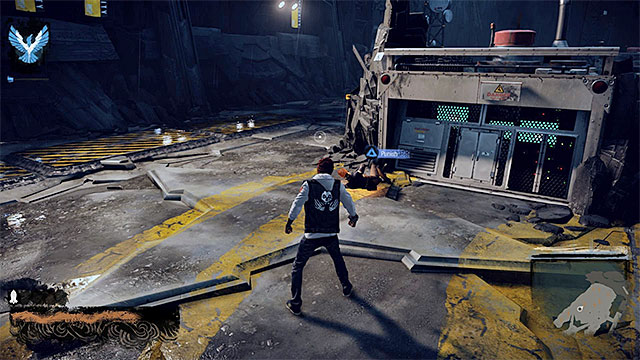
When you destroy Augustine's cover, make some more attacks to hurt her directly. Fire until woman lands on the arena. In such a situation, you need to run up to Augustine and press the Triangle (if you play as the hero), or the square (if you are playing as the villain) to land a powerful kick (the above screenshot).
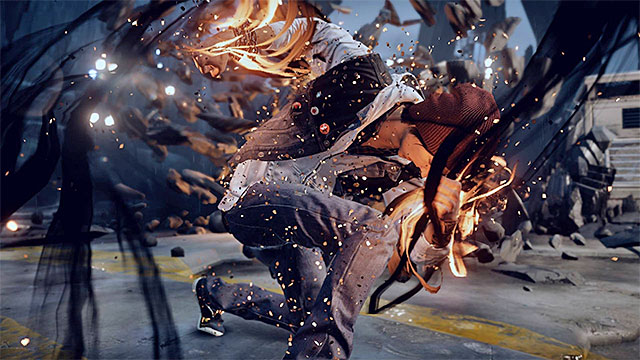 Usage of the special attack ends the first part of the encounter
Further part of the first phase doesn't differ too much. You still have to destroy Augustine's shield and melee attack her only when she falls on the ground. After several sequences like that, game will let you to fire a special attack. You don't have to make anything special as this attack always hits. It means also that the second part of the encounter begins
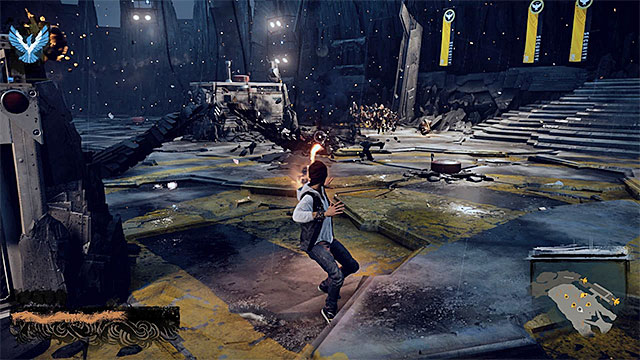 Try to kill elite enemies ASAP and then focus on the regular soldiers
Don't think that you'll be able to resume attacking Augustine at once, as she'll leave arena and send a group of soldiers at Delsin. Don't underestimate those enemies. Many of them have superpowers (and those should be dealt with as first ones) and many covers are already destroyed here. Don't stop for too long anywhere and don't let enemies get close to Delsin. Use the better attacks (rockets also) always when it's a chance to attack a stronger enemy or a group of them.
 Eliminate Augustine's soldiers before you focus on here
Augustine will join the battle after eliminating the main group of DUP soldiers. Notice that there are several new soldiers at the arena. You should get rid of them ASAP, because there'll be no more enemies. Augustine will move around the battlefield so pay even more attention to keep away from her.
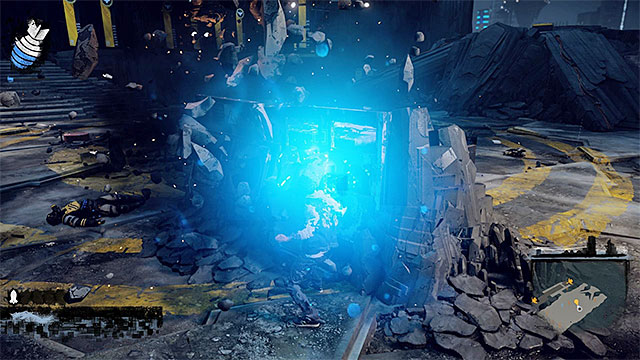 You can switch onto Video powers
Second phase of the encounter is very similar to the first one, so you again have to make strong distance attacks to destroy her shield. A difficulty may lay in a fact that you lose all places to regenerate Smoke, but, luckily, it doesn't weaken the main character. Why? Because now you can look for Vide regeneration points. Use the strongest power (Bloodthirsty Blades) which is as effective as rockets.
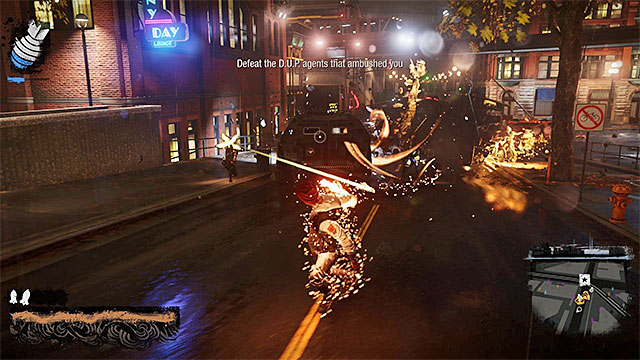 Using the special attack again finishes this encounter
Continue attacking, using Smoke or Video whichever suits you. As in the first part of the encounter, after which series of hit, you have to kick Augustine when she lies on the ground (the Triangle or the Square). After several sequences like that, you may perform a special attack. Making it, ends this encounter.
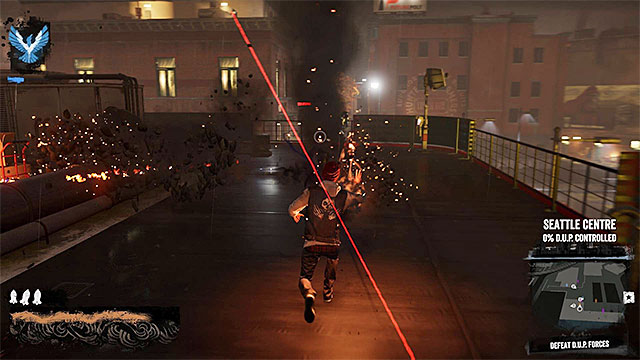 Defeat all DUP soldiers
When you regain control, you find yourself in the northern-west part of the Market District in the northern Seattle. Your new task is to find Hank, who has betrayed you during exploration of the prison. Start attacking nearby DUP soldiers but remember to regenerate power, which is probably low after encounter with Augustine. You don't have to destroy nearby armor carriers, as they shouldn't be active. But beware of snipers. Find and eliminate them before they shot you down.
Beware of elite enemies who will appear at the crossroadsAfter eliminating DUP soldiers, get on the roof of high building and press Up. It lets Delsin determine the way he should follow to find Hank. Your new target is a big crossroad in the Georgetown, on east from the beginning location. When you get there, be ready to eliminate a big group of enemies, among which you find also an elite scientist and heavy armored ones. So you should use the strongest powers and, in case of need, retreat onto the roofs.
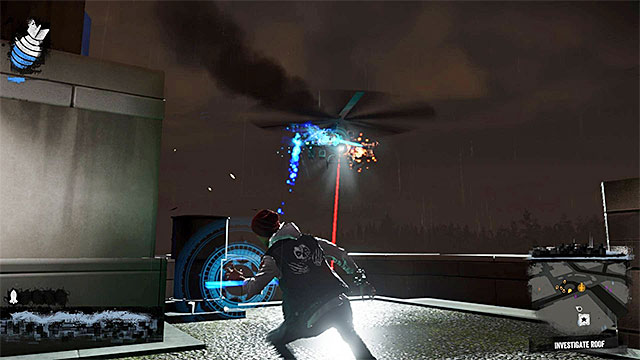 Shot down the helicopter ASAP
Make sure you eliminate all enemies and head for some higher shelve. Press the Up and find Hank. Now you need to get onto the skyscraper's roof in the southern-west part of Belltown. When you get on the roof, begin with killing snipers. Prepare also to shot down a new helicopter. As in the previous cases, use the most powerful attacks and avoid its rockets.
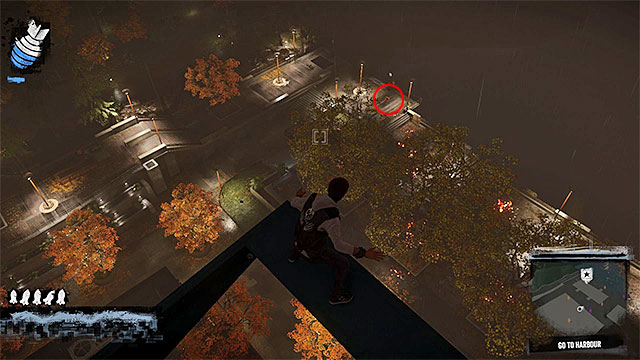 Here you find Hank
Remain on the roof where the last encounter took place and use the phone for the last time to radar Hank. You have to reach the marine in the northern-east part of Belltown. Here you find Hank.
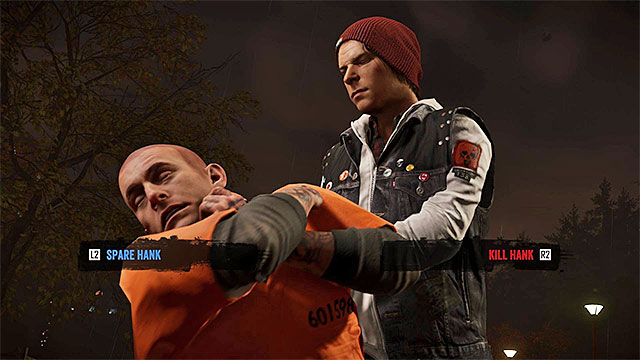
After you approach Hank (it is a good idea to fly there) and land any attack, against him (even the weakest one) you will watch a cutscene, featuring him, and you will have to take another important decision(the above screenshot). If you want to gain good karma, you need to let Hank escape with his daughter (the blue option - Spare Hank). If you want to gain bad karma, you need to murder Hank, as a revenge for the death of Reggie (the red option- Kill Hank). Regardless of your decision, this mission ends here and you will have unlocked access to the Ascension mission.
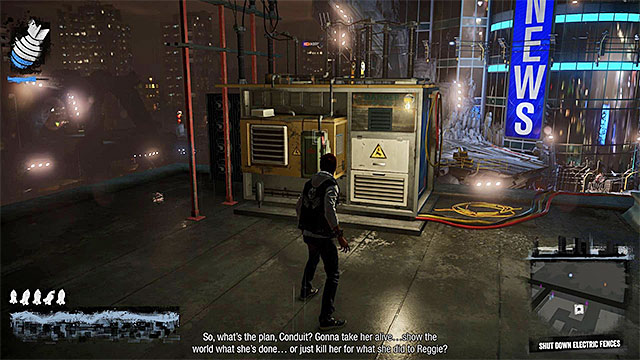 Eliminate the enemy forces or avoid them
The best moment to start this mission is right after the previous one, i.e. after you have dealt the situation with Hank that you have found near the harbor. Go to the South-West, towards the destroyed bridge in the Market District (note - if you have not recaptured this district from D.U.P. forces, there may be an enemy base here!). It is a good idea to take the highway, to get there, and eliminate the enemy soldiers that you encounter (you can also walk around them).
The rooftop with the generatorThe easiest way to make it over from the Southern Seattle assumes using Video Surge (the circle) from the Video category. Sufficiently early, stand by a satellite dish, thanks to which you will be catapulted after you press the button. You can now reach the rooftop of the building in the Uptown district, where there is a generator that powers the electric fence of the D.U.P. main skyscraper You will have to choose your last mission:
Note! Selecting this mission is recommended only if you follow the path of the hero, i.e. you strive for amassing good karma. It is worth knowing that starting this mission lock access to mission 17b (Kill Augustine), which has been prepared with playing, as the bad character, in mind.
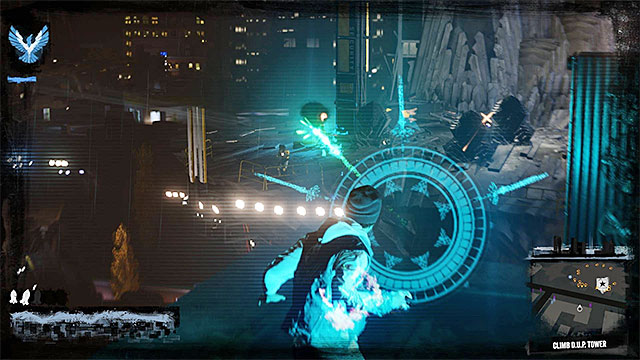 Attack the enemies that you see in the distance
The starting point for this mission is on the rooftop of a building in the Uptown district, to the North of the D.U.P. main tower. Make sure, however, that you have approached the correct marker, because the one connected with the Bad Karma mission is right next to it. After you start the mission, start by sabotaging the generator (slide your finger down the touchpad) and start firing from a safe distance, aimed at the enemies that are patrolling the balconies below, around the central building. You should especially watch out for the snipers, try to eliminate them in the first place and hide behind the generator, or the other covers, if necessary.
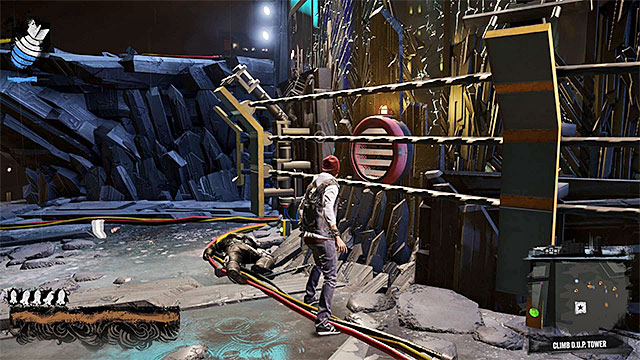
Do not haste too much to reach the D.U.P. skyscraper and try to eliminate as many soldiers, at a long distance, as possible. Only then, start switching into smoke and hovering in the air (the Smoke category), leaping off the roof (the Neon category) or perform a standard flying (the Video category). Depending on your preferences, you can now encircle the building and eliminate all of the remaining enemies that stay on this level, or turn to the shaft shown in the above screenshot, which has been unlocked after the generator has been destroyed. To use the shaft, you need to activate Smoke power.

After Delsin is catapulted, turn into smoke (the circle) at the right moment and access the other shaft to reach a balcony above. You need to get to the neighboring platform. Wait here for Fetch to appear and seize the situation to obtain the shard shown in the above screenshot, which used to be inaccessible, during the free exploration the Uptown district.
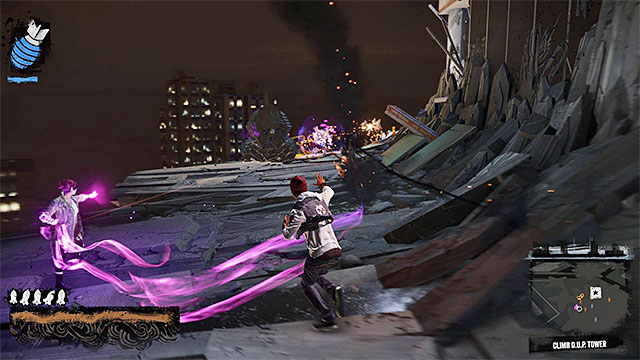 Eliminate the enemies with your special powers
Wait for Fetch to unlock one of the nearby shafts for Delsin and press be circle, after you reach it, thanks to which your character will be catapulted. After you land onto the balcony above, be prepared to square off against another group of D.U.P. soldiers. During the fights along your path to the top, it is a good idea to use smoke power on a regular basis. You do not need to save it up, because you will be encountering chimneys, and the other interactive elements of the surroundings, thanks to which you will be able to regenerate your powers.
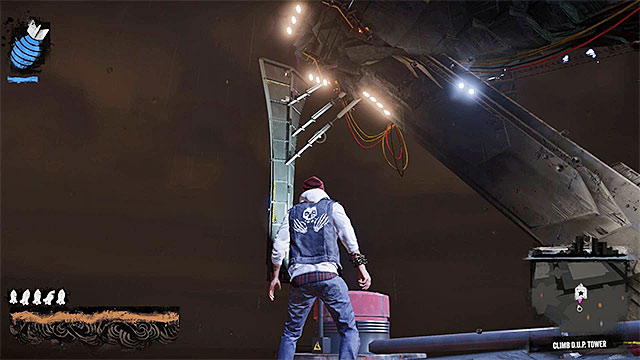
Again, you need to wait for Fetch to use her powers to unlock access to the shaft here. This time around, you will have to perform a bit harder task, because you need to leap towards the vertical element of the structure, shown in the above screenshot. After Delsin is catapulted, start rising up in the air and turn into smoke, while attempting to grab onto the first interactive ledge. Now, start jumping towards those of the ledges that are located above and finally fly towards the stable ledge.
 Cooperate with Fetch and eliminate enemies
Here, you will have to defeat a small group of D.U.P. soldiers, which you should not have too many problems defeating. It is a good idea to take, to your advantage, the fact that Fetch is using the Stasis Bubble and either to attack the armless enemies trapped in the bubbles, or use the fact that they cannot attack Delsin and fire at the other enemies. After Fetch has unlocked another shaft, run up and launch yourself into the air, towards the vertical structure that you can see in the distance. Climb to the very top and fire at the enemies at a longer distance.
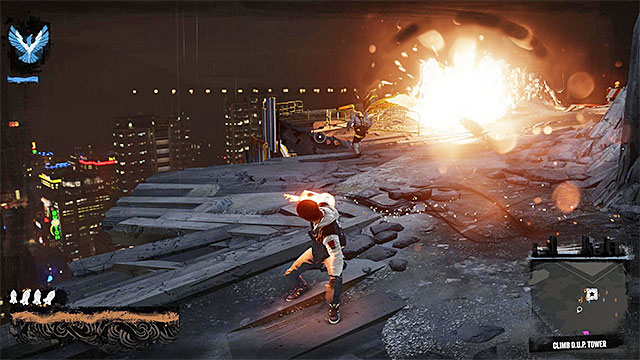 Rely on rockets and the other strong attacks.
Glide towards the next platform, after you get under fire again. You need to watch out here, because Delsin will not be able to use covers at first, and many of the enemies are using quite powerful abilities. Therefore, you should fire Cinder Missiles on a regular basis, thanks to which you will eliminate the opponents much faster. After you have eliminated all of them, find a new shaft in the skyscraper's wall and use it to reach the site where you fight a larger battle.
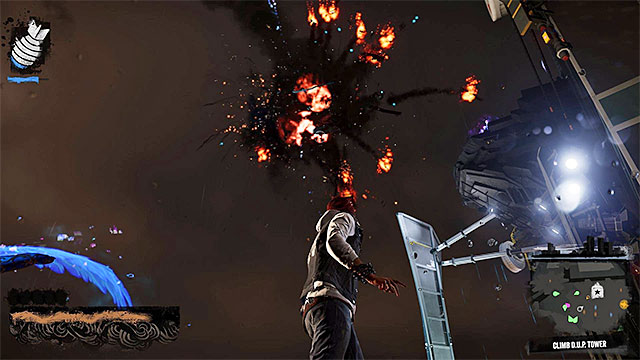 Do not worry about the choppers, because they will be busy attacking Eugene and his monsters.
This fight, with the D.U.P. soldiers, is much easier than it might seem at first, because apart from Fetch, also Eugene, angels and demons summoned by him, will lend a hand (Eugene will appear in the form of the huge angel that you have seen before). In the initial phase of the fight, focus only on the elimination of the nearby soldiers and only after you have dealt with them, attack the enemy choppers. The good news is that the flying machines will by busy attacking someone else so, you do not need to fear their missile fire.
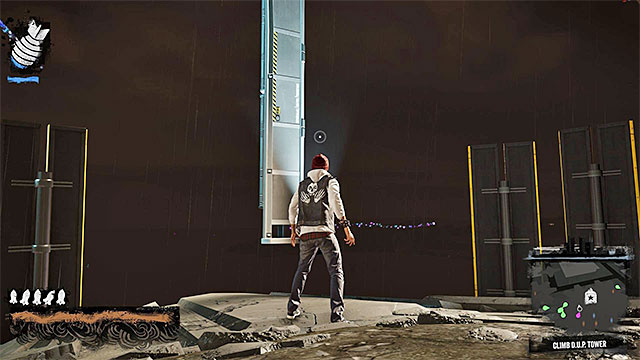
After you have eliminated all the soldiers, and brought all the choppers down, stop in the position shown in the above screenshot. Leap towards the vertical structure and reach it by flying up to it and changing into smoke. Climb to the very top, jump onto the ledge and fire at the elite enemy, who is occupying the ledge below (use the advantage of height and aim at the ammo boxes). After you have cleared the area, jump onto the neighboring balcony (leap off the shaft) and follow Fetch.
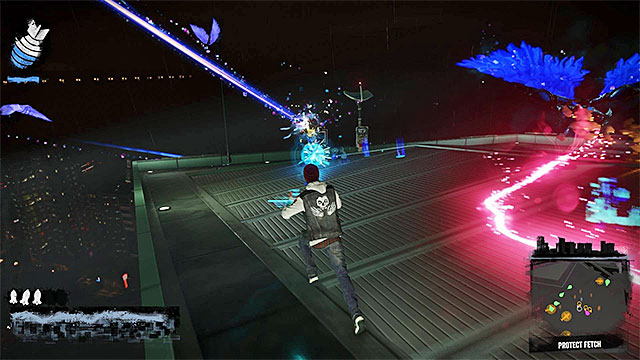 Clear the rooftop and only then jump off the antenna
Follow Fetch's suggestion and switch the category of your powers. Approach the nearby antenna and press the touchpad, to drain it for energy, and activate the Video category. You can now use the Video Surge (Circle), as you run, to reach the skyscraper's rooftop. Start attacking the D.U.P. soldiers here (You can still count on Eugene for his help), and deal first with the characters that are close to (the armless) Fetch. After you win the fight, jump off the antenna (Circle) thanks to which you will reach the atrium, where you will fight the final showdown with Augustine.
 Do not stop anywhere, to prevent being hit with a big fragment of concrete
The showdown consists of two parts and the premises of its first phase are similar to the ones, during the fight with Brooke Augustine. Therefore, you should focus on maintaining a safe distance from the opponents and avoid her main attacks, which is throwing large items at Delsin.
 Dodge to prevent taking damage from Augustine's attacks
Augustine also learned several new tricks, since the last meeting. I recommend that you, first of all, keep running around the atrium, because she is able to immobilize Delsin (the rings that appear on the ground), and also send two types of blades, against him (you can dodge to the sides from them or jump above them). At this point, it is worth adding that in the case of critical damage, it is worthwhile to return to the starting points and hide behind pillars located on the left and on the right(they will be even more helpful in the second phase).
 You can drain TV sets for energy
TO deal damage to Brooke you should use the best available attack, from the Video category, i.e. Bloodthirsty Blades. The game will let you replenish your Video energy levels and you can do that by reaching the monitors at the other end of the atrium. Drain them for energy only after Augustine finishes her current attack and, it would be good if you had the upgrade, which would allow you to cut short the draining, by a half.
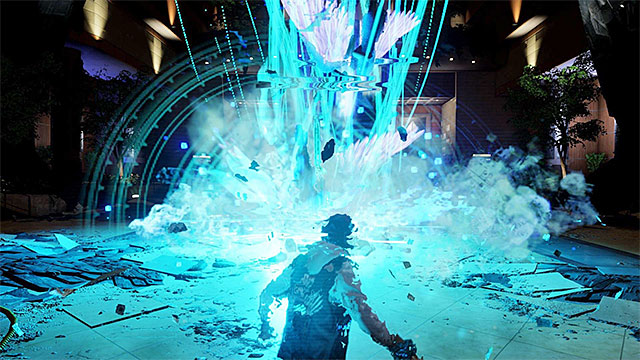 After you launch the special attack, the first phase of the fight will end.
Just like in the case of the fight in the fifteenth mission, you need to try eliminating the objects around Augustine, thanks to which she will start to take damage and she will, finally, land on the ground. You need to run up to her, then, and press the Triangle to land strong kicks. After several repetitions, the game will allow you to launch your special attack. Press any button on the d-pad. The successful attack will result in unlocking a category of powers connected with concrete, and in ending the first phase.

Right after the second phase of the battle starts, Augustine will turn into a huge monster. Do not bother about the fact that you cannot attack her, for now. Keep running around the atrium and try avoiding the boss's attacks (ground slam and large projectiles). Once again, I remind you about the pillars near the starting point (an example in the above screenshot) because the boss will not be able to approach Delsin, if you stand behind them (it will, e.g. block on a tree). and/or will be unable to take his health points with the strong ground slams. It is worth remembering about this important facilitation, for the duration of the entire second phase.
 Approach the core relay only after the enemy walks away
Avoid Augustine's attacks, up to the point when there will appear Eugene and throw the first Core Relay into the atrium. Do not haste to reach it and wait for a good moment and take up energy from it, only then (by pressing the touchpad. Delsin will unlock a concrete power connected with faster and safer movement - Boulder Dash. Start using it, of course (Circle) thanks to which you will avoid taking serious damage.
Note- The Concrete power bar regenerates spontaneously so, while fighting, you do not need to search around for spots to about replenish it.
 The Concrete Shrapnel allows you to launch simple ranged attack
You still need to avoid Augustine so, keep running around the atrium and try to hide behind pillars. After Eugene throws the second core into the building, wait for a good moment again and take up energy from it, in order to unlock the first offensive Concrete power- Concrete Shrapnel (R2). from now on, you can attack Augustine at a distance. However, do not expect that her health points will start do dwindle quickly, because the power is quite weak.
 You can now move around the atrium more efficiently and remain in the air for longer
While attacking Augustine, do not miss the moment at which there lands another core relay in the atrium. Draining it for energy will result in unlocking a defensive concrete power Concrete Thrusters (L1). It consists in performing far jumps which help you move around the arena efficiently and hover in the air, and this is what is useful if you need to avoid the attacks under Delsin. Continue fighting by using the Concrete Shrapnel to deprive the boss, slowly, of her health points.
 Use Concrete Barrage to deal more damage to Augustine
After several moments, Eugene will throw in the fourth (the last) core relay. Draining it for energy will unlock the most powerful concrete ability- Concrete Barrage. You activate this attack by pressing R1 and it deals the most damage so, I recommend that from now on, you keep using this one . Additionally, what speaks for this is the fact that you will not have to worry that much about Heavy Ammo because, in the case of the Concrete category, it also replenishes spontaneously (you just need to wait several seconds).
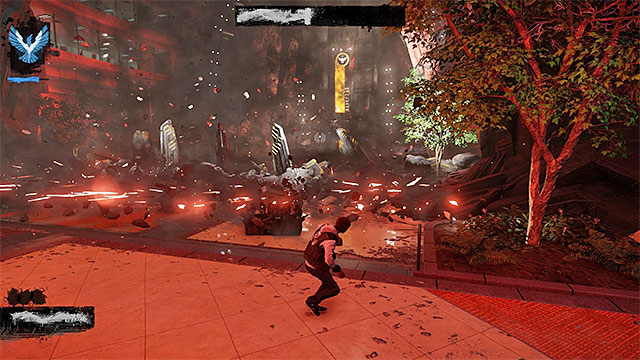 One of the boss's new attacks
Starting with the moment in which you gain access to Concrete Barrage, Augustine will be using new types of attacks herself. She is able to "Flatten" herself and move all around the atrium floor, as well as turn into a kind of a snake. In both cases, it is a good idea to keep hiding behind pillars, jump, run around the atrium and use dodges, reinforced with Boulder Dash and Concrete Thrusters.
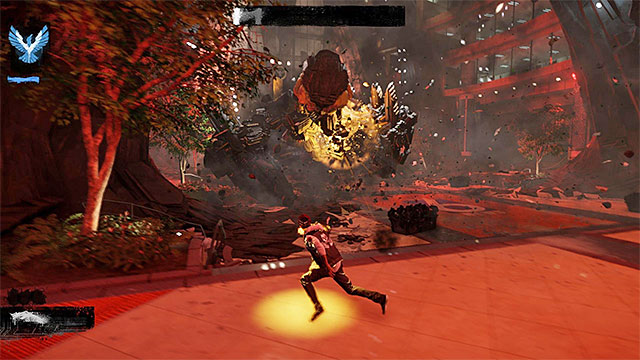 Deprive Augustine of more and more health points and try to avoid dying yourself
For the rest of the battle, you should be focusing only on effective use of Concrete Barrage and on avoiding the snake-boss's attacks, i.e. the big projectiles thrown towards Delsin, and snake attacks. After Augustine's health bar reaches zero, the victory will ensue.

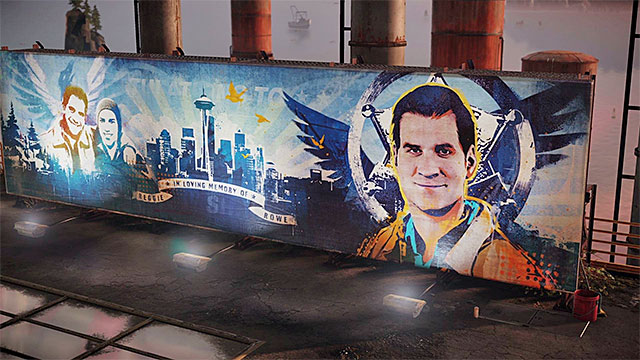 The good ending
You can now watch the good ending of the game's storyline- congratulations!
Note! After the credits end rolling, you will return to Seattle so, you can easily resume recapturing of district, gathering karma or completing side missions. If, however, you want to complete the Bad Karma path, you will have to start over.
Note! Selecting this mission is recommended only if you follow the evil path, i.e. you strive for amassing Bad Karma. It is worth knowing that starting this mission lock access to mission 17a (Expose Augustine), which has been prepared with playing, as the hero, in mind.
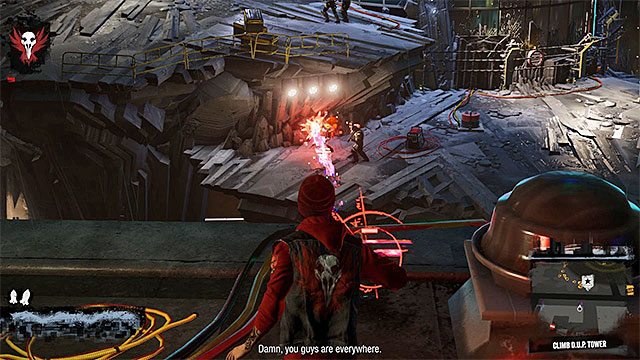 Attack the enemies that you see in the distance
The starting point for this mission is on the rooftop of a building in the Uptown district, to the North of the D.U.P. main tower. Make sure, however, that you have approached the correct marker, because the one connected with the Bad Karma mission is right next to it. After you start the mission, start by sabotaging the generator (slide your finger down the touchpad) and start firing from a safe distance, aimed at the enemies that are patrolling the balconies below, around the central building. You should especially watch out for the snipers, try to eliminate them in the first place and hide behind the generator, or the other covers, if necessary.
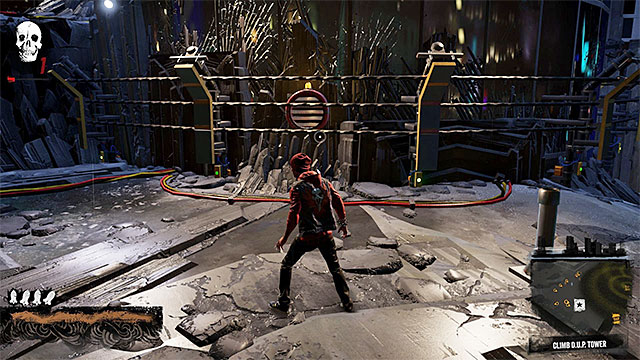
Do not haste too much to reach the D.U.P. skyscraper and try to eliminate as many soldiers, at a long distance, as possible. Only then, start switching into smoke and hovering in the air (the Smoke category), leaping off the roof (the Neon category) or perform a standard flight (the Video category). Depending on your preferences, you can now encircle the building and eliminate all of the remaining enemies that stay on this level, or turn to the shaft shown in the above screenshot, which has been unlocked after the generator has been destroyed. To use the shaft, you need to activate Smoke power.

After Delsin is catapulted, turn into smoke (the circle) at the right moment and access the other shaft to reach a balcony above. You need to get to the neighboring platform. Wait here for Fetch to appear and seize the situation to obtain the shard shown in the above screenshot, which used to be inaccessible, during the free exploration the Uptown district.
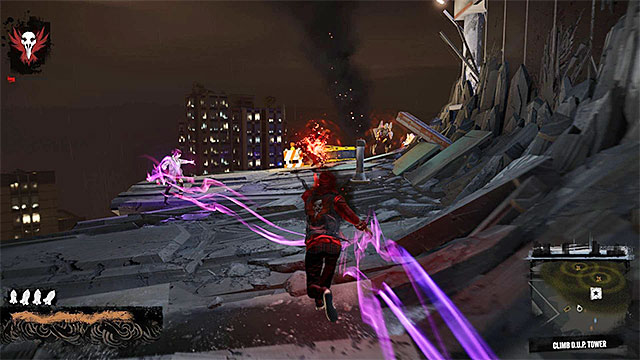 Eliminate the enemies with your special powers
Wait for Fetch to unlock one of the nearby shafts for Delsin and press be circle, after you reach it, thanks to which your character will be catapulted. After you land onto the balcony above, be prepared to square off against another group of D.U.P. soldiers. During the fights along your path to the top, it is a good idea to use smoke power on a regular basis. You do not need to save it up, because you will be encountering chimneys, and the other interactive elements of the surroundings, thanks to which you will be able to regenerate your powers.
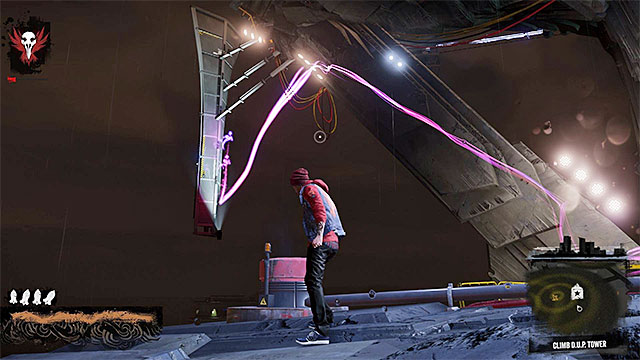
Again, you need to wait for Fetch to use her powers to unlock access to the shaft here. This time around, you will have to perform a bit harder task, because you need to leap towards the vertical element of the structure, shown in the above screenshot. After Delsin is catapulted, start rising up in the air and turn into smoke, while attempting to grab onto the first interactive ledge. Now, start jumping towards those of the ledges that are located above and finally fly towards the stable ledge.
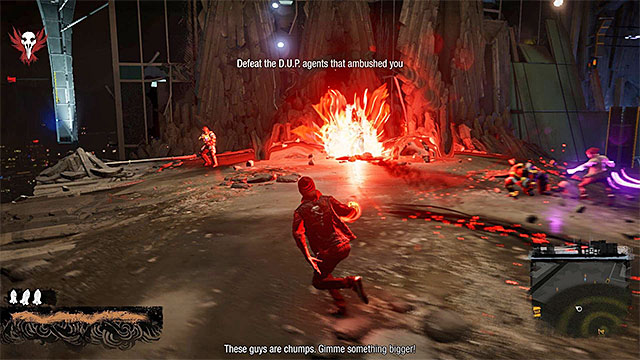 Cooperate with Fetch and eliminate enemies
Here, you will have to defeat a small group of D.U.P. soldiers, which you should not have too many problems defeating. It is a good idea to take, to your advantage, the fact that Fetch is using the Stasis Bubble and either to attack the armless enemies trapped in the bubbles, or use the fact that they cannot attack Delsin and fire at the other enemies. After Fetch has unlocked another shaft, run up and launch yourself into the air, towards the vertical structure that you can see in the distance. Climb to the very top and fire at the enemies at a longer distance.
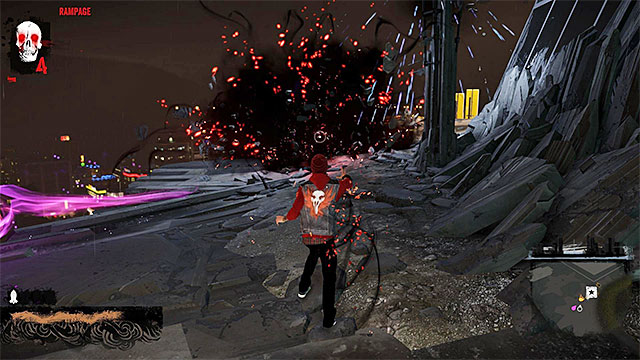 Rely on rockets and the other strong attacks
Glide towards the next platform, after you get under fire again. You need to watch out here, because Delsin will not be able to use covers at first, and many of the enemies are using quite powerful abilities. Therefore, you should fire Cinder Missiles on a regular basis, thanks to which you will eliminate the opponents much faster. After you have eliminated all of them, find a new shaft in the skyscraper's wall and use it to reach the site where you fight a larger battle.
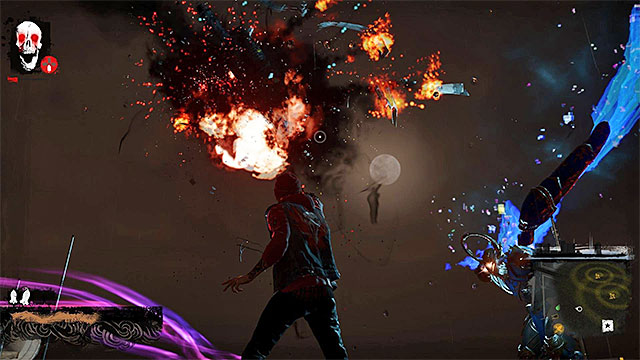 Do not worry about the choppers, because they will be busy attacking Eugene and his monsters.
This fight, with the D.U.P. soldiers, is much easier than it might seem at first, because apart from Fetch, also Eugene, angels and demons summoned by him, will lend a hand (Eugene will appear in the form of the huge angel that you have seen before). In the initial phase of the fight, focus only on the elimination of the nearby soldiers and only after you have dealt with them, attack the enemy choppers. The good news is that the flying machines will by busy attacking someone else so, you do not need to fear their missile fire.
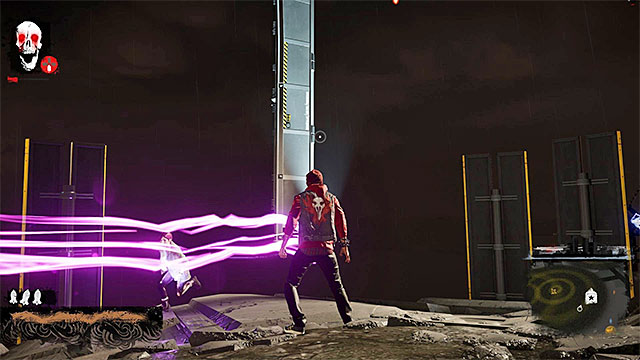
After you have eliminated all the soldiers, and brought all the choppers down, stop in the position shown in the above screenshot. Leap towards the vertical structure and reach it by flying up to it and changing into smoke. Climb to the very top, jump onto the ledge and fire at the elite enemy, who is occupying the ledge below (use the advantage of height and aim at the ammo boxes). After you have cleared the area, jump onto the neighboring balcony (leap off the shaft) and follow Fetch.
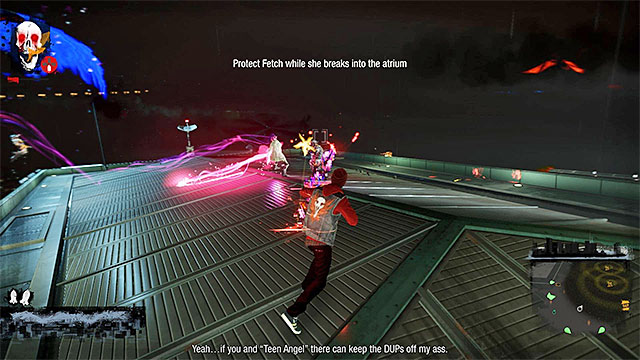 Clear the rooftop and only then jump off the antenna
Follow Fetch's suggestion and switch the category of your powers. Approach the nearby antenna and press the touchpad, to drain it for energy, and activate the Video category. You can now use the Video Surge (Circle), as you run, to reach the skyscraper's rooftop. Start attacking the D.U.P. soldiers here (You can still count on Eugene for his help), and deal first with the characters that are close to (the armless) Fetch. After you win the fight, jump off the antenna (Circle) thanks to which you will reach the atrium, where you will fight the final showdown with Augustine.
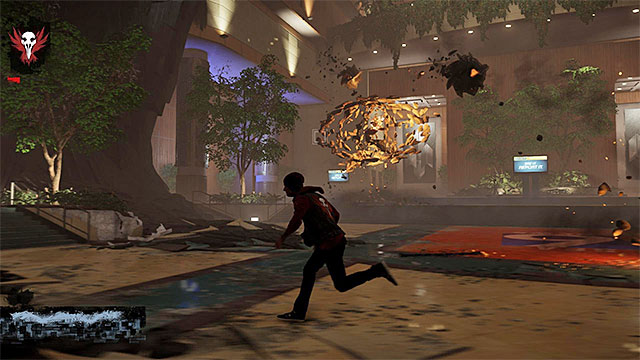 Do not stop anywhere, to prevent being hit with a big fragment of concrete
The showdown consists of two parts and the premises of its first phase are similar to the ones, during the fight with Brooke Augustine. Therefore, you should focus on maintaining a safe distance from the opponents and avoid her main attacks, which is throwing large items at Delsin
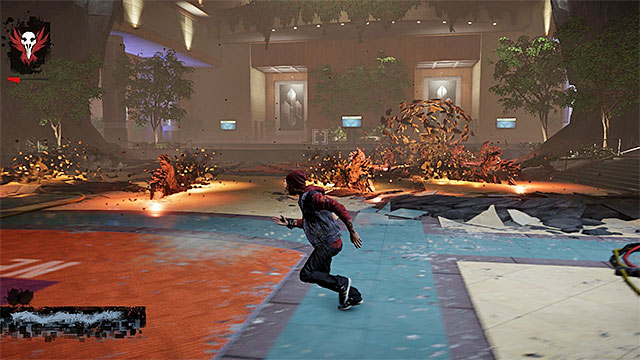 Dodge to prevent taking damage from Augustine's attacks
Augustine also learned several new tricks, since the last meeting. I recommend that you, first of all, keep running around the atrium, because she is able to immobilize Delsin (the rings that appear on the ground), and also send two types of blades, against him (you can dodge to the sides from them or jump above them). At this point, it is worth adding that in the case of critical damage, it is worthwhile to return to the starting points and hide behind pillars located on the left and on the right(they will be even more helpful in the second phase).
 You can drain TV sets for energy
TO deal damage to Brooke you should use the best available attack, from the Video category, i.e. Bloodthirsty Blades. The game will let you replenish your Video energy levels and you can do that by reaching the monitors at the other end of the atrium. Drain them for energy only after Augustine finishes her current attack and, it would be good if you had the upgrade, which would allow you to cut short the draining, by a half.
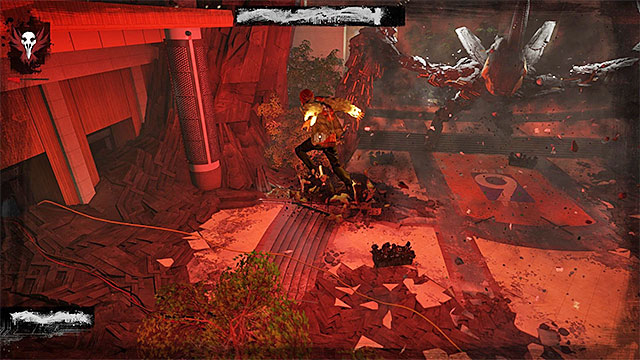 After you launch the special attack, the first phase of the fight will end
Just like in the case of the fight in the fifteenth mission, you need to try eliminating the objects around Augustine, thanks to which she will start to take damage and she will, finally, land on the ground. You need to run up to her, then, and press the Triangle to land strong kicks. After several repetitions, the game will allow you to launch your special attack. Press any button on the d-pad. The successful attack will result in unlocking a category of powers connected with concrete, and in ending the first phase.
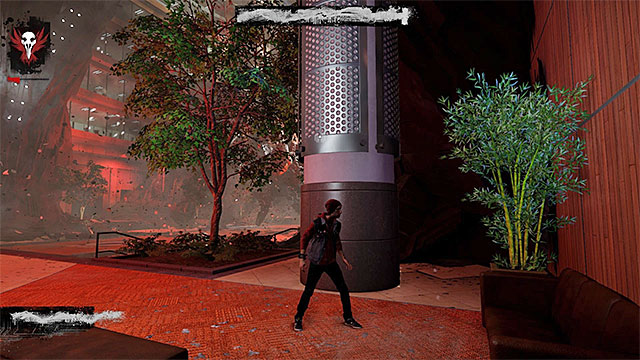
Right after the second phase of the battle starts, Augustine will turn into a huge monster. Do not bother about the fact that you cannot attack her, for now. Keep running around the atrium and try avoiding the boss's attacks (ground slam and large projectiles). Once again, I remind you about the pillars near the starting point (an example in the above screenshot) because the boss will not be able to approach Delsin, if you stand behind them (it will, e.g. block on a tree). and/or will be unable to take his health points with the strong ground slams. It is worth remembering about this important facilitation, for the duration of the entire second phase.
 Approach the core relay only after the enemy walks away
Avoid Augustine's attacks, up to the point when there will appear Eugene and throw the first Core Relay into the atrium. Do not haste to reach it and wait for a good moment and take up energy from it, only then (by pressing the touchpad. Delsin will unlock a concrete power connected with faster and safer movement - Boulder Dash. Start using it, of course (Circle) thanks to which you will avoid taking serious damage.
Note- The Concrete power bar regenerates spontaneously so, while fighting, you do not need to search around for spots to about replenish it.
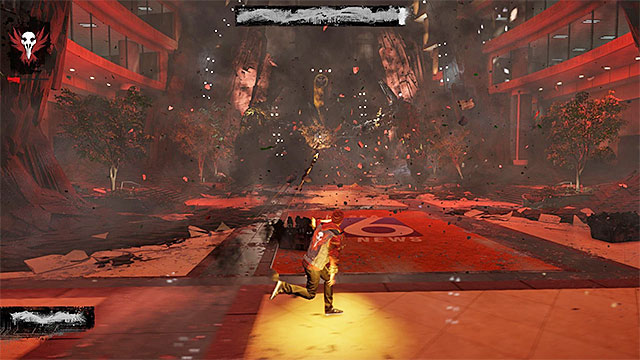 The Concrete Shrapnel allows you to launch simple ranged attack
You still need to avoid Augustine so, keep running around the atrium and try to hide behind pillars. After Eugene throws the second core into the building, wait for a good moment again and take up energy from it, in order to unlock the first offensive Concrete power- Concrete Shrapnel (R2). from now on, you can attack Augustine at a distance. However, do not expect that her health points will start do dwindle quickly, because the power is quite weak.
You can now move around the atrium more efficiently and remain in the air for longerWhile attacking Augustine, do not miss the moment at which there lands another core relay in the atrium. Draining it for energy will result in unlocking a defensive concrete power Concrete Thrusters (L1). It consists in performing far jumps which help you move around the arena efficiently and hover in the air, and this is what is useful, if you need to avoid the attacks under Delsin. Continue fighting by using the Concrete Shrapnel to deprive the boss, slowly, of her health points.
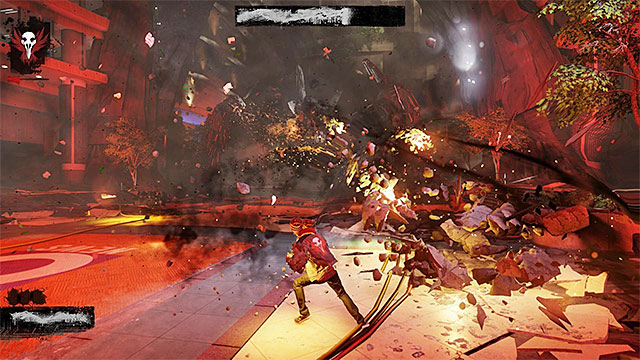 Use Concrete Barrage to deal more damage to Augustine
After several moments, Eugene will throw in the fourth (the last) core relay. Draining it for energy will unlock the most powerful concrete ability- Concrete Barrage. You activate this attack by pressing R1 and it deals the most damage so, I recommend that from now on, you keep using this one . Additionally, what speaks for this is the fact that you will not have to worry that much about Heavy Ammo because, in the case of the Concrete category, it also replenishes spontaneously (you just need to wait several seconds).
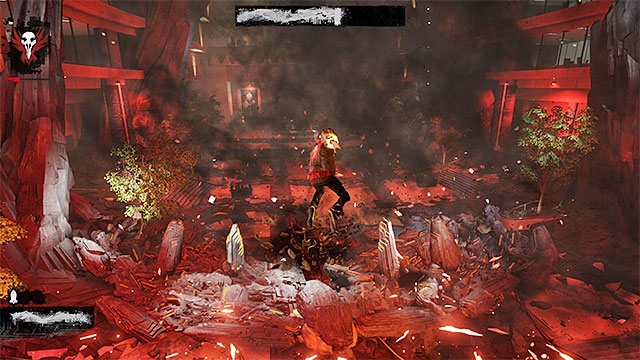 One of the boss's new attacks
Starting with the moment in which you gain access to Concrete Barrage, Augustine will be using new types of attacks herself. She is able to "Flatten" herself and move all around the atrium floor, as well as turn into a kind of a snake. In both cases, it is a good idea to keep hiding behind pillars, jump, run around the atrium and use dodges, reinforced with Boulder Dash and Concrete Thrusters.
 Deprive Augustine of more and more health points and try to avoid dying yourself
For the rest of the battle, you should be focusing only on effective use of Concrete Barrage and on avoiding the snake-boss's attacks, i.e. the big projectiles thrown towards Delsin, and snake attacks. After Augustine's health bar reaches zero, the victory will ensue.
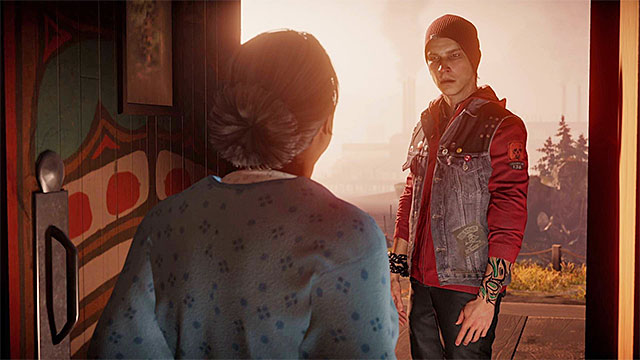 The bad ending
You can now watch the bad ending of the game's storyline- congratulations!
Note! After the credits end rolling, you will return to Seattle so, you can easily resume recapturing of district, gathering karma or completing side missions. If, however, you want to complete the Bad Karma path, you will have to start over.
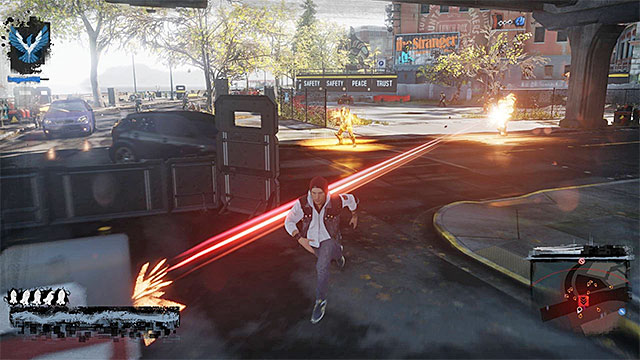 An example D.U.P. forces' attack
After the credits roll, you will be transferred back to the main part of Seattle and you will be able to keep exploring the city. Before you decide to start the game over again, in order to explore the alternative way of gaining karma points, I recommend that you take to the following:
Note! If you managed to recapture the entire city from D.U.P., still before you completed the last mission of the story mode, you do not need to bother that this will shut your way, to gain experience, or obtain trophies connected with fight. It is still possible to attack single APCs rolling all around the city (the big yellow icon on the mini-map). Apart from that, the D.U.P. forces will be attacking, the selected districts of the city (D.U.P. Raid), on a regular basis (you will always receive a message pertaining to that), which will provide you with the opportunity to fight more battles.
inFamous: Second Son does not grant you with any additional reward, (e.g. a trophy or karma points) for the 100% completion, but it informs you of your current progress, thanks to which you will know how close you are to the end of your endeavors. The percentage progress is displayed in the save game and load game windows. .
The following count as a basis for calculation of the percentage progress:
However, the following ARE NOT included:
The important piece of information is that the percentage of progression is measured for the karmic path that you selected at the beginning of the game. And so, if you are playing as the hero, the progression percentage will not decline if you miss the missions connected with the villain path. This, of course, means that you can complete the game, in 100%, two times - once for the hero character and once for the villain character.
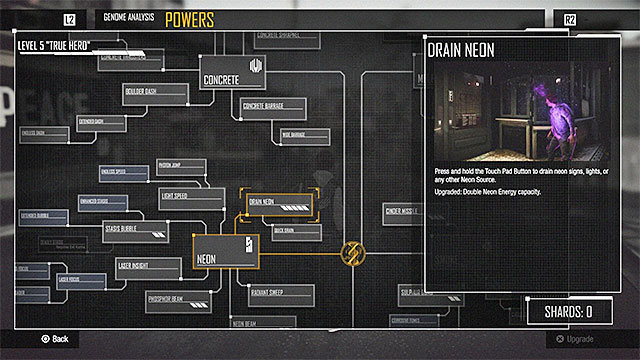 The tree of powers grows as you progress in the game
The main protagonist, in inFamous: Second Son, can use many different powers and abilities. A lot of them are locked, at the beginning of the game and you gain access to them in the course of the game's storyline, or by spending the Blast Shards that you collected. Additionally, it is worth knowing that some of the more advanced abilities are available only after you reach the specific hero, or villain, level.
At any point you can, of course, check out on the tree of powers, by pressing the Options button and accessing the correct tab (L1 and R1 buttons). The tree is quite feeble at the beginning, but it will grow to have many branches, towards the end of the game.
The abilities available in the game, are divided into five distinct categories:
On the following pages of this chapter, you will find tables with comments concerning the individual powers, which make up the specific categories (you can find detailed descriptions in the game - the right side of the screen, after you have selected an individual power). The bold type has been used to highlight those of the powers that are especially attention-worthy, already at the initial stages of the game.
Important note: If you manage to collect all of the Blast Shards, from each district of the city, (their whereabouts are displayed on the map, starting with the moment at which you destroy the mobile command center in a given district), you will be able to buy all of the "universal" abilities and upgrades, as well as the powers that are connected with your karmic path (e.g. all the powers that are available for the hero only).
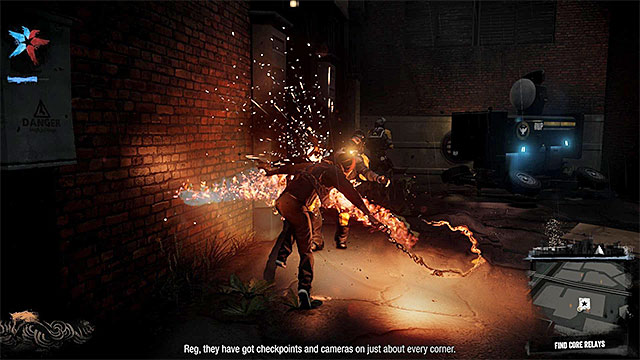 Melee is a good way of eliminating single enemies but, only of the ones that are not good in direct fights.
This category is unique in that it is not connected with any category of Delsin's powers. Therefore, you can use the melee abilities, which you unlocked, or bought, regardless of the category that is active at that moment.
THE NAME OF THE POWER
TYPE
COMMENTARY
Melee
Regular ability
This is the basic attack in melee, which you land with the Square. THE IMPORTANT piece of information is that its action differs, slightly, depending on the currently selected category of powers. For example, after you activate Smoke, the attacks are swift, but they deal no serious damage. In the case of the Video category, you need to take into account the fact that your attacks will be slow, but they will claim more health points, when they connect.
Comet Drop
Regular ability
This ability is unlocked as you progress in the game and it is a good idea to use it regularly, and start any major battle with a strong aerial attack. Also, always try to jump off rooftops of skyscrapers, which will ensure greater blast.
Obliterating Drop
Regular ability
This power can only be used by a character with bad karma. It allows you to get rid of one, or several, enemies right at the very beginning of a battle.
Karmic Healing
Regular ability
This power is mainly usable at the highest difficulty level, because it is then that you will be bent on regenerating health in any ways possible.
Execute
Regular ability
It is not a priority to purchase this power, because, even without it, you will be able to reach the next villain level, still before you complete the storyline missions.
Enemy Drain
Regular ability
Purchase this power only if you have unlocked the previous one - Execute. Regeneration of some of the energy is useful only if you do not want to, or cannot, return to the points where you can fully replenish it, too often.
Dash Strike
Regular ability
This power is useful for elimination of single opponents armed with firearms because, the faster you reach them, the more you can restrict the risk of getting under fire.
Dash Subdue
Regular ability
You do not need to purchase this power, because you always have plenty of time to incapacitate the opponent.
Dash Slam
Regular ability
You do not need to purchase this power, because you always have plenty of time to murder the opponent.
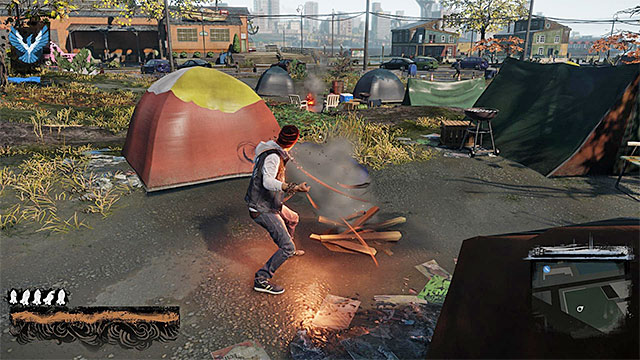 To regenerate smoke supplies, you can use chimneys, car wreckages or some bonfires
This category is the first one that you gain access to. Its basic functions are unlocked still during the prologue, although the more advanced ones (which deal more damage) become available only after you reach Seattle. I recommend against ignoring this category, even after you unlock the next groups of powers, because it is useful (and sometimes necessary) also later into the storyline.
THE NAME OF THE POWER
TYPE
COMMENTARY
Smoke Dash
Regular ability
This is the basic power, connected with fast movement. Turning into smoke also helps you dash between rooftops, avoid water or avoid obstacles.
Double Air Dash
Regular ability
It is a good idea to unlock this power early into the fame, because it helps you, considerably, reach the more distant ledges, without the necessity to get down to the ground level.
Car Boost
Regular ability
This skill unlocks as you progress in the game and it is a good way to, e.g. reach a ledge above or dash away from the battlefield.
Vent Dash
Regular ability
This power is available since the very beginning of the game Remember that venting shafts have been marked on the minimap.
Vent Healing
Regular ability
This power is useful, mainly at a higher difficulty level, because you will be bent on replenishing your health points, in any way possible.
Enhanced Vent Launch
Regular ability
It is not too valuable a skill because, instead of darting into the air, with increased force Double Air Dash is more useful.
Smoke Shot
Power with upgrades
Since it is the basic attack in this category, it is a good idea to purchase both upgrades, sooner or later, thanks to which your energy consumption drops by a half.
Sustained Fire
Regular ability
This power is available only for the villain and it is a good idea to unlock it because, thanks to it, you can fire more projectiles in a burst.
Sulphur Headshots
Regular ability
This power is for the hero only. In itself, it is not too valuable, but it gives you access to the power described below.
Knockout Headshots
Regular ability
Also this power is available for the hero only. I recommend that you turn your interest to that, assuming that you do not have any problems with frequent headshots.
Cinder Blast
Power with upgrades
This, quite strong, attack is especially useful for destroying enemy structures and barriers. It is a good idea to invest in both upgrades (lower energy consumption) although, not at the very beginning of the game.
Obliterating Blast
Regular ability
This power is available for the villain only. You can consider buying it if you have already collected enough blast shards, because you gain bad karma faster, thanks to it. Still, this is not a priority.
Sulphur Bomb
Power with upgrades
This power is available for both karmic paths but, it is hero that will profit from it more. I recommend that you upgrade it, additionally, because in its standard form, it is not too powerful.
Corrosive Fumes
Regular ability
Extending the duration of the primary power - Sulphur Bomb - helps you stun more enemies each time but, even without it, you will be well off.
Giant Sulphur Bomb
Regular ability
Just like above, this ability is only available for the hero. It is a good idea to unlock it, if you use the Sulphur Bomb often, because its increased blast radius makes it more useful.
Cinder Missile
Power with upgrades
Rockets deal huge damage but unfortunately, the cost of upgrades is very steep. In spite of that, I recommend that you strive for buying them, on a regular basis, because you will, then, not have to leave that often the battlefields, where heavy ammo is worth its weight in gold.
Orbital Drop
Regular ability
This power is unlocked as you progress in the game. Using it is possible only after you have filled the (good, or bad) karma bar and, since this takes a lot of time, leave it only for the most difficult of battles.
Drain Smoke
Power with upgrades
Delsin can suck the smoke energy since the very beginning of the game. I recommend that you purchase the successive upgrades, as soon as they re unlocked, which will increase your energy supply.
Quick Drain
Regular ability
This power is useful only in the final phase of the game, because it is then that your character starts running into bosses and enemies that can obstruct him from absorbing the smoke power.
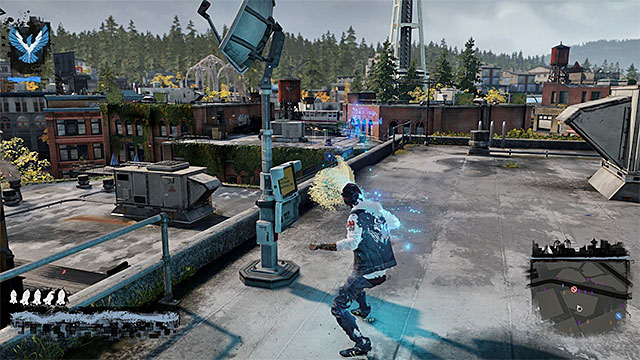 The Neon force regenerates by draining neon lights for power
This category is unlocked as the second one. You receive its initial functions during mission 5 (Go Fetch, although all of the remaining attacks are unlocked as you complete mission 6 (Light It Up). I recommend that you upgrade this category, also after you have unlocked the Video category, because it does not lose on its significance, or power, late in the game.
THE NAME OF THE POWER
TYPE
COMMENTARY
Light Speed
Regular ability
This is a basic power that is connected with faster movement. It will allow you to explore the city faster although, to appreciate it, it is a good idea to unlock Endless Speed.
Photon Jump
Regular ability
This power does not play any key role, although it may help you while moving around correctly, e.g. while avoiding obstacles, while sprinting, or reach the lower rooftops faster.
Endless Speed
Regular ability
Te game will not allow you to unlock this power straight away, but it is worth waiting and buy it as soon as it is possible. The unlimited "free" run is very useful, if you want to reach a location fast or, e.g. you need to chase someone.
Neon Beam
Power with upgrades
Since it is the basic attack in this category, it is a good idea to purchase both upgrades, sooner or later, thanks to which your energy consumption will drop by a half.
Burst Fire
Regular ability
This power is available for the villain only and it is a good idea to unlock it, because it increases the rate of fire of the Neon Beam.
Radiant Sweep
Regular ability
This power is unlocked as you progress in the game. It is possible to use it only after you fill the (good or bad) karma bar and, since this is a time consuming process, leave it for the hardest of battles.
Phosphor Beam
Power with upgrades
The strong energy beam is not as useful as, e.g. Cinder Missiles in the Smoke category, but still it is a good idea to unlock the successive (and costly) upgrades, thanks to which your limit of heavy ammo will rise.
Laser Insight
Regular ability
This power unlocks as you progress in the game and it is a good idea to use it for careful elimination of single enemies. I recommend that you upgraded with the powers described below, thanks to which it will become more useful.
Laser Focus
Regular ability
This ability upgrades the Laser Insight and it is a good idea to unlock it as early as possible because, thanks to slowing down of time, it will be easier for you to gain good, or bad, karma.
Extended Focus
Regular ability
Just like above, it is a good idea to ensure additional slowing down of time, which facilitates aiming.
Speed Loader
Regular ability
This is a quite useful power, which is connected with Laser Insight, because it allows toy to launch the attack, connected with aiming, more often.
Stasis Bubble
Power with upgrades
This power is available for both karmic paths but, you are going to use it more often, while playing as the hero. Personally, I recommend that you rely on the other attacks of the neon category.
Deadly Stasis
Regular ability
This power is excusive for the villain and it slightly raises the usefulness of the primary Stasis Bubble power, thanks to which you can gain bad karma ore easily.
Enhanced Stasis
Regular ability
Unlocking this power raises the effectiveness of the Stasis Bubble. It is a good idea to consider buying it if you use the "bubble" often and you play as the hero.
Extended Bubble
Regular ability
The Stasis Bubble power generates a much bigger bubble now, thanks to which you can enclose more enemies. However, this does not mean that this power is a any bit more useful.
Drain Neon
Power with upgrades
Delsin can drain energy from neon lights, from the moment in which this power category is unlocked. I recommend that you acquire upgrades as they are unlocked, which increases the power supply.
Quick Drain
Regular ability
You are going to use this ability only in the final phase of the game, because this is when you start running into bosses and enemies that can obstruct you from acquiring Neon energy.
The Video energy can be replenish by sucking energy from, e.g. TV sets, computers and antennas on rooftopsThis category becomes available as the third in the row and all of its basic powers are unlocked during the twelfth mission (Zero to Hero) of the game's storyline. I recommend that you upgrade it until the very end of the game, because many of the following chapters revolve around using it on a regular basis. Apart from that, in itself, this category encompasses many useful powers.
THE NAME OF THE POWER
TYP
COMMENTARY
Video Surge
Regular ability
This is the basic ability connected with fast movement. I recommend that you use it, mainly, in the case of long flights between buildings, although it is also useful in the case of, e.g. fast reaching of rooftops.
Hovering Fire
Regular ability
Personally, I am not too great a proponent of this power, although you can find it interesting, if you are a fan of attacking enemies, while in mid-flight.
Airwave
Regular ability
Another, relatively, useless power, connected with remaining airborne for an extended period of time.
Double Air Surge
Regular ability
It is a good idea to unlock this power as quickly as possible, because it allows you to use the flight ability twice, without the necessity to touch to the ground. It comes in handy, e.g. while attempting to reach far off buildings.
Signal Boost
Regular ability
This power plays no vital role, although you may want to use it, for accurate movement and allow you to, e.g. avoid obstacles or extend the flight a bit.
Video Torrent
Power with upgrades
Since it is the basic attack in this category, it is a good idea to buy both upgrades, sooner or later, thanks to which the energy consumption will drop by a half.
Extended Torrent
Regular ability
This ability is available for the villain only and it is a good idea to unlock it, because you can then fire more projectiles, in a single burst.
Narrow Band
Regular ability
This power is available for the villain only and it is a good idea to unlock it, because it improves on your accuracy and effective range of the Video Torrent attacks.
Shroud of Invisibility
Regular ability
Invisibility is not one of my favorite powers in this category, although it allows for cool surprise attacks or quick escapes from the battlefield, in case in which you sustain more serious damage.
Enhanced Invisibility
Regular ability
This ability is available for the hero only. You do not need to turn your interest to it straight away, although the fact that the attack does not disable invisibility, makes Shroud of Invisibility gain in usefulness.
Extended Invisibility
Regular ability
The best way to unlock this power is with the one described above, thanks to which you will be able to eliminate2-3 enemies, while remaining completely invisible.
Summon Wingman
Regular ability
Thanks to unlocking this ability, you can start using the Shroud of Invisibility also while fighting larger groups of enemies, without worrying that the enemies will focus their attention on Delsin, after invisibility terminates.
Demon Twins
Regular ability
It is an expansion of the power described above, although it is only available for the villain.
Unholy Trinity
Regular ability
If you liked the effects of the Demon Twins, you can also buy this power, because it summons three demons into the battlefield, instead of two.
Bloodthirsty Blades
Power with upgrades
The blades deal a lot of damage, of course on condition that they hit their target directly. Just like in the case of the Cinder Missile and the Phosphor Beam, in the previous categories, the upgrades are very expensive but, you should not ignore them ( after you upgrade this power to its maximum, you receive five pieces of ammo).
Blade Flurry
Regular ability
Unfortunately, this power is available for the villain only. If you can, unlock it immediately, because it increases the potency of the Bloodthirsty Blades.
Blade Storm
Regular ability
Just like above, you need to play the villain to be able to increase the number of the blades that you fire and, at the same time, deal more damage.
Hellfire Swarm
Regular ability
This power unlocks as you progress in the game. You can only use it after your (good or bad) karma bar fills up and, since this is a time-consuming process, leave it for the most demanding battles.
Drain Video
Power with upgrades
Delsin can drain electronic devices for energy, from the moment in which this power category is unlocked. I recommend that you upgrade it on a regular basis, thanks to which you will increase your supply of energy.
Quick Drain
Regular ability
You are going to use this ability only in the final phase of the game, because this is when you start running into bosses and enemies that can obstruct you from acquiring Video energy
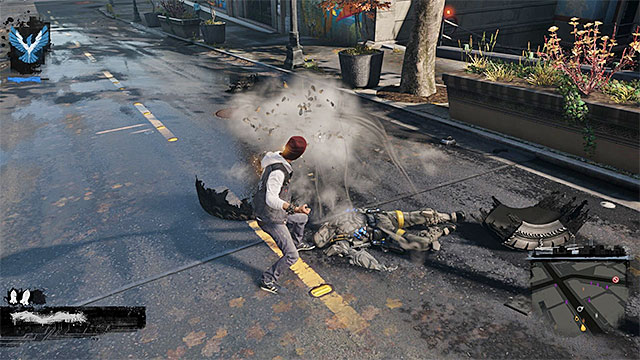 The power of Concrete can be regenerated the fastest, by draining energy from the enemies that you defeat.
This category is unique in many respects, because you can use it for the first time, during the battle with the final boss (either while playing as the hero or as the villain). Therefore, you can start using it for good, only during the free exploration of the city, after you have completed the storyline of the game.
This category is, in many ways, similar to the previous three, although it has many unique points. One of them is the fact that there is no division into the powers for the villain and for the hero. As a result, you can unlock all of the powers, regardless of your selected karmic path. Another important difference is that the concrete energy button can replenish spontaneously (along with heavy ammo).
THE NAME OF THE POWER
TYPE
COMMENTARY
Boulder Dash
Regular ability
This is the basic power connected with movement. Unlike the Smoke, Neon and Video categories, this does not increase the speed of movement, nor does it help you reach rooftops faster. Instead, you can count on better protection against the enemy attacks and on the ability to ram into the smaller elements in the environment.
Extended Dash
Regular ability
This ability does not improve, considerably, on the Boulder Dash, although the good news is that you do not need to return to your regular form as often.
Endless Dash
Regular ability
I do not see any particular use for this power. The regular dash is enough to get away from the theatre of fights, or to reach a group of enemies.
Concrete Shrapnel
Regular ability
The basic attack in the Concrete category and, unfortunately, it cannot be upgraded. What is even more, its range is only average.
Extended Shrapnel
Regular ability
It is a good idea to unlock this power, because you can fire more projectiles, in a single burst, then.
Concrete Barrage
Regular ability
The concrete slabs deal extensive damage and, apart from that, are useful for elimination of groups of enemies, instead of single targets. I recommend that you use this attack as often as the heavy ammo allows.
Wide Barrage
Regular ability
Increases the range of the Concrete Barrage, which makes it even more effective and makes it even more useful against groups of enemies.
Concrete Thrusters
Regular ability
This power unlocks still during the final battle. Far jumps and floating in the air are useful only in certain situations.
Double Lift
Regular ability
Unlock this ability only if you liked the Concrete Thrusters.
Triple Lift
Regular ability
Unlock this ability only if you liked the Concrete Thrusters.
Strength of Stone
Regular ability
It is a good idea to purchase this power quickly, especially if you are playing at the highest difficulty level and you need to strive to keep the health bar at the safe level.
Strength of Granite
Regular ability
It is a good idea to purchase this power quickly, especially if you are playing at the highest difficulty level and you need to strive to keep the health bar at the safe level.
Drain Concrete
Power with upgrades
Delsin can drain the defeated enemies for power, right after the moment in which he returns to the city, after the final battle. I recommend that you purchase upgrades for this power, as soon as they unlock, thanks to which you will extend your energy supply.
Fight with Hank is a part of a tutorial but still will be mentioned also here. You have to fight with this convict during the quest Prologue: The Visitors.
 Attack Hank using the chain
After watching the cutscene you'll find yourself in the main room and you'll have to defeat Hank, which is quite easy. Start with using Smoke Dash and use near covers to avoid projectiles shot by him. In the meantime try to get closer to him. Once you get close enough to the convict use the main attack with your chain. Do not count on defeating him with one series of attacks because he will try to move away from you. Fortunately you do not have to worry that he will flee but be ready to overcome various obstacles (closed gate among other things). After Hank leaves the building, move to the exit door and use the touchpad. This short and easy fight is over.
Fight with Fetch is first "real" boss fight in the game. You'll have to face her during the main quest in Seattle - Go Fetch.
 Avoid Fetch's laser attacks
The fight with Fetch starts in the theater. At the beginning try to familiarize yourself with her two standard attacks. She will try to deal you damage with a laser and you can avoid it by using Light Speed and by hiding behind covers.
 The energy explosion inflicts huge damage
Do not try to approach Fetch because she could then use energy explosion and such attack can strongly weaken or even kill you (if you are already wounded). It is worth mentioning that you do not have to fight with her in a melee to win this duel, so keep your distance from her.
 Absorb energy from neons
The fight with Fetch is divided into two parts. In the first one you have to absorb energy from nine neons located in the building (this is also a way to refill Neon energy). Each time you approach neon position yourself in such place that Fetch can't hit you and then start absorbing energy (press touchpad).
Clear out the entire ground floor, finding all neons and absorbing their energy. But this is not all, because there are some neons on upper balcony. To reach them run over walls, watching out for Fetch. When you absorb energy from all neons, the second part of the fight begins.
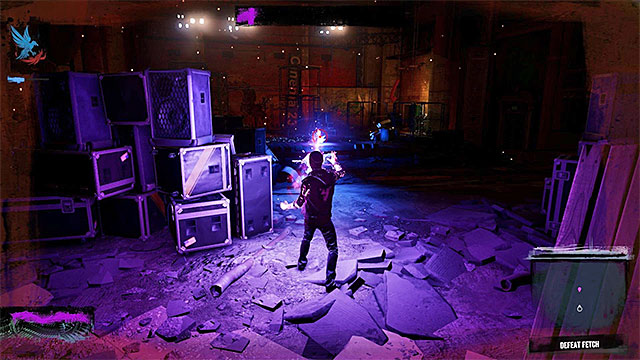 Attack Fetch from a distance to weaken her
In the second part of fight you'll be able to use basic distant attack of Neon power. It is Neon Beam which can be activated by R2 button (it is equivalent of Smoke Shot from smoke attacks category). Start using this attack to weaken Fetch but be aware that she will also use it, so keep moving and/or use covers. The girl can hide from time to time and in such situations track her down by following her traces.
This enemy (Department of Unified Defense Agent) is encountered during the eighth main mission (The Test), that is when you are trying to cross the bridge between the north and south part of Seattle.
 Ranged attacks can be avoided by running or taking covers
A duel with the agent takes place on a large arena located near the southern part of the city. Let us traditionally start with a few words about the boss's attacks, which is because they are quite diversified and they inflict considerable damage, so you really need to make effort to avoid them. One of the main attacks that the elite D.U.P. agent has, is casting massive cement blocks at the main hero, which you can avoid by running or taking appropriately big covers.
 Try to avoid contact with auto-targeting missiles
Another major attack the boss has is firing auto-targeting missiles that move under the ground and inflict damage upon contact with the main hero. In this case, it is highly advisable to often perform dodges and run around all the time, hoping that an enemy missile will miss Delsin. Otherwise, the main hero may be seriously injured and temporarily dazed, thus getting exposed for further attacks from the boss.
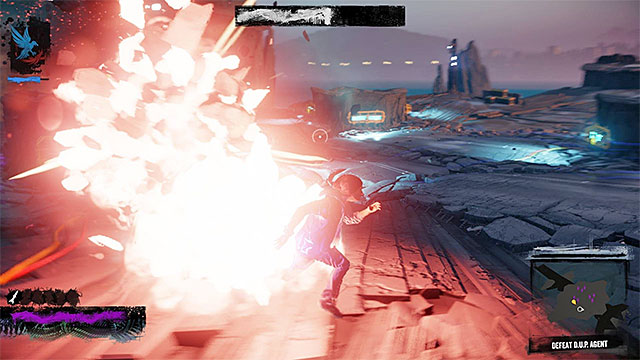 Melee attacks performed by the boss are very strong
The last attack D.U.P. agent has, is used in the later phase of the duel. The distinguishing feature of it, is that the boss temporarily ceases fighting at a distance. Namely, he will try to perform a single melee attack. As with the previously described auto-targeting missiles, the key to keeping Delsin alive is to avoid such charges by dodging and running, as they may inflict serious injuries.
 Do not absorb energy from neon lights while you are exposed for the boss's attacks
So much for the boss's abilities, now some information on how to deal with him. The first thing you need to do is to switch Smoke power to Neon power by absorbing energy from one of the neon lights in the area. But do not rush into this (that also applies to regenerating the energy bar later in the fight), but first make sure that the boss is not currently in a position from where he could easily interrupt the charging process and weaken Delsin at the same time. By the way, I recommend getting the improvement that shortens energy absorption time, although you can handle even without that.
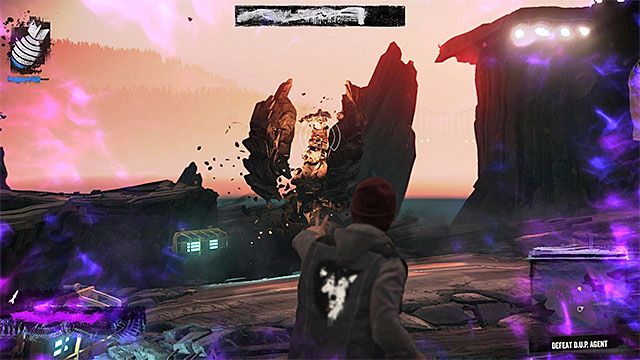
Theoretically, you can attack the boss with all available ranged attacks (do not try to get near it - melee combat is not an option), but the best result comes from using a combination of Laser Insight with Phosphor Beam. Start by holding L2 button and right after that hold R1 (Phosphor Beam attack needs a moment to charge up). Now try to aim directly at the boss while in slow motion mode (as in the picture above), waiting for the moment when the missile launches.
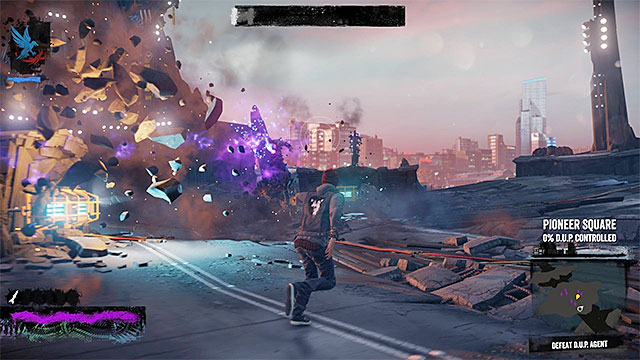 Use Phosphor Beam attack, but remember to regularly refill heavy ammunition supply
Using Phosphor Beam power will only prove successful and take away a lot of hit points from the boss, if the energy beam hits directly at him and not at the concrete elements floating around. From now on, keep repeating all the steps as described above and be sure to frequently regenerate power by absorbing energy from neon lamps, because Phosphor Beam attack requires Heavy Ammo. Reducing the D.U.P. agent's health bar to zero will terminate the duel.
You fight an angel summoned by Eugene during the eleventh mission of the game: Heaven's Hellfire. Encounter begins when you get to the cellar and search it a bit.
 Avoid lava
At first, several words about this encounter in general. It's divided onto several parts, where your primary task is to get rid of huge amount of angel's health and avoid all his attacks and other dangers. The last category is lava, filling the whole arena. Falling into lava doesn't mean you're dead, but you have to hurry onto the dry land. In such a case, changing into smoke or Light Speed power will be useful.
Another important thing is moving around the arena. You should, in majority, rely on energy pillars like the one shown on the screen above. Getting into the energy torrent will jump out Delsin. For getting onto shelves safely, you should also use the option of floating. Use this skill when you want to get closer to the boss and fire at him while remaining mobile.
 You won't be safe behind pillars, because they can be easily destroyed
At the beginning, boss will have only one attack - a strong beam of energy fired at Delsin. Stay mobile and jump between shelves and wait for angel to finish his current attack. I don't recommend hiding behind pillars, as they'd be destroyed. You can try to grab the outer edges of shelves, on which you should remain safe.

You can use both Smoke and Neon powers to attack angel. There are nearby points to regenerate energy used for offensive powers. One of them is shown on the screen above. Use those points mostly to replenish Heavy Ammo.
 Make distance attacks to weaken the boss
As you probably figure out, the best attacks you use with R1 button are the best one to decrease angel's health bar. I recommend to mostly use them and the standard distance attacks (R2 button) between the first ones.
First part of the encounter ends after several successful hits. After that, you're again in the cellar. Approach the TV you see to get to the second stage of the battle.
 Use the strongest attacks again
Second part of the encounter brings two important changes. First, is a boss attack, Besides firing an energy beam, he'll also fire explosive missiles at Delsin from time to time. When you see angel preparing to this attack, jump onto other shelves to avoid damage. Attack angel the same way you did previously, using the strongest abilities (R1 button).
 Return onto the platforms with vertical pillars of light to avoid not necessary damage from lava.
The other new thing is the boss moving around. When only you notice that he changes into a group of angels, fire at them to lower the boss' health bar. The more important is what will happen in a moment. The part of shelves will lower. You have to act quick to not get into the lava. You should start floating in the air and reach one of the shelves with the vertical pillar of light. After landing, use the mentioned "elevator" to get onto the new arena and resume the boss fight.
Continue attacking from distance, remember to keep Delsin alive (start jumping around when heavily wounded) and run away from platforms falling into lava. You return to the cellar when boss' health drops below the half. Get to the another part of the building to move to the third stage of the battle.
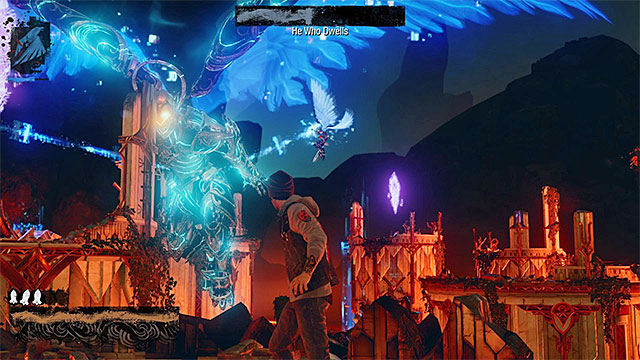
In this part, the only new thing is that boss will be supported by the smaller angels (screen above). ALWAYS focus on eliminating them firstly, because until that, the main boss will be immortal. The rest of the encounter has no more changes, so you have to beware of two types of boss' attacks and platforms falling in lava.
Decrease the boss' health bar and try to keep Delsin alive. Encounter ends when health bar is down to zero.
First of two encounters with Brooke Augustine takes place while you're exploring the prison on the island during the fifteenth mission of the game (Quid pro Quo). Encounter begins soon after reaching the area and watching the cut scene with Reggie.
 Avoid objects threw by Augustine
Encounter with Brooke Augustine takes place on the big arena where you can move freely. As like in previous boss fights, try to keep Augustine at bay and don't get closer for melee attacks. Important is also to keep being mobile and/or hiding behind covers while Augustine throws things at you.
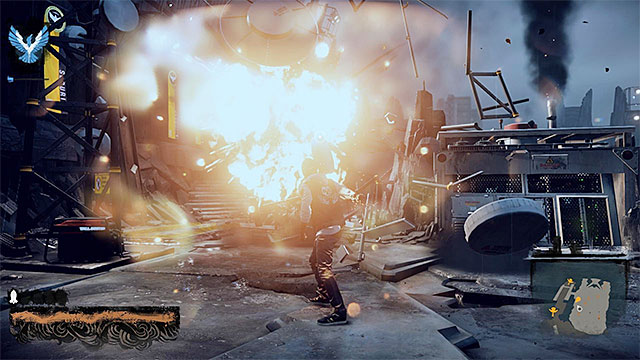 Fire rockets to destroy Augustine's cover
The best is to use the strongest Smoke Attack, which is Cinder Missile (R1), to attack Augustine. Notice that each hit destroy part of her cover.
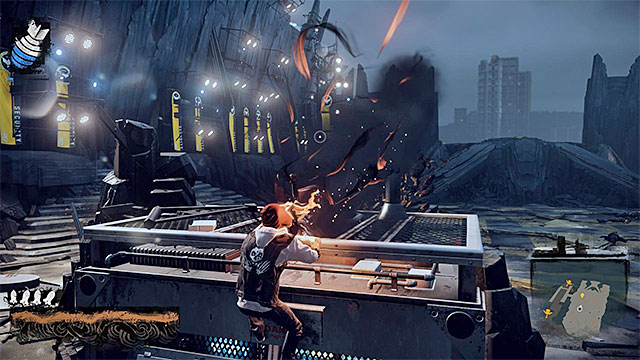 Regenerate the Smoke and heavy ammo often
Important thing about attacking your opponent is that you can't stop it for a longer period of time, as she will regenerate. So you should have a lot of heavy ammo (try to increase its limit with upgrades) and replenish it regularly. In this area you can find a lot of places to regenerate Smoke, but use them only when Augustine finishes her attack. Otherwise, your action may be interrupted (here an upgrade which decreases the time of draining the smoke may be handy).

When you destroy Augustine's cover, make some more attacks to hurt her directly. Fire until woman lands on the arena. In such a situation, you need to run up to Augustine and press the Triangle (if you play as the hero), or the square (if you are playing as the villain) to land a powerful kick (the above screenshot).
 Usage of the special attack ends the first part of the encounter
Further part of the first phase doesn't differ too much. You still have to destroy Augustine's shield and melee attack her only when she falls on the ground. After several sequences like that, game will let you to fire a special attack. You don't have to make anything special as this attack always hits. It means also that the second part of the encounter begins
 Try to kill elite enemies ASAP and then focus on the regular soldiers
Don't think that you'll be able to resume attacking Augustine at once, as she'll leave arena and send a group of soldiers at Delsin. Don't underestimate those enemies. Many of them have superpowers (and those should be dealt with as first ones) and many covers are already destroyed here. Don't stop for too long anywhere and don't let enemies get close to Delsin. Use the better attacks (rockets also) always when it's a chance to attack a stronger enemy or a group of them.
 Eliminate Augustine's soldiers before you focus on here
Augustine rejoins the battle after you eliminate the main group of DUP soldiers. Notice that there are several new soldiers at the arena. You should get rid of them ASAP, because there'll be no more enemies. Augustine will move around the battlefield so pay even more attention to keep away from her.
 You can switch onto Video powers
Second phase of the encounter is very similar to the first one, so you again have to make strong distance attacks to destroy her shield. A difficulty may lay in a fact that you lose all places to regenerate Smoke, but, luckily, it doesn't weaken the main character. Why? Because now you can look for Vide regeneration points. Use the strongest power (Bloodthirsty Blades) which is as effective as rockets.
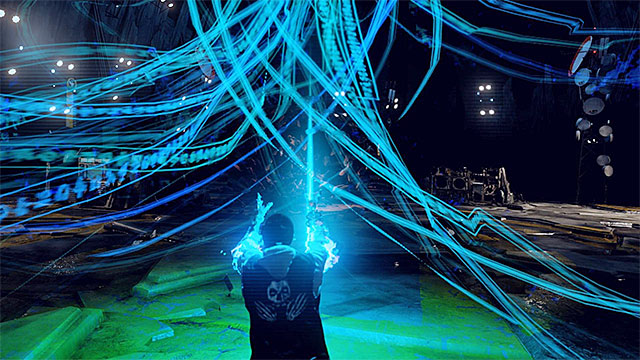 Using the special attack again finishes this encounter
Continue attacking, using Smoke or Video whichever suits you. As in the first part of the encounter, after which series of hit, you have to kick Augustine when she lies on the ground. After several sequences like that, you may perform a special attack. Making it, ends this encounter.
The second battle with Augustine takes place towards the end of the game's storyline. Regardless of whether you started mission 17a, connected with good karma (Expose Augustine), or 17b connected with bad karma (Kill Augustine) the course of the battle in the atrium (the rooftop of the D.U.P. skyscraper) will be the same.
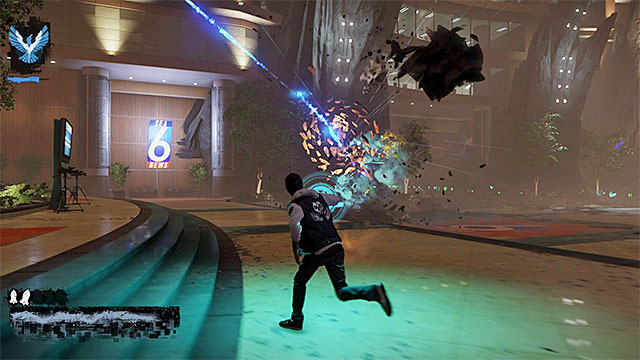 Do not stop anywhere, to prevent being hit with a big concrete fragment
The showdown consists of two parts and the premises of its first phase are similar to the ones, during the fight with Brooke Augustine. Therefore, you should focus on maintaining a safe distance from the opponents and avoid her main attacks, which is throwing large items at Delsin.
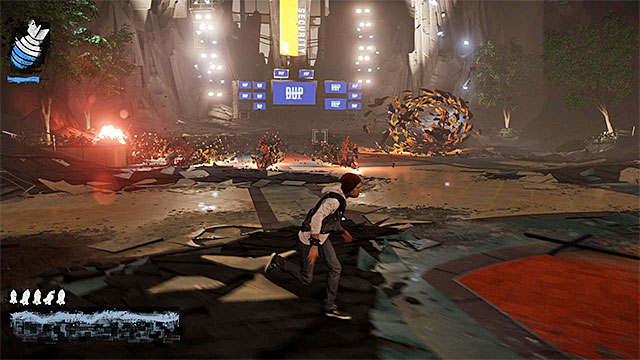 Dodge to prevent taking damage from Augustine's attacks
Augustine also learned several new tricks, since the last meeting. I recommend that you, first of all, keep running around the atrium, because she is able to immobilize Delsin (the rings that appear on the ground), and also send two types of blades, against him (you can dodge to the sides from them or jump above them). At this point, it is worth adding that in the case of critical damage, it is worthwhile to return to the starting points and hide behind pillars located on the left and on the right(they will be even more helpful in the second phase).
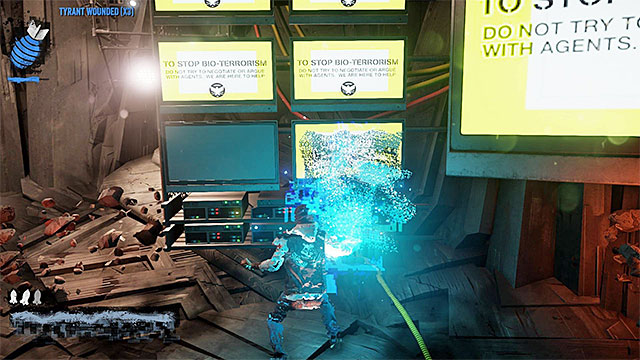 You can drain TV sets for energy
TO deal damage to Brooke you should use the best available attack, from the Video category, i.e. Bloodthirsty Blades. The game will let you replenish your Video energy levels and you can do that by reaching the monitors at the other end of the atrium. Drain them for energy only after Augustine finishes her current attack and, it would be good if you had the upgrade, which would allow you to cut short the draining, by a half.
 After you launch the special attack, the first phase of the fight will end.
Just like in the case of the fight in the fifteenth mission, you need to try eliminating the objects around Augustine, thanks to which she will start to take damage and she will, finally, land on the ground. You need to run up to her, then, and press the Triangle to land strong kicks. After several repetitions, the game will allow you to launch your special attack. Press any button on the d-pad. The successful attack will result in unlocking a category of powers connected with concrete, and in ending the first phase.
Right after the second phase of the battle starts, Augustine will turn into a huge monster. Do not bother about the fact that you cannot attack her, for now. Keep running around the atrium and try avoiding the boss's attacks (ground slam and large projectiles). Once again, I remind you about the pillars near the starting point (an example in the above screenshot) because the boss will not be able to approach Delsin, if you stand behind them (it will, e.g. block on a tree). and/or will be unable to take his health points with the strong ground slams. It is worth remembering about this important facilitation, for the duration of the entire second phase.
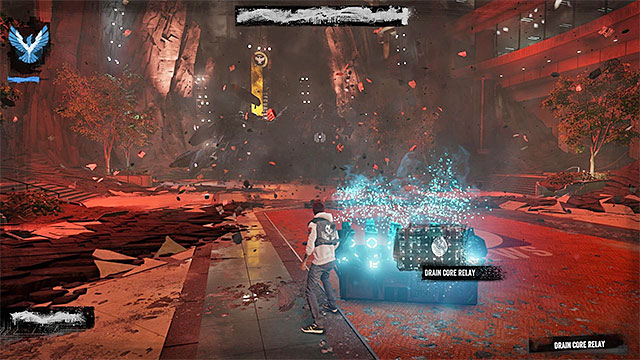 Approach the core relay only after the enemy walks away
Avoid Augustine's attacks, up to the point when there will appear Eugene and throw the first Core Relay into the atrium. Do not haste to reach it and wait for a good moment and take up energy from it, only then (by pressing the touchpad. Delsin will unlock a concrete power connected with faster and safer movement - Boulder Dash. Start using it, of course (Circle) thanks to which you will avoid taking serious damage.
Note- The Concrete power bar regenerates spontaneously so, while fighting, you do not need to search around for spots to about replenish it.
 The Concrete Shrapnel allows you to launch simple ranged attack
You still need to avoid Augustine so, keep running around the atrium and try to hide behind pillars. After Eugene throws the second core into the building, wait for a good moment again and take up energy from it, in order to unlock the first offensive Concrete power- Concrete Shrapnel (R2). from now on, you can attack Augustine at a distance. However, do not expect that her health points will start do dwindle quickly, because the power is quite weak.
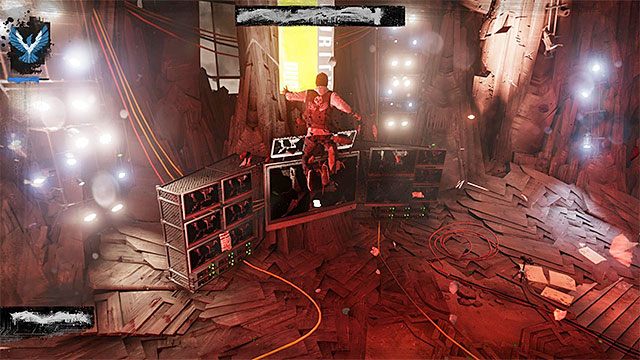 You can now move around the atrium more efficiently and remain in the air for longer
While attacking Augustine, do not miss the moment at which there lands another core relay in the atrium. Draining it for energy will result in unlocking a defensive concrete power Concrete Thrusters (L1). It consists in performing far jumps which help you move around the arena efficiently and hover in the air, and this is what is useful, if you need to avoid the attacks under Delsin. Continue fighting by using the Concrete Shrapnel to deprive the boss, slowly, of her health points.
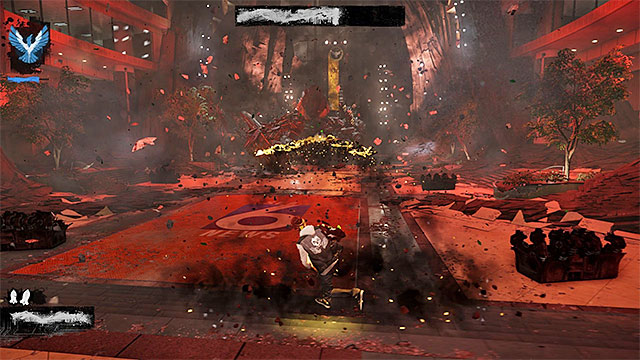 Use Concrete Barrage to deal more damage to Augustine
After several moments, Eugene will throw in the fourth (the last) core relay. Draining it for energy will unlock the most powerful concrete ability- Concrete Barrage. You activate this attack by pressing R1 and it deals the most damage so, I recommend that from now on, you keep using this one. Additionally, what speaks for this is the fact that you will not have to worry that much about Heavy Ammo because, in the case of the Concrete category, it also replenishes spontaneously (you just need to wait several seconds).
 One of the boss's new attacks
Since the moment in which you gain access to Concrete Barrage, Augustine will be using new types of attacks herself. She is able to "Flatten" herself and move all around the atrium floor, as well as turn into a kind of a snake. In both cases, it is a good idea to keep hiding behind pillars, jump, run around the atrium and use dodges, reinforced with Boulder Dash and Concrete Thrusters.
 Deprive Augustine of health points and try to avoid dying yourself
For the rest of the battle, you should be focusing only on effective use of Concrete Barrage and on avoiding the snake-boss's attacks, i.e. the big projectiles thrown towards Delsin, and snake attacks. After Augustine's health bar reaches zero, the victory will ensue.
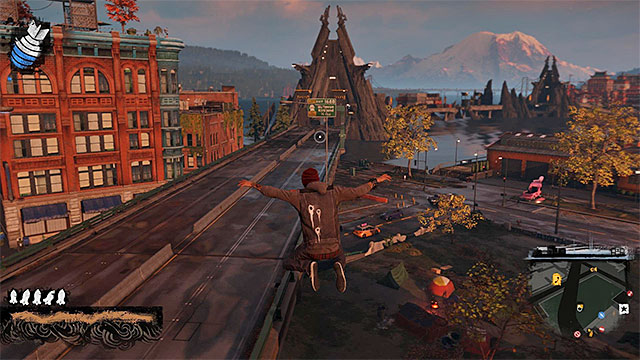 The bridge is not immediately accessible
We begin with few words on a virtual version of Seattle. The city is divided into several smaller districts, whose names are shown on the main map. The entire northern part of the city is available right after you get to the city (main quest Welcome to Seattle). Southern part of the city is accessible by a bridge located in the eastern part of the map, but it is not accessible initially. You can use the bridge only after unlocking one of main quests: Trash the Stash (Good Karma) or Fight Intolerants (Bad Karma).
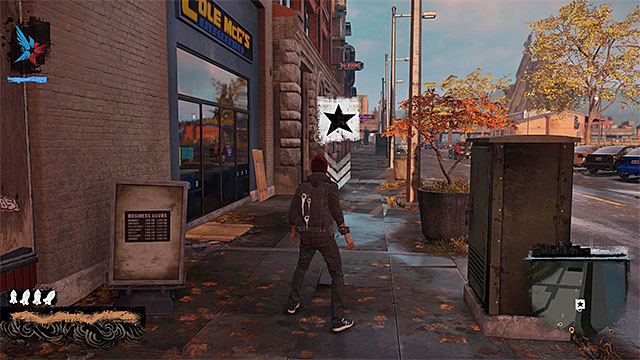 A sample starting point of a new quest
Since inFamous: Second Son is a sandbox game, there are many different activities available for you:
Note! Information on attractions waiting for Delsin in the city can be also found in the guide inFamous: Second Son in 10 simple steps.
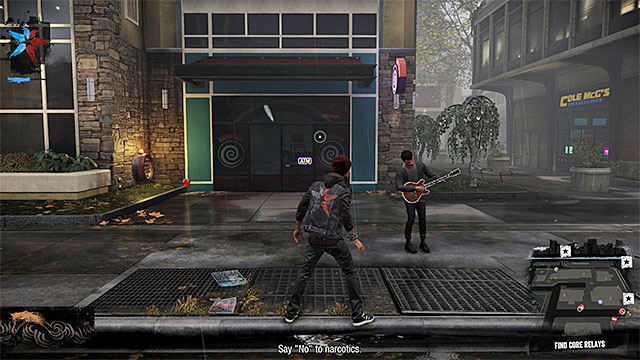 Engaging in side quests is advisable because you can easily acquire Good or Bad Karma
Side quests in inFamous: Second Son are very lame and unfortunately they repeat themselves regularly, but still they are worth to be completed, because they are good way to acquire Good or Bad Karma. Random events appear at random locations so you should frequently check on your mini-map where they are always marked.
Sample side quests which reward you in Good Karma are: saving civilians imprisoned in cages, getting rid of drug dealers and eliminating bandits who shoot at cops. Sample side quests which reward you in Bad Karma are: murdering people who protest against bio-terrorists, eliminating street musician or killing suspects imprisoned in cages.
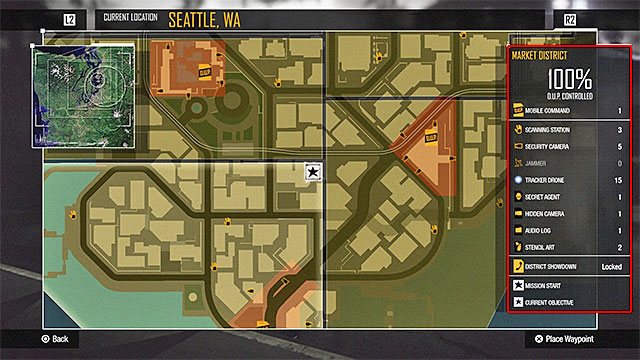 Information on additional activities are shown on the right side
It would be best to complete additional activities during main quests, although some of them (shards for example) are available at any time. You can check your progress on the district map - information on additional activities is shown on the right side of the screen. Each completed activity moves you toward the battle over the district because it lowers the D.U.P. control factor.
Additional activities available in the game:
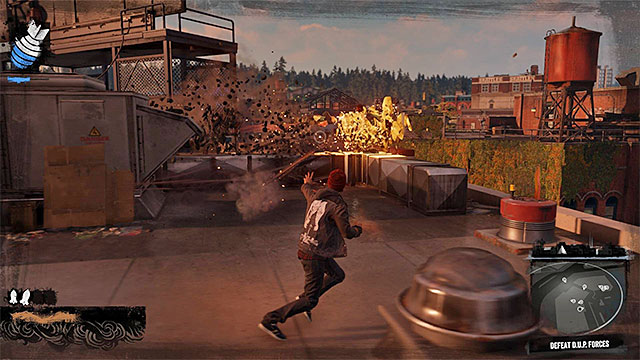 Winning the (long and tiring) battle will allow you to take control over the district
You can start fighting over the district only after lowering D.U.P. control factor to 30%. After that you have to go to the placed marked with a phone icon on the map and start the fights after a funny phone call. Each battle is very demanding because you'll have to deal with snipers, powerful opponents with powers, armored vehicles or even helicopters, among other things. You should prioritize your actions, planning to eliminate first those opponents which are the biggest threat. Do not forget about withdrawing when you get injured or when your smoke or heavy ammo supplies are depleted.
The main advantage of taking over the district is fact that all enemy forces in the area are gone, so you do not have to worry about them anymore. In addiction you'll be rewarded in unique jackets and fast travel option (it works between districts which are already taken over).
The above map shows entire city and informs you about all important locations visited during completing the main game plot. Information on additional activities is automatically added to the map after destroying the mobile command centre in given area. What's more, you can check here locations of security cameras, scanning stations and jammers.
Below is a summary of selected additional activities in Queen Anne district.
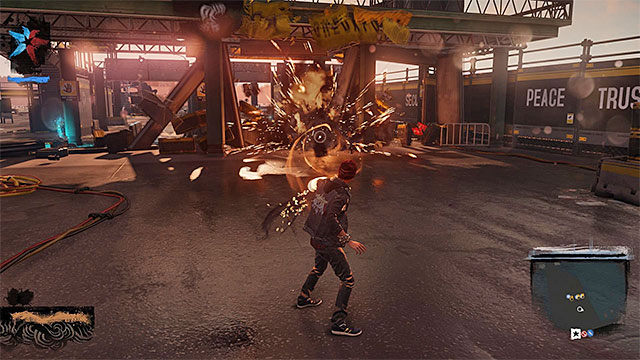 Destroy checkpoint to reveal collectibles
1) Blast Shards - You may have problems finding some of 17 shards located in Queen Anne district. Few of them are hidden inside devices next to checkpoints. So destroy these checkpoints using more powerful powers and pick up all secrets.
 Enemy agent will start escaping
2) Secret Agent - A person you're looking for is black and you shouldn't have problems in finding him. Try to shoot at him while chasing him because he could try to hide in an enemy base or lose you.
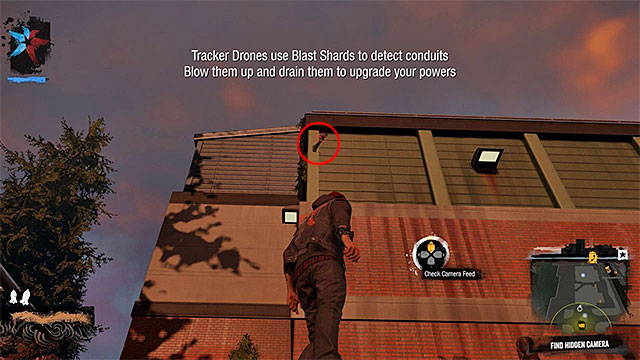
3) Hidden Camera - Press the appropriate button on the pad to see camera's footage because that will help you to locate it. Location of the camera is shown on the above screen.

4) Audio Log - After you get to the location marked on the map (destroyed bridge) make sure to use your phone because it will be informing you how far from a target you are. Hard disk with log is located on a platform near water (screen above).
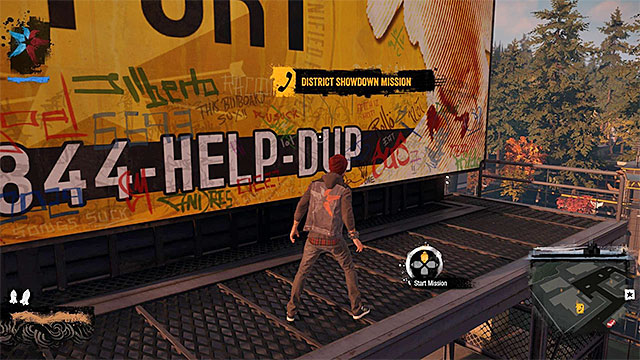 District showdown starting point
The fight to take over Queen Anne district (District Showdown) will be possible only after D.U.P. forces control less than 30% of a district. Go to the place marked with a phone icon. It would be best to use one of ventilation shafts there, so Delsin will get to the metal balcony adjacent to a large billboard. Now make a call to start the battle.
 A powerful punch is a good starting point
Try to get to one of rooftops of adjacent building as soon as possible because D.U.P. forces will soon appear in the area and it would be good to start the battle with some powerful ground punch for example (I recommend using Comet Drop). Once the battle begins focus on destroying enemy armored vehicles (Cinder Missile - R1 can be very helpful here) and eliminating opponents with supernatural powers (try to kill them from a distance). Watch out for snipers (laser sights) trying to constantly move. Fight until all enemy forces are defeated.
Rewards for taking over Queen Anne to:
Below is a summary of selected additional activities in Seattle Centre district.
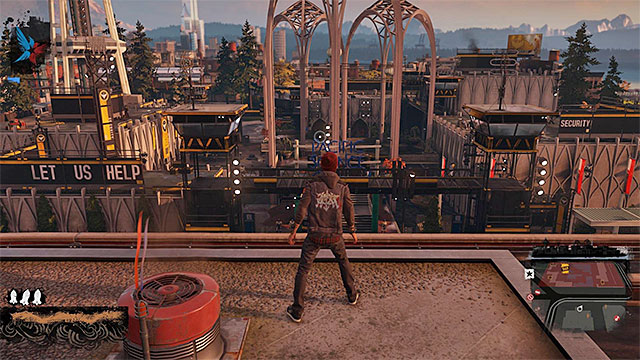 Enemy base
1) Mobile Command Centre - D.U.P. base is located in the northern part of district. It surrounded by quite high walls but the good idea is that you can get there from any side because it is not adjacent to water. After attacking the base try to quickly destroy enemy watchtowers and watch for snipers (destroy balconies where they are standing) and enemies with supernatural powers. Since the base has few levels you can easily avoid enemy attacks and get to smoke places faster.
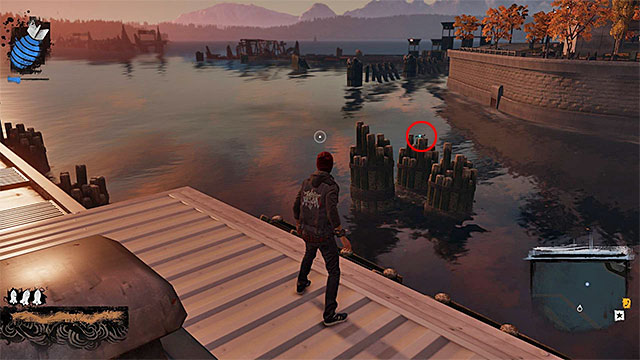 You should start flying here
2) Blast Shards - One of shards is located over water (western part of district). Start on the nearby metal construction and alternately use hovering over water and Smoke Dash. Try to land on wooden stakes.
Two other drones are attached to the lantern and horizontal bar on the building but in both cases you can catch them by climbing up.
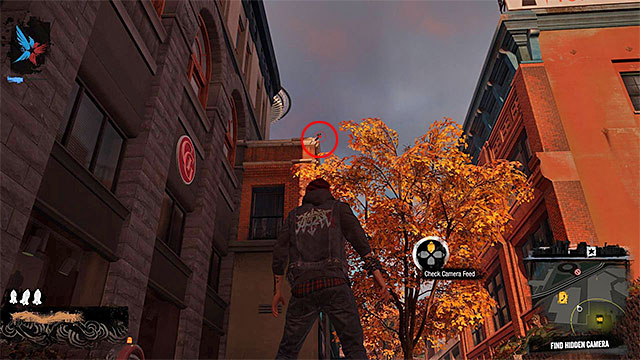
3) Hidden Camera - The camera you're looking for is located in the place shown on the above screen.
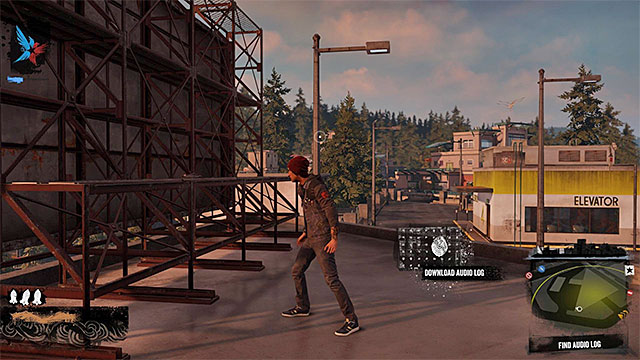
4) Audio Log - You have to get to the highest level of the parking. Hard disk is located at the back of the billboard shown on the above screen.
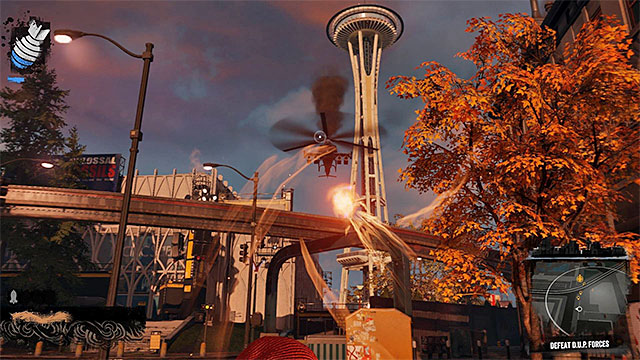
The fight to take over Seattle Centre district (District Showdown) will be possible only after D.U.P. forces control less than 30% of a district. Go to the place marked with a phone icon (large billboard on the rooftop) and make a call.
When the battle begins focus ONLY on helicopter which appears in the area. Keep running to avoid missiles which can injure you badly. You can also get down to lower levels (running between buildings), so enemies in the helicopter will have problems to aim at you. As for attacking the helicopter I recommend using Cinder Missile but other distant attacks are also good. Try to destroy the machine before you have to regenerate your smoke, because you could be easily killed during absorbing smoke. When the helicopter is down the battle ends.
Rewards for taking over Seattle Centre to:
Below is a summary of selected additional activities in Market District.
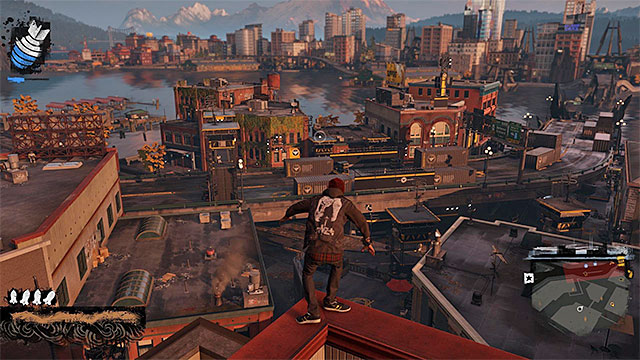 Enemy base
1) Mobile Command Centre - D.U.P. base is located near water in south-eastern part of district. It is not typical construction because enemy forces occupy two different levels - upper highway and lower yards and streets. Regardless of which level you want to clear first (even partially) you have to be aware of an elite soldier with powerful powers and minigun. As a reminder - keep attacking him until he creates a shield. After that quickly run towards him and finish him.
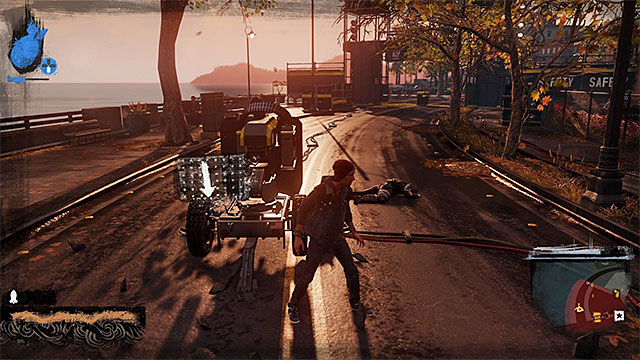
Another threat is Auto Turret. There are several of them placed on the lower level. Their fire is very painful for your character so make sure to avoid them at all costs. You can use distant attacks to destroy them or disable them when you get close to them from behind (screen above). Mobile command centre is located on the lower level (under the highway, next to a small parking lot). I suggest destroying it only after elimination of an elite soldier and auto turrets.
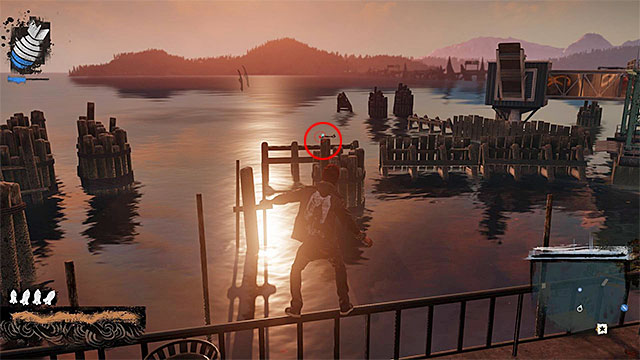 You should start flying here
2) Blast Shards - One of shards is located over water (north-western part of district). Start on the nearby railing for example and alternately hover over water and use Smoke Dash. Try to land on wooden stakes.
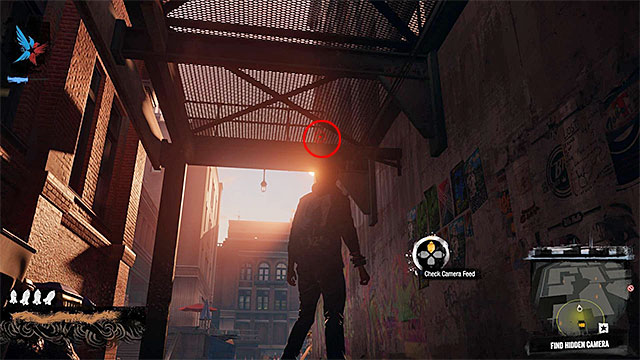
3) Hidden Camera - The camera you're looking for is located in the place shown on the above screen.
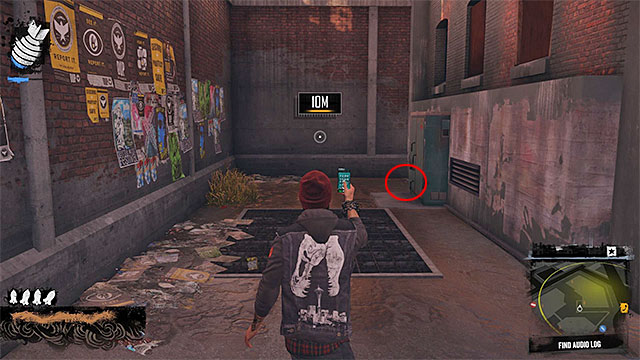
4) Audio Log - You have to get to the narrow alley shown on the above screen. Hard disk can be found on the right.
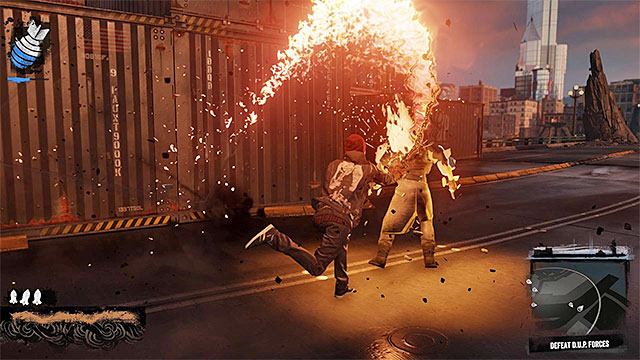 It is better to fight elite soldiers on the highway
The fight to take over Market District (District Showdown) will be possible only after D.U.P. forces control less than 30% of a district. Go to the place marked with a phone icon (large billboard on the rooftop) and make a call.
The biggest threat is a new type of elite opponents - they have more powerful powers than usually. I recommend fighting with them on the rooftops or on the highway located over the previously destroyed mobile command centre.
Rewards for taking over Market District to:
Below is a summary of selected additional activities in Paramount district.
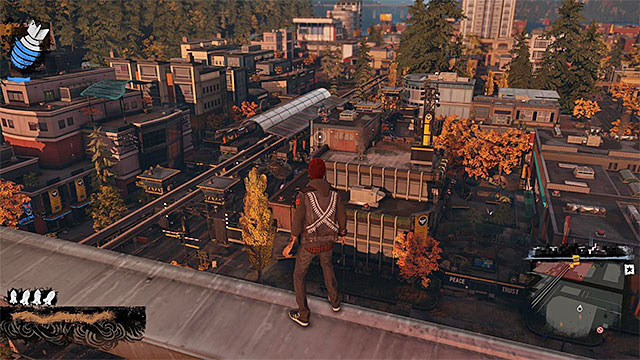 Enemy base
1) Mobile Command Centre - D.U.P. base is located in northern part of district. This is a railway station area and you have to be very careful during the attack. Watch out mainly for a single elite soldier with supernatural powers and minigun. Another threat is presence of auto turrets which should be destroyed from a distance or just disabled.
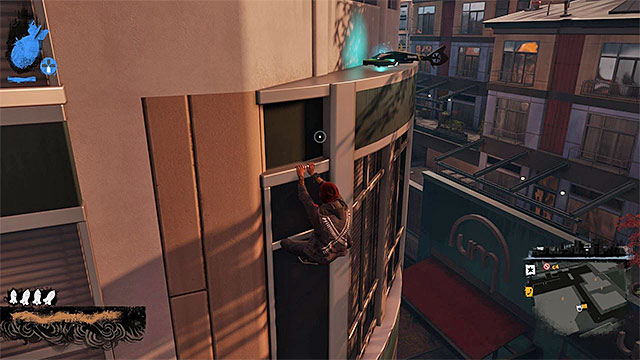 One of drones
2) Blast Shards - Few drones are located in places which are more difficult to reach like one the edge or on the top of the lantern. Generally however you just have to look around. One of drones is hidden near the point where you start looking for an audio log and you can miss a blue spot on the map if you do not zoom it in maximally.
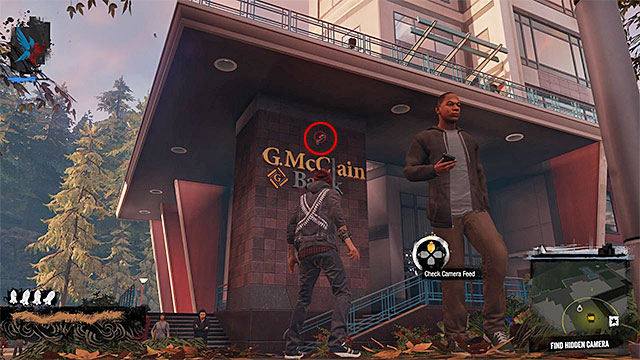
3) Hidden Camera - The camera you're looking for is located in the place shown on the above screen.
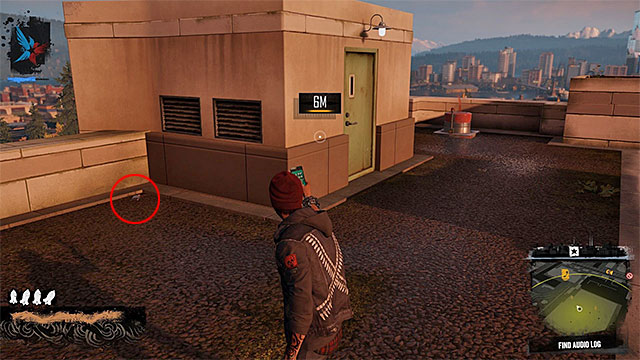
4) Audio Log 1 - Start in north-western part of Paramount district. Get to the rooftop of nearby building. Hard disk is located in the place shown on the above screen.
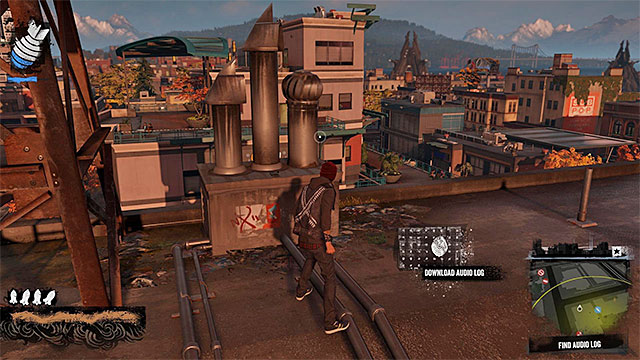
5) Audio Log 2 - Start in southern part of Paramount district. Get to the rooftop of nearby building. Hard disk is located in the place shown on the above screen (next to water tower).
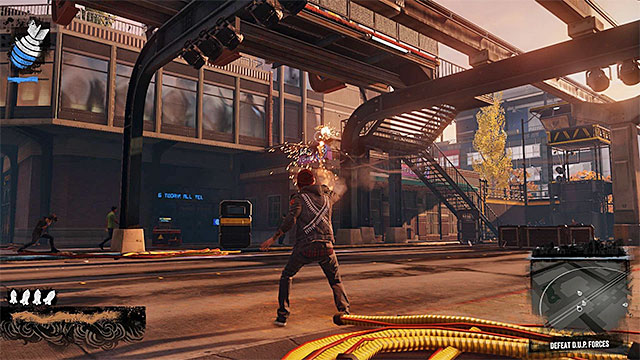 Get rid of snipers as soon as possible
The fight to take over Paramount district (District Showdown) will be possible only after D.U.P. forces control less than 30% of a district. Go to the place marked with a phone icon (large billboard on the rooftop) and make a call.
After the battle begins watch out for elite soldiers with supernatural powers. But this is not the only threat because there are also snipers here - you should eliminate them as soon as possible. Keep fighting until the base is secured.
Rewards for taking over Paramount to:
Below is a summary of selected additional activities in Georgetown district.
 Enemy base
1) Mobile Command Centre -D.U.P. base is located in the northern part of district and this is multilevel parking building occupied by enemy soldiers. You can get there in many ways - try to bounce from one of adjacent buildings, fly there, climb up to the top or just start at the ground level and slowly walk up. Use main parking ramps or side staircase to move between levels.
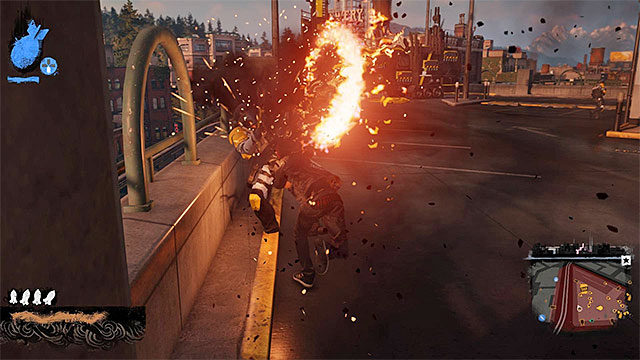 It is very dangerous on the upper parking level
Command centre is located on the top level of the parking and unfortunately it is heavily guarded - you'll encounter here few elite enemies. You can try to lure them one by one to lower levels or attack them from a distance locating yourself on rooftops of nearby buildings. The most impressive way to eliminate them is to use one of most powerful attacks, Orbital Drop for example. Such attacks are very effective because parking is not large and enemies on the top level are standing close to each other.
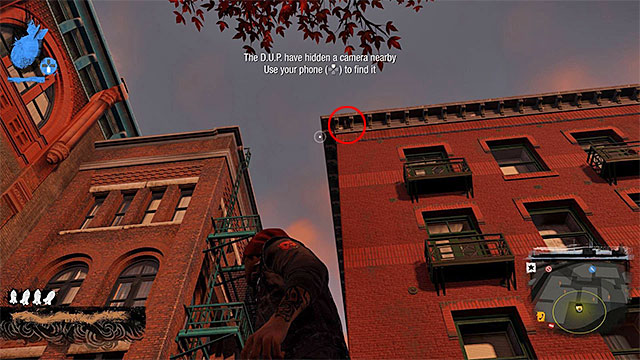
2) Hidden Camera - The camera you're looking for is located in the place shown on the above screen.
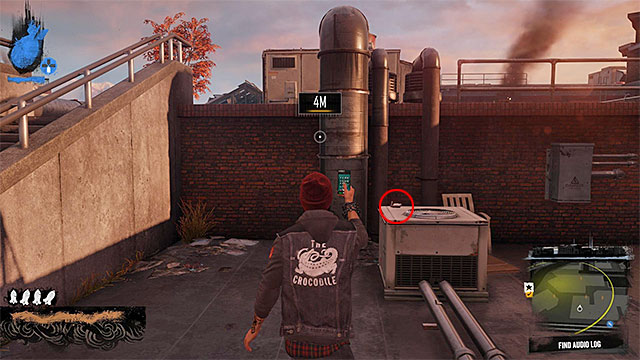
3) Audio Log - You have to get to one of most distant rooftops. Hard disk is located in the place shown on the above screen.
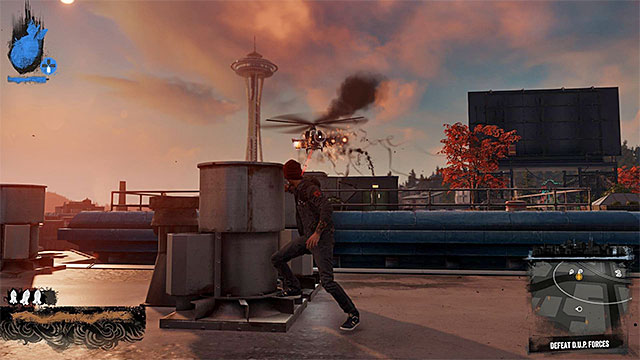 Attack only the helicopter in the beginning
The fight to take over Georgetown district (District Showdown) will be possible only after D.U.P. forces control less than 30% of a district. Go to the place marked with a phone icon (large billboard on the rooftop) and make a call.
When the battle begins focus ONLY on helicopter which appears in the area. Keep running to avoid missiles which can injure you badly. You can also get down to lower levels (running between buildings), so enemies in the helicopter will have problems to aim at you. As for attacking the helicopter I recommend using Cinder Missile but other distant attacks are also good. Try to destroy the machine before you have to regenerate your smoke, because you could be easily killed during absorbing smoke. When the helicopter is down you can eliminate D.U.P. soldiers on nearby rooftops, but that shouldn't be a problem.
Rewards for taking over Georgetown to:
Below is a summary of selected additional activities in Pioneer Square district.
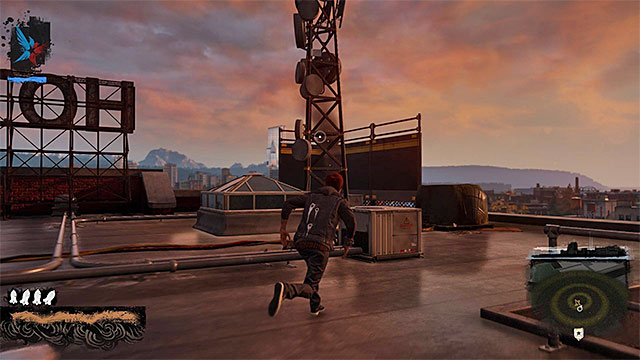 Try to destroy jammers so you can use your mini-map again
1) Mobile Command Centre - D.U.P. base is located in the northern part of the district and there are two jammers nearby - you should destroy them first. Good news is that each of them can be easily destroyed. Bad news is that you'll have to deal with many enemy soldiers with several of them possessing supernatural powers.
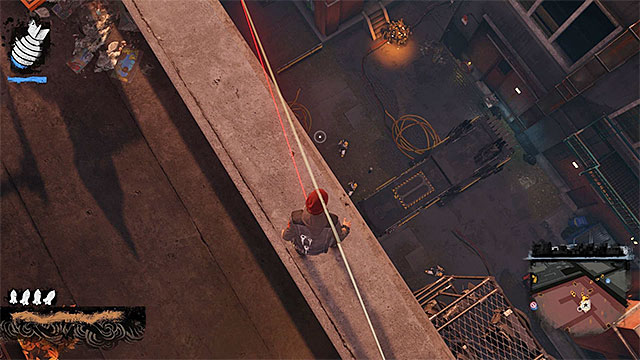 Command centre location
Mobile command centre is located in the alley between buildings and the very effective way to destroy its generators and eliminate nearby D.U.P. soldiers is to powerfully hit the ground (Comet Drop for example). Keep repeating this process until you succeed. This is not the only way to do your job here - you can also use distant attacks for example.
 The bridge between two parts of Seattle
2) Blast Shards - Some drones in Pioneer Square district can be found on rooftops, under the highway or on lanterns but you shouldn't have much trouble with them. The only problematic one is located near the bridge between both parts of Seattle. You can get there even if you don't have an access to the southern part of the Seattle yet. Just destroy the barricade and watchtowers (or just bypass them) and then look at one of containers to find the drone.
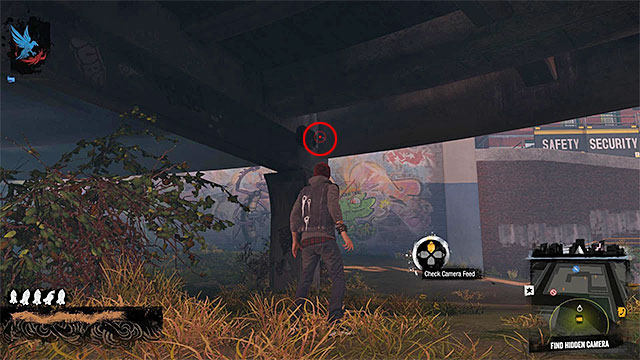
3) Hidden Camera - The camera you're looking for is located in the place shown on the above screen.
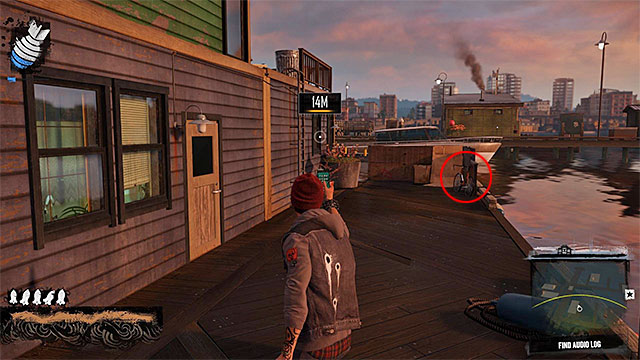
4) Audio Log - You have to reach one of wooden catwalks in marina. The hard disk is located next to the bike (screen above).
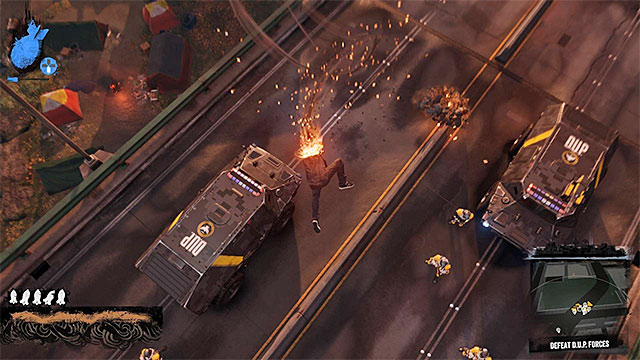 Attack enemies on the highway with rockets and ground hits
The fight to take over Pioneer Square district (District Showdown) will be possible only after D.U.P. forces control less than 30% of a district. Go to the place marked with a phone icon (large billboard on the rooftop) and make a call.
All enemy forces should appear on a highway - which is big advantage. They won't be able to reach Delsin, so initially you should attack them from a distance trying to blow up armored vehicles. After that move closer to the highway and use some attacks from the air like Comet Drop. Watch out for a single soldier with minigun - you have to weaken him down and them finish him after he creates a shield.
Rewards for taking over Pioneer Square are:
Below is a summary of selected additional activities in Belltown district.
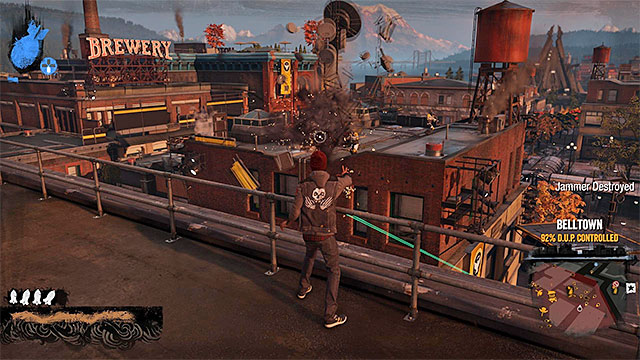 Destroy jammers
1) Mobile Command Centre - D.U.P. base is located in the north-eastern part of the district and is surrounded by three jammers. You should destroy them first but you have to watch out because there are many enemies (also with powers) who occupy rooftops of nearby buildings. I recommend using ventilation shafts to get to jammers, so it will be harder to take you down.
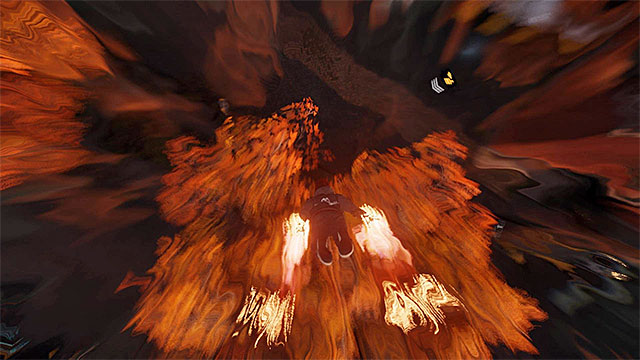 Orbital Drop is one method to quickly clear the yard
Once you destroy all jammers, focus your attention in mobile command centre. It is located on a small yard between buildings so you'll have to use some kind of powerful attack from the air. Watch out for enemies with powers, as well as standard soldiers and automatic guns (it would be best to switch them off - press touchpad once you get behind them).
 Climb up the skyscraper rooftop
2) Blast Shards - In Belltown district you can find few hidden drones. One of them is located on the rooftop of a skyscraper. Since the game doesn't allow you to use ventilation shafts to get there, you'll have to climb it up.
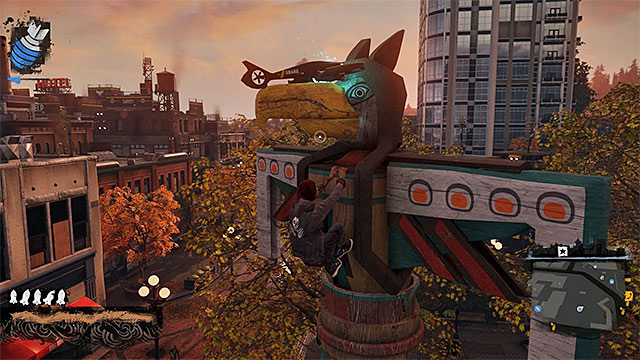 Climb up the totem
Two other drones need more advanced climbing - first one is located on the top of a large totem and second one can be found on the neon adjacent to Super Car Wash.
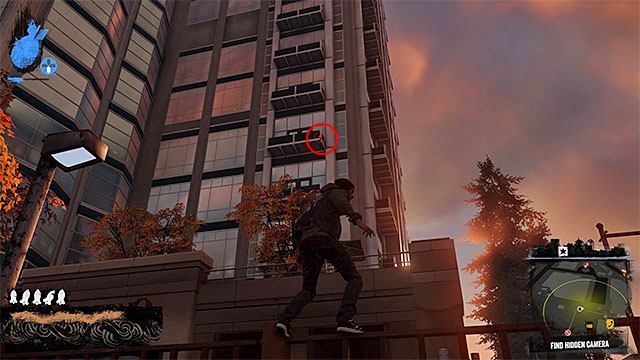
3) Hidden Camera - Camera you're looking for is located in the place shown on the above screen.
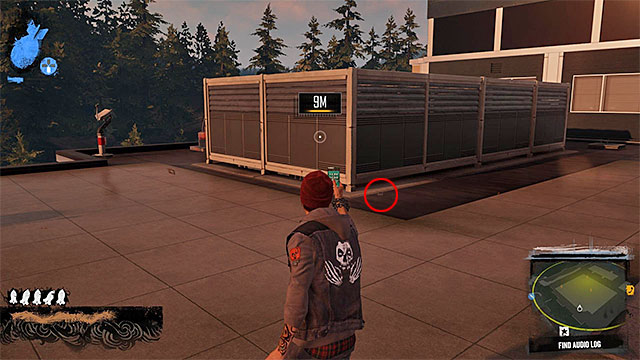
4) Audio Log - You have to get to the rooftop of a nearby building. Audio log is located on the ground, next to huge air conditioner (screen above).
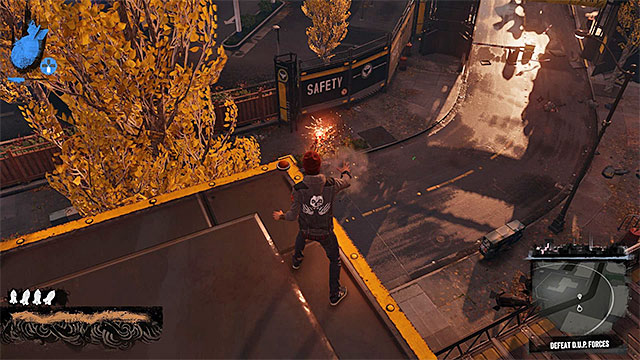 Try to attack the elite enemies one after the other
The fight to take over Belltown district (District Showdown) will be possible only after D.U.P. forces control less than 30% of a district. Go to the place marked with a phone icon (large billboard on the rooftop) and make a call.
I suggest starting this battle with eliminating weaker D.U.P. soldiers who are occupying two rooftops (one building is a carwash). Once you deal with them you'll be able to focus on main targets - two elite soldiers. Try to split those two and then attack them one after other because it will take some time to kill them. Do not forget about your stronger attack and withdraw when you get into troubles - simultaneous attack from two sides can quickly finish you.
Rewards for taking over Belltown district are:
Below there is a summary of selected extra activities in Lantern District, specifically those, which may prove a bit problematic.
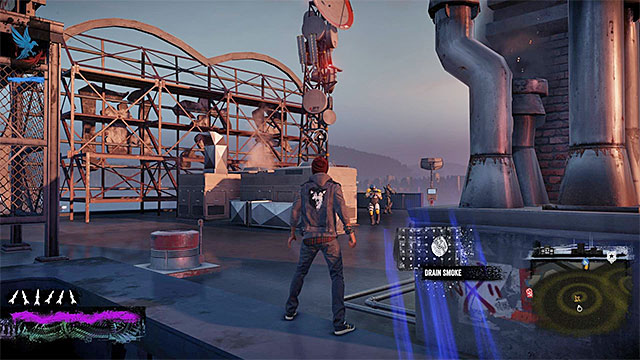 Destroy five Jammers
1) Mobile Command Center - There are 5 Jammers in the Lantern District and I strongly recommend you take care of them immediately. Due to the fact that all the Jammers can be found on building roofs (the tall ones'), it is a good idea to use Neon power, so you could quickly run up the wall to the top. Of course, watch out for the enemies, who guard almost every Jammer, particularly on those endowed with supernatural powers.
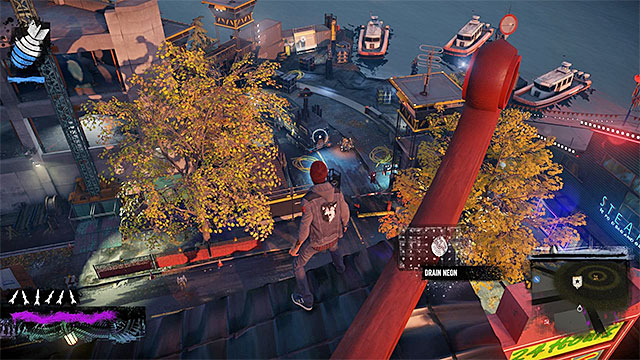 Sneak peek at the enemy base
D.U.P. headquarters are located in the north-east corner of the district, near the bridge between the two parts of the city. While attacking the area where the mobile command center is located, watch out for the Auto-Turret set on one of the containers near the water, as well as for at least one elite soldier, whom you should preferably eliminate with ranged attacks or heavy blasts in the ground.
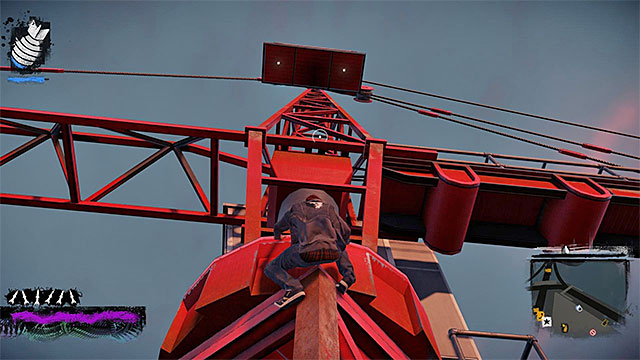 You need to get to the top of the crane
2) Blast Shards - Definitely the best hidden collectible is the tracker drone located on the top of the red crane. First, use the Light Speed ??power (Neon category) to run up the metal construction of the crane. Unfortunately, in the final part of the climb you will have to climb the old fashion way by clutching to interactive edges.
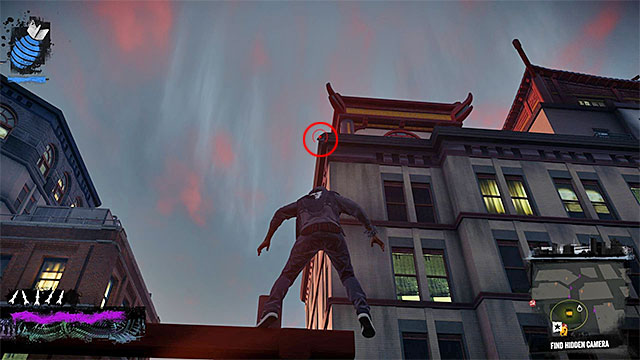
3) Hidden Camera 1 - Go to the starting point of this activity, located in the western part of the Lantern District. The camera you seek is in the place shown in the above screenshot.
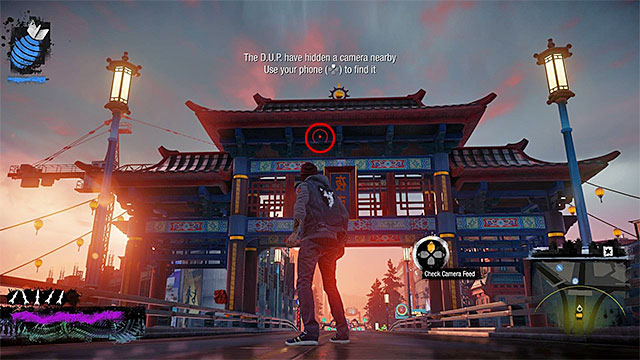
4) Hidden Camera 2 - Go to the starting point of this activity, located in the northern part of the Lantern District. The camera you seek is in the place shown in the above screenshot.
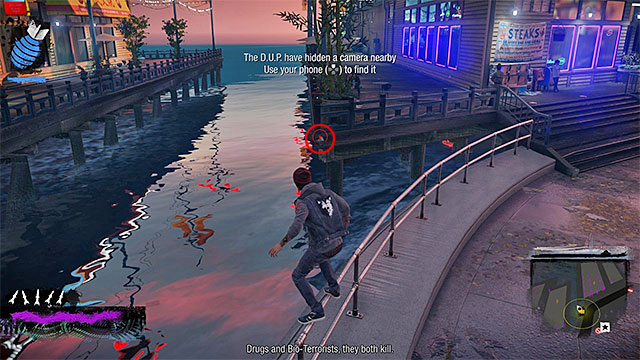
5) Hidden Camera 3 - Go to the starting point of this activity, located in the eastern part of the Lantern District. The camera you seek is in the place shown in the above screenshot.
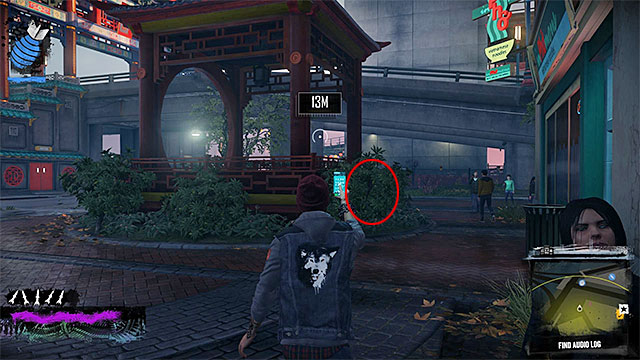
6) Audio Log - Once you start searching for the audio log, you need to get to the gazebos shown in the above screenshot. The hard disc is hidden in the grass.
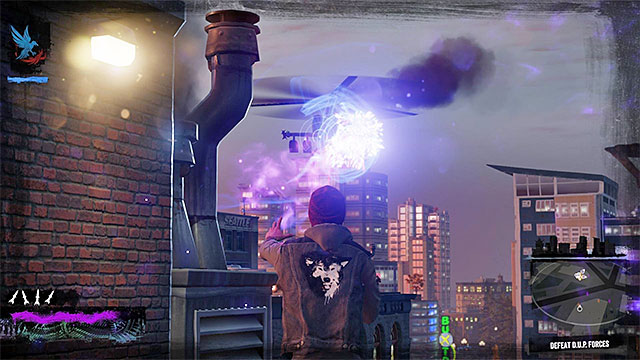 Taking the helicopter down is of the highest priority
Starting the fight over control of the Lantern District (District Showdown) will become possible only after lowering D.U.P. control indicator to 30%. Head to the place marked on the map with a phone icon (large billboard on the roof) and make a call.
Shortly after you start the battle over the district in question, you should notice an enemy helicopter heading towards Delsin. Smoke category will prove very useful for taking down the enemy flying machine, since Cinder Missile attack (R1) from this category does not require prior charging. Switching to smoke is not absolutely required, and if you started with Neon category, you can stay with that (in this case, I recommend to often use close aiming in slow motion mode). In addition to the helicopter, you also have to get rid of the enemies occupying one of the most remote rooftops, and it would be good to approach them rather quickly, so they did not shoot at you any longer.
Rewards for taking control over Lantern District:
Below there is a summary of selected extra activities in Waterfront, specifically those, which may prove a bit problematic.
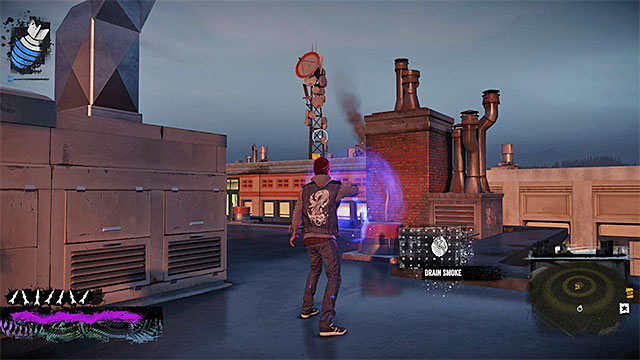 The Jammers can be destroyed e.g. with ranged attacks
1) Mobile Command Center - There are two Jammers in Waterfront district and just as in the case of other city districts it would be good to locate and destroy them before taking actions against mobile command center. Of course I advise you to be careful, as the roofs of buildings where Jammers are will be guarded by enemies with supernatural powers (you can avoid the threat by destroying the turrets over a large distance).
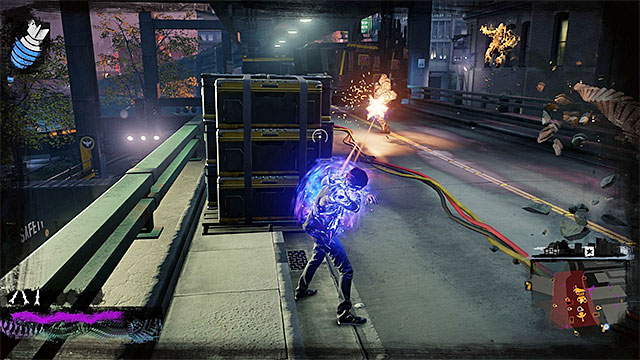 There is, among others, an elite soldier with a minigun in that area
As for the mobile command center, it is located in the D.U.P. headquarters in the northern part of the district (a small harbor). Here, you need to take some precautions, for there is an elite soldier with a minigun in the area, as well as a couple of Auto-Turrets. I suggest you first jump on the highway extending over the base and shoot at the elite enemy and other targets from that place. As for the towers, jumping down at the lower level in the right place you will give you a convenient position behind them, so you can easily get close to the Turrets and sabotage them. Proceed to destroying the mobile command center only after thoroughly clearing the area.
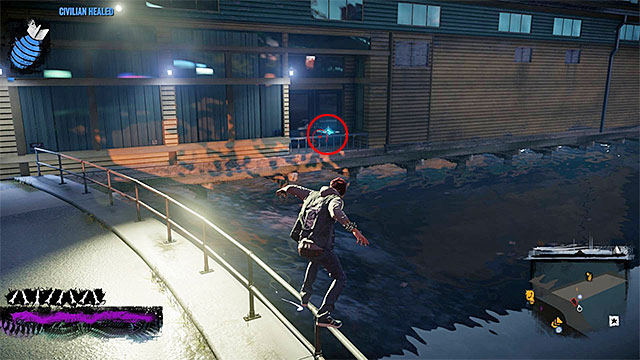 The drone is on the balcony over the water
2) Blast Shards - One of the hardest accessible tracker drones is on a small balcony near the enemy base at the docks (the northern part of the district), and in order to safely reach that you need to use floating ability after bouncing from the railings. If you are currently using Smoke category, Smoke Dash ability might be useful here too (Circle on the pad).
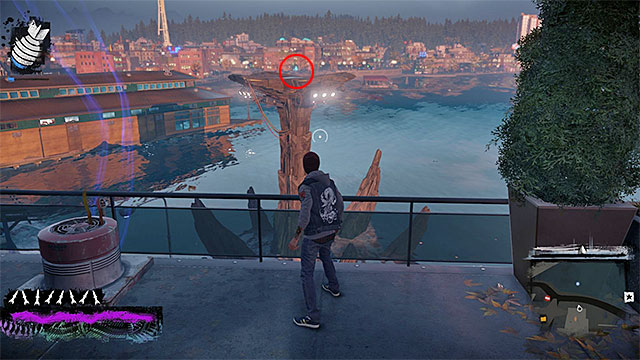
Another shard that is difficult to obtain is located on the platform above the water, as shown in the picture above. It is located in the north-western part of the Waterfront district. Start on a shelf, south of its destination. You can bounce up from the shelf (Neon category) and glide directly towards the platform with the collectible or alternatively keep using floating and Smoke Dash (Smoke category) interchangeably.
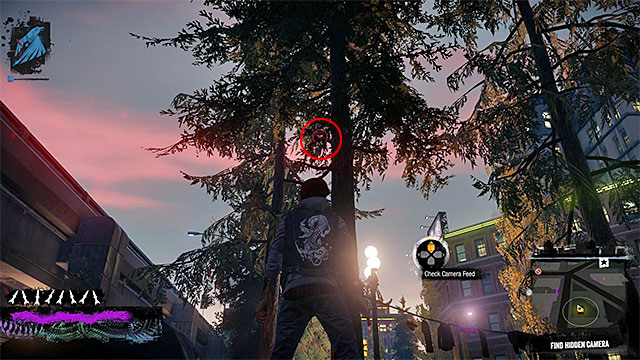
3) Hidden Camera - The camera you seek is in the place shown in the above screenshot.
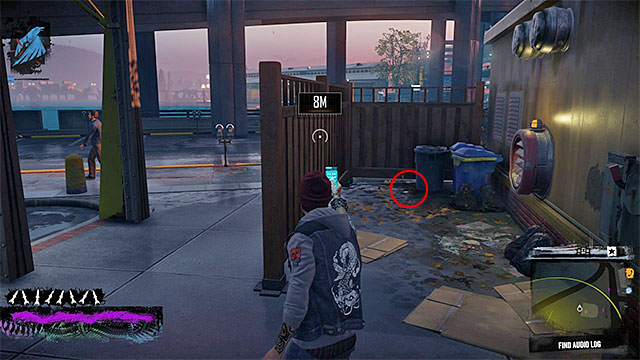
4) Audio Log - Once you start searching for the audio log, you need to examine a small alley, where you will find litter bins (picture above).
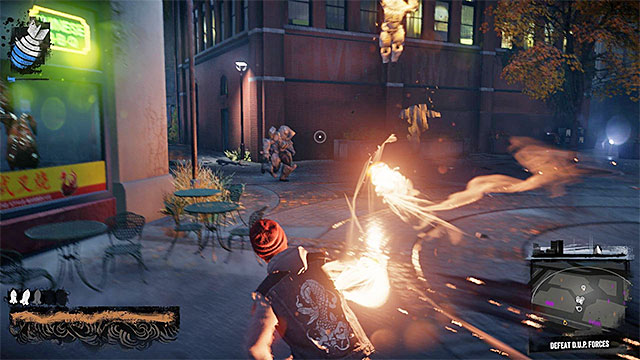 Use the strongest attacks and regularly refill energy reserves
Starting the fight over control of Waterfront district (District Showdown) will become possible only after lowering D.U.P. control indicator to 30%. Head to the place marked on the map with a phone icon (large billboard on the roof) and make a call.
During the battle over gaining full control of the district in question, first of all you will have to defeat a group of heavily armored opponents, naturally, equipped with supernatural powers. Try to use the strongest attacks, so as to gradually reduce enemies' energy. A good idea is to attack the enemy soldiers one by one. Moreover, you should make every effort to avoid direct contact with them (they can inflict serious damage in melee combat). Naturally, do not forget to regularly refill your energy (chimneys or neon lamps, depending on the current power category).
Rewards for taking control over Waterfront :
Below there is a summary of selected extra activities in Uptown, specifically those, which may prove a bit problematic.
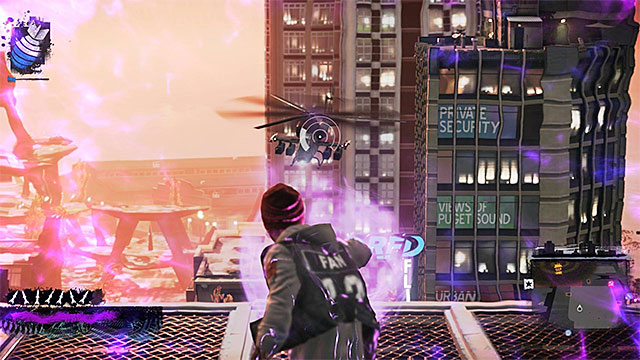 Fire powerful missiles in at the helicopters and avoid their rocket fire
1) Mobile Command Centers - Uptown district is the only one where there are two mobile command centers. Moreover, there are three Jammers around here and just as in case of other districts it is good to destroy them from a distance. Getting closer to a mobile command center will certainly draw attention of enemy forces. Unfortunately, you need to remember that in both cases a combat helicopter, among other things, will head your way. Remember to use powerful ranged attack (R1 button) to fire missiles at helicopters, while avoiding their rocket fire at the same time.
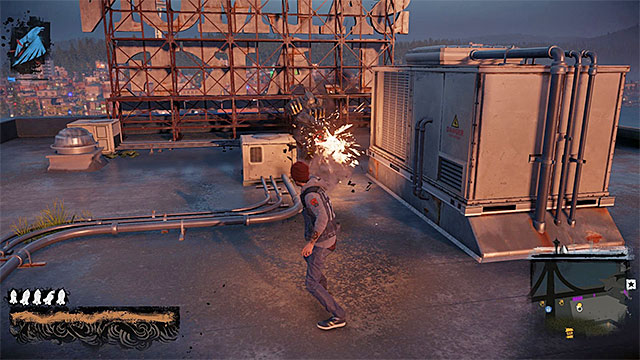 One of the heavily armored soldiers
In addition to the helicopter, you must also be careful of, among others, heavily armored opponents, who have some other special abilities too. As much as it is possible, try to keep the enemies at bay (at close quarters they can quickly inflict heavy damage to Delsin) using strong attacks to gradually reduce their health. It is worth mentioning here that there is a chance of encountering enemy snipers in the area as well as Auto-Turrets - as always it is best to sabotage those.

The two enemy bases have completely different structures from those that you know from other districts in Seattle. Namely, you need to get to the top of a round walker (Light Speed ability ??from Neon category is very helpful here) and start destroying generators mounted in the side supports (such as in the picture above). Once the main core is revealed, jump to the central platform and perform a sabotage in a well-known way.
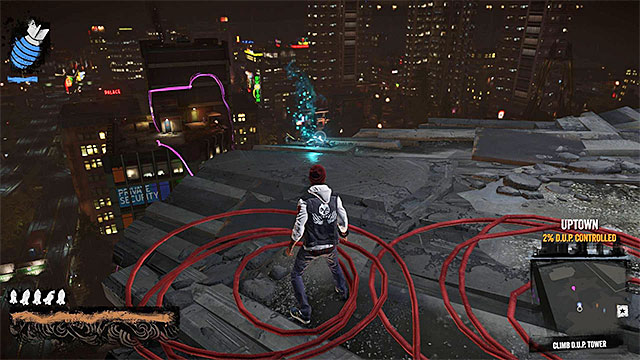
2) Blast Shards - You are able to reach one of the shards in the Uptown district only after you have made sufficient progress in the storyline, because it is located on a ledge high above, which is inaccessible at first (the drone is at the border between the Uptown and Waterfront districts). The earliest that you can obtain it, is during mission 17a (Expose Augustine) or the 17b main mission (Kill Augustine), i.e. during your path to the top of the D.U.P. skyscraper (the above screenshot). If you have missed this collectible, you can return to the region of the skyscraper, after you complete the game's storyline, and repeat the initial part of the climbing.
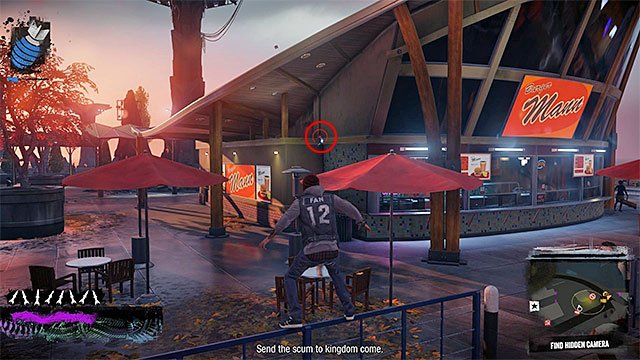
3) Hidden Camera - The camera you seek is in the place shown in the above screenshot.
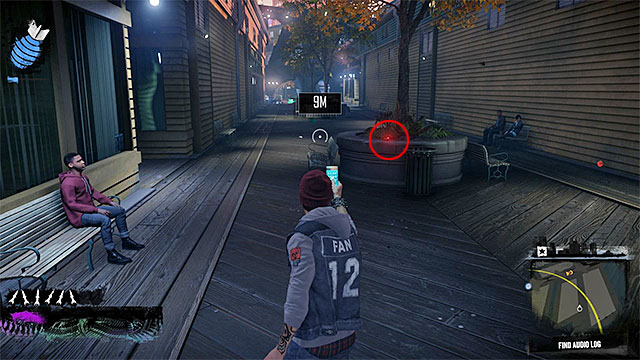
4) Audio Log - Start looking for the audio log in the western part of Uptown district, and it may happen that the marker appears on the world map only when you get close to the area. Once you start searching for the audio log, you need to examine one of the alleys between buildings (picture above).
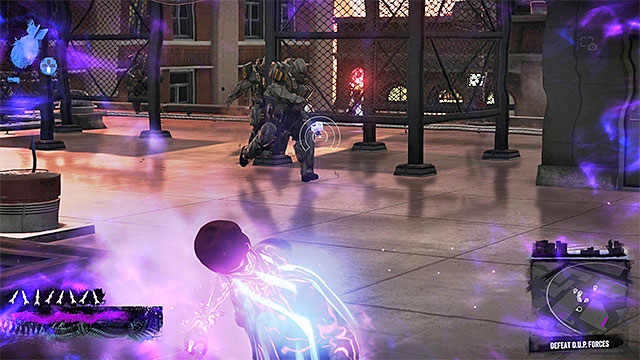 Keep a safe distance and perform strong attacks
Starting the fight over control of Uptown district (District Showdown) will become possible only after lowering D.U.P. control indicator to 30%. Head to the place marked on the map with a phone icon (large billboard on the roof) and make a call.
During the battle for control over the district in question, once again you will have to face mainly heavily armored soldiers, whom you have probably fought while attacking the two mobile command centers. As a reminder, it is advisable to keep a safe distance and rely on strong ranged attacks. There is also a group of standard D.U.P. soldiers to eliminate, but they should not cause you too much trouble.
Rewards for taking control over Uptown :
Below there is a summary of selected extra activities in Denny Park, specifically those, which may prove a bit problematic.
 Sneak peek at the enemy base
1) Mobile Command Center - Denny Park is a very small district, so you should not have much trouble finding the enemy base (it looks a bit different from the typical military construction which you encountered e.g. in the northern part of Seattle) or the Jammer located on the top of that, which should preferably be destroyed with a powerful missile fired from a distance.
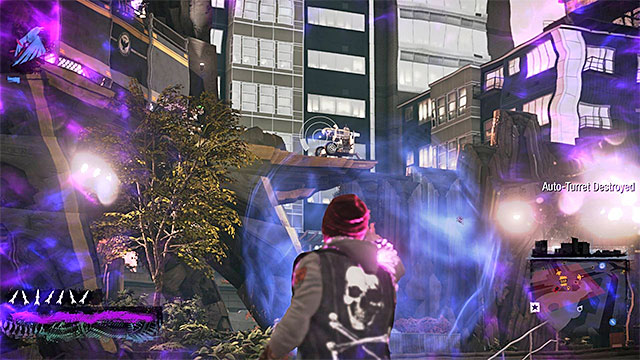 It is good to destroy Auto-Turrets from a safe distance
After destroying the tower with a Turret, attack enemy forces. As usually in this type of situation, pay most attention to eliminating the elite opponents, while avoiding their powerful attacks. There are also several Auto-Turrets on the upper level of the base - it would be really nice to blow them up with distance attacks, so you did not have to worry about them later during the fight. You need to get to one of the higher levels of the central structure, and the easiest way to do that is by using Light Speed ??dash (Neon category). Start looking for generators mounted in the side supports of the local structure and destroy them, ultimately revealing the central core.
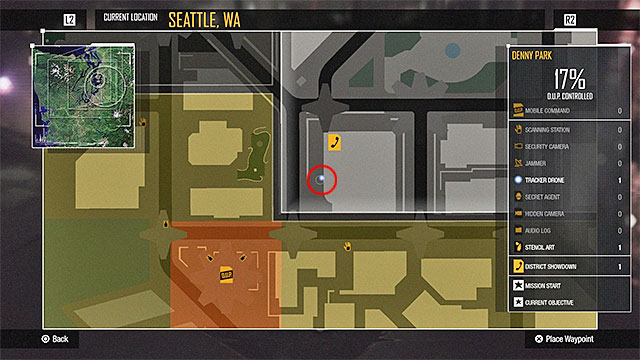
2) Blast Shards - Most of the shards are hidden on rooftops, but at this stage of the game you should already be acquainted with this. The only troublesome collectible is the one shown in the picture above, because the blue dot that stands for the location of the tracker drone may appear on the map with some delay (drone is attached to the neon billboard on Rexagon building, just by the roof of the skyscraper), namely after destroying one of the Jammers in neighboring Downtown district (the Jammer's range partly overlaps with ??Denny Park district).

3) Hidden Camera - The camera you seek is in the place shown in the above screenshot.
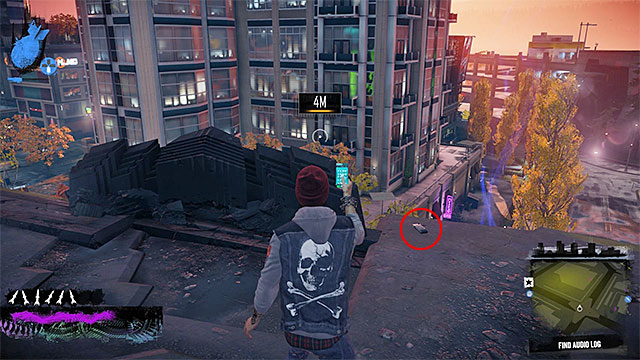
4) Audio Log - Once you start searching for the audio log, you need to get to the very top of the concrete structure standing by one of the crossroads. The hard disc lies in the place depicted in the screenshot.
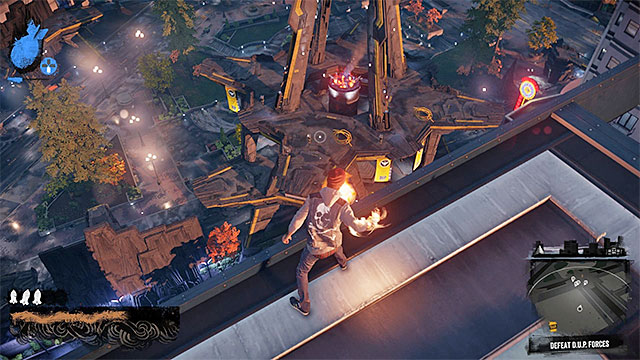 First, eliminate the enemies who are using the most powerful abilities
Starting the fight over control of Denny Park district (District Showdown) will become possible only after lowering D.U.P. control indicator to 30%. Head to the place marked on the map with a phone icon (large billboard on the roof) and make a call.
Battle of Denny Park district will not surprise you with anything unusual. There is a relatively small group of enemies to eliminate, however there are also elite troops among the D.U.P. forces, so keep attacking them from a distance and use the most powerful abilities. Also, do not forget that you should avoid sniper fire and frequently change your position, in order not to let the enemies get close.
Rewards for taking control over Denny Park :
Below there is a summary of selected extra activities in Downtown, specifically those, which may prove a bit problematic.
 The Jammers are not well guarded
1) Mobile Command Center - There are three Jammers in Downtown district, although they are remote from the main base in this location. Each Jammer is, of course, located on a rooftop, and the easiest way is to destroy them is by attacking from a distance. But it is not really required, the more that they are defended rather poorly.
 Try to avoid fire from two helicopters at the same time
As for the base, getting close to the mobile command center will cause as many as two enemy helicopters to take off. Obviously, you should use the best powers available (those under R1) and stand in such places (e.g. on low roofs or covered balconies) so that at any given moment you were attacked only by one chopper. Shoot down the helicopters one after the other, and do not forget to refill heavy ammo reserves which is very useful to fall through with that plan. After securing the area well enough, get to the upper level of the central structure in the base, destroy the generators mounted in its side supports and then sabotage the main core.
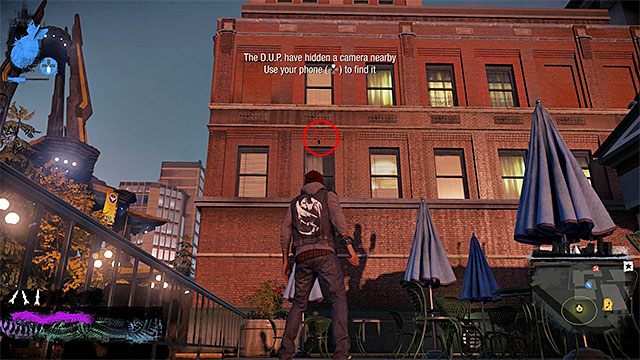
2) Hidden Camera - The camera you seek is in the place shown in the above screenshot.
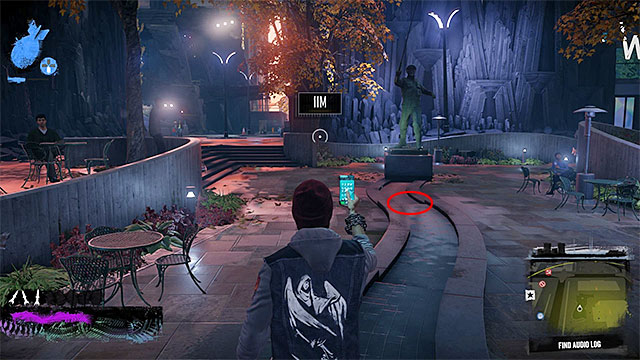
3) Audio Log - Once you start searching for the audio log, you need to examine the nearby square with a fish statue. The hard disc is lying on the ground, as shown in the screenshot.
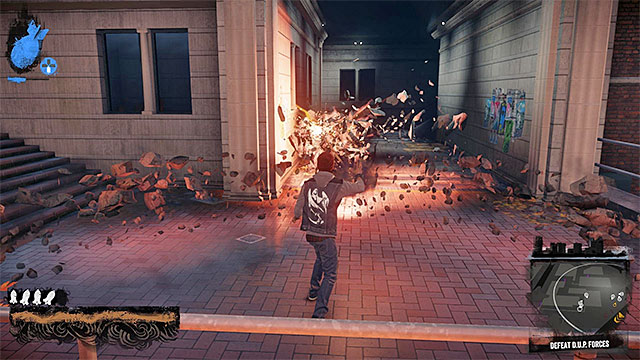 Be careful of the elite enemies and do not leave them for later
Starting the fight over control of Downtown district (District Showdown) will become possible only after lowering D.U.P. control indicator to 30%. Head to the place marked on the map with a phone icon (large billboard on the roof) and make a call.
Once the main battle starts, as always, try to locate elite enemies as soon as possible and then attack them. Depending on your preference, you can keep attacking from a safe distance or close the gap and force opponents to act defensively. Leave the standard D.U.P. soldiers at the end - as always, they are not difficult to defeat.
Rewards for taking control over Denny Park :
Below there is a summary of selected extra activities in Rainier, specifically those, which may prove a bit problematic.
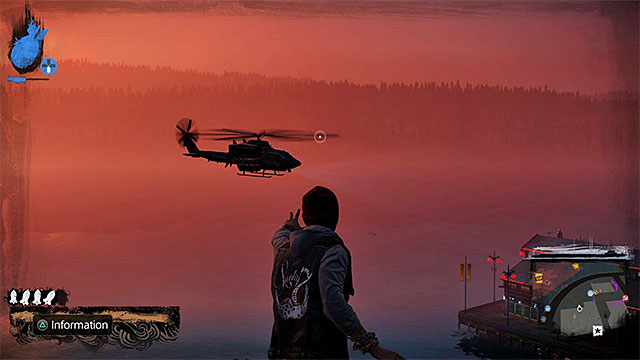 The enemy base is guarded by two choppers, among other forces
1) Mobile Command Center - Quite exceptionally, there are no Jammers in Rainier district, but what may surprise you even more, is the fact that the enemy base is not on dry land. It was raised on islands located in the eastern part of the district. Once you get close to it, you have to be ready to shoot down two enemy helicopters that will take off with one purpose only - kill Delsin. Try to destroy enemy flying machines one after another, at any given time fighting with only one of them and avoiding powerful rocket fire from the helicopters.
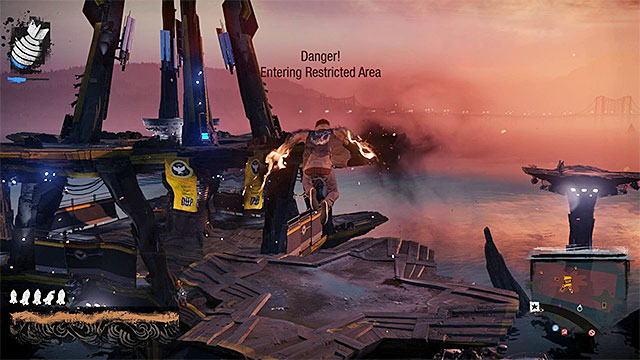 You should start moving from platform to platform only after you have eliminated most of the snipers
Shooting down the two helicopters is not enough, because while trying to approach the mobile command center you will also be disturbed by snipers positioned on smaller islands scattered around the central and largest one. Try to deal with these opponents using ranged attacks, and only after you eliminate most of the snipers, proceed with your plan of reaching the mobile command center. Depending on your preference, either use floating ability to get to one of the smaller platforms or, bounce off from the roof of one of the nearby buildings and glide directly toward the main platform. Of course, try not to fall into the water during the crossing, because once you return to dry land you will have to start the whole process again.
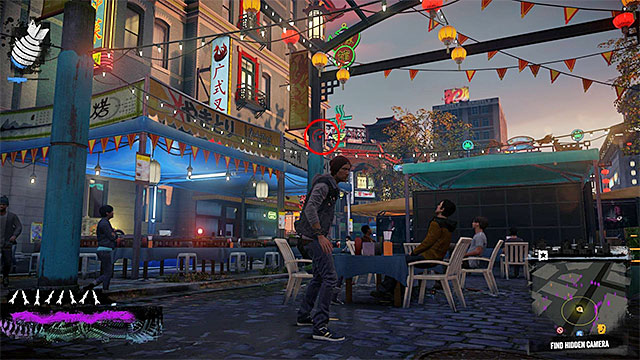
2) Hidden Camera - The camera you seek is in the place shown in the above screenshot.
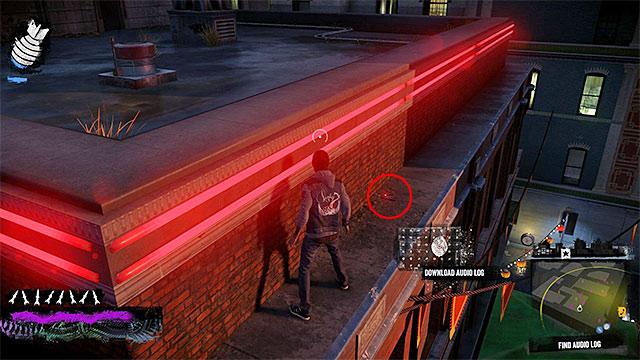
3) Audio Log - Once you start searching for the audio log, you need to get on the roof of one of the nearby buildings and then jump down to the cornice, as shown in the picture above.
 The soldier with a minigun is the greatest threat in this battle
Starting the fight over control of Rainier district (District Showdown) will become possible only after lowering D.U.P. control indicator to 30%. Head to the place marked on the map with a phone icon (large billboard on the roof) and make a call.
It would be good to start this battle by blowing up two armored vehicles that are parked on the street under the billboard as soon as possible, because this way with a little luck you will get rid of several standard soldiers before they get away from the vehicles. When it comes to the most serious threats, first and foremost, watch for the elite soldier with a minigun. Try to attack him from a distance and as much as it is possible avoid direct confrontation with this character (do not forget that you must finish off the enemy after he loses enough hit points).
Rewards for taking control over Rainier:
In inFamous: Second Son there is a total of 48 Trophies that you can obtain. They have been listed below and, further in the text, you will find information on the circumstances of unlocking the individual trophies.
Type of the cup: brown
Way to unlock: You need to use the Comet Drop on three coughing opponents.
COMMENTARY: To induce incessant cough in, at least, three enemies, you need to use the Sulphur Bomb (L1) from the Smoke category, best by throwing it from a ledge above. The only thing that you need to do is jump off the ledge and activate Comet Drop (the Square) ad slam against the ground in the correct spot. Note - since a single attack needs to wound the three enemies, it would be best if you upgraded the Sulphur Bomb with Giant Sulphur Bomb.
Type of the cup: silver
Way to unlock: You need to pain all of the Stencil Art in Seattle.
COMMENTARY: It is worth reminding that, destroying the mobile command centers reveals the spots where you perform the graffiti. Apart from that, you need to make sure the that you paint those of the examples of graffiti, which are connected with the karmic path that you have chosen.
Type of the cup: brown
Way to unlock: You need to take the decision connected with bad karma (the red option) while playing through the game's prologue.
COMMENTARY: -
Type of the cup: brown
Way to unlock: You need to capture a half of Seattle's districts.
COMMENTARY: Information on how to weaken the influence of the D.U.P., in the individual districts, and on how to capture them, can be found in the chapter entitled the City.
Type of the cup: platinum
Way to unlock: You need to obtain all of the remaining trophies.
COMMENTARY: -
Type of the cup: brown
Way to unlock: You need to heal a total of 10 wounded civilians .
COMMENTARY: The best way to heal the civilians is while following the path of the hero (good karma).
Type of the cup: brown
Way to unlock: You need to complete mission 17b (Kill Augustine), i.e. the one connected with Bad Karma.
COMMENTARY: -
Type of the cup: brown
Way to unlock: You need to seize control over one of Seattle's districts.
COMMENTARY: Information on how to weaken the influence of the D.U.P., in the individual districts, and on how to capture them, can be found in the chapter entitled The City.
Type of the cup: brown
Way to unlock: You need to defeat an opponent by using three categories of the powers.
COMMENTARY: It is a good idea to single out a stronger opponent, for this trophy, as well as a location where you can easily switch between the individual power categories (smoke, neon, video and concrete). Start attacking the hostile character and make sure that any attack from a given category (best the weakest one) connects , at least, once.
Type of the cup: brown
Way to unlock: You need to eliminate ten groups of the Akurans (Sharks).
COMMENTARY: The best is to decide to obtain this trophy, while completing the game as the villain (bad karma).
Type of the cup: brown
Way to unlock: You need to drive the D.U.P. completely, from one of the Seattle districts.
COMMENTARY: Information on how to weaken the influence of the D.U.P., in the individual districts, and on how to capture them, can be found in the chapter entitled The City.
Type of the cup: silver
Way to unlock: You need to drive away the D.U.P. completely, from one of the Seattle districts.
COMMENTARY: Information on how to weaken the influence of the D.U.P., in the individual districts, and on how to capture them, can be found in the chapter entitled The City.
Type of the cup: brown
Way to unlock: You need to take the decision connected with good karma (the blue option) during the fifteenth mission of the game (Quid pro Quo).
COMMENTARY: -
Type of the cup: brown
Way to unlock: You need to use the karmic force attack to defeat, exactly, one enemy.
COMMENTARY: As the karmic force attack, you should understand those of the powers that you start with the down button on the D-pad, after the karmic bar has is full, e.g. Orbital Drop in the case of the Smoke category. After you start any fight, stop attacking in any way, at the moment at which there will remain only one opponent in the battlefield (check the minimap to make sure) and initiate the power.
Type of the cup: brown
Way to unlock: You need to locate and destroy a half of the total of the Security Cameras.
COMMENTARY: The game informs you of cameras since the very beginning and you can destroy them with any ranged attacks that you want.
Type of the cup: silver
Way to unlock: You need to complete the game at the Expert difficulty level.
COMMENTARY: The best idea is to choose this difficulty level, while completing the game for the second time (a new karmic path), thanks to which you will realize about the mechanics of the game and realize the threats that await the protagonist.
Type of the cup: silver
Way to unlock: You need to reach the final, fifth, villain level (bad karma).
COMMENTARY: Remember to take those of the decisions that are connected with the acquisition of bad karma and to participate often in the small events that influence your karma levels (attacking of the protesters, killing of the street musicians, etc.).
Type of the cup: brown
Way to unlock: You need to be airborne for, at least, 45 seconds.
COMMENTARY: You can use either the Video or the Concrete category (it unlocks after you have won the final battle of the game). As for the Video category, use the Airwave to your advantage, in order to stay up in the air for longer. In the case of the Concrete category, use the Concrete Thrusters and the powers that are connected with it. You can find more information, on the abovementioned powers, in the game (the tree of powers) and the chapter entitled Delsin's Powers.
Type of the cup: brown
Way to unlock: You need to attack a total of ten people wearing billboards (the walking billboards).
COMMENTARY: It is best to do that while completing the game as the villain (bad karma).
Type of the cup: silver
Way to unlock: You need to find all of the Blast Shards.
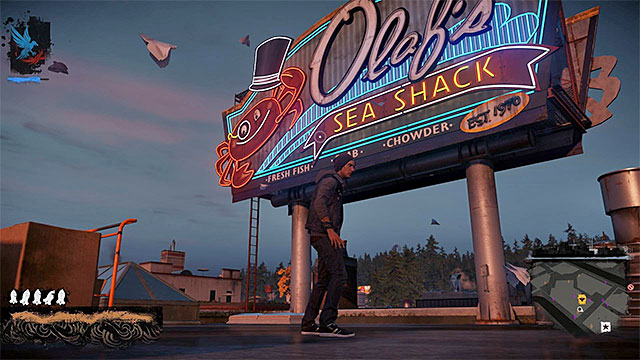
COMMENTARY: It is worth reminding that, destroying of the mobile command centers reveals the whereabouts of the shards on the map of Seattle. reaching one of the shards in the Uptown district (the above screenshot) is possible only during missions 17a or 17b (or after you complete either). You can find more information on that, in the chapter entitled The City.
Type of the cup: brown
Way to unlock: You need to take the decision connected with good karma (the blue option), during the eleventh mission of the game (Heaven's Hellfire).
COMMENTARY: -
Type of the cup: silver
Way to unlock: You need to seize control over all of the Seattle districts.
COMMENTARY: Information on how to weaken the influence of the D.U.P., in the individual districts, and on how to capture them, can be found in the chapter entitled The City.
Type of the cup: silver
Way to unlock: You need to find, and destroy, all of the Security Cameras.
COMMENTARY: The game informs you of cameras since the very beginning and you can destroy them with any ranged attacks that you want.
Type of the cup: brown
Way to unlock: You need to hit three weak spots on the enemies' bodies, with neon projectiles, within six seconds.
COMMENTARY: You can attempt to obtain this trophy, only after you have unlocked the Neon category and, additionally, it is also a good idea to buy all of the abilities connected with Laser Insight (L2), especially the ones that ensure slowing down of time. Find a group of, at least, three opponents and do your bidding. Depending on your preferences, you can hit either the blue or the red spots on the bodies of the enemies.
Type of the cup: brown
Way to unlock: You need to find a half of all the available Blast Shards.
COMMENTARY: It is worth reminding that destroying of the mobile command centers reveals the whereabouts of the shards, on the map of Seattle.
Type of the cup: brown
Way to unlock: You need to defeat ten drug traffickers.
COMMENTARY: It is best to attack the drug dealers, if you decide to play the game as the hero (good karma). Remember that you should always destroy the container, with the drugs inside, afterwards.
Type of the cup: brown
Way to unlock: You need to fly through two venting shafts, without touching to the ground and use the Comet Drop, afterwards, to attack an enemy.
COMMENTARY: Make sure that you have selected the Smoke power and ;locate any building with two venting shafts, close to each other, e.g. one on the ground floor and the other on the balcony above. After you fly through both of the shafts (remember that you cannot touch to the ground!), initiate the Comet Drop (the Square) and make sure that you slam against the ground, in the spot where there is an opponent standing. The best place to obtain this trophy is near one of the D.U.P., HQs, thanks to which you will be sure that there are many enemies around.
Type of the cup: brown
Way to unlock: You need to take the decision connected with bad karma (the red option) while completing the eleventh mission (Heaven's Hellfire).
COMMENTARY: -
Type of the cup: gold
Way to unlock: You need to complete the game as the hero (good karma).
COMMENTARY: You need to remember that you select the appropriate playing style, at the very beginning of the game (the key karmic choices and the small decisions connected with karma).
Type of the cup: brown
Way to unlock: You need to defeat a total of ten opponents, by destroying ammo boxes.
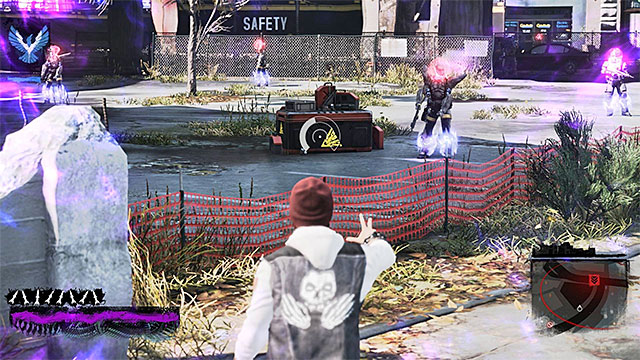
COMMENTARY: You can find ammo boxes, among others, while fighting at the D.U.P. bases and you can tell them by the red color (an example box in the above screenshot). Always wait until there appears, at least, one opponent at the box and explode it only then, with any ranged attack.
Type of the cup: brown
Way to unlock: You need to take the decision connected with good karma (the blue option) during the game's prologue.
COMMENTARY: -
Type of the cup: silver
Way to unlock: You need to reach the highest, fifth, hero level (good karma).
COMMENTARY: remember that you need to take the main decisions that provide you with good karma, and that you often take part in the small events that influence your karmic level (healing of civilians, rescuing of the imprisoned, etc.).
Type of the cup: silver
Way to unlock: You need to find and collect all of the Audio Logs.
COMMENTARY: It is worth reminding that, destroying the mobile command centers reveals the spots where you can find the Audio Logs on the map of Seattle.
Type of the cup: brown
Way to unlock: You need to drive the D.U.P. from a half of the total of Seattle's districts.
COMMENTARY: Information on how to weaken the influence of the D.U.P., in the individual districts, and on how to capture them, can be found in the chapter entitled The City.
Type of the cup: silver
Way to unlock: You need to find and eliminate all of the Secret Agents.
COMMENTARY: It is worth reminding that, destroying the mobile command centers reveals the spots where you can find the Secret Agents on the map of Seattle.
Type of the cup: gold
Way to unlock: You need to complete the game as the villain (bad karma).
COMMENTARY: Remember that you need to choose the correct playing style at the very beginning of the game (the key karmic choices and the small decisions connected with receiving karma).
Type of the cup: brown
Way to unlock: You need to perform the Comet Drop, from the height of, at least, 170 meters.
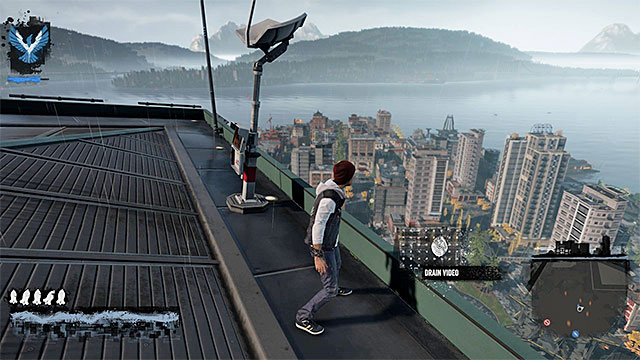
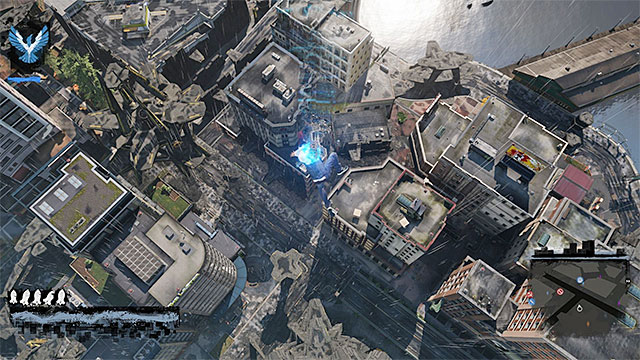
COMMENTARY: You get the opportunity to obtain this trophy, only after you have completed the main storyline of the game. You need to return to the rooftop of the D.U.P. skyscraper, in the Uptown district, i.e. the building where you fight the final showdown with Augustine. After you reach the rooftop (screenshot 1), make sure that you have selected the Video category and use the relay here to catapult. While in the air, perform two short flights (press and hold down the Circle) in order to fly away from the skyscraper. Then, hold down the Square to start the Comet Drop - screenshot 2).
Type of the cup: brown
Way to unlock: You need to complete mission 17a (Expose Augustine), i.e. the one connected with Good Karma.
COMMENTARY: -
Type of the cup: brown
Way to unlock: You need to rescue, a total of, ten other people with powers, who are attacked by the mob.
COMMENTARY: It is best to save the other people with powers, while completing the game as the hero (good karma). Remember that you do not need to kill, or stun, any of the hostile civilians, because they will start escaping after Delsin approaches the character that needs rescuing.
Type of the cup: silver
Way to unlock: You need to locate and destroy all of the Hidden Cameras.
COMMENTARY: It is worth reminding that, destroying the mobile command centers reveals the spots where you can find the Hidden Cameras on the map of Seattle.
Type of the cup: brown
Way to unlock: You need to attack, a total of, ten street performers (the people on the sidewalk with the guitar).
COMMENTARY: It is best to attack the street performers, while completing the game as the villain (bad karma).
Type of the cup: gold
Way to unlock: You need to interrupt a total of ten activist protest rallies, against bio-terrorists.
COMMENTARY: It is best to attack the participants of the rallies, while completing the game as the villain (bad karma).
Type of the cup: brown
Way to unlock: You need to finish off a total of ten dying enemies or civilians.
COMMENTARY: It is best to execute the wounded, while completing the game as the villain (bad karma).
Type of the cup: brown
Way to unlock: You need to take the decision connected with good karma (the blue option) during the fifth mission of the game (Go Fetch).
COMMENTARY: -
Type of the cup: brown
Way to unlock: You need to liberate, a total of, ten suspects kept in cages.
COMMENTARY: It is best to liberate the civilians, while completing the game as the hero (good karma).
Type of the cup: brown
Way to unlock: You need to take the decision connected with bad karma (the red option) during the fifteenth mission of the game (Quid pro Quo).
COMMENTARY: -
Type of the cup: brown
Way to unlock: You need to destroy five cars within five seconds.
COMMENTARY: It pays off to use one of the strong attacks, to obtain this trophy, which are launched with the R1 bumper (e.g. Cinder Missiles connected with Smoke). Find a place where the cars formed a traffic jam (in wait for the lights to change or, as a result of a road block) or a parking lot where there is the number of the cars that you need. Start firing the consecutive projectiles and make sure to ensure the appropriate number of these, still before you start.
Type of the cup: brown
Way to unlock: You need to take the decision connected with bad karma (the red option) during the fifth mission of the game (Go Fetch).
COMMENTARY: -
inFamous: Second Son doe not have the slightest problems, running smoothly, on PlayStation 4, thanks to which the animation does not tear, even during the largest of battles. It is worth adding the Sucker Punch studios are planning on the upgrade that adds the 30 fps option to the menu. The game requires to be fully installed on the console's hard drive, to run properly. What takes up additional space are the Cole's Legacy DLC and the inFamous Paper Trail optional missions.
Single player: Yes
offline co-op (split screen/hot seat): No
Co-op over the Internet: No
Multiplayer: No
 inFamous Paper Trail main page
inFamous Paper Trail is an extraordinary set of optional objectives that you can take on while playing the game for the first time or after its completion (having previously completed all the main missions). The distinguishing feature of this element of inFamous: Second Son is that these tasks are performed either in the game (short missions published weekly starting from the game release date) or on several websites related to the project. The benefit of getting involved into inFamous Paper Trail activities is that it gives you an opportunity to gain a lot of karma in the game, through which you can level-up in hero or villain trait more quickly.
The project's main website is http://infamouspapertrail.com/ - I suggest you start by visiting this site and reading frequently asked questions - http://infamouspapertrail.com/faq. You must log on to the website to join the adventure. You can create a new account or use your Facebook account. After you log in and type in basic personal data, you will be directed to the main page. Here it is worth to click on Link your account button. Depending on how you have logged in, either you will be asked for your PSN account data or these will be transferred automatically (if you have logged in using Facebook.)
The above map shows the entire city and provides information on all the important locations visited during subsequent missions of inFamous Paper Trail. It is noteworthy that the game allows you to return to where data is transferred from in such cases as e.g. when evidence transfer gets interrupted or when you fail to create a new profile in time on inFamous Paper Trail website. Starting points of side quests are marked on the in-game map with yellow.
Before you take on the first mission from inFamous Paper Trail, make sure that you have created an account at http://infamouspapertrail.com/ and that you have linked it with your PSN profile. The mission in question should be unlocked after completing the main mission 7a (Trash the Stash) or 7b (Fight Intolerants), that is just before heading to the south part of Seattle (Mission 8 - The Test). Look for the newly added yellow marker on the map and head there.
The starting point for missions from inFamous Paper Trail is the metal construction with two neon signs on its sides, as shown in the screenshot above. It is located in Pioneer Square district, specifically in the same place where Delsin first meets Fetch (which happens during the main mission 4). Go to the yellow marker and confirm your willingness to start the adventure, which will launch a cut-scene involving a mysterious "paper rabbit."
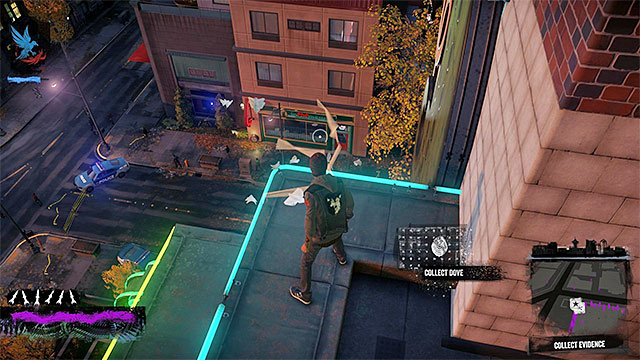 Follow the paper rabbit, using traces that it left to make navigation easier
The aforementioned person, who is endowed with supernatural powers, tries to escape. Start a pursuit, during which you should have Neon category active, so as to be able to use Light Speed ??ability and reach rooftops of adjacent buildings more easily. No need to hurry though, as the escapee is regularly stopping, so Delsin could catch up. The chase is relatively long, although nothing extraordinary happens in its later phase.
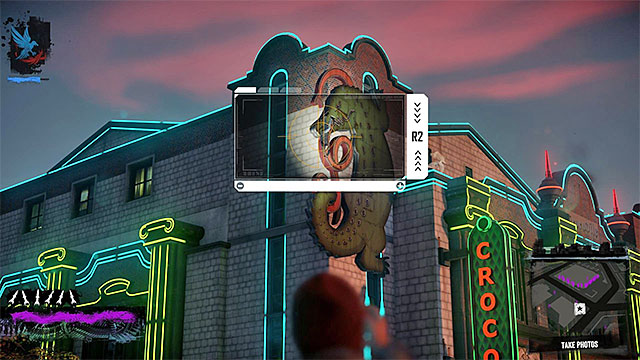 You have to take three photos
The pursuit comes to an end in the south-west corner of Paramount district, as Delsin reaches a crime scene. Take the phone out of the inventory by pressing up on the D-pad. You have to take photos of three important areas related to the crime scene. These are namely: the roof, the person murdered, and the green traces guarded by the police in the square in front of the building.
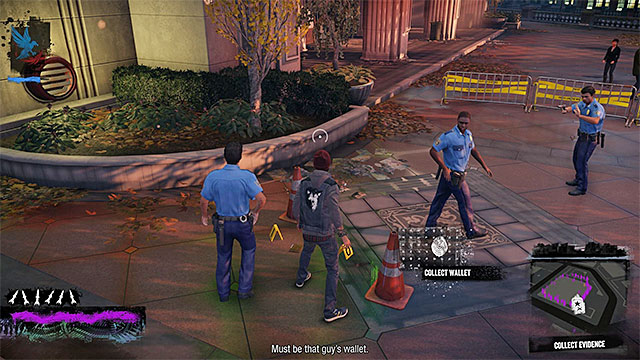
Approach the police officers who are guarding the area. If you play as villain (evil karma), you can kill them and examine the crime scene undisturbed. However, if you play as hero (good karma), leave them be and quickly steal the wallet shown in the above screenshot (press the touchpad). Quickly retreat after successful theft, because law enforcement officers may soon start shooting.
The second trace is on the roof of the buildingYou must now get to the roof of the theater next to the crime scene. Examine the roof, so that the main character found an origami dove. Finally, jump off the roof, stand in a designated location, and transfer all the collected traces into your inFamous Paper Trail profile.
Note: Even if you have completed the above mission before creating an account at inFamous Paper Trail website, you will not lose your progress. After following all the required steps on the main website, you just have to return to the vicinity of the crime scene and find a new yellow marker.
 The main page of the profile
Sign in to http://infamouspapertrail.com/ and go to the profile view. Proceed to examining traces obtained in the game, namely Origami Dove #1, Crime Scene Photos and the Detective's Wallet. Examining the dove and the pictures will not reveal anything noteworthy. When it comes to the wallet, the game will allow you to further examine the objects inside (most of them are random). Take a look at the business card that belonged to the murdered detective.
 Login button is at the bottom of the page
The e-mail address found at the detective's business card will direct you to another fake website: http://brunbergdetectiveagency.com - it is best to open it in a separate browser tab. Just as in the case of the previous website, you need to log in by entering the data from the recently created account or your Facebook account. Go to the bottom of the page and click on the login button for detective agency employees.
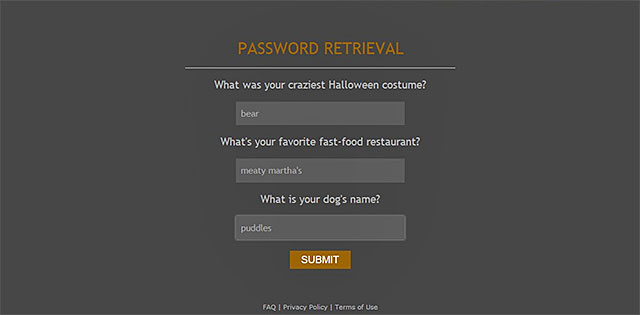 Exemplary answers
Enter emiliob username and then click on password retrieval. The game will ask you to answer three personal questions set by the detective, and these are, unfortunately, randomly selected. The solution is waiting for you back at the http://infamouspapertrail.com/, because by examining items from the wallet you can find hints on the correct answers. This could be, for example, his dog's name or his favorite restaurant. Enter the correct answer into the following fields (capital letters are not necessary) and send the form to get access to the account.
 An exemplary code
Click on the only case available. You can read here the information from all the tabs or go directly to the one with Killian Czalov's phone ID number (fourth item from the top). Save the number in a text file or leave the detective agency website tab open.
 Enter the previously discovered combination (the one on the picture above is only an example)
Visit http://infamouspapertrail.com/ once again and select the last item from the list, that is Delsin's Phone. Enter the number you acquired from the detective agency database, click on Submit button and wait for confirmation. You can now launch the game and take on the second mission.
Note: If the submit button does not work, it could mean that you are using a web browser that is not fully compatible with the site. Check if you have JavaScript disabled or use a different browser.

Go to the marker in the south-west corner of Paramount district and interact with it in order to enter the inFamous Paper Trail website. If you have followed all the steps described in Part 1 - Things to do outside the game, the game will allow you to start the second mission (see picture above), which requires you to locate Killian Czalov's phone by tracking GPS signal. Press up on the D-pad to start this mission.
 The bandits spread out in a side alley
As Czalov's phone signal is initially very far from the main character, you should use, e.g. Light Speed ??ability, and check the phone between consecutive dashes in order to determine if you are moving in the right direction. The point of destination is an alley located in the western part of Pioneer Square district (the same area where you started inFamous: Paper Trail), which you will recognize by the fact that some hostile characters appear on the mini-map as red icons. I suggest you move to the rooftops of the surrounding buildings and discern the situation undisturbed.
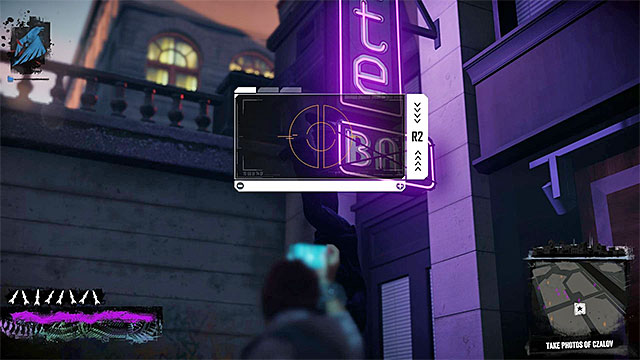 Keep looking for interactive locations and take pictures of them
It is best to attack the drug traffickers gathered in the area with a heavy blast in the ground performed from the air, although you can also, for example, shoot at them from rooftops. You have to deal with all enemies, because it is only then, when access to the new crime scene is unlocked. Go to the camera icon and start taking photos of key elements of the environment. Namely, you have to take photos of two different parts of the victim's body as well as of the red container on the right.
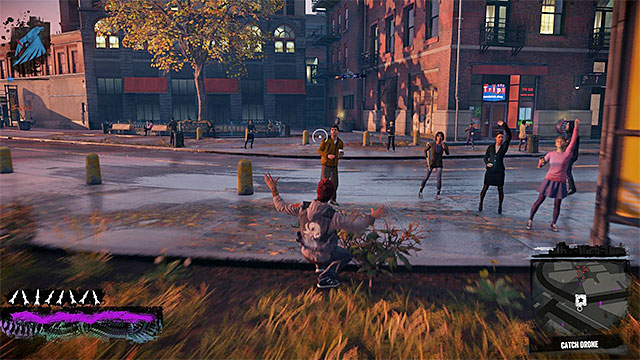 Do not allow the drone you follow to get far away from Delsin
Shortly after taking the pictures, the main character sees a tracker drone captured by drug traffickers. Go after the drone and try not to lose it. Using Light Speed ??(Neon) or Smoke Dash (Smoke) ability is not necessary for keeping a safe distance from the drone. Neither you need to stay on rooftops. It is worth noting that in whenever you lose sight of the drone for a moment, you can still keep following it, as its position is displayed on the mini-map.
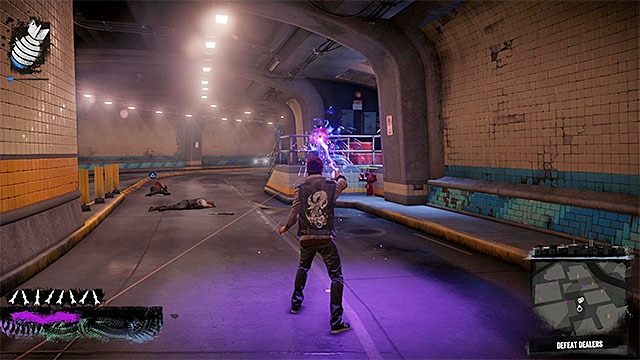 Defeat the drug dealers in the tunnel and examine the tracker drone
The tracker drone will lead you to a tunnel beneath Georgetown district, where you will have to face another group of drug traffickers. I suggest you attack the enemies from a large distance, the more that there are not many physical obstacles in the area, which could serve as covers for Delsin. After eliminating all the opponents, go to the captured tracker drone and check the contents of its box.
The last thing to do, is to get to the evidence transfer location in the western part of Pioneer Square district.
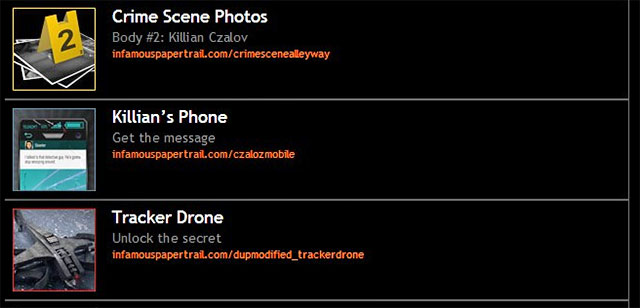 New exhibits
Log on http://infamouspapertrail.com/ again and go to the profile view. Examine the traces acquired during the second mission. Crime Scene Photos will not lead you to any revolutionary discoveries. Using Killian's Phone will allow you to read messages from Skeeter. Finally, proceed to careful examination of the Tracker Drone. Click on the drone's icon to open the access window.
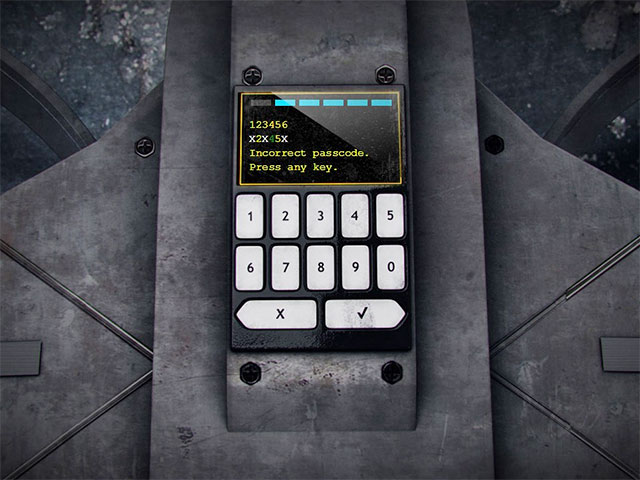 You may try some combinations
Access to the tracker drone box can be obtained in two ways. The first method involves finding the correct combination (it is always randomly chosen by the game). Start by entering any string of digits, such as 123456, so to get a response from the drone computer. An X indicates that the digit does not appear in the combination at all. The yellow color indicates that the digit appears in the combination, but in a different place. Green indicates that the digit is in the correct place in the string. In your each attempt you should leave the correct numbers (green) in the same place, and experiment with the others, keeping in mind that the digits marked in yellow fit in another slot. After several trials, you should determine the correct code.
Note: If the confirm button does not work, it could mean that you are using a web browser that is not fully compatible with the site. Check if you have JavaScript disabled or use a different browser.
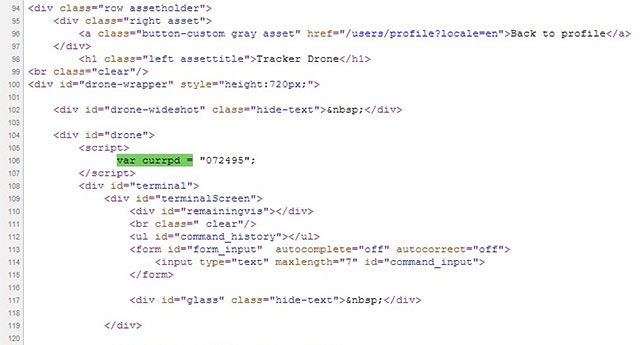
The second method involves a clever trick on the inFamous: Paper Trail website performed by opening its source code. Click the right mouse button on the site and select page source option. Locate the line 106, where var currpd = phrase is, as it is here where password to the drone computer is stored (as depicted above).
 Click on the cash and read the letter
Once you open the drone, click on the cash stored inside so to find a letter. Reading the letter will end the current part of the investigation. You can now launch the game again and take care of the third mission.
 Starting place of the third mission
Make sure that you followed all the steps on the website (the main objective was to "remove" the letter from the drone) and go to the marker located in the western part of Pioneer Square district. Once you reach the place and the game successfully connects with your inFamous: Paper Trail profile, press up on the D-pad to start the third mission.
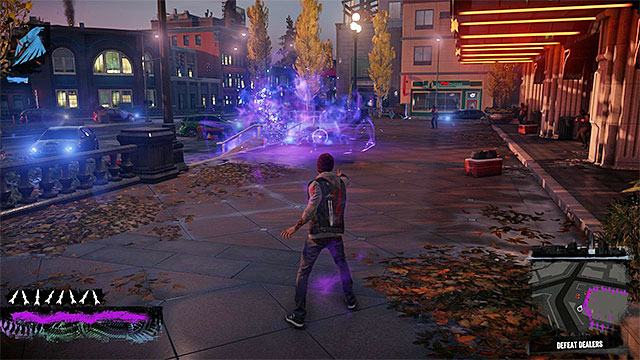 Get rid of the drug traffickers
Head back to the theater (Crocodile) located in the south-western part of Paramount district. This is an area where you have already been, when you examined the first crime scene, so you will easily get to the destination point. Once you reach the place, start by taking care of drug traffickers standing in front of the main entrance to the theater. Defeating them is very simple, because they do not have any extraordinary powers.
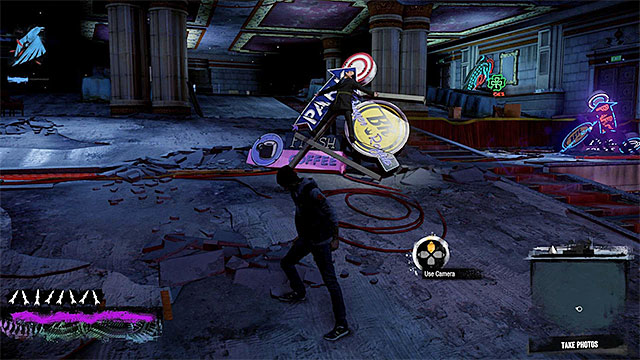 New crime scene
Once you win the fight, walk up to the theater's front door and wait until you get automatically moved into the building. Go to the room where you dueled with Fetch during one of the main missions and find another victim. Of course, you have to examine this crime scene, namely, take pictures of three different parts of the man's body.
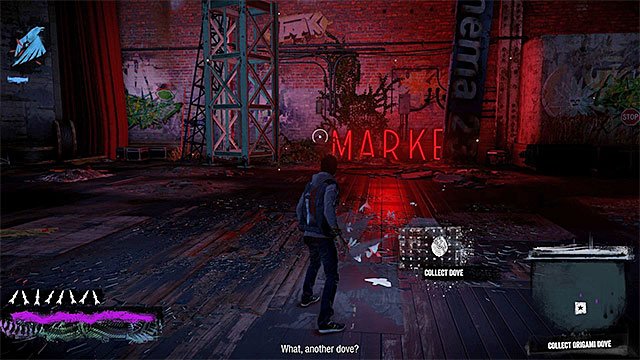 Another dove
Once you take the pictures, watch a short cut-scene with a "paper rabbit" and examine the exact spot where this character has just been standing. This will allow Delsin to take find another origami dove. The only thing left for you to do, is to leave the building, thus automatically sending the newly obtained exhibits to inFamous: Paper Trail.
 New exhibits
Log on http://infamouspapertrail.com/ again and go to the profile view. This time you will not spend much time on the inFamous: Paper Trail website, because you just need to examine the collected traces. These are namely, Origami Dove # 2 and the Crime Scene Photos. These are all the steps required for completion the first chapter.
Before you start the second chapter of inFamous Paper Trail, make sure that you make all things in the fist chapter. I mean of course completing the third optional mission and examining its trails on site http://infamouspapertrail.com/. Second chapter of inFamous Paper Trail should be unlocked after finishing mission 13a (Flight of Angels) or 13b (Hunting the Hunters). Find a yellow marker on the map and head for it.
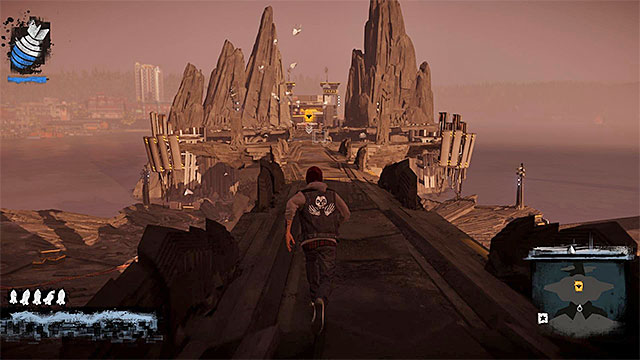
You begin the second chapter of inFamous Paper Trail in place shown on the screen above. It's on the bridge connecting the southern and northern Seattle, next to the arena where Delsin fought in the eighth mission (The Test) against an elite DUP agent. Approach the yellow marker and, after connecting with the site, confirm that you want to continue.
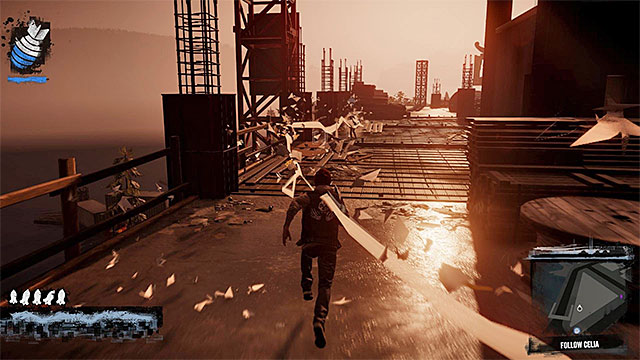 Follow Celia, using the paper trails to navigate
You'll chase Celia, a paper rabbit like you, and it works as the similar scene from the first mission of Paper Trail. So you can't lose the chase as Celia will regularly stop and wait for you to keep up. During the chase you should use Neon or Video power, so you don't have a problem of reaching the roofs and crane on the construction site. Chase takes several dozens of seconds and ends nearby the new crime scene in the northern-east Rainier.
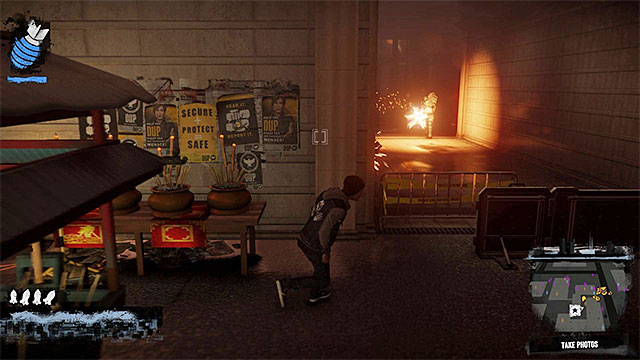 Beware of enemy with a minigun
Begin from picking up an Origami Dove left by Celia and then jump down. Game won't let you examine the crime scene as there are two groups of DUP soldiers there and you have to get rid of them. You have be very careful as Delsin encounter here many enemies with power and one also with a minigun. Consider attacking enemies from roofs with your most powerful attacks (R1 button).
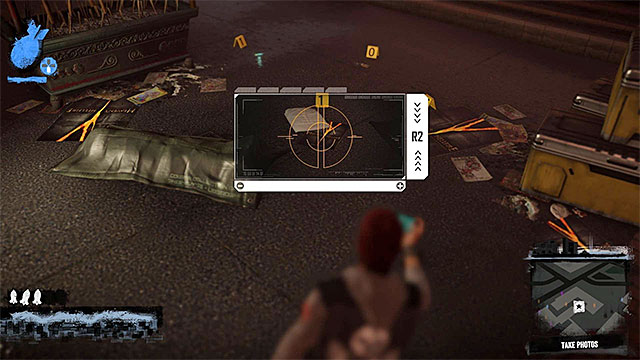 You have to photograph the crime scene and take several proofs
Return to the crime scene when the vicinity is clear. Stand where the game show you to and press Up to start making photos. You have to photograph three objects (use the bar at the bottom to find them) and then take three items: Note, Phone and Key Fob.
Now you just need to get to the place where you sent the proofs. It's in the center of Waterfront.
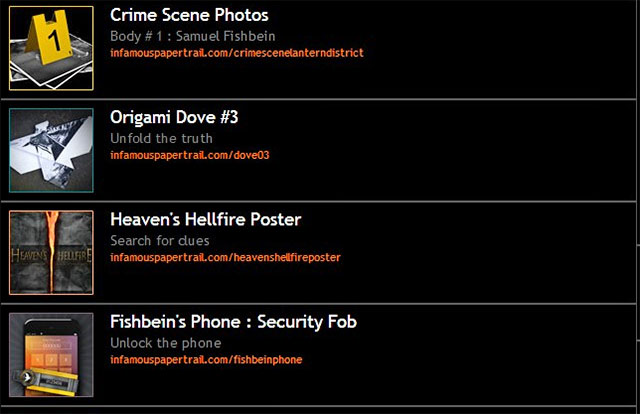 New proofs
Log in onto http://infamouspapertrail.com/ and open your profile. Start examining proofs you get in the fourth mission, which are: Origami Dove #3, Crime Scene Photos and Heaven's Hellfire Poster. At the end, choose Fishbein's Phone and try to get to his voicemail. Unfortunately, you need a password.
 Input the number to the browser
If you want to guess the numbers via the "official method", login into DUP Intranet, by clicking in your profile or inserting the address http://departmentofunifiedprotection.com/intranet. After logging in, insert the number written on the Origami Dove #3, which is 34856135421.
Click on the button to send the code. You get an Origami Dove #4. Scroll down to the very bottom of the site and look at the picture showed on the screen above. Follow dots and write down numbers to get a new FAN Number: 36544572885.
 Document
Switch again onto the main site of the DUP Intranet and insert the number you've received. This let you unlock the Security Protocol Document. After reading it you know that there is a code: there is 3 added to each number of the code.
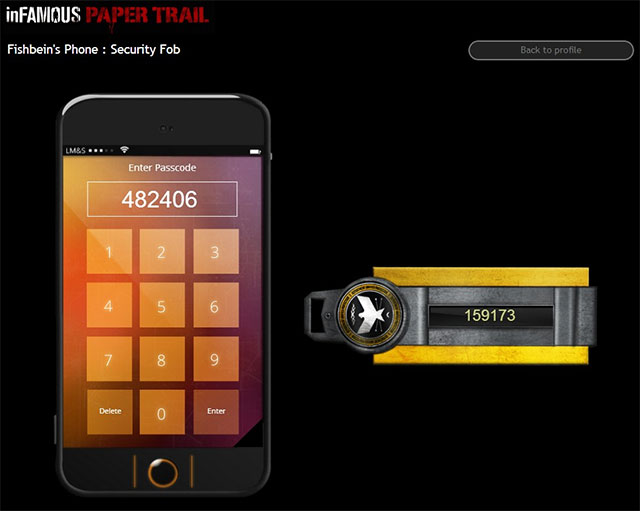
You can return to the main profile on the http://infamouspapertrail.com/ and choose Fishbein's Phone. Look at the current code displayed by the token and add 3 to each its number.
Very important remark: The code includes the last digit of the value, what makes thing more difficult when it's 7, 8 or 9. 7+3 is 10, so you have to put 0. 8+3 is 11, so you have to put 1. 9+3 is 12, so you have to put 2.
Remark - if the confirmation button on the phone doesn't work, it may mean that you use the browser which is fully compatible. Check if, for example, your JavaScript isn't switched off or check other browser.
Exemplary code and solution is shown on the screen above. When you get a confirmation of completing the mission, head for where you begin the fifth optional mission.
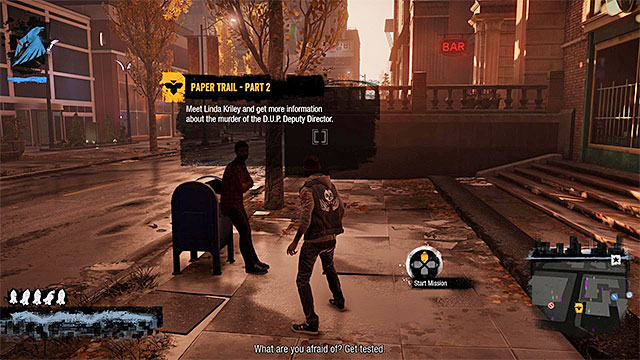 Here you begin another inFamous Paper Trail mission
Head for the marker in the central part of Waterfront and use it to connect with your Paper Trail profile. If you make everything ok on the website (hacking the Fishbein's phone) game let you begin the fifth mission. You have to find Linda Kriley. Press Up to begin this mission.
 As usual, you have to investigate the crime scene
Your current target is northern part of Rainier. When you get there, ignore the policemen around the building and get on one of the higher shelves. Here is the new crime scene. You have to perform standard investigation activities. So begin with photographing corpses in proper position (in two different places) and the document. Then approach the mentioned notepad and press touchpad to pick it up.
You can return to the place where you began this mission (Waterfront) to send forward the proofs. Leave the game for a while and log into the Paper Trail profile.
New proofsLog in onto http://infamouspapertrail.com/ and open your profile. First, look through the Crime Scene Photos and then click on the Kriley's Datebook.
 Linda Kriley's website
Notice the address at the top of the Datebook and write it into the browser - http://www.lindakrileylegal.com. Log in and start reading the red text, switched by the hacker, who broke the Kriley's security. Write down digits you find in the text. They makes a new FAN Number: 14359595841.
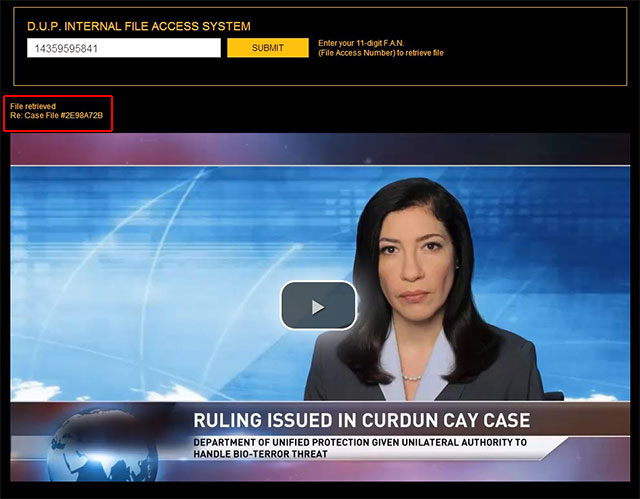
Return to the main profile onhttp://infamouspapertrail.com/ and go to the DUP Intranet. Wait for the browser window to appear and put in the number you've found. If you do it right, you get an access to the video. Watch it and notice the case number marked on the screen above.
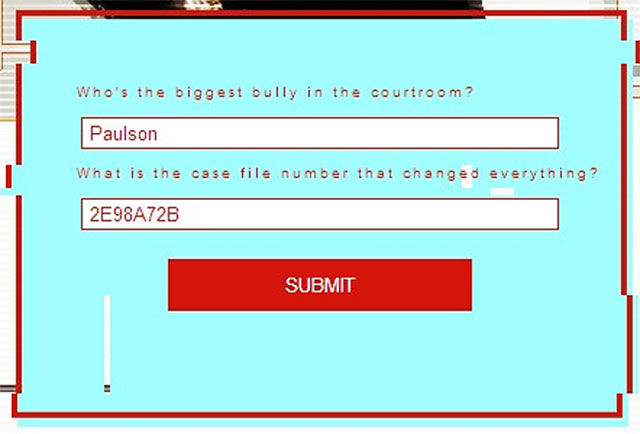
Open Kriley's website once again - http://www.lindakrileylegal.com. Get interested in a form on the right. You have to fulfill it correctly (screen above). To the first box you have to insert Paulson and to the second one a case number (2E98A72B; game may randomize this number, copy it carefully from the video). You can again launch the game and start completing the last mission of the second chapter.
 Entrance to Eugene's hideout
Make sure that you made all things on http://infamouspapertrail.com/ and return to the start point in Waterfront, where you've begun the previous secondary mission. When you connect with your profile, press Up to begin a new mission. At first, you have to get to the northern part of Rainier. Pass policemen set up around the marker and approach the manhole to get into Eugene's cellar.
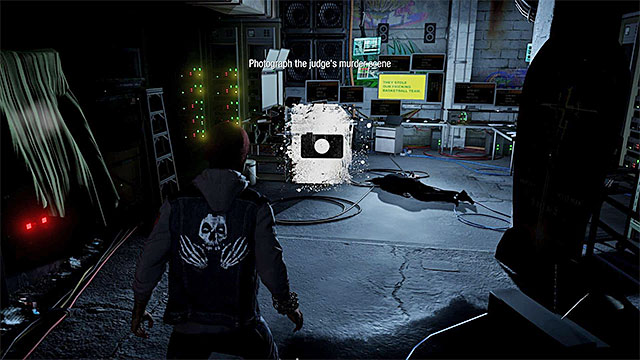 Crime Scene
You've visited this place in the eleventh main mission. This time, there no battles to be made. Start exploring the hideout. You find a murdered judge. Search the scene, making two photos of Paulson's limbs and then pick up his Wallet.
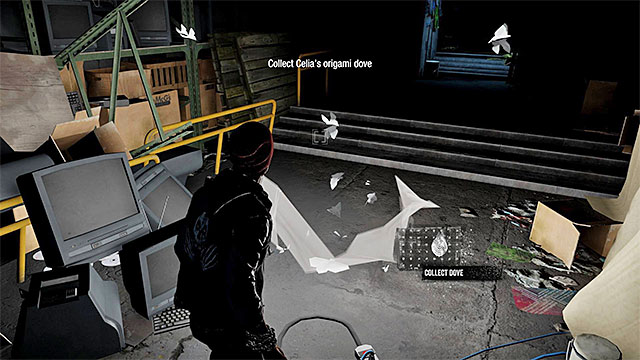 Pick up an Origami Dove
Now you can head for the exit. Pick up the new Origami Dove and after that return to the center of Rainier. Move away from the area guarded by the policemen and wait until proofs are send to your Paper Trail profile.
 New proofs
Log in onto http://infamouspapertrail.com/ and open your profile. As in the end of the first chapter, you'll spend here only a moment. You just need to look at the three proofs you've found in Eugene's cellar: Crime Scene Photos, Paulson's Wallet and Origami Dove #5. It's all in the second chapter.
Before you start chapter three, of the inFamous Paper Trail, make sure that you have performed all of the activities in the second chapter. What is meant here is completing the sixth optional mission and investigating all of the clues connected with it, at http://infamouspapertrail.com/. Find the new yellow marker on the map and head towards it.
 The starting point for the third chapter
The starting point for the third chapter, connected with the inFamous Paper Trail, is on the rooftop of one of the buildings in Georgetown. Approach the yellow marker and, after you have connected to the site of the inFamous Paper Trail confirm that you want to continue.
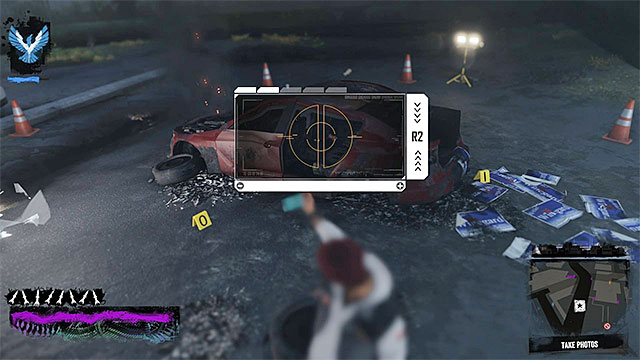 While following Celia, use the paper trails for navigation
Ahead of you, there is another chase after Celia, i.e. the "paper bunny". This part of the mission is subject to the same rules as the chases in the first and the second chapters of the inFamous Paper Trail. It is impossible lose the chase, because Celia is stopping on a regular basis, and waiting for you to come closer. During the chase, it is best to use the Neon and the Video powers, thanks to which you will not have any problems with reaching, among others, the successive rooftops. The chase last several tens of seconds and it ends near the next crime site in Georgetown.
Take a photo of the destroyed car, among othersYou need to approach the crime scene and the important piece of news is that it is being guarded by the police. If you are playing as the villain (bad karma), you can kill them all. If you are playing as the hero (good karma) leave them be and walk around them, from behind. After you approach the crime scene, select the phone from the inventory. You need to take a photo of three objects - the burned car, the posters behind the car and a new origami dove. Finally, pick up the Origami Dove and the Poster.
Now, you only need to reach the place where you send the gathered evidence and it is located in the central part of the Market District.
 New evidence
Log on to http://infamouspapertrail.com/ again, and access the profile window. Examine the evidence that you have gathered in the seventh mission, i.e. the Crime Scene Photos, the Origami Dove #6 and the Winegard Campaign Poster #1. Take the most careful look at the origami dove, because you will receive a number, after you unfold it (the last screenshot).
 Enter the appropriate number into the browser
You need to log on to the DUP Intranet, whether by clicking on the main site of the profile, or by entering the http://departmentofunifiedprotection.com/intranet in a separate browser window. After you have logged in, enter the number that has been provided on the origami dove 6 that you have examined, i.e. 43300691701. wait for the view from holding cell 404 to load.
Note - if the buttons that you are supposed to navigate with, around the cell, do not work properly (i.e. a window does not shut properly) this may mean that you are using a browser that is not fully compatible with the site/ Find out if the JavaScript processing is not disabled, or use another browser.
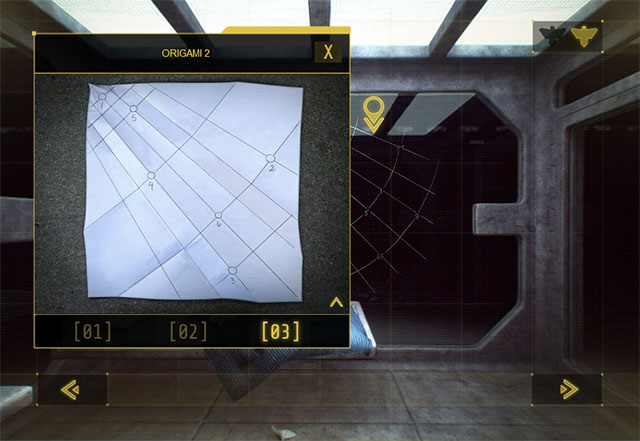 Each time you find a new origami dove see all of the tabs
Start your examination of cell 404. To navigate, use the side buttons and, additionally, click here on the interactive buttons on the screens. You need, this way, examine two more origami doves (their icons will appear in the upper-right corner of the screen - from now on, you can select them freely) and the four remaining interactive areas.
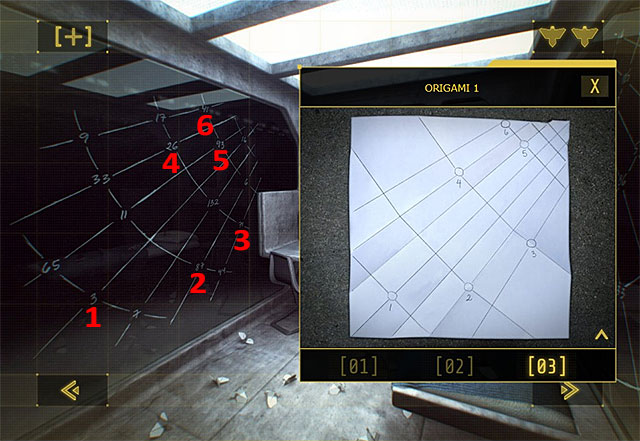
Now, you will have to solve the most difficult part of the puzzle, because you need to read two more numbers, thanks to the drawings that appear on the doves. Start with Origami 1. Stop on the holding cell view, shown in the above screenshot, and display, additionally, the scheme on the origami dove. The plan is that you read the values on the drawings, which have been drawn on the cell's windows. In this case, you will get 38771269341.
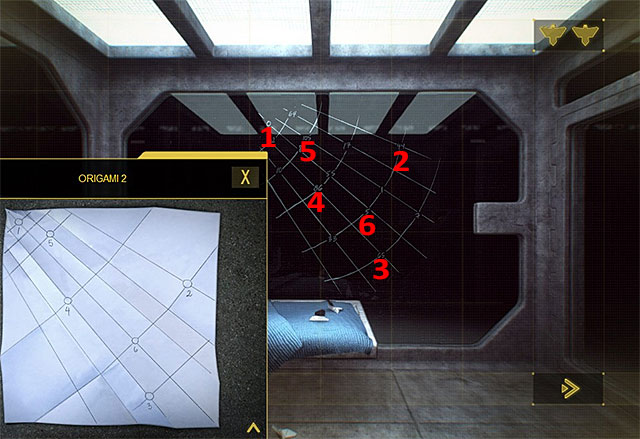
Do the same in the case of Origami 2. Stop on the screen shown in the above screenshot. Just like earlier, you need to get the values, basing on the scheme of the dove. Thanks to this, you will get 04465861055.
 The important numbers in the report
Return to the browser of the DUP Intranet and enter the first one of the numbers that you have obtained- 38771269341. Thanks to this, you will see the report that concerns the incident. See the last page of the document. Take down the number of the person that appears in the report (00731718404), and a new investigation number (46298893710).
Enter 00731718404 in the DUP Intranet browser, thanks to which you will access the file of the guide. After you learn the file, enter report number- 46298893710. See the last page and take down the number of the camera, which appears in the place shown in the above screenshot. Note - the number is generated randomly, by the game!
 An example number
Return to your profile now, at http://infamouspapertrail.com/ and select Delsin's Phone that you have been ignoring so far. Into the phone, you need to enter the camera number that you reach in the most recent document. Send the number and wait for the response. After you receive the confirmation of the completion of the mission, start the game again and head towards the starting point for the eighth optional mission.
Note - If the number confirmation button, in the phone, does not work, this may mean that you are using a browser that is not compatible with the page. Check if, e.g. JavaScript processing is not disabled, or use another browser.
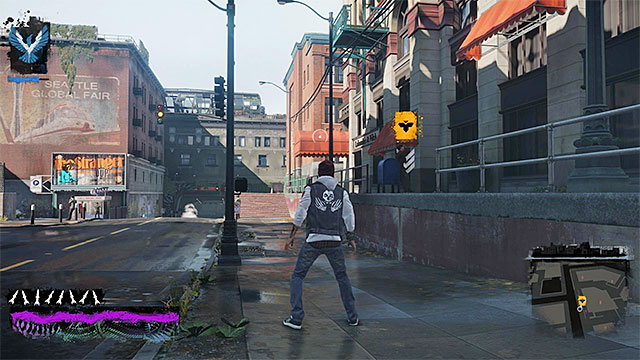 The starting point for the eighth mission of the inFamous Paper Trail
Head towards the marker in the central part of the Market District and interact with it, to connect with your inFamous Paper Trail profile. If you have performed all of the steps correctly, on the internet site of the game (entering the camera number that you have found in the report), you will be allowed to start the eighth mission and it concerns the investigation of the circumstances of the assassination attempt, on senator Winegard. Press UP on the D-pad to start the mission.
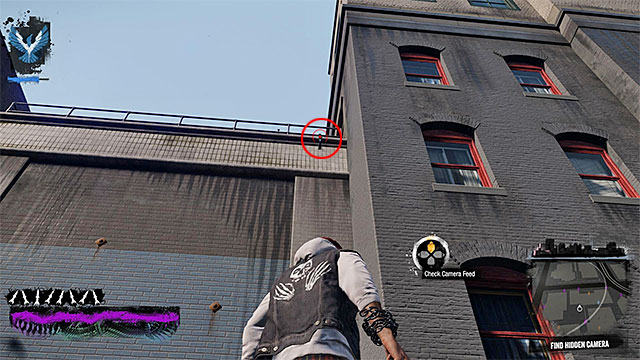
You can now head towards Paramount. Reach the area marked with the white circle and start searching for the hidden camera. It is worth reminding here that you cap press UP on the D-Pad to get the camera view, which will make it easier for you to locate it. The camera is on the wall of the building in the South-Western part of the area marked on the map and it has been shown in the above screenshot (its exact whereabouts have been marked on the map provided with this chapter of the guide).
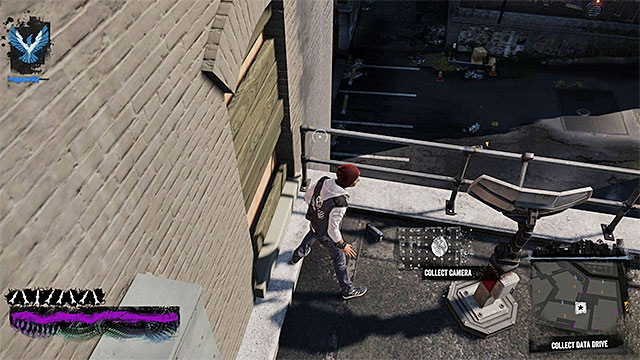 The camera is on the rooftop
Use any ranged power to destroy the camera and reach the rooftop that neighbors its mounting place. Find the damaged device here (Camera) and collect the hard drive with the data saved on it. You can now go to the Eastern part of Paramount to send the evidence that you have found. Exit the game, for a moment, and log on to the inFamous Paper Trail profile.
 An example solution to one of the defragmentation attempts (the hexes are always randomly generated)
Log on to http://infamouspapertrail.com/ and access the profile window. Select the new item on the list, i.e. the (DUP Camera Drive). wait for the data to load and start a succession of seven logic games. read the instructions on the screen, carefully, whose most important premises are as follows:
A few valuable hints:
Note - if the windows, in which you complete the successive games, becomes inactive, this may mean that you are using a browser that is not fully compatible with the page. Check, e.g. if the JavaScript processing is not disabled, or use another browser.
 The plate number
For completing all seven games, you are rewarded with the unlocking of the video material and with a note, which concerns the software patch. Start by choosing the Video File and view it. Towards the end of the video, (after around a minute has elapsed) you will notice a registration plate number- 9G0598AC. Take it down or remember it.
 Enter the registration plate number into the appropriate field
After you check the note about the Software Patch. you will be directed to the new webpage- http://departmentofunifiedprotection.com/vehicletracker. Log on to the page and enter the license plate number into the appropriate field (note - the number on the plate includes the digit "0" and not the letter "O"!!!). Wait for the vehicle is found. You can now restart the game and complete the last mission of the third chapter.
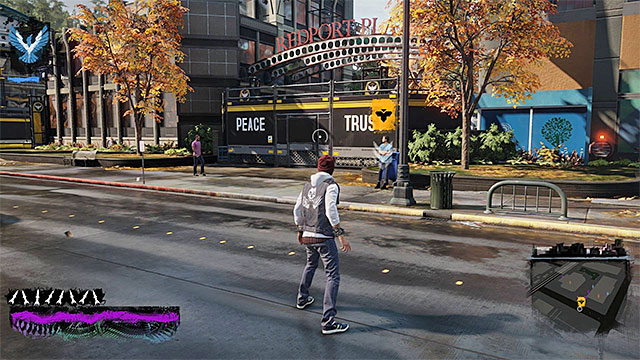 The starting point for the third mission of the inFamous Paper Trail
Go towards the marker in the central part of Paramount and interact with it, in order to log on to your inFamous Paper Trail profile. IF you have taken all of the steps correctly, on the web page (tracking the car, basing on its license plate) you will e allowed to start mission nine and it is connected with reaching the location, where the senator's car is parked. Press Up on the D-Pad to start the mission.
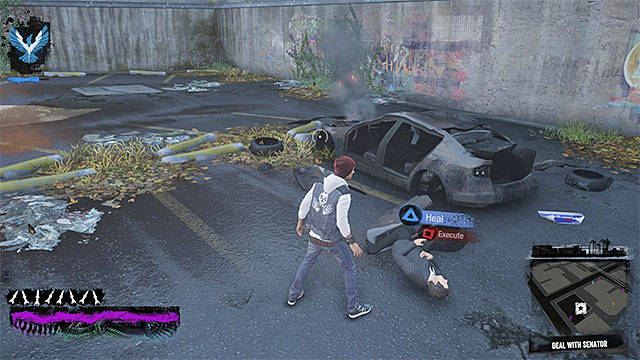 You can either murder the senator or let him live
You can now head towards the North-Eastern part of the Market District. Make it over to the rooftop of one of the buildings around, which will start a cutscene of the senator's car exploding. Go to the explosion scene. If you are playing as the villain (bad karma), you need to murder the senator (the Square). If you are playing as a hero (good karma), you need to heal him (the Triangle). Regardless of what you did, you still need to collect two more items from the crime scene- the Origami Dove and the Poster. You now need to exit the game again and log on to your inFamous Paper Trail profile.
 New evidence
Log on to http://infamouspapertrail.com/ again, and access the profile window. This time around, you are not going to spend too much time on the site of the inFamous Paper Trail. Start by taking a look at the new evidence - the Origami Dove #9 and the Winegard Campaign Poster #2. Apart from that, you can access the http://winegardlies.com site and read the information there (there is an audio file among them) This is the end of the third chapter.
 The page with instructions and a pdf file to download
Before you start the fourth chapter of the game, you can take the steps connected with gaining access to the additional audio file. Take a look at the list of the items connected with the third chapter and select the Origami Dove Pattern. After a new page loads, examine the drawings that inform you of the successive steps of the origami dove creation. What is even more, you can click on the button at the bottom, thanks to which the game opens a pdf file with a ready-made pattern to fold one's own dove, which you can print!
Note - make sure that you have a program, for viewing pdf files, installed (e.g. the-free-to-use Adobe Reader), because you will be unable to load the file with the ready-made pattern to print.
 After you enter the number from the origami dove, you will be able to listen to the audio file
Thanks to folding your own origami dove, basing on the pattern provided by the game, you will be able to obtain a new number. If, however, you do not want to waste time, you can use the solution- 93588247459. Log on to the DUP Intranet http://departmentofunifiedprotection.com/intranet and enter the number into the browser. You can now select the bonus file
Before you start the fourth chapter of the inFamous Paper Trail, make sure that you have completed all of the activities of chapter three. What is meant here is the ninth optional mission and the clues connected with it, on the http://infamouspapertrail.com/ page. On the map, find the new yellow marker and head towards it.
 The starting point for the fourth chapter
The starting point of the fourth chapter, connected with the inFamous Paper Trail, is in the street, in the North-Eastern part of the Market District. Approach the marker and, after you log on to the page of the inFamous Paper Trail Project, confirm that you want to continue.
As usually, you will have to chase Celia, i.e. the paper bunny. Just like in the previous chapters, it is impossible for you to lose the chase, because Celia will be stopping, on a regular basis and allow you to catch up. During the chase, use the Neon, or the Video powers, thanks to which you will not have any problems reaching the rooftops. The chase ends next to the structure shown in the above screenshot, in the Seattle Centre. You need to reach the top of the structure and, the easiest way to do that, is by using the Neon power (run up one of the props) or with Video (catapult from one of the nearby satellites).
 The spot where you find the dove
Regardless of how you reached the top of the structure, you need to collect the Origami Dove there. You only need to reach the place, from which you send the gathered evidence and it is located to the North-East of here.
 Enter the numbers into the browser
Log on to http://infamouspapertrail.com/ again, and access the profile window. Select the only available item, i.e. Origami Dove #10. Take a careful look at the dove and find the number, on the last picture. You can now access the DUP Intranet http://departmentofunifiedprotection.com/intranet. After you log on, enter the number that you found on the origami dove 10- 99902081433. Examine the document and find another number in its middle part- 62751111459.
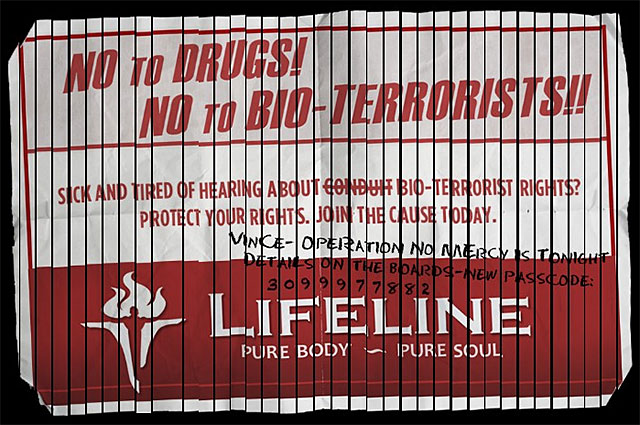
You will now have to solve a puzzle, which consists in moving the paper strips around. The thing is about putting together a shredded flyer and learning about its message. The solution has been presented in the above screenshot. The game does not confirm the fact of solving this puzzle so, do not worry if you receive no message. Read the number that appears on the flyer, which is randomly generated. This means that you need to assemble the flyer on your own, without using any solution from this guide.
Note - While assembling the flyer, try to find the successive letters of the main message "No to Drugs! No to Bioterrorists!". This will allow you to complete the puzzle faster.
Note - if the strips do not move around the screen, this may mean that you are using a browser that is not fully compatible with the page. Check, e.g. if the JavaScript processing is not disabled, or use another browser.
 The button that redirects you to the forum
You now need to log on to http://lifelinepurity.com/, the link to which was provided on one of the documents that you examined earlier. Scroll to the bottom of the page and click the button, thanks to which you will be redirected to the forum.
 An example passcode
Select the first thread on the top (Funny Flick), i.e. the one with 11 posts. You will be asked to provide the passcode and you need to enter the code, which you obtained from the shredded flyer.
 You need to reveal the picture
After you gain access to the secured thread, see the video file from the first post and learn the contents of the entire discussion. The most important step is to examine the last post, which has been authored by Vengeful_Vince. Click on the link in this post, which will reveal the picture. You can now start the game again and start the eleventh mission.
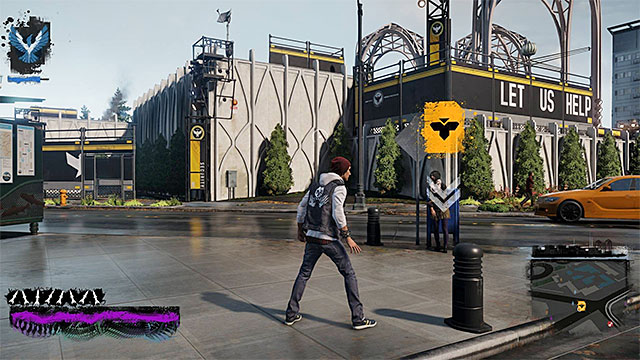 The starting point for the eleventh mission of the inFamous Paper Trail
Head towards the marker on the boundary between the Queen Anne and the Seattle Centre. Interact with it to access your inFamous Paper Trail profile. If you have take all of the steps, on the internet page of the game, properly (revealing the picture on the forum), you will be allowed to start you will be allowed to start mission eleven. It is going to be about finding and examining the corpses of bio terrorists. Press UP on the D-Pad to start the mission.
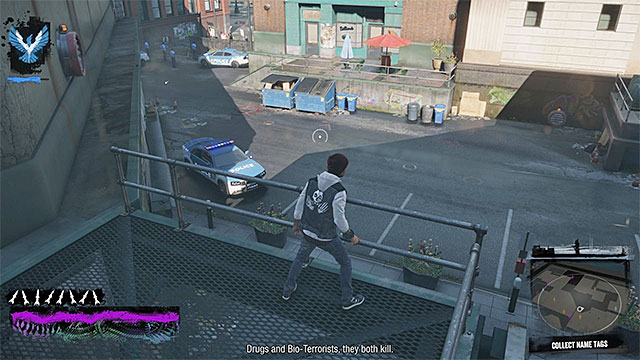
The mission marker does not appear on the map of Seattle but even though, you will not have too many problems finding the new crime scene. You need to reach the central part of the Market District. Kill the policemen here, or walk around them, thanks to which you will gain access to the area guarded by the police, which has been shown in the above screenshot.
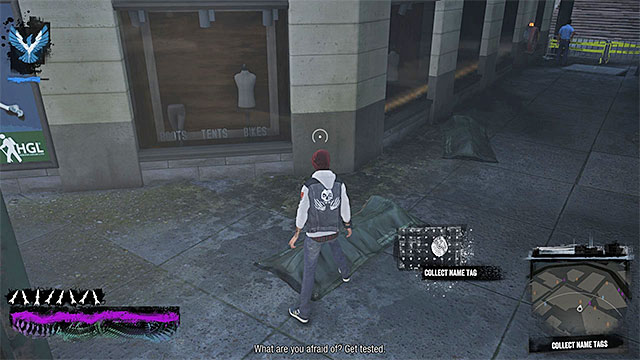 An example corpse bag
You need to find, and examine, a total of eight corpses here. Find the corpse bags and interact with them, in order to obtain the toe tags. After you have examined all eight, go North in order to send the data that you have collected. You need to perform the investigation, at the inFamous Paper Trail page, again.
 One of the toe tags
Log on to http://infamouspapertrail.com/ again, and access the profile window. From the list, select the toe tags that you have obtained at the crime scene (Bagged and Tagged) and start examining them. You should especially take note of the lower part of each tag. If you connect all of the dots, from all of the tags, you receive a code: 02240835619.
 Enter the code into the browser
As you probably guessed, you now need to access the DUP Intranet http://departmentofunifiedprotection.com/intranet. After you log on, enter the above number into the field, which you obtained thanks to the analysis of the tags. After the above page loads up, take a look at the next origami dove and take down two numbers that have been provided above- 05673392606 and 48281723399. Enter each of the codes into the browser. Thanks to the first number, you gain access to information about one of the convicts, whereas the other displays a report. At the bottom of the second document, there is another number, which you need to enter into the browser- 70031718405. Take a look at this document and take down the last combination- 10255211988.

After you enter the last number, you will access a webpage, where you need to solve a puzzle. Click on the phone and start solving it. The main premise of the puzzle is joining together the individual fragments of the telephone screen. Of course, you can assemble the whole screen and listen to the conversation or, only the upper part, whose aim is to reach the ID number of ID Felix Coogan (the above screenshot). The important piece of information is that the ID number is random, each time so, you cannot rely on this guide for that.
Note - If the puzzle window is inactive (e.g. you cannot move the interactive elements around) this may mean that you are using a browser that is not fully compatible with the page. Check, e.g. if the JavaScript processing is not disabled, or use another browser.
 An example ID
Return to http://infamouspapertrail.com/ and select Delsin's Phone. Enter the ID, which you have just obtained, into the phone and wait for response. You can now start the game again and complete the last mission of the fourth chapter.
 The starting point for the twelfth mission of the inFamous Paper Trail
Head towards the marker in the central part of the Market District and interact with it to connect to your inFamous Paper Trail profile. If you have taken all of the steps, on the game's web page, properly (obtaining the ID and entering it into Delsin's phone) you will be allowed to start the twelfth mission and it is going to be about tracking down Tyler Bennet, who is using a pseudonym "Purity_Now". Press UP on the D-Pad to start the mission.
The game will now start the process of tracking down the person that you are looking for and, if you want to use the phone's readings, you first need to reach the rooftop of one of the buildings. The tracking app will direct you towards the small dock shown in the above screenshot, in the Southern part of Georgetown.
 You can knock down or kill the person that you find
Head down the Eastern pier (the bigger one) Southwards and reach the staying place of Tyler Bennet, after several moments. If you are playing as the villain (bad karma), you need to kill him (the Square). If you are playing as the hero (good karma), you only need to knock him down (the Triangle).
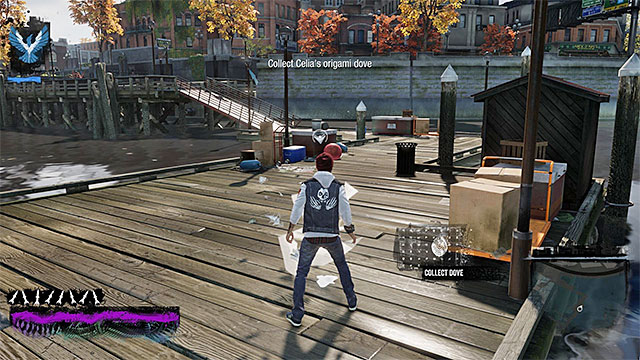 Collect the new dove
Regardless of what you did, pick up the Threat List from the pier. Try to leave the docks, thanks to which there will appear Celia around. Collect the Origami Dove that she left behind. You now need to exit the game and log on to your inFamous Paper Trail profile.
 New evidence
Log on to http://infamouspapertrail.com/ again, and access the profile window. This time around, you will not spend too much time on the inFamous Paper Trail Project page. Start by viewing Origami Dove #12. Then, select the Bennet's DUP Drive. You can listen to the audio file, read the Threat List and take a look at the mails. It is all you need to do in the fourth chapter.
Before you start the fifth chapter of the inFamous Paper Trail, make sure that you have performed all the activities in the fourth chapter. What is meant here is completing the twelfth optional mission and examining the evidence connected with it, on http://infamouspapertrail.com/. Find the new yellow marker on the map and head towards it.
 The starting point for the fifth chapter
The starting point of the fifth chapter connected with the inFamous Paper Trail is in the alley, in the central part of Downtown. Approach the yellow marker and, after you have connected with the inFamous Paper Trail Project page, confirm that you want to continue.
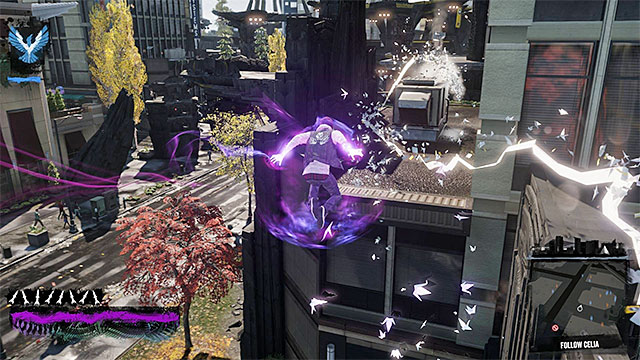 While following Celia, use the paper trails for navigation
You now need to chase after Celia, i.e. "the paper bunny" again. There is nothing exceptional about this chase. It is actually the same as the ones in the previous chapters of the inFamous Paper Trail.
It is impossible to lose the chase, because Celia will be stopping, on a regular basis, in wait for you to catch up. During the chase, use the Neon, or the Video powers, thanks to which you will not have any problems reaching the rooftops. The chase lasts several tens of seconds and it ends where it started. Collect the Origami Dove that Celia leaves behind and reach the spot, from which you send this evidence, which is in the Denny Park.
Log on to http://infamouspapertrail.com/ again, and access the profile window. Start by selecting Origami Dove #12 and after the new page loads up, examine the last picture thoroughly. You need to solve a puzzle here and it consists in finding out the symbols from the bottom row. You need to join the symbols of the same type, with lines. Start with the picture with number 1 next to it. The above screenshot presents the solution to the puzzle, for the first symbol. Note that the lines form a digit and it is a part of the combination. You can perform all of the steps for the following symbols, yourself, or take the solution from here, which is not randomly generated - 26371475197.
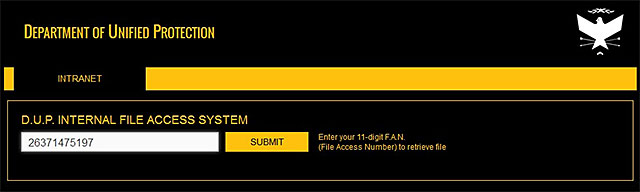 Enter the number into the browser
Access now thee DUP Intranet http://departmentofunifiedprotection.com/intranet. After you have logged on, enter the code that you have just obtained. Take a look at the document that displays and find a combination, at its end- 29834579345. Also this number needs to be entered into the browser.
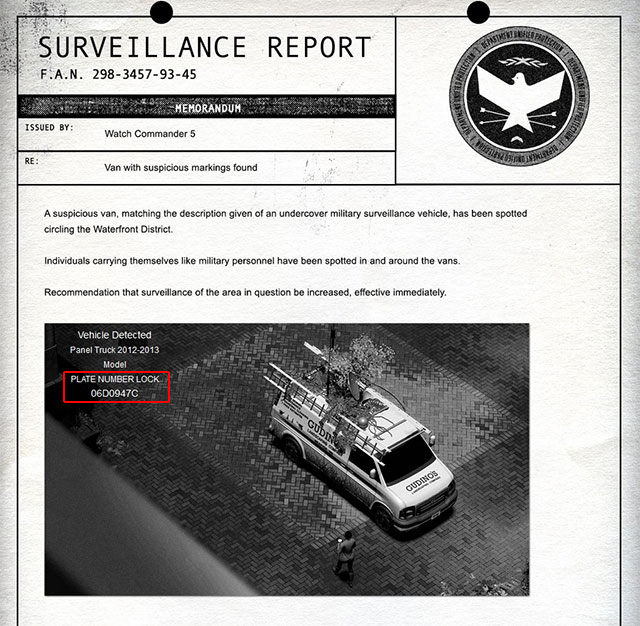
After another page loads up, take a look at the photo from the surveillance camera. You need to take down the license plate number, provided in the spot shown in the above screenshot. Note - the number is randomly generated so, you need to read it yourself.
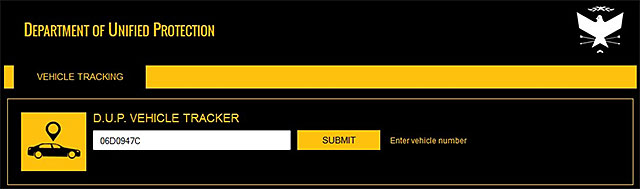 An example license plate number
The next step is to load the page that allows you to track vehicles, i.e. http://departmentofunifiedprotection.com/vehicletracker. Log on to that page and enter the registration number, into the field. wait for the van to be tracked down. You can now start the game again and complete the fourteenth mission.
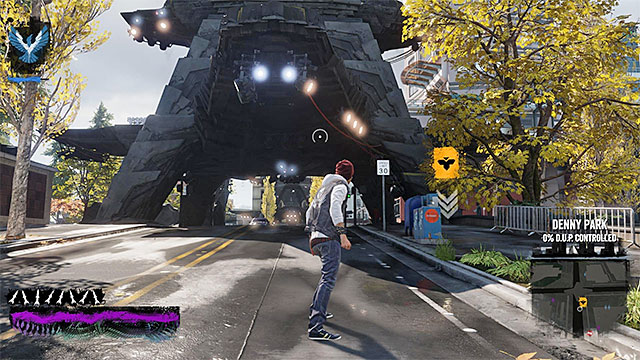 The starting point for the fourteenth mission of inFamous Paper Trail
Head towards the marker located in the central part of the Denny Park. Interact with it to connect to the inFamous Paper Trail profile. IF you have performed all of the steps, connected with the thirteenth mission, correctly (tracking the van basing on its license plate number), you will be allowed to start mission fourteen and it is connected with following the tracked vehicle. Press UP on the D-Pad to start the mission.
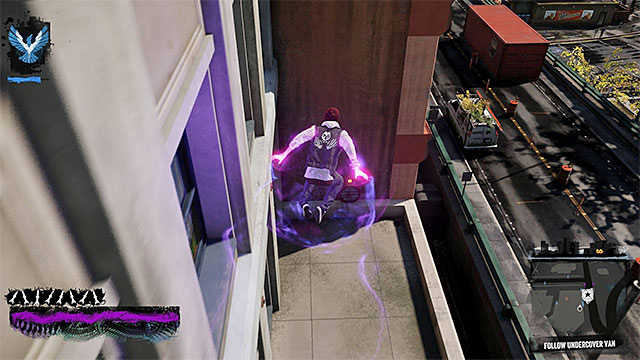 It is best to jump from one rooftop to another
Head towards the van, to the North of the starting point, in Waterfront. After you approach the van, it will start going along the highway, to the West. Start following the vehicle, best by jumping over from one rooftop to another, along the Southern side of the route. After it goes off the main road, the car will drive into the alley in Uptown.
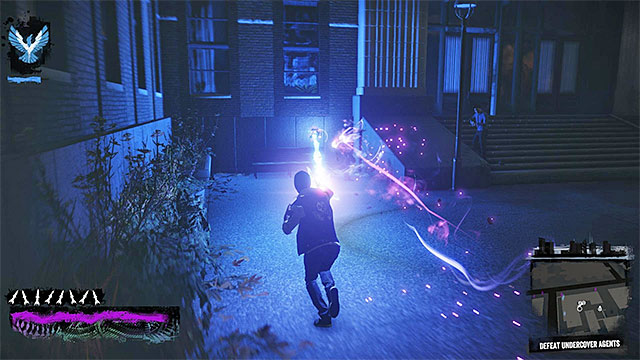 You need to eliminate all of the enemies
Finally, you need to deal with the armed agents near the place where the van was parked. I recommend that you perform an air attack and deal with the remnants, in any way you want. After you have eliminated all of the enemies, you will complete this mission and you will be asked to continue on the inFamous Paper Trail page.
 The first van screen
Log on to http://infamouspapertrail.com/ again, and access the profile window. Select the only option from the list, i.e. the one connected with investigating the van's interior Gudino's Landscaping Van. wait for the game to load the view from the inside of the van. Start by collecting the origami dove (the blue icon) from the table on the right. After you see all three screens, walk deeper into the van (the yellow icon).
 The second van screen
Also here, there are two interactive spots. Ignore the one on the left, for the time being, and turn your interest to the safe on the right. Soon, the game will load a new screen and you will have to open the safe.
Note - if the navigation around the van is inactive, or if it is not possible to solve the below puzzles, this may mean that you are using a browser that is not fully compatible with the page. Check, e.g. if the JavaScript processing is not disabled, or use another browser.
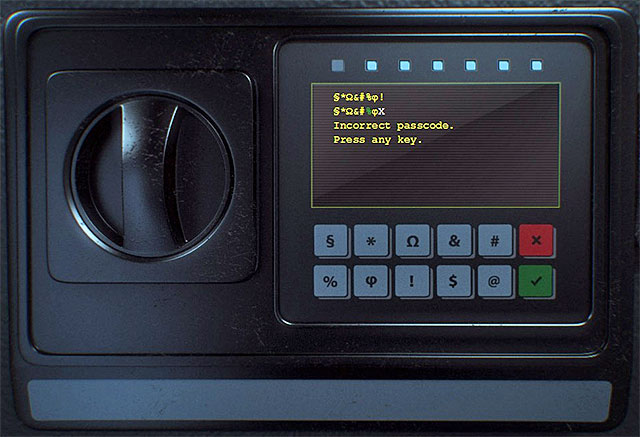 You need to try the combinations, one after another, until you get the correct one
To open the safe, you need to solve another puzzle and its assumptions are similar to those of the puzzle with the drone, which you had to deal with in the first chapter of the inFamous Paper Trail. The plan assumes that you determine the safe combination and you need to do that on your own, because it is randomly generated.
Start by entering any string of eight symbols (the gray buttons) and make sure that each one is different than the rest (the symbols do not repeat). Wait for the safe computer to respond and analyze the response. The white letter X, under a given symbol, means that it does not appear in the combination. Green color means that the given symbol is in the right position. To sum up, with each next attempt, you need to leave the symbol where it is correct (green color) and experiment with the remaining ones (yellow color and the ones that you have not tried at the beginning of the puzzle).
An additional handicap here is the fact that you only have seven attempts to go with. I recommend, therefore, that you perform PrintScreen of all the feedbacks from the computer in the safe, thanks to which you will be able to improve on your results with each consecutive attempt. If, in spite of that, you fail to guess the correct combination, it will be reset and the fun start s over.
Click on the document that was inside the safe and start reading it, thoroughly. I recommend that you especially read the page with the information and hints on using computer terminals. You are going to need this, in a moment. Very carefully, also read the last page. In the area shown in the above screenshot, there are a login and a password (it is randomly generated). Take this information down.
 Enter login and password
Return to the previous screen and click on the computer on the left. Wait for the screen to load. First of all, you need to take two steps:
 The list of command displays after you enter the Help command
You are now going to take on the most difficult and the most demanding puzzle, so far. It consists in finding, on the hard drive, the SurveillanceLocations.jpg file. It is placed in a random folder so, you need to locate it on your own. For all of that, you are going to be using an UNIX terminal and you will be entering various commands.
First of all, take a look at the available commands, whose functions and example use have been included in the document that you found in the safe. This is the full command list:
Note! The remaining typical UNIX commands are unavailable during the puzzle and you are not going to need them.
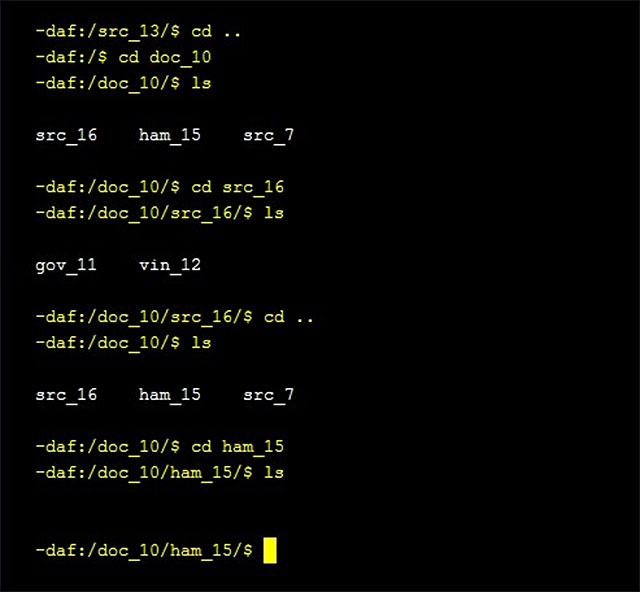 Use commands 'cd' and 'ls' alternatively
As already mentioned, the graphic file is in a random folder and also, the folder tree is not predetermined. As a result, you need to search through the contents of the drive, and this is what the entire process should look like:
Continue searching, up until the moment, at which the system, after you enter the ls command, informs you of the presence of the SurveillanceLocations.jpg file (the above screenshot).
The only thing that you need to do now is open the graphic file that you have found and to do that, you need to enter the open SurveillanceLocations.jpg command. After you get an appropriate confirmation and see the report, return to the game to start the next mission.
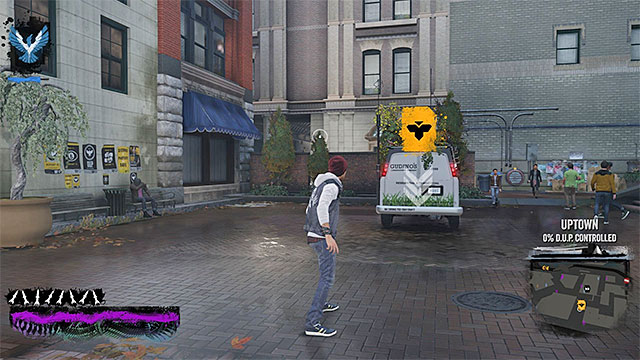 You need to return to the van that you followed in the previous mission
Head towards the marker located in the North-Eastern part of Uptown which is the van that you have been following in the fourteenth mission of the game. Interact with the marker to connect to your inFamous Paper Trail profile. If you have performed all of the steps, on the internet page, properly (locating the graphic file on the hard drive and viewing it) you will be allowed to start the fifteenth mission and it concerns tracking down, and destroying, the remaining vans. Press UP on the D-Pad to start the mission.
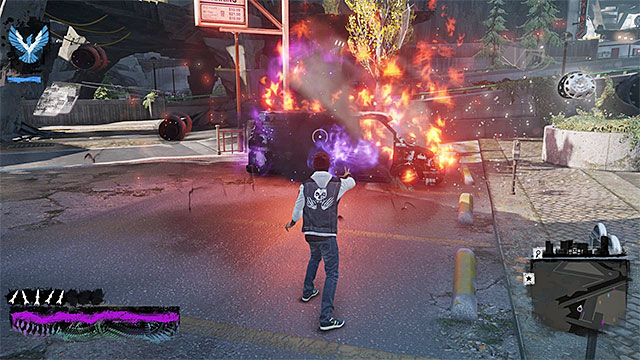 Blow up the vehicles that you find
As you probably have noticed, on the map of Seattle, there appeared four new markers - three of them are in Uptown and one in Waterfront. Head towards one of the vans and, after you get there, locate the vehicle inside the marked area(you will have no problems doing that, because each vehicle is parked in a well-exposed spot). You need to destroy each one of the vans and the easiest way to do that is by firing the strongest attack, available after you press R1. In the same way, blow up the other three vans.
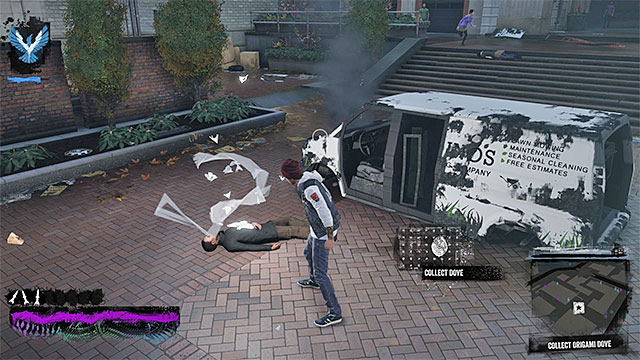 Collect the dove that Celia left behind
Finally, return to the starting point and destroy the van that you broke into, during the most recent visit to inFamous Paper Trail Project. Thanks to this, there will appear Celia and you need to pick up the Origami Dove that she leaves. Again, you need to leave the game and log on to your inFamous Paper Trail profile.
 New evidence
Log on to http://infamouspapertrail.com/ again, and access the profile window. This time around, you are not going to spend too much time on the inFamous Paper Trail Project page. Start by viewing Origami Dove #15. Apart from that, you can listen to the new audio file (General Slain) and read the article in one of the newspapers (State of Alarm). This is the end of the fifth chapter of the inFamous Paper Trail and you can now start the last, sixth, one.
Before you start the sixth chapter of the inFamous Paper Trail make sure that you have performed all the activities in the fifth chapter. What is meant here is the optional, fifteenth, mission and examining the clues connected with it, on the http://infamouspapertrail.com/ site. Find the new yellow marker on the map and head towards it.
 The starting point for the sixth chapter
The starting point of the sixth chapter connected with inFamous Paper Trail, is in the side alley, in the North-Western part of Waterfront. Approach the yellow marker and, after you have connected to the inFamous Paper Trail Project page, confirm that you want to continue.
 While following Celia, use paper trails for navigation
You will now have to chase Celia, i.e. "the paper bunny" again. This chase is no different from the previous ones, throughout the inFamous Paper Trail. It is impossible to lose the chase, because Celia will be stopping, on a regular basis, in wait for you to catch up. During the chase, use the Neon, or the Video powers, thanks to which you will not have any problems reaching the rooftops. This particular chase is a bit longer that the previous ones and it ends in the South Eastern part of Waterfront. Collect the Origami Dove that Celia left behind and reach the spot from which you need to send it, which is located to the North-West of here.
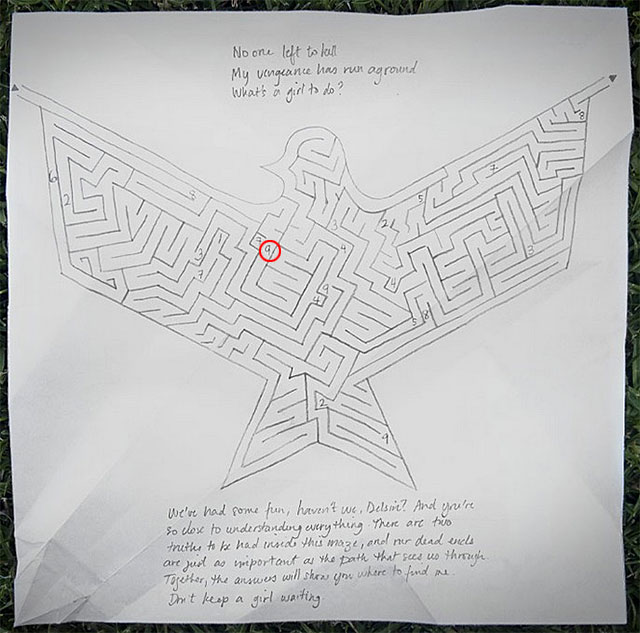
Log on to http://infamouspapertrail.com/ again, and access the profile window. Select Origami Dove #16 and after the next page loads, examine the last picture carefully. You need to solve a puzzle here and it consists in tracing the only possible way through the labyrinth. While solving the puzzle, you need to write down, or remember the digits that you encounter. The first one is nine, shown in the above screenshot. You can either complete the puzzle on your own, or use the solution provided in this guide. The number is - 98279935328.
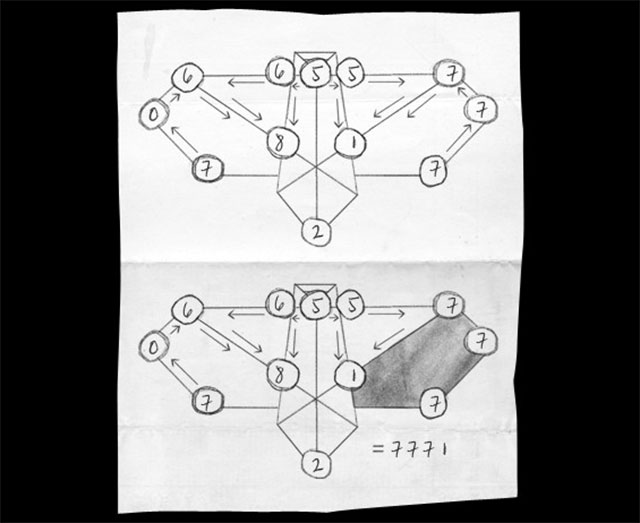 The slip of paper, with the code, is randomly generated
Now, access the DUP Intranet page http://departmentofunifiedprotection.com/intranet. After you log in, enter the code that you have just obtained. See the new report and, especially, pay attention to the last page, with the code on it. You are going to need it to complete the next inFamous Paper Trail mission (it is a good idea to perform a Print Screen and save the file somewhere on the HDD). Note - the paper is randomly generated!
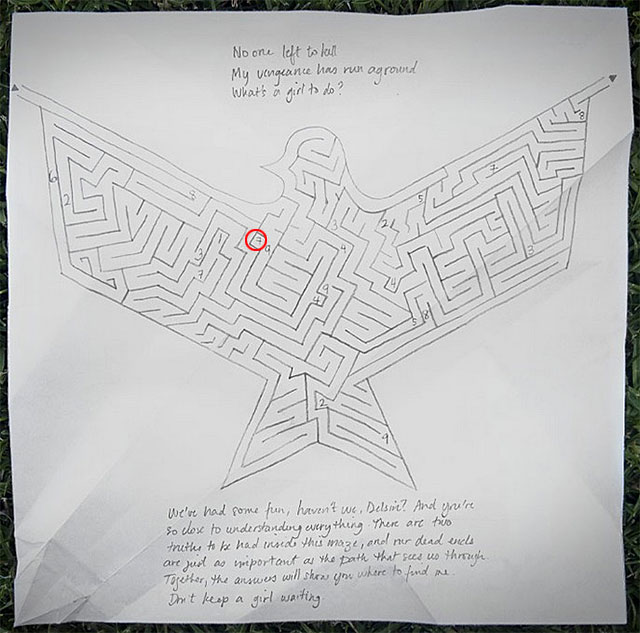
Once again, return to the drawing with the labyrinth connected with the origami dove 16. Again, pass through the entire labyrinth but, this time, take down the digits that you pass by, in the corridors next to you. The first such digit is seven. You can complete the puzzle on your own, or use the code provided in this guide. The code is - 74631428457. Enter this code into the browser at http://departmentofunifiedprotection.com/intranet and read through the new document. You can now return to the game and start the seventeenth mission.
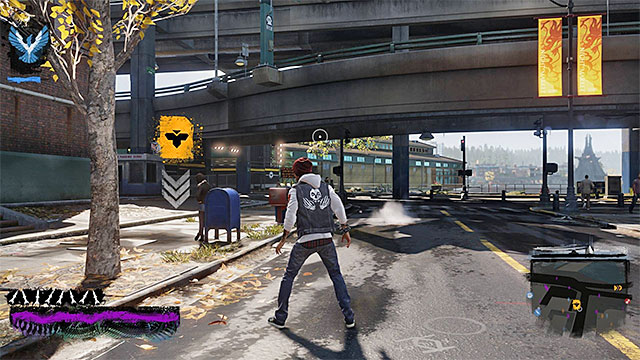 The starting point of the seventeenth mission of the inFamous Paper Trail
Go to the marker in the central part of Waterfront. Interact with it to connect to your inFamous Paper Trail profile. If you have performed all of the steps, on the internet page, properly (entering both combinations, basing on the analysis of the picture with the labyrinth) you will be allowed to start the seventeenth mission and it is going to concern taking photos in five different locations, all around the city. Press UP on the D-Pad to start the mission.
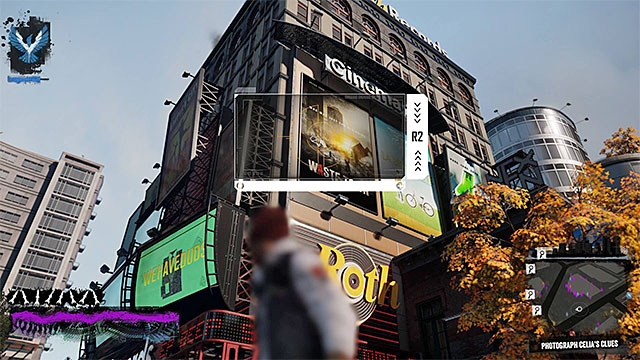
You can visit the locations, in which you take the photos, in any order but, to maintain some order, go to the point located in the North-Eastern part of Rainier. After you get there, stand in the marked spot and select the camera. The trace left by Celia has been shown in the above screenshot and you need to photograph it.
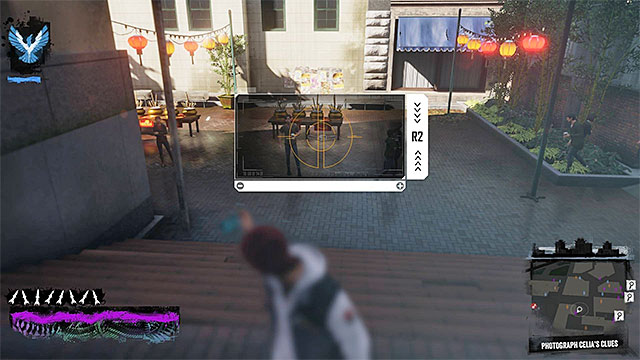
Now, head towards the marker in the Northern part of Rainier. The trace that you are looking for has been shown in the above screenshot.

Go now to the South-East and reach the marker in the central part of Rainier. Locate the next trace shown in the above screenshot.
Go now to the Western part of Rainier. The trace is in the spot shown in the above screenshot.
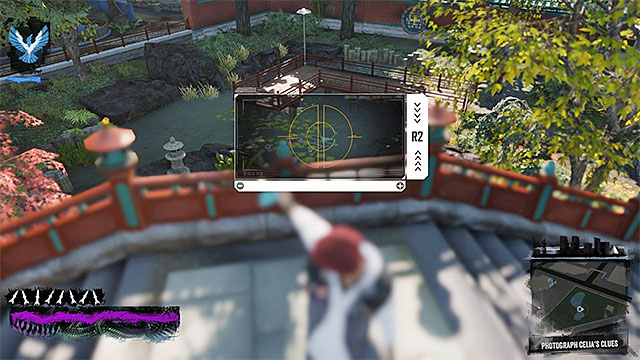
Finally, examine the marker located in the Southern Rainier. You will find the trace in the spot shown in the above screenshot. Return to the starting point for this mission to send the photos. You can now turn off the game and start completing the puzzles on the inFamous Paper Trail page.
Log on to http://infamouspapertrail.com/ again, and access the profile window. From the list, select the Dove Tag Photo and wait for the page, with five pictures, to load. The main premises of the puzzle is that you read the successive fragments of the code, using the slip of paper, with the picture of the dove, which you obtained in the first part of this chapter. I recommend that you open the drawing in a separate tab, or in a separate graphics processor (PrintScreen) to be able to perform the analysis on a regular basis.
Since the numbers on the paper with the code are randomly generated, you need to solve the puzzle on your own. The successive screenshot provided with this guide should help you arrive at the correct answer, because they inform you of the spots in which you obtain the numbers. The first part of the puzzle has been presented in the above screenshot - you need to take and write down the number from the field encircled in red. (in my case, it was 2).
Scroll down the page and start the analysis of the second photo (the above screenshot). You need to take one digit again (in my case, it was 1).
View the third photo (the above screenshot). Things get a bit complicated here, because you will have to take three digits here, which are connected with the area on the photo, which has been painted over. While taking the digits, you need to follow the path determined by the arrows, starting with the red circle 1 and ending with the red circle 3 (in my case, it was 571).
Also from the fourth photo, you need to obtain three digits (the above screenshot). You need to take them in the correct order (in my case, it was 568).
There is still the fifth photo that you need to examine (the above screenshot). This time, you need to obtain four digits and, just like earlier, you need to follow the path determined by the arrows (in my case, it was 7068).
 An example number
If you have obtained all of the digits in the correct way, you now have a twelve-digit code (in my case, it was 215715687068, but you will arrive, of course, at a completely different number). Select Delsin's Phone. Enter the number that you obtained and send it. Soon, you will receive a response and you will be able to return to the game, in order to start the next mission.
Note - if the phone buttons do not work, this may mean that you are using a browser that is not fully compatible with the page. Check, e.g. if the JavaScript processing is not disabled, or use another browser.
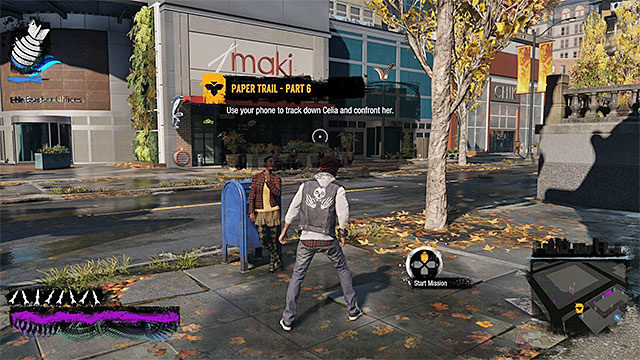 The starting point for the eighteenth mission of the inFamous Paper Trail
Head towards the marker in the central Waterfront. Interact with it to access your inFamous Paper Trail profile. If you have performed all of the steps, on the internet page, properly (determining the correct number and entering it into Delsin's phone) you will be allowed to start the eighteenth mission and it is going to concern locating Celia's apartment. Press UP on the D-Pad to start the mission.
 The entrance to Celia's apartment
Make it over to the rooftop of one of the taller buildings and start tracking the signal, using the phone. Head West, because Celia's apartment is in Uptown. You need to get near the balcony, high above, which neighbors the green door to the apartment. After a short cutscene, jump over to the balcony and wait until you are prompted to log on to the inFamous Paper Trail internet site.
 One of the four screens that provide you with the view on Celia's apartment
Log on to http://infamouspapertrail.com/ again, and access the profile window. Select the only available option, connected with exploring Celia's apartment (The Lair). Start the exploration. To navigate around the various parts of the lair, use the four arrow buttons. Additionally, click on all of the interactive spots, on each screen. You need, this way, explore all four new origami doves (their icons will appear in the upper-right corner of the screen - from now on, you can simply select them), and the six remaining areas- voice recorder (listen to the recording), corpse under the ceiling, the document nailed to the door, two drawings on the walls and the computer (ignore it, for now).
 You need the drawings on the walls to solve the puzzle
You will now take on the puzzle, similar to the one that you have already been solving, in the third chapter. You need to read four new numbers, by using the origami doves that you have, and the paintings on the walls, in two different parts of the Lair.
Zoom in the screen, on any of the drawings on the wall, and connect two of the origami doves, to those drawings. In both cases, compare the markings from the doves, with the ones that appear on the wall, thanks to which you will obtain new numbers. Do the same in the case of the second wall with the drawing. Doing all of the above will get you, as many as, four different numbers- 64675342331, 13898114116, 21634934183 and 45831175379 (they have been predetermined).
You now need to log on to the DUP Intranet by entering the http://departmentofunifiedprotection.com/intranet address into the browser. After you log on, start entering the numbers that you have just obtained (in any order). Each time you enter a number, the game displays a document and you need to read it through. Especially, focus on the area marked in the above screenshot. Take down the numbers from each of the documents (they are randomly generated). After you enter the four numbers, you will have an, almost, complete combination (there is only one value missing).
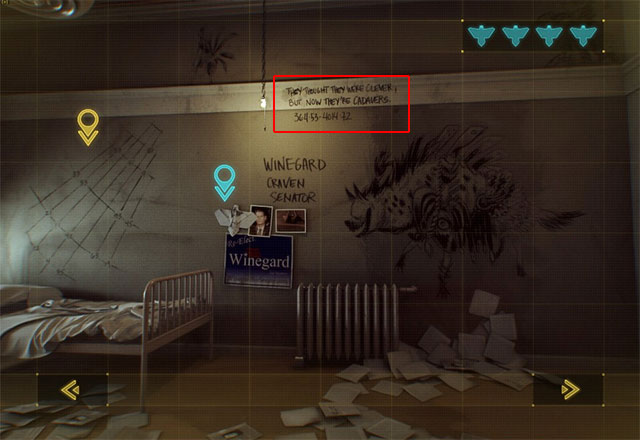 You can obtain one of the numbers from the wall in Celia's apartment
Fortunately, the missing value is not a problem, because on one of the screens from Celia's apartment, you will notice 36453401472. Enter that number into the browser on the DUP Intranet and read the last, fifth document, where you should find the missing value. Connect it with the rest, thanks to which you should obtain a complete code )in my case, it was 27-0-76-86-55, but yours is going to be different, of course).
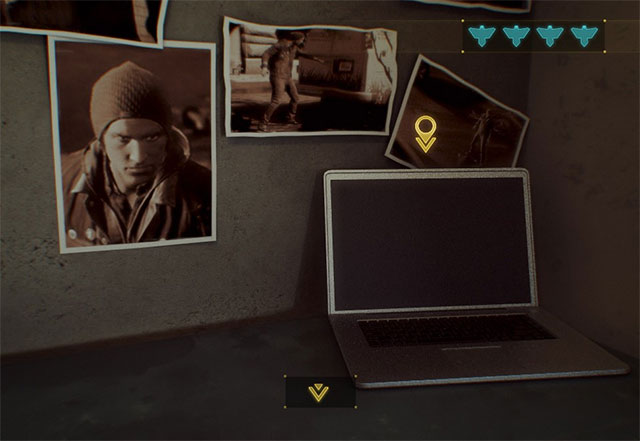 Select the computer
Return to the exploration of Celia's apartment and switch to the screen, where you can see the computer. Zoom in on the area with the computer and interact with it.
The final puzzle is about entering the answer to the three fields on the computer screen (the above screenshot). Into the field on the left, you need to enter the password that you determined (in my case, it was 27-0-76-86-55), into the middle one, you need to enter Hitori, and into the one on the right, you need to enter Saisei (you could obtain the answer to this puzzle by means of careful exploration).
Note - If the "Submit" button does not work, this may mean that you are using a browser that is not fully compatible with the page. Check, e.g. if the JavaScript processing is not disabled, or use another browser.
Start analyzing the correspondence. You need to scroll to the very bottom and click the link highlighted in the above screenshot. You can, for the last time, start the game and start the final mission of the inFamous Paper Trail.
Note - it is possible to complete the sixth chapter only after you have completed the game's story mode.
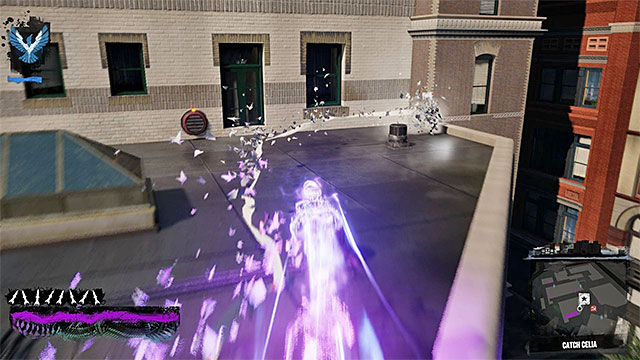 While following Celia use the paper trails for navigation
You need to return to Celia's apartment in Uptown. Interact with the marker to connect to your inFamous Paper Trail profile. If you have performed all of the steps, on the game's web site (reading the secret correspondence after breaking into the computer) you will be allowed to start the last, nineteenth mission. Press UP on the D-Pad and start the final chase after Celia. The premises of this one are the same as in the case of the ones that you took earlier so, you cannot lose it, because Celia will be stopping on a regular basis and waiting for you to catch up. During the chase, use the Neon, or the Video powers, thanks to which you will not have any problems reaching the rooftops.
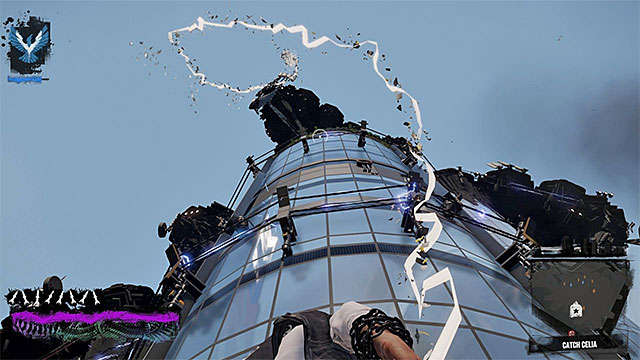 Use the power of smoke to reach the spot, in which Celia is
Towards the end of the chase, Celia escapes to one of the balconies of the tower that you have visited in the 17a or 17b mission. To get to the spot that she is in, you need to switch to Smoke and use the nearby venting shafts.
 The newly unlocked entrance to the tower
Celia escapes into the tower and you need to approach the door located on that balcony, to join her. After you get into the arena, where you fought your final battle with Augustine, pick up the last Origami Dove), which will start the final cutscene connected with Celia.
 One of Delsin's bonus outfits
Wait until you return outside. As a reward for completing inFamous Paper Trail, you gain access to Delsin's several new outfits. The most interesting is the one that makes Delsin resemble a bunny. Congratulations
Note - if you want to, you can log on to the inFamous Paper Trail web page again and see the last Origami Dove #21, but you do not receive any additional rewards for that.

 Impire Game Guide & WalkthroughinFamous: Second Son Game Guide & WalkthroughinFAMOUS Game Guide & WalkthroughInjustice: Gods Among Us Game Guide & WalkthroughIndigo Prophecy / Fahrenheit Game Guide & Walkthrough