
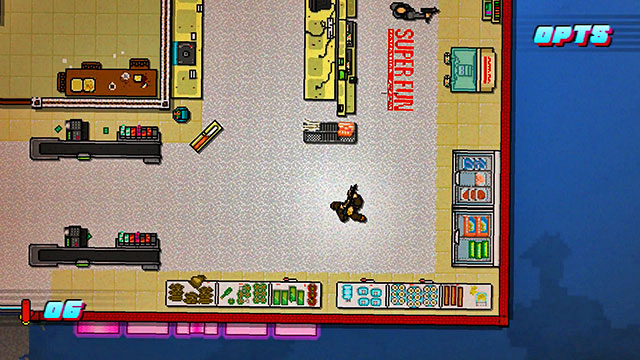
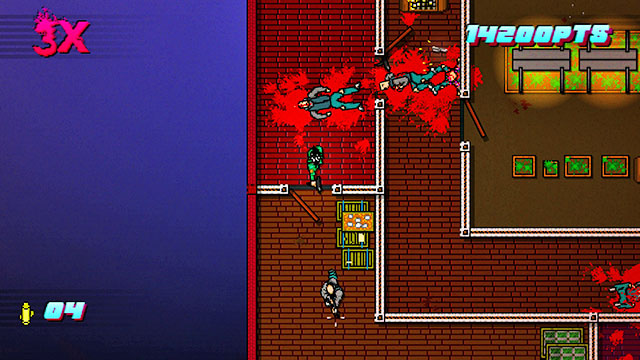
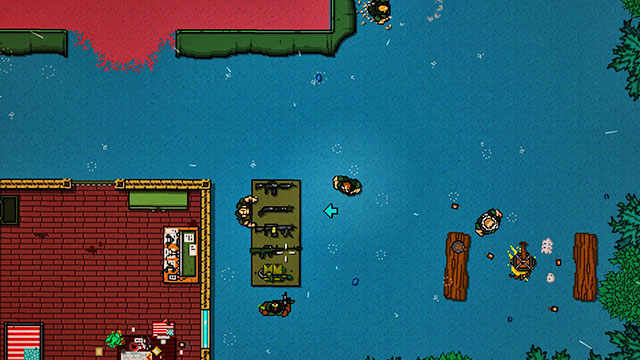
Hotline Miami 2 is the continuation of an independent game made by the Dennaton Games studios, which tells the story of a man that performs various missions for the "voice in on the phone". The second installment of the game tells about the aftermath of his activities, as seen from the perspective of a film-maker, a detective of the group of the masked vigilantes and several other characters. In each of the missions available in the game, your task is to clear a given area of the opponents, using a wide selection of melee weapons, firearms and special skills of the characters. After you complete each mission, you get to see the mission summary, where you are assessed, according not only to your effectiveness, but also your style and speed. This guide has been prepared basing on the premiere version of the game in English, for PC computers, basing on the gameplay at the medium difficulty level. Since it is dialogues only that have been translated, for the official version, it is English names and terms that have been used in the text. The guide omits tutorial mode, i.e. Pilot - Midnight Animal, as well as descriptions of cutscenes between the individual missions. In the missions that allowed choice of the character, ones that can freely use any of the weapons that you find, have been selected. This walkthrough should be perceived as a collection of hints. Bugs, random deployment of the enemies that move around freely, as well as the choice of the characters can affect the situation on the maps in the way that has not been presented in this walkthrough. Additionally, this walkthrough has been conceived with people who want to complete the game, but not necessarily with the highest ranking. Obtaining the A-grade, in each of the missions, and above, requires constant acting and adjusting to the situation on the map, which proved to be difficult to present in this text.
This guide for Hotline Miami 2 includes:
Lukasz "Salantor" Pilarski ()
Stay calm. Playing Hotline Miami is based on replaying certain missions, learning from own mistakes and dying a lot. It may happen that you will be replaying a given mission twenty times and more, although your approach will be different each time. In such a case, stay calm and do not vent your frustrations onto the replay button. This only adds to your annoyance and makes completing the game more difficult.
Be prepared for any possibility. Each plan to complete a stage, prepared by you, may end up in a failure. After you learn that, it is going to be easier to live each failure down and try again.
Remember about the option to look around. The range of vision of the character is short, and additionally it is limited by the direction in which it is facing. Therefore, often are the situations, in which you will be killed with a shot in the back, you are jumped by the dog out of the neighboring room, or you will be surrounded by enemies that there was no way for you to see. By looking around. You will know where to expect the attack from.
Pay attention to where you stop. Some of the objects on the map ensure you with cover. Some do not. You can walk over some of them, where as some other will block you. During the initial attempts to complete each of the stages, pay attention to which objects ensure you with protection and which ones can be shot through. Thanks to this, you will fare off better, in the situation of danger, and you will not lose your ammo on the opponents that are behind covers.
Remember about the range of vision, of each opponent. There is a predetermined range, to which each of the opponents can see. This means that in small rooms, you will be noticed, virtually, immediately, but not in long corridors. Thanks to this, you can eliminate opponents over long ranges, with pistols and shotguns, or sneak past them.
Make noise. Apart from the suppressed pistol, each weapon makes noise. Noise can attract opponents from the neighboring rooms, even if they will have to cross the entire map to reach you. Thanks to noise, you can decrease difficulty level of many stages. It is enough that you stand near door, fire and after a while, start killing everyone that tries to cross the door. On many maps, this technique allows you to kill, as many as, a dozen opponents, with minimum effort. The only problem here may be ammo, which you run out of, in the case of many enemies. In such a situation, as long as there are no big enemies around, you can also use melee weapons.
Attracting attention requires time. The majority of opponents do not pay attention to you, if you simply run in front of opened door. You need to stop, at least, for a moment, for the opponent looking in that direction to notice you. This is important in the case of the gunmen that are about to start shooting, if you stand in the passageway for too long.
Pay attention to windows. It is possible to shoot across every window. It can be done both perpendicularly to the window, and at an angle., as long as the bullet goes across a fragment of the window, at least. This is important because you get spotted mainly in situations, in which you are standing right in front of them, at the other side of a window. By standing at an angle, it is possible to shoot them, before they spot you. This technique also allows you to kill opponents at the other end of a long room, who are standing too far for an perpendicular shot to reach them. This is also true for opened doors and entrances without doors. For as long as there is no wall, between you and the opponent, you can shoot them at any distance.
Open the doors using your weapon. Every door can be opened and closed using bullets. Throwing a weapon or hitting with a melee attack doesn't work this way. A door opened with a shot stun, but don't kill - the door will absorb all the bullets. This way, you can shoot at the door stunning the enemy that stands right behind it and then eliminate his ally on the other side of the room. Not every gun works the same on doors. They will behave differently, depending on whether you use a shotgun or a machine gun, whereas a silenced pistol, nail gun or Irvina won't move them at all. Not every enemy - for example some bigger guys (called big guys in this game guide, because of their large size) and dogs - can be stunned this way. You should check which way a door opens and whether it is not already maximally opened.
Watch out for the door to the mission zone. After you enter a building, you may not be able to leave, until you kill all of the opponents inside. This is important, because in some of the missions, you encounter opponents right behind the door, sometimes right after you enter a map. Therefore, be prepared for having to kill someone immediately, without the option to retreat.
Do not worry about silent takedowns. Opponents do not pay attention to the corpses of the killed, even if they are treading over them. This is one of the reason to approach the game as a sneaking game and try to act from shadows. It pays off to keep quiet, only in situations, in which you do not want to fight against a bid group, or you are short on ammo. Otherwise, it is better to be loud.
Use covers. No opponent can see you across a wall, or closed door. This also goes for the opened door, as long as you and the opponent are standing at both sides of it. This allows you to remain unspotted for longer and to fight only some of the opponents in the room. Thanks to this, you can also lurk for the opponents and eliminate them quickly. Opening the closed door also allows toy to stun the opponent at the other side, but finishing him off makes you defenseless against enemy attacks. By hiding behind the door, you can attack the opponent with melee weapon and kill him at the spot, without worrying that that you will be attacked by someone else, while finishing him off.
Find out which rooms are soundproof and which enemies are "deaf". It may happen that, by shooting by a wall, you attract the attention of only some of the opponents. Also, it may happen that all of them will attack you. This is important because it allows you to plan on your actions better and eliminates the risk of being attacked from behind. Knowing that one of the opponents will always remain where he is, you can leave him for the end and even ignore him completely, until you clear the rest of the map.
Pay attention to the direction, in which opponents are faced. An opponent with his back turned at the door, will most probably not spot you. Similarly, the opponent that keeps looking in one direction, unlike opponents that keep looking around. This is important, because it allows you to kill them without worrying that they will turn towards you, at any moment, and attack you. Also, this also allows you to determine which part of the map can be left for later, after you clear the rest of it, without the risk of being attacked from behind.
Learn the routes of patrolmen. Most usually, they go along walls and allow you to stun opponents with doors. Spend some time learning those routes to make things easier for yourself.
Be careful who you want to stun. Dogs and big guys are resistant to hitting with doors. You can stun only normal enemies that can be killed with one hit. Every enemy stronger than that will be only pushed back and thus alarmed about your presence.
In this part of the guide, we omit the following characters: Pig Butcher, Detective Manny Pardo, Richter and The Henchman. It is because you play each one of these characters the same way. Pig Butcher is slightly different, but only because of the animation of the finishing move. The other five characters are different either because of some elements of the gameplay mechanics or the masks and weapons selected before a mission. You can unlock more masks and other equipment as you make progress in the game.
The group consists of four members. Corey in the zebra mask has the roll dodge skill. After you press the space bar, the character performs a roll that allows you to dodge melee weapons and bullets. You cannot stun anyone with the roll and you cannot carry any weapon, while performing it. There needs to be some interval between two consecutive rolls, which means that you cannot dash into a room full of gunmen and expect that you can dodge all of the bullets. This is a very useful skill, if you are attacked by several opponents at a time, or you want to shorten the distance safely, between you and the gunman. For example, you can open the door, dash towards the enemy, roll dodge from his bullet and kill him right after you get up. It is a good character for everyone, especially for beginners.
Tony in the tiger mask cannot use weapons, but each of his attacks kills on the spot. The only exception are beefcakes, who get stunned from these attacks. For this reason, he cannot get too many points for the diversity of attacks but, to make up for that, he has a considerable bonus to the special value. Tony is defenseless against gunmen, whom he needs to kill in melee. On the other hand, the character is very fast, does not need to worry about ammo and worry that the stunned opponents get back on their feet, behind his back. Additionally, if Tony stuns an opponent, he eliminates him automatically, without you having to take any additional action. In general, this character is very useful, but on condition that you do not want to use firearms and you are prepared to do lots of running, dodging from enemy bullets and hiding from gunmen. Therefore, it requires some level of familiarity with the game.
Alex & Ash are two swans. One of them carries a chainsaw, at all times, whereas the other one carries firearms. You control both of them at a time. You attack in melee with the left mouse button and shoot with the right one. After you have used up the entire clop[, the other character picks up the first firearm that you happen to find so, you do not need to swap weapons manually. What is even more, the chainsaw kills at the spot. Also beefcakes, although in their case, you will have to see a short animation. Both of the attacks can be performed simultaneously. This means that you can, at the same time, cut up the beefcake and shoot at the rest of the opponents. Therefore, this character requires some practice and learning the controls, because it is very easy to mix things up, while controlling it. Additionally, two characters mean twice as many opportunities to die (as soon as one dies, the other one gives up) and makes you move around carefully. It is possible for the other character to get stuck against a wall, or in the neighboring room, unable to cross the door, until the first one comes back. This twosome is good for the more experienced players, because it combines Corey and Tony, without the roll dodges of the former, and downsides of the latter.
Mark wears the bear mask and he starts off wielding two machine guns, and spare clips. After you press the left button, you fire and after pressing the right button, the character shoots to the sides, which allows you to kill opponents approaching from two different directions. In the case of stunning, the animation of finishing off, with bare hands, is a bit slower than in the case of the rest of the characters, but not as slow as in the case of Jake. After you use up ammo, the character plays like Corey, just without the option to do dodges. Mark is slightly better off, at the beginning, than the others, but the lack of additional skills makes him moderately useful, later into each of the missions. The character is good for everyone.
Has no mask, nor weapons to choose from. Also, he cannot pick up firearms up until he gets annoyed. After he picks up a weapon, he destroys it immediately and you receive 1000 points. Then, the current state of the multiplier goes up by one. Also, the character cannot use sharp melee weapons, such as knives. He needs to fight with blunt weapons, such as sticks and bars. Apart from that, while fighting, he does not kill, but he wounds everyone.
You cannot use firearms with this character, which makes the gameplay quite difficult. It requires you to hide behind covers, draw the attention of the enemies to you and disarming guns quickly. You can make the game easier by enraging the character. It is done by stunning two enemies and then killing them. Evan, after stunning, hits using the left mouse button and with the right button, you can interrupt the stun. To finish an enemy, you have to hit twice. It applies to fighting using your fists or melee weapons, however, in both cases, the opponent won't be killed yet. To make it happen, Evan has to continue hitting until the enemy stops moving. After killing two opponents this way, Evan will be able to use a special melee weapon and gun until the end of the mission. Moreover, the animation of finishing an enemy with bare hands gets longer. You can either try to finish every mission without using lethal weapons, or kill two enemies in the way described above and make the task much easier. Doing so will influence the ranking at the end of the mission, lowering the special statistic by 4000 points.
He has three items to choose from. Bodyguard provides roll dodge and a sword. The functioning of this skill is the same as in the case of Corey, whereas the sword is a specific melee weapon. It is slower than the rest of them and it takes some time to draw and sheathe the sword, which makes you defenseless for that time. On the other hand, the range of the sword is longer than of the rest of melee weapons. Therefore, with a bit of perseverance, you can complete quite a fragment of each mission, using the sword. In spite of that, it is better to swap it for a firearm, as quickly as possible. Mainly because it is useless against beefcakes.
As for the rest of the items, dirty hands is identical as in the case of Tony's, whereas bloodline as in the case of Mark's.
The Soldier has two weapons. He cannot swap them, nor throw them away and switches between them with the right mouse button. If you run out of ammo for firearms, you need to replenish it in the crates all around the map. First, you have lots of ammo, but with each replenishment, you get less and less. In other words, it pays off to save up on ammo, or you will have to fight with a limited amount of ammo. On the other hand, the melee weapon, the knife, functions in the same way as its counterpart that you loot from enemies.
From among the five available firearms, machine gun and shotgun are no different than the ones that you have been using, while playing as the other characters. The Big machine gun has a larger firepower and spread than the smaller machine gun, but it also uses up ammo faster and is louder. The Sniper rifle has fast and accurate bullets, but it reloads slowly. Apart from that, it is loud. It is an ideal weapon for precise elimination of distant targets. The flamethrower has a long range and it kill everything, including beefcakes. Additionally, it can burn up several opponents at a time, as long as they have been close to each other (not in a straight line, or the flame stops on the first one). However, it is quite loud and covers up the screen, which makes it difficult to control the situation. Apart from that, flames are stopped by windows and the weapon uses up ammo fast. Each of the Soldier's weapons is good, in its own respect. If you prefer a standard weapon, pick the machine gun or the shotgun. If not, try the flamethrower or the sniper rifle.
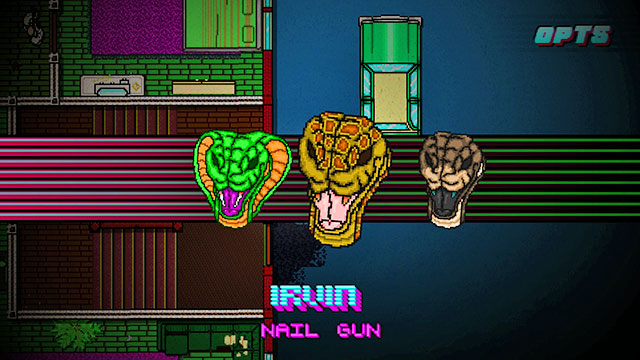
He has three masks. Jake makes each item that he throws, stun instead of killing. It is effective against everything, except for beefcakes. It is useful, especially if you run out of ammo for firearms. Also, this allows you to eliminate opponents silently, because the thrown object does not make noise. Irvin has a nail gun. This weapon goes as a suppressed pistol and it holds 20 bullets. Dallas, on the other hand, has the inner warrior skill. It functions like Tony's mask, but the difference is that the right mouse button activates nunchuks. After you press it, the character produces the weapon and swings it around for a moment. After a while, he starts running and killing everything within range, and stunning beefcakes. After several moments, the character stops and hides the weapon. While drawing and holstering the weapon, the character is vulnerable to enemy attacks. Also, he may be killed without problems. Apart from that, he is a killing machine.
Regardless of the mask, the character has a very slow animation of finishing off with bare hands - the slowest of all the characters in the game, save Pig Butcher. Take this into consideration, while trying to finish off the opponents close to the rest opponents that are still standing.
The difference between the pistol and the shotgun is in accuracy. While shooting ahead, over long distances, shotgun is nearly sure to hit the target, whereas the pistol not necessarily. As you decrease the distance to the opponent, the accuracy of the pistol increases, but it is better to kill the opponent, at the other end of the room, with the shotgun. The shotgun is also better when it comes to controls, which is quite inconvenient in the case of accurate shooting at bigger groups of moving opponents. In such a situation, it gives you a higher chance of hitting the targets, thanks to its spread, while this is much more difficult in the case of the pistol.
With the choice between the shotgun and the machine gun, it is better to go for the latter. The clip of the shotgun is, usually, of smaller capacity (2-6 rounds), and is slower to reload. Machine gun can fire with continuous fire, which makes it easier to clear an area of opponents. However, while using machine gun, you need to be careful and do not keep the firing button pressed the whole time. It is much better to fire with short bursts, which makes ammo last for longer.
Suppressed pistol is a specific weapon. A shot is ignored, for as long as it reaches its target. Even then, not all of the opponents take note of that. Using it, you can clear the entire room, by shooting through a window or a door, at the enemies at the other side of the room. Its downside is the necessity to shoot precisely and the spread, but if you do not want to be spotted, or attract attention, there is no better firearm for that.
In the case of melee weapons, you need to take two things into consideration - range and the speed to finish off. The former is important only at the beginning. With time, both knife and a bar will be equally effective. The latter is important only when you want to score additional points for finishing off. This action is quick with a knife and it does not require any additional action from you. Finishing off with a crowbar, or a bar, requires three strikes and, what follows, additional clicks. Therefore, the knife is better, if you want to finish off quickly, whereas finishing off with other weapons may end up with being surprised by the enemy. A lethal surprise, because you cannot break the finishing off animation.
Fighting with bare hands makes sense when you want to score additional points for finishing off the opponents. In many situations, e.g. while fighting dogs or beefcakes, there is no point in fighting with bare hands. If possible, get a weapon as quickly as possible. Fighting with weapons is easier. Apart from that, finishing off is of various duration, longer in the case of beefcakes and some characters, during which you are defenseless. Due to this, you need to use it with care, pay attention to the types of opponents that you take on and leave the ones, where finishing off takes the longest, for the end.
The basic thing that you need to remember, throughout the entire game, is the rule of one life. Everything living, on the map, dies after one strike or bullet. There are four exceptions here. The first one are beefcakes, that are resistant to the majority of melee weapons, they are invulnerable to throwables and, after being shot, they either die instantly, or after several seconds. The second exception are the sword fighters in the Take Over mission, who are capable of dodging each bullet shot at them. They cannot be reached with a throwable and they need to be killed in melee. The third exception is the special police officer in the Final Cut mission. After he is attacked, with any weapon, he loses his consciousness and he gets up after several seconds. He needs to be stunned first and finished off afterwards. This takes several seconds and makes you completely exposed to enemy attacks. The fourth exception is the situation, in which an opponent can take several bullets, fired from the pistol or the machine gun. All the rest of the opponents, i.e. humans and dogs, die instantly after they are shot. It is also worth mentioning that dogs get faster when close to you. Therefore, you should always try to shoot them from distance or attack with a melee weapon early enough.
Apart from the abovementioned opponents, the one-life rule goes for you also. This forces you to approach fights carefully. You can dash into a room full of enemies only if you have plan on how to clear it, and there are no gunmen inside. Otherwise, you die quickly, after a blow or after you take a bullet and you will have to start over. For the purposes of safety, you should fight away from windows, and especially, you should not turn your back at them. There is a high chance that you then get killed by the opponent at the other side.
For this reason, it is better to fight against the smallest groups of opponents possible, who are either going your direction, or following your footsteps. This will allow you to eliminate them quickly, without fear of being attacked by someone else. Also, it is better to fight in a small room with one door only, than in a big one with many windows. Fighting in big rooms is good only in situations, in which you have a firearm, the opponents fight without weapons and there are no shooters patrolling nearby area. Otherwise, a big room means a risk of replaying the stage.
While fighting with any weapon, you need to keep in mind the reload time. This goes for both firearms and melee weapons, which in the case of the latter, means the interval between two individual strikes. This is important, because you will often be fighting groups of enemies. You kill the first one and the second one takes advantage of the interval, between the strikes, or shots, and gets you. This is especially important in the case of pistols and shotguns, because the projectiles from both kill only the first target in their way. If the enemies are running your direction, one after another, and you shoot at them, you kill only the first one. You need to fire again to eliminate the next one. This problem is nonexistent in the case of melee weapons, which kills everything within range, regardless of the numbers. For this reason, one of the most effective tactics is luring opponents out, into the neighboring rooms, hiding behind the corner and killing them in one, or two, strikes of the knife or the bar. Also, this allows you to stun some of them with the door.
While fighting with firearms, remember about ammo. After the clip depletes, you can still throw your weapon but, in the majority of cases, you do not kill anyone with that. Therefore, after each shootout, switch your weapon to the one with more ammo in the clip. This is especially important in the case of shotguns and machine guns. A machine gun, with two rounds left, given its inaccuracy, is useless. The same goes for the shotgun, especially if you are going to fight a bigger group of opponents.
While fighting with firearms, you also need to focus on a given opponent, with the lock on. Roll over the opponent and press the middle mouse button. If everything is right, the reticle turns red and your character will be following the opponent that you have locked on. This allows you more precision, especially against moving opponents. It is not necessary to complete the game and it is difficult to use against big groups of enemies, but it is useful against single targets, e.g. after you enter a room, or lean out from behind a cover. You just have to be careful when the target dies, because lock on will the stop working. It may cause you trouble when fighting multiple enemies, because after killing one of them, the aim will suddenly change its position and the rest of your bullets will fly in a wrong direction. Lock on doesn't work when playing on high level of difficulty.
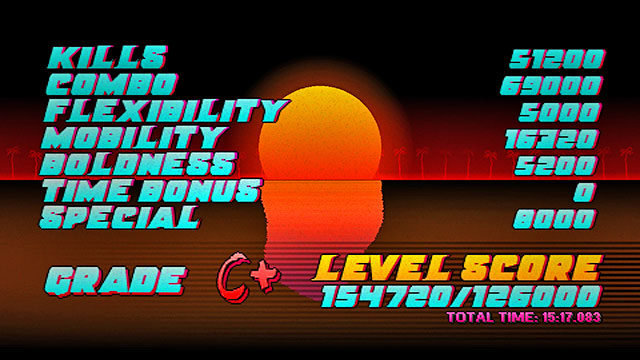
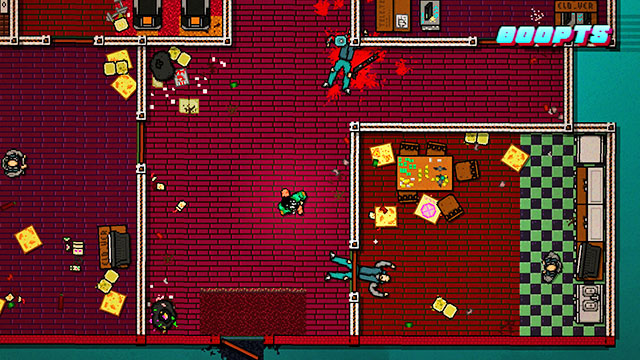
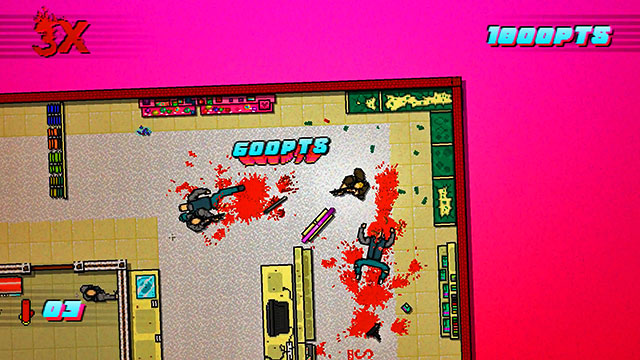
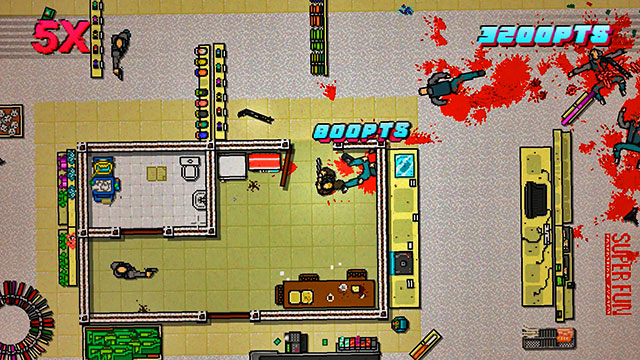
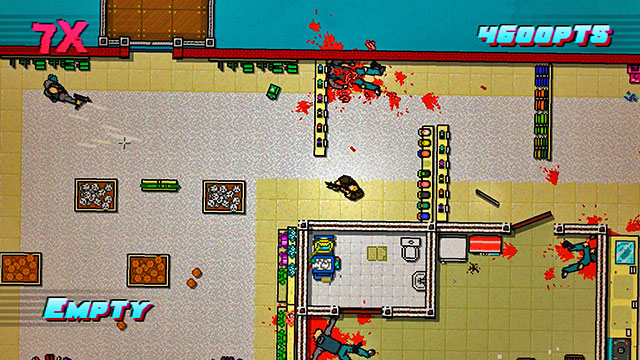
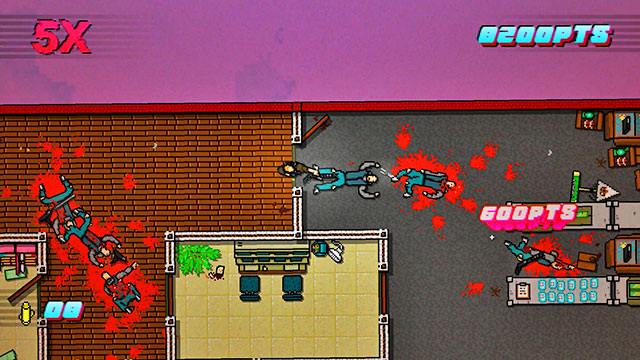
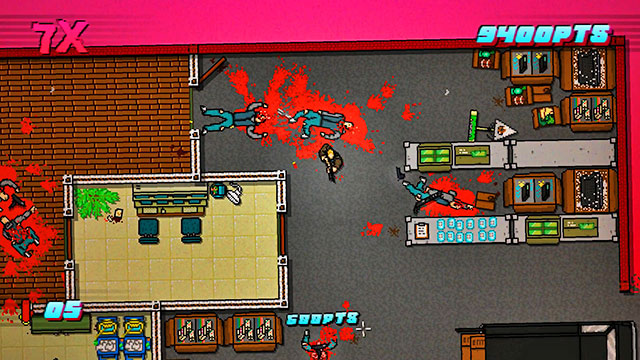
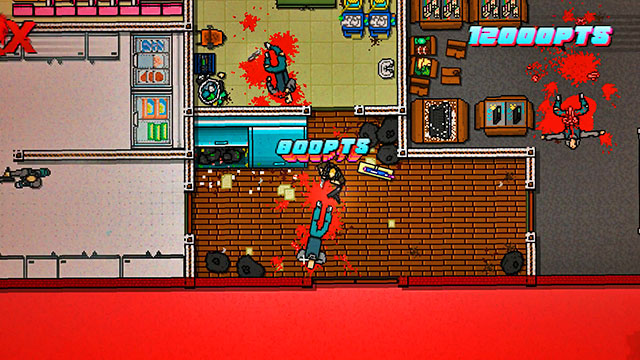
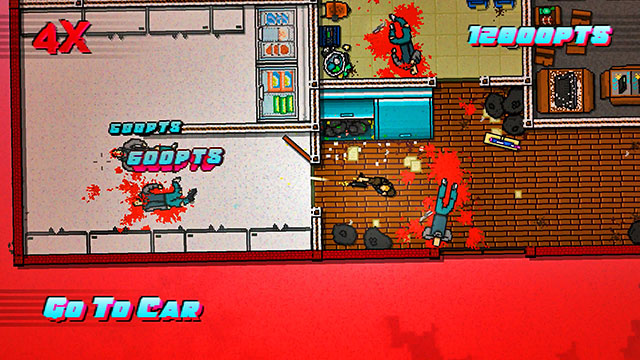
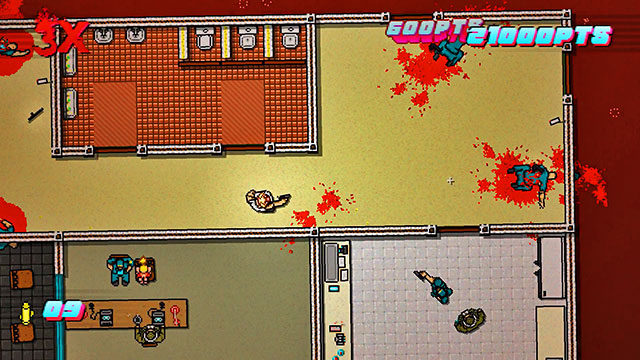
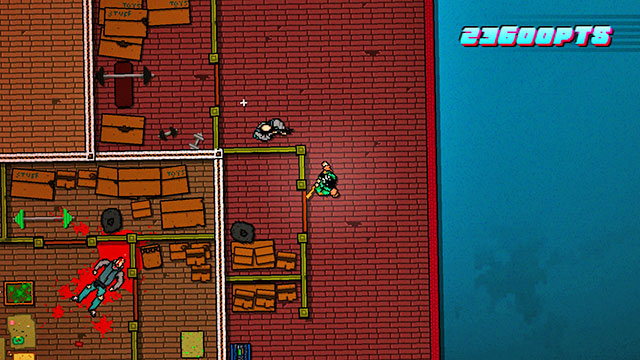
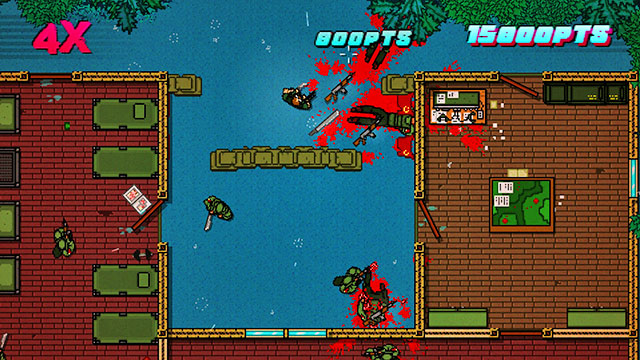
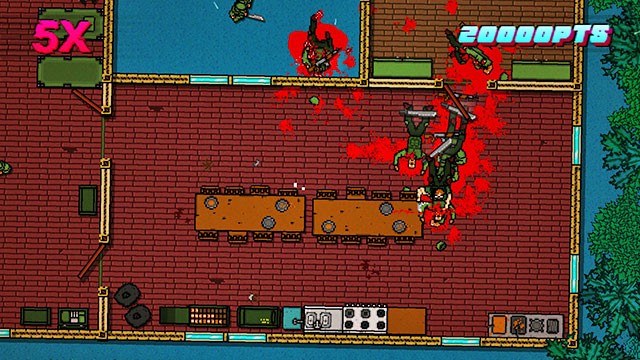
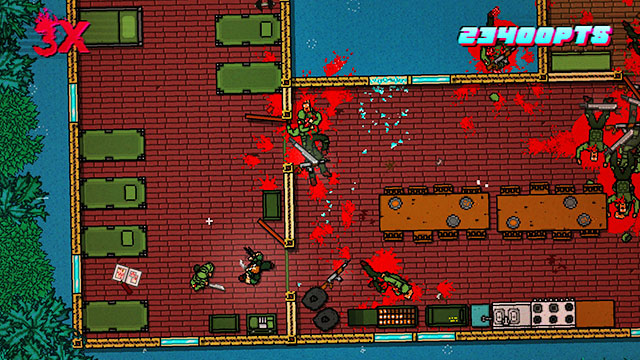
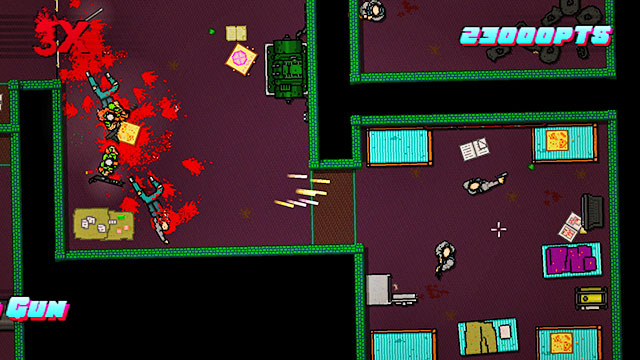
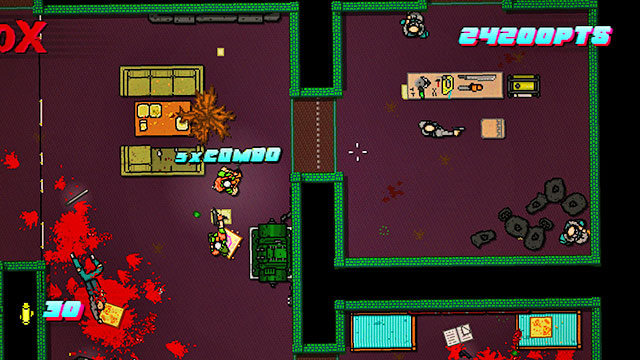
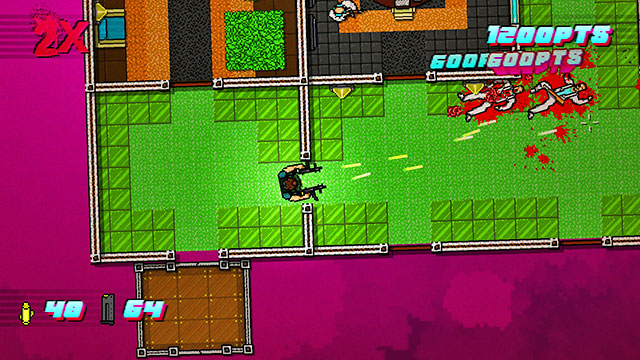
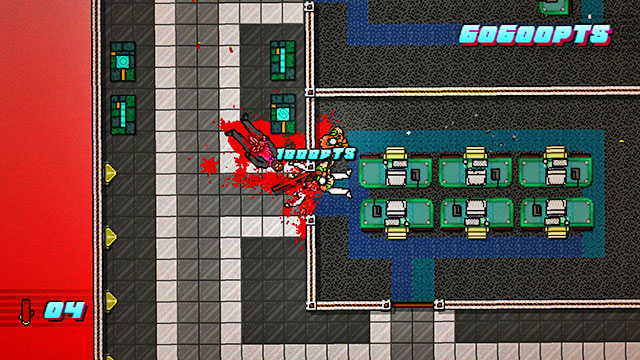
The results that you receive at the end of each mission is calculated, basing on several factors. First of all- kills. This value is determined by the number of opponents at each stage. It is constant and it cannot be changed, considering the fact that, either way, you need to kill all of the opponents, to complete the mission. Some of the missions allow you to spare several opponents, but it is unproductive, from the perspective of scoring. This category includes everything, ranging from kills with melee weapons, through killing with firearms, finishing off the unconscious. It is important that killing a knocked down opponent is more valuable than killing with melee weapon. The difference is 200 points, but with a high number of kills, this may make a difference for the overall score.
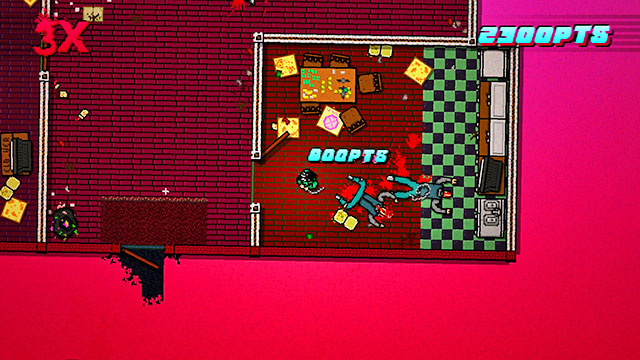
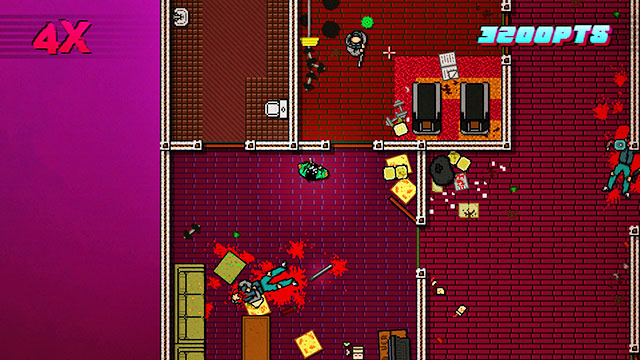
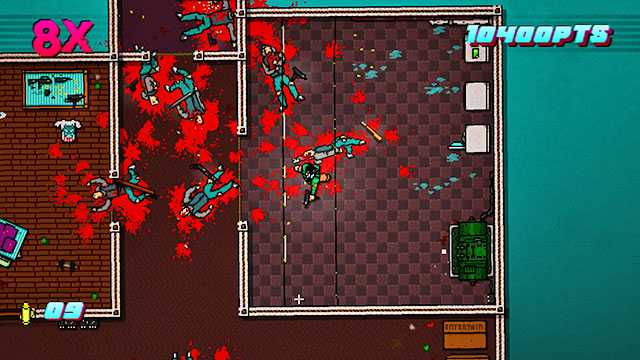
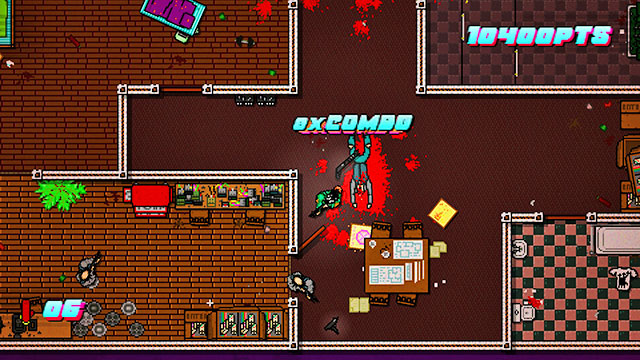
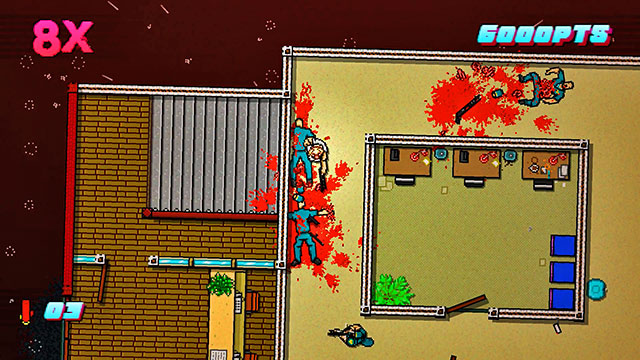
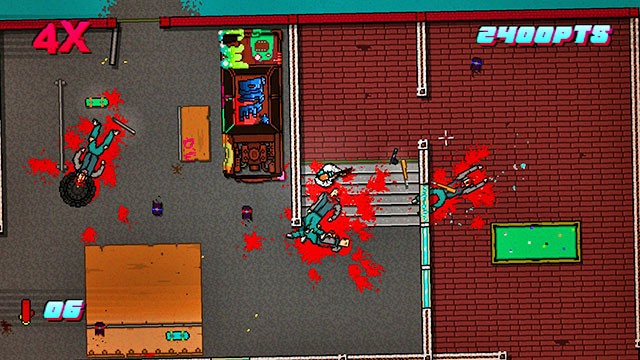
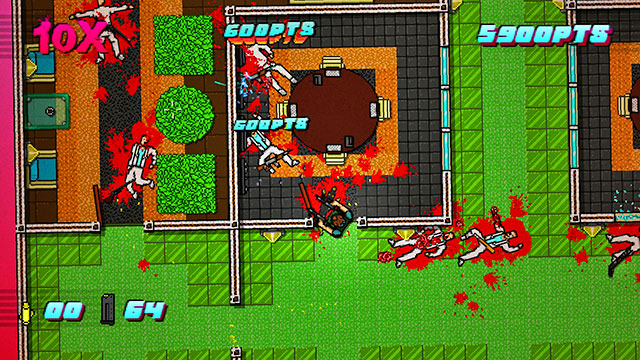
The second value is combo, and it reflects how many opponents you managed to kill within short intervals. The higher the multiplier in the upper-left corner of the screen, the higher the combo bonus. The later into the game, the higher the chance of obtaining a high multiplier, but you need to approach this with care. Combo is easy to lose, by accident, which makes you replay the mission and decreases the number of points available from the time bonus. The easiest way to bring up the multiplier is to use weapons that wound multiple opponents, at a time, i.e. all melee weapons and the shotgun. Machine guns and pistols are more troublesome, because they shoot in a straight line, more or less, whereas the shotgun has a wider spread. With shotgun, you can kill three opponents, side-by-side, whereas there may be problems with that, using the pistol.
Flexibility means the versatility of armaments. The more frequently you switch your weapons, the higher this value. This is especially important in the case of firearms, which depletes ammo sooner or later; as well as from the perspective of the characters that use no firearms and fight bare-handed. In such a case, the special value goes up.
Mobility determines how mobile you were. To gain as many points as possible, you need to restrict moments of taking a breath, to a minimum and keep moving around the map. It would be best if you combined movement with elimination of enemies.
Boldness means stunning with doors, throwables, and exposing yourself to enemy fire. The higher the risk that you take, the more points you receive. For example, you can stun and finish off an opponent when another opponent is running towards you and, after you are done, kill him also. You can start the shooting while dashing towards the enemies and finish them off while under enemy fire. Also, you can dash towards the enemy, shoot two of them, stun the third with the pistol that you throw and finish him off, while the rest are darting towards you. Each of these situation is highly risky and it may end in your death and, what follows, it is more valuable from the score perspective.
Time bonus determines if you have completed the mission fast enough. The game calculates the combined time that you have spent completing a mission, from the beginning, until you kill the last opponent (after you do, the timer stops). On this basis, it is determined if you earned the bonus. Each replay of the mission decreases the bonus, which in extreme situations amounts to zero.
Special depends on the character that you played as. For example, for Corey, his value is 8000, whereas for Tony - 22000. The more restricted the capabilities of a character, or the more difficult it is to play with that character, the higher the value.
Theoretically, to obtain the S rank, you should stay on the move the whole mission, fight shooters on close distances, stun the enemies using doors and throwing items and change weapons as frequently as you can. Moreover, you have to maintain a high combo and complete the mission in as little trials as possible. Practically, the only condition is to obtain the highest combo that you can. This way, you can obtain the S rank even if you finished the mission in 40 minutes using only one weapon. You can also try to work on mobility and flexibility, but it is not necessary. The only thing that you have to focus on is to obtain a very high combo in every location in a mission - during the early levels, you have to have 10 and during later chapters - 20 or more. If you achieve a high combo in two locations in a mission and you won't do it in the third one, there is a chance that you will "only" obtain A+ instead of S. Low combo earns less points, which makes one high combo (20) better then ten low combos (2).
To obtain a high combo, you have to get to know the location well - it's rooms, placement of the enemies, their weapons and so on. Next, you have to plan the way in which you're going to complete it, select the order of eliminating the opponents, picking up weapons and dealing with patrols. Therefore, a good tactic is to complete every mission three times. The first time is to progress in the campaign, the second to get to know the locations and the third time to achieve a high rank. Usually, three trials is enough to obtain at least A-.
Knowing every mission well will allow you to choose which enemy to kill as the last one and when to progress to the next location. The value of your combo is retained when changing locations, as long as you do it in a given amount of time. It means that with a bit of skill, you can finish every missions with a combo of 100 or more, which will give you not only the S rank, but also thousands, or even millions of points. Thus, it is good to plan every location in such way so that the last enemy in your combo stands near the exit. You may have little time to kill the first enemy after entering the next location, but most of them are built in such way that you should be able to do that. Moreover, the combo value doesn't resets when dying in a new location, so you can enter it a few times and get to know it to later focus on increasing your combo.
All the tips described above apply to playing on the high level of difficulty, with two changes. Firstly, every map gets turned around. Secondly, the placement of enemies is completely different. This means that if you want to achieve a high score, you have to plan every mission again.
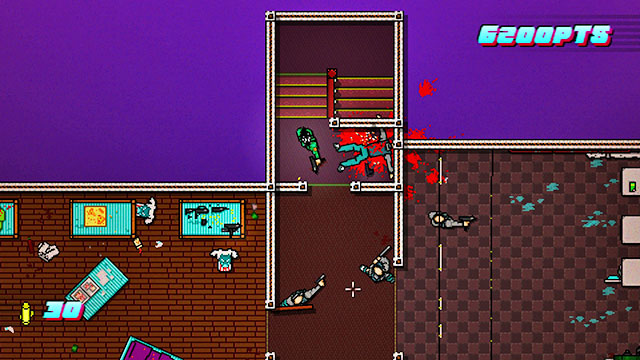
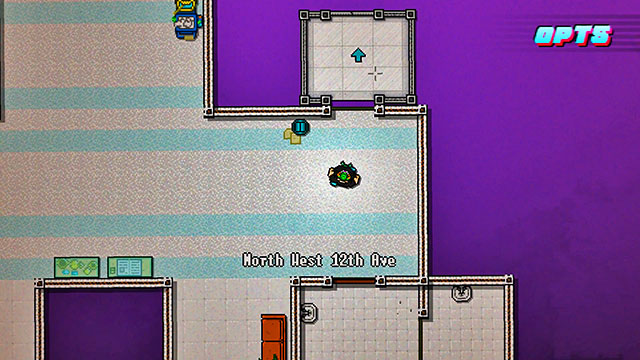
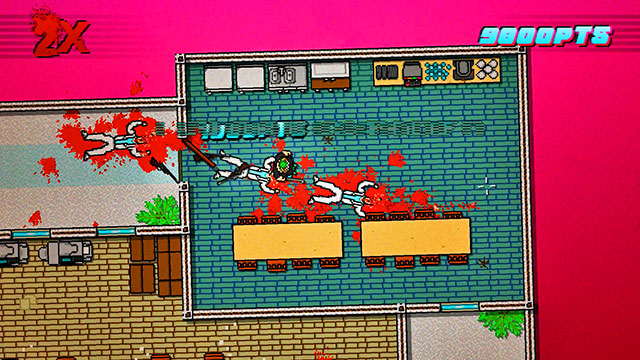
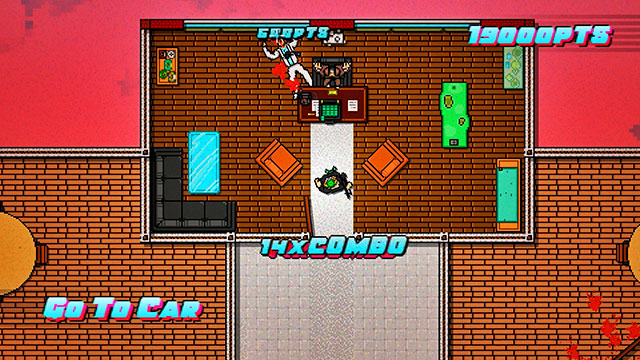
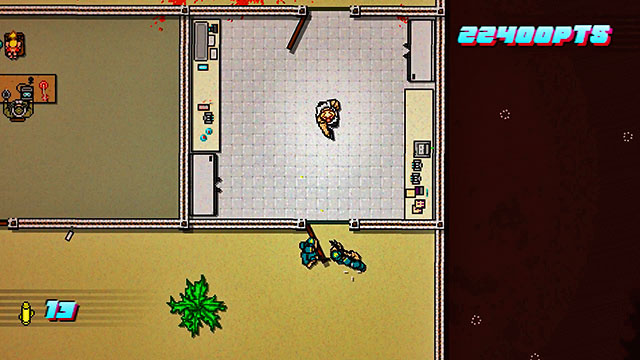
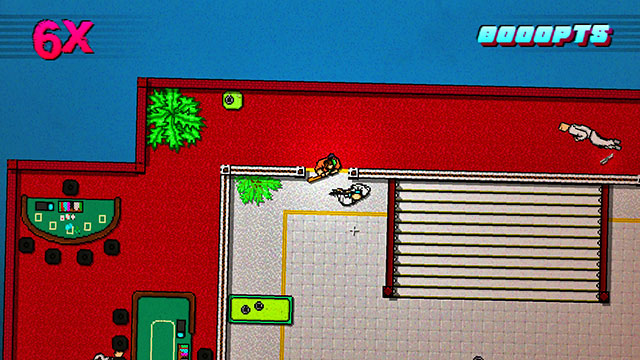
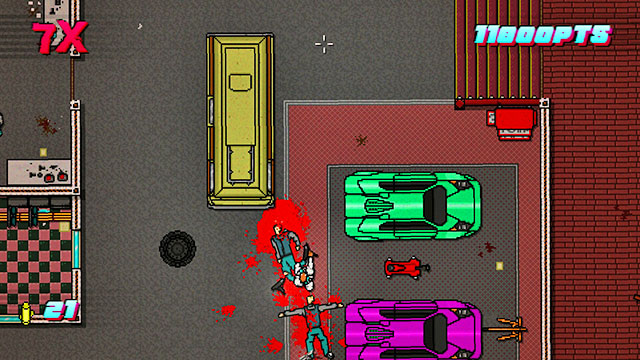
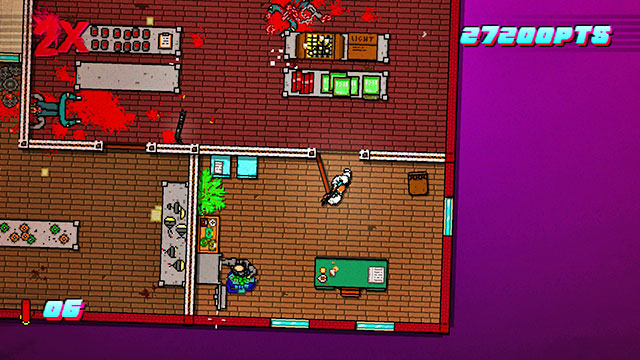
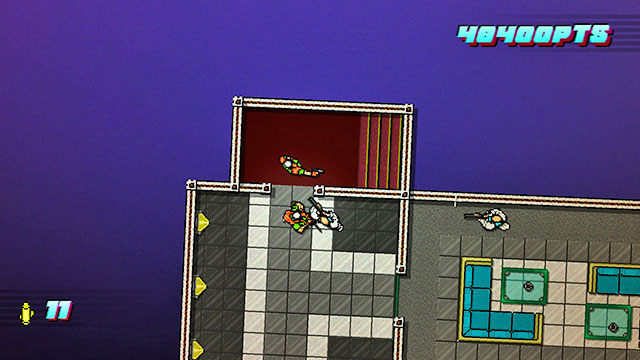
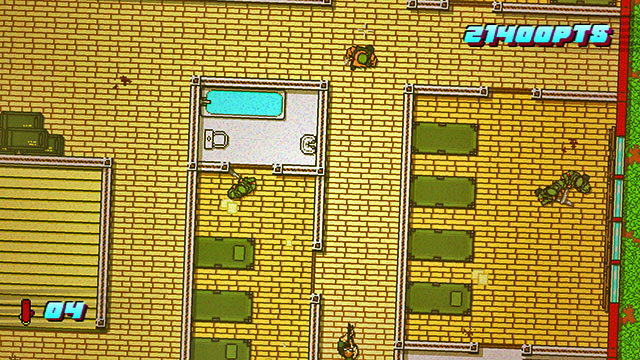
After you exit the car, cross the door. Mug the opponent with you melee weapon. Pick up the gun and climb higher. You spot an opponent with a firearm. Leave him be, for now.
Return to the entrance and cross the door to the right. In the kitchen, there is another opponent. Kill him. Up until now, the first opponent should be awake. Kill him also.
Go left. The lower door takes you to the next opponent. In the room above, there are two more. All of them have melee weapons. After you kill them, go right.
Te last opponent is to the right of the stairs. He has a firearm, but you can run up to him, before he fires. Defeat him and throw the melee weapon away. Take any firearm and climb upstairs.
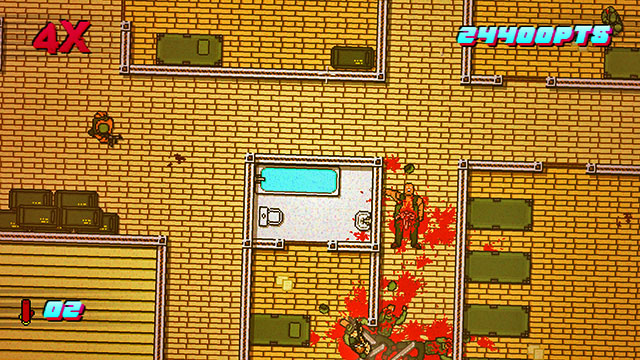
Once there, fire at the enemy by the stairs. The noise attracts the others. Shoot them when they are running towards you. More shots can attract more opponents. Keep fighting until they stop coming.
In the rooms to the left and to the right, there is an opponent with a firearm. There are two more patrolling the corridor. You have a choice, either wait for them by the stairs and shoot them as soon as they appear, or deal with the opponent in the right room first. In both cases, the noise should alarm the rest. Hide from the shooters and eliminate the rest of the opponents.
You can also deal with the one in the room on the left, in the first place where, on the table, in the upper-right corner, there is a machine gun.
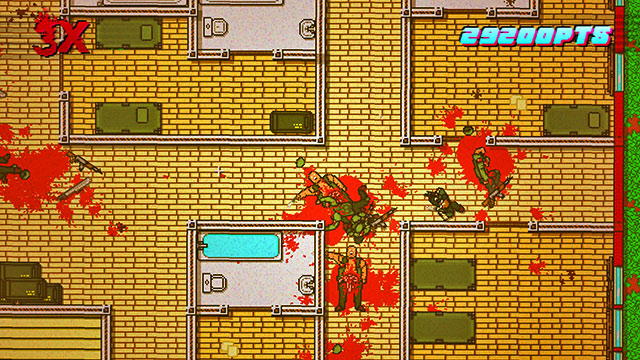
The last two are downstairs. Enter the room through the door to the right. If you are lucky, you stun one of them. If not, enter and shoot the one the closest to you. Get back and wait for the other to exit the room and shoot him also. Also, you can throw the firearm away, equip the melee weapon, appear in the door and retreat behind the corner, after a while. Both of the opponents will follow and you only need to attack them at the right moment.
After you have defeated all, return to the ground floor and get into the car.
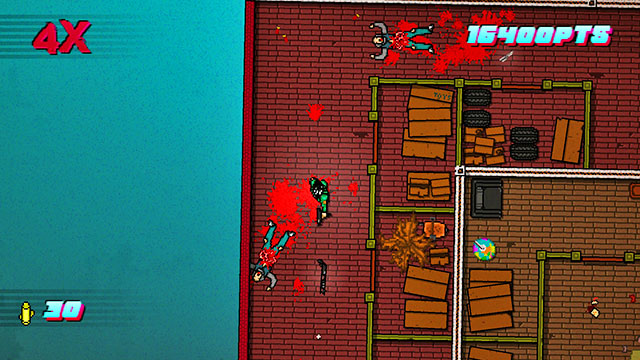
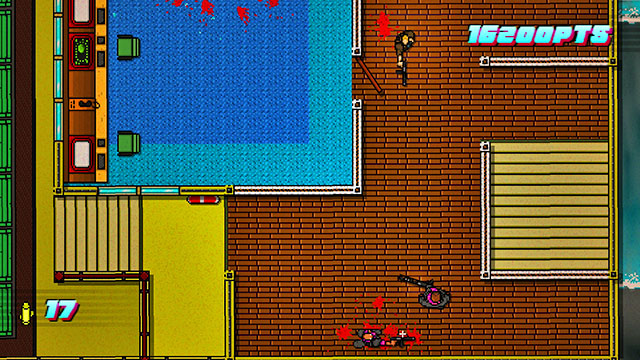
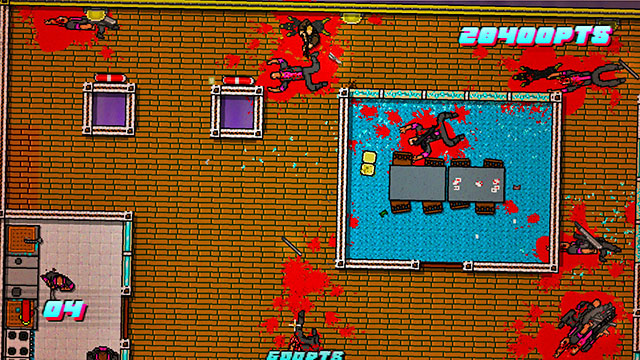
Approach the car's trunk and take the shotgun out. Then, enter the building. To the left, there is an opponent. If he spotted you, shoot him. If not, go right.
To the right, there is a shooter aiming at the wall. Kill him and climb upstairs.
Above the killed shooter, there are two more. One of them has a firearm, and the other melee weapon. You can lean out from behind the cover and shoot them, or lean out, for a moment, and then retreat, to have them follow you. A good method is also to shoot one of them, stun the other with the thrown weapon. Thanks to this, you receive more points for diversity of killing.
Switch the shotgun for the melee weapon and enter the room in the idle, through the upper door. Kill the first opponent and approach the wall on your left. Jump out, from behind the corner, dash towards the other enemy and kill him also. If you worry that he does not come, instead of melee weapon, you can use the firearm that you have taken from the first one.
Pick up the new weapon and go up. Lean out from behind the cover and shoot the first target. Do the same with the other, unless he is alerted by the noise. If you killed the opponent by the entrance, at the beginning, you can now go for the elevator. Otherwise, take a look around, to the left of the map. The last opponent has melee weapon so, he should not make any trouble. Pick up the gun with the most ammo and enter the elevator.
While upstairs, shoot the first opponent. The noise attracts more of them. Hide behind the corner and shoot at everything that comes. When you kill all of them, go right.

Wait for the shooter to stand behind the door and give it a push. Shoot the other opponent, and the third one, with his back turned at you. Finish off the stunned opponent and pick up his weapon.
Look down. Around, there are two opponents. You can lean out from behind the corner and try to shoot them. You can also lean out, attract their attention, get behind the corner and wait for them to come.
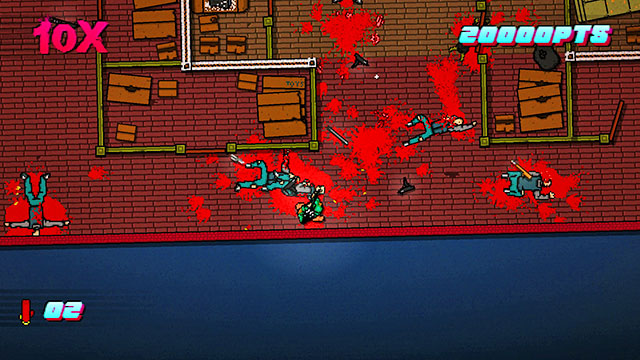
After you have eliminated both, go downstairs, up to the last door. Cross it and shoot the opponent. The noise may attract more so, watch out.
The last two are in the neighboring room. You can either enter immediately, and kill them both, or stun one of them with the door and finish him off, after you kill the other. In both cases, these are the last opponents on this map.
After you have killed the opponents, return downstairs. After you leave, you are going to talk to the police. After that, get into the car.
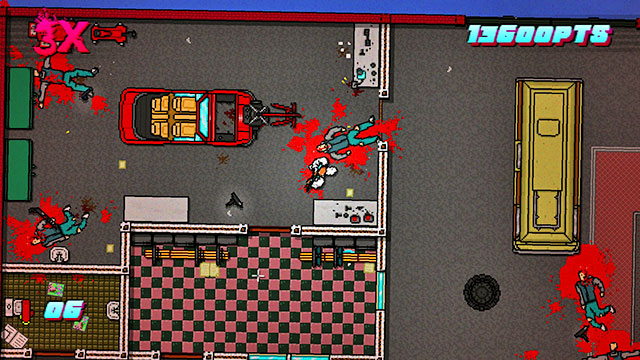
After you enter the building, go to the elevator to the right.
Once upstairs, go right. Enter the room and get out immediately. The opponents will follow. Stun them with the door, or defeat them with bare fists. Take the melee weapon. Try to kill them as close to the Southern wall as possible, or even better, in the neighboring room.
Go along the left wall and watch out for the window that you can be shot across. Enter the room and kill the shooter. If you have used the melee weapon, this will most probably go unspotted. If you used the firearm, you attract the opponents from the neighboring rooms. Kill them.
Enter any room. Wait for the shooter to stand next to the door, stun him and kill him. Take his weapon and climb to the lower level of the room, while aiming to the left. The room is being patrolled by two shooters. You have just killed one of them and the other one is remaining. If, after you killed the first one, you go down and shoot near the windows, there is a chance that you kill the other also. If not, you attract his attention with the shot so, be careful.

Go left. Through the windows, you will be spotted by the guards in the room above. Therefore, keep your weapon ready. After you defeat them, open the door. You can either shoot the shooters, or throw items at them. If you get them, they die instantly. Take the weapon of one of them.
Go upstairs. The corridor is being patrolled by one shooter. Cross the door and, while aiming to the right, shoot into the corridor. One of the bullets should reach the guard. The last two are in the room to the right. After you kill them, take a new weapon. The model does not matter, it is the remaining ammo that matters.
After you get upstairs, kill the first opponent and the second one also. Enter the room on the left and eliminate the shooter. The noise may attract more of them so, get ready. Take the firearm. Across the windows, shoot the opponents at the other side of the map. Then, walk over to the room on the right and do the same. Watch out for the shooters patrolling nearby.
Also, you can attract the attention of the opponents and hide in the room, with your melee weapon equipped. The opponents come over and let you perform a group massacre.
Sooner or later, you will have eliminated all of the shooters and there will only be opponents with melee weapons left. You can lay your fire on them or defeat them in direct combat. Also, you can attract their attention, by shooting across the windows, at the door.
The last opponent is hiding in the room at the very top. Open the door and immediately, fire at him.
After the mission, return downstairs and get into the car.
Wait for the cutscene to end. After you regain control, approach the first policeman and open the door. Pick up the bar and kill the other policeman with it. After that, go left.
On the next map, there are lots of policemen patrolling the area. Some of them have firearms. It is best to start the elimination with the patrol at the bottom. Get onto the stairs and run towards the wall. Then, lean out from behind the wall, let yourself be spotted and hide behind the corner. Wait for the policemen to approach and kill them. Take their firearms, kill the policeman with the weapon, in the passage to the right. The noise will attract more of them. Wait for them to approach and shoot them.
Stand by the stairs and look up. The other patrol should be close nearby. If you aim your shot well, you should kill both of the policemen. Go upstairs, where you find another policeman with a firearm. Shoot him and kill another policeman, who has been attracted by the noise.
Switch your weapon and go right. Some of the policemen are in rooms, whereas some are in the corridor. As soon as you start shooting, you attract their attention. Keep going right and eliminate opponents. Watch out for the opponents with firearms.
To your right, there are two rooms. In each, there is a policeman with melee weapon and on with a firearm. Shoot both.
Start with the upper room and deal with the bottom one. The upper one does not have door so, stunning the policemen is out of the question. After you do your job, head towards the next part of the precinct. Remember to collect another weapon with full clip.
After the cutscene, approach the window and fire at the policemen. Kill one of them and do the same with the remaining two, while they are running for you.
The gunshots will attract more opponents. Wait for them. One of them should have a firearm, probably a shotgun. Replace your old gun with this one.

To your right, there are several policemen and one that is stronger than the rest. Each shot you fire and a blow only knock him down and you can only kill him by finishing him off. The finish off animation is long so, first kill the other policemen. Gunshots should attract their attention.
After that, go right. Kill the two policemen in the upper-right part of the map. One of them has a firearm. Keep shooting and you attract the attention of the policemen in the kitchen. One of them is a beefcake. Keep shooting at him, while retreating. In the worst case scenario, you will have to wait for him to bleed out. In the best one, you kill him.
Under the kitchen, there are two more policemen, including a shooter.
If everything has gone right, you get the instructions to collect the keys. You find them on the policeman with two pistols. Note the arrow.
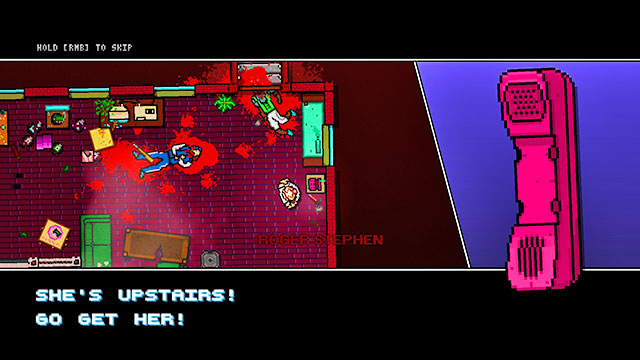
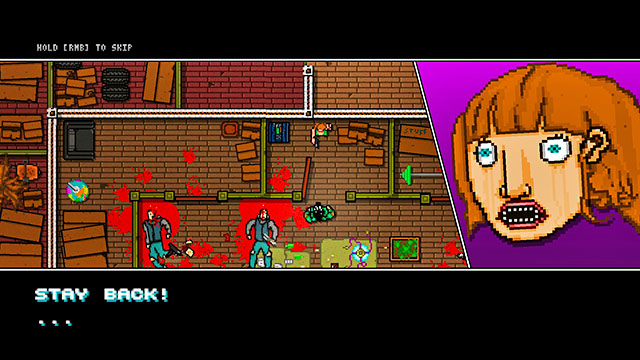
Pick up the keys and go to the room with a woman in. Open the door.
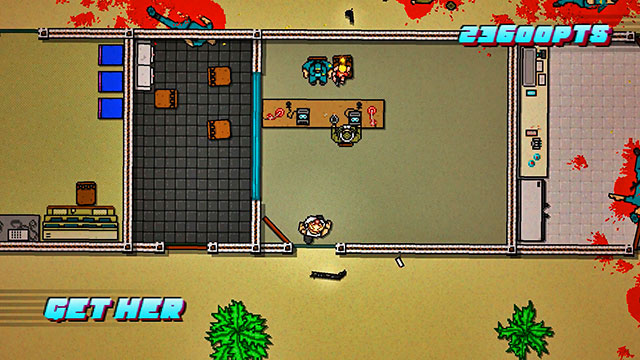
You are going to see a cutscene, in which your character is killed by the woman. After you see the instructions, press R. See another cutscene.
At the beginning of the mission, approach the bodyguard to the right. You start a conversation. After it ends, approach him and hit him. The writer launches at the guard and nails him to the ground. Press the attack key several times and the bodyguard starts bleeding. The writer tries to reanimate him, but to no avail. Walk inside.
While inside, go left. Let the two opponents, with melee weapons see you by the door. Beat them up, take their weapons and defeat the shooter. There will an opponent arrive from upstairs and the first two will wake up. With a stick, eliminate them all. Remember to break the shotgun.
After you have defeated all four of them, go right and enter the room at the other side of the floor. Employ the same tactics as before. If the shooter notices you, backtrack to the wall and wait for him to approach you. Again, remember to destroy the firearm and watch out for the opponent coming from above. If nobody came, the better for you. Remember that he is there, though.
Go upstairs. There, you encounter an opponent with a stick and a shooter, behind the corner. Dash into him and beat him up. Also, deal with the man with a knife, nearby. Go left. Before that, break the firearm.
You will reach a door. At the other side, there is a shooter waiting. Attract his attention and backtrack. Beat him up in the corridor. If he was already standing at the door, you can try mugging him there but, under no circumstances, should you enter the room. Otherwise, you will be spotted by the shooters downstairs.
Return to the entrance, by walking around the entire floor. Dash up to the shooter on the left, hit him and backtrack immediately. Wait for the other shooter and beat him up also. You do this only now, because earlier you had to eliminate the shooter at the upper part of the level. Otherwise, you would have been spotted by him. Break the weapon by the stairs
If you feel up to it, you can reverse the order - start with the shooters at the stairs, and deal with the one by the stairs afterwards.
While upstairs, dash into the room opposite the stairs. Beat up both of the opponents inside and switch the weapon. Wait for the first patrol to arrive nearby. You can lure them inside or hit the first one with the door. Beat up both of them and break their weapons.
On the upper floor, there is one more patrol. You can do either of two things. You can go to the room to the left, beat up the opponent there, return to the first room and attack the patrol from there. Also, you can simply wait for the patrol. Either way, it is better to defeat them now, even if you lose your multiplier this way. Both of the patrolmen use firearms so, defeating them is going to make your life easier. Remember to destroy the weapons.
After you beat up both of the shooters, deal with the rest of the opponents. They are in the nearby rooms, either by themselves, or in pairs. Some of them have firearms, and others melee weapons only. You can lure them out or attack them individually. Pick what works best for you and clear the floor of the opponents. You can leave them be also, but there is no good reason to do that.
After you clear the entire map, go to the sauna. Here, you watch a cutscene. If, so far, there is an opponent surviving, after the conversation he ceases to be hostile. This is why, before you enter the sauna, you'd better clear the entire stage. Otherwise, you lose points.
After the conversation, return to the car.
Go upstairs. Along your path, you encounter two opponents with melee weapons. Kill them, take the weapon. Next to the stairs, there is a shooter. Kill him and collect his weapon.
On the upper floor, first kill the opponent to the left. He has a firearm. Immediately after wards, kill the one to the right. Just in case, you can do that while still on the stairs, or attract them with some noise. It is possible that gunshots will lure out the opponents in the room to the right. Kill them also. Switch your firearm to the melee weapon.
Enter the room on the right. Cross the toilet into the room with mattresses and go downstairs. Kill the enemy with the firearm.
Exit to the corridor and go right. Kill another shooter. If you are lucky, you stun another one with the door. Eliminate him.
Go left. defeat two more enemies. As you go to the shooter, cover yourself with the door, which will win you some time, before he spots you. Kill him and take his weapon.

Eliminate the enemy in the corridor, and another one in the room on the left. Gunshots may attract more opponents so, be prepared for their arrival.
Another opponent is waiting I the bottom-left corner of the map. He has a firearm so, it is best to kill him with fists or with the melee weapon.
The last enemy is standing to the left of the stairs. He has melee weapon so, he should not be a problem. As you go towards the stairs, try to collect a weapon. Melee one will do.

Upstairs, first kill the guard with melee weapon. You can attack the one with the firearm while running, you can also lean out from behind the corner, for a moment, get back and wait for him to come. Take his weapon and shoot into the corridor. If you are lucky, you kill one, or two more enemies.
Go downstairs. Along your path, keep an eye on the passage on the right. Sometimes, there is a shooter there, who spots you immediately.
Go downstairs. In the corridor, there are two enemies, including a shooter. Kill them. If you run out of ammo, pick up the weapon of the killed opponent. In the corridor to the right, there is a dog and another one patrolling the room upstairs. You can provoke both of them and attract them with noise. Either way, it is better to eliminate both, before you proceed.
In the room, there are four opponents, who it is better to kill by shooting at a distance. The fifth one is in the room to the right. You can kill him first and then deal with the rest. You can also kill the majority of them and the lonely one leave for the end, as long as he is not attracted by the noise. Either way, you need to use a firearm. The majority of opponents here have one.
Return to the corridor and go right. There is an enemy with melee weapon waiting for you there. Shoot him.
Fire your weapon into the corridor. If you are lucky, you kill the last enemy. Or two, as long as one of them has not been attracted by the noise, into the central room. If not, approach and deal with them. Watch out, one of them has a firearm. You can proceed now and fire a burst occasionally, or look around.
After you kill the last enemy, return to the big room with several shooters. Go to the room in the upper part and enter. There, you find a girl. Talk to her.
After the conversation, return to the car. Do not enter the room or the woman shoots you and you will have to clear this floor all over again.
Enter the room and shoot the man to the left. You have a suppressed pistol so, you will not alert anyone.
Go right. On the stairs, there are two guards and another one next to the billiards table. Wait for the first one to appear and shoot him. You can wait for the other, or lean out from behind the corner and shoot him also. The third one has melee weapon so, he is not too much of a threat. Do not worry about the windows in the lower part of the room. Nobody will spot you.
Stand above the billiards table and shoot down. You should get a shooter in the lower- right part of the map.
Climb down the stairs, next to the sofas, there are two more shooters. Lean out from behind the corner and deal with them both.
Three more are on the left. If you have been using a loud weapon, they will most probably attack, while you were dealing with the previous two. If not, they are waiting. Kill them with ranged shots. This way you will have cleared the entire floor, Go to the next part of the stage.
Of the entrance, go down and kill the two enemies with melee weapons.
By the cars, there are more enemies, with firearms this time. Shoot them or lure them behind the corner, and deal with them using a stick or fists. Also, remember to fire at the opponent in the room to the left. If you keep appropriate distance, he does not spot you, even in spite of the windows.

Go upstairs. If you have done everything correctly, all you find here are corpses. If not, get ready for a fight with one, or two survivors.
To the left, there are three more shooters. One of the enemies is patrolling near the door, whereas the remaining two are on the left. You can kill them by shooting across the door, at an angle. If there is anyone surviving, enter the room, attract their attention and retreat, while aiming at the door. They will get to the point of your gun themselves.
At this level, there should be three opponents left. Two of them are with firearms and you find them in the room on the left. Shoot them at a safe distance. The last one is in the bottom-left room. It is possible that he died, while you were shooting at his colleague, across the window. Otherwise, shoot him across the window or enter the room. He has melee weapon so, before he reaches you, you will be able to kill him.
After the fight, return to the first map and go right.
After you enter a new map climb upstairs and kill the shooter. Immediately, turn down and kill the dog.
The noise should attract the nearby opponents. Deal with them all and replace your weapon.
You find more enemies in the room to the right. There is a dog and one of the men is facing the wall. Deal with the animal and watch out for the first of the shooters. Kill the other one from a safe distance.
The bottom part of the map is being patrolled by a dog. In the room behind the window, there are several opponents. Carefully, lure them out with your firearm, e.g. by shooting across the windows, and wait for them to arrive. Kill them all.
Go to the room which the last group dashed out of and proceed to the right. Stun the first enemy with the door and shoot the other one immediately afterwards. If the table is in your way, get back and wait for the opponent to get to you.
After you kill both, go to the last room. Kill the man at the safe and take the bag.
Return to the car. Before the mission ends, you will have a short conversation with the remaining bandit.
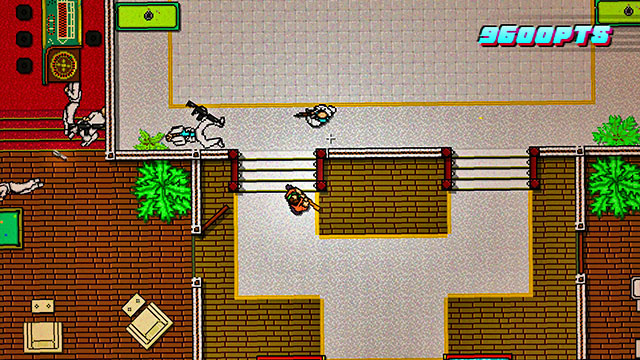
Dash inside and head towards the wall. You will attract the attention of the first enemy. Kill him. A bit below, there is an opponent with a firearm. If he spotted you, wait behind the corner and kill him. If not, lean out from behind the corner and hide to attract him. Take his weapon.
With the weapon, clear the room on the left. You can dash inside, guns blazing, and kill them all, but it is way safer to lure them out, or kill them from a safe distance.
You encounter two more enemies in the rooms below. You can either leave them for later or kill them now. Both of them have melee weapons.
In the room on the right, there are four enemies waiting, including shooters. Kill the first ones, from a safe distance and the rest of them, by leaning out from behind the corner.
With a bit of luck, you also get the bandits in the next room. Approach it and deal with the remnants, carefully. After that, climb up the stairs. Before that, get a weapon with a full clip.
Behind the first door, go right. Shoot the guard on the left. The noise will attract many opponents. Stand your ground and kill them all.
Go left. Open the door and shoot the enemies. Also, you can lure them out, into the corridor. In such a case, stand in its upper part and shoot everyone that appears in the door.
Kill the opponents in the room below and climb upstairs.
Shoot into the corridor. With a bit f luck, you kill both of the enemies there.
On the right, there are three more. Lean out from behind the corner and shoot at them. Then hide and wait for the rest to come.
The last enemy is in the room in the bottom-right part of the map.
After you have cleared this level, return to the ground level and go to the central room, where there is the rest of the crew waiting. See the cutscene of meting out justice.
At the beginning of the mission, you get to choose your weapon. At first, it is restricted to a machine gun and a shotgun. Pick the weapon and climb upstairs. You are going to cross the jungle now.
After you approach the building, go down. Open the door and shoot at the beefcake. Kill him on the spot, or he kills you. On the spot.
The noise will attract a large group of enemies. Get ready for their arrival. You can shoot, but it is much better to use the knife. The enemies are walking in a row, which makes it easier to kill them all.

Not all react to the shooting. Go to the upper room and eliminate them. Just in case, you can shoot, but the knife is just as good.
You find the last two enemies by the map exit. They are too far away for the knife to be used safely so, shoot them both, by leaning out of the room carefully. Leave this map.
After a while, you reach more developments. Open the door and shoot the first enemy. Wait for the rest to come around, attracted by the noise and deal with them also.
Downstairs, there are two enemies with melee weapons. Kill them with the knife.
Fire across the window to kill the big enemy. You o not need to kill him on the spot, but wound him, at least, so he bleeds to death after several seconds. He does not have a firearm, therefore, you can ruin from him in a straight line. As for the remaining two enemies, also shoot them across the window, or after you get inside.
The last enemy waits hidden behind sandbags. You can shoot him but, he is easy to get in the spot in which he stands, after which you use the knife. Leave this map and proceed.
While on the last map, carefully lean out from behind the corner and fire. This will attract several opponents. Wait behind the corner and kill them with the knife, as soon as they come close.
After that, enter across the door above, into the room on the right. Carefully, open the door and fire at the first enemy that you see. As for the rest, you can shoot them also, but it is better to wait in the passageway and use the knife.
Go left and shoot the rest of the enemies. If the noise has not attracted them all, eliminate them from a safe distance.
After you clear the map, leave via the only possible way.
The first enemy on the left has melee weapon, the next one has a firearm. You should be able to kill both, bare-handed.
There are two more enemies on the right. One of them has a firearm. In the room, there is a beefcake so, make sure that you have enough ammo in your weapon.
You find the last two at the bottom, on the right. Just like earlier, one of them is standing still, whereas the other is patrolling the area. In the room, there is a shooter so, kill him as soon as possible.
After a short conversation with a crew member, descend into the sewers.
Kill the opponent that is patrolling the area on the right and go up. You encounter two mere enemies with melee weapon and a dog. Watch out for it and, if necessary, hide behind the corner.
Ahead, on the left, there are two shooters. The first one is patrolling the corridor, whereas the other one is patrolling the recess on the left. It is best to distract them one after another and wait for them to come around. The distance between you and them is so small that both of them will be trying to shoot at you.

In this part of the stage, there is another guard dog patrolling. Kill it.

The last two targets are in the corridor on the right, to the next part of the mission.
Go up. Kill the enemy standing right by the door and deal with another dog. You can use the firearm, which will make it possible for the dog to jump at you. Leave the beefcake for the end. Remember to keep, at least one bullet and keep retreating. After you shoot him, it takes several seconds for him to bleed out.
In the upper corridor, there are several enemies and a dog. Some of the enemies have firearms. Either shoot them, or lean out from behind the corner to have come to you.

Take a weapon from one of the corpse and look at the room on the left. There, you find several opponents patrolling, including shooters. Kill them from a safe distance. Mind the other dog that has appeared behind your back!
Go down. In the big room, there are more enemies. It would be best to shoot them.
The last-but-one group is in the bottom-right part of the map. They are far enough, for you to shoot them from a safe distance.
In the room above the previous one, there is the last threesome waiting for you. replace your weapon with one with full clip and shoot all three of them. It is best to stand below the entrance and shoot at an angle. The noise should lure out all of the remnants. Alternatively, you can enter and attract their attention.
After this, return to the car.
Of the car, go left and up, at the bridge. Immediately, after you enter the map, be prepared for the first enemy. Beat him up and take his weapon.
There are two more waiting above. Approach them and kill them. Only after that, return to the first one. If you finish him off fast faster, there is a chance that the remaining two will surprise you in the act and kill you.
Go right and keep hiding behind the containers. Always plan your route in the way that allows you to end to the left of one of the containers. Along your path, kill to a head all of the enemies with melee weapons. It is best to start above and go down, so you eliminate all of them. Only then, approach one of the firearms on the ground.
On the right, there are five shooters waiting. All of them are hidden behind natural obstacles and they start firing, as soon as they spot you. The problem is that you cannot shoot them, until they get up. Therefore, you need to lean out from behind the corner in the way that does not allow the enemy to see you. A moment before, fire several bullets in his direction. If you are lucky, you get the enemy right after he gets up but, before he fires. If you did not time this well, the policeman gets shot or the enemy will manage to hide again. Timing here requires some practice but, you should quickly grasp it. You need to repeat the pattern five times, up until you eliminate all of the shooters. Take the weapon of the last one and go ahead. Use the passage in the upper part of the map.
Kill the two men with melee weapons. It is best that you do that as close to the left side of the map, as possible, to prevent attracting attention of the others. Then, fire at an angle, across the window, at the bit opponent. Hit him once, at least. The noise should attract others.
Hide next to the stairs and eliminate everyone that comes close to you. They may be the opponents from the room below, the ones with firearms, patrolling the area on the right, or the enemies from below, armed with melee weapons. Wait for the situation to get calm and go right.
Lean out from behind the corner and shoot both of the enemies on the right. Take the weapon of one of them.

Stand to the left of the main stairs and start shooting down. With a bit of luck, you kill the enemies patrolling the area, including a beefcake.
If the mission has not yet been completed, backtrack to the beginning. It is possible that you missed someone with a melee weapon. Take the stairs above. Before that, remember to replace your weapon with one with a full clip.

While atop the stairs, shoot into the passage. You kill a dog, several enemies and you lure out more of them. Keep shooting, until you run out of targets.
After the initial massacre, enter the nearest room. Kill the guard. Shoot the next one across the window (aim at an angle). If you are fast enough, he does not spot you.
You can also reverse the order, because killing the guard in the first room is nearly bound to attract the others. While in the room, you can fire at them across the window.
In the upper-left part of the map, there are several more opponents and another dog. Some of them might have survived, after the first shooting. Finish them off. They do not have any firearms so, this is not going to be difficult. Then, shoot down. You should kill, at least, one enemy.
In the room on the left, there is a beefcake. Shoot him across the window and eliminate the other one.
The last two enemies are oblivious to your presence. You an kill them with fists. Take a new firearm and go left.
Enter the room, stun the shooter and finish him off. Pick up the weapon - either his or yours - and shoot the enemy at the other side. If you are using a loud weapon, the noise will attract more enemies. Exit the room and retreat to the entrance, while firing at the attackers. Watch out for shooters. If you have been shooting quietly, do the same but this time, do not expect any immediate attack.
After you have eliminated the initial wave, replace your weapon, lean out from behind the table and shoot the opponent. You will also take out several more.
Also, you can look up and fire several shots at the enemies in the glazed room. Replace the weapon and go left, carefully.
On the left side of the map, there are enemies with melee weapons, both outside and inside the room above. After you kill them, stand next to the door and shoot to the right. You should kill, at least, one enemy. Finish off the rest and go left, across the passage marked by the game. Remember to replace your weapon.
Immediately, turn up and fire to kill the first enemy.
A bit higher up, there are several more. Immediately, go there and deal with all of them. Do not approach too close to the window. replace your weapon.
Shoot the beefcake across the window. This way, you attract the attention of the rest. Deal with all of them. Behind the window, there also is a dog patrolling the area.
After you kill it, take a look into the upper room. There are two enemies with melee weapons there so, it is nothing serious. Kill them. Across the window, deal with the patrolling enemies, as long as there are any left.
In the glazed room, on the left, there are four more. Shoot them from a safe distance and deal with the opponent above.

The last two are in the room below. Fire your firearm at them.
Leave the level and return to the car. At the door, you are going to have a conversation with the police.
In this mission, you are going to control all five members of The Fans so, prepare for the changing gameplay style, every level.
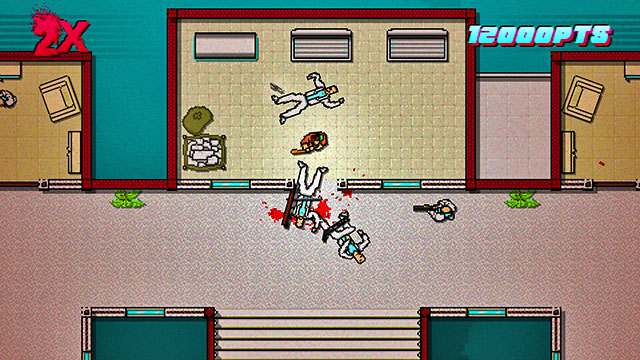
You start off as Mark. Go right and shoot the three guards in the corridor. Then, open the door above and kill two more. It is possible that the noise will attract the dog in the room on the right so, be careful.
Enter the room by opening the door carefully. Kill both of the shooters.
Turn right and shoot at two more guards across the window.

Exit the room and go right. Shoot the beefcake across the window. With a bit of luck, you also kill the other guard. Watch out because he has a firearm.
Return to the entrance and go up. While by the trees, shoot ahead. In front of you, there is a glazed room. Inside, there are several opponents. With a bit of luck, you will kill them.
Go a bit higher up. Kill both of the opponents in the right side of the room, and across the window, in the neighboring room, two, or three more. If you do not kill them, you may be spotted and shot at. In such a situation, retreat and wait for them to approach.
As you go higher and higher, watch out for the remaining opponents, including a dog, which might have been attracted by the noise. It is best to lean out, across the door, and scan the area. If it is clear, go up.
Stand at the door and shoot to the right. Thanks to this, you kill the last two opponents on this floor, patrolling the room. If you failed, approach the glazed room and deal with them, by shooting across the glass.
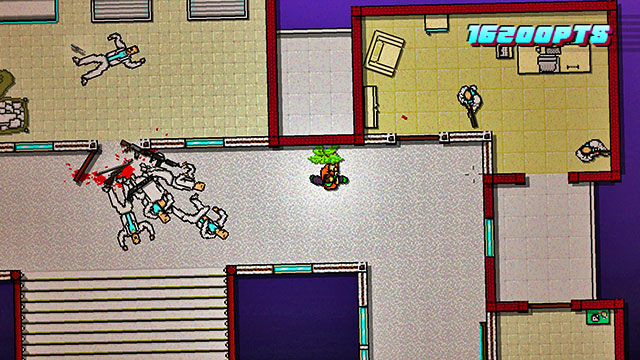
After the cutscene, you cut to Corey. Exit the elevator. Beat up the first opponent. Take his weapon and shoot the other one. Finish off the first one.
Open the door on the left and attract the attention of the opponents. Retreat into the corridor and kill them there. Take the weapon.
Return to the corridor and go to the door on the right. Wait for the beefcake to pass by it and kill him. The noise should attract the others. If so, hide behind the corner and wait for them. replace your weapon with the one with a full clip.
Return to the room with the table. Push the door and shoot the first opponent. Immediately afterwards, the rest will attack. Retreat and kill them all. You should especially watch out for the dog.
If you have done everything right, the noise will attract another beefcake. Shoot him from a safe distance. After that, replace your weapon.
Deal with the opponents in the room on the left. Both of them have firearms so, first open the door, shoot the first one, retreat and wait for the other to come by.
The upper corridor is being patrolled by two opponents. Shoot them from a safe distance.
If you have made much noise, you find the final enemies in the upper-right corner of the map. If not, you should find them in the left part, possibly in the bottom-left corner.
After you have cleared the floor, you cut to Tony. Go left. Knock down the beefcake and kill all the remaining opponents that attack you. For now, stay away from the window or you will be shot at.
After you have killed the first group of enemies finish off the beefcake. With the area clear, approach the door below and make the enemies attack you. Hide behind the corner, kill both of them. Return to the door and attract the attention of the shooter. Lure him out of the room and kill him next to the previous ones.
Go right. Stand in the passageway and have the shooter spot you. Move and he will follow you. Kill him and proceed.
At the next door, there are two shooters waiting. One of them is pacing around and the other stands still. Ahead, there is a glazed room, patrolled by three more shooters and a beefcake. Your task is to lure out the first two and then the rest. You can do that either by the columns, or run up to the wall between the pair of windows and wait there for them. Do not hide behind the corner, by the windows. The enemies are nearly sure to spot you there and shoot you. For safety, it is best to lure the enemies out, one-by-one.
After you kill them, approach the door. Inside, there are two opponents, with melee weapons, waiting.
Towards the end of this stage, you are going to fight two shooters and an opponent with a melee weapon. Encourage them to leave, by standing next to the window. Wait for them to come to get you and kill them.
Towards the end of this mission, you cut to Alex & Ash. Depending on how the game generates the initial deployment of enemies, you can encounter the first one either in the room on the right, or right by the starting point. In the case of the former, wait for them to pass by the entrance and chainsaw them. In the case of the latter, kill the enemy straight away.
Stand in the corner of the room and fire. The noise will attract more guards from the neighboring rooms. Kill them all. Fire again. If nobody is coming, go right.
On the right, you are going to fight four opponents, mainly shooters. You can take out some of them by shooting. As for the rest, dash up to them, avoid detection and kill them in direct combat. If you keep shooting, there is a chance that you attract the enemies in the neighboring rooms.
Backtrack to where the initial massacre took place. Stand at the wall and fire. If nobody is coming, make sure that the area is clear. It is possible that the fight with the previous group of enemies attracted several of them. If the area is clear, go to the xerox room.
In the next one, there is a beefcake and an enemy with a firearm, waiting for you. Remember about the order- first kill the shooter, the beefcake afterwards. It takes too long to finish the latter and it may be interrupted. The only exception is the situation, in which you can shoot accurately. In such a case, the order does not matter.
Your next target is the patrol of two shooters in the corridor. Stun the first one with the door, kill the other one and finish off the first one.
Shoot the opponent by aiming into the corridor. Do this from a safe distance. Pick up a new weapon.
In the room, there are a beefcake and several opponents waiting. Shoot them across the door. If you run out of ammo, use the chainsaw or pick up another weapon. Kill the last enemies from a safe distance, as long as they have been attracted by the noise.
After you kill everyone, use the elevator and go to the rooftop. The mission ends with a cutscene.
During the intro before the mission, approach the telephone. It is located near the wall, between two doors leading to the bedroom and to the children's bedroom. The game won't highlight the phone, but after stepping back and clicking the action button, Evan will listen to a message on the answering machine. The reason that you did that will be explained after completing the mission.
Defeat the first two enemies and go left from the starting position. Take the gun from one of them. If you were unlucky, a shooter will notice you. Hide behind the corner and wait for him. Stun the whole three enemies and then go upstairs. Lure the opponents on the right out of the room and beat the up behind the corner. Don't forget to unload their weapons.
The upper platform is being patrolled by two shooters and two men with melee weapons. You need to lure them out of this part of the map and beat up in a safe location. The shooters are deployed in such a way that you do not need to worry about a shot in the back, while fighting one of them. Again, remember to unload the weapons. After you beat up everyone, return to the crossroads and go left.
Lean out from behind the booth, attract the attention of the first shooter and beat him up. As for the second enemy, with a melee weapon this time, you find him below.
Another twosome is on the left. Beat them up, run up to the shooter in the toilet and defeat him also. Unload his weapon.
Go up and hide behind the corner. Lure out all of the opponents, including shooters. Do not attack up front or you will be killed.
In the same way, defeat the last threesome in the upper-right corner of the map. After you beat up the shooter, you can charge at the rest.
At the beginning of the next map, go left. Beat up the enemy with the stick and take the weapon, as long as you do not have one already. Go up. Behind the corner, there are more enemies. Beat him up also.
Attract the attention of the next enemies above. The area is being patrolled by a shooter. Watch out for him. It is best to take a look around, find out where he is, approach and retreat immediately, to where you beat up the first three enemies. He should follow you.
You find two more shooters on the right. Use standard tactics and remember to unload their weapons.
The last two are above, to the right. They have melee weapons so, they are not too much of a threat.
The leader is wandering around the map. If he spots you, he starts hitting his pipe against the ground, which alarms the rest of the gang. To defeat him, you only require one blow. Additionally, for defeating him, without being spotted, you receive an achievement.
After going out from the subway. If you've listened to the message on the answering machine during the intro to this mission, Evan will be placed in a secret location.
The only thing that you can do in the bar is talk to Biker, a character from the previous episode of the game. Do it and leave the bar.
After you reach the enemy positions, start by shooting the opponent on the right. The noise will get the nearby enemies here, including a beefcake. Shoot him in the first place and, at least, wound him enough for him to bleed to death. Also, the there will be an attack coming from the left so, for safety, backtrack to where you started, after you entered this map and fight back the attack, from both sides, there.
After you do, do the same on the left. Watch out for the opponents in the building on the left, because they may spot you and start shooting.
Return to the right side of the map and go up. Kill the enemy between the plants. Retreat, because the noise will bring others. If possible, replace your firearm for the knife, to save up on ammo.
In the next room, there are two enemies. Kill the shooter across the window and handle the other one in melee. On the left, there is an ammo crate. If necessary, use it.
On the left, there is another enemy between the flowers, and a beefcake. Kill the latter in the first place. Remember that you cannot kill him on the spot and you can only wound him. In such a case, escape to let him bleed to death.
Kill the remaining two with the knife, preferably after you stun the first one with the door. Go to the next location.
After you enter a new location, go right. Kill the two enemies using the knife. They fight in melee so, there is no point in shooting at them. Then, eliminate the shooter to the North of the stairs. The noise may lure another enemy here so, be careful.
Above the stairs, there is an ammo crate. Use it and shoot the soldiers patrolling the area.
On the right, there are more opponents. The first one is patrolling the area and the other one will come dashing to you, if you attract his attention. The other one is hiding behind an obstacle so, you will have to encourage him to leave, by showing yourself. He behaves in the same way as the shooters in the Dead Ahead mission and he needs to be defeated in the very same way. The last shooter is hiding behind the tree, right above the crate. First shoot the patrolling enemy, then the one hiding behind the tree and then the one crouching behind the obstacle.
Go left. You encounter two more shooters. Kill them in any order.
Below the shooters, there is another soldier crouching behind a cover, and two more with melee weapons. Deal with both of them and have the shooter het up, after which shoot him also. Go to the next area.
Go to the right of the stairs and wait for a beefcake to appear. Shoot him, switch the weapon for the knife and kill the opponent in the room on the left. If the noise attracted someone, kill him also.
Wait or another beefcake to appear. Exit into the corridor and shoot him. Watch out, because there is another shooter behind you. Right after you kill the beefcake, retreat to the room and make sure that the area is clear.
Go to the room on the right, were there is a shooter. Lure him out and kill him with the knife. Watch your back, because there may be two more surviving shooters patrolling.
Go left. In the room above the stairs, there are three enemies. Shoot them by standing in the passageway and retreating immediately. If you run out of ammo, finish off the remaining one, with the knife.
Return to the corridor on the right and go up. In the upper-right corner, there is another enemy.
There are two more waiting in the left part of the building. One of them is the shooter that is looking across the window. Use the knife to kill both.
The last two shooters are to the left of the stairs. They are far away from the door so, it would be best to shoot them. The noise should attract the attention of the other one, which makes it easier.
After you clear the base, get down and go up, You get into your unit.
Climb up the stairs into the first room. If you have a firearm, shoot the enemies below. If not, attract their attention, retreat to the stairs and beat them up. Take the melee weapon.
Carefully, open the door to the room on the left and attract the attention of the opponents. Retreat behind the corner and beat them all up. As of now, you do not want to make noise so, do not use your firearms.
Take the firearm and stand to the left of the room. Wait for the beefcake to stand at the door and shoot at him. This way, you will attract the attention of several more enemies. Shoot them, but do that at an angle. Do not hit the table or you cause an explosion, which may also kill you, and covers the entire area.
After you have cleared the room, take a new weapon. Go to the room with explosives and stand above the table. Aim at the door and wait for the dog to come. Shoot it and then, deal with the rest. Do not let them shoot at the table! For safety, stand in the corner of the room and shoot ahead.
You find the last two enemies in the rooms in the upper-left and upper-right corners of the map. Both of them have firearms so, shoot them right after you enter the room. Before you go up, take a new firearm. Any, just with its clip full.
While above, open the door and shoot the first opponent. Then, retreat and start shooting at the door. A big group of enemies will appear, including a beefcake and a dog so, try to save up ammo. If necessary, grab another weapon and climb down the stairs, to have more room to take the shots.
After the massacre, take a new weapon and open the door above. With a shot at an angle, kill one of the guards in the blue room. Wait for the rest to arrive and kill them also. If necessary, retreat behind the corner.
In the room below, on the left, there are two more shooters. Get a new firearm, retreat and kill them from a safe distance.
The last two groups of enemies are above, on the left and below on the right. The former could have survived your attack earlier. If this happened, go there. Also, you can destroy the table with explosives, above. The explosion should kill all of the remaining opponents. Kill the last opponent with a shot to the back.
Before you go up, take a new firearm.
While above, use similar tactics, as on the lower floor. Open the door and shoot at the first enemy, retreat and shoot anyone that appears in the door. You should have enough ammo for all of that. If necessary, take another weapon, or retreat behind the corner and finish your job with fists.
Go down, there are three opponents waiting for you opponents. Shoot the first one. The noise will lure out the rest. Shoot them also.
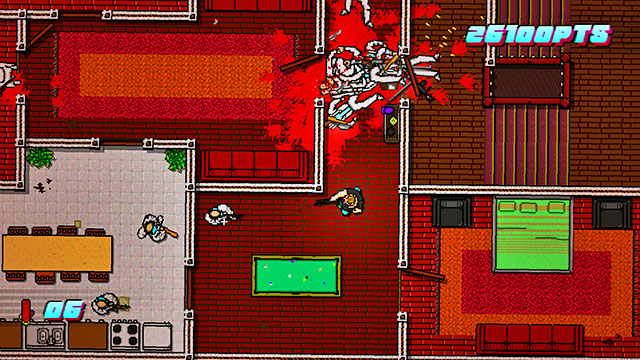
You find the last enemies on the top of the map. The first one is in the room above, on the left. He has a firearm so, shoot him right after you enter the room. As for the other pair of the shooters, you find them above, to the right. You can kill them with the melee weapon, but it is safer to shoot them.
After you have cleared the building, return to the car.
There also is an alternative ending for this mission. You simply need to be killed in one of the rooms on the upper floor, for the enemies to take you in for interrogation. It is a good idea to postpone this moment, to gain as many points as possible and the best course of events is if you clear the entire upper floor and do not get killed.
After the mission starts, go up and look to the right. Probably, you will notice one of the enemy patrols. Shoot them.
Hide behind the generator and look up. You note another patrol. Shoot at it from a safe distance. The noise attracts more enemies, but none of them will attack you from behind. Take a good position and you will be able to keep an eye on all of them.
After the massacre, go to the building on the right and kill all of the surviving enemies. It is best to use the knife for that, to save up on ammo. You can stand between the building and the edge of the map to shoot the enemy across the window.
Go up. You notice an enemy patrol, including a beefcake. Shoot them, while retreating. If you run out of ammo, backtrack to the starting point and hide behind the corner.
At this point, you will have, most probably, run out of ammo and there are two more groups of shooters to kill. Use the standard tactics of luring out and killing in the most convenient spot. After you have cleared the map, go North.
After you enter a new map, go right. Replenish your ammo by the truck. Then, go right. Between the fence and the edge of the map, there are several opponents. Shoot them. You can use up the entire clip, since there is an ammo crate next to you. A bit to the North, there is one more opponent. Deal with him and in doing this, you will clear this part of the map of enemies.
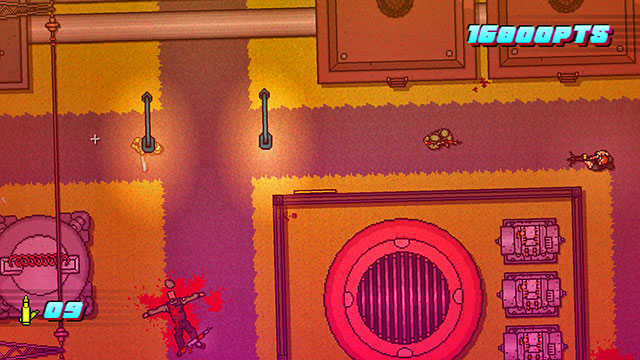
The path on the left is being patrolled by several guards with firearms. You can wait for them by the crate and kill them one after another, or walk out to meet them. Watch out, however, because the area to the left is also being patrolled by a pair of shooters, and a beefcake. Take a look around to find convenient position. Remember to kill the beefcake in the first place.
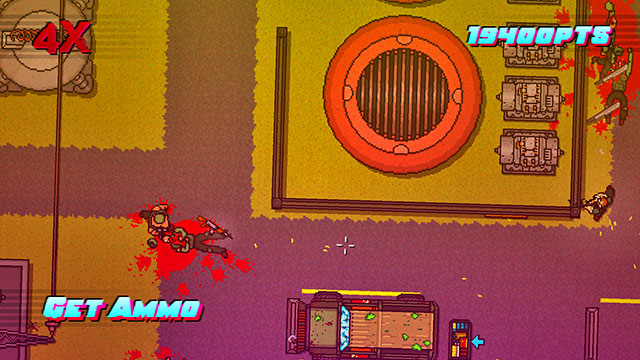
Ahead, to the left, there are more guards with melee weapons. There are two of them and they are within a certain distance of each other. If you have already dealt with the shooters, you can kill them with the melee weapon. If not, shoot them, just in case.
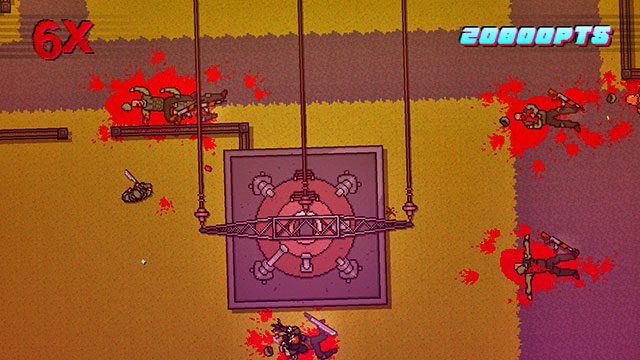
You find the last opponents among generators. Shoot the first one and the rest will attack. Deal with them with the knife. If not, attack them from above. Among the generators, there is a pole that does not allow you to shoot them all at once. Replenish your ammo and leave the map across the Northern exit.
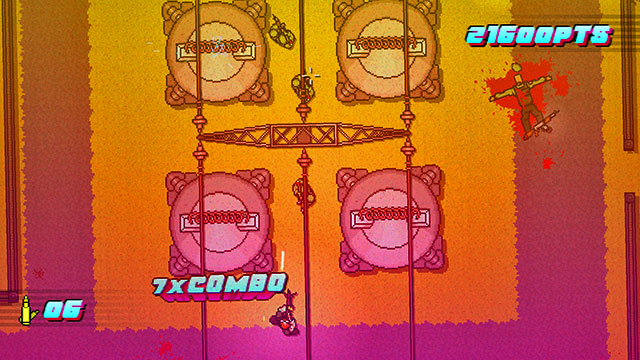
Approach the power plant entrance and wait for the first guard to attack you. Attack him with the knife. Then enter. As you go up, fire several rounds into the room on the right, so you can kill the beefcake. Dodge the bullets, dash into the room and kill the other guard, and take cover. If you have done everything correctly, there will be several opponents in the door, but you will not be shot at.
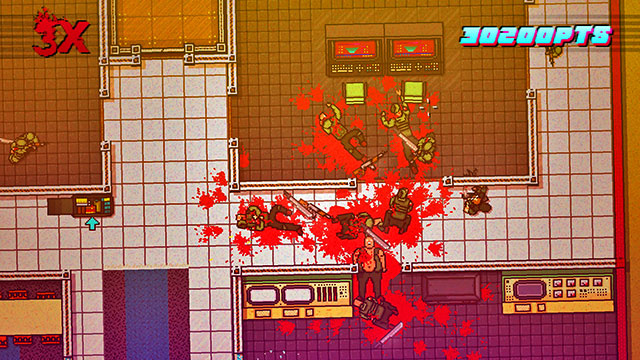
With the knife, kill the nearest enemies. The rest of them will either stand motionlessly, or patrol the area. Find out about the routes they take. And clear the right side of the map of the enemies.
Replenish your ammo. On the left, there are several shooters waiting. Return to the right side of the map and eliminate them using the distance. You can also lure them out to the crate, shoot them and replenish your ammo immediately. Two opponents in the left corridor may not spot you, but they are close enough to the corner, and the passage, that you can kill them with the knife.
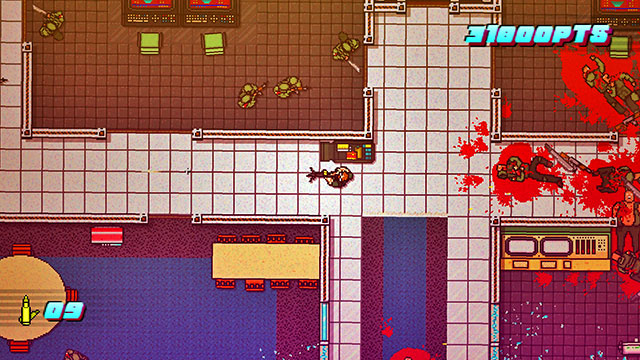
Shoot the last enemy in the room on the left, across the window. Replenish your ammo and enter the elevator.

While upstairs, enter the room on the right, immediately, and shoot the guard. You will be immediately attacked by the men patrolling the area. Shoot them or kill them with the knife, if you can run up to them sufficiently fast. Then, replenish your clip.
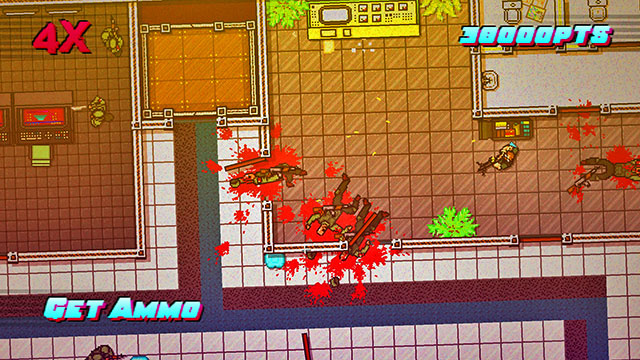
Another shooter is patrolling the area. There are more of them in the room on the left. To the far left, there is a beefcake. First of all, deal with the regular guards and replenish your ammo. Then, return to the beefcake. It would be best if you killed at once. Otherwise, shoot at him, wound him and escape immediately. He will soon bleed to death.
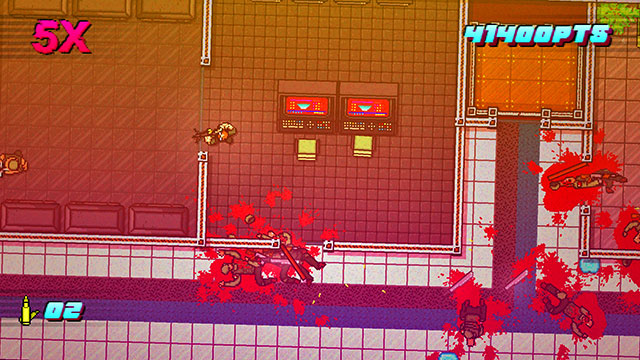
In the room opposite the elevator there is a guard. In the next one, there are two. The best way to shoot them is across the opened door. You can fire once, to lure them out, and kill them with the knife.
In the corridor, there are several guards with melee weapons. In the room on the left, there is another one, and a shooter. Eliminate them all with your firearm. As for the room use windows/ After you clear the room, go left.
You will reach the power plant control system. After the cutscene, pick up the wounded colleague and enter the elevator.
Keep going ahead. Take the first turn to the left and go down. There are several turns, but there are no branches or dead ends. After a while, you reach the corridor and the exit.
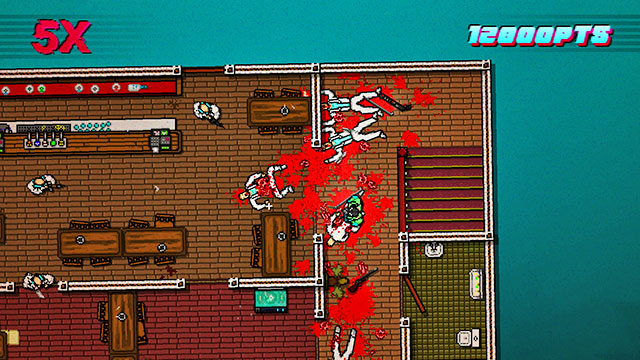
Outside, talk to the wounded man.
From now on, Evan can use guns.
Pay attention to the weapon the shooter at the entrance is using. If it is a machine gun, stun him with the door. Pick up the weapon and shoot the rest of the opponents. If this is a shotgun, stun him and beat up the rest with fists. In the meantime, pick up the stick and use it in combat and for finishing off. The shotgun is too slow to clear the room with it quickly.
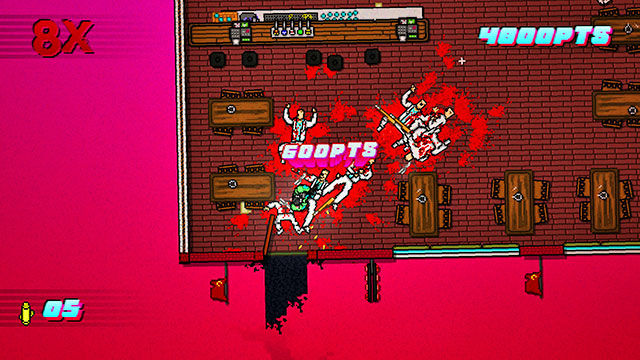
In the upper part of the room, you find more enemies with melee weapons and several shooters. Te first one is standing close to the kitchen entrance. Lean out from behind the corner and shoot as many as you can. The rest will, most probably, by attracted by the noise. If not, lean out from behind the corner to make them spot you. Ideally, you kill the first shooter on the spot, and you will be able to collect his weapon.
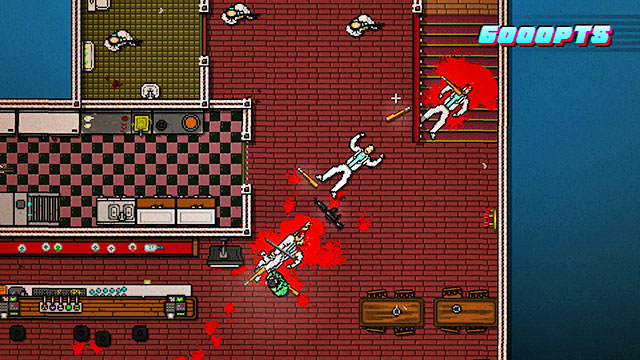
Finally, you will be fighting the last two shooters. Kill both of them, while standing in the entrance and shooting at them. After you clear the map, collect the weapon of one of them and climb the stairs.
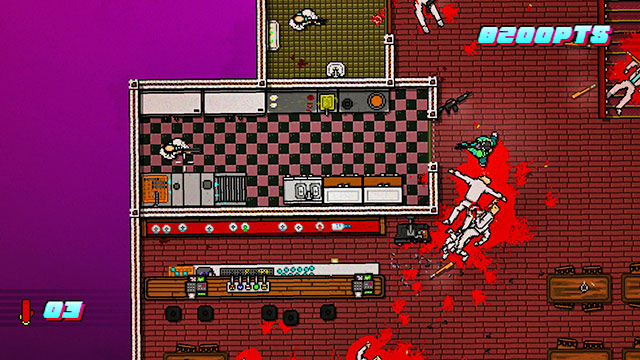
Shoot the guard to the left of the stairs. Then. Retreat and shoot anyone coming your way. If necessary, retreat towards the stairs. After the fight, pick up a new weapon and deal with the two shooters in the room on the left.
Another big group of enemies is below. It is best to deal with them by standing within a certain distance of the entrance on the left and by shooting into the room. This way, you should kill, at least, the majority of the opponents. As for the rest of them, you can deal with them in melee or with the other firearm.

The last opponent patrolling the area is in the bottom-right part of the map. There is quite a chance that he has not heard the shooting earlier.
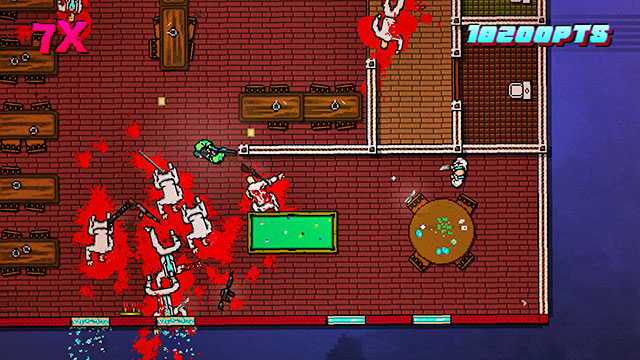
After the massacre, return to the car.
Carefully, enter the building. Wait for the first two enemies to attack you and beat them up. Then, look right. You will spot a shooter and a beefcake patrolling the corridor. You need to approach the corridor in the way that enables the beefcake to spot you, wait for the shooter, beat him up, take his weapon and shoot the beefcake. Ignore the rest. You can beat them up, but do not finish them off, because there is no time for this. Deal with the rest only after you kill the beefcake. Do not worry about the unconscious opponents. All in all, there only is one firearm on this floor. Go up.
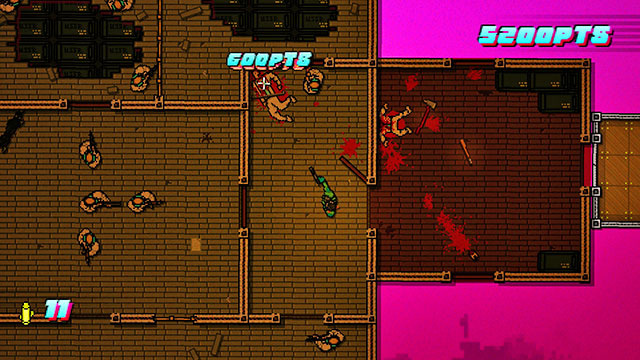
Thrown your weapon at the guard at the door, approach to him and finish him off. With the weapon that you have just obtained, kill the men in the next room.
Higher up, and on the left there is a door. But not below. Take advantage of that and shoot the men patrolling the room below. Watch out because one of them is a beefcake. Within a safe distance, you can shoot at him and wait until he bleeds to death. If everything goes right, he does not even realize what has happened.
Also, you can ignore the lower room and go left. Watch out for the dog and start shooting at the opponents there. There are shooters among them. If necessary, retreat and deal with the rest with the melee weapon.
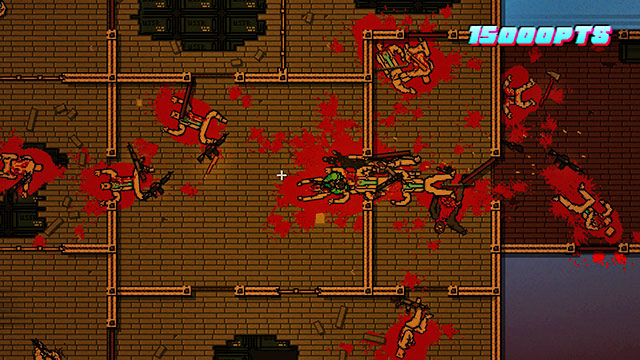
Shoot the single opponent guarding the upper room.
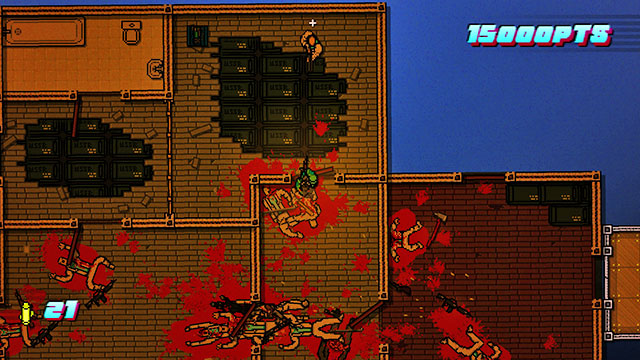
You find another beefcake, along with guards, at the bottom on the left. Open the door and shoot them all. Retreat to the right, if necessary.
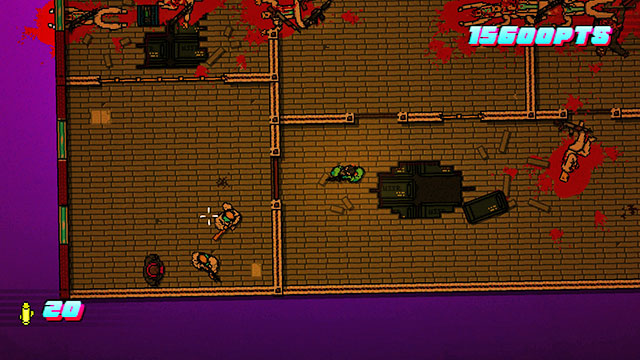
Walk inside and start shooting from above. The bullets will cross the barriers and kill the guards z upper-left room. Their make-up is the same as it was in the room that you are currently in. If there are any surviving, make sure that he is not running in your direction. If not, finish him off. If you run out of ammo, take another weapon.
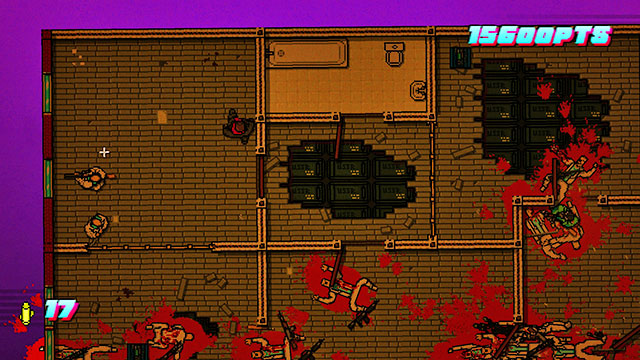
After you have cleared the level, return to the car.
Enter the first room and attract the attention of the guards. Retreat and beat up both, collect the weapon. Again, enter the room and wait for the shooter patrolling the neighboring glazed room,. Let your self be spotted and retreat. Kill him and take his weapon.
With the firearm, clear the room on the right. Watch out for the dog, and another one that may attack you from behind. Your next target are the two opponents in the room on the right.
Use the left door to exit the room, and shoot the guard in the upper-right part of the level. From there, go down and shoot the remaining two guards. Finally, enter the bathroom. Stun the guard with the door and finish him off. If the level has not been completed, most probably you have forgotten about the last dog in the lower part of the level. Swap your weapon for the one with full clip.
Shoot the first guard. Then, kill the two men and the dog running on the left, as well as another dog and a guard attacking from above. They will run towards you in the way that enables you to fire short busts. After that, stand under the plant and shoot the beefcake in the neighboring room. Try to kill him on the spot or he may manage to get you. There is a chance that the noise will attract one of the shooters from the upper part of the level. If so, kill him and tale his weapon. If not, lean out from behind the corner and attract his attention. After this massacre, you are going to need a full clip.
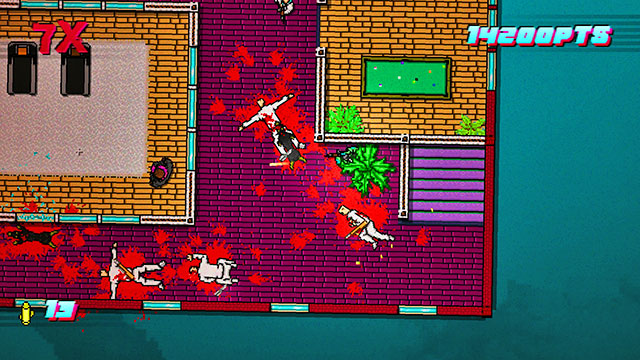
Across the windows, kill the two shooters in the room on the left. Enter and fire into the corridor, where there should be, at least, one more opponent.
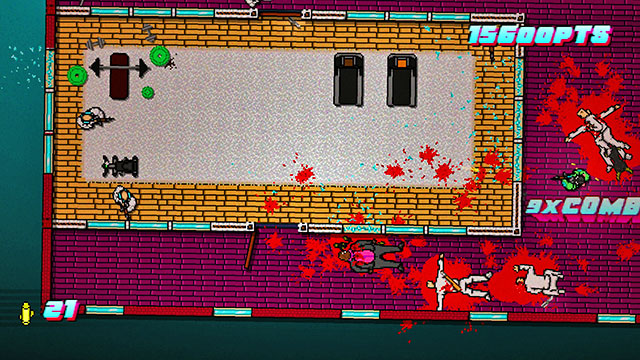
Start clearing the rest of the level with the upper-left room. The majority of the enemies have melee weapons so, they will not be a threat. You can obtain a firearm, with a full clip, in the bathroom on the right, in case you consider whether to attack the last opponent, or not. The noise should not attract the guards in the neighboring rooms, but if this happens, throw the firearm away, lurk for them and defeat them with fists.
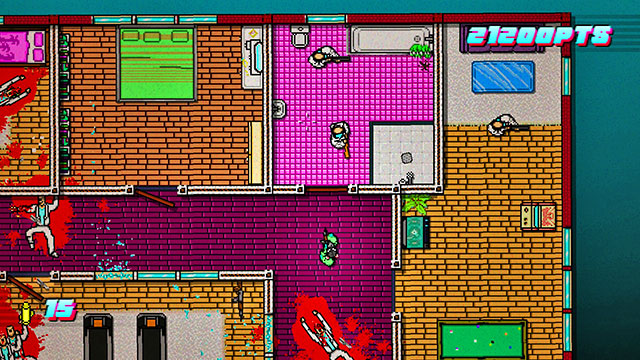
After you clear both of the floors, exit the building.
At the beginning, go along the only path available until you reach a sports field. When you reach it, you will encounter a strong enemy. You cannot hit him without a weapon, so at first, you will have to do some running. Try to maintain distance and run along the fence. The enemy will stop for a while every few seconds and then he will rush at you, shortening the distance between you considerably. When he does that, it is best to make him hit one of the walls. Wait until he starts running towards a wall and then head the other way. The enemy will reach the wall and bounce away from it, allowing you to increase the distance. The charge lasts for a few seconds, after which the enemy returns to his normal speed. The opponent is so fast that he will be able to catch you at least once. On the other side, it will be easier for you to figure out his pattern of running.
After the opponent dashes towards you twice and returns to his normal speed, on the left of the map, there appears a weapon. Pick it up and kill him. Go right, and right again, on the next map. Do not go down, or you will be shot by the police.
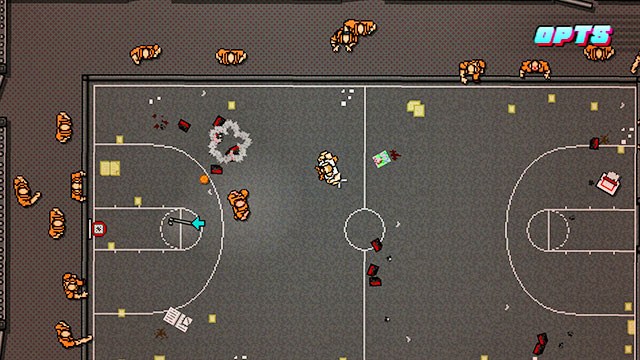
After you enter the map, go up immediately and kill the guards there. There will arrive more, from below. Kill them also. Then, stand in the lower window and let yourself be spotted by the shooter. Move down a little, wait for him to find you and kill him. Take his weapon.
With the firearm, shoot the guards in the upper room. You will be able to kill, at least, one of them, for sure. Wait for the other to reach you and shoot him also.
Using windows, clear the lower room also. Watch out for the guards patrolling the area. If you are spotted, retreat. The Guard in the lower room should have a bigger firearm. Pick it up.
Shoot the guards on the right side of the map, by taking to your advantage the fact that you are invisible to them, over longer distances. Watch out for the shooters and, if necessary, retreat into the scene of the first massacre. The area to the right, above is being patrolled by one more guard. Deal with him, carefully.
You find the last two of the shooters in the bathroom. Stun the first one with the door, shoot the other and finish off the first one. Replace your weapon and proceed.
Right after you enter the map, go to the first room above. Throw your weapon at the first guard, dash up to the second one and beat him up. Eliminate both and pick up the weapon of one. Then, exit to the corridor, shoot the guard and retreat. There will be quite a group to dash in your direction, after a while. Retreat and shoot them like ducks.
You find two more below. Start with the room below on the left. Shoot the shooter, and deal with the other one. Then, go right. Make sure that there is no shooter above. If there is, kill him first. Then, carefully, lean out from behind the corner and shoot the first guards on the right. Retreat and wait for the other one. Shoot him also.
You find another shooter below, on the right. Probably, due to the noise earlier, he is on his own now. Deal with him, preferably with the firearm.
The last group of the guards is above on the right. Stun the first enemy with the door, shoot the rest. Be careful, because most of them have firearms. After you clear the room, take the uniform and go down.
ON this level, there are opponents that can dodge bullets. You can defeat them with the melee weapon, or by throwing any item at them, and finishing them off, when they are on the ground. The first one is to the left of the entrance to the level so, pay attention to the moment at which he attacks.
After you enter the map, shoot all prisoners that you meet. If the fast prisoner left you alone, take the baton, enter his cell and kill him. If not, throw your firearm at him and finish him off.
The area to the right is being patrolled by an enemy with a shotgun. Kill him and take his weapon. Below, there are several cells with windows between them. If you time it well, you will be able to kill both of the weaker opponents with one shot. Be prepared for the attack of the faster opponents. If necessary, throw your weapon at them and retreat for the baton.
In the cells on the left, there are two more enemies. One of them has a firearm so, deal with him in the first place.
In the corridor that goes up, you find another quick prisoner so, be prepared to throw your weapon at him. The last one is guarding the level exit. Deal with both of them. Before you proceed, take a new firearm from one of the cells.
Open the door and shoot down to kill a beefcake. Then, shoot the inmate on the left. The noise attracts more of them.
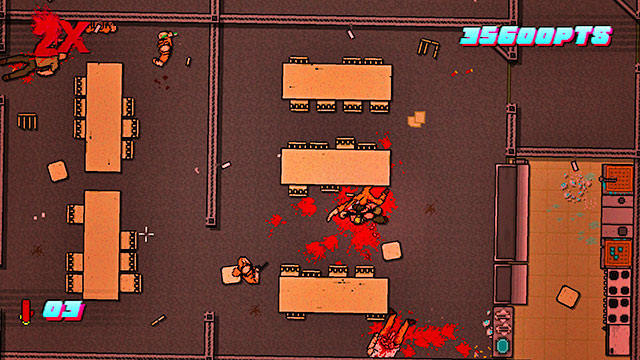
Switch your firearm for the melee weapon. On the left, there is another quick opponent, standing at the wall, by the table. Kill him with the baton, or the broken glass.
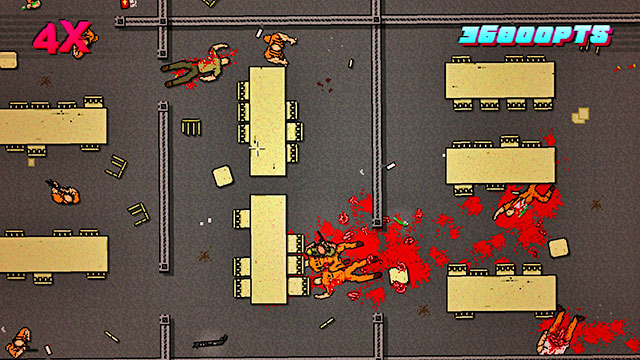
On the left, there are two more rooms patrolled by shooters and people with melee weapons. Attract their attention and have them follow you. Kill them all, take the firearm and use it to shoot at the room above, as long as there is still someone in there.
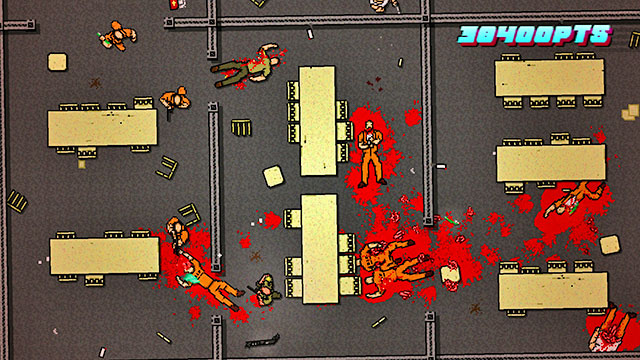
By shooting at an angle, surprise the opponent with the firearm. Then, quickly, shoot the beefcake, who attack you. Finally, deal with the remaining two inmates.

In the next room, there is a shooter and two quick inmates. Take the melee weapon. Lean out from behind the corner and have the inmate hiding above attack you. Kill him. If the shooter spotted you, wait for him. If not, take the firearm and shoot him. Enter the room. From your right, you will be attacked by another enemy. Throw your firearm at him and finish him off on the ground, or with the melee weapon. After the massacre, exit across the passage in the upper-right corner of the map.
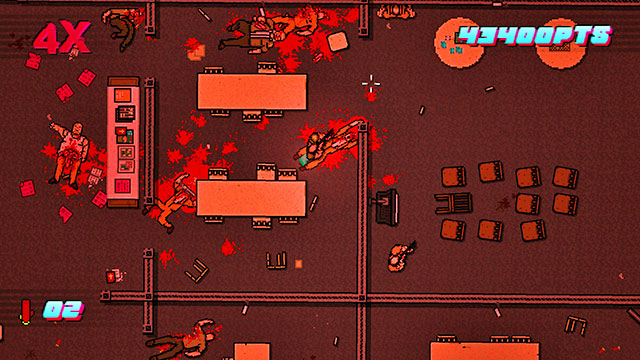
Go left, until you return to where you saw the inmates killed by the armed cops. Go towards them. After they see the uniform, they let you through. Get into the car.
A very dark and difficult mission. Be ready to die a lot from the hands of the enemies that ambush you from the darkness. It gets easier in the second location, but you will also have some troubles with learning the placement of your opponents. Feel free to increase the brightness of your screen.
Enter the building and kill the first guard. Stand in the passage and attract the attention of two more. Retreat and wait for them to approach you. Then kill them.
If you take the firearm from the first shooter that you kill, you can use it against the next guard. If not, dart across the room and hide under the tree. This way, you will attract more guards. Wait for them to approach you and kill them.
There are three more enemies on the right. One of them is on the elevation and two more in the bathroom. Kill them in this order. From one of the enemies that you killed earlier, take the firearm.
The upper part of the map is being patrolled by several shooters. Attacking them over distance is going to be difficult so, it is best to come closer. Stand by the stairs on the left and shoot the opponents across the window. Get away from the window, wait for the enemy to climb down the stairs and shoot them all. Pick up a new weapon from one of them.
Inside the tree, there is another shooter hiding. Carefully, eliminate him.
The last shooter is in the upper-right part of the map. It is possible that he noticed you earlier. If not, kill him from a safe distance. After you get the option to, take the upper passage. Before that, take a new firearm.
Go to the room on the left. Shoot the first enemy and face the door. Kill anyone that crosses it, including a beefcake. Keep fighting as long as the opponents keep coming. Replace the firearm for a new one.
Return to the entrance and go right. Shoot the patrolling guard and others that come around, attracted by the noise. Follow the corridor up, eliminate enemies in the rooms that you pass by . If you run out of ammo, replace your weapon.
At the end of the corridor, watch out for the shooters. For safety, clear the rooms by shooting across the opened passages. In these rooms, there are no doors so, there is nothing to block your bullets.
Along your path, you pass by a room that you cannot access. Its right wall is windows only and inside, there is a shooter. Shoot him and make sure that he does not respond with fire.
You find the last group of enemies in the upper-left room. After you kill them, take a new firearm. Return to the first map and go right, this time.
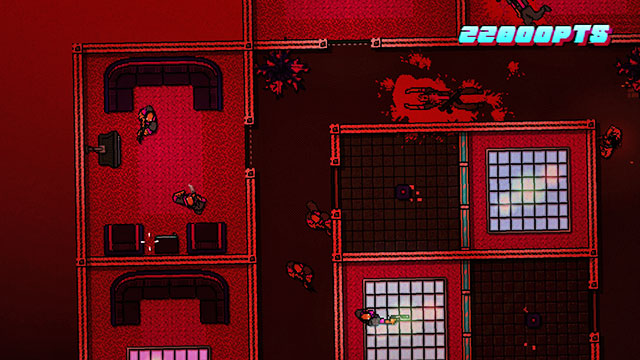
There only are three beefcakes here. Start shooting at them immediately. Make sure that you do not use up the entire ammo, before you kill all three. If necessary, wound them all and escape, to wait until they bleed to death.
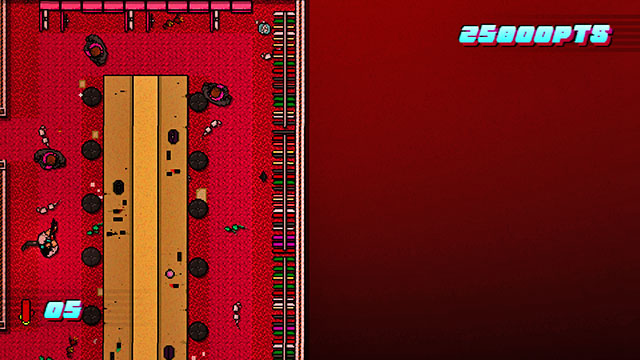
After you are done, return to the car.
After the mission starts, go up. Kill the first shooter and wait for the rest to reach you. Then, go left. Kill the guard patrolling the corridor. In the next rooms, there is a guard in each. Kill them, by darting in front of the door and aiming up. Take a new firearm.
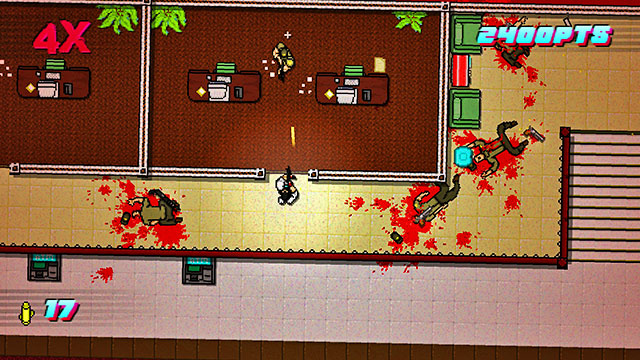
Return to the stairs. You will not two groups of guards patrolling the area. Shoot them from the stairs, first of all, by shooting at the shooters. If necessary, climb up the stairs and hide behind the corner. After the fight, take a new firearm.
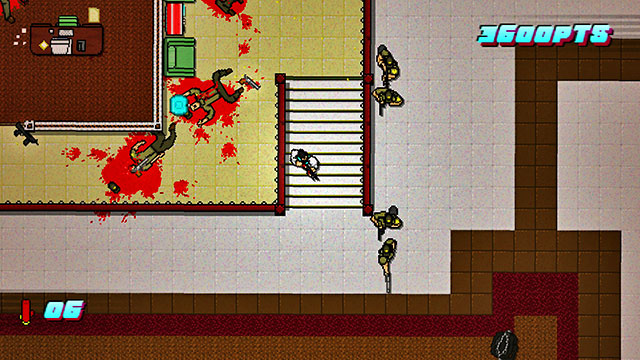
Below, the situation is similar. Stand in the right end of the corridor and shoot everything that moves. Then, clear the rooms. Watch out for the lower-left room, where there are two shooters. Take a new firearm.
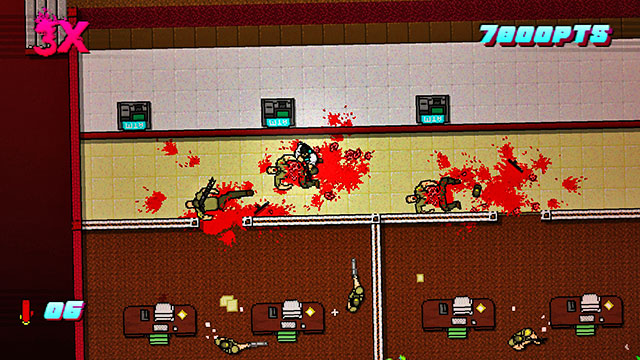
In the lower-right part of the map, there is another shooter patrolling the area. Kill him from a safe distance. You find the last opponent on the right side of the map. He is fighting with a melee weapon so, he should not be a problem. After the fight, take a new firearm and go up.
Hide behind the wall. You are up to a fight against two shooters, just like in the Dead Ahead mission. Lean out so one of them spots you, fire immediately towards him and find out if he is dead. If so, deal with the other one. If not, repeat the action. Kill them both.
With the rest of the ammo, shoot at the room on the left. The noise will get more enemies here. Use up the entire clip, and take a new firearm, the one next to the entrance. Kill all of those that come running to you.
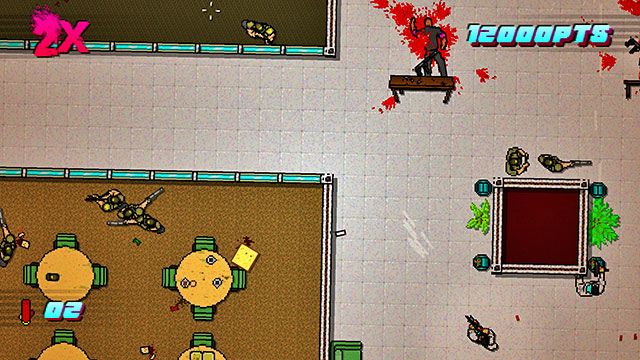
With the job done, deal with the two guards above the starting point. You can kill them with fists.
In the toilets, there may be more guards, unless that have been attracted by the noise of the shooting earlier. Kill the ones that failed to react.
In both rooms on the left, there are shooters. Kill them with by shooting at an angle. Make sure that the noise does not attract the rest of the guards, including a beefcake. If this happens, focus on him. Move carefully, because there may be enemies that you cannot see, at first sight.
You find the last enemies in the upper-left part of the map. Shoot them and take their firearms. Leave the level.
After you enter the map, go down. Shoot the opponents across the window. If there is a survivor, enter and finish him off. Be careful, because the noise will alert the guards in the room above.
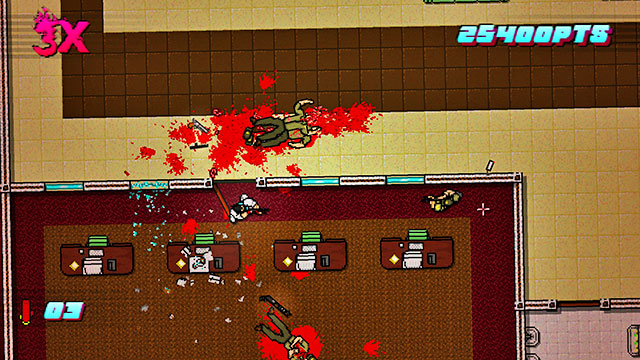
Go up and shoot the enemies in the room. Stand in the door to the next one and shoot two more. Replace your weapon, with the one with the full clip.
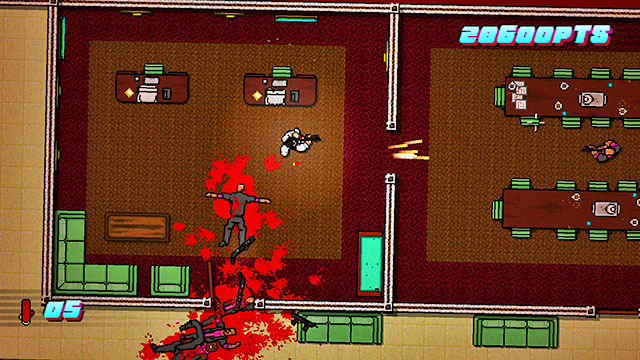
Eliminate the patrolling guard. Below, by the tables, you find the last group of opponents, including shooters. Stand in the door to the room and shoot whoever you can. If you run out of ammo, retreat and wait for the enemies to come to you.
After you kill the last enemies, go right and see the cutscene.
First, you are going to watch several cutscenes. Your only task is to talk and pick up items. Follow the instructions, until you reach the movie set.
After you enter the map with enemies on, walk through the door. Immediately, run to the guard above, hit him, take his weapon and kill the dog. Finish off the guard. You will be fighting next to windows so, you should be spotted by the rest of the guards. Wait for them and deal with them all.
The corridor on the right is being patrolled by a beefcake and a guard with a firearm. Stand in the door and wait for the beefcake to turn the corner. Exit the room and let yourself be spotted by the shooter, and retreat. Kill the shooter and take his weapon.
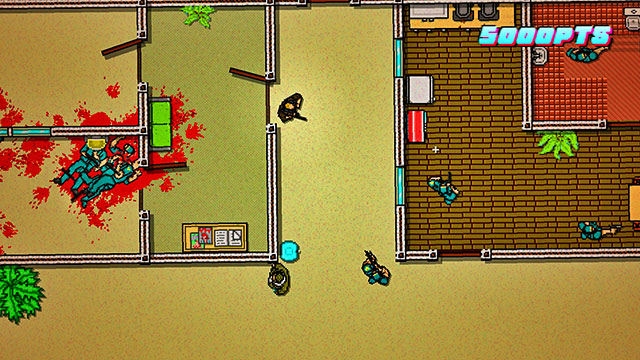
Stand in the corridor and shoot the guard in the right room, across the window. You will be immediately spotted by the rest. Kill them and, focus especially on the beefcake. If necessary, retreat and defeat them all with fists, or with the melee weapon, but only if you manage to kill the beefcake. Remember that neither fists nor melee weapons are effective against him.
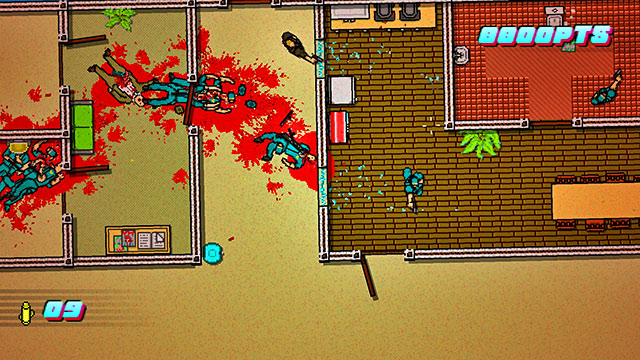
You find more guards below. There should be few of them there, due to the noise that you caused. Shoot them from a safe distance. Take a new firearm and proceed.
Enter the upper-left room. With the door, stun the first guard and shoot the other. The noise will attract more enemies. Shoot everyone that tries to enter the room. If necessary, stun them with the fist, of kill with the melee weapon.
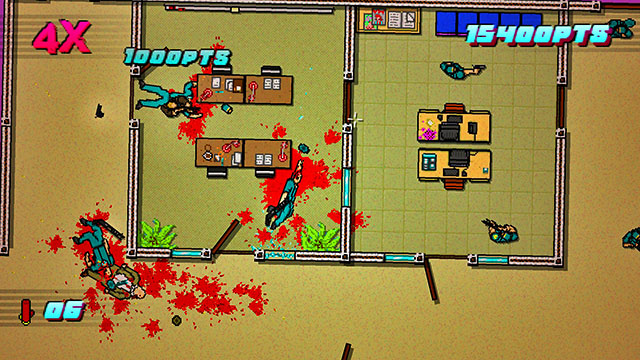
Across the windows, clear the next room. If you run out of ammo, replace your firearm with a new one. Watch out for the guards patrolling the area to the right. After you clear the room, deal with them.
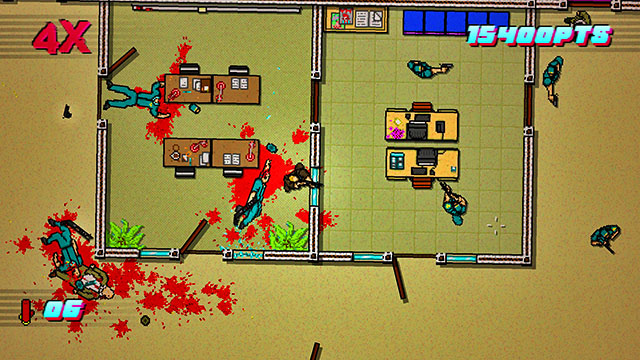
IN the room below, there are three enemies. Kill one of them, across the window and wait for the other two to come to get you. Kill them also.

You find the last three in the room below, on the right. Shoot the first one across the window and wait for the rest. Kill them also.
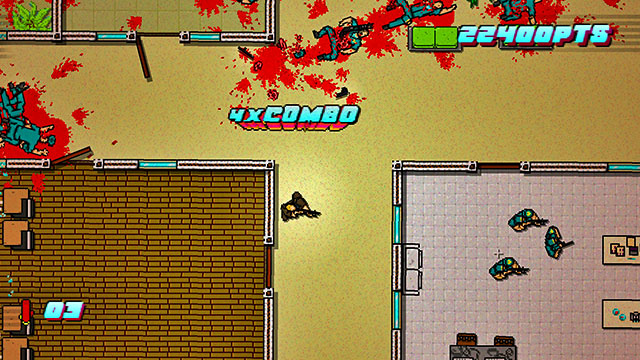
After the massacre leave the building.
After you enter the building, go right. If it is possible, start by killing the beefcake. If not, go ahead. On the right, you spot a shooter. Turn his attention to you, kill him and take his weapon. You will attract the attention of several more enemies so, kill them. With the firearm, return to the beefcake and deal with him.
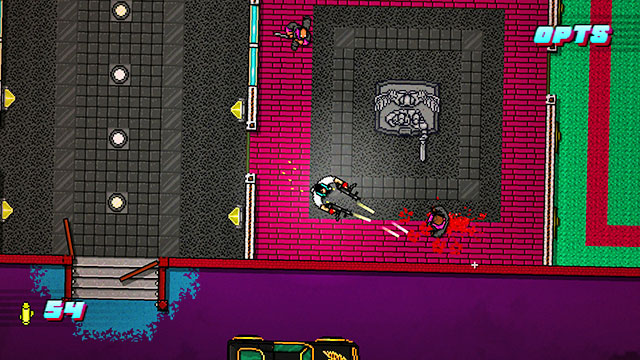
If you started with the beefcake, go up and deal with the shooter and the guards. Watch out for the windows, because there may be more shooters there. Take a look around and make sure that the noise has not attracted more opponents. If not, go left. There, you find another beefcake, shooter and several men with melee weapons. Kill them all.
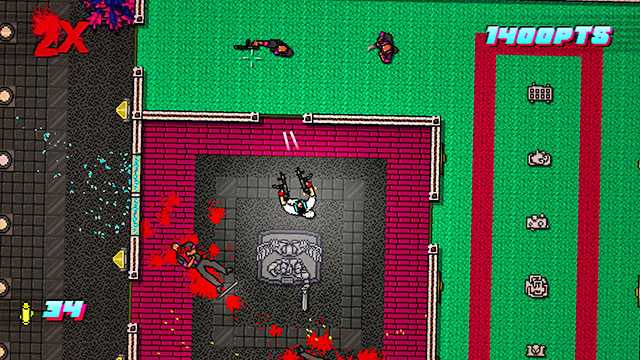
Return to the right side of the map. Watch out for the patrolling dog. Approach the windows and eliminate the opponents at the other side. If necessary, pick the firearm from the body of the earlier shooter.
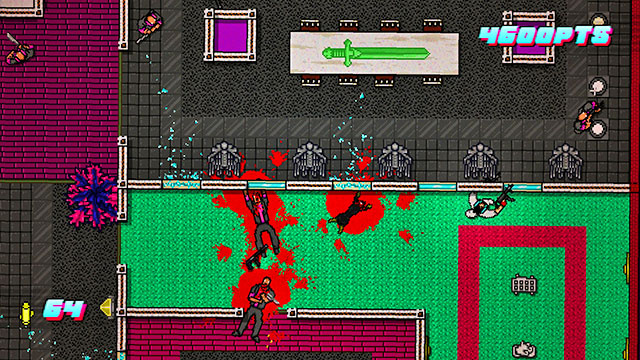
With the right side clear, stand in the door of the green room and look up. Kill the patrolling guards. Shoot some of them across windows. The rest of them will not react, if you do that from appropriate distance.
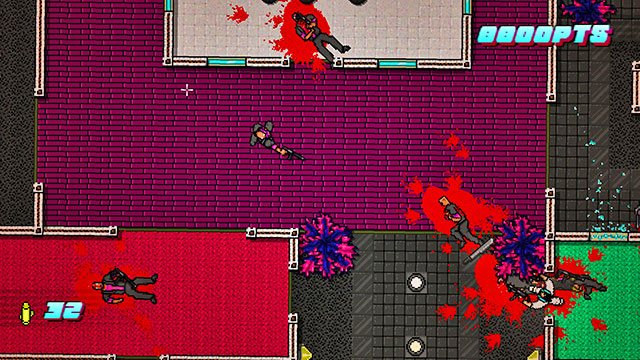
Watch out for the dog on the left. Across the window, shoot the guards in the room above. If they are too far, approach the door and shoot them then.
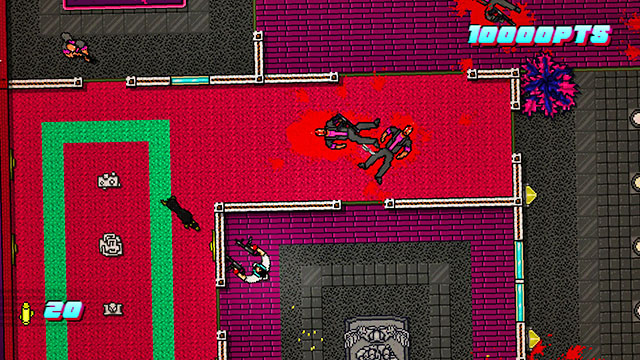
After you have cleared the left side, approach the glazed room. Kill everyone that you can, over a long distance, and let yourself be spotted by the man with the sword. He will dodge any bullet, but he is vulnerable to the melee weapon. Attract his attention retreat for the melee weapon and kill him.

The last opponents are on the stairs, on the left and in the room with guitars on the right. Both of them have melee weapons. After you kill them, take a new firearm and climb up the stairs on the right.
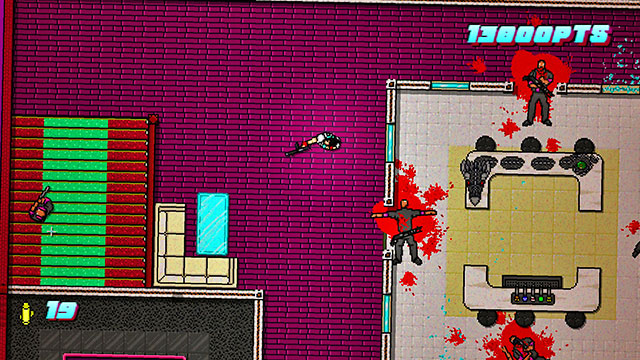
Across the window, shoot at the beefcake. Wait for a moment, and shoot down to kill the patrolling dog. Wait for the enemies to arrive and shoot them.
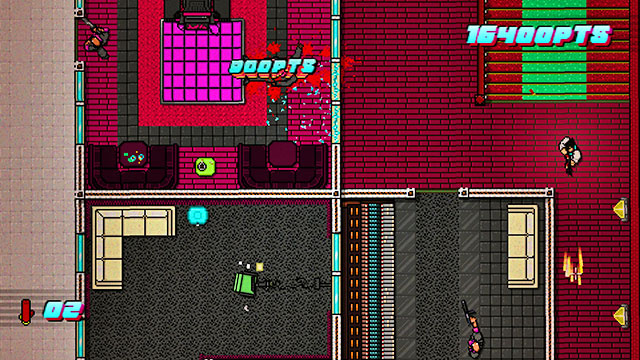
Go up and shoot everyone that you see. If you run out of ammo, attract their attention and retreat. If everything has gone fine, the noise will attract the opponent with a sword. Pick up the melee weapon and kill him.
retreat. In the room next to the stairs, kill the shooter. Watch out for the windows.
Go right and then left, along the corridor. Kill both guards. Pick up the weapon and kill the enemies across the windows.
Go up. Enter the main corridor. Watch out for the dog around. Across the window, shoot the beefcake and his companion. Next to them, there also is an opponent with sword. Retreat for the melee weapon and kill him.
Kill the dog in the corridor. Find out who is in the next room. If there only is the guard from below, enter and shoot him. If not, stand in the door, kill the guard above and deal with the one below, afterwards.
Finally, you need to deal with the two enemies with melee weapons. After you kill them, take a new weapon and go into the marked area.
On the next map, go right and shoot the first guards. The noise attracts lots of enemies, including beefcake so, be prepared for a tough fight and attacks on two sides.
After the massacre go left. Shoot the other beefcake, across the window, and deal afterwards with the other opponent, with a melee weapon.
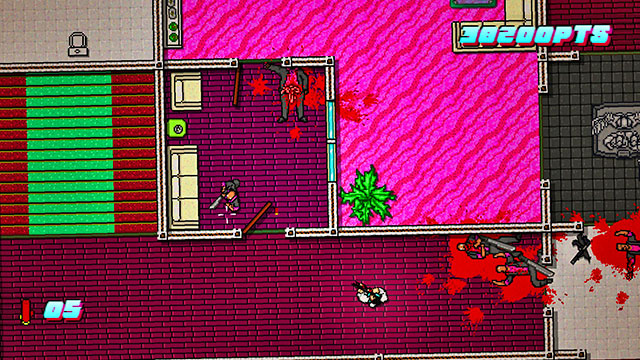
Go up, watch out for the remaining opponents. On the left, there is another beefcake and three patrolling dogs. Shoot them. The noise attracts some of the nearby enemies. Kill the rest across windows.
Go up. Kill the last dog. Watch out for the windows and deal with the guards inside the room and around.
In the corridor, there is another enemy with sword. Retreat for the melee weapon and kill him with it.
Shoot across the window to clear the room on the right.
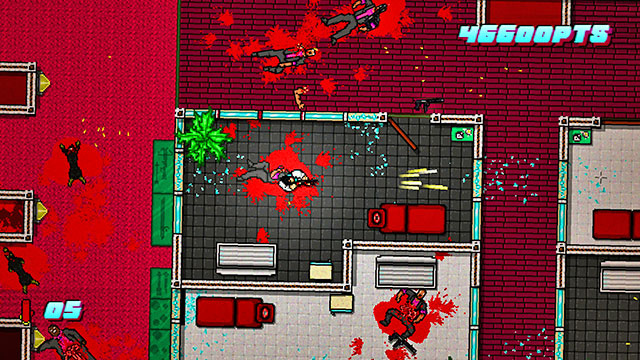
There are more guards in the upper-right side of the map. They are close to the door so, you can kill them with the melee weapon.
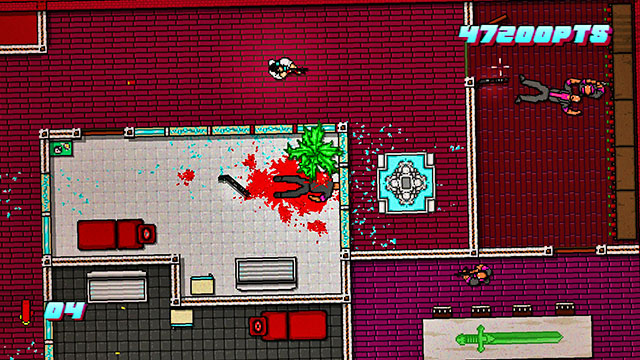
You find the last guard in the room above the stairs, on the right.
If the mission does not end, take a look around. It is possible that there is one more dog around.
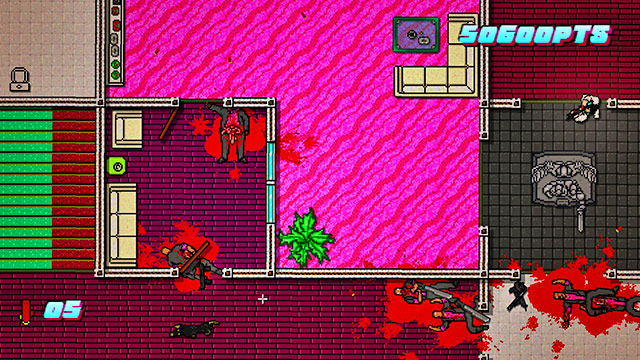
After you clear the map, climb up the stairs and approach the desk of the enemy boss. See the cutscene.
Just like in Pilot, in this mission there is no score. Therefore, there is no sense in trying to complete the mission with a high rank.
Take a few pills. You have to wait for a while before eating each one. Mind the blue arrow. When it shows up, you can take another pill. After swallowing a lot of them, you will feel better - turn the water on. At this points, the location gets more colorful and the camera starts shaking. Spend a while on getting used to a knew situation which may make it more difficult for you to complete the mission. Also, be ready to see a lot of very bright colors that make it harder to play.
After a while, your character will pick up a weapon. Go upstairs.
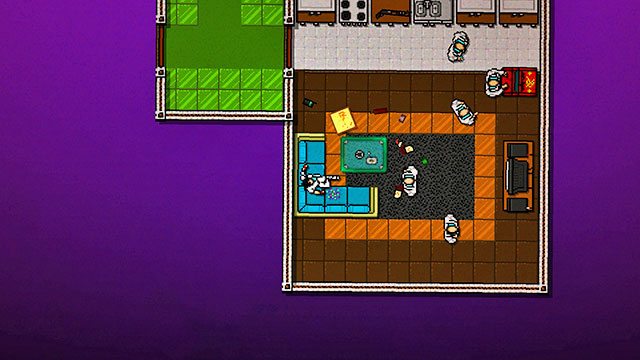
Shoot the first enemy. Next, run to the room on the left, hit the shooter and take his weapon. Kill everyone that gets close to you.
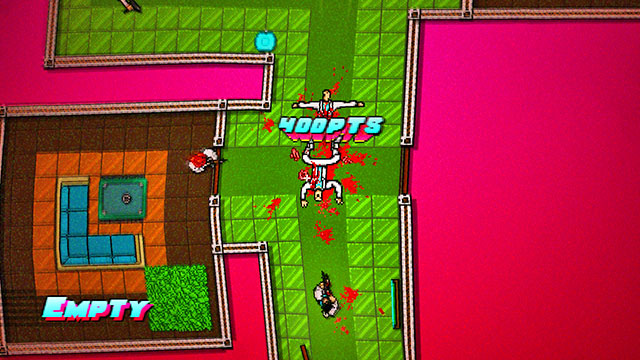
In the neighboring rooms, there are single enemies and a dog. Shoot them all and proceed.
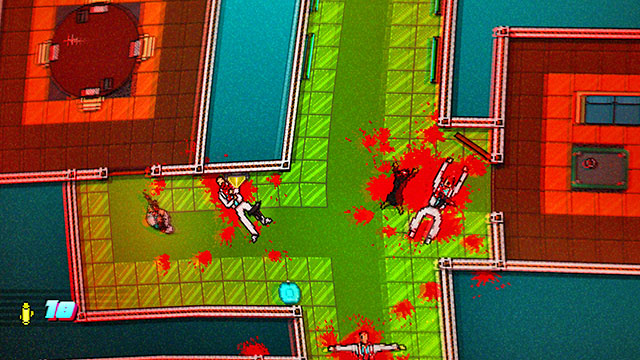
In the room with the bear, you have to reach the stick. Get back and go past the enemy keeping as much distance as you can. Don't get near the opponent, because if you do, it will get on four feet and quickly kill you. You can stand in the top left corner, wait until it gets closer, head downstairs and then turn right. Pick up the stick and kill the animal. When approaching it, be careful, because it will attack you. If you miscalculate the moment in which you should attack, you will have to fight again.
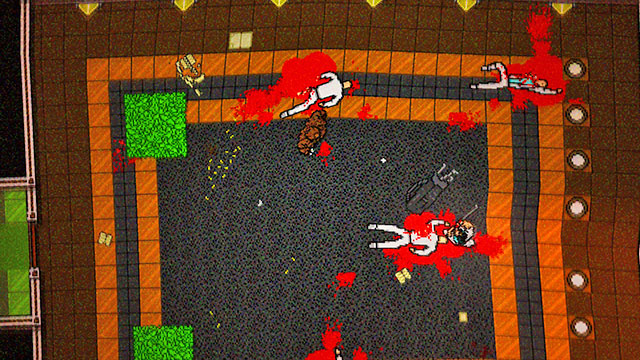
Move along. You will watch a few short cut-scenes. Eventually, you will appear in a room with a weapon. Pick it up and stand in the middle. Wait until the enemy is located above or beneath you and shoot him. Shattered glass will tell you from which side you were attacked. The enemy is quite fast, but not so fast that you cannot hit him. You have six bullets in your gun, so sooner or later, you will succeed. You can also stand on the enemy's way and shoot him as he approaches you. You just have to stand in the other side of the room, which will give you a lot of time to get rid of the opponent.
After regaining control over the hero, go right.
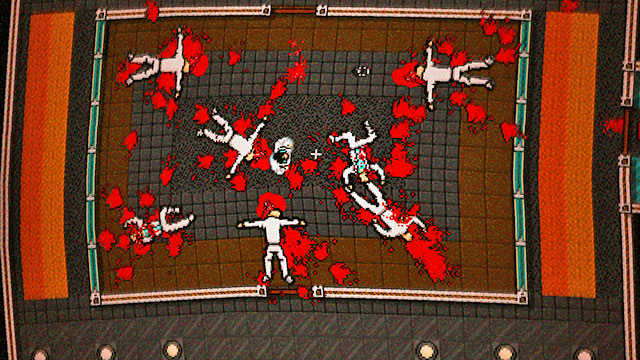
Wait until the guard is on the right side and run to get the shotgun. Shoot the enemy, then the rest of them as they enter the room. Aim carefully and don't waste your ammo, because you won't be able to refill it. Inside the gun, there are a number of bullets that is enough to kill all the enemies while missing only once. If you miss two times, allow an opponent to kill you, because you won't be able to finish the mission. Your enemies will be dogs and big guys that cannot be defeated with bare hands.
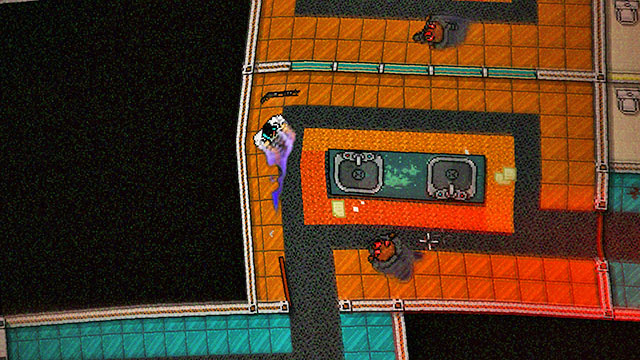
In the next part of the building, pick up the weapon and go left. Approach the darkness. After regaining control over the character, go right while aiming left. As soon as the enemy appears, shoot him down. One bullet is enough. Move along.
When on the roof, approach the helicopter landing site. A monster will appear, It's head will try to bite you and the other one will shoot missiles. First, kill the head that is closer to you and then approach the shooting one. You can run across the monster's neck and body.
At the end, go upstairs and enter the rainbow bridge. Congratulations, you've just completed the game.

To unlock the bonus scene, you have to reach Scene 15 - Withdrawal. When clearing the last floor, don't let yourself be killed and be taken by the Russian mafia. IF you're able to leave the building in one piece, a short conversation will await you outside.
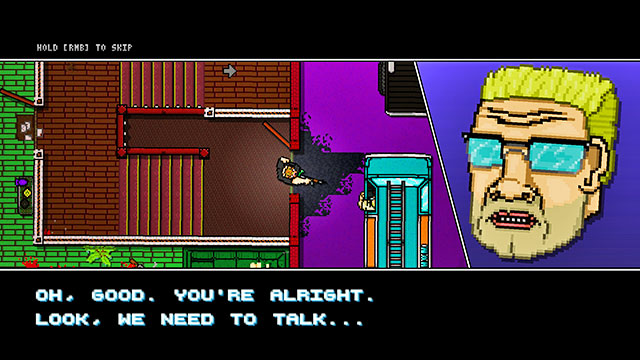
In the next scene, you have to wait until the blonde guy leaves the room. When he does, you will have a few seconds to take the disk from the desk. Use the action button. Jake should pull out his gun and pick up the item and you will hear an appropriate sound, similar to the one when you pick up a weapon.
In the next scene, the disk should be lying next to other Jake's things. Pick it up.
If you've done everything properly, Evan will ask his friend about the contents of the disk. From this moment, a new task will appear in the mission menu.
After beginning the mission, go right and upstairs twice. The building is now abandoned, so you don't have to worry about enemies. Eventually, you will reach a room with a large group of people in masks. After leaving it, enemies will appear.
Go downstairs and beat up the first opponent. On the left, by the wall, you will notice the second enemy. Lean from the door, draw his attention and get back. Be careful, as he carries a gun. Beat him up and brake his weapon.
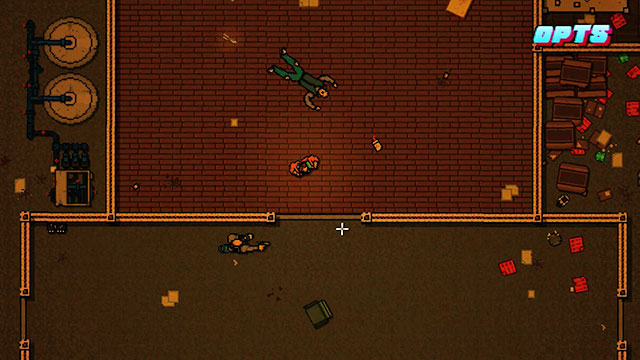
Go downstairs and stand by the wall. On the right, you will notice two people with guns, patrolling the area. Lean from the corner, get back and wait until they get close to you. Beat up both of them and brake their weapons. If you were lucky, you will be noticed by one of the enemies from the room on the right. Take the melee weapon from him.
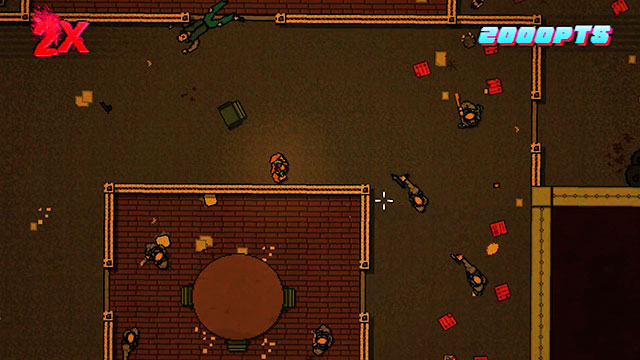
Wait until the enemy in the room below (holding a gun) appears near the entrance and beat him up. Defeat the rest of the opponents immediately and finish them one by one. Lastly, brake the guns and take the melee weapon, if you don't have one already.
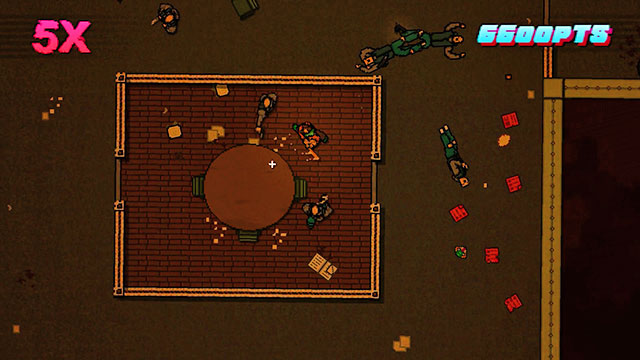
You will encounter another four enemies in the room on the left. There is one with a gun near and one with a melee weapon near the entrance. The other two are patrolling the territory above you. It is best to lure them all out from the room, wait outside and stun them when they get close. Watch out for the shooter upstairs, as he can quickly kill you when you will be finishing your previous targets.
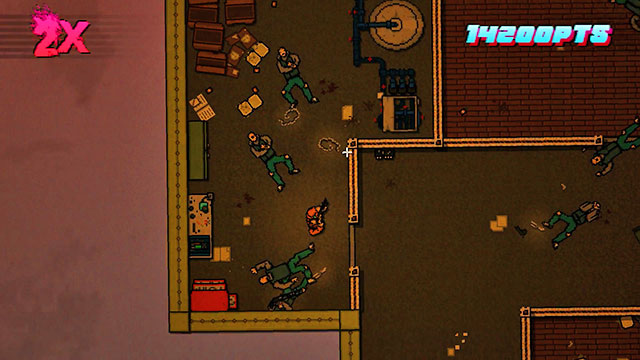
Go to the room on the right. Near the entrance, you will encounter an opponent with a melee weapon. After defeating him, get close to the left wall and go upstairs.
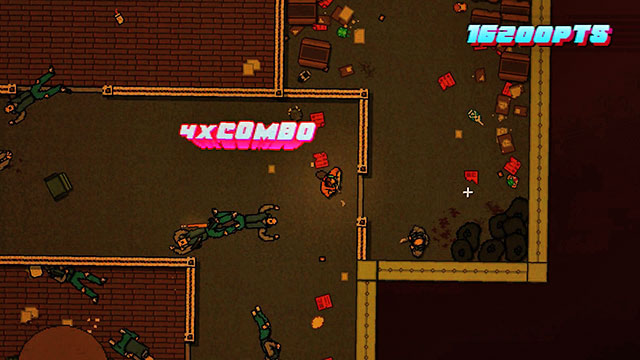
In the last room, you will e facing two shooters. Carefully lure them out and beat them. Don't forget to brake their guns.
Go downstairs. Enter the next part of the building while sticking to the left wall. It will make the next part of the mission much easier.
You will notice two shooters on the left. You can lure the first one out of the corridor and the second one will be waiting in the room. Draw the attention of the first one and then approach the second enemy to beat him up. Don't brake their weapons for now.
In the room below, there is one more shooter and a few opponents with melee weapons. Lure the shooter and beat him up.
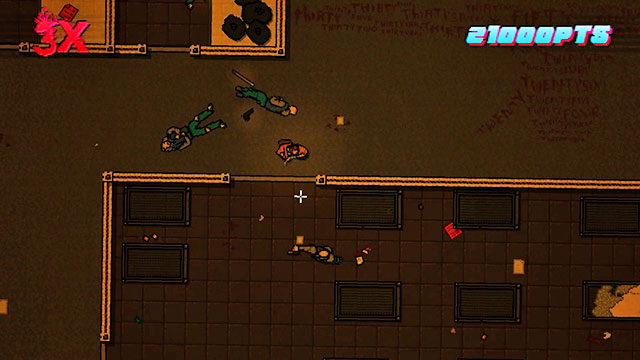
On the left, you will notice two more enemies with melee weapons. Beat them up. Now, you can brake the weapons lying on the ground. If you don't have a melee weapon already, take it from one of the opponents.

There is another shooter on the right and presumably the last enemy with a melee weapon. The shooter is patrolling the area right near the entrance, so you can beat him without luring him out. You just need to attack in the right moment. Brake his gun and go downstairs. If you haven't beat him up earlier, you will have to fight one more enemy with a melee weapon.
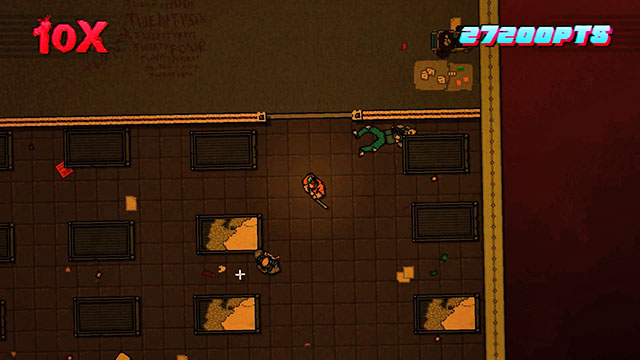
Downstairs, you will encounter four shooters. Two of them are standing near the entrance and the other two are patrolling the area on the right. Draw the attention of the first two and beat them up on the other side of the door. Brake their weapons. You have to lure the second group carefully, because both the enemies will be shooting at you simultaneously. They won't see you when they stand near the right wall, so you have to wait until they move towards the entrance. After defeating the enemies, go left.

Upstairs, there are two shooters. Another one is waiting in the room downstairs. On the left, you will see two opponents with melee weapons. There is a chance that they will all attack you right after you enter this part of the mission, so be very careful. If however, you are not attacked, start from defeating the melee fighters. Next, beat the shooter downstairs and lastly, the two upstairs. Lure the shooters out of the rooms, beat them up in the corridor and brake their weapons.
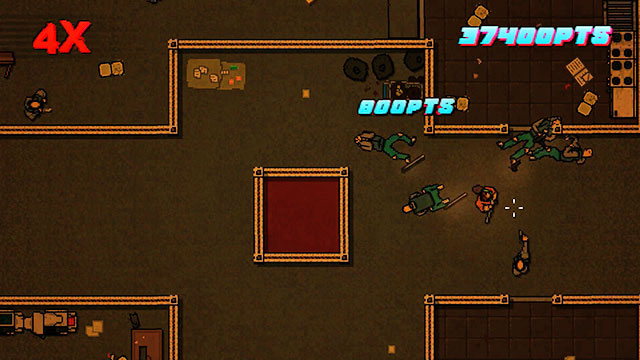
Three more groups of enemies are located on the left. They all consist of shooters and people with melee weapons. Downstairs, the enemies are standing in one place, but upstairs, on the left, there is a patrol. Look around to see the situation.
Attacking the opponents directly would make no sense, as you would be immediately killed. The only effective strategy is to lure the enemies one by one and beat them up behind the corner on the right in one of the rooms. You have to be very careful, because when leaning, you can be noticed by another group of enemies.
It is best to start upstairs. Stand near the upper wall of the room downstairs and wait until the enemy sees you. It will happen if you stand diagonally to the door. It is quite large, so you should be seen rather quickly. Step back, hide behind the corner and beat the opponent. Do the same in the room downstairs. If you stand far away enough, you won't be seen by the enemies patrolling the left part of the map.
Gradually clear out both rooms. When you do that, hide behind the lower room and learn the paths of the patrols on the left. Lean from behind the corner, draw their attention and beat them up when they get close. Repeat until the path to the exit is safe.
Don't forget to break every weapon to obtain extra points.
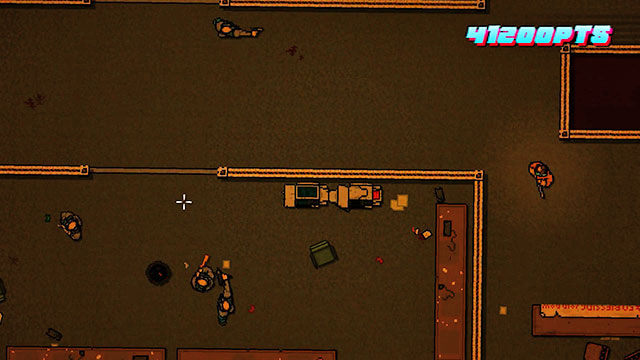
You will find the last enemy, a shooter, in the toilet near the entrance.
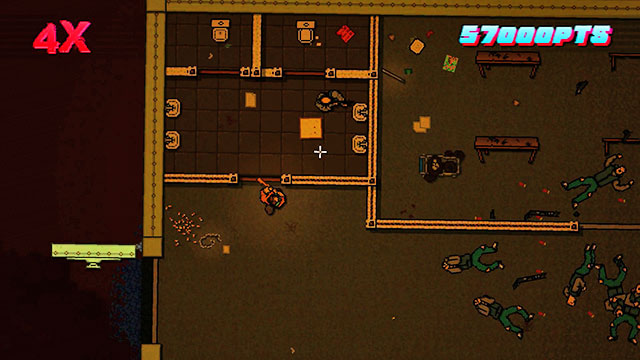
After defeating the last opponent, leave the building.
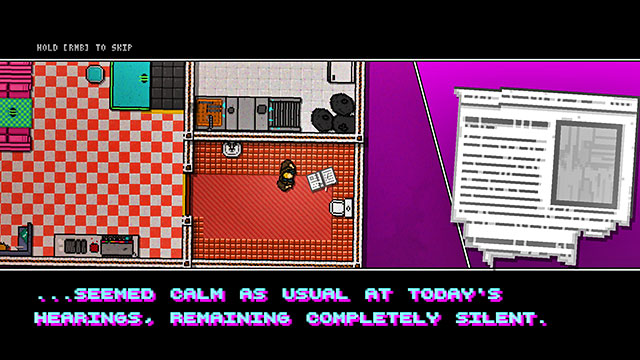
There are 10 Newspaper Articles in the game that you can find before and after some of the missions. They contain additional info about the events in the game. Collecting them all will earn you an achievement.
You will find the first one in the mission 2, Homicide intro. The newspaper is located in the toilet, in which the detective is washing his hands.
The second newspaper can be found in mission 6, Moving Up intro. You will see it in the corner of the room where The Fans are, on the table.
The third newspaper is in mission 7, No Mercy outro. You will find it upstairs, in the top right corner of the map, to the right of the coach and the cat sleeping on it.
The fourth newspaper can be found in mission 10, The Pit intro. It is located on the counter, to the right of the door to the toilet.
You will find the fifth newspaper in mission 11, Dead Ahead intro. Look in the kitchen, to the left of the fridge, above the table.
The sixth one can be found in mission 13, Subway intro. It is located on the desk below the bathroom, to the right of the round dining table.
You can find the seventh newspaper in mission 17, First Blood intro. Look for it on the round dining table.
The eighth newspaper is in mission 20, Release intro. It is located in the bedroom, in the top right corner on the map, on the bed with a lot of papers.
You will find the ninth newspaper in mission 22, Blood Money intro. Look for it on the desk near the entrance, above the elevator on the first floor.
The tenth newspaper can be found in the outro of the same mission. When in the detective's apartment, go to the kitchen. The newspaper is lying to the left of the gas cooker, to the right of the bathroom.
Hotline Miami 2 requires a low end PC. OpenGL 3.2a has been released in 2009, the recommended CPU has premiered a year before that. The required RAM and HDD space is already present in the majority of office computers. The game would probably run smoothly even on office computers.
In the 1920 x1080 resolution and vsync enabled, the game runs great. Save occasional freezes right after you kill the last enemy, the game caused no problems. The problems were resultant from the necessity of actively changing soundtrack, which could be a little bit troublesome, in the heat of a fight.
The game needs to be registered through Steam and offers offline single player only. The required controls are the keyboard and the mouse, but these can be replaced with PlayStation 4 and Xbox 360 controllers.
Singleplayer: Yes
Offline Co-op (split screen/hot seat): No
Multiplayer: None.
This guide has been drawn up basing on the PC version, on computer of the below specs:
The game ran smoothly, in the 1920 x 1080 resolution and vsync enabled. It froze for a moment, after the last opponent was killed, and when the track changed.
With system requirements in mind, the game should run on most contemporary laptop computers without any problems.


 Harry Potter and the Half-Blood Prince Game Guide & Walkthrough
 Half-Life 2: Episode Two Game Guide & WalkthroughHeroes of Might & Magic III: HD Edition Game Guide & Walkthrough
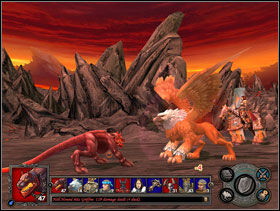 Heroes of Might and Magic V Game Guide & Walkthrough
 Halo 4 Game Guide & Walkthrough