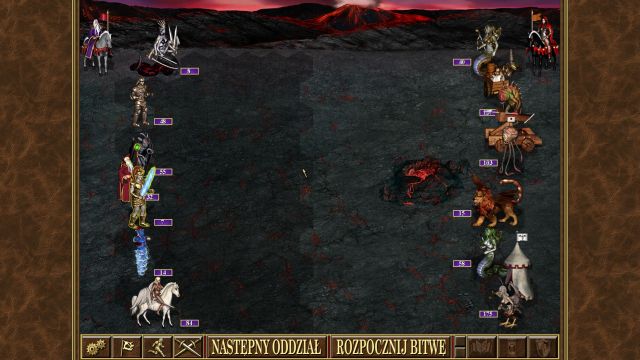
Heroes of Might & Magic 3: HD Edition guide contains a very detailed walkthrough of the single-player campaign, coupled with tips and tricks concerning the selection of starting rewards, as well as related to additional quests and activities. Aside from that, you can find a complex description of all the units and buildings, as well as relations between different fractions existing in the game. The guide also contains the information about each and every spell and artifact, as well as different gameplay mechanics, related to movement around the map, city development, or battling other players. Additionally, here you can find information about game controls, hardware requirements, and each and every achievement available in the game. Heroes of Might & Magic 3: HD Edition is a reedition of a legendary game released in 1999, by the now extinct company named 3DO. It's a mix between an RPG and a turn-based strategy, and the reedition was prepared by the DotEmu studio.
Heroes of Might and Magic 3: HD Edition guide contains:
Jakub Bugielski ()

Select next hero

Issue movement order

Information about the kingdom

Overworld / underworld view

Spellbook screen

Sleep hero

Wake up hero

Journal

End round

Travel options

View the world

Puzzle (obelisk) map

Dig

Information about the scenario

System options

Game menu

Load game

Restart scenario

Save game

Back to Windows

Back to game

Hero movement

Turn on / off combat automation

Issue "Defend" order

Issue "Wait" order

Spellbook

Retreat

Surrender

View unit

Turn on / off the information about a unit

Turn on / off movement grid

Turn on / off cursor shadow

Turn on / off unit shadow


Scroll combat log

Next unit

Begin combat (during the tactical screen)
Games from the Heroes of Might & Magic series, as well as the like, were always characterized by high difficulty level, as well as a long process of "getting into the game", so that the player can be fully aware what is happening around him / her. This chapter was made for this very reason - to explain difficult, poorly explained gameplay mechanics.
1. Plan your city development in accordance to the mission / scenario you are playing. If there are numerous powerful units around your city, preventing you from exploring the area around it, you should focus on creature dwellings during the first couple of rounds, so that at the beginning of the second week you can recruit some stronger units. If there are no such creatures, and you are sure that enemy players aren't close either, you should aim to build the Capitol as soon as possible.
2. While battling a large amount of shooters, fighting from a distance, restrain from moving before they make their shot. The reason for that is simple - shooters are given a damage penalty, if their target is located more than half a screen away from them. If the enemy gets closer, however, they no longer have that penalty, meaning that they will deal full damage. Therefore it's a good idea to use the "wait" order before you make your own move - this way enemy shooters will have to shoot at your units faster, with a penalty, and afterwards you will still be able to make you move.
3. In each city you managed to conquer, you should recruit a new hero - he/she can be used to flag all the mines in the area, or to collect treasures, while the "main" hero can just simply move on to the next enemy city.
4. In each city you conquered, you should leave a small group of units (it can even be a freshly hired hero) and build (if it isn't already there) both the Citadel, and the Castle. This way you will be able to protect the city from weaker enemy forces, and their scouts won't be able to retake it.
5. At the beginning of each mission and / or scenario, start off by flagging an Ore Mine and a Lumber Mill - wood and ore are, next to gold, the most important resources in the game and most buildings require them, so it's crucial to begin their extraction as soon as possible.
6. Trading on a Marketplace is expensive, but sometimes it can save your skin, allowing you to, for instance, construct a building before the end of the week. Don't hesitate to use it if you have a need, or if you have a lot of other resources to trade.
7. Remember, that every Marketplace build decreases the costs of trading resources.
8. Remember to buy a spellbook for each and every hero you have! Even the simplest, harmless at the first glance spells can turn the tides of a skirmish. 500 gold pieces for a spellbook is almost nothing, especially given the fact how much it can offer to you.
9. Resource Silo is an expensive, especially at the beginning of the game, investment, but its costs will pay back quickly - both in cities in which it gives you a piece of wood and ore, or in those producing a piece of the remaining resources. Construct it early on, and you will surely notice how useful this building is.
10. Remember to buy the siege machine offered by your Blacksmith. Ballista deals low damage, but with the proper amount of Attack and / or abilities coming from the hero, which increase its effectiveness, it can dish out some serious damage. The same goes for Healer's Tent and the Ammunition Cart - their costs are minimal, while they increase the effectiveness of your army.
11. If you have the opportunity, try to get the Tactics ability each time - it allows you to move your units before the actual combat starts, which can help you secure your key units, like shooters, or allow you to get to the enemy units quicker.
12. Remember that each and every hero has his/her own "favorite" type of terrain (you can read about it in the "Movement" chapter) - while travelling along different terrain types, they will have various movement penalties, ranging from slight, almost unnoticeable, to massive, decreasing the range they can travel by half! Whenever you conquer the enemy city, try to choose your heroes accordingly, so that they match the terrain around the city.
13. If the enemy besieged your city, don't leave the castle walls (provided that you've built Citadel, or especially, Castle) - if the enemy does not have a lot of flying units, he won't be able to get past your walls unless there's a whole in there, which can take up to several rounds to happen. It can sometimes lead to a situation, in which a small, powerless army defeats an army several times stronger.
14. Additionally, if the enemy has besieged your city, and the whole scenario is going on for a couple of months and you both have access to powerful, numerous units, it's worth to destroy the enemy Catapult first, using your shooters and / or spells. Without it the enemy won't be able to destroy your walls, and if he doesn't have enough flying units, or shooters, he can just surrender, as no matter what he does, you will still emerge victorious!
15. Regardless of whether you're using a might, or magic hero, always try to gain access to at least one (or preferably more) school of magic. Mastery over a certain school of magic will allow you to target all the units on the battleground with a single spell, be it a beneficial, or a negative one - spells affecting the monster behavior, or their stats, are several times stronger than those which deal flat damage.
16. If you see an enemy hero army consists essentially of units immune (Black and Gold Dragons, Efreets) or extremely resistant (Golems, Dwarves) to fire magic, you must immediately cast the Protection from Fire spell on your units, as there's a big chance that the battlefield will be struck with the Armageddon spell - it deals huge damage to every unit on the battlefield, so it's worth to be prepared for that.
17. Use support spells all the time - Bless is extremely effective on units with huge "spread" in their minimum / maximum damage (2-7, or 10-20). Prayer is one of the best spells in the game, and the Haste spell will allow you to disrupt the order of enemy units' movement. Spells like Stone Skin, Shield, Bloodlust can increase the effectiveness of your units, and those spells are mainly from the 1st level, meaning that your hero does not have to have Wisdom ability at all.
18. Don't forget about the negative spells as well, which can be cast on the enemy units - Slow can decrease the movement of enemy units by up to 50% (!), Curse will cause them to deal minimum damage (which is extremely effective against units with huge "spread" in their damages).
19. If a single enemy unit poses lethal threat, use the Blind spell to eliminate it from combat for a couple of rounds - it will give you a huge edge against the enemy, especially if he lacks the means of neutralizing the spell.
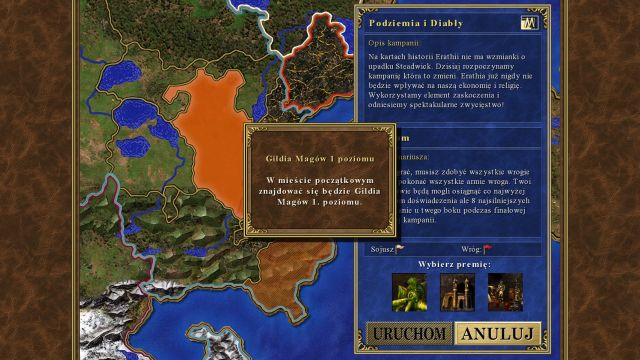
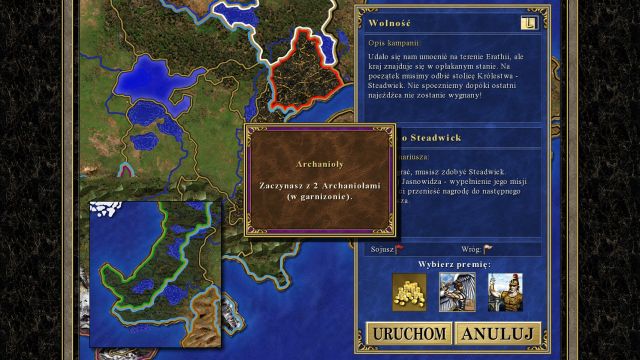
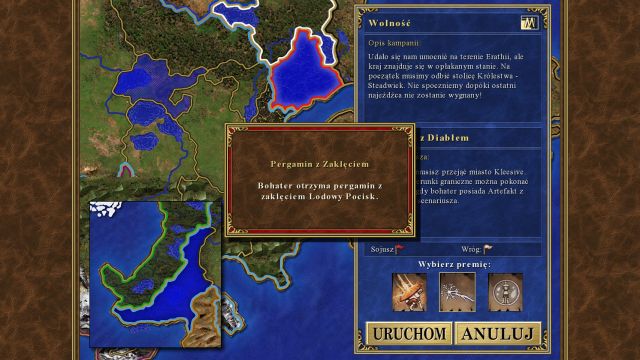
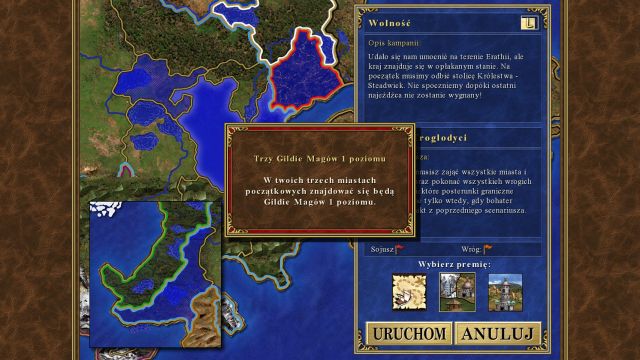
 It's worth to take Rare Resources as a starting bonus.
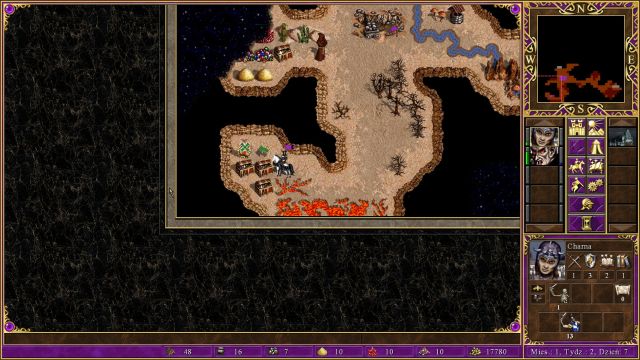
The first mission from the Long Live the Queen campaign is a typical tutorial - those missions are relatively easy and are there to introduce new players into the gameplay nuances. All three mission of this campaign will give a Castle city at your command. Before the mission starts, you will have an opportunity to select your starting bonus - the best to take are rare resources, as they will immediately come in handy.
 Do not falter - every unit around your starting hero will join your cause.
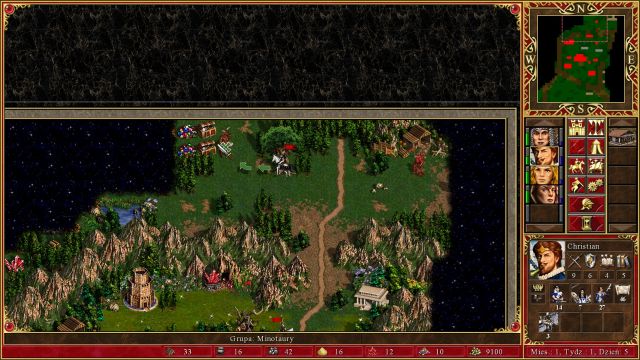
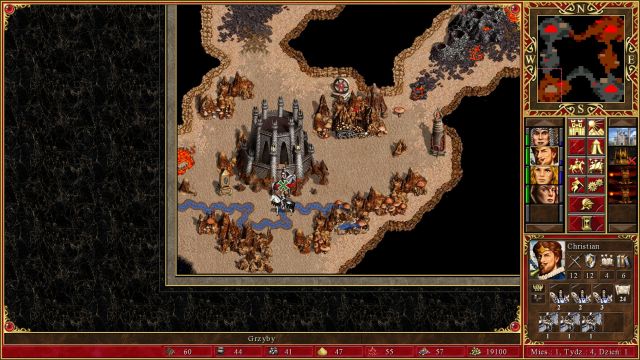
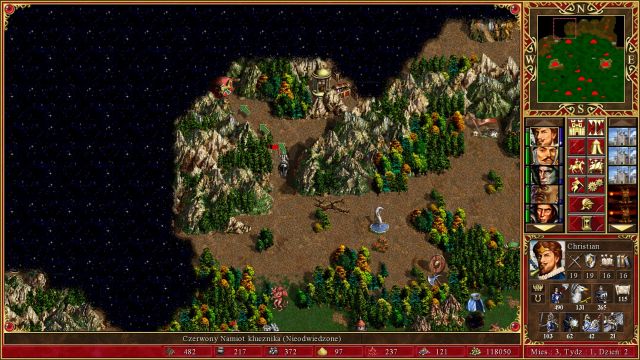
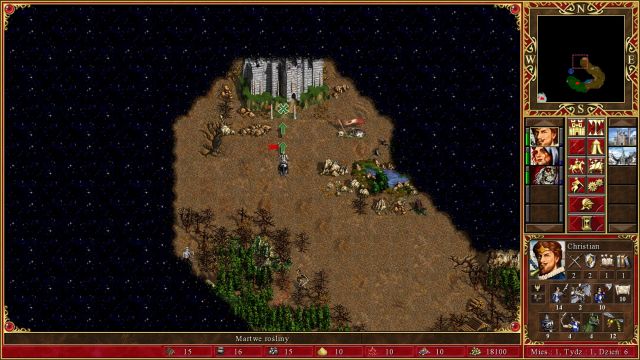
You begin the mission with a single hero (Christian), surrounded by groups of Pikeman and Archers - do not falter, as every unit around your hero will join your cause as soon as you try to attack them. Collect all your forces, enter the city (point S1 on the map) and build Upg. Archer's Tower. Recruit all the available forces and upgrade your Archers - you should now have a decent amount of Marksmen. Remember to buy a Spellbook - Christian does not have it from the beginning, but the ability to cast spells at the start of the map is very crucial and makes the first few fights a lot easier.
 There are tons of resources scattered around the sea.
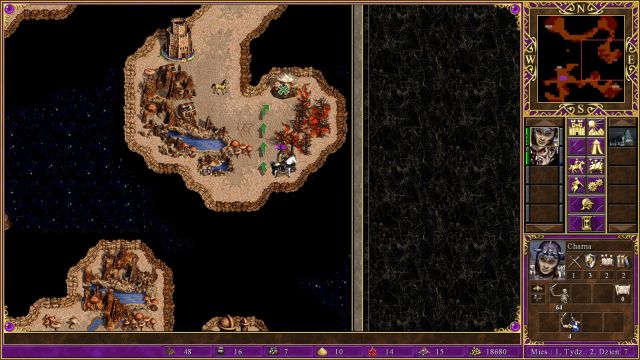
Leave the city and head West - just next to the Castle you will notice a Sawmill. Seize it and collect all of the nearby resources - further path to the West is blocked by a group of Cerberi, which you shouldn't bother yourself with at the moment. Head your hero to the North from your city - there are literally dozens of items to collect there, including a few artifacts. Don't forget to seize control over each and every mine you stumble upon. In the meantime, recruit a second hero at your Inn, have him enter one of the ships near your city and use him to clear out the water - there are tons of resources scattered around this area (mainly Wood and Ore). Continue scanning the sea area and order Christian to head North, until he reaches a portal (point M1a on the map) - you can (and you should) send him there to collect a couple of useful artifacts.
The first week's construction in your city should look like that:
 Gold Mines are extremely crucial.
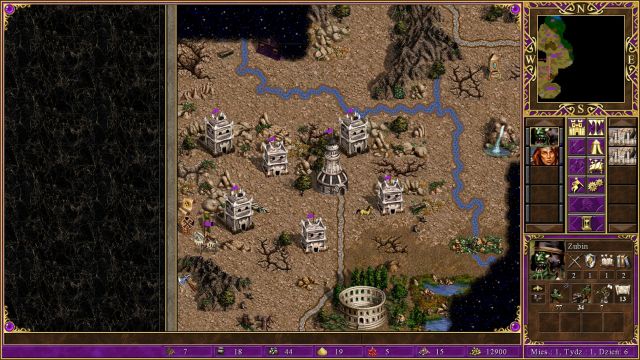
This way, at the start of the second week you will have access to all of your units (7th level one, Angels, are blocked during this mission). As soon as the first day of the second week start, recruit all of your troops, recruit additional Castle hero and have him take all of the troops - he/she should now have a sizeable army at his disposal, especially given the fact that it's only the beginning of the second week. Order him to head West, through the passageway blocked by a group of Cerberi - you should have no problem dealing with them (if the enemy wants to run away don't let them to that and fight them - additional experience is always wanted). There are three important mines here - Sulfur (point MINE1 on the map), Gems (MINE2) and gold (MINE3). You must seize them all (there will be some problems with the gold mine, as it's protected by a relatively powerful group of units).
 And another gold mine.
Your "Naval" hero should be nearing the end of his task of clearing the sea - as soon as it happens, dock the ship next to the enemy city (located near the left edge of the map - point W1 on the map). If you happen to land near the city at an appropriate moment, you should meet with no resistance at all - don't forget that you must wait a round before you can move your hero after he landed on the ground. As soon as you take control over the enemy city, build a Citadel and a Castle there, as there's a big chance that there's an enemy hero nearby. After constructing the latter defending the city will be a piece of cake - stand behind the walls, so that your Archers can get rid of enemy forces, while trying to protect all shooters you happened to have there. If you have access to the Slow spell, use it on an enemy who has the ability to fly. After you've defeated the enemy you should explore your new surroundings and seize every mine you stumble upon.
The next week (in your primary city) should look something like that:
The reason to upgrade Barracks and Griffin Tower first, instead of, for instance, Training Grounds or Monastery, is the fact, that those units benefit from the upgrade the most. Swordsmen, which are now Crusaders, are given better stats, but the most important factor is the Double Strike ability. The same applies to Royal Griffins - not only that they now have better stats, they can use their retaliate unlimited amount of times (the effectiveness of this maneuver should be obvious). In the following weeks you should focus on upgrading other unit-production buildings, as well as invest in 2nd, or even 3rd level Mage Guild.
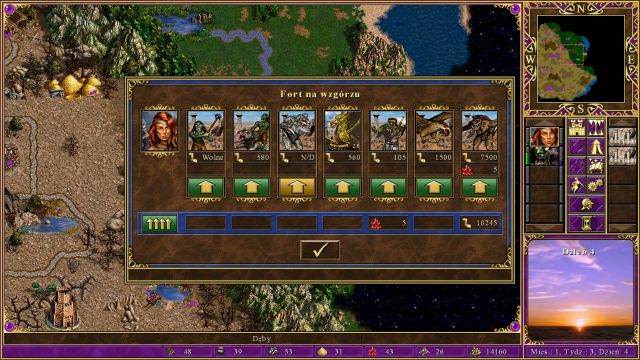
 Hill Fort eases the unit upgrade process.
As soon as Christian is back from his artifact hunting adventure (if you wanted to collect them, of course - remember, that artifacts, unlike experience, aren't transferred to the next mission), get him back to your town, recruit all the troops you can and send him to the North again, but not where the artifacts were, but slightly to the West, onto the snowy terrains. There's another enemy Castle here (point W2 on the map). If you managed to recruit most of your troops (and if you upgraded some, or all of them), capturing the city will be a piece of cake. There's a high chance that there's going to be at least several heroes venturing near the city you've just captured - eliminate them as fast as you can, to prevent them from messing around with your mines. Additionally, don't leave the freshly taken Castle without any protection - hiring a new hero, even with his basic army, but coupled with Citadel (or better - Castle) will allow him to protect the city even against a lot stronger enemy assaults.
After you've captured the Castle, recruit (if there are any troops to recruit) all units and head North - after a short while you will be back on the grassy terrains. There's another enemy Castle here (point W3 on the map) to capture. The whole process should be almost identical to the previous one - capturing it should be extremely easy. North from the Castle you've just captured you should be able to see a Hill Fort (point POI1 on the map), which allows you to upgrade your units for a little fee - it will come in handy, especially if you didn't wait to upgrade your troops and attacked the enemy early on.
If you have done everything mentioned above, all you have to do now is to capture the last enemy city (point W4 on the map) - to get there, you will need to enter one of the underground entrances. The first one is located near the first Castle you've captured (South-Western section of the map - point P2a on the map), the second one right next to your last acquisition (North-East - point P1a on the map) - keep in mind that an enemy hero, with a rather large army, can arrive through those entrances, so it's generally a good idea to protect those entrances with equal, or preferably stronger army of your own.
 Place your hero by the entrance to the enemy city to prevent him from leaving it.
All you have to do is to capture the previously mentioned city. Take your two strongest heroes, divide your whole army between them and send them through different underground entrances - this way no enemy hero will slip by to surprise you. While you make your way throughout the underworld, you should ignore all the mines you stumble upon - in a few turns you will end the mission, therefore you won't need any extra resources. When you reach the enemy city, transfer all your troops to the strongest hero (probably Christian), but before you attack it, you can do some extra "activity" if you want to.
Heroes from this mission (and from most of the other ones as well) are transferred to the following ones (their experience, as artifacts and army are lost). You can use the time, when your enemy can't do anything anymore (because your hero blocks the entrance to his last city) to run around the map with your other 3 heroes (only 4 heroes are transferred to the next mission) to visit all the learning places. This way, during a short time, all your heroes will receive a massive experience and ability boost, which can (and will be, if you will follow this guide) in the next mission. You should also build Mage Guild in each of the captured cities and visit it with your heroes (together with Christian). By doing this they will learn literally dozens of powerful spells - thanks to that, they will be able to defeat troops several times stronger than their armies, which otherwise would be next to impossible to achieve.
Regardless of your decision, attack the enemy city, capture it and finish this mission of the campaign. You will have the opportunity to save the game (use it!) and you will be moved to the second mission screen.
 Angels are the best starting item.
At the beginning of the second mission, select an Angel as a starting item - during this mission you will have access to 7th level units.
This map is a lot smaller than the previous one - additionally, with proper planning, you will be able to finish it during several rounds! As soon as the mission starts, locate the hero who acquired an Angel and transfer it to Christian. Afterwards, send him to the North - a neutral enemy, Angel, will await you here. It's going to join you, which, obviously, you should accept. Continue your journey to the North and seize the city (point N1 on the map) - inside you will find a pre-built Portal of Glory, so use the opportunity and hire an additional Angel and build City Hall to increase your income. To the left and right of your freshly captured Castle you will find neutral Portals of Glory, guarded by Angels and Archangels - both of those units will decide to join you. Incorporate them into your army and attack the neutral nests of Angels - with your current army you should have no problems with eliminating the guards. After you've captured them, recruit the Angels awaiting inside - you should now have quite a collection of them!
 Normally you wouldn't be able to challenge Minotaurs during the 5th round of the 1st week!
There's really no point in building your Castle any further, as most of your gold will be used to recruit more Angels - you can focus on increasing your gold income. During the time Christian captures Portals of Glory, use your remaining heroes to collect all the treasures scattered around the area - this is the time in which leveling them up in the previous mission pays off. Even if you attack a lot more powerful creature packs, you should have no problems defeating them with your spells and troops at your disposal.
After you've captured Portals of Glory with Christian, order him to go to the North, and then to the West, until you reach the North-Western edge of the map (point POI1 on the map). To accelerate collection of treasures, have a second hero accompany Christian - let Christian take care of monsters, while the second hero collects the loot.
 By collecting the Angel Wings you will make the whole mission a lot easier.
When you arrive at the previously mentioned, North-Western edge of the map, you will find an artifact there - Angel Wings. This item allows the hero wielding it to pass through terrain obstacles, but this time you will use it in a different manner. Give the artifact to the hero venturing with Christian and send him to the Seer's Hut, located to the North of your Castle (point POI2 on the map) - there you can exchange the item for 10 Angels! After you've received the reward, divide them between a few packs - 2x5 or in a 3-3-2-2 configuration. This way you will be able to easily defeat every enemy, especially because it's probably still the first week!
 It's beneficial to block the last enemy city again so that you can train your heroes.
There's only one thing to do - send Christian to the underground entrance located to the East of your Castle (point P1a on the map), and order the second hero, with the freshly acquired Angels, to go to the second entrance (point P2a on the map). Their goal are four enemy cities (points W1, W2, W3 and W4 on the map). Seize control over three of them, and as soon as you arrive at the last one, you can use the same tactic like during the ending of the previous mission - you can block the exit from the enemy city by placing a hero with a powerful army there. In the meantime, send all your heroes in places where they can earn experience points, as well as learn spells (you should build Mage Guilds in every seized city and send your heroes there) - this will come in handy in the last mission of this campaign, as your 8 most powerful heroes will be transferred there. After you've finished leveling them up, capture the last city and end this mission.
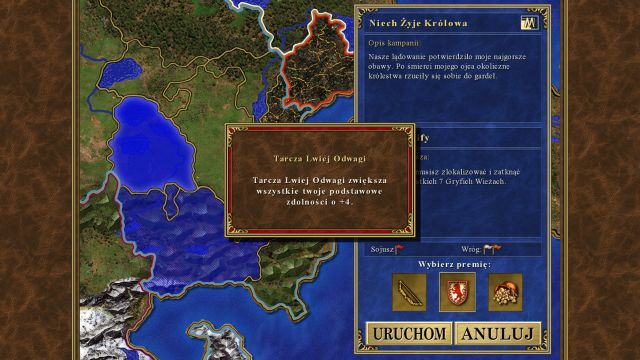 Take the Lion's Shield of Courage as your starting item.
Before the mission starts, you will, as always, have the opportunity to select your starting item. Your best choice would be the Lion's Shield of Courage, as it increases the Attack, Defense, Spellpower and Knowledge of your hero by 4 - take it and be happy about a huge power spike. Your goal is to take control over 7 Griffin Towers, located in the Northern part of the map.
 If you are quick enough, you will be able to take control over two enemy Inferno towns before the end of the first week...
If you leveled your heroes properly during the previous missions, you will be able to see the fruits of that process during this one. Additionally, if you act quickly, you will be able to make this mission extremely easy. Collect all your troops from your heroes and divide them between your two best ones - the first one would be probably Christian, while the second one should be someone with immense magical power. Send one of your heroes along the Western way, and as soon as he/she reaches the place in which the road goes straight North, turn left and capture the enemy city (Inferno) (point W1 on the map). Afterwards, send that hero to North-East, to the underground entrance (point P1a on the map). Do the same with the second hero - send him East, and as soon as he/she reaches the fountain, turn right and capture another Inferno city (point W2 on the map). Afterwards send him to North-West, inside a second underground entrance (point P2a on the map).
 ... and after a couple of days the enemy Dungeon cities as well.
After getting underground, capture both Dungeon cities located near the entrances (points W3 and W4 on the map), and send your heroes to the Southern part of the underworld, where you will find the last enemy city (point W5 on the map). Your task for now is to hold all three of those cities (W3, W4 and W5) for at least a week, so that the Orange player gets eliminated.
 Don't get near the cities located near the underground entrances - an ambush awaits you there!
After you've done that, the mission becomes fairly simple - you won't be harassed by the enemy, aside from extremely weak attacks, performed by heroes coming from the cities located near the entrances to the underground (points POI1 and POI2 on the map). However, don't attack them - when you get near, you will be ambushed by a sizeable enemy army, which you certainly won't be able to defeat at this moment. Use that moment of peace to build up your starting cities (Castles) - those which you've managed to capture from the enemy should only be used as gold generators. Additionally, remember to visit each and every Guard Tent (points K1a, K2a and K3a on the map).
 All you have to do now is to visit all the Guard Tents and capture all 7 Griffin Cliffs.
After you've gathered enough forces, transfer all your army to a single, or a pair of heroes, and capture the previously mentioned cities (points W6 and W7 on the map) - the army which will attack you as a part of the ambush should pose no threat to you anymore. As soon as you capture them, head North to flag all 7 Griffin Cliffs (points Z1-Z7 on the map) - you will have to go through a couple of garrisons, protected by two enemy heroes, as well as visit one of the Guard Tents (point K3a on the map). As soon as you capture 7 Griffin Cliffs, the mission will end.
 A 100 Imps for free is a good starting bonus.
At the beginning of this mission, you, as always, will be able to choose between three different starting bonuses - the best bet is a pack of 100 Imps. Your goal is to kill the Golden Dragon hiding in the underground.
 The neutral Rampart serves the purpose of gold generator, not as a troop recruitment place.
Start off by building the Upg. Imp Crucible in your city (point S1 on the map), and then recruit your army, upgrade your Imps into Familiars and head South. Capture the Ore mine and go West - you will stumble upon a neutral Rampart city (point N1 on the map). Capture it and continue your journey to the West, until you reach an enemy Castle city (point W1 on the map). Attack the city and capture it, and quickly go North-East, where you will find a second enemy city (point W2 on the map). Capture it and continue North - a third enemy Castle city awaits you there (point W3 on the map). Take it, go back East, replenish your mana at the Well and head towards the last enemy city, located further to the East (point W4 on the map). After you capture it, the enemy player will be eliminated.
During the time you are capturing enemy cities, hire 2-3 additional heroes and send them throughout the surrounding area, to collect resources, artifacts and capture mines. Additionally, remember to visit the Red Guard Tent (point K1a on the map), located practically in the South-Eastern edge of the map (it will come in handy in about a week). As for the city development, you don't really have to rush, but it's a good idea to have those buildings by the end of the first week:
 Green Dragons blocking the entrance to the underworld.
This way you will gain access to the strongest Inferno unit you have at your disposal at the time - Cerberi. The upgraded, three-headed hounds have extremely good speed, couple with above average stats, and most importantly, a special attack, allowing them to hit 2 adjacent to their primary target foes (and the enemy won't be able to retaliate). By building the Citadel, as well as the Castle, you will double their "basic" weekly growth - even if you aren't capable of recruiting them all, you can just collect enough gold and do it later. After you've recruited all your troops, transfer them to a single hero and clear the bottom part of the map from the creatures protecting various treasures and mines.
During the second week you should build:
 And here's the enemy you need to get rid of.
If you are lucky, you will gain access to all your units before the end of the second week - if you've captured all of the enemy castles, spend 2-3 weeks recruiting your Inferno army. You will need the army to break through several Green Dragon groups - don't take too long though, as with each week the amount of dragons inside increases. Before you go underground, activate both Guard Tents (points K1a and K2a on the map). All you have to do now is to go to the underground (point P1a) and start eliminating the dragons. You only need to defeat a lone, Gold Dragon, located in the Southern section of the underground (point Z1 on the map). After you get rid of it, the mission will end.
 Select the Mage Guild as your starting bonus.
Begin the mission by taking the Mage Guild lv. 1 as your starting bonus - it will come in handy to supply your hero with spells (don't forget to buy a spellbook!), as well as will speed up the process of your city development (especially the City Hall).
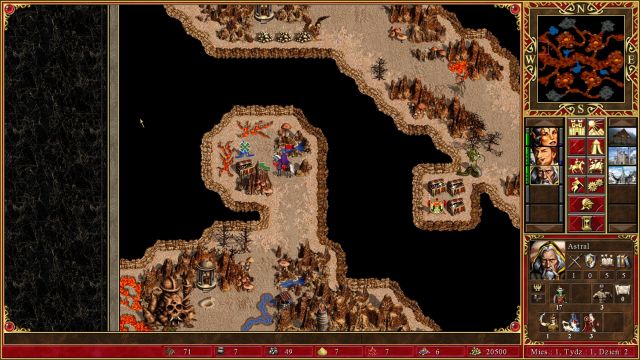
Start off with building the Pillar of Eyes, and after that recruit all your available units. Afterwards, head North from your starting city, reveal part of the underworld map by visiting the Pillar of Fire (point POI1 on the map), and from there head North-West. After a short while you should arrive at a neutral Dungeon city (point N1 on the map). Defeat the creatures dwelling inside, enter the city, build Town Hall and use the opportunity that you can build Harpy Hags here (upgrade those already present inside your army and recruit any available). After you've done that, continue to the North-West - you should soon arrive at a crossroads, leading upwards and to the left. Use whatever route you wish to and you should soon stumble upon another neutral city, located to the North-West of the previously captured one (point N2 on the map).
 Pillars of Fire reveal a small area around them.
After capturing this Dungeon city, you will now have access to Minotaur Kings, the most powerful units at your disposal at the moment. Based on the day of the week in which you've captured this city, you can do two things - you can either wait till the beginning of the second week (while building the Citadel and the Castle along the way) to recruit more Minotaur Kings, or you can collect any troops available at the moment and head towards the entrance to the surface (the entrance can be found near the first city you've conquered - point P1a on the map). Naturally, during your skirmishes with your main hero, you should hire 1 or 2 additional ones and clear the area of any treasures.
 The quicker you conquer neutral cities, the better.
You will surface near an enemy Castle-type city, which is located to the East of your current position (point W1 on the map). Capture it and head towards the North-Eastern edge of the map, where you will find another enemy city (this time a Rampart type - point W2 on the map). Capture it and head South-East - in the lower left corner of the map you will find an enemy Tower city (point W3 on the map).
You should now have 3 out of 4 enemy cities captured - the last one is located in the North-Western section of the map (point W4 on the map). Use the same tactic as during the first mission of the previous campaign - set your hero just outside the enemy city and use the rest of your heroes to clear out the whole map. Focus on gaining as much experience as possible - 8 out of your heroes, with a maximum 12th level, will be transferred to the next mission. Visit all the learning places, and those in which you can increase their stats, as well as try to build Mage Guilds in all of your cities (you will have access to several 5th level Mage Guilds this time). After you're finished with the preparations, attack the enemy city and finish this mission.
 It's more beneficial to select heroes from the second mission.
Before you start the mission, you will have the opportunity to select between two starting bonuses - one will give you access to all your heroes from the first map of this campaign, while the other one will transfer those from the second mission. The choice, essentially, is optional, but your heroes will be transferred with any experience they managed to acquire, and while the second mission had several times more opportunities to gather experience, you should definitely select those from the second mission. This guide assumes that you take heroes from the "Groundbreaking" mission.
If you've managed to level the heroes from the "lucky 8", which were transferred to this mission, while collecting as many spells as possible in the process, your task is going to be a lot easier. In the first days of the mission those heroes, who have access to powerful spells, will be your greatest asset - with that type of a hero you will be able to easily defeat armies several times stronger than yours, even by having a lone, single unit in the hero garrison. There are rules for that - don't attack enemies who are extremely fast and will be able to reach your unit(s) in a single move, nor target any shooters.
 It's only a 12th level hero, but even with that your task will be several times easier.
Besides those 8 heroes, you will have three different cities at your disposal - Inferno and Dungeon (points S1 and S2 on the map), giving you access to everything, as well as a Castle type (point S3 on the map), which, unfortunately, can't be developed properly, as it has most of its buildings locked (that is why it will serve the purpose of a gold generator).
Start off by constructing several buildings in your cities - Marketplace in the Inferno, Chapel of Stilled Voices in the Dungeon, and Inn in the Castle. Build any units available in all of those cities and transfer them between 3 heroes - the best choice is to give them to heroes with powerful magical capabilities, which will allow you to defeat stronger foes. If you don't have enough "magical" heroes, any, developed will suffice. If you have more than 3 heroes focused on magic, you can leave any of them (besides those 3 mentioned earlier) with a couple of units (even a s ingle one will suffice - the best ones are those slow units, with a lot of health and / or defense). Additionally, remember, that some units are highly resistant (Dwarfs, Golems, Elementals, some level 6-7 units), or totally immune (like Black Dragons) to magic - don't attack them with your magic-wielding hero.
 In normal conditions, this battle would, at best, end with serious casualties - thanks to magic I lost none!
Because of the fact, that you have two cities, which can be fully developed (Inferno and Dungeon), you must choose which one you should focus on during the early game (later on resources are no longer a problem, so you can develop several cities at the same time). The best choice is to focus on the Dungeon city and rush the Dragon Cave, to gain access to your 7th level units, Dragons, as soon as possible. Not only that the upgraded version is practically the strongest unit in the game (with a complete magic immunity!), you can travel to the bottom right corner of the underground (to the East from your Dungeon city) to visit a Dragon Cave (point POI1 on the map) - this building, after you've defeated a couple of Red Dragons, will allow you to recruit those Red Dragons every week! If that wasn't enough, it will increase your Red Dragon weekly growth in the Dungeon city by 1! It means, that if you build a Castle, you will be able to recruit 4 Dragons a week! With this amount of those powerful units no foe will pose any threat to you.
 General Kendall will probably have a lot stronger army, regardless of the day in which you attack him.
Your enemy (at the beginning ) has only a single hero - General Kendall, which, unfortunately for you, will have a huge army in his possession, regardless of the day in which you decide to attack him. Your goal during this mission is to capture the Steadwick city, which is guarded by this very hero. His city (of Castle type) is located in the Western section of the map (point W1 on the map) - it's surrounded by a mountain range, and if you want to get inside, you will have to break through one of the garrisons (points G1, G2 and G3 on the map). You have 3 months to capture the Steadwick city - yes, you don't have to fight with General Kendall, you just need his city.
Besides the cities, with which you start, you can conquer a few additional ones, controlled both by your enemy, as well as neutral ones. Two enemy cities can be found to the West from your own cities on the surface - the first one to the West from Inferno (point W2 on the map), and the second one from your Castle (point W3 on the map). In the upper right and lower left corner of the map you can find two neutral cities (respectively: Rampart and Tower - points N1 and N2 on the map), and in the upper left corner of the map there's the last Castle city, controlled by the Red player.
Because of the fact, that your enemy won't be harassing you that much (he will hire new heroes, but they won't have enough army to pose a threat, especially when you use your magical heroes), you can focus on developing your Dungeon city and exploring the map - focus on artifact hunting, in case you end up having to fight with General Kendall.
Dungeon, first week development:
Inferno, first week development:
Build only those three buildings - the resources will be used to develop the Dungeon city, and as soon as you construct a City Hall you will have a lot more gold. A serious development of this city can begin during the second week, while making sure that you've constructed at least 6 creature buildings in the Dungeon city.
Castle, first week development:
Your Castle have a very limited building possibilities, with the lack of 6th and 7th level units, so you should focus on a single thing - generating as much gold as possible. Build the two mentioned buildings, and during the latter turns you can get a couple of Mage Guild's levels, or construct a City Hall to have a bigger gold income - there's no point in building the army, as you won't have access to the strongest ones.
 And here's the city you need to conquer - watch out for the pesky Kendall!
If you managed to build all the mentioned buildings, you should have 6 Red Dragons at the start of the second week - 4 from the city and two from the Dragon Cave, which must first be conquered. Use the "weakness" of Red Dragons, their limited magic immunity (only 1-3 levels) and defeat them with powerful spells, such as Implosion, or Inferno, or, in extreme cases, Chain Lightning. With the proper spellpower of your hero, you will be able to finish the fight in one, or two rounds. Don't rush against the Black Dragons which are nearby - they are immune to magic and will rip you to shreds.
From this moment on focus on Dungeon city only - upgrade all your units (the faster you gain access to Black Dragons, the better), and in the meantime develop your Inferno city (Castle can be omitted, with the exception of City Hall and Mage Guild). Try to rush the Capitol - Red Dragons use up extreme amounts of gold. Give all your Red Dragons to one hero, and transfer the rest of your troops to another one and use him/her to clear the map faster.
There are two methods to capture the Steadwick city - you can either decide to fight General Kendall, or use a little ruse. The first option is extremely difficult to execute, as your enemy will probably have a lot stronger army at his disposal - you will have to use magic and plan your moves accordingly if you want to defeat him. The ruse mentioned earlier is about dragging Kendall out of his "playground" - to get to him you will have to go through one of the garrisons. Before you do so, however, the enemy won't attack you - this can be used to lure him out, while the other hero captures his city. To do so, set up two heroes by the garrisons - each one must be standing near a different one. Break through the garrison with the "lure hero" and provoke General Kendall to attack you - you can either stand in one place and wait for him to come at you, or move back a bit to lure him out further from his guard post. While the other hero keeps Kendall busy, use the second one, break through another garrison and take the enemy city, which should have almost no defenses. After you've captured the enemy city, the mission will end!
 Korbac is better suited for this mission.
Before you start the mission, you will have three options to select from - Korbac, who is a Beast Master (focusing on Attack and Defense), Verdish, a Witch, who specializes in magic (gaining Wisdom and Spellpower more frequently while leveling up) and an option to choose them randomly. More important that their "class" are their specializations - in case of Verdish it's First Aid, which is one of the least useful abilities in the game. Korbac, on the other hand, has a specialization in Serpent Flies, which is extremely effective, as it increases the effectiveness of those units (and their upgraded version, Dragonflies). The choice is simple - Korbac. The mission is fairly simple - your only task is to find and flag all the mines on the map, without any time limit. To make the task even easier, you should get rid of the enemy.
You start with two Fortress-type cities, as well as with the hero you've chosen. You should start developing the city where your hero starts at (point S1 on the map) and the first week should look like this:
Development of the second Fortress (point S2 on the map) is almost the same, with a single difference:
 During this mission it's very profitable to play aggressively...
This way of developing your cities isn't accidental - the tactic implies getting rid of the enemy player during the first several turns. As you build up your cities, seize control over nearby mines and collect the treasures - some of the neutral monsters (especially those from the Fortress) will be willing to join you. Recruit a second hero - it's important that he/she is from the Fortress city, as he/she won't have a huge movement penalty while traveling through the swamps. During the next few days focus on building up your cities and capturing mines.
 ... so that at the beginning of the third week the enemy is no more!
As soon as the second week starts, order your hero to get back to the "main" city (S1) and recruit all available troops - remember to upgrade those already present at his disposal. After you've done that, head towards the garrison located to the South of your city (point G1 on the map) - you should have no trouble breaking through it, because it's guarded by a little amount of enemy troops. After you're through, head East - there you will find the first enemy city (point W1 on the map), which, if it's still first, or second day of the second week, will have minimal defenses. After taking control over the city head South from the garrison gate you've just busted through and you should soon stumble upon the second enemy city (point W2 on the map) - the last enemy encampment is located to the West from your actual position (point W3 on the map). After getting rid of the enemy you can fully focus on your main objective - flagging all the mines on the map. If you have trouble getting to the Gold mine you must travel to either of the Guard Tents (blue, or red - points K1a or K2a), open up the path near the last enemy city (point K1b or K2b), and then go through the portal (point M1a on the map), to get to the Gold Mine (Point M1b on the map).
Remember, that the last, third mission of this campaign gives you the opportunity to use heroes from this, or the second, mission - if you want to transfer Korbac and c.o. there, spend some time leveling them up. You can transfer up to 8 heroes, with a maximum of 12th level to the final mission of this campaign.
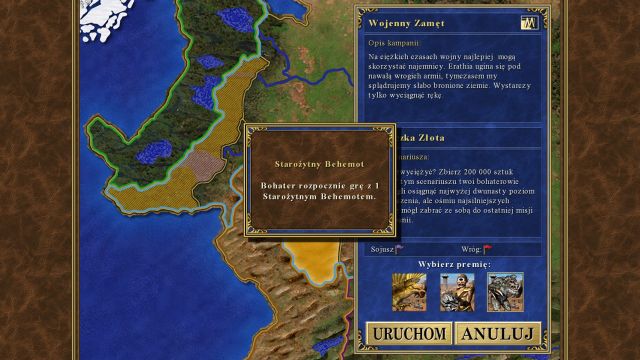 Don't even thing about anything and just take the Ancient Behemoth!
At the beginning, as always, you will have to choose between 3 starting bonuses: 3 Thunderbirds, 2 Cyclops Kings or 1 Ancient Behemoth. The choice is obvious - the Ancient Behemoth is the best one, which you surely will find out in a moment. Your task is to collect 200,000 gold - an easier task it may initially seem.
Two Stronghold cities have been given to you, each one with a hero at the gates. Near your first city (point S1 on the map) there's a Hill Fort (point POI1 on the map), which will allow you to upgrade your units without the need to construct upgraded buildings in your cities - this is even more important, as with the case of the Stronghold city, you can easily gain access to 7th level unit as soon as the second day of the first week!
The first week in your "first" city (S1) should look like this:
 Access to 5th and 7th level units in this city during the first days of the first week is a common occurrence.
This way, after the first week ends, you will have access to 3 Behemoths, 9 Rocs and a group of Goblins and Wolf Riders. What is more important, you can easily upgrade those troops at a Hill Fort almost for free - no other player in no other city can have access to 4 Ancient Behemoths and 9 Thunderbirds at the beginning of the second week. With those troops you will have no problems while dealing with your enemies. Remember to build your Capitol as soon as possible - construction costs will pay back after 5 rounds and afterwards it will allow you to easily recruit your troops.
The second city (S2) should be build in this way:
After you've constructed those 5 buildings, wait a little bit after you've completed the buildings in the first city - after you've done that, build those exact same buildings in this one as well, to gain access to Rocs and Behemoths, as well as Castle, which will increase their weekly growth. Having access to those units in both cities, as well as being able to upgrade them at the Hill Fort, will make your army extremely powerful.
The reason why you're not building all those buildings in both cities at the same time is the limitation of resources, especially wood - Stronghold cities are known for their quick development, i.e. early access to powerful units, but immense amounts of wood and ore are needed in the process, especially when you want to build Citadel and Castle as well. If you, however, managed to quickly capture lumber mill(s) and ore mine(s), as well as secured some "loose" resources, you can execute the construction plan from the first city in the second one as well - you will have access to more units early on. Additionally, remember to build other unit-production buildings (you can have some problems with Cyclops, as their building is extremely expensive) - you don't have to upgrade them, naturally, as you have a Hill Fort close to your cities.
 In between your cities you will also find a lot of creature dens.
After the second week begins, get back to city in which you have access to Rocs and Behemoths (S1) and recruit all the units there. Afterwards, order your hero to go East from that city - bust through the Halberdier group blocking the passageway, seize control over the Gold Mine located further to the East (point MINE1 on the map). The Gold Mine is protected by a group of Griffins, but you should have no problems while dealing with them. After you capture the mine, head South, to upgrade your units at a nearby Hill Fort (point POI1 on the map). Finally, after you've upgraded your units, head North, where the first enemy city (point W1 on the map) awaits and capture it, which should be trivial. Examine the surrounding area, collect all the resources, items and capture all the mines you might have missed.
With the arrival of the third (or fourth, depending on the time you've spent on collecting your army) you should get back to the city, recruit all your troops and upgrade them again at the Hill Fort. Afterwards head South, where you will find an underground entrance (point P1a on the map). You can go either North or South from there - the first option will lead you to a bigger island, where you can find two enemy cities, while the latter one leads to a small island with a single, lone enemy encampment. Start off with the Northern entrance and send your hero to the exit leading to the surface (point P2b on the map) - if you don't want the enemy from the bottom entrance to interfere, send a second hero to the underground to block the entrance, which should scare off the attacker.
 Hill Fort - every Heroes' player dream!
After emerging to the surface through the exit (P2a) immediately head North-East - the first enemy city on this island awaits you there (point W2 on the map). After you've captured it go straight South - at the end of the second part of the island there's the next enemy city (point W3 on the map). All you have to do now is to go back to the underworld and leave through the Southern exit (point P3b on the map) - you can use the second hero for that task as well. Go there and capture the final enemy city (point W4 on the map). After you've captured all 4 enemy cities the enemy will be defeated and you can now fully focus on your goal of collecting 200,000 gold.
There are two methods - you can simply click the "end turn" enough times until you reach the required threshold (with the amount of cities and Gold mines it won't even take half a minute), or go to the underground exit near the second enemy city (Northern exit - point N2 on the map) and visit the red Guard Tent (point K2a on the map - before you go there, however, you have to visit the first Guard Tent, located at the K1a point). After you've done that, go to the upper left corner of the map (point K2b on the map) - a passageway awaits there, leading to a small place filled with gold (you can collect up to 100,000 gold here!) One way or the other, the mission will end as soon as you collect 200,000 gold.
Remember that heroes from this mission are transferred to the next one - a maximum of 8 heroes up to 12th level. You won't be able to level that many heroes to that level, because there aren't enough opportunities to do so during this mission, but if you want to choose them as your heroes for the final chapter of this campaign, try to level up one hero to 12th level and have 2 or more heroes with 8-10th level as well - remember to collect spells from Mage Guilds.
 Select the heroes you want to start with.
As with most of the "third missions" of the campaign, you must choose which heroes you want to start with - those from the first, or from the second map. The choice is yours to make, but the ones from the first mission have a slight advantage here, as most of the terrains here consist of swamps, which heroes from other cities than Fortress have difficulties moving through. The third mission gives you the classic goal - you must defeat your enemy.
This mission is rather simple - you must defeat two enemy players. The first one has access to units from Castle, as all of his cities are of that type, while the other can control either Fortress ones, or Stronghold, depending on the heroes you've chosen at the beginning. Yours, as well as your enemies' cities are scattered around the edges of the map and the red player is located directly in between both of you - to get there, you will have to get through a rather strong garrison. Because of that, during the first few weeks you should focus on building your army and exploring the small area around your cities.
 Garrisons and the units stationed there are quite strong, but after 2 or 3 weeks you will annihilate them with ease.
Remember that the enemy will have heroes from the previous missions as well - you can weaken him considerably by using a little forte. If you decided to get heroes from the first mission to accompany you, remember to discharge all your heroes, except for one, during the second mission, so that the enemy will only have a single, high-leveled hero at the beginning, whereas you have several of them. If you've decided to take heroes from the second mission, do the same but delete heroes during the first mission.
The mission takes place on swamps, so it's generally a good idea to have heroes with Pathfinding, or take this ability whenever you have the opportunity while leveling them up - each level of this ability decreases the movement penalty on harsh terrains, such as swamps.
Start off by building the City Hall in all three cities, which will provide you with a good amount of gold income. Afterwards, focus on developing a single city only (the one with the pre-built Fort - point S1 on the map) - building up three Stronghold cities at the same time requires immense amounts of resources, which you, at the moment, don't have. During the first week you should build:
 This Mirror Entrance is the reason you should be fast during this mission.
Additionally, you can build a Marketplace, and then a Resource Silo in your second and third city - it will give you 2 additional pieces of lumber and ore a day, which will come in handy. All you have to do now is to properly clear the area surrounding your cities, construct all unit-production buildings (as well as their upgraded versions) in your main city and then recruit them all. A good moment to start acting is the beginning of the 4th week - you now should have access to all of your units. Recruit them all and head towards the bottom Garrison (point G1 on the map).
Garrison defenses are rather strong, but you should now have zero problems with them. After you break through it, immediately head North - here you should arrive at the first enemy city (point W1 on the map). After capturing it, go North-West, until you reach the second enemy city (point W2 on the map), and a little further in the same direction the last, third enemy city (point W3 on the map). At the same time, at the last Castle you've captured, you will find a Mirror Entrance (point M1a on the map) - by entering it you will be teleported right in the middle of enemy territory (point M1b on the map). This is precisely why you should take control over the map as soon as possible, so that the enemy won't be able to harass you this way.
If you have any units to recruit, or if you've built up the second city, recruit them all and deliver them to the hero you've just captured the enemy cities with and order him/her to go through the teleport. Three enemy cities are (from your current position) to the North-West (point W4 on the map), North-East (W5), as well as South-West (W6). You can capture them in any given order, but it's better to start with the one located to the North-West, then go East to capture the next one and then go for the last one.
 Archangels are always a good choice.
At the beginning of the mission you will have a choice between: 10,000 gold, 2 Archangels or 2 Titans. You should choose Archangels, as they are extremely effective at the beginning of the map, as well as during the latter parts.
You begin the mission with two cities: Castle and Tower (points S1 and S2 on the map). The Tower should be treated mainly as a gold income, and later on as a resource (thanks to Resource Silo) source, because you won't need any troops from there. Focus on building up your Castle - during the first week you should construct:
The most important thing about the first week is to have a Portal of Glory and Castle constructed - from the beginning of the map you will have a neutral Portal of Glory at your disposal, located to the North of your Castle, but you won't have access to it, but it will still increase your weekly growth of Angels and Archangels by 1. Additionally, recruit two extra heroes - one at the Castle and the second one at the Tower - and use them to scan around the area to collect gold and flag mines.
 One of the enemy's cities on the surface...
Recruit all your forces and give them, along with 2 Archangels, to Christian, and send him East. After he arrives at the Sulfur mine (point MINE1 on the map), go further East and as soon as you spot a lane of trees above him, order him to go North - after a couple of turns you should arrive at an enemy Castle city (point W1 on the map). Capture it, and head towards East, where you will find the second enemy city, this time of Inferno type (point W2 on the map). Afterwards, send Christian South - in the bottom right corner of the map (point W3) there will be the last enemy city on the surface.
 ...and another one.
It's important to keep an eye on two entrances to the underground, which will soon be flooded with enemy heroes. The first one is located near the city you've just captured (point P1a on the map), and the second can be found to the North from your Inferno city (point P2a). To prevent the enemies from storming the surface, all you have to do is to set your heroes, equipped with powerful units, at the entrances, and eliminate all enemy heroes trying to get through there. Send Christian to the entrance located to the North of the Inferno city, with the same army he used to capture enemy cities. The entrance in the bottom right corner of the map should be protected by a hero equipped with the army from your Castle, in which you've built Portal of Glory (that is why it's so important to construct this building before the end of first week) - 4 Angels, coupled with a small amount of other units of levels 1 to 5 will be enough to keep that way safe for a while.
For now all you have to do is build up your cities - your "first" Castle should be build to the maximum, together with an upgrade to your Angels as soon as you are able to do so. The rest of the Castle-type cities are somehow limited - you can't build Portal of Glory there, and some of them can't have a Castle either (only Citadel). It's not a serious problem though, as you still have access to every other unit. If you have secured both underground entrances with your heroes, the enemy won't be able to harass you at all - don't forget to send some extra units (mainly Angels) to both of them from time to time to strengthen them up.
 The last enemy city to capture.
Before you depart into the underworld, you should first send a hero, together with a powerful army, in the upper left corner of the map (point POI1 on the map) - you will find a prison there, with General Kendall inside, the same you've defeated (or outsmarted) several missions back. The prison is protected by a group of Devils (about 10 to 12 units), which is the reason to bring a powerful army here, so that you won't sustain heavy casualties. General Kendall isn't powerful, or all that useful, but you need his artifact - Ladybird of Luck. Take it to the Seer (point POI2 on the map), and it will be exchanged for an item (Badge of Courage), which increases your heroes' stats, and it will be transferred into the next mission.
After a month or so has passed and the first week of the second month has begun, recruit all your troops and give it to Christian and use the bottom underground entrance (point P1a on the map) - there should be Black Dragons there (only 3 units, so do not falter), which must be defeated. Get into the underworld (don't forget to protect the second entrance with another hero to prevent the enemy from attacking the surface) and capture 3 enemy cities along the way (all of them are of Dungeon type - points W4, W5 and W6 on the map), until you reach a garrison (point G1 on the map). It's protected by quite an army (10 Black Dragons, 40 Chimaeras, 60 Minotaurs Kings and 80 Evil Eyes), so be prepared for a tough battle. Cast a Blind spell (if you have it) on one of the Chimaeras, or use Haste / Bless / Prayer to make the whole battle a lot easier.
After getting through the garrison all you have to do is to get back to the surface and capture Steadwick city (point Z1 on the map), to end the mission. No hero is transferred to the following mission, unfortunately.
 Ice Bolt is, literally, the lesser evil.
At the beginning you have the option to choose from three different spells - the best, but still the average one, is the Ice Bolt, as the other two aren't really useful for you, and the bolt will ease up some of your encounters in the early game.
You begin with three cities - two of Castle type (one of them lacks the Fort - points S1 and S2 2 on the map, respectively) and a Rampart one (S3). Your hero starts at one of the Castle cities (S1), that is why you should focus on developing this very city - the remaining ones will be used for gold income. Five enemy cities, all of Inferno type, are located in the Eastern section of the map - you can sleep peacefully though, as the passageways from there are blocked by strong groups of Pit Lords, so you can expect at least a few weeks of no enemy in sight.
Use this precious time to build up both of your Castle cities - begin, of course, with the one where your hero started at. During the first week you should construct:
Thanks to that, at the beginning of the second week you should be able to recruit quite a lot of units, which will allow you to clear the area around your city. In the other two cities try to construct:
After constructing those 5 buildings, leave those cities, at least for now, because you will need every resources you can get to build Portal of Glory, Citadel, Castle and Capitol in your "main" city. During the second week, construct the following buildings:
 During the first days you will be protected by Pit Lords.
Constructing the Portal of Glory during the second week is quite a task (especially if you decided to construct the Capitol first), but it's perfectly doable. If you, however, fail to do so, take it easy - construct it in the next few days. During the second week you can spend some of your resources on developing your Rampart city - in case the enemy tries to attack you. During the second week (if you have enough resources for the Castle city) construct:
The above list does not include days, in which you should construct those buildings for a simple reason - you can do that at whatever moment you want, but try to construct at least some of them during the second week. You don't have to recruit troops as soon as you do so - all you have to do is to keep about 15-20k gold at all times (which shouldn't be a problem, given that you have 2 Town Halls, a Capitol and there's a Gold mine, at point KOP1 on the map, which should put you at around 10k gold a turn) and recruit your troops whenever you see an enemy approaching your city (reveal the map around the closest Pit Lord, to the East from your Rampart, so that you can reach to the attack quicker). The enemy shouldn't bring a big army, but better safe than sorry.
If you managed to construct the Portal of Glory during the second week, start your assault as soon as the fourth week of the first month starts - if not, delay everything by one week (first week of the second month). By that time your Castle should have every building constructed - recruit all your troops and go East, to break through the passageway blocked by a group of Pit Lords. Near your two Castles you have access to two different passageways - take the "upper" one.
 Enemy forces aren't anything to be afraid of...
As soon as you cross the passageway, to the East, you will find the first enemy city (point W1 on the map). After capturing it go further to the East, until you reach the crossroads, leading upwards and downwards - go along the bottom route. At the end of it there's the second enemy Inferno city (W2). Seize control over it and get back to the crossroads and take the Northern route now. Ignore the passageway on the right side, because it's protected by a large group of Archdevils. Instead, continue North, and at the end of the road a third Inferno city will await you (point W3). After capturing it go West, and after a turn of wandering you will arrive at the penultimate enemy encampment (W4).
Now, unless there's an enemy wandering around, you should have peace - the only city you need to capture is located behind the Archdevil blockade mentioned earlier (point W5 on the map), meaning that the enemy won't be able to do anything to you anymore. Gather an army, get rid of Archdevils and attack the last enemy city - there shouldn't be any resistance there. Afterwards the mission will end.
 Take the Expert Logistics, as it will allow you to move around swamp terrains easier.
At the beginning you will have to choose between: Expert Logistics, Dwarven Shield, or Centaur's Axe. Both of those artifacts are tempting, but given the circumstances (most of the map is covered in swamp-type terrain) you will benefit the most from the Expert Logistics.
 A neutral garrison will protect you yet again.
You will have access to three cities: one of the Tower type (point S1 on the map), a two Castles (points S2 and S3), which both lack the Fort. You should focus on the Tower, by constructing those buildings during the first week:
Thanks to that, you will have access to units of levels 1 to 6 before the end of the first week. In the meantime, construct those buildings in your two Castles:
By constructing those 5 buildings you will have 5k gold income, which should allow you to recruit most, if not all, troops from the Tower city. During the second week focus on one of the Castles and construct:
Constructing (and recruiting) Angels and Giants at the same time has no point, as you won't have access to enough gems, and both of those units require them (not to mention that you must have a considerable amount of that resource to construct their dwelling). It's crucial to decide which one you want to have - Angels seem to be the better option, as Giants does not have the ability to throw their thunderbolts at the enemy from afar, which their upgraded version can do.
During the third week focus on finishing everything up inside those two cities - try to upgrade most of your units (besides Angels / Giants) and have a Castle built in both of them. It's worth to gather 10k gold for a Capitol - the investment will pay back in 5 rounds and the additional 2k gold a round will surely come in handy. At the beginning of the second month recruit all your units and divide them between two heroes and set them (heroes) near the garrisons. One hero (with the Tower army) should be standing near the garrison located directly below the Tower (point G1 on the map), while the other one (with the Castle army) by the garrison to the East from the Tower (G2). Remember to defeat all the units around your cities and collect all the artifacts protected by them - they will surely benefit your heroes in the upcoming rounds!
 Tower forces are extremely expensive, but they more than make up for it with their combat effectiveness.
Break through both of the garrisons now. Send the Tower hero South, until he/she reaches the crossroads - from there continue South and along the Eastern road, until you reach the enemy city (point W1 on the map). After capturing it, take the road leading South - not far away from you there's the second enemy city (W2). In the meantime send the Castle hero South as well - the enemy city is located near the garrison (W3).
After capturing those three cities, you must keep an eye out on enemy heroes wandering the area, so that they won't get retaken. Send the Tower hero North-West (by going through a narrow passageway) until he/she reaches another enemy city (W4). After conquering it go along the way leading North-West - there you will find the penultimate enemy city. In the meantime send the Castle hero West - as soon as he/she reaches the road, head North, where, at the end of the road, near the third garrison, you will find the last enemy city (W6). All you have to do now is to hold those cities for a couple of days - if the enemy remains without a city for 7 days, he will be defeated and you will complete the mission.
 Three Mage Guild lv.1 buildings are the best choice.
At the beginning you will choose from: Expert Navigation, Mage Guild lv. 1 in each of your starting cities, or a Mage Guild lv.3 in your main city. The best option is to take three Mage Guild lv. 1 - not only that it will allow you to save a lot of resources, it will speed up construction by a great degree.
Begin by constructing those buildings in all your cities:
After the third day you will have 6k gold income. Afterwards, construct those buildings in your Tower city:
During the second week try to build a Capitol in one of your cities, and build Castles in every one of them. Remember to not stay still - use the time to flag all the mines in the area and collect all the treasures and artifacts as well. Near the Tower city (to the North) there's a Hill Fort (point POI1 on the map), so you can easily upgrade your troops - which will soon by used.
 This artifact will increase the power of Astral.
At the arrival of the third week, recruit all your troops from the Tower city (point S3 on the map), and head to the mentioned Hill Fort to upgrade them. Afterwards, send the hero to the underworld through the entrance located South from your Castle (P2a). After arriving there, head North, where you will find an artifact (Spellcaster's Hat) protected by a swarm of Zombies (about 300 units - POI2 on the map). The encounter is rather hard, but it's well worth the effort - the reward is an artifact which grants access to all level 5 spells to the wearer!
After recruiting the army for Astral (Tower hero), focus on building up your remaining cities, so that you have access to all units up to level 6 (ignore Angels and Green Dragons at the moment, as you won't have enough resources to hire them all). With the beginning of the 4th week, hire all Castle / Rampart units, give them to the appropriate hero (Christian for the Castle, Jenova for the Rampart) and buy a boat at the shipyard, located on the beach, East from the Tower city (point POI3 on the map). Use it to explore the huge sea terrains - there are dozens, if not hundreds of treasures scattered around here. Why take an army you may ask? Because there's a number of smaller islands here, where strong monsters (like Gold Golems) can be found. To collect treasures faster, you can bring an extra one, or two heroes along with the one with army. At the center of the sea there's a Cartographer, who will reveal the whole sea for 1000 gold. After you've collected all the sea treasures, head East, break through Water Elementals and land on the shore. There's a couple of mines and treasures here, as well as a number of underground entrances (points P4a, P5a and P6a on the map), which lead directly to your main enemy city.
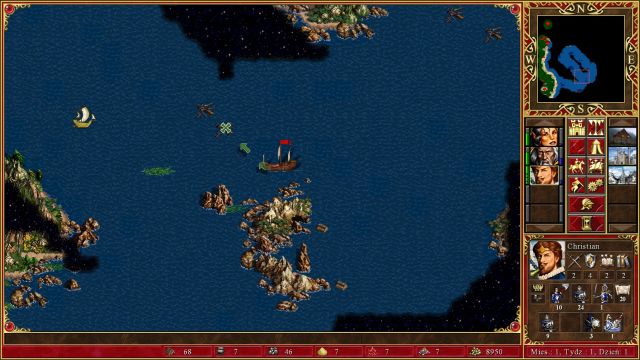 It's a good idea to send 1-3 heroes on the sea early on, as there are dozens of treasures scattered there.
Your task is to get underground and capture all 5 enemy cities located there - before you do so, hire all the units for your third starting hero (Christian / Jenova, depending on who you've sent to clear the sea). You should also get back to Tower with Astral and recruit all the new units - you can also hire a new hero, give him the troops, order him to visit the Hill Fort and after upgrading those units deliver them to Astral directly underground.
Send Astral underground through the entrance North from the Tower (point P3a on the map), and as soon as he arrives there, send him East, go through the Southern garrison (G5) and capture the enemy city (W2). Send the second hero to the underground entrance between Rampart and Castle cities (P1a) and as soon as he arrives there order him to go through the South-Eastern passageway, through the garrison (G1) and to conquer the enemy city located North (W1).
After capturing those two cities, order Astral to go through the Southern garrison (point G6 on the map), and then to go East, until he reaches another garrison (point G7), behind which you will find the third enemy city (point W4). The hero, who took the Northern city, should go through the Northern garrison (point G2), then head East, through another garrison (G3) and conquer the fourth, penultimate enemy city (W3). There's only one city left. To get there, send Astral through the garrison located North from the city he just captured (G8) and the second hero through the Southern one (G4) - they should meet in the middle, right next to two Medusas Nests. The enemy city is located East from their position - the last garrison awaits you there (G9) and the strongest enemy you've faced so far.
To win this battle, you will need a strong army, as well as magic - Astral comes to the aid, together with his artifact granting him access to all level 5 spells. With a proper artifact configuration, as well as high enough level, Astral will be able to (with the help of Implosion, for instance) deal more than 1000 damage with his spells! Start the encounter by casting beneficial spell onto your troops or a negative one onto the enemy units, or try to disable one of the enemy shooters with your Blind spell. If the enemy has Red, or Black Dragons, focus your units onto them, and let Astral to fight the rest of the enemy forces with his spells. Remember that the enemy is alone, and you have 3 armies at your disposal - if one of your heroes fails, you can use another one to defeat the enemy.
 As always, it's more beneficial to take units as the starting bonus.
As always, you can choose from three different starting bonuses: a Scroll of Death Ripple, 1 Black Knight or a Skeleton Transformer. Take the Black Knight, as the building can be easily built and the Death Ripple is a common spell for heroes from the Necropolis. Your task is to get to Stonecastle city (point W1 on the map) with an artifact called Spirit of Oppression.
The enemy won't be harassing you at all, but you have "only" three months to complete the task. Start off by building the Tomb of Souls, recruiting all your troops and giving it to your hero. Afterwards, leave the city and head South, to flag a lumber mill. Use the nearby neutral dwellings to recruit additional units and head West from the freshly captured lumber mill. Break through the garrison (point G1 on the map), and through the next one, located further West (G2). Collect the Blind spell from the Shrine (point POI1 on the map), which will be useful in the upcoming battles. Continue along the way, to the South, until you reach the entrance to the underground (P3a), located at the bottom of the map.
In the meantime build up your stating city. Construct:
You won't be able to construct anything more, as you will run out of Ore - Ore mine will be found later on.
 One of the artifacts.
In the underworld you will have to fight the extremely annoying Monks and Zealots. Here's where the Blind spell comes in handy - thanks to that, you will be able to disable the enemy unit for a couple of rounds, which will save some of your units. Remember to regularly replenish your mana at nearby wells - you don't want to enter the fight without being able to cast Blind. After you've defeated the first group of Zealots, go South - here you have to defeat another group, and collect the Pendent of Total Recall (point Z1 on the map).
 One of the three Seers.
Backtrack to the surface and head North - to the right of the lumber mill you will find a Seer's Hut (point Z2 on the map). Give him the artifact to get another quest. In return for delivering the Pendent of Total Recall, you will be given Hourglass of the Evil Hour. You now have to go to the underground entrance located in the upper left corner of the map (point P2a on the map) - before you do so, you can visit your city to recruit additional units. After getting to the underworld, continue along the only path until you reach the exit to the surface - don't go there but head South, where you will find another Seer's Hut (point Z3 on the map). Exchange the artifact to get the Pendent of Dispassion and get back to the surface through the entrance you've just passed by (point P1b on the map).
Use the opportunity that you are near the city and recruit and / or upgrade your troops and go to the last Seer's Hut located near the Lumber Mill (point Z4 on the map) to exchange the Pendent of Dispassion for the Spirit of Oppression. Afterwards head South and go through the garrison (point G3 on the map). After you reach the road, head West - you should soon arrive at the enemy city (W1), which you must conquer to finish the mission. Remember to enter the city after you've captured it.
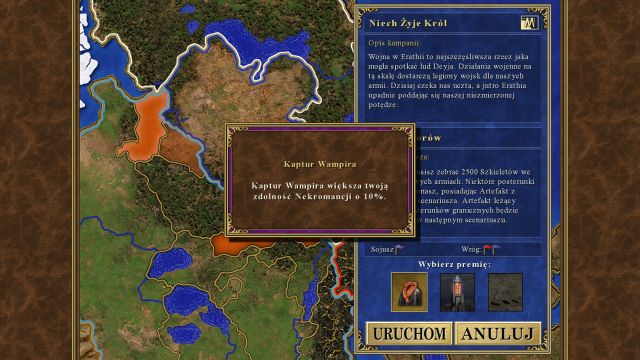 Vampire's Cowl is the best starting item.
At the beginning you will choose from: Vampire's Cowl, Necromancy Amplifier or Unearthed Graves. Take the first one, as the other can easily be constructed. Your task here is to collect 2,500 Skeletons during 3 months - you won't have any enemy here, so you can relax.
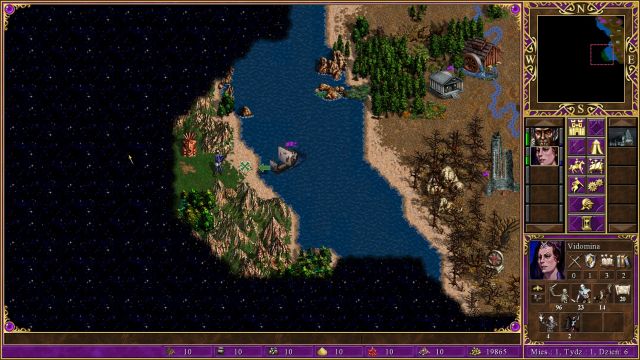 More enemies which can be turned into Skeletons can be found on the neighboring island.
Start off by constructing the Fort and recruiting all of your forces. Give them to Vladomina and leave the city, capture the Gold Mine (point MINE1 on the map) and order her to go South, to meet with Vokial, who is carrying the Vampire's Cowl, the artifact you've selected as your starting bonus. Give the item, as well as any troops to Vladomina and get her on the boat, West from where Vokial started at (point POI1 on the map) - use it to cross the water and get on the neighboring island, where more enemies await you.
To complete the task and gather 2,500 Skeletons, you must follow a couple of rules. First things first, fight all the enemies you encounter, even those who are running away - the Necromancy ability will allow you to turn the percentage of killed enemies into Skeletons. Secondly - try not to use your Skeletons in combat, as each one you lose will delay your task.
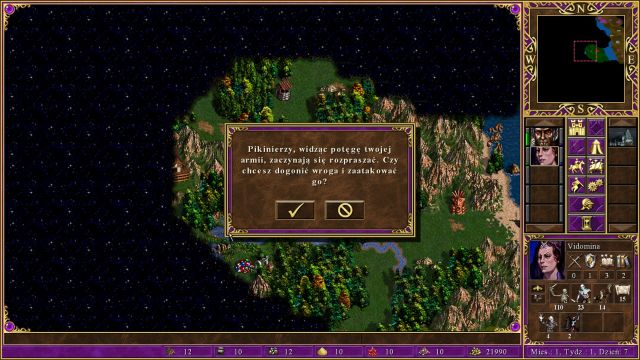 Don't let any enemy escape!
By going West you will get to the blue enemy city - Rampart (point W1 on the map). To get there, you must circle around it from the left side. Conquer it as fast as possible and start turning the creatures found there into Skeletons. After capturing it, head South-West - there you will find another enemy city, this time of Castle type (W2). Along the way you will stumble upon masses of Pikemen, which can be turned into Skeletons. There's only one enemy city left to capture - it's located in the upper left corner of the map (point W3 on the map).
After you've conquered all 3 enemy cities, you will have to run around between them and your Necropolis - you will have to recruit any units there and send them to your starting city in order to turn them into Skeletons. You can use Vokial for this task. Don't forget to clear the map - there are dozens of Pikemen, Centaurs, Archers and other weak, but numerous enemy groups scattered around the island. Remember that the Skeletons must be given to a single hero in order to complete the mission.
 Take Zombies as your starting bonus.
At the beginning you will be able to choose from: Pendant of Death, Scroll of Protection from Earth or 25 Zombies. The best option is to take the Zombies. This mission is all about kicking your opponents' butts.
You have two Necropolises at your disposal - while developing them, focus on the one located in the middle of the map (point S1 on the map), because it's closer to the enemy lines. Start off by building City Hall in both Necropolises. Afterwards, focus on the one in the middle and construct:
In the second city (S2) construct the following buildings:
As soon as the second week starts, send your hero to recruit all the troops from the Necropolis in the center of the map and use them to clear all the mines you had no access to prior to this point. During the second week, construct (in the "center" Necropolis) the following buildings:
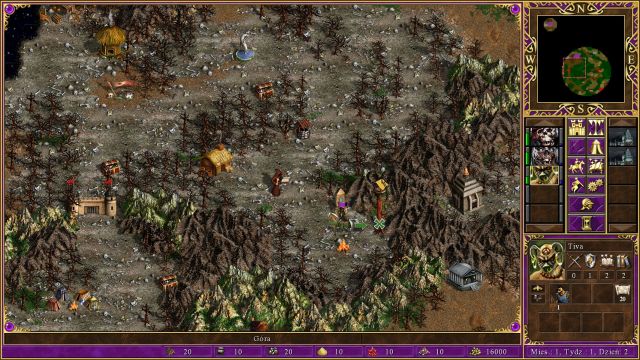 Use the Observatory to know what your enemy is planning to do.
With some luck, there's a chance that you will be able to construct all those buildings - at the beginning of the third week you will have access to a lot of units. In the meantime try to build up your second Necropolis - start off by building all 7 creature dwellings, even if you won't have the resources to recruit, or upgrade them. With the arrival of the fourth week, provided that you've managed to recruit most of your units from the "main" city, you can prepare to attack the enemy. Send your hero North from your "central" Necropolis, where a garrison can be found (point G1 on the map). Break through it and direct your steps towards the enemy Necropolis (point W1 on the map). As soon as you capture it, get back to the middle of the map and head South, to the second garrison (G2). After piercing through it go West, where a second enemy Necropolis awaits you (W2).
Afterwards get back to the center of the map and collect all your troops, as you will have to conquer the last enemy city. The city is located in the lower right corner of the map (W3) - enemy army shouldn't be spectacularly strong, so you should have no trouble beating it. After you capture the city, the mission will end.
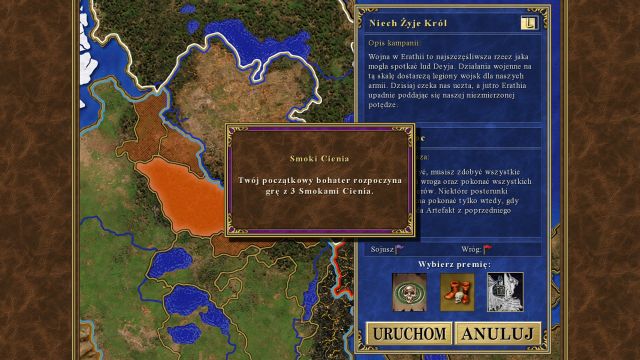 Ghost Dragons will allow you to play aggressively from the beginning.
The last mission from this campaign gives you access to: Scroll of Death Ripple, Dead Man's Boots or 3 Ghost Dragons. Dragons will benefit you the most, so it definitely should be your choice. Your task is to defeat all the enemies.
The enemy, as always, has a big lead in the number of cities (5 to 3), and to make things worse, the map this mission takes place on is really large. That is precisely why it's beneficial to play really aggressively here and why I recommended to take Ghost Dragons as your starting bonus. The Dragons will be given to Vokial, a hero located near your central Necropolis (point S2 on the map) - enter the city, build Tomb of Souls, recruit all the troops, leave the city and head along the road, leading South. After you reach the crossroads, continue along the Southern route. Additionally, remember to hire a hero in the middle Necropolis (S2) and use him to collect nearby treasures and flag mines.
After a short while you should arrive at a garrison (G2) - thanks to your Ghost Dragons you will rip the enemy to shreds. It's worth to leave a little group of units at the garrison, so that an enemy scout, with almost no army, won't be able to slip by onto your terrain - drop all the Walking Deads, which only slow your hero down, as well as a group of Skeletons (20 to 30 should suffice). With that the passage to your domain should be relatively safe, at least from weak enemy scouts. Now head South, until you reach the crossroads with an Observatory next to it.
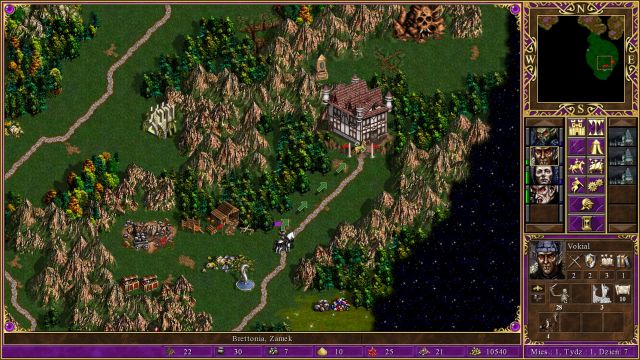 The first enemy city, which is left undefended!
In the meantime, while you use Vokial to attack the enemy, you should build up your own cities. Due to the fact, that you will soon conquer a city located right in the middle of the map, you should focus on developing the Necropolis which is furthest to the West (point S1 on the map), because it will be easier to operate with that - the other two Necropolises should be used, at least for now, to generate income.
Western Necropolis (S1) development during the first week:
Central Necropolis (S2), that in which Vokial started, development during the first week:
And now it's turn for the Eastern Necropolis (S3) development during the first week:
The reason for building creature dwellings in your "economic" cities is because you want to have a way of defending them in case an enemy decided to visit you - you must have the ability to recruit troops, but you shouldn't do that beforehand, because at the moment you won't need any units from those cities. Further development of your Necropolises should look like this:
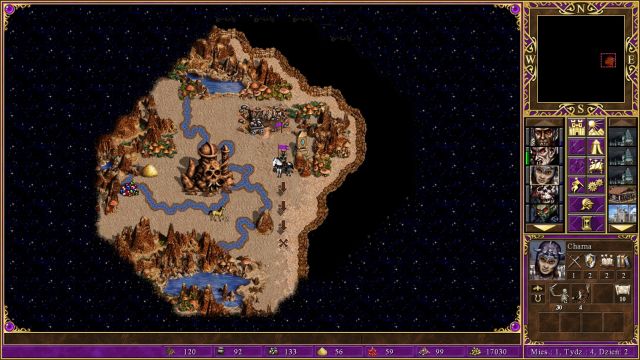 It's a good idea to reveal a small area around the underground entrance to be able to react to enemy movements earlier.
As soon as Vokial reaches the Observatory, visit the building to reveal the surrounding area - near the hero position, South-East from it, you will notice the first enemy city (Point W1 on the map). Go there to conquer the city - you will have to venture a little further South to be able to reach it. Pay attention to the crossroads, linking three different routes. After you've conquered the city, immediately hire an additional hero and use it to collect nearby treasures and flag mines and build Blacksmith, Mage Guild lv. 1 and Town Hall in that city.
Send Vokial to the crossroads mentioned above and order him to heat along the Western route. After he passes by an Ore Mine (which, obviously, you should flag), continue along the road leading North, where you will find the second, more developed enemy city (point W2 on the map), which you must conquer. This city will be the source of Vokial's army in the future - you must build it up as fast as possible.
After capturing the second enemy city, send Vokial (and before that hire any troops at the Castle you've just conquered) North-West - this time not along the route, but through a "shortcut" (you will pass by a Guard Tent). Hire a hero in the newly acquired city and build Citadel, Castle, Stables and Training Grounds in there as well - try to construct those buildings before the end of the second week. If you have enough time, build Upg. Archer's Tower and Upg. Barracks as well.
 The Magic Portal spell is one of the most powerful spells in the game.
After marching for a round-two, you should arrive at the Alchemist Lab (Mercury "mine") - from there head West and continue along the road to stumble upon the third enemy city (point W3 on the map). If you managed to capture those three cities before the end of the second week, the rest of the mission is going to be a lot easier.
At the beginning of the third week, recruit all the units at the second Castle you've captured - try to recruit Cavaliers, Swordsmen (or Crusaders, if you upgraded Barracks), Archers (or Marksmen) and Griffons (if you are able to, recruit Monks and Pikemen as well). Transfer those troops to a new, fresh hero - his / her only task will be to eliminate any heroes wandering in the area. Afterwards, recruit as many units as you can in your Western Necropolis - if you are short on gold, wait for 2-3 rounds to collect enough of it and recruit all your units. Give them to one of your Necropolis heroes you've been given at the beginning of the mission and send them through the garrison located South-East from the Necropolis (point G1 on the map), and give the troops to Vokial. Remember to visit the Hill Fort before that, so that you can upgrade your units for cheap.
If you managed to do everything mentioned above, you should have a huge city advantage over your enemy (6 to 2), and an appropriately large army to be able to defeat any enemy attack - the enemy himself shouldn't have any significant troops at his disposal, because he lost 3 of his cities extremely fast. You now have to conquer two remaining enemy cities, located in the South-Western (point W4 on the map) and South-Eastern (Point W5 on the map) sections of the map to achieve victory. Additionally, remember to follow those rules:
Finish the mission by attacking the last two enemy cities.
 Take the Adept Logistics.
Like always, you will be able to choose from 3 different starting bonuses: Boots of Speed, Adept Logistics or 2,500 gold. The gold is a bad choice, the artifact won't be transferred to the next mission, but your hero will be, so taking an ability is a good idea. To sum it up - take the Adept Logistics.
Your goal is to reach the city of Highcastle (point S1 on the map) with the Statesman's Medal artifact, which one of your heroes, Nimbus, has from the very beginning. Unfortunately, that hero is stuck behind a series of guard posts, and you will have to focus on your other hero and the Castle city. Start off by building the Upg. Archer's Tower. Now recruit all your Marksmen, upgrade any existing Archers, recruit any remaining units and capture the Lumber Mill just below your city. Afterwards, head towards the Ore Mine, located East from your city - in the meantime hire additional hero and transfer his/her army to your primary one. Now go through the garrison (Point G1 on the map) and head North.
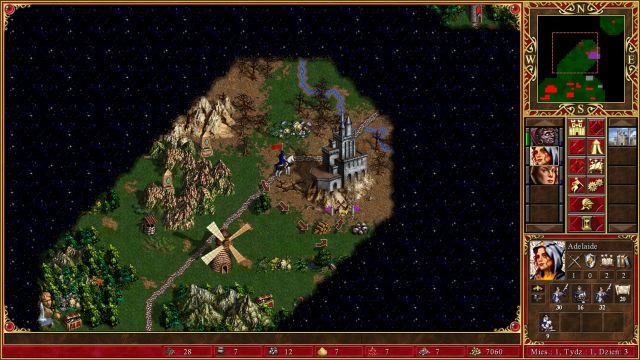 Get rid of the enemy as quickly as you can.
By going along the road you will soon arrive at an enemy Necropolis (point W1 on the map). Capture it and continue your journey North, or North-West to be more precise, to reach the second, and last at the same time, enemy city (point W2 on the map). After capturing it and defeating any remaining enemy heroes, you will be able to focus on your main goal - transporting Nimbus to your Castle.
To let the hero pass, you have to visit every Guard Tent. The locations are as follow:
After you've visited all three Guards, you only have to transport Nimbus, together with his artifact, to your starting Castle. Remember that up to 7 (+ Nimbus) of your heroes are transferred to the following mission, so you should spend some time leveling your heroes.
 Take the Grand Elves.
At the beginning you can choose from: 35 Royal Griffins, 35 Iron Golems and 35 Grand Elves. Grand Elves are the best choice - they are extremely effective at the beginning of the game, as most of the mines around your cities are protected by slow, melee units, which Grand Elves are extremely effective against.
As you can see, you have access to 4 different cities. You can build them up in any order you wish, as everyone prefers different playstyles, but there's one argument in favor of the Castle-type one (point S1 on the map), which is the Hill Fort (Point POI1 on the map) located South-East from the mentioned city. This guide assumes that you've also chosen to build up your Castle.
Start off by building the City Hall in all your cities, and then start clearing the area around them and flag as many mines as you are able - you have 4 cities, so you will need inhuman amount of resources to supply them all. Here's where the hero experience gained in the last mission comes in handy - if you have a hero with immense magical power (as well as several magic schools mastered), fighting your enemies will be trivial, as magic is extremely effective during early game, as you are unable to recruit huge amounts of units.
Construction order in your Castle type during the first week:
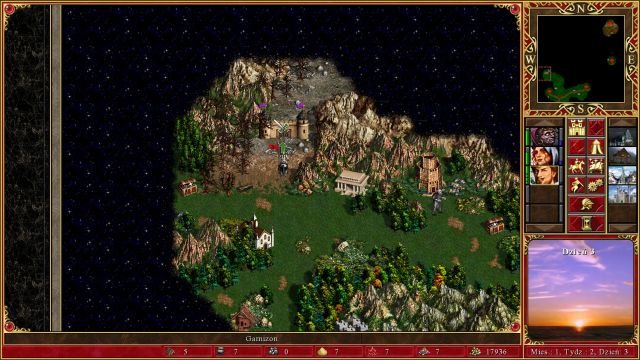 The garrison is easy to break through.
As soon as the beginning of the second week arrives, hire all your army and send it to the Hill Fort (point POI1 on the map) so that you can upgrade it to have quite a deadly army at your disposal. After you've done that, transfer this army to your strongest hero (preferably with extremely powerful magical power) and send him/her North, to break through the enemy garrison (point G1 on the map). After seizing control over it, head North-West, to take control over the first enemy city (point W1 on the map). You can use the Tower hero to secure the freshly acquired Necropolis (build Citadel and Castle as well) to prevent it from being retaken.
Also, remember to start building up your other cities - you can either focus on a single one and build it up to level 7 creatures, or develop them all at the same time, to have access to units of level 1 to 4 at the end of the second week, together with a Citadel and a Castle. You can also focus on building up your Necropolis (point S4 on the map) so that you can flank the enemy, by attacking him from the East.
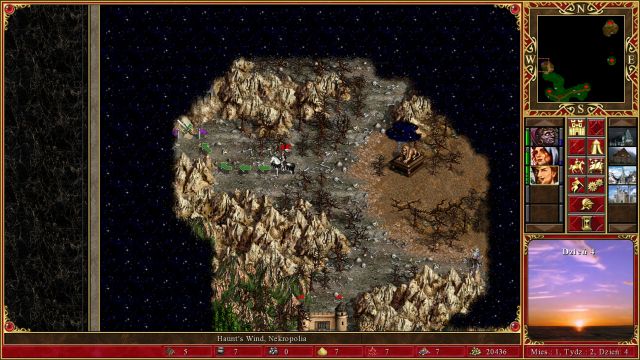 Don't let the enemy to build up his city.
After capturing the first enemy castle, send your forces to another enemy Necropolis (point W2 on the map). Afterwards, you will only have two more cities to capture - both are located North from the cities you've managed to capture so far (points W4 and W4 on the map). Also, you should remember about protecting your own turf - the enemy won't be lying still and will surely start harassing you. The experienced mage from the previous mission comes out again - thanks to spells at his/her arsenal, you will be able to defeat armies several times stronger than yours.
If you are ready, send your Castle forces to take out the enemy city located in the North-Western section of the map, and at the same time send your Necropolis units (or any other) to attack the last enemy encampment (located to the North from the city you've captured as the second one). After conquering all the enemy cities the mission will end - remember, that 7 strongest (+ Nimbus) heroes will be transferred to the following mission, so it's worth to spend some time leveling them up, visiting learning places, as well as visiting cities with Mage's Guilds in order to learn spells.
 Helm of the Heavenly Enlightenment is one of the strongest artifacts in the game.
The last mission of this campaign gives you access to powerful starting bonuses: Helm of the Heavenly Enlightenment, Tome of Earth Magic, or Spellbinder's Hat. The first item will be the most effective one here, as this map is full of cursed ground, which blocks the ability to cast spells while fighting on it, so the remaining two items' effectiveness will be lowered. Take the Helm of the Heavenly Enlightenment.
 Attack the enemy garrison as soon as possible.
This mission can be completed extremely fast - if the heroes, which were transferred along with Nimbus to this mission, are from the Castle, you can use the opportunity that your Castle (as well as the rest of the cities you have here) have access to upgraded units of levels 1 to 4. Transfer all the castle-type troops onto a highly experienced hero (but no the mage-type, because, as was already mentioned, you will fight on cursed ground a lot - the best choice would be a Knight hero. If you lack any, you can use Catherine, because she has 11th level). Afterwards, enter the Castle (point S2 on the map), hire every unit and upgrade all the troops you've gathered - thanks to that you should have quite a powerful army at your disposal.
Now head North from your Castle city, until you reach an Observation Tower - from there head East, to get to a heavily guarded garrison (point G1 on the map). This garrison is the only serious obstacle on your way, so if you manage to break through it, the whole mission will be practically finished. Remember that you can't use any spells while fighting with the garrisons' defenders, as you are on a cursed ground. When you get through, use the neutral Mausoleum and Halls of Darkness to recruit some Liches and Dark Knights (you must, unfortunately, defeat the guardians). Afterwards get back on the road and head North - stop in the middle of the road and turn right - there you will find an extremely powerful artifact, protected by a group (40) of Demons. You should definitely acquire it, as the sword gives you +5 points to Attack, Defense, Wisdom and Spellpower!
 Behind this garrison there's the enemy city.
After collecting the valuable artifact, continue along the road and break through another garrison (point G2 on the map) - there are no enemy shooters here, so you can just wait with your troops for the enemy to come to you, while you reduce their numbers with your own Marksmen and/or other shooters. The next garrison awaits you to the East from the previous one (points G3 on the map) - this one does not have any shooters either. Go through the garrison and you should be able to see the enemy city on the right side - you should be able to easily conquer it, as it has almost no defense. To get to the second, and at the same time the last enemy city, go South, through another garrison (G4) and from there go West - the city should be right in front of you (W2). There's no cursed ground here anymore, so you can freely use your spells!
After you've conquered the second enemy city, brace for a counterattack - the enemy has powerful army at his disposal, but it's divided between three different heroes, so there shouldn't be any problems. Defending it is made easier, as the enemy castle is fully built - this means that strong walls and 3 towers will help you during the siege. After you've defeated all enemy heroes, the mission will end.
 Boots of Speed are the most effective starting bonus.
The first mission of this short, three-mission campaign. This is definitely the shortest, and the easiest campaign in the game - you can finish it in well under half an hour.
At the beginning you will have three options too choose from: Boots of Speed, 5000 gold or 4 Pegasi. The best choice is to take the Boots of Speed - Pegasi aren't anything special, and you won't be able to use the gold, because your starting city is very limited when it comes to buildings, and you will get most, if not all, of your troops from neutral dwellings. The goal of this mission is to acquire the Grail - you have two in-game months to do it.
Start of by building an Inn in your city and hire 1-2 additional heroes - they will be useful later during this mission. Transfer all your troops to Mephala and clear the surrounding areas from the neutral monsters. There are two "ambushes" here as well, in which you will be given a small amount of monsters. You won't have access to any units from your Rampart city, so you have to rely on numerous neutral dwellings - points from POI1 to POI13 represent the locations of those dwellings. Your castle development isn't important, but you can build up Mage's Guild and Marketplace in order to gain access to City Hall.
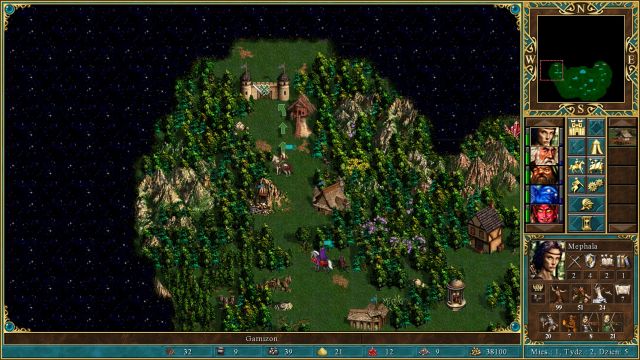 Getting through the garrison is extremely easy.
At the beginning of the 3rd week, transfer all your troops from your heroes to Mephala and order her to go through one of the garrisons (points G1 or G2 on the map), which you surely have already located. There are 15 Marksmen, 20 Archers, 10 Griffins, 20 Halberdiers and 25 Pikemen stationed at both garrisons, so you should be able to take them on without breaking a sweat. You should focus your attention on enemy shooters - eliminate them as fast as possible, with, for instance, your own shooters.
After breaking through the garrison capture the neutral Enchanted Spring (point POI10, or POI18, depending on your side) to recruit Pegasi and Dendroid Arches (POI11 or POI12) - you will have to defeat a group of Dendroid Guards, but they are extremely slow, so your shooters should be able to handle them without you losing any unit. Afterwards go East, until you reach the crossroads - go along the bottom one to reach a Hill Fort (POI14). Upgrade your units, take control over the next Enchanted Springs and Dendroid Arches near the second garrison and clear out the garrison itself, so that your heroes can move around freely.
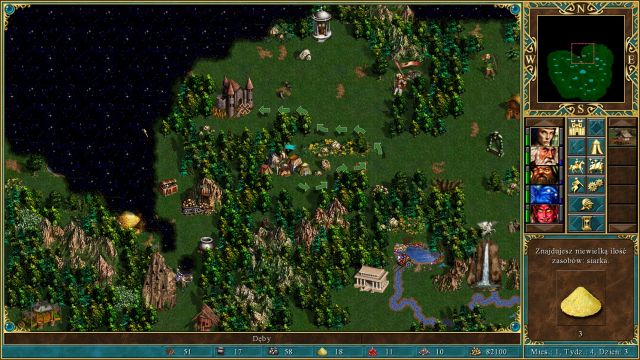 Hill Fort will strengthen your troops.
Wait for a couple of rounds, recruiting all creatures waiting for you in the dwellings. At the beginning of the second month (or to be safer - second week of the second month) transfer all the units to Mephala, upgrade them at the Hill Fort and go North from the fort itself.
 The location of the grail.
You will have to fight several powerful units hero - it's very important to lose as little forces as possible, because you will soon be fighting against two groups of Angels. You don't have access to most units from your city, so any lacks in power, or defense, must be made up with unit quantity - that is precisely the reason why I told you to wait for a couple of weeks to gather army. After you've defeated the Angels, you now only have to dig out the Grail - the above screenshot shows the location of the Grail (point Z1 on the map).
To dig out the Grail, your hero needs his full move - it means that you will have to wait a round in a place for your hero to be able to dig. Afterwards, click on the options icon (check the "Interface" section in case you can't find it - the icon looks like a flag) and select the option to Dig. As soon as you dig out the Grail, the mission will be over.
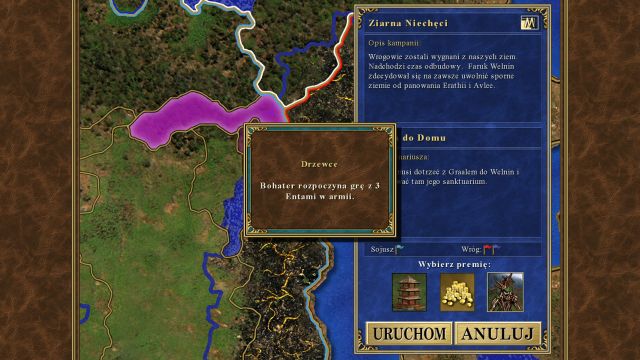 Select Dendroid Soldiers as your starting reward.
Your task is to lead the hero (Rayland), who is located in the North-Western section of the map to the city located in the opposite one, South-Eastern edge (point S1 on the map) and to build a Grail there. You can choose between 3 different starting rewards: Magic Guild lv. 3, 5000 Gold, or 3 Dendroid Soldiers. You should choose Dendroid Warriors, as your city is again very limited.
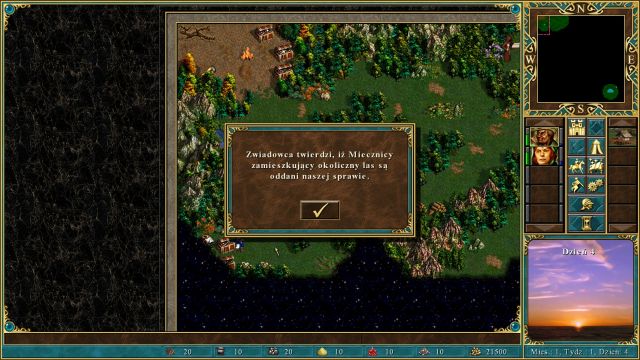 You will stumble upon several notes like that one.
This mission is probably the easiest one from the game, especially because a lot of units will be willing to join your cause - those units are marked by the "POI1" point on the map at the beginning of this chapter. Gather all the gold chests, as well as the artifact, and then head through the narrow passageway to the East - you will get a note saying that all the Dendroid Guards will join your forces. Remember, that it's only Dendroid Guards who will join you - their upgraded version, Dendroid Soldiers might too, but it's not guaranteed. "Collect" both Dendroid Guards and Soldiers in the area (both will join), get back at the beginning and head South.
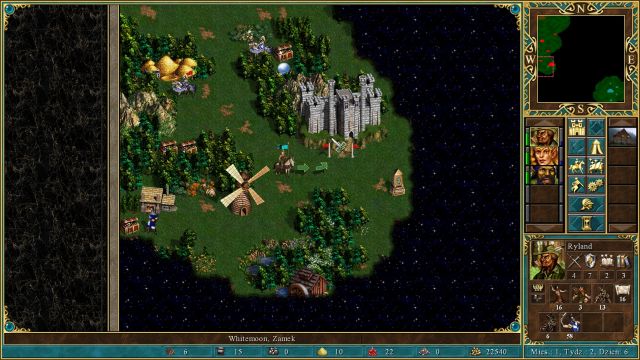 You can capture the enemy city, but it's not required to do so.
Another note - Swordsmen will join your forces too (remember, that the upgraded version, Crusaders, won't be so willing). Head all the way South, gathering all the Swordsmen you stumble upon until you reach an enemy city - you can capture it, but it's optional. From there head South again, and you should soon reach a forest area - inside, there are two groups of Wood Elves, who will join your forces (Grand Elves aren't especially willing to do so). Leave the forest and head East, passing by a couple of Dwarven Warriors along the way.
 The last decision which you have to make during this mission.
Gather another group of Wood Elves, visit the Fountain of Youth and attack the Unicorns - by now you should have gathered a fairly decent army, which should have no problems with those enemies. All you have to do is to get through the last enemy group, Pegasi, enter the city and build the Grail - to do so, enter the city with the hero carrying the artifact and click on the Town Hall building, the one you normally press to gain access to buildings. You will see a note on the screen, asking you whether want to build the Grail in this city - accept it and leave the town to complete this mission.
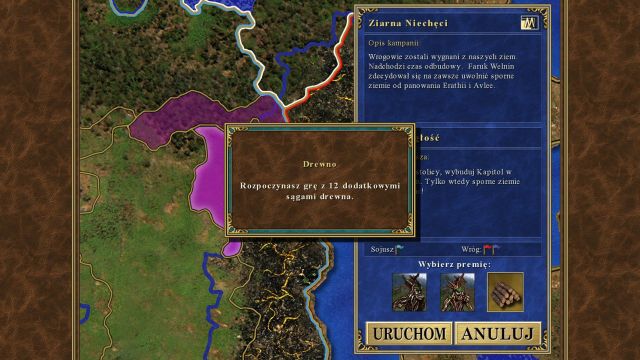 Wood will be useful during the first couple of rounds.
Your task here is simple - construct the Capitol. At the beginning you will have to choose from: 3 Dendroid Soldiers, 6 Dendroid Guards and 12 pieces of wood. The last option is the best one, given the character of the mission - every few rounds (and after a while every single round) you will lose a portion of your gold and wood, and there's no lumber mill in the area. It will be useful to achieve your goal.
This is another mission, which can be done in a couple of minutes. Your goal is to build the Capitol, but to do that, you will need several other buildings as well. The only problem here is the extreme shortage of wood, which, unfortunately, will be stolen from you regularly - a small amount of this resource can be found scattered around the town, guarded by neutral monsters. Don't collect all of it during the same round, but wait for a moment that you will be able to use it - the wood you collect will be stolen at the beginning of the next round.
The order of construction should look something like that:
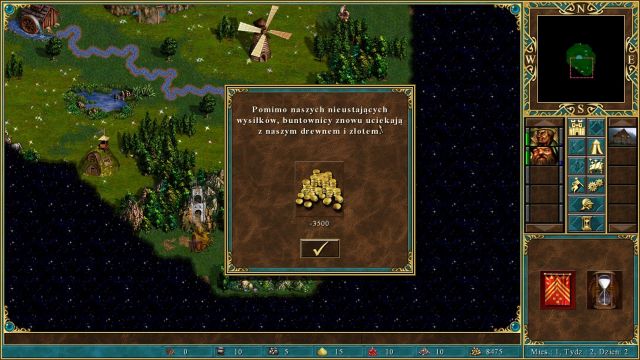 You will see this note frequently.
Constructing the first 3-4 buildings won't be a problem, but after the 4th day you will lose a lot of wood and with each round you will lose it again. Therefore it's crucial to construct Marketplace, Mage Guild and Blacksmith during those first rounds - they require a great deal of wood, and the Marketplace itself will be used to buy wood off the market. You should have no problems with that as well - the city you are using has a Grail constructed, meaning that with the Town Hall you will have 7000 gold income.
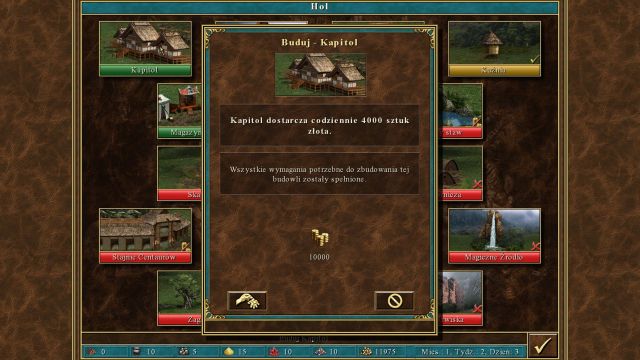 Finally it's over!
You will run out of wood while wanting to build the Castle - don't but it piece by piece, but gather the required amount of gold, during a few rounds and buy all the wood you need in one go. After you've accumulated 30,000 gold, enter the Marketplace, buy 10 pieces of wood (or collect some of those scattered around your city) and build up the Castle. All you have to do now is to just wait for the gold, construct the Capitol and finish this easy campaign.
Attack: 4
Defense: 5
Ammo: -
Damage: 1-3
Health: 10
Speed: 4
Cost: 60
Growth: 14
Attack: 6
Defense: 5
Ammo: -
Damage: 2-3
Health: 10
Speed: 5
Cost: 75
Growth: 14
Pikeman is the most durable 1-st level unit in the game - they have exceptionally high health, and their defense makes them perfectly fit to defend other units, especially shooters from the Castle. The only drawback of this unit is their spread between minimum and maximum damage, meaning that their damage dealt can fluctuate wildly, decreasing their overall effectiveness in combat, as well as their somehow low speed - this matter can be dealt with, however, by usage of spells such as Bless (to get rid of their spread in damage) or Haste.
The upgraded Halberdier eliminates all the drawbacks of the basic unit - lower difference between minimum and maximum damages, additional points to attack attribute, as well as increased speed. Unfortunately, those benefits come with an increase in recruitment costs, nonetheless it's one of the best upgrades for a unit of 1-st level.
There's also somehow hidden ability of Pikemen, as well as Halberdiers, which is the invulnerability to the Cavalier / Champion ability called "Jousting Bonus" (More on this can be found below), which certainly adds some value to those units, especially when you are dealing with other players using Castle army.
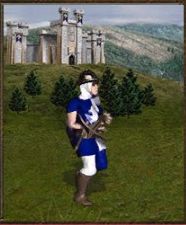
Attack: 6
Defense: 3
Ammo: 12
Damage: 2-3
Health: 10
Speed: 4
Cost: 100
Growth: 9
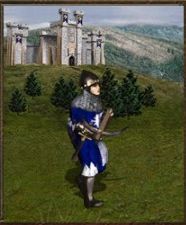
Attack: 6
Defense: 3
Ammo: 24
Damage: 2-3
Health: 10
Speed: 6
Cost: 150
Growth: 9
The Archer is a rather average unit in comparison with other 2-nd level creatures. Their primary stats aren't much better than those of a Pikeman, but their defense, as a 2-nd level unit, is their main weakness - that is why those units need the assistance of other, especially melee ones from the Castle.
The upgrade to Marksman is without a doubt one of the best in the game! It does not increase their stats - besides a double in the amount of ammo and a useful speed boost - but they are given an insanely powerful ability, called Double Shot. As the name implies, it allows them to shoot twice in the same turn, each one dealing the same damage - it can be compared to having at least twice the amount of Archers. Their only drawback is a huge increase in recruitment cost, which is especially felt at the beginning of the game, but this investment is certainly worth your time.
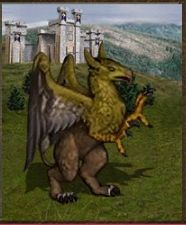
Attack: 8
Defense: 8
Ammo: -
Damage: 3-6
Health: 25
Speed: 6
Cost: 200
Growth: 7
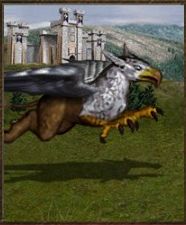
Attack: 9
Defense: 9
Ammo: -
Damage: 3-6
Health: 25
Speed: 9
Cost: 240
Growth: 7
Griffins are one of the best 3-rd level units in the game. That is not because of the stats, which, truth be told, are rather average, but it is due to their counterattack ability, allowing them to retaliate three times (a "normal" creature can retaliate only once during a single turn), which makes them ideal to fight between a group of enemy units. They also have the ability to flight, allowing them to easily pass terrain obstacles, as well as fly through castle walls.
Royal Griffins are given everything that they might have hoped for - increased attack, defense, a huge improvement to speed and an upgraded counterattack ability. Now they can retaliate unlimited amount of times! It's unbelievably powerful in defense, as well as offense - all you need to do is to send this unit behind enemy lines and watch as the enemy numbers dwindle with their each and every move.
Both Griffins, as well as Royal Griffins benefit greatly from the Bless spell - they have a rather large spread between their minimum and maximum damage, which in turn decreases their overall efficiency. With the above mentioned spell you will no longer have to worry about it. Remember to always (and as fast as possible) build the Griffin Bastion, to increase their weekly growth.
Attack: 10
Defense: 12
Ammo: -
Damage: 6-9
Health: 35
Speed: 5
Cost: 300
Growth: 4

Attack: 12
Defense: 12
Ammo: -
Damage: 7-10
Health: 35
Speed: 6
Cost: 400
Growth: 4
Swordsmen, contrary to the first thought, have higher defense than attack, making them ideal to protect more vulnerable targets, like Archers and/or Monks - that doesn't mean that they can't be used in an offensive manner. Although lower, their attack is still one of the highest of all 4-th level creatures, which is further enhanced by their large health pool and good damage. Their only drawback is speed - it can take up to 3 turns to get to the enemy lines.
Upgrade to the Crusader is an ideal one - those units receive a buff to their attack, damage and speed, and, most importantly, a Double Attack ability (the same which Marksmen receive upon their upgrade). This makes Crusaders the strongest (offensive-wise) 4-th level unit in the game, especially if the enemy is unable to counter their attack and they can deliver 2 full-damage hits, without losing their numbers.
Given their extreme effectiveness, they are often targeted by enemy Blind, Slow or other debuffing spells - it's worth to hold on to your Dispel (and not waste the turn on any other spell) spell to be able to counter that tactic. Crusaders, as well as Swordsmen, greatly benefit from both Haste and Bless spells - both of those increase their effectiveness substantially and should be used whenever you have an opportunity to do so.
Attack: 12
Defense: 7
Ammo: 12
Damage: 10-12
Health: 30
Speed: 5
Cost: 400
Growth: 3
Attack: 12
Defense: 10
Ammo: 24
Damage: 10-12
Health: 30
Speed: 7
Cost: 450
Growth: 3
Monks are, aside from their high ranged damage, a relatively weak type of unit - they have a high attack attribute, but their defense, as well as health pool make them extremely susceptible to damage, both ranged and melee ones.
Zealot upgrade fixes all of the original unit shortcomings - they receive a huge boost to their defense, as well as speed, and the "no melee penalty" ability, allowing them to effectively counter any enemy wanting to fight them in close quarters. All those buffs are given for only 50 additional gold per unit! Without a doubt it's one of the most important upgrades in the Castle and should be done as soon as possible.
Attack: 15
Defense: 15
Ammo: -
Damage: 15-25
Health: 100
Speed: 7
Cost: 1000
Growth: 2
Attack: 16
Defense: 16
Ammo: -
Damage: 20-25
Health: 100
Speed: 9
Cost: 1200
Growth: 2
Cavaliers are strong, but at the same time relatively weak, especially as a 6-th level unit. They have a good amount of defense and attack, coupled with a large health pool, but their biggest flaw is their gigantic spread between minimum and maximum damage - that is precisely why you should always cast Bless on them, which should give them a tremendous offensive boost.
Upon upgrade, practically all of their stats are enhanced - increased attack and defense, lower damage spread, and a good speed boost. The upgrade, both the building itself as well as the increase in recruitment costs isn't a big one, which is why you should invest it as soon as possible - this unit will greatly benefit from it.
Cavaliers, as well as Champions, have an additional ability, called "Jousting Bonus", which can be simply called "charge". For each square the unit travels before they attack the enemy, they will deal 5% bonus damage. It means, that if the Champion attacks a unit which is 9 squares ( the speed of the Champion) away from it, it will deal 45% more damage! As you can see this ability offers a huge power spike, which should always be abused - you can further increase its effectiveness by using the Prayer or Haste spells, which both increase the range a Cavalier / Champion can travel before attacking.
Attack: 20
Defense: 20
Ammo: -
Damage: 50
Health: 200
Speed: 12
Cost: 3000 + 1 gem
Growth: 1
Attack: 30
Defense: 30
Ammo: -
Damage: 50
Health: 250
Speed: 18
Cost: 5000 + 3 gems
Growth: 1
Angels are decisively the strongest 7-th level unit in the game. They have large amount of both attack and defense, a good health pool, and huge, fixed damage. Additionally, they have the ability to fly and one of the highest speeds in the game - there is only a small number of units which can move before them. Unfortunately, all of those awesome stats come with large recruitment costs.
Additionally, Angels give all your units (including themselves) +1 to morale, and thanks to their "Hate Devils" trait, they deal 150% damage to Devils and Archdevils.
Archangels are even more powerful - they are given a huge boost to their attack and defense attributes, a bigger health pool and a tremendous speed increase, thanks to which they are almost certain to be the first to move. All of the above mentioned makes this unit the best 7-th level creature in the game - if only they had any magic resistance or immunity, because they are often targeted by enemy Blind spell.
Archangels have the same additional abilities that their basic "form" have, except for one - the ability to resurrect (once during a single fight) any fallen group of units. The value of the Resurrect ability is 150 health points for each Archangel. The "one-time only" limit can be easily bypassed - all you have to do is to use the Clone spell on your Archangels, and the created copy can use the Resurrect ability, even if the original unit already did that. The whole process can be repeated an unlimited number of times - at least for as long as the player has a sufficient amount of mana.
Attack: 5
Defense: 3
Ammo: -
Damage: 2-3
Health: 8
Speed: 6
Cost: 70
Growth: 14
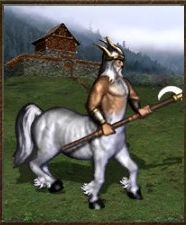
Attack: 6
Defense: 3
Ammo: -
Damage: 2-3
Health: 10
Speed: 8
Cost: 90
Growth: 14
Centaurs are one of the most offensive-oriented 1st level units in the game. Both offensive stats, attack and damage, are well above average, which, coupled with their huge speed (especially for a 1st level unit) allows them to unleash quick, devastating attacks against unsuspecting enemies. Their only flaw is defense, making them extremely vulnerable when they are swarmed by enemy forces.
Centaur Captain gains benefits in almost all aspects - aside from defense, they have increased attack, health and speed, making them even more offensive-oriented than before. Again, their biggest flaw is their defense, which remained unchanged - additionally, they now have the highest recruitment cost of all 1st level units in the game.
Attack: 6
Defense: 7
Ammo: -
Damage: 2-4
Health: 20
Speed: 3
Cost: 120
Growth: 8
Attack: 7
Defense: 7
Ammo: -
Damage: 2-4
Health: 20
Speed: 5
Cost: 150
Growth: 14
Dwarves are best suited for defense, as they have average attack and good defense, coupled with above average health pool. However, they have one major weakness - they are immensely slow, which means, that they can take up to 5 (!) rounds to get to the enemy forces. For this very reason they are best used as a protector for Wood / Grand Elves. A nice addition to this very sturdy unit is their 20% resistance to magic.
Battle Dwarves are given a slight improvement to their attack, and a huge (at least for them) boost to speed, allowing them to keep up with at least some other units - they can now be used in an offensive manner. Although they aren't so slow anymore, their strength lies in defending Rampart's shooters - with their magic resistance "upgrade" (now 40%) they are perfectly suited for the task, as the enemy will have problems to get rid of them by using magic.
By building Miner's Guild you will increase their weekly growth - the building itself costs almost nothing, so it's worth to construct it as soon as possible.
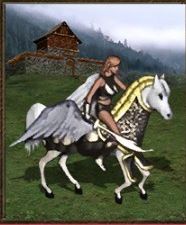
Attack: 9
Defense: 5
Ammo: 24
Damage: 3-5
Health: 15
Speed: 6
Cost: 200
Growth: 7

Attack: 9
Defense: 5
Ammo: 24
Damage: 3-5
Health: 15
Speed: 7
Cost: 225
Growth: 7
Time for a strictly offensive unit. Wood Elves are the sole shooters from Rampart, but they are really good at their role - they have exceptionally high attack parameter, as well as above average speed. Their offensive capabilities came at a cost, unfortunately, as their defense is bad, to say at least, and their health pool is lower than that of Dwarves - for that very reason they should always have Dwarves' / Dendroids' backup, because even the weakest melee units in the game can do some serious damage to them when they get into range.
Grand Elf upgrade is almost exactly the same as of a Marksman from Castle city - it does not affect the unit's offensive capabilities, aside from a slight increase of speed, but they are given the Double Shot ability, increasing the overall effectiveness of the unit twofold. Unfortunately, Grand Elves are still bad at defense and close combat, so they should be always protected by melee defenders from Rampart.
Attack: 9
Defense: 8
Ammo: -
Damage: 5-9
Health: 30
Speed: 8
Cost: 250
Growth: 4
Attack: 9
Defense: 10
Ammo: -
Damage: 5-9
Health: 30
Speed: 12
Cost: 275
Growth: 4
Pegasus is a typical, balanced unit - they can dish out quite a lot of damage, but they come with a huge spread in them, and their attack, defense and health pool are, at most, pretty average. Their biggest virtue is their speed and the ability to fly - it allows them to attack enemy rear lines, making them ideal to eliminate shooters.
The upgraded version, Silver Pegasus, is awarded with bigger attack, defense, and a huge improvement to their speed - now it's one of the fastest, non 7th level unit in the game. Thanks to that, they can strike an enemy unit even in the first round, and with their increased defense they are not so susceptible to damage anymore. The upgrade itself increases the recruitment costs only slightly, making this one of the most profitable upgrades in the game, which should be done as soon as possible.
Both Pegasi and Silver Pegasi have a rather interesting, additional ability, allowing them to increase the mana costs of spells cast by the enemy hero by 2. Additionally, both units benefit greatly from the Bless spell, which nullifies their damage spread.
Attack: 9
Defense: 12
Ammo: -
Damage: 10-14
Health: 55
Speed: 3
Cost: 350
Growth: 3
Attack: 9
Defense: 12
Ammo: -
Damage: 10-14
Health: 65
Speed: 4
Cost: 425
Growth: 3
Dendroids, just as Dwarves, are primary used for defensive measures - their speed is tragically low, making them one of the slowest units in the game. They make up for that with their high defense and exceptionally big health pool, allowing them to survive countless enemy attacks - there's a high chance that even after the worst battles you will end up with a sizeable squad of those units.
Dendroid Soldiers get a slight boost to speed and increased health pool, which makes it even more difficult to eliminate them, but aside from that they are essentially the same as their basic form.
Both Dendroid Guards and Dendroid Soldiers have one of the best defensive abilities in the game - Binding. Each enemy struck by either of those units is bound to the ground, which restricts their movement - they can only attack the Dendroid itself, or any adjacent unit (units located farther than 1 hex from them are out of their reach) and cannot move an inch. The effect lasts until the Dendroid moves, or is destroyed. This ability makes them perfect at keeping the Wood / Grand Elves relatively safe, out of the enemy flyers' reach.
Dendroid Saplings building increases their weekly growth, which, given their effectiveness in defense, as well as their extremely low recruitment costs, should be build as soon as possible.
Attack: 15
Defense: 14
Ammo: -
Damage: 18-22
Health: 90
Speed: 7
Cost: 850
Growth: 2

Attack: 15
Defense: 14
Ammo: -
Damage: 18-22
Health: 110
Speed: 9
Cost: 950
Growth: 2
Unicorns are average 6th level units - their stats are quite good, but they are nothing exceptional in comparison with others from the same tier. They are primary used in offensive, thanks to their damage and speed.
War Unicorns are given a large boost to their speed and health, making them even stronger on the frontlines. An additional advantage is only a slight increase in recruitment costs.
Both Unicorns, as well as War Unicorns have two additional abilities. The first one is a 20% chance to blind (the same effect as with the Blind spell) the enemy they hit for 3 rounds. The second one is an aura, which increases magic resistance of them and any adjacent, ally units by 20%.
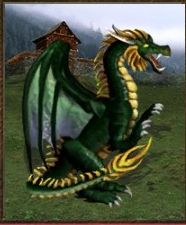
Attack: 18
Defense: 18
Ammo: -
Damage: 40-50
Health: 180
Speed: 10
Cost: 2400 + 1 crystal
Growth: 1
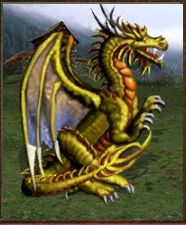
Attack: 27
Defense: 27
Ammo: -
Damage: 40-50
Health: 250
Speed: 16
Cost: 4000 + 2 crystals
Growth: 1
Green Dragons are able to dish out some serious damage, but at the same time they are one of the most vulnerable 7th level units in the game, mainly because of their low health pool and defense. They are exceptionally good in offense, thanks to their ability to fly, their speed, and a special type of attack, Breath Attack, which is exclusive to all Dragons - it hits the enemy and another unit standing behind it with a single strike. As always, you mush be careful, as the breath attack can hit your units as well.
Golden Dragons are in another league. After the upgrade they are given a tremendous boost to attack and defense, bigger health pool and the speed allowing them to outrun most of the units in the game. The upgrade itself, like with all the other 7th level units in the game, is absolutely crucial and should be made as quickly as possible.
The special ability of both dragons is magic resistance. Green Dragons are invulnerable to spells ranging from 1st to 3rd level, and Gold Dragons are also immune to 4th level. Additionally, they are also resistant to monster-based abilities, such as Weakness, Paralysis, Petrify, etc.

Attack: 3
Defense: 3
Ammo: -
Damage: 1-2
Health: 4
Speed: 4
Cost: 30
Growth: 16
Attack: 4
Defense: 4
Ammo: 8
Damage: 1-2
Health: 4
Speed: 5
Cost: 40
Growth: 16
Gremlins are amongst the weakest and worst units of 1st level in the game - they are only beaten by Imps from the Inferno city. Their attack and defense is low, but their biggest flaws are both small, 4-point health pool and the fact that they are extremely slow. Instead of using this unit as cannon fodder, you should upgrade them as soon as possible (even during the first turn).
Master Gremlins are several times more effective than their basic form. They gain the ability to throw their ball from a distance, becoming the only 1st level shooter in the game (at the same time making the Tower the only city with 3 shooters). They are also given a slight boost to their attack, defense and speed. Heroes from this city are often given a huge amount of Gremlins at recruitment - that is precisely why you should upgrade their building at the very beginning of the game. No other city can have such an amount of shooters in the first week of the game!
Attack: 6
Defense: 6
Ammo: -
Damage: 2-3
Health: 16
Speed: 6
Cost: 130
Growth: 9
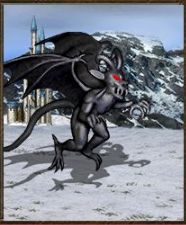
Attack: 7
Defense: 7
Ammo: -
Damage: 2-3
Health: 16
Speed: 9
Cost: 160
Growth: 9
Gargoyles are one of the most effective 2nd level units in the game - they have a decent amount of attack, defense and damage, and quite big, especially given their low tier, health pool. Additionally, they are capable of flying and have a rather high amount of speed - can one with for more?
Yup, upgrade. Obsidian Gargoyles are basically the empowered version of the basic unit - regardless of the fact, that their health and damage is the same, they have increased attack and defense, and are given a huge boost to speed, allowing them to cross the entire battlefield in a single move.
Gargoyles, as well as their Obsidian cousins are born to be a menace to enemy shooters - the basic form is effective against low level creatures, while the upgraded Gargoyle can keep up with units few tiers above it. Another virtue of those units is their immunity to most monster-based abilities, such as Weakness, Life Drain, etc.
Given their high effectiveness, you should construct Sculptor's Wings as soon as possible, to increase their weekly growth.
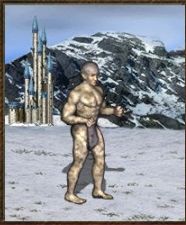
Attack: 7
Defense: 10
Ammo: -
Damage: 4-5
Health: 30
Speed: 3
Cost: 150
Growth: 6
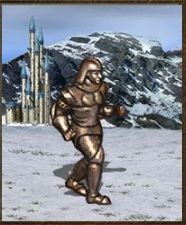
Attack: 9
Defense: 10
Ammo: -
Damage: 4-5
Health: 35
Speed: 5
Cost: 200
Growth: 6
Stone Golems, similar to Dwarves from rampart, or Walking Dead from Necropolis, are mainly used in defense - because of their lacks in movement and speed they aren't suited for offense, but they have an outstanding amount of defense and health, easily exceeding other 3rd level units (and even some of 4th level ones!). Additionally, they can dish out some serious damage, but, as mentioned above, they are extremely slow.
Upgraded version, Iron Golems, have increased attack and speed, which makes them deceptively effective in offense - although their speed is still not big enough for them to freely move around the battlefield. What is more, they have been given a larger health pool, which makes the Iron Golems even sturdier and perfect for their defensive task.
Both Stone and Iron Golems have lots and lots of resistances. Both are immune to most monster-based abilities, as well as mind spells - additionally, they have extremely high magic resistance (50% for Stone and 75% for Iron Golems), making them exceptionally effective against magic-oriented heroes.
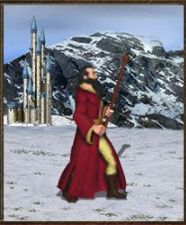
Attack: 11
Defense: 8
Ammo: 24
Damage: 7-9
Health: 25
Speed: 5
Cost: 350
Growth: 4
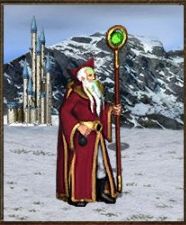
Attack: 12
Defense: 9
Ammo: 24
Damage: 7-9
Health: 30
Speed: 7
Cost: 450
Growth: 4
Mage is one of the best 4th level units in the game, especially given the fact that it's a shooter. It has high attack and is able to do a large amount of damage, but, as with any other shooter, it lacks in the defense and health departments. This is partially compensated by the fact that it has "no melee penalty" ability, making it quite effective against units fighting in close quarters.
Archmage is slightly better than its basic form - upon upgrade it receives a small improvement to attack and defense, as well as health. The thing that clearly stands out is the speed - excluding few units, such as Titans, Archmages are one of the fastest shooters in the game.
A thing worth mentioning, is the special ability of both Mages and Archmages, which perfectly blends in with the Tower city - if the hero has Mage / Archmage unit in his/her army, all the spells he/she casts cost 2 mana points less. Taking into account the fact that this city heavily relies on spells, and that the heroes from it are known for getting a lot of points into Spellpower and/or Wisdom, this unit will vastly increase their effectiveness.
Attack: 12
Defense: 12
Ammo: -
Damage: 13-16
Health: 40
Speed: 7
Cost: 550
Growth: 3
Attack: 12
Defense: 12
Ammo: -
Damage: 13-16
Health: 40
Speed: 11
Cost: 600
Growth: 3
Genie is quite an uneven unit - it has quite a lot of attack and defense, relatively high damage and good speed, allowing it to easily harass enemies standing on the other side of the arena, but "thanks" to a very low health pool it is extremely vulnerable to enemy attacks, which does not allow it to charge at the enemy units like, for instance, Minotaurs from Dungeon.
Master Genie gains a huge speed buff, but the overall stats remain exactly the same. The only difference is that it gains the ability to cast a random beneficial spell on a targeted ally unit. The power of the spell is exactly the same as with a hero with 6 points of Spellpower - unfortunately, Master Genie can use this ability only three times during a single skirmish.
Both Genies have an additional property - they hate Efreets and Efreet Sultans, which allows them to deal 150% damage against those units.
Attack: 16
Defense: 13
Ammo: -
Damage: 20
Health: 110
Speed: 5
Cost: 1100
Growth: 2
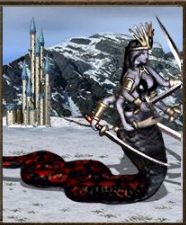
Attack: 16
Defense: 13
Ammo: -
Damage: 30
Health: 110
Speed: 7
Cost: 1600
Growth: 2
Naga is a very powerful 6th level unit - it has a high attack and damage, which, additionally, is fixed. What is more it has a large health pool, which can only be rivaled by few units in the game.
Naga Queens are without a doubt one of the most powerful 6th level units in the game. Upon upgrade they are given a tremendous boost to their damage - no other unit in the game, excluding those of 7th level can rival them in this field. Additionally, Naga Queens are given a boost to their speed, allowing them to easily catch up to most units.
If that wasn't enough, both Nagas have the "No Retaliation" ability, preventing the enemy from counterattacking. This, coupled with their extremely high stats makes those units, especially the Queen ones deadly. If only they weren't so darn expensive...
Attack: 19
Defense: 16
Ammo: -
Damage: 40-60
Health: 150
Speed: 7
Cost: 2000 + 1 gem
Growth: 1
Attack: 24
Defense: 24
Ammo: 24
Damage: 40-60
Health: 300
Speed: 11
Cost: 5000 + 2 gems
Growth: 1
The 7th level unit from Tower, Giant, has the biggest damage out from all the units in the game, and at the same time is one of the cheapest of its tier. Unfortunately, it has its flaws, which are small health pool and low speed and defense attribute.
The upgraded unit, Titan, is a masterpiece - not only that it receives a big attack and defense boost, it now has double (!) the amount of health points, as well as higher speed, it can also attack from a distance. This means that the Titan is the only 7th level shooter unit in the game. Additionally, it has the "no melee penalty" ability, which should easily prevent any melee unit from engaging Titans in close quarters. There's more to it - Titans deal 150% damage against Black Dragons, becoming their natural enemies.
Giants, as well as Titans have an immunity to mind spells, which makes it impossible to cast Blind and/or Hypnotize spells on them. Given their rather large spread in minimum / maximum damage, a good tactic is to use the Bless spell on them, thus allowing them to deal their full, huge damage with each strike.
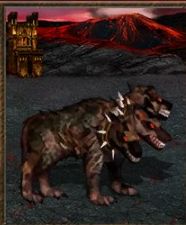
Attack: 2
Defense: 3
Ammo: -
Damage: 1-2
Health: 4
Speed: 5
Cost: 50
Growth: 15
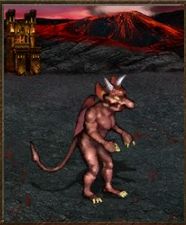
Attack: 4
Defense: 4
Ammo: -
Damage: 1-2
Health: 4
Speed: 7
Cost: 60
Growth: 15
Imps are without a doubt the weakest units in the game - they have low attack and defense values, their damage is ridiculous and with a spread between minimum and maximum damage. To make matters worse, they only have 4 health points. As always, it's not quality that matters, but quantity, so it's worth to build Birthing Pool to increase their weekly growth.
Upon upgrade, Familiars are given a boost to both attack and defense and quite a lot of speed points, making them no so useless as their basic form - their flaw remains their low health pool, which is left intact. Additionally, Familiars gain the ability of Mana Steal - each time the enemy hero uses a spell, Familiars will transfer 20% of the enemy hero spent spellpoints to their own hero.
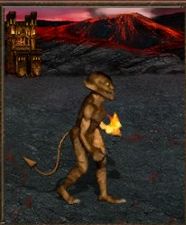
Attack: 6
Defense: 4
Ammo: 12
Damage: 2-4
Health: 13
Speed: 4
Cost: 125
Growth: 8
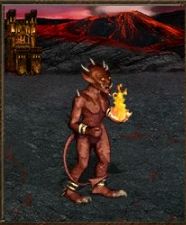
Attack: 7
Defense: 4
Ammo: 24
Damage: 2-4
Health: 13
Speed: 6
Cost: 175
Growth: 8
Gogs are Inferno's sole shooters, and as a 2nd level unit they are pretty balanced. Their attack and damage are well above average, but it comes with a price - low health pool and sluggishness are things that outshine their overall offensive effectiveness.
Magogs are one of those units that benefit greatly with their upgrade, but this time it's not because of their slightly improved attack and speed. The main reason for that is their special attack - instead of hitting one enemy unit, they throw a fireball (the same as with the Fireball spell, naturally) that deals damage to the targeted enemy and every adjacent creature. This attack is extremely effective, as most of the times you will be able to hit more than 1 enemy unit - the thing that you need to remember about is the fact, that their attacks can hurt your own units, even if they are immune to fire (like Efreets).
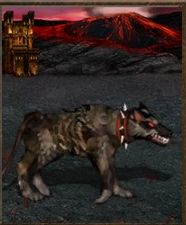
Attack: 10
Defense: 6
Ammo: -
Damage: 2-7
Health: 25
Speed: 7
Cost: 200
Growth: 5
Attack: 10
Defense: 8
Ammo: -
Damage: 2-7
Health: 25
Speed: 8
Cost: 250
Growth: 5
Hell Hounds are one of the best 3rd level units in the game (second only to the Griffins, thanks to their counterattack ability) - they dish out serious damage and are extremely fast, especially as a not upgraded and non-flying unit. Unfortunately, they have series of flaws, like low weekly growth and health pool, which prevents them from shining.
Hell Hounds are nothing before Cerberi- upgraded hounds are better in every aspect. They are given a boost to their defense, they are now faster and can attack up to three enemies simultaneously, if the enemies stand near each other (fortunately, the triple attack won't affect your own units). To make them even more awesome, they are given a special ability to their attack, which prevents enemy units from retaliating. Cerberi should be primarily used for offensive measures - their speed, coupled with damage and special properties of their attack will allow them to wreck havoc between enemy lines and your foe will have a hard time countering them because of their triple attack.
Given their extreme effectiveness, you should build Cages as soon as possible, to increase their weekly growth. Additionally, remember to frequently use Bless on them, as they have a huge spread between minimum and maximum damage.
Attack: 10
Defense: 10
Ammo: -
Damage: 7-9
Health: 35
Speed: 5
Cost: 250
Growth: 4
Attack: 10
Defense: 10
Ammo: -
Damage: 7-9
Health: 40
Speed: 6
Cost: 275
Growth: 4
After the perfect Hell Hound / Cerberus, the time has come for Demons, which, aside from their awesome design, are the weakest 4th level units in the game. Just look at their stats and compare them to previously described dogs - they are only a little higher, while still losing in speed big time. However, Demons are extremely cheap (being the cheapest 4th level unit in the game), so you won't feel betrayed by recruiting them.
The upgrade does not help them at all - they are given a slight improvement to health and speed, but that's it, no special abilities or resistances, nothing. You can easily neglect this upgrade and construct it only after you've built other, more important and useful buildings.
Attack: 13
Defense: 13
Ammo: -
Damage: 13-17
Health: 45
Speed: 6
Cost: 500
Growth: 3
Attack: 13
Defense: 13
Ammo: -
Damage: 13-17
Health: 45
Speed: 7
Cost: 700
Growth: 3
Pit Fiends are good, balanced units - they have high attack and defense attributes, and are able to deal massive damage, while average speed allows them to catch up to most units in the game. Their only flaw is a low health pool, which makes Pit Fiends quite vulnerable to enemy attacks.
Pit Lord upgrade hardly offer any stat boost over Pit Fiends, while they still cost a lot more, so to some it may seem as a useless upgrade. As always, the devil is in the details, or to be more precise, in their special ability. Thanks to that, they are able to summon Demons (yup, those Demons described above) from the corpse of an allied pack, which forces the enemy to focus their attacks on your Pit Lords - leaving them by may result in an infinite number of Demons returning on the battlefield. Thus this becomes one of your most important upgrades - thanks to a lot of cannon fodder (mainly Imps / Familiars) from Inferno, your Pit Lords will have their hands full all the time.
There are, however, to conditions on the Raise Demon ability - for each Pit Lord in the pack you can summon Demons equal to 50 health points. It means, that 7 Pit Lords can summon up to 10 Demons (because each Demon has 35 health points). Those values, quite obviously, aren't rounded and by, for instance, using 2 Pit Lords, you will be able to bring only 2 Demons back. The second condition is that you need the same amount of fallen units (in health points), because you won't be able to summon 20 Demons from a corpse of a single Imp.
Attack: 16
Defense: 12
Ammo: -
Damage: 16-24
Health: 90
Speed: 9
Cost: 900
Growth: 2
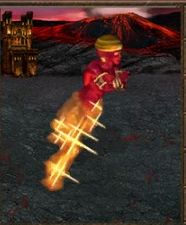
Attack: 16
Defense: 14
Ammo: -
Damage: 16-24
Health: 90
Speed: 13
Cost: 1100
Growth: 2
The Efreet is a good 6th level unit, which easily keeps up with his counterparts from other towns. Their biggest merits are high attack attribute and damage, which, coupled with immense speed, allows them to get to the other side of the battlefield, and your enemies, during a single move - their only problem is, as always, relatively low defense.
Efreet Sultan gains a bonus to its defense, as well as a huge buff to speed, but the thing that makes them stand out from their "normal" cousins is their Fire Shield. Each time an enemy attacks the Sultan, 20% of the damage it dealt comes back at it. The enemy planning to attack this unit has to be on constant guard, as a moment of inattention can be fatal - sending a powerful unit, for instance Ancient Behemoths, or other 7th level creatures will easily wipe out the Efreet Sultan squad, but the enemy will sustain immense casualties thanks to the Fire Shield.
The Fire Shield effect can strike an enemy infinite amount of times and can cause quick a havoc - there's no point in sending melee units against them, but at the same time their speed allows them to easily reach the enemy's shooters. Your enemy won't have a choice - he/she will have to sacrifice some units to get rid of Sultans.
Aside from that, both "basic" and upgraded Efreets have invulnerability to fire magic, as well as they deal 150% damage when fighting against Genies.

Attack: 19
Defense: 21
Ammo: -
Damage: 30-40
Health: 160
Speed: 11
Cost: 2700 + 1 mercury
Growth: 1
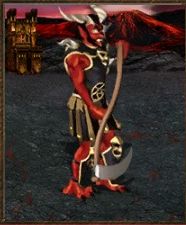
Attack: 26
Defense: 28
Ammo: -
Damage: 30-40
Health: 200
Speed: 17
Cost: 4500 + 2 mercury
Growth: 1
Devils are relatively weak 7th level units, especially given their somehow average stats, but they more than make up for it with their speed, as well as the ability to block an enemy counterattack thanks to "no retaliation" ability.
Arch Devils gain everything that the "basic" unit lacked - huge improvement to attack and defense, a little buff to health pool, and, what's most important, an immense speed increase, which makes them second fastest in the game. Thanks to that, they are ideal to get rid of enemy shooters, as they can easily reach the other side of the battleground in a single move - if you are not fighting against Castle city, they will be moving first, because from all the units in the game only Archangels are faster than them.
Additionally, both Devils and Arch Devils have a number of abilities their disposal. They move around by teleporting, meaning that their move won't be restricted by any terrain obstacles. Also, they decrease the luck of all enemy units by 1, as well as have a bonus to damage (150%) when fighting against Angels and Archangels.
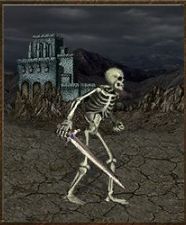
Attack: 5
Defense: 4
Ammo: -
Damage: 1-3
Health: 6
Speed: 4
Cost: 60
Growth: 12
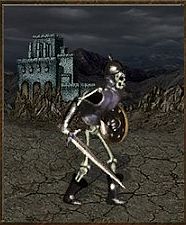
Attack: 6
Defense: 6
Ammo: -
Damage: 1-3
Health: 6
Speed: 5
Cost: 70
Growth: 12
Skeleton is one of the best 1st level units in the game - it has good stats, regardless of the slightly lower health pool than Pikeman and Centaurs. Skeleton Warriors are given balanced attack and defense attributes and a slight speed improvement - all that comes with a minor recruitment cost increase.
Stats aside, the most important aspect of those units comes with the special ability of Necropolis' heroes - Necromancy. It allows to bring back to life a percentage (depending on the level of the hero's abilities and buildings in your cities it can reach up to 40%!) of fallen, enemy units as Skeletons. It means, that after several encounters you will have several times more of them that it would normally by possible.
A thing to note, is the fact, that even though the Necromancy skill brings back enemies as normal Skeletons, this can be easily bypassed - if your hero has a full 7-creature army, and one of those creatures are Skeleton Warriors, Necromancy will bring enemies to life as Skeleton Warriors, not the regular ones. It will allow you to save a huge amount of money and effort, as you won't have to run around the map upgrading them on your own.
Attack: 5
Defense: 5
Ammo: -
Damage: 2-3
Health: 15
Speed: 3
Cost: 100
Growth: 8
Attack: 5
Defense: 5
Ammo: -
Damage: 2-3
Health: 20
Speed: 4
Cost: 125
Growth: 8
Walking Dead are very similar to Dwarves from the Rampart city - they are extremely slow, their defense and attack attributes are below average, as well as their damage, but they shine because of a huge (especially for a 2nd level unit) health pool.
Zombie are given a slight improvement to their speed, and a gigantic boost to health - still they are extremely slow and weak. However, they now have a special ability, allowing them to spread disease to the enemies they attack, which decreases their attack and defense by 2 points for 3 rounds.
Walking Dead, as well as Zombies, should be primarily used to defend Liches / Archliches, because their nonexistent speed won't allow them to catch anything but a Dwarf.
Attack: 7
Defense: 7
Ammo: -
Damage: 3-5
Health: 18
Speed: 5
Cost: 200
Growth: 7
Attack: 7
Defense: 7
Ammo: -
Damage: 3-5
Health: 18
Speed: 7
Cost: 230
Growth: 7
Wights are another very average Necropolis unit. Just take a loot at their stats and everything will become clear - excluding health points, they are only slightly stronger than Skeletons, while at the same time being several times more expensive and less numerous. Their only virtue is the ability to fly, which allows them to move around the battlefield freely.
Wraight upgrade is without a doubt one of the worst in the game - aside from a slight speed increase, all their stats remain the same. They also gain an ability similar to Familiars from the Inferno city - they steal 2 points of mana from the enemy hero, whether he casts a spell or not.
Wights and Wraights have an ability to regenerate, allowing them to replenish their health to a maximum level at the start of each round - given their low health pool, it's a rather useless ability, which comes in handy only during the very few first days, when the enemies you face are weak. Their only application is to fight with enemy shooters - together with Vampires and Dragons from the Necropolis, they can easily block all the enemy shooters.
Attack: 10
Defense: 9
Ammo: -
Damage: 5-8
Health: 30
Speed: 6
Cost: 360
Growth: 4
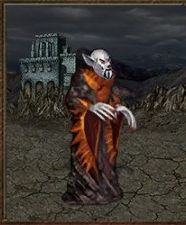
Attack: 10
Defense: 10
Ammo: -
Damage: 5-8
Health: 40
Speed: 9
Cost: 500
Growth: 4
The basic form of this 4th level unit is rather average - its only slightly stronger than the above described Wraight, but it has almost double the amount of health points. Both versions of vampires have the ability to fly.
Vampire Lord is a completely different story - after the upgrade it becomes the strongest 4th level unit in the game (maybe on par with Crusaders from Castle). Aside from a slight increase in defense, a huge boost to health and speed, this unit gains an unique ability activated during its attacks - Drain Life. With each strike Vampire Lords steal health points from the enemy, healing and resurrecting themselves in the process - they steal the same amount of health points that they deal damage. It makes them almost invulnerable - if the enemy won't send his whole army to kill them off fast, they can resurrect themselves back time after time, which often lead to a situation in which you won't lose a single Vampire Lord, even during the most brutal skirmishes. The only flaw of this ability is the fact, that they can only bring back Vampire Lords that died during the exact same battle - if they died in earlier skirmishes, the units are lost.
Both Vampires, aside from the ability to fly, can block enemy counterattacks ("no enemy retaliation"), which allows them to attack any enemy and come out of it unpunished. They are extremely expensive, especially in the case of Vampire Lords, but they are well worth the investment.
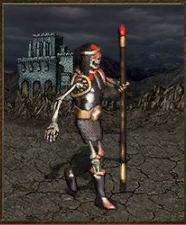
Attack: 13
Defense: 10
Ammo: 12
Damage: 11-13
Health: 30
Speed: 6
Cost: 550
Growth: 3
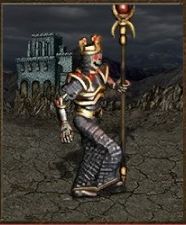
Attack: 13
Defense: 10
Ammo: 24
Damage: 11-15
Health: 40
Speed: 74
Cost: 600
Growth: 3
The only ranged unit in the Necropolis city, at the same time being on of the most powerful shooters in the game. They have high attack attribute and damage, while at the same time their defense is above average.
Power Liches are given a huge boost to health and increased damage, as well as speed. It's one of the most profitable upgrades in the game, because their recruitment costs are only slightly increased, while they are given powerful improvements.
Liches, as well as Power Liches have an Area of Effect attack - they launch a death cloud, which, just like in the case of Magogs, inflict damage to every unit in a close vicinity to the target. Only living units are damaged, so you don't have to worry about attacking your own units by accident (provided that you will only use undead units).
Regardless of their good defense and health pool, it's still worth to defend them properly - use your Walking Dead / Zombies, who aren't suited for combat either way.
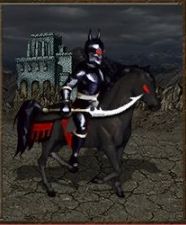
Attack: 16
Defense: 16
Ammo: -
Damage: 15-30
Health: 120
Speed: 7
Cost: 1200
Growth: 2
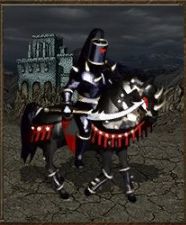
Attack: 18
Defense: 18
Ammo: -
Damage: 15-30
Health: 120
Speed: 9
Cost: 1500
Growth: 2
Black Knights are good, balanced units - high attack and defense attributes, huge health pool and high, however somehow "spread" damage, coupled with good speed are the stats that distinguish them from other 6th level units from other cities.
Dread Knights are without a doubt the best 6th level unit in the game. They have even higher attack and defense attributes, their speed is improved, and they are given two special abilities activated during attacks. The first one is a 20% chance to cast a Curse spell on the enemy, while the latter is a 20% chance to deal double (!) damage. In case the latter, Deathblow, kicks in, they are easily able to rival, or even overpower some of the 7th level units!
Black and Dread Knights are very expensive, but they are certainly worth their price.
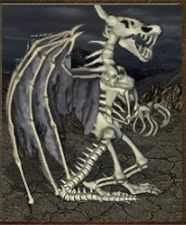
Attack: 17
Defense: 15
Ammo: -
Damage: 25-50
Health: 150
Speed: 9
Cost: 1800
Growth: 1
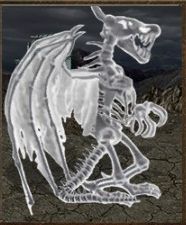
Attack: 19
Defense: 17
Ammo: -
Damage: 25-50
Health: 200
Speed: 14
Cost: 3000 + 1 mercury
Growth: 1
Bone Dragons are one of the weakest 7th level units - it's a rare sight to see a 6th level unit to be only slightly weaker than the 7th level one, and in this situation that is the case. Their only virtue is their good speed and the ability to fly - their damage, even though quite high, is somehow limited because of the huge spread.
Ghost Dragons aren't a big improvement at the first sight - except for their large speed and health improvement, they are given only 2 points to attack and defense. As always, the devil is in the details - together with the upgrade they are given a special ability, which allows them to age their enemies. A unit which was aged (there's 20% chance for that to happen with each strike) has its health points reduced by 50% (!).
As you probably guessed, Aging is extremely effective against 7th level units - decreasing the health pool of Archangels to 125 points, or those of Black Dragons / Titans to 150 should be abused as much as you can. The moment in which the ability "kicks in", you should focus all your troops on the aged enemy, so that it can be eliminated as soon as possible.
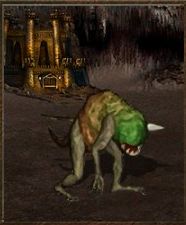
Attack: 4
Defense: 3
Ammo: -
Damage: 1-3
Health: 5
Speed: 4
Cost: 50
Growth: 14
Attack: 5
Defense: 4
Ammo: -
Damage: 1-3
Health: 6
Speed: 5
Cost: 65
Growth: 14
Troglodyte is a unit which can be simply described as "average" - its stats are good, but they don't stand out from other 1st level units. The main role of this unit is to protect ranged units from Dungeon.
Infernal Troglodyte gains a boost in practically every aspect, becoming more of a offensive unit, mainly due to the increased speed and health.
Both units have a rather unique special ability - immunity to Blind. It makes them invulnerable to the said spell, as well as the effect inflicted by the attacks of Unicorns from the Rampart city. 1st level units are often immensely numerous, which is why they are a constant target for the Blind spell, to eliminate them from combat - not in this case. It's worth to build Devil's Circle, to increase their weekly growth.
Attack: 6
Defense: 5
Ammo: -
Damage: 1-4
Health: 14
Speed: 6
Cost: 130
Growth: 8
Attack: 6
Defense: 6
Ammo: -
Damage: 1-4
Health: 14
Speed: 9
Cost: 170
Growth: 8
Harpy, given the stats, seems to be ridiculously weak - she's only a little bit stronger than previously described Troglodyte, besting the 1st level unit only in health. Her biggest virtue is the unique attacking method - Harpy flies up to her victim, attacks it and gets back to the place from where she took off, making a counterattack a lot harder.
Harpy Hag is basically a stronger version of the basic unit, with a large improvement to speed. That what makes this unit stand out is, again, the unique attacking method - just like before, Harpy Hag flies to her enemy, attacks and gets back to her starting place, but this time the enemy can't even retaliate thanks to another ability of her attack. Thanks to her speed, which can be further increased with spells (Haste, Prayer), or artifacts, it can be said that Harpy Hag is a free (because of no ammo) shooter, because she is able to fly to the other side of the battlefield, attack, and get back to her starting place without taking any damage.
Both variants of Harpy greatly benefit from the Bless spell, as they have a huge spread between minimum and maximum damage.
Attack: 9
Defense: 7
Ammo: 12
Damage: 3-5
Health: 22
Speed: 5
Cost: 250
Growth: 7
Attack: 10
Defense: 8
Ammo: 24
Damage: 3-5
Health: 22
Speed: 7
Cost: 280
Growth: 7
One of the two shooters from Dungeon city, Beholder, has above average statistics as for a 3rd level ranged unit. High attack attribute, good damage and large health pool are the main merits of the unit. Another strong point about it is the "no melee penalty" ability, making Beholder a very difficult foe to get rid off from the battlefield.
Evil Eye gets upgraded stats, especially speed, which makes this unit even deadlier then before.
Attack: 9
Defense: 9
Ammo: 4
Damage: 6-8
Health: 25
Speed: 5
Cost: 300
Growth: 4
Attack: 10
Defense: 10
Ammo: 8
Damage: 6-8
Health: 30
Speed: 6
Cost: 330
Growth: 4
Another ranged unit from the Dungeon city is quite a weird one, because looking at the stats only, the Medusa is only slightly stronger than the previously described Beholders, while having lower weekly growth. Medusas have "no melee penalty" as well, and an additional ability - they have a 20% chance to turn the enemy they attack in melee range into stone (the effects lasts 3 rounds) - it's another punishment for units foolish enough to engage them in hand-to-hand combat.
Medusa Queen gets an increased attack and defense, bigger health pool and double the amount of ammo.
Both Medusas are quite specific, because their low amount of ammo and special abilities make them into a semi-hybrid unit - during the first couple of rounds they can shoot at their enemies, and then just simply join into melee combat, where, paradoxically, they perform even better than from afar. If you, however, want them to remain ranged units, buy an Ammo Cart from Dungeon's Blacksmith.
Attack: 14
Defense: 12
Ammo: -
Damage: 12-20
Health: 50
Speed: 6
Cost: 500
Growth: 3
Attack: 15
Defense: 15
Ammo: -
Damage: 12-20
Health: 50
Speed: 8
Cost: 575
Growth: 3
Minotaur is a terrific unit - it has extremely high damage, easily besting some of the 6th level units. On top of that, it has high attack and defense attributes, coupled with big health pool - all those combined make the Minotaur a formidable unit, created to demolish other creatures in melee combat.
Minotaur King is basically a better version of the "younger brother" - an attack improvement and a good amount of extra defense and speed makes this unit even more deadly on the battlefield. Upgraded building is cheap, the increase in recruitment costs is slight - those two factors makes this upgrade one of the best in the game.
Both Minotaurs have an additional ability, simply called "High Morale". It means, that this unit has a chance to have an extra move (just as with a normal morale bonus) and there's practically no chance to lose a move because of bad morale.
Attack: 15
Defense: 13
Ammo: -
Damage: 14-20
Health: 80
Speed: 7
Cost: 850
Growth: 2
Attack: 16
Defense: 14
Ammo: -
Damage: 14-20
Health: 80
Speed: 11
Cost: 1050
Growth: 2
Manticore is a pretty average, especially when we compare it to the Minotaur - both units have similar stats, with a slight health and speed advantage on the Manticore's side. Additionally, it has the ability to fly, as one of the three units in Dungeon city.
Scorpicore upgrade increases slightly the attack and defense of the creature, as well as giving them a huge speed boost, allowing this unit to move quicker than most other creatures in the game. Additionally, Scorpicore gains a special ability called Paralysis - each attack has 20% chance to paralyze an enemy for 3 rounds. Upgrade comes with a large increase in recruitment costs, but the unit is well worth the extra gold.
Attack: 19
Defense: 19
Ammo: -
Damage: 40-50
Health: 180
Speed: 11
Cost: 2500 + sulfur
Growth: 1
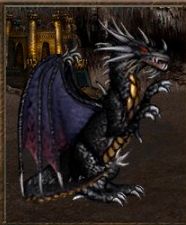
Attack: 25
Defense: 25
Ammo: -
Damage: 40-50
Health: 300
Speed: 15
Cost: 4000 + 2 sulfur
Growth: 1
Red Dragons are similar to their kindred, Green Dragon, from the Rampart city. They have extremely high damage, but low attack and defense attributes, which coupled with a low health pool limits their effectiveness - it's very easy to lose them in the heat of combat. Another virtue of this unit is the immunity to magic of 1-3 levels.
Black Dragons are entirely different - bested only by the Archangels, Black Dragons are the best 7th level creatures in the game. They are given a huge boost to attack, defense, speed and health, making them several times more effective than Red Dragons. Additionally, Black Dragons are the only unit in the game completely immune to all spells (unfortunately, to those positive as well). Titans and Giants receive from and deal 150% damage to Black Dragons.
They are exceptionally good in offense, thanks to their ability to fly, their speed, and a special type of attack, Breath Attack, which is exclusive to all Dragons - it hits the enemy and another unit standing behind it with a single strike. As always, you mush be careful, as the breath attack can hit your units as well.
Attack: 4
Defense: 2
Ammo: -
Damage: 1-2
Health: 5
Speed: 5
Cost: 40
Growth: 15
Attack: 5
Defense: 3
Ammo: -
Damage: 1-2
Health: 5
Speed: 7
Cost: 50
Growth: 15
Goblins, just like Troglodytes, are at most average, and they don't stand out in comparison to other 1st level unit. They are quite fast, but the rest of their stats are mediocre, placing them behind Pikemen and Centaurs.
The Hobgoblin upgrade gives them increased attack and defense, as well as a boost to speed - thanks to that, they become the second fastest 1st level unit in the game, bested only by the Centaur Captains.
You should invest in the Hut, which increases their weekly growth.
Attack: 7
Defense: 5
Ammo: -
Damage: 2-4
Health: 10
Speed: 6
Cost: 100
Growth: 9
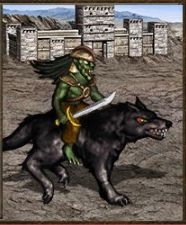
Attack: 8
Defense: 5
Ammo: -
Damage: 3-4
Health: 10
Speed: 8
Cost: 140
Growth: 9
Wolf Riders are basically an upgraded version of Goblins - their stats are practically doubled, with half of the 1st level units' weekly growth. Wolf Riders are highly offensive units, where they can dish out some unexpectedly high damage - their speed definitely helps them to achieve that. Their biggest flaw is low health pool.
The upgrade, aside from leaving the health pool intact, increases every single aspect of the unit, even the damage gain a boost, which is very rare. Additionally, they gain the Double Strike ability, the same that Crusaders gain when they are upgraded - it makes them extremely deadly in melee combat. Given their low health pool, it's a good idea to "eat" the retaliation of the enemy unit with a different creature, so that Wolf Raiders can deliver two full strikes to the enemy.
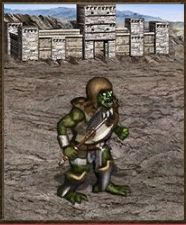
Attack: 8
Defense: 4
Ammo: 12
Damage: 2-5
Health: 15
Speed: 4
Cost: 150
Growth: 7
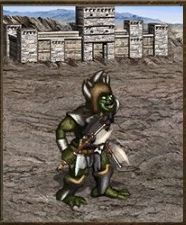
Attack: 8
Defense: 4
Ammo: 24
Damage: 2-5
Health: 20
Speed: 5
Cost: 165
Growth: 7
One of the two ranged units in Stronghold, Orc, is a weak unit - although it is able to deal some serious damage, it has the lowest defense rating from all 3rd level units, which together with a rather low health pool makes them extremely vulnerable to attacks. A very low speed does not help either, as this unit is among the slowest in the game.
Orc Chieftain upgrade does not give much, but improves slightly two of the biggest flaws of this unit - speed and health pool. The upgrade itself is cheap, and the recruitment costs are only slightly higher, which makes this somehow profitable upgrade.
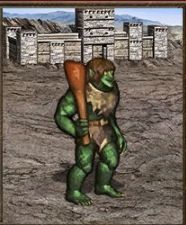
Attack: 13
Defense: 7
Ammo: -
Damage: 6-12
Health: 40
Speed: 4
Cost: 300
Growth: 4
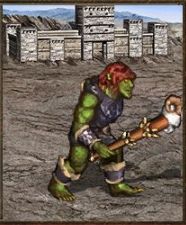
Attack: 13
Defense: 7
Ammo: -
Damage: 6-12
Health: 60
Speed: 5
Cost: 400
Growth: 4
Ogre is almost perfect - it has immense amount of attack, damage and health, but the price for those stats are quite low defense and extremely low speed, which makes the Ogre a defensive unit.
Ogre Mage, besides getting a huge boost to health (50% increase!) and a slight increase to speed, receives a very useful (especially in this city) ability of Bloodlust, Just as the spell, it increases the attack of a selected unit - the strength is the same as with a hero casting it with advanced fire magic mastery. It negates the problem of low mobility of this unit - you can now just simply use it to buff your units, while at the same time guard your shooters.
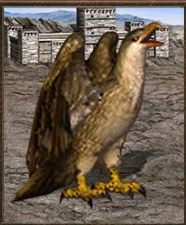
Attack: 13
Defense: 11
Ammo: -
Damage: 11-15
Health: 60
Speed: 7
Cost: 600
Growth: 3
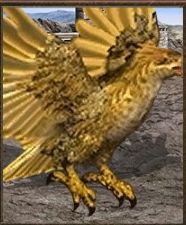
Attack: 13
Defense: 11
Ammo: -
Damage: 11-15
Health: 60
Speed: 11
Cost: 700
Growth: 3
Another very good unit from Stronghold. Rocs are the only units in this city with the ability to fly, which, coupled with their above average stats allows them to wreck havoc on the battlefield. Together with the fact, that the building allowing you to recruit them can be constructed even during the first day of the first week! That adds even more value to this unit.
Thunderbirds, on the first glance, are given a huge boost to speed, and nothing more, making them useless? Nothing like that! Together with the speed improvement, Thunderbirds gained an ability activated during their attacks - they have a 20% chance with each strike to struck their enemy with lightning (aside from their normal attack). The damage is equal to Number of Thunderbirds * 10 (10 Thunderbirds is 100 damage, 50 is 500 damage, and so on). They are perfectly fit to eliminate enemy shooters, to whom they can easily get during the first round.
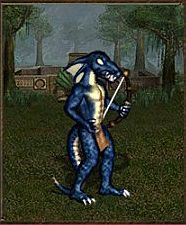
Attack: 15
Defense: 12
Ammo: 16
Damage: 16-20
Health: 70
Speed: 6
Cost: 750
Growth: 2
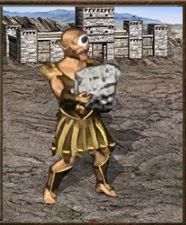
Attack: 17
Defense: 12
Ammo: 24
Damage: 16-20
Health: 70
Speed: 8
Cost: 1100
Growth: 2
Cyclops is the only 6th level unit in the game, which at the same time is a shooter. They have high damage, as well as attack, but their small, as for a 6th level unit, health pool makes them quite vulnerable, especially against fast units. Their slow speed and the lack of "no melee penalty" makes them struggle against melee attacks, so they should be protected at all costs.
Upgraded version, Cyclops King is over 50% more expensive to recruit, but it is more than understandable - increased attack, defense, as well as a large boost to speed makes this unit a lot more effective than it was before.
Both Cyclops and Cyclops King have a rather unique ability, which is Ballistics - it allows them to throw their huge rocks at the enemy walls, just like catapults do. Both of those units do it equally effective as a catapult with an Advanced Level Ballistics (increased damage to walls), and with the case of Cyclops King, he can throw the rock twice during a single round. Even when they aren't extremely deadly as shooters, they are effective during sieges - with a little bit of luck, you will be able to take out 1-2 archers in the enemy walls, or make a breakthrough during the first round.
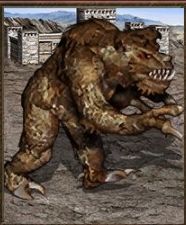
Attack: 17
Defense: 17
Ammo: -
Damage: 30-50
Health: 160
Speed: 6
Cost: 1500
Growth: 1
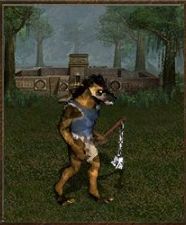
Attack: 19
Defense: 19
Ammo: -
Damage: 30-50
Health: 300
Speed: 9
Cost: 3000 + 1 crystal
Growth: 1
Behemoths have rather average stats for a 7th level unit - despite having good damage, their low health pool, defense and speed makes them extremely vulnerable to enemy attacks, especially shooters and casters. They, however, have a rather interesting ability called Defense Reduction - each time a Behemoth attacks, it decreases (but only during the attack itself) the defense of the attacked unit by 40%, which immensely increases the damage it deals. Also, it's the cheapest 7th level unit in the game.
Ancient Behemoths receive upgrades in those fields in which they lacked the most - almost doubled health pool and speed! Another good thing is an increase in attack and defense. What makes those units extremely lethal is their upgraded Defense Reduction ability - now their attack decreases the defense of an enemy by 80%! This makes them the conquerors of all 7th level units in the game - none of them can go 1 on 1 with Ancient Behemoths, as their defense will be reduced to the level of a 1st level unit.
Casting Bless and / or Haste on them increases the effectiveness of the unit, so they should be used as often as possible. Additionally, don't forget to cast Bloodlust from the Ogre Mage to increase their damage.
Attack: 3
Defense: 5
Ammo: -
Damage: 2-3
Health: 6
Speed: 4
Cost: 50
Growth: 12
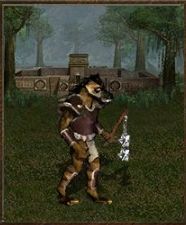
Attack: 4
Defense: 6
Ammo: -
Damage: 2-3
Health: 6
Speed: 5
Cost: 70
Growth: 12
Gnolls are slightly above average compared to other 1st level units - they have good damage, coupled with the highest defense (together with Pikemen), but they are lacking in speed, which doesn't allow them to be at their best.
Upgrade to Gnoll Marauder gives them boosts to attack, defense and speed, making them deadlier and more offense-oriented than before. They are perfectly fit to go on the front lines, especially because of their high damage.
Attack: 5
Defense: 6
Ammo: 12
Damage: 2-3
Health: 14
Speed: 4
Cost: 110
Growth: 9
Attack: 6
Defense: 8
Ammo: 24
Damage: 2-5
Health: 15
Speed: 5
Cost: 140
Growth: 9
A rather strange shooter, as it's a unit which is more defense- than offense-oriented - it has a lot of health points and a very high defense attribute. It does not mean that it's not able to do some good damage from afar.
Lizard Warrior gains buffs in every (literally) fields - higher attack, even higher defense, increase in damage, a little boost to health and speed. All those things with extremely low recruitment costs makes this one of the best upgrades in the game. The unit performs well as a shooter, and can take care of itself when it comes to melee-combat thanks to high health pool and defense.
Attack: 7
Defense: 9
Ammo: -
Damage: 2-5
Health: 20
Speed: 9
Cost: 220
Growth: 8
Attack: 8
Defense: 10
Ammo: -
Damage: 2-5
Health: 20
Speed: 13
Cost: 240
Growth: 8
Serpent Flies are one of the most annoying units in the game - they aren't especially strong, but thanks to their good defense and very high speed they can prove to be a menace, especially to the enemy shooters, which they can reach almost during the first round. Their attacks have the ability to Dispel - their target loses all the positive status effects.
Dragon Flies are given a small upgrade to attack and defense and a huge speed boost - now it's even easier to make your enemy's life a miserable. Aside from the dispelling effect of their attack, they now inflict the enemy with Weakness, decreasing its attack. This should be the first upgrade to buy during your adventure with this city - the increase in the effectiveness of this unit is immense.
Attack: 11
Defense: 11
Ammo: -
Damage: 6-10
Health: 35
Speed: 5
Cost: 325
Growth: 4
Attack: 12
Defense: 12
Ammo: -
Damage: 6-10
Health: 40
Speed: 7
Cost: 400
Growth: 4
Balisik is a very powerful 4th level unit - small costs, coupled with good stats, especially attack, damage and defense will make you fall in love with this creature. The only flaw is the low speed.
Greater Basilisk is one of the best 4th level units in the game - together with the upgrade, it receives bonus attack, defense, health and, what is most important, a large speed boost, eliminating the only flaw this unit ever had.
Additionally, both Basilisks have a unique ability to Petrify - each attack have a 20% chance to turn the enemy foe into stone for 3 rounds. This, together with their above average stats, makes them one of the worst enemies you can face on the battlefield.
Attack: 10
Defense: 14
Ammo: -
Damage: 12-16
Health: 70
Speed: 5
Cost: 525
Growth: 3
Attack: 11
Defense: 16
Ammo: -
Damage: 12-16
Health: 70
Speed: 6
Cost: 600
Growth: 3
Gorgons are the most resilient 5th level units in the game - their extremely high defense attribute, together with their health pool makes them difficult to eliminate. As far as their damage go, their are average.
Mighty Gorgons get a huge boost to already high defense, and probably the most powerful ability in the game, which makes them the destroyers of 7th level units, Death Stare. Each time every Mighty Gorgon in a group attacks, there's 10% chance to instantly kill a single attacked unit, regardless of it's strength and defense.
It does not mean that 10 Mighty Gorgons have 100% chance to kill a single unit. The model looks like this: 1-0,9^x, where X is the number of Mighty Gorgons. While using 5 of them, there's 41% chance to kill 1 additional enemy, 10 of them gives 65% and so on. Additionally, 11-20 Gorgons have a chance to kill two units, 21-30 to kill three units and so on. It makes them extremely lethal when fighting with 7th level creatures, even despite their relatively low damage.
Attack: 14
Defense: 14
Ammo: -
Damage: 14-18
Health: 70
Speed: 7
Cost: 800
Growth: 2
Attack: 14
Defense: 14
Ammo: -
Damage: 18-22
Health: 70
Speed: 11
Cost: 1100
Growth: 2
Wyverns are cheap, and easily accessible units (you can recruit them as soon as the second day of the first week!), which are effective in the early game. Despite the fact that they aren't any stronger than a Gorgon, they have the ability to fly and are quite fast.
The upgraded version, Wyvern Monarch is several times stronger. It receives increased stats, especially a huge bonus to speed and damage, but the most important is the special ability, called Poison Attack. Each time the creature attacks, there's a 50% chance to poison the enemy, which reduces their maximum health by 10%. The effect lasts for 3 rounds and it can be stacked up to two times - you can decrease the maximum health of an enemy unit by up to 50%! The effect wears off after the battle in which the enemy was poisoned, it has no time limit until then. Remember to attack several targets to poison as many as possible.
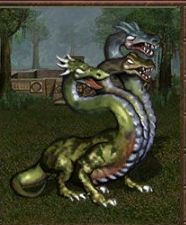
Attack: 16
Defense: 18
Ammo: -
Damage: 25-45
Health: 175
Speed: 5
Cost: 2200
Growth: 1
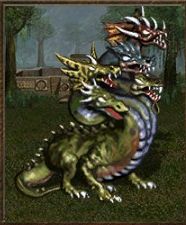
Attack: 18
Defense: 20
Ammo: -
Damage: 25-45
Health: 250
Speed: 7
Cost: 3500 + 1 sulfur
Growth: 1
Hydra, at leas stats-wise, is one of the weakest 7th level units in the game. It has a huge spread between the maximum and minimum damage, its slow and vulnerable to attacks, thanks to low health pool and defense. It's also extremely cheap and easily accessible - you most probably be able to recruit it by the end of first week.
Chaos Hydras receive almost nothing from the upgrade, aside from an increase to health and slightly higher attack, defense and speed, but they still seem to be weak.
That which makes this unit stand out (and the basic version as well), is the ability to attack every creature around the Hydra. All you need to do is to order your Hydra to attack an enemy, wait for enemy units to swarm it and watch as they are killed one after another. In case of the Chaos Hydra the process is even easier - its attacks does not allow the enemy to retaliate.
Both version benefit greatly from a couple of spells: Haste, Bless (because they have huge spread in damage), Teleport (because you can just send your unit in the middle of the enemy forces) and Counterstrike. The last one will cause the enemy to stay as far as possible from your Hydra, as with each strike he will lose more and more units.
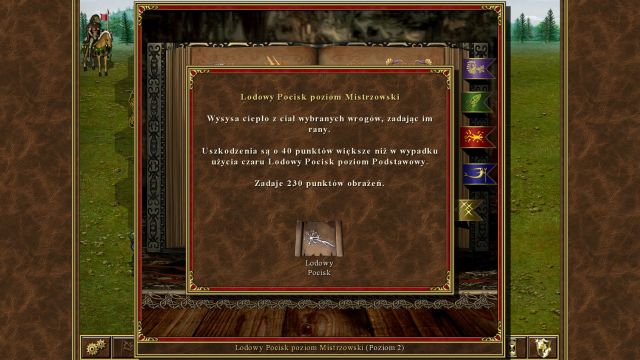 The attack of the unit (11), and the attack boosted by the hero's Attack attribute (19).
Attack attribute is, next to Defense, one of the two factors influencing the amount of damage dealt by player's troops to the enemy. The moment the combat starts, the hero's attack attribute is added to the attack of every creature at his command. By pressing and holding the right mouse button over a unit, you can see it's character sheet, on which you will find, inter alia, the attack (or defense) attribute - the value before the brackets shows the "normal" attack (or defense) of the unit, while the one in the brackets shows the attack (or defense) of the unit increased by hero's stats.
The principle of how attack works is simple - for each attack point exceeding the defense of the attacked unit, the unit will deal 5% additional damage. If, for instance, the attacking unit has 15 points of attack, while the defending one has 11 defense, the damage will be increased by 20%, because there's a 4 point difference between those attributes. The highest damage increase can reach up to 300% (60 points of difference between attack and defense attributes).
Defense works in a similar way - for each defense point of the attacked unit, which exceeds the attack of the attacking unit, the defending unit will receive 2,5% damage less. Again, if the attacking unit has 11 points of attack, and the defending one has 15 points of defense, the defending unit will receive 10% damage less, because of the 4-point difference in their attributes. Defense can decrease the amount of sustained damage by up to 30% (12 points of defense).
The attack and defense of the hero can be influenced by two things : experience levels and artifacts wielded by the hero. With each experience level, there's a chance, that a hero will be given an additional point to attack or defense attribute (drawn randomly from attack, defense, power and knowledge). Naturally, some heroes have a higher chance to get a attack or defense point upon reaching a new level - more on the matter can be found in the next chapter called "types of heroes". As far as the artifacts influencing the attributes of the hero go, you can find all the information in the "Artifacts" chapter.
Apart from attack and defense coming directly from the hero, those attributes can also be increased by using certain spells:
Spell
Basic Level
Advanced Level
Expert Level
Bloodlust
+3 attack
+6 attack
+6 attack for all allied units
Frenzy
100% defense converted into attack
150% defense converted into attack
200% defense converted into attack
Slayer
+8 attack against Dragons, Hydras and Behemoths
+8 attack against Angels and Devils
+8 attack against Titans
Prayer
+2 attack, defense and speed
+4 attack, defense and speed
+4 attack, defense and speed for all allied units
Precision
+3 attack (only for shooters)
+6 attack (only for shooters)
+6 attack to all units (only for shooters)
Weakness
-3 attack
-6 attack
-6 attack for all enemy units
Shield
+3 defense
+6 defense
+6 defense for all allied units
Stone Skin
15% less damage from hand-to-hand combat
30% less damage from hand-to-hand combat
30% less damage from hand-to-hand combat for all allied units
Air Shield
25% less damage from ranged attacks
50% less damage from ranged attacks
50% less damage from ranged attacks for all allied units
Power attribute directly influences the strength of the spells.Power and Knowledge directly influence the magical effectiveness of a hero. Knowledge attribute increases the mana pool of the hero - for each point of Knowledge, the mana pool of the hero is increased by 10 points (this can be further increased with the help of the Intelligence skill).
Power attribute increases the damage the spells cast by the hero inflict, as well as the duration of most of empowering, as well as weakening ones. The duration of most of the spells in the game looks like this: 1 round * Power. It means, that a hero with 10 points of Power will be able to cast a spell, for instance, Haste, which will last up to 10 rounds. A thing worth noting, is the fact, that the Power of the enemy hero does not affect the duration of a negative spell you cast on his units - if your hero has 10 Power, while the enemy one has 20, the duration of, for instance, Slow will still be 10 rounds.
Additionally, the Power, or to be more precise, the strength of the spells can be influenced by a number of artifacts - more on that matter can be found in the "Artifacts" chapter.
As it was mentioned above, the mana pool of the hero is directly connected with the amount of Knowledge point the hero has. Normally, a hero regains 1 point of mana a day. To increase this value, you can use a number of artifacts (detailed information can be found in the "artifacts" section), or by the Mysticism skill. You can also fully regenerate heroes' mana pool - to do this, visit a Well, or leave your hero in a city with a Mage Guild for 1 day, after which his mana reserves will be replenished.
Replenishing your mana is extremely crucial, especially to heroes concentrating on magic - there's nothing worse than entering a fight and finding out that your mana supply is dry. Always check your mana reserves before making a crucial decision.
This chapter contains a table, from which you will learn the information about the types of heroes from various cities, such as the chances of getting a certain attribute (Attack, Defense, Power, Knowledge) at varying levels of experience.
City
Hero
Levels
Attack
Defense
Power
Knowledge
City
Knight
2-9
40%
40%
10%
10%
10+
30%
30%
20%
20%
City
Cleric
2-9
20%
15%
30%
35%
10+
20%
20%
30%
30%
Rampart
Hunter
2-9
35%
45%
10%
10%
10+
30%
30%
20%
20%
Rampart
Druid
2-9
10%
20%
35%
35%
10+
20%
20%
30%
30%
Tower
Alchemist
2-9
30%
30%
20%
20%
10+
30%
30%
20%
20%
Tower
Wizard
2-9
10%
10%
40%
40%
10+
30%
30%
20%
20%
Inferno
Demon
2-9
30%
30%
20%
20%
10+
20%
20%
30%
30%
Inferno
Heretic
2-9
20%
10%
35%
35%
10+
25%
25%
25%
25%
Necropolis
Death Knight
2-9
30%
25%
20%
25%
10+
25%
25%
25%
25%
Necropolis
Necromancer
2-9
15%
15%
35%
35%
10+
25%
25%
25%
25%
Dungeon
Lord
2-9
40%
35%
15%
10%
10+
30%
30%
20%
20%
Dungeon
Warlock
2-9
10%
10%
50%
30%
10+
20%
20%
30%
30%
Stronghold
Barbarian
2-9
55%
35%
5%
5%
10+
30%
30%
20%
20%
Stronghold
Battle Mage
2-9
30%
20%
25%
25%
10+
25%
25%
25%
25%
Fortress
Beast Master
2-9
30%
60%
5%
5%
10+
30%
30%
20%
20%
Fortress
Witch
2-9
5%
15%
40%
40%
10+
20%
20%
30%
30%
Let's take, for instance, the Knight from Castle. A first level Knight should have stats like that: 2 Attack, 2 Defense, 1 Knowledge and 1 Power. During the next 8 levels (until he reaches level 9), he will have 40% chance to gain additional Attack attribute, 40% for defense and 10% for Knowledge and Power, each time he gains a level of experience. Theoretically speaking, on 9th level, the Knight will have 5 Attack, 5 Defense, 2 Knowledge and 2 Power.
From the moment he reaches the 10th level, the growth will change. Now with each level of experience, the Knight will have 30% chance to gain an Attack or Defense point, and 20% chance to gain a Knowledge or Power point. The moment he reaches 20th level, he will, theoretically, have 8 points of Attack, 8 Defense, 4 Knowledge and 4 Power.
 You can set up your units before the actual combat starts with the help of Tactics.
Combat in Heroes of Might & Magic 3 HD is based on turn-based system, but not like in the other RPG games, when it works like "the first one to move is the X player, after which the Y player makes his move". Here the order of the movement is strictly connected with the Speed attribute of units - the higher the speed is, the faster (and further) the unit will move. It replaced the "initiative" attribute, which was present in the earlier installments of the series. The order of movements can also be influenced by certain artifacts and spells, such as Haste, Prayer and Slow, which increase or decrease speed, or Blind, which prevents movement.
Combat can be divided into two kinds: against neutral monsters or versus other players (cpu-controlled or a living player). The difference, despite appearances, is quite significant, as the enemy hero has a huge influence on the abilities of units under his command, and the appropriate amount of Power and Knowledge attributes will allow the hero to turn the tides of every battle.
The whole combat stats from attacking the monster / other hero by another hero - the action is moved to a small battlefield, divided into net-like fields (hexes), representing places in which units can be placed. The speed attribute, which influences the order of movement, determines the range of a unit as well - a unit with 10 points of speed will be able to cover a distance of 10 hexes. The whole battlefield is 15 hexes wide and 11 hexes tall. Additionally, terrain obstacles main appear on the battlefield, severely limiting, or even preventing movement in a given direction. Most of the units present in the game take 1 hex, but some of them can be 2 hexes wide.
Besides that, there's an interface bar present on the screen, which allows you to control various gameplay mechanics, such as:
The battle is won by the "last standing" enemy - the one who loses all the units is the one to lose. After the battle ends, the victor receives experience points and any artifacts that the defeated hero had in his inventory.
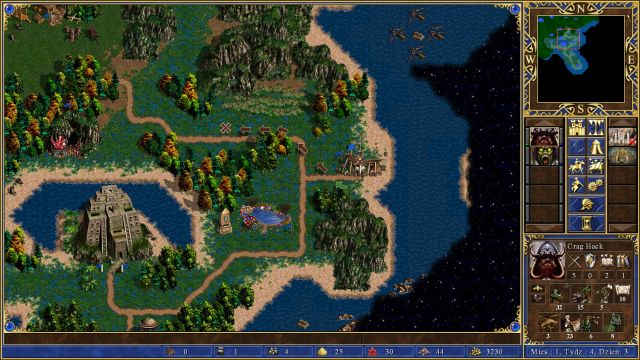 The green arrow represents the movement range of the hero, while the bronze one the inaccessible area.
Moving around the map is, without a doubt, the most important aspect of gameplay, without which one wouldn't be able to defeat enemy units, or capture other cities. Because of that, it's important to understand how this mechanic works.
Each hero receives a certain amount of movement points at the beginning of each day - thanks to them he's able to move around the map. The amount of movement points a hero has is influenced by a number of factors:
The most important factor is the unit speed, of which existence a lot of people have no idea about - the type (or to be more precise, the speed) of your slowest unit directly influences the amount of movement points your hero receives at the beginning of a day. This looks like this:
Unit speed
Amount of movement points
1-4
15
5
16
6-7
17
8
18
9-10
19
11+
20
As you can see, carrying slow units can be a bad idea, especially when you want to have a highly mobile hero. Obviously, the table shows the values of a hero without any artifact and/or skill influencing his movement point pool.
Additionally, the type of soil your hero moves through has a huge impact on the range he can travel, which looks like this:
Type of soil
Influence on a single move point
Cobblestone road
50%
Gravel road
65%
Dirt Road
75%
Dirt, Grass, Lava, Subterranean
100%
Rough
125%
Sand, Snow
150%
Swamp
175%
To better understand the table, we can use an example. If a hero has 16 movement points, it will, in normal conditions, while travelling on the grass, allow him to cover the distance of 16 fields. If, however, the hero moves on a Cobblestone Road, he will be able to cover the distance of 32 fields (because moving to each field costs 50% of movement points), and while moving through swamps he will be able to cover the distance of 9 fields.
A thing worth noting, is the fact, that moving diagonally costs 1.5 movement points per field.
The last thing influencing the hero's travel speed is a mechanism called "native terrain". It means, that each city (units coming from that city) has a "favorite' type of terrain - heroes from this city will move around that terrain as if they were moving through the grass, without any penalty to movement speed, while "foreigners" will move in accordance to the above table.
Below you will find a table representing the type of terrain, together with the fraction, for which a given terrain can be called a "native" one:
City
Native Terrain
City
Grass
Rampart
Grass
Tower
Snow
Inferno
Lava
Necropolis
Dirt
Dungeon
Subterranean
Stronghold
Rough
Fortress
Swamp
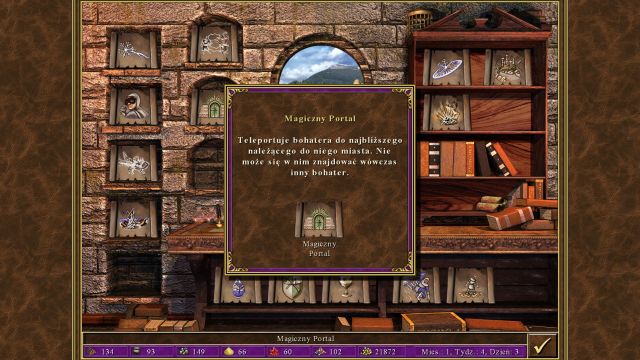 Spells can turn the tides of even the most desperate of skirmishes!
Magic is a very important in-game mechanic - even the weakest, most basic spells can turn the tides of every battle, which is why they are welcome in both a mage's, as well as a knight's arsenal, who is focusing primarily on attack and defense attributes of his/her units. Spells are divided into four general "schools" of magic: fire, water, earth and air.
Things affecting the strength of spells:
In the following chapters you will find tables representing each and every spell present in the game, coupled their effectiveness on various levels of given schools of magic. Some of the spells are common to more than one element - some of the spells are "element-less", which is why various schools of magic influence their effectiveness (but the effects aren't cumulative).
Damage in the tables are represented like this: (Power*10)+50. It means, that a Hero with a Power equal to 5 is going to deal 100 points of damage with a given spell, a hero with 7 points of Power will deal 120 points of damage, and so on. This value is, of course, increased by various items and / or skills featured few paragraphs earlier - the exact amount of damage can be inspected by pressing and holding the right mouse button over a given spell.
Spells can be cast in two different "places" - during combat, as well as while being on the world map. In the first case, the player can only use offensive, or defensive spells, which directly influence units on the battlefield (dealing damage, changing their stats, etc.), and in the latter case you can only cast "support" spells, which simplify, or change the map exploration process. The second group includes spell such as: View Air, Disguise, Visions, Dimension Door, Fly, View Earth, Town Portal, Summon Boat, Scuttle Boat and Water Walk. The rest of the spells are used only during combat.
To use a spell, you have to select it from a spellbook (if you don't know how to do that, check out both of the Interface chapters at the beginning of this guide) and select the target. If the player has a mastery over a given school of magic, the spell, depending on its type, will be either cast on the whole allied / enemy units, or it will "simply" be empowered (i.e. will deal more damage).

Cost: 5
Level: 1
Duration: -
Description: Target, enemy unit receives (Power*10)+10 damage.
Advanced level: Target, enemy unit receives (Power*10)+20 damage.
Expert level: Target, enemy unit receives (Power*10)+30 damage.
The first offensive spell in the game, which can almost always be found in any first level Mage Guild. It's mainly used during the early rounds, because even those heroes who lack Power can deal significant damage - later on the effectiveness falls off considerably, because it lacks a good Power-damage ratio.

Cost: 5
Level: 1
Duration: 1 round
Description: Protects the selected unit, reducing damage received from Fire spells by 30%.
Advanced level: Allied unit receives 50% less damage from fire spells.
Expert level: All allied units receive 50% less damage from fire spells.
Protection from Fire is probably the most (if not the only) reasonable protection from element spell, because there's a high chance that the enemy will be using one of the powerful fire-based offensive spells. Your biggest concern is, obviously, the Armageddon spell - if you see an enemy hero, who has a lot of Power, and his/her army consists mainly of units immune (Black and Gold Dragons, Efreets), or with a considerable amount of immunity (Golems, Dwarves) to fire magic, immediately cast Protection from Fire, as there's a huge chance that the enemy is preparing the mentioned spell - Armageddon deals immense amounts of damage, so it's crucial to be prepared for it.
If, however, the enemy lacks any significant amount of Power (less or equal to 5), you can easily ignore this spell - even if the enemy casts Armageddon, it won't deal serious damage.

Cost: 6
Level: 1
Duration: 1 round
Description: The enemy unit will deal its minimum damage while attacking.
Advanced level: The enemy unit will deal its minimum damage (-1) while attacking.
Expert level: All enemy units will deal their minimum damage (-1) while attacking.
The Curse spell is basically the opposite of Bless - enemy unit (or units) effected by it will deal their minimum possible damage. What does that mean? It means, that if the enemy unit has a damage range of 2-7, in normal non-cursed conditions its attack would deal 2, 3, 4, 5, 6 or 7 (for each unit in the group) damage. While under the influence of the Curse spell, its damage will always be 2. If you have Advanced Level of fire magic, its attacks will now deal minimum damage (-1) - for a unit with 2-7 attack it will be 1, and for a unit with 4-10 it will be 3, and so on.
As you can see, this is an extremely powerful spell, which, with proper composition of the enemy army, can severely decrease its effectiveness - if the enemy army consists of units with a big "spread" in their minimum/maximum damage, it's worth to cast Curse on them.

Cost: 5
Level: 1
Duration: 1 round
Description: Increases the Attack attribute of a unit by 3.
Advanced level: Increases the Attack attribute of a unit by 6.
Expert level: Increases the Attack attribute of all units by 6.
A good spell, which is useful in any situation - the majority of the damage you deal comes directly from your units, therefore increasing their attack attribute by 6 points will give them a significant boost. Remember, that for every point of Attack exceeding the defense of an attacked unit, the attacker will deal 5% additional damage - in extreme situations, it can cause your units to deal 30% more damage with each strike!
This spell should be used in combination with the Bless spell (Bless as the first one to cast). An exception to this rule, when it's not profitable to use them both together, is a situation, in which your units have rather "fixed" damage, without a lot of "spread", like "10-20", or "2-7" - in those situations you should use Bloodlust only.

Cost: 10
Level: 2
Duration: 1 round
Description: Target, enemy unit is disabled until it is attacked. 50% chance for retaliation when attacking the blinded unit.
Advanced level: Target, enemy unit is disabled until it is attacked. 25% chance for retaliation when attacking the blinded unit.
Expert level: Target, enemy unit is disabled until it is attacked. The enemy won't retaliate after being attacked.
An extremely powerful spell, which can disable a unit from combat - a blinded unit will be useless for the enemy, unless he/she casts the Dispel spell on it, or a certain amount of time has passed. It's a perfect way of getting rid of a powerful enemy - the spell can be used on almost any unit in the game, besides those which are immune to mind spells (undead, Titans) or those completely immune to magic (all Dragons).
Remember about a few things - you can blind several enemy units during a single battle (but only a single one during a single round), and that a blinded enemy "comes back to life" when it is attacked.

Cost: 4
Level: 2
Duration: 1 day
Description: Displays number of monsters in a wandering monster troop and whether or not the troop will offer to join the casting hero's army. Range is equal to Power or three, whichever is greater
Advanced level: Additionally, it now shows the enemy hero's primary skills, as well as his army.
Expert level: Additionally, it now shows the information about an enemy city.
Another very useful spell, which can be cast on the world map. After casting it, you must press and hold the right mouse button over an enemy hero to learn about a set of things - the amount of information depends on the highest level of proficiency in a given school of magic. Additionally, it's an useful spell while dealing with neutral monsters, as it allows you to estimate the chances of the enemy joining your army.

Cost: 8
Level: 2
Duration: 2 rounds
Description: Creates a 2-hex wall of fire on the battlefield. Enemy units crossing the wall will receive (Power*10)+10 damage.
Advanced level: Creates a 2-hex wall of fire on the battlefield. Enemy units crossing the wall will receive (Power*10)+20 damage.
Expert level: Creates a 2-hex wall of fire on the battlefield. Enemy units crossing the wall will receive (Power*10)+30 damage.
An interesting, but purely situational spell. Just as the Force Field, this spell is mainly used to block access to a certain target, like an important unit - the enemy unit can still reach it, but it will receive some damage, which, with proper amount of Power, can deal significant amount of damage.
Another application of the spell is blocking wall breaches, during the time when you are protecting your city against an enemy siege - setting up a Fire Wall onto a breach will cause the enemy to take some damage if they want to enter your castle and get to your units.

Cost: 15
Level: 3
Duration: -
Description: Target unit, as well as those in the immediate vicinity of it receive (Power*10)+15 damage.
Advanced level: Target unit, as well as those in the immediate vicinity of it receive (Power*10)+30 damage.
Expert level: Target unit, as well as those in the immediate vicinity of it receive (Power*10)+60 damage.
The first fire-based offensive spell. It deals moderate damage, but it's not the damage which distinguishes this spell - it's the area of effect. With it you will easily be able to affect 2-3 enemy units at a single time. If the enemy troops are scattered around and you are unable to hit more than a single one, use a different spell, as the damage is low when hitting a single target.
Additionally, remember, that both the enemy and yours units will be affected by the Fire Ball.

Cost: 18
Level: 3
Duration: until activated
Description: Places 4 landmines on the battlefield. Allies can see the landmines and can freely pass them, but the enemies will trigger them, receiving (Power*10)+25 damage.
Advanced level: Increases the amount of mines placed on the battlefield to 6. Mines now deal (Power*10)+50 damage.
Expert level: Increases the amount of mines placed on the battlefield to 8. Mines now deal (Power*10)+100 damage.
Without a doubt one of the most useless spells in the game (only Quick Sands can rival it). Landmines, provided that an enemy unit steps on them, deal almost the same damage as a Fire Arrow, and with their mana cost it's clearly a better idea to cast a different offensive spell, such as Lightning Bolt, Ice Bolt, Fire Ball or any other - without a doubt you will be able to deal more damage this way.

Cost: 12
Level: 3
Duration: 1 round
Description: Decreases the luck of an enemy unit by 1.
Advanced level: Decreases the luck of an enemy unit by 2.
Expert level: Decreases the luck of all enemy units by 2.
A spell, which, theoretically, can be effective, because it can significantly lower the luck of enemy troops, but it is weak because of one thing - decreasing luck does not decrease their combat effectiveness by a great deal.
Even if you are able to decease it from 3 to 1 (or to 0, if it originally was below 3), the effect is not worth it. Luck gives a small chance to inflict double damage - +1 luck gives a 4,2% chance, +2 is 8,3%, and with +3 a unit has 12,5% chance of double damage. In the best scenario you will slightly decrease their chance for that to happen - there are at least several spells which decrease the effectiveness of enemy units in a more reliable manner, such as Curse or Weakness.
Additionally, unlike Morale, Luck can't take negative values.

Cost: 24
Level: 4
Duration: until a single attack is performed
Description: The affected enemy unit attacks the nearest group, whether it's an ally or a foe. Affects units in a range of 1 hex around the target.
Advanced level: Increases the range of the spell to 7 hexes around the target.
Expert level: Increases the range of the spell to 9 hexes around the target.
Immensely powerful, but equally expensive spell. It allows you to saw confusion into the enemy troops - suffice to say, that in the Expert level, you will be able to affect 3 units, before they can even make their move. Under the influence of the Berzerk spell, the unit will attack the nearest group, whether it's a foe or an ally - the hero of the unit loses any control over the said unit.
In some extreme situations it can allow you to affect almost the whole enemy army - all you have to do then is to watch as the enemy units are slaying each other. If your enemy lacks any means of disabling the spell, he/she may simply surrender, as he/she won't regain control over the units.
If your units get hit by this spell, use your Dispel or Cure magic to negate the effects of Berzerk. You can also use the Antimagic spell to protect key units from getting under its control.

Cost: 16
Level: 4
Duration: -
Description: Target unit, as well as those in the immediate vicinity of it receive (Power*10)+20 damage.
Advanced level: Target unit, as well as those in the immediate vicinity of it receive (Power*10)+40 damage.
Expert level: Target unit, as well as those in the immediate vicinity of it receive (Power*10)+80 damage.
Inferno is basically a stronger version of Fire Ball - it deals slightly better damage, but the thing that matter the most, is the significantly increased area of effect. This spell, excluding the Armageddon and the Death Ripple spells, can harm the biggest amount of units with a single use - with a little bit of luck and / or planning, you will easily be able to hit 5 enemy units.
The spell is perfect to harass enemy shooters - if they are stationed near a catapult / ammo cart or any other siege equipment, all you have to do is target the said equipment and the shooters close to it will be in the area of effect as well.

Cost: 24
Level: 4
Duration: -
Description: All units on the battlefield receive (Power*50)+30 damage.
Advanced level: All units on the battlefield receive (Power*50)+60 damage.
Expert level: All units on the battlefield receive (Power*50)+120 damage.
A typical double-edged sword type of a spell - it deals damage to your enemies, as well as to your own units. Additionally, it has the greatest damage of all the other offensive spells in the game (Implosion can deal higher damage, but it's a single-target spell) - the amount of damage easily go into the thousands.
An ideal tactic, which you can use the spell with, is to use units completely immune to magic (Black and Gold Dragons, both Efreets) or with a high amount of resistance (Dwarves, all types of Golems) to fire magic. If your army consists of those units, you can freely cast Armageddon each round - after two, three casts, the enemy army will be no more (provided that they don't have any immune creatures, as well).
if you see an enemy hero, who has a lot of Power, and his/her army consists mainly of units mentioned above, immediately cast Protection from Fire, as there's a huge chance that the enemy is preparing the mentioned spell to annihilate your army.

Cost: 16
Level: 4
Duration: 1 round
Description: Target, allied troop's attack rating is increased by eight against behemoths, dragons, and hydras
Advanced level: The attack bonus also affects devils and angels.
Expert level: The attack bonus also affects titans.
Theoretically, an immensely powerful spell, as it increases the attack attribute of your units when dealing with 7th level units, but it has one, major flaw - you can cast it on a single allied unit during a single round. It makes it inferior to spells such as Prayer, Bloodlust, or even Bless or Haste, as they are more effective because they can be cast on your entire army. The only exception to this rule is when your hero has only 1-2 units under his command, which can easily be targeted by the spell, and the enemy's army consists mainly of 7th level units - such a situation has almost zero chances of happening though.

Cost: 16
Level: 4
Duration: 1 round
Description: The attack attribute of a given unit is increased by 100% of the troops defense attribute. The defense is reduced to 0.
Advanced level: The attack bonus is now 150% of unit's defense value.
Expert level: The attack bonus is now 200% of unit's defense value.
Another very situational spell. After casting it, the attack of your unit can increase by several points, increasing the damage it can dish out even by hundreds (!) percent, but its defense will be reduced to 0 - it means, that every unit that decides to attack it will deal colossal bonus damage (a 7th level unit with an attack equal to 30 points will deal 150% extra damage!).
This spell is useful in a couple of situations - when you want to deal extreme damage and you are entirely sure that your enemy won't be able to retaliate, or enemy army lacks any shooters, or units with high mobility, so that your "buffed" unit remains unharmed. In any other scenarios you shouldn't use this spell, as it can greatly benefit you, or cause you to lose the entire battle.

Cost: 16
Level: 4
Duration: 1 round
Description: 20% of melee damage dealt to the unit affected by the spell is reflected back to the attacker.
Advanced level: 25% of melee damage dealt to the unit affected by the spell is reflected back to the attacker.
Expert level: 30% of melee damage dealt to the unit affected by the spell is reflected back to the attacker.
The spell, which at the same time is the ability of the Sultan Efreets - any enemy unit attacking the creature affected by the Fire Shield in melee will receive a percentage of the damage back. It can be used in several effective ways - you can cast the spell on a very mobile, preferably flying unit (like Griffins, Archangels, Archdevils, or any flying creature - Dragons can't be used, as they are immune to magic) and then attack the enemy shooter with it. Your enemy will have two options - he/she can either attack the unit, suffering extreme loses due to the effect of the spell, or ignore it, while your unit blocks the enemy shooter.
Additionally, it's a good method of protecting your own shooters - the enemy will sustain severe loses once he/she decides to gang up on your shooters with melee units.
Cost: 25
Level: 5
Duration: whole battle
Description: Summons (Power*2) Fire Elementals. You can't summon more than one type of elemental during a single battle, but several of the same time can be summoned.
Advanced level: Summons (Power*3) Fire Elementals.
Expert level: Summons (Power*4) Fire Elementals.
This spell, coupled with high Power attribute of the hero casting it, allows you to summon quite an amount of elementals to aid you, but there's one single problem - summoning Earch Elementals, from the Earth Magic school, is a lot more efficient, because those units are simply stronger. However, if you lack the ability to summon other elementals, using this spell is by no means any waste.

Cost: 5
Level: 1
Duration: -
Description: Target, enemy unit receives (Power*10)+10 damage.
Advanced level: Target, enemy unit receives (Power*10)+20 damage.
Expert level: Target, enemy unit receives (Power*10)+30 damage.
The first offensive spell in the game, which can almost always be found in any first level Mage Guild. It's mainly used during the early rounds, because even those heroes who lack Power can deal significant damage - later on the effectiveness falls off considerably, because it lacks a good Power-damage ratio.

Cost: 6
Level: 1
Duration: - 1 round
Description: Target, allied unit's speed is increased by three hexes.
Advanced level: Increases the speed by 5 hexes.
Expert level: Increases the speed of all allied troops by 5 hexes.
One of the best spells in the game, and without a doubt the best 1st level one. Increasing the speed of a unit allows you to move it quicker than it should, which, as can easily be guessed, can disrupt the flow of the whole battle. Expert Level of the spell allows you to cast Haste on all your units, which gives an immense edge against your enemy.

Cost: 2
Level: 1
Duration: until the end of the round
Description: Shows the location of all artifacts on the View World screen.
Advanced level: Shows the location of all artifacts, as well as heroes, on the View World screen.
Expert level: Shows the location of all artifacts, heroes and cities on the View World screen.
A very useful and extremely cheap to use spell. Even if the basic level of the spells is not very powerful, the Advanced (as well as Expert) one will allow you to track your enemy's movements on the world map, whether you've already noticed the enemy, or he is still in the fog of war. It decreases the chances of getting surprised unprotected and allows you to plan your actions ahead.

Cost: 7
Level: 2
Duration: 1 round
Description: Increases the luck of your unit by 1.
Advanced level: Increases the luck of your unit by 2.
Expert level: Increases the luck of all allied units by 2.
Fortune, contrary to the first thought, is one of the weakest and least useful spells in the game because of a very simple reason - there's tons of ways to acquire the maximum (3) level of luck for your units, be it with the help of artifacts, or simply be visiting various places. There's a lot of better spells to be cast during a battle.

Cost: 10
Level: 2
Duration: -
Description: Target, enemy unit receives (Power*25)+10 damage.
Advanced level: Target, enemy unit receives (Power*25)+20 damage.
Expert level: Target, enemy unit receives (Power*25)+30 damage.
Lightning Bolt is basically a stronger version of a Magic Missile - it costs twice the amount of mana, dealing significantly higher damage. A good Power/damage ratio makes this spell effective both in early and late game. It's worth to use it on enemy shooter units, or to weaken those powerful 7th level creatures - with a proper amount of Power, artifacts and skills, you can kill several of them with a single use.

Cost: 7
Level: 2
Duration: 1 round
Description: Protects the selected unit, reducing damage received from Air spells by 30%.
Advanced level: Allied unit receives 50% less damage from Air spells.
Expert level: All allied units receive 50% less damage from Air spells.
Protection from Air is useful only when you are certain, that the enemy has large amount of Power and is likely to use spells such as Lightning Bolt, or Chain Lightning - in other cases the spell is completely useless, because of the fact, that it only decreases damage from air-oriented spells and that no unit in the game does any elemental-related damage.

Cost: 8
Level: 2
Duration: 1 round
Description: Increases the attack attribute of a shooter unit by 3.
Advanced level: Increases the attack attribute of a shooter unit by 6.
Expert level: Increases the attack attribute of all shooter units by 6.
Another spell which, theoretically, looks promising, but in reality turns out to be weak. There are better spells to cast on your units, such as Bloodlust, or Bless, not to mention the Prayer spell, which, aside from attack, also increases the defense and speed of a unit. Therefore it's better to use a different spell than Precision.

Cost: 10
Level: 2
Duration: Whole battle
Description: Decreases the defense of a single, enemy unit by 3 points - the spell can be cast unlimited amount of times, as the effect stacks.
Advanced level: Decreases the defense by 4 points.
Expert level: Decreases the defense by 5 points.
An extremely effective spell against units with a high amount of defense. Each hit of the spell decreases the defense of the target, and the effect can stack up infinite amount of times - as a result, you can easily knock the defense of an enemy unit to zero, provided that the battle lasts long enough. This spell is rather ineffective against enemies lacking huge amounts of defense.

Cost: 4
Level: 2
Duration: 1 day
Description: When the casting hero is right-clicked by opponents, all of the hero's creature troops are displayed as if they were composed of the most powerful creatures in the hero's army. Troop population numbers are represented normally.
Advanced level: As with the basic level, but the amount of troops is shown as 0.
Expert level: Units are represented as if populated by the most powerful creature in the hero's best city.
This spell can be effective during a multiplayer game, because even if your enemy understands, that you are deceiving him, he won't be able to check your "real" army before attacking you - in a normal game, when you are faced against computer-controlled players, this spell is completely useless.

Cost: 4
Level: 2
Duration: 1 day
Description: Displays number of monsters in a wandering monster troop and whether or not the troop will offer to join the casting hero's army. Range is equal to Power or three, whichever is greater
Advanced level: Additionally, it now shows the enemy hero's primary skills, as well as his army.
Expert level: Additionally, it now shows the information about an enemy city.
Another very useful spell, which can be cast on the world map. After casting it, you must press and hold the right mouse button over an enemy hero to learn about a set of things - the amount of information depends on the highest level of proficiency in a given school of magic. Additionally, it's an useful spell while dealing with neutral monsters, as it allows you to estimate the chances of the enemy joining your army.

Cost: 15
Level: 3
Duration: 1 round
Description: Target, allied unit receives -25% damage from ranged attacks.
Advanced level: Target, allied unit receives -50% damage from ranged attacks
Expert level: All allied units receive -50% damage from ranged attacks.
A highly situational spell, as it primarily depends on the contents of the enemy army. If your foe has a lot of shooters, especially those which are doing area of effect damage (Liches, Magogs), it can prove to be extremely effective - on the Expert level you will reduce damage received from ranged attacks by half, on all your units, which basically halves the effectiveness of the enemy shooters. This spell is very useful when dealing with Tower's troops, as there are 3 shooters there, one of which is a 7th level unit, with the biggest damage in the game. If the enemy lacks any significant "shooting power", you can ignore this spell and just cast Blind on enemy shooters.

Cost: 15
Level: 3
Duration: -
Description: All undead forces on the battlefield receive (Power*10)+10 damage.
Advanced level: All undead forces on the battlefield receive (Power*10)+20 damage.
Expert level: All undead forces on the battlefield receive (Power*10)+50 damage.
A very useful spell when dealing with an undead army, because only those units will receive damage (this spell is like a mirror image of the Death Ripple). The damage potential of this spell may seem low, because a simple Lightning Bolt is able to deal more to a single target, but the power of Destroy Undead lies in the possibility of targeting every undead unit on the battlefield.
Assuming that your hero has Expert knowledge in Air Magic and 15 points of Power - every undead unit on the battlefield will receive 200 points of damage. Adding the artifact which increases damage from air spells by 50%, or the hero skill increasing the overall damage coming from spells, a single target will easily receive over 300 points of damage - it means, that each round you will be able to deal way over 2000 points of damage to the enemy Necropolis' hero army! However, you shouldn't use that spell when you have your own undead units in the army, as they too will receive damage from this spell.

Cost: 18
Level: 3
Duration: -
Description: The player seizes control over an enemy unit, which has less than (Power*25)+10 points of health. Allied units can attack the hypnotized unit without fear of retaliation.
Advanced level: The player seizes control over an enemy unit, which has less than (Power*25)+20 points of health.
Expert level: The player seizes control over an enemy unit, which has less than (Power*25)+50 points of health.
An extremely powerful spell, provided that your hero has enough points of Power, to seize control over an enemy unit. It's an effective way of dealing with enemy shooters - those units tend to have low amount of health points, which makes them easier to hypnotize. An enemy, who just lost control over a unit will have a tough decision to make - he can either leave the unit alone, risking severe loses, or simply kill his own unit.

Cost: 24
Level: 4
Duration: -
Description: An enemy unit is struck with lightning, receiving (Power*40)+25 points of damage. The lightning bolt then jumps to another, closest target, dealing half the amount of damage - the effect is repeated until 4 targets are hit.
Advanced level: Increases the damage to (Power*40)+50 points and the maximum amount of targets to 5.
Expert level: Increases the damage to (Power*40)+100 points.
One of the best offensive spells in the game, such that even a hero without the knowledge of Air Magic, or excessive amount of Power will be able to inflict significant damage. The spell has a wonderful Power/damage ratio, making it effective throughout the whole game - you only need to check the table above to understand just how much damage Chain Lightning is able to deal.
On the other hand, before you decide to use this spell, you must check, if there are no allied units near the enemy you want to target, or if there's enough enemies to hit - if not, the lightning will struck your units as well.

Cost: 24
Level: 4
Duration: -
Description: The allied unit can retaliate 1 additional time.
Advanced level: The allied unit can retaliate 2 additional times.
Expert level: All allied units are able to retaliate 2 additional times.
Another interesting spell, which can severely punish the enemy who carelessly send his units to battle. Also, it's a good method of protecting your key units, such as, for instance, an Archangel, or a group of shooters with the "no melee penalty" ability - in most cases, the enemy will send a weak unit to "eat" the retaliation and then send the rest of his forces to finish it off - with the help of Counterstrike, especially on Expert level, your enemy will have to think twice before making any move.

Cost: 25
Level: 5
Duration: 1 round
Description: Enemy spells cast on your unit have 20% chance to be repelled back at a random enemy unit.
Advanced level: Increases the chance to 30%.
Expert level: Increases the chance to 40%.
Another spell, which, in theory, is amazing, but in practice is, at most, average. Even a 40% chance to repel a spell back at the enemy unit does not guarantee, that it will happen - besides, an enemy won't target your unit, which is protected by a Magic Mirror either way.

Cost: 25
Level: 5
Duration: whole battle
Description: Summons (Power*2) Air Elementals. You can't summon more than one type of elemental during a single battle, but several of the same time can be summoned.
Advanced level: Summons (Power*3) Air Elementals.
Expert level: Summons (Power*4) Air Elementals.
This spell, coupled with high Power attribute of the hero casting it, allows you to summon quite an amount of elementals to aid you, but there's one single problem - summoning Earch Elementals, from the Earth Magic school, is a lot more efficient, because those units are simply stronger. However, if you lack the ability to summon other elementals, using this spell is by no means any waste.

Cost: 20
Level: 5
Duration: 1 day
Description: Allows the hero to fly through terrain obstacles - the move must end on a flat, passable terrain, on the ground. The range of the Fly spell is 60% of any remaining movement points the hero has at the moment of casting.
Advanced level: Increases the range to 80% movement points.
Expert level: Increases the range to 100% movement points.
One of the most unbalanced spells in the game, because it allows you to:
The reasons explained above caused the spell to be regularly banned during tournaments, because the spell gives a huge edge to the one using it.

Cost: 25
Level: 5
Duration: -
Description: Teleports the hero to target, visible and unoccupied location on the world map. The spell can be cast up to two times a day, each time decreasing the movement points of the hero by 3. If the amount of movement points is below 3, the spell cannot be cast.
Advanced level: The spell can be cast up to three times a day.
Expert level: The spell can be cast up to four times a day, and each use decreases the amount of movement points by 2.
If you thought that the above spell, Fly, was overpowered, you are definitely on the wrong! Dimension Door, in terms of strength, loses only to Town Portal (which can be found in the Earth Magic section of this guide). The ability to teleport your hero to the other side of the screen, and to be able to do it several times in quick succession... The spell can be used to move around the map quickly, to pass terrain obstacles (you only need a small piece of revealed land to teleport), or to simply make your enemy's life a miserable one - you can pop out of nowhere, teleport to the enemy's city gates and seize control over the city.

Cost: 5
Level: 1
Duration: -
Description: Target, enemy unit receives (Power*10)+10 damage.
Advanced level: Target, enemy unit receives (Power*10)+20 damage.
Expert level: Target, enemy unit receives (Power*10)+30 damage.
The first offensive spell in the game, which can almost always be found in any first level Mage Guild. It's mainly used during the early rounds, because even those heroes who lack Power can deal significant damage - later on the effectiveness falls off considerably, because it lacks a good Power-damage ratio.

Cost: 5
Level: 1
Duration: 1 round
Description: Protects the selected unit, reducing damage received from Water spells by 30%.
Advanced level: Allied unit receives 50% less damage from Water spells.
Expert level: All allied units receive 50% less damage from Water spells.
Protection from Water is useful only when you are certain, that the enemy has large amount of Power and is likely to use spells such as Frost Bolt, or Frost Ring - in other cases the spell is completely useless, because of the fact, that it only decreases damage from water-oriented spells and that no unit in the game does any elemental-related damage.

Cost: 5
Level: 1
Duration: 1 round
Description: Target, ally unit deals the maximum amount of damage when it attacks.
Advanced level: Target, ally unit deals the maximum amount of damage +1 when it attacks.
Expert level: All allied units deal the maximum amount of damage +1 when they attack.
One of the best spells in the game, which can only be cast during combat. After casting it, the unit you targeted (or all of your units, if you have Expert Level in Water Magic) will deal its maximum damage.
If a unit targeted by the spell has a damage range of 2-7, it will, under normal conditions, deal 2, 3, 4, 5, 6 or 7 damage (for each unit in the group) at the moment it attacks the enemy, making its attacks to fluctuate in damage. To get rid of this effect, you can cast bless on it, which will allow it to always deal its maximum damage, which is 7, greatly increasing the overall effectiveness of the unit.
This spell can be immensely powerful when used on creatures with a huge "spread" in their minimum / maximum damage - if a unit has '40' or '50' damage, there's no point to cast Bless on it, as it will literally give nothing to it.

Cost: 5
Level: 1
Duration: -
Description: Removes positive, as well as negative, status effects from a target, allied unit.
Advanced level: Removes positive, as well as negative, status effects from a target, allied, or enemy, unit.
Expert level: Removes positive, as well as negative, status effects from all units on the battlefield.
A really good spell, which can turn the tides of any hopeless skirmish, during which your enemy keeps on buffing his own units, while curing yours - if you cast it on the Expert Level, you will, literally, reset all the units, because it takes away all the status effects of every creature. On the basic level it's still an useful spell, because you can take off a negative spell (like Blind, Hypnosis) from your unit, while on the Advanced level you can dispel any effects on an enemy unit, which was heavily buffed by the enemy.

Cost: 6
Level: 1
Duration: -
Description: Removes all negative effects and regenerates (Power*5)+10 health of an allied unit.
Advanced level: Removes all negative effects and regenerates (Power*5)+20 health of an allied unit.
Expert level: Removes all negative effects and regenerates (Power*5)+30 health of all allied units.
Another extremely useful spell. In contrast to the previously described Dispel, Cure works only on allied units - it's useful when you want to get rid of those pesky negative status effects cast on your units, or you simply want to heal them up a bit, without taking out negative effects off the enemy forces. The healing aspect is a nice addition, but weaker units, with smaller health pools won't be able to benefit from it fully, as it heals to the maximum, but does not resurrect fallen creatures. It means, that a creature needs to have at least 25 health points (with a hero with 1 point of Power) to fully benefit from the healing.

Cost: 8
Level: 1
Duration: -
Description: Summons one of your hero's boats to their current location. If none of those boats are available, then one of your other heroes' boats is summoned. Spell has a 50% chance of working. The spell fails if there are no unoccupied boats available.
Advanced level: Same as Basic Effect, except that if no boats are available, a new one is created. The spell has a 75% chance of working. There are a maximum of sixty-four boats allowed on the Adventure Map at one time. The spell fails if all are occupied.
Expert level: Same as Advanced Effect, except that the spell has a 100% chance of working (unless all sixty-four boats are occupied).
A spell, which is useful only on those gigantic maps with immense amounts of water. In a hypothetical situation, a player can land on one side of the island, clear it and get to the other side, summon the same boat to him and board it, without the need to lose time to get back to it. Naturally, if the map lacks any water, the boat cannot be summoned.

Cost: 8
Level: 2
Duration: -
Description: Target, enemy unit receives (Power*20)+10 damage.
Advanced level: Target, enemy unit receives (Power*20)+20 damage.
Expert level: Target, enemy unit receives (Power*20)+50 damage.
The Ice Bolt spell is one again a more powerful version of the Magic Missile - increased mana cost translates to higher amount of damage dealt, making this spell useful both in early and in late game. In a certain sense, this spell is an equivalent of the Lightning Bolt from Air Magic - which one the hero will use depends solely on the level of school(s) of magic he has learned. It's worth to use it on enemy shooter units, or to weaken those powerful 7th level creatures - with a proper amount of Power, artifacts and skills, you can kill several of them with a single use.

Cost: 4
Level: 2
Duration: 1 day
Description: Displays number of monsters in a wandering monster troop and whether or not the troop will offer to join the casting hero's army. Range is equal to Power or three, whichever is greater
Advanced level: Additionally, it now shows the enemy hero's primary skills, as well as his army.
Expert level: Additionally, it now shows the information about an enemy city.
Another very useful spell, which can be cast on the world map. After casting it, you must press and hold the right mouse button over an enemy hero to learn about a set of things - the amount of information depends on the highest level of proficiency in a given school of magic. Additionally, it's an useful spell while dealing with neutral monsters, as it allows you to estimate the chances of the enemy joining your army.

Cost: 8
Level: 2
Duration: 1 round
Description: The attack attribute of a target, enemy unit is decreased by 3 points.
Advanced level: The attack attribute of a target, enemy unit is decreased by 6 points.
Expert level: The attack attribute of a all enemy units is decreased by 6 points.
This spell is the opposite of the Bloodlust from the Fire Magic. The ability to decrease the enemy attack attribute comes in handy when you are playing a hero with low defense attribute, while the enemy has high attack - after casting it on every enemy unit, you will be able to level the difference in attack / defense quite a bit.
Remember, that each attack point of an enemy unit surpassing the defense of your unit, which is being attacked, increases the damage dealt to that unit by 5% - in some extreme cases, you can decrease the enemy bonus damage by 30%!

Cost: 8
Level: 2
Duration: -
Description: Removes one, non-magic obstacle (trees, stones) from the battlefield. Objects such as cliffs are not removed.
Advanced level: The spell now also removes magic obstacles.
Expert level: Removes any obstacles from the battlefield, apart from elements of the environment.
An extremely situational spell, as it's not affecting any unit directly, but allows you to remove an obstacle, which, for instance, blocks your unit from attacking your target. It comes in handy in situations, in which the course of the whole battle can depend on a single attack - and as that does not happen frequently, this spell is one of the rarest to be seen on the battlefield.

Cost: 12
Level: 3
Duration: -
Description: Units surrounding the target of the spell receive (Power*10)+15 damage. The unit the spell was cast on remains unharmed.
Advanced level: Enemy units receive (Power*10)+30 damage.
Expert level: Enemy units receive (Power*10)+60 damage.
A powerful spell, but equally situational - the target of this spell must be surrounded by several units, which the spell can damage, in order for it to be worth casting, as it has poor Power/damage scaling. If the target is surrounded by at least two enemy units, you can freely cast this spell - if, however, that's not the case, and there's a single enemy unit to be harmed by it, cast Lightning Bolt or Ice Bolt instead.

Cost: 15
Level: 3
Duration: -
Description: Moves the targeted ally unit to the designated spot on the battlefield. The unit can't be moved above moats and walls.
Advanced level: You can now teleport the unit above moats.
Expert level: You can now teleport the unit above walls.
Yet another situational spells, as the type of units you have under your command decides, if it's worth to cast it. If you have extremely powerful, but slow units, such as (Ancient) Behemoths, or (Chaos) Hydras, moving them in between enemy units may prove fatal to your foe, as you will be able to deliver a sudden, deadly strike. If your units have a lot of mobility, or the teleportation won't give you any edge, it's better to use another spell.

Cost: 12
Level: 3
Duration: 1 round
Description: Increases the morale of an allied unit by 1.
Advanced level: Increases the morale of an allied unit by 2.
Expert level: Increases the morale of all allied units by 2.
Similar to Fortune from Air Magic, Mirth is a rather weak spell, because it's easy to accumulate the maximum amount (3) of morale for your troops, be it from artifacts, or visiting various places scattered around the world. It's better to use a given round of battle to cast a different spell - an exception to this rule is when your units' morale is below 2 points, and that is when casting Mirth can prove to be effective.

Cost: 12
Level: 3
Duration: 1 round
Description: Half of creatures in an enemy unit with ranged attack forgets to shoot.
Advanced level: All creatures in an enemy unit with ranged attack cannot shoot.
Expert level: All creatures in all enemy units with ranged attacks cannot shoot.
The strength of this spell depends on the contents of the enemy army - if the enemy heavily relies on units with ranged attacks, it's worth to use this spell to decrease some of their effectiveness (or to completely shut them down as shooters, depending on the level of Water Magic your hero has) as shooters. If your enemy lacks spells such as Dispel, or Cure, he will be forced to send his shooters into close combat, where those units may (and most likely will) have a penalty to damage, severely lowering their effectiveness.
There's no point in using this spell when your enemy does not have powerful shooters, or your enemy uses units from the Dungeon or Tower cities - most shooters from those cities have "no melee penalty", making this spell not so effective against them.

Cost: 16
Level: 4
Duration: 1 round
Description: Increases the attack, defense and speed of a single allied unit by 2.
Advanced level: Increases the attack, defense and speed of a single allied unit by 4.
Expert level: Increases the attack, defense and speed of all allied units by 4.
Prayer is probably the most powerful unit enchanting spell in the game. The possibility (on the Expert Level of Water Magic) of increasing the attack, defense and speed of all your units by 4 gives an immense edge over your enemy - it's also a perfect way of reducing the gap between your units and the enemy ones, in a situation in which you are controlling a hero who is highly magic-oriented, while your enemy is a pure "fighter", with a lot of attack and defense.

Cost: 24
Level: 4
Duration: current battle
Description: Creates the copy of a selected allied unit. The copy does the same damage, but it is dispelled the moment it sustains any damage. You can clone units of 1-5 levels.
Advanced level: You can now clone units of 1-6 levels.
Expert level: You can now clone units of 1-7 levels.
A powerful spell, which can turn the tides of any battle. A cloned unit retains the damage, as well as abilities of the original creature - a cloned Archangel can use his resurrection, even when the original used it before the cloning happened. There can be more than one clone on the battlefield simultaneously.
The only flaw of this spell is the fact, that the clone is dispelled upon taking any damage - because of that, it's worth to clone shooters, or units, which are highly unlikely to be retaliated at (with "no retaliation" ability).

Cost: 12
Level: 4
Duration: 1 day
Description: The hero casting the spell may walk across bodies of water. The move must be finished on dry land. The range of the Water Walk spell is 60% of any remaining movement points the hero has at the moment of casting.
Advanced level: Increases the range to 80% movement points.
Expert level: Increases the range to 100% movement points.
This spell is very similar to Fly, but it is limited to moving through water, without the necessity to use a ship. It's a very effective way of crossing water, because of the fact, that a hero boarding and/or leaving a ship will lose all his movement points and will have to wait a day before he can move - with the help of this spell you won't have to wait for that. There's only one condition - the movement must end on dry land, meaning that you can only go to, for instance, a neighboring island.

Cost: 25
Level: 5
Duration: whole battle
Description: Summons (Power*2) Water Elementals. You can't summon more than one type of elemental during a single battle, but several of the same time can be summoned.
Advanced level: Summons (Power*3) Water Elementals.
Expert level: Summons (Power*4) Water Elementals.
This spell, coupled with high Power attribute of the hero casting it, allows you to summon quite an amount of elementals to aid you, but there's one single problem - summoning Earch Elementals, from the Earth Magic school, is a lot more efficient, because those units are simply stronger. However, if you lack the ability to summon other elementals, using this spell is by no means any waste.

Cost: 5
Level: 1
Duration: -
Description: Target, enemy unit receives (Power*10)+10 damage.
Advanced level: Target, enemy unit receives (Power*10)+20 damage.
Expert level: Target, enemy unit receives (Power*10)+30 damage.
The first offensive spell in the game, which can almost always be found in any first level Mage Guild. It's mainly used during the early rounds, because even those heroes who lack Power can deal significant damage - later on the effectiveness falls off considerably, because it lacks a good Power-damage ratio.

Cost: 5
Level: 1
Duration: 1 round
Description: Shields a selected, allied unit, decreasing the amount of damage it receives in melee combat by 15%.
Advanced level: Shields a selected, allied unit, decreasing the amount of damage it receives in melee combat by 30%.
Expert level: Shields all your units, decreasing the amount of damage they receive in melee combat by 30%.
Another defensive spell, which increases the resistance of your units. It differs from Stone Skin in effect - Stone Skin increases the defense of your creatures, directly reducing any sustained damage, while here the effect is more indirect, because it only reduces damage from melee attack. When to use them?
Rules are simple - if your enemy does not have a lot of shooters, it's more beneficial to use Shield, which decreases MELEE DAMAGE. If the enemy, on the other hand, deals a lot of damage with the help of his shooters, it's better to use Stone Skin, which increases defense in general, reducing damage from both melee, and ranged attacks at the same time. Of course, you can as well use both of those spells simultaneously.

Cost: 5
Level: 1
Duration: 1 round
Description: Increases the defense of a single, allied unit by 3 points.
Advanced level: Increases the defense of a single, allied unit by 6 points.
Expert level: Increases the defense of all allied units by 6 points.
The basic defensive spell from the Earth Magic school, which allows you to increase the resistance of your unit, or your whole army, depending on the mastery over Earth Magic. Just as with the Prayer spell, it's a good method of reducing the gap between your units and the enemy ones, in a situation in which you are controlling a hero who is highly magic-oriented, while your enemy is a pure "fighter", with a lot of attack and defense. If you lack Prayer on Expert Level, this is a good replacement spell.

Cost: 6
Level: 1
Duration: 1 round
Description: Decreases the speed of a single, enemy unit by 25%.
Advanced level: Decreases the speed of a single, enemy unit by 50%.
Expert level: Decreases the speed of all enemy units by 50%.
The opposite of Haste spell. Despite the low level of this spell, this is one of the most powerful and annoying spells you can cast on your enemy - on Expert Level it allows you to decrease the speed of the whole enemy army by half, which disrupts and delays the enemy movements, giving you a huge edge over your foe. Even if your enemy manages to take it off, the desired effect will be achieved, as it will delay some of your foe's troops, changing the outcome of the whole battle.

Cost: 2
Level: 1
Duration: - until the end of the round
Description: Displays the location of all resources on the View World Screen.
Advanced level: Displays the location of all resources, as well as mines, on the View World Screen.
Expert level: Displays the entire terrain, all mines and loose resources on the View World Screen.
Similar to View Air, this is a very useful and cheap spell. It comes in handy when you are frequently running out of a given resource and instead of buying it off the market yet again, you want to find and flag the mine responsible for delivering it. On Expert Level it allows you to see the entire map, which will help you to mark key locations.

Cost: 10
Level: 2
Duration: -
Description: All units, except undead, receive (Power*5)+10 damage.
Advanced level: All units, except undead, receive (Power*5)+20 damage.
Expert level: All units, except undead, receive (Power*5)+30 damage.
The equivalent of the Destroy Undead spell - the only difference is the fact, that it targets all units except for the undead ones. The spell, in theory, is very good, because while playing the Necropolis you will use only undead creatures in your army, allowing you to spam the spell each round without the fear of losing some precious units. There's only one problem - the spell deals incredibly low damage. Even a her with 30 points of Power will deal up to 180 points of damage to all living creatures (1260 in total) - for comparison, the same hero, with 30 points of Power, with the help of Chain Lightning will deal over 2500 damage to 5 enemy units (almost doubling the damage). The only time it's worth to use this spell is when your hero lacks spells such as Chain Lightning, Fire Ball, Inferno or Ice Ring.

Cost: 4
Level: 2
Duration: 1 day
Description: Displays number of monsters in a wandering monster troop and whether or not the troop will offer to join the casting hero's army. Range is equal to Power or three, whichever is greater
Advanced level: Additionally, it now shows the enemy hero's primary skills, as well as his army.
Expert level: Additionally, it now shows the information about an enemy city.
Another very useful spell, which can be cast on the world map. After casting it, you must press and hold the right mouse button over an enemy hero to learn about a set of things - the amount of information depends on the highest level of proficiency in a given school of magic. Additionally, it's an useful spell while dealing with neutral monsters, as it allows you to estimate the chances of the enemy joining your army.

Cost: 8
Level: 2
Duration: until touched
Description: Quick sands are placed in four random hexes on the battlefield. Those places are invisible to creatures unless they are on their native terrain. A unit stepping on the quicksand pit will be stopped.
Advanced level: Creates quick sands in six random places.
Expert level: Creates quick sands in eight random places..
In theory a somehow effective spell, but in practice one of the most useless ones - the chances of an enemy unit stepping on the quicksand pit are extremely slim, and if you want to disable a certain unit from combat, it's safer to just use Blind or Frenzy on it.

Cost: 15
Level: 3
Duration: 1 round
Description: Target, allied unit can only be affected by spells from 4th and 5th level.
Advanced level: Target, allied unit can only be affected by spells from 5th level.
Expert level: Target, allied unit is completely immune to magic.
An extremely powerful spell, especially in those situations, in which you are fighting with powerful magic-oriented heroes, who may want to seize control over your unit (Hypnosis), or disable it from combat for a couple of rounds (Blind). Before you cast it, think about which unit from your army poses the biggest threat to your enemy - this unit should be protected by Anti Magic.

Cost: 12
Level: 3
Duration: 1 round
Description: Protects the selected unit, reducing damage received from Earth spells by 30%.
Advanced level: Allied unit receives 50% less damage from Earth spells.
Expert level: All allied units receive 50% less damage from Earth spells
In contrast to other protection from element spells, this one may prove useful to you. The reason for that is simple - earth magic has two powerful offensive spells. The first one is the Meteor Shower, which can deal immense damage to your units when stacked close to each other, and the latter one is Implosion, a spell, which deals the highest amount of damage in the game (a powerful mage can easily deal 2000 points of damage to a single target).
Protecting all your units with this spell should effectively discourage your enemy from using the above mentioned spells. If, however, you are certain that the enemy does not have those spells at his disposal (which can be easily judged by his Power and Knowledge attributes - if they are low, there's a high chance that he can't even cast them), you can just ignore this spell.

Cost: 20
Level: 3
Duration: -
Description: Damages the enemy walls in two random places.
Advanced level: Damages the enemy walls in three random places.
Expert level: Damages the enemy walls in four random places.
A spell which can only be used during a siege on an enemy city. After casting it, you will damage the walls of the enemy castle in several random places (the amount of them are dependent on the level of Earth Magic your hero has) - each place is damaged in a same way as if a stone from a catapult would hit it. On an Expert Level, this spell can severely damage the enemy castle, making the whole siege a lot easier.

Cost: 15
Level: 3
Duration: permanent
Description: Reanimates deceased, allied undead units - the amount of health points cannot exceed (Power*50)+30.
Advanced level: Reanimates deceased, allied undead units - the amount of health points cannot exceed (Power*50)+60.
Expert level: Reanimates deceased, allied undead units - the amount of health points cannot exceed (Power*50)+160.
The equivalent of the Resurrection spell, with a slight difference - it only affects undead units. This spell, coupled with the Necromancy skill of your hero, allows you to decrease the amount of troops lost during a battle - it has a huge Power/effectiveness ratio, which means, that even not so magically-focused heroes will be able to bring back a lot of troops. A thing worth noting is the fact, that the effect is permanent and the troops aren't lost after the battle ends.

Cost: 15
Level: 3
Duration: 2 rounds
Description: A two-hex wide Force Field is created in the designated place, preventing enemy units from passing it.
Advanced level: Force Field is now three-hexes wide.
Expert level: Force Field is now three-hexes wide.
Another fairly situational spell, which can be useful in some critical situations. With the help of Force Field, you will be able to block the passageway to your shooters whenever you are too short on troops to leave them by to defend them. It can also be used to block a hole in a wall - this way the enemy won't be able to get inside your walls.

Cost: 16
Level: 4
Duration: -
Description: Units in the range of the spell receive (Power*25)+25 damage.
Advanced level: Units in the range of the spell receive (Power*25)+50 damage.
Expert level: Units in the range of the spell receive (Power*25)+100 damage.
One of the most powerful offensive spells in the game - in an ideal situation, you will be able to attack 5 units at the same time. Inflicting damage on even 1-2 enemy units is still effective, as this spell has extremely good Power/damage ratios and it will still hurt them a lot, even if your hero lacks insane amounts of Power points. In the hands of a powerful mage, this spell is extremely lethal - a single use can kill several 7th level units!

Cost: 16
Level: 4
Duration: 1 round
Description: Decreases the morale of an enemy unit by 1.
Advanced level: Decreases the morale of an enemy unit by 2.
Expert level: Decreases the morale of all enemy units by 2.
Similarly to Misfortune, this spell is a rather useless one, if the enemy hero (and his units) has 3 points of morale. In such a situation, you will decrease it to 1 - enemy units will still have a bonus, giving them a chance for an additional move (1 gives 4,2% chance, +2 is 8,3% and +3 is 12,5%).
However, if the enemy hero has 0, or -1 point of morale (this can be checked by pressing and holding the right mouse button over the enemy hero, or any of his units), it can be effective. Contrary to luck, morale can reach negatives values - with -1 the enemy units have 8,3% chance to lose their move during a given round, -2 gives them 16,7% chance for that, while -3 gives a 25% chance of them losing their move. If you manage to drop the morale of your enemies to -3, there's a high chance that some of those units will lose their move.
Cost: 30
Level: 4
Duration: -
Description: After casting, the hero moves to the nearest allied city, losing 30 points of movement during the process.
Advanced level: The hero can move to any allied city, but it cannot be visited by another hero.
Expert level: : The hero loses only 20 points of movement while casting the spell.
The time has come for the most unbalanced, overpowered spell in the game, which, at any moment, provided that he has enough movement points, allows the hero casting it to move to an allied city, even from the other side of the map - it makes any surprise attacks futile, as you won't be able to even get near an enemy castle, when the enemy hero has this spell at his disposal, and there's no need for the enemy to leave any army at the city garrison.

Cost: 20
Level: 4
Duration: -
Description: Restores a fallen, allied unit for the duration of the battle - the amount of health points cannot exceed (Power*50)+40.
Advanced level: Increases the health limit to (Power*50)+80.
Expert level: : Increases the health limit to (Power*50)+80 and the units are resurrected permanently.
The equivalent of the Animate Dead spell, this time affecting the living creatures. In the basic, and advanced form, it allows you to bring back your units only for the duration of the battle - on the Expert level, however, the units are resurrected permanently. This spell allows you to bring back immense amounts of fallen creatures, which makes it extremely effective during long bouts, especially if your enemy lacks this spell.

Cost: 30
Level: 5
Duration: -
Description: An enemy unit receives (Power*75)+100 damage.
Advanced level: An enemy unit receives (Power*75)+200 damage.
Expert level: : An enemy unit receives (Power*75)+300 damage.
Implosion is an immensely powerful offensive spell - it has an extremely high Power/damage ratio, which allows it to deal insane amounts of damage. It's a perfect way of eliminating any target, but it's primary use is to get rid of enemy 7th level units - with the proper amount of Power, it can easily kill over 10 units of 7th level with a single use!

Cost: 25
Level: 5
Duration: whole battle
Description: Summons (Power*2) Earth Elementals. You can't summon more than one type of elemental during a single battle, but several of the same time can be summoned.
Advanced level: Summons (Power*3) Earth Elementals.
Expert level: Summons (Power*4) Earth Elementals.
The strongest summoning spell in the game, because of the fact that Earch Elementals are the strongest from all the other types - if you want to aid yourself with a summoned ally, the best choice is to select an Earth Elemental.
 A partly equipped hero.
There are literally hundreds of artifacts in the game. Those are items, which are equipped directly on the hero - they increase the heroes' stats, which influence the behavior of his units, as well as those commanded by the enemy he is facing on the battlefield.
Artifacts can be placed in the following slots:
As can be seen, there's plenty of items to choose from, as there are numerous artifacts in the game, and everyone should find something for themselves. Of course, the effectiveness, or the power of the artifacts does not depend solely on their characteristics, but also on the type of the hero wielding it, or even the army the player is using. For instance:
There are numerous examples of such influence on units - the choice of artifacts is truly unlimited.
In the following chapters you will find tables representing items from different groups (slots), coupled with their influence on the hero and/or his army.
Icon
Name
Influence

Shield of the Dwarven Lords
Increases the Defense attribute of the hero by 2.

Shield of the Yawning Dead
Increases the Defense attribute of the hero by 3.

Buckler of the Gnoll King
Increases the Defense attribute of the hero by 4.

Targ of the Rampaging Ogre
Increases the Defense attribute of the hero by 5.

Dragon Scale Shield
Increases the Defense and Attack attribute of the hero by 3.

Shield of the Damned
Increases the Defense attribute of the hero by 6.

Lion's Shield of Courage
Increases the Defense, Attack, Power and Knowledge attribute of the hero by 4.

Sentinel's Shield
Increases the Defense attribute of the hero by 12, but at the same time decreases the Attack by 3.
Icon
Name
Influence

Centaur's Ax
Increases the Attack attribute of the hero by 2.

Blackshard of the Dead Knight
Increases the Attack attribute of the hero by 3.

Red Dragon Flame Tongue
Increases the Defense and Attack attribute of the hero by 2.

Greater Gnoll's Flail
Increases the Attack attribute of the hero by 4.

Ogre's Club of Havoc
Increases the Attack attribute of the hero by 5.

Sword of Hellfire
Increases the Attack attribute of the hero by 6.

Sword of Judgement
Increases the Defense, Attack, Power and Knowledge attribute of the hero by 4.

Titan's Gladius
Increases the Attack attribute of the hero by 12, but at the same time decreases the Defense by 3.
Icon
Name
Influence

Breastplate of Petrified Wood
Increases the Power attribute of the hero by 1.

Armor of Wonder
Increases the Defense, Attack, Power and Knowledge attribute of the hero by 1.

Rib Cage
Increases the Power attribute of the hero by 2.

Scales of the Greater Basilisk
Increases the Power attribute of the hero by 3.

Tunic of the Cyclops King
Increases the Power attribute of the hero by 4.

Breastplate of Brimstone
Increases the Power attribute of the hero by 5.

Dragon Scale Armor
Increases the Defense and Attack attribute of the hero by 4.

Titan's Cuirass
Increases the Power attribute of the hero by 10, but at the same time decreases the Knowledge by 2.
Icon
Name
Influence

Helm of the Alabaster Unicorn
Increases the Knowledge attribute of the hero by 1.

Skull Helmet
Increases the Knowledge attribute of the hero by 2.
Helm of Chaos
Increases the Knowledge attribute of the hero by 3.

Crown of the Supreme Magi
Increases the Knowledge attribute of the hero by 4.

Hellstorm Helmet
Increases the Knowledge attribute of the hero by 5.

Crown of Dragontooth
Increases the Knowledge and Power attribute of the hero by 4.

Thunder Helmet
Increases the Knowledge attribute of the hero by 10, but at the same time decreases the Power by 2.

Helm of Heavenly Enlightenment
Increases the Defense, Attack, Power and Knowledge attribute of the hero by 6.

Spellbinder's Hat
All 5th level spells are available to hero when worn

Sea Captain's Hat
Increases hero's movement rate at sea, allows you to summon and destroy boats and protects from whirlpools.
Icon
Name
Influence

Dragonbone Greaves
Increases the Power and Knowledge attribute of the hero by 2.

Sandals of the Saint
Increases the Defense, Attack, Power and Knowledge attribute of the hero by 2.

Dead Man's Boots
Increases the effectiveness of the "Necromancy" skill by 15%.

Boots of Levitation
Allow hero to walk across the water.

Boots of Speed
Increases hero's movement rate over land.

Boots of Polarity
Gives 15% to magic resistance.
Icon
Name
Influence

Necklace of Dragonteeth
Increases the Power and Knowledge attribute of the hero by 3.

Celestial Necklace of Bliss
Increases the Defense, Attack, Power and Knowledge attribute of the hero by 3.

Necklace of Swiftness
Increases the combat speed of all your units by 1

Necklace of Ocean Guidance
Increases hero's movement rate at sea.

Pendant of Courage
Increases the Luck and Morale of all your units by 3.

Stateman's Medal
Reduces the costs of surrendering.

Pendant of Holiness
Protects your units against the "Curse" spell.

Pendant of Total Recall
Protects your units against the "Forgetfulness" spell.

Pendant of Life
Protects your units against the "Death Ripple" spell.

Pendant of Death
Protects your units against the "Destroy Undead" spell.
Pendant of Free Will
Protects your units against the "Hypnosis" spell.

Pendant of Dispassion
Protects your units against the "Berserker" spell.

Pendant of Second Sight
Protects your units against the "Blind" spell.

Pendant of Negativity
Protects your units against "Lightning" and "Chain Lightning" spells.

Garniture of Interference
Gives 5% to magic resistance.
Amulet of the Undertaker
Increases the effectiveness of the "Necromancy" skill by 5%.
Collar of Conjuring
Increases the duration of all your spells by 1 round.
Icon
Name
Influence

Still Eye of the Dragon
Increases the Luck and Morale of all your units by 1.

Quiet Eye of the Dragon
Increases the Defense, Attack, Power and Knowledge attribute of the hero by 1.

Ring of Vitality
Increases the health pool of all your units by 1.

Ring of Life
Increases the health pool of all your units by 1.

Ring of the Wayfarer
Increases the combat speed of all your units by 1.

Diplomat's Ring
Decreases the costs of surrendering.

Ring of Conjuring
Increases the duration of all your spells by 2 rounds.

Equestrian's Gloves
Increases hero's movement rate over land.

Eversmoking Ring of Sulfur
Generates 1 extra unit of sulfur per day.

Ring of Infinite Gems
Generates 1 extra gem per day.
Icon
Name
Influence

Dragon Wing Tabard
Increases the Power and Knowledge attribute of the hero by 2.
Ambassador's Sash
Decreases the costs of surrendering.

Angel Wings
Allows the hero to fly through terrain obstacles.

Recanter's Cloak
Prevents casting of spells of level 3 and above during combat.

Cape of Conjuring
Increases the duration of all your spells by 3 rounds.

Surcoat of Counterpoise
Gives 10% to magic resistance.

Vampire's Cowl
Increases the effectiveness of the "Necromancy" skill by 15%.

Cape of Velocity
Increases the combat speed of all your units by 2.

Everflowing Crystal Cloak
Generates 1 extra crystal per day.
Icon
Name
Influence

Head of Legion
Increases by 6 the weekly growth of creatures of 1st level, if the artifact is equipped on the hero - affects only the city in which the hero wielding the artifact is.

Legs of Legion
Increases by 5 the weekly growth of creatures of 2nd level, if the artifact is equipped on the hero - affects only the city in which the hero wielding the artifact is.

Loins of Legion
Increases by 4 the weekly growth of creatures of 3rd level, if the artifact is equipped on the hero - affects only the city in which the hero wielding the artifact is.

Torso of Legion
Increases by 3 the weekly growth of creatures of 4th level, if the artifact is equipped on the hero - affects only the city in which the hero wielding the artifact is.

Arms of Legion
Increases by 2 the weekly growth of creatures of 5th level, if the artifact is equipped on the hero - affects only the city in which the hero wielding the artifact is.

Crest of Valor
Increases the Morale of all your units by 1.

Glyph of Gallantry
Increases the Morale of all your units by 1.

Clover of Fortune
Increases the Luck of all your units by 1.

Cards of Prophecy
Increases the Luck of all your units by 1.

Ladybird of Luck
Increases the Luck of all your units by 1.

Spyglass
Increases the hero sight radius by 1 point.

Speculum
Increases the hero sight radius by 1 point.

Shackles of War
Neither you or your opponent may retreat or surrender when equipped.

Order of Might
Increases the morale of all your units by 1. Your units become immune to all mind spells (such as Frenzy, Hypnosis, etc.).

Hourglass of the Evil Hour
Negates all the luck bonuses on the battlefield.

Spirit of Oppression
Negates all the morale bonuses on the battlefield.
Spell Scroll
Adds a spell to the heroes' spellbook, as long as the Spell Scroll is equipped.

Orb of Silt
Increases damage dealt by Earth magic spells by 50%.

Orb of Tempstuous Fire
Increases damage dealt by Fire magic spells by 50%.

Orb of Driving Rain
Increases damage dealt by Water magic spells by 50%.

Orb of the Firmament
Increases damage dealt by Air magic spells by 50%.
Tome of Earth Magic
Adds all Earth magic spells to the heroes' spellbook.
Tome of Fire Magic
Adds all Fire magic spells to the heroes' spellbook.
Tome of Water Magic
Adds all Water magic spells to the heroes' spellbook.
Tome of Air Magic
Adds all Air magic spells to the heroes' spellbook.

Orb of Vulnerability
Negates all natural magic resistance of all units on the battlefield.

Orb of Inhibition
Prevents all spellcasting on the battlefield.

Sphere of Permanence
Protects your units against the "Dispel" spell.

Charm of Mana
Increases the hero's daily mana regeneration by 1 point.

Talisman of Mana
Increases the hero's daily mana regeneration by 2 points.

Mystic Orb of Mana
Increases the hero's daily mana regeneration by 3 points.

Bird of Perception
Increases the effectiveness of the "Eagle Eye" skill by 5%.

Stonic Watchman
Increases the effectiveness of the "Eagle Eye" skill by 10%.

Emblem of Cognizance
Increases the effectiveness of the "Eagle Eye" skill by 15%.

Bow of Elven Cherrywood
Increases the effectiveness of the "Archery" skill by 5%.

Bowstring of the Unicorn's Mane
Increases the effectiveness of the "Archery" skill by 10%.

Angel Feather Arrows
Increases the effectiveness of the "Archery" skill by 15%.

Golden Bow
Your troops can shoot at any distance and through any obstacle without the penalty.

Endless Purse of Gold
Generates 500 extra gold per day.

Endless Bag of Gold
Generates 750 extra gold per day.

Endless Sack of Gold
Generates 1000 extra gold per day.

Everpouring Vidal of Mercury
Generates 1 extra mercury per day.

Inexhaustable Cart of Wood
Generates 1 extra piece of wood per day.
Inexhaustable Cart of Ore
Generates 1 extra piece of ore per day.
Description: Use a cheat code.
Description: Complete the "Long Live the Queen" campaign.
Description: Complete the "Dungeons and Devils " campaign.
Description: Complete the "Liberation" campaign.
Description: Complete the "Spoils of War" campaign on Tatalia's side.
Description: Complete the "Spoils of War" campaign on Krewlod's Side.
Description: Complete the "Long Live the King" campaign.
Description: Complete the "Song of the Father" campaign.
Description: Complete the "Seeds of Discontent" campaign.
Description: Complete 10 maps on Normal Difficulty without cheating.
Description: Complete 10 maps on Hard Difficulty without cheating.
Description: Complete 10 maps on Expert Difficulty without cheating.
Description: Complete 10 maps on Impossible Difficulty without cheating.
Heroes of Might & Magic III: HD Edition has pleasing to the eye, definitely sharpened, compared to the original, graphics, which, unfortunately, comes with a significant increase to the hardware requirements. It does not, however, mean that you will need a PC capable of running Crysis 3 on in full HD - this guide was prepared on a machine equipped with AMD Phenom II X4 B50 3.6GHz processor, 16GB of RAM and a GeForce GTX 650 Ti graphics card. This configuration exceeds the recommended system requirements for the game, making the game work flawlessly, regardless of the selected resolution. The game does not require a constant Internet connection, but it is required in order to play multiplayer games in Online mode.
Singleplayer: Yes
Offline co-op (split screen/hot seat): Yes
Co-op over the Internet: Yes
Multiplayer: Yes, up to 8 players
The guide has been written up PC version of the game. The PC specifications are as follow:
This configuration allowed the game to work flawlessly, regardless of the selected screen resolution.


 Heroes of Might and Magic V Game Guide & Walkthrough
 Hearthstone: Curse of Naxxramas Game Guide & Walkthrough
 Harry Potter and the Order of the Phoenix Game Guide & WalkthroughHeroes of Might & Magic III: HD Edition Game Guide & Walkthrough
 Halo 3 Game Guide & Walkthrough