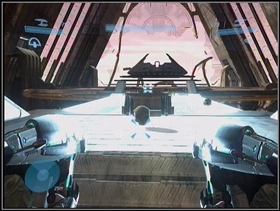
"Let's finish this war" Master Chief once said and now he gets to keep his promise. So feel free to join us and let's fight the enemy together. In this guide you can find not only a detailed walkthrough but also a complete list of weapons, vehicles, usable items, achievements and step-by-step instructions on how to get all skulls in the game. Hopefully, prepared that way you can earn as many points as possible to represent proudly the Chief of all Chiefs.
Maciej "Shinobix" Kurowiak
MC6Pistol
Effectiveness: Low.
Assault Rifle
Effectiveness: Medium. Very common and popular weapon. Finding ammo for it should not give you any difficulties.
Battle Rifle
Effectiveness: High. This gun is one of the most effective in the whole game and it has more firepower than in Halo 2. Use zoom and aim at Brutes' head.
Sub Machine Gun (SMG)
Effectiveness: Medium. SMG ammo is relatively easy to find (especially in levels where you are fighting the Flood). It's not very accurate but can be useful against Drones.
Shotgun
Effectiveness: Medium, but only at short range. It's not as commonly used as in Halo 2, since many other weapons you have at your disposals are more effective against the Flood.
Sniper Rifle
Effectiveness: Very high, but you don't get too many occasions to find the weapon.
Rocket Launcher
Effectiveness: High, but only at a distance. Used mostly against vehicles or large enemy groups. Rare weapon.
Spartan Laser
Effectiveness: Very rare weapon used mostly against vehicles.
Grenades
Effectiveness: Very high. There are three types: common frag grenades; plasma grenades and incendiary grenades (Molotov Cocktail type).
Flamethrower
Effectiveness: Medium. Very rare weapon. It could be useful against the Flood but it has very short range.
Machine gun/Plasma turret
Effectiveness: Very high. In Halo 3 you can take turrets with you, so do it when you get the chance.
Plasma Pistol
Effectiveness: Low.
Plasma Rifle
Effectiveness: High, as in the previous Halo titles. This time though you can use it against the Flood.
Needler
Effectiveness: Low. It was useful in past Halos but now it cannot stay on par with other, more effective weapons.
Fuel Rod Gun
Effectiveness: High. This is an equivalent of a Rocket Launcher, but it has more firepower. It's good for destroying almost everything except fast vehicles (like Ghost).
Brute Shot
Effectiveness: High, but you can do well without it. Other weapons are also very effective in hand-to-hand combat, so Brute Shot blade isn't your best option anymore.
Carbine
Effectiveness: Very high. This weapon has changed the same way Battle Rifle has . Now it's one of the best weapons in the whole game. The worst enemy of Brutes' head.
Energy Sword
Effectiveness: High, but it's not as necessary in campaign, as in past Halo games.
Sentinel Beam
Effectiveness: Not a common weapon and less useful than in the past.
Spiker
Effectiveness: High. When you're out of Battle Rifle ammo, get a Spiker and it will do nicely.
Mauler
Effectiveness: Medium. Very interesting weapon, powerful but only at short range.
Gravity Hammer
Effectiveness: Medium. Special weapon used only by Brute leaders. It's a melee weapon so it's relatively useless in campaign.
Beam Rifle
Effectiveness: Very high. Alien equivalent of a sniper rifle.
Grav Lift
Use: A platform which can lift you high in the air;
Deployable Cover
Use: Deployable shield.
Cloaking
Use: Temporary invisibility;
Bubble Shield
Use: Force field.
Regenerator
Use: Restores shield as long as you stay in its radius
Auto-Turret
Use: It's an auto-turret. No big surprise there;
Invincibility
Use: Temporary Invincibility;
Trip Mine
Use: Simple, it's a booby trap;
Flare
Use: Blinds everyone in radius;
Power Drain
Use: Absorbs energy from foes nearby and disables vehicles;
Radar Jammer
Use: Enemy radar goes mad.
Ghost
It's a small and fast vehicle, very common in the Covenant forces. It's equipped with two Plasma Rifles and a booster module . In this part of the Halo series Ghost sadly isn't as useful as it once was. Mostly because of the fact you can't fly with it everywhere you might want to. So if you try to get through a narrow doorway, some secret force pushes you away.

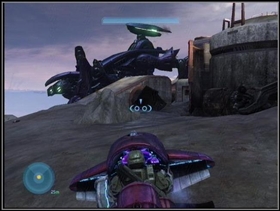
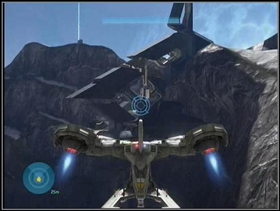
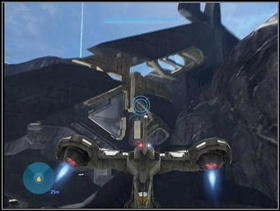
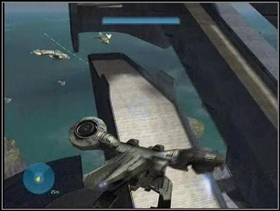
Banshee
Flying machine of Covenant forces. It has the two Plasma Cannons, Fuel Rod Gun and a booster module. In Halo 3 campaign you probably won't use it too much, as you can get the hornet instead.
Prowler
This is the newest version of former Spectre. It's better armed and more resistant. In campaign it's not too common and it's usability leaves a little to be desired.
Wraith
A tank of Covenant forces armed with mortar bombs. It also has Mortar Cannon (or anti-AA Gun), double Plasma Cannons and ability to boost. It's still as slow as you might remember but more accurate and deadly. There are two versions of Wraiths - mortar and anti-aircraft. The second one is almost harmless to most foes, because it's cannon targets the air.
Warthog
Everybody knows how Warthog looks and works, because it's the trademark of the series. You might encounter three versions of this vehicle: standard rifle, gauss gun (especially dangerous against vehicles) and transporter ( transports soldiers, no surprise there).
Scorpion Tank
Infantry tank capable of dealing massive damage. It's big, tough, slow and extremely deadly. Try it on everything except Scarabs.
Mongoose
It's built for speed and speed only. Good for "tactical retreat" but it's rather useless in a fight.
Hornet
Flying machine of marine forces. It's slow but useful against ground targets.
Chopper
Alien version of a motorbike. It's fast but hard to maneuver. Equipped with a front cannon.
Grunts
Cannon fodder of the Covenant forces - always sent to the frontline. Usually encountered in large groups, they can also ride Ghosts and use turrets.
Jackals
The second line of the Covenant forces and their main soldiers. Jackals can be equipped with shields and Beam Rifles or Carbines.

Drones
If you hear a buzzing sound it's a sure sign that Drones are near. They're not very dangerous (albeit still tougher than in Halo one) and you can take them down with use of SMG.
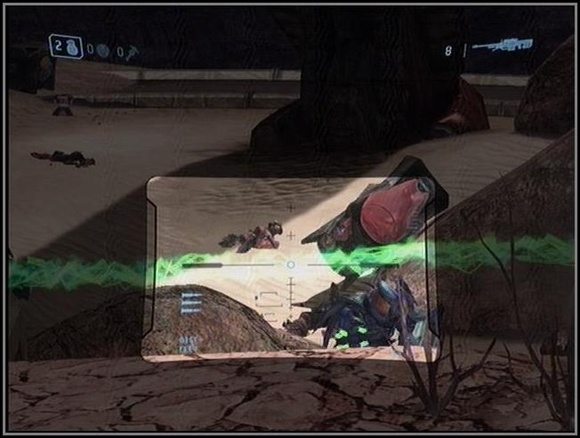
Hunters
The biggest and most dangerous soldiers of Covenant forces. They resemble mechs and are armed with a lethal weapon - Fuel Rod Gun, which emits a green ray. Try to shoot them with Sniper Rifle targeting red/orange points on their back. You can also use grenades but the first method is much more effective.

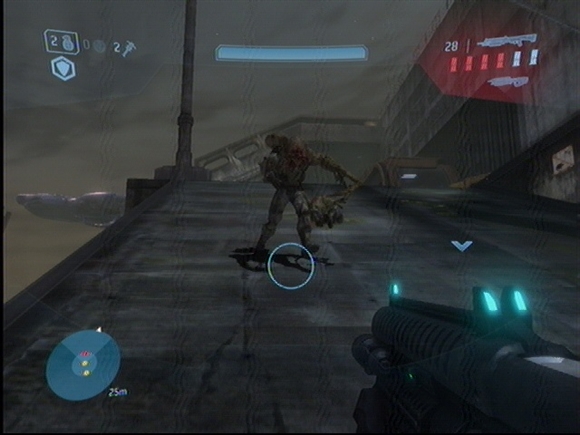
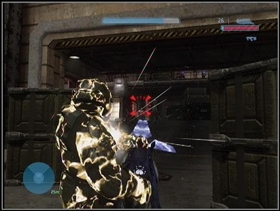
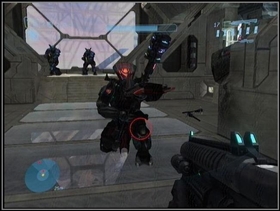
Brutes
Like Elites once, the Brutes are your main enemies in Halo 3. There are many types of Brutes - the weaker ones lead Grunts to battle. Their leaders wield Gravity Hammers and can use temporary invincibility.
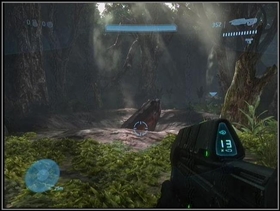
As in previous installments of the series, Master Chief will have to face not only the Convenant Forces but also The Flood.
Spores
Those little monsters with tentacles are not dangerous when there are few of them. But their strength lies in numbers and many of them can kill you instantly - especially when your shield is down.
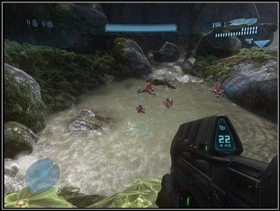
Warriors and changelings
They can have various weapons but aren't as tough as in previous Halos. Changelings are new types of the Flood forces, you can meet them in three forms: spiders are the weakest of them, but can change into a living needler, which, as its name implies, can shoot with needles. The biggest and most dangerous of them are large golems.
Iron
10 p.
a skull;
Black Eye
10 p.
a skull;
Tough Luck
10 p.
a skull;
Catch
10 p.
a skull;
Fog
10 p.
a skull;
Famine
10 p.
a skull;
Thunderstorm
10 p.
a skull;
Tilt
10 p.
a skull;
Campaign Complete: Normal
125 p.
finish the campaign on the normal difficulty;
Campaign Complete: Heroic
125 p.
finish the campaign on the heroic difficulty;
Campaign Complete: Legendary
125 p.
finish the campaign on the legendary difficulty;
Landfall
20 p.
finish 1st level on the difficulty higher than easy;
Holdout
20 p.
finish 2nd level on the difficulty higher than easy;
The Road
20 p.
finish 3rd level on the difficulty higher than easy;
Assault
30 p.
finish 4th level on the difficulty higher than easy;
Cleansing
30 p.
finish 5th level on the difficulty higher than easy;
Refuge
30 p.
finish 6th level on the difficulty higher than easy;
Last Stand
40 p.
finish 7th level on the difficulty higher than easy;
The Key
40 p.
finish 8th level on the difficulty higher than easy;
Return
50 p.
finish 8th level on the difficulty higher than easy;
Graduate
10 p.
earn 5 exp or finish 10 games to complete training in online mode;
Guerilla
10 p.
earn 15000 exp in 1st level in Campaign Scoring mode;
Demon
10 p.
earn 15000 exp in 2nd level in Campaign Scoring mode;
Cavalier
10 p.
earn 15000 exp in 3rd level in Campaign Scoring mode;
Askar
10 p.
earn 15000 exp in 4th level in Campaign Scoring mode;
Exterminator
10 p.
earn 15000 exp in 5th level in Campaign Scoring mode;
Ranger
10 p.
earn 15000 exp in 6th level in Campaign Scoring mode;
Vanguard
10 p.
earn 15000 exp in 7th level in Campaign Scoring mode;
Orpheus
10 p.
earn 15000 exp in 8th level in Campaign Scoring mode;
Reclaimer
10 p.
earn 15000 exp in 9th level in Campaign Scoring mode;
UNSC Spartan
15 p.
advance to sergeant during online game;
Spartan Officer
25 p.
advance to officer during online game;
Mongoose Mowdown
5 p.
crush your foe under the wheels of Mongoose during online game;
Up Close and Personal
5 p.
destroy 5 enemies in hand-to-hand combat;
Fear the Pink Mist
5 p.
destroy 5 enemies using Needler;
Headshot Honcho
5 p.
destroy 5 enemies with headshots;
Used Car Salesman
5 p.
destroy a vehicle with 3 enemies onboard;
Two for One
5 p.
double kill using Spartan Laser;
Too Close To The Sun
5 p.
destroy a Banshee using Spartan Laser;
Triple Kill
5 p.
destroy 3 enemies in 4 seconds;
Overkill
5 p.
as above but 4 enemies;
We're In For Some Chop
5 p.
destroy a vehicle using a mine;
Steppin Razor
5 p.
triple kill using a sword;
Killing Frenzy
5 p.
destroy 10 enemies in a row without dying;
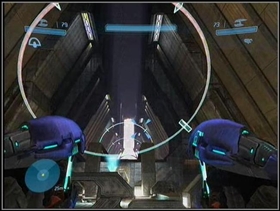
Walk It Off
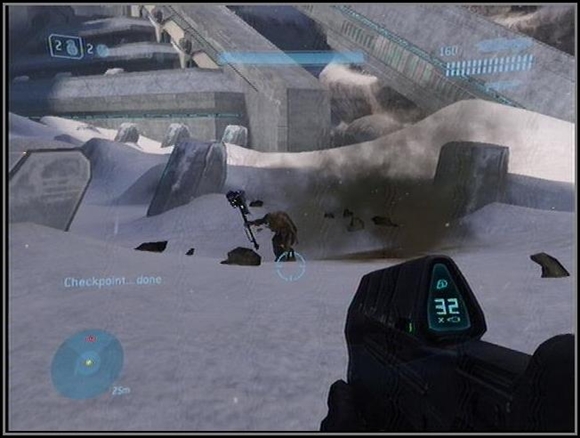
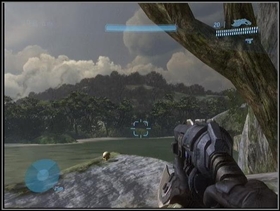
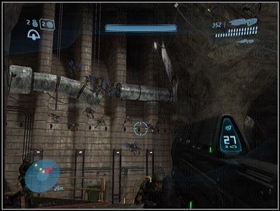
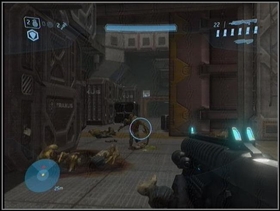
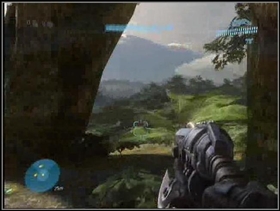
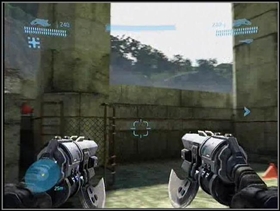
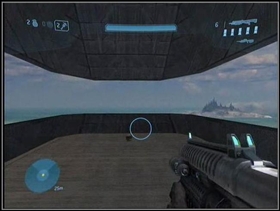
After regaining your consciousness, go through the jungle with the rest of team. This is a training mission, but you shouldn't forget about few rules - do not underestimate Grunts, shoot at Brutes first and don't waste your ammo. Let's start.
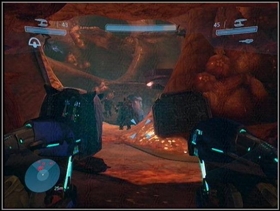
You will need some warm up. When you meet Grunts and a Brute kill the monkey instantly and then exterminate the rest of dwarfs. Destroy reinforcements staying on the top of the stone wall. Eliminate enemies in the usual way - first Brutes, then Grunts. Don't go any further, there is an important treasure near. Your first skull in the collection.
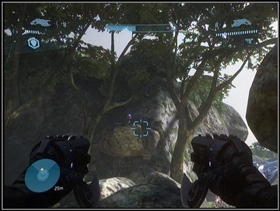
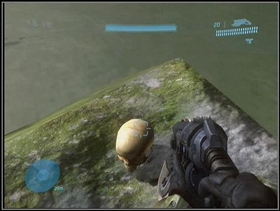
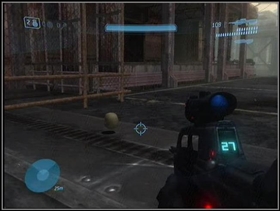
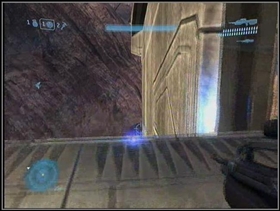
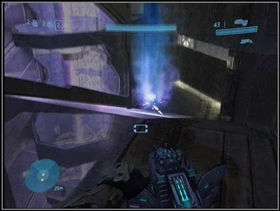
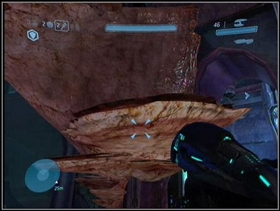
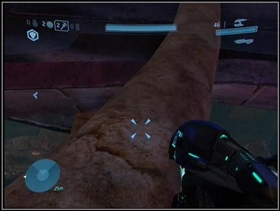
Blind Skull
You'll find it on the rock near the lake where you've seen the Phantom. Go right from that place and then walk straight to the edge of the cliff. You'll see a rock with a skull on it.
Effect: HUD disappears.
Beyond the cave you'll notice a group of sleeping Grunts. Go down and kill them honorably.... and don't wake them up.
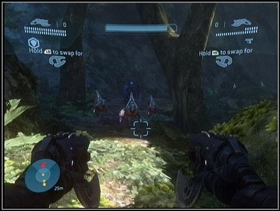
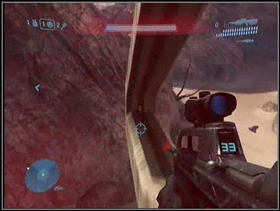
The river is not too far. Next group of aliens means more ammo in your clip. If you can't find enough bullets for your Spiker, get a gun from one of the marines. On the beach you'll be attacked by a group of enemies. An accident makes the evacuation a disaster.
Find Johnson's crashed Pelican
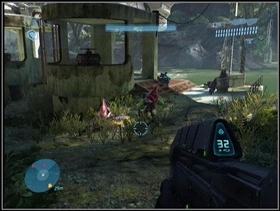
Well, the Pelican crashed and of course it's you, who needs to find it. Enter the buildings, killing more enemies on your way. Be careful around Brutes with Brute Shots. In the jungle you'll be attacked by Jackals, clear your way with accurate shots.
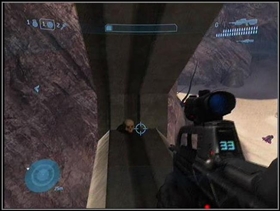
Find Johnson before he's captured
The party's over and that big group of Grunts is fairly dangerous. Try finding a Carbine (finding Spiker ammo might be difficult), then shoot all the Jackals aiming at you from the rocks. When they're down, finish the Grunts.
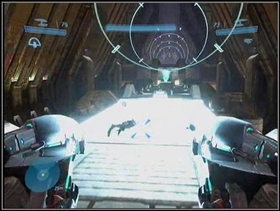
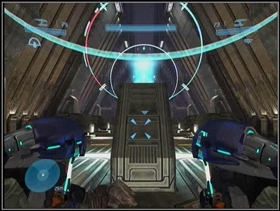
Quid Pro Quo
Rescue Johnson and his squad
Take the Sniper Rifle and shoot as much enemies as possible. Then go down and take care of the Grunts. Probably you'll run out of ammo, so don't be shy and change your weapon anytime. On the bridge take care of those Brutes and Jackals (if you don't want to fight, then you can skip the fight by taking the path beneath the bridge). On the other side you'll find a room filled with prisoners. Nothing left to do but to free them.
Stay alive! Pelican inbound!
Fight isn't over but what you should be interested most is the next skull. Clear your surroundings of enemies and you can reach the next achievement.
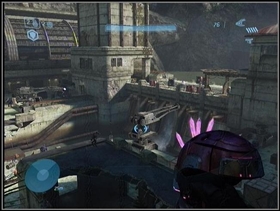
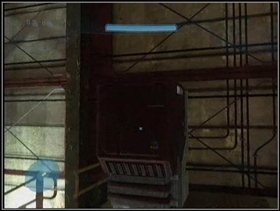
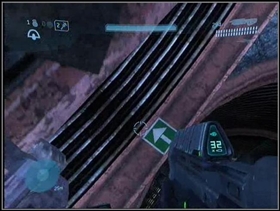
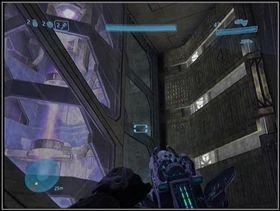
Iron Skull
To get to it, you need to leave the room where you freed those marines and turn left. The go straight ahead, towards the big bridge and take the steps to reach those pipes you can see stretching along hangar windows.
Effect: If you die in solo mode, you respawn at the entrance to a given area, and not on a checkpoint. In co-op mode, if someone dies, all players return to the nearest checkpoint.
Know your role...
Secure perimeter defences
You can survive without legs and arms, but without a skull? Unacceptable! Let's find the Black Eye Skull then.
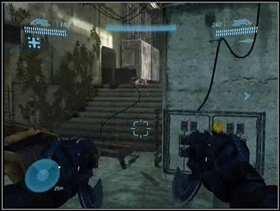
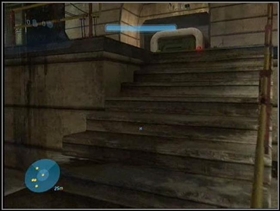
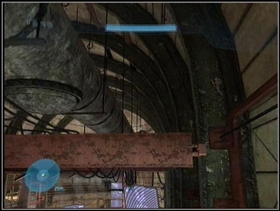
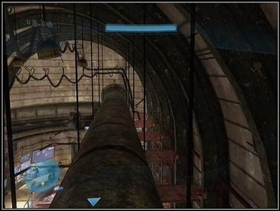
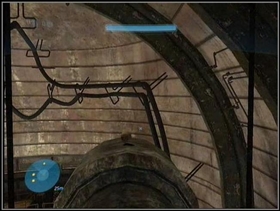
Black Eye Skull
Rather easy to find. Go alongside the hangar and upstairs. You should see a box on the left. Jump on it, then turn around to see monitors on the far end of the room. Do you see a pipe? Jump on it and you'll find a Black Eye Skull when you reach the end of that pipe.
Effect: Your shield doesn't regenerate until you hit an enemy in hand-to-hand combat.

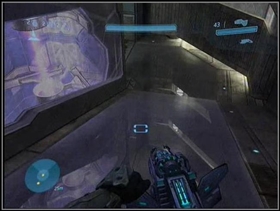
Now go downstairs. Take a weapon and follow the soldiers. When you hear an explosion it's time to fight.
Neutralize hostiles in the hangar
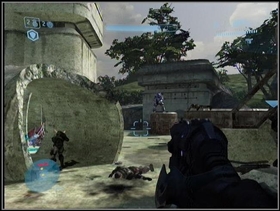
Walk the corridors until you reach an exploding Warthog. You will have to fight Grunts and some Jackals. Destroy them one by one, and watch those grenades. At that moment, changing your weapon to something other than human rifle is not recommended, since it's easy to find normal ammo here. Turn into corridors and reach the hangar.

You need to fight off a few waves of enemies. Take down all the Jackals first, then "borrow" the Turret and wait for the main force. When Phantom appears, make good use of your Turret and your mission will be complete.
Get back to the ops-center
Now you need to go back to the start. On your way you will meet some old friends - Drones. Shoot them with SMG.
Gift with purchase
Rescue marines in the barracks
In the control room go upstairs. You will see a lot of Brutes swarming the room. It's not going to be an easy fight so be careful. A good start would be throwing a few grenades at them, and then killing them off one by one. Remember to aim at the head. When the fight is over jump into the hole.

You'll meet a few Drones in the corridor - DO NOT JUMP INTO THE HOLE! It's time to get your next skull.
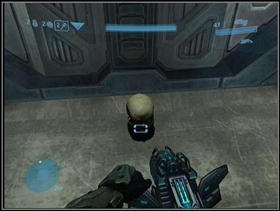
Grunt Birthday Party Skull
You can find this amusing birthday party skull beneath a platform you are standing on. Try to stand on the edge on the hole. Then fall on the protruding platform beneath. Now go back to take the skull.
Effect: A head shot will result in the unlucky Grunt's head exploding into birthday confetti.
Despite the support of your old friend the fight with lurking Brutes won't be easy. Try not go too fast forward, kill them carefully one after another, collect grenades and use them when you can. Remember, you have a very powerful ally who cannot die - let him do part of the work for you.
Evac via the landing pad
Go to the elevator and move up after all marines get onboard. Just after the short ride, you'll be attacked by a large group of Brutes. Some of them have jetpacks but they're not as dangerous as flying Elites once were.
Last One Out, Get the Lights
Return to the ops-center, arm the bomb
After getting the new orders follow the arrow. Borrow a plasma turret from Grunts and take them down. You can exchange that turret for a new one to stay with a full clip. The Bomb is guarded by Brutes but with that weapon you should be able to clear your way in less than a minute.
Escape - Find the elevator in the hangar
The Elevator is in the hangar, so you need to go there now. Go downstairs, when you reach the hangar, you can simply enter the elevator and avoid fighting with Jackals and Grunts.
Lead marines away from the base
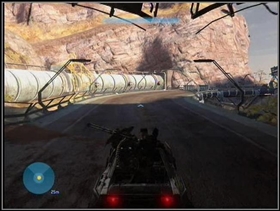
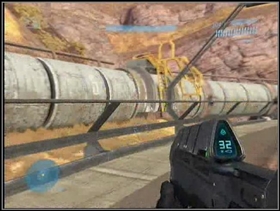
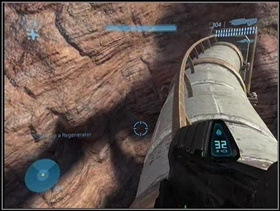
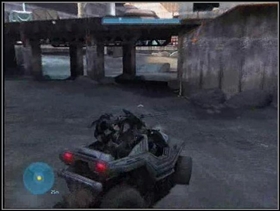
Time to leave the base and get some fresh air. Before you do that, hop into the Warthog in the garage. Near the exit you'll meet a group of hitchhikers - some Grunts and Jackals, just waiting to be crushed under the wheels. The road is straight so you cannot get lost. Eventually you will find your way blocked by the force filed. You'll have to cross the barrier on foot, and destroy the generator before you can get into the Warthog again. When you leave the tunnel take a short break. It's time to get your next skull.
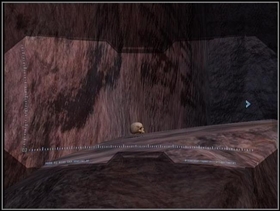
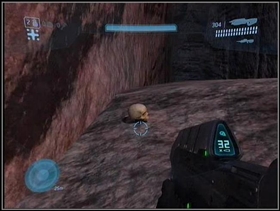
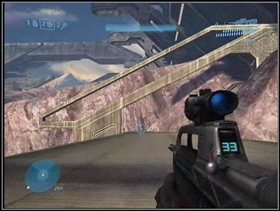
Tough Luck Skull
Do you see a big pipe along the left side of the road? Take the second ladder, on the top turn left. Jump over the fence, and turn right. Look down and you should see a narrow path on the right side of the cliff. Drop on it, move forward and turn right. You should see a skull lying on the rock.
Effect: Your enemies avoid your grenades and missiles more effectively.
The Broken Path
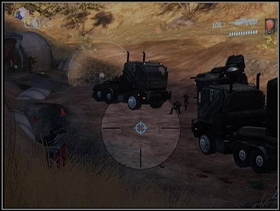
Get to the town of Voi
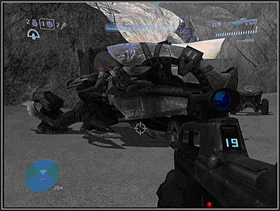
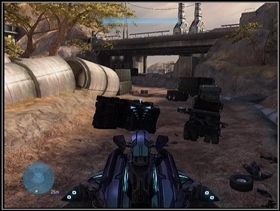
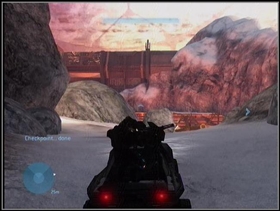
This place is going to be a battlefield so stay on the top of the hill and take down as much Brutes as possible using your Battle Rifle. When the Wraith arrives, move towards it as fast as possible and try to take it over. It won't be easy but it's possible (use the R2 button when you're near the Wraith, then tap B). Having that Wraith at your disposal will make your battle much easier. If, by any chance, you destroy the Wraith, there's still hope: you can always take the Warthog.
After leaving the cave you'll get attacked by Choppers. Don't take any of them, because you'll just get rammed by the others. Try to destroy them one after another instead. There are two Wraiths in the vicinity, take them out using... Wraith or Chopper (only when there are no other enemy Choppers around).
There is one last barricade on your way. If you have a Wraith, it's a piece of cake. If not, the battle may be a little harder. Firstly, take down the turret, secondly destroy Brutes. Grenades, headshots and a dash of luck constitute a win. When the fight is over destroy the generator.

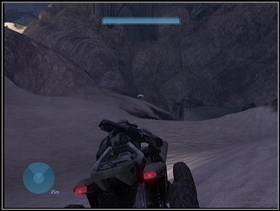
On this level you can find many Ghosts. There is no faster vehicle in this game so get it asap.
Destroy first anti-air Wraith
Your first mission is to open the gates to make way for the Warthog and the rest of marines. Open all gates you can find but when you reach the battlefield do not attack yet. It's time for the next skull.
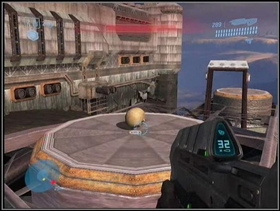
Catch Skull
This skull is placed on the silo on the right side of the battlefield. To reach it get the Warthog and ride towards the silo. You'll see an elevated spot on the left side of the silo and that's the place to crash your Warthog in. Jump on the hood and then jump on top of the silo. The skull is yours.
Effect: All enemies and allies are equipped with more grenades and throw them more often.
There are two Ghosts in the hangar. Get one of them and clear the field. Take down the Wraith destroying the engine on its back.
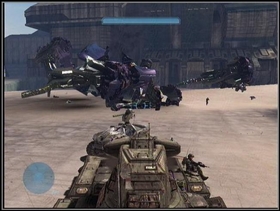
Destroy all other Wraiths
Move into the building but don't leave your Ghost yet. Get inside crushing any opposition. After a while you'll be on the next battlefield. Destroy Wraiths but be careful - Grunts in vehicles have tendencies towards going kamikaze, so destroy them before they get the chance to.
Judgement
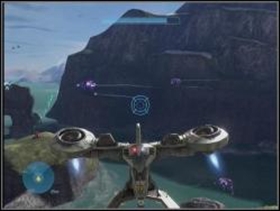
Kill the Scarab Tank
After a short while another of your old friends will appear. The Scarab shouldn't be hard to destroy. Shoot its legs first. After it goes into a crouch enter the vehicle, and destroy the core. Run away, it's going to explode.
Neutralize the anti-air cannon!
Follow the marines (unfortunately, you need to leave the Ghost). Before you reach the cannon, you have to go through the structure. Take a Battle Rifle with you. There are many Brutes inside, but they're walking in groups so you can use grenades to get rid of them. You can find some ammo near the exit. After a short while the next, powerful enemy appears, Hunters. Hide yourself and target their weak points (orange places on their back). All it takes are some well-aimed shots and they're down. Near the exit you'll meet some Brutes but it's nothing compared to the cannon crew. It's a good idea to take the turret first if you want to capture the hill and destroy the cannon. This way it will be much easier to destroy many Grunts and even the most dangerous Brutes. The cannon's weak point is on the bottom.
It followed me home
Find the crashed Flood ship
As you enter the area try to get the next skull.
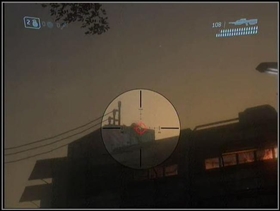
Fog Skull
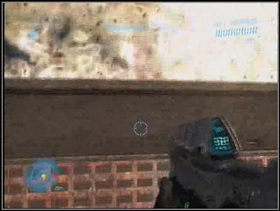
Switch your weapon to Battle Rifle and (using zoom) check the roof of the building on the right. When you see the alien jumping from the roof, shoot him. He'll drop the skull, which you can pick up from the ground.
Effect: motion detector disabled.
Some well-known guests appeared at the party. As usual the most useful weapon here is a sword or a shotgun. Go along the street till you reach the first enemy group. After some quick fun with soldiers they turn on you. You still don't have the best weapon for these situations at your disposal, so use whatever you have to survive (melee included).
Beyond the doorway to the building a true apocalypse awaits. Kill as much enemies as possible then find the big box with a pulsing led. Get the shotgun and that's another big step towards success.
At the next gateway the fight should be much easier, and shotgun can be really helpful. Go towards the large gate, and walk above it using the platform. Drop through the hole in the floor. Despite the support a fierce battle awaits you.
Shadow of Intent
The road is rather long and you will get attacked all the time. Get a sword when you have a chance to and it will help you tremendously. You can also take the turret for a short time to repel the attack. Just one more step to the ship. You'll meet some changelings on your way but with some luck you should eventually reach the hatch in a relatively short time.
Just one more step to the ship. You'll meet some changelings on your way but with some luck you should eventually reach the hatch in a relatively short time.
Infinite devil machine
Search the ship for Cortana
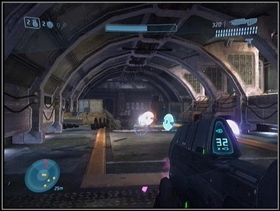
This place is almost absolutely safe. Just don't shoot at the walls (and don't free those spores) and everything will be alright. In short time you'll reach your goal.
Installation 00
Eliminate hostile anti-air units
You're starting with a sniper rifle. It should be very useful here which you can find on your own in a short while - just don't miss terminals and the skull in this level. Follow the marines until you see a structure guarded by Grunts and Brutes. Kill Brutes with some well-aimed headshots. Grunts and Jackals are not worthy of your precious Sniper Rifle ammo so use Battle Rifle instead.

When you reach the next camp, killing everything around won't be as easy. After you finish off the Grunts, reinforcements will arrive in the form of two Hunters. If you're not ready to fight them, just avoid the battle altogether. Remember not to miss the terminal on the left side of the corridor.

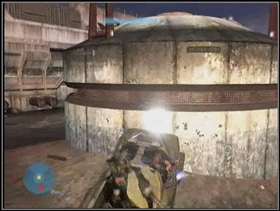
Destroy the Brutes and their reinforcements. You can take the Prowler but it's pretty much useless here. A better choice is to go through the desert and take over a Ghost when you see one. After passing the first enemy camp you will approach a large building. The next skull is waiting for you there.
Famine Skull
Only one problem here - you can't reach it in an ordinary way. The only way to get it is to use a grenade to extend your jump distance. Throw the grenade on the platform edge and quickly jump towards the skull - the explosion should extend your jump and make it long enough to reach the skull.
Effect: Any weapon found at the dead enemy contains much less ammo.
Beyond the cave a true battle will start. Take down the Wraith, then the turret and after that Ghosts. Anti-AA Wraiths are almost defenseless so destroying them shouldn't constitute much of a problem.
Lead friendly armor through the wall
Take the Scorpion and follow your allies. Destroy everything on your way - mostly Wraiths and one Phantom. At the entrance to the building you will need to leave the tank. When you reach the place with a button, push it and a bridge will appear. There is also a terminal behind you. Go to the exit.
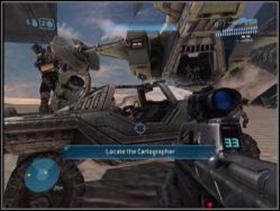
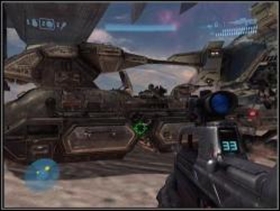
Locate the Cartographer
There is no way to continue your mission with Scarab in the yard. You can take this mechanical monster down using the same tactic as always - destroying the core on its back. Before you enter the building - GET THE GRAV LIFT (it's in the structure in the middle of the field , near Scarab). You're going to need it.
Real men don't read maps
Kill sleeping Grunts and go downstairs. In the room under the stairs, there is a terminal. In the next room, near the stairs the next skull awaits.
Cowbell Skull
To reach it you need to use Grav Lift - put it somewhere in the middle of the "stairway" then jump from the top facing the platforms on the left. You will need few tries to succeed.
Effect: grenades and missile weapons are more effective.
Head downstairs for Evac
There will be a fight downstairs, but it is a piece of cake compared to the battle at the end of this level. You will get into a fight with a dozen of Brutes. First throw grenades at them, then try to engage them one after another. There is a Carbine nearby, and it might come in handy. Destroy Jackals at the end.
Deactivate first barrier tower
From the start of this level, you're wielding a very powerful weapon - Spartan Laser . It can destroy vehicles with ease but its ammo is limited so use it wisely (like when a Wraith appears). In this level you should find two skulls and three terminals. Get to work.
First group of enemies should be piece of cake. Just watch the Wraith and be careful around Brute with Fuel Rod Gun and auto-turrets.
After the fight take the Warthog and go to the mainland. After a short drive Ghosts will appear. Destroy them (you can also take one - it can be useful but it's not necessary). When you approach the Wraith destroy it with laser. The turret should be next and when Choppers come let your people do some work. When the fight is over go inside the building and take down the front guard using a vehicle. Sadly you will have to leave it before you get inside.
In the first room a big group of Brutes, Jackals and Grunts awaits for merciless extermination. You know what to do. Afterwards go upstairs. There is a terminal near so use it.
On the top a big tough group of Brutes awaits. The leader with a hammer should be taken down first. After the fight is over, activate the panel and leave outside.
Deactivate final tower barrier
Go back to the beach and get the Hornet.
If you want it done right
Hornet isn't all that maneuverable but taking down all the Banshees around won't be a hard task to complete. Be accurate and don't let them shoot you from behind. There is a skull in the building nearby.
Thunderstorm Skull
Getting this skull isn't a hard task. Fly your Hornet into the structure, land on the middle bow-shaped part and simply take the skull from the ground. In this structure (but inside the building) you can also find the next terminal.
Effect: all enemies are tougher.
After approaching the next tower, destroy as much enemies as possible from the air. Inside a very unpleasant surprise awaits you. Instead of Grunts, two big and dangerous Hunters reside here. Try to get them using Carbine or Battle Rifle and targeting orange spots on their back. Near the elevator you should find the next terminal. Same as before, go upstairs, destroy guards and push the button. When enemies appear, you can use Brute Leader's weapon. Go outside and get the Scorpion.
Journey's End
Breach the Citadel
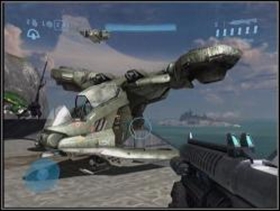
Drive along the way destroying everything you can see. Then switch over to Hornet ( as a pilot). Now you need to destroy not one but two Scarabs. It's not so hard to do as it might seem at first. Destroy all the Banshees around, then Ghosts and get the crew of the Scarabs. At the end shoot at Scarab cores. After the battle get with the Arbiter into the Citadel.
Stop Truth from firing the rings
Follow the Arbiter inside. Fight until you reach the bridge. After finishing off the leader, destroy the rest of the enemies, but don't leave yet.
IWHBYD Skull
This skull appears only when you jump through the rings in proper order. The first one is the closest to the elevator, the seventh is the closest to the light bridge. Jump at the following order: 4,6,5,4,5,3,4. After that the ring skull should appear near the bridge.
Effect: unlocks some dialogues in Campaign Mode.
Escape the Flood!
Leave this place the same way you came here, then jump into the hole.
Find Cortana
The most important rule in this level is to remember that you shouldn't leave enemies behind. Proceed only after the room you're in room is clean. Destroy spores using, for example, assault rifle. Going through the corridors find the Pelican, and remember it's location after all, you'll need to escape this place. You should reach a big cave with mushroom-like rocks on the walls. Stay here for a while, it's time for the next skull.
Tilt Skull
Find the red construction with some kind of open hatch in the middle. Jump on it, then jump left-forward. Turn left and jump on the higher level - then turn behind and jump to the highest level. Pass the narrow bridge and the skull is yours.
Effect: Enemies are less vulnerable to given kind of ammo.
Farther ahead you can find a flamethrower. Leave it though - it's not useful enough against shooting changelings. In the next room move up until you reach the door.
Now you're in the core room of the ship. Shoot to everything that moves and have legs. Destroy all the enemies, then pass the door and destroy the blue sphere.
Nor Hell a Fury
Destroy the reactor/Escape High Charity
It's time for revenge. Leave this room and enter the core room. Kill all enemies, and destroy three columns one after another. After it's done you need to evacuate. Get to the Pelican as fast as possible, but don't do it in blind panic. Kill enemies you meet on your way and don't let them surround you.
Find the Control Room
Saving the world, humanity and stuff like that can be left for later. The most important thing now is to find the last skull.
Mythic Skull
This skull is the easiest to find. Just turn left from the main road and simply pick it up from the snow. The next terminal is nearby - jump on the metal construction and turn right.
Effect: Makes the difficulty one level harder.
Below you'll get attacked by infected aliens. There are a lot of them so destroy them carefully and don't try anything risky. Try to stay close to the Arbiter - he's a powerful ally and cannot die.
Kill the Monitor and activate Halo
The Monitor is easy to destroy. Shoot at him using any weapon you have. After a while get the laser from the floor, and shoot a few times.... It's over.
Get to the Frigate
Run to the exit. Beyond the doorway, turn right and go to the next door. You'll get attacked by infected aliens - don't run into enemies blindly - try to destroy them to avoid problems later. You'll reach the Warthog eventually, and the main part of the escape starts there. It depends entirely on the choices you make. Just be ready for many, many deaths and restarts. Congratulations, you've just finished the fight.
Level: Sierra 117
You'll find it on the rock near the lake where you've seen the Phantom. Go right from that place and then walk straight to the edge of the cliff. You'll see a rock with a skull on it.
Effect: HUD disappears.


Level: Sierra 117
To get to it, you need to leave the room where you freed those marines and turn left. The go straight ahead, towards the big bridge and take the steps to reach those pipes you can see stretching along hangar windows.
Effect: If you die in solo mode, you respawn at the entrance to a given area, and not on a checkpoint. In co-op mode, if someone dies, all players return to the nearest checkpoint.
Level: Crow's Nest
Rather easy to find. Go alongside the hangar and upstairs. You should see a box on the left. Jump on it, then turn around to see monitors on the far end of the room. Do you see a pipe? Jump on it and you'll find a Black Eye Skull when you reach the end of that pipe.
Effect: Your shield doesn't regenerate until you hit an enemy in hand-to-hand combat.
Level: Crow's Nest
You can find this amusing birthday party skull beneath a platform you are standing on. Try to stand on the edge on the hole. Then fall on the protruding platform beneath. Now go back to take the skull.
Effect: A head shot will result in the unlucky Grunt's head exploding into birthday confetti.

Level: Tsavo Highway
Do you see a big pipe along the left side of the road? Take the second ladder, on the top turn left. Jump over the fence, and turn right. Look down and you should see a narrow path on the right side of the cliff. Drop on it, move forward and turn right. You should see a skull lying on the rock.
Effect: Your enemies avoid your grenades and missiles more effectively.

Level: The Storm
This skull is placed on the silo on the right side of the battlefield. To reach it get the Warthog and ride towards the silo. You'll see an elevated spot on the left side of the silo and that's the place to crash your Warthog in. Jump on the hood and then jump on top of the silo. The skull is yours.
Effect: All enemies and allies are equipped with more grenades and throw them more often.

Level: Floodgate
Switch your weapon to Battle Rifle and (using zoom) check the roof of the building on the right. When you see the alien jumping from the roof, shoot him. He'll drop the skull, which you can pick up from the ground.
Effect: motion detector disabled.

Level: The Ark
Only one problem here - you can't reach it in an ordinary way. The only way to get it is to use a grenade to extend your jump distance. Throw the grenade on the platform edge and quickly jump towards the skull - the explosion should extend your jump and make it long enough to reach the skull.
Effect: Any weapon found at the dead enemy contains much less ammo.
Level: The Ark
To reach it you need to use Grav Lift - put it somewhere in the middle of the "stairway" then jump from the top facing the platforms on the left. You will need few tries to succeed.
Effect: grenades and missile weapons are more effective.
Level: The Covenant
Getting this skull isn't a hard task. Fly your Hornet into the structure, land on the middle bow-shaped part and simply take the skull from the ground. In this structure (but inside the building) you can also find the next terminal.
Effect: all enemies are tougher.
Level: The Covenant
This skull appears only when you jump through the rings in proper order. The first one is the closest to the elevator, the seventh is the closest to the light bridge. Jump at the following order: 4,6,5,4,5,3,4. After that the ring skull should appear near the bridge.
Effect: unlocks some dialogues in Campaign Mode.


Level: Cortana
Find the red construction with some kind of open hatch in the middle. Jump on it, then jump left-forward. Turn left and jump on the higher level - then turn behind and jump to the highest level. Pass the narrow bridge and the skull is yours.
Effect: Enemies are less vulnerable to given kind of ammo.
Level: Halo
This skull is the easiest to find. Just turn left from the main road and simply pick it up from the snow. The next terminal is nearby - jump on the metal construction and turn right.
Effect: Makes the difficulty one level harder.


 Heroes of the Storm Game Guide & Walkthrough
 Heroes of Might and Magic V Game Guide & Walkthrough
 Hitman: Blood Money Game Guide & WalkthroughHeroes of Might and Magic V: Hammers of Fate Game Guide & Walkthrough
 Halo 4 Game Guide & Walkthrough