This unofficial guide to Grand Theft Auto V is a complete guide to Los Santos and its vicinities, to help you experience all of the attractions that the game has to offer in the least painful way possible and to help you achieve 100% completion of the game. In this guide, you will, first of all, find a very detailed description of completion all of the main missions for the single player mode, and also of all of the optional tasks and challenges that you receive from people that you meet in the street or unlock yourself.
A large part of this guide is devoted to whereabouts of all collectibles. Apart from that, chapters devoted to the activities and mini-games available in the game (buying an estate, playing tennis, performance of stunts, diving and many more), describing all of the three playable characters and earning of achievements/ trophies will also be published.
Guide to Grand Theft Auto V inculdes:
Arek "Skan" Kaminski, Jacek "Stranger" Halas and Bartek "Snek" Duk ()
This unofficial guide to Grand Theft Auto V presents all of the key relationships in the game and helps learning its basics. The first chapter with hints presents, in detail, all of the most important elements of the game, like fighting, driving cars, boats and planes, acquisition of new equipment or escaping police chases.
ON of the most important chapters of this guide is the one devoted to the three playable characters, i.e. Franklin, Michael and Trevor. The descriptions of individual characters include, predominantly, the information on their special skills. Apart from that, it also includes hints on effective improvement on the skills of the protagonists.
Just as important a part of this guide, are the descriptions of all the activities and hobbies and these are, among others, playing golf, practicing yoga, participating in car races, visiting strip clubs, participating in triathlons, cab driving, game hunting, stock trading or acquiring new estates.
Another interesting part of this guide concerns the topic of unlocking friendships, as well as love affairs, and caring for them. This guide describes, in detail, who a given character can interact with and to which extent.
The whole is supplemented with very detailed maps marked with places to start available activities, a list of Easter Eggs and interesting sites in the county of Blaine, as well as a full list of achievements and trophies
Grand Theft Auto V - Strategy Guide is the first part of our enormous guide for Grand Theft Auto V. The other two are Grand Theft Auto V - Missions and Grand Theft Auto V - Maps & Secrets. Check them out!
This guide for Grand Theft Auto V include:
Arek "Skan" Kaminski ()

Pause

Zoom in the radar / Info on multiplayer game

Change the camera

Switching the special ability

Choosing the character

Change the character to Michael

Change the character to Franklin

Change the character to Trevor

Switch from the singleplayer mode to GTA Online

Interaction menu

Start / Stop recording

Start / Stop recording a replay

Cancel recording

Context action

Move

Jump

Sprint

Enter a vehicle

Sneak

Look back

Aiming

Hide behind cover

Throw a grenade / Detonate a sticky bomb

Weak melee attack

Strong melee attack

Dodge in a melee fight

Shoot

Reload the weapon

Change weapon accessories

Zoom in / zoom out when using the scope / camera

Zoom in when using the scope / camera

Zoom out when using the scope / camera

Weapons wheel

Change weapons / Previous or next weapon from the current category
No weapons

Melee fight

Shotgun

Heavy weapon

Special weapon

Pistol

SMG

Assault rifle

Sniper rifle

Leave the vehicle
 scroll up
Next weapon

Next weapon

Previous weapon

Look back

Next radio station

Previous radio station

Next song from your own radio

Previous song from your own radio

Movie camera
Tuning the radio

Slow-motion

Duck in a car

Speed up / slow down the action during stunt jumps

Speed up the action during stunt jumps

Slow down the action during stunt jumps

Accelerate

Brake


Turn left / right

Lean forward

Lean back

Shooting from a car

Aiming from a car

Lights

Handbrake

Horn

Sprint on a bike

Front brake on a bike

Increase throttle

Decrease throttle


Leftward / rightward move

Turn the plane left

Turn the plane right

Bring the nose of the plane down

Bring the nose of the plane up

Shooting from the plane

Shooting from the plane

Aiming left

Aiming left

Pull out / hide the gear

Hook switch / Hover mode

Change the plane's weapon camera

Increase the sub's speed

Decrease the sub's speed


Sharp left / right turn

Left turn

Right turn

Move the sub's nose forward

Move the sub's nose back

Ascent

Descent

Controlling the parachute

Deploy the parachute

Deploy / abandon the parachute

Breaking left

Breaking left

Precise parachute controls

Parachute smoke
Phone


Use the phone

Navigating the phone's menu


Choose


Cancel

Option


Special option

Scrolling


Take a selfie with your phone

Change your facial expression while taking a selfie

Turn on the grid while using the phone's camera

Control the depth of field while using the phone's camera

Write a message to everyone

Write a message to your team

Press and talk

Point

Throw a weapon

Throw ammunition

Moving on foot or by means of transport

Sneaking

Looking around

Looking backwards / Rapprochement


Activating the special skill of the character

Jumping / Climbing

Entering and leaving vehicles

Sprint

Choosing the character

Changing camera mode


Pike jump (unwittingly head-first which implies inevitable damage and wounds depending on how you fall)

The weapon choice wheel

Aiming

Hiding behind cover

Shooting

Performing dodges

Striking weak blows / Reloading your weapon

Striking strong blows

Bending down and turning around

Pulling out the chassis
Looking around

Looking backwards

Leftward move

Thrust and ceiling decreasing

Rightward move

Thrust and ceiling increasing

Shooting

Changing the armament

Answering the phone and selecting folds

Shifting tabs of your phone and hiding it in your pocket

Using the phone / Phone menu up / Telescope and camera control

Phone menu to the right

Skipping the call / Phone menu down / Telescope and camera control

Phone menu to the left
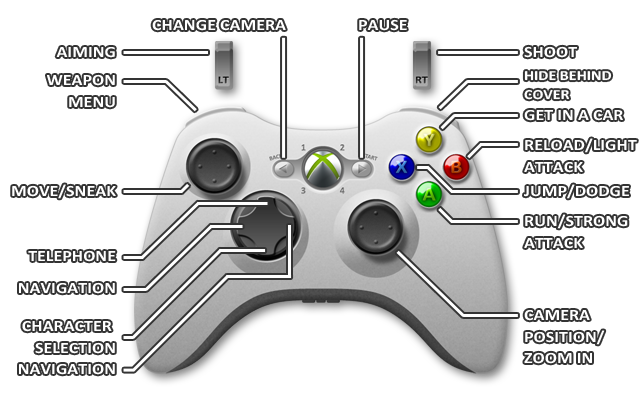

Move

Sneak

Change camera position

Zoom in while targeting/ Look behind

Run/Strong melee attack

Reload/ Light melee attack

Jump/Get over an obstacle/ Dodge in melee fight

Take control over a means of transport

Telephone

Character selection

Navigate the phone's menu

Navigate the phone's menu

Bring up the weapon menu

Target

Hide behind a cover

Shoot

Change camera

Pause
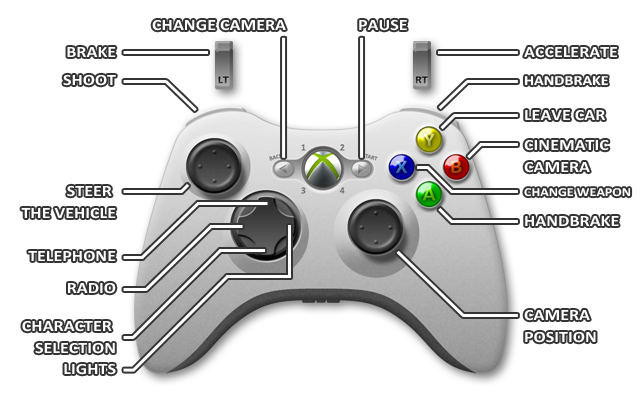

Steer the vehicle

Honk

Change camera position

Look back

Handbrake

Cinematic camera

Change weapon

Leave the vehicle

Telephone

Select character

Bring up the radio station selection window

Turn on lights

Shoot while driving

Brake/Rev up

Handbrake
Accelerate

Change camera

Pause
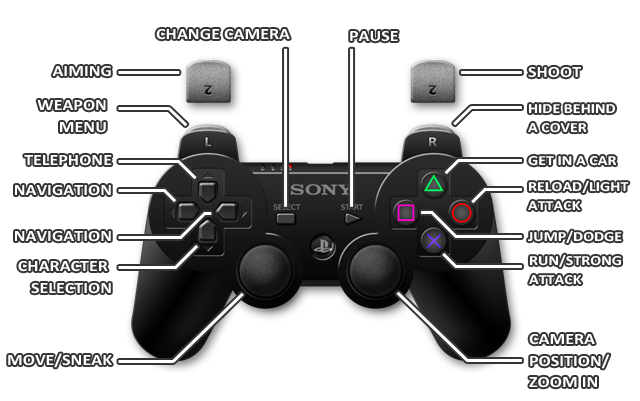

Move

Sneak

Change camera position

Zoom in while targeting/ Look behind

Run/Strong melee attack

Reload/ Light melee attack

Jump/Get over an obstacle/ Dodge in melee fight
Take control over a means of transport

Telephone

Character selection/Hide phone

Navigate the phone's menu

Navigate the phone's menu

Bring up the weapon menu

Target

Hide behind a cover

Shoot

Change camera

Pause
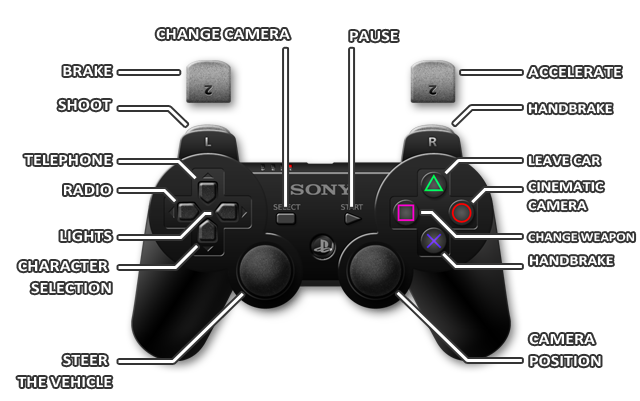

Steer the vehicle

Honk

Change camera position

Look back

Handbrake

Cinematic camera
Change weapon

Leave the vehicle

Telephone

Select character

Bring up the radio station selection window

Turn on lights
Shoot while driving

Brake/Rev up

Handbrake

Accelerate

Change camera

Pause

Moving on foot or by means of transport

Sneaking

Looking around

Looking backwards / Rapprochement


Activating the special skill of the character

Jumping / Climbing

Entering and leaving vehicles

Sprint

Choosing the character

Changing camera mode


Pike jump (unwittingly head-first which implies inevitable damage and wounds depending on how you fall)

The weapon choice wheel

Aiming

Hiding behind the curtain

Shooting

Performing dodges

Striking weak blows / Reloading your weapon

Striking strong blows

Bending down and turning around

Pulling out the chassis

Looking around

Looking backwards

Leftward move

Thrust and ceiling decreasing

Rightward move

Thrust and ceiling increasing

Shooting

Changing the armament

Answering the phone and selecting folds

Shifting tabs of your phone and hiding it in your pocket

Using the phone / Phone menu up / Telescope and camera control

Phone menu to the right

Skipping the call / Phone menu down / Telescope and camera control

Phone menu to the left
 It'll be hard without it.
As part of release of the GTA V for next generation consoles PlayStation 4 and Xbox One (PC premiere is scheduled for the end of January), the creators decided to somehow encourage stagers to buy again their favorite title, only this time in a highly refreshed version and of course on a completely different platform. As compensation, a number of innovations has been prepared for them, some of which can be treated as an exclusive content to be unlocked only under certain specific conditions. Of course, the most important of the changes which is the introduction of an optional view of a first-person perspective will be accessible for everyone without exception, just as many graphical improvements or improvements affecting the diversity of gameplay - higher resolution textures, improved special effects, or more than 150 new tracks and radio broadcasts. Unfortunately, supplements such as special challenges, missions, weapons, and vehicles will be accessible only for the privileged ones. And here's how to seize at ease the whole essence of the new edition of GTA V.
The game unlocks new content when it detects that the GTA V in version for PlayStation 3 or for Xbox 360 has already been played on the account PSN or Xbox LIVE currently used. To make it work, you have to complete a couple of steps:
1. Create Social Club account -http://socialclub.rockstargames.com/ . If you already have one, log in.
2. When creating an account or when setting the properties (after logging in) assign to it the account PSN or Xbox LIVE on which you have played GTA V for PS3 or Xbox 360.
3. Log in to the PlayStation 4 or to Xbox One using an assigned PSN or Xbox LIVE account.
4. Start the game.
If you played the previous generation of consoles without an Internet connection and you do not have any PSN or Xbox LIVE achievements / trophies from the previous version of the game, the additional content may not be available. To unlock it, before completing the instructions above, log in to previous generation console using the account assigned to Social Club account, start the game, complete main mission called Franklin and Lamar and save the game.
Below, you can find some of the information that will ensure you with an easier start, and help understand the key relationships in the game.
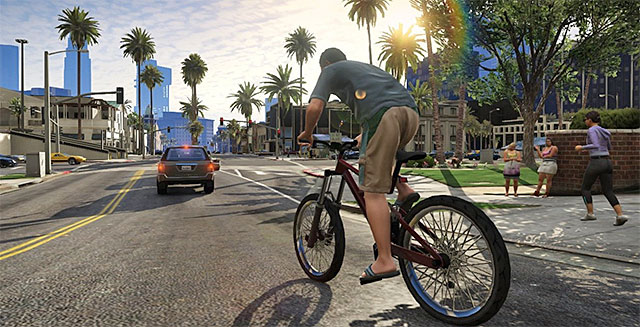
 You'll drive for the most of the in-game time
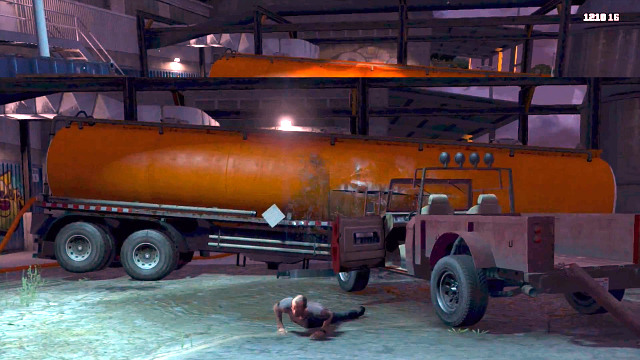
Cars are the basic conveyance in GTA V. Each of playable characters has its own, personal vehicle which should be, in general, first for upgrading. But you don't have to limit yourself to only this one. To get a new car (or any other vehicle), you need to get close to it, use a key to get into the car. Then, the character will steal this vehicle. Speed of this process depends on the fact if the car is parked or not and its technical state. If the car is closed, you have to break in first, by destroying the window and start the engine, what takes precious seconds and isn't recommended when in hurry. If the vehicle is currently moving, your character will throw out owner from the inside and take his place. But you need to be careful, as some of people will try to retake their property by throwing you out, firing at you or even stealing other car and beginning a chase after you. While stealing, pay an attention also for neighborhood and presence of police. Police will react immediately if they see theft and start chasing you. What is more, some vehicles have alarm installed, which will attract nearby policemen even if they don't see the act of stealing. Alarm turns off after few seconds.
Stolen car may be inscribed to the particular character permanently by parking it in the garage. Then, even if it is destroyed, you'll find it again in your garage. And if you leave it somewhere in the city, or lost in any other way, you can find it in the police garage, from which you can regain it by paying 250$. If you want to increase limit of available cars, you need to buy new garages spread out in the whole city.
Cars can be modified by upgrading their performance, endurance, look and even the sound of horn. To do so, you have to visit one of Los Santos Custom workshops. But notice, that modifying a car also inscribes it to the particular character, what may be a temporarily way to control more vehicles when you have only one default garage in your Safehouse. Exclusive cars may be bought also in the Internet.
 Performing big jumps is necessary for Stunt Challenges
Basic controlling the car is contained in four simple activities. Speed up and brake/reverse on triggers, direction of driving on the left analog and hand brake on A/X. What is more, while driving, you can, among others use a horn, lights or change the radio station. Details can be found in the chapter dedicated to controls. But the very drive is concentrated on those four highlighted above which may be challenging for the less experienced players. Cars are rather sensitive and their physics may resemble the one from race games, so on the beginning you may experience slight difficulties with feeling the way you should control vehicle, especially on turns. If so, try not to accelerate too much in first missions and slow down while approaching a turn. Game is made in a way to not be a race challenge at the beginning, so even driving relatively slowly, you should finish all time missions easily. And, simultaneously, every driven kilometer will give you better feeling of controls and experience. Also the type of the car and character's driving skills are important. If you experiences difficulties on harsh bends, try to get a car with possible biggest adhesion. You should also remember about Franklin's special ability, which slows down driving and makes easier moving between obstacles and taking turns.
If the car is in the air, move your left analog to keep him stable on wheels during landing. Every successfully finished flight affects rate of driving skill development. If the car turns upside down, you can move it back on the road by moving the left analog side. You can also jump out from the rushing car by pressing a key for entering/exiting the vehicle, but it may seriously hurt your character, or even kill him.
While driving, you can also start firing by pressing and holding LB/L1 and aiming with the right stick.
 Motorcycles are controlled in a similar way to cars
Controlling monocycles, in general, is very similar to driving cars, but, additionally, you can balance your body back and forward by moving the left analog back and forward. When you move it back hardly, you can ride on back wheel, while leaning it forward during braking will make you stop on one wheel. If you ride on bike, you can also jump after reaching particular speed for acrobatic figures.
What is more, if you ride a bike, when you get a proper speed, you can jump up for a stunt. Bike is a bit different in a way of controlling, and instead holding speed up, you have to constantly propel it up with pressing A/X.
 Sailing also shouldn't be problematic
To keep boats, you need a place where they can be docked, which are marinas. Marinas are the only way to keep boats in game, which any character has. There is only one, Puerto Del Sol in La Puerta. You can buy it for 75 thousands (separate for each character). It's crucial if you want to keep any stolen yacht or buy any on-line.
The controlling itself is easy and similar to driving cars, so it shouldn't be problematic. In case of bigger boats, you may be problem with agility, so take it into consideration if you plan to sail through the narrow channels. Moving the left stick back and forward, you can also lower or rise the bow of your ship, what makes longer jumps possible. What is more, some smaller machines, like water scooters or submarine, may turn left and right quickly by pressing proper bumpers or L1/R1, depending on the console.
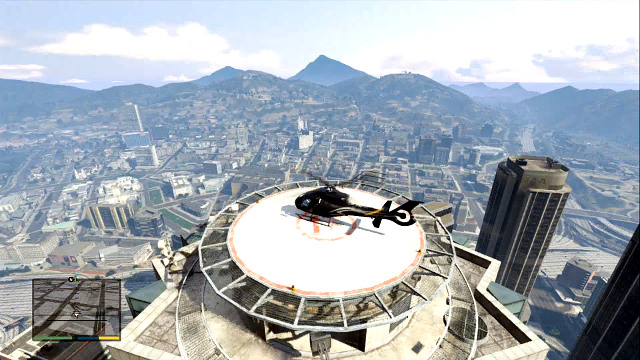
As in the case of cars and boats, flying machines also require a special place for storing them. Airplanes have hangars and helicopters helipads. Trevor has one hangar, but remaining two will have to buy some if they want to start collecting airplanes. But remember, that if you park plane in the hangar, you have to drive it inside. If you leave it on the landing site, it won't be saved. Airplanes may be bought or stolen. Flying is probably the most difficult thing to master in the case of controlling machines in GTA V and it's easy to have an accident. So, it's a good idea to buy a parachute in Ammu-Nation before you go flying, to not become a wet stain on the ground. Remember also about the Fort Zancudo, nearby which the airspace is closed, If you have to fly next to it, keep it low to get out of the radar range.
Very good place to train is a Flight School, where you can not only get to know basic controls, but you'll have an occasion to practise more complicated acrobations and develop your character's flying skills.
What is more, remember that over some government facilities (like Fort Zancudo, prison) the air zone is closed. If you get there, you'll hear a radio message to get out of there immediately and if you don't listen, you'll start be chasing by army. If you need to fly through such zone, keep it at the minimum altitude to not get discovered by radar.
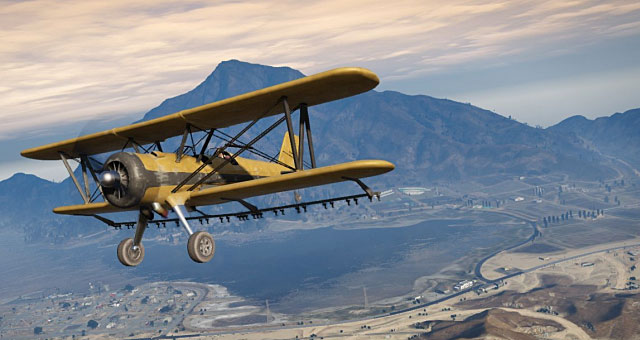
 Airplanes are difficult to master
Flying with an airplane may be problematic for new players and require few crashes before you catch what it's all about. First of all, triggers are for acceleration/slowing down, as in the case of the rest of vehicles. Left analog decides about plane's position - flying up, down or turning it. LB/RB/L1/R1 buttons set a direction in which the machine is turned. To rise, speed up the plane in the airstrip and then fly up and hide the undercarriage (L3). While flying, keep position close to the horizontal axis. If you fly in the city center or nearby the mountains, you shouldn't fly around with max speed, because you'll never know if you don't have to avoid a tree or some skyscraper in a moment. Flying is only a half of the success - the other half is, of course, landing. You can land, theoretically, on every long flat surface, but it's best to practice on the airstrip. Slow down steadily few hundreds meters before the landing site. Keep the plane horizontally and slide out the undercarriage (don't hook anything with wheels!). Start lowering the machine slowly and, simultaneously, brake (you can release the gas pedal at all) when you only touch the ground. If your speed is to high when you touch the ground, plane will, probably, fly up again. If it bounce too high, don't try to take it down again, because you'll probably crush. Fly up and return to perform the whole landing procedure once again, but this time slower.
 Helicopter is better for accurate landing
Using a helicopter is a way different than the plane. Here, triggers are responsible for increasing and lowering the altitude. Left analog moves helicopter into the direction you want to fly, while LB/RB/L1/R1 turn machine left/right. If you want to land, simply, steady the machine and then slowly bring him down with LT/L2. Steering helicopters is probably a bit easier than with planes, but it's, still, complicated procedure requiring a bit of experience, so you may experience difficulties at the beginning. And, if you have an armed helicopter (e.g. Buzzard), you can use its weapon with X/square.
You should remember and take care about your equipment during the whole game. There are Ammu-Nation shops spread out in San Andreas - there, you can buy weapons and armors. In general, buying weapons will be an overextended effort and a waste of money, because you find it anyway at bodies, so don't rush with that. But there are some exceptions, like when you are caught by the police and you have nothing in hand. In this case, you should buy any shotgun, which eliminates most of enemies with a single shot. Pay an attention also to the dialogues which take place before missions, because you'll often obtain hints, like "consider usage of sniper rifle or sticky bomb". If you hear something like that, it's best to buy the suggested weapon if you don't have one. It should make missions easier, otherwise you'll be forced to improvise and the game will become harder. You can also take information about free weapons which you can take from the shop from dialogues, messages, in-game information (e.g. rockstar social club), so remember to notice such things. At the end: remember, that if you have several weapons of the same type (pistols, shotguns), game will automatically chooses the first model (in general : the weakest one). In this situation, remember to change weapon manually. Open the wheel of choice (LB/L1), choose the type of weapon and the switch between particular models with left and right direction button. Notice, that you have to repeat it with every change of character.
 You should but upgrades to your weapons
If you can omit buying the weapons themselves, you should remember to buy ammunition and upgrades for the weapons you currently have. Those, which you can buy, vary depending on the particular weapon, but, in general, most of them can have a silencer, a flashlight, increased size of clip or decreased recoil. In general, every upgrade is useful and you should buy all of them, if you can. The only exception is change of your weapon colors, which is a purely cosmetic tool and doesn't affect the game. About the weapons itself - you should focus on rifles (away enemies) and shotguns (close enemies), so those ones should be upgraded firstly. You should also always have several grenades or Sticky Bombs at hand, which may be useful under the heavy fire. But, in general, remaining explosives are rather something to break the boredom than a real help in encounters. You'll find them during missions, so you'll see how they work in action.
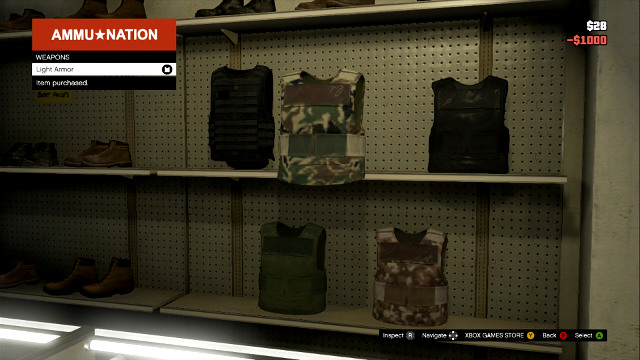 Armors protect you against bullets
Additionally, you can also buy armor and, later on, a parachute in A-N. Parachute will be useful, rather, from time to time than often. Due to the complicated procedure of flying in GTA, you should take one before any aerial travel, but, on the other side, when you're doing an aerial mission, destroying your plane means, in general, a failure. Because of that, parachute will be useful only when you decide to go flying on yourself.
On the other hand, you should buy armor before every major mission. Armors in GTA elongates your health bar. Every shot (only shot, armors don't protect you against explosions or falls), which you get, decreases the armor bar and then the health bar. So, it's an additional protection which you should have in case of any serious action. Type of the armor determines the protection. There is no way in saving money, so you should invest in the most expensive armor for 2,500$. At the beginning, it may be a problematic amount, but after a jeweler robbery, you should be able to buy a new armor every now and then. So remember to visit Ammu-Nation when you see one.
When you begin playing in GTA V, you'll have rather a little of money and won't be able to go crazy during shopping. But there are several ways to add few zeros to your account.
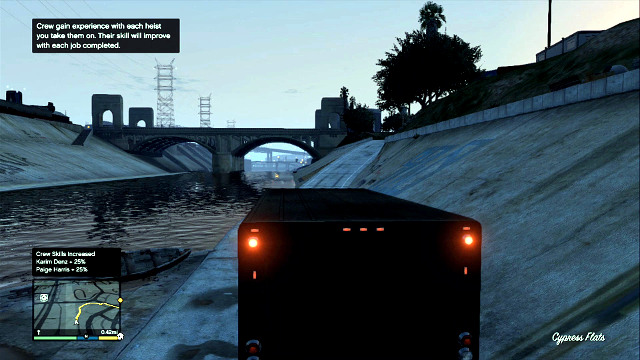 Weaker companions will upgrade their skills with preserving low financial demands
The most obvious way to get extra cash, is to start robbing. Every time you collect your team, you can choose between several candidates, who's skills differ a lot. The better skills, the less complications during the mission, but also the more money you have to put on the table. But it should be noted, that worse candidates will develop their skill with every robbery but, simultaneously, they keep their low financial demands. So the most economically, is to choose the cheapest companions. Missions will be, in general, more complicated, but you shouldn't feel that too much. For example, during the first robbery, when you choose the weakest driver, you won't obtain instructions where to drive to, worse motorcycles in the sewers and small stop after that, but you should make it. The worst shooter will make him crush and lose money, but you'll collect them as Franklin, so there is no lose. Choosing the IT man defines how much time you have for looting all cases and it's the only crew member at who you shouldn't spare money, because he decides how much cash you'll get from the robbery. At the next robberies, you can use the same companions and they should be better. But you have to decide by yourself, if you're ready for bigger challenge - if yes, you'll increase your income greatly.
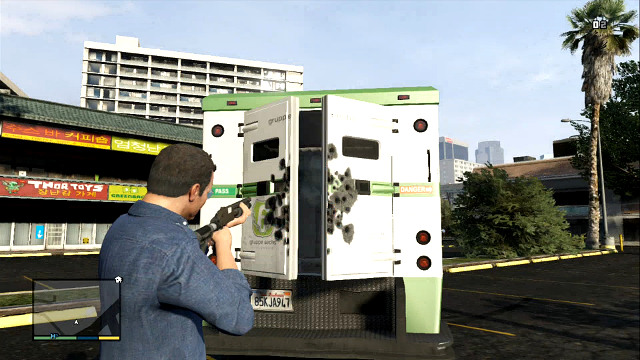 Fire at the lock to open the van
While wandering around, you should run into armored vans, which have a lot of money inside. Depending on the reaction time, you can eliminate bodyguards before or after they got into the van. But if they detect you, they'll run away and you'll have to begin the chase. When you take over the vehicle, you have to open the back door. You can use, for example, a Sticky Bomb, but the shotgun will also make it. Aim at the lock, in the very middle of the door. When you open it, you get cash. Its amount is variable, but it should be about five-six thousands. Also, beware of police, because you'll have 2-star Wanted level. So, firstly get rid of it and then collect the cash.
As every standard criminal, you can also get into the shop and steal all money from its owner. It won't be large amounts, but few additional dollars should get into your wallet. When you enter the shop, aim at the owner and he begins to unload the cash. Sometimes, he may have a shotgun, hidden under the counter, so you have to kill him first and then open the cash, by firing at it. If so, look around - there may be other cash also. Naturally, after that you'll have a police on your tail, so you should have a prepared car in the front of the shop or, at least, a place where you can hide.
You can steal from gas stations, supermarkets and liquor shops. You can't steal from clothing shops and Ammu-Nation, where you can take out your gun.
Playing on the Stock Exchange, may give you a powerful amount of dollars, if you know which shares to choose. In the game, you will hear about growths and falls which may happen, so listen to them carefully (if you don't hear clearly, you can always check it in the options) and then buy proper shares. The biggest vein of gold is Franklin, while he performs kills on company presidents for Lester. So before you begin mission, invest in corporation, opposite to at which you attack (repeat for all three kills). More detailed information in chapter about the Stock Exchange.
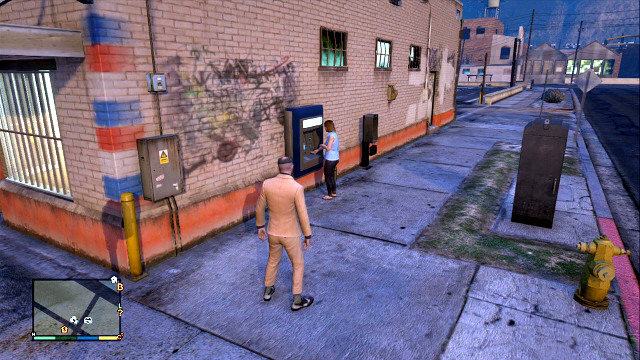 People using ATMs should have some money with them
You can also earn money from secondary missions, events, activities and buying companies. Take part in races, steal taxi and become a taxi-driver, catch thieves, find collectibles (remember to take Chop with you) or, simply, attack people on the street and take them money. In the latter case, you should interest in people at ATMs, because they should have more money than the random persons. It won't be great amount of cash (dozens, sometimes few hundreds of dollars), but it's something at the beginning of the game. At the end: remember, that the easiest way to get money, is to save them. Don't buy weapon - get it from someone. Don't buy a car, steal it. Spend money only on the very necessities. Additionally, you can also get a 15% discount in Ammu-Nation - you have to complete all challenges on the shooting range. If you complete all of them with gold medal, discount grows to 25%.
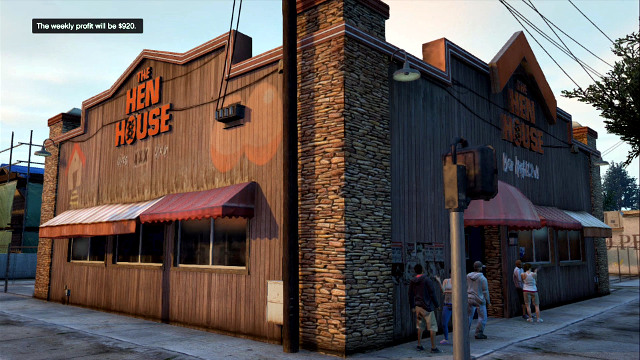 Properties guarantee every week profit
In San Andreas, you can find a whole lot of properties which you can own. It may be something connected with activities (like hangar), or some business which will generate every week profit. To buy a property, you have to find it and pay. New properties are unlocked as the game progresses. What is more, some of them are limited to one or two characters, while other may be bought by all of them.
When you become an owner, you'll receive messages about completing a mission from time to time. Ignoring it decreases the profit from particular week. Ignoring it may decrease or even totally destroy the income from the particular week.
Before you buy a property, remember that this is a long-term investment which won't refund if you plan only to finish the game and end your adventure with GTA. One week is about five hours of constant playing (besides sleeping or hospitalizing what speeds up the time). Simultaneously, to get a 100% of game completion, you have to have 5 generating income properties, so they are necessary. There are also an alternative variant of spending your time in San Andreas, so, after all, you should get interested in them. But if you care only about money, you should notice how quickly the investment will refund before you buy it. Compare the general price with the weekly income. The best refund financially is within about a year and a half. You should consider for example Smoke On The Water or The Hen House which are cheap with a solid income.
If you're ready to take things in your own hands, some properties will pay for missions. Waste Dump pays 150$ for every destroyed car while Sonar Collections Dock pays 23 thousands for a portion of nuclear waste (but there are only 30 of them). Focusing in this particular areas you can very quickly make those business return your payments and start profiting faster than in classical model, but it's time consuming.
At the end, there are some businesses, which are financial black holes, but may be useful from other reasons. For example, buying a taxi company, will give you free taxis, what may be useful, when you want to get on the other side of the map and you won't want to spend 10 minutes driving. Buying Los Santos Customs workshop in Grand Senora Desert gives you free car upgrades for Franklin.
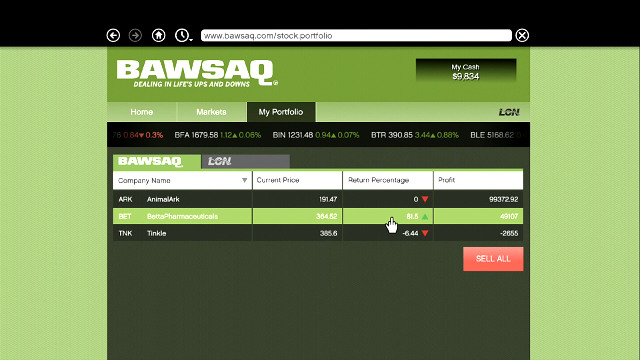 You get an access to the Stock Exchange via the Internet
Playing on the Stock Exchange may increase your amount of money very easily. You get an access to the Stock Exchange via the Internet. To do so, you can use computer or mobile phone.
The Stock Exchange in GTA works like the real one. You buy shares the cheapest you can and then try to sell them at the biggest price you can get. In-game Stock has two indexes: in-game and depending on your actions, LCN, and BAWSAQ, which is affected by all players through the Rockstar Social Club. Notice, that BAWSAQ requires an Internet connection to your console.
BAWSAQ is much more unpredictable due to its way of working, but you can, in general, assume that if something starts rising, it will going up and up as the players start noticing the fact and buy this particular shares. Of course, you have to control the situation and observe the price, because at the certain moment it may start dropping.
As of LCN, it's very easy to control and get huge amounts of $ from it. Actions go up or down, depending on the performed actions. Information about it may be found in various dialogues and radio. When you're prepared you can achieve a lot of incomes. Remember also, that each character has separate shares, so if any goes up, buy them for all three of them.
While playing, you can notice a general tendency of rises and slumps. Watch the charts. If any company increases its value and then slumped, it's a pretty good chance, that it'll rise again. In general, you shouldn't keep shares for too long, as the market is very fragile and may change totally in few dozens of minutes. You shouldn't also invest all money, and those invested split for few companies in which you believe will rise up.
 Franklin has a series of missions in which he kills presidents of big corporations
You can manipulate the shares mostly thanks to secondary missions of Franklin for made for Lester. Lester will order you to kill particular heads of corporations, whose deaths will increase shares of their rivals. Before you begin such a mission, it's worth to have accumulated a lot of money in order to get even more. Buy shares for all characters before you begin the mission , because when you begin, you won't be able to change the character. After the mission is done, the shares should rise in within ten hours. Then sell them, Be careful not to keep them too long, because the price will start stabilizing after some time.
Here is detailed list of shares you should buy:
If you want, you can buy also shares of the sabotaged company, when they are the cheapest. For example, at Multi-target Assassination up will go Debonaire shares and down Redwood shares. When you sell Debonaire, you can buy Redwood very cheaply. In two days their price also returns to normal. Then, you can buy it for the double profit.
Aside of the Lester mission, you can also manipulate the Stock manually, by buying particular shares and destroying properties of the rival company. Here you can see the companies linked with their rivals:
Destroying properties of one of the companies listed above, pumps up the shares of the rival. You can, for example, buy FlyUS shares and then head for the airport and destroy everything marked with AirEmu logo. As in the case of Lester missions, you can also buy the AirEmu shares when they are cheap and hope their price will rise again.
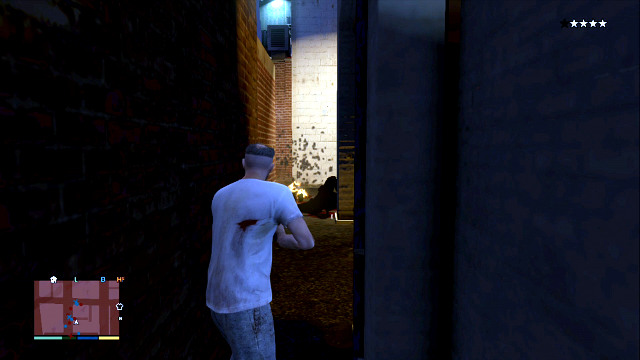 Stars determines the usage of police forces
Sooner or later your actions will make you confront the police, who will try to pacify you quickly. Chase will end on one of three ways:
Wanted Level, presented as stars, determines the amount of police forces used against you. It works like that:
One Star - the basic criminal act which begins the chase. It's activated for example after firing at pedestrians or stealing the car. If there is a police car nearby, the chase begins immediately. Otherwise, the citizens have to call the police first. You can neutralize the caller, so the crime won't be reported. At this stage, one police car will try to stop by asking you to drive aside. Police won't fire at you, but if you don't surrender quickly, it gets quickly into Two Stars.
Two Stars - when you don't get arrested on the previous level at once or if you start fire next to the policemen (or at them). At this stage police will fire at you and more police car joins the chase. They are more aggressive and will try, probably, to ram you.
Three Stars - when you kill a policeman, you get Three Stars. Chase will be bigger and a police helicopter, Maverick with two shooters on board, joins the action. There will be also blockades on the road. You get also Three Stars automatically when you sneak in some crucial locations, like Los Santos airport (only if you don't have a hangar) or port.
Four Stars - more madness brings Four Stars. Here, you will have to stand against FIB equipped in, among others, tear gas. Policemen have rifles and bulletproof vests. You meet heavy SUVs on the road, and antiterrorists will jump down from helicopters. Four Stars you get also when you break into the Zancudo Fort.
Five Stars - the highest level is connected with National Office Of Security Enforcement (NOOSE), who joins the chase. Many helicopters appear on the sky and all units will continue firing (even during the driving) to destroy your vehicle.
To get away from the police, you have to disappear from their view range and then wait until they stop the chase. As long, as you are seen by at least one policeman, the radar will flash blue-red, and more and more units will come to get you. While running away, you should change your direction very often, using faults, to get into a main channel of Los Santos or out of the city. In general, you should avoid main streets and use, for example, track ways or, if you're playing as a Franklin and have a fast car, drive upstream with his Special activated. Trevor may use his Special to survive a big fall and try to lost the chasers. Situation is more complicated when you have a helicopter on your back. The easiest thing to do is to destroy it or kill the pilot, if you don't have heavy weapons in hand. But if you can't, you have to move quickly and change direction very often and immediately. In center of the city, use the narrow alleys to get lost it. In the countryside, you may use environment, like get the helicopter into pillars or even an air turbine and make it crash.
When you lose the police, you have to hide until the chase ceases. At this stage, Stars in the upper right corner will flash white-grey. Nearby police will be visible on the radar with a small aura around them, marking their field of vision. If you get into it, you'll be spotted and the chase resumes. So you just have to avoid them. In theory, you can change vehicles or even clothing to speed up the whole process and lose the police. Practically, it's not necessary. Being in the policeman range doesn't affect you when you're covered. Notice, that on the screen above, the character is within the sight range of the policeman, but the chase doesn't resume. So you just need to get onto the back of a building, hide in a side alley or even crouch behind a small wall and wait. Game is made in a way, that you can even get into thick brushes next to the road, and police cars won't notice you. Good place is also Ammu-Nation - at its back, it has often a room which isn't seen through the main window. Get there and police at the entrance won't pay an attention on you. If you're next to the bigger water, you can jump in and swim from the shore a bit, to get out of the sight. But don't jump into any motorboat or not swim too far away to not attract boats of LSPD. Remember also, that beginning of a mission ends the chase. As in the previous game, you can repaint your car in the workshop to eliminate Wanted Level at once.
In this part, you can learn about some of the elements of GTA V interface, to know where you can find all of the information that you need.. Depending on your current situation, some of the markings are available in the game only under certain conditions and they may temporarily appear in the place of the already existing ones. The detailed information can be found in the descriptions of individual elements.
 More realism + more details = loads of fun.
The most developed and awaited change in the GTA V was supposed to be a highly detailed view mode from a first person perspective. It moves the entire game in a new level, as it allows to look at the world in an unique way not only during the exploration of the terrain or during the fighting, but also when driving and flying machines. To start it you have to switch between the camera modes using the touch panel, and of course stay on the right one. After activation, the view will be shown from the character's perspective which will highly influence the surroundings reception, steering and graphic effects. In connection with new camera mode, the creators have introduced a lot of new animations of the ways of moving and of fight, and, what's more, have reconstructed the appearance of cockpits of conducted vehicles.
 Only me, my motorbike and a wide highway.
When using the first-person mode options we can experience many new things but on the other hand - at least at the beginning - we can as well experience difficulties related to the free exploration of the world presented. At this point it is all about managing the aforementioned cars, motorbikes or helicopters. Looking from the hero perspective, the visibility range is significantly reduced, which translates directly into the quality of sense of direction and the opportunity to experience collisions. Well, you can get used to everything, especially when it implies great moments and breathtaking views.
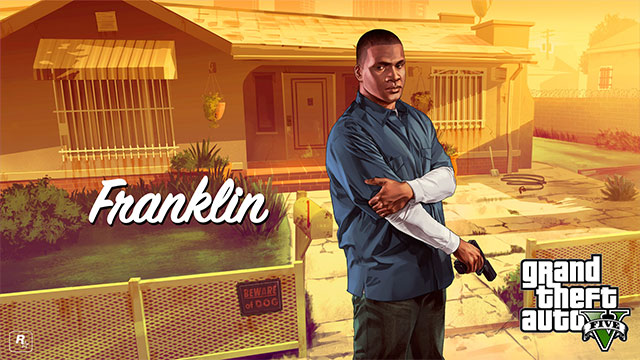 Franklin is an excellent driver
Franklin is a criminal in his twenties, and he is of the Afro-American descent, who performs his daily duties of a repo man, i.e. he recovers cars for Simeon Yetarian, a drug dealer of Armenian descent. Franklin is an ambitious man and his desire is to get promoted in the criminal underground - a dream he hopes to come true thanks to his cooperation with Michael Trevor.
Specialty: Above all, Franklin is an excellent driver, which becomes useful especially when you need to lose your tail, or leave a site of robbery really quickly. Apart from that, he is also a gifted sniper thanks to which, if the need arises, he can provide support for his colleagues.
Special skill: Franklin's special skill is the ability to slow down time while driving. This helps you enter narrow turns or skid around various obstacles in the way.
Game elements reserved for this character: For some missions Franklin can take with him Chop, a Rottweiler that belongs to his friend, Lamar. There also are a number of side missions exclusively for this character, connected with, among other, participating in gang wars or illegal car races.
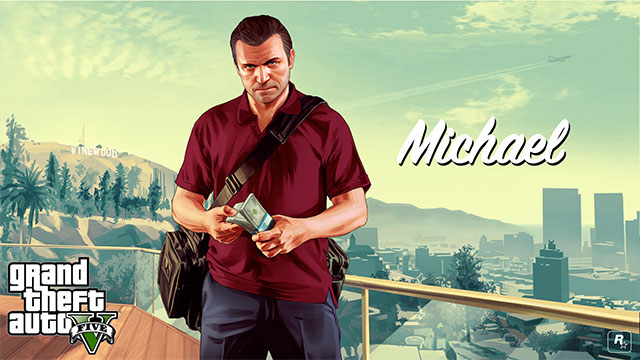 Michael is the mastermind that plans every bigger heist
Michael is a former robber in his forties, who cut a deal with federal government and became a crown witness. After changing his personals, he was put in one of the luxurious districts of Los Santos. Since Michael's relations with his wife and children are bad, to put it mildly, he wants to come back to his previous occupation and attain self-realization in what he is best at.
Specialty: Michael is responsible for organizing and planning on heists throughout the game. When it comes to more practical side of his abilities, he is perfect at handling firearms although, whenever necessary, he can also be effective fighting from hiding.
Special skill: Michael's special skill is the ability to slow down time during fire exchange (a typical bullet-time known from many shooters). This, of course, helps you target and eliminate enemies efficiently.
Game elements reserved for this character: Because Michael is subject to the crown witness protection program, he has access to side missions that he performs for the FIB (Federal Investigation Bureau; the in-game counterpart of the actual FBI).
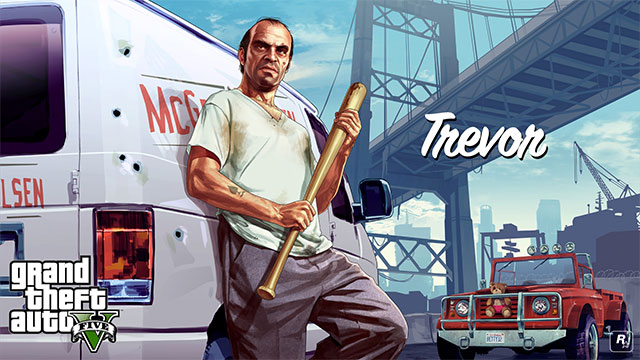 Trevor is an experienced pilot
Trevor is a balding and not too sane former military pilot, know for frequent episodes of aggression and lack of respect for human life. In the past, Trevor was friends with Michael but, due to a conflict of interests, he is not on friendly terms with Michael anymore.
Specialty: Trevor is a former military pilot, which means that he is better at piloting helicopters , planes and all sorts of flying machines than the other two protagonists. This ability comes in handy when you need to leave a site of robbery or shootout really quick.
Special Skill: Trevor's special skill is activation of berserker mode of a kind, when he deals more damage to enemies and becomes less vulnerable to their attacks. Furthermore, Trevor is capable of landing strong punches in a melee fight.
Game elements reserved for this character: In the game, there are many optional and often crazy challenges prepared with Trevor in mind. Furthermore, there are a number of missions connected with fighting The Lost Motorcycle Club that is hostile towards Trevor.
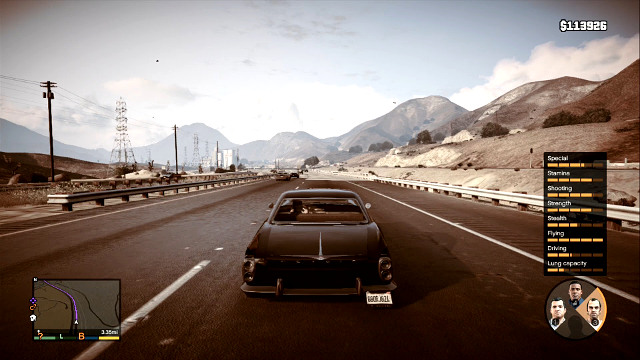 Statistics can be found in the character choosing window
When you play as a particular character, you upgrade his skills by making actions. When you repeat that action sufficient amount of times, the character gets additional point to the trait. Remember, that you develop only the character you're playing in the very moment, not all three of them at once.
Special - defines how long your special ability can be active. The more you use it, the faster it's developed and the longer you can use it. Special is separate for every character:
Stamina - let you run, swim and drive a bike longer. Increased by any of those activities.
Shooting - decreases the recoil, increases a clip size and speeds up reloading. Increased by firing at enemies and completing challenges on the shooting range.
Strength - defines damage dealt in melee, tennis and golf skills and reduces damage received from explosions, falls and knocks down by the car. Increased by melee fighting, golf and tennis.
Stealth - increases a speed of moving and decrease an amount of noise produced while sneaking. Increased by stealth and elimination of enemies. To switch into stealth mode, press L3.
Flying - increases the agility of the plane and decreases the wind effect. Increased by flying and attending to the flight school.
Driving - upgrades agility during big jumps and one-wheel rides. Trained by landing with cars on all fours and one-wheel rides.
Lung Capacity - determines how long you character can stay under the water. Upgraded by diving.
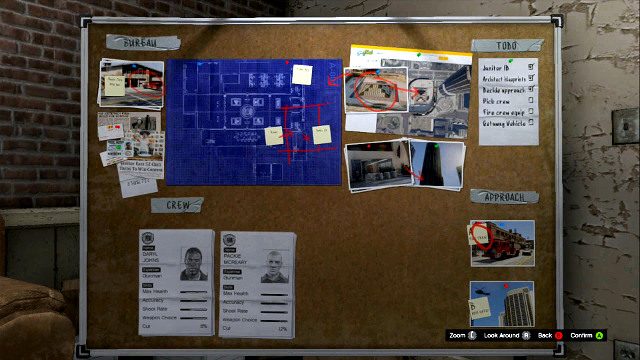 Choice of approach and crew takes place during planning the robbery
In the game, you have six big robberies to perform, which are connected with a solid amount of cash. Preparing to each mission, you can choice between two ways of making the. You should choose the one which better suits your preferences. You'll be informed what you have to do and make a choice basing on that knowledge, so if you don't like flying, choose a plan without the helicopter. Depending on your choice, you'll have to also take care about proper equipment, to make mission possible - mostly, it's all about stealing a car.
The other important factor is a choice of crew. There are three basic categories of companions: driver, hacker and a shooter, but not every robbery requires all of them. Each of them will want his part of the looted goods. The better his skills, the more he will demand, but the mission will be easier. Cheap crew will make the mission harder and, sometimes, not everyone will make it out in one piece (but you still have to spend his part of money). After all, cheap crew is better from the financial point of view, because you'll keep the majority of money. What is more, companions increased permanently their skills during actions and keep their low financial demands. It means that choosing hacker Rick to The Jewel Store Rob will give you a little of time for emptying the cases during the robbery - but at the next mission, his skills will be similar to the ones of the best hacker and he keeps his low financial demand of 4% part. If you feel okay for a challenge, the cheapest crew will be the most profitable. But if you want a bit of confidence, you can hire one veteran.
You will have to choose between tricky and noisy variants. The mission doesn't change due to this choice, but you'll probably deal better with the tricky one as you'll be able to spend all the time the hacker gives you for emptying cases instead of dealing with people in there. To this mission you need a three-man crew:
This robbery, as it turns out after making it, won't give you any money. Also, you don't have to collect a crew. You can approach it by attacking the freighter from the sea or using the helicopter. Choice doesn't matter in this case. In the first option, you'll have to deal with the ship service , the other one includes a lot of flying and firing at the chasing helicopters, what not for all is funny.
As in the case of Merryweather, this robbery is also without the crew. You can't also choose an approach.
Robbing the Paleto Bank is, again, without the choice of approach. But you can choose one of gunmen. Choosing the cheapest option is connected with the companion's death (remember that you have to pay him, even if he dies). The other ones (Packie, Chef, Montoya) won't get hurt. In this mission, it's better to invest in better crewman, because you'll separate in some moment and he'll try to slow down attackers from NOOSE single-handedly.
This robber may be played in two ways. You can infiltrate the building, plant bombs and drive there as a fire brigade. The other way is to attack directly from the air, landing on the roof with parachutes. First option seems to be easier: you mainly walk, run and fire a little, but you have to hurry due to limited amount of oxygen. And because of the smaller crew, you'll earn more. Choice of crew depends on the way of robbing you chose:
1. Fire Brigade:
2. Roof:
The last big robbery may be played in obvious or subtle way. The first option is way more difficult, but may give you much better financial output than the other one.
1. Obvious:
2. Subtle:
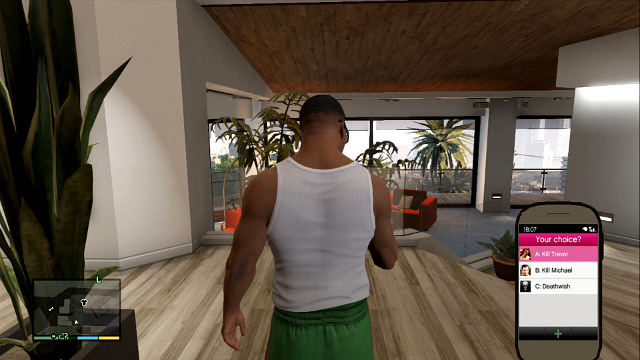 Franklin will have to choose the game ending
When the last big robbery is done, you'll have to finish the whole story once for all. Franklin will be visited by Devin who suggests killing Michael. Now you have to choose one of ways which will determine the game ending. Remember, that when it's done you can freely make all secondary missions and activities besides the missions connected with a dead character. Remember also, that you can't change your choice after you make it. If you kill any of your playable characters, you won't be able to resurrect him by replaying this mission!
 Trevor will burn
Franklin will call Trevor and ask him to meet. Then, he'll call Michael and ask him to help kill Trevor, but he'll have doubts. During the encounter, Trevor runs away and Franklin starts chasing him. You'll have to run after him until the cut scene triggers (you can't damage his car). Michal will ram Trevor and he crashes into the fuel cistern. When you fire at Trevor, the gasoline starts burning and Trevor will die. If you wait too long, Michael will fire first at Trevor. After that, Michael and Franklin talks a bit and then each of them head in his own direction. After this ending, Trevor will disappear from the game world and you won't be able to make any missions you didn't complete to this point.
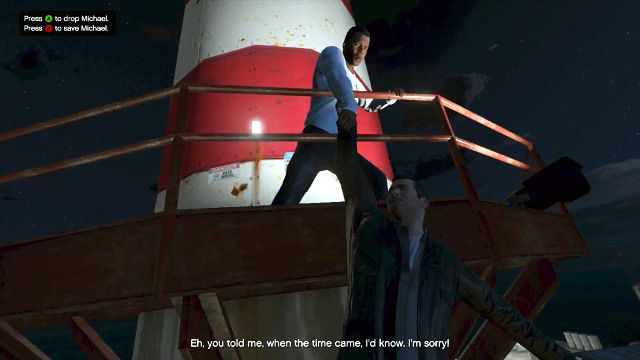 Michael will fall down whatever you choose
Franklin will call Michael and ask him to meet. Then he calls Trevor and asks him to help kill Michael, but he refuses. When you meet Michael, a cut scene triggers after which you start chasing Michael (you won't be able to kill him during that). After that, another cut scene triggers, due to which Michael falls out from behind a barrier but you catch him. You can now choose between letting him fall or releasing him, but even if you pull him up, he'll hit Franklin and fall down, killing himself. Then Franklin calls Lamar for a meeting. After this ending, Michael will disappear from the game world and you won't be able to make any missions you didn't complete to this point.
 Option C is the only way to keep all character alive
The longest, the most difficult but also, probably, the most rewarding ending. Franklin calls Lester to find a way of saving both of his friends. Lester will suggest a meeting in abandoned place, where you will fight both Merryweather and FIB. Before heading there, you'll get also Lamar. At the site, you four will be fighting against those two groups and they'll be fighting against each other. After this battle, they will make a decision to revenge all important persons who has caused those events. Trevor will ride to kill Steve Heines, Franklin will take care about Mr. Cheng from Chinese Triad and Michael will eliminate Stretch, who framed Lamar. When those three are dead, your next target is Devon Weston, who has to be kidnapped by Trevor. When it's done, in the next cut scene you will see your character together pushing car with him inside of the cliff and what finishes the revenge. Option C is a happy ending in which all three characters remain playable when the main storyline ends. You can play all uncompleted missions and those completed one by choosing them in menu.
 Lamar is Franklin's friend
The mechanism of establishing and maintaining acquaintances, friendships and love affairs in Grand Theft Auto V, works on the principles similar to those from the previous installments of the game, and although it is not as time consuming as in part four,, and it does not involve caring about good relations with the other characters that often. Each of the three protagonists in GTA V starts off with several friends (e.g. Lamar being friends with Franklin or Ron and Wade being close acquaintances to Trevor) and/or family members (the wife, the son and daughter of Michael's), which he can interact with in various ways. Some of the people can be met in the living places of the protagonists (e.g. Franklin's aunt sitting in front of TV at his place) but, a far superior method of contacting the other characters is calling them on the phone. In a way identical to part four, after you make a phone call you can arrange a meeting in a place of your choice and spend your time in nice (or not) company.
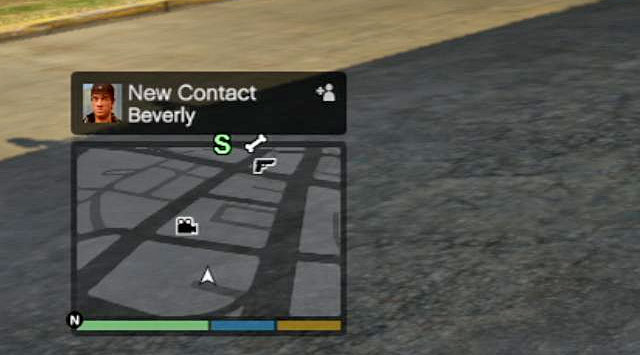
The contacts list of each of the playable characters is flexible and it can grow in size throughout the game. This usually happens when you meet a whole new person while performing main, or side, side missions, and you make friends with them. Fortunately, you do not need to look into the contacts list on regular basis, because the game will always notify you of the fact of adding a new contact.
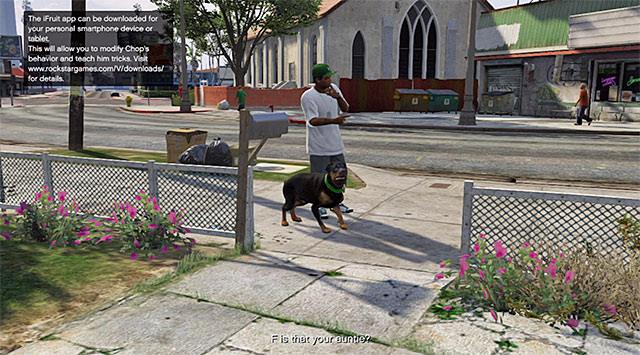 Chop
ChopChop is a Rottweiler belonging to Lamar, i.e. a close friend to Franklin. This nice little doggy appears for the first time during the fourth main mission, and already then Franklin can, to some extent, influence his actions, by summoning him during that mission. The matter of making friends with the dog, and training him, comes into full spin only after you complete the fourth mission. You need to wait until you receive a message from Lamar, which concerns taking over the custody over Chop (temporarily, of course).
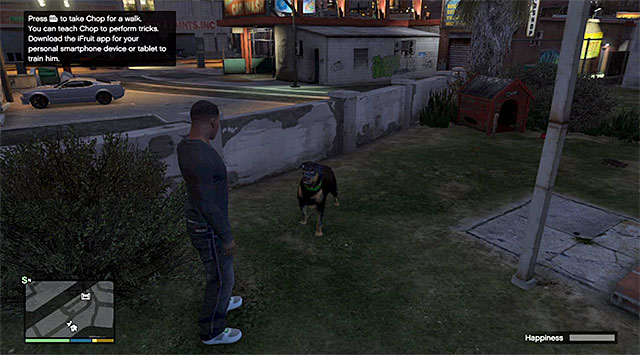 Two "basic" modes of interaction with the dog is walking him and throwing him a ball
After you return home, you can find Chop at the Franklin's home's backyard, i.e. in the kennel erected there for him. The easiest way to improve on Chop's happiness is walking him frequently around the vicinity. Of course, the walk is not the only available option, because you can also teach the dog various tricks. Initially, the only available one is throwing him a ball, so that Chop can fetch it, although, with time, new forms of activity become unlocked.
If you have an IFruit application, you can additionally play with your dog and teach him new tricks and unlock new in-game possibilities. The fun with this application is similar to Tamagotchi. You have to feed Chop, play with him, take him for walks and play in minigames. It will improve dog's abilities and helps in looking for collectibles, because Chop will automatically point place where you can find one. In this application, you can also change the dog-collar color.
For the time of writing this guide, application is available only for iOS, but it should be released soon on Androids also. To use it, you need a Rockstar Social Club account linked with Xbox Live/Playstation Network with GTA.
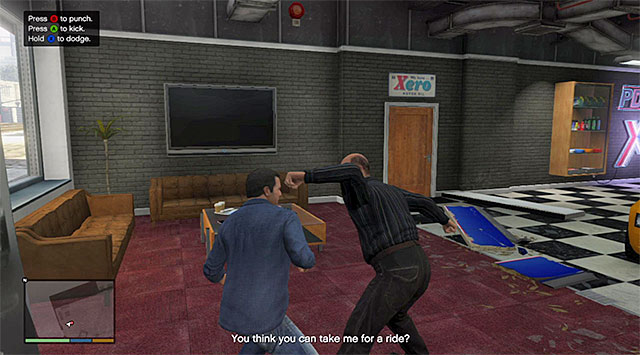 Performing dodges correctly will help you keep the health bar at the safe level
In the fifth installment to the series, melee fights have not changed too much, in comparison with Grand Theft Auto IV. You will learn about the mechanics of fighting, for the first time, towards the end of the fifth main mission, but there is nothing to stop you from learning it on your own.
You should start each fight by locking onto the opponent. You can throw slow or fast attacks. The former carry a greater probability of reaching the target, but they do not inflict much damage. Strong attacks, ion the other hand, may be unsuccessful but, if they reach the target, they are capable of inflicting more damage, and may bring the enemy down in extreme cases. It is just as important to perform dodges correctly. It is worth noting here that you can either restrict yourself to performing the dodge itself, or counter the enemy right afterwards.
If you plan on winning melee fights on a regular basis, I recommend that you, first of all, increase the strength bar for your current character. You can ensure yourself with an easy way to success by playing as Trevor because he is capable of inflicting much more serious damage in melee fights after activating the fury mode (his special skill).
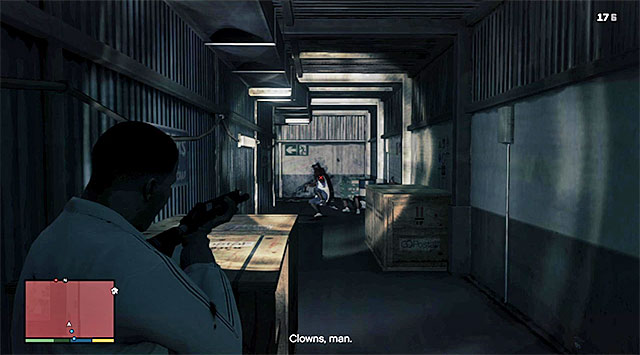 Using covers is crucial
One of the most important things that you should learn perfectly, while in a shootout, is hiding behind covers. they will shield you from damaging your armor and losing your health. It is the more important since the protagonists' health can replenish itself only to the half of its full value and it only does so if you let your character stop to catch some breath. While selecting the covers, try to pick the ones that cannot be destroyed (avoid hiding e.g. behind vehicles or wooden fences) and, if necessary, use the option to conduct blind fire, i.e. firing without sticking your head out from behind the cover.
While starting the game, each one of your characters will, most probably, have a pistol at his disposal. In theory, more weapons can be bought at each Ammu-Nation store, but the best idea is to collect these for free, while completing the main and side missions The game will, almost never, make you go for a mission without being prepared and, if a given mission does not require it, without bearing any cost, you will most probably receive proper armament.
Weapon selection should, of course, depend on the situation in the battlefield, where pistols and automatic rifles seem to be most versatile. Regardless of the weapon that you choose, always try shooting the enemy on the head because not only you will eliminate them faster, but also save time and ammo. Apart from that, you will meet the games requirements for the mission completion in 100%. You should be careful using all of the variations of explosives, as well as grenades and rocket launchers because, explosions within a short distance of your character can quickly kill him.
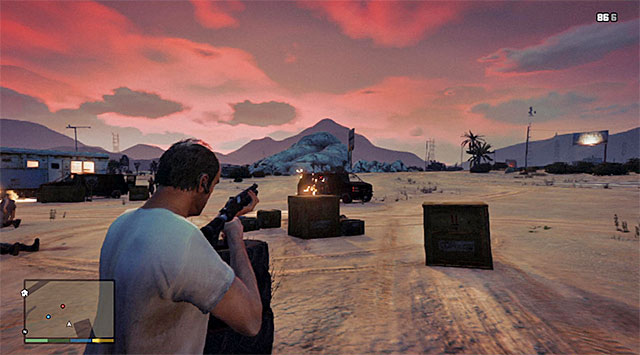 Trevor's special skill will allow you to limit time behind covers
It is best to fight the battles with firearms as either Michael or Trevor. Michael has the special skill which allows him to slow down time, while Trevor, thanks to his fury mode, inflicts more damage. This means that not only can you ignore looking for suitable covers, but also that you can allow yourself use weapons of weaker firepower, because their strength will be considerably increased.
 Franklin can shoot from a vehicle more effectively than his colleagues
There are two courses in which fighting from vehicles can be conducted. The most obvious variant is to conduct fire from behind the wheel (or from the co-driver's seat in the case of some missions) of a moving vehicle. The main advantage of this is that, due to the fact that you are driving, you are a harder target to hit so, as a result, you do not need to worry about taking damage too much. The basic shortcoming is that very often it is more difficult to hit your target. In the best situation here is Franklin, because activating his special skill makes time slow down while he is driving, thanks to which you can allow yourself increased precision while firing. I recommend that you use this skill as often as possible, especially if a given mission requires you to murder the character that you are chasing.
 Hitting a quad or a motorcycle will knock off balance the character that is using it
The other variant assumes eliminating enemies by using the vehicles themselves, but I recommend against too risky actions. It is almost certain that, e.g. if you try to slam into successive enemies, you will be shot down sooner than you do your job. It is much better to slam into single characters with greater speed and drive away right after the successful action. It is necessary that you use the vehicle's mass to your advantage and ram into bikers and ATV riders in a situation when you are driving a bigger vehicle. Knocking the character that you attack, off the vehicle, does not necessarily need to kill them but, at least will slow them down, which will make it easier to attack that person.
Still, I recommend against using vehicles as covers because, as it has been suggested earlier, they can be easily destroyed and, as a result, you can bring about instantaneous death of your character. You can allow yourself an exception only in a situation when your vehicle is in a perfect condition and your enemies use weak weapons (e.g. pistols only).
Following the main plot, you'll visit many interesting places. But San Andreas offers much more than what you can see initially and there are interesting places which can be easily missed, if you don't bother to find them. On the map you can find location of places with some mysteries, are useful or just offers a perfect view.
 Fort Zancudo is a heavy equipment mine
The mysterious military base is hidden behind a west side of San Andreas. You will be nearby it several times during your missions, but probably you won't get inside - which is worth a trip. You can find there, among others, Rhino tank, Lazer P-996 jet, Buzzard helicopter and even a powerful Titan. But, unfortunately, entering the base is equal to four Wanted Stars. And, additionally, you can simply sneak in and penetrate freely so you have to rush things inside, because the longer you're inside, the harder is to get out due to the growing number of guards and machines. But you can get a bit crazy inside. Besides interesting training center in there, you can also find a lot of weapons spread here and there like a minigun.
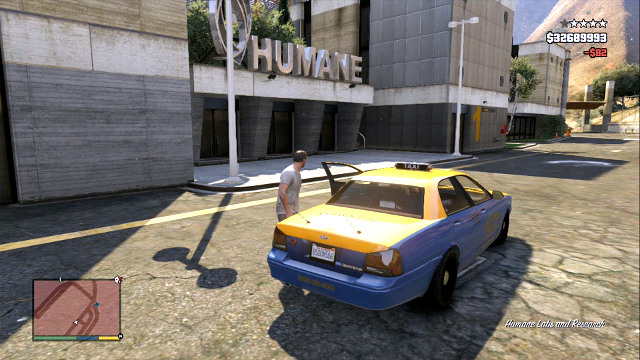 Humane Labs
Another secret place with not clear features is a Humane Labs and Research Company. Located on the eastern coast, almost opposite to the Fort Zancudo. Like in the case of the Fort, you get four Stars for only getting in there. You visit it in one mission, but directly from the inside. o see it from the outside, you have to get there alone. What's interesting, you can take a cab which will take you to the very entrance. But you always get a four stars.
 On the roof of NOOSE you find a Buzzard
On the eastern cost you can also find a headquarter of NOOSE. It's another governmental facility. But on the contrary to Fort Zancudo and HLRC entering it won't cause any stars. You can find there, for instance, a Buzzard helicopter on the roof. To get there, you have to climb up on the ladder on backs on right from the main entrance and then get on the left side of the building.
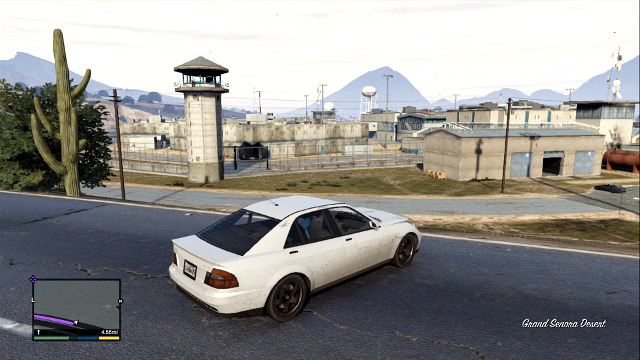 This prison isn't well guarded
Bolingbroke Penitentiary located on south from the Trevor's hangar in Sandy Shores is another place you can visit looking for an adventure. An attempt of breaking in gives you Wanted level but riding around it is completely safe. Next to the prison you can find runaways. They'll pretend to be hitchhikers, but don't get fooled - they are armed. You can recognize them for their orange uniforms.
You should also visit a Los Santos airport. You can find there planes like Luxor. What is more, you can steal big planes similar to Boeings 747 which cannot be bought in any other way. Unfortunately, you can't store them because they are too big for any hangar. There is also no entering them animation. To get inside of a one, you have to stop at the wheel and press the button for getting inside the plane.
Remember also, that if you don't have a hangar, getting on the airport gives you three Wanted stars.
 The highest building in Los Santos
The highest building in LS, inspired by US Bank Tower in Los Angeles. Wonderful viewpoint, what is more, there is a Helipad on the roof (you can't buy it). It's located in the Pillbox Hill, in the center of the city. If you can't find it, just look up.
 Los Santos at its best
On the northeast end of LS you can find a huge VINEWOOD sign, inspired by famous HOLLYWOOD. You can climb on one of letters and see a beautiful panorama of the whole city. What is more, from the top you can easily notice nearby race track, amphitheatre and observatory. Those are next interesting places which you can visit and where you won't get during the main missions.
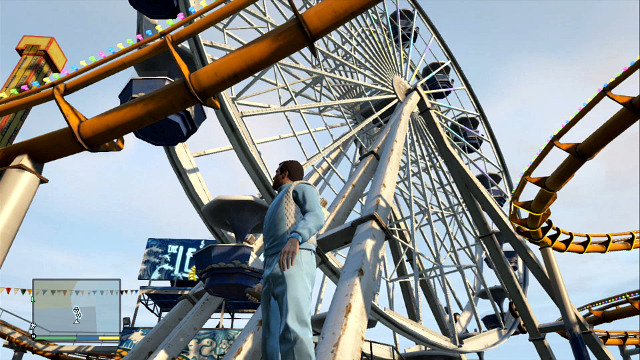 Ferris Wheel is the main attraction on the beach
On the beach in Del Perro you can find a fun fair. You can use some attractions of it, like the Ferris Wheel to look on the city from another perspective.
 Hint on the station
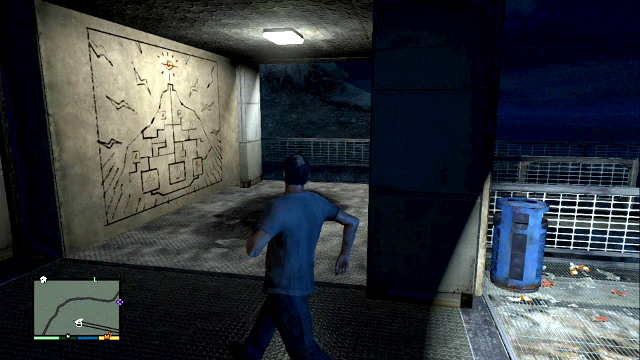
Mount Chilliad is the biggest mountain in the game, on the very north of map. You can get there using a cable car. It's the majestic place from which you have a perfect look on the whole San Andreas, but you can also find here few surprises. On the very top, you can find a parachute and two cross motorcycles. You can ride down from the mountain or jump from it, or make both at once triggering the parachute while being in the air on the motorcycle. What is more, here one of the biggest game mysteries is located. At the final station of the train you find a mysterious painting on the wall. And at the back of the main viewpoint you find an inscription saying to return when "your story ends". It doesn't mean the storyline, but 100 % of completion the game (check the proper chapter of this guide for more information). When you make it, return there at night (at 3 am to be precise) to see UFO over the mountain in the storm. The painting may suggest also some hidden room inside the mountain - maybe it will be a part of DLC.
What is more, this mountain contains many more interesting views and situations. You can run into, for example, a random event when you hear about missing motorcyclists in the radio and then wandering around you hear their voices.
 Altruist Camp
There are also Altruist cultists on the mountain mentioned above. It's a cannibal village which is cut off from the civilization. Trevor may transport there hitchhikers (there is an achievement for that). What is more, when you get there four people, cultists will try to capture Trevor, who will have to fight his way out of there. In this village you can find, among others, RPG, Assault Rifle, baseball cap and a lot of money. When you pick up a hitchhiker, its location shows up - it's the easiest way to get there. You can also place there your private Point of Interest to not forget about it.
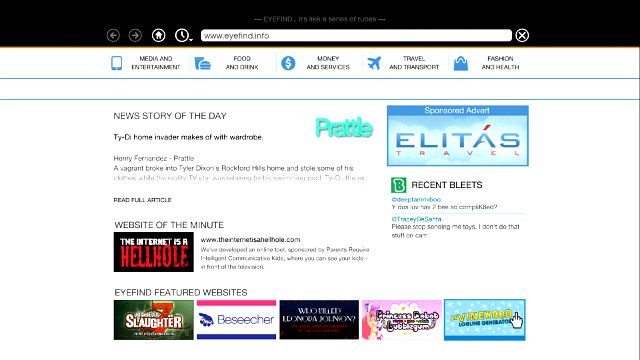 Internet has many surprises for you
Another "thing to check" is also the Internet. Normally, browsing ends on checking shares and your bank account. But the game offers also many internet pages full of specific humor, which is typical for GTA series. You can find, among others, a perfect name for your children (www.yournewbabysname.com) and get to know more about your ancestors (www.yourdeadfamily.com). Click links, ads and use browser to visit more and more pages. You find about hundred pages so pick up phone and start surfing.
Grand Theft Auto V is full of different references, secrets and curiosities. On the map you can find the most important things to see. Additionally, you can find much more subtle Easter eggs.
References to games from Grand Theft Auto series
When Trevor drives somebody down, he sometimes grants himself with ten points. In the first game of series, every driven down pedestrian gave you ten points.
Z-Type car which Franklin has to steal for Devin, and later can be bought for 10 millions of dollars, is a vehicle of Zaibatsu gang from GTA 2.
DJ Lazlow, who conducts the Fame or Shame, conducted radio programs in GTA III, Vice City and San Andreas.
When Michael get to his home, he may sometime say "Daddy's back, you bitches". Those words begin GTA IV.
Another reference to GTA IV: during preparation to jeweler robbery, you may hear that Lester says about a "man from Eastern Europe" who has stopped his activities recently. What is more, at Michael's, Jimmy is browsing profile of Niko on LifeInvader on his laptop.
You can also find here many characters from the previous part of Grand Theft Auto. Johnny Klebitz is killed by Trevor when you meet him for the first time since prologue. Packie can be hired when you meet him in the random event and while making Epsilon missions, you run into Marnie.
Choosing 9485550100 on your phone, which is a number of song identification in GTA IV you'll hear a modem sound.
In mission Derailed, where Trevor on the motorcycle has to jump onto the train, one of additional tasks is called "Better than CJ". It's a reference to the similar mission from San Andreas, where CJ also had to race with a train.
During the mission Hood Safari you visit Groove Street, which is perfectly known to fans of San Andreas. What is more, approaching it you may notice three persons riding bikes in the opposite directions. They look like CJ, Sweet and Big Smoke. It's a reference to one of first missions in SA where you, as CJ, followed the remaining duet.
In-game you can find a lot of references to other game from Rockstar, which is Red Dead Redemption. On the bookshelf at Franklin's, you can find, among others, "Read Dead" written by J. Marston (main character). What is more, many names in this game is borrowed from RDR, like Escaler bus, or streets Cholla Springs Avenue and Armadillo Avenue.
Reference to other Rockstar title, L.A. Noire, is The Elysian Fields Freeway. In L.A. you can find a company called Elysian Fields Co.
In Sub Urban you can buy a hawaiian shirt from Max Payne 3.
Game, in which Michael's son is playing, is a parody of all games similar to Call of Duty
In this game you can also find billboards advertising the new reality show, called Rehab Island. Its logo is very similar to the polish game logo - Dead Island.
Rockstar references also to its direct rival, which is a series Saints Row. While driving around you can hear citizens saying "City of Saints gonna struggle,. Los Santos ain't in no trouble".
Trevor's hideout in Floyd's apartment is almost a copy of Melanie's apartment, one of character from Jackie Brown by Quentin Tarantino.
In one of missions for Devin, Franklin has to steal JB 700 car which is a copy of Bond's car from Goldfinger. Its very name is also a reference to agent 007.
The way Michael destroys house in which tennis trainer is hiding was used by Riggs in Lethal Weapon 2.
If you choose a sneaky approach during the jeweler robbery, you'll have to steal exterminators car which has a sign "It's A Bug's Death" on the side. It's a reference to A Bug's Life.
When you take a bus trip around the city, one of the stops is a city hall. Guide will tell you that it was a place of final in the film Invasion: Los Santos. It's a reference to the Battle: Los Angeles.
The device with which Omega scans Franklin and using which Michael alien artifacts for Epsilon is similar to the device from Ghostbusters.
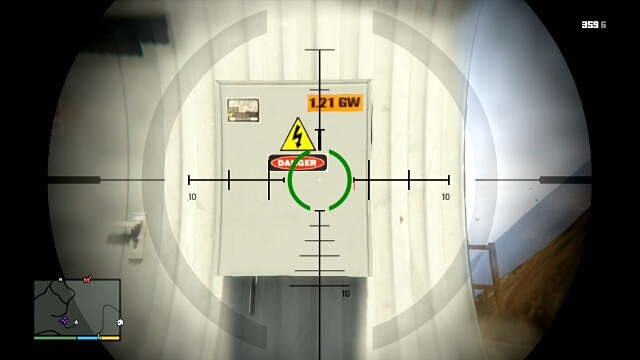 1.21 GW
On the generators in the whole San Andreas you can see a stick note informing that they generates 1.21 GW. It's an energy required to power up Delorian in Return to the Future.
Subtle approach to The Big Score is inspired by the film The Italian Job.
When you go to the cinema, you may see a trailer of Rise of the Planet of Apes. Obvious reference to the Planet of Apes.
In the cinema studios you find a picture with Elvis, Marilyn Monroe, John Wayne and Charlie Chaplin.
In the clothing shops you can buy, among others, vest of main character in Drive and clothes of Jack Torrance from The Shining.
In the Prologue, you can find a frozen alien under the bridge through which train is coming. It's the first of many references to UFO you can find in this game.
During the Predator mission, when Michael uses sniper rifle to find and kill O'Neill brothers, you can run into a Big Foot in the forest.
Referring to the Goatse meme, some of taxi cabs have a 80AAT533 number.
Property name Smoke on the Water is a reference to the famous song of Deep Purple with the same title.
In the Lester's hideout you can find his figures collections. There are for example Master Chief from Halo, Superman and Han Solo.
You can find also here parodies of popular social services. There are, for example, LiveInvader (Facebook) and Bletter (Twitter). There is also a parody of MySpace, called MyRoom. When you get on its site (myroomonline.net), you can read that back in the 2008 it was leader of social services and now is totally deserted because creation of the LiveInvader.
While surfing in the Internet, the middle finger of the cursor is slid out.
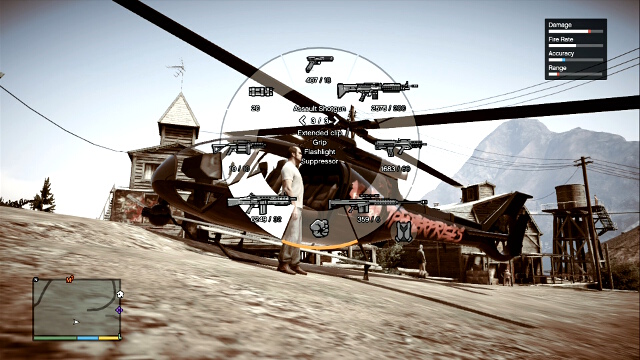 Weapon statistics may be found in the right upper corner of the screen
You can choose the tools you carry by pressing LB/L1 and then switch between weapon types. When you have more than one types of the same weapon category, you switch between them with left and right direction buttons. Notice also where you're firing. When you shoot, small red area will appear on the radar - it shows the range of noise of your weapon. Each enemy will react if he can hear it. What is more, if there is a police in range of it, it also gets interested at firing man. You can use muffler to decrease risk of getting busted.
If you plan to fight hand-to-hand, purchase a knife, which is by far the best melee weapon. Nightstick, a hammer or a baseball bat are slower, less effective and harder to acquire. The knife clearly distinguishes itself. Furthermore, it is very cheap and available virtually from the beginning of the game. Along with the update accompanying the release of the game to new platforms, an ax has also been added. The fight with it will be especially sanguinary, because the inflicted wounds are gruesome and there is no shortage of blood. It is difficult to asses whether it is better than good old knife but one thing we know for sure - it introduces a breath of fresh air and allows you to play a racial butcher-killer. It will be accessible in stores when you complete the mission Trevor Philips Industries.
The best choice within pistols is AP Pistol. You have to increase its clip size. It's a great weapon, maybe even better than semi machine guns! You can rely on it if you don't have an access to rifles. Stun gun is more for fun than any other actions. You can ignore it, but it may be useful when you don't want to kill someone (like in Trevor's mission for Maude). But it has a very low fire rate (fires one for about four seconds).
Those babies are rather unnecessary in your arsenal. If you have AP Pistol, it's much better than all of them. But if you want to use those, get to the Rockstar Social Club. Then, you'll obtain for free Assault SMG in Ammu-Nation for each character (it should hang on the wall on right).
Shotguns are short distance weapon. Ideal for in-house fights for example. When enemies are close to you, switch to them immediately. The most basic version, available from the very beginning, deals huge damage, which kill almost everything. What is more, it can be muffled! The minus is, of course, need of reloading every time. But after all, it's not worth changing it until you get the last one shotgun, Assault. It deals less damage, but it's fully automatic and will be a tool of doom in small rooms.
Basic long-range weapon. When you can get a new model, buy it immediately and get all upgrades. The best model (Advanced Rifle) will be available very late, but you can get it in the village of Altruist Cult (place where Trevor can deliver hitchhikers).
There are only two types available. Regular (MG) and upgraded one (Combat MG). But they are not that much better from rifles. They deal similar damage with smaller rate of fire and less accuracy. But they have much bigger range and clip size. In general, they are better solution before you lay your hand on Advanced Rifle. But when you get the last one and upgrade it, it will be much better from Combat MG. Unless you're fighting many enemies at once and don't have a time for reloading.
Powerful weapon to take down enemies from a distance. Basic sniper rifle may be muffled what makes it a little ahead comparing to the heavy version. Muffler decreases damage a bit, but it won't affect effectiveness that much. But the heavy version can pierce armor, having a smaller clip size. In general, the regular model is more universal and will work almost always, but if you have troubles with aiming at heads you can buy the heavy version.
The top heavy caliber weapon is definitely a grenade launcher. With it you can easily handle any situation quickly eliminating the threat. It is fast, has a decent range, and above all, it is extremely effective. It will destroy almost everything in one shot (in fact only tanks may need more shots). The biggest downside is the limit of ammunition that you can carry, but twenty shots is still more than you may need in almost any situation. The RPG inflicts slightly more serious injuries, but its slowness limits its possibilities. Minigun can easily slash enemies, but you cannot hide behind the curtains with it, so you will be very sensitive to any shots. Railgun, or electromagnetic cannon, the brand new toy which we will be able to use in the new version of GTA after - according to official information - completing mission called Minor Turbulence (you have to go to the gun store and shell out some money). It allows you to strike powerful but requiring reloading shots that smash almost to smithereens all hit objects. We purchase it as soon as possible.
You should always have a pack of Sticky Bomb with you. They are very useful explosives, especially to use from inside the car. And especially when you're playing as Franklin. You ride to the target you want to blow up, turn on Special to slow down time, aim, throw, drive a bit and detonate. It's very effective technique or all chases when your target is driving away. It will also work on police car chasing you. Sticky Bombs are better than grenades in all aspects. Remaining explosives aren't that much useful. Grenade may be useful during shootings with many enemies on a small area and tear gas when you don't want to kill your target - but in that case it's better to use a Stun Gun.
Some special vehicles, like tanks, jet aeroplane or luxury, unique car, may be bought in the Internet. Then, they appear in your garage or hangar. But they are extremely expensive, so if you want to omit that incredible spending, you can just steal the vehicle you're interested in. On the map you can see list of places with unique vehicles, which cannot be found on the street. If the vehicle isn't there, move away and return after a while or change the character and try again. If it doesn't work, return in other time or perform a mission.
 The person with the lowest number of hits win
In GTA full golf game may have at max 9 holes. The rules are simple. You have to put the ball in the hole in the smallest amount of hits you can. Each hole has a suggested number of hits. If you make it within this number, you don't have any points. Each hit below par is a negative point, and each over par is a plus point. Points have their own names:
The game wins the one with the smallest number of total hits.
 Notice the wind and choose clubs carefully
Before a hit, you have to aim at the place you want to hit with the right analog. You can change your club to increase or decrease your range (up and down on D-Pad), but the game will adjust the proper club itself and, in general, you can rely on that (unless there are some specific situations like you don't want to hit into a lake for sure so switch into a weaker club). Try to aim in the brightest grass (hitting from elsewhere weakens power and precision) and avoid all obstacles on your way, like trees and brushes. By pressing right trigger you can check the way of hit and make sure that there are no visible obstacles. Notice also force and direction of the wind. Wind 3 will move the ball strongly aside so remember about it and change the aiming.
When you choose a club and place of hit, push the left analog down to begin a swing. Observe the motion of the horizontal line. When it's in the middle of yellow field, push the analog up to hit. The more away the line is from the yellow field, the worse hit will be. When the ball is flying, you can change its direction with the left analog and pressing A/X.
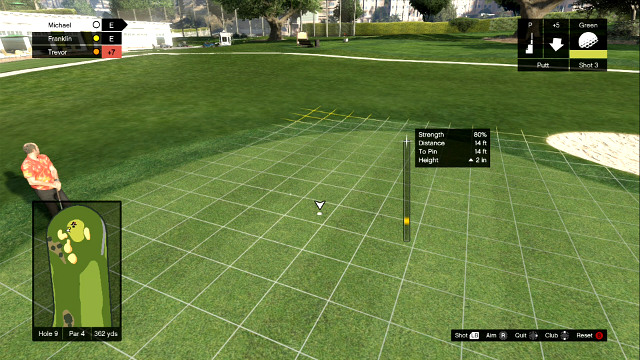 Finishing hits test precision, not strength
When the ball is in the brightest part of the grass, you can use putter for a precise, short hits. The best is to aim a bit behind a hole. Remember about the wind and move the sight a bit aside. This club is less sensitive for wind, so you should be careful with corrections.
To finish golf to 100% game completion, you have to win match for all 9 holes.
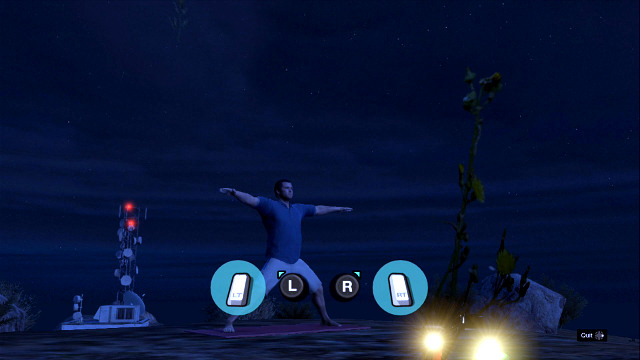 While training yoga, you have to press analogs constantly
Training yoga contains three position. If you break position in the middle, you can begin it again up to three times. To perform an exercise, choose proper direction on the analog and then hold it. Then, holding analogs, you have to press simultaneously both triggers to breath in and then release them to breath out. After that, you begin a new exercise and you have to move analogs one more time (remember, you can't release those when you move them), hold them and again breath in and breath out. Process is repeated until Michael finishes his position.
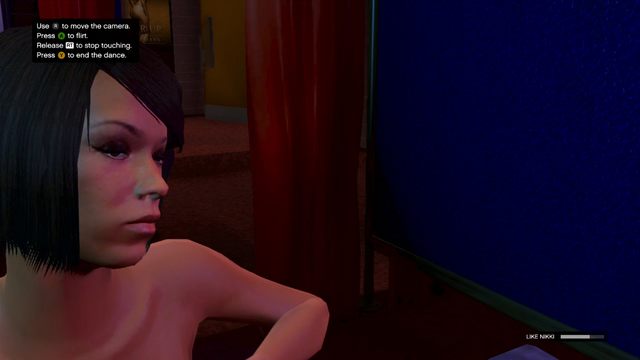
In the Strip Club you can buy a private dance for 40 dollars. It begins a mini game in which you have to touch and flirt with the dancer until you fill the bar in the right bottom corner. There'll be a bodyguard who will look at you and try to not let that happen. When he is nearby, release RT/R2 used for touching and only flirt with the girl (A/X). When he moves away, press trigger and return to touching. When you get three times spotted by the bodyguard, you're thrown out from the club. You can easily check if he is getting closer. Notice a small breach on the screen between a wall and a curtain. Look at it and stop touching girl when you only notice a move through it. When Trevor takes over club, he can touch girls without paying an attention on security.
When you fill the bar, you may offer her to ride to her or if she can bring her friend for a double dance. Only those girls will agree ride home: Julliet, Infernus and Sapphire. You get their numbers and they'll send you their pictures from time to time. It's necessary for 100 % completion of the game.
Hunting becomes available after making secondary missions for Cletus Trevor. When you begin hunting, you get an unlimited ammo to sniper rifle quad and a whistle to lure out nearby animals. Whistle (left direction button) you use to identify place nearby to which are animals. Then, you have to find a target and kill it. Cletus suggests sneaking in (L3) to minimize noise. But in practice, animals won't get scared unless you get real close. Use quad to move faster, especially to making photos. Look also at the wind indicator and move always against wind. Notice also indicator's color: when it's green you can walk steadily, when it's red turn away.
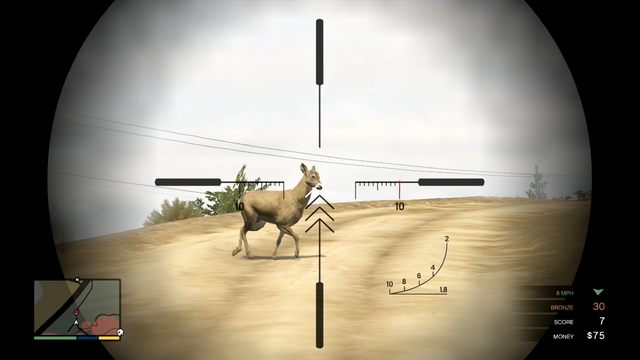 Does don't have horns and shouldn't be killed unless it's a part of challenge
Your target is almost everything which moves, except the does (the one without horns). It can be a bird, coyote, deer or boar. Then, you have to photograph the animal and send your photo to Cletus. He evaluates it and transfer proper amount of money onto your account. The most precious are the deers, 5 points and 50$. You can increase it to 7 points and 75 dollars for hit in the neck and 10 points/100 dollars for hit in the heart. As the game progresses, you can receive special challenges (like kill two deers without a whistle or drive down the boar), which will give you more points. Hunting lasts to the twilight. Earned points determine the medal you get for hunting. When the day is getting to be over, you get a message from Cletus. Hunting may be resumed only at the next morning.
While hunting, you have to beware of cougars. Those closest ones are marked on the radar, you'll also hear a specific noise. Change the sniper rifle to shotgun. In case of need use your Special. When it's launched, Trevor will survive an attack and will kill the car when he gets up. Otherwise, he dies immediately. Killed cougar can also be photographed and send to Cletus.
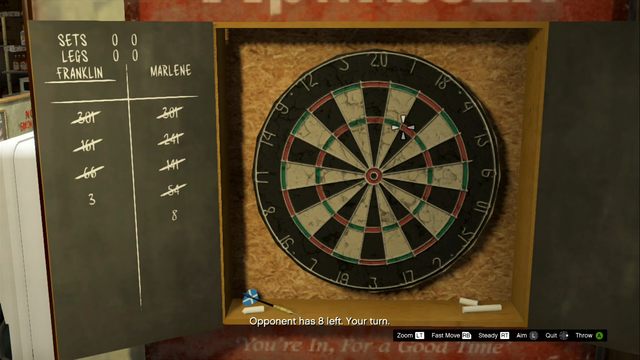 Triple 20 is most valuable
In darts, you have to go down from 301 points to the 0 by hitting in the particular places on the board. Big fields (white and black) are worth the number written on them. Small fields (red and green) making two circles are doubled on the outer circle and tripled in the internal one. Hitting the middle of board gives 25 or 50 points, if you get in the very middle (bullseye). Remember, that to finish the game you have to hit the multiplied value from circles or from the middle of board. In other words, if you need 6, hitting 6 won't end the game. You have to hit a triple two (inner ring) or double three (outer ring) to finish. If you hit the six only or anything more, you won't end the game and you bust your turn.
You throw the dart with A/X. You aim with the left analog. You can also hold RB/R1 to speed up throws. Sight will tremble a bit to make your task more difficult and you can stabilize it for while by pressing RT/R2. When you begin the game, try to always aim at the triple twenty. When you do it three times in a row, you get down about 180 points and then you can win in the second turn when you just need to get rid of 121 points. You can hit then, for example, triple twenty (71), triple seven (40) and double twenty (0).
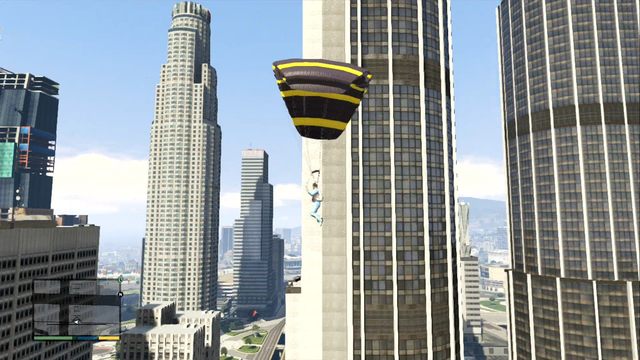 Jumping down from the skyscraper is healthy
Parachuting isn't a typical activity in which you have to drive to the particular place, as in the similar activities. To jump, you have to have a parachute first. You can buy it in (Ammu-Nation) or find it (e.g. at the last station of railway at Mount Chilliad). Then, when you're up in the air, you can jump out from the airplane and start diving. Pushing analog forward you speed up, and moving it back slows flying. When you think that it's time to open a parachute (you can do it even just a bit over the surface), you can open it with A/X. As in the case of diving, you can speed up and slow down with the left analog. What is more, RB/LB/L1/R1 can let you turn during flying.
Parachute may be also opened after jumping on the motorcycle. But motorcycle will fall and you lose it. Parachute is disposable and after every jump you have to buy a new one.
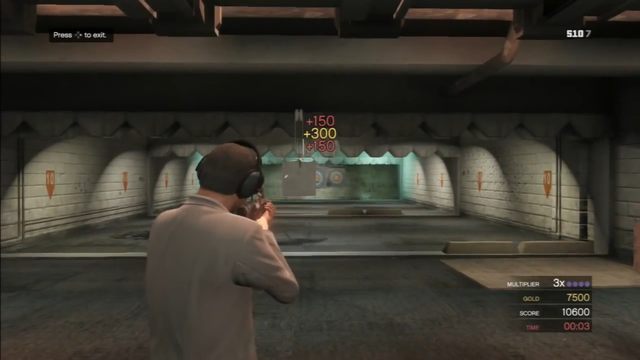 Finishing the challenges in Shooting Range gives you a discount
Some of Ammu-Nation shops have a shooting range at its backs. You can use it for 14 dollars. There, you have three challenges for every type of weapon. Your task is to fire at shields when they appear, the closer the middle, the more points you get, up to the hundred. What is more, every accurate shot is sum up to the multiplier which may increase your amount of points. Each shot which misses, zeroes the multiplier and you have to build it up from the beginning. The time is limited and the earned points determine the medal you get.
Notice, that challenges are for particular types of weapons (pistols, rifles, shotguns) not for their sub-types. So use the model you feel comfortable with (you may have to unlock it first). Ideal is an automatic weapon with a big clip size. If you're good with bronze medals, you can complete almost all challenges by pulling the trigger constantly without bothering about multiplier. But gold medal require more precision and a solid multiplier, so you can't let yourself miss too much. The shields uncover rather in the same sequence, so remember where to aim before they show up. Medal in every type of weapon gives you a discount in Ammu-Nation.
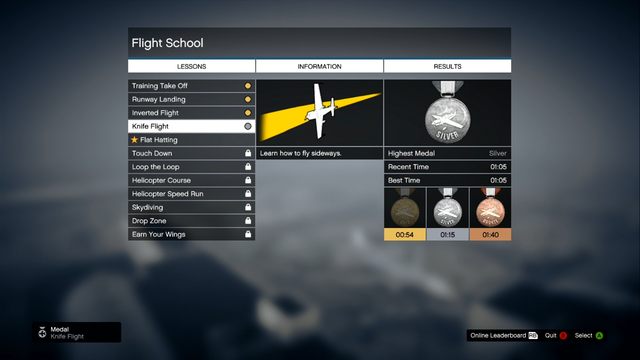 Flight School let you learn techniques
Flight School let Franklin and Michael develop their skills (Trevor has it very good but he also can learn something new). It has twelve missions in which you have to make missions ordered by the instructor. The faster you make it, the better medal you get.
1. In the first mission you just have to start and fly through the two checkpoints. Speed up the plane with RT/R2 and then rise moving the left analog back. When you're in the air, stabilize the flight and fly through your target.
2. In the second mission, you have to land. Fly steadily to the landing site, slide out the undercarriage (L3) and slowing down slowly set the plane on the landing site. But don't stop totally! When you land, move on side. So drive slowly and then turn left using LB/L1.
3. In this mission, after rising you have to make a barrel and then, three times in a row, fly upside down. First of all, make sure that you're high enough to not hit in any of skyscrapers. When you get on the proper altitude, perform the commends of trainer (notice the bar in the right bottom corner showing when you can make a stunt). To make a barrel, just push the left analog left or right until you make a full rotation.
4. Another simple mission. You have to keep the plane vertically. You do it like the barrel but you have to release the analog earlier to "stand" on the wing instead of making a full rotate. Remember, that when you fly, you increase or decrease altitude with LB/RB/L1/L2 depending on the wing on which you lean on.
5. First tricky mission which may turn out to be problematic. You have to fly a rather long route between low checkpoints. Fly easily and steadily and turn on bumpers. Notice symbols on checkpoints because they show where the route goes and let you turn before you even fly through the checkpoint. If you miss any checkpoint, you get a five penalty seconds. Fly steadily and slowly and you should make it without any problems.
6. You have to make a crash landing on the bridge. There is no time limit, so you can take your time. Try to touch the bridge on its very beginning and close to the middle to not hit the barriers. Then speed up and avoid cars to get to the finish.
7. Here, you have to make a loop. First of all, head your plane towards sea, not towards the city. When being there, move your analog back when only you see a red bar in the right bottom corner of the screen. It appears a moment before trainer's command, so if you begin it earlier, you spare few precious seconds. Pull down until you make a full turn. It's important for plane to fly steadily, so try not to move analog on sides. The last trick may be problematic. Here, you have to make a half of loop and change it into a barrel. It may need several attempts.
8. Now, you start controlling the helicopter. And for the beginning, more checkpoints to get. It should be somehow easier than the similar mission with a plane. Remember about the altitude (control it with triggers). You don't have to hurry too much, fly calmly and you should make it in time for a gold medal. On your way you find many opportunities for Under the Bridge challenge, but do it only if you really feel your helicopter. Landing may be problematic. Remember to steady your vehicle by slowing down and flying in place. Then, slowly put him down.
9. Another flight with a helicopter, but this time you have to hurry a bit, and some of checkpoints really vary in mean of altitude. It's mission which requires a lot of practice, so you should train a lot to make it. You have to perfect balance between increasing and altitude and speed, and also skillful landing. The most important thing is not to get frustrated and try again and again. After a few attempts it should be relatively easy.
10. Rather easy mission in which you have to land after parachute jump in the particular place. The best is to open a parachute after few seconds of flight to have as much time and control over where you fly to. Remember that you can speed up and slow down and turn under bumpers. Try also fly on the circle from the front to make it easier. When you're close to it, trigger focus on the landing site (B/wheel) for even better control.
11. Another parachute mission. Here, you have to land on a riding truck. First of all, notice the traffic lights and try to fly equal to them. Landing on the truck is a task for the left analog. It may require several attempts, but this mission isn't really that hard.
12. The last mission is a return to the plane and another checkpoint flight. This time, you have three types of them. Yellow standard, green ones through which you have to fly vertically and blue for upside down flying. Notice a plane drawn on the green checkpoints and move the plane according to the drawing. It's not a requirements and you can fly also other side, but following drawings will make easier for you to take a turn before another checkpoint. This mission may seem problematic, but it's all about learning and remembering the sequence of turns. After several attempts you shouldn't have a problem with finishing it. If you don't miss any checkpoint, you should easily get a gold medal.
 Tennis increases character's strength
Tennis has real rules here. So, gem ends when any of players get 45 points and win a gem ball. 1 set is 5 gems. You get 15 points for every good hit. Gem ball is after getting 45 points: it decides whether you win or not particular gem or set. If both players have 45 points, it is deuce. During that, one of players has to win two balls in a row to win the gem.
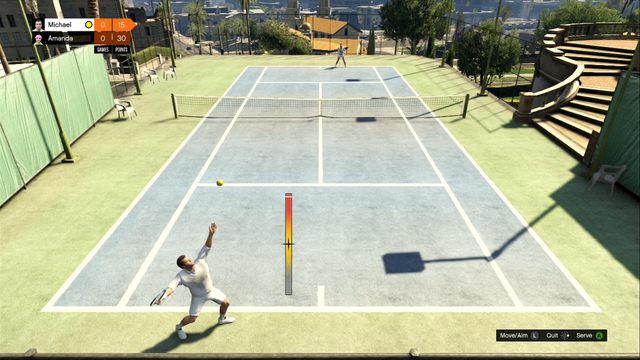 Bar defines the hit strength.
At the end of each gem, you change sides. During the gem one serves all the time. You start serving by pressing A/X. A bar appears. To serve, press A/X again when the horizontal line is in the upper part of the bar. If the ball doesn't get on the other side of the net, you can try again, but three fails in a row means a point for the rival.
Red part of bar is the strongest hit. With left analog you can also aim the hit. If it's strong enough and well aimed, you may get a service ace.
You move on the court with the left analog. It's important to choose the proper position, to get the ball at the time. Try to aim at the side of court opposite to where your enemy is standing. You do so by moving the left analog left or right when you hit the ball. You'll force him to run and make a mistake sooner or later. What is more, sometimes when the ball lands on your side, it has some particular color instead of white. Hitting the ball with a key in the same color is a play which may give you the point in the easiest way. Naturally, it's not obligatory and you can play whatever you like.
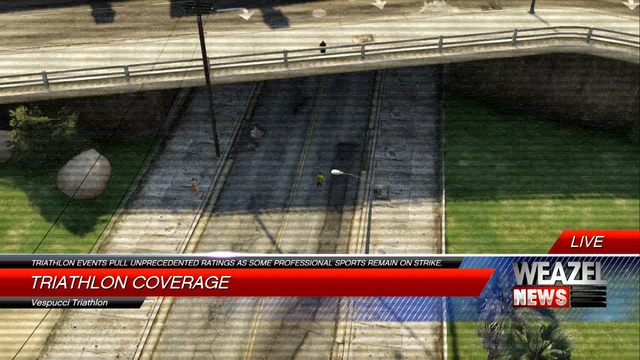 You can watch yourself in TV
Triathlon is a swimming, bike and running race in one. It's a great way to increase stamina of all three characters and injure your fingers from constant clicking. The rule of all three races is simple. Left analog controls where you move while pressing A/X constantly speeds you up. If your character has low stamina, he will get tired sooner so you will have to slow down or don't bother with that and start losing health points. After two normal triathlons, you unlock the third one, The Coyote Cross Country Triathlon, which takes half an hour. Before choosing it make sure that your character has good stamina. Pause it regularly also to give a break for your fingers.
 Races are Franklin's specialty
In this game you can find several types of races. Water, off-road and street ones. The best suited character to this job is Franklin, due to his very useful Special which makes easier every hard turn. What is more, on he can take part in night street races in Los Santos.
The general rules are similar for every race. To get a medal, you have to finish it in the first three places. But you can't fire at your enemies or try to blow them up. You can push them, what they will also try to do. You have to also get through every checkpoint. In most of cases (besides street races), you'll get a vehicle which you will control, so you don't have to run around whole San Andreas to find a proper vehicle.
First of all, remember that racing in GTA isn't similar to Sonic Racing. Speeding up constantly you'll surely get out of the route and break. If you burn the gum before the start, you slow down your vehicle and there are no accelerators on the route, nor bonuses. Drive carefully and calmly, avoid accidents. If you crash at the start, don't cry - computer players also make mistakes, so you may have a chance to catch up with them. Try to avoid too much pushes. Drive in a safe distance from everyone and notice symbols on checkpoints which inform you about the next turn. Try also to find various shortcuts through grass or parks. In water races you can also lean the scooter back to jump on waves. It's slower than normal driving, but you may be able to jump over obstacles and other players. You'll quickly discover that races in Grand Theft Auto V are not too challenging if you only have a proper car, drive carefully and use Franklin's Special.
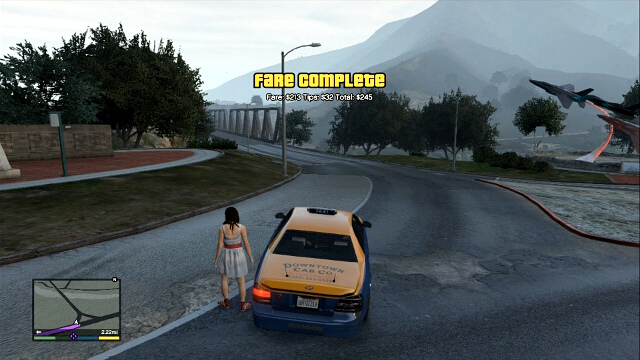 Each ride means additional cash
You can earn additional cash for becoming a taxi driver. To begin, you have to steal a taxi cab (hold key for entering the car. Remember that you can also stop the taxi riding next to you). There are two options of getting the job. You can press L3 to get a client or wait from the drive proposition from the central. You accept proposition also with L3.
The rules of taxi driving is fairly easy. You ride to the particular place, client enters the car and then you take him where he wants to. The faster you make, the more tip you get but you have to be careful, because crazy drive and accidents may frighten him and then he may decide to leave the cab without paying. You get about 100 dollars for a mile plus tip which is about 30-60 dollars. When you finish one drive, you can take another one at once or wait.
If you want to complete an achievement with buying a company and making a private drive, you have to buy Down Town Cab Co. and then wait for a proposition. It's not a standard drive, so making a standard drive won't give you an achievement.
In this chapter, you will find a full list of radio stations available while driving a car in GTA V. Also, all of the songs broadcasted by the stations have been written down, to make it easier for you to find a station that fits your liking best.
 Blue Ark FM Logo
The Blue Ark FM radio station plays reggae. Is hosted by Lee "Scratch" Perry, a composer, producer and dubmaster from Jamaica, highly regarded by reggae fans.
Track list:
 Channel X Logo
The Channel X radio station plays punk rock. Its host is jest Keith Morris, the leader of an American punk rock band Black Flag.
Track list:
East Los FM 106.2 LogoThe East Los FM 106. 2 radio station specializes in Latino rhythms and plays bits created in Latin America, and which represent music genres like hip-hop, ska, rock or electronica. This station is hosted by Don Cheto (a Mexican musician) and Camilo Lara (also born in Mexico a highly0-regarded DJ and producer).
Track list:
 FlyLo FM Logo
The FlyLo FM radio station plays experimental electronic music. It is hosted by Flying Lotus, i.e. Steven Ellison - a rapper and producer from Los Angeles.
Track list:
 Los Santos Rock Radio Logo
The Los Santos Rock Radio station plays classic rock. It is hosted by Kenneth Clark "Kenny" Loggins, an American singer, musician and composer.
Track List:
 Lowdown FM Logo
The Lowdown FM radio station plays soul. It is hosted by a well-known American actress Pamela "Pam" Grier.
Track List:
 Non Stop Pop FM Logo
The Non Stop Pop FM radio station plays contemporary pop music. It is hosted by a 21-year-old British model Cara Delevingne.
Track list:
 Radio Los Santos Logo
The Radio Los Santos radio station plays contemporary rap music. It is hosted by Kurt Alexander, pseudonym Big Boy. He works as a DJ in a Los Angeles radio KPWR.
Track list:
 Radio Mirror Park Logo
The Radio Mirror Park radio station plays independent music (indie). It is hosted by Twin Shadow, i.e. George Lewis Jr. - a musician from the Dominican Republic, who specializes in such musical genres as chillwave, newwave or synthpop.
Track List :
 Rebel Radio Logo
The Rebel Radio station plays classical country music hits. It is hosted by The Dancing Outlaw, i.e. Jesco White - a popular, American dancer and comedian.
Track List :
 Soulwax FM Logo
The Soulwax FM radio station plays techno music. It is hosted by the members of the title Belgian music group Soulwax.
Track List :
 Space 103.2 Logo
The Space 103.2 radio station plays funk music .it is hosted by William Earl "Bootsy" Collins, an American singer, musician and composer.
Track List :
 Vinewood Boulevard Radio Logo
The Vinewood Boulevard Radio station plays alternative rock. It is hosted by Nate Williams and Stephen Pope, i.e. the members of an American music group Wavves.
Track List :
West Coast Classics LogoThe West Coast Classics (WCC) radio station plays rap music of the eighties and nineties. It is hosted by DJ Pooh, i.e. Mark Jordan - a renowned American rapper and producer.
Track List :
 WorldWide FM Logo
The WorldWide FM radio station plays ambient and chillout music. It is hosted by a world-known DJ and producer Gilles Peterson.
Track List :
 The Logo of the Public radio stations
In Grand Theft Auto V there also are radio stations that are public in their character which, instead of music, broadcast news reports and talk shows. These are:
 Your stats may be checked in the main menu
Finishing the GTA V on 100% requires spending a lot of time with the game. But, luckily, from the technical point of view, it's not a 100% for real. Your level of completion may be checked in statistics in the main menu.
Here is a full list of required things:
Getting 100% completion rewards you with an achievement. What is more, a spaceship appears high over the Fort Zancudo. You can get close to it, but it's defended by some kind of a force field and each trial of takeover kills you.
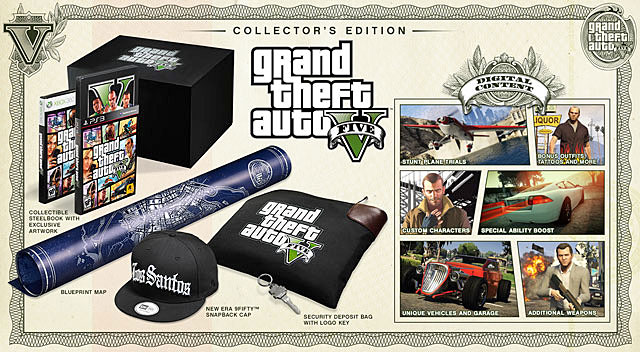 Collector's Edition of GTA V can take pride in the richest contents
Grand Theft Auto V comes in three different editions - Standard, Special and Collector's. In this chapter, you will find detailed information about the contents of each edition, which should be helpful while buying the game.
The contents of this editions are as follows:
The contents of the Special Edition are as follows:
The contents of the Collector's Edition is as follows:
As in the previous games, GTA V offers a variety of simplifications for those who doesn't want to play according to the rules or just looks for alternative way of playing. To active code, you have to insert quickly particular combination of keys. Remember that all directions has to be chosen on the D-Pad and after activiation of codes all achievements are turned off. If you save game in that moment, they'll be disabled on every save to the end. Each usage of the code requires putting it in once again so if you have to get rid of five start Wanted Level, you have to put the combination five times in a row. What is more, when you summon a vehicle make sure you're on a big, open space.
Quick running

Quick swimming

Burning bullets

"Bang Bang"

Explosive melee attack

Charging Special

Wanted Level + one star.

Wanted Level minus one star

Parachute

Five minutes immortality

Maximum HP and armor

Weapon and ammo

Super jump

Slowing up aiming (sums up to four times, five usage resets it)

Drunk Mode

Low gravity

Sliding cars

Change of the weather

Slowing up speed (sums up to four times, five usage resets it)

If any vehicles doesn't want to show up, make sure that there is enough of free space next to you.
Buzzard

Caddy

Comet

Crop Duster

Limo

PCJ-600

Rapid GT

Sanchez

Stunt Plane

Trashmaster

Quick running

Quick swimming

Burning bullets
"Bang Bang"

Explosive melee attack

Charging Special

Wanted Level plus one

Wanted Level minus one

Parachute

Five minutes immortality

Maximum HP and armor

Weapon and ammo

Super jump

Slowing up aiming (sums up to four times, five usage resets it)

Drunk Mode

Low gravity

Sliding cars

Change of the weather

Slowing up speed (sums up to four times, five usage resets it)

if any of vehicles doesn't show up, make sure that there is enough free space next to you.
Buzzard

Caddy
Comet

Crop Duster

Limo

PCJ-600

Rapid GT

Sanchez

Stunt Plane

Trashmaster


A Lot of Cheddar - Spend a total of $200 million across all three characters.

A Mystery Solved - Solve the mystery of Leonora Johnson. (collect all 50 Letter Scraps).

All's Fare in Love and War - Purchase Downtown Cab Co. and complete a private fare.

Altruist Acolyte - Deliver an unsuspecting victim to the Altruist Cult. Trevor, from time to time, will have random missions when someone asks him for a ride. To make an achievement, take someone to the Altruist Cult, which is marked on the map with A, next to the Chiliad Mountain.

Career Criminal - Attain 100% Game Completion. Detailed list of requirements can be found in the particular chapter of this guide.
Close Shave - Complete all Under the Bridge and Knife Flight challenges.

From Beyond the Stars - Collect and return all spaceship parts. Franklin missions in Strangers and Freaks.

Kifflom! - Complete your path to enlightenment... or not. You can complete this only with Michael. While surfing in the Internet, visit a website of Epsilon and perform a psychological test. More detailed description may be found in Atlas.

Los Santos Customs - Fully mod a vehicle.

Multi-Disciplined - Attain a gold medal in all applicable hobbies and pastimes. It includes shooting range, aerial school, all types of races and triathlon. You need only one gold medal in every discipline.

Out of Your Depth - Get killed by a shark. Sail out on the ocean to find a shark - they are marked with red dot on the map.

Pimp My Sidearm - Fully mod a weapon.

Red Mist - Complete all Rampages. They are marked with a skull.

San Andreas Sightseer - Explore all of Los Santos and Blaine County. Unexplored regions are covered with the fog of war, so get there to uncover a new part of the map.

Show Off - Complete all Stunt Jumps.

Solid Gold, Baby! - Earn 70 Gold Medals on Missions and Strangers and Freaks. Remember that you can repeat missions.

Three Man Army - Survive 3 minutes on at least a 3 star Wanted Level with all three characters together off mission.

TP Industries Arms Race - Purchase McKenzie Field Hangar and win the arms race.

Trading Pure Alpha - Make a profit over your total investments in the stock market. The best way is to invest in companies suggested by Lester.

Wanted: Alive Or Alive - Deliver a bail bond target alive to Maud. There are five missions. You need just to hit a runaway to make them stop escaping.

Waste Management - Purchase the old dock and collect all nuclear waste. There are 30 of them.
All hidden achievements are related with the main storyline, so you won't miss them as the game progress unlocks them. All of them are uncovered when you finish the main game.

A Fair Day's Pay - Unlocked after mission Caida Libre.

A Friendship Resurrected - Unlocked after mission Fame or Shame.
Blitzed - Unlocked after robbery in Blitz Play.

Diamond Hard - Unlocked after jeweler robbery..

Small Town, Big Job - Unlocked after bank robbery (The Paleto Score).

Subversive - Unlocked after robbery on Merryweather (The Merryweather Heist).

The Big One - Unlocked after the last robbery (The Big Score).

The Government Gimps - Unlocked after robbery on FIB (The Bureau Raid)

The Moment of Truth - Unlocked after revealing the truth about Brad by Trevor (Bury the Hatchet).

To Live or Die in Los Santos - Unlocked at the end of the game.

Welcome To Los Santos - Unlocked after the first Franklin mission.
This unofficial guide to Grand Theft Auto V - Quests & Missions offers a thorough help with completing all of the missions available in the game. This guide includes, first of all, a walkthrough for all of the missions in the single player campaign. The descriptions of individual missions inform of the actions that need to be undertaken to complete them correctly, and also suggest the best way to take advantage from the main character's strong points and what needs to be done to complete each of the missions in 100%. A strong emphasis has been put on completion of heists, which play a key role in the game. The descriptions of heists consider all of the possible variants of acting, so that completing heists is possible regardless of the adopted tactics.
Apart from the description of the main missions, this guide also includes walkthroughs for all of the side missions given to you by strangers and freaks as well as the descriptions of random events, which you can witness as you explore the game world.
This guide comes complete with a very detailed map, where there have been marked locations of mission givers (both main and optional), as well as all of the other important places (e.g. the location where you can obtain a specific vehicle, or store location).
Grand Theft Auto V - Missions is the second part of our enormous guide for Grand Theft Auto V. The other two are Grand Theft Auto V - Strategy Guide and Grand Theft Auto V - Maps & Secrets. Check them out!
Grand Theft Auto V - Quests & Missions guide include:
Jacek "Stranger" Halas ()
The descriptions of the main missions have been published in the s guide, more or less in the order that they are unlocked by the game. Still, it is worth knowing that you do not necessarily need to complete them in that same order. What is even more, the missions connected with assassinations, which you are tasked with by Lester, (23: Hotel Assassination, 24: The Multi Target Assassination, 44: The Vice Assassination, 45: The Bus Assassination, 50: The Construction Assassination) can be left for later. Personally, I recommend that you take to them after you have completed the last big heist because, with several/tens of millions of dollars on your pocketbook, you will be easily able to multiply your assets and, as a result, buy all of the available estates.
At the same time, it is worth noting that it is impossible to complete all of the missions contained in this guide at one sitting, because many of them are bound with specific heist variants. Personally, I recommend that you save the game before you start your preparations for each one of the major heists, which will enable you to check out on all of the missions and, at the same time, select the heist variant that you consider more profitable.
Successive missions from strangers and freaks are unlocked as you make progress in the game but, there is no one specific moment at which a given mission becomes available. That is why I recommend that you check out on the map frequently and make sure that the locations, in which the question marks are supposed to appear, are discovered early enough (fortunately, most side missions take place in Los Santos and Sandy shores).
Many of the stranger and freaks missions come interconnected, and it is usually the case that the next mission from a given person becomes available after the previous one is completed. Many times you will also need to wait for several hours, or days, until it is available.
By analogy to the main missions, most of the side missions can be repeated from the level of the pause menu. The exception to this rule are the missions which consist only of listening to the person in question (e.g. the initial meeting with Omega, Abigail or Nigel).
Random events become available at various stages of the game and they start appearing already in the initial hours of the game. Most of them start in specific locations but, not necessarily after you visit that location for the first time. If this was the case, you need to visit that place later in the game, in hope that the event reappears.
Unlike the main missions, or stranger and freaks missions, random events cannot be repeated from the level of the pause menu. It is worth knowing, however, that a given event does not repeat if you complete it properly. Several of the events (e.g. attacks on marijuana plantation, ATMs), follow a cyclical pattern, i.e. they repeat on a regular basis.
This category of missions becomes available only after you purchase the appropriate estates. Most of the missions connected with estates are random in their character, i.e. you can practically at any moment in the game, receive a phone call, or a message with the information of the availability of a new mission. You, of course, need to be playing the correct protagonist for that to happen - while playing, e.g. as Michael, you will be receiving information from the managers of the estates that he bought, while Franklin's and Trevor's estates are inactive.
Way to unlock: The mission starts automatically after the game is launched.
Playable characters: Michael, Trevor
Additional information: This mission not only constitutes the introduction to the game proper, but will also help you get acquainted some of the most important mechanics at work in the game, like participating in shootouts, driving vehicles and switching between the playable characters. You do not need to prepare yourself for this mission in any particular way, because all of the new elements of the game will be presented to you on a regular basis.
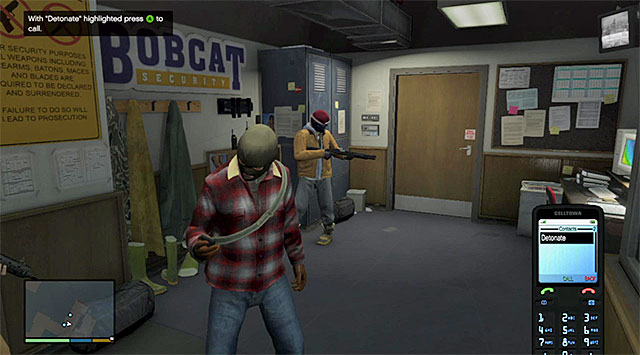 You need to use your phone to detonate the charge
You start off by controlling Michael, temporarily without the possibility to cut to Trevor. Acquaint yourself with the radar, enter the room where the hostages are being held. Aim your weapon at the hostages (do not shoot) to make them walk over to the neighboring storage room. After that, select your cell phone from the inventory, select the default Contacts tab and confirm the remote detonation of the charge (Detonate), which will unlock access to the vault.
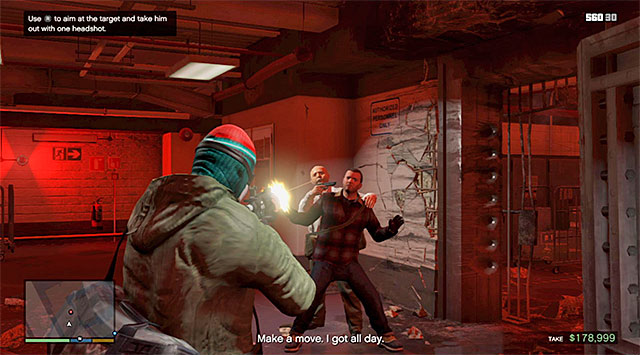 Target the guard's head
Follow the linear corridors to the vault and enter. Approach the table marked by the game to collect money. Try leaving the vault, which will result in Michael's being apprehended by one of the guards. Do not worry about that, because this scene is a part of the tutorial that is supposed to acquaint you with cutting between the playable characters. Press, and hold down, the correct button on your game pad, select Trevor and release the button. After you cut to Trevor, aim at the guard's head and kill him.
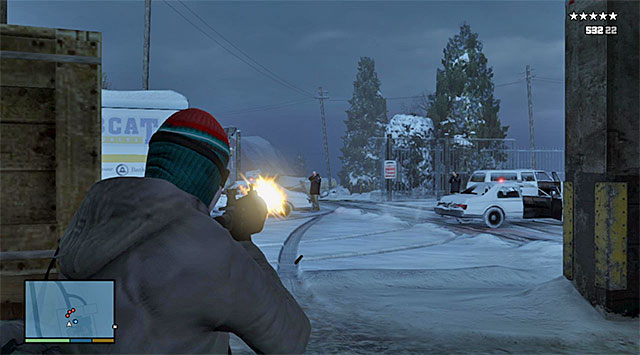 The shootout on the yard in front of the bank
Resume your march towards the building's exit and learn, along your way, how to use covers. After you are out in the parking lot, in front of the building, hide behind the nearest cover and start eliminating the police officers in this area. You can keep playing as Trevor but, if you want your aim and your shooting to be more precise, cut back to Michael. Regardless of the character that you have chosen, keep killing the policemen the closest to you in the first place, thus preventing them from coming closer or flanking you.
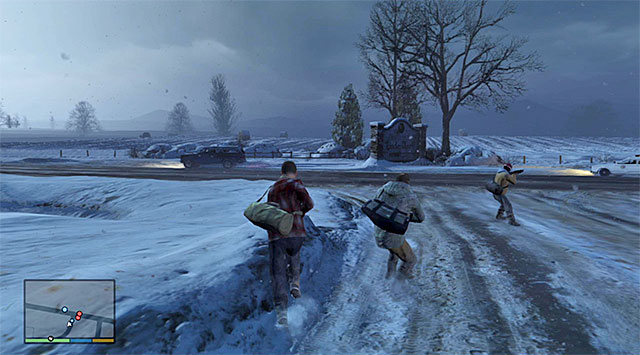 The car that you are going to use to flee
Soon, you will have to walk along a gravel road towards the trunk road. It is a good idea to sprint here but, remember that you also need to keep eliminating the police officers and hide behind cars or other effective covers, whenever necessary. After you reach the abovementioned trunk road, eliminate the last group of police officers and run up to the vehicle that stopped on the left, to get into it.
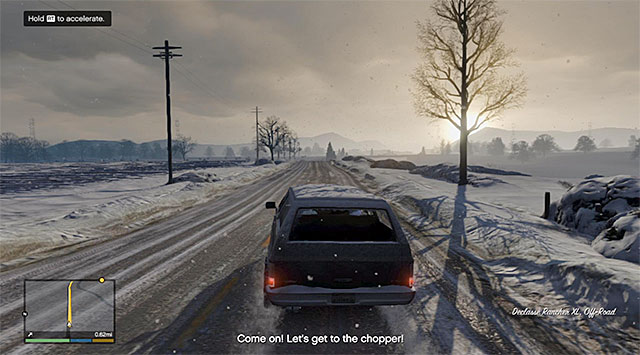 The road towards the airport
Ahead of you, there is the first scene in which you need to control a vehicle. The route towards the airport is simple, because all you need to do is drive straight ahead and take a turn to the right only after you get near a police road block. Finally, you are going to watch a short scene , during which you will have to control Trevor. Continue your fire from behind your cover to eliminate the incoming police officers. The game will soon start another cutscene and the prologue will end.
Rewards for the completion of the mission: none
Requirements for the completion of the mission in 100%: There are no additional requirements to this mission so, it is completed in 100% automatically.
Way to unlock: you need to complete mission 1 (Prologue).
Playable characters: Franklin
Additional information: The predominant aim of this mission is to get you acquainted with Franklin. Furthermore, you will be able to practice the more advanced maneuvers with vehicles, using of special skills as well as escaping police pursuits. This time around, you also need to meet certain requirements if you want to finish this mission in 100% and, for more details, see the end of the description of this mission.
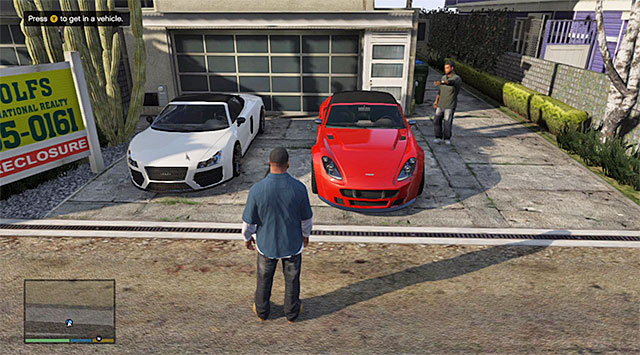 Two vehicles to choose from
It has already been stated that you complete the mission, in its entirety, by playing as Franklin. Go along the narrow alley between buildings to reach a location with two sports cars parked. You need to get into one of them and it is good to know that your choice has absolutely no bearing on the mission, because both of them are similar in terms of their performance.
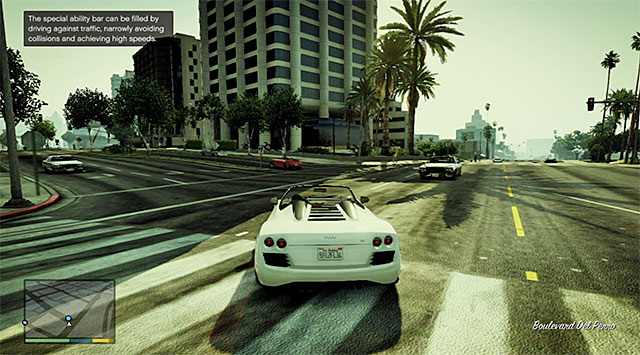 Franklin's special skill helps him avoid collisions
In accordance with the piece of information that you received,, you will have to follow Lamar in his car. As you drive, you of course cannot let Lamar get too far away but, you should pay even more attention to not bumping into the other cars and obstacles, in order not to damage the stolen car. In accordance with the game's suggestion, it is a good idea to practice Franklin's special skill. After you initiate that skill, you can observe time slowing down while driving a car. It is best to use this skill to swerve around the more demanding obstacles, to take sharp turns into alleyways and to perform swift U-turns.
 While driving across the movie set, try not to bump into anybody
Further on, you will have to drive across a movie set and it is worthwhile to make sure that you do not bump into anybody dressed up as an alien. A bit later, you will have to perform several jumps. I recommend against getting carried away with that, to prevent collisions with the others in the street. Finally, you will have to drive through three multi-storey parking lots and you can turn on the headlights in your car to help you.
Soon, Franklin and Lamar will become wanted and, as a result, you will have to lose a two-star police pursuit. The mechanics here are a bit different than in the previous installments of the game, because you first need to disappear from the sight of the chasing policemen (use the car's top speed to pull that off), and wait in hiding for the chase to end to prevent the chase from being resumed. I recommend that you hide in some side-alley or in an underground garage (the above screenshot).
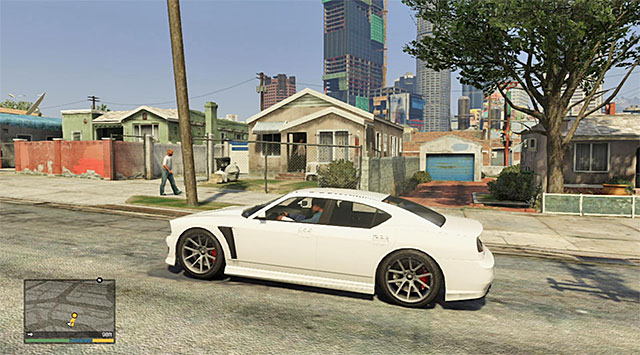 The vicinities of Franklin's house
After you lose your tail, drive towards the car dealership marked on the map, owned by Simeon Yetarian. You should, of course, avoid any collisions on your way there, although, it pays off to get there before Lamar. After you watch the cutscene in the dealership, get into Franklin's private car (Bravado Buffalo) and reach Franklin's house. Park the car in the garage, which will complete this mission.
Note- If you want to save the mission, interact with the bed in the bedroom. This is also the first time when you can use the option to repeat an already completed mission (to test another combination of the playable characters, or to complete the mission in 100%).
Rewards for the completion of the mission:
Requirements for the completion of the mission in 100%:
Way to unlock: You need to complete Main mission 2 (Franklin and Lamar). Wait for a phone call from Simeon Yetarian, answer it and listen to the conversation. You can now go to the car dealership to start the mission (letter S on the world map).
Playable characters: Franklin
Additional information: While playing this mission, you will take part in your first shootout but, again, you do not need to get prepared for that in any particular way, because you will receive automatically the weapon that you need to dispose of all of your enemies. At the same time, it is worth noting that Franklin will be, once again, accompanied by Lamar during this mission.
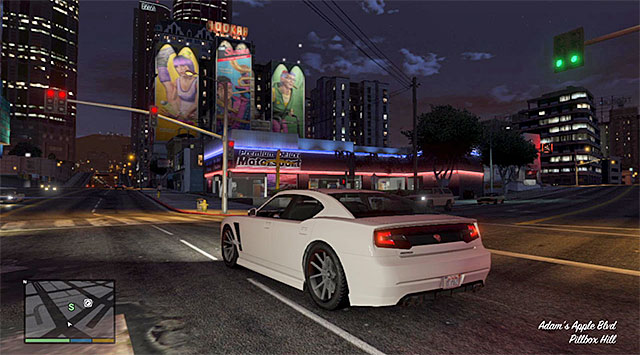 Car dealership
It has already been mentioned, in the introduction, that to start this mission, you need to return to the car dealership owned by Simeon Yetarian's, which you already had the chance to visit towards the end of the first mission. The dealership is marked on your map as S and it is located Northwards of Franklin's house. After you reach the dealership's region, park your car in the alley at the back of the building and enter through the garage. Watch a cutscene that is an introduction to this mission.
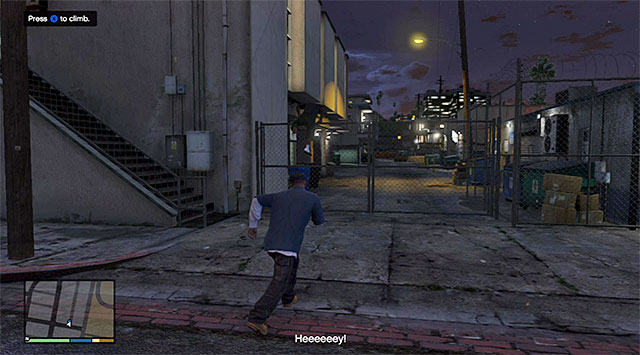 The Fence
Exit the dealership building and get into a car (e.g. the one owned by Franklin) and drive to the location where you are supposed to steal the motorbike, i.e. to Vespucci Beach. After you get there, park your car near the small circle marked by the game, get out of the car and go left. Approach the fence and press the correct button to hop over it.
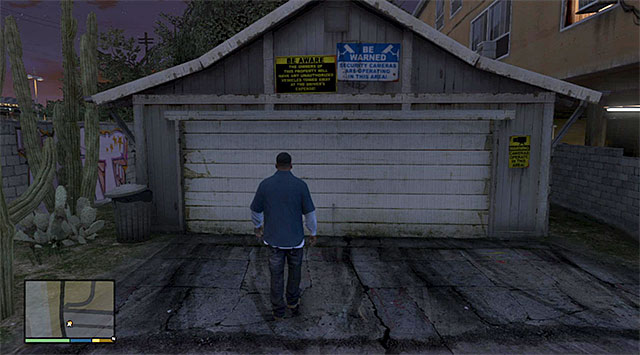 The garage to the right
As you go along to the garages located at the end of the alley, remain within short distance of Lamar. Do not attempt to run and do not get too far away from your ally, because otherwise you can alarm the neighborhood which will result in the mission's being failed. Stop after you reach the garages and explore the area to the right straight away. This will result in the initiation of a cutscene of an encounter with the hostile gang of Los Santos Vagos.
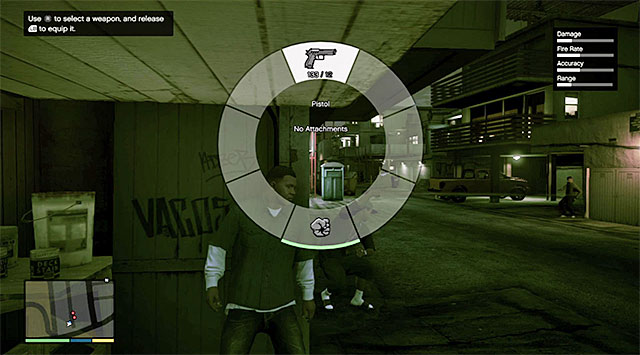 Weapon selection dial
Right after you regain control over Franklin, run up to the pistol on the ground to pick it up automatically. Bring up the weapon selection dial now (by pressing and holding down the correct button) and select this weapon from the list (pistol). Note- if you already have some better weapon, you, obviously, do not need to use the pistol. Still, it will suffice for the task of eliminating the hostiles.

Quickly, position yourself next to the garage's wall to prevent taking damage unnecessarily, as a result of staying out in the open. Shoot the Vagos gang members that are standing the closest to you and, to the extent this is possible, target their heads. When the moment is right, target the gas tank shown in the above screenshot, which will result in a big explosion. Also, watch out for the new gangsters, who have appeared up on the balconies of the building to the right.
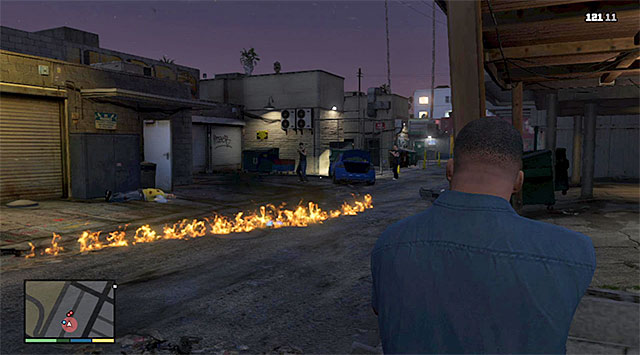 Shooting at the fuel trail will result in the explosion of the gangsters' car
The enemies will soon try to flee on one of the cars parked near the alley. First lay fire on the car, and then send a single bullet into the fuel trail that trails behind it, which will result in the explosion of the vehicle. You can now return to the location that you parked the car in. Jump over the fence, get on the car and start chasing the character escaping on the motorcycle.
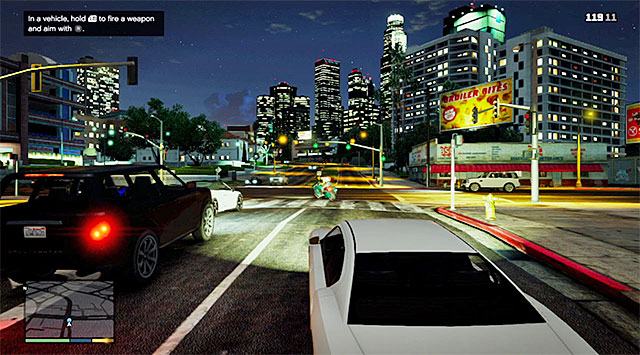
During the chase, try and avoid bumping into the other cars. Shorten the distance to the motorcycle that you are chasing and initiate Franklin's special skill, i.e. slowing down of time. Press and hold down the button as prompted by the game to stick your head out through the window and start firing with your pistol. Try to hit the biker (the above screenshot), which will conclude the chase. The only thing left for you to do is approach the bike (Western Bagger) and ride it to the location where this mission finishes, i.e. the Car Wash located close to Franklin's house.
Rewards for the completion of the mission: none (when it comes to the bike that you have just stolen, you will receive it from Lamar, later into the game, as a gift, a fact which you will be notified of with a text message).
Requirements for the completion of the mission in 100%:
Way to unlock: You need to complete the Main mission 3 (Repossession). After a while, next to Franklin's house, there will appear a marker that informs you that you can start another mission (letter F on the world map).
Playable characters: Franklin, Chop
Additional information: Chop is the name of the Rottweiler owned by Lamar and it is this nice little doggy that is the main attraction of this mission. Apart from getting acquainted with Chap, there are two chases for you to have - one by car and the other one, where you will have to get the chased character on foot.
 An alleyway to the place where you will find the wanted gangster
Approach the circle in front of Franklin's house, thanks to which you will see a cutscene of the conversation with Lamar during which you will learn about the scheme to abduct a member of the hostile gang of Ballas. Follow Lamar and reach the van (Vapid Speedo). Get into the car and wait for both Lamar and Chop to join you. Drive to Vinewood Boulevard - a district located to the North. After you approach the marked destination, drive into the narrow alleyway between buildings.
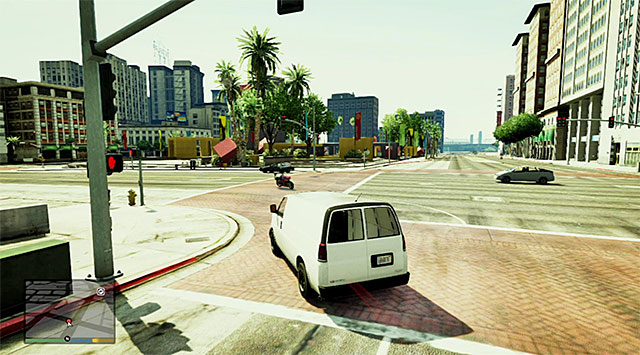
Once a new cutscene ends, return quickly to the van and start your chase behind the gangster escaping on a bike. During the chase, try using Franklin's special skill, i.e. slowing down of time, as often as possible. This will allow you to limit the risk of colliding with the other vehicles during fast ride and will allow you to perform sharp turns without the necessity to decrease the van's speed (the above screenshot).
 The first part of the chase
Although the chase will not end up in a failure right after you hit something bigger, try not wasting the van that you are driving and cover the route without flawlessly. After several moments, you will reach an accident site. Get out of the van and follow Chop. It is a good idea to use active sprint here, by tapping the run button rhythmically. Follow the dog and jump over the fence along your way. A bit further, you will have to cut through a wooden fence. Turn right and run towards the depot. Soon, another cutscene will start.
 The view on the attempt, by Chop, to find the gangster
Follow the game's suggestion and cut to Chop. You will not be able to control the animal directly, but instead you will gain a view of how the dog is trying to trace the gangster. Wait for Chop will stop at one of the railway cars, cut back to Franklin and open the car.
 The car that the gangster is hiding in
Cut back to Chop and wait for him to reach another place. Ahead of you, there is a quite funny scene because, after Chop returns to Franklin, you will have to drag the dog away from another dog that he was going to copulate with. For the last time, cut back to Chop and wait for the animal to stop at the next car. Once again, take control of Franklin and open the car.
 The final part of the chase
You can now resume your chase after the gangster, who has been hiding in the car. It is not going to take long because Chop will soon get the victim and bring him down. Wait for Franklin to get into the van and drive towards Lamar's hideout. During the ride, your character will decide to liberate the freshly-apprehended gangster so, the only thing left for you to do is take Lamar to the Recreational Center.
Rewards for the completion of the mission:
Requirements for the completion of the mission in 100%:
Way to unlock: You need to complete Main mission 3 (Repossession). Visit Simeon Yetarian's car dealership again (letter S on the world map).
Playable characters: Franklin, Michael
Additional information: IT is another, quite unique, mission. Its first part will get you acquainted with quite simple mechanics of sneaking. Its second part is even more interesting in that it introduces Michael into the main campaign mode, and tutors you on fighting melee fights. To the extent it is possible, I recommend that you practice melee fighting beforehand, to avoid problems with completing this mission in 100%.
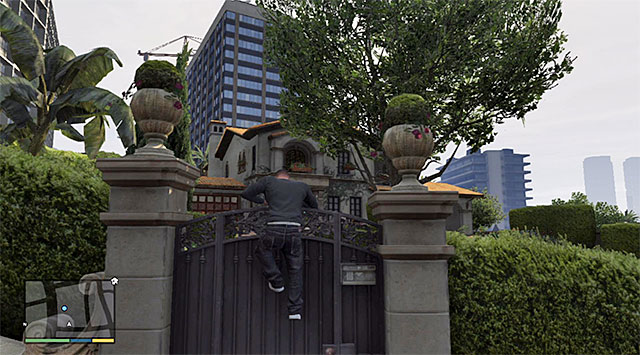
Reach the car dealership and approach Simeon Yetarian, who should be staying in front of the building. After you watch a cutscene, go to the Rockford Hills district (the Northwestern part of Los Santos). On your way there, listen to the phone talk with Simeon. Stop after you find yourself near the villa that you need to steal the vehicle from. Locate the gate shown in the above screenshot, hop over it and land at the premises of the estate.
 The gardener
Start by pressing the analog stick, so Franklin can start sneaking. Along your way to the estate, you will probably notice the gardener working on the left and, although it is absolutely viable to walk around this character, I recommend that you sneak up from behind to him and knock him down. It is one of the requirements to receive the 100% status after the completion of the mission.
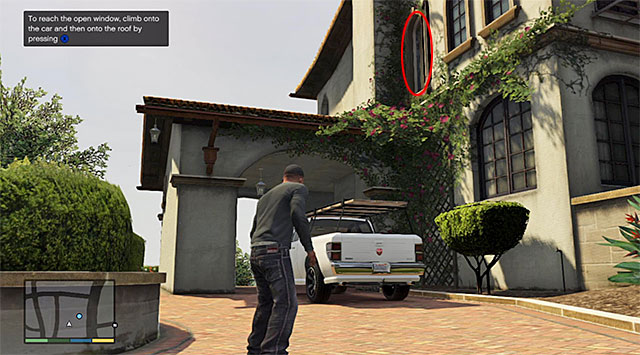 An open window on the first floor
Do not attempt to use the main entrance to the villa, because it is locked. Instead, go to the right of the entrance, to reach the gardener's car (the above screenshot). Climb onto the roof of the car, and then onto the fragment of the roof. Performing both of these actions will allow you to reach the open window on the villa's upper floor.
 Garage entrance
Stop after you reach a small bathroom on the upper floor and wait for the young woman to go to her room. Go towards the stairs that lead to the ground floor. Turn left here and approach carefully the woman, who is flirting right now with the tennis instructor. At the first opportunity, turn left again, which will allow you to reach the garage. Get into the SUV parked here (Karin BeeJay XL).
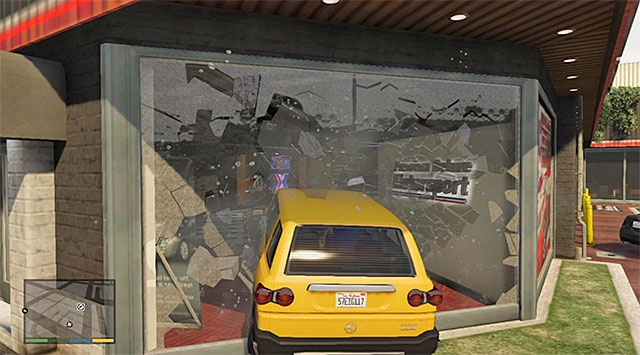
Carefully, drive out of the garage, and from the estate and drive towards Simeon's dealership. On your way there, you are up for an unexpected encounter with Michael and, if you want to take a better look at him, press the button that the game prompts you to. Complete your drive to the dealership and stop near the circle marked by the game. After you watch another cutscene, move the car, you need to cut through the wall of glass shown in the above screenshot.
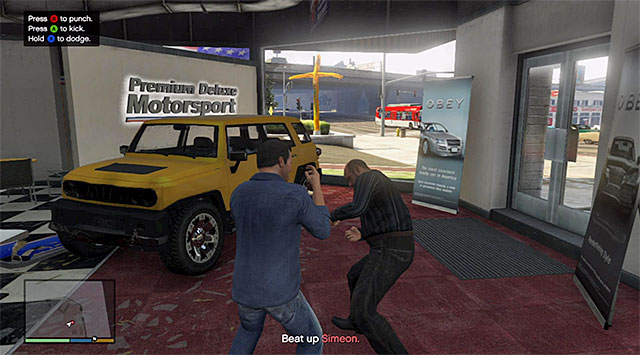 Perform dodges and wait for opportunities to land a blow
Soon, you will cut to Michael and you will have to fight a melee fight. If it is your first fight, you necessarily need to get acquainted with the information displayed on the screen, concerning the buttons used in fights. Start by locking onto Simeon and start performing dodges, while waiting for the convenient moment to land a blow. After you have inflicted enough damage to the car dealership owner, the mission will end.
Rewards for the completion of the mission:
Requirements for the completion of the mission in 100%:
Way to unlock: You need to complete Main mission 5 (Complications). You can now go to Michael's house (letter M on the world map).
Playable characters: Franklin, Michael
Additional information: it is a not-too-demanding mission, although it is not devoid of several stunning moments. It will allow you to get acquainted with Michael a bit more, and with the select members of his family. Towards the end of this mission, you will also learn how to use the car garage system that will allow you to fix, repaint and tune your vehicles.
 Michael's estate
To start this mission, you need to go to Michael's estate in Rockford Hills, i.e. the location that you have already visited during the previous mission. What is interesting, is that you can reach villa both as Franklin and Michael. Which character you choose will have bearing on the beginning of the mission. Still, I recommend that you reach the mission's starting point as Michael, because the game will present you with the most important places in the estate, and also play an additional cutscene.
 The truck with the stolen yacht
Still before you leave Michael's estate (the game will automatically cut to this character and lock, temporarily, character selection) his son Jimmy will call him to inform him that the family yacht has been stolen, and that he is onboard of the boat that is being transported on land. Exit the villa and get onto Amanda's car (Ubermacht Sentinel). Wait for Franklin to join you and drive to Pacific Bluffs, a district neighboring the western motorway. After you near the point marked by the game, you should notice the truck with the stolen yacht.
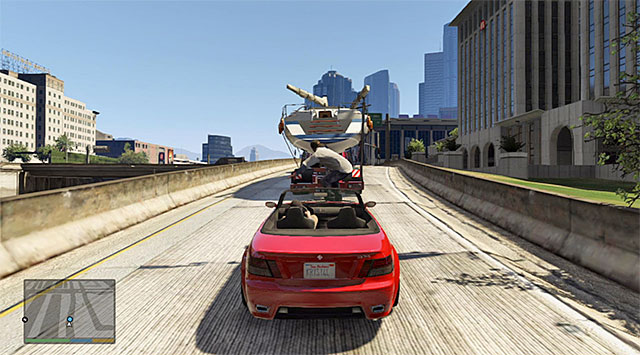 You need to get to the truck close enough, for Franklin to jump onto the trailer.
Follow the truck and try to avoid bumping into the other cars while driving, especially that Michael does not have the skill of slowing down time while driving. Your task is to near the truck in such a way, as to enable Franklin to jump onto it and mount the yacht. Note - while preparing for the jump by Franklin, you cannot perform any abrupt movements with the steering wheel but, since the truck is going along the motorway, this should not be too difficult.
If you want to, you can follow the game's suggestion and switch to the "movie camera", especially that the game will not allow you to cut to Franklin. Continue your drive behind the truck and watch over your companion's actions. You need to be ready to save Franklin's life, by shooting on the head the opponent that Franklin is struggling with.
Soon, another important moment will come, and this time around you will have to save Jimmy. As soon as Michael's son hangs down above the highway, drive under the yacht's mast, so that Jimmy can drop down into your car (the above screenshot). Note - If you want to complete this mission in 100%, you need to hurry about this action! Finally, get back behind the truck speeding to enable Franklin to take another jump.
The car garageThe attempt to retrieve the stolen yacht was, unfortunately unsuccessful, because the car driven by Michael will fail. Listen to Franklin's suggestion and drive towards the Los Santos Customs car garage in the Western part of the city (it neighbors the airport, among others). After you reach your destination, park your car in the circle marked by the game and watch the cutscene.
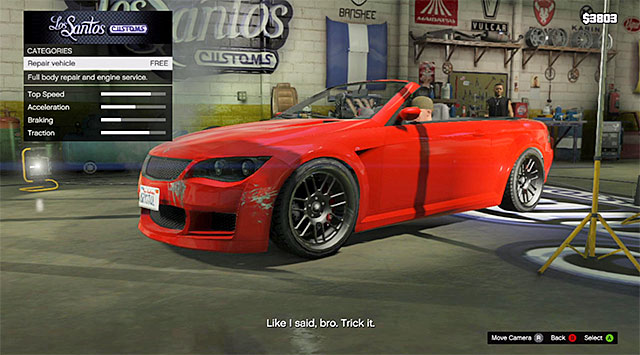 Repairing Amanda's car is the only compulsory action
Soon, the game will cut to Franklin and you will be playing him until the end of this mission. Drive up to the garage's door. To complete the current part of the mission, you only need to select the car repair (which is free of charge) although, if you have too much cash on you, you can also try tuning your vehicle. The only one thing left to do now is taking Jimmy back home. Take your time while doing that and try not to bump into anything to prevent damaging the freshly-repaired car.
Rewards for the completion of the mission:
Requirements for the completion of the mission in 100%:
Way to unlock: You need to complete Main mission 6 (Father/Son). After some time, next to Franklin's house, there will appear a marker informing you that you can start a new mission (letter F on the world map).
Playable characters: Franklin
Additional information: this mission's constituent parts is, predominantly, a series of quite demanding shootouts when you will have to monitor not only your own health, but also that of your companions. On the other hand, you do not need to make any preparations in particular, because this will constitute a part of this mission. The end of this mission, is a three-star police pursuit which, due to Franklin's skills, should not prove to be too demanding.
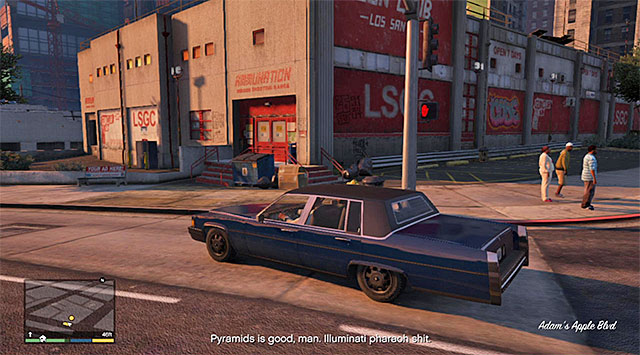 The Ammu-Nation store
Return to Franklin's house and enter, which should initiate a cutscene. After it finishes, get into the car parked in front of the building (Albany Emperor), with Lamar and Stretch, and drive to the Ammu-Nation store, located to the North of here, which specializes in trading guns.
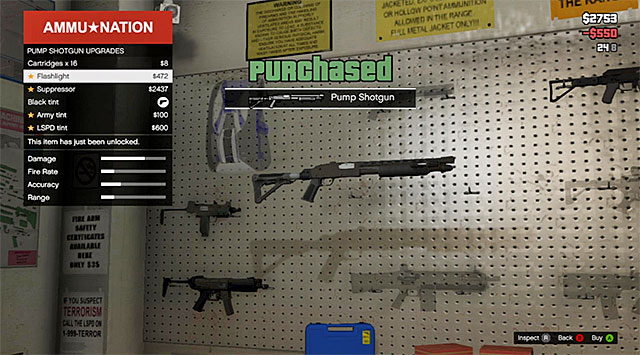 You need to buy a shotgun and a flashlight for it
Enter the store and approach the salesman to start the purchase. The compulsory purchase is the 550 dollar-worth Pump Shotgun, plus an upgrade in the form of a 472 dollar-worth flashlight. If you have enough money, it may be a good idea to get prepared for the future fights and obtain some other kinds of firearms, grenades and a good armor. After you finish shopping, return to your car.
 The plant's entrance
The next destination is the Recycling Plant located to the South-West of the store. After you get there, prepare your shotgun (or any other good weapon). Enter the building and go to the upper floor, thus reaching the room where you will watch another cutscene.
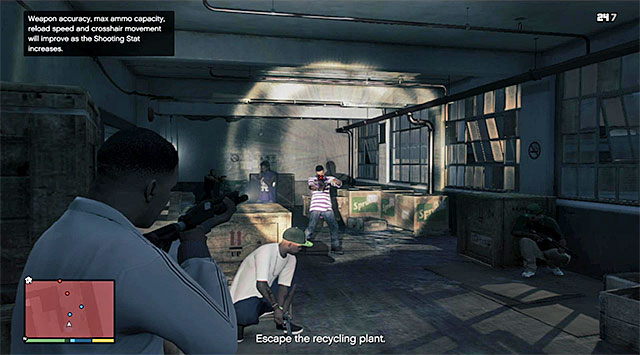 The first group of enemies
Right after the cutscene, dash into the neighboring room, stand behind the crates and start firing at the first group of the Ballas. It is a good idea to use the newly-bought shotgun here, because, in most cases, a single shot will do the trick. Remember, also, that you need to monitor Lamar's and Stretch's health because the death of either of them equals failing the entire mission automatically. After you eliminate the enemies, collect the ammo and weapons from their corpses, and follow your companions.
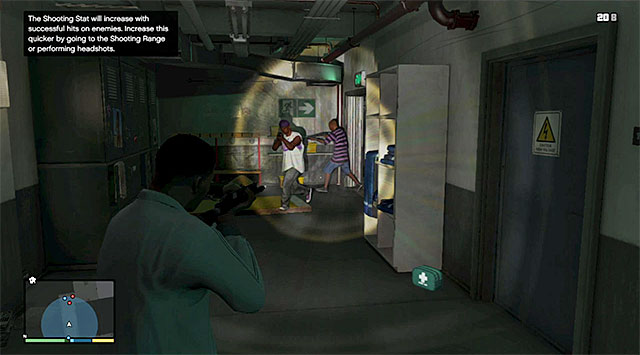
Watch out for the two enemies that will cut through the door in the location shown in the screenshot. You need to shoot them as quickly as possible (again, the shotgun will come in handy here), to prevent Lamar from dying. There are more gangster waiting for you in the neighboring room and you should not haste about walking into that room, and hide behind a good cover to eliminate all enemies without any pressure.
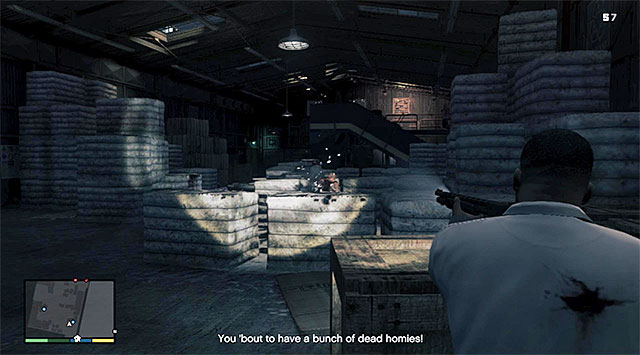 The last big hall in the plant
Reach the staircase and keep vigilant, while climbing down the staircase because you will bump into a hostile gangster. Open the yellow door, hide behind the crates and eliminate the enemies. Walk into a much larger area and start eliminating the gangsters. During the fire exchange, try and keep away from the right side of this area because, soon this part will catch fire and, as a result, a moment's inattention could end up really badly for your character.

Go now towards the exit (you should notice a first-aid-kit along your way), deal with the last group of gangsters in the nearby corridor. After you exit the building, quickly select the Assault Rifle from your inventory (you probably collected one of these from one of the corpses) or any other weapon effective at a longer distance. You need to eliminate the two sharpshooters onboard the police chopper (the above screenshot).
 Escape over the rooftops
Follow Lamar and Stretch and go towards the yellow ladder. Start sprinting (by tapping rhythmically on the run button) over the rooftops. Keep close to your allies, ignore the nearby enforcers. Jump over the wall and locate a four-door car, as quickly as possible, and get into it.
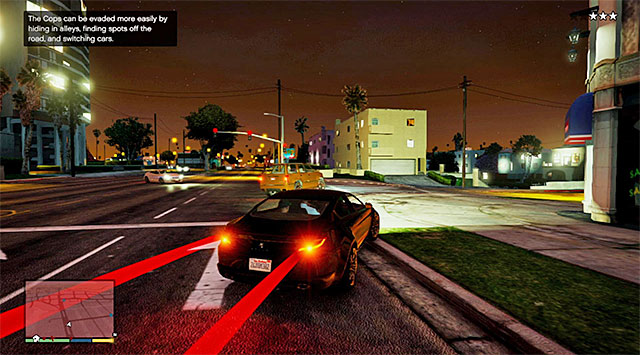 You need to keep wits about yourself and use Franklin's skills to lose the tail
Now, you will have to escape a three-star police pursuit and, if you have not yet participated in this kind of things, it is good to know that, apart from the squad car, also a police chopper will join the chase. You need to lose the policemen so, first you need to move ahead of the enforcers and find an underground parking lot, or a tunnel or (if there is nothing better around) and alley or any other secluded place where you can wait until the chase is over. During your escape, it is a good idea to use Franklin's special skill, to be able to take sharp turns and get into the narrow alleyways without any problems. In order to, officially, complete this mission, you need to take your friends into the vicinities of Franklin's house.
Rewards for the completion of the mission:
Requirements for the completion of the mission in 100%:
Way to unlock: You need to complete Main mission 6 (Father/Son). You can now go to Michael's house (letter M on the world map).
Playable characters: Franklin, Michael
Additional information: Completing this mission should not be too much of a problem to you although, towards the end, the main characters will switch their specialties (i.e. Michael will have to drive the car and Franklin will have to conduct effective fire. Before you start this mission, it would be a good idea to buy a good automatic weapon for Franklin (or replenish the ammo supplies to his currently owned weapon), although this is not necessary.
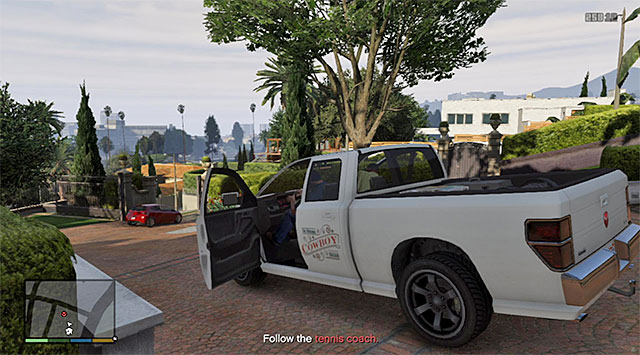 The gardener's Pick-up truck
Just like in the case of mission 6, the game will allow you to choose whether you want to go to villa as Michael or Franklin. Personally, I recommend picking Michael because the game will play an additional cutscene, featuring Amanda being caught in bed with the tennis instructor. Run out of the estate, get into the truck parked on the driveway (Bravado Bison), wait for Franklin to join you and follow the tennis instructor.
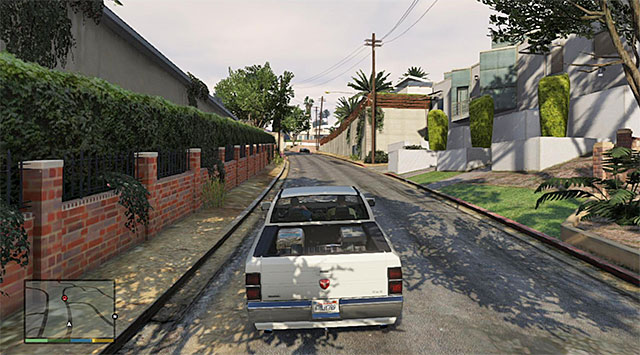 You need to watch out along your way through the narrow streets of Vinewood
The chase will take you to the Vinewood Hills and, because there are a lot of narrow streets there, would be a good idea to watch out, especially that Michael cannot use the time-slowing special skill. Ignore the fact that you will lose the chased car for a moment, because this is a part of the chase. After several moments you will have to get off the asphalt road. Reach the estate with the instructor hidden inside and watch another cutscene.
 Press and keep holding down the acceleration button until one of the supports breaks loose,
After Franklin attaches the rope to one of the supports, return to your car and press, and hold down, the acceleration button/trigger. Do not release it until the estate's balcony crashes down. You can now go ahead and start your drive along the canyon to return to Michael's villa.
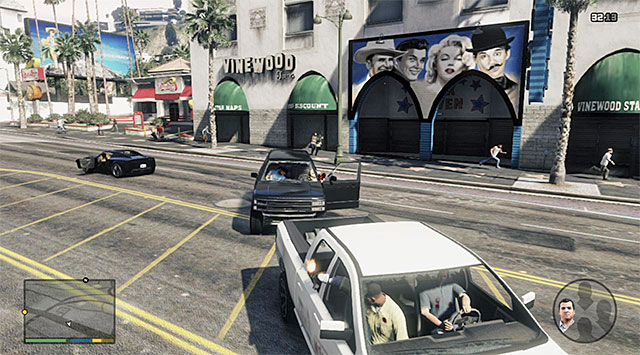
On your way back, you will receive a phone call and learn that you have accidentally destroyed the villa of a big shot Martin Madrazo. Soon, his people will appear in the region and they will start chasing Franklin and Michael. Follow the game's suggestion and cut to Franklin to deal with the incoming vehicles. As you conduct fire, you should try targeting the drivers (the above screenshot) and remember that the pistol is not the only possible weapon to use here (everything depends on Franklin's current arsenal).
 The location of finishing this mission
Elimination of all the cars with Madrazo's people will not necessarily put an end to your problems, because you could have drawn the attention of the police. Cut back to Michael and lose the police pursuit if it really turned out to be necessary. Finally, return to Michael's estate, where an unpleasant meeting with Martin Madrazo will take place.
Rewards for the completion of the mission:
Requirements for the completion of the mission in 100%:
Way to unlock: You need to complete Main mission 8 (Marriage Counseling). You can now go to Michael's house (the letter M on the world map).
Playable characters: Michael
Additional information: During this mission, you will get acquainted with several new elements of the game, namely with the use of bicycles, and jet skis, as well as swimming and diving. This mission is not too difficult, and allows you to meet Michael's (unattended) offspring.
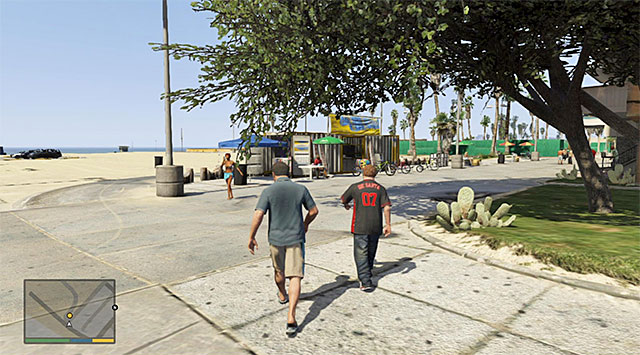 Bike rental stand
After you reach Michael's estate, the game will play a cutscene of the quarrel with Jimmy, with quite a violent ending to it. Michael and Jimmy will, eventually, stick with the idea of having a bike ride together. Exit the estate and get into Michael's car (Obey Tailgater) and go towards the Vespucci Beach. After you get there, get out of the car and go to the bike rental stand.
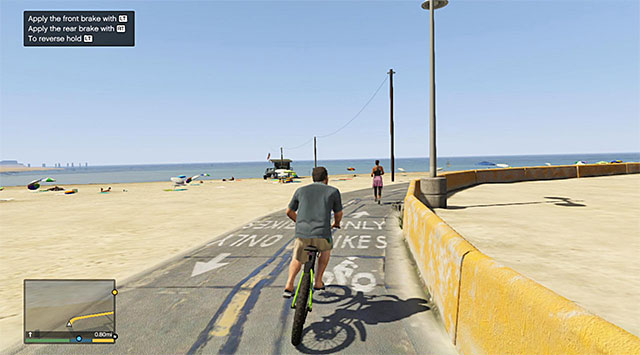 Remain on the path during the race
Select any bike and start a race, with the finish line at the end of the pier. It may take you some time to learn the basis (you pedal by tapping on the jump button) although, the game will display for you all of the buttons that are active for the ride. It is quite facilitation that, due to his low fitness, is not going to move too fast. Ride along the route towards the pier, where the race ends. The game will start another cutscene concerning Tracy.
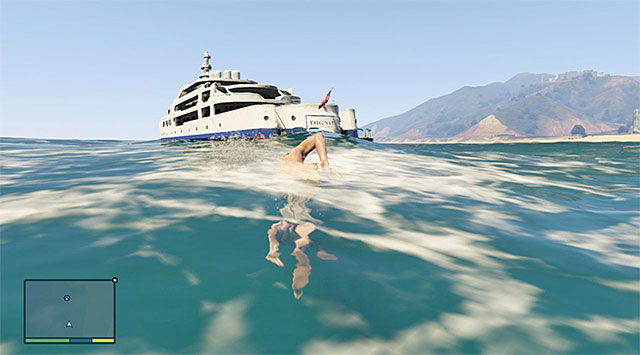 Try not to lose time while trying to reach the yacht
Start running towards the pier's edge and press the button that the game prompts you to, at the right moment. This way you will bounce off the ground and jump into water. Michael will dive into the ocean but, it would be good if you resurface as quickly as possible and start swimming towards the yacht that you can see in the distance (remember to keep tapping the action button rhythmically to swim faster). After you reach the yacht, climb aboard and watch another cutscene.
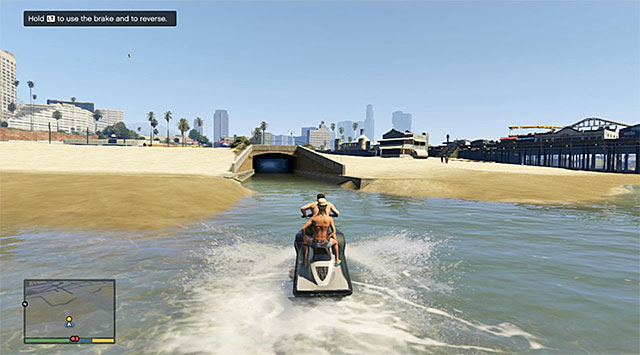 Start escaping on the ski jet with steering into the nearby tunnel.
You now will have to take a new chase scene, where you will be using the ski jet (Speedophile Seashark). Steer towards the tunnel that Tracy points you to. During this chase, try not to release the acceleration button/trigger, and perform tighter turns if necessary, basing on the instructions displayed on the screen (by pressing an additional button).
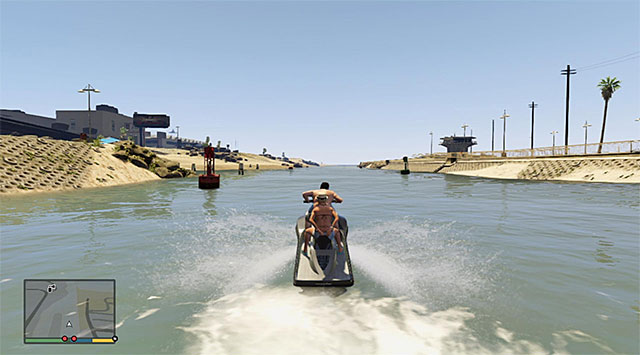
Keep steering ahead and do not waste time to explore side-branches, because they will lead you nowhere, initially. The ski jets chasing Michael and Tracy should give in somewhere around the area shown in the above screenshot. The only thing left for you to do is return to the beach neighboring the pier, with Jimmy waiting in it. Steer into the deep sea and go north. Stop the jet ski in the marked area, which will conclude this mission.
Rewards for the completion of the mission:
Requirements for the completion of the mission in 100%:
Way to unlock: You need to complete Main mission 8 (Marriage Counselling). You can now go to Lester's house (letter L on the world map).
Playable characters: Michael
Additional information: This one is another, quite relaxing, mission during which you will visit the headquarters of a company that owns a fictional social networking service LifeInvader. Apart from that, you will be presented with another interesting element of the game, i.e. visiting clothes stores.
 Lester's house
Lester's house is in the Southeastern Los Santos. More precisely, it is in the El Burro Heights district. After you get there, park your car in front of the house, and go towards the entrance to meet up with an old friend of Michael's. Lester will want to exact revenge on Jay Norris, the owner of the LifeInvader corporation.
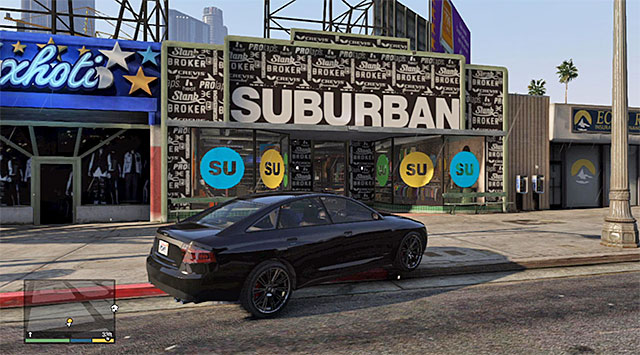 Clothes store
The first part of the plan assumes purchasing a disguise that will help Michael make himself resemble the other employees at Norris's company. To do that, you need to reach the Suburban clothes store in the Northern part of the city, in the Vinewood district. Enter the shop, talk to the saleswoman and choose one of the elements suggested by the game (they cost 120 dollars each).
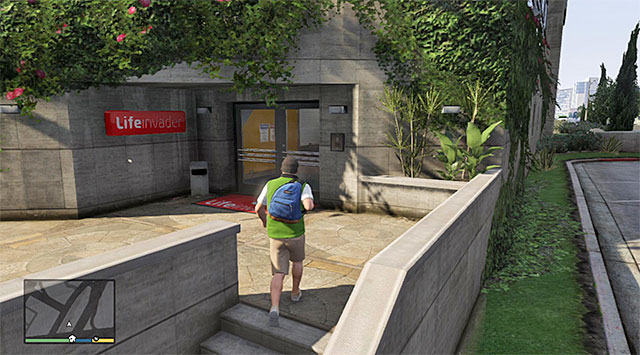 The back entrance to the company
Exit the shop and start your journey to Rockford Hills, because that is where the headquarters for the LifeInvader company is located. Park near the building and go towards the back entrance, which will start a cutscene showing a nifty way to get into the office. Follow the programmer that Michael met inside the building.
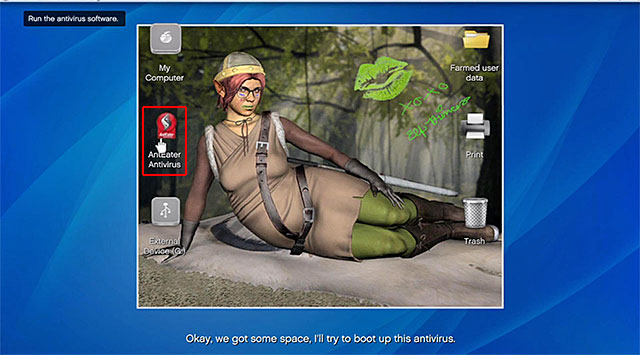
Now, you will play a funny mini-game. Start shutting down pop-ups with pesky advertisements, by clicking the X symbol in the upper-right corner of each window. After you have cleared the screen, click quickly on the icon of the AntEater Antivirus (shown in the screenshot). Scan the computer and Exterminate all of the viruses.
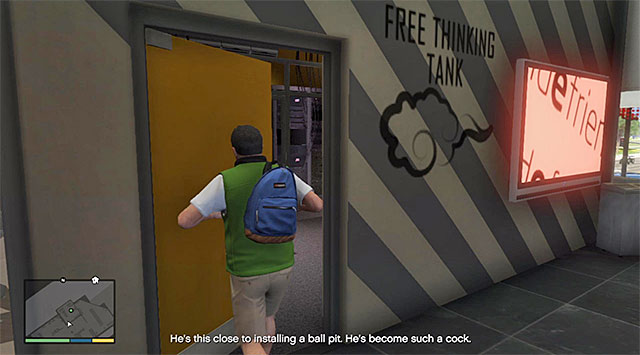 The entrance to the room with the prototype
After you have watched another cutscene, enter the side room to let Michael modify the prototype of the new device stored in the office. Return along the same path that you took to get here and exit the LifeInvader office. Do not go back to Lester's house and go to Michael's estate instead. Go here to the living room and turn the TV on.
Use the left analog stick to flip through channels. Keep doing that until you reach the transmission from the announcement by Jay Norris. In accordance with the information that you have received, you need to wait for Norris to present the crowd with the prototype of the device. Select the phone from Michael's inventory, access Contacts and call Jay Norris (the above screenshot). Watch the explosive finale and listen to the conversation with Lester.
Rewards for the completion of the mission:
Requirements for the completion of the mission in 100%:
Way to unlock: You need to complete Main mission 10 (Friend Request). Wait for a phone call from Amanda, answer the phone and listen to the conversation.
Playable characters: Michael
Additional information: It is a very unique mission in that it is not compulsory and the game does not take it into account while determining your progress with the main missions. It only consists of a three-star police pursuit and, because it is Michael that takes part in the chase, instead of Franklin, losing the enforcers is not going to be that easy.
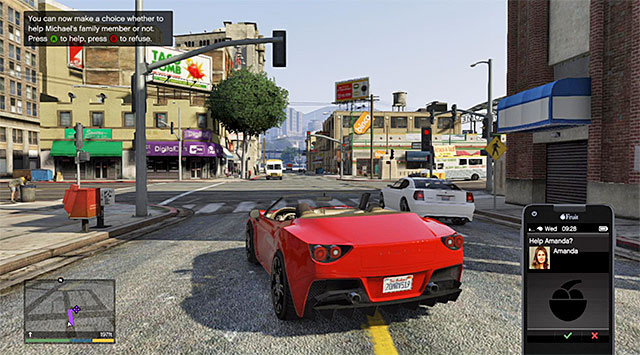 The moment of choice
Some time after the completion of the tenth main mission,, while playing as Michael, you should receive a phone call from Amanda who is asking for help. Towards the end of the conversation, you will have to decide whether you want to help her or not and it is obviously better to go for the former.
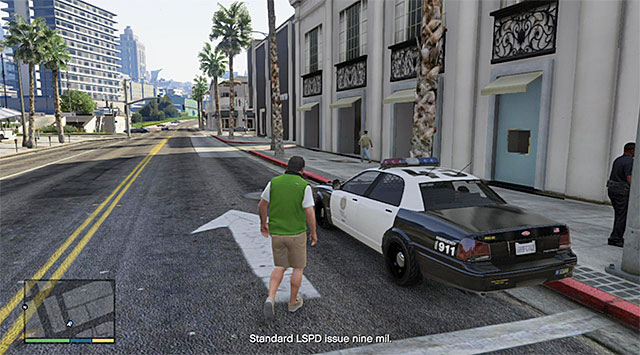 Squad car
The game will start a timer but, you should have plenty of it to reach the Rockford Hills district (as the last resort, you should try to find a fast car). After you get there, get into the squad car (Police Cruiser) with the arrested Amanda in it, which will start the chase (3 stars).
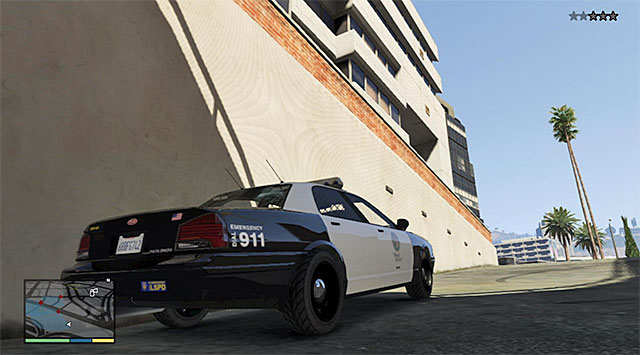 Wait in a secluded place until the pursuit stops
Just like in the case of pursuits in the previous missions, try to make use of side-roads to lose the cops. Since there is also a police chopper involved, try to hide in the place where you will not be detected from aboard the helicopter. Wait for the police to give up further search and take Amanda back home.
Rewards for the completion of the mission: none
Requirements for the completion of the mission in 100%: There are no additional requirements to this mission so, it is completed in 100% automatically.
Way to unlock: You need to complete Main mission 10 (Friend Request). You can now go to the to the garment plant where Lester is staying (letter L on the world map).
Playable characters: Michael
Additional information: This mission performs the role of your preparation for the first big heist, where the target is the jewel store. Your first task will be to check out the store's security system. It is the final part that is most important, though, because you will have to determine the plan of the heist and which people are going to take part in it.
NOTE: Towards the end of this mission, you will have to make a decision concerning how you want to play the heist out. The choice itself is going to have bearing both on the heist itself, and on the preparatory missions that precede it. I strongly recommend that you save the game before you start this mission!
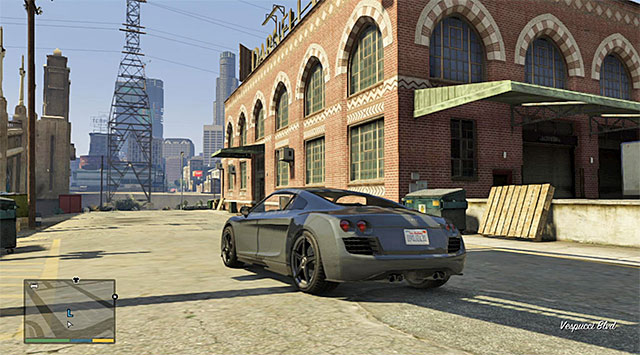 The plant
Before you set out to this mission's starting point, make sure that Michael is wearing a suit (this is requisite, e.g. if you haven't changed since the completion of the previous mission). Fortunately, you do not need to go shopping because it is enough to return to Michael's estate and open the wardrobe to choose one of the suits. The point that you need to get to is the garment plant in the La Mesa district that serves as Lester's command center. Once you get here, talk to Lester to learn about the idea to rob a local jewel store - Vangelico.
 Vangelico jewel store
Exit the building , get in Michael's car (Obey Tailgater) and drive towards the jewel store located to the North-west of the plant in the Rockford Hills district. After you get into the marked area, get out of the car and walk into the alley between buildings, to the store's entrance.

You now need to use glasses fitted with camera, to take a picture of three different elements of the store's security system. They have been shown in the above screenshot; and they are the alarm system, the camera and the ventilation system. After you have taken the pictures, talk to the salesman and return to your car, where there is Lester waiting for you.
The next step is to take a better look on the ventilation system and to do so, you need to make it onto the rooftop. You should be able to locate here the entrance to the area where construction works are taking place (the above screenshot). Park your car, get inside and climb up the stairs.
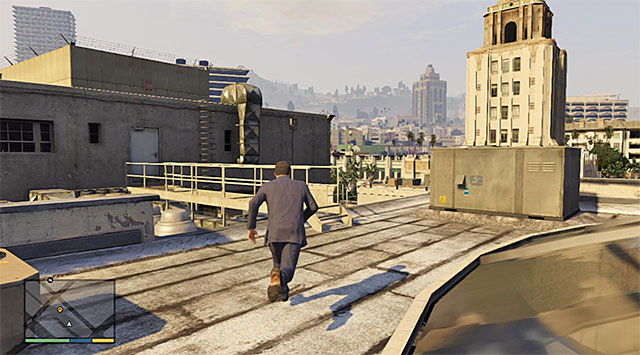 You need to reach the opposite end of the roof
Climb up the two ladders and, after you are there, go right. Try climbing onto the portion of the roof located higher, although this will turn out to be insufficient to examine the store's ventilation system. As a result, go towards the Northeastern part of the roof and jump over the obstacles in your way, like low walls, and climb the ladder. The point you need to get to is the vantage point marked by the game.
Turn on the camera in the glasses again. You need to target and take a picture of the ventilation system shown in the screenshot. You can now return downstairs, while keeping all precautions. Get into the car and return, with Lester, to the command center, i.e. to the garment plant.
 The moment when you choose your modus operandi
The last part of the mission is planning the heist itself, and this is the most important part because you will have to make a key choice. You need to decide whether you want to go for the Loud or for the Smart variant. Each one of the variants has its own preparatory missions and they also slightly differ in terms of the course of the heist itself. The decision is yours and, both of the variants have been given a detailed description below.
In a nutshell:
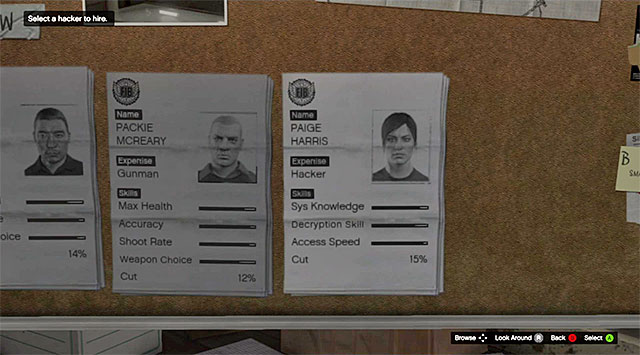 You need to determine who is going to be the driver, the sharpshooter and the hacker
Towards the end, Lester will make you select the accomplices for the heist (not counting Franklin and Michael). In this case, you need to determine if you want to save up a bit and select rookies in each of the specialties (driver, gunman, hacker) or maybe to go with specialists who will demand a larger interest in the loot. You can easily select the weakest candidates i.e. who want the smallest share in the profit. Their participation in the heist will, in no way, compromise the mission's success and, thanks to the fact that you select them, the protagonists will receive more cash.
Rewards for the completion of the mission: none
Requirements for the completion of the mission in 100%:
Way to unlock: You need to complete Main mission 11 (Casing the Jewel Store) and decide on the Loud variant of the heist. After you receive a message from Lester, there will appear the Hs symbol on the world map, which symbolizes the police SUV driving all around Los Santos.
Playable characters: Michael
Additional information: The one thing that sets this mission apart from the others is that its starting point is not an immovable point. When it comes to the premises, it consists of two parts - seizing the police SUV and losing the pursuit. I recommend that you consider preparing for this mission by purchasing an armor and a good automatic weapon but, if you try hard enough, you can do just as well using a pistol only.
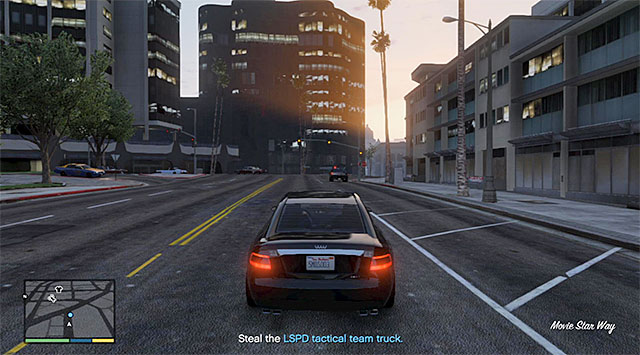 The police SUV
To start this mission, you need to come close to the police SUV riding all around Los Santos. The mission will start automatically when you come close enough to the vehicle, which you will have to steal.
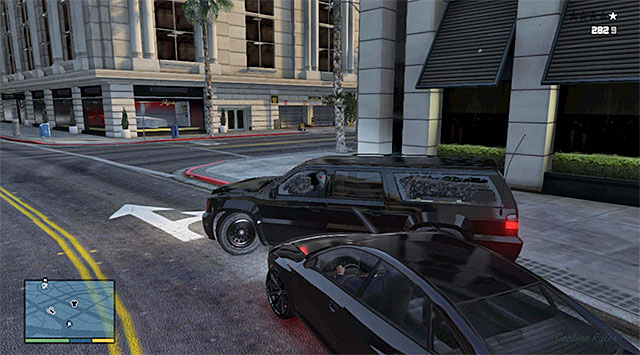 Lay surprise fire on the policemen
Do not hope to be able to attack the SUV once it stops for the lights, because it ignores them and stops nowhere. As a result, I recommend that you lay fire on the vehicle and try targeting the driver straight away, or deal with the passengers first.
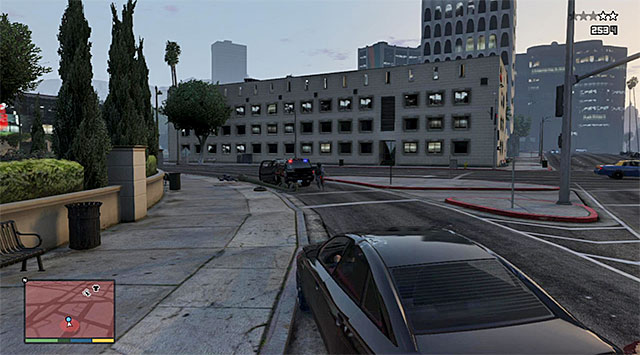 Watch out for the enemies who can get out of their car and open automatic rifle fire at you
Take your time and do not hurry to seize the SUV because it comes with a full set of enforcers who are, additionally, equipped with good automatic weapon. If the car stops, then you should get away from it or lay continuous fire on it, to render the enemies incapable of starting fire. Seize the police (the FIB) car only after you eliminate all of the people who travelled on it.
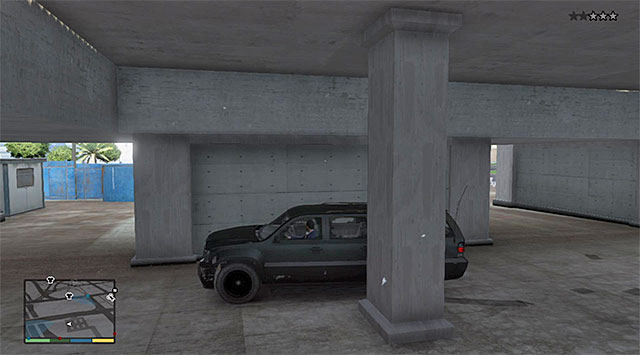
As you have probably guessed, you now need to escape the police pursuit (three stars). During the attempts to lose the tail, remember that a SUV is not as maneuverable as a squad car, which you should keep in mind especially while steering along narrow alleys. Because also a police chopper takes part in the pursuit, it is a good idea to hide in some roofed location (the above screenshot) After the pursuit ends, drive up, on the stolen SUV, to Lester's plant and park under the bridge.
Rewards for the completion of the mission: none
Requirements for the completion of the mission in 100%:
Way to unlock: You need to complete Main mission 12 (Carbine Rifles). This mission starts automatically after the previous one is completed.
Playable characters: Michael, Franklin
Additional information: In spite of what it may seem, this mission is not too difficult, assuming that you have selected specialists for your crew, thanks to whom all of the actions will be performed infallibly and with clockwork precision. During this mission you will have to cut between Franklin and Michael on a regular basis to allow for the use of their respective skills as well possible.
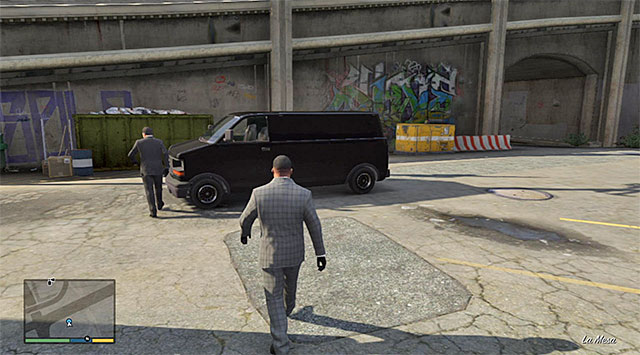 The van that you are going to use to get to the heist site
The game will start an initial cutscene, right after the completion of the previous mission, i.e. after you deliver the FIB car to the region of the garment plant. After you will gain control over Franklin, exit the building, get into the van (Declasse Buritto) and wait for the rest of the team to join you. You can now go towards the jewelry store, while listening to the conversation of the people in the van.
 Keep picking the jewels from the display cases
Right after the heist starts (while playing as Michael), focus entirely on the collection of jewels from the display cases marked in green. If you have hired a good hacker for this mission, you will have 90 seconds to plunder the store. If you have made sure to hire a good firearms specialist, then he will not kill anybody and quickly deal with the person that comes out of the side room. You should have no problems with removing jewels from all of the cases.

Leave the store and, after you watch a short cutscene, start escaping on a dirt bike (Maibatsu Sanchez), after having cut back to Franklin. Follow the remaining two bikers, do not worry too much about the four-start pursuit. Of course, do not forget about Franklin's special skill, which will allow you to avoid bumping into the other vehicles on the road, and take sharp turns without any problems. Jump down to the highway and enter the tunnel mouth shown in the screenshot.
Note- If you have selected an amateur gunman, he may crash at the tunnel's mouth. If this happens, make sure that you collect the bag with cash that he dropped.
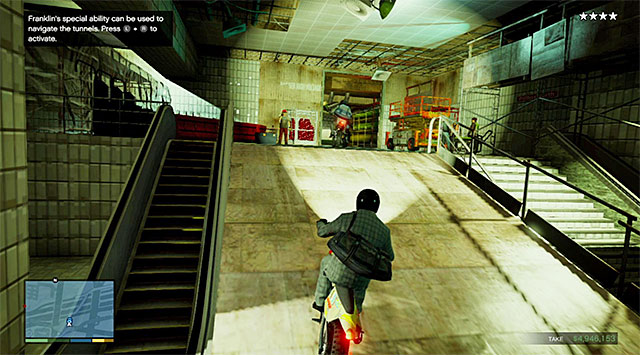 Slow time down frequently
During your ride along the tunnels, make a frequent use of Franklin's special skill, especially that you will often have to take the narrow passages. Listen to the comments of the others, who will be informing you of was of further escape. This part of the mission will conclude after you get out of the sewers.
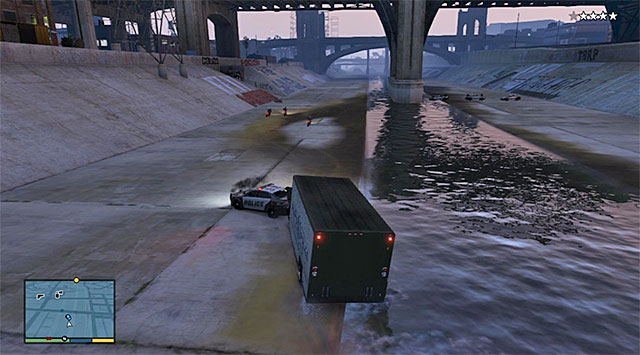
Soon, you will cut to controlling Michael who is driving the van (Vapid Benson). Your new task is to protect the escaping bikers but, you do not need to use your weapons to do that, you can simply keep pushing the squad cars off the route (the above screenshot). At the same time, try and remain within a short distance of your fellows and react quickly to new threats.
 The location where the mission ends
After you have got rid of all the police cars, park the van in the place marked by the game and wait for all of the bikers to ride inside the van. The only thing left to do for you is watch the final cutscene and get acquainted with the results of the heist.
Rewards for the completion of the mission:
Requirements for the completion of the mission in 100%:
Way to unlock: You need to complete Main mission 11 (Casing the Jewel Store) and select the Smart variant towards its end. After you receive a message from Lester, there will appear the Hs icon on the world map, which symbolizes the pest control service van.
Playable characters: Michael
Additional information: this is the first one of the short missions connected with the smart heist variant. I recommend that you complete it without raising alarms, especially that it is going to be easy to pull off.
 The harbor warehouse
The van that you need to steal is parked in the harbor (Elysian Island), in the southern part of Los Santos. Reach the region of the warehouse's entrance, where the vehicle is but, do not go into the main entrance of the building, because you would alarm unnecessarily the employees, as well as a nearby guard.
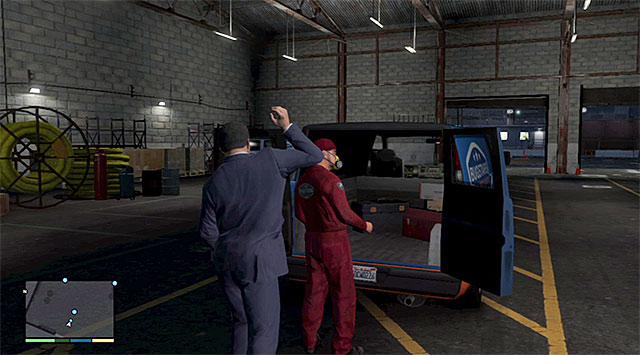
Walk around the warehouse to get to the back of the building. Get out of your car, enter the sneak mode and approach, carefully, the employee shown in the above screenshot. Attack him from behind and knock him down without raising the alarm. You can now get into the van (Declasse Burrito).
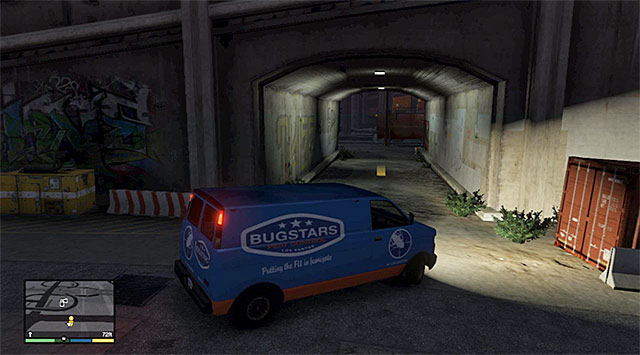 The location where you need to leave the van
There is one more action to do, which is delivering the stolen van to the garment plant region. Rev up the van to prevent being spotted while leaving the harbor and, after you get to your destination, park the vehicle under the bridge. Attention - if, for any reasons, you don't want to stun the bug exterminator (getting rid of him doesn't block a chance for completing mission in 100%), you can sneak into the van parked in the right corner of the storehouse and break in. In this case, ride out from the storehouse slowly (keep to the left wall) to not get spotted.
Rewards for the completion of the mission: none
Requirements for the completion of the mission in 100%:
Way to unlock: You need to complete Main mission 11 (Casing the Jewel Store) and select the smart variant of the heist towards its end. After you receive the second message from Lester, there will appear the Hs icon on the world map, which symbolizes a truck driving moving the streets of Los Santos.
Playable characters: Michael
Additional information: One of the things that sets apart this mission from the other ones is that its starting point keeps moving around. Depending on the decision that you have taken, you will either have to deliver the entire van to the plant, or the grenade case only. The only obstacle in this mission is that you will need to lose a police pursuit.
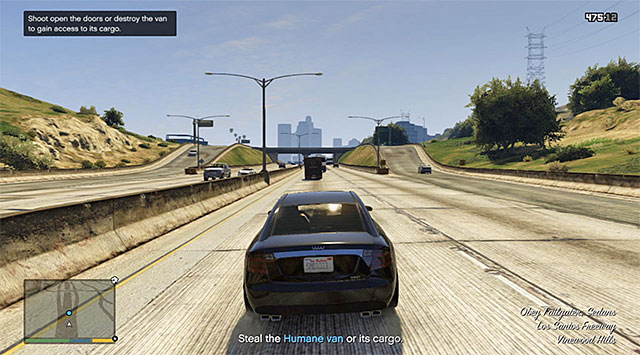 The truck with the cargo of your interest
To start this mission, you need to come close to the van on its route along the highways of Los Santos, to the airport and back. The mission will start automatically, as soon as you come close enough to the van.
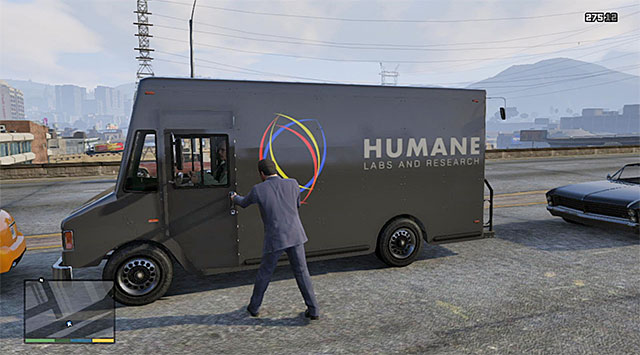 Cross the van's way and toss the driver out onto the street
There are two different ways in which you can obtain the cargo. The first variant assumes that you steal the van itself. In this case, you can shot the driver or get in his way, pull him out of the van and drive away quickly.
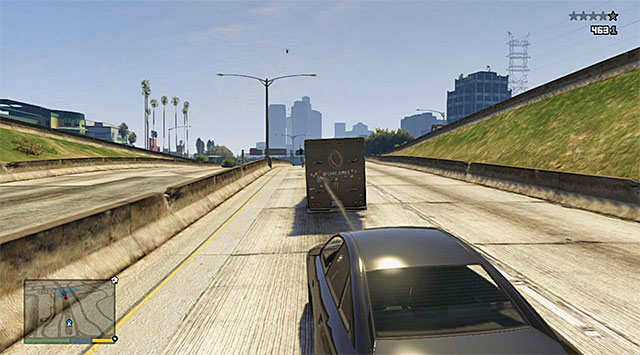 Destroying the van's back gate
The second variant assumes that you destroy the back gate in the van. Start shooting during the drive, and to the extent it is possible, use some better king of weapon. After you destroy the gate, the grenade case will fall out into the street. Stop the car, run up to the case quickly and pick up the case. I recommend this variant, because it is one of the requirements for the 100% completion of this mission.
 Leave the case in the room on the upper floor
Towards the end of this mission, you will have to handle a police pursuit and it is going to be easier to escape if you have followed the second variant, because you will still be in your own car. If you have stolen the van, just like in the previous mission, leave it under the bridge and, if you have stolen the case, enter the plant and drop it after you enter a small storage area.
Rewards for the completion of the mission: none
Requirements for the completion of the mission in 100%:
Way to unlock: You need to finish two main missions - 14 (Bugstars Equipment) and 15 (BZ Gas Grenades). This mission will start automatically, right after you complete both of these missions.
Playable characters: Michael, Franklin
Additional information: In spite of what it may seem, this mission is not too difficult, assuming that you have hired specialists, thanks to which, all of the actions will be performed infallibly and with clockwork precision. During this mission, you will be cutting between Franklin and Michael on a regular basis, to allow for the use of their respective skills as well possible.
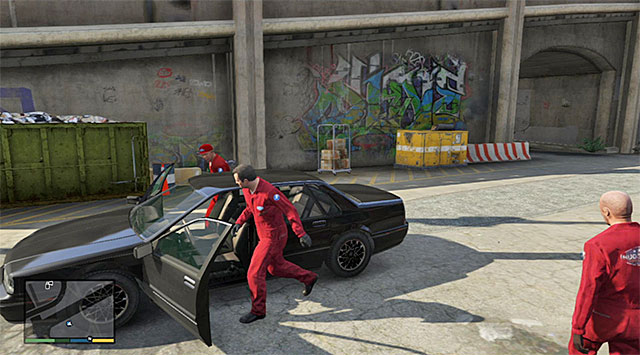 The car that you are going to use to reach the site
The game will start a cutscene and start the mission right after the second one of the missions, preceding the heist itself, is completed. After you will gain control over Michael walk outside of the building, get into the sedan (Albany Primo) and wait for Franklin to join you. You can now go towards the entrance to the building site at the back of the jewel store, which you have seen during one of the previous missions.
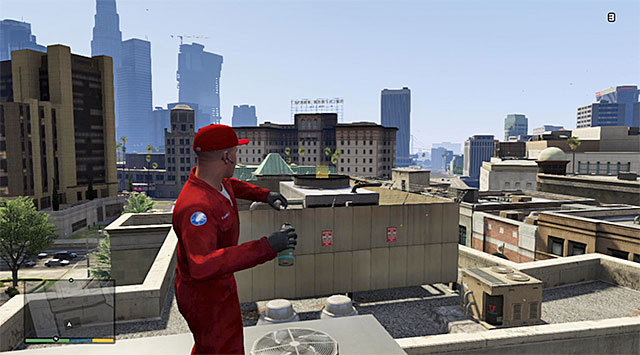
Soon, you will cut to Franklin. Enter the building, climb up the stairs and use the ladders to the rooftop. You now need to reach the "vantage point", which you have been using during one of the previous missions to a take picture of the ventilation system. Stand in the spot shown in the screenshot, select the BZ Gas grenades from your inventory and try throwing them into one of the slots in the air conditioner. Do not worry if you miss your target first time around because, in total, you have five grenades and just as many attempts.
 Keep stealing jewels from one display case after another
A successful throw will result in gassing of the people that are currently staying in the store. This is when the game will, automatically, cut back to Michael. Focus on collecting the jewels only, from the cases marked in green. If you have hired a good hacker, you will have 90 seconds. You should have no problems collecting jewels from all of the cases.
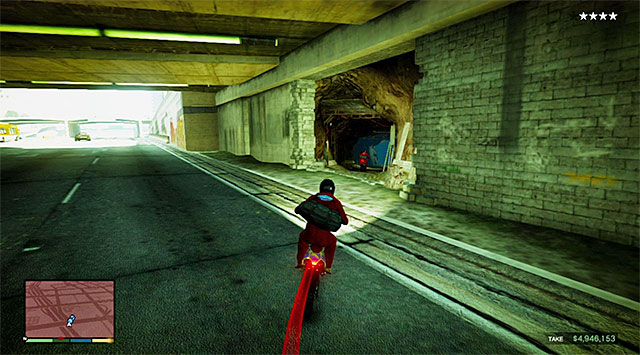
Leave the store and, after you watch a short cutscene, start escaping on a dirt bike (Maibatsu Sanchez), after having cut back to Franklin. Follow the remaining two bikers, do not worry too much about the four-start pursuit. Of course, do not forget about Franklin's special skill, which will allow you to avoid bumping into the other vehicles on the road, and take sharp turns without any problems. Jump down to the highway and enter the tunnel mouth shown in the screenshot.
Note- If you have selected a weak gunman, he may crash at the tunnel's mouth. If this happens, make sure that you collect the bag with cash that he dropped.
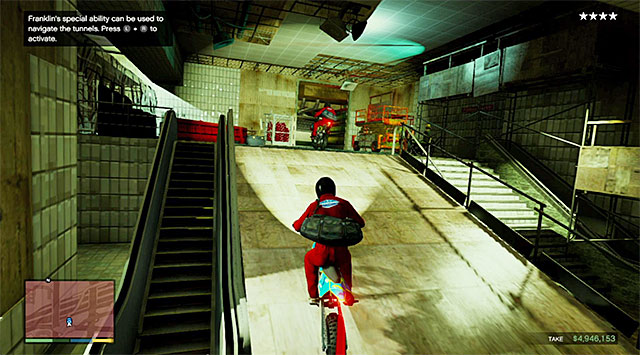 Slow time down frequently
During your ride along the tunnels, make a frequent use of Franklin's special skill, especially that you will often have to take the narrow passages. Listen to the comments of the others, who will be informing you of was of further escape. This part of the mission will conclude after you get out of the sewers.
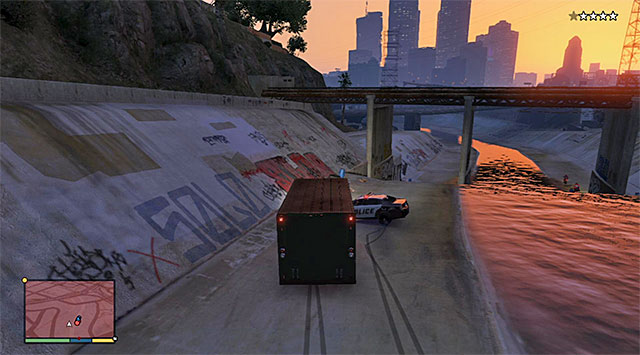
Soon, you will cut to controlling Michael who is driving the van (Vapid Benson). Your new task is to protect the escaping bikers but, you do not need to use your weapons to do that, you can simply keep pushing the squad cars off the route (the above screenshot). At the same time, try and remain within a short distance of your fellows and react quickly to new threats.
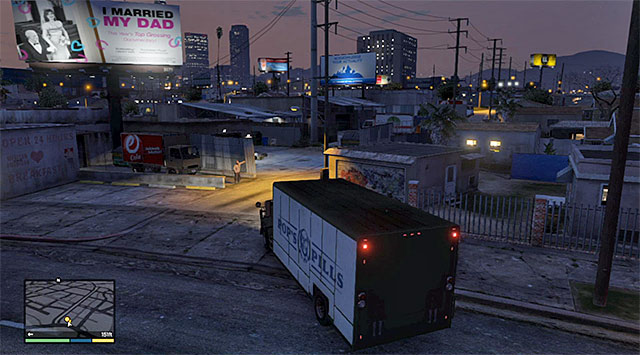 The location where the mission ends
After you have got rid of all the police cars, park the van in the place marked by the game and wait for all of the bikers to ride inside the van. The only thing left to do for you is watch the final cutscene and get acquainted with the results of the heist.
Rewards for the completion of the mission:
Requirements for the completion of the mission in 100%:
Way to unlock: you need to complete one of the missions connected with the heist on the jewel store (The jewel Store Job), i.e. either mission 13 (the Loud variant) or mission 16 (the Smart variant). You can now go to Michael's house (letter M on the world map).
Playable characters: Trevor
Additional information: The beginning of this mission may be misleading, because you control here neither Michael nor Franklin and, for the first time in the main campaign, you take control over Trevor. This mission has been constructed in such a way, so as to prove how violent and mentally unstable a person Trevor is - you will have to handle a car chase, shootout and even an attempt to push a trailer into the river.
NOTE: From now on, the option to cut to Franklin and Michael will be disabled (also between individual missions). To enable it again, you need to complete several of the main missions reserved for Trevor.
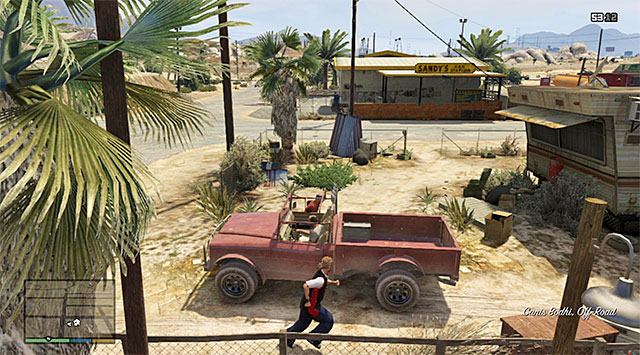 Trevor's truck
The first step is to go to the villa as Franklin or Michael and, as it is the case for this type of situation, the choice of character does not play any vital role. Enter Michael's estate so that the game can start several new cutscenes. After they finish, you will cut to Trevor. Start by taking a seat in Trevor's truck (Canis Bodhi) and wait for Ron and wade to join you.
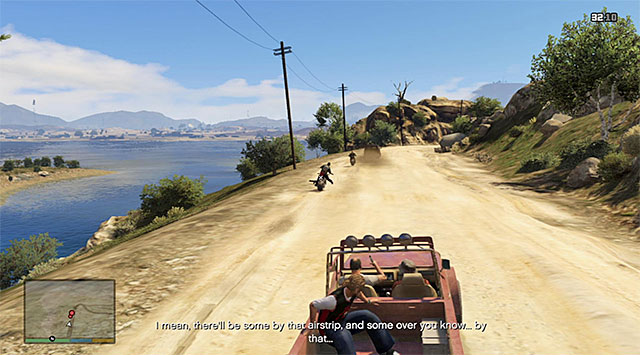
Drive towards the location named Grapeseed. Your current destination is the farm where Trevor will meet the members of the biker gang. After you watch the cutscene, start chasing behind the bikers. During this pursuit, ignore attacking the black van . It is a good idea to wound two bikers at the right moment (the above screenshot).
 The Motel
Keep following the black van, remember not to perform any dangerous maneuvers and keep in mind that your truck is not too maneuverable. The chase will end near the motel (or rather a trailer park) and you will have to fight a quite easy battle here. I recommend against using the car here. You'd better get out of the vehicle and select one of the available weapons from the inventory (e.g. the shotgun).
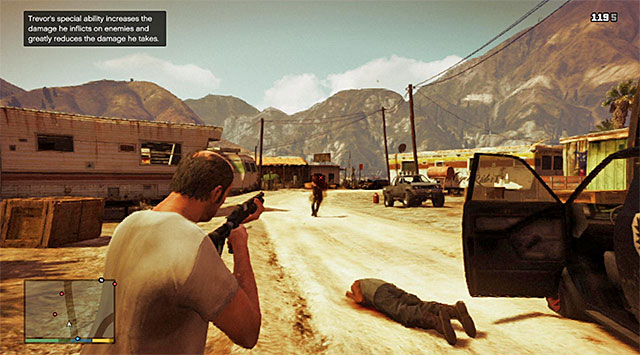
Stat shooting at the bikers that are staying in the area of the motel, while remembering to use covers frequently and about checking out on the radar if nobody is trying to surprise Trevor from behind or from the side. Occasionally, it is a good idea to get out from behind the cover and activate Trevor's special skill, which introduces him into the berserker state (the above screenshot). After you activate the fury mode, you do not need to worry, about the damage you take, that much. At the same time, it will be easier to eliminate enemies . Naturally, you should also remember about hiding behind a cover whenever you decide to disable the fury mode, or before it ends.
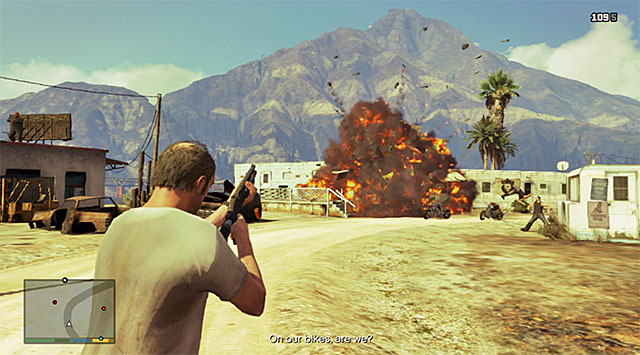 Shooting at the tank results in the explosion of the trailer
It has already been mentioned that you need to watch your back because some of the bikers will join in only after some time. At least one of them will also use a car in a attempt to leave the motel, and it is worthwhile to shoot him as he will be passing Trevor by. Furthermore, I recommend that you look around for explosive gas tanks and cause one of the bigger trailers to explode. After some time, the bikers will flee and, if you want to complete this mission in 100%, you need to get them before they get too far away (use a bike, or some other vehicle if you do not want to take too much unnecessary risk).
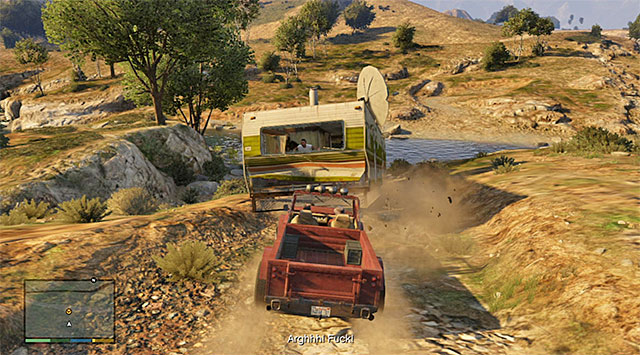 Keep pushing the trailer until it falls into the river bed
After the fights finish, collect the ammo from the defeated enemies and return to your truck, where there should already be Ron waiting for you. Now you need to reach the place where Ortega's trailer is. After you get there, Trevor will implement his plan of pushing the trailer, with Ortega inside, into the river. Press, and hold down, the acceleration button/trigger and do not let go until the trailer falls into the river.
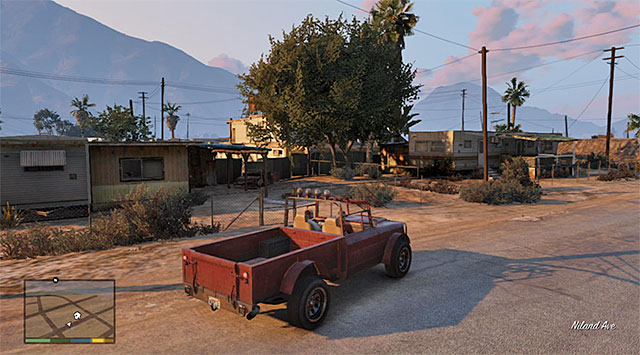 The place where this mission finishes
After a short conversation, frighten Ortega by aiming a gun at him. According to your preferences, you can leave and let Ortega lives or kill him. Get back into the truck and return, with Ron, to Trevor's trailer, which will conclude this mission.
Rewards for the completion of the mission:
Requirements for the completion of the mission in 100%:
Way to unlock: You need to complete Main mission 17 (Mr. Philips). After some time, next to Trevor's trailer, there will appear a marker that informs you of the possibility to start a new mission (letter T on the world map).
Playable characters: Trevor
Additional information: This is another very exciting mission and, as much as at the beginning you will have to try to eliminate the enemies without raising the alarm, sooner or later things will get increasingly complicated and you will take part in a major fight at the airport, this time. The final part of this mission is a quite complex tutorial that covers the topic of pilotage, and more precisely the using of one of the basic models of aircraft.
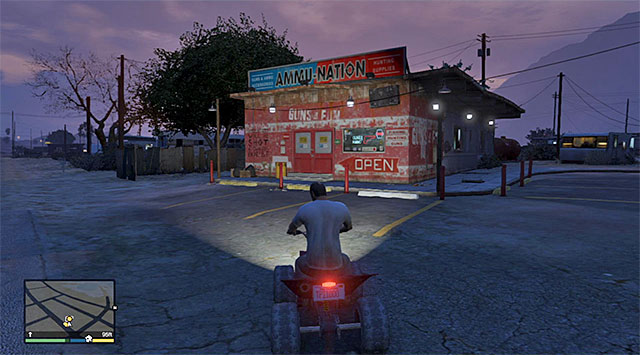 The Ammu-Nation store
After you return to Trevor's trailer, you will meet Ron and talking to this character will start the mission. Wait for the cutscene to end and mount one of the ATVs parked in front of the trailer (Nagasaki Blazer). The first place that you need to visit is the local Ammu-Nation store so, go West.
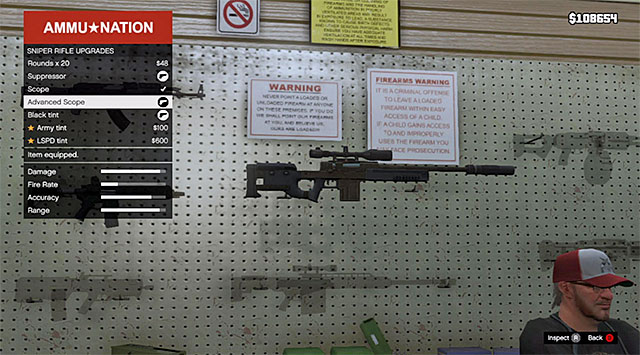 You need to select the sniper rifle and upgrade it in a proper way
Park in front of the store, enter and talk to the salesman. You need to take the sniper rifle, which you got for free, and upgrade it with a Suppressor., as well as the Advanced Scope. After you collect the upgraded weapon, return to the ATV and reach the airport to the South-West of here. There, you need to climb the water tower.
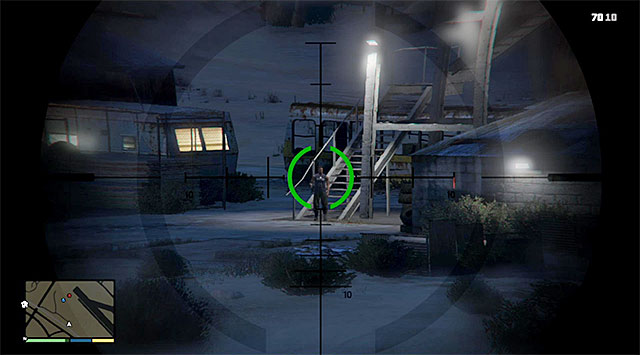 The first enemy to shoot
Select the sniper rifle from your inventory, enter the targeting mode and zoom in as much as possible. First of all, target Ron and listen to his comments and instructions carefully throughout this mission, because they will concern the problem of avoiding detection. Start by shooting the enemy on the stairs at the foot of the control tower (you do not need to aim at the enemies' heads, because hitting them on the chest will do equally well).
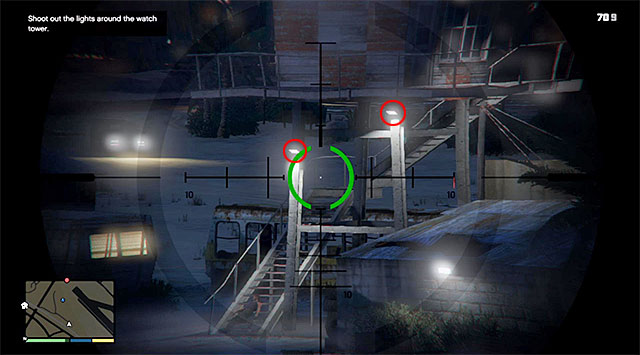
The next step is destroying the two lamps marked in the above screenshot, and you need to do that before the incoming car comes within short distance of the person you have just shot. Start targeting the van and, follow Ron's instruction of not shooting until there will be an enemy getting out of it.
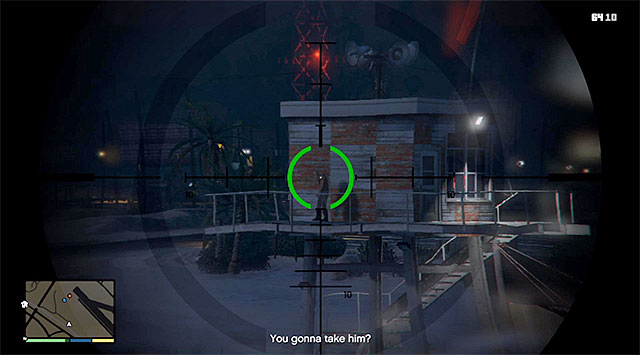 An enemy atop the control tower
The next target for elimination is the guard that will appear atop the control tower, i.e. above the enemy that you killed as the first. After you shoot, start observing the region of the stairs, at the foot of the tower, once again. This is so, because there will soon be an enemy to stop in that region. Shoot him before he notices the body and alarms the rest of the bikers.
 The region of the gas tank
Target the upper part of the tower again and eliminate quickly the enemy that will appear on the external balconies. Start observing Ron once again and wait for him to reach the place where he is supposed to plant the explosive, i.e. near the gas tank. You should especially be careful while eliminating the second biker, and eliminate him before he raises alarm.
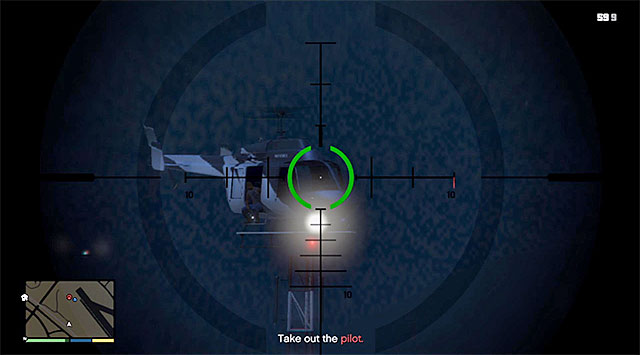
Wait for Ron to plant the bomb on the gas tank and be ready to eliminate the last enemy, who will approach from the right. This is not yet the end to your problem, because, there will be an enemy helicopter to appear above the airport. Again, listen to Ron's suggestion and shoot the pilot at the right moment (the above screenshot), to stage an accident.
 During the airport fights, use Trevor's special skill to your advantage
Unfortunately, although this ended in success, you will no longer be able to stay in hiding and, as a result, you will have to take up some more aggressive action. Go quickly towards the apron area and, after you get there, dismount your ATV and start the standard fights. Just like in the case of the fight in the previous mission, it is a good idea to use Trevor's special skill to your advantage, because it will be easier to get rid of the enemies in the fury mode.
 Keep eliminating the enemies and blow up the elements of the surroundings
Ultimately, you need to eliminate all bikers that are staying on the runway. After you have cleared this area, dash into the hangar on the left, so that Trevor can automatically jump onto the wing of the plane piloted by Ron. This is not the end yet, because you need to continue fire and eliminate, in the first place, those who appear the closest to the plane. After the plane, piloted by Ron, makes it into the runway, detonate the explosive that you have planted earlier, and also aim at the orange tanker parked on the right.
 After the successful take-off, hide the gear and throw off the last one of the bikers
Try to eliminate all of the bikers staying at the airport, because it is one of the requirements if you want to complete this mission in 100%. After a few moments, Trevor will let go of the wing and, automatically, run up to another plane (Cuban 800) on the runway. Start accelerating, try not to taxi off the runway and ignore the new bikers. After you have gained enough speed, bounce off the ground and hide the landing gear. It is also a good moment to shake off the enemy, who managed to cling to the right wing, by performing a full spin.
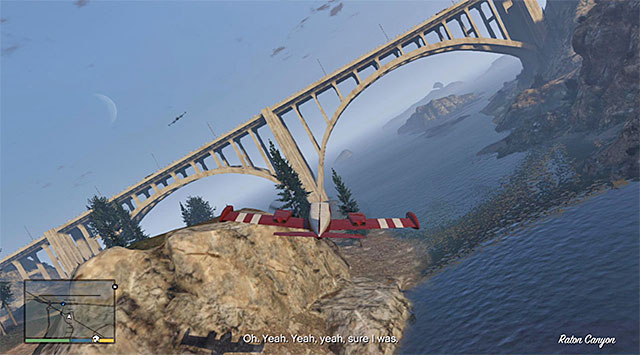 Try to fly under all of the bridges that you pass by
You now need to follow the plane piloted by Ron. It is a good idea to get acquainted with the basic information along your way, concerning the controlling of aircraft. During your way to the drop zone, you should also be on the lookout for any opportunities to fly under the bridges that you pass by, because this is one of the requirements to complete this mission in 100%.
After you get close to the military base, follow Ron's instruction and lower your altitude, thanks to which you will not be spotted by the radar and avoid alarming the base to your presence. Do not overdo with flying on the low altitude, though because you could crash. Continue your flight and, after you get to the area shown in the screenshot, press the button that the game prompts you to, which will result in the cargo being dropped.
 The place where the mission ends
The final part of this mission is returning to the other airport in this area. You still need to remember to keep at low altitude (and not flying directly over the military base!). Also, look around for possible bridges to fly under. After you approach the airport, extend the landing gear, decrease the plane's flying speed and land carefully. The only thing left for you to do is park the plane in the hangar, which will conclude this mission.
Rewards for the completion of the mission:
Requirements for the completion of the mission in 100%:
Way to unlock: You need to complete Main mission 17 (Mr. Philips). You can now go to the Yellow Jack Inn (letter C on the world map).
Playable characters: Trevor
Additional information: This mission is relatively short but, like in the case of Trevor's previous missions, it is overflowing with action. This time around, you will need to defend against waves of attacking hostile gangsters. For the purposes of this mission, Trevor will receive good weapons for free so, you do not need to buy anything (although you can purchase an armor if you need to).
 The Inn
The starting point for this mission is a small inn located exactly to the south of Trevor's trailer. After you reach the inn, watch the cutscene of the meeting with Mr. Cheng and his translator. Then, get into your car and take both of them to the meeting in the meth lab.
Hitting the gas tank will cause an explosionClaim the automatic rifle from Chef, smash the window and start firing t the members of the Aztec gang. I recommend that, as you continue fire, you target the red gas tank located near one of the vehicles, which will result in a series of explosions that will make it easier to clear the area.
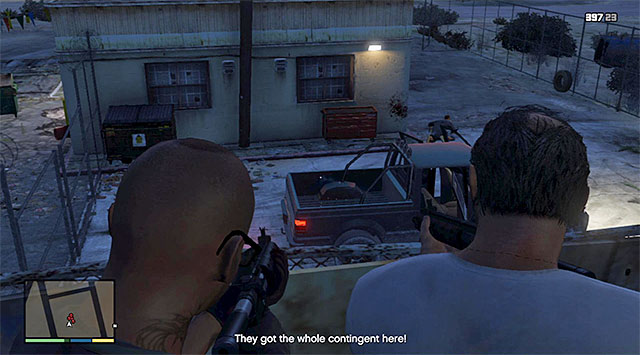 The balcony
After you have eliminated the first group of gangsters, follow Chef to the external balcony. Try to stop the incoming enemies from coming too close to the building. If you fail to do that, be prepared to eliminate the gangsters quickly, who may be trying to use the stairs. Just like earlier, you need to eliminate all of the enemies.
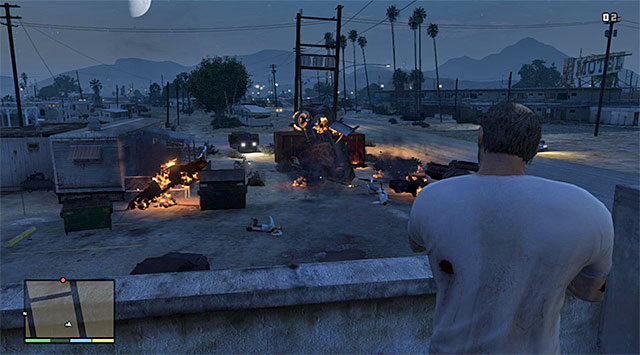 The grenade launcher will help you clear the area
Follow Chef onto the rooftop and start attacking the enemies, who will start appearing at the back of the building. In the initial phase of the gunfire, try to hit the red gas tank and, after you receive a grenade launcher from Chef, start aiming at the incoming vehicles, and if it is possible, blow them up before they unload with enemies.
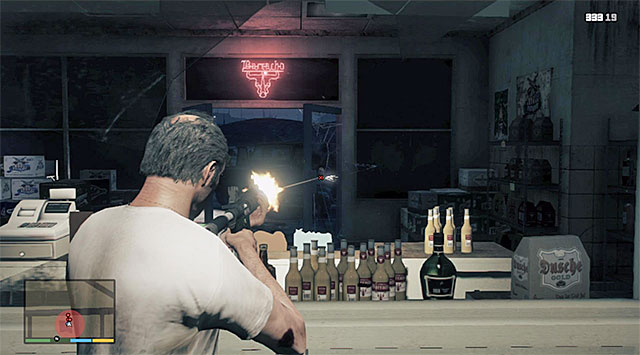 The location of the last attack
Finally, you need to reach a room on the ground floor of the building and deal with the enemies who are trying to cut through the main entrance. I recommend that, in this case, you use the traditional pistol or an automatic rifle. After you fit them back, dash out of the building and attack the fleeing enemies, while trying to kill them all before they make it to the vehicles and drive away. The only thing remaining for you to do here is return to the ice container to free the characters that used to be hidden.
Reward for the completion of the mission:
Requirements to complete the mission in 100%:
How to unlock: you have to complete the main mission 19 (Trevor Philips Industries). Then you can head for the inn (C letter on the map).
Playable characters: Trevor
Additional information: All this mission is about attacking and destroying the methamphetamine laboratory - and it's easiest to do with muffled sniper rifle. Trevor should have this weapon from one of previous main missions. But if you don't have any, I recommend to visit one of Ammu-Nation shops and buy one.
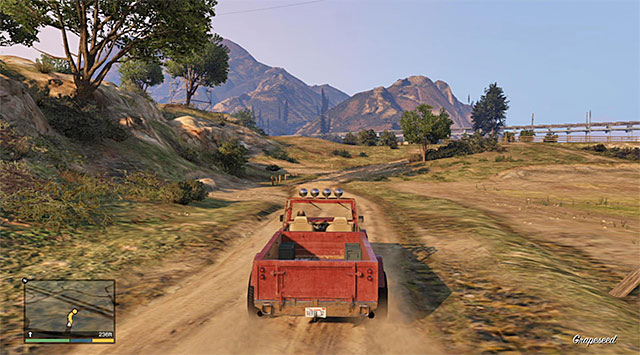 Country road to the farm
Begin from visiting the inn again to meet Mr. Cheng. When you get unsatisfying (delicately) answer, head for O'Neil brothers' farm on the north-east from the country town. When you get there, get out of the car and approach the vantage point suggested by the game to get oriented in the situation.
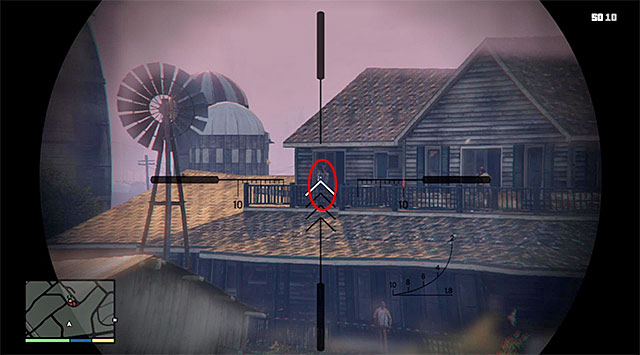
As I mentioned, sniper rifle may be very useful in this mission, because it let you clear the neighborhood without alarms and getting involved in direct shootouts. I suggest to begin from eliminating person shown on the screen above, who is looking around via the binoculars. Then, take care about enemies at the upper balconies and set up next to the shutters.
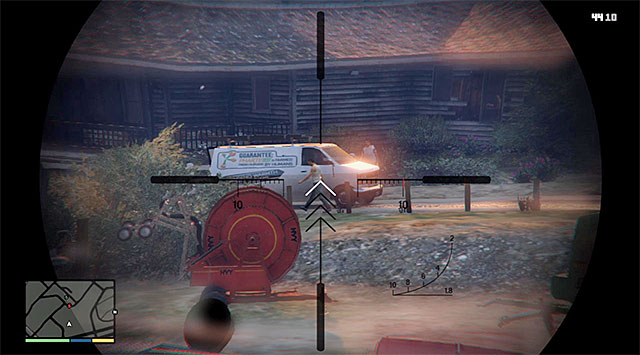 You can let several enemies flee to have less number of persons to eliminate
Enemies placed on the bottom should leave soon in a white van - so you can let them do it or kill them earlier. At the very end focus on two persons set up next to the shed. If you don't want to raise an alarm, kill those enemies one after another.
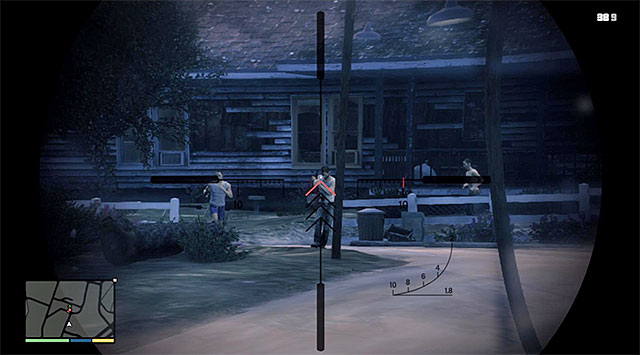 Wait until enemies run out from the building and kill them
If you followed my hints related with killing enemies, you'll have only those inside the building to deal with. You can still use your sniper rifle, but that will alarm enemies in this moment. The simplification is a fact, that they don't have your firepower and they'll die, mostly, before you got into their range. Other interesting variants of behavior is to throw grenades through the window or just get inside the building and begin the slaughter with, for example, a shotgun.
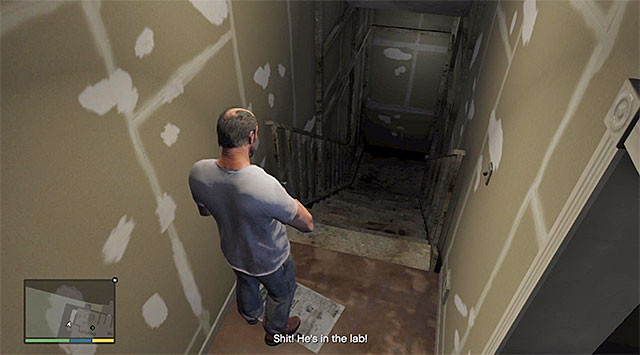 To the basement!
When you secure the whole building, find stairs leading to the basement and eliminate the last enemy there (don't get tricked, he is armed and he'll pull the gun out in the very last moment). You can pick up a gas canister.
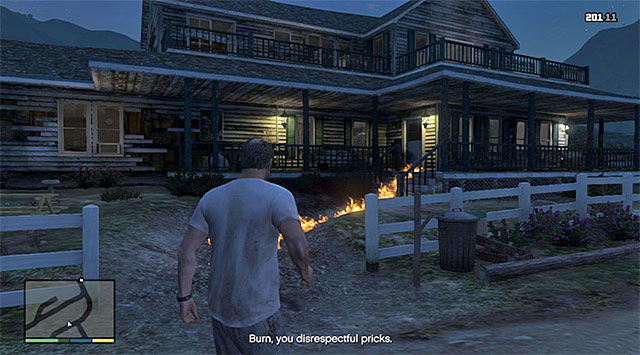 Firing at the gas traces causes a fire
The final part of this mission is only a pleasure. Start pouring out the gas from the canister moving outside the building. Drop the canister and aim at the gas traces on the ground - when you fire at that, the fire starts spreading out. The last thing you have to do is to move away from this place.
Reward for this mission: none
100% mission completion requirements:
How to unlock: you have to finish main mission 20 (Crystal Maze). After a while, a new mark will appear at the Trevor's trailer. It informs you that you can begin a new mission (T letter on the map).
Playable characters: Trevor
Additional information: In the beginning, you'll need to sneak and avoid detection again, but this time sniper rifle isn't necessary - the other muffled weapons are also ok. The second part of this mission is more enjoyable and contains a long ride to Los Santos with many funny talks between Trevor and Wade.
 Trailer Park
When you return to Trevor's trailer, you meet Wade. Watch a cut scene, enter the car (Canis Bodhi) and head west for the Trailer Park. When you get there, you obtain new objectives: you'll have to plant five explosives on the chosen trailers. And as you have to sneak, get out from the car and choose any gun with silencer.
 First enemy
While you moving in the park, you'll notice members of The Lost MC gang. You should eliminate all of them, by attacking from behind or with muffled gun. I don't recommend to get involved in direct shootouts, because it not only makes impossible to complete this mission in 100% but also lures out new enemies out from trailers. I recommend to begin eliminating with the person working at one of the cars.
In the further part, you don't have to hurry, because it may lead to a sudden detection. What is more, if you wait a while hidden, two motorcyclists will leave the Park. Be cautious next to the pickup (screen above), because there is a poorly visible enemy nearby. Remember also to eliminate grouped enemies quickly or they will raise an alarm.
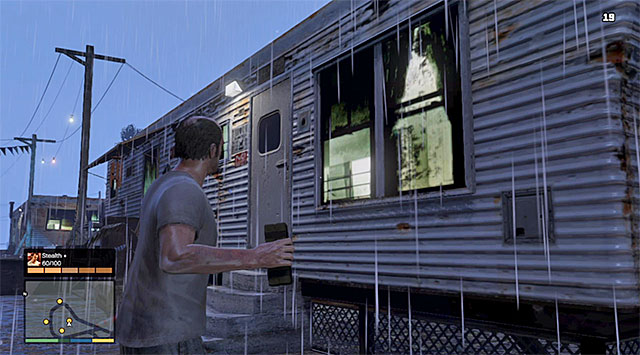 Aim at the trailer and plant bomb
You should start planting explosives after clearing the whole area. Choose Sticky Bombs from your inventory and start throwing them at the marked trailers. After that, I recommend to move back to the place from where you have begun this mission and then detonate them, so you don't get surrounded by new motorcyclists. Eliminate enemies who run out from remaining trailers.
 Vantage point
Return to Wade and begin a long journey to Los Santos. It'll be one stop during that, where you can take a look at the beautiful city panorama. Your destination is Vespucci Beach (next to the beach and pier), because it's where the Ralph's, Wade's cousin, apartment is.
Reward for this mission:
100% mission completion requirements:
How to unlock: you have to finish main mission 21 (Friends Reunited). Now you can head for Michael's house (M letter on the map).
Playable characters: Michael, Trevor
Additional information: This mission is rather short and shows not that much besides reunion of Michael and Trevor (only a new chase). Luckily, the chase is quite demanding, because you'll have to use a huge truck with low performance and manoeuvrability.
You begin this mission, you have to get to the Michael's mansion. You have get there as Travis or Michael and, as usual, the choice of character won't affect the mission. When the cut scene in the mansion ends, take control over Michael and get into his car (Obey Tailgater). Then, head for The Maze Bank Arena. When you get there, park the car in the marked place and, if you want to complete this mission in 100%, hit the service person next to you (screen above).
 Truck which will be used in the race
Enter the building and, after another cut scene, as Trevor start chasing fleeing Lazlow. Follow the path and after a while you get to the exit from the arena. Run to the parked nearby (JoBuilt Phantom), wait for Michael to join you and start a chase after the Lazlow's vehicle.
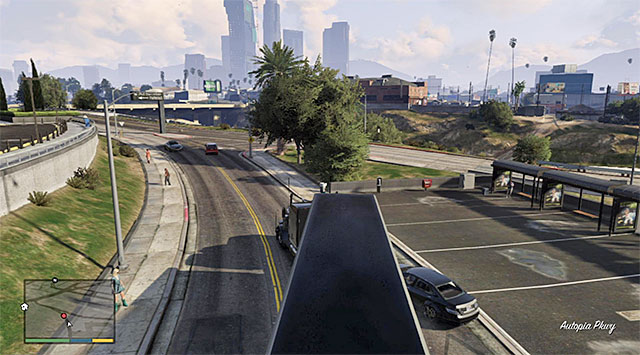 You can ram vehicles freely
As it was said, you have to perform all turns carefully, because your truck is rather uncontrollable. But don't worry if any vehicle rides your way - you can push him out without losing speed. After a while, game suggests to get off the trailer, but I don't recommend that - even if that speeds you up, it won't let you complete this mission in 100%.

Ignore the fact that Lazlow's car is in the safe distance from your truck, because this chase cannot end too early. Focus on correct driving and getting through the difficult parts of the route. Especially, be alert at the place shown on the screen, where you have to run on the tracks. You can rise the camera slightly, to avoid collision easily.
 The moment for a Truck Jump!
The second difficult moment is when you have to perform a jump. First of all, try to do it without any unnecessary turns, thanks to what truck won't catch about anything. Lazlow's car will be a bit ahead, but it's almost an end. You just need to watch the last one cut scene.
Reward for this mission:
100% mission completion requirements:
Way to unlock: You need to complete main mission 22 (Fame or Shame). Some time after the completion of this mission, you will receive a message from Lester, in which he will ask you to meet him. You can now set out towards the promenade neighboring the beach (letter L on the world map).
Playable characters: Franklin
Additional information: This mission is entirely concerned with the performance of the first paid assassination. I strongly recommend that you get well prepared for this one, because, quite exceptionally, you will not have access to the best weapons, nor will the game suggest sufficiently early which items you should take along. I recommend that you visit an Ammu-Nation store to purchase a sniper rifle, and additionally, equip it with silencer and a better scope.
Note - assassination tasked to you by Lester are grouped by the game together with the other main missions. It is worth knowing, however, that you do not need to complete them straight away and it is not requisite that you complete them before the next major heists. Therefore, if you want to, you can leave them for later.
 The starting point for the mission
You meet Lester in the promenade neighboring the Vespucci Beach. During the conversation, you will learn that Lester wants Brett Lowrey, the President for the Bilkinton Research company, assassinated. The man is currently staying at the Von Crastenburg hotel in the Rockford Hills district. The bad news is that he has his own bodyguards.
Note - during the conversation, Lester will also bring up the topic of using assassinations for making profitable decisions at the stock exchange. In this case, murdering Lowrey will increase the value of the Betta Pharmaceuticals corporation shares. Knowing that this will happen, you can purchase them sufficiently early, in hope for the increase in their value after you perform the assassination.
 The alley to the underground parking lot
Get into your car and go to the hotel where there is Lowrey. The best way to approach the hotel is by taking the narrow alley between buildings. Drive into the multi-storey parking lot and park your car in the marked area. That is when the game will start the countdown, and you will have 90 seconds to murder Lowrey.
You will be granted a lot of freedom when it comes to assassinating Lowrey and, I recommend against a direct confrontation, which will, unnecessarily, end up in a shootout, and may also result in a police pursuit. It will be much better to eliminate the target using the sniper rifle (this is required if you want to complete this mission in 100%), whose purchase I have recommended at the very beginning of this mission. Climb up the stairs to reach the second level of the parking lot (on the top level there is a very high wall), and position yourself in the spot shown in the screenshot.
 Target the man and fire
Aim the sniper rifle at the black SUV and wait for Lowrey to appear in the area (he can approach from any side so, there is no ideal position to take the shot). Try to kill the marked target (pink shirt) before he manages to get into the car and flee.
 You need to leave the assassination site
If you are equipped with a suppressed rifle and took your shot from one of the parking lot's upper levels, you will not be spotted by Lowrey's bodyguards. Otherwise, you should expect to have a fight with them (use the supports and cars in the form of covers, which may also be joined by the police. Regardless of how things go, you need to get away from this area. Receive a phone call from Lester, who will inform Franklin that the reward for the completion of the contract, as well as the keys for the estate in Vinewood Hills, has already been transferred.
Rewards for the completion of the mission:
Requirements to complete the mission in 100%:
How to unlock: you have to finish the main mission 23 (Hotel Assassination). You can head for the car wash in the Little Seoul (L letter on the map).
Playable characters: Franklin
Additional information: This mission is very similar to the previous one reserved for Franklin, because he becomes, again, a contract killer. This time, he'll have to eliminate four targets, and three of them should be eliminated with some long range weapon, like muffled sniper rifle. As of preparations, choose some fast car, because the key to the success is a rapid moving between locations.
 Here you begin this mission
You begin this mission nearby the car wash in Little Seoul in Los Santos. When you get there, approach the phone box and pick up a phone from Lester, who explains the details of mission. The plan is to kill four corrupted jurors in the juridical case connected with tobacco company Redwood Cigarettes. Attention - if you play on the stock exchange, consider buying shares of Debonaire Cigarettes, because it'll profit the most from those killings.
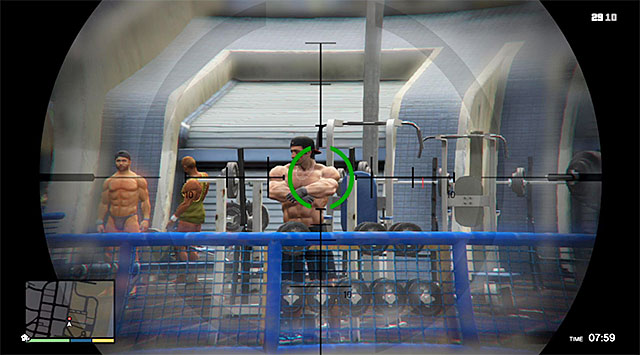
You have to eliminate four persons in 9 minutes. First corrupted one is a body-builder and can be found nearby the Vespucci Beach. Stop in a distance from the person shown on the screen above and only then fire. Following those hints, you shouldn't alarm civilians and attract police attention.
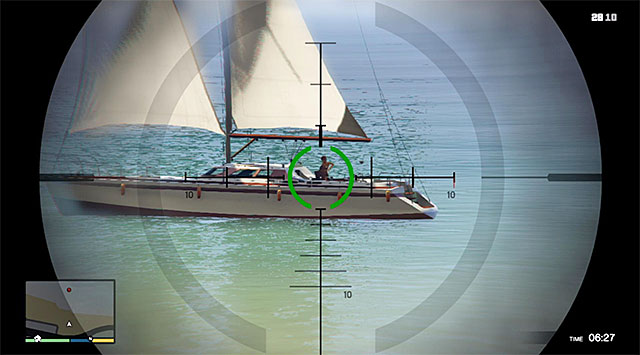 Fire from a big distance
The second juror can be found on the yacht, docked next to the Pacific Bluffs (north-west part of Los Santos). Stop the car at the shore, choose the sniper rifle and aim at the yacht. Don't worry if you kill also his girl, because it won't affect the result of this mission in a negative way.
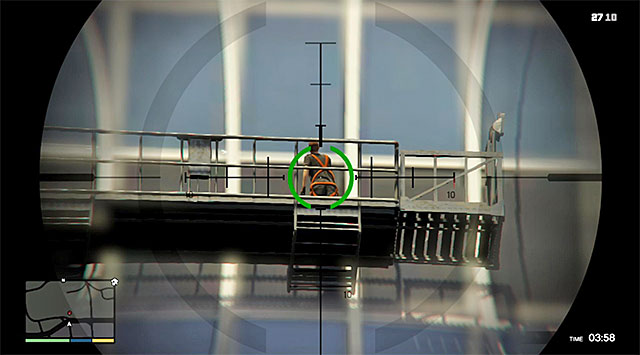
The third one, is a high-rise worked, who is in the western Vinewood, at the Elipse Medical Tower. When you get there, prepare sniper rifle, because you have to aim at the elevator shown on the screen. Kill the marked person.
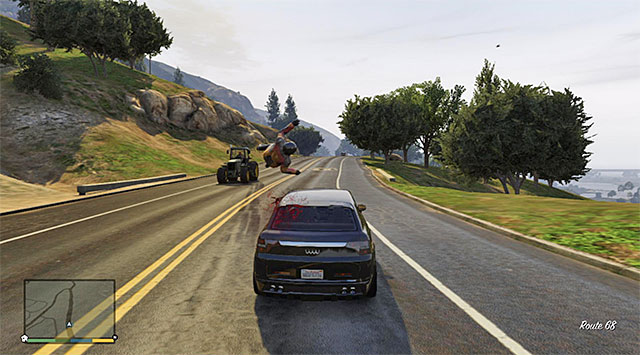 Motorcyclist can be rammed or shoot down
The last , fourth one, is, in default, on the Vinewood hills. But this assassination differs because he'll start a motorcycle trip just after you get close to him. Begin the chase and fire him down while he is riding or ram him with the car. Now you just need to listen to the new conversation with Lester.
Reward for this mission:
100% mission completion requirements:
How to unlock: you have to finish main mission 22 (Fame or Shame). You can head for the observatory (B letter on the map).
Playable characters: Michael
Additional information: You don't have to prepare to this mission at all, because during performing it, Michael will lose all his things. As of the mission itself, it is very interesting, because it includes running away from the coroner's office and begins in the... mortuary. The last part of mission is a rather demanding, three-star chase.
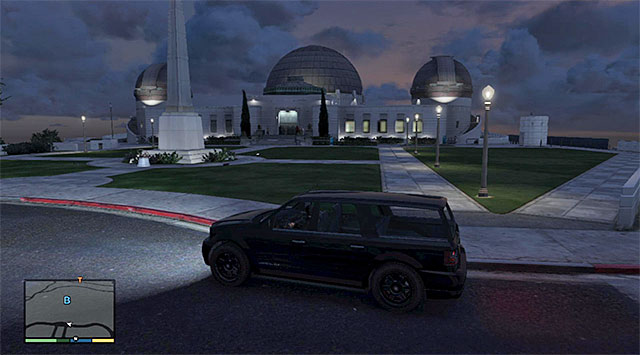 The observatory
To begin this mission, you have to get to the observatory, on north from Los Santos, on the Vinewood hills. Approach the observatory from north, get out of the car and head for the vantage point, where Dave awaits (Michael's contact in FIB). Listen to the conversation about infiltration the coroner's office and verifying if Ferdinand Kerimov is dead for real.
 Mortuary scene
When Michaels wakes up in the mortuary, you can get up from the section table or listen to the doctors conversation. In the other case, don't wait too long, because surgeons will start to cut Michael's body what will kill him, apparently.
 Go from behind and kill an enemy
When you regain full control, turn on the sneak mode and approach the first enemy from behind and eliminate him in melee fight. Pick up his pistol and search both bodies in the mortuary. You'll get to know, that Kerimov isn't among the dead men here. Listen to the new conversation with Dave.
 Use a slow motion
From now on, you need to take into consideration additional complications, because you'll have to eliminate hostile agents on your way to the exit. Begin from killing the person who appears in the main corridor, then head left and deal with more enemies in this area. During all those encounters, I recommend to use special Michael's ability, a slow motion, which helps you eliminate enemies with quick headshots. Don't forget also to use covers as often as you can.
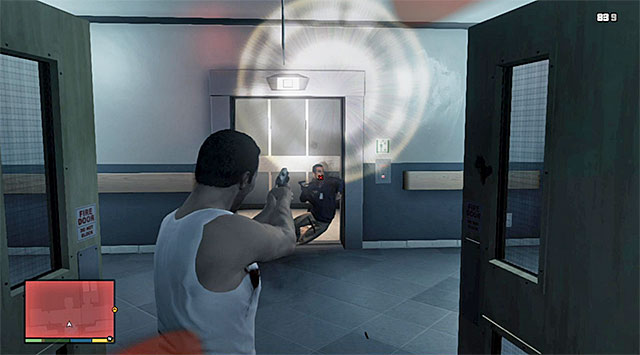 An elevator
Move forward and be careful next to the reception - be read to quickly eliminate an enemy, who runs out from the nearby elevator. You can take his machine pistol. Find a med kit attached on the right wall and choose door leading to the staircase. As you can probably figure out, you meet another agent on the stairs. Enter the new corridor, kill an enemy and go right. Choose another stairs and kill another person while climbing up.
When you get to the new, big area, deal with closest enemies and be prepared for a new attack, from the direction of staircase. After fights, look around and find a black bag (screen above). Open it and collect all Michael's weapon which he has lost.

Now you can head for the archive in the corner of this location. Approach the window marked by the game and break it, so Michael can jump out through it and get out of the building. You have to act quickly, so try to break into one of nearby vehicles.
 Meeting place with Franklin
Try to leave the parking lot ASAP and get on the street, because there is a three-star chase in front of you and, as a result of it, you can be quickly surrounded. As in the previous chases, when you get away from police cars and a helicopter, you have to look for alleys, underground parking lots and places like that where you can hide. When the chase ends, wait until Michael calls Franklin and meet him on the oil field, on the east from the city centre (El Burro Heights).
Reward for this mission: none
100% mission completion requirements:
How to unlock: you have to finish main mission 25 (Dead Man Walking). Now you can head for Michael's mansion (M letter on the map).
Playable characters: Michael
Additional information: It's one of the most relaxing mission which offers, first of all, possibility of taking part in Yoga classes. In the final part of this mission you'll encounter very funny cur scene about unpredicted effects of anaesthetic.
 Read commands displaying on the screen
When you get to Michael's mansion, his wife will ask him to join the yoga classes conducted by Fabien. You will have to make three positions - read carefully instructions which will appear on the screen. You change your position by simultaneously leaning out the analogs.
 Breath in and out properly
When you change the body position, you have to make a breath in (simultaneously press both triggers) and then breath out (releasing both triggers). Continue exercises what leads to the interesting final of yoga.
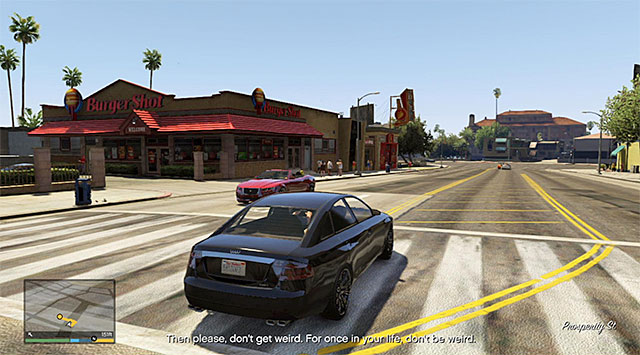 Burger Shot
Go on the first floor and enter Jimmy's bedroom, what forces him to take a ride with Michael. Exit the mansion, enter Michael's car (Obey Tailgater) and wit for his son to join you. You can head for the Burger Shot restaurant, where Jimmy meets his buddy, who is a dealer.
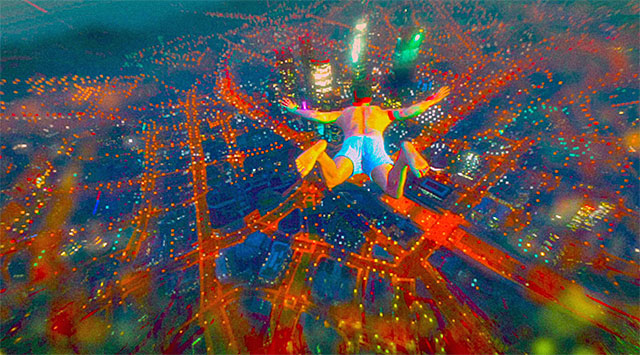 One of hallucinations
On your way back to Michael's mansion, Jimmy offers him a bought drug what causes serious (and very funny) hallucinations, which end up with a long flight (you can end it by crushing into a building). Now you just need to get to your mansion and read a letter left by Michael's wife.
Note: Performing this mission is connected with two losses, which there is no way to avoid. Michael's funds on his account will deplete by several thousand dollars, and Jimmy will also take his personal car (you will retrieve it further in the game - wait for a text message from Jimmy).
Reward for this mission:
100% mission completion requirements:
How to unlock: you have to finish main mission 25 (Dead Man Walking). You can head for the skyscraper, which is a headquarter of FIB (B letter on the map).
Playable characters: Michael, Franklin, Trevor
Additional information: It's something like demonstration mission, in which all three Playable characters will take part for the first time and a lot of fun is to observe their cooperation (and influencing it). Your plan is to attack the FIB skyscraper to capture Ferdinand Kerimov and each of characters will have his role in it.
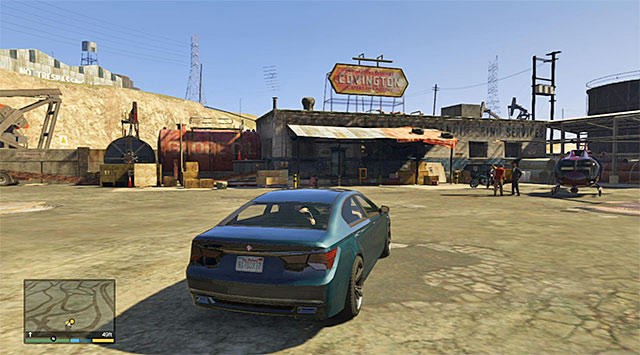 Your base
You have to begin this mission as Michael. Get to the FIB skyscraper in the centre of Los Santos, where you meet Dave, Steve Haines and Andreas. After listening to the plan about taking over Ferdinand Kerimov from the building where he is kept by FIB, follow Dave and enter his car (Ubermacht Oracle). Head for the square which is your base in the El Burro Heights. There, you meet Franklin and Trevor.
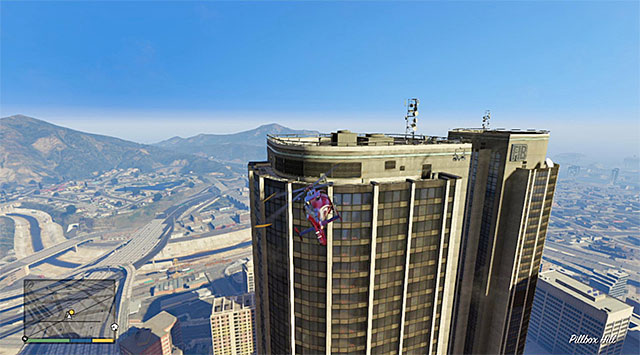
Soon, you get control over Trevor and begin conducting the helicopter. If it's your first flight, read information about flying displayed on the screen. Your destination is FIB skyscraper and, according to the instructions, you have to get over its western wall (screen above) what triggers a cut scene.
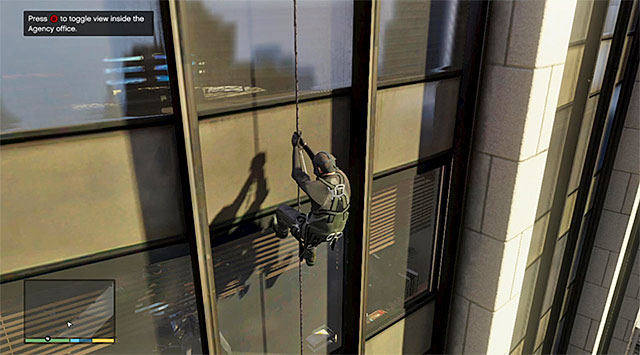 Stop over the room with kept Kerimov
Wait until game switches to Michael and slide down. You can bounce from the wall to speed that up. Get close to the room with Kerimov and switch to the cinematic camera to watch part of the interrogation. When you get necessary information, go into the room through the window.
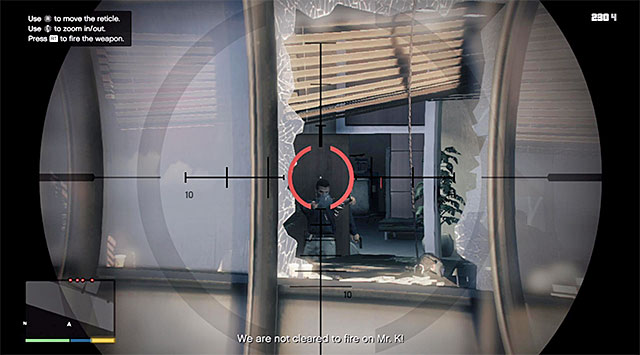 Eliminate agents with sniper rifle
According to the game suggestion, switch quickly to Franklin who is a sniper support for Michael. Start eliminating agents in the room where Michael is. Try not to hit your ally and aim for enemies' heads, but kill quickly.
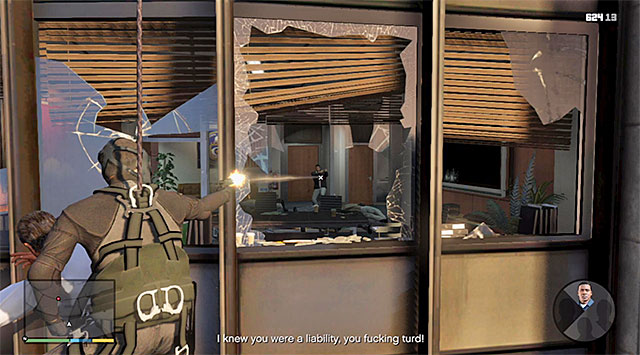 Eliminate more enemies in the building
Game switches again to Michael - you have to deal with remaining agents in the room where Kerimov was interrogated. You can, of course, use slow motion what makes easier for you to perform Headshots. Wait until Trevor pulled Michael and Kerimov on helicopter's board what begins your escape.

Take control over Franklin for the very last time in this mission. As you probably noticed, there is a helicopter with armed people heading your way and your task is to take it down. Don't aim at the shooters, only at the pilot (screen above) what let you eliminate the danger quicker.
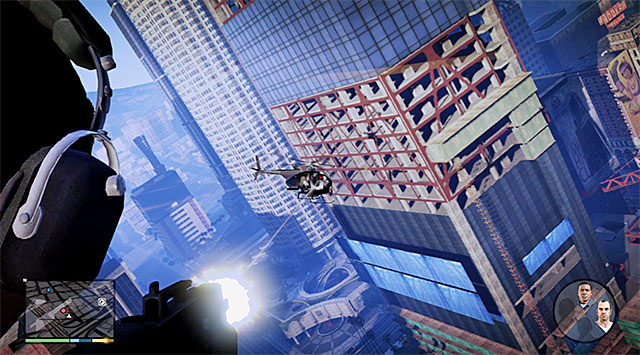 It's better to control Michael
During the last part of mission you can choose whether you prefer to pilot the helicopter as Trevor (fly slalom to become a hard target for attacks) or provide fire as Michael. I recommend the other variant, because you should take down enemy helicopters faster if you take care about them by yourself. As previously, use slow motion and don't bother about the ammunition.
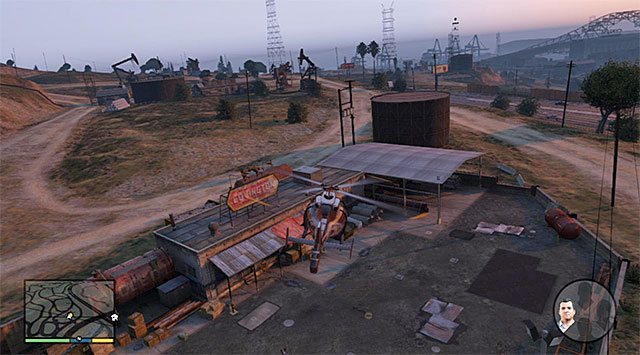 Landing site
You have to defend to the moment where all enemy helicopters are destroyed. Take control over Trevor and return to you base. Place the machine carefully on the ground what ends this exciting mission.
Reward for this mission:
100% mission completion requirements:
Way to unlock: you need to complete Main Mission 27 (Three's Company). While playing as Trevor, wait for a phone call from outside of his contacts list, or while playing as Michael, wait for a phone call from Steve.
Playable characters: Trevor, Michael
Additional information: The main attraction of this mission is the possibility of subjecting Kerimov to all sorts of torture, aimed at procuring information. The character responsible for inflicting the tortures is Trevor, of course. Michael's task, on the other hand, will be to eliminate the person that has been singled out and, this part of the mission can be completed without any problems.
 A phone call from Steve
You can activate this mission while playing as Michael or Trevor (in the case of the latter, you will receive a phone call from an unknown caller). Listen to the conversation with Steve and set out towards the warehouse located Northwards of the port (if you are currently playing as Trevor, you can cut to Michael and speed up this process).
 The estate that Kerimov points you to
Wait until you regain control over Michael, get into Dave's car (Ubermacht Oracle) and drive towards the estate that Kerimov pointed you to, which is located in the Rockford Hills district, close to your character's villa. After you get there, it will, unfortunately, turn out that the interrogated character gave you the wrong address, as a result of which, This time as Trevor, you will start torturing the man.
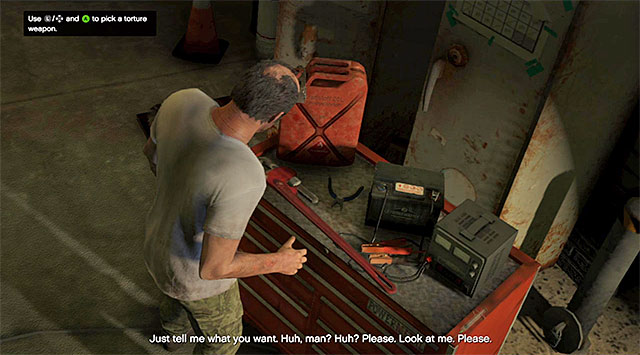 The selection of tools
During this mission, you will have to play four scenes of a (very brutal) interrogation and Trevor has, at his disposal, just as many torture tools available so, it would be good if you used each one of them exactly once. The items on the workbench are:
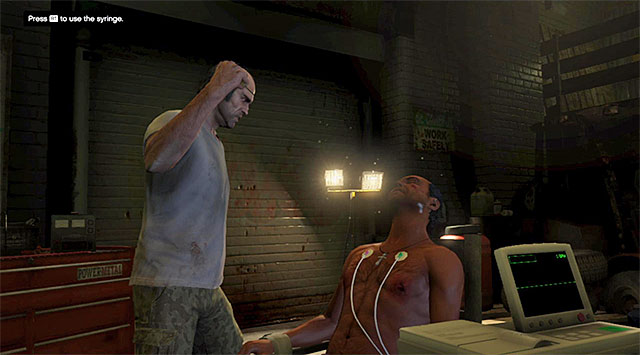
The crucial dependency connected with the tortures is that you should be taking frequent looks at the heartbeat monitor and not exaggerate with the tortures. Otherwise you can bring about cardiac arrest. This does not end the mission, because you can apply an adrenaline shot in such a situation (the above screenshot). You should realize, however, that applying adrenaline will prevent you from completing the mission in 100%. That is why you should take frequent breaks and be careful, especially while electrocuting Kerimov.
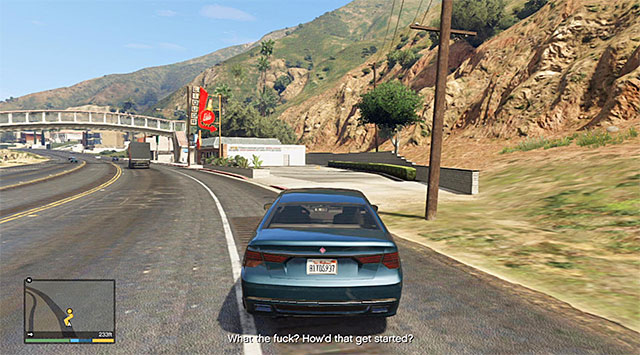 The place to stop the vehicle
After the first part of the torture scene ends, you will receive, from Kerimov, new whereabouts. Wait until you cut to Michael and go to the Humash district, located in the North-Western part of the city. After you arrive there, park at the highway and wait for Michael and Dave to take their positions across the road from the mission's target, on the hill.
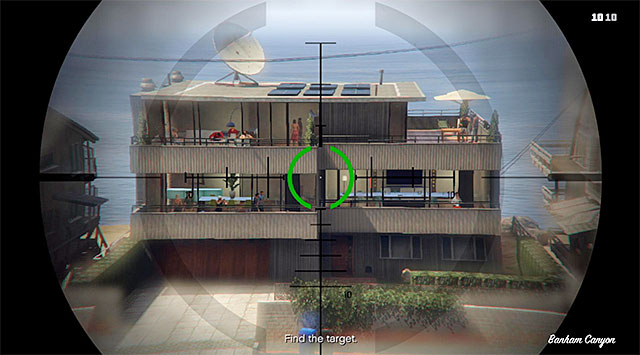 The first use of the scope
After you cut back to Trevor in the torture chamber, you will have to play the second part of the interrogation. As a result, you will learn about the general features of the person that you are looking for. Wait until you cut back to Michael and use the scope. Unfortunately, there are many people in the building right now, so you will cut back to Trevor once again. In the aftermath of the third part of the interrogation, you will learn that your target is wearing a beard.
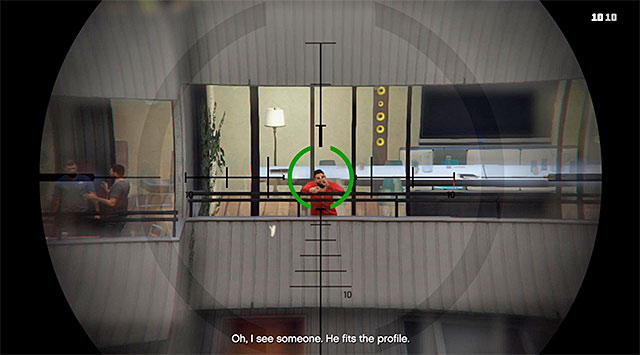
While playing as Michael once again, use the scope. However, this time, the attempt to recognize the target will be failed again. Again as Trevor play through the last one, fourth, part of the interrogation, and you will learn that he is left-handed and is a smoker. Wait until you cut back to Michael, target the person that you can see in the screenshot and take your shot (it is best to aim at the head).
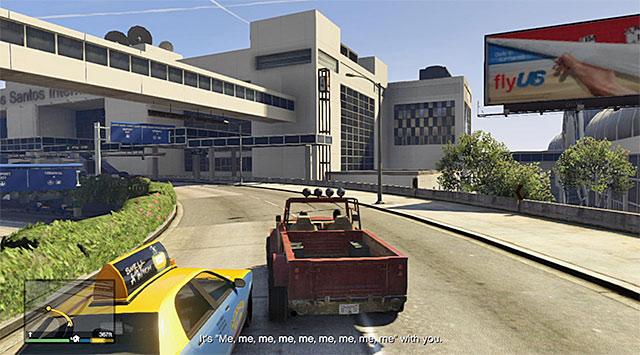 The place where the mission ends
Watch the cutscene and, as Trevor, start the final part of this mission, which assumes that you take the severely wounded Kerimov to the airport, to ensure him with the possibility to leave Los Santos safely. Soon, this mission will conclude.
Rewards for completing the mission: none
Requirements for the completion of the mission in 100%:
Way to unlock: You need to complete Main mission 27 (Three's Company). You can now visit Franklin's former home (letter F on the world map).
Playable characters: Franklin, Trevor
Additional information: the most interesting bit of information is that it will allow you to visit Grove Street, i.e. the location that should be perfectly known to all the fans of GTA: San Andreas. When it comes to the preparations, I recommend that at least one character takes grenade launcher along for the mission (preferably Trevor), because this will make it easier to win many of the fights. Towards the end of this mission, you will also have to play a pursuit on jet skis but, it is not especially demanding.
 Grove Street
To start this mission, you need to visit Franklin's first house, i.e. the one that he used to live in until he got a villa on the hills of Vinewood from Lester. You can get there as either Trevor or Franklin, and this is not going to have any significance. After you listen to the conversation, in which also Lamar will take part, while playing as Franklin, get into the van (Vapid Speedo) and drive for the meeting at Grove Street. After you get there, get out of the van and go to the site of the trade.
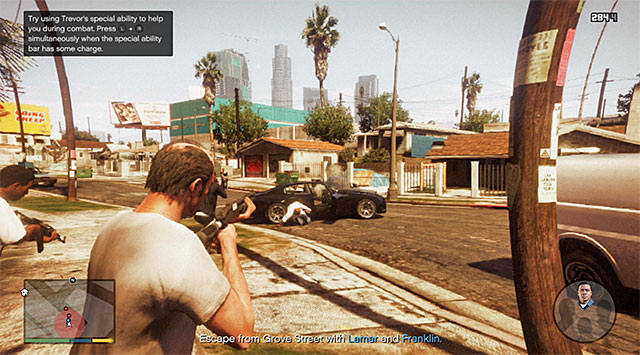 Trevor's special skill will prove very useful here
Right after the cutscene, you will have to decide who you want to control during the fights with the hostile gangsters. I recommend Trevor because, due to his special skill, you will not have to hide behind covers, thanks to which you will be more efficient at eliminating the enemies.

Keep pushing ahead, and keep in mind that there will be appearing new gangsters around, on a regular basis. It is best to eliminate the ones in cars by using the grenade launcher suggested above (the above screenshot) which will make it considerably easier to win fights. Just remember not to cause an explosion near Franklin or Lamar, because the death of either will mean failing the mission.
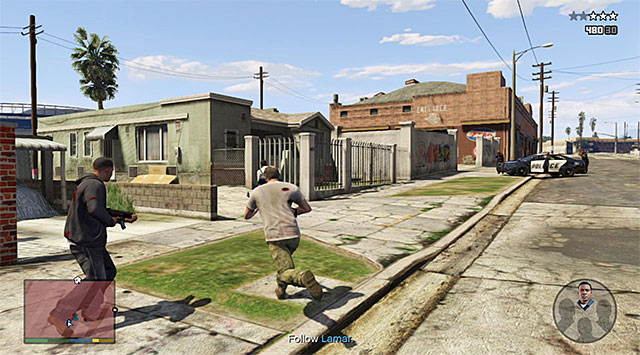 Escape from the Grove Street
Soon, there will police start coming, and I recommend against getting into unnecessary fire exchange with them. Instead, follow Franklin and Lamar to the left and reach the area where you have noticed the jet skis parked. Cut to Franklin and take control over one of the ski jets.
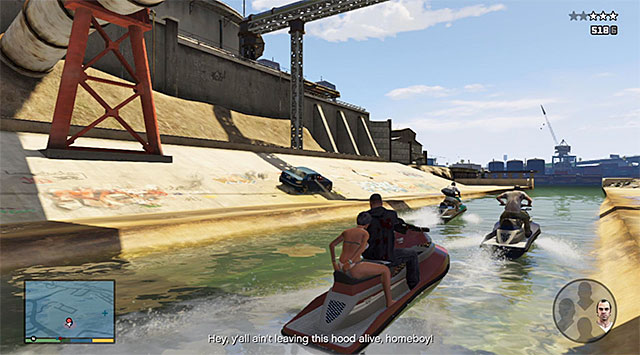 Deal with the last group of gangsters
Follow the channels and attempt to keep within short distance of Trevor and Lamar. If you want to, you can attack the gangsters that are chasing you and, for obvious reasons, it is best to use Franklin's special skill here (slowing down of time while riding) which will make it easier to target the gangsters.
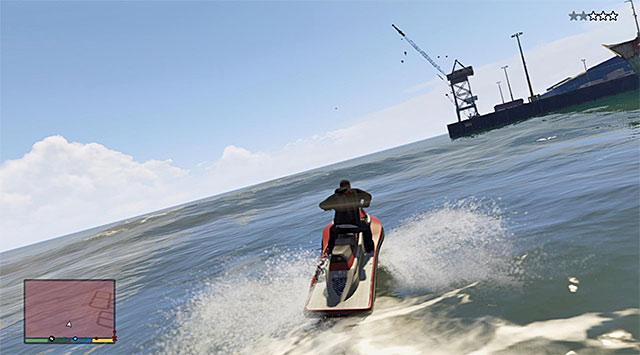 Finally, you need to lose the police pursuit
Ignore the police helicopter that is chasing you and wait for the moment in which Lamar will suggest that it would be good to take part. Steer in the direction different than that taken by your allies, and watch out not only for the helicopter, but also for the police boats. This mission will conclude after you lose the pursuit.
Rewards for completing the mission:
Requirements for the completion of the mission in 100%:
Way to unlock: You need to complete Main mission 22 (fame or Shame). You can now visit Floyd's house in the Vespucci Beach district, which became a hideout for Trevor after he reached Los Santos.
Playable characters: Trevor
Additional information: It is a relatively long mission that fulfills the role of the preparations for another big heist on one of the cargos stored in the port. Trevor will be the one responsible for organizing this one. You will have to perform many activities in the port, including interaction with a big crane. The final part of this mission, just like in the case of the Jewelry Store Job, will include the necessity to decide on the mode of action.
NOTE: Towards the end of this mission, you will be presented with a choice of possible variants of the heist on the valuable cargo in the port. The choice itself will have bearing both on the heist itself, as well as on the preparatory mission. I strongly recommend that you save game before starting this mission!
 The port's entry gate
To start this mission, you will have to go to Floyd's house, which is located in the Vespucci Beach district. After the cutscene, get into Trevor's car (Canis Bodhi), wait for the two other characters to join him and drive towards the port located to the south of Los Santos. Stop at the entry gate, wait until you are let through and park in the spot that Floyd points you to.
 Dock Handler
Wait for Wade to be delegated to perform a "special task" and follow Floyd. After a moment you will have to perform the first activity under the guise of a port employee. You will have to carry two containers over to different spots. Get into the Dock Handler and drive towards the location where the containers are.
Stop at the first one of the containers and position the crane of the vehicle right above the container. Lower the crane and press the appropriate button to grab the container (the above screenshot).
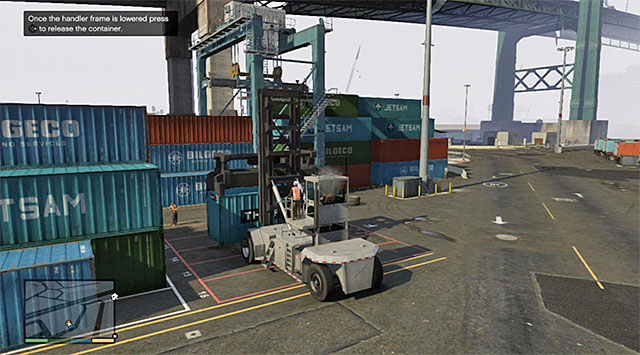 The place where both of the containers need to be delivered
Lift the crane and drive towards the location where the container needs to be put. Along your way, try and not bump into the elements of the surroundings, to prevent damaging the container. Lower the crane and release the container to leave it in the designated spot. You need to do the same when it comes to the second container.
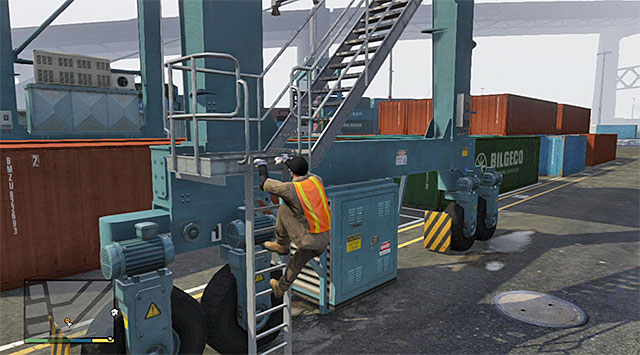 The ladder to the overhead crane
You can now get out of the Handler and go towards the overhead crane near the freighter. Locate the ladder to the top of the crane, start climbing and make sure that you do not fall down. After you reach the top, listen to the port employee's instructions and make it over into the operator's cabin, thanks to which you will take control over the crane.
Also this time, you need to transport two containers but, it is a bit more complicated to control this crane. To move the whole structure around, use the right analog stick, and to control the crane itself, use the left analog stick. You need to direct the crane over the first one of the containers (the above screenshot) and grab it.
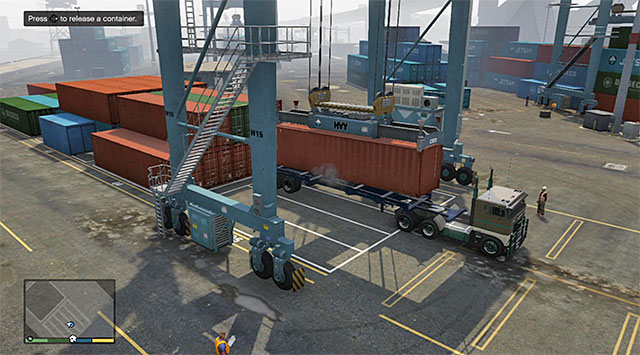
Lift the container that you have just grabbed and move the entire carriage to the right. Keep doing that until the crane is above the truck's trailer. Just like before, you need to be precise here. Keep the container hovering right above the trailer (the above screenshot), and release it. Repeat all of the activities with the second container.
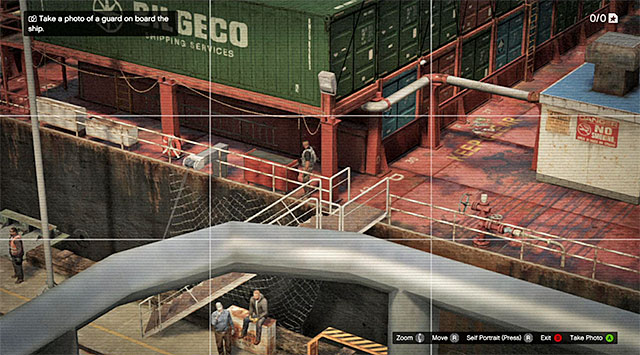
You can now get out of the cabin. Jump over the balustrade, carefully, and stop at the very end of the catwalk marked by the game. Select the phone from your inventory and activate its camera (Snapmatic). You need to take three pictures - first of all take a picture of the front part of the freighter, then the large numbers of armed men onboard (the above screenshot, and the back part of the freighter. After you have taken all three photos, select the sending option and select Ron from the contacts list.
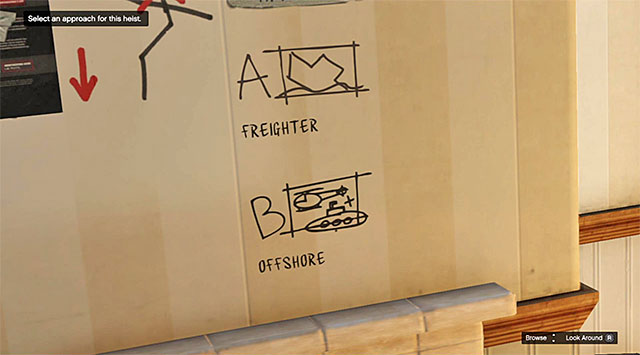 The place where the truck stops
Very carefully, get to the bottom now and get into one of the trucks, which you have just put a container onto (JoBuilt Hauler). Drive towards the dock located to the South-East of here, and remember not to run over a port employee, or alarm the port's crew. After you reach the dock, park the truck in the marked area and watch a funny cutscene.
The moment of variant selectionYou can now return to Floyd's house to conceive a heist plan. Just like in the case of the Jewelry Store Job, there are two different variants available, i.e. the direct one (A- Freighter), or the attack on the offshore (B-Offshore) attack. In both cases, there will be different preparatory missions to play, and also the course of the heist is going to be completely different. The decision is yours and, of course, both of the available variants have been described further in this walkthrough.
A short summary:
Rewards for completing the mission: none
Requirements for the completion of the mission in 100%:
Way to unlock: You need to complete Main mission 30 (Scouting the Port) and wait until you are texted by Wade. This will result in the appearance of the Hs marker on the world map, which marks the place where you can find the sub.
Playable characters: Trevor
Additional information: The most important piece of information, in connection with this mission, is that it is common for both variants, i.e. the attack on the freighter and the attack offshore. Stealing the sub is an easy task but, it is a good idea to seize the opportunity and learn its controls while hauling it from the water. Furthermore, I recommend that you take a suppressed sniper rifle along.
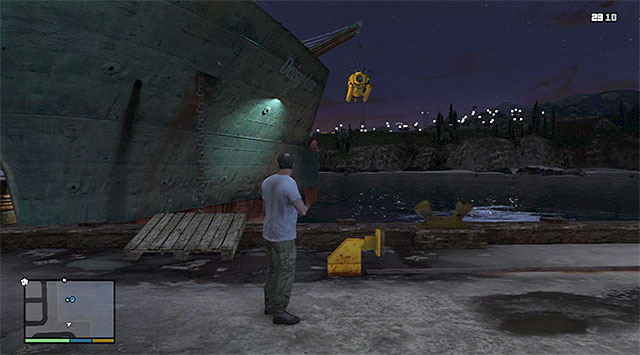
The sub is in the docks, in the South-Eastern part of Los Santos and it is attached to a large ship. After you get there, get out of your car and stop in the spot shown in the screenshot, from which you will have perfect visuals on the sub.
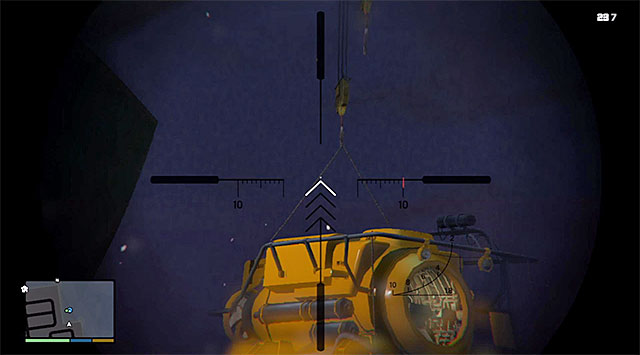 Use the sniper rifle and target one line after another
In accordance with the previous suggestion, select the sniper rifle from your inventory and start aiming at the lines that the sub is suspended on. You need to hit all four of them, thanks to which the sub will detach from the vessel. Jump into water and swim up to the sub (Submersible) and get onboard.
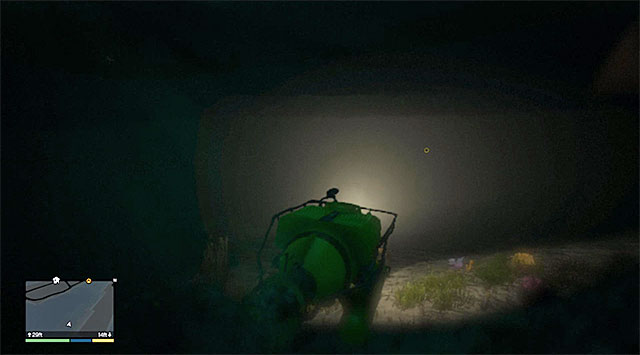 Your destination is the yellow underwater circle
You can now steer to the point where the sub will be pulled out of water, and it is located to the West of here. I recommend that, during your journey there, you learn exactly how the sub is controlled and stay well above the bottom, thanks to which you will prevent bumping into obstacles, which unnecessarily makes the mission longer. After you approach the destination, you will notice a yellow circle in the distance, which is where you need to deliver the boat.
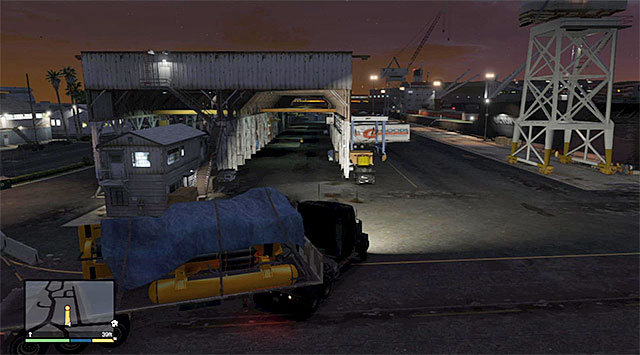 The place where the mission finishes
Wait for the sub to be transported onto the truck bed, het into the truck and drive towards the warehouse to the West of the port that you visited in the previous mission. Stop the truck in the marked area, which will conclude this mission.
Rewards for completing the mission: none
Requirements for the completion of the mission in 100%:
Way to unlock: You need to complete Main mission 31 (Minisub) and, as Trevor, wait for a phone call from Wade (Also it may turn out to be necessary to complete some other missions as Franklin or Michael). You can now return to Floyd's apartment (letter H on the world map).
Playable characters: Trevor, Michael, Franklin
Additional information: This heist is more demanding than the one on the jewel store and, to an even larger extent, it relies on cooperation between the playable characters. This mission consists of two constituent parts - first you need to plant explosives on the freighter and detonate them, and then examine the freighter's wreckage in search for the precious cargo, and steal it using the sub.
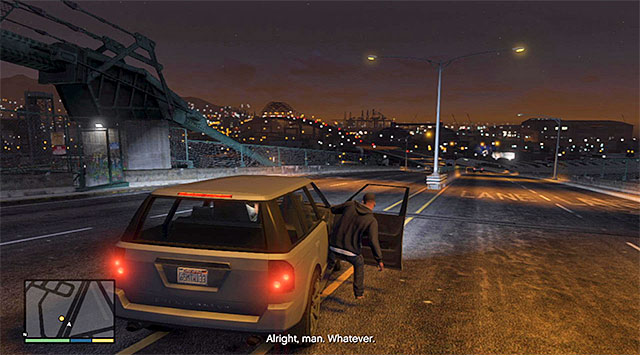 The bridge near which Franklin will be deployed with a sniper rifle
After you return to Floyd's apartment, watch the cutscene of the meeting of all the people involved in the heist. Walk outside and use Trevor's car, or any other vehicle, capable of taking at least three people. Your first task is to reach the bridge located near the port, i.e. the place from which Franklin will be able to cover his colleagues.
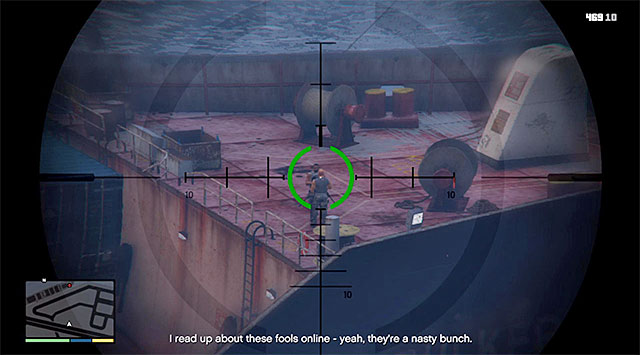
Wait for the game to cut to Franklin and take the vantage point near the stairs. Watch another short cutscene and, after it finishes, take a single shot at the two guards shown in the screenshot.
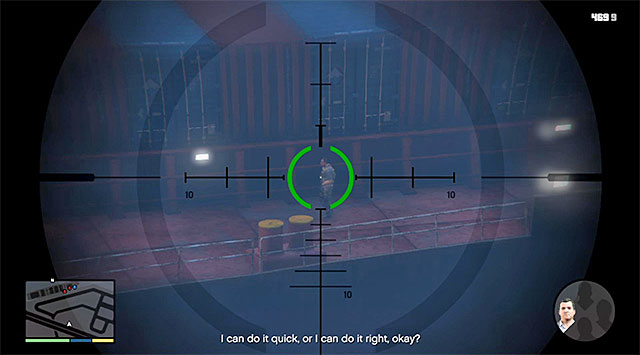 As Franklin, you need to help Michael stay in hiding
From now on, you will be able to cut between Franklin and Michael without restrictions. If you want to play as Franklin, you need to use your sniper rifle to help Michael eliminate all of the guards effectively, who appear in his way. Try not to miss them, the important thing is that you o not need to aim at their heads because, by hitting them on the chest, you will also be able to take them down with a single shot
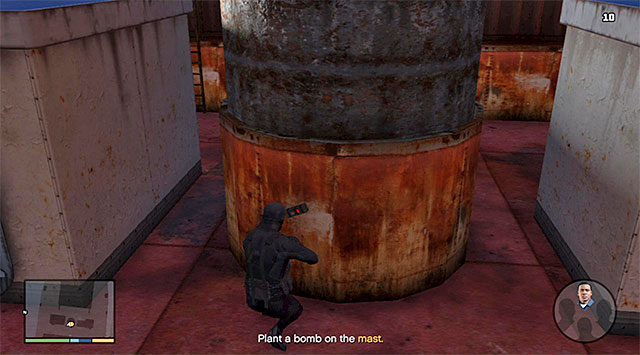 While playing as Michael, you need to sneak across the board and plant the explosives one after another
If you want to play as Michael you need to reach places where you are supposed to plant explosives . After you make it to the marked point, select the Smart Bomb from your inventory and plant it (do not detonate it!). In my opinion, controlling Michael is a better decision, because you will be then allowed to dictate your pace in an easier way. What is even more, Michael has a suppressed pistol so, he can also eliminate the enemies silently.
 The region f the ship's entrance
After you have planted three bombs, it will turn out that you need to plant the fourth one inside the ship. It is a good idea to take control over Franklin here and help Michael at clearing the manhole that he needs to reach. You especially need to watch out for the enemies occupying the upper balconies because, for obvious reason, their range of vision is wider.
 Keep helping Michael avoid the mercenary attacks
Do not worry about the fact that, onboard the freighter, the alarm will be raised, because there was no way of preventing that. You now need, while playing as Franklin, cover Michael, who is running to leave the vessel's board. Keep listening to his comments and eliminate, with the sniper rifle, all of the guards that appear nearby.
 Defend yourself from fire
Things will soon get complicated, though, because Franklin will be noticed and, as a result, the enemies staying in the port will lay fire down on him. Ignore Michael, for the time being, and focus on eliminating the enemies that are currently firing at Franklin. Eliminate in the first place the enemies staying out in the open and then, the ones hiding behind cars and the other covers.
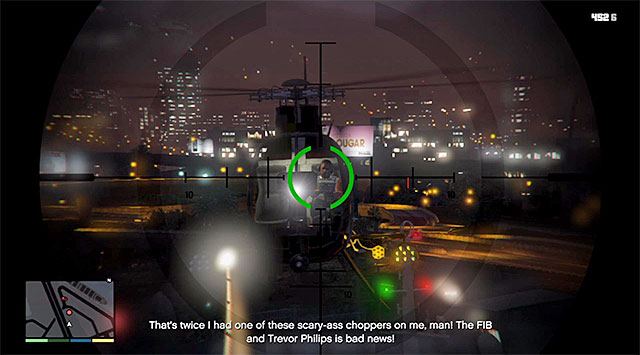
Be ready to bring down the enemy helicopter, by targeting it as soon as you receive news of its appearance in the area. Just like in the case of the previous main missions, it would be best if you aimed at the chopper's pilot (the above screenshot), which will cause the machine emergency land.
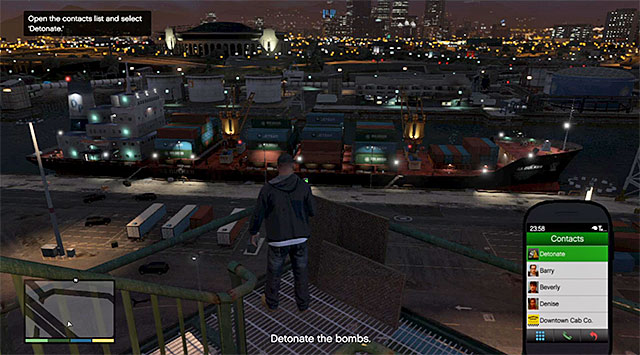 Detonate the charges remotely
After you have dealt with all of the mercenaries, who have been firing at Franklin's positions, you should resume covering Michael who is trying to escape from Merryweather's board. After you watch a short cutscene of Michael jumping into water, select the phone from Franklin's inventory, access Contacts and Detonate the charges.
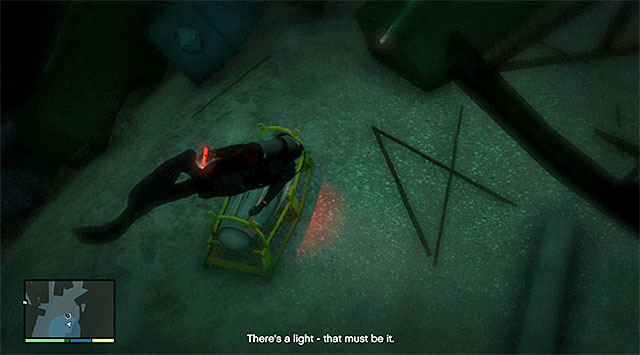
Wait until you take control over Michael and set out to find the cargo. Steer the sub basing on the sonar readings, towards the point that the sound waves come from. After you come close to the cargo, it will be marked with a green marker, which has been presented in the above screenshot.
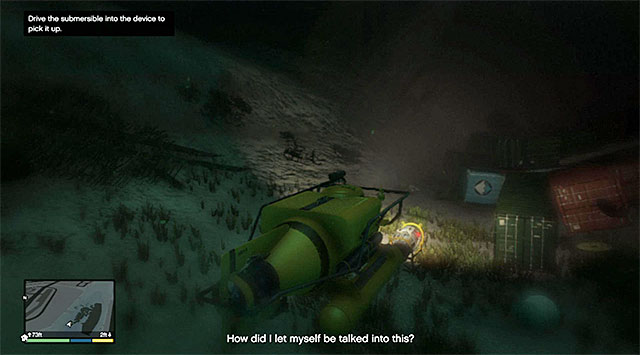 You need to approach the cargo, thanks to which it will cling to the sub
After several moments you will take control over Trevor. Set out towards the cargo found by Michael, and try not to bump into the containers or the bottom on your way there. Approach the cargo as much as you can, thanks to which it will automatically cling to the boat.
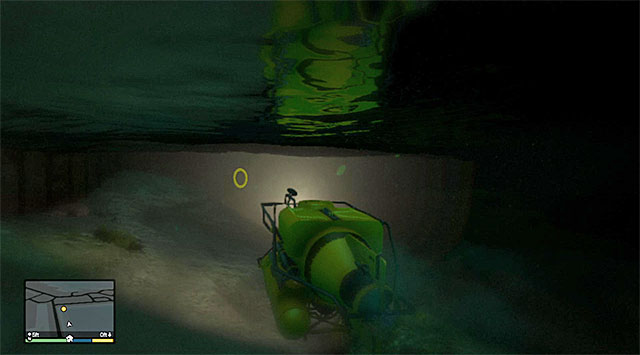 The place where the mission ends
The only remaining thing for you to do is approach the spot where the sub needs to be pulled out of water, which is located to the South-West of the place where you found the cargo. Along your way, use the map of the surroundings, to your advantage, which will make it easy for you to locate the right path (the yellow ring hovering underwater). This mission will soon end, and it is not going to be as fruitful as the characters participating in the heist, would have wished it to be.
Rewards for completing the mission: none
Requirements for the completion of the mission in 100%:
Way to unlock: You need to complete Main mission 30 (Scouting the Port) and, towards its end, decide for the Offshore attacks. After you receive a text message from Wade, there will appear the Hs symbol on the world map, which marks the place where you can find the military cargo helicopter.
Playable characters: Trevor
Additional information: To steal the helicopter is not easy, because it is located in the military base and, after you walk into the base, a four-star pursuit will start. What is even more, onboard the chopper, you will have to pay attention to the AA defense and the enemy combat helicopter.
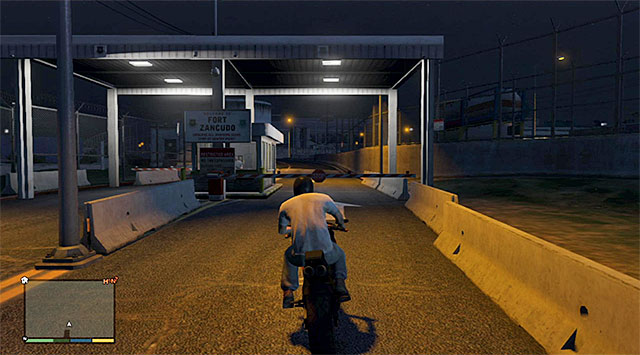 One of the entrances to the base
The chopper that you are looking for is at Fort Zacundo located in the North-East portion of the map. If you want to get there by a vehicle, it is best to drive up there from the Northern side and cut through the security gate. On your way to the helicopter pad, you will, obviously have to avoid soldiers or shoot at them.
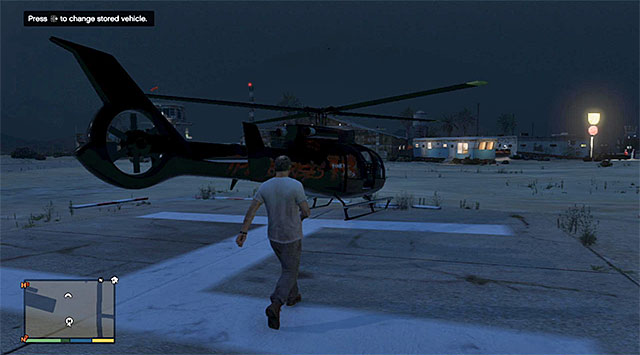
It is a way better idea to make it over to the base on a regular chopper and, to do that, you need to visit the airports seized by Trevor, located to the South-West of the Sandy Shores. After you get there, get aboard the chopper shown in the screenshot (Frogger). Try to maintain low altitude while flying and, right after you get over the military base, land the helicopter as close to the cargo helicopter as possible. Thanks to this you will not be taken down by the AA Crew.
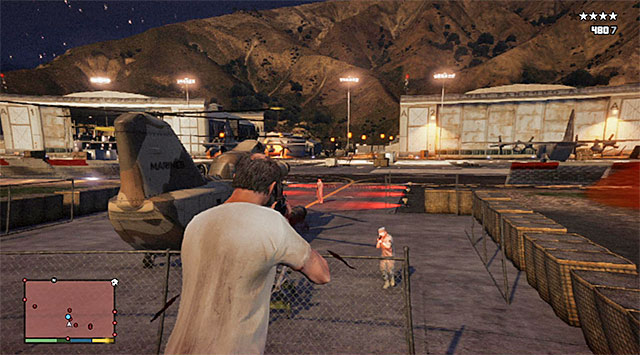 Use the fury to make it easier to kill the soldiers
Regardless of the variant, I recommend that you use Trevor's special skill combined, with a good weapon, to eliminate all of the enemies near the military chopper (Cargobob) and only then take a seat aboard.
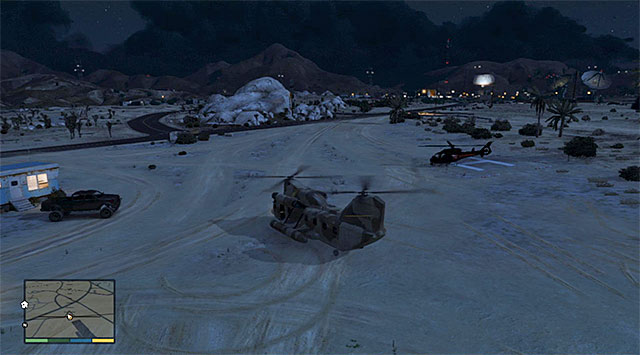 The landing field
Take off as soon as possible and fly towards the airport mentioned above, i.e. to the South-East. There will be another military chopper that will chase after Trevor but, if you do not slow down for anything, you should not get hit (you can also increase your chances by maintaining a low altitude and by using, to your advantage, the nearby hills to hide behind). After you reach the landing field, land the helicopter in the marked area.
Rewards for completing the mission: none
Requirements for the completion of the mission in 100%:
Way to unlock: You need to complete Main mission 30 (Scouting the Port) and choose the Offshore attack towards its end.
Playable characters: Michael
Additional information: This one is not a fully fledged mission, but rather an additional activity. If you, at the moment of completing the main mission connected with the examination of the freighter, Michael's flying skills were at an insufficient level, during the conversation with Trevor he will learn that he needs to work some more on it. Trevor will suggest visiting the flight school.
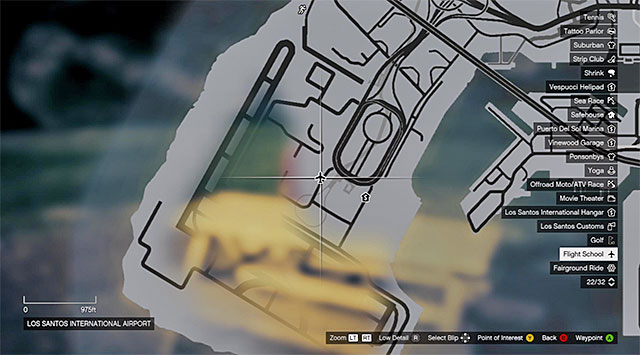
The Flight School is located in the place shown in the screenshot, i.e. in the Southern part of Los Santos, right next to the airport. Go to the Flight School and start completing the exercises. Note - you can find a detailed description of the Flight School in the GTA V - maps and collectibles guide.
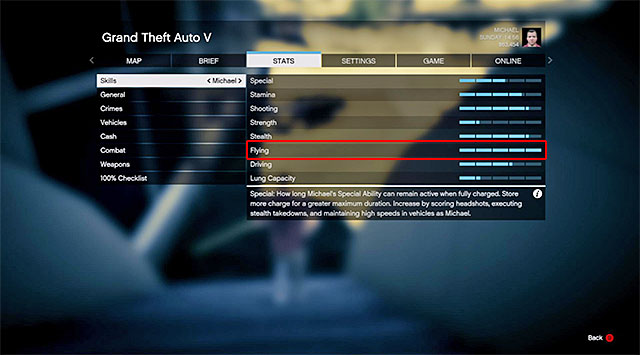 Develop one of Michael's skills to its maximum value
Keep completing an exercise after another, best until the moment when Michael's pilotage skills are developed to the maximum level, i.e. to 100 points. After you complete the Minisub and Cargobob missions, an option to start a new heist should become available.
Way to unlock: You need to complete Main Missions 31 (Minisub) and 33 (Cargobob), and also develop Michael's pilotage skills (Additional mission: Flight School; it may turn out that also completing some other missions, reserved for Franklin and Michael. is necessary). While playing as Michael, wait for a message from Trevor. You can now go to Floyd' apartment (letter H on the world map).
Playable characters: Trevor, Michael, Franklin
Additional information: this heist is even more demanding than the jewel store job and puts even more stress on teamwork between the playable characters. The mission consists of three parts - transporting the submarine into the area of the of the Merryweather vessel, lowering the submarine and using it to locate the cargo, and return to the airport with the stolen cargo.
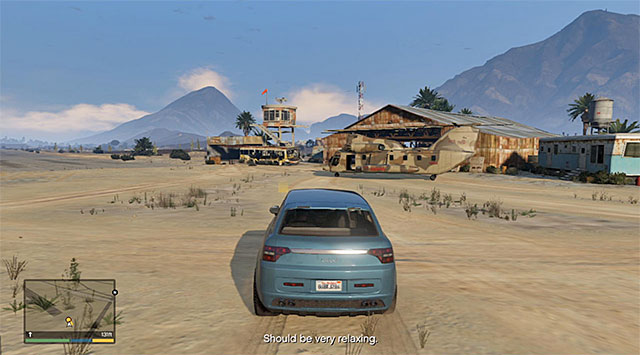 The airport
After you return to Floyd's apartment, watch the cutscene of the meeting of all the people involved in the heist. While playing as Michael exit the building and obtain any vehicle with the capacity of, at least three. Your first task is to reach the airport seized by Trevor, which is located in the central part of the world map, To the South-West of the Sandy Shores.
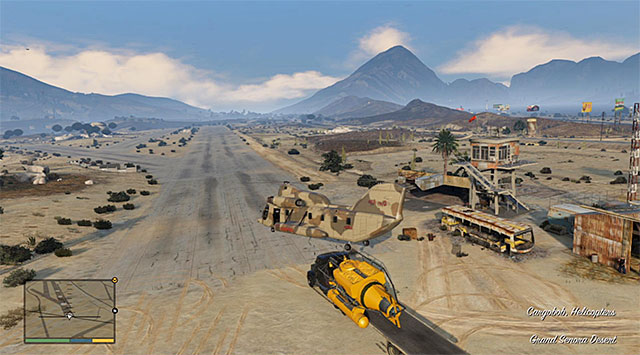 You need to hover above the sub and attach it to the chopper
Take your seat aboard the cargo helicopter (Cargobob), fly up into the air and keep the helicopter hovering above the sub. Extend the hoist and catch onto the sub to start the process of transporting it.
 The spot of releasing the sub
Your destination is to the North-West of the island so, you are up for a long flight. Try and keep the chopper at a high altitude, thanks to which you will avoid knocking against a tree or a slope of the Chiliad mount. After you get into the region where the tests are conducted, decrease the flight speed and release the sub.
After you cut to Trevor select the phone from his inventory and access the Trackify app. You can now start submersing. Swim towards the sea bottom and follow the red dot that you can see on the smartphone's display. You need to keep in mind the fact that the entire process is going to take you some time, because the cargo that you are looking for is deep underwater -it has been shown in the screenshot.
 Resurface
In accordance with the received piece of information, approach the cargo, thanks to which it will automatically cling to the sub. Now, for a change, you will have to start resurfacing but, the good news is that you will not be bothered (for now) by anybody.
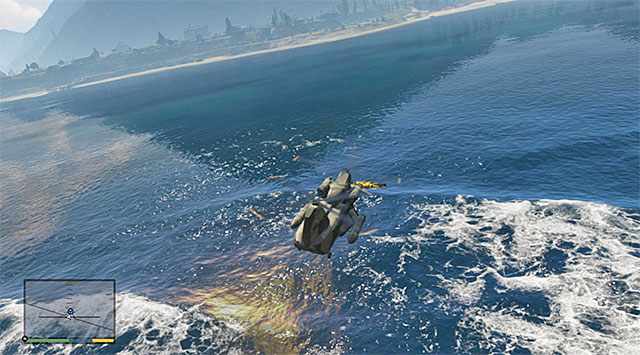 Attach the sub again and fly towards the airport
After the sub reemerges again take control over the chopper controlled by Michael. Hover on, the chopper, over the sub and use the hoist in the way that you have already learned, and fly back to the airport where you have started the entire operation.
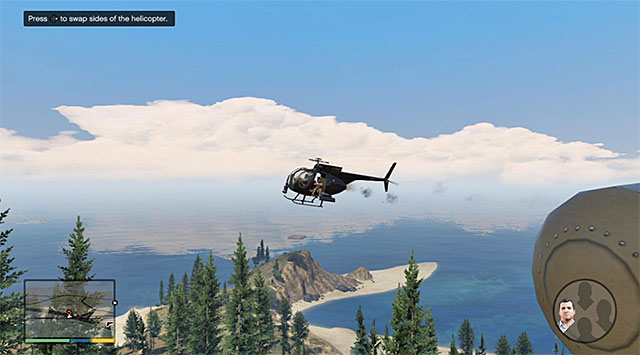 Conduct continuous fire
Unfortunately, you need to come to terms with the fact that things will soon get complicated, because there will be helicopters, with Merryweather mercenaries onboard, to start pursuit after Michael's chopper. Cut to Franklin and start your fire at the enemy choppers, while remembering about the option to slow down time. While conducting fire, you need to change between the left and right machine gunner positions . Fortunately enough, you should be able to tell by the radar where you currently need to fly.
 The place where the mission ends
Towards the end of the mission, you will have to conduct fire from the rear part of the helicopter but, in this case this will not change much. Still, try to eliminate all of the threats. The last step is to return to the airport, while playing as Michael again - first detach the sub carefully, and then land. This mission will soon conclude, and the results are not going to be as satisfying as the people participating in the heist would have wanted them to be.
Rewards for completing the mission: none
Requirements for the completion of the mission in 100%:
Way to unlock: You need to complete Main mission 29 (Hood Safari). Some time after the completion of this mission, you should receive a message from Steve who demands a meeting with you.
Playable characters: Trevor
Additional information: This one is a very short mission that consists of one conversation only and it constitutes and introduction t another big heist.
 The meeting place
The meeting place with Steve and Dave is in the location that you have already visited in mission 27, i.e. a kind of a base located near the scrapyard in the El Buro Heights district. It is best to go there as Michael, thanks to which you will listen to a full conversation, concerning preparations for another big heist. After the cutscene, get into Trevor's car (Canis Bodhi) and leave this place to finish this mission and add the preparatory missions markers to the world map.
Rewards for completing the mission:
Requirements for the completion of the mission in 100%: This mission has no additional requirements so, it is completed in 100% automatically.
Way to unlock: You need to complete Main mission 35 (Blitz Play). There is no marker for this mission and you can start it at any location..
Playable characters: Trevor
Additional information: All of the missions connected with a new heist are very short. This one is about stealing any car and leaving it in a spot where it will pass unnoticed.
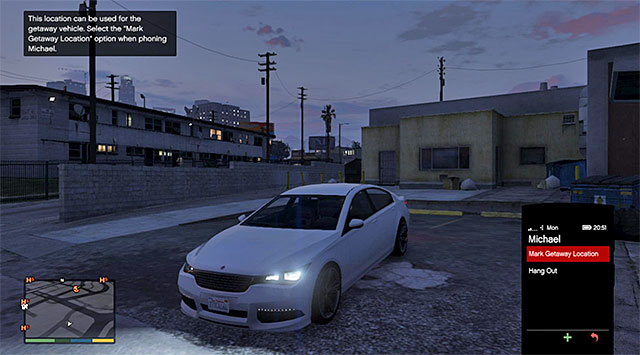 Leave the car in a side alley
Which vehicle you choose to get away has no significance. You should pay a bit more attention to the selection of the spot where to hide the stolen car. The heist itself is going to take place in Cypress Flats (the Southern part of Los Santos, to the West of El Burro Heights). Therefore, it would be a good idea to hide the vehicle somewhere nearby. Choose some side alley, discernibly distanced from a main road (if it is a poor location, you will get informed about that). Turn on the phone, find Michael in the contacts list and select the first item on the list (Mark Getaway Location). You can now walk away from the car.
Rewards for the completion of the mission: none
Requirements for the completion of the mission in 100%: There are no additional requirements for this mission so, it is completed in 100% automatically.
Way to unlock: You need to complete Main mission 35 (Blitz Play). Locate the Hs to the north of the port that marks the whereabouts of the tow truck.
Playable characters: Trevor
Additional information: All the mission in connection with the new heist are very short. In this one you only need to steal a tow truck and deliver it to the base.
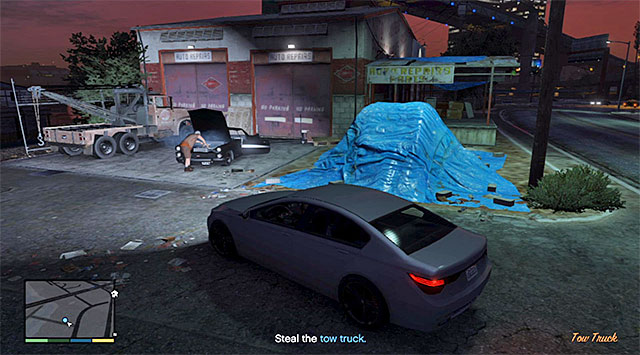 The place to find the tow truck in
The vehicle you are looking for is to the North of the port (Elysian Island). After you get there, you can either surprise attack the car assistance service worker, or get into the truck straight away. You need to keep in mind that this will involve, most probably, the necessity to escape a police pursuit and, since the tow truck is not too maneuverable, try to hide in a side-alley as quickly as possible and wait until the pursuit is over. After it is called off, return to the base and leave the truck on the parking lot.
Rewards for the completion of the mission: none
Requirements for the completion of the mission in 100%:
Way to unlock: You need to complete Main mission 35 (Blitz Play). To the north of the base, there will appear the Hs icon that symbolizes the moving trash truck.
Playable characters: Trevor
Additional information: All of the missions in connection with the new heist are short. In this one, you only need to steal a trash truck and deliver it to the base.
 You can either cut the trash truck's way, or wait for it to stop
To find the trash truck, you need to explore the entire Mirror Park district, i.e. the area located to the north of the base. Depending on your preferences, you can either cut the truck's (Trashmaster) way or throw the driver out of the cab after the truck stops in front of one of the households. You need to keep in mind that this will, most probably involve the necessity to escape a police pursuit and,, since the truck is not too maneuverable, try to hide e.g. under the bridge, located to the South of Mirror Park, as quickly as possible, to wait until the pursuit is over. After it is called off, return to the base and leave the truck on the parking lot.
Rewards for the completion of the mission: none
Requirements for the completion of the mission in 100%:
Way to unlock: You need to complete Main mission 35 (Blitz Play). Locate the Hs icon near the beach in the Western part of the city, which is the whereabouts of a mask store
Playable characters: Trevor
Additional information: All of the missions in connection with the new heist are short. In this one, you only need to purchase masks for all of your accomplices and yourself.
 White hockey mask
The mask store is located in the Western part of the city, right next to the Vespucci Beach. After you get there, approach the store and purchase the masks. If you want to complete this mission in 100%, you need to buy three white hockey masks. This means, of course, that you will have to spend a total of 1500 dollars. After you buy the masks, walk away from the store.
Rewards for the completion of the mission: none
Requirements for the completion of the mission in 100%:
Way to unlock: You need to complete Main mission 35 (Blitz Play). Locate the Hs in the central part of the city that symbolizes the Ammu-Nation store.
Playable characters: Trevor
Additional information: All of the missions in connection with the new heist are very short. In this one, you will only have to buy boiler suits for all of your accomplices and yourself.
 One of the three boiler suits
The Ammu-Nation store, which sells boiler suits, is located in the central part of the city, in the Pillbox Hill district. After you enter the store, turn right and approach the display with pieces of clothes. If you want to complete this mission in 100%, you need to buy one suit of each type, i.e. the Navy Boiler Suit (navy blue), Gray Boiler Suit and Green Boiler Suit. The suits are 105 dollars each so, you will spend on them 315 dollars in total. After you have bought the suits, leave the store.
Rewards for the completion of the mission: none
Requirements for the completion of the mission in 100%:
Way to unlock: You need to complete Main missions 36 (Getaway Vehicle), 37 (Tow Truck), 38 (Trash Truck), 39 (Masks) and 40 (Boiler Suits). You can now return to the base(letter H on the world map).
Playable characters: Michael, Trevor, Franklin
Additional information: The heist itself is, fortunately, more complex than the previous missions, which were as short as they could get. The first part of this mission is an attack on an armored van and the game will not get you the opportunity to show what you can do. The second part of the mission is way more interesting and it assumes fighting against large police forces. The final part is a pure formality, because as a result of having gotten rid of most of the police officers, your passage to the vehicle that you have stolen earlier, will go unhampered. Note - if you want to make better preparations for the mission, you should also buy armors (or better weapons/ammo) at one of the Ammu-Nation stores.
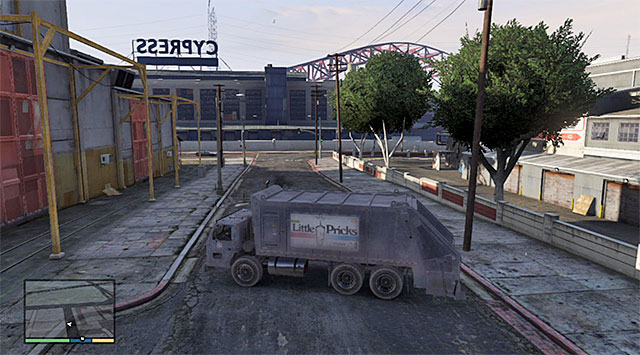
Ju8st like before, you can reach the base, located in the El Burro Heights district, as any of the three protagonists. After you watch the cutscene, wait until you cut to Michael and go to the Cypress Flats district, located to the North-West of here After you get there, watch a short cutscene and park the trash truck in the way shown in the screenshot, thus blocking the whole road.
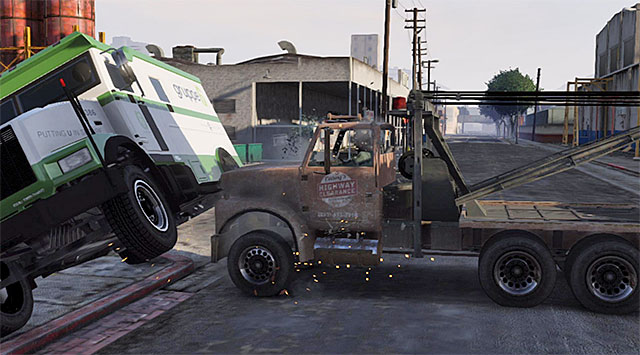 You need to slam into the armored vehicle
Wait until you take control of the tow truck controlled by Franklin and drive towards the armored vehicle, which will be stopped by the trash truck, which was parked across the road by Michael. Slam into the van as hard as you can.
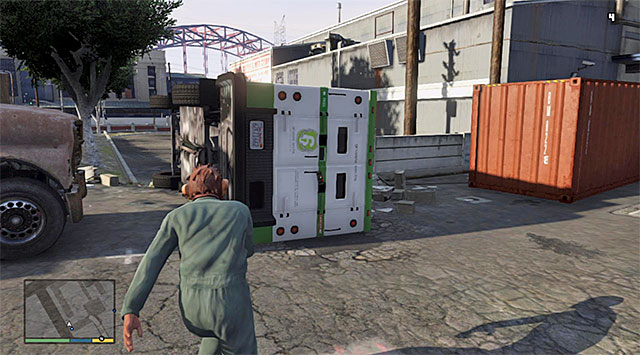
You will still have to control Franklin. Get out of the truck, quickly, approach the back part of the tipped armored van, and make sure that you have selected the Sticky Bombs from your inventory. Stick one of the bombs to the back gate of the armored van (the above screenshot), walk away a bit and detonate it. Wait for Michael to collect the loot from the van, while you are aiming at the guards.
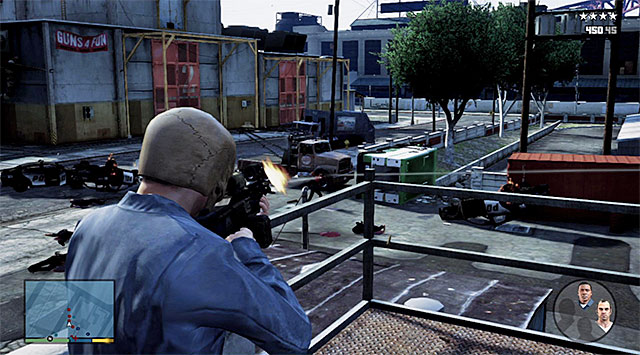
You are up for the most difficult, and the most interesting at the same time, part of this mission. You need to fight back the police (four stars) until you eliminate (almost) all of them. What is even more, you can freely cut between the three playable characters. While playing as Michael, the easiest way to fight back is from the balcony shown in the screenshot and to slow down time as often as possible. Thanks to this you will not have to take unnecessary risk and will be more efficient at killing enemies.
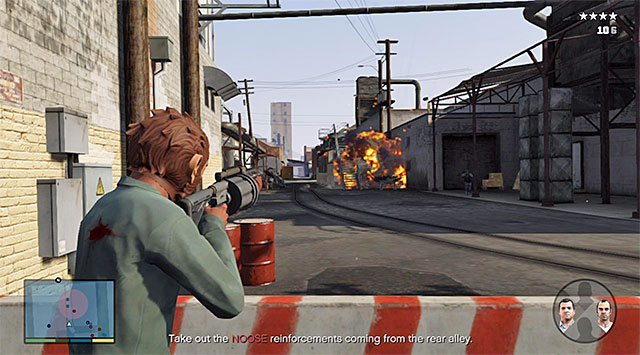
While playing as Franklin it is best to keep an eye on the side alley shown in the screenshot, where new enemies will, quite quickly, start to appear. If you want to, you can use bombs or the grenade launcher to your aid, to eliminate larger groups of law enforcers easily.
While laying as Trevor it is good to make use, predominantly, of the rocket launcher that is in his equipment. Initially, you can use the launcher to blow up the police cars (the above screenshot), but later on you can eliminate larger enemy groups this way. Trevor, should also cover Michael and prevent the police from getting too close to the balcony he is occupying. For this, you can use the sniper rifle.
 The enemy snipers
While fighting, try changing the character you are currently playing as, on a regular basis, especially that, to complete this mission in 100%, you will have to perform ten such changes. You should also take into account the fact that things will get additionally complicated. The first serious impediment is the appearance of enemy snipers on the roof of the building to the right. It would be best if Trevor took care of these characters (the sniper rifle).
 Shoot down the police chopper
The second impediment is the appearance of the police chopper over above the battlefield. Also in this case, it is Trevor that should move into action, and bring down the enemy helicopter with the rocket launcher. Continue fighting to decrease the police in numbers. Their strength is symbolized by the stars and towards the end of the mission, instead of the initial four stars, there will only be one.
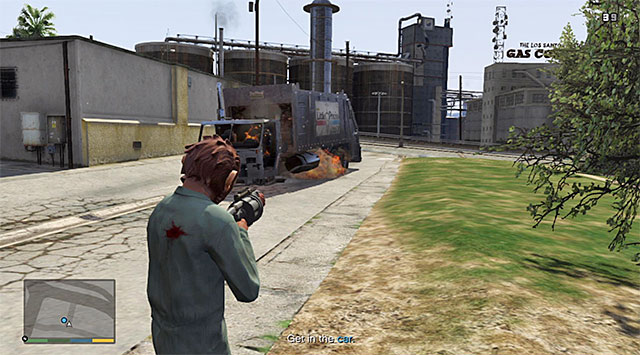 You need to destroy the trash truck after you leave the battlefield
Wait for a command from Michael, cut to Franklin and reach the trash truck (Trashmaster), while ignoring single enemies in this area. You now need to make it over to the car that you have parked in a side alley in one of the previous missions and, if you have chosen the place well, this will not be long. After you get there, destroy the trash truck (e.g. with another bomb), get into the getaway car and drive away from the truck wreck.
 The place where the mission ends
Wait for a phone call, after which you will cut to Michael. The last thing for you to do is reaching Devin Weston's estate, located on the Tongva Hills, to the North of Los Santos.
Rewards for the completion of the mission:
Requirements for the completion of the mission in 100%:
Way to unlock: You need to complete Main mission 41 (Blitz Play #2). You can now go to the meeting with Devin (letter D on the world map),which is located in central Los Santos, in the Alta district.
Playable characters: Franklin, Trevor, Michael
Additional information: This mission, almost entirely, assumes making use of various means of transport - first it is Franklin's car, then the police motorcycle and two very fast sports cars to top it off. Regardless of which vehicle you are currently using, the key to success is avoiding traffic.
 Gas station
The starting point of this mission is the construction site and, if you want to listen to conversation with Devin and Molly in its fullest, it is best to reach there as Franklin. During the meeting, you will learn that you need to obtain two very expensive cars. After the conversation has finished, get into your car (Ocelot F620), drive into the highway and towards the gas station located in the Eastern part of the map After you get there, you will have to race against two boys driving very fast cars.
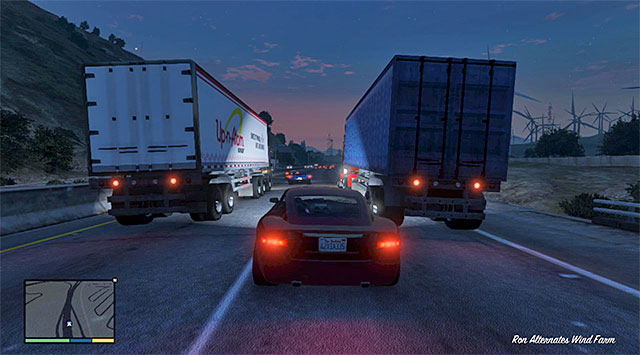
You need to be prepared for a long race, during which you need to focus entirely on overtaking the slower cars on the road. You should not attempt to overtake the remaining participants of the race because this is not required by the game and, after all, the game will not allow you to do that in the initial stage of the race. Along your way, use Franklin's special skill to your advantage and drive between two trucks (the above screenshot) and two busses because all of this is required to complete this mission in 100%.
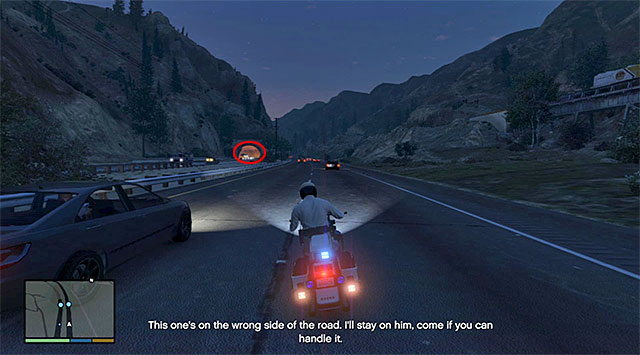 The tunnel that you need to follow Trevor into
You need to follow the sports cars until the game starts a short cutscene. Wait until you cut to Michael and start your pursuit on the police bike. Also here, you do not really have to strive for the victory over the two sports cars, and only make sure that you do not bump into anything along your way. At the right moment, follow Trevor into the tunnel to the left (driving against the traffic), thanks to which you will perform another action required for a 100% completion of this mission.
 You need to watch out, especially while crossing a small town
Continue racing and, just like earlier, focus mainly on overtaking the slower vehicles, especially that Michael can fall off the bike and cause the entire mission to be failed. After the cars that you are chasing, stop, decide which character you want to control from now on, until the end of this mission.
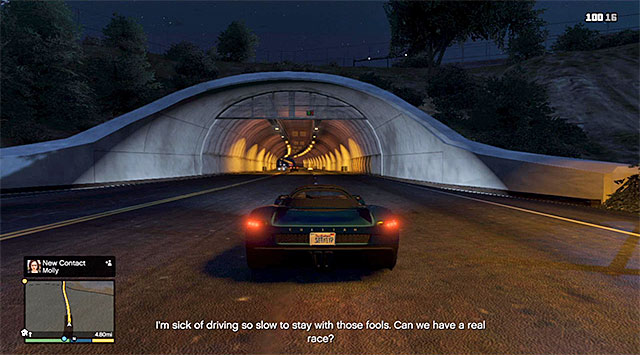 Try to maintain high speed at all times
Regardless of which playable character you choose, there is only one thing left for you to do, i.e. reaching the Los Santos garage. Do not worry if you damage the car that you are driving, because the game does not require you to deliver it in perfect condition. After all of the characters meet in front of the garage, the mission will end.
Rewards for the completion of the mission:
Requirements for the completion of the mission in 100%:
Way to unlock: You need to complete Main mission 42 (I Fought the Law...). You can now go to the meeting place with Devin (letter D on the world map) - if you are playing as Franklin, it is the base in El Burro Heights and, if you are playing as Trevor, it is the police station in the Strawberry district.
Playable characters: Trevor, Franklin
Additional information: This mission is not too demanding. Its main highlight is the ability to use the camera mounted on the police chopper, first to locate the famous movie producer, and to track him during his escape on a very rare car. The final stage of the mission is the drive on the abovementioned vehicle, accompanied by a police pursuit.
 If you start off as Franklin, the mission will start when Trevor is already airborne
I recommend against starting off this mission as Franklin (the El Burro Heights base), because you will miss, this way, visiting the police station.
 The helicopter on the precinct's rooftop
If you have decided on Trevor, you can start this mission by going to the police precinct in the Strawberry district. Have a short conversation with the person staying in the first are of the building and take the door out to the staircase (Locked Rooms). Climb up the stairs to reach the rooftop and get into the helicopter (Police Maverick). What is interesting, you will not be piloting the helicopter itself, and only controlling the on-board camera.
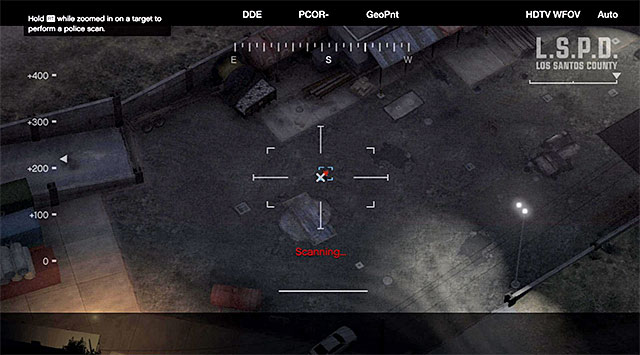 Franklin
Spend some time learning the camera's controls. Panning the view and zooming in is done with both analog sticks. The appropriate buttons/triggers are responsible for eavesdropping on the conversations of the targeted individuals, as well as for scanning them. Start by targeting the first blue rectangle and, after the helicopter gets there, perform a scan of Franklin's.
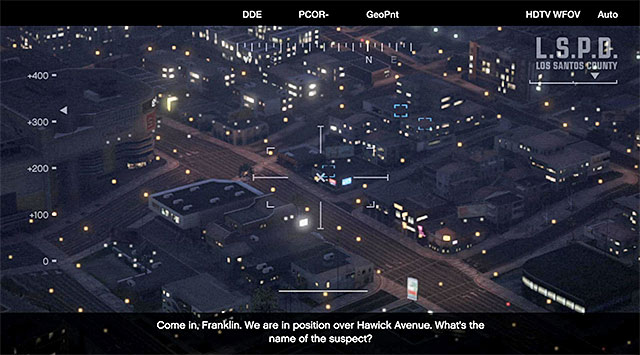 New targets to scan
Target onto the new rectangles and, after the helicopter comes near, start scanning the marked individuals. I recommend that, before you start scanning each one of the persons, you should also turn on the on-board microphone, to listen to their conversations (this is required for the completion of this mission in 100%).
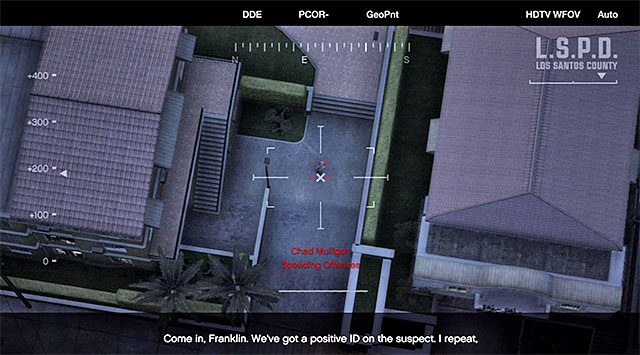
Also this time, you will fail to find the suspect, i.e. Chad Mulligan. Again, direct the chopper into a new target group. You do not need here to scan all of them, and only the person shown in the above screenshot, because that is Mulligan. Start the process of following him. You need to wait until the music producer reaches the garage, where he is keeping his valuable car.
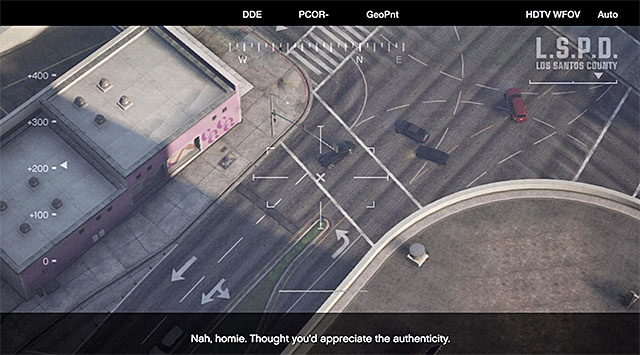 Track the speeding car with the camera
Mulligan will soon start escaping from Franklin and Trevor's task will be to track the car using the on-board camera. Because you are dealing with a fast moving target here, you should consider zooming out, and do not worry if you lost your visuals of the car, because this is only temporary. This part of the mission ends when Mulligan drives into a multi-storey parking lot.
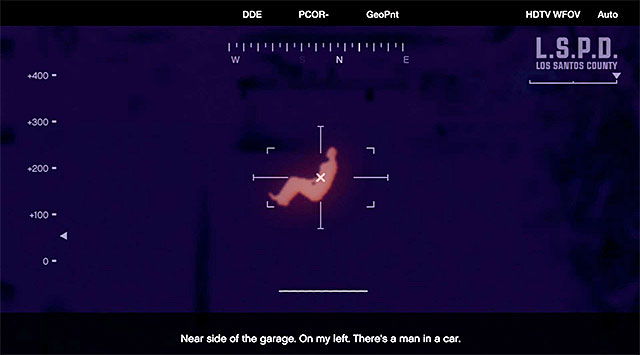
You do not need to worry about having lost the person you are tracking. Wait for the helicopter to lower its altitude and the thermal vision camera becomes available. Target the person shown in the screenshot straight away, in the car parked in the parking lot.
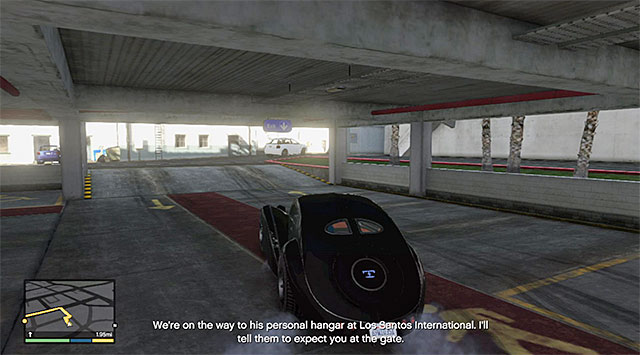 Carefully, drive out of the parking lot
Wait until you cut to Franklin. It would be a good idea to kill Mulligan, who has been, until recently escaping on his car. Otherwise, soon after the car theft, the game will initiate a two-star pursuit. For obvious reasons, not only will this extend this mission, but also increase the risk of damaging the car. Get into the rare car (Truffade Z-Type), drive out of the underground parking lot (try not to collide with anything) and drive towards the airport in the southern part of Los Santos.
 The delivery place of the stolen car
After several moments, a two-star pursuit will start and, since the car that you are driving is neither fast nor maneuverable, you'd better wait through the entire pursuit in a side alley, or a tunnel. After you reach the airport, stop at the control gate and drive into the hangar on the left. The only thing left for you to do is leave the airport, which will conclude this mission.
Rewards for the completion of the mission: none
Requirements for the completion of the mission in 100%:
Way to unlock: You need to complete Main mission 24 (The Multi Target Assassination). Some time after the completion of that mission, there will appear a new point near the Legion Square, and it refers to another phone talk with Lester.
Playable characters: Franklin
Additional information: This is yet another assassination that you are tasked with by Lester. Elimination of the target is not going to be too demanding and, just like on the previous missions of this kind, it is a good idea to come equipped with the suppressed sniper rifle.
 The Legion Square
The starting point for this mission is the Legion Square, located in the central part of Los Santos. After you get there, you need to approach the phone booth and answer the phone call from Lester, who will explain to Franklin the details of the mission. The plan assumes that you murder Jackson Skinner who has been charged with the unauthorized selling of personal data. Not - if you deal in stocks and bonds, you should consider buying the stocks of the Fruit company, because they are the ones to profit from Skinner's death most.
 The whereabouts of the prostitute
Get into your vehicle and drive to the South-West i.e. to the La Puerta district. After you get there, stop the car near the place where the prostitute, which Lester pointed you to, works.
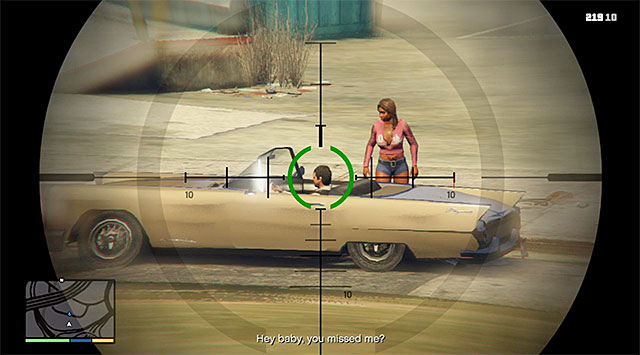
Get out of the car and climb the nearby hill. From your inventory, select the sniper rifle and wait patiently for the car with Skinner in it appears. You will know him by the car which the prostitute will get into. Kill Skinner with a long-range shot (the above screenshot) and leave the murder site quickly. The only thing left for you to do is contact Lester.
Rewards for the completion of the mission:
Requirements for the completion of the mission in 100%:
Way to unlock: You need to complete Main mission 44 (Vice Assassination). You can now go to the phone booth in the central part of Los Santos, i.e. in the Hawick district (letter L on the world map).
Playable characters: Franklin
Additional information: This mission is one of the many contract assassinations and you receive it from Lester, of course. In this case both to get to the murder site, and to eliminate the target named by Lester, you will need to use a city bus.
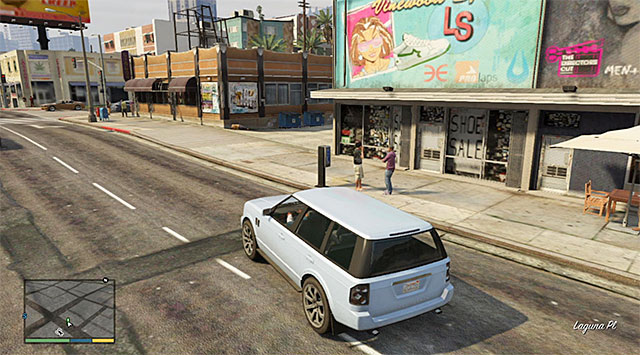 The phone booth
The starting point for this mission is the Hawick district located in the central part of Los Santos. After you get there, you need to approach the phone booth and answer the phone call from Lester, who will explain the details to Franklin. The plan assumes that you assassinate a ruthless murderer Isaac Penny. To your advantage, you will use the fact that he likes commuting to work on the bus. Note - if you deal in stocks and bonds, consider purchasing the bonds of the Vapid corporation, but only after you complete this mission, because only then they will rise in value.
 Keep stopping on consecutive bus stops
You can now go to the South-East, i.e. to the bus depot located in the Textile City district. After you get there, get into a city bus and start your run by driving up to the consecutive bus stops marked by the game, and stopping to let the passengers in.
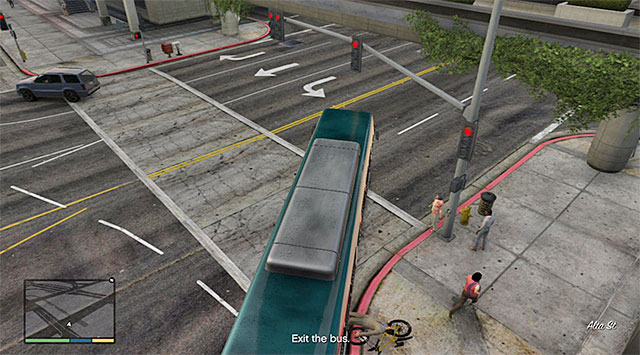 Bump into Isaac while driving the bus
Isaac Penny will appear on the fourth stop that you stop by but, after he smells the rat, he will give up his journey on the bus and decide on a bike instead. Do not get out of the bus and follow the escaping billionaire. Wait until the moment is right and slam into him with large power, which will result in his death. The only thing left for you to do is get out of the bus, walk away from here and wait for the final conversation with Lester.
Rewards for the completion of the mission:
Requirements for the completion of the mission in 100%:
Way to unlock: You need to complete Main mission 41 (Blitz Play #2). You can now go the meeting place with Solomon Richards (letter S on the world map), who is staying at the movie set in the North-Western part of Los Santos.
Playable characters: Michael
Additional information: There are two constituent parts to this mission. The first part is a bit easier because, although it requires you to remain in hiding, the error margin is wide. It is going to be a bit more difficult towards the end, because you will need to prove your skills at pilotaging helicopters to give a good scare the passengers of the aircraft. When it comes to the process of preparation for this mission, it is worth taking a suppressed weapon along (e.g. a regular pistol).
 The gateway into the movie studio
The starting point for this mission is a movie set located in the North-West part of the city, In the Richards Majestic district. After you get there, drive up to the gate to the movie set and wait until you are permitted to go through. Enter the main building to start the meeting with Solomon Richards, who will ask Michael for help to convince an actor to return to job with the same contractual conditions. After the meeting ends, get into a fast car and drive Westwards. Stop the car in front of the night club that Richards mentioned.
 The first enemies
Hop over the gate and enter the sneaking mode. If you want to complete this mission in 100%, you should know that you will have to sneak-kill, at least, three enemies, on your way to the rooftop with the helicopter. Two of them are standing close to each other and it would be best if you slowed down time here, and used your suppressed weapon. Regardless of how you played that out, use the ladder on the left.
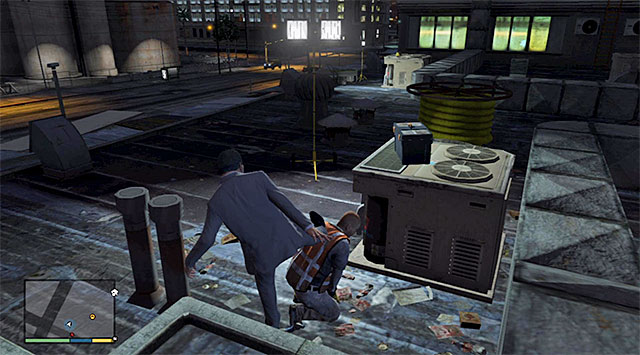 A persons staying on the rooftop
Atop the new roof part, there is a single opponent and eliminating him is the easiest thing to do, because you only need to get him from behind and eliminate him in melee. After that, go right and use the ladder on the right to reach a higher portion of the roof.
 The last ones of the encountered opponents
Keep vigilant here, because, on the balcony in front of Michael, there will appear another two enemies. If you have already sneak-killed three people, you can wait for these to walk away. Otherwise, follow them carefully and make one more use of the combination suggested earlier (time slowing+ silenced firearm). In both cases, you need to reach the ladder and approach the helicopter.
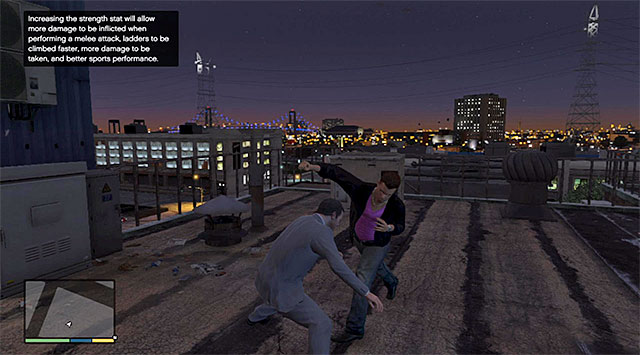 You need to win the fight against Rocco
The game will have Michael here win a fist fight with Rocco. Because your opponent is fit, try to pull off infallible dodges. Otherwise, your character will be taking considerable damage. Continue landing blows until you bring Rocco down. You can now get into the helicopter (Frogger).
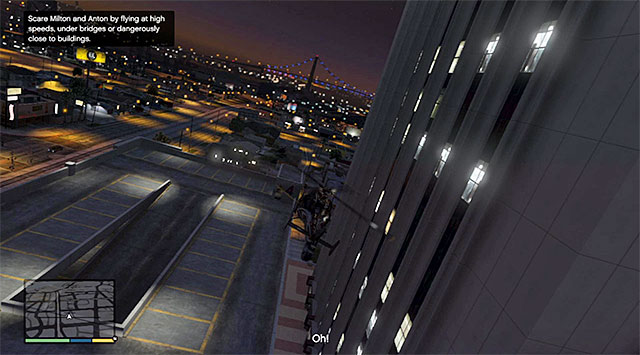 Keep flying right next to the tall buildings
Ahead of you, there is the most exciting part of the mission, because, in an attempt to convince Milton McIlroy to change his mind, you will need to scare him, and the plan assumes that you perform a number of dangerous maneuvers while airborne. You can, for example, try to fly right next to the skyscrapers.
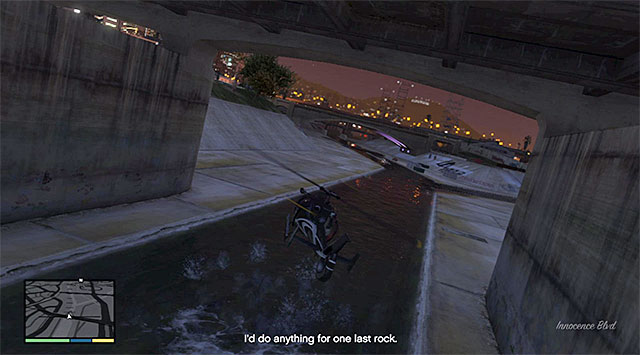 Make sure that you do not hit the bridge
The other effective methods of coercing Milton include flying under bridges and reaching the helicopter's top speed. Regardless of what you decide to do, you should make sure that you do not crash or damage the machine too much.
After McIlroy changes his mind, fly back to the filmmaking studio where you have started this mission. You need to land in the large, empty water reservoir (the above screenshot). You only need now to return to Solomon Richards's office and watch the final cutscene.
Rewards for the completion of the mission:
Requirements for the completion of the mission in 100%:
Way to unlock: You need to complete main missions 43 (Eye in the Sky) and 46 (Mr. Richards). While playing as Michael, wait for a phone call from Martin Madrazo, who will ask Michael and Trevor to meet him at his farm (letters Mz on the world map).
Playable characters: Michael, Trevor
Additional information: What may prove most problematic, is the beginning of this mission, which will require you to discharge, precisely, several shots at the engines of the airplane that you are following, in order to damage them. After that, you are up for a nice ride on an endure motorcycle, during which you will need to be careful only while performing long jumps.
 The van parked at the observatory
The starting point for this mission is Martina Madrazo's farm, located to the North of Los Santos near the Vinewood Hills. You can reach the farm as either Michael or Trevor and, this is obviously not going to have any bearing on the mission. During the conversation with Madrazo, you will learn that he plans on murdering his cousin by shooting down the plane on which he wants to leave San Andreas. Wait until you gain control over Michael and go towards the observatory located to the West of here. After you get there, get into the van marked by the game (Declasse Burrito).
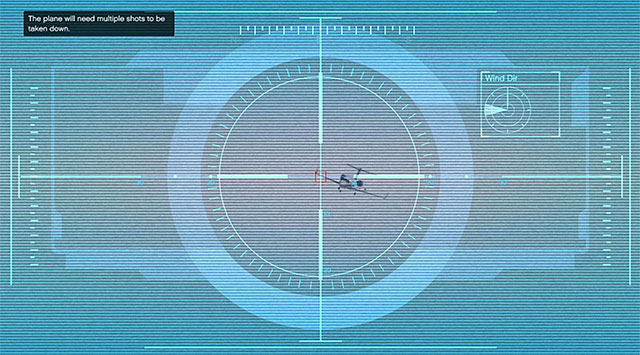 Aim at the red square instead of the plane itself
Spend several moments to learn about the basic controls of the cannon inside the van - to rotate the cannon and zoom in, use both of the analog sticks. Zoom in to the maximum, target the plane and aim at the red square to correct the bullet's flight. In total, you need to hit the plane three times and, the game does not require to be too precise so, even if, at the moment of the shot, the crosshair is slightly away from the square, the hit will be accepted anyways.
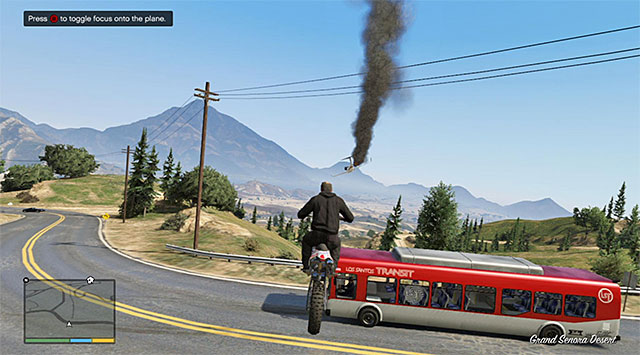 The first jump
After a while, you will cut to Trevor and your task will be now to follow the jet with its engine down. The route on the endure bike (Sanchez) is, fortunately, quite obvious but, you should watch out for the moments where you need to perform a longer jump. You will have to perform the first one right after you come down a big elevation and you need to jump over the road.
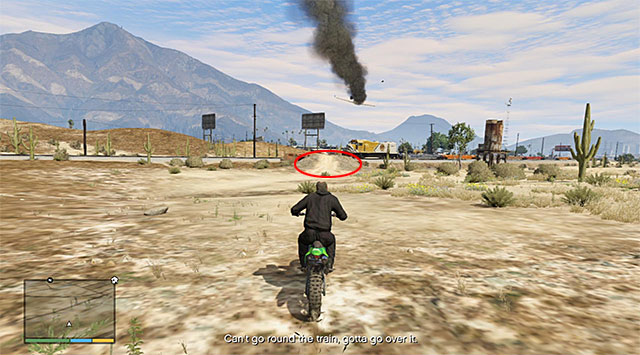
You will need to perform another longer jump near the airfield located close to Sandy Shores. Use the ramp marked in the above screenshot, thanks to which you will easily avoid the dashing pursuit.
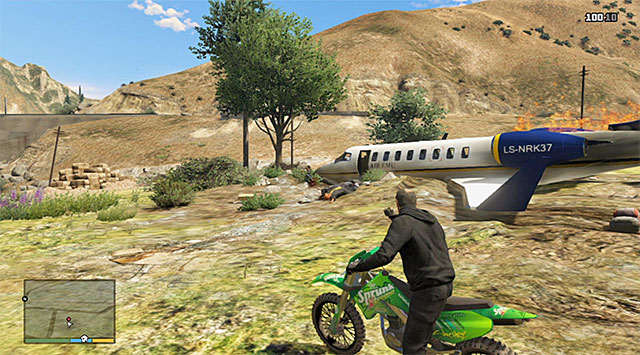 Kill Javier and enter the wreck
Continue following the jet, avoid civilian cars and elements of the environment. Wait for a moment when the plane crashes against the ground and ride up to the wreck. Kill Javier, who is standing nearby and enter the wreck to retrieve the document case.
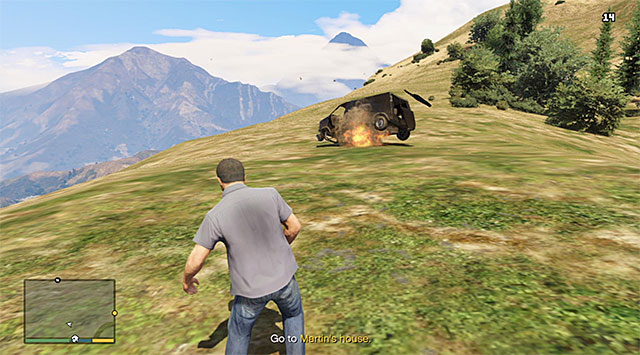 The easiest way is to blow up the van
Wait for the game to cut back to Michael and leave the vicinities of the observatory. The game will soon make you to destroy the van that you have just used to shoot the plane down. Depending on your preferences, you can either drive the van into water, push it off a high cliff, or ( which is the best idea) blow it up using explosives (any bomb or grenade).
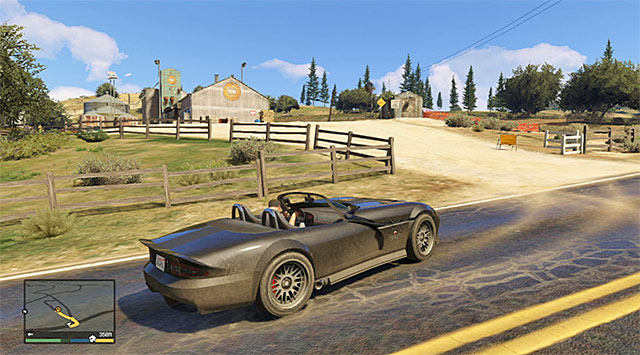 Cement works
Get a new means of transport and drive towards the Madrazo farm. On your way, Michael will be contacted by Trevor, who will inform him of a change of plans. This means that you need, for a change, reach the abandoned cement works in the desert. This is where this mission will conclude.
Rewards for the completion of the mission: none
Requirements for the completion of the mission in 100%:
Way to unlock: You need to complete Main mission 47 (Caida Libre). You can now go to the movie set located in the Richards Majestic district (letter D on the world map).
Playable characters: Franklin
Additional information: The first part of this mission assumes that you sneak into the movie set to knock down one of the actors, and it is short and simple. You are going to face an actual challenge in the second part of this mission, where you will have to steal a rare car model. Delivering this vehicle to the garage will turn out to be an pretty difficult task.
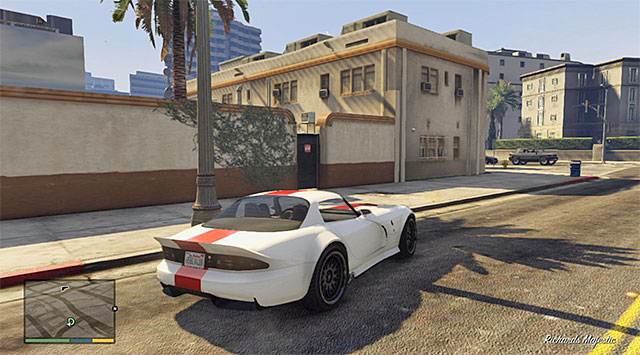 Stop near the movie set without driving into it
The starting point for this mission is the region of the movie set located in the Richards Majestic district, i.e. in the North-Western part of the city. Note - do not attempt entering the movie set through the main gate, because this would result in the police being alarmed. Instead, stop right next to the black side-gate and wait for a phone call from Molly.
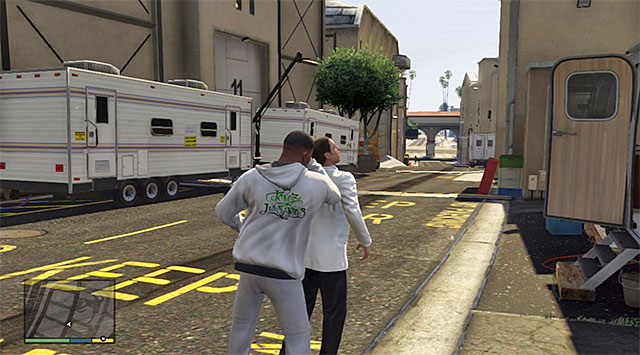 The actor
Hop over that gate, go left and then right. Carefully, sneak up to one of the actors from behind and attack him by surprise. Thanks to this, Franklin will drag his body away into a trailer and put the tuxedo on.
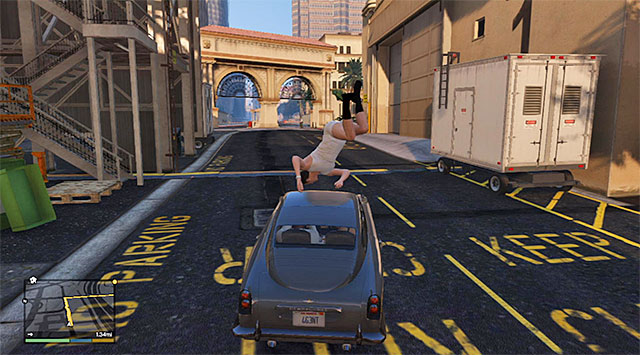
You can now go towards the place where there is the car that you can steal. Get into that car (Dewbauchee JB 700) and go towards the exit from the filmmaking studio that you have passed by earlier. Along your way, try to bump into the actor that you have knocked down earlier (the above screenshot), because this is required for the completion of this mission in 100%.
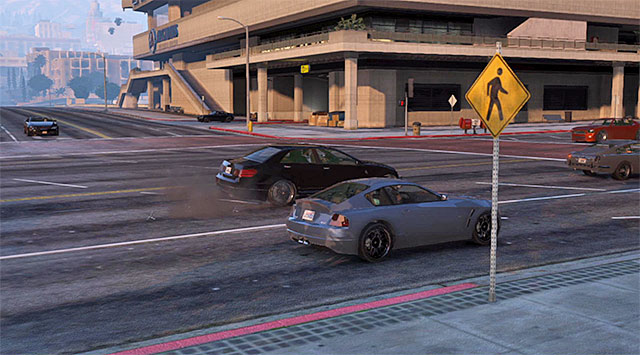 Use the spikes to get rid of the security cars
On your way to the garage you, unfortunately, need to come to terms with the fact that the actress on the passenger seat will be grabbing the steering wheel and interfering with Franklin's driving. As a result, try and drive along the middle of the road which will limit the risk of a serious crash. Soon, two security cars will join in. wait until you receive information of the possibility to release spikes on the road, by pressing the appropriate button on the D-pad. Do that twice, to eliminate one security car at a time.
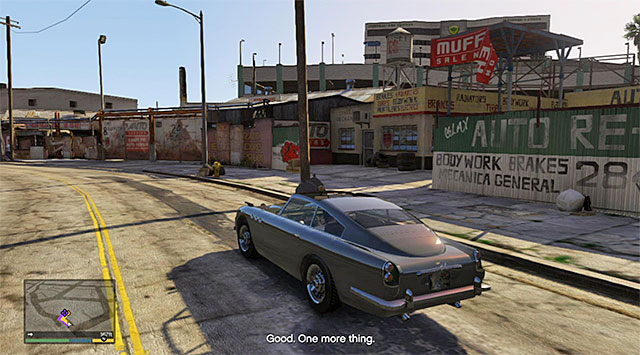 The place where the mission ends
This is not yet the end to all the fun. The game will also allow you to get rid of the pesky stowaway. Wait for the piece of information to be displayed and press the button that you are prompted to, to activate a catapult of a kind. You can now take the car back to the garage.
Rewards for the completion of the mission: none
Requirements for the completion of the mission in 100%:
Way to unlock: You need to complete Main mission 47 (Caida Libre). While playing as Franklin, you can now go to Michael's estate (letter M on the world map).
Playable characters: Trevor
Additional information: The entire mission is virtually played up in the air, and the major obstruction is the fact that it assumes using a biplane that is quite difficult to maneuver, and which you need to fly on a low altitude. The insane plan of Trevor's, which assumes making it onboard of a huge cargo plane, may also require you to give it several shots.
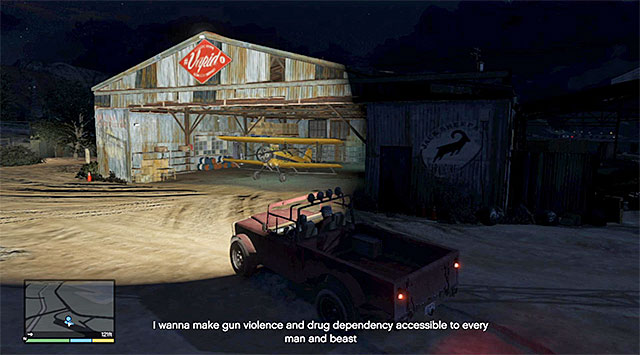 The hangar with the biplane
To start this mission, you need to visit Michael in the Rockford Hills district but, as soon as you get there as Franklin, you will cut to Trevor and this is the character that you are going to control throughout this mission. Get into Trevor's truck (Canis Bodhi) and go to the airfield located to the North of his trailer. Go into the hangar and take your seat aboard the biplane (Duster). Taxi out of the hangar and take off.
 Watch out for trees, poles and other high-located elements
Ron will son inform you of the major handicap of this mission, which is the necessity to fly low to prevent being detected by the radar in the nearby military base. Each time your altitude is too high, you will be notified of that with sounds, and also by Ron and you will have several seconds to correct that. On the other hand, do not bother about flying too low because it is easy to bump into a tree or a pole then.
 You need to fly around the military base
For the whole time, keep flying towards the cargo plane that you can see in the distance, which will be flying around the isle in the clockwise direction. You should especially pay attention after you get near the Zacundo military base. YOU CANNOT violate its air space so, fly around the base on the left. I recommend that, in the final phase of following the plane, you should fly over the highway, thanks to which you will not have to watch out for tall elements that much.
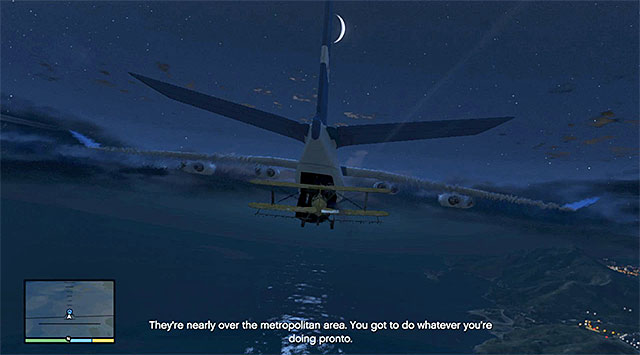
Wait until the moment when you receive a piece of information of the sufficient distance from the military base, at which point you can start going up to come near the cargo plane. You need to get prepared to pull off a dangerous maneuver, because you will need to fly inside the plane through the hatch shown in the screenshot.
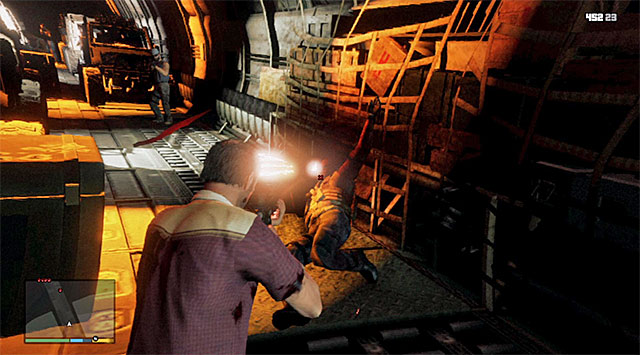 Get rid of all the mercenaries
Start exchanging fire and use Trevor's skill (fury) to your aid, combined with, e.g. a shotgun or a good automatic weapon. Additionally, avoid any contact with jeeps that will be set into motion by the plane's movement and falling out of the cargo door. Do not let them push you out or tip over.
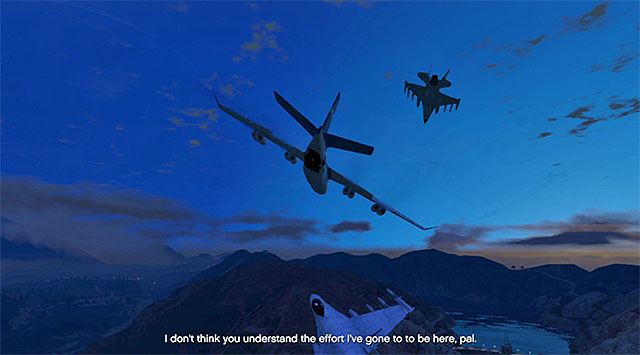 Unfortunately, you cannot destroy the enemy fighter planes
After you have eliminated all of the enemies, cut through to the cockpit, kill one of the pilots and take the cargo plane's yoke. The return flight to the airport in the Northern part of the map will, unfortunately, end up in a failure. Around, there will appear enemy fighter planes and you will neither be able to take them, nor escape them (in spite of Ron's suggestion to increase the plane's altitude).
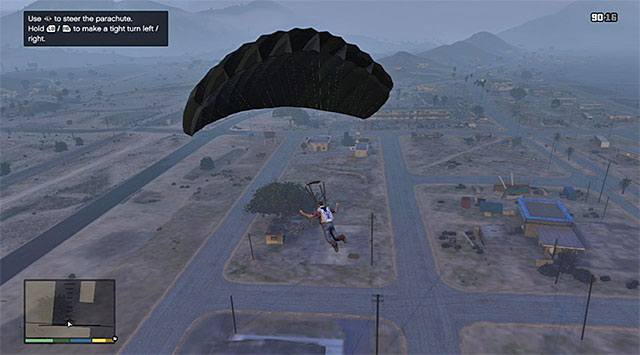 Do not forget to use the parachute!
Wait for the cargo plane to be hit with rockets and start escaping it. After you get to the plane's cargo section, get into the off-road car (Mesa) and drive it out of the plane. While airborne, get out of the car and, after you near the ground, open your parachute. The mission will soon conclude.
Rewards for the completion of the mission: none
Requirements for the completion of the mission in 100%:
Way to unlock: You need to complete Main mission 45 (Bus Assassination). Some time after you complete that mission in the La Mesa district, there will appear a new landmark concerning another conversation with Lester.
Playable characters: Franklin
Additional information: Unlike the previous assassinations, where you could eliminate target without taking too much risk, this time around, it will be necessary to eliminate a few, quite numerous gangster groups in direct fights. This is not the only problem, though, because towards the end of the mission, you will have to eliminate a person that Lester points you to, still before they take off on a helicopter. Note - it is a good idea to equip yourself with a good assault rifle for this mission. Furthermore, you could make use with a good armor, although it is not required.
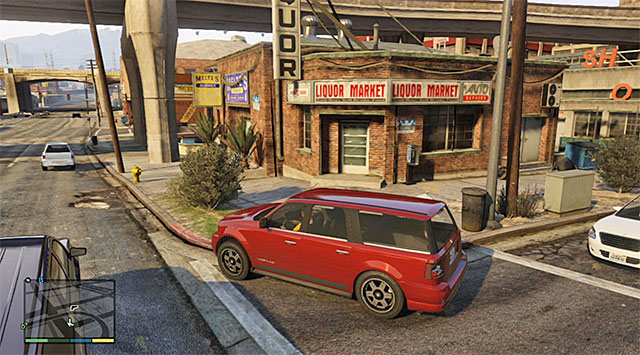 The phone booth
The starting point for this mission is the phone booth in front of the liquor store located in the La Mesa district, i.e. in the Eastern part of Los Santos. During your conversation with Lester, you will learn that another person on his hit list is Enzo Bonelli - a big fish in the underworld, who specializes in real estate. Note - if you play the market, purchase the bonds of the Gold Coast company, because they will profit most from the Gangster's death.
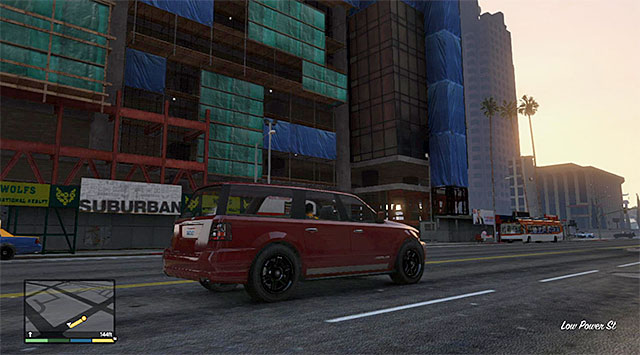 The construction site
Bonelli is currently staying at the construction site in the central part of the city, i.e. in the Pillbox Hill district. Get out of the car and go West. After you get there, do not hope that you will be able to make it over to the rooftop of the skyscraper under construction unnoticed. Even if you try to do that, a major battle will unleash anyways.
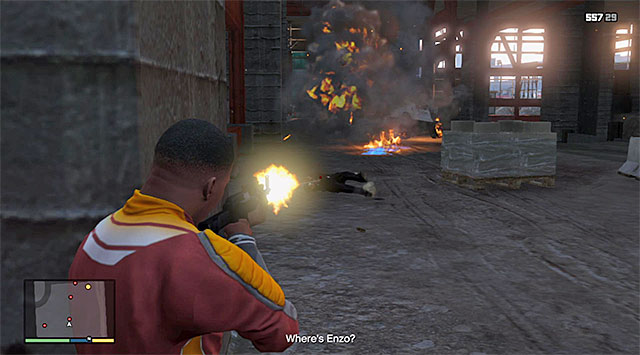 Keep helping yourself with exploding the cars in this area
During the fights you should make a frequent use of covers, especially that many of the enemies come equipped with better types of weapons, effective also at a long range. You should also keep an eye on your radar and do not let yourself be surprised from the side, and also throw explosives towards the cars parked here to make it easier for yourself to eliminate the enemies. Ultimately, you need to reach the first elevator and interact with it.
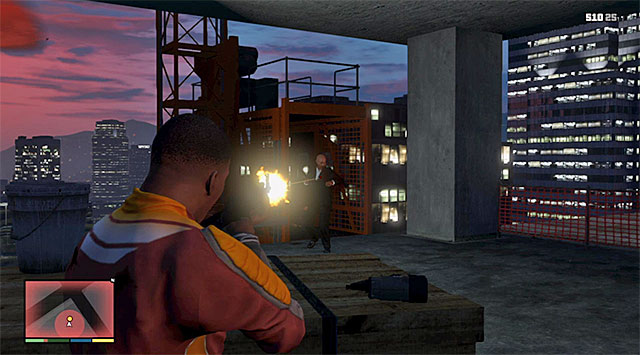 The second elevator
Right after you get out of the elevator, hide behind a cover and resume attacking the hostiles. Keep pushing forward and watch out for the two enemies that will make it onto the current level on the elevator. Eliminate them and enter the second elevator, which will take you to the very top.
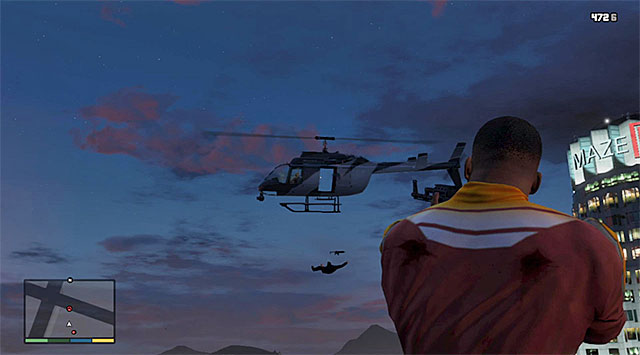 Try to shoot down the enemy helicopter
As quickly as possible, run up to the crates and, after you eliminate the closest enemies, lay fire down onto Bonelli's helicopter. If you are using the assault rifle, you should continue your fire and try to eliminate the pilots. If you, on the other hand, have a rocket launcher, you should use it to destroy the chopper.
 Land somewhere near the skyscraper
Deal with the remaining enemies on the rooftop, collect one of the two parachutes lying around. Bounce off the roof, use the parachute and, after you land safely, talk to Lester.
Rewards for the completion of the mission:
Requirements for the completion of the mission in 100%:
Way to unlock: You need to complete Main mission 49 (Minor Turbulence). You can now go to the meth lab (letter B on the world map).
Playable characters: Michael, Trevor
Additional information: this mission fulfils a preparatory role before a bank heist, i.e. the third one of the major heists in the game. Unlike the previous ones, you do not need to save the game additionally because, the only decision that you will be allowed to make, is the choice of the accomplice towards the end of this mission. The mission itself is pretty easy and its more exciting moment is the off-road race between Michael and Trevor.
 You need to reach the building's upper floor
The starting point for this mission is the meth lab located in Sandy Shores to the West of Trevor's trailer (you have already have the opportunity to visit this place in the nineteenth mission of the game). You can start this mission as either Michael or Trevor by reaching one of the rooms on the upper floor. After the cutscene, also featuring Steve and Dave, leave the lab and get into Michael's car (Declasse Premier).
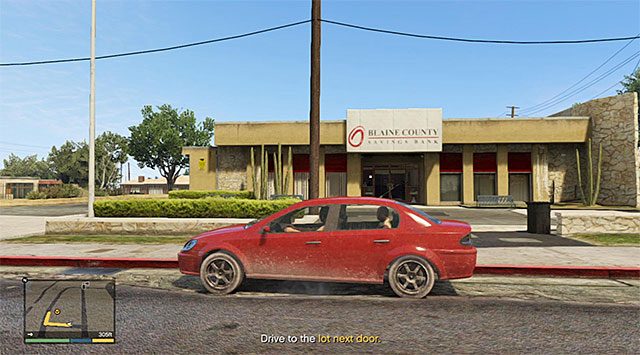 The bank's main entrance
You can now go Paleto Bay - a town in the Northern part of the map. After you get there, stop near the bus stop and wait for Lester to arrive. First of all, you are up for a reconnaissance of the bank that you are supposed to hit. Park your car in front of the bank and change your camera to the cinematic view to zoom the image in a bit. Then, drive into the small field to the left of the building.
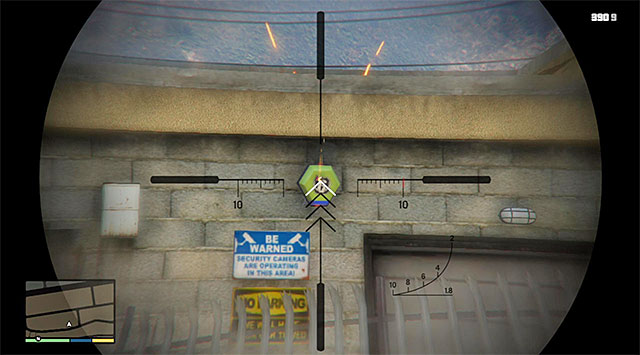
Get out of the car and use a weapon (a scoped one would be best) to destroy the alarm shown in the above screenshot, which has been mounted onto the bank's wall. After you do that, return quickly to the car, drive into the nearby gas station. Observe the police's reaction and listen to the conversations of the people in the car.
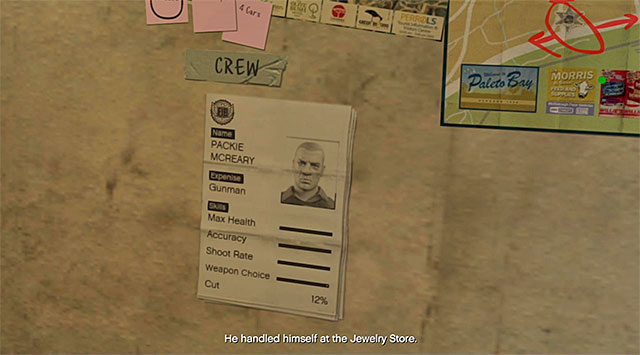 The best choice will be the same person that took part in the jewel store heist
Another part of the mission is the return to the meth lab and, it is a race, of a kind. I recommend that you cut to Trevor, because he managed to steal a good bike in the meantime and, as a result, it will be easier for him to reach the destination as the first. The last part of this mission is planning on the heist itself and, as I have mentioned before, you will not have to decide on a given variant. The only decision that you need to take is the selection of the gunman as a support for the heist, and it would be good to choose the same person that accompanied you at the jewel store heist. This is so, because the skills of that person increased since the last heist.
Rewards for the completion of the mission:
Requirements for the completion of the mission in 100%:
Way to unlock: You need to complete Main mission 51 (Paleto Score Setup). After you receive a text message from Lester, there will appear the Hs icon that symbolizes the moving military convoy en route to Fort Zancudo.
Playable characters: Trevor
Additional information: The main premise of this mission is to steal a military truck from the military convoy and it is a part of the preparations for the bank heist in Paleto Bay. The best way to attack the convoy is with sticky bombs and a scoped weapon (e.g. the sniper rifle) and, if you do not have this kind of equipment, you'd better visit an Ammu-Nation store before starting this mission.
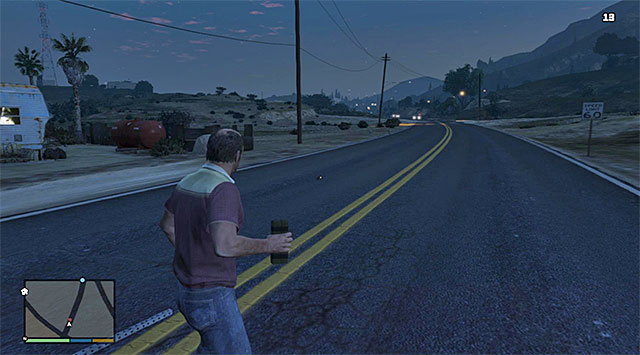 Put a bomb on the road
This mission starts when the convoy comes close, or when you attack from a larger distance. You should spend some time learning the current route of the convoy and stop, at least, several hundred meters ahead of it. From your inventory, select the sticky bomb and leave one on the road.
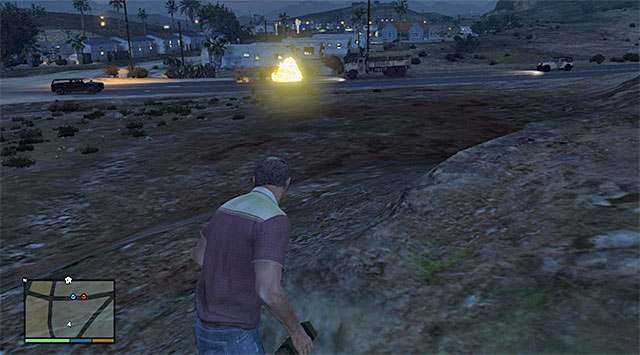 You can detonate the bomb right before the off-road car in the convoy, or blow it up
Walk away from the road and it would be best if you hid on a nearby hill. Wait for the convoy to approach. You an detonate the explosive fight in front of the first off-road car in the convoy, or detonate it at the moment when you will be able to damage it (do not damage the truck too much!) but, in the latter case, it will be more difficult to meet one of the requirements for the completion of the mission in 100%.
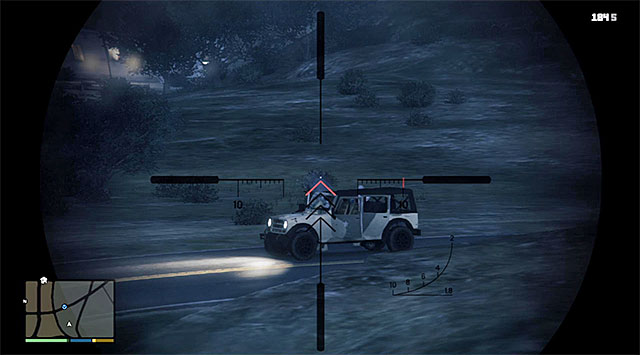 Eliminate the soldiers at a distance
You should now switch quickly to a scoped weapon (a sniper rifle would be best here) and lay fire down on the soldiers that will come out of the cars in the convoy. I recommend that you target their heads and use the distance to your advantage. Try to eliminate all of the soldiers this way.
 The place where the mission ends
Fortunately, you do not need to worry about the appearance of police reinforcements. Approach the vehicles in the convoy and get into the truck (Barracks). The only thing left for you to do is to take the truck back to the meth lab and park it near the garage.
Rewards for the completion of the mission: none
Requirements for the completion of the mission in 100%:
Way to unlock: You need to complete Main mission 51 (Paleto Score Setup). While playing as Trevor, wait for a phone call from Franklin, who will inform you of the activity of the O'Neil brothers and of the fact that he is trailing some of them. You can visit Trevor's trailer, while playing as him, or as Michael, (letter T on the world map) or cut to Franklin to start the mission automatically.
Playable characters: Trevor, Michael, Franklin
Additional information: The initial part of the mission is nothing out of ordinary, and it assumes that you take part in an easy chase and fly a helicopter. The second part is more interesting, where you will need to track down the people that you are looking for, first from aboard the helicopter, then with Chop's help.
 The moment when you start your chase after the O'Neil brothers
It has been already said that, if you cut to Franklin, you will miss the entire initial part of this mission. As a result, it is much better to play as either Michael or Trevor while visiting the trailer in Sandy Shores. After you have listened to the conversation, get out of the trailer and start a journey on your car. At this moment, you will automatically cut to Franklin who is following the O'Neil brothers' SUV.
 You need to approach the blazing wreck
This chase is not too demanding, especially that the highway is wide and there should not be too much traffic there. You only should watch out while sliding off the highway, and try not to bump into anything or anyone. The SUV that you are chasing will soon fall off the slope and catch fire, and the O'Neil brothers will get away from the wreck. Get out of your car and approach the blazing car, then wait for Franklin to contact his colleagues. After you cut to Trevor, finish your ride to the airport and get into the chopper (Frogger). You can now start your flight to the West, i.e. towards the woods, where the O'Neil brothers' SUV crashed (your destination is the yellow circle hovering over the woods).
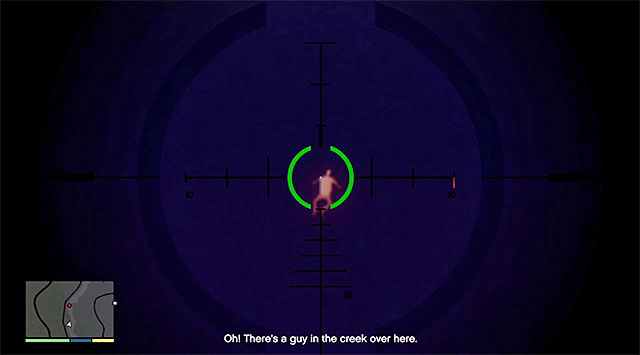 The first one of the wanted brothers is swimming in the lake
Wait to cut to Michael and start your search through the woods to find the O'Neil brothers (Note - do not shoot at the game because this will render you unable to complete this mission in 100%). Use the thermal vision mode to your aid (the appropriate button on the D-pad) examine all of the nearby heat sources, with the goggles zoomed in to the maximum. You will notice the first one of the brothers in the stream on the left.
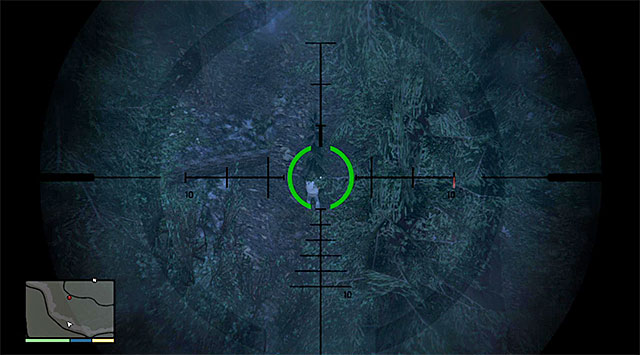 The second one of the O'Neil brothers
The second one of the brothers is in the central part of the woods and it is much easier to locate him. Murder this one and resume your search.

The last one of the enemies is hiding in the place shown in the above screenshot, i.e. near the hill. Do not get scared to see a rocket shot towards the helicopter, it is a part of the mission. Also, do not attempt to target the enemy from aboard the helicopter, and cut to Franklin.
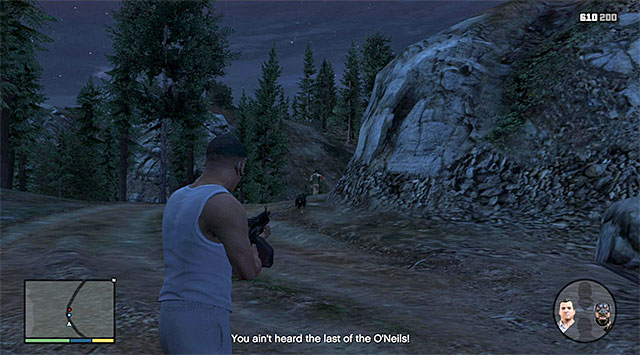 Eliminate the last one of the enemies
After you cut to Franklin, follow Chop and make your way through the little brook. What is interesting, you can also cut to Chop (only as a spectator) to speed up the process of finding the last one of the O'Neil brothers, although this is not necessary. After the dog finds the last brother, shot him as Franklin. Wait until you cut to Trevor, land in the woods to collect Franklin and Chop, and return to the airfield, which will conclude this mission.
Rewards for the completion of the mission: none
Requirements for the completion of the mission in 100%:
Way to unlock: you need to complete missions 52 (Military Gear) and 53 (Predator). Wait for a phone call from Lester and go to the meth lab. (letter B on the world map).
Playable characters: Michael, Trevor, Franklin
Additional information: The heist on the bank in a small seaside town, will turn out to be more complicated than it could seem because, apart from the police, you will also have to deal with the military, including several tanks! Thanks to the gear from the convoy, Michael, Trevor and Franklin, fortunately, come well prepared for al surprises and, as a result, the mass extermination of the enemy should not be that difficult.
NOTE: After the completion of this mission, Trevor and Michael will not be able to visit Los Santos for some time , because they will be hunted there by hostile gangsters working for Martin Madrazo, who will be alarmed straight away of their coming to the city. If you still need to take care of any side missions in the city, it would be good to do them now, before starting this main mission.
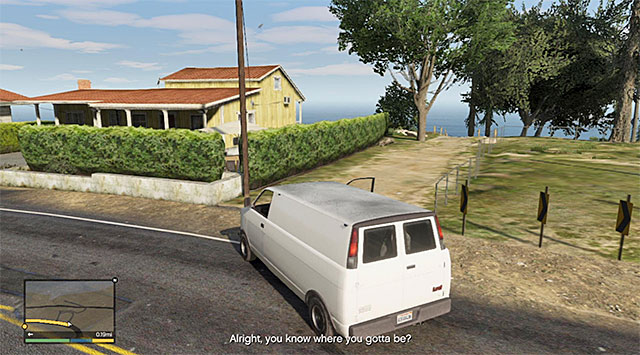 The place where Franklin drops off
Just like in the case of the preparatory mission before the bank heist, after you reach the meth lab, you need to climb up the stairs to the upper floor. Wait for the meeting to end and, while playing as Michael get into the van. You can now drive to Paleto Bay, i.e. to the Northern part of the map. After you get into the town, drop Franklin off in the marked area.
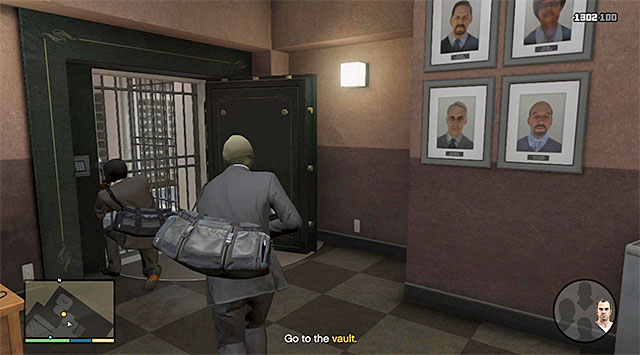 The entrance to the vault
Park the van in front of the bank and come inside, at the same time target the bank's employees. Wait for the request for help at forcing the gate to the vault open, and go there. After a while, you will cut to Trevor. After you have learned the situation outside, also with this character go into the vault. Get ready, because there is the most exciting part of this mission ahead of you!
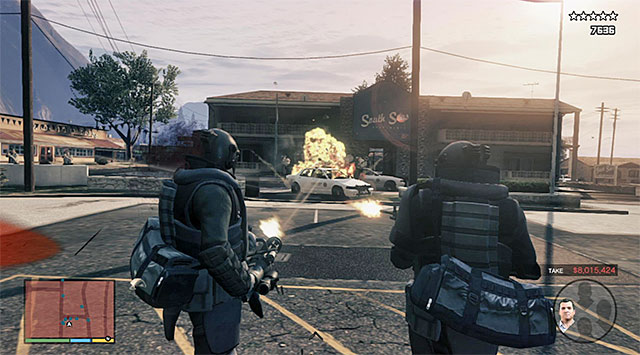 Keep blowing up one police car after another
Continue playing as Trevor and start discharging your minigun in his inventory. To the extent it is possible, you should first target the police cars, because destroying them will not only allow you to deal with them quickly, but will also bring you closer to meeting one of the requirements to complete this mission in 100%, which concerns wreaking havoc. Do not worry too much about the fact that you are out in the open, because the armors of all robbers are very durable. It is also worth knowing that, as a result of enemy attacks, you will be losing small portions of the loot so, you should not ignore the enemy fire too much.
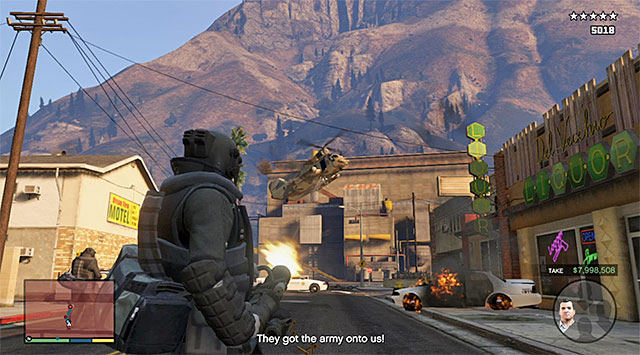
Soon after the fights start, there will appear a police chopper above the bank and, it would be good if you shot it down quickly. Depending on your preference, you can switch to Michael for a moment, or keep playing as Trevor. Regardless of on which character you decide, walk along the narrow alley located across the street of the main entrance to the bank. Be prepared here to eliminate further policemen, who will appear on the right. Then, use Trevor's minigun, or any other effective weapon, to destroy the fence shown in the screenshot.
The military chopperThings will soon go from bad to worse and the harbinger of the problems will be the appearance of two large vans with SWAT soldiers inside. Try blowing up both of them, before better equipped enemies come out. Follow the other robbers and react quickly to the appearance of a military cargo helicopter by shooting it down.
 Keep eliminating the incoming soldiers and destroying their cars
After you reach the next square, the game will suggest that you cut to Michael and both fight the soldiers approaching the battlefield, mainly in the off-road cars. It is, obviously, a good idea to make use of the special skill of the controlled character, i.e. time slowing. Also, keep taking advantage of the large firepower of the weapons you are equipped with, as well as of the fact that you are carrying large amounts of ammo. The game will soon start a cutscene and, if you have chosen a good gunman for the mission, he will suggest that you split into two groups, while remaining here to continue fire and make it easier for Trevor and Michael to evacuate.
Soon, for the first time throughout this mission, you will cut to Franklin, who stole a bulldozer in the meantime. Drive along the town's streets, towards the colleagues and, to the extent it is possible, tip over the jeeps in your way (the above screenshot), and squash soldiers. Do not get carried away with this sort of actions, though, because Franklin is not wearing any armor and the bulldozer's cabin is not indestructible either.
 The factory
Reach the square with Michael and Trevor in it and wait for another cutscene. Drive towards the factory building that you can see in the distance. Along your way, ignore any tanks because, as long as you do not stop here, you are safe. Drive up to the factory's entrance as much as possible, which will conclude your drive on the bulldozer.
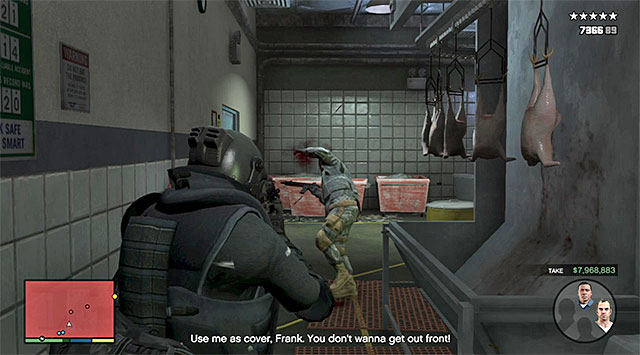 Keep cutting through one factory room after another
During the walk across the factory, you need to play either as Michael or as Trevor, because Franklin is not wearing the special armor and could easily die, as a result. Keep eliminating the soldiers and secure one room after another.
 The train station
It is worth knowing that, if you hired a skilled gunman, you will not have to worry about any attacks from the back and, as a result, the escape from the factory will be much easier. Continue along your path and watch out for the soldier who can, unexpectedly, throw a grenade. Ultimately, you need to reach the train station at the back of the factory, which will conclude this mission.
Rewards for the completion of the mission:
Requirements for the completion of the mission in 100%:
Way to unlock: You need to complete Main mission 54 (Paleto Score). You may now visit Trevor's trailer (letter T on the world map).
Playable characters: Trevor, Michael
Additional information: This mission is virtually overflowing with action, whose aim is to obtain cargo carried by train. First, you will have to jump onto the speeding train and make it derail. Afterwards, you will have to locate the cargo, while fighting back mercenary attacks. You do not really need to get prepared, in any particular way, for this mission, although it would be a good idea to make sure that Trevor is equipped with a sniper rifle and a good automatic weapon.
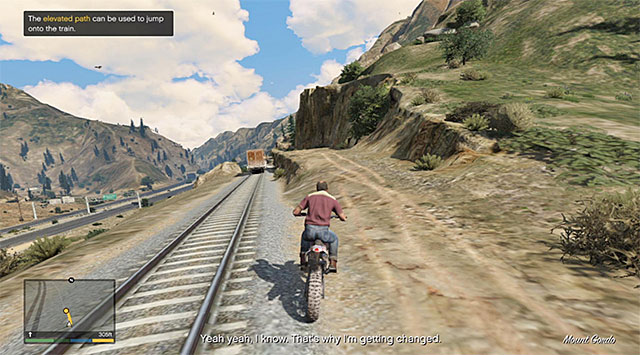 One of the few small elevations
After the cutscene in the trailer, you will cut to Trevor. Get onto the endure bike (Maibatsu Sanchez). You can now ride towards the railway located to the North-West of here. After you get there, follow the train and search for an opportunity to ride onto one of the elevations on the right that you pass by along your way.
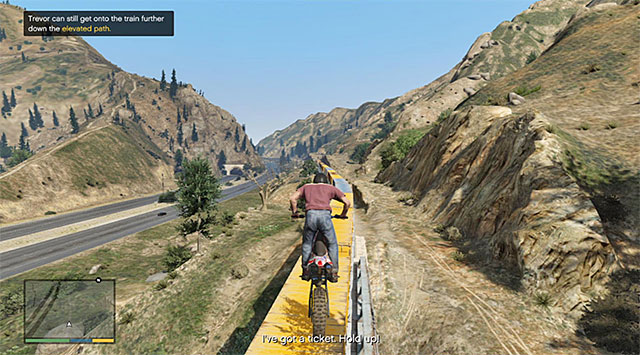
You will now need to perform a very risky maneuver, because you need to bounce off the ramp located at the very end of the elevation. You have to do it at the angle and, at such a speed, that will ensure you with landing on one of the railway cars. (the above screenshot). If you fail to perform the first jump properly, you will have the opportunity to give it one more try at one of the elevations ahead. But, you need to keep in mind that you will not be able to complete this mission in 100% then.
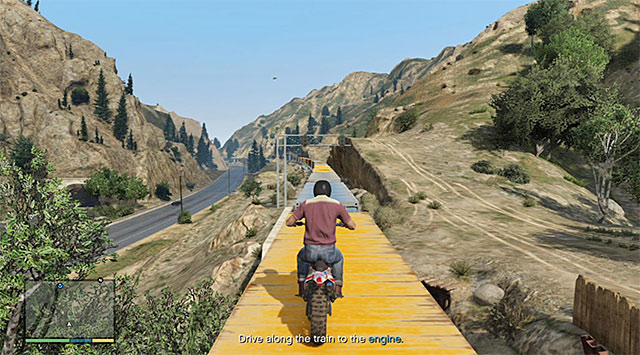 Do not fall off any of the cars
After a successful landing, star a careful ride along the cars, towards the rail engine, where the game will start a cutscene. Now, you will have to operate the train, a ride during which you do not need to perform any special actions. Do not attempt to stop the train, because the mission assumes causing the train to crash with another train.
Wait until you cut to Michael and set out, on the boat (Nagasaki Dinghy), towards the more distant of the two bridges that you can see in the distance. Watch here a breathtaking cutscene of the collision of both trains. Steer the boat towards the yellow car shown in n the screenshot, select the sticky bomb from the inventory and attach it to the car. Steer away from the car and detonate the charge.
 Use the fury mode to your aid
After a while, you will cut to Trevor, and your task will be to cover Michael while he is busy checking out the car. Start by firing at the boats approaching from the right, while hiding behind the fallen tree, or using the fury mode (Trevor's special skill), to eliminate the mercenaries quickly.
 Thermovision will help you locate the enemies
Another serious threat for you, will be enemy choppers and, similarly to the previous missions, it always pays off to target the pilot, thanks to which the helicopter will crash. After you receive a warning of the enemy sharpshooters deployed on the bridge, select the sniper rifle from the inventory and enter thermovision mode to make it easier for you to search out and eliminate enemies. Take out one more chopper and try to eliminate the enemy paratroopers before they land on the nearby hill.
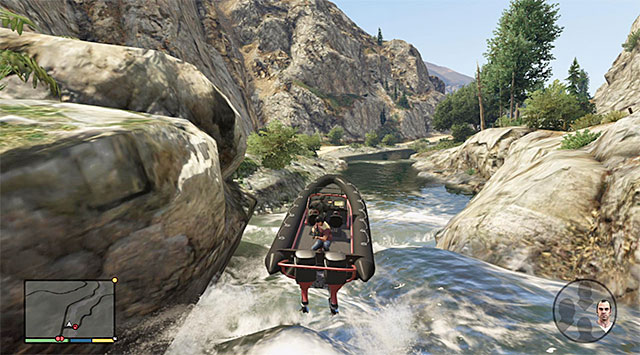 While playing as Michael you need to control the boat
After Michael finds the cargo, wait for him to swim up to Trevor and gets out of water. This is the last part of the mission, which assumes taking part in an escape from the mercenaries, down the river. This is the last part of the mission which assumes escaping from the mercenaries down the river. If you want to play as Michael you should better focus on avoiding rocks and other obstacles.
 While playing as Trevor, you need to eliminate the Merryweather mercenaries
It is much better to play as Trevor, because you will be able to dispose of the mercenaries which chase you, much quicker. Apart from the enemies that use boats, you should also watch out for the enemy vehicles riding alongside the river and helicopters. Try to bring them down as quickly as possible. After the chase finishes, cut back to Michael and steer back to the river bank, where there are two vehicles parked.
Rewards for the completion of the mission: none
Requirements for the completion of the mission in 100%:
Way to unlock: You need to complete Main mission 55 (derailed). You can now go to the meeting with Steve and Dave, which is to take place on the beach in the North-eastern part of the county (letter B on the world map).
Playable characters: Michael, Trevor
Additional information: This one is a quite long mission, which consists of three parts. The first part assumes playing a diver and its aim is to make it inside a research facility. The second part is about stealing the toxin and it allows you to act in shadows. The this part is about making it out of the building with the toxin and transporting it on the chopper. In this case, you will be taking part in direct fights with the enemy.
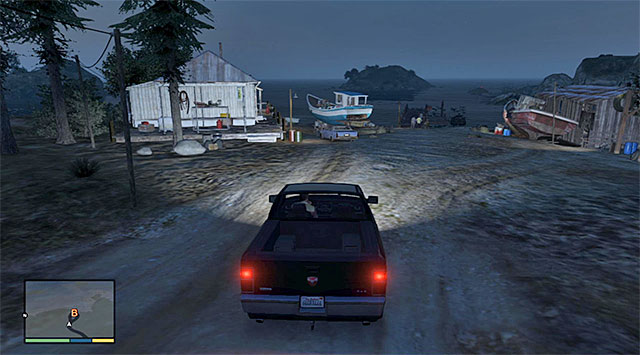 Mission's starting point
The starting point for this mission are the vicinities of a small fisherman's cabin on the beach in the North-Western part of the map, and you can reach here as any of the three playable characters. Listen to a long conversation with Steve and Dave, after which you will cut to Michael. Get into the boat (Nagasaki Dinghy) and steer it towards the point marked at water, exactly to the East of the research facility.
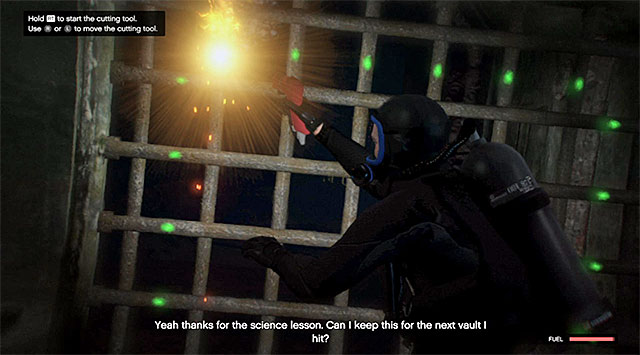
Press the appropriate button on the game pad to dive and follow your "colleagues" of the FIB. Ultimately, you need to reach the small cave, with a grate securing the entrance to the facility. Wait for Michael to produce a blowtorch from the inventory and start cutting though the bars in the spots marked in green. Follow the instruction and do not use up too much fuel, because you may run out of it prematurely, which will result in failing the mission.
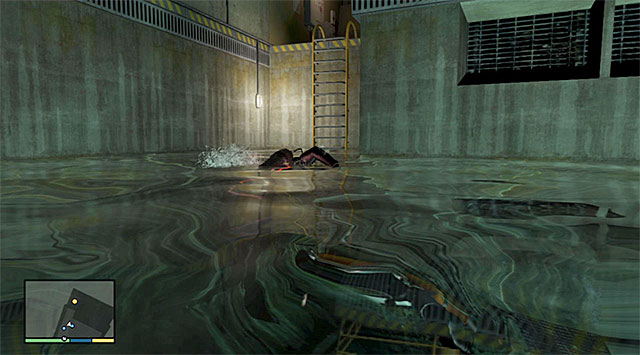 Resurfacing
Continue using the blowtorch for cutting through the green points, which will result in unlocking access to the net of underwater tunnels. Follow Steve and Dave again on a pretty long swim, during which you will, fortunately, not need to deal with any additional safety measures. After you reach a larger area, resurface and take the ladder. At the same time, make sure that you have selected the stun gun from your inventory.
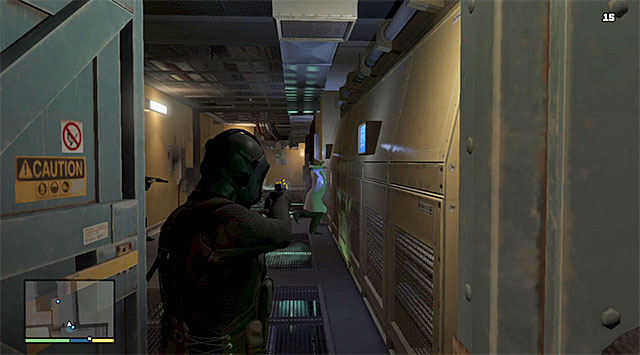 Keep using the stun gun on the people you encounter
Right after you open the door, use the stun gun to electrocute the first one of the scientists. Go straight ahead and eliminate the guard in the same way. Note - while using the stun gun, you need to be accurate about shooting, because it takes several seconds after each shot to recharge and, in the meantime, you could be attacked or cause the alarm to be raised. You can, of course, use the time-slowing skill to your advantage, although, in the case of Michael, this is best left for the final part of this mission.
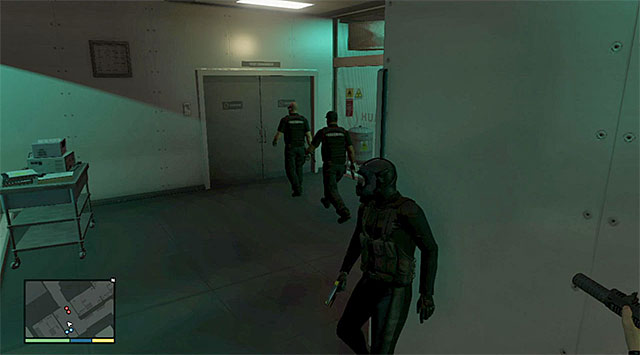 You can either hide r eliminate the patrolmen
Be prepared to take out the second scientist, who will reach here on the elevator. After you do, take his access card, enter the elevator and wait for it to take all three of you to another floor of the research facility. Soon, you will reach a room with two scientists. Attack one of them and, right after the stun gun recharges, deal with his colleague who, in the meantime, should not raise the alarm (you can also run up to him and attack him with fists). Keep going ahead, listen to the warning about the approaching patrol, after a moment. I recommend that you hide behind the wall on the right and wait for the guards to leave this area, although, you could also eliminate them too (for obvious reasons, this is going to be more risky).
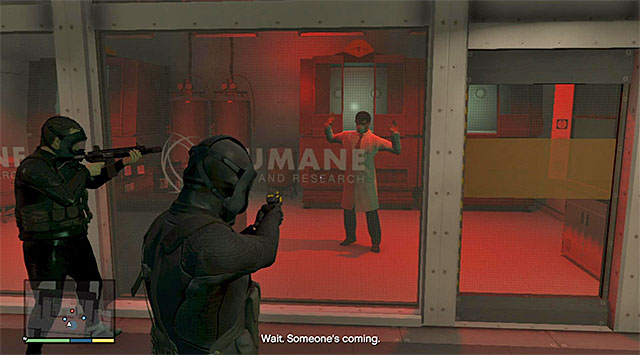 The room with the toxin in it
After you reach the coolroom's entrance, use the access card that you have just obtained to unlock the passage. Approach the room with a single scientist in it and, after you listen to a heated exchange, use the stun gun on his colleague that appears on the left. After the scientist unlocks access to the locked room, use the stun gun on him also. You can now approach the piece of equipment where the toxin is stored, which will result in the alarm being raised in the facility. Leave this room and follow the remaining members of your team.
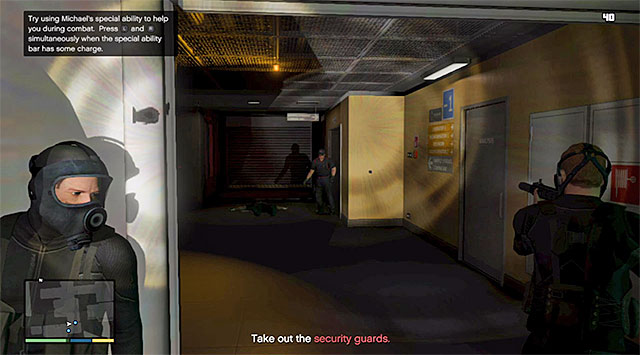 Use covers and eliminate one guard after another
Along your way towards the exit, you will be bumping into new guards on a regular basis. At first, it is a good idea to hide behind covers often, and use the stun gun on them. This is so, because for the completion of this mission in 100%, it is required that you eliminate, at least, eight enemies using that weapon. Only after you meet this requirement, switch to a firearm and start taking up more risky actions, while using the time-slowing skill to your aid.
 Watch out for the soldiers who guard the building's exit
You need to watch out especially after you reach the region of the facility's exit, because you will meet here soldiers, who come equipped better. I definitely recommend that you rely on the covers in this area and the time-slowing skill. Try to clear all the region of the enemy units. Make your way into the yard in front of the building and run up towards the refrigerating unit to put there the recently-obtained toxin.
 Approach the refrigerating unit
You will soon cut to Trevor, who is piloting the cargo helicopter (Cargobob). Fly towards the research facility and do not worry, because entering its airspace will not result in a new pursuit. Hover with the chopper over the refrigerating unit, which will result in a cutscene, of the hooking up of the cargo, being played. Fly with the cargo towards the airport in Sandy Shores, and remember that you need to maintain the right altitude to prevent bumping into any of the elevations in this area. After you reach the airport, hover over the truck, release the cargo and land the helicopter.
 The Madrazo Farm
The final part of this mission is a pure formality because, still playing as Trevor, you will need to take the previously-abducted Patricia back to Martin Madrazo's farm. Just to remind you, the farm is located to the North of Los Santos.
Rewards for the completion of the mission:
Requirements for the completion of the mission in 100%:
Way to unlock: You need to complete Main mission 56 (Monkey Business). You can now return to Floyd's apartment (letter T on the world map).
Playable characters: Trevor
Additional information: this is a very short mission, and devoid of major fireworks at that. It s only aim is to find a new living place for Trevor. As his new home, he will chose...a local strip club!
 The strip club
After you return to the apartment, you are going to meet up with Floyd and Debra, which is going to end in a quite unexpected way. Get into your car and wait for Wade to join you. Drive to the Vanilla Unicorn strip club, located to the West of here, in the Strawberry district. After you reach this place, the game will start another cutscene, which will result in taking control over the club. This means that, from now on, this is the place that becomes Trevor's hideout in Los Santos.
Rewards for the completion of the mission:
Requirements for the completion of the mission in 100%:
Way to unlock: You need to complete Main mission 57 (Hang Ten). You can now visit the strip club seized by Trevor (letter T on the world map).
Playable characters: Trevor, Michael
Additional information: This mission presents the preliminary preparations for another major heist. You do not need to get prepared in any particular way for this mission, nor save the game, because you will not need to take any decision after the reconnaissance ends. This does not mean, though, that this mission is linear in its course - at specific moments you will be able to decide whether you want to play as Michael or Trevor.
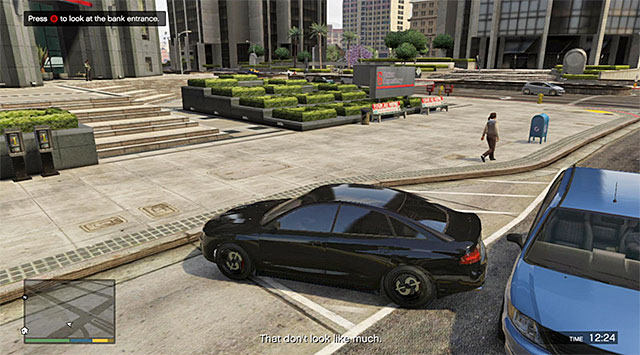 Michael and Franklin need to examine the region of the bank's entrance
Start by paying a visit to the strip club and going to the office at the back of the club, thanks to which you will watch a longer cutscene. After you cut to Michael, get into your car, wait for Franklin to join you and drive towards the bank. You can now choose if you still want to control Michael, or maybe cut to Trevor. Personally, I recommend that you choose variant one , because right after the reconnaissance, playing as Michael, the game will make the switch anyways. You need now to examine the bank's main entrance (press and hold down the cinematic camera button) and then, the gate located at the back of the building.
 Trevor needs to reach the airport with Lester
After you cut to Trevor, go towards the airport in Sandy Shores. The important piece of information is that the game will start a stopwatch and you cannot afford too much time, because you will have to perform al of the preliminary activities before 15:30. After you reach the airport, get into the chopper (Frogger), wait for Lester to join you and fly Southwards, towards the Murrieta Heights district.
 The convoy
The aim to this flight is to find the convoy moving around the Murietta Heights, consisting of two armored vans. Regardless of the time in which you have got here, the stopwatch will disappear and you will start following the vans. Above all, remember that you should not fly too close to the convoy, which may not only cause you to fail the mission, but also to lose the chance to complete it in 100%.
 Fly under one of the bridges
While following the trucks, it pays off to switch to the cinematic camera on a regular basis, which will show you the view from Lester's camera. It is, all in all, a good idea because using this view, will make it easier to fly the chopper in a straight line. Along your way, look out for bridges and fly underneath, at least, one of them. Try not to lose the visuals of the vans, because you will not be able to spot them on your radar but, at the same time, do not exaggerate with following them too closely, especially that they will be making frequent stops for, e.g. traffic lights.
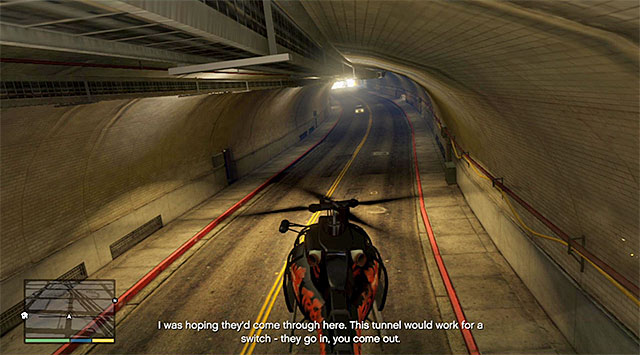
Towards the end of this phase, the vans will drive into a tunnel and, if you are planning on completing this mission in 100%, you need to fly into that tunnel also (the above screenshot). During the flight along the tunnel, perform slight movements with the analog stick in the attempt not to collide with the walls too often, which would result in the destruction of the chopper. The vans will soon enter a garage, which means an end to following them.
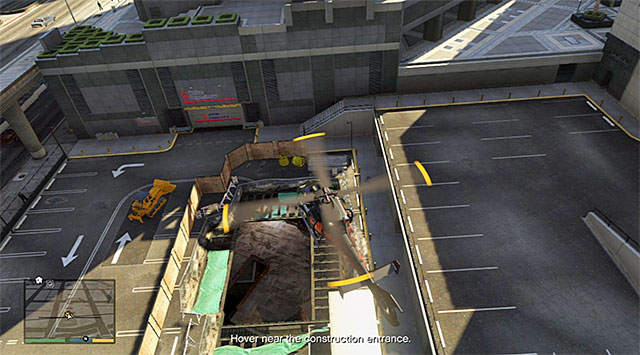
Without waiting for Lester's instructions, fly behind the bank building right after you regain control over the chopper, and hover above the construction site shown in the screenshot. Allow Lester a careful look at the area.
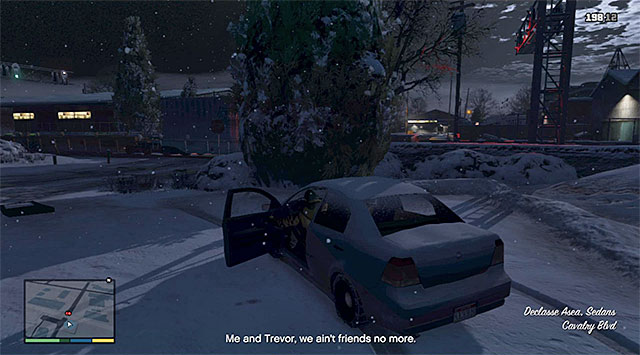 You need to take Franklin back to his villa, or return with Lester to Sandy Shores
Towards the end of the mission, you need to decide who you want to finish the mission as - a choice that is not going to have any bearing on how the mission ends. If you still want to play as Trevor, you will have to return to the airport with Lester. If you cut to Michael, you will have to take Franklin back to his estate in the Vinewood Hills.
Rewards for the completion of the mission: none
Requirements for the completion of the mission in 100%:
Way to unlock: You need to complete Main mission 58 (Surveying the Score). You can now return to Michael's villa (letter M on the world map).
Playable characters: Michael, Trevor
Additional information: The main highlight of this mission is that you can pay another visit to the town of Ludendorff in the North Yankton state, which was the site of the events played in the prologue. It is worth noting that you do not need to buy any equipment for this mission, because Michael will be stripped of all his belongings right after he enters North Yankton anyways. This, apart from pistol.
Note: After the mission ends, Michael will be unavailable for some time and, to make him available again, you will have to complete several main missions. So, if you still have some urgent business to perform as Michael (side missions, activities, etc.) it would be better to deal with all of it before you start this mission.
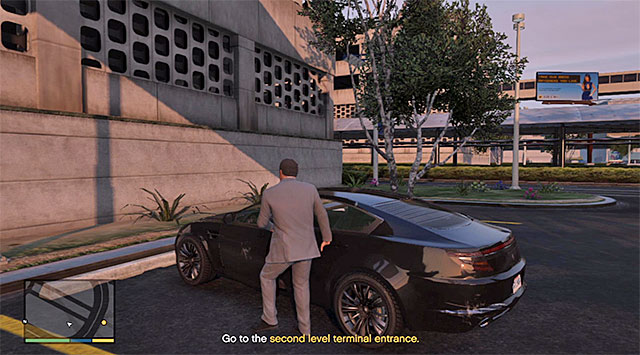 The airport
Reach Michael's estate and watch the cutscene of Trevor's aggressive burst. Wait until you take control of Michael and leave the villa. Do not bother with the fact that Trevor stole Michael's car, because you do not need to race with him. Leave the estate, wangle some means of transport and drive towards the airport located in the Southern part of Los Santos. Park the car in the marked area and go towards the stairs, which will take you to the entrance to the main terminal.
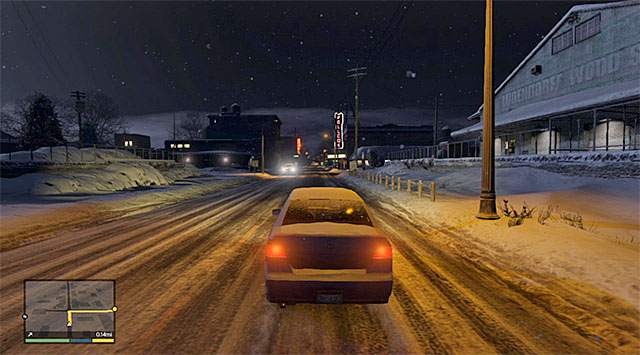 Ludendorff
The game will start a cutscene of your flight to the state of North Yankton. After you regain control over the protagonist, start driving along the road to the town of Ludendorff. Drive into the city and take the right turn at the main crossroads, to reach the local church.
 The place where you meet Trevor again
Get out of the car, walk towards the cemetery adjacent to the church and take the entrance on the right. You need to reach Michael's grace, currently being dug up by Trevor. Watch the cutscene here - Trevor and Michael's meeting will be interrupted by bandits sent by Wei Cheng.
 Keep hiding behind tombstones and walls
It has already been stated that, as a result of the plane flight, Michael was deprived of all his weapons, apart from the pistol. Hide behind any tombstone and start eliminating the incoming enemies. During the fights, it is of course a god idea to help yourself with time slowing, thanks to which you will be able to target the enemies' heads eliminate them and faster.
 It pays off to destroy the enemies' cars
Keep pushing forward. You should not be in a hurry here, especially that the new enemies will be coming here by cars. It is a good idea to try blowing up their cars. You also should examine the corpses of all the enemies thanks to which, sooner or later, you will obtain an automatic weapon.
Michael's carUltimately, you need to cut to the parking lot in front of the church. You can ignore the enemies across the tracks because, even if you kill them, this will not alter the mission's results. The attempt to escape the city on Michael's car will end up in a failure, and he will be apprehended by Cheng's people.
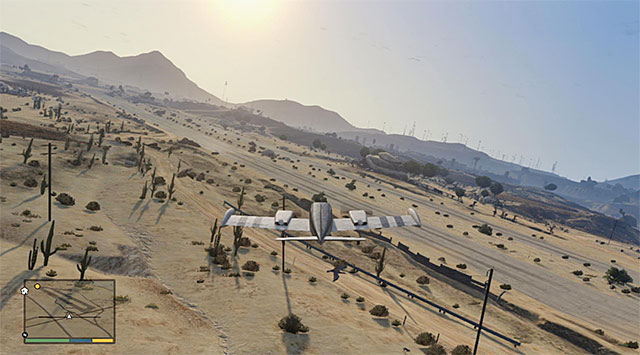 The airfield
Soon, you will cut to Trevor, who is returning on his plane (Cuban 800) to the Blaine county. Answer the phone call from Cheng, reach the airfield in Sandy Shores and land, which will conclude this mission.
Rewards for the completion of the mission:
Requirements for the completion of the mission in 100%:
Way to unlock: You need to complete Main mission 59 (Bury the Hatchet). You can now visit Franklin's former living place (letter D on the world map).
Playable characters: Franklin, Trevor
Additional information: The mission starts off calm and it assumes reaching the platform trailer on the car stolen by Lamar. After that, you will need to take a long ride on the truck. Things will get complicated only later, which will make Franklin eliminate the attacking police forces. Fortunately enough, since you will be driving the "Bond's car", this is not going to be difficult.
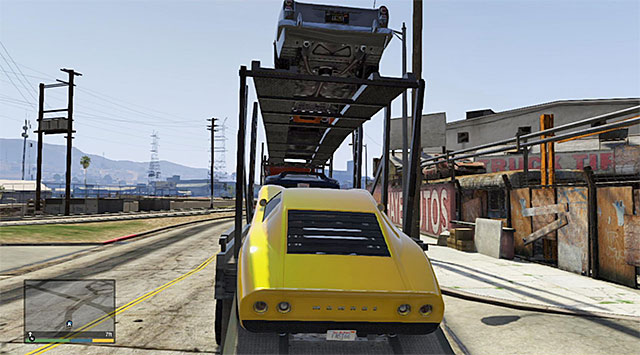 The platform trailer
To start this mission, you need to visit Franklin's first living place, where he used to live before obtaining the villa on the Vinewood Hills from Lester. It is best to get there as Franklin because, if you choose Trevor, you will cut back to Franklin automatically anyways. Wait for the phone call from Lamar and reach the area that he points you to, where he has parked a stolen car (Pegassi Monroe). Get into the car and drive towards the garage but, in this mission, for a change, you need to get onto the platform trailer attached to the tractor unit used for transporting cars.
 Leave Los Santos and start a long ride along the highway
After you cut to Trevor get into the truck (MTL Packer) and set out for a long journey whose destination is the northern part of the map. You should be especially careful while still within the city limits, and try not to bump into the elements of the surroundings by taking turns of a bigger radius.
 You can switch to the cinematic camera to check out on Franklin
Your journey along the Western Highway will be uneventful, at first. Still, after you cover some 3/5 of the distance, the truck will be noticed by the law enforcement, who will start a pursuit (two stars). Continue along the way and, according to the instructions, try not to perform any abrupt turns, which will allow Franklin to reach one of the cars transported on the trailer.
 Use the guns to destroy police cars
After Franklin gets into one of the cars (Dewbauchee JB 700), cut to him and start protecting the truck from the attacks. First of all, you should be making use of the on-board cannons mounted into the car, while trying at the same time, not to hit the truck accidentally.
 Road spikes are also a good way of losing the pursuit
To deal with the police cars chasing the truck, it is a good idea to use road spikes. Irrespective of the method of elimination of the police cars, try to avoid coming into contact with them because, maintaining a good condition of the car is one of the requirements to complete this mission in 100%.
 The place where the mission ends
You need to continue protecting the truck driven by Trevor, until you get rid of all of the police cars. Keep playing as Franklin and follow the truck. The place where the mission ends is a small inn at the highway, where you will briefly meet Molly.
Rewards for the completion of the mission: none
Requirements for the completion of the mission in 100%:
Way to unlock: You need to complete Main mission 60 (Pack Man). You can now visit Franklin's former living place (letter D on the world map).
Playable characters: Franklin, Michael
Additional information: The primary objective of this mission is to free Michael, who is being held by Wei Cheng's people. The first part of this mission assumes that you locate the place where Michael is being held, where the second one is about rescuing him and, for obvious reasons, this is going to involve elimination many of the hostile gangsters.
 Initiate the Trackify app
Just like in the previous main mission, you need to reach Franklin's former home, and playing either Trevor or Franklin is not going to matter here. After you watch the cutscene, cut to Franklin, get into your car and wait until you gain access to the Trackify app. In the meantime, you will cut to Michael. After you watch a short cutscene of the interrogation, return to the game as Franklin. From the inventory, select the smartphone and initiate the Trackify app that Lester sent you.
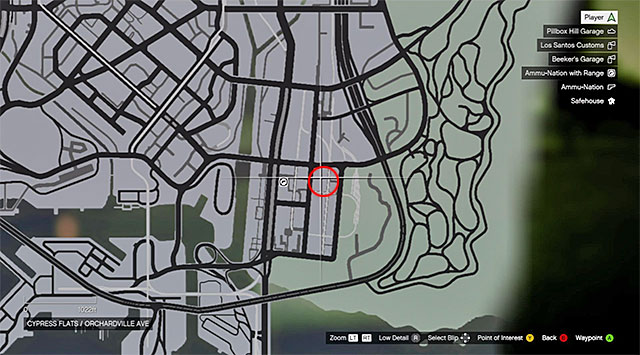
You now need to get to the red dot displayed on the smartphone's display, i.e. to the South-East. The destination is the meat factory, marked in the above screenshot. Do not create a checkpoint there, because this will render you unable to complete this mission in 100%. Instead, rely on the app's readings, especially that the health bar that you can see above the smartphone's display, will be slowly depleting.
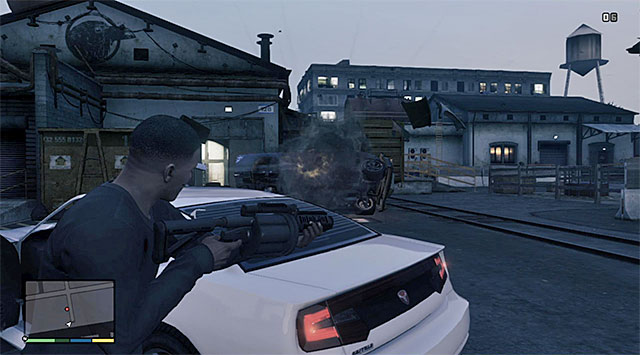 Deal with the enemies in the yard
After you reach the meat factory, get out of the car and deal first with the enemies in the yard in front of the building (it is a good idea to use a grenade launcher, or explosives here, to blow up one of the cars). After you clear the area, enter the building.
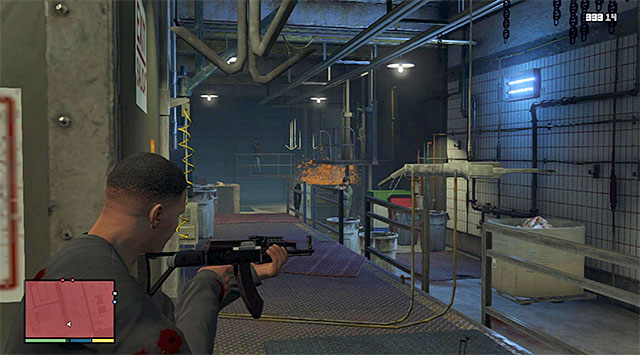 Rely on covers
Starting with this point, you can take your time so, make use of all the covers that you encounter, and remain ready to deal with enemies, who will, unexpectedly crop up behind Franklin. On your way to the hall where Michael is being held, it is a good idea to look for opportunities to eliminate the enemies in the brutal way, e.g. as a result of contact with the operating machinery.
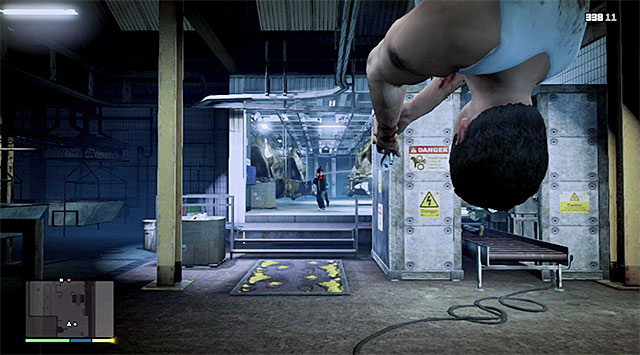 Slow down time to your advantage
After you reach Michael, press the appropriate button on the D-pad to throw him a pistol. After you have cut to Michael, start eliminating the enemies that you can see in the distance, while using the time-slowing skill. You should also watch out for the additional enemies approaching from the left.
 Keep pushing towards the factory's exit
Soon you will cut to Franklin. Go towards the freezer and try to clear it thoroughly. Franklin will be attacked by an assailant with a knife and, after Michael kills him, you will regain control over him. Note - along your way ahead, I would recommend that you do not cut between characters too often because, it is one of the requirements of completion of this mission that you limit such cuts to three.
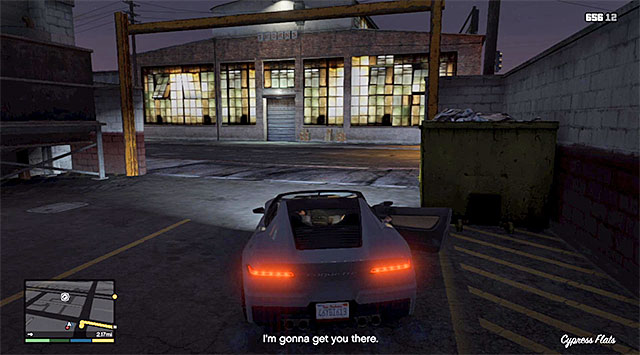 The car that you could use to escape
After you make it to the factory's exit, quickly get into the car parked in front of the building (Invetero Coquette) and drive towards Michael's estate, North-West of here. Soon, Franklin and Michael will be chased by Cheng's people. Ignore them and focus on driving, thanks to which you will lose them, sooner or later.
Rewards for the completion of the mission:
Requirements for the completion of the mission in 100%:
Way to unlock: You need to complete Main mission 61 (Fresh Meat). You can now return to the movie studio that you visited earlier in the game, which is located in the North-Western part of Los Santos. (letter S on the world map).
Playable characters: Michael
Additional information: It is a very short mission, and pretty uncomplicated at that. Its only premise is to eliminate Rocco, as a form of revenge for assailing and mugging Solomon Richards.
 The SUV that you need to use for the pursuit
To start this mission, you need to visit the movie studio again. Just like before, you enter via the main gate but, this time, do not drive to Richards's office. Instead, approach one of the trailers here, thanks to which you will note that he was mugged by Rocco and Gianni. Right after you regain control over Michael,, get into the SUV parked nearby (Gallivanter Baller) begin the pursuit.
 Conduct fire and look out for opportunities to murder Rocco
Leave the movie studio carefully and lay fire down on the car, which Rocco is escaping on. After Rocco's car hits something, shoot both him and the goon that is accompanying him. Wait for Michael to contact Richards and, during the conversation, tell him that you want to meet again. You can now return to Solomon's apartment, where you will be able to claim a little reward.
Rewards for the completion of the mission: none
Requirements for the completion of the mission in 100%:
Way to unlock: You need to complete Main mission 61 (Fresh Meat). You can now visit the clothes factory, where there is Lester (letter L on the world map).
Playable characters: Michael
Additional information: This mission plays the role of preliminary preparations for the infiltration of the Agency's building, whose aim is to determine if there is an internal investigation against Michael's friends from the FIB, and what kind of evidence material was gathered. Fortunately, this mission is not too difficult and it assumes identifying and following one of the janitors, to obtain his name tag and boiler suit.
 The region of the FIB parking lot
This mission's starting point is the clothes factory, which you have already visited while preparing for the jewel store heist and which is located in the La Mesa district. After you get there, watch a cutscene of the meeting with Steve and Dave. Exit the building and get into the car. Wait for Lester to join you and drive towards the FIB skyscraper located to the West of here. Stop the car near the driveway to the multi-storey parking lot.
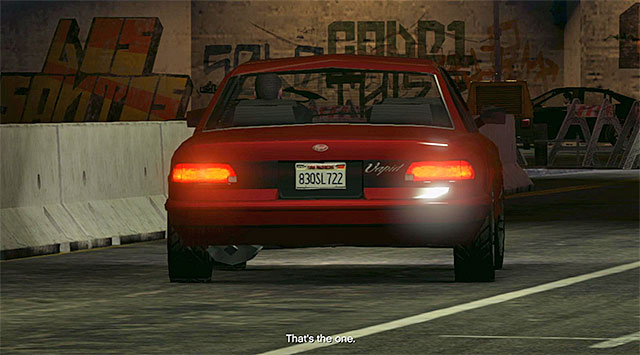
Your task is to identify the car belonging to the janitor, and its plate number is 83QSL722. Check thoroughly all of the cars leaving the garage, by pressing, each time, and holding down the movie camera button. The janitor's car is the red sedan car shown in the above screenshot.
 Keep within a safe distance from the car you follow
Start following the car. While playing this part of the mission, you need to remember to keep a safe distance from the janitor's car. If his car happens to stop for the red light, you should also stop your car at the curb. Do not worry if your view of the car becomes obstructed by the other cars, because you will be able to track the janitor's car on your radar anyways.
 Wait for the janitor to enter his apartment and join him
The part where you follow the car draws to an end after it reaches a building, where the janitor's apartment is, and it's the West Vinewood. Park your car in the spot where Lester tells you to and start following the man on foot, while still keeping the safe distance. Wait for the man to enter his apartment on the upper floor and join him. After you watch the cutscene of the obtaining of the janitor's name tag and clothes, return to Lester. Return to the factory and go to the office on the upper floor.
Rewards for the completion of the mission: none
Requirements for the completion of the mission in 100%:
Time - You need to complete this mission within 9 minutes.
Way to unlock: You need to complete missions 62 (The Ballad of Rocco) and 63 (Cleaning Out the Bureau), and wait until there appears a marker next to Michael's villa (letter M on the world map).
Playable characters: Michael
Additional information: This mission is wacky and overflowing with humorous accents. Its primary premise is that you reunite Michael's entire family under the same roof. You are going to visit, among others, the tattoo parlor and...the therapist!
 The cafe
Reach Michael's estate. After you watch the first cutscene, featuring Jimmy, get into your protagonist's car (Obey Tailgater), wait for Jimmy to join up and drive to the East towards the Bean Machine caf. You are going to meet Amanda and Fabien here.
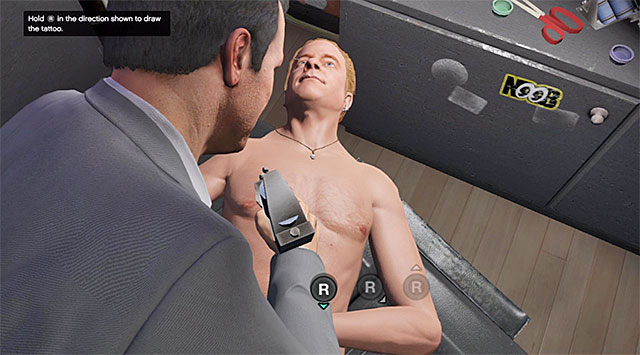 Keep performing the appropriate movements with the right analog stick
Another stop you are going to make is at the tattoo parlor, Where you are going to meet Tracey and Lazlow - you first need to pierce his face in three different points, and tattoo a large penis on one of the two available spots on his body (you need to lean the right analog stick basing on the instructions that the game displays), and finally cut his hair.
The building where Doctor Friedlander's surgery is locatedGet into the car again and drive towards Doctor Friedlander's surgery in the Del Perro district in the North-Western part of the city. After you watch the cutscene of the visit at the therapist's, return to Michael's estate with the entire family.
Note: completing this mission comes with the losing of four thousand dollars, which is the therapist's pay.
Rewards for the completion of the mission: none
Requirements for the completion of the mission in 100%:
Way to unlock: you need to complete Main mission 63 (Cleaning Out the Bureau). You can now switch to Franklin, which will start this mission.
Playable characters: Franklin
Additional information: In itself, this mission is very short and it revolves around attempts to gain access to the construction site to obtain the FIB building plans. The important piece of information is that a conference will take place in Lester's factory, towards the end of the mission. The result of this conference will be selection of the action plan, and selection of people to hire, who will take part in the heist apart from the protagonists.
NOTE: Towards the end of this mission, you will have to make a choice of the mode of burgling into the FIB skyscraper. The selection will have baring both on the heist itself, as well as on the preparatory missions before the heist. I strongly recommend that you save the game before starting this mission.
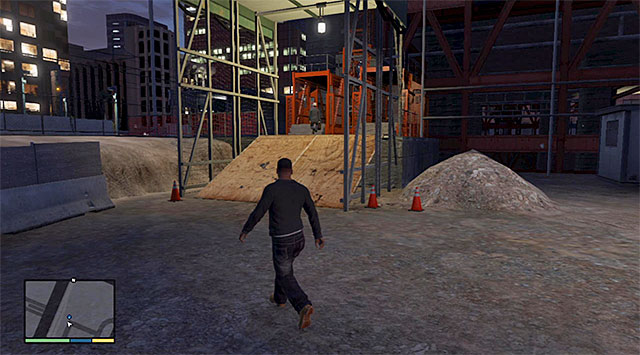 The elevators
After you take control over Franklin, you will find yourself at the Pillbox Hill construction site. Walk into the site, follow the architect that you can see in the distance and try not to alarm the workers around. From one of the characters that you pass by, you can receive your protective helmet but, even if you are not wearing one, nobody will try stopping you. Reach the elevators, get into one of them to reach to the top of the skyscraper under construction.
 Sneak up to the architect from behind and eliminate him
Continue following the architect. Attack him only after he walks away from the rest of the workers - I recommend a melee attack from behind, although you can also use a suppressed weapon. After the successful action, collect the case with the documents and return to the elevator to leave the construction site (do not use the architect's car or you will alarm the others!). Return to the clothes factory, i.e. to Lester's HQ.
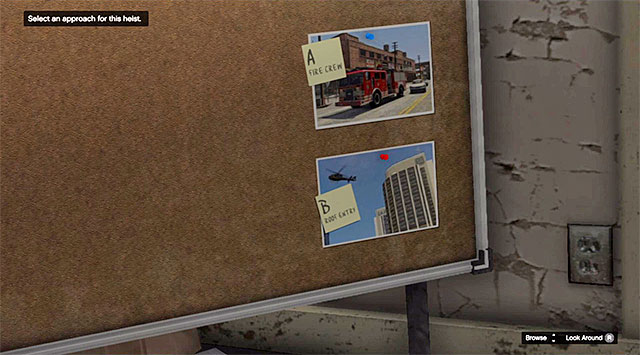 The moment of selection of the heist mode
I have already suggested at the beginning of the description for this mission that you will have to take one more step, i.e. plan the heist on the FIB skyscraper. Just like in the case of the jewel store and the harbor jobs, there are two variants to choose from, i.e. planting bombs in the skyscraper and making it to the server room disguised as the fire brigade (A - Fire Crew), or jumping onto the rooftop from a chopper, after which you break into the server room (B - Roof Entry).
Short summary:
Rewards for the completion of the mission: none
Requirements for the completion of the mission in 100%:
Way to unlock: You need to complete main mission 65 (Architect's Plans) and select the variant that assumes disguising as firemen (Fire Crew), towards the end of that mission. There is no marker for this mission and you can start it anywhere.
Playable characters: Michael
Additional information: you have already had the opportunity to play a similar mission earlier throughout the campaign .
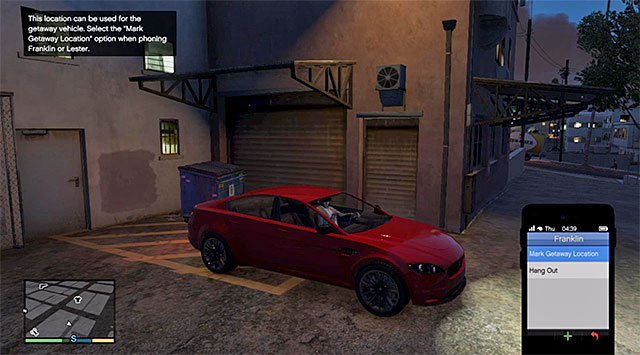 Park your car in a side-alley, best in the center of the city near the FIB skyscraper
This time around, for your getaway, you need to pick a car capable of taking four people, at least, but this does not matter if it is going to be some slow pick-up truck or a fast car. Just like before, you should spend some time determining the spot to park the stolen car. The main part of the heist is, of course, going to take place inside the FIC building, i.e. in the center district of Pillbox Hill. This means that it would be a good idea to hide the car somewhere nearby. Pick a side-alley, at a discernible distance from the main road (the game will let you know if it is a poor location). Turn your mobile on, find Franklin or Lester on the contacts list and select the first item on the list (Mark Getaway Location). You can now walk away from the car.
Rewards for the completion of the mission: none
Requirements for the completion of the mission in 100%: There are no additional requirements for this mission so, it gets completed in 100% automatically.
Way to unlock: You need to complete main mission 65 (Architect's Plans) and select the variant that assumes dressing up as firemen (Fire Crew), towards the end of this mission. There is no marker on the map for this mission and you can start it anywhere.
Playable characters: Michael
Additional information: The only premise of this short mission is to steal the fire truck. After you do, you will have to deliver the truck to the marked place.
 Select the emergency services phone number
I recommend against searching for the fire truck in one of the fire stations spread around the game world, because this will render you unable to complete this mission in 100%. Instead, stop somewhere near Lester's clothes factory, produce your phone and dial 911, or select the Emergency Services from the contacts list. After you call them, confirm that you want to summon the Fire Dept.
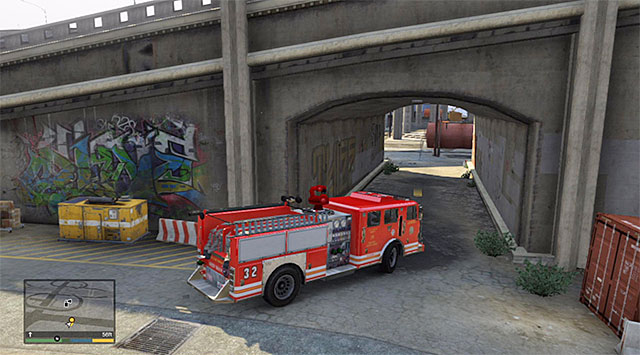 The location to hide the fire truck
Wait for the fire brigade to arrive and steal the Fire Truck. Of course, you need to realize that this will alarm law enforcement so, soon after you obtain the truck, hide in some side-alley to wait through the pursuit. After it is over, drive the truck to the clothes factory and park it under the bridge.
Rewards for the completion of the mission: none
Requirements for the completion of the mission in 100%:
Way to unlock: You need to complete main missions 66 (Getaway Vehicle #2) and 67 (Fire Truck), and contact Lester. You may now return to the clothes factory, i.e. Lester's base (letter H on the world map).
Playable characters: Michael, Franklin
Additional information: The initial part of this mission is very calm because Michael will need to take on the janitor's duties and plant the explosives while cleaning the floors. The second part of this mission is more interesting, because it assumes infiltrating the building under the guise of firemen. Do not expect that the workers of the Agency will remain oblivious to your actual plans until the very end, but still, you will need to eliminate only a small group of agents, and only after you steal the data from the server room.
 Security gates
You start off as Michael. Exit the clothes factory, get into Michael's car (Obey Tailgater) and drive to the Pillbox Hill district, i.e. to the FIB skyscraper. Park in front of the building, walk inside, around the security gate and walk into the elevator. Enter the maintenance room and wait for Michael to collect the mop.
 You need to remove stains from the floor
Walk towards the first part of the offices. Put the bucket down and start removing grime from the floor so, approach the red dots on the radar and press the correct button. Each time after you remove stains, return to the bucket to clear the mop. After you have performed all of the work in this part of the building, approach the boxes, thanks to which Michael will automatically place a bomb there.
 The toilet
Walk into the next part of the office floor. Here, there are four different fragments of the floor to clean so, get busy. Remove the stains from the first two fragments and go, with the bucket, to the next corridor. After you are done with your cleaning job, enter the men's restroom and wait until this area is left by one of the employees. You can now enter the stall marked by the game and plant the second bomb there.
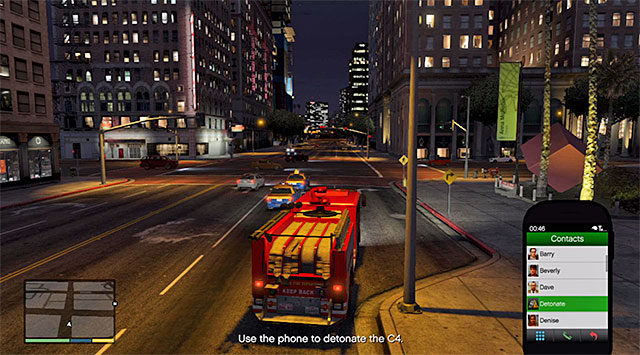
Pick up the bucket and return with it to the maintenance, at which you have started the exploration of this floor. Take the elevator down and exit the skyscraper. Stop in the marked area and wait until you cut to Franklin. Approach the spot where you are supposed to take Michael aboard the fire truck and select your smartphone from your inventory. Access the Contacts list and confirm the detonation of the explosives (the above screenshot).
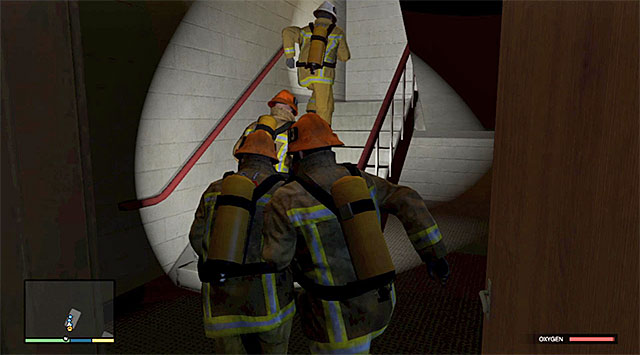 The staircase
You can now drive towards the FIB skyscraper. In accordance with the information, you can take your time because the other units did not receive the notification, as a result of Lester's actions. Park in front of the skyscraper and get inside. Use the elevator again to reach the 47th floor. Starting here, it is a good idea to perform all of the actions in a hurry because your oxygen supply is limited, which can be seen on the bar in the bottom-right corner o your screen. Oxygen will be depleting very slowly, but do not be influenced by that, as there are many actions to perform. Your current objective is to get to floor 53 so, follow your teammates to reach the staircase.
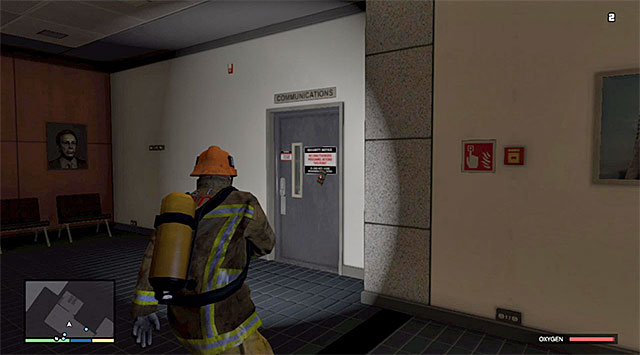
After you have reached floor 53, start crossing one office after another, towards the server room marked on the radar. From the inventory, select the sticky bomb, aim at the server room's door (the above screenshot) and detonate the explosive from afar. You can now enter the server room and collect the disk with the data.
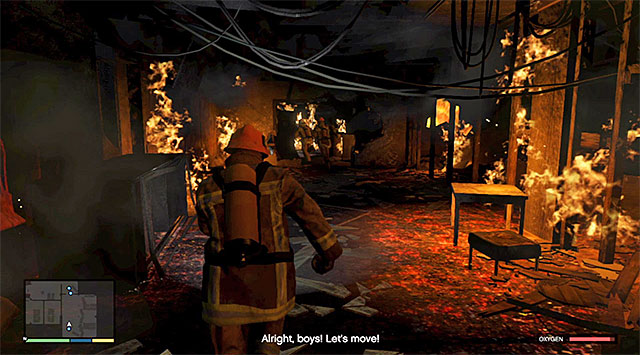 Keep crossing one office after another
Exit the server room and start going in the opposite direction, by following Michael and the rest of the team. Things will get complicated after you reach the staircase, because it will turn out to be destroyed. This means that you need to cut through floor 52. After you experience a small explosion, help your teammate up and resume your run across the demolished building. Make use of a structural element to reach the lower floor.
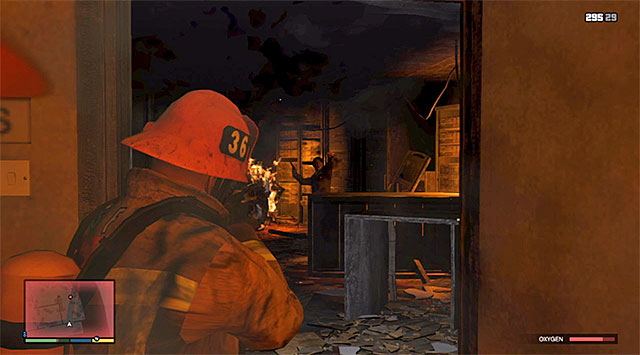 Eliminate the Agency workers quickly
Franklin will soon be temporarily incapacitated. After you regain full control over him, set out to meet up with your teammates. You can take your time because you will have to handle the first wave of hostile Agency workers. Fortunately, the enemies are not too well armed so, try not to lose too much time while attempting to eliminate them. Keep cutting through successive offices in the building and attack the enemies that will be coming in groups of two, at most. Ultimately, you need to make it to the staircase and climb down to floor 50.
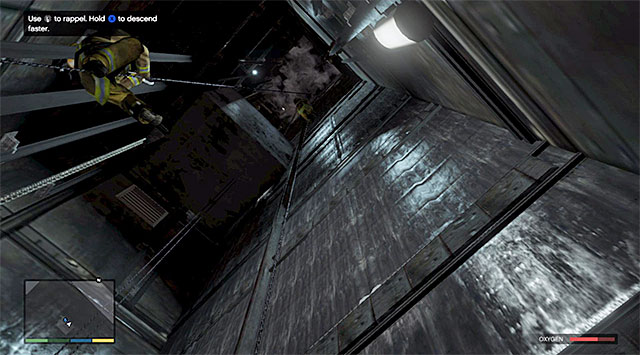 The elevator shaft
Soon after you start the exploration of floor 50, you will meet the remaining characters again so, continue following them. Reach the elevator shaft and, after you see a short cutscene, abseil down the sling. While playing this part, it is a good idea to bounce off the shaft's walls on a regular basis and perform long jumps which will speed up the whole process. Also, ignore the big elements falling down, because none of the should hit you anyways. After you reach the ground floor, dash out of the building and get into the fire truck.
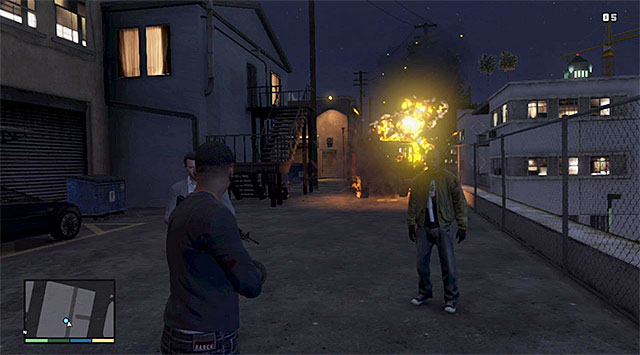 You need to destroy the fire truck
You can now return to the spot where you have left the getaway car, while completing one of the previous missions. As long as you have chosen a spot close to the FIB skyscraper, you do not need to worry about the police pursuit. After you get to the car, destroy the fire truck (e.g. using another bomb), get into the car and wait for the rest of the team to join you. The only thing left for you to do now is safely reach Lester's home located in the El Burro Heights district.
Rewards for the completion of the mission:
Requirements for the completion of the mission in 100%:
Way to unlock: You need to complete main mission 65 (Architect's Plans ) and choose the Roof Entry variant towards the end of that mission. Wait until you receive a message from Lester and return to the clothes factory, i.e. the headquarters (letter H on the world map).
Playable characters: Michael, Franklin
Additional information: The variant which assumes gaining entry to the FIB skyscraper from the roof, and it assumes fighting more fights than in the case of infiltrating the building dressed up as a fireman. You are going to encounter the first wave of enemies right after you break into the server room, and this is going to be a chain of fights lasting until the very end of this mission. When it comes to the theft of evidence from the server room, there are several interesting mini-games connected with it, which, contrary to what it may seem, you may find a little bit problematic.
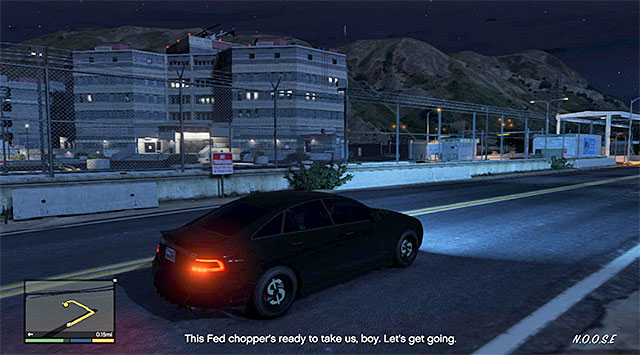 The government agency
You kick off as Michael. Exit the clothes factory, get into your car (Obey Tailgater) and drive towards the government agency located to the West of Los Santos. There is only one way to your destination and you will be automatically granted access to the facility. Park your car in the marked spot and watch the cutscene.

After you regain control over Michael, get into the chopper (Maverick) and fly it to the West. You need to start ascending and fly towards the yellow circle. Watch a short cutscene here, bounce off and start the freefall. After several tens of seconds, open the parachute and try to approach the FIB skyscraper rooftop shown in the screenshot. Try to land inside the big yellow circle and use the option to target the rooftop, if necessary, as well as slowing down of time, by pressing and holding down both of the buttons, to slow down the fall.
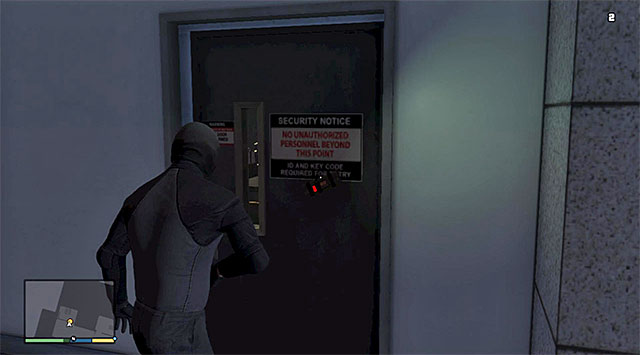
Wait for the team members to gain access inside the skyscraper. Select the sticky bomb from the inventory, target the server room door shown in the screenshot and detonate the explosive from afar. Quickly enter through the door, because this will start the alarm in the FIB headquarters.
 Find the identical IP address
Now, you are going to play several mini-games, whose aim will be to break into the terminal. Start by selecting the My Computer icon, and then the external drive J:. Start by accessing the HackConnect.exe app. Your task is to locate the IP address identical to the one displayed at the top of the screen. Fortunately, even f you deplete the number of available attempts, or the time limit, you will be able to start again, with a different address.
 Select the consecutive red letters to complete the password
Now, start the BruteForce.exe app. The rules of this game are obvious, because you need to press the appropriate button on the gamepad each time the red letter is in the blue frame. If you press the button with a wrong letter selected, the process starts over again. After you complete this mini-game, access the Down&Out.exe, program, which will initiate a two-minute-long data downloading process.
 Attack the appearing enemies
As you can probably figure out, you will now have to defend yourself here, until the data downloading process is completed. Depending on your preferences, you can play as either Michael or Franklin. In both cases, remember to make an extensive use of the covers and watch out for the enemies appearing on the glass roof, while trying to deal with them as quickly as possible. In dire straits, conduct blind fire and use the grenade launcher or explosives.
 Watch out for the enemies wearing helmets and bulletproof vests
The action plan will soon change because the chopper, which you had to use to evacuate, will be shot with a rocket (unfortunately, you cannot in any way prevent that because the chopper is piloted by a person from outside of the group of the hired accomplices). Keep firing your defensive actions and be careful after the enemies use a smoke grenade. Do not allow the enemies to come close to the spot where you are defending, and consider using better weapons than the startup ones. This is so, because you will need to deal with enemies wearing heavy armors.
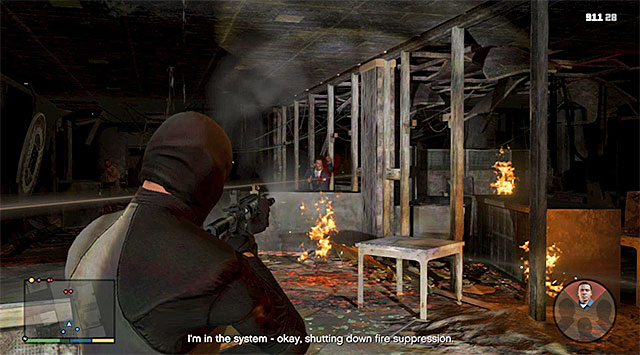 Try not to kill civilians
After the data downloading process is over, collect the drive with the copied data and follow your allies, while playing as any character of your choice. Soon, you will bump into two enemies and, because they appear right next to you, it is better to eliminate them in melee combat. Climb down the stairs to floor 52 and lay fire down on the enemy at the other side of the door. Start walking now through the blazing offices, while eliminating the armed Agency employees. Do not attack the armless civilians though, because this would render you unable to complete this mission in 100%.
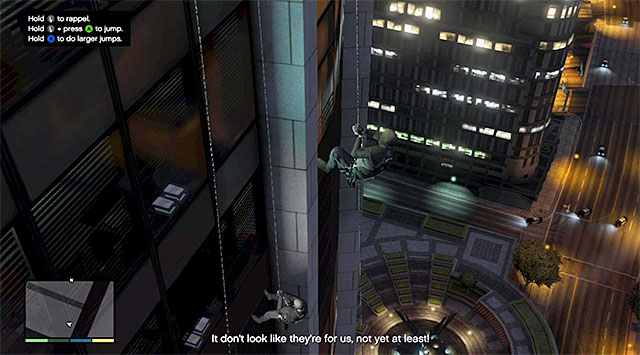 Keep bouncing off the skyscraper's wall
Ignore the destroyed chopper and make it through to the lower level. Also here, attack only those of the people who use firearms. Climb down the stairs to reach the lower level and reach the place where you can attach the abseil sling. Start sliding down the building's wall. During this action, it is a good idea to bounce off the skyscraper's wall on a regular basis to perform long jump and speed up the process as a result.

After you reach the external balcony, cut to Michael and use the time-slowing skill to eliminate the pilot of the chopper shown in the above screenshot. While doing that, try to conduct your fire from behind a cover. After you are done, locate a new point to attach your sling and complete the slide down the wall. To reach the yard in front of the FIB headquarters. Hide here behind one of the posts and eliminate the last enemies in this area.
 Get into the ambulance and drive away from the skyscraper
If you have hired a good driver for this job, he will drive up to the building in an ambulance, and you will not need to play through a chase scene. Get into the ambulance and drive away from the site. The only thing left for you to do now is reach safely Franklin's estate in the Vinewood Hills.
Rewards for the completion of the mission:
Requirements for the completion of the mission in 100%:
Way to unlock: You need to complete one of the missions connected with the FIB skyscraper heist (The Bureau Raid), i.e. mission 68 (dressing up as firefighters) or mission 69 (roof entry). You can now get to the meeting place with Dave, i.e. the Kortz Center complex (letter B on the world map).
Playable characters: Michael, Trevor
Additional information: As you can probably figure out, meeting with Dave is not going to be friendly and the entire mission will turn into a heated fire exchange, with the Agency's tams and Merryweather mercenaries to join in. The greatest surprise is going to be the joining of Trevor who decided to Help Michael and Dave to leave the Kortz Center safely.
 The place where you meet up with Dave
The starting point of this mission is the Kortz Center complex located to the North-west of the main part of Los Santos, and you need to get there as Michael. There is only one path leading up to the destination and, after you get there, leave your car on the parking lot. Cover the rest of the way on foot, reach the balcony above and find Dave in the South-Eastern corner. You will watch a cutscene of the conversation with Dave, Steve and Sanchez, after which there will be a massive fight to play.
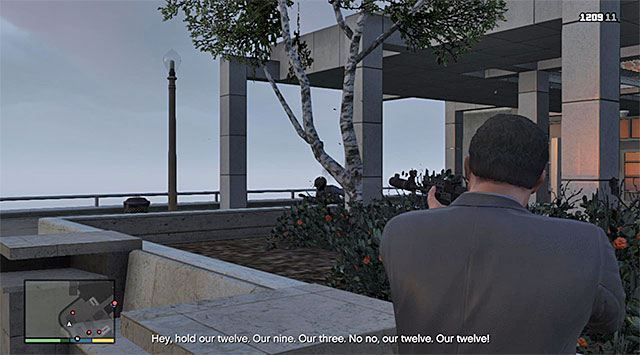 Rely on Michael's special skill
Right after the fights start, select a better weapon from the inventory (e.g. the assault rifle), start eliminating the closest enemies. During the shootout, keep using Michael's special skill on a regular basis, especially that many of the enemies are wearing heavy armors and, as a result, it is better to aim at their heads. After you have dealt with the enemies that posed the greatest threat to Michael, walk towards the yellow point marked by the game.
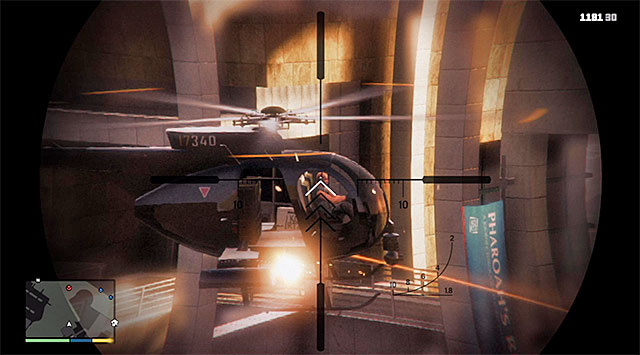
After you approach the main yard, there will appear a Merryweather chopper here, and that is when you will cut to Trevor. Use the sniper rifle and try to shoot the pilot of the chopper as quickly as possible, which will result in bringing the helicopter down (the above screenshot).
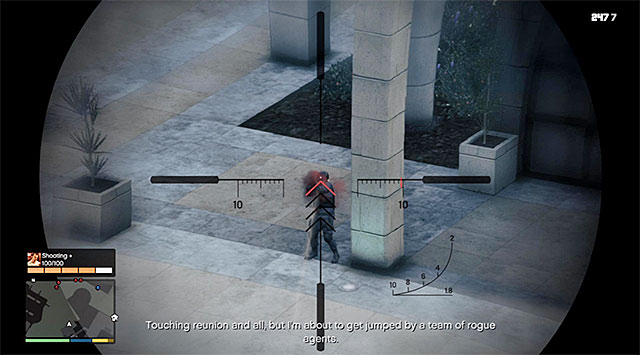 You can play as either Trevor or Michael
Continue shooting your sniper rifle and try eliminating, in the first place, the enemies that pose the greatest threat to Michael and Dave. The game will soon unlock Michael again so, you can decide for yourself if you want to attack the enemies from afar, or get involved into more direct confrontations, rely on slowing down of time. Trevor does not need to move from his position, whereas Michael needs to reach the main yard.
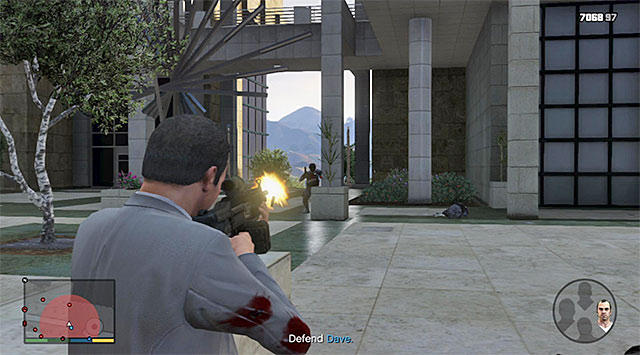 Cover Dave, who is hiding near the fountain
Around, there will soon appear a Merryweather chopper and, just like earlier, it would be a good idea to get rid of it by using Trevor's sniper rifle, or on slowing down of time by Michael. After Michael reaches Dave, start covering the colleague from the Agency. You should first try eliminating those of the enemies that are the closest, and also pay attention to the fact that there appeared another Merryweather chopper here.
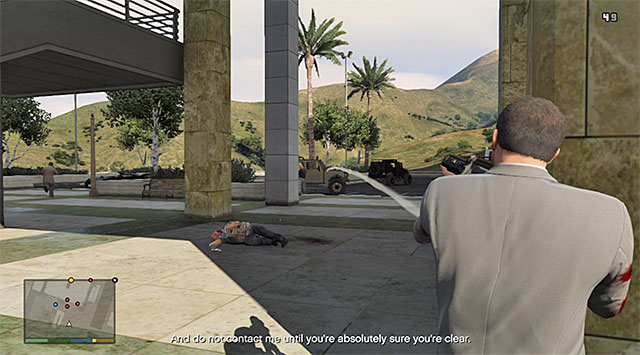 Try blowing up several vehicles
After you have cleared the area, cut to Michael and follow Dave. Do not attempt to leave the area as soon as possible, because you will be surprised by another group of Merryweather mercenaries on the parking lot, in front of the complex. Make use of pillars and the other objects in the surroundings to hide behind. It also pays off to use the grenade launcher or explosives to your advantage, to blow up the cars with the enemies positioned at.
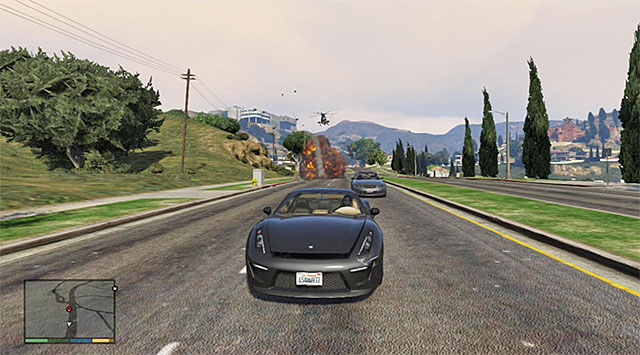 The last one of the Merryweather choppers
After you are done, break into one of the vehicles in the parking lot and start escaping. There will be one more, the last one, chopper to follow Michael and, if you want to complete this mission in 100%, you need to destroy the helicopter. You can do it by getting out of the car and use the rocket launcher, or a scoped rifle, to knock the machine off the skies, or reach the city as quickly as possible, in hope that the chopper will crash while maneuvering among buildings. Regardless of your variant of behavior, you ultimately need to reach the Morningwood district to meet up with Trevor.
Rewards for the completion of the mission: none
Requirements for the completion of the mission in 100%:
Way to unlock: You need to complete main mission 62 (The Ballad of Rocco). Some time after you complete that mission, there will appear a marker in the movie studio (North-Western Los Santos), to let you know that you can start another mission. (letter S on the world map).
Playable characters: Michael
Additional information: This mission, almost entirely, consists of the car chase after Molly, which is filled to the brim with situations taken straight out of action movies. Towards the end of the mission, you will have to lose a three-start police pursuit and this may turn out to be more difficult that you might, at first, suspect.
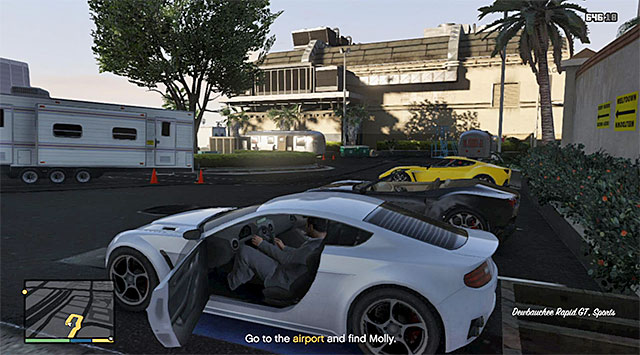 Choose a good car for the chase
After you reach the movie studio, drive into it and go to Solomon's office to watch a cutscene, featuring also Molly and Devin. Wait until you get outside and get into some fast car to reach the place marked on the map, where Molly is currently staying (she is, of course, moving all the time). Do not attempt to get the woman at all costs, because the game will prevent you from finishing the chase too early. Instead, focus on flawless driving, while listening to the phone conversation with Devin.
 The view from the Weazel News chopper
Soon after you get Molly's car, also police will join in the whole "fun". Keep a safe distance from the woman's car and do not bump into the police cars to prevent drawing their attention. I recommend that you switch to the cinematic camera on a regular basis, which will be showing the view from the Weazel News chopper that is observing the entire chase from the sky.
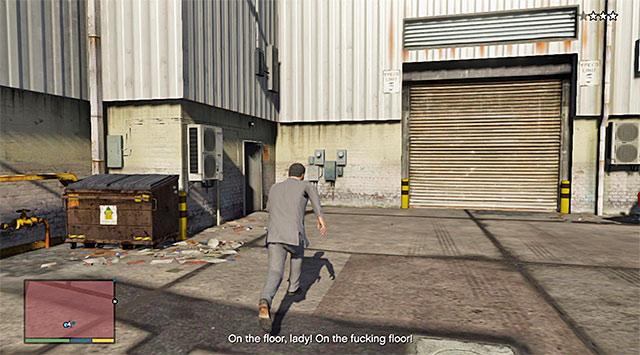 You need to enter the building
Drive into the airport area and, while playing this mission, avoid contact with planes and the other obstacles, because a serious crash may cause you to lose Molly's car, or even destroy the vehicle that you are driving. After Molly's car slams into a building wall, get out of the car and follow her, while coming through successive airport buildings. The chase will soon draw to an end and Molly herself will die a tragic death. Approach the film that she drops and collect it.
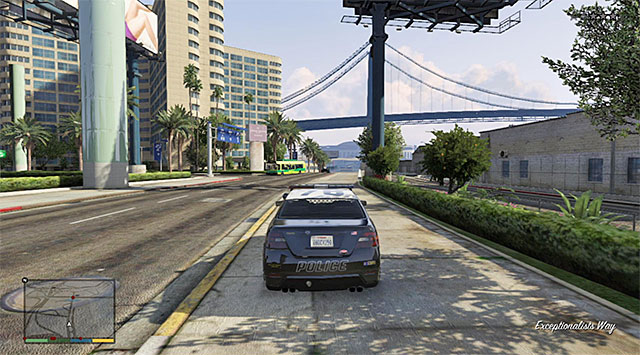 You can use one of the police cars to escape
There is the last part of this mission ahead of you, i.e. losing a three-star police pursuit. Start by eliminating the policeman who was chasing after Molly. You should also keep in mind that there will be further police cars to appear near the hangar. Therefore, it is a good idea to eliminate the policemen that will get out of them. For the escape itself, you can use one of the police cars - you could leave the premises of the airport and, after you leave the police cars behind, find some side alley or an underground parking lot.
It is a away better decision, in my opinion, to lose the three-star pursuit is to use one of the planes that you find at the airport, e.g. the jet shown in the screenshot. You would have to drive onto the driveway really quickly, bounce off the ground and reach the altitude high enough to be unreachable for the police chopper. Regardless of what you do, listen to the phone talk with Solomon at the end of the mission.
Rewards for the completion of the mission: none
Requirements for the completion of the mission in 100%:
Way to unlock: You need to complete main mission 70 (The Wrap Up). You can now go to Franklin's villa (letter F on the world map).
Playable characters: Franklin, Michael, Trevor
Additional information: This mission provides a lot of freedom when it comes to the character selection because, throughout the major part of the fight in the sawmill, you will be able to cut freely between the main protagonists. The point of the attack on the sawmill is to free Lamar and, in spite of the presence of numerous Ballas gangsters in the area, you will not find it overly problematic.
 The sawmill
To start this mission, you need to return to your estate, as Franklin, on the Vinewood Hills, in order to meet up with Tanisha. You will learn from the woman about the trouble that Lamar got into, and you will be dispatched to the sawmill. Get into any car and go North. The sawmill is in the North-Western part of the map and, after you get there, you will meet up with Trevor and Michael.
You will now watch a short cutscene of the preparations for the attack. Michael will automatically take his position on the hill and will be conducting a sniper fire. As far as Trevor and Franklin are concerned, the game will let you determine where they should attack the sawmill. Below is a legend to the map shown in the above screenshot.
1 - Main entrance attack- The enemies will spot your character, but you can count on support from Michael.
2 - Side entrance attack - There is a bulldozer here, which you will be able to use in order to get to the sawmill safely, and also squash some of the enemies.
3 - Railroad-side attack - The enemies will not spot your character, and you count on support from Michael.
After you have positioned a character in a given spot, press the button on the D-pad to confirm your choice. Personally, I recommend that you attack as Trevor, from point 1 or 3, and as Franklin from point 2.
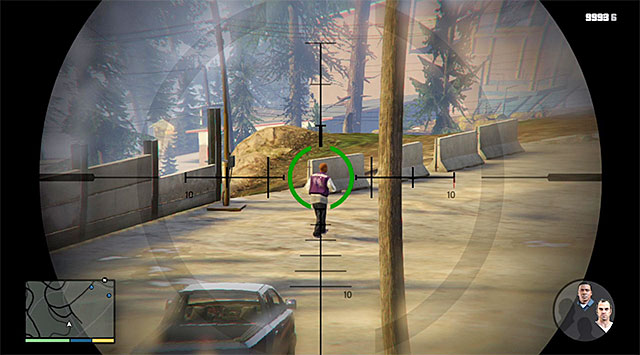 Target and eliminate the enemies from a safe distance
Right after you start the attack on the sawmill, select your favorite character and join the fights. I recommend that, during this mission, you cut between characters on a regular basis because, not only will this increase your chances to complete this mission in 100%, but also you will be able to adjust better to the current situation in the battlefield. While playing as Michael, you should be using the sniper rifle at all times and eliminate, in the first place, the gangsters involved currently in the fire exchange with Franklin and Trevor.
The bulldozer will help you avoid the enemy fireIt is a good idea to make use of the abovementioned bulldozer while playing as Franklin, at least to ensure yourself with the opportunity to infiltrate the sawmill safely. Further into the battle, you should rely on covers and perform more standard actions.
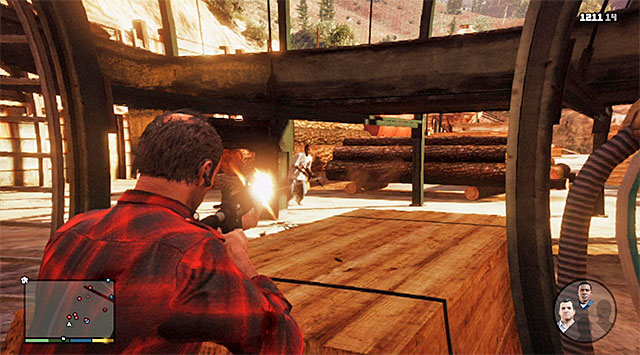 Make frequent use of Trevor's fury
While playing as Trevor it is a good idea to rely on his special skill, i.e. the fury mode, thanks to which you will be able to deal with larger groups of enemies more effectively. Thanks to fury, you will also not need to hide behind covers at all times, which will allow you an aggressive attack on the enemy positions.
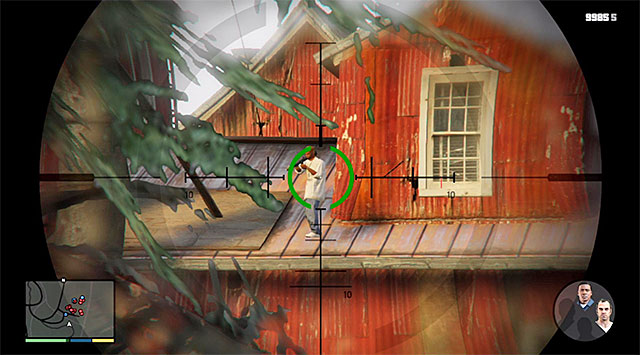
Unfortunately, you need to keep in mind that some of the enemies will join the fights later, and also that there will appear additional threats later into the mission. I recommend that you cut to Michael and eliminate the enemy with the rocket launcher (the above screenshot) and a few enemy snipers.
Lamar is being kept outside of the main building, in the place shown in the above screenshot. Reach with any character of your choice and draw your attention to the first-aid-kit attached to the wall of the sawmill. Start cutting through to the exit, accompanied by Lamar. Just like earlier, you can either play as Franklin or Trevor and fight from the ground, or play as Michael and snipe the enemies down from the hill. In the latter case, you should watch out for the enemies who try to come close to Michael, and eliminate them sufficiently early.
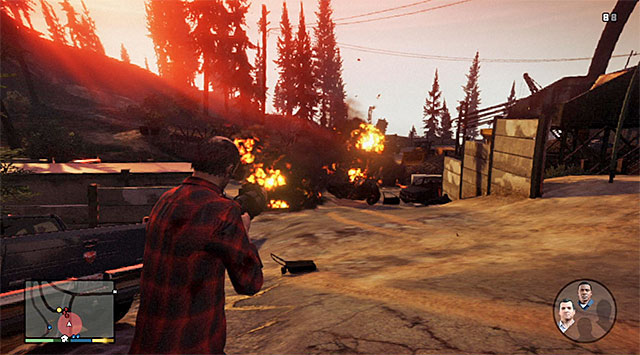 Blow up the gangsters' cars
You should keep in mind that there will appear another group of the gangsters at the sawmill's exit and, since they come in cars, you should use the grenade launcher to your advantage. After you have cleared the premises, cut back to Franklin, get into any car and wait for Lamar to join you. Drive to Los Santos. You need to take Lamar home, which will conclude this mission.
Rewards for the completion of the mission: none
Requirements for the completion of the mission in 100%:
Way to unlock: You need to complete main mission 71 (Legal Trouble). Some time after the completion of that mission, there will appear a marker near one of the luxury Ponsonboys store, which will let you know that you can start a new mission (letter M on the world map).
Playable characters: Michael
Additional information: The leitmotif for this mission is the premiere of a movie that was made with Michael's collaboration. As much as the first part of the mission is entertaining in its character, in the other one you will need to take more definitive and aggressive action, whose aim is to save the protagonist's family.
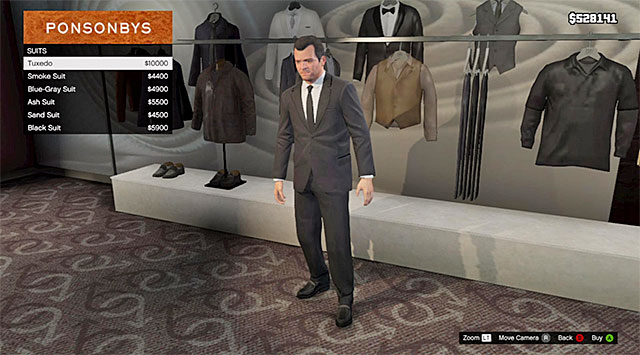
This mission's starting point is the Ponsonboys luxury clothes store located in the Rockford Hills district. After you get there, enter the store and walk towards the exposition on the right. You need to buy the tuxedo shown in the above screenshot, which involves the expenditure of 10 thousand dollars. If you do not have that much money on you, you should perform some additional actions before making the purchase e.g. rob a security van , or wait for your income from the owned estates.
 The limo ride
At the moment of purchasing the tux, Michael will automatically put it on. Exit the store and take your seat at the back of the limo that Jimmy got for the movie premiere. During your ride to the movies, where the premiere is scheduled, you can turn on the optional cinematic camera. It is also a good idea to receive the phone call from Devin Weston. With Devin himself, you will meet on the red carpet in front of the movie theater's entrance, and he will suggest you that Michael's wife's life is in peril.
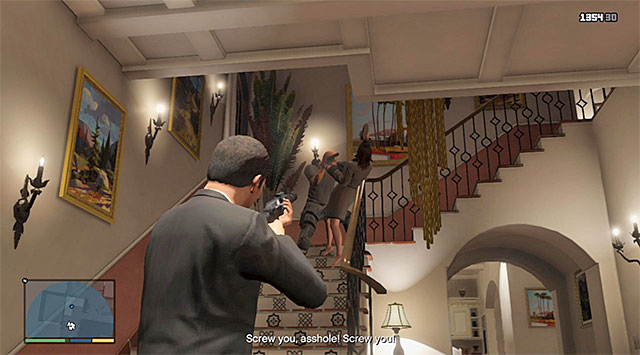 The enemy struggling with Amanda
Your new task is to reach Michael's house within two minutes. You can use the limo (Dundreary Stretch), on which you came to the theater with Jimmy, although it is going to be a better idea if you steal some faster car. Regardless of the means of transport that you pick, after you get to your destination, get out of the car and eliminate the mercenary who is attacking Amanda (it is best to kill him with a well-aimed shot to the head).
Go to the upper floor and enter Tracey's bedroom located opposite the stairs. Michael's daughter is being held by another enemy. Wait for the character to stick his head from behind Tracey (the above screenshot), initiate the time-slowing skill, just in case, and eliminate the bandit with a well-aimed shot to the head (for obvious reasons, Tracey cannot get hurt).
 Eliminate the remaining opponents in the villa
Retreat towards he stairs and start by eliminating the enemies who will be trying to make it upstairs. Climb down to the ground floor and start eliminating the enemies, who are staying in the estate, one after another. You do not need to hurry here too much so, do not take too much risk. Keep using the time-slowing skill to your advantage and hide behind covers. Do not forget, also, that you can collect the first-aid-kit from the kitchen.
 It is a good idea to blow up cars in the driveway
There are further Merryweather mercenaries waiting outside. Select the back exit and start killing them off. Eventually, return to the vehicle in front of the estate. The last wave of bandits will arrive in cars and, as a result, it would be a good idea to blow them up quickly, using, e.g. the grenade launcher or explosives. After you have cleared this area, return to the estate's upper floor, which will result in a funny cutscene, of the enemy elimination, being played.
Rewards for the completion of the mission:
Requirements for the completion of the mission in 100%:
Way to unlock: You need to complete main mission 73 (Meltdown). Wait for a phone call from Jimmy, answer it and listen to the conversation.
Playable characters: Michael
Additional information: This one is a quite unique mission because it is optional and it does not count while calculating the current progress in the main plot. The premise of this one is that you help Jimmy who has got into trouble, of his own fault.
 The moment of choice
Some time after the completion of mission 73, you should receive a phone call from Jimmy, while playing as Michael. During the conversation, you will learn that Jimmy was kidnapped by the persons that he offended online. At the very end of the conversation, you need to decide whether you want to help him or not, and it is a better option, of course, to select the former.
 Lay down fire on the car but do not wound any of the passengers
The car that Jimmy is being held in is traveling across the wilderness in the central part of the map (Banham Canyon). After you come close to the SUV, start firing any weapon at it but, in accordance with the instructions that you get on the screen, try not to kill any of the abductors. After the car is sufficiently damaged, it should stop and the abductors will start running. Ignore them and, instead, return with Jimmy to the current living place of Michael's family.
Rewards for the completion of the mission: none
Requirements for the completion of the mission in 100%: There are no additional requirements for this mission so, it gets completed in 100% automatically.
Way to unlock: You need to complete main mission 73 (Meltdown). You may now go to Trevor's strip club (letter H on the world map).
Playable characters: Michael, Trevor, Franklin
Additional information: This one is a very short mission which entirely revolves around planning another big heist. Traditionally, you will have to make a choice towards the end of this mission, concerning the variant of behavior and the make up of the team.
NOTE: Towards the end of this mission you will have to decide about the way of pulling off of the last major heist. This choice will influence both the heist itself, and the preparatory missions that you play before it. I strongly recommend that you save the game before you start this mission!
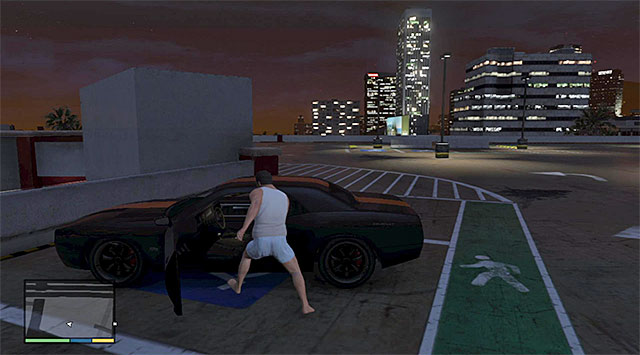 The moment of choice of the heist variant
To start this mission, you need to go to the strip club seized by Trevor, i.e. to the Strawberry district, as any of the protagonists. After you listen to a short conversation, and to Lester's speech, you will be presented with a choice of one, from among two, possible variants of behavior. The Subtle variant assumes that you seize the armored vans and make it into the vault dressed as the armed guards, which will have you hire as many as five accomplices (two gunmen, two drivers and a hacker). The Obvious variant assumes that you drill a large tunnel to the vault, and steal the gold using choppers and a railway engine, which will have you hire four accomplices (two gunmen and two drivers). In each one of the cases, there will be different preparatory missions to play and the heist itself is going to be completely different. The decision is yours and, of course, both of the variants have been described further in this walkthrough.
Short review:
Rewards for the completion of the mission: none
Requirements for the completion of the mission in 100%: There are no additional requirements for this mission and it gets completed in 100% automatically.
Way to unlock: You need to complete main mission 74 (The Big Score) and select the subtle variant towards the end of that mission. After you receive a message from Lester, there will appear the Hs icon on the world map, which symbolizes the police van.
Playable characters: Michael
Additional information: The only premise of the preparatory mission is that you need to acquire the stingers which are inside the van. These are going to be during the heist to stop the armored vans.
The van that you are looking for is on the parking lot adjacent to the police station in the Rancho district, In the Southern part of the city. I strongly recommend that you try to sneak into the police parking lot, thanks to which you will not have to worry about the police pursuit and about whether you are going to make it with the stolen car without serious damage, or not. Try to make it to the back of the building, but do not pick the alley with the two policemen in it, and take the one neighboring it. Enter the sneak mode and, carefully, approach the fence shown in the above screenshot.
 The van
Hop over the fence and go straight ahead, still while sneaking, and sneak past one of the policemen. Get into the police van (Police Transporter) and drive it out of the parking lot carefully, while trying not to get spotted. The only thing left for you to do is reach carefully the hideout and park it in the marked area.
Rewards for the completion of the mission: none
Requirements for the completion of the mission in 100%:
Way to unlock: You need to complete main mission 74 (The Big Score) and select the Subtle variant towards the end of that mission. Wait until you receive an e-mail message from Lester. Which is going to include the location of the car in the Pillbox Hill district.
Playable characters: Michael
Additional information: In total, you need to steal three cars, where all three thefts are similar to each other. After you acquire a car, you first need to take it to the garage for necessary alterations, and only then to the hideout.
Do not worry about the fact that, on the world map, the exact location is not displayed, because you will have no problems finding it anyways. The e-mail from Lester is, of course, a clue and it includes two pictures - one showing the car and the other specifying the area on the map. The car that you are looking for (Bravado Gauntlet) has been parked on the top level of the parking lot in the Pillbox Hill district. The exact location of the car has been presented in the above screenshots.
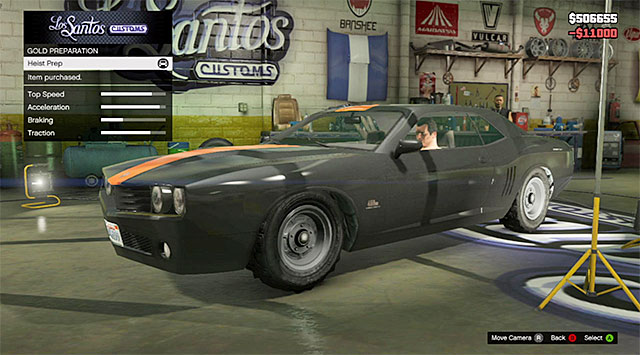 The basic modifications cost 11 thousand dollars
Get into the car (unobstructed) and drive it to the Los Santos Customs garage, located near the airport, i.e. in the South-Western part of the city. Along your way, try not to bump into anything to prevent further costs. Drive into the garage and start buying the parts. The mandatory alterations (Heist Prep) cost 11 thousand dollars but, if you have more cash on you, you could also buy two additional upgrades, i.e. the Armor for 5 thousand dollars and bulletproof tires for 4 thousand dollars. Drive out of the garage and, carefully, drive the modified car to the hideout. Park the car in the garage and walk outside.
Rewards for the completion of the mission: none
Requirements for the completion of the mission in 100%:
Way to unlock: You need to complete main mission 74 (The Big Score) and select the Subtle variant towards the end of that mission. Wait until you receive an e-mail from Lester, which is going to include the location of the car in the Rockford Hills district.
Playable characters: Michael
Additional information: In total, you need to steal three cars, where all three thefts are similar to each other. After you acquire a car, you first need to take it to the garage for necessary alterations, and only then to the hideout.
Do not worry about the fact that, on the world map, the exact location is not displayed, because you will have no problems finding it anyways. The e-mail from Lester is, of course, a clue and it includes two pictures - one showing the car and the other specifying the area on the map. The car that you are looking for (Bravado Gauntlet) has been parked at the small parking lot in front of the CaCa store located in the Pillbox hill district. The exact location of the car has been presented in the above screenshots.
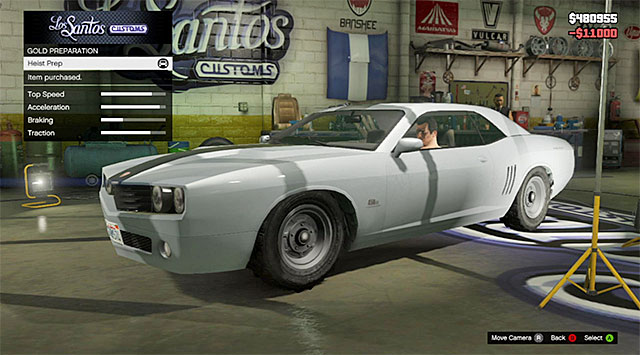 The basic modifications cost 11 thousand dollars
Get into the car (unobstructed) and drive it to the Los Santos Customs garage, located near the airport, i.e. in the South-Western part of the city. Along your way, try not to bump into anything to prevent further costs. Drive into the garage and start buying the parts. The mandatory alterations (Heist Prep) cost 11 thousand dollars but, if you have more cash on you, you could also buy two additional upgrades, i.e. the Armor for 5 thousand dollars and bulletproof tires for 4 thousand dollars. Drive out of the garage and, carefully, drive the modified car to the hideout. Park the car in the garage and walk outside.
Rewards for the completion of the mission: none
Requirements for the completion of the mission in 100%:
Way to unlock: You need to complete main mission 74 ((The Big Score) and select the Subtle variant towards the end of that mission. Wait until you receive an e-mail from Lester, which is going to include the location of the car in the Rockford Hills district.
Playable characters: Michael
Additional information: In total, you need to steal three cars, where all three thefts are similar to each other. After you acquire a car, you first need to take it to the garage for necessary alterations, and only then to the hideout.
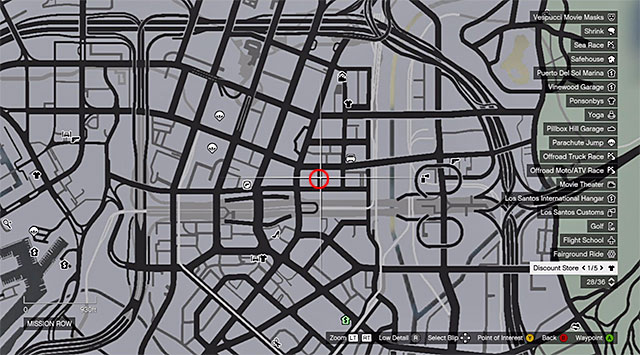
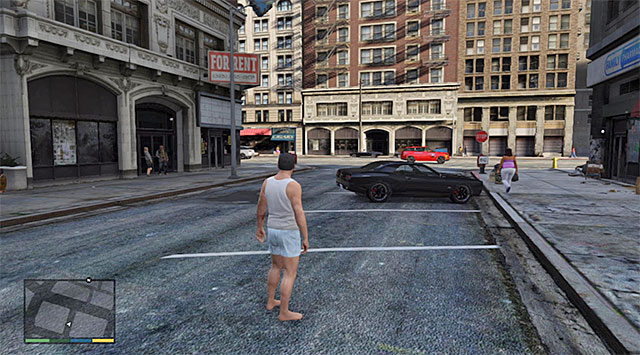
Do not worry about the fact that, on the world map, the exact location is not displayed, because you will have no problems finding it anyways. The e-mail from Lester is, of course, a clue and it includes two pictures - one showing the car and the other specifying the area on the map. The car that you are looking for (Bravado Gauntlet) has been parked in the small parking lot in front of the Templar hotel in the Mission Row district. The exact location of the car has been presented in the above screenshots.
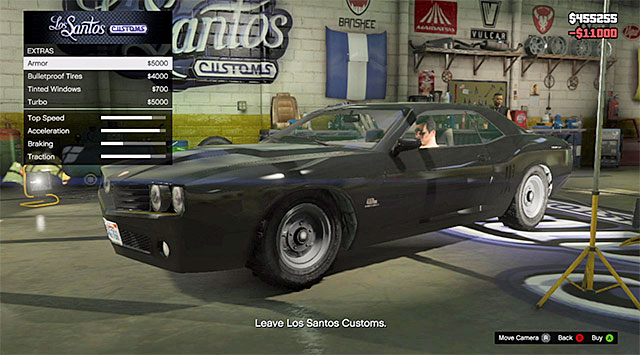 The basic modifications cost 11 thousand dollars
Get into the car (unobstructed) and drive it to the Los Santos Customs garage, located near the airport, i.e. in the South-Western part of the city. Along your way, try not to bump into anything to prevent further costs. Drive into the garage and start buying the parts. The mandatory alterations (Heist Prep) cost 11 thousand dollars but, if you have more cash on you, you could also buy two additional upgrades, i.e. the Armor for 5 thousand dollars and bulletproof tires for 4 thousand dollars. Drive out of the garage and, carefully, drive the modified car to the hideout. Park the car in the garage and walk outside.
Rewards for the completion of the mission: none
Requirements for the completion of the mission in 100%:
Way to unlock: You need to complete main missions 75 (Stingers), 76 (Gauntlet - Pillbox Hill), 77 (Gauntlet - Rockford Hills) and 78 (Gauntlet - Mission Row). You may now pay another visit to the strip club (letter H on the world map).
Playable characters: Michael, Trevor, Franklin
Additional information: You have, probably, already figured out that there is a quite log mission to play through. The initial part of the heist is very simple, and it assumes that you stop the armored vans and use them to gain access to the vault. In the middle part of the mission, there is going an interesting interlude to take place, connected with redirecting the traffic. The final part of the mission is the most exciting, because you first are going to need to win a fight with Merryweather mercenaries, and escape the police pursuit using the cars that you have stolen earlier.
 The tunnel that you need to wait for the convoy in
Just like earlier, you start off the mission playing as any of the playable characters and you need to visit the strip club which belongs to Trevor. After you see the cutscene, cut to Michael, get into the SUV and drive towards the tunnel located to the North of here. You need to reach the tunnel within an hour of the in-game time but, since this is a mere half a mile, this should be no problem to you. After you get there, stop the car in the tunnel and wait for the convoy to appear.
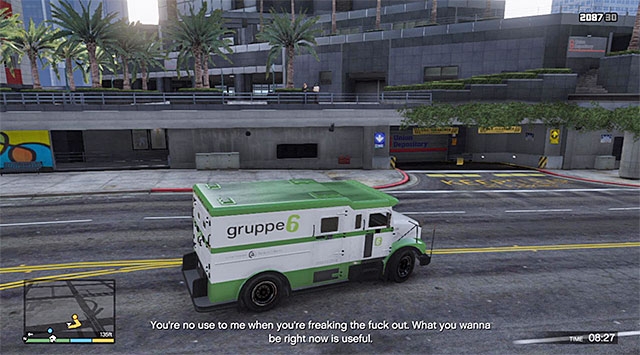 The entrance to the underground garage
Press the button for throwing spreading the stinger and drive away a bit from the place where they are spread. Wait for the tires of the armored vans to burst, get out of the car and start targeting the guards but, try not to kill them. After you take Casey hostage, get into one of the vans and drive away, towards the underground parking lot's entrance.
 Keep following the bank manager and do not use guns
The next part of the mission is also very linear, because you need to keep following the bank manager to the elevator and, after a few moments, to the bank's vault. Watch a cutscene here and set out back towards the elevator after it finishes. Wait for the gold to be loaded up and drive out of the underground parking lot. Follow the other one of the armored vehicles and, after you receive a notification of the appearance of the Merryweather units around, cut to Franklin.
Ahead of you, there is a mini-game that consists in manipulating the traffic lights on the convoy's route. Look at the above screenshot where A is the starting point, B is the destination and the red line marks the route. You need to perform two different actions. First of all, keep changing lights along the convoy's route (blue arrowheads) to, to the extent possible, make green light wait for the convoy at each of the crossroads. At the same time, try to slow town the Merryweather units (red arrowheads), by changing the lights on the crossroads that they reach. Note - if you want to complete this mission in 100%, you need make 10 such changes at most so, restrict yourself only to blocking off only those of the units that are very close to the convoy.
 Attack the Merryweather mercenaries
Leading the convoy through correctly, will unfortunately not get things done, because there will appear the Merryweather mercenaries while you are unloading the trucks and loading the gold into the sports cars. Start the major fight of this mission, during which you will be granted freedom of cutting between Michael, Trevor and Franklin. The good idea is to spread the three around this location, thanks to which you will be capable of covering larger area.
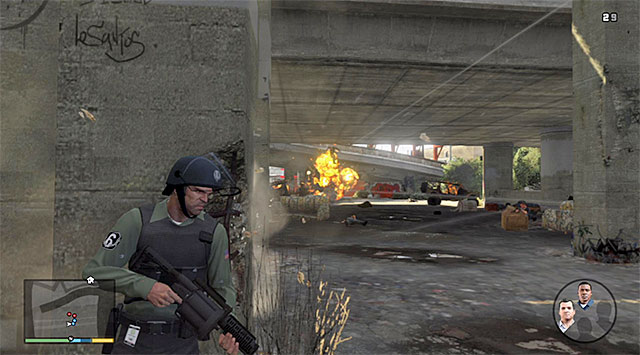 Keep blowing up the enemy cars
During the fights with the Merryweather mercenaries, you should first of all watch out for your flanks. Do not allow the enemies to attack you by surprise. Do not forget that you can also use Trevor's fury mode and Michael's slowing down of time to eliminate the enemies efficiently. You should also wait for opportunities to blow up the cars in which the enemies came. Further in this fight, you should also deal with the snipers deployed on the bridge that you can see in the distance.
 Follow Trevor's and Michael's cars and slow down time whenever necessary
After you win the fight, watch a short cutscene and after you cut to Franklin, start your escape on the cars with the stolen gold. Do not worry too much about the five-star police pursuit because, if everything goes according to the plan, nothing bad should happen. Follow the other two cars, use Franklin's special skill at moments when there is a risk of colliding with a police car, a regular car or element of the surroundings. You should also watch out while entering sharp turns and driving along tight spaces (e.g. a construction site).
If you have followed my suggestion and invested in armor and bulletproof tires, the escape should prove to be easier, although having the upgrades mounted is not required at all to succeed. Continue driving until you reach a big tunnel. You need to drive here onto the truck on the right (shown in the screenshot, slow down time if necessary), before the truck leaves the tunnel.
 The point where the mission concludes
The final part of this mission is a formality, because you only need to return to Michael's villa, while playing as Franklin, and watch the cutscene of the meeting with Lester. Nobody will bother you anymore.
Rewards for the completion of the mission:
Requirements for the completion of the mission in 100%:
Way to unlock: You need to complete main mission 74 (The Big Score) And select the Obvious variant towards the end of that mission. There is no marker for this mission on the map and you can start it anywhere.
Playable characters: Michael
Additional information: Earlier, there were two similar missions but, this one requires you to perform specific missions without offering as much freedom as the previous ones.
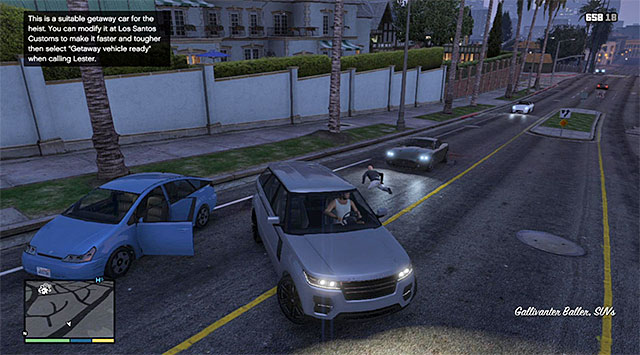 The example of a vehicle that can be used for the heist
The plan assumes obtaining some four-door car where, in accordance with the piece of information from Lester, this needs to be some larger vehicle so, I would recommend some SUV.
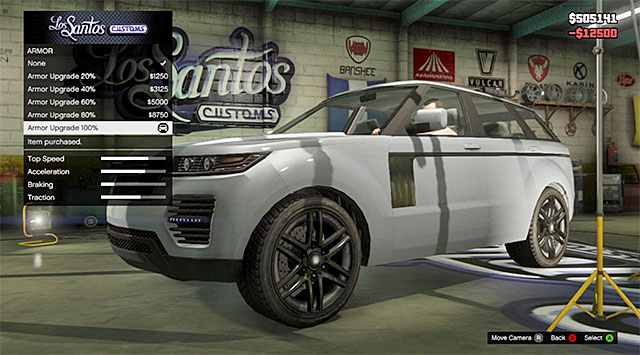 If you want to, you may purchase a better armor
It would be a good idea to make an additional, optional, stop at the Los Santos Customs garage to customize the car a bit. This is so, because you are going to use the car to escape a pretty demanding police pursuit. The list of the purchases recommended by me includes an Armor Upgrade - the most expensive one would be best, and Bulletproof Tires. Both of these upgrades are going to cost you a dozen or so thousand dollars and, although it is not mandatory, it will make things easier towards the end of the heist.
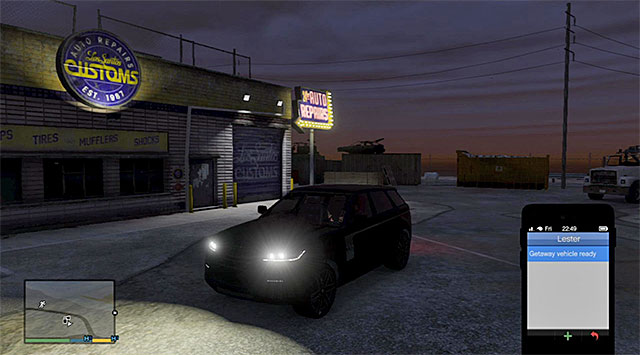
Regardless of whether you have decided to make the upgrades or not, you need to contact Lester. Select him from your contacts list and confirm your readiness to use the stolen car (Getaway vehicle ready - the above screenshot). You can now reach the marked underground parking lot. Leave the car and walk away from here
Rewards for the completion of the mission: none
Requirements for the completion of the mission in 100%: There are no additional requirements for this mission, so it gets completed in 100% automatically.
Way to unlock: You need to complete main mission 74 (The Big Score) and select the Obvious variant towards the end of that mission. After you receive a message from Lester, there will appear the Hs icon on the world map that marks the place where the drilling machine is located.
Playable characters: Michael
Additional information: One of your tasks throughout the preparatory missions, is to steal the driller to be used in the heist. Unfortunately, the problem is that it is located in a well-guarded spot. As a result, it is a good idea to equip yourself with a good suppressed weapon that will help you eliminate the guards watching the driller.
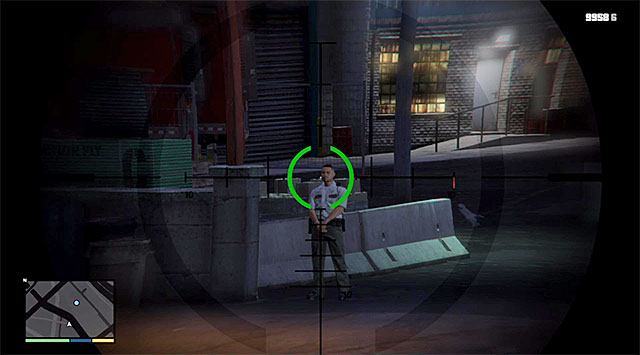 The first guard
The machine that you are looking for is mounted onto the truck parked at the square in the La Mesa district. Unfortunately, you cannot hope that stealing it will go unnoticed and, if you want to complete this mission in 100%, you cannot cause the alarm to be raised, which would end up in a two-start police pursuit. I recommend that you approach the square from the West and eliminate, in the first place, the sole guard who is guarding one of the entrance, from a distance.
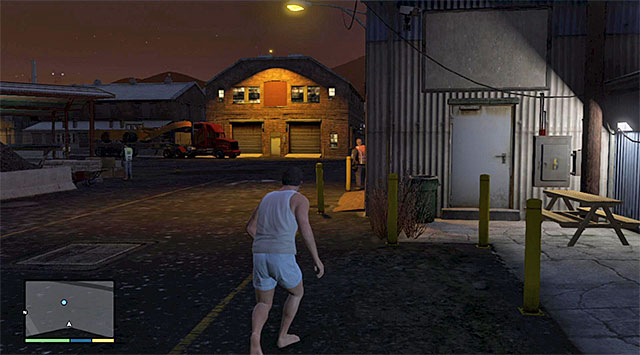 The next two enemies
After you encroach the square, deal with the enemy on the right, and with his colleague on the left, and do that before he starts going towards the driller. For the first time in this mission, it is better to use the suppressed weapon.
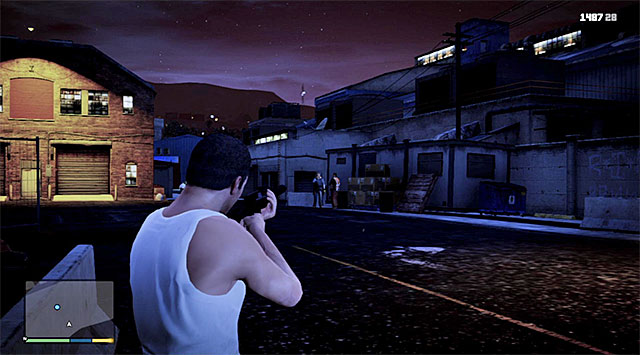 The conversing workers
The next people that you should take to is the two workers involved in a conversation on the right, with a guard standing a bit further away. I strongly recommend that you slow down time at this point, thanks to which the enemies will not raise the alarm.
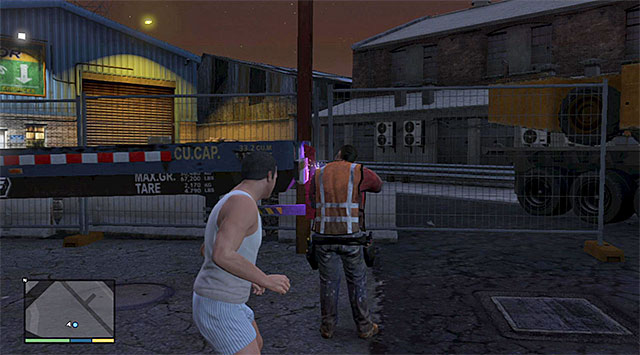 The worker with a blowtorch
Finally, deal with the three characters on the left, i.e. the worker with the blowtorch near the driller, the man in a yellow vest and a guard standing at the well-lit entrance to the building on the left.
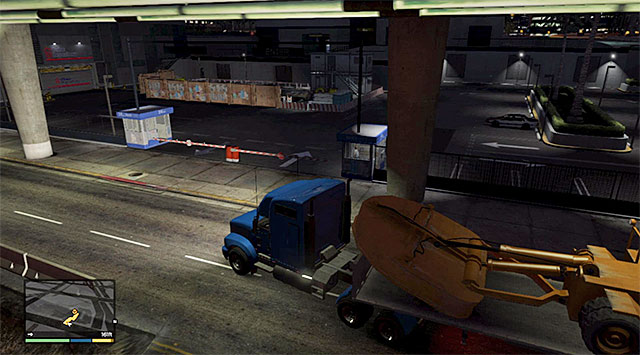 The place where the mission ends
After you have cleared the entire area, get into the truck (MTL Packer). Carefully, drive out of the square that you have just secured and deliver the driller to the parking lot near the bank. Leave the truck in the marked area and walk away from here.
Rewards for the completion of the mission: none
Requirements for the completion of the mission in 100%:
Way to unlock: You need to complete main mission 74 (The Big Score) and select the Obvious variant towards the end of that mission. After you receive a message from Lester, there will appear the Hs icon on the world map which marks the railway station.
Playable characters: Michael
Additional information: One of the assumptions of this mission is stealing a railway engine and an empty cargo car, thanks to which they can be used for the heist itself. If you perform all the steps correctly, you will not need to fight anyone, nor will you alarm the police.
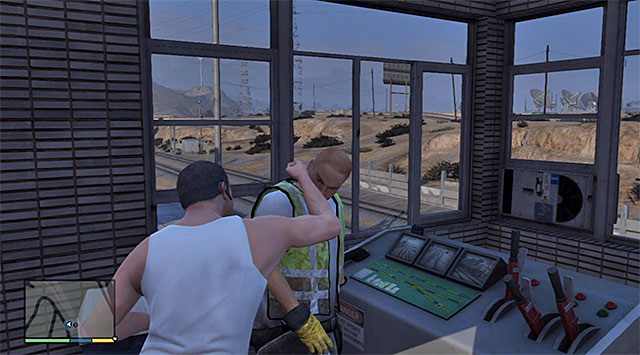
The starting point for this mission is the railway station located on the east of the map, right next to the highway and the quarry. After you get there, listen to the conversation with Trevor and get into action. Start sneaking towards the two railway workers that you can see in the distance. First, surprise-attack the one in the control tower (the above screenshot).
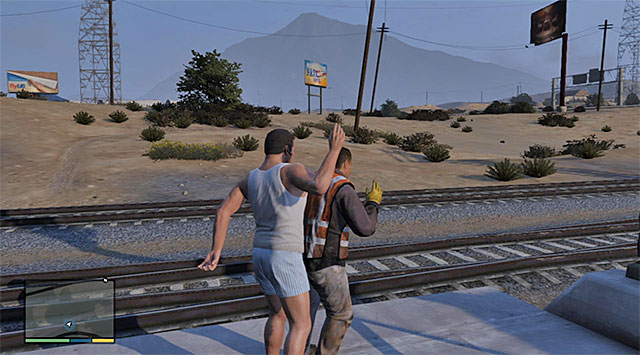 The other one of the railway workers
Exit the control tower and eliminate the worker at the tracks. You can now return to the room where you have neutralized the first one of the workers, and interact with the control panel. Wait for the train which, as a result of your actions, will roll into the side-tracks.
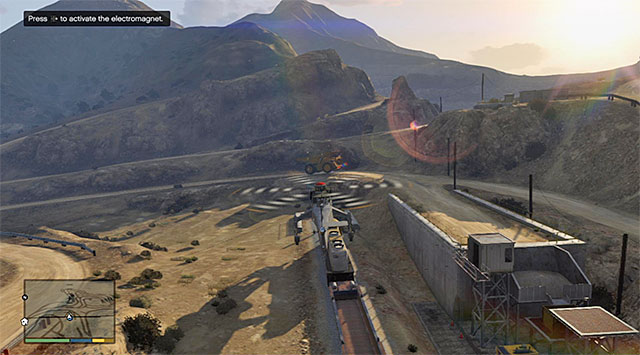
Cut to Trevor now, who has in the meantime gotten into a cargo chopper (Skylift). Fly up to the train that Michael has diverted and hover over the railway engine (the above screenshot). After you receive a suitable piece of information, activate the electromagnet by pressing the appropriate button on the D-pad. You now need to deliver the railway engine to the airfield (do not fly too low or you will bump into a pole!) and put it onto the truck.
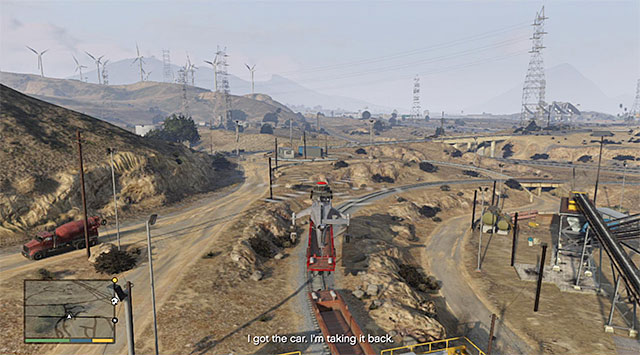 One of the empty railway cars
Fly towards the railway station again and attach one of the empty cargo cars to the electromagnet. After that, return to the airfield again and put the car onto the truck. This is the end of this undemanding mission.
Rewards for the completion of the mission: none
Requirements for the completion of the mission in 100%:
Way to unlock: You need to complete main missions 80 (Getaway vehicle #3), 81 (Driller) and 82 (Sidetracked). You can now visit the strip club (letter H on the world map).
Playable characters: Michael, Trevor, Franklin
Additional information: You have probably figured out already that this is going to be a relatively long mission and, unlike the Subtle variant, it consists of a series of very demanding fights, which will start right after you drill the tunnel to the vault. Further into the mission, you will also need to handle a police pursuit, which is going to be easier if only you invested into the upgrades for the getaway car. Paradoxically, the final part of the mission is the easiest one, because the act of shooting down the choppers chasing after him will play out without him intervening too much in it.
 The bank's main entrance
Just like earlier, you can start this mission as any of the playable characters and you need to visit Trevor's strip club. After you watch the cutscene, cut to Michael and get into the car (Ubermacht Oracle) to reach the region of the bank's main entrance and collect one of the hired accomplices. After you receive an appropriate piece of information, cut to Franklin.
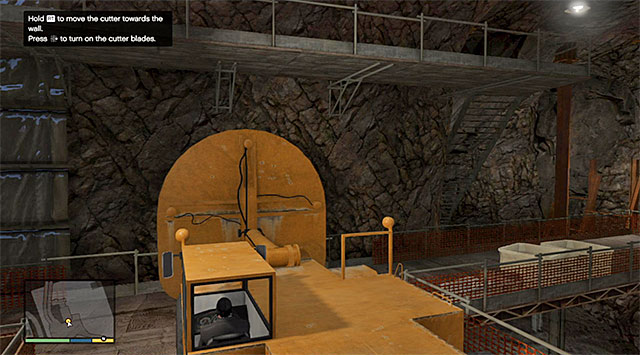
You probably already noticed that Franklin is already in the driller's cab (HVY Cutter). Start by coming closer to the wall separating the construction site from the vault. Stop in the spot shown in the above screenshot and press the button on the D-pad that the game prompts you to. This will start the driller.
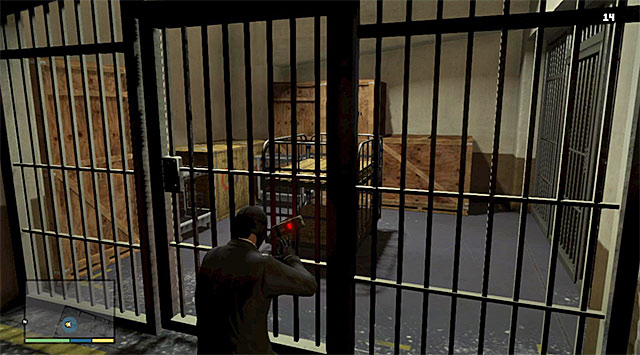 Plant the explosives and detonate them
Wait for the blades to drill through the wall, into the tunnel to the vault, rev up the driller and stop it near the starting point of this part of the mission. Exit the cab and walk through the tunnel. Select the sticky bombs from the inventory and plant them, one on each of the metal gates. After you do that, get away and detonate the charges.
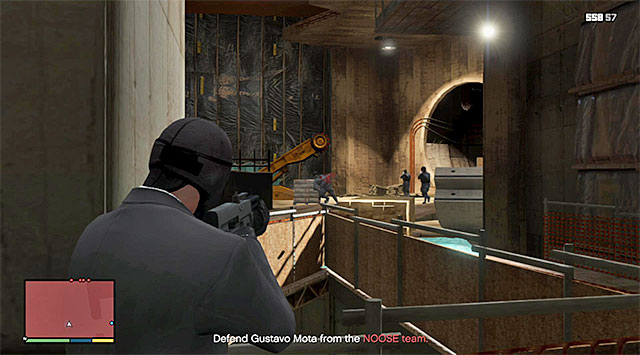 Attack the incoming enemies
Quickly return to the area where the driller is parked, because there will soon the SWAT team members start to appear. Start protecting your ally by conducting fire from behind a cover and do not allow any of the enemies to come close. While fighting, be prepared to change your position at some point, because a group of law enforcers will start approaching from the opposite tunnel. You should decide to do that only after you have eliminated all of the enemies from the first wave, thanks to which you will not be attacked at both side simultaneously.
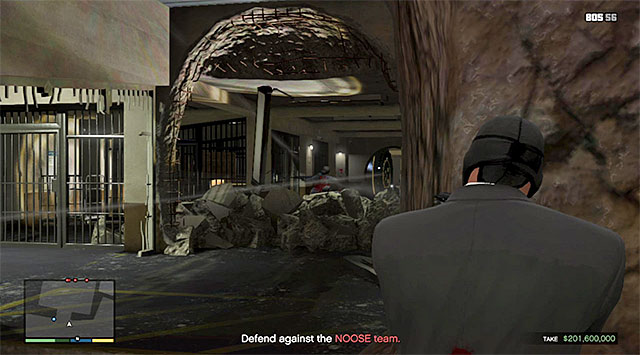 Watch out for the groups that will reach the vault and the large hole in the ceiling
You are going to fight another battle after Franklin manages to attach the cargo with gold to the sling of the chopper piloted by Trevor. They will approach from the side of the vault that you have stolen the gold from. It pays off to take advantage of the fact that they first need to walk through a narrow tunnel to come close to you. The last wave of the SWAT team members will abseil down the hole that you used to get the gold out so, you should be prepared to change positions swiftly (it pays off to defend yourself while near the vault that you have just emptied).
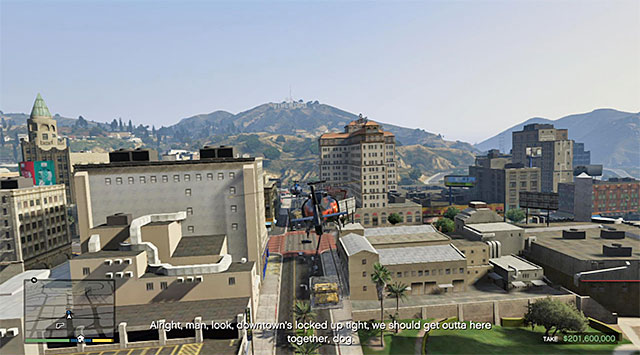 Follow the second one of the choppers
Continue fighting until the game suggest that you should cut to Trevor. During the interlude, you do not need to figure things out on your own, and only follow the chopper ahead, to the North where you can leave Los Santos. After you receive an appropriate message, cut to Michael.
 The place where you meet Franklin
You are going to deal with yet another series of fights but, along your way to the place where you are supposed to meet Franklin, you will, at first, have to deal with weak police officers. Keep pushing forward, use the covers on a regular basis and slow down time frequently. After you come close to a small bridge, the game will grant you with the possibility to cut between Michael and Franklin freely. You will also get a new objective to the mission, being the reaching of the underground parking lot where you have parked the getaway car previously.
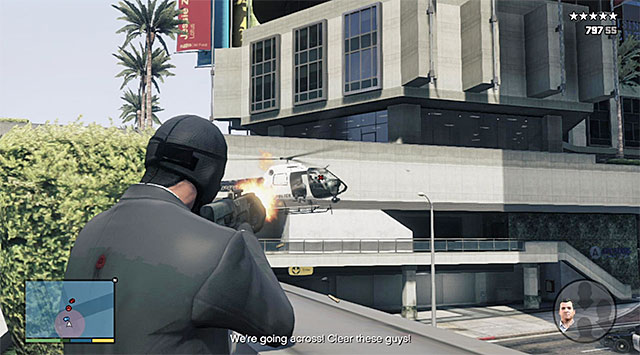 Keep destroying the enemy choppers
Resume your walk and keep in mind that you will need to eliminate not only the regular policemen, but also SWAT team members. This is not the only problem, though, because there will appear a chopper around very soon, and it would be a good thing to shoot it down, by targeting the pilot. Keep following your allies, cut between the playable characters on a regular basis, to take the best advantage of the position in which they currently are. Wait for a moment when there will appear another chopper appear on the left and eliminate the pilot.
 The square to fight another major fight on
Take the stairs to the square in front of the skyscraper, deal with the enemies that you find here and shoot down the third chopper, from behind a safe cover. After you have cleared the area, go towards the narrow passage that some of the policemen earlier appeared at. This time, it will become necessary to shoot down a helicopter belonging to the Merryweather corporation.
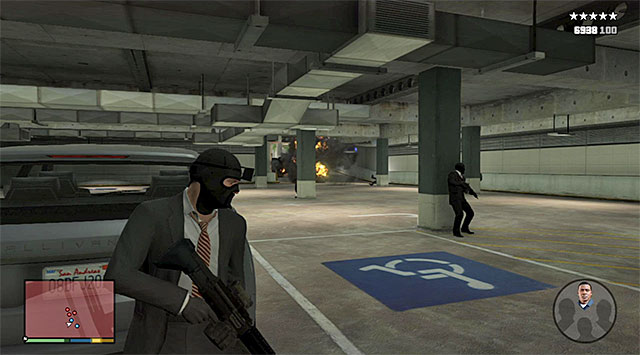 The underground parking lot
Climb down the stairs, while eliminating all of the enemies that you encounter. After you come close to the one of the trunk roads, it would be a good idea to lay fire, from the balcony, down on the police cars (it is a good idea to use the grenade launcher or explosives), to kill the policemen next to them the easy way. Take the first left turn and enter the underground parking lot. There is the last major fight to handle here, during which it pays off to hide behind pillars and explode cars (apart from the one that you are going to use as the getaway vehicle!).
 You can lose the police pursuit e.g. by driving around the wilderness
After you have secured the area, get quickly into the vehicle that you have left here earlier, exit the garage and start your escape. It is not going to be that easy to lose the five-star pursuit but, if you have taken my advice and upgraded the car with the armor and the bulletproof tires, you will not have to worry that the car will be destroyed too early. Traditionally, a good place to hide is a multi-storey parking lot but, you can also drive out of the city and take advantage of the fact that policemen do not do that well off-road. A risky choice is attempting to reach the Los Santos Customs garage.
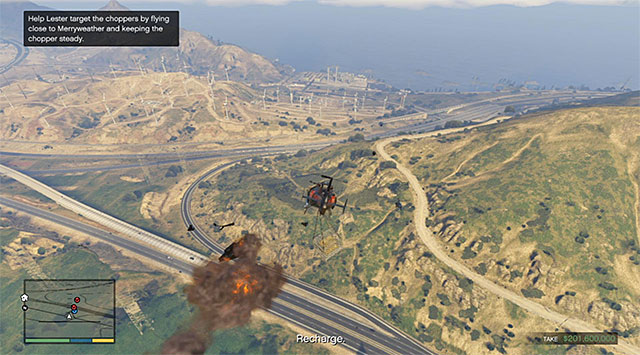 Avoid violent turns to allow Lester target the other choppers with ease
After you have lost the pursuit, cut back to Trevor, to learn that you will need to shoot down the hostile Merryweather choppers. What makes this a lot easier is that you do not need to attack them personally, and only need to make sure that the flight is stable. Thanks to this, the rockets discharged by Lester will be hitting their targets. At the same time, remember not to fly too low because you will easily bump into a tall object in the environment (e.g. a pole or a wind power plant).
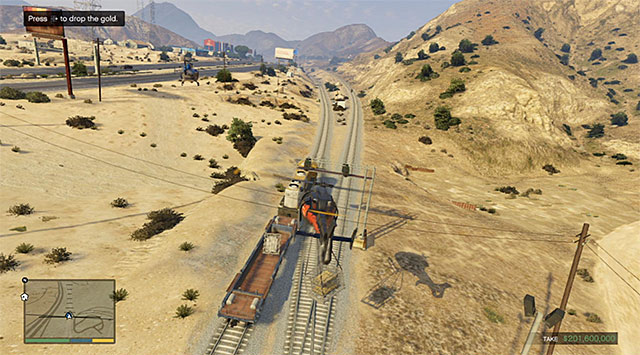 You need to put the cargo onto the railway car
The final main part of this mission is to put the gold into the cargo car attached to the railway engine that you have stolen earlier. What makes this more difficult is that the train remains in constant motion. Therefore, you not only need to steer the chopper above the track, but also move for the whole time and await the moment at which you can press the button on the D-pad and release the cargo. You can now return with Lester to the airfield, which will complete this mission.
Rewards for the completion of the mission:
Requirements for the completion of the mission in 100%:
Way to unlock: You need to complete one of the missions connected with the last major heist (The Big Score), i.e. either mission 79 (the Subtle variant) or mission 83 (the Obvious variant). You can now go to the villa in the Vinewood Hills (letter F on the world map).
Playable characters: Franklin
Additional information: All in all, this is not a mission per se, and rather a short meeting with Devin Weston. Still, it is VERY important from the standpoint of the plot, because it concerns the selection of the game's ending.
NOTE: After this mission ends, Franklin will have to make a choice of one of three possible endings. The decision that you take is irreversible so, it is highly recommended that you save the game before meeting up with Devin!
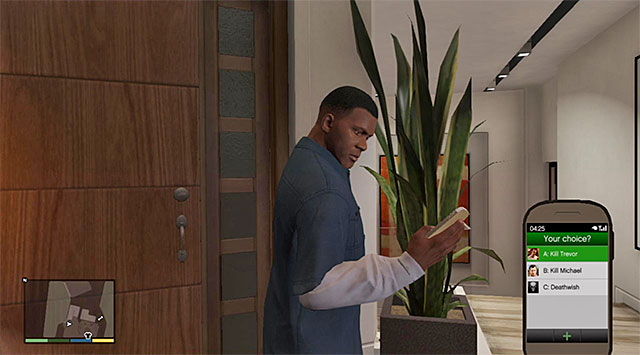
While playing as Franklin you need to return to his estate in the Vinewood Hills. After you get there, approach the marked point, turn back and return to the exit door. You are going to meet Devin Weston who will give Franklin an ultimatum of a kind. After the meeting finishes the main protagonist will select the cell phone from his inventory (the above screenshot) and this is when you will have to make a choice as to the game's ending. The available variants are:
NOTE: If, in spite of my recommendations, you have chosen either ending A or B, you should make sure, beforehand, that you have completed all of the side missions available for Trevor/Michael.
Way to unlock: After the meeting with Devin Weston (Finale - introduction) you need to select variant A.
Playable characters: Franklin
Additional information: Murdering Trevor is going to be less problematic than it may seem at first. There is one car chase to play but do not worry because you will not have to get involved in a direct fire exchange with Trevor. Note - it is a good idea to take a fast maneuverable car for this mission.
 The place where you meet Trevor
Wait for Franklin to set up a meeting with Trevor in a secluded area and to inform Michael of his plans. You can now drive towards the meeting place, i.e. to the El Burro Heights district, in the South-Eastern part of the city. After you get there, watch a short cutscene.
 Use time-slowing to your advantage
Get into the car quickly and follow Trevor. While chasing him, do not try to stop the car driven by Trevor prematurely, because the chase will stop at a predefined moment. Instead, focus on flawless driving and make use of Franklin's special skill, as often as necessary, to enter sharp turns and avoid obstacles.
 You need to take a shot at Trevor
You especially need to watch out where it will be necessary to go against the traffic. While driving along the highway, later into the chase, consider going along the hard shoulder of the street, which will help you get around the traffic itself. The chase draws to an end near the oil field. Take a single shot towards Trevor or the puddle of fuel around him, which will start the last series of cutscenes.
Rewards for the completion of the mission:
Requirements for the completion of the mission in 100%:
Way to unlock: After you meet Devin Weston (Finale - introduction) you need to select variant B.
Playable characters: Franklin
Additional information: Murdering Michael is a bit more problematic than in the case of Trevor, abut you do not need to expect a difficult mission anyways. There are two chases that you need to play here - the first one on the car and then on foot. Note - It is a good idea to take for this mission a car that drives well in the off-road areas.
 The place where you meet up with Michael
Wait for Franklin to set up a meeting with Michael and to inform Trevor of his plans. You can now drive towards the meeting point, i.e. to the Ron Alternates farm located in the eastern portion of the map, close to the highway. After you get there, watch a short cutscene.
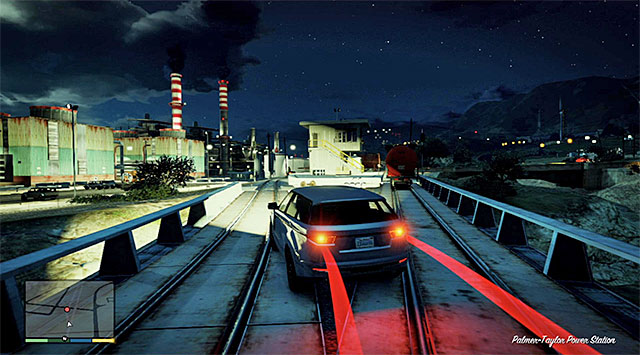 Use time-slowing to your advantage
Get into the car quickly and start your chase after Michael. While chasing him, do not attempt to stop the car driven by him prematurely, because the chase will end at the predetermined moment. Instead, focus on flawless driving and make use of Franklin's special skill, as often as necessary, to enter sharp turns and avoid obstacles. You should be especially careful while riding along railway tracks, and make sure that you do not slide off the embankment. The chase will end near the oil refinery.
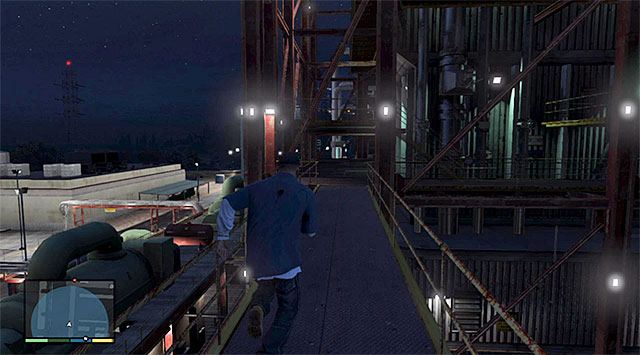 Follow the escaping Michael
Get out of the car and follow Michael, by following the red dot visible on the radar and reaching the stairs to the catwalks. Climb up the stairs to the very top to examine the spot where Franklin has seen Michael for the last time. This will result in the last part of the pursuit where you will have to dodge bullets. You do not need to aim at Michael while responding with fire, and only to make him start firing again and resume his escape.
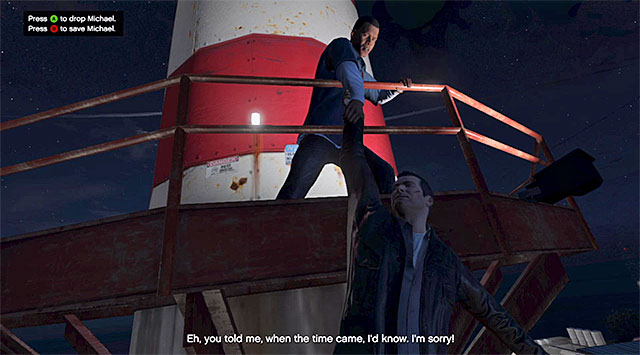 Regardless of your decision, Michael will die
The place where you need to go is one of the tallest funnels in the refinery. Take the ladder here, which will result in a cutscene being played. Eventually, you will have to decide whether you want to let Michael fall straight away or maybe try to pull him up. Still, in both cases, Michael will fall from height to his death. You may now watch the final cutscene.
Rewards for the completion of the mission:
Requirements for the completion of the mission in 100%:
Way to unlock: After you meet Devin Weston (Finale - introduction) you need to select variant C.
Playable characters: Franklin, Michael, Trevor
Additional information: The mission connected with variant C is definitely the longest and the most difficult. In its initial part, you will be required to fight a very demanding battle in the foundry. Its further fragments are, fortunately, easier a bit and they assume that you eliminate Stretch, Steve Haines, Wei Cheng and Devin Weston. Note- I recommend that you prepare yourself appropriately before beginning this mission. I recommend that you equip all of the protagonists with armors. You should also make sure that Trevor has a sniper rifle in his inventory (a suppressed one would be best), and Franklin has sticky bombs.
Lester's houseWhile playing as Franklin wait until he contacts Lester. After you have listened to a short conversation, drive to Lester's house, which is located in the South-Eastern part of Los Santos, in the El Burro Heights district. After you get there, you will watch a cutscene of the discussion concerning the solution to the problematic situation that Franklin has gotten into.
 The driveway to the foundry's premises
Leave the house and wait for Franklin to contact Lamar. Reach the area where Lamar's house is located, thanks to which the protagonist will be able to take him for a new mission. The next place that you need to reach is the foundry located to the East of Lamar's house in the Murrieta Heights district. Enter the foundry and reach the spot where you meet Michael and Trevor.
 Franklin's default staying place
Right after the conversation between the protagonists, there will start a major battle with members of an FIB task force taking part in, in the first place, who will be then joined by the Merryweather mercenaries. Note that you can freely cut between the protagonists and the choice of who you want to play as, currently has no significance. Franklin will be initially occupying one of the upper balconies, on the left of the place where the most recent conversation took place.
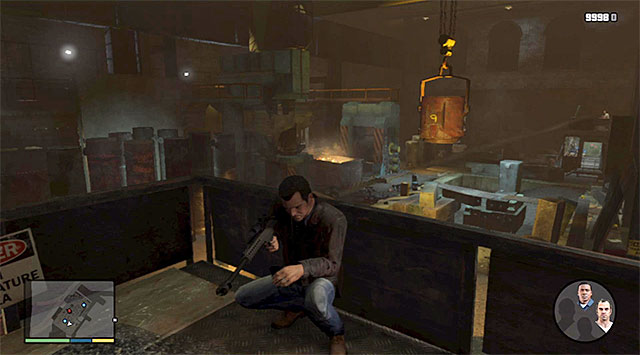 Michael's default staying place
Michael will, at first, occupy the balcony located in the spot where the last meeting took place. By default, he is using a heavy sniper rifle which, although it has large firepower, unfortunately needs to be reloaded after each shot. As a result, you should consider selecting another scoped weapon from the inventory (e.g. a good assault rifle).
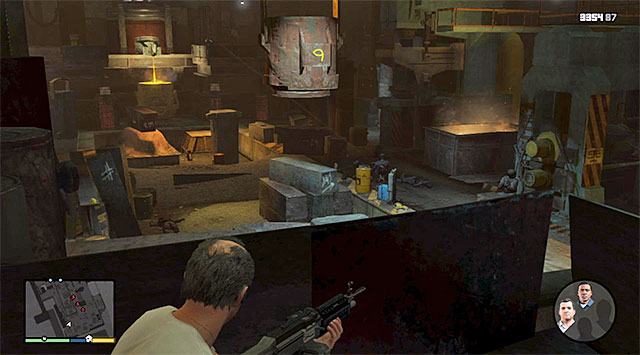 Trevor's default staying place
Trevor will at first occupy a small roof above the entrance to the foundry, which is a perfect place to surprise the enemies appearing below him. When it comes to the weapon, by default he is using a heavy machine gun and it is a good idea to stick to it, especially that the gun is compatible with Trevor's fry mode.
 Watch out for the enemies approaching from the upper balconies
At first, the enemies will be appearing at the foundry's lowest level, although you need to realize that there will be a few Merryweather mercenary groups to approach from the balconies above, located on the left of the places where Franklin and Michael are hidden. It is best to eliminate these enemies with well-aimed shots from a scoped weapon at the moment at which they position themselves at the balustrades.
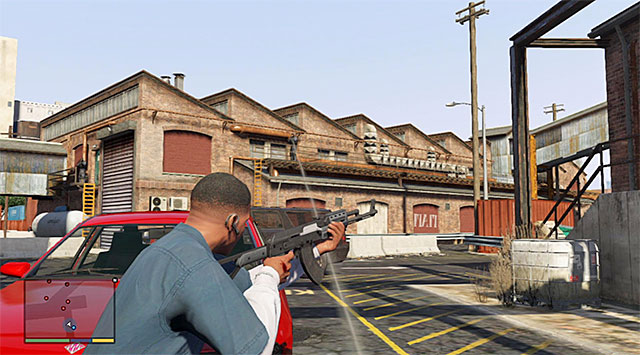 You need to join Lamar and defeat the enemies with joined forces
Continue fighting until you receive from Lamar an request for help with fighting back the enemies that appeared outside of the foundry. Cut to Franklin, clear the area of the closest enemies and set out with help only after that. After you leave the foundry's main building, hide behind one of the covers and start firing at the enemy forces. You should watch out here for the enemies hiding behind the cars, as well as for those occupying the balconies above.
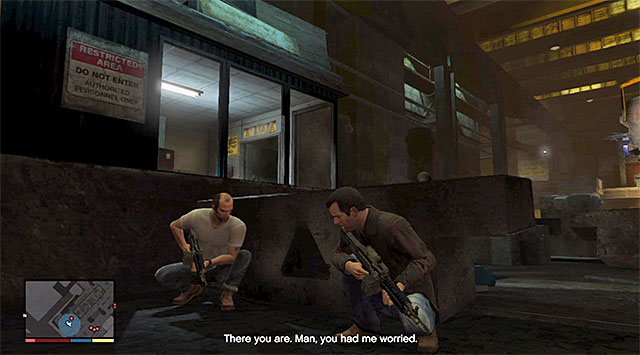 The wall with Trevor skulking behind
The next highlight of the fight will be losing contact with Trevor. Cut to Michael, and just like earlier, start by dealing with the enemies staying at the foundry's lowest level. Only then, jump over the balustrade and get to the corner where Trevor used to be. This will allow you to find out that Trevor is now taking cover behind the wall on the lower level. Join him and start eliminating the successive enemies(you can now cut to Trevor).
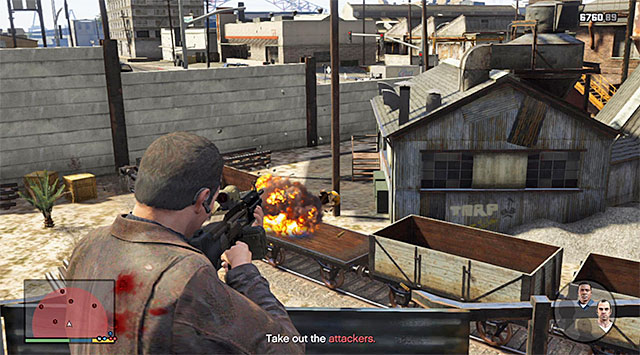 Fight out in the open and watch out for the single hostile chopper
After you have eliminated all of the enemies, while playing as Michael or Trevor walk outside of the building. The game will also unlock Franklin at this moment, as a result of which you will be able to cut between the playable characters freely. You should remember to use covers here and also look out for the opportunities to blow up cars. You should also handle the single chopper, by shooting it down personally, or waiting until either of the allies will deal with it.
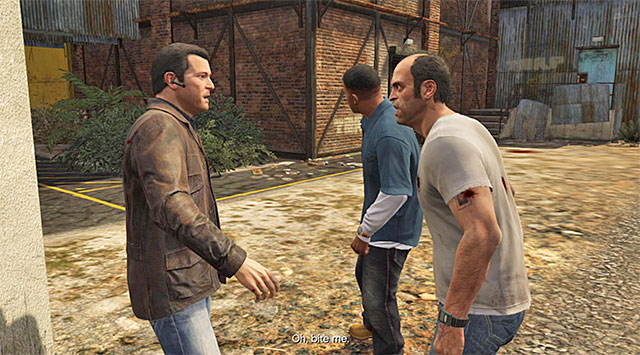 The rendezvous point
Ultimately, you need to get rid of all of the FIB employees and Merryweather mercenaries, who attacked the foundry. You need to set out to the foundry's cargo bay with your current character, which will result in the playing of the cutscene in which further part of the mission will be discussed. The protagonists need to go to different locations to eliminate three key targets - Michael will have his to kill Stretch, Trevor will have to deal with Steve Haines and Franklin with Wei Cheng.
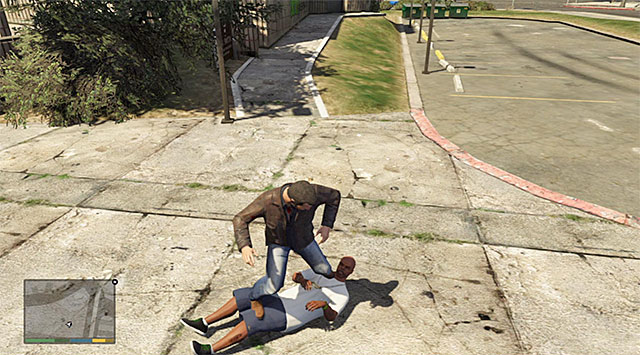
I recommend that you first cut to Michael, because his target (Stretch) is located within the shortest distance of the foundry, in the Strawberry district. After you get there, get out of the car, approach Stretch and start firing at the gangster that accompany him. Try not to shoot Stretch himself, because this would make you unable to complete this mission in 100%. The best way to deal with Stretch (the above screenshot) is to catch up with him and fell him down to deal with him in melee fight without getting him the opportunity to land a single blow. After you have eliminated this character, return to the car and start your escape. You can attempt to either escape the Ballas that are chasing you, or lay down fire on their car in an attempt to shoot the driver.
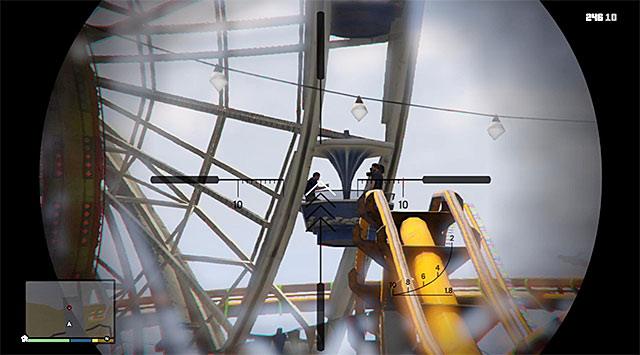
I recommend that you now cut to Trevor. Steve Haines is staying near the Del Perro promenade in the western part of the city. After you get there, it will turn out that Haines is being interviewed inside one of the cabins of the Ferris wheel. Stop in the spot where you will have good visuals on the Ferris wheel and, follow the instructions and do not come too close to it. Select the sniper rifle from your inventory (best if suppressed) and target Haines. Try to hit Steve on the head (the above screenshot) because this is required to complete this mission in 100%. After you are done, get quickly into a car and drive away from the site, while losing the police pursuit that could, in the meantime, set out to catch Trevor. (use the beach or side alleys).
You can now cut to Franklin, who should be on his way to the Pacific Bluffs club, located to the North-West of the city. Stop on the highway, drive up to the club, carefully, and throw a sticky bomb towards We Cheng's limo (using explosives is one of the requirements to complete this mission in 100%). Quickly detonate the charge (the above screenshot) and start your escape. Just like in the case of the event with Michael, it is a good idea to eliminate the driver of the vehicle that is chasing you, thanks to which you will shake off the pursuit earlier.
 Walk around the gate to Weston's villa
Towards the end of this mission, you will have to abduct Devin Weston who is staying in the villa on the Tongva Hills. It is going to be Trevor who will be responsible for that. Devin is surrounded by armed bodyguards and, although you could eliminate some of them from a safe distance, I recommend that you instead sneak up there. Gain access to the villa by jumping over the hedge located to the left of the main gate.
Along your way through the estate, you can make use of a suppressed weapon and avoid raising the alarm although, even if the bodyguards notice Trevor, nothing bad will happen. Continue around the estate until you reach a large balcony. Devin is hiding in the container shown in the screenshot.
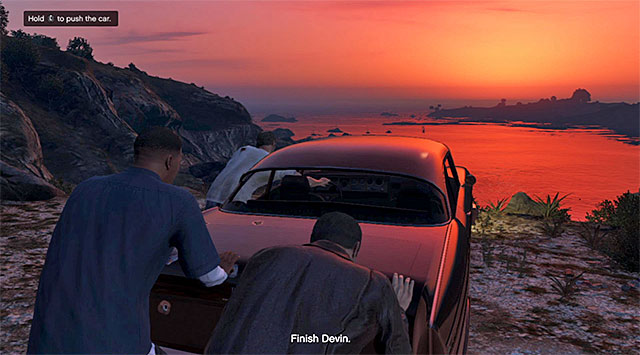 Push down the car with Devin inside
After you watch the cutscene, wait for Trevor to get into the car with the abducted Weston (Declasse Tornado). Drive towards the beauty spot in the North-Western part of the map, right next to the Sonar Collections dock (one of the purchase-able estates). The last thing to do is lean the analog stick up, so that the protagonists can push the car, with Devin trapped inside, off the cliff.
Rewards for the completion of the mission:
Requirements for the completion of the mission in 100%:
 An example marking of a side-mission for Franklin
Missions that you receive from strangers follow the rules similar to those of the side missions in Grand Theft Auto IV. It is worthwhile to be on the lookout, while playing the game, for question marks that appear on the map. These signal that you can start an optional mission (the color of the question mark signals which one of the protagonists the mission is for). The markers appear at pre-determined moments in the campaign, and at different times of the day so, do not worry if no icon appears, on the map, during your first visit to a given location. I naturally recommend that you complete all of the side missions because they not only serve as a form of escape from the main plot, but they will also enable you to get more money or make new contacts.
Note: To learn about the detailed locations of the people that you receive side missions from, see the page with the detailed world map.
Availability: Franklin
Location: You need to talk to Tonya and you can meet her at the opposite side of the street from Franklin's house (the above screenshot). Approach her to initiate the conversation and start this optional mission.
 The Towtruck
Return to your vehicle (or obtain some means of transport), wait for Tonya to join you and go towards a police parking lot East of Franklin's house. Drive up to one of the parking lot's gates, wait for it to open, drive inside and get out of the car. Approach the Towtruck and get into it. .
 Stop the truck in back to front, or back to back with the car and use the tow hook
Your task is to tow away the abandoned car to the police parking lot. After you reach the car's location position yourself back to front or back to back with the car. Lower the crane (using the left analog stick) and rev up to the car and hook it. Lift the crane arm and, only then, drive towards the parking lot. On your way back, you should not be performing any violent maneuvers, so as not to lose the car that you are towing by accident. After you make it back to the parking lot, stop near the circle marked by the game and unhook the car wreck, which will allow you to complete this simple mission.
Rewards for the completion of the mission:
Requirements for the completion of the mission in 100%:
Availability: Franklin
Location: This mission becomes available some time after you complete the Pulling Favors side mission. Just like earlier, you need to talk to Tonya again, and you will find her in the same spot as previously, i.e. across the street from Franklin's house.
 Hook at the back of the car
The premises of this mission are identical to those of the previous one. You need to reach the parking lot, while accompanied by her, reach the location where there is an inappropriately parked SUV, on the Towtruck. Since you cannot hook the car by its front, you need to rev up to the car's back, and hook the car in the way you have already learned. Finally, take the car back to the police parking lot and leave it there, in the marked area.
Rewards for the completion of the mission: none
Requirements for the completion of the mission in 100%:
Availability: Franklin
Location: This mission becomes available some time after you complete the Another Favor side mission. This time around, you need to wait until you receive a text message from Tonya, in which she will ask for yet another favor. Call the woman to discuss the details of the mission and when you start it
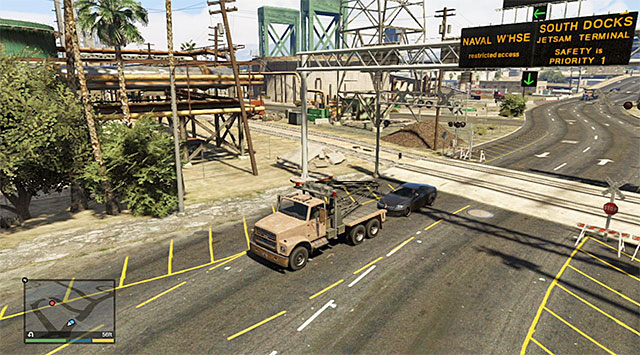 You need to quickly tug the car away from the tracks.
There is nothing out of the ordinary with the beginning of this mission, because, again, you need to reach the police parking lot and get into the Towtruck. Drive towards the location where a broken down car has been reported. After you near your destination, you will learn that the car broke down across the tracks so, you need to act fast. Park in front, or at the back of the car, hook it and drive away as quickly as possible, to avoid colliding with the train.
 Leave the car next to the car garage building
Wait for the owner of the car to get into the truck and go towards the car garage located close to Franklin's house. Park on the square in front of the garage, unhook the car and listen to the conversation, over the phone, with Tonya.
Rewards for the completion of the mission: none
Requirements for the completion of the mission in 100%:
Availability: Franklin
Location: This mission becomes available some time after the Pulling Favors Again optional mission. Just like in the case of the previous mission, you need to wait for a text message from Tonya, in which the woman asks you for help. Call her in order to discuss the details of the mission and the time of starting it.
 Hook onto the back of the broken down car
Reach the police parking lot, get into the Towtruck and drive towards the broken down car. Note that the game displayed a timer, but 5 minutes is enough time to reach the destination. I recommend that you use Franklin's special skill along the way, to be able to enter sharp turns without the necessity to slow down. After you reach the broken car, wait for its owner to get into the truck. I recommend that you hook the crane to the rear part of the car, thanks to which you will not have to turn the truck around on your way back to the car garage (it is located Eastwards of here). Leave the car on the square in front of the car garage and listen to the conversation with Tonya.
Rewards for the completion of the mission: none
Requirements for the completion of the mission in 100%:
Availability: Franklin
Location: This mission becomes available some time after the Still Pulling Favors optional mission. This time, as it was the case with the first two missions given to you by Tonya, you need to meet her in person to talk to her face to face. The woman will, traditionally, be waiting for you across Franklin's house.
 Since the car bumped into a tree, you need to hook its rear
Accompanied by Tonya, drive up to the police parking lot, change to the Towtruck and drive to the site of the accident. After you get there, park the truck exactly behind the damaged car and use the crane. Take the car back to the car garage and leave it in the marked area. Finally, return to the police parking lot and wait for Tonya to get out of the truck.
Rewards for the completion of the mission: none
Requirements for the completion of the mission in 100%:
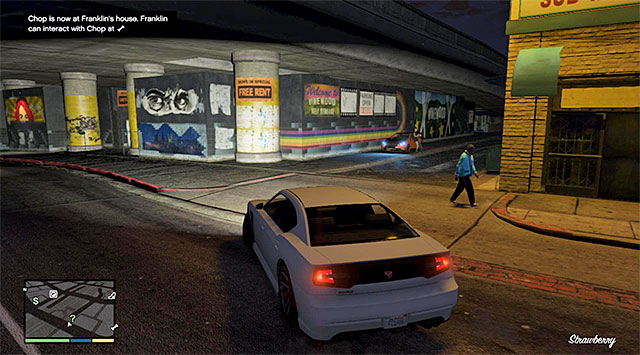
Availability: Franklin
Location: You have to meet with Hao, participant of the illegal car races. You can find him at night in the ally on south from the Simeon Yetarian's car showroom (screen above). Talk to the driver to learn about the possibility of taking part in a nighttime race.
 The starting point of the race
Before you start the race, you of course need to obtain a car and, since the first race is quite easy, you can simply use Franklin's private car. i.e. Baravado Buffalo (of course, if you are currently in the possession of a better car, then it is even better). Regardless of what car you are going to use, reach the race's starting point.
 Often use the time-slowing skill
The race consists of two laps and, to complete this mission, you need to win the race. Remember to use Franklin's skill to enter sharp turns safely and, to the extent it is possible, avoid bumping into the other racers, as well as civilian cars and obstacles in the environment.
Rewards for the completion of the mission:
Requirements for the completion of the mission in 100%:
Availability: Franklin
Location: You need to talk to Beverly, who is a paparazzo. You can find him in the West Vinewood district, and more precisely next to the stairs to the right of the building shown in the above screenshot.
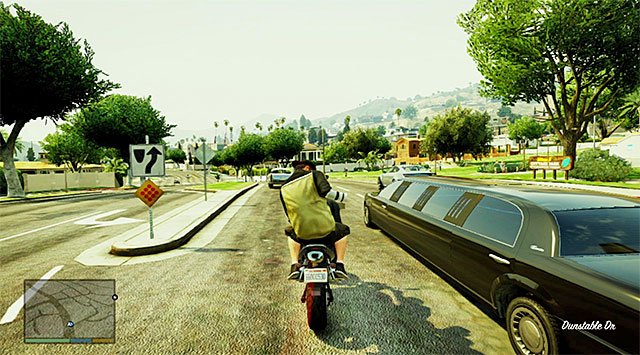
Your task is to ensure Beverly with the opportunity to photograph Miranda Cowan - a celebrity who is travelling on a limo. Run up to the bike (Shitzu PCJ 600), wait for the paparazzo to join up with you and follow the limo. According to Beverly's instructions, you need to ride parallel to the limo (the above screenshot) and, for obvious reasons, it is a good idea to use time-slowing here(still, you should leave some of the special skill bar filled for later). You get opportunity to take a picture at three different moments and, it is worthwhile to make sure that Beverly takes all three opportunities to take a picture.
 Knocking Madison off requires getting close to his bike.
Towards the end of the mission, the limo with the celebrity in it will also be chased by a competitor paparazzo - Madison. Just like earlier, you need to get right next to your target, this time to enable Beverly to knock his opponent off his bike. The only left thing for you to do now is take Beverly to a nearby parking lot.
Rewards for the completion of the mission:
Requirements for the completion of the mission in 100%:
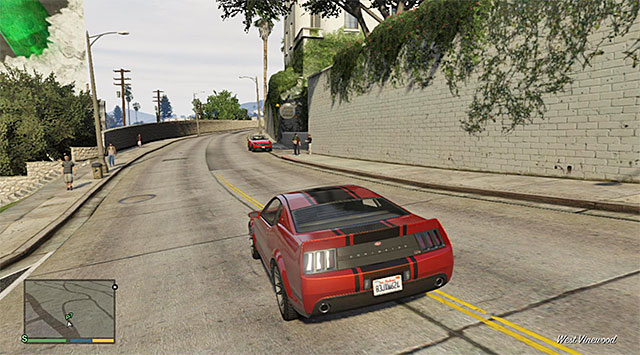
Availability: Franklin
Location: This mission becomes available some time after you complete the Paparazzo optional mission. Just like earlier, you need to meet up with Beverly but, this time he will be waiting for you in a different part of the West Vinewood (the above screenshot).
 The swimming pool
Follow Beverly towards the entrance to Poppy Mitchell's estate. Follow Beverly's instructions and stick close to him. Run only when he does. I also recommend that you jump into the swimming pool on your way, which will allow you to complete this mission in 100%.
Eventually, you need to reach the place where Beverly will give you his camera. Zoom in on Poppy having sex. You need to make sure that her face is in the camera's frame, thanks to which the frame's color will go to green. Continue recording until the moment that your cover is blown. Once this happen, run behind Beverly and jump to a lower level after you run around the building.
 Try keeping Poppy within the frame
Run up to Beverly's car parked near the estate and take your place on the couch. Ahead of you, there is the final, and quite long, part of the mission. You do not need to attack anybody and you only need to keep recording Poppy trying to get the paparazzo. Just like in the case of the scene with the estate, try keeping Poppy's face within frame for as long as possible, by turning it and zooming out if necessary. The mission will end soon after Poppy crashes her car.
Rewards for the completion of the mission: none
Requirements for the completion of the mission in 100%:
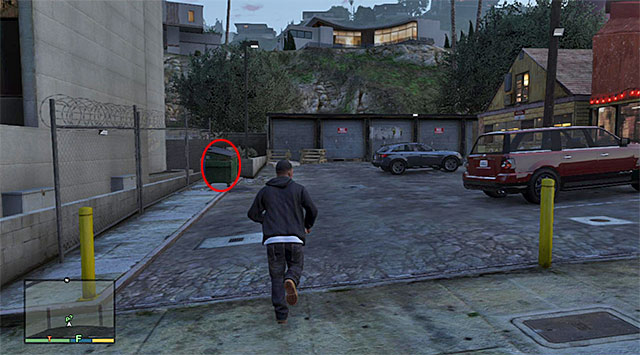
Availability: Franklin
Location: This mission becomes available some time after the completion of the Paparazzo - Sextape optional mission. This time around, you will find Beverly hiding in a trash container on the parking lot shown in the screenshot, in the West Vinewood. Listen to the conversation that will concern entering a partnership with Beverly, and unlocking several additional missions, as a result.
Rewards for completing the mission: none
Requirements for the completion of the mission in 100%: This mission has no additional requirements so, it is completed in 100% automatically.
Availability: Franklin
Location: This mission becomes available after the completion of the Paparazzo - The Partnership optional mission. You need to wait until you receive a message from Beverly. You can now go to the green circle shown in the screenshot, which is located in Downtown Vinewood.
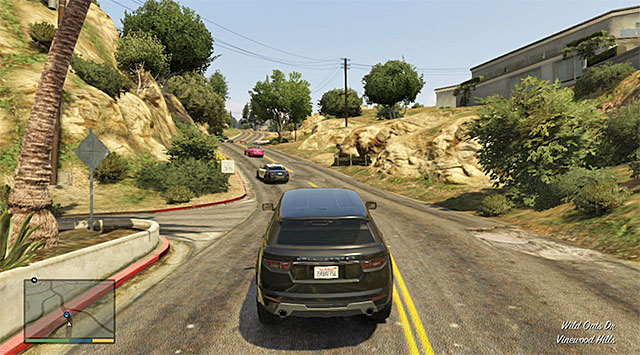 Join the pursuit
After you come close to the place where the mission starts, you will receive a phone call from Beverly with the information of a police pursuit after the celebrity Poppy Mitchell. Join this pursuit and, at the same time, make sure that you are driving a fast enough car, thanks to which you will not let the pursuit leave you behind. During the pursuit, follow Poppy's car, as well as the squad car, and make sure that you do not bump into the police car by accident. In situations, in which you need to avoid traffic, or perform a sharp turn, use Franklin's special skill.
The pursuit will end when Poppy's car will run into a tree. Park your car nearby, get out of it and select your phone from the inventory. Activate the camera (SnapMatic), zoom in on Poppy and wait until she is handcuffed (the above screenshot). Only then take a photo and send it over to Beverly. You can now walk away from the site and listen to the final conversation with Beverly.
Rewards for completing the mission: none
Requirements for the completion of the mission in 100%:
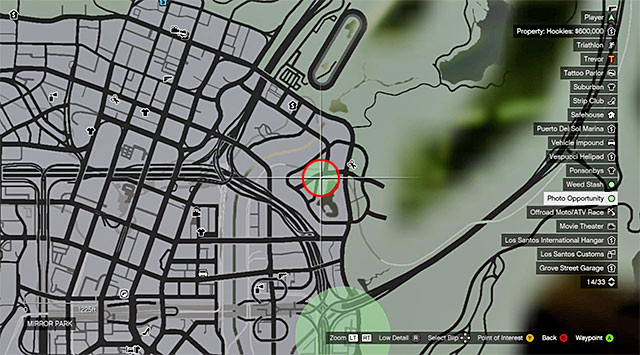
Availability: Franklin
Location: This mission becomes available after the completion of the Paparazzo - The Partnership. You need to wait until you receive a message from Beverly. You can now go to the green circle shown in the screenshot, located in the North-Eastern part of Los Santos. More precisely, it is the Mirror park.
 The place to start climbing
After you come close to the starting point of this mission, you will receive a phone call from Beverly to inform you that the word is that Georgina - a celebrity, is going to buy drugs. The paparazzo will want to catch he r red handed, of course, and he will task you with doing that. On your car, reach the Chico's Supermarket and listen to the conversation with Beverly's contact. Take a look around the main entrance behind the container that you can climb onto. Climb onto the store's roof and start sneaking.
You eventually need to reach the edge of the roof, above the backalley behind the store, i.e. the location where Georgina makes the deal (the above screenshot). Select your phone from the inventory, activate the camera (SnapMatic) and wait for the dealer to hand the package to one of Georgina's bodyguards. Only then, take a picture and send it over to Beverly. Carefully, jump down from the roof and walk away from the place where you took the picture. Talking to Beverly will conclude this mission.
Rewards for completing the mission: none
Requirements for the completion of the mission in 100%:
Availability: Franklin
Location: this mission becomes available after the completion of the Paparazzo - The Meltdown and Paparazzo - The Highness special missions. You can now go to the place where the last meeting with Beverly takes place, i.e. the West Vinewood. You will notice him in front of one of the hotels.
 The easiest way to eliminate Beverly and his goons is with grenade launcher
During the conversation with Beverly, it will turn out that he does not plan on splitting the profit, from the most recent missions, between himself and Franklin. As a result, it will be necessary to kill this character. If you want to complete this mission in 100%, you will need to eliminate Beverly and two of his companions in one attack. Therefore, I recommend that you use the grenade launcher. After you perform this action, you will have to lose police pursuit, because an attack with the grenade launcher may, for obvious reasons, be noticed.
Rewards for completing the mission: none
Requirements for the completion of the mission in 100%:
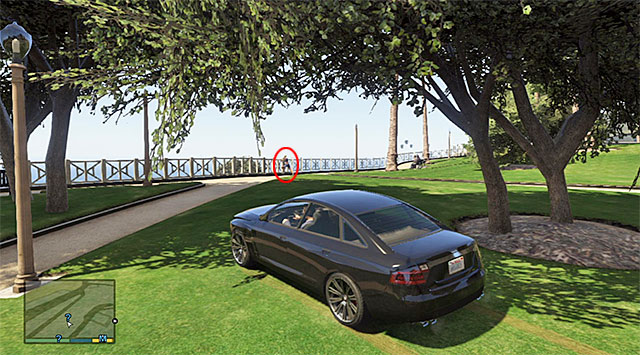
Availability: Michael
Location: You need to talk to Mary Ann, who is preparing for her run in the Pacific Bluffs district, to the South-West of Michael's house (the above screenshot).
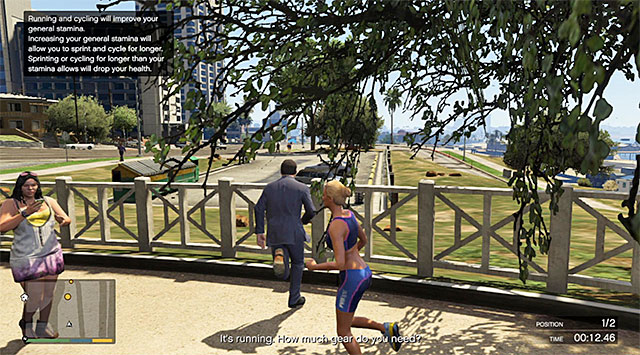
This mission is quite unique in its course, because it is a race that is supposed to determine who will be the first to reach the finishing line on the beach. It is best to take up this mission only after you develop Michael's stamina, although this is not necessary. Regardless of the circumstances of this mission, right after you start the race, jump over the balustrade shown in the screenshot, thanks to which you will make the course to the next checkpoint shorter.
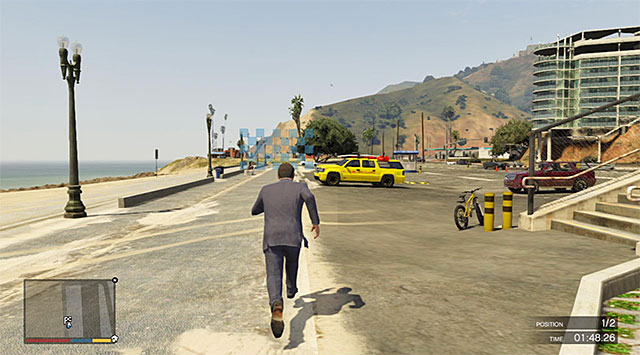 The finishing line
Further into the race, keep dosing the moments of sprint and regular run, to prevent exhausting Michael prematurely. Note - after your stamina drops down entirely, Michael will still be attempting to sprint but his health bar will start to decline. Fortunately, if you play out well everything, this will not happen. The mission will be complete after you are the first one to reach the finishing line.
Rewards for the completion of the mission:
Requirements for the completion of the mission in 100%:
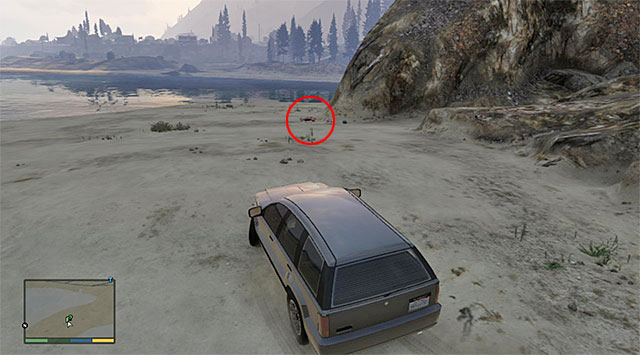
Availability: Michael
Location: you need to talk to Mary Ann, who is getting prepared for the triathlon in the North-western part of the map. More precisely it is close to the town of Paleto Bay (the above screenshot).
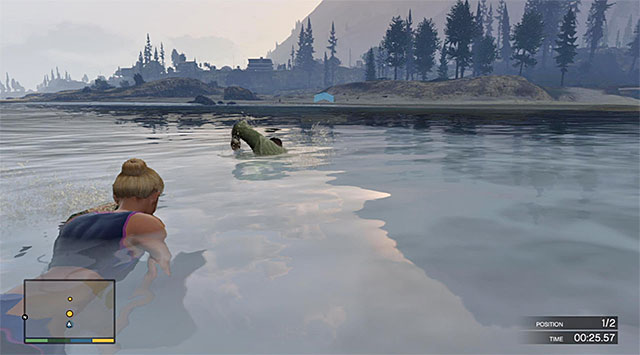 Swim towards the shore
The course of this mission is not too ordinary, because it is a triathlon. The best moment to start this mission is only after you develop Franklin's stamina, although it is not necessary. Start off by jumping into water and swimming across the bay to reach the shore that you can see in the distance. Note - do not exaggerate with excessive physical strain because, after you deplete all the stamina you have, Franklin's health will start to drop. Fortunately, if you play your cards well, this is not going to happen.
The second part to the triathlon is a mountain bike race. You do not need to wait for Mary Ann so, hop onto the bike straight away and start reaching the successive checkpoints. During this trial, you should especially watch out in the spot shown in the above screenshot, where you are going to perform a long jump. Reaching the other side requires you to ride with high velocity so, if you do not want to risk a colliding with the bridges supports, you can aim your bike to the left of it and, as a result lose not too much time while returning to the main route.
 The finishing line
The third, last, part of the triathlon is the rum. Again, I remind you not to exaggerate with pressing the sprint button and focus on keeping considerable advantage over Mary ann. The mission will be complete after you are the first one to reach the finishing line.
Rewards for the completion of the mission:
Requirements for the completion of the mission in 100%:
Availability: Michael
Location: You need to talk to Mary Ann staying at the large Vinewood sign (the above screenshot). It is best to start this mission only after you have developed Trevor's stamina although, this is not required.
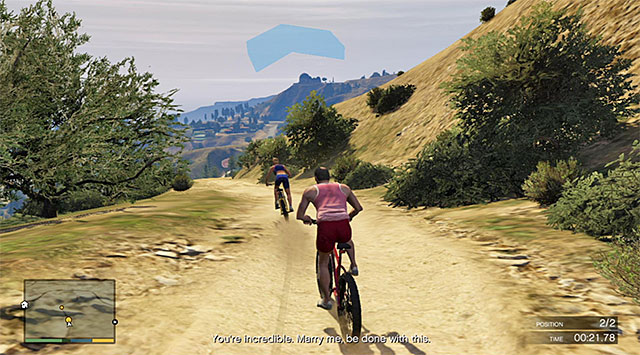 During the race, avoid collisions with Mary Ann's bike
After you watch the hilarious cutscene, during which Trevor declares his love, hop onto the mountain bike and join the race. While reaching successive checkpoints, try not to collide with Mary Ann's bike and do not worry if she is ahead of you at the beginning of the race, which should dwindle as the race progresses. The mission will be complete after you are the first one to reach the finishing line.
Rewards for the completion of the mission:
Requirements for the completion of the mission in 100%:
Availability: Michael
Location: You need to reach the Legion Square located in central Los Santos and talk to Barry, who is gathering signatures under the proposal to legalize marihuana (the above screenshot).
 Conduct continuous fire
You are going to play a very hilarious mission, because, due to smoking a specific variation of marihuana, Michael will be experiencing serious hallucinations, whose effect is the appearance of hostile creatures. Use the minigun to eliminate these creatures and pay attention especially to the creatures appearing on ledges above Michael.
 After you are grabbed, you need to liberate yourself quickly
If it happens that Michael is grabbed by one of the aliens, you need to follow the game's suggestion and move the left analog stick sideways in order to free yourself. Continue fighting until the hallucinations wear off.
Rewards for the completion of the mission: none
Requirements for the completion of the mission in 100%:
Availability: Trevor
Location: You need to reach the Legion Square located in the central part of Los Santos and talk to Barry who is gathering signatures under the proposal to legalize marihuana (the above screenshot).
 Conduct continuous fire
You are going to play a hilarious mission, because, due to smoking a specific variation of marihuana, Trevor will be experiencing hallucinations, whose effect is the appearance of clowns around. Use the automatic shotgun to eliminate the clowns. In the first place focus on the dancing ones.
 Quickly destroy all of the appearing vehicles
Every now and then, you should notice clown cars stopping nearby. Try destroying them as quickly as possible because this will bring you closer to completing this mission in 100%, and prevent other enemies from arriving. Continue fighting until the hallucinations wear off.
Rewards for completing the mission: none
Requirements for the completion of the mission in 100%:
Availability: Franklin
Location: you need to reach the Textile City district, located in the central Los Santos and locate Barry that is gathering signatures under the proposal to legalize marihuana (the above screenshot). What is interesting, after having smoked a joint, Franklin will not start hallucinating, unlike his colleagues. Instead, in a not-too-distant future, you will be able to perform several missions for Barry.
Rewards for completing the mission:
Requirements for the completion of the mission in 100%: This mission has no additional requirements and it is completed in 100% automatically.
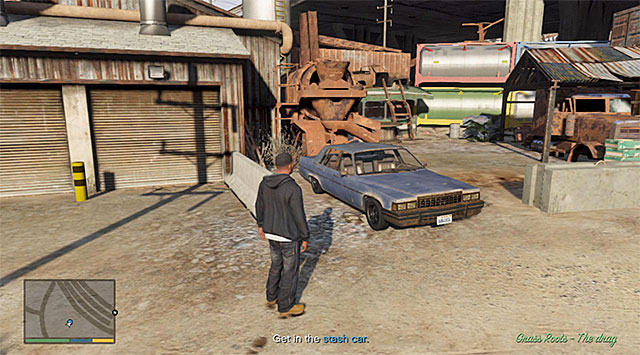
Availability: Franklin
Location: This mission becomes available some time after the completion of the Grass Roots - Franklin optional mission. You need to wait until you receive a message from Barry. You can now set out to find the car in the La Puerta district, located in the South-Western part of Los Santos, close to the airport. Examine the area within the large green circle. The location of the car has been presented in screenshot 1 and it is a dilapidated Albany Emperor (screenshot 2).
 The Towtruck
The attempt to start the car's engine will end in a failure so, get out of the car and take a look around for a Towtruck. Your new task will be to tow the wreckage away, towards Barry's living place.
 Park the towtruck right in front of the wreckage and lower the crane
Park exactly in front of the wreckage, lower the crane (the appropriate movement with the left analog stick) and rev up carefully, to hook the car. Lift the crane only after that and drive towards the marked area. After you get near Barry's apartment, lower the crane, unhook the car and drive away from here. Wait for a phone call from Barry, which will conclude this mission.
Rewards for completing the mission: none
Requirements for the completion of the mission in 100%:
Availability: Franklin
Location: This mission becomes available some time after the completion of the Roots of Grass - Franklin optional mission. You need to wait until you receive a message from Barry. You can now drive to the Murrieta Heights district, located in the eastern part of Los Santos, to find the car. Examine the area within the big green circle. The location of the car that you are looking for has been presented in screenshot 1 and it is a pick-up truck (screenshot 2).
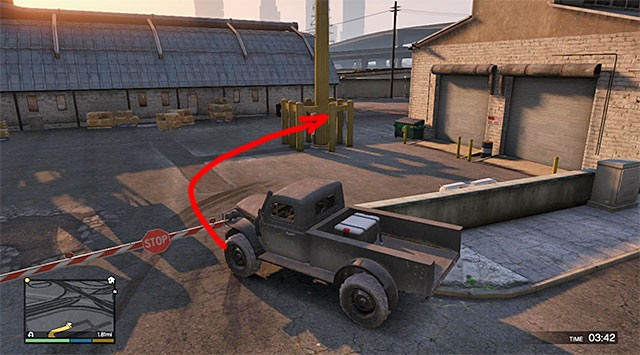
Get into the car quickly, because right after you listen to a conversation with Barry, the countdown will start (5 minutes). It would be good to leave the place, where you have found the truck, by taking the first right turn and by driving into the passage shown in the screenshot. This will let you avoid alarming law enforcers who are lurking nearby.
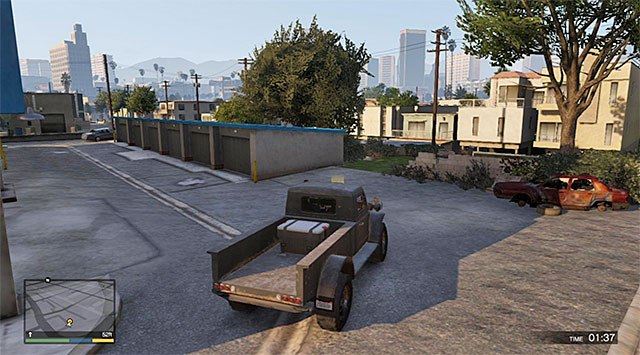 The place where the mission ends
Return to the main road and drive towards Barry's apartment. On your way, try and pick the main roads and use the time-slowing skill whenever necessary, thanks to which you will not lose too much time. Park the truck at the back of Barry's apartment and walk away from here. Wait for a phone call that will conclude this mission.
Rewards for completing the mission: none
Requirements for the completion of the mission in 100%:
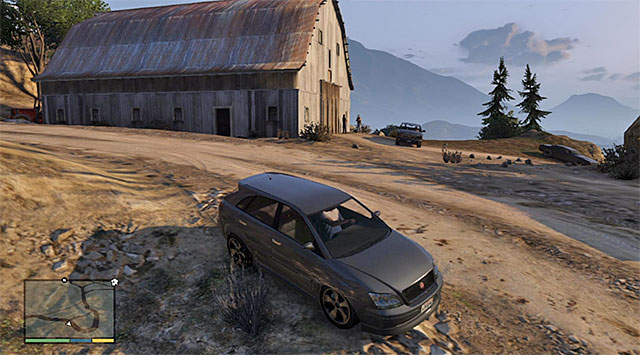 Wait for Barry to call you
Availability: Franklin
Location: You need to complete all of Barry's mission for Franklin, i.e. Grass Roots- Franklin, Grass Roots - The Drag and Grass Roots - The Pickup. Wait for the marker to appear in the Alta district, which will let you know that you can talk to Barry again. After you get there(the region of the town hall) you will not meet Barry, but you will be able to have a phone talk with him.
Rewards for the completion of the mission: none
Requirements for the completion of the mission in 100%: There are no additional requirements for this mission so, it gets completed in 100% automatically.

Availability: Trevor
Location: You have to get to the house in the middle of nowhere (location Grapeseed), on the north-east from Trevor's trailer (screen above). Talk with Maude. She tells you about possibility of making some missions for here - finding persons with warrants (Maude will send you their locations via e-mail and all those missions are described in the following part of this chapter).
Reward for this mission:

Availability: Trevor
Location: This mission becomes available when you finish the secondary mission for Maude. You have to wait for an e-mail from her about the sought person and its location. Ralph Ostrowski is hiding in the quarry, at the highway, on the south-east from Trevor's trailer (marked place on screen above).
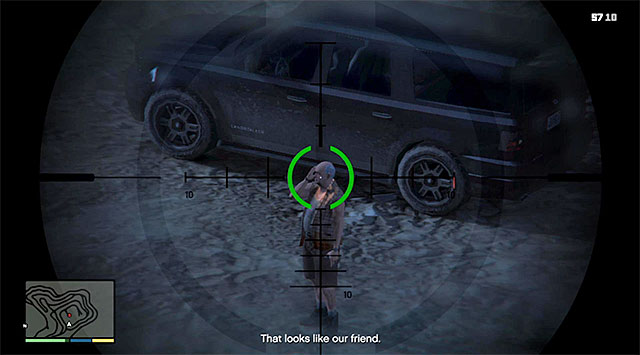 Sniper rifle is a good way to kill Ostrowski
Ralph is at the very bottom of quarry and you can complete this mission in two different way. If you don't have anything against killing him, use a sniper rifle and eliminate Ralph from the safe distance or kill him while car chase.
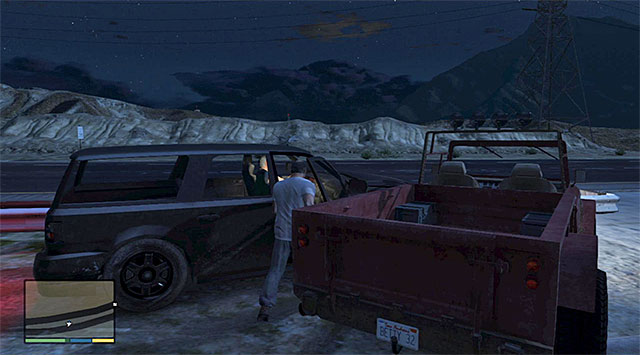 Cut in on Ralph's car
The better idea is to capture Ralph alive, because there is a higher reward for that. make sure that you have a good car and approach Ralph so he begins an escape. During the chase, try to push out his car to make him stop somewhere. Quickly run to the Ralph's car and take him out of the car. If you chose this option, take Ostrowski to the Maude's house.
Reward for this mission:
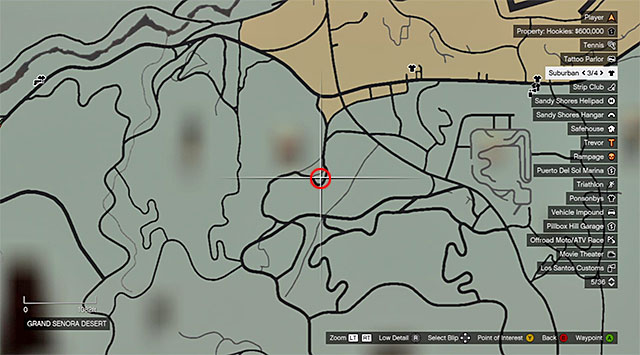
Availability: Trevor
Location: This mission is available after finishing the secondary mission Maude: Ralph Ostrowski. You have to wait for an e-mail from Maude with information and location of the sought person and its location. Larry Tupper is hiding at the deserted farm, on the dessert, on the south-west from Sandy Shores. Exact location is shown on the screen above.
A barnLarry is set up with his friend next to the barn and if you don't have anything against killing him, go on one of hills and fire at them from distance (sniper rifle). But the better idea is to try to catch Larry alive. In this case, you have to approach the barn.
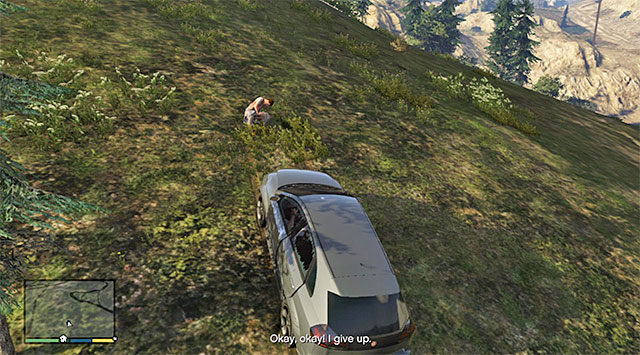 The most comfortable is to hit him delicately with a car
Ignore fire from Larry's friends and wait until the runway start fleeing (if it doesn't happen, kill one of his friends to "motivate" him). Start chasing him and knock him down after a long run or hit him delicately with a car. Then, get a vehicle and return to Maude with Larry.
Reward for this mission:
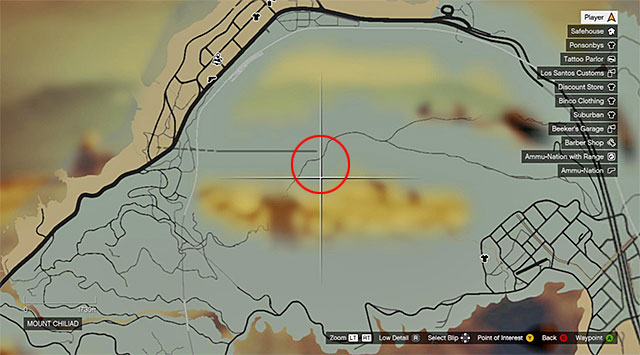
Availability: Trevor
Location: This mission is available some time after finishing the secondary mission Maude: Larry Tupper. You have to wait for an e-mail and information about sought person location from Maude. Glenn Scoville is on the one of the most unavailable locations of this world, next to the top of Mount Chiliad (screen above).
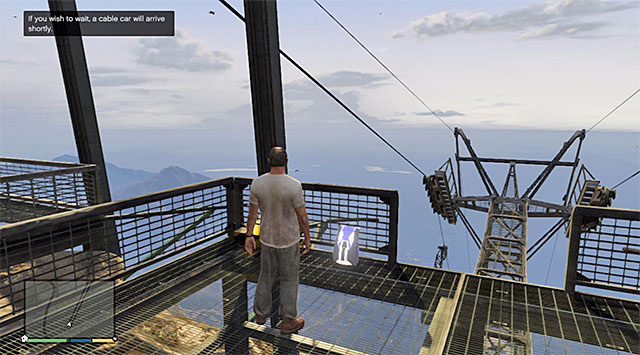
At the top of mountain you can get in two basic ways: using cable-railway or riding via one of the slopes with motorcycle or quad. Whatever you choose, search the vicinity of the railway and pick up a parachute (screen above), because it will help you catch Glenn.
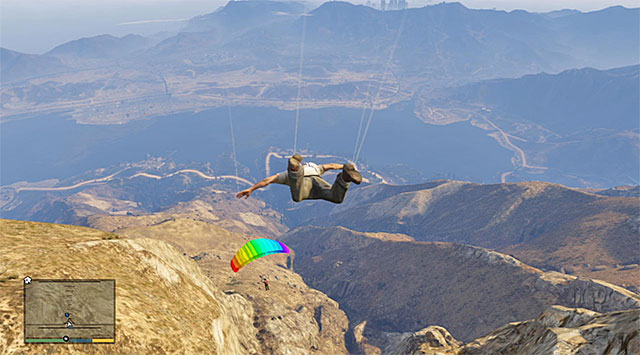 Don't forget to open the parachute!
Glenn stands a bit on south from the railway station and if you want to kill, fire at him before he starts escaping. Otherwise, run to him and then jump from the top and open the parachute. Try to move in a way not to lose the runaway.
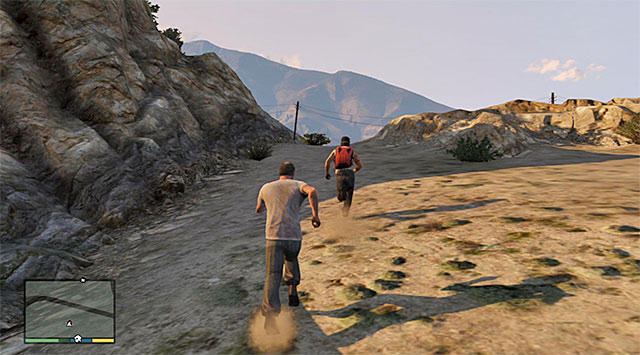 Catch Glenn and knock him down
Try to land as closest to the Glenn so you won't waste a lot of time for catching up with him. If Trevor has highly developed Stamina, he should be able to take him on his own. Otherwise, find any vehicle quickly and get the runaway. After that, take Glenn to Maude.
Reward for this mission:
Availability: Trevor
Location: This mission is available some time after finishing the secondary mission Maude: Glenn Scoville. You have to wait for an e-mail from Maude with information and location of the fourth sought person. Curtis Weaver is in the activist camp next to the highway in the northern part of the map (screen above).
Getting there isn't as easy as it seems to be. You have to find a small tunnel (screen above) net to the highway.
 Catch up with Curtis and knock him down
When you enter the activist camp, turn right and approach the old man. Hide behind a cover to avoid fire and then start running after this man. If Trevor developed Stamina, he should make it on his own. Otherwise, wait until you get nearby the highway or any other road and find some vehicle. When you catch Curtis, take him back to Maude's house.
Reward for this mission:

Availability: Trevor
Location: You have to get to the house in Sandy Shores village, nearby the Trevor's trailer (screen above). You meet here Cletus, who offers you taking part in a series of shooting tests.
Take a sniper rifle from Cletus and head for a balcony from where you begin firing. The plan is to hit at three satellite dishes. The most problematic should be the one shown on the screen above, because it's covered by the American flag.
Enter random vehicle and ride with Cletus to the abandoned motel. Also here you have to reach a balcony and listen to the new objectives. This time, you have to hit tires of three cars passing you by. Remember that you're firing only at the tires, and try to aim at vehicles which are placed under the good angle to your position (screen above) to make hits easier.
 Use the fact that coyotes are unaware about the danger of Trevor's presence
At the end, move to the motel's roof. Ahead of you the last test in which you have to kill three coyotes. Noticeable fact is that if you want to complete this mission in 100%, you have to kill two coyotes with a single shot, so wait until they got in a straight line. This mission ends soon.
Reward for this mission:
100% mission completion requirements:
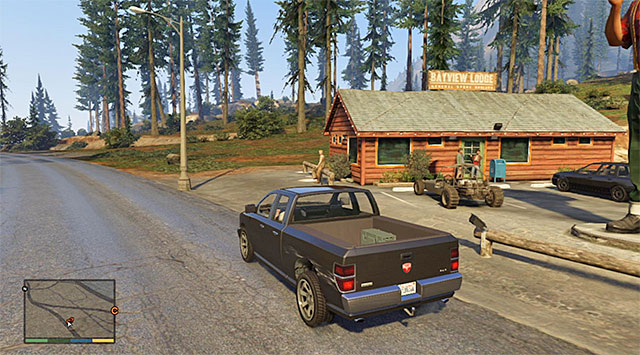
Availability: Trevor
Location: This mission is available some time after finishing the secondary mission Target Practice. You have to wait until you get a message from Cletus and meet with him in the north-west part of the map, in the Paleto Forest. The man will be waiting at one of the houses (screen above).
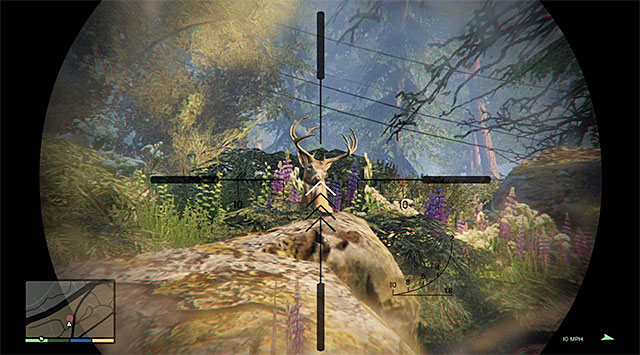 First moose
This is another trip with Cletus and this time you'll be hunting moose. Take a sniper rifle and a decoy from Cletus and follow him, turning on the sneak mode. On your way listen to Cletus' hints, from which you get to know, among others, that the safest way to get close to the moose is moving against the wind (marker of wind's strength and direction is in the right bottom corner of the screen). Soon, you approach the first animal. Aim at the moose and fire! Attention - if you want to complete this mission in 100%, you have to kill moose by firing at their hearts.
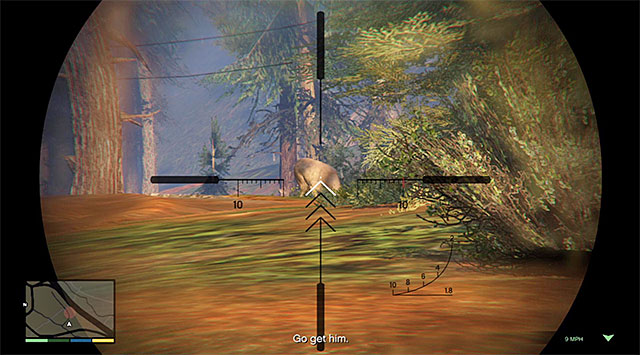 Second moose
You can move on. To locate the second moose, you have to use a decoy, which you obtained from Cletus at the beginning of this mission. Location marked on the map is only an approximation and remember not to hurry. As previously, you can try to aim at animal's heart or just kill it quickly.
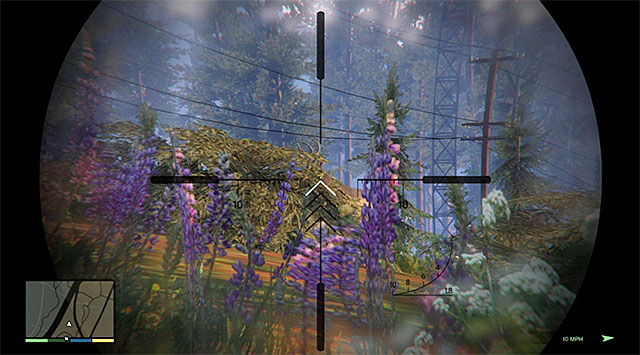 Third moose (male)
Cletus informs you about location of moose pair and, according to the obtained information, you have to hunt the male one, which is the one with antler. Use decoy, take a good position and kill this moose from a long distance.
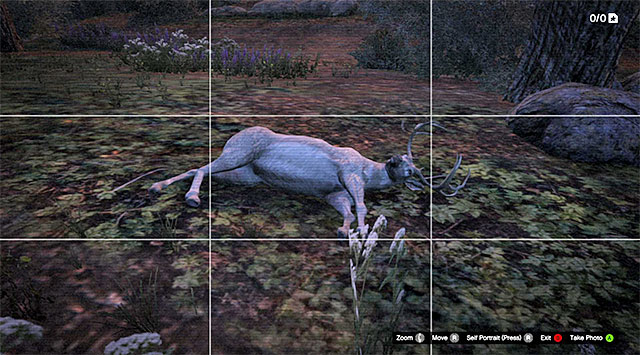
Hinting for the last moose is without Cletus help. Perform all actions like in the previous cases, that is use decoy often and remember to move only against the wind (you can wait until it changes its direction), because it allows you avoid detection. When you kill the animal, approach the corpse, choose phone from the inventory and turn on Snapmatic. Take a photo (screen above) and send it to the Cletus. Now you just need to wait for a call which ends this mission.
Reward for this mission:
100% mission completion requirements:
Availability: Trevor
Location: You have to reach a liquor shop in the Sandy Shores, on west from Trevor's trailer (screen above). Approach the people drinking beers in front of the shop.
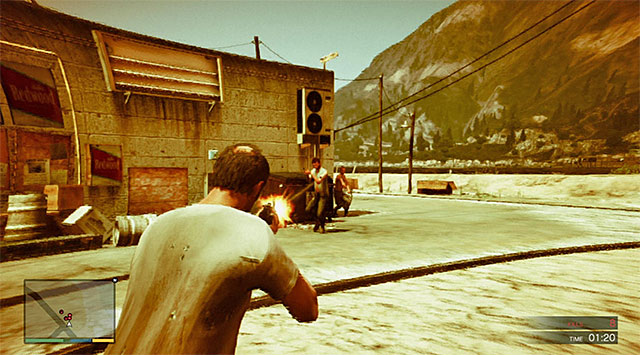 Use rifle to kill enemies
Rampages in GTA V have structure similar to those from previous parts, so you just spread destruction and chaos freely. To complete this mission, you have to kill at least 25 rednecks in 2 minutes. A simplification is fact that Trevor's special ability is always on in this mission. So you don't have to bother in hiding behind covers - just move and kill. You should use mostly your assault rifle for elimination.
 Grenades will help you blow things up
When the mission is activated, Trevor obtains also grenades and I recommend to use them for exploding nearby vehicles. What is more, be careful at the end of mission, because at least one car will try to drive you down (jump on the side, kill the driver or place yourself next to the wall). Mission ends after 2 minutes (independently on the number of kills).
Reward for this mission: none
100% mission completion requirements:
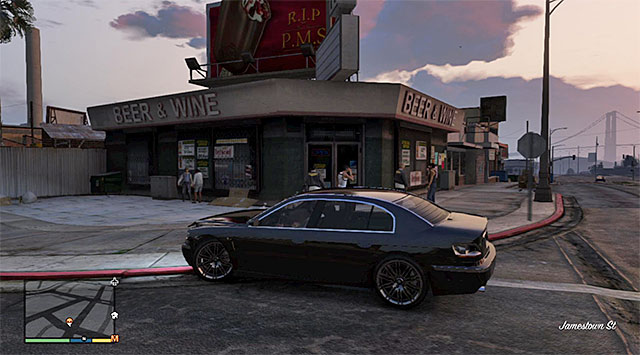
Availability: Trevor
Location: This mission is available after finishing the secondary mission Rampage One. It's beginning locations is marked by a skull icon on the map, in the south-east part of Los Santos. Stop in front of the shop (screen above) and approach gangsters standing nearby.
 Grenades are still the best way to get rid of vehicles
General assumption of this mission hasn't changed from the previous one. Don't hide, stay in the open space and eliminate enemies. Use machine gun to kill people and grenade s to destroy arriving cars (don't let Trevor get rammed). Rampage ends within 2 minutes and you have to kill at least 30 persons to complete it.
Reward for this mission: none
100% mission completion requirements:
Availability: Trevor
Location: This mission is available after finishing the secondary mission Rampage Two. Its beginning location is marked by a skull icon in central part of Los Santos, in Chamberlain Hills. Stop at once of houses and approach gangsters standing in front of it (screen above).
 Fight takes place nearby a long alley
Assumptions of this mission is identical like the previous Rampages, so eliminate gangsters with your assault rifle. Fight takes place in a long alley and consider moving away from that, because otherwise you may be surprised from both sides without possibility of finding any safe zone. As previously, watch out for enemy vehicles and destroy them with grenades. Mission lasts 2 minutes and you have to kill at least 30 enemies.
Reward for this mission: none
100% mission completion requirements:
Availability: Trevor
Location: This mission is available after finishing the secondary mission Rampage Three. Its beginning locations is marked by a skull icon, which is on the crossroads in the central part of the map (area named Great Chaparral on west from the small city where is Trevor's trailer). When you get there, stop at the broken jeep (screen above) where two soldiers are working.
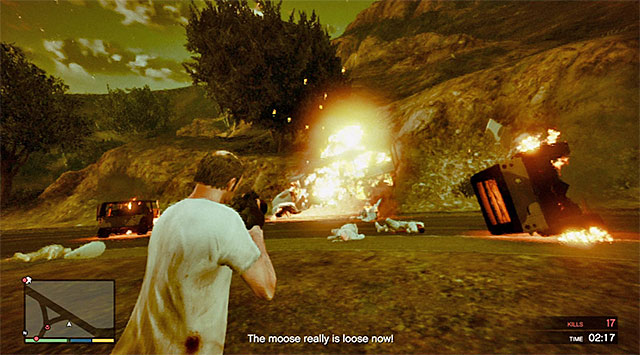 Grenade launcher is your best friend in this mission
This time, a bit different challenge awaits you. Get out of the road and start firing at enemies with grenade launcher. Aim at stopping jeeps and army trucks, trying to destroy them before soldiers run out of them and spread out.
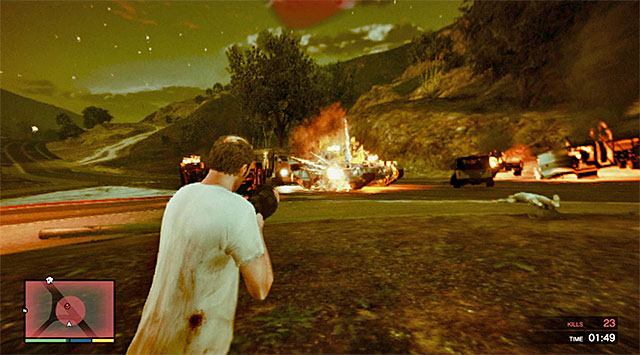 Tank can be destroyed only after several hits from grenade launcher
During this fight, you'll get an occasion to destroy at least two enemy tank. Remember to keep moving, sideway, and use your grenade launcher constantly. To destroy any of tanks, you need to hit it at least few times. Mission lasts 3 minutes and you have to kill 35 soldiers in this particular time.
Reward for this mission: none
100% mission completion requirements:
Availability: Trevor
Location: This mission is available after finishing the secondary mission Rampage Four. Its beginning location is marked by a skull icon, in the north-west part of Las Santos, in Mirror Park. You have to reach place shown on the screen above and approach the hipster sitting at the table.
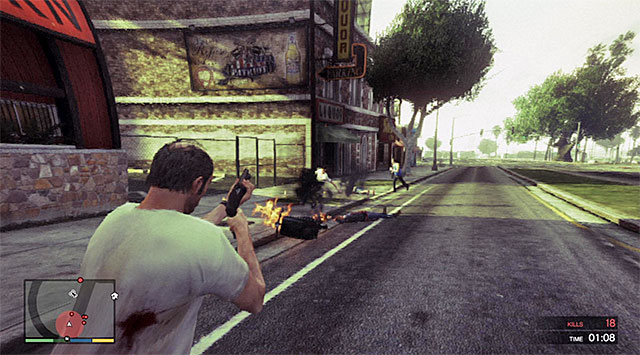 Watch out for enemies on monocycles
This mission is standard one - you have to use your firearm and grenades to kill hostile hipsters and destroy their vehicles. During this fight, pay an attention to "suicides" on bikes and scooters, who will try to hit Trevor - kill them, before they move close to you. Mission lasts 2 minutes and you have to kill at least 20 hipsters within this time.
Reward for this mission:
100% mission completion requirements:
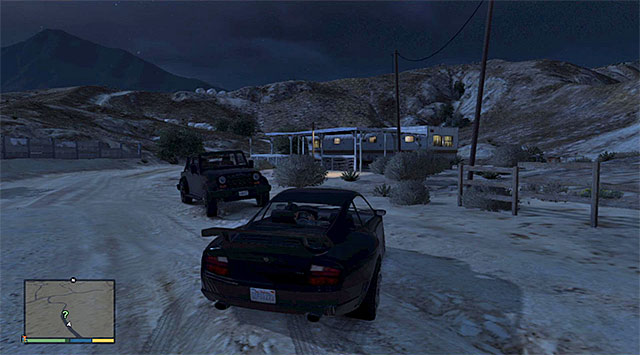
Availability: Franklin
Location: While playing as Franklin, you need to reach the trailer in the South-East of Sandy Shores, i.e. the one where Trevor has his trailer. After you get there, (the above screenshot) talk to the man called Omega to learn about his ideas about liens. You may now take to searching for the spacecraft parts. There is 50 of them, in total.
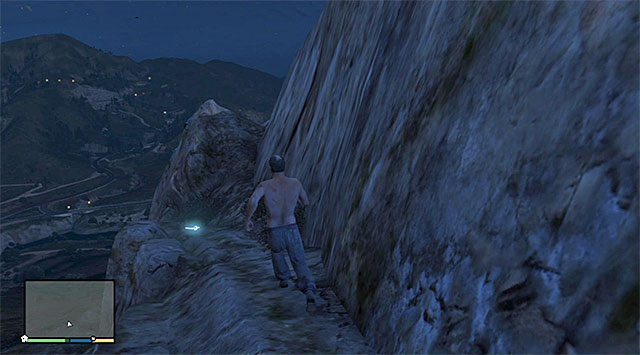 An example spacecraft part - there is 50 of them, in total
I recommend that you use the "GTA V - maps and collectibles" to locate the parts. An important piece of information is that also Michael and Trevor can engage themselves in searching for the collectibles of this group. All of the items you find will be included into one pool. Personally, I recommend that you use Trevor because many of the parts are located in inaccessible areas and the best way to get there is on the chopper.
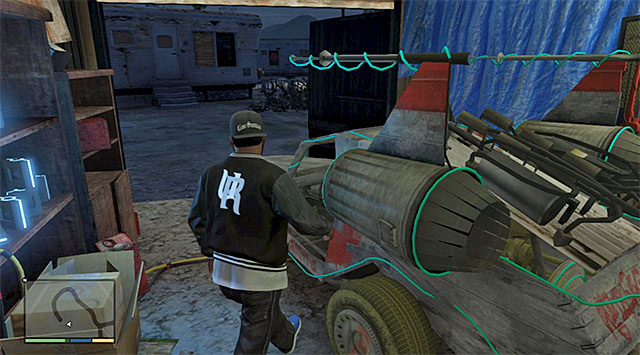 The unique buggy
After you have collected all 50 parts, while playing as Franklin, wait for a text message from Omega and get to a small trailer park located in the Eastern part of the map, to the North of the hills with wind farms. Approach Omega to talk to him again, and to give hi what you have found. The game does not award you anything for that, per se, but you will be allowed to take a buggy car from the garage (Space Docker), which has been modified by Omega.
Rewards for the completion of the mission: none
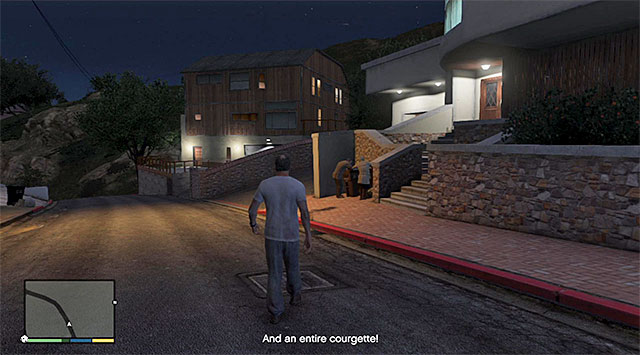
Availability: Trevor
Location: You have to reach Tongva Hills in Vinewood. On the screen above you can see two old persons - Nigel and Mrs. Thornhill. Listen to their conversation and get to know that they collect personal stuff of celebrities. When you get an e-mail from Nigel, orange circles start appearing on your maps, marking possibility of beginning new secondary mission related with collecting items of famous persons.
Reward for this mission:
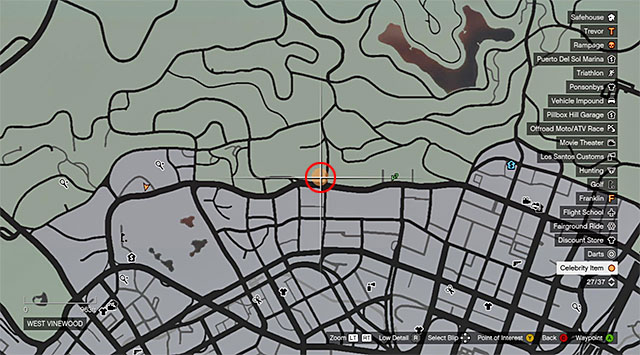
Availability: Trevor
Location: This mission becomes available after the completion of the Nigel and Mrs Thornhill. While exploring Los Santos, you may notice the red circle shown in the above screenshot, which directs you to the club located in the West Vinewood district.
 The Entourage
After you get there, enter the venue location, where a gig from the Love Fist is scheduled. First of all, go to the room on the upper floor. Once here, listen to the conversations of the entourage of the rock band, because this is necessary to complete the mission in its fullest.
 Perform dodges to avoid taking damage
You can now return downstairs and start a fight with Willy, i.e. one of the members of the band. During the fight, perform dodges and attack Willy until he falls to the ground. Pick up the gold tooth and leave the club, because you still need to lose a two-star police pursuit. After you escape from the chase, wait for Trevor to contact Nigel.
Rewards for completing the mission: none
Requirements for the completion of the mission in 100%:

Availability: Trevor
Location: This mission becomes available after the completion of the Nigel and Mrs Thornhill optional mission. While exploring Los Santos, you may notice the orange circle shown in the above screenshot, which directs you to an alley in the Rockford Hills district.
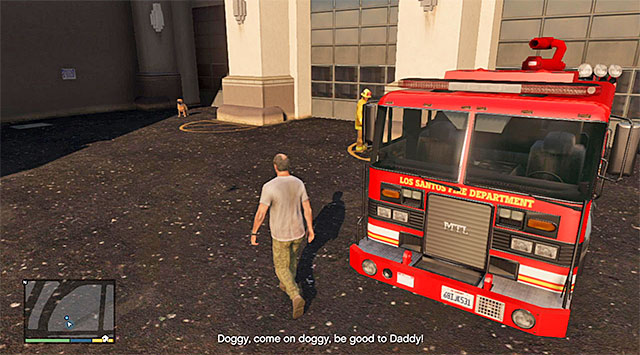 The region where the chase ends
After you get there, approach Kerry and start chasing her dog. Since Trevor cannot use any vehicles during the chase, it would be a good idea to develop his stamina beforehand. Thanks to which he will not run out of steam too early. The chase after the dog will end around the fire department. Approach Dexie, collect the collar and listen to the phone conversation with Nigel.
Rewards for completing the mission: none
Requirements for the completion of the mission in 100%:
Availability: Trevor
Location: This mission becomes available after the completion of the Nigel and Mrs Thornhill optional mission. During your exploration of Los Santos, you may notice the big orange circle shown in the above screenshot. It directs you to a golf course located in the Northern part of Los Santos (the grounds of the golf club).
 The best way to eliminate Mark and his bodyguards using firearms
The aim of this mission is the acquisition of a golf club that belongs to Mark Fostenburg. I recommend that you drive your vehicle into the golf course (you can do that by starting near the entrance to the main building), approach the celebrity as much as possible and kin Fostenburg, and his bodyguards (best with an automatic weapon). I recommend against playing cat and mouse with the celebrity, because this will not allow you to complete this mission in 100%. After you have obtained the valuable club lose the police pursuit and listen to the conversation with Nigel.
Rewards for completing the mission: none
Requirements for the completion of the mission in 100%:

Availability: Trevor
Location: This mission becomes available after the completion of the Nigel and Mrs Thornhill. While exploring Los Santos, you may notice the orange circle shown in the above screenshot, which directs you to Tyler Dixon's estate located in the Rockford Hills district.
 The gardener
Drive up to the main gate and locate the place where the wall is lower, to the left of the gate. Climb over the wall there, start sneaking and surprise attack the gardener who is standing near the van parked on the driveway.
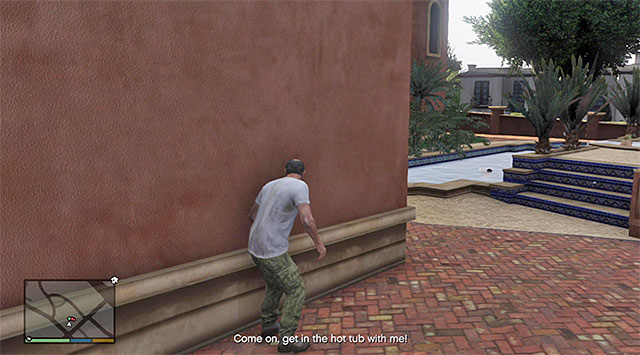
Run around the house from the right, now, jump over the two other walls. Eventually, you should reach the spot shown in the screenshot, i.e. near the swimming pool with Tyler and an accompanying woman in it. If you want to complete this mission in 100%, you cannot let yourself be detected. As a result, you need to time the theft of the clothes well. More precisely, it is when Tyler walks out of the pool and starts calculating calories. After you have stolen the clothes, retreat to the point where you have waited for the celebrity's move and leave the estate (note - if you are spotted by Tyler or, if you kill him, you will have to lose a two-star police pursuit!). You can now contact Nigel.
Rewards for completing the mission: none
Requirements for the completion of the mission in 100%:
Availability: Trevor
Location: This mission becomes available after the completion of the Vinewood Souvenirs- Willie, Vinewood Souvenirs - Kerry, Vinewood Souvenirs - Mark and Vinewood Souvenirs - Tyler optional missions. You need to wait until there appears a new meeting place with Nigel, on the map. It is located in the North-Western part of the city, and more precisely, in the Del Pierro district ( the above screenshot).
 Keep within close range of the celebrity
After you have listened to the conversation with Nigel, Get into his car quickly (Declasse Premier), and start a chase after the escaping Di Napoli's SUV. While playing this kind of chase, do not attempt to bump into the star's car, because you will not stop him this way. To the extent it is possible, avoid colliding with the other cars and objects in the environment.
 Do not bump into anything while driving across the hospital building
You will be chasing the SUV across several underground parking lots, but, you should be most careful in situations in which you will have to drive the wrong way (against the traffic). Finally, you will have to drive across a hospital building and it is necessary that you slow down here to prevent hitting anything or anyone. You should also decrease your speed before you jump through a big destroyed window, to prevent damaging your vehicle. The only thing left for you to do is drive up to Di Napoli's smashed car, which will conclude this mission.
Rewards for completing the mission: none
Requirements for the completion of the mission in 100%:
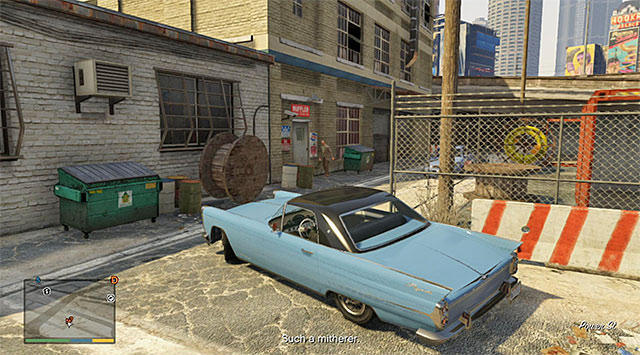
Availability: Trevor
Location: This mission becomes available after the completion of the optional Vinewood Souvenirs- Al Di Napoli mission. You need to wait for the appearance of the new meeting location with Nigel. It is located in the central Los Santos, in the side alley in the Strawberry district (the above screenshot).
 One of variants of behavior assumes freeing Di Napoli
Listen to the conversation with Nigel that concerns the elimination of Al Di Napoli. Enter the old man's car (Declasse Premier) and drive towards the train station located in the eastern portion of the map. On your way, Trevor will start talking to Napoli and, if you want to make a quick buck, you can stop the car and let him out of the trunk. Know however, that this variant will make it unable for you to complete this mission in 100%.
A way better option is to ignore the man and complete your journey to the train station. Position the car exactly on the tracks (the above screenshot) and wait for a train to arrive (you can switch the camera to the cinematic mode). Note - if you want to complete this mission in 100%, you should jump out of the car, and away from the tracks, at the last possible moment. I recommend that you first master this variant, especially that if Trevor dies, you will only have to repeat the last dozen or so seconds of the mission. After you murder Di Napoli, contact Nigel.
Rewards for the completion of the mission:
Requirements for the completion of the mission in 100%:
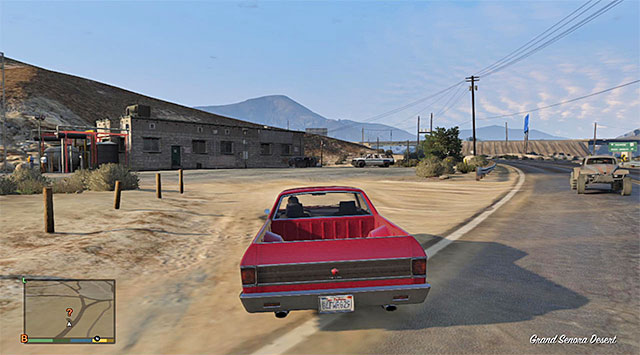
Availability: Trevor
Location: You need to reach the buildings located right next to the road in the Eastern part of Sandy Shores (the above screenshot).You will meet Joe and Josef here, members of the title civil patrol that are looking out for illegal immigrants.
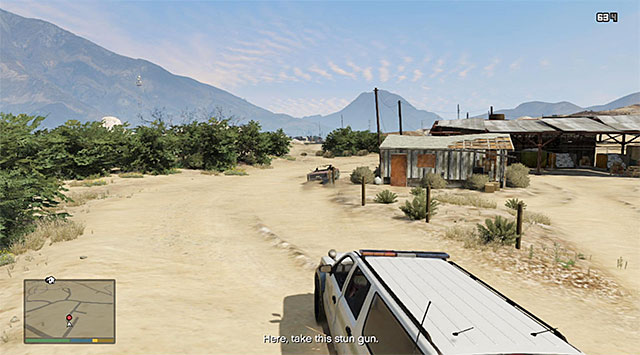 Keep shooting at the escaping vehicle and watch out for the big jumps while driving off-road
Get into the SUV that belongs to the members of the civil patrol (Park Ranger) and drive to the East, towards the Yellow Jack Inn. Park the vehicle in front of the inn, come inside and examine the building. Return to the parking lot and, quickly, get into the car again to start the pursuit after the escaping Mexicans. It would be good to finish this chase early enough, because this is required for the completion of the mission in 100%. Use automatic weapon or any other good weapon but, lay your fire down only on the car that you are chasing, instead of the people in it.
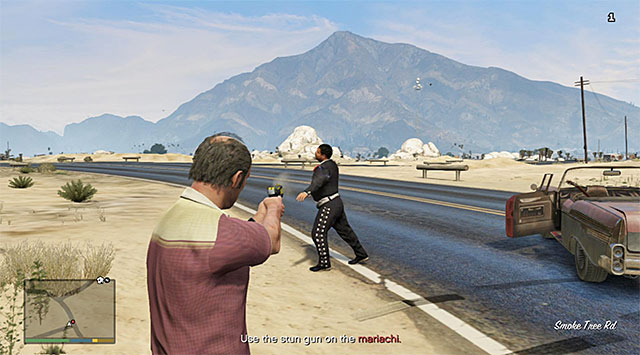 You need to use the stun gun on the immigrants that you catch up with
After you have sufficiently damaged the car that you are chasing, it should stop. Get out of the SUV, from your inventory select the stun gun, which you have received from Joe. Use the stun gun twice on the mariachi. After you arrest the apprehended people, get into the car on which they were escaping and wait for the mission to conclude.
Rewards for the completion of the mission:
Requirements for the completion of the mission in 100%:
Availability: Trevor
Location: This mission becomes available some time after the completion of the optional Civil Border Patrol mission. You need to reach a mountain path located to the South of Mount Chiliad to meet up with Joe and Josef again (the above screenshot).
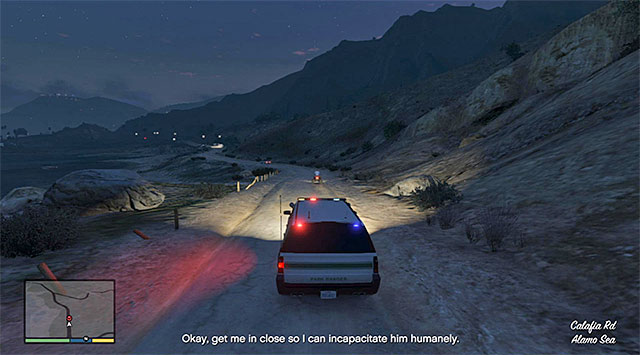 The ATV rider
Listen to the conversation and get into the SUV (Park Ranger) to start your chase after the person escaping on an ATV. Just like in the previous mission, you could lay fire on the ATV, using an automatic weapon, which will result in the damaging on the vehicle. After the rider stops the ATV, get out of the car and make sure that Trevor stuns the man with his stun gun.
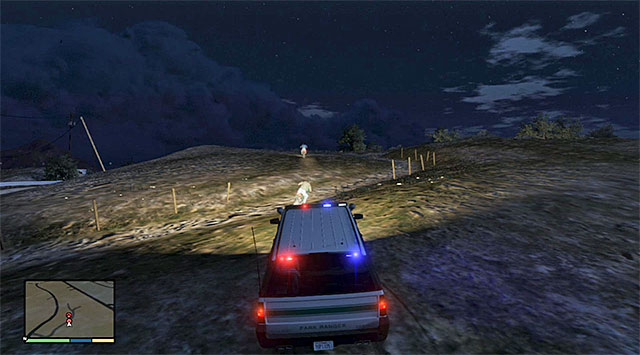 The bikers
Take the rider to the car and go to the cement works located to the South of here. In this case, you will have to arrest two bikers and, if you are fast enough, using weapons will not be necessary. You can just as well bump into each of the bikes. Use the stun gun on the new immigrants and wait for them to get into the car. This is the end of this mission.
Rewards for the completion of the mission:
Requirements for the completion of the mission in 100%:
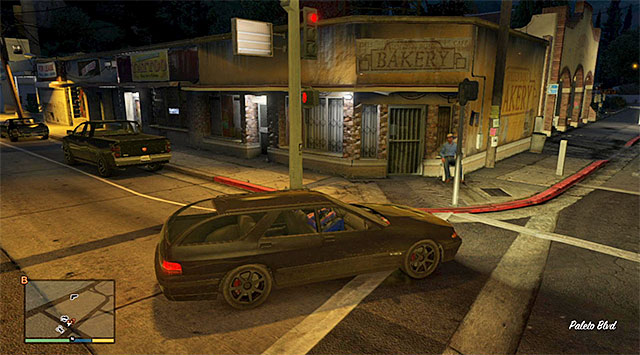
Availability: Trevor
Location: This mission becomes available some time after the completion of the optional An American Welcome mission. This time around, you need to meet up with a wrongly arrested person, and they are in a small town in the North-Western portion of the map (the above screenshot).
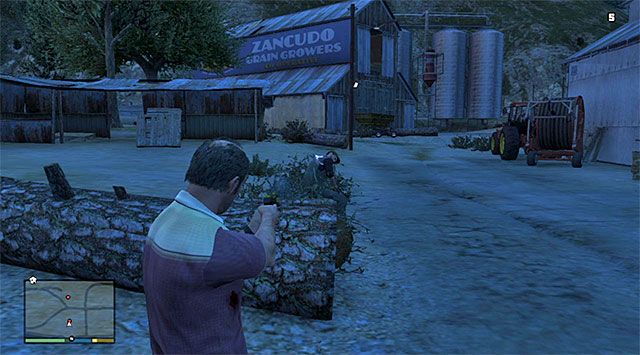 Josef
JosefAs a repentance for the previous sins, you will have to neutralize Joe and Josef. As a result, go to the farm located to the North-east of the starting point of this mission. After you get there, first stop near Josef. Use the stun gun on him, and kill him.
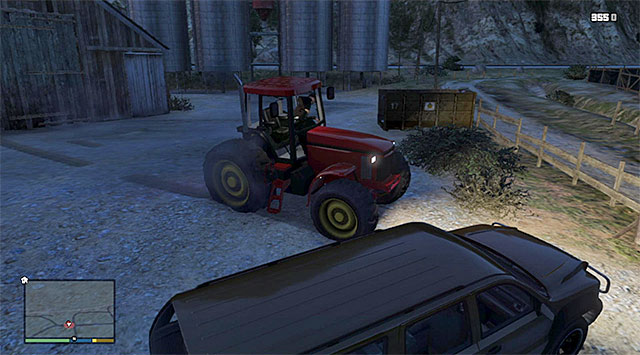 The tractor on which Joe is escaping
Get into the car and prepare yourself to start your pursuit after Joe, who will drive a tractor out of the barn. Try to stop the tractor before it leaves the premises of the farm, by firing at the vehicle from your car. Quickly, get out of the car and start chasing after Joe. Also in this case, it would be good to stun him with the stun gun and shoot.
Rewards for the completion of the mission: none
Requirements for the completion of the mission in 100%:
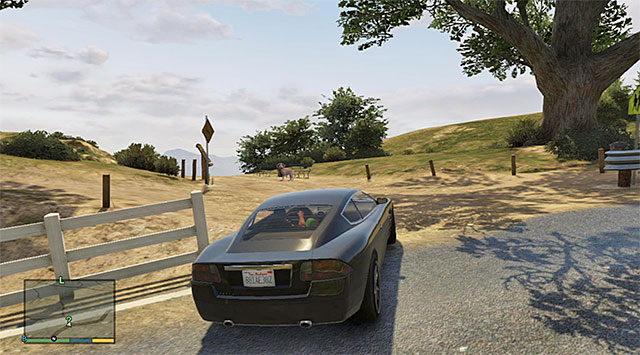
Availability: Franklin
Location: You need to reach the Vinewood Hills, located to the North of Los Santos. At one of the asphalt roads, you should notice the dog shown in the screenshot. Stop your car and follow the dog. The animal will take you to the place there is a skydiver who was most unfortunate with his landing. Free Dom to learn that he is a lover of extreme sports and to receive an invitation to one such event. Follow Dom and stop where you will notice a chopper summoned by him. Take your seat onboard the helicopter.
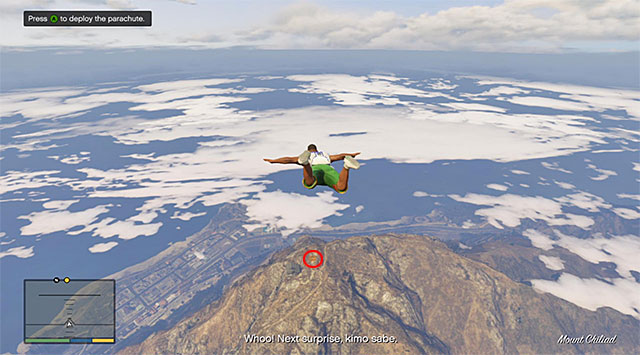
Depending on which you prefer, you can either listen to the full conversation with Dom, or speed up the flight to Mount Chiliad. After you are above the mountain, press the appropriate button to jump out and start your way down. Of course, you do not need to open the parachute straight away, and wait until you are closer to the mountain. Also, you are not required to aim at the landing site shown in the above screenshot but, if you land too far away from the yellow circle, it will turn out that you need to take a stroll which, due to the topographical nature of this area, may turn out to be very arduous. Note - it is a good idea to press, and hold down, the button that targets the landing site automatically, thanks to which it will be easier for you to land properly.
 The ride down
Wait for Dom to land also and approach the nearby mountain bikes. Mount any of the bikes and ride down the slope. Try not to slow down anywhere along your ride and, at the same time, watch out for possible steepness of the ground because, a bad move may result in a crash and/or failing the race. This is not to say that you need to avoid getting out of the track entirely. I recommend that you experiment here, especially that one of the additional challenges in this mission is performing a long jump on the bike.
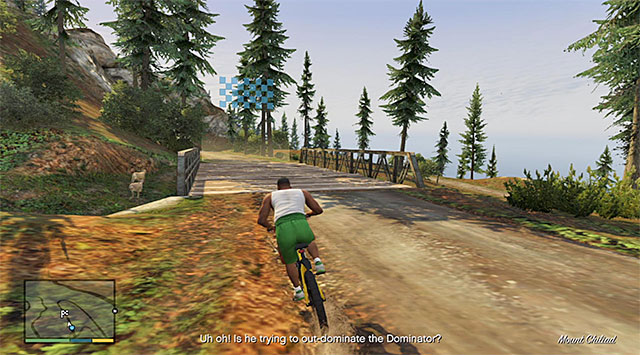 The finishing line
This mission will end as soon as you reach the finishing line located in the woods, at the foot of Mount Chiliad. Dom should slow down a little before the finishing line so, do not worry if you have lagged behind throughout the entire race, because you should be able to overtake him towards the end.
Rewards for the completion of the mission:
Requirements for the completion of the mission in 100%:

Availability: Franklin
Location: This mission becomes available some time after the completion of the optional Risk Assessment mission. This time, you need to meet up with Dom at the airport in the Southern part of Los Santos (the above screenshot).
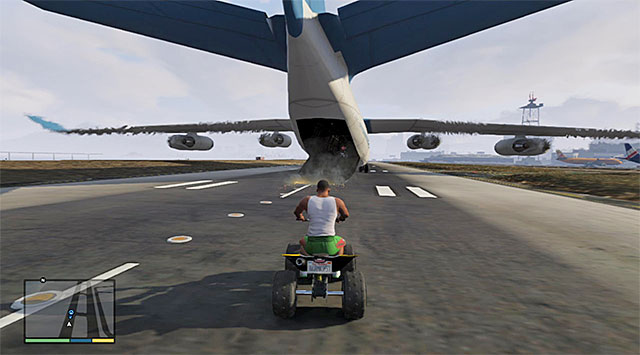 The cargo plane
Hop onto the ATV (Nagasaki Blazer) and start following Dom by entering the airport (do not worry, you will not cause a police pursuit). Turn right, watch out for the taxiing plane. You need to ride up the ramp into the plane's cargo compartment, and wait for it to reach another location of an insane activity, with Franklin and Dom on the board.
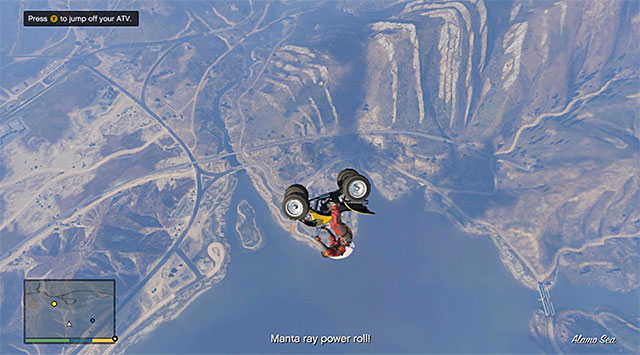 Perform rolls on the ATV
Ride out of the plane and do not release the ATV straight away, because performing, at least, eight full rolls is required to complete this mission in 100%.
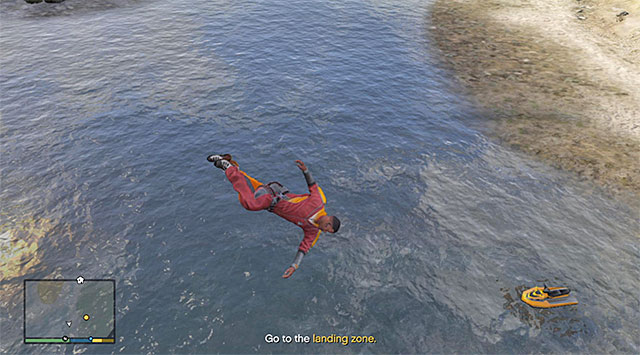
After you have performed the required amount of rolls, release the ATV and go into the regular freefall. Open the parachute and fold it right above the landing zone . Try to slam against the water surface (the above screenshot). If you have folded it on a low altitude, Franklin will not die, and you will have completed another activity required to complete the mission in 100%. You can now swim up to the landing zone (the yellow circle) and wait for Dom.
Rewards for the completion of the mission: none
Requirements for the completion of the mission in 100%:
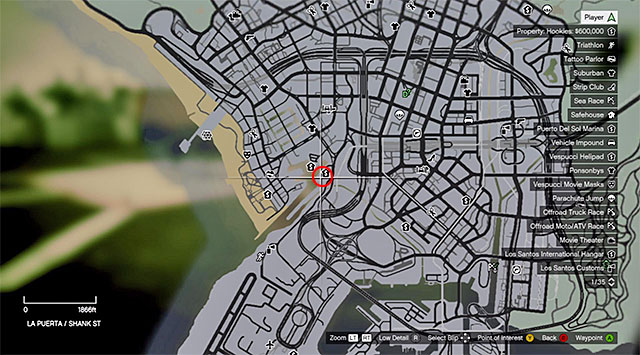
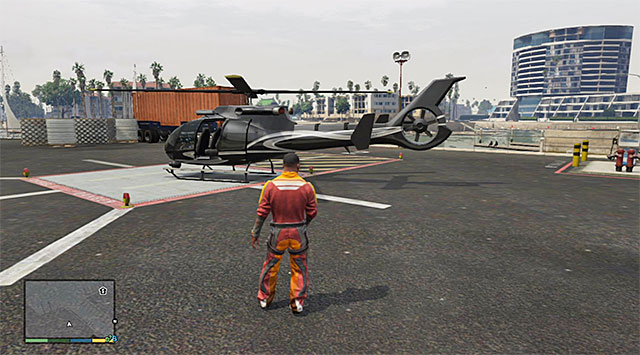
Availability: Franklin
Location: This mission becomes available some time after the completion of the optional liquidity Risk mission. This time, you will meet up with Dom on the rooftop of the skyscraper located in the Pillbox Hill district. Since there are no elevators or stairs to the rooftop, you need to take a helicopter to get there. I recommend that you look for one to the West of the skyscraper, near the landing pad shown in the above screenshot, in the La Puerta district.
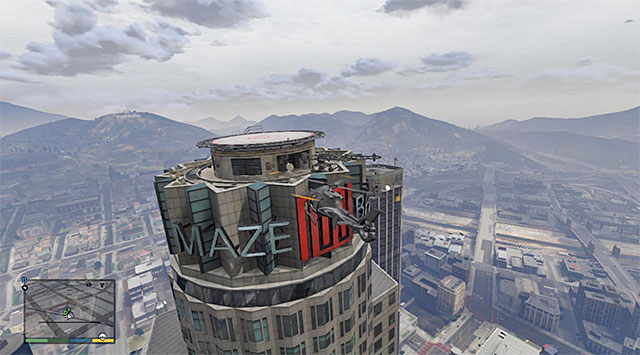 The skyscraper that Dom is on the top of
Get into the helicopter (Frogger) and fly towards the marked building. Land on the rooftop and approach Dom. This way you will start this mission.
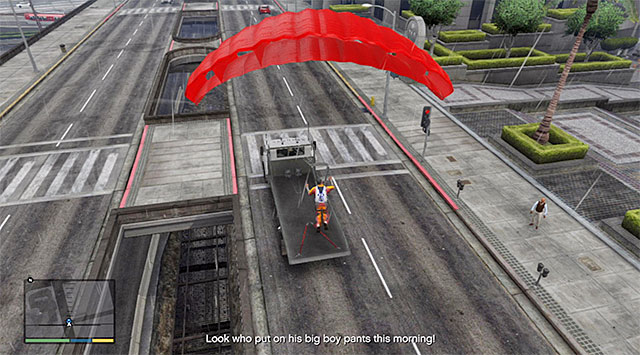
The mission proper is very short and it assumes landing on the flatbed of the truck shown in the screenshot, after jumping off the skyscraper's roof. Make sure that you open the parachute as late as possible, and also do not forget about pressing, and holding down, the button for targeting of the truck,, which will make it easier to land. Wait for Dom to join you and watch the final cutscene.
Rewards for the completion of the mission: none
Requirements for the completion of the mission in 100%:
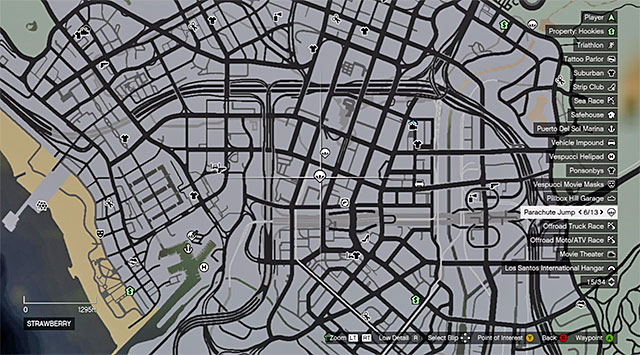 You can tell the site where you can skydive by the parachute icon
Availability: Franklin
Location: Start by completing the Targeted Risk side mission. To unlock this mission, you additionally need to take all of the 13 jumps, whose locations have been marked on the world map in the GTA V - Maps and collectibles guide. It is worth adding that you have, or even should, reach some of the sites on, e.g. a helicopter. You do not need to complete them in 100%, i.e. you do not need to perform ideal maneuvers while airborne, nor land perfectly.
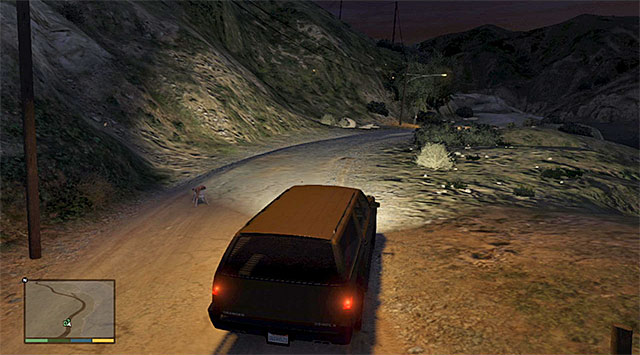
After you take all of the parachute jumps near the dam in the Land Act Reservoir location (to the North-east of Los Santos), there will appear a marker that lets you know about the availability of this mission. After you get there, you should search out the dog shown in the screenshot. Listen to the one-sided "conversation" and reach the dam to meet up with Dom. The freak will try a jump without a parachute on, which will end up in his tragic death.
 The site of the jump
If you want to complete this mission in 10%, you need to pick up the parachute lying somewhere on the left, after you watch the cutscene featuring Dom. Walk over the gate on the right, hop over the balustrade and use the parachute to prevent sharing Dom's fate. Fortunately, you do not need to land right next to Dom's corpse because this can be, just as well, some more distant spot.
Rewards for the completion of the mission: none
Requirements for the completion of the mission in 100%:
Availability: Michael
Location: You need to purchase a property called Dock Sonar Collections (it costs 250 thousand dollars) located in the North-Eastern part of the map, Westward of Mount Chilliad. After you purchase the property, while playing as Michael wait for a question mark to appear, reach the place and walk over to the other end of the pier shown in the above screenshot. Talk to the woman that you find there. Abigail will send you on an errand to find parts of the submarine deep underwater in various parts of the map. To start the process of searching for the submarine parts, walk aboard the red boat (Nagasaki Dinghy) moored at the pier, which is equipped with a diving suit.
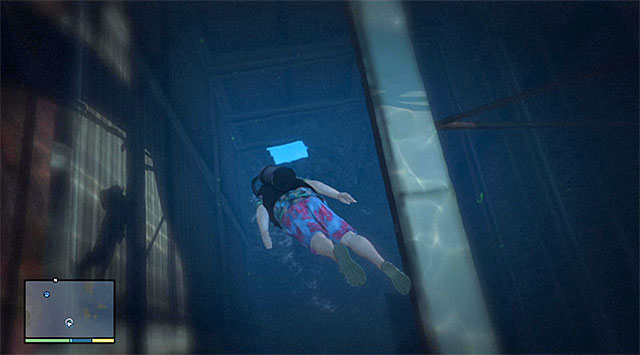 An example of a submarine part - there is 30 of them, in total
To locate the submarine parts, you may either use the "GTA V - Maps and collectibles" guide, or head towards the green circles appearing on the world map, and follow the radar's readings. I recommend that you have a careful look while underwater, because apart from the collectibles themselves, you can also find briefcases with cash, first-aid kits and new weapon models. You should watch out for sharks also, and steer clear of them, because they may attack Michael.
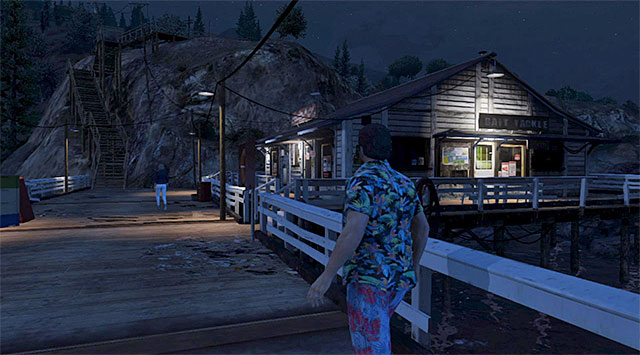 You can either kill Abigail or let her leave the dock
After you have collected all thirty parts, wait for Michael to contact Abigail and return to the Sonar Collections dock to talk to the woman. The final to this conversation will be a pretty disenchanting one because you will receive the measly 10 dollars for your efforts. Depending on your preferences, you can either exact revenge on the woman, or let her leave the dock.
Rewards for the completion of the mission:

Availability: Trevor
Location: You need to reach one of the estates in the North-Western part of Los Santos , to the North of the golf track. In the place shown in the above screenshot, you will find a former real estate agent named Josh Bernstein. He will ask you for help at exacting revenge on Lenny Avery. The plan assumes that you locate, and destroy, all of the advertisements located all around.
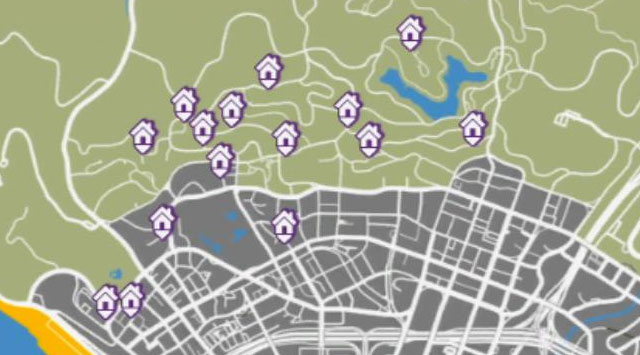
Wait until you receive an e-mail from Berstein and a message on your smartphone displays. Click on the link in the message, which will take you to Lenny's web site. Open the map here, which has been presented in the above screenshot. Note that the positions of all the estates, being Avery's responsibility to sell, have been marked on the map. It is at each of these estates that you will find the advertisements.
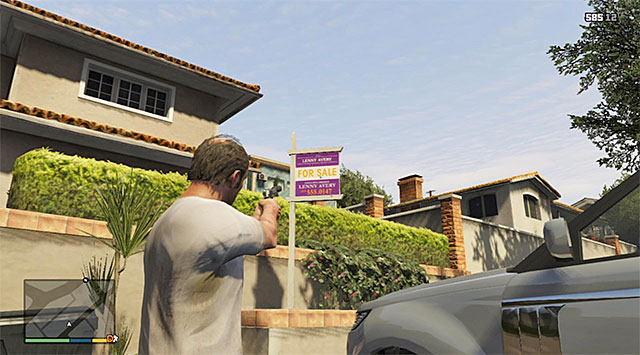 An example advertisement
You can, of course, visit the estates in any order you want and in total, there is fifteen of them. Each time you find an advertisement, destroy it in any way you want to by e.g. hitting it with your car, or by shooting it.
Rewards for the completion of the mission:
Requirements for the completion of the mission in 100%: there are no additional requirements for this mission so, it gets completed in 100% automatically.

Availability: Trevor
Location: this mission becomes available some time after the completion of Extra Commission side mission. Wait until you receive a message from Josh and get to the meeting place with him, at the motel in the Rancho district (the above screenshot). After you get there, listen to the conversation with Berstein and go to the room upstairs. Note - before you start this mission, it is a good idea to equip yourself with a melee weapon (e.g. a baseball bat or a club purchased in the Ammu-Nation store).
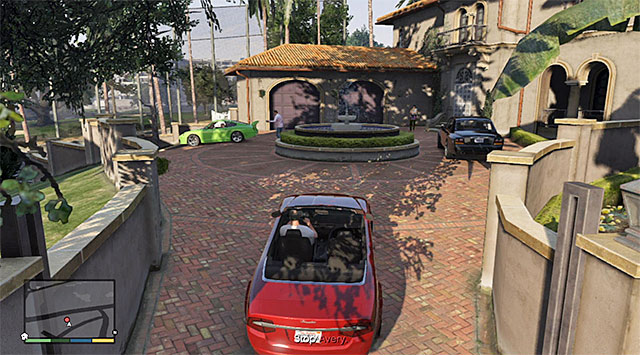
During the conversation, Josh will ask you to scare Lenny. You need to get to the estate owned by him, in the Rockford Hills district, and you can either use your own means of transport, or take Berstein's car (Lampadati Felon GT). The important thing is that you drive a fast vehicle. After you get to the Rockford Hills, locate the estate shown in the screenshot and start chasing the green sports car which belongs to Lenny.
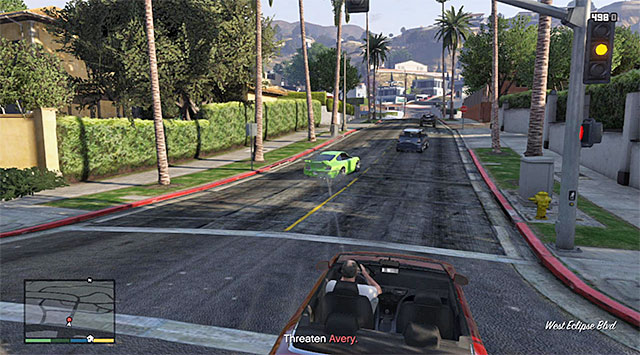 Keep shooting at Avery's car
Try to keep within small distance of Lenny's car and continue firing at it. Do not try to shoot Lenny, and only damage his car so, aim at the bodywork and not at the windows. After Lenny stops his car, stop next to him and get out of your car. From your inventory, select the melee weapon and use it to hit Lenny. The mission will soon conclude.
Rewards for the completion of the mission: none
Requirements for the completion of the mission in 100%:
 Josh's car
Availability: Trevor
Location: This mission becomes available some time after the completion of the Closing the deal side mission. Wait until you receive a message from Josh and like in the previous mission, visit the motel in the Rancho district. Go to the room on the upper floor and listen to the conversation with Josh, in the course of which you will be asked to set his former estate on fire. After the conversation, get into Josh's car (Lampadati Felon GT), which will, automatically, provide you with a petrol canister.
 Follow the radar 's readings while spilling fuel
Josh's villa is located in the Rockford Hills district. After you get there, park your car somewhere near one of the main entrances to the estate (best if you chose the side entrance), and hop over the wall. Go to the back of the building and select the canister from your inventory after you reach the big grill. Start spilling fuel onto the ground while following the path shown on the radar.
After you have spilled all of the fuel, hop over the wall again to leave the estate. Select any weapon from the inventory (something with a muffler and a scope would be best), aim at the fuel trail (the above screenshot) and take a shot. Get into your car and drive away from the estate. If you have been quick enough, none of the police will notice you. Otherwise, you will have to lose the pursuit also. The only thing left for you to do is listen to the phone talk with Josh.
Rewards for the completion of the mission: none
Requirements for the completion of the mission in 100%:
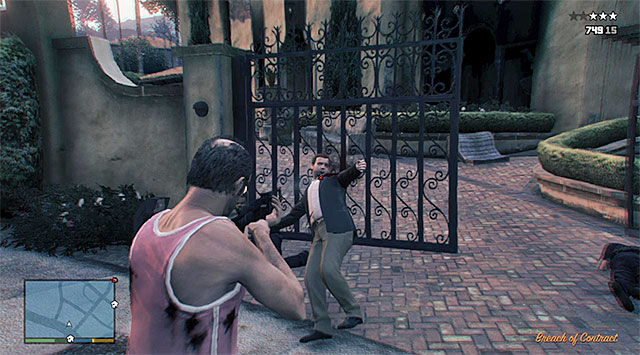
Availability: Trevor
Location: this mission becomes available some time after the completion of the Surreal Estate side mission. Visit the estate in Rockford hills again (the one which you have set on fire in the previous mission). Approach Josh, who will publicly accuse Trevor of the fire and alarm the police who accept the notification. If you want to complete this mission in 100%m you need to shoot Josh (the above screenshot). Apart from that, it would be a good idea to deal with the police also, because they can otherwise respond with fire.
 The police car
Quickly, run up to the police car parked next to the villa (Police Cruiser), get into the car and start escaping. There is a three-star pursuit to shake off, so you need to make sure that you get sufficiently far away from the site in the first place. Then, find some tunnel or an underground parking lot, thanks to which you will also lose the police chopper, apart from the regular police units.
Rewards for the completion of the mission: none
Requirements for the completion of the mission in 100%:
Availability: Michael
Location: Unlocking this side-mission, connected with the Epsilonist cult, is obvious and you do not need to prepare yourself for it in any way, or wait until you reach the appropriate moment in the campaign mode.. While playing as Michael, connect to the internet in any way you want (e.g. using your smartphone) and use the search engine to find the www.epsilonprogam.com site (the above screenshot).
 This test has no bearing on whether the mission will be unlocked or not
After you access the site, find the Evaluate Your Identity button. The test consists of 10 questions, where the answers you provide influence only as much as the looks of the site that presents the results. This will not influence, on the other hand, on the unlocking of the mission because it will become available irrespective of the options that you have taken while taking the test.
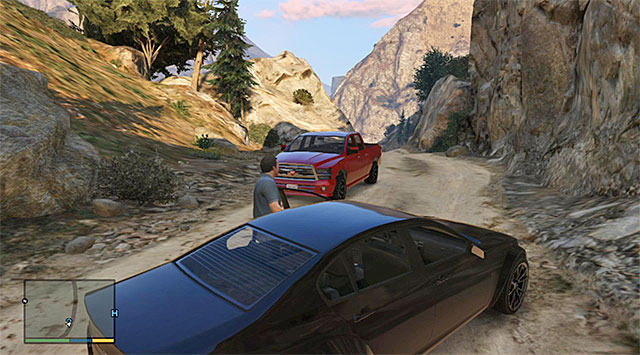 The truck that you are looking for
Wait for a question mark to appear on the map, which is going to take you to Raton Canyon in the central part of the map. Get there and approach the red pick-up truck, which will start a cutscene and complete the first meeting with the Epsilonists.
Rewards for the completion of the mission: none
Requirements for the completion of the mission in 100%: There are no additional requirements for this mission so, it gets completed in 100% automatically.
Availability: Michael
Location: This mission becomes available after you complete the Seeking the Truth side mission. Wait for an e-mail from Marnie and access it to click on the link contained in the message. Thanks to this, you will visit the www.epsilonprogam.com site again. Select the option of donating $500 for the needs of the cult(the above screenshot).
 The building where you meet with the Epsilonists
You now need to wait patiently until there appears the cult symbol in the North-Eastern part of the map (letter E on the world map). It is the Downtown Vinewood district. More precisely, it is the small building neighboring the Pitchers club, among others, i.e. one of the purchase-able estates. Enter the building and watch a cutscene of your meeting with Marnie and several more cultists.
Rewards for the completion of the mission:
Requirements for the completion of the mission in 100%: There are no additional requirements for this mission so, it gets completed in 100% automatically.
Availability: Michael
Location: This mission becomes available after you complete the Accepting the Truth side mission. Wait for an e-mail from Marnie, open it and click on the link contained in it, thanks to which you will visit the www.epsilonprogam.com site again. Select the option of donating $5000 to the cult's account.
NOTE: If you are playing the basic version of the game (no patches installed) you need to mind the fact that there is a serious glitch in the game, which may make you unable to unlock the remaining missions connected with the Epsilonist cult. I recommend that you save the game before you start this mission and save again only after the completion of the ENTIRE mission, i.e. at earliest, after you receive another e-mail message from Marnie (after you steal all five means of transport).
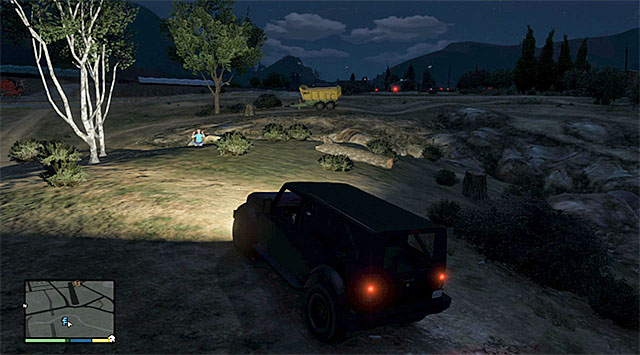 The spot where you meet Marnie
You now need to wait patiently, until near the airport, there appears the cult symbol in the Northern part of the map (to the North of Sandy Shores). (letter E on the world map). After you get there, (the Grapeseed location) have another conversation with Marnie to learn that Marnie desires Michael to acquire four rare car models and one rare motorcycle for her. Wait for an e-main from Marnie which is going to include the names and the pictures of the vehicles in question. The game will not point you to specific places where you can steal the vehicles that the cultists are interested in. Therefore, you will have to find them on your own. Note -detailed information on the available means of transport are contained in the "GTA V - Maps and collectibles" guide.
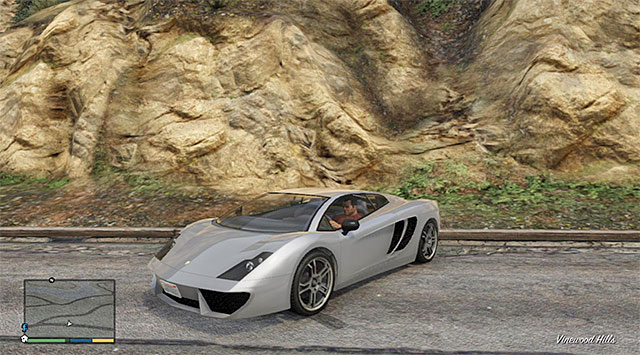 Pegassi Vacca
Pegassi Vacca is a car that you may notice while exploring the Vinewood district. One of such cars is parked in front of the estate in the Eastern part of this district.
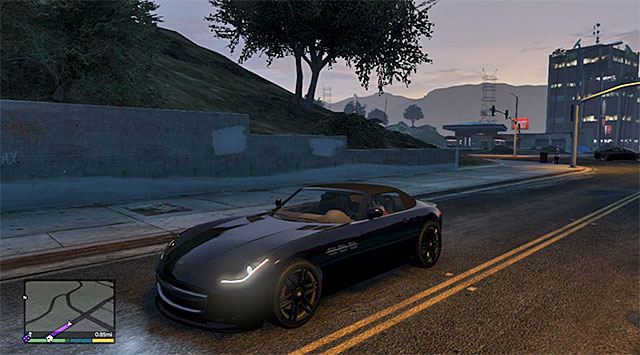 Benefactor Surano
Benefactor Surano is a car that you see pretty often in Vinewood, Rockford Hills and the other more luxurious districts of the city.
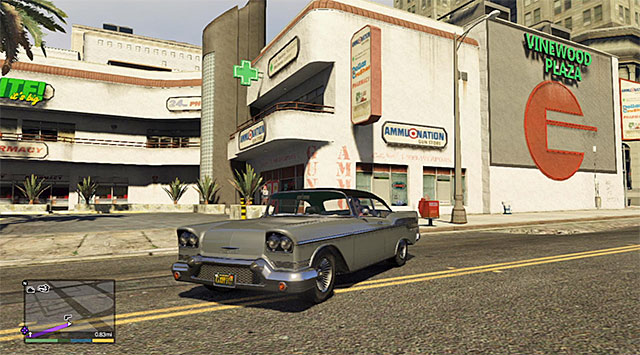 Declasse Tornado
Declasse Tornado is a car that you can find in many different areas of the game world, e.g. in front of an estate in the central Vinewood and in front of the car garage in the Hawick district.
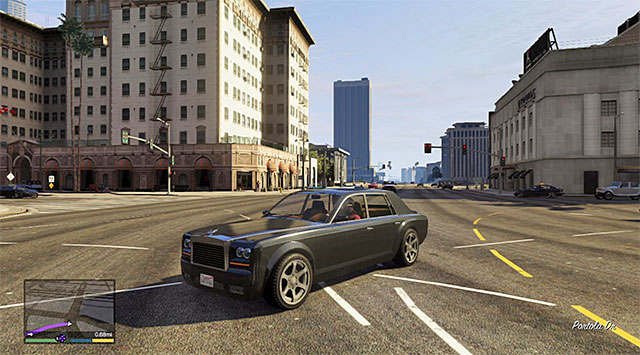 Enus Super Diamond
Enus Super Diamond is a car that you see in Vinewood Rockford hills and the other luxury districts on a regular basis.
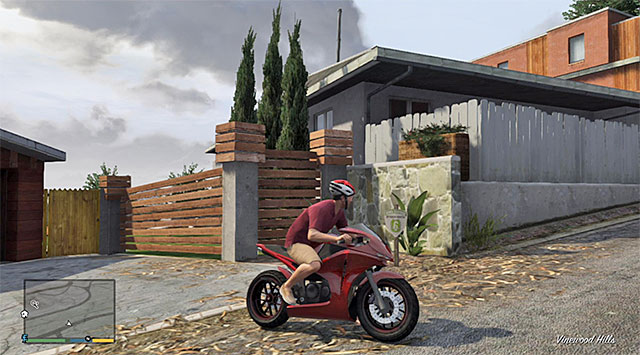 Dinka Double-T
Dinka Double-T is a bike that you may notice while exploring Vinewood. One of these is parked behind an estate in the Eastern part of this district.

You need to deliver all of the stolen means of transport to the garage adjacent to one of the estates in the central Vinewood. After you have performed all of the actions, DO NOT SAVE the game and wait for confirmation from Marnie (the above screenshot). The result of this message should be unlocking the next mission automatically.
Rewards for the completion of the mission: none
Requirements for the completion of the mission in 100%: There are no additional requirements for this mission so, it gets completed in 100% automatically.
 The place where you meet up with Marnie again
Availability: Michael
Location: This mission becomes available after you complete the Accepting the Truth mission. Wait for an e-mail message from Marnie and reach the farm in the Grapeseed location, to the North of Sandy Shades, again. Listen to the conversation with Marnie and Jimmy Boston, from whom you will receive a detector for finding the traces of supernatural beings.
The plan is that you locate three different items and you need to know that, if you use the detector (targeting trigger/button) you will be unable to complete this mission in 100%. As a result, I recommend that you reach the places presented in the successive screenshots, without using this device. The first object that you are looking for is the TV set.
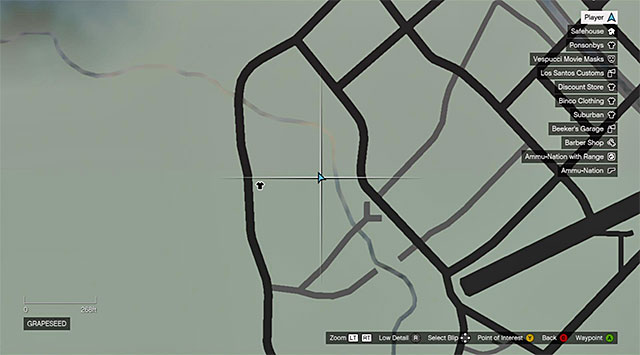
The second one is a white box the whereabouts shown in the screenshot).
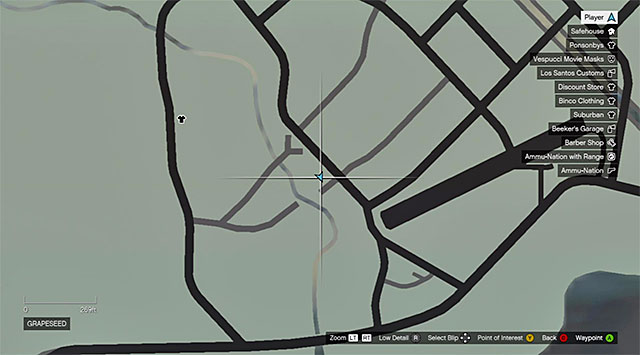
The third item that you are looking for is a shoe (the whereabouts shown in the screenshot). After you have located all three items, listen to the conversation with Marnie and Jim. Rewards for the completion of the mission:
Requirements for the completion of the mission in 100%:
Availability: Michael
Location: This mission becomes available after you complete the Chasing the Truth side mission. Wait for an e-mail from Marnie, open it and click on the link inside. This way you will visit the www.epsilonprogam.com. Website again. Click twice on the button of donation of 5000 dollars to the cult's account, to transfer a total of 10 thousand dollars. You now need to wait patiently until there will appear a cult symbol next to Michael's estate, in the Downtown Vinewood district (letter E on the world map). Meet Marnie there (the above screenshot).
After the meeting with Marnie finishes, you should wait for another e-mail and click onto the link in the message. After you gain access to the www.epsilonprogam.com click on the indicated big button and select the Blue Robes option, which will result in buying a complete cultist uniform. It is worth adding that the uniform costs 25 thousand dollars so, if you do not have that amount of money at your disposal, you need to acquire the funds in some way (e.g. by performing some other missions, wait for the income from the other estates that you own, or steal from armored vans).
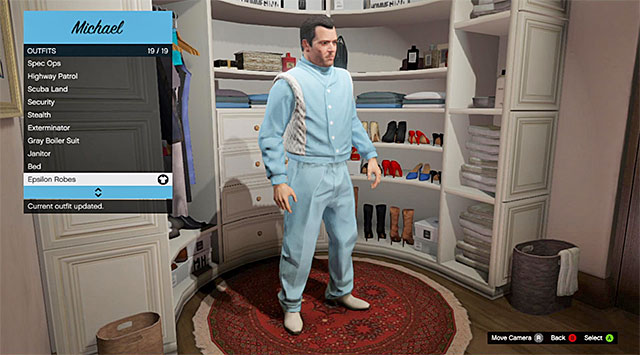
Return to Michael's villa and use the bed in the bedroom several times (you do not need to save the game here, although this is entirely possible), thanks to which you will speed up time (each interaction with the bed progresses time by 6 hours). Wait about one day this way, and you should receive an e-mail confirming that your uniform has been delivered. Approach the wardrobe, locate the cloths that you have bought (the above screenshot) and put on the Epsilon Robes.
 You can use the bed or wait 10 days by performing some other missions
The next requirement is to wear the robes for, at least, ten days and, just like in the case of the recent acquisition, you can speed up time by interacting with the bed. As you can easily calculate, progressing the ten days will require you to perform 40 such interactions. If you have done everything according to the plan, you will eventually receive an e-mail from Cris with congratulations.
Note - if you have waited for the appropriate number of days and you still have not received the confirmation (from the Epsilon store or from Cris) try leaving the villa or not performing any action for the next dozen, or so seconds after you have left the bed.
Rewards for the completion of the mission: none
Requirements for the completion of the mission in 100%: There are no additional requirements for this mission so, it gets completed in 100% automatically.
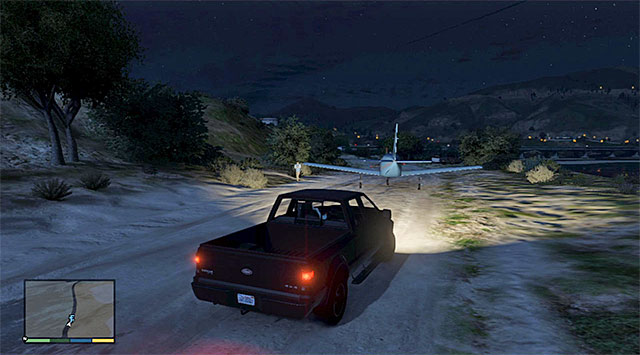
Availability: Michael
Location: This mission becomes available after you complete the Bearing the Truth side mission. Wait for a text message from Jimmy Boston and set out to meet up with Tom (the above screenshot), who is waiting in the Western part of the map, to the West of Fort Zancudo (letter E on the world map).
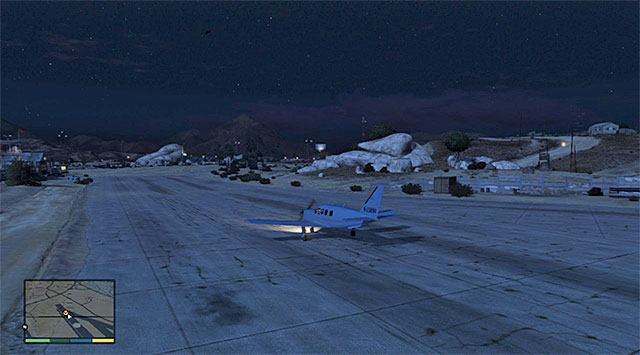 The place where the mission ends
After you listen to a short conversation, get on the plane (Velum), take off without bumping into any of the objects in the surroundings and fly towards the airfield in Sandy Shores. Along your way, listen to the phone conversation with Jimmy and try flying under, at least, one of the bridges. Land the plane carefully and leave the plane in the marked area. Talk to Jimmy and wait for him to leave this place aboard the plane that you have just delivered.
Rewards for the completion of the mission: none
Requirements for the completion of the mission in 100%:
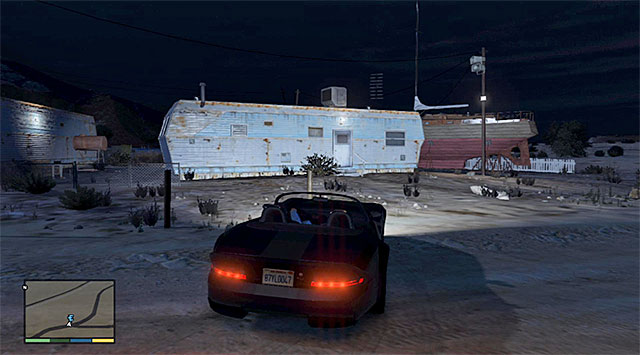
Availability: Michael
Location: This mission becomes available after you complete the delivering the Truth side mission. Wait for a new marker to appear, which will let you know that there is another mission from the Epsilon cultists available (letter E on the world map), which will be located in the Grand Senora Desert, to the South of Sandy Shores. After you get there, approach the trailer shown in the screenshot and initiate the meeting with Marnie, Tom and jimmy.
 The best solution is to run in circles
This mission is quite exhausting because it assumes that you make a pilgrimage of a kind, which is about covering five miles on foot. I recommend that you start running in circles (the game will notify you of the fact of entering the "pilgrimage grounds"). I recommend against straying into more desolate areas because you can be then attacked by a wild animal and you will have to start over.
 Answer both phone calls from Cris
The game should inform you, on a regular basis, of your progress in this mission (every 0.1 miles) although covering the entire distance is a matter of running around for a dozen or so minutes. After some four miles you will receive a phone call from Cris who will motivate you to complete the pilgrimage. Run the last, fifth, mile thanks to which you will complete this mission.
Rewards for the completion of the mission: none
Requirements for the completion of the mission in 100%: There are no additional requirements for this mission so, it gets completed in 100% automatically.

Availability: Michael
Location: This mission becomes available after you complete the Exercising the Truth side mission. Wait for a new marker to appear, which will let you know about the availability of the availability of the last Epsilon cultists' mission (letter E on the world map). It will appear close to Michael's villa in the West Vinewood and it is the cult's local headquarters shown in the above screenshot. Note - Michael is going to need to have 50 thousand dollars on him at the moment of starting this mission (another "donation") so, if you do not have that much money on you, you should make suitable preparations.
 The place where the convoy stops
Listen to a short conversation with Cris, to learn that Michael is supposed to join a convoy escorting the cash, amassed by the cult, to the place where it will be loaded onto a chopper and taken away from the country. Get into the vehicle and follow the vehicle to reach, after several moments, one of the side alleys in the Northern part of the city.
 The present from the cultists :-)
There are two variants of behavior here. Variant one assumes that you leave the car, with the cash onboard, alone. Go to the nearby parking lot where you will claim your reward, i.e.... a dilapidated tractor.
 Attack the helicopter crew
It is a WAY BETTER idea, required at the same time to complete this mission in 100%, is to attack the cultists in order to steal the transported cash. I recommend that, in such a situation, you start shooting from a larger distance, at the helicopter crew. Do not worry if you miss the pilot, because you will get another opportunity a bit later.
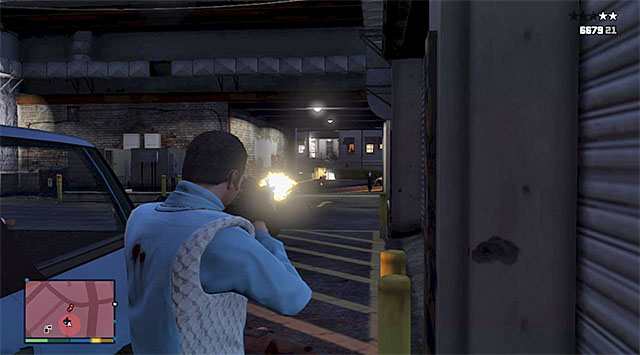 You need to eliminate all of the guards
Now, you should take to the armed guards standing around. Of course, I recommend that you use the skill of slowing down time to your advantage, and hide behind vehicles and big objects. Watch out for new cultists approaching from the side of the alley that you earlier got through after the convoy. Be ready to deal with them (leave no one alive).
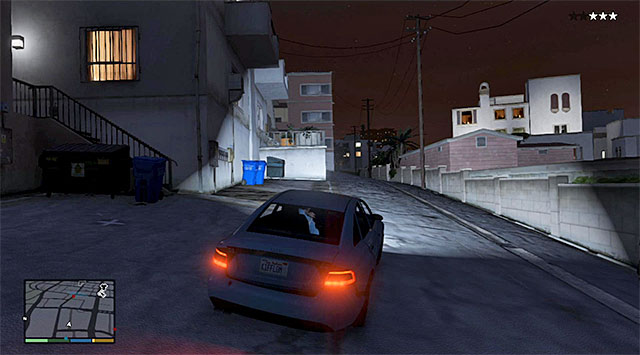 Lose all of the pursuits
After you have cleared the area, get into the car with the money on you and start escaping. If the cultist helicopter is still operating, it would be a good idea to find a safe spot and shoot it down from there (target the pilot or use the rocket launcher). Otherwise, focus only on losing the police pursuit. The reward for this mission is the whole cash stolen from the cultists.
Rewards for the completion of the mission:
Requirements for the completion of the mission in 100%:
 An example letter - there are 50 of them in total
Availability: any character
Location: This mission assumes solving the mystery of Leonora Johnson's death. The only way to unlock it, and to determine the personals of the murderer at the same time, is to find all 50 letter scraps. The exact whereabouts of the scraps have been provided in the "GTA V - maps and collectibles" guide.
One of the pages of the letterAfter you have collected all of the scraps, you will be able to acquaint yourself with the full contents of the letter. This is not mandatory, of course, but this will allow you to learn better about the conditions of that murder. You will learn that it is Peter Dreyfus who murdered her.
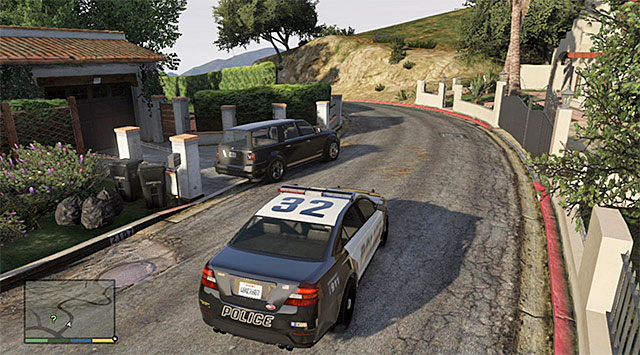
You can now go to Peter Dreyfus's estate located in the Western part of the Vinewood Hills. After you get there (the above screenshot) you could deal with Dreyfus's SUV (Landstalker), because he will soon try to use it to escape. If you do not want any unnecessary commotion, break into the car and park it, e.g. on one of the nearby hills.
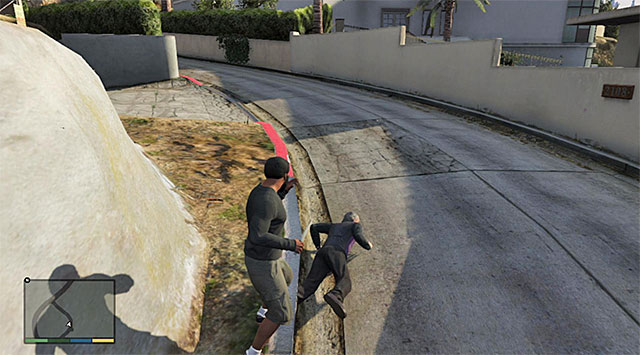 You can deal with Dreyfuss in any way you want
Only now, hop over the wall to make it into the estate and reach the place where Dreyfuss is meditating. After the meeting finishes, the man will launch to his escape and you can, theoretically, allow him to leave this place. It is much better, though, to murder him, because it is required to complete this mission in 100%. If you have followed my earlier suggestion and sabotaged, or moved the car, your job will be easier because you only need to shoot him from a distance or catch up with him, and attack him in melee fight.
Rewards for the completion of the mission: none
Requirements for the completion of the mission in 100%:
 Unexpected meeting
Availability: Trevor
Location: this mission becomes available after you have completed the entire main plot and selected either Ending B or Ending C towards the end. Take control over Trevor and after you receive a message from Ron, return to the trailer that belongs to the protagonist (in Sandy Shores), thanks to which you will discover that he was visited by his mother. The elderly lady will ask her to supply her with a unique medicine.
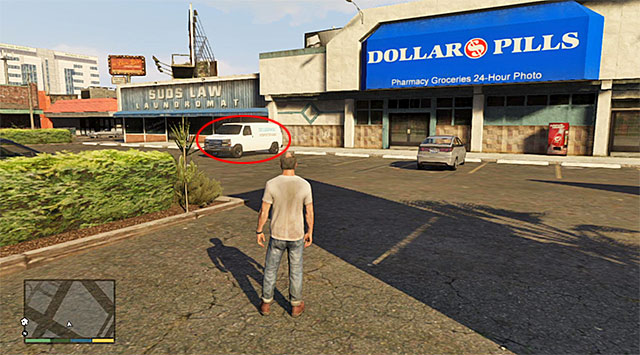
The plan assumes that you steal the van with the Deludamol pills but, the game will not point you to the specific vehicle and require you to find one of such vehicles on your own. The Deludamol vans can be found, first of all, on parking lots at most hospitals and pharmacies in the game world. One of such places is the Dollar Pills pharmacy shown in the above screenshot, which is located to the South of Trevor's strip club, in the Strawberry district. After you have stolen the van, drive it back to the trailer, where the protagonist will not find his mother.
Rewards for the completion of the mission: none
Requirements for the completion of the mission in 100%: There are no additional requirements for this mission so, it gets completed in 100% automatically.
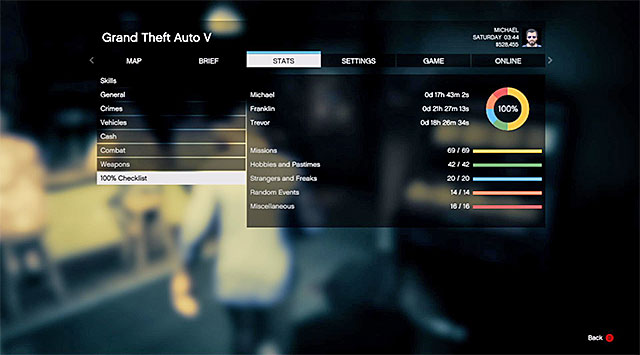 You first need to beat the game in 100%
Availability: Franklin
Location: You get the opportunity to start this mission after you complete the game in 100%. You can check on your current progress from the level of the stats window. Furthermore, the detailed information concerning all of the activities for the 100% completion of the game can be found in "GTA V - Game Guide".
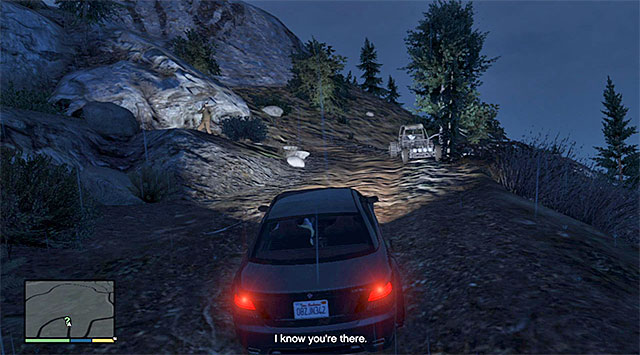
This mission does not become available right after you attain the 100% game completion status. You need to be patient and spend a lot of time doing some other activities, and wait for the moment when there will appear a question mark in the North-Western part of the map (close to Mount Chiliad). Go there as Franklin to meet a hunter there (the above screenshot). From him you will learn about a beast in this region.
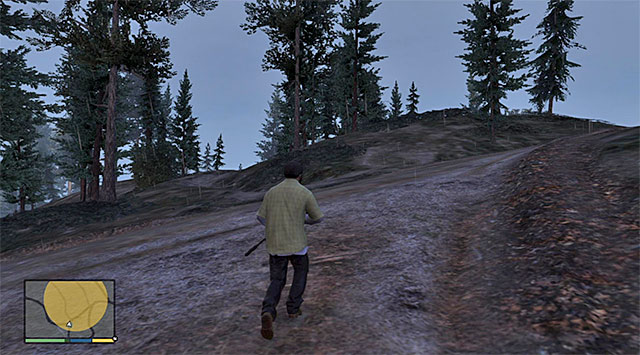 The region where you need to look for the beast
After you have listened to the conversation, go to the place with footprints to the North-West of the mission's starting point. Walk on foot because using a means of transport will render you unable to complete this mission in 100%.
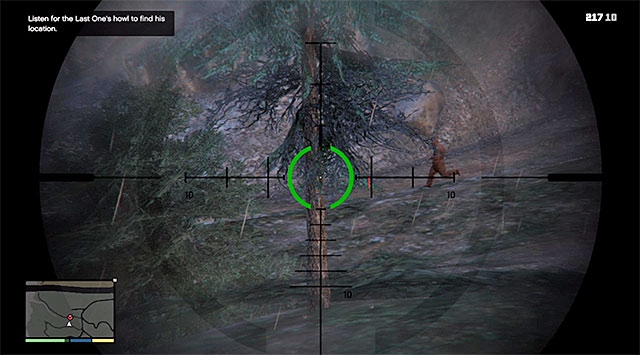 Try to shoot the beast with the scoped sniper rifle
After you get there, explore the entire marked area and you should be able to notice the running beast, which you of course need to follow. During the chase, try using the sniper rifle to cripple the beast but, do not target the head, and different body parts. At the same time, try to hit the beast, at least, three times. For tracking the beast, listen out for the sounds it makes and use the red dots appearing on your radar.
 Do not allow wild animals kill you
An additional disadvantage is the fact that, along his way, Franklin will bump into several wild animals. It is a good thing to deal with them quickly by using a good assault rifle, for a change.

The chase ends either after you shoot the best on the head (which is not an easy task) or at the cliff shown in the above screenshot. Using any weapon, shoot at the beast, thanks to which you will determine that this was only a man in disguise. This is the end of the hunt.
Rewards for the completion of the mission: none
Requirements for the completion of the mission in 100%:
While exploring the game world, you may witness random events which you will be let know about, thanks to the red dots on the radar. This kind of activities is not perceived by the game as "regular" missions, which means that ignoring a given event will not prevent you, for good, from completing it. O recommend against missing them because, in most cases, completing these is neither demanding nor time consuming. Apart from that, you can easily earn some money or make new contacts.
Each random event is activated in a predetermined spot in the game world. What may turn out helpful in this respect is the map that you can see on the top of the screen, where you can find various spots marked. Note - do not worry if a random event does not initiate during your first visit to a place. In such a situation, wait for some time and try again in the future (at the same time, make sure that you are laying the appropriate character because some of the random events are reserved for certain characters.
Availability: any character
Location: The parking lot in front of the Dollar Pills pharmacy located in the Strawberry district in the central Lost Santos.
 You can help the robbers, leave them to their fate or kill them
Drive up to the robbers that have just performed a burglary, but they do not have any getaway vehicle. If you want to help them escape, you should make sure that you are driving a four-door vehicle and wait for them to get in the car. At this moment, the game will start a pursuit (2 stars) so, in the way you have learned throughout the main campaign, you need to lose the police enforcers. After you do, take the robbers to the spot of their choice. If you do not want to break the law, drive away from the site or eliminate the bandits, thus helping the law enforcement, in fact (in this case, it is worthwhile to examine the robbers' bodies to find quite a lot of cash on them).
Note - if you are playing as Trevor, there is an alternative way to complete this mission. You can take the bride to the Altruist cult's headquarters, located at the foot of Mount Chiliad in the North-Western part of the map (letter A on the world map). For delivering the man to the Altruist cult, you will be rewarded with 1000 dollars.
Rewards for the completion of the event:
 The best method to catch up with the thief is in a fast car
This event activates in two different places in the game world, and it is always the same in its course. You should hear a cry from a person whose bicycle has been stolen. Catch up with the thief (best with a fast means of transport) and knock the bike or shoot/kill the thief. Get onto the bike and return it to the owner.
Availability: any character
Location: Little Bighorn Avenue in the Rancho district in the South-Eastern part of Los Santos.
Rewards for the completion of the event:
Availability: any character
Location: Bridge Street in the Hawick district, in the North-Eastern part of Los Santos.
Rewards for the completion of the event:
Availability: any character
Location: North Rockford Drive in the Richman district in the North-Western part of Los Santos.
 The best way to catch up with the thief is on a very fast vehicle
You should hear a cry from a person whose bike Pegassi Bati 801 has been stolen. Catch up with the thief (best by using a fast means of transport) and knock the bike or shoot/kill the thief. Get onto the bike and return it to the owner.
Rewards for the completion of the event:
Availability: any character
Location: The construction site in the Little Seoul district, in the central part of Los Santos, close to Franklin's first house.
 The bulldozer
While driving along the construction site in Los Santos (the Little Seoul district, to the North-West of Franklin's house) you may watch a cutscene of an unfortunate accident. Reach the construction site quickly and, after you listen to the cry of the trapped worker, get into the bulldozer (HVY Dozer) parked nearby.
 You need to unlock access to the driver's door
Use the bulldozer to unblock the driver's door of the damaged truck. After you do that, retreat with the bulldozer to a safe distance and wait for the explosion. You now need only to receive the thanks from the saved worker.
Rewards for the completion of the event:
 The easiest way is to slam the vehicle into the robber
This event activates in three different areas of the game world and, for a change, only 1 and 3 are nearly identical. You should hear a cry from a person assailed by a robber who will start running. The easiest way to get the robber, and eliminate him, is to use the car to run over him. After you have eliminated the threat, collect the money and either keep it or give it back to the victim.
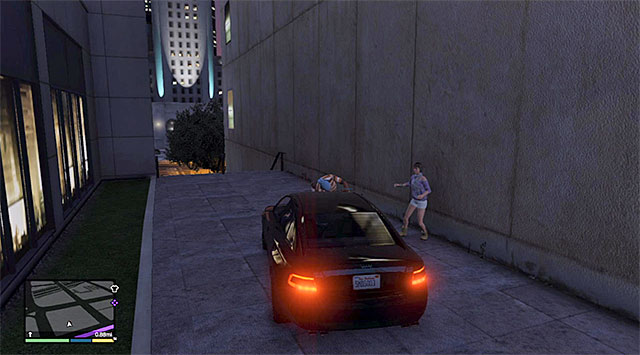 The easiest solution is to slam your car into the bandit
This event activates in three different locations in the game world and variation 2 is a bit different than the other two. You should hear a cry from a person who is being aimed at by the bandit. The easiest way is to eliminate him by slamming your car into him (make sure that you do not knock the civilian also!).
Availability: any character
Location: The alley in the Strawberry district, in the central part of Los Santos.
Rewards for the completion of the event:
Availability: any character
Location: The alley in the Hawick district in the North-Eastern part of Los Santos.
Rewards for the completion of the event: none
Availability: any character
Location: The Vespucci Boulevard in the Pillbox Hill district in the central part of Los Santos.
Rewards for the completion of the event:
Availability: any character
Location: The motel at Route 68 to the South-West of Sandy Shores (central part of the map).
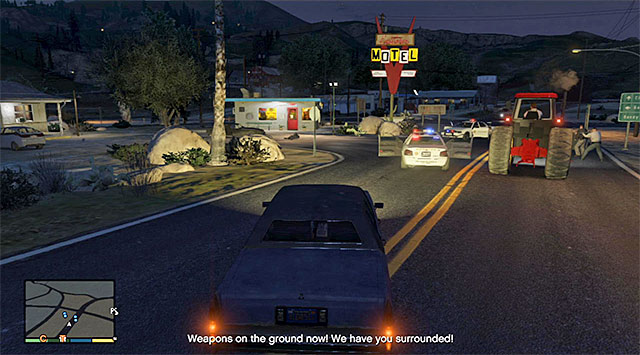 You can kill either the policemen or the robbers
Stop near the motel where there is a heated fire exchange. You can behave here in two different ways. Variant one assumes that you help the robbers and eliminate all of the attacking policemen. The reward in this case, is 5000 dollars. Variant two assumes that you attack the robbers, or wait until they are killed by the law enforcers. Collect the two briefcases dropped by the bandits, to get richer by 10000 dollars. In both cases, you will have to lose a police pursuit towards the end (a two- or three-star pursuit)
Rewards for the completion of the event:
Availability: Michael or Franklin
Location: A small farm in the central part of the map (Grand Senora Desert), to the South-West of the prison.
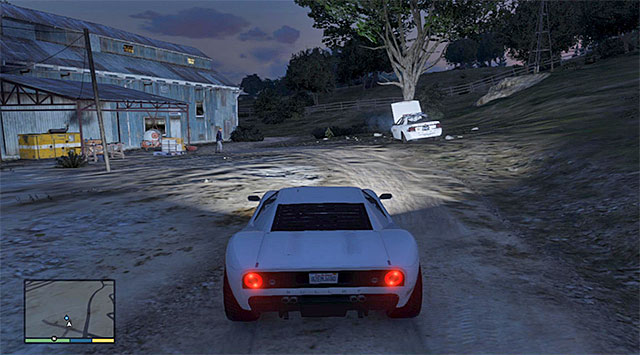 The inmate standing at the demolished police car
After you reach the farm, you should notice a prisoner standing next to a police car smashed against a tree. You can decide whether you want to take the passenger and take him to the spot of his choice. You need to keep in mind that, in such a situation, there will start a police pursuit. Lose the police by, e.g. going across wilderness, and complete the journey to the destination.
Rewards for the completion of the event:
Availability: Michael or Franklin
Location: a field road in the central part of the map (Grand Senora Desert), right next to the prison.
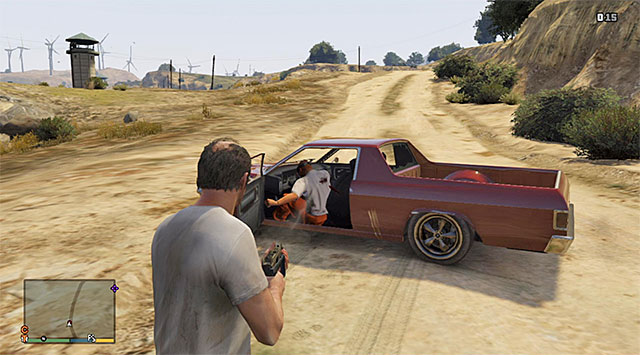 Ignore the prisoner or kill him right after he steal the car from your character
You should notice a runaway prisoner wearing an orange uniform and, if you are gullible enough to stop and talk to him, he will produce his weapon and make you give him your car. Follow his instructions and kill him right at the moment when he sits behind the wheel. Of course, you can take a shot in the first place, or not stop at all and, right after you notice the prisoner, drive away from here.
Rewards for the completion of the event: none
Availability: any character
Location: The Senora Freeway in the North-Eastern part of the map, to the East of Mount Chiliad
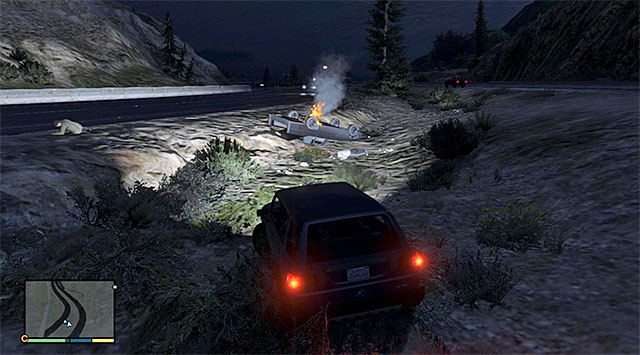 The blazing wreckage
Stop next to the burning car to notice a woman that begs for help. Approach her and, after you listen to the conversation, return to your car. You need to take Taliana to the place that she points you to, in Sandy Shores. Along your way, you will learn that she was involved in a robbery and that she is an experienced driver. She will offer her services at the future heists.
Rewards for the completion of the event:
 Approach the marked characters and listen to the short conversation
This event activates in two different areas and it is always the same in its course. You may meet drunk people who will ask you to use their car to give them a lift to a spot, in the game world, of their choice. Get into the marked car, wait for the passengers and reach the marked point. While driving, try not to exceed the permitted speed or bump into the other cars or objects, because otherwise the passengers may vomit and the ride will end prematurely.
Note - if you are playing as Trevor, there is an alternative way to complete this mission. You can take the bride to the Altruist cult's headquarters, located at the foot of Mount Chiliad in the North-Western part of the map (letter A on the world map). For delivering the man to the Altruist cult, you will be rewarded with 1000 dollars.
Availability: any character
Location: La Spada restaurant located in the La Puerta district in the Western part of Los Santos.
Rewards for the completion of the event:
Availability: any character
Location: Armadillo Avenue in Sandy Shores in the central part of the map.
Rewards for the completion of the event:
Availability: any character
Location: The scenic point in the North-Western part of the map, which is located near the highway and Mount Chiliad.
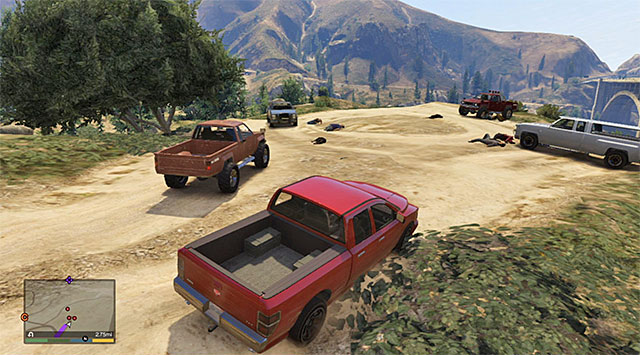 The scenic point
Reach the scenic point to notice many killed gangsters. Search through all of the bodies to find a briefcase with cash on one of the dying bandits.
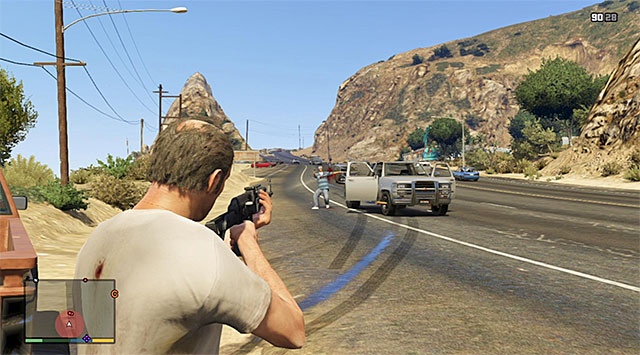 You need to get rid of all the enemies
Soon after you leave the area where you have found the briefcase, you will be attacked a few groups of gangsters. Depending on the playable character that you are playing now, as well as on your equipment, you can try to shoot at the gangsters from the speeding car, or stop and eliminate the enemies in a safer way, after you hide behind the car (or any other cover). After you have eliminated the assailants, consider examining the bodies for additional weapons and cash.
Rewards for the completion of the event:
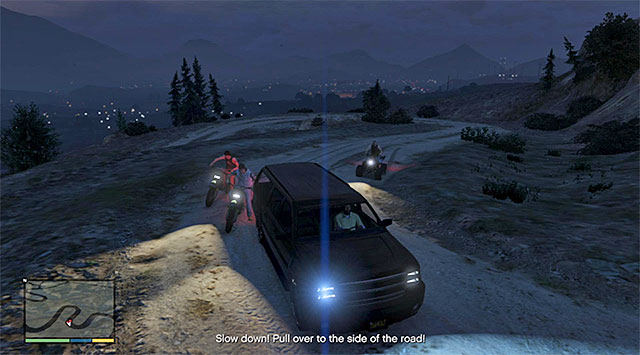 Keep slamming into the ATVs and the motorcycles, or conduct fire
This event activates in three different locations of the game world and its course is always the same. You can bump into the members of the border patrol on the lookout for illegal immigrants. The patrolmen will demand you to pull over your vehicle, and it is a good idea to attack them straight away, without giving them time to show their initiative. Depending on your preferences, you can try to squash the bikers and the ATV riders, or conduct fire while driving the car (this is especially advisable while playing as Franklin). Do not get out of the car because you can be quickly surrounded and killed. After you eliminate the riders, examine their bodies to find weapons and cash (up to 700 dollars).
Availability: any character
Location: Mt Haan Road in the central part of the map, to the North of Vinewood Hills.
Rewards for the completion of the event: none
Availability: any character
Location: Tataviam Mountains near the highway in the Eastern part of the map.
Rewards for the completion of the event: none
Availability: any character
Location: The Raton canyon in the central part of the map, to the West of Sandy Shores and to the South-West of Mount Chiliad.
Rewards for the completion of the event: none
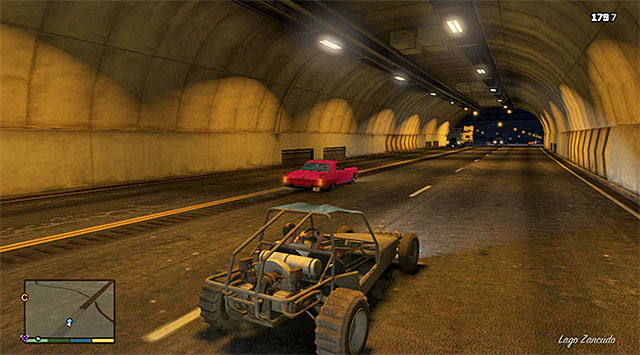 The easiest way is to kill the thief
This event activates in two different places in the game world and it is always the same in its course. You should hear a cry from a person whose car has been stolen . You need to catch up with the escaping car (you need to drive a quite fast car) and try to shoot the thief. After the successful action, get into the stolen car and return it to the assailed person.
Availability: any character
Location: The Great Ocean Highway in the Western part of the map.
Rewards for the completion of the event:
Availability: Michael
Location: Exceptionalists Way to the North-East of the airport in Los Santos.
Rewards for the completion of the event:
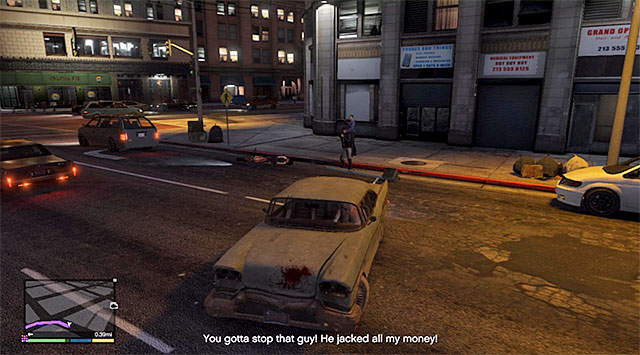 You need to stop the thieves and retrieve the cash stolen by them
This event activates in two different locations in the game world and it is similar in its course in both cases. You should hear a cry for help from a person who has been robbed. Follow the thieves using a vehicle (a bike or a van) stop them, best by laying fire down on the vehicle, and deal with them (note - they can respond with heavy fire!). After the successful action, collect the stolen money. Depending on your preferences, you can either keep the whole sum for yourself or give the money back to the victim.
Availability: any character
Location: Hawick Avenue in the Hawick district in the North-Eastern part of Los Santos
Rewards for the completion of the event:
Availability: any character
Location: San Andreas Avenue in the Textile City district in the central part of Los Santos.
Rewards for the completion of the event:
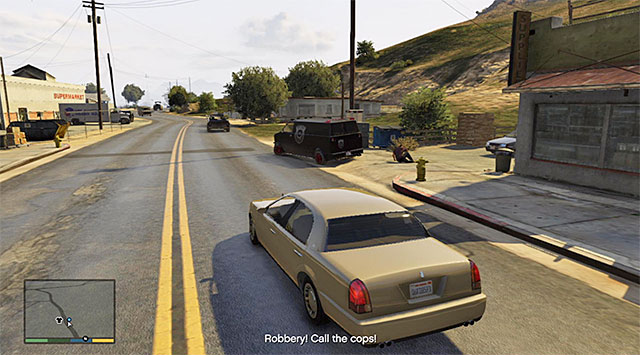 You need to stop the thieves and retrieve the money that they have stolen
This event activates in two different areas in the game world and in both cases it is similar in its course. You should hear a cry from a person who has been robbed. Start chasing the robbers who drive a van, stop them, best by laying fire down on their vehicle, and deal with them (note - they may respond with heavy fire!). After the event, collect the money. Depending on your preferences, you can either keep the money for yourself or give it back to the victim.
Availability: any character
Location: North-Western part of Grapeseed to the North of Sandy Shores.
Rewards for the completion of the event:
Availability: any character
Location: Route 68 in the central part of the map, to the South of Sandy Shores.
Rewards for the completion of the event:
Availability: Michael or Trevor
Location: One of the detached houses in the El Burro Heights district, in the Eastern part of Los Santos.
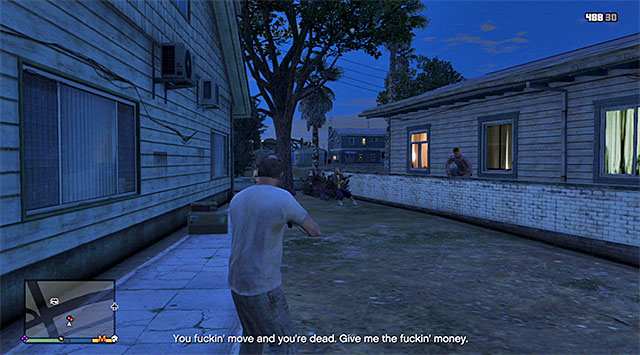 The trap
Stop near the woman crying for help. Follow her but be prepared with a good firearm, because it is a trap and you will soon be attacked by armed gangsters. Deal with all of them (it is a good idea to use Michael's time-slowing skill here, or Trevor's fury mode) and collect the weapons, ammo and cash that they dropped.
Rewards for the completion of the event: none
Availability: any character
Location: The back street behind the fuel station in the La Mesa district, in the eastern part of Los Santos.
 The woman crying for help
Park your car in the narrow alley at the back of the fuel station and notice a woman in this area, who will ask you for help saving her wounded boyfriend. Follow her and, as soon as an armed assailant jumps out from behind a wall, select any weapon from the inventory and kill both hostiles. For safety, it is better to play this mission as Michael (time slowing) or equip yourself with an armor. After you have eliminated the enemies, examine the bodies for weapons, ammo and cash.
Rewards for the completion of the event: none
This event activates in two different locations in the game world and it is similar in both ways. The attempt to enter the robbed store will result in a cutscene of the entire event. After you regain control over the main protagonist, you need to attack the bandits that are running away either on foot or by car, and retrieve the stolen cash. At this moment you need to decide whether you want to keep the money or give it back to the salesman in the store.
Availability: any character
Location: The Bob Mulet Hair & Beauty store located in the Rockford Hills district in the Northern part of Los Santos.
Rewards for the completion of the event:
Availability: any character
Location: The clothes store Suburban in the Del Perro district in the Western part of Los Santos.
Rewards for the completion of the event:
Availability: any character
Location: One of the estates at Wild Oats Drive in the Vinewood Hills.
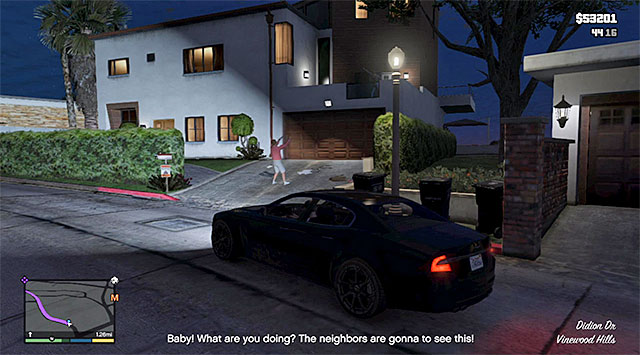 The place where you meet the arguing couple
Drive up to the estate to notice an enraged woman who threw her husband out of the house for his cheating on her. Offer to take the man to a local golf club, to get another golfing partner.
Note- if you are playing as Trevor, there is an alternative way to complete this mission. You can take the man to the Altruist cult's headquarters, located at the foot of Mount Chiliad in the North-Western part of the map (letter A on the world map). For delivering Castro to the Altruist cult, you will be rewarded with 1000 dollars.
Rewards for the completion of the event:
Availability: any character
Location: The Ineseno Road neighboring the highway in the Western part of the map..
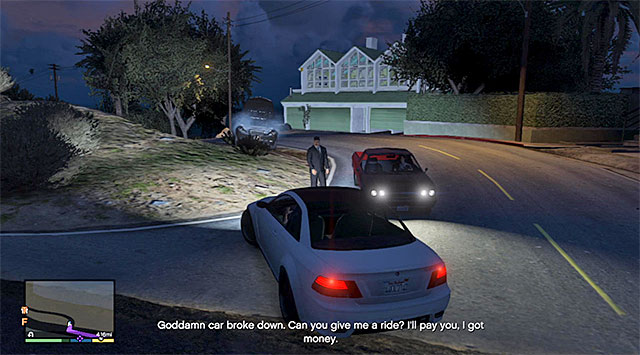 The person standing next to the broken car
Stop near the person standing next to a broken car and offer to give him a lift to the airport. It is worth noting here that there is a time limit on how long you can take to reach the airport. Therefore, you should make sure that you are driving a sufficiently fast car and avoid unnecessary collisions on the road. For the fare, you are rewarded with cash, although if you reach the destination within 2 minutes and 20 seconds, the hitchhiker will let you in on which shares are worth investing in, in the nearest future.
Note - if you are playing as Trevor, there is an alternative way to complete this mission. You can take the man to the Altruist cult's headquarters, located at the foot of Mount Chiliad in the North-Western part of the map (letter A on the world map). For delivering the man to the Altruist cult, you will be rewarded with 1000 dollars.
Rewards for the completion of the event:
Availability: any character
Location: The region of North Calafia Way located to the North-West of Sandy Shores, to the south of Mount Chiliad.
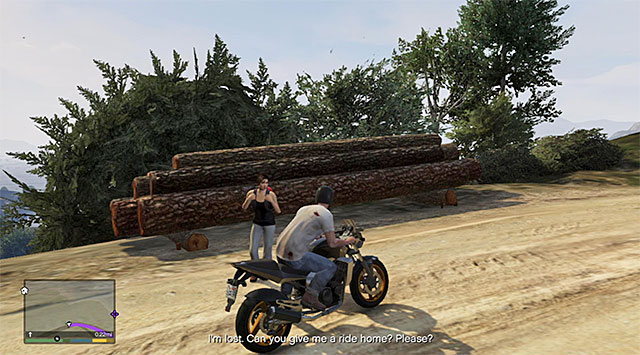 The hitchhiker
Stop next to the hitchhiker with red backpack at the road, who will ask you to take her home in the Mount Gordo Road location. As a reward, you will receive the girl's contact data.
Note - if you are playing as Trevor, there is an alternative way to complete this mission. You can take the woman to the Altruist cult's headquarters, located at the foot of Mount Chiliad in the North-Western part of the map (letter A on the world map). For delivering the woman to the Altruist cult, you will be rewarded with 1000 dollars.
Rewards for the completion of the event:
Availability: any character
Location: The East Joshua Road near the highway in the Eastern part of the map, to the North-east of Sandy Shores.
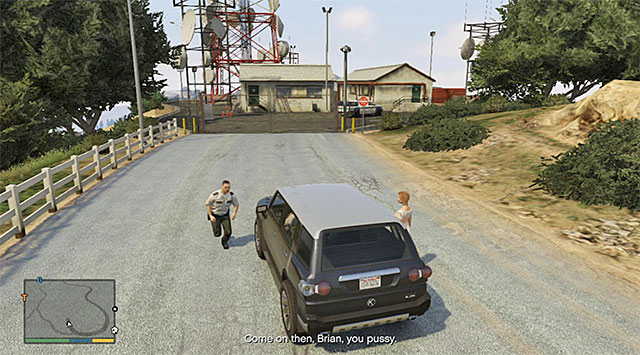 You can kill the boyfriend of the girl that you gave a lift to, or ignore him and drive away
Stop next to the hitchhiker standing at the road, who will ask you to take her to her boyfriend's working place at the Vinewood sign in the central part of the map. After you get there, the jealous man will attack your character. You can shoot/kill him (watch out for another guard who may join the fight), or ignore him and drive away.
Note - if you are playing as Trevor, there is an alternative way to complete this mission. You can take the woman to the Altruist cult's headquarters, located at the foot of Mount Chiliad in the North-Western part of the map (letter A on the world map). For delivering the man to the Altruist cult, you will be rewarded with 1000 dollars.
Rewards for the completion of the event:
Availability: any character
Location: Vicinities of the church in the Great Chaparral location, in the central part of the map, to the West of Sandy Shores.
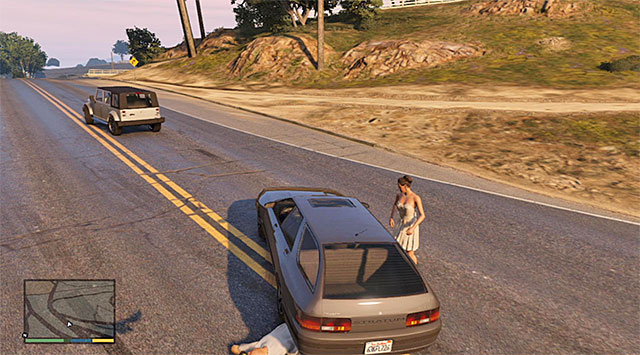 You need to park near the bride and wait for her to get into the car
Stop where you notice a bride to learn that she has left her man standing at the altar. She will ask you to give her a lift home.
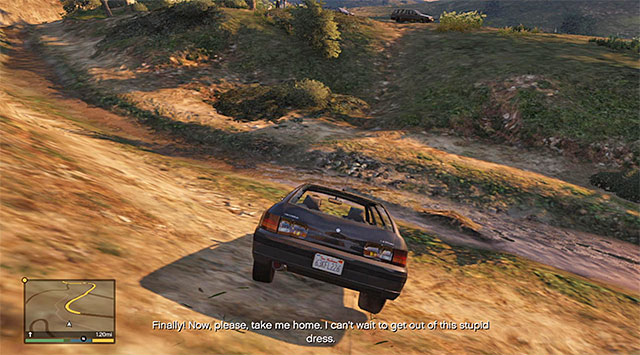 You can easily lose the groom's car by riding over the wilderness
Unfortunately, you need to keep in mind that, soon after the journey starts, the enraged groom will set off after you. I recommend against responding with fire to his attempts to push you off the road, because shooting the groom will prematurely end the whole event. Instead, focus on flawless drive and consider taking a ride off-road, thanks to which you will earlier lose the groom's car and you will be able to reach your destination unbothered.
Note - if you are playing as Trevor, there is an alternative way to complete this mission. You can take the bride to the Altruist cult's headquarters, located at the foot of Mount Chiliad in the North-Western part of the map (letter A on the world map). For delivering the man to the Altruist cult, you will be rewarded with 1000 dollars.
Rewards for the completion of the event:
Availability: Trevor
Location: The Altruist cult hangout at the foot of Mount Chiliad in the North-Western part of the map.
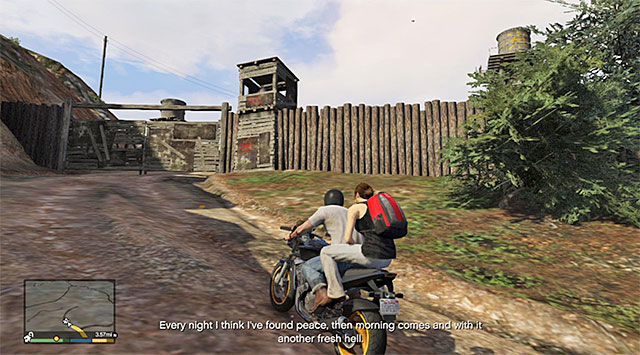 The altruist hangout, where Trevor can bring various people on regular basis
This event directly connects to many other events, which consist in giving a lift to randomly met people. As you probably realize, while playing as Trevor, you can go to an alternative destination and take the people he picks up, to a point different than the one defined by them, i.e. to the Altruist hangout (each such action is rewarded with 1000 dollars). After you deliver the fourth person to the cult hangout, the game will start a cutscene, of Trevor being captured by the cannibals. Wait for the protagonist to gain access to automatic weapon and start the bloodshed in the cult's headquarters, while using covers and Trevor's special skill to your advantage. After the fights finish, it will be necessary to explore this area because, apart from cash and ammo, you can also find a rocket launcher, among others.
Rewards for the completion of the event: none
Availability: any character
The spots where you can encounter the armored vans have been marked on the map attached to this description.
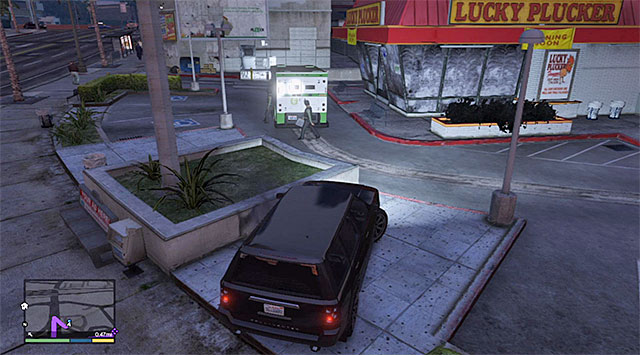 It is a good idea to attack the guard before he puts the briefcase into the van
This event activates in as many as ten different locations in the game world, and it is always identical in its course. You should notice a white and green armored van, and it is a good idea to try obtaining the cash carried by it. I recommend that you attack the van as soon as it stops at the fuel station, or where the guard receives the money. At the same time, you should note that the guards are very vigilant and they will attack you as soon as they see a gun in your hand. The best idea is to attack the guard carrying the case with the money before he puts the case in the van. You should be, of course, prepared to produce quickly your favorite weapon from the inventory and eliminate both of the guards before they manage to respond with fire (you can also squash with your car, at least, one of them).
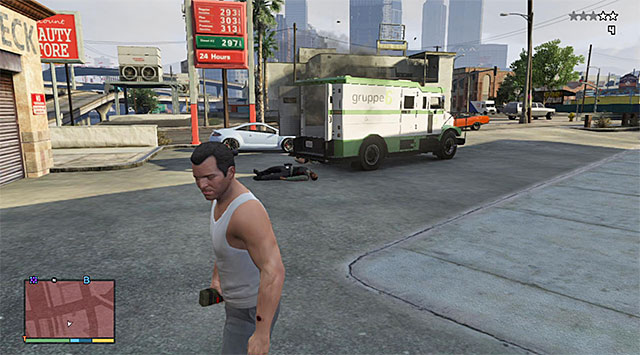 A bomb is a good way to open the van's door
If the briefcase with the cash in it has already been loaded onto the van, the only way to obtain it is to destroy the van's back gate. Approach the gate and start firing at it using, e.g. the assault rifle, or attach a sticky bomb to it and detonate it. Regardless of how you decided to obtain the money, eventually, you will need to shake off a two- or three-star police pursuit so, start running right after you have obtained the briefcase.
Rewards for the completion of the event:
Availability: Michael or Franklin
Location: Marina Drive in Sandy Shores in the central part of the map.
 Eliminate the two bikers
Stop next to the drug trafficker captured by the two members of The Lost MC biker gang. Eliminate the armed assailants, listen to the thanks and go with the character that you have saved to his car.
 Fight back the new wave of the bikers
This is not the end, yet, to your problems, because there will come new bikers into the area. Take cover early enough and be prepared to eliminate the enemies. After you are done with The Lost MC gangsters, receive a reward from the person that you have saved (assuming that he survived the attack). Also, it is worthwhile to examine the bodies of the bikers for weapons and cash.
Rewards for the completion of the event:
Availability: any character (best if you play as Trevor)
Location: To the South of Sandy Shores (the Smoke Tree Road). You need to locate an abandoned car here.
 The suspicious car
Any attempt to come close to the car, as either Michael or Franklin, will result in the blinding and electrocuting of your character. After you wake up, you will notice that you are wearing your underwear only and that you are lying on railway tracks (fortunately, you will lose neither cash nor weapons). Quickly, escape from the tracks to avoid being run over by the train.
If you are playing as Trevor, you can defend yourself against being captured by the unknown assailant. In such a situation, before you come close to the vehicle, initiate the fury mode (Trevor's special skill) and gun the assailant down early enough.
Rewards for the completion of the event: none
Availability: any character
Location: Ron Alternates Wind Farm in the Eastern part of the map. You need to find a camper parked here.
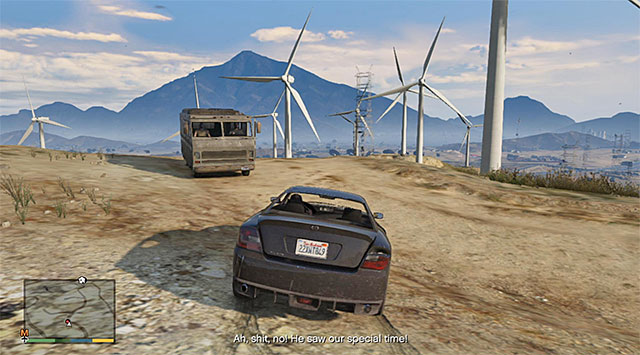 The camper
Inside the camper, there are two men making out. At the sight of your character, they will get out of the car and lay fire on you so, be prepared to kill them. After the fire exchange finishes, check out the bodies to collect weapons and the cash.
Rewards for the completion of the event: none
Availability: Michael or Franklin
Location: The Baytree Canyon Road in the central part of the map (Grand Senora Desert), Northwards of Vinewood and to the South-West of Sandy Shores.
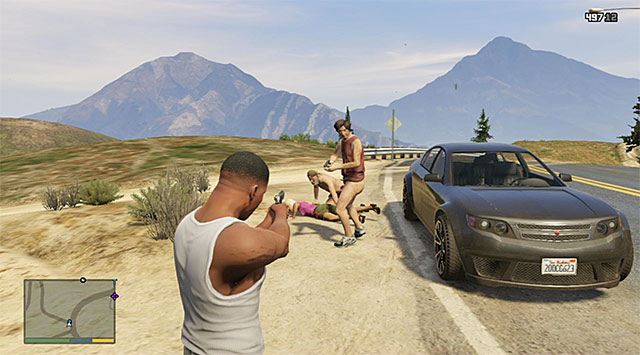 Eliminate the assailants
Drive up to the two half-naked altruists attacking an armless woman at the side of the street. Use firearms to eliminate the assailants (you need to be careful because they may respond with fire) and get into the car to take the girl home after you have listened to the conversation.
Rewards for the completion of the event:
Availability: Michael or Franklin
Location: Simeon Yetarian's car dealership in the Strawberry district, Northwards of Franklin first home.
This event is available only within certain time frames, i.e. from the moment at which you complete the fifth main mission (Complications), until the moment at which you start the seventeenth main mission (Mr. Phillips). Return to Simeon Yetarian's car dealership and eliminate the two hostile security guards., who have been hired by the Armenian car dealer. After you have eliminated them, leave the site and lose the police pursuit that might have started in the meantime (one star).
Rewards for the completion of the event: none
Availability: any character
Location: The farm in the North-Eastern part of the map, at the foot of Mount Chiliad and to the North of Grapeseed.
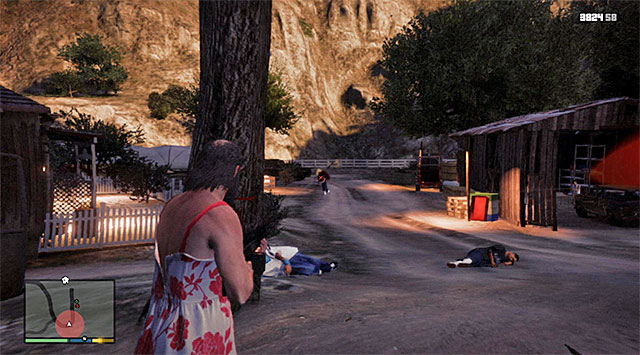 Deal with the armed characters at the farm
After you reach a quite well-hidden marijuana plantation, you will encounter a group of hostile characters. Deal with all of them while taking advantage of covers, the special skill and a scoped weapon. After you are done, examine the shed in search for a briefcase with a big amount of money.
Note- this event renews on a regular basis. You can return to the plantation after seven days of the first shootout to steal another briefcase with money.
Rewards for the completion of the event:
 Help the criminal by attacking the policeman who is chasing him
This event can be started in two different locations in the game world and its course is always the same. You should notice that a police officer is trying to catch up with a criminal escaping from him. For stopping the criminal )e.g. by shooting or knocking him down), not only won't you be rewarded, but also draw the police attention to yourself (a two star police pursuit). As a result, it is way better to eliminate the policeman, for which you will receive the escapee's thanks and some cash. After you listen to the final conversation, get away from the site quickly and start escaping the three-start police pursuit.
Availability: any character
Location: the O'Neil brothers' farm located to the North of Sandy Shores. Take a look around in the wilderness because this is where the chase is going to take place.
Rewards for the completion of the event:
Availability: any character
Location: The Northern part of the Ron Alternates Wind Farm located in the Eastern part of the map. Take a look around the wilderness because this is where the chase is going to take place.
Rewards for the completion of the event:
Availability: any character
Location: The alley in the Vinewood Boulevard district in the North-Eastern part of Los Santos.
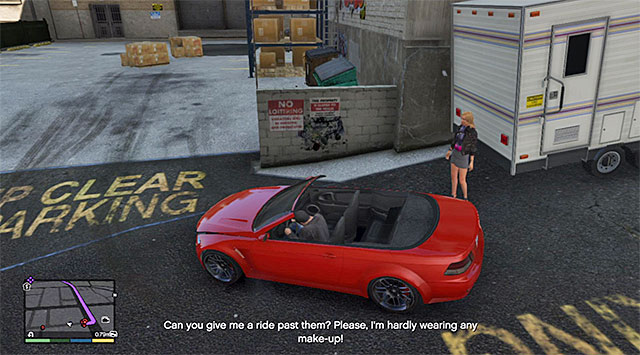 The hiding celebrity
Park the car in the alley where Lacey Jonas is hiding from a group of paparazzi. You can offer to take the woman back to her estate.
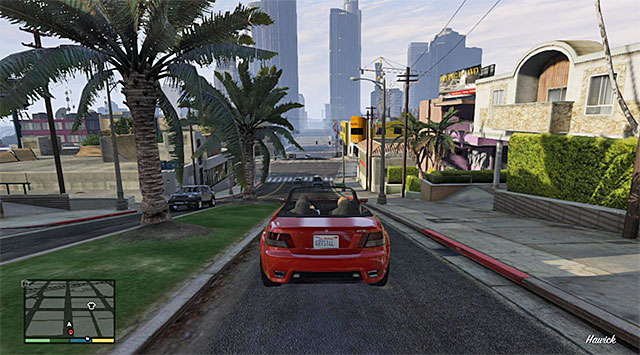 You can lose the chase thanks to, e.g. fast and flawless driving
If your car is relatively slow, try to take advantage of the narrow alleys and the paparazzi that are chasing you will, sooner or later, bump into an obstacle. If you, on the other hand, are driving a fast car, follow main roads and strive for the top speed of your vehicle. Do not try to kill the paparazzi because this will cause the event to be failed. After you lose the chase, Take Lacey back to her estate in the Vinewood Hills.
Note - if you are playing as Trevor, there is an alternative way to complete this mission. You can take the man to the Altruist cult's headquarters, located at the foot of Mount Chiliad in the North-Western part of the map (letter A on the world map). For delivering Lacey to the Altruist cult, you will be rewarded with 1000 dollars.
Rewards for the completion of the event:
Availability: any character
Location: Any ATM in the game world.
 An example ATM
After you come close to one of the ATMs in the game world, this can initiate an event of an assault on a person withdrawing cash. The best way to catch up with the robber and eliminate him is to use a car and bump into him. After you have retrieved the cash, you can either keep it for yourself or take it back to the robbed person.
Note- If the bandit has not appeared next to the person after they withdrew the cash, you can assail them yourself after they walk away from the ATM. This way you will earn several thousand dollars but, on the other hand, will lead to a police pursuit (one star).
Rewards for the completion of the event:
Availability: any character
Location: The road to the North of Paleto Bay in the northern part of the map.
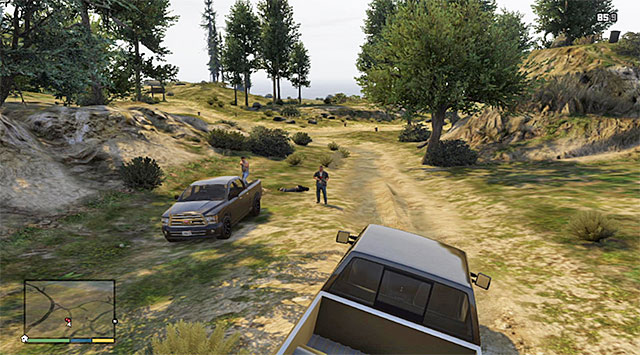 Eliminate the assailants and free the woman
Take a look around for a pick-up truck, with two armed men at and a woman who is to be buried alive soon. Start by using your firearms to eliminate the assailants. Then approach the woman and free her. Listen to the conversation, get into the car and start your ride towards the small parking lot located on the Vinewood Hills. After you have taken the woman back into the spot of her choice, wait for a phone call from her, which will give you 60000 dollars.
Note - if you are playing as Trevor, there is an alternative way to complete this mission. You can take the bride to the Altruist cult's headquarters, located at the foot of Mount Chiliad in the North-Western part of the map (letter A on the world map). The reward for taking the woman to the Altruist cult is measly 1000 dollars so, I recommend that you give up this idea.
Rewards for the completion of the event:
Availability: any character
Location: The driveway in front of one of the estates in Vinewood Hills.
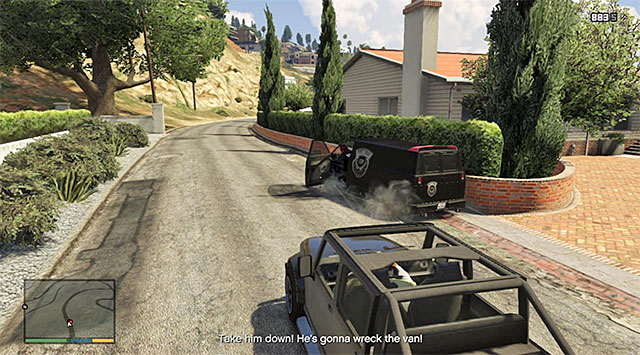 Target the tires of the van that you are chasing
After you drive close to the correct estate, you should notice members of The Lost MC biker gang, attempting to kidnap a young woman. Follow that van and lay fire down on it (I recommend that you aim at the tires), thanks to which you will bring the vehicle to a halt. Eliminate the bikers and approach the back gate of the van to free the woman.
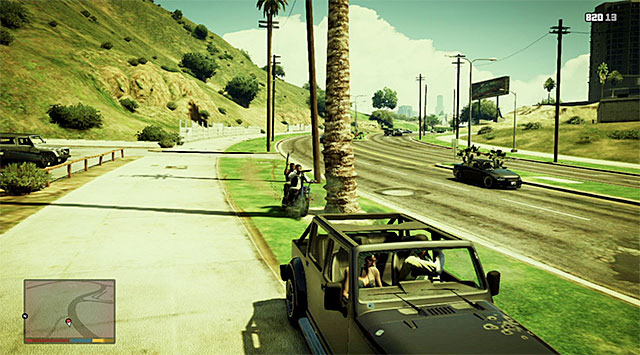 Be prepared to fight back another group of bikers
The girl will ask you to take her to a safety and it is, obviously, a good idea to go for it. Get some good means of transport (I recommend against convertibles or motorcycles) because you will be attacked by another group of The Lost Mc gang members, along your way to the destination. You can attempt to lose the bikers, fire at them during the ride (it is recommendable to play as Franklin) or stop the car and take part in a more standard fire exchange. Still, in the case of the latter, you will be exposing the life of the girl you saved to unnecessary danger. The mission will conclude as soon as you reach the safety.
Note - if you are playing as Trevor, there is an alternative way to complete this mission. You can take the bride to the Altruist cult's headquarters, located at the foot of Mount Chiliad in the North-Western part of the map (letter A on the world map). For delivering the man to the Altruist cult, you will be rewarded with 1000 dollars..
Rewards for the completion of the event:
Availability: any character
Location: The Alta street in the Downtown Vinewood district, i.e. the Northern part of Los Santos.
 The bus
Locate a small bus used for city tours used in Vinewood (one of Los Santos districts). You can get into the bus and wake part in such a tour (the cost amounts to 40 dollars) but, it will take place only if this service is available at that specific moment (otherwise you need to try again later).
Rewards for the completion of the event: none
Availability: any character (it is not recommended to play as Trevor)
Location: Route 68, to the East of Fort Zancudo located in the Western part of the map.
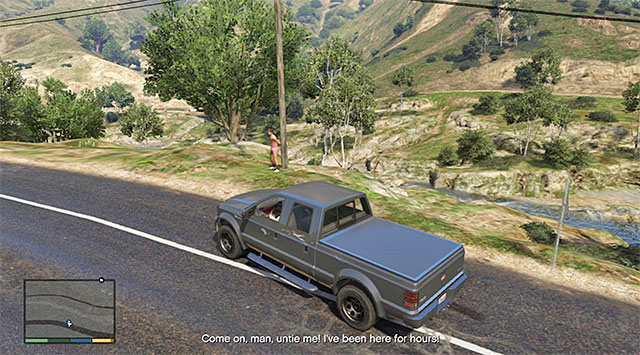 The young man roped to a pole
You should notice a young man who has been tied to a pole at the road. As a result of the conversation you will learn that it is the effect of a stag party gone wild. Offer to help the man reach the church, where his wedding is scheduled, on time. At the same time, you should make sure that you are driving a fast car, because you will have to race against time (the time limit is 5 minutes).
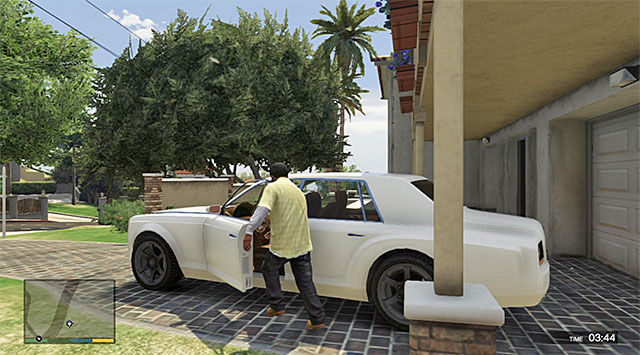 The wedding limo
The first stop is one of the luxury estates in the North-Western part of Los Santos. After you get there, wait for the man to change and, in the meantime, get into the luxury wedding limo (Enus Super Diamond).
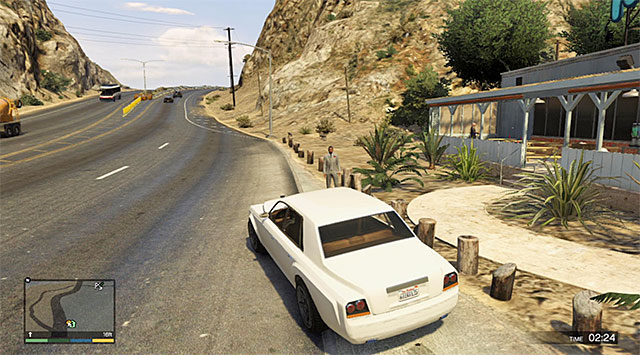 The Hookies Bar
The next stop is the Hookies bar (one of the purchase-able estates)at the highway in the Western part of the map. I recommend against playing as Trevor because he can bump here into bikers who will open fire at him and can murder the people in the car as a result.
 The place where the event ends
The final destination is the church in Paleto Bay, i.e. in the Northern part of the map. After you get here, you will watch a funny cutscene and will learn, at the same time, that you may keep the limo.
Rewards for the completion of the event:
The option of obtaining unique properties (save garages) unlocks after you have completed the eighteenth mission. Depending on the individual property, some missions will become available right after you obtain that property, or they will become available at random moments throughout the game (you will usually learn about the possibility to take up a mission by receiving a message from the manager of that property). It is worth noting here that each of the properties is connected with the protagonists that purchased it. For example, if you have purchased a hangar in the airfield while playing as Trevor, he will be the only character entitled to perform missions connected with this property.
Note- in case of profitable properties (e.g. all three movie theaters in Los Santos) it is not recommended to ignore the messages, from the managers, of the possibility to perform a mission. Otherwise, you may lose some, or the whole, of the weekly income. In some cases, this may be as much as several tens thousands of dollars.
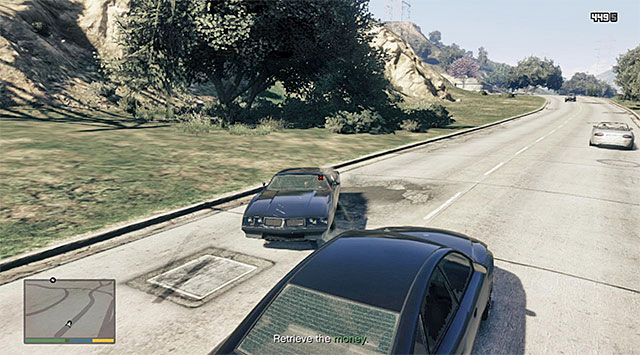 You need to kill the thief and retrieve the stolen money
You may receive a message from the keeper of a night club that he was robbed. After you get there (point P on the world map), you should notice an escaping car, which you need to chase (it would be a good thing if you drove a fast car). Shoot the thief (note - he may respond with fire) and retrieve the stolen money.
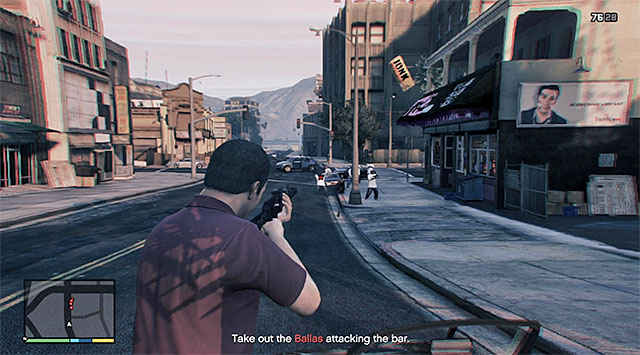 Kill all of the gangsters
You may receive a message from the night club keeper that he is under fire from armed assailants. After you get there (point P on the world map) you should notice the members of the Ballas gang, and you need to get rid of them all. During the fights, remember to use the skill of slowing down time to your advantage. After the fights are over, escape the police.
You may receive a message from the night club keeper concerning the shortage of alcohol. After you reach you're the location where the truck with the liquor was parked (letter P on the world map) get into it and start your ride towards the club. On your way there, you need to find a compromise between the fast and the careful. Try not to bump around too much to prevent spoiling your cargo. At the same time, do not drive too slow to be able to make it within allotted time.
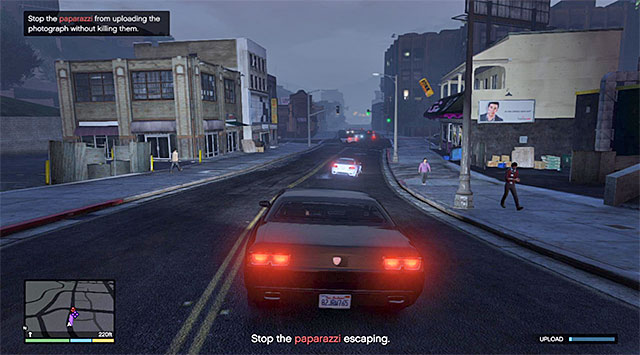 The paparazzo will dart away after you come close to the property
You may receive a message from the manager of the night club that there is a paparazzo taking pictures of VIPs and that it would be a good idea to stop him before he manages to send them away. Start your chase after the paparazzo and, instead of laying fire down on him, try to throw him off the bike, or wait until he collides with something. At the same time, you should pay attention to the bar in the bottom right corner of the screen, because the whole pursuit must end before it fills up. Stop near the collision site to pick up the photo camera and the smartphone.
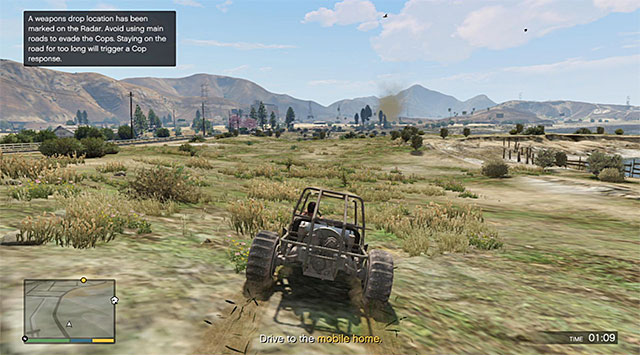 Keep away from main roads
You can begin this mission immediately after buying a hangar. Get into BF Dune Buggy parked nearby to start it. Head for the drop zone marked on the map and, according to obtained instruction, avoid any main roads to not lure any attention to you. Luckily, your car works very well on the offroad.
 If you hurry up, nothing will stops you before taking a package
To get to the drop zone, you have theoretically 90 seconds, but I recommend to speed up or you'll run into other smugglers and you'll have to run away or fight them. If you appear soon enough, nothing happens after picking up the package (you don't have to get out of the car). Now you just need to return to the hangar.
Note - after several days have passed, you will have the opportunity to take another smuggling job.
Reward for this mission:
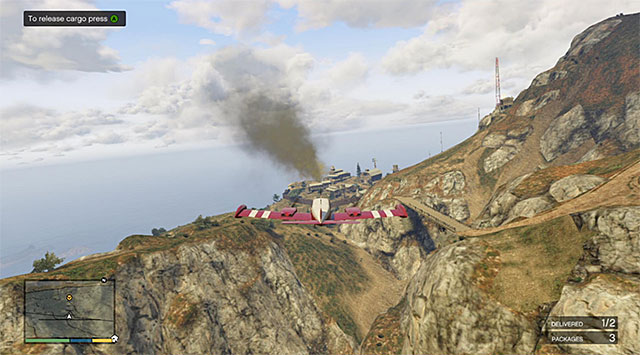 Look out for the drop zone
You can begin this mission immediately after buying a hangar, just get into a Cuban 800 which is in the hangar. Ride out of the building and turn for the airstrip. The plan is to drop cargo in two marked places on the map which you recognize from the distance by a lot of smoke rising up.
Every time you get close to the drop point, slow down and wait until a yellow circle appears on the radar (screen above). Only then push the button for dropping the package down. When you deliver both packs, return to the landing site and exit the airplane.
Note - After several days have passed, you will have the opportunity to take another smuggling job.
Reward for this mission:
 Deal with the first wave of gangsters
You can receive a message from a car scrapyard keeper that it has been attacked by the members of a biker gang - the Lost MC. Get there, hide behind a good cover and start eliminating the enemies, one after another.
 It is a good idea to blow up the enemies' cars
Unfortunately, you need to take into consideration the fact that soon next enemies will arrive on their cars. If you come equipped with the grenade launcher, rocket launcher or regular explosives, destroy the cars before new enemies get out of them. Keep fighting until you fight the bikers back.
 You need to kill the thief and retrieve the stolen money
You may receive a message from the manager of a movie theater, which concerns a theft in the theater. After you get there (letter P on the world map) you should notice an escaping vehicle and you need to start chasing it (it pays off to drive a fast car). Shoot the thief (note - he may respond with fire) and retrieve the cash that he has stolen.
You may receive a message from the manager of the theater, concerning the advertising of the business. Drive to the airport (letter P on the world map) and get to the plane that was prepared for you (Mallard). Start the plane and start visiting the areas marked on the ma with yellow circles, in any order you want to. Each time you are within the yellow area, press the appropriate button on the D-pad to drop the leaflets. Eventually, return to the airport and land carefully.
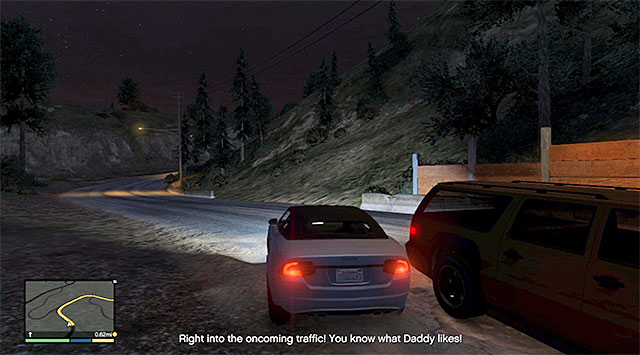 Perform dangerous maneuvers on your way to the destination point
You may receive a phone call from the manager of a cab company, who is asking you to serve a special guest, who demanded the best driver to take him to the spot of his choice. After you confirm that you want to take the fare (you can also refuse it, of course), and reach the place of collection of the teenager. The lad will make an additional request that you perform dangerous maneuvers on the way to the destination point. So, you can consider driving against the traffic, along the sidewalk and wilderness, as well as jumps and entering sharp turns using the handbrake. To perform all of the activities, use Franklin's special skill to your aid.
Rewards for the completion of the mission:
cash (base + bonus based on how long and how eventful the ride was)
 The port
You may receive a phone call from the manager of the cab corporation, with a request to serve a special client, who demanded the best driver to take him to the spot of his choice. After you confirm the fare, (you can also refuse it) reach the spot where you are supposed to collect the man. Franklin will be asked to reach the port, where the nephew of the client spends his time in bad company. After you get there, park the car in the marked area and watch the course of the events (you can use the movie camera).
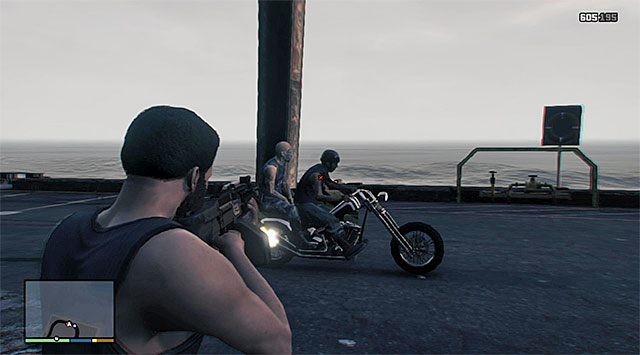 You need to attack successive bikers
Be prepared to deal with the members of The Lost MC biker gang and, since you are playing as Franklin, it would be a good idea to start the time-slowing skill before you exit the car and eliminate those of the enemies that are the closest to you. This is not the end to your problems, because there will be further bikers to come. Hide behind a cover and eliminate them also. During the fights, try to act fast and, to the extent possible, divert attention from the man that you have brought to the docks, thanks to which you will prevent him from dying.
Rewards for the completion of the mission:
cash
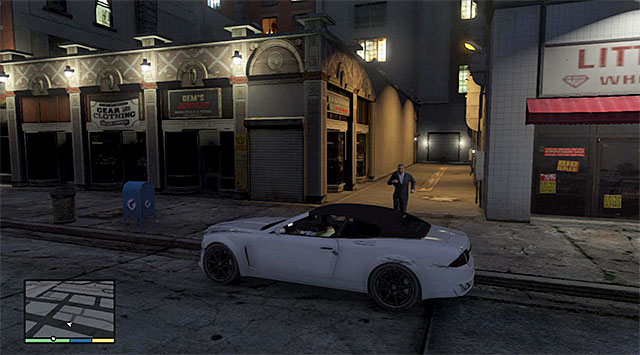 Be prepared to lose the police pursuit that will start right after the heist
You may receive a phone call from the manager of the cab corporation, with a request to serve a special client, who demanded the best driver to take him to the spot of his choice. After you confirm the fare, (you can also refuse it) reach the spot where you are supposed to collect the man. Soon after the ride starts, you will learn that the client is about to carry out a heist on one of the jewel stores. Park your car in the designated area and wait for derrick to return to the car after the not-so-successful job. I recommend that you look out for the nearby alleys as quickly as possible , or for a multi-storey parking lot because a police pursuit is quick to happen, and you will have to shake it off. Eventually, take the man to the airport.
Rewards for the completion of this mission:
cash (base fare + a bonus of 10000 dollars+ an additional bonus dependant on how long the pursuit was)
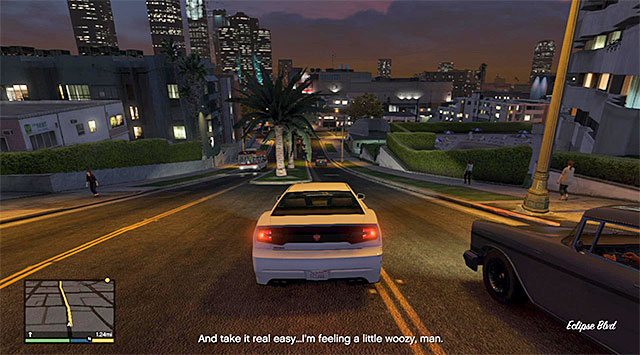 Do not drive too fast and try not to bump into anything
You may receive a phone call from the manager of the cab corporation with a request to serve a special client, who demanded the best driver to take him to the spot of his choice. After you confirm the fare, (you can also refuse it) reach the spot where you are supposed to collect the man. The intoxicated client will ask Franklin to drive smoothly and, if you do not want him to vomit while in the cab, or demand to stop, you cannot go too fast. It is also very important that you do not bump into any other vehicles, the elements of the surroundings or pedestrians.
Rewards for the completion of this mission:
cash (base fare + a bonus for not causing the passenger to vomit)
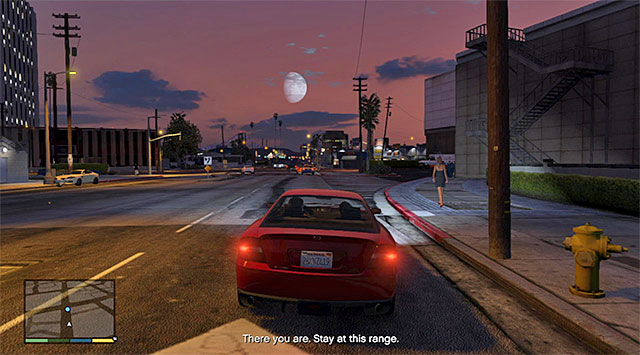 Remain within a safe distance from the car that you follow
You may receive a phone call from the manager of the cab corporation with a request to serve a special client, who demanded the best driver to drive her. After you confirm the fare, (you can also refuse it) reach the spot where you are supposed to collect the woman. The girl will ask you to take her to her fianc's workplace, and then to start following him. While following the man, do not come too close to the car that you follow, because this may result in failing the mission(keep using the radar's readings). After the fianc's car stops on the parking lot, wait for the instructions and approach the spot to see a quite unexpected ending to the mission.
Rewards for the completion of the mission:
cash (base fare + a bonus for following the fianc without attracting his attention)
You may receive a phone call from the manager of the cab company with a request to serve a special client, who demanded the best driver to drive her. After you confirm the fare, (you can also refuse it) reach the spot where you are supposed to collect the woman. She will ask you to take her to the most luxurious store in the city. Open the world map and delineate the route to the Rockford Hills district, because that is where the luxury Ponsonboys store is.
Rewards for the completion of the mission:
cash (base fare + a bonus for singling out the right store)
You may receive a phone call from the manager of the cab company with a request to serve a special client, who demanded the best driver to take him to the spot of his choice. After you confirm the fare, (you can also refuse it) reach the spot where you are supposed to collect the man. The student will ask you to take him to his girlfriend, who took his car and admitted to having broken it.
Rewards for the completion the mission:
cash
New contact on Franklin's contacts list: Liz
You may receive a phone call from the manager of the cab company with a request to serve a special client, who demanded the best driver to take him to the spot of his choice. After you confirm the fare, (you can also refuse it) reach the spot where you are supposed to collect the man. You will be asked to reach the place where the poker tournament is being held. You have 3 minutes and 30 seconds to complete this fare but, if you want to get a tip, you need to get there within 3 minutes (to drive fast and carefully, you can use Franklin's special skill to your advantage)
Rewards for the completion of the mission:
cash (base fare + a bonus for reaching the destination ahead of time)
You may receive a phone call from the manager of the cab company with a request to serve there clients, who demanded the best driver to take him to the spot of his choice. After you confirm the fare, (you can also refuse it), make sure that you are driving a four-door car and only then, reach the spot where you are supposed to collect the three men. To complete the route, you need to take the threesome into three different destinations, i.e. the Maze bank, the Fleeca bank and a convenience store.
Rewards for the completion of this mission:
cash (base fare + a bonus for reaching the consecutive locations quickly)
You may receive a message from the manager of the theater, concerning the fact that it has been robbed. After you reach the place (letter P on the world map), you should notice an escaping car, and you have to follow it (it would be good if you drove a fast car). Shoot the thief (note - he may respond with fire) and retrieve the stolen cash.
You may receive a message from the manager of the theater, concerning the advertising of the business. Drive to the airport (letter P on the world map) and get to the plane that was prepared for you (Mallard). Start the plane and start visiting the areas marked on the ma with yellow circles, in any order you want to. Each time you are within the yellow area, press the appropriate button on the D-pad to drop the leaflets. Eventually, return to the airport and land carefully.
You may receive a message from the manager of the theater, concerning the fact that it has been robbed. After you reach the place (letter P on the world map), you should notice an escaping car, and you have to follow it (it would be good if you drove a fast car). Shoot the thief (note - he may respond with fire) and retrieve the stolen cash.
 Make sure that you do not bump into anything, especially if your character has not master piloting
You may receive a message from the manager of the theater, concerning the advertising of the business. Drive to the airport (letter P on the world map) and get to the plane that was prepared for you (Mallard). Start the plane and start visiting the areas marked on the ma with yellow circles, in any order you want to. Each time you are within the yellow area, press the appropriate button on the D-pad to drop the leaflets. Eventually, return to the airport and land carefully.
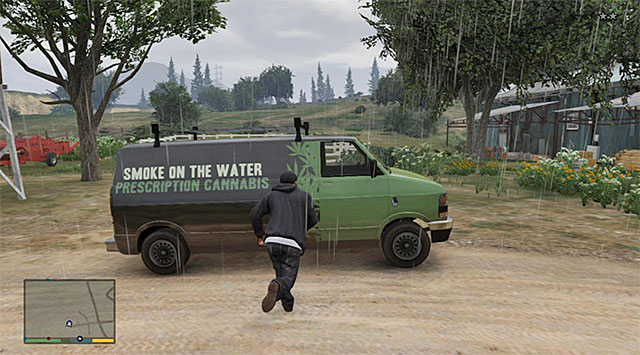 The van
You may receive a message from the manger of the property, concerning the issues with hemp delivery. After you get to the place where the van with the cargo has been parked (letter P on the world map), get in and drive towards the store. Depending on how you unlocked this mission, it may turn out to be necessary to race against time (choose the shortest route possible and avoid collisions), or avoid police pursuit (drive along wilderness or along the beach until you lose the cops). Regardless of the course of the mission, park the van in a small alley at the back of the store.
You may receive a message from the manager of the estate, concerning the theft of the van with the valuable cargo inside. Your task is to stop the van, but do not exaggerate with excessive fire because destroying the van will result in failing the mission. The best idea is to use Franklin's special skill (slowing-down of time), during the ride and aim at the people in the van. Eventually, get into the van and return it to the store (it may be necessary to lose police pursuit).
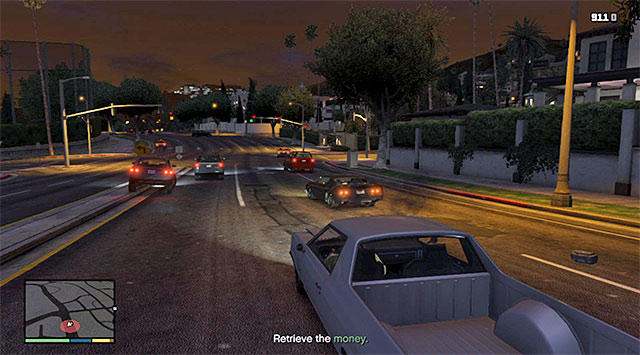 You need to kill the thief and retrieve the stolen cash
You may receive a message from the manager of the property, concerning the fact that it has been robbed. After you reach the place (letter P on the world map), you should notice an escaping car, and you have to follow it (it would be good if you drove a fast car). Shoot the thief (note - he may respond with fire) and retrieve the stolen cash.
You may receive a message from the manager of the property concerning the fact that it is under fire from armed assailants. After you get there (letter P on the world map), you should notice members of one of the local gangs and you need to eliminate all of them. While conducting fire, remember that you can use your character's special skill to your advantage. Towards the end of the shootout, do not allow any of the gangsters to flee (it is worthwhile to blow up their cars beforehand). Also, you should be prepared for a police pursuit.
You may receive a message from the manager of the property concerning the problems with alcohol delivery. After you get to the place where the truck has been parked (letter P on the world map), get inside and drive towards the property. On your way, you need to work out a compromise between a fast and careful ride. Try not to bump too much into the other cars and the elements of the surroundings to prevent spoiling the cargo but, at the same time, do not move too slow to make it within the allotted time.
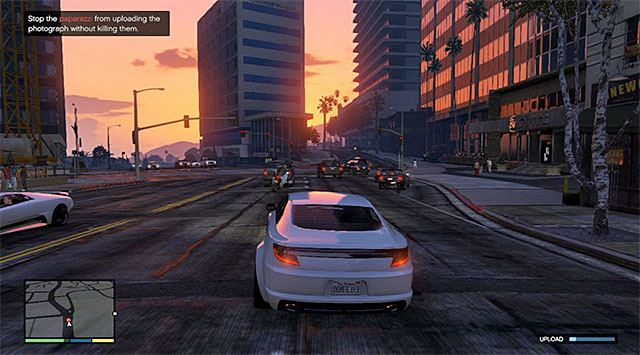 The paparazzo will flee soon after he comes close to the property
You will receive a message from the manager of the property concerning the fact that a paparazzo took pictures of several VIP guests, and it would be good to stop him before he manages to send them away. Start your chase after the paparazzo but, instead of firing at him, try and knock him off the bike, or wait until he bumps into something. At the same time, note the bar in the bottom-right corner of the screen because the entire thing must be completed before it fills up. Stop near the accident site and collect the photo camera and the smartphone.
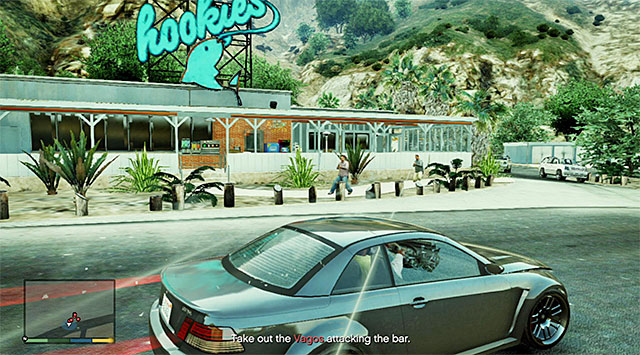 Kill all of the gangsters
You may receive a message from the manager of the property concerning the fact that it is under fire from armed assailants. After you get there (letter P on the world map), you should notice members of one of the local gangs and you need to eliminate all of them. While conducting fire, remember that you can use your character's special skill to your advantage. Towards the end of the shootout, do not allow any of the gangsters to flee (it is worthwhile to blow up their cars beforehand). Also, you should be prepared for a police pursuit.
You may receive a message from the manager of the property, concerning the fact that it has been robbed. After you reach the place (letter P on the world map), you should notice an escaping car, and you have to follow it (it would be good if you drove a fast car). Shoot the thief (note - he may respond with fire) and retrieve the stolen cash.
You may receive a message from the manager of the property concerning the problems with alcohol delivery. After you get to the place where the truck has been parked (letter P on the world map), get inside and drive towards the property. On your way, you need to work out a compromise between a fast and careful ride. Try not to bump too much into the other cars and the elements of the surroundings to prevent spoiling the cargo but, at the same time, do not move too slow to make it within the allotted time.
You will receive a message from the manager of the property concerning the fact that a paparazzo took pictures of several VIP guests, and it would be good to stop him before he manages to send them away. Start your chase after the paparazzo but, instead of firing at him, try and knock him off the bike, or wait until he bumps into something. At the same time, note the bar in the bottom-right corner of the screen because the entire thing must be completed before it fills up. Stop near the accident site and collect the photo camera and the smartphone.
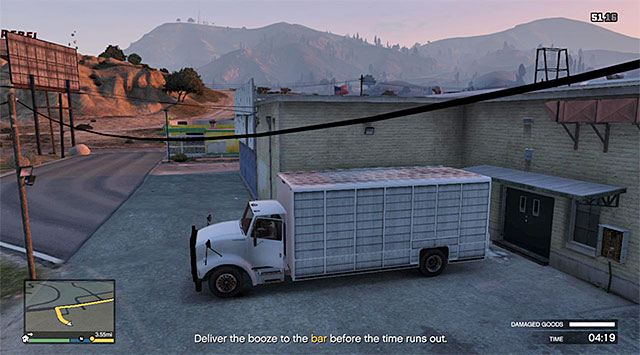 The truck
You may receive a message from the manager of the property concerning the problems with alcohol delivery. After you get to the place where the truck has been parked (letter P on the world map), get inside and drive towards the property. On your way, you need to work out a compromise between a fast and careful ride. Try not to bump too much into the other cars and the elements of the surroundings to prevent spoiling the cargo but, at the same time, do not move too slow to make it within the allotted time.
You may receive a message from the manager of the property concerning the fact that it is under fire from armed assailants. After you get there (letter P on the world map), you should notice members of one of the local gangs and you need to eliminate all of them. While conducting fire, remember that you can use your character's special skill to your advantage. Towards the end of the shootout, do not allow any of the gangsters to flee (it is worthwhile to blow up their cars beforehand). Also, you should be prepared for a police pursuit.
You may receive a message from the manager of the property, concerning the fact that it has been robbed. After you reach the place (letter P on the world map), you should notice an escaping car, and you have to follow it (it would be good if you drove a fast car). Shoot the thief (note - he may respond with fire) and retrieve the stolen cash.
You will receive a message from the manager of the property concerning the fact that a paparazzo took pictures of several VIP guests, and it would be good to stop him before he manages to send them away. Start your chase after the paparazzo but, instead of firing at him, try and knock him off the bike, or wait until he bumps into something. At the same time, note the bar in the bottom-right corner of the screen because the entire thing must be completed before it fills up. Stop near the accident site and collect the photo camera and the smartphone.
 Sherlock Holmes would be helpful... or a decent guide from gamepressure.com
Murder Mystery is an additional and completely optional mission. Access to it can be obtained only by players buying the game again for a new platform. It was designed exclusively for the character of Michael, so in any case, you cannot undertake it with the other heroes of the series. Basically, our puzzle mentioned in the title consists of several concrete steps that have been described below.
First, we need to find in the area of Los Santos - of course using Michael - four secret signs, which are directly related to that crime. A distinctive sound informs us about finding these secrets.
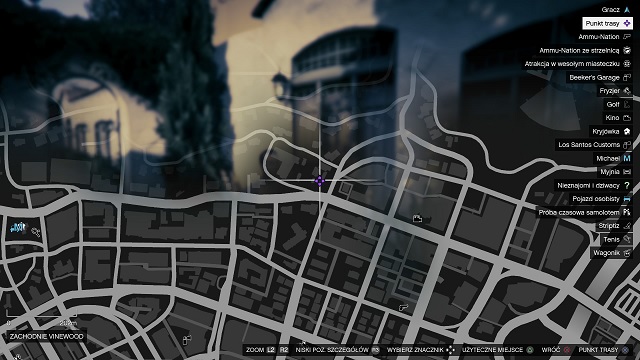 Gentry Manor Hotel
The one saying "Old Fred acts nice, but it ain't so!" can be found in west part of Vinewood, in Gentry Manor Hotel.
 Entrance to this part of the hotel.
Passage with stairs leading to hotel complex where we will find the inscription is located in the longer part of the wall on the street side.
 And here is our first inscription.
The inscription can be easily seen on the wall of a building which we pass by as first right after entering the inside of hotel complex.
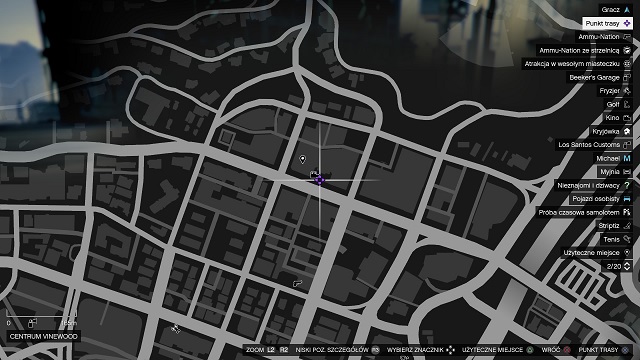 Oriental Theater.
The second one saying "Ain't no mystery. They drowned her because of what she knew!" can be found in Downtown Vinewood, at the entrance to the cinema called Oriental Theater.
 Hidden a little bit, but still can be found.
We will find the inscription hidden on a wall behind one of the palms growing in front of the entrance to the cinema.
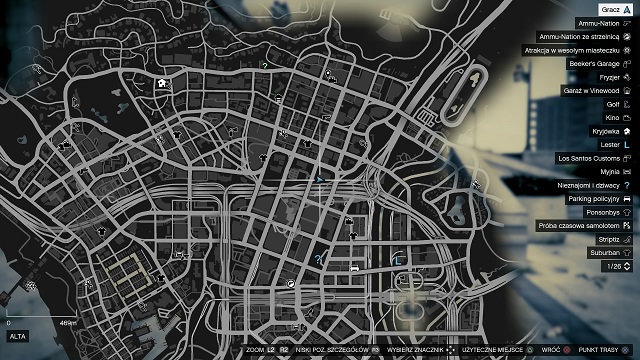 City Hall.
The third saying "Fred makes cartoons for kids, funny thing considering what he hid" can be found in the housing estate called Alta, on the City Hall building.
 The lamp is clearly showing us that the inscription is close.
Having arrived at the place, you have to go round the building and find a hollow in the wall. Stairs with provisional lawn on both sides lead there. In case of any problems, just look at the minimap visible on the picture above, which will give you the sense of direction.
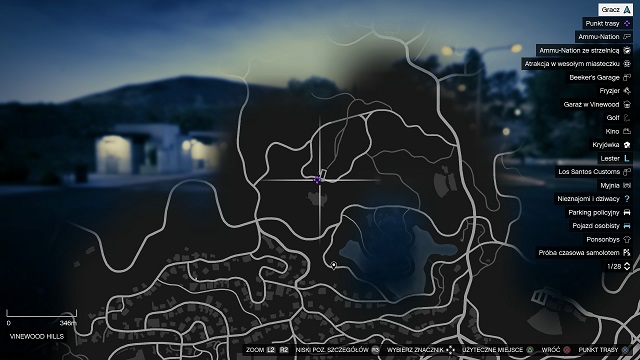 Galileo Observatory.
The fourth one saying "David Richardsknows" can be found inVinewood Hills, in the building of Galileo Observatory.
 Path leading to the inscription.
Reaching the place we choose passage leading to the rear of the building (as viewed from the front, it will be the left one) and we pass along to get to the wall on which we will see the information sought by us.
 The last inscription has been found!
And here is our last inscription - as mentioned before, it is on an outside wall of the building, between two vents.
 Depths of the sea close to the coast where Fort Zancudo is located.
Having found all the inscriptions, it is time for you to hit the road again going to the coast where Fort Zancudo is located. In an underwater place marked on the map, you should go out into the deep (for example using diving equipment or a submarine) and find a specifically preserved body of a dead woman.
 The poor girl can be found on the very bottom of the ocean.
Having found the dead woman, you have to swim to a proper see level to complete the task officially.
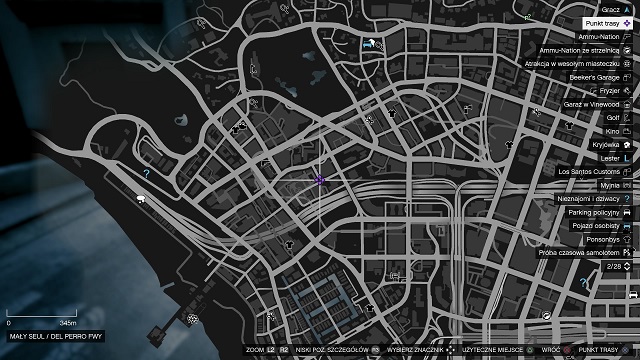 Richards Majestic.
The penultimate step unlocks after completing the main plot mission called Meltdown and it consists on reading a letter at Solomon Richards' office.
 The entrance is enlightened with a yellow marker.
The office that we reach by long stairs is open only in late hours, that is from 9 o'clock in the evening.
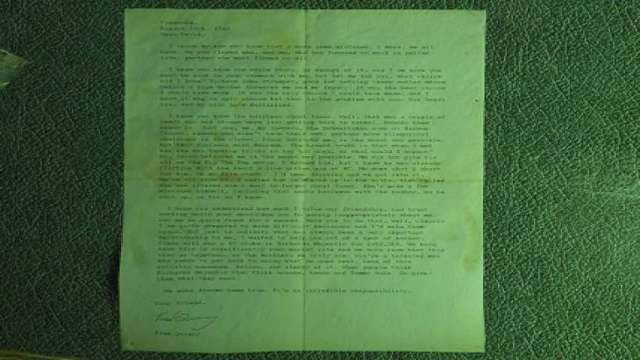 We read the letter to know what it is all about.
In the office we find a letter informing us about existence of another place which we should visit now to complete our investigation.
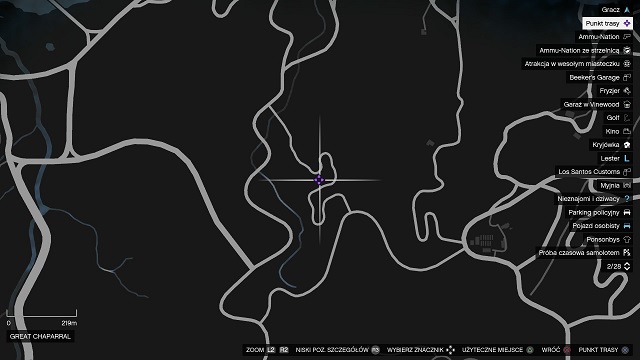 Great Chaparral.
The coal-pit we are looking for can be found in Great Chaparral, at the foot of the mountain, close to a vehicular route.
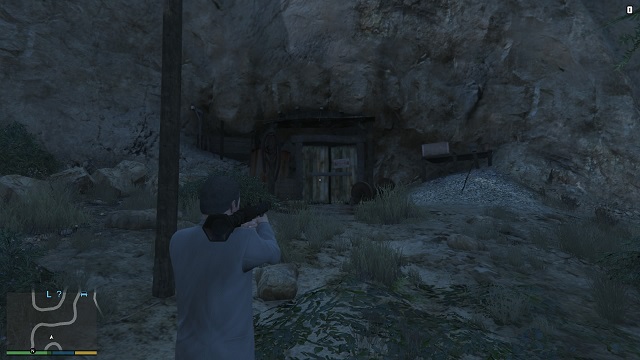 We demolish the entrance and here we go.
After reaching the entrance we demolish it with a series of firearms or, which is faster, with a rocket launcher or grenade launcher. Each way is good.
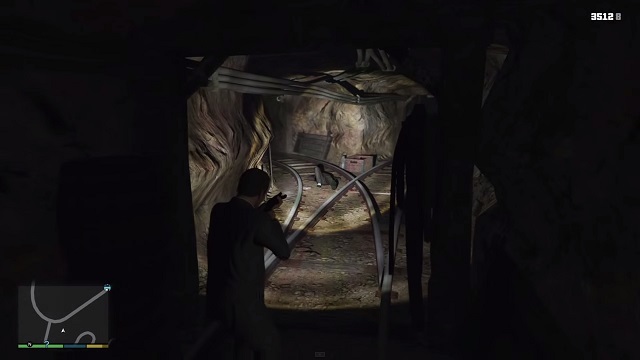 The end of our little adventure.
In the coal-pit at the bifurcation you will see a corpse. Having interact with it, you will obtain a prize for completing the whole mission - that is 2 specific Noir filters.
 You can feel the ambience!
They can be used in two ways. Firstly, choosing Isaac in contacts and calling him by mobile phone we automatically activate a new graphical view (another phone is the second filter and the third means returning to the basic one - mechanism works cyclically), while during taking photos, these filters will be available in effects adjusting options.
 With this dog breed it should be the easiest.
Wildlife Photography Challenge is a special, additional and dedicated only for returning players mission that we can complete with Franklin. It is available after completing the Paparazzo mission commissioned by Beverly. Its completion means receiving a notification about a specific task from LS Tourist Board. It will consist on taking photos of several animals using a mobile phone. What is important, each photo will have to be made in such a way that the image is not processed in any way or modified with filters; pet must be entirely covered by the frame and of course alive.
It is difficult to give an exact location of all the animals on the map, which is why the following guidelines about in which areas of Los Santos one has search for them should be very useful.
Animals required:
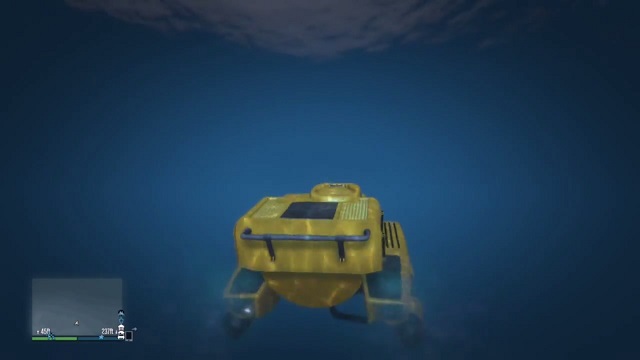 Prize worth of dedication.
Having taken all of the photos (taking particular ones is marked with a proper graphic statement), we obtain the information about the prize which is Kraken Sub submarine.
 In case of loss, it will automatically reappear in this location.
We can get this toy in a fishing village called Cape Catfish which is located close to Grapeseed on the east coast of the isle.
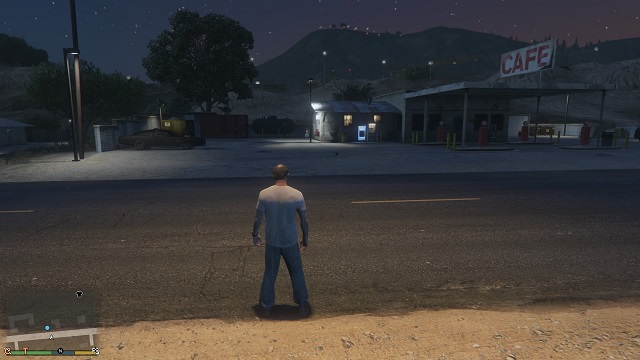 The car is almost asking to be stolen.
Random incident - officially called Duel - enables acquiring a neatly armored vehicle Duke O'Death with any of characters after completing Pulling Favors mission. To do it you have to simply find and steal the car at first.
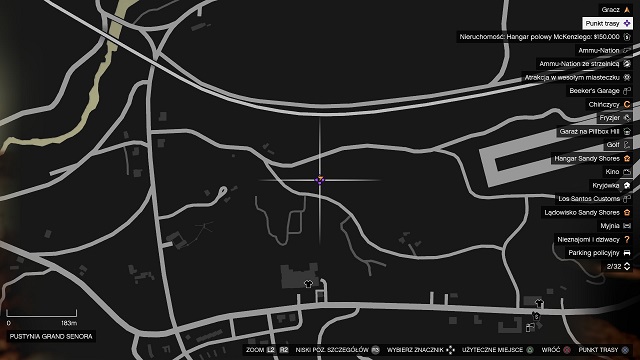 I wonder who left that toy-car next to a second-rate road house.
You can find it on a car park next to a road house (cafe, petrol station) on road number 68 leading through Grand Senora Desert (more or less around Harmony).
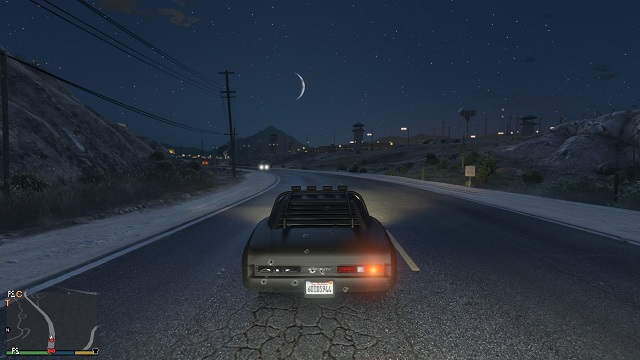 Now we know...
A couple of moments after we steal the car, the proprietors with two trucks and three SUVs show up. We have to kill them all or run away.
Actually it's not that far away.Completing this task will make the car appear in two specific locations. The first of them is the field with machinery to crude oil extraction, on the west from the airport on Grand Senora Desert (the vehicle is next to one of the machines).
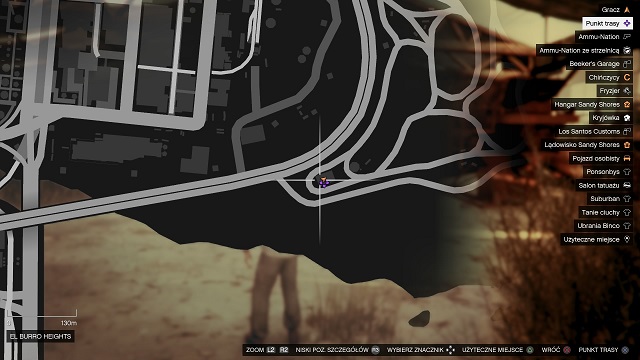 That's a bit further.
The other one is under a roofing in south-west part of scrap-heap in El Burro Heights district.
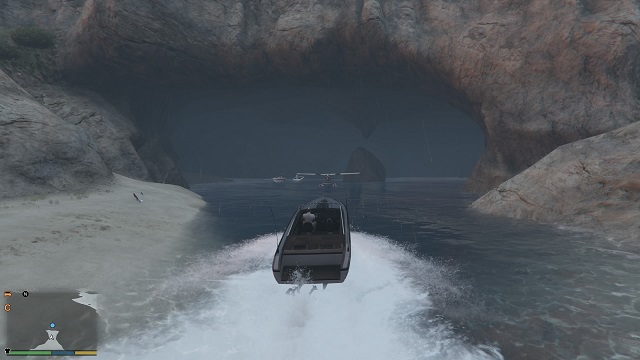 Got ya!
Another random mission is this time associated with getting a hydroplane (light aircraft that can land on water) and may be realized by any of the available character under two conditions. Firstly, Nervous Ron has to be completed and secondly, you have to get to that location using an aqueous vehicle - for example a boat.
 Good hideout.
The place we are looking for is a water cave located on the east coast of the isle, on the east from RON Alternates Wind Farm.
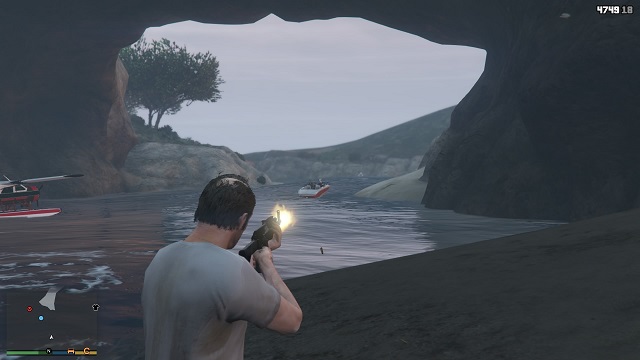 Schematically: we murder everyone and get the prize.
After reaching the cave we kill the crew of motorboats and small ships inside and we get the plane with which we have to fly off to complete the task (as we start, other two boats show up on the horizon but we can leave them and fly away).
 The first gang-board.
If we managed to fly away, we will now be able to get our hydroplane in two places. The first of them is a gang-board on the north coast of the Alamo Sea.
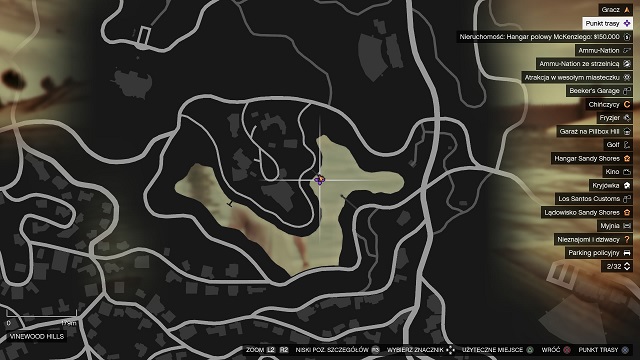 Another gang-board.
The other place is also a gang-board but this time on a lake in Vinewood Hills. Optionally, you can also buy the plane on Elitas Travel's website for $500,000.
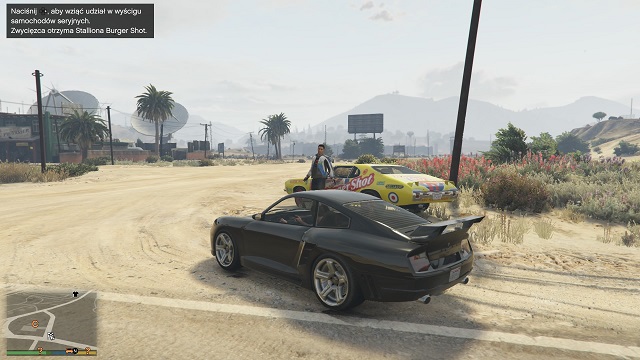 Challenge accepted.
Stock Car Racing is a special series of races dedicated for Trevor which can be undertaken after completing Mr. Philips mission and having arrived to the place appointed by a race car. It consists of 5 races which take place always on the same track, with the same number of participants (9) and with the same number of laps (5). The only thing that changes is the prize for the first place which is a race car (each time different).
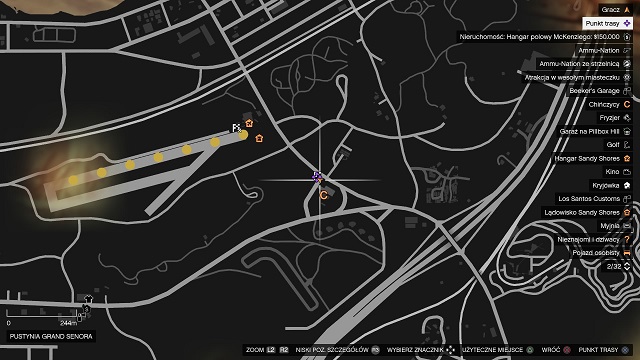 There we will find a driver standing close to his vehicle.
The place where we can start a race is close to Yellow Jack Inn bar on Grand Senora Desert.
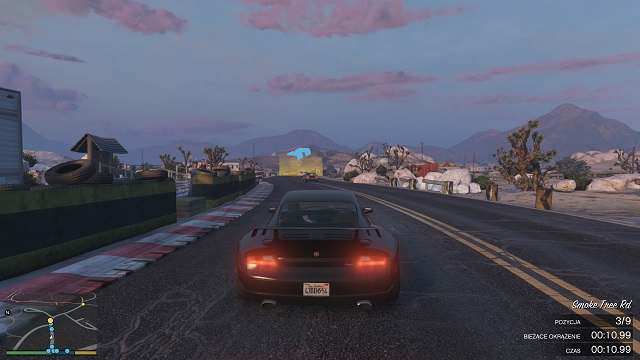 The sooner you take the lead, the better.
Route designed for these races is relatively short, it consists as well of straight sections and very sharp turns where you can easily hit the pole or barrier and thus lose the lead. Of course, in case of a collision, hold triangle to safely return to the road. After the end of each race, we have to move away a little so the principal could refresh.
 Burger Shot Stallion.
Prize for the first race Burger Shot Stallion.
 Redwood Gauntlet.
Prize for the second race is Redwood Gauntlet.
 Piswasser Dominator.
Prize for the third race is Piswasser Dominator.
 Sprunk Buffalo.
Prize for the fourth race is Sprunk Buffalo.
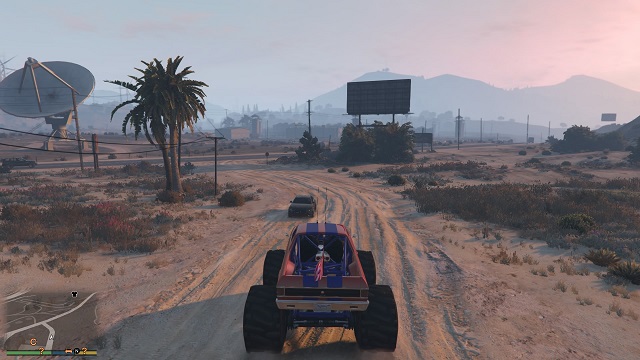 Cheval Marshall.
Prize for the final race is Cheval Marshall which will later be stationed in Trevor's aviation hangar (possibility to choose out of 25 graphic patterns which symbolize national flags). The other four cars will be available in individual garages of all characters.
This unofficial the Grand Theft Auto V - Maps and Secrets guide is a supplement for the main guide and for the mission description guide. It focuses mainly on presenting all of the collectibles available in the game and on their exact whereabouts. This guide, among others, includes information on how to find the hidden packages, spaceship parts, radioactive waste or the submarine parts. It also holds true for challenges - the guide informs of bridge locations that you can fly under or the sites for skydiving or stunts
Another important part of this guide is all sorts of juxtapositions. This guide, among others, includes complete lists of all available means of transport, weapons and stores (including their stock).
This is supplemented by very detailed maps , with precise whereabouts of collectibles and challenge completion sites marked.
Grand Theft Auto V - Maps & Secrets is the third part of our enormous guide for Grand Theft Auto V. The other two are Grand Theft Auto V - Strategy Guide and Grand Theft Auto V - Missions. Check them out!

Grand Theft Auto V - Maps and Secrets guide include:
Bartek "Snek" Duk ()
Tennis is available for Michael and only for him.
Playing tennis in GTA V isn't complicated, but requires a bit of patience and training, especially for the highest difficulty level.
 Tennis court
Game rules aren't too much different from the real tennis, but, of course, the very mechanic of the game is simplifier. There are gems, sets, mistakes and gem/game points.
Tennis is a pleasant and, sometimes, challenging activity - winning gives a bit of satisfaction. What is more, while playing, Michael's stamina is increased what is an additional advantage.
Darts are in a small pub out of the time and it's the only attraction of this local.
Your enemy will be a person who is next to you at this very moment. The mechanics isn't very complicated, but it requires a bit of precision.
The satisfying element of this game is a fact, that if your enemy annoys you, you can end the game and fight him. All in all, clashes are normal in such pubs.
 Almost in the very center!
It's worth to visit the golf field if you want to pass some time in peace and play a bit.
The rules of golf are simple - onscreen tutorial will explain them all to you and the rest you'll learn during the game. You can travel around the field in a cart or just move automatically between tees with LB button.
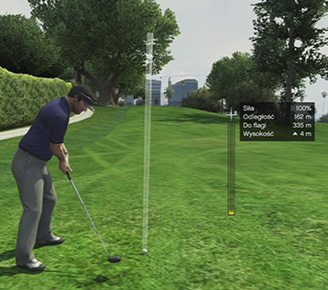 Will I hit or not?
Golf club is not only for hitting balls - you can also use it at any of players on the golf field if he annoys you.
If you need a relax and rest, you can try yoga exercises. There are simple and increase the particular character's stamina.
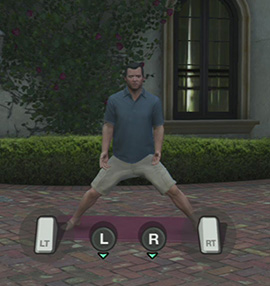 Breath in and breath out...
Yoga is unlocked after finishing the main mission "Did Somebody Say Yoga?". Yoga can be trained only by Michael and Trevor.
Triathlon is a sport which joins cycling, running and swimming. This activity is a good way to increase character's stamina. The best is to use it on the character with the biggest stamina if you want to win.
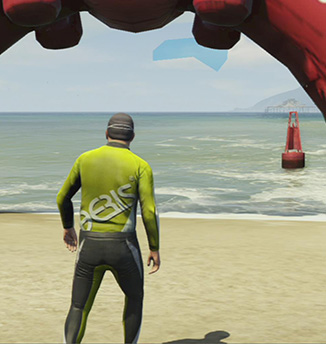 Bathing time!
Rules are simple - run, ride or swim to the checkpoints until you get to the finish. Remember not to get involved into fights with other participants, because it will end this activity.
Mud, sand and thick tires, this is off-road. You can drive a jeep, quad or a motorcycle (depending on the race) and compete with other drivers on the out-city roads.
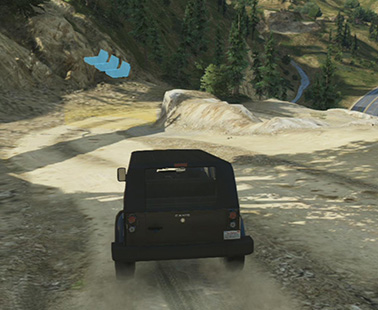 Turn!
Turn!Of course, your main task is to get to the finish as a first one. The best character for races is, of course, Franklin due to his Special and better driving skill.
Get into the water scooter and race on the waters around the San Andreas.
 Suit and a water scooter sounds great together... doesn't it?.
Follow appearing checkpoints to get to the finish - you have to be the first one. But don't try to eliminate your opponents, because it'll disqualify you from the race.
Flight School is useful if you want to improve flying skill of your characters You get a challenge list, which has to be fulfilled in order to obtain a pilot license.
 And up he goes!
Before every challenge, you'll see a short cinematic instruction presenting what you have to do. What is more, you'll get many advices via radio from your instructor.
Parachute Jumps are activity which is unlocked after finishing the secondary mission "Targeted Risk" available only for Franklin.
Each jump requires a smooth landing on the yellow marked area. Landing outside this area doesn't complete the jump and you have to repeat it.
Jumps also differ one from another. In some you jump out from the flying plane or helicopter in other you drive out from the skyscraper in the center of Los Santos. It's exciting activity and a pleasure for eye.
 I fly cause I want...
You want to get crazy a bit? You like fast driving but you need a challenge? So perform all Stunt Jumps you can find in the whole San Andreas state. Those are, in general, ramps on which you have drive with the biggest possible speed.
To complete such a jump, you need to land smoothly on all four wheels.
You can perform jumps with every land vehicle, but it's best to use the fastest ones. During the jump you can control the camera and slow down or speed up the time.
 Another station... nearby tree.
One of two aerial challenges is flying under the bridges. The task is simple - get a plane or helicopter and fly under the bridges marked on the map above.
It isn't a difficult challenge, it may be even a pleasure one if you take into consideration views that you can watch during those flights.
It's best to use the most skilled flying character, like Trevor.
 Carefully, slowly...
Knife Flights are aerial challenges in which you have to fly between chosen buildings in vertical position.
You should visit an aerial school if you want to learn how to fly like that.
The easiest and quickest way to complete all Knife Flights is to use a jet plane due to its mobility and speed.
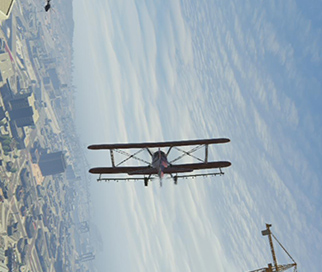 Variations over Los Santos.
You can find it in the location marked on the above map. This car is not always going to be there so, you need to check several times if you really want to own this car.
You can find it in the garage marked in the above screenshot. This car is not always going to be there so, you need to check several times if you really want to own this car.
Available for purchase at legendarymotorsports.com. The price: $475,000
 Dewbauchee JB 700
Available for purchase at legendarymotorsports.com. the price: $1,000,000
 Grotti Stinger
Available for purchase at legendarymotorsports.com. The price: $490,000
 Pegassi Monroe
Available for purchase at legendarymotorsports.com. The price: $10,000,000
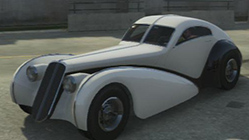 Truffade Z-Type
You can find it in the richer districts of Los Santos, e.g. Vinewood. This car is not always going to be there so, you need to check several times if you really want to own this car.
Available for purchase at legendarymotorsports.com. The price: $650,000
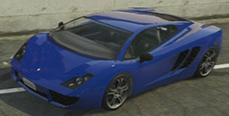 Grotti Cheetah
Available for purchase at legendarymotorsports.com. The price: $759,000
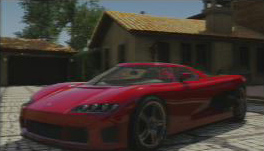 Overflod Entity XF
Available for purchase at southernsanandreassuperautos.com. The price: $440,000
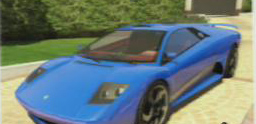 Pegassi Infernus
Available for purchase at legendarymotorsports.com. The price: $1,000,000
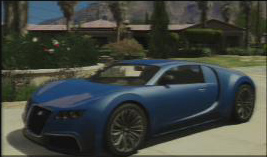 Truffade Adder
You can find it in the richer districts of Los Santos, e.g. Vinewood. This car is not always going to be there so, you need to check several times if you really want to own this car.
One of elements of customization is a possibility of tattooing. All three characters can visit chosen tattoo parlor and place a tattoo on their bodies.
 Michael decides to immortalize his love to whisky.
You don't have a lot of choices, but it's enough. Every character has other tattoos to choose, so you don't have to worry, that they will be identical. Sometimes, available tattoos may differ in different parlors.
In the criminal world of Los Santos, robbing banks isn't everything. You have to also look good and that's why you'll find in here Clothing Stores. There are only three types of stores: cheap (normal clothes, sometimes the same like in Binco but cheaper), Binco (sports, normal clothing), Suburban (more relaxed clothes) and Ponsonboys (expensive, luxury clothes - suits, shirts etc).
 You need a solid jacket for rainy days.
Each character can buy different clothes, except for the several blouses and t-shirts which are available for all of them. Choice of clothes is all on you.
Unfortunately, you can't change the colors, but most of models has several various colors. You should also approach every shelf in the shop - not at all of them you can buy things, but it's easy to skip something.
There is a quite a lot of clothes, so you may spend some time in the stores.
Elegant outfit should be completed with a proper hairstyle, which can be made by Hairdressers marked on the map above.
 You like to be like Henry Schrader from the Breaking Bad?
Besides a hairstyle, you can also make yourself a beard. But there is not a lot of options, especially for Michael and Trevor. Some Hairdressers offer additional hairstyles, so it's worth to check out all of them.
Ammu-Nation shops are known from previous parts of Grand Theft Auto series. This time, every gun can be modified in various ways: you can add a muffler, flashlight, increase a size of clip or change the weapon color.
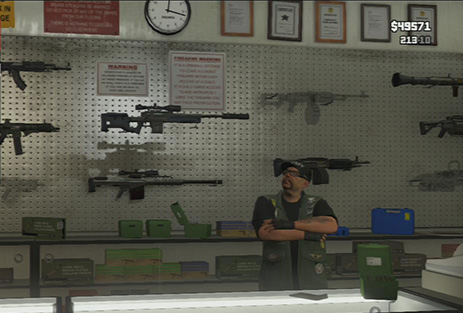 Big choice!
What is more, some Ammu-Nation shops offer also a Shooting Range. There you can not also check your freshly bought weapons, but also take part in available challenges. They are not too complicated - you just have to fire at the appearing targets, but every next challenge is more difficult.
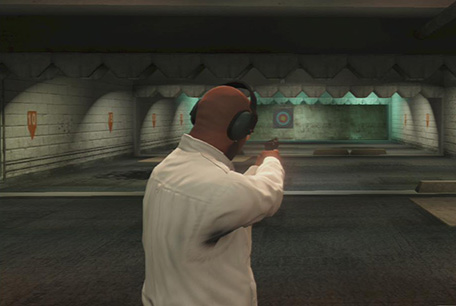 Nice shot!
Time you spend on the Shooting Range won't be wasted, because it increases your firing skill. The longer you train, the better you fire.
In the whole San Andreas state you can find a lot of shops where you can buy sweets which will regenerate your health or... rob them.
To begin a robbery, you just have to take out your gun and aim and the seller. You can wait until he packs money or take them by yourself. Robbery, of course, automatically alarms police.
Remember also not to show your backs to the seller. Some of them have weapons and will start firing at you the moment you turn away.
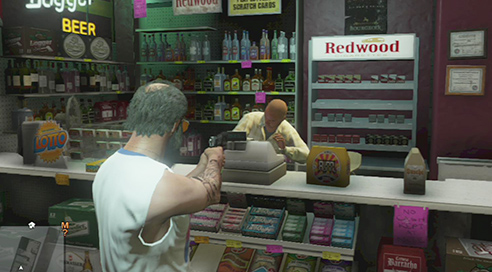 Give your money!
In GTA V you find a lot of races, especially the street ones. So you'll need a quick car, won't you? To get one, find any car and head for one of Tuning Parlors - Los Santos Customs.
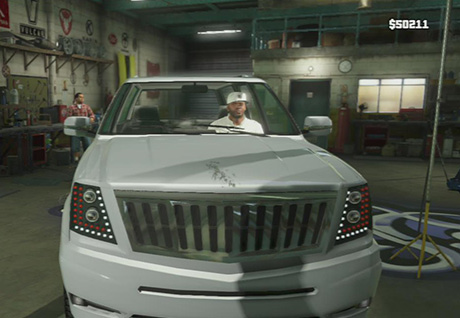 A little twisted, but it'll work.
The most tuning options is available for sports car: you can change bumpers, add spoilers and many, many other.
Such parlors can also save you during your escape from police. Just ride into one of them (make sure that there is no police car next to you) and change your car color. Stars should disappear and you can freely ride out.
Driving on muggy or sandy roads or just using one car, makes your vehicle dirty. The only way to clean it is to visit a car wash.
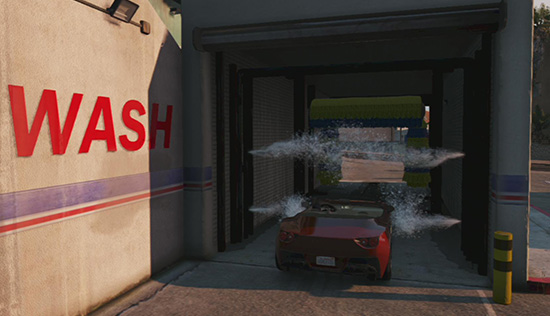 Shines bright like a diamond.
For proper price, your car will be totally cleaned.
You have bought an expensive car and it disappeared after finishing some mission? Don't worry, you'll find it on the Police Parking Lot. For a proper sum of money (usually it's 250$), you'll get it back.
 Receiving your stolen car from the police.
It happens to many cars, not only those bough ones. If you start liking any car and it disappears, it means that it's now on the Police Parking Lot.
Sometimes man needs to get rest from all this criminal stuff. This is a moment for some pleasant movie.
There are several cinemas available, all marked on the map above. To watch any movie, you have to buy a ticket in the kiosk, which is, usual, at the very entrance.
 It's rather boring...
Movies repeat very often and you have to decide if they are worth of spending several minutes with them.
Visit in a Strip Club is for sure a fun rest from criminal world, but pay an attention for the state of your wallet, as it may decrease very quickly in there.
You can sit at the main stage and encourage the dancer to further parts of the show, by throwing her bills or ask one of dancers for a private dance.
Every dancer has a bar of liking, which can be increased in various way, but mostly with cash.
If the liking bar of any dancer is full, you will be able to go with her to her house, but not every dancer will agree to that.
 Entrance to the Strip Club.
If you decided to return to home with a dancer, she may send you later a message or simply call you.
Prostitutes are known and popular aspect of Grand Theft Auto series. In the fifth game you won't miss them also.
You can find them fastest in the districts marked on the map above. They show up about after 22. You just need to drive next to one of them and wait until she gets in or honk.
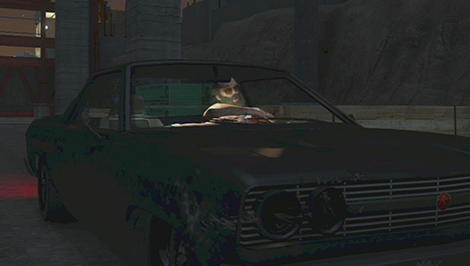 Free time of Trevor looks like that...
To use her services, you'll have to take her to some secluded place. Spending time with a prostitute regenerates your health but decreases your money.

 Two of 50 letter scraps scattered around the city.
Letter Scraps are collectibles connected with achievement "A Mystery, Solved". There are 50 letter scattered all around Los Santos and its outskirts.
Spaceship parts are collectibles needed to finish the game for 100%. You have to first finish the secondary mission "Omega" to unlock them.
Those collectibles, like Letter Scraps, glow slightly, what makes easier to find them, You can also hear a vibration when you're nearby them.
Parts may be collected by all three characters, but only Franklin may begin and finish the mission "Omega".
Spaceship Parts..
When you find all parts, return to Omega. After a short cut scene, new achievement unlocks: "From Beyond The Stars".
To unlock Radioactive Wastes, you'll have to buy a property marked on the map above. After that, a bathyscaphe appears in the marine. You'll search the underwater with that.
For each waste you get 23 thousands of dollars and finding all of them grants you additionally with 250 thousands of dollars.
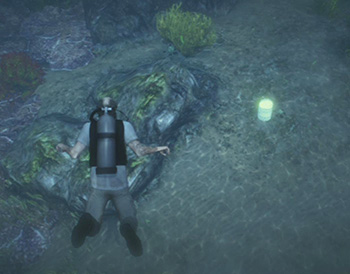 Little tiny waste.
Radioactive Wastes are yellow barrels with a Biohazard mark. As the other collectibles, they glow a bit, what makes them easier to find. What is more, in the bathyscaphe you have an access to the Trackify application on your phone. It's a radar thanks to which you can find all wastes.
Hidden Packages are cases spread out in whole San Andreas. All of them but one are located under water and those are often locations with ship or plane wrecks.
Usage of bathyscaphe or other boat with diving equipment is recommended. Some packages are hidden very deep or requires getting inside one of wrecks what will be impossible without diving device.
You can also search all wrecks, because most of them will contain a lot of useful things, like bulletproof vests.
There is also a cheating way to get a lot of money if you're a patient man. What it's all about: find random package, pick it up and quickly switch to the other character and then back to the one with who you have just picked the package. Package will reappear and you will be able to take it once again. You can repeat it many, many times, but it's very time consuming.
 The Hidden Package.
To unlock Submarine Parts, you have to finish mission "Death on the Sea". This mission is only available for Michael and appears when you buy a property marked on the map.
When you begin it, a boat for finding Submarine Parts will appear in docks. When you get in it, you'll see a green marked area on the map: this is location where you can find Submarine Parts. When you get there, notice a white circle; the lesser the circle, the closer you get to the part. In one location you find, in general, several parts and you'll have to dive to get to them. Don't worry, because this boats gives you diving equipment automatically.
 Submarine Part.
To unlock Epsilon Tracts, you have to first finish several missions connected with them. They are available only for Michael and you can find their description in the "Missions" part of this guide. Those missions are as following:
You will also receive SMS with hints concerning location of tracts.
 That's how tracts look like.
When you find them all, Marnie will send you a message with link to the new Epsilon page on which you can find a long text Epsilon Tract of the 9th Paradigm. This will be probably your only reward.
 Tract location.
Tract is on an island marked on the screen above. It's isn't difficult to spot, as it's almost on the top of the rock.
 Some of them are fastidious...
People buying the GTA V again on new consoles and PC will have another opportunity to properly explore Los Santos and make an effort to find some unique items to be photographed. In this case, of course, it is about the Monkey Mosaics - wall paintings showing the pictures of a colored monkey; in total 50 pieces. After taking photos of all of the pictures (they have to fit in the frame as a whole and then be stored in the memory), you will get access to a special monkey disguise and to a car painted in monkey graphics (you will find it in your garage). Only Franklin will be informed about existence of task after completing Chop mission but all of our protagonists will be able to take an active part in completing the entire task.
This guide to GTA Online answers all the most important questions regarding the first steps in the game.
It contains description of character creation along with statistics determining their further development. It also contains tips on how to start your adventure with the game as well as general hints on how to survive your very first moments in the game's world.
Here you will find detailed descriptions of available game modes, which among other things, explain how to join a game in-progress and how to create your own match.
You will also learn how to join an existing crew and how to start your own group.
Another part of the guide focuses on a detailed description of in-game weapons along with rank level required to unlock them.
The chapter devoted to finances will help you to quickly multiply your in-game money and protect it from other players.
The concluding part of the guide is a table of rewards granted for particular achievements.
GTA Online guide contains:
Damian Kubik & Patrick "YxU" Homa ()

Character movement

Camera movement

Stealth

Look back

Action/running button

Jump

Enter vehicle

Hit

Cell phone

Weapons menu

Take cover

Aim

Shoot

Zoom in or out / open interaction menu (hold)

Game menu

Turn

Camera movement

Horn

Look back

Handbrake

Switch weapons

Exit vehicle

Cinematic camera

Cell phone

Shoot

Handbrake

Brake/reverse gear

Accelerate
Zoom in or out

Game menu

Character movement

Camera movement

Stealth

Look back

Action/running button

Jump

Enter vehicle

Hit

Cell phone

Weapons menu

Take cover

Aim

Shoot

Zoom in or out / open interaction menu (hold)

Game menu

Turn

Camera movement

Horn

Look back

Handbrake

Switch weapons

Exit vehicle

Cinematic camera

Cell phone

Shoot

Handbrake

Brake/reverse gear

Accelerate

Zoom in or out

Game menu
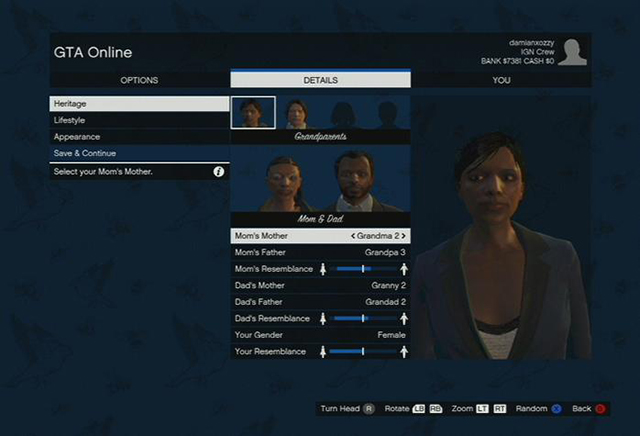 Choose the looks of your parents and grandparents
The first step you have to take in GTA Online is to create a character. The process itself is quite unusual. You do not simply chose one of several faces for your character, shape of their nose or angle of ears. For starters, you choose your grandparent's faces - both maternal and paternal. The next stage is to choose your character's sex and set their mother's and father's resemblance.
Next, define the character's lifestyle. Note that your statistics rise or fall depending on how much time you devote to particular activities.
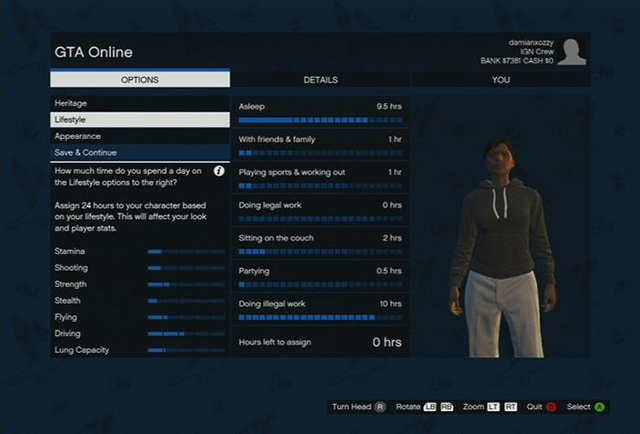 This is how you set the statistics
Let us focus on creating a character that would be just perfect for a beginner. The statistics which will be the most useful are: stamina, shooting, strength, and driving.
To create such character, use the following pattern:
Asleep - 9,5 hrs
With family & friends - 1 hrs
Playing sports & working out - 1 hrs
Doing legal work - 0 hrs
Sitting on the couch - 2 hrs
Partying - 0,5 hrs
Doing illegal work - 10 hrs
Another tab concerns your character's general appearance. First, you set age from 21 to 40. The next step is to choose your hairstyle and hair colour, and optional facial hair. You may also choose a hat and glasses. When everything is ready, click Save & Continue. Now just type in the character's name, accept, and here you go.
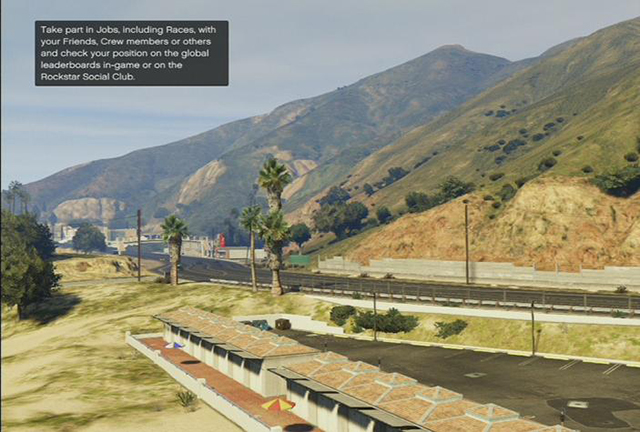 The game's start
Your first in-game challenge is a race organized by Lamar, known also from the story mode. Try to be the first to cross the finishing line, because this way you will get the second experience level. As soon as the race ends Lamar gives you another task. You have to get to the location marked on the map. Your objective is to collect a bag of drugs. Be careful, you will be thrown in at the deep end. Once you beat your opponents, head to Gerald's to get the stuff. The route will be shown on the map. When you finish the job, you will be promoted to level 3. Before you get full freedom, you still have to follow the game's directions for some time. Now you are required to head to clothes store to do some shopping. Buy any clothes you like and go outside. Since now you are free to enjoy the game's enormity to full extent. At the beginning try to get level 5 by participating in races. I do not recommend taking part in Deathmatch games at the very start, because the only weapon available at this point is a pistol, which does not set your chances very high. Upon turning level 5, you will unlock an SMG - with this you can easily face other players.
 Game menu is very clear
Game menu in GTA Online is very clear and simple. Press START button to open it.
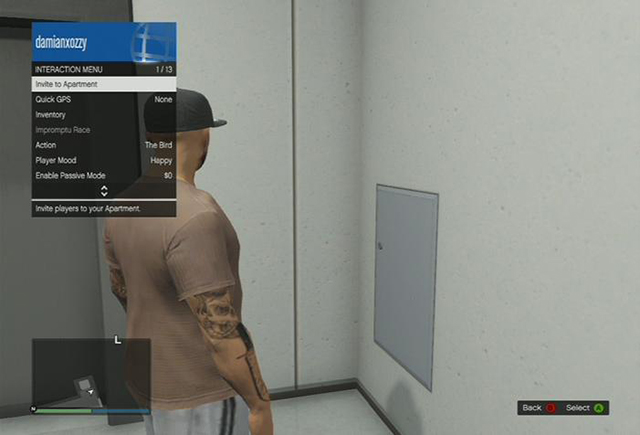 Interaction menu
To open interaction menu hold Back/Select.
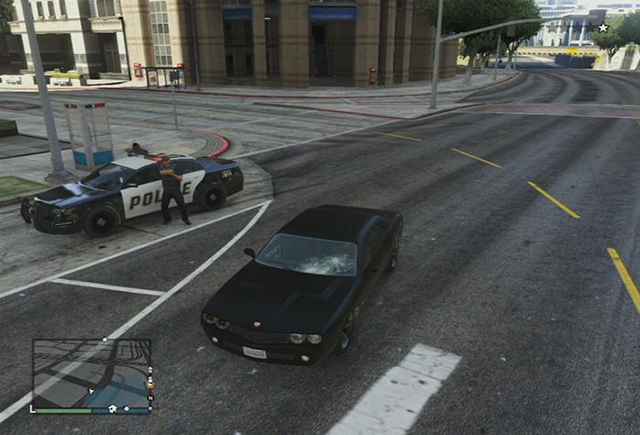 Wanted level is represented by stars in the top-right corner of the screen
Some basic information on how to deal with law enforcement officials:
In GTA Online, you usually move around by car. In order to always have a quick access to a car without resorting to theft, which may often result in a police pursuit, it is good to mount a tracker in your car. Once you buy it for your car, it will always be waiting nearby when you log into the game. This is a major convenience, especially when you spawn in the middle of wilderness, where there are hardly any cars to use. To have a personal car, first you need to find a car you like. In other words, you have to steal it. Once you get a car, head to one of the Los Santos Customs shops - they are marked on the map with a spray can icon.
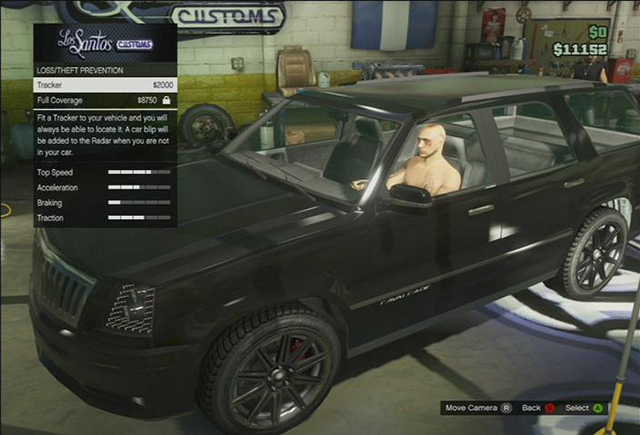 You can mount a tracker in Los Santos Customs
When you enter a LSC garage, you will see a list of car modifications. To mount a tracker, choose option Loss/theft prevention. This will roll out another list with two options. Click on Tracker option. This is it. Now you can always find your car. It will be marked on the map with a car icon. The first tracker is mounted for free, every other costs 2000$.
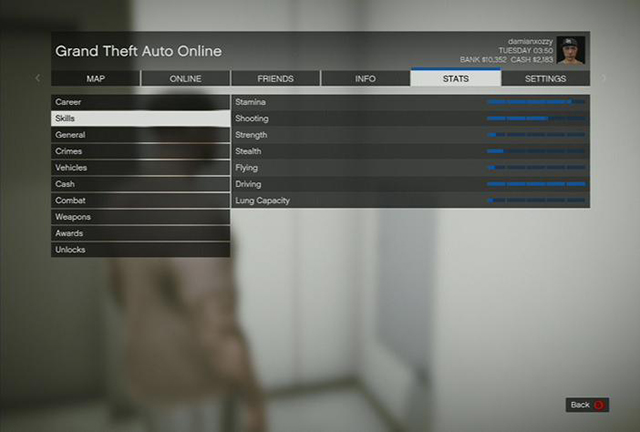 Stats
StatsYour GTA Online character's skills are measured in 7 statistics bars
The best way to develop skills is to use them.
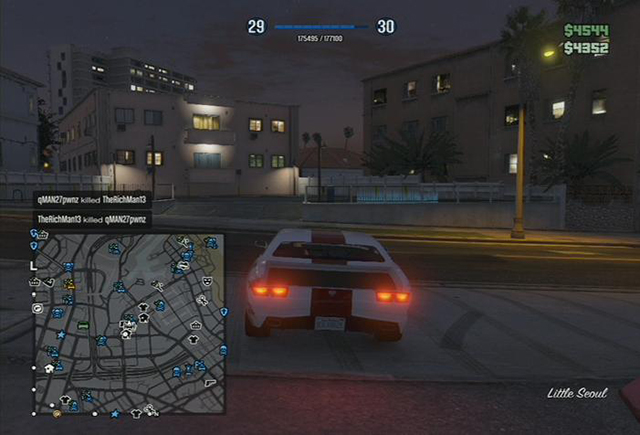 Rank determines how others see you
Your character's rank determines the range of possibilities you have. The higher your rank is, the more things the game has to offer. Through leveling-up you unlock new vehicles, weapons, jobs, clothes, etc. Basically, the rank also stands for your skills. The higher the rank is, the more respect other players show you (in theory at least). You can level-up in several ways.
 Jobs are the game's fundamental feature
Jobs are the most important aspect of GTA Online. Taking part in them earns you money and reputation points. What is more, through participation in jobs you get practical experience which, though does not influence any in-game statistics, increases your chances of getting a high final position - the more you race, the better driver you as a player become. An undeniable advantage is that currently you are not limited to races and missions. You can also take part in Deathmatch games, parachuting, or Survival mode. As for me, the Survival mode is, right next to missions, the most interesting of all jobs, probably because it is quite demanding and offers gameplay that is typical for Online games which require cooperation between players.
Jobs fall into five categories, which are further divided into subcategories according to the type of gameplay they offer.
 You can race on various types of vehicles
There are various types of vehicles in races:
NOTE: If you happen to fall of the track, miss a checkpoint, or wreck your vehicle, press Y (X360) or TRIANGLE (PS3) to return to the last checkpoint passed.
 You can fight alone or in a team
(NOTE: You do not have to visit an ammunition store each time you want to take part in this type of actions, because before a game starts you are given a chance to buy ammo to all weapons that you are carrying.)
 Missions are varied and often prove to be demanding
GTA Online missions have wide variation of objectives. The goals differ depending on the mission type. Missions can be performed solo or with help of other players. It is better to play in cooperation though, because it is more interesting.
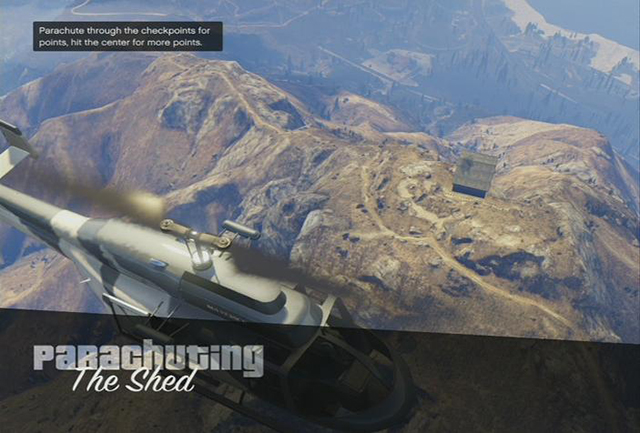 Jumping off a helicopter is a good opportunity to admire views
Parachuting is another fascinating competition. To win, you need to get more points than others. You earn these for flying through checkpoints - the closer to the center you get, the more points you receive. However, to finish the competition and collect all the points, you cannot miss the landing zone.
 Survival games consist of 10 waves
This game mode sets you against waves of enemies. If you die, you can watch your friends' progress until the current round ends. You will respawn for the next one. This mode offers ten consecutive waves. To complete the challenge, you need to beat all ten.
NOTE: When a job ends, you can vote for the next one. The number of votes determines which job will be next.
With the patch 1.17, GTA Online gets a new play mode which is "Last Team Standing - LTS". It is a mode which bares many similarities with the team deathmatch. It differs from it with one thing: During the fight, the person with only one life left, has to wait for the end of the round for as long as the winner is not revealed. In this mode it is vital to keep track over the amount of the character's health, pick up the med-kits and armors and to use covers all the time. This mode can be played by up to 16 players. The number of them differs dependable on the map chosen.
Adversary mode covers three types of tasks with the division on different teams of a different sizes. The main point of these missions is to put two opposite teams in the game. One will be defending whilst the other will be attacking the former. Both will have to perform certain tasks, despite the efforts of the offensive team. The mode is unlocked after rank 12.
Come Out To Play -The first type of mission. It can be played by 2-8 players. There are two teams: The Runners (up to three players) and the Hunters. The latter are equipped in the vehicles which type is dependable on the map. They are also given sawed-off shotguns with which they have to kill the couriers before they get to their spots. The Runners have to get to their spots within a particular time. They have got all range of arms, but they have got only one life each.
Siege Mentality - The next mode is designed to be played with 2-12 players. The teams are divided on the Attackers and the Hold Outs. The latter must defend their spot, or more precisely, their lives - as each of them is given only one. Hold Outs can't leave their specified area as it would result with the failure of their team. They have to defend (with the full choice of weapon range) this area from the Attackers which will be equipped only with sawed-off shotguns. The latter win when none of the Hold Outs is left alive.
Hasta La Vista - The last mode requires exactly 4 players. These are divided into two teams: The Cyclists and the Truckers. The rules are simple: The cyclists have to reach the finish line within the 5 minute whilst the truckers have to make sure that the former won't do so. Again, the cyclists got only one life each. The truckers win if the cyclists are dead or if they are not in the finish line after 5 minutes. No one can change their vehicle and no one wields a gun in this mode.
Press the top arrow to enter the cell phone menu. Here you can choose from two options: Quick Job and Jobs List.
 Joining jobs with your cell phone
Quick Job menu allows you to join the closest job in-progress. Clicking on Join Random will send you to one of three types of games which are about to start. You can also manually set the type of game you want to join. Depending on your feelings, you can choose between Join Race, Join Deathmatch, and Join Mission. Jobs List, on the other hand, contains invitations from other players as well as missions given by NPCs (e.g. Simeon or Lamar). This tab also holds invitations to jobs which are still active, that is those not yet taken by other players.
You can also join jobs through the game menu. Go to Game menu > Online > Jobs > Join Jobs. Here too you can choose to join a random job or a specific game type.
Another way to join missions is through the contact menu. You just need to call one of the mission givers - be it Lamar - to get to play a mission.
 Starting a job via the world map
Press START, to open the GTA Online world map. There are icons which stand for particular jobs. There are two ways to get there. You can either set GPS route and drive there, or use "quick travel" option. If you choose the first option, point a job icon with the cursor and press A (X360) or X (PS3) to set the route to a given location. Remember to exit a vehicle before entering the job circle - you have to be on foot to start it.
Using "quick travel" is much easier. You just point a job icon with the cursor and press X (X360), SQUARE (PS3). You will be asked if you really want to start the job. Accept this and it is all set.
However, when joining a job via the map, there is a high probability that no one is currently playing this. In that case, you become the host, i.e. you create the job.
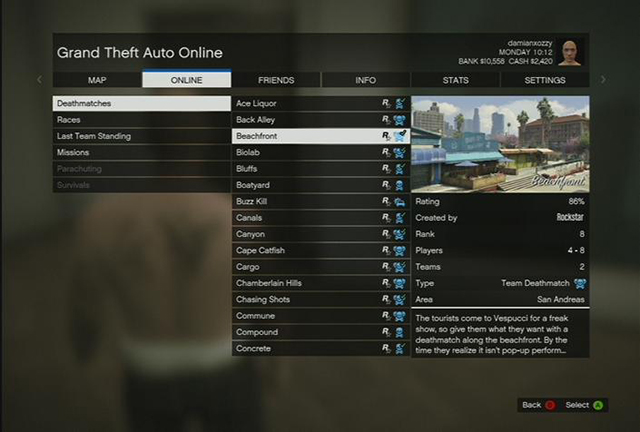 Job creator
Just like in case of joining current jobs, creating your own offers several options. The easiest way to create a job is through the game menu. Go to Menu > Online > Jobs > Create jobs. Click Created by Rockstar. This will roll out a list of all available game modes. Choose a mode and get to another list, which contains all the games of the type. Choose one of these to become its host. The creative freedom depends on the game type. Some jobs let you modify almost all their aspects (e.g. in races you can set cars, race type, number of laps, and so on), while in others you can only set the weather. However, as a host, you have the freedom to decide who joins the game. You may create private sessions only with these players who you personally invite.
The second way to create a job is pretty much the same as joining jobs via the world map. In this case, click on a job icon of your interest. When you get at the right location and stand inside the job circle, you will be given a choice. Click Create to become the game host.
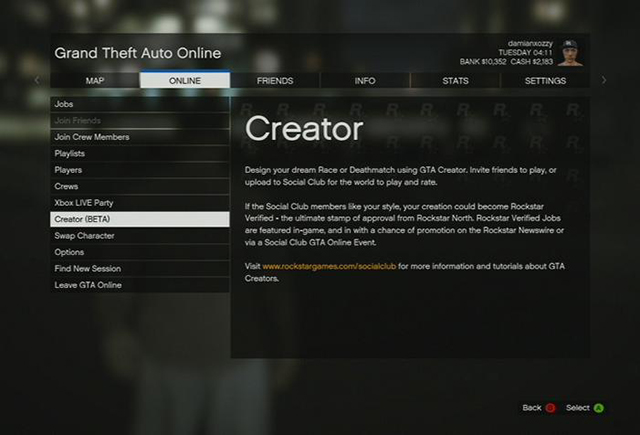 Content creator
Rockstar has made available a content creator (currently in beta version). To get the access to this application, you just need to download an automatic update to your console. The creator allows you to create custom games in several modes. You have, basically speaking, unrestrained freedom as to game location, available weapons (in Deathmatch), or setting whatever starting point for a race you can imagine.
Game modes available:
To start the creator, enter the game menu, go to Online tab and select Creator (BETA).
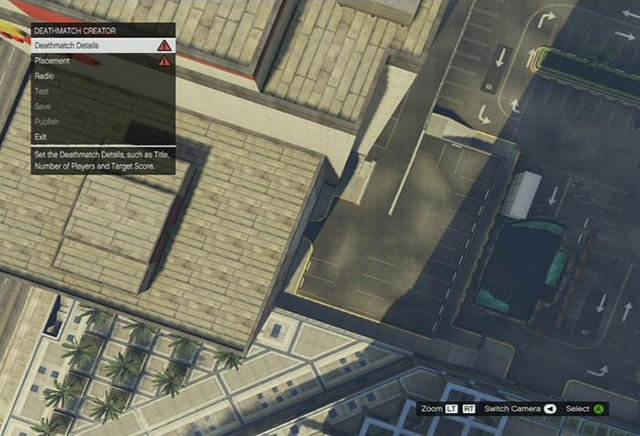 Deathmatch creator
You have two modes to choose from: all for all or team fight. The first step is to select a place where you want to create your Deathmatch. Open the map and click on the location you want to move to. You will see the selected area from above. You can move the view with the left analogue stick and change camera position with the right one. The left and right triggers can be used to zoom in and out.
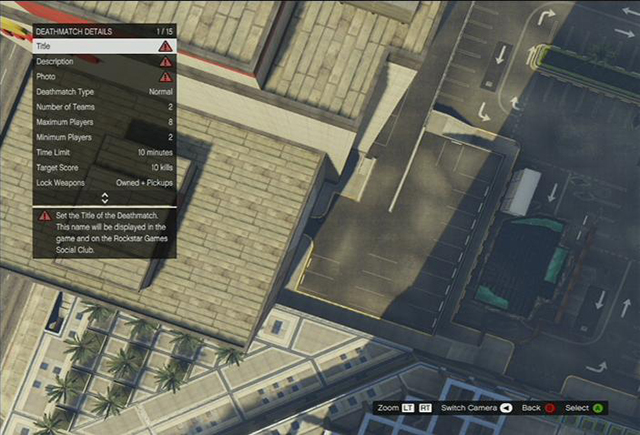 Deathmatch details
Select Deathmatch details. Here you have some basic options, such as:
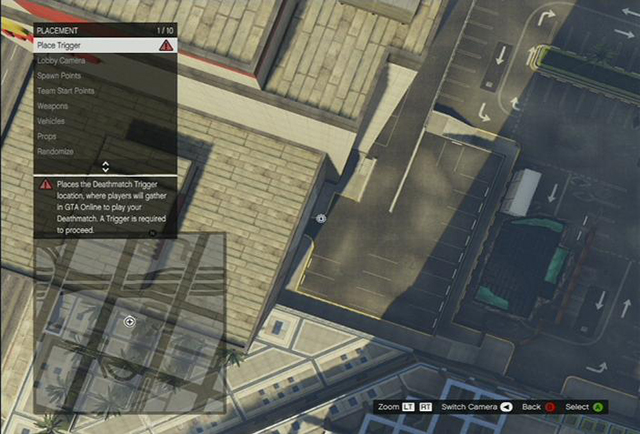 Placement
Another game creation option is Placement.
Radio - choose a radio station you want to listen to during the creation process
When the creation is ready you need to test it. Click on test option. A Deathmatch against AI-controlled characters will start.
After you have finished the test you can make some final changes. If everything is working as planned, you have now two options.
Save - you can invite other players to your game, but your creation will not be available in Rockstar Games Social Club.
Publish - your game goes to the website and others can check it out. The best creations get "Rockstar verified".
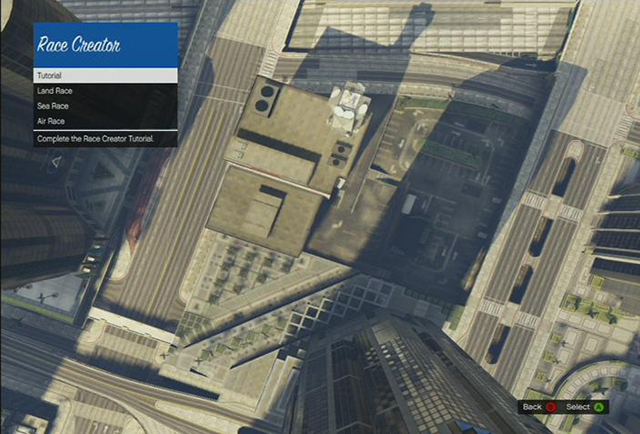 Race Creator
The first step to create a race is to choose one of three variations
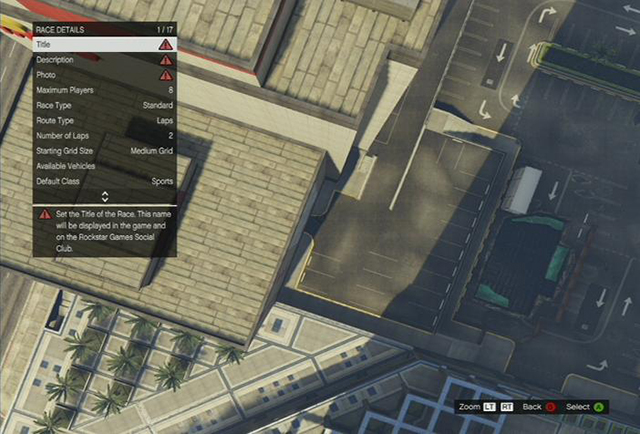 Race details
Race details
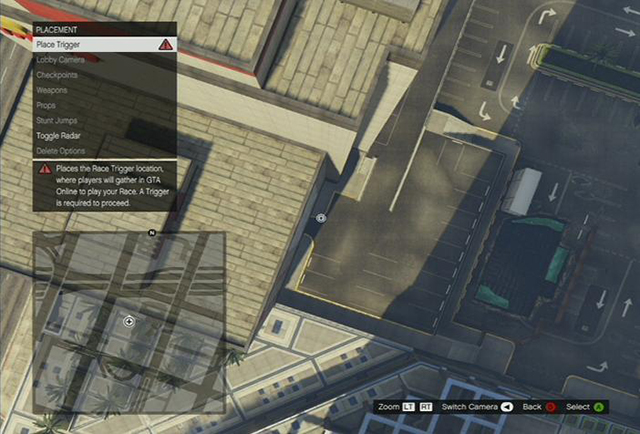 Placement
Placement
Radio - choose a radio station you want to listen to during the creation process
When the creation is ready you need to test it. Click on test option. A race will start.
After you have finished the test you can make some final changes. If everything is working as planned, you have now two options.
Save - you can invite other players to your game, but your creation will not be available in Rockstar Games Social Club.
Publish - your game goes to the website and others can check it out. The best creations get "Rockstar verified".
After you publish a game, you can edit the creation at any moment. To do this, choose Load Content in creator menu.
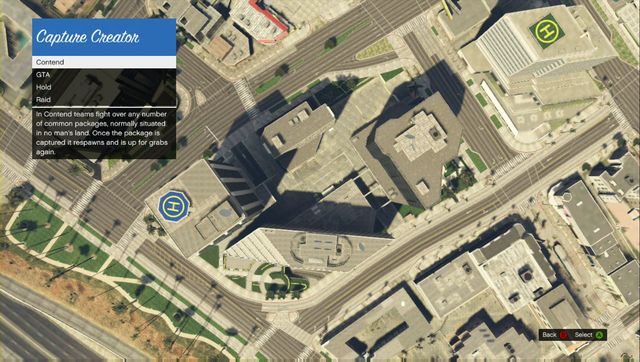 Choose the mode first.
To start creating a "Capture" game you will have to pick one of the modes: Contend, GTA, Hold or Raid. No matter of your choice, the next steps will be similar.
Capture Details
You can also change the number of pedestrians and a vehicle traffic, police interventions etc. Now select the spawn points, capturing points, location of the guns and vehicles and the starting point for the both teams, to make your map ready to be played.
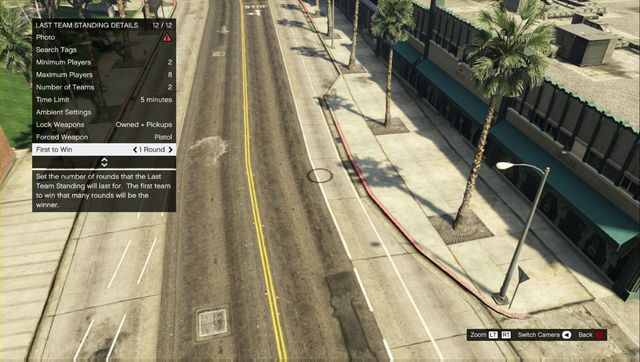 TLTS Creator
Creating the TLTS game is very similar to creating a Capture map. However, there are no capture points, as it is not the objective of these missions.
Capture Details
You can also change the number of pedestrians and a vehicle traffic, police interventions etc. Now select the spawn points, capturing points, location of the guns and vehicles and the starting point for the both teams, to make your map ready to be played.
Just like in the real world, money is essential for survival in GTA Online. Cash can be earned in several ways.
Your primary source of money are jobs. For each finished game you get salary, whose height depends on your score. As far as Deathmatch is concerned, you can get extra cash by collecting the money dropped by killed enemies.
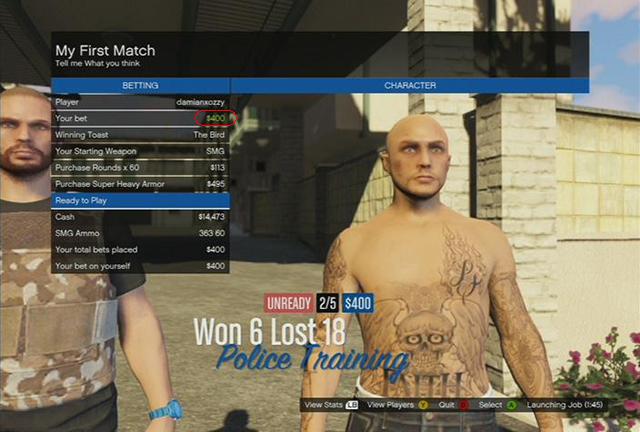 Bets can get you extra money
You can get extra money for jobs, if you win a bet placed on the player who you think may win the game. Of course, you can place the bet on yourself. Note that after you name the sum of money you still have to press A (X360) or X (PS3) to place the bet. When the number is green, it means that the bet is in play. This is shown on the previous picture.
Another way to earn money is to deliver cars to Simeon. Early in the game you get a text message from him with a list of cars he needs. When you find a car from the list, first you have to respray it, as he will not accept it otherwise.
From time to time a message like this will appear on the screen. This means that there is a specific vehicle marked on the map - one of those that Simeon needs. Get this vehicle, respray it in LSC, and deliver to Simon, to get extra money. Remember though - first-come, first-served.
In Los Santos Customs shops you can also sell common vehicles right from the street. However, one shop will not accept an infinite number of cars. To sell a common car, drive to LSC and select Sell option. Before that you may repair the car. This makes little sense though, because the selling price will only rise that much as much you spend on the repair.

To earn extra money, you can rob stores. These are marked on the map with the icon presented on the picture above.
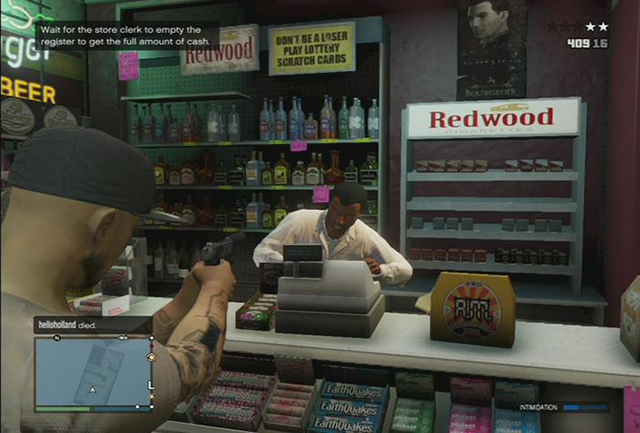 You need to keep a bead on the shop assistant, so he gave you all the money
When you enter a store, draw a bead on the shop assistance. An intimidation bar will appear at the bottom of the screen. When it is full, the shop assistance will give you all the money. Usually a robbery ends with a police pursuit.
If you are currently not doing any job, keep an eye on the information shown at the bottom of the screen. From time to time, there is an equipment supply dropped over Los Santos. This is marked on the map with a green square with a question mark. Remember the rule - first-come, first-served.
Robbing the shop may be made faster by using the headset. All that has to be done is to yell at the clerk. It is also possible to kill him and take the money by yourself. It is important not to take eyes from the clerk even after collecting the many, as he/she may attack you with a gun hidden under the counter (usually it is a sawed-off shotgun). It is best to shoot the shopkeeper in arm to prevent his retaliation. Killing the clerk may increase the number of the stars.
If you carry a lot of money on you, it would be a good idea to transfer them into a bank account. There are two ways to do this.
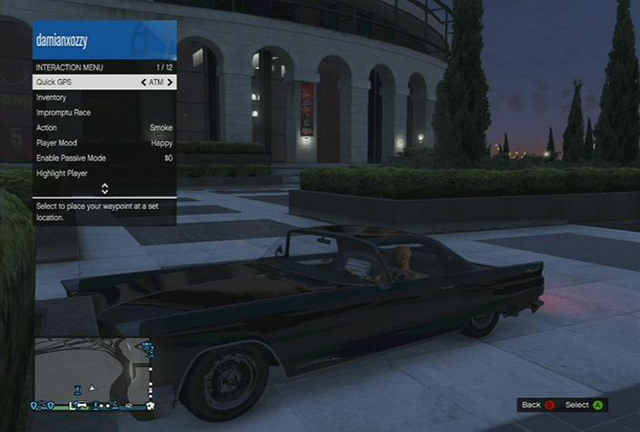 Interaction menu allows you to quickly get to a ATM
You can transfer money into your account using a network of ATMs located all around Los Santos and its surroundings. To do this, press and hold BACK (X360) or SELECT (PS3), to open interaction menu. In Quick GPS option search for ATM. The shortest route will appear on the map. When you get at the place, press right arrow, to use this. Select Deposit option and the money amount. Now you just need to confirm the operations and that is it. If you want to withdraw your money from the bank, follow the patterns as before, this time though select Withdraw option.
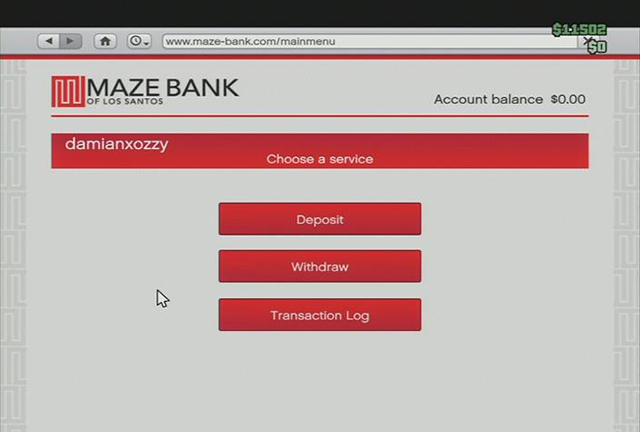 The website of the bank where you keep your money
Money can be deposited or withdrawn from the account anywhere and anytime you want, as long as you are in Sandbox Mode. Open your cell phone with a proper button. Then open the internet browser. Enter Money and Services and open Maze Bank website. Click on the Main Menu and, depending on what you want to do, select Deposit or Withdraw, and set the amount of money.
If you want to check the history of all transactions (both made through ATMs and on the bank website), select Transaction Log.
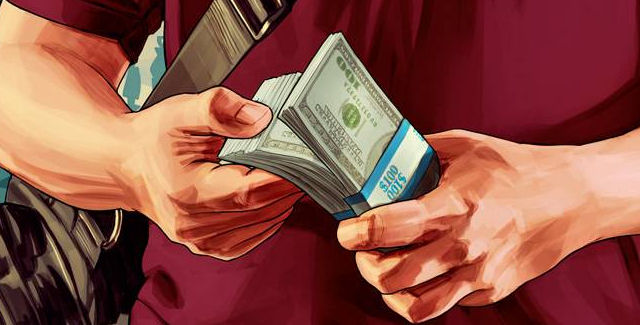
Basically, you earn money to spend them. The same is true for GTA Online. You can find many stores offering various goods in the game world. Businesses fall into four categories:
The following chapter describes places where you can do your virtual shopping and make use of various services offered in Los Santos and Blaine county.
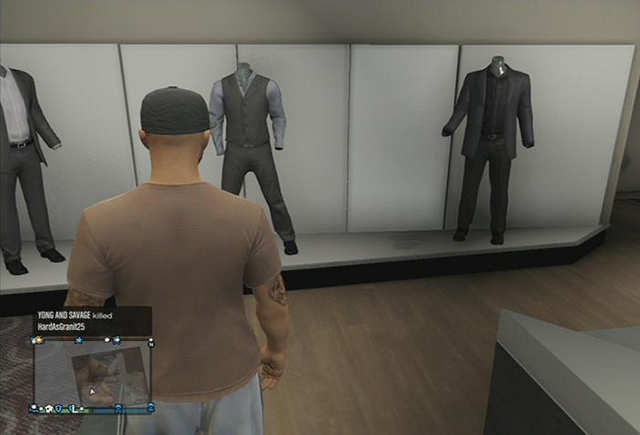 A clothing store
There is a wide selection of clothes, starting with jeans, through coveralls, ending with fancy suits. You can choose costume as you see fit. There are three clothing brands in the game.
All the stores differ only in name and dcor - they all have the same selection of wares. Low-priced clothing stores bear design of a typical second-hand store. Suburban looks like a store from a shopping mall, while Ponsonboys, with their smart suits and elegant shoes on display, look like stores for the rich. However, every store holds the same selection of wares. Overall, there are 12 clothing stores in the game.
Gun shop is a well-known place to all GTA fans. You will probably be visiting it more often than any other store. Only here you can buy freshly unlocked weapons and weapon attachments. In Ammu-nation stores you can get ammo as well as various sorts of bulletproof vests. You can also buy shoes and tops. There are 11 stores of the chain in the game.
 A mask store
There is only one mask store in the game. It is located close to Vespucci Beach. Masks can serve two purposes. First, they are there for the looks. Second, if you are being chased by the police, you may put on a mask in interaction menu, to remove one star from the current wanted level.
 A tattoo parlor
You can decorate your body with tattoos in parlors. There is a wide selection of patterns for all parts of body. New tattoos are unlocked along with ranking-up or they are given as awards - this how to get a unique pattern. There are 6 tattoo parlors in the game.
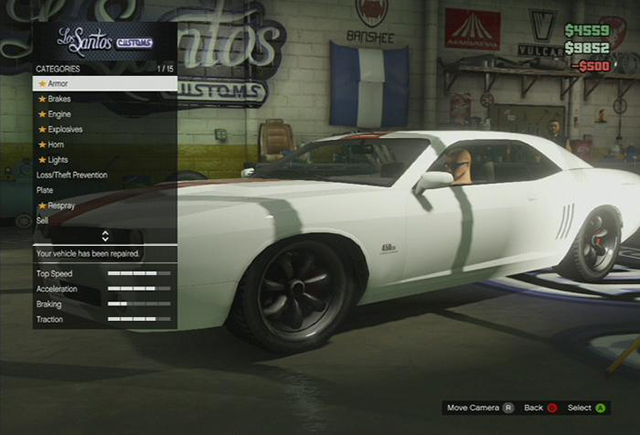 A Los Santos Customs shop
You can customize your cars in Los Santos Customs, a custom car corporation. Almost everything is customizable. From respraying, through adding an improved armor, to implementing turbo, which improves the car's performance. You unlock car improvements through ranking-up and winning races limited to a particular car category. Moreover, in LSC you can mount a tracker and sell cars. There are 4 Los Santos Customs shops in the game.
 Barber shop
Here you can change your hairstyle as well as facial hair. New hairstyles are unlocked through ranking-up. There are 7 barber shops in the game.
You can buy a variety of vehicles through the Internet. To browse through offers, open your Internet browser on your cell phone and select Travel and Transport bar.
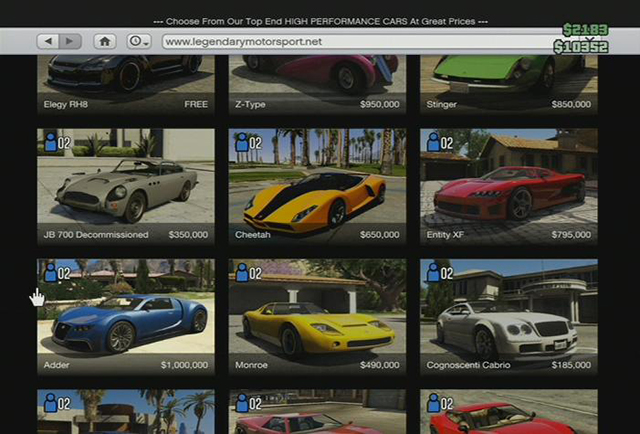 Car store
There are two stores which specialize in automotive industry
The numbers next to the blue icon stand for how many people can move in a particular vehicle.
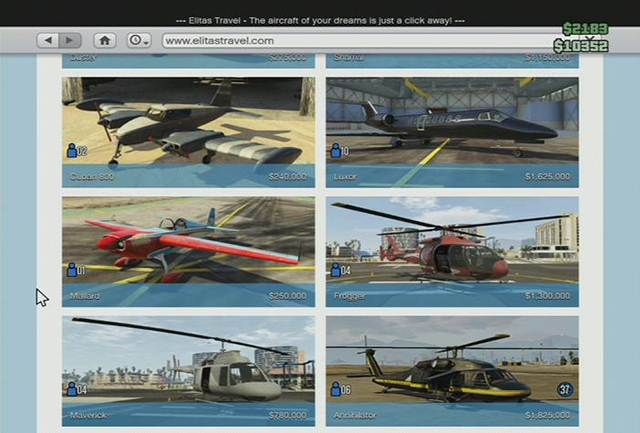 An aircraft store
Elitas Ravel specializes in dealing in all sorts of aircrafts. Here you can buy sport planes, cargo planes, jets, and helicopters. You do not have to be very reach to buy one, since the prices start at 240,000$. However, if you want to get them all, be ready to spend 11,000,000$.
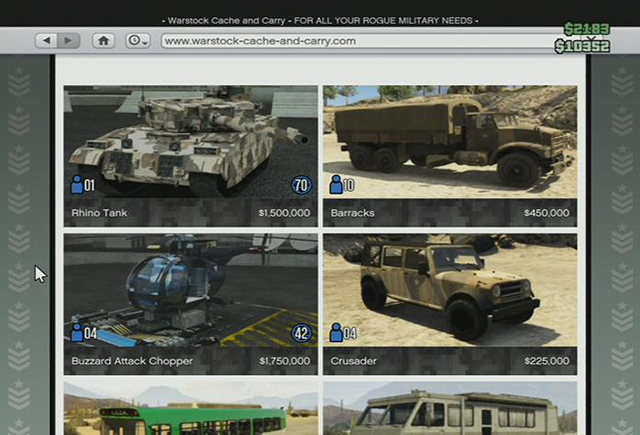 Armored vehicles
Warstock Cash & Carry has the monopoly for armored vehicles. If you want to spread terror in the streets or pack a group of friends to one vehicle, you must absolutely visit this website.
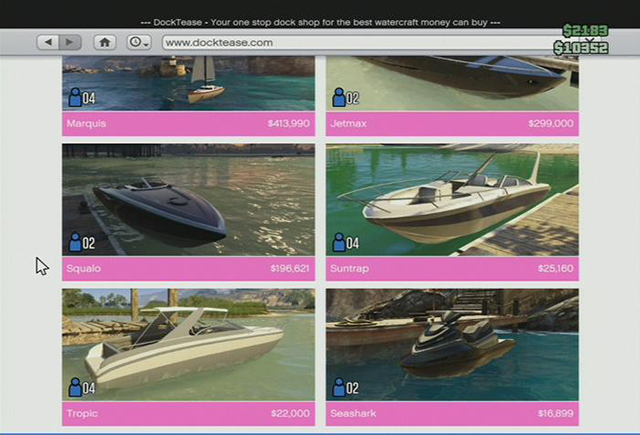 Boat store
Dock Tease company deals in watercrafts. Here you can by a yacht, motor boat, or jet ski. If you are sick and tired of Los Santos traffic or you suffer from fear of heights, visit this store and buy yourself a boat, so you could admire views at calm sea.
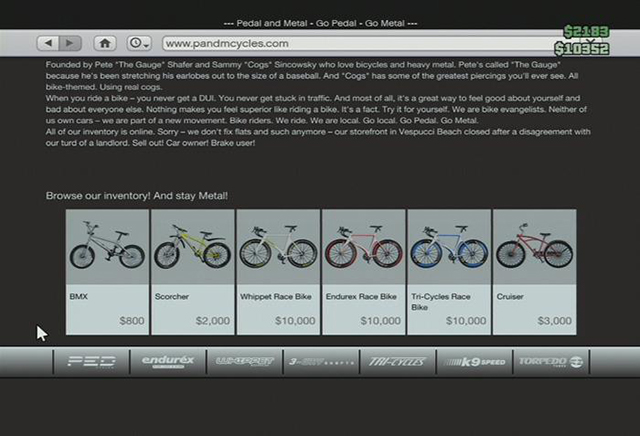 Bicycle store
If you fancy to work out a little bit and improve your stamina, make sure to visit Pedal and Metal website. This store specializes in selling both casual and sport bikes. You can buy a BMX starting from 800$ - merely an equivalent of a one store robbery.
There are two ways to buy your dream house: via a website or by traversing the city looking for Dynasty 8 signs.
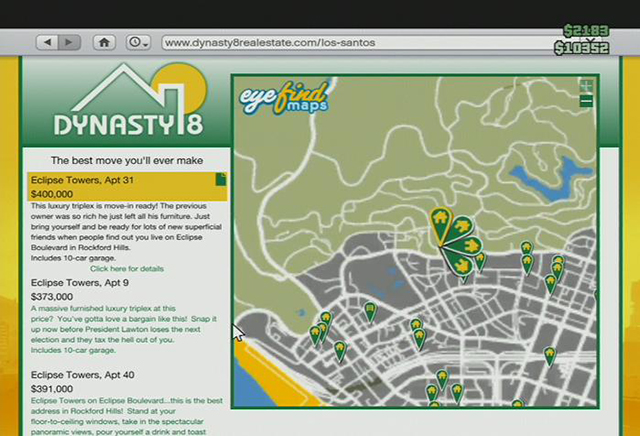 Real estate agency
Open Dynasty 8 website - look for it in Money and Services tab. Here you can buy both houses and garages. On the website there is a map with all properties that are currently for sale. If you find a particularly interesting offer, click on the marker on the map and select Click for details. The next page contains the estate's description. Now you have three options.
 Dynasty 8 sign
In your travels across Los Santos and Blaine county you may come across a Dynasty 8 sign. If you like the property that it is standing next to, and you happen to have enough money, do not hesitate and buy the place. You just need to approach the sign and press a button, to purchase the house.
While playing GTA Online you do not have to work alone. At any moment, you can join a crew created by other players. This gives you a spectrum of possibilities and lots of extra fun. Each crew member may choose unique emblems for their group. When being in a crew you can earn extra experience and reputation points. You may also rank-up in the crew hierarchy and, in time, even become its leader. If you cannot find a group that suits your needs, you may create your own and invite friends to fight by your side.
The first thing you need to do before joining an existing crew or creating a new one, is registering in Rockstar Games Social Club.
 The main site of Rockstar Games Social Club
Enter www.socialclub.rockstargames.com website. In the right-top corner there is a yellow box with Join the Club sign. On the next site, you will have to type in some basic info like: nickname, e-mail address, password, date of birth, and your country. For the sake of security measures, your password has to contain at least one big letter and one digit. Once you type in all the data, click on Create an Account. This means that you accept the privacy policy.
You can also create an account using social networks. Click on the icon of a social network and you will be redirected to login site. Once you log into your account, proceed according to instructions on screen.
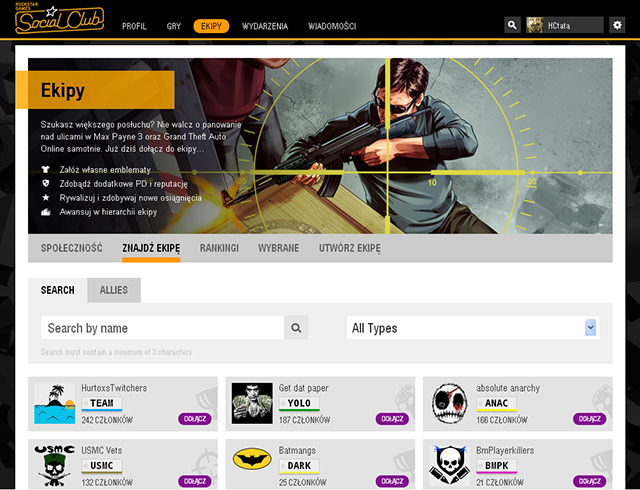 Click on Join to become the crew member
You can join a crew via Rockstar Games Social Club website. Once you register there, you may log in. Then click on CREWS. On the following screen you will be given five options. Click on FIND A CREW. Then you can choose one of the randomly selected crews. You can also find a crew by typing in its name in the field marked with a magnifying glass icon. There are two types of crews - open and closed. You can join open crews freely - just click on JOIN to become a member the group. If you want to get inside a closed crew, you need to request an invitation, then it is up to the crew's leader whether to invite you or not.
You can also join a crew directly from your console. Open Online tab in game menu and choose Crews from the list. Another list will appear on the screen. In Suggested Crews tab you will find randomly selected crews that you may join. If you decide to join one of them, click action button on the group's name and select Join the crew. You can check out an adequate tab to see crews that your friends are in and join them by following the same steps as in joining a suggested group. In Invitations tab you will find invitations to crews sent by other players. You may accept or decline these.
NOTE: You can be a member of up to five groups at the same time, however, only one may be active.
 Type in your crew's data on the website
If you could not found a crew that would suit your needs or simply want to have your own group, here you can learn how to do this. In Crew tab on Rockstar Games Social Club website, click on Create a crew. Type in the details on your soon-to-be crew, such as name displayed in the game and on the Social Club website, group's Tag and color. You may tick the Invited only box, if you do not want anyone to join without your permission. Leaving this box empty will allow anyone to join the group. You can also choose the type of the crew and type in its motto. Below, there are ranks admitted to players at certain level. You may type in your own names for the ranks or stick to the customary ones. If everything is ready, click on Save the crew. This option can be found at the bottom of the site. And this way you have just created your own crew in GTA Online.
To be able to use all of the tuning elements, you need to win races in the online mode. By winning a race, you unlock elements for a specific vehicle type (to unlock bike parts, you need to win bike races).
 Los Santos Customs, the temple of tuning
In LSC (Los Santos Customs) garages, you can also sell cars for decent cash (ranging from several to a dozen-or-so thousands- depending on the car value). However, you cannot do this all the time and only occasionally (more or less, very hour)/ For this reason, try to deliver expensive cars only, but not above the super-cars threshold. To learn about this, see below...
Special vehicles (police cars, fire trucks) cannot be sold, nor modified. Also, cars of the other players count as special vehicles. You can often get into them, but you cannot keep them or sell them. However, the groups of special vehicles are super-cars, which you can see on the roads and on parking lots. You cannot sell them, keep them or modify them in the garage, either. What is even more, if you steal such a car, it is possible that you will be hunted by the owner and you get a bounty on your head. To have an easy access to all the cars, the easiest way to do this is buying them. You can buy them over the internet. After that, the car is delivered to your garage and it is supplied with tacking a chip.
Weapons are essential tools to survive in GTA Online world. There are 25 types of weapons in the game as well as weapon attachments.
Weapon types:
Weapon attachments (depend on the weapon type)
Weapon
Attachments
Unlocked at level 1
A typical .45 caliber pistol. 12-bullet clip, upgradeable to 16.
Attachments:
Extended magazine
Flashlight
Silencer
Unlocked at level 9
Semi-automatic combat pistol. 12-bullet clip, upgradeable to 16.
Attachments:
Extended magazine
Flashlight
Silencer
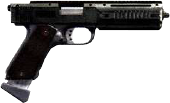
Unlocked at level 33
AP Pistol. Fully automatic, high penetration. 18-bullet clip, upgradeable to 36.
Attachments:
Extended magazine
Flashlight
Silencer
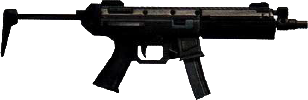
Unlocked at level 11
SMG. Automatic, 30 bullets in a clip.
Attachments:
Extended magazine
Flashlight
Scope
Silencer
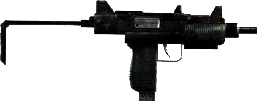
Unlocked at level 5
Micro SMG. Small, neat, quick fire rate (900 rounds per minute). Perfect for beginners.
Attachments:
Extended magazine
Flashlight
Scope
Silencer
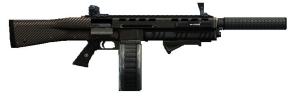
Unlocked at level 37
Assault Shotgun. Fully automatic, quick fire rate, 8 bullets in a clip.
Attachments:
Extended magazine
Grip
Flashlight
Silencer

Unlocked at level 17
Pump Shotgun. A perfect weapon for close quarter combat.
Attachments:
Flashlight
Silencer
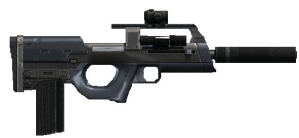
Unlocked at level 29
Assault SMG. Fully automatic, 30-bullet clip.
Attachments:
Extended magazine
Flashlight
Scope
Silencer

Unlocked at level 24
Assault Rifle with large clips. Very accurate at long distance.
Attachments:
Extended magazine
Grip
Flashlight
Scope
Silencer
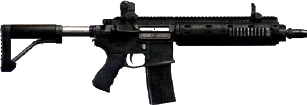
Unlocked at level 42
Carbine Rifle. Very accurate at long distance. Large clips.
Attachments:
Extended magazine
Grip
Flashlight
Scope
Silencer
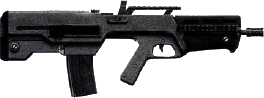
Unlocked at level 70
Advanced Rifle. The smallest assault rifle. Accurate, quick fire rate.
Attachments:
Extended magazine
Flashlight
Scope
Silencer

Unlocked at level 21
Sniper Rifle. Accurate at long distance. Long reloading time.
Attachments:
Silencer
Advanced scope

Unlocked at level 90
Heavy Sniper Rifle. Armor-piercing ammunition. Equipped with laser point.
Attachments:
Advanced scope
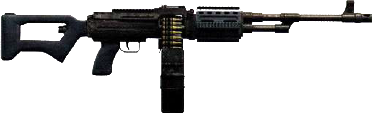
Unlocked at level 50
MG. Works fine against multiple enemies.
Attachments:
Extended magazine
Scope
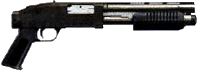
Unlocked at level 80
Combat MG. Extremely quick fire rate.
Attachments:
Extended magazine
Grip
Scope

Unlocked at level 100
RPG. Perfect against armored vehicles.
Attachments:
None
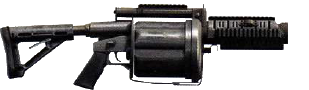
Unlocked at level 60
Grenade Launcher. Very useful against multiple enemies, e.g. in Survival Mode.
Attachments:
None
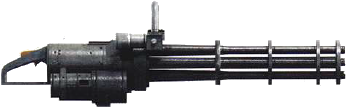
Unlocked at level 120
Minigun. Irreplaceable in Survival Mode. Very quick fire rate (2000-6000 rounds per minute.
Attachments:
None
Unlocked on registering in Rockstar Social Club.
Sawed off. Irreplaceable at short ranges.
Attachments:
None
Unlocked at level 20
Jerry Can. Perfect for destroying stationary vehicles. You can spill gasoline and set it ablaze with a shot from a gun.
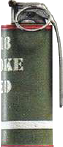
Unlocked at level 13
Tear gas. Good for paralyzing groups of enemies.

Unlocked at level 15
Hand Grenade

Unlocked at level 19
Sticky Bomb. Perfect for setting traps. Plant a bomb, hide and wait for a target, then detonate.
Unlocked at level 1
Nightstick. Useful in melee combat.

Unlocked at level 1
Knife. Perfect for close kills.
Additional weaponry can be unlocked by downloading a DLC. A big advantage of these weapons are their availability in the shops right away after downloading DLC (even if the player has ran 1).
Weapon (DLC)
Upgrades
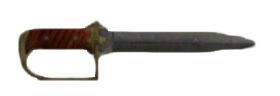
Antique Cavalry Dagger- standard knife, a bit more stylish than the usual.
Upgrades:
None

The most basic melee weapon -Broken bottle - very cheap.
Upgrades:
None
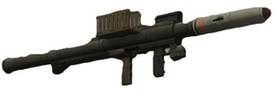
Based on the basic missile launcher the- Homing Launcher - shoots the projectiles which can lock on the target. Best to use against the flying vehicles.
Upgrades:
None

The Proximity Mine, which explodes when someone comes in its range. Grate for setting up the traps. The player also dies if he comes in its range.
Upgrades:
None

SNS Pistol - 6 round pistol with an average accuracy.
Upgrades:
Extended clip
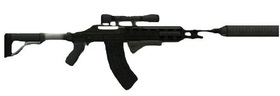
Heavy and accurate. The Heavy pistol has got the clip with the capacity of 18 rounds.
Upgrades:
Extended clip
Flashlight
Suppressor
Vintage Pistol, 7 round pistol with a mediocre range and accuracy. It is also of the vintage style.
Upgrades:
Extended Clip
Suppressor

Flare Gun has two flares equipped. It can be used to knock down the enemy or to set him on fire.
Upgrades:
None
Very swift Heavy shotgun with only one round but of a hefty damage and great accuracy. Good arm for the beginners.
Upgrades:
Extended Clip
Flashlight
Suppressor
Grip
Carbine Rifle is a rifle which is equipped with a scope without zooming feature. Cheap substitute for a sniper rifle.
Upgrades:
Extended Clip
Flashlight
Suppressor
Grip
Scope
Special Carbine shots bullets almost as fast as the SMG. Clip holds 30 rounds.
Upgrades:
Extended Clip
Flashlight
Suppressor
Grip
Scope
Bullpup Rifle is perfect for shooting in series, although it is fully automatic by default.
Upgrades:
Extended Clip
Flashlight
Suppressor
Grip
Scope
Parachute is useful when planning to jump of a big heights.
Upgrades:
Backpack and smoke color can be changed.
GTA Online offers not only the path of a "professional career" of a big city gangster. There are several places where you can kick back and blow off some steam.
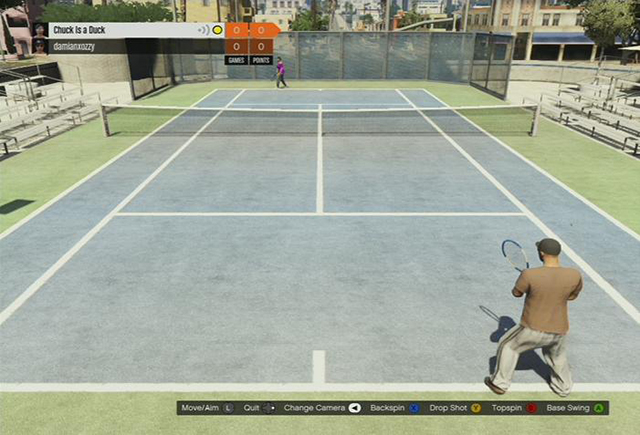 Tennis
Before you start a tennis match, you can set its length. You may choose between 1, 3 or 5 sets. A set is won by the player who wins 6 games. The rules are the same as in real life tennis. To start a match, you need 2 players - you cannot play against AI. Although it is far from being an accurate simulator of tennis, you may spend some nice moments playing this. What is more, playing tennis improves stamina, so visiting a court now and then can be worthwhile.
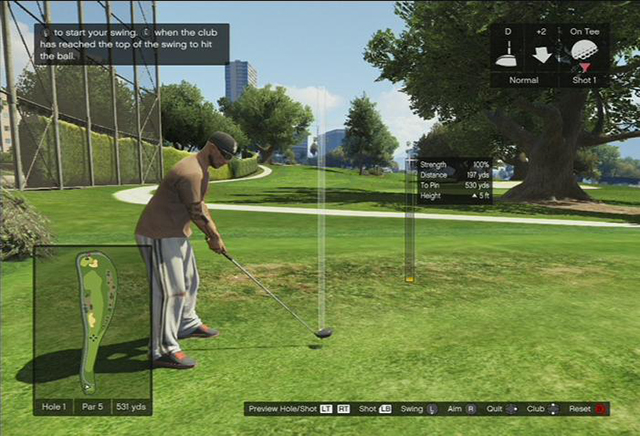 A golf course
If you still feel like doing some sport after playing tennis, you may visit a golf course. This game mode was developed with significantly more care and proves to be more fun. Generally speaking, the main objective in golf is to hit a ball into a hole at as few attempts as possible. You may choose your gear according to your likening or, perhaps, your technical knowledge and actual experience. There are several golf clubs to choose from. You may play solo or compete with other players.
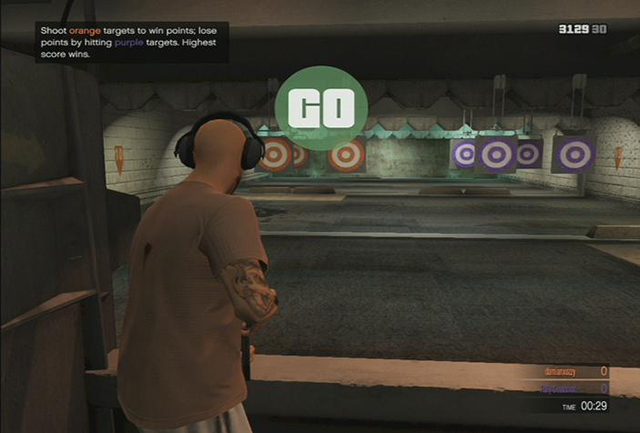 Shooting range
If you want to try out how you can handle a gun, head to a shooting range. These are located at the back of some Ammu-nation stores. You may play solo or compete against other players in various game modes. Generally speaking, the player who gets the most points for hitting targets, wins.
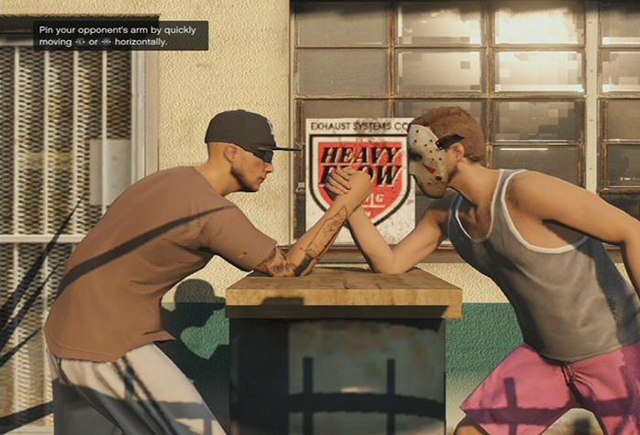 Arm wrestling
If you want to try out your strength, challenge a player to an arm wrestling duel. Not only physical condition of your character (though very important) determines the winner - it is also important how fast you can move your fingers. The faster you move the analogue stick, the more strength your character applies.
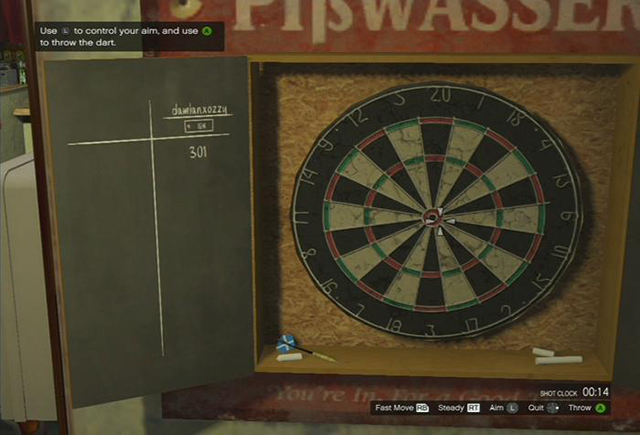 Darts
DartsYou can play darts in a bar located at Grand Senora desert. The rules are quite simple. To win a game, you need to reduce your score from 301 to exactly zero before your opponent does. Note that your last throw must hit a double band. A game can be won in two rounds minimum.
The inner bands score you triple points, while the outer score double.
If you feel like having some other thrills than golf or darts, you may visit a strip club. For 40 bucks a dancer will keep you amused with a private dance. While she is displaying her charms you can touch her with right trigger. This will gradually fill up a bar in the bottom right corner of the screen. When the bar is full, the dancer will offer you to spend the rest of the wild evening with her at home.
Award
How to get?

Hottie tattoo
Complete Lapping It Up Award
(watch 25 lap dances at Vanilla Unicorn)

Skull tattoo
Complete Head Banger Award
(headshot 500 enemies)
Skull and Sword tattoo
Complete The Bounty Hunter Award
(kill 25 targets with bounty on their heads)
Way of the Gun tattoo
Complete the Pistol Whipped Award
(kill 500 with a pistol)

Hustler tattoo
Checking Out
(win a game of darts in a 6 dart checkout)

Clown tattoo
Rob 5 stores
Clown and Gun tattoo
Rob 10 stores

Clown Duel Wield tattoo
Rob 15 stores
Clown Duel Wield Dollars tattoo
Rob 20 stores

Los Santos Customs tattoo
Fully modify a vehicle
Trust no One tattoo
Complete the Car Bomber award
(kill 25 players with vehicle bombs)
Blackjack tattoo
Complete the Full Metal Jacket award
(earn 50000$ on robbing armored trucks)
Blank Scroll tattoo
Kill 250 players in all game modes
Embellished Scroll tattoo
Kill 500 players in all game modes
Seven Deadly Sins tattoo
Kill 1000 players in all game modes
Burning Heart tattoo
Win 50 Deathmatch games

Grim Reaper tattoo
Be a team carrier in 50 Team Deathmatch games
Broken Skull tattoo
Kill 100 enemies with a sniper rifle

Flaming Skull tattoo
Have at least 10 killstreak in a Deathmatch game
Dragon and Dagger tattoo
Complete the Equalizer award
(get 50 revenge kills on players who killed you 3 times in Deathmatch games)
Melting Skull tattoo
Kill 500 enemies in Deathmatch games
Racing Blonde tattoo
Break a world record in a race
Racing Brunette tattoo
Win 50 races
The Wages of Sin tattoo
Get the most kills in Survival mode

Grim Reaper Smoking Gun tattoo
Complete the Clear Out award
(5 gang attacks in a day, in one session)

Ride or Die tattoo
Complete the Road Rage award
(kill 3 other racers in GTA Race and win)

Angel tattoo
Complete the All Rounder award
(win every game mode, including all types of Deathmatch and races)

Red Skull T-Shirt tattoo
Complete the Survivor award
(pass wave 10 in Survival mode)
Rockstar T-Shirt tattoo
Use the content creator to create a job which gets Rockstar verified
Award
How to get?
Los Santos Belle T-shirt
Get your fist special crate.

"Gimme That" T-shirt
Get the platinum "Gimme That" medal ( collect 100 crates in any "Capture" mode)

"Boss" T-shirt
Get the platinum "Boss" medal (Be the heists leader 25 times)

"For Hire" T-shirt
Get the platinum "For Hire" medal (be a part of the heists crew 25 times)

"Car Display" T-shirt
Get the platinum "Car Display" medal (store 30 cars in your garage).
"Soldier" T-shirt
Get the platinum "Soldier" medal (Whilst on your own, kill 25 times the entire enemy team in the "Last Team Standing").

"Psycho Killer" T-shirt
Get the platinum "Psycho Killer" medal (Kill 100 psychos - players marked in).
"Awarded" T-shirt
Get the platinum "Awarded" medal (get 25 platinum medals through the heists and heists preparations)
"Can't touch this" T-shirt
Get the platinum "Can't touch this" medal (Finish the heist without suffering any damage)
"Immortal" T-shirt
Get the platinum "Immortal" medal (win 25 captures in a row, without dying.)
Elitas T-shirt
Finish the San Andreas Flight School.

Chrome Rims - Sport
Get the platinum "Conqueror" medal (win 50 "Captures")

Chrome Rims - Lowrider
Get the platinum "Mailman" medal (deliver 100 crates in the "Captures")

Chrome Rims - Offroad
Get the platinum "No Deal" medal (kill 100 people with crates using "Captures").

Chrome Rims - High End
Get the platinum "Moments of Glory" medal (Finish 50 heists)

Chrome Rims - Tuner
Get the platinum "Be Prepared" medal (finish 50 heist preparations)

Chrome Rims - Motorcycles (Bike)
Get the platinum "Peek-a-Boo" medal (kill 100 people with your night vision device on)

Chrome Rims - SUV
Get the platinum "Undefeated" medal (win 50 " Last Team Standing" missions)

Chrome Rims - Muscle
Get the platinum medal "Last Man Standing" (be the last player in the LTS 50 times)
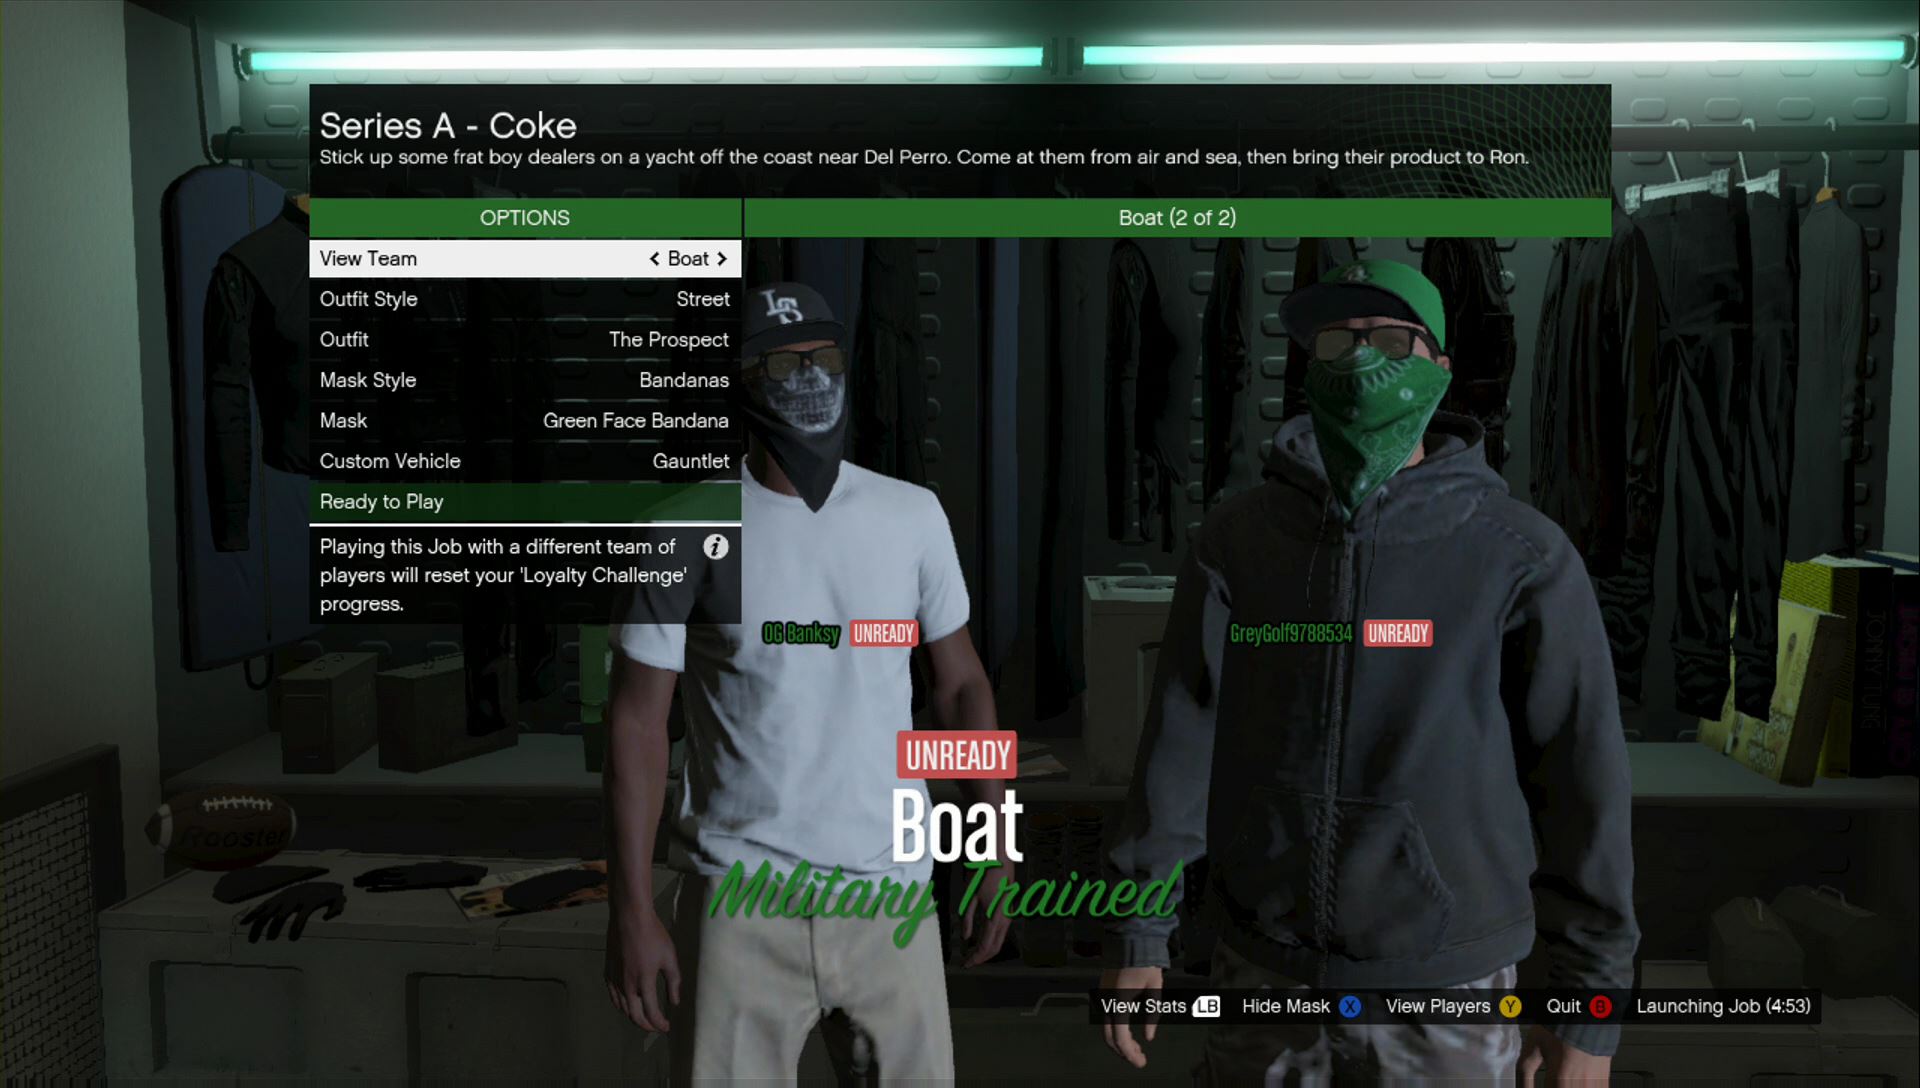
Elite Challenge T-shirt
Beat all of the Elite Challenges.
Grand Theft Auto Online: Heists is a New DLC for multiplayer, which enriches the gameplay by new missions for the crew to complete - heists. It is a very good income source and an interesting element of the gameplay. During heists with your own crew (4 players - 2 in the first heist) you complete a mission in which each of the crew members perform predetermined actions allotted to them. For this reason, an important element here is cooperation, because the mission may be failed, if one of the crewmembers fails to do their job. For this reason, it is difficult to join a crew you do not know, when you are a beginner at a low level. To start a heist, you need preparations - complete the gear, prepare the heist spot... such missions are much shorter, easier and much more common - but you receive less money for that. If the mission is failed, it can be replayed, without side effects, but often they take long and not all the players may agree to that, at which point the mission is interrupted. In the missions, not always you can die - in the bottom-right corner of the screen, you can view the numbers of "lives" the crew has - this figure goes down, if one of the crewmembers dies and the mission is interrupted if someone dies and you have no lives left; or if a premise of the mission is not reached, in any other way (if the gear is destroyed).
 To be able to use all of the attractions in the game, you need cash
In the missions leading up to the heists, the pay is usually low - around 10-30 thousand dollars. You always receive more money, and slightly more experience and reputation, after you reach a higher rank - i.e. you make a name for yourself above the rest of the crew, in the number of the completed missions and killed opponents.
You can get quite decent money for heists. The amount received depends on how much is allotted to whom, by the leader of the crew - the amount usually ranges between $100000 and $1000000. The leader of the crew may take as much as the rest of the crewmembers, but he needs to make some investments, prior to that, which is spent on necessary arrangements. The standard amount each player receives is, around 15%, but this can be changed by the leader. Also, it is him that allots individual tasks to the crewmembers and this is what the division may depend on. An important element is escaping with the money and doing that again, in the case of a failure - you can then lose a considerable amount of cash, as a result. Therefore, make sure that the difficulty level is proportional to the crew's level.
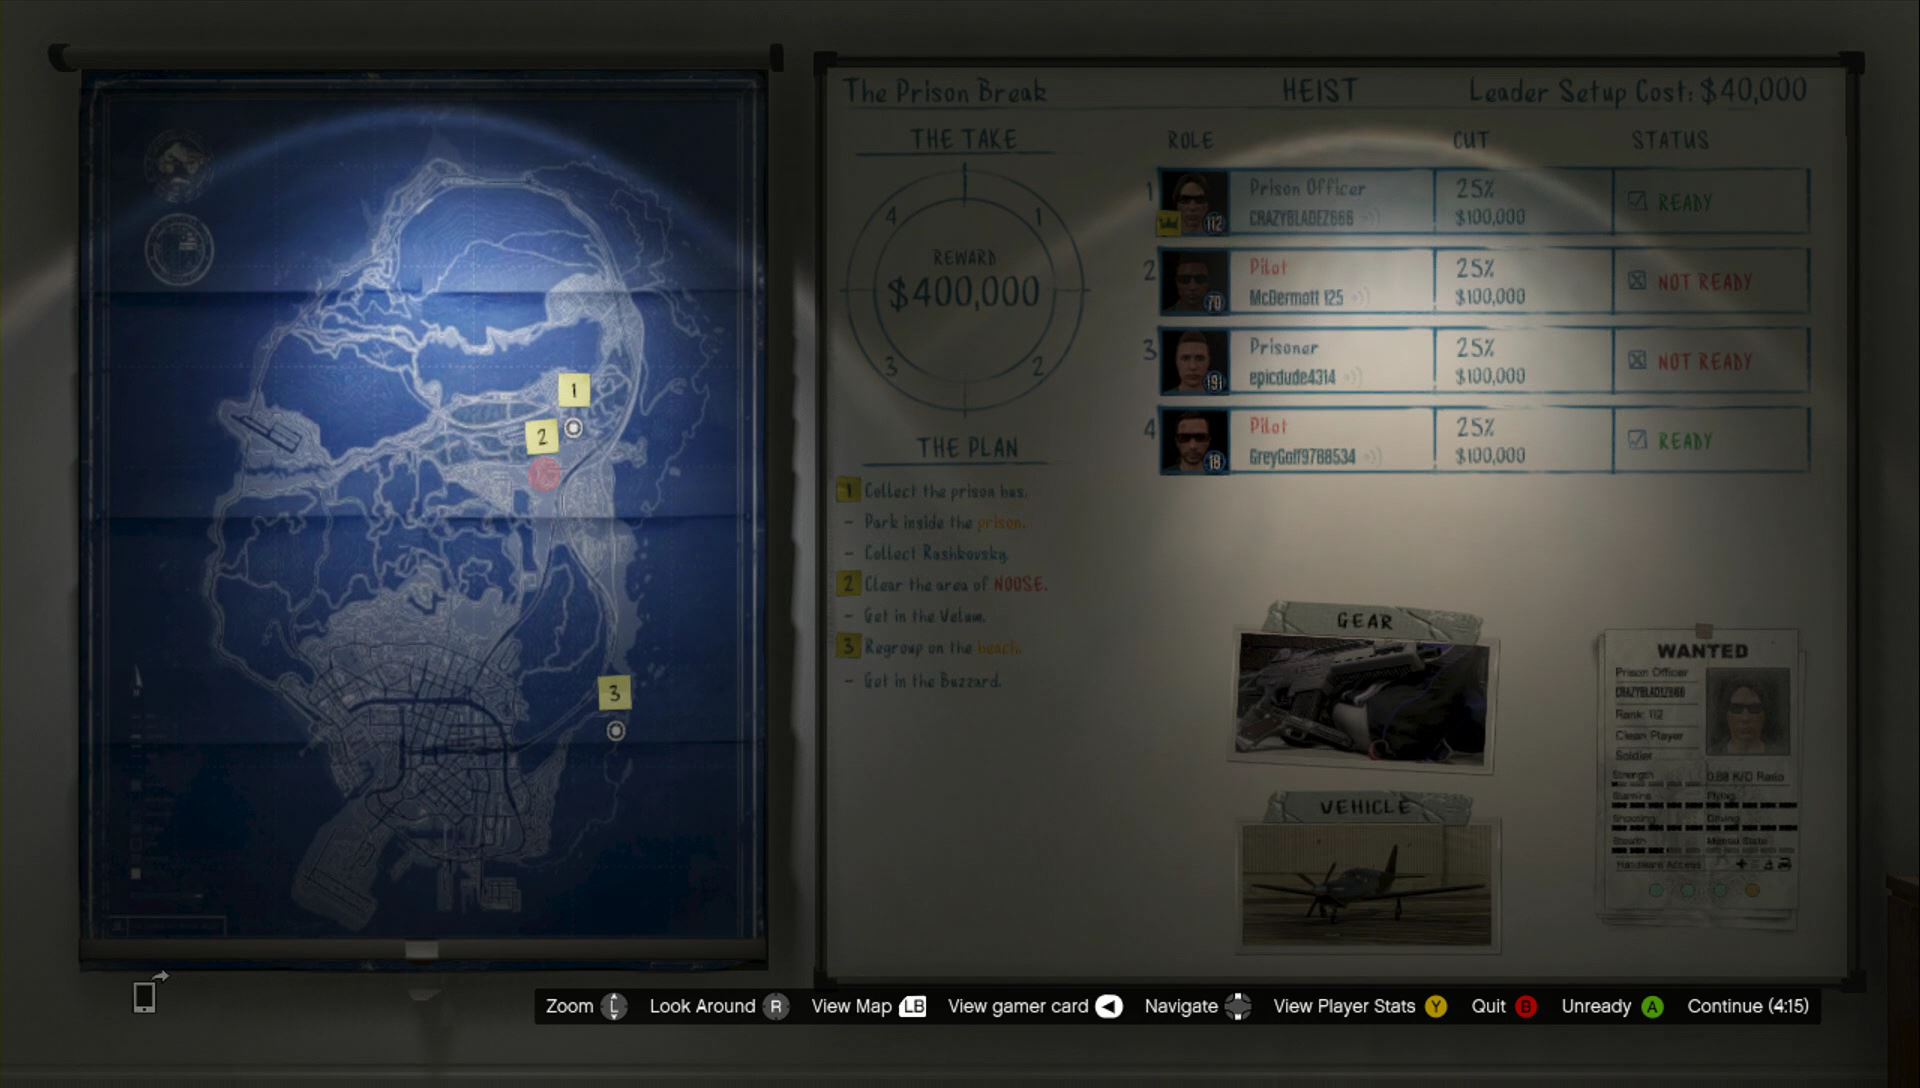 The heist arrangement screen, where you assign tasks and each member's share
If you want to join a heist, or the arrangement mission, you can do that at any moment. However, if you start the game with people you do not know, you can be excluded, if your experience and statistics are too low - everybody can view those in the game's lobby. This is why, if you want to start your own heist, you need to be at, at least, 12th experience level. At this point, Lester will contact you- talk to him to get more information. The other thing required for the heist is your own place - i.e. any building. The prices of those range between $25000 and $500000 so, it is a good idea to start with your own resources. You can buy the estate by approaching the bulletin board in the building that is marked for sale, on the world map, or via the www.dynasty8realstate.com website that you access with a laptop or with your smartphone.
As soon as you meet both of the conditions, go to your place and find the planning room. At the board, you can start planning on your heist. Invite your friends to the game, or determine conditions, on which new people can join you, by means of inviting and filtering players. After you gather the crew, access the planning screen again. Assign everyone with their role in the heist - the tasks that they need to complete. It is better to put weaker players into groups, the better ones can perform their tasks on their own (if there are ones). Then, determine shares that each player receives. Also, you can deal with smaller tasks, such as determining outfits for the crew. An important thing is that you can set the difficulty level of the mission - at the easy level, you receive more lives for the crew, but a half of the money and experience. At a high difficulty level, you receive 25% more money, but this is really hard - hard level is recommended against, in the case of new players, especially in missions where it may get really hot. The good news, for the new players, is that you receive a bonus of $100000 for each first bank heist.
The most important thing is good preparationsTo max out on your income, from each heist, you can increase the difficulty level, which gives you 25% more income. Additionally, you can complete each mission in the "elite" way - these are the special requirements that are displayed at the end of each heist (most commonly, it means making it within certain time, or the survival of all the crewmembers, as well as not restarting the mission). Meeting the elite requirements provides you with a high money bonus but, all of the requirements need to be met, then.
There also are additional rewards for the heists:
The first heist is a tutorial mission - Lester provides you with the information that you need. You only need one other player to get prepared. The missions are very fast and it is difficult to fail here, provided both of you have appropriate experience. This is why, it is a the source for very quick, but low income.
 Stop in front of the Fleeca bank and wait
At the beginning of your preparations, you only need to get into a car and wait in front of the bank, in the Western part of the map, next to the highway. One of the player does the driving and the other waits. On your way back, however, the other player will have to complete a simple minigame to break security. This consists in making a line between points A and B, three times. After you return to your place, the first mission is completed.
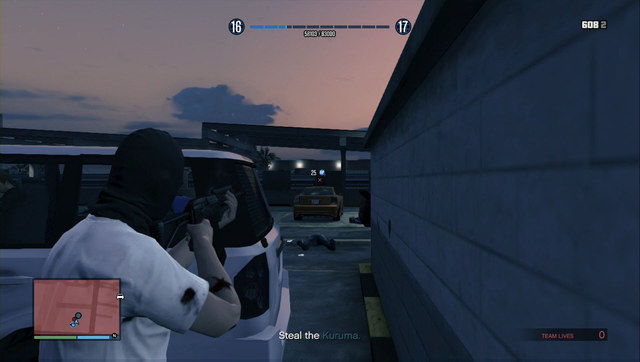 Fight your way to the car by killing all of the gang members
The second preparatory stage is getting a getaway car. Get to the top level of the multistory garage (both of you). Kill all of the opponents there - it is recommended that you strike both at the same time, by sneaking. Also, it is possible for one of the players to distract the opponents, whereas the other one sneaks to steal the car.
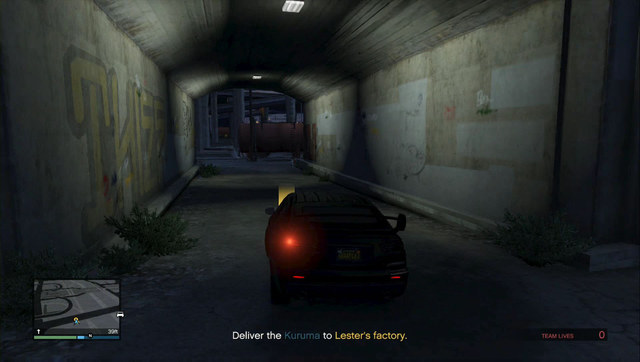 Park the stolen car next to Lester's factory
It is a heavily armored car so, you do not need to worry. You find this out again, while you will be returning to Lester's factory, while being chased by a multitude of opponents.
Hint: you do not need to drive your car to the top level, you can just as well climb the stairs. This way, you get to the top, at the opposite side to the spot, where the car is parked. However, if you have a long-range weapon, you can eliminate many of the gangsters without taking damage yourself.
Default income: 115 000$
Special objectives:
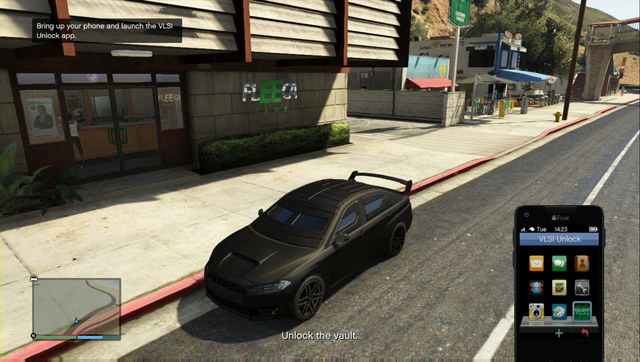 After you hack into the vault, you need to open it with the phone, before you start the heist.
For this heist, two people are required. First, go together to get the armored getaway car from Lester. One player is driving and the other one will have to make a breach in bank security (the minigame that you have already played in the preparatory mission). As soon as you get there, enter the bank.
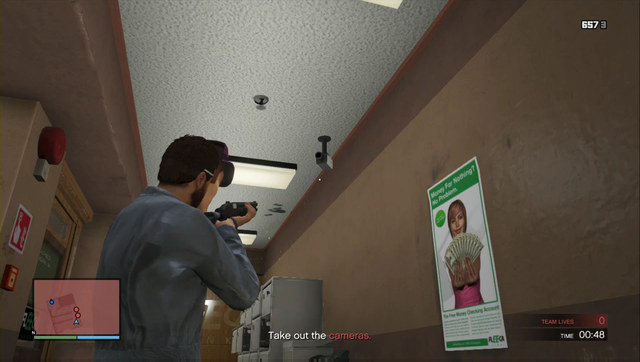 Destroy cameras in the room
One of the players deals with the four cameras and scares people (aim at them, shoot next to them and destroy objects). The other one goes to the back of the bank, where you need to drill a hole in the unlocked vault. The first player can see the scare-meter in the bottom-right corner of the screen - keep it filled for the whole time. As soon as you hear the other player open the vault, run to the car and prepare to escape.
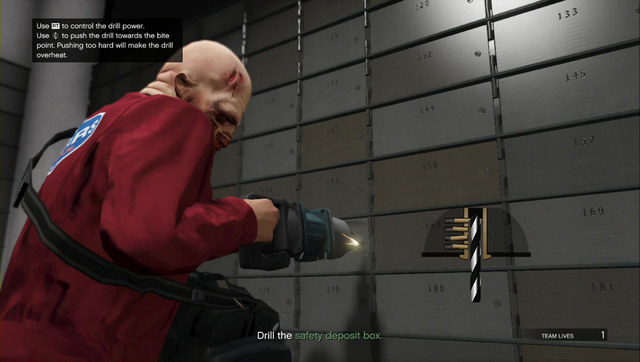 Using the drill requires a feel to it
The task of the other player is not too easy for a new player - you need to feel the pressure and the number of the drill's revolutions, to complete this task quickly and not overheat the drill. After you drill though each piece of metal, take a moment's rest for the drill to cool down. Attach it o the piece of metal delicately and attach some pressure, at the steady revolution rate, initially. Increase the revolution rate only after you penetrate the metal layer.
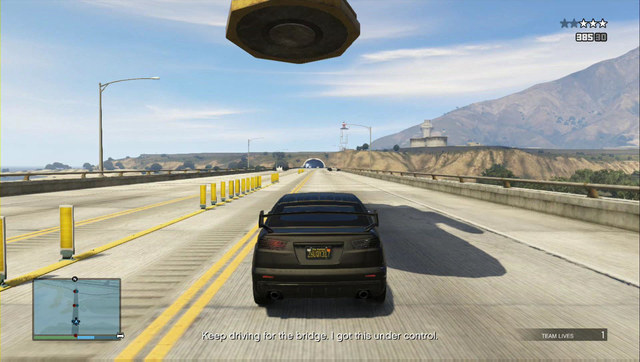 Drive the car under the magnet directly
Then, have the driver wait in the car and escape along the highway. Along your path, you get to three road blocks. Several meters ahead, there is a chopper waiting, which lifts your car. If you do not manage to drive under the magnet, before the bridge ends, the mission ends.
You will have to invest some of your own money into the second heist, for which to buy gear and prepare yourself. This is 40000$. However, this is an one-time investment - if the mission is failed or it gets interrupted, you will not have to pay any more than that. Before you start the mission, you need to do some preparation.
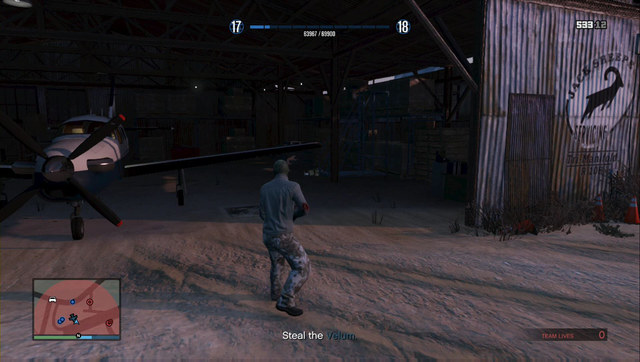 Steal the plane from the hangar
The firs preparatory mission is to get to the McKenzie airport and deal with the gangsters. One of the players (the pilot) walks over to the hangar, in the meantime, and steals the plane. After you have eliminated the first wave of enemies, more will come on cars and they will be trying to block the runway. This is why, it would be good if the pilot is not a total newbie. After you start taxying, cover the plane with everything that you have.
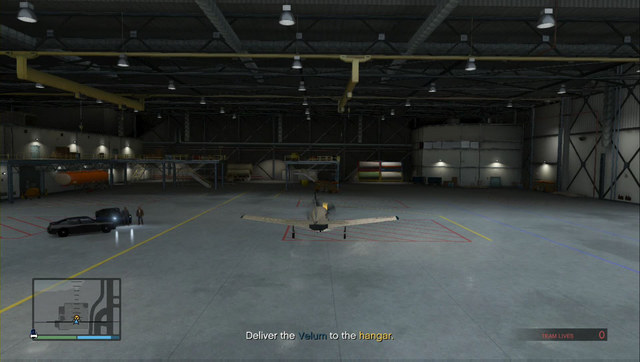 Deliver Velum to the airport hangar
As soon as the plane is aloft, you need to get it safely to the airport in the Southern bay and land it in the marked spot. At the same time, the rest either fights back the gangsters or escape the site.
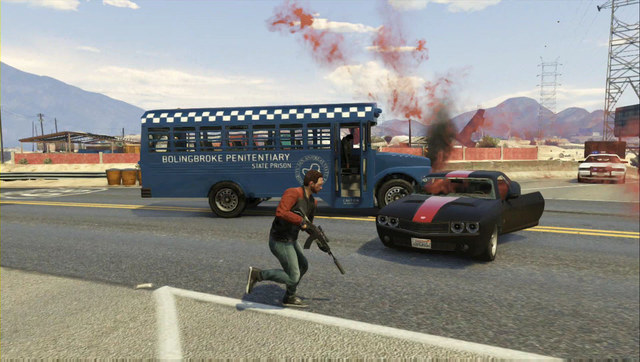 Steal the bus and do not batter it too much
The other required vehicle is the prison bus. This task could take one player only. You play as a team, but each one needs to handle things on their own. Reach the prison bus driving along the boundary of the desert, in the Northern part of the map. It is being escorted by a helicopter so, deal with it in the first place. The rest of the team may get the road block ready, in the meantime, and steal the bus. It is important not to damage it too much, after you steal it, or you fail the mission. Take the bus to the destination.
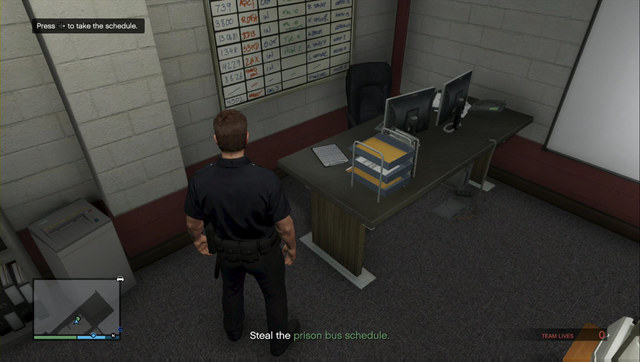 The schedule is on the desk in the corner - you only need to pick it up and leave, without being seen
In the next mission, you are split into two teams - disguised as policemen and thieves. The policemen need to get a police car and lose the tail. Then, head to the police station. If you do not have any police pursuit on you, enter the building, enter the room on the right and take the schedule from the desk. Then, return to the car.
 Blow up the police car and escape on the getaway car
You only need to drive the car to the destination, now. There are fuel tanks there - set the car on fire and take the document to your place, which ends this mission.
 The first one to open the container will be driving an excellent car
There is more work to be done by the thieves. Reach the docks and go onboard the marked ship. There, fight your way to the bow of the ship, by dealing with enemies hiding behind the containers.
Do not worry about damage - the client accepts the car, as long as it is operationalAs soon as you reach the destination, climb onto a container, deal with the remnants and approach the container. During the cutscene, the car will be stolen. Then, get the car to the garage to complete the mission.
Hint: split the crew into 1 policeman and 3 thieves.
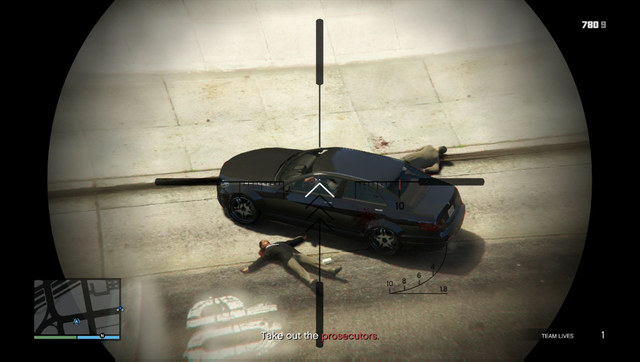 Kill everyone as soon as they get off the car
This mission becomes available only after you have made prior preparations. Two teams need to take out two important people. One of the teams goes to the city center. In the marked area, climb the ladder onto the building. Both of you pack sniper rifles. Wait for the car to arrive. Kill both of the people that get out of the car, simultaneously (and optionally the driver) and escape from the scene immediately. Lots of police will arrive and you still need to steal the documents that the target had on him. After you steal the papers, lose the pursuit and wait for the other team /return to the base.
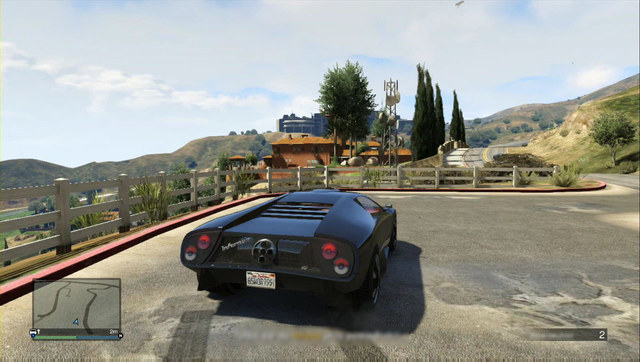 The senator's estate - you kill many of the security guards using the sniper rifle
The other team needs to eliminate a lawyer, at his place. The estate is being guarded by security. The game recommends that you do things silently and eliminate the guards in the way that makes it impossible for the rest to find the bodies, nor hear the gunshots. However, if you make some noise, the target will start escaping on foot.
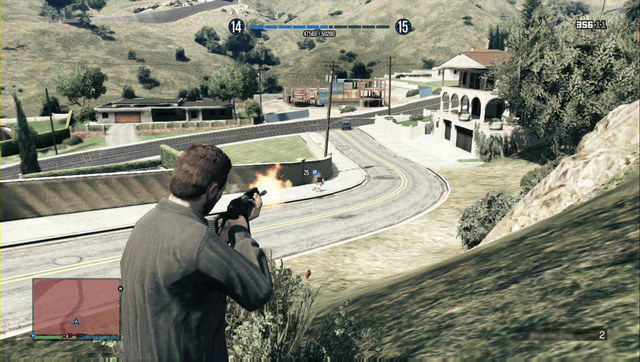 If you prefer to, kill him as he is escaping the estate
You can kill him at any moment, outside of his estate and not bother about the security guards. Lose possible pursuit and meet up with the first team.
Hints: split the team. 3 players go to the city center and 1 to the villa. The first team: have one player wait at the street level, so you can steal the files before police arrive. If this fails, take a fast, or a heavily armored car, drive up to the case and have the passenger grab it.
Default income: 400 000$
Special objectives:
 You can follow the enemy planes to prevent being chased yourself
The second part is not that easy. Use all of the preparation objects. The division of the crew is 1:1:2. The first player is the pilot. He first goes to the airport and takes the plane supplied during preparations. Do not drive into the airport, up until you receive the text message that you can, or the police will start chasing you. Fly up to the spot and wait for the prison team to recapture the prisoner. In the meantime, you will be attacked by fighter planes - avoid them and do not let yourself be shot down.
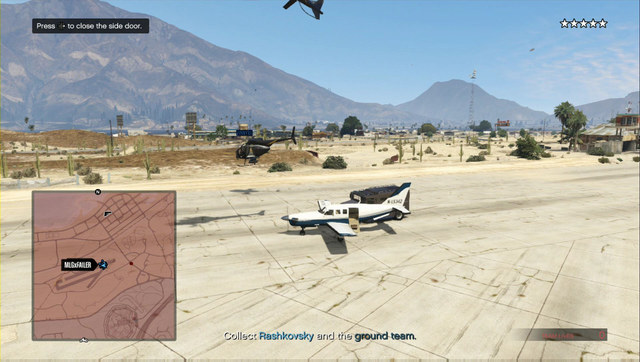 You can land on the airport or on the highway - simply, take the passengers onboard and do not crash
Then, land and take the entire crew (apart from the sniper) and the prisoner (remember to open the side door in the plane), lose the chase and get to the destination.
Hints: before you leave the airport, wait for your time meter to reach 3:30, because the prison crew will not manage to do their job too quickly and, the earlier you reach the destination, the more fighter planes you will have to deal with. The other hint is that if you do not get under fire, take the initiative - get behind an enemy plane and follow it, while mirroring his maneuvers.
 After the driver realizes what is going on, he starts escaping - kill him
The sapper - he needs to do several things: first of all, he steals the actual bus, drives it to the McKenzie airport, and blows it up. Then, he steals the fighter chopper - it is being guarded by a heavily armored Merryweather mercenary.
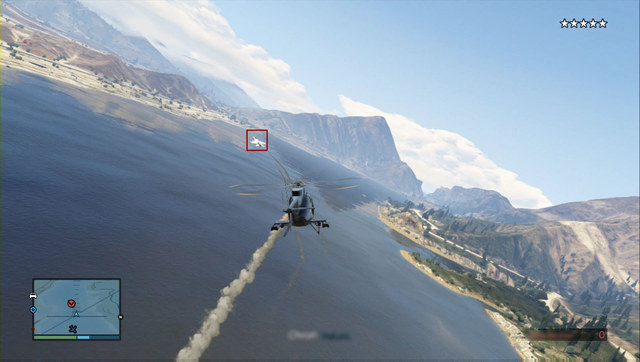 Buzzard has homing missiles
Then, get up into the air and cover the pilot from the incoming planes - homing missiles work best here. The sapper gets to know that when the crew gets outside of the prison walls - get to them to cover them. After the pilot gets the prisoner and the crew onboard, escort them to the destination and then, collect them from the beach and go to the city.
Hints: do not try to help the prison team - you will be shot down over the prison; eliminate the chopper guard with a headshot- do not try to drive him over or he survives.
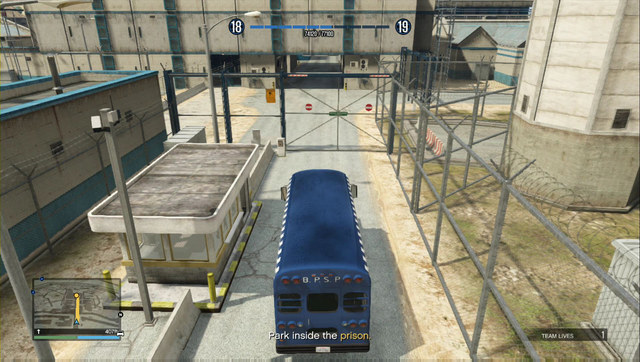 All of the gates swing open after you get into the bus
The prison team, i.e. the players disguised as the guard and the prisoner. Take the bus and drive it to the prison. Stop at the gates for control and park the bus in the marked area. The guard is the only one to have a weapon - it is best to start the attack as soon as possible, sooner or later you will have to fight of the guards. The prisoner has no weapon so, he should take one from the nearest policemen. As soon as you find Rashkovsky fight your way to the gate, at which you find an armored car - use it to get to the airport, where you change to the plane.
Hint: it is best to select the strongest crew for this mission, both when it comes to the familiarity with the game and statistics. It is a good thing to complete this part quickly, so the pilot and the sapper do not wait too long.
This heist is a serious thing. It is recommended against joining any other crew, if you are a beginner with GTA Online: Heists. The problem here is not only lack of experience, synchronization and communication between players (or lack thereof), but also the familiarity with the goals of the mission - which is not always that clear.
 Eliminate all of the FIB agents
The first preparatory mission. Reach the marked spot (the garage) as the entire crew. It is a good idea to take a bigger car along (or even a van) and park it in the center of the area, because you cannot move cars that are already there. Two players remain on the ground level, one of them climbs the rooftop and another one goes onto the fire escape in the building - depending on the assigned roles. Hold your positions, for a moment, up until a black car arrives. After you receive the codes from the men, you will be surrounded by the FIB. Have one of the players on the ground, and from the balcony cover the backstreet, whereas the ones in the garage and on the rooftop attack the agents in the street. You should be able to deal with them quickly. Note the agents that arrive later in the backstreet. As soon as you eliminate all, reinforcements will arrive, but you are ready to escape, at that point. Escape to the getaway point, preferably by twos in each car, or all of you, so you can fight back the pursuit. After you get to the destination, the mission ends.
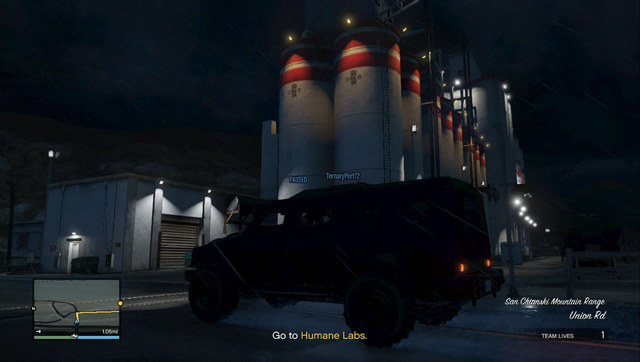 You will encounter insurgents many time, throughout the game - get to know them
In the second mission, divided into two teams, het to the quandary. Use sniper rifles to eliminate everyone in sight, deal with the rest at close quarters. Have two teams enter two insurgents, one of them is heavily armored. The player that mans the turret and rockets has the most important job to do, of covering all the crew from the choppers and then, from the armored cars. Drive to the destination. After you get there, eliminate the rest of the agents in the pursuit.
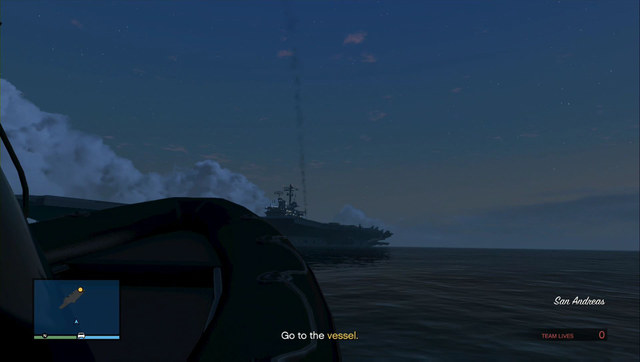 You can see the vessel from afar
In this mission, everyone should know how to handle planes. Often, the mission ends in a failure, when one of the players fails to do his job. First, get to the meeting point - there, you find a motorboat. Go aboard and get to the aircraft carrier out in the sea. Steer inside and get off the boat.
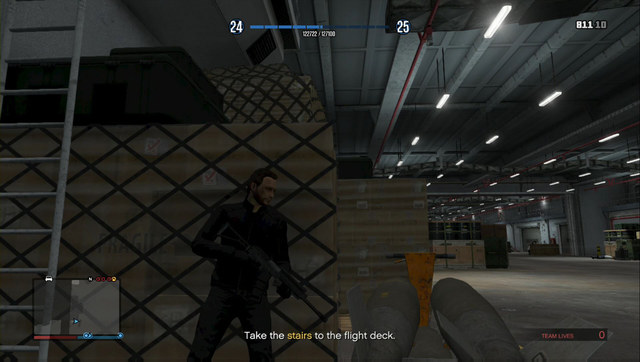 Use cover and, if you are short of health, blind-shoot
Inside, deal with everything that moves and watch out for the guards on the stairs. Climb the stairs and get outside, through the "Exit" door. There, after you deal with the numerous armed forces, steal the planes. The one with the best piloting skills takes the Hydra.
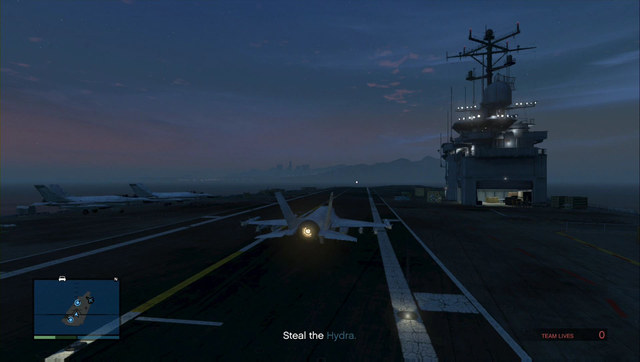 If you do not do that well, as a pilot, have someone else fly the Hydra
Your next task is to cover the Hydra and protect it against the multitude of fighter planes. They do not attack the individual players and they only focus on the Hydra. Use homing missiles and eliminate the targets quickly. You now need to deliver the plane to the airport - in spite of the description in the escorting mission, you will not be bothered anymore.
Hint: the worst case scenario is when someone fails to do their job aboard the vessel. In corners, on stairs and in small rooms, you often find a first-aid kit and armor. It is a good thing to remember about that.
The next mission is to get the Valkyrie chopper. As one team, reach the Southern docks. It is a good idea to act systematically and at a long range - use sniper rifles and shotguns, and do not allow a situation, in which only one player keeps the things going. You will be attacked by a chopper - it is best to use a homing missile or, in an extreme situation, fire all at once, at the vehicle, and try to kill the pilot. Before you get to the helicopter, you still need to eliminate an enemy sniper. After you have taken the Valkyrie and gone up into the air, you do not avoid the pursuit. Fortunately, one of the players will be able to use the on-board weaponry. Finally, after you reach the destination, and landed, the mission ends.
 Park the car in the marked area and get ready for some action
Again, there are no clear-cut roles in this mission. Reach the Northern part of the lake in the desert, where you find the military SUV. Drive the entire crew to the lab. Here, the game save automatically and the real plight starts. You need to deal with all the guards but, make sure that nobody spots a corpse or hear gunshots. After the alarm starts, the mission ends.
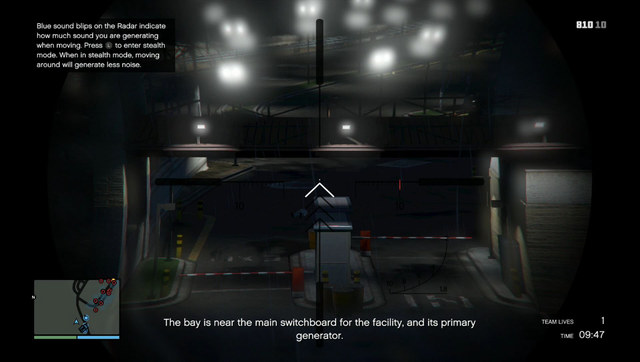 Take down the first two with another player
Start by taking out the two guards with sniper rifles (each one receives a suppressed one) at the main gate and follow the path to the parking lot, where there are no guards. Have one of the players drive the SUV there.
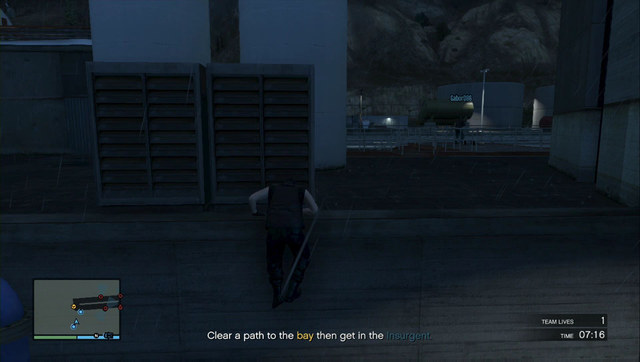 Towards the end of the building, you find a spot where you can climb.
Wait for the enemy vehicle to leave the base and climb up the stairs, to the rooftop. Also, you can climb onto the extension, past the yellow "8" painted onto the side. Many of the of the guards, and scientists wearing white garments, come in groups. The key to complete this mission properly is to eliminate the targets quickly and simultaneously.
Keep an eye on the people that may spot the corpses and deal, in the first place, with the one that will not be seen. Although you only have 10 minutes, you do not need to hurry with completing the mission. Where there are group of three opponents, it is best to position yourself at a n angle and take down two of them in a single shot - this is permissible. After you have eliminate all opponents, use the control panel to open the garage - this requires you to complete a simple minigame - and drive inside on the SUV. Leave the base on the Humane Labs vehicle, nobody will then pay attention to you, as long as you keep quiet. .
Hint: the mission is nearly impossible, if you do not harmonize with the rest of the crew, especially if you are playing with random people. In practice, the mission requires that you have headsets for voice communication and that you determine who does which part. Actually, it is enough that two players complete the part of the mission.
Default income: 540000$
Special objectives:
IN this heist, you operate in two groups: the pilot, the gunman on the chopper and a team of silent assassins inside the lab. First, get to the chopper in the Northern part of the lake to the North. After you all get onboard, fly to and hover over the lab - there, the EMP charge, which you have supplied earlier, goes off. It disables power supply, which makes the ground team use night vision. You do not need to keep quiet - walk inside, by blowing up the main door eliminate the opponents in the corridor and follow the marker. The best weapon here is the shotgun, due to the short distances. Once there, you get to another door - you cannot blow up this one. To open it, you need to press the button, on both sides, simultaneously - this is why voice communication is required, from one of the players, at least.
Exit the building and head towards the ocean. Put on the diving suits and swim down the tunnel, as quickly as possible, because you soon run out of air. Once there, you will be collected by a helicopter - you can use flares to help the pilot find the landing spot. As soon as the ground team is onboard, the assistant pilot will be able to do his job - he now needs to eliminate the incoming enemy Buzzards.
Hints: this mission is nearly impossible, if you cannot communicate verbally. In the ground team, there should be the most experienced crew members. Remember that you do not need to haste to complete this mission.
 Landing the chopper on the yacht requires lots of precision
In this mission, you need to steal coke from a yacht. You split into two teams - one of the teams takes the dinghy, whereas the other one takes the chopper. It would be good if the pilot could handle choppers well, because landing on the yacht requires lots of precision. The team from the pontoon should deal with the opponents on the lower deck, whereas the ones from the chopper deals with ones on the upper one.
 Coke is next to the captain's seat
Collect the package marked on the radar and escape. It would be best if everyone escaped on the chopper, because you need to lose the police pursuit and reach the delivery point - it is the fastest and the surest of solutions.
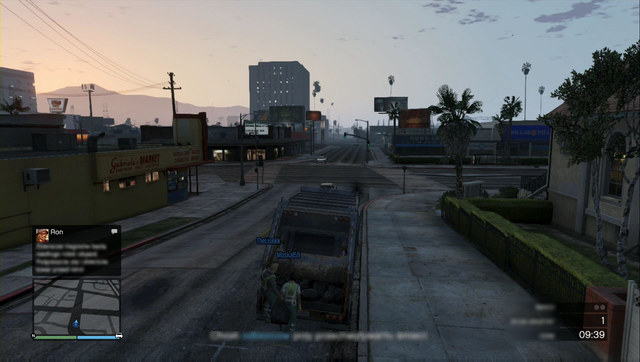 The trash truck is not too fast, use side alleys to lose the gangsters
It would be good if everyone had armors and could fire well, for this mission. Also, it would do good to have several grenades or, even better, a rocket launcher. First, get to the location, where there are garbage trucks and steal one, after you deal with several guards. Two players get on the truck and other two take their positions at the back of the truck - their task is to collect the stuff. You need to drive to four locations and collect the stuff hidden in trash bags. Only the players at the back of the truck can collect them.
 Collect the black bags lying next to the containers
In the first pint, you attract nobody's attention, but in each following one, you will be surrounded by enemy gangsters. The players inside the truck should cover the ones that pick the bags, after which you get back inside, as quickly as possible, and move on. Many of the gangsters arrive on cars so, explosives will come in handy here. Also, you will get a tail on your way towards the delivery point - it is best to turn into narrow alleyways between buildings, to reduce the threat that the players at the back of the truck die under enemy fire.
Hint: each time, you need to stop the truck in the marked area. However, after that, it is better to drive up to the stuff to be collected to make things faster.
In the next mission, you need to remain completely silent and unspotted. First, collect the suppressed weapons from the container and get into the pontoon. After you get to the destination, enter the sneak mode - no one on the crew should be spotted, which would start the alarm. Eliminate each opponent that you meet with the suppressed weapons, or in melee - the bottom line is synchronization of actions and picking those of the targets that ensure remaining in hiding. You do not need to kill all of them - just enough to ensure that you get to the vans, at the back, safely. Of course, after you try to leave the location and go towards the destination, you will start being chased - simply, do not let the enemies destroy the vehicles and make sure nobody dies.
The next objective is similar to the previous one. You reach the spot - the sawmill - and steal two trucks loaded with the goods. The crew is divided into two teams now - the watchers and drivers. First of all, eliminate the opponents from afar, until it gets safe to steal the trucks. Get to the delivery point along the forest road, where there are several ambushes arranged. This is why you should watch out, especially that it is not easy to cross this area in these cars.
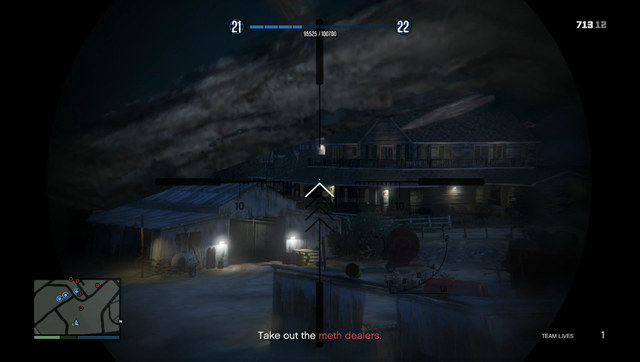 You can take out the majority of opponents at a long distance
The last preparatory mission should not be difficult to complete. Get to the O'Neil brothers' farm. First, eliminate, at a long range, as many opponents as possible and then, clear the building interior. Do not roam about too much, because there are many opponents lurking in windows. Before you continue, make sure that the area is clear, because you need to steal the tanker, which is vulnerable to gunfire.
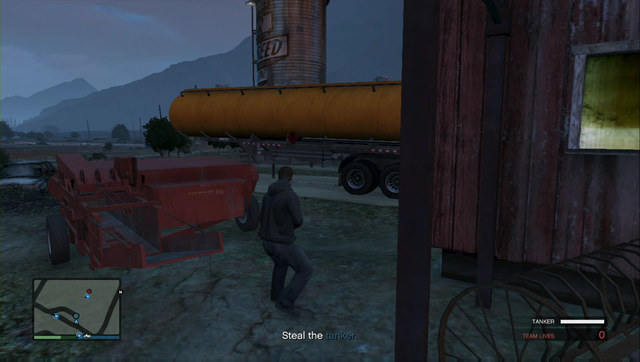 The orange tanker
You need to attach it to a truck and there are quite a few of them around. The ones that have been prepared especially for that, are In the Northern part of the farm. You have a limited amount of time to deliver the tanker. Along your path, the rest of the crew protect the cargo from the pursuers.
Default income: 404 000$
Special objectives:
This time, instead of a regular heist, you get a transport mission, which resembles the "Weed" mission, in its premise. Divided into two teams, get to the storage - the ground team (drivers) and watchers in side positions. First of all, fight back the heavy attack on your place. You do not need to hurry in this part, it is best to save up on your armor, as much as possible. As soon as it gets quiet, the rivers take the trucks (Bensons), the same ones as in the preparatory mission and the watchers enter the armored car with the turret. Now, take the trucks to the marked area. The key to success here is to eliminate targets in your path, quickly and efficiently, also the ones up in the air - have the gunman deal with the choppers. As soon as you reach the delivery point, the mission ends in a success.
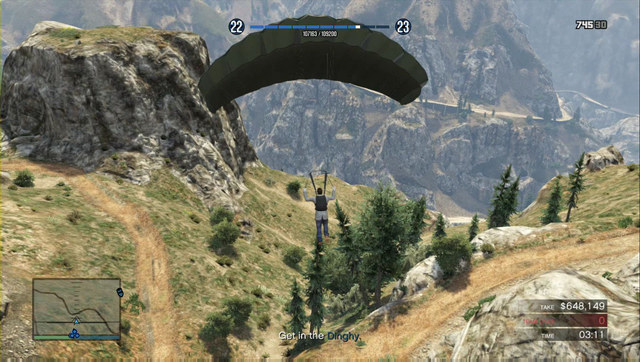 One of the Post-OP vans
This is an exceptionally easy mission, which requires some cooperation, though. Two crewmembers become drivers and they get a navigator to help them. Drive outside of the city, where the navigator should start the Trackify app in his phone. Red dots display on the screen - use the D-pad to mark the way to the nearest destination, for the driver to follow.
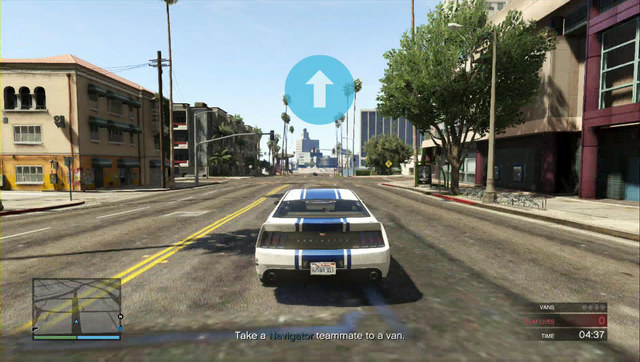 Blue arrows navigate you along the way
The driver will be navigated by means of the arrows displayed in a blue circle. As soon as you get there, you find the Post-OP van - have the navigator take a photo of the license plate, with the phone, and go to the next point.
After you have marked enough vehicles, you receive information on which one you need to steal and deliver to the storage. This is the easy part - the car will be displayed on the main radar and there will be no need for a chase.
This task requires you to split into two teams. As the entire crew, go to the quay, where there are motorboats awaiting. Steer them to the isles marked on the radar. At a distance, you will spot a patrolling police chopper - it is your primary target. The secondary ones are the policemen spread all around the small archipelago. As soon as you have dealt with all of them and reach the marker, you will be joined by the person you are looking for. Take him to the pontoon but, one of the players will have to stand (and may fall out, as a result). Also, the driver can drive him up to the motorboats. Then, steer up the river, until you reach the lake, where you lose the police pursuit. Then, take the man to the destination.
This one is an interesting mission. Three players in one team and a driver. On the van, get to the marked area and attack the men (also snipers) in the alleyway between the buildings. In the meantime, the driver needs to be prepared to get to the black van and steal the gear, after which he returns to the car. The rest of the crew needs to go to the black van and stat escaping. The driver simply needs to deliver the white van and the ones in the black one, lose the pursuit. Then, they reach their marker on the radar to complete the mission.
In spite of simple assumptions, may prove problematic. You need to abduct a truck - to do this, take each your own car (it is even better if these are quire big cars) and form a blockade on the bridge. Then, hide behind the cars and wait for the Merryweather soldiers. In the first place, deal with the chopper, then with all the ground units. No one should try to get the truck before the soldiers are all dead, to prevent the destruction of the car. Finally, on the Insurgent, escort your own truck to the marked area.
The last preparatory mission, before the heist itself. Get getaway vehicles - the bikes. Go to the place of the Lost gang and deal with the members. At the back, there are the bikes. You simply need to get on them and return to the destination. What may be the problem is the numerous blockades, along the way, formed by the gang members, because it is easy to fall off the bikes and die under enemy fire. This is why, while leaving the backstreet behind the club, ride straight ahead, in spite of what the GPS suggests - the majority of the blockades have been formed at the club's exit. This way, you will avoid the greatest threat.
Default income: 1000000$
Special objectives:
In the last heist, each crewmember with a separate role: crowd control, sapper and hacker, need to know their objectives well. First of all, drive up to the bank and get inside.
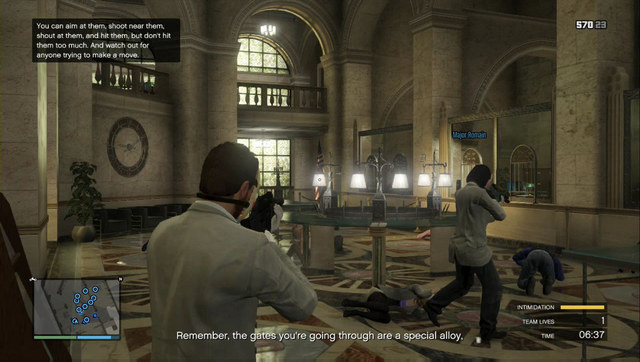 Watch the civilians, if they get too brave, they start the alarm
Two members of the crowd control team deal with the guards. Then, they occupy themselves with intimidating the people, by aiming at them, shooting near them, but without killing anyone, and wrecking the stuff around. The sapper and the hacker go to the back of the bank and deal with the gate, and into the vault. With the first door forced down, one of the crowd control team goes to the cashier deck to keep an eye on them and deal with the guards coming down the stairs.
At the same time, the hacker opens the vault, using the terminal, and the sapper waits to blow up one more security system. Then, they come in, one after another, take the cash and the whole crew heads back to the exit.
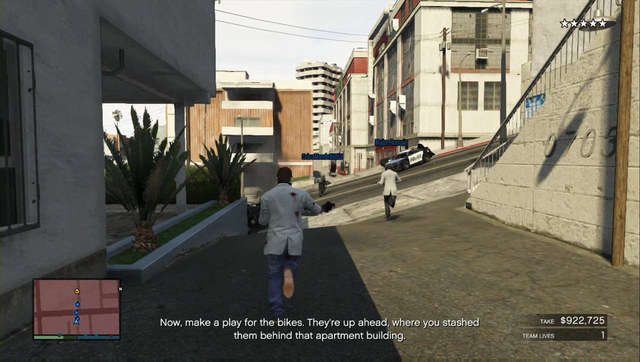 Escape along side alleys and take the motorcycles
You exit all at the same time and shoot at everything that moves. It is best if one of you has a rocket launcher and a minigun. Also, an HMG does the job. As soon as you clear the streets, escape along the side alley opposite. New small police units will keep arriving - now you only require a good machine gun to eliminate the incoming opponents. Also a chopper arrives, which you need to deal with, as quickly as possible. At the first intersection, run right and reach the end, where there are the bikes waiting, as well as boxes with armor.
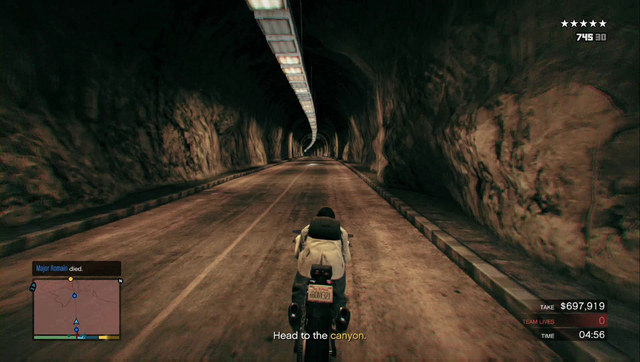 The second-last fragment of the road runs along the canyon - only here are you safe
Get on the bikes and head towards the destination, you only have 10 minutes. You can reach the destination separately or in pairs. In such a situation, the passenger will conduct fire. As soon as you leave the city, around the lake, on the bridge, there is a road block, and another one near the destination marker, where you need to ride into the canyon. Then, cross the forest towards the next marker - here, the pursuit is negligible. First of all, make sure that nobody gets off the road, or fall off the bike.
Release the parachute immediately - otherwise, you land too early and you will have to run towards the pontoonAfter you reach the last marker, after you jump off the cliff, get off the bikes and release the parachutes, which need to take you to the pontoon, quite far away. As soon as the entire crew gathers, you only need to steer the pontoon out into the sea and reach the last marker, where the mission ends.
Hint: instead of the bikes, you can take a car - it would be best if you all got into a SUV or an off-road car - it is no good in the city, but outside of it, it gets much better - you can head Northwards, straight away, and take a shortcut up. The pursuit does not reach you there, unless choppers are used.
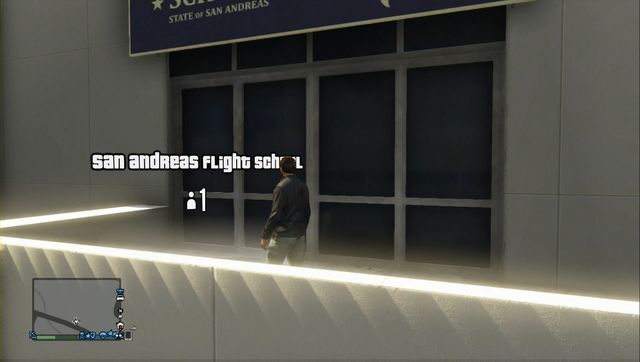 Flight School entrance.
The Flight School is an addition available after downloading free DLC. This activity is very similar to the one that can be played in single player mode. However, here you will be faced with the 'military' challenges which are the hardest challenges. It is a great possibility to earn money and experience. It also enhances your flying skills.
The tasks can be repeated, but then you will get only about 10% of the former reward. Acquiring gold medals equals the payment of 10-30 thousand dollars as well as 1-2 thousands of experience.
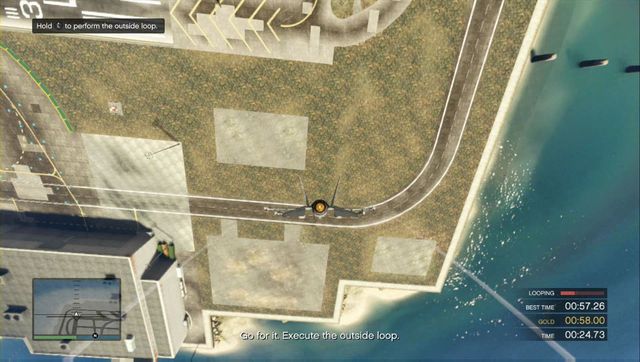 Don't finish your loop until the bar is full.
Outside loop. Start performing the loop right after reaching the first marker. The latter should be performed partially under the bridge, immediately after reaching the last marker from the next three. It can be seen in the clip before the mission. Medals are given dependently on the amount of time.
Right after beginning this lesson, plane's engines will be turned off. You will have to land in a particular spot, the closer the better. It all comes down to the right timing. Use the plane's nose to direct yourself in the beginning of the landing-stripe. When you are about 1000-1500 meters from the spot, pick yourself up to land in the middle of the lane. Don't forget about sliding out the undercarriage. Start braking immediately. The medal is dependable on the distance from the spot.
 Jump out of the plane immediately as the backpack won't wait for you.
You are jumping out of the plane and free-falling for as long as you catch the parachute. After grabbing it, you will have to dive for as long as you find it necessary. Your object is to land in one of the circles in the stadium. Your medal will be dependable of the circle in which you have landed.
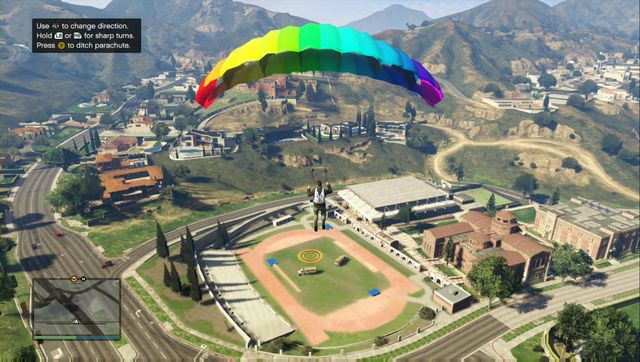 Try slowing down before landing.
If you are descending too fast, your avatar may move a bit after landing. Thus, it is good to land in front of the circles if your speed is high. Remember about the precise landing feature.
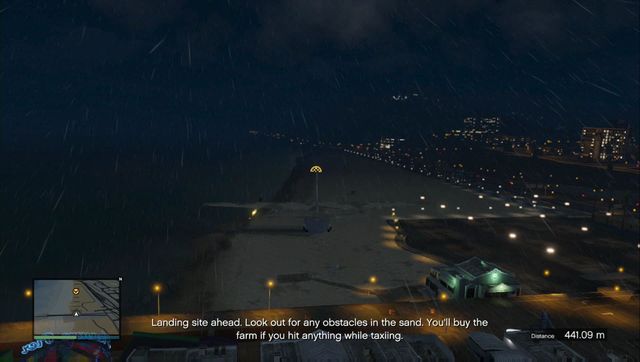 You can see the landing place from a distance. Aim for it.
Flying the plane in the rain between the buildings, what could possibly go wrong? Absolutely everything. To make things even harder, the landing spot is placed on the beach and in the middle of the landing process, one of your engines will blow off. Your medal will be dependable of the distance from the spot on which you are supposed to place your plane Try to land as close as possible as the plane will stop almost immediately after touching the sand. You can pull the plane's nose down, but do not accelerate at any time.
 Land wherever on the semitrailer.
In this lesson you will be rewarded dependable on the amount of time of completion. Start descending right after starting the lesson. It is vital to brake before the truck comes. Don't forget that this helicopter is equipped with a slide out undercarriage. Keep the descending button pressed after you touch the semitrailer to assure that the helicopter is intact. To receive the gold medal you will have to complete this lesson within 19 seconds. It is easier to do it by flying into the semitrailer without much of a breaking. You should manage to connect your helicopter with the truck without failing. In order to complete this lesson you do not have to be in the center of the marker either.
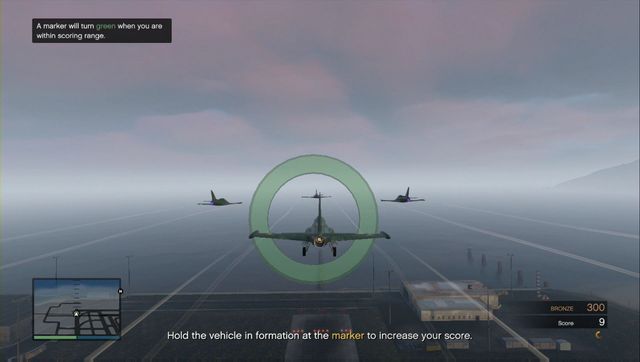 Keep yourself in the green marker for as long as you can.
Probably the hardest lesson. It requires couple of retakes in order to get the gold medal. Fly at the full speed and don't slow down even when you are performing a loop. Using the camera which is placed in its maximum distance from the plane may be of some help.
 Try to use the camera from inside the vehicle camera.
Use the Buzzard helicopter, to shoot the targets. Only in the first attempt the mission is preluded with a training lesson. Shoot 25 targets with your helicopter's machine gun to get the gold.
Tips: Don't change you helicopter's angle. Just move up and down turning from left to right. Skip the target by the crane. You can also change the camera to one from the inside of the machine.
 The ending with the windmills is the most deadly part. Be careful.
Keep as close to the ground as possible. It is one of the hardest task. Here are the tips which should make it easier for you to acquire gold medal or to help you finish the lesson at all if you are not the top notch pilot.
Tips:
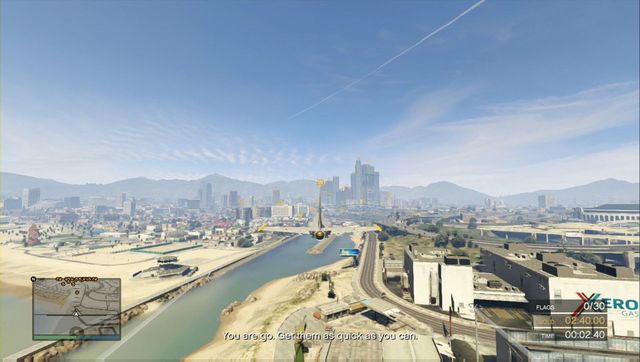 Don't worry about time if you are aiming for bronze.
Yet another hard lesson. It requires good strategy as well as the skills. You will need to collect 30 points by flying through targets in a particular order. The tip here would be to fly in big circles in the beginning and slowly narrowing them. Avoid sharp turns and maneuvers as your speed will be heavily decreased and you may crash.
 Map with the targets.
The targets are marked on the map. After some training you may try to draw the line of your flight, which may be of some help for you later on.
 Perform the maneuvers in the marked spots.
The very last lesson. Follow the leader. It is not that much of a problem. In order to acquire gold medal you will be restricted to making 2-3 mistakes. Just follow the leader through the markers and perform the particular maneuvers dependable on the color of the marker (inversion/flying sideways - blue and green). Performing the tricks will take 2 seconds from your time. The penalty for not performing the tricks are additional 5 seconds added to your time.
Along with the new DLC you will acquire an access to the bounties planted on you and on others. The way it works is simple: Every player can place a bounty over on other player. It can be done for the sakes of retaliation or simply for fun. A player who kills a person marked by you, will get the reward which will be transferred from your personal in-game account. When it is someone else who places the bounty, you will be notified over the radar with the nickname of the marked player. The way of killing him is up to you. If it is your head which has been marked, the notification will be placed in the middle of the screen written in a big white font.
 The bounty notification can be seen on top of the radar.
If the marked player gets killed, or the player manages to survive for about an hour, the bounty disappears. Doing a mission may be a way of avoiding getting killed. One can also take his way to the wilderness. If you will survive, whilst on a run - the reward will be yours.
The bounties do not disappear even when you turn off the game. You will still be marked when the game is turned back on. Time does not pass when the game is off. There are also the bounties that are inflicted by the game system itself. For example, if you still one of the super-cars, you may receive a SMS with a threat which later on may cause the bounty to appear. Its figure may differ dependable on the car. Other rules are the same as the rules of the normal bounty.
You have to have got at least Rank 10. If you do, you can call Lester and choose the option of inflicting the bounty. You also need to have some money on yourself.
Along with the Heists DLC, a new kind of tasks comes to play. The Daily Objectives are three random objectives which change each real-life day. They are paid with money and reputation points. All of the objectives have to be done in the same day they were given. Types of the tasks differ. They may require from you to participate in the race, to jump with a parachute or to modify a car. The list obviously goes on. You have to have got at least Rank 15 to participate in the DO. All of the objectives can be checked in the interaction menu. You will be notified when the Dos will be unlocked.
Collecting cars may also be a Daily Objective.The Daily Objectives can accumulate in the weekly or monthly objectives. The latter cover the period of 28 days. If you will do all of the Dos within the week, or four of the weeks within the month, you will be granted with a big bonus. In this case, you can't skip a day within this period.
Rewards:
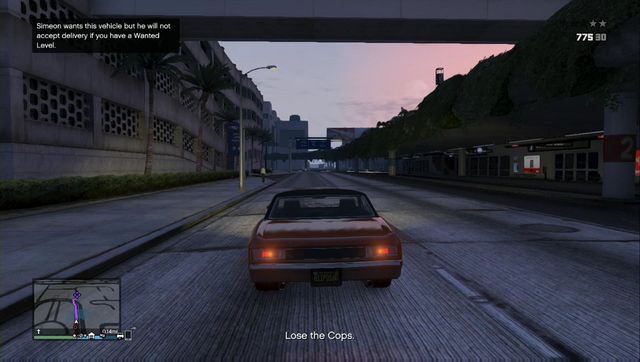 The list of wanted cars can be checked in the SMS.
After reaching rank 10 you will get an access to the missions from Simeon. In these missions you will have to collect cars for him. The list of the vehicles you will have to bring to him will be given to you via a SMS. On a day you can collect only one car. Getting into a wanted car will come with a notification. Now all you need to do is to get the car to the garage in the Los Santos Customs and change its paintwork (choose the cheapest option for about 780$). From there, go to the garage in the docks to finish the mission. You cannot be pursued by the police and if the vehicle is damaged you will have to pay for it, so be careful.
Getting into a wanted car comes with a notification.In opposite to the cars you are bringing for sale to the Los Santos Customs, the prices about 1,5x higher, but to the LCS you can bring as many cars more often than once a day. Then again, the cars from the SMS list are the part of the Daily Objectives. The payment oscillates within the range of 2 000 - 12000$ (excluding the costs of the paintwork)
Sometimes the special tasks of delivering a car will be given to all of the players. There will only be one car to get, so the fastest wins. Get to the car marked with a green icon on the radar and change its paintwork before getting it to the Simeon. You will be paid twice as much as you would be in the LCS.

 Guild Wars Game Guide & Walkthrough
 Guild Wars 2 Game Guide & Walkthrough
 Grand Theft Auto IV Game Guide & Walkthrough
 God of War: Ascension Game Guide & Walkthrough
 Guild Wars 2: Super Adventure Box Game Guide & Walkthrough