
This guide to the Ghostbusters the Video game consists mostly of a very detailed walkthrough of all seven missions of the singleplayer campaign. Reading the walkthrough section will allow you to find out how to defeat ghosts and you'll also know where to look for all bonus items. The blue color was used to mark all the cursed artifacts you'll find during the course of the game and the green color should help you in finding out that you came across a new type of a ghost available for a scan. Aside from the walkthrough my guide also contains a full list of all achievements/trophies with a lot of hints on how to get them.
Stranger
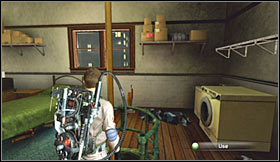
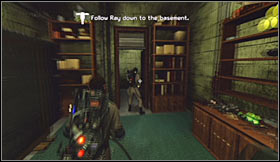
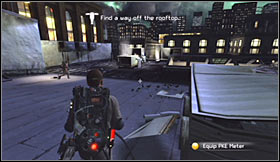
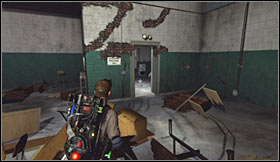
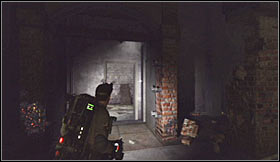
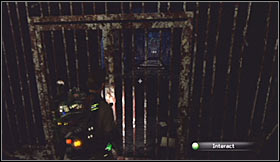
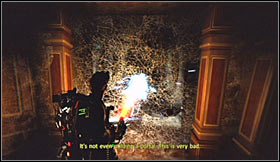
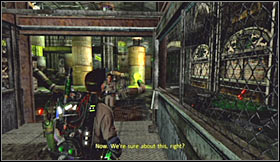
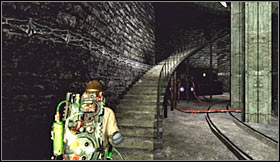
Level walkthrough: Your first task will be to enter the basement and I would recommend using a fire pole to get to the lower floor. There are two fire poles inside the firehouse. One of the poles is located next to arcade machines and the other one is in the bedroom. If you don't want to use the poles you can also find the stairs.
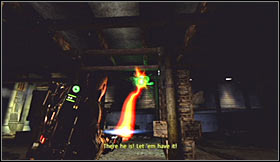
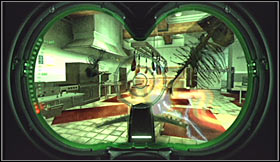
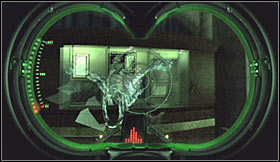
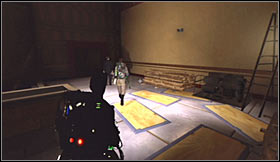
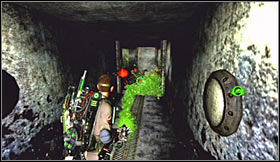
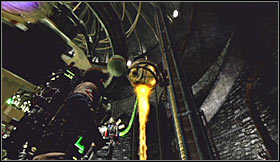
Eventually you should be able to reach a large garage section. A second staircase is located to the left of secretary's desk. Proceed to the basement, turn left and get ready to use your Proton Gun for the very first time. Aim the stream at something that looks like a fuse box (where you see Slimer). The ghost will escape and you'll receive further instructions.
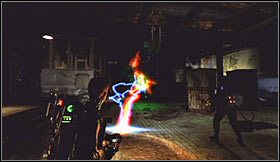
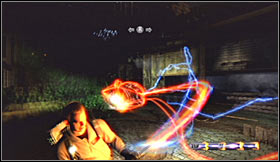
Follow Ray's instructions by heading towards a second room of the basement. Make a stop upon your arrival and make sure to listen to his instructions on how to capture a ghost. This process is divided into three phases and obviously you'll have a chance to practice all three. Start off by firing a Blast Stream while having the ghost in your sight. Keep shooting and listen to new info. You'll find out that your actions result in the ghost getting weaker.
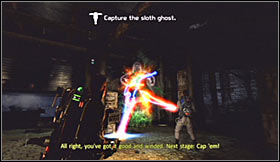
Don't forget to vent your tank each time the power levels are in red, because otherwise your weapon will overheat and you'll have to wait longer for it to cool down. Keep attacking the Slimer until it'll escape from the basement. Instead you'll be given a chance to attack a Sloth Ghost. For now use your main stream to weaken the creature.
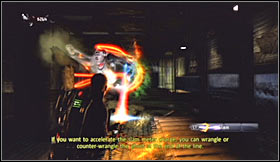
It shouldn't take too long for you to capture the ghost inside the stream and this is a start of the second phase. Listen to new instructions, especially to hints on how to keep the ghost inside the capture stream by moving the stream in the opposite direction. You can practice this move right now. Also - don't forget to avoid crossing streams with your partner, but I'm sure that you remember this from the movies. :-)

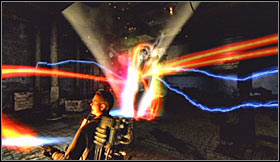
When you advance to the third phase you'll be informed that you must set up a trap on the ground. Once this is done focus on relocating the captured ghost, so it'll appear above the trap. Notice that the trap has activated and your goal will be to keep the ghost inside the bright light, preventing it from escaping. Just as before, this means moving the stream in the opposite direction.
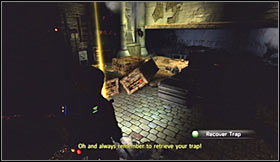
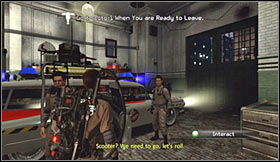
Once you've successfully captured a ghost don't forget to collect the trap from the ground. This also applies to the rest of the game, however you'll only be allowed to pick up your traps. Watch a new cut-scene and approach Ecto-1 to end this introductionary level of the game.
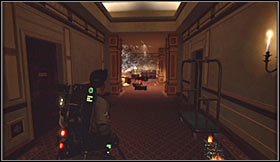
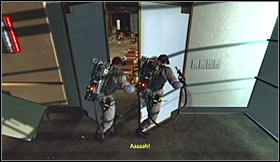
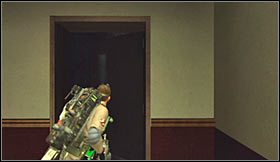
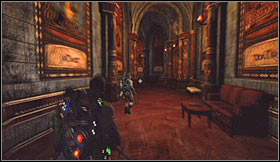
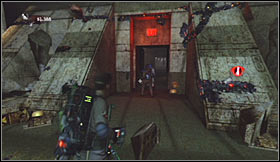
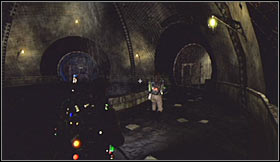
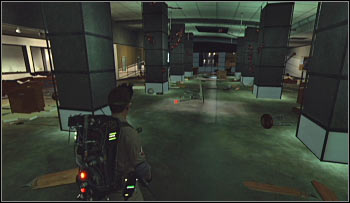
Level walkthrough: Start off by following the rest of your team and ignore the fact that you can't use your weapon for the time being. Eventually you'll get to the elevators and you must use one of these objects to travel to a higher floor. Head forward and turn left when you reach a junction, because other passageways are inaccessible.
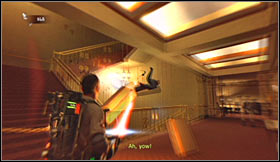
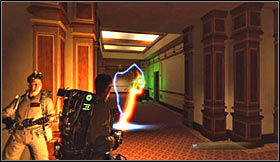
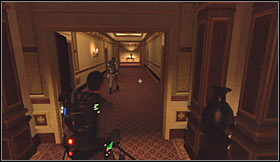
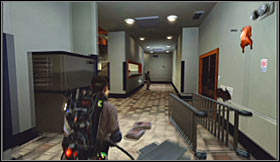
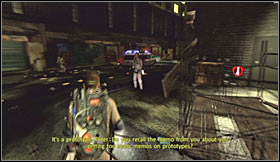
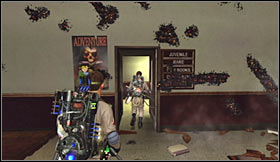
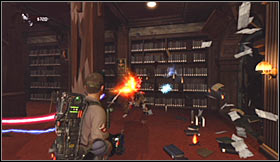
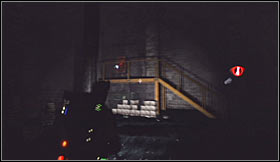
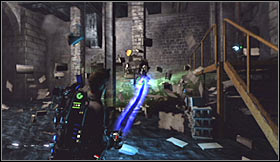
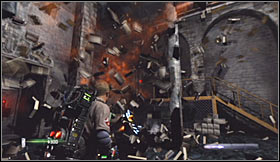
Watch out when you get to the staircase, because one of the ghosts will start throwing items at you. It's not a serious threat and you don't have to inspect the stairs. Instead head forward. Slimer is hiding just around the corner and you should lean out quickly to surprise it. Use your Proton Gun and keep firing at the ghost until it escapes once again.

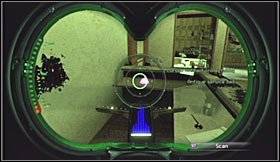
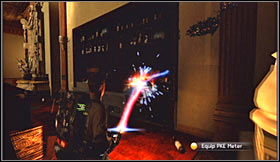
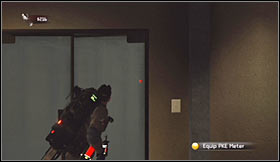
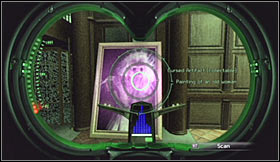
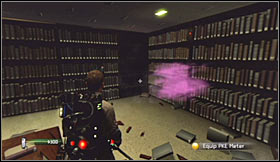
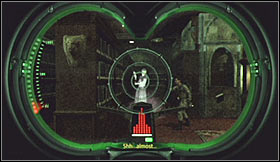
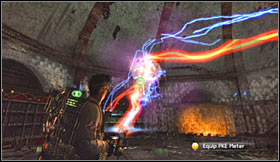
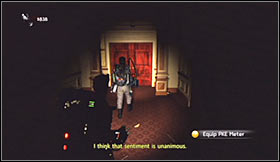
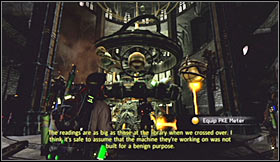
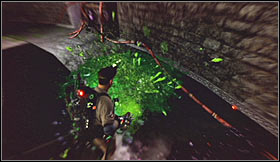
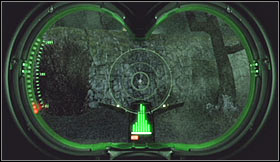
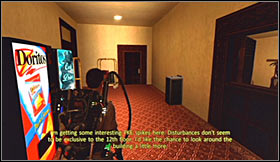
Listen to a new conversation after which you'll be allowed to use a PKE meter for the first time. Start off by examining a purple stain on the wall and you'll find Ectoplasm. Proceed to the next corridor. Observe how your meter reacts and it shouldn't take too long for you to find out that the ghost is hiding inside the vase. Scan the object to scare it away.
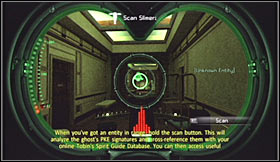
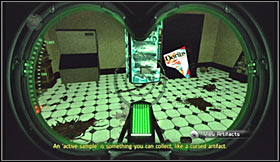
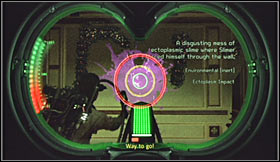
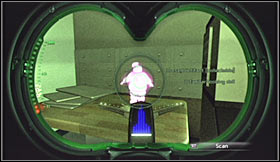
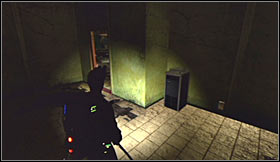
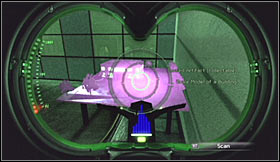
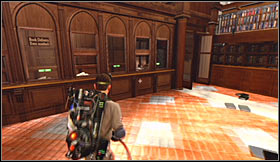
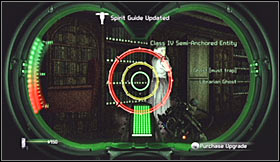
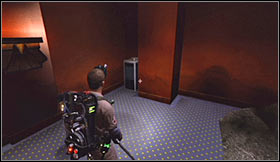
It would now be a good time to scan Slimer using your PKE meter. Don't forget to keep pressing the scan key until you've received confirmation. You may proceed to the next section. Make sure to explore the area around the vending machine along the way, because you'll find the first artifact (Gustav Self-Service Tray) there.
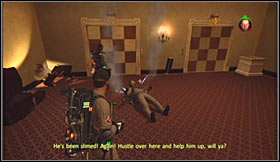
Keep following your ally and you'll soon receive a distress call from Peter. It looks like he's hurt, but you won't have to get to him right away. Explore nearby corridors if you want to. Arrive near the elevators, approach Peter and press the action key to heal him. Make a few steps forward and press a button on the wall to call one of the elevators. Return to the ground floor.

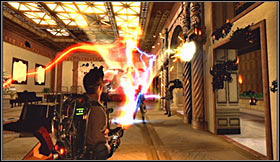
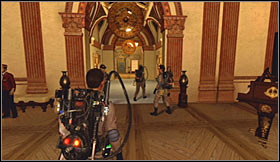
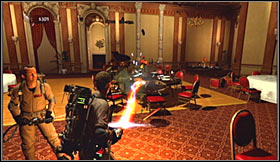
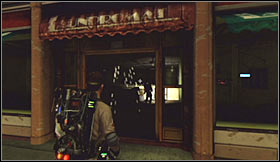
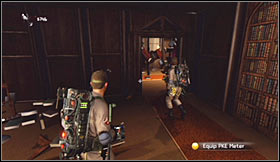
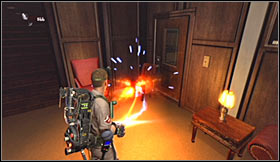
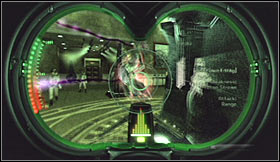
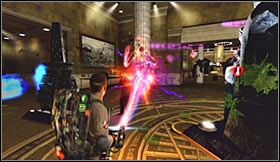
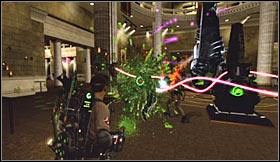
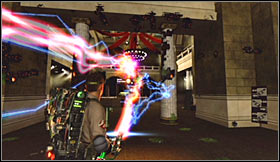
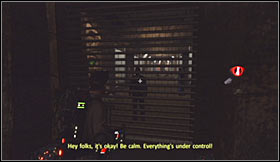
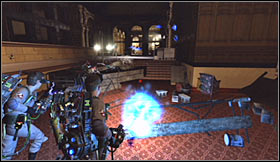
Start running towards the lobby. Make sure to choose your PKE meter when you get there, because you'll be given a chance to scan one of Bellhop Ghosts. You may now start attacking the ghosts. Each time focus on a single target and don't forget that you can dodge their attacks.
I would strongly recommend that you start placing your traps on the ground, because otherwise you won't improve your statistics for capturing the ghosts. All the phantoms will soon escape and you'll have a chance to explore this area. Use your PKE meter near the reception desk and you'll find the second artifact (The Summoner Bell).
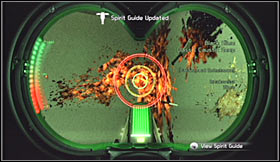
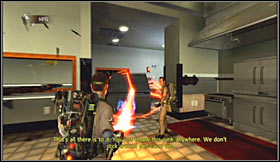
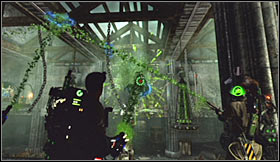
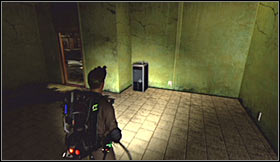
Notice that you can't reach the ballroom from here, so instead you'll have to follow Peter into the kitchen. Upon your arrival in the kitchen ignore flying objects, because you won't be attacked here. Instead inspect some of the nearby walls using your PKE meter and scan Black Slime.
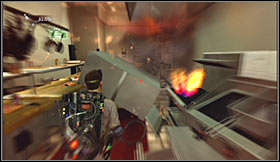
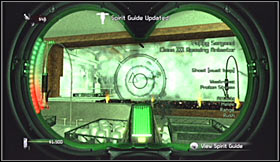
Head on to the next room. Choose a narrow passageway near kitchen devices and notice that one of the wraith has blocked it. Move back and instead proceed to a door located to your left, because this new passageway is now unlocked. Turn right quickly when you arrive inside a new room. Use your PKE meter to scan Pappy Sargassi.
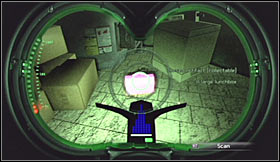
I would recommend that you keep using your PKE meter, because you'll be given a chance to scan other ghosts as well - Dead Fish Flier. Once this is done switch to your main weapon and fire at the ghosts a few times until they disappear. Approach a large object which is blocking your way and use Capture Stream ability to pick it up. Place it somewhere to your left.
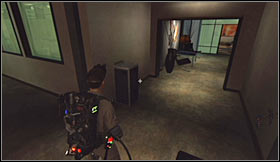
You'll soon exit the kitchen. Ignore Peter's actions for the time being and explore a corridor located to your right. Get to the opposite end of the corridor and use your PKE meter to find the third artifact (Stay Puft Figure). You may now return to your ally. Head forward and it won't take long for you to reach the ballroom area.
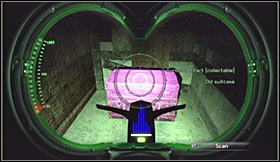
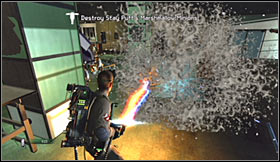
Get ready for your final duel with Slimer. Before you decide to attack the ghost, you should focus on finding a new bonus item. Proceed to the opposite end of the ballroom and stand in front of the bar. Notice a wooden section of the wall. You'll have to destroy this entire fragment to unlock a small passageway. Head inside and find the fourth artifact (Voyaging Case International).
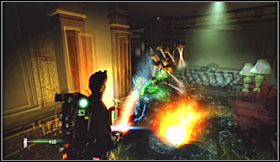
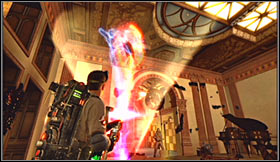
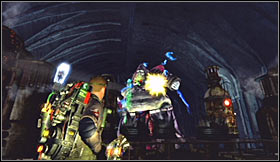
You may now start attacking the ghost. This means you'll have to repeat all three phases you've practiced during your stay in the firehouse. Slimer will hide under the table several times, but thankfully destroying objects from the environment will allow you to continue attacking him. Finish the fight by setting up a trap and capturing him. Get rid of the Slimer to proceed with the rest of the mission.
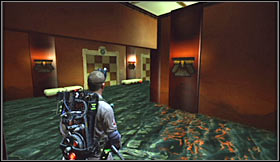
Once the battle has ended choose the nearest passageway in order to return to the lobby area. Get ready to defend yourself against new types of ghosts and don't forget to place your own traps. Eliminate all the ghosts using your main gun. Listen to a new conversation afterwards (if it doesn't start make sure you've collected your traps).
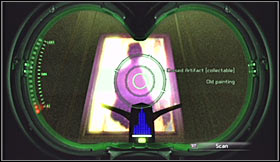
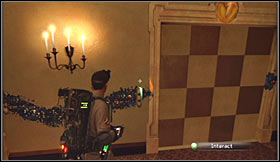
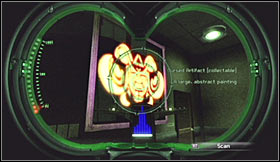
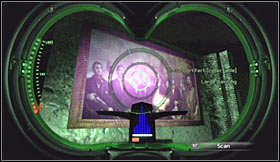
Start following Spengler by heading towards a previously unexplored area of the hotel. When you get to the staircase you'll be rewarded with an interesting cut-scene. Wait for the main character to regain consciousness and use the stairs to reach an upper floor. Use your PKE meter on one of the paintings. This will allow you to acquire the fifth artifact - Portrait of G. Sedgewick.
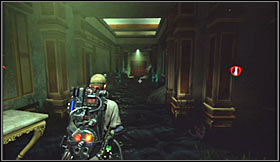
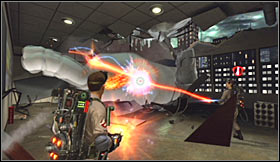
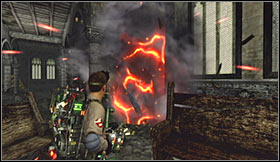
Proceed towards a corridor located to the right of the stairs and the surrounding area is going to be flooded in just a few seconds. This won't modify your initial plan in any way, because you'll have to return to the exact same corridor. Pursue a larger ghost by exploring flooded corridors.
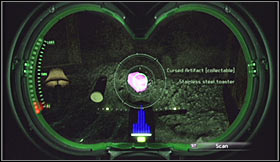
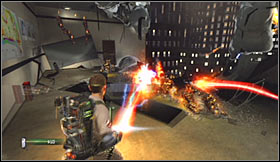
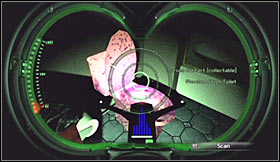
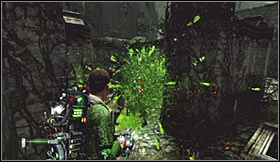
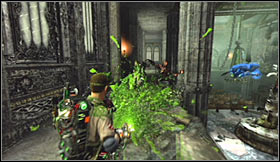
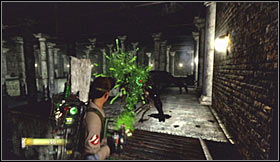
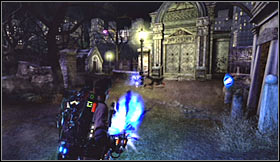
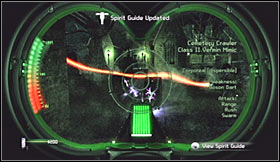
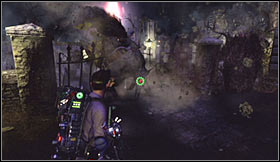
One of the nearby corridors hides the sixth artifact (Toaster of Sights Unseen). It's located behind a sofa, so you must be thorough. You'll also encounter a new type of creatures, called Candelabrum Crawler. Don't forget to take a scan! Thankfully you won't have to place any traps on the ground, because all the crawlers can be killed with your standard attacks. Prevent them from surrounding the main character and you should be fine.

Eventually you should be able to locate a longer corridor with a vending machine seen in the distance. Head to that location to continue going after the ghosts. Watch out for new crawlers along the way, especially since there are going to be a lot of them. Find a partially destroyed corridor which will lead you to a final area of this map.
You should end up standing near two elevators. Ignore them and proceed towards a much larger area. Get ready to attack the last ghost with your primary weapon (also - take a scan if needed). For now you'll only want to make it weaker, so don't place any traps. Keep attacking the spirit until it escapes. You'll also noticed that your colleagues have arrived in this room.
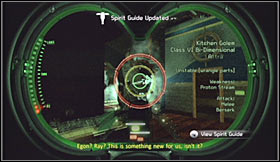
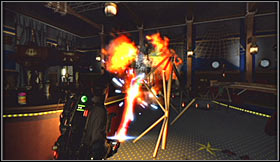
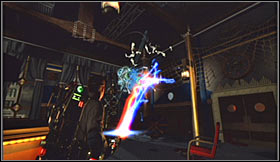
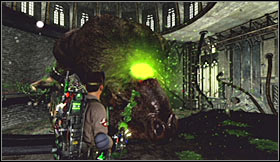
Proceed towards the bar and notice that a powerful golem has appeared nearby. Take a quick scan of the Kitchen Golem. Move back and start attacking this creature. It's important to avoid its attacks, because otherwise you may lose a lot of health. I would also recommend reviving your teammates each time they're been knocked out of the battle.
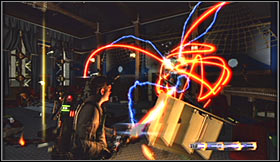
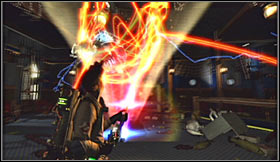
Obviously you'll have to destroy the golem with your Proton Gun. This will result in the main ghost reappearing. You can finally go through all three phases of capturing the ghost. Notice that you're going against a more powerful phantom, so it's going to take longer than usual to weaken it. Trapping the ghost will allow you to end this first full mission of the game.
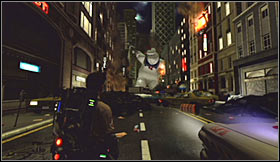
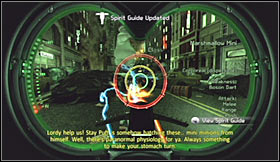
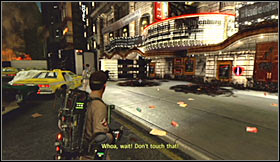
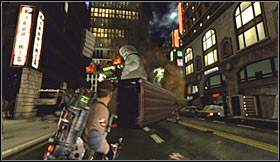
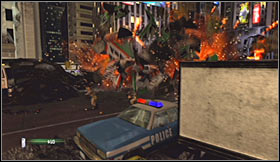
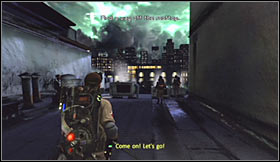
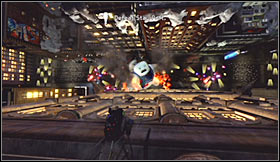
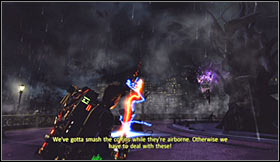
Level walkthrough: You start the game on the streets of New York. Ignore a large boss creature seen in the distance, because you won't have to worry about its actions for the time being. Instead focus on following Ecto 1. You'll soon be attacked by a first group of ghosts. Make sure to scan a spirit called Marshmallow Mini and then start using your Proton Gun. Thankfully, all of these creatures will die quickly.
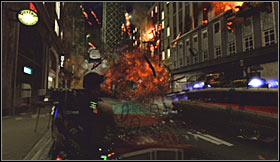
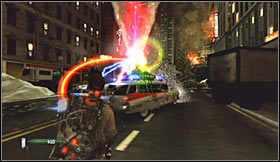
Wait for Stay Puft to destroy nearby cars, unlocking a passageway. Get ready to take a scan of a new phantom - Hobo Ghost. I would now recommend that you follow instructions given to you by your colleagues. Use the super slammer on Ecto 1 to eliminate enemy ghosts quickly. The biggest advantage here is that you won't have to struggle with the captured ghost. All you have to do is to make it touch the roof of the car.

Keep pushing forward, eliminating hostile creatures along the way. Each time you attack a new group of ghosts focus on a single target. Make a stop once you've reached a large number of obstacles. You'll be rewarded with a short cut-scene here after which you'll have a chance to scan a new ghost - Stone Gargoyle.
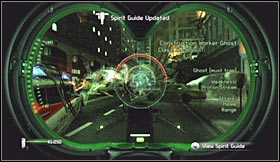
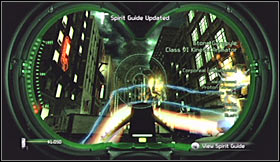
Thankfully eliminating the gargoyles is going to be easy, because you won't have to trap them. Nevertheless you should acknowledge the fact that they're going to be more resistant to your Proton Gun than other ghosts, so they won't go down quickly. Aside from the gargoyles you'll also be dealing with Construction Worker Ghosts, so make sure to take a new scan.
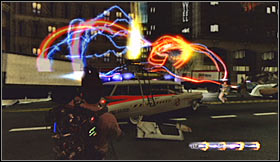
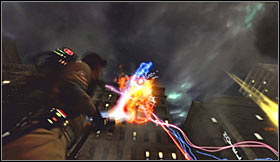
Be careful while fighting the flying ghosts, because their attacks may result in your character losing a lot of health. Thankfully you'll be allowed to use Ecto 1 to trap them quickly and painlessly. Watch out for your teammates and revive them each time they're in need of healing. Wait for Ecto 1 to park in an alley when it's all over. Enter a nearby laundromat afterwards.
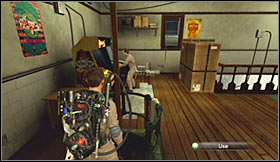
Ignore the moving washing machines, because they don't pose a threat. Go to the other side of the laundromat. Before you exit make sure to explore a small room to your right. This will allow you to get your hands on the first artifact - Gaillano's Enchanted Pail. You may head outside.
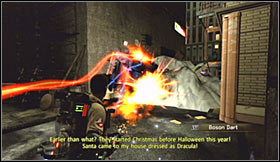
Once you've left the building turn right and use your newly acquired ability. You will be allowed to fire projectiles called Boson Darts. Make sure to maintain safe distance if you don't want to receive any injuries being result of an explosion. Destroy the obstacles in the alley and wait for Ecto 1 to show up. Follow the car to a new alleyway.
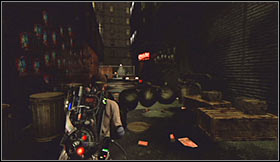
Explore the area behind a large truck parked to your right and you shouldn't have any major problems finding the second artifact - 3-Toed Jenkin's Midnight Goose. You may now proceed to your left. Use Boson Darts again to get rid of a wooden obstacle. Proceed forward, but turn left when you have the chance. Explore a new small alley to find the third artifact - Patrelli's Mischievous Cone.
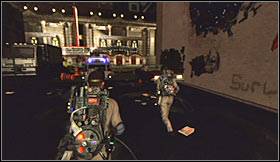
Return to the area where Ecto 1 is parked and begin moving towards one of the main streets of New York. Once you get there take your time exploring your surroundings. You'll find a lot of black slime, but you won't have to scan it. Wait for a new type of a ghost to appear - Opera Diva Ghost.
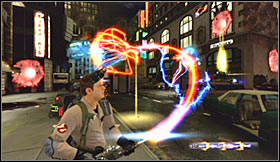
Obviously you'll have to use your PKE meter to scan the creature. Afterwards you'll be allowed to engage the spirit in open combat. Watch out for diva's shock wave, because it can deal a lot of damage. You'll soon notice that other ghosts have arrived in the area. I would recommend focusing on the gargoyles first, especially since they'll be the easiest ones to neutralize.
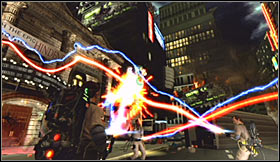
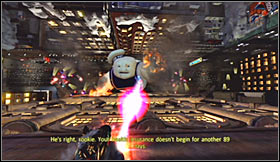
Keep attacking enemy units and make sure to keep placing new traps and to attract the wraiths to them. Ignore Stay Puft for the time being, because your top priority at the moment is to eliminate all hostile ghosts. Once this is done you'll be rewarded with a new cut-scene.
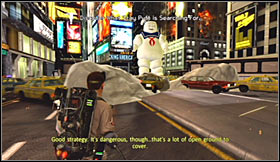
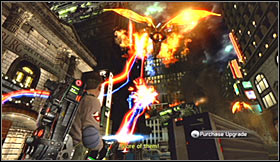
Make a few steps towards Stay Puft and use this free time to destroy some of the nearby cars. Once you notice the boss heading your way retreat in order to prevent the main character from being crushed. As for the scan, you can do it now or wait for a better opportunity which will present itself shortly. The easiest way to survive here is to remain close to your ally.
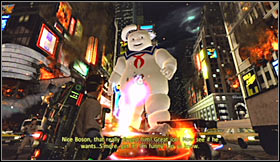
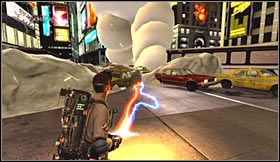
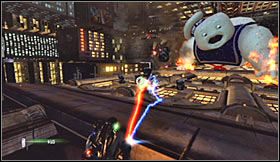
Make sure that you follow the plan by attacking Stay Puft with your newly unlocked Boson Darts. It doesn't really matter which part of its body is targeted as long as the boss receives hits. Avoid its attacks at the same time by moving back or by using the dodge action. Keep attacking the boss until a nearby blockade will explode, allowing you to move on.

You'll now have to keep repeating actions explained above, so this means attacking the boss with the projectiles and moving back when a new part of the map is unlocked. Eventually you should be able to reach an entrance to one of the skyscrapers. Head inside as soon as possible.
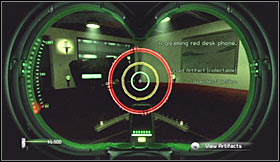
Once you're inside ignore smaller creatures for the time being and proceed directly to a reception desk. Examine the large desk to find the fourth artifact - Asmodeus' Hotline. You may now begin attacking nearby beasts and after the battle has ended follow your ally to the elevators. Wait to be transported to a higher floor.
Start off by moving forward. Wait for Ray to take a scan of the area and then proceed to your left. You'll have to approach a double door. Press the action key to open the door and head inside. Move on towards the windows while staying close to the right wall. Inspect an object in the corner to uncover the fifth artifact - Homan's Black Low-Rise.
Keep using the PKE meter, because you'll want to scan the roof. This will trigger an event resulting in A LOT of enemy creatures showing up around you. Prevent the beasts from cornering you and keep reviving your teammate whenever he's in need of help. Once you've won proceed towards a new door.
Watch out, because you're going to be attacked by more creatures when you open the door. Kill them and then head forward. Observe the windows to your right, because you'll have a chance to scan Stay Puft. Don't worry if you aren't quick enough, because this isn't the last "photo opportunity". Examine the left wall just around the corner to find a painting which is the last sixth artifact - The Ravishing Red Prince.
Keep following your teammates. Wait for one of your colleagues to open the door and attack Stay Puft upon your arrival to a destroyed room. Thankfully a single Boson Dart will do the trick. Get ready to defeat a small group of less powerful creatures. Once they're gone find a new door and eventually you'll get to a safe corridor. Listen to a new conversation there.

Obviously you must now use the stairwell to get to the top of the skyscraper. Don't even bother going down, because the stairs would have been destroyed. Ignore Stay Puft's attacks along the way, because you're in no danger. Head forward when you get to the roof and get ready to defeat new ghosts.
You'll be dealing mostly with construction workers here, so you won't be surprised by anything new. Don't forget to set up your very own traps and avoid crossing streams with other ghostbusters. Each time focus on a single target to get this over with as soon as possible. Start moving towards the edge of the roof once it's safe.
Be careful, because Stay Puft will appear in front of you rather unexpectedly. Fire a single Boson Dart at the boss and it'll lose balance and fall. Watch a new cut-scene after which you'll find yourself in a very uncomfortable position.
This is the last phase of the boss fight. Thankfully you won't have to try too hard to prevail. All you have to do is to keep firing projectiles at the boss and it will lose balance each time it's close enough to your character. The only thing you'll have to watch out for are going to be smaller creatures. Use your proton stream against them and it'll all be over in about one minute.
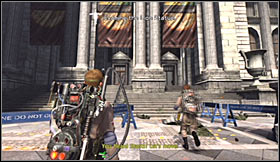
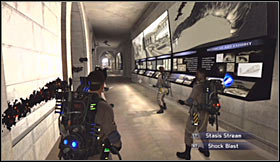
Level walkthrough: You start the game in front of the library, so obviously you'll have to head inside. Ignore the first group of ghosts and don't worry, because you'll be given an opportunity later on to scan them. For now use the stairs to get to the upper balcony. Rejoin with the rest of the team and you'll find out that you've unlocked a Dark Matter Generator, as well as two attacks - Stasis Stream and Shock Blast.
Return to the ground floor and choose the PKE meter from your inventory. Scan the ectoplasm on the ground and then some of the objects from the environment. It should all result in Ectoplasmic Residue appearing near your position. Take the scan and then go back to the balcony. Turn left and proceed towards a newly unlocked passageway.
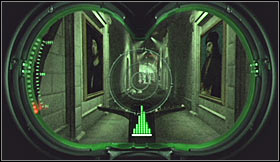
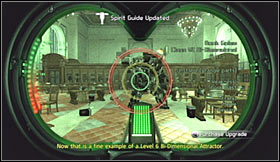
Keep heading forward, ignoring hints about the possibility of using your PKE meter. Turn right when you get to the gate and enter a large study area. Make a few steps forward and wait for a Book Golem to appear near your position. You can scan this mini-boss right now, however you'll also encounter other golems later on, so it's not a top priority.
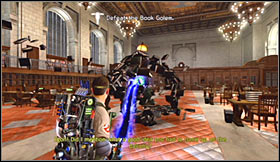
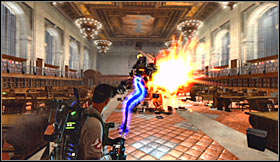
I would strongly recommend that you start using your new attack called Stasis Stream during the course of this duel. Notice that your hits are slowing down the beast and thanks to that your allies on a nearby balcony can attack it. It would be a good idea to purchase upgrades before the start of this battle, especially the one that prevents this gun from overheating prematurely.
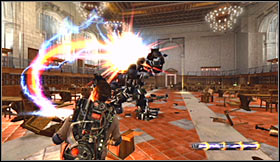
It shouldn't take too long for the golem to lose most of its health points. Once it has only one left switch to the Proton Gun and try capturing its head with an alternative stream. Slamming the head will allow you to win this duel as the rest of its body will automatically explode.
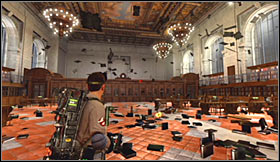
Proceed to the area where you've seen the golem for the first time and choose a door located to your left. Activate your PKE meter to find the first artifact - Portrait of Eleanor Twitty. Return to the study, however this time choose a door located to your right. Destroy wooden obstacles here and use the stairs to reach a lower floor.
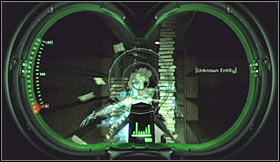
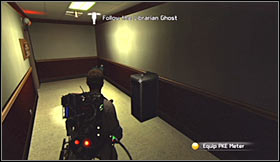
Stop for a short while upon your arrival in a new area. Use your PKE meter and wait for the Librarian Ghost to appear. Don't worry if the ghost escapes, because you'll be given other opportunities to take a scan later on. Proceed to the nearest door and you should find your way to a room with a lot of book shelves.
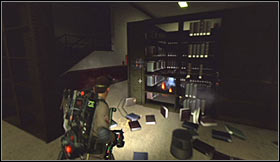
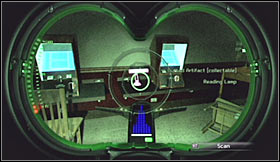
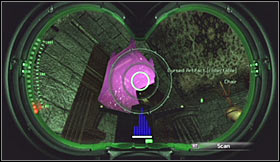
Ignore the fact that some of the nearby shelves are going to be moved by ghosts, because sooner or later you'll find your way to your current destination. Head over to the exit and proceed to your left to find the second artifact - Reluctant Reading Lamp.

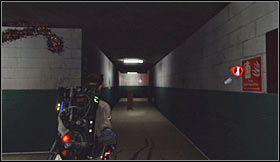
You should now choose a narrow passageway located between the book shelves. Get ready, because you'll have a chance to scan the Paper Construct ghost. Thankfully eliminating these ghosts is going to be very easy. Keep firing with your Proton Gun and use Boson Darts from time to time. Proceed to a brighter area to advance to the next section of the library.
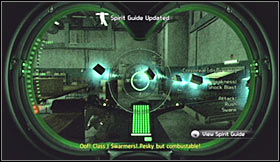
Head forward. Ignore a small room with black slime along the way and instead proceed to a much larger warehouse. Make a few steps forward and get ready to defend yourself against Book Bats. Scan one of the bats and then choose the Dark Matter Generator from your inventory.
You can use either of the attacks of the generator to get rid of the bats. Firing the stream is more efficient against single wraiths and the blast attack is the best choice against larger groups. Keep fighting until you're the only one standing. Notice that a new phantom called Crusto has appeared near your position.
It's important to use your Proton Gun against Crusto. Thankfully a standard stream will be more than enough to weaken him. Don't forget that you'll have to trap him if you want to get rid of him once and for all. Wait for similar ghosts (Cruster) to appear and scan one of them. Start attacking them afterwards and get ready to defend yourself against new flying books as well.
Proceed towards the only available exit. Ignore weird occurrences along the way, because you won't come across any ghosts until you've entered a larger room. You'll be dealing with less powerful phantoms, so it shouldn't be difficult to prevail. Keep pushing forward until you reach an area with a purple mist.
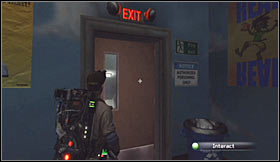
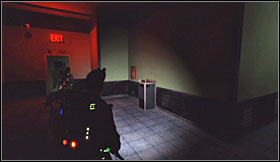
Choose the PKE meter from your inventory and you'll be given a new chance to scan the librarian. Proceed towards the passageway with an EXIT sign above it and look around. Your main adversary will disappear once again and you'll have to neutralize a large group of flying books. Don't forget to use the generator here and keep fighting until it's safe.
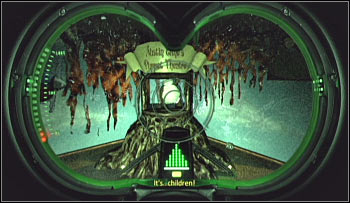
Follow one of your colleagues to a new passageway once it's safe. Watch a cut-scene and head forward. You shouldn't be too surprised to hear that you'll have to neutralize other ghosts along the way. Eventually you'll come across a door. Open it and you'll find yourself standing inside a children study.
Proceed to a door with an EXIT sign. This passageway is located on the opposite side of the room, but thankfully there aren't any ghosts in the vicinity. Use the stairs and destroy a chair when you get to a new room. Enter a small room to your right and use your PKE meter to find the third artifact - Pin-up Calendar of DOOM!
You may start moving towards the next large area of the library. Approach the librarian and once again wait for her to be scared away. Obviously this will result in more ghosts appearing near your position. Use your PKE meter to scan one new type of a phantom, called Book Centurion. This ghost can be neutralized using the standard attack of your Proton Gun.
Go to the area where your colleagues are standing once you've won. Approach a bookshelf and press the action key o unlock a secret passageway. Use the stairs to get to the basement located under the library and fire at least one Boson Dart to destroy a wooden obstacle.
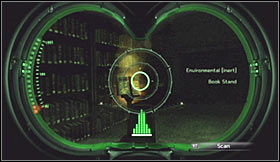
Proceed towards a much larger room and once you've arrived use your PKE meter to examine one of the bookstands. Sadly this will result in new ghosts appearing near your position and you should also know that you'll be dealing with large groups, including Book Bats, Paper Constructs, Book Centurions and Crusters. Leave the Cruster for later, because it's the only spirit from this group that you'll have to trap.

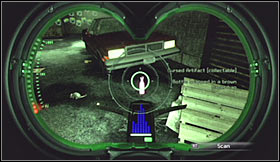
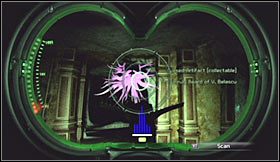
You may proceed to the area where you've seen the ghost of the librarian. There's a dark passageway nearby and you'll have to use it to get to the next section. Once you're inside a small room inspect the area to your right. Choose the PKE meter from your inventory and find the fourth artifact - Seat of Vapors Foul.
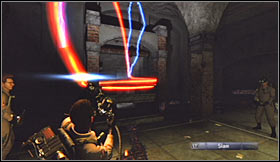
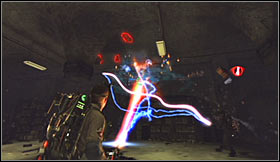
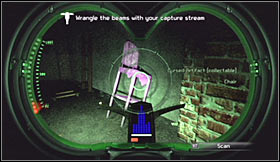
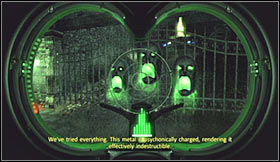
You'll now have to unlock a nearby passageways and this means getting rid of three metal beams. Each time you must start by using the Capture Stream of your Proton Gun. Lift the beam in the air and place it somewhere nearby. Perform these actions with all three objects and head on to a new passageway.
Head down and eventually you'll end up standing inside a partially flooded room. Go to the nearest balcony and use the power switch. Sadly this will result in a new Book Golem appearing near your position. Use the same methods as before, so you'll have to keep running near the golem while using the Dark Matter Generator.
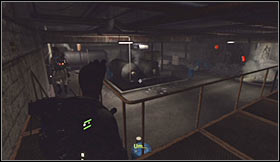
Keep attacking the golem until it has only more health unit left. Switch weapons and use the Proton Gun to make the golem explode. You may proceed towards a new passageway. Keep heading forward until you get to a larger room. Head down and wait for your colleagues to join you.
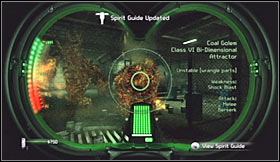
Watch out, because soon after you've seen the ghost of the librarian you're going to be attacked by two Coal Golems. Take a quick scan of one of the golems and then attack them both. It doesn't really matter which weapon you'll be using during this fight, because they're equally effective. Each time focus on attacking a single target instead of trying to destroy both golems at the same time.
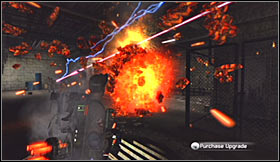
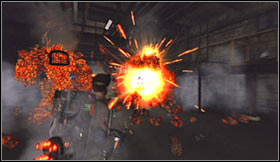
Thankfully eliminating the golems is going to be simple, as long as you use the same methods as before. Once you've won go to your left and choose the PKE meter from your inventory. Destroy a new obstacle using the Boson Dart and you'll be rewarded with a cut-scene. You'll also find out that you've unlocked a new weapon (Slime Gun) and a new ability (Slime Blower).

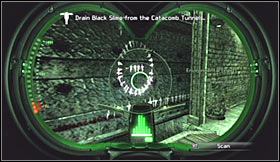
Use the newly unlocked weapon to get rid of black slime blocking the entrance. This will allow you to use the tunnel. Travel trough the tunnel and eventually you'll reach a larger room. Approach the librarian ghost for the last time. Watch a short cut-scene and pick up the book.
Choose the PKE meter from your inventory and scan the area to find a ghost. You'll now have to get ready to defeat the librarian in open combat. As soon as this duel has started choose the Proton Gun from your inventory and start shooting at floating bookstands.
Your objective will be to destroy all bookstands and you'll have to avoid librarian's attacks at the same time. Don't forget to revive your teammates whenever necessary. Once you've destroyed the stands you'll be allowed to focus on eliminating the librarian. All you have to do is to trap her using standard proton streams.
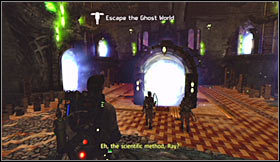
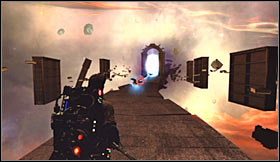
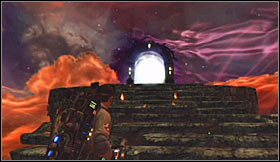
Once you've succeeded in getting rid of the miniboss approach a small levitating sphere and press the action key. This will result in the team being transported to an alternate dimension. Wait for a nearby gate to be raised and use the stairs. Fire your Slime Gun to neutralize black slime. This will also allow you to uncover a portal. Use it to get to a new location.
You'll end up standing in a large hall and being surrounded by new objects. Head on to a portal located in the center of the room. Once you're close enough it'll disappear and you'll have to defeat a new Book Golem. Notice that you can't rely on your teammates this time, so you should start using the Proton Gun right away, without slowing down its movements first. Weaken the beast and perform an "execution" to get rid of it.
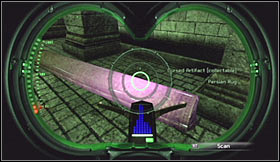
Use the stairs when it's safe and turn left after you reach a large gate. Proceed towards a new teleportation device. Head on to the other side, make a few steps forward and choose the PKE meter from your inventory. Find and collect the fifth artifact - Ali El-Baluu's Irksome Rug.

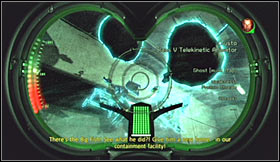
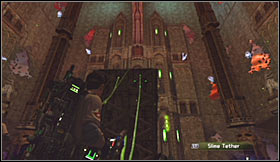
Go back to the main hall with other portals. This time you'll have to choose a portal located to the right of the main gate, so it'll be directly in front of where you're standing. Head forward, however watch out for a new golem along the way. Use your Proton Gun and prevent the creature from hitting you. Rejoin with the rest of your squad and you'll find out that you've been awarded with a new type of an attack, called Slime Tether.
Approach a huge drawbridge and take your time to see how your new ability works. Be patient, because the first part of the drawbridge is going to be lowered by one of your colleagues. Approach the other part. Aim one end of the rope at the bridge and the other end at the ledge you're standing on. If you've done everything according to the plan you'll notice that the bridge is being lowered. If you're unlucky try again or attach two ropes to the same object.
You may proceed forward and eventually you'll end up standing inside a room with a large movable object. Attach one end of the rope to the object and the other end to the wall. Repeat this a few more times and you'll uncover a portal hidden in one of the walls.
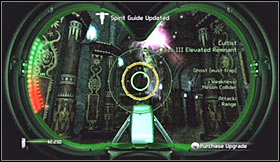
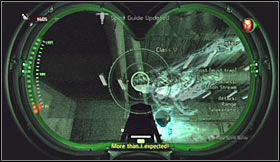
Keep following your colleague, but sadly one of the portals he'll use is going to disappear right in front of your nose. Get ready to take a scan of a new phantom, marked as the Cultist. I would recommend using your Proton Gun during the course of this battle, but don't forget to keep moving, so you won't be an easy target.
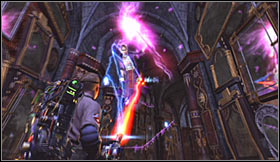
Once the ghost has disappeared proceed to the opposite end of this hallway and stop near the mirrors. Wait for the Cultist to show up again and this time you'll be allowed to get rid of it once and for all. Remember to place a trap on the ground once it's been properly weakened. Once you've won go to a newly unlocked portal.
Keep running forward and continue eliminating less powerful creatures as you progress. Eventually you'll have to get to a new teleportation device. Ignore smaller ghosts flying around you, because you won't be bothered by them. Instead turn right and head upwards until you find the next portal.
You'll now have to take part in a series of standard fights and to be more specific you'll be going against small group of Paper Construct creatures. Keep using the teleportation devices and remember to move slowly, so you'll receive points for each kill.
Your top priority at the moment will be to reach a large entrance which will be located to your left. Look around when you get to a room with floor upside down. The sixth artifact (Featherwell's Stalking Chair) can be found near the roof, to your left. You may proceed towards the exit.
Eventually you should be able to get to the stairs floating in the air. Start heading upwards and watch out for new "haunted books" along the way. Thankfully it won't be hard here to prevail. You can fight the books or you can leave dangerous areas as soon as possible.
You'll have to use the rope (Slime Tether) a few times along the way. Aim the rope at the upper sections of the stairs and then attach the other end to the platform you're standing on. The final phase of this approach will allow you to launch a rope at a floating platform located to your right.
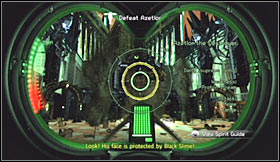
Pull the platform and once you're on it you'll have to launch the rope at least two more times to get to a new portal. Step through the portal and witness a new cut-scene. Get ready to defeat the final boss of the library - a powerful demon called Azetlor the Destroyer. Start off by scanning the beast.
Make sure to follow instructions given to you by other members of your team. As a result you should choose the Slime Gun from your inventory. Use this weapon to destroy some kind of a defensive layer surrounding the beast. Aim for the upper parts of its body and make sure to keep moving. Don't forget to revive your teammates each time they're in need of healing.

The second phase of this duel will require you to switch weapons. Start using the Proton Gun and aim for the large mask. Use capture stream ability to rip it off. Doing this will allow you to focus on attacking Azetlor's eye. It shouldn't take too long for you to win. Once the boss is gone step through the last portal to end this quite challenging mission.

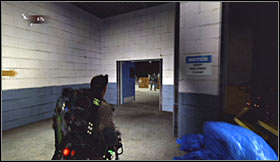
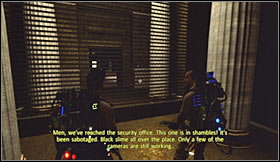
Level walkthrough: You start this level standing in a dark warehouse area of the museum. Ignore objects from the environment and follow your colleagues to the first checkpoint. You'll come across black slime along the way and it would be a good idea to use the Slime gun to clear your path. Eventually you'll find a locked door.
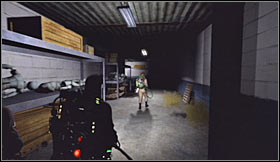
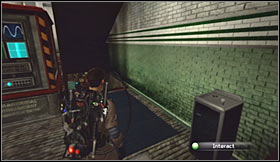
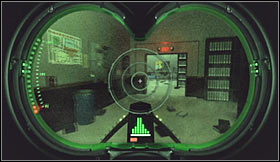
Turn around. You can find the power switch on your own or you can use the PKE meter to help you in uncovering its location. Either way you'll have to destroy a couple of crates found in the corner of the room. Flip the switch, return to the door and enter the next room.
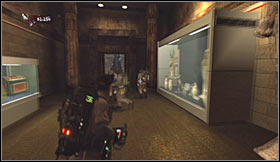
Continue moving forward. Ignore black slime stains seem along the way, because you won't have to destroy them and they won't pose a threat. Reach a larger room and inspect the area to your left to find the second artifact - Ritual Mask of Bad Advice. You may proceed to the next section.
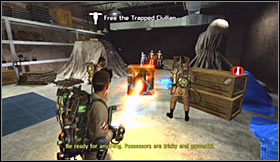
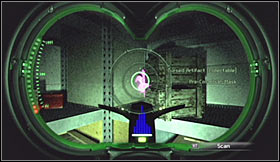
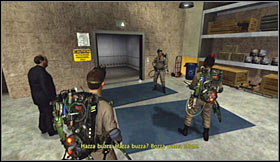
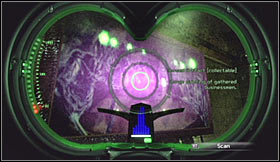
Approach a large crate located in the central area of the warehouse and destroy it with your primary gun to free the museum curator. Wait for a new cut-scene to be displayed on your screen and take a quick scan of Ray's body to add a new entry to your list of ghosts (Possessed Human).
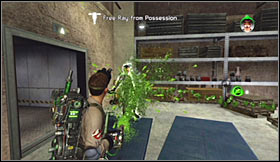
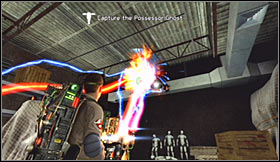
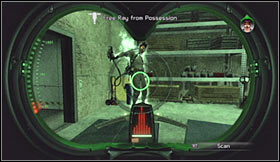
Choose the Slime Gun from your list of weapons and use the slime to help your possessed friend by sending the ghost away from his body. Quickly choose the PKE meter and scan the actual Possessor Ghost. You may now get rid of this phantom by going through all three steps and by using one of carried traps.
You may finally enter a nearby elevator. Wait for it to reach the ground floor of the museum where you'll be presented with yet another cut-scene. Once the cut-scene has ended make sure to take a scan of Beauty Queen Ghost.
I guess I should tell you that you'll be dealing with a lot of nasty ghosts here, especially since you'll have to trap most of them. Some of the phantoms will also possess civilians from time to time. Ignore them unless it's your colleagues we're talking about. Leave them for later and focus on eliminating more powerful wraiths in the first place.
Once you've eliminated all flying ghosts you may focus on rescuing the possessed ones with your Slime Gun. Your final objective here will be to secure two large areas. Thankfully you won't have to go anywhere afterwards, because you'll be presented with a new cut-scene right away. Follow your colleagues and notice stains on the floor along the way (you won't have to scan anything).
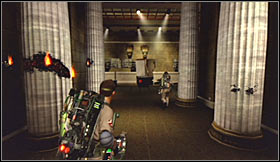
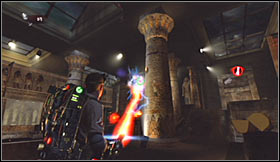
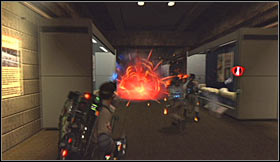
Choose the PKE meter from your inventory when you reach the first area with the exhibits, because you'll have a chance to take a scan of a Possessed Statue. Use Dark Matter Generator to eliminate these beasts (preferably Shock Blast ability), because Proton Gun is slightly less effective. Nevertheless it won't take too long to eliminate each group. Take out all hostile units and find a passageway between four large columns.
Turn right an get ready to eliminate other creatures along the way. It would be a good idea to neutralize them from a larger distance, so you won't have to risk your life too often. Proceed towards a door and press the action key to open it. Notice an escaping ghost in the next room, however for now focus on getting rid of less powerful targets.
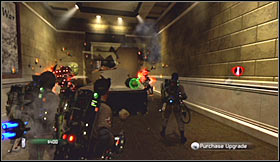
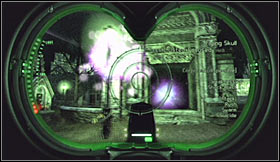
Keep pushing forward and use small bridges to get closer to your destination. You'll soon notice that a large group of Flying Skulls has appeared near your position. You must use the Shock Blast attack to get rid of the skulls quickly, so it's going to be very similar to fighting flying books from the library level. Eventually you'll reach a new door located to the left of a large pyramid.
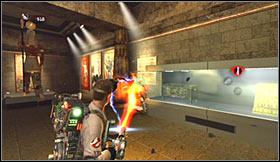
Proceed to your right and get ready to engage more spirits when you're close enough to the statues. Just as before, attack them from a safe distance and revive your colleagues when they suffer major injuries. Open a new door and listen to a short dialogue when you get to the gate. You'll soon reach an area with the Civil War exhibit.
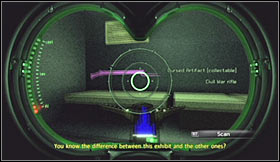
Start this tour by going to your left and examining some of the nearby exhibits. This will allow you to get your hands on the second artifact - Cursed Musket of C. Starkey. You may proceed towards the exit where you'll be rewarded with a cut-scene showing ghosts from two opposite sides going after each other.
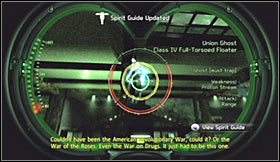
It would be a good idea to scan two new types of ghosts - Union Ghosts and Confederate Ghosts. You may now begin attacking them. It's not going to be easy here, so you should always focus on eliminating single targets. Stay away from larger groups and dodge their attacks, so you won't have to be saved too often by your colleagues.
Once you've won go to the door you were trying to open before. This time you'll be allowed to proceed and you'll also witness a new cut-scene. When you get to the Egyptian exhibit get ready to defend yourself against a large group of flying skulls. Don't forget that you should be using the Dark Matter Generator to destroy them.
You'll soon be asked to close one of the nearby portals in order to prevent more skulls from reaching this dimension. I would recommend that you practice closing portals, because you'll come across more of them later on. Thankfully this is a very easy task. All you have to do is to use your Slime Gun on a red hole located on the ground. Go to the exit afterwards.
You'll probably notice a guard standing on the other side of the gate, however talking to him is not mandatory. Instead you can proceed to your right without making any stops. Watch a new cut-scene and get ready to defeat walking statues, as well as undead soldiers. I would recommend starting off with "stationery" targets and leaving the flying phantoms for later, especially since you'll have to use traps to get rid of them for good.
Go to the upper floor when it's safe and rejoin with the rest of your squad. Choose the PKE meter from your inventory and inspect the purple door. You'll have to wait for this conversation to end after which you'll be allowed to use your Slime Gun to unlock this passageway. Head on towards a dark corridor.
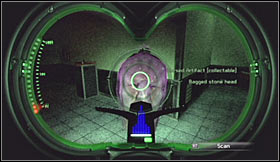
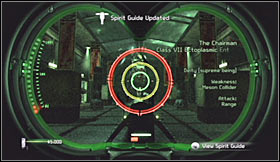
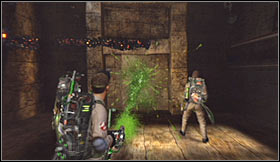
Keep running forward and ignore black slime seen along the way, because you won't have to get rid of it. Instead be on a look out for the third artifact - Bagged Head of Azathotep. I would recommend scanning The Chairman when you get to the next room. Don't worry if you miss this opportunity, because you'll have to defeat him soon enough.
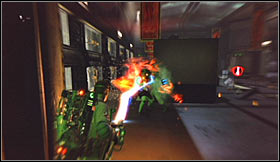

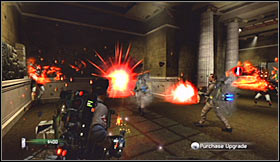
As you've probably noticed, The Chairman has sent a relatively large group of ghosts to hunt you down. You'll be dealing mostly with walking statues and flying skulls, so it shouldn't be a problem to prevail. Head on towards a large gate once it's safe. Choose the left corridor when you reach the junction and take your time in finding the fourth artifact - Phoenician Plague Vase.
Return to the junction, however this time choose the corridor located to your right. You'll encounter a lot of new statues along the way and they'll be coming back to life. Thankfully it'll be easy to destroy them and you shouldn't avoid these fights, because you can score a lot of points easily. Check the painting on the left wall for the fifth artifact (Painting of the Trustees) and proceed towards a nearby door.
Get ready to defeat the last group of statues while trying to reach your current destination. Take your time and be thorough, so you won't be surprised later on. Eventually you'll have to find your way to a much larger room where you'll be presented with an interesting cut-scene.
Wait for the cut-scene to end and examine the large structure in the center of the room with your PKE meter. You'll have to destroy this object with a single Boson Dart. Notice that doing this has unlocked a new passageway. Use the stairs to get to a series of dark corridors.

It would be a good idea to follow your team members unless you want to get lost in the dark. If you do separate use your PKE meter to find the way to the exit. You should be able to reach a slightly larger room. Turn left there and examine the objects on the ground to find the final sixth artifact - Remote Controlled Ecto-1.
You should now go to the opposite balcony, rejoining with the rest of your team. Choose the PKE meter from your inventory when you come across an obstacle. Scan the right wall, target the purple element and unlock this new passageway with your Slime Gun. Enter a dark tunnel and familiarize yourself with the instructions of your new weapon (Meson Collider).
Proceed towards a gate which is going to be located to your right and press the action key to open it. Keep running forward and it shouldn't take long to reach the final area of this map where The Chairman will be waiting for you. Scan the beast if you haven't already done that and get ready for a long and a tiresome battle.
This fight has two main phases and you'll be dealing with them alternately. Whenever you have the chance attack the boss with your newly unlocked Meson Collider. Make sure to aim for its head, because this is the only way to inflict major injuries. Otherwise you would have to spend too much time and you would risk failing the mission.
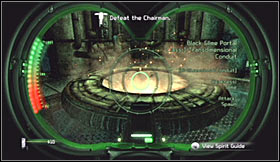
Each time The Chairman has suffered some injuries it'll retreat and you'll be forced to deal with smaller creatures. The most important part here is to keep neutralizing new portals. There are going to be four them (in all the corners) and you'll have to be ready each time a new portal has been activated. Naturally you must use your Slime Gun to close them.
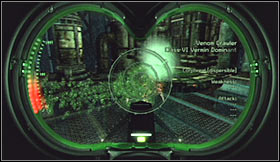
Various creatures will use the portals to cross dimensions and it'll be your job to eliminate them as soon as possible. At first you'll only be dealing with Venom Crawlers. Thankfully you won't have to switch weapons to kill them, because the Slime Gun will do the trick.
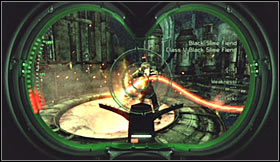
Later on you'll encounter two other types of phantoms - Black Slime Fiends and Black Slime Ghosts. Don't forget to scan everything new, so you won't have to repeat the mission when you finish the game. Keep attacking The Chairman until it loses enough health points to explode.
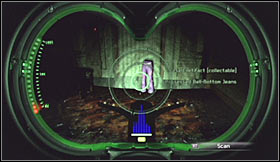
Level walkthrough: Start off by heading forward. You won't have to be moving slowly here, because you won't encounter any ghosts for the time being. Follow your colleagues at first, however make sure to explore a dark corridor to your left. Use your PKE meter to find the first artifact - Possessed Bell-Bottom Jeans.
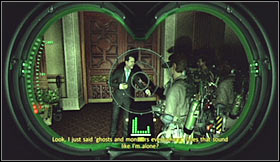
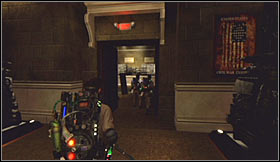
You may rejoin with the rest of your squad. Proceed towards the elevators. You shouldn't have any problems navigating through the lobby area, because you've been here before. Listen to a few short statements concerning a new ghost and head on to the next corridor to find the manager.
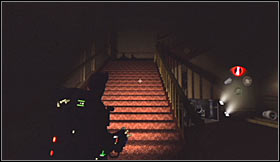

Abandon your colleagues once the conversation has ended. This time you'll want to explore the stairs by heading towards an upper floor. Check the corner behind a wheelcart to find the second artifact - Broccoli Queen Autobiography. Head back down and resume your previous actions by following your squad members. Watch a new cut-scene and listen to a conversation about the location of the fuse box.
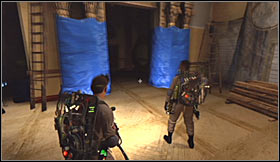
Your next target area is the kitchen, however be careful, because on your way to that location you're going to be attacked by very agile creatures, called Webbed Fiends. You can deal with them on your own or you can wait for your colleagues to provide assistance. Once you've won choose the door leading to the kitchen.
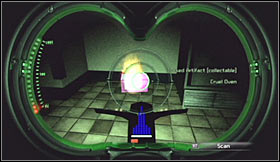
Thankfully you won't encounter any new ghosts right now, because they won't appear until you've restored power. Check the area to your right when you enter the kitchen. Use the capture stream on the left refrigerator. Doing this will allow you to uncover the location of the third artifact - Cruel Oven.
You may now begin exploring the kitchen area. Destroy black slime with your Slime Gun if you want to, however this is optional. Focus on finding a small door on the other side of the kitchen. Open the door to reach your current destination.

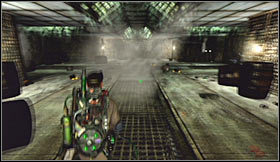
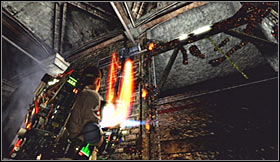
Head down, open a nearby gate by pressing the action key and proceed to your right. Locate a light switch and use it to restore power. Notice that you're now surrounded by electrical discharges. Choose the Slime Gun from your inventory. You'll have to attach the rope to a round lamp seen in the water and the other end to the wall.
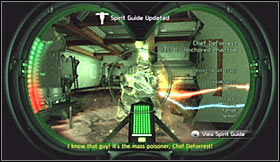
If you've done everything according to the plan the lamp should be raised and it'll be safe to leave this area. Open the gate again and return to the kitchen. Approach a burning stove and get ready to take scans of three new types of ghosts (Cook Ghost, Chef DeForrest and Kitchen Flier).
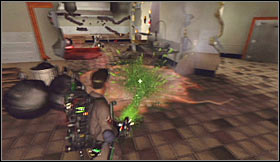
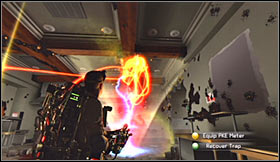
I would recommend that you start off by dealing with the flying objects using your Shock Blast attacks. Patch up two portals found in the kitchen using the Slime Gun. Finish off by dealing with the cooks and with the chef who obviously is going to be the most powerful one. Don't forget to trap the ghosts and once they're gone return to the lobby area.
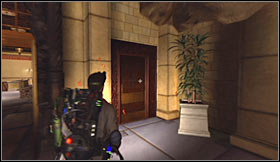
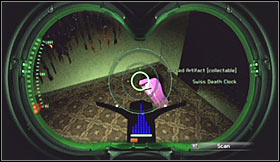
Leave the rest of your team behind for a short while and return to the area where you've started this level. There's going to be a small door to the left of the main entrance. You can open it thanks to restoring the power earlier on. Once inside take out your PKE meter and scan the area for the fourth artifact - Swiss Death Clock.
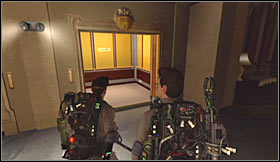
You may now rejoin with the rest of your squad. Start moving towards the elevators and enter the one that will open once you're close enough. Listen to an interesting conversation on your way to a higher floor. Start following your colleague and stay close to him until he pries open one of the doors.
You should separate from your teammate here. Choose a corridor located to your left. You'll have to open the last door to your right which will allow you to enter one of the apartments. Locate a door leading to the bathroom and use your PKE meter to find the fifth artifact -Phantom Flush Toilet. You may return to the corridor where your colleague is waiting.

Watch out, because you'll be dealing with a lot of Spider Crawlers from now on. Don't forget to take a scan of one of these creatures. As for means of eliminating them, Proton Gun is your best choice here. Keep pushing forward until you come across a large web. Destroy this obstacle with a single Boson Dart.
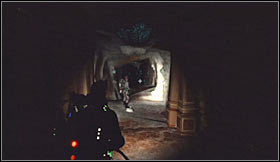
Watch a short cut-scene and once it's over explore the corridor to your right. Doing this will allow you to get your hands on the final sixth artifact - The Unruly Beard of V. Belascu. Return to Spengler and follow him to a new corridor. Obviously you should be ready to get rid of more spiders along the way.
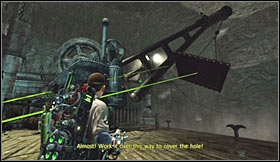
It shouldn't take long to reach the area where the hotel room is supposed to be located. Use your PKE meter and scan the left wall to uncover a door. Destroy this obstacle with your Slime Gun, so you'll be allowed to head inside. Continue exploring nearby rooms until a new cut-scene is displayed on your screen.
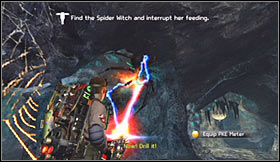
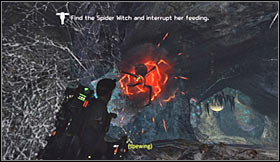
Once again you must use the PKE meter to scan your surroundings. Your objective here will be to find out where the boss is hiding. Wait for the Spiderwitch to appear and take her scan before engaging her in an open combat.
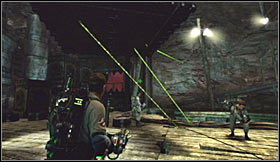
Remember to keep moving, so you won't be an easy target. Keep attacking the queen with Boson Darts. It would also be a good idea to upgrade your Proton Gun prior to this boss battle. Don't forget to vent your weapon frequently, because you can't afford any mistakes, such as allowing your weapon to overheat.
Once the queen has lost a few health points you should notice that she ran away. Don't even bother using your PKE meter to find her. Instead go back to the area where you've seen a couple of cocoons. You must attack the queen before she fully regenerates her life energy, because otherwise you would start this fight from the beginning.
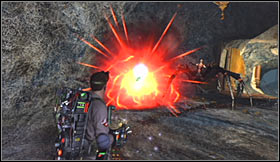
You won't be surprised by anything new from now on. Keep attacking the witch using Boson Darts and follow her each time she tries to regenerate in order to prevent her from regaining health points. Focus only the boss once you're close to a win. Killing the queen will end this mission.
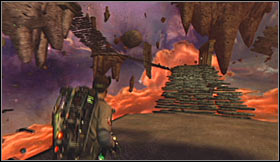
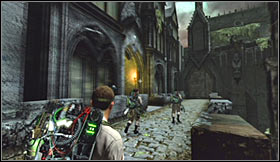
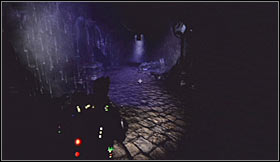
Level walkthrough: Make a few steps forward and listen to what your team members have to say. Turn around and choose the Slime Gun from your inventory. You must now use the ropes to grab a large crane. Attach one end of the rope to a wooden platform and the other one to the ledge you're standing on.
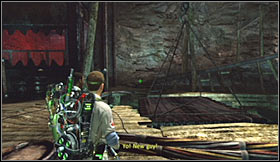
Notice that the crane has to be turned by almost 180 degrees, so you must keep using the ropes. Remember to attach the ropes to different objects from the environment. Eventually you'll have to stop the platform near the abyss and it'll lower itself automatically once the ropes disappear. Use this platform to get to a narrow ledge.
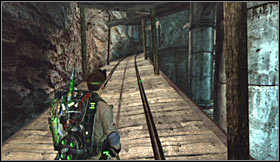
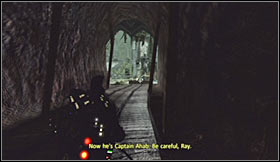
Start moving forward, but watch out for a mine cart which will appear rather unexpectedly in front of you. Thankfully all you have to do here is to move away from the train tracks and you'll be fine. Head on to the next area to find yourself close to a large statue.
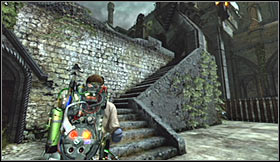
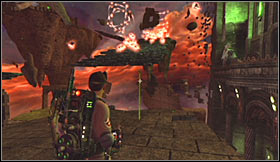
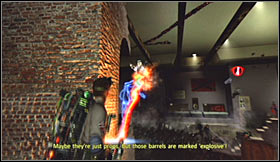
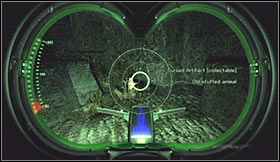
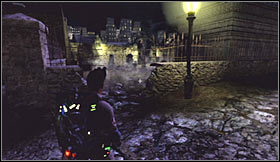
It's important that you explore the area to your right. Destroy the barrels and use your handy PKE meter to find the first artifact - Church of Gozer Songbook. Proceed towards the castle seen in the distance and use the stairs to get to the large wall.
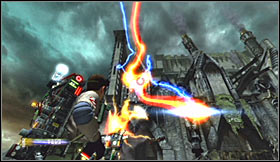
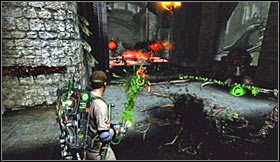
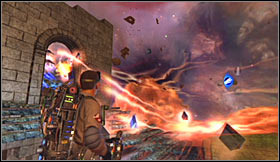
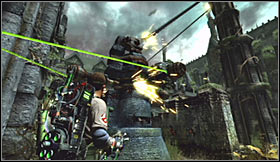
Make a few steps forward and get ready to defend yourself against a large group of gargoyles. The easiest way to get rid of the gargoyles is to keep using the Dark Matter Generator, however a Proton Gun will also do the trick. Once the gargoyles are gone you'll have to take care of Venom Crawlers. Slime Gun is the only reasonable choice here. Keep moving slowly and neutralize red portals found along the way.
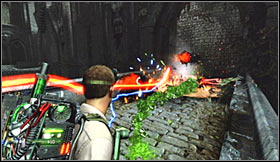
Keep heading towards a new passageway, eliminating anything that will stand in your way. Eventually you'll reach a large gate, but once again you won't be allowed to head inside right away. Don't worry, because you'll open the gate soon enough. For now use the stairs to reach a small labyrinth.
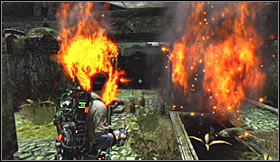
Obviously you should start exploring the labyrinth. Don't forget that you can set the hedge on fire and in some cases this will allow you to explore otherwise inaccessible areas. Use your PKE meter here to find the location of the second artifact - Anguished Stuffed Bear.
Find a large device with a chain attached to it. Choose the Slime Gun from your arsenal and start using the ropes in order to activate this machinery. It shouldn't be a problem, as long as you attach the other end of the rope to nearby walls. Watch out, because you may be attacked by new monsters in the meantime, including previously fought Black Slime Ghosts and Black Slime Fiends.

Secure the area and then head back to the stairs. This time you'll be allowed to step through the large gate in order to explore the rest of the temple. Proceed directly to your right and witness a new cut-scene. Once the cut-scene has ended start running forward while remaining on the upper balcony.
Ignore smaller corridors found along the way. Eventually you should be stopped by a large wall. Locate a wooden fragment and destroy it using Boson Darts. Enter a small chamber afterwards and locate the third artifact (Fox Hunt on Tiamat Island) with your PKE meter. Return to a large door which you've probably noticed along the way. Try choosing this passageway and you're going to be stopped by ghosts.
Turn around and inspect a large structure located in front of you. There are some Black Slime Ghosts in the area and you'll soon have to defeat them. Watch out for Black Slime Fiends as well, because they will appear on the balcony. Use your trusty Slime Gun to defeat both types of phantoms and keep fighting until the large gates opens again.

Notice that you're alone after the cut-scene and this means that you'll have to be more careful from now on. Head forward and then turn right. Get rid of the black slime and then find a small tunnel located on the right wall. Once you've found a larger room get ready to defend yourself against a large group of Venom Crawlers.
You'll now have to find the entrance to the next tunnel. Get to the junction and choose a tunnel located to your right. Take out your PKE meter upon your arrival in the next room and scan the area to find the fourth artifact - Wheel of the Alabaster Wretch. Get ready to eliminate a new group of smaller creatures once the object is in your possession.
Return to the tunnel and choose the only unexplored passageway. If you have some difficulties navigating through the sewers be on a look out for areas where new crawlers will appear and you'll know that you're travelling in the right direction. Exit the tunnel and go through several larger rooms where you'll encounter more monsters.

Eventually you should be able to reach a large chamber filled with black slime. Your objective is to get to the other side of the room and this can be accomplished by staying close to the left wall. Stop once you're close to a wooden bridge and choose the PKE meter from your inventory. Scan one of the objects to find weird markings.
The object you've just scanned must be lowered and this of course means using the capture stream of your Proton Gun. Don't aim directly at the metal object, but at a small mechanism located next to it. Notice that new enemies have arrived in the meantime and a new Black Slime Monster will be among them. Take a scan of this beast before the fight starts.
The new monster you've just encountered is very similar to the golems you've fought before. The good news is that it's less resistant, because it'll die soon after you start using your Slime Gun. Just make sure that you don't let it get too close and you'll be fine. You can now start shooting at smaller creatures. Don't forget to close the portals, so they won't keep appearing endlessly. Locate a new tunnel entrance when it's safe.
Start running forward. You won't be making any unwanted stops here, because you'll encounter only one small group of spiders along the way. Once the spiders have been eliminated explore the corridor to your right and use the PKE meter to find the fifth artifact - Ghostbusters DVD.
Continue exploring the sewers. Thankfully you won't have to worry about getting lost, because there's going to be only one passageway leading to your current destination. You'll encounter several groups of monsters along the way, but killing them is going to be easy. Get to a larger area and approach a nearby sarcophagus to rescue one of your allies.
Use the stairs to reach an upper balcony and find a passageway leading to the next big room. Remain on the ground floor and keep heading forward. Turn left once you've gone past the first large tank and use your PKE meter to find the last sixth artifact - Singing Slime.
You may proceed to the upper balconies. Find a new portal located on a nearby wall and approach it. Obviously you'll have to be ready to defend yourself against new monsters, including flying ghosts. I would recommend closing all the portals before you engage phantoms in an open combat. Once it's safe follow your colleague to the next room of the facility.
Start off by opening a second sarcophagus which is going to be located to your right. You can continue exploring the area once a new member has been added to your team. Just as before, focus on closing the portals. Prevent the beasts from surrounding you and it shouldn't be too difficult to win. You'll only have to watch out while going against a large slime monster.
Proceed towards the elevator when you're ready to move on and use it to reach the upper balconies. You must now choose a narrow passageway leading towards the stairs and you'll end up standing inside a chamber with a huge machine. Approach the round object and scan it with your PKE meter.
Solving this riddle is going to be easy. Notice three yellow spheres moving in two directions. Stop your character near the lowest point of the first sphere. You'll have to destroy this object by attaching a rope to it. Attach the other end of the rope to the ground. If you've done everything according to the plan the sphere will come crashing down. Repeat these actions with two other spheres, because one of these objects was already destroyed when you got here.
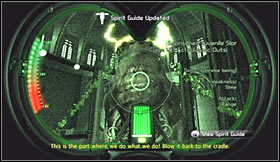
Listen to a short conversation and notice that this chamber is being flooded with black slime. As a result you'll have to use the nearest staircase to get to an upper balcony. Wait for this entire room to be flooded and that's when the main boss of this level will appear. Obviously you should take a quick scan of the Imprisoned Juvenile Slor.

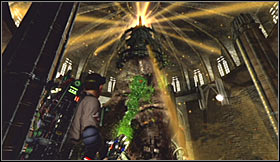
The first phase of this battle is by far going to be the easier one. All you have to do here is to use your Slime Gun to destroy all floating eyeballs located near the creature. You'll then witness bright light and you'll also advance to the second phase.
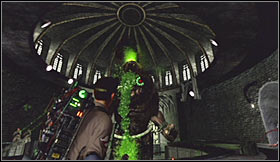
You'll now have to start running while you remain on the balcony. This will allow your colleagues to attack the beast without having to worry about it fighting back. Don't forget to dodge often by pressing a special key, however you can also be using pillars for cover. Eliminate new eyeballs whenever you see them on the balcony.
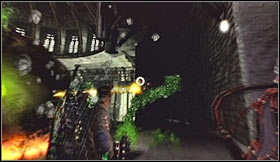
Watch out for new stains on the ground and neutralize black slime if you have a free moment. You'll also be given a chance to inflict extra injuries to the boss, because the creature will lose balance from time to time. Aim for the glowing eye while using the Slime Gun. Keep repeating all these locations until the boss loses all health units.
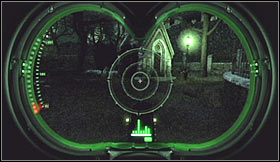
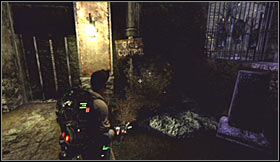
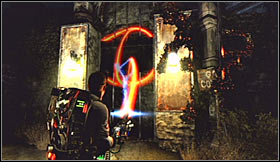
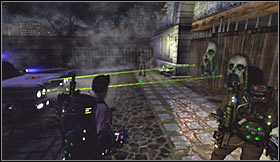
Level walkthrough: Head forward after you've started the mission and you'll find a gate with three skulls. Examine this entire area with your PKE meter and it shouldn't take too long for you to find the first artifact - Whistling Bust of Mausch. Move back a little and locate a hole in the brick wall to enter cemetery grounds.
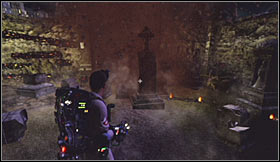
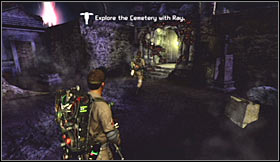
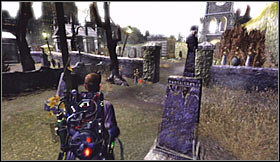
You may now start exploring your surroundings freely, especially since you won't encounter any monsters here. Ignore graves coming out of the ground, because you can destroy them easily with your primary weapon. Eventually you should be able to get to the section filled with more graves.
Continue moving forward. You shouldn't have any problems finding the correct path, because you'll be surrounded by obstacles from all sides. Focus on reaching a small chapel. Approach the entrance and notice skulls flying out of the building. They won't attack you and you won't have to take any scans, because the skulls are already in your database.
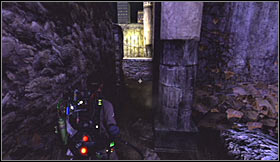
Don't enter the mausoleum right away. Instead head over to your left and inspect the area around a smaller crypt. Naturally, you must use your PKE meter here to uncover the location of the second artifact - Ghostbuster's Mug & Balloon. Go back to the mausoleum, enter it and use the stairs.
Get rid of the black slime and then use your Proton Gun to unlock a nearby passageway. You'll be dealing with similiar obstacles in the area, but thankfully destroying them is going to be easy. Focus on finding the exit from this tunnel complex. This will allow you to reach an isolated area of the cemetery.
I assume that you may have some problems figuring out the next step. Stand in front of a GATE CONTROL sign. You'll have to use your capture beam on the metal object. Once you've captured it press the key responsible for the slam attack. This will allow the object to touch the ground.
Notice that Ray has joined you and you'll have to follow him into a new crypt. Once again you'll be allowed to move fast, because you won't encounter any ghosts here. Choose a very narrow passageway located next to the fence. Watch out, because the next area of the cemetery is being guarded by hostile creatures.
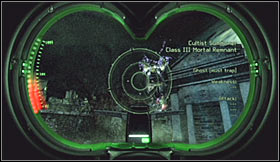
Obviously you should begin by taking scans of two unknown creatures - Grave Fiends and Cemetery Crawlers. You'll also be dealing with Cultists, but you've already had a chance to add them to your database. During the battles focus on keeping Ray alive, because if he gets knocked down you can also die easily and it'll be game over for you both.
I would recommend that you keep using the Proton Gun, because this weapon will be effective against all kinds of threats, so you won't have to switch guns too often. Don't forget that you must trap Cultists if you want to get rid of them for good. Also - neutralize nearby portals as soon as possible, so it'll stop more monsters from crossing dimensions.
Destroy large obstacles located between two street lamps. Doing this will allow you to get to the next area of the cemetery. Set fire to a hedge and explore the area near the crypt. The second artifact (Stone Angel Head) is hidden nearby.
You may proceed to the next section. Watch out, because you're going to be attacked by new ghosts upon your arrival in a slightly larger area. Notice that it usually takes a single Boson Dart to kill Grave Fiends, so you can eliminate them quickly. Pay more attention to powerful creatures, including an entirely new Cultist Summoner.
It would be a good idea to use the Meson Collider against the summoners, however the Proton Gun can also inflict serious injuries as long as it's properly used. Once you've won follow your colleagues and you'll soon end up standing in front of the entrance to a new crypt.
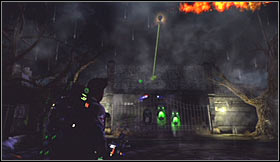
Thankfully you won't travel through an entire underground complex, because you'll soon find the exit from the mausoleum. Head forward and eventually you'll come across a large gate. Watch a new cut-scene, turn right and get ready to defeat a small group of less powerful creatures.

Remain near main paths and keep heading forward. It would be a good idea to memorize this route, because you'll be travelling in the opposite direction soon enough. Find the missing object on the ground and pick it up using the capture beam. You must now start moving back to the large gate while holding the key in the air. Watch a new cut-scene.
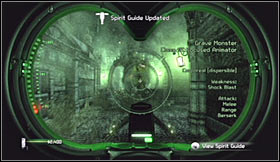
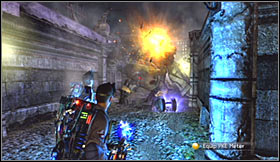
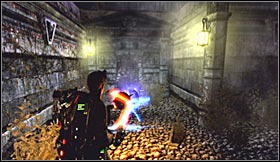
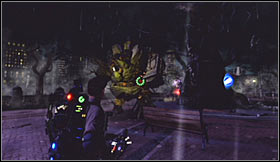
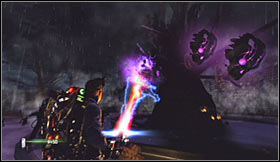
Obviously you should start off by taking a scan of the Grave Monster. Head back and keep firing at the beast using the Dark Matter Generator. I guess you may be surprised to hear that your enemy is not that powerful, so it shouldn't take too long for it to die. Make sure to maintain safe distance while fighting the monster, so you won't be heavily injured.
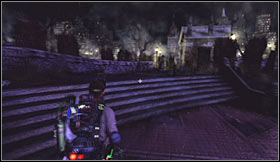
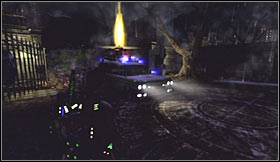
Pick up the glowing object again and proceed towards the gate. Thankfully it will be automatically placed in one of the slots once it's close enough, so you won't have to be very precise. Watch a cut-scene and use the stairs to exit the crypt. Turn right and make a few steps forward.
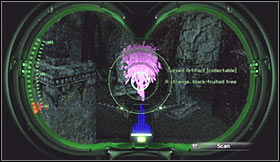
Make sure to choose the PKE meter from your inventory. Explore the surrounding area, because the fourth artifact (Ghostfruit Tree) is hidden behind one of smaller crypts. You may now begin moving towards a much larger tower seen in the distance. Find a passageway leading to a square with a large fountain where you'll encounter new monsters.
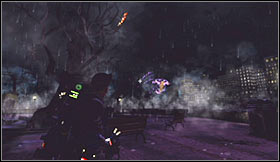
You'll have to take part in a series of challenging fights here. The first phase of this battle will require you to direct your attention to eliminating smaller creatures. All the beasts will use flying coffins to get to your position. Don't forget that a single Boson Dart will kill most of them. Watch out for Cultist Summoners at the same time, because their attacks are quite powerful.
The second phase will feature Flying Skulls and a new Grave Monster. Destroying the skulls should be easy. As for the large monster, attack it from a larger distance and don't forget that there's only one ghostbuster with you, so you must heal him when he's heavily injured. Otherwise you would risk losing this battle.

Secure the square and once it's safe proceed towards an unexplored area of the graveyard. You'll probably encounter smaller beasts nearby, but killing them should be easy. A large monster will appear near one of the crypts. Kill it and choose the passageway it was guarding from you.
Your next objective here is to find a small section of a metal fence. Approach the fence and you'll notice that a new monster is heading tour way. Get rid of the beast using the same methods as before and explore the area where you've first seen it. Use your PKE meter here on a brick wall and get ready to defeat yet another beast.

You shouldn't have any major problems killing this monster. Watch out, because soon after it's dead more Cultist ghost will appear near your position. Make sure to set up a lot of traps, because it's the only way to get rid of them. Keep heading forward until you get to a passageway with Ecto 1 parked on the other side of the fence.
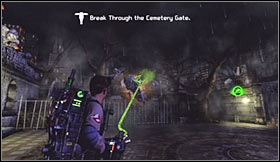
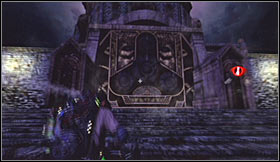
Proceed to your right, approach a smaller gate and destroy a wall made out of skulls which will be located to your right. Notice that a new passageway has been unlocked and obviously you should choose it. Destroy some of the nearby roots in order to enter an underground complex and keep pushing forward until you find a larger cave with a waterfall.
You'll probably notice some coffins floating in the water. Approach them and you're going to be attacked by a large group of less powerful creatures. Use Boson Darts or standard streams to get rid of them. Once it's safe destroy new roots which will be located to the left of the pond.
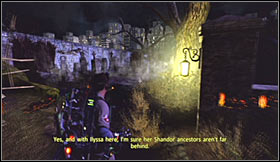
It would be a good idea to choose the PKE meter along the way, because you'll soon end up inside a cave with the fifth artifact (The Skull of Ivo Shandor). Collect this item and destroy other obstacles. It shouldn't take too long for you to get to the next cave, but you'll come across even more monsters there.
As you've probably noticed, there are new portals near your position and you should neutralize each portal as soon as possible. Prevent the monsters from surrounding you and once they're gone find a way to exit the cave system. Approach a large gate and check one of the alcoves to the left. Doing this will allow you to collect the last sixth artifact - Archangel's Gallbladder.
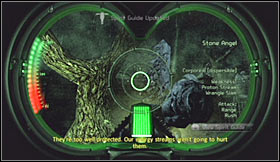
You should now examine the gate where Ecto 1 is currently parked. Listen to a few short statements made by your colleagues and get ready to defend yourself against Stone Angels. Naturally, before you attack the angels, make sure to take a scan of one of the monsters.
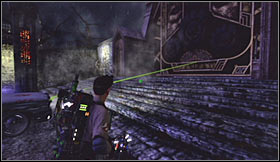
Ignore hints provided in your ghost database, because you'll have to use the rope (Slime Tether ability) to move on with this mission. Each time you start a new action you must catch the angel with your rope. Attach the other end of the rope to a brick wall located ABOVE the gate (the one with glowing skulls). Watch out for enemy attacks in the meantime, because they can be quite nasty.
Keep repeating all of these actions until all three skulls are "turned off". If you've done everything according to the plan Ecto 1 will be able to destroy the gate to reach your position. Approach the second gate and connect it to the vehicle. You'll probably have to use two ropes to succeed. Enter a new area and keep heading towards a large entrance seen in the distance.
Get closer to the stairs and wait for Ecto 1 to arrive. Start off by performing similar actions to those you did a few seconds ago, so you should connect the hood of the car to the gate. Sadly in this case you won't be allowed to move on with the mission that easily, because the vehicle will die on you. Instead you'll have to defeat a lot of angry spirits.
I would recommend that you focus most of your attacks on the Cultist ghosts. Don't forget that you can use the Slam Dunk ability to eliminate them with a single action. Aside from these powerful ghosts you'll also be dealing with smaller creatures and they will use a nearby passageway to get to you.
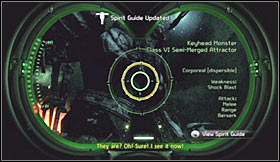
New stone angels will join this fight later on. You should keep using the Slime Tether ability to get rid of them, especially since you won't be restricted while attaching the rope to the objects from the environment. Once you've won you'll notice that Keyhead Monsters have awakened. Take a scan of one of the statues.
The best weapon to use against the statues is the Dark Matter Generator. Use the same tactics as before, so you should be firing at them from a SAFE distance. Thankfully both statues will explode rather prematurely, so this isn't going to be a long fight. Once they're gone eliminate a few smaller creatures which may have arrived here in the meantime.
Your next task will be to transport two glowing objects which were left off by the huge statues. Pick up the first item using the capture beam and then move it towards a hole located next to the gate. Follow these instructions with the second "key" and you'll be allowed to head inside. Naturally, you'll be a target for new monsters at the same time. You can defeat some of these creatures yourself or you can rely on your colleagues.
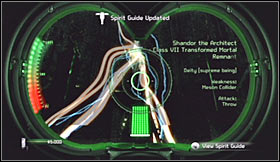
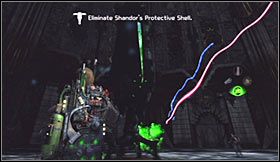
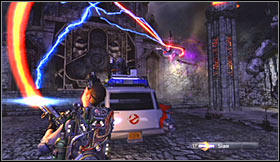
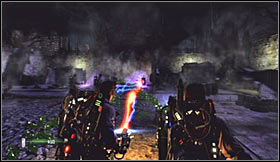
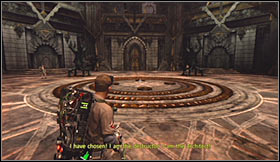
Watch a new cut-scene and take a scan of the final boss of the game - Shandor the Architect. Ignore him for the moment and position yourself close to one of levitating objects. You can now assist your colleagues in inflicting damage to Shandor, however watch out for his counterattacks. They're quite deadly and you can't afford getting hit too many times.
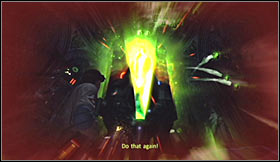
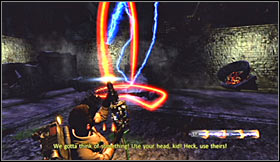
You'll have to wait for Shandor to lose enough health points to initiate a regeneration process. Notice that a large crystal has opened. Use this opportunity to destroy it with Boson Darts. Make sure to keep your friends alive while trying to defeat Shandor, because his single attack may result in at least one of them receiving life-threatening injuries.
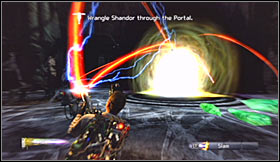
I guess you won't be too surprised to hear that you'll have to repeat these actions with three other crystals. Each time stay close to a crystal and keep attacking Shandor until he decides to heal himself. Once he's lost almost all health points use your capture beam to move him towards a glowing portal.
You've now advanced to phase two of this duel. Wait for a large structure you're standing inside to lose its roof. Don't worry, because you won't have to avoid any falling objects. Remain where you are until Shandor appears in his true destructive form.
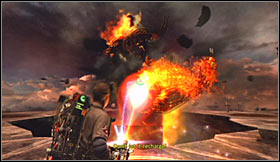
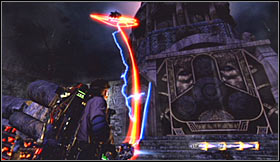
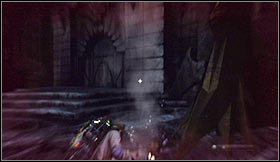
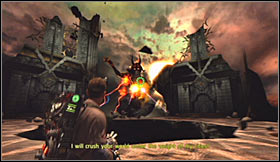
I would recommend that you choose the Meson Collider from your arsenal. Begin by firing at the boss. Avoid huge boulders being thrown at you by Shandor, because you may end up getting killed if you get hit by one of these objects. The same goes with a flame wall, however in this case it's much easier to move away from a dangerous area.
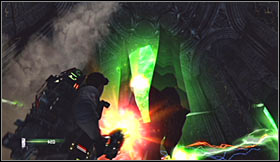
Shandor will naturally try to heal himself once he's lost a couple of health units. This means you'll have to use your guns to destroy floating objects appearing around him. Keep firing at the towers from a distance while running towards them.
It all goes down to one thing - you must inflict more injuries than Shandor is able to take back. Sooner or later he'll die and that'll be the end of the game. Congratulations on finishing the singleplayer campaign!
...And You Want to Keep It?
Requirements: Acquire a cursed artifact.
Comments: You'll find more than 40 artifacts throughout the course of an entire singleplayer campaign, so you can accomplish this task very soon.
Aim for the Flat Top!
Requirements: Eliminate a hostile creature.
Comments: You can fulfill this assignment during your first stay in the Sedgewick hotel when you get rid of the first Candelabrium Crawler.
Are You A God?
Requirements: Finish the game on the highest difficulty setting.
Back Off Man. I'm a Scientist
Requirements: Scan all ghosts.
Comments: Remember that you can monitor your progress using the REPLAY MISSION function, because the game will inform you how many ghosts have you scanned. Check my main guide to find the locations of all the phantoms and remember that only full scans count.
But the Kids Love Us!
Requirements: Find out the secret of the children's study.
Comments: This challenge is tied directly to the third mission of the game (public library). Start off by reaching the study designed for children. You'll have to perform three activities here. Head on to your right. Approach the tree and use your PKE meter to scan a bear.

You must now explore the central area of the room. Examine the floor and it shouldn't take too long for you to find the drawing. Scan it with the meter.
Finally, proceed towards a door leading to the left room. Stand near the door and fire a single Boson Dart to unlock this passageway. Enter a small room and take a scan of a new toy. You'll receive this achievement soon after you've scanned the last object from the list.
Disaster of Biblical Proportions
Requirements: Finish the seventh level of the game (Central Park Cemetery)
Get Her!
Requirements: Finish the third level of the game (Public Library).
Ghost Fever Grips New York
Requirements: Finish the fourth level of the game (Museum of History)
Ghostbusters Drinking Game
Requirements: Drink water from eight fountains.
1) Firehouse
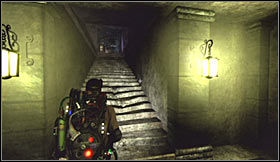
Location: This first fountain can be found next to the stairs leading to the basement.
2) Sedgewick Hotel
Location: You have to be in the lobby area. Check one of the side corridors near vending machines. You'll also find a cursed artifact nearby (possessed bell).
3) Sedgewick Hotel
Location: During your exploration of the flooded corridors get to the elevators. The fountain can be found in the corner to your right.
4) Times Square
Location: This fourth fountain is located to the right of the exit from the laundromat (beginning of the mission).
5) Times Square
Location: Explore one of the hallways of the skyscraper. You'll find the fountain just as you're about to enter a larger room with one of the artifacts.
6) Public Library
Location: The sixth fountain is in the hallway leading to children's study. It's very easy to find.
7) Museum of History
Location: You can find this device in a long hallway and you can get there not long after using the Slime Gun to uncover a secret door.
8) Return to Sedgewick Hotel
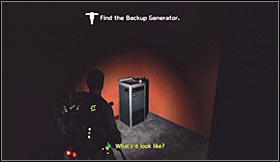
Location: The last eighth artifact is located near the generator room. You'll find it as soon as you've left the kitchen.
Comments: Completing this assignment will require you to drink water from eight different fountains. These objects are hidden in the first five levels of the singleplayer campaign (including the tutorial mission). Use the description and pictures seen above to find them which shouldn't be a problem. If you decide to use the Replay Mission feature to get to the missing fountains make sure to reach a new checkpoint after drinking water, because otherwise your progress won't be saved and you'll have to try again.
Heat 'Em Up
Requirements: Purchase all upgrades for the Proton Gun.
Comments: Proton Gun is by far the most useful weapon in the game, so I would recommend purchasing at least some of the upgrades as soon as possible.
Hedgebuster
Requirements: Burn down the labyrinth during your stay in the castle.
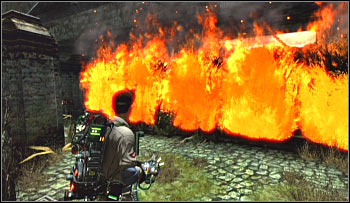
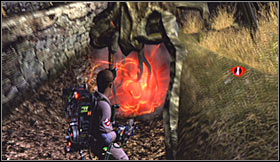
Comments: This challenge is tied directly to the sixth mission of the game (lost island). Start off by getting to the castle and finding the labyrinth. You must now burn ALL the hedges using your Proton Gun. You can't miss any of these objects. Thankfully the labyrinth itself is rather small, so it won't take too long. You'll be given your reward after you set fire to the last hedge.
I Ain't Afraid of No Ghost
Requirements: Trap your first ghost.
Comments: You can complete this objective during the tutorial segment.
I Don't Want My Face Burned Off
Requirements: Purchase all upgrades for the Meson Collider.
Comments: This is the last weapon you'll get your hands on and it's not that useful. As a result you should focus on upgrading other guns first and leave this one for later.
I Feel So Funky
Requirements: Allow Slimer to knock you down.
Comments: There shouldn't be any problems completing this assignment, because sooner or later you'll be slimed by the ghost. This will probably occur during the tutorial mission or during your first stay in the hotel.
I Looked at the Trap, Ray!
Requirements: Trap 20 ghosts.
Comments: Don't forget to set up your own traps, because only those will count. If you're lucky you'll end this challenge long before the end of the game.
I Love You When You Rough-House!
Requirements: Destroy an office space during your visit to the Times Square.
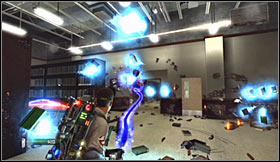
Comments: This challenge is tied directly to the second mission of the game (Times Square). Soon after you've escaped the boss you'll end up exploring a skyscraper. Wait for the team to reach an upper floor and you'll enter a room with one of the artifacts in the corner. Destroy EVERYTHING you see here, including windows and tiles on the nearby pillars. You'll receive the achievement while trying to leave this area through a nearby door.
I'm a Ghostbuster, Not a Doctor!
Requirements: Heal your colleagues 20 times.
Comments: There shouldn't be any major problems completing this objective, assuming that you're playing on normal or high difficulty settings. Each time you see wounded colleagues get to them as soon as possible and press the action key to heal them. You can also "allow" some of the ghosts to inflict injuries to your colleagues, without attacking the phantoms right away.
I'm Picking Up A Signal...
Requirements: Scan a ghost.
Comments: You can end this challenge easily by scanning a Slimer during your stay in the Sedgewick hotel.
I've Quit Better Jobs Than This
Requirements: Get rid of the black slime found in a small storage area of Sedgewick hotel.
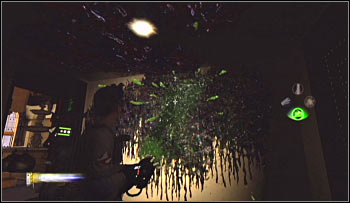
Comments: This challenge is tied directly to the fifth mission of the game (return to the Sedgewick hotel). You must first locate the switch in the generator room to get the power running back again. Afterwards return to the lobby and find a small room with one of the cursed artifacts. You must now use your Slime Gun to get rid of the black slime from all nearby surfaces.
It's Slime Time
Requirements: Use Slime Tether ability on 15 ghosts.
Comments: This is an easy challenge and you shouldn't have any problems completing it. Keep attaching ropes to encountered ghosts. You can attach the other end of the rope to a surface of your choosing, because it only counts that they're eliminated.
Kosher!
Requirements: Cook a ham found in the ballroom.
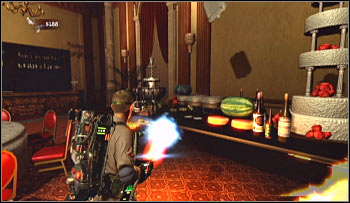
Comments: This challenge is tied directly to the first mission of the game (Sedgewick hotel). During your stay in the hotel you'll have to reach a large ballroom. Find the long table where Slimer was seen for the first time and cook the ham with your Proton Gun. If you can't find it destroy everything from the table. :-)
Let Me Guess, Gozer Worshippers
Requirements: Finish the sixth level of the game (Lost Island).
Mother Pus Bucket
Requirements: Purchase all upgrades for the Slime Gun.
Comments: You won't be allowed to use the Slime Gun early on during the course of the game, but you shouldn't ignore this weapon. It's useful in getting rid of obstacles and ghosts, so you should purchase at least some of the available upgrades.
Nice Shootin', Tex!
Requirements: Finish the game with less than 100000 dollars of property damage.
Comments: This is by far the most difficult challenge of the game and you can only fulfill it if you decide to finish the game for the second time. It's EXTREMELY important that you choose the lowest Casual difficulty setting. Doing this will allow to rely more on your teammates and the ghost themselves will die quickly. Each time you attack a new ghost focus on NOT hitting any objects from the environment by mistake. You should also ignore using some of the more powerful abilities, such as Boson Darts. Try to outsmart your opponents by moving back from areas filled with destroyable objects. Thankfully you'll always be informed whether you've hit something or not and if you caused too much damage reset your console to start again from the last checkpoint. The only good news is that you won't have to worry about causing damage during the last two missions, because the action there won't take place in populated areas.
One down, on the Ground!
Requirements: Destroy a flying coffin.
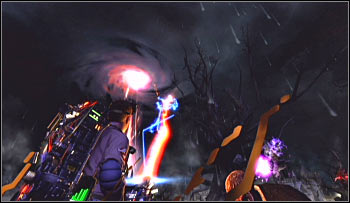
Comments: This challenge is tied directly to the last seventh mission of the game (Central Park cemetery). You must reach a large fountain that's going to be guarded by the ghosts. Notice that coffins are landing in this area and monsters are using these objects to reach your current position. You must destroy one of the coffins with your Proton Gun BEFORE it touches the ground.
Once S'more into the Breach
Requirements: Finish the second level of the game (Times Square).
Slam Dunk!
Requirements: Trap a ghost using Slam Dunk ability.
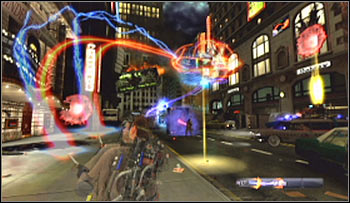
Comments: Make sure that you've purchased Slam Dunk Trapping ability from the upgrade menu. Capture a ghost using your Proton Gun and then slam it. Naturally, a trap must be set up under the ghost in order for you to succeed. This is a very useful action, because it allows you to skip the last phase of the ghost capturing process.
Slime Dunk!
Requirements: Trap a ghost using Slime Tether ability.
Comments: The ghost must be weakened before you're allowed to trap him with this ability. Attach the opposite end of the rope to the trap and the ghost will be sucked in.
Somebody Saw a Cockroach on 12
Requirements: Finish the fifth level of the game (Return to Sedgewick Hotel).
Spores, Molds and Fungus
Requirements: Find all cursed artifacts.
Comments: Read my guide in order to find out where to look for the artifacts (blue color in the text).
Stasis Dunk
Requirements: Trap a ghost using the Dark Matter Generator.
Comments: It would be a good idea to accomplish this assignment while fighting a less powerful ghost. Weaken the spirit so its energy bar will be in red and then slow it down using the generator. Place a trap under the slowly moving spirit and it should be sucked in without being able to fight back. I would also recommend trying to complete this assignment while you're alone, because otherwise your colleagues may interrupt.
The Destructor
Requirements: Finish the game with more than 3 million of property damage.
Comments: You shouldn't have any problems reaching this limit during your first playthrough (on normal or high difficulty setting). The best area to collect money for destroying objects from the environment is the Times Square, because you'll receive up to 60-70 thousand dollars for each vehicle/bus. You can also wreak havoc during your stay in the museum, especially while exploring themed exhibits. Remember that you can't gain any money during the last two levels.
The Flowers are Still Standing
Requirements: Finish the first level of the game (Sedgewick Hotel).
Total Protonic Reversal
Requirements: Stun yourself with your own weapon.
Comments: You can fulfill this assignment as soon as you've been given a Proton Gun. Stand close to a wall, so it won't take too long.
We Be Fast! They Be Slow!
Requirements: Purchase all upgrades for the Dark Matter Generator.
Comments: I have to admit this wasn't my favorite weapon and so I would recommend buying only the essential upgrades and spending the rest of your money on other weapons from your arsenal.
We Came, We Saw...
Requirements: Finish the game on the lowest or on the normal difficulty setting.
We Have the Talent
Requirements: Finish the introductionary level of the game (Firehouse).
We Have the Tools!
Requirements: Purchase all upgrades.
Comments: If you're lucky you'll earn enough money to buy all the upgrades long before the end of the game (probably during your second visit to the hotel or while exploring the island).
You Gonna Try This Pole!
Requirements: Slide down on the fire pole.
Comments: You can fulfill this objective as soon as you've started the game. There are two poles in the firehouse. Read my main guide to find out their locations.
You Never Studied
Requirements: Learn about the Civil War.
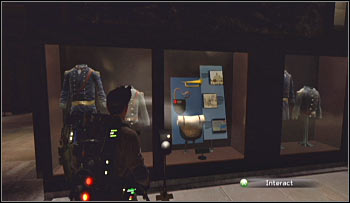
Comments: This challenge is tied directly to the fourth mission of the game (Museum of History). Thankfully you won't have to try too hard to finish it. All you have to do is to examine four objects from the Civil War exhibit. Go left upon your arrival in the exhibit, approach a large display cabinet filled with uniforms and press a button.
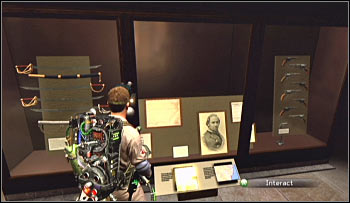
Go back to the entrance and this time examine the weapons. Just as before, you must locate a terminal and press a button to listen to commentary.
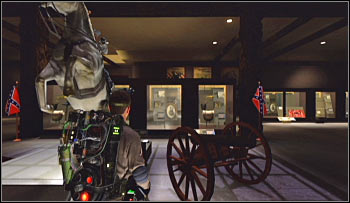
There are two more buttons for you to push and they're located near horses and cannons (central area of the room). You should receive the reward after pressing the fourth button. Thankfully you won't have to stay too long to actually listen to what the commentator has to say.
ACHIEVEMENT/TROPHY
REQUIREMENTS
Egon's Guinea Pig
Use each power-up and each element of your arsenal at least once.
Employee of the Month
Become the best player in all six multiplayer modes (Containment, Destruction, Protection, Slime Dunk, Survival, Thief).
Gozer's Most Wanted
Complete all game modes on each multiplayer map.
It's a Living!
Trap 50 ghosts during multiplayer matches.
Loans Paid Off
Gather at least 100 thousand dollars during Xbox LIVE matches.
No Job Too Big
Defeat all ghosts from the Most Wanted list.
On the Payroll
Finish a campaign on Xbox LIVE without dying.
Overachiever
Gather 250 thousand dollars during Xbox LIVE matches, complete 50 challenges and win 30 awards.
Payday!
Become the best player in all multiplayer campaigns.
Wanted!
Defeat three ghosts from the Most Wanted list.


 Gunpoint Game Guide & Walkthrough
 Grand Theft Auto Online Game Guide & Walkthrough
 Gothic 3 Game Guide & Walkthrough
 Gears of War: Judgment Game Guide & Walkthrough
 Grey Goo Game Guide & Walkthrough