
The Gears of War Judgment guide contains complete description of completing all campaign chapters along with a tactics for particular fights and tougher moments. The guide contains also tips on earning three stars in each section. The walkthrough is complemented by locations of all COG tags which can be found during the gameplay and ways of unlocking all game achievements. This guide will significantly facilitate completing the game on the highest difficulty level.
The guide contains:

The guide uses following markings:
Note!
In this part of Gears of War series weapons and enemies are generated randomly at each stage. That means that configurations of enemies encountered in the game might differ from those described in this guide.
Michal Rutkowski ()
Translated by: Maciej "Elrond" Myrcha
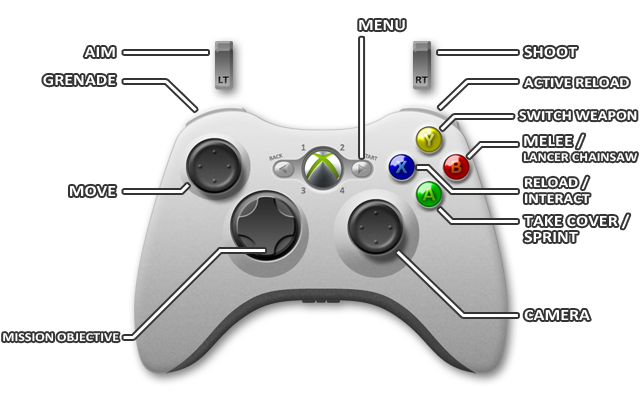

Move

Camera

Take cover
Sprint (hold)

Melee
Lancer Chainsaw (hold)

Reload
Interact (hold)

Switch weapon

Mission objective

Throw grenade

Aim

Active reload

Shoot

Menu
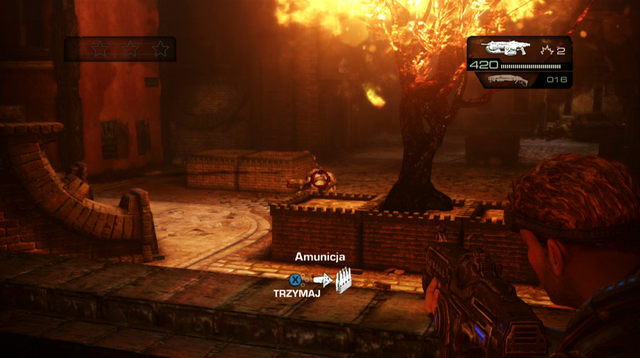
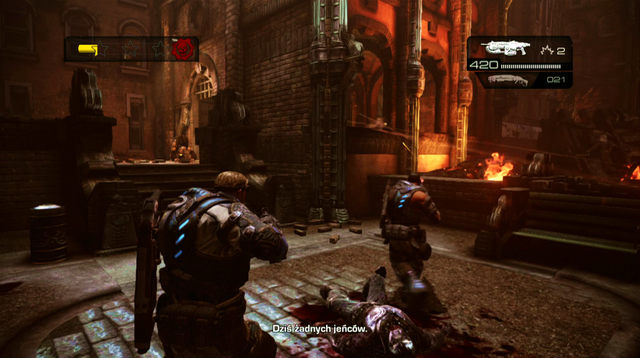
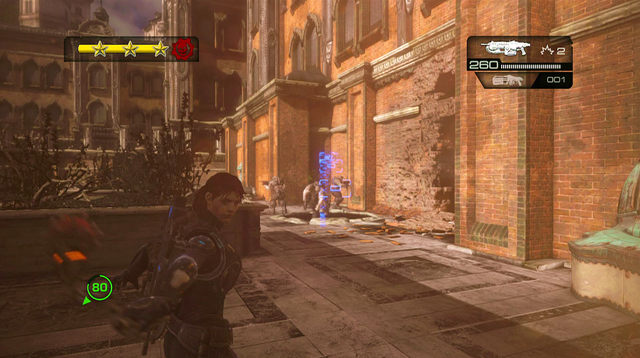
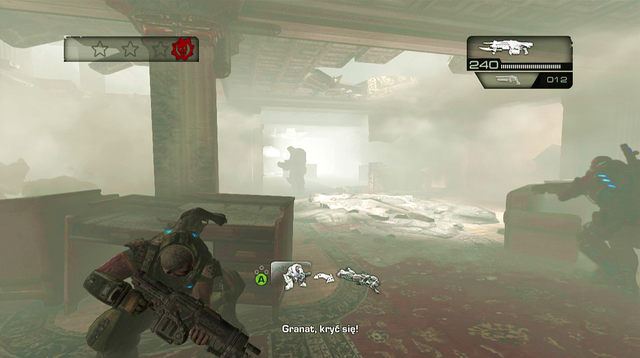
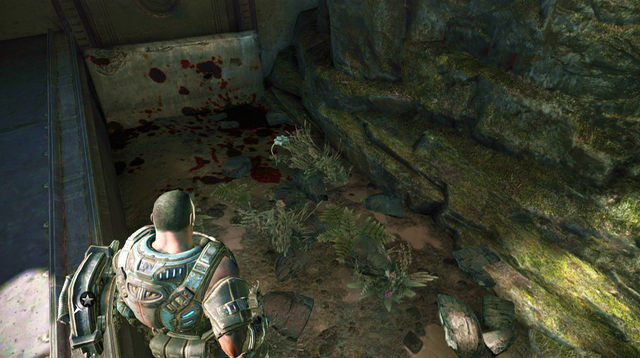
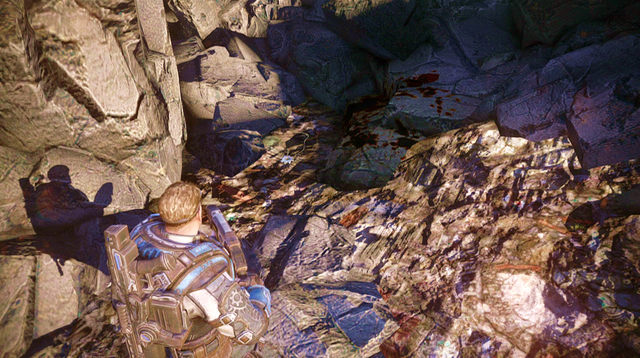
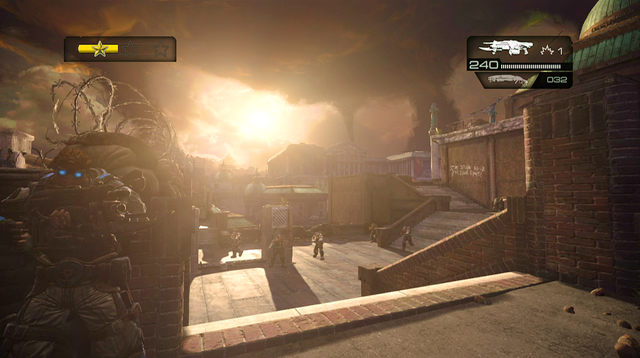
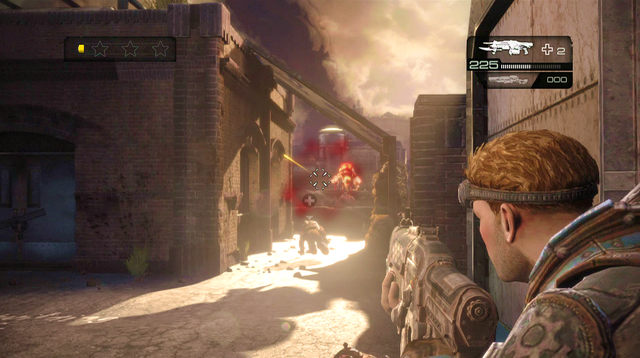
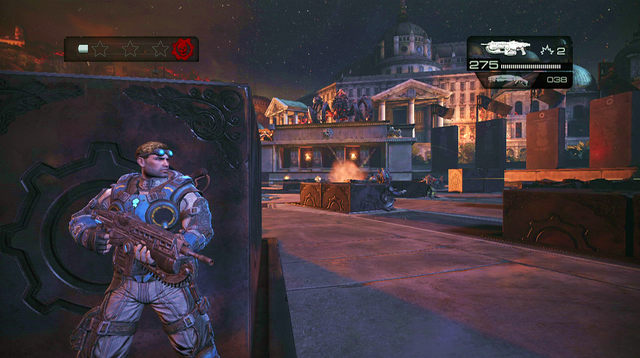
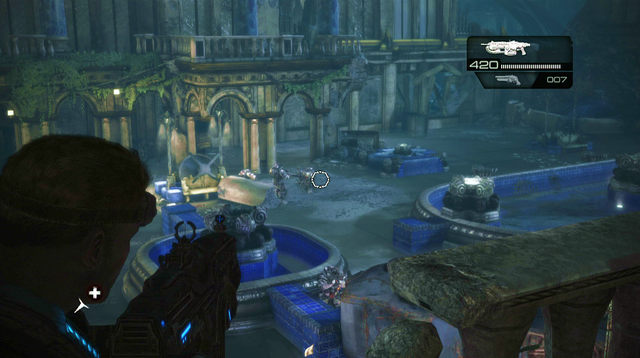
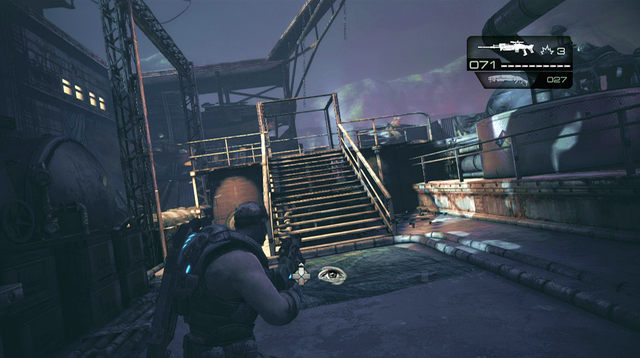
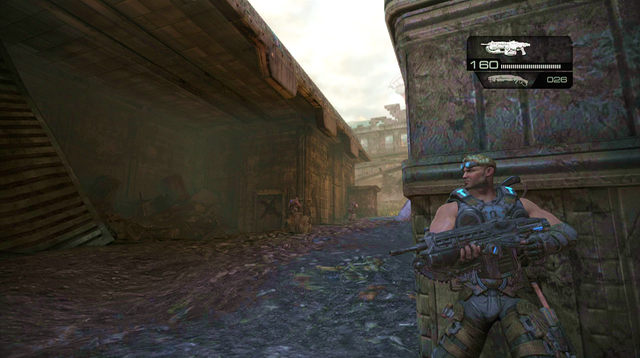
Exit the corridor and go down the stairs on the left. Turn right and remove the sofa blocking the way. Open the blocked door on the left side. Go through narrow alleys until you reach a courtyard on the left with a burning tree in the middle. Here you'll encounter a first group of enemies (including Wretches which will try to shorten the distance to you). Go down the first stairs and cover behind a low wall, where you have a clear view of enemies below.
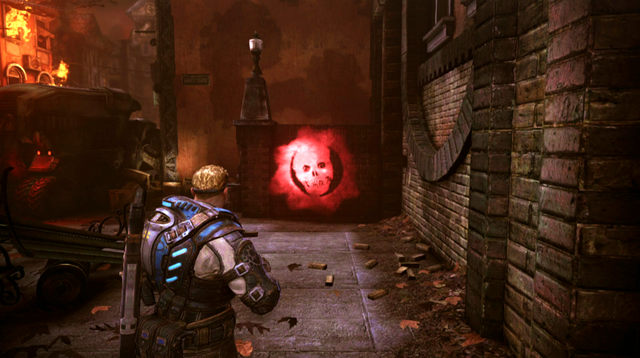
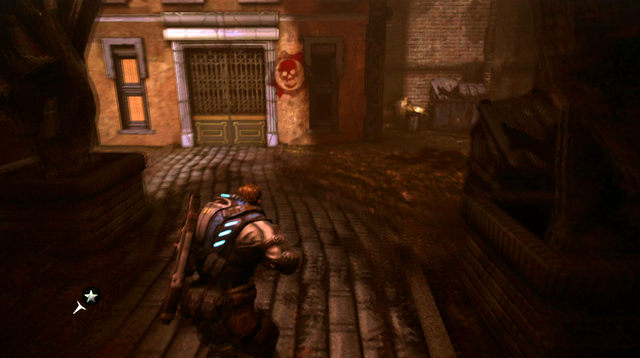
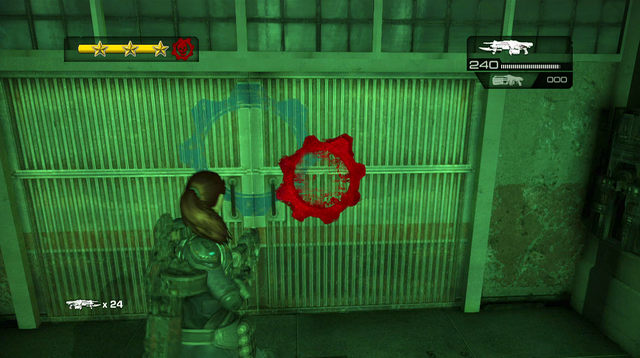
After clearing the area, go down. In the alley on the left you'll find some ammo. When you move forwards, you'll notice the symbol of first declassified mission on the wall to the right. In this stage of the game Wretches will be replaces with their dark version, which explodes after death. When one of them dies close to you, use evade to avoid damages.
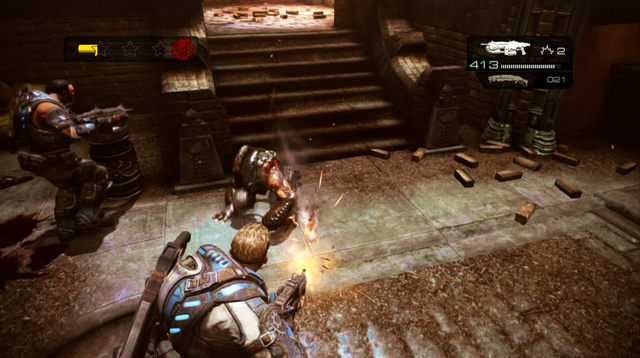
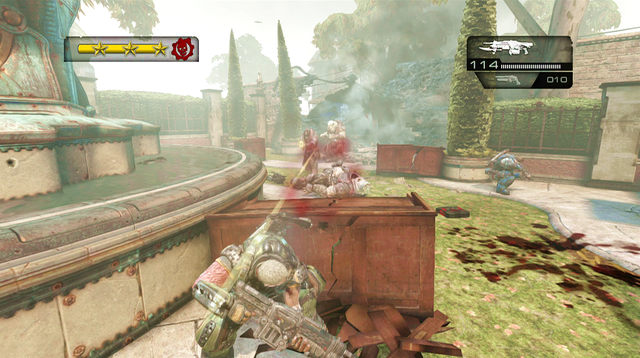
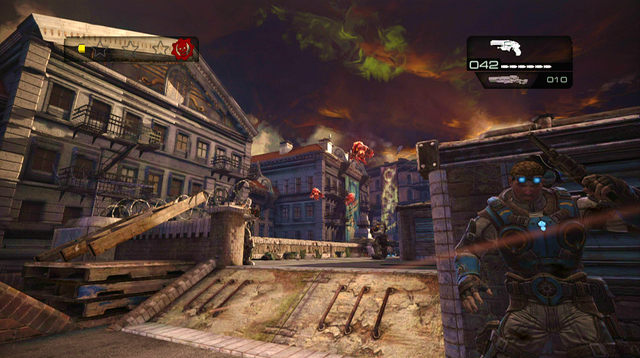
Once you find a convoy, go to the building on the left. Clear it out of enemies and go to the entrance on the left. Repeal attacking enemies at this spot, while your companions take care of the other side (AI should manage this). When the left side of the area is under control, focus on enemies behind the wall on the other side of the courtyard.
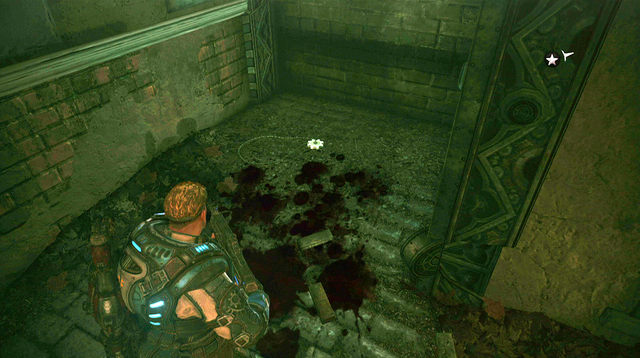
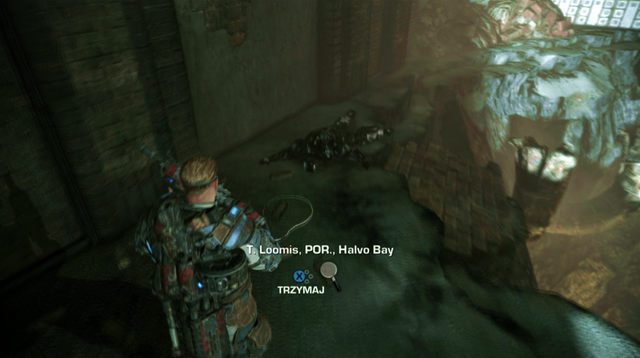
Before you move to the designated target, go to the end of the street and get behind the fence of the last house on the right. There is a COG tag in the right corner, next to the trash.
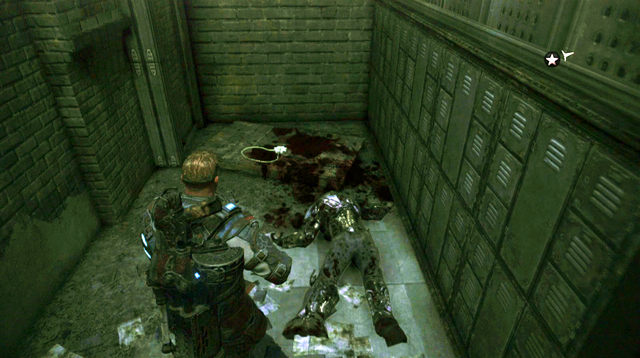
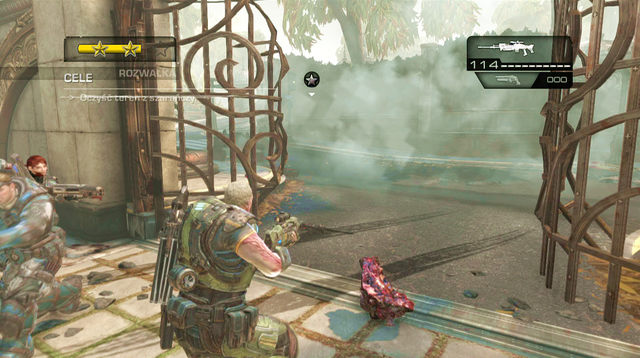
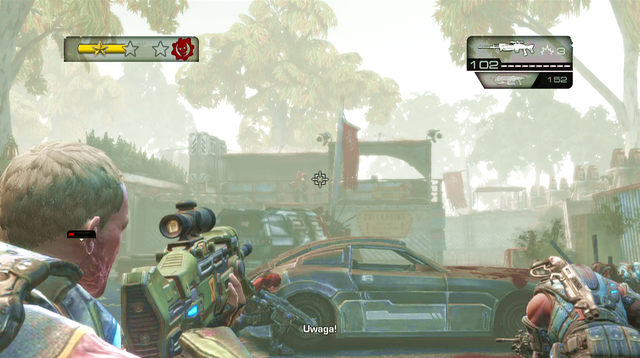
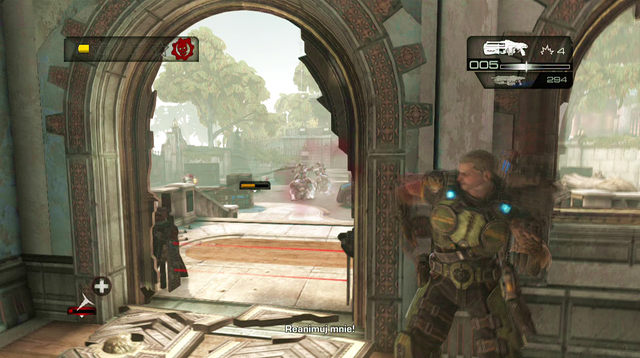
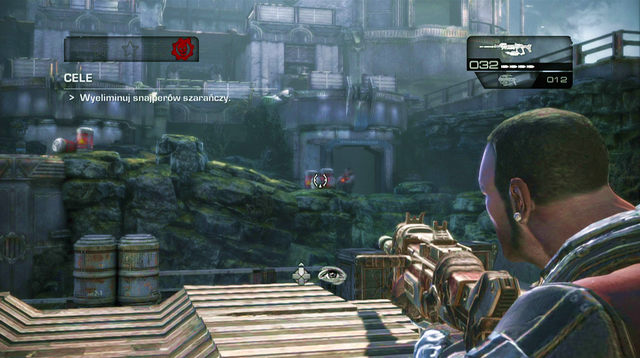
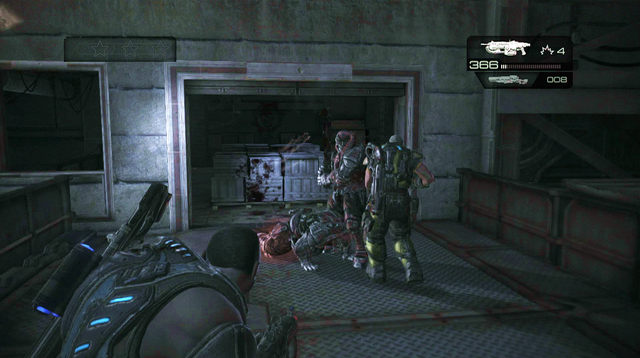
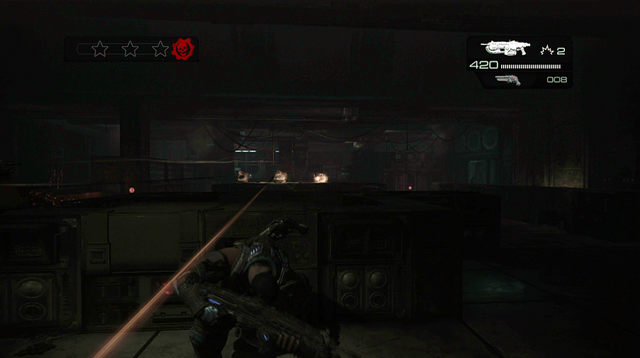
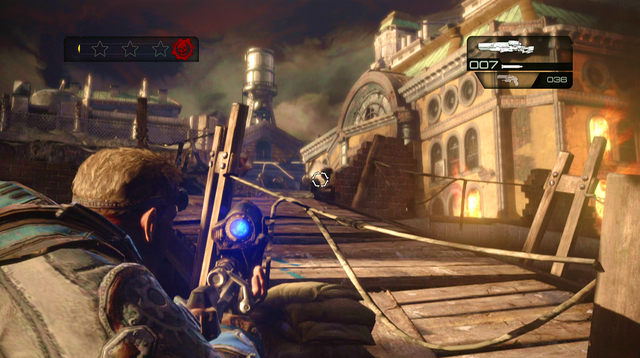
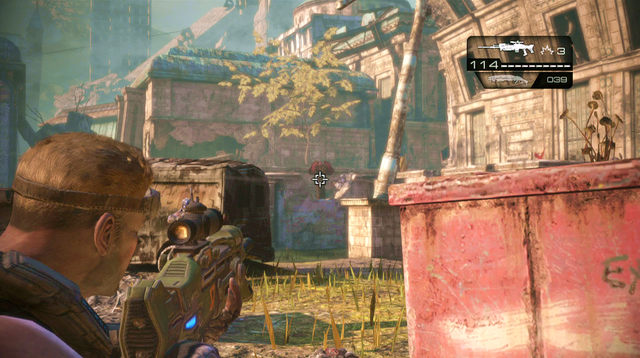
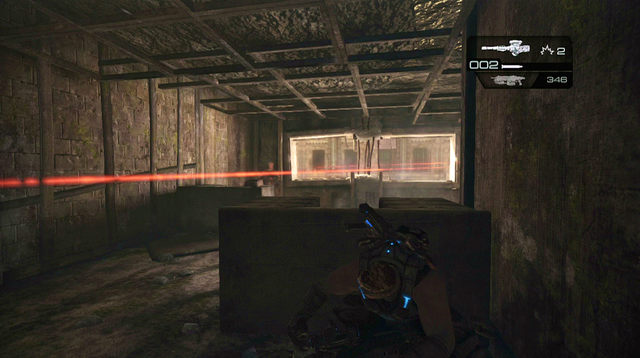
Pick up the sniper rifle which you can find at the body and a symbol of declassified mission. Before accepting it, replenish your ammo at the end of the corridor, right from the body. After accepting declassified mission you'll have three and half minutes to clear the passage to the museum. Once you start it, keep running towards your target.

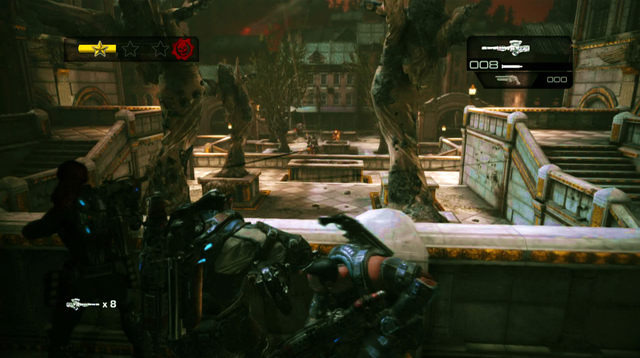
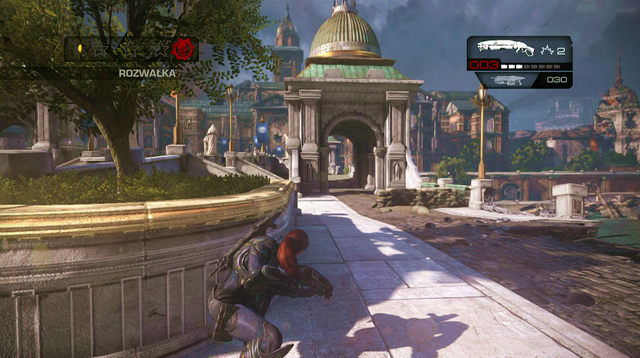
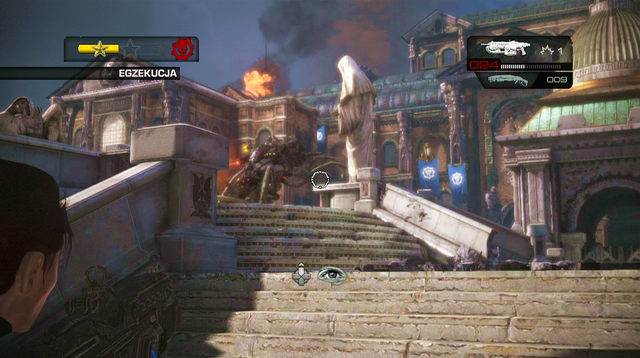
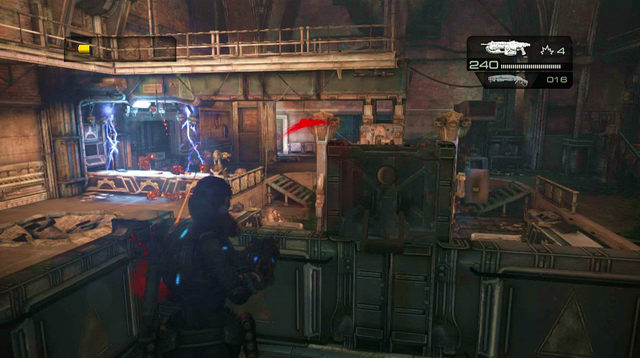
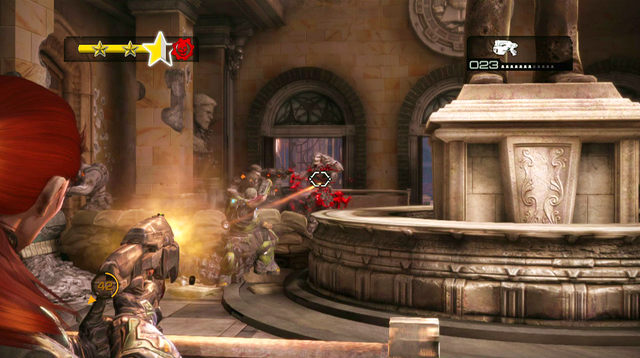
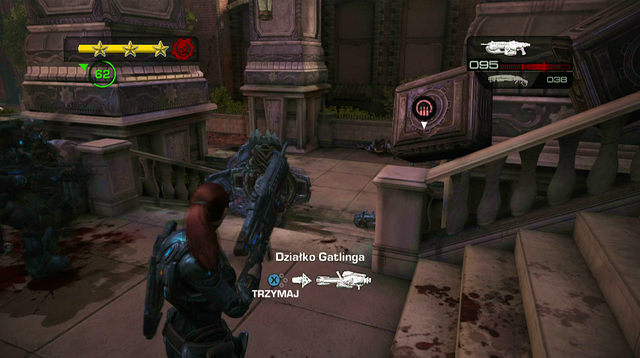
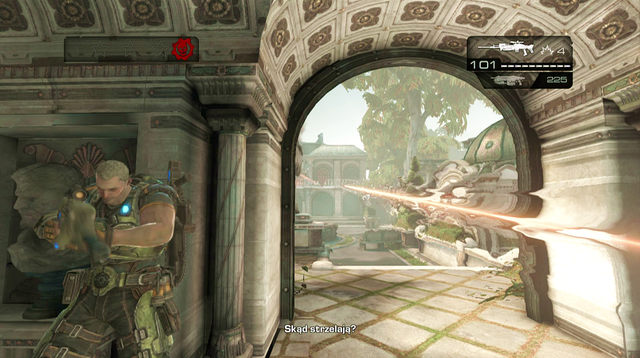
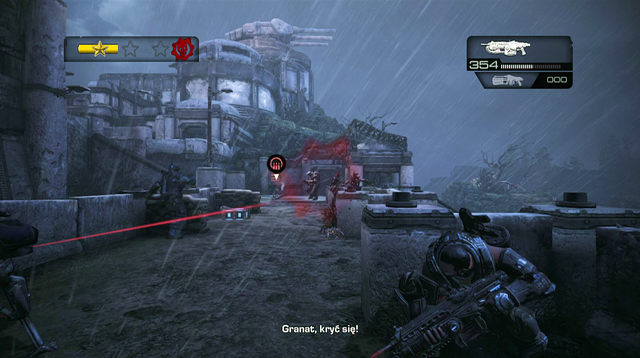
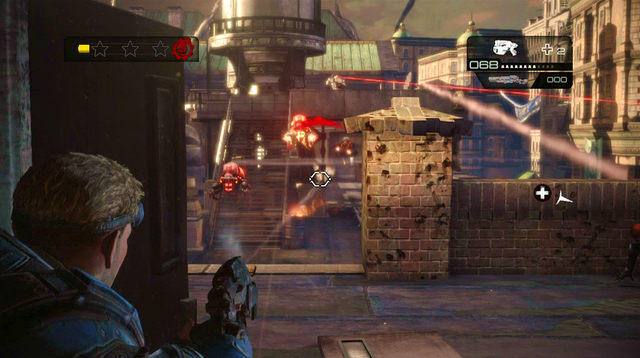
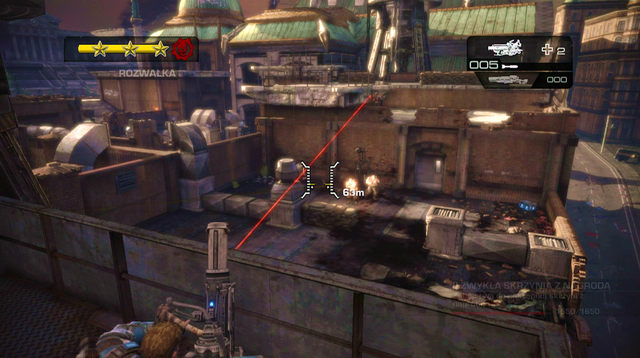
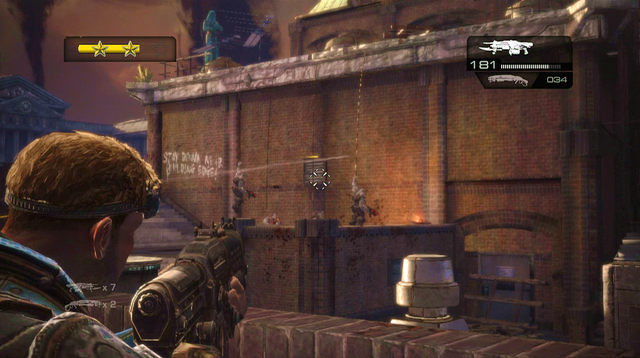
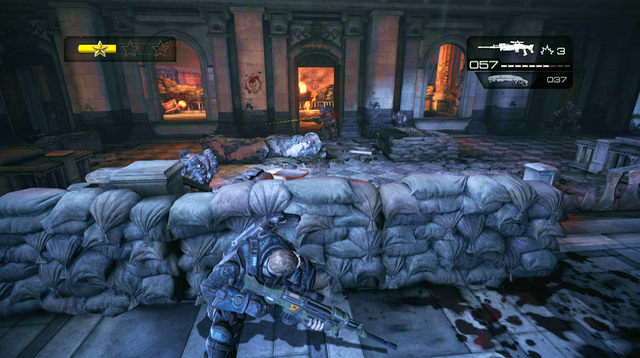
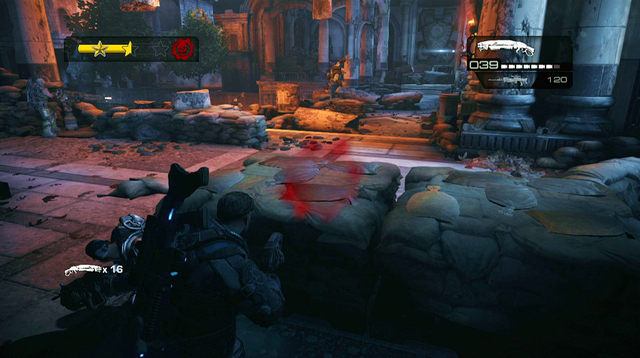
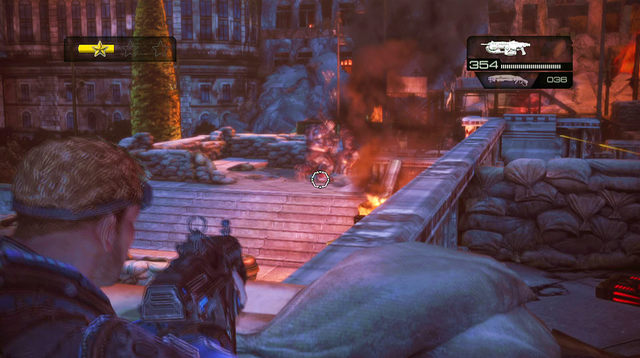
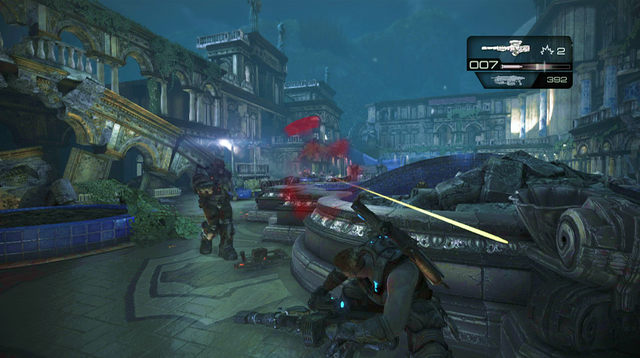
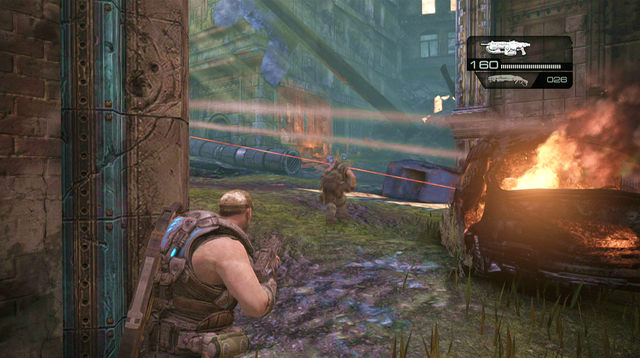
Cross the bridge to the left side and hide behind first cover. Enemies will be coming down in three waves. At the end of each one you'll have to kill Boomer or an opponent carrying Gatling gun. If you decide to go up the stairs before dealing with the third wave, enemies will stop appearing and you'll be able to move further. It is important to have at least 1:50 minute in order to clear the next area and achieving at least one and half star. In order to do this try to kill enemies with headshots using the sniper rifle and kill last of them as well as close opponents with melee attack. In this stage much depends on luck and type of enemies which will appear.
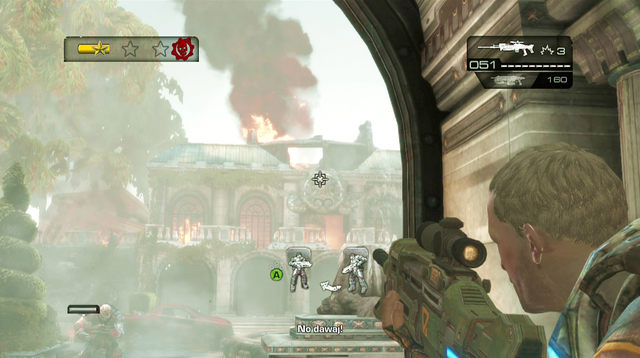
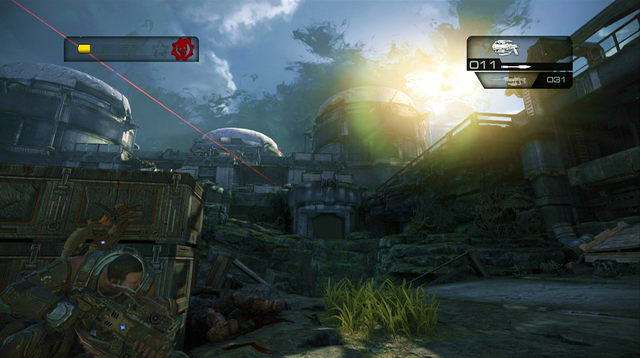
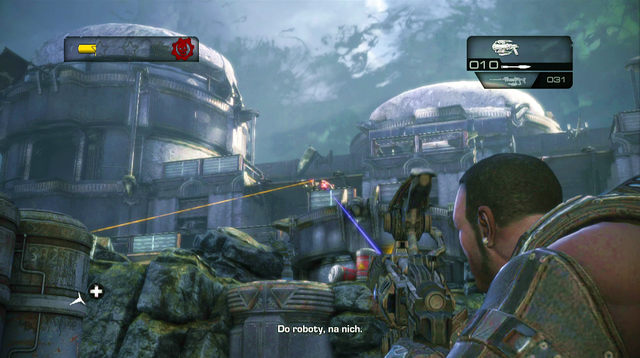
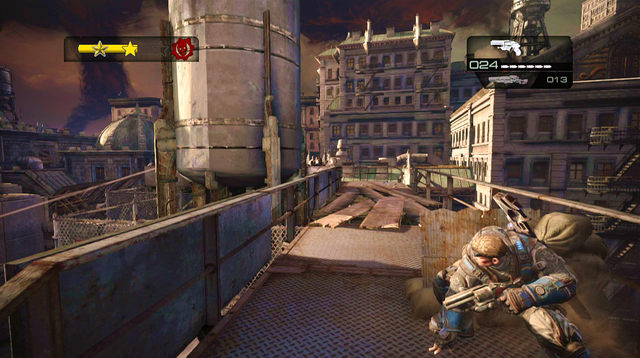
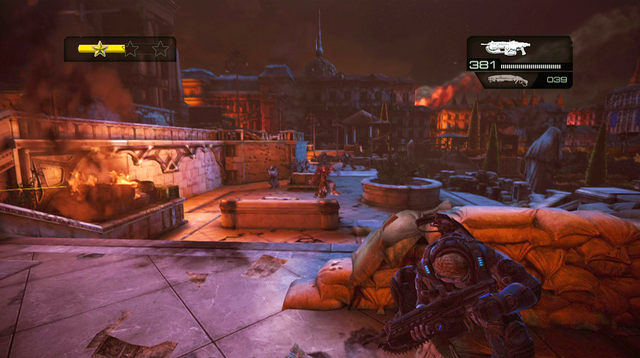
Once you get further, quickly run up the stairs on the right, because you'll find yourself under the turret fire. If you have any grenades, toss them to the square where the turret is located. After clearing the area use the mentioned turret to eliminate enemies coming out from the hole and the alley on the right. At the end Tickers and Boomer will appear through the door behind the turret. Once you kill them quickly run towards the door before the time runs out.
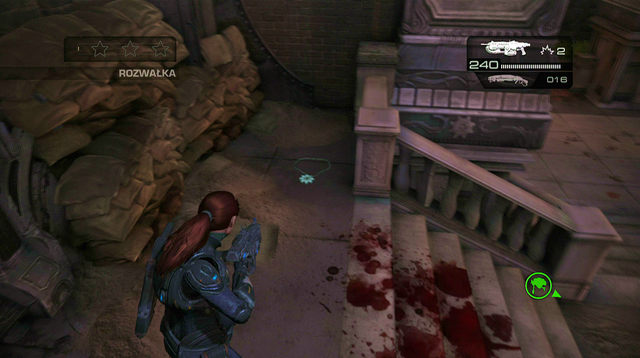
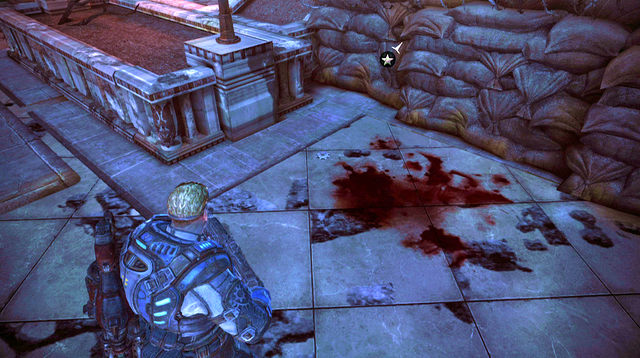
If you do not have a time limit then before ending this stage go down the stairs to the statue in lower part of this area and turn right to the alley. At its end there is a COG tag on the right side.

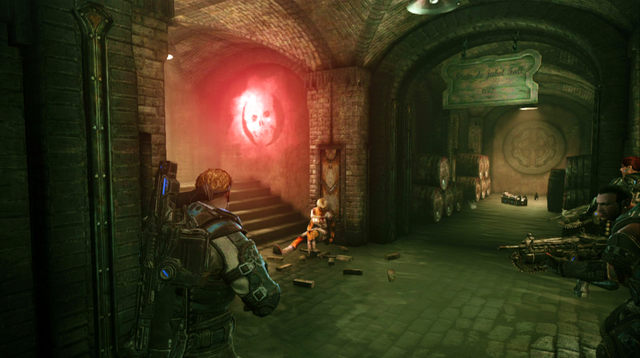
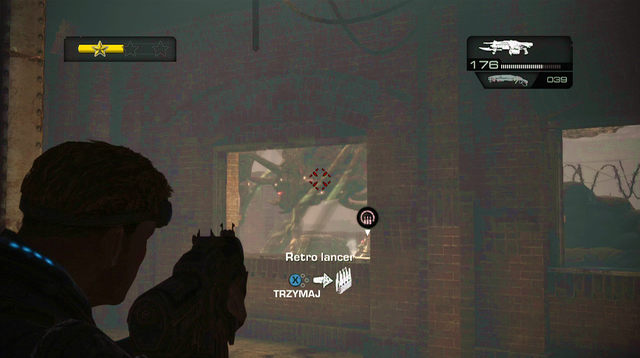
After destroying the door go right through the corridor. You'll find a symbol of declassified mission on the wall there. After accepting the mission, your arsenal will be limited to hammerbursts, sawed-off shotguns and one-shots. After destroying another door, go to the alley on the right. At its end you'll find next COG tag.

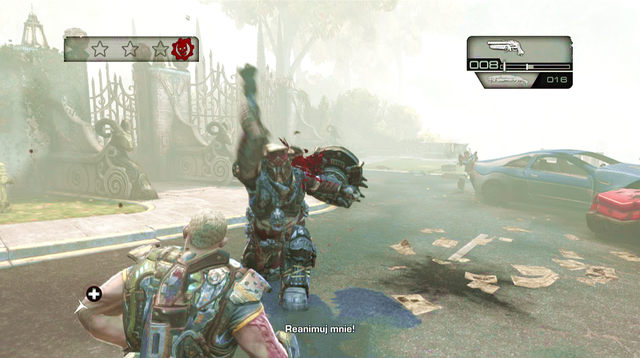
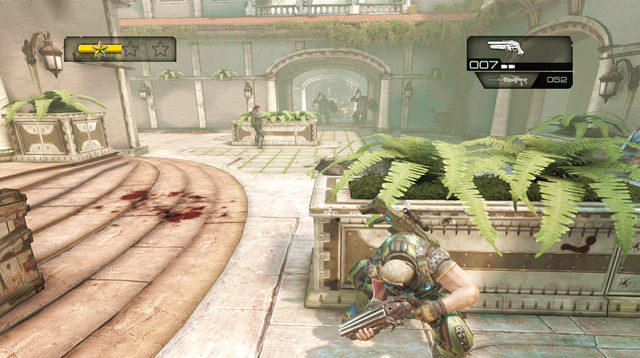
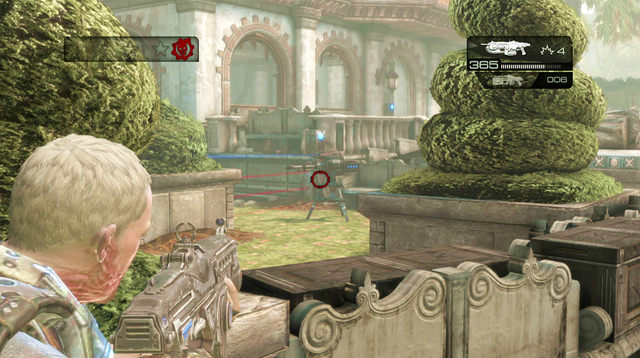
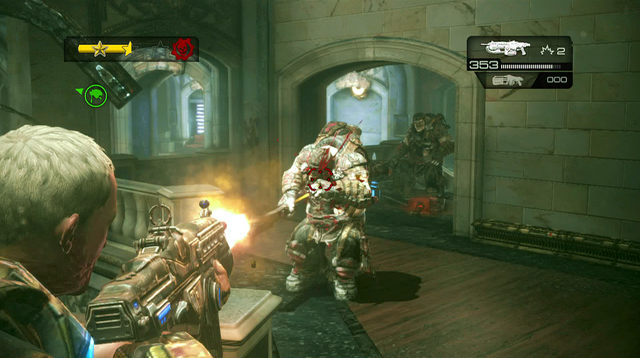
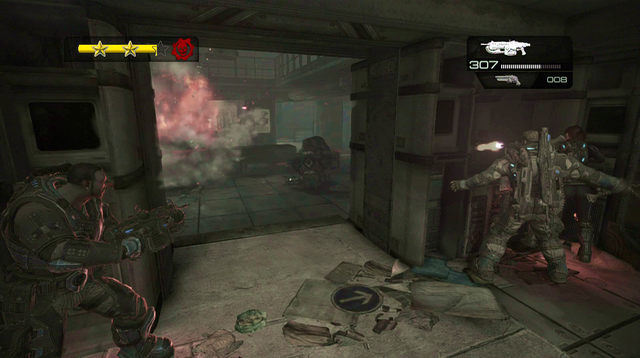
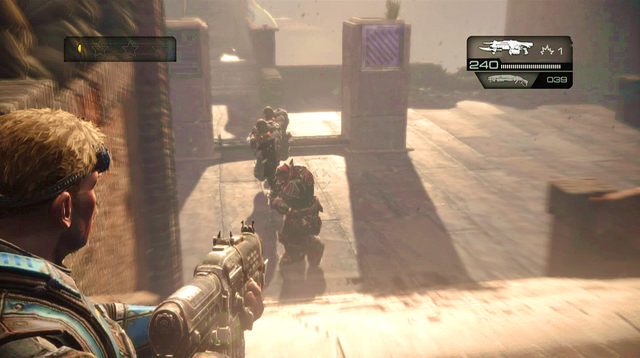
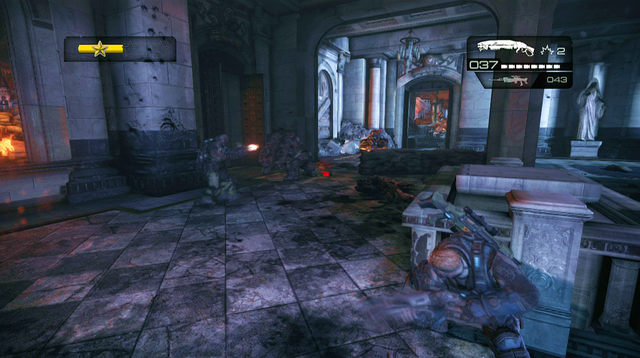
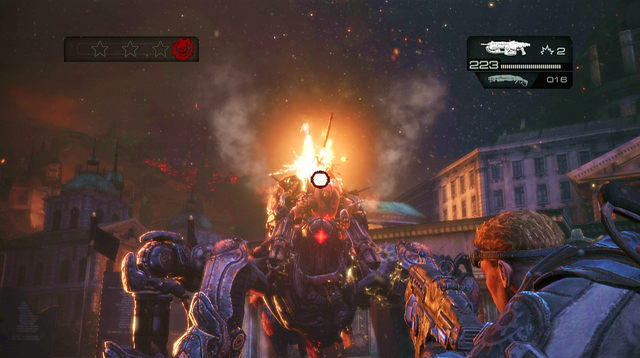
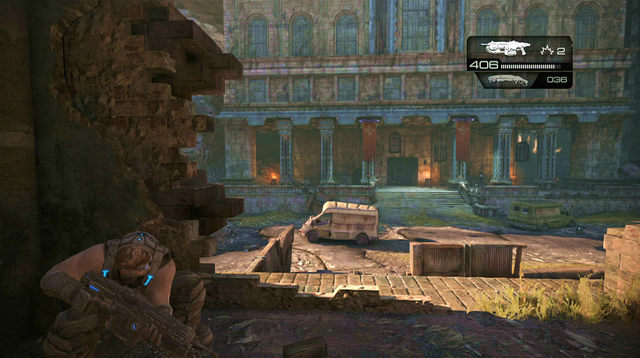
Return to the main street and head to the museum entrance. Here you'll come across healing Kantus. You should deal with this opponent at once, because he can revive dead companions. Since the mission conditions force you to use short range weapons, you have to come closer to enemies.
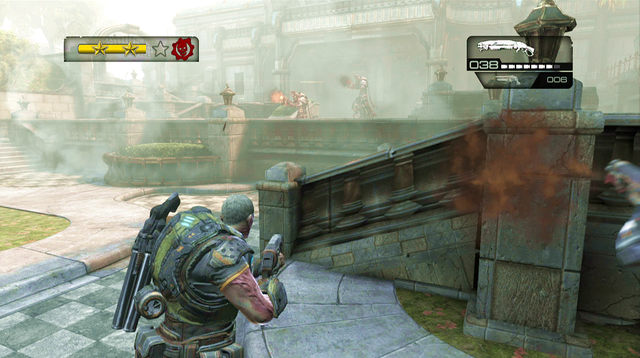
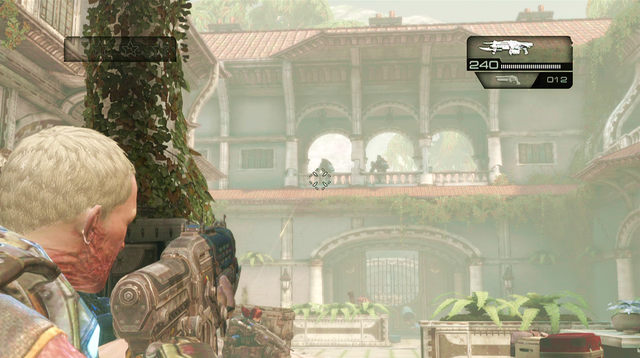
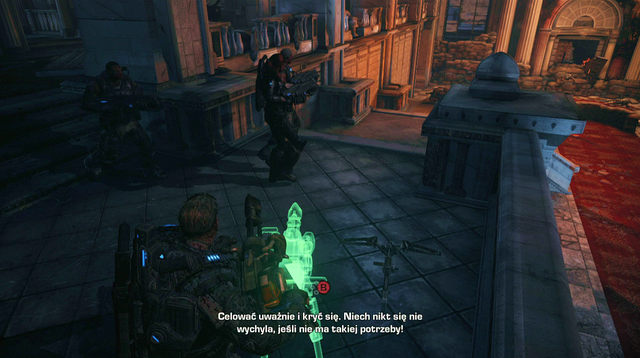
Clear the way to the stairs top, often using covers. Enemies at the top have one-shots, so be careful. Once you get in front of the entrance and clear the area, pick up the one-shot leaned against column and prepare to repeal enemies attacking you from the passage you came here. First kill Boomers and Kantuses.
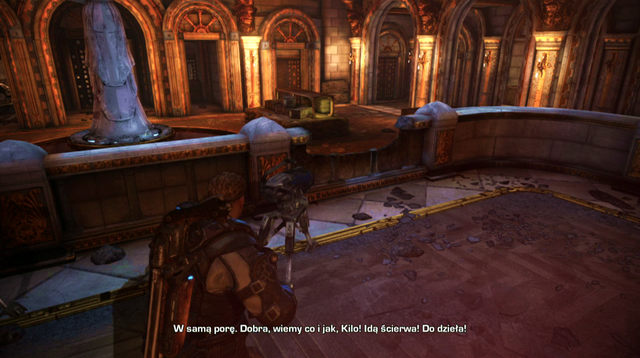
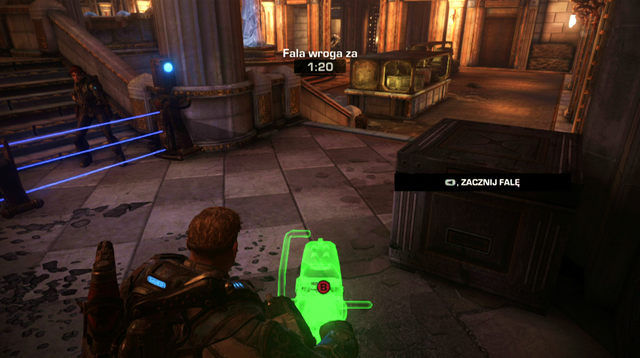
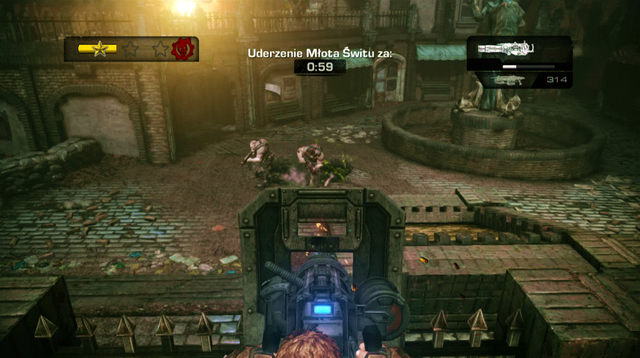
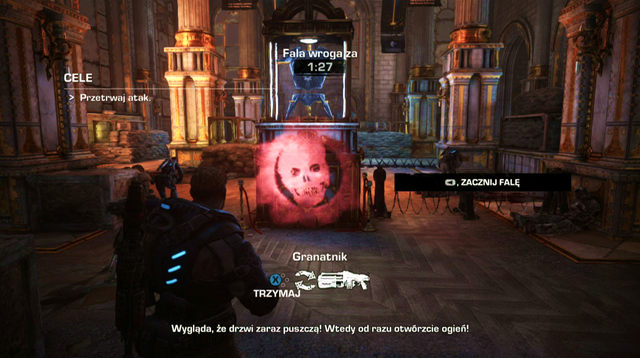
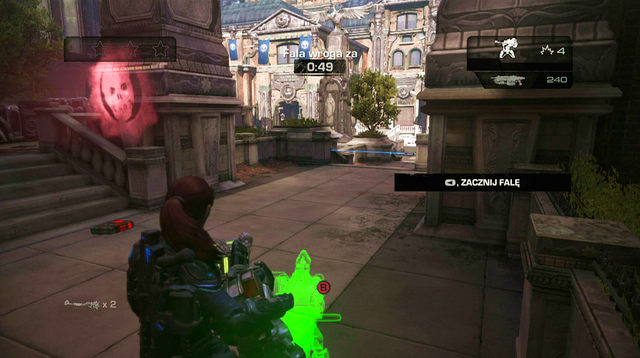
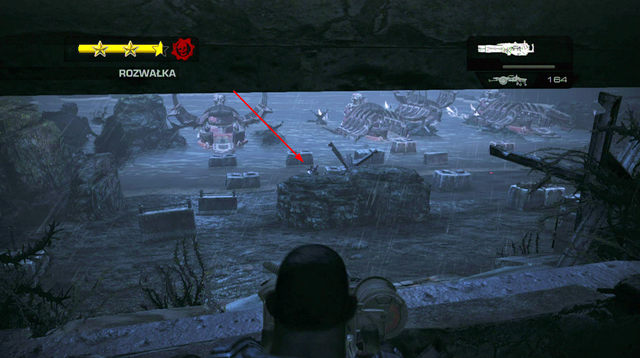
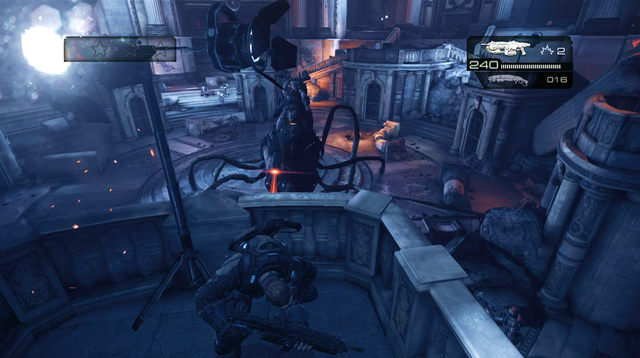
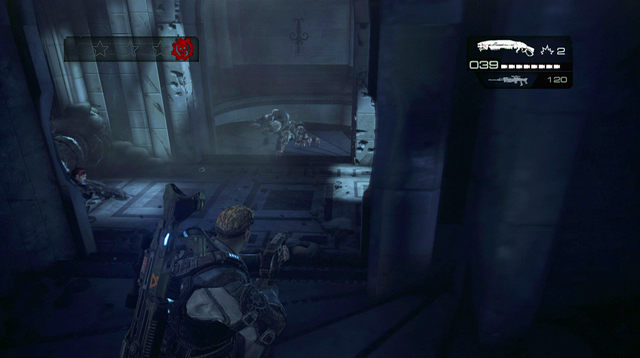
After the cut-scene you'll see two sentinels in front of you. Put them on the left and the right side, somewhere in the middle of the stairs. There are many ammo crates scattered all around, as well as grenades - pick them up (you can use them on walls as mines). Your time is limited, so hurry with preparations before the attack begins.
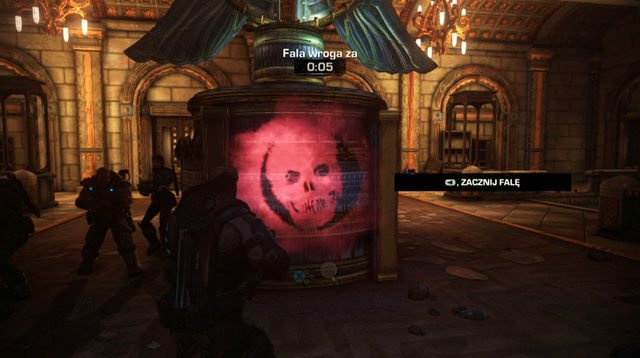
There is a symbol of declassified mission on the wall. If you activate it, you'll have to face also Nemacysts, which explode when get close to you. You can try to shoot them down before they come closer or jump aside just before explosion.
When the attack begins, I recommend focusing on defending the right wing, which is attacked with by more enemies. Keep monitoring sentinels because they might run out of ammo (a proper symbol appears over them - you have to go there and replenish sentinel's ammo). After repelling the first wave you'll have some time to replenish your ammo. The next attack will be even stronger. Prepare for a large group of Boomers coming from the left side. Stay on the instant move, avoiding/destroying Nemacysts. Pay also attention if any of opponents drops Gatling gun, which can be very helpful in repelling the attack.

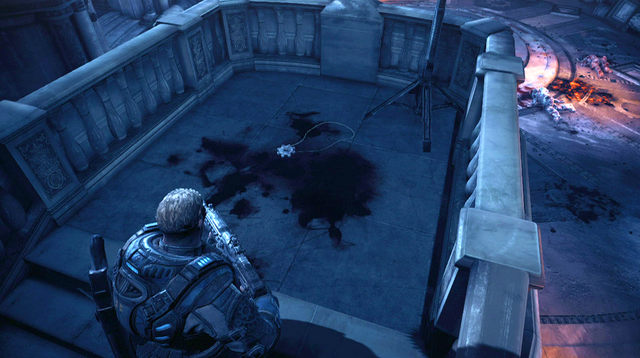
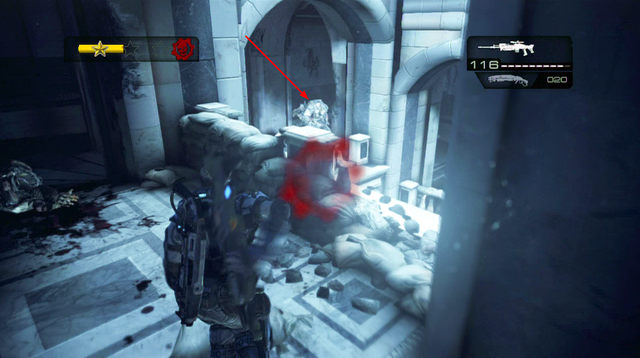
After defeating the second wave you'll be able to go to the next area. But before you do this, jump over the small wall surrounding the statue in the lower part of the hall. In front of the statue you'll find another COG tag.
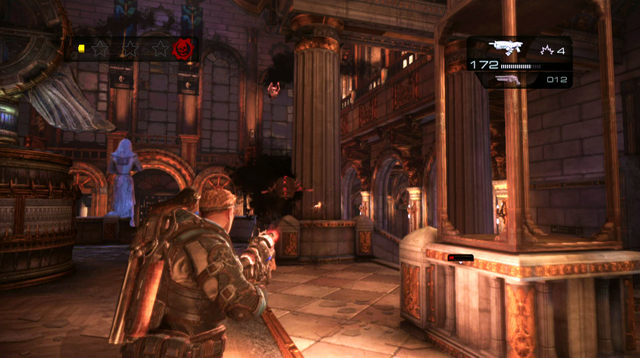
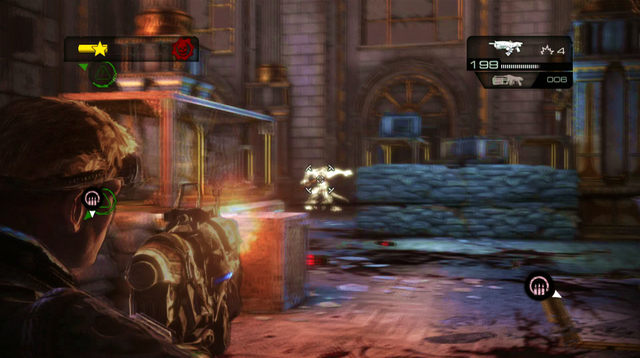
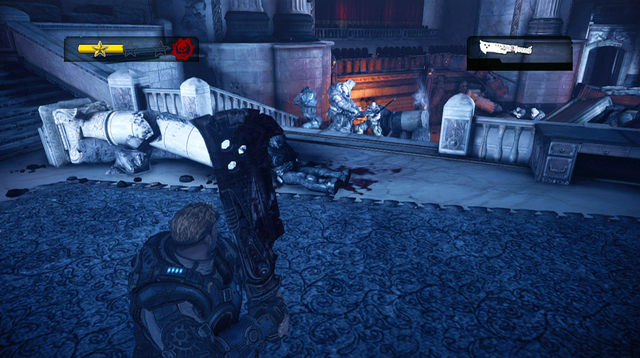
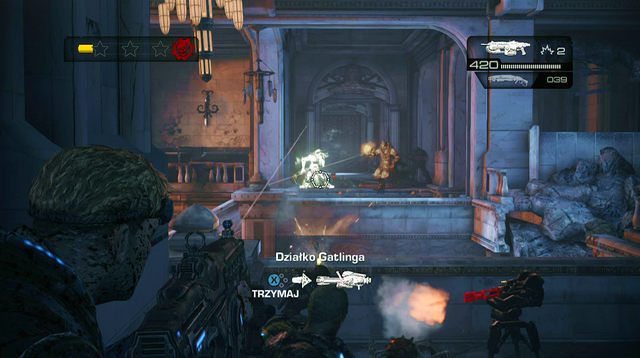
There is a declassified mission symbol on the left wall. After activating it Cyclops Drones will be wielding Lancers. After opening the door, quickly take cover. On the other side of this room you can notice the turret. You can try to get it from the right side, killing enemies on your way or use the shield, which can be found right from the entrance to the room. Personally I recommend the first option.

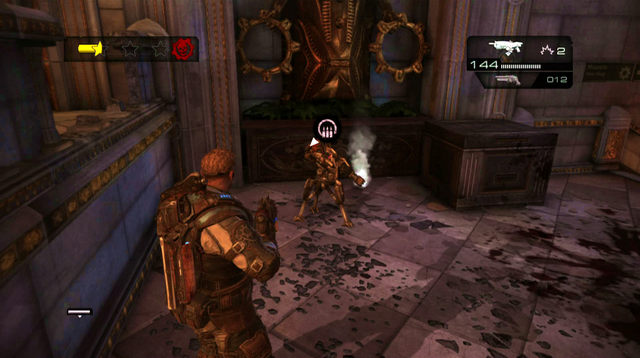
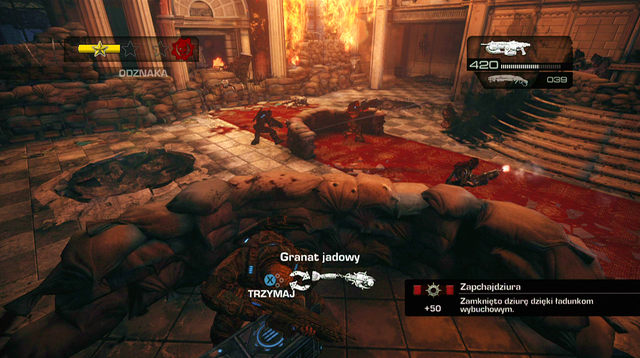
When you get to the turret, use it to finish enemy remaining. The holes will appear on the left and the right side - new enemies will appear there. You can close them by tossing a grenade inside. Once the room is cleared, Boomer will come out from the right door. Before you move on after killing him, collect grenades and ammo from side rooms.

You'll find COG tag between stairs leading to the turret and the next stage.
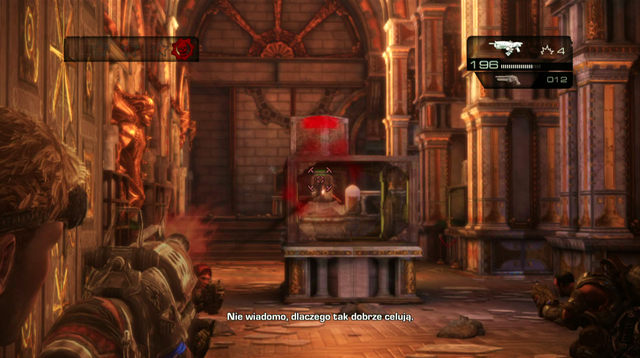
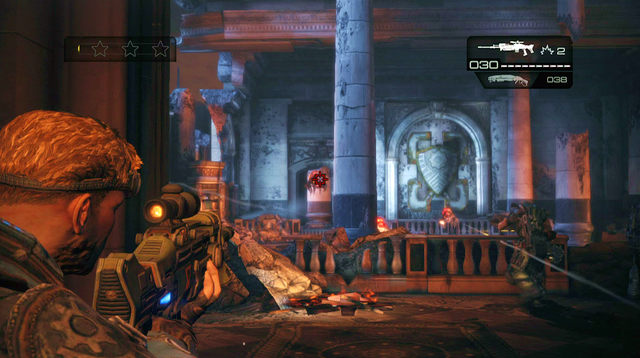
Go down the stairs. There are two sentinels in front of you. Put one of them at the very left side and the one in front of the glowing armor in a glass case, which you have to defend after activating declassified mission. The third sentinel can be found at the farther column on the left - put it on the balcony to the right, so it can cover with fire the longs passage straight ahead. There is also grenade launcher at the entrance, which can be very useful.
The entire attack is lead through the entrance on the other side of the room, so you could put there some grenades on the wall. Go back to the armor, which you have to defend. Keep monitoring if sentinels have enough ammo. If Tickers join the attack, move away from the armor so the explosion won't damage it. Check the farther part of the room, where you can come across Kantuses reviving their allies.

After a short break, the second wave will also attack you through the front door. You can again put some grenades there as mines. You can also try to get closer to the entrance and focus fire of several enemies on you. After that, use the grenade or grenade launcher to get rid of them at once. If Tickers show up, try not to stay in one place too long.
After clearing the hall, go right from the exit of this room. You'll find there another COG tag.
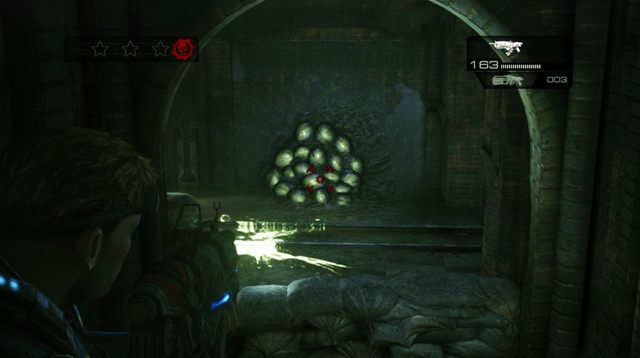
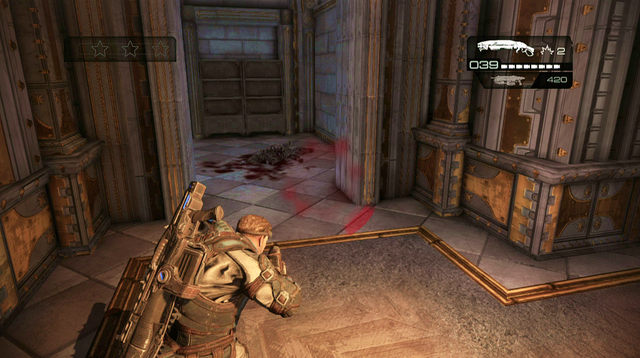
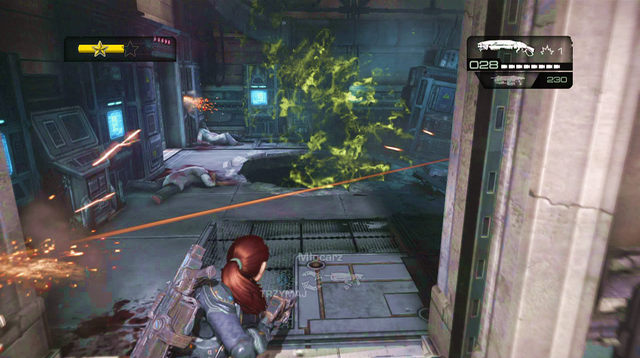
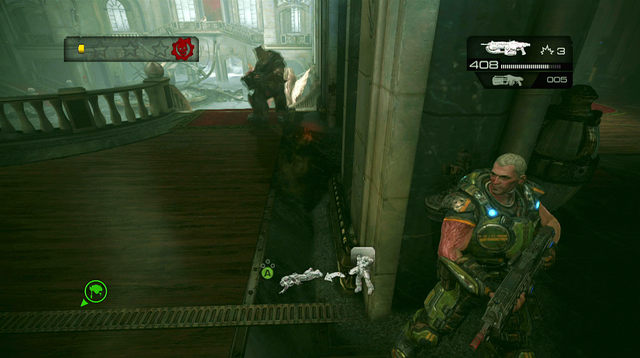
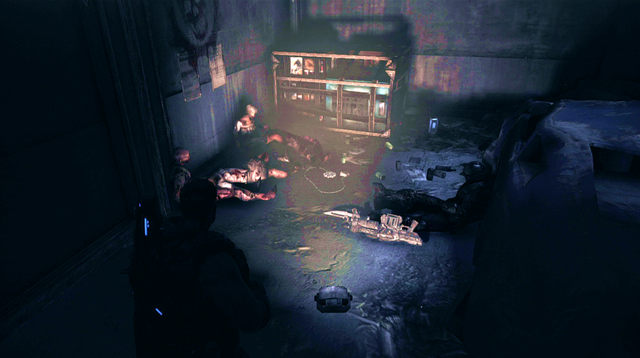
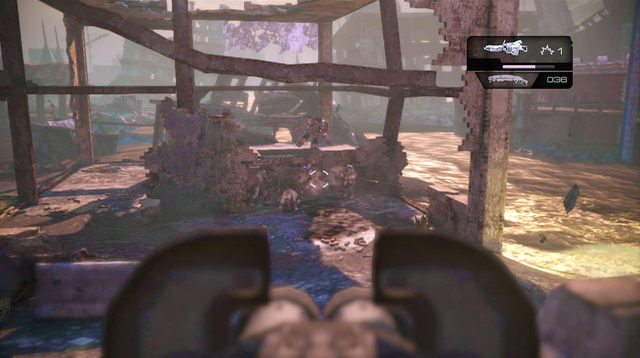
Go down the stairs. You'll see declassified mission symbol on the wall. You need to find and destroy 10 serapede eggs. Several eggs are scattered randomly but most of them is always located at the same place. First one can be found at the end of the stairs. The second one is located right from the entrance to the small room (in front of the stairs), gull of Retro Lancers.
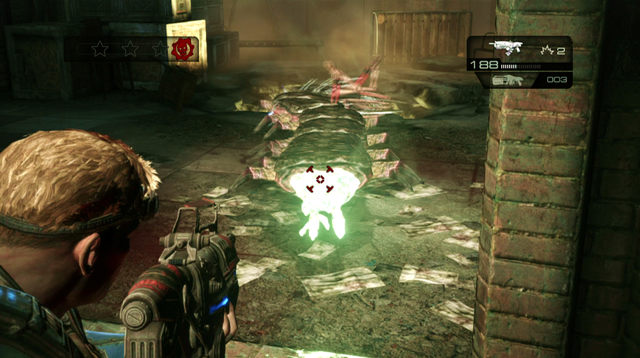
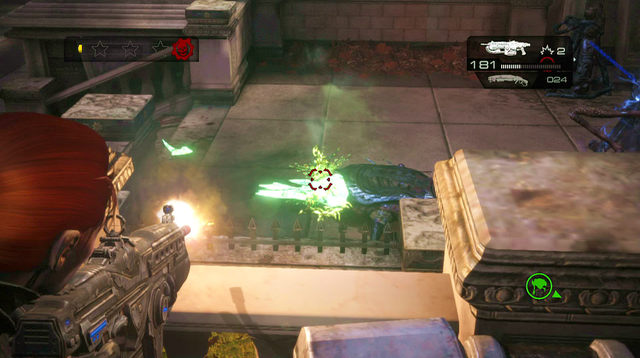
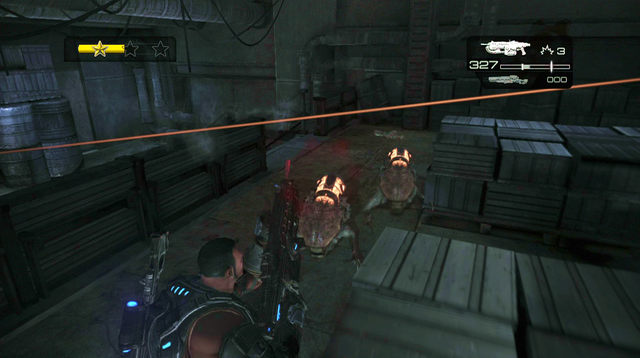
Once you reach the end of the corridor, on the right side you'll encounter first Serapede. His only weak point is his back part, glowing green. Retreat, so the insect focuses on your companion and when he turns back to you, start shooting at his vulnerable point. Repeat this until the enemy is dead.
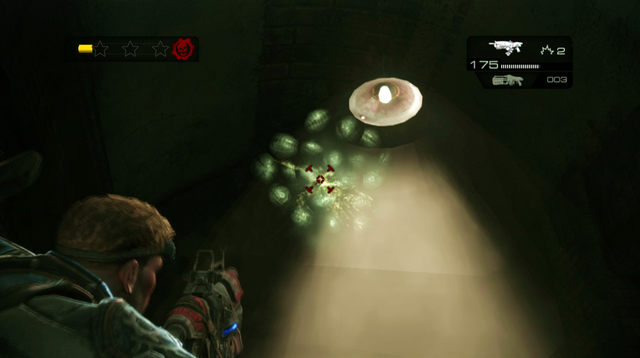
Now look inside the large room on the right. You'll find there several eggs. When searching them pay particular attention to the ceiling and a hole in the floor. Other eggs can be found in a small room on the left and in a corridor leading to the next area. Before you go there, make sure that all eggs are destroyed.
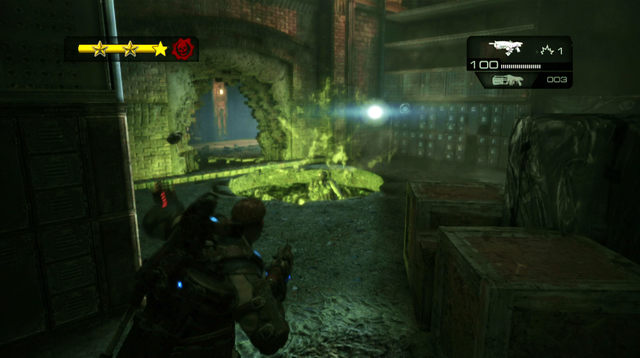
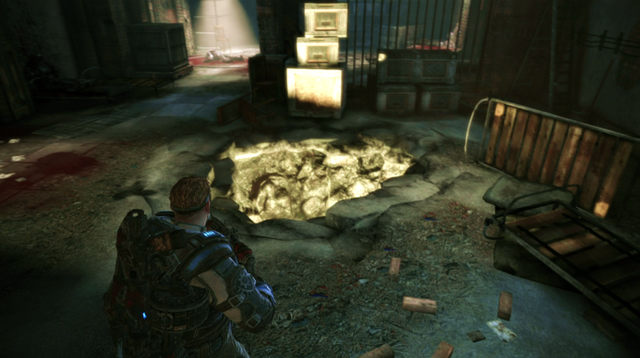
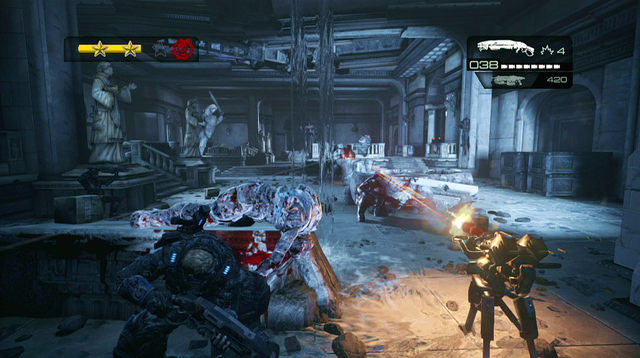
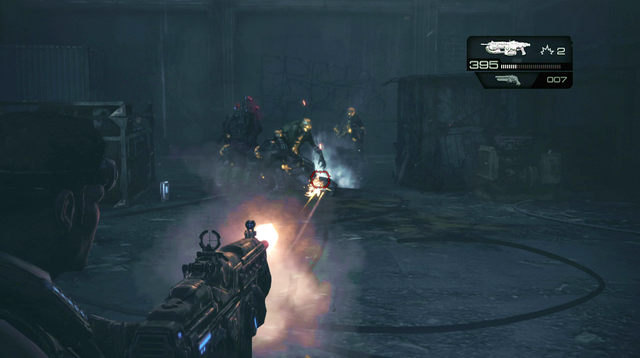
In the large archive room you'll be attacked by more Serapedes, Tickers and Wretches. There are some grenades in the center of the room - pick them up. A hole will appear in the right corner - toss the grenade to close it. Enemies with flamethrowers will come up running from behind the destroyed wall. Shoot the fuel canisters on their back to quickly eliminate them. Few enemies will appear also on the balcony to the right.
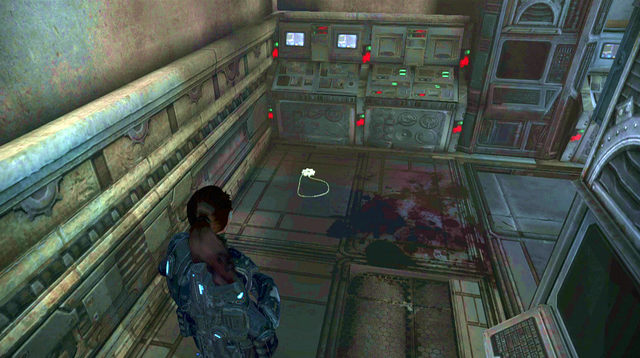
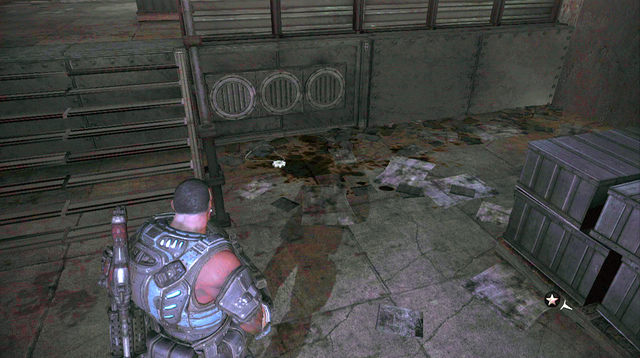
Approach the hole in the wall and go to the left corner - you'll find a COG tag there. Now go through the mentioned hole in order to get to the passage leading to the next stage.
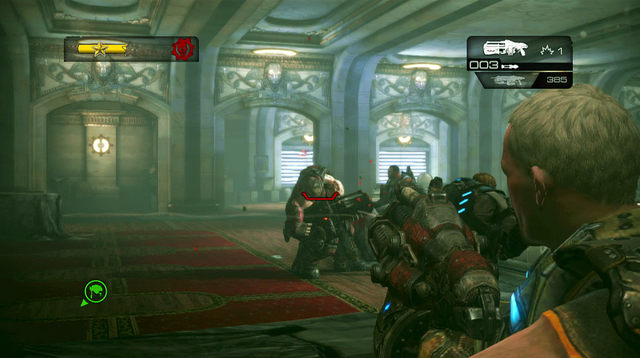
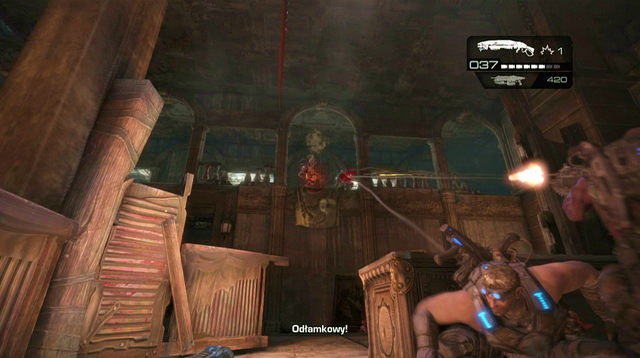
There is a declassified mission symbol on the right wall. After accepting it, the visibility gets reduced and when you get to the next room you'll be attacked by Therons with cleavers. Try to stay in the room with a declassified mission symbol and wait there for enemies. It is best to use against them any Shotgun or Grenade Launcher. Jump aside when you see them preparing to attack you. Prepare also to repeal several Boomers. After getting deeper inside the room, you'll be attacked by next wave. In the center part of the room, on the left, there is a Gatling gun next to the crate and further you'll find an ammo crate. Back off behind any cover and wait there for enemies.
There is another COG Tag on the right side of the room, between a large hole in the floor and the wall. Go up the stairs and turn into the right corridor to end the mission.
Go to the door and get down the stairs on the left. At the very bottom you'll find a declassified mission symbol on the left passage wall. If you accept it, ammo will be reduced, you'll have no access to Longshots and more Reavers will appear. Get to the bridge and go to its left or right side. Then take cover. Because your ammo is limited, wait for enemies and try to kill them in a melee fight. Make sure to collect all ammo from dead bodies and go a bit further.

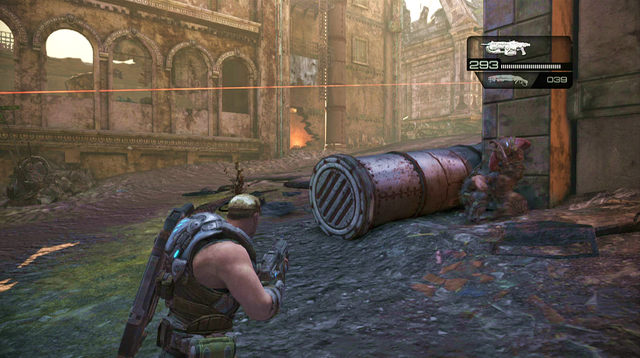
Hide under one of domes on the left or the right side and shoot at first Reaver, which will land on the bridge. There is one more Reaver flying over the bridge, who shoots a projectile at you from time to time - make sure to take cover then. Wait until the rider and the creature itself fires an explosive arrow/projectile. At this point you have some time to shoot at them. The Reaver's weak point is orange spot on his abdomen.
When you get closer to the center part of the bridge, another Reaver will appear. Return under the previous dome and keep shooting at the creature, waiting for more enemies. When you run out of ammo, you can take a risk and run through the center part of the bridge, searching for supplies (make sure that there is no enemy at the turret). With a bit of luck it can happen that your companions will finish the creature.
After killing the beast, enemy reinforcements will appear on the right part of the bridge - try to kill opponents in a melee fight. Before you move any further, make sure that you've collected all ammo. On the other side of the bridge you'll find another turret (next to the vehicle), which should be your primary target. When more Reavers land, cover under the dome you've been passing by and kill beasts from this spot. You can also back off even further. In short breaks between fights try to collect ammo if you are running out of it, watching out for the Reaver flying over the bridge. After clearing the area you can move on.
But before you continue, return to the center part of the bridge, with many statues. Move to the spot, where the bridge is destroyed. On the left side you'll find COG tag.
Go through the door on the left. When you get to the small armory, you'll find a declassified mission symbol on the right wall, near the door. Before you accept the mission, make sure that a Grenade Launcher has appeared in the locker right from the symbol (another option is Flamethrower). If not, load the last checkpoint. Pick up the Grenade Launcher and grenades and replenish Lancer ammo.
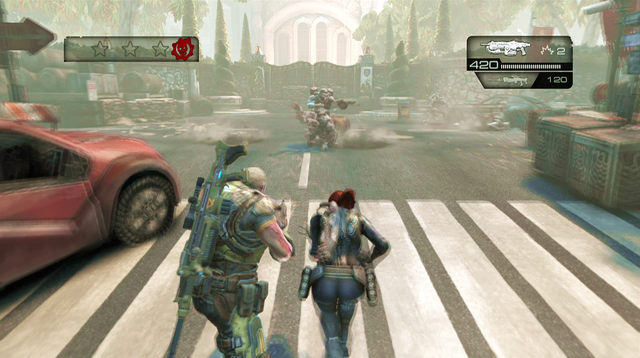
Activate declassified mission and quickly run through the door left from the symbol. Run to the opposite side of the courtyard, where you can find One-shot. Use it to eliminate all Boomers (about 10 of them) or other large units, which can appear here. Also kill opponent operating turret on the right, in front of the entrance to the academy.
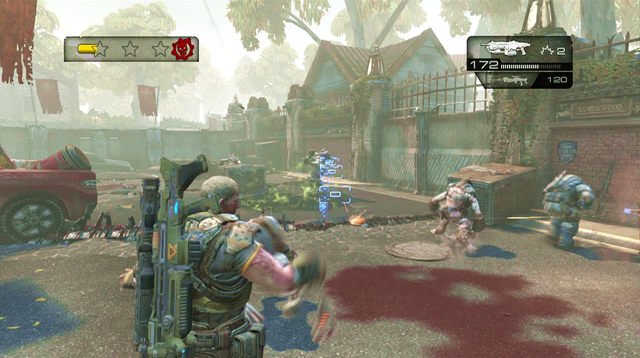
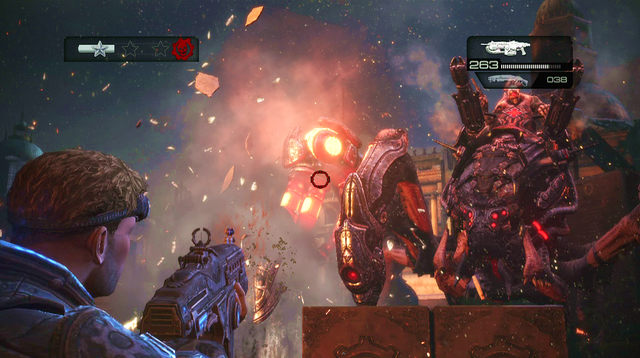
Once you clear the courtyard (you need at least 1:40 min left), a Rager will burst through the door. Use a Grenade Launcher to kill him and run inside the academy. There are two more Ragers behind bags - kill them with Grenade Launcher, grenade or Lancer's chainsaw/bayonet. You have to inflict them a lot of damage to tear them to pieces before they can have a chance to change their form.

If you're not limited with time limit then you can go to the room left from the building entrance. You'll find there a COG tag.
Run further through the left corridor, ignoring Tickers/Wretches you pass by. Finally you'll get to the last room to be cleared. Again make sure that none of Ragers changes his form. Otherwise the fight will take longer and for that you do not have time. After killing all enemies, jump onto the platform on the left side of the room and get to the designated door before time runs out.
There is a declassified mission symbol on the right wall. After activating it the visibility will be reduced because of toxic fumes. Switch the lever on the left side of the door to open it. You'll be attacked by a large group of enemies. When you kill first opponents, go to the left side of the room and use the stairs to go up. You'll find there a Gatling gun lying on the floor. When you move further, you'll find the lever which can be used to electrocute nearby enemies. There is also a hole on the left, which can be sealed by tossing a grenade inside. Watch out for enemies on the catwalk under the ceiling.
New enemies will appear on the other side of the room with large windows on the wall (Kantuses among others, they should be your primary targets). Watch out for Boomer and try to toss a grenade inside the hole to limit enemy numbers (but only if you already have earned three stars or you're close to accomplish that).
Once you clear the area, go to the right side of the room, where enemies were appearing from. You'll find there a COG tag.
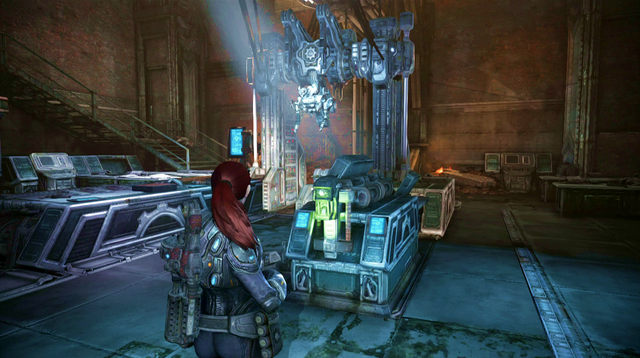
Go through the corridor to the panel and use it to open lab door. Go down the stairs and use the Container Terminal to activate a robot. There is also a Grenade Launcher in this room, which can be useful later.
There is a declassified mission symbol on the right wall at the top of the stairs. After activating it, the robot will be attacked by large number of Nemacysts. After getting to the corridor, you can find Gatling gun lying in the corner, near the "Cullum Hall" plate (I recommend saving it for the courtyard which is the next area). After getting to the large hall, the robot will shield itself and enemies will appear on the right and left side of corridor you came here through. During the fight monitor also the opposite side of the hall, where several Wretches can appear.
When the robot reaches blocked door and starts unlocking it, prepare for the new fight. Enemies will come out running from the left and the right side of the blocked door. After killing all enemies, Nemacysts will attack you from the other side of the hall. Try to focus their attention on you, so they do not attack the robot. Take cover behind the destroyed pillar left from the door and from this spot try to kill as many enemies as you can, before they reach the robot.

Before getting to the next location go to the room on the right from the hall exit. There is a COG tag behind the desk.

After getting to the courtyard (do not forget to take Gatling gun with you, if you have any ammo left), take cover behind concrete benches on the left. First you'll have to deal with another wave of Nemacysts. Again try to focus their attention on you, destroying them with Lancer when possible and jumping aside when they come closer. But do not jump towards the robot, so accidental explosion won't damage it.
After that a hole will appear in front of the stairs. Quickly close it tossing a grenade inside, in order to limit number of enemies. A Boomer or another large opponent will appear in the distant part of the courtyard. If you have any Gatling gun ammo, this is the best moment to use this weapon.
After getting to the further part of the courtyard, the robot will shield itself again. A hole will appear on the right, behind your back - toss the grenade there to close it if you have any. Then back off to any cover near the robot. Prepare to fight two larger enemies, who will appear at the right and the left side of the robot (go to the other side of the courtyard using the stairs where the robot stopped). The last stage of defending the robot is destroying Nemacysts flying over from the left and then from the right side of the robot.
There is a declassified mission symbol on the wall in front of you. After accepting it your only weapon will be pistol. You can pick up the sentinel located right from the statue in the middle of the room - place it at the robot when you have time. In order to accomplish stage with three stars, place the sentinel with its back towards the entrance from which enemies will be attacking you, so it will kill only enemies appearing the robot. Try to kill all enemies who get close in a melee fight, saving ammo for Boomers. There is ammo crate left from the statue - use it when needed. (Note! The fight can start with attack of Wretches or standard opponents sliding down on lines. In my case I got three stars in the second attack option).

Before leaving atrium go to the room on the right - you'll find there COG tag behind the door. While following your mission objective you'll find also a Tripwire Crossbow lying on crates, which can be useful in the next stage.
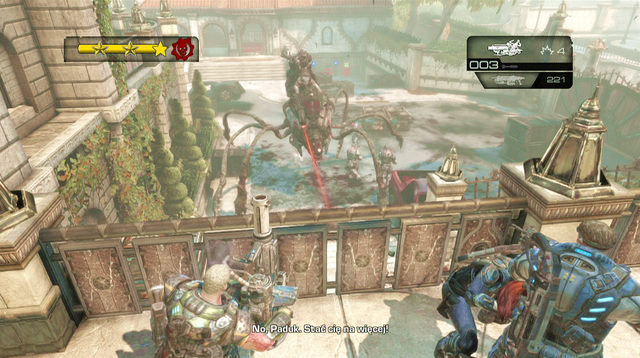
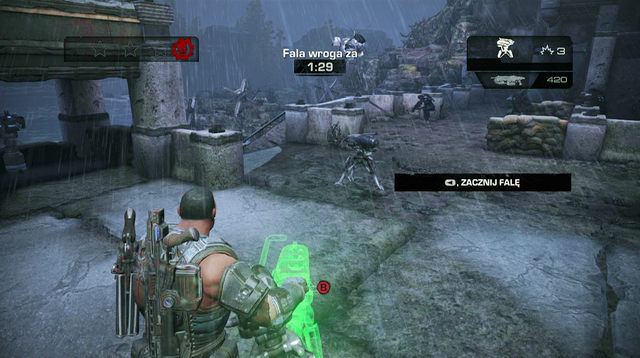
Use the Tripwire Crossbow which you found at the end of the previous stage to set up traps in passage on the left and on the right (pull it to the maximum to place it on the wall). Then go to the point, where you can see equipment from the crashed helicopter and pick up sentinels. Place them there, as well as in the left and the right passage, so they can defend stairs leading to the robot. Before starting the fight, collect all weapons, grenades and Gatling gun (save it for larger enemies in the second wave). There is a declassified mission symbol right from the robot, near the stairs. Activate it to add Corpsers and Serapedes to enemy troops.
When the attack starts, go to the stairs on the left or on the right from the robot. Tickers will appear first, trying to destroy your defense lines. When Serapedes appear, back off to the place with the robot and try to shoot their weak point when they are destroying your defense lines. If you can't see their weak spots, try to toss a grenade there.
Now prepare to fight Corpsers. In this case you also have to attack them from behind, which is not shielded. After dealing some damage the opponent will dig into the ground and you'll be able to see only the legs attacking you. Run away as fast as you can. At this stage they will be probably the only remaining enemies, so use the entire area, looking for the best position to fight. From time to time make sure that sentinels do not run out of ammo. If you can lure Corpsers to rights position, sentinels will help you to kill them.
After a break a second wave will attack you. Quickly replenish grenades if there are any and use the Gatling gun. Prepare for Boomers and Kantuses. Watch out also for enemies with Torque Bows. You can try to place shields on stairs (2 at minimum), left by opponents in order to slow down the attack a bit.
Go to the place where you were defending the robot. Climb up the stairs behind it. There is a COG tag on the right.
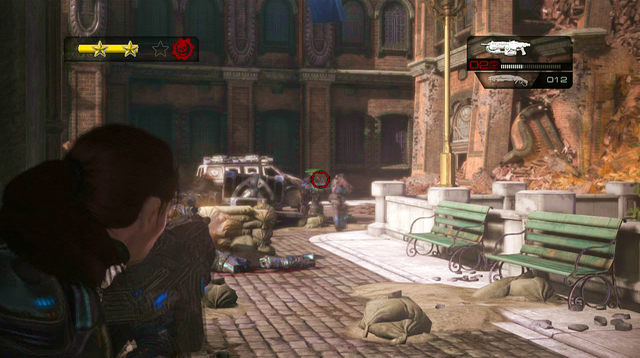
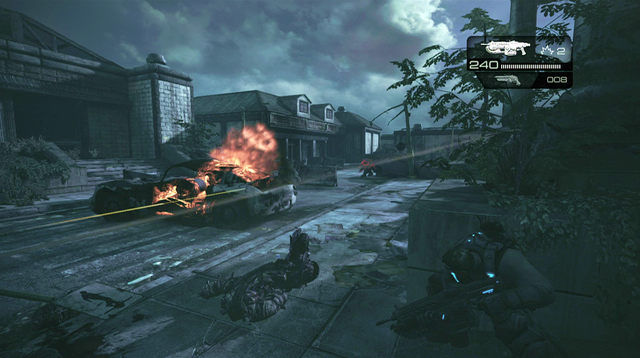
Go to the front of the mansion and move to the right. There is a declassified mission symbol on the wall in front of you. If you accept it, you'll be limited to Gnashers and Sawed-off Shotguns only. Jump through the hole in the wall on the right and go to the street. At this point you can be attacked by Bloodmounts or Maulers supported by smaller unit. Because weapons enforced by mission conditions are good for short distance, it is easier to repel attack of Bloodmounts. Try to kill beasts first and not their riders. Sawed-off shotgun is perfect for this. If you have to deal with second combination you can try to reload last checkpoint or try to get your opponents from the not shielded side.

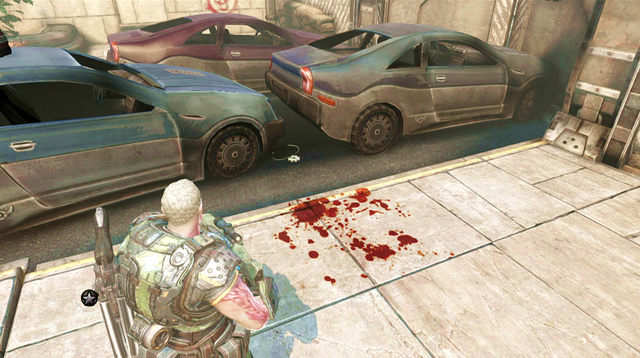
Go up the street, staying on the right and collect ammo from crates. A hole will appear behind the blue car - close it with a grenade or keep it open to gather some star points. At the end of the street you'll find another ammo crate next to the damaged car. After clearing the area, go through the gate on the right side of the street.
Once you enter the mansion area you'll be attacked by Corpsers. Try to get them from the back/side and shoot with Sawed-off Shotgun. Prepare also to fight with several Wretches. There are Kantuses on the terrace but there are no enemies to be retrieved, so you can deal with then at the end. There are also few more enemies in the further part of the garden, but they shouldn't be a problem.

Before leaving mansion garden, head right from the stairs leading to the exit gate. You'll find there COG tag.
Go up the stairs. There is a declassified mission symbol on crates to the left. If you accept it, Locust will start using smoke grenades to reduce visibility. Go to the end of alley. You'll find there Retro Lancer and Sawed-off shotgun ammo. Now go back and go through the gate on the right. Wretches will attack you in front of the building entrance. When you get inside, Locust will start using previously mentioned smoke grenades. Take cover and wait for enemies. Watch out for Wretches jumping down through holes in the cellar.
Move bit further, watching out for enemies using Gatling gun. You can also take one from the body of previously killed opponent, but in case of declassified mission reduced visibility will make aiming more difficult. At the other end of the building go to the exit on the right. Stay inside and kill enemies being covered or through the hole in the wall left from the exit (now the Gatling gun can be useful). Especially watch out for enemies with Torque Bows. When you move further, larger enemies will appear in the hole in the fence, but you can safely kill them being covered behind the fountain.
At point, where you can end this stage, move bit further up the street. On the left, behind the part of the low wall, you can find COG tag.
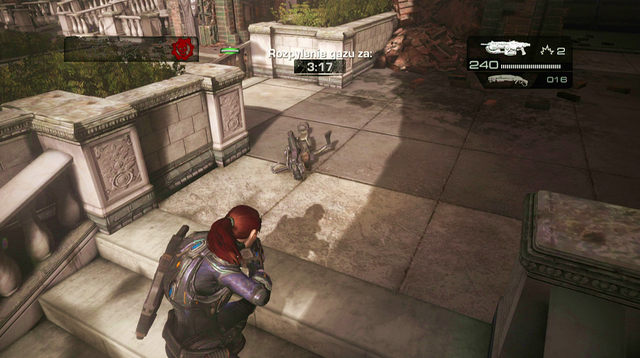
There is a declassified mission symbol on the left wall. After accepting it you'll have to finish this stage in 3:30 minutes. Quickly jump over sandbags and pick up Markza lying next to the corpse at the crate. Use it to kill Kantuses on the balcony visible in a distance. While shooting them, watch out for enemies with cleavers. They will be appearing until you kill both Kantuses or close the hole in the center part of the yard, tossing a grenade there.
Now prepare to defeat Maulers who will cross the destroyed gate, as well as new enemies with cleavers. There is a Gatling gun in the right passage from the mentioned gate, which can be very useful if you do not have a Sawed-off Shotgun which perfectly deals with enemies on a short distance.
Keep moving and turn to the corridor on the right. Two Ragers will jump out from the ground (try to kill them fast, so they have no time to turn) and a hole will appear behind a further gate. If you're close to get three stars and have a grenade, then close it. Try to kill as many opponents you pass by as you can, run to the street and turn left and then right. At the end of this street you'll find ammo and ending point.
At the ending point, near the car wreckages on the left side of the street, you'll find COG tag.
Go past the car wreckage, where you can find ammo crate and a Lancer. At the bottom of overturned car you'll find a declassified mission symbol. When you activate it, additional enemies will attack you from behind at certain point of this stage. Keep destroying enemy spiked barricades blocking your way. In front of the mansion gate new enemies will appear (with flamethrowers among others - shoot at fuel containers).
Destroy another spiked barricade and turn to the right street. Cut through wooden obstacle and kill enemy shooting mortar on the left side of the street. An enemy with flamethrower will appear at this place. Behind other spiked barricades you destroy, w hole in the ground will appear - close it with a grenade.
Bloodmounts will get through the farther gate. After getting to the other side, you'll see an opponent with a mortar on the turret - quickly eliminate him. You can also hide inside open containers on the left and on the right if needed. Now prepare for Wretches and Bloodmounts (again try to kill the beast first and then deal with the rider).

Before you continue any further, look for another COG tag near the blue container on the left side of the street. If you have accepted the mission, once you pass by the check point where you killed enemy with a mortar (you can find grenades there), Bloodmounts and Wretches will attack you from behind.
There is a declassified mission symbol on the right wall. Once you accept it, Locust will One-shot will join defense lines of mortars. There is a Longshot in front of the symbol - it is very useful while clearing the area. After jumping over the hole, take cover under the dome on the left. On the other side of this building you can find a sentinel - place him on the left, under the cover. Enemies with One-shot are standing on balconies on the other side. Keep monitoring where they are aiming (laser beam), lean out when it is safe in order to kill them.
Watch your left side, where main enemy forces will be coming from (Maulers among others). If you've placed the sentinel properly, it should cover with fire enemies attacking you. First mortar is located over the center part of the balcony with opponents with One-shot (it shoots through the hole in the roof). Once you destroy it, another large group of enemies will appear, this time on the left side of the estate. The second mortar is located on the balcony on the left side of the building.

After clearing the area, look around for the entrance down to the garage. It is located right from the spot where you can end this stage. COG tag can be found on the left, between tires and the bookshelf.
You'll find the Booshka and a declassified mission symbol on crates in front of you. When you accept it, the estate will be additionally defended by sentry guns and laser fences. Before you jump over the concrete benches left from the symbol, destroy sentry guns on the left (it is best to toss the grenade there) and on the right. Then destroy laser fence in front of you.

Once you jump over benches, prepare to toss a grenade in order to close the hole which will open under the statue straight ahead. Destroy the laser fence blocking the way to the building on the left and from a safe distance destroy two sentry guns located inside. Now you can go there.
Do not destroy any more laser fences (they can block the way for enemies) and prepare for the attack (with Bloodmounts and opponents with torque bows among others). Watch out for the stairs in the center of this building, because enemies can try to get to you also from this place. You can try to quickly secure it by using Tripwire Crossbow which can be found inside the building. The Booshka which you've found at the beginning of this stage or a Grenade launcher can be very useful in repelling enemy waves.
The next attack of opponents with cleavers and torque bows will be supported by a mortar, so better stay inside the building and get rid of enemies from there. In order to kill mortar operator you have to run to the other side of the square and go up the stairs on the left. Your target is located at its top. Quickly pick up the mortar, position yourself at railing and prepare for another attack. Shoot at distance of about 80-90 meters to hit enemies. The last moving target is Reaver. It moves at a distance from about 50 meters (if it stands next to the stairs) to 90 meters (between cars).

After eliminating the enemy, go down the stairs and turn to the left passage (under the balcony where you were using the mortar). There is a COG tag on a dresser to the right. Go outside, collect ammo (absolutely pick up the Grenade launcher if there is any) and go to the next stage, which is a short walk to the underground.
After riding up the elevator you'll find a declassified mission symbol on the wall in front of you. After accepting it, Locust with One-shots will join the fight. Wait until the power is down. The door right from the symbol will be opened and then will be destroyed by Wretches. After killing them take the Grenade launcher (use it only when needed) and a sentinel from the room. Place it quickly on the large balcony, left from the passage to the previous room. Prepare for enemies with cleavers and Boomers, attacking you from the right and from the bottom.

You have to keep covering because on the other side of the hall there are enemies with One-shot on the balcony. The fastest way to eliminate them is to get to them by running over the right or the left side (here you can find a COG tag).
After clearing the hall you'll have 1:30 minute to prepare for the next wave. Place the sentinel at the bottom of the hall, next to the right stairs - most of enemies will appear there. Often monitor its ammo level. This is not the last wave so do not use the most powerful weapons yet. The attack will be started by Tickers and Therons. After that prepare to deal with Boomers supported by standard units. Check if there is any Kantus hiding at the bottom of the hall.
The next wave will attack you in 30 seconds. Move the sentinel back upstairs and place it near the robot, which will fly to the hall. If you have time, return to the room where you've found a sentinel and pick up Tripwire Crossbow. Quickly place traps on stairs. When the attack begins, get to the other side of the hall, where enemies with One-shots should appear and quickly kill them. If you are quick enough to get there, they won't even appear there. Prepare for enemies with cleavers and Serapedes or Bloodmounts with Maulers. You can try to load the last checkpoint, waiting for the easier combination.
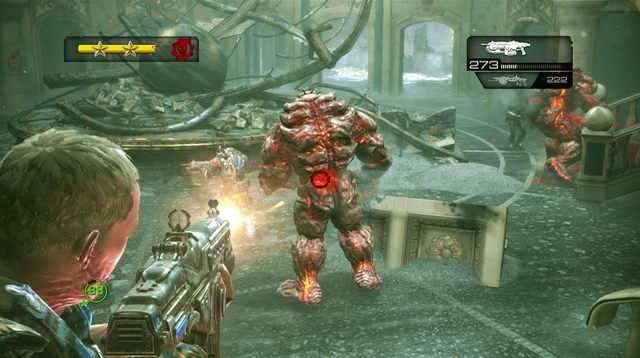
Use the entire hall for fighting and running away. At some point Berserkers and enemies with flame throwers will join the fight. First, deal with latter ones, because you need their weapons to kill Berserkers. Collect all flame throwers and start using them against Berserkers. Their armor will change color, which is a signal to attack them using standard weapon. When their armor gets back to the normal state, use the flame thrower again. Keep watching out for their charges and monitor their position all the time. From time to time ammo crate appear near the robot - use it when needed.

During repelling waves of enemies, remember about COG tag located on the floor, on the left side of the hall, over the main mansion entrance. You have to collect it before killing the last Berserker, which ends this stage.
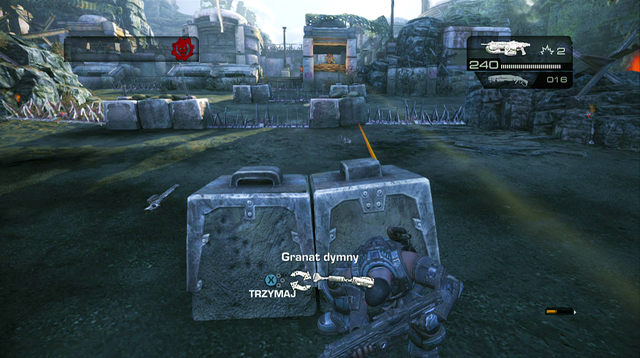
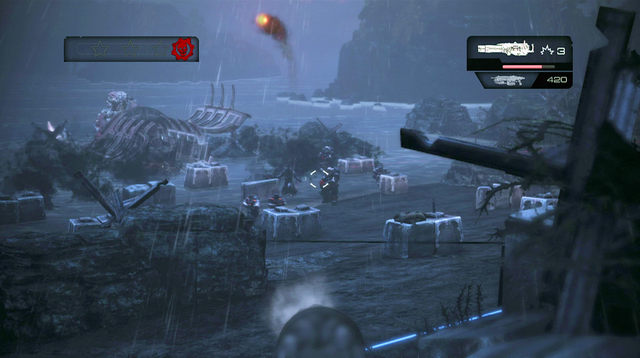
There is a declassified mission symbol on the door in front of you. After activating it, the entire beach will be better defended and there will be some frag grenades planted in some places. Once the door opens, quickly run towards the nearest cover, which is only few steps from the ship. After a moment you'll hear the first mortar projectile so you have to keep moving. Pay attention to your companions' warnings, informing you about mortar fire. Between shots try to get closer to defense lines and destroy barricades. To make your task easier, collect smoke grenades lying next to the center cover, right in front of first barricades. You can use them also to detonate planted frag grenades.
Keep covering and wait for bigger enemies, like Maulers. Use smoke grenades as cover and move towards buildings. On this distance the mortar can't hit you. Go to the right of the building and go up the stairs to upper part of defense lines. You are safe here against turrets. Wait for rest of enemies and move to the further part of the base.
After clearing the area go to the destination. Turn right and collect grenades and ammo from inside buildings. Go to the end of the terrace and pick up a COG tag from the left building.

After few steps you'll see a declassified mission symbol on the wall on the left. When you activate it, you'll have 3:30 minute to clear this stage and reach the end point. After activating it quickly jump over obstacles and go through the short tunnel. You can quickly run to a distance Silverbak and kill all nearby enemies with it - this will shorten the fight but you'll be more vulnerable to enemy fire. You can also stay where you are and fight from behind covers. The important thing is that you need at least 1:45 minute before entering the next area.
After clearing this are, the gate in front of you will be opened. Position yourself in front of the gate, watching out for enemies on the right and place shields, thus enabling missiles. Use them to get rid of enemies hiding behind covers and larger units. Use also the car wreck on the other side of the gate, as cover for yourself.

After clearing the other side of the gate, go to the building on the right. When you get closer to the end point, you'll find a COG tag near sandbags.
There is a declassified mission symbol on the wall in front of you. When you activate it, your equipment will be reduced to shield and Lancer. Before using the panel and going outside, pick up ammo. Right after opening the door you'll find yourself under heavy fire. Use the shield and cover behind a small wall in front of you. Tickers will come out running from the top - take care of them first.
After repelling the first attack, Kantus will appear at the top. Try to get to buildings on the right, if you are under the turret fire. Go through buildings to safely get closer to enemy defenses. Watch out for barricade near the stairs inside. When you get close to the top, prepare for new wave of Tickers - try to use them against enemies to blow them up, so they can't be resurrected. After getting to the top, turn right to the tunnel with several enemies.
After killing the last enemy, return to the place with turret. Go down a bit, keeping on the right. There is a COG tag behind a concrete cover.

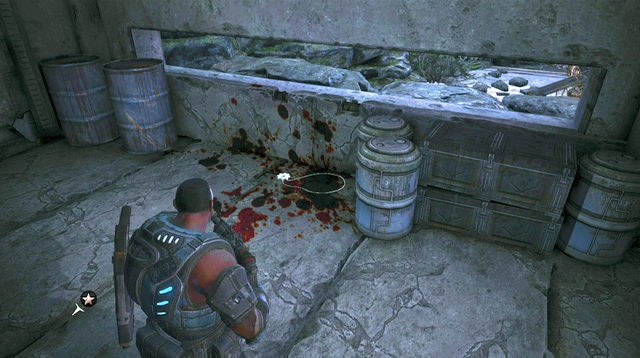
Right after starting the mission go outside the tunnel and go up the stairs on the left. You'll find another COG tag next to barrels. Follow the path until you see a declassified mission symbol on the left wall. After activating it you'll be able to use only Torque bows and Breechshots.
Go past the car and jump lower. Quickly hide behind railings leading to the elevator. You have a good view on enemies coming up the hill on the other side. One is climbing on the right and another one - on the left. Try to kill them before they get to the top, by shooting explosive barrels for example.
Once you kill them, get to the cover closer to the cliff (the best is the one on the right). Enemies will carry One-shot so monitor their current aims (laser beam). When you get to the mentioned cover, go to its right side. One of enemies is now in your range and none of the rest can shoot you. So kill him when the opportunity appears.
Now go to the left side of the cover and wait for the moment when one of enemies lean out and aim at other direction. You have to be patient and kill enemies one by one, not being hit by a One-shot. Rest of enemies has torque bows and sniper rifles. After killing the last enemy, the elevator will come down. There are several enemies inside - kill them all.

While riding up the elevator, new enemies will appear on the other side of the cliff. Watch out for the laser beam of the One-shot and try to kill as many of them as you can to earn third star. Keep moving, jumping asides and making sure that no enemy is using the turret in the central part of the path. After getting to the top, the stage is completed.
There is a declassified symbol on the right wall before the turn. After activating it a strong wind appears, which makes moving and shooting more difficult. In the next room you'll find grenades, a Lancer, a sniper rifle, a Sawed-off shotgun and ammo crate. Move further and jump down. There are stairs on the left and on the right - after a moment Therons will appear there. But the main attack will be carried from the right side.
Now move closer to barriers and take cover, so Boomer's projectile can't hit you. If you have a sniper rifle then use it to get rid of this enemy. Pay attention to whether more Therons is not running at the bottom. If you still have ammo for sniper rifle then kill also Kantus resurrecting dead units.
After clearing the area new enemies will come out running from the distance part of the base, with Kantuses among others - deal with them first. Watch out again for Therons and Tickers running up the stairs.
Once you kill all enemies get inside the building on the right. Go down the first stairs and look to the left - you'll see a COG tag. Along your way to the next stage look around for a Grenade launcher dropped by Boomer - it will be useful in the next stage.

After riding down the elevator, run towards Container Terminal. Turn right at the first turn and start moving back, thus getting to a COG tag. Now return to Container Terminal and use switch there.
Turn left to see a declassified mission symbol on the wall. When you activate it, the lights will be turned off and you can die when knocked down. On the left side of the door you can pick up Sawed-off shotgun (but if you have a Grenade launcher from the previous stage - keep it). Switch the button on the left side of the door and go through it. Walk over the corridor collecting ammo along your way. Turn left. Run towards covers and hide behind them when you see enemies coming running.
New enemies will appear in a distance part of the room, with Mauler among them. In the center part of the room you can find a sentinel and use it later in this stage. There is also a Grenade launcher lying on the right. Move to the next corridor on the right and approach the next larger room. You can place sentinel at the entrance if you still have it. You can get around the enemies inside from on the right side (pick up grenades along your way), where you can have a good view on hidden enemies (also Mauler). After killing all of them, go to indicated point to end this stage.

Go to the room and turn left. There is a COG tag in the corner. On the wall on the other side of the room you'll see a declassified mission symbol. When you accept it, enemy forces defending the beach will be supported by enemies with One-shot. Move further and jump outside through the hole in the wall.
There is a Grenade launcher and ammo crate on the ground. On the left you'll see also two sentinels. Place them in front of the stairs on the left and on the right. You can find there also a Tripwire Crossbow, but you should save it for next waves of enemies. After placing sentinels, use one of turrets.
When the first ship arrives, try to kill as many enemies as you can before you see a One-shot laser beam. At this point quickly withdraw and wait for enemies. First, Tickers will appear. If you think you're able to do it, eliminate the opponent with a One-shot and after that deal with rest of enemy soldiers with turret to save ammo for Boomers. Otherwise finish them with a Grenade launcher. When the time counter for the next wave appears, quickly run to the beach and collect ammo.
Use the turret to kill enemies from the second ship. When you see the One-shot laser beam or you can't stand the enemy fire, retreat. Watch out for enemies with flame throwers and Maulers. If the latter ones hide behind their shields, try to position yourself in such places that your sentinels can shoot their backs. Also monitor the passage to the bunker on the left - it might happen that the opponent hides there.

Collect ammo from killed enemies before next wave starts and quickly return to the turret. This is the last attack, started by Tickers and enemies with flame throwers. After a moment mortars will start shooting, so you have to take any cover. There is a bunker with turret on the left or small shelter at the top of the stairs to the right. In both cases carefully monitor the entrance to your hideout.
Later on new Tickers and Kantuses will appear. When it gets safer, locate the enemy operating the mortar and try to kill him, thus having more freedom of movement. Most probably he is hidden behind rocks, on the left side of the beach. After killing the last enemy, enter the ship to end the mission.
Get off the wharf and approach the wall on the left to find a declassified mission symbol. When you activate it, additional enemy units will join fights. Go up the stairs on the right side of the sidewalk and pick up Markza from near the bodies and ammo on the left. Move ahead and hide behind the low wall in front of you. There is a turret on the opposite side - eliminate its operator with Markza. Prepare for new enemies, trying to get to the turret.
Watch out for the stairs on your left, where enemies can appear. Toss a grenade towards enemies left from the turret. Two Maulers will appear left from the mentioned stairs (watch out for barricades - destroy them). Further on you'll locate one more turret, so it would be better to kill Mauler when you are not under the turret fire (withdraw a bit to the right).

After approaching the right turret, the reinforcements will appear on the left. Kill them all and hide in the place they came from. You have to keep covered, because mortar fire will start after a moment. The enemy with the mortar is located on the other side, well hidden behind a low wall. Focus on the rest of enemies, especially on trying to get to the turret. Two more Maulers will appear at some point, but if you stay at the top, you'll have a good spot to shoot them.
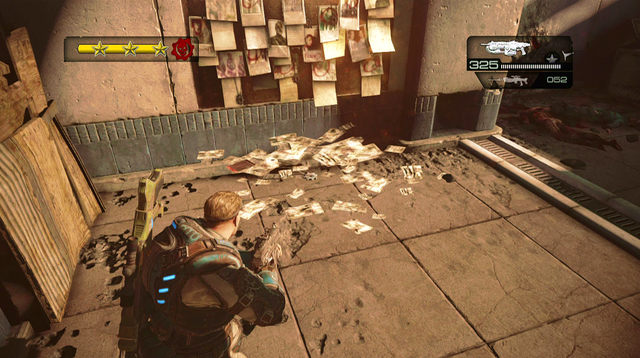
When you clear the area, return to the place, where you met first enemies. There is a board with photos of missing people to the left from the entrance. A COG tag lies under the board. After picking it, you can advance to the next section.

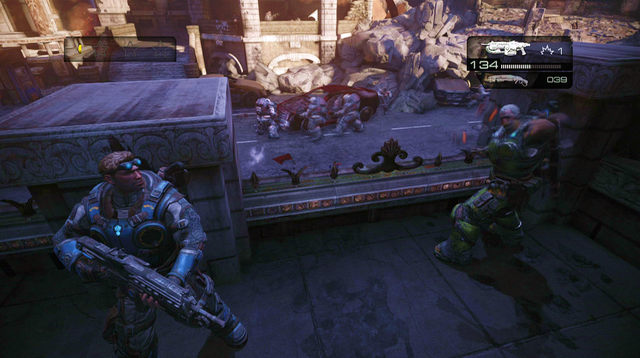
Move deeper inside the corridor, to find a declassified mission symbol on the left wall. When you activate it, there will be extra enemy units. Break through the door and exit to the street. Look for a shotgun to the left from the first parade vehicle and grenades bit further. In front of the second parade vehicle you can locate the stairs. Go up the stairs and turn right. You'll see a COG tag lying near a low wall. If you continue going there, you'll find also grenades.
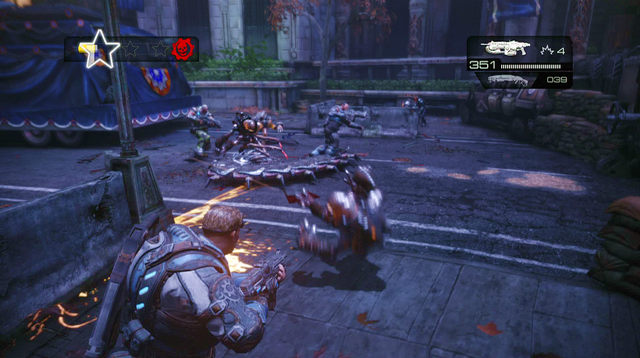
You'll find a lot of ammo and weapons around the second parade car (pick up a Lancer if you do not have anything with high fire rate). Destroy serapede eggs on the right side of the blocked passage. Approach the valve on the left and use it. The blockade will be raised a bit and Serapede will appear under it. Also explosive Wretches will join the fight. Jump over nearby walls in order to shoot Serapede's weak point. After that a Corpser appears. Use the entire area to run away its attacks and find a good spot to shoot its abdomen. After killing it you'll be able to raise the blockade completely. You'll advance to the next section.
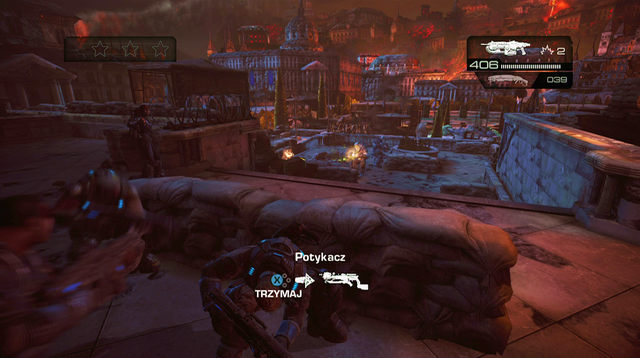
You'll find two Tripwire Crossbows near the car and at the top of the stairs, on the right. Save one of them for later and use another one to plant traps on the stairs. Stay at the top of the stairs, because it is very good spot to shoot at enemies. Toss few grenades when you see Boomers coming. Keep monitoring stairs on your left, because at some pint Therons and Wretches will appear there. Replenish your ammo when needed, using the crate behind you.
After the fight pick up the Tripwire Crossbow and go along the street to the right. Pick up the Grenade launcher left by Boomers. Eventually you'll reach the ruined building on the left. Go up and keep on the left. There is a COG tag among the rubble.

One the left wall you'll see a declassified mission symbol. When you accept it, enemy units will be strengthened with heavy units and Ragers. Approach the blocked door and let the robot open it. Use the previously picked Tripwire Crossbow to plant traps along the path leading inside building. Take the sentinel from the room to the left and place him at the robot, on the corner near the door. There is also One-Shot near the destroyed wall to the right, but save it for later, because Ragers will appear first and it is hard to hit them with this weapon.
First enemy units will come from the left side of the street. After repelling first wave of Ragers you can try to kill few Maulers with One-Shot. If they get to the door, run around the room trying to get them from behind and put them under the sentinel's fire, monitoring its ammo state. Another same group will appear on the right side of the street. Again try to kill some larger units with the One-Shot before Ragers appear. Remember, that there are ammo crates in rooms to the left and to the right from the door. After killing the last enemy you'll be able to advance to the next section.
Turn left. There is a Grenade launcher and ammo lying near the stairs on the right. Do not pick up the ammo until you activate declassified mission. Go up the stairs. There is a declassified mission symbol on the wall in front of you. When you activate it, you'll be restricted to use only Boltoks and sniper rifles. If you accept that, return down the stairs and pick up ammo. Go outside and walk over the catwalk to the other building's rooftop and return to the previous rooftop. Enemies will appear on the left and in front of you - they can easily surround your position if you do not withdraw. Patiently wait for enemies leaning out and running towards you. When you kill few of them, you can try to run to the next rooftop and finish the rest of enemies. You can also go to the middle of the catwalk and try to use the sniper rifle to eliminate them.
Pick up ammo left by dead enemies and use the catwalk on the left to get to the next rooftop. You'll notice hooks on the left wall - enemies have started to climb lines. You can try to shoot off the hooks. In the next wave flying enemies will appear - they fall down and explode after few hits. You can use this to your advantage and kill enemies under them. During the fight watch out for snipers located on rooftops to the right. Remember also to save sniper rifle ammo for the end of this section, when the Reaper will appear.
After going further collect ammo at the end of the rooftop and turn right, where you'll come across more enemies. When you get to the rooftop with destroyed silos, a large group of flying enemies will appear - eliminate them. After killing them, go to the right side of the rooftop and head towards the silo you see there. New enemies using hooked lines will appear in front of you.
When you try to get to the next building, a Reaper will come. Return to the silo and hide behind it. Now shoot the raider using the sniper rifle and then focus on the beast (you can use a pistol). Shoot at the Reaper in pauses between his shots. Look around for ammo if needed.

After killing him, go to the left side before you continue to the next rooftop. Enter the platform there and turn left. There is a COG tag lying near a low wall. Pick it up and go to the rooftop, where a Reaper was located previously. New explode enemies will fly from the left. Try to kill them all while taking cover. If they get close to you, withdraw so you won't be hit by explosions. After killing the last of them you'll be able to advance to the next section.
There is a declassified mission symbol on the right mission. When you activate it, you'll be equipped only with Boltok and sniper rifle with no ammo. Go to the left side of the rooftop, where you can find a COG tag on the ground, near the scaffolding. There is also a cleaver near the body to the right - you can pick it up, since you have no ammo.
Walk over the catwalk to the other side, where two enemies will come running out of the building. You have to kill them in a melee fight or with previously mentioned cleaver. One of them should drop ammo. There is one more enemy in the building - try to kill him with one shot. You can find sub pistol next to the body near the door and on the mattress - replace Boltok with it.
Break through the door and immediately take cover. There are enemies with One-shots on the other side. Also explosive opponents will appear - kill them while staying inside the building. When only enemies with One-shots are left on the battlefield, try to run up to them or wait until they move towards you.
After clearing the area quickly get to the platform previously occupied by enemies with One-shots. You'll find there a mortar - pick it up and aim it at the direction opposite to the door you came here through. New enemy waves will appear in front of you. Try to shoot at about 60 meters distance. Also opponents with One-shots will appear on the rooftop on the opposite side, but you are safely covered behind the barrier. In order to kill them, aim at the 90-100 meters. After killing the last of them, advance to the next section.
You'll find Retro Lancers and Gnasher in the room. There is also a declassified mission symbol on the wall to the right. After activating it you'll have two minutes to finish this section. Open the door and go outside. You'll see a turret straight ahead - you have to get around it on the right. But before you continue, quickly take off all flying enemies.
Next wave of enemies will use lines on the other side of the rooftop. Try to shoot off some hooks and toss a grenade towards opponents who made their way to the rooftop. You have to kill as many enemies as possible before they can reach fortification on the right side.
If you have any grenades left, toss them towards enemies who hides on the other side and slide down the lines later on. When there are only few of them left, try to get closer to their positions. You'll find there the ending point of this section, so it would be good to get there as soon as possible.

Reach the place with a turret which you had to bypass and turn left. Descend to the lower level and turn left. There is a COG tag behind sandbags.
After starting the mission you'll be attacked by several enemies. Retreat to the safe place behind a cover when needed. After killing them, go to the designated place. There is a declassified mission symbol on the wall of the hideout. When you activate it, the visibility will be reduced. Inside the hideout you'll find three sentinels. Place two of them near the stairs, so they can attack backs of enemies. Third of them can be places between stairs. There is also a Tripwire Crossbow in the hideout, but save it for the second wave of enemies. Therons will appear first, running up the stairs on the right side. After them prepare for Maulers supported by smaller units. Try to maneuver them so their backs face sentinels when they go up. Watch out for the stairs on the left. When needed, run around the hideout, jumping through windows.

After that Kantus and Tickers will appear. Keep monitoring if sentinels have enough ammo. After repelling the first wave, you'll have 30 seconds break to replenish ammo from crates in the hideout. This is also a good moment to collect a COG tag. Descend to the lower level, run up the stairs on the left and turn right. You'll see a broke down door in front of you. Run inside and walk to the end of the corridor, turning left. At its end you'll find the item you're looking for. It is not possible to collect it before the first wave.
After collecting the item, return to the hideout to replenish ammo. Kantus and Tickers will appear on the lower level. Prepare also to fight Ragers and Bloodmounts. Use the window again to quickly escape from enemies. When you notice rockets coming from the sky, run inside the hideout. After a moment two Reapers will land. Hide behind the pillar in the center of the hideout and get rid of the rest of smaller units. When only Reapers are left, shoot them through windows, hiding from rockets. After killing both creatures, the mission is over.
After regaining control over your character, withdraw deeper into the room. Go up the stairs to the platform on the left and hide behind railings. A Reaper will land in the room after a moment. Keep shooting at him, even when he aims at you with rocket launcher. Railings should keep you safe. Watch out for Therons or Wretches. If the Reaper manages to get inside the room and gets closer to you, leave the platform and return to the place where you've started this section. When he is close to you, start running around the platform and keep shooting at his weak point, at the bottom of the abdomen. During running, watch out for smaller units in the room.

When you kill the Reaper, deal with the rest of smaller enemy units (snipers on the platform among others). Go left from the starting place, looking for the platform with small gears symbol. At the top of this platform you'll find a COG tag.
Keep going left. After a moment you'll see a declassified mission symbol on the left wall. After activating it, you'll be able to use only cleavers. Jump over the sandbags and go up the stairs. There can be few enemies on the top and an opponent with a Gatling gun further on. In order to kill him you have to force your companions to attack him and help them when the gun is overheated. There is also one more Grinder further on and several smaller units. Use the same tactics as previously. After killing the last enemy, the transition to the next section will be opened.
You'll find the Lancer, Sawed-off shotgun and ammo crate inside the room. In the next room there is Markza lying on the desk - pick it up. As for the second weapon, I suggest choosing something good in the close range fights. When you get close to the passage to the next room, flying enemies will appear - they explode after being killed. Return to the room where you've found Markza and take cover. Eliminate waves of enemies from this place, avoiding possible damages caused by explosions. After killing the last enemy, continue to the next room.

There is a declassified mission symbol on the wall near the hole. When you activate it, the visibility will be reduced. After getting inside the room, a Mauler will get inside through the door. After killing him, go to the passage and hide on the left side. Kill all enemies visible in a distance using Markza and use the shotgun to eliminate close opponents. Pick up ammo when needed. After that a Grinder will appear and get closer to the passage. Wait until his gun gets overheated and use Markza to shoot his head several times.
When you kill most of enemies, get inside the room and move to its right side. Go to the fortification in more distance part of the room (save grenades from ammo crate for later) and prepare to fight enemies who come running through the balcony on the left. There will be enemies with flame throwers and a Grinder among others. Finally, fight the Boomer.
The last wave will appear in the passage on the right. This will be a huge group of Maulers and a Boomer. If you have any grenades left, this is a good moment to use them. You can also get to the body of the previously killed Boomer and check whether he didn't drop a Grenade launcher. Retreat to the previous defense point when needed and use Markza then. After killing enemies who will appear later, you'll be able to advance to the next section.

But before you do this, return to the passage which you used to enter this room. Get to the first passage on the left, leading to the balcony, There is a COG tag behind the bench on the left.
There is a declassified mission symbol on the right wall. After activating it your health won't regenerate after damages. Pick up the shotgun and ammo - you can leave the grenade launcher, because using it on a short range can be dangerous. There are also Stim-Gas grenades near the door - this will be the only way to heal yourself after activating the declassified mission. Use them, when your health bar gets critically low. Break the door and go to the staircase. You'll be attacked by Wretches - kill them with a shotgun when they get close. You can also try to retreat behind your companions and fight from there.
When descending, you'll be attacked by more waves of Wretches, which can appear also behind you. So walk slowly, withdrawing behind your companions after each attack and checking your back. In the middle of the walk you'll find other Stim-Gas grenades. When you descend further, a large enemy with a cleaver will appear, supported by Wretches. Retreat, shooting him through the staircase, when he is on the other side.
Ignore the Sawed-off shotgun near the exit outside. When you descend event more, you'll find Stim-Gas grenades on the ground. Return to the exit and go outside. There is a sniper rifle on the left, near the sandbags - it can be useful later. There is also a turret on the left, close to the descent, which can be used to eliminate exploding Wretches coming running. If they come to close, you can retreat to the staircase and kill them there.

Thereafter a large group of enemies will come running from the other side of the hall (Boomers or Maulers among others). You can try to use the turret again to kill as many enemies as possible before they get closer. Remember about Stim-Gas grenades to heal yourself when needed. When enemies start to surround you, you can get back to the staircase. After killing the last enemy you can advance further.

There is a COG tag near the sandbags on the right, in front of the door leading to the next section.
Enter the large hall. There is a declassified mission symbol on the boarded-up door. When you activate it, your sight will be impaired after taking damage. Move back a bit further and pick up a sentinel from the ground near the stairs. Place him few steps below so it can guard the entrance from the bottom. You can also find a Tripwire Crossbow and set some traps on the stairs railings. Return to the sentinel and wait for enemies.

The first wave will get through the door on the floor on the other side of the hall. You can welcome them with a Gatling gun. When the enemy fire is too intensive, cover behind one of pillars on the top of the stairs. After a moment Kantus should appear - kill them at once. Keep monitoring sentinel's ammo.
After that, a hole will appear in the lower left part of the hall - close it with a grenade. Another one will appear at the bottom of the stairs, behind sandbags - you can close also this one if you've already accumulated about one and half star. Otherwise let enemies come out in order to increase your score (Kantus will appear again - kill them at once). The last hole will appear between upper parts of the stairs.

After killing the last enemy, go up the stairs on the opposite side of the entrance you got here. Turn left on the entrance, where the first wave of enemies appeared and get to its end. You'll find a COG tag there.
If the sentinel is not destroyed, take it with you to the next room. After breaking the door, you'll be attacked at once. Get inside and place sentinel on the right side of the first cover you see - hide behind it. You can be attacked by standard enemies and ones with flamethrowers or by enemies with Torque bows and Therons. In the latter case you can retreat to the previous room, where you can deal with charging enemies without exposing yourself to fire. After killing the last enemy you can advance to the next section.
Go inside the room. There is a declassified mission symbol on the left wall. When you activate it, you'll be limited to boomshields and Sawed-off shotguns only. Knock through the door - on the left side you'll find ammo crate but save it for later. After entering the main hall you'll be attacked. Retreat to the passage with ammo crate and stand behind the boomshield, thus blocking the passage. Wait here for Wretches and Bloodmounts. Try to shoot monsters first and after that - their riders.
When the situation calms down, you can go to the next room and shoot backs of entering enemies (opponents with flame throwers among others). After killing the last enemy, go down the stairs to the bottom of the hall. Enter the room on the right to find a COG tag on the ground.
At the base of the statue you'll find a declassified mission symbol. After activating it, you'll have four minutes to clear the area out of enemies and reach the designated point. Before you activate it, take the grenades lying to the right. There is also a Grenade launcher there. Near the sandboxes on the left you can find a Tripwire Crossbow, which can be used against the first wave of enemies. After jumping over mentioned sandbags, the hole will appear on the right, at the bottom of the stairs. There is no sense to close it and waste grenades, because most of opponents will come out of it before you can even react. Collect Grenade launcher ammo from Boomers' bodies or Gatling gun from Grinders.
After going right, watch the cutscene. Now hide behind the flowerbed and kill Mauler and another Boomer (collect Grenade launcher ammo if he dropped it). Now prepare for Ragers - try to tear them apart with a grenade or a Grenade launcher before they transform. You can go now to the left side of the stairs and shoot back of enemies running below.
The entire section is based on reasonable usage of Grenade launcher ammo - use it to eliminate larger enemy units and Ragers (check dead bodies for more ammo). You have also to keep moving down the stairs in order to get to the designated place in time. Very important thing is to not allow transformation of as many Ragers as you can. Once you get out of frag grenades, pick up Kantus ink grenades, which will appear later.
Left from the point leading to the next section, you'll find the stairs. Use them. Now turn left and go to the end of the platform. On the left side, behind a low wall, you'll find a COG tag.
There is a declassified mission symbol on the block to the left. When you activate is, elite Locust units will also defend Karn. After the fight begins, quickly take cover behind one of blocks. Try to shoot out boss's cannons. After few accurate hits the guns will stop and the beast will lean forwards, revealing a weak spot on the abdomen. Shoot it, watching out for fire projectiles.
When you destroy that point, the boss will retreat to the building rooftop and the rest of Karn's units will join the fight (Maulers among others). Watch out not to stand on boss's way when he walks towards the building. Use the time before more enemies appears, to replenish ammo (it is scattered all over the place). Boss won't wait until you kill all enemies and after a while he will descend to the square again. So kill as many enemies as you can before that happens.
After the boss descends the square, monitor moves of the Kern's creature. When he starts hitting the ground with his front legs then he is about to charge at you. So go away from the place where he runs to (always in a straight line). Turn around and shoot boss's right leg (it has different color than other). Try to move asides during shooting, because boss is using underground grenades. When the point on the boss's leg stops lightning, prepare for the next charge.

After destroying his leg, the boss will again flee to the rooftop and more enemies will join the fight (Ragers among others). Replenish ammo again before boss's guards appear and try to kill as many of them as you can, before the boss descends to the square. Ignore or kill the rest of enemies (if you do not have three stars) and focus on the creature's head when he spits the acid. In the rest of the fight try to cover bend blocks against turret fire - you can stop them for a moment by shooting them. When the creature falls down and tries to stand up, shoot him with whatever you have. If you deal him enough damage, the fight will be over.

During the fight remember about COG tag, which you have to collect before you kill the boss. After the fight begins, run to the left. When you pass the building descended by the boss, look for the COG tag near the wall surrounding the area.
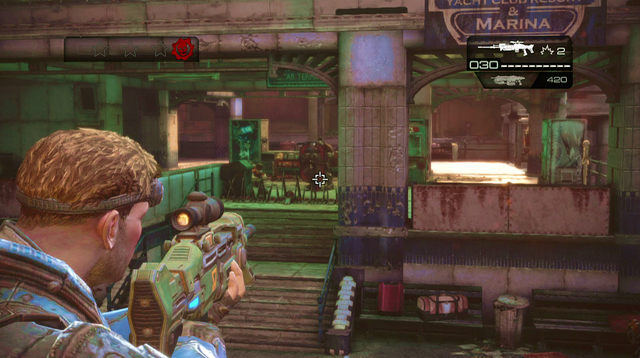
Walk over the wooden bridge to the other side. Go down the stairs and keep walking down the street, passing by vehicle wreckages on the right. When you get to the lower street, you'll encounter first group of enemies. Hide behind the building corner on the right and eliminate opponents from here.

Once you start walking another street down, a closed gate in front of you will be raised and new enemies will start appearing there (large units with Digger Launchers among them). After killing all of them, go through the gate. On the other side you'll have to quickly get to the end of the street and run into the building there before the avalanche gets you.
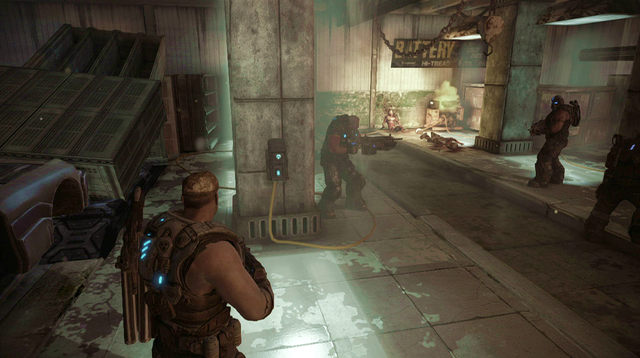
Go to the other side of the workshop and start the generator under the "Battery" sign. Now approach the pillar on the left (close to the entrance) and press the button there. The car on the left will be raised, thus unlocking the further passage.
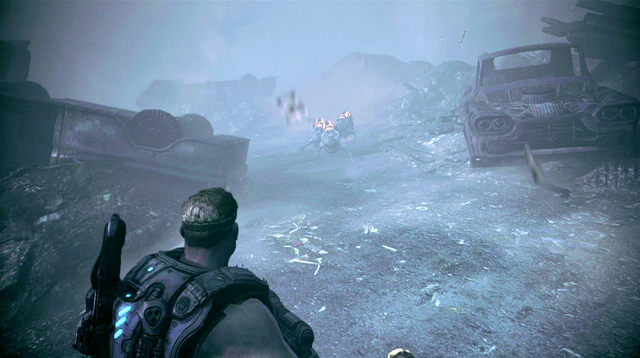
Knock down the door in order to get into the store. There are grenades behind the shelves on the right, at the back of the room. Knock down another door and walk outside. You'll find yourself on the foggy street. Tickers will come running from behind vehicle wreckages on the right. Walk down the street and prepare for more waves of these enemies. After passing the burning vehicle, turn right. You'll see a closed gate at the end of the path, on the left side.
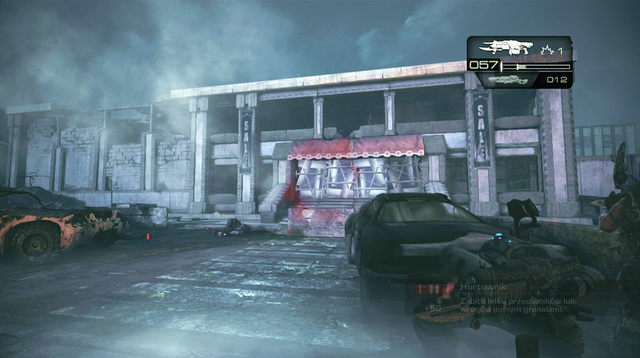
Enter inside the guard room on the left side of the gate and use the button to open the entrance gate. Snipers are hiding in the building at the end of the street. You can pick up a sniper rifle located near a small kiosk remains. When you try to get close to snipers, the fog will thicken and enemies will disappear. Withdraw to the place where you've found a sniper rifle. Enemies will appear at the end of the street and on the floor of the building on the right. A new wave will get through the building's barricaded door. These are equipped with Digger Launchers and there are also Ragers among them, so try to change your covers often. In case of danger you can withdraw to the place where you've found the sniper rifle.
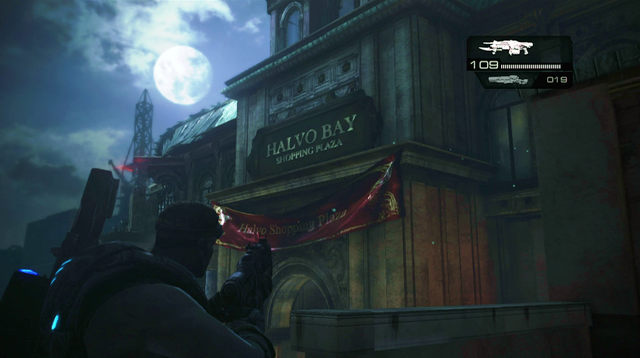
After clearing the passage, enter the building previously occupied by enemies. Watch out for possible survivors and go to the room on the opposite side of the entrance. Break down the door and enter the generator room. There are grenades in the left corner. Walk through the hole in the wall and go down the stairs leading to the mall canter through the security entrance ("Security" sign over the door).
There is an ammo crate inside. Go down the stairs left from the blocked door. The door will lead you to the hall. There is a turret at the top of the stairs. If you still have the sniper rifle, use it to take down the turret operator. Otherwise go to the back of the stairs and toss a grenade up. You can also wait for the moment when the enemy aims at the other side and shoot him then or wait for the moment when he has to reload the turret and then charge at him.
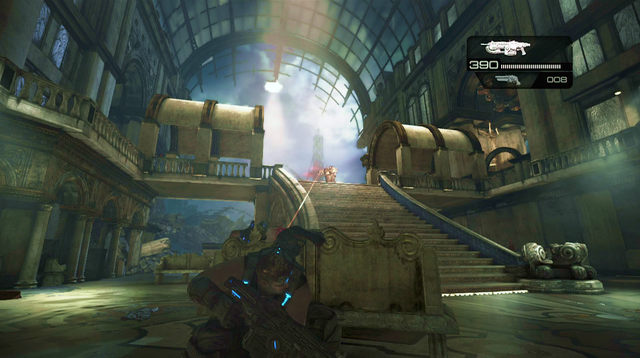
After clearing the top of the stairs, place yourself behind the turret. First kill enemies on the left side of the floor and then deal with ones running from the below the stairs. After killing the last enemy, the wall left from the turret will be destroyed. Go through the hole and run to the other side of the floor. Quickly hide under the rooftop, covering from mortar fire. Kill one of the enemies holding mortar from here. The second one is located below - get him after killing most of enemies.
On the other side of the fountain on the ground floor prepare yourself for new enemies. You can use mortars to deal with them. A new group will appear on the left side of the fountain. After killing them go to the other side of the terrace and look for the One-Shot. Use the weapon to kill larger enemies, which will appear on the left.

After killing all enemies, return to the stairs leading to the floor. Go to the right. There is a COG tag behind pillars under balconies. Go to the door on the right, behind the hole in the wall. Walk through the room and get outside. Approach the gate leading to Paduk's camp.
After starting the mission, turn left. Walk past the overturned car wreckage and look for garages on the left. The door to the right is opened. Get inside and approach the car furthest from the entrance. There is a COG tag near the corpse.
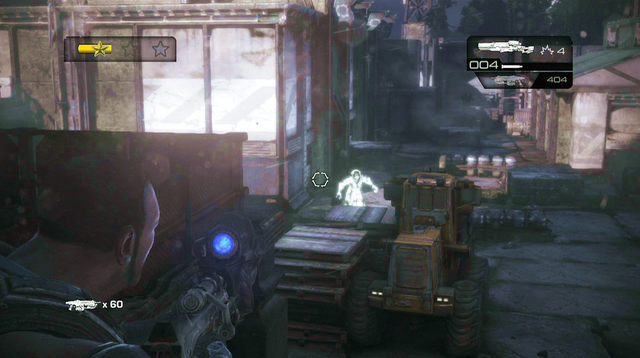
Pick it up and return to the starting point. Go down the stairs in front of you. Walk to the left side of the square with crates and the container. Go down another stairs and approach the generator. When it stops working, start retreating to the stairs you used to get here. After a moment you'll get attacked by Glowing people. Do not let them surround you - if you stay in the middle of the stairs, opponents should attack you one by one. When needed, retreat to the beginning of this section.
After killing the last enemies, enter the building left from the generator. Wait until Paduk open the entrance (collect ammo in the meantime). Now walk through the passage. Walking over the corridor you'll be attacked by new waves of enemies, jumping through the doors, walls and the ceiling. Check rooms occupied by enemies, looking for ammo and in order to pass by obstacle blocking your way. The door at the end of the corridor opens to the staircase leading to the building's rooftop. Use the elevator.
Go up the stairs to the top and walk to the center of the platform. After the cutscene, jump over the obstacle on the left from the entrance. The gas in the room will deal some damage to you from time to time. When you get to the fork, choose the left path and jump over obstacles to get to the further platforms. You'll be constantly attacked by enemies. Try to ignore them and kill only those blocking your way.
After getting to the designated point, raise the gas locker cover to get gas mask. The remaining enemies will disappear and the passage to the stairs leading to the upper deck will be opened. Move to the other side of the room watching out for enemies attacking you. Place yourself in some narrow passage, thus limiting number of enemies attacking you at the same time.

Use the stairs to get to the upper deck. Once you get to the very bottom, go through the door left from the designated passage. Enter the room on the right. There is a COG tag in the further corner. When you get close to it, you'll be attacked again.

After picking up the COG tag return to the stairs and use the passage leading outside. You'll be attacked by exploding Wretches. After killing them, go down the stairs. In the center of the deck you'll find a flare which you have to use it. But before you do it, collect ammo and pick up a Gatling gun located on the right, behind the flare.
After using the flare go up the stairs to the balcony on the right, taking Gatling with you. Locust will attack you in a moment. A Reaper will be flying over the platform. After a moment he will land on one of the rooftops on the right or on the left. When you shoot him, he will fly over the platform and again land on rooftop. New wave of enemies will appear from between platforms where Reaper was landing. Also Boomers will join the fight, going down the stairs on the left.
After them prepare to deal with one more Reaper, who will act the same as the previous one. When you kill the last enemy, you'll see a helicopter in a distance. Now you have to keep fighting until the helicopter lands on the platform. The fight will be joined also by infected people. Try to stay in the move, changing covers and not letting enemies surround you. More Reapers will appear during the fight - kill them when you have time for that. When the helicopter lands, go to the passage on the left, deeper on the platform. Run up the stairs and approach the helicopter to end this section.
Turn right behind the corner of the building on the right and head towards the gate in front of you. Enter the building on the left ("Slothrops"). Go outside through the room on the right. When you see a mortar projectile flying towards you, retreat to the building you just left. There is a turret on the building's terrace on the other side. Make sure that its operator is dead and run towards the mentioned balcony. More enemies will appear behind the turret (one with the Digger Launcher among them). After killing them, use the further turret.
New enemies will appear through the wall in front of you. Try not to let them reach the stairs leading to the balcony occupied by you. If any enemy gets through, leave the turret and kill him. In the next wave Ragers will appear. If they do not try to run to the balcony, leave them for later and try to kill them before they can transform. After killing the last enemy, approach the river, right from the turret you were using.
After a moment a door on the balcony previously occupied by you will be destroyed by an enemy with the Digger Launcher. After killing him, enter the building which your opponent has left. Go outside, using the passage on the left. Approach the truck and shoot the gas tank on its right side. Now go over the bridge made of the truck to the other side of the toxic river and enter the hole in the building.

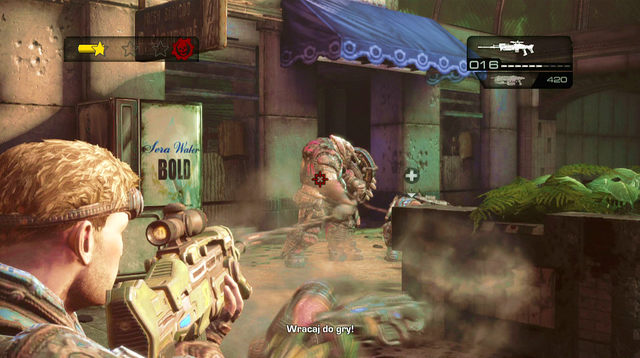
Approach the entrance gate on the right and open it. Pick up the explosives and use the door on the left side of weapon lockers. While you walk to the other side of the room, you'll be attacked by Tickers. After killing them, enter the staircase on the left side of the room. When you get to the upper floor, head to the passage on the right, leading to the room with cars. Inside this room you'll be attacked by transformed Ragers.
Use the passage on the right side of the room where Ragers came from. Go outside using the hole in front of you. After passing by a large statue, go down a small hill. Turn left. An enemy with One-Shot will appear in the window of the building in front of you. Hide inside a niche of the building on the left. Run closer to the opponent only to see him running away.
When you get in front of the building occupied by enemy with the One-Shot, turn right. After you get to the end of buildings, the car in front of you will be hit with the One-Shot. Hide at the building's corner and when you have a chance, run behind the building on the other side.
The next place which you have to reach is the hole in the building on the other side. Go through the hole in the other side of the room, where you'll be attacked by enemies from the fire escape. Go up the stairs to the building on the right side of the alley. Pass by shelves and approach the entrance from the side guarded by enemies with One-Shot.
You have to get to the other side again and run inside the building though the hole on the corner. Inside the building you'll get attacked by a group of enemies (one of them has a Digger Launcher).

After killing enemies go to the other side of the room, opposite to the hole you've entered here through. Go down the stairs behind the counter on the right to the lower level. You'll find a COG tag behind the first wall on the left.
Pick up the COG tag and return upstairs. Go through the hole in the right wall. Again run to the other side, heading towards the stairs leading inside the building. While inside take the stairs and get to the upper floor, where you'll be attacked by Wretches. Go to the breach at the corner and kill as many enemies in front of the building on the other side as you can. To the right from the breach there is a stand of enemies with One-Shot - you could try to pick it up.
After clearing the area, get inside the building. Approach the pillar on the left from the entrance and plant the explosive by pressing sprint button when both circles are in the same position. At this point you'll be attacked by enemies descending from balconies above. They will be appearing constantly so you have to watch for a moment where there are less enemies and then plant the rest of charges (3).

After planting the last charge, enemies from the outside will blow out one of the walls. Move there. On the right side of the hole you'll find the One-Shot - use it on larger enemy units. Save at least two bullets for Reapers, who will appear later. After killing few more enemies, the section will end.
Start going up the stairs to upper floors. After getting to the top, break out the door and get inside the room. A soldier on the left will notice you. Approach the place where you heard the shot and take the One-Shot near the dead soldier. Kill sniper on the same level - the rest might be ignored.

Go to the right side of the corridor, where enemy units will appear (they use hooked lines). Move to the other side of the floor where the generator and the hole in the ground are located - prepare to kill enemies coming out from the hole.

Get down through the mentioned hole, using the descent neat the desk next to the window. Approach the entrance on the left side of the corridor, where you see a body and a sign on the floor. Enemies will come running from the office. After killing them jump through one of the holes in the wall at the center of the office. There is a COG tag on the left side of the room, lying on the floor. Return to the office and use the left cat head statue behind the desk. You'll open the armory entrance.

Return to the hole you used to descend here and move up the cage on the right. Use the door to get outside the building's rooftop - watch out, because you'll be attacked here. After killing first wave of enemies, go to the upper part of the rooftop. New enemies will appear here (there are two with Digger Launchers among them). After them a Reaper will land on the rooftop. Keep moving around the rooftop and jump to the lower part of the rooftop when the monster gets closer to you
.
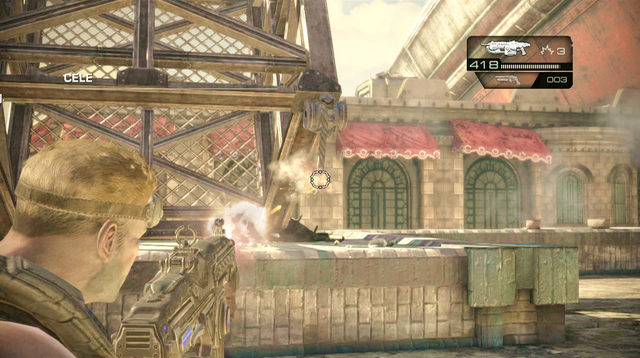
After killing the last enemy, shoot two lines which hold a metal construction. Go through this provisory bridge to the other rooftop. A next wave of enemies will attack you there - they will be sliding down lines from the ship deck. At the end of the fight, a Reaper will land on the upper part of the rooftop. Since he will stay still, try to get him from behind and shoot his weak point under his abdomen. After killing the enemy, use the door under the Reaper to get to the staircase.
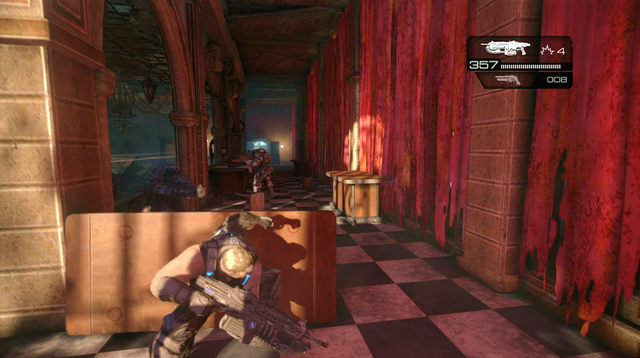
Go down the stairs to the lower floor. Use the passage on the right to get to the hall. New enemies will appear from the hole in the floor, which will be created later on. Particularly watch out for Boomer and enemies with Torque bows on the other side of the hall. Try to kill Ragers guarding the passage to the kitchen, before they can transform.
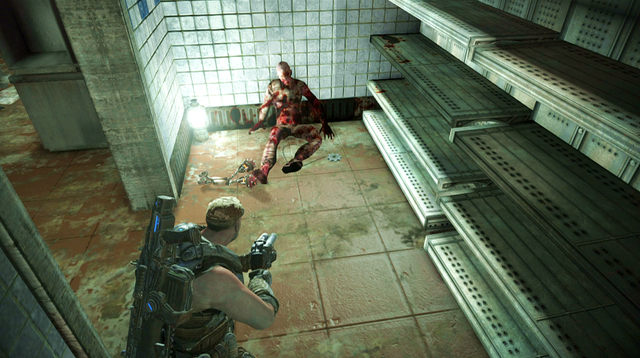
After killing the last enemy, go to the kitchen ("Galley" sign over the door). Inside the room you'll be attacked by new enemies, with armored Kantus among them. Aim his torso to deal him damage. Look for the entrance to the small room to the left from the kitchen entrance (there is a fridge with gears symbol near it). You'll find a COG tag inside.
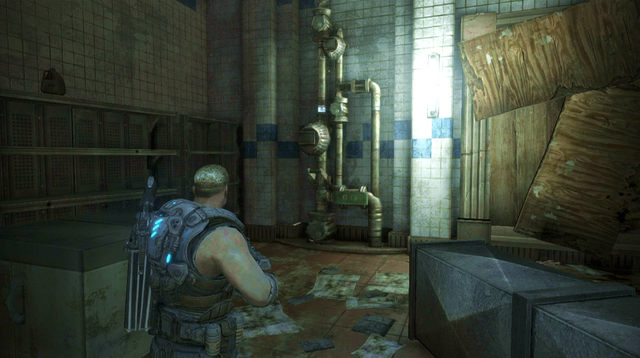
Your objective is to find three gas valves. There are also several water valves in the kitchen. Follow the pipes from the first valve with "Gas" sign in the left corner of the kitchen, in order to find ones you're looking for. The second valve can be found in the corner, opposite to the first one. The last valve is located bend the wall, to the right from the kitchen entrance. After opening three valves kill the last enemy in the kitchen.
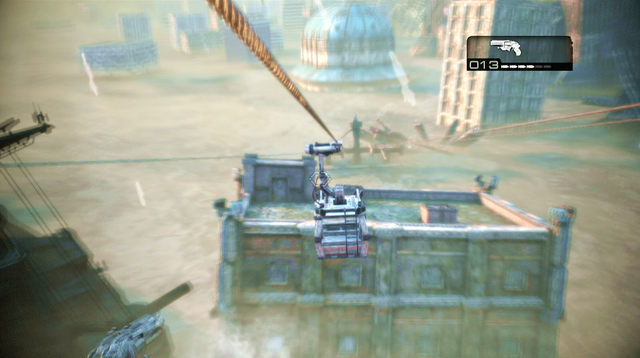
While sliding down the line ignore enemies you pass by and focus on gondolas moving towards you. Shoot latches holding them on the line to clear your path. After jumping on the roof, the mission will end.

Most often at the beginning of each stage of the level you can see a declassified mission symbol. Activating it results in speeding up earning stars bar and adding new challenges during completing the task. It could be for example using only given type of weapon, limited ammo, more enemies, etc. Not accepting the mission significantly reduces your chances to earn maximum number of stars (in some cases you can't earn them at all). On higher difficulty levels most difficult missions are those with time limit. Not reaching the designated point before time end results in your death.
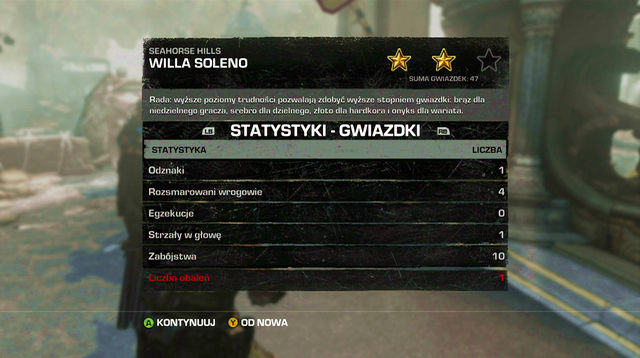
After completing each stage you'll see a table with your statistics. You can also learn from it what speeds up earning the stars. These are headshots, gibbing enemies, performing executions, ribbons, achievements and enemies killed. If you get kicked down before earning 3 stars, the stars bar is decreasing. Longer you stay kicked down, more bar "disappears".
In the Old Town stage. Before you move to the designated target, go to the end of the street and get behind the fence of the last house on the right. There is a COG tag in the right corner, next to the trash.

In the Riverwalk District stage. Before ending this stage go down the stairs to the statue in lower part of this area and turn right to the alley. At its end there is a COG tag on the right side.
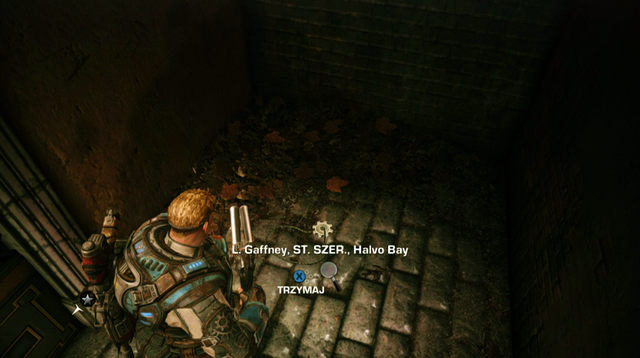
In the Museum Gardens stage. After destroying the door and getting outside to the starting point of the mission, go to the alley on the right. At its end you'll find next COG tag.
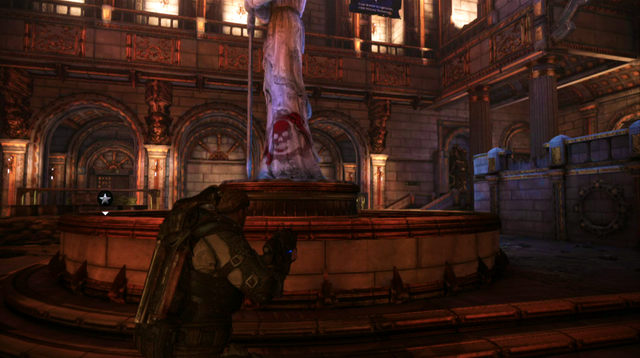
In the Great Hall stage. After defeating the second wave you'll be able to go to the next area. But before you do this, jump over the small wall surrounding the statue in the lower part of the hall. In front of the statue you'll find another COG tag.

In the Kaskur Wing stage. You'll find COG tag between stairs leading to the turret and the next stage.

In the East Wing stage. After clearing the hall, go right from the exit of this room. You'll find there another COG tag.

In the Archives stage. In the left corner of the archives room, standing in front of the hole in the wall used by enemies to attack you.

In the Vaults stage. There is COG Tag on the right side of the room, between a large hole in the floor and the wall.

In the Enfield Bridge stage. In the center part of the bridge, with many statues. Move to the spot, where the bridge is destroyed. On the left side you'll find COG tag.
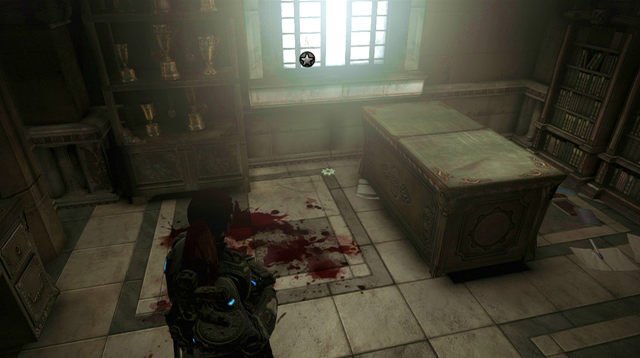
In the Courtyard stage. After clearing the courtyard and getting to the next building (after encountering first Rager), you'll find COG tag in the left room from the entrance.

In the R&D Labs stage. Go to the right side of the first room. Enter the next room with windows. There is COG tag in the right corner.
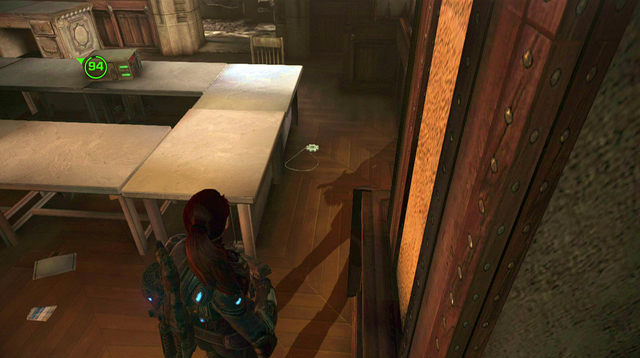
In the Monroe Commons stage. In the large hall where you're defending the robot, go rooms on the right and move towards the hall exit. There is a COG tag behind the desk.
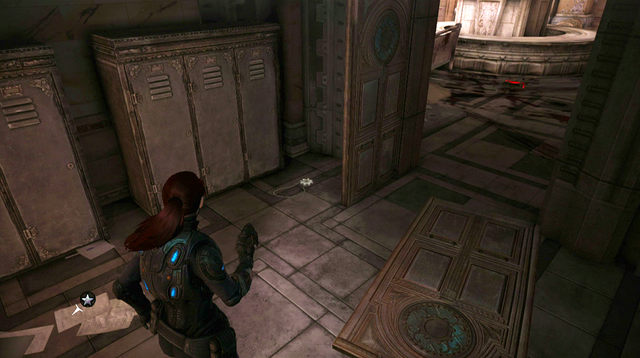
In the Atrium stage. Before leaving atrium go to the room on the right - you'll find there COG tag behind the door.

In the Crash Site stage. Go to the place where you were defending the robot. Climb up the stairs behind it. There is a COG tag on the right.

In the Amador Park stage. Before leaving mansion garden, head right from the stairs leading to the exit gate. You'll find there COG tag.
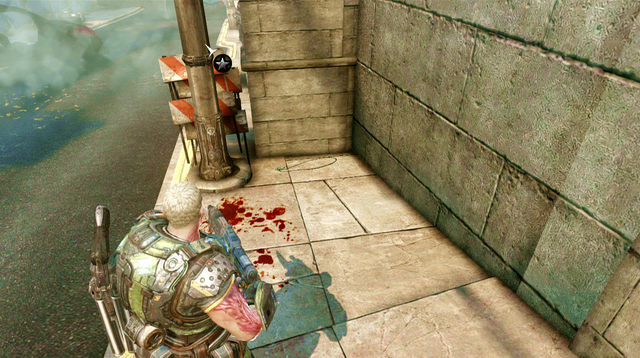
In the Magadha Villa stage. At point, where you can end this stage, move bit further up the street. On the left, behind the part of the low wall, you can find COG tag.

In the Soleno Villa stage. At the ending point, near the car wreckages on the left side of the street, you'll find COG tag.
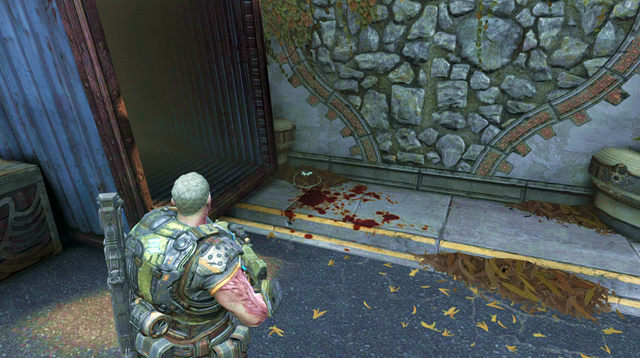
In the Windward Way stage. In the location where you encounter a second opponent operating a mortar you'll find a COG tag at the container on the left side of the street.
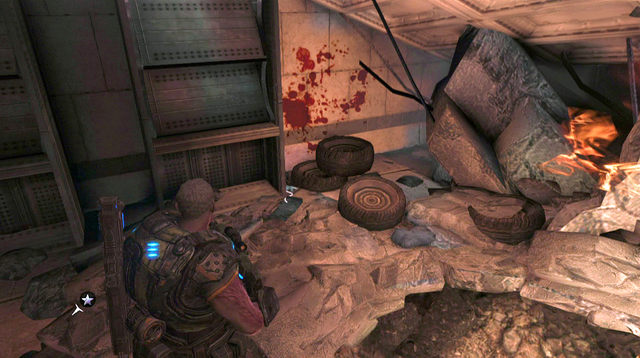
In the Risea Estate stage. Right from the place where you can end this stage look around for the entrance down to the garage. COG tag can be found on the left, between tires and the bookshelf.
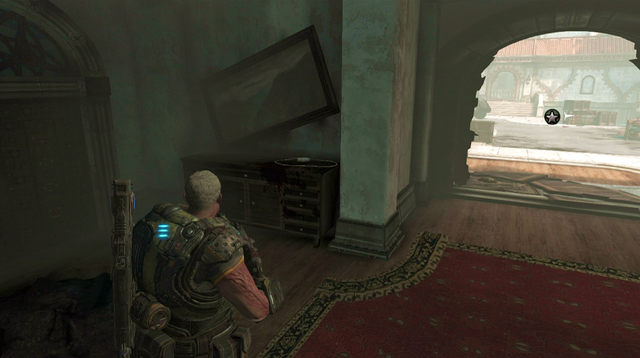
In the Guest Bungalows stage. Go to the passage under the balcony where you were using the mortar. There is a COG tag on a dresser to the right.
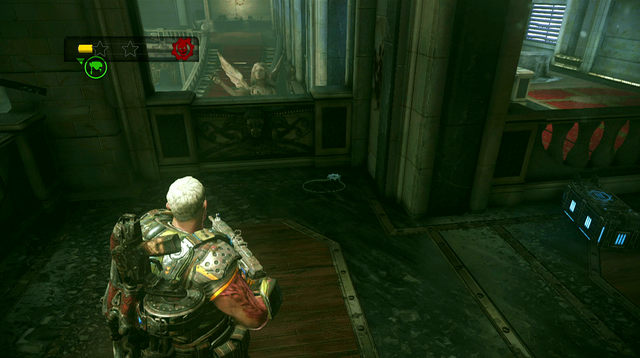
In the Elliott's Mansion stage. During repelling waves of enemies, remember about COG tag located on the floor, on the left side of the hall, over the main mansion entrance. You have to collect it before killing the last Berserker, which ends this stage.
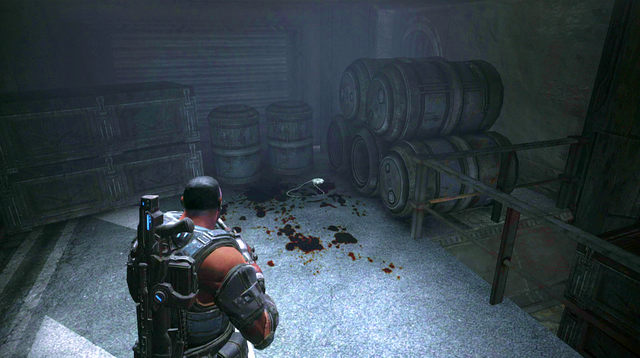
In the Fortress stage. To the right from the place where you can end this stage, there is a terrace with two building on the left. A COG tag is in the second building.
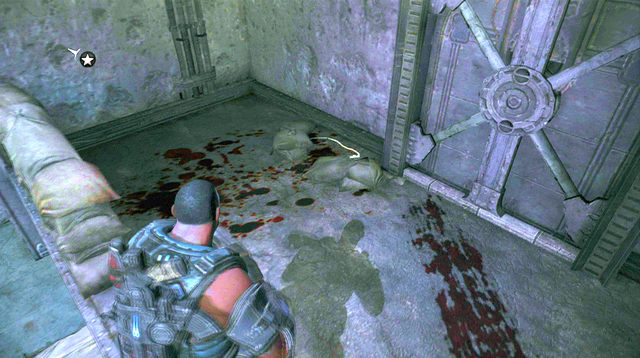
In the Container Terminal stage. In front of the building where you can end this stage, there is a building on the right. A COG tag can be found behind sandbags.
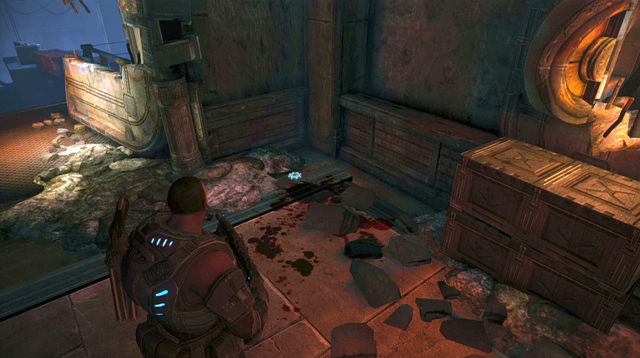
In the Motor Pool stage. After getting outside, head path up, keeping on the left. Right before the top turn right, behind a concrete cover. A COG tag is there.
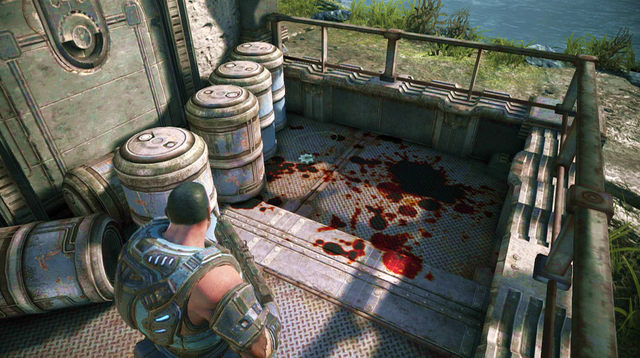
In The Cliffs stage. Right after beginning the stage, go outside the tunnel and go up the stairs on the left. Next COG tag is located near barrels.

In the Central Base stage. After getting outside, enter the building on the right. Go down the first stairs and turn left to see a COG tag.
In the Container Terminal stage. After beginning of the stage run towards Container Terminal. Turn right at the first turn and start moving back, thus getting to a COG tag.
In the Beach stage. At the beginning of the stage go to the room and turn left. There is a COG tag in the corner.

In the Wharf District section. Go left at the place, where you encounter first enemies. There is a board with photos of missing persons. A COG tag can be found under it.
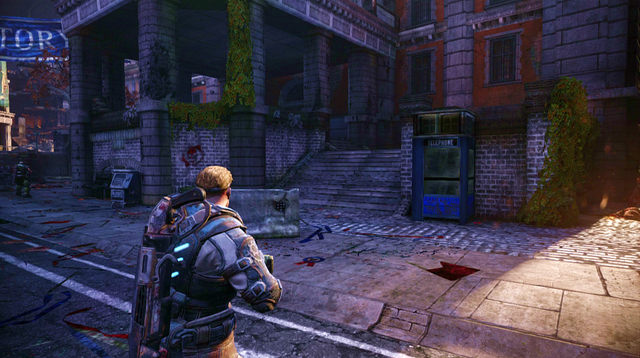

In the Parade Grounds section. After getting to the streets you'll see a stairs on the right, in front of the second parade vehicle. Go up the stairs and turn right. The COG tag lies near a low wall.

In the Upper State Street section. After killing the patrol, you'll go to the ruined building on the left. Go up and keep on the left. A COG tag lies between the rumble.
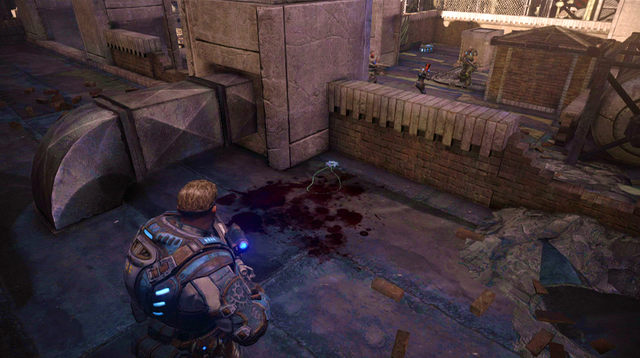
In the State Street Rooftops section. Go to the left of the rooftop from which you fight a Reaper, near the catwalk leading to the rooftop with mentioned Reaper. There is a platform - enter it. Turn left to find a COG tag near a low wall.
In the First Avenue Rooftops section. After starting the mission go to the catwalk leading to the other side and turn left. A COG tag lies near the scaffolding.
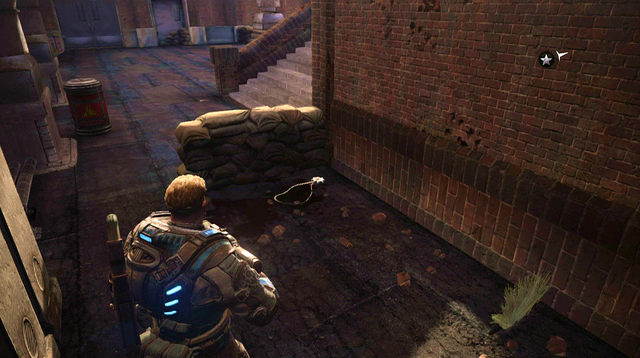
In the Museum Square Rooftops section. After getting outside go to the place with a turret and turn left. Descend to the lower level and turn left again. A COG tag lies behind the sandbags.

In the Overlook section. After repelling the first wave of enemies go down the stairs on the left side of the hideout. Turn right where you'll see a broke down door in front of you. Run inside and walk to the end of the corridor, turning left. At its end you'll find the item you're looking for. It is not possible to collect it before the first wave.
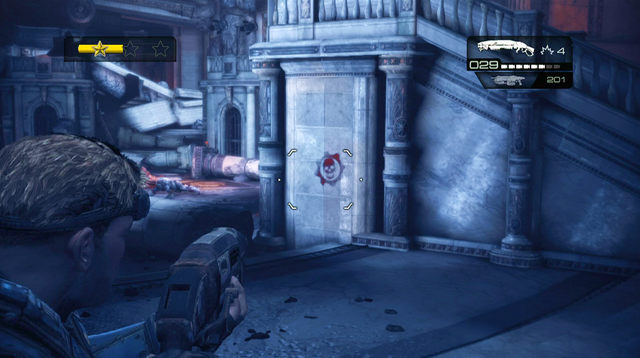

In the Grand Courtroom section. Go left from the starting place, looking for the platform with small gears symbol. At the top of this platform you'll find a COG tag.
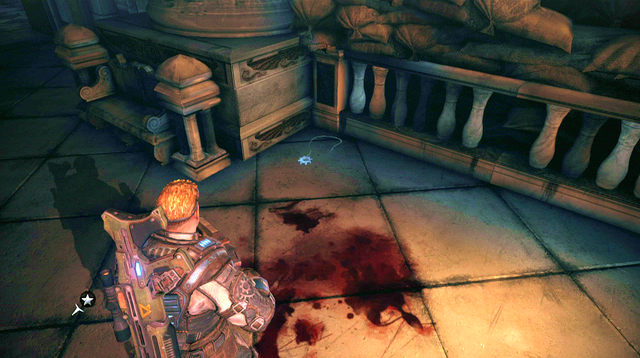
In the Halls of Judgment section. In the room, which door was open by a Mauler, take the first exit on the left, leading to the balcony. There is a COG tag behind a concrete bench.
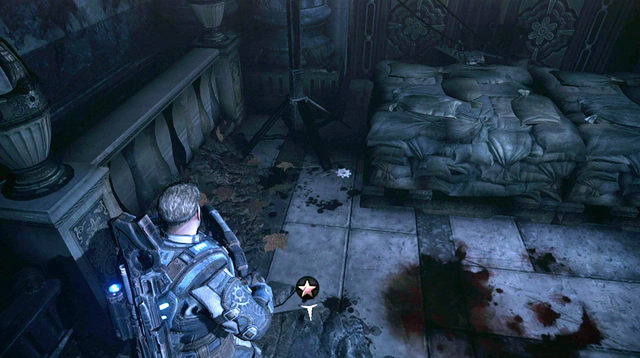
In the Terrace section. There is a COG tag near the sandbags on the right, in front of the door leading to the next section.
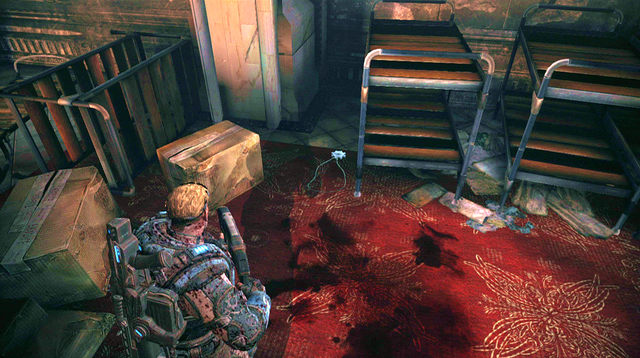
In the North Entrance section. Go up the stairs on the opposite side of the entrance you got here. Turn left on the entrance, where the first wave of enemies appeared and get to its end. You'll find a COG tag there.

In the Main Entrance section. Go to the main hall and descend the stairs. Enter the room on the right and pick up a COG tag from the floor.

In the Great Staircase section. Left from the point leading to the next section, you'll find the stairs. Use them. Now turn left and go to the end of the platform. On the left side, behind a low wall, you'll find a COG tag.
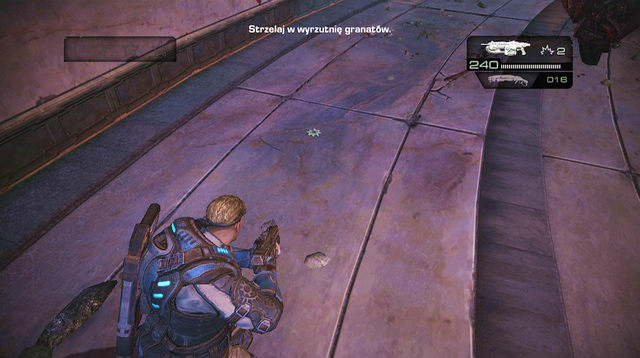
In the Plaza for the Tyran Dead section. After the fight begins, run to the left. When you pass the building descended by the boss, look for the COG tag near the wall surrounding the area.
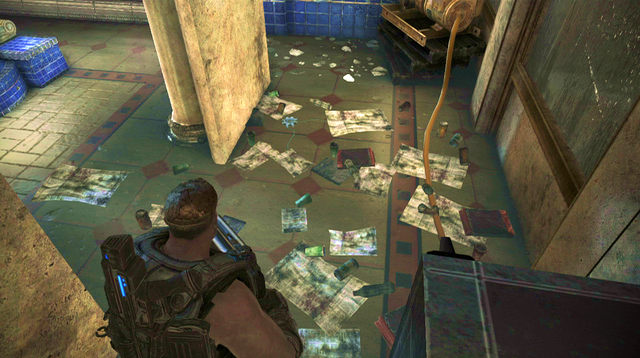
In the Reunion section. In the room with broken fountains, approach the stairs leading to the upper floor. On the right side you'll find a COG tag behind pillars under balconies.

In the Anybody Home section. After starting the mission, turn left. Walk past the overturned car wreckage and look for garages on the left. The door to the right is opened. Get inside and approach the car furthest from the entrance. There is a COG tag near the corpse.
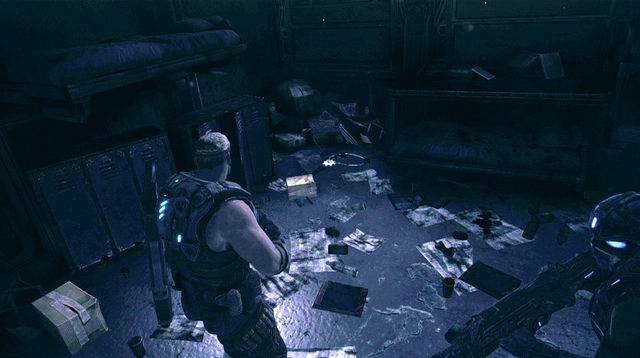
In the Dead End section. After you used the fire escape to get to the upper deck and take off gas masks. Go through the door to the left from the target passage. Enter the room on the right. There is a COG tag in the further corner.
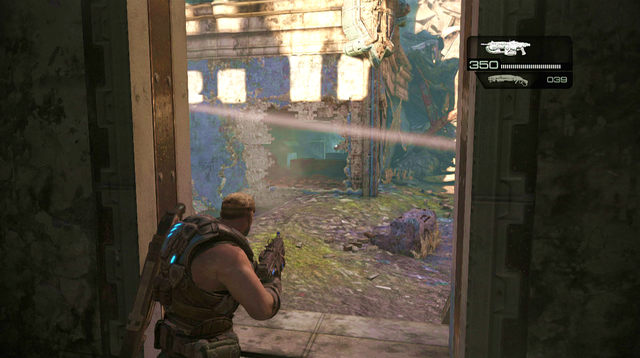
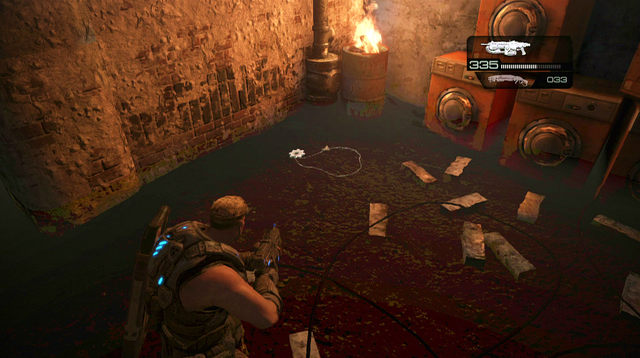
In the One Step Closer section. When you're under the fire of enemies with one-Shot you have to get inside the building shown on the first screen, through the hole at the corner. After killing enemies go to the other side of the room, opposite to the hole you've entered here through. Go down the stairs behind the counter on the right to the lower level. You'll find a COG tag behind the first wall on the left.

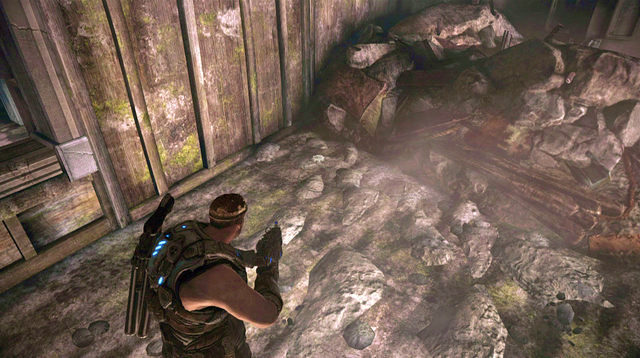
In the Straight to the Top section. At point where soldier gets torn by a One-Shot, go through the corridor guarded by sniper and get to the other side of the floor. You'll get to the generator near the window and the hole in the floor to the left. Use the hole to descend to the lower level. Move to the office at the end of the corridor and jump through the hole in the right wall. There is a COG tag lying on the floor to the left.

In the A Few Complaints section. After getting to the kitchen, go to the left. Look for the entrance to the small room to the left from the kitchen entrance (there is a fridge with gears symbol near it). You'll find a COG tag inside, near the body.
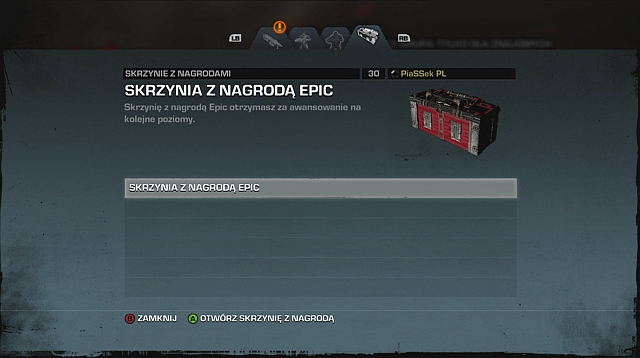
There are three types of PrizeBoxes in the game, earned for various activities and progresses. These types are: Normal, Rare and Epic. Boxes can be earned for killing given amount of enemies with particular weapon, earning medals or advancing to the next level. Boxes can be earned many times fulfilling the same condition, but requirements might be raised. For example the first box is earned after killing 100 enemies, but the next one is awarded after killing 500 enemies.
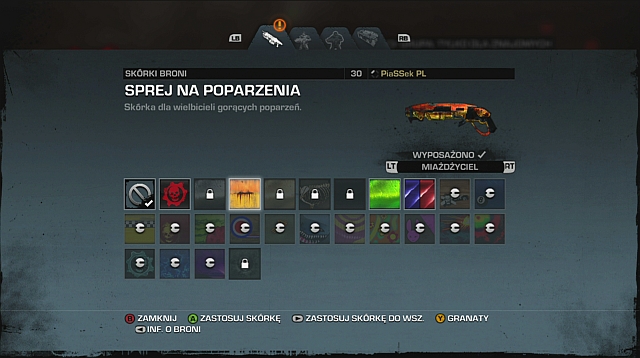
The box content can be checked in the Config section, PrizeBoxes tab. There are three main types of rewards inside the PrizeBoxes: XP (normal box), character skins or weapons skins. Rewards inside the boxes are generated randomly. It means that one player can find in the first box a golden Lancer skin and the other can find there 200 XP.
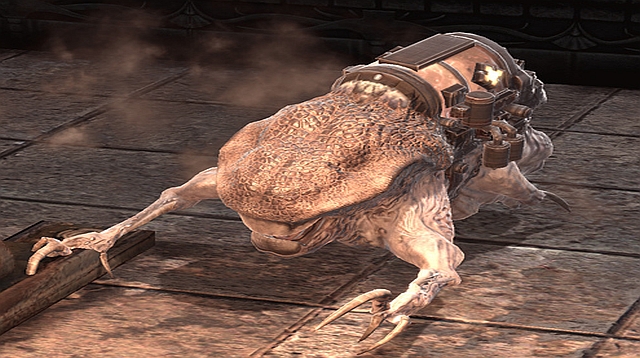
Tickers - enemies which run towards the player and explode when get close or die. When Tickers approaches you and starts ascending, you have to options: jump aside or attack with melee fight. In the latter case you'll kick him off to the safe distance. In addition it won't move for a while, which gives you a great opportunity to kill him from a safe distance.

Wretches - average sized enemies, which are a threat only on a short range. When it gets close to you, the best weapon against them is any shotgun. Retreat without aiming and shoot, thus avoiding their attacks and eventually you got him killed. In addition there is a dark version of this enemy, which explodes after death. Remember that Wretches can jump over the wired blockades and barricades.
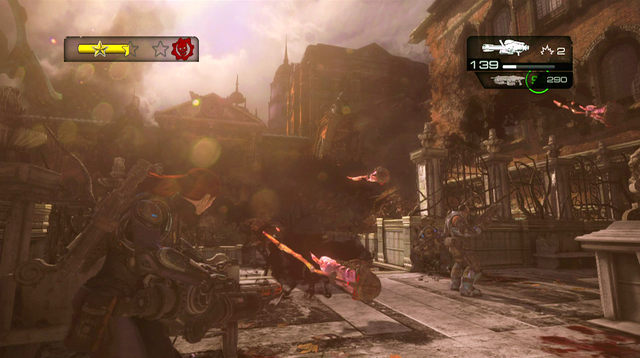
Nemacysts - some kind of kamikaze, which tries to get to the player and explode. The best tactics is to kill them before they can get closer or jumping aside before they explode. At the end phase of their flight, Nemacysts are not as agile which helps to avoid damage.
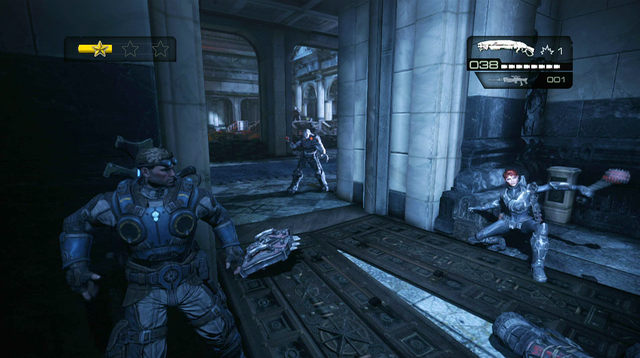
Grub - basic type of the enemy, which differs only with used weapons. In close combat particularly watch out for enemies with Lancers. When they get close, quickly kill them with any shotgun or prepare your lancer for a duel with saws.
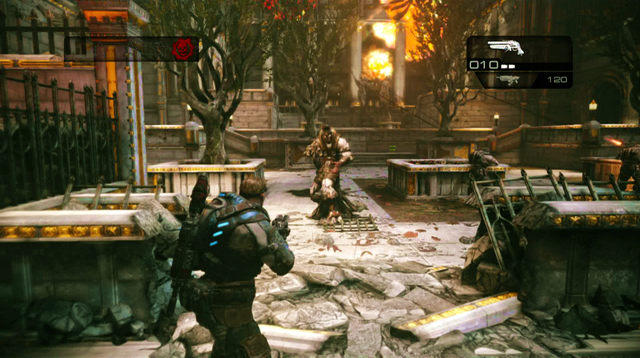
Kantus - the enemy which can revive fallen Grunts if they haven't been torn to pieces or killed with a headshot. In addition he has Ink Grenades, which create a deadly cloud around them when tossed. If there are no larger enemies, like Boomer, attacking you, Kantus should be your first target.

Rager - after certain amount of damages this enemy transforms into another form and charges at the player. The best tactics is to use a grenade, Grenade launcher or Lancer's saw to tear off the Rager before he starts to transform. If he already transformed, aim at his back which is also vulnerable for Lancer's saw attack.

Therons - There are two types of this enemy. The first one has a cleaver and charges at the player. If you do not kill him before he gets closer, take any shotgun and retreat while shooting without aiming. This way you can shoot and avoid his attacks at the same time. Another type is equipped with a Torque bow. In this case you can charge at him, after he shoots his arrow.

Serapede - a green fragment on the end of the last segment is the weak point of this enemy. Before it dies you have to destroy all its segments. The last segment is often out of your range. In such case you should run around a larger obstacle, waiting until enemy focuses on other target.

Mauler - large enemy, who starts hiding behind the shield covering his front, after few shots. Same as with the serapede, you should keep him on a distance, trying to shoot at his back from the safe distance. When the enemy stops hiding behind the shield and starts to charge at you, run away. If you have any spare grenades, toss them at him.
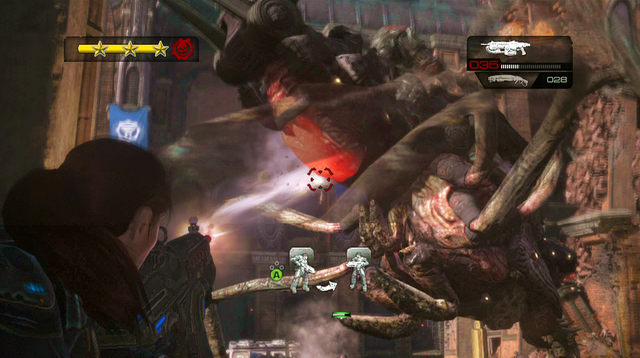
Boomer/Grinder - two enemies of the same type, using different weapons. Boomer uses Grenade launcher and Grinder uses the Gatling gun. In both cases you should fire from behind covers, waiting for the pauses in Boomers shots or overheating of the Grinder's gun.
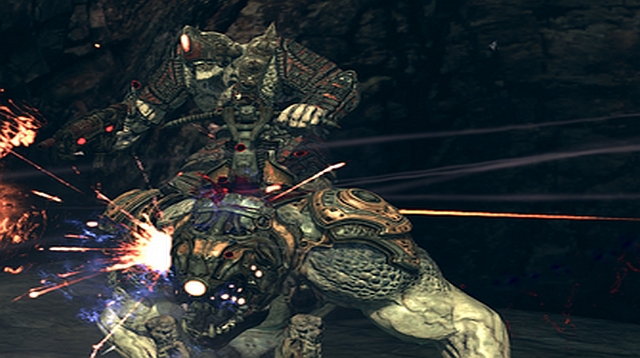
Bloodmount - a Grub riding a beast. It is best to kill the creature fist and then deal with the Grub. The beast tries to shorten the distance, so you can use this for your advantage by using any shotgun. Same as Wretches, this beast can jump over barricades and high obstacles.
Reaper - the largest enemy, which can be encountered on regular basis. The beast is equipped with rocket launchers. In addition it can carry up to two enemies (one is equipped with Torque bow). You can kill raiders first and then deal with the beast or focus your fire only on the creature, which will kill all enemies at once. The weak point is located under its abdomen. You can also try to attach a grenade to its body when it is not moving.
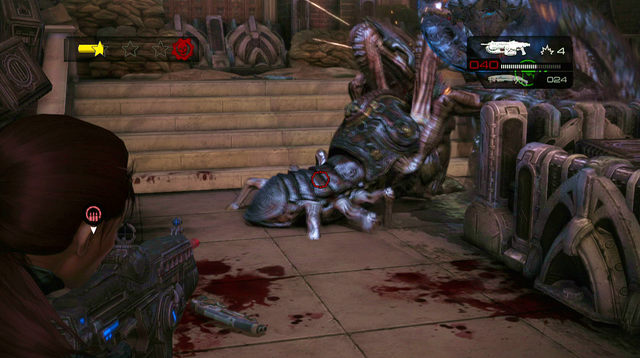
Corpser - enemy, which protects its front part with its legs. You have to get it from behind, where its weak spot is located or toss a grenade for example which will result in raising its legs. After given number of damage the enemy can bury itself into the ground - in this case keep moving, avoiding underground attacks.
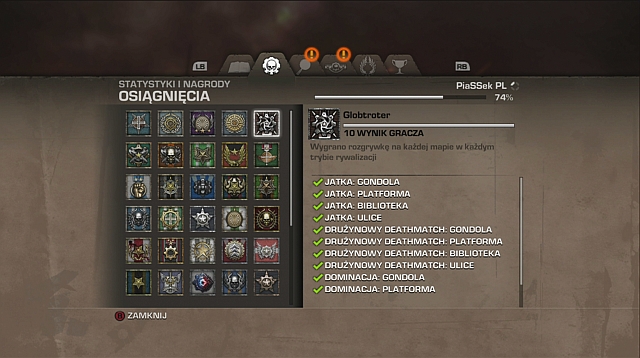
The below table lists game achievements and how to earn them. There are 50 achievements in total, of which only two requires multiplayer mode. The unlocking progress can be monitored in "Stats and Awards" submenu, "Achievements" tab.
Name
How to unlock
They Call Him Karn
Complete Museum Of Military Glory.
Open Arms
Complete Halvo Bay Military Academy.
The Real Thing
Complete Seahorse Hills.
Take Back This City
Complete Onyx Point.
I Told You
Complete Downtown Halvo Bay.
This One's Not Over
Complete Courthouse.
Friends
Complete Aftermath. In order to unlock this mission, you have to earn 40 stars in Judgment campaign.
Determined
Complete Judgment campaign on at least Casual difficulty.
Steel Nerves
Complete Judgment campaign on at least Normal difficulty.
Iron Fist
Complete Judgment campaign on at least Hardcore difficulty.
Lion Heart
Complete Judgment campaign on at least Insane difficulty. In order to unlock this difficulty setting you have to complete the game on any other difficulty setting.
Party People
Complete any game section with three other players, on any difficulty.
Blood Brothers
Complete Judgment campaign in co-op on any difficulty. Aftermath mission is not counted.
Challenge Accepted
Complete any declassified mission. Earning 3 stars is not required.
Never Give Up
Complete 20 declassified missions. Earning 3 stars is not required.
Quality Soldiering
Complete all 42 declassified missions. Earning 3 stars is not required.
A Peek into the Future
Watch Aftermath teaser.
The Aftermath
Unlock Aftermath. In order to unlock this mission, you have to earn 40 stars in Judgment campaign.
Rising Star
Attain 50 stars on at least Casual difficulty.
Shooting Star
Attain 75 stars on at least Normal difficulty.
Star Struck
Attain 100 stars on at least Hardcore difficulty.
Superstar
Attained all 126 stars on Insane difficulty.
Never Forgotten
Recover 10 COG tags. Exact locations of all COG tags are described in the "COG tags" chapter.
Veteran Remembrance
Recover 25 COG tags. Exact locations of all COG tags are described in the "COG tags" chapter.
Respect for the Fallen
Recover All 48 COG tags. Exact locations of all COG tags are described in the "COG tags" chapter.
Ribbon Master
Earn 3 unique Ribbons in any section. Sample Ribbons:
- The Double: 2 Quick Kills in a Row;
- Clusterluck: Kill multiple opponents or enemies with one grenade;
- Hat trick: score 3 headshots in a row without dying.
Proud Wearer
Equip medal.
Ready for War
Earn at least one Onyx medal. Each medal Has several ranks, marked with stars under the medal. In order to earn the Onyx one, you have to unlock fourth medal star. The easiest in my opinion is Trapper, which unlocks after completing 40 sections without dying.
Sybarite
Earn the Onyx "War Supporter" medal. Play 5 games in "Events". New events appear once a week.
Seriously Judgmental
Complete all Declassified Missions on Insane difficulty.
Level 5
Reach level 5. See "Unstoppable" achievement.
Level 10
Reach level 10. See "Unstoppable" achievement.
Level 20
Reach level 20. See "Unstoppable" achievement.
Level 30
Reach level 30. See "Unstoppable" achievement.
Level 40
Reach level 40. See "Unstoppable" achievement.
Level 50
Reach level 50. See "Unstoppable" achievement.
Let's Do This
Reach level 50 and chose to re-up for another tour.
Fearless
Reach level 50 a second time and chose to re-up for another tour.
Unstoppable
Reach level 50 a third time and chose to re-up for another tour.
Death to Locust
Kill with all classes of COG in "Overrun" or "Survival".
Death to the COG
Kill with all classes of Locus in "Overrun" or "Survival".
Survivor
Complete wave 10 on all maps in "Survival" mode.
Globe Trotter
Win a match on every map in all "Versus" modes.
Jack of All Trades
Win 10 matches of "Overrun".
Team Leader
Win 10 rounds of "Team Deathmatch".
All Rounder
Win one match in "Free For All", "Team Deathmatch", and Domination".
Roaming Free
Win one match on every map in "Free For All".
Team On Tour
Win one match on every map in "Team Deathmatch".
Overran
Win one match on every map in "Overrun".
Dominator
Win one match on every map in "Domination".


 Grand Theft Auto IV Game Guide & Walkthrough
 Grand Theft Auto: Chinatown Wars Game Guide & Walkthrough
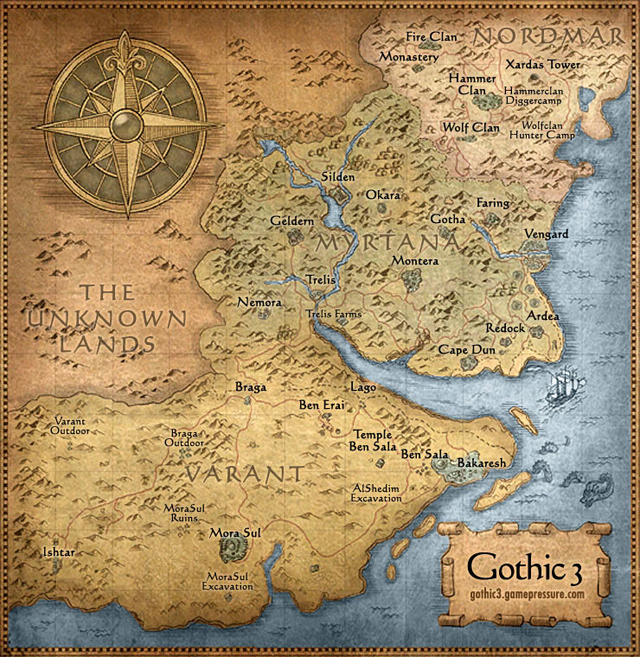 Gothic 3 Game Guide & WalkthroughGears of War: Judgment Game Guide & WalkthroughGunpoint Game Guide & Walkthrough