
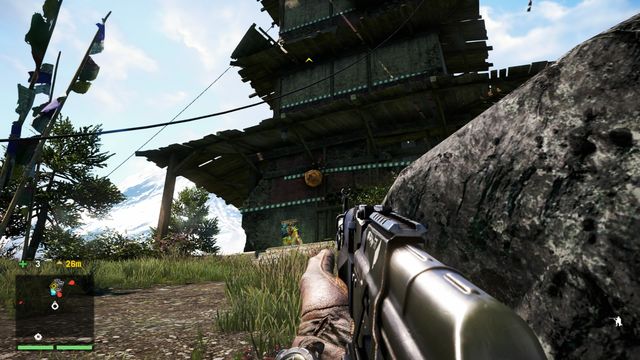
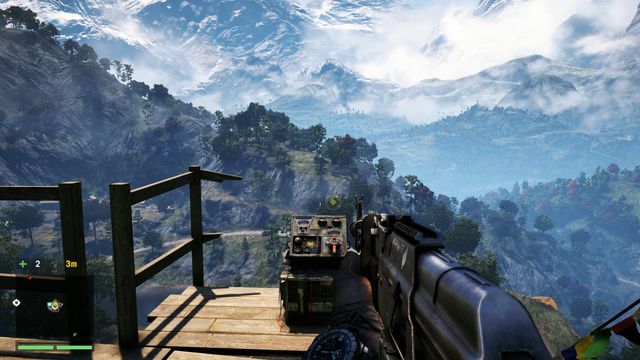
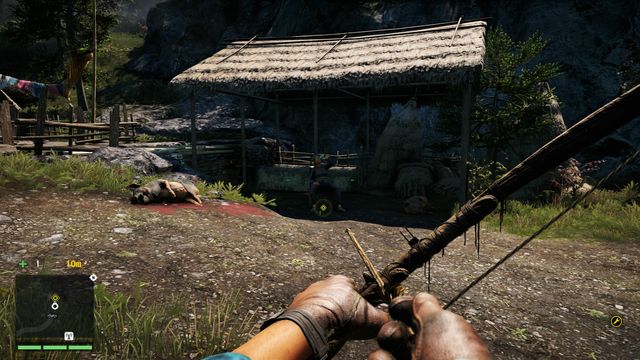
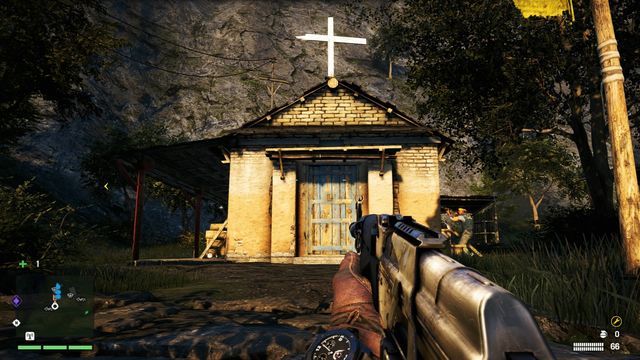
The unofficial guide to the Far Cry 4 game is a comprehensive compendium of knowledge about the main aspects of the gameplay, in the next installment of the popular series of FPS games from Ubisoft. Inside, you will find the complete walkthrough of the single player campaign mode, as well as a list of several dozens of additional, optional tasks, with hints on how to complete them. A detailed list of locations, with numerous places marked on them, where you will find hundreds of collectible items scattered around the world, can be found inside as well. The majority of gameplay time will be used on liberating camps and fortresses of Pagan Min's army. The guide won't fail at this, and will describe each and every one of them, while hinting the best available approach, so that the player can easily and effectively clear them out of the enemies. As Far Cry 4 is a typical shooter, the guide thoroughly describes each weapon and equipment available to the player, together with the information on where to buy, or find, the desired piece of equipment. Additionally, the guide explains each and every ability of the main character, with their strong points and drawbacks, as well as their application. Far Cry 4 was created by the Ubisoft Montreal studio, who previously worked on the second installment of the series, which action was set in Africa. Additionally, each department of the French studio helped with the production of the game. The first installment of the game was produced by Crytek, in 2004, and a year later Ubisoft took the responsibility to create the sequels and console spin-offs of the series. Far Cry 4 is the first installment of the series to appear on the consoles of the new generation (PlayStation 4 and Xbox One).
In this guide for Far Cry , you can find:
Norbert "Norek" Jedrychowski ()
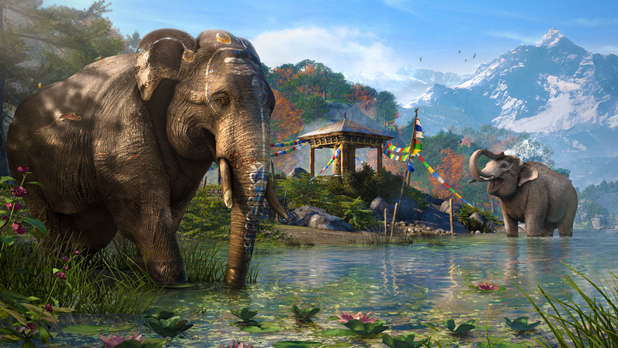
The Far Cry series, yet again, brings you to the most exotic places of our planet. In Far Cry 4, in contrast to the third installment of the series, you will have to bid farewell to the golden beaches, dense tropical jungle and the turquoise sea, as you will be dropped in the heart of mountainous Asia. The action of the title takes place in a small, fictional, Himalayan country named Kyrat, whose culture and architecture is based on the Bhutan, Nepal and Tibet. The country inhabitants are attached to centuries-old traditions and a simple model of life. Unfortunately, their peace is suddenly interrupted by a violent civil war, being the work of Pagan Min, an eccentric military warlord, and the self-proclaimed king of Kyrat. Together with his fanatic followers, he induces terror and strong-arm governments, bringing together a large number of civilian victims. The rebels are trying to resist the sick ambitions of Min, trying their best to remove him from power.

The main character of Far Cry 4 is Ajay Ghale. He's an ambitious, yet inexperienced man, born in the United States of America, although his family originated from the Kyrat. To fulfill the last will of his deceased mother, to scatter her ashes on home soil, Ajay, despite the dangers, goes on a journey to Asia. After arrival, he meets Min and gets caught up against his will in the struggle between the supporters of the dictator and the guerrillas.

Motion

Sprint/(hold) Hold Breath

Look Around

Melee Attack/Takedown/(hold) Move Body

Reload/(hold) Interact Action

Switch Weapon/(hold) Heal

Crouch/Slide

Jump/Skip

Camera

Throw Rock

Call "Guns For Hire"

Mines/C4

Aim/Peek

Weapons/(hold) Syringes

Shoot/Blind Fire

Throw/(hold) Cook Throwable

Game Menus

Options

Drive

Autopilot

Look Around

Takedown

(hold) Enter/Exit

Switch Weapon

(hold) Handbrake

Switch Seats (driver-MMG)

Radio On/Off

Throw Rock

Call "Guns For Hire"

Radio Next Song

Aim

Shoot

Throw

Game Menus

Options

Drive

Look Around

Takedown

(hold) Enter/Exit

Switch Weapon

Descend

Ascend

Aim

Shoot

Throw

Game Menus

Options

Movement

Sprint/(hold down) Hold breath

Camera controls

Melee attack/Execute/(hold down) Pick up the corpse

Reload/(hold down) Interact

Weapon selection/(hold down) Heal

Crouch/slide

Jump/Hop over
Camera

Stone throw

Call for "Guns for hire"

Mine/C4

Aim/Peek from behind the cover

Drinks/(hold down) Weapon swap

Fire/Blind fire from behind the cover

Throw/(hold down) Select a throwable

Game menu

Options

Steer

Automatic steering

Camera controls

Execute

(hold down) Enter/exit

Weapon selection

(hold down) Handbrake

Change seats (Driver/HMG nest)

Radio on//off

Stone throw

Call for "Guns for hire"

Radio: next track

Aim

Fire

Throw

Game menu

Options

Steer

Camera controls

Execute

(hold down) Enter/exit

Weapon selection

Descend

Ascend

Aim

Fire

Throw

Game menu

Options

Movement

Sprint/(hold down) Hold breath

Camera controls

Melee attack/Execute/(hold down) Pick up the corpse

Reload/(hold down) Interact

Weapon selection/(hold down) Heal

Crouch/slide
Jump/Hop over

Camera

Stone throw

Call for "Guns for hire"

Mine/C4

Aim/Peek from behind the cover

Drinks/(hold down) Weapon swap

Fire/Blind fire from behind the cover

Throw/(hold down) Select a throwable

Game menu
Options

Steer

Automatic steering

Camera controls

Execute

(hold down) Enter/exit

Weapon selection

(hold down) Handbrake

Change seats (Driver/HMG nest)

Radio on//off
Stone throw

Call for "Guns for hire"

Radio: next track

Aim

Fire

Throw

Game menu

Options

Steer

Camera controls

Execute

(hold down) Enter/exit

Weapon selection

Descend

Ascend

Aim

Fire

Throw

Game menu

Options
Movement
Sprint/(hold down) Hold breath

Camera controls

Melee attack/Execute/(hold down) Pick up the corpse

Reload/(hold down) Interact

Weapon selection/(hold down) Heal

Crouch/slide

Jump/Hop over

Camera
Stone throw

Call for "Guns for hire"

Mine/C4

Aim/Peek from behind the cover

Drinks/(hold down) Weapon swap

Fire/Blind fire from behind the cover
Throw/(hold down) Select a throwable

Game menu

Options

Steer

Automatic steering

Camera controls

Execute

(hold down) Enter/exit

Weapon selection

(hold down) Handbrake

Change seats (Driver/HMG nest)

Radio on//off

Stone throw

Call for "Guns for hire"

Radio: next track

Aim

Fire

Throw

Game menu

Options

Steer

Camera controls

Execute

(hold down) Enter/exit

Weapon selection

Descend

Ascend

Aim

Fire

Throw

Game menu

Options
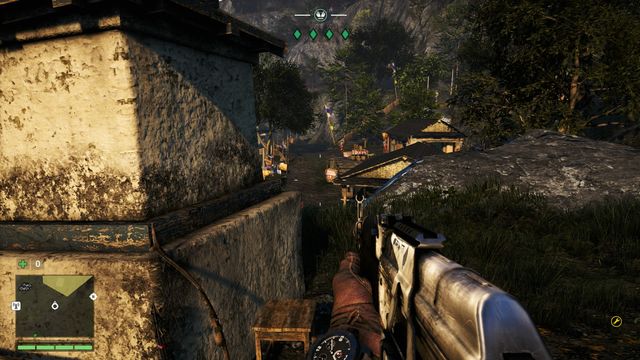
 It is always a good idea to use the advantage of height- there is a lower risk of being spotted.
1. Reveal the map. You do that by seizing all of the bell towers. Right at the outset, you can seize the ones in the Southern and central Kyrat . After you gain access to the second part of the map (the "Key to the North" mission), you will be able to liberate more of them. It is best to do this as early as possible.
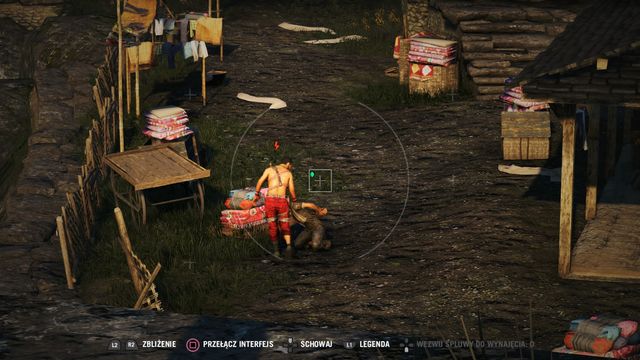
2. Trade as often as you can (at the beginning, at least). With a small backpack, you load it quickly, with various loot. At the beginning of the game, looting the corpses of the defeated opponents may, quite well, profit you. You can sell the trinkets that you do not need, to the traders in hideouts, but also to the traveling traders.
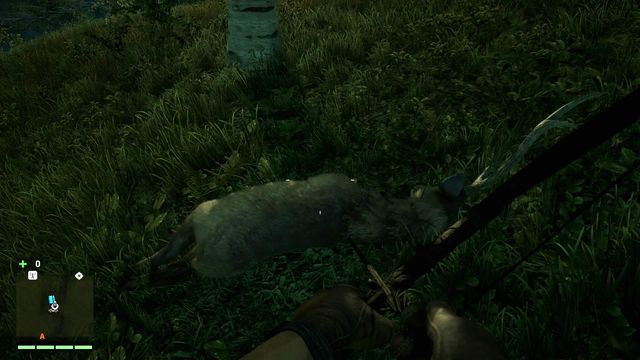
3. Kill and skin animals, as often as possible, while completing other missions. This way, you find out that you already have the necessary material, after you decide to upgrade your equipment.
4. Keep silent. The majority of missions can be completed, while staying undetected. In many cases, sneaking is additionally rewarded (e.g. while liberating outposts) and sometimes, this will be outright necessary (some missions). Therefore, remember about crouching and keeping an eye on the detection meter.
5. Remember to carry "silent" weapons around, the absence of which makes sneaking pointless. It is much easier to kill an opponent with the bow or the crossbow, with a throwing knife or the sniper rifle. This eliminates the risk of being spotted, you also do not need to sneak up and past, too much. Try to aim to the head, especially in the case of opponents with bulletproof vests and heavy ones. They are invulnerable to shots to the chests.
6. Use the camera. After you zoom in, you can take a closer look at the area. Also, the camera allows you to mark the enemies, who you can then watch over. Just remember that the marking action is temporary. Still, it is an invaluable tool, especially if you are planning on an onslaught.
7. Do not take "leaps of faith". The best case scenario, if you fall from a height, is that you lose a larger amount of health. In the majority of cases, it ends in death. If you like jumping down, get a wingsuit that you can use to glide. You take no damage from jumping into water.
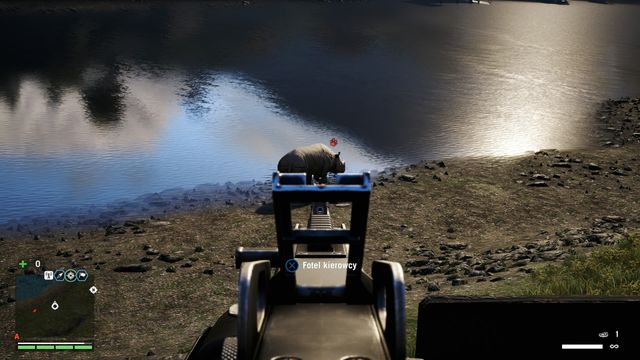
8. Exploit the advantage provided by elephants. If you prefer the assault style, they will work excellently for you. They are resistant and they ensure you, additionally, with quite a protection. Also, you can shoot while riding one, in case charges and crushing are not enough. Therefore, remember to unlock the skill of riding elephants as quickly as possible.
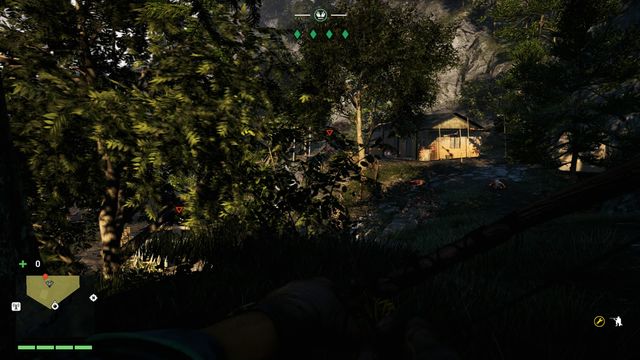
 If there is nowhere to hide, escape into water - wild animals steer clear of it.
9. Also the other animals can be of use. You need to approach the fauna here with respect, but sometimes, it is advantageous to use them for your own ends. By smashing gates that animals are kept in, or by planting bait next to soldiers, you can be nearly certain that there will be a predator to wreak havoc and be an involuntary ally in your cause. Just make sure that you are not attacked yourself and that you eliminate hunters beforehand, who can control some of the animals.
10. The best means of transport around Kyrat is the buzzer, which you can find in certain points on the map. It is worthwhile to remember those spots, because sometimes, you need to cover some distance in a car, before you can fly a buzzer. After you effect an appropriate purchase, you can find the machine next to The Ghales' Homestead.
11. Remember to distribute your skill points. For nearly every action, you receive experience points, which you should invest into the skills that you need, immediately. It is necessary that you extend your health bar, increase the potency of syringes and obtain the skill at elephant riding. Then, improve on your combat skills, especially the ones related to execution.
12. In some cases, you are going to need syringes. Therefore, collect leaves and use them to craft substances to heal your character, strengthen yourself in combat or to be able to see all of the opponents around, temporarily.
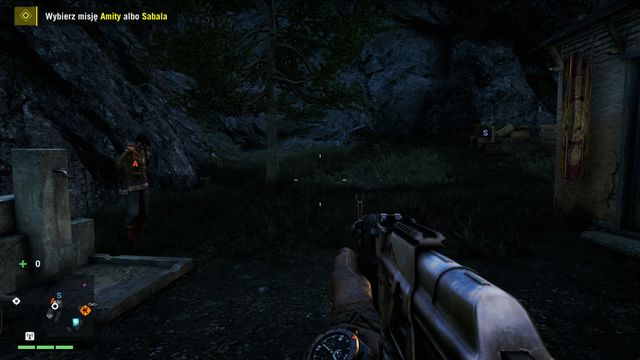
13. Your choices affect some of the campaign mode missions, as well as its ending. By supporting Amita or Sabal you lose the option to complete some of the missions (to learn more, see the "Balance of Power" chapter).
14. It is worthwhile to complete side missions and search for collectibles. Thanks to this, you receive lots of money and experience.
15. Take good care of your karma level, thanks to which you pay less at stores.
16. Seize several watchtowers, at least, to facilitate traveling around the map (the "Fast travel" option).
17. It is a good thing to have all of the available weapon types on you. A sniper rifle, crossbow or grenade launcher will always come in handy. Depending on your needs and preferences, into the last slot, put a shotgun, assault rifle or something stronger.
18. Kill eagles. These pesky birds can appear everywhere, at the least expected moment. Make them pay!
19. In general: kill everything that moves - or be killed. Leave only elephants be. They are harmless and can be used in the form of tanks.
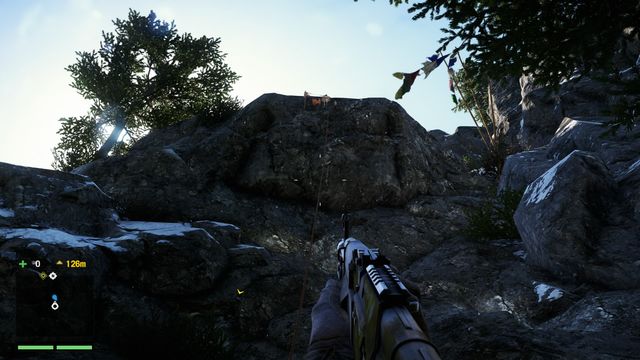
At first the entire map of Kyrat is veiled by the fog of war. It hinders your movements and prevents you from completing some quests. To reveal the map and unlock some new possibilities you need to take over the radio signal. You can manage it by destroying radio boxes with transmitters which you can find on the top of every bell tower. The bell towers were built in over a dozen of places on this island. Climbing on a bell tower and damaging a transmitter will result with revealing a specific part of the map and will give you an information about some new places nearby. Beside that you will also receive some experience points, few free guns from Longinus and you will be allowed to buy some new weapons in shops.
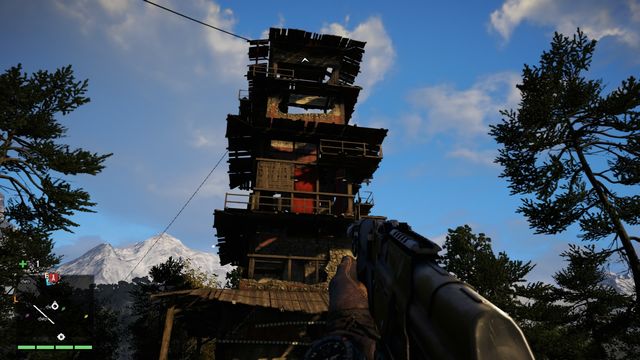 Every bell tower is almost identical.
Unlike outposts the bell towers are not guarded. You may find some lonely enemies nearby only few of them. Climbing to the top of a bell tower is always somewhat different, however there is a lot of similarities between every tower. You will start to climb at the very bottom where you have to find a platform on which you can climb or a hanging rope which you can grab. While moving up you need to look for places which will help you to get higher, mostly new platforms and ropes. Sometimes you have to bypass a bell tower using a narrow passage. Don't look down and try to not run to fast since it may end up with your fall. Also try to be careful when you walk through the narrow boards or you jump between the subsequent edges.
 When you are inside always look for hanging ropes and narrow desks which will allow you to walk to the other side and so on.
Climbing to the top is an arduous, although pretty easy task. Remember to not rush yourself since falling may end up with the death of your hero. If you haven't found an exit just try to look around again. There is always a ladder or a shelf on which you can climb and then jump from it on the other side or on a desk which you can use as a passage leading to the higher level. In some places you can also destroy few boards to crouch out to the external part of a tower. When you will be on the top you need to interact with a transmitter to take over the signal and reveal a part of the map. Remember that you don't need to climb down - a much easier way is to use a zip-line.
Some bell towers may allow you to get to top right away if you will use the buzzer. If so then you need to land the buzzer in a right spot or jump out when you are right above a tower and then destroy a transmitter as usual. The effect will be identical as if you'd climb the entire way from the bottom.
 Don't forget to destroy a box with a transmitter.
Taking over the bell towers is worth your time. It will unlock for you the access to some new weapons and quests and you will also receive experience points. It will also reveal some interesting places nearby which may be related to new quests as well.
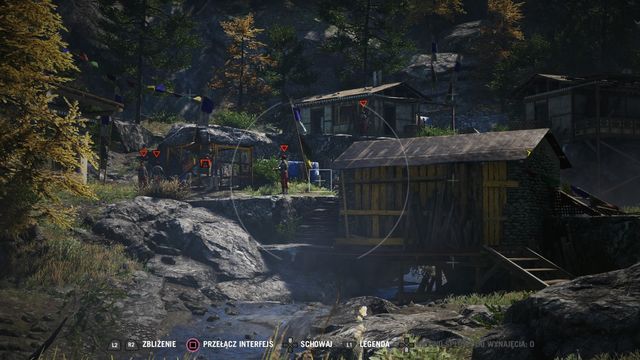
In over a dozen places hard upon the main roads are located the enemy military posts. You can take over every one of them what will unlock some new quests as well as the access to the "fast travel" option. On the freed area will also appear friendly (instead of enemy) patrols.
 You can eliminate the isolated enemies without arousing suspicions.
There are three ways to take over every military post:
- total destruction - choose this way if you don't care about being detected and you can deal with the alarms and reinforcements before breakfast. You don't need to use any specific tactic beside having a good gun and a good cover. If you choose this way you need to be prepared to fight with enemy reinforcements which sometimes can be pretty huge.
- no alarm - this situation takes place when you will be detected by an enemy although he or she will not be able to turn on the alarm. It will allow you to avoid the enemy reinforcements. You can choose this way if you will, for example, be spotted by only the last enemy (after you will eliminate the rest of them quietly) or you have deactivated an alarm earlier on.
- no detection - the most rewarded option when consider the received experience points. To choose this way you need to take over the entire enemy post without being detected by even a single opponent. To succeed you need to kill your enemies by using (for example) a bow or the takedown. You also will need to distract them by throwing rocks around the place. It's not essential however any other method is also related with the huge risk of being detected.
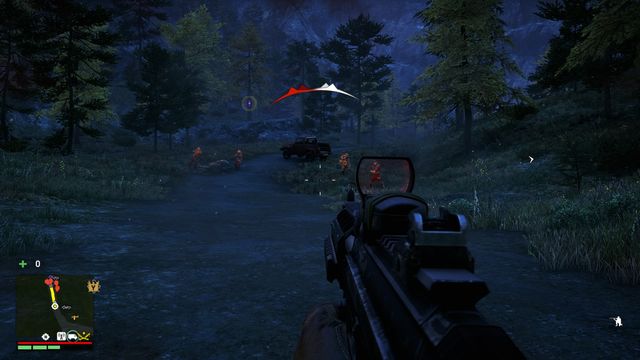
 Highlighting your enemies will allow you to follow their every move.
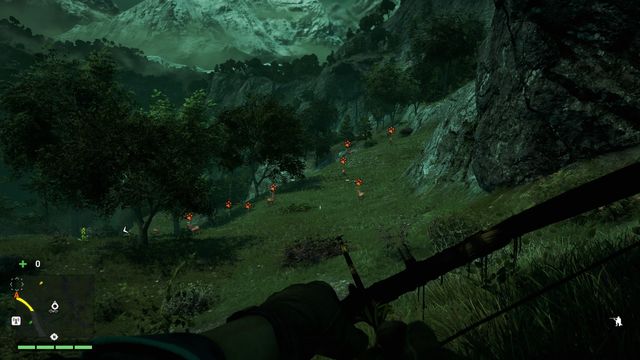
The first thing you need to do is a little reconnaissance. To do so you need to use your camera and mark all the enemies. Various enemies will be tagged with different icons. Remember that you can mark the hunters for only a short time. After a while the icon above their head will disappear so you should try to memorize where have you saw them or eliminate them before anyone else.
 Watching the area from above will help you to plan your attack and to eliminate your enemies in many points of the military post without being noticed.
The best way is to take over every post methodically and quietly not only because of the experience points bonus but because of the simplicity of this option. Especially at the beginning of your attempt try to sneak around. Kill while using your hidings as many enemies as you can and think about turning of or destroying an alarm. In some outposts there is more than one box with the alarm so you need to take care of all of them if you want to be sure that the reinforcements will not appear. Remember that the top floor or the roof of the highest building and the high rocks' ledges will almost always provide you the best view of the entire outpost. Sometimes it is good to bypass the entire post while keeping a safe distance and to mark as many enemies as you can and after that go to the right spot and then to begin the extermination. You should start by killing the hunters or the enemies with a heavy weapons (you need to have the Heavy Takedown skill).
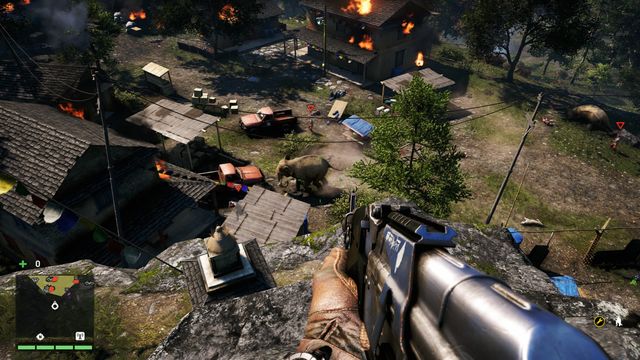
 Releasing an elephant (or any other aggressive animal) will significantly facilitate taking over the military post.
You can additionally facilitate taking over the outposts by using some additional options. In some places you can open a cage which keeps a locked animal. Released animals are mostly going to attack the guards and even succeed to kill some or all of them, initiating the chaos at the same time. You can also set up a bait in a convenient place which may lure a predator to help you. However if you want to use the animal's help you need to eliminate the local hunters first since if you won't do that they will kill your companions really fast. If you prefer to use a brutal force you may want to call the "Guns for Hire" or to use an MMG or a mortar which you can find in some areas.
In the "Outposts" chapter every single enemy post is shortly described. However, remember that every presented tactic is just a proposition and is focused on quietly eliminating your enemies.
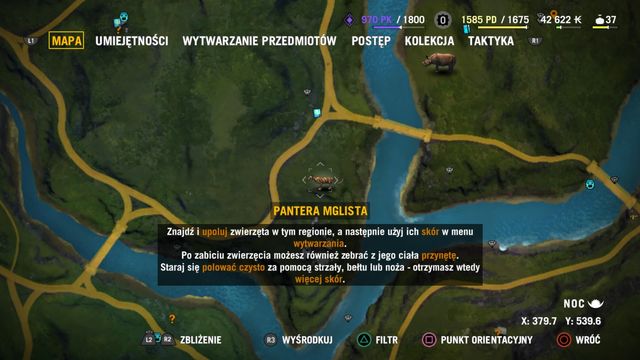 You can easily find the occurrence of every kind of animal on the map.
After you will take over the radio signal in a bell tower you will see many different animal icons on the map. They represent the areas where you can find a specific animal species. These areas are not always reliable since animals often move between places so if you can't find an animal you are looking for you should search the surrounding area or go to a different place with the same icon. Sometimes you can also wait for a few game-hours in an outpost (after the fast travel use a bed) since some species can be easily frightened (mostly by gunshots) and it may be hard to find them after that. The better solution then may be just to give them some time to calm down.
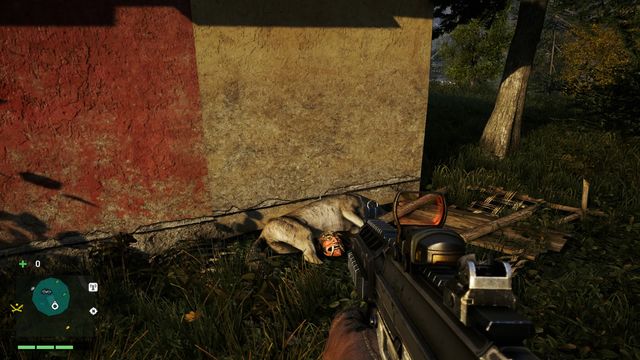
 Bodies of dead animals which you can use to collect their skins are marked on the mini-map with a grey "X" mark.
You can interact with every killed animal to collect a bait and a specific animal's skin. You can use a bait to lure a predator. Drop it on the ground and after a short time you should be able to see a new predator around such as a bear, a tiger or a leopard. From the other hand you can use the animal skins to upgrade your items such as the loot bag (you can increase its capacity) or by crafting a bigger bag for the explosives. In the crafting menu you can find out what types of skins and how many of them will you need to craft a new upgrade. When you will collect the necessary items the upgrade option will be unlocked.
 If you can't catch a running animal you can just run over it and then exit your vehicle and without any problem take the carcass's skin.
Animal species (from which you can gain their skins) may be divided into several types:
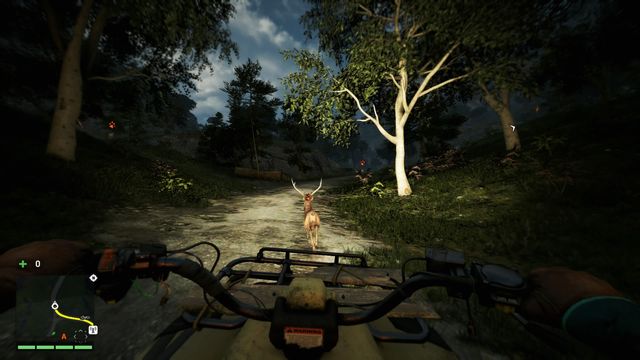
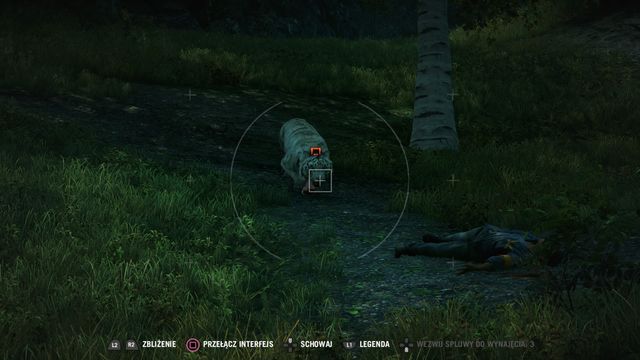
- harmless and timid - this category includes animals such as pigs, macaques, sambars or bharals. These animals will not attack the player but run away from him instead. They are difficult to kill since, maybe beside the pigs, all of them are pretty quick and may be scared even by a sound of a random gunshot from a long distance. The best solution is to get close to these animals quietly and then kill them from a bow or, as an complete alternative, just to chase them with a car and run over them. If you can't find a specific animal species you may want to craft a Hunting Syringe (with a blue and a red flowers) which will mark all animals for thirty seconds.
- aggressive (smaller sizes) - this category includes animals such as wolfs, dhols, leopards and also the demon fish. These animals will attack the player and may easily kill him. Wolfs and dhols mostly attack grouped and that makes them very dangerous. From the other hand panthers and tigers, even though they attack alone, are also very fast and deal a lot of damage. Hunting on this kind of animals may be more difficult and in some situations it is good to use guns and collect less skins but also survive while doing so. You can also use a bait to lure these animals.
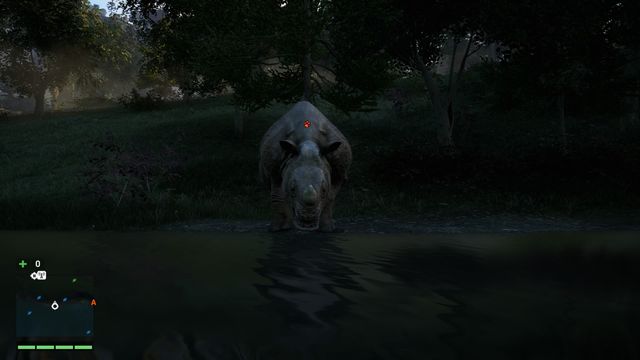
- aggressive (big) - the most dangerous animals around. This category includes mostly animals such as rhinoceros' and bears. They are most durable and trying to hunt them with a bow is pretty much pointless. You need to use a good rifle or even an MMG or grenades (remember to use them to only weaken the animals and not to kill them).
There are also some other animals which you may meet but are not worthy to be hunted. Elephants may be used (after you will learn a specific skill) to ride on them or even to attack your enemies with them. There are also some species (such as turtles or snakes) which you can't get any skin from.
 If you want to hunt a timid animal be sure that you will succeed with the first shot.
You can also hunt in several ways. The most beneficial is to kill them in a "fair" fight. It means you need to try not to damage the animal skins what will allow you to collect a skin twice from a single animal and you will receive 20 points of karma. To do so you have to kill an animal with a thrown knife, a bow or your bear fists. The best way is probably to use your bow, especially to catch a smaller timid animals. One headshot hit from a hiding should finish a job. However bigger animals may require something different since if you will fail they will just rip you to shreds. The fair hunting may work if you will try to catch some big cat or dog, although it will not help you a lot if you will try to fight with a rhinoceros or a bear. That's why you need to use at least a rifle to kill them. In sum: try to kill small predators and harmless animals with a clean, fair hunting (you can also drive over a running herds) and don't show any mercy to bigger animals.
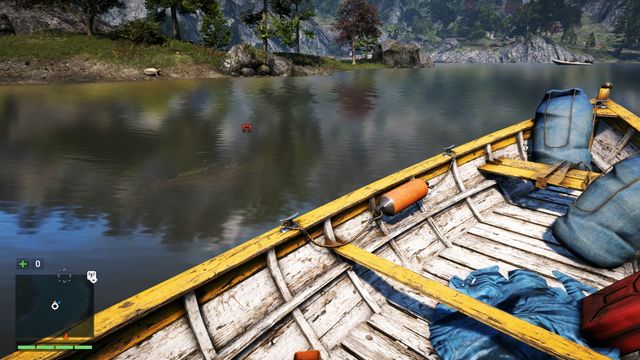 Watching for a fish from a boat is a lot easier when you will craft and use a Hunting Syringe.
A small exception is the hunting for a fish. It's difficult to find a fish from the coast (you may need to use a Hunting Syringe) however if you will succeed you can make a photo of it with your camera and then try to shoot it from a boat or even a coast. After that you need to dive and take care of it under the water. Another way is to just walk into the water and let a fish to attack you. Finally a fish will catch Ajay's leg what will initiate a QTE sequence. Press the right button at the right time to kill a fish and after that you can collect its skin.
 To catch a big animal you need to use a really deadly weapon.
You also need to remember that the animals killed with any explosives or fire will have a damaged skin so their death will not give you any profit whatsoever. The most important is the final blow so it is not bad to weaken the rhinoceros with few grenades and then to finish him with something more conventional such as a rifle. In many cases taking the predator skins is really easy since all you need to do is to have a jeep with an MMG or to use a nearby machine-gun nest. Throw a bait and catch a weapon fast to kill an animal lured by a fresh meet. Thanks to this weapon you will kill a bear or a Bengal tiger without a problem. It may also be useful when you will hunt for a rhinoceros however you need to be careful since they can just turn over your vehicle. In that case run as fast as you can toward water since this animal will not follow you there.
 The hunter's paradise.
To upgrade your items to the maximum level possible you will need to use a very specific rare skins. You can find them by completing quests from the "Kyrat Fashion Week" series (you can read about it in the "Activities" chapter).
 Upgrading equipment to the maximum level requires leather of unique animals.
With the appropriate number of animal skins, you can upgrade your bags, your backpack or the wallet. Thanks to this, you will be able to carry more ammo, baits or money around. There are 10 upgradeable pieces of equipment, 9 out of which require the skins of unique animals to be upgraded to the maximum level (the "Fashion Week in Kyrat" missions). Try to upgrade the most useful items, as quickly as possible (weapon holster, backpack).
Below, you can find the list of the required skins. With all of them, you can upgrade your equipment to the maximum level. The list does not include the skins of unique animals.
- 6x Tibetan Wolf skin
- 7x Malayan Tapir skin
- 7x Honey Badger skin
- 5x Bhral skin
- 3x Assam Macaque skin
- 6x Indian Rhino skin
- 7x Sambar skin
- 4x Wild Pig skin
- 4x demon Fish skin
- 4x Boar skin
- 5x Dhole skin
- 8x Bear skin
- 5x Yak skin
- 4x Shadow leopard skin
- 7x Bengal Tiger skin
- 7x Snow Leopard skin
 The successive upgrades make the game easier.
The requirements for each upgrade of a piece of equipment can be viewed after you access the "Crafting" menu. Here, you can also find out by how much the capacity of your bag increases, at the higher level. Below, you can find the list of all the items and their successive levels of upgrade.
0. Owned - holds only one weapon of a given type
1. 3x Tibetan Wolf skin - holds only one Side arm and one weapon of a given type
2. 3x Malayan Tapir skin - holds only one Side arm and two weapons of a given type
3. 3x Honey Badger skin - holds only one Side arm and three weapons of a given type
0. Owned - Holds: 250000$
1. 2x Bhral skin- capacity: 500000$
2. 3x Asssam Macaque skin- capacity: 1000000$
3. 4x Indian Rhino skin - capacity: 2000000$
4. Mad Devil skin - capacity: 5000000$
0. Owned - capacity: 30 items
1. 2x Sambar skin- capacity: 60 items
2. 3x Pig skin- capacity: 90 items
3. 4x Demon Fish skin- capacity: 120 items
4. Ghost Bear skin - capacity: 150 items
0. Owned - 3 tonics of each type
1. 2x Boar skin- 4 tonics of each type
2. 3x Tibetan Wolf skin- 5 tonics of each type
3. 4x Malayan Tapir skin- 6 tonics of each type
4. Sky Tiger skin - 8 tonics of each type
0. Owned - capacity: 2 bait units
1. 2x Dhole skin- capacity: 3 bait units
2. 3x Yak skin- capacity: 4 bait units
3. 5x Bear skin- capacity: 5 bait units
4. Gulo skin- capacity: 6 bait units
0. Owned - a small bag for ammo for side arms, SMGs, shotguns, assault rifles and LMGs
1. 2x Boar skin- a medium-sized bag for ammo for side arms, SMGs, shotguns, assault rifles and LMGs
2. 3x Bhral skin - a big bag for ammo for side arms, SMGs, shotguns, assault rifles and LMGs
3. 4x Cloud Leopard skin - a huge bag for ammo for side arms, SMGs, shotguns, assault rifles and LMGs
4. a Shadow Leopard skin - a huge bag for ammo for side arms, SMGs, shotguns, assault rifles and LMGs
0. Owned - 3 grenades, Molotov cocktails, throwing knives
1. 2x Yak skin- 5 grenades, Molotov cocktails, throwing knives
2. 3x Dhali skin - 7 grenades, Molotov cocktails, throwing knives
3. 5x Bengal Tiger skin - 9 grenades, Molotov cocktails, throwing knives
4. skin Black water Dragon- 15 grenades, Molotov cocktails, throwing knives
0. Owned - 3 mines, C4
1. 2x Indian Rhino skin- 4 mines, C4
2. 3x Snow Leopard skin- 5 mines, C4
3. 5x Sambar skin- 6 mines, C4
4. Thick Skin skin - 8 mines, C4
0. Owned - a small bag for flamethrower fuel tanks, flares, rockets and grenade launcher ammo
1. 2x Bengal Tiger skin - a medium -sized bag for flamethrower fuel tanks, flares, rockets and grenade launcher ammo
2. 3x Bear skin - gigantic bag for flamethrower fuel tanks, flares, rockets and grenade launcher ammo
3. 4x skin Snow Leopard - huge bag for flamethrower fuel tanks, flares, rockets and grenade launcher ammo
4. Carcadan skin - big bag for flamethrower fuel tanks, flares, rockets and grenade launcher ammo
0. Owned - 10 regular arrows, 3 incendiary, 3 explosive, 10 bolts
1. 1x Pig skin - 15 regular arrows, 4 incendiary, 4 explosive, 15 bolts
2. 3x Clouded Leopard skin - 20 regular arrows, 6 incendiary, 6 explosive, 20 bolts
3. 4x Honey Badger skin - 30 regular arrows, 8 incendiary, 8 explosive, 30 bolts
4. Tenzin skin - 50 regular arrows, 10 incendiary, 10 explosive, 50 bolts
 You can buy maps from every merchant and from every weapon cabinet from the outposts which you have taken over.
While playing the game you can find five types of collectibles. Four of them (which are letters, journals, Mani wheels and posters) will be marked on your map when you will buy the special map named "Kyrat Items". Another thing is the location of Masks of Yalung since the bought map will mark only the approximate location of the mask you are looking for.
Kyrat is divided into four parts: the southern part, the central part, the northern part and the northern-eastern part. Buying a Kyrat Items map marks only collectibles which you can find on a specific area. For finding these objects you will receive experience points, achievements and karma points or new weapons. Additionally collecting the entire set is necessary if you want to reach the 100% completion of the game. Maps will be 25% cheaper if you will reach the 8th level of karma.
 On the bottom of the map you can see your current coordinates.
In specific parts of this guide you will find the coordinates (described as X, Y) related with every collectible. To find out what is your current position you need to enter the map menu where you will find this information in the right bottom corner of the screen.
 Mohan Ghale's Journal.
In the Kyrat you can find 20 journals which belong to your father. You can always get an access to the entries from the found diaries in the collection menu. When you will collect all twenty of them you will be able to read the story of your parents and will also let you read some information about the Kyrat from few years ago when the Pagan Min was taking over control. After you will collect four journals you will unlock a unique weapon - the 87.
 Look for the masks in different, sometimes difficult to reach places.
You need to remove 55 masks. You can destroy them with the specific button or simply by shooting them with a weapon. When you will get to the location in which a mask is hidden the area in which you need to find it will be marked on your mini-map with the blue color. When you will be close to a mask you should try to listen carefully to the music (just like in the "Hunt the Thimble" game). The closer you are to a mask the more precise is the specific sound which you will hear. After you will destroy the 20th mask you will unlock a unique weapon called the Trooper. After you will destroy all 55 masks you will receive the unlimited supply of "Guns for Hire" tokens.
 A Mani wheel.
To "collect" the wheel you need to spin it. Just stand next to it and press the right button. For every spun wheel you will receive karma points. In the entire Kyrat you may find 40 wheels.
 A bag with a lost letter.
The bags with the lost letters are hidden mostly in caves and caverns. You need to find a bag first and from the inside you can take out a letter. You can find 20 letters in total.
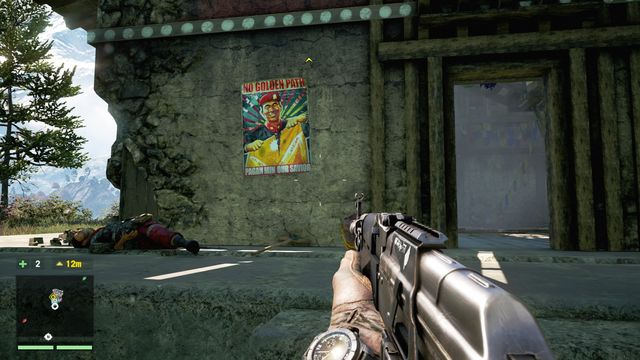 One of the posters.
In Kyrat are even 150 propaganda posters to find. They are hidden in different places but mostly on the walls of buildings. You can pluck them away with a specific button or destroy them by using, for example, a flamethrower. If you will pluck even the first poster you will unlock in shops the Stormer weapon. Plucking next posters will allow you to destroy the enemy propaganda camps.
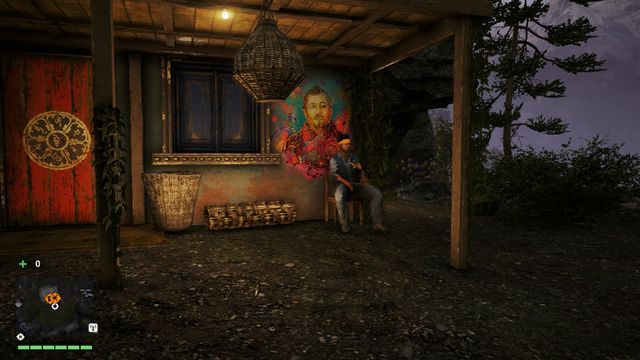 The steward sits in front of the house.
While completing the main quests you will be able to take over the Ghale's house and to buy some upgrades related to this place. These upgrades do not influence the percentage of the completion of the game however some of them may be quite handy. Prices of these upgrades will be reduced by 25% once you will reach the 7th level of karma.
Below you will find the available upgrades and items related with them. In the parenthesis you can read the original price of an upgrade (without the discount). The most important upgrades are the buzzer and the garden.
1. Water Faucet (25000 Rupees) - next to the building you will find a body armor.
2. Trading Post (50000 Rupees) - inside the house, on the second floor, you will find the trading post, which allows you to trade and choose your equipment.
3. Exterior Upgrade (75000 Rupees) - the visual upgrade of the house from the outside, the esthetic upgrade only.
4. Interior Upgrade (100000 Rupees) - just as the previous upgrade its only esthetic change of the interior visual.
5. Moonshine Kit (125000 Rupees) - behind the house you will find free Molotov cocktails.
6. Interior Lighting (150000 Rupees) - few lamps upgrades inside visuals, nothing beside that.
7. Tree Decorations (175000 Rupees) - in front of the house you will find some small amounts of money from time to time.
8. Pinfold (200000 Rupees) - in the small pinfold next to the stream you will find few pigs and free throwing knifes.
9. Garden (300000 Rupees) - in front of the house few herbs will be planted which will allow you to harvest them to use them in crafting (making syringes).
10. Buzzer (400000 Rupees) - on the right side of the house you will find the buzzer.
11. Shrine (500000 Rupees) - inside the house you will find a small shrine from which you can collect some small amount of money from time to time.
 The "golden" pipe. Brings back memories.
Additionally inside of the house you may find some drugs after completing side quests for Yogie and Reggie. If you will use them you will be transported to a random location.
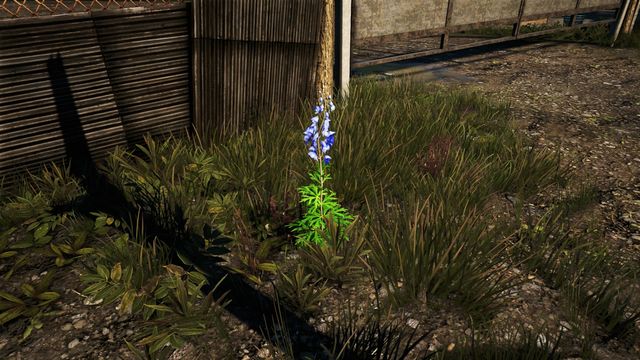 The color of the flower tells you what kind of leaf you will receive.
During your travels through the Kyrat you will often pass some plants which leaves you can receive. You may use these leaves to craft some syringes which provide you a temporary bonus when you use them.
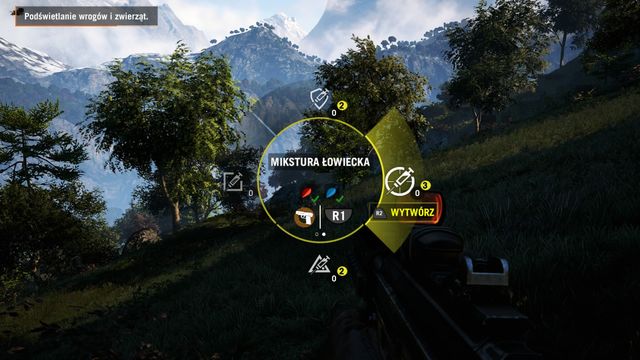 From the syringes crafting menu you may easily choose which one do you want to craft.
To craft syringes you need to invest experience points into specific skills. There are also available skills which increase the effects and the duration of using these syringes. Every syringe component is destroyed once you use it to craft something. You need to use leaves of the plants of different colors.
1. Health Syringe (two green plants) - crafted right after you will collect required leaves. It heals some amount of health bars which you can increase by learning few specific skills. It is good to have few of these syringes always when you try to deal with some difficult quest.
2. Hunting Syringe (blue and red plants) - highlights your enemies and animals from the area nearby. The upgraded Hunting Syringes allow you to walk quietly and to be completely ignored by animals (unless you won't provoke them). The perfect potion for hunters.
3. Survival Syringe (red and yellow plants) - reduces the damage taken you will take in melee fight and decreases the chances of being stunned by your enemy. The upgraded Survival Syringe reduces also the damage taken from bullets. Use it if something goes wrong and you have problems in fight.
4. Overdose Syringe (white and purple plants) - you are both dealing and taking twice as much damage as usual. Use it if you are in fairly safe spot and you just want to eliminate you enemies as fast as possible.
5. Focus Syringe (blue and yellow plants) - you move a lot faster and you can stay longer under the water. The upgraded Focus Syringe allows you to dodge some of the bullets which will fly towards you and in effect you will also receive less damage.
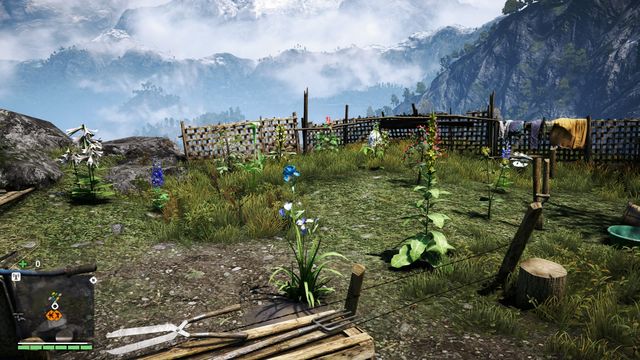 You will find every plant you need in the garden.
If you have problems with finding plants or you just don't want to spend time on looking for them you may want to buy the Ghale's Homestead upgrade which is the garden (for 300000 Rupees). You will find all the plants you need in one place, right in front of your house.
 Spinning the wheel ensures you with quite an income of Karma.
The factor that determines how "good" you are in Far Cry 4 is your Karma level. It reflects how you have been behaving towards civilians, animals and Golden Path soldiers. With your progress into the campaign, and while you are completing the successive missions, the level rises, but to attain the top eighth karma level, you will have to break a sweat.
 Karma events appear at random in various spots of the map.
How to obtain Karma points:
- complete missions; before you start one, you learn about the possible rewards;
- spin Mani wheels, which rewards you with a high karma bonus;
- participate in karma events;
- find collectibles, Occasionally, you will be rewarded with a bonus;
- kill the animals in a "clean way" (arrows, bolts, knife)
Remember that you can also lose your points. It happens when you kill civilians and Golden Path soldiers.
Rewards for individual karma levels:
1. Prices on weapon upgrades -25%
2. Unlocks the upgrade for "Guns For Hire"
3. Prices on weapons -25%
4. Unlocks another upgrade for the "Guns For Hire"
5. Prices on maps of locations -25%
6. Unlocks a signature weapon - Shredder
7. Prices on items for Ghales' Homestead -25%
8. Prices on collectibles maps -25%
 You need to remain unspotted, while freeing the captive.
During the game, you will be often informed of a karma event, which is going to take place near your current position (it is marked in violet, on the radar). These events are optional and you do not need to complete them. However, if you decide to help your allies, or civilians, after the event you receive additional karma points and money (talk to a mission-giver). You ten receive one "Guns For Hire" token.
This is the full list of the available events:
1. Skirmish - several of the Golden Path soldiers are fighting the soldiers of the Royal Army. Kill the opponents to complete the event.
2. Rescue the hostages - soldiers of the Royal Army keep a hostage. Eliminate them silently and untie the captive. You need to be careful, because the hostage is killed if you are spotted.
3. Assassination - a lieutenant of the Royal Army is usually accompanied by 2-4 other opponents. Eliminate the lieutenant and search the body.
4. Kill the Courier - while traveling on the roads, you can encounter an escaping courier (on an ATV or in an off-road car). Kill him and search the body.
5. Bomb Defusing - you need to defuse bombs. Make sure you are not spotted in the act.
6. Stop the explosion - similar to the above, but you do not have to defuse the bombs, if you kill everyone stealthily (otherwise, a countdown will start).
7 Predators - kill all of the wild animals that attacked civilians/Golden Path soldiers. In this type of missions, you need to act fast, because the animal are proficient at killing your allies.
8. Penal expedition - the once-captured outpost has been recaptured; stay there and fight the enemies back.
9. Broken car - sometimes, you meet civilians standing on the road, whose car has broken down. You simply need to repair it.
 The skill to ride the elephant makes many missions easier.
For performing some of the actions in the game (missions, finding collectibles, seizing outposts, revealing bell towers, killing opponents, etc.) you are rewarded with experience. With these, you gain successive experience levels, for which you receive skill points. You can spend these points on skills that facilitate combat and survival.
 Some of the skills make it easier to eliminate several opponents at a time, whereas the others expand health meter and increase the potency of healing syringes.
All of the skills have been put into two separate trees: the Tiger and the Elephant. With the Tiger tree, you can improve, mainly, on your offensive skills, e.g. various types of takedown. The Elephant tree expands the health bars and increases the potency of syringes. There are 6 subcategories to choose from - to unlock the third skill in a given column, you first need to obtain the first and the second one. Only then, can you spend your points on the skill that you want.
Name
How to unlock
Effect
Death from above
Available from the beginning of the game
By jumping from above (e.g. from a rooftop) towards the opponent, you automatically execute a takedown.
Death from below
Available from the beginning of the game
While below a ledge, you can draw one, or two opponents, off the ledge (e.g. into a chasm or water).
Cover takedown
1 "Eye for an Eye" mission
You can eliminate the opponent, while behind a cover.
Grenade Takedown
1 "Bomb Defusing" mission
You eliminate the opponent with his grenade.
Knife throw Takedown
Available from the beginning of the game
After you eliminate an opponent, you can throw his knife at another one.
Handgun Takedown
Available from the beginning of the game
After you eliminate an opponent, you can use his gun to fire at the rest of the enemies.
Vehicle Takedown
1 "Kyrati Films: races" mission
You can perform the takedown while on a vehicle and, automatically, change into the other vehicle.
Chain Takedown
Defeat 1 penal expedition
Allows you to eliminate enemies close to each other, in a sequence of takedowns.
Loot Takedown
Available from the beginning of the game
During the takedown, you automatically loot the corpse.
Drag Takedown
Available from the beginning of the game
After the takedown, you can automatically drag the body.
Bullet Sponge
Perform 3 takedowns
The bulletproof vest has higher protection factor.
Heavy Takedown
Destroy 1 "Pagan's Wrath" convoy
Allows you to eliminate heavily-armored soldiers.
Running Reload
Available from the beginning of the game
You can reload without stopping.
At the ready
Available from the beginning of the game
Switching between the normal mode and the sight is faster.
Stay on Target
Kill 3 enemies with headshots
You can reload sniper rifles and handguns, while aiming.
Ammo wrangler
Complete 1 Longinus quest
Faster reload of all weapons.
Moving Target
Available from the beginning of the game
You can fire your handgun, while carrying a body.
Casual Marksman
Available from the beginning of the game
Improves your accuracy, while shooting from the hip
Huntsman
Ring two bells of Enlightenment (in Shangri-La)
Reduced swaying, while aiming the bow
Breath control
Complete 2 "Rescue the Hostages" missions
Expands the time for which you can hold your breath (underwater, while aiming).
Focused Driver
Available from the beginning of the game
Vehicles resist higher damage.
Moving Mountains
Available from the beginning of the game
You can carry the bodies of heavy soldiers.
Soft Landing
Liberate 2 without being spotted
You take less damage, while falling.
Non-Stop
Attain Karma level 4
Endless sprinting and faster movement, while crouched.
If you want to play a stealth game, it is a good choice to unlock, at the beginning, four skills that improve on your takedown: " Knife Takedown", "Handgun Takedown", "Loot Takedown" and " Drag Takedown". The first two make the path for two more interesting skills, of which the last one is the best ("Chain Takedown"). The next two allow you to unlock better protection for your bulletproof vest ("Bullet Sponge") and to the "Heavy Takedown" that becomes useful later into the game. You can unlock them relatively early and it is a good idea to do so, to expand your repertoire of attacks. Also, you are going to find useful "Death from below" and "Death from Above", available from the beginning of the game.
If you opt for more open warfare, "Heavy Takedown" will come in handy anyways. It makes it easier to kill the heavy opponents, at least at the beginning of the game. Also, It is a good idea to unlock the "Ammo Wrangler". Eventually, you will also find use for "Breath Control" and "Sprinter".
Name
How to unlock
Effect
Capable strength
Available from the beginning of the game
Raises the number of health bars to 3.
Forceful strength
Available from the beginning of the game
Raises the number of health bars to 4.
Dominant strength
Complete the "Key to the North" main mission
Raises the number of health bars to 5.
Unyielding strength
Complete the "Payback" main mission
Raises the number of health bars to 6.
Healing Syringe level 2
Available from the beginning of the game
Improves the potency of Health syringes - they restore 4 bars of health.
Inner Strength
Available from the beginning of the game
Faster regeneration of health bars
Improvised Surgery
Complete one "Armed Escort" mission
When out of healing syringes, heal 2 bars of health
Healing Syringe level 3
Craft 3 syringes (of any kind)
Improves the potency of healing syringes - they restore 6 bars of health.
Gadget Training
Available from the beginning of the game
The speed of repairing vehicles is increased; better camera.
Trade Agreement
Available from the beginning of the game
At store, you can buy special arrows and upgrades for sticky bombs.
Syringe Overdose
Complete 1 "Kyrat Fashion Week" mission.
Allows you to craft an overdose syringe.
Karma Boost
Buy an upgrade for Ghale Homestead
Adds a bonus to your karma rewards (can be upgraded 10 times).
Harvester
Available from the beginning of the game
You harvest one plant for 2 leaves.
Hunting syringe
Available from the beginning of the game
Allows you to craft "Hunting Syringes".
Hunting syringe level 2
Complete the "Truth and Justice" main mission
Upgrades hunting syringes
Duration Boost
Complete a mission from Yogi and Reggi
Expands the duration of hunting syringes (can be upgraded 10 times)
Rhino skin
Available from the beginning of the game
You take less damage from fire and explosions.
Survival Syringe
Available from the beginning of the game
Allows you to craft a survival syringe.
Survival Syringe level 2
Buy 1 signature weapon
Upgrades survival syringes.
Duration Boost
Gain rank 2 on the arena
Extends the duration of survival syringes (can be upgraded 10 times).
Elephant Rider
Available from the beginning of the game
Allows you to ride elephants
Focus syringe
Available from the beginning of the game
Allows you to craft Focus syringes.
Focus syringe level 2
Complete the "Key to the North" main mission
Upgrades Focus syringes.
Duration boost
Complete 1 "Kyrat Fashion Week" mission.
Extends the duration of Focus syringes.
The first skills that you should invest in are the ones that increase the number of available bars of health- "Capable strength" and "Forceful strength". After more skills become available (after you complete specific missions) remember about getting more. Also, it is a good idea to take interest, from the very beginning, in "Healing Syringe level 2" and "Inner Strength", thanks to which you can quickly unlock the "Improvised Surgery". Out of the available ones, also get "Rhino Skin" and the indispensable "Elephant Rider".
What skills you get from then on, depends on which syringes you want to craft. Inarguably, "Hunting Syringe" will come in handy, and you will also often use "Survival syringe" in case of open combat. Also remember to extend the duration of syringes, by investing into "Duration Boost" multiple times.
To learn more about the function of syringes, see "Basics-> Syringes".
 Some of the weapons are unlocked the first time you are at the store.
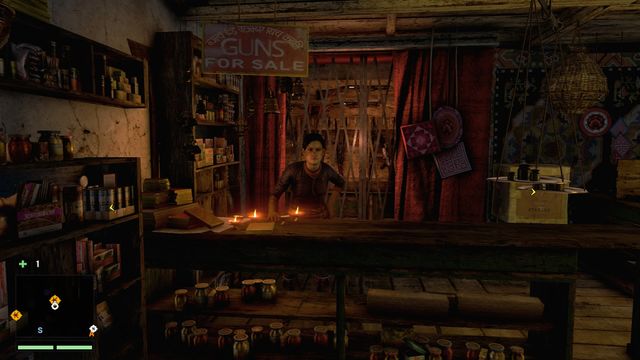
In stores, from various traveling traders and also in lockers in your hideouts (liberated outposts) you can buy your equipment. The majority of weapons can be unlocked by completing storyline missions or side missions. Some of the guns also become available the first time you loot them, e.g. from a dead soldier. This does not mean that it automatically becomes yours - you still need to buy it. To get weapons for free, activate bell towers.
 Four weapon slots allows you to alter your tactics fast, whenever required by the situation.
After you upgrade the "Holster" to the maximum level, you can carry around 4 guns - 3 main ones and a sidearm. Additionally, depending on the bag for throwables, and the bag for explosives, you can carry around various number of Molotov cocktails, mines and C4 explosives. After you complete various upgrades, you can carry quite an arsenal with lots of ammo. At the stores, you can buy appropriate weapons and put them in the slots. Also, you can buy various upgrades for the weapons.
 Upgrades improve on weapons' statistics. A better sight ensures you with better zooming.
To do that, pick the weapon that you want to modify. Then, assign it to a specific slot. After that, you access the menu that specifies the statistics of the weapon. You can pick from among three types of upgrades - the barrel, the scope and the magazine. Not all of the upgrades are available for each of the weapons, some have restrictions, when it comes to the number of possible modifications. While picking an upgrade, you can view how they will affect the statistics of the weapon.
Remember to pick the muffler, for stealth actions.
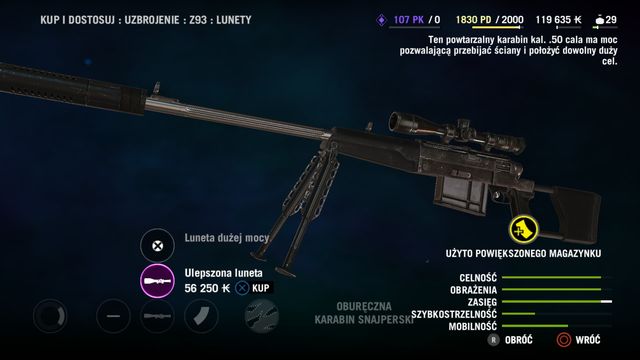
 The best sniper rifle in the game can easily penetrate walls.
Apart from the regular ones, there also are signature weapons. These are better and remodeled variants of the standard guns. They have better statistics - greater accuracy, improved firepower or firerate. You cannot change upgrades here - the gun that you buy must remain intact. There are conditions that you need to meet, if you want to get a given weapon. If you are not in a hurry, I recommend that you do that only after you reach the third Karma level, at least - you will then receive a discount of 25%, which makes a difference, given the prices of these guns.
Name
Price (without the discount)
How to unlock
Sixer
255000$
Your first visit to the store
HS77
280000$
Complete 2 "Hunting: Control" missions
Cannon
300000$
Complete 5 "Hostage Rescue" missions
Rebel
315000$
Liberate 10 outposts.
Stormer
290000$
Remove 1 propaganda poster
Stinger
295000$
Destroy 2 "Pagan's Wrath" convoys
Shredder
500000$
Reach the sixth level of Karma.
87
270000$
Collect 4 Mohan Ghale's journal entries.
Bull
305000$
Complete 2 "Defuse the Explosive" missions
Warrior
320000$
Seize 2 "Royal cargo" trucks
Trooper
415000$
Collect 20 Yalunga masks
Bushman
440000$
Reach rank 10 on the arena
Predator
300000$
Complete 4 "Armed Escort" missions
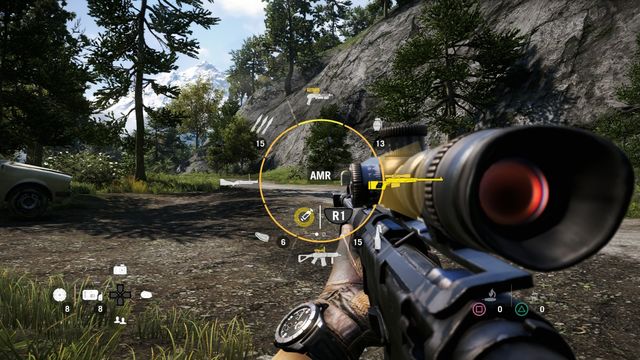
AMR
520000$
Liberate 23 outposts
Ripper
460000$
Seize 4 forts
Buzzsaw
550000$
Liberate 17 bell towers
 All of the main quests are less than 50% of the completion of the game.
Completing the main plot may be just the beginning of your fun. After the final credits you can choose to stay on the Kyrat and take care of your unfinished business. In every moment of the game you can enter the completion menu where you will find out your current status which depends on the items you have found, quests and activities you have completed. To reach the 100% completion of the game you need to put some effort into it.
- Complete 32 Campaign Missions
- Complete 4 "Shangri-La" Missions
- Complete 4 "Longinus" Missions
- Complete 4 "Yogi & Reggie" Missions
- Release 17 Bell Towers
- Release 24 Outposts
- Take Over 4 Fortresses
- Reach the 8th Karma Level
- Buy 64 Weapons
- Unlock 48 Skills
- Craft 39 Item Upgrades
- Travel Using 18 Vehicles
- Complete 8 "Eye For An Eye" Quests
- Complete 7 "Assassination" Quests
- Complete 4 "Hunting Control" Quests
- Complete 6 "Hunting Survival" Quests
- Complete 4 "Hunting Supplies" Quests
- Complete 9 "Kyrat Fashion Week" Quests
- Complete 8 "Golden Path Supplies" Quests
- Complete 4 "Propaganda Center" Quests
- Complete 14 "Hostage Rescue" Quests
- Complete 8 "Armed Escort" Quests
- Complete 7 "Bomb Defusing" Quests
- Complete 9 "Kyrati Films: Racing" Quests
- Complete 9 "Kyrati Films: Survival" Quests
- Destroy 3 "Pagan's Wrath" Convoys
- Take Over 3 Loads
- Collect 20 Lost Letters
- Collect 20 Mohan Ghale's Journal
- Collect 40 Mani Wheels
- Destroy 55 Masks of Yalung
- Destroy 150 Propaganda Posters
 You can explore Kyrat freely even after you will complete every campaign mission.
The 100% completion is not affected by things like:
- Fighting on the Arena
- Ghale's Homesteads Upgrades
- King Min's Kyrat Entries
- Locations Discovered
- Notes Read
- Outpost Master Sessions
- Defeated Punitive Expeditions (defending the once conquered outposts)
- Destroying New Convoys (more than essential 3)
- Taking Over New Loads (more than essential 3)
 The events are going to take an unexpected turn.
Welcome to Kyrat! At first you will watch a long cut-scene, so sit down cozily in a chair. It will take a while before you will be able to control your hero.
 Look around the rooms to collect some money and items which you can sell later on.
Begin your exploration with reading a note which you can find on the same floor on which you will start to play. You also should loot the nearby chest to collect some money and items which you can sell later on. Do the same on the lower level of the building. You will find there another three notes and just as many chests. Now you can go on the lowest level. You will enter a door which will open a room where you will see your recent companion being tortured. You can't do anything to help him right now. Head to the exit.
 Run as fast as you can towards the truck to escape from the mansion.
After making some new friends you will have to use all your speed to run through the door. Don't stop and use the sprint to get quickly to the truck outside. After a short ride you will receive a weapon which you need to use to eliminate your enemies during your ride. The travel will finish just as quick as it begun and you will be left alone.
 After the crash flee toward left right away. Keep crouching.
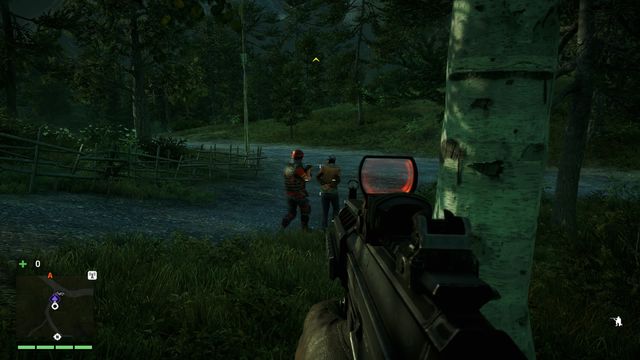
After the crash keep being hidden since you don't have a weapon beside a khukri. Four enemies are going in your direction so if you will walk on an open field you will probably die fairly quickly. The better way is to crouch and try to bypass your opponents on the left side. The game will also teach you how to throw a rock to distract them. Few steps further and you will have to pass the brook where you will find yet another enemy. Throw a rock to distract him what will allow you to either walk behind him or, what is a much better way, walk to him and use the takedown. If you will do that you may take from his body the "Kalash", however you have to use it reasonably since at the moment you have not a lot of ammo. Now you may try to swim (or rather dive) in a water and then eliminate next two opponents from behind. Killing them from o short distance will allow you to save some bullets.
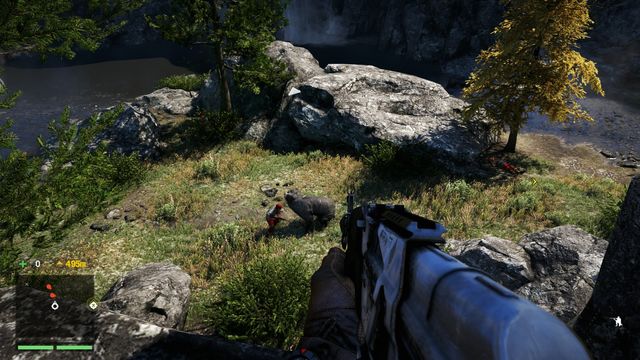
Keep going to the bell tower. A bit further you will see a bharal's body. Collect his skin (later on you can use it to craft some item) and take his meat which you can use as a bait. Throw your bait from the cliff between the enemies shown on the screenshot. It will lure a bear which will finish the job for you. Now you can take their ammo (and, if you want, finish off the bear before you will climb down) and along go forward along the brook.
 Using your camera will let you plan your next move a lot easier.
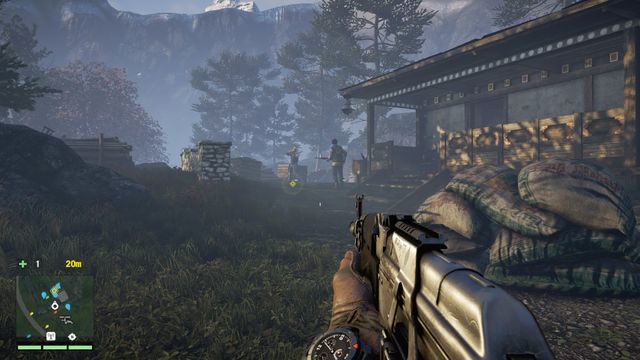
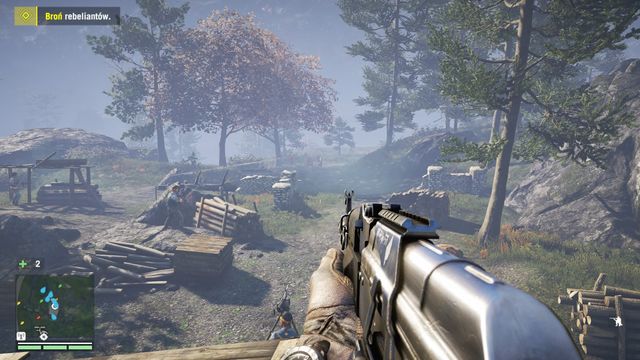
You will get to a small camp in which you will see few enemies. You can use your camera to mark them what in effect will highlight them with a red mark above their heads. The contours of the tagged enemies are also visible through the walls. The fastest way to eliminate this group is to make a turmoil. Shoot your enemies from a large distance (try to hit the leopard) what will lead to releasing the wild animal from its cage. This way will allow the cat to do most of the killing for you. Shoot only these enemies who will run specifically in your direction. It will let you save your ammo. Fortunately your resources will radically change once you clear the camp and then loot it. You will find here a lot of machine gun bullets, especially on a chest next to the building up from the right side.
 Use the thrown rope to finally get to the bell tower.
When you will finish collecting new items go directly towards the bell tower. On your way you are not going to be disturbed by any enemy however watch out for precipices. Take a good run, use the sprint and jump when you are very close to the edge. At the end of the road use the hanging rope and follow the path to get right to the bell tower, where you will find Sabal. Take the ammunition quickly and go to the second floor where you will find a good position to defend before the incoming attack.
 You may find a good shooting position from above.
Take a moment to shoot to the incoming enemies. A great help will be a bunch of grenades which you can find in this place. Don't save any resources since if you will be too tardy you may end up with a dead Sabal what will end up failing your quest. All the explosions will finally be cause of the avalanche and the quest will be completed.
You can start this mission right after finishing the Prologue. The quest giver is Sabal which you can find in the Banapur village.
You need to find the scene of the accident. The easiest way to get to this place is by using a hang-glider or a zip-line and then by using a quad. The screenshot from above shows you the place in which you will find the grappling hook which will allow you to climb on the ledges what in effect will significantly help you to move faster.
You can test your new item very fast. Use the grappling hook to get on the higher level and after that run and jump from the edge of the closest ledge to get on another ledge. On the next gap you need to use the grappling hook first and after that you need to swing a little and then to use your grappling hook once again on another escarpment (you will see a viable option). Now you can go to the top.
 By destroying the beehive you will enrage a local bees which will attack your enemy nearby.
Near the tower there are only two enemies. You can eliminate the first one easily just by shooting to a beehive which is right above his head. Wait a moment to avoid being attacked by bees. Now you can walk inside the bell tower. Head to the top and be careful especially in the building's corners since it is easy to fall out from there. At the top you will find a transmitter you are looking for which you have to destroy what will complete your mission.
 At the top of the bell tower you will find a transmitter which you have to destroy.
In a similar way you can reveal next parts of the map. Climb on more bell towers and destroy the transmitters. For doing so you will also receive new weapons and unlock new quests.
 Amita have lowered the tone a little bit.
You will unlock this mission by talking with Amita which will also give you a bow. The easiest way to get to Kanan is by using a hang-glider. Speak with her to unlock another objective.
 Kanan is not going to be very talkative.
The observatory point will be near to the place in which you have "talked" to Kanan. Being on the cliff use the camera to mark two wolfs which are on the bottom. Now you may safely jump to the water and swim to the place on a coast where you can find villagers bodies.
 When you are in the observation point you may use the camera to highlight two wolfs.
Quietly approach to the wolfs. Start with the one who is closer to you. While aiming make sure that it's body (even better: it's head) is between the two lines, in the very end of them. Hold your bow in that position and draw the string when you are completely sure of your target (the easiest way is to shoot when the animal is not moving). If you have hit its head you will kill him instantly, otherwise you may need to shoot again. Before you will get close to the lair kill both wolfs and then collect every skin you can find around. Inside the lair you will find another wolf and deeper on a body which you can loot for some money and items. Go outside and shoot to the red barrel (although keep a safe distance if you don't want to die).
Go back to the near farm where you will meet Amita what will complete the entire quest. After that Sabal will call you and your map will be updated with the mark which shows where you can" meet Longinus.
 You will meet Longinus in the "church".
This quest begins when you will go to the Longinus (the letter "L" on your map). Inside of the building you will find a little bit loony "priest" and you will receive a weapon. He will also give you more weapons if you will destroy take over more radio signals from bell towers. After a short conversation with Ajay the priest will receive the information about an attack on the Banapur village. Don't waste any time and right after you will leave the building use a quad to get to the village since you have only few minutes to do so. You should be able to accomplish that fairly easily if you will not spend your time on watching vistas.
When you will get to the place shown on the screenshot from above the timer will stop. Now you have to eliminate every enemy inside the village. Remember to keep moving and acting methodically to avoid being caught by a group of enemies since it may end up pretty bad for you.
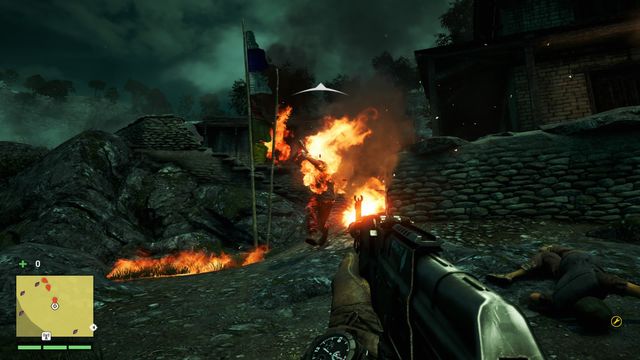 The burning enemies may be pretty dangerous... If they will be able to catch up with you.
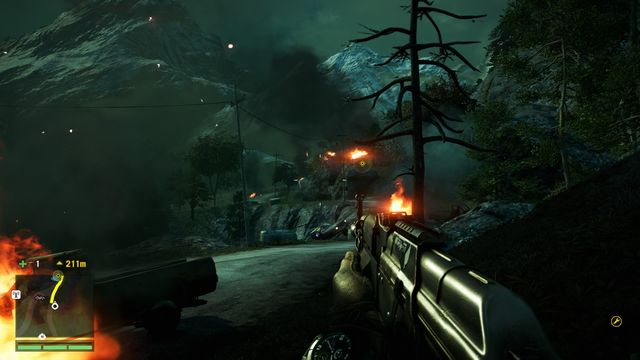
Try to avoid the fire. The entire village is burning and walking into the fire results in taking damage. Look out for Molotov cocktails which will be thrown at you and at the enemies who are throwing them. If you will hit anyone of them he will also start burning and running towards you. Don't let him to catch you and shoot him down fast.
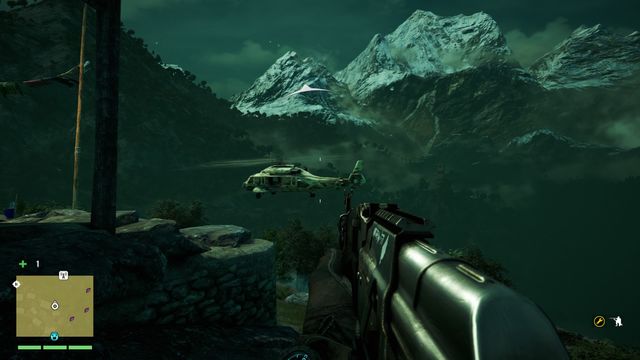 You may instantly eliminate the entire enemy reinforcements if you will throw a grenade in the whole group right after they will exit the helicopter.
When you will finish fighting with the most of enemies in the village you will see that on a field in front of the village there is a helicopter from which two more groups of soldiers want to get out. Set up the machine gun or use a grenade to deal with them fast. Nearby this place you can also find a chest with ammunition although you probably don't have any problems with ammo right now.
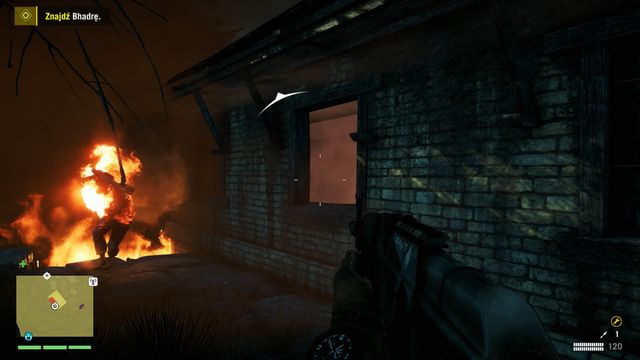
Exterminating the reinforcements will result with receiving the information according to which you need to release Bhadra. Go towards the building marked on your map which leads to a building. On the left of this house you will see two more enemies with Molotov cocktails. Deal with them and go to the back of the building where is yet another soldier. You can see there an open window which you can use to get inside of the building (compare to the screenshot above). Once you will get inside turn left, then downstairs where you will see Bhadra which is treated by Ajay. After that this mission will be completed.
This mission will begin automatically right after you will the previous one. You job is to release the kidnaper hostages. Go to the settlement which is marked on your map. Right before you will get there the game will be saved thanks to the check point.
 The bow will help you complete the mission quietly.
From now on try to sneak through this place since you don't want to be seen by anyone. Go to the higher position to have a better view on the settlement. Remember to take the bow which you can see next to the statue since trying to complete the mission quietly is the easiest way and will help you to save all four hostages.
 These enemies will kill the hostages almost immediately after they will notice you.
Now you can use the camera to highlight every enemy in sight. You should especially watch out for these of them who are currently beating up two hostages. They are on the left side, slightly lower, and there is another one on the right side, higher. These enemies will try to kill every hostage right away after you will be spotted. That's why you need to take care of them first.
 The first from the right already down. The next target is the one who is beating up the prisoner.
Start from the right side. The first enemy is close to the main road and he will be an easy target. After you kill him eliminate another one (the one who is next to the hostage) and be sure that no one will notice what is going on. You should be able to kill the third one without any problem as well. Now the entire higher level is clear so you can return to the place from which you have picked up the bow. From this place you should start by killing the enemy who is beating up the prisoner. The second target is the one who holds the Kalash who walks few meters away. Now you only have to deal with the last enemy who walks between upper and lower part of the village. Wait for him to show up in your sight or just go and catch him. Finishing off the last opponent should not be a problem for you. Now you can release the hostages and take few items which you can find in the chests nearby.
This quest will be given to you by Amita and will start automatically right after you will release the hostages. Go to the outpost and try to get to the place which you can find on the screenshot from above. From this place you will have a perfect view of the outpost and you will be able to easily highlight every enemy in sight.
 Releasing the elephant will make the entire quest much easier.
If you will decide to take over this outpost by stealth then it will be a very easy task. The only thing you need to do is to release the elephant locked in the cage within the outpost. You can accomplish that by throwing a grenade beneath the gate. You will stay unnoticed and the elephant will take care of your business. You don't have to interrupt him whatsoever. If for whatever reason he will not be able to kill all the enemies you can climb down and take care of the people who were able to stay out of the range of the furious animal. Completing this mission also completes the Act I.
 The choice you have to make will be of great importance in the further part of the game.
You will activate this mission when you will choose Amita after her argument with Sabal in the Khilan's Bazar area. Depending on your choice both the quest, the reward and the next mission will differ.
 Search the bodies of the dead soldiers for the intel.
When you will get to the camp you need to collect the intel from three dead bodies. The first one you may find in the river in which there is also a big fish which you have to deal with. Now you can dive to take the intel from the body. The second intel you may find in the middle of the camp next to the statue sculpted in a rock on the left. The last intel is with the soldier's body under the columns in the upper part of the camp. While you are exploring the camp you need to watch out for the hunters. These silent assassins will try to kill you with their bows. Once you will finish your job you can go to the next place.
 If you don't have a bow yet you may try to takedown one of the hunters.
This quest is not going to be that easy. At least at the beginning try to stay hidden. This camp has a lot of archers who will shoot towards you from so many directions that you will be very confused trying to track their sources. There is also few opponents with machetes. Be sure that you will not allow them to get close to you. If you don't have a bow yet you should try to get one by using the Takedown on an enemy with this weapon and pick it.
 If you will stay hidden you will be able to complete this quest without any problem.
Stay hidden and try to kill quietly as many enemies as you can. It will significantly facilitate this part of the mission. You need to kill all of the enemies to complete this quest. Amita will become the leader of The Golden Path and will keep this position unless you will choose different later.
 Your main task is to keep alive at least two rebels.
When you will accept the Sabal's offer you need to get to the Bravo camp and get close to the rebels. Fill your ammunition and spread some mines on a road in front of the MMG from where the first wave of enemies will come. You need to protect the camp. To complete the quest you have to keep alive at least two rebels.
 Spread some mines on the road in front of the MMG.
The first wave of enemies you may easily defeat by shooting it from the roof of the building or even just by using the MMG. You will be attacked only by the hunters so you need to carefully observe the road. Then you will be attacked by two enemies from the upper part of this area (right of the MMG). Watch out for their flaming arrows. The best thing to do is to clear the road as fast as you can and then go on the hill to focus the attention of the hunters. It is also easier to kill them from the closer distance. The last wave will come from the north, from the scrubs next to the house.
 Walk around the house to eliminate the hunters who are hidden in the upper part of the camp.
During the fight remember to keep moving. You may want to walk around the camp. Start from clearing the enemies from the road, then walk right and to the top. This way will allow you to keep track of the enemies and keep the rebels safe.
 Walk around the left side of the camp and start with killing the hunters from the rocks above.
After you will defeat your enemies you may go to the next camp. Watch out for another hunter which you will meet on your way.
When you will get to the camp you need to stay away from its central part. Instead turn left and climb to the top of the rocks there. Be careful since you may find here four hunters. Takedown one of them and change your gun for his bow. Now you can kill another three hunters. From this place you also have the perfect view of the camp underneath where you can find another three enemies. Kill them to complete your mission what will also allow Sabal become a leader of The Golden Path.
The monastery is impressive.You will receive this quest from Sabal if you will reject his previous offer and complete the quest for Amita (Hunt or Be Hunted). Go to the monastery and speak with Raju inside. Now you need to take a sacrificial basket and get to the large chamber where you need to light two candles, spin a Mani wheel and throw the mysterious powder into the fire which will turn blue. After all these actions you may head to the exit. You will receive a message according to which the monastery will be attacked soon.
 A scapegoat.
If you have supported Sabal in the previous mission, you will have the opportunity to see a goat being made an offering of. Then, exit the monastery. You need to take the same steps as before, with the only exception - you will be attacked out of a sudden, without any time to get prepared. Also, do not hope for any backup.
 Your enemies will attack from both the right side and the left side.
You need to plant some mines and C4 outside and fill your ammunition as well. After a while there will be a lot of action. Don't count on your allies since they will die pretty fast. Your main task is to defend the monastery what is not related to exterminating your enemies as much as it is to eliminating these soldiers who try to plant bombs in the strategic places: under the main entrance, under the altar ahead and under the left armory. All of these places will be marked on the map with a specific icon.
You can't let the enemy to blow off the monastery. In a limited time you need to kill all the enemies who are planting the bomb.The most important thing is to kill eliminate these soldiers. When you will receive a massage about a bomb you have to go fast to a marked place. It doesn't mean you may just ignore all the other enemies. Be careful and try to not walk in front of someone's rifle since it may end badly. In the final part of the battle bombs will be planted in three places at the same time. Take care of the closest place first and then choose which group you want to deal with next. From the upper part of the monastery (next to the doors) you may get underneath pretty easily thanks to the zip-line. Defeating the last group and wave after you will save the monastery will allow you to complete this mission.
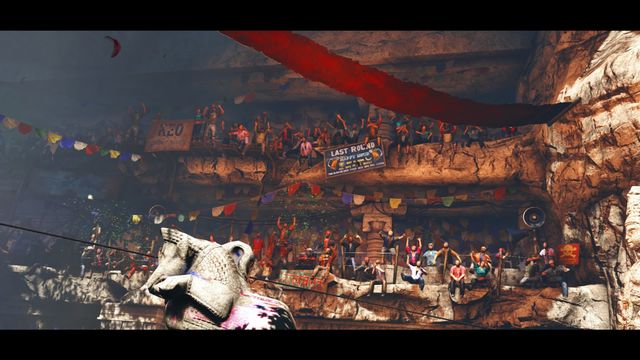 The crowd is already waiting for its Olympics.
You will find Bhadra southeast of the Banapur village (the letter B on the map). Speak with her and then go to the Ghale's homestead (the letter Y on the map). After a short and interesting conversation you will be taken on the arena. You have only one and simple task: survive to the end.
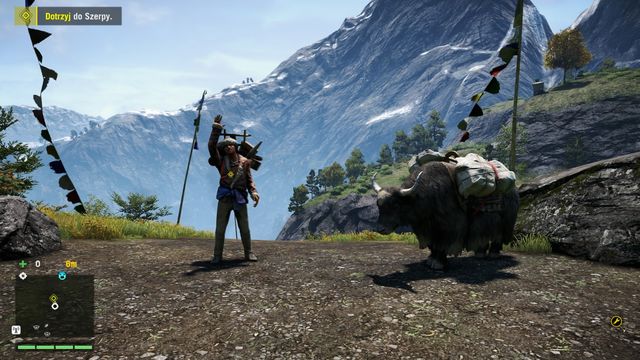 Hide in the place in which you will appear and wait for the beast to kill one of your opponents.
At first you only have a melee weapon so don't jump on your enemies right away. You are not the only person on the arena - it's a free for all. At first just sit in some place and wait for a wolf to kill someone. Take the victim's weapon and then join the fight although remember that you don't have a lot of ammo. The easiest way is to find your own corner of the area and fight only with the enemies which noticed you or came very close to you. In the second, the third and the fourth round your main enemies will be soldiers with Kalashs and the biggest threat: the tiger. In the fourth and at the same time the last round beware of the Molotov cocktails which your enemies will throw at you.
 A grenade or an overwhelming amount of gunfire directed into the enemies who are just entering the arena will help you a lot.
The last round will also change the roles of the participants since you will become the one person which have to defeat all of your enemies single-handedly. You will be attacked by a group of enemies with Kalashs although your main problem is the enemy in a heavy armor. Go fast to the second end of the arena from where you may throw the grenades and Molotov cocktails which you were able to collect earlier. Try to do that as fast as you can, before your enemies will spread over the area. At first focus the soldiers which will get close to you. The heavy-armored one leave at the end. You may weaken him (or even kill him) by using only grenades and Molotov cocktails. If you will fail to finish him this way you can also use the shotgun from a close range.
 The last opponent is the most difficult one to defeat since he has the heavy armor. Weaken him with grenades or shoot directly into his head.
During the battle try to change your position mostly between the rounds and focus on gathering more ammunitions. Wining the fight will also complete the mission and will allow you to participate in the further battles on the arena.
The journey worthy of Napoleon.You will receive this mission from Longinus who will temporarily change his location (the letter L on the map). At first use the help of your carrier to get to the covered by the snow picks of the Himalayas.
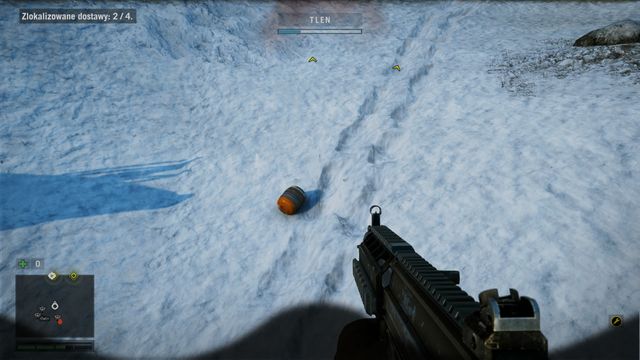 Remember to collect the scattered filters which will increase your supplies of the oxygen.
Your task is not the easiest one. At first you have to find an oxygen mask which will allow you to move in this area. You have to kill the enemy (the radio operator) whom you may find inside of the tent in front of you and take a mask from him. You also should deal with another three enemies in this territory since all of them have the oxygen supplies which you need to collect. These filters are orange and you should collect them whenever you will see one of them on the ground.
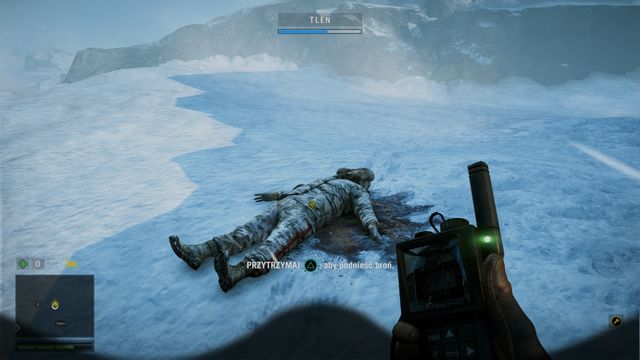 The first package.
Use the GPS to localize the first package. To collect it you have to search the body of a dead enemy. The special impediment may be the nearby pack of wolfs.
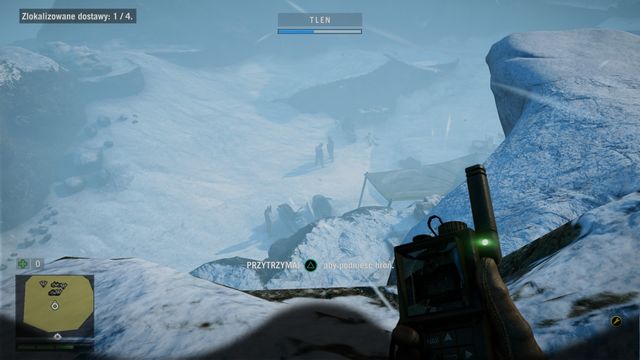 You may kill the enemies in the camp and collect their air filters.
To find the second package head to the camp on the right. You will find here some enemies which you should kill even if it will turn into a big fight. It will allow you to collect a great amount of the oxygen supplies and no one will bother you while you will collect the package.
 The next package you will find in the cave. Beware of the bear which is prowling in this area.
The third package is in the cave and finding it may be difficult because of the darkness and the bear which resides in this place. If you have a grenade you may use it to weaken him before he will attack you. You may run away from the bear although it is difficult and takes a lot of time which you don't have too much to spend since your oxygen is limited. On your way to the body collect another air filter, search the dead body and leave the cave.
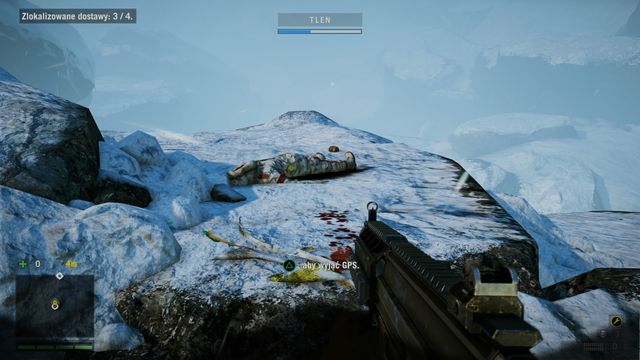 The package you are looking for may be found easily thanks to the track of blood.
The last package contains your cargo. After you will exit the cave you have to climb on some ledges. While you are outside better watch out for two leopards nearby. You can avoid them or eliminate them most preferably one by one. You can also escape from them thanks to the grappling hook which you may use on the edge of this area and get to the ledge underneath. It will give you some time to heal. The body you are looking for is easy to find since you only need to follow the track of blood visible on the snow.
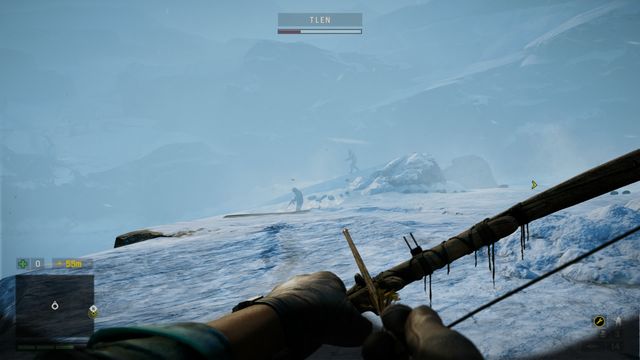 On your way you will encounter over a dozen of enemies.
Take the package and go back to your carrier. On your way nearby the checkpoint watch out for the enemy patrols which travel on the snowmobiles. If you need more oxygen try to eliminate one of this vehicles. The blizzard radically decreases the visibility what allows you to get really close to your enemies. Another way is to just run in the direction marked on your map and ignoring all the enemies. Before they will notice your presence and shoot you down you should be able to get to the ledge above which is far away from them. Getting back to the carrier completes this quest.
 Remember to use the GPS locator to find the packages you are looking for fast.
During this entire mission your main enemy will be the time itself, and to be more specific: the limited supply of the oxygen which is represented by the blue mark on the middle of the screen. Remember to keep complementing your air filters with the orange containers scattered on your road or taken from the killed enemies. If you will run out of the oxygen your character will die and you will return to the last checkpoint with the full oxygen supply.
 The fastest way to get to the cave from the Ghale's homestead is by using the hang-glider.
This mission will begin when you will get to the Ghale's homestead where you may speak with Yogi and Reggi. They will tell you where you can find a part of the thangka which you can find in a distant cave. The quickest way to get there is by using the hang-glider.
 In front of this alter you will find the thing you are looking for.
When you will get to the cave you need to take care of the few hunters. You may also spin a Mani wheel. When you are in front of the golden gate you may jump down and then climb a little bit using the grappling hook. You will enter a mysterious chamber where in the center you will see the item you are looking for and which will take you to a weird, different world.
The tiger will become your ally.At first you need to just jump ahead. When you will be under the water swim towards the water surface through the hedge made of the fish. When you will get to the ashore you may go straight ahead along the path. You will see a wounded tiger from which you can take a weapon and go further ahead. A moment later the tiger will appear again and will become your ally which you may order to attack the enemy demons. Your main task is to spin two big wheels who are both on your left and your right.
 There is a lot of enemies and they are dealing a lot of damage with their attacks. Don't let them surround you and use the help of the tiger.
Every wheel is surrounded by a lot of enemies. You may eliminate them and keep healing yourself although remember that only few of their hits is enough to kill you. The good solution is to use the tiger. Just point him the enemy you want it to attack. If the tiger will die it will reborn again soon and even you are unable to kill all the enemies at the same time you may just keep using the tiger and this way you will be perfectly safe during the process. Keep repeating the attack and clean both wheels to update your quest.
 You will meet the last group of enemies after you will pass the stairs.
Your next task is to get to the big bell. On your way you will meet another group of enemies on the middle of the big square on the end of the long stairs. Use the tiger to kill them all. Beware of the arsonist who may attack you by spitting the fire on you. Follow the game's suggestions and let the tiger to distract him and when he will succeed you will be able to take down this enemy. After you will defeat all of your enemies you have an open path to the bell which you may "release" by interacting with it.
 "Releasing" the bell will move you to your parents' house.
The mission will be completed and you will be moved to the Ghaels' homestead which from now on you may upgrade and repair.
 Don't make too much of a mess if you don't have to.
If in this conflict you decided to support Amita your job will be to take over the opium factory. Head to the place marked on your map and once you will pass the checkpoint you will enter an extensive yellow area. From now on you need to move carefully. Next to the first house you will meet an enemy who stands still. Use the opportunity and kill him quietly. Now you may head towards left where few steps after the small stairs, next to the tree, you may eliminate another opponent.
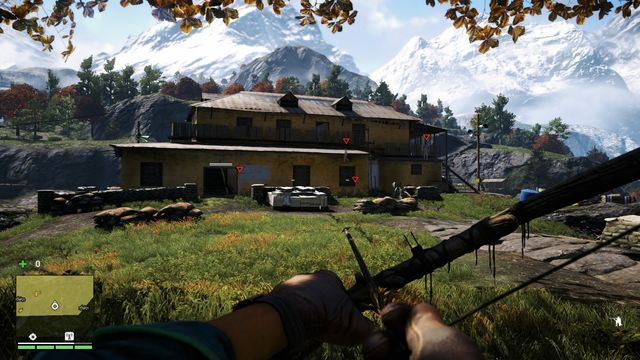 The big house is the central and the most important location on this plantation.
This way you will clean the foreground of the big building in the center of the plantation around which most of your enemies are grouped. You can stay here for a moment to observe them. Your next task is to eliminate all of them. Try to memorize their patterns to get the information where you can safely shoot them down and avoid being noticed at the same time. You also may disarm two alarms because it will significantly reduce the amount of enemies if you will be noticed. Completing this mission while being stealth is a lot easier and will allow you to save your ammunition, grenades and healing syringes. All these things will be very useful in the next stage of this mission.
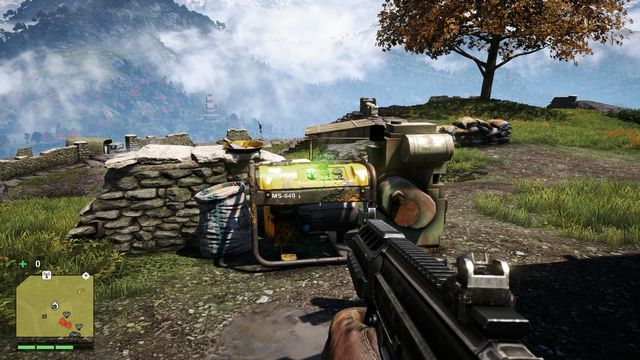 Turning on the water drenchers will allow you to save the field if it will start burning.
If you will decide to use the brutal force you need to remember that the fields can't burn down. You need to reasonably use your grenades and Molotov cocktails and also you have to avoid damaging the explosive barrels. You can use the water drenchers to save a burning field. There are four fields and you need to use the drencher on a specific field to put out the fire. Try to also stay out from the battle dogs which are on the loose. You can find three of these beasts in total and if they will notice you they will almost instantly jump on you.
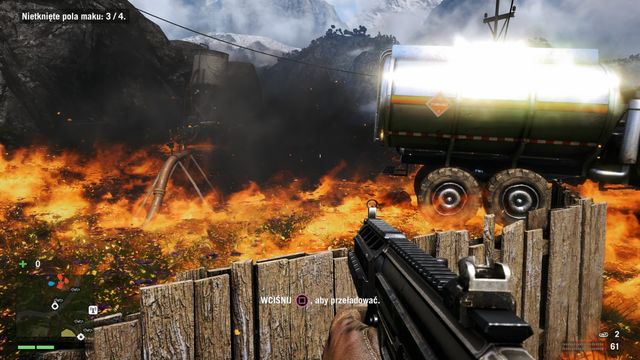 Try to save the burning fields as fast as you can.
When you will send to Amita the information about taking over the factory you need to fill your ammo fast and regroup in the place marked on your map. Your next job is to defend the plantation from four waves of the enemy soldiers. Don't count on your allies since they will die almost immediately. Listen to the messages which will inform you from where you can expect the incoming wave and try to prepare yourself in a right spot as fast as you can. At first you have to eliminate the enemies who throw the Molotov cocktails both in your direction and on the fields. If the field will start burning you will be informed about this and you need to run towards it and find out the generator which turns on the water drencher. Remember that one field may be arson even few times. To succeed you have to survive all waves with the saved fields (they can be slightly damaged).
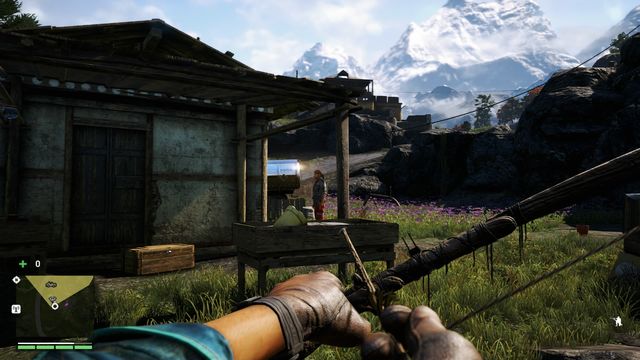 Don't make too much of a mess if you don't have to. At least at the beginning.
If you have decided to support Sabal in this conflict you will have to burn down the entire opium factory. Don't forget to bring with you the Molotov cocktails and maybe some flamethrower. Head to the place marked on your map and once you will pass the checkpoint you will enter an extensive yellow area. From now on you need to move carefully. Next to the first house you will meet an enemy who stands still. Use the opportunity and kill him quietly. Now you may head towards left where few steps after the small stairs, next to the tree, you may eliminate another opponent.
You may as well just throw the Molotov cocktails while making a flight above the plantation in a buzzer however you need to watch out for the accurate eye of the sniper.Going forward you don't have to play around and kill your enemies quietly since even if the enemy will be hallowed there will be no incoming reinforcements. However there is a lot of enemies here and you may still decide to keep your actions undetected. The most important area on the plantation is the big building in the center. On its balcony you will find a wandering sniper whom you should eliminate as one of the firsts. Before you will start burning the fields down you should eliminate all of the enemies first whatever method you will choose. It will make the burning process a piece of a cake.
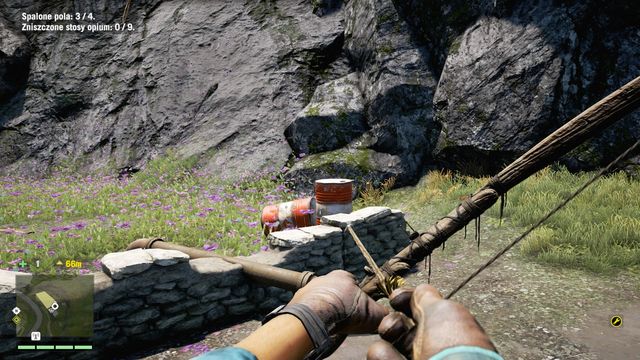 Shooting the explosive barrels down will burning the entire field.
You may set fire on the fields by throwing on them the Molotov cocktails or with a flamethrower. You may also find a lot of red explosive barrels which you may shoot down to initiate the explosion. Be sure that you have turned off or destroyed the generators which sprinkle the water over the area. You need to set fire to the four fields in total and the fastest way is by using the Molotov cocktails.
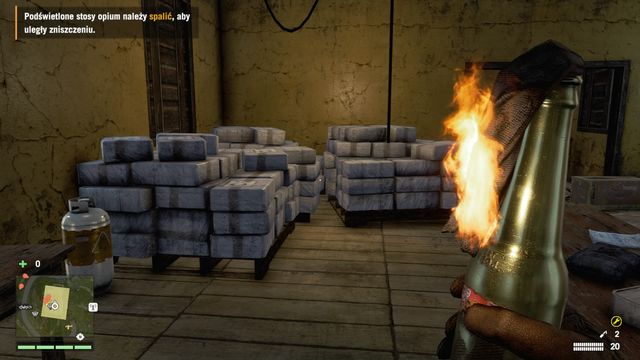 The last thing you need to do is to deal with the stacks of opium.
Now you should enter the building. On the two levels you will find a lot of opium. When you will set on fire all the nine stacks you will complete the mission. If you still haven't kill some enemies you don't have to bother with them anymore.
 After the first statue will collapse you should beware of the sniper hidden ahead of you.
You will receive this mission from Amita. Go to the place marked on your map and use the grappling hook to get on the top of this area. You will see the stairs ahead of you. After a moment you will see an explosion which will destroy the first statue. Your task is to not allow the next explosion to happen.
You have to keep being hidden for as long as you can. You need to take the position in front of you. From this place a sniper observes the entire area. The best way to get there is to take the path on the right of the small stairs next to which you will appear after you will finish climbing up. There is a lot of enemies around here although you can easily eliminate them quietly if you will use a bow. You may also use the bait to distract other enemies. After you will clean the entire lower level you will see on the right side few rocks and ropes on which you can climb up.
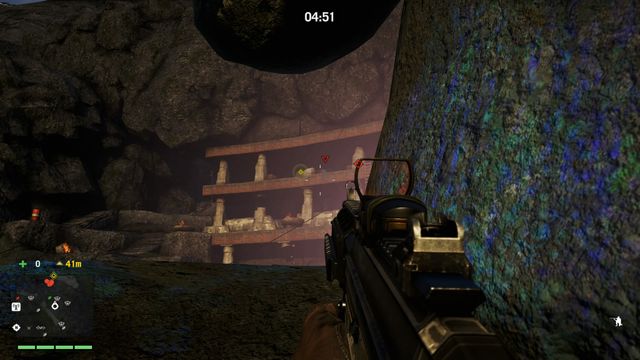 If you will start the count down when you will be next to the statue you will have no problem with a time limit.
When you will pass the statue you will initiate the alarm and you will have 5 minutes to get to the detonator. First you have to shoot down the group of enemies underneath and then eliminate the sniper (you may need some grenades to accomplish that). After you will clean the area you will be able to deactivate the detonator.
If you will begin shooting earlier you will initiate the countdown when you will be detected. It's not really worth it since there is a lot of enemies here and if a lot of people will attack Ajay he may easily die. An additional impediment is the presence of sniper. You may be unable to kill all of the enemies methodically. If you will be detected anyway you need to run up the stairs ahead and try to dodge the sniper's firing. When you will get to the top start eliminating your enemies.
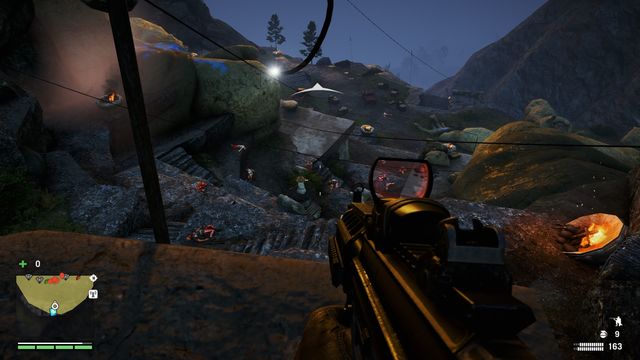 During the fight keep watching your radar to protect yourself from the attacks which you may not be able to see in front of you.
You next task is to protect the other statue. Prepare your weapons fast and pick fill ammo using the boxes on a small balcony (where you have deactivated the transmitter). The best thing to do is to stay on this position since your enemies will have a long path before they will get close to you. It allows you to easily kill them, especially when they will climb up on the rocks. Beware of the enemies with the melee weapons and these who have shotguns since they can easily defeat you.
 To shoot down the helicopter during its flight you need to aim slightly in front of it in the widest part.
When you will defeat all of your enemies you still need to destroy the helicopter. Keep being hidden and take the rocket launcher on the left of the damaged detonator. You only need to hit him once. The best way to do so is to shoot when he approaches to you. In such situation for a short moment he flies in a straight line and you will have no problem hitting him.
 Run up to jump over to the next platform.
After you fight the opponents back, you still need to light the hearth on the palms of one of the surviving statues. Stand in front of the statue and locate the spot, on which to use the hook, on the right. Then, jump over to the platform and light the first hearth. Then, you only need to climb up the ladder and walk over to the next hearth (if you run up properly, you will not have to use the hook). You only need to watch out for the sniper below, he will be firing at you - it is a good idea to eliminate him beforehand. Lighting the second hearth ends this mission.
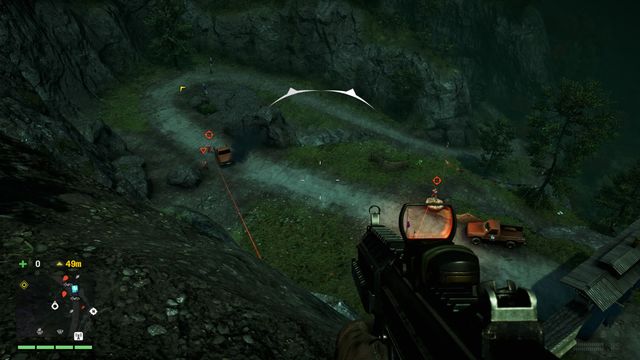 Before your next step eliminate the snipers first.
Your last task is to initiate the collapse of the path which leads to the statues. Go to the place marked on your map and look around when you will be in the narrow passage. You will see below you over a dozen of enemies. Before you will go further eliminate the two snipers since they may easily shoot you down on an open field. After that use the grappling hook to get higher and destroy the highlighted escarpment with a rocket launcher, grenade launcher or grenades. Blocking the path finishes this mission.
You will receive this quest from Noore. During this mission you have to almost constantly stay hidden. Remember that if you will start any alarm the mission will be interrupted. Don't forget to equip a bow (or any other quiet ranged weapon) and a pack of arrows.
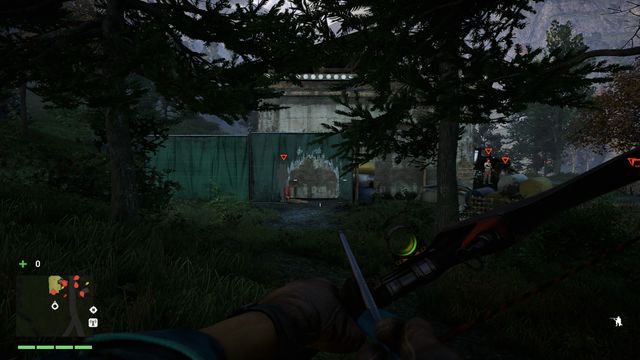 Kill the guard who is right behind the hole in the fence.
At the beginning of this quest you need to get to the area marked on your map. Your first task is to get to the back of a truck. Looking from the side of the road walk towards left side of this little camp. Next to the hole in the fence you will see the first target that needs to be takedown and then you can get inside.
 Walk to the truck without being detected.
Right behind the corner of the building turn right. Kill the enemy inside quietly or avoid him. You will get inside of the storage from where you can imperceptibly enter the truck.
 Don't even think about attacking a group of enemies.
You will be moved to the area where De Pleur is having a party during which he plays with his prisoner. You need to photograph three places where the prisoners are interrogated. You have to keep being undetected so don't kill anyone or do it only when they are completely isolated. Don't forget about the possibility of moving the bodies away and hiding them behind larger objects.
 The building on which you have to climb.
You should start with the room that is located furthest to the right. From the place where you are right now turn right and keep being out of your enemies' range. Walk around the truck and then climb on the ledge. Few steps further you can see an enemy which you may kill quietly to get on the top of the building undetected. Make a photograph when you are next to the barred window.
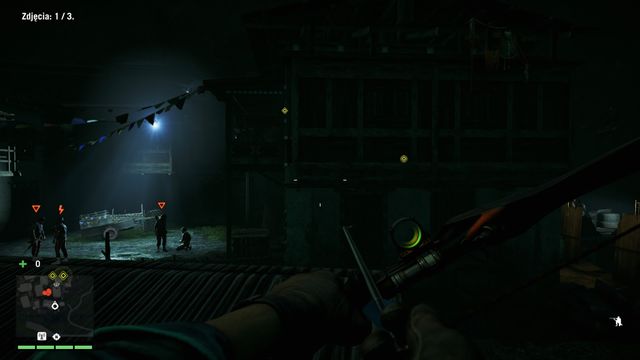 On the building on your right you will get by using the grappling hook.
Go downstairs and then ahead. On your right you will see the watchtower. Go on the top of the building that is on your left. When you will be on the roof you will be able to see a group of enemies. Jump down from the right and then use the grappling hook to get on the roof of the next building. Now go to the end and jump on the roof of the building below from where you can make another photograph.
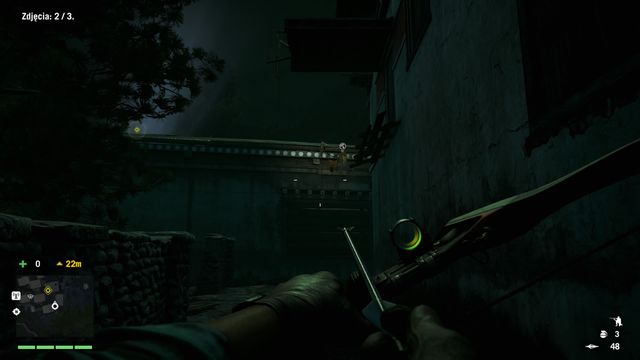 Use the grappling hook again to get on the roof from where you can make the last photograph.
No get on the ground and go towards the last interrogation room. Use the grappling hook to get on the building's roof. From this place you can easily make a photo of a man who is during the electrocution.
 The building that you need to climb onto
If Sabal is the current leader of the Golden Path, this part of the mission is a bit different- instead of taking photos of the interrogation rooms, you need to rescue three prisoners. First, deal with rightmost one. From your starting point, go right and walk around the truck, while staying out of sight of the opponents. Then, climb onto the ledge. A bit ahead, you spot an opponent - kill him silently and turn left. Here, before the building, kill another guard, and yet another one next to the woman inside. Then, untie the prisoner.
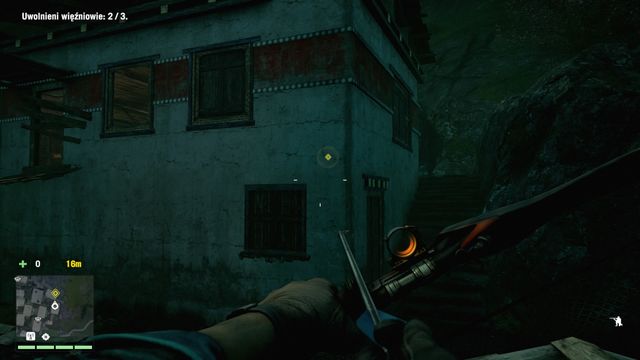 In the room at the ground of the building, you find the last prisoner.
Now, return to where you killed the first opponent and go left. Pass by the watchtower on your right. Go behind the building on your left. Around the corner, kill the guard, enter the building and free the prisoner. Then, on the next building, also on the right, use the hook to get to the rooftop of the next building. Reach the end and jump down onto the roof of a lower building and onto the ground. Dash ahead, up the stairs and turn left, where you find the third prisoner.
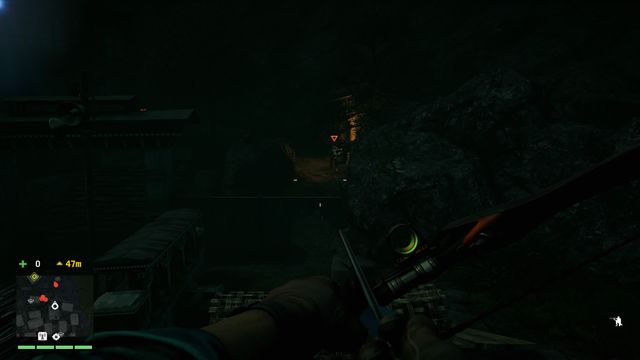 Walk around a group of enemies on the right side. On your way eliminate the isolated enemy.
After you will photograph the three interrogation rooms you need to get to the De Pleur's office. Take the path on the right of a place where you have made the last photograph (go down). It will allow you to walk around a large group of enemies. When you will find a hole in the fence you may kill an isolated guard and then without any problem just go to the place marked on your map. Go up and then use the window to get inside the room. Go down the ladder and open the door. Now listen for a moment to the conversation which De Pleur has through the phone. Now the next quest will be activated.
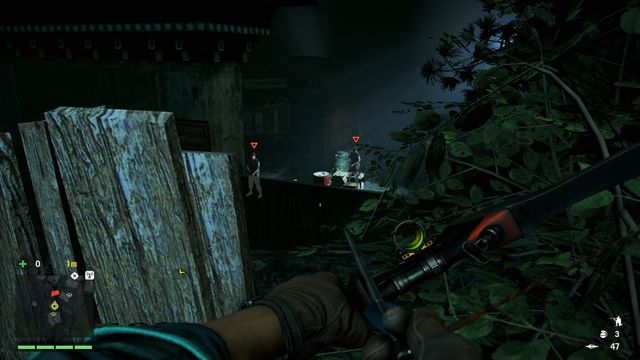 You don't have to stay undetected anymore. If you want to have some fun you may destroy the explosive barrels.
In the final part of this mission you don't have to care about an alarm although it doesn't mean that you should start burning this place to the ground. The best way is to keep using a bow and avoiding your enemies or eliminating them quietly. This way you won't have to deal with the bigger part of the camp. In every moment you can leave the body that you are carrying behind and focus on eliminating the enemies. When you will clear your path just pick up the De Pleur's body (which will be always marked on the mini-map) and take it to the car without a problem.
 Put De Pleur inside and drive away.
Throw De Pleur into the trunk and go to the place marked on your map. If you will drive fast enough you won't have to be afraid of the one car that will chase you. When you will get to your destination the mission will be completed.
Completing this mission also weakens the De Pleur's outpost named Varshakot. It is a good moment to attack it.
 From a safe distance study the area and highlight the enemies.
Speak with Amita and get to the area that she will choose. Fill there your ammo and speak to the leader of the rebels to receive another quest. Use the opportunity to highlight all of your enemies. You should especially notice a jeep with an MMG that drives around the brickyard and the elephant that you may use to get rid of the enemies.
 The first generator. Few steps behind it you will find a box with an alarm.
Try to stay hidden since if you will be detected then the enemy reinforcements will appear and they will make this mission a lot harder. At first go slightly down and deal with an isolated enemy nearby. Now you can deactivate the alarm. Now you may shoot to the elephant on the right side although the best moment to do so is when the hostile jeep is nearby. If you do so the elephant will probably eliminate the jeep from the further game.
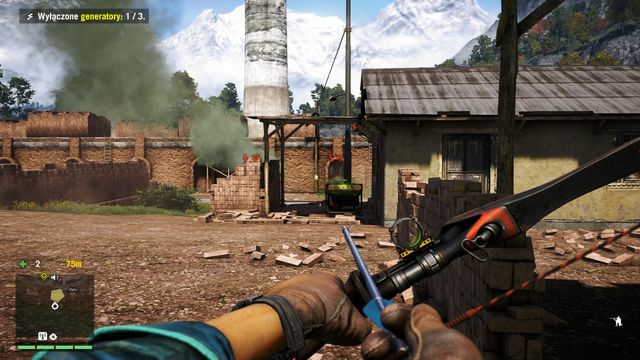 The second generator and the last alarm. Beware of the battle dog which wanders in this area.
Make a use of the chaos which you have initiated and walk around the brickyard choosing the left side. On your way you will see a first generator which you need to deactivate. Behind it you may also find an alarm to turn off. Keep walking around the brickyard. Beware of the battle dog which wanders in this area. When you will deactivate both the generator and the alarm you may walk to a place which is close to the place you have come from. On your way you will pass the last generator which you need to deactivate as well.
 Turning off the third generator will open the door to the heroin factory.
Now head to the door to the laboratory. When you are next to them beware of the two enemies which will exit from them. Now you can enter the brickyard.
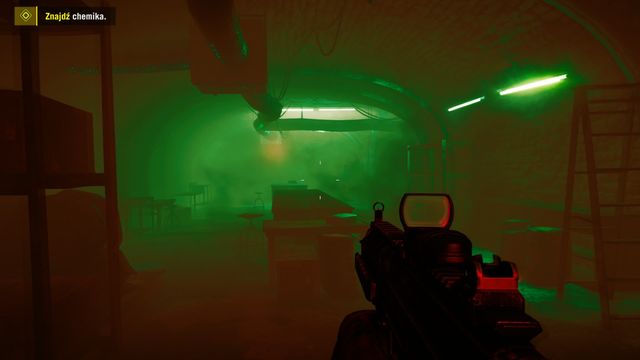 In the smoky rooms look around carefully since it's difficult to see the enemies.
Now you will have quite some fun. Turn left and then right next to the wall turn right. Open the door behind which you will see few enemies. You may deal with them with whatever weapon you want and if you will be in trouble just use a grenade. Notice that you will not see your health bar anymore although you need to keep healing yourself. Go further inside the factory and eliminate methodically all the enemies you will find. You need to get to the door in the room which is "luminescent" with a green glow. Behind this entrance your will find the chemist who is your target. Kill him and exit from the laboratory. And then... Kill the chemist few more times. Keep doing so until you will get the message according to which you need to leave the brickyard.
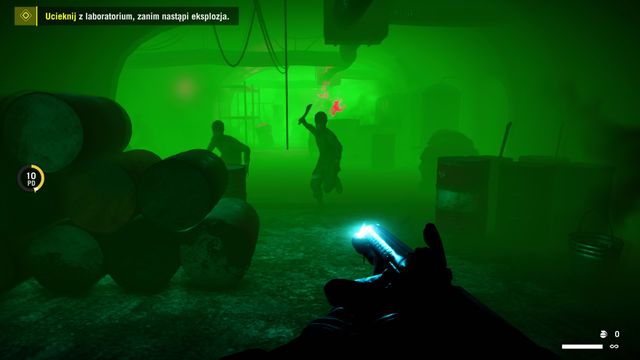 You may shoot your enemies from the distance. You don't have to worry about the ammo. Unlike your health bar.
Now you can really exit the room. Eliminate the incoming enemies using the guns which you have received. It should be an easy task. Remember to keep healing yourself from time to time. If you won't remember you can count on the reminder message from the game itself. These enemies will disappear after a single hit so if you will have to you can even save yourself with the melee fight. Getting to the end of the road and opening the exit door will complete this quest.
 Scout the area from afar and mark the enemies
Talk to Sabal, take the explosives and get to your destination. Replenish your ammo there and talk to the rebel lieutenant to receive another mission. Take the opportunity and mark all of the enemies. Note the off-road car with an HMG, circling around the brickyard, as well as the elephant, which you can use to snap the ropes.
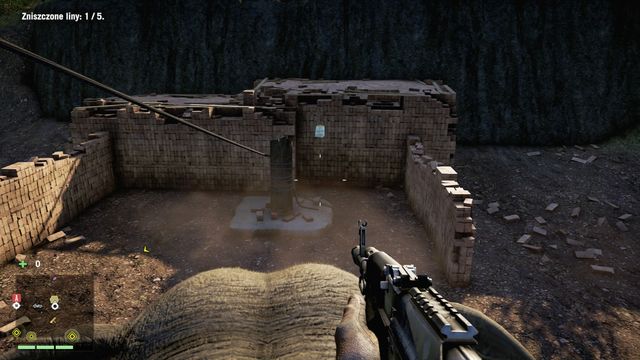 You destroy the ropes with the elephant.
You can complete this mission in the stealthy way, by walking around the brickyard and deactivating the alarms, while taking down the opponents. Remain in hiding because, if you are spotted, reinforcements will arrive and it will make the mission more difficult to complete. At the beginning, descend a bit and eliminate the opponent around here. Then, deactivate the alarm. Now, you can fire at one of the elephants on the right. It is best to do this, when the enemy car is passing by. Thanks to this, the elephant will, most probably, trample it.
Seize the moment of commotion and walk around the brickyard on the right side. In the corner, there is the first alarm box. Keep going around the brickyard and, after you reach the other side, more or less in the middle, you pass by the last, third alarm box. Watch out for the dog here. After you deactivate all of the alarms, you can try to take the enemies down, silently, or mount the elephant to destroy the ropes.
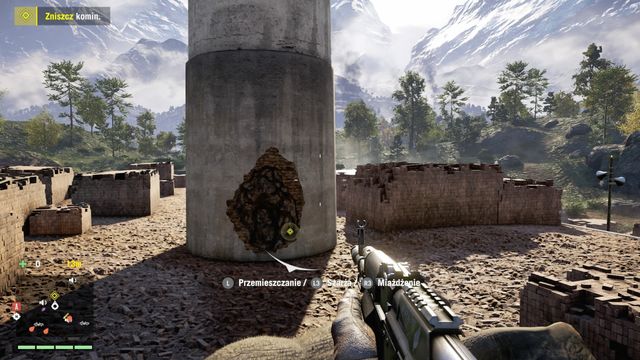 As soon as you destroy five ropes, the chimney can be tipped over.
To destroy a rope, charge towards it and the elephant will automatically snap it. It is the easiest to charge around the brickyard and break all of the ropes. Finally, climb upstairs and charge at the chimney to tip it over. Through the hole, jump into the lab.
If you have not decided on the silent variant, you have lost nothing - as you fight mounted on the elephant's back, you trample the incoming enemies. You should especially pay attention to the off-road cars with HMGs mounted and deal with them in the first place. Also, remember that you can fire your weapon, while on the animal's back. You can also irritate another elephant, thanks to which the majority of opponents focus on it.
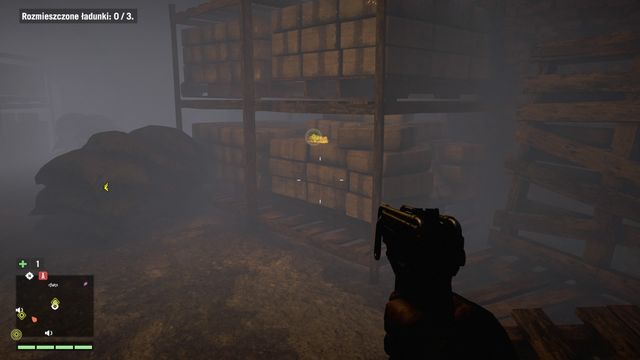 The spot where you plant the explosives has been highlighted in yellow.
After you enter, your task is to plant three explosives. Watch out, because inside, there are several opponents. Before you complete the main objective, you had better eliminate them to make things easier. The first spot to plant the C4 explosive is on the palette with bricks, at the end of the first, long corridor. Then, head towards the direction,, from which you came, and place the second charge on the yellow canister. Plant the third on the palette, close to the door.
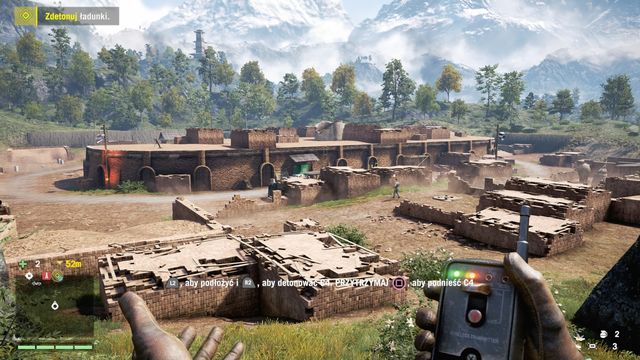 Finally, detonate the explosives, while away from the brickyard.
After you plant all three explosives, leave the brickyard and detonate the explosives, after you walk away a bit.
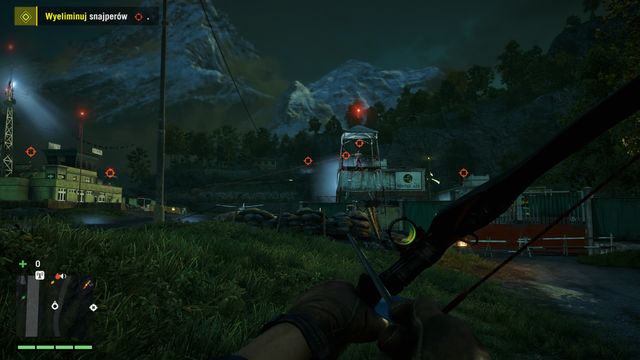 You absolutely need to highlight all of the sniper
At the beginning of this mission you will get to the place marked on your map with a letter W after a phone conversation. Go to the airport. Your first task is to eliminate 6 snipers. At first use the camera to highlight all the targets. On the right side of the airport you will find four enemies and on the other side another two. Don't forget about the enemies on the ground. You don't have to kill them however if they will notice you they will turn on the alarm what will fail your mission.
 From the top of the roof you will frag the first sniper without a problem.
Start with eliminating the sniper which you will have ahead then enter the airport area undetected. Walk around the right side of the fence and then climb on the roof when the sniper there will turn to you with his back. From this place you can shoot the third enemy which you can see on the other building on your right. If you have a good bow you will also be able to kill the enemy ahead of your current position.
 The control-tower.
Now return to the place where you have killed the first sniper and walk around the airport with a very safe distance. Head to the control-tower and take quietly the first sniper here. Go to the place which is marked on your map and pick up the sniper rifle.
 Carefully observe the meeting.
Willis will order you to cover him from the place where you are right now because something may go wrong. Observe these two gentlemen during their conversation. When you will hear the verbal commend you may start eliminating your enemies. You have to keep Willis alive. You will see his health bar on the screen. Eliminate as many enemies as you can. If you are not a great sniper or Willis will hide behind the building where you can't shoot to anyone you may walk on the ground and finish your job with a shotgun.
 At first take care of the infantry and then shoot down the helicopter.
Once you will defeat your enemies a helicopter will appear nearby. You have to destroy it as fast as you can. To do so you may use the rocket launcher or the grenade launcher. If you are good with the sniper rifle you may also try to shoot the helicopter down. However destroying the helicopter doesn't ends this mission. Find a shelter since this entire region will soon experience the rain of mortar missiles. There will also be a lot of infantry which you need to eliminate including some new snipers. To unlock the next part of the mission you need to eliminate this last wave of enemies.
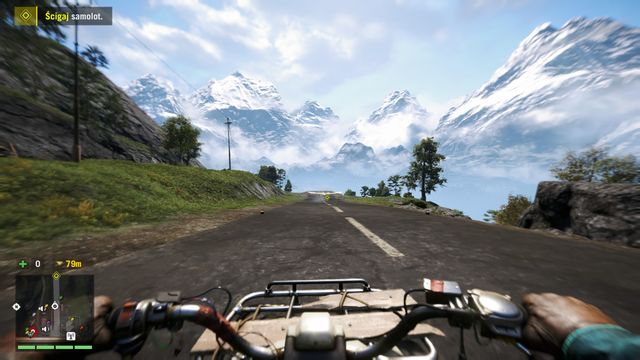 Get to the end of the airstrip as fast as you can.
Thankfully this quest is not difficult. Quickly jump on a marked quad and drive with it to the end of the airstrip following the plane. After you will fall of the edge use the overalls which you have received and, well, don't do anything after beside making some slight turns towards the plane. The idea is that you don't want to dive too low but instead you want to maintain your height and to get close to the plane. Ajay will effectively destroy the machine and use the parachute. When you will land on the ground the mission will be completed.
You will begin this mission when you will meet with Willis on the airport. Be sure that you have a fair amount of ammunition and health syringes. In some parts you may also use a grenade launcher and maybe the sniper rifle if you can use it well.
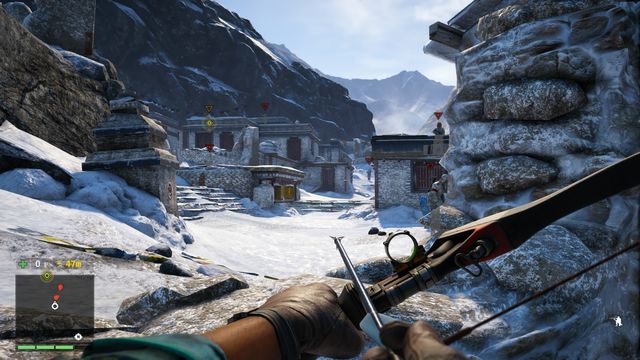 Your target will be marked with the orange color.
When you will get to the first village you need to beware of the enemies since they wear the white uniforms and are hard to notice. In the left side of this area you will also be able to find the sniper so it is better for you to avoid walking in an open field. The lieutenant you are looking for you will find on the roof of the building which is close to the center of the camp. Kill him and then photograph his body. Apparently it is not the person you were looking for so will have to move forward. If you have been undetected until now you don't have to start the pointless fight as well.
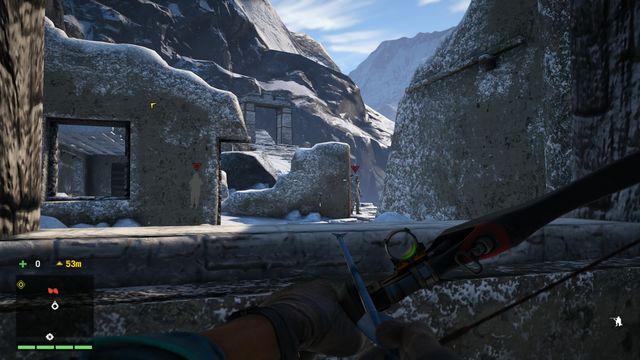 Watch out for the enemies behind the windows.
Stay between the two walls. You can use a window to see two enemies. Go down and stay on the right side. Eliminate the closes enemy and in the right moment kill the second one and finally the third one who wanders on the road.
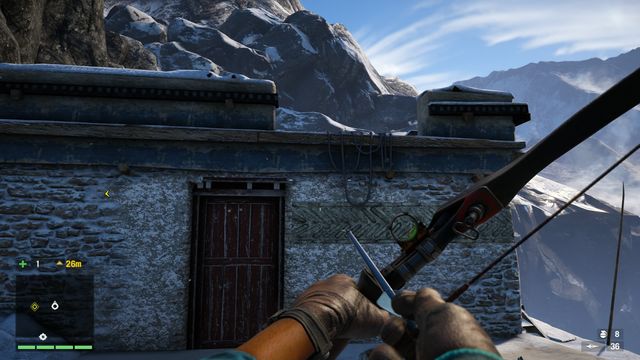 On the roof of this building you can fill your ammunition supplies.
Now turn slightly towards left and go on the building on which you will find yet another enemy. The next one wanders on the balcony. Highlight him and climb up on a balcony when he will be turned to you with his back. Do the same thing with the enemy on the roof. Kill him quietly and fill the ammunition. Heading to the next point you need to beware of the two more enemies. Once you will get there you may open the gate.
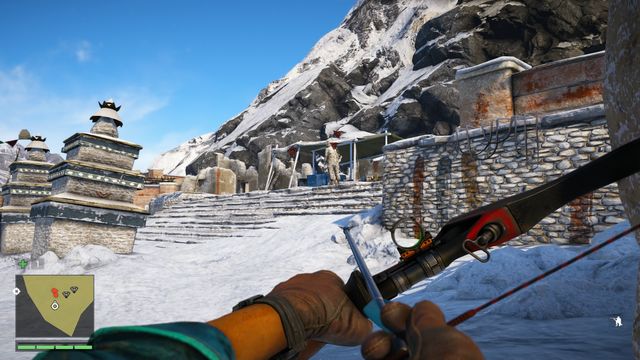 Avoid the talking soldiers by using the hanging ropes on the right side.
Right after you will enter the territory of the monastery you will see two enemies in ahead of you. Wait for them to start talking and then go ahead and stay next to the wall on your right. Climb up using the hanging ropes and walk around this complex sticking to a wall.
You will see a bow leaning against a chest. Close to the end of the wall you will see the entrance to the building which you can see on the screenshot. On the other side of it you will find the exit which will lead you to the stairs which you may use to go on the higher level. Kill the enemy inside and enter the highest floor of the building.
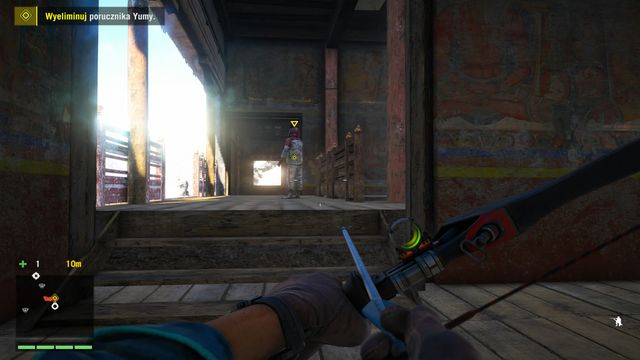
When you will get to the surface you need to turn right. After a moment you will get to the balcony where you will find the lieutenant (shown on the print screen above). Kill him and search his body then go downstairs toward the gate. On your way eliminate a sniper and then right in front of the gate kill another enemy. You can wait here for a moment until he will step away from the door. Now open the gate.
 Don't go to the center of the cave where is the majority of the enemies. You can choose the tiny path close to the rocks on your right instead.
In the cave you will get to the big area where you will find few enemies. Take the path on the right. On the other side you will find an enemy which you need to kill. Now you can go to the water however try to not be detected by your enemies so try to also be as quiet as you can. If you will be noticed by someone you may dive to hide from him. Get to the bridge although be beware of the heavy armored soldier with a flamethrower here. Even if you will be detected don't try to fight but run for your life to the exit from the cave instead.
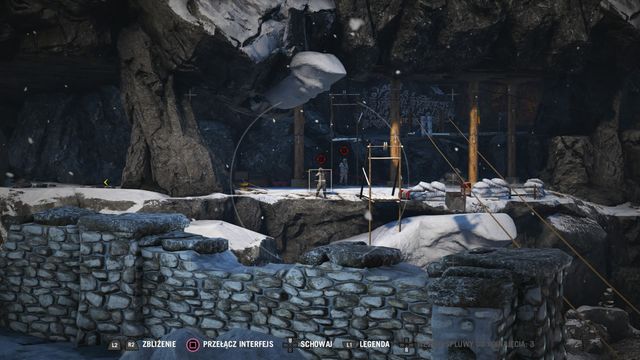 While you are on this area remember that there are snipers observing this place.
You will get to the wide area in which there is a lot of enemies. If you want to use a bow to eliminate them be sure that you will hit them in their heads. To kill them you need even two hits and if you won't shoot fast enough you will be almost surely detected. Start with eliminating two enemies below on your right. If you have a necessary skill you can takedown both of them at the same down. Now go higher and turn right to the small defile between the rocks. Kill a nearby enemy.
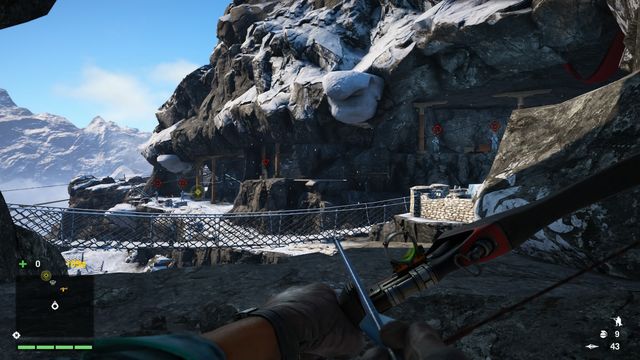
You will get to the area shown on the screen shot above. Ahead you will see two snipers and slightly on your left another two of them. Take the path on your right where you will see another enemy. Now you can kill the snipers. You should be able to do it undetected however if you don't want an unnecessary risk you may try to kill them both at the same time with a grenade or a grenade launcher. Now jump from the escarpment below you and then go towards the two last enemies. Throw a grenade in their direction and try to finish them with a gun right away. It is a very a loud but also a very fast and effective way.
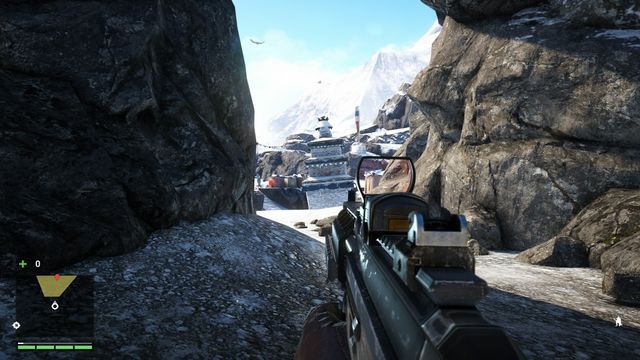 Behind the last defile you will see your target guarded by a few minor soldiers.
Your final target is right next to the end of the short passage you need to pass. Your task is to eliminate the leader and his soldiers as well. The lieutenant is next to the MMG above. You may succeed quite easily if you will use the sniper rifle. If you don't have one right now with there is a possibility to go back and take one from a sniper's body. If you want you may still keep being hidden and eliminate few enemies undetected. If you will be noticed don't spare any resources and use anything you have to finish your enemies off. Cleaning this place will complete your mission and after a while you will be taken back to the Kyrat. Remember to use a parachute since you are going to soar.
Slightly guide your character while falling to hit the ground where you need to be.The next quest for Willis. At the beginning your main task is to use the overalls you have received to get to the area where you are needed. Jump from the edge and slightly guide your character while soaring instead of just diving in. It will allow you to easily get where you want to be.
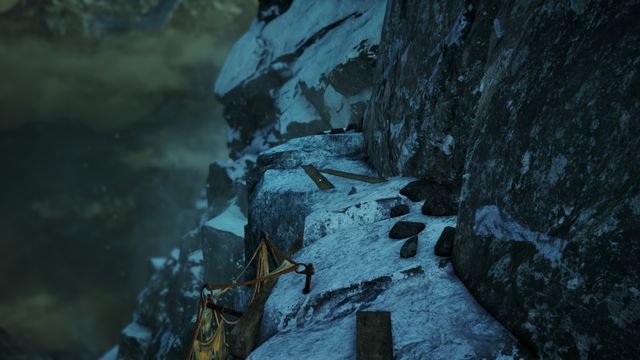 You need to kill two soldiers who are removing the snow fast or to distract them and pass them from the left side.
When you will get to this area you need to use the grappling hook and get to the escarpment on your left. Once you are on the top go ahead of you. After a while you will notice two soldiers who are removing the snow here. You can kill them but an easier way is to distract them by throwing a rock. Pass the guards and jump down from a little edge right behind them. Now you can move through the stairs.
On your left you will find a small chapel. The lieutenant you are looking for will be nearby. You may just hide here and highlight all the surrounding enemies to find your target. He is moving with a group of guards.
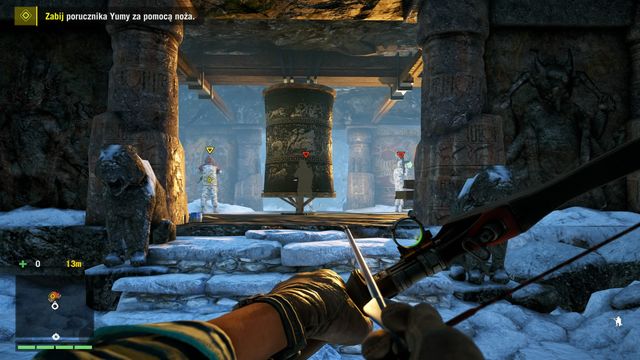 Your target will wander nearby and from time to time he will step into the chapel.
When you will find your target make an ambush somewhere on his path. Remember that to kill him you have to use a knife. You may succeed in one of two ways: with a takedown or by throwing a knife at him. Eventually you may also just cut him to his death if you will be detected for some reason. Right now you may just ignore the other enemies. Kill the lieutenant as fast as you can and when you will finish make him photo just as quick. Now run away from this area. You may also try to sneak behind two wandering soldiers and just takedown them both at the same time or one after another instantly.
 The most difficult part of the soaring is to hit the narrow hole between the rocks.
After the successful assassination attempt get to the marked edge and jump down again. While you are soaring you should not just dive but try to turn to avoid the rocks instead. Beware of the helicopter. To avoid him you can only dive. The biggest problem is the last defile since without difficult diving you won't make it. Try to aim the hole between the rocks perfectly and lower your height. In the end open the parachute and land next to the plane to finish this mission.
You may easily walk along the edge.This mission will begin automatically right after the completion of the "Death From Above" quest. Your main task is to escape from the prison. To accomplish that you need to find a grappling hook first which is divided into two parts. Go along the rocks behind the place in which you will be able to use a grappling hook later on. Right after you will exit the prison you need to turn left.
 Wait a moment and let a demon to walk into the next room.
You will enter the room in which you will see few demons which you have seen already in the Shangri-La mission. Stay out of them since you don't have how to eliminate them. Wait for an enemy to leave your current location and then go straight ahead. Don't let them detect or you will be quickly killed.
Find the area shown in the print screen above and turn right then once you get to the end of the path and you will be next to the grating turn left. Take from the body the first element which you need to collect to construct a grappling hook. Now you may go straight ahead and go to the area marked by the game, although keep avoiding the demonic enemy.
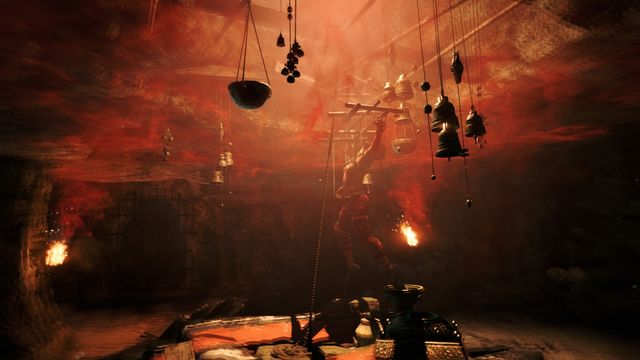
When you will get to this area start following the black, blinking shadow. Go through the open grating and afterwards turn left into the corridor where you will find a demon. Turn right to walk around him. You will enter the room shown in the print screen above where you will find the second part of a grappling hook.
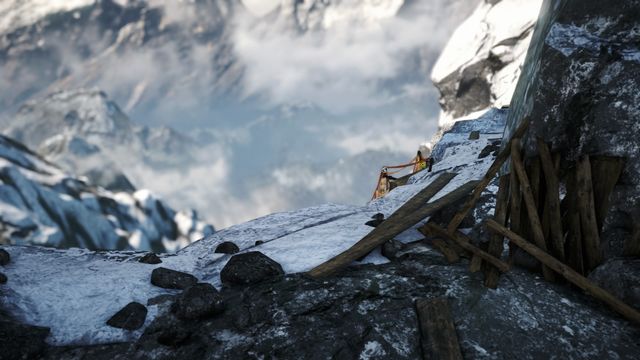 Use the grappling hook which you have constructed while you will stand next to the edge to safely get down.
Keep avoiding a demonic enemy and return with the path you have come here. Your destination will be the escarpment which you have passed by before. You can use here your newly constructed grappling hook.
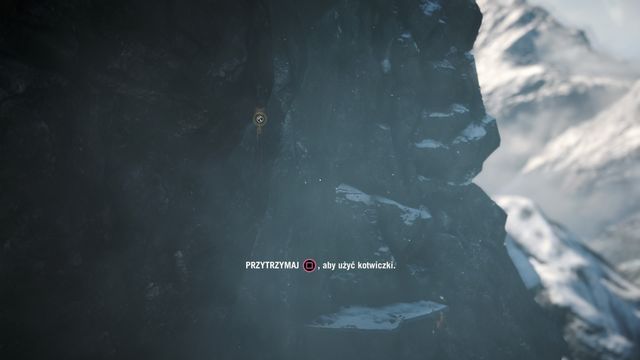
You will see underneath you the ledge shown in the print screen above. Swing on the rope and jump on the next platform. Now you need to use your grappling hook another two times to get on the ground. In the next part of your escape you will walk on a small wooden bridge which will collapse under you and this way you will slide down. Again you have to use your grappling hook two times although you will eventually fall down.
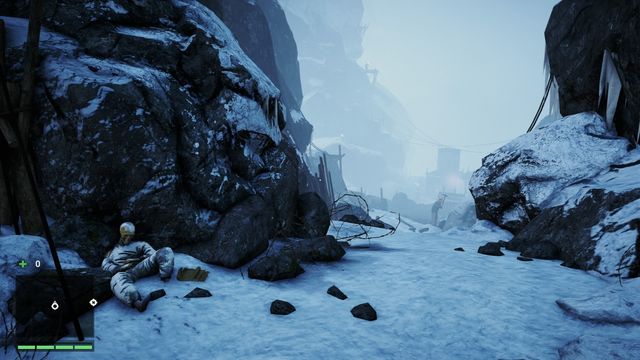 Wait in the bottom area until a heavy armored enemy and a dog will get to the next part of the camp.
When you will wake up go straight ahead. When you will pass the worker who uses a pickaxe you need to wait until a heavy armored enemy and his dog will walk away from the prisoner who is tied to the building. Now you can go the his body and take from him few throwing knives. Turn slightly left and pass the zip line to walk a little bit lower.
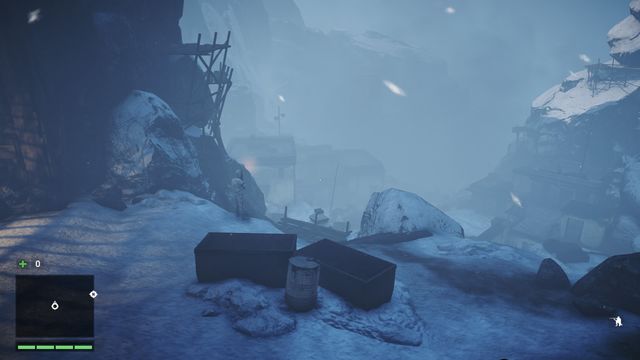
Use your knifes in the place shown on the screen shot above to kill a soldier wandering nearby. Aim well and throw two knifes very fast. Take his weapon although don't try to initiate any kind of an open fight since you don't have a lot of ammunition. Stay hidden and use the weapon only if you will not have any other choice.
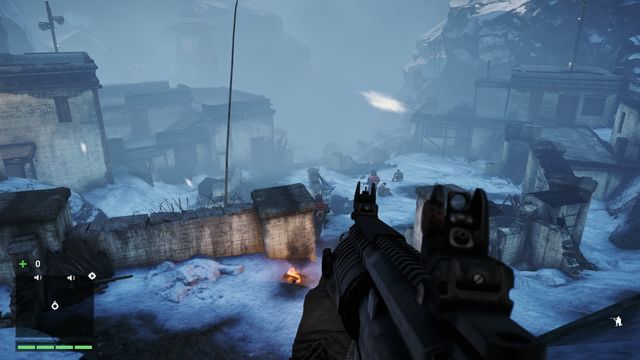 Beware of the two heavy armored soldiers. Use the left path to avoid them.
Use the path to the left of the camp to circle it, then go inside and head to the middle. Be careful not to be spotted by the soldiers. Having the soldiers on you right, head to the building in front of you. On the top, next to the chest with an alarm, jump over the wall, to the right. From here, you can exit this part of the camp safely.
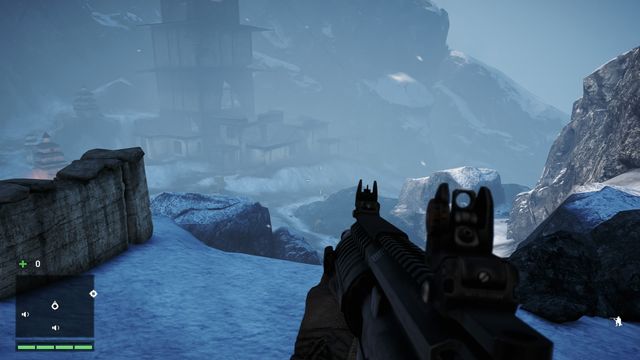 You can find a few interesting guns in the tower.
A bit lower, on your left, you will notice a high tower. Try to sneak inside. You will find real treasures there - several heavy guns and some ammo. Now you can start the fun with your newly found weapons or continue sneaking, using the guns only when noticed. If you have no interest in collecting those weapons, you can go around this part of the camp by walking the right side and keeping away from the bell tower.
 Eliminate the enemy and sneak from the side.
The last part is the easiest to pass. Wait until the enemy on the roof turns his back at you and go onto the roof to eliminate him. It doesn't matter whether you do it silently or with a gun - if someone notices you, just run through the camp to the place shown on the map. When loosing your consciousness, you will see Bigfoot - or maybe it's just your mind? Anyway, the mission will end and you will wake up in a safe place.
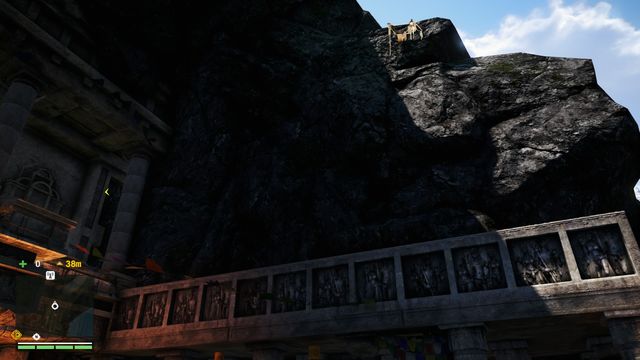 Near the entrance to the arena, on the right, you will notice a place for using your grappling hook.
Talk to Amita and Sabal, then, head to the arena. The main entrance is blocked by enthusiastic crowd, so you have to use another way to get inside. On your right, high on the rocks, you will notice a grappling point. When you're up in the air, swing and use the hook again. Jump onto a rock shelf and step onto the arena.
 Shoot the two soldiers and pull all the levers
When you're inside, head right through the narrow corridor and jump down. In the room on the left, you will see two enemies. Kill them and pull all the levers to let the animals out on the arena. Wait until they kill all the enemies and go back to the corridor.
 When in the corridors, some of the enemies will run straight onto your gunpoint.
Now, prepare for some action. You have a few groups of enemies heading tour way, but they are not difficult to defeat. In the narrow corridors, you will have no trouble killing them using grenades or a grenade launcher. Near the arena exit, you can let a tiger out of its cage and it will get rid of the most of your enemies (watch out not to turn it against you).
 Decide about Noore's fate.
After defeating all the enemies, there will be nothing standing on your way. When you reach Noore, you will have a moment for shooting her. Otherwise, she will kill herself. Either way, the mission will end and Noore's fortress will be weakened.
Before starting the mission, make sure you have a grenade launcher or a rocket launcher with you, which will make the task much easier. Talk to Amita on the arena (the stairs on the left lead to a balcony). Head to the ambush site.
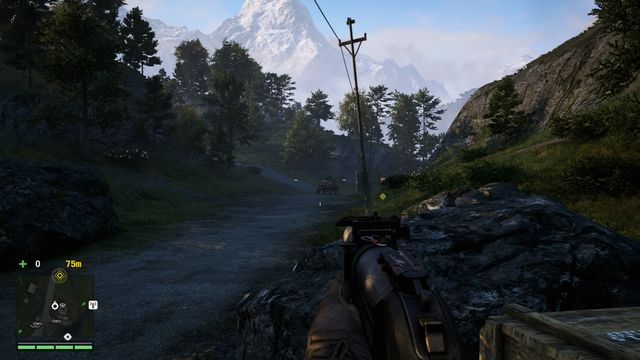 When you can see the convoy, prepare your launcher.
Your task is to stop the convoy, but remember that you cannot destroy the truck. There are two jeeps in the convoy, filled with enemies and with MMGs on the back. You will use your launcher on them. As soon as you can see the vehicles, get rid of the first jeep, omit the truck and destroy the other one. Now, get inside the car to chase the truck (don't let it get too far from you). The driver will stop near a small enemy camp - shoot all the enemies and hijack the vehicle.
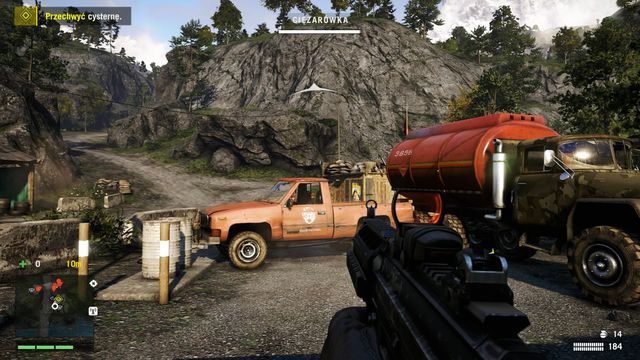 If you don't manage to hijack the truck sooner, you will just have to defeat a few enemies more.
You can make this part of the mission easier by blocking the road before the convoy appears. Place two cars across the road - one vehicle should be directed south, so you can use it in case the truck would go through the blockage somehow. If the truck stops, eliminate the driver and take the wheel. You can also eliminate him when he's still driving. No matter what method you use, try no to damage the truck too much.
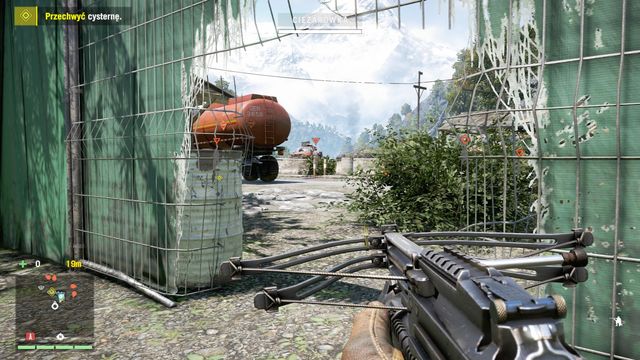 Walk around the bridge and, at the other side, find a hole In the fence- cross it and enter the truck.
If it is Sabal that is the current leader of the Golden Path, this part of the mission is a bit different. You are not going to need the grenade thrower here - the sniper rifle is going to be a better choice. Go to the marked bridge, over which there is the tank that you are looking for. It is being guarded by a dozen-or-so soldiers, who you can eliminate from the rock, which you climb next to the bridge. A better idea, though, is to pilfer the tank silently. To do that, enter the water and get out at the opposite bank of the river. Here, climb onto the rocks, using the hook, and face the tank. Through the hole in the green fence, you will approach the truck without being seen. Steal it and escape towards the bridge. If you chose the assault method, remember not to damage the truck too much.
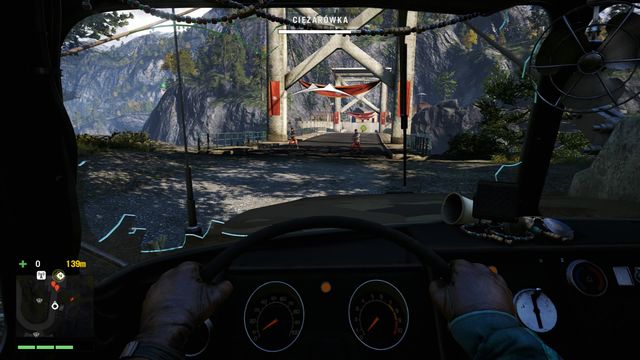 Achieve the appropriate speed before reaching the obstacle so that you not get stuck.
When driving the truck, don't mind the enemy vehicles too much. If you drive fast enough, they will have no chance of destroying the tank. Just make sure that you have enough speed before driving at an obstacle.
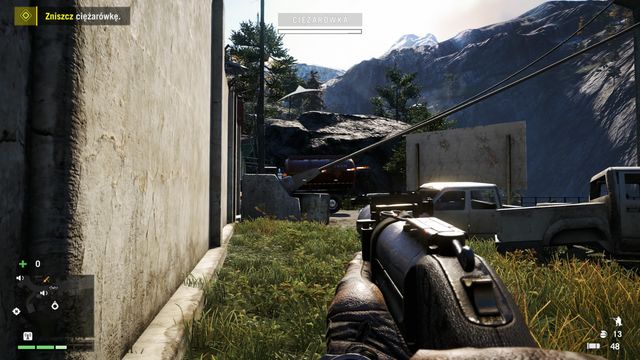 From near the wall, you can safely destroy the truck.
Park the truck as close to the gate as you can (run over a few enemies before so that they wouldn't interrupt you). Get out of the vehicle and hide close to the wall so that the sniper couldn't see you. Destroy the truck using a grenade launcher or a rocket launcher.
 Use the grenade launcher to eliminate the enemies quickly.
Now you have to eliminate all the enemies located near the bridge. Don't even think about crossing it - stay behind the wall as long as you can and use the hole in it to eliminate as many soldiers as you can. Try to shoot at the explosive barrels to destroy vehicles and kill enemies. After clearing out the area, send a message and prepare for defense.
The last part of the mission is defending the bridge. The enemies will be coming from the place shown in the picture above. Try to destroy the vehicle with all the enemies. Watch out for two snipers and a heavy armored soldier with a flamethrower. After defeating all the enemies, you will be able to enter a new location.
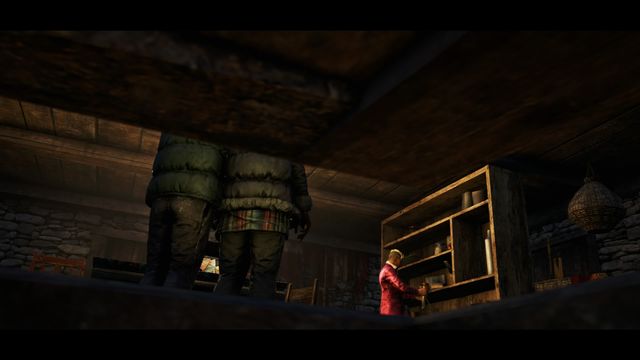 An unexpected guest.
You start the mission by simply driving through the spot shown on the map. Head to the village and talk to the rebels.
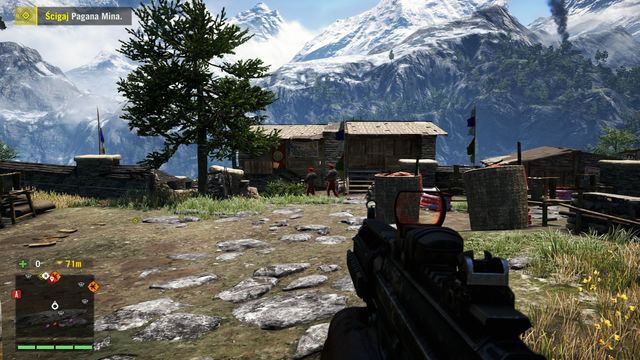 Right after stepping out of the hut, quickly kill or go past the two enemies.
In the hut where the meeting should take place, you will see Pagan. After a short cut-scene, run outside. Quickly eliminate or go past the two enemies and start controlling the buzzer. Your task is to kill the escaping enemy. When flying, watch out for the missiles shot coming the bell tower.
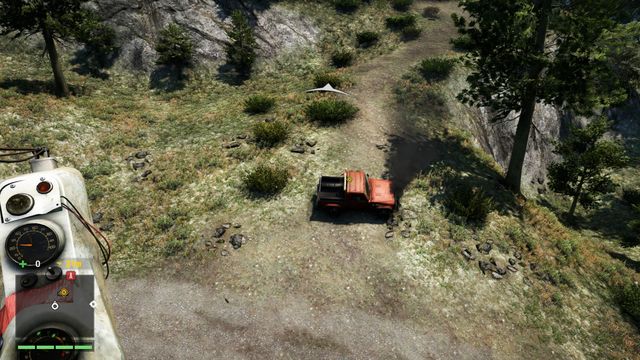 If you have a grenade launcher, you can quickly and easily eliminate Pagan.
The easiest way to destroy the car is to damage it using a grenade launcher. Shoot at the vehicle or slightly before it to make it stop. Pagan will step out of it. Shoot another missile and the car will explode. If the enemy dies, the mission will end. If you don't have a grenade launcher, try to fly low enough to shoot at the enemy using the side weapon. There is a high chance that you will kill him eventually.
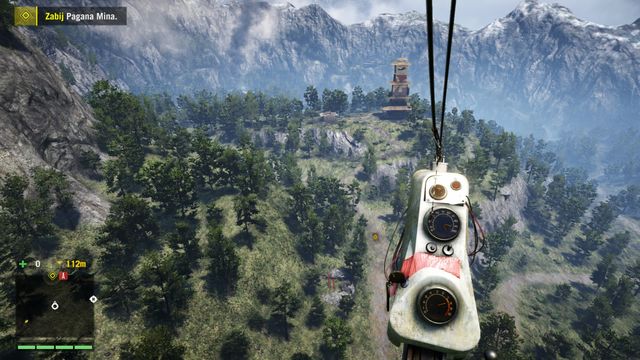 When chasing Pagan, watch out for the missiles coming at you.
If you don't manage to kill Pagan, he will reach his hideout. The enemy will get out of the vehicle and you should do the same. Eliminate the soldier located there and eventually, kill Pagan (you can find him in the room on the right, the blue door below).
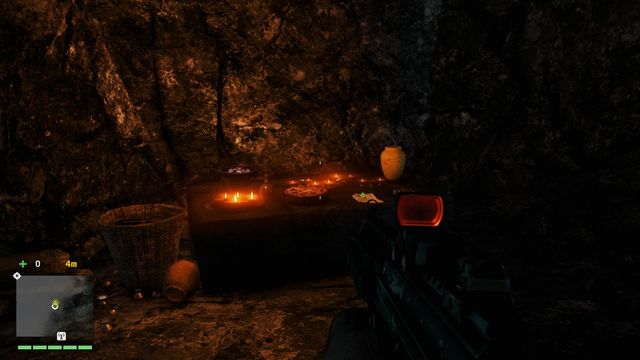 You will find the note on the table.
After watching Pagan's transmission, head to the mine. Go inside and take the left path when the roads split. Read the note on the table.
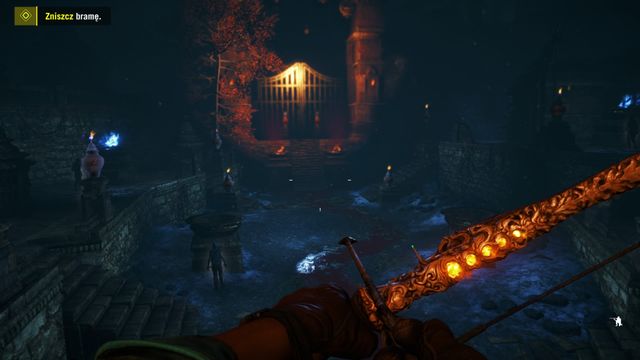 Before approaching the gate, clear the area from above.
After regaining control over your character, head towards the river of blood. When you reach the waypoint, use the grappling hook to get to the top. Your task will be to destroy quite a big gate that you can see behind the arena. You will manage to do that by shooting one of the two urns located in front of it. However, first clear your way from the enemies. Using the bow that you know from Shangri-La, you will have no troubles defeating them. Slow the time to aim carefully. The enemies' bodies will disappear right away, so it is possible to eliminate them all without drawing anyone's attention.
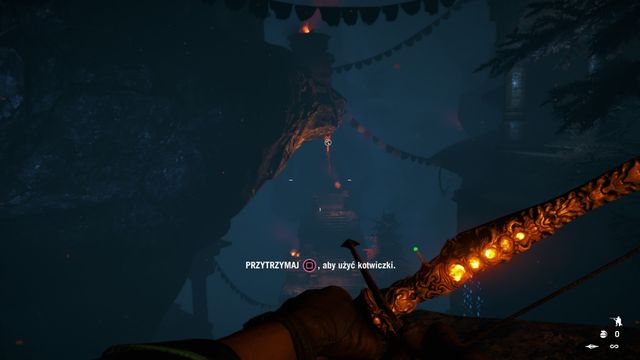 After using the hook, swing and jump onto the rock shelf.
Destroy the gate and use the hook right behind it to get to the higher level. When on the top, use the hook again to jump onto a platform. From there, using the hook again, go up. Now you have to swing a few times and jump onto another grappling point, and then another. Eventually, you will reach the gate.
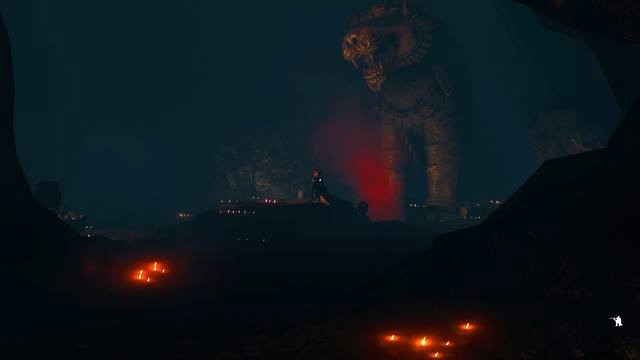 After going into the cave, you will see a short cut-scene with Yuma. After it ends, you will regain control over your character.
Now, head towards the river of blood. Go through the cave. A short cut-scene with Yuma ensues.
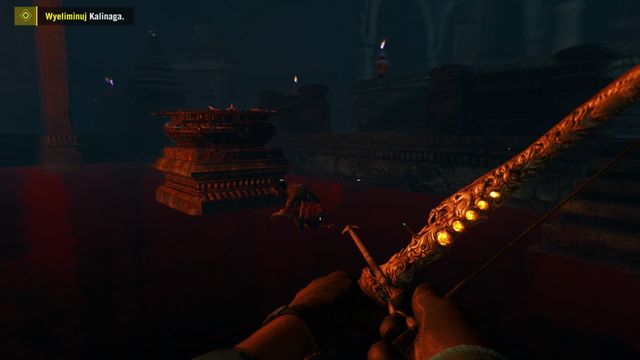 After hitting Kalinag, approach him quickly and finish him.
After you wake up, your task will be to kill the demon. During the fight, stay on the move constantly. Your enemy shoots very accurately, so standing in one place may end up badly for you. Try to run around the small arena, preferably in crouching position, from one cover to another. Your task is to hit Kalinag using a bow and then finish him. If you're not fast enough, your opponent will stand up. This situation will repeat three times.
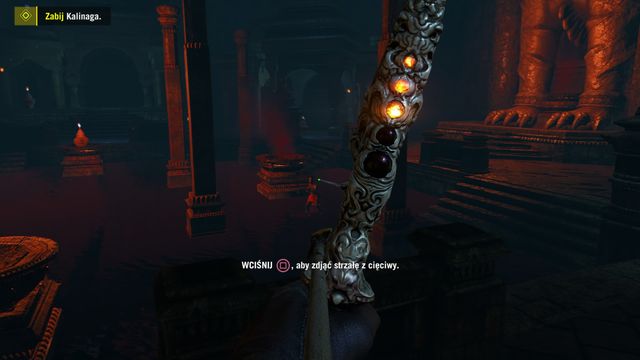 It is much easier to hit the moving target when using close-up and slowing down the time.
During the last fight, you will also face a tiger and some archers. First, eliminate the beast and then focus on the others. Use your ability to slow down the time, as Kalinag is pretty fast. When you see him, pull the bowstring and aim carefully. Three hits from the bow and three finishing moves will do the trick.
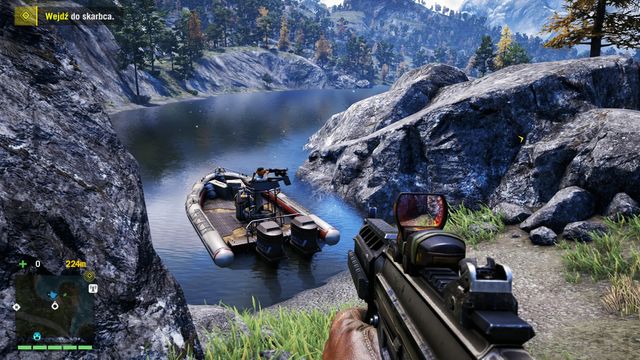 Rebels waiting for the sign.
After talking to Amita and after accepting her proposition, head towards the temple. The best way is to approach it from the north-western side (a small island located half-way to the temple). From here, you will have a good view on the environment.
Attention: There is a high chance that you will be attacked by a crocodile when going to the temple - get ready for a QTE.
Attention2: If you prefer doing things using force, head to the boat with an MMG on it. The rebels on the boat will help you fighting the enemy.
 After reaching the shore, watch out for the enemies walking nearby.
Before going into the lake, you should notice a patrol boat. Stay underwater so that the soldiers wouldn't see you or eliminate the boat using a sniper rifle (shoot the two passengers). Next, approach the shore in the place where you can see some stairs. Kill the soldier located here and head right. Watch out and wait until the heavy armored soldiers moves away from the door. Then, go inside the vault.
 Use the hook to enter the vault.
You can also find an entrance at the back of the temple. After reaching the shore, go the opposite way from what the minimap is telling you. Behind the temple, you can find an entrance in a stone circle. When at the bottom, swim for a while underwater and you will get to the right place.
 When inside, watch out for the enemies, especially for the heavy armored soldier.
After reaching the vault, go through the first chamber (you can still remain unnoticed - there are three enemies here). Turn left, straight to a large room (watch out for a soldier), where you can collect some money. Next, open the gate for the rebels.
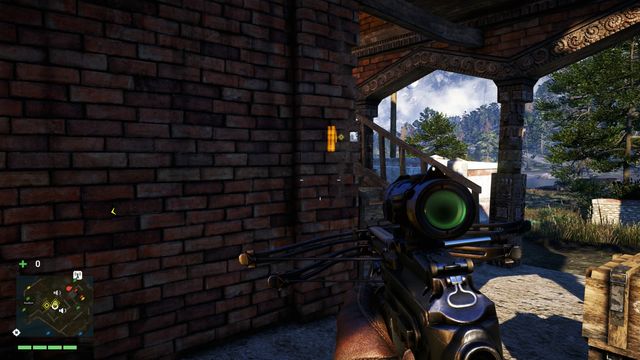 The places in which you should plant C4 are marked with yellow color.
Take the bag with the explosives and head outside. Go through the chambers - depending on how many enemies you or the rebels have eliminated, you will encounter more or less soldiers now. Plant one of the explosives right near the entrance and then take the stairs located outside to go to the next floor. Plant another C4 there. Now, quickly get onto the boat, not minding the enemies. It will be the fastest if you use the Auto-Cross. When in the boat, man the turret.
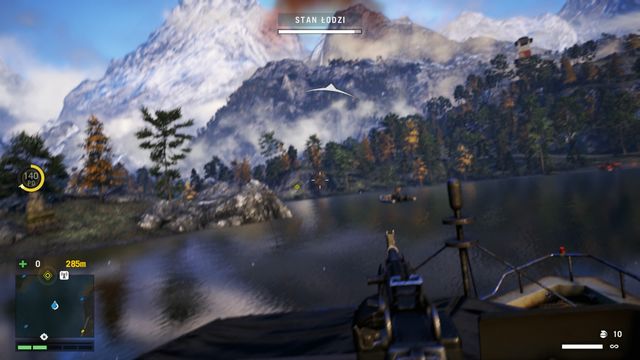 When escaping, try to eliminate all the enemy boats before they get close to you.
Your task is to destroy the boats chasing you. Your boat is pretty durable but don't let them shoot at you too much. The journey is not long, but you will notice a helicopter attacking you in the last phase. Reaching the shore will end the mission and Amita will become the leader of the Golden Path.
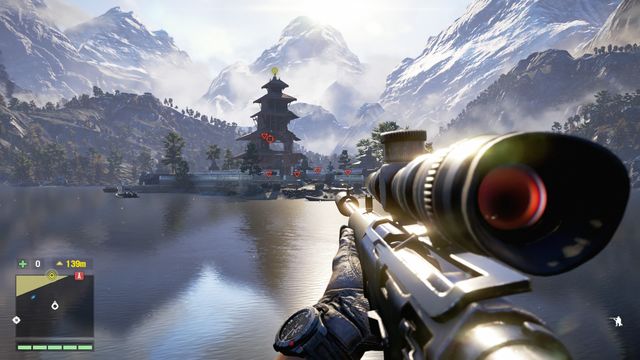 It is a good idea to scout the situation from afar.
If, in the last mission, you support Sabal, you will have to save the temple, instead of destroying it. Head towards the temple; it is best to approach it from the North-Western direction (the islet midway into the temple)/ You will have a good view of the area, from here.
Note: it is highly probable that you will be attacked by a crocodile, along your path - be prepared for a QTE.
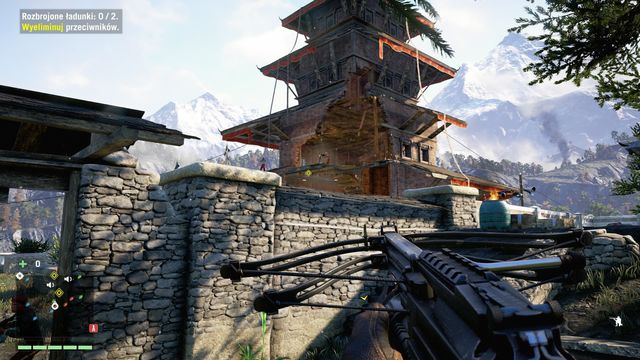 Walk around the temple and enter through the back door. Thanks to this, you do not raise the alarm.
After you get to the other side, your mission will be to disarm two bombs. Try to remain in hiding because a countdown starts, if you are detected,. You will then have to disarm the bombs, as fast as possible, which the enemies will be trying to prevent.
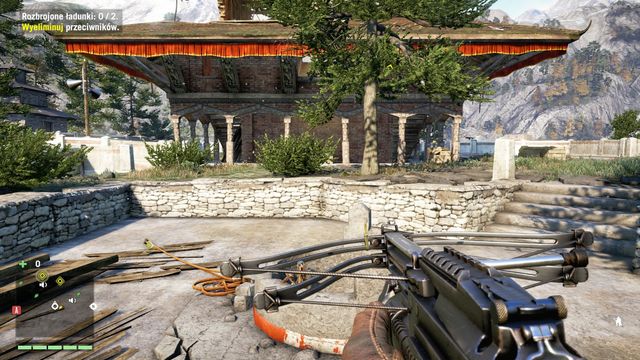
It is best to try to get inside around the back. After you get to the shore, go away from the marker on the minimap (do not go towards the main entrance). Behind the temple, within the concrete circle (the screenshot) there is an entrance. Down below, swim underwater a bit and you will resurface near the first charge.
 A good headshot deals with the heavy opponent.
Make sure that you are not spotted by the soldier near the water (it is best to take him down). The bomb itself is being guarded by a heavy opponent with a flamethrower. You can either try to distract him or take him down as well. However, it is better not to risk here and eliminate him with a headshot, fired from a sniper rifle. Then, approach the charge and disarm it.
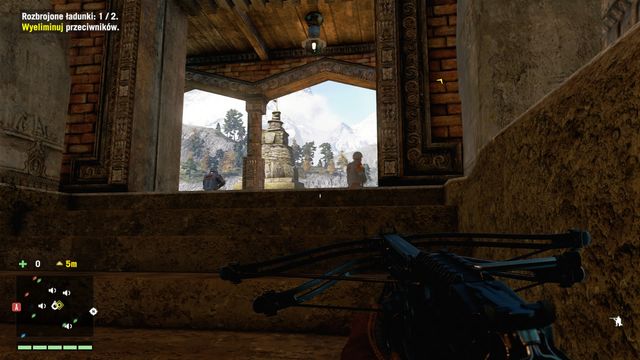 At the exit, watch out for two guards.
Climb up the stairs, towards the main entrance. Crouch while going there, because there is an enemy soldier on the stairs. Near the very exit, throw a stone ahead to distract the two guards here. Then, dash near the wall and turn towards the stairs, around the corner.
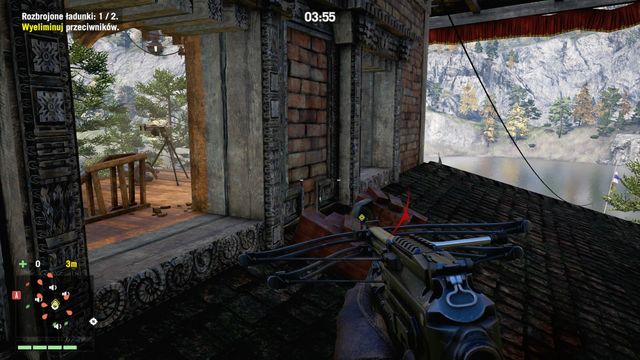 The second charge is on the rooftop outside (jump out through the window)
On the upper floor, you again need to watch out for two opponents. Try to eliminate them silently, in order not to e bothered, while you are dealing with the bomb. It is behind the wall, on the roofing. If you are spotted, at this moment, kill the two quickly and defuse the bomb. Thanks to this, you will progress to the next stage of the mission.
If you have been remaining in shadows, until now, it is a good idea to kill, at least, few more opponents, Otherwise, first clear the interior of the temple, of the approaching soldiers and eliminate the rest using the sniper rifle. If you have been noisy, expect a chopper with an HMG mounted to arrive. Aim at the cockpit and take out the pilot.
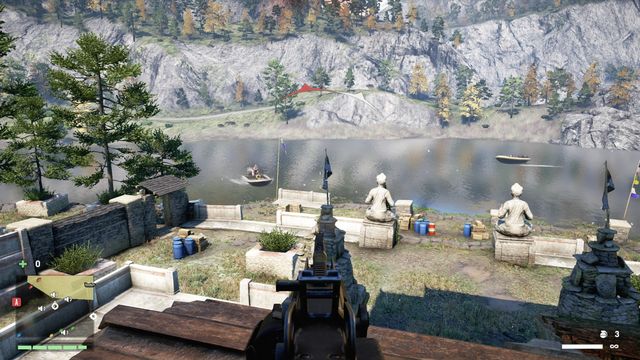 Try to eliminate the boats, while they are still coming, or right after they pull in.
Your last objective activates right after you defeat all of the enemies. Grab an HMG and get ready for the attack from the Eastern direction (attack zones will be highlighted in yellow). Try to destroy the enemy boats, still before they reach the shore, or at the moment of unloading, when the soldiers are clustered together and they are easier to kill. After you fight them back, turn back and grab the grenade launcher. Again, try to destroy the entire boats. With the third wave of opponents, also a chopper will arrive, from the mainland side. Watch out for the chopper here, as well as for the sniper in the thickets. Also, pay attention to the actions of the opponents, and keep an eye on the radar, to prevent being surprised from behind. After you eliminate all three waves, the mission will be completed.
You will obtain this mission only if you've supported Amita during the last choice (the Culture Wars mission).
The fastest way to reach to place is to use the buzzer (watch out not to fly straight between the batteries - you should land a bit earlier).
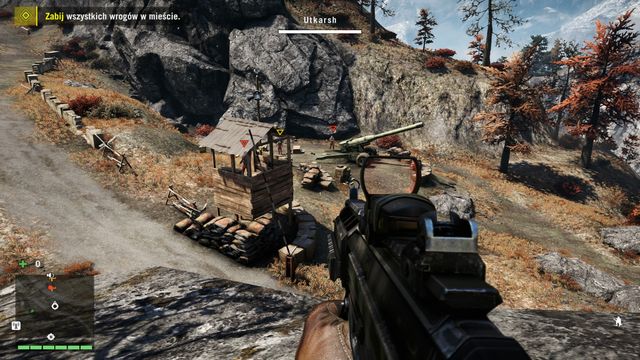 If you activate the alarm, enemy reinforcements will come.
Near the first cannon, you have to eliminate four enemies. The leaders are marked with yellow color and they are responsible for shooting, so if the town endurance bare will be dangerously low, you will have to eliminate them first. Try not to be noticed at this stage of the mission - you can simply destroy the alarm box. After eliminating all the enemies, head towards the village.
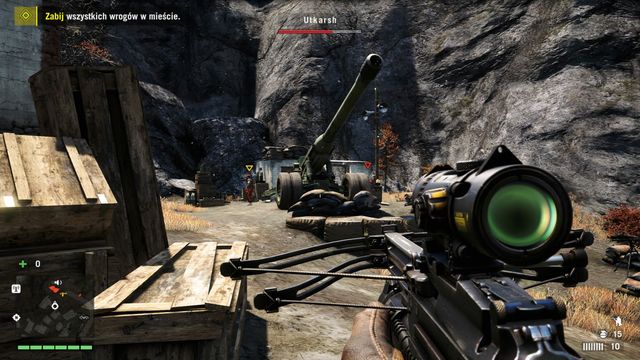 Control Utkarsh bar and don't let it fall to zero.
Watch out for the sniper located on the watchtower. You will find the next cannon around the tower - head right when after you enter the village. Here, you also have to kill all the enemies. You can do that easily by standing on the roof of the building that you see when on the way. If you don't want to have enemy reinforcements all over you, destroy the alarm box before starting the fight or eliminate all the enemies silently. The third and the last cannon is located in the highest part of the village. The strategy here is the same - watch out for another sniper. After killing all the enemies, you will receive a new objective.
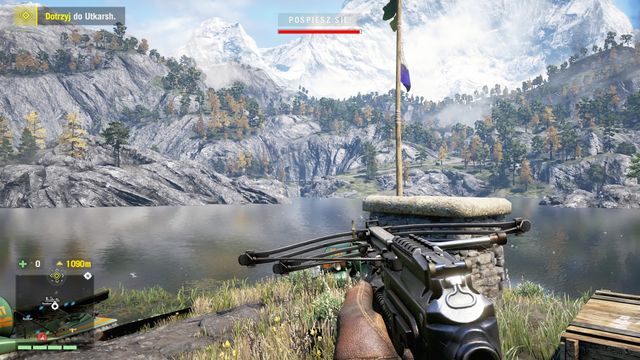 Quickly eliminate the incoming enemy forces.
There is a vehicle heading your way, with two sappers inside. You have to protect them. Go onto the tower and grab your grenade launcher. Omit the first car and then get ready for three jeeps full of enemies. From this position, you should have no trouble aiming at them. Destroy them before the soldiers get out. After a while, the sappers will plant explosives near the first cannon.
 Destroy the helicopter before the enemies get out to make the task easier.
With your allies, head to the second cannon. If you have the appropriate weapon, you can shoot down the helicopter heading this way. When you do that quickly enough, you will make the task much easier for yourself, as you will kill several enemies at once. When the sappers are planting explosives, watch out for another wave of enemies - you can use the MMG located here. After the cannon explodes, head to the third cannon. Clear the area again so that your allies could plant the bomb. Watch out for the enemies that shoot at the when they do that. After the explosion, you will complete the mission.
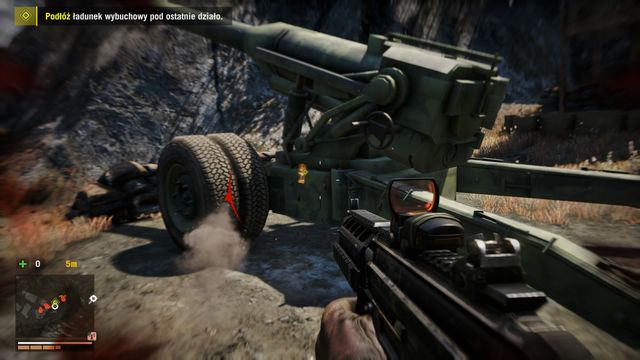 In case the sappers die, plat the bomb yourself.
During the mission, remember not to stand to close to the cannons after the bombs are planted (you will notice a countdown starting when it happens). It may so happen that both sappers get killed. In such case, pick up the bag with explosives and plant them yourself.
You have a limited amount of time to reach the city.This mission is the aftermath of choosing Sabal and completing "Cease and Desist" in the last "Balance of Powers" choice. It starts right after you leave the temple and meet with Sabal and Bhadra.
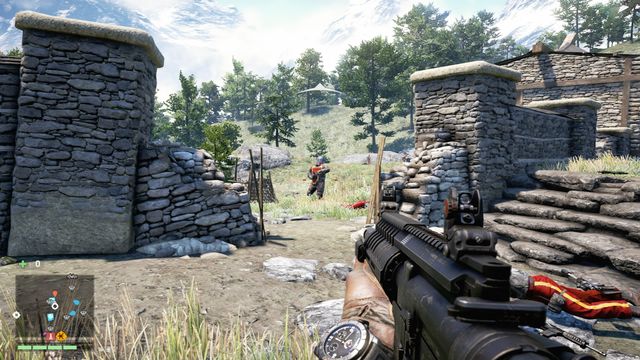 During the defense, you should especially watch out for the heavy opponents.
After you start the mission, head towards the village. You have a limited time to get there but, if you stay on your path, you will make it. In Utkarsh, walk into the house, more or less, in the center of the village and talk to the civilians there, through the grates in the window.
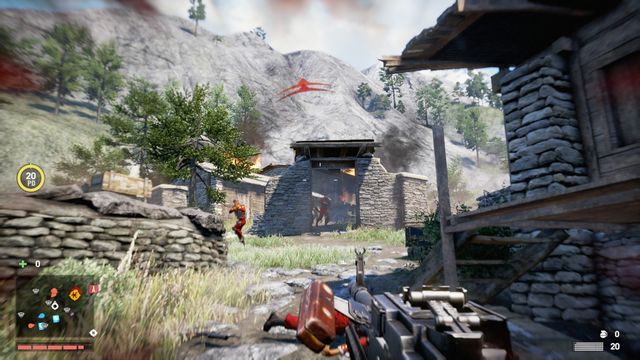 It is easier to deal with the opponents with a heavy weapon.
Your mission is to defend the city against waves of opponents. There are three of them and they are not too much different from each other, in their make up. The first wave comes from the east, another one from the west and finally, from the east and the north. Among the opponents that are noteworthy, there are heavy opponents, 2 LMGs and a flamethrower. It is a good idea to pick up their guns, in the case of the heavy weaponry, because the opponents come in groups, which makes it easier to eliminate them then. During the second wave, you should watch out for the helicopter circling around in the sky - it would be best to shoot it down, between the individual onslaughts.
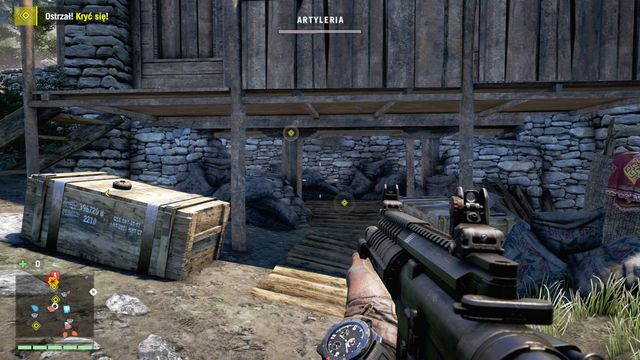 Remember to take cover, before time elapses.
The successive waves are intermittent with artillery fire. As soon as you hear the characteristic message, there appears a bar on the screen, which represents time left for finding a cover. They are marked on the radar. Crouch under one of them to wait through the raid. Use this moment to reload the guns. After you fight back the last wave of enemies and hide from the third raid, the mission ends.
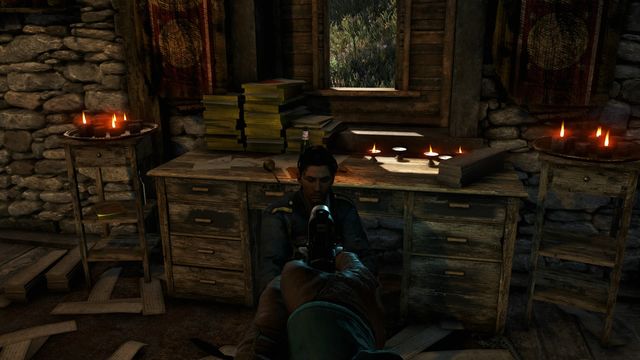 You can shoot Sabal or spare his life.
Amita will ask you to kill Sabal, who wants the division of the Golden Path. Head to the place shown on the map and locate Sabal on the top of the stairs in a small hut. After a conversation, you will only have a short while to shoot him. You can also spare Sabal's life and you will never see him again.
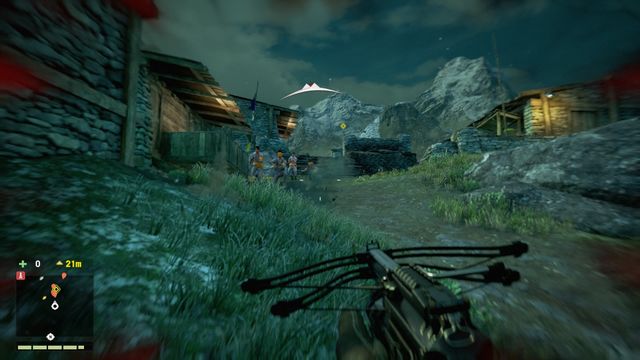 Before you can get to Amita's cottage, you still need to eliminate several fighters of the Golden Path.
Sabal demands that you kill Amita. Go to your destination. At the village entrance, watch out for several soldiers, who are guarding access to their leader. You need to kill them all and clear the area, before you enter Amita's cottage. Do not be deceived by their uniforms - the soldiers of the Golden Path attack you as soon as they spot you. After a short exchange of fire, you can decide Amita's fate - either kill her or let her go. In both cases, your choice will have no effect on the future events and you will never see Amita again, anyways.
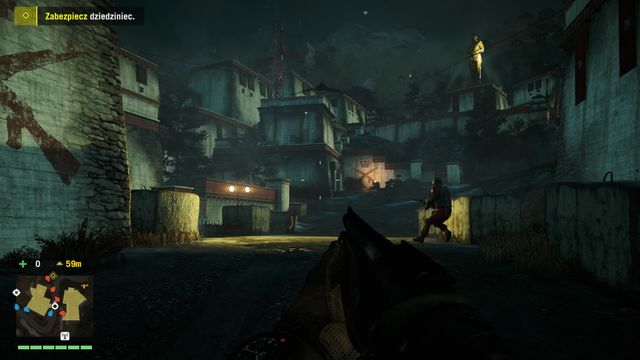 Before assaulting the Royal Palace, make sure that you are prepared.
To start the mission, go and meet with rebels. It is the last main campaign mission and it consists in claiming Pagan Min's fortress, which is very well guarded. Make sure that you take proper equipment. A sniper rifle and a grenade launcher will surely be of use and you should also take a shotgun for close contact.
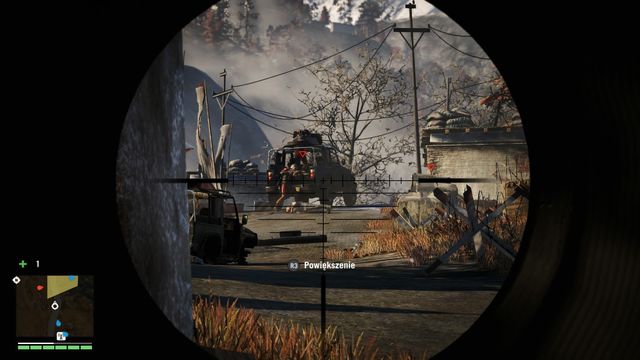 Using the sniper rifle, eliminate the most dangerous enemies: snipers, soldiers with rocket launchers, soldiers manning the MMGs and mortars.
After reaching the fortress, clear the area around it using your sniper rifle. Focus mainly on the soldiers with MMGs and mortars and also the snipers. From a safe distance, kill as many enemies as you can and then start heading towards the palace. Move from one cover to another in crouching position. Eliminate all the soldiers that you encounter so that they wouldn't trouble you from behind.
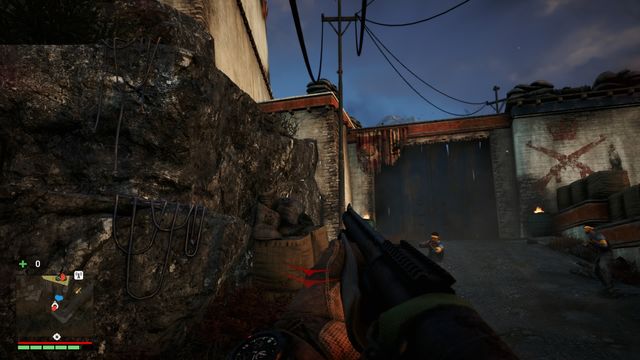
Near the gate, turn left and enter the next part of the fortress by climbing the rocks. Behind the gate, watch out for more enemies - when they are close to you, use your grenade launcher to eliminate whole groups. A bit further, turn left (watch out for soldiers above you).
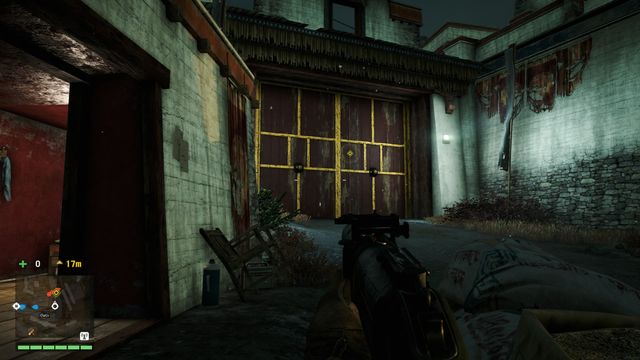 Refill your ammo (the room on the left) and destroy the gate.
Your task is to destroy the gate. You can do this using a rocket launcher or grenades (you will find some ammo in the room on the left). After completing the task, enter the courtyard.
Your task is to capture three strategic point.After going through the gate, you have to clear out both sides of the courtyard. First, eliminate the jeep with MMG that drives to the middle. Next, turn left and go up the stairs. You will get to the Armory which you have to capture - stay inside and eliminate a wave of enemies that will come at you.
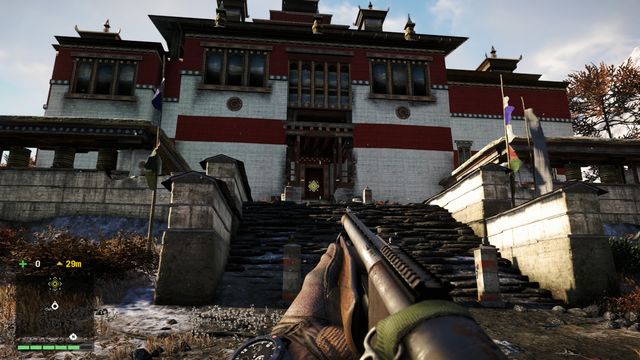 When capturing territory, prepare for a wave of soldiers.
Opposite the Armory, you will find the Comm Center. Again, stay inside until you capture it. The last place that you need to go to is the HQ. After capturing this place, you have to eliminate all the remaining enemies here. After you do that, head to the point of meeting with the rebels and get ready for the last attack.
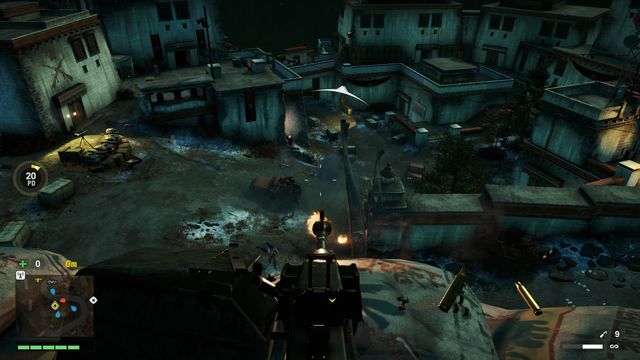 Try to destroy the jeeps before the soldiers get out.
Grab an MMG and shoot at the approaching jeeps, as well as the soldiers attacking you from the left. You should be able to kill most of them using this weapon, but mind also the radar. When your enemies manage to get close to you, leave the MMG and eliminate them, as otherwise they can ambush your from behind. Do not stay glued to the MMG without any knowledge of what is going on around you.
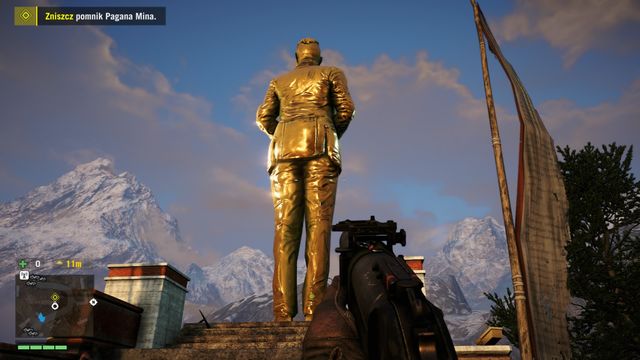 The statue of Pagan Min.
After eliminating all the enemies, destroy the statue of Pagan Min.
The way to the palace should go without any surprises.After completing the previous mission, you have to confront the main villain. Get in the car and head to a dinner with Pagan. After reaching the palace, go inside and open the door.
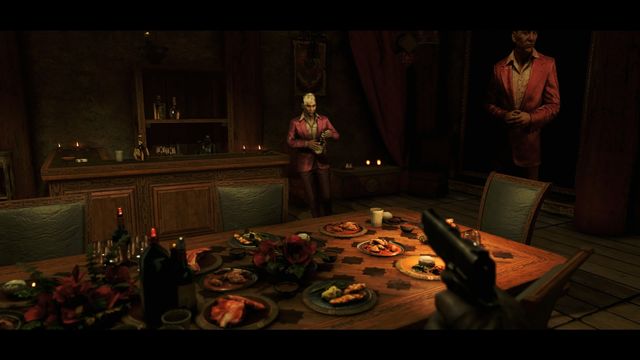 The ending that you will watch depends on the decision you make.
The ending depends on your decision. There are three options available: you can kill Pagan right away, shoot down his helicopter a bit later or not do anything and let him escape. No matter of what you choose to do, the last fortress - Rajgad Gulag will be weakened.
In Far Cry 4, your choices influence not only the gameplay but also the game ending. You can either support Amita or Sabal, whom you can later meet in bad circumstances, after the plot ends. The decision that you make during the last (or the first) mission influences only the ending. There are two main endings, the first being a variation of the previous one and the second - a completely different, alternative ending.
Below you can find the Letter of all the endings, along with a description of what you have to do in order to see each one.
 Place your mother's ashes in the shrine and let Pagan fly away.
During the meeting in the Royal Palace, do not kill Pagan. Talk to him and after the conversation, go outside, to a small shrine, where you should spill ashes of your dead mother. Do not shoot at Pagan's chopper but let him fly away instead.
During the last mission, shoot Pagan Min when you can do that.
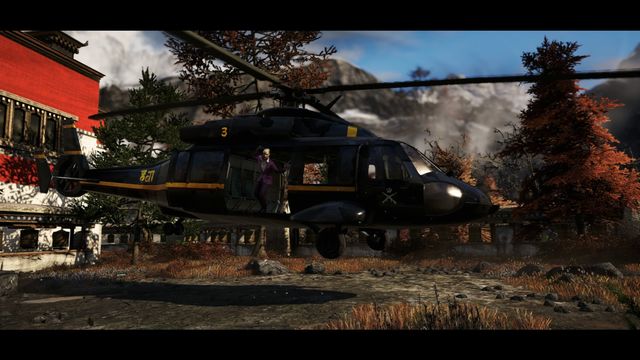 Don't let Pagan fly away - you will have a moment for shooting down his helicopter.
At first, do not kill Pagan, talk to him and go to the shrine. Then, when the chopper will be flying away, shoot it down (use a grenade launcher or a rocket launcher). After completing the game, you can go back to place where the helicopter crashed.
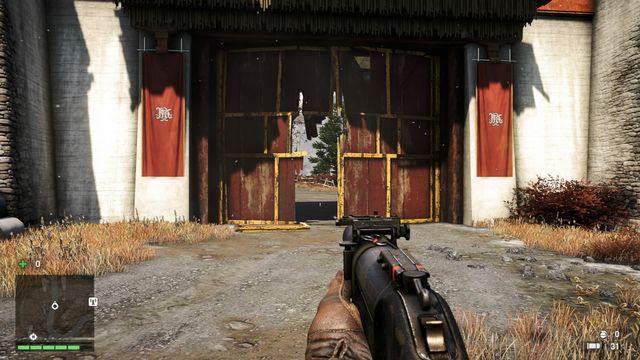
To do that, head to the Royal Palace. To the right of the broken statue, you will find a closed gate (screen). Destroy it and head towards the palace.
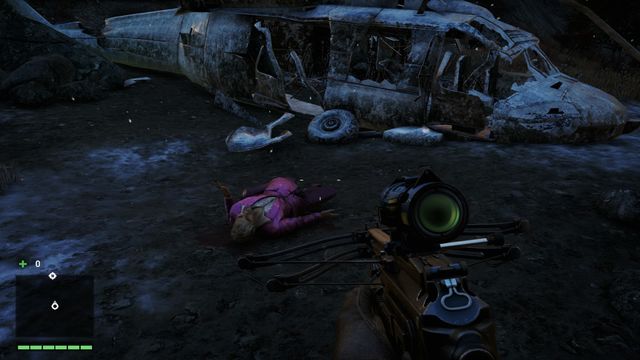 The only thing that you can do here is search Pagan's body.
Not far from the gate, on the left, you will find the wreck and Pagan's body. You can search through it and you will obtain 250000$, a brooch and a golden pen with an inscription saying: "For You, my Love, Ishwari".
 After about fifteen minutes, Pagan will come back.
You can also end the game right after it starts. To do that, during the Prologue, do not leave De Pleur's manor when Pagan and De Pleur leave. You will regain control over Ajay and the game will suggest that you search through the manor. Don't do that, but simply stay where you are and wait (approximately 15 minutes). After this time, Pagan will come back and you will go to Lakshmana's shrine. Place your mother's ashes there and leave - this is the last, secret ending.
 Amita and Sabal are driven by different motives.
Missions from this section are the ones in which you have to choose between Sabal and Amita. It means that depending on your decision, you will be completing a different task. It also influences the missions that will come later, depending on who is the leader of the Golden Path. Completing a mission for one leader sets him on the position of a leader until the next mission of this type. The last choice is the most important. The person supported by you will become the leader of the Golden Path.
You have to decide what your next task should be - retrieving valuable information (choosing Amita Mission: Hunt or Be Hunted) or defending the camp (Sabal Mission: Rebel Yell). Your choice will influence the following events and also change the next mission (A Cultural Exchange).
Another clash between the leaders will be about the opium plantation. Amita will want to capture it (Reclamation) and Sabal will want to destroy it (Burn it Down). Your choice will also influence the next missions to some extent: The Sleeping Saints and City of Pain.
Your third choice between the missions of Amity and Sabal concerns the drug factory. If you support Amita your mission will be to seize the factory, to be able to use it later on, to your advantage. (the "Advanced Chemistry" mission). Sabal, on the other hand, wants you to raze the factory to the ground (the "Basic Chemistry" mission). Your choice affects one of the following mission ("A Key to the North") to a minimum extent.
It is the most important choice that projects onto the ending. Amita wants you to destroy all of the Jalendu temples, which is going to liberate the women of Kyrat from superstitious practices (the "A Cultural Exchange" mission). Sabal, on the other hand, wants to spare the temple and unify the people under the common idea of tradition and former beliefs (the "Cease and Desist" mission). Your choice will affect which mission you will receive next - "Valley of Death" if you support Amita or "Take Cover", in the case of lending your support to Sabal. It goes without saying that also the opponent that you kill in "To Reap What you Sow". Is different And finally,: it is your choice that determines who takes on the leadership of the Golden Path and, after you defeat Pagan, of the entire Kyrat. You will be able to meet up with that NPC after the game ends (see the description below).
 Amita and her big plans in real life.
If in the final choice, you've supported Amita (Culture Wars mission), you can meet here right after the plot ends (no matter of what ending you choose). Go to Thirty and you will see a cut-scene in which Amita orders the Golden Path soldiers to force children to work on the plantation. The one that you've helped to reclaim in one of the missions.
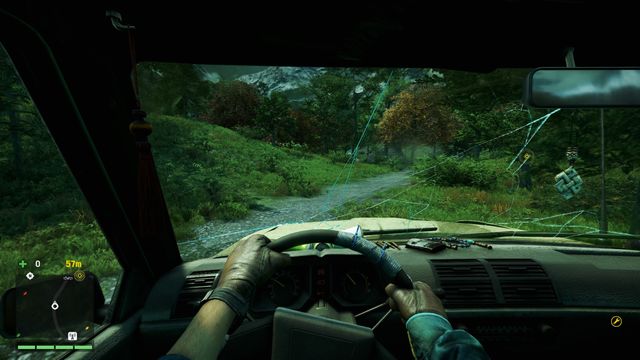 You don't need to keep very close to the Smuggler, but be careful not to lose the icon on the minimap.
Your task is to follow the Smuggler to his hideout (it is best if you stay unnoticed) and then killing him. First, go to the place shown on the map where you should get inside the car and wait until the Smuggler arrives. When he goes past your position, start following him carefully. You have to chase him all the way to his hideout - the Smuggler can't get too far from you, as you will fail the mission. If you're noticed, the Smuggler will start driving faster, which will make the task more difficult, but not impossible to complete. Allow the target to go past you, as there is an escort there that can spot you - start following him after a few seconds and remember that you cannot yet kill the Smuggler.
 Prepare an ambush and open fire from behind a cover or throw some grenades at the group of enemies.
After a short ride and reaching a crossroads, the game will be saved, Smuggler's escort will slow down and he will go to the Vault. You can now start the fight - your task is to kill the Smuggler, but the Vault is pretty well guarded. It is good to throw 2 or 3 grenades to quickly eliminate the enemies standing in a group.
 The diamonds can be found on the table.
After dealing with enemy soldiers, search the Smuggler's body and take his key to the Vault. Go inside and kill two soldiers. Take the items from the table.
 There's a welcoming committee outside the cave.
When leaving the Vault, be careful as you will encounter some enemies. Don't rush into the fight, but stay inside and eliminate at least some of them. Then, sprint to your car and escape the blue area. Now you only have to deliver the diamonds to the right place and you will complete the mission.
When the Smuggler goes past you, head to the jet-ski.This mission is similar to the previous one. Your task is to follow the Smuggler. Head to the place shown on the map and hide near the jet-ski. When the target goes past you, under the bridge, you can start following him. Staying approximately 100m behind him will guarantee you that you will not be noticed and you will safely reach the hideout. The jet-ski easier to control then a car and it is faster than Smuggler's boat.
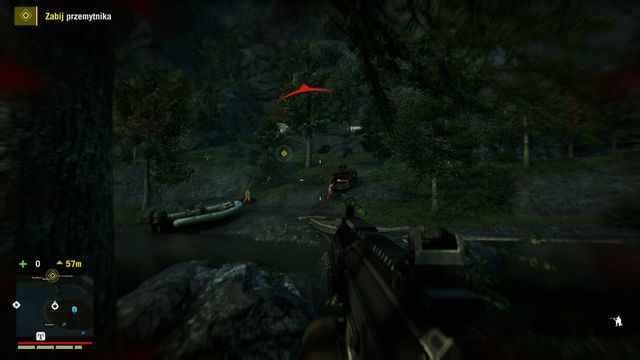 It's time to start the fun. Just watch out for the soldier with MMG.
After reaching the waypoint, get out of your vehicle and start the fight. You can try to eliminate them silently, but you also simply defeat them in an open fight. There will be several enemies, each one standing on different altitude, so you won't be caught in between their shots. After abandoning your vehicle, watch out for the soldier on the jeep, with MMG. If you're noticed, the only way to deal with him is throwing a grenade at the car. After killing the Smuggler, take his key to the Vault.
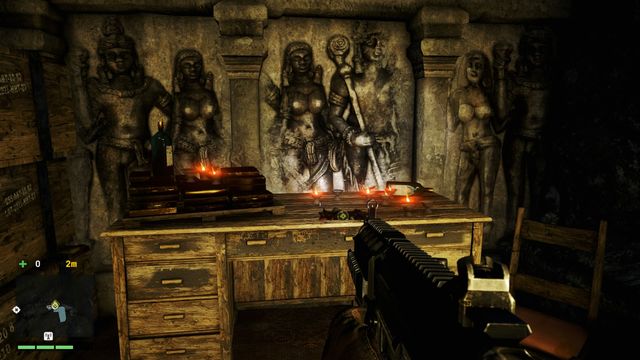 Don't forget why you've come here.
When inside, don't rush into the big hall, as there are five enemies awaiting you there. The best way to defeat them is to crouch behind a cover and eliminate them carefully. After clearing the area, collect the diamonds and head towards the exit. Now, you can fight the enemies awaiting you or just go past them quickly. If you choose the second option, a good solution would be to quickly run left after stepping outside and escape the blue zone. If you choose to fight the soldiers, be careful not to be caught in the crossfire. Try to eliminate the group of enemies using a grenade. No matter of what strategy you choose, delivering the diamonds to the right place will end the mission.
 Follow the Smuggler without going too low.
This mission is identical to the previous ones. Head to the place shown on the map and wait for the Smuggler. He will be driving in a car, below your position. Using the buzzer, you will have no trouble following him without being noticed. Just remember not to go too low.
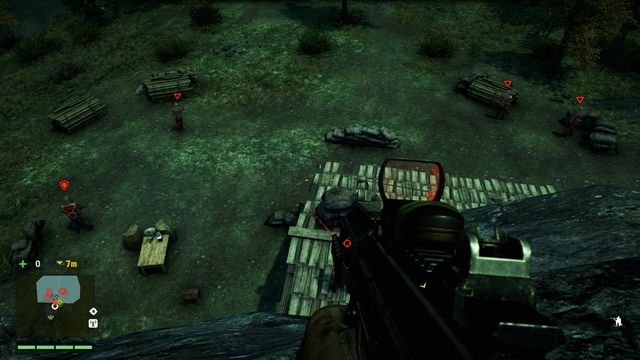 Go around the hideout and you will find a perfect spot for silent action.
Near the vault, there is a sniper and an armored soldier, so it may be difficult to win in an open fight. Instead of that, walk around the blue zone from the left. Climb the rocks and eliminate the sniper (it is best to do it from some distance). From here, you will have a clear shot at anyone. A good idea is to use a grenade launcher and eliminate the armored soldier first. The rest of the enemies shouldn't cause you much trouble. After killing all of them, search the Smuggler's body and enter the vault.
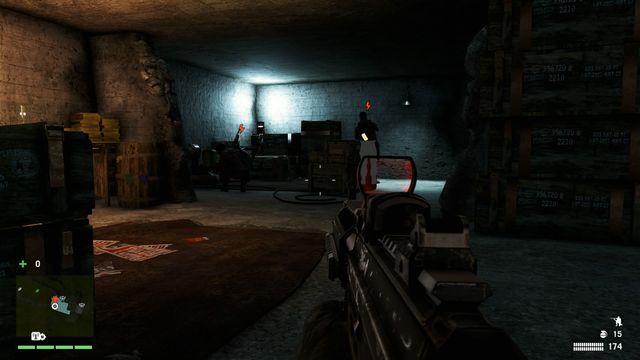 You will find the diamonds on a stool by the wall.
When inside, be careful as there are a lot of enemies there. Sneak near the left wall and approach the two soldiers facing their back at you. There, on a stool, you will find a diamond. If you're noticed, deal with the enemies before going outside. A shotgun will be of use in the small rooms.
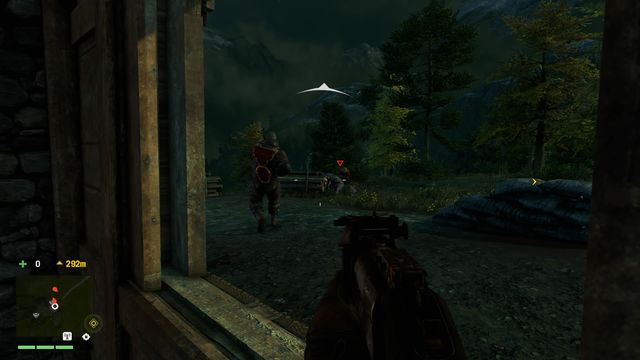 You can quickly clear the area using a grenade launcher.
As always, you will encounter some enemies when leaving. Using the cover, you can try to eliminate them (watch out for the armored soldier with LMG), but it will be easier for you if you sprint out of the door and quickly head right. You will find a quad there. Deliver the diamonds and you will complete the mission.
 Longinus gives beautiful sermons.
The fourth and the last mission given by Longinus (it is good to take a sniper rifle with you). It is similar to the previous tasks.
 Don't forget to keep your distance from the enemy, but you cannot let him drive too far away.
Head to the place shown on the map and wait for the Smuggler. He will be driving down the road from your position. The Smuggler will stop for a while and then start driving again. Follow him but keep your distance.
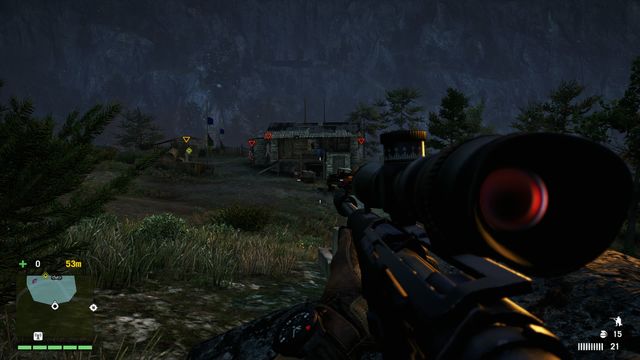 Using the sniper rifle, you can eliminate the enemies outside the vault. You can do that also when you will be leaving.
Outside the vault, you will encounter only few enemies. Watch out for the armored soldier and his machine gun. If you have a sniper rifle, you can quickly clear the area. Inside, watch out for a soldier located right next to the entrance (there are three enemies inside). Take the diamond and head towards the exit.
 When inside, don't let the enemy ambush you. The soldiers are hiding right behind the wall.
Watch out in the narrow passage, as there are a lot of enemies incoming. You may have some troubles with the snipers. You can take the risk and quickly run outside. Get into the car and if you're lucky, you will safely drive away. To eliminate the risk and make sure that you complete the mission, first eliminate the snipers (a sniper rifle will be of use). You will find them opposite the entrance, between the trees. It will be much easier for you to escape after you kill them. If you cannot escape, you have to eliminate all of the enemies or at least most of them. Don't let the soldier with the flamethrower catch you and watch out for the grenades.
After you get out of the blue zone, take the diamond to the point shown on the map. As a reward for completing Longinus missions, you will receive a very good rocket launcher - LK-1018.
A quite easy and slightly crazy mission. To start it, talk to Yogi and Reggie in the tent near Ghales' house. After a short cut-scene, you will noticed that you've been drugged and moved to a cave. You will start seeing shapes of enemies and animals through the walls.
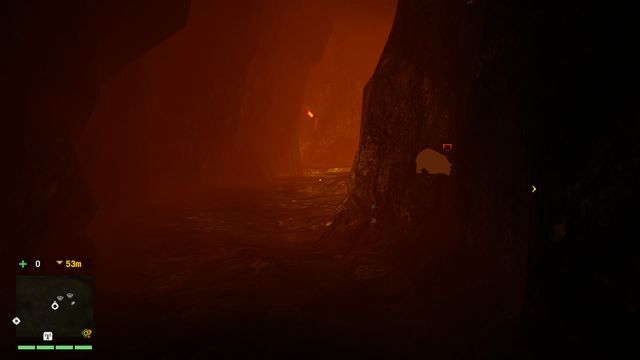 Don't attack the animals as it is not necessary.
At the beginning, inside the cave, you're weaponless, so go past the animals and step outside. From the body lying nearby, pick up a weapon and then head to the first place marked on the map. As you go, you might want to find yourself some means of transport.
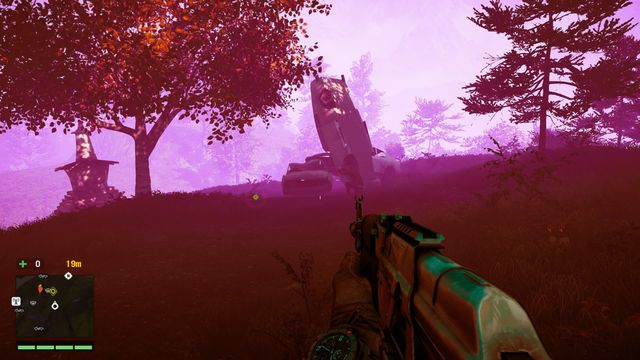 Hallucinations can be dangerous.
After reaching the place, it will turn out that Yogi and Reggie are not there. Head to the next point. Watch out when you get there, as you will see a rhinoceros materializing from your hallucinations... Run away quickly and head to the third point. You won't find your equipment here, but you will be attacked by three soldiers and two bears (you can simply run away).
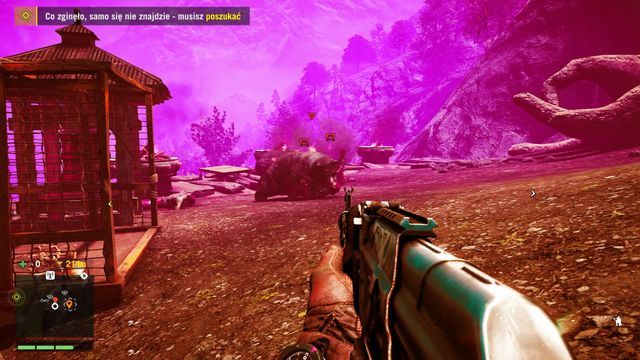 You don't have to fight the bear - it is better to just run away and let the animals deal with the soldiers.
You will find the fourth point inside a cave. It is the last place that you need to visit - here you will meet the persons that you seek and the mission will end. You will also regain all your equipment.
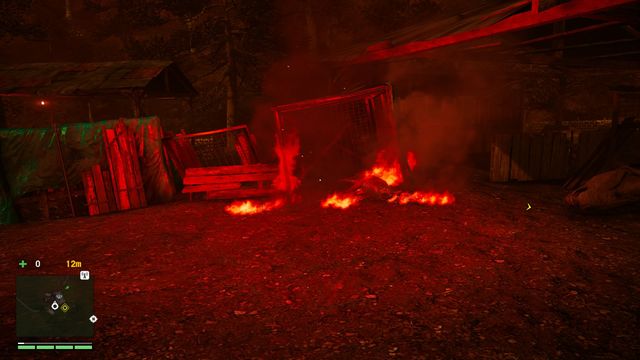 Waking up here is not very pleasant. Don't forget to bring a weapon as it may be of use.
Another mission in which Ajay is high. After a short cut-scene, you will wake up in the middle of a forest which is, of course, on fire. Pick up the weapon and head forwards. At the first point that you have to reach, the silhouettes of your friends will be replaced by three enemies. Don't let them hit you with petrol bombs - jump down and use your gliding suit.
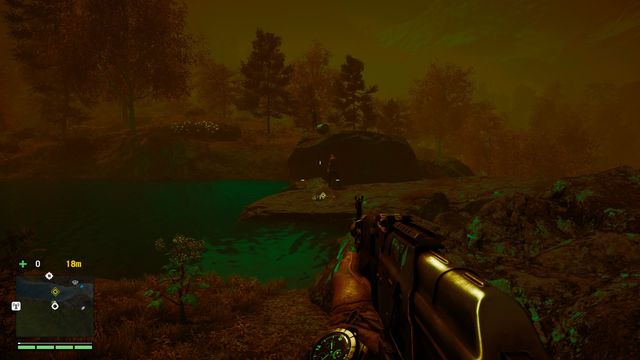 Get ready for two enemies.
Reach the second point. Here, your hallucinations will turn into two soldiers throwing petrol bombs. Kill them quickly or go past them. You will find the exit behind the soldiers. Use the gliding suit to reach the last point.
 Get your equipment back to complete the mission.
Here, you have to go on the top of a small roof. Eliminate the two enemies that materialize and go inside the house. You will find your equipment on the ground. Collect it to complete the mission.
 Dive into the water to get out of the cave.
In this mission, Ajay is on drugs again. This time, you will wake cup in a flooded cave. Jump into the water and swim underwater heading towards the flares. After reaching the surface, pick up the weapon lying near the bodies. Jump into the water again and follow the flares to get out of the cave, near a jet-ski.
 When swimming, watch out for enemies on a boat.
Now, you have to go from one point to another. The only difficulty will be the soldier on a boat with MMG. There's no point in fighting them - just go past them and use the speed of your jet-ski to lose them.
 At the last point, you will find your equipment.
You will complete this mission after you reach the last point, step on the shore and collect your equipment.
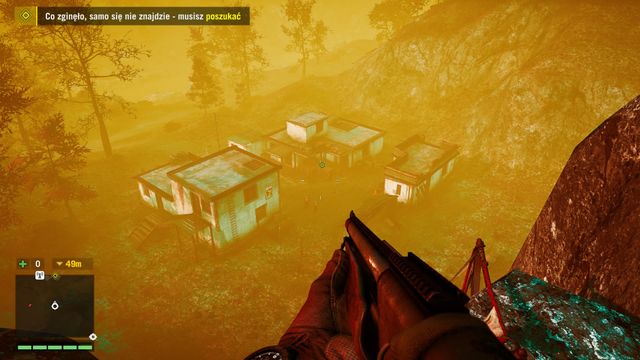 Take a shotgun with you as it will be useful.
The last mission in this section. After falling into the water, get out quickly and you will be attacked by fish. At the next point, remember to pick up the shotgun. After seeing hallucinations about your friends, you will find yourself in a different place. Watch out here, because two enemies will materialize.
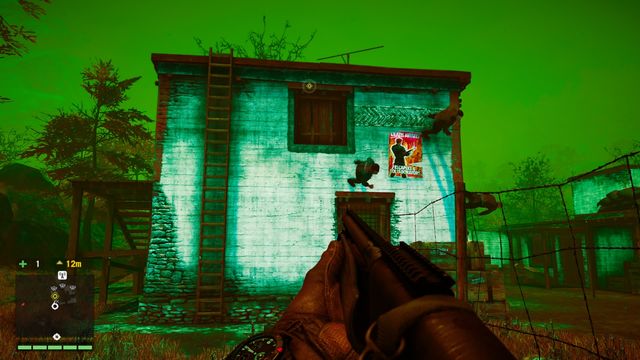 You will find a buzzer on the roof of the building..
Next, you will be teleported into high mountains. Go down the stairs and jump onto the platform. You will fall down, but you won't be hurt. Go to the roof of the building and you will see a buzzer materializing next to you. Get into it and fly to the place shown on the map. Watch out for the huge rocks appearing in front of you.
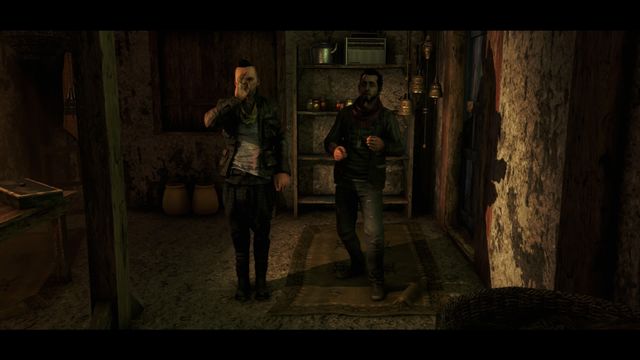 Yogi and Reggie are waiting with a reward...
After reaching your destination, go inside the house to complete the mission.
![You will find Thangka in a flooded cave, near a statue [X:546, Y:486] - The Hunt For Rakshasa - Side quests - Shangri-La - Far Cry 4 - Game Guide and Walkthrough](https://game.lhg100.com/Article/UploadFiles/201512/2015121518580087.jpg)
You will find Thangka in a flooded cave, near a statue [X:546, Y:486]. To reach it, go to a location called Kalinga's Descent. Jump down, into the water. You can see the entrance to the cave in the screen above.
 The rocks will create a safe path.
When inside, go straight, across the bridge that the rocks create. After meeting a tiger, walk along and interact with the seeker. You will receive a bow. From now, you can use it to kill enemies. The ability to slow down time will make it easier (it activates automatically as you pull the bowstring).
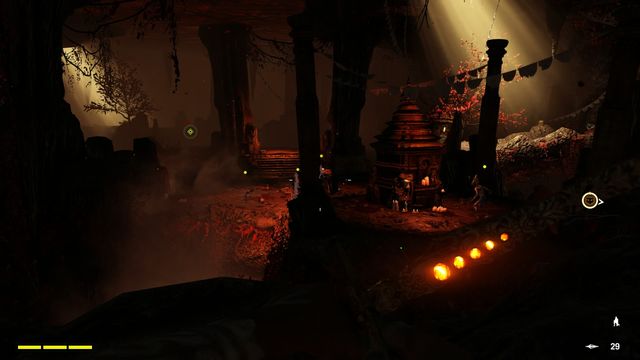 Don't rush into open fight - instead, eliminate the enemies from a safe distance, using your bow.
You will have the opportunity to test your new weapon very soon, in a big chamber. After going inside, don't go down right away, but eliminate the enemies standing on the scarp on the left. Then, deal with the opponents in front of you. Using the bow and with the help of the tiger, clear the area and head forward. Near the exit, you will encounter two archers - killing them requires two hits or one headshot.
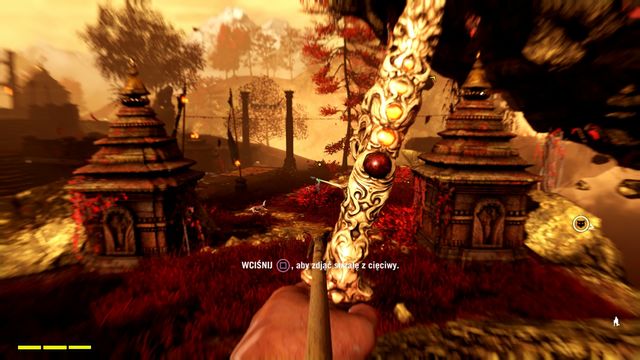 Thanks to slow-motion, you have a while for aiming.
Go along the stream, heading towards the red portal. It will take you to another location. Here, try to stay unnoticed and eliminate the enemies silently. Jump down and head left to find the next portal. After going through it, use the Mani wheel and leave through the red portal.
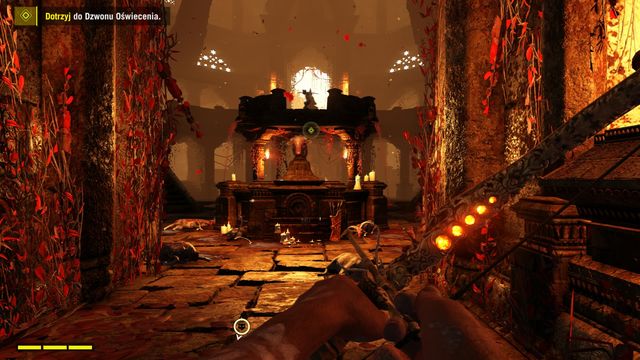 Watch out for the archers in the temple.
Go through the temple (watch out for the archers) and go outside. Use the Auto-Cross here. You will see a lot of enemies standing on your way to the bell. Use the tiger to distract them and finish as many demons as you can from behind a cover. Watch out for the opponent that spits fire. If you're noticed, there's no point in fighting them all. Run quickly to the bell and ring it to kill the remaining enemies and complete the mission. You will be teleported to Ghale's Homestead.
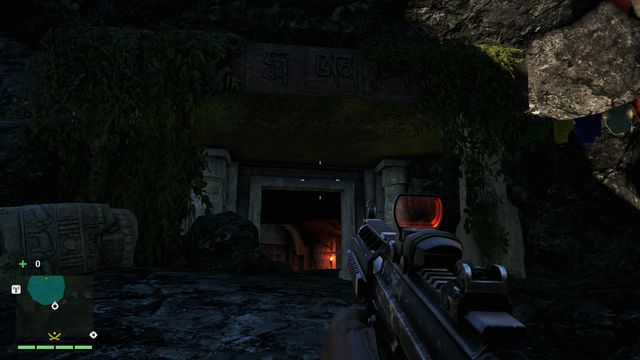 The entrance to the temple.
You will find Thangka in a temple in the mountains ([X:246, Y:508] in Kalinag's Door. You can reach it by climbing a long way and jumping over a few precipices. Near the entrance, watch out for the enemies.
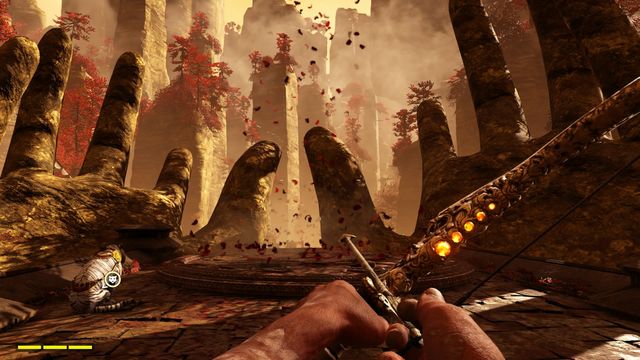 After stepping onto the circle, you will start floating.
After being teleported to Shangri-La, head straight. After a while, you will reach bunch of leaves floating in the air. Go between them. You will be dragged into the air and you won't be able to do anything for a moment. At the end, dive slightly and land without hitting the gate.
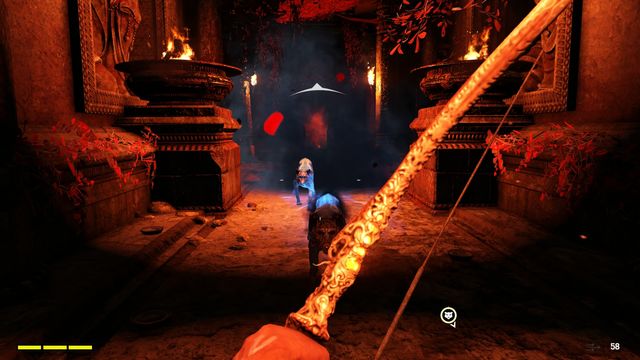 Eliminate the incoming beasts as fast as you can.
Approach the seeker. You will obtain the ability to shoot multiple arrows at once. Just press the key responsible for shooting (if you hold it for a while, the shot will be more focused. In the corridor nearby, you will have the opportunity to test your new skill as a bunch of enemies will appear here. Send the tiger to distract the fire-spitting creature to avoid the damage. When the fight is over, go through the portal.
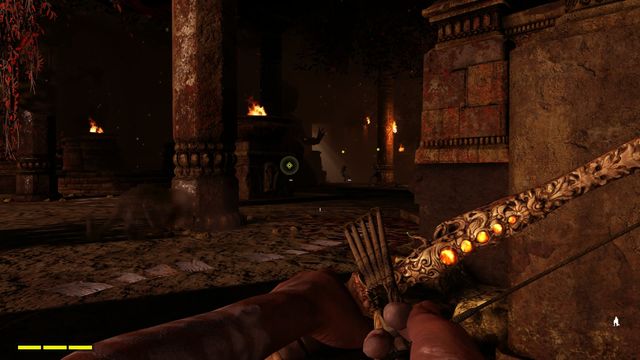
Take the stairs and you will reach the place that you can see in the screen above. Eliminate the enemies (it is best to do it from a safe distance or with the help of the tiger). After a while, more opponents will appear - watch out especially for the animals. After you clear the room, go outside.
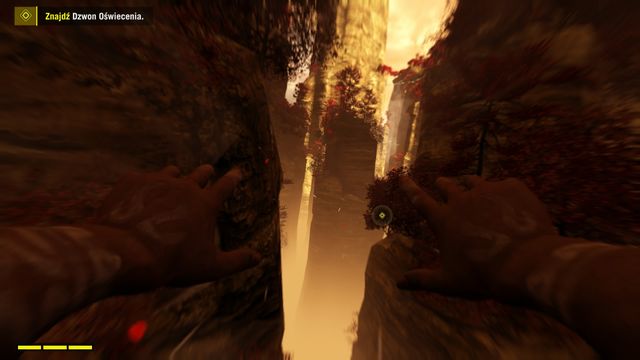 Be careful in the narrow passages.
You will have to do some flying again. Try not to make too strong turns or fly close to the rocks. Lower the altitude in the right time to be caught into airflow. At the end, land behind the gate.
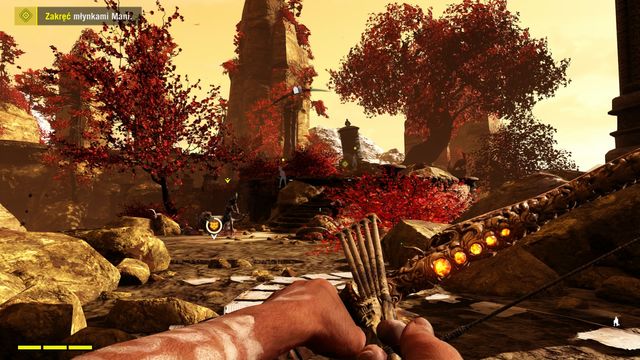 From distance, eliminate as many enemies as you can.
Your task will be to get to a big wheel and turn it. Before heading to the center of this area, try to eliminate as many enemies as you can (there are quite a few of them here). Use the tiger (if killed, it will respawn after a while) and slow-motion to do that quickly. Also, be careful when jumping onto lower levels, as it is easy to fall down.
 When flying, dive under the rocks.
After turning the Mani wheel, head right, down the stairs, to another whirlwind. When flying, remember to dive under the rocks. Behind the second whirlwind, slightly turn right no to fly too far. Near the last whirlwind, go slightly left and land.
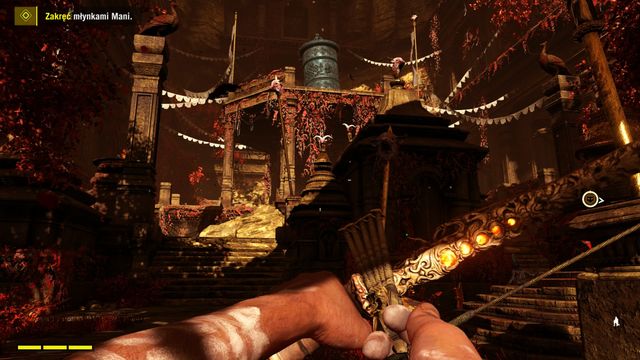 There are a lot of archers here.
You're in an area where you can find the next Mani wheel. Be careful, as there are a lot of archers in this place. Move quickly, shoot at the enemies from short distance and perform group kills - it is not the fastest way to get to the wheel. When going through enemy forces, remember to select tasks for your tiger. Near the Mani wheel, watch out for two enemies that materialize here. Turn the wheel and go to the last whirlwind located in front of you.
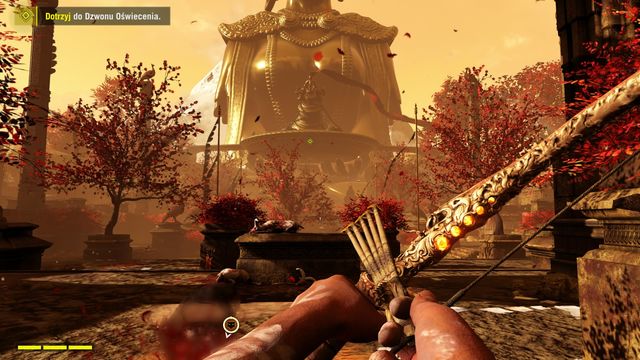 Make the tiger distract the enemies and run towards the bell.
After you land, your way to the bell will be clear. There are a lot of enemies here, but you can simply go past them. To do that, send the tiger on the fire-spitting demon located in the middle of this area. When it draws the attention of most of the enemies, quickly run to the right and don't mind the opponents. Deal with those enemies that stand in your way using takedown. At the end of the road, turn right, onto the bridge and it will lead you to the bell. Ring it to complete the mission and you will be teleported to Kyrat.
You will find Thangka in Kalinag's Vantage [X:678, Y:560]. You can reach the entrance to the temple by using the Auto-Cross two times.
 Shortly after beginning the mission in Shangri-La, watch out for your first enemies.
In Shangri-La, walk along the only available path. After a while, behind a bridge, you will encounter three hostile animals. Eliminate them using your or send the tiger and head forward.
 Help the elephant and it will help you.
After climbing the scarp, you will encounter a few enemies. Clear the area and approach the elephant to save him. From now on, you can ride on its back.
 Near the wheel, watch out for the fire-spitting demon - send the tiger to fight it.
Your new ally will turn out to be very helpful. Get rid of the enemies by ramming and crushing them. Get off the elephant and clear your way to the Mani wheel and turn it. Then, without any enemies troubling you, do the same with the second wheel. After you do that, a few opponents will appear, but you should have no trouble defeating them with the help of your animals.
 You don't have to worry about the enemies when riding on the elephant.
A bit farther, you will reach a big gate. Ram it with your elephant. Don't get off the animal but crush the enemies on the road. After destroying the second gate, on foot, enter a big hall in which you will find a statue.
A few enemies will appear near the bell.Head up the stairs. Watch out for the enemies appearing all the time. When on the top, turn right so that you have the statue behind you. You will see the bell and two demons materializing in front of you. Watch out for the archers on both of the balconies. Clear your way to the bell as fast as you can - ringing it will end the mission.
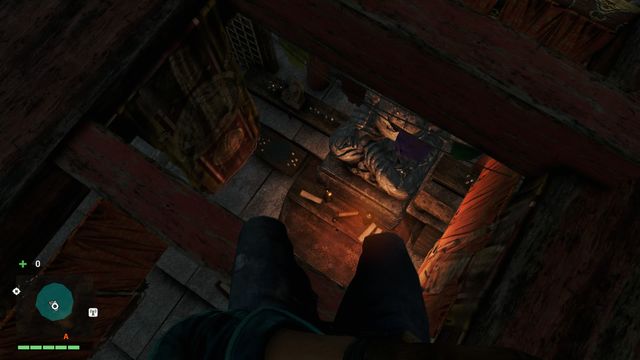 You can enter the temple from above.
You will find the last Thangka in quite a secluded place. From the Anadekhi Ruins location [X:765, Y:810] head west. Look for a grappling point in the nearby rocks and go up. Swing a few times and jump over the edge to land on a path. Head to the end of it and use the hook again to lower yourself to the temple.
 Start aiming when the demon is will be getting ready to attack you.
Now, you will have to face Rakshasa. Your task is to defeat the flying demon. You can use your bow and your tiger - keep the bow for Rakshasa and use the tiger to eliminate other dangers. When shooting at Rakshasa, always use the aiming mode, which will slow down the time and will allow you to perform a better shot. The opportunity to shoot appears always when the demon is getting ready to spit fire missiles. You will notice it opening its mouth. The mouth will turn red and you will have a few seconds for shooting. This way, you will deal damage to the enemy and prevent it from firing the missiles. Repeat that three times to make Rakshasa fall down.
 When the demon falls down - send the tiger to attack it.
After shooting Rakshasa down, you will have a moment to send the tiger. It will go straight into the demon's mouth and Rakshasa will be vulnerable for a moment. You have to hit the beast in the red spot again to deal more damage. Repeat the whole sequence two times (three hits when the bird is flying and then, when it's down.
 The tiger's attack will give you a moment for hitting Rakshasa straight in the mouth.
During the third "round", you only have to hit Rakshasa when it's in the air (it will finish the fight and you no longer have to send the tiger). What makes this phase more difficult is that every other time the demon breaths fire, you cannot hit him. Therefore, you have two times less opportunities to attack. Try to take advantage of each one by pulling the bowstring early enough. Another difficulty will be the new enemies (fire-spitting demons and animals), so send your tiger to distract them. After you hit Rakshasa three times, the fight will end.
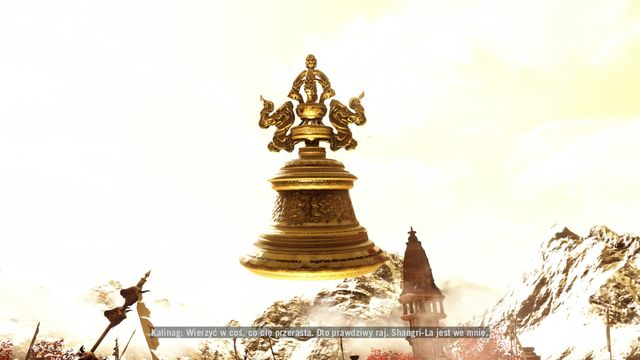 It's the end of the Shangri-La story.
The battle with the demon is not easy. Try to hit the target every time you aim to finish it quickly. Don't mind the other enemies - just run around the arena and avoid the missiles. If they become too annoying, shoot some of them. However, your main way of dealing with tem is the tiger. Keep your eye on Rakshasa all the time, especially during the last phase, when you can only hit it during every other time it wants to attack. Try to avoid the fire, as you have to put out the flames when hit and it slows you down, preventing your from healing. Remember also that if you don't hit the enemy during the attack, you will not block it, so keep moving to avoid the missiles.
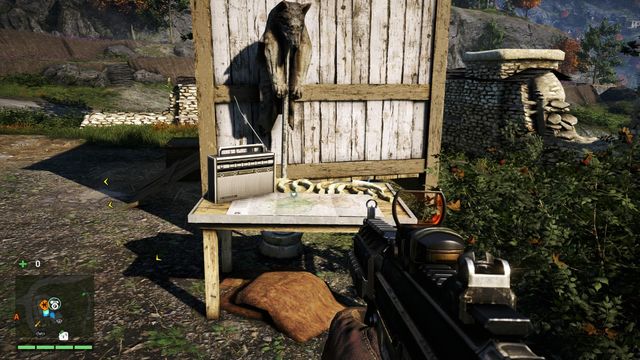 You start the mission from reading Chiffon's plans.
Missions of this type are unlocked after capturing a given Outpost. They consist in hunting a specific, rare animal using a given weapon. The reward is the animal's hide, which allows you to upgrade a given item.
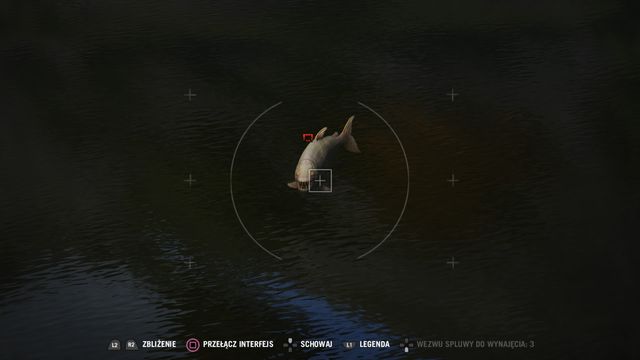 This fish is much bigger then other demon fish.
Animal: Black Water Dragon (fish)
Upgrade: Throwables Bag
Weapon: Throwables
Your target is a giant fish. After heading to the place shown on the map, take a grenade launcher, which will be perfect for this task. You can located the fish using the camera (it's the biggest one in the river). If you still can't see it, you can use a Hunter's Instinct syringe to be able to see all the animals for some time. Next, you just have to aim carefully and after killing the fish, swim towards it.
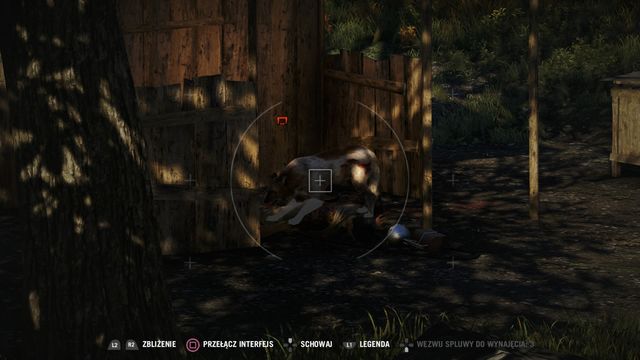 You will recognize Tenzin by a different color of fur.
Animal: Tenzin (Tibetan Wolf)
Upgrade: Quiver
Weapon: Bow or Crossbow
After reaching the place, you will hear some woman screaming. In the house, you will find a normal animal, which you should eliminate silently. Next, search for the right animal near the small shed behind the house (you will know it by the brighter color of its fur). There's one more animal there. Using your bow, perform 3-4 shots (normal, but you can't also use explosive or burning arrows). If things get ugly, you can fall back a bit and the animals should return to their previous place.
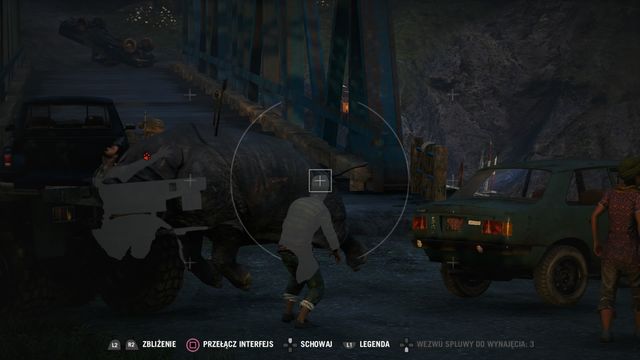 The rhino is busy doing damage on the bridge so take advantage of it.
Animal: Karkadann (rhino)
Upgrade: Heavy Ammo Bag
Weapon: Shotgun
The rhino is a tough opponent in itself, and you deal here with the special variation. After heading to the place shown on the map, you will witness a rampage on the bridge. Locate the beast and take your position on the rocks, to the left of the bridge. You should be safe here, out of the animal's reach. Don't waste tour time and try to finish the rhino when it's busy ramming cars and killing people. They will draw the attention of the beast and you will have the chance to shoot freely.
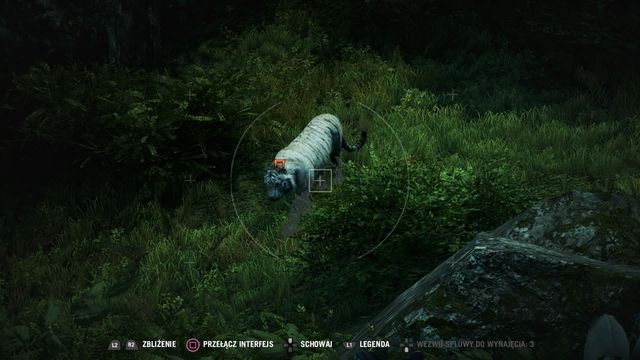 The tiger you seek has an unique color of fur.
Animal: Heavenly Tiger
Upgrade: Syringe Kit
Weapon: Assault rifle
After reaching the zone, watch out for the first (normal) tiger that will attack you. A bit farther, on a rock shelf, you will notice another one. It is good to lure it and shoot it down so that you won't have any distractions later. Using the rocks, you can try to "play" a little with the beast. Your target is a tiger with white fur - you can try to lure it to the right spot with some bait. If you have a few pieces of meat, try to make it approach the place where you've found the weapon. By doing so, you will have the opportunity to jump into water and heal yourself when the situation gets bad. The tiger, busy eating the bait, will also be vulnerable to your attacks. Take advantage of it.
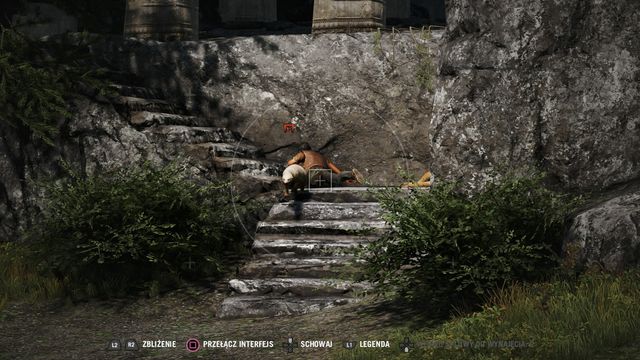 Gulo is not big, but very dangerous.
Animal: Gulo (honey badger)
Upgrade: Bait Bag
Weapon: LMG
Out in the wild, in the area where you will be looking for the honey badger, you will find no other animals, only their bodies. Gulo is a fast and deadly honey badger. After picking up the weapon, hide in the bushes to the right of the entrance to the small temple (before the stairs). After a while, you will see a man running and the honey badger jumping out to attack him. Shoot the beast as it feeds. When Gulo is far away from you, use the aiming mode and short bursts and when it's close, load it with bullets.
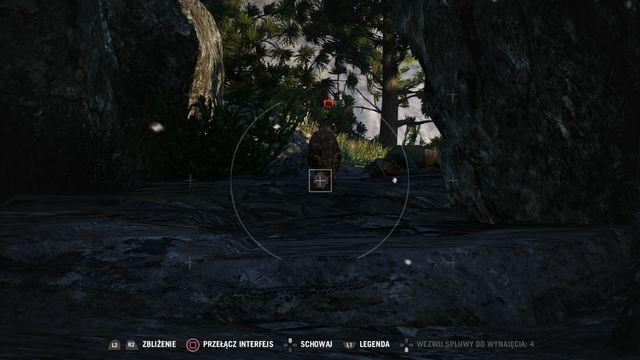 Use the bait to lure the leopard.
Animal: Shadow Leopard (Leopard)
Upgrade: Ammo Bag
Weapon: Assault rifle
Go into the marked area and switch your weapon, if you do not have the assault rifle equipped. With the hook to get higher, where you are attacked by a regular snow leopard. Then, get a bit higher and, after you pass by the bent body, go left, into the cave (in front of the entrance, watch out for another snow leopard)/ The beast that you are looking for is on the meadow, right after you enter the cave. Do not try too much employing any particular strategy - stuff the animal with the clip-full of ammo, best at a close distance, at the moment at which you are attacked. It is a good idea to have a weapon with high rate of fire and a clip of greater capacity, as well as several baits, which you can use to distract the animal.
 First, eliminate all of the regular wolves and then, the rare specimen
Animal: Mad Devil (a wolf)
Upgrade: Wallet
Weapon: Bow or crossbow
After you reach the area, watch out for the two scavenging wolves. The animal that you are after is stands out with the color of its fur - it is black. You find the Mad Devil around the cave entrance, most probably accompanied by another wolf, which you need to kill in the first place. Then, aim at the animal's head and wait to be attacked. Then, take several more shots to kill the wolf. It is more effective to use an automatic crossbow here, instead of the bow - the fire rate here is much of an advantage.
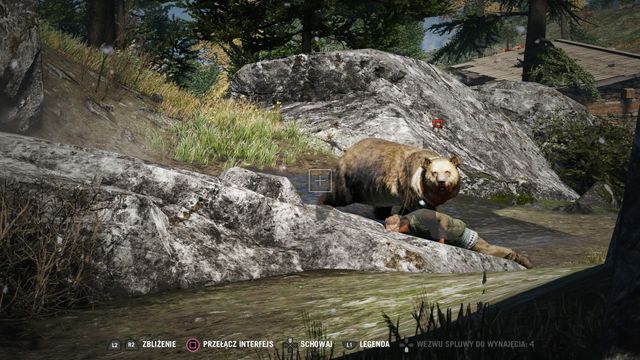 The bear is very irritated - in the case of a charge, get off its way.
Animal: Ghost Bear (bear)
Upgrade: Backpack
Weapon: Shotgun
After you reach the hunting grounds, watch out right at the entrance to the blue zone - near the small waterfall, you are attacked by two bears. Use a strong weapon, maneuver around the rocks and finish out the beasts. Then, enter the cave at the end of which, there is the animal. The best idea is to employ guerilla tactics here - you stand no chance against the beast, face to face. You can easily escape it, using the grappling hook. This way, you will be able to get to a safe ledge, where you can heal. Pound at the bear, escape from its sight and get down again - unloading the second clip into the animal gets the job done.
 Kill the elephant by the tactic of lightning raids and lightning escapes.
Animal: Thickskin (elephant)
Upgrade: Munitions bag
Weapon: Flamethrower/Molotov cocktails
Before you start the hunt, it is best to equip yourself with the maximum capacity of Molotov cocktails. As soon as you get there, with appropriate weaponry equipped, you find the elephant without any problems. It wreaks quite a havoc near the building around. The method here is simple, throw molotovs at it, to attract it. Then, escape out of the blue zone, where the elephant is not going to charge at you. While there, set it on fire with the flamethrower. Also, use the trees to your advantage, where you can hide from the charges of the animal and, at the beginning, also exploit the animal's inkling towards tipping cars over. Raid the elephant several times, until you extinguish the life in the infected elephant.
As soon as you kill the animal, you will be able to perform the final upgrade. Also, remember to visit Mr. Shiphon's house.
 Talk to the woman in front of the arena and prove to her that you can be let in.
After you complete "The mouth of Madness" in Shanath, you gain access to the arena, where you can fight. There are three fight modes here. For each kill, you receive a certain amount of points. Executions, headshots and multiple kills, with e.g. grenade, are rewarded with the highest bonus. With each victory, you go up in ranks. Remember to pick first-aid kits that are thrown to your feet, by the cheering crowds. Also, remember to pick ammo from the corpses of the opponents.
 Use to your advantage the fact that everyone is fighting everyone here.
In the arena, two teams face each other. The third one are wild animals. Yu are an ally to nobody so, you can wait until your opponents bleed out and then start fighting. It is better, though, to fight from the very beginning (or after the animals are eliminated) and execute stealthily. The opponents are busy fighting each other so, targeting Ajaya takes them some time. In the final round, you are alone, against a team of various opponents, depending on your progress into the battles.
 Obtaining the weapon from a heavily-armored opponent makes things easier.
Just like in the previous mode, also here, the battle is fought between two, three teams. The fight is fought in a similar way - you are alone, with no one to help you so, eliminate whoever you can. What may be the greatest problem are the heavy soldiers and wild animals. It is very useful here to have the "Heavy Takedown" skill unlocked, to be able to kill stronger opponents without problems. The weapons that you pick up from them is going to be useful, while eliminating wild animals. The fight ends after you die, each successive round brings in waves of stronger opponents.
 Crowds love winners.
When it comes to alliances, everything remains the same. There are two, or three teams fighting each other, and wild animals. Your task is to withstand five rounds, using the weapon of your choice. Keep an eye on first-aid kits and ammo, because you cannot pick up weapons from the dead. Try to perform as many takedowns as possible and shoot accurately, to see the end of this and win. Remember that you should not hide in corners and kill two or three opponents - you need to ensure good score to receive, at least, two or three stars at the end (this depends on the number of points that you receive for killing opponents).
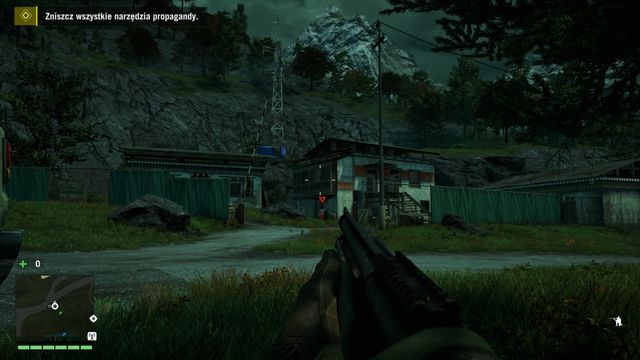 In each camp, watch out for guards.
You learn about the propaganda center after you have picked enough posters (5,15,25,35). After that, talk to the radio announcer to receive the mission to destroy the propaganda center.
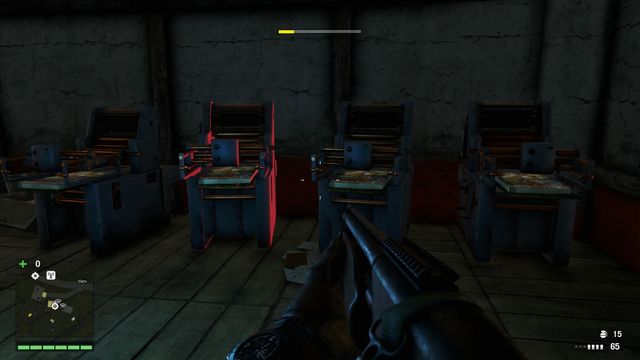 You make noise by damaging machines - it is better to clear the area beforehand.
Your targets are various tools of propaganda, around the camp. These are machines, computers, cars with loudspeakers and the transmitter. It is best to clear the camp of the enemies, beforehand. If possible, remain in hiding for as long as possible (thanks to this, you will avoid fighting the reinforcements.
 Watch out for the mast - if you are too close, it can drop onto your head.
Then, take to the destroying of the required stuff. Thanks to the yellow bar, you will know many more there are left to destroy (the devices are highlighted). Finally, destroy the transmitter (make sure that it does not drop on you) and defeat the reinforcements. Destroying all of the required tools of propaganda, and fighting the enemies back, ends this mission.
To complete the game in 100%, you need to complete 4 missions of this type.
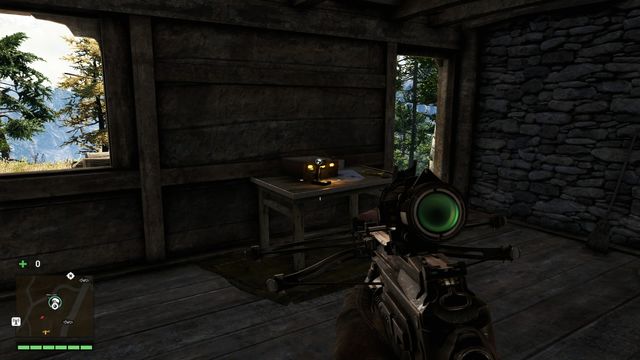 Approach the radio to start a mission.
You receive delivery requests after you seize bell towers - listen to the radio message in the nearby building to start the mission.
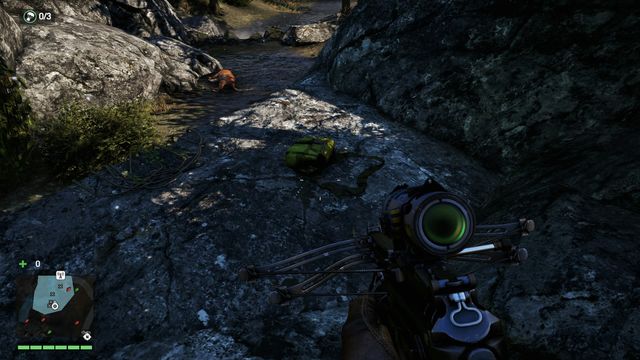 While picking the yellow bags, watch out for the opponents.
Your task is to find a certain numbers of deliveries. These are yellow bags that you can most often find near corpses of soldiers of the Golden path. You can find them within the areas marked in blue. Around, you need to watch out, because usually, there are several opponents around.
 Reach the door before time elapses, which ends the mission in success.
After you collect the last batch, a countdown starts. You need to make it within the allotted time and complete the delivery. The door that you need to knock on is in the recess in the rock. Reaching it before time elapses ends the mission.
Completing 8 missions of this type is required to complete the game in 100%.
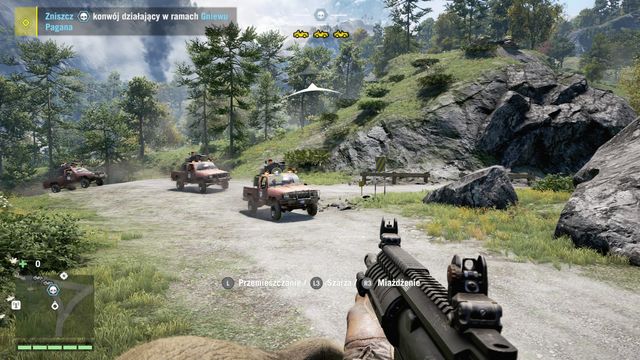 The convoy consists of three cars.
By liberating the outpost, you anger Pagan and around the camp, there appears a convoy of three off-road cars filled with enemies. Each of the cars is fitted with an HMG nest, manned by one of the opponents. To destroy the convoy, you need to kill all of the opponents (you can leave the cars intact).
There are several simple ways to do that:
- use an elephant in the form of a tank and trample the convoy
- pound the convoy with rocket-launcher fire (it is best to stand on the roadside)
- use the buzzer and the grenade launcher
- lay HMG fire down on it
 Thanks to using the elephant to ram the convoy and laying fire down on cars, you deal with the convoy in no time at all.
Of course, you can also try to eliminate the opponents in a different way, but using heavy weaponry, explosives or the elephant will definitely by fruitful. Eliminating the passengers of the three cars results in destroying the convoy.
Completing the game in 100% requires you to destroy three convoys, where as you receive a signature weapon after you destroy two of them - Stinger.
After you liberate an outpost, there appears a truck around (it is marked on the map). Your task is to either destroy the truck or seize it. For the former, a rocket launcher or a grenade launcher would be best. Drive up to the truck ,, as close as you can, and fire, or lurk on the route. For destroying the truck, you receive some experience and money.
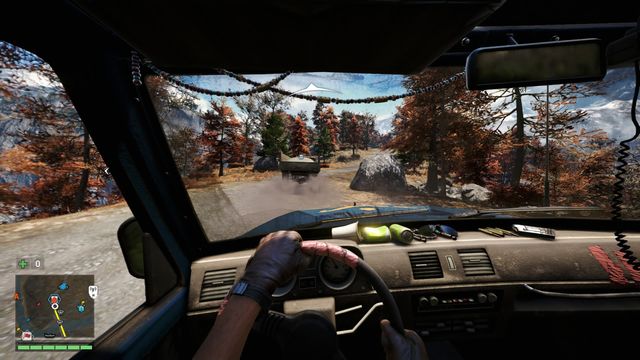 The driver starts escaping, as soon as he spots you.
A much better option is to hijack the truck and deliver it into the marked area. To do that, you need to eliminate the driver, which may be the hardest thing to do - as soon as he spots you, he starts escaping. Then, try to ram into the truck to make it go off the road. Then, enter quickly and pound at the cab. A much better method is possible if you have the "Vehicle Takedown" skill. You then need to drive up, near the driver and press the takedown button. From his vehicle Ajay will change into the truck and kill the driver.
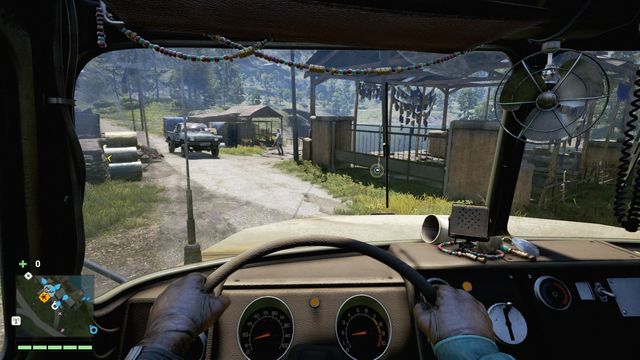 Delivering the truck into the marked area is additionally rewarded.
After you seize the cargo, get to the marked place Apart from the larger amount of experience points, also your ammo is replenished.
To complete the game in 100%, you need to seize three cargoes and, after you seize the second one, you receive a signature weapon- Warrior.
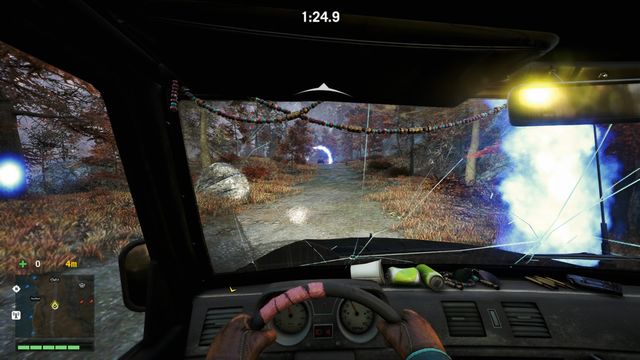 Each checkpoint adds 5 seconds.
The race is similar to the regular ones (Kyrati films: races). The rulers here are nearly identical so , try to drive fast but, do not worry about losing time, while slowing down on turns. It is better to stay on the track than to miss the checkpoint. Just like earlier, watch out for the obstacles along your route, mainly the oncoming cars. Reaching the last checkpoint ends the race.
 You should be especially careful, while maneuvering the buzzer - missing a checkpoint may cost you lots of time.
Although this type of races are similar, they are different from the regular ones, a little. The first difference is that you need to change between vehicles - at specific points, you need to change. This goes for cars and for boats, or the buzzer. Here, you will often be harassed by opponents so, it is a good thing to have a weapon of high firerate on you. The last difference is that time is counted differently - you start with a predefined number of seconds and you receive a reward regardless of how much time you have left (you cannot run out of time, though). Each successive checkpoint provides you with additional 5 seconds. The race is replayable.
To complete the game in 100% you need to complete all 9 races.
 You need to come as third, at least, to complete the race.
A regular race. After you start, get into the vehicle provided and drive. There is a specific number of checkpoints that you need to reach. The better the time, the more money you receive.. Your main opponent her , paradoxically, may be too high speed, at least on bumpy roads and in turns. Do not hesitate to slow down, then and make up for the lost time on straight fragments of the track. The worst thing that may happen to you is get off the trace and miss a checkpoint p the following ones remain inactive, for as long as you do not cross the one that you missed.
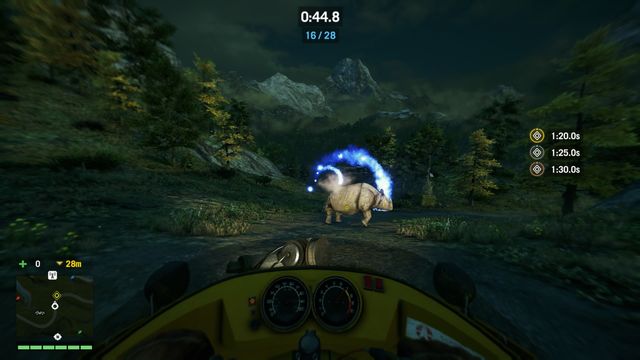 There are various obstacles in front of checkpoints.
You should also watch out for various obstacles, along your route, such as cars, animals and people, who just "happen" to be around. You complete the race after you reach the last checkpoint (it will be highlighted in red), before time elapses - it may be the weakest, brown, result (you then receive less money. Also, you can improve on your final score.
To complete the game in 100% you need to complete all 9 races.
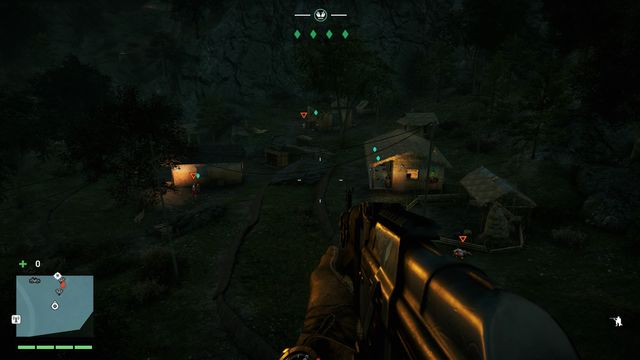 You meet mission givers in hideouts.
You receives the missions from civilians that you find in the fortresses and outposts that you liberate. At the beginning, when the opponents are weak, you will be doing well equipped with the bow only. Later into the game, it is a good idea to get the skill that allows you to perform stealthy takedowns, a suppressed sniper rifle and a grenade launcher, just in case.
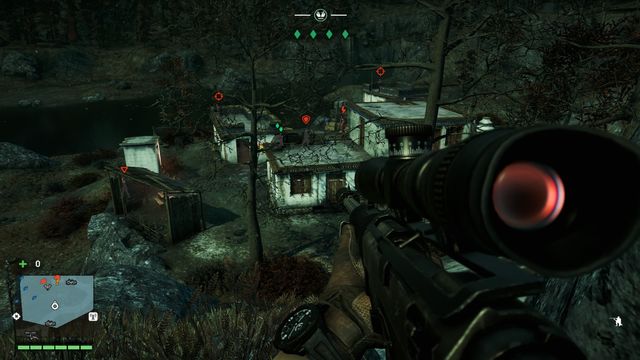 The farther into the game, the more enemies you encounter.
Your mission is to rescue, at least, two of the four tied up hostages. They are being guarded by the opponents. They may be of various kinds, sometimes they are regular soldiers, but later into the game they get stronger (also heavy opponents and snipers appear). You need to eliminate all of them silently, or at least most of them. If you are spotted, the guards quickly execute the hostages.
A good vantage point is the most important thing.The exception is a situation, when you are spotted by the last one, or two, guards - if you eliminate them quickly, no one will be harmed. Therefore, it is a good idea to leave for the one those of the guards, that are the most difficult to sneak up to. In case you are detected, you still have some time to rescue the captives. After the fight, untie them and receive your reward.
Completing the game in 100% requires you to complete 14 such missions. Completing five unlocks a signature weapon - Cannon.
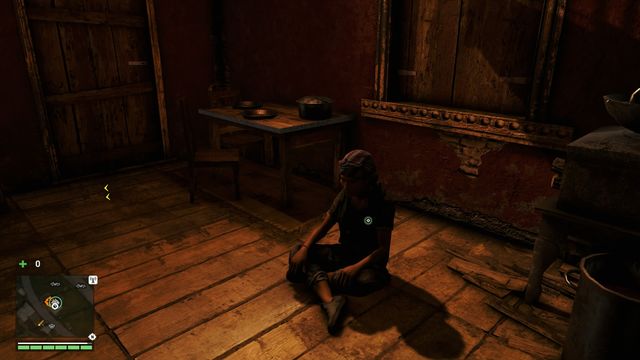 An example quest giver.
You receive this kind of missions from civilians in hideouts (after you "Fast-Travel" to the outpost, or fort, that you have liberated) you need to kill specific commanders using specific weapons.
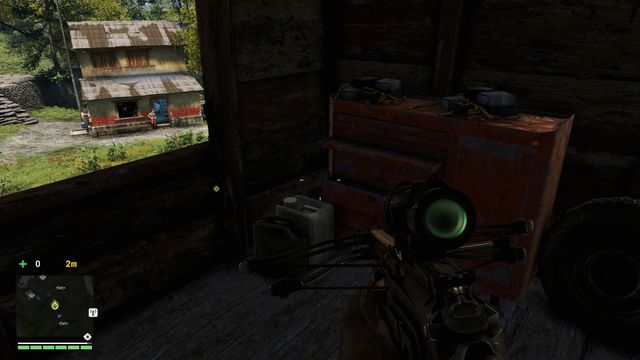 If you do not have the required weapon,, obtain it beforehand, in the marked spot.
After you receive the mission, go to the specified area. Usually, it is a small camp, where you find several soldiers, apart from your target (you can kill them with any weapon you want). You can find the commanders with the camera (the yellow marker over the head). Also, remember to get the required weapon.
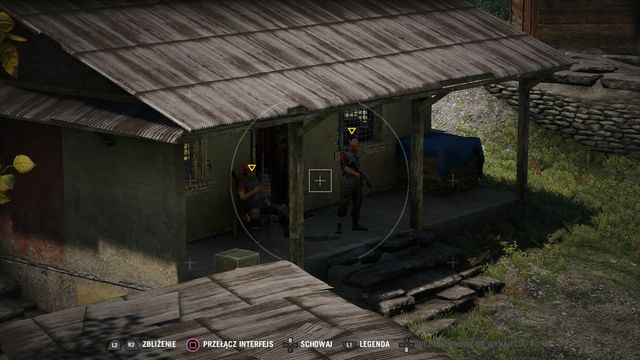 Before you move into action, mark your main targets.
Then, you can launch the onslaught, or kill silently the opponents, while leaving the commanders for the end. Regardless of your method, remember that you need to use a specific weapon to kill the commander, or you fail the mission.
Starting the assault may make it difficult to complete this mission, it is easy to kill the commander with a different weapon, then, especially grenades. Also, remember that the camps are heavily guarded by snipers and heavy opponents.
 Remember to take a photo of the corpse.
Finally, photograph all the killed commanders. As a reward, for completing the mission, you receive some money and experience points. If you want to complete the game in 100%, you need to complete all 9 missions of this kind.
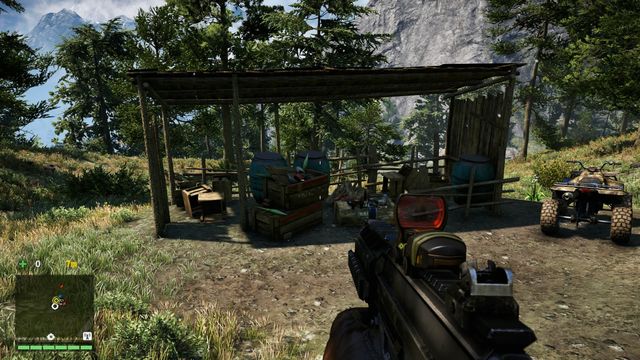 At the spot, you can replenish your ammo.
This kind of missions consist in clearing the grounds of animals, tasked to you by individual villagers. It is a good idea to get a decent weapon and hunting syringes.
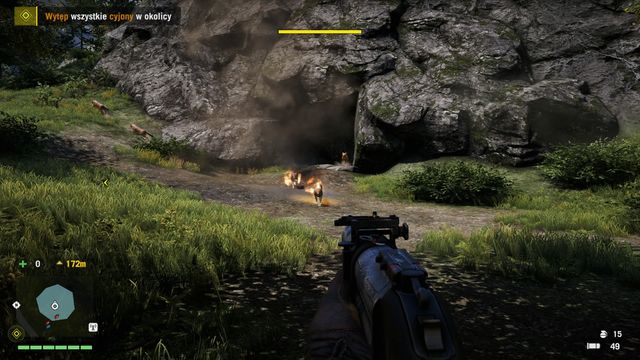 There are quite a few animals to kill, try to eliminate them as fast as possible, e.g. with explosives.
After you replenish your supplies in a given area, go to one of the small hunting ground. There, within a small area, there are several animals herded together. You need to eliminate all of them, which you are informed about, by the yellow bar in the middle of the screen. The fastest way to do this is to pepper the animals with grenades and finish your job with a shotgun, or other weapon (an LMG, for example). After you are done here, get to another hunting ground and do the same. Killing all of the animals in a given area ends the mission. After you complete two such mission, you receive a signature weapon - HS77.
To complete the game in 100% you need to complete 4 such missions.
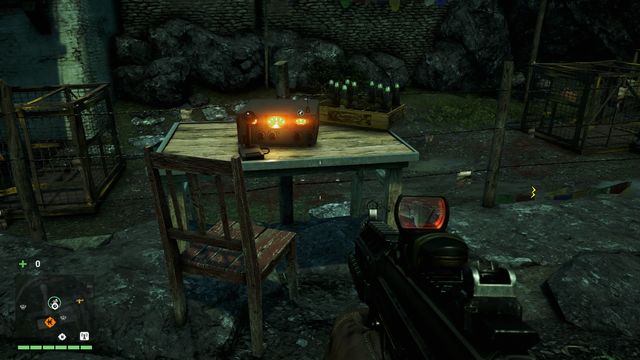 Approach the radio to start the mission.
You start the mission, by receiving a distress call on the radio, from outposts. Then, go to the marked area to help the civilians and the Golden Path soldiers.
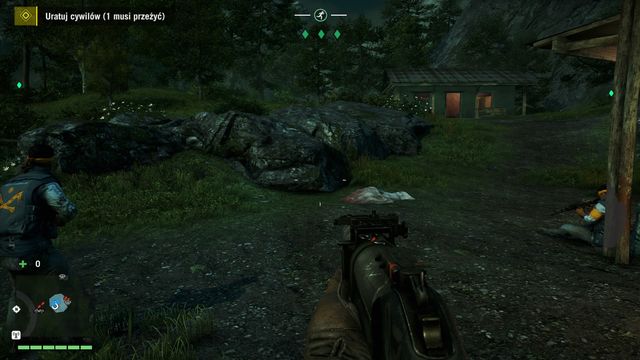 Watch the civilians and, if necessary, attract the animal's attention.
Your task is to fight back successive waves of various wild animals (of one type per mission). Try to eliminate them at a long distance (the grenade launcher is perfect here), because there is a certain number of civilians that need to survive, for the mission to be completed. Some of them have guns and they will help you, whereas the others need to be defended. It is a good idea to take a powerful shotgun along, or an LMG, which is just as lethal. Also, try to attract their attention, thanks to which you lure them away from the people that you need to defend.
To complete the game in 100%, you need to complete 6 such missions.
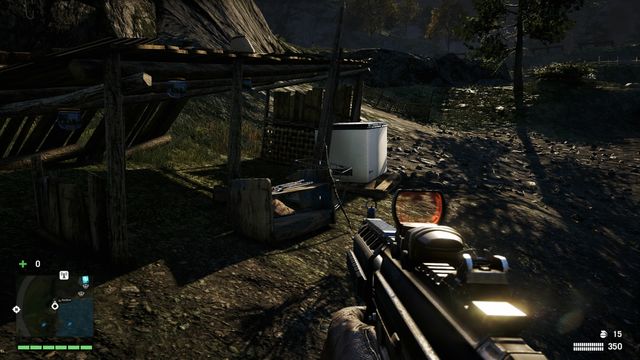 If you do not have an appropriate weapon, you can get one during the mission.
You receive the mission by talking to the civilians that are busy flaying animals. Before you start one, it is a good idea to get a decent bow or automatic crossbow, as well as supplies required for hunting syringes.
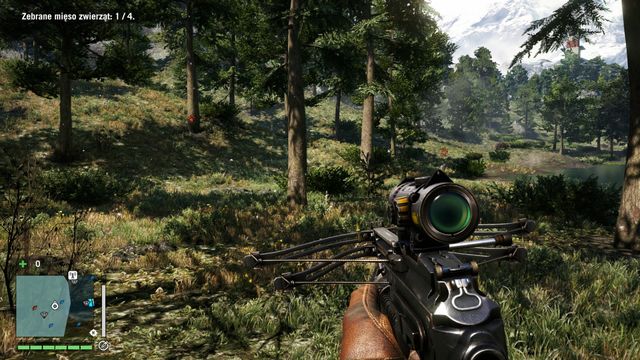 A syringe allows you to track the animal quickly.
Go to the hunting grounds, where you can find the required weapon, if you do not have one already. Your task is to eliminate a certain number of animals and skinning them. Then, you only need to deliver the meat to a specific point.
 Finally, take the meat to the fridge.
The only difficulty here may be the escaping animals. In such a situation, it is better to use a hunting syringe, to be able to track them from afar. In the case of a chase, the crossbow will come in handy, thanks to which you will have no problems shooting the animal. Also, remember not to use any other weapon than the bow or the crossbow, or you will fail the mission.
To complete the game in 100%, you need to complete 4 such missions.
 One of the mission-giving rebels.
You start the mission by talking to one of the soldiers of the Golden Path. You often find them far away, but still near the liberated outposts. It is a good idea to take along all of the tools that make stealthy working easier - a sniper rifle, bow and a crossbow, and throwing knives.
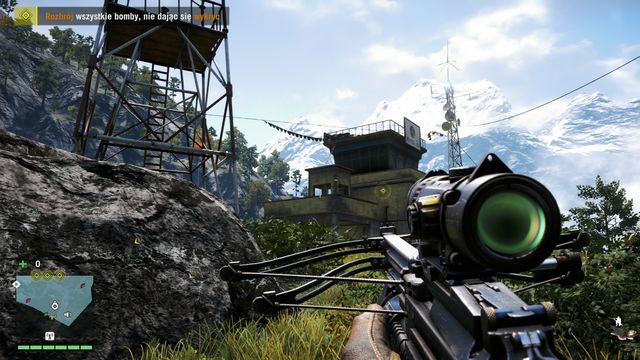 Approach the endangered area silently, because it is full of opponents.
Your mission is to deactivate a specific number of charges, around a quite vast area and guarded by lots of opponents (later into the game, they are aided by snipers, heavy opponents and guard dogs). Try to find a vantage point and take out as many of the opponents as possible. Do this with a sniper rifle and eliminate them where they cannot be spotted. You do not need to kill all of them (or none of them), but clearing the grounds before you enter, makes things much easier. In the first place, try to eliminate the opponents above the ground level, i.e. everyone patrolling the upper portions of the location and (especially) the ones on rooftops - they are the fastest to spot Ajay.
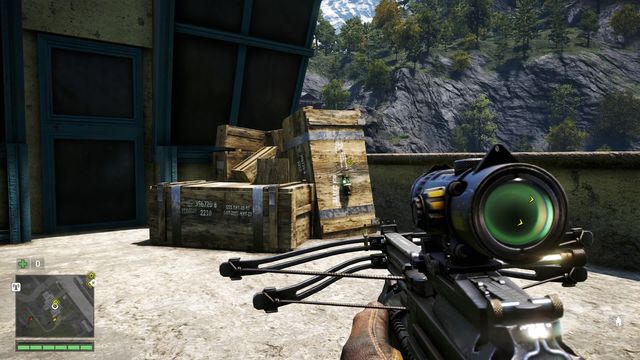 Diffusing the bomb takes only a moment.
After you reach the charge, hold down the appropriate button, for a moment, to defuse it. After you do that with the rest of the bombs, your task will be to walk away from the area. You do not need to worry that you will be spotted, simply walk away a bit and soon, the mission will be completed.
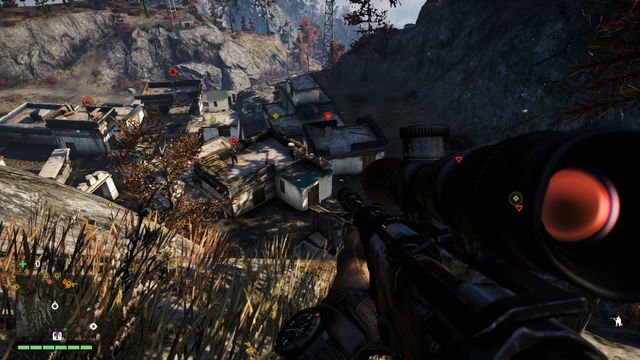 Use the advantage of height to eliminate, at least, several of the opponents.
If you happen to be spotted before you defuse all of the bombs, things will get complicated - you will have several tens of seconds to defuse the rest of them. Try to make to them as quickly as possible and kill only those of the opponents that pose immediate threat to you. Completing two such missions unlocks a signature weapon - Bull, whereas to complete the game in 100% you need to complete all 7 of the missions.
 Another mission that you start using the radio.
You start the mission by responding to radio messages, which you can find in various places, usually near bell towers. After you start the mission, go to the driver and get on the back of the truck.
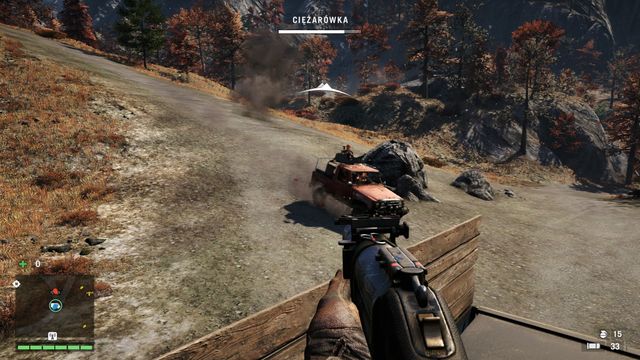 In the first place, shoot at the off-road cars that are attacking the truck.
Your mission is to defend the truck against the attacking opponents. It is best to use the grenade launcher and an LMG, thanks to which you quickly eliminate the opponents. Single enemies are no threat (as long as they are not armed with an RPG), pay attention to the vehicles. With the grenade launcher, destroy the off-road cars with HMG nests and grenade launchers, which may quickly drive down the truck's durability bar.
 After the situation gets tight, get out of the truck and eliminate the threat.
Remember that you can jump off the truck at any moment. It stops then and waits for you to be done, before it starts going again. It is a good idea to do that, if you cannot handle the excessive numbers of opponents (e.g. the ones on ATVs). They will then direct their fire towards the truck, at which point you can deal with them with ease.
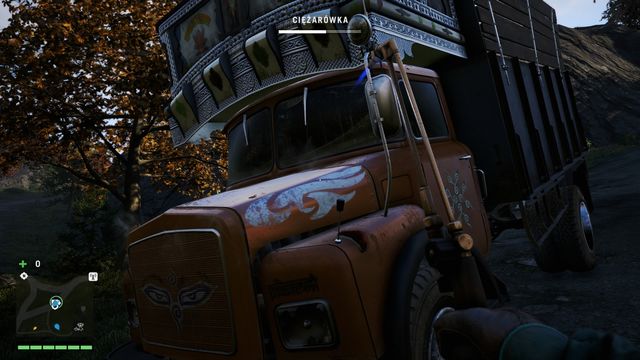 Remember about the option to repair.
Jumping off the truck also allows you to repair it (when the truck's energy bar drops down). The opponents will be attacking you occasionally so, use the time between the individual waves and repair the truck. If possible, it is a good idea to do that, because it is required for the completion of the mission to get the truck to the destination point in one piece.
Completing 4 missions of this type unlocks a signature weapon - Predator, and completing all 8 is required to complete the game in 100%.
 Successive commanders of the Golden Path task you with assassinations.
You receive this sort of missions from commanders of the Golden Path, who are in some of the outposts that you liberate. They are standing near tables and examining maps.
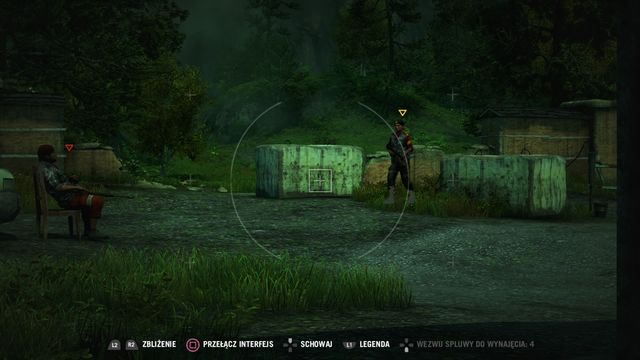 Beforehand, scout the area and identify the commander.
Your task is to eliminate one of the commanders (the yellow marker overhead), with any weapon. The main difficulty lies in the way that you need to complete the mission is: you cannot be spotted. Your actions are, therefore, restricted to two variants: stealth takedown of the commander, without raising the attention of the others, or clearing the area, just as stealthily.
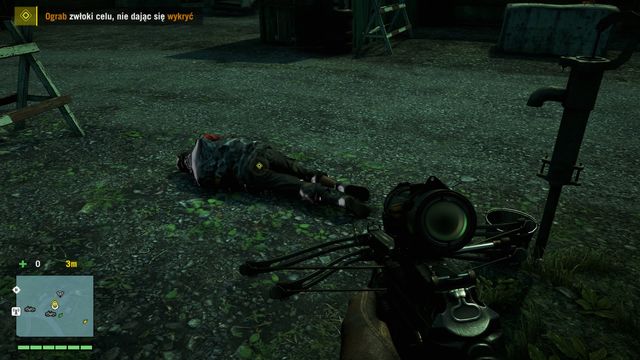 Without appropriate takedown skills, you still need to loot the commander's corpse.
After you kill the commander, you need to search him to obtain the documents. Then, an additional minitask is activated, which consists in concealing the corpse.
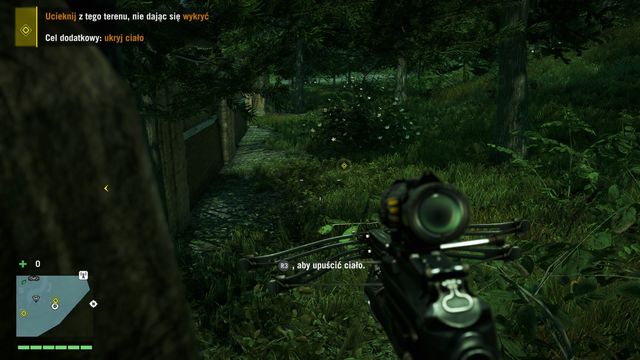 If you want to receive additional cash and experience, pick up the corpse and hide it in a marked area.
To hide the corpse, you need to pick it up and take it to one of the points marked on the radar. You are then rewarded with additional money.
After you kill the commander (regardless of whether you concealed the body or not) get away from the area to complete the mission. Remember that throughout the entire mission, also after you kill and hide the body, you cannot be spotted.
At some points, things get easier if you have skills connected with silent takedown, searching and hiding the bodies: Cover Takedown, Heavy Takedown, Moving Mountains, Dragging and Looting. To complete the game in 100%, you need to complete 7 missions of this type.

You will receive this mission from Amita and it will begin automatically after rescuing the hostages (liberating this outpost is one of the missions of the main campaign - Incursion). Head towards the outpost (the best way is to approach the place shown in the screen, as you will have a perfect view and a clear shot on everyone).
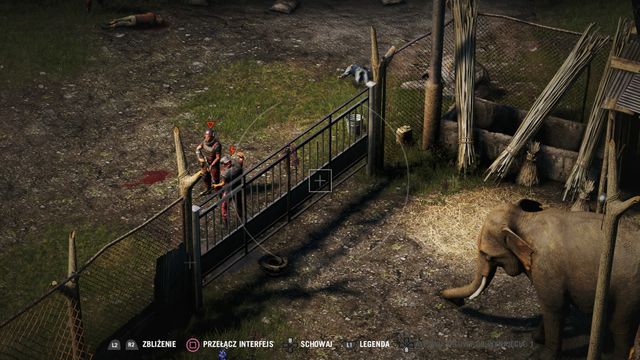 Setting the elephant free will make the task much easier.
Liberating this outpost while staying unnoticed is very easy. The only thing that you have to do is to set free the elephant that is held there. Destroy the gate using a grenade and watch as the elephant deals with the enemies. You don't need to help your "minion", as it will manage to defeat all the opponents. If by some miracle, the elephant gets killed, go down and eliminate all the remaining soldiers.
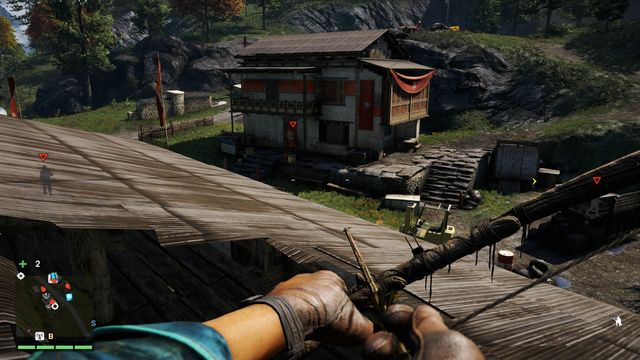 From the rooftop, you will have a good view on the place. Also, it will be easy for you to eliminate two enemies going inside the building.
At this outpost, you will have to deal with a few enemies with Kalashnikovs. You will find a good vantage point on the roof of the building on the left - from here, you can mark all the enemies and then eliminate two of them (for example the two inside the building) using a bow. Also, throw a bait somewhere in the middle, and a wild animal will help you fight the opponents.
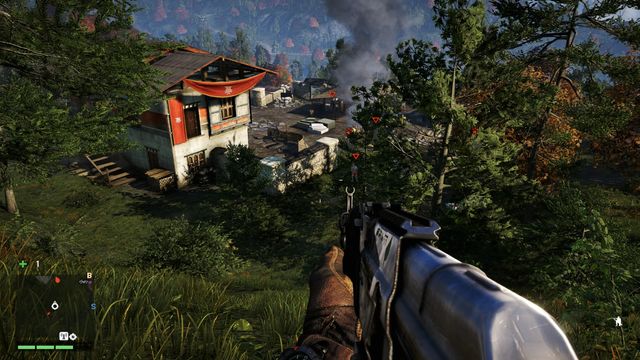 The armored soldier is the most difficult to eliminate.
When capturing this outpost, you have to watch out especially for an armored soldier located here. It is good to first eliminate other enemies (5-6 of them in here) and leave the tough gut for the end. Remember to aim at his head, as his torso is very resilient. You can sneak up to a few soldiers from behind, because they are far away from one another. The two enemies standing next to each other, near the house on the left, can be killed using a grenade or Molotov cocktail.
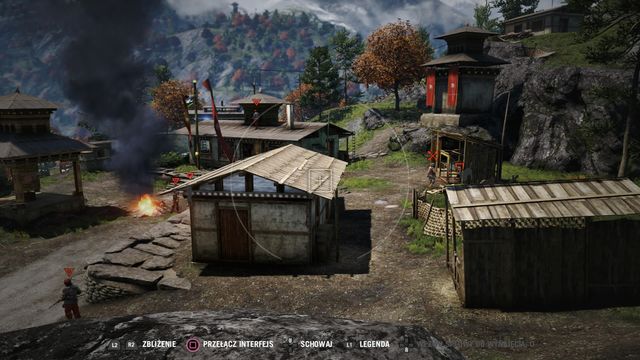 Eliminate the hunter on the right and free the tiger - it will make a lot of mess and kill a few enemies.
When attacking this outpost, it is good to use the help of the tiger locked in a cage. First, kill the hunter located nearby (do it silently). Next, go down and destroy the cage using a melee attack. Quickly run back to your position. The tiger will cause a lot of confusion and you will be able to eliminate the surprised enemies. You can also destroy the cage using a grenade - you won't risk being detected or attacked by the animal.
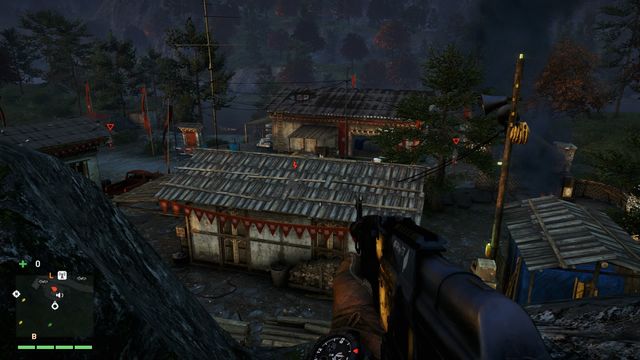 Taking a higher position always helps when capturing outposts.
In this outpost, you won't find anything special - just a few usual enemies. The easiest way is to climb the rocks to have the altitude advantage. Eliminate your opponents silently or using a bow to stay unnoticed.
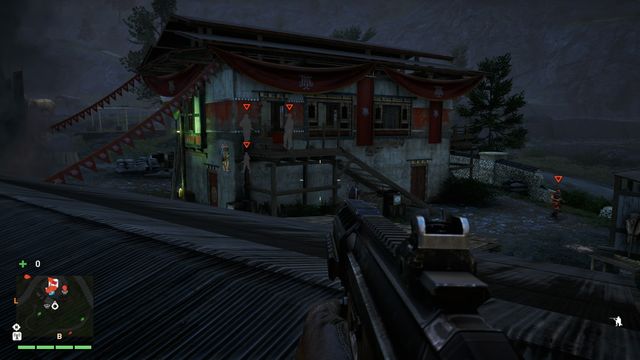 From the roof, you will have a good view on the area - just watch out not to be seen by the soldier that also goes up there.
There are quite a lot of enemies in this area. They are located near two buildings and also a bit farther, near the terraces. A good idea to go onto the roof of one of the buildings, from where you will have a perfect view on the enemies (be careful, as one of them may also go there). From here, you can easily destroy the alarm box, if you're noticed by the soldiers.
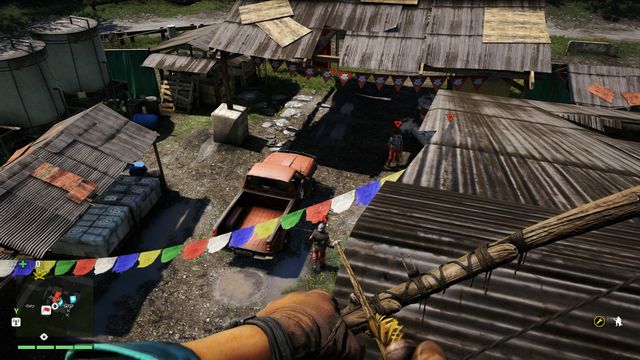 Eliminating the sniper will allow you to kill enemies in any order.
The key aspect of capturing this outpost is to eliminate the snipe located on the roof of the highest building around. Go left, around the fence and go onto the roof of a small house. Then, when the moment is right, jump down and quickly go up the ladder. Take down the sniper using a bow or takedown and the whole outpost will be at your mercy. It is good to continue using your bow and kill the soldiers that are separated from others, because when you draw someone's attention, the alarm may go off.
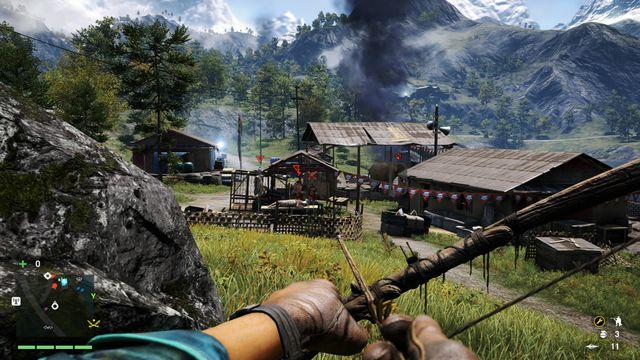 Shoot the elephant with your bow and it will break the cage.
This outpost is very easy to capture. Approach it from the side of the road (having the river to your right) and hide behind a rock. Then, shoot an arrow at the elephant locked in a cage. This way, you will upset the animal and it will start killing your enemies. Help the elephant by shooting the enemies that hide behind obstacles, but do it from behind a cover, to stay unnoticed. Before freeing the animal, you might consider killing the two hunters that guard the outpost.
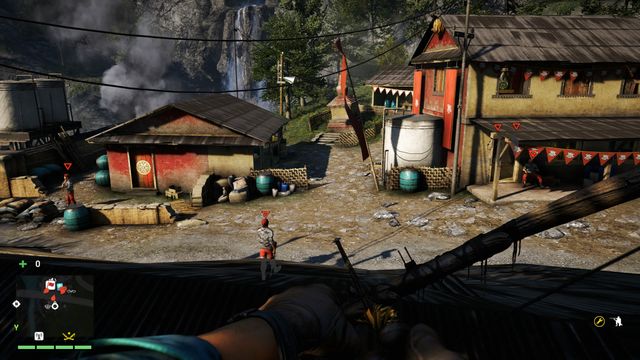 By destroying the beehive located on the building on the right, you will kill the nearby enemies.
In this outpost, it is good to locate your enemies using the building on the left side of the road, which should be pretty easy to climb on. From this position, you will be able to see practically all of the opponents, which will allow you to plan your attack easily. Be careful however, as there are two hunter located near the small building in front of you. It is good to start clearing the area from them. Moreover, you can see a beehive on the big building - shoot it to kill the nearby enemies.
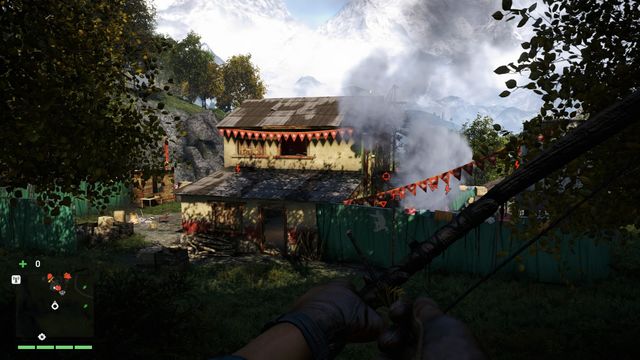 The building from which you will be able to see the whole area.
The main difficulty when capturing this outpost is the presence of a sniper and a war dog. Remember also that there are two alarm box in this area, so if you want to make sure that there won't be any reinforcements coming, you will have to destroy both of them. The roof of the building (the one with the sniper on the second floor) should be a good vantage point. Go around the outpost from the right side and reach the back of it. When the moment is right, go to the roof. Taking advantage of the altitude, look around the area and plan your attack. It is good to eliminate the sniper first (when you're still inside the building), as he might be able to see the dead bodies of other soldiers. You don't have to worry about the dog when on the roof, so leave it for the end.
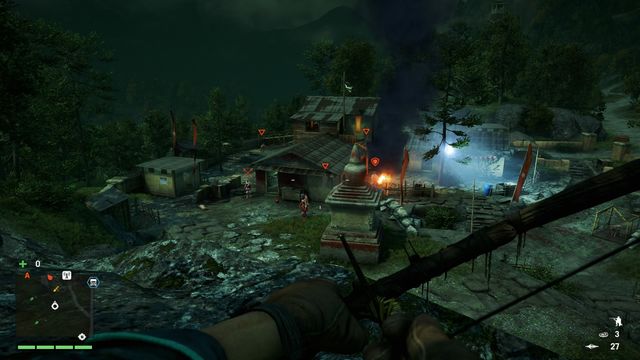 After eliminating the hunters, you will be able to free the wolf or throw the bait without risking your life
Near this outpost, watch out for the wolves living around the area. There are two hunters in the outpost, so if you're noticed, you will be attacked by a pack of wild animals. It is good to start clearing the area from eliminating the hunters. Approach the outpost from the left side of the road and climb the rock shelf to have a good view on the whole area. You will notice the hunters - if you eliminate them quickly enough, when they are facing their backs at each other, other enemies won't notice you. Now you can start dealing with other soldiers. Use the wolf locked inside a cage to make it quicker. An interesting way of dealing with the enemies is also to use the mortar that you can access after killing the hunters. Remember that after shooting, you will draw the attention of your opponents. However, it is a good way for eliminating the remaining enemies with one shot.
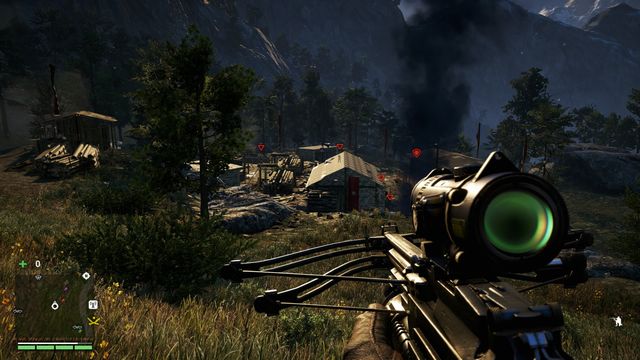 From the roof of this building, you will have a perfect view of the whole outpost.
When approaching this outpost from the side of the crossroads, go past a big rock and go around the outpost. From a small rock shelf, you will be able to jump down and then enter the building using the stairs. However, you will have a better view when climbing to the roof instead of going inside. Try to stay unnoticed, without making the soldiers sound the alarm, because when it happens, you will be attacked with Molotov cocktails. Eliminate the soldiers with throwables first and then, deal with the usual enemies. If you're noticed, avoid the attacks by running from one side of the roof to another.
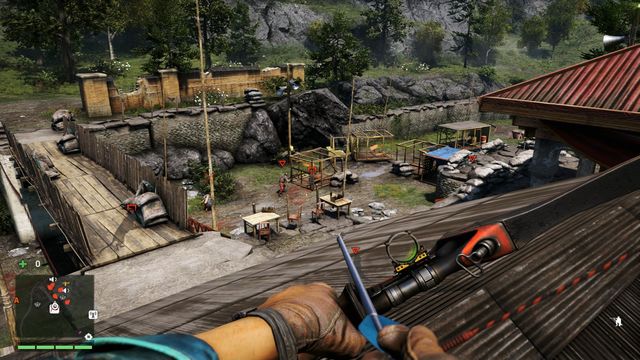 Most of the enemies are located near the cages.
This outpost is located in a small valley, so you can easily mark the opponents from above. Most of them are located in the place where the tigers are kept. One of the hunters is walking near the summerhouse (he is easy to kill without drawing attention). After killing the hunter, try to shoot the other one and set the tigers free. Grenades should also be helpful, as they may kill some of them enemies and open the cages. Leave the armored soldier for the end (unless the tigers already killed him). If you con, use takedown to get rid of him quickly, or simply use a grenade launcher.
From some distance, mark as many enemies as you can to have a better view of the situation.Unfortunately, there's no perfect vantage point around this outpost. You can mark the most enemies when standing on the rocks, to the left of the road. Then, you can silently go down (kill the soldier on your way) and sneak to the cage with the leopard. You can set it free, but first, kill the hunter walking nearby. From here, you can also destroy one of the alarm boxes. Go behind the building and across the bridge to go inside. Eliminate the armored soldier with and jump on the small roof. You now have a good position to eliminate the res of the enemies.
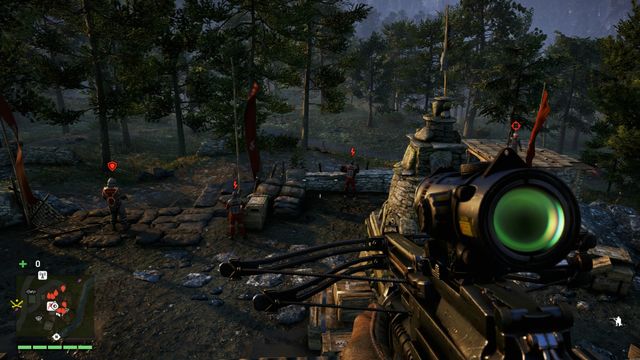 From the central point, you will have a good view on every part of the outpost.
Circle the outpost (you should be facing the buildings with your back facing north). There are less enemies in this part. Jump onto a small building, right near the face. Your target is the highest building in the outpost. You can access it using the ladder on the left. It is good to wait for a while, as there is a soldier that goes onto the roof from time to time. Kill him from some distance so that he wouldn't surprise you later. Climbing the building is not difficult. Just make sure that the armored soldier has gone the other way. When on the roof, you will have a perfect view on all the enemies, so you can start eliminating him, either with a crossbow, sniper rifle, or a bow. Remember to aim at the head, as some of the enemies have Kevlar vests and may require more shots to be killed. It is better to aim a little longer then draw the attention of other soldiers with a missed shot.
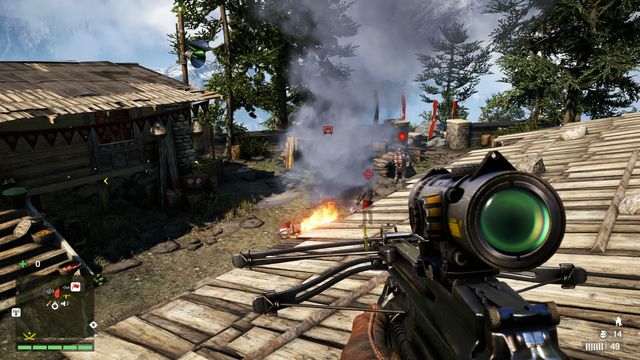 Set the bear free to distract the enemies. In the meantime, eliminate the sniper.
There are four armored soldiers guarding this outpost, so it will be much easier if you have a proper skill for eliminating them. Circle the outpost from the north, walking along the wall. Before a small building, jump over the wall and climb the ladder to get to the roof. Be careful, as there are a lot of enemies in this area. Approach any of the edges with caution. From here, you can destroy at least one of the alarm boxes (you can try to shoot the second one, but be careful no to be noticed). Also, a good idea is to destroy the cage with a bear inside (for example using a crossbow). He will make a lot of mess and surely eliminate a few enemies. When the soldiers are distracted, eliminate the sniper and then, the rest of the opponents.
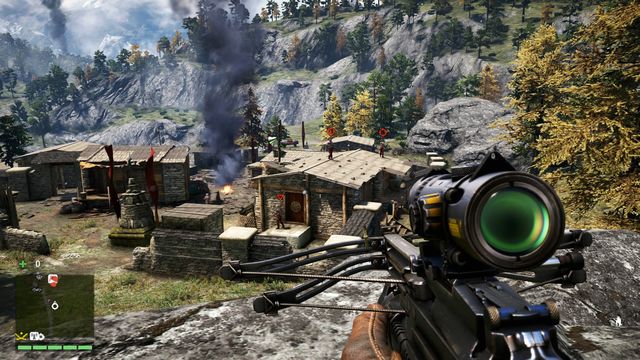 From the rock, you will have a good view on the front part of the camp. The most important thing is to eliminate the two snipers.
Approach the outpost from the side of the road, having two big rocks on your right. The key to silently capturing this area is to get rid of two snipers on the roof. Do it when they are standing facing their backs at each other. However, you have to be very quick to not draw any attention. After eliminating the snipers, go onto the same roof. From here, you can destroy one of the alarm boxes and the next one will be accessible after you jump onto another building. You will also be able to see the rest of the enemies clearly. They are mostly separated from each other, so try to eliminate them in places to which other soldiers don't go.
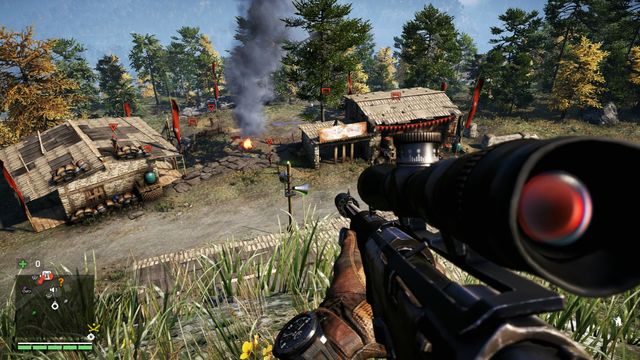 The enemies have no chance when you have a good sniping position. You can eliminate them quietly.
When capturing this outpost, it would be a shame not to use a sniper rifle (with a silencer of course). Climb the rocks and you will be able to see the whole outpost. From here, you will be practically invisible to the enemies. You will have no trouble marking the soldiers and three war dogs. Shoot out the opponents slowly and consequently and the outpost will be yours.
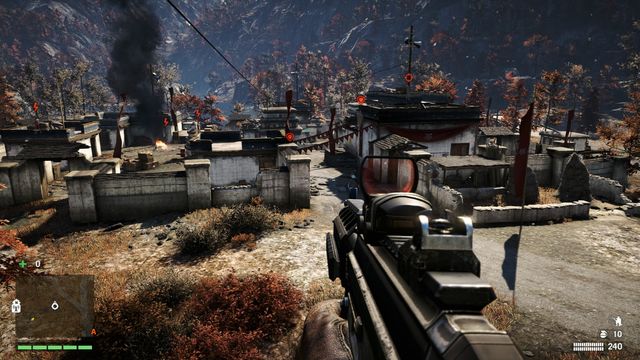 After eliminating the snipers, you can use the rope to get to the roof in the center of the outpost.
It is a strongly guarded outpost. An advantage here is the fact that the enemies are spread around quite a large area. This way, you can eliminate them without drawing attention. Take a sniper rifle with a silencer - in this area, there are three enemy snipers. Eliminating them from distance (when they are on the roofs) will makes the task easier and you will be able to move around more freely. You will find a good position on the rock shelf near the road (west from the outpost). Make use of the altitude and kill the unarmored soldiers, leaving the armored ones for the end. Using the rope, you will quickly get onto the roof, right in the middle of the camp. Make sure that the snipers are dead. From here you will be able to finish the job, ever performing takedown (by now, you should have the appropriate skill).
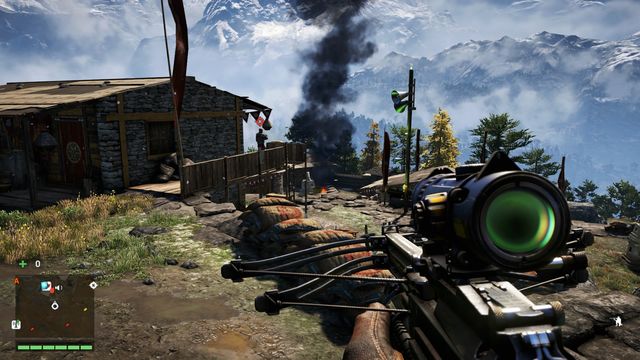 From the roof of the building on the left, you will have a good view on the camp.
You can approach the outpost from the south. You will reach some rocks, from which you can see a part of the camp. In front of you, there will be one of the alarm boxes and a small house on your left (watch out for the sniper nearby). From the roof, on which the sniper is standing, you will have a perfect view on the whole outpost, so you can plan the order of eliminating the enemies. It is good to start from the sniper, which is standing on a balcony, right underneath you. After you kill him, he won't be able to see the bodies of his allies. When standing near the left edge of the roof, you can see a cage with a leopard. It is good to destroy it (move back from the edge so that the wild cat won't attack you). When the leopard distracts the soldiers, you can destroy the alarm boxes and then start killing the rest of the enemies. You will probably have to go down to eliminate the last one - you can find him to the right, near the MMG.
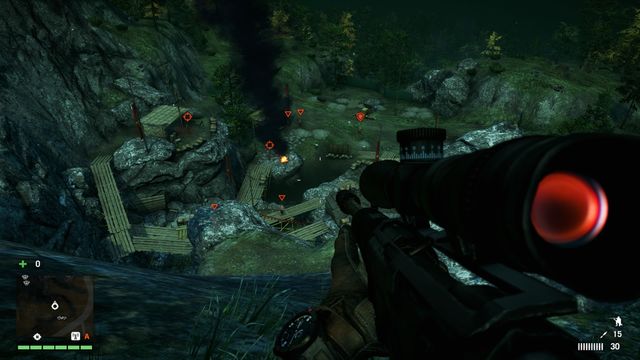 Capturing this outpost will be very easy with a sniper a rifle.
Make sure to take a sniper rifle with you - it will make the task much easier, as the mine is located in a valley. From the rocks around the mine, you will have a perfect view on the area and it will be easy to eliminate all the enemies. To reach an even better position, go down and stop at the height of the wooden bridge. Here, you have to be careful not to be noticed, but the distance from your opponents is smaller so it will be easier for you to shoot. First, eliminate the sniper walking near the alarm box on the left. Next, deal with the enemies located near the rocks - kill those that are the closest so that other soldiers can't see their bodies. Then, kill the other sniper and then the rest of the enemies. You can kill them in any order, but leave the armored soldier for the end. If you have a weapon that's strong enough, you can kill him with a shot in the head. Otherwise, sneak to him from behind or use a grenade launcher.
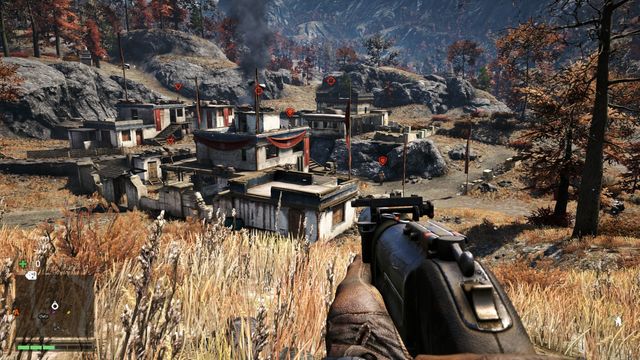 Eliminating the two snipers should be your priority.
It is good to start capturing this outpost from the south. From a nearby rock, you will easily mark most of the enemies. If you have a sniper rifle, you can take down the two snipers - do it quickly so that one soldier doesn't see the body of the other one. Next, approach the corner of the small building, circle it and jump onto the roof (watch out for an armored soldier here). Then, sneak to the building on which the sniper was standing earlier, go inside through the window and go to the position of your dead enemy. It's quite risky, but from this place, you will be able to see all the enemies. Also, you will be difficult to notice. No matter what strategy you choose to follow (the rocks on the other side are also a good starting position), the most important thing is to eliminate the two snipers. When they're down, it will be much easier for you to move around the outpost.
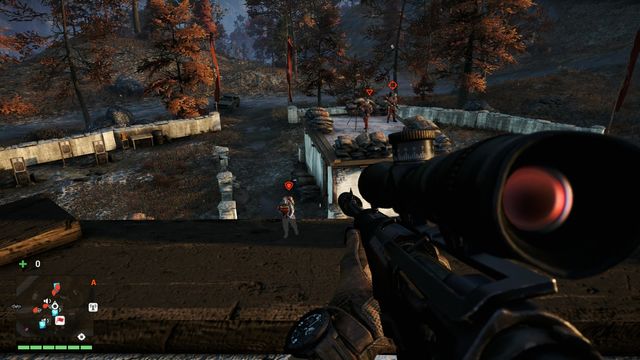 After climbing to the roof, you will have a good position for eliminating the enemies.
This outpost is surrounded by hills, so you can use them to mark your opponents. On one of the rocks, you will find a rope attached to a stone statue. You can attach the rope to it and quickly reach the highest building in the area. Before you do that, it is good to eliminate the sniper located nearby so that you won't be ambushed. There are not a lot of enemies here, but watch out for the snipers and the armored soldier. It is good to combine two strategies when capturing this outpost. First, from a distance, kill the snipers and those enemies whose bodies won't be seen (for example the ones on high roofs). Next, go down to the camp to eliminate the rest that you couldn't reach from above. You can also try to kill everyone without going into the camp, but you will have to change your position.
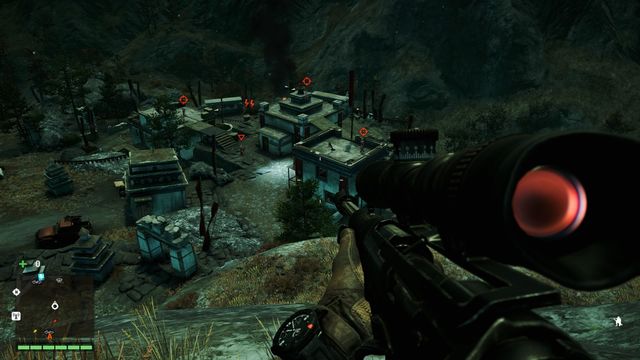 Eliminating the snipers will make the task easier for you.
In this outpost, you will find only a few usual enemies and three snipers, who are the biggest difficulty when trying to capture the camp silently. Climb the rocks on the south to eliminate the snipers, as they are located on different roofs. This way, you won't draw the attention of the rest of the enemies, so you can go down and climb one of the buildings. You will have a better view on the outpost and you will be able to learn the paths of each enemy, or kill them with a bow or crossbow. You can also stay on the rocks, from where you also have a nice view on the area - liberating the outpost using a sniper rifle is not very difficult.
Attack this fortress after you've completed the City of Pain mission. It will make it easier for you, as there will be 2 alarm boxes, not 3, in the area. There will also be less enemies. It is good to have a grenade launcher or the Heavy Takedown skill and a Guns for Hire token. Think about a new bow and don't forget to take enough ammo. By doing so, you will be fully prepared to start the task.
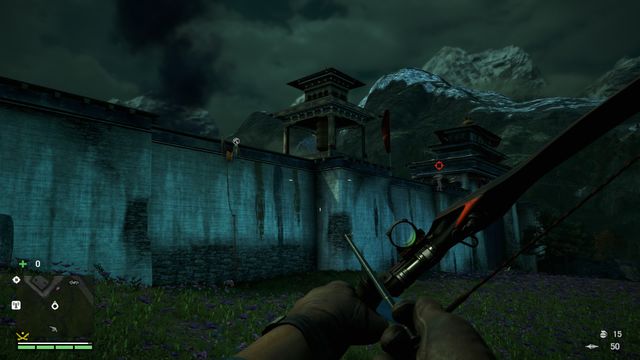 Using the grappling hook, reach the top of the wall and eliminate the first sniper.
Start from the south. To the left of the gate, you will notice a grappling point. When on top, kill the sniper standing there. If you have a good bow and a steady hand, kill another sniper standing on the other side. Do it from the building below (while standing on the edge). Along the wall, head to the north gate and jump outside. Sneak through the gate (watch out for the dog) and turn left, behind a building. Walk straight, up the stairs and you will reach one of the alarm boxes, which you should of course deactivate. If you haven't killed the second sniper, go up and do it now
 Disable the alarms on the way.
Jump down onto a smaller building, from where you will have a good view on the central part of the square. Notice (and destroy) the second alarm box. You don't have to worry about reinforcements anymore. Now, it is a good moment to summon a mercenary, using the Guns for Hire token. He will make some noise and distract the enemies. Help him by shooting the opponents from behind a cover. The hardest part is defeating the heavy gunners. Do it using takedown (if you have the appropriate skill) or a grenade launcher. Two grenades thrown at them should also do the trick. Leave the armored soldiers for the end, as they are the biggest threat for you.
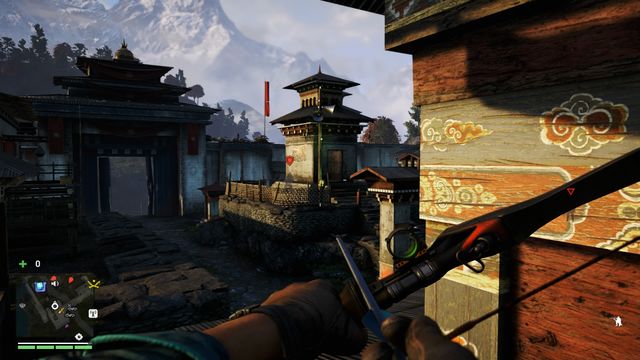 Kill the heavy gunner at the end.
To sum up: first, deal with the snipers, then, destroy the alarms. This will make it easy to eliminate the rest of enemies. Distract them by hiring a mercenary and kill the soldiers from above. The easiest way to deal with the heavy gunners is to use a grenade launcher or simply throw grenades.
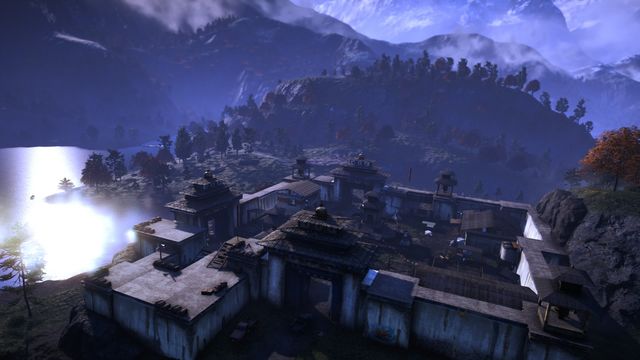 Completing the task unnoticed is rewarded with extra points.
After capturing the fortress, your outposts in this area won't be attacked anymore. You will also not encounter any enemies.
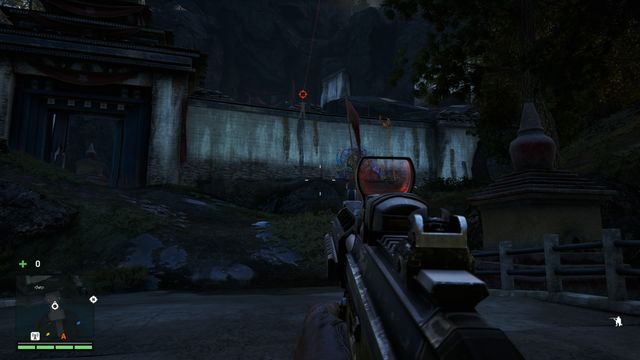 Right after climbing the wall, kill the sniper.
Capture this fortress after you complete the Shoot the Messenger mission. Without Noore, it will be weaker and the alarm outside the fortress will be disabled. Inside, there are a few usual soldiers and two heavy gunners, so make sure that you have the proper equipment. You won't be needing a Guns for Hire token here, as the mercenary wouldn't be able to reach this area. You're on your own, but capturing this fortress is not so difficult.
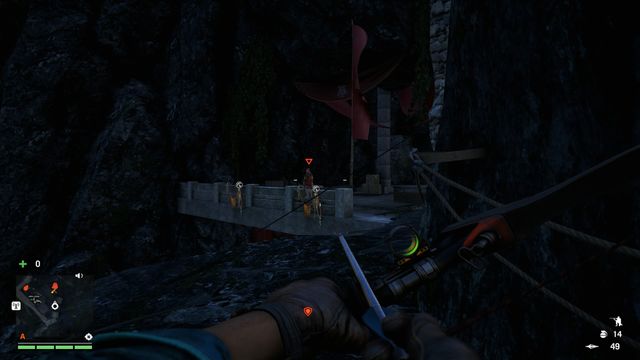 Deal with the soldier on the balcony and the upper level will be clear.
Approach the fortress and climb the wall from the right side. You can do it using your grappling hook. Eliminate the sniper and use the platform on the right to go up. Here, kill another enemy and go inside.
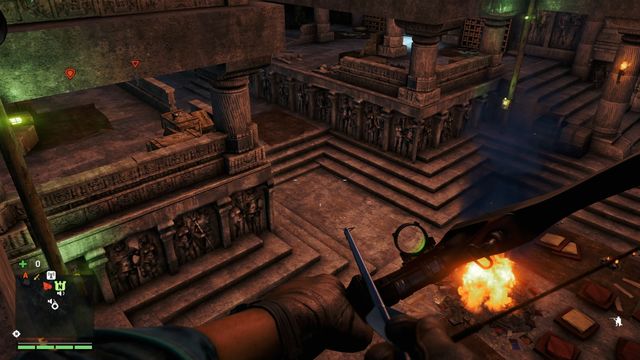 When inside, you can easily destroy two alarm boxes.
Approach the edge but don't go down. From here, you can shoot two alarm boxes. Staying on the upper level will allow you to see the inner and the outer part of the fortress. If you don't make too much noise, no enemy will find you here. Eliminate the soldiers with machetes (inner part) and then, clear the outer part (a few usual enemies). At the end, deal with the armored soldiers. Kill them using a grenade launcher, grenades or takedown. If you lure them closer to the walls (for example by throwing a stone), you can also eliminate them using the mortar located on the balcony.
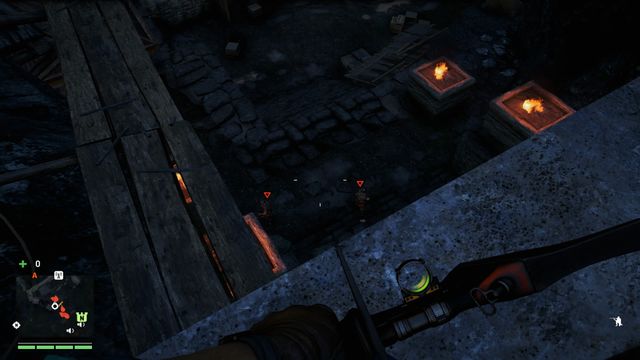 Finish the confused enemies from the balcony, while staying unnoticed.
You can also try to access the fortress using a different way. Instead of climbing the wall, use the grappling hook on the left part of the gate. This path will lead you inside the fortress, to a big hall on the lower level. From here, you can disable both the alarms and start eliminating the enemies.
Capture this fortress after completing the Payback mission. You will have to disable 3 alarm boxes, but there will be less enemies inside.
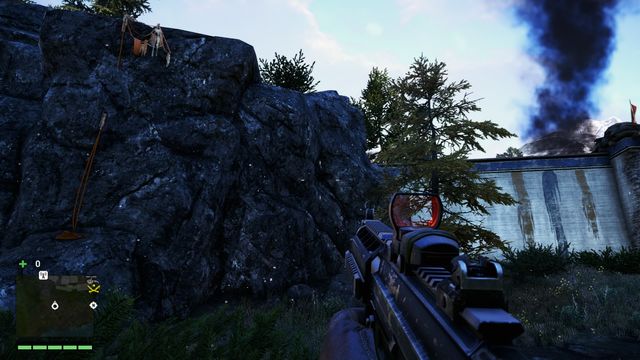 Use the grappling hook to climb the rocks. You will have a good view on the fortress.
The easiest way is to eliminate the enemies using a sniper rifle. Use the advantage of height that the rocks around the fortress will give you. From up there, you can quickly disable the alarms and kill all the soldiers. There are quite a lot of them, but focus especially on the heavy gunner and the sniper.
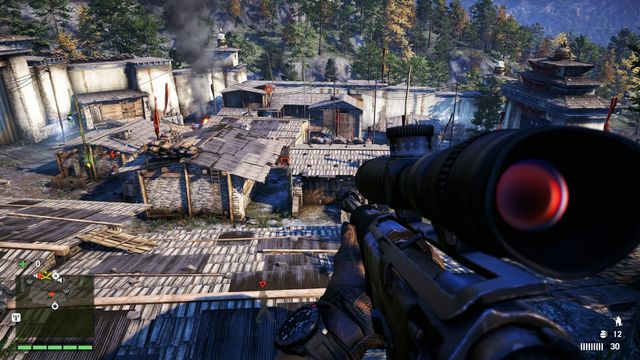 One of the quickest ways of dealing with the enemies is to use a sniper rifle.
When near the fortress, go left and climb the rocks using your grappling hook. From here, mark as many soldiers as you can (especially the sniper), who will notice you first if you make too much noise. Then, start killing the enemies (before that, you can destroy two alarm boxes). Try to stay unnoticed. If the soldiers start to suspect something, hide for a while and change your position. At the end, eliminate the heavy gunner and the dog.
Even if you don't plan to use a sniper rifle, use the advantage that the rocks and the roofs can give you. It will be a bit harder to complete the task using a bow or a crossbow, because the soldiers are far away from one another. However, such strategy can also be effective.
The last fortress in the game, belonging to Pagan Min. It is best to capture it after you finish the main story, because the fortress will be weaker then.
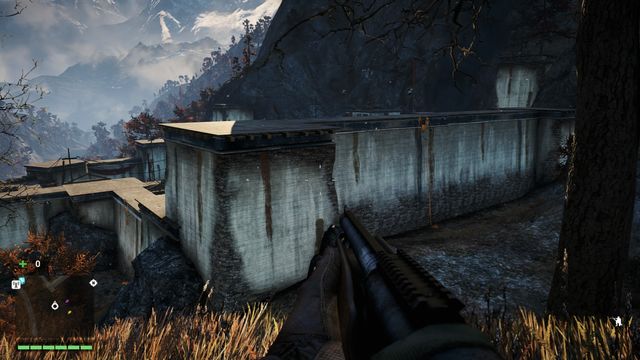 From the wall, you will be able to plan your next moves.
First, climb the wall (use the grappling hook). From here, mark all the enemies. The fortress is divided into two parts. On the right, a bit higher, you will notice two snipers on roofs. Start by eliminating them.
 After dealing with the snipers, killing the res of the enemies while staying unnoticed should be much easier.
Next, you can eliminate all the other enemies using for example a sniper rifle, or go right, to the area where the snipers where. From there, you can go to the central building in the fortress (here you can disable the alarm) and you will have a good view on the rest of the territory. You have a few enemies to kill, among them two armored soldiers.
After eliminating all the opponents, the last fortress in the game will be yours.
You will find the journal in a house, to which you can move using fast travel.
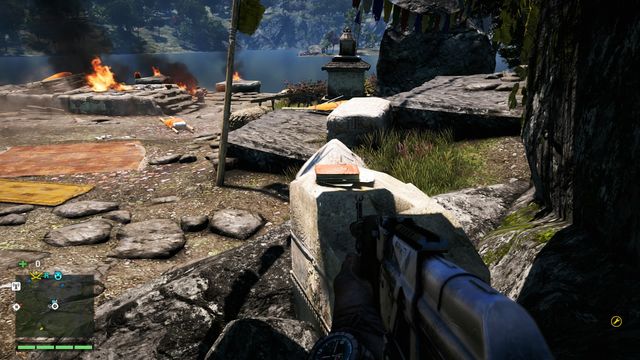
You can find the journal on a stone pedestal, which will be directly behind you, when you're facing the lake.

This journal is lying on the floor in the room to which you move when you use fast travel.
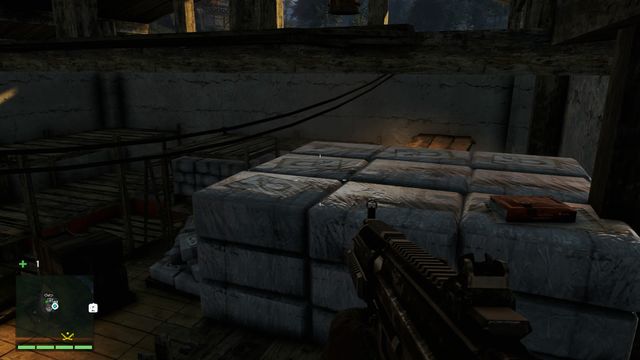
You will find this journal inside an abandoned house/magazine. Jump on the wooden platforms and onto the stack of white packages, on which you will find the journal.
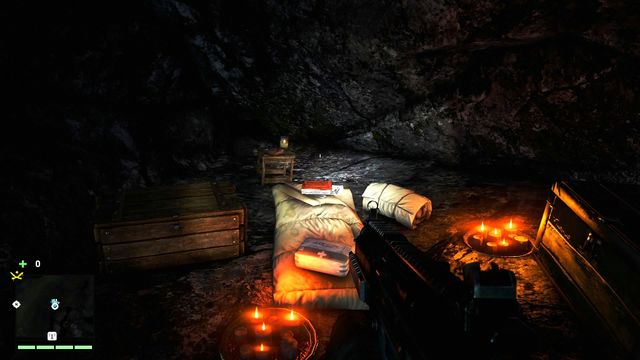
You can get to the cave after climbing a rock shelf at the feet of the mountain. Jump over the precipice using the hook. The journal is lying on a bed in a small cave.
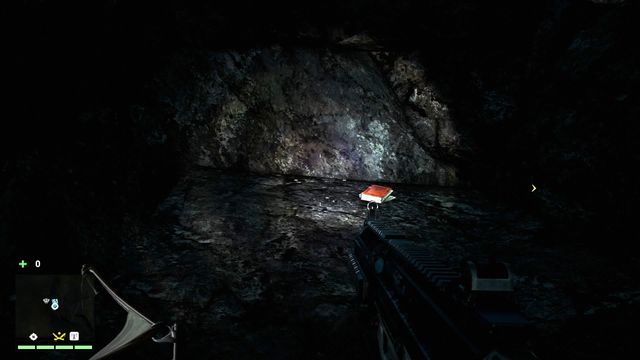
You will find the journal on the last shelf in the cave, which you can access by using the grappling hook a few times.
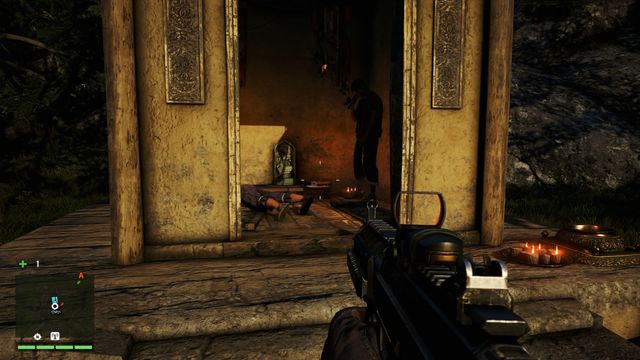
You will find the journal in the corner of a small shrine below the mountain.
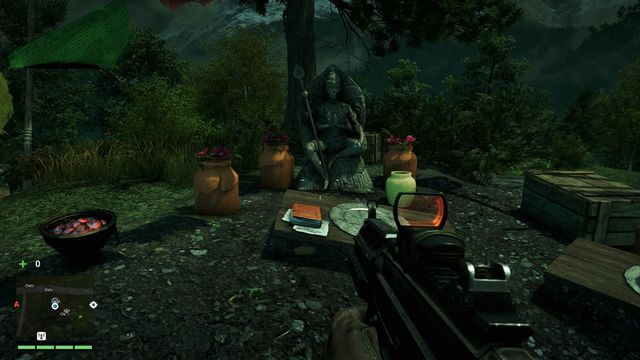
On a table near a small statue; close to the road, on a small hill
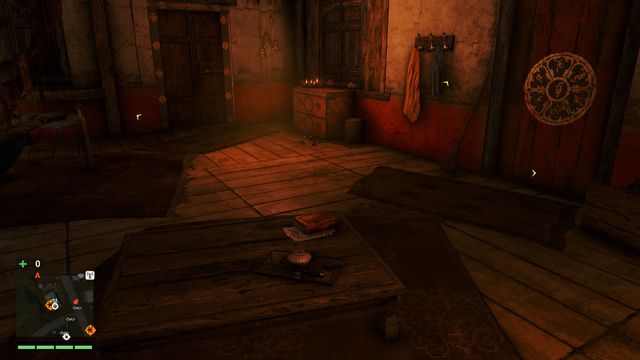
You will find this journal on a table located inside a room, in which you land when you use fast travel.
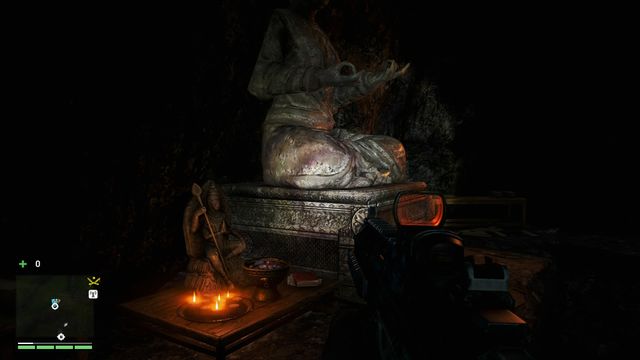
Inside the cave, turn left and go to another chamber through a partially collapsed passage. The journal is lying on a table, to the left of the statue.
After travelling to Ghale Homestead, go outside. Go behind the house and use the stairs to go to a small shed, where you will find a journal on a table.
You will find the journal in a cave. When going inside, jump into the water near a large golden gate. Then, use the hook to go up and you will find yourself on the other side of the gate. Turn around and go across the stone bridge. The journal is located in a small chamber, to the right of the statue
After using fast travel, you will find the journal on the table, to the right of the main door.
Near the wheelbarrow, notice a passage leading down. Go there and you will find the journal on the first rock shelf on which you can stand.
To find this journal, you have to go inside a small cave, high in the mountains. To reach it, go to the other side of the river to the Nadi Gardiyana Summit location [X:348,Y:685]. When you get there, use the rope to make it to the cave. Inside, use the grappling hook to go to a lower chamber, where you will find the journal.
The journal is lying on the table, next to the monitor.
You will find this journal on a table, in the first building on the right (across the bridge, when looking from south of Kyrat).
The journal is lying behind a pile of bones, under the rocks.
You will find the journal underwater, on a piece of stone wall.

You can collect the journal during the last mission of the main campaign, when you leave the urn with the ashes of your mother.
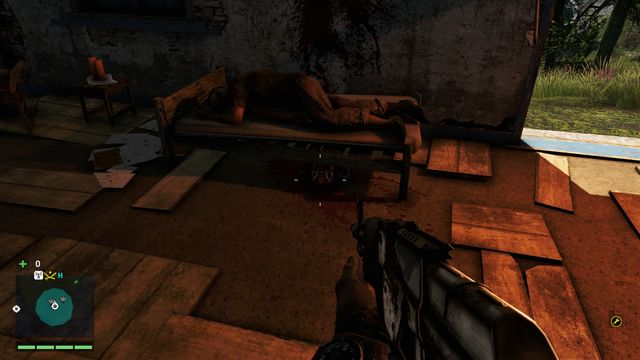
You will find the mask in a small hut, under the bed with the body.

In the middle of the lake, underwater. Take the mask off the dead man's face.
Inside the cave, to which you have to go crouching, on a large rock, right under the body.
To reach this location, you will have to do some climbing. Locate the wreck on the top. You will find the mask under a broken wing.
You will find the mask among underwater, in the middle of the river, near a dead body.
To obtain this mask, go up, to the left of the stream. From here, you will be able to jump onto the other side and then climb up. Go across the bridge to reach a cave under a waterfall and jump down. Underwater, near a dead body, you will find the mask.
You will find this mask hanged on a boat. The boat is located near a house by the river (not far from the road).
Dive into the water and you will notice a wreck of a car with a body inside. Locate the mask on one of the rocks, to the left of the car.
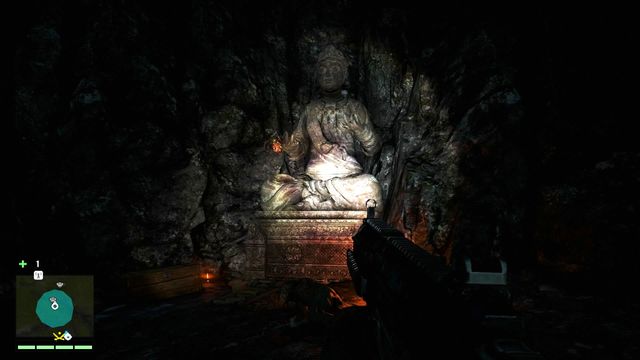
This mask can be found inside a small cave, hanging on the right hand of a statue.

Locate a well near the house (close to the wall) and go inside using the hook. Dive into the water and swim under the rock. You will find the mask in one of the boxes. Be careful, as you may easily loose your orientation here and drown. Try to remember the place where you begin diving.

Head left from the outpost, towards the mountains. Walk along them and you will reach a grappling point. Climb the rock and you will see a body on your left. The mask is located a bit lower, behind the body.
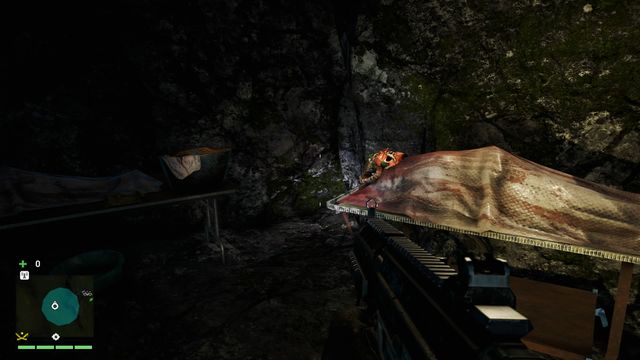
In the hospital (inside the cave), on the face of one of the dead patients.
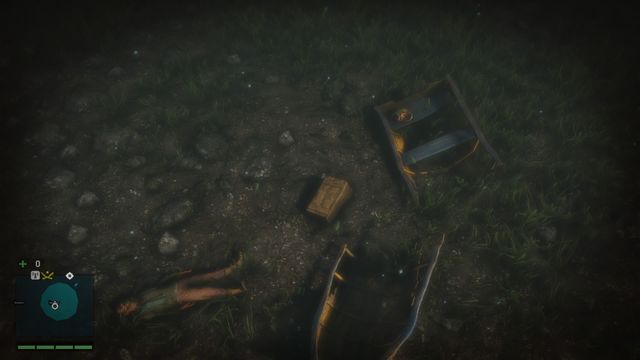
You can find the mask in the middle of the lake (use a boat to get to the right place - this way you won't risk being attacked by the inhabitants of the lake). Jump into the water and locate a wreck of a boat, in which the mask is lying.
Locate a dead man on a rock and pull the mask off his face.
In the camp, locate a tent with a body lying next to it. Circle the large rock and take the mask.
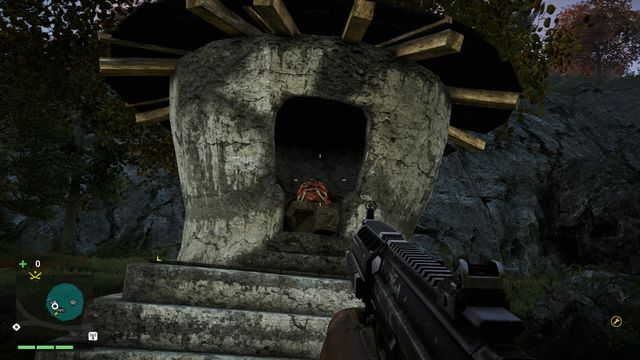
To the right of the stairs, you will notice a few dead bodies. On the left, there will be a statue, empty inside. You will find the mask there.
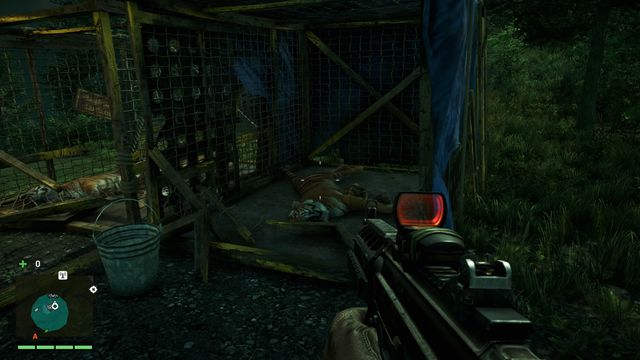
The mask is located inside a cage with a dead tiger. Break the cage with melee attack.
Inside a small house (there are two houses here, but go inside the one that is located lower). The mask is lying on shelf by the wall, opposite the entrance.
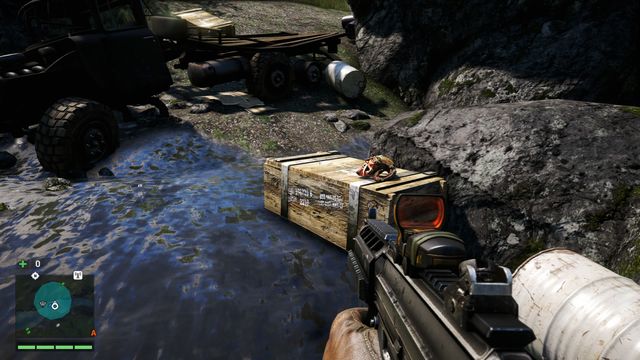
You will find the mask inside a cave. Die into the water and take it off the skeleton.
The mask is located in a cave, on the upper level. Locate the gate on the left, on the higher rock shelf. Shoo at the gate with a grenade launcher or a rocket launcher to obtain the mask.
Inside a cave, on a table the serves for an altar.
You will find the mask on a crate. It's floating on the water, to the right of the broken truck.
Go through the narrow passage and use the hook to go up. Swing a little and jump onto the rock shelf. Take the mask off the dead body.
You will find the mask in the corner of a cage near the campfire.
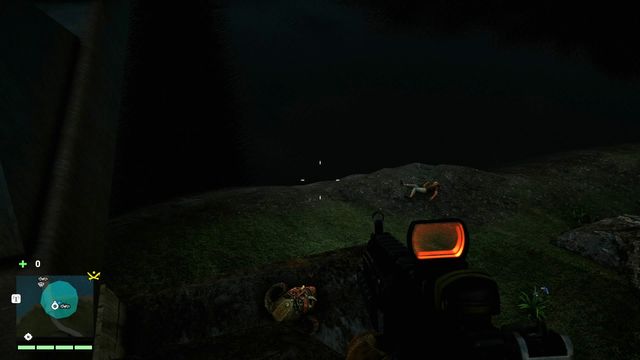
To find this mask, go to the end of the bridge. Don't go down, but stand on the rock shelf behind the barrier. From here, you should be able to see a body, a note and a mask.
At the end of the narrow road, you will find a house. Inside, on the right, there is a carpet hanging on the wall and. On the top shelf, next to the carpet, you can see the mask.

Circle the house from the left and locate a wooden cage near the corner. Destroy it and you will see a dead wolf and a mask.
You will find the mask behind one of the rocks near the tent.
Facing the wreck, notice the log on the left and a large rock behind it. You will find a body there, with a mask on its face.
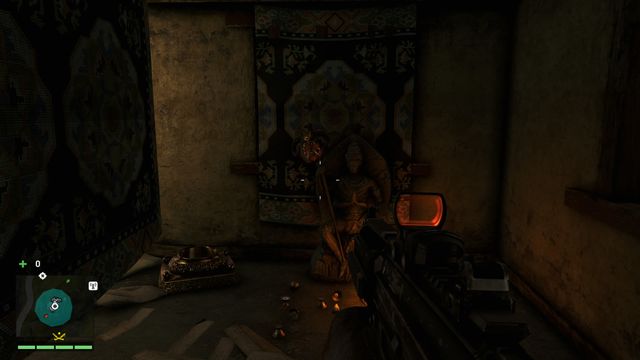
Approach the river. In the middle of it, you will find a few rocks creating a small island and dividing the river into two. In the middle of the island, under some bushes, you will find the next mask.
When on the bridge, go down and locate a wreck of a care with two bodies inside. You will find the mask in the water, near the shore (among some barrels), opposite the wreck.
Facing a large statue, turn around towards the side from which you came. Above the passage, on some rocks, you will notice the next mask. Simply
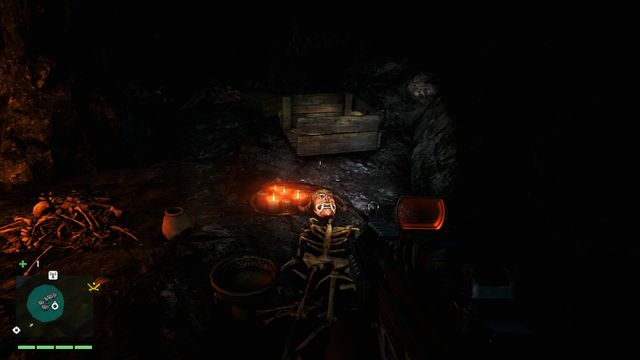
Inside the cave, on the left. The mask is attached to the skull of a nearby skeleton.
Inside the house, hanging on a small statue near the window.
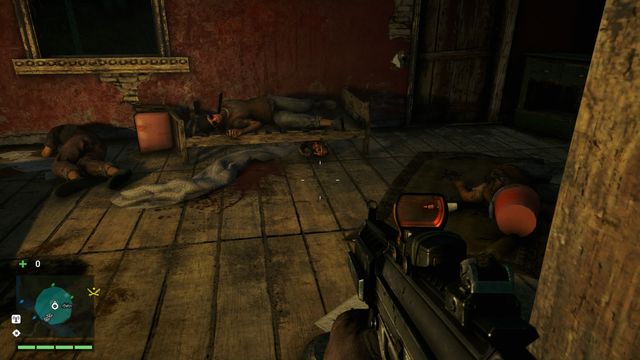
The mask is located inside the house, under one of the beds.
You will find the mask inside a cave, on the lower level. Watch out for two enemy soldiers.
You can find the mask in the wreck of a boat.
To collect this mask, you have to dive. Jump into the water near the scarp where you can see a dead body. The mask is attached to a skeleton.
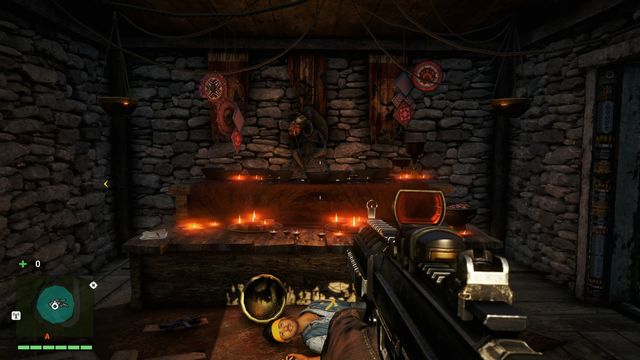
Inside the shrine. The mask is hanging above the later, on a statue.
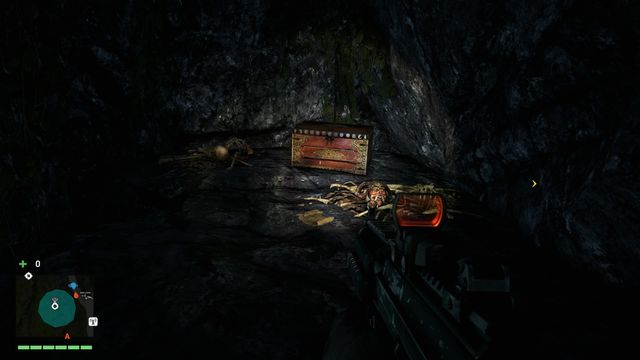
To find this mask, you have to use the hook to make it onto a rock shelf. From there, go inside a small cave - the mask is lying near the chest.
On the top, you will find house. Right behind it, go to a cave, through a hole (use the hook to go down). You will find the mask at the end, behind the gate on the left. To destroy the gate, simply shoot at it.
Locate a large house, in which there is a cage with a body inside (covered with blue material). You will find the mask between the cage and the house. It is easy to notice from above.
You will find the mask inside a cave, on the second platform. You can access this place using the hook and then swinging to jump onto the scarp.
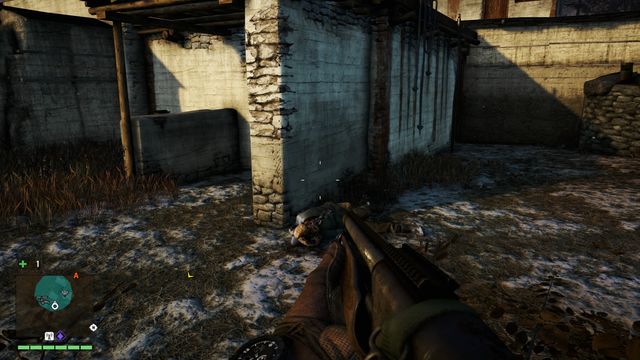
You can find the mask on a dead man's face, near a wall in the northern part of this location.
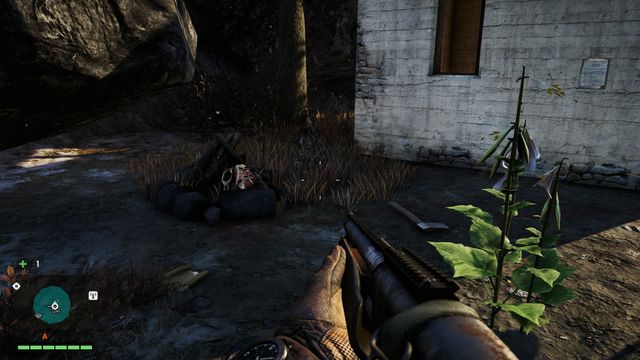
The mask is lying on a pile of wood, near an empty house.
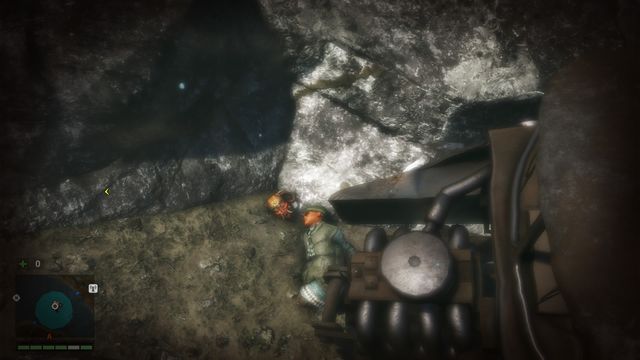
Take the mask off the dead body located behind a large rock.
Close to the road, near some rocks, you will notice a wreck of a car. The mask is located between the two large boulders.
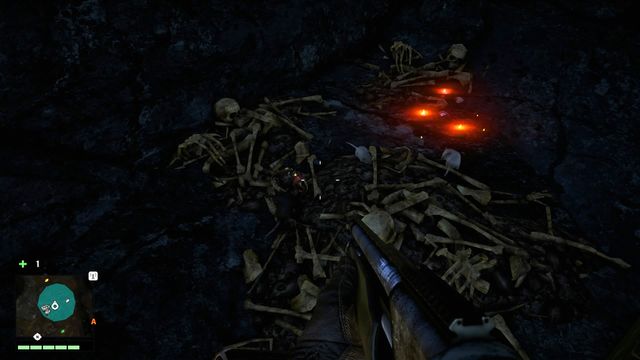
The mask is located inside the cave, in the right part. It's lying on the ground, among the bones.
You will find the mask on a large boulder, inside the cave.
Near the entrance to a small cave, there are two shrines. The mask is located near the one on the left, behind a rock.
Take the mask off the dead body located near some rocks, behind the car.
The mask is located underwater, in the middle of the river, near a wreck of a truck.
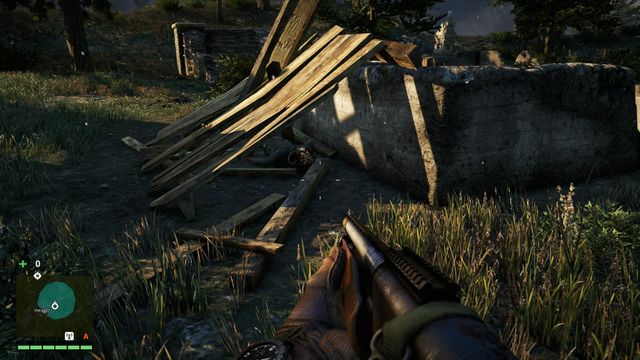
This mask can be found under a wall, near some desk, in the central part of the location.
The mask is attached to a skeleton in a wooden box, on the edge.
You can find the mask in the house on the left (when facing north). It is lying inside a shelf, between two beds.
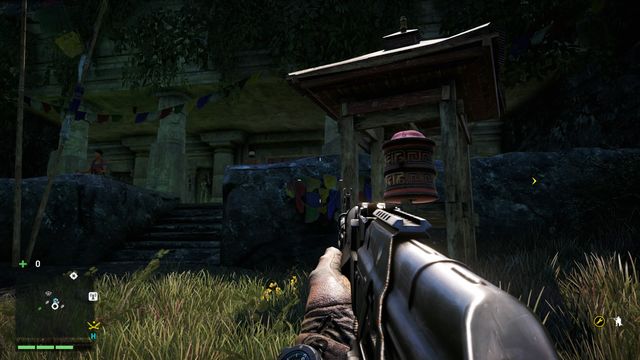
You will find the wheel on the right, near the entrance to Kyra's Guidance.
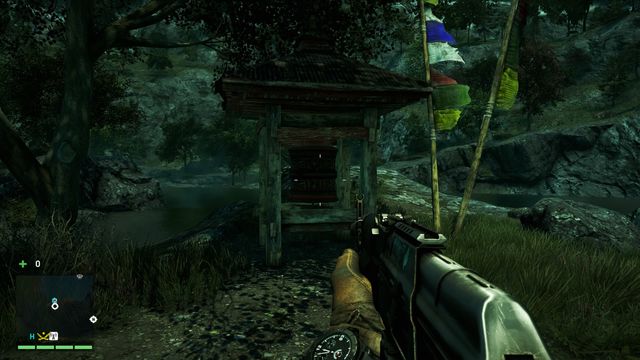
Go off the main road and approach the lake. You will find the wheel in front of you.
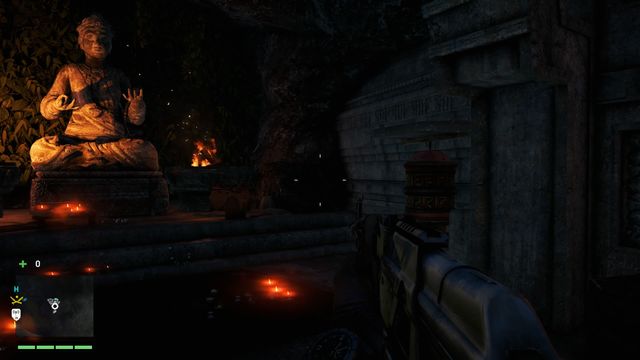
This location is wheel. From the lake side, use the hook to climb all the way to the top. Then, climb a little higher and you will notice a path on the left. Swing over the precipice and jump when the moment is right. Use the hook again to go down. Jump over another precipice (using sprint) and you will reach the upper part of the waterfall. Behind it, there's a cave in which you will find a wheel (next to the statue).
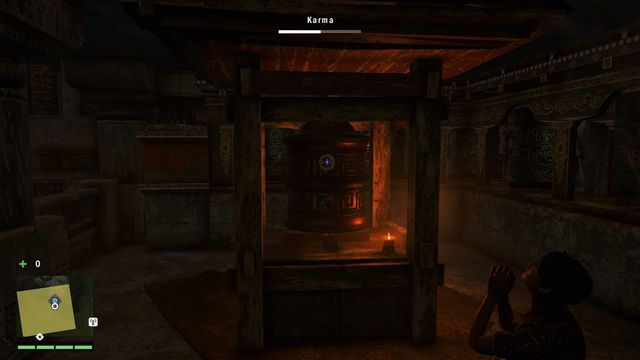
You will find this wheel in the monastery's main hall, on the right.

This wheel is located at the end of the road, on the right, near a large statue.
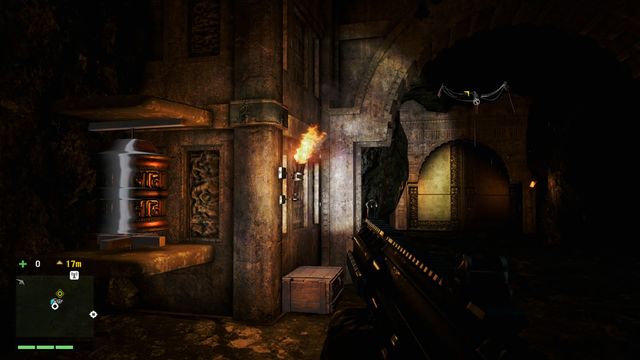
This wheel is located inside a cave, on the left, near the entrance to the chamber with Thangka element (in The Protector's Arrival mission).
Go to Chinjan Sherpa Camp and from there, go higher. Near a wooden totem (in the shape of a cross with a dog-like demon), you will find the wheel.
You will find the wheel on an island in the middle of the river. You can access it by swimming or using a narrow bridge (the wheel is located right behind the bridge).
Head left from the outpost, towards the mountains. Walk along the mountains and you will reach a grappling point. Climb the rock shelf and you will see a body on your left. Climb higher and you will notice the wheel, near the entrance to a small cave
You can find the wheel in a small shrine, to the right of the entrance.
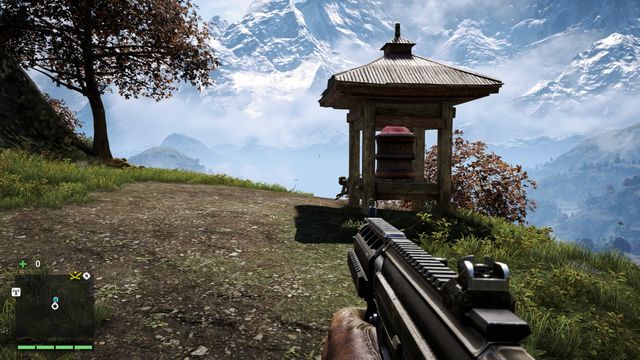
Heading south from Tirtha (along the stream), you will reach a path, at the end of which you will find the wheel.
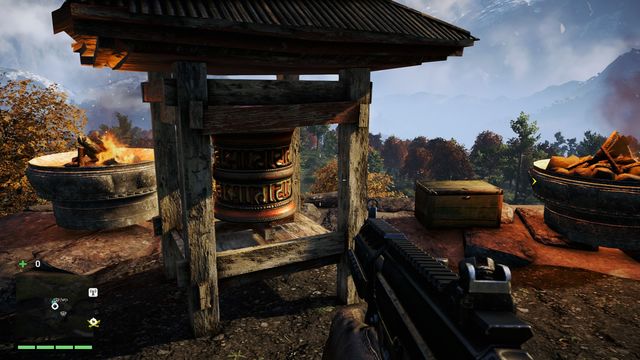
The wheel is located near a large statue.
You will find the wheel inside a small shrine.
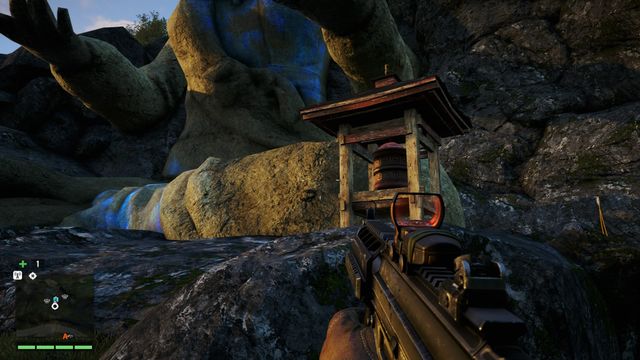
This wheel is located under right near a big statue.
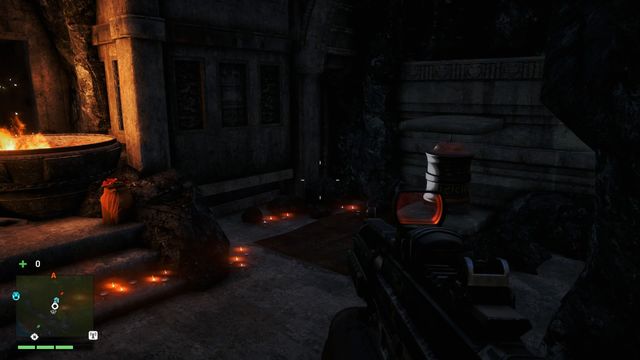
Inside a small cave, to the right of the statue.
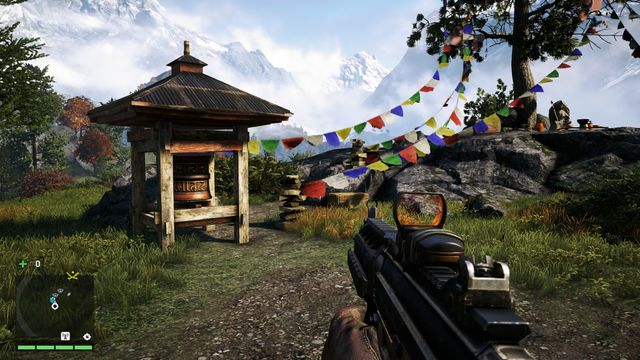
You will find the wheel at the end of the path, near a tree growing among some rocks.
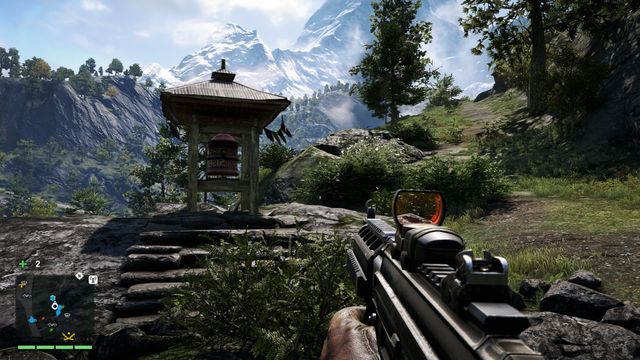
Having the rocks on your right, you can see the wheel on the left, right near the path.
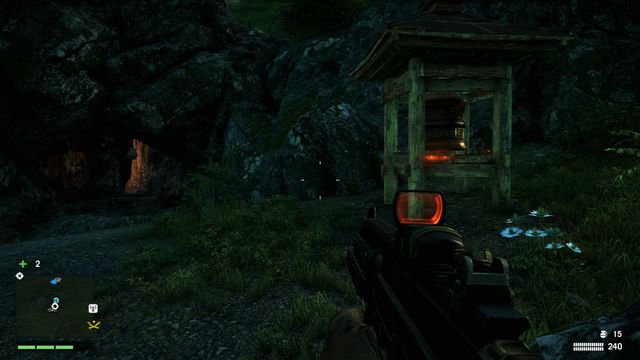
The wheel is located near the entrance to a cave, to the right of the path.
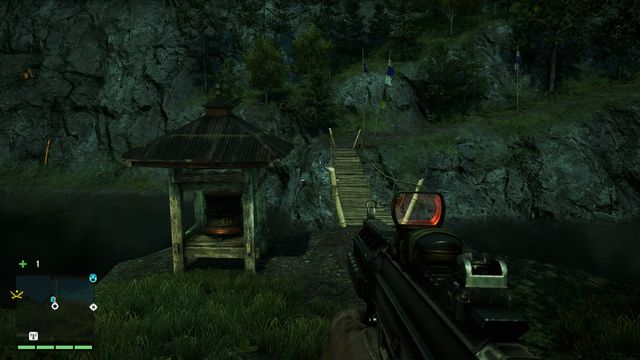
You will find the wheel near a bridge on the river, not far from the path.
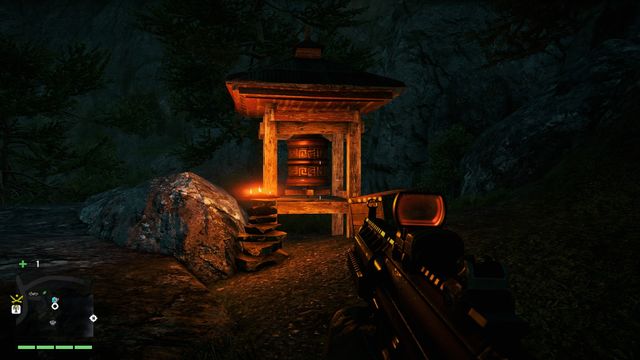
Facing the statue, turn left and go along the path. You will find the wheel there.

With the tents behind your back, you will notice the wheel near some rocks, on the left.
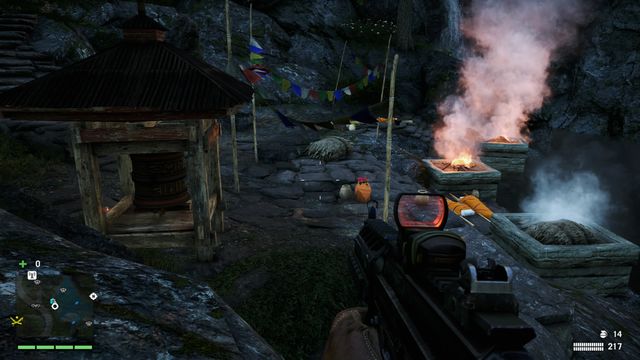
You can find the wheel in at the bottom of this location, right near the river.
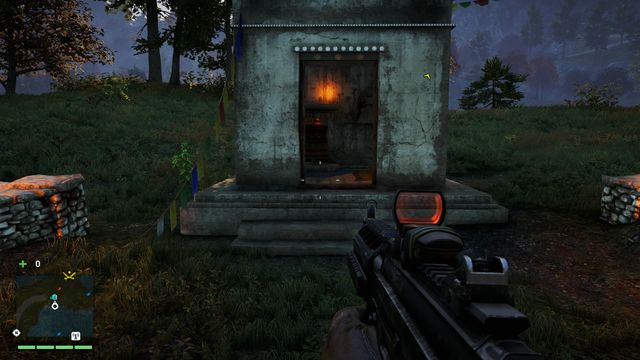
This wheel can be found in the place where three narrow paths cross.
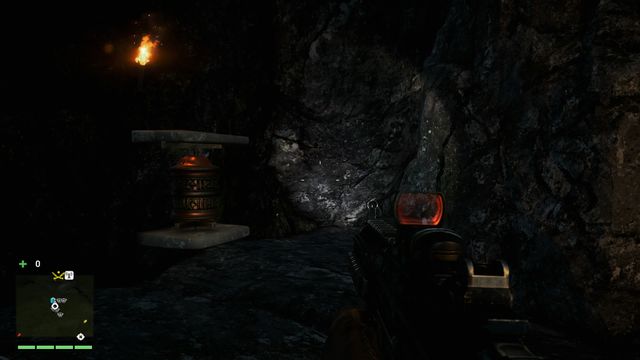
You will find this wheel inside the cave, in a larger chamber to the right of the entrance.
This wheel can be found inside a small shrine located on an island, in the middle of the river.
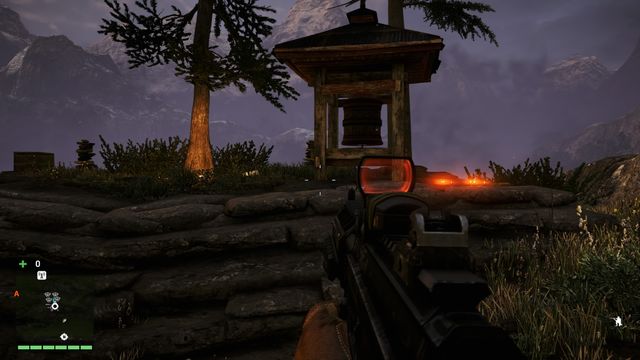
On a vantage point (on a rock platform).
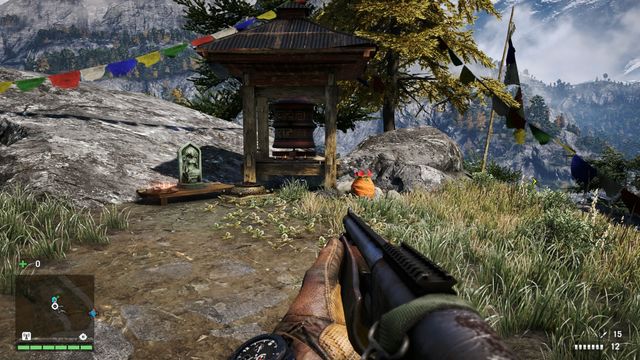
You will find the wheel near a tree, at the end of the road.
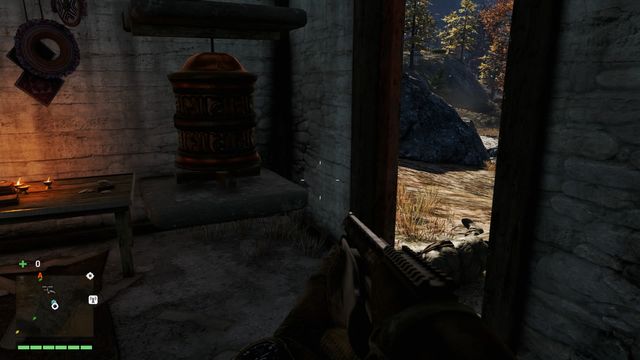
This wheel is located in a small shrine, to the right of the entrance to it.
In the corner of a house on a small hill.
You will find the wheel in a small bay, near the mountains.
After climbing a few dozens of stairs, you will reach a vantage point. The wheel is located near the house.
You will find the wheel in a small shrine by the river.
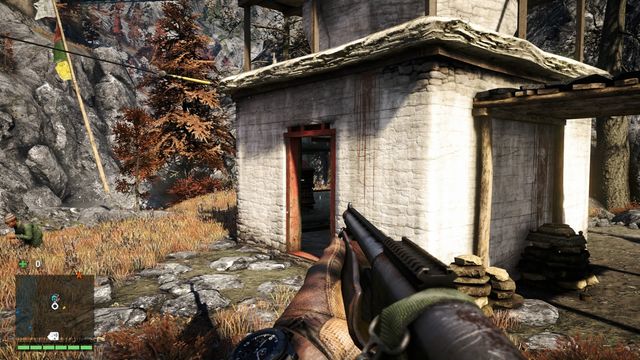
This wheel is located in a camp, not far from the crossroads (watch out for enemies here).
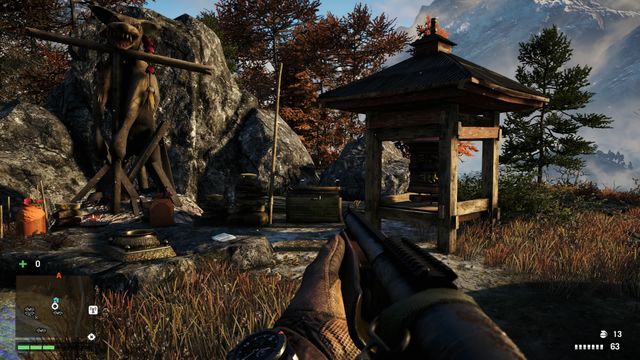
The wheel can be found in the central part of the location.
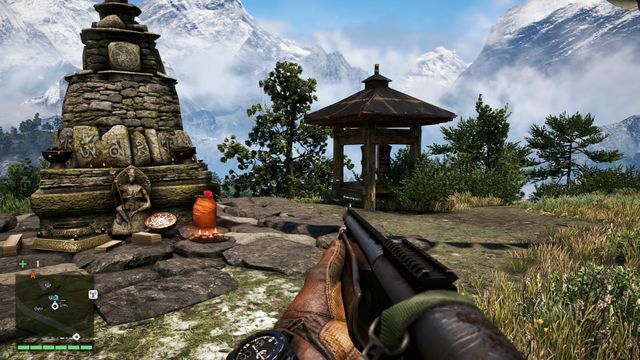
You will find the wheel a little above the hut.
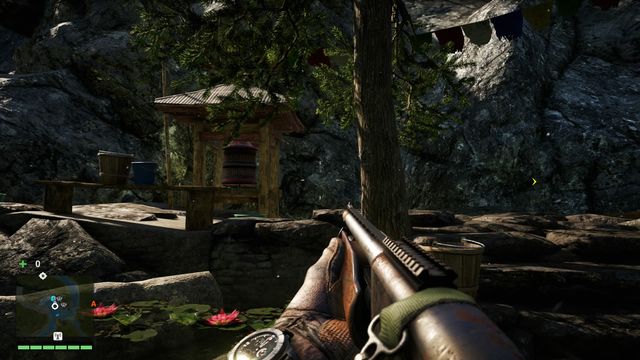
The wheel is located near the rocks.
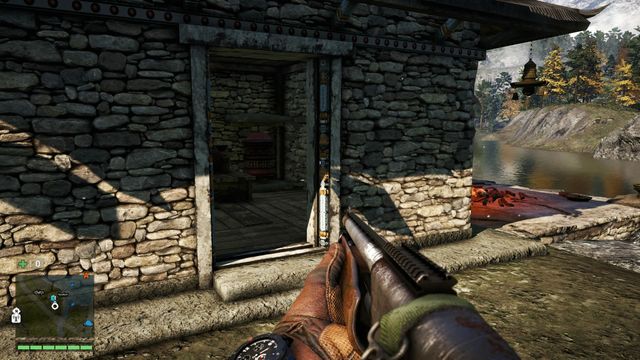
In a small shrine by the lake.
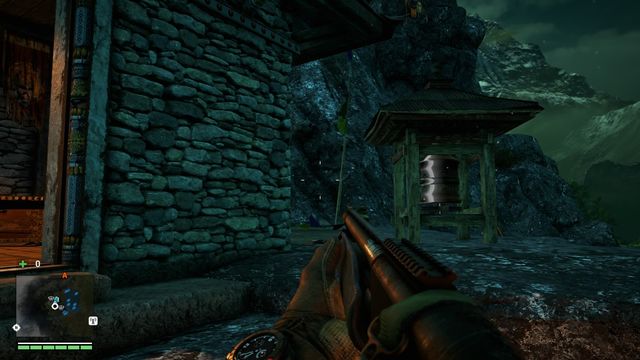
The wheel is located near the entrance to the shrine.
Right by the shoreline.
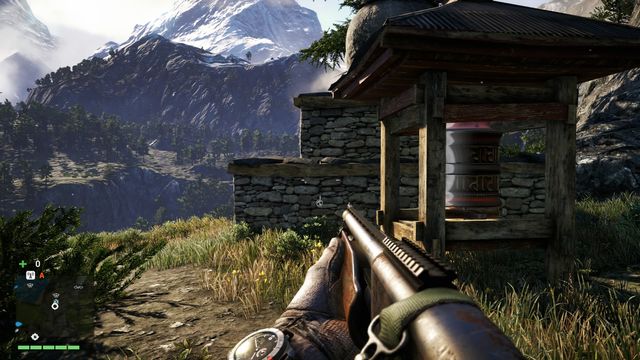
Near the road leading through the tunnel, locate a grappling point. Swing on the rope and jump onto a platform - you will find the wheel there.
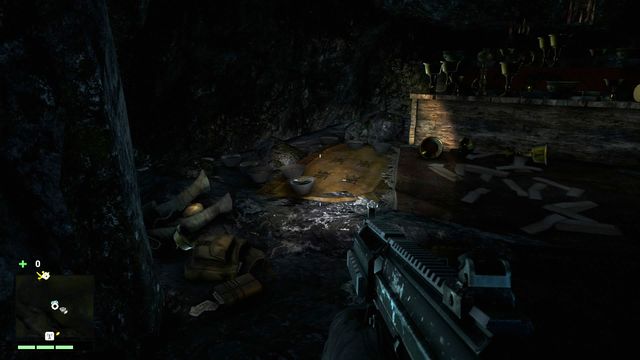
You have to enter the cave crouching (you will find the entrance under a large rock shelf). You will find the bag in the chamber with a lot of chalices.
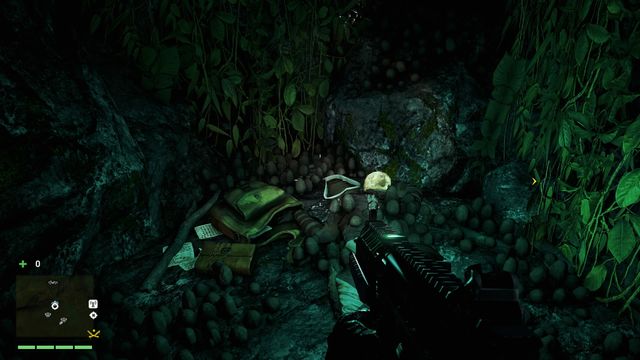
After going inside the cave, turn right and climb the scarp. Use the hook to go higher. Jump onto another rock shelf and you will find the bag in a small cave.
Enter the cave using the hook. Inside, you will find the letter near the large collapsed statue.
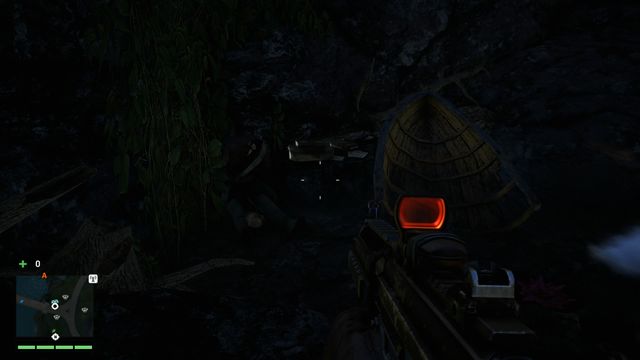
The letter is located in a cave, close to the bridge. You will find the bag in the middle, near a broken boat.
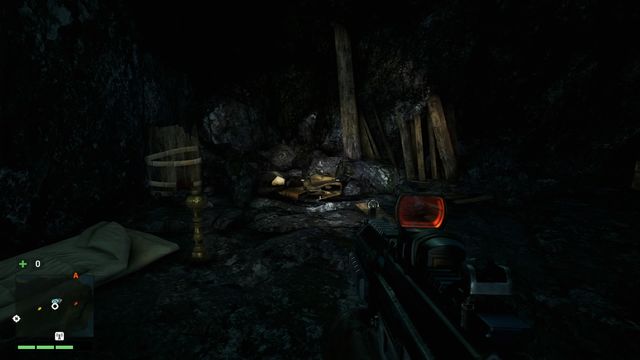
You will find the entrance near the river. The letter is lying at the end of the cave, near the bed.
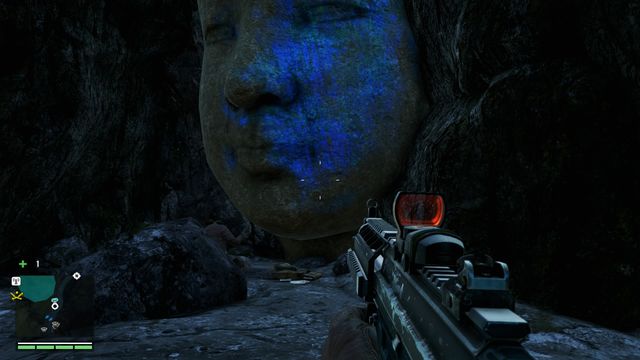
Go down twice and use the hook to reach a rock shelf on which you will find a med kit and a kevlar vest. From there, go up (use the hook) and you will enter a small cave. Inside, you will find the letter near a large blue face.
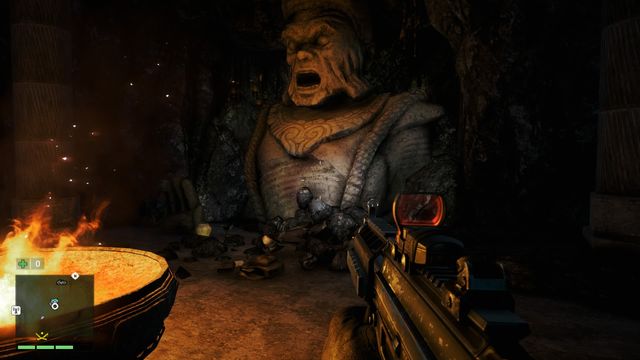
You can enter the cave through a small hole in the ground (use the hook). Swim to a small chamber. Behind the fire, near the statue, you will find a bag with a letter.
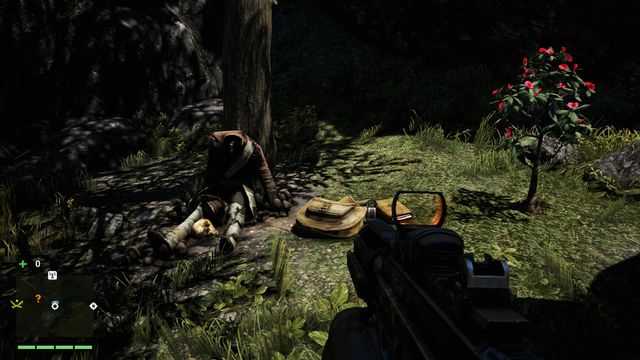
Inside a small cave, on the bed.
Go between the rocks, to a small valley. You will find the bag near a body leaning on a tree.

You will find the bag in the middle of the lagoon.
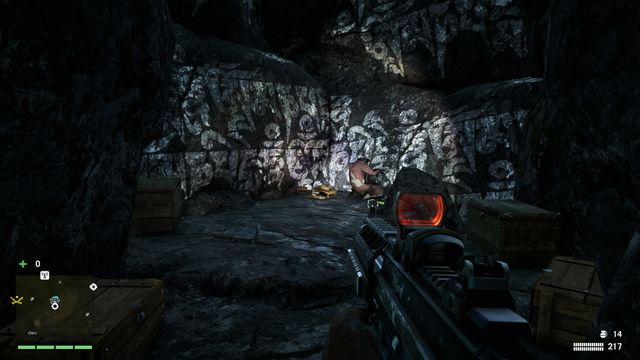
The bag is located at the end of the small cave.
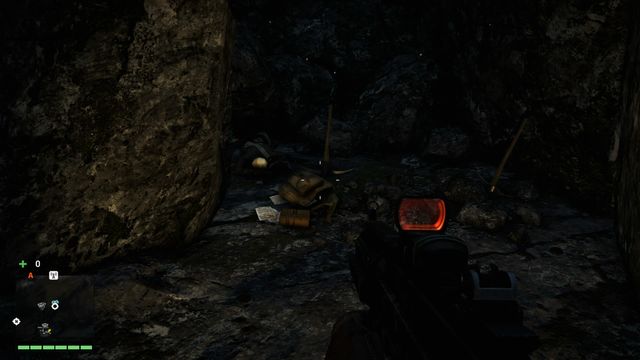
The letter is located inside the cave. After going in, turn right and go to the end.
You will find the bag behind the house, in a small cave. After going inside the house, destroy the planks that block the passage.
The letter is lying on a wooden bridge connecting two rock shelves.
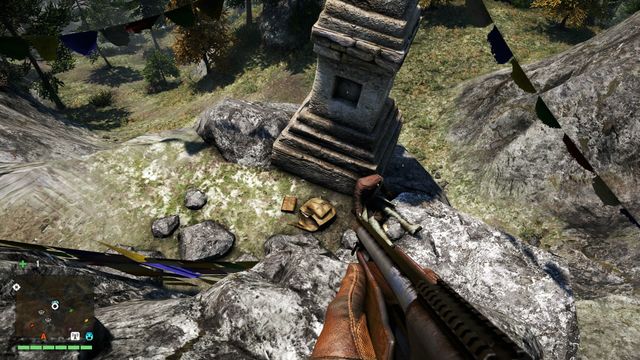
Head south from the camp and go down. You will notice a small statue and a bag lying nearby.
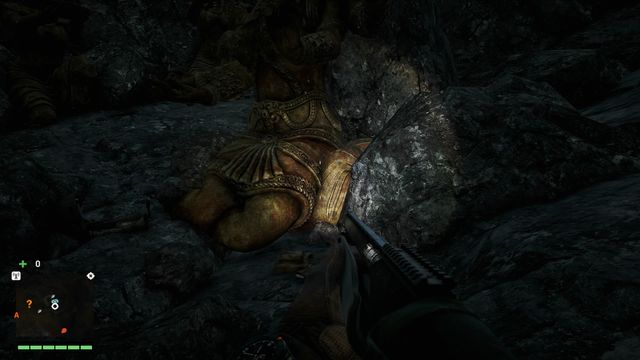
You can find the letter inside the cave, in a large chamber at the end. The bag is lying near the statue.
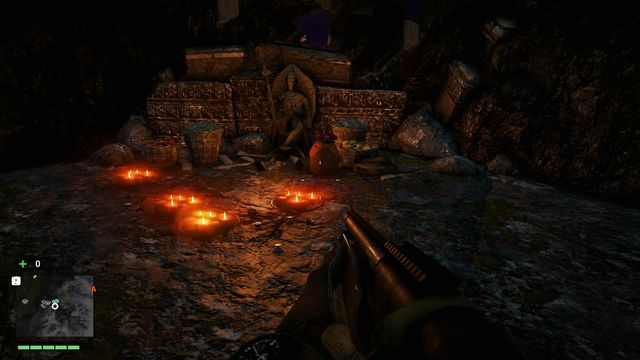
The bag is located inside the cave, near a small altar.
You will find the letter under the last building in the north-eastern part.
The letter is lying between rocks, near the stream.
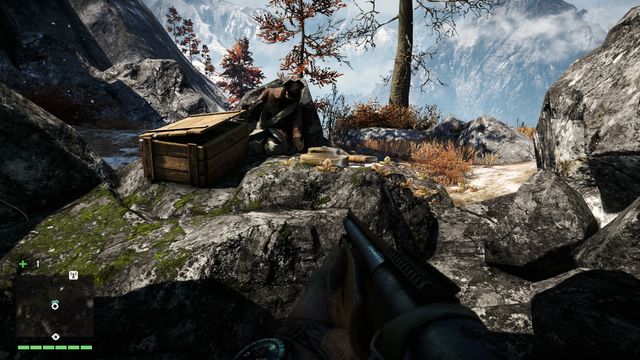
To reach the summit, you have to use the hook in the narrow passage a few times. It is located on a scarp, near a dead soldier.


 Fallout 3 Game Guide & Walkthrough
 FIFA 15 Game Guide & Walkthrough
 Fable II: Knothole Island Game Guide & Walkthrough
 Fallout 3: Broken Steel Game Guide & WalkthroughFar Cry 4 Game Guide & Walkthrough