This guide to the Fallout: New Vegas provides a detailed description of both the story line and all side quests. Description covers information about possible solutions of specific quests and their endings. The text is divided into three main sections - the story line, side quests and maps.
The story line is additionally divided into some subchapters where you can read about initial quests (optional but must be completed in specific order), information about factions you can choose to be loyal to during a game and quests connected with them, detailed description of these quests and finally game ending quests including fight for Hoover Dam.
The second chapter contains all side quests sorted in alphabetical order.
At the end of this guide, in the third chapter, you can find world maps, where we've marked all places and characters listed in the guide.
References to maps are marked as follows:
(Mx:y), where x is the map number and y is the position on this map;
(MxY:z), where x is the map number, Y is the inner map letter and z is the position on this map;
(MsX:y), where s is the segmented map, X is the segment letter and y is the location number;
Examples:
The marking (M23:56) means, that you have to go to position 56 marked on map 23. As for segmented maps, (MsE:12) means the location number 12 in the E segment.
Color markings:
#1, #2 - signs that refer to screens above the text (in case when there are two of them, not a single one). The #1 means the left screen and the #2 means the right screen.
Red - characters encountered in the game;
Green- items;
Blue - game locations;
Orange - skills / perks required in order to obtain specific dialogue options.
Artur "Arxel" Justynski
Translated by Maciej "Elrond" Myrcha
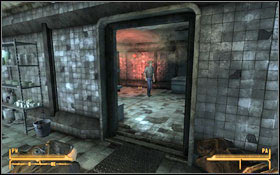
You start at Doc Mitchell' (M1:1), waking up with terrible headache. You'll be asked about your name first #1 and then you can customize your appearance #2 (or just use the generator).
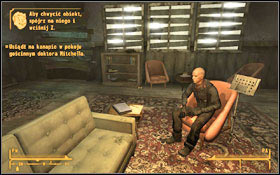
After you gain control over your character, follow doctor's further instructions. Go to the Vit-o-Matic Vigor Tester #1, where you can assign your SPECIAL points, then sit down on the couch #2 and after short psychological test assign tag-skills.
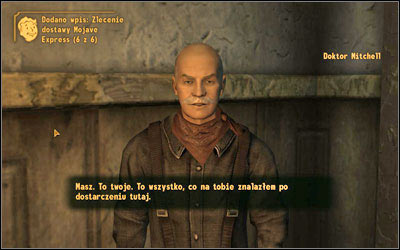
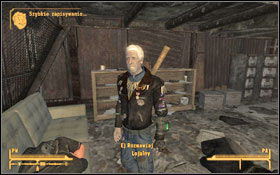
The doctor will walk you to a door, where you'll get some useful items: Mojave Express Delivery Order, 4 Stimpaks, 18 caps, 6 bobby pins, Pip-Boy 3000, Vault 21 jumpsuit. You will also get a weapon, dependent on the selected tag-skill.:
If you haven't chosen any of above skills, you will get a Pistol.
The game will also offer you an option to play in Hardcore mode. If you activate it now, you'll be able to toggle it anytime later. And if you play through to the end of the game in hardcore mode, you'll receive an achievement/trophy. Don't forget to look around - you can find some more useful items.
Quests unlocked: [Back in the Saddle], [They Went That-a-Way].
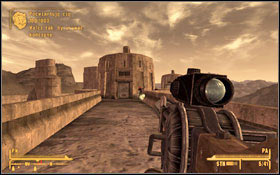
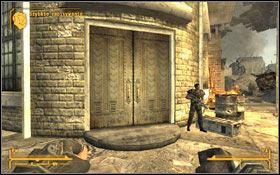
![Go to the [Saloon Prospector] (M1:2), where you will meet Sunny Smiles - Back in the Saddle - Initial quests - Fallout: New Vegas - Game Guide and Walkthrough](https://game.lhg100.com/Article/UploadFiles/201512/2015121518532174.jpg)
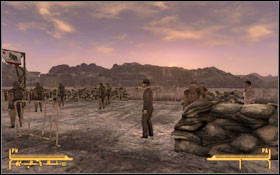
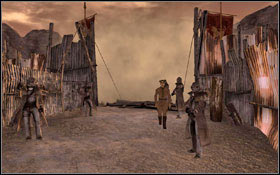
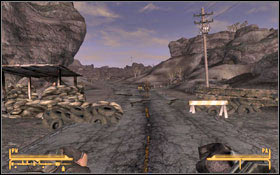
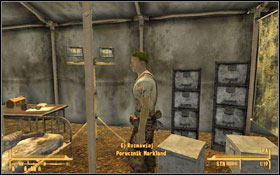
Go to the [Saloon Prospector] (M1:2), where you will meet Sunny Smiles. Right next to the entrance sits Easy Pete, who can provide you with information on Victor who saved you, on a dam or on the man who shot you. Talk to Sunny and ask her for desert surviving lessons. Follow her outside (M1:3) where she will give you a Varmint Rifle. Your task is to shoot 3 sunset sarsaparilla bottles on the fence. Shoot without and with aiming and also while crouching. You can't use the V.A.T.S. system!
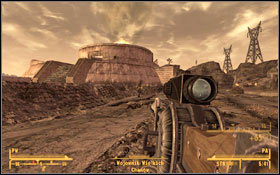
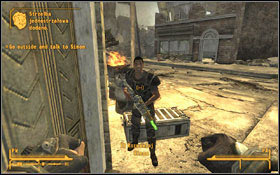
![Run after Sunny to [Goodsprings Source] (MsD:23) - Back in the Saddle - Initial quests - Fallout: New Vegas - Game Guide and Walkthrough](https://game.lhg100.com/Article/UploadFiles/201512/2015121518532156.jpg)
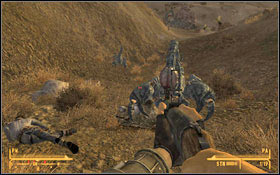
Run after Sunny to [Goodsprings Source] (MsD:23). You have to kill some geckos wandering there. You can do it while sneaking in order to surprise them (more damages) or just with a frontal attack. Now you can try the V.A.T.S. system. You'll receive 60 5.56 mm rounds as a reward. Talk to Sunny again:
After reaching the next well you have to do the same as earlier, but now you have to watch out for a settler - try not to kill him. As a reward you'll get 50 caps. And if the settler is still alive you'll get also 3 bottles of purified water and your reputation in Goodsprings will be improved. Once again you can choose:
The second choice unlocks [By a Campfire on the Trail] quest.
In this quest Sunny will teach you about Crafting. First you have to collect a xander root and a broc flower.
Xander root can be found near the abandoned school house (M1:10) #1.
Broc flower (M2:1) #2 can be found in the [Goodsprings Cemetery] (MsD10).
Return to Sunny, she'll be waiting near a campfire. Activate it (the E key) and then choose a Healing Powder recipe. After crafting at least one powder, Sunny will send you back to the [Prospector Saloon] (M1:2), where you'll talk to Trudy.
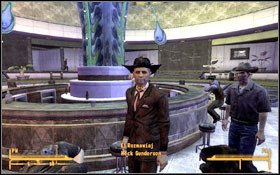
As an optional quest you can talk to Victor #1 - he wanders somewhere in Goodsprings or resides near his house (M1:9). Thank him for saving your life and ask about people who attacked you. Your next target is [Primm] (MsF:4). Upon entering the city zone, you'll be warned of marauding, fugitive convicts. Clear your way (or just sneak in) to the [Vikki and Vance Casino] (M3:1) and talk to Johnson Nash #2. Ask him about lost package showing the delivery order and about a suspect who shot you.
A side quest is unlocked: [My Kind of Town].

Deputy Beagle may know something about the mysterious man. However he is held by convicts #1 in the nearby [Bison Steve hotel] (M3:2). You can sneak in there #2 (M3A:1) or shoot out all enemies. When you reach Beagle, you'll get some choices:
If you decide to keep him as a companion, you can give him some weapons and he will help you to clear out the rest of convicts (if you didn't do so earlier).
![Your next target is [Novac] (MsE:21) #1 - They Went That-a-Way - Initial quests - Fallout: New Vegas - Game Guide and Walkthrough](https://game.lhg100.com/Article/UploadFiles/201512/2015121518532224.jpg)
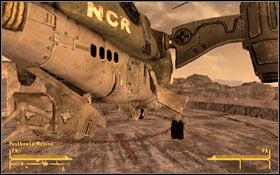
Your next target is [Novac] (MsE:21) #1. Approach the [Dino Dee-lite Front Desk] (M4:1) and talk to Jeannie May Crawford. Ask her about the man in the checkered suit and she'll send you to a local sniper, Manny Vargas, who is on his ship in the Dinky the T-Rex's mouth (M4:2). Go to the dinosaur's tail and then take stairs up #2. There are few ways to get information you need:
![With information you got, you'll be directed to [Boulder City] (MsE:9) - They Went That-a-Way - Initial quests - Fallout: New Vegas - Game Guide and Walkthrough](https://game.lhg100.com/Article/UploadFiles/201512/2015121518532230.jpg)
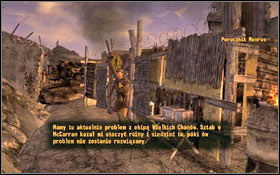
With information you got, you'll be directed to [Boulder City] (MsE:9). You'll meet Lieutenant Monroe #1 there, who will ask for your help in releasing NCR hostages.
A side quest is unlocked: [Boulder City Showdown].
Whichever option you choose, you need to get to Jessup (M5A:1) #2 and question him about a Platinum Chip (or just kill him). You will learn that a man named Benny has it. You do not have to complete this quest.
A quest is unlocked: [Ring-a-Ding-Ding!].
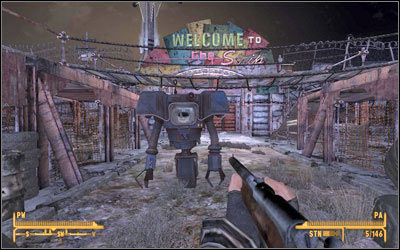
It is time to stand face to face with Benny. Go to New Vegas Strip but before you can go inside, you'll be stopped by Securitron [Freeside] (M6:1). You have to undergo a procedure or show him a passport. You got several ways to deal with it:
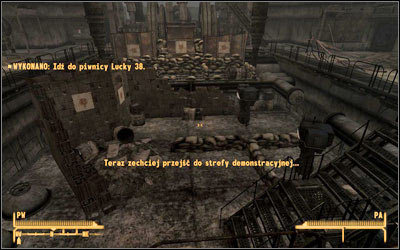
After you step into [New Vegas Strip] (M7) you'll be welcomed by Victor, who will invite you on behalf of Mr. House to his apartment in [Lucky 38] (M7:1).
A quest is unlocked: [The House Always Wins, I].
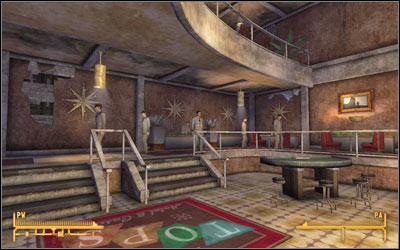
In order to obtain the Platinum Chip you need to go to the [The Tops Casino] (M7:3), where you can find Benny. There are few options you can choose. After entering the Casino, you have to give away your weapons (or hide some as an option - the higher sneaking level you have, the better weapon you can keep) but you will get it back when leaving.
Start [The House Always Wins, I] and Mr. House will tell you how to get to Benny.
Talk to Benny (M7A:1). He'll ask you to go to the quiet place and have a chat. You can agree in two ways:
Enter the [Presidential Suite] (M7A:2) using the Presidential Suite Key, which Benny gave you. Walk around for a while and then go to an intercom near the elevator. You'll hear some unpleasant message - Benny won't come. Choosing proper dialog options [Speech 35], [Speech 50] you can convince Benny to spare your life. Otherwise after a while four Benny's bodyguards will pop in and you have to fight them. Benny will flee.
A quest is unlocked: [Wild Card: Ace in the Hole].
You need to talk to Yes Man to complete [Ring-a-Ding-Ding!].
After a successful chat use an elevator (M7A:3) and go with Benny to his room on 13th floor (M7B:1) or to the presidential suite (M7A:2). Being there:
If you choose second or third option you will have to fight his bodyguards and if you wanted to sleep with Benny:
If you kill him, take the Platinum Chip from his body. If you decide to sleep longer than him, Benny will escape.
A quest is unlocked: [Wild Card: Ace in the Hole].
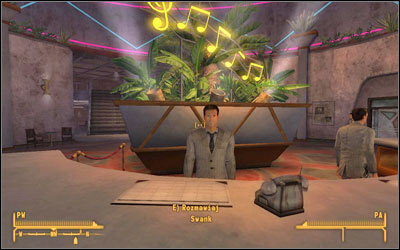
Talk to Swank (M7A:4) at the reception desk:
If your speech tests fail or you lack of evidences, you can convince Swank just a bit - you'll be able only to take your weapons with you.
Whichever option you choose, Swank can help you in two ways:
If you choose the first option, just go to the Benny's room (M7B:1) on [13th floor] (M7A:3) and search it discovering hidden room (M7B:2). Benny will flee.
If you decide to deal with him, go to Benny's room (M7B:1) on [13th floor] (M7A:3).The main difference is that now Benny waits for you there. You can end the mission in a few ways:
If you choose the first option, you won't be attacked by bodyguards. If you choose the second one, Benny will flee and you'll have to fight a few guards.
A quest is unlocked: [Wild Card: Ace in the Hole].
Just kill Benny, his bodyguards and the rest of guys in a hotel. Search his body and take the Platinum Chip.
A quest is unlocked: [Wild Card: Ace in the Hole].
Once [Ring-a-Ding-Ding!] is completed, a moment comes when you have to choose a faction you'll be loyal to. You can choose one out of four possibilities:
Each faction has its own questline (they are divided in this guide into the relevant chapters), but a lot of side quests are the same, because of need to choose (or destroy) other faction. You are able to eliminate, ignore or try to side with any of factions but you have the greatest freedom in case of the Independent Vegas. The other factions have their own specific plans for other groups and prefer that some of them are eliminated and some better join them.
There are of course more Minor (or Other) Factions, but only these listed below count during the final battle for Hoover Dam:
You don't have to take a decision right now. You can complete some initial quests for each faction and then decide which suits you best.
There is one more special chapter in this guide, which contains two quests dealing with the arrival of NCR president to the Hoover Dam. Almost each of factions has its own plans connected with the president and therefore you will have to complete one of two quests:
For the first one, your task is to protect the president and prevent the assassination, while in the second case you have to kill the president personally.
The last listed chapter deals with the final fight on the Hoover Dam. Depending on the faction you're loyal to, you will have to complete one of the four quests:
This quest is very easy and all you have to do is to search Benny's room in The Tops. Take an elevator (M7A:3) and go to the [13th Floor] of The Tops. Go to the room (M7B:1). On the back you'll find a hole in a wall (M7B:2), which leads to a hidden room where Yes Man resides. If Benny has escaped in [Ring-a-Ding-Ding!], this Securitron can tell you where you can find him. Ask for other things too, so you can conquer Vegas on your own, without being loyal to any of factions. You will also know the exact plans of Mr. House, as Yes Man is programmed to provide you with any assistance.
A quest is unlocked: [Wild Card: Change in Management], [Wild Card: Side Bets], [Wild Card: You and What Army?].
![NOTICE: Once you've decided to open a hall, [The House Always Wins, I] becomes failed and you won't be able to join Mr - Wild Card: Change in Management - Yes Man - Fallout: New Vegas - Game Guide and Walkthrough](https://game.lhg100.com/Article/UploadFiles/201512/2015121518532341.jpg)
NOTICE: Once you've decided to open a hall, [The House Always Wins, I] becomes failed and you won't be able to join Mr. House.
A first goal to conquer a Vegas is to kill Mr. House or render him powerless. Go to the [Lucky 38] (M7:1) where you'll be welcomed by Victor. Take an elevator and go down to the [Mr. House's chamber]. You'll reach a giant TV with an image of Mr. House. To have full access to terminals you must have:

Go to the terminal to the left #1 and open the hall. There are two Securitrons inside, which will attack you right after you enter the room. You can either disable them using a terminal to the right (only a temporary effect) or go directly to a terminal to the left #2 and go straight to the [Control room].

You will find Mr. House's life support chamber inside a control room. Activate it using the terminal and you'll have a few choices:
If you've chosen deactivation of the implant, you won't get negative reputation.
After dealing with Mr. House, go back to Yes Man [13th floor] (M7B:2) and tell him that Mr. House is out of the game now. If you have the Platinum Chip, meet Yes Man in Lucky 38, at Mr. House's apartment, where you can install Yes Man's A.I. in the Lucky 38's main frame. After a while you'll be moved to the basement where you can see upgrading of Securitrons.

![Go south-east to [Cottonwood Cove] (MsG:22) - Wild Card: You and What Army? - Yes Man - Fallout: New Vegas - Game Guide and Walkthrough](https://game.lhg100.com/Article/UploadFiles/201512/2015121518532476.jpg)
Go south-east to [Cottonwood Cove] (MsG:22). You'll meet a Caesar Legionnaire - to continue do one of the below:
Go ahead to meet Cursor Lucullus (M8:1) #1, who will transport you to [The Fort] (MsE:5). Give away your weapons (or hide them) and then go to the inner camp (M9:1) to meet Caesar #2. If you do not have the Platinum Chip, you'll get it now.

![Accept the first part of [Render Unto Caesar] and go to the vault (M9:2) - Wild Card: You and What Army? - Yes Man - Fallout: New Vegas - Game Guide and Walkthrough](https://game.lhg100.com/Article/UploadFiles/201512/2015121518532469.jpg)
Accept the first part of [Render Unto Caesar] and go to the vault (M9:2). Upon entering it you will get all of your confiscated items back. Use the Chip in a machine to the right #1 and a hole in the floor will open. Go into the [Securitron Vault]. On a monitor (M9A:1) near the entrance you'll find:
Go ahead and get ready to meet first Protectron #2. If your [Science] is high enough you can go to the security room (M9A:2) and disable:
You can also find a Plasma rifle there.

Run to the main hall, where you will see an army of Securitrons. If you haven't managed to disable robots and turrets, the fight might be very tough. You got two solutions now:

If you've decided to destroy the army, you have to eliminate three reactors (M9A:3) #1, but if you want to upgrade Securitrons, go upstairs where you can find a terminal which you can use to upgrade the army (M9A:4) #2. To do so, just use the Chip. Upgrading the army is a definitely better option, as Securitrons will help you in a final battle for Hoover Dam. The quest is completed and you can return to Yes Man.
If your decision was to destroy the army, you won't be able to cooperate with Mr. House and additionally on your way back you'll face few securitrons. You're still able to cooperate with Caesar, because he'll think that the earthquake caused by upgrading the army was in fact a devastating explosion which destroyed the underground complex.
If you've decided to conquer Vegas on your own (with a little help of Yes Man), you can think of the fate of each main factions. You can visit them in any order. For each of factions you can choose one of three ways:
![Headquarters: [Ultra-Luxe] (M7:4) - Wild Card: Side Bets - Yes Man - Fallout: New Vegas - Game Guide and Walkthrough](https://game.lhg100.com/Article/UploadFiles/201512/2015121518532482.jpg)
Headquarters: [Ultra-Luxe] (M7:4)
Leaders: Mortimer (M7C:2) / Marjorie (M7D:1)
Side quest: [Beyond the Beef]
![Headquarters: [Gomorrah] (M7:5) - Wild Card: Side Bets - Yes Man - Fallout: New Vegas - Game Guide and Walkthrough](https://game.lhg100.com/Article/UploadFiles/201512/2015121518532411.jpg)
Headquarters: [Gomorrah] (M7:5)
Leaders: Cachino (M7F:2) / Big Sal (M7F:5) / Nero (M7F:5)
Side quest: [How Little We Know]
![Headquarters: [Nellis Air Force Base] (MsC:3) - Wild Card: Side Bets - Yes Man - Fallout: New Vegas - Game Guide and Walkthrough](https://game.lhg100.com/Article/UploadFiles/201512/2015121518532454.jpg)
Headquarters: [Nellis Air Force Base] (MsC:3)
Leaders: Pearl (M11:1) / Loyal (M11:2)
Side quest: [Volare!]
![Headquarters: [Red Rock Canyon] (MsA:14) - Wild Card: Side Bets - Yes Man - Fallout: New Vegas - Game Guide and Walkthrough](https://game.lhg100.com/Article/UploadFiles/201512/2015121518532494.jpg)
Headquarters: [Red Rock Canyon] (MsA:14)
Leaders: Papa Khan (M17:1) / Regis (M17:1) or (M17:2)
Side quest: [Oh My Papa]
![Headquarters: [Lost Hills] (MsD:21) - Wild Card: Side Bets - Yes Man - Fallout: New Vegas - Game Guide and Walkthrough](https://game.lhg100.com/Article/UploadFiles/201512/2015121518532594.jpg)
Headquarters: [Lost Hills] (MsD:21)
Leaders: Nolan McNamara (M13B:1)
Side quest: [Still in the Dark]
A quest is unlocked: [Wild Card: Finishing Touch].
After completing the last quest, regardless of the combination of factions you've destroyed, ignored or have won their support, you have to do some final touches before the final battle for Hoover Dam.
Optionally, you will learn that the president of NCR - Kimball - has decided to visit a Dam and there is a high probability of assassination. According to Mr. House, the president should stay alive.
What's important, if you do not have a sufficiently high reputation with the NCR [Liked], you won't be able to get very close to the president.
You'll get the Override Chip from Yes Man. Go to the [El Dorado Substation] (MsE:7) where you'll be stopped by NCR Sergeant.
Being inside activate the terminal and turn on the substation power supply. Go back to Yes Man (M7:1) and tell him about your mission. If you're ready you can start the final battle for Hoover Dam!
A quest is unlocked: [No Gods, No Masters]
![Given by: Victor [New Vegas Strip] - The House Always Wins, I - Mr. House - Fallout: New Vegas - Game Guide and Walkthrough](https://game.lhg100.com/Article/UploadFiles/201512/2015121518532509.jpg)
Given by: Victor [New Vegas Strip]
Securitron will talk to you right after you cross a Strip gate for a first time. He'll invite you on behalf of Mr. House to his apartment in [Lucky 38] (M7:1). You'll meet Victor inside. Take an elevator and go down to the [Mr. House's chamber]. You'll reach a giant TV with an image of Mr. House. If you have completed [Ring-a-Ding-Ding!] before and you have the Platinum Chip, you can give it to Mr. House. You'll receive 1000 caps as a reward.
If you do not have the Chip, you can negotiate a higher price for its delivery. You can also learn how to catch Benny:
You can also inquire in detail about the Chip [Speech 50] or question his humanity [Medicine 35]. Complete [Ring-a-Ding-Ding!] in order to get the Platinum Chip.
If you fail to get the Chip, return to Mr. House and tell him about the situation.
A quest is unlocked: [The House Always Wins, II].
If you already have the Platinum Chip, meet Mr. House at Lucky 38, where you can give him the Chip. After a while you'll find yourself in the basement where you can watch Securitron upgrading scene.

![Go south-east to [Cottonwood Cove] (MsG:22) - The House Always Wins, II - Mr. House - Fallout: New Vegas - Game Guide and Walkthrough](https://game.lhg100.com/Article/UploadFiles/201512/2015121518532565.jpg)
Go south-east to [Cottonwood Cove] (MsG:22). You'll meet a Caesar Legionnaire - to continue do one of the following:
Go ahead to meet Cursor Lucullus (M8:1) #1, who will transport you to [The Fort] (MsE:5). Give away your weapons (or hide it) and then go to the inner camp (M9:1) to meet Caesar #2. If you do not have the Platinum Chip, you'll get it now.
![Accept the first part of [Render Unto Caesar] and go to the vault (M9:2) - The House Always Wins, II - Mr. House - Fallout: New Vegas - Game Guide and Walkthrough](https://game.lhg100.com/Article/UploadFiles/201512/2015121518532522.jpg)
Accept the first part of [Render Unto Caesar] and go to the vault (M9:2). Upon entering it you will get all of your confiscated items back. Use the Chip in a machine to the right #1 and a hole in the floor will open. Enter the [Securitron Vault]. On a monitor (M9A:1) near the entrance you'll find Mr. House. Go ahead and get ready to meet first Protectron #2. If your [Science] is high enough you can go to the security room (M9A:2) and disable:
You can also find a Plasma rifle there.

Run to the main hall, where you will see an army of Securitrons. If you haven't managed to disable robots and turrets, the fight might be very tough. To upgrade Securitrons, go upstairs where you can find a terminal (M9A:4) which you can use to upgrade the army #2. To do so, just use the Chip. While going back, visit Mr. House (M9A:1). You can ask him about a payment (if you didn't have the Chip earlier) and also about his further plans.
If your decision was to destroy the army, you won't be able to cooperate with Mr. House and additionally on your way back you'll face few securitrons. You're still able to cooperate with Caesar, because he'll think that the earthquake caused by upgrading the army was in fact a devastating explosion which destroyed the underground complex.
A quest is unlocked: [The House Always Wins, III].

A next quest is to convince Boomers to support Mr. House. You can also neutralize them by killing their leaders - it is up to you.
To get a deal with this faction you have to complete [Volare!]. You can find detailed information on how to get to the [Nellis AFB] and what to do there in proper section of this guide.
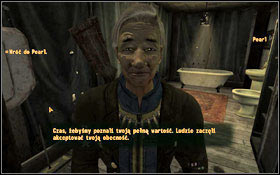
Briefly: You have to gain high reputation with Boomers [Idolized] - you can raise it by helping people in Nellis:
Return to Pearl and help Loyal to raise the bomber from the bottom of Lake Mead.


If you've decided to neutralize the faction, just kill both leaders: Pearl (M11:1) #1 and Loyal (M11:2) #2.
Whichever option you've chosen, return to Mr. House and tell him that the quest is completed.
A quest is unlocked: [The House Always Wins, IV].
In this quest you have to deal with Omertas. You can complete [How Little We Know] by choosing one of two possible solutions or eliminate this faction by killing its leaders.
![You decide to complete [How Little We Know] and support Cachino - The House Always Wins, IV - Mr. House - Fallout: New Vegas - Game Guide and Walkthrough](https://game.lhg100.com/Article/UploadFiles/201512/2015121518532644.jpg)
You decide to complete [How Little We Know] and support Cachino.
Briefly: Find out the Cachino's secret by getting his journal. Then ask Troike about guns supply shipment and destroy it. Next thing is to get to know what Clanden is up to. After that meet Big Sal and Nero and kill them both ending the quest.
![You decide to complete [How Little We Know] and support Big Sal and Nero - The House Always Wins, IV - Mr. House - Fallout: New Vegas - Game Guide and Walkthrough](https://game.lhg100.com/Article/UploadFiles/201512/2015121518532680.jpg)
You decide to complete [How Little We Know] and support Big Sal and Nero.
Briefly: Find out the Cachino's secret by getting his journal. Talk to Big Sal or Nero, who will kill Cachino. Help the Family:
Go back to the leaders. The quest is completed.


If you've decided to neutralize the faction, it is enough to kill three leaders: Cachino (M7F:2) #1, Big Sal (M7F:5) #2 and Nero (M7F:5).
Whichever option you've chosen, return to Mr. House (M7:1) and tell him that the job is done.
A quest is unlocked: [The House Always Wins, V].
This quest is connected with Brotherhood of Steel. Mr. House wants you to wipe out this faction. You can also make a deal with them. There are two ways to destroy the BoS. You can find the faction in the [Hidden Valley] (MsD:21). They are located in the bunker (M13:1).
When you reach the bunker you will meet a Brotherhood Paladin. Start shooting and kill all personnel in the bunker.

When you reach the bunker you will meet a Brotherhood Paladin. You will have to give away all your weapons and items and go to the [L1]. Go downstairs and talk to Paladin Ramos (M13A:1). Agree to meet Elder (M13B:1). Start completing [Still in the Dark] until you have full freedom of movement, that means you've passed the first test and your explosive collar is removed.
Approach the characteristic red terminal (M13B:5) #1. The self-destruct sequence can be activated in two ways:
In order to activate the terminal in the second option you have to steal:
You can do it by stealing or killing them and searching the bodies. Generate the auto destruction password, log in to the red terminal (M13B:4) and activate it. After this you will become hostile to the Brotherhood so your way back won't be so easy.
Whichever option you choose, go back to Mr. House (M7:1) and tell him that the mission is completed.
A quest is unlocked: [The House Always Wins, VI].
In this quest you have to protect President Kimball from an assassination attempt.
A quest is unlocked: [The House Always Wins, VII].
![A quest is unlocked: [Youll Know It When It Happens] - The House Always Wins, VI - Mr. House - Fallout: New Vegas - Game Guide and Walkthrough](https://game.lhg100.com/Article/UploadFiles/201512/2015121518532733.jpg)
A quest is unlocked: [You'll Know It When It Happens].
Briefly: Go to the [Hoover Dam], where you must protect the President while his visit. To prevent the assassination attempt:
Return to Mr. House (M7:1) and tell him that the mission is completed.
Regardless of whether you saved the president or not, you'll be assigned with the last task. You will get the Override Module from Mr. House. Go to the [El Dorado Substation] (MsE:7) where you'll be stopped by NCR Sergeant.
Being inside activate the terminal and turn on the substation power supply. Return to Yes Man (M7:1) and tell him about your mission. If you're ready you can start the final battle for Hoover Dam!
A quest is unlocked: [All or Nothing].
![Given by: Vulpes Inculta [New Vegas Strip] - Render Unto Caesar - p. 1 - Caesars Legion - Fallout: New Vegas - Game Guide and Walkthrough](https://game.lhg100.com/Article/UploadFiles/201512/2015121518532755.jpg)
Given by: Vulpes Inculta [New Vegas Strip]
You'll meet him right after your first visit at The Tops Casino (after completion of [Ring-a-Ding-Ding!]). You'll receive the Mark of Caesar from him, which allows you to enter the Fort. Caesar wants to speak with you himself.
Go south-east to [Cottonwood Cove] (MsG:22). You'll meet a Caesar Legionnaire - to continue do one of the below:
Go ahead to meet Cursor Lucullus (M8:1) #1, who will transport you to [The Fort] (MsE:5). Give away your weapons (or hide them) and then go to the inner camp (M9:1) to meet Caesar #2.

Your quest is to destroy Mr. House vault (M9:2). You can access it only by having the Platinum Chip. If you don't have it, you'll receive it from Caesar now. Upon entering the vault you will get all of your confiscated items back. Use the Chip in a machine to the right #1 and a hole in the floor will open. Enter the [Securitron Vault]. On a monitor (M9A:1) near the entrance you'll find Mr. House - it is your last chance to change a faction you're loyal to.
NOTICE: If you've decided to destroy the underground vault, you won't be able to join Mr. House. If you've decided to upgrade the army you can continue with this quest.
Go ahead and get ready to meet first Protectron #2. If your [Science] is high enough you can go to the security room (M9A:2) and disable:
You can also find a Plasma rifle there.
Run to the main hall, where you will see an army of Securitrons. If you haven't managed to disable robots and turrets, the fight might be very tough. You got two solutions now:

If you've decided to destroy the army, you have to eliminate three reactors (M9A:3) #1, but if you want to upgrade Securitrons, you must go upstairs where you can find a terminal which you can use to upgrade the army (M9A:4) #2. To do so, just use the Chip.
If your decision was to destroy the army, you won't be able to cooperate with Mr. House and additionally on your way back you'll face few securitrons. You're still able to cooperate with Caesar, because he'll think that the earthquake caused by upgrading the army was in fact a devastating explosion which destroyed underground complex.
Return to Caesar (M9:1) where you can choose how to deal with Benny.
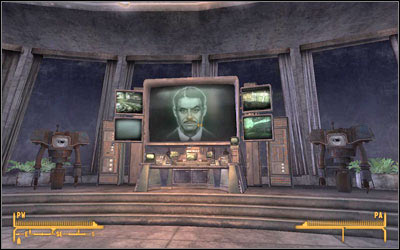
Your next goal on your way to conquer a Vegas is to kill Mr. House or render him powerless. Go to the [Lucky 38] (M7:1) where you'll be welcomed by Victor. Take an elevator and go down to the [Mr. House's chamber]. You'll reach a giant TV with an image of Mr. House. To have full access to terminals you must have:

![NOTICE: Once you decide to open a hall, [The House Always Wins, I] becomes failed and you won't be able to join Mr - Render Unto Caesar - p. 1 - Caesars Legion - Fallout: New Vegas - Game Guide and Walkthrough](https://game.lhg100.com/Article/UploadFiles/201512/2015121518532860.jpg)
NOTICE: Once you decide to open a hall, [The House Always Wins, I] becomes failed and you won't be able to join Mr. House.
Go to the terminal to the left #1 and open the hall. There are two Securitrons inside, which will attack you right after you enter the room. You can either disable them using a terminal to the right (only a temporary effect) or go directly to a terminal to the left #2 and go straight to the [Control room].
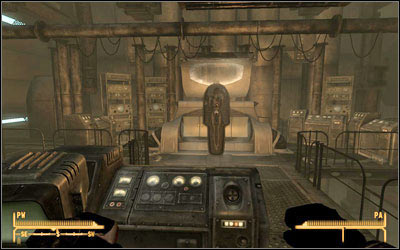
You will find Mr. House's life support chamber inside a control room. Activate it using the terminal and you'll have a few choices:
If you've chosen the deactivation of the implant, you won't get negative reputation. Return to Caesar (M9:1) and tell him that the job is done.
A next quest is to convince Boomers to support Mr. House. You can also neutralize them by killing their leaders - it is up to you.
OPTION 1
To make a deal with this faction you have to complete [Volare!]. You can find detailed information on how to get to the [Nellis AFB] and what to do there in proper section of this guide.
Briefly: You have to gain high reputation with Boomers [Idolized] - you can raise it by helping people in Nellis:
Return to Pearl and help Loyal to raise the bomber from the bottom of Lake Mead.
OPTION 2
If you've decided to neutralize the faction, just kill both leaders: Pearl (M11:1) #1 and Loyal (M11:2) #2.
ENDING
Whichever option you choose, go back to Caesar (M9:1) and tell him that the job is done.
While talking to you about the next job, Caesar will have a headache. With [Medicine 40] you can ask him if he experiences this kind of pain for a first time.
Your target is White Glove Society. Caesar wants to make an alliance with them. He will tell you that they were cannibal once and you can use this information. To make an alliance with this faction, complete [Beyond the Beef] using Solution 2. You can help the Society to convert them to cannibalism! If you do this, wait till next day and talk to Marjorie (M7D:1). The alliance with Caesar's Legion will be set.
Return to Caesar and with [Medicine 40] show your concerns about his headaches or say, that his head looks like it is about to explode. Whichever option you choose, the conversation continues. You will get the key to the bunker in Hidden Valley and in a moment later Caesar will hang. Tell him about it or [Medicine 40] explain the phenomenon which has just taken place. Press on it [Medicine 40] and Caesar will go to bed.
This quest is connected with Brotherhood of Steel. Caesar wants you to wipe this faction out. You can also make a deal with them, but this will be against Caesar's plans. There are two ways to destroy the BoS. You can find the faction in [Hidden Valley] (MsD:21). They are located in the bunker (M13:1).
OPTION 1
When you reach the bunker you will meet a Brotherhood Paladin. Start shooting and kill all personnel in the bunker.
OPTION 2

When you reach the bunker you will meet a Brotherhood Paladin. You will have to give away all your weapons and items and go to the [L1]. Go downstairs and talk to Paladin Ramos (M13A:1). Agree to meet Elder (M13B:1). Start completing [Still in the Dark] until you have full movement freedom, that means you've passed the first test and your explosive collar is removed.
Go to the characteristic red terminal (M13B:5) #1. The self-destruct sequence can be activated in two ways:
In order to activate the terminal in the second option you have to steal:
You can do it by stealing or killing them and searching the bodies. Generate the auto destruction password, log in to the red terminal (M13B:4) and activate it. After this you become hostile to the Brotherhood so your way back won't be so easy.
ENDING
Whichever option you choose, return to Caesar (M9:1) and tell him that the quest is completed.
Go to the Caesar's tent to talk to Caesar in private.
If you've successfully chosen one of above lines you can offer him the operation [Medicine 75], which is quite easy procedure [Speech 65] - you won't have to search the vault looking for missing Auto-Doc parts.
Otherwise you can only suggest using Auto-Doc which unfortunately is incomplete. It lacks Diagnostic Scanning Module.
A quest is unlocked: [Et Tumor, Brute?].
Depending on how you've decided to heal Caesar, there are two possible solutions to this quest:
You need to obtain Doctor's Bag and Surgical Tools. You can find both things in the [New Vegas Medical Clinic] (MsB:14). The Doctor's Bag can also be purchased (it costs around 60 caps), but it is also possible that you already have it (you could find it near the Doc Mitchell's bed). You can also purchase Surgical Tools but they cost around 1000 caps.
If you haven't managed to properly diagnose Caesar, you need to find missing Auto-Doc part. Head to the [Vault 34] (MsB:30). You should watch out for Golden Geckos, Feral Ghouls and Vault Security, either at the entrance and inside the vault. Look for a corridor with a leaking pipe. Further way is flooded so dive under the desk and locate a vault technician there. Search him and get the security terminal password #1. Now go through the clinic heading to the Armory (M18A:4), which is also flooded #2. There is another drowned vault technician with the utility terminal password.

Go to the utility room where you can access the terminal using the password you've found (M18A:5) #1 and activate the pump system. Next go to the [Armory] where you can find the diagnostic scanning module (M18B:1) #2.
When you have all needed items, return to Caesar's tent (M9:1). If you have the diagnostic scanning module, install it in his Auto-Doc. Next activate it and choose:
If you've chosen the first option, Caesar will be very grateful and he will give you another task - to kill Kimball, the NCR president.
If you've killed Caesar you will have to face Lucius in a while. You can lie to him [Medicine 50] or [Speech 50], that you couldn't do anything. Lucius will become a new leader and he will give you another task - to kill Kimball, the NCR president
A quest is unlocked: [Arizona Killer].
![Given by: NCR Soldier [New Vegas Strip] - Things That Go Boom - NCR - Fallout: New Vegas - Game Guide and Walkthrough](https://game.lhg100.com/Article/UploadFiles/201512/2015121518532962.jpg)
Given by: NCR Soldier [New Vegas Strip]
You will encounter a NCR soldier right after your visit in the Lucky 38 Casino (after conversation with Mr. House) or after dealing with Benny in The Tops Casino ([Ring-a-Ding-Ding!]). He'll give you the Ambassador Crocker Note and ask you to visit Ambassador Dennis Crocker at the NCR embassy (M7:6). Once you get there, talk to the receptionist - she'll tell you where you can find the ambassador. Go and talk to him.
Your task is to convince Boomers to make an alliance with NCR. You can also neutralize them by killing their leaders - it is up to you.
To get a deal with this faction you have to complete [Volare!]. You can find detailed information on how to get to the [Nellis AFB] and what to do there in proper section of this guide.
Briefly: You have to gain high reputation with Boomers [Idolized] - you can raise it by helping people in Nellis:
Return to Pearl and help Loyal to raise the bomber from the bottom of Lake Mead.


If you decide to neutralize the faction, just kill both leaders: Pearl (M11:1) #1 and Loyal (M11:2) #2.
Whichever option you choose, return to Ambassador Dennis Crocker (M7:6) and tell him that the quest is completed.
A quest is unlocked: [King's Gambit].
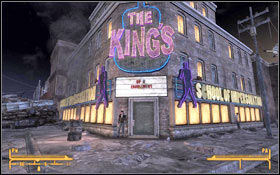
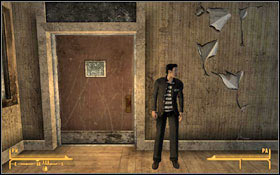
Your next job is to silence one of Kings - Pacer, but in a way that implicates someone other than the NCR. You can also complete this quest in two ways - diplomatic or violent. Go to the [King's School of Impersonation] (M6:6) #1 where you can find Pacer. He is near by the door #2.
The diplomatic solution - if you want to talk to the King, you have to pay enter fee:
While talking to the King you can mention, that you had to pay - you'll get your caps back. The King doesn't want to listen to just anybody and he won't stop attacking NCR citizens in Freeside, but you can take a job from him.
After completion of this quest you can ask the King for one favor - ask the King to stop the violence in Freeside. Scroll down to the ending.
If you haven't taken the quest for the King and have decided to return to the Ambassador, you'll receive further instructions. You'll be sent to Colonel Moore, who is stationed at the Hoover Dam. If you take this solution, it will probably end with the shooting, so you can ask for another option. The Ambassador can give you second choice - to talk to Colonel Hsu at Camp McCarran, who prefers more peaceful approach. It is up to you which option you'll take.
MOORE
Head to [Hoover Dam]. Being in (M19:3) go down to the [Hoover Dam Office] and then go to the Colonel Cassandra Moore's office. Tell her that you are being sent by the Ambassador. Head to the [King's School of Impersonation] (M6:6), talk to the King and give him an ultimatum. Whichever option you choose, all Kings will be shot. Scroll down to the ending.
HSU
Head to the [Camp McCarran]. You will find the Colonel (M25A:2) in the [Camp McCarran Terminal building] (M25:1). Tell him that you are being sent by the Ambassador. Head to the [King's School of Impersonation] (M6:6), talk to the King and give him an ultimatum:
Only two first options lead to a peaceful ending, while choosing the third option starts the shooting. If you've chosen peaceful solution, Pacer will try to eliminate you and NCR troopers, so you have to kill him. Scroll down to the ending.
Go to meet Rotface (M6B:8), who can provide you with some useful information and rumors only for a cap. Keep paying him until he provides you with two pieces of information:
Now you have three possibilities to choose from:
You can add some Psycho to Pacer's Jet, which can be found under his bad on the third floor #1. Pacer will come to his room to take some drugs and he'll die because of a heart attack. Scroll down to the ending.
You can also use the Van Graffs to implicate them in his death. Go to the [Silver Rush] (M6:2) and follow [Birds of a Feather]. As soon as Pacer shows up in front of the door, refuse to let him in #2 - he'll attack you, so shoot him. Scroll down to the ending.
Go to see Ralph [Mick & Ralph's] (M6B:2) and ask him to forge a note from Jean-Baptiste to Pacer about having the drug for him. Go to the Pacer's room in [King's School for Impersonation] (M6:6) and leave there the false note about stolen Jet. Pacer will check his stash and will immediately run over to Silver Rush, where he will be killed by a bodyguard. Scroll down to the ending.
Whichever option you choose, return to the Ambassador Dennis Crocker (M7:6) and report that the task is done. You will get some caps. With [Barter 60] you can ask for more.
The quest is unlocked: [For the Republic, Part 2].
Go to [Hoover Dam] (MsE:10) where you will meet Colonel Cassandra Moore. She'll give you some further tasks connected with game factions.
![You have to break the alliance between Khans [Red Rock Canyon] (MsA:14) and Caesar - For the Republic, Part 2 - NCR - Fallout: New Vegas - Game Guide and Walkthrough](https://game.lhg100.com/Article/UploadFiles/201512/2015121518533019.jpg)
You have to break the alliance between Khans [Red Rock Canyon] (MsA:14) and Caesar. You can do it in two ways:
SOLUTION 1
Kill Papa Khan (M17:1) and Regis (M17:1) or (M17:2).
SOLUTION 2
Bring to breaking the alliance. Complete [Oh my Papa].
Briefly: You have two possible ways to break the alliance:
In the second case you have to:
All you have to do now is to convince Papa Khan to join your side or show him a book called Pretty Pretty Horsies: A History of the Mongol Empire about Khan's history.
ENDING
Whichever option you choose, return to Colonel Moore and report that the task is done.
The next faction to deal with is The Omertas [Gomorra] (M7:5). Before you go there though, talk to Liza O'Malley, the NCR embassy receptionist (M7:6). You'll learn that The Gomorrah Hotel receptionist is in their debt and should help you.
SOLUTION 1
![You decide to complete [How Little We Know] and side with Cachino - For the Republic, Part 2 - NCR - Fallout: New Vegas - Game Guide and Walkthrough](https://game.lhg100.com/Article/UploadFiles/201512/2015121518533075.jpg)
You decide to complete [How Little We Know] and side with Cachino.
Briefly: Find out the Cachino's secret by obtaining his Journal. Next talk to Troike about mysterious weapon supply and destroy it. Ask what Clanden is into. Then meet Big Sal and Nero and kill them both ending this quest.
SOLUTION 2
![You decide to complete [How Little We Know] and side with Big Sal and Nero - For the Republic, Part 2 - NCR - Fallout: New Vegas - Game Guide and Walkthrough](https://game.lhg100.com/Article/UploadFiles/201512/2015121518533045.jpg)
You decide to complete [How Little We Know] and side with Big Sal and Nero.
Briefly: Find out the Cachino's secret by obtaining his Journal. Talk to Big Sal and Nero, who will kill Cachino. Help the Family:
Return to the leaders. The quest is completed.
SOLUTION 3

If you've decided to neutralize the faction, it is enough to kill three leaders: Cachino (M7F:2) #1, Big Sal (M7F:5) #2 and Nero (M7F:5).
ENDING
Whichever option you choose, return to Colonel Moore and report that the task is done.

Your next goal to conquer a Vegas is to kill Mr. House or render him powerless. Go to the [Lucky 38] (M7:1) where you'll be welcomed by Victor. Take an elevator and go down to the [Mr. House's chamber]. You'll reach a giant TV with an image of Mr. House. To have full access to terminals you must have:

![NOTICE: Once you've decided to open a hall, [The House Always Wins, I] becomes failed and you won't be able to join Mr - For the Republic, Part 2 - NCR - Fallout: New Vegas - Game Guide and Walkthrough](https://game.lhg100.com/Article/UploadFiles/201512/2015121518533168.jpg)
NOTICE: Once you've decided to open a hall, [The House Always Wins, I] becomes failed and you won't be able to join Mr. House.
Go to the terminal to the left #1 and open the hall. There are two Securitrons inside, which will attack you right after you enter the room. You can either disable them using a terminal to the right (only a temporary effect) or go directly to a terminal to the left #2 and go straight to the [Control room].

You will find Mr. House's life support chamber inside a control room. Activate it using the terminal and you'll have a few choices:
If you've chosen deactivation of the implant, you won't get negative reputation. Return to Colonel Moore and report back that the mission is done.
This quest is connected with Brotherhood of Steel. Colonel Moore wants you to wipe out this faction. You can also make a deal with them. There are two ways to destroy the BoS. You can find the faction in the [Hidden Valley] (MsD:21). They are located in the bunker (M13:1).
SOLUTION 1
When you reach the bunker you will meet a Brotherhood Paladin. Start shooting and kill all personnel in the bunker.
SOLUTION 2
When you reach the bunker you will meet a Brotherhood Paladin. You will have to give away all your weapons and items and go to the [L1]. Go downstairs and talk to Paladin Ramos (M13A:1). Agree to meet Elder (M13B:1). Start completing [Still in the Dark] until you have full freedom of movement, that means you've passed the first test and your explosive collar is removed.
Approach the characteristic red terminal (M13B:5) #1. The self-destruct sequence can be activated in two ways:
In order to activate the terminal in the second option you have to steal:
You can do it by stealing or killing them and searching the bodies. Generate the auto destruction password, log in to the red terminal (M13B:4) and activate it. After this you will become hostile to the Brotherhood so your way back won't be so easy.
ENDING
Whichever option you choose, go back to Colonel Moore (M7:1) and tell him that the mission is completed.
Your last task is to protect the President and prevent the assassination.
A quest is unlocked: [You'll Know It When It Happens].
Briefly: Go to the [Hoover Dam], where you must protect the President while his visit. To prevent the assassination attempt:
Once this mission is over, it is time for final fight.
A quest is unlocked: [Eureka!].
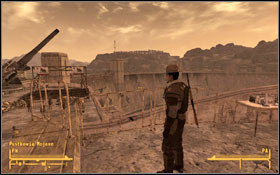
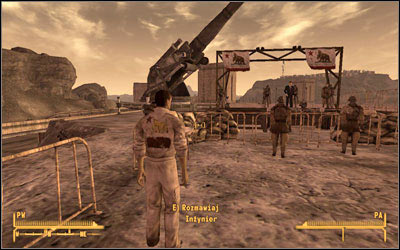
To take this quest you need to have high reputation with NCR. Go to [Hoover Dam] (MsE:10), heading to the [Visitors Center] (M19:3). You'll find Ranger Grant #1 inside, right in the very centre. Talk to him about Kimball's visit. Depending on your reputation, you'll get less or more information, as well as a permit to carry your weapons drawn or free movement in all areas. If you wait till next day, you'll have more time to search the area. When you are ready, go to Grant. This time you'll find him on the observation deck #2.
The President will arrive shortly.
Watch the suspicious behavior of one of the Engineers, who will come a moment later after the president.
You'll find a Redundant Detonator. Pickpocket it and return to Grant - the president will be evacuated in a while.
You have two ways to purchase a dog - you can get the Rex in [G.I. Blues] or you can borrow the dog from one of the NCR soldiers in the area. The second option requires [Animal friend] perk.
The dog will start barking when detecting the Engineer - try not to scare him away while talking to him. Return to Grant and tell him about the detonator - the president will be evacuated after a while.
![If your science perk is high enough [Science 50], you can break in to the terminal in the Visitors Center and gain some information about possible sniper attack - Youll Know It When It Happens - President Kimball - Fallout: New Vegas - Game Guide and Walkthrough](https://game.lhg100.com/Article/UploadFiles/201512/2015121518533186.jpg)
If your science perk is high enough [Science 50], you can break in to the terminal in the Visitors Center and gain some information about possible sniper attack. Look at the closest tower (M19:4). You can see there the second NCR Ranger - go up top. If you're late and there is only one Ranger there, talk to him. After short conversation he will attack you so you have to kill him. If there are two Rangers there, do not shoot as the first, while the task will fail.
Report it to Grant - the president will be evacuated after a while.
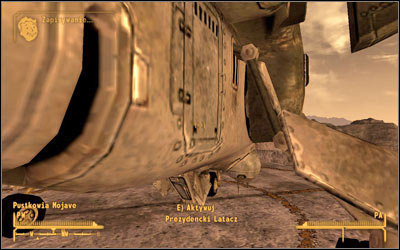
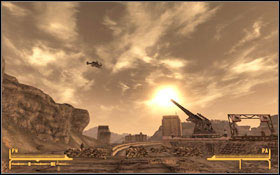
Once Kimball lands, go to the landing area. There are few ways to do it:
When you near by the Vertibird, search it. With [Repair 50] or [Explosives 50] you'll find the bomb.
Report it to Grant - the president will be evacuated after a while.
You should start this quest by talking to Cato Hostilius #1, who will provide you with some initial action plan. You'll find him near by the [Ranger Station Delta] (MsE:16). When you're ready, wait until morning. If you have no plan at all, you can ask for some suggestions.
You will also get a NCR Trooper Costume, so you can move freely among other NCR soldiers. Put it on. Head to [Hoover Dam] (MsE:10), following Cato. He'll cross over into the crowd #2. When you're ready, ask him about the president's arrival. There are few ways to assassinate the president.
![Before your conversation with Cato, go to the Visitors Center (M19:3) and hack the terminal [Science 50] - Arizona Killer - President Kimball - Fallout: New Vegas - Game Guide and Walkthrough](https://game.lhg100.com/Article/UploadFiles/201512/2015121518533232.jpg)
Before your conversation with Cato, go to the Visitors Center (M19:3) and hack the terminal [Science 50]. Alter the Vertibird's flight plan and then talk to Cato. Listen to the speech and wait till the President gets back on-board and the Vertibird takes off. It will crash into the mountains, killing the president. Return to Caesar or Lucius [The Fort] (M9:1).
Go up to the roof of the Visitor Center #1 and hack the console you find there.
Once Kimball is dead, return to Caesar or Lucius [The Fort] (M9:1).
Talk to Cato, asking about the president's arrival. Head to the landing area, which is guarded by NCR soldier #1.
When you're near by the Vertibird #2, plant there a bomb [Explosives 50]. Wait till the speech's end and watch the Vertibird lifts off and explodes killing the president Kimball.
Once Kimball is dead, return to Caesar or Lucius [The Fort] (M9:1).
Ask about the president's arrival. When he comes, look for some quiet place, safe enough to snipe the president #1. The first tower (M19:4) #2 to the far left is perfect for this task, if you are capable to shoot the target down from a distance. Though you have to take into consideration that you can be recognized.
Once Kimball is dead, return to Caesar or Lucius [The Fort] (M9:1).
If you have a C4 and a detonator, you can kill Kimball during his speech, with the "help" of private Jeremy Watson. Just before the president's arrival, Watson will accost you (if you're close enough) and ask if you haven't seen his helmet. His helmet is located on a table next to the stairs. Put a C4 in the helmet [Explosives 50], go back to the private and tell him where the helmet is. Ask about the president's arrival. When he comes and the private is nearby him, find a safe location and set off the C4.
Once Kimball is dead, return to Caesar or Lucius [The Fort] (M9:1).

You'll get this quest, if you've decided to help Yes Man.
Once you've accepted the task, you'll be moved near Hoover Dam #1. You'll be accompanied by the type II Securitron. Go ahead - you have to reach the Hoover Dam Control Tower (M19:1) and install the override chip there. Get ready for an intensive fight - you'll be attacked by few Centurions #2.
NOTICE: If you have an alliance with Great Khans, a small group of them arrives to help you. And if your reputation with NCR is quite low, you'll have to fight also against NCR soldiers.

Go ahead, killing more Legion troopers.
NOTICE: If you have an alliance with Boomers, their plane will bombard the enemy when you're nearby the second tower (M19:1).
Walk through the door to the Hoover Dam Control Tower and head to the [Hoover Dam offices]. Being there, go to the control room and install the chip (M19A:1). Just in front of the entrance you will find NCR Heavy Troopers (M19A:2) #1.
Install the override chip and watch Yes Man appearing on screens #2.
The second option appears if during your task in the bunker in [Wild Card: You and What Army?] you've decided to upgrade the Securitrons army. You have to manually activate the switch (M19A:6). Go to the other side of the dam (M19A:4).
If you've decided to destroy generators, go to the [Hoover Dam Power Plant] (M19A:3), where you'll manually activate the switch (M19B:1) leading to the explosion. Go back to the [Hoover Dam offices] and then go to the other side of the dam (M19A:4).


NOTICE: If you've upgraded the Securitrons army and you've activated them, they'll help you right now.
Keep going, fighting with Centurions until you'll reach the [Legate's Camp] (M19:2). Head to the Legate's tent (M20:1) #1. There are three ways to deal with him:
The fight will be very tough in first case, while you'll have to fight also some Veteran legionaries who help the Legate. The main gate is closed, so you have very limited room to maneuver. And remember that the Legate prefers fighting with melee weapons so use this as your advantage and try to shoot his legs to slow him down.
If you decided to talk to him, your skills should be maxed - [Speech 100], [Barter 100]. There are few possible conversation's ending but every leads to the Legate's surrender.


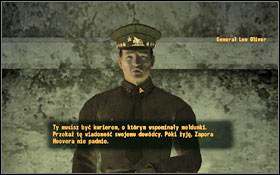
After dealing with the Legate, head towards the gate (M20:2) - the General Lee Oliver #1 will show up. Same as with the Legate, there are also two possibilities to deal with him:
The fight will be easier in first case, while you have the whole Securitrons army for your help.
If you decide to talk with the General, you skill should be maxed [Speech 100]. There are also conversation's ending but every leads to the General's capitulation.
Talk to Yes Man #2.
Congratulations, you've finished the game.
Depending on your actions during the game, there will be a variety credits at the end, outlining the current situation in Vegas.

You'll get this quest, if you've decided to help Mr. House.
Once you've accepted the task, you'll be moved near Hoover Dam #1. You'll be accompanied by the type II Securitron. Go ahead - you have to reach the Hoover Dam Control Tower (M19:1) and install the override chip there. Get ready for an intensive fight - you'll be attacked by few Centurions #2.
NOTICE: If you have an alliance with Great Khans, a small group of them arrives to help you. And if your reputation with NCR is quite low, you'll have to fight also against NCR soldiers.
![Walk through the door to the Hoover Dam Control Tower and head to the [Hoover Dam offices] - All or Nothing - Main plot - Hoover Dam - Fallout: New Vegas - Game Guide and Walkthrough](https://game.lhg100.com/Article/UploadFiles/201512/2015121518533458.jpg)
Walk through the door to the Hoover Dam Control Tower and head to the [Hoover Dam offices]. Being there, go to the control room and install the chip (M19A:1). Just in front of the entrance you will find NCR Heavy Troopers (M19A:2) #1.
Install the override chip and watch Mr. House appearing on screens #2. You have to manually activate the switch (M19A:6). Go to the other side of the dam (M19A:4).

NOTICE: If you have an alliance with Boomers, their plane will bombard the enemy when you're nearby the second tower (M19:1)
Keep going, fighting with Centurions until you'll reach the [Legate's Camp] (M19:2). Head to the Legate's tent (M20:1) #1. There are three ways to deal with him:
The fight will be very tough in first case, while you'll have to fight also some Veteran legionaries who help the Legate. The main gate is closed, so you have very limited room to maneuver. And remember that the Legate prefers fighting with melee weapons so use this as your advantage and try to shoot his legs to slow him down.
If you decided to talk to him, your skills should be maxed - [Speech 100], [Barter 100]. There are few possible conversation's ending but every leads to the Legate's surrender.
After dealing with the Legate, head towards the gate (M20:2) - the General Lee Oliver #1 will show up. Same as with the Legate, there are also two possibilities to deal with him:
The fight will be easier in first case, while you have the whole Securitrons army for your help.
If you decide to talk with the General, you skill should be maxed [Speech 100]. There are also conversation's ending but every leads to the General's capitulation.
Talk to Mr. House #2.
Congratulations, you've finished the game.
Depending on your actions during the game, there will be a variety credits at the end, outlining the current situation in Vegas.
You get this quest, if you've decided to help Caesar's Legion.
Once you've accepted the task, you'll be moved to [Legate's camp]. Go to Legate Lanius (M20:1) #1, who will assign you a task. Go to the camp's gate (M20:3), accompanied with some Legionnaires. Your main target is western power plant. Go ahead along with the dam, wiping out the NCR troops. You have to reach the Hoover Dam Checkpoint (M19:5) #2.
NOTICE: If you have an alliance with Boomers, their plane will bombard the enemy.
There is a Legion Decanus inside, which can assign you two optional tasks:
If you decide to free Centurions, you can order them:
Head to the Visitors Center (M19:3).
NOTICE: If you have an alliance with Great Khans, a small group of them arrives to help you #2.
![Once youre inside the [Hoover Dam Power Plant], engage further heavy armored NCR troops and try to get down to the basement - Veni, Vidi, Vici - Main plot - Hoover Dam - Fallout: New Vegas - Game Guide and Walkthrough](https://game.lhg100.com/Article/UploadFiles/201512/2015121518533517.jpg)
Once you're inside the [Hoover Dam Power Plant], engage further heavy armored NCR troops and try to get down to the basement. Being on the level 04, go through the door leading to the General Oliver's office (M19B:2). The conversation will start #1. There are two ways to deal with:
If you decide to talk to general, your skill [Speech 100] has to be maxed. Remember to choose only these conversation options, where nothing about killing is.
If you try to fight the General, he will run away leaving you with the force field in front of you. Turn left and make your way upstairs, behind the force field. When you're on the next floor, among some desks, watch out for the NCR guards, tripwires and bear traps. On the top floor you will meet the General Olivier #2 accompanied by NCR Heavy Troopers. Kill them all to complete the task.
Return to the compound entrance where you'll meet the Legate. Talk to him.
Congratulations, you've finished the game.
Depending on your actions during the game, there will be a variety credits at the end, outlining the current situation in Vegas.
You get this quest, if you've decided to help NCR.
When you accept the task, you'll be moved to General Oliver's Compound #1. One of the workers will come, reporting that a group of legionaries broke into the power plant. Your task now is to get to the Legate's camp and kill Lanius. Just after you leave the General's office, you'll meet Mike Lawson. The mechanic will make a suggestion to flush the Legion invaders through the generator's turbines. Head to the Hoover Dam Power Plant 03, where you can find the console #2. [Science 65] use the terminal to engage the turbines and flush the Legion troops out.
Unfortunately, the system will clog so you have to manually decrease the water pressure. Go down to the Hoover Dam Power Plant 04 and exit to the dam exterior (M19B:3). Search for valve #1 and release it. Return to the Power Plant 3 and then to upper levels until you reach the exit #2.
Proceed ahead, heading to the Hoover Dam Checkpoint (M19:5).
NOTICE: If you have an alliance with Boomers, their plane will bombard the enemy #1.
NOTICE: If you have broken an alliance between Great Khans and the Legion, a small group of them arrives to help you.
You can find a terminal #2 inside the checkpoint. [Science 100] if you have a detonator you can overload generators and then blow them up.
Right after you exit the checkpoint, you'll meet a NCR Ranger Veteran Commander #1, who awaits your orders:
NOTICE: If you have an alliance with Enclave, they will help you now.

![Keep running, fighting with Centurions until youll reach the [Legates Camp] (M19:2) - Eureka! - Main plot - Hoover Dam - Fallout: New Vegas - Game Guide and Walkthrough](https://game.lhg100.com/Article/UploadFiles/201512/2015121518533668.jpg)
Keep running, fighting with Centurions until you'll reach the [Legate's Camp] (M19:2). Head to the Legate's tent (M20:1) #1. There are three ways to deal with him:
The fight will be very tough in first case, while you'll have to fight also some Veteran legionaries who help the Legate. The main gate is closed, so you have very limited room to maneuver. And remember that the Legate prefers fighting with melee weapons so use this as your advantage and try to shoot his legs to slow him down.
If you decided to talk to him, your skills should be maxed - [Speech 100], [Barter 100]. There are few possible conversation's ending but every leads to the Legate's surrender.
Talk to the General #2.
Congratulations, you've finished the game.
Depending on your actions during the game, there will be a variety credits at the end, outlining the current situation in Vegas.
![Given by: Diane [Red Rock Drug Lab] (MsA:13) - Aba Daba Honeymoon - Side quests - Fallout: New Vegas - Game Guide and Walkthrough](https://game.lhg100.com/Article/UploadFiles/201512/2015121518533617.jpg)
Given by: Diane [Red Rock Drug Lab] (MsA:13)
You can find Diane in the trailer or by the fire (depends on time of the day). Ask her if she got any job for you. The quest will start and you'll be asked to find a missing drug runner who hasn't reported back for two days. Head to the [Cottonwood Cove] (MsG:22) where you'll find crucified Anders (M8:2) #1. You can cut him down or leave him. Whichever option you choose, go to Diane (MsA:13) and tell her that you've found Anders. You can choose to earn 250 caps or a recipe as a reward.
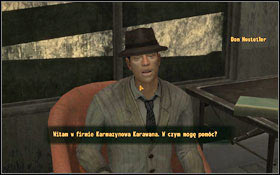
![Your next task is to deliver a package to the client at [Crimson Caravan Company] (MsB:13) - Aba Daba Honeymoon - Side quests - Fallout: New Vegas - Game Guide and Walkthrough](https://game.lhg100.com/Article/UploadFiles/201512/2015121518533612.jpg)
Your next task is to deliver a "package" to the client at [Crimson Caravan Company] (MsB:13). Locate Dom Hosteler there (M12:2) and give him the package. Return to Diane (MsA:13) and receive your payment. She'll tell you about next package to be delivered. This time the [Vault 3] (MsB:23) is your target. Watch out for Fiends lurking there. Upon entrance to Vault 3 you will be approached by one of them.
Go to the [Vault 3 - Maintenance Wing] (M14A:2) where you can find Motor-Runner in his throne room (M14B:2) #2 - give him the package.
Return to Diane (MsA:13) for your reward.
![Diane has no more tasks for you but you can teach Jack some new recipes [Science] - Aba Daba Honeymoon - Side quests - Fallout: New Vegas - Game Guide and Walkthrough](https://game.lhg100.com/Article/UploadFiles/201512/2015121518533680.jpg)
Diane has no more tasks for you but you can teach Jack some new recipes [Science]
Every time you can take caps or chems as a reward or refuse to take any payment.
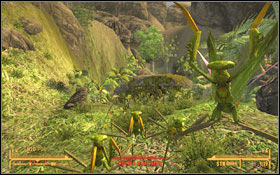
![Given by: Raquel [Nellis AFB] (M11:5) - Ant Misbehavin - Side quests - Fallout: New Vegas - Game Guide and Walkthrough](https://game.lhg100.com/Article/UploadFiles/201512/2015121518533742.jpg)
Given by: Raquel [Nellis AFB] (M11:5)
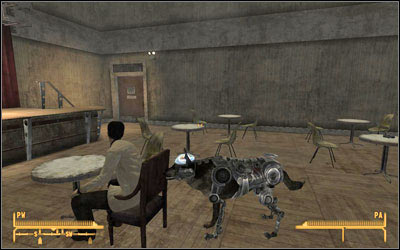
This quest is quite easy. You have to kill all the ants in the generator room. You'll get also a hint that these ants will explode if killed with laser guns or flamer. If you own any of these, use it. Additionally Loyal #1 works on some special weapon against ants, so you can talk to him about this. You can find him in the Hangar (M11:2). The only problem is to find the proper frequency for the Sonic emitter to work.
You can also hunt the ants without emitter. Head to the [Nellis Array] (MsC:2) and take any of two entries to the [Nellis Array Generators] #2.
Get ready for the fight against Big ants (you can find their locations on the map). Now you have to options - either to kill all ants or place Loyal's sonic emitter on the ant mound and activate it (if you have it) (M11A:2) #1. Go to the generators (M11A:1) #2 and flip the two array generator switches. To restart them, go upstairs and activate the switch you'll find there. Return to Raquel (M11:5) and let her know the generators are running again and ants are dead (or lie if you haven't kill them).
![Given by: Private Renolds somewhere on the road between [Nelson] (MsE:23) and [Techatticup Mine] (MsG:7) - Anywhere I Wander - Side quests - Fallout: New Vegas - Game Guide and Walkthrough](https://game.lhg100.com/Article/UploadFiles/201512/2015121518533725.jpg)
Given by: Private Renolds somewhere on the road between [Nelson] (MsE:23) and [Techatticup Mine] (MsG:7)
You will be asked to rescue captives held by Legion.
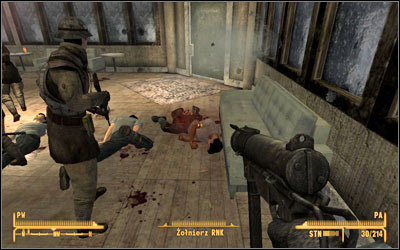
Head to the mine [MsG:7], you'll find two Legion Recruits patrolling the entrance. You can either sneak past them or kill them. Killing them is a better solution though, while you have to clear your way later. Being inside head to prisoners (M23:1), (M23:2) #1. Just after you open the cages, you'll be attacked, so it is better to eliminate all Legion soldiers before you free the prisoners.
You can either kill him or sneak behind him and pickpocket the key. Free NCR soldiers and head to the exit. You'll meet Private Renolds nearby, where you talk to him before.
![Given by: Ranger Milo [road to Nelson] (MsE:23) - Back in Your Own Backyard - Side quests - Fallout: New Vegas - Game Guide and Walkthrough](https://game.lhg100.com/Article/UploadFiles/201512/2015121518533794.jpg)
Given by: Ranger Milo [road to Nelson] (MsE:23)
Just west of Nelson, you'll discover a small NCR checkpoint #1 and you'll be stopped by Ranger Milo.
You have to rescue the NCR hostages. Go to [Nelson] (MsE:23) where you'll find some crucified soldiers (M21:3) #2. Milo will cover your back from the hill.
You decide to rescue them. The Legion soldiers will attack you immediately. It might be a little bit tough to fight them, even with help from Milo. It is good idea to deal with the Legion soldiers first and free the hostages after that (you'll be sure not to kill them accidently - of course you can kill them too if you want). After the shooting return to Milo. You will receive a small reward.
Kill the hostages. You can do it either by detonating some explosives under the crosses (you can find some C-4 by the road), using the gun from a close distance or shooting them with a sniper rifle. After dealing with the hostages return to Milo. You receive get a small reward.
![Given by: Heck Gunderson [Beyond the Beef] (M7C:1) / Mortimer [Beyond the Beef] (M7C:2) / Marjorie [Beyond the Beef] (M7D:1) - Beyond the Beef - Side quests - Fallout: New Vegas - Game Guide and Walkthrough](https://game.lhg100.com/Article/UploadFiles/201512/2015121518533841.jpg)
Given by: Heck Gunderson [Beyond the Beef] (M7C:1) / Mortimer [Beyond the Beef] (M7C:2) / Marjorie [Beyond the Beef] (M7D:1)
Right after you enter the Casino you'll be asked to give away your weapons.
You can complete this mission in two ways. You can talk either to Heck Gunderson (M7C:1) #1 / Marjorie (M7D:1) or to Mortimer (M7C:2) #2.
NOTICE: If you've killed Heck in [Pheeble Will], [Beyond the Beef] fails.
After short conversation with Heck you'll learn that his son is missing. Go to the [Ultra-Luxe Gourmand Restaurant] (M7C:3) where you'll find Marjorie #1, the second leader of the White Glove Society. Ask her about the missing person - you'll learn that this is not a first time that someone is missing. She'll send you to see the other manager named Mortimer (M7C:2). He'll tell you that he knows where to find the investigator you can talk to and will give you the key to the Investigation room. Head to [Ultra-Luxe Hotel Rooms] (M7C:4) and find the investigator's room (first to the right). You'll find dead Jay Barnes #2. Search him and get the Matchbook. You'll be attacked by two members of the White Glove Society. When you've dealt with them, read the information on the Matchbook. It says: "Steam Room. 4PM."
Wait till 4PM and head to Ultra-Luxe Steam Room. Upon entering the room you will meet Chauncey. After a short conversation you'll learn the whole truth about returning to cannibalism. Mortimer is behind this plan. Ask him about Ted, who probably lives and will be served as a main meal at the banquet at 7PM. After you're done with Chauncey, an assassin will enter the room to kill him. Kill the assassin.
Your next task is to get to the kitchen. There are few ways to do it:
NOTICE: at this moment you still can change your mind and support the White Glove Society. In this case scroll down to the Solution 2
Go to the kitchen (M7D:2) where you'll find a guard:
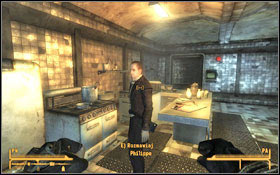
You'll meet Philippe #1 in the kitchen and you need to get rid of him:
Whichever option you choose, you'll receive Philippe's recipe. Go to the cooker (M7E:2) and prepare the meal:
You can also drug the wine (M7E:3) if you have Med-X and [Medicine 25].
Wait till 7PM and use the intercom to call the waiter. He will take the wine or the meal.
Open the fridge (M7E:1):
[Speech 38] quiet him down or attack him. Now you can return to Heck with his son or to go to the dining area (M7E:4) and expose Mortimer after he finishes his speech (you'll be attacked by all diners). If you've drug the wine they all will be unconscious.
Do not talk neither to Heck nor to Marjorie and go directly to Mortimer (M7C:2) #1. If your reputation with the Strip is high enough [Liked], he will tell you about his problem and will ask for your help. You have to find the man who was supposed to be a victim for a banquet but he escaped and Mortimer has kidnapped son of Heck Gunderson, a very powerful Brahmin Baron, instead. You'll receive Cattle Prod and keys to the Ultra-Luxe freezer, Gourmand kitchen and Ultra-Luxe Penthouse. Go to the kitchen where you'll find a guard:
Open the fridge (M7E:1) #2:
You next choice depends on whether Ted is alive or already frozen:
[Speech 38] quiet him down or attack him (read the next point). Now you can return to Heck with his son #1. If you lie to him you can continue with the mission - scroll down to the ending. You'll receive 500 caps as a reward. If you blame the White Glove Society or Mortimer, the task will be finished. Heck will suggest a blockade of food to the Strip but you can convince him [Speech 35] that this is not a good plan.
Collect a bit of Ted's blood and head to the [Ultra-Luxe Penthouse] (M7C:5). Watch out for the guards. Put the Ted's blood in the bed and in the bathroom sink #2. Leave the casino and locate any of the Securitrons to inform him about a crime. Scroll down to the ending.
ENDING
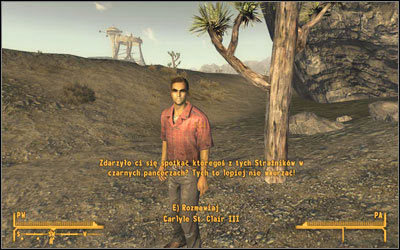
You need to obtain a replacement for Ted Gunderson for the banquet. Head north from Freeside to Carlyle St. Clair III's house.
Return to Mortimer (M7C:2) and tell him that Carlyle will come to talk to him or that his body is in the dumpster near the house.
If you're here because of Caesar's order, wait till morning and talk to Marjorie (M7D:1). She'll accept the alliance with the Legion.
![Given by: Gloria Van Graff [Silver Rush] (M6:2) - Birds of a Feather - Side quests - Fallout: New Vegas - Game Guide and Walkthrough](https://game.lhg100.com/Article/UploadFiles/201512/2015121518533928.jpg)
Given by: Gloria Van Graff [Silver Rush] (M6:2)
Before you enter [Silver Rush] you will be searched and asked to give away all you weapons #1. Being inside wait till Gloria finishes her business #2 (do not go too close to the guards while they can attack you). Ask for a job - you'll have to guard an entrance. Take the job and go outside where you can talk to Simon and ask him for details.
Take up position on the other side of the door and wait till Simon gives you some stuff #1 - you'll get the Van Graff Combat Armor and guns:
Take the one you prefer. Your task to turn away all sorts of drunks, punks and vermins. There will be some customers from time to time.
1. Drunk - tell him that you can't let him in
2. Gambler - search him first
3. Gambler - search him:
4. Gambler - search him. He'll attack you so you have to kill him.
5. Pacer #2 (he'll show up if you haven't killed him in [King's Gambit]) - he'll ask you to deliver some message for Gloria:
It was your last customer - give away your gun, enter the [Silver Rush] and talk to Gloria.
You'll receive your reward and next task to do. It is simple - you need to deliver a package from Van Graffs to the specific location (west from [Raul's Shack] (MsC:4) #1). Hand the package to a strange man:
Return to Gloria (M6:2) who has no more tasks for you but you can talk to Jean-Baptiste and get an assignment #2.
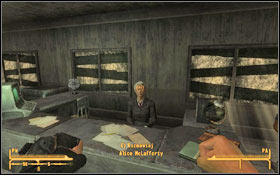
Your new task is to find a girl named Rose of Sharon Cassidy and bring her back to Jean-Baptiste. Ask him where to find her. You won't get too much information but he'll send you to see Alice McLAfferty at the [Crimson Caravan] (MsB:13). You can find her in the office (M12:2) #1. You'll learn that Alice also looks for Sharon, and the girl can be probably found at the [Mojave Outpost] (MsF:15).
Take the quest. Otherwise when you meet with Cass (M24:1) #2 you won't be able to take her to the Van Graffs'. Cass can become your companion also in [Heartache by the Number].
When finally Cass is your companion, go back to the Van Graffs (M6:2) and bring her to Jean-Baptiste #1. Talk to Gloria again - there is a big deal ahead. You'll find yourself in some warehouse where you witness the deal with the Legion. Of course nothing goes as it should and the shooting starts #2. Kill all Legionaries. Your last conversation with Gloria will take place at her shop. The task is over.
![Given by: Lieutenant Markland [Bitter Springs] (M27:1) - Bitter Springs Infirmary Blues - Side quests - Fallout: New Vegas - Game Guide and Walkthrough](https://game.lhg100.com/Article/UploadFiles/201512/2015121518534069.jpg)
Given by: Lieutenant Markland [Bitter Springs] (M27:1)
Being in the Bitter Springs camp you can find Lieutenant Markland #1, who needs some help with his patients. Tell him that you were sent by Captain Gilles and you offer him your support. You have to find 3 doctor's bags as well as some books on the topics of pediatric care and psychological care. Don't forget to ask him where you can find these books.
If you got any doctor's bags with you, you can give them to the lieutenant at once. But if you have to find them, the best place to look for them is [New Vegas Medical Clinic] (MsB:14). Buy them at Doctor Usanagi #2 (one bag costs about 60 caps).
![Both books can be obtained in the [Crimson Caravan Company] (MsB:13), at Blakes (M12:3) #1 - Bitter Springs Infirmary Blues - Side quests - Fallout: New Vegas - Game Guide and Walkthrough](https://game.lhg100.com/Article/UploadFiles/201512/2015121518534090.jpg)
Both books can be obtained in the [Crimson Caravan Company] (MsB:13), at Blake's (M12:3) #1. Each of them costs 22 caps: Tiny, Tiny Babies: All You Need To Know About Pediatric Medicines and Stress and the Modern Refugee: A Primer. Once you have the supplies and the books return to Markland (M27:1). You can ask him for any surplus supplies or some medical surprise and to cover you expenses.
![Given by: Red Lucy [Thorn] (MsB:5) - Bleed Me Dry - Side quests - Fallout: New Vegas - Game Guide and Walkthrough](https://game.lhg100.com/Article/UploadFiles/201512/2015121518534019.jpg)
Given by: Red Lucy [Thorn] (MsB:5)
You can get to the [Thorn] through the sewers. The main entrance is well marked, so you won't miss it anyway #1. Locate a woman named Red Lucy inside (M36:1) #2. Ask her how you can earn her admiration and how you can pay tribute to her. You'll be assigned with series of tasks in which you'll have to collect various eggs from different creatures.
Your first task is to obtain giant mantis eggs. Go outside the Thorn and head to [Vault 22] (MsA:9). Kill all mantises #2 and head to [Vault 22 Main Entrance]. Fix the elevator (M16:1) or go down with the stairs (M16:2) to the [Vault 22 - Pest Control]. Go through the door (M16E:1) and head to the [Vault 22 - Food Production]. Inside the tunnels go straight to the giant mantis eggs (M16C:3) #2.
Return to Red Lucy [Thorn] (M36:1) and give her the eggs.
Your next target is to collect Radscorpions eggs. Go outside the Thorn and head to the [Great Khan Camp] (MsD:11). Kill all giant radscorpions #1 there and collect the eggs from the egg clutch #2.
Return to Red Lucy [Thorn] (M36:1) and give her the eggs.
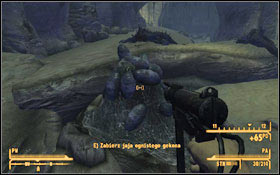
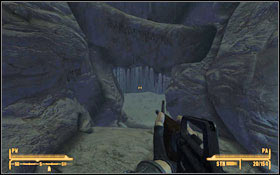
Now you have to collect fire gecko eggs. Go outside the Thorn and head to the [Lucky Jim Mine] (MsG:9). Enter the [Bootjack Cavern] #1, clear your way out of geckos and collect the fire gecko eggs lying on the ground (M37:1) #2.
Return to Red Lucy [Thorn] (M36:1) and give her the eggs.
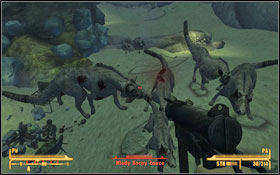
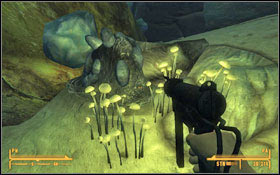
Your next task is to get night stalker eggs. Go outside the Thorn and head to the area nearby [Bloodborne Cave] (MsC:6). Go inside and clear your way out of night stalkers #1. Now collect the Night stalker eggs lying on the ground (M38:1) #2.
Return to Red Lucy [Thorn] (M36:1) and give her the eggs.
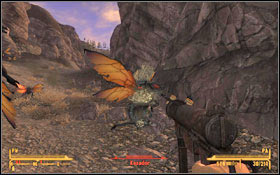
Time to find some cazador eggs. Go outside the Thorn and head to the [Remnants Bunker] (MsA:10). Only from this region you'll be able to get to the marked place. There are plenty of cazadors #1. Kill them all and collect the cazador eggs lying on the ground #2.
Return to Red Lucy [Thorn] (M36:1) and give her the eggs.
Your final task is to collect Deathclaw eggs. These can be obtained in one of two locations:
Return to Red Lucy [Thorn] (M36:1) and give her the eggs. You'll receive 2500 caps as a reward.
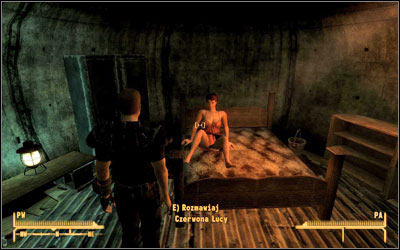
Although the task is completed, you can ask Lucy to go to a bit more secluded place. Follow her ...
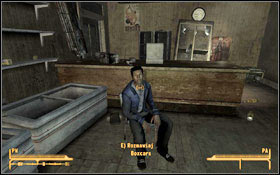
![Given by: Boxcars [Nipton] (M34:1) - Booted - Side quests - Fallout: New Vegas - Game Guide and Walkthrough](https://game.lhg100.com/Article/UploadFiles/201512/2015121518534251.jpg)
Given by: Boxcars [Nipton] (M34:1)
Boxcars can be found in General Store in Nipton #1. Give him Med X and keep talking about "The Lottery" . You'll learn that Legion has enslaved a few Powder gangers. Say that you'll free them. Head to the [Legion Raid Camp] (MsG:11). Once you get there, kill the Legion troops #2 guarding the captives and rescue the kidnapped Powder Gangers.
![Given by: Lieutenant Monroe [Boulder City] (M5:1) - Boulder City Showdown - Side quests - Fallout: New Vegas - Game Guide and Walkthrough](https://game.lhg100.com/Article/UploadFiles/201512/2015121518534299.jpg)
Given by: Lieutenant Monroe [Boulder City] (M5:1)
This task is likely to be activated automatically during completion of [They Went That-a-Way]. Lieutenant will ask you to release two NCR hostages kept by Great Khans. There are few ways to complete this quest.

It can be amicably settled. Suggest that you try to make a deal with Khans. Enter the [Boulder City Ruins] (M5:1) and head to the [Great Khans hideout] (M5A:1). Talk to Jessup. There are two choices:
If you kill him do not forget to search his things. You'll find the Engraved Cigarette Lighter and the Chairmen Job Offer. In the second option only the Engraved Cigarette Lighter is available.
Return to Lieutenant Monroe (M5:1) and talk about the deal
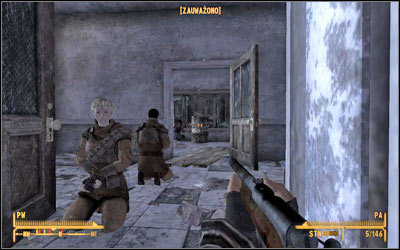
You can sneak to the hostages from the other side. It is best to do this at night. It is always good to use a Stealth Boy if you have any. If you manage to get to the building where the hostages are kept (M5A:2), lock-pick the door and free them quickly. Cover the hostages with fire during the escape. NCR soldiers will also start shooting. Return to Lieutenant Monroe (M5:1) - it doesn't matter if the hostages are still alive.
You can kill Lieutenant Monroe as well as all NCR soldier and then go to meet Jessup (M5A:1). Tell him that you've cleared the area. As a reward he'll tell you about the Platinum Chip and will give you the Engraved Cigarette Lighter.

![Given by: Joana [Gomorrah courtyard] (M7H:1) - Bye Bye Love - Side quests - Fallout: New Vegas - Game Guide and Walkthrough](https://game.lhg100.com/Article/UploadFiles/201512/2015121518534389.jpg)
Given by: Joana [Gomorrah courtyard] (M7H:1)
The prostitute will offer you her sexual services. [Speech 50], [Speech 75] will result in invitation to her private room (M7H:2). Follow her. Once you're alone #1 you can have a good time with Joana or talk to her (or first play with her and then have a conversation). During talk you can notice [Medicine 50] that she doesn't look good. Start pushing and you'll learn that she is imprisoned and she can't escape. Ask about Carlitos and tell her that you will find him. You can do it for free or for 200 caps (or for having fun with her again). Leave Gomorrah and head to the Vault 21 (M7:7) #2.

Locate Carlitos inside the vault (M40:1) #1 and tell him that you're here on Joana's request. He is willing to help her escape. Return to Joana (M7H:2) and [Speech 40], [Speech 50] assure her that she's safe with you. Go to see Carlitos (M40:1) again. He'll tell you that you can help Joana escape to Freeside between 12AM and 1AM - only then you can free the prostitutes. You can follow Carlitos suggestion and get some support. He knows two guns-for-hire that owe him a favor. Return to Joana and tell her everything you know.
To get mentioned support you have to go to the [Atomic Wrangler Casino] (M6:3) where you'll find Big Beard and Little Beard #2. Tell them that Carlitos is ready to cash his poker chips. They will agree to support you.
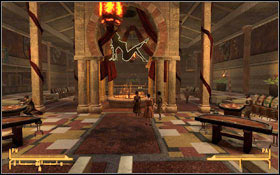
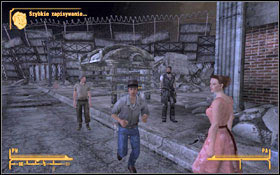
Wait till midnight and go to see Joana. She will disguise herself and will go to the Gomorrah lobby. Follow her there. Two fellow prostitutes (also disguised) will come too #1. When you're ready, approach Joana and tell her to go out. Leave the club. Then run towards Freeside to the meeting place (M6:7) #2. The Omertas thugs will show up after a while:
Carlitos will thank you:
![Given by: Ranger Jackson [Mojave Outpost] (M24:2) - Can You Find it in Your Heart? - Side quests - Fallout: New Vegas - Game Guide and Walkthrough](https://game.lhg100.com/Article/UploadFiles/201512/2015121518534352.jpg)
Given by: Ranger Jackson [Mojave Outpost] (M24:2)
Your task is very simple. You just have to clear the road on the way to Mojave Outpost. Exit the headquarters and proceed along the road until you encounter Giant Ants #2. Start the extermination and kill all insects. After the job is done return do Jackson (M24:2), who will provide you with 100 caps, 2 Caravan lunches, a Service rifle, 72 armor piercing 5.56mm rounds, and 2 Weapon repair kits.
Given by: Michael Angelo [Michael Angelo's Workshop] (M7:8)
Look for Michael in his workshop. He will think that you work for Mr. House at first and you come on his behalf:
Or tell him that you do not work for Mr. House. When you lie to him, you can change your mind and tell him that you were kidding.
Start asking him about his life and:
Whichever option you choose, the conversation will continue. Michael will ask you to take several pictures of some distinctive signs in the wasteland. Agree and get the Codac R9000 from him. You can take pictures of signs listed below in any order. If you've run out of the camera film, return to Michael to get more.
The Bison sign in [Primm] (MsF:4)
![The Dinosaur Thermometer in [Novac] (MsE:21) - Classic Inspiration - Side quests - Fallout: New Vegas - Game Guide and Walkthrough](https://game.lhg100.com/Article/UploadFiles/201512/2015121518534492.jpg)
The Dinosaur Thermometer in [Novac] (MsE:21)
![The big bottle sign at the [Sunset Sarsaparilla Headquarters] (MsB:18) - Classic Inspiration - Side quests - Fallout: New Vegas - Game Guide and Walkthrough](https://game.lhg100.com/Article/UploadFiles/201512/2015121518534477.jpg)
The big bottle sign at the [Sunset Sarsaparilla Headquarters] (MsB:18)
![The sign over the main doors at [HELIOS One] (MsE:17) - Classic Inspiration - Side quests - Fallout: New Vegas - Game Guide and Walkthrough](https://game.lhg100.com/Article/UploadFiles/201512/2015121518534451.jpg)
The sign over the main doors at [HELIOS One] (MsE:17)
![The sign of airfield in [Camp McCarran] (MsB:28) - Classic Inspiration - Side quests - Fallout: New Vegas - Game Guide and Walkthrough](https://game.lhg100.com/Article/UploadFiles/201512/2015121518534454.jpg)
The sign of airfield in [Camp McCarran] (MsB:28)
Once you have taken a picture of all of the landmarks, return to Michael Angelo (M7:8) and get the reward.
![Given by: Captain Gilles [Bitter springs] (M27:1) - Climb Evry Mountain - Side quests - Fallout: New Vegas - Game Guide and Walkthrough](https://game.lhg100.com/Article/UploadFiles/201512/2015121518534490.jpg)
Given by: Captain Gilles [Bitter springs] (M27:1)
Captain Gilles wants you to track down who attacks the camp. Head north to the [Great Khan supply cave] (M27:2). Watch out for the geckos wandering in the area. Enter the cave. You'll find Oscar Velasco (M27A:1) there. You can deal with him in few ways:
If you've succeeded with peaceful solution you can offer him:
If you've chosen the first option, you'll receive a key to the Great Khan Supply Cache.
Return to Gilles (M27:1) and tell her about Oscar.
Given by: Vulpes Inculta [Nipton] (M34:2)
When you approach the main entrance, you'll be introduced to Vulpes Inculta #1. Listen to him very carefully. Your task is to spread the word of the Legion's work in Nipton. Head to [Mojave Outpost] (MsF:15) where you'll find Sgt. Kilborn right behind two giant statues (M24:3) #2.
Whichever option you choose, your task will be completed.
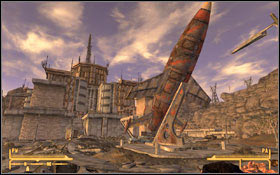
![Given by: Manny Vergas [Novac] (M12:2) - Come Fly With Me - Side quests - Fallout: New Vegas - Game Guide and Walkthrough](https://game.lhg100.com/Article/UploadFiles/201512/2015121518534440.jpg)
Given by: Manny Vergas [Novac] (M12:2)
Talk to Many and ask if he needs any assistance. Your task is quite easy - you have to clean the REPCONN Test Site of the Nightkins . Go to the [REPCONN Test Site] (MsD:30) #1. Clear your way to the [REPCONN Facility] killing all feral ghouls. Go inside where you'll discover an intercom telling you where to go next (M30:1). Watch out for the traps and for the ghouls. You'll discover another intercom. Activate it and you will be able to go inside. After a short conversation with Chris Haversam, he will send you to meet Jason #2, who can be found in the next room.

You'll learn about some kind of "daemons" which were probably let go by feral ghouls. Agree to deal with those daemons. You'll receive the key to the [REPCONN basement] (M30:2). Go there. Being inside locate the corridor and go ahead, turning right at the end. You'll get into the room where you can find Davison (M30A:1) #1.
If you've killed all Nightkins, return to Jason.
If you've chosen the second option, tell him that you were sent here by the ghouls. You'll learn that there is a large shipment of stealth boys in the complex. Your task is to search one last room where someone kills all Nightkins coming inside. Go to the room (M30A:2). You'll meet Harland #2 there.
If you decide to kill him, return to Davison (M30A:1) and tell him that you've done your job.
If you decide to help the ghoul you have to locate his missing friend (M30A:3) and check if she is still alive. Go back to the corridor and turn left at the end. You'll meet few Nightkins (M30A:3). One of them has a jailer's key #1. Go down and head to the door. In one of the rooms you'll find an imprisoned, dead Ghoul #2. Return to Harland (M30A:2) and tell him that you've found his friend's body. He'll leave the place.
There is a terminal (M30A:5) upstairs which contains shipment information about Stealth Boys. Read all data and return to Davison (M30A:1). Then return to Jason and tell him that the Nightkins are gone. You'll be sent to the basement again, where you'll learn what to do next (M30A:6).
Your last assignment is to find missing rocket parts. Talk to Chris about missing parts. You need to search for the thrust controllers and the Isotope-239 igniting agent. The controllers can be obtained from Old Lady Gibson at [Gibson Scrap Yard] (MsE:18) #1. She demands 500 caps for the parts.
The ignition part can be found north of [Clark Field] (MsG:6), right near a dead body #2.

Return to Chris and give him the parts. Head to the viewing deck where you can finish your task:
Activate the navigation console:
You'll earn the positive reputation in both cases.

![Given by: Neil [Black Mountain] (M44:1) - Crazy, Crazy, Crazy - Side quests - Fallout: New Vegas - Game Guide and Walkthrough](https://game.lhg100.com/Article/UploadFiles/201512/2015121518534656.jpg)
Given by: Neil [Black Mountain] (M44:1)
Neil can be found at the Neil's Shack #1. As you approach the area, he'll run towards you and will tell you that the area is quite dangerous. You'll learn that a super mutant named Tabitha has taken over the radio station and she orders other super mutants to kill people.
He'll agree and will meet you at the summit. On your way up you'll come across few Mutant and Nightkin patrols (M44:2) #2 - kill them. Once you reach the summit talk to Neil (M44:3) and make some plan.
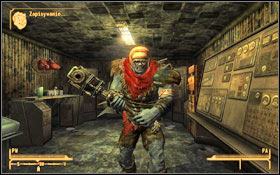
This is the violent solution. Head to Broadcast Building (M44:4) and take the second door in the background. Just under the stairs leading up you will find the key to Tabitha's room #1. Head to the first floor, open the door and kill this beauty #2.
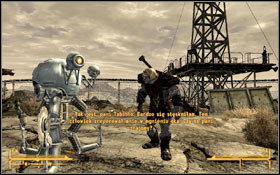
Enter the storage shed (M44:5). You'll find robot named Rhonda inside #1.
When you go inside you'll meet Tabitha #2. She'll thank you for repairing the robot and she'll leave. You'll also get a second key to her personal room.
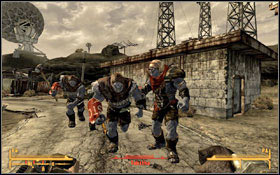
Go inside the Prison Building (M44:6). There are two terminals inside. You can either hack the secured one or read all entries from the second terminal. You'll find there a password to the secured terminal. Open the door - you'll find Raul #1 inside.
When you go inside you'll meet Tabitha #2. You have to kill her. Just before the fight you can give a weapon to your companion in order to support you.
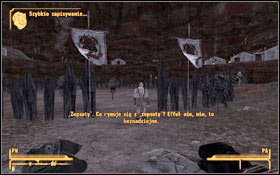
![Given by: Jerry the Punk [Red Rock Drug Lab] (MsA:13) - Cry Me a River - Side quests - Fallout: New Vegas - Game Guide and Walkthrough](https://game.lhg100.com/Article/UploadFiles/201512/2015121518534681.jpg)
Given by: Jerry the Punk [Red Rock Drug Lab] (MsA:13)
You will find Jerry the Punk near the camp and the Red Rock Drug Lab. He stands nearby the arena #1 during the day, while during the night he can be found in his tent. You can listen to his scribble poetry. Talk to him and suggest him to join the Followers of the Apocalypse. [Speech 30] tell him to leave his life as a Great Khan. Go to the Followers at [Freeside] (M6B:1). Locate Julie Farkas #2 and tell her that you've found a poet who doesn't want to be a Great Khan anymore. She'll be pleased to admit him as a new member. Return to Jerry (MsA:13) and tell him that he can join the Followers.
![Given by: Francine Garret [Atomic Wrangler Casino] (M6:3) - Debt Collector - Side quests - Fallout: New Vegas - Game Guide and Walkthrough](https://game.lhg100.com/Article/UploadFiles/201512/2015121518534791.jpg)
Given by: Francine Garret [Atomic Wrangler Casino] (M6:3)
Your task is to collect debts from few casino's customers. You'll get 25% of these debts in return.
You have to collect debt from three people, in any order.
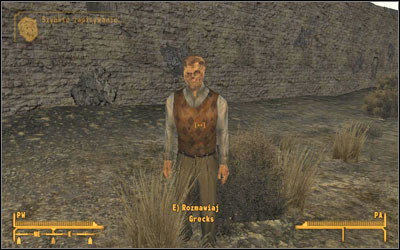
Grecks (M6B:6) owes the casino 138 caps. Tell him that you're here to collect his debt. He'll pay you 138 caps at once.
You can also pickpocket him or kill him.

Lady Jane (M6:4) owes the casino 250 caps. Tell her that you're send by the Garrets. She'll tell you that unfortunately she can't pay the debt because she has lost her money with the caravan:
If you are not able to convince her using your skills, suggest her to fake her own death. You'll get 156 caps.
If you've decided to take caps from her caravan or you know its location, go to the [Broc Flower Cave] (MsG:12). Locate the Jane's Brahmin and search it. You'll find 276 caps.
You can also pickpocket her or kill her.
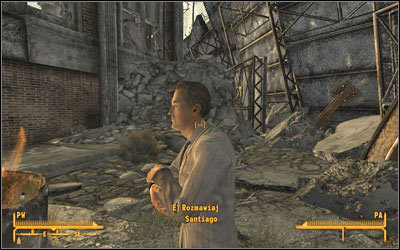
Santiago (M6B:9) owes the casino 212 caps. Initially he will refuse to pay the debt, saying that he is a VIP in Freeside and for 50 caps he can sell you a secret password which gives some kind of discount at Mick's.
NOTICE: Santiago is a cheater!
Mention the debt again:
You can also pickpocket him or kill him.
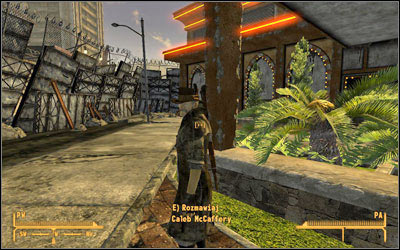
Return to Francine Garret (M6:3) and give her caps you've collected. Now you'll get between 150 and 661 caps as a reward, depending on the percentage and amount of caps you got from clients.
You'll learn that there is one more person who owes her money. This is a man named Caleb McCaffery. Go to the Strip and locate Caleb near the entrance to the Gomorrah (M7:9).
Return to Francine (M6:3) and show her Caleb's hat. You'll get some caps as a reward and a key to the room in the Atomic Wrangler Casino.

![Given by: Melissa [Great Khan Encampment] (MsD:11) - Dont Make a Beggar of Me - Side quests - Fallout: New Vegas - Game Guide and Walkthrough](https://game.lhg100.com/Article/UploadFiles/201512/2015121518534765.jpg)
Given by: Melissa [Great Khan Encampment] (MsD:11)
Melissa #1 has a problem with the supply. Offer her your help with finding the missing shipment. You do not have to search long - the suitcase is probably in [Sloan] (MsD:13). Go there and enter the Mining Office (M31:1). Walk up the stairs - there is a suitcase to the left of the desk #2. unfortunately there is only a pack of cigarettes inside.
Go outside and talk to Chomps Lewis (M31:2) #1 about the empty suitcase. He'll point you to [Primm] (MsF:4). You'll find a Tyrone (M3:3) #2 in one of the NCR soldiers' tent there. Talk to him and ask him about the chems. Tyron will ask for additional 300 caps:
Whichever option you choose you'll obtain chems. Now the task can be finished in two ways.
Return to Melissa (MsD:11) with the chems shipment. You'll get 150 and some chems as a reward.
After leaving the tent go to the other one, where you'll find Lieutenant Hayes. Tell him that Tyrone was smuggling for Khans. You can also rat Chomps Lewis out or say that no one else was involved. The quest is over.
You can also return to Melisa (MsD:11) and :
![Given by: ED-E [Primm] (M3:4) - ED-E My Love - Side quests - Fallout: New Vegas - Game Guide and Walkthrough](https://game.lhg100.com/Article/UploadFiles/201512/2015121518534849.jpg)
Given by: ED-E [Primm] (M3:4)
To start this quest you have to go to the [Nash residence] in Primm (M3:4). There is a robot #1 lying on the table inside the building. Examine it carefully:
<Companion Protocol:: Begin> ED-E will become your companion. The robot contains some voice recording, which can be triggered when it hears certain keywords. Go to Old Lady Gibson [Gibson Scrap Yard] (MsE:18) #2, who will tell you about solar plant HELIOS One. The quest will start and you also will hear first voice recording about Whitley. You'll also learn that the robot is a prototype "duraframe" model. Listen to the whole recording.
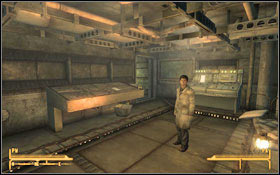
![Wait about 10 days (in game time) and go to the [HELIOS One] (MsE:17) to talk to Ignacio Rivas (M29A:2) #1 - ED-E My Love - Side quests - Fallout: New Vegas - Game Guide and Walkthrough](https://game.lhg100.com/Article/UploadFiles/201512/2015121518534890.jpg)
Wait about 10 days (in game time) and go to the [HELIOS One] (MsE:17) to talk to Ignacio Rivas (M29A:2) #1. Ask him about ARCHIMEDES - the next recording will be triggered. Listen to it. Wait next 2 days and go to meet Lorenco, the BoS Knight. He'll ask you to get the robot to one of the patrols to examine it in detail. Now head for [REPCONN Headquarters] (MsD:6). First, open the door to the right - [Lockpick 50] or using the terminal [Science 50]. While going to upper levels you will be stopped 3 times by the Mobile Facial Recognition Scanner. If your skills are not high enough, you will have 30 seconds to leave the building regardless of your answers.
You must use: [Speech 60], [Intelligence 7], [Luck 7], in this order. Being on the third, [Last REPCONN Headquarters Floor] you will find dead patrol #2. Search the bodies and take BoS mission tape. Head to the [Hidden Valley] (MsD:21). When you find it (or it is already found), you'll meet April Martimer, a member of the Followers of the Apocalypse. She'll make a counter-offer asking you to pass the robot to the Followers. Now you have to possible choices and you have to decide what upgrades of ED-E you want - its armor or weapons.
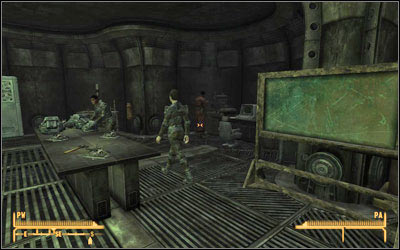
Enter the BoS Bunker (M13:1) and use a password with the terminal. You will meet a Brotherhood Paladin. You will have to give away all your weapons and items. Next you will talk to Elder McNamara, who will assign you [Still in the Dark]. You need to complete its first part (deal with a guard) in order to continue with your task. When you have full freedom, go to Lorenzo [Hidden Valley Bunker, L2] (M13B:4) and give him the robot. It will have its armor upgraded. Wait 3 in-game days and you will get a message saying that ED-E has returned to Primm. Go there and talk to the robot [Primm] (M3:4). The task is complete after a short conversation.
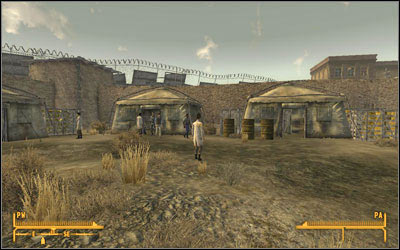
Go to the Mormon Fort (M6B:1), where you can find April Martimer. Give her the robot. It will have its weapons upgraded. Wait 3 in-game days and you will get a message saying that ED-E has returned to Primm. Go there and talk to the robot [Primm] (M3:4). The task is complete after a short conversation.
![Given by: First Sergeant Astor [Camp Searchlight] (MsG:20) - Eye for an Eye - Side quests - Fallout: New Vegas - Game Guide and Walkthrough](https://game.lhg100.com/Article/UploadFiles/201512/2015121518534853.jpg)
Given by: First Sergeant Astor [Camp Searchlight] (MsG:20)
NOTICE: In order to take this task you need to visit the [Cottonwood Cove] (MsG:22) first.
Sergeant Astor patrols the area along with his companions #1. When you mention the Cottonwood Cove while talking to him, the quest will start. He'll assign you with complete intelligence mission: you have to collect some intel on Legion future raids and troop movements. You'll also receive a NCR bug which has to be plant in Legion's radio. Heat to [Cottonwood Cove] (MsG:22) where you'll have two choices to deal with the task.
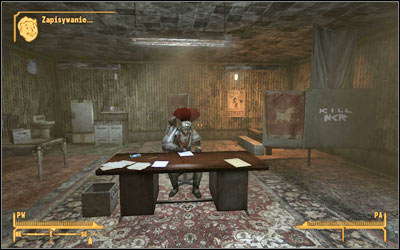
Talk to Aurelius of Phoenix (M8:4) about bugging the radio. You'll get the old intel data and the NCR soldiers will be taken by surprise by the Legion. Return to Astor (MsG:20) and give him the bad data.
Enter the Legion Headquarters (M8:4) and plant the bug in the radio #1. Search the cabinet and get the Legion raid intel. Go outside and head to the Aurelius' office. Search his desk #2 and take the documents about the patrols. Return to Astor (MsG:20) and give him the intel data you've collected.
Your last task is to wipe the Legion camp out. You can just pop in and kill all of the Legionnaires if you're tough enough and you think you can make it.
The second option is to drop several radioactive barrels into the camp (M8:5). Legion soldiers will be doomed.
Return to Astor (MsG:20) again and report that the cove is clear.
![Given by: Elder McNamara [Hidden Valley bunker L2] (M13B:1) - Eyesight to the Blind - Side quests - Fallout: New Vegas - Game Guide and Walkthrough](https://game.lhg100.com/Article/UploadFiles/201512/2015121518534939.jpg)
Given by: Elder McNamara [Hidden Valley bunker L2] (M13B:1)
This quest can be obtained only if you completed [Still in the Dark] in favor of Elder McNamara #1.
You task is to plant a Remote Signal Transponder in the broadcast building at the [Black Mountain] (MsD:15). To get there you have to head to north from the Valley. You'll meet Neil (M44:1) there who will assign you with [Crazy, Crazy, Crazy] #1. Watch out for Mutants, Nightkins (M44:2) #2 and a few Centaurs.
Once you've reached the summit, you'll have a few ways to get to the broadcast building #1. Take a look at [Crazy, Crazy, Crazy] section to get Tabitha killed. Being on the first floor of the broadcast building (M44:4), attach the Remote Signal Transponder to a console in the upper level of the radio center #2.
Report back to Elder McNamara (M13B:1). You'll become Brotherhood of Steel Paladin. You'll also receive the Power Armor and a training on how to use it as a reward.
Given by: Sgt. McCredie [Camp Golf] (M28:1)
Talk to Sgt. McCredie and ask him about duty in the camp. Push him and he'll tell you about Misfits. Tell him that you'll try to whip them into shape. You can find Misfits outside, nearby their tent (M28:2).
Talk to Pointdexter #1. You'll decide to cheat the system and alter the reports which you find in House Resort. Go to the main entrance (M28:3). You can access the reports via the main terminal in the lobby or the other one, in the office. The second one is secured [Science 50] but you can access it in peace. It doesn't matter which terminal you use #2. Select the Squad CG554-2 report - Misfits and alter it.
Return to Pointdexter (M28:2) and tell him about your work.
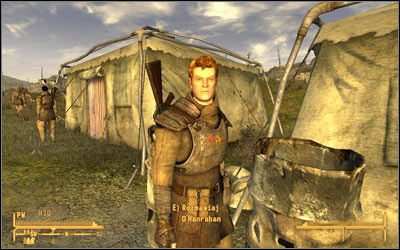
Talk to O'Hanrahan #1. He thinks that the squad needs to relate to each other better. You need to talk to every squad member: Pointdexter, Mags and Razz. Ask them about their background and tell them to be more polite to each other by convincing them with [Speech 40].
Return to O'Hanrahan (M28:2) and tell him that from now on quad members work together, not against each other.

Talk to Razz #1. He thinks that the squad needs some Psycho. You'll get drugs from Jack at [Red Rock Canyon] (MsA:13). Depending on the time of day, you will find Jack sitting by the fire #2, or in a trailer. Say that Razz wants the usual - you will receive a package, on account of Razz of course.
Return to Razz (M28:2) and give him the package.
Talk to Mags #1. She thinks that the squad needs more training with guns and explosives. You need your skills to be high enough to teach the squad: [Guns 25] [Guns 35], [Guns 45]. Of course, shooting only is not enough, so talk to the soldiers again #2 and teach them about grenades: [Explosives 25], [Explosives 35], [Explosives 45].
Return to Mags and ask her about squad's improvement.
![Given by: Arcade Gannon [Old Mormon Fort] (M6B:1) - For Auld Lang Syne - Side quests - Fallout: New Vegas - Game Guide and Walkthrough](https://game.lhg100.com/Article/UploadFiles/201512/2015121518535040.jpg)
Given by: Arcade Gannon [Old Mormon Fort] (M6B:1)
To start this quest you need first to have Arcade as your companion. But the appropriate conversation option will show up only if he trusts you. And to gain his trust you need to complete following quests:
NOTICE: what's important, you need to have quite a progress with the main storyline (doesn't matter for which faction) to trigger this quest.
If you have already Arcade in your team, your next task is to convince five people to come to a Remnants meeting. You can talk to them in any order.
NOTICE: Arcade has to be your companion and be with you during every conversation with Elders.
Judah Kreger
Can be found in [Miguel's pawn shop] (MsB:3). He'll come to the meeting with no problems.
You'll receive a single word of the five-word pass phrase - "Navarro".
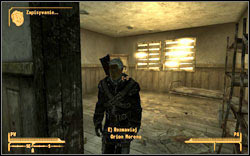
Orion Moreno
Can be found in a house near the [NCR Sharecropper Farms] (MsB:11). He'll come to the meeting with no problems.
You'll receive a single word of the five-word pass phrase - "remember".
Cannibal Johnson
Can be found in [Cannibal Johnson's Cave] (MsB:31). He'll come to the meeting with no problems.
You'll receive a single word of the five-word pass phrase - "old".
Daisy Whitman
Can be found in or near her hotel room (M4:4) in [Novac] (MsE:21). She'll come to the meeting with no problems.
You'll receive a single word of the five-word pass phrase - "Dear".
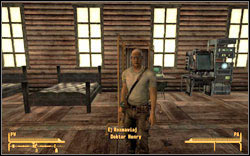
Doctor Henry
Can be found in the main building (M35:3) in [Jacobstown] (MsA:2). Unfortunately he has to finish his tests first and you need to complete [Guess Who I Saw Today] for him and then ask him again. He'll agree to come to the meeting then.
You'll receive a single word of the five-word pass phrase - "friends".
![Once youve convinced all Remnants, it is time to go to the [Remnants Bunker] (MsA:10) - For Auld Lang Syne - Side quests - Fallout: New Vegas - Game Guide and Walkthrough](https://game.lhg100.com/Article/UploadFiles/201512/2015121518535140.jpg)
Once you've convinced all Remnants, it is time to go to the [Remnant's Bunker] (MsA:10). You can enter it only with the whole password: "Dear old friends, remember Navarro". Head to the briefing room (M47:1) and talk to Judah. He will ask you whether you want Enclave to fight against NCR or Caesar's Legion.
NCR
If you want to support NCR, Moreno won't be happy and will run out the room. Go after him. You'll find him outside, wearing Remnants power armor:
Whichever option you choose, you'll get the door keycard. Go inside and you'll receive Power Armor (if you do not have one). Talk to Whitman - she'll train you how to use the armor. Leave the briefing room and the quest will be over.
LEGION
If you decided to aid the Legion, Johnson won't be happy but he will make no problems because of that. Talk to Moreno and ask him for training in Power Armor. Leave the briefing room and the quest will be over.

![Given by: The King [Kings School of Impersonation] (M6:6) - G.I. Blues - Side quests - Fallout: New Vegas - Game Guide and Walkthrough](https://game.lhg100.com/Article/UploadFiles/201512/2015121518535143.jpg)
Given by: The King [King's School of Impersonation] (M6:6)
Your task is to find out why one of the bodyguards in Freeside earns so many caps. Go to the main gate, where you'll find Orris (M6B:4) #1. Hire him and pay him 200 caps. Go after him and watch out for any suspicious activity. After a while he will start to run and you won't be able to catch with him. He will start shooting and just after you reach the crossing, you'll find some dead bodies #2.
NOTICE: To get this quest complete, you have to notice on of two facts now. If your skills are not high enough, you'll return to the King, telling him that you didn't find anything suspicious. You have to do it again.
You can shoot Orris and fake thugs or just return to the King (M6:6) and tell him about your findings.
Your next task is little bit easier. Go to the [Old Mormon Fort] (M6B:1) and talk to wounded men about the attacks. Ask for the details - first talk to Roy and then to Wayne. Return to the King (M6:6) and report him back what you've found. You have to learn some more information though and you have few possibilities right now.
You'll learn about major Elizabeth Kieran who provides food to poor people.
To get any information from them you have to pass a short knowledge test (below are the correct answers):
If you answer correctly all three questions, you'll learn where free food is provided and the password, which is "Hope".
Go to the major. She is at the Ruined Store (M6B:5). There are two guards next to the entrance #1. You have two ways to get inside the building:
You'll get a small meal from Elisabeth #2. Ask her if she provides free food for local inhabitants and tell her that this is very important for Julie. You'll learn that the messenger was sent to the King and was beaten. Return to the King (M6:6) - Pacer will immediately approach you as you walk in the King's School of Impersonation. He will ask you to keep hush about his involvement. You can agree, refuse to do this or ask for money to stay quiet (200 caps, and you can ask for more with [Barter 50]). Of course, regardless of which option you choose, go talk to the King.
After a while one of the King members pops up and tells you two of the battle near the train station between Pacer and NCR.
Head over to the station (M6B:7) and talk to Elizabeth Kieran saying that the King wants to support them. Say that he had no idea about beating the messenger - she will agree to get his support. Return to the King (M6:6) and tell him that you have resolved the conflict. As a reward you'll get a favor of your choice:
Head over to the station (M6B:7), help Pacer and shoot all NCR soldiers out.
A sniper rifle is very useful here - you can shoot all enemies out from a distance (especially these standing on the lookout tower). When it's over return to the King (M6:6) and tell him that the problem with NCR is solved. As a reward you'll get a favor of your choice:

![Given by: Trudy [Prospector Saloon] (M1:2) / Ringo [Goodsprings Gas Station] (M1:4) - Ghost Town Gunfight - Side quests - Fallout: New Vegas - Game Guide and Walkthrough](https://game.lhg100.com/Article/UploadFiles/201512/2015121518535280.jpg)
Given by: Trudy [Prospector Saloon] (M1:2) / Ringo [Goodsprings Gas Station] (M1:4)
You can get this quest after completing [Back in the Saddle] (if you've decided to finish the tutorial right after shooting the bottles) or [By a Campfire on the Trail] (if you decided to complete the tutorial). Being in the saloon you'll witness an argument between Trudy and Joe Cobb #1. You can talk to both characters but you can side only with one of them. In this quest you have to listen to and help Trudy. If you decide to side with Joe, you have to read [Run Goodsprings Run] quest section.
You can also talk to Ringo (M1:4) right away and choose proper dialog line [Speech 20].
After talking to Trudy head to Ringo #2 who hides at the [Goodsprings Gas Station] (M1:4). Mention the Powder gangers and offer your help. You have to gather as many Goodspring townfolks as possible to get a support for yourself and Ringo in fight against the Powder gangers. You do not need to complete optional tasks.
![Return to Sunny [Prospector Saloon] (M1:2) and ask if she will help you - Ghost Town Gunfight - Side quests - Fallout: New Vegas - Game Guide and Walkthrough](https://game.lhg100.com/Article/UploadFiles/201512/2015121518535227.jpg)
Return to Sunny [Prospector Saloon] (M1:2) and ask if she will help you. She'll agree without hesitation. You can return to Ring and tell him that Sunny will help you or you can try to get support from other inhabitants. Go to the [Goodsprings General Store] (M1:5) and look for Chet #1 (he might stand at the desk or can be found in his bed). When you ask him for help he'll refuse initially. To convince him you need a proper dialog line [Barter 25]. You'll get the Leather Armor.
Easy Pete #2 can be found either near the saloon (M1:2) or in his house (M1:6). To convince him to help you, you need the [Explosives 25] skill to get the proper dialog line. You'll receive 5x dynamite when the fight begins.
You'll find Trudy at the Prospector Saloon (M1:2) or in her house (M1:7). To convince her you need to choose one of the two dialog lines (it depends on your skills): [Speech 25], [Sneak 25]. She'll join you as soon as the shooting starts.
Doc Mitchell #2 can be found in his house (M1:1). You can ask him to cure you and to help you in fight against the Powder gangers [Medicine 30]. You'll receive 2 Doctor's Bags and 3 stimpaks.
![Return to Ringo [Goodsprings Gas Station] (M1:4) and tell him that you are ready to face the Powder gangers - Ghost Town Gunfight - Side quests - Fallout: New Vegas - Game Guide and Walkthrough](https://game.lhg100.com/Article/UploadFiles/201512/2015121518535293.jpg)
Return to Ringo [Goodsprings Gas Station] (M1:4) and tell him that you are ready to face the Powder gangers. The shooting begins and you have to fight 6 thugs. If you're quick enough you can use dynamite to hurt them all badly. Remember to use covers. Once all the Powder Gangers are dead, talk to Ringo.
![Given by: Doctor Henry [Jacobstown] (M35:3) - Guess Who I Saw Today - Side quests - Fallout: New Vegas - Game Guide and Walkthrough](https://game.lhg100.com/Article/UploadFiles/201512/2015121518535331.jpg)
Given by: Doctor Henry [Jacobstown] (M35:3)
The Doctor #1 needs an investigation about Nightkin stealth mutation. You can have Lily as your companion in this task, but this is optional. She can be found in front of the lodge (M35:4) #2. She'll mistake you for her son, Jimmy. Ask her if she wants to come along with you to Nightkin's cave and examine the mutation.
NOTICE: If you already have a human companion, Lily won't be able to join you.
![Head to [Charleston Cave] (MsA:1) and enter it - Guess Who I Saw Today - Side quests - Fallout: New Vegas - Game Guide and Walkthrough](https://game.lhg100.com/Article/UploadFiles/201512/2015121518535371.jpg)
Head to [Charleston Cave] (MsA:1) and enter it. Continue through the cave towards marked point (M46:1), killing Nightstalkers on your way. Do not let Lily to be killed! Examine dead Nightkin #1 - you'll find Chewed Stealth boy. Now return to doctor Henry (M35:3). You have to test the Stealth boy on someone and Lily is the best experimental subject. Talk to her and when she agrees to be tested, talk to the doctor again. Wait until test is finished #2.

As soon as the doctor has finished his experiment, Keene enters the room and demands the Stealth Boy prototype:
The doctor wants more research on the prototype:
![Given by: Morgan Blake [Sharecropper Farms] (M45:3) - Hard Luck Blues - Side quests - Fallout: New Vegas - Game Guide and Walkthrough](https://game.lhg100.com/Article/UploadFiles/201512/2015121518535320.jpg)
Given by: Morgan Blake [Sharecropper Farms] (M45:3)
She'll ask you to check water pumps, because something is probably wrong with them. Go to the [East Pump Station] (MsB:21) #1 where you can find a terminal #2. [Science 50] fix the terminal and read a note about a radiation in a filtering system.

![Travel to the [Vault 34] (MsB:30) - Hard Luck Blues - Side quests - Fallout: New Vegas - Game Guide and Walkthrough](https://game.lhg100.com/Article/UploadFiles/201512/2015121518535325.jpg)
Travel to the [Vault 34] (MsB:30). The reactor (M18A:2) is your target. Unfortunately the door leading to the Overseer's Office is blocked so you need to get a key. Look for a corridor with the leaking pipe. Further way is flooded, so dive under the desk and locate a vault technician there (M18A:3). Search him and get the security terminal password #1. Now go through the clinic heading to the Armory (M18A:4), which is also flooded #2. There is another drowned vault technician with the utility terminal password.

Go to the utility room where you can access the terminal using the password you found (M18A:5) #1 and activate the pump system. Next go to the [Armory] where you can unlock the door leading to the Overseer's Office (M18B:1) #2.
![Once youre inside the [Reactor room] you have to watch out for radiation and vault inhabitants - Hard Luck Blues - Side quests - Fallout: New Vegas - Game Guide and Walkthrough](https://game.lhg100.com/Article/UploadFiles/201512/2015121518535449.jpg)
Once you're inside the [Reactor room] you have to watch out for radiation and vault inhabitants. You'll reach a huge terminal (M18C:1), where you can:
If you decide to close the exterior vents, water won't be radiated any longer.
You can also save trapped Vault 34 inhabitants, but the Sharecropper farms will be doomed.
![Given by: Cass [Mojave Outpost] (M24:1) - Heartache by the Number - Side quests - Fallout: New Vegas - Game Guide and Walkthrough](https://game.lhg100.com/Article/UploadFiles/201512/2015121518535431.jpg)
Given by: Cass [Mojave Outpost] (M24:1)
You can start this mission either by talking directly to Cass #1 or by completing [You Can Depend on Me]. If you started it by talking to Cass, after a short conversation you'll learn that you can find some job at Crimson Caravan.
Complete [You Can Depend on Me].
When you buy out her caravan, Cass won't be able to leave this place while there is some danger on the north. Go to Jackson (M24:2) #2:
Cass will be free and she will join you as a companion.
Cass will ask you if you could diverge a little bit and visit the place, where her caravan was attacked. Go with her to the [wreckage of her caravan] (MsB:36) and take a closer look at the remains #1. Your next target is [Griffin Wares Sacked Caravan] (MsA:6) - search this place too. Cass will find a map with yet another place marked on it - [Durable Dunn's Sacked Caravan] (MsB:19) #2. Go there and also search the place. Cass will come to the conclusion that the attacks were caused by Van Graffs.
You can complete this task in two ways.
You decide to kill the Van Graffs and Alice. Go to the [Silver Rush] (M6:2) and kill all people. Then go to the [Crimson Caravan] (M12:2) and get rid of Alice.
You can collect some evidence and rely on NCR justice. Go to the [Crimson Caravan] and open the safe in the office (M12:2). Take the contract you found there. Now go to the [Silver Rush] (M6:2), give away your weapons at the entrance and go inside. Locate the safe and open it - it is good to have Stealth Boy with you. Take the Letter to Gloria.
Talk to Ranger Jackson at the [Mojave Outpost] (M24:2) and give him the evidence. If you've killed Jackson before, you won't be able to choose this ending.
![Given by: Julie Farkas [Old Fort Mormon] (M6B:1) - High Times - Side quests - Fallout: New Vegas - Game Guide and Walkthrough](https://game.lhg100.com/Article/UploadFiles/201512/2015121518535438.jpg)
Given by: Julie Farkas [Old Fort Mormon] (M6B:1)
Talk to Julie. When you notice that the situation in the Freeside looks pretty nasty, you can get to the point of conversation in which you may ask for a job. Your task is to help addicts to quit being addicted.
Bill Ronte can be found near the [Atomic Wrangler Casino] (M6:8), just under the door to Freeside #1. Tell him that you're here to help him to get sober. He doesn't want your help though so you have to deal with his dealer.
Jacob Hoff can be found in the building near the Mick and Ralph's (M6B:10) #2. He also doesn't want to quit chems. You'll learn that Dixon is also his dealer.
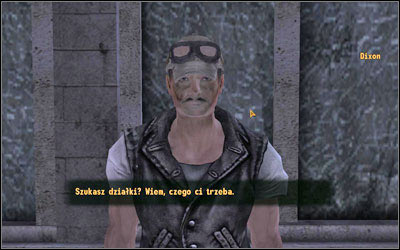
Dixon wanders near the Mick and Ralph's (M6B:2). Tell to him about Bill and Jacob and ask him politely to leave them alone.
Now you can return to Bill and Jacob and tell them that Dixon won't supply them anymore.
JACOB
He wants you to get him some stuff:
BILL
He wants you to get him some stuff:
Return to Julie Farkas [Old Mormon Fort] (M6B:1) and tell her that both addicts are clean.
![Given by: Joana after completing [Bye Bye Love] / Yes Man [The Tops 13th floor] (M7B:2) / Mr - How Little We Know - Side quests - Fallout: New Vegas - Game Guide and Walkthrough](https://game.lhg100.com/Article/UploadFiles/201512/2015121518535520.jpg)
Given by: Joana after completing [Bye Bye Love] / Yes Man [The Tops 13th floor] (M7B:2) / Mr. House, [The House Always Wins, IV] / Ambassador Crocker, [For the Republic, Part 2]
You can obtain this quest from many NPC's. Just after you enter the Casino, you will be asked to give away your weapons, although you can keep hidden one. Go to the receptionist (M7F:1) #1 and try to get any information about Omertas plans [Speech 28]. You can also use the [Terrifying Presence] perk on one of the Omertas thugs and find out where Cachino is. You can find him sitting by the table (M7F:2) or (most probably) he will catch you when you head towards him #2.
After asking him about dodgy business, Cachino will leave. You need to get some proof that something is wrong. To do so you can try:
If you choose second option you have to pay her 300 caps for the key or use [Strength 8] to get the key free of charge or lower the bribe to 200 caps with [Barter 55]. Take the elevator (M7F:3), head to [Gomorrah Rooms] and then step into Cachino's rooms. Pass behind the guard and open the door using the [Lockpick 75]. Search the desk to the left #2 and you'll find the Cachino's Journal.
Return to Cachino (M7F:2) and show him the journal. Now you can choose one of two ways to complete this task:
If you give Cachino the journal back, you can help him to thwart the Family plans - solution 1. And if you decide to keep the journal, scroll down to the solution 2.
Side with Cachino and help him to thwart the Family plans. You have to get some information from Troike about mysterious weapon supplies or get to know what Clanden is into. You'll receive the Zoara Club key.
TROIKE
Go to the elevator leading to the [Gomorrah Lower Level] (M7F:3). When you're downstairs, open a door (M7G:1) with a key and head to the room where you'll find Troike (M7G:2) #1. Ask him about weapons - he won't be very helpful:
Return to the lower level and take the door (M7F:4) to a balcony, where you can find Big Sal (M7F:5) #2.
You can also find a Troike blackmail note in Big Sal's office safe. You can get the password from the boss by stealing it, open the safe by yourself or hack the terminal to open it.
Return to Troike (M7G:2) and tell him that he is free of his contract. Ask about guns:
In the first case leave the casino and come back. If you choose the second option, go to the basement (M7G:3) and plant the Thermite (M7G:4). You can also search boxes first and take weapons you find. Return to Cachino (M7F:2) and report to him. The ending begins.
CLANDEN
You will find him in his room but basically he will not give you any clues. However you can find a safe behind the wardrobe #1 [Lockpick 75], which contains Snuff Tapes. You can now talk to Clanden or to Cachino (he'll tell you to talk to Clanden anyway):
ENDING
Both, you and Cachino will meet the bosses. [Speech 80] coax Cachino to start the shooting - the bosses shouldn't expect that. Follow him to the room. You'll get a gun - sit down on a coach and start a conversation. [Speech 80] you can ask about the plan and then lie that Nero asked you to kill Big Sal. The shooting will start soon - kill Nero. You can also give a signal to Cachino anytime to shoot one of the bosses. The task is over.
You decide to keep the journal - go to a balcony, where you can find Big Sal (or Nero) (M7F:5) #1. There is a guard right to the door (M7F:4).
Tell the bosses that one of their employees cheats them.
Go after the boss to his office #2 where he will deal with Cachino.
Ask the boss what to do next. You have to help two Family members - Troike and Clanden.
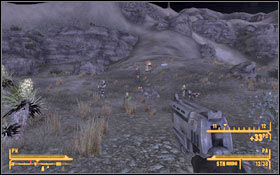
TROIKE
Go to the elevator leading to the [Gomorrah Lower Level] (M7F:3). When you're downstairs, open a door (M7G:1) with a key and head to the room where you'll find Troike (M7G:2) #1. Ask him what he needs - you have to help him to find a missing shipment of weapons. Leave the casino and head to [Sunset Sarsaparilla Headquarters] (MsB:18). You'll find a weapons shipment north west of the Sunset Sarsaparilla Headquarters (M10:1) #2. Watch for the Fiends guarding it. Take the shipment and return to Troike (M7G:2).
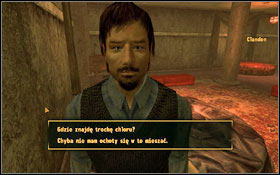
CLANDEN
You will find him in his room #1. Ask him what does he need - [Science 60] you can guess by yourself or just ask him directly. It is about chlorine. You can get it in one of two places - in the Ultra-Luxe Casino or in Freeside.
Go to the [Ultra-Luxe Casino] (M7:4), give away (or holdout) you weapons and head to closed storage room at the end (M7C:6). To open it you need [Lockpick 25]. Take the Container of chlorine #2 and return to Clanden.
You can also visit [Mick and Ralph's] (M6B:2) and buy chlorine there [Science 60] or you can convince the trader [Barter 50] to sell it for a half price. Return to Clanden.
Return to the boss to finish this task.
If you haven't complete the task, the Omertas will attack you during the final battle at Hoover Dam, however they won't use the bomb.
If you have sided with the bosses, the Omertas will attack you during the final battle at Hoover Dam and they will use the bomb.
If you've helped Cachino, the Omertas won't attack you during the final battle at Hoover Dam.
![Given by: Veronica [188 Trading Post] (MsE:6) - I Could Make You Care - p. 1 - Side quests - Fallout: New Vegas - Game Guide and Walkthrough](https://game.lhg100.com/Article/UploadFiles/201512/2015121518535614.jpg)
Given by: Veronica [188 Trading Post] (MsE:6)
You can find Veronica standing by the tent. To get her as a companion, you can't say under any circumstances that you like to shoot BoS soldiers. When she finally agrees to join you, you'll start to travel with her. To start the quest you need to trigger three conversations with Veronica. Some of the dialog lines can happen only once, so if you have already heard that line or have completed the quest before recruiting Veronica, the trigger won't occur. There are three triggers that can never go away though, so you can start the conversation with Veronica.
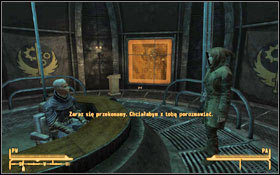
Once you've started the mission, Veronica will ask you to go to the BoS bunker. Head to [Hidden Valley] (M13:1). You can enter with no problems, while Veronica knows the password #1. Go to see the Elder McNamara (M13B:1) #2 - Veronica will talk to him.
Head to the exit - you'll be stopped by Veronica. Ask her what to do next. She'll mention the previous Elder named Elijah, who had some more information. Leave the bunker and head to the [HELIOS One] (MsE:17). Find the Gibson's Shack #1, which contains the terminal #2. You will find data on three interesting technologies. Ask for:
Now you can choose one of three paths - you need any of above technologies as a proof for Elder McNamara.
Go to the terminal building in the [Camp McCarran]. Locate Thomas Hildern (M25A:1) and talk to him about his current research. You have to take [There Stands the Grass] and complete it. Next just take a copy of data in the computer.

![Being at the [entrance to the Vault 22] you can either fix the elevator (M16A:1) or take the stairs down (M16A:2) - I Could Make You Care - p. 1 - Side quests - Fallout: New Vegas - Game Guide and Walkthrough](https://game.lhg100.com/Article/UploadFiles/201512/2015121518535792.jpg)
Being at the [entrance to the Vault 22] you can either fix the elevator (M16A:1) or take the stairs down (M16A:2). Head to the 4th level of the vault [Vault 22 - Common Area] and locate the Overseer's office (M16D:3) #1. Activate the terminal you've found there and unlock all three doors (crew quarters, the databank door and cave door). Now head to the [Vault 22 - Pest Control] level where you can find the computer (M16E:1) with data you need. Download it #2.
Return to Elder McNamara (M13B:1) to complete your task.
First you have to know where to look for it. The best place for such information is Vault 21 gift shop (M7:7) with Sarah #1 running it. Ask what she sells and then change the subject to C-Finder. You'll learn that she has sold it to some guy. Ask for details and she'll tell you that you can find him near by the Mick & Ralph's (M6B:2). After reaching the place you'll find a dead man #2. Ask local people if they have seen the gun. The Vagrant knows the answer but you need to pay him 10 caps. Then you will learn that pair of children can sometimes be seen running around the streets and playing with the gun.


Only a boy named Max wants to talk to you #1. Ask him if he will sell you a gun:
Your next task is to activate C-Finder. Head to [Helios One] (MsE:17). Get inside and keep going forward until you pass by the Fantastic and go outside (M29A:3). Head to [Solar collection tower] (M29:5) and find the terminal which turns off the turrets (M29B:1). Your next target is [HELIOS One Observation Level] but before you use the door (M29B:2) to get there, search the room (M29B:3). You can find two Poseidon Energy ID cards. Now go to the observation level, where the HELIOS One mainframe #2 is located.
Unfortunately it lacks the power but you can provide it in two ways:
To find a bot go up the stairs #2. To activate it:
Robot will go down and will repair the mainframe. When you enter the configuration menu, choose ARCHIMEDES II.
Return to Elder McNamara (M13B:1) to complete your task.
![Head to [Nellis AFB] (M11:1) (read [Volare - I Could Make You Care - p. 2 - Side quests - Fallout: New Vegas - Game Guide and Walkthrough](https://game.lhg100.com/Article/UploadFiles/201512/2015121518535892.jpg)
Head to [Nellis AFB] (M11:1) (read [Volare!] section about how to get there safely). Being at Pearl's house, search the cabinet in the corner. You'll find a Col. Blackwell key inside along with the inventory transfer order.

![Travel to [Vault 34] (MsB:30) - I Could Make You Care - p. 2 - Side quests - Fallout: New Vegas - Game Guide and Walkthrough](https://game.lhg100.com/Article/UploadFiles/201512/2015121518535883.jpg)
Travel to [Vault 34] (MsB:30). The reactor (M18A:2) is your target. Unfortunately the door leading to the Overseer's Office is blocked so you need to get a key. Look for a corridor with the leaking pipe. Further way is flooded, so dive under the desk and locate a vault technician there (M18A:3). Search him and get the security terminal password #1. Now go through the clinic heading to the Armory (M18A:4), which is also flooded #2. There is another drowned vault technician with the utility terminal password.

Go to the utility room where you can access the terminal using the password you found (M18A:5) #1 and activate the pump system. Next go to the [Armory] where you can unlock the door leading to the Overseer's Office (M18B:1) #2.
![Being inside the [Vault 34 reactor] you have to watch out for the radiation - I Could Make You Care - p. 2 - Side quests - Fallout: New Vegas - Game Guide and Walkthrough](https://game.lhg100.com/Article/UploadFiles/201512/2015121518535830.jpg)
Being inside the [Vault 34 reactor] you have to watch out for the radiation. Locate the Overseer #1 and kill him. Search his body and take the password to the terminal nearby. Activate it and open the door leading to the armory. Go there, open the door (M18B:2) and locate a locked box with the Pulse Gun (M18B:3) #2.
Return to Elder McNamara (M13B:1) to complete your task.
When you return with the technology to Mcnamara, Veronica will talk to him again but he'll remain unconvinced. Go outside - Veronica will talk to you. After a short conversation you can give her an advice:
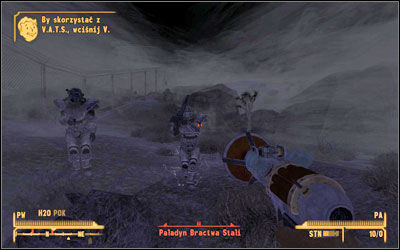
Go outside. You'll be confronted by a group of BoS Paladins. They do not like the fact that Veronica stays:
If you have the pulse gun, now it is time to use it - it will be perfect against heavily armored enemies. Once you've dealt with them, talk to Veronica. The task is over.
Veronica gets the Bonds of Steel perk.
Leave the vault. You'll be confronted by a group of BoS Paladins. Once you've dealt with them, talk to Veronica. She'll suggest to go to the Followers of the Apocalypse [the Followers' outpost] (MsB:38) #1. Go inside and talk to Doctor Alvarez about Veronica joining them. Unfortunately, the person who makes such decisions is missing. Go away from the outpost and wait at least 24 hours in-game time. When you return to the outpost, you'll find that all are dead. The rogue paladins who did the massacre are in other room #2. After a short conversation they must be killed. Talk to Veronica. The task is over.
Veronica gets the Causeless Rebel perk.
![Given by: Lieutenant Gorobets [Camp McCarran] (M25:4) - I Dont Hurt Anymore - Side quests - Fallout: New Vegas - Game Guide and Walkthrough](https://game.lhg100.com/Article/UploadFiles/201512/2015121518535997.jpg)
Given by: Lieutenant Gorobets [Camp McCarran] (M25:4)
You'll learn that Cook-Cook attacked Betsy and 10 of Spades. They managed to escape but Cook-Cook has raped Betsy. He'll ask you to help her and convince her to get some treatment. You'll find her in the same tent as Lieutenant Gorobets or in close proximity to it. She'll be convinced that everything is all right:
Talk to:
10 of Spades - tell him that you try to convince Betsy to see the doctor. He will suggest Doctor Usanagi to treat Betsy and will send you to Sgt Bitter-Root;
Corporal Sterling - ask him what he thinks about you idea to send Betsy to a doctor. He'll tell you that only her pride is a problem;
Sgt Bitter-Root - you can say that he got unusual name [Speech 30] but you don't want to offend him. When you ask him about Betsy, he'll tell you that she should visit Doctor Usanagi.
Return to Betsy and tell her that other teammates think, she should visit the doctor. She will agree to take some medical help.
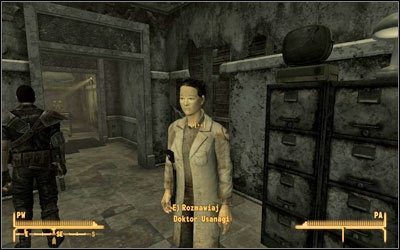
After convincing Betsy, go and talk to Lt. Gorobets again, who will send you to the [New Vegas Medical Clinic] (MsB:14), where you can find Doctor Usanagi. Tell her that Corporal Betsy from the 1st Recon squad is on her way to visit the clinic.
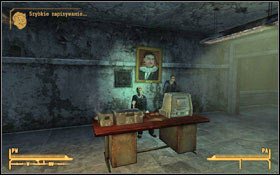
Given by: Boone
To activate this quest, Boone has to be your companion ([One For My Baby] must be completes) and you have to do some things, which will trigger proper dialog options.
NOTICE: Boone has to be your companion when doing below tasks.
You do not have to complete all of these tasks though. At some point the quest will be unlocked. Go with Boone to [Bitter Springs] (MsC:10) #1. He will tell you some story. In order to hear its ending, you have to go to the [Coyote Tail Ridge] (MsC:11) and stay there overnight #2.
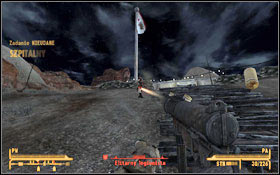
The Legion raiding party appears. Now you can:
There will be two waves of Legion forces #1, #2. Watch out for these troops who come toward Bitter Springs, because if they destroy the town, you won't be able to complete the side quest connected with this town. Once the Legionnaires are dead, talk to Boone:
![Given by: Eddie [NCR Correctional Facility] (50:2) - I Fought the Law - Side quests - Fallout: New Vegas - Game Guide and Walkthrough](https://game.lhg100.com/Article/UploadFiles/201512/2015121518535902.jpg)
Given by: Eddie [NCR Correctional Facility] (50:2)
Go to the NCR Correctional Facility Administration building (M26:2). You will find Eddie on the first floor of the building #1. He'll assign you few tasks. First you have to deal with Chavez who sets up his own crew and attacks traders. Head to [Powder Ganger Camp South] (MsD:28) where you'll find Chavez #2. Tell him that Eddie has sent you:
Return to Eddie (M26:2) and report that the job is done.
![Your next target is suspicious merchant over at [Jean Sky Diving] (MsD:24) - I Fought the Law - Side quests - Fallout: New Vegas - Game Guide and Walkthrough](https://game.lhg100.com/Article/UploadFiles/201512/2015121518535982.jpg)
Your next target is suspicious merchant over at [Jean Sky Diving] (MsD:24). He can be found standing by the hut:
If you keep the conversation, tell him to leave while he can
Once you've done with this man, return to Eddie (M26:2) and report that the job is done.
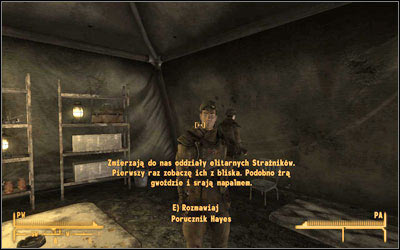
Your final task is to get information from Primm about NCR plans for the prison. Head to [Primm] and locate the NCR camp (M3:3). Talk to Hayes and ask if NCR plans to attack the prison. He won't tell you anything. Go to the [Vikki and Vance Casino] (M3:1) and talk to Nash.
You'll learn that NCR plans to attack the prison. Now you have to ways to end this task.
Return to Eddie (M26:2) and inform him that NCR plans the attack.
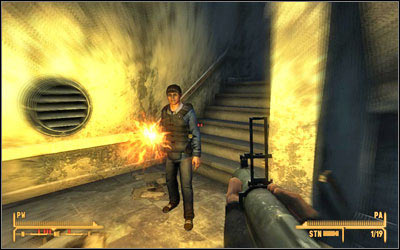
Betray Eddie and go to Hayes (M3:3). Tell him that you know about the attack and offer him your support. You'll be sent to Sergeant Lee, who is located on a hill near the prison. The assault will begin. You have to kill Eddie.

![Given by: Lucius [The Fort] (M9:1) - I Hear You Knocking - Side quests - Fallout: New Vegas - Game Guide and Walkthrough](https://game.lhg100.com/Article/UploadFiles/201512/2015121518540018.jpg)
Given by: Lucius [The Fort] (M9:1)
Lucius can be found in the Caesar's tent #1 most time of the day. Your task is to get a replacement firing mechanism for the Legion's artillery weapon. The best place to get it is [Nellis AFB]. Take a look at [Volare!] to learn how to get there (if haven't visit the place earlier). If you have a bone to pick with the Boomers you will have to fight your way to the workshops. The Howitzer Firing Mechanism is located in the locker #2 in the workshop (M11:6) in the middle.
![Return to [The Fort] and install the replacement firing mechanism into the Legions howitzer (M9:3) - I Hear You Knocking - Side quests - Fallout: New Vegas - Game Guide and Walkthrough](https://game.lhg100.com/Article/UploadFiles/201512/2015121518540065.jpg)
Return to [The Fort] and install the replacement firing mechanism into the Legion's howitzer (M9:3). Then return to Lucius (M9:1) and inform him about the mission result.
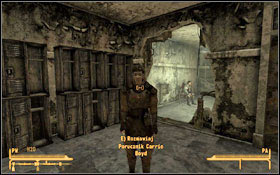
![Given by: Colonel James Hsu [The Camp McCarran Terminal building] (M25A:2) - I Put a Spell on You - Side quests - Fallout: New Vegas - Game Guide and Walkthrough](https://game.lhg100.com/Article/UploadFiles/201512/2015121518540047.jpg)
Given by: Colonel James Hsu [The Camp McCarran Terminal building] (M25A:2)
Talk to Colonel Hsu. You'll learn that there is a spy inside the camp. Offer him your help. Go and talk to Captain Curtis - he can be found on the first floor in his office, just behind the escalator (M25A:3). Ask him what he knows about the situation. You also have to talk to Carrie Boyd and Contreras. Go to meet Boyd (M25A:4) #1 - she is upstairs. Ask her if there was anything suspicious lately. She'll tell you about break-ins. Ask her for a key to the control tower to check this lead. Go out through the back door (M25A:6) and head to the control tower (M25:2) #2.
Read entries from the computer and note that someone was in the tower at 1AM. Wait until then and you'll see someone wanders over the tower. You can confront him now but this is not a good idea, while you won't get any information, You can also follow him to the tower #1. Now you have two choices:
Do not wait any longer. Run out the tower and head to the terminal building. Go outside and take an escalator up (M25A:5). Locate the bomb #2 inside the monorail station and defuse it [Explosives 35] or [Science 45]. Return to Colonel Hsu.
Return to James Hsu (M25A:1) and report back that you've found a spy. You'll learn that Curtis has an access to the monorail. Run towards the monorail station taking the stairs up (M25A:5). Unfortunately you'll be late and the train will explode. Return to Colonel Hsu.
![Given by: Ranger Ghost [Mojave Outpost] (M24:4) - Keep Your Eyes on the Prize - Side quests - Fallout: New Vegas - Game Guide and Walkthrough](https://game.lhg100.com/Article/UploadFiles/201512/2015121518540130.jpg)
Given by: Ranger Ghost [Mojave Outpost] (M24:4)
Talk to Ranger Ghost in the Mojave Outpost. You can find her on the rooftop of the building #1. Your task is to visit [Nipton] and investigate what is going on there and why there is of smoke rising from the town. Upon approaching the town hall (M34:2) you will be greeted by Vulpes Inculta #2. Ask him what has happened in town. Return to Ranger Ghost (M24:4) and tell her that the town was razed to the ground by Caesar's Legion.
![Given by: Frank Weathers [Aerotech Office Park] (M42:2) - Left My Heart - Side quests - Fallout: New Vegas - Game Guide and Walkthrough](https://game.lhg100.com/Article/UploadFiles/201512/2015121518540194.jpg)
Given by: Frank Weathers [Aerotech Office Park] (M42:2)
Ask him about his family. You'll learn that they were taken into slavery.
He'll confess that he has abandoned them. Promise to help him to free his wife and children. Head to [Cottonwood Cove] (MsG:22) where the slaves are kept (M8:3). To free them:
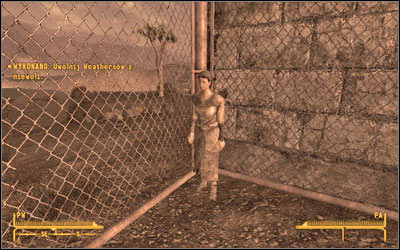
Once you've opened the cages, talk to Mrs. Weathers:
Now you have to disarm the slave collars:
Return to Frank (M42:2) and tell him that his family is free when he ask about them. If he'll ask where they are:
Depending on how many members of the family survives, you will receive an adequate number of caps:
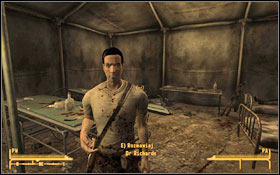
![Given by: Dr Richards [Camp Forlorn Hope] (M22:1) - Medical Mystery - Side quests - Fallout: New Vegas - Game Guide and Walkthrough](https://game.lhg100.com/Article/UploadFiles/201512/2015121518540180.jpg)
Given by: Dr Richards [Camp Forlorn Hope] (M22:1)
The doctor #1 will tell you that someone steals his medical supplies. Tell him that you'll search for the culprit. You can also ask him what is missing [Medicine 50] or what the symptoms are after using the Hydra. You'll find Private Stone (M22:5) #2 trying to sneak his way out near one of the tents. Ask him about the missing supplies.
To complete this task you have to decide about Private's fate:
After you return to Richards (M22:1):
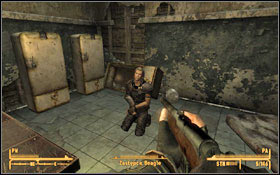
![Given by: Johnson Nash [Vikki and Vance Casino] (M3:1) - My Kind of Town - Side quests - Fallout: New Vegas - Game Guide and Walkthrough](https://game.lhg100.com/Article/UploadFiles/201512/2015121518540156.jpg)
Given by: Johnson Nash [Vikki and Vance Casino] (M3:1)
Go to see Deputy Beagle. He is tied up at the [Bison Steve Hotel] (M3:2) by Convicts though. You can either sneak in to Deputy Beagle #1 (M3A:1) or try to kill all enemies #2. After that you have few possibilities:
If you decided to take him with you, you can give him some weapon. He can help you in clearing the remainder of the Hotel.
Regardless of whether or not Deputy Beagle survived, your task is to find a new sheriff for Primm. There are three possible candidates.
![Youll find him at the [Vikki and Vance Casino] - My Kind of Town - Side quests - Fallout: New Vegas - Game Guide and Walkthrough](https://game.lhg100.com/Article/UploadFiles/201512/2015121518540104.jpg)
You'll find him at the [Vikki and Vance Casino]. All you have to do is to talk to him about the Sheriff job.
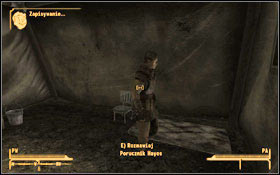

Go to the NCR encampment (M3:3) on the other side of the highway from Primm. Ask Lieutenant Hayes #1 to become a sheriff. He can help but he needs some more soldiers in order to do this. You'll be send to the [Mojave Outpost] to meet Major Knight (M24:2) #2. Talk to him about Primm and ask for the support.
Return to Hayes (M3:3) and tell him that you got more soldiers as a support. NCR will take over Primm.
![Go to the [NCR Correctional Facility] (MsD:27) - My Kind of Town - Side quests - Fallout: New Vegas - Game Guide and Walkthrough](https://game.lhg100.com/Article/UploadFiles/201512/2015121518540240.jpg)
Go to the [NCR Correctional Facility] (MsD:27). Upon entering the facility, you will find yourself in a lounge-like area (M26:1) and a Powder Ganger wearing a guard uniform will stop you. You need to pay him 100 caps to enter. Meyers sits at one of the tables. He'll agree to become a sheriff when you tell him about the job but you have to get him a pardon from the NCR first. Go to [Mojave Outpost] and talk to Knight (M24:2) #2. Ask him for a pardon for Meyers:
Return to Meyers (he can be found either in [Correctional Facility] (M26:1) or just outside Primm (M3:5)) and tell him that he's free. He'll take care about the town.
![Given by: Capitan Gilles [Bitter Springs] (M27:1) - No, Not Much - Side quests - Fallout: New Vegas - Game Guide and Walkthrough](https://game.lhg100.com/Article/UploadFiles/201512/2015121518540233.jpg)
Given by: Capitan Gilles [Bitter Springs] (M27:1)
Talk to Captain Gilles who can be found in the camp #1. She needs any support you can provide her: additional troops, supplies and medical supplies. Ask her about the details and she'll assign you some more quests connected with main mission. To continue your task you need:
Once you get the reinforcements, it is time to take care of supplies. You need to visit three Great Khan Supply Caves. If you've completed [Climb Ev'ry Mountain] and you got a key from Khan, you won't have to use the [Lockpick] skill to get the supplies. Go and visit mentioned caves: (M27:2), (M27:3), (M27:4) and retrieve Great Khan supply cache from each of them #2.
NOTICE: The cache found in a (M27:3) cave is radioactive.
Return to Captain Gillies (M27:1) and give her the supplies.
You can ask Captain about some additional caps for your help.

![Given by: The King [The Kings School of Impersonation] (M6:6) - Nothin But a Hound Dog - Side quests - Fallout: New Vegas - Game Guide and Walkthrough](https://game.lhg100.com/Article/UploadFiles/201512/2015121518540207.jpg)
Given by: The King [The King's School of Impersonation] (M6:6)
This quest can be taken only after completing [G.I. Blues] and asking about the cyberdog #1. Talk to The King and ask if there any chance to help the dog. You'll be sent to the [Old Mormon Fort] (M6B:1) where you can find Julie Farkas. Ask her if she knows how to help Rex. You'll learn that the dog needs a brain surgery along with serious fixes. These can be done by Dr. Henry but before you go to see him, return to The King (M6:6) and tell him that there is a hope for Rex. The dog will become your companion. Head to [Jacobstown] (M35:3) to meet the doctor #2.
In order to help Rex you have to find a new brain for him. There are three brains available. Each of them offers different upgrades for the dog.
![Go to the [Gibson Scrap Yard] (MsE:18) and talk to Old Lady Gibson - Nothin But a Hound Dog - Side quests - Fallout: New Vegas - Game Guide and Walkthrough](https://game.lhg100.com/Article/UploadFiles/201512/2015121518540201.jpg)
Go to the [Gibson Scrap Yard] (MsE:18) and talk to Old Lady Gibson:
![Go to [The Fort] (MsE:5) and talk to Antony (M9:4) - Nothin But a Hound Dog - Side quests - Fallout: New Vegas - Game Guide and Walkthrough](https://game.lhg100.com/Article/UploadFiles/201512/2015121518540258.jpg)
Go to [The Fort] (MsE:5) and talk to Antony (M9:4):
Agree to fight dog in the arena with only a machete. Take Lupa's brain.
![Go to the area near the [Poseidon Gas Station] (MsA:16) - Nothin But a Hound Dog - Side quests - Fallout: New Vegas - Game Guide and Walkthrough](https://game.lhg100.com/Article/UploadFiles/201512/2015121518540372.jpg)
Go to the area near the [Poseidon Gas Station] (MsA:16). There is a Fiend called Violet along with her dog - Violetta. Kill the dog and take its brain.

Return to Dr. Henry with one of the three brains (or with all of them). Now you have to choose which brain should be implanted:
![Given by: Papa Chan [Red Rock Canyon] (M17:1) / Karl [Red Rock Canyon] (M17:1) - Oh My Papa - Side quests - Fallout: New Vegas - Game Guide and Walkthrough](https://game.lhg100.com/Article/UploadFiles/201512/2015121518540321.jpg)
Given by: Papa Chan [Red Rock Canyon] (M17:1) / Karl [Red Rock Canyon] (M17:1)
Your task is to break the alliance between Great Khans and the Caesar's Legion. After a short conversation with Karl (M17:1), talk to Papa Khan asking him to break the alliance. He will refuse regardless. Go outside and talk to Regis (M17:2). There are few ways to convince Papa to break the alliance.
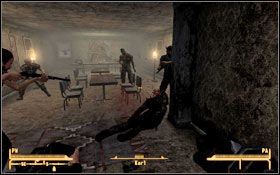
Sneak into the Karl's room and open the Footlocker #1. There is a Karl's journal inside. Show it to Papa Khan - he will kill Karl after a moment #2.
You can also talk with Karl and get some more information using your skills: [Speech 25], [Speech 50], [Speech 75]. Tell Papa Khan everything you know- he will kill Karl after a moment #2.
Scroll down to the ending.
You have to convince Regis, Jack, Diane and Melissa to support you. When it is done, scroll down to the ending.
REGIS
In order to convince him, head to [The Fort] (MsE:5) and then find the Caesar's tent (M9:1). You'll find there Legion slave ledger #1. Return to Regis - he is either in his tent (M17:2) or inside the building (M17:1) #2, depending on time of the day. Show him the book and you'll get his support.
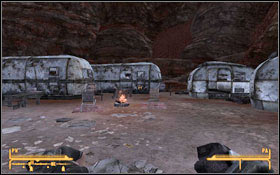
JACK and DIANE
Head to the [Red Rock Drug Lab] (MsA:13) where you'll find both of them #1 (in the trailer or by the fire, depending on time of the day). It is enough to convince one of them to get the support of both.
As for the Jack, it is enough to talk to him with the [Speech 60] skill.
If your skill is not high enough, go and talk to Diane. You need to find evidence that Caesar is hurtful to drug runners. Go to the [Cottonwood Cove] (MsG:22) where you'll find crucified Anders (M8:2) #2. You can cut him off or leave him there. Return to Diane (MsA:13) who already knows what has happened to Anders. Ask her about the alliance - she'll support your side.
MELISSA
You'll find her at the [Great Khan Encampment] (MsD:11). Simply tell her that women are not allowed to serve in the Legion which will convince her to speak against Caesar.
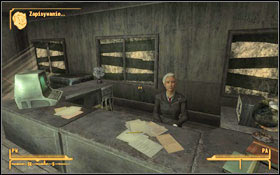
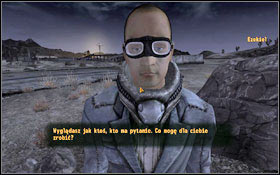
Talk to Papa Khan about breaking the alliance. Before this happens though, he wants to have some legacy for the Great Khans.
Choosing the first option will finish the quest. If you select the second option you will have to get some knowledge about Great Khans past. Go and meet Followers of the Apocalypse at the [Old Mormon Fort] (M6B:1). Head upstairs in one of the towers (M6B:3) and talk to Julie Farkas #1. Ask her about some inspiration for Great Khans and she will point you to a Follower named Ezekiel, who can be found at [188 Trading Post] (MsE:6) #2. Ask him about Khan's history and you'll get a history book: Pretty Pretty Horsies: A History of the Mongol Empire. Return to Papa Khan (M17:1) and give him a book. The alliance between Great Khans and Caesar's Legion will be broken.
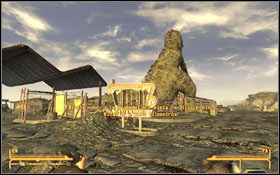
![Given by: Boone [Novac] (M4:2) - One For My Baby - Side quests - Fallout: New Vegas - Game Guide and Walkthrough](https://game.lhg100.com/Article/UploadFiles/201512/2015121518540487.jpg)
Given by: Boone [Novac] (M4:2)
Boone is a sniper who is on duty in the dinosaur's mouth #1 at night. To talk to him you have to be there between 9PM and 9AM #2. Ask him if he expect any visitors. [Speech 41] suggest that you could tip him off if you meet the right person. Boone needs someone whom he can trust. You have to find out who has sold his kidnapped wife into slavery. If you succeed you have to bring this person in front of the Dino and put on the beret you got from Boone. It will be a sign for him to kill that person.
During your investigation you can question a few Novac inhabitants but you do not have to do it.
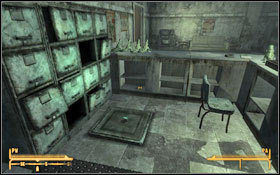
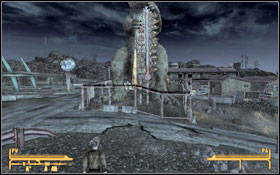
There are seven inhabitants you may question:
Manny Vergas (M4:3), Ranger Andy (M4:5), Cliff Briscoe (M4:6), Dusty McBride (M4:7), Alice McBride (M4:7), Jeannie May Crowford (M4:8), No-bark Noonan (M4:9).
As for No-bark you may force him [Strength 6] to speak.
Listen very carefully what people want to tell you. Now you have two choices:
No-bark Noonan is the most important character. Follow his suggestions and head to the motel lobby (M4:1). You'll find a locked safe there just behind the counter #1. You can open it by yourself [Lockpick 25] or with the key (pickpocket it from Jeannie May Crawford). There is a Bill of Sale note inside which tells who is guilty - Jeannie May Crowford. Go to her (M4:8) and tell her that you want to show her something. Go in front of the Dino #2 and put Boone's beret on. She'll be shot down.
Once the culprit (or innocence person) is dead, return to Boone (M4:2).
You can ask Boone to be your companion. [Intelligence 6] tell him that snipers work in teams.
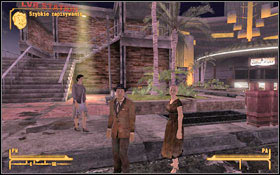
![Given by: Ethel Phebus [New Vegas Strip] (M7:11) / Walter Phebus [New Vegas Strip] (M7:11) - Pheeble Will - Side quests - Fallout: New Vegas - Game Guide and Walkthrough](https://game.lhg100.com/Article/UploadFiles/201512/2015121518540499.jpg)
Given by: Ethel Phebus [New Vegas Strip] (M7:11) / Walter Phebus [New Vegas Strip] (M7:11)
This mission may be finished in two ways, depending on who you talk to.
Talk to Ethel #1 and ask her what she and her husband want to do on the Strip. You'll learn that the man named Heck Gunderson is involved in this. Ask if you can help somehow. Your task will be to convince her hushed to forget about the whole case. Talk to Walter:
Ask him about a problem with Heck:
Walter decides to leave the town. Your mission is over.
Talk to Walter #2 (or first talk to Ehtel and then choose this solution)
Ask him about a problem with Heck:
Go to the [Ultra-Luxe casino]. Heck can be found at the bar (M7C:1) #2. While talking to him you'll learn that he looks for his missing son.
[Beyond the Beef] begins.
Return to Walter (M7:11) and tell him what you know. Your next task is to get rid of Heck and his son (optionally). You can also ask for the payment:
To find Ted, see [Beyond the Beef] section where you can find more details on this.
ENDING
Depending on what dialog options you've chosen when discussing about price and who has died, you'll receive between 500 and 2000 caps.
![Given by: Alice McLafferty [Crimson Caravan Company] (M12:2) - Pressing Matters - Side quests - Fallout: New Vegas - Game Guide and Walkthrough](https://game.lhg100.com/Article/UploadFiles/201512/2015121518540549.jpg)
Given by: Alice McLafferty [Crimson Caravan Company] (M12:2)
In order to take this quest you have to complete [You Can Depend on Me] first.
Your task is to turn off the bottle cap press. Head to the [Sunset Sarsaparilla Headquarters] (MsB:18) and enter the [Shipping area]. Turn right and head to the bottle cap press (M48:4) eliminating the Sunset Sarsaparilla robot employees that stand in your way. There are two more robots inside the room with the press. Interact with it #2 and take all the useful parts. Return to Alice McLafferty (M12:2) and tell her that the press is shut down.
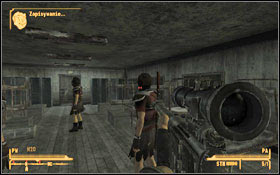
![Given by: Major Polatli [Camp Forlorn Hope] (M22:2) - Restoring Hope - Side quests - Fallout: New Vegas - Game Guide and Walkthrough](https://game.lhg100.com/Article/UploadFiles/201512/2015121518540525.jpg)
Given by: Major Polatli [Camp Forlorn Hope] (M22:2)
Your task is to help local officers. Head to Quartermaster Mayes, who can be found in his tent (M22:3) #1. Your first mission is to find missing soldiers and retrieve lost supplies. Go to [HELIOS One] (MsE:17) where soldiers were given the supplies. Talk to Lieutenant Haggerty (M29:1) - she'll give you the location of the supplies. You'll find them near the Camp Forlorn Hope (M22:4) #2. Once you gather the Camp Forlorn Hope Supply Crate, you will be attacked by the Legion Recruits. Return to Quartermaster Mayes (M22:3) and give him the supplies.
Talk again to Major Polatli (M22:2). Now you'll be sent to visit Dr. Richards (M22:1).
If your skills are high enough, it is time to cure the patients. There are three of them and each can be treated with your skills or with the proper equipment.
1. [Medicine 35] or Med-X, whiskey, Surgical Tubing .
2. [Medicine 50] or Med-X, Medical Brace, Bonesaw.
3. [Medicine 75] or Med-X, Tweezers, Super Stimpak.
Speak to Dr. Richards after dealing with the patients.
As for the second option, you can return to Major (M22:2) and tell him that you were unable to assist the doctor - you'll get another task.
Return to Major (M22:2) and tell him about your mission results.
Tour last task is to attack Nelson. Meet Sergeant Cooper near the camp #1. Depending on your reputation with NCR you'll get a few soldiers as a support. There might be maximum four of them. Now you have to decide from which side you'll attack Nelson.
It is a real charge - if you own heavy guns, this option is for you.
It is perfect spot if you prefer sniper guns.
Your main target is Dead Sea who can be found in one of the barracks (M21:2) #2. When the fight is over, return to Major Polatli (M22:2) and tell him about the victory.
![Given by: Tech Sergeant Reyes [Camp Forlorn Hope] (M22:2) - Return to Sender - Side quests - Fallout: New Vegas - Game Guide and Walkthrough](https://game.lhg100.com/Article/UploadFiles/201512/2015121518540526.jpg)
Given by: Tech Sergeant Reyes [Camp Forlorn Hope] (M22:2)
Sergeant Reyes can be found in the Camp Forlorn Hope Command Center. Your task is quite simple, while you have just travel between different locations. First you have to deliver new codes to all Ranger stations (there are 6 of them). You can visit them in any order.
![[Ranger Station Alpha] (MsE:3) - Comm Officer Castillo #1 - Return to Sender - Side quests - Fallout: New Vegas - Game Guide and Walkthrough](https://game.lhg100.com/Article/UploadFiles/201512/2015121518540547.jpg)
[Ranger Station Alpha] (MsE:3) - Comm Officer Castillo #1.
[Ranger Station Bravo] (MsC:9) - Comm Officer Tiden #2.
![[Ranger Station Charlie] (MsG:4) - Comm Officer Stepinac #1 - Return to Sender - Side quests - Fallout: New Vegas - Game Guide and Walkthrough](https://game.lhg100.com/Article/UploadFiles/201512/2015121518540628.jpg)
[Ranger Station Charlie] (MsG:4) - Comm Officer Stepinac #1. It might be that Ranger Station Charlie is already wiped out.
[Ranger Station Delta] (MsE:16) - Comm Officer Scheffer #2.
![[Ranger Station Echo] (MsG:14) - Comm Officer Green #1 - Return to Sender - Side quests - Fallout: New Vegas - Game Guide and Walkthrough](https://game.lhg100.com/Article/UploadFiles/201512/2015121518540674.jpg)
[Ranger Station Echo] (MsG:14) - Comm Officer Green #1.
[Ranger Station Foxtrot] (MsA:11) - Comm Officer Lenk #2 - she'll think that you're sent by the Omertas:
Return to Sergeant Reyes (M22:2) and tell her that the codes are delivered. Your next task is to double-check the intel reports on several stations. Head to [Ranger Station Alpha] (MsE:3) and ask Ranger Lineholm #1 about high casualties. She'll tell you that such a report wasn't filed. Go no to the [Ranger Station Delta] (MsE:16), where you have to talk to Ranger Pason #2. When asked about Legion supermutants' attack, he'll tell you that this is a lie.
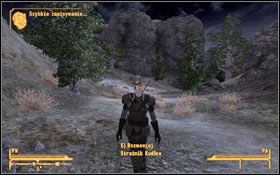
![The last station to check is [Ranger Station Foxtrot] (MsA:11) - Return to Sender - Side quests - Fallout: New Vegas - Game Guide and Walkthrough](https://game.lhg100.com/Article/UploadFiles/201512/2015121518540672.jpg)
The last station to check is [Ranger Station Foxtrot] (MsA:11). Ranger Kudlow #1 will also negate the strange report about Nightclaws trained by the Great Khans. Return to Reyes (M22:2) and tell her that she is right about false reports. Now you have to go to [Camp Golf] and locate House Resort (M28:3) there. Talk to Chief Hanlon who can be found on the balcony #2 (you have to wait if he sleeps). Say that you know that he manipulates intelligence data.
He wants to talk about it in his office. Listen to the story.
In the second option you have to find someone who will take the Chief to prison. Unfortunately after you leave his office, Hanlon will close the door and will commit suicide. The task is over. You do not have to return to Reyes.

![Given by: Joe Cobb [Prospector Saloon] (M1:2) - Run Goodsprings Run - Side quests - Fallout: New Vegas - Game Guide and Walkthrough](https://game.lhg100.com/Article/UploadFiles/201512/2015121518540718.jpg)
Given by: Joe Cobb [Prospector Saloon] (M1:2)
You can get this quest after completing [Back in the Saddle] (if you've decided to finish the tutorial right after shooting the bottles) or [By a Campfire on the Trail] (if you decided to complete the tutorial). Being in the saloon you'll witness an argument between Trudy and Joe Cobb #1. You can talk to both characters but you can side only with one of them. In this quest you have to listen to and help Joe. If you decide to side with Trudy, you have to read [Ghost Town Gunfight].
After listening to Cobb run after him (M1:8) and get the plan's details. Offer your help and convince him with [Intelligence 6] or free food. Whichever option you choose, the conversation will go on. You'll learn that you have to kill Ringo. You can find him at the [Goodsprings gas station] (M1:4). As soon as he learns that Joe looks for him, he'll start the fight #2. Kill him.
Return to Cobb (M1:8) and tell him that Ringo is no problem anymore. It is time to get some supplies - you do not have to complete these tasks, while they are optional, but they can help you later. You'll find Doc Mitchell #1 in his house (M1:1). Lie to him, that you need some help for a hurt traveler and then use [Medicine 25] to convince him.
Chet #2 can be found in the [Goodsprings General Store] (M1:5). To convince him you need one of the skills: [Barter 25] or [Speech 25]. You'll receive Leather Armor and 30 x 9mm rounds.
Return to Cobb (M1:8), give him supplies and begin to invade Goodsprings. Kill all inhabitants including Sunny Smiles, her dog, Easy Pete, Trudy, Doctor Mitchell. Once the residents of Goodsprings are dead, talk to Cobb.
![Given by: Crandon [North Vegas Square] (MsB:7) - Someone To Watch Over Me - Side quests - Fallout: New Vegas - Game Guide and Walkthrough](https://game.lhg100.com/Article/UploadFiles/201512/2015121518540706.jpg)
Given by: Crandon [North Vegas Square] (MsB:7)
Talk to Crandon (M49:1) #1 and ask him in detail what does he do or if he need help with some problems. When he'll ask you why do you think, that North Vegas inhabitants need your help at all, you have to choose one of the below options:
The newcomers, who live near by the playground (M49:2) #2, are making problems. Talk to Squatter Bill and tell him that they can't stay here.
Return to Crandon and tell him the job is done.
In your second mission you have to go to the [North sewers] (M49:3). When you reach a group of Greasers (M49A:1) #1, talk to the leader of the group, Greasy Johnny.
Return to Crandon and tell him what you've done.
For your next mission go to [Crimson Caravan Company] (MsB:13), where you can find Hostetler Home. Go inside and talk to Mrs. Hostetler about her problem She'll ask you to spy on her daughter and see what her new friends are up to. Head back to [North Vegas Square] and talk to Jules (M49:4) #1. Ask him about Alice Hostetler - you'll learn that she probably hangs out with Andy's crew. You can find them in a building called The Gray (M49:5). Enter the building - there is a thug in front of Andy's room:
If you choose the second option, you'll have to open the door by yourself. Being inside the room, you can find the Henchman Message to Andy Scabb #2, lying on the table underneath the TV.
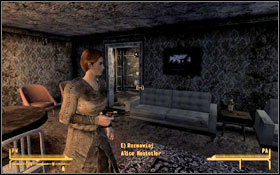
As soon as you leave the building, you'll meet Andy #1.
Return to Mrs. Hostetler and tell her about plans of stealing the money from Crimson Caravan Company. You'll meet also Alice with the gun there #2.
SOLUTION 1
Tell her that you do not want to hurt her. [Speech 70] you just want to say, that Andy is using her - show her the note you've found in Andy's room. [Intelligence 7] ask her if she really wants to do it.
SOLUTION 2
In any time of conversation tell her that Andy has sent you. Ask Alice if she has money:
If you choose the second option you can:
SOLUTION 3
Say that you are not interested with this argument and they should deal with the issue themselves - Allice will shoot her mother. Do nothing or kill Alice.
ENDING
If Mrs. Hostetler is alive, you can:
If she's dead, you can loot her body and take 1000 caps.
![Given by: Elder McNamara [Hidden Valley] (M13B:1) - Still in the Dark - p. 1 - Side quests - Fallout: New Vegas - Game Guide and Walkthrough](https://game.lhg100.com/Article/UploadFiles/201512/2015121518540857.jpg)
Given by: Elder McNamara [Hidden Valley] (M13B:1)
In order to talk to Elder McNamara, you have to visit one of the bunkers (M13:1). When you reach the bunker you will meet a Brotherhood Paladin #1. You will have to give away all your weapons and items and go to the [L1]. Go downstairs and talk to Paladin Ramos (M13A:1) #2.

Agree to meet the Elder (M13B:1). Agree to make a test proving you loyalty. You will be fitted with an explosive collar. At the entrance to the right in the chest you will find your equipment #1. Go outside and head to the other bunker (M13:2). Depending on time of the day there can be a NCR soldier inside. If he is not there you can wait or "play" with his radio:
If Dobson is inside the bunker #2:
If you decide to convince him to leave:
Choosing the first option forces man to leave the bunker. If you choose the second option, show him your collar. It will be taken off and BoS soldiers will come after a while. The task will fail.
You can also
Return to BoS and talk to Elder McNamara. If you've killed NCR Ranger use [Speech 65] skill and convince him that this has to be done this way.
Wait a little a visit him again in the Elder's chamber (M13B:1). Accept you first task. You have to locate three missing patrols and retrieve the holotapes. When you exit the bunker, you will be confronted by Head Paladin Hardin, who wants to oust McNamara and lead the BoS.
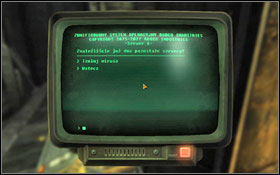
Agree to help him. Tell him that the Elder wants you to search for the missing patrols. Before you do this you can complete two optional tasks. Go to Scriber Ibsen (M13B:2) and help him with destroying the virus.
Wait for Scriber's sign and when the virus jumps, run to one of the terminal. If you will find such characters #1 after you access database, everything is OK. The virus shows his presence with funny text #2. You have to isolate it three times in three different terminals. When you're run out of time, try again. You need to pass the speech test, otherwise the task will fail. Now you can consult the bunker's database.
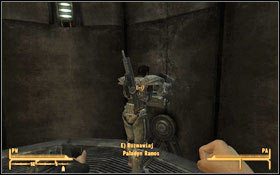
You need Paladin Ramos' (M13A:2) clearance to check some secret entries in the database. After you get it, return to the terminal (M13B:2) and read the Incident #2. Return to Ramos (M13A:2) and ask him about the Chain that Binds. Return to the terminal again and read about the Chain that Binds. Visit Head Paladin Hardin (M13B:3) #1 and tell him about the Chain that Binds.
It is time to search for the missing patrols. The closest one is located east from the bunkers #2. Watch out for centaurs and an irradiated crater with bodies. Run very fast and search the bodies looking for BoS holotapes.

![The second patrol was lost at [REPCONN Headquarters] (MsD:6) - Still in the Dark - p. 1 - Side quests - Fallout: New Vegas - Game Guide and Walkthrough](https://game.lhg100.com/Article/UploadFiles/201512/2015121518540943.jpg)
The second patrol was lost at [REPCONN Headquarters] (MsD:6). Open the door to the right with [Lockpick 50] or by using the terminal [Science 50]. While going to upper levels you will be stopped 3 times by the Mobile Facial Recognition Scanner #1. If your skills are not high enough, you will have 30 seconds to leave the building regardless of your answers.
You must use: [Speech 60], [Intelligence 7], [Luck 7], in this order. Being on the third, [Last REPCONN Headquarters Floor] you will find dead patrol #2. Search the bodies and take the BoS holotape.
![The last missing patrol is located near the [Nellis AFB] (MsC:3) #1 - Still in the Dark - p. 1 - Side quests - Fallout: New Vegas - Game Guide and Walkthrough](https://game.lhg100.com/Article/UploadFiles/201512/2015121518540953.jpg)
The last missing patrol is located near the [Nellis AFB] (MsC:3) #1. To get there safely read the [Volare!] quest description or just complete it first which will cause the bombardment to stop. Look for a dead BoS Paladin and take the holotape. After you've retrieved all holotapes, return to Elder McNamara (M13B:1) #2 and give him the tapes. Then talk to Head Paladin Hardin (M13B:3) - you got enough evidence to oust the Elder.
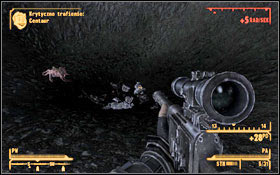

If you decide to help Elder McNamara, you need to complete three tasks. The first task is to get the holotapes. The closest missing patrol is located east to the bunkers #1. Watch out for centaurs and an irradiated crater with bodies. Run very fast and search the bodies looking for BoS holotapes. The second missing patrol is located near the [Nellis AFB] (MsC:3) #2. To get there safely read the [Volare!] quest description or just complete it first which will cause the bombardment to stop. Look for a dead BoS Paladin and take the holotape.
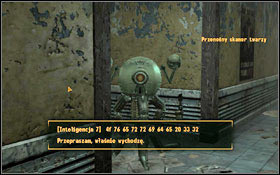
![The last patrol was lost at [REPCONN Headquarters] (MsD:6) - Still in the Dark - p. 2 - Side quests - Fallout: New Vegas - Game Guide and Walkthrough](https://game.lhg100.com/Article/UploadFiles/201512/2015121518540975.jpg)
The last patrol was lost at [REPCONN Headquarters] (MsD:6). Open the door to the right with [Lockpick 50] or by using the terminal [Science 50]. While going to upper levels you will be stopped 3 times by the Mobile Facial Recognition Scanner #1. If your skills are not high enough, you will have 30 seconds to leave the building regardless of your answers.
You must use: [Speech 60], [Intelligence 7], [Luck 7], in this order. Being on the third, [Last REPCONN Headquarters Floor] you will find dead patrol #2. Search the bodies and take the BoS holotape. After you've retrieved all holotapes, return to Elder McNamara (M13B:1) #2 and give him the tapes. You'll be assigned with the next task.
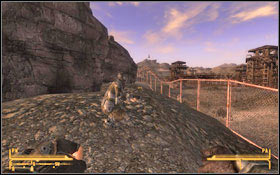
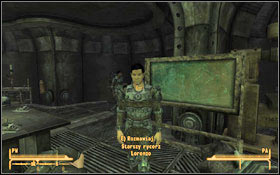
You have to get field reports from Brotherhood scouts #1. You have to pass correct password in order to receive the scouts' reports. You need to visit (in any order) the [NCR Correctional Facility] (MsD:27), the [Coyote Den] (MsF:10) and the [Camp Forlorn Hope] (MsE:20). Return to Elder McNamara and give him the reports. Your last task is to retrieve the parts for repairing the air filtration system in the bunker. Talk about this with a Senior knight Lorenzo (M13B:4) #2. You have to visit three vaults.
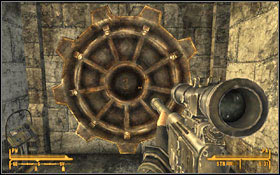
VAULT 3 (MsB:23)
Watch out for the Fiends living in the area. Activate the control panel to the left #1 to enter the [Vault 3 - Recreation Area]. You'll encounter a Fiend (M14A:1) there:
Go to [Vault 3 - Maintenance Wing] (M14A:2) and locate a locker (M14B:1) there. It contains Reverse Pulse Cleaner #2.

VAULT 11 (MsE:8)
Open a simply-looking entrance #1. Go through the whole Vault to the [Vault 11 - living quarters] (M15A:1), watching out for scorpions and giant mantises. Follow the stairs down to the [Vault 11 - lower level] (M15B:1). Locate a locker under water in the flooded room (M15C:1). It contains Differential Pressure Controller #2.
VAULT 22 (MsA:9)
Being inside [Vault 22 - the entrance] you can take the stairs down (M16A:1) or fix the elevator (M16A:2). Head to the [Vault 22 - Common Areas], drop down to the level below and find the door labeled Quarters (M16D:1). Watch out for the Spore Carrier Savages. In one of the rooms (M16D:2) you can find a Vault 22 Cave Door Keycard #1. Go now to the [Vault 22 - Food Production] and open the door (M16C:1). Enter the cave and go to the [Vault 22 - Oxygen Recycling] (M16C:2). Now you can reach a room with a locker where 6 HEPA 20 Cartridge Filters (M16B:2) #2 are located.
Return to a Senior knight Lorenzo (M13B:4) and give him all the parts. Return again to Elder McNamara and collect your reward.
![Given by: Loyal [Nellis AFB] (M11:2) - Sunshine Boogie - Side quests - Fallout: New Vegas - Game Guide and Walkthrough](https://game.lhg100.com/Article/UploadFiles/201512/2015121518541133.jpg)
Given by: Loyal [Nellis AFB] (M11:2)
Your task is to repair broken solar array panels #1. You can try to repair them by yourself with the [Repair 65] skill or to retrieve the spare parts. Loyal doesn't know where to look for them though. But if have already been at the [HELIOS One] (MsE:17), tell him that the parts can be found there. Upon entering the front entrance (M29:1) to the HELIOS One you'll meet Lt. Haggerty #2.
If you choose any other dialog line, you'll be taken for a spy.
Now you can head to the panels. Go through the [HELIOS One building] until you get outside. Locate 5 fallen solar panels (M29:2) and take the parts out of them [Repair 20]. Head back to [Nellis AFB] and go to the generators. Repair the solar panels using the parts you have.
Return to Loyal (M11:2) and tell him that the solar panels are repaired.
![Given by: Tommy Torini [The Tops Casino] (M7A:5) - Talent Pool - Side quests - Fallout: New Vegas - Game Guide and Walkthrough](https://game.lhg100.com/Article/UploadFiles/201512/2015121518541107.jpg)
Given by: Tommy Torini [The Tops Casino] (M7A:5)
Enter the casino and take the stairs up. Look for the entrance to the Aces (M7A:5). Talk to Tommy and offer him your help in finding new talents for the show.
You can recruit new performers in any order, but every time you got a new one, you have to return to Tommy.
He can be found by the Strip gate (M7:10). Tell him that you can talk to Tommy from the Tops Casino about his talent
Return to Tommy (M7A:5) to get your reward.
Upon you give him the talent card:
If you've coaxed Billy to ask for higher wage:
![You will find him inside [Atomic Wrangler Casino] (M6:3) - Talent Pool - Side quests - Fallout: New Vegas - Game Guide and Walkthrough](https://game.lhg100.com/Article/UploadFiles/201512/2015121518541115.jpg)
You will find him inside [Atomic Wrangler Casino] (M6:3). You can either ignore his provocation or [Speech 25] answer him sneeringly. After talks about the salary, offer him a job for Tommy. Unfortunately, the ghoul has a contract with the Garrets, so go to talk with James near the bar.
Return to Hadrian and tell him that he is free to go. Give him the Tommy Torini's Business Card.
Return to Tommy (M7A:5) to get your reward.
![He can be found in the room on the second floor of the [Novac hotel] (M4:3) - Talent Pool - Side quests - Fallout: New Vegas - Game Guide and Walkthrough](https://game.lhg100.com/Article/UploadFiles/201512/2015121518541122.jpg)
He can be found in the room on the second floor of the [Novac hotel] (M4:3). He will be scared of you, thinking that you want to kill him. You can tell him that he's safe or lie to him The conversation will go on - offer him a job for Tommy and give him the Tommy Torini's Business Card.
Return to Tommy (M7A:5) to get your reward.
![Youll meet him on the road to [El Dorado gas Station] ] (MsE:14), just next to a huge Billboard - Talent Pool - Side quests - Fallout: New Vegas - Game Guide and Walkthrough](https://game.lhg100.com/Article/UploadFiles/201512/2015121518541103.jpg)
You'll meet him on the road to [El Dorado gas Station] ] (MsE:14), just next to a huge Billboard. Ask him if he would like to work at The Tops Casino. The offer will sound a little bit suspicious, so you have to tell him where the catch is.
Tell the truth and then start asking him about his life. Finally you'll start to talk about The Tops:
Return to Tommy (M7A:5) to get your reward.
![Given by: Elder Hardin [Hidden Valley Bunker L2] (M13B:1) - Tend to Your Business - Side quests - Fallout: New Vegas - Game Guide and Walkthrough](https://game.lhg100.com/Article/UploadFiles/201512/2015121518541161.jpg)
Given by: Elder Hardin [Hidden Valley Bunker L2] (M13B:1)
This quest can only be started after completing [Still in the Dark] and if you have sided with Hardin and you've helped him to become Elder #1.
You have to kill all Van Graffs in Silver Rush. Head to the shop in [Silver Rush] (M6:2) #2. There are few ways to deal with Van Graffs.
Kill Simon (a bodyguard guarding the entrance), go inside the shop and start killing everyone. Notice however that everyone inside uses really newest technology when it comes to the weapons.
Give away your weapons at the entrance and then obtain some high-tech weapons if you can pay for it. Choose some badass gun and start the blood bath. Do not forget Simon outside.
Start completing [Birds of a Feather]. During your duty at the entrance, wait for the fourth customer. Do not search him and let him in - he is a suicide bomber. The huge explosion will kill everyone inside. Do not forget to deal with Simon.
Start completing [Birds of a Feather]. At the final phase, when you meet the Legion, side with them against the Van Graffs. Start killing them - the Legion soldiers will support you.
After your mission is complete, return to Elder Hardin (M13B:1) and tell him about your work. You'll become a Paladin of the Brotherhood. You'll also receive the Power Armor and a training on how to use it as a reward.
![Given by: Lieutenant Haggerty [HELIOS One] (M29:1) - That Lucky Old Sun - Side quests - Fallout: New Vegas - Game Guide and Walkthrough](https://game.lhg100.com/Article/UploadFiles/201512/2015121518541280.jpg)
Given by: Lieutenant Haggerty [HELIOS One] (M29:1)
Lieutenant Haggerty can be found at the entrance on the south side of Helios One #1. She'll stop you when you approach her (if you were here before you can get inside with no problems).
When you allowed to enter, locate Fantastic (M29A:1) #2. You can lie that you're here to substitute him and then [Speech 25] bully him for some caps. Ask him about mirrors. Your task is to retarget these mirrors in such a way that they will help to produce more power. Energy has to be redirected to Strip and to McCarran. You'll obtain the password to the west mirror control terminal.

Go to the second room. You'll find Ignacio Rivas (M29A:2) #1 there. You can talk to him. He'll ask you with which faction you side.
You'll obtain the password to the east mirror control terminal. Go outside (M29A:3). You need to restart two terminals - #2 (M29:3) and (M29:4). Watch out for the traps, mines and tripwires and NCR guard dogs (eastern shack).

If you've talked to Ignacio, you'll be assigned with the optional task - to arm the ARCHIMEDES defense system in such a way that it can destroy the nearby NCR forces. Head to [Solar collection tower] (M29:5). Find the terminal which can shut off the turrets (M29B:1). Then go to the [Observation level], but before you enter the door (M29B:2), search the room (M29B:3). You'll find two Poseidon Energy Employee IDs lying on the floor. The HELIOS One mainframe #1 is located in the Observation level. Unfortunately it doesn't have enough power. To get it working you have two choices:

To find a bot go up the stairs #1. To activate it:
Robot will go down and will repair the mainframe.
Once you're ready, prepare to configure power grid (choosing one of the below options results in positive reputation with one of the factions):
1. McCarran and Las Vegas Strip. NCR reputation
2. Fremont and Westside. Followers of the Apocalypse reputation
3. Full region. Followers of the Apocalypse reputation
4. ARCHIMEDES II. Followers of the Apocalypse reputation
5. Full Region (Emergency Output Level) Followers of the Apocalypse reputation
After you've chosen one of the options, go outside the tower and activate the Reflector Control Panel #2. Return to Fantastic (M29A:1) and talk to him.
![Given by: Festus [Sunset Sarsaparilla Headquarters] (M48:1) - The Legend of the Star - Side quests - Fallout: New Vegas - Game Guide and Walkthrough](https://game.lhg100.com/Article/UploadFiles/201512/2015121518541259.jpg)
Given by: Festus [Sunset Sarsaparilla Headquarters] (M48:1)
You can find Festus in [Sunset Sarsaparilla Headquarters] (MsB:18). As you enter the factory, to your left is the famed Festus cowboy. Greet him with "Pleased to Meetcha" and then ask for stars "Star info". Your task is very simple - you have to collect 50 Sunset Sarsaparilla star bottle caps.
Sunset Sarsaparilla star bottle cap locations can be found in the World Atlas.
![Wandering in the area outside the entrance to [Nipton] (MsF:18), you can find Tomas and Jacklyn - The Legend of the Star - Side quests - Fallout: New Vegas - Game Guide and Walkthrough](https://game.lhg100.com/Article/UploadFiles/201512/2015121518541238.jpg)
Wandering in the area outside the entrance to [Nipton] (MsF:18), you can find Tomas and Jacklyn. Side with one of them by killing another.
TOMAS
If you've decided to help Tomas and you've killed the woman, talk to him and ask him why he was attacked by her. You'll learn that she wanted his lucky necklace made of the Star caps.
If you have chosen the first of the second option, you'll get 7 Sunset Sarsaparilla star bottle caps.
JACKLYN
If you've decided to help Jacklyn and you've killed that man, talk to her and ask her why she was attacked. You'll learn that she wanted the necklace made of the Star caps.
If you've killed her, loot her body and take 9 Sunset Sarsaparilla star bottle caps.
After collecting at least 50 caps, return to Festus to get your reward. But unfortunately there is no reward (except the story about The Legend of the Star). You'll automatically start this mission which actually is a real prize for your troubles. Go to the vault. The way is blocked (M48:2) so you have to find another way. There is one room with a collapsed ceiling (M48:3) #1. Go to the upper floor and find a room with a safe. There is a hole over the safe - go through it. You'll find crates with caps inside #2. There is also dead Allen Marks in the corner, as well as holotape with the true story about Star Caps.
![Given by: Captain Parker [Aerotech Office Park] (M42:1) - The Coyotes - Side quests - Fallout: New Vegas - Game Guide and Walkthrough](https://game.lhg100.com/Article/UploadFiles/201512/2015121518541303.jpg)
Given by: Captain Parker [Aerotech Office Park] (M42:1)
You can find captain wandering near by the fountain #1. Your task is to find some missing NCR refugees. Head to [Southern gate to Westside] (MsB:4) and enter [Westside]. You'll find Saint James and Dermot there (M43:1) #2. Talk to them - James will mention Aerotech.
Visit the Casa Madrid Apartments (M43:2) and search both men's rooms. You'll find a ledger #1 on the desk in Dermot's room, which will be good evidence. And being in James room, pick up the teddy bear from his bed #2.
Now you can return directly to Captain Parker (M42:1) and tell him about your findings or confront James and Dermot (M43:1).
The first and the second option lead to fight with both men.
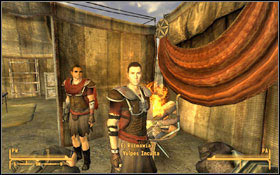
![Given by: Vulpes Inculta [The Fort] (M9:1) - The Finger of Suspicion - Side quests - Fallout: New Vegas - Game Guide and Walkthrough](https://game.lhg100.com/Article/UploadFiles/201512/2015121518541306.jpg)
Given by: Vulpes Inculta [The Fort] (M9:1)
Your task is to meet Martina Grossbeck, who has stolen some information from the Omertas. Head to the Strip and visit the Vault 21 Gift Shop (M7:7). Enter the [Vault 21] and head to Martina's room (M40:2). Upon reaching it, you'll meet few thugs from the Omertas #2.
Return to Vulpes (M9:1) #1 and tell him that Martina is safe. If you've killed her you can use her terminal and learn that she was selling information to Curtis from NCR.
![Given by: Emily Ortal [New Vegas Strip] (M7:2) - The Moon Comes Over the Tower - Side quests - Fallout: New Vegas - Game Guide and Walkthrough](https://game.lhg100.com/Article/UploadFiles/201512/2015121518541363.jpg)
Given by: Emily Ortal [New Vegas Strip] (M7:2)
You can meet Emily only when your reputation in Strip is quite high (you need to deal with Benny or initiate combat in The Tops in order to get Emily to appear). She stands near the gate #1. She'll ask you to bug Mr. House's mainframe.
You'll receive an electronic bug. Enter the Lucky 38 casino and head up the stairs trying to locate the [VIP lounge] #2. You'll find the terminal right behind the bar - hack it and bug the network. Leave the casino and tell Emilly that you bugged the network. The bug will stop working after a while though.
![Given by: Colonel Carrie Boyd [Camp McCarran Terminal Building] (M25A:4) - The White Wash - Side quests - Fallout: New Vegas - Game Guide and Walkthrough](https://game.lhg100.com/Article/UploadFiles/201512/2015121518541454.jpg)
Given by: Colonel Carrie Boyd [Camp McCarran Terminal Building] (M25A:4)
This quest is activated in parallel with [I Put a Spell on You].
After you talk to James Hsu, you'll be send to Curtis and then you'll meet Colonel Carrie Boyd (M25A:4) #1. Ask her if she has seen anything suspicious and then talk about missing people. She will tell you that Corporal White has gone missing.
It is time to start an investigation - check the Corporal White's cabinet (M25A:7) in the main Hall of McCarran #2. You'll find there the Corporal White's Journal too.
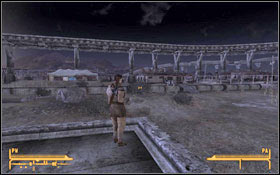
Next head to Gomorrah (in Strip) (M7:5) and go to the courtyard (M7F:6). Find Dazzle there (M7H:3) #1 and talk to her about White. Your next clue and a source of information is Trent Bascom (M45:1), who can be found on the [Sharecropper Farms] (MsB:20). Although he also doesn't know too much, he'll mention that White used to talk about the water treatment plant. Your next target is Lieutenant Romanowski (M45:2) #2.
![Youll learn that White went to [Westside] - The White Wash - Side quests - Fallout: New Vegas - Game Guide and Walkthrough](https://game.lhg100.com/Article/UploadFiles/201512/2015121518541445.jpg)
You'll learn that White went to [Westside].
Go to Westside and head to the Casa Madrid apartments (M43:2), where you can talk to Anderson #1. He also doesn't know too much about White.
When he finally reveals the truth, you can complete this quest in few ways:
Agree but demand caps - you'll get 10% of daily store income ([Barter 50] - you can bargain 20%]. Caps can be collected every two days at Etienne in the store (M43:3) #2.
You can choose whichever option you want.
Return to Lieutenant Boyd (M25A:4) and tell her what happened to Corporal White.
Given by: Thomas Hildern [Camp McCarran Terminal building] (M25A:1)
Your task is to visit Vault 22 and to download the research data from the computer. After talking to Thomas #1 you can have a small conversation with Angela Williams, who will tell you that you are not the first one sent there. She will also ask you to find Keely - the previous researcher who is gone missing. You can talk to Thomas again and with [Speech 40] demand the doubled payment. Head to the [Vault 22] (MsA:9) #2 and enter it.
![Being in the [entrance to the Vault 22] you can either fix the elevator (M16A:1) or take the stairs down (M16A:2) - There Stands the Grass - Side quests - Fallout: New Vegas - Game Guide and Walkthrough](https://game.lhg100.com/Article/UploadFiles/201512/2015121518541556.jpg)
Being in the [entrance to the Vault 22] you can either fix the elevator (M16A:1) or take the stairs down (M16A:2). Head to the 4th level of the vault [Vault 22 - Common Area] and locate the Overseer's office (M16D:3) #1. Activate the terminal you've found there and unlock all three doors (crew quarters, the databank door and cave door). Now head to the [Vault 22 - Pest Control] level where you can find the computer (M16E:1) with data you need. Download it #2.
You can return to Thomas (M25A:7) and complete your task.
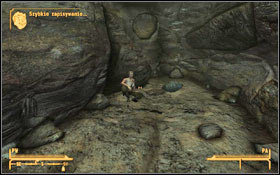
Go to the locked door (M16E:2) and enter a cave system. Watch out while there are numerous Mantis and Spore plants inside. When you find Keely (M16E:3) #1, talk to her. You'll learn that plants are out of control but there is a way to fix this situation. Agree to help her and meet her on the second floor [Vault 22 Oxygen Level]. Talk to Kelly again (M16B:3) #2 and will tell you about her plan to eliminate the spores.
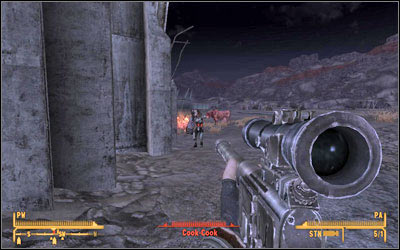
You'll learn that the whole Vault is full of the flammable gas, which can destroy the contagious spores. Your task is to make the ignition but this is only possible if you go very close to the vents. Go down to the [Vault 22 - Pest Control] where you'll find these vents (M16E:4) #1. The best idea is to use some kind of explosives (like dynamite, C4 or frag grenade) to ignite the gas. Remember also to duck somewhere - the damage from the blast and flames will go along the whole corridor #2. Return to Keely [Vault 22 Oxygen Level] (M16B:3) and collect your reward.
There is one more issue to be dealt with - the research data. Keely wants you to delete them:
Return to Thomas (M25A:7) and give him the data or tell him that the research data is lost. If you don't give him the data, you won't get any reward. If you've freed Keely, go and talk to Angela - you'll get a reward.
![Given by: Major Dharti [Camp McCarran] (M25:3) - Three-Card Bounty - Side quests - Fallout: New Vegas - Game Guide and Walkthrough](https://game.lhg100.com/Article/UploadFiles/201512/2015121518541526.jpg)
Given by: Major Dharti [Camp McCarran] (M25:3)
The major wanders around a camp. You can find him near the terminal building most of the day. Your task is to kill three Fiends. It is up to you how you eliminate them but you have to bring him their undamaged heads. If you shoot any of them in the head, the task will end with failure. You can take only one mission at a time so each time you have to return to the major, give him the Fiend's head and take another task.
The best way is to use a sniper rifle and shoot all targets from a distance. You may consider using V.A.T.S. system during this mission, while then they won't have head shots more likely.
![Head to the [Poseidon Gas Station] (MsA:16) when youll locate Violet with no problems - Three-Card Bounty - Side quests - Fallout: New Vegas - Game Guide and Walkthrough](https://game.lhg100.com/Article/UploadFiles/201512/2015121518541598.jpg)
Head to the [Poseidon Gas Station] (MsA:16) when you'll locate Violet with no problems. Watch out for her dogs while they can prevent you from shooting Violet very effectively. If you have the [Animal Friend] perk, you can use it and they won't attack you at all. When you shoot the Fiend, take Violet's head and return to Major Dharti (M25:3). Give him the head and collect a reward.
There are two ways to deal with this particular Fiend. You can fight him one on one or get some support from the 1st Recon squad. You'll find Lieutenant Gorobets at the main square (M25:4) - ask him for help. You can either be a decoy to lure Nephi out of his hideout or kill him along with the 1st Recon squad. The squad will be waiting in the Samson Rock Crushing Plant. Go and meet Nephi.
Head to the [Vault 3] (MsB:23) and enter [the Fiend's territory]. You have to fight many of them before you reach Driver Nephi (M41:1). Remember not to shoot his head accidentally.
When you shoot the Fiend, take Driver Nephi's head and return to Major Dharti (M25:3). Give him the head and collect a reward.
The information you can get from Little Buster might be very helpful with this mission. You can find him in the centre of Camp McCarran or in his tent (M25:5). He'll tell you that Cook-Cook has a brahmin herd with his favorite one named Queenie. Head to the [South Vegas Ruins West Entrance] (MsB:22). You can either fight Cook-Cook or kill Queenie as Buster suggested. If you kill the brahmin, Cook-Cook will fly into a rage, killing anyone near him and clearing a path for you. Kill him then, watching out for his close range weapon - a flamer. Remember not to shoot his head accidentally.
When you shoot the Fiend, take Cook-Cook's head and return to Major Dharti (M25:3). Give him the head and collect a reward.
![Given by: Marcus [Jacobstown] (M35:1) - Unfriendly Persuasion - Side quests - Fallout: New Vegas - Game Guide and Walkthrough](https://game.lhg100.com/Article/UploadFiles/201512/2015121518541669.jpg)
Given by: Marcus [Jacobstown] (M35:1)
You can get this quest only when you visit Jacobstown for the second time. When you are there for the first time, Marcus will greet you only. Next time he will approach you and will ask for help with some NCR soldiers harassing the town. You can deal with the situation peacefully or with violence. Head to mercenaries (M35:2) and talk to their leader, Norton #2. He stands in the middle of the road.
Return to Marcus (M35:1) and tell him that the town is safe again and mercenaries have left.
Now you have two options:
Return to Marcus (M35:1) and tell him that the town is safe again and mercenaries have left.
You can ask for 3000 caps instead of 2500, what means that you'll get 500 from the transaction. When you pay off mercenaries return to Marcus (M35:1) and tell him that the town is safe again and mercenaries have left.
Start shooting or choose real bad dialog lines. Marcus and other supermutants will come to help you after a while. When it's over, talk to Marcus.
![Given by: Pearl [Nellis AFB] (M11:1) - Volare! - Side quests - Fallout: New Vegas - Game Guide and Walkthrough](https://game.lhg100.com/Article/UploadFiles/201512/2015121518541657.jpg)
Given by: Pearl [Nellis AFB] (M11:1)
The toughest part of this task is to get inside the base and more precisely, close to its entrance while when you get close enough, the artillery starts shooting at you. Near the [Field's Shack] (MsB:16) you'll find George #1 standing on the road. He can make a deal with you for 300 caps. If you can go inside the Boomers base and return, he'll give you 600 caps. You can try to lower the price to 200 caps [Barter 40]. He'll give you a tip how to make it into the base. If you do not want to spend your money, read the note below:
"The key to avoiding the artillery is to move from building-to-building up the northwest side of town toward the front gate. Stick to the high cover in the northeast corner of the two buildings, then make a bee line for the gate. The Boomers won't shoot at their own people, so stick to the fence until you make it to the gate. Also, I know there is an old train tunnel that enters the area from the south, but no one has ever come back out of there to say it is safe."
Use these suggestions until you reach the gate #2. The Boomer Guard will come after a while and will call Raquel. She'll take you to Pearl (M11:1). To gain Boomer's favor you have to get highest possible reputation with them [Idolized]. You can gain it by helping Boomers in Nellis and completing missions for them.
Argyll (M11:4) takes care of patients and will ask you for help. You can help him though only if your skills are high enough.
You need to heal three patients. You can heal each of them: [Medicine 40], [Medicine 50], [Medicine 60] or just leave them. You'll get positive reputation for healing them.

Pete (M11:3) can be found in the museum. Go to him and listen to the Boomers' history lesson. Don't disturb him, otherwise you'll have to listen to this again. If your skills are high enough you get some more information out of him gaining positive reputation each time: [Explosives 40], [Science 35], [Survival 40], [Speech 40], [Speech 55], [Repair 40].
Character: Raquel
Location: [Nellis AFB] (M11:5)
Quest: [Ant Misbehavin']
Character: Loyal
Location: [Nellis AFB] (M11:2)
Quest: [Sunshine Boogie]
You can also complete the optional [Young Hearts] quest for Jack (M11:2). It requires some particular skills to be finished and it is not marked on the map while doing the [Volare!] quest. It helps you raising your reputation with Boomers.
You do not have to complete all these quests to gain high reputation the Boomers. Once you're idolized by them, go to see Pearl (M11:1). Before you can get support from the Boomers you have to complete one more task. Go to Loyal (M11:2) and ask him about Lady in the water. He'll ask you to get the airplane from the bottom of the lake. You'll receive two flotation devices and Loyal's detonator. Optionally you can to Jack, who was working long ago on Rebreather. It will allow you breathe underwater. Unfortunately there is one part missing.
Once you've succeeded, you'll get the Rebreather. Head to the lake, jump into the water and dive under the plane (if you have the Rebreather - use it now). Attach both ballasts under the plane's wings #1 and resurface. Now it is time for a detonator. Head towards harpoon gun #2 - the detonator will start to beep. Equip it as a weapon and fire it to raise the plane.
Return to Loyal (M11:2) and tell him about your success. You can ask him [Intelligence 7] how to get the plane without attracting anyone's attention. Return to Pearl (M11:1) and ask her if she agrees to support you during the final fight at Hoover Dam. She'll agree.
![Given by: James Garret [Atomic Wrangler Casino] (M6:3) - Wang Dang Atomic Tango - Side quests - Fallout: New Vegas - Game Guide and Walkthrough](https://game.lhg100.com/Article/UploadFiles/201512/2015121518541702.jpg)
Given by: James Garret [Atomic Wrangler Casino] (M6:3)
He will tell you that his clientele has very specific interests. Your task is to recruit a ghoul dressed up in a cowboy suit, a smooth talker, and a robot.
You can look for these people in any order.
![Go to the [Old Mormon Fort] (M6B:1), where you can find a ghoul wearing a cowboy outfit, named Beatrix Russell - Wang Dang Atomic Tango - Side quests - Fallout: New Vegas - Game Guide and Walkthrough](https://game.lhg100.com/Article/UploadFiles/201512/2015121518541731.jpg)
Go to the [Old Mormon Fort] (M6B:1), where you can find a ghoul wearing a cowboy outfit, named Beatrix Russell. Ask her directly about working for Garrets and mention the form of this work (as a prostitute). You can convince her only by talking about some discounts [Barter 35] or [Speech 35]. Return to James (M6:3) and tell him that you found a worker.
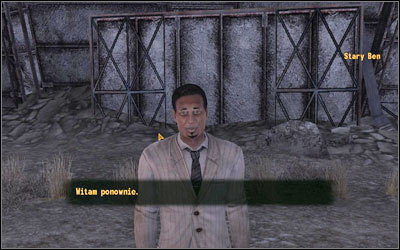
A smooth talker can be found nearby the Strip entrance (M6:4). Talk to Old Ben and ask him to work for Garrets. You can convince him only with these options:
Only these options guarantee that Old Ben accepts your offer. Return to James (M6:3) and tell him that you found a worker.
You can get a sexbot in two ways. If you've asked James where you should look for one, you'll be sent to Ralph - go to Mick & Ralph's (M6B:2). Ask about a sexbot and you'll be sent to Cerulean Robotics. You can also ask if you need any holotapes or other things to program a bot - Ralph can help you with this:
Wait two days (in game time) and return to get a holotape program.
If you have the holotape (or not), go to Cerulean Robotics (M6:5). There are few Giant Rats inside - get rid of them and clear you path towards Fisto. Go to the terminal:
After that you can test the Fisto on your own. If it works, send him to Garrets.
You'll get some caps for every worker. The basic rate is 50 caps, unless you were able to get it doubled. In case of a sexbot:
[Barter 40] say, that Fisto will serve for years
[Speech 40] mention your salary
Whichever option you choose, you will receive additional caps.
![Given by: Dead Sea [Nelson] (MsE:23) - We Are Legion - Side quests - Fallout: New Vegas - Game Guide and Walkthrough](https://game.lhg100.com/Article/UploadFiles/201512/2015121518541784.jpg)
Given by: Dead Sea [Nelson] (MsE:23)
You'll meet a Legionary scout on the main road (M21:1). If you have Mark of Caesar or you reputation with Legion is not critical, you can meet Dead Sea (if you have the mark, you'll be taken to him).
![Hell assign you with a very simple task - to kill all officers in [Camp Forlorn Hope] (MsE:20) - We Are Legion - Side quests - Fallout: New Vegas - Game Guide and Walkthrough](https://game.lhg100.com/Article/UploadFiles/201512/2015121518541750.jpg)
He'll assign you with a very simple task - to kill all officers in [Camp Forlorn Hope] (MsE:20). You have four main targets to eliminate.
The second solution allows you to eliminate only these characters, which you have to kill without being noticed.
You can find Dr. Richards in the medical clinic (M22:1) #1. Tech Sergeant Reyes and Major Polatli are in the communications tent (M22:2) #2 and Quartermaster Mayes is in the tent (M22:3).
Once you've killed them all, return to Dead Sea (M21:2) and tell him that the task is finished. You'll get your award.
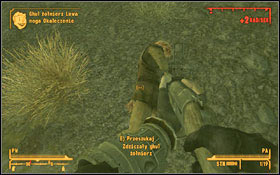
Given by: First Sergeant Astor [Camp Searchlight] (MsG:20)
You can find Sergeant Astor near the Camp Searchlight where he is on a patrol with small group of NCR soldiers #1. Ask him what he does here. After a small conversation he'll tell you about soldiers turned into ghouls and will ask you for a help. You have to kill 10 NCR ghouls and bring their irradiated dogtags back as a proof. You'll receive a service rifle and 10 caps for each tag. Rush into the city and kill all ghouls. Not every of them have tags - keep your eye on ghouls wearing an NCR uniform #2. You'll be able to get only 9 dogtags so to get one more you may need to comb the town of any. When you have 10 tags, return to Sergeant Astor and give him the dogtags.
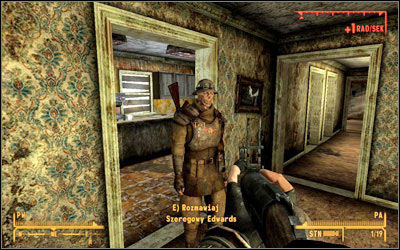
If you still lack one tag, you can check the house (M33:4) where Private Edwards can be found. His dogtag can be obtained in few ways.
You can also mention the dogtag:
Tell him that there is a NCR soldier waiting outside to kill him:
Ask him if there is a place where he could probably go and if the radiation is the only thing he is afraid of. You'll learn that he is afraid of Radscorpions too:
If you choose the second option, go to Sergeant Astor and tell him about Edwards:
Whichever option you choose, return to Edward and tell him the news. You'll receive his dogtag.
Once you've collected all dogtags, return to First Sergeant Astor and give them to him. Each one is worth 25 caps. If you have them all you'll receive 250 caps more and a rifle.
![Given by: Logan [Camp Searchlight] (M33:1) - Wheel of Fortune - Side quests - Fallout: New Vegas - Game Guide and Walkthrough](https://game.lhg100.com/Article/UploadFiles/201512/2015121518541853.jpg)
Given by: Logan [Camp Searchlight] (M33:1)
Head to NCR Storage Room (M33:1) #1. Remember to watch out for the ghouls lurking in the area. There are few terminals in the area, which can be hacked to activate some defense turrets - they are very useful. Once you're in the Storage Room, talk to Logan #2 and ask if you can help him somehow. He needs to locate some radiation suits. You can get this location by hacking [Science 50] the storage terminal which is nearby. You can also open the safe for yourself if you want.

Tell Logan that you've found the suits. After you return suits to Logan, you can loot the town. [Speech 50] you can convince him to give you better share. Go to [Niptop] (MsF:18) where you can find out more about the suits in local shop (M34:1) run by Boxcars #1. Ask him about supplies for NCR. Head to [Hidden Supply Cave] (MsF:11), open the main door and go inside. The cave is almost empty but you can find a Radiation Suit Package #2 there. Return to Logan (M33:1).
Your first target is a police station (M33:2) #1. Go there with pack of Mercenaries, watching out for ghouls - Logan can't be killed! You can find some defense towers there and a terminal which activates them. Once you get inside #2, you have to find few things which belong to NCR:
After obtaining all of these parts, talk to Logan. You'll get the key to the Fire Station - head there now (M33:3) #1. There is a nasty surprise waiting for you inside - a Radscorpion Queen #2 with some minions. Kill them all, go to the upper level and look for more NCR parts:
After you return to Logan and give him the parts you've found, he'll start shooting at you. Kill him before he kills you.
Given by: Samuel Cooke [Vault 19 - 1 floor] (M32:1) or Philip Lem [Vault 19 - 1 floor] (M32:2)
There are two paths to complete this quest, depending on where you've started it.
If you've decided to side with Samuel, talk to him in his office #1 (M32:1). Ask for his work - he wants you to kill fire geckos to clear the way to sulfur. You'll receive a card to a red sector, which unlocks some doors (M32:3). Head to elevator and come down to the [Vault 19 - Living Quarters] (M32:4). Locate the common room (M32A:2) with the pool tables and a hole in the floor. You can get there through the door (M32A:1) #2.
![Once youre in the [Sulfur Cave], you have to clear the whole area out of the Fire geckos (M32B:1) - Why Cant We Be Friends - Side quests - Fallout: New Vegas - Game Guide and Walkthrough](https://game.lhg100.com/Article/UploadFiles/201512/2015121518541903.jpg)
Once you're in the [Sulfur Cave], you have to clear the whole area out of the Fire geckos (M32B:1). After that return to Samuel (M32:1) the same way you came here. You'll be assigned with next task. You have to go to the [Red Rock Canyon] (MsA:14) and ask Papa Khan (M17:1) if the Powder Gangers may join forces with him. He will agree whatever you offer. Return to Samuel (M32:1) and tell him that you've convinced Papa Khan.
NOTICE: to choose and complete this path, you need at least 3x C4 and the detonator
If you've decided to side with Philip, talk to him in his office #1 (M32:2). Ask for his work - he wants you to seal the Sulfur Caves. You'll receive a card to a blue sector, which unlocks some doors (M32:5). Head to elevator and come down to the [Vault 19 - Living Quarters] (M32:6). Locate the common room (M32A:2) with the pool tables and a hole in the floor. You can get there through the door (M32A:3) #2.
Once you're in the Sulfur Cave, you have to clear the whole area out of the Fire geckos. Examine the rocks (M32B:2). Now you have few choices:
If you plant too many explosives and destroy the vault, the mission will fail.
After you've destroyed the cave, return to Philip (M31:2) and tell him about your work
In the second case you have to go to the [Red Rock Canyon] (MsA:14) and ask Papa Khan (M17:1) if the Powder Gangers may join forces with him. He will agree whatever you offer. Return to Philip (M31:2) and tell him that you've convinced Papa Khan.
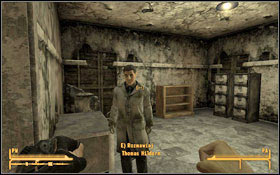
![Given by: Alice McLafferty [Crimson Caravan Company] (M12:2) - You Can Depend on Me - Side quests - Fallout: New Vegas - Game Guide and Walkthrough](https://game.lhg100.com/Article/UploadFiles/201512/2015121518541971.jpg)
Given by: Alice McLafferty [Crimson Caravan Company] (M12:2)
Your first task is to deliver the invoice to Dr. Hildern at [Camp McCarran] (MsB:28). Enter the [Camp McCarran terminal building] (M25:1), where Thomas Hildern (M25A:1) #1 can be found. Return to Alice (M12:2). You'll be assigned with three more tasks. The order of completing them doesn't matter.
Go to the [Atomic Wrangler Casino] (M6:3), where you'll find Henry Jamison #2. Speak with him about quitting his job at the Crimson Caravan Company
Return to Alice (M12:2) and receive your reward which depends on the way you've dealt with Henry. It is 150 caps if you've killed him, 300 caps if you've agreed to pay his debt and his severance pay, 400 caps if you've agreed to pay only his debt, 500 caps if you made him leave.
![Go to the [Gun Runners] (MsB:11) #1 - You Can Depend on Me - Side quests - Fallout: New Vegas - Game Guide and Walkthrough](https://game.lhg100.com/Article/UploadFiles/201512/2015121518541989.jpg)
Go to the [Gun Runner's] (MsB:11) #1. You can't be seen during this mission. The best way is to wait till night and then use the Stealth boy. Open the gate [Lockpick 50] and enter the Gun Runner's factory. Move to the other room where the terminal is located #2. Log in and grab the information off the terminal. Head back out being undetected and return to Alice (M12:2) to get your reward. It is 300 caps if you've been attacked, 400 if you've been detected but there was no shooting and 500 if everything went according to plan.
![Youll find Cass at the [Mojave Outpost] (MsF:15) among the barracks (M24:1) #1 - You Can Depend on Me - Side quests - Fallout: New Vegas - Game Guide and Walkthrough](https://game.lhg100.com/Article/UploadFiles/201512/2015121518541965.jpg)
You'll find Cass at the [Mojave Outpost] (MsF:15) among the barracks (M24:1) #1. Tell her that Crimson Caravan Company wants to buy out her own caravan. Make an offer and push on the subject.
You'll buy out the caravan.
Cass will take the challenge but you need to get 12 bottles of Whisky. She'll get drunk and no matter which dialog line you choose next, she'll agree to sign the papers.
![You need to talk to Jackson at the [Mojave Outpost] (M24:2) - You Can Depend on Me - Side quests - Fallout: New Vegas - Game Guide and Walkthrough](https://game.lhg100.com/Article/UploadFiles/201512/2015121518542042.jpg)
You need to talk to Jackson at the [Mojave Outpost] (M24:2). Convince him to let Cass free:
A side quest is unlocked: [Heartache by the Number].
After a short conversation you'll buy out the caravan.
Return to Alice (M12:2) and tell her that Cass has sold the caravan.
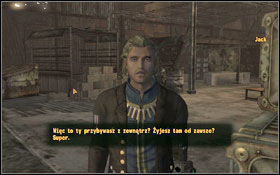
![Given by: Jack [Nellis AFB] (M11:2) - Young Hearts - Side quests - Fallout: New Vegas - Game Guide and Walkthrough](https://game.lhg100.com/Article/UploadFiles/201512/2015121518542037.jpg)
Given by: Jack [Nellis AFB] (M11:2)
Start talking to Jack #1 and ask him about how you can help him. Only two dialog lines will start the quest. You need [Speech 35] or [Confirmed Bachelor]. Jack reveals that he's in love with a girl from a Crimson Caravan. Agree to speak with her. Leave Nellis and head to [Crimson Caravan Company] (MsB:13). You'll meet a redhead girl there (M12:1) named Janet #2. Talk with her about Jack:
Then tell her that you'll ask Pearl for permission to go to Nellis or [Speech 55] lie to her that she can pass - she'll die and the quest will fail. Go to the [Nellis AFB] and talk to Pearl (M11:1). Convince her to allow Janet entry into Nellis: [Speech 50] or [Lady Killer] tell her that it will mean a lot for Jack.
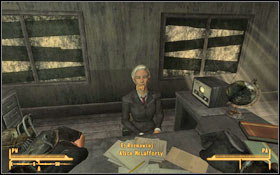
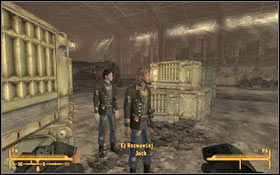
Go to Jack (M11:2) and tell him that Pearl has agreed to let the girl in. To minimize the probability of shooting her, he will give you Boomer Outfit for Janet. Go again to the [Crimson Caravan Company] and talk to Janet (M12:1). Tell her that she got a safe passage to Nellis and give her the Outfit (you can also lie to her [Speech 55]). Before you go you have to talk to Alice McLafferty (M12:2) #1.
Only two last options allow Janet to go to Nellis. Talk to Janet for a last time and take her to the [Nellis AFB]. Return to Jack #2 and talk to him when Janet finally comes.
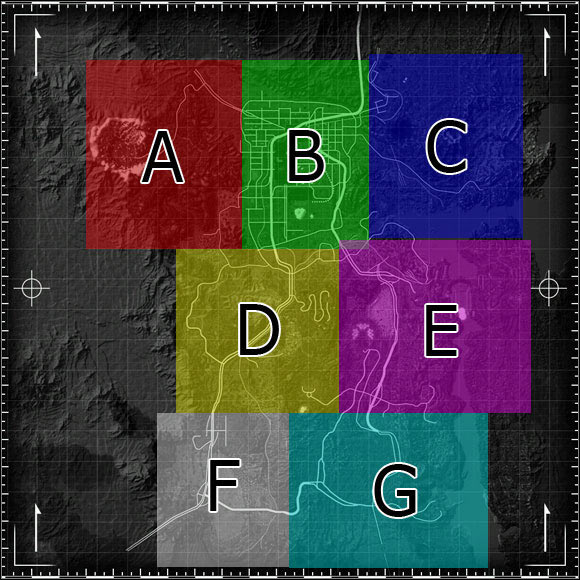
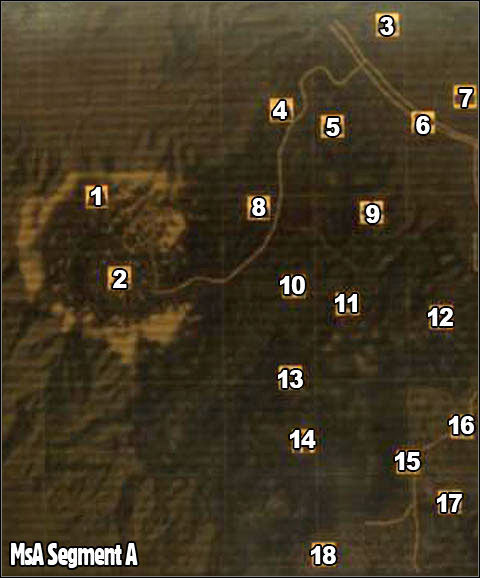
1. Charleston cave
2. Jacobstown
3. Brooks Tumbleweed Ranch
4. Ruby Hill Mine
5. Followers safehouse
6. Griffin Wares sacked caravan
7. Horowitz farmstead
8. Silver Peak Mine
9. Vault 22
10. Remnants bunker
11. Ranger station Foxtrot
12. Brewer's Beer bootlegging
13. Red Rock Drug Lab
14. Red Rock Canyon
15. Chance's Map
16. Poseidon gas station
17. Nopah Cave
18. Spring Mt. Ranch State Park
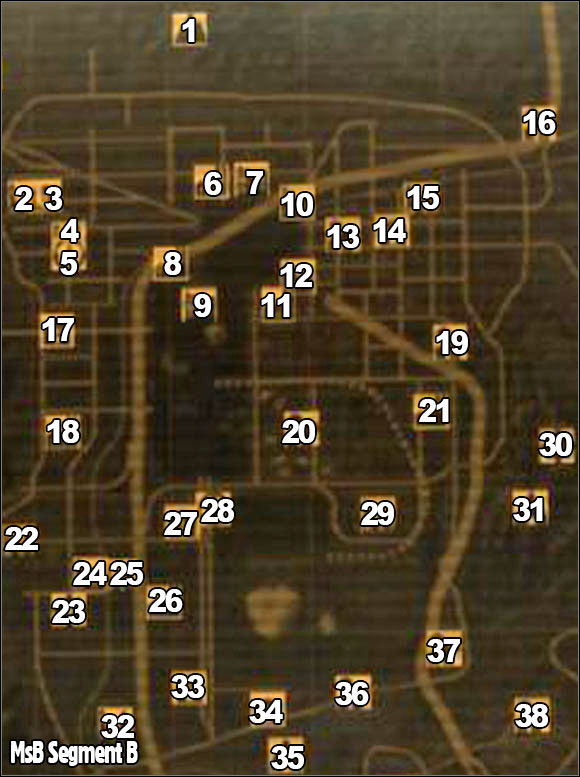
1. Northern passage
2. Westside West Entrance
3. Miguel's pawn shop
4. Westside South Entrance
5. Thorn
6. H&H Tools Factory
7. North Vegas Square
8. South Cistern
9. The Strip North Gate
10. Freeside's north gate
11. Gun Runners
12. Freeside's east gate
13. Crimson Caravan camp
14. New Vegas Medical Clinic
15. Mole Rat Ranch
16. Fields' shack
17. Monte Carlo Suites
18. Sunset Sarsaparilla Headquarters
19. Durable Dunn's sacked caravan
20. NCR sharecropper farms
21. East Pump Station
22. South Vegas Ruins West Entrance
23. Vault 3
24. South Vegas Ruins East Entrance
25. New Vegas Steel
26. West Pump Station
27. El Rey motel
28. Camp McCarran
29. Aerotech office park
30. Vault 34
31. Cannibal Johnson's cave
32. Samson Rock Crushing Plant
33. The Basincreek Building
34. Allied Technologies offices
35. Ant mound
36. Cassidy Caravan wreckage
37. Grub n' Gulp rest stop
38. Follower's outpost
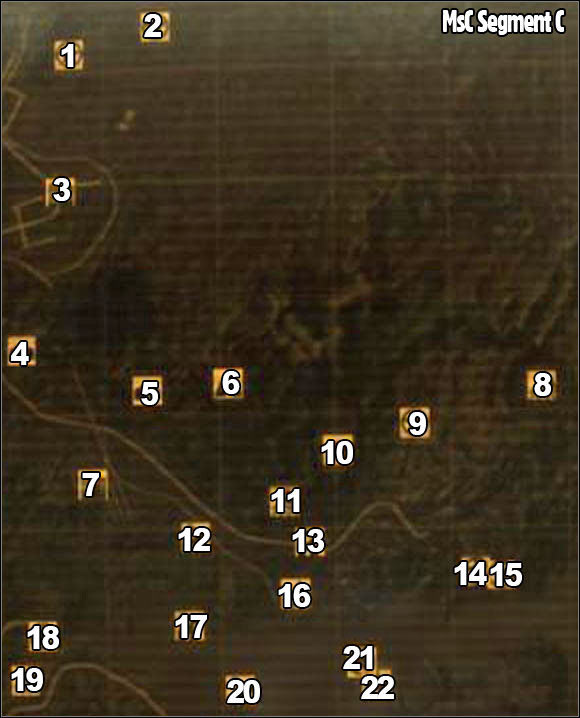
1. Nellis Hangars
2. Nellis array
3. Nellis Air Force Base
4. Raul's shack
5. Brotherhood of Steel safehouse
6. Bloodborne cave
7. Gypsum train yard
8. Devil's Throat
9. Ranger station Bravo
10. Bitter Springs
11. Coyote Tail ridge
12. Cap counterfeiting shack
13. Bitter Springs recreation area
14. Camp Guardian
15. Guardian Peak
16. Callville Bay
17. Fisherman's Pride shack
18. Camp Golf
19. Lake Las Vegas
20. Scavenger platform
21. Crashed B-29
22. Lake Mead Cave
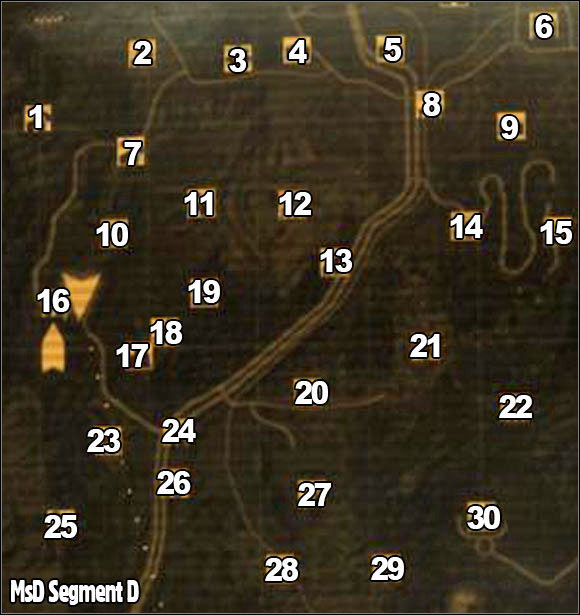
1. Tribal Village
2. Bonnie Springs
3. Vault 19
4. Whittaker Farmstead
5. Hunter's farm
6. REPCONN Headquarters
7. Makeshift Great Khan camp
8. Junction 15 Railway Station
9. NCR Ranger safehouse
10. Goodsprings Cemetery
11. Great Khan encampment
12. Quarry Junction
13. Sloan
14. Neil's Shack
15. Black Mountain
16. Goodsprings
17. Goodsprings Cave
18. The Devil's Gullet
19. Yangtze Memorial
20. Powder Ganger camp north
21. Hidden Valley
22. Scorpion Gulch
23. Goodsprings source
24. Jean Sky Diving
25. Lone Wolf Radio
26. Powder Ganger camp west
27. NCR Correctional Facility
28. Powder Ganger camp south
29. Powder Ganger camp east
30. REPCONN Test Site
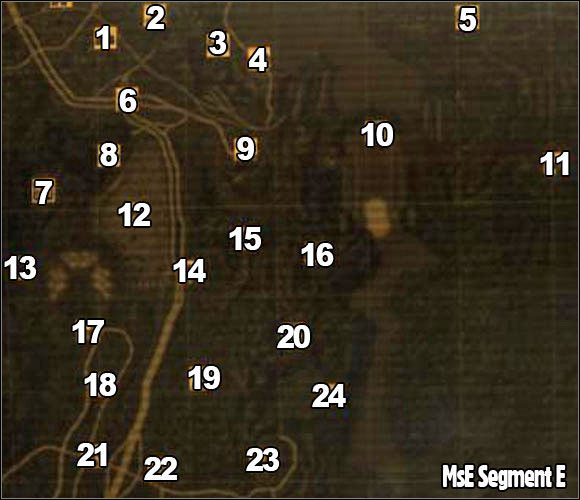
1. Deserted Shack
2. Mountain Shadow Campground
3. Ranger station Alpha
4. Boulder Beach Campground
5. The Fort
6. 188 Trading Post
7. El Dorado substation
8. Vault 11
9. Boulder City
10. Hoover Dam
11. Legate's Camp
12. El Dorado Dry Lake
13. Black Rock Cave
14. El Dorado Gas & Service
15. Cazador nest
16. Ranger Station Delta
17. Helios One
18. Gibson Scrap Yard
19. Southern Nevada Wind Farm
20. Camp Forlorn Hope
21. Novac
22. Toxic dump site
23. Nelson
24. Abandoned BoS Bunker
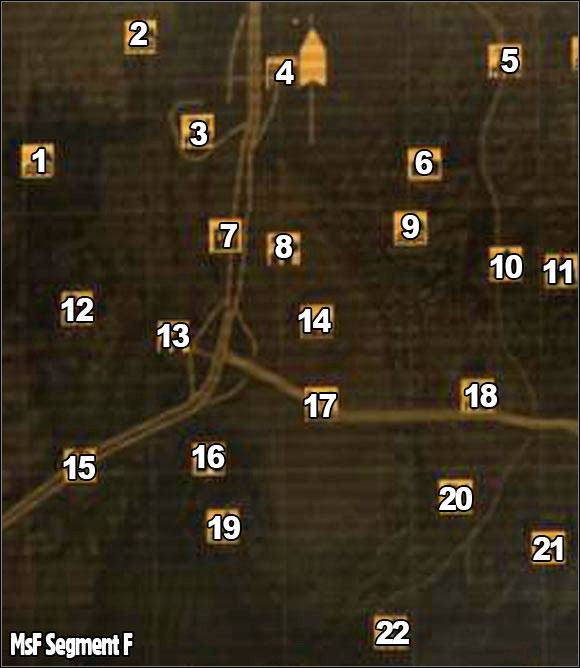
1. Mesquite Mountains Crater
2. Canyon Wreckage
3. California Sunset Drive-in
4. Primm
5. Emergency Service Railyard
6. The Prospector's Den
7. Nevada Highway Patrol station
8. Ivanpah Dry Lake
9. Jack Rabbit Springs
10. Coyote den
11. Hidden supply cave
12. Mesquite Mountains Camp Site
13. Nipton Road Reststop
14. Ivanpah Race Track
15. Mojave Outpost
16. Morning Star Cave
17. Nipton Road Pit Stop
18. Nipton
19. Crescent Canyon west
20. Mojave Drive-in
21. Bradley's shack
22. Crescent Canyon east

1. Primm Pass
2. Harper's shack
3. Dead Wind Cavern
4. Ranger station Charlie
5. Highway 95 Viper's Encampment
6. Clark Field
7. Techatticup mine
8. Wrecked Highwayman
9. Lucky Jim mine
10. Walking Box Cave
11. Legion raid camp
12. Broc Flower cave
13. Snyder Prospector Camp
14. Ranger station Echo
15. Cliffside prospector camp
16. Wolfhorn ranch
17. Raided farmstead
18. Coyote mine
19. Searchlight North Gold Mine
20. Camp Searchlight
21. Sniper's nest
22. Cottonwood Cove
23. Matthews Animal Husbandry Farm
24. Searchlight East Gold Mine
25. Cottonwood Overlook
26. Smith Mesa Prospector Camp
27. Blue Paradise Vacation Rentals
28. Caesar's Legion safehouse
29. Old nuclear test site
30. Crashed Vertibird
31. Searchlight Airport
32. Fire Root Cavern
33. Cottonwood crater
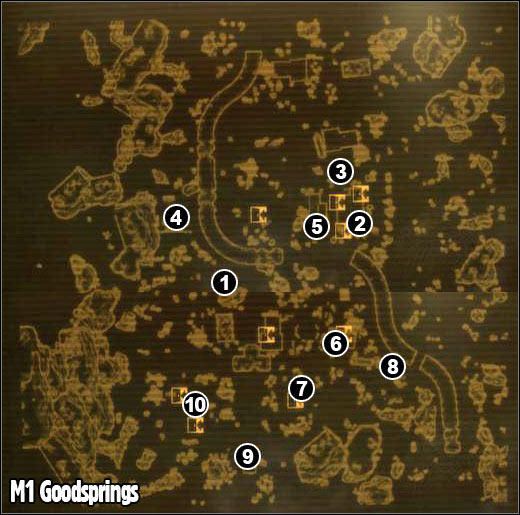
1. Mitchell's house
2. Prospector Saloon:
3. Sunny Smiles - connected to [Back in the Saddle].
4. Goodsprings gas station: Ringo
5. Goodsprings General Store: Chet
6. Easy Pete's house
7. Trudy's house
8. Joe Cobb - [Run, Goodsprings, Run].
9. Victor's shack
10. Xander root - [By a Campfire on the Trail].
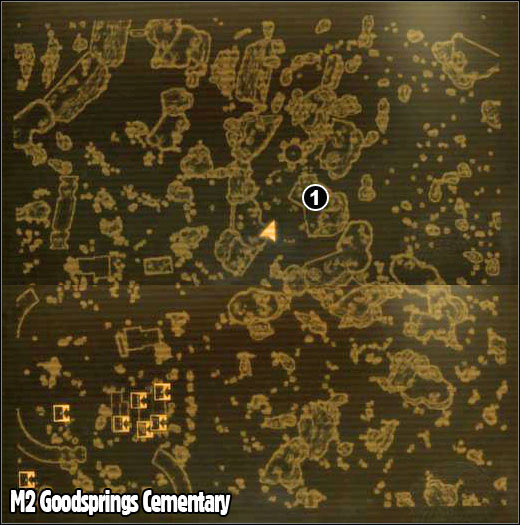
1. Broc flower - [By a Campfire on the Trail].
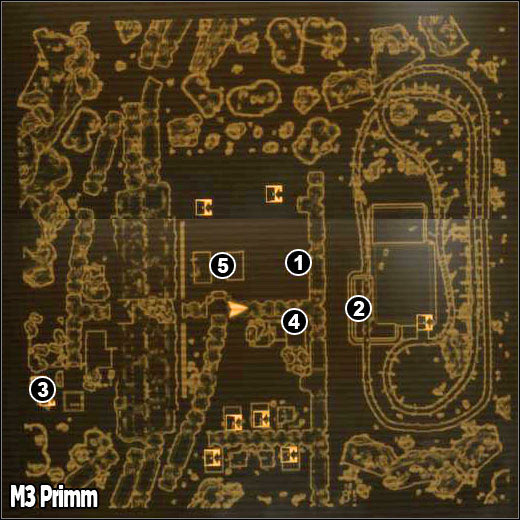
1. Vikki and Vance Casino:
2. (M3A) Bison Steve hotel
3. Lieutenant Hayes, Tyrone
4. Nash residence:
5. Mayers - [My Kind of Town].

1. Deputy Beagle

1. Dino Dee-lite reception:
2. Dinky the T-Rex:
3. Hotel rooms:
4. Hotel rooms: Daisy Whitman
5. Hotel rooms: Guard Andy
6. Cliff Briscoe's house
7. Dusty McBride and Alice McBride house
8. Joannie May Crawford's house
9. No-bark Noonan's shack
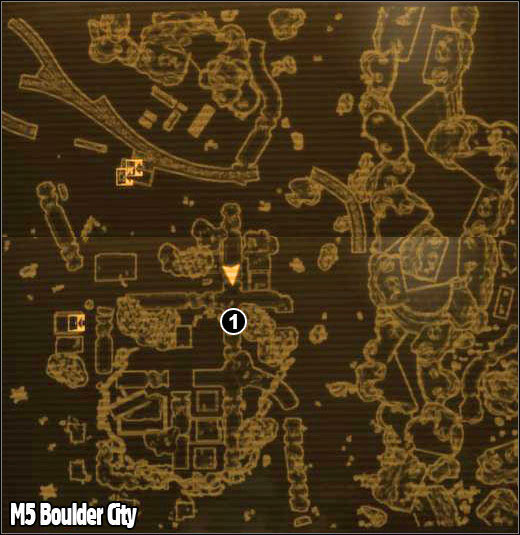
1. Lieutenant Monroe
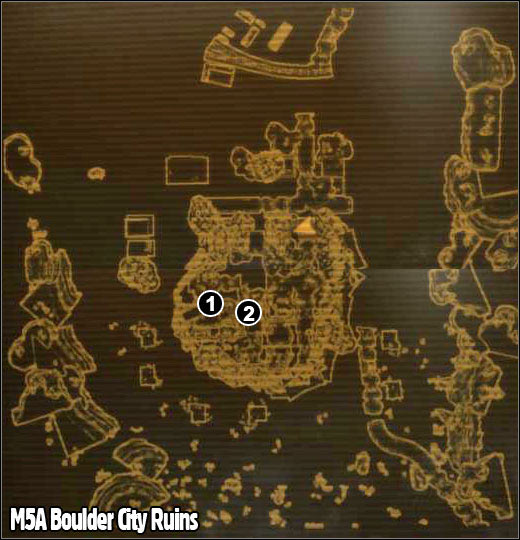
1. Jessup
2. Hostages - [Boulder City Showdown]
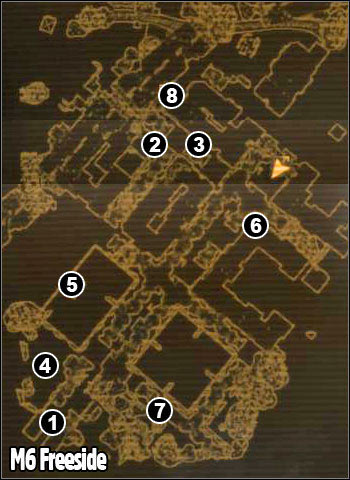
1. Securitron
2. Silver Rush:
3. Atomic Wrangler Casino:
4. Old Ben - [Wang Dang Atomic Tango];
5. Cerulean Robotics: Fisto - [Wang Dang Atomic Tango].
6. The King's School of Impersonation:
7. Carlitos - [Bye Bye Love]
8. Bill Ronte - [High Times].
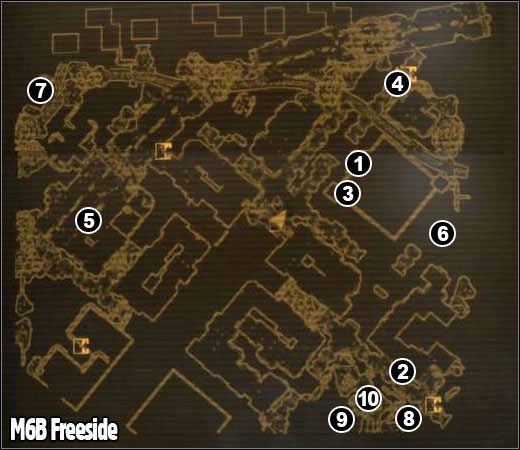
1. Old Mormon Fort:
2. Dixon, Mick & Ralph's:
3. Julie Farkas' tower
4. Orris - [G.I. Blues].
5. Ruined shop: Elizabeth - [G.I. Blues].
6. Greks - [Debt Collector];
7. Elizabeth Kieran - [G.I. Blues];
8. Rotface
9. Missionary - [G.I. Blues];
10. Jacob Hoff - [High Times].
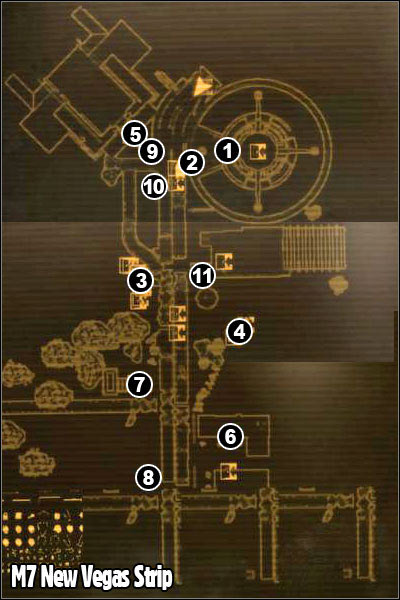
1. Lucky 38 casino: Mr. House
2. Emily Ortal - [The Moon Comes Over the Tower].
3. (M7A) The Tops Casino
4. (M7C) Ultra-Luxe Casino
5. (M7F) Gomorrah
6. NCR Embassy: Ambassador Dennis Crocker
7. (M40) Vault 21
8. Michael Angelo's Workshop: Michael Angelo
9. Caleb McCaffery - [Debt Collector].
10. Billy Knight - [Talent Pool].
11. Ethel Phebus and Walter Phebus
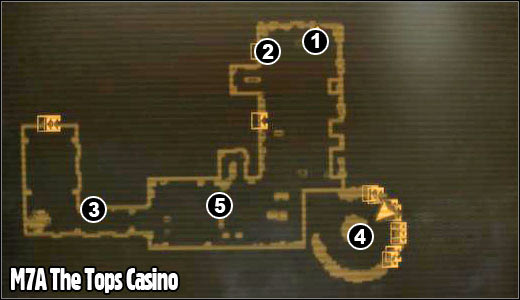
1. Benny
2. Presidential suite
3. (M7B) 13th floor
4. Swank
5. The Aces Theater: Tommy Torini

1. Benny's room
2. Secret workshop: Yes Man
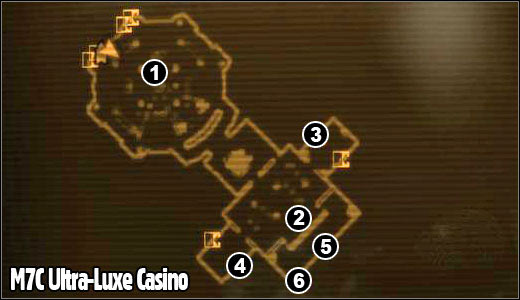
1. Heck Gunderson
2. Mortimer
3. (M7D) Gourmand
4. Hotel Rooms: Jay Barnes - [Beyond the Beef].
5. Bon Vivant Suite
6. Container of chlorine - [How Little We Know].
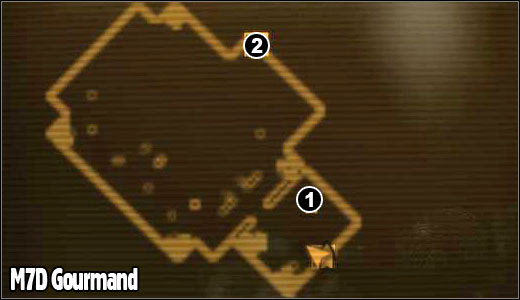
1. Marjorie
2. (M7E) The kitchen
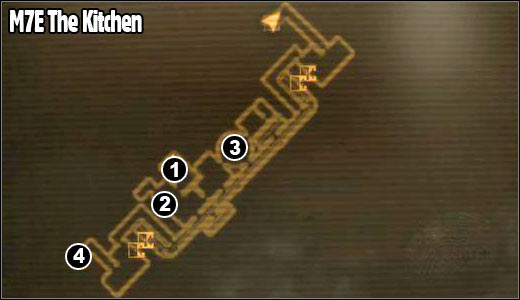
1. Ted Gunderson - [Beyond the Beef].
2. Philipp - [Beyond the Beef].
3. Wine - [Beyond the Beef].
4. The banquet room
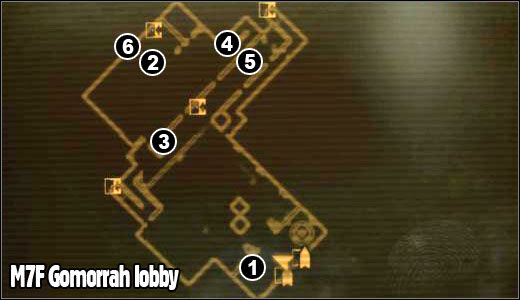
1. The receptionist
2. Cachino
3. (M7G) Lower level
4. The Zoara Club door
5. Big Sal
6. (M7H) Gomorrah courtyard
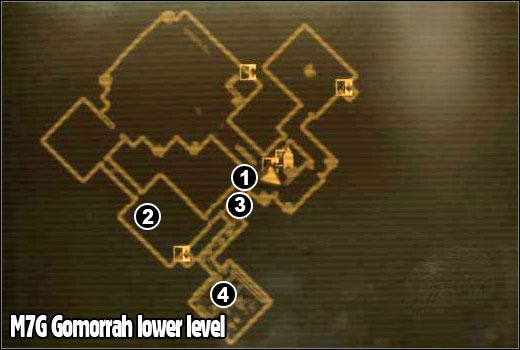
1. Door
2. Troike
3. Basement - [How Little We Know].
4. The weapons storage room - [How Little We Know].
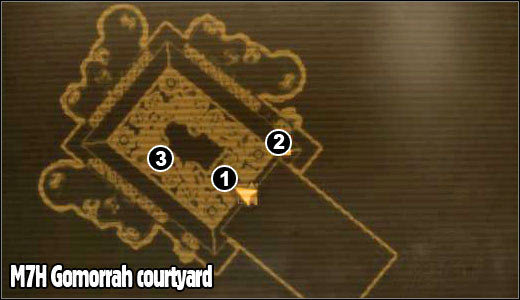
1. Joana - [Bye Bye Love].
2. Joana's room
3. Dazzle - [The White Wash].
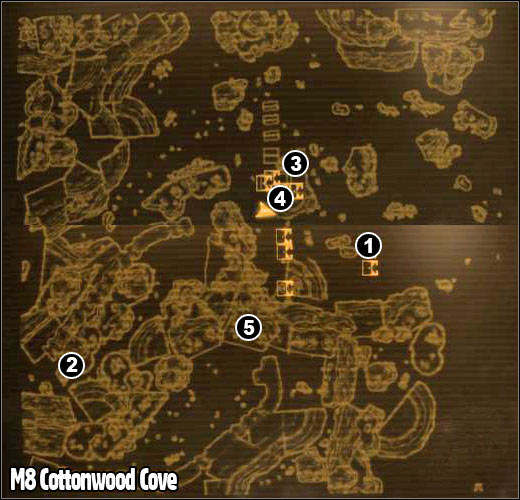
1. Cursor Lucullus
2. Anders - [Aba Daba Honeymoon]
3. Weathers family - [Left My Heart].
4. Aurelius from Phoenix
5. abandoned truck with copious amounts of nuclear waste - [Eye for an Eye].
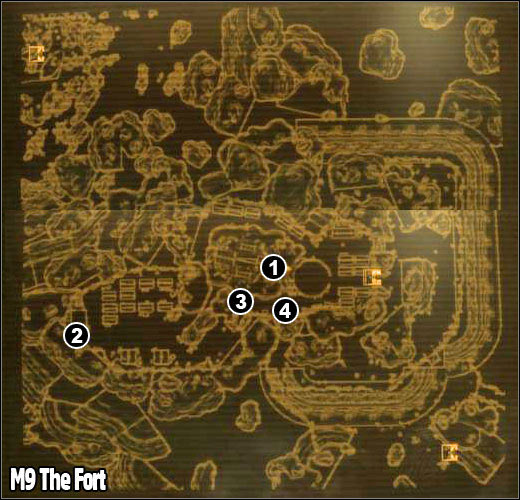
1. Caesar's ten:
2. (M9A) Securitron Vault
3. Howitzer - [I Hear You Knocking].
4. Antony - [Nothin' But a Hound Dog].
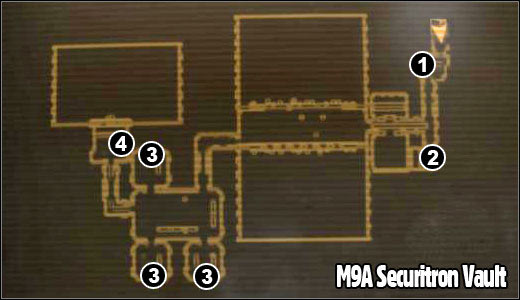
1. Monitor with Mr. House / Yes man
2. Security room
3. Generator (to destroy a bunker)
4. Terminal (to upgrade the army)
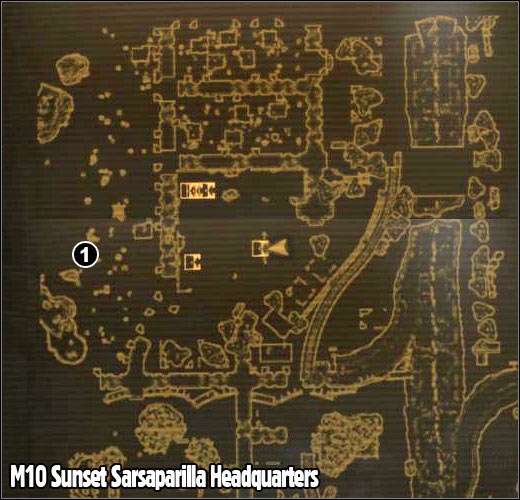
1. weapon shipment - [How Little We Know].
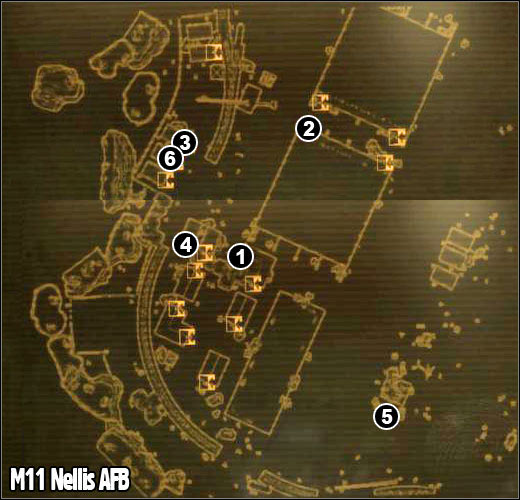
1. Pearl
2. Hangar:
3. Pete
4. Argyll
5. Raquel - [Ant Misbehavin'].
6. Howitzer firing mechanism - [I Hear You Knocking].
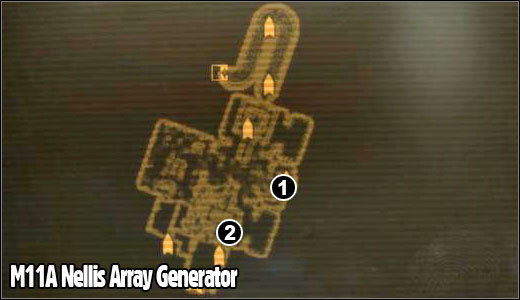
1. Generators
2. Ants' nest
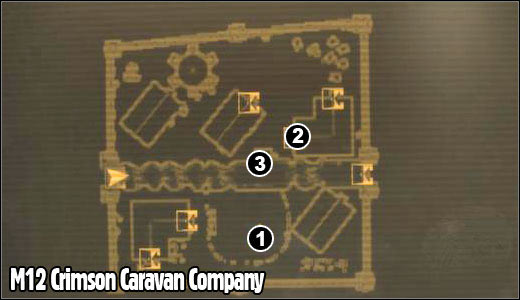
1. Janet - [Young Hearts].
2. Alice McLafferty
3. Blake - [Bitter Springs Infirmary Blues].

1. (M13A) BoS bunker
2. Bunker: Dobson - [Still in the Dark].
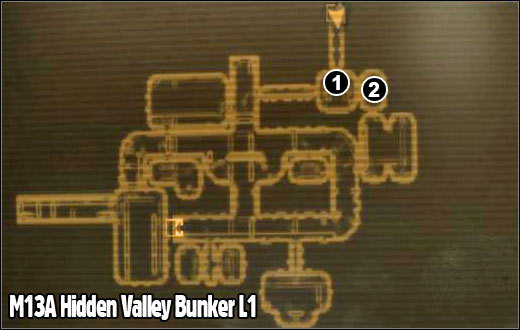
1. Paladin Ramos - on your first visit in the bunker.
2. Paladin Ramos' room
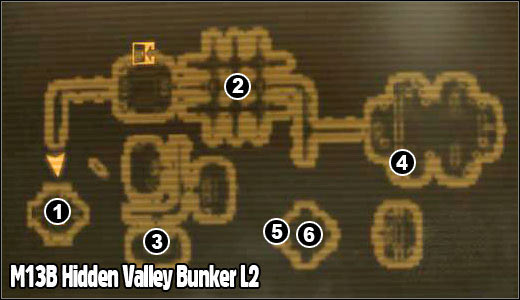
1. Elder McNamara / Elder Hardin
2. Scribe Isben
3. Head Paladin Hardin
4. Senior Knight Lorenzo
5. auto-destruction terminal
6. Head Scribe Taggart
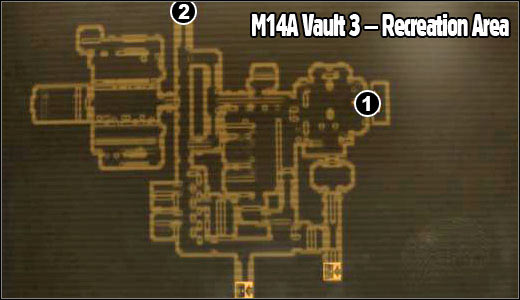
1. Fiend
2. (M14B) Vault 3 - Maintenance Wing
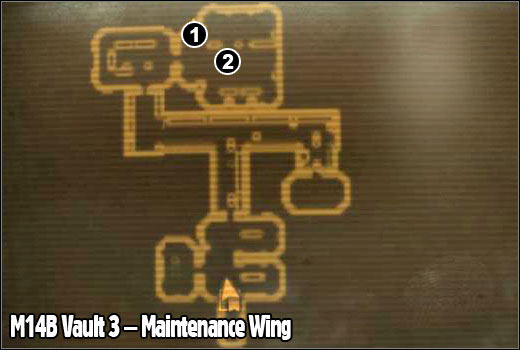
1. Reverse Pulse Cleaner -[Still in the Dark].
2. Motor-Runner
1. (M15B) Vault 11 - Living Quarters

1. (M15C) Vault 11 - lower level
1. Differential Pressure Controller - [Still in the Dark].
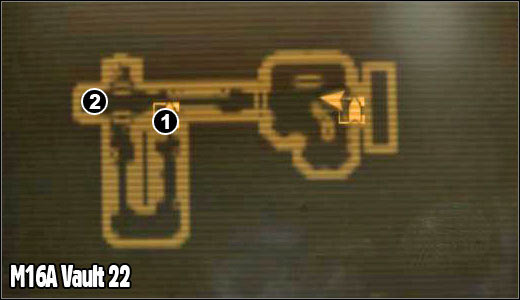
1. (M16B) Vault 22 - Oxygen Recycling
2. Elevator
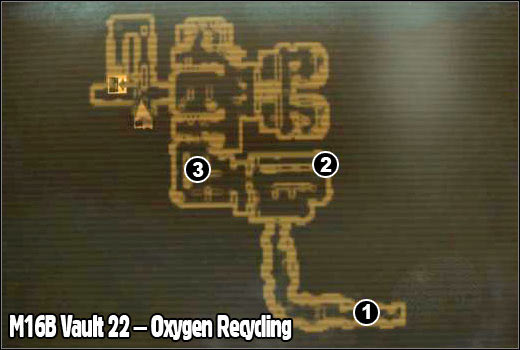
1. (M16C) Vault 22 - Food Production
2. HEPA 20 Cartridge Filters - [Still in the Dark].
3. Keely - [There Stands the Grass].
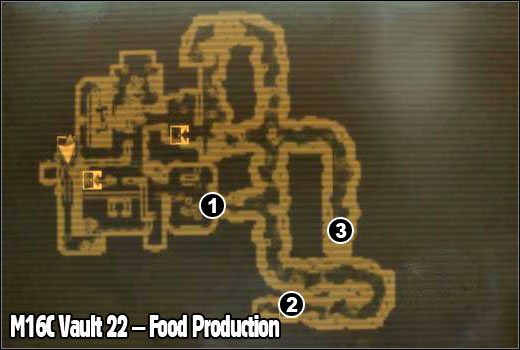
1. Door to the cavern
2. (M16B) Vault 22 - Oxygen Recycling
3. Mantis eggs - [Bleed Me Dry].
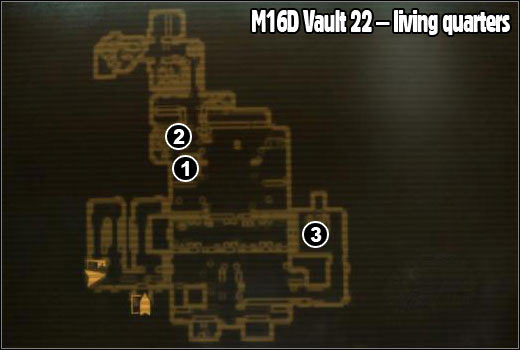
1. Entrance to quarters
2. Vault 22 Cave Door Keycard - [Still in the Dark].
3. Overseer's office / Terminal
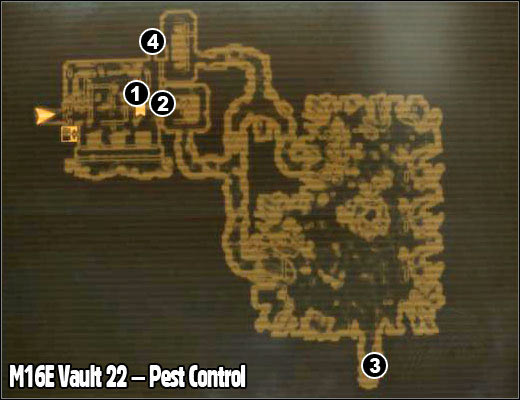
1. Computer - [There Stands the Grass].
2. Door to the cavern
3. Keely - [There Stands the Grass]
4. vent with gas - [There Stands the Grass].
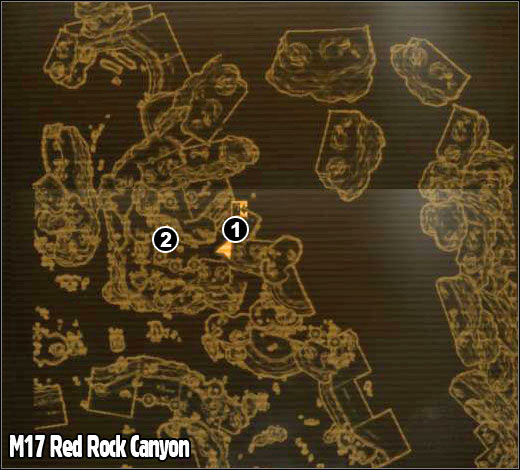
1. Khan's house:
2. Regis' tent.
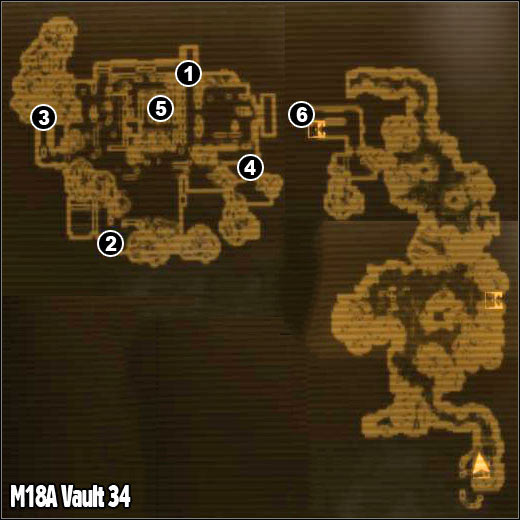
1. (M18A) Vault 34 - Armory
2. Overseer door
3. Vault technician / the security terminal password
4. Vault technician / the utility terminal password
5. Terminal
6. (M18C) Vault 34 - Reactor
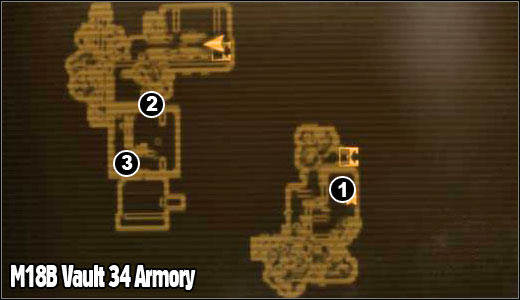
1. Terminal / Diagnostic module - [Et Tumor, Brute?].
2. Armory door
3. Pulse gun - [I Could Make You Care].
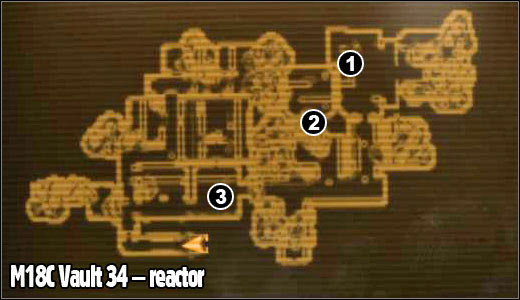
1. Reactor
2. Terminal
3. Guard
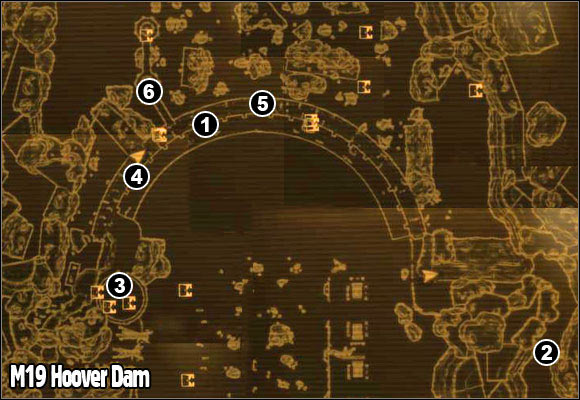
1. (M19A) Offices
2. (M20) Legate's camp
3. Visitor Center: Sgt. Grant
4. Tower with the sniper - [You'll Know It When It Happens].
5. Check point:
6. Intake tower: Legion reinforcements - [Veni, Vidi, Vici].
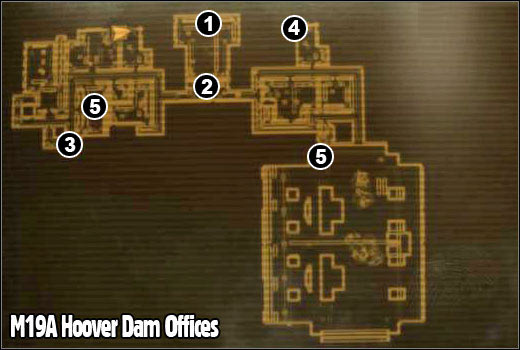
1. Mainframe
2. Heavy armored NCR troops
3. (M19B) Power Plant 01
4. (M19) Hoover Dam
5. Colonel Moore
6. Switch
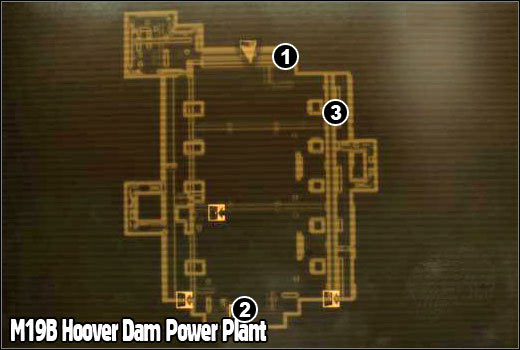
1. Switch (level 01)
2. General's Oliver room (level 04)
3. (M19) Hoover Dam - exit (level 04)
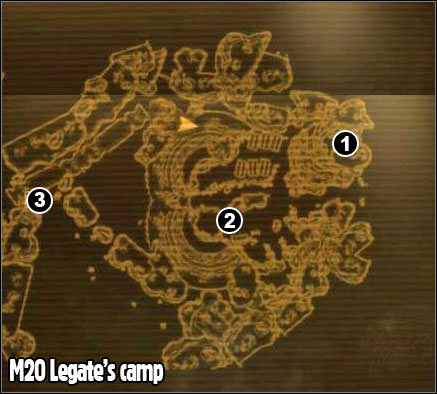
1. Legate Lanius
2. Gate / General Lee Oliver
3. (M19) Hoover Dam
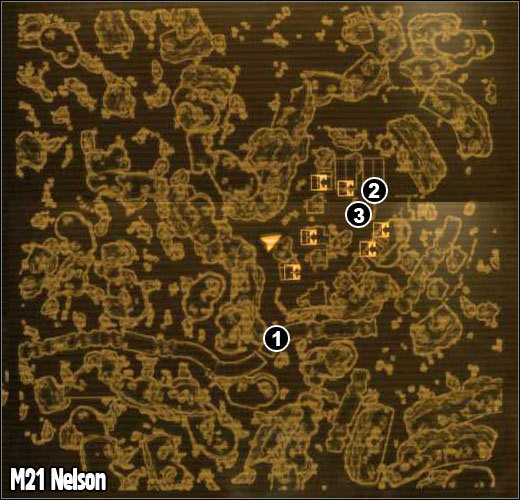
1. Legion scout
2. Dead Sea
3. Crucified soldiers - [Back in Your Own Backyard].
1. Medical center: Dr. Richards
2. Command Center:
3. Quartermaster's Mayes Tent
4. Camp Forlorn Hope Supply Crate - [Restoring Hope].
5. Private Stone - [Medical Mystery].
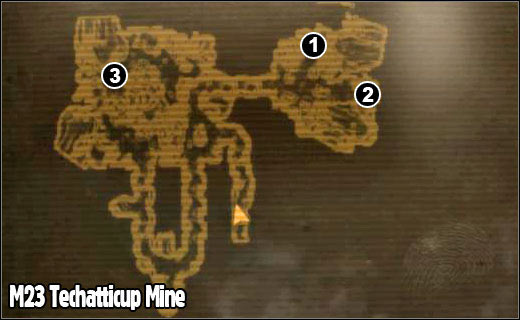
1. Captives - [Anywhere I Wander].
2. Captives - [Anywhere I Wander].
3. Alexus
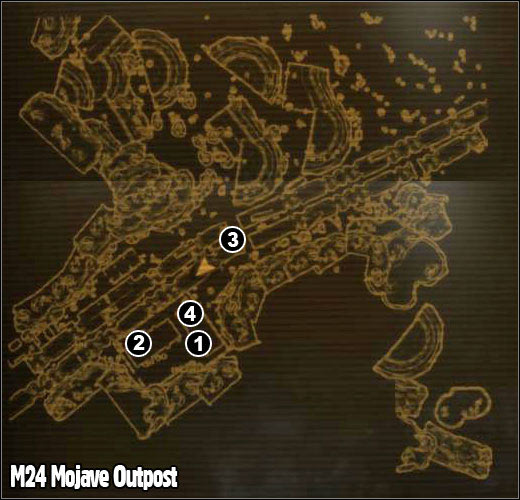
1. Barracks: Cass
2. Barracks:
3. Sgt. Kilborn - [Cold, Cold Heart].
4. Ranger Ghost
1. (M25A) Camp McCarran Terminal building
2. Control tower
3. Major Dharti
4. Courtyard:
5. Little Buster's tent
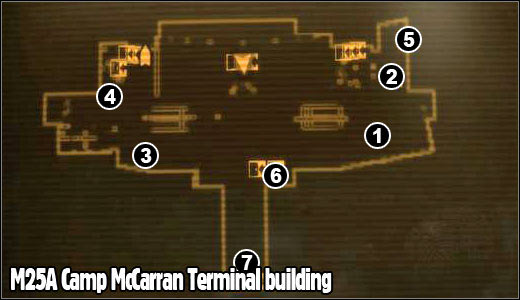
1. Thomas Hildern
2. Colonel James Hsu
3. Captain Curtis
4. Lieutenant Boyd
5. Train station
6. Exit to airfield
7. McCarran main hall
1. Visitors Center: Mayers - [My Kind of Town].
2. NCR CF Administration Building: Eddie
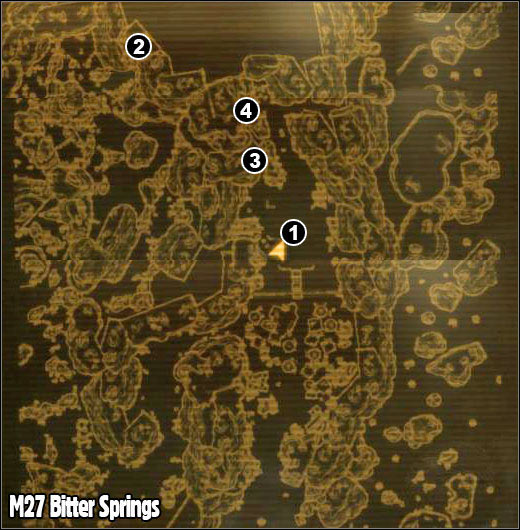
1. Captain Gilles
2. (M27A) Great Khan supply cave
3. Great Khan supply cave
4. Great Khan supply cave
1. Oscar Velasco
1. Sgt. McCredie
2. Misfits - [Flags of Our Foul-Ups].
3. House Resort: Chief Hanlon
1. (M29A) HELIOS One Power Plant / Lieutenant Haggerty
2. Parts of solar panels - [Sunshine Boogie].
3. The west mirror control terminal
4. The east mirror control terminal
5. (M29B) Tower with solar panels
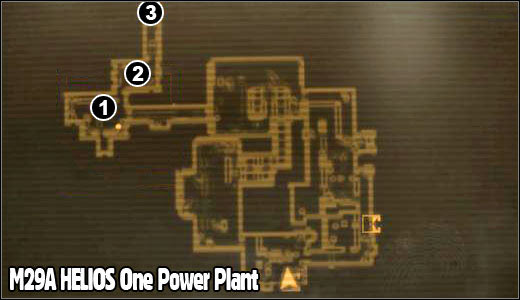
1. Fantastic
2. Ignacio Rivas
3. Exit to HELIOS One yard
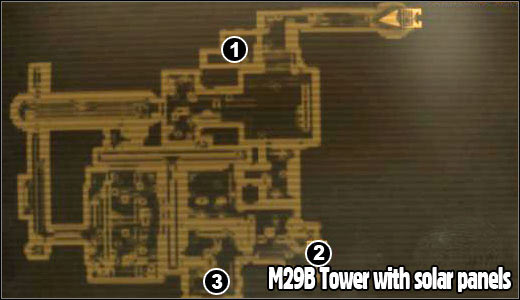
1. Terminal for controlling the turrets
2. HELIOS One Observation level
3. Poseidon Energy Employee IDs
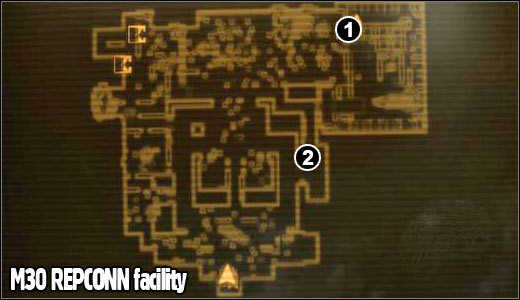
1. Laboratories:
2. (M30A) REPCONN's basement
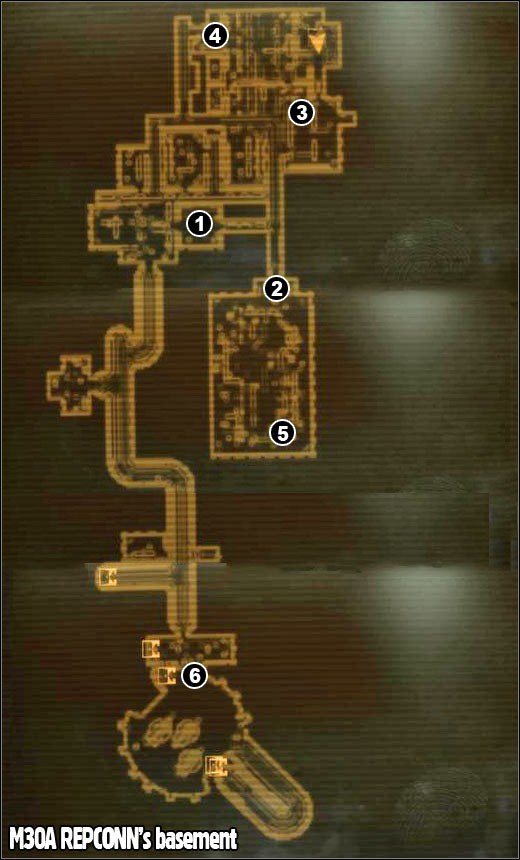
1. Davison
2. Harland
3. Imprisoned ghoul
4. Prison key
5. Terminal with data on the package
6. Chris Haversam ([Come Fly With Me]);
1. Mine offices:
2. Chomps Lewis
1. Samuel Cooke
2. Philip Lem
3. Red sector door
4. (M32A) Vault 19 - Living Quarters
5. Blue sector door
6. (M32A) Vault 19 - Living Quarters
1. Red sector door
2. (M32B) Sulfur cavern
3. Blue sector door
1. Fire geckos - [Why Can't We Be Friends?]
2. Sulfur
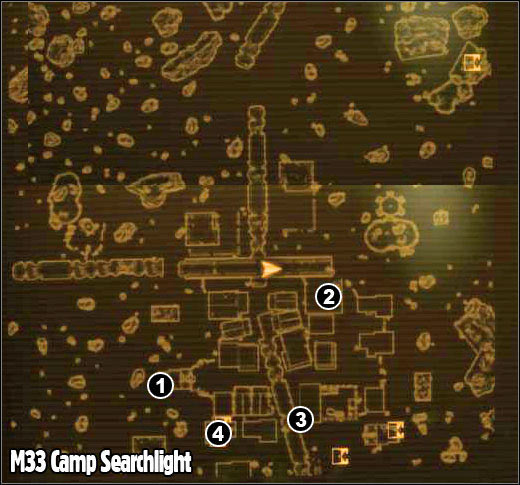
1. NCR Warehouse:
2. Police station
3. Fire station
4. Private's Edwards house
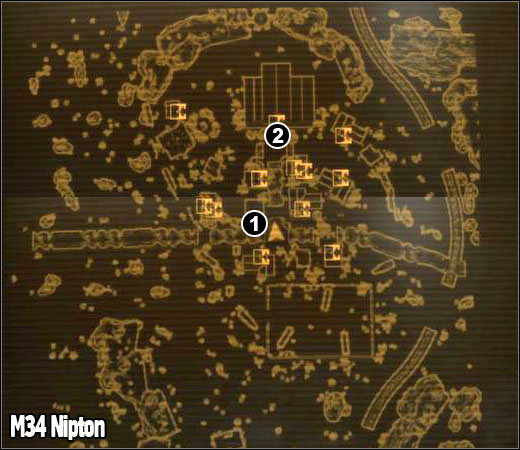
1. General Store: Boxcars
2. Vulpes Inculta
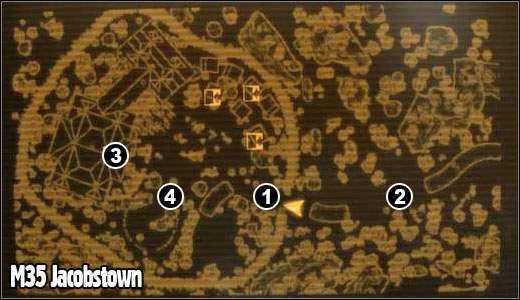
1. Marcus
2. Mercenaries - [Unfriendly Persuasion].
3. Dom: Dr. Henry
4. Lily
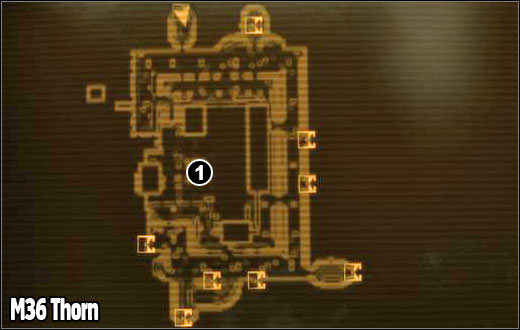
1. Red Lucy
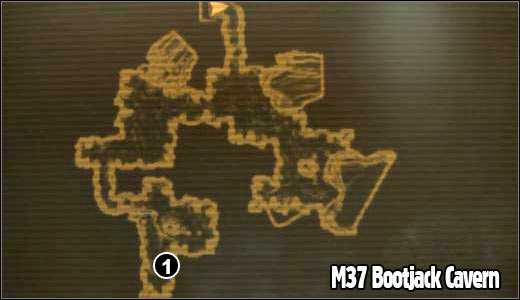
1. Fire gecko eggs - [Bleed Me Dry].
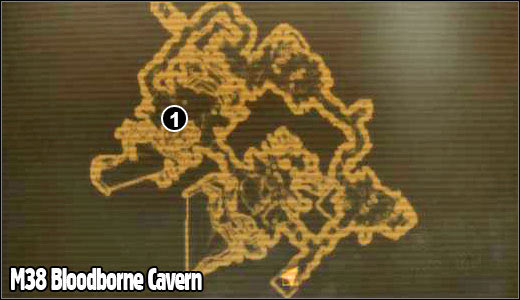
1. Night stalker eggs - [Bleed Me Dry].
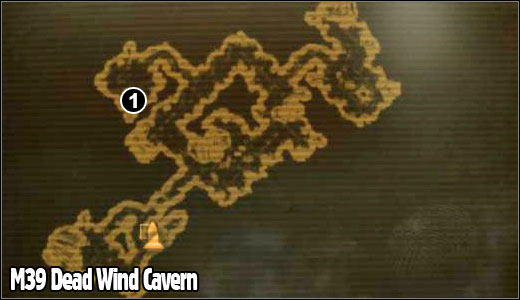
1. Deathclaw eggs - [Bleed Me Dry].
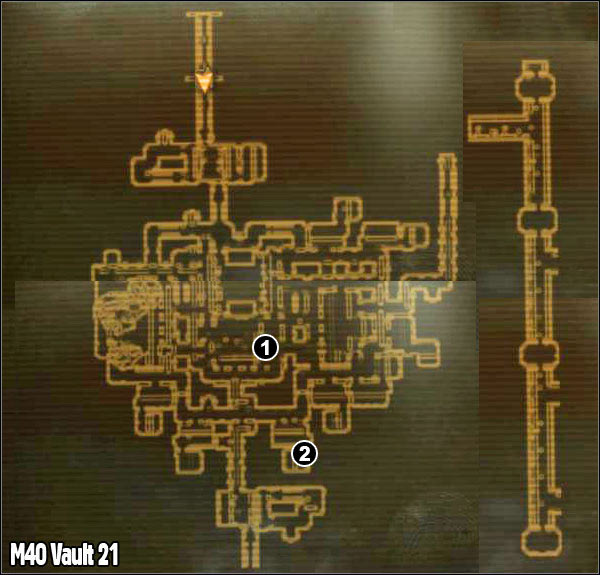
1. Carlitos
2. Martina - [The Finger of Suspicion].
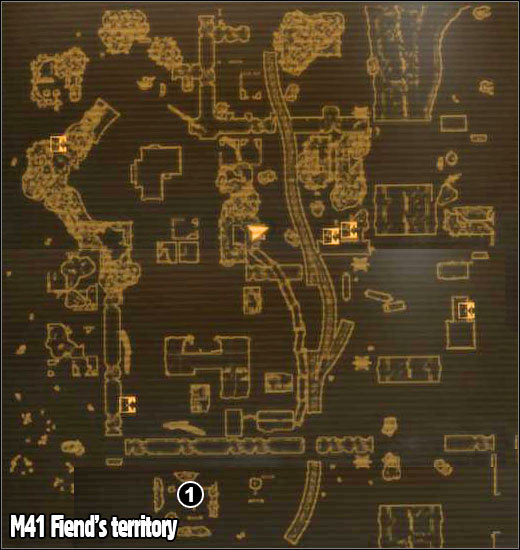
1. Driver Nephi - [Three-Card Bounty].
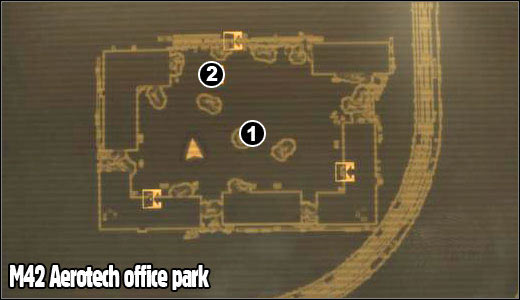
1. Captain Parker
2. Frank Weathers
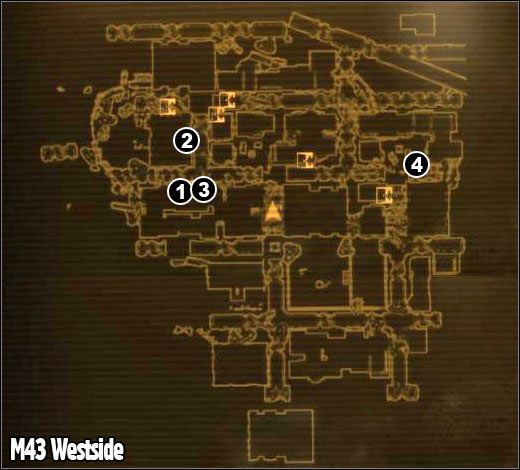
1. Saint James and Dermot
2. Casa Madrid Apartments
3. Etienne's shop
4. Hector

1. Neil
2. Check points with Nightkin and Mutants
3. Neil - [Crazy, Crazy, Crazy]
4. Broadcast Building: Tabitha
5. Storage shed: Rhonda
6. Prison building: Raul
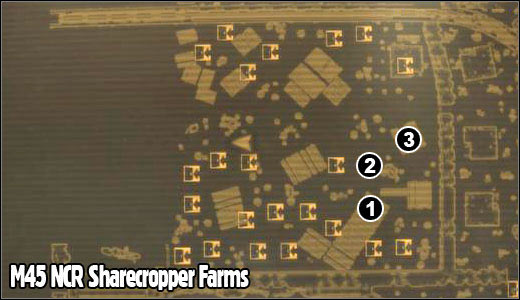
1. Trent Bascom - [The White Wash].
2. Lieutenant Romanowski - [The White Wash].
3. Morgan Blake
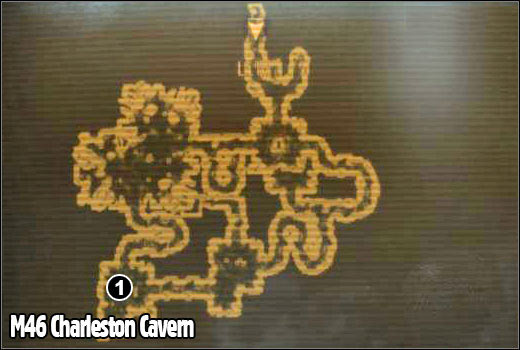
1. Chewed Stealth Boy - [Guess Who I Saw Today].
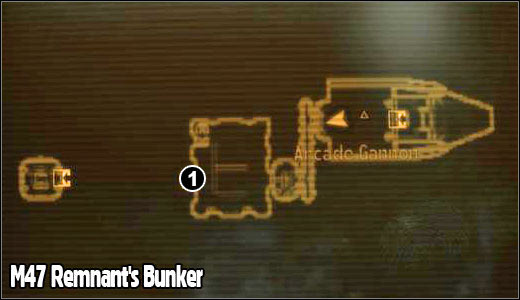
1. Door to the Command Room
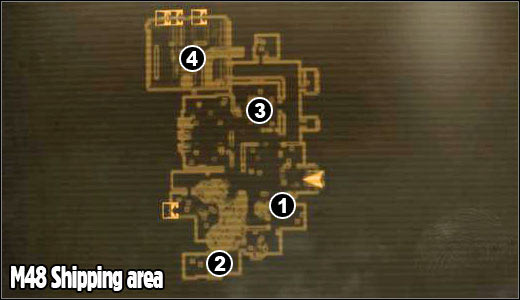
1. Festus
2. Treasury
3. Room with fallen ceiling
4. Bottle Cap Press - [Pressing Matters].
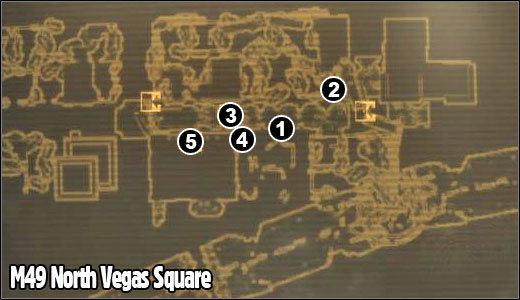
1. Crandon
2. Squatter Bill - [Someone To Watch Over Me].
3. (M49A) North sewers
4. Jules - [Someone To Watch Over Me].
5. The Gray building
1. Greasy Johnny


 Flight Simulator X Game Guide & Walkthrough
 Far Cry 2 Game Guide & Walkthrough
 FIFA World Game Guide & Walkthrough
 Farming Simulator 15 Game Guide & Walkthrough
 FIFA 16 Game Guide & Walkthrough