This game guide contains descriptions of all the Hunters and Monsters available in Evolve, along with a lot of screens that illustrate the described elements. You will also find here some additional, unique tips on how to play with each class and you will get to know their strong and weak point. There are also more general information, describing the basic mechanics of controlling both Hunters and Monsters. Moreover, all the game modes are described in the guide, along with explanations about how to play each one. Evolve is a game designed by the developers of a different co-op game - Left 4 Dead. However, this production joins co-operation and rivalry, where (in the basic mode) four players become Hunters that have to kill a Monster controlled by another player. Despite the Hunters' numerical advantage, the gameplay is very well-balanced and everything depends on the players' skills. In this game guide, you can read about all the abilities and weapons available for each character. The basic version of the game gives the players three different Monsters that can be unlocked during the gameplay and three Hunters from each class, which also can be unlocked. There are also other modes, such us defending power generators from Monsters or rescuing people in the jungle from being eaten by the enemy.
The Evolve game guide:
Marcin "Xanas" Baran ()

W - forward, S - back,
D - rght, A - left

Sneak

Sprint/Climb (Monster)

Map

Set a marker for the squad

Fire/Attack (Monster)

Aim/Sniff (Monster)

Jump

Reload

Player List

Evolve

Push to Talk

Action/Feeding (Monster)

Ability 1

Ability 2

Ability 3

Ability 4
Goliath is the first monster, available right after starting the game. It resembles a giant monkey and it is agile, fast and also strong. It can jump very far and climb any surface so moving across an uneven terrain will not be a trouble.
Depending on the Stage of evolution, Goliath has the following amount of hp:
Stage 1 = 5 bars
Stage 2 = 8 bars
Stage 3 = 10 bars
Moreover, it has two skills that can be used both for attack and for escape. They are Charge and Leap Smash. They allow the Monster to deal a lot of damage, but also to quickly get away from the enemies.
When evolving, Goliath gets bigger and bigger, which makes it slower, but stronger.
It is best to start fighting the Hunters in a place that is the most suitable for you. It can be a tunnel or some building (for example the one with the generator inside). This way, it will be difficult for your enemies to dodge your attacks and you will have the upper hand. The only exception here is staying at a power relay building. If hunters follow you into the building, you will gain the upper hand. If they, on the other hand, keep firing at you from the outside of the building, leave as quickly as possible.
Focus on one target and try to pin it to the wall using Charge. Hunters will have troubles getting out when a Monster is attacking them near a wall. After using Charge and hitting the wall with your enemy, use all your other skills to finish him.
Remember to always keep an eye on the character that you've knocked down and when someone tries to revive him, use Rock Throw or Leap Smash to interrupt. When you're sure that the Hunter is dead, you can focus on another one.
Also, you can kill the knocked down opponent. If this is an option, there appears a skull icon, with the health bar depleting above the opponent. To speed up this process, start bashing the opponent, to eliminate him for good (or at least, until the next deployment takes place).
Rock Throw - Goliath takes a large rock and throws it in the direction that you choose. It not only deals damage when falling on the ground, but can also hit a Hunter who is currently floating in the air and throw him down. Such a throw can be delayed by holding down the throwing button. Goliath will then freeze in the throwing position, which is a perfect tactic against a hunter that wanted to avoid such an attack, with his jetpack.
Leap Smash - Goliath jumps to a given place, pushing away the enemies that are in the range of the attack. You can also use it for running away or moving quickly across the map.
Fire Breath - a burst of flames from the Monster's mouth. It works for some time and you can move while the skill is active. It is good to use it when your enemy is trapped by the wall or for dealing additional damage to hunters in the air.
Charge - Goliath charges in the chose direction, knocking away the enemies that are on the way. A good skill for starting the fight, when the Hunters are chasing you. If you suddenly turn around and use Charge, there is a chance that they won't manage to dodge. Taking 1/3 of all the Hunters' hp at the beginning of the battle is a very good start.
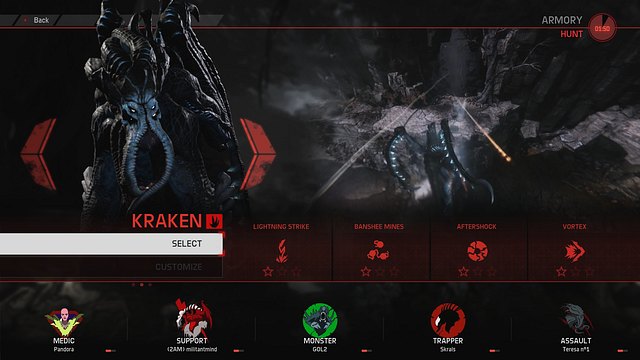
Kraken is a Monster that can float and fly. By pressing the jump button, in mid-air, you are temporarily boosted, which allows you to cover the distance so no obstacles will stop you. Moreover, Kraken has two types of basic attacks. When on the ground, it fights with its tentacles, dealing quite a lot of damage, and when in the air, it shoots energy balls.
A good combination of skills for attacking one enemy is: Vortex -> Lightning Strike -> Banshee Mine. It knocks away the enemy, stuns him and activates Lightning Strike in the place where he lands. After that, his should be so low that a single Mine will finish him.
You can also use Banshee Mine while escaping the hunters. During such an escape, you simply need to deploy them along your path, whih will have the opponents have to deal with them in the first place.
Depending on the Stage of evolution, Kraken has the following amount of hp.
Stage 1 = 5 bars
Stage 2 = 8 bars
Stage 3 = 9 bars
Lightning Strike - Kraken's aimed skill, which summons three thunders that quickly get closer to each other. When they meet, a huge explosion occurs that knocks the enemies away. It is good to use it when Kraken is up in the air.
Banshee Mine - Kraken places large balls of energy on the ground, which explode when in contact with the enemy. The energy can also be shot at the enemies.
Aftershock - The Monster creates an energy field around it, which hast to charge for some time and then deals damage to all the enemies in the range of attack. A good skill to use when the Hunters surround you and are close to you.
Vortex - Kraken shoots an energy ball at the enemies to knock them away. It is good to use this skill to pin a Hunter to the wall and finish him. Also, you can use it to push the enemies and run away.
Wraith is a monster that requires a bit different approach, than the rest of them. You can count them as one to avoid a direct confrontation with an entire group, and they only attack single opponents, by surprise, faster than anyone can spot that. This does not mean that he does not stand a chance against an entire group. Still, at level one or two, this may be tricky.
First of all, Wraith needs to focus on avoiding opponents and evolving as quickly as possible. With the jump button, it teleports good several hundred meters, in a given direction, which allows him to cover long distances. An additional defensive skill is Decoy, which allows him to form a clone, become invisible and deceive the pursuers.
An interesting trick to pull off as Wraith is finding a lake with Tyrant and waiting for the hunters to come close. Also, it is a good idea to perform Abduction, then, on one of them (preferably against the medic), thanks to which such a hunter is devoured by a random monster, away from the rest of the squad.
If you get caught, use the Supernova, and then Decoy, to spread chaos among the hunters.
If you manage to kill three and the fourth one escaped, you can always go to destroy the power relay.You need to remember that Wraith is an assassin that is the fastest against single units. It is not a good idea to launch from one opponent to another. If he gets bent on one opponent, he should attack him for as long as he kills him. Also, this monster does not need to worry that someone picks up the knocked-down opponent, because he has two dashing skills. He simply needs to keep an eye on the downed enemy and, as soon as he spots that this is what is going on, dash towards the other enemy and kill him.
This beast is not designed for long-winded fights so, if you are going to fight hunters, make sure that you are well prepared. It is best to keep avoiding them, up until the third evolution stage takes place, because the initial number of health slots is low and each damage that you take can tip the scales. If a battle between the Wraith and hunters takes place, it is going to be a very short one and either he will kill the opponents or they will kill him, swiftly.
Depending o the evolution stage, the amount of Wrath's health is as follows:
Stage 1 = 4 bars
Stage 2 = 6 bars
Stage 3 = 8 bars
Warp Blast - The first of Wraith's skills. Using it results in his quick dashing into a given area and in a blast that scatters everyone around. It is a good idea to use it also for escapes, and to separate a tight group.
Abduction - Thanks to this skill, he dashes towards one of the hunters and returns into the initial position, with that hunter. It is ideal for separating units from the rest of the group and leaving them at the mercy of wildlife.
Decoy - this skill is mainly used to deceive opponents. As soon as you know that the Hunters are on your trail, use this skill to form a clone of yourself, in their path. If well-used, it may have the opponents use up the mobile arena against it, thanks to which you will not have to worry about them for a longer duration of time.
Supernova - this is the strongest of the offensive skills of the monster. It increases damage and speed of the basic attacks, as a result of which you become a walking killing machine. It is a good idea to combine it with Decoy because, if you first activate Supernova, and then Decoy, then the clone will have this passive skill also on himself, which makes two of you, for some time.
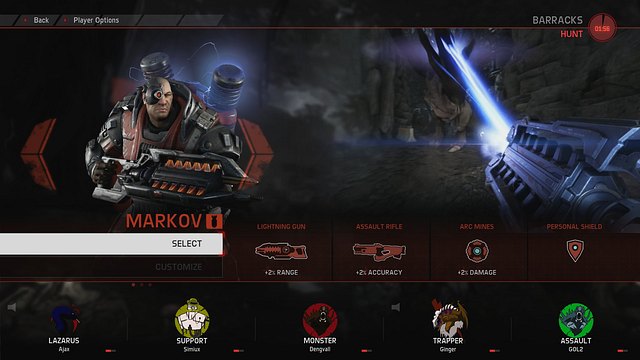
Markov is the first available character from this class. His main weapon is a Lightning Gun, which hits several targets at once on short and medium distance. Moreover, Markov's Arc Mines are very effective when fighting for example Goliath.
When you lock the Monster inside the Mobile Arena, it is good to first set up as much mines around the Monster as you can. The best way is to place them right in front of him, but it is quite risky. Moreover, the mines require some time to activate so you should place them near the Monster or near yourself and provoke the enemy to charge at you.
An additional downside it that armed mines are easy to spot. If the opponent spots them, he will be able to walk around them or change positions. In spite of that, if deployed properly, they can deal quite a damage to the enemy. Also, mines can be used as location devices and you can place them over the map at certain intervals.
When you're in trouble and you have no help of Medic or Support, you can use the shield that you have in your equipment. It will keep you alive for a while and allow you to switch your position. There are two suggestions, as concerns using Markov's shield. First of all, it should be used when the opponent is about to land a strong attack (activated skills of the monsters), and not when you are attacked with a melee attack. Secondly, use this skill when the monster wants you eliminated from further battle for good. While down on the ground, you can use it and buy your squad mates more time to distract the opponent.
Since Markov's class is Assault, he deals the most damage of all, so try to attack the monster even when moving to another position. Also, remember that if there is a medic on the squad, who tags the monster's weak points, use the Assault Rifle to fire at them. At such moments, you will deal twice the damage.
Equipment
Lightning Gun
Arc Mines
Personal Shield
Assault Rifle
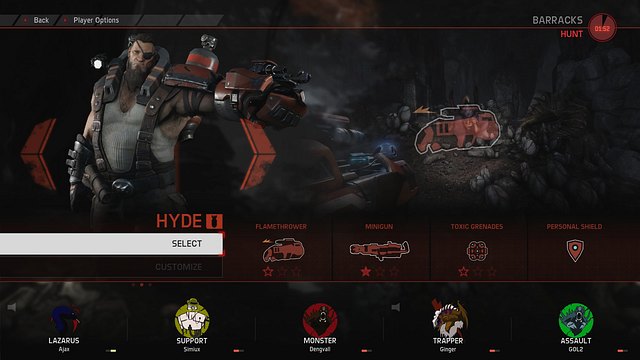
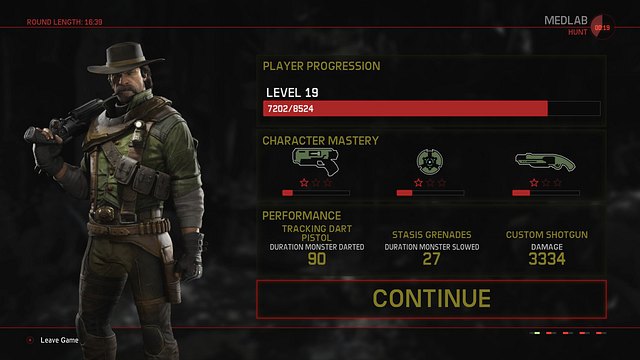
Hyde is the second character in the Assault class and you can unlock him by completing certain milestones. After each game, you will see the game's results screen, where you can look up your progress. Those milestones are based on dealing enough damage with certain skills. Hyde's whole equipment is different, only the shield remains the same.
The Flamethrower deals the most damage, but you need to be very close to the enemy to use it, so it is good to connect it with using shield. This way, the Monster won't be able to knock you down and you will safely back away.
Over longer distances, it better to use Hyde's minigun, which has the greatest ammo capacity, of all the weapons in the game, as well as the highest firerate. However, when shooting, its accuracy gets worse and worse, which makes it work better on short distance. It is good for attacking weak points.
Toxic Grenades are Hyde's last gadget. They spread toxic gas that hurts and slows down enemies standing in the range of attack. You should use it frequently, switching between normal weapon and the grenades, because of the cooldown. The best way is to throw a grenade, switch to Minigun or Flamethrower and when the grenade is active - use it again. Monsters will often stay near the knocked down Hunters to prevent their companions from reviving them. A grenade is a perfect weapon for such occasions, because you force the enemy too move away from the spot and you can help your your ally. The toxic fumes given off by the grenade slows down not only the opponent, but you're your mates so, use it only in the case of a chase after a monster, or at the moments critical to you.
Equipment
Flamethrower
Minigun
Toxic Grenade
Personal Shield
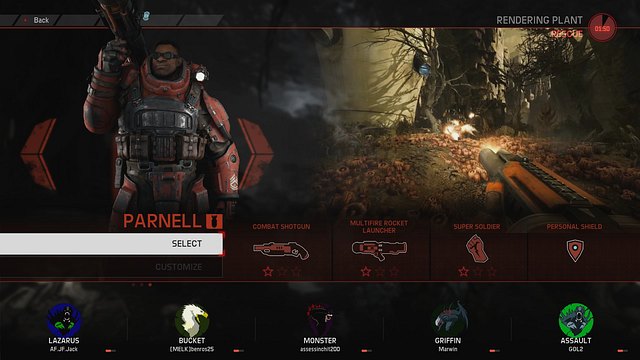
Parnell is the third character in the Assault class. To unlock this character, you need to complete milestones by dealing damage as Hyde. Just like in Markov's case, you can look up the milestones after each individual game, in the summary window. Parnell's abilities are different than those of the previous two. His primary skill - Super Soldier creates a perfect opportunity to deal immense damage to opponents. The best moment to use it is when a monster is trapped in a mobile arena, by the Trapper. The skill itself increases considerably the rate of fire which, in combination with the Multifire Rocket Launcher is quite a challenge for the monster. Apart from increasing the rate of fire, the skill also immensely increases the speed of movement. The downside of this skill is that it decreases maximum health so, it is not recommended to use it, during a direct fight with a monster.
Combat Shotgun is an automated shotgun that is perfect at short distance. Its spread is wide so, in cooperation with the medic and his skill of marking weak spots is a perfect solution, during face-to-face combat with a monster. The last skill is the one that is common for all the Assault characters, i.e. the Personal Shield. Just like in the case of Markov and Hyde, use it only for emergency.
Equipment
Multifire Rocket Launcher
Combat Shotgun
Super Soldier
Personal Shield
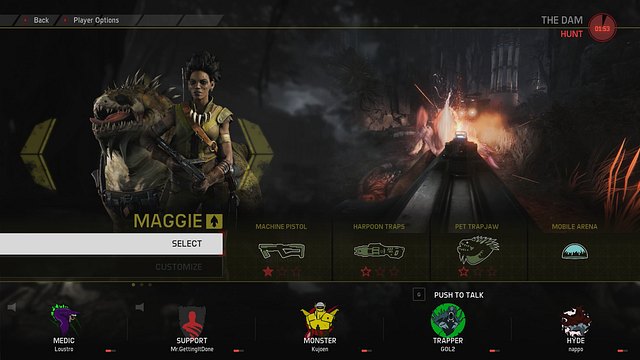
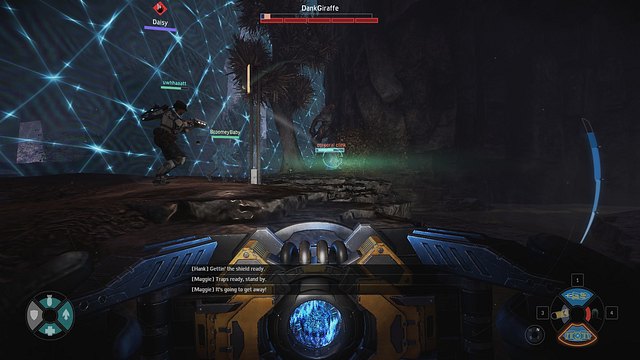
Maggie is the first Trapper available in the game. This character is quite unusual, because she also has a pet - Daisy, which tracks the Monster all the time.
Usually, you follow the Monster's trails, but when you have Daisy in the team, you should stay close to it all the time. It doesn't use the trails to track the enemy down, but relies on its smell, leading you straight to the beast. When Daisy stops running and starts sniffing, it means that the Monster is very close. This is also suggested by the yellow monster icon. If, however, Daisy stops and the icon does not appear over her head, this means that she has lost track of the monster. In such a situation, you need to walk around for as long, as she finds the trail again. During fights, Daisy attempts restoring fallen allies.
 The Mobile Arena allows you to trap the monster.
The Mobile Arena is the only way to prevent the monster from running away for longer period. You have to be careful when setting up the arena, because there is a risk that you place it in the wrong place and the monster will run away. If you do not entrap the monster, it is necessary that you remove it (hold down the appropriate button), because otherwise you will entrap your allies and you will not be able to continue the chase, for as long as the barrier is up.
Machine Pistol is Maggie's only weapon that deals damage. The longer you shoot, the worse the accuracy. It is better to shoot using short bursts.
Harpoons are very useful if you want to stun the enemy. They work perfectly with Hank's Orbital Barrage. The Monster can cut a rope with one hit, so it is good to shoot them from different sides. This way, one swing may not be enough to cut all the ropes.
Equipment
Machine Pistol
Harpoon Mine Launcher
Daisy
Mobile Arena
Griffin is the second Trapper that you unlock, as a result of maxing out on all of Maggie's skills. His tracking system is much different from the one in his predecessor. This Trapper uses motion detectors for tracking monsters. It may be problematic at the beginning of the game. If the monster starts off sneaking without leaving any tracks, and he gets outside of the boundaries of the first deployed detector, the Hunters may go astray. Remember to set the first Sound Spike right after you land, after the game starts; the monster may be within range.
On the other hand, when Griffin sets all five devices, the monster will have problems losing Hunters. It is a good idea to employ a scheme in setting the devices. For example,, it is a good idea to set them in a straight line, in the middle of the map, to know where to look for the monster, or within greater distances of each other, all around the map. It is not a good idea to leave larger stretches of land outside of the detector's range, because this is not too effective.
Harpoon Gun is useful especially if the monster wants to escape. While he is escaping, simply fire at his back and, as long as he is within reach, he will be slowed down. It is useless during the battle because, as soon as you get hit, the connection breaks and you need to reload. Also, it is always useful to be behind the back of the monster. When he is charging at your allies, you can use the harpoon to slow him down. Do not use it if the monster is charging at you, because this does nothing.
Weaponry
Gauss SMG
Harpoon Gun
Sound Spike
Mobile Arena
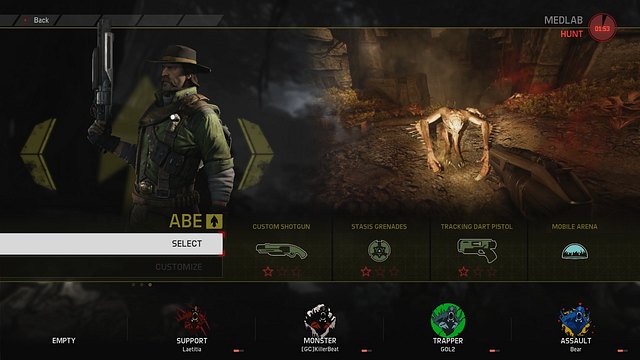
Abe is the last Trapper available in the game. His approach to tracking monsters is different from that of Maggie and Griffin. For that, he uses a special dart gun. He simply needs to shoot at the monster, for him to become visible on the map, and the screen, for quite a long time. Additionally, you can use the gun to tag local wildlife. If the monster devours the marked animal, he becomes marked himself. Give it a try and the monster may prey on the animal. Also, it is a good idea to use it, with the monster enclosed in the arena, but it soon disappears.
 Tracking dart gun is Abe's only tracking device
Abe's another weapon are stasis grenades. There is no cooldown time on them and you can keep throwing them without limits. They heavily slow the monster down and makes it difficult for him to escape. It is best to use them with the mobile arena about to disappear, to slow him down for as long as possible.
Abe's only weapon is a shotgun of high rate of fire. It deals medium damage, but it is really fast. Still, you need to be careful with it, because the higher the rate of fire, the wider the spread, which makes it more difficult to get the monster. Sometimes, it is better to stop firing for a moment to have the reticule return to normal.
Weaponry
Custom Shotgun
Tracking Dart Pistol
Stasis Grenade
Mobile Arena
Val is the first Medic that the player can choose. It is one of the most important team members, because a Medic can heal others with the Medgun. However, the Medgun can heal everyone except yourself, which makes you vulnerable to the beast's attacks. Val can use Healing Burst, which instantly heals all the characters, including herself.
Val is not only a healer. She also has a very useful sniper rifle, which can pierce through the Monster's armor and mark it with special points. Whoever hits the point later, deals twice more damage to the enemy.
Hitting the target using the sniper rifle is not as easy as it seems.Val's another weapon is Tranquilizer Rifle, which slows the Monster down and puts a mark on it that shows its location, even if it is out of your range of view.
This character is Medic who not only can heal, but also increase the damage dealt by the companions, slows the enemy down and marks its location. When playing Val, always try to stand in a place that is invisible to the Monster. You have to remember that your main task is to stay alive and keep your allies alive as well. Moreover, the sniper rifle doesn't work well when the beast is too close to you, so it will be better if you choose for example a high rock shelf. The player who controls the Monster will usually want to kill you first, so always try to search for a position when the enemy will have troubles reaching you (for example near Harpoons or Mines).
Equipment
Armor-Piercing Sniper Rifle
Medgun
Tranquilizer Rifle
Healing Burst
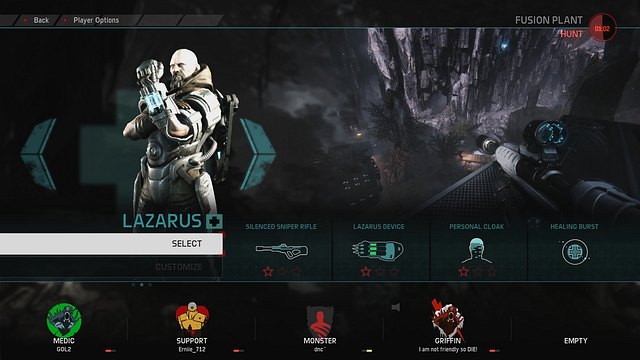
Lazarus is the second character from the Medic class. As opposed to Caira and Val, he doesn't have two healing skills, but only one. The second ability that helps Lazarus to keep his allies alive is The Lazarus Device. It can simply revive dead companions. Other Medics have to pick up knocked-down players before they die, whereas Lazarus can wait until the death of a team member and then revive him.
Some extra information:
- You cannot revive companions that have died underwater.
- You can revive even dead animals.
 Lazarus should always stand at the back.
The Cloaking Device skill is very helpful when reviving other players, because the Monster will not abandon a dead body knowing that Lazarus is in the team. When playing this character, you have to stay at the back and often use camouflage. Experienced players controlling the Monster will know that they need to kill Lazarus first to win the battle. If Lazarus dies, no one can be revived anymore.
This Medic's only weapon is Silenced Sniper Rifle, which works very wall on long distance and when it hits the target in the aiming mode, it creates a weak spot. The weak spots are smaller than the one that Val makes, but there is usually more of them.
Of course, try to help your allies with Healing Burst, but your safety should be your priority.
Equipment:
Silenced Sniper Rifle
The Lazarus Device
Cloaking Device
Healing Burst
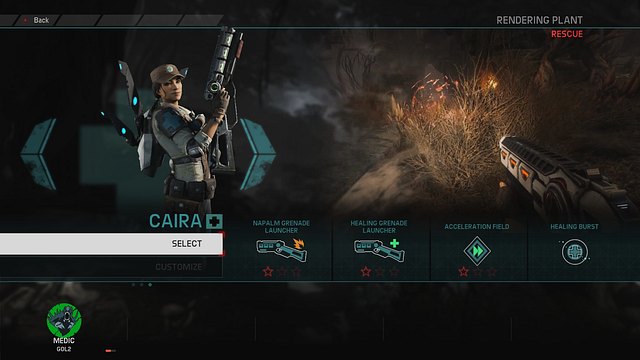
Caira is the last representative of this class in the basic version of the game. Just as Val, she has two healing, but she's also a perfect support when it comes to the team's mobility.
As Caira, you have to make good use of your grenade launcher. Shoot Napalm Grenades at the enemies all the time, but mind your allies also. If the health of one of them falls below 50%, switch to Healing Grenades and shoot them at the injured team member.
 Napalm Grenades can be distinguished by the red color.
It is worth mentioning that Caira is the only Medic that can heal herself using her own healing skills (Healing Grenades). If the Monster is constantly attacking you, use Healing Burst and shoot Healing Grenades under your own feet.
Acceleration Field is a good tool for fighting and chasing the Monster. If you spot the enemy or you see some startled birds nearby, use this skill to allow your Trapper to reach the Monster and use Mobile Arena. You can also use Acceleration Field when the enemy is attacking you or when all your companions die and you have to wait for the drop. You will easily run out of the Monster's range of smell to safely wait for these two minutes.
Equipment
AOE Grenade Launcher (Napalm Grenade)
AOE Grenade Launcher (Healing Grenade)
Acceleration Field
Healing Burst
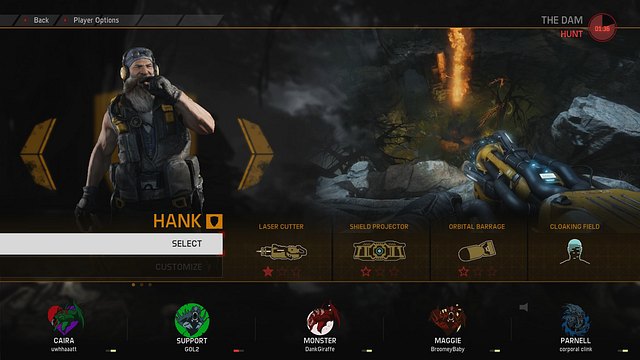
Hank is the first Support available in the game. He is a very important part of the team, because he can make others temporarily immortal. It happens quite often that the Medic is not able to heal everyone and the beast is charging at one of the team members. In such a situation, Hank places a shield on the companion, which will save him from dying. The shielding effect can be administered in doses so, the best moment to use it is when the monster attacks an ally. Moreover, he can turn invisible and revive an ally so that the Monster couldn't see.
Hank works well with the Trappers harpoons, because when they stun the Monster, it becomes an easy target for Hank's Orbital Barrage, which deals some serious damage if all the missiles hit the target.
 The shield can often save somebody's life.
Laser Cutter is Hank's another gadget. It is a fast and accurate weapon. It is good to use it when you have Val or Lazarus in the team, because of their ability to mark the weak points on the Monster (the good accuracy of the Laser Cutter makes it easier to hit the spots).
Equipment
Energy Shield
Laser Cutter
Orbital Barrage
Cloaking Device
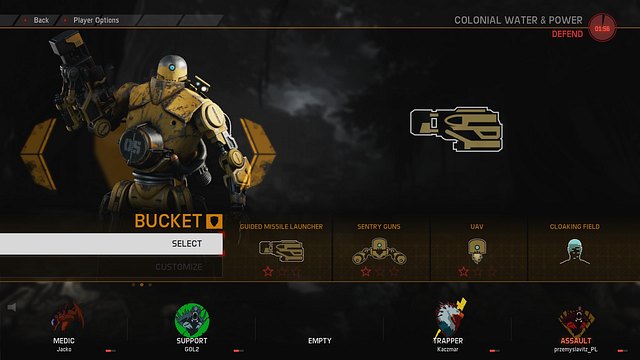
Bucket is the second Support character, which you unlock by maxing out on Hank's skills. Where Hank focused on keeping the squad alive, this robot focuses on dealing damage and tracking the monster.
His most useful technique is Flying UAV, thanks to which Bucket separates its head and uses it as a flying camera. Thanks to this, he can move without boundaries and see more. The only downside of this is that the rest of the robot stands still, where it is vulnerable to attacks. This is why, it is best to use it only or a short while, instead of for longer, because you can be attacked then or, you may simply be left behind. As soon as you locate the monster, you only need to keep it in sight, for several seconds, to have it marked.
It is a good idea to use this ability, if you know that the mobile arena will soon disappear and the monster will escape. This way, you tag the monster so, you will be able to track him afterwards, without problems.
If you manage to track him while he is escaping, remember that he will know about it. This is why, return to the body immediately and resume the chase, because the monster will speed up.
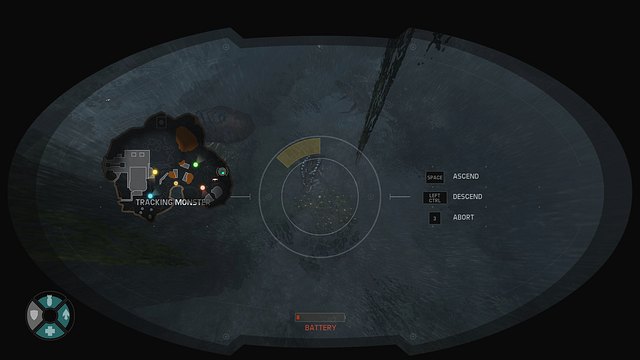 Bucket tracking the monster
Before you send the head to locating the monster, set several drones around you. It pays off to have some sort of protection, when you are not at the body. There are several interesting functionalities of the Flying Sentries. They deal lots of damage but, during the battle, it is best to set them around the monster, because setting them near him, results in him destroying the bots in one attack. If you surround him with the drones, he will, at least, have to break a sweat. Set the drones all around the map and the monster is sure to destroy one, if it bothers him. If you keep an eye on the map, you will surely notice a Flying Sentry missing.
Bucket's weapon is its Laser Guided Missile Launcher. What makes the weapon interesting is that you can guide your missiles. Thanks to this, you can attack the monster from, e.g. behind rocks.
Weaponry
Flying UAV
Laser Guided Missile Launcher
Flying Sentries
Cloaking Device
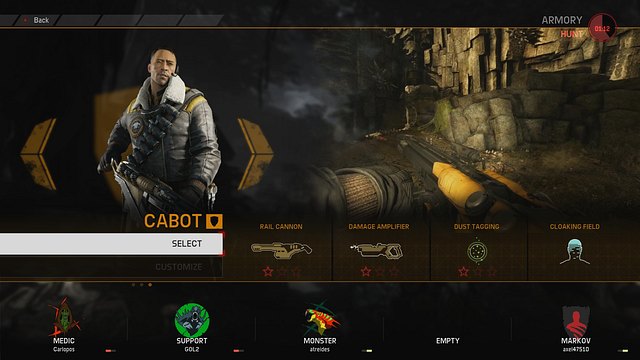
Cabot is the last Support hunter, in the basic version of the game. Unlike Bucket and Hank, he can aid the search for the monster and increase damage dealt by all of the sources.
His strongest and, the only, weapon is Rail Cannon, which is a single-shooter, long-distance shotgun. Not only does it deal high damage, but also it penetrates any obstacles in the way. If it penetrates, e.g. a rock, it deals less damage than in the case of a clear shot.
 Cabot's gun is one of the nicest weapons in the game
The next device that Cabot is using is Damage Amplifer, which fires a beam towards the monster, at which point all of the damage that he takes is doubled. It works best in combination with a character that deals high damage himself.
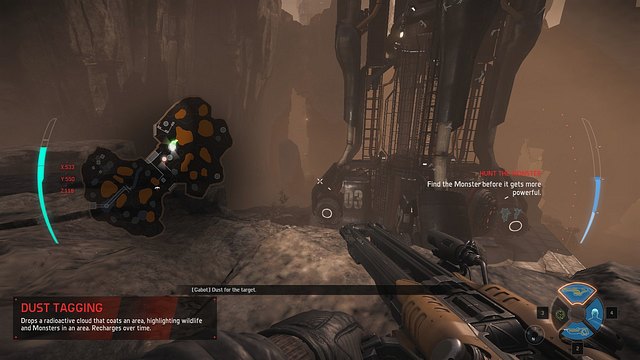
The third thing Cabot is using is Radioactive Dust Tagging, which aids tracking the monster. The character tags a strip of land, at which point the ship drops a radioactive dust bomb, which tags all of the living creatures there. The radius is quite vast so, you often catch the monster within the blast. Right after the game starts, it would be best if you found out which way the monster's tracks go and drop the bomb in that direction.
Later into the game, it is a good idea to climb a high elevation and mark the farthest point, considering the fact that the monster has quite an advantage of distance, over the hunters.
Weaponry
Rail Cannon
Radioactive Dust Tagging
Damage Amplifer
Cloaking Device
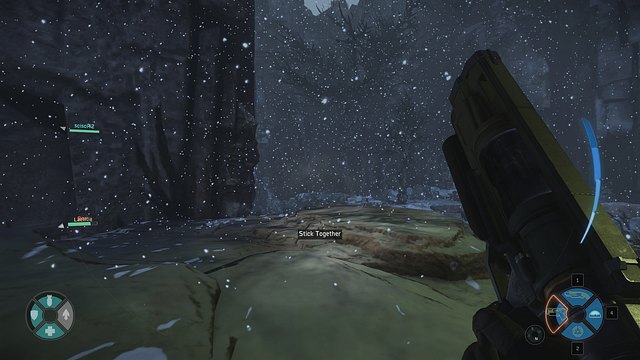
Skirmish has only one type of gameplay, which is Hunt. During the game, you can control either one of the four Hunters or the Monster. However, which role you will play depends not only on your choice. After clicking "Choose Role", you create a ladder of characters that you would like to play the most. If the icon of the Monster is the leftmost picture, it means that you prefer playing this role.
After finding a server, the game decides which role you will play, considering your preferences. You can of course leave the server if you don't like the choice, but you will have to wait one minute until you can join a game again.
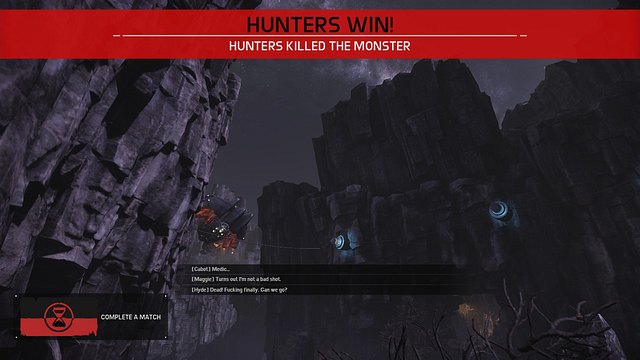
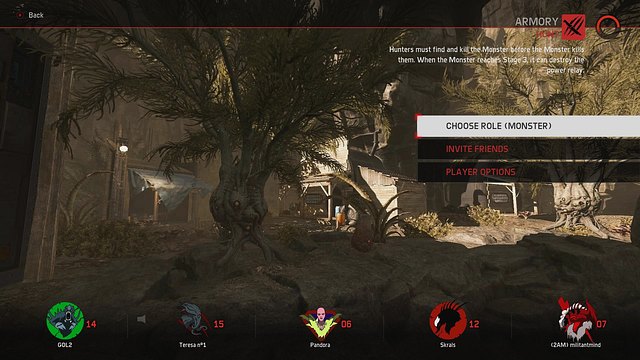 After selecting this option, you will start choosing your character.
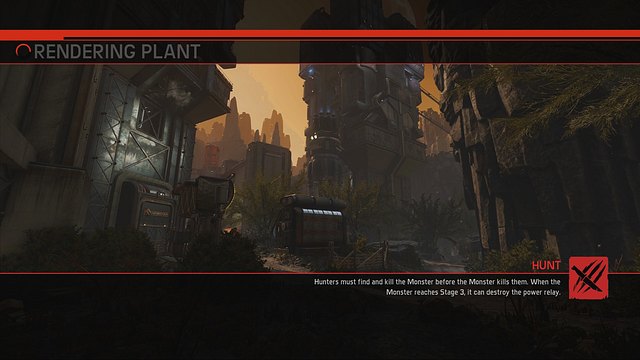
The rules of the game are simple - the Hunters chase the Monster on one of several available maps and one side has to kill the other side. However, it is not so easy for the Hunters, as the Monster is of course faster than them. The Monster tries to run away to get stronger and evolve to next Stages. Therefore, it is best for the Hunters to kill the monster as quickly as they can, before it reaches the third Stage. The longer the game, the more difficult it is for the Hunters and the easier for the Monster. Alternatively, the Monster can win by destroying the generator which can be found on every map. The Monster can destroy the generator only after reaching the third Stage.
Maps are relatively small, but you particularly feel this when you play as the Monster, because when playing as a Hunter, you sometimes feel like the map has no ends. If the maps were bigger, the Hunters would get bored, because it is sometimes difficult to find the Monster. It is good to have your mini-map active all the time to know your position and to estimate the enemy's location.
Evacuation is a campaign mode that consists of five missions, where a team of hunters, or the monster, needs to win. Officially, the party that wins the most missions, wins.
Usually, the game starts with selecting the map and the mode. Players vote on the initial map, after which the game proper starts. It needs to be pointed out that if a player gets to play as the monster in the first mission, he remains the monster until the end of the campaign. Unlike in Skirmish, here one of the sides has to complete a task during an individual game, whereas the other side needs to prevent them from completing that task.
Possible types of missions:
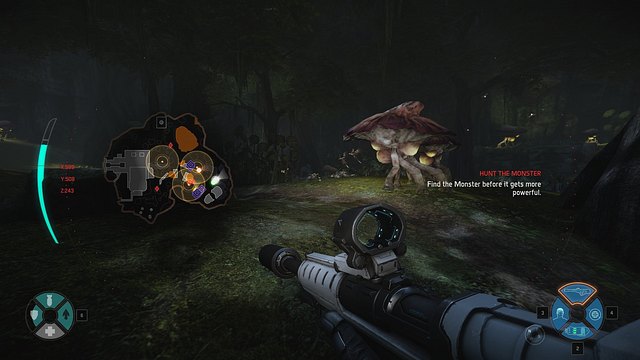
Hunt - a regular monster hunt, just like in Skirmish.
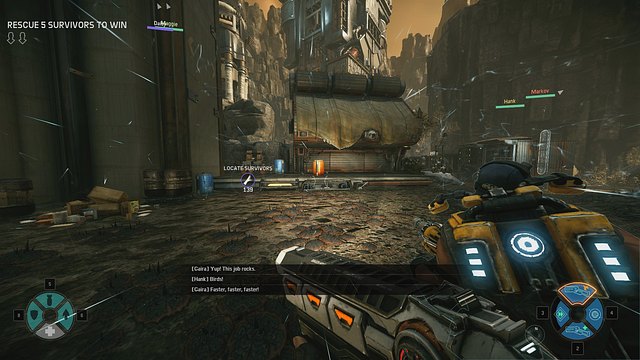
Rescue - The hunters need to rescue 5 NPCs, before the monster kills them. To make things easier, the people to rescue appear in pairs, on the map. They are on the brink of dying and, if the hunters do not haste to rescue them, they die with time. The hunters need to reach the dying, stand him up and escort him to the exit point. Of course, an alternative is to kill the monster, or to kill the hunters. Here, the monster starts of at level 1 and it is a good idea to reach, at least, level 2, before attacking the men to rescue. Unlike in hunt, here the monster is usually not going to be bothered by the hunters, busy with a different task.
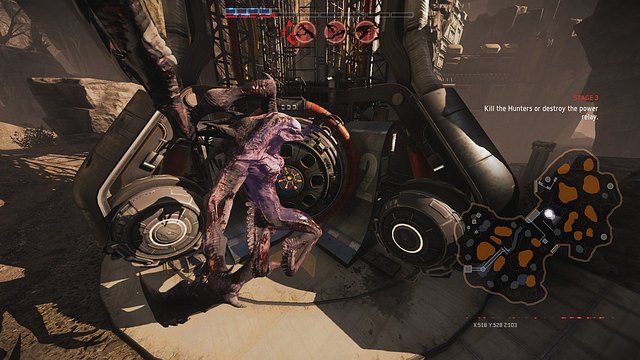
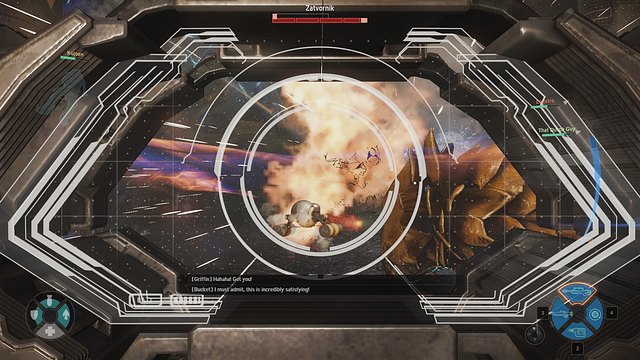
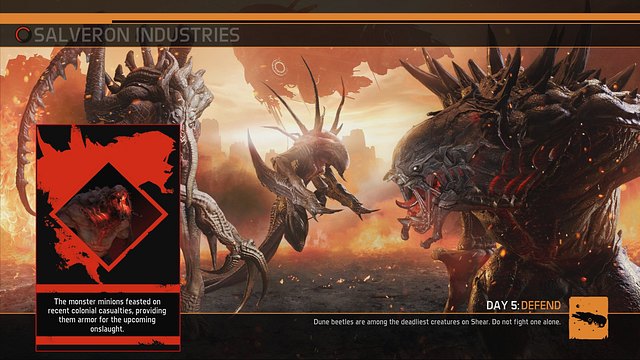 On day 5, Defend is always played
Defend - As the monster, you need to prevent humans from leaving the planet. Together with smaller goliaths, you need to attack power relays of the field, which stand between you and the ship. An important element is the fact that the hunters use stationary turrets that deal quite a damage so, it is better to consider your strategy here. A good monster, for this type of mission, is Kraken, which can attack at a long range, outside of the range of turrets. In spite of that, there is a time limit set for the monster: you need to win within 10 minutes. Of course, the alternative is to kill the monster and the other way around. Here, the monster starts off at level 3 so, no further evolving is needed but, it is a good idea to get a quick fix of several animals, to charge armor.
Nest - As a team of hunters, you need to destroy six eggs before time elapses. The eggs are hard and difficult to smash so, it is better to rely on high firepower, such as Hank's, who can quickly destroy an egg with an orbital attack. As the monster, you need to protect the eggs, up until time elapses, or kill all hunters. Also, you can interact with eggs and, after a while a Goliath hatches. Only one Goliath can hatch, at a time but, thanks to this, you can surprise the hunters and attack them two-on-four. Such a minion is a great aid so, it is a good idea to keep close to it. Here, the monster starts off at level 1 and it is a good idea to evolve to, at least, level 2, before you attack the hunters. Unlike in hunt, here the monster is usually not going to be bothered by the hunters, busy with a different task.
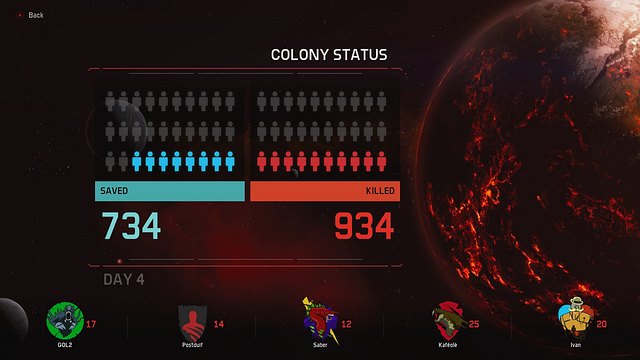
Winning the match, rewards you with lots of points, whereas losing rewards you with few. Additionally, the winner of a game, are usually rewarded with a bonus for the next day. For example, if the hunters kill the monster during the Hunt, locals help them fighting the monster on the next day. At the end of the fifth day, all points are added up and each of the sides receives as many experience points. If you exit the game, before the end of the campaign, the points are lost.
In Evolve, you can progress through experience levels, thanks to which you can receive interesting bonuses. After each game, you receive a certain amount of points, which are then calculated into experience.
After you level up, you can receive:
Obviously, the higher level you want to reach, the longer it takes and, how many points you receive, is determined by your activity in the game. Additional points can be received fur using a skill, on an opponent, for several times, for winning a game, for restoring your companions, etc.
In spite of that, the best way to level up is playing the Evacuation mode. After five missions, you receive a bonus to experience, depending on how many of them you won and to what result. E.g. you receive a lower bonus if you defeat all of the hunters, as the monster, but after they destroyed all of your eggs in the Nest mode.
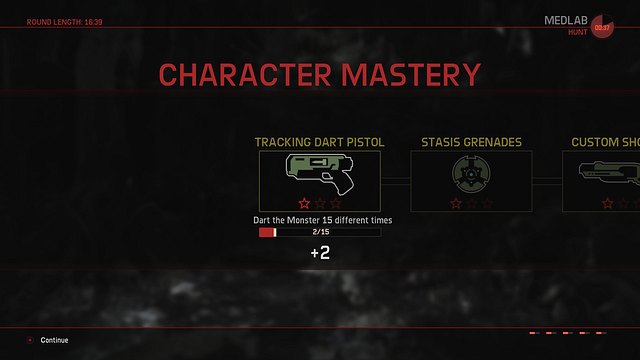
Unlocking new characters is one of the simplest mechanisms present in the game. Yet, it still deserves a mention. In the basic version of the game, there are three characters, in each class, available. At the beginning, you have access to the first ones. To gain access to the rest of them, you need to use the skills, of the initial characters, often. This means that, if you want to unlock Griffin, you need to use your weapons and skills as often, as possible, while playing as Maggie.
Your progress in the mastery of the skills is communicated to you, thanks to the bar that keeps appearing in the bottom-left corner of the screen.
In the very same way, if you want to, you can unlock Abe, you need to use Griffin's skills often.
But, even if you unlock new characters, it pays off to pay as the previous ones, if you like. Then, you can upgrade your skills, thanks to which you upgrade damage dealt by them, their range, etc. Of course, you do that by using the specific skills, as long as possible.
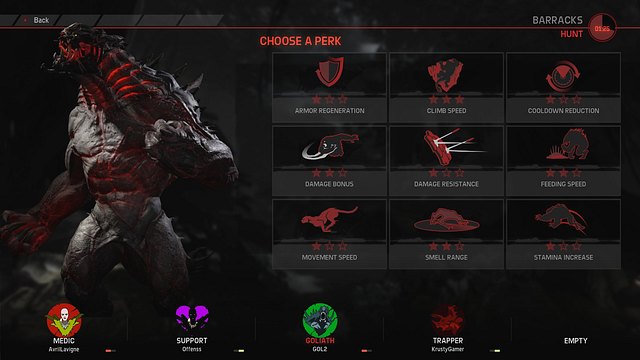
Perks are passive skills that can be unlocked and upgraded, as you progress to higher levels, as well as ones that can be obtained temporarily, during a single game.
After you have selected a character, you always get some time to pick the perk. It should be noted that the monster and the hunters pick from separate pools. You can pick only one perk per game so, you should consider if you are going to need faster preying on wildlife or maybe decreased damage taken.
The available perks can be viewed in the following tables:
Starting perks
Reload Speed
Faster guns reloading
Quick Switch
Faster switching between weapons
Jump Height Increase
Increases jumping height
Jetpack Recharge
Shortens Jetpack cooldown
Health Regeneration
Health regeneration per second
Damage Resistance
Decreases damage taken by your character
Damage Bonus
A bonus to damage dealt by your character
Capacity Increase
Perks obtainable from animals
Decreased Class Special Cooldowns by 50%
Decreases Class Special Cooldowns by 50%. Obtainable from elite Megamouth.
Increased Battery and Clip size by 75%
Increases maximum capacity of Jetpack. Obtainable from elite Obsidian Beetle
Dexterity Increase: Faster Reload and Weapon Switch
Improves reloading and switching weapons. Obtainable from elite Mammoth Bird
35% damage increase
Increases your damage by 35%. Obtainable from elite Crowbill Sloth
Bullets Slow monster
Bullets Slow down the monster. Obtainable from elite Steamdon
Bullets poison monster
Bullets poison the monster. Obtainable from elite Venom Hound
Health Regeneration
You receive spontaneous Health Regeneration per second. Obtainable from elite Tyrant
Wildlife runs away
Wildlife runs away from you. Obtainable from elite Cephalodon
Jump height increased by 400%
Jump height increased by 400%. Obtainable from elite Blitz Leopard.
Starting perks
Armour Regen
Increases Armour Regeneration rate
Climb Speed
Increases Climb Speed
Cooldown Reduction
Reduces cooldown on skills
Damage Bonus
Provides a bonus to damage
Damage Resistance
Increases resistance to damage
Feeding Speed
Increases Feeding Speed
Movement Speed
Increases Movement Speed
Smell Range
Increases Smell Range
Stamina Increase
Increases Stamina regeneration rate
Perks obtainable from animals
Friendly Birds
Birds do not escape, after they see you. Obtainable from elite Obsidian Beetle
Ability Cooldown Reduction by 50%
Ability Cooldown Reduction by 50%. Obtainable from elite Mammoth Bird
Increased Movement Speed by 35%
Increased Movement Speed by 35%. Obtainable from elite Canyon Strider
Health Regenerates over time
Your health regenerates. Obtainable from elite Tyrant
Stamina Increase
Stamina Increase. Obtainable from elite Desert Nomad
Armor Regenerates 30% Faster
Armor Regenerates 30% Faster. Obtainable from elite Reaver
Increased Feeding Speed
Increased Feeding Speed. Obtainable from elite Cephalodon
Increased Climbing Speed
Increased Climbing Speed. Obtainable from elite Blitz Leopard
Increased Smell Range by 100%
Increased Smell Range by 100%. Obtainable from elite Spotter
In the PC version, Evolve has relatively high graphics card requirements. This guide has been prepared on a computer with AMD Phenom II X4 965, 8GB RAM, AMD Radeon HD 7850- a required specification, although the game menu froze often, for about 2 minutes. No significant drops in framerate have been noted, both while playing as a hunter and the monster.
Singleplayer: Yes
Offline co-op (split screen/hot seat): No
Co-op over the Internet: Yes
Multiplayer: Yes
This guide has been drawn up on a PC version, on a computer with below specs:
On the above system, the game ran without major problems and it froze only after the game menu was accessed. In such a case, the only thing to do was to wait for the game to un-freeze.
Yes , playing Evolve on laptop computers is possible.


 Europa Universalis IV Game Guide & WalkthroughEuro Truck Simulator 2 Game Guide & WalkthroughElite: Dangerous Game Guide & WalkthroughEvolve Game Guide & Walkthrough
 Enemy Territory: Quake Wars Game Guide & Walkthrough