Eador: Masters of the Broken World is a fantasy strategy game based on such titles as Disciples, Heroes of Might and Magic and Civilization. Its complex and challenging gameplay may prove difficult for both beginner and advanced players, and this guide is here to help - offering not only a thorough explanation of the game mechanics, but also a series of ready-made solutions that facilitate playing against computer-generated challenges. With this compendium in hand, no Master of the Broken World will have trouble winning battles, exploring terrain and leveling up heroes.
List of contents:
To make navigating through the guide easier, we've used the following color codes:
Brown - units, monsters, guards;
Green - skills, statistics, special characteristics and medals;
Blue - spell and rituals;
Orange - buildings and their expansions.
Beginning the adventure with Eador is a certain challenge. While the game offers many useful tips, achieving the best results requires that you learn it inside out. This is a chapter for those players that feel lost in the initial stages of the game because they don't know what to do or which path is the best to choose. The following pages of the guide are my attempts to describe all initial activities, step by step, with proper explanations to my decisions and alternative solutions. I hope that thanks to them no one will feel disappointed or confused by the game's mechanics.
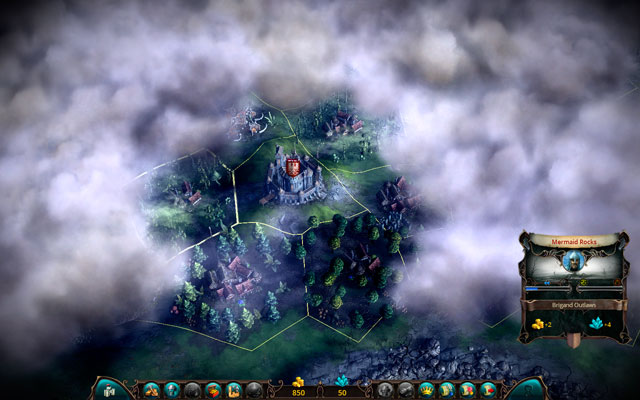
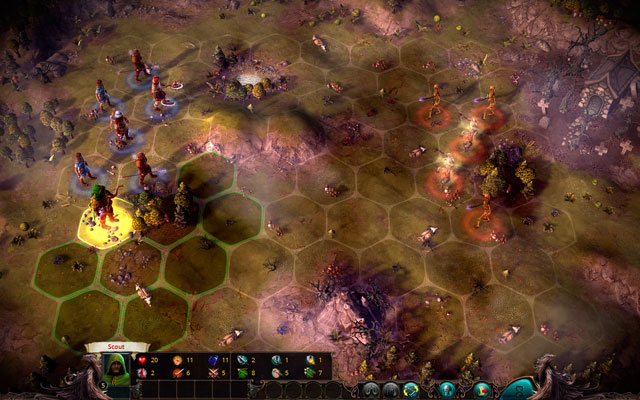
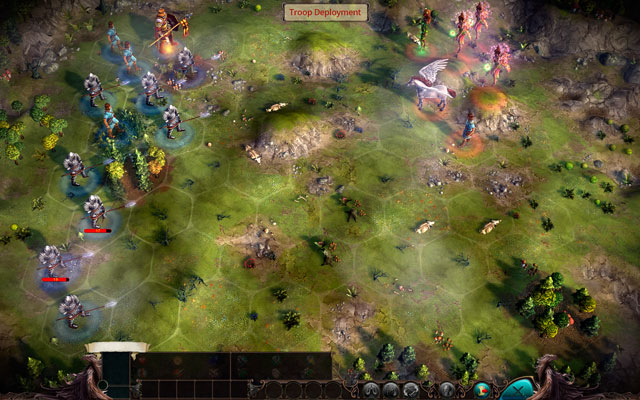
The first thing to get acquainted with is the map. If it's large and filled with many opponents, you need to prepare for a long and devastating war. If it's small, you may be able to win in less than 20 rounds. In the former case, select the Commander or the Wizard for the hero, in the latter: the Warrior or the Scout.
In the meantime, look around the provinces around your castle as they will provide you with income in gold or crystals. For example, if there are only swamps in the area, your Wizard will gain lots of crystals for spells, but the Commander won't get enough money to recruit soldiers. The other two classes don't need to bother with such things!
The choice of the hero's class determines the shape of the entire play. Warriors and Scouts require Workshops and other buildings that allow buying equipment - seeing as that they're both skilled soldiers, their gear is quite often what wins or loses the battle. The case is very different with Commanders, who are poor warriors entirely dependent on their army. It's logical they would want to have a military infrastructure. What about Wizards? The bearded men in funny clothes depend on artifacts and units only to a small extent, but instead require schools of magic to be able to learn new spells. Each hero has their own build for the expansion of the kingdom (you can find more about heroes and their advancement in the Heroes chapter) - make sure you remember that along the play.
How does it look on the practical side? Regardless of the choice of the hero, there is one building that you should build right at the beginning - the Tavern. It increases gold income, allows recruiting mercenaries, and opens access to other useful buildings further in the game.
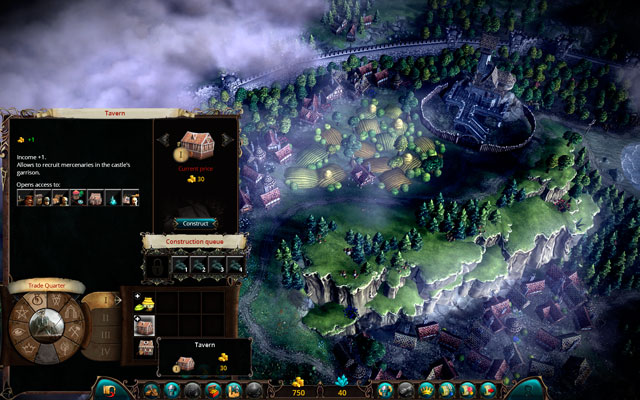
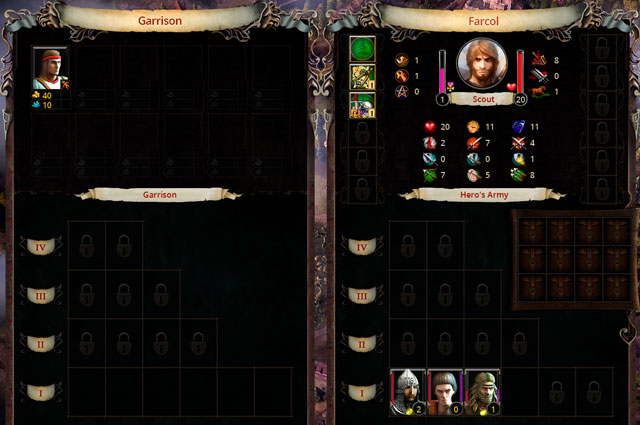
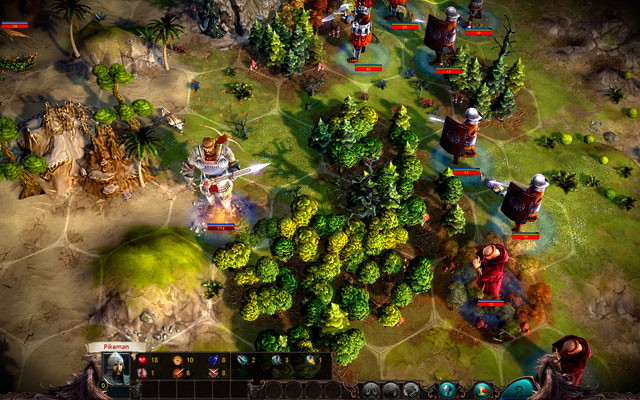
Once it's up and running, hire your first units. Mercenaries are generated randomly, so it's not always a good idea to recruit them (sometimes it may even ruin your budget). On the other hand, high-level units lets you deal with the opponent quickly and save the time required to gain new troops. Make sure to consider both options before making a choice.
Example: as seen above, building the Tavern got me a highly useful Pikeman. It cost me some money, but the upkeep cost doesn't leave a lot to wish for, and its statistics are solid.
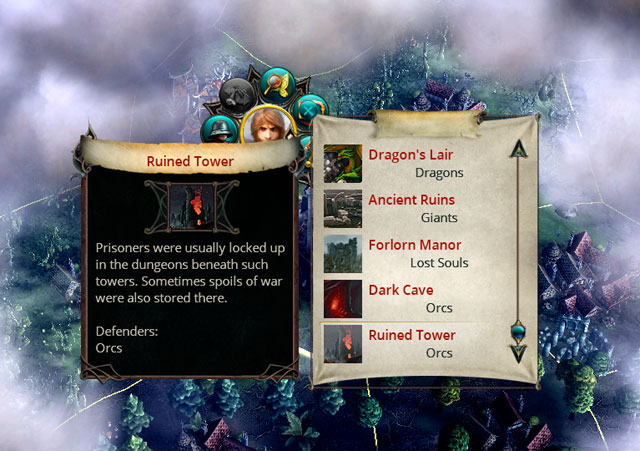
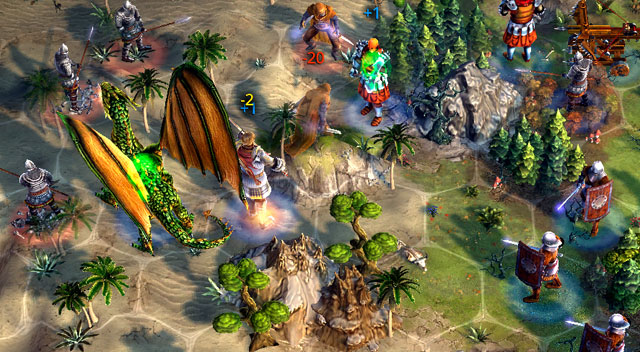
At this point, you should look around the capital and check how strong are the creatures in its dungeons. If there are the undead, goblins, bandits or orcs, you may have some chances against them and should attack. It's a much better option that gaining new provinces, as it brings more income (see below).
Example: a battle with a group of Orcs and Goblins dwelling beneath the surface of the capital has brought me almost 100 gold of income. During the fight, I kept protecting my hero, who shot most of the enemies without a sweat. None of the allies died and the hero leveled up.
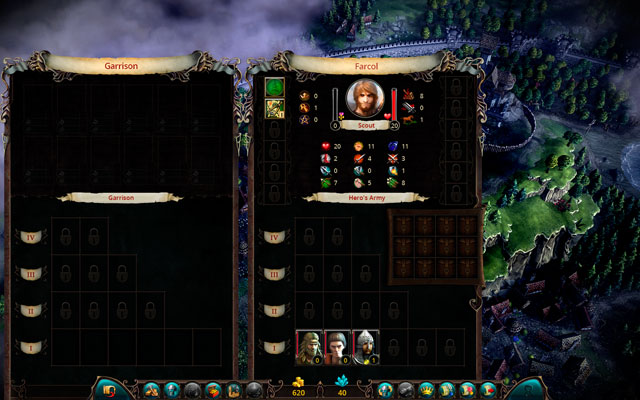
If you won your first battle, regenerate the strengths of your troops by moving them to the city's garrison. In the meantime, think about how you want to expand your infrastructure. As I mentioned earlier, Scouts and Warriors will be grateful for a Workshop where they could buy and repair their equipment. The Wizard will make a good use of a Library, while the Commander will be comfortable in any of the recruitment buildings. Notice, however, that if you suffered some losses or gained a Command point, you should focus most importantly on units rather than other needs - otherwise you won't be able to widen the reach of your empire.
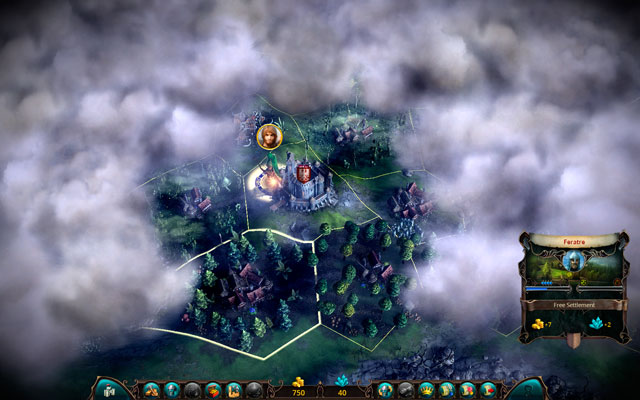
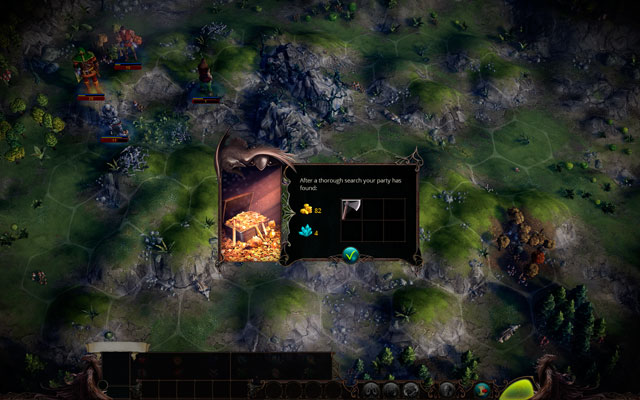
Example: since my units have been gravely wounded in the previous battle, I moved them to a garrison to accelerate their recovery and send my Scout to explore the terrain, which quickly gave a positive result (see below). For my new building, I chose the Workshop, because my hero's gear was halfway worn out and required repairs.
Once the "easy" dungeons beneath the capital run out, it's time to get us some new areas. The provinces surrounding our castle are usually the easiest to conquer, whereas the further away a given province is situated, the more difficult challenges await within it. Conquering provinces isn't something you should be impatient about. Each offers a different kind of income (see: Economy: The Basics) and is guarded by a different kind of opponent. In general, you can assume the following difficulty level:
Free Settlement < Brigand Outlaws = Orcish Tribes < Barbarian Tribes = Lizardmen
Since free settlements are the easiest to conquer, choose them first. The income from other provinces may be greater, but it's almost certain we won't be able to defeat their defenders.
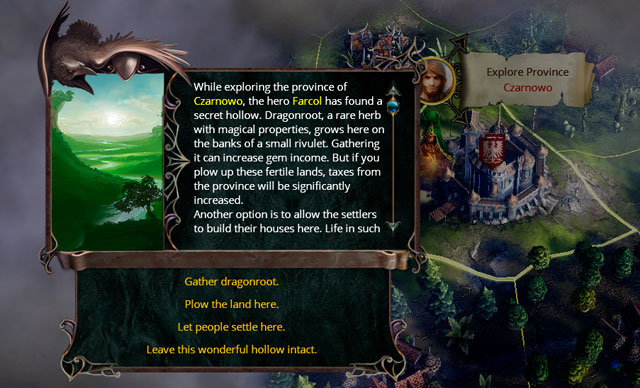
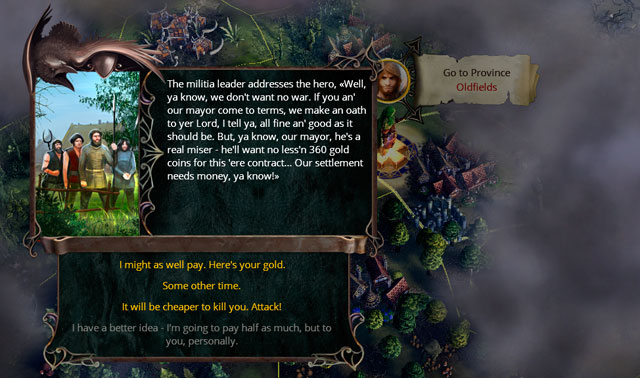
Example: my soldiers may not have recovered fully, but driven by a thirst of money I decided to attack the nearest free settlement. At the same time, I build an Altar in the capital in order to gain access to the Brotherhood of Light and be able to recruit Healers. Before battling the settlers, I tried to negotiate with them, but given that their price was too high, I decided to conquer the province by force (see below). This resulted in a drop of my karma and the happiness of the subjects, but I valued gold more.
Conquer provinces as long as you have enough army units and weapons for your hero. If on one of your conquered tiles you come upon a location that is easy to raid, make it your priority. Nevertheless, try to seize those provinces that you need the most at a given moment (i.e. because they give a lot of gold or have a special resource). Also, pay attention to what race is living on the terrain you're interested in, because they affect the nature of your kingdom. At this point, you won't be able to form any alliances yet, but if you have a chance further in the game, don't hesitate to use it (see: Races).
Example: having conquered my first province, I decided to return to the capital and repair my health. In the meantime, I build the Brotherhood of Life and recruited my first Healers, which greatly increased the recovery rate of my units. In the following round, I paid a visit to Orcs dwelling in caves beneath the castle and made quite a profit on them. I also build a Pantry, which is required for constructing more advanced buildings.
At this point it becomes crucial to conquer all provinces within the first circuit around the capital, one by one, replenish supplies and grow your infrastructure (local as well, if you can). If you're playing a Wizard, you absolutely must build a Library and at least one school of magic (see: Magic). Regardless of the hero's class, you also need to take care of the kingdom's finances by constructing buildings that will let your economy grow. The Inn is a good choice, seeing as it guarantees +2 gold income and allows building Pubs in provinces (additional +1 gold).
Example: in the following rounds, I had managed to conquer several closest provinces, replenish my losses and repair my budget with Tavern and Pubs. I also haven't forgotten about exploring the easiest dungeons and keeping my hero's equipment in line. Additionally, I had chosen a defensive specialization for my army, which fits the Scout very well (see: Units and Strategy). This explains my investment in a Pikeman School and the following Forge.

The rest of the play involves widening your influences, recruiting better and better units, leveling your hero and... fighting enemies. There are no strict rules there - just react to the enemy's actions and try to seize their capital as fast as you can, but don't forget about defending your own. Uncover new terrain along the way; you might also want to hire a second hero to have them help out in dungeon raids and acquiring resources. In one word - play, play, play!
Eador: Masters of the Broken World has a certain number of rules and mechanics that aren't made transparent to players. Considering how largely they affect the nature of the play and the challenges laid down in front of every Master, it's worth taking a look at them. Interestingly enough, most of them are dependent on the chosen difficulty level. See the table below:
Difficulty Level
Points
Max. Corruption
Number of Provinces after which Corruption Starts
Experience for Battles
Neutral Creatures Life
Gold Income
Initial Gold
Crystal Income
Initial Crystals
Beginner
25%
60%
18
130%
55%
+15
1000
+5
100
Skilled
50%
66%
16
120%
70%
+10
850
+3
50
Competent
75%
72%
14
110%
85%
+5
600
+1
30
Expert
100%
78%
12
100%
100%
-
500
-
20
Master
125%
84%
10
90%
115%
-
500
-
20
Lord
150%
90%
8
80%
130%
-
500
-
20
Overlord
175%
96%
6
70%
145%
-
500
-
20
Another thing that may be confusing is the citizens' Happiness, which is descriptive rather than numerical (instead of -5 you have, for example, the word "hate"). Buildings that raise Happiness usually give a +1 bonus, some spells and guards raise it by +2 or +3. It's easy to get lost in this mess, so how do the actual numbers look? Exactly like this:

+3
Happy

+2
Very content
+1
Content

0
Quiet

-1
Discontent

-2
Very discontent

-3
Indignant

-4
Furious

-5
Hateful
What about exploring provinces? What percent of land you need to uncover for the province to expand? Find your answers below:
Icon
Name
Exploration Required

Dead Lands
-

New Lands
0%

Settled Lands
20%

Hamlet
25%

Village
30%

Large Village
40%

Small Town
50%

Town
60%

City
70%

Trade Center
70%
The final matter is the karma. Karma determines whether the player will have to face disastrous catastrophes or exclusively positive events throughout the play. Karma is affected not only by plot choices made at the end of each battle (help refugees or sentence them to famine?), but also by the selection of buildings, guards and creatures. The latter it's not much a problem, seeing as each karma-affecting building has a proper symbol, as seen below:
+ karma
- karma


Karma is also affected by certain spells - unfortunately, the game doesn't include information on which spells. What's worse, you can't check the current state of your karma either, so in essence we're forced to wander in the dark. However, the files of Eador: Genesis, on which Masters of the Broken World is based, may serve as a certain indication. There's no guarantee they have been adapted fully, but it's better than nothing.
Spell
Karma
Black Magic
-5
Corruption
-1
Dark Pact
-7
Disease
-1
Exorcism
+1
Inferno
-1
Mass Disease
-1
Mass Suicide
-1
Raise Ghost
-2
Raise Ghoul
-1
Raise Skeleton
-1
Raise Vampire
-2
Raise Zombie
-1
Summon Fiend
-2
Summon Hellhound
-2
Summon Imp
-1
Summon Demon
-3
Summon Devil
-5
Vampirism
-1
White Magic
+1
In Eador: Masters of the Broken World, heroes play the primary role. They are the only ones who can command armies, travel around the map, complete missions, obtain new terrain and lay siege to enemy castles. It's their traits and their predispositions that determine the nature of the play and the success of the player. An empire that doesn't have a high-level hero is an easy picking for hostile units - they will have no trouble crossing the city's borders and defeating its defenders. All things considered, leveling up your heroes and their equipment is the first thing to do.
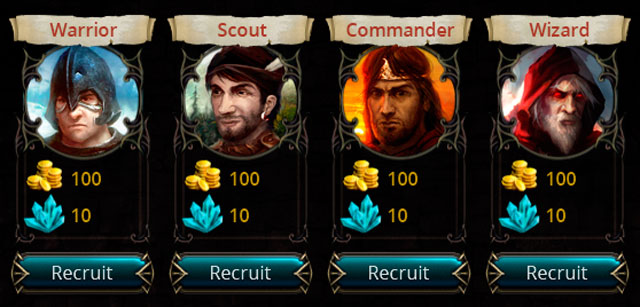
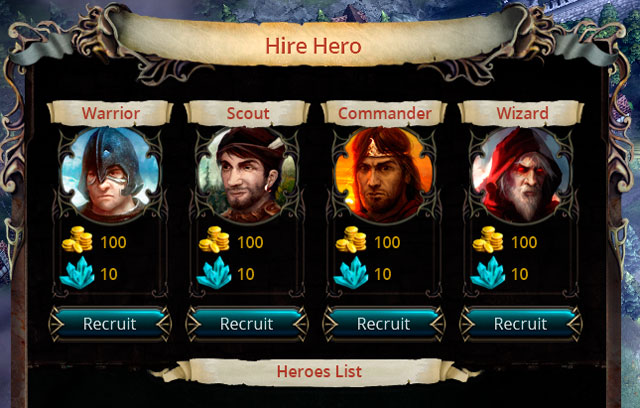
As seen above, heroes come in four categories: Warrior, Scout, Commander and Wizard. Each is described in detail in a separate section of the guide - for now we will only focus on general rules and regularities.
Let's begin with the fact the first two classes work great at the beginning of the game, only to put the brakes on a little as they level up. The Warrior and the Scout have no trouble with the first encounters on the battlefield - in fact, they may be the only units altogether to survive the battle - all because they deal a great amount of damage and can evade enemy attacks (whether due to armor or the ability to fight from distance). This makes them the basic striking force of any army - its sword and its shield.
The situation is in complete reverse when it comes to the Commander and the Wizard. They're both very fragile and prone to deaths, but as the game progresses they become extremely useful due to their unusual abilities. And so, the Commander, despite little skill on the battlefield, can lead a much greater number of units (which is a very useful thing), while a high-level Wizard is capable of turning the tide of the battle with only a few spells. With their frequent deaths both may not be the best choice at the beginning of the play, but as soon they level up they become virtually invaluable.
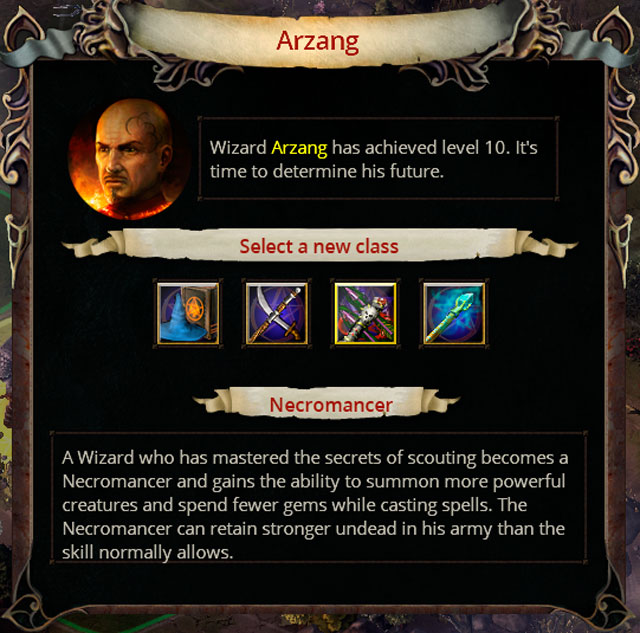
Heroes gain experience for exploring terrain and winning battles (only if they survive!). Each level up raises one of their abilities and allows them to select any of the three suggested class skills. Once they reach level 10, they also choose a specialization, which determines their further development. You can read more details about them in the further sections of the guide.
Notice that hiring a hero automatically raises the price of all remaining ones. What it means is that in most cases we will only be able to afford only one hero for the first several rounds - the other ones will be simply too expensive. Nevertheless, as long as it doesn't ruin your budget, consider hiring a second hero later in the play. With two, assign one to fighting enemies and the other to explore the lands in your possession (which have a tendency to expand rather too quickly). The Ranger is the perfect choice for the latter, but make sure to raise their Exploration.
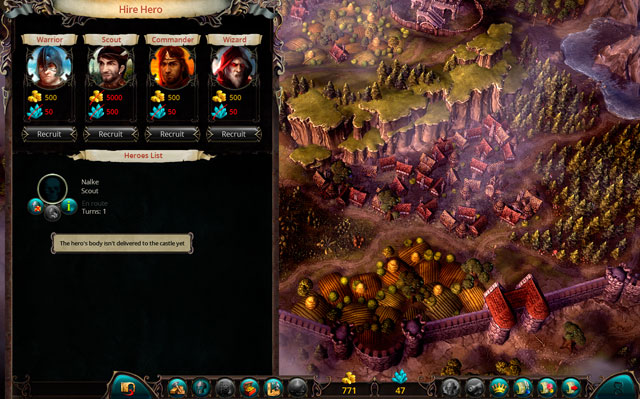
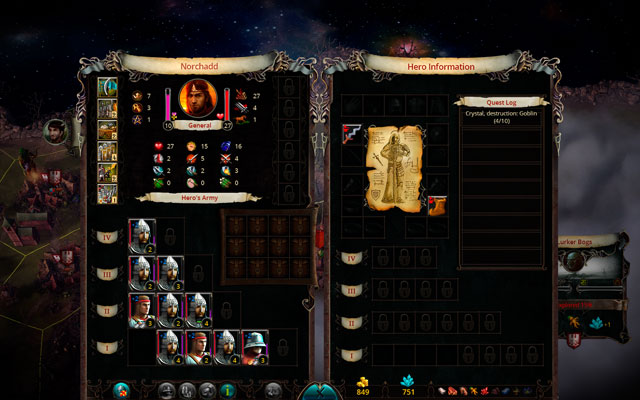
What to do when the hero falls in battle? There are two options. You can abandon the poor soul and liquidate their army along with all their items, or... resurrect them in the castle, paying a sum depending on their current level (sometimes we can also bring them back right on the spot). If you can't afford resurrection, wait a few rounds and bring them back later by clicking on the hero icon in the bottom left corner (see above). Alternatively, you can also invest in special Temple buildings, which lower the costs of this painful process.
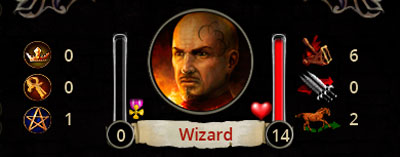
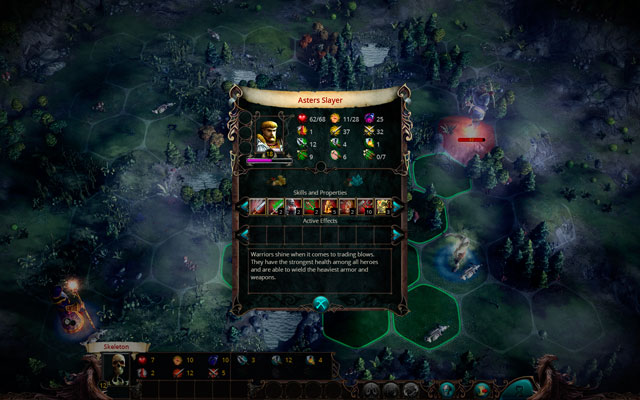
Heroes are described by three general statistics that affect their performance. Those, to the left of the portrait, are: Command, Health and Magic (see above). Each has a substantial influence on the hero's skills and their abilities on the battlefield. Let's have a closer look.

Command - corresponds to the number of units in the hero's army and their maximum experience level (I, II, III or IV). If you wish to have a large army with a lot of powerful creatures, this is the stat to grow - preferably by investing in a Commander which specializes in it. Notice that Wizards are terrible at commanding, but instead they can summon monsters during battle.
The increase in the size of the hero's army along with the Command stat is as follows:
Command Level
Level 1 Soldiers
Level 2 Soldiers
Level 3 Soldiers
Level 4 Soldiers
0
3
0
0
0
1
4
0
0
0
2
4
1
0
0
3
4
2
0
0
4
4
2
1
0
5
5
3
1
0
6
5
3
1
1
7
5
3
2
1
8
6
4
2
1
9
6
4
3
1
10
6
4
3
2

Health - corresponds to the number of health points, stamina and morale of the hero, as well as the number of health points regenerated outside of battle. It's a crucial trait, relevant mostly to Warriors, as it allows creating resistant and hard-to-kill characters. Wizards expand it the less, which makes them vulnerable and limits their actions (they tire quickly).
The increase in the hero's statistics along with Health levels is as follows:
Health Level
Total Health Points Bonus
Total Stamina Bonus
Total Morale Bonus
0
0
0
0
1
+3
+1
+1
2
+6
+2
+2
3
+10
+3
+3
4
+14
+5
+4
5
+19
+7
+5
6
+24
+9
+7
7
+30
+12
+9
8
+36
+15
+11
9
+43
+18
+13
10
+50
+22
+15

Magic - enables learning better spells and increases the overall number of available ones. Each hero can develop it to a certain level, but only Wizards can master it - they are the only ones who have access to the most powerful spells, and they use it more frequently, too. Notice that the Wisdom skill additionally increases the number of available spells.
The number of spells increases as follows:
Magic Level
Level 1 Spells
Level 2 Spells
Level 3 Spells
Level 4 Spells
0
3
0
0
0
1
4
0
0
0
2
4
1
0
0
3
4
2
0
0
4
4
2
1
0
5
5
3
1
0
6
5
3
1
1
7
5
3
2
1
8
6
4
2
1
9
6
4
3
1
10
6
4
3
2
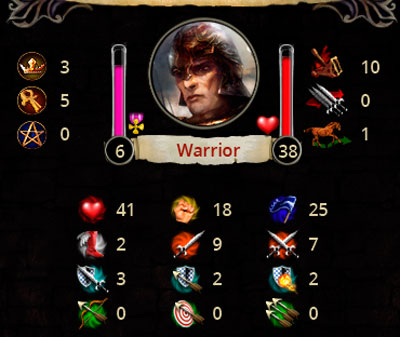
There are also three intermediate traits (to the right of the hero's portrait - see above), though they have a lesser influence on the play. You can raise them by investing in certain skills. These intermediate traits are:
Siege - speeds up the pace of a siege. Increase it by investing in Logistics (Commander's skill).
Initiative - determines who starts the battle. Increase it by investing in (as follows: Warrior, Scout, Commander, Wizard): Athletics, Reaction, Maneuvering or Wand Master.
Mobility - determines the number of movement points on the world map. Keep in mind that stepping on a tile without a Stable means a loss of a substantial amount of movement points, depending on the type of terrain. Increase it by investing in Pathfinding from the Scout set or Maneuvering from the Commander's.
Apart from that, heroes are described by general battle statistics, same as regular troops. These statistics are described in the Units - The Basics section.
Warriors are heroes adapted to taking in great amounts of damage and dealing deathly blow in melee combat (they can also shoot, but aren't too good at it). They use a variety of weapons and armor, including the heaviest and the most powerful ones - and it really pays off to invest in them. They can't, however, cast spells and can only command a limited number of troops, but are a serious threat in themselves. Properly grown, they become virtually invulnerable to blows and can kill enemies with a single strike. They're the perfect choice for beginner players who don't want to delve to deep into the mechanics of the game, but just win battles.
Warriors can use item from groups: Common, Melee Weapon, Heavy Weapon, Light Armor, Medium Armor, Heavy Armor, Shield.
Warrior's Level Up Chart
Hero's level
Command
Health
Magic
0
-
+1
-
1
-
+1
-
2
+1
-
-
3
-
+1
-
4
+1
-
-
5
-
+1
-
6
-
-
+1
7
-
+1
-
8
+1
-
-
9
-
+1
-
10
-
-
-
Total:
3
6
1
As you can see, Warriors specialize in leveling Health, which makes them very resistant and additionally immune to fear and exhaustion. Magic is of little use to them, so its low rates shouldn't be a problem. The only really problematic issue concerns low Command levels that should be further increased through a proper specialization. It's so happens that once the Warrior reaches level 10, they can choose one of four specializations: Berserker, Slayer, Holy Knight, Dark Knight. Below are the details:
Name
Icon
Statistics at Level 20
Available Equipment
Class bonus
Berserker

7 Command
10 Health
3 Magic
Common, Melee Weapon, Heavy Weapon, Light Armor, Medium Armor, Heavy Armor, Shield
Berserk (3) skill. Can expand Warrior Skills to level 5, the maximum.
Slayer

6 Command
10 Health
4 Magic
Common, Melee Weapon, Heavy Weapon, Ranged Weapon, Light Armor, Medium Armor, Heavy Armor, Shield
Poison Attack (2), Poison Shot (2) and Precise Strike (2) skills. Can expand Warrior and Scout Skills to level 3.
Holy Knight

8 Command
10 Health
2 Magic
Common, Melee Weapon, Heavy Weapon, Banner, Light Armor, Medium Armor, Heavy Armor, Shield
Cure Wounds (3) and Smite Evil (1) skills. Can expand Warrior and Commander Skills to level 3.
Dark Knight

3 Command
10 Health
7 Magic
Common, Melee Weapon, Heavy Weapon, Wand, Light Armor, Medium Armor, Heavy Armor, Shield
Soul Stealing (3) skill. Can expand Warrior and Wizard Skills to level 3.
Berserker: the optimal choice if you wish to make your hero into a true killing machine. Class skills at level 5 give insanely huge bonuses. What's more, the Berserk skill allows for staying on high battle alert and efficiently dealing damage despite serious wounds (though a healing unit in the army also comes in handy).
Slayer: a fairly interesting option, though inferior to the two neighboring ones. Scout Skills are only moderately useful to a Warrior, while low maximum Command levels and the inability to increase Warrior Skills properly are a great limitation here. On the other hand, poisoning enemies is remarkably useful, same as the freedom of choice when it comes to fighting styles (melee and ranged work almost equally well). If you raise Reaction to level 3, you will get an additional movement point, which are extremely important.
Holy Knight: a choice that allows for a reasonable balancing between the advantages of the Warrior and the typical benefits of the Commander. An army of 13 that a Holy Knight can command is an impressive force in which the high-level, well-equipped hero will be one of the most powerful units. Importantly enough, Command Skills allow for further enhancements of the troops, which is a strong justification for the class.
Dark Knight: an option that turns the hero into a sort of a vampire: an enemy killed in direct combat will heal the hero's wounds (three times maximum). However, seeing as it limits the maximum Command level to only 3, the Dark Knight is the least beneficial of the given specializations. Command level 3 translates to a very small and a very weak army. Although you receive the ability to cast advanced spells, magic will still remain the domain of the Wizards. What's worse, any magic skills whatsoever don't correspond to any previous developments of the hero, thus leaving him moderately good at everything, but not really great at anything. As a result you only get a quasi-wizard which deals great damage in direct combat, but is not able to do anything else (because in during a round they can only cast a spell or fight).
The above comparisons leave no doubt that the optimal choices are Berserker and Holy Knight. Empirical tests prove it further, and stat growth at level 20 seals it. At level 20, specializations reach their full potential which involves additional bonuses to already added class bonuses. Unfortunately, it also involves a halt in the hero's stat growth - they remain on the exact same level (choosing a specialization is irrevocable, with especially far-reaching consequences).
Below is the chart of final specializations (they can't be chosen - level up is automatic!):
Name
Icon
Statistics
Available Equipment
Class Bonus
Commentary
Chieftain

7 Command
10 Health
3 Magic
Common, Melee Weapon, Heavy Weapon, Light Armor, Medium Armor, Heavy Armor, Shield
Berserk (8) skill, can expand Warrior Skills to level 5, the maximum.
Master Slayer

6 Command
10 Health
4 Magic
Common, Melee Weapon, Heavy Weapon, Ranged Weapon, Light Armor, Medium Armor, Heavy Armor, Shield
Poison Attack (4), Poison Shot (4) and Precise Strike (4) skills. Can expand Warrior and Scout Skills to level 3.
Champion

8 Command
10 Health
2 Magic
Common, Melee Weapon, Heavy Weapon, Banner, Light Armor, Medium Armor, Heavy Armor, Shield
Cure Wounds (3), Smite Evil (3) and Reincarnation (1) skills. Can expand Warrior and Commander Skills to level 3.
Death Knight

3 Command
10 Health
7 Magic
Common, Melee Weapon, Heavy Weapon, Wand, Light Armor, Medium Armor, Heavy Armor, Shield
Soul Stealing (8) skill. Can expand Warrior and Wizard Skills to level 3.
Chieftain: a simple expansion to the basic Berserker doesn't add too much - in fact, the hero's growth has been halted. Any benefits from class skills raised to level 5 should nevertheless balance the losses, as they significantly increase the hero's statistics.
Master Slayer: a high-level hero can deal great amount of damage, both in melee and ranged combat, while additionally poisoning enemy units. High mobility allows reaching and eliminating the enemy very quickly. It's a pretty solid option, though incomparably weaker than the two neighboring ones.
Champion: above level 20, the Champion becomes unbeatable. The one-time ability to resurrect themselves in case of death is a highly useful skill, especially if the hero has high Defense and strong Attack - in which case they become a real pain in the enemy's ass, without dying practically ever (unless they face off a Chieftain, that is).
Death Knight: expanding the hero's vampiric abilities doesn't really make a difference. In comparison with the other specializations, magic remains utterly unprofitable.
Above level 20, the Champion easily wins over a Chieftain - mainly because of the incredibly handy Reincarnation and the common outnumbered factor (two units more in the army). Champions can additionally heal their wounds, which balances out, for example, the abilities of a high-level Slayer. The Master Slayer is also a good choice due to their mobility, universality and poison strikes. In the end, though, the Champion is the optimal choice for about 90% of the situations throughout the play.
There are many builds for heroes, but only a handful of them are optimal. The chart below presents the ideal types: such that give the most desirable benefits in combat and while moving on the map. In reality, however, it's generally impossible to achieve these combinations - in order to avoid budget shortfalls and bankruptcy, eventually you're going to have to invest in the passive Blacksmithing skill to secure yourself a larger income, and that takes a skill space.
Skills are arranged according to their relevance (the sooner a skill is on the list, the more important it is in the game). Unfortunately, each level up gives the hero only 3 skills to choose from, so the outlined order may be disrupted. Don't mind it, though - just raise your hero the only way you can.
Name
Icon
Suggested Skills
Commentary
Berserker

Weapon Master, Armor Master, Combat, Athletics, Constitution, Resistance
Raise each to level 5, the maximum. Athletics is relevant in that it allows reaching the target quicker, so don't underestimate it.
Slayer

Weapon Master, Armor Master, Combat, Athletics, Reaction, Archery, Marksmanship, Resistance, Constitution, Pathfinding
Raise Athletics to level 1 to gain the specialization, then raise Scout Skills. You can return to Athletics before Pathfinding.
Holy Knight

Weapon Master, Armor Master, Combat, Athletics, Offensive Tactics, Discipline, Defensive Tactics, Leadership, Resistance, Logistics
Same as above - Athletics is used solely to gain the specialization; in itself it's much less relevant than Offensive Tactics, Discipline, Defensive Tactics and Leadership (but not Logistics and Resistance!). Notice that the selected Commander Skills affect not only the troops, but the hero as well.
Dark Knight

Weapon Master, Armor Master, Combat, Athletics, Wisdom
the rest according to preferred spells:
Necromancy and Summoning
or
Magic Power and Concentration
and finally:
Thaumaturgy, Constitution, Resistance
Same as above - Athletics is much less relevant that magic skills but you need to invest it to gain the specialization.
Warrior Skills focus on increasing the performance and statistics of the hero, crafting them into better and more efficient killing machines. Only one skill - Blacksmithing - diverges from this path as it serves in fixing the budget shortfall. It doesn't mean that you should ignore it, though - on the contrary, it becomes a great help in the process of expanding your empire because money disappear very quickly and having a source of a steady income always pays off. It becomes painful only later in the game, but by then you'll have cash aplenty
Name
Icon
Level 1
Level 2
Level 3
Level 4
Level 5
Weapon Master

Attack +1
Counterattack +1
Attack +2
Counterattack +1
Attack +1
Counterattack +2
Attack +2
Counterattack +2
Attack +2
Counterattack +2
Armor Master

Defense +1
Ranged Defense +1
Defense +1
Ranged Defense +1
Defense +1
Ranged Defense +1
Defense +1
Ranged Defense +2
Defense +2
Ranged Defense +1
Constitution

Health Points +2
Stamina +1
Health Points +2
Stamina +1
Health Points +3
Stamina +1
Regeneration +1
Health Points +4
Stamina +2
Health Points +5
Stamina +2
Regeneration +1
Willpower

Resistance +1
Morale +1
Resistance +1
Morale +1
Resistance +1
Morale +1
Resistance +1
Morale +2
Resistance +1
Morale +2
Athletics

Initiative +1
Trudge (3)
Initiative +1
Recover (3)
Initiative +1
Speed +1
Initiative +1
Charge
Initiative +1
Speed +1
Combat
Precise Strike +1
Parry +1
Precise Strike +1
Parry +1
Precise Strike +1
Parry +1
Precise Strike +2
Parry +2
Precise Strike +2
Rotary Attack
Blacksmithing

Equipment Usage -10%
Income +5
Equipment Usage -10%
Income +5
Equipment Usage -10%
Income +10
Equipment Usage -10%
Income +20
Equipment Usage -10%
Income +30
What about the remaining skills? Generally speaking, all are important, seeing as all of them increase the abilities of the hero. The priority, though, should be trinity of Weapon Master, Armor Master and Combat, which raise the hero's defense against regular attacks and allows them to deal great amounts of damage in combat. If you intend to treat your hero as the primary striking force (which is advisable), you should also invest in Athletics - mainly because it increases the hero's range and allows for trudging. Constitution pays off only on the condition that you intend to specialize your Warrior into a Berserker - two-point Regeneration on level 5 is a pretty fun bonus, especially if the hero is already resistant to blows (high Defense). Finally, if your enemies are magic users - and especially if the opposing hero is a Wizard - make sure to invest in Willpower to protect yourself against hostile spells.
Unfortunately, the patterns outlined above are too perfect to be true; the reality is much more brutal. If you don't pay attention to economy, you will quickly run out of money, so as soon as you can, invest at least one point in Blacksmithing. It's the only way to become financially secure enough to start thinking about the primary trinity and raising the remaining skills (including Blacksmithing to at least level 3).
It's also worth mentioning that Constitution is the least beneficial choice, because in the general overview it gives much smaller bonuses that it may seem at first. Why? Because in the last stage of the game, Regeneration is barely noticeable: enemies deal several dozen damage points with a single blow (less if you have a great armor and good defensive skills), so a few additional points don't really make a difference. It's much better to invest in damage dealing (Weapon Master), ignoring the enemy's defenses (Combat), mobility (Athletics) or defensive skills (Armor Master, Willpower, Combat). The only exception is when you have absolute certainty that the enemy doesn't have a spellcaster - if so, ignore Willpower and invest in Constitution.
Scouts are experts in ranged combat, with a variety of bows and crossbows at their disposal. They deal great amounts of damage, can partially ignore the enemy's defenses and are surprisingly mobile (both on the battlefield and on the map). Unfortunately, they don't do so well when it comes to melee combat, though the key to success lays in retreating a few steps back and firing at the enemy form a safer distance. Scouts also prove to be great secondary heroes outside of battle - which is thanks to their bonuses to terrain exploration and finding treasures. One way or the other, they have to be armed with a good bow and arrows - these are the primary factors that determine their effectiveness. In battle, place them on hills (longer range) and to whatever it takes to cover them with your troops.
Scouts can use items from groups: Common, Melee Weapon, Ranged Weapon, Light Armor.
Scout's Level Up Chart
Hero's level
Command
Health
Magic
0
-
+1
-
1
+1
-
-
2
-
-
+1
3
+1
-
-
4
-
+1
-
5
-
-
+1
6
+1
-
-
7
-
+1
-
8
-
-
+1
9
-
+1
-
10
-
-
-
Total:
3
4
3
Scouts raise their statistics in a fairly balanced manner - they can be made either into skillful commanders, deadly warriors as well powerful wizards. By default, they also have an ability called Forest Knowledge, which allows them to move in forests without penalties to movement. Once they reach level 10, they can choose one of four specializations: Archer, Adventurer, Ringleader, Ranger. Below are the details:
Name
Icon
Statistics at Level 20
Available Equipment
Class Bonuses
Archer

6 Command
8 Health
6 Magic
Common, Melee Weapon, Ranged Weapon, Light Armor
Double Shot (8) skill, can expand Scout Skills to level 5, the maximum.
Advenroundser

6 Command
10 Health
4 Magic
Common, Melee Weapon, Heavy Weapon, Ranged Weapon, Light Armor, Medium Armor, Heavy Armor, Shield
Finds 50% more gold and crystals while searching locations and receives twice as much payment for completed quests. Additionally, can change weapons during battle without the loss of round.
Can expand Warrior and Scout Skills to level 3.
Ringleader

8 Command
8 Health
4 Magic
Common, Melee Weapon, Ranged Weapon, Banner, Light Armor, Medium Armor, Shield
Raises Looting by 3 levels, increases income from plundering provinces by 25% and increases mobility on the world map by 1.
Can expand Scout and Commander Skills to level 3.
Ranger

5 Command
7 Health
8 Magic
Common, Melee Weapon, Ranged Weapon, Wand, Light Armor
Receives a +10 bonus to Exploration and their sabotage is one level more effective than Scouting would suggest. Additionally, they can sabotage enemies one time more than the usual.
Can expand Scout and Wizard Skills to level 3.
Archer: enables shooting twice as frequently, which is an obvious advantage in ranged combat. You'll be able to kill most enemies before they even reach you. There are, however, two major drawbacks. Firstly, low Command levels are a serious limitation as to the numbers of your troops, and the number of your troops may determine the outcome of the battle. Secondly, ammo has an annoying tendency to run out just when you need it the most. If that happens, the hero should support the team with magic and stay away from any fighting altogether. Notice that the Archer has up to 10 spells in their book, including one on level III and one on level IV - a surprisingly good mix. Make sure, though, that they don't run out of Stamina - it's a particularly painful experience.
Adventurer: despite what the name might suggest, it's not a good specialization. What it does is that it balances out the hero's ranged and melee combat skills and opens access to the heaviest weapons and armor (which usually raises Defense and Attack). In reality, though, this potential universality doesn't come in handy at all - pitted against experienced Warriors and stronger units, the Adventurer falls pretty quickly, while their archery skills remain on the same level. Bonuses to Health, Defense Points, Melee Combat and acquired gold are quite pleasant, but not enough to win.
Ringleader: any class bonuses for this specialization are marginally noticeable: the only thing worthy of attention is increased mobility. The main asset of the Ringleader is the army - enhanced by Commander Skills and bigger than the other specializations'. However, given that the hero's growth is halted (they won't be able to deal more damage than in the moment of acquiring the specialization), in most cases it's not enough to win. The Archer is the better choice.
Ranger: a pretty bizarre creation which makes the hero moderately good at virtually everything, but not really great at anything. To make them into something beneficial, invest in Scouting and develop a strategy of poisoning the enemy (magic specializations enhance the effect!). The combination of time-limited, poison-afflicting or fear-inducing spells is a pretty solid mixture. The Ranger should be an interesting option to players who like trickery and have a lot of money (sabotage is expensive). The Archer is still better, though, having a comparable number of spells but dealing much more damage in ranged combat.
In general overview, the Archer makes for one of the best specializations in the game - being versatile and great in dealing ranged damage. The only thing to make sure of is to have them covered by a large number of troops - otherwise they will fall pretty quickly. In addition, there is an interesting trick to apply when battling an enemy hero - instantly eliminating them with the Double Shot (perfect for Wizards and Commanders). To get the right range and force, buy proper weapons and arrows, or just stand on a hill. That shouldn't be a problem, should it?
As for other specializations, both the Ranger and the Ringleader have some potential, but they're not always up to the challenge - especially since the first requires insane financial outlays. The Adventurer performs the worst of them all, given that they waste the most important asset of the Scout and offer little in return - only increased resistance and the ability to fight hand-to-hand.
Specializations reach their peak at level 20, which involves gaining additional bonuses to already added class bonuses. Unfortunately, it also involves a halt in the hero's stat growth - they remain on the exact same level (thus choosing a specialization is irrevocable, with especially far-reaching consequences).
Below is the chart of final specializations (they can't be chosen - level up is automatic!):
Name
Icon
Statistics
Available Equipment
Class Bonuses
Sharpshooter

7 Command
10 Health
3 Magic
Common, Melee Weapon, Ranged Weapon, Light Armor
Double Shot (8) skill with the cost lowered to 3 stamina points; can expand Scout Skills to level 5, the maximum.
Mercenary

6 Command
10 Health
4 Magic
Common, Melee Weapon, Heavy Weapon, Ranged Weapon, Light Armor, Medium Armor, Heavy Armor, Shield
Finds 100% more gold and crystals while searching locations and receives twice as much payment for completed quests. Additionally, can change weapons during battle without the loss of round. Receives a fixed +2 bonus to speed and +3 to initiative.
Can expand Warrior and Scout Skills to level 3.
Raider

8 Command
10 Health
2 Magic
Common, Melee Weapon, Ranged Weapon, Banner, Light Armor, Medium Armor, Shield
Raises Looting by 6 levels, increases income from plundering provinces by 50% and increases mobility on the world map by 2.
Can expand Scout and Commander Skills to level 3.
Pathfinder

3 Command
10 Health
7 Magic
Common, Melee Weapon, Ranged Weapon, Wand, Light Armor
Receives a +20 bonus to Exploration and their sabotage is two levels more effective than Scouting would suggest. Additionally, they can sabotage enemies one time more often than the usual.
Can expand Scout and Wizard Skills to level 3.
Sharpshooter: lowering the cost of Stamina for Double Shot is quite a useful bonus - the hero becomes even more deadly, while virtually undefeatable.
Mercenary: bonuses for the specialization level up are pleasant, but come too late. Still the least profitable of the choices.
Raider: the hero receives the ability to move around the map quicker and obtain much more gold for fighting creatures, but these are the only noticeable benefits. Still not the optimal choice.
Pathfinder: the enhanced Ranger receives a small bonus to sabotage and exploration - but, sadly, that's it.
At this point in the game, the Sharpshooter specialization remains the best choice, winning over the Pathfinder due to lowered Stamina costs. It doesn't mean, though, that you should utterly ignore the latter - it's still an interesting and beneficial option. The remaining ones are greatly inferior, so don't mind them altogether.
There are many builds for heroes, but only a handful of them are optimal. The chart below demonstrates the ideal types, such that give the most desirable benefits in combat and while moving on the map. The Scout, however, can (and should!) invest at least several points in skills that increase income. Diplomacy is a good choice in this matter, seeing as it increases rewards received for completing missions and winning on the arena, lowers buying and repair costs, and additionally opens new dialogue options while talking to NPCs. Looting is not too shabby as well as it increases the amount of gold and crystals received after a battle - thus guaranteeing a frequent and additional source of income (not too large, though, but noticeable).
Skills are arranged according to their relevance (the sooner a skill is on the list, the more important it is in the game). Unfortunately, each level up gives the hero only 3 skills to choose from, so the outlined order may be disrupted. Don't mind it, though - just raise your hero the only way you can.
Name
Icon
Suggested skills
Commentary
Archer

Marksmanship, Archery, Reaction, Scouting
Raise the above to the maximum level, then invest in
Pathfinding and Diplomacy
Given that the archery specialization is all about increasing the frequency of shooting, focus on developing ranged combat effectiveness. Other skills are of secondary importance.
Advenroundser

Marksmanship, Archery, Reaction, Scouting, Armor Master, Weapon Master, Combat, Willpower, Athletics, Constitution
Increase Scouting only to level 10 in order to unlock the specialization - you can ignore it later and focus on battle skills.
Ringleader

Marksmanship, Archery, Reaction, Scouting, Offensive Tactics, Ranged Tactics, Discipline, Defensive Tactics, Leadership, Logistics
Same as above, but with the inclusion of Commander Skills (which enhance not only the army, but the hero's a abilities as well).
Ranger

Marksmanship, Archery, Reaction, Scouting, Wisdom
the rest according to preferred spells:
Necromancy and Summoning
or
Magic Power and Concentration
and finally:
Thaumaturgy and two chosen skills
This time, Pathfinding isn't used just for unlocking the specialization, but is a fundamental and indispensible part of the build. Poisoning the enemy's supplies and causing panic works perfect in combination with magic abilities - especially with spells that can afflict additional poisoning, summon the undead or induce fear.
First and foremost, Scout Skills increase the hero's abilities pertaining to ranged combat, magic defense and ranged damage. These are crucial for Scouts, but not really meaningful to other classes. Before you wring your hands, though, notice that Scouting enables sabotaging the enemy's supplies - which is a great advantage in time of battle. Also, consider skills that increase income. Commanders that specialize in ranged combat (Tacticians) also have the handy Pathfinding. It's not as bad as you may imagine.
Name
Icon
Level 1
Level 2
Level 3
Level 4
Level 5
Marksmanship

Ranged Attack +1
Ranged Attack +1
Ranged Attack +1
Shot Range +1
Ranged Attack +2
Ranged Attack +2
Shot Range +1
Reaction

Initiative +1
Ranged Defense +1
Resistance +1
Initiative +1
Ranged Defense +1
Resistance +1
Initiative +1
Ranged Defense +1
Resistance +1
Initiative +1
Ranged Defense +1
Resistance +1
Initiative +1
Ranged Defense +1
Resistance +1
Scouting

Exploration +5
Enables reconnaissance
(viewing enemy units)
Exploration +5
Enables false alarm
(lowers the enemy's stamina)
Exploration +5
Enables poisoning enemy supplies
(poisons enemies)
Exploration +10
Enables instigating panic
(lowers enemy morale)
Exploration +10
Reconnaissance and sabotage are 50% cheaper
Archery

Precise Shot +1
Ammo +1
Precise Shot +1
Ammo +1
Precise Shot +1
Ammo +1
Precise Shot +2
Ammo +1
Precise Shot +2
Ammo +1
Pathfinding

Forest Knowledge +1
Hill Knowledge +1
Swamp Knowledge +1
Mobility +1
Terrain Knowledge +3
Terrain Knowledge +4
Mobility +1
Diplomacy

Rewards +10%
Prices -10%
Rewards +10%
Prices -10%
Rewards +20%
Prices -10%
Rewards +30%
Prices -10%
Rewards +30%
Prices -10%
Looting

Loot +10%
Loot +10%
Loot +10%
Loot +20%
Loot +20%
Scouts should focus on three crucial skills - Marksmanship, Archery and Reaction. They give great results in ranged combat and at the same guarantee full protection against hostile archers and spellcasters. Diplomacy and Looting should come next - both are practically equally good, but you should invest in only one (so as not to waste XP). Pathfinding and Scouting may be much more effective in battle, but without proper financial skills you'll surely go bankrupt (or at least suffer from economic stagnation) - they should always come first. Naturally, if you can do well without them, that's good too.
Commanders are adapted to lead large armies and reinforce their statistics through their own abilities. On their own, they don't pose any threat whatsoever - they can't withstand too many blows and their attacks may at best make the enemy laugh. In time, though, they amass very powerful and very numerous amounts of troops, which become virtually indestructible with properly strong bonuses. The strength of Commanders doesn't come from their own, then, but from the troops they command. It doesn't mean, though, that buying equipment for them is a loss of money - on the contrary, they require many protective artifacts to even survive a battle. Their skills may affect both the army and themselves, but they're often not enough. You should therefore invest in several basic spells that will render the Commander at least somewhat useful on the battlefield. Commanders work best on large and complex maps - on the smaller ones they will be easily slaughtered by hostile Warriors and Scouts.
Scouts can use items from groups: Common, Melee Weapon, Banner, Light Armor, Medium Armor, Shield.
Commander's Level Up Chart
Hero's level
Command
Health
Magic
0
+1
-
-
1
+1
-
-
2
-
+1
-
3
+1
-
-
4
-
+1
-
5
+1
-
-
6
-
-
+1
7
+1
-
-
8
-
+1
-
9
+1
-
-
10
-
-
-
Total:
6
3
1
Obviously enough, Commanders expand mostly Command; Health is a secondary issue, while Magic doesn't interest them practically at all. This should tell in what direction should the whole leveling up go right from the start. The goal is to amass as big an army as possible and then conquer one province after another using it. This process involves a lot of money - you not only have to hire soldiers, but also cover their pays (and replace them with new ones if they fall). This, in turn, requires a well operating economy system that would strike a balance between management and military potential. All this makes the Commander the most expensive of all heroes.
At level 10, the Commander may choose one of four battle specializations which determine their further development. These are: General, Warlord, Tactician, Priest. Below are the details:
Name
Icon
Statistics at Level 20
Available Equipment
Class Bonuses
General

10 Command
6 Health
4 Magic
Common, Melee Weapon, Banner Light Armor, Medium Armor, Shield
Increases Attack and Counterattack of all units by 1.
Can expand Commander Skills to level 5, the maximum.
Warlord

10 Command
8 Health
2 Magic
Common, Melee Weapon, Banner, Heavy Weapon, Light Armor, Medium Armor, Heavy Armor, Shield
Increases Defense of all units by 1.
Can expand Warrior and Commander Skills to level 3.
Tactician

10 Command
7 Health
3 Magic
Common, Melee Weapon, Banner, Ranged Weapon, Light Armor, Medium Armor, Shield
Increases damage dealt by shooting units by 2 (excluding magic missiles), increases Initiative by 1.
Can expand Scout and Commander Skills to level 3.
Priest

10 Command
4 Health
6 Magic
Common, Melee Weapon, Banner, Wand, Light Armor, Medium Armor, Shield
Increases Resistance of all units by 1 and morale by 2.
Can expand Commander and Wizard Skills to level 3.
General: enables additional improvements to the hero's army - Commander Skills at level 4 and 5 give very pleasant bonuses, so if you have a large army, it's an extremely beneficial option. The hero will still be no good at practically anything (if not at casting a few spells), but their army should take any threat head on. Additional bonuses to attacking and counterattacking are reasonably noticeable and give some edge on the battlefield.
Warlord: with this specialization you can craft your Commander into a pretty solid battle unit, but it involves losing all high-level Commander Skills altogether. In the long run it doesn't really pay off, because instead of enhancing your army to a major force you get only a slightly better soldier (better, but not great).
Tactician: this specialization will allow your Commander to shoot at enemies and be able to sabotage their supplies (Scouting), but not enhance your army any further way. Bonus to ranged damage units is quite ok, but the units themselves have an unpleasant tendency to die - especially when pitted against a Wizard of a Scout. All in all, the Tactician is a pretty interesting choice, but definitely not the optimal.
Priest: Priests combine the assets of Commanders and Wizards - they can't expand their Commander Skills any further, but to some extent they make up for it with their spells (especially if you specialize in the school of Sacred Magic, which buffs allied units). The limitation to level 6 in magic is a certain drawback - it gives you only a handful of spells, and not too advanced, either. Nevertheless, the Priest is a fairly good choice.
All things considered, the General or the Priest are the optimal choices here. The former significantly reinforces allied units with passive bonuses to all statistics, while the latter is able to cast spells right on the battlefield, which is often the determining factor of winning or losing. The Tactician, as long as they specialize in poisoning the enemy's supplies (though Pathfinding also comes in handy) is useful, at least to some extent, as well. The Warlord, though, with sacrificing the enhancement of the army for their own strength and resistance, is a complete waste of resources.
At level 20, specializations reach their full potential, which involves additional bonuses to already added class bonuses. Unfortunately, it also involves a halt in the hero's stat growth - they remain on the exact same level (choosing a specialization is irrevocable, with especially far-reaching consequences).
Below is the chart of final specializations (they can't be chosen - level up is automatic!):
Name
Icon
Statistics
Available Equipment
Class Bonuses
Marshal

10 Command
6 Health
4 Magic
Common, Melee Weapon, Banner Light Armor, Medium Armor, Shield
Increases Attack and Counterattack in all units by 2.
Can expand Commander Skills to level 5, the maximum.
Battlemaster

10 Command
8 Health
2 Magic
Common, Melee Weapon, Banner, Heavy Weapon, Light Armor, Medium Armor, Heavy Armor, Shield
Increases Defense of all units by 2 and gives them 1 point of regeneration per round.
Can expand Warrior and Commander Skills to level 3.
Strategist

10 Command
7 Health
3 Magic
Common, Melee Weapon, Banner, Ranged Weapon, Light Armor, Medium Armor, Shield
Increases damage dealt by shooting units by 4 (excluding magic missiles), increases Initiative by 2.
Can expand Scout and Commander Skills to level 3.
High Priest

10 Command
4 Health
6 Magic
Common, Melee Weapon, Banner, Wand, Light Armor, Medium Armor, Shield
Increases Resistance of all units by 2 and morale by 4.
Can expand Commander and Wizard Skills to level 3.
Marshal: a simple expansion of the General's class bonuses gives you even further edge in battle. Still a great option.
Battlemaster: the class bonus at level 20 is really tempting, but at this point it will be only marginally noticeable - by then you deal damage by the dozens, so 1 regeneration points per round is not really a benefit at all.
Strategist: a good choice if your army has at least 3 ranged units. Otherwise, you won't practically notice any difference.
High Priest: class bonuses are only barely noticeable and not really useful. In the end, the High Priest steps back before the Marshal.
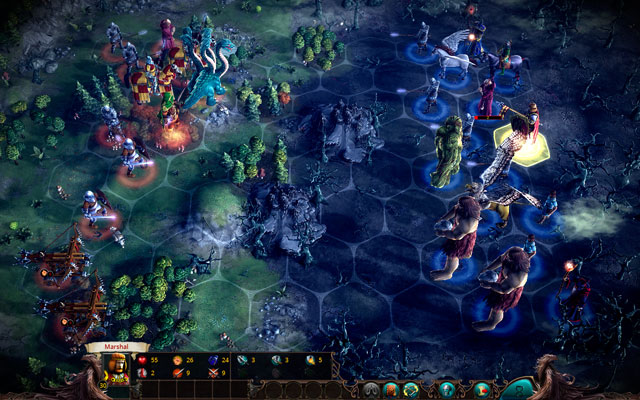
Above level 20, choosing the General specialization (and later the Marshal's) becomes even more justified. With the optimal division of XP, the General guarantees great bonuses to all units in the army (and to themselves); see the chart below. It's a truly significant advantage. Unfortunately, all abilities and bonuses last only as long as the Commander, so it's of utter importance to protect them in battle (invest in good armor and assign units and spells for protection).
Maximum Bonuses to the Marshal's Troops
Statistics
Bonus
Attack
+5
Counterattack
+5
Defense
+3
Ranged Defense
+3
Health Points
+6
Resistance
+3
Ranged Attack
+2
Ammo
+2
Range
+1
Initiative
+5
Stamina
+7
Mobility
+2
Experience
+25%
Morale
+7
There are many builds for heroes, but only a handful of them are optimal. The chart below demonstrates the ideal types, such that give the most desirable benefits in combat and while moving on the map. Unfortunately, the specifications of the Commander make them virtually unattainable - a large and high-level army requires very high wages, and these may often lead to a general bankruptcy of the whole kingdom. Luckily, there is the Logistics ability which significantly lowers the army upkeep costs. Without suitable pay, your troops will vanish into thin air!
Skills are arranged according to their relevance (the sooner a skill is on the list, the more important it is in the game). Unfortunately, each level up gives the hero only 3 skills to choose from, so the outlined order may be disrupted. Don't mind it, though - just raise your hero the only way you can.
Name
Icon
Suggested Skills
Commentary
General

Offensive Tactics, Maneuvering, Defensive Tactics, Leadership, Discipline
if you have a lot of ranged units, invest in Ranged Tactics. Otherwise, level up Logistics anyway.
These combinations will allow you to acquire the aforementioned maximum bonuses. Keep in mind, though, that you won't be able to get any of them without properly developed Logistics.
Warlord

Offensive Tactics, Maneuvering, Defensive Tactics, Leadership, Discipline, Armor Master, Constitution, Willpower, Weapon Master, Combat
Warlords should chose their skills as a support for troops and an investment in various defenses for themselves (if the hero dies, so do the bonuses!). Take care of them first before you start thinking about increasing the hero's attack.
Tactician

Offensive Tactics, Maneuvering, Ranged Tactics, Defensive Tactics, Leadership, Scouting, Archery, Marksmanship, Reaction, Logistics
Given that the Tactician is a pretty god archer and has bonuses to ranged attack for all ranged units, focus on boosting it the most (and hire some sharpshooters as bodyguards). With the ability to instigate panic among the enemy's ranks, Scouting also comes in handy. It's also not a bad idea to improve the hero's overall performance.
Priest

Offensive Tactics, Maneuvering, Defensive Tactics, Leadership, Wisdom, Discipline,
the rest according to preferred spells:
Necromancy and Summoning
or
Magic Power and Concentration
And finally:
Thaumaroundsgy and one chosen skill
As soon as you specialize, spend the majority of skill points on magic abilities, most importantly Wisdom. In the vast majority of cases, buff spells are what work the best (those grouped mainly under scared magic), so Magic Power and Concentration seem to be best choices.
Commander Skills are all about passively enhancing their troops, but they also affect Commanders themselves. The Commander alone is not a very good unit and is easily defeated by the more powerful opponents, but their greatest strengths lie in the untiring, highly resistant and very powerful army. Remember, though, that any bonuses that affect your units are only viable as long as the Commander lives, so it's crucially important to protect them in battle.

If you're playing one of the other classes and had chose to invest in Commander Skills, you're troops will receive many useful bonuses. In case of the Warrior or the Scout, you don't really need to worry about their safety, they will take care of themselves perfectly well. Wizards have it a lot worse, so make sure to give them ample protection.
Name
Icon
Level 1
Level 2
Level 3
Level 5
Level 5
Logistics
Army Upkeep -10%
Siege +5
Army Upkeep -10%
Siege +5
Army Upkeep -10%
Siege +5
Army Upkeep -10%
Siege +10
Army Upkeep -10%
Siege +10
Discipline

Health Points +1
Resistance +1
Health Points +1
Health Points +1
Resistance +1
Health Points +2
Health Points +1
Resistance +1
Offensive Tactics

Attack +1
Counterattack +1
Attack +1
Counterattack +1
Attack +1
Counterattack +1
Defensive Tactics

Ranged Defense +1
Defense +1
Ranged Defense +1
Defense +1
Defense +1
Ranged Defense +1
Ranged Tactics

Ranged Attack +1
Ammo +1
Ranged Attack +1
Ammo +1
Range +1
Maneuvering

Stamina +1
Stamina +1
Stamina +1
Mobility +1
Stamina +2
Stamina +2
Mobility +1
Leadership

XP +5%
Morale +1
XP +5%
Morale +1
XP +5%
Morale +1
XP +5%
Morale +2
XP +5%
Morale +2
The Commander's basic skill is Logistics, which decreases the army upkeep cost. In itself, it only gives a bonus to Siege (not particularly useful), but, more importantly, allows for a quick gathering of a large army and saves the kingdom from bankruptcy. Once you have it covered, focus on subsequent enhancements to your troops. Offensive Tactics, Defensive Tactics and Maneuvering are especially worthy of your attention given that they boost your troops' most important statistics (Attack, Defense and Stamina). Discipline also comes in handy, increasing the amount of Health Points, as well as Leadership, which allows for an instant acquisition of a tried and elite army (though the Morale bonus is not much of a use). If you have a lot of ranged units - which is at least 3 - consider Ranged Tactics to boost your archers. It gives only a slight bonus, barely noticeable, so in the end you may as well drop it.
Wizards are heroes that specialize in casting spells - and, sadly, only in casting spells. They have very little health points and command only a small army, but that is to some extent justified by their magical potential. Experienced spellcasters can turn the tide of the battle with only a few spells, impel the enemy to commit suicide or create ready troops right on the battlefield (through necromancy or demonology). Their capabilities are gigantic, but the problem lies in their combat survivability - a smart Scout can easily kill a Wizard with only a single shot. What's worse, they're further weakened by their low Stamina, while the high costs of spells (some of which require crystals) can damage the kingdom's budget. All things considered, the Wizard is a choice first and foremost for experienced players.
Wizards can use items from groups: Common, Wand.
Wizard's Level Up Chart
Hero's level
Command
Health
Magic
0
-
-
+1
1
-
-
+1
2
+1
-
-
3
-
-
+1
4
-
+1
-
5
-
-
+1
6
+1
-
-
7
-
-
+1
8
-
+1
-
9
-
-
+1
10
-
-
-
Total:
2
2
6
As you can see, Wizards put their focus into developing their basic skill, Magic. Seeing as they have very little Health Points, don't recruit them on small maps because they will die in a matter of minutes (an enemy Warrior or Scout will quite literally tear them apart). Wizards do a lot better on vast, well-expanded maps that take over a hundred rounds to conquer. In that time, they can greatly enhance their magic abilities, learn numerous spells and chose a specialization upon reaching level 10. Since it determines the further direction in which the hero will develop, this decision here is of great importance. Before you make it, though, take a moment to consider the choice of spells, given that they are what define the nature of the battle and the gameplay itself. The spells are described in detail in the section devoted to magic - so here I will only mention that they are divided into six very different schools of magic. Obviously enough, choose spells in accordance with the hero's level up direction.
As mentioned earlier, Wizards may choose one of four specializations: Mage, Battlemage, Necromancer and Enchanter. Below are the details:
Name
Icon
Statistics at Level 20
Available Equipment
Class B\onuses
Mage

6 Command
4 Health
10 Magic
Common, Wand
Spellpower permanently raised by 2.
Can expand Wizard Skills to level 5, the maximum.
Battlemage
2 Command
8 Health
10 Magic
Common, Melee Weapon, Wand, Heavy Weapon, Light Armor, Medium Armor, Heavy Armor, Shield
Raises Resistance by 2 and ignores 2 Resistances points in enemies.
Can expand Warrior and Wizard Skills to level 3.
Necromancer

7 Command
3 Health
10 Magic
Common, Melee Weapon, Wand, Ranged Weapon, Light Armor, Shield
Summoning raised by 2. Spells cost 25% crystals less. Can retain units 1 level more powerful than Necromancy allows.
Can expand Scout and Wizard Skills to level 3.
Enchanter

8 Command
2 Health
10 Magic
Common, Melee Weapon, Banner, Wand, Light Armor, Medium Armor, Shield
Spells last 3 rounds longer.
Can expand Commander and Wizard Skills to level 3.
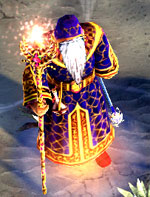
Mage: useful only to reach level 20 and unlock the next class, the Archmage. While it may offer the maximum enhancement of magic abilities, in reality they don't prove any substantial advantage (bonuses are quite modest at best). Mages are good with every school of magic, but not really great in any of them.
Battlemage: significantly increases the hero's survivability on the battlefield and allows them to cast spells more frequently (due to raised Stamina). Nevertheless, given that it limits Command to a meager 2, it's not a particularly good choice - a microscopic army won't do you any good. All in all, it's the least beneficial specialization.
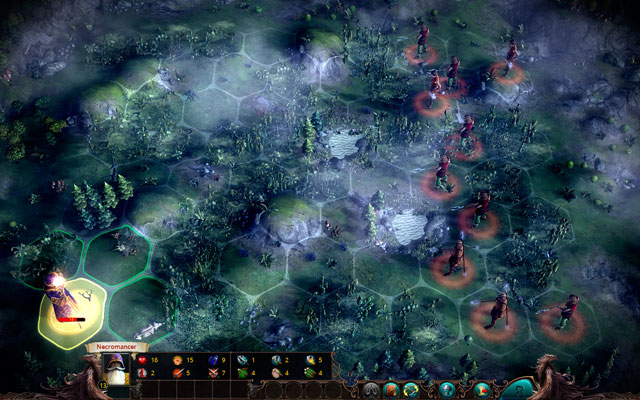
Necromancer: Necromancers have vast possibilities - they can use dead bodies of enemies and allies to summon various undead units in their places. More importantly, the summoned creatures receive a stat bonus and can remain as units in the army even after the battle is over (at some crystals cost, though). Limitations in Wizard Skills are not too painful as well due to powerful class bonuses. The drawbacks, on the other hand, involve a low amount of Health Points and Stamina, as well as Scout Skills that are not quite useful (apart from Scouting to poison enemies and Reaction to raise Initiative).
Enchanter: Enchanters cast time-limited spells. They are truly great at it, but they need to take into account their low Stamina and little Health Points - otherwise they die easily and can't act too often. Despite this, they make a pretty interesting option due their Commander Skills which work wonders alongside their buff and debuff spells.
Among all Wizard specializations, Necromancers and Enchanters perform the best, so you don't really have to pay too much attention to the other classes. The commanders of the undead should focus primarily on the school of necromancy and develop the Necromancy and Summoning skills. Another plus is that they can retain units one level more powerful that the skills suggests - which means that instead of limiting yourself to Ghouls, you can also add Ghosts. The thing is, though, that in order for this to work someone has to die in battle - that's the only way to create an undead unit. Importantly enough, the one to die should be a living unit: machines and zombies don't count. Another problem may stem from the fact that units can be brought back only where they fell - if someone else stands on their tile, there's no necromancy to speak of. To avoid this, make sure to have at least several strong offensive spells, or you won't be able to resurrect anyone. Alternatively, you can add several weaker units (such as Militiamen or Goblins) to use them for your undead army. The best for this purpose are, however, the Pikemen - they stop an invading army and slowly kill its units. Regardless of the choice, make sure that the kingdom doesn't run out of crystals - the upkeep, the summoning and the casting require high amounts of them.

As for the Enchanter, the situation is completely different. Their only purpose is to cast buff spells on allied units and debuff spells on enemy units. The hero receives a bonus as long as all time-limited spells are in working, so that's what you should focus on developing (each school has at least one such spell). Everything depends on the preferred school - for example, sacred spells considerably buff allied units, while necromancy spells considerably debuff enemy troops. The only problem here is the hero's Health factor - they can cast only a few spells because they quickly run out of Stamina. What's worse, the Enchanter can be easily killed by a hostile hero. This can lead to a particularly ridiculous situation in which an enemy Scout leveled up to a Sharpshooter kills the Enchanter in the first round of the battle. In most cases there's nothing you can do about it simply because the enemy has higher Initiative - unless you've invested in Wand Master and Maneuvering and got yourself some more points.
As you can see, both options are both handy and laden with drawbacks, thus playing a Wizard is one of the biggest challenges in Eador: Masters of the Broken World. Only the best players will reach the ultimate specializations at level 20. Below is the list of options:
Name
Icon
Statistics
Available equipment
Class bonuses
Archmage

6 Command
4 Health
10 Magic
Common, Wand
Spellpower permanently raised by 2. Can cast two spells per round.
Can expand Wizard Skills to level 5, the maximum.
Warwizard

2 Command
8 Health
10 Magic
Common, Melee Weapon, Wand, Heavy Weapon, Light Armor, Medium Armor, Heavy Armor, Shield
Raises the hero's Resistance by 4 and ignores 4 Resistances points in enemies.
Can expand Warrior and Wizard Skills to level 3.
Master Necromancer

7 Command
3 Health
10 Magic
Common, Melee Weapon, Wand, Ranged Weapon, Light Armor, Shield
Summoning raised by 4. Spells cost 50% less crystals. Can retain units 2 levels more powerful than Necromancy allows.
Can expand Scout and Wizard Skills to level 3.
Master Enchanter

8 Command
2 Health
10 Magic
Common, Melee Weapon, Banner, Wand, Light Armor, Medium Armor, Shield
Spells last 6 rounds longer.
Can expand Commander and Wizard Skills to level 3.
Archmage: the ability to cast 2 spells per round is impressive and truly useful, but involves two major drawbacks. Firstly: after casting three series of double spells, the Archmage loses all Stamina and can't do anything else. Secondly: unlocking the specialization requires playing a Mage for a long time, which is quite challenging in itself (see: previous chart). You also need to remember that casting the same spell on the same target twice in 90% of cases won't increase the spell's duration or its power. So what do we get in return? The ability to determine the flow of the battle right from the beginning. Spells that work on whole armies or deal extensive damage (for example, to eliminate enemy archers, heroes or spellcasters) are particularly useful. To some extent, you can boost your hero's health issues by casting Stamina-increasing spells, but that's a waste of the Archmage's potential and a loss of space in the spell book.
Warwizard: harder to kill than its predecessor and more powerful in terms of damage to enemy units, but a good chunk of its potential is wasted on fairly useless Warrior Skills.
Master Necromancer: allows the Necromancer to keep summoned Vampires and render their undead more powerful than the usual. This not only evens out, but actually surpasses the bonuses that come from fully developed Necromancy. Sadly, though, Command levels limit the number of blood suckers to only one - but you can still summon any number of them. You can also increase the hero's Initiative thanks to Wand Master and Reaction abilities; they give some chance of a first strike, and thus an obvious advantage.
Master Enchanter: the Enchanter receives twice as large class bonuses, but keeps the same advantages and disadvantages.
To sum up, the Master Necromancer, Master Enchanter and Archmage (in this exact order) are the most beneficial of the four specializations. Each is characterized by a different playing style and preferred spells, so take a moment before make a final choice. Nevertheless, consider investing in enhancing Initiative - if you get a chance to start the battle, you may have quite often already won it (simply immobilize or blind the enemy hero).
There are many builds for heroes, but only a handful of them are optimal. The chart below demonstrates the ideal types, such that give the most desirable benefits in combat and while moving on the map. The Wizard is the only class that doesn't have any ability related to increasing income - which can be a pain since armies have to be kept somehow and spells cost a lot of crystals. I would therefore strongly recommend buying some financial skills (which may become particularly important to Necromancers given that having an undead army involves numerous crystals expenses).

Skills are arranged according to their relevance (the sooner a skill is on the list, the more important it is in the game). Unfortunately, each level up gives the hero only 3 skills to choose from, so the outlined order may be disrupted. Don't mind it, though - just raise your hero the only way you can. On a side note, if you wish to play a Wizard, make sure to invest some points in Initiative - it's the only way to ensure that you'll be the one to begin a battle.
In general, there are two types of Wizards: supporting (which cast time-limited spells, buff spells, debuff spells and damage dealing spells) and summoners. The chart below takes that into consideration.
Name
Icon
Suggested skills
Commentary
Mage

For a summoner: Necromancy, Wisdom, Summoning, Magic Power, Wand Master, Concentration
For a supporting wizard: Wisdom, Necromancy, Magic Power, Concentration, Thaumaturgy, Wand Master
The first type should focus on summoning skills, summoning spells and necromancy, the second should increase the effectiveness of casting all types of spells.
Battlemage

For a summoner: Necromancy, Wisdom, Summoning, Magic Power, Athletics, Armor Master, Constitution, Wand Master, Thaumaturgy, Concentration
For a supporting wizard: Wisdom, Necromancy, Magic Power, Concentration, Athletics, Wand Master, Armor Master, Constitution, Thaumaturgy, Summoning
Depends on preferred spells - if you like summoning creatures, the first build is for you. Those who despise summoning should chose the latter.
Necromancer

For a summoner: Necromancy, Wisdom, Summoning, Magic Power, Reaction, Scouting, Wand Master, Thaumaturgy, Concentration + any of the remaining ones
For a supporting wizard: not worth it with this specialization!
Necromancers should focus solely on Summoning and Necromancy and reinforce them with Scouting to be able to poison enemies. Initiative increasing skills, Wand Master and Reaction also come in handy.
Enchanter

For a summoner: not worth it with this specialization!
For a supporting wizard: Wisdom, Magic Power, Concentration, Thaumaturgy, Wand Master, Maneuvering, Offensive Tactics, Defensive Tactics, Discipline, Leadership
(if you have a lot of archers in your army, you can switch Discipline for Ranged Tactics).
All skills of the Enchanter should focus on reinforcing spells, that is boosting their durations and effectiveness. Spend some points on Commander Skills as well, they will give some bonuses to your army.
Wizard Skills focus on enhancing their spells - be it by extending their duration, their basic power of the power of summoned creatures. Wizards may not be destined to fire wands (they're much more effective with casting "regular" spells), but don't underestimate the Wand Master skill - not with its ability to increase the Initiative of the whole army, thus giving you a chance to start the battle. If the wizard is the first to act, they will have a strategic advantage over the enemy - mainly because they will be able to eliminate the enemy hero before the enemy hero kills them.
Name
Icon
Level 1
Level 2
Level 3
Level 4
Level 5
Magic Power

Spell Power +1
Spell Power +1
Spell Power +1
Spell Power +1
Spell Power +2
Concentration

Spell Duration +1
Recovery +1
Spell Duration +1
Recovery +1
Spell Duration +1
First Aid +1
Spell Duration +1
Recovery +2
Spell Duration +1
First Aid +2
Summoning

Summoned Crearoundses Power +2
Summoning Range +1
Summoned Crearoundses Power +2
Summoning Range +1
Summoned Crearoundses Power +2
Summoning Range +1
Summoned Crearoundses Power +2
Summoning Range +1
Summoned Crearoundses Power +2
Summoning Range +1
Thaumaroundsgy

Hero Resistance +1
Enemy Resistance -1
Hero Resistance +1
Enemy Resistance -1
Hero Resistance +1
Enemy Resistance -1
Hero Resistance +1
Enemy Resistance -1
Hero Resistance +1
Enemy Resistance -1
Wisdom

XP Gained +10%
Bonus I level spell
XP Gained +10%
Bonus I level spell
XP Gained +10%
Bonus II level spell
XP Gained +10%
Bonus III level spell
XP Gained +10%
Bonus IV level spell
Wand Master

Initiative +1
Wand Shot +1
Initiative +1
Wand Shot +1
Initiative +1
Wand Shot +1
Initiative +1
Wand Shot +2
Ammo +2
Initiative +1
Wand Shot +2
Range +1
Necromancy

Summoned Undead Power +1
Undead Regeneration Outside Battle +10%
Allows Keeping Summoned Skeletons
Summoned Undead Power +1
Undead Regeneration Outside Battle +10%
Allows Keeping Summoned Zombie
Summoned Undead Power +1
Undead Regeneration Outside Battle +10%
Allows Keeping Summoned Ghouls
Summoned Undead Power +1
Undead Regeneration Outside Battle +10%
Allows Keeping Summoned Ghosts
Summoned Undead Power +3
Undead Regeneration Outside Battle +10%
Allows Keeping Summoned Vampires
The choice of abilities rests on the preferred type of schools of magic and the chosen specialization (described in previous chapters, and in the chapter devoted to magic). Generally speaking, summoning enthusiasts should pay special attention to Necromancy and Summoning, while the remaining Wizards should take an interest in Concentration, Magic Power and Thaumaturgy. Wisdom, which increases the number of spells, is useful to all magic users.
Balancing the budget - managing the kingdom in such a way as to produce income - is one of the most important elements in the game. It's not an easy task, either - money literally evaporate right before your eyes and acquiring new sources of income is both time-consuming and expensive. This is where we will try to figure out how to manage administration and economy properly.
The most important thing to know is to learn what affects your gains and losses. You can view the current balance sheet by moving the cursor over gold and crystals icons at the bottom of the screen (see below). As you can see, military units under the command of the leader consume almost the entirety of the kingdom's budget. You can either: dismiss them, conquer a new province, use a ritual or invest in buildings that will increase revenues - there are the four major ways to improve your finances.

So what is it that consumes your gold and crystals? The list is pretty long and contains a range of factors. In fact, you can practically say that the whole idea is spending money in such a way to receive even more money later. Below is the list of all in-game elements that require financial outlays:
Loss Factors
Type
Nature of the Loss
Required Materials
Buying troops (mercenaries cost twice as much)
One-time
Varying depending on troops
Army upkeep (mercenaries cost twice as much)
Constant
Gold and/or crystals
Hiring heroes
One-time
Gold and crystals
Resurrecting heroes
One-time
Gold and crystals
Resurrecting the undead after battle
One-time
Crystals
Undead army upkeep
Constant
Crystals
Guards upkeep in provinces
Constant
Gold and/or crystals
Casting spells
One-time
Crystals
Building buildings
One-time
Varying depending on building
Buying or repairing items
One-time
Varying depending on item
Performing rituals
One-time
Varying depending on ritual
Random events
Various
Varying depending on event
Corruption
Constant
Gold and crystals
How to make up for the above losses? The first choice would be to conquer a new province: they guarantee some substantial monetary injection and open up further development possibilities. Interestingly, the more populous the province, the more revenues it generates, so make sure to take good care of your lands by allowing them to grow. The growth is in turn hampered mainly by the current state of uncovered terrain, which can be further uncovered by sending a hero on reconnaissance (see below). Exploring terrain in 100% is crucial as it will get you an additional bonus to income. You can read more about it in the chapter devoted to Exploration.
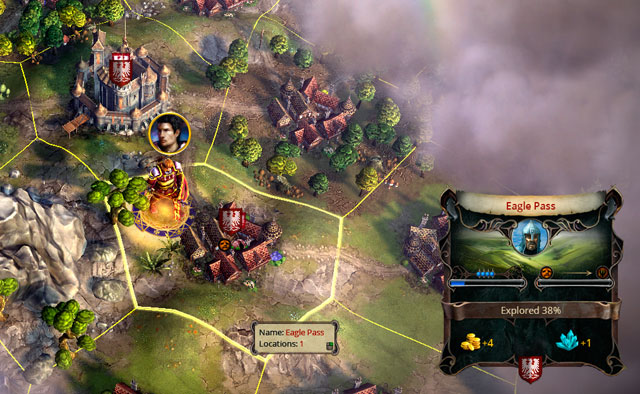
The tiles you conquer are divided into four categories: plains, hill, forests and swamps. While planning expansion, consider the benefits each type of terrain can give you. These are:
Types of Provinces
Name
Revenues
Exploration Rate
Plains
Very large amounts of gold, little amounts of crystals
Vey fast
Hills
Large amounts of gold, little amounts of crystals
Moderately fast
Forests
Comparable amounts of gold and crystals
Moderately fast
Swamps
Large amounts of crystals, little amounts of gold
Very slow
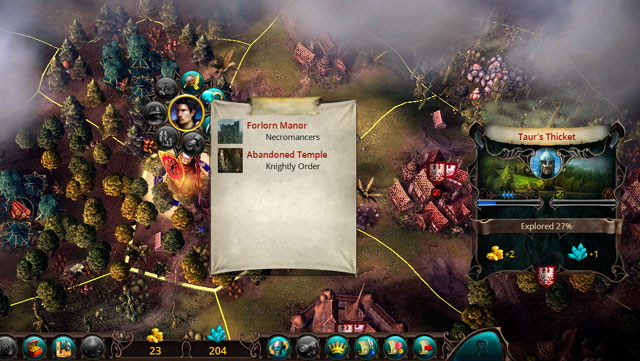
The problem with conquering provinces is that the further they lay, the more powerful creatures defend them. Sometimes it's better to restrain your imperial impulses and focus on internal politics. Bandits' and creatures' hideouts that lay within your borders provide an excellent source of one-time income. If you've discovered such locations, dispatch a hero with a properly suited army to defeat their guardians (see below). This will get a you a nice financial injection while often involving additional bonuses, such as acquiring random items. Notice that the more powerful the creatures that defend the area, the bigger the treasures you can squeeze out of them. Also, it's worth mentioning that you receive a certain amount of gold and crystals after every victorious battle - though these are not huge sums.
Another way to maximize revenues is to construct proper buildings in the city and within provinces. In each category of buildings there are at least several that in some way increase the kingdom's income or minimize its costs. The choice determined mostly by the nature of particular provinces. For example, if you have a castle surrounded by plains only, build a Farmers Market that will allow you to set up some lucrative Mills in provinces. On the other hand, if you've begun the game on hills, the best thing to do would be to build a Diggers Guild and expand the Mines network. If your kingdom is rich in unusual resources - such as arcanite or mithril - build whatever buildings increase income that come from them (see: Economy: Resources).
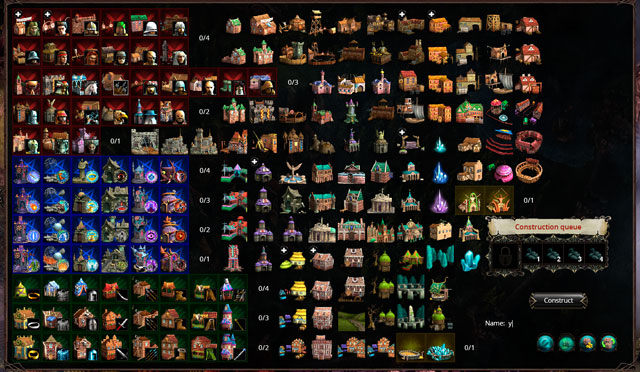
This is of course only the tip of the iceberg - building that increase revenues are aplenty and they form a complex network of dependencies. The game displays all required info in a very easy manner: just open the city map and have a look at different categories, then chose whichever building matches the terrain and your gameplay style. Below is a list of all buildings that don't require any resources to operate (those that do are described in Resource: Resources Buildings), but guarantee almost an instantaneous rise in income (increasing income and unlocking access to more lucrative provincial buildings).
Building Raising Income
Name
Category
Cost
Bonus
Province Building Unlocked
Province Building Cost
Province Building Bonus
Tavern
Trade
Level I
30 gold
+1 to gold per round
Allows recruiting mercenaries
None
None
None
Inn
Trade
Level II
90 gold
1 horse
+2 gold per round
Allows recruiting better mercenaries
Allows recruiting Adventurers Guard
Pub
25 gold
+1 gold per round
+1 to Happiness if you have a Theater in the capital
Farmers Market
Trade
Level II
100 gold
2 horses
Increases population growth in the capital
Mill
Only plains!
80 gold
+5 gold per round
Market
Trade
Level III
300 gold
1 iron
1 mandrake
1 wood
3 horses
+5 gold per round
Lowers resources buying costs by 10%
Storehouse
50 gold
+1 gold per round
The hero can trade items as they would in the capital
Merchant Court
Trade
Level III
200 gold
1 wood
2 horses
+4 gold per round
Allows recruiting better mercenaries
Allows recruiting Adventurers Guard
Pub can be upgraded to Tavern
50 gold
+3 gold per round
+1 to Happiness if you have a Theater in the capital
Increases the Morale of defenders by 2
Chamber of Commerce
Trade
Level IV
1000 gold
1 horse
1 mithril
1 arcanite
3 marble
+20 gold per round
Lowers resources buying costs by 10%
Tavern can be upgraded to Inn
70 gold
+6 gold per round
+1 to Happiness if you have a Theater in the capital
Increases the Morale of defenders by 3
Traders Guild
Trade
Level IV
550 gold
3 horses
1 mithril
1 arcanite
1 marble
+15 gold per round
Lowers resources buying costs by 10%
Storehouse can be upgraded to Mall
70 gold
1 horse
+5 gold per round
The hero can trade items as they would in the capital
Crystal of Force
Temple
Level I
50 gold
30 crystals
1 mandrake
+1 crystal per round
Lowers hero hiring costs by 10%
Allows heroes to receive simple quests
None
None
None
Crystal of Power
Temple
Level II
400 gold
50 crystals
2 arcanites
+2 crystals per round
Lowers hero hiring costs by 10%
15%
Allows heroes to receive moderate quests
None
None
None
Crystal of Might
Temple
Level III
900 gold
125 crystals
2 arcanites
1 black lotus
+4 crystals per round
Lowers hero hiring costs by 10%
20%
Allows heroes to receive difficult quests
None
None
None
Pottery
Craftsmen
Level I
70 gold
1 wood
+2 gold per round
Granary
20 gold
Accelerates provinces' growth rate
Carpenters Guild
Craftsmen
Level II
130 gold
1 iron
3 wood
+3 gold to all wood sources per round
Sawmill
Only forests!
60 gold
1 wood
+5 gold per round
+3 gold from wood per round
Diggers Guild
Craftsmen
Level II
140 gold
2 iron
1 wood
None
Mine
Only hills!
70 gold
1 iron
+5 gold per round
+2 gold from iron per round
+4 gold from marble per round
+6 gold from mithril per round
Shipbuilders Guild
Craftsmen
Level II
400 gold
1 iron
4 wood
None
Shipyard
Only coasts!
100 gold
3 wood
Allows heroes to cross water tiles
Seafarers Guild
Craftsmen Quarters
Level III
1200 gold
4 wood
2 mithril
+1 gold per round from all coastal provinces
Allows upgrading Shipyard to Port
Only coasts!
200 gold
1 iron
2 wood
+7 gold per round
Allows heroes to cross water tiles
Explorers Guild
Craftsmen Quarters
Level IV
1500 gold
2 wood
1 marble
3 horses
Accelerates exploration by 30%
Allows upgrading Port to Lighthouse
Only coasts!
150 gold
1 iron
1 wood
1 arcanite
+10 gold per round
Allows heroes to cross 2 water tiles
Winery
Craftsmen
Level III
330 gold
1 mandrake
1 horse
2 wood
Increases Happiness in the capital by 1 and the Morale of defenders by 2
Allows upgrading Mill to Brewery
100 gold
8 gold per round
+1 to Happiness
+2 to the Morale of defenders
Drivers Guild
Trade
Level II
250 gold
2 wood
4 horses
None
Allows upgrading Granary to Stables
150 gold
2 horses
+2 gold per round
+5 gold from horses per round
Pharmacy
Temple
Level II
550 gold
10 crystals
1 marble
3 mandrakes
+5 gold to all mandrake sources per round
None
None
None
Hippodrome
Entertainment
Level II
700 gold
2 wood
4 horses
+10 gold per round
+1 to Happiness in capital
+5 gold to all horse sources per round
None
None
None
Arena
Entertainment
Level II
750 gold
10 crystals
1 iron
2 horses
1 granite
1 mithril
Increases Happiness in the capital by 2.
Allows heroes to participate in tournaments and bet on contestants
Arena
150 gold
1 iron
2 horses
+3 gold per round
+2 to Happiness
Traveling Circus
Entertainment
Level III
1500 gold
4 horses
Increases Happiness in the capital by 2.
Increases gold income in provinces with arenas by +3 and their Happiness by 1.
None
None
None
Enchanted Grove
Forest
Level I
200 gold
50 crystals
2 mandrakes
1 arcanite
+1 crystal per round
Allows hiring Forest Guard
Lowers waiting time between rituals by 1
None
None
None
Magic Well
Forest
Level II
50 gold
20 crystals
1 arcanite
+10 gold per round
None
None
None
Crystal Garden
Forest
Level II
50 gold
20 crystals
1 arcanite
+2 crystals per round
None
None
None
Stonehenge
Forest
Level II
600 gold
50 crystals
3 arcanites
2 mandrakes
+3 crystals per round
Allows hiring Forest Guard
Lowers waiting time between rituals by 1
Gives one schematics to Pyramid of the Ancients
Enables recruiting Ents (if you have seeds!)
None
None
None
Source of Gold
Forest
Level III
600 gold
40 crystals
2 arcanites
1 dionium
Replaces 2 crystals for 50 gold each round
Source of Crystals
None
None
None
Source of Crystals
Forest
Level III
400 gold
50 crystals
2 arcanites
1 black lotus
Replaces 15 gold for 10 crystals each round
Excludes Source of Gold
None
None
None
Oracle
Forest
Level III
1500 gold
150 crystals
2 arcanites
3 dionium
+3 crystals per round
Increases the chances of positive random encounters and lessens the chance of negative random encounters
Lowers waiting time between rituals by 1
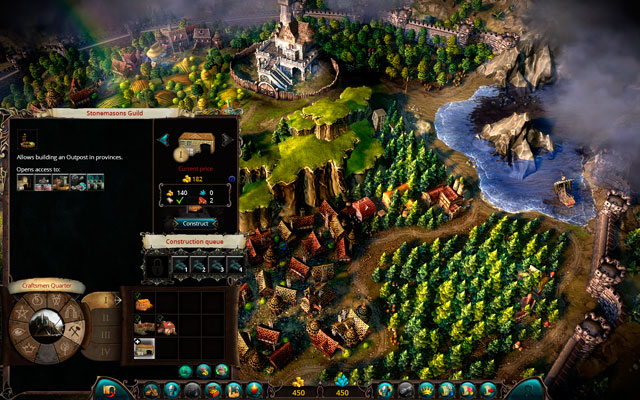
If you have a large kingdom, pay special attention to buildings that permanently raise income from all tiles of the same type. They are going to cost you a little, so don't buy them right at the beginning. They are:
Buildings Raising Province Income
Name
Category
Cost
Bonus
Foresters Guild
Foresters Quarters
Level I
200 gold
3 wood
1 iron
+1 gold from all forests per round
Herbalists Guild
Foresters Quarters
Level I
350 gold
25 crystals
2 mandrakes
1 wood
1 arcanite
+1 gold from all swamps per round
Monstrologists Guild
Foresters Quarters
Level IV
1500 gold
30 crystals
2 horses
2 mythril
+1 gold from all swamps per round
Geologist Guild
Craftsmen Quarters
Level III
430 gold
1 iron
2 wood
1 mithril
+1 gold from all hills per round
Seafarers Guild
Craftsmen Quarters
Level III
1200 gold
4 wood
2 mithril
+1 gold from all coastal provinces per round
Road Network
Trade Quarters
Level III
3000 gold
1 wood
4 horses
1 mithril
+1 gold from all provinces per round
The quantity and nature of your budget losses is hugely dependant on the types of your heroes. Wizards require large amounts of crystals to use on spells and maintaining their undead army, while Warriors and Scouts often have to buy and repair equipment (which usually costs a lot of gold and some amount of crystals). Commanders are the most expensive because their armies require constant financial outlays in all kinds of resources. Notice, however, that heroes themselves can generate some income, or at least minimize losses, thanks to certain of their abilities. You can read more about in the Heroes chapter.

Apart from the already mentioned ways of repairing your budget (conquest, exploration, expansion and heroes' abilities), there are also rituals. These are spells of global effect which affect the gameplay in various ways, often by bending its rules a little. They described in details in their own chapter (Rituals), so here let's just have a look at those budget-related:
Spell
School
Cost
Required Break
Effect
Enchanted Coffer
Wizardry
Level I
20 crystals
4 rounds
Cast on an allied province, gives a one-time amount of gold, dependant on population density. Also, lowers Happiness in the province by 1.
Dark Ritual
Chaos
Level I
10 crystals
4 rounds
Sacrifices a part of the province's population by lowering its Happiness by 1 in exchange for a randomly generated amount of crystals. Works only on allied and populated provinces.
Gifts of Earth
Elemental Magic
Level III
20 crystals
1 mandrake
10 rounds
Increases all revenues generated in the chosen province for 10 rounds.
Tower of Lightning
Wizardry
Level IV
50 crystals
1 Dionium
10 rounds
A tower is raised in the province which permanently increases crystals income and strikes enemies during battle. Can be raised only if there is enough space and it's the only building of this type in the province.
Gifts of Heaven
Sacred
Level IV
100 crystals
1 Dionium
20 rounds
Choose one:
a) 500-900 gold
b) 150-250 crystals
c) item: 70% - level IV, 30% - level V
d) + 5 do Happiness in province
At first, the economy aspect in Eador seems clear and easy, but later you begin to notice many additional, and sometimes unexpected, mechanisms. As is turns out, apart from the standard means of payment - gold and crystals - there are also nine resources scattered all around the map. These special materials are required for the recruitment of certain units and constructing some more advanced buildings. If you're running short of them, you're going to have to look outside the borders. Luckily, this process is automatic - each creature or building has an added resource price. Below is a chart of basic global prices:
Basic Resource Prices
Name
Icon
Gold
Crystals
Rarity
Location
Iron

15
0
Common
Hills
Redwood

10
0
Common
Forests
Horses

35
0
Common
Plains
Mandrake

10
5
Common
Swamps
Arcanite

50
20
Rare
Swamps
Marble

110
0
Rare
Hills
Mithril

80
10
Rare
Hills
Dionium

600
50
Very rare
Forests
Black Lotus
400
100
Very rare
Swamps
If one of your provinces is rich in a particular resource, you can use at will. One deposit is enough for the whole empire and its quantities are infinite - there's no worrying about it ever running out. In other words, if you're constructing a building that requires two units of wood and three horses, but only have one of each, don't worry - you have in fact the necessary amount (infinite). If you didn't have either of them, you'd have to buy them for the market price, for example 105 gold for three horses. The basic prices in the chart above can vary depending on random events or the decisions of the player and their opponents. You can check the current price under Statistics in the bottom right corner of the screen (see below).
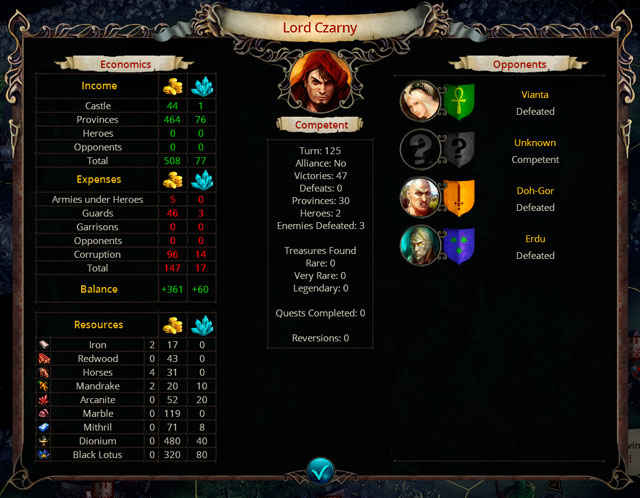
There are also three buildings under Trade category that lower the costs of resources: Market, Traders Guild and Chamber of Commerce. If you see valuable resources on the map and need them very much in a given moment, try building any of them (they also have other useful functions).
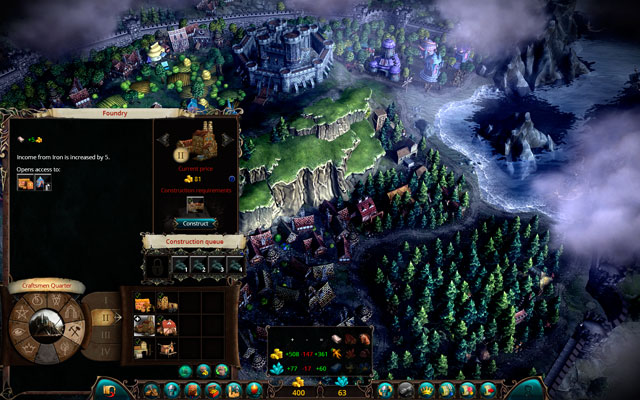
To be able to extract certain resources, you first need to control a province that is rich in it. In case of rare resources, you might also have to defeat whoever is guarding a mine, cave or other point of interest. As for locations, there are several ways to pinpoint them: by exploring the province with the help of the hero, by constructing specific buildings in cities (Geologist Guild, Pathfinders Guild, Herbalists Guild - requires further exploration anyway) or through a random encounter. Obviously enough, try to amass as many different resources as you can; they greatly facilitate expansion and lower the empire's costs.
Is it worth conquering provinces rich in resources you already have? Most certainly! This is when you should invest in buildings that raise income from mining, which improve your kingdom's budget. These buildings are:
Building Name
Category
Building Cost
Bonus
Province Building Unlocked
Province Building Cost
Province Building Bonus
Carpenters Guild
Craftsmen
Level II
130 gold
1 iron
3 wood
+3 gold from all wood sources per round
Sawmill
Only forests!
60 gold
1 wood
+5 gold per round
+3 gold from wood sources per round
Diggers Guild
Craftsmen
Level II
140 gold
2 iron
1 wood
None
Mine
Only hills!
70 gold
1 iron
+5 gold per round
+2 gold from iron per round
+4 gold from marble per round
+6 gold from mithril per round
Foundry
Craftsmen
Level II
90 gold
3 iron
+ 5 to gold from all iron sources per round
None
None
None
Stable
Trade
Level I
100 gold
1 wood
2 horses
+5 gold from all horse sources per round
None
None
None
Drivers Guild
Trade
Level II
250 gold
2 wood
4 horses
None
Enables upgrading Granary to Stables
150 gold
2 horses
+2 gold per round
+5 gold from horses per round
Pharmacy
Temple
Level II
550 gold
10 crystals
1 marble
3 mandrakes
+5 gold from all mandrake sources per round
None
None
None
Hippodrome
Entertainment
Level II
700 gold
2 wood
4 horses
+10 gold per round
+1 to Happiness in capital
+5 gold from all horse sources per round
None
None
None
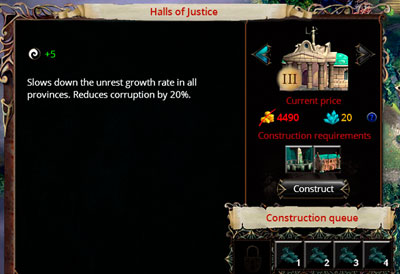
Large kingdoms struggle with corruption - if the kingdom grows too extensive, some portion of revenues will start going missing. The scope of the problem is determined by the difficulty level:
Difficulty Level
Maximum Corruption
Number of Provinces Corruption Starts From
Beginner
60%
18
Skilled
66%
16
Competent
72%
14
Expert
78%
12
Master
84%
10
Lord
90%
8
Overlord
96%
6
Corruption levels can be minimized with buildings from Central Quarter category. They are, however, so expensive that it makes sense to invest in them only later in the game. Before you get to that point, the best way to counter corruption is to... restrain your expansive impulses and avoid provinces populated by goblins and dwarves. These are the two races that increase crime the most (see: Races).
Rituals are powerful spells that are cast on the world map, with resources as payment. Some reinforce the overall performance of the kingdom, others damage the enemy, and some even bend the rules of the game. All, however, are tools very useful in helping you widen the reach of your rule, so make sure to acquire at least some of them, even if magic repels you.
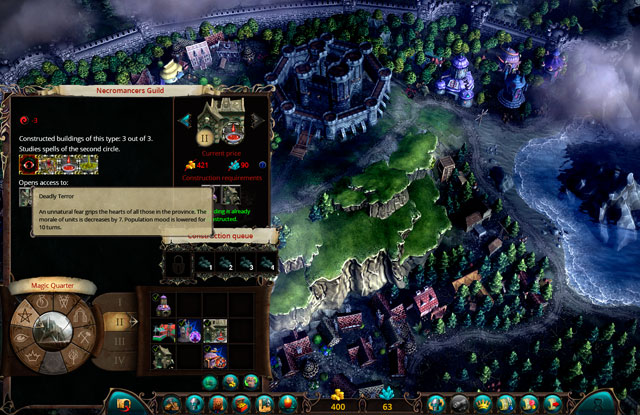
There are two ways of acquiring rituals. You can do it by placing particular buildings in the Magic Quarter of the capital, or through random encounters and loot gained from battles. In practice, the first option is much more comfortable because it allows you to pick spells in accordance with your needs. It's even better if you have a Wizard as you hero - you get access to spells from your chosen school of magic (to which the ritual is assigned). If the hero is non-magical, that's ok too - all heroes can use basic magic.
Similar to spells, rituals affect your karma, so make sure your choices don't anger the gods (sometimes a single decision can have disastrous results). Below you will find charts with all essential information pertaining to rituals.
Ritual
Level
School of Magic
Karma
Enchanted Coffer
I
Wizardry
Negative
Chalice of Life
I
Sacred
Neutral
Extravaganza
I
Sorcery
Neutral
Walking Dead
I
Necromancy
Negative
Fair Wind
I
Elemental
Neutral
Dark Ritual
I
Chaos
Negative
Creation
II
Wizardry
Neutral
Heavenly Light
II
Sacred
Positive
Illusionary Battle
II
Sorcery
Neutral
Deadly Horror
II
Necromancy
Negative
Gifts of Earth
II
Elemental
Neutral
Chaos spawn
II
Chaos
Negative
Magic Barrier
III
Wizardry
Neutral
Heavenly Guards
III
Sacred
Positive
Mass Insanity
III
Sorcery
Neutral
Undead Uprising
III
Necromancy
Negative
Blizzard
III
Elemental
Negative
Rain of Brimstone
III
Chaos
Negative
Tower of Lightning
IV
Wizardry
Neutral
Gifts of Heaven
IV
Sacred
Neutral
Astral Gates
IV
Sorcery
Neutral
Pestilence
IV
Necromancy
Negative
Conflagration
IV
Elemental
Negative
Demon invasion
IV
Chaos
Negative
You can perform only one ritual per round as each of them requires a specified break between the next use. The waiting time, though, can be lowered by constructing certain buildings in the city - such as Enchanted Grove, Stonehenge or Oracle (found in Forest Quarter.) Unfortunately, they're quite expensive, so you'd do better if you refrained from buying them early on.
To help you enjoy the game and facilitate managing your kingdom, have a look at the next pages, which outline all rituals in detail.
Icon
Spell Name
Level
Cost
Break
Effect
Commentary

Enchanted Coffer
I
20 crystals
4 rounds
Cast on an allied province, gives a one-time amount of gold, dependant on population density. At the same time, lowers Happiness in the province by 1.
A fairly useful ritual that allows exchanging crystals for gold, though you can get better results with the Source of Gold building.

Creation
II
20 crystals
1 mandrake
10 rounds
Crafts a random level II-IV item.
The better the item, the less chance of getting it. The only ways this ritual pays off is when you have a lot of crystals to spare. Unused items can be sold (sometimes with a handsome profit).

Magic Barrier
III
100 crystals
1 arcanite
10 rounds
Protects an allied province from enemy spells and armies for 3 rounds.
A very useful ritual that forces enemy units into finding alternative ways for conquest and therefore wasting precious rounds. Sadly, doesn't last for too long.

Tower of Lightning
IV
50 crystals
1 Dionium
10 rounds
A tower is raised in the province, which permanently increases crystals income and strikes enemies during battle. Can be raised only if there is enough space and it's the only building of this type in the province.
If you wish to increase your crystals income, this a pretty good option, but don't expect too much from lightning bolts - they're only moderately effective.
Icon
Spell Name
Level
Cost
Break
Effect
Commentary

Chalice of Life
I
15 crystals
4 rounds
Restores 5 Health Points to a chosen hero and their army. Doesn't work on the undead and machines.
5 points is not much, but the cost of the ritual is reasonable enough. In the beginning stages of the game it can save a few rounds which would have otherwise been devoted to healing units.

Heavenly Light
II
30 crystals
1 mandrake
10 rounds
Restores 30% of Heath Points to all units in the province and raises their Morale by 5. Additionally, raises citizen Happiness by 2 and greatly increases population growth. Works for 10 rounds.
A surprisingly effective ritual, much better than Extravaganza. Use it in provinces witch a high uprising rate or to heal battered armies.

Heavenly Guards
III
50 crystals
1 arcanite
10 rounds
Forms a Pegasus Watch in the province, which will defend it from enemies and explore surrounding areas. Increases Happiness by 2. Can't be cast over besieged or protected provinces.
The watch is surprisingly strong, and the Happiness bonus is major advantage. Use it when you're expecting a raid or have trouble with rebels.

Gifts of Heaven
IV
100 crystals
1 Dionium
20 rounds
Choose one:
a) 500-900 gold
b) 150-250 crystals
c) item: 70% - level IV, 30% - level V
d) + 5 do Happiness in province
If one of your province has a major problem with Happiness, this is the ritual to go. It also allows repairing the budget, but in the final stages of the game it's not usually a burning matter anymore.
Icon
Spell Name
Level
Cost
Break
Effect
Commentary

Extravaganza
I
10 crystals
10 rounds
Increases Happiness in province by 1 for 10 rounds.
The basic way to prevent social unrest. Unfortunately, it doesn't work well in the long run - better to take a look at Sacred Magic.

Illusionary Battle
II
20 crystals
1 mandrake
10 rounds
The chosen hero and their army take part in an illusionary battle in which they don't receive damage, but gain XP. Afterwards, they lose a few Morale points.
An easy way to for leveling up. Interestingly enough, the hero doesn't need any army - the battle will still be won. It's only a shame that it takes this long for the ritual to refresh.

Mass Insanity
III
70 crystals
1 arcanite
15 rounds
Citizens of a chosen province instigate a mass rebellion.
You can mess with your enemy with it, but that's practically it. There are more powerful spells at this point in the game.

Astral Gates
IV
100 crystals
1 Dionium
15 rounds
Instantly transports the chosen hero to the capital. If the capital is under siege, the hero lands on a nearby allied tile. The spell won't work if there are no such tiles in the area.
Helpful in tight corners when the hero can't return to the capital in time. Not much of a use if you're careful and watch your enemy's moves.
Icon
Spell Name
Level
Cost
Break
Effect
Commentary

Walking Dead
I
10 crystals
4 rounds
The hero is joined by one low-level Skeleton or Zombie.
Utterly useless - if your spellcaster has Raise Skeleton or Raise Zombie, they won't break a sweat getting more (and better!) minions.

Deadly Horror
II
15 crystals
1 mandrake
10 rounds
Lowers the enemy army's morale by 7. Happiness in the province affected by the spell drops by 2 for 10 rounds.
You can make your enemy's life much harder, but only due to a possible uprising among their ranks. The sole lowering of Morale doesn't give much effect.

Undead Uprising
III
50 crystals
1 arcanite
10 rounds
An uprising of the undead takes place in an enemy province. If the undead win, the place turns into a no man's land.
The undead aren't particularly strong, but they can deal with weaker guards perfectly well (provinces with no protection are taken over instantly). It's useful if you don't mean to take over the enemy's lands, but want to destroy them. Try using it on lands rich in resources to undermine the enemy's economy.

Pestilence
IV
140 crystals
1 black lotus
13 rounds
Takes 50% of health of all living creatures in the given area. Kills most citizens and lowers their happiness.
Can be performed only on populated provinces.
The perfect ritual to use before battle, allowing you to easily defeat the enemy and take over their lands. Together with battle spells, poison spells or the Scout ability, it's a deadly combination.
Icon
Spell Name
Level
Cost
Break
Effect
Commentary

Fair Wind
I
5 crystals
10 rounds
Increases the hero's mobility by 4. Works for one round.
Quite useful, especially if you have a lot of stables in provinces - combined, the spell allows to instantly attack and surprise a far-off enemy.

Gifts of Earth
II
20 crystals
1 mandrake
10 rounds
Increases all revenues generated by a chosen province for 10 rounds.
Handy in repairing the budget hole. Increases revenues independently of the basic values - both in gold and crystals.

Blizzard
III
40 crystals
1 arcanite
10 rounds
Kills a portion of the province's population, decreases revenues generated by it and steals a part of the enemy's riches. Enemy hero loses one round.
Fairly useful in that it allows to freeze the enemy for a while and undermine their economy. There are, however, better rituals.

Conflagration
IV
140 crystals
1 black lotus
10 rounds
Destroys two randomly picked buildings in a chosen enemy province, kills a large portion of its population and weakens its fortifications. Deals 15 damage points to all units within the area.
A powerful spell allowing you to significantly weaken the enemy's army. In many cases, though, Pestilence from Necromancy works better, because it takes half of the enemy's health. The major drawback to Conflagration is that high enemy resistance may render it weak.
Icon
Spell Name
Level
Cost
Break
Effect
Commentary

Dark Ritual
I
10 crystals
4 rounds
A portion of the province's population is sacrificed in exchange for several dozen crystals.
In the long run, doesn't pay off at all. The losses quickly exceed the benefits, and citizens begin rebelling. In one word - not worth the effort, unless you're in hostile territory and intend to retreat.

Chaos spawn
II
20 crystals
1 mandrake
8 rounds
A low-level (I-II) creature of chaos joins the hero. To get a new division, the hero needs a free slot in the army.
Summoned creatures are not particularly strong and have a very negative disposition (can be combined only with evil troops). In general, the spell isn't of much use, although it may come in handy if you're complaining on a lack of soldiers.

Rain of Brimstone
III
80 crystals
1 arcanite
10 rounds
Kills a portion of the enemy's population and takes 10 health points from all hostile units within the area. A high Resistance lessens the effect.
The damage dealt isn't too high, and in most cases barely noticeable. That being said, the edge can be of some use.

Demon invasion
IV
100 crystals
1 black lotus
10 rounds
A chosen enemy province is invaded by a powerful army of chaos. If the devils win, the area becomes a barren neutral tile.
The summoned creatures are quite powerful and capable of dealing with most guards. It's best to unleash them on provinces in which you intend to face the enemy hero - it will weaken them a great deal, making the victory one step closer.
To win a war, you need army. In Eador: Masters of the Broken World there are over a hundred types of diverse units, all of them with their own abilities and statistics. It takes a lot of time to figure out which are good for what, and to use them in practice is a challenge requiring a lot of skill. Luckily, the guide will give you all the details you need to know about particular armies and units. After all, no leader starts their carrier without getting to know their forces and working out an optimal way of doing battle.
Let's start with the basics. All units are described with several key statistics that play a crucial role in the outcome of the battle. See below:
Icon
Name
Description

Hit Points
When hit points drop to zero, the unit dies. Whatever it takes, make sure that doesn't happen, because buying new units is going to cost you a lot of money. Healing skills and magic, such as Regeneration and First Aid, also come in handy. On the other hand: poisoning is a great way of eliminating low-resistant units.

Stamina
The less Stamina points, the more tired the unit. Exhausted troops deal less damage, and if they lose their strengths completely, they lose a round and can't counterattack. Crossing hills, wastelands, deserts, swamps and forests costs more Stamina than crossing plains. Luckily, Stamina can be regenerated during you rest or by casting specific spells. Notice that your enemy can be tired out, too; it's great way to win a battle.

Morale
Troops' Morale drops due to negative spells, wrong unit selection or the death of nearby allies. When it drops to zero, the unit flees (the opponent loses control over it). If all enemy units flee, the battle is won. Frightened units can still counterattack, though, so they're not an easy target.

Speed
Speed determines how many tilescan a unit travel in their round. Crossing a difficult terrain (such as hills, forests and swamps) requires higher Speed.

Attack
Attack determines the number of damage a unit deals while striking and it's the basic value of all melee troops. In battle, the first strike goes to the attacker (Attack), while the defender strikes second (Counterattack). The number of damage drops with Stamina and Health Points.

Counterattack
Counterattack determines the number of damage a units deals in response to an enemy Attack and it's valid only in melee combat. Obviously enough, if a unit dies as a result of an enemy strike, it can't perform a counterattack.

Defense
Lowers the number of damage received in direct combat. It's especially important to units standing in the first line of battle.

Ranged Defense
Lowers the number of damage received in an enemy fire (non-magical). Particularly useful if the enemy has a lot of ranged units, or during a siege.

Resistance
Lowers the effectiveness of negative spells cast on troops (either curses, or damage-dealing spells), and as such is the basic source of defense against enemy spellcasters.

Ranged Attack
Determines the number of damage dealt in ranged combat and it's the basic value for all archers and shooting units. Its effectiveness drops along with Stamina and Health Points.

Range
Determines how far a unit can shoot. High Range allows eliminating enemies before they can reach your troops.
Ammo
The number of Ammo determines how many shots a unit can fire during a single battle. When they run out of ammo, they start fighting hand-to-hand. Some creatures can replenish ammo during battle.
The above statistics can be raised by using special spells, with medals received for exceptional achievements and on leveling up. A small army comprised of tried veterans can often be much more powerful than a larger, but poorly trained one. Tend to the survivability of your units by allowing each battle to make them stronger and more resilient. The easiest way to achieve this is by recruiting several healing units which only purpose is to keep the other ones alive.
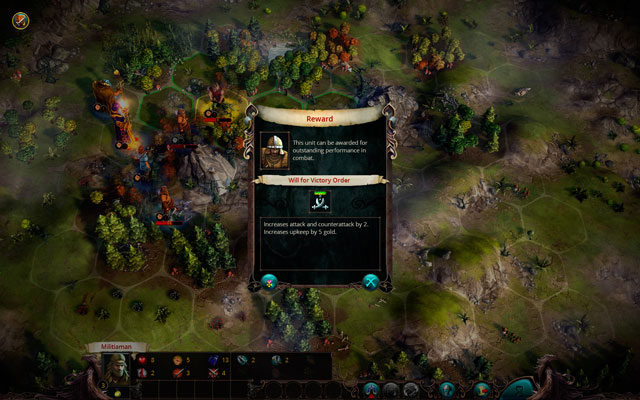
The factor that determines the size of the hero's army is their Command level (See: Heroes: The Basics). As for units, they can be recruited in cities in dedicated Military Quarter buildings or in a Tavern with mercenaries. Some troops can be summoned by special spells (the undead, demons), some can be hatched from seeds or eggs (Spiders, Treants, Basilisks, Slugs, Hydras, Manticores), others can be hired in designates headquarters on the world map. In case of "hatchable" creatures, you first need to acquire a particular egg - they can be sometimes found in underground vaults or received during battle - and then construct special buildings in your Forest Quarters. Afterwards, just open the recruitment screen and drag the item into a designated slot.
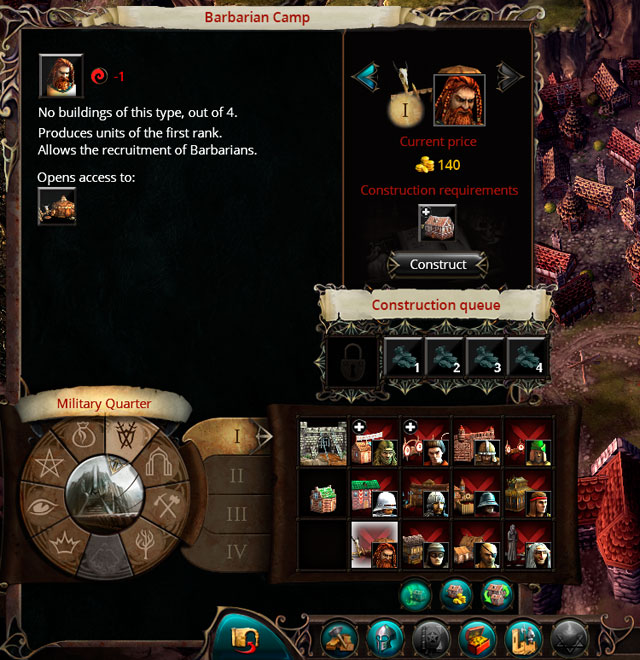
When creating an army, remember not to mix creatures with opposing alignments, good and evil, as it significantly lowers the troops' morale and may have catastrophic results on the battlefield (the enemy may win only by casting fear-inducing spells). Neutrally aligned units work well with both types, but are generally weaker, so pay attention to what you are choosing. You can check unit alignments on the city screen - neutral creatures are at the top, good in the middle, and evil at the bottom (see above).
Furthermore, keep in mind that once you select a headquarters for your units, the choice can't be reversed and it comes with consequences. What it means in practice is that if you've built, for example, a Barbarian Camp, you won't be able to destroy it. What's more, there is a certain limit as to the number of military buildings of a particular rank: when you reach that limit, you won't be able to build more. In other words, if you build four recruitment buildings of the first rank, you lose access to all remaining ones (of the same rank). This is grave limitation as to the variety of your army, and furthermore - its specialization. All things considered, you should decide what your playing style is going to be early on.
Rank
Buildings Available
I
4
II
3
III
2
IV
1
The next chapters contain lists of all creatures living in the Broken World. A number of useful tips and suggestions should help you exploit their potential in the most optimal manner: even the smallest units can prove valuable in the hands of a gifted strategist. Individual descriptions also contain some helpful information as to the optimal juxtaposition of units in relation to each other in order to maximize their effectiveness.
Rank I creatures are the weakest units available in the game. They don't cost much and don't require sophisticates resources to operate, but can be accessed very early. They allow the growing of the army in its first iteration, but due to their poor statistics, they aren't fit for long and complex campaigns. Don't underestimate them, though - until the hero reaches high Command levels, they're the absolute basis of every army. Access to more advanced units opens only in the medium stages of the game, but even though new units outrank them, they still retain their value.
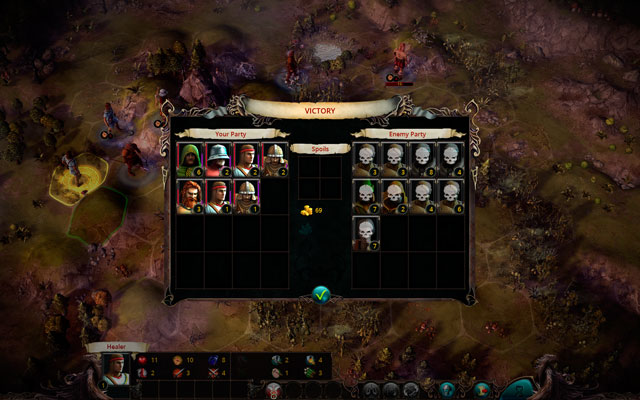
Unit selection depends on your strategy and the chosen hero. In general, there are two approaches you can apply: offensive and defensive. In the former, focus on units that deal a lot of damage and are able to stalk the enemy (by fire or negative spells). The latter is mostly about protecting key figures with high Defense, Counterattack, gradually bleeding the enemy out and supporting allied units. It's easy to notice that evil creatures are more effective with the first model, while good creatures perform best in the second. The Warrior is in an obvious choice for the offensive approach, whereas Scouts and Wizards are better in defense (in which the primary directive of the army is to protect them). As for Commanders, everything depends on selected skills, though a defensive strategy seems more sensible.

If you wish to play offensively, as soon as possible invest in Barbarians. Their initial cost may be quite high, but their attacks deal huge amounts of damage and the Berserk skill sustains their effectiveness despite whatever wounds that may receive. Alternatively, you can also pick Brigands, which cost significantly less, but are weaker and also take a portion of battle spoils. As for ranged units, the best choice is the Shaman because they deal quite substantial amounts of magic damage over a relatively long distance. With such an army, you'll only need to wait until the enemy approaches close enough and tear them apart with melee units and your shamanic magic.
The drawback here is that an offensive army doesn't have a healing unit, which may translate to a high death rate. It's therefore recommended to invest in some healing spells for the hero - but don't forget that evil units affect karma, and karma may take its revenge!
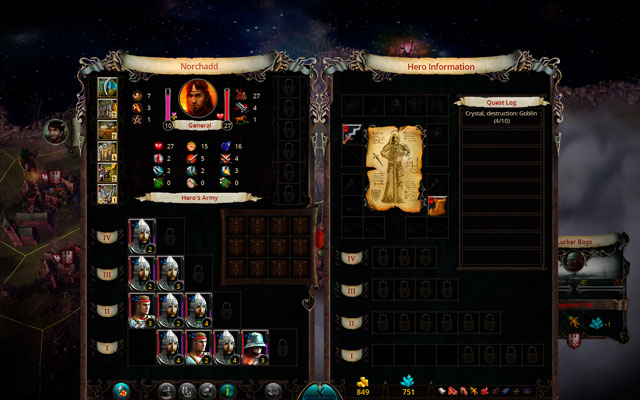
An opposite philosophy applies to the defensive play. Defensive players should invest most importantly in Healers to heal the remaining units (one Healer for three "regular" units). With that covered, consider Pikemen due to their high Defense, Counterattack and a very useful skill called First Strike. These two types of troops supplement each other greatly and allow achieving surprisingly good scores - especially if they're led by a Scout or a Commander. Use Pikemen to cover the most vulnerable units, counterattack and heal wounded soldiers. If that doesn't work, you may also consider Swordsmen and Crossbowmen.
The drawback of the defensive play is its exclusively defensive nature - if the enemy has a lot of ranges units (and in the worst case - magic missile-throwers), they will kill the Healers without a sweat and proceed to exterminating the rest of your army. Keep that in mind and train your hero in damage dealing to make sure that doesn't happen (enemy archers usually have low HP).
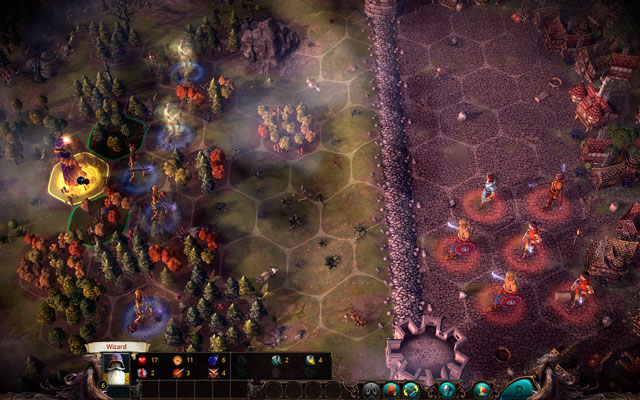
An utterly alternative solution is necromancy, an interesting choice for a Wizard. As soon as you can, build a School of Necromancy and learn spells to summon the undead (Raise Skeleton and Raise Zombie). Unfortunately, you can only do it in the third round of the game - due to buildings' requirements - so in the meantime you can visit some dungeon and use its guards. You can also consider recruiting some unconventional troops which primary purpose would be to die in battle: you can use the dead to resurrect them into the undead. Militiamen are quite good in this regard, though Pikemen allow for effectively killing enemies and using their bodies for dark rituals. The latter is a much better option, but also much more expensive. Also, notice that the upkeep of the undead army requires both a high level of the hero's Necromancy and certain amounts of crystals (but not gold!). It's a relatively economical solution, but at the same time involving a lot of negative karma - each spell from the School of Necromancy diminishes it.
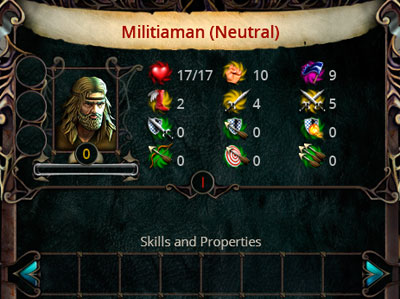
Recruitment Cost
10 gold
Upkeep
2 gold per round
Location/Recruitment
Recruiting Station 50 gold
Alignment
Neutral
Skills
None
Militiaman is the worst unit in the game - worse even than Goblins. As such, they are peasants armed in pitchforks and dressed in rags. The only good thing about them is that they can be recruited in the first round of the game for minimal costs.
Nevertheless, even Militiamen can be of some use, for example to Necromancers, who can use their dead bodies to create a grand army of the undead. On level up, some Militiamen can also re-train into Spearmen, which are much more useful.
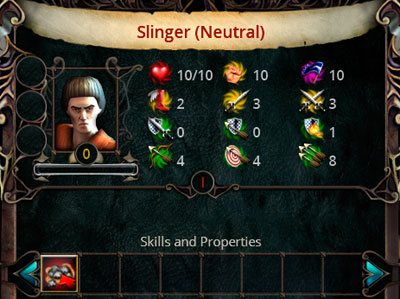
Recruitment Cost
15 gold
Upkeep
3 gold per round
Location/Recruitment
Slinger School 80 gold
Alignment
Neutral
Skills
Collect Ammo - allows collecting several units of ammo in return for one round
Slingers are the weakest of ranged units. The deal small amounts of damage, have a limited range and get killed easily. Not worth any investment altogether, but if somehow they found their way into the army, you can use them as fodder to Necromancers or as a ranged support for better units.
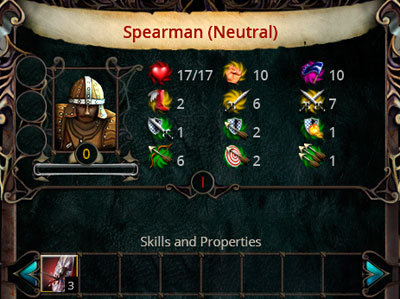
Recruitment Cost
25 gold
Upkeep
5 gold per round
Location/Recruitment
Spearman School 80 gold
Requires Workshop
Alignment
Neutral
Skills
Heavy Ammo - lowers Ranged Defense of a hit target by 1. Works for 3 rounds
Noticeably better than Militiamen, but still not much of a threat. They have an interesting one-time feature in that they can throw a spear into nearby enemies and deal them some substantial damage. This gives them a certain edge in direct combat, at which they're not particularly good. On higher levels they may gain the Forced March ability, which makes them slightly more useful.
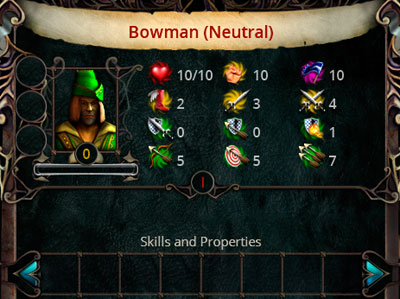
Recruitment Cost
60 gold, 1 wood
Upkeep
12 gold per round
Location/Recruitment
Shooting Ground 150 gold, 3 wood
Requires Workshop
Alignment
Neutral
Skills
None
The biggest advantage of Bowmen is their range - surprisingly large for such low rank. Nevertheless, Bowmen aren't particularly useful: they deal low amounts of damage and are sitting ducks for the enemy (they die instantly). They become quite effective on higher levels, but other units are much stronger by then. Another thing is the cost - high enough to doubt the point.
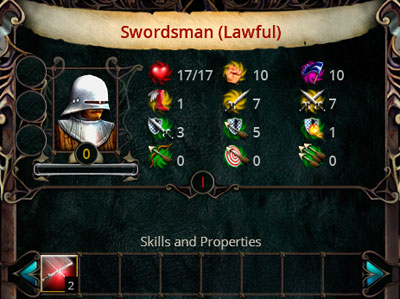
Recruitment Cost
45 gold, 1 iron
Upkeep
9 gold per round
Location/Recruitment
Swordsman School 120 gold, 2 iron
Requires Forge
Alignment
Good
Skills
Parry - if a unit is attacked in melee combat for the first time in a given battle, its Defense is temporarily raised by 2
High Defense, further increased by Parry, is a strong point. Attack and Counterattack don't leave a lot to wish for, either, and the recruitment and upkeep costs are quite reasonable. This leaves only one drawback: low Speed, which noticeably limits the Swordsmen's range. Nevertheless, they still remain very useful and relatively effective. You can use them both in defense and offense; on higher levels they may sometimes gain the Forced March ability that temporarily raises their Speed.
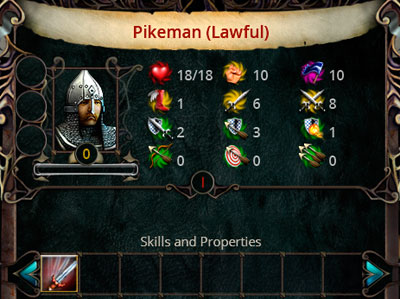
Recruitment Cost
35 gold, 1 iron
Upkeep
7 gold per round
Location/Recruitment
Pikeman School 110 gold, 2 iron
Requires Forge
Alignment
Good
Skills
First Strike - in melee combat, the Pikeman strikes first (in defense, counterattacks before enemy unit). Doesn't work if the enemy has it also
This unit can form a whole build of an army. High Counterattack and the extremely useful First Strike allow for stopping an enemy force and gravely injuring the opponent even before the battle begins. It's only important to put enough healing units behind their backs - properly covered, they become an almost undefeatable barrier. Only high-level monsters are capable of breaking through a wall of Pikemen supported by Healers (though enemy ranged units can easily eliminate the latter). On level up, focus on increasing Counterattack and Defense, their two most important statistics.
The biggest flaw of the Pikemen is their defensive nature - they won't be the first choice if you want to attack an enemy formation. However, their low costs should allow to quickly outweigh these losses.
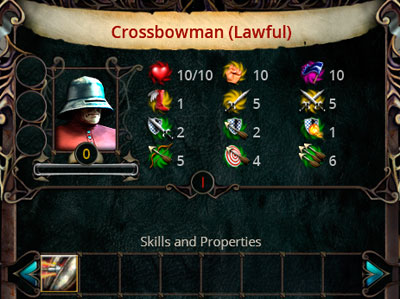
Recruitment Cost
60 gold, 1 iron, 1 wood
Upkeep
12 gold per round
Location/Recruitment
Crossbowman School 150 gold, 1 iron, 1 wood
Requires Forge and Workshop
Alignment
Good
Skills
Armorpiercing Shot - ignores half of the enemy's Ranged Defense
For their high price and requirements, the Crossbowmen aren't particularly useful. Their range is limited and they deal small amounts of damage, whereas the special ability only comes in handy when fighting high-level enemies (which shouldn't be engaged at the beginning of the game at all). In a general overview, despite their high Defense and nice melee combat skills, they're not the most sensible of choices.
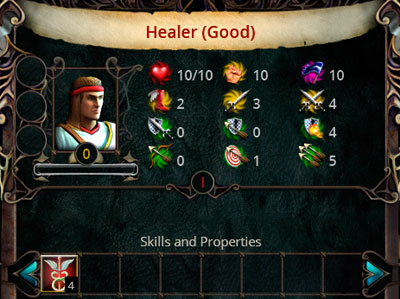
Recruitment Cost
30 gold, 5 crystals, 1 mandrake
Upkeep
6 gold and 1 crystal per round
Location/Recruitment
Brotherhood of Light 90 gold, 5 crystals, 1 wood
Requires Altar
Alignment
Good
Skills
Healing - heals around 4 Health Points of an allied unit, as long as the unit is in range. Using the ability lowers the amount of Ammo. The presence of a Healer in the army increases the healing rate after battle
One of the most useful units at the beginning of the game, which can heal selected nearby units and increase their regeneration rate outside of battle (thus also increasing the rate of interactions around the map). They're also moderately inexpensive and useful as supportive forces. Considering, however, their vulnerability to enemy archers, Healers should be properly covered.
Once your city grows enough to give you access to Monks, Healers lose their usefulness - their more expensive counterparts are more effective. You can dismiss them or replace them with other creatures.
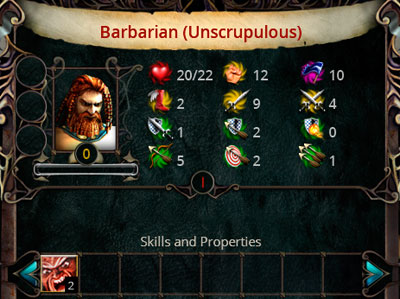
Recruitment Cost
30 gold
Upkeep
6 gold per round
Location/Recruitment
Barbarian Camp 140 gold
Requires Tavern
Alignment
Evil
Skills
Berserk - if a Berserker receives a mighty blow, their low health won't affect the amount of dealt damage and their Attack will raise by 2. As long as they are in this condition, they also can't be frightened (their Morale never drops)
Barbarians are the best rank I offensive units. They have a substantial amount of Health Points, high Attack, satisfying Speed, and the ability to throw an axe at a nearby enemy. If that's not enough, the Berserk ability additionally allows them to increase the amount of damage they deal, even despite wounds. This is almost a perfect combination, which only drawback is low Defense. Health loss can be, however, made up for with healing spells or units, so it's not a major issue. In a general overview, Berserkers should be the primary force behind any offensive army.
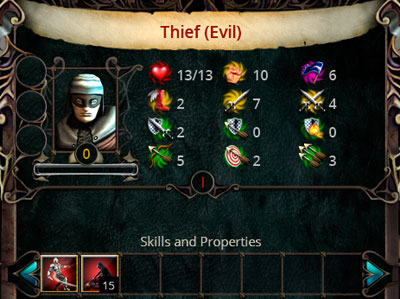
Recruitment Cost
15 gold
Upkeep
3 gold per round
Location/Recruitment
Den of Thieves 70 gold
Requires Tavern
Alignment
Evil
Skills
Agility - avoids enemy counterattack
Marauder - reduces the amount of battle spoils by 15%
At first, the advantages of the Thief seem quite tempting. Their initial cost is pretty low, damage dealt not too shabby, and the ability to avoid counterattacks, high Speed and a one-time knife throw feature are an added bonus. Unfortunately, in the long run, their drawbacks are much more noticeable. Thieves have a tendency to steal everything that falls into their hands, and the loss of gained loot can be quite painful. What's worse, they have little Health Points, nominal Defense and very low Morale, all of which can eliminate them from battle very quickly. They may gain additional abilities on higher levels (such as Poison Attack), but by that time there are better units available.
As an offensive unit, the Thief isn't so bad, but you need to pay attention to their Health. Most Thieves die long before they reach a level that opens access to additional abilities.
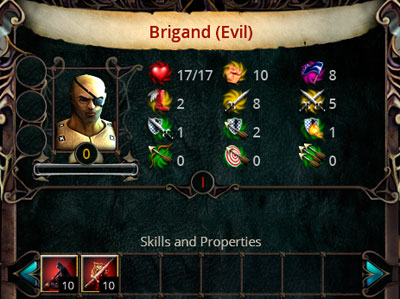
Recruitment Cost
10 gold
Upkeep
2 gold per round
Location/Recruitment
Brigand Lair 60 gold
Requires Tavern
Alignment
Evil
Skills
Plunderer - lowers income from an occupied province by 10%
Marauder - reduces the amount of battle spoils by 10%
Brigands are average in practically everything. They have medium Attack and Defense, normal amounts of Health Points and no useful skills. They have, however, major drawbacks - they lower the amount of gold from taxes and loot. Brigands may be easy to obtain, but doing business with them doesn't end well. Just like in real life.
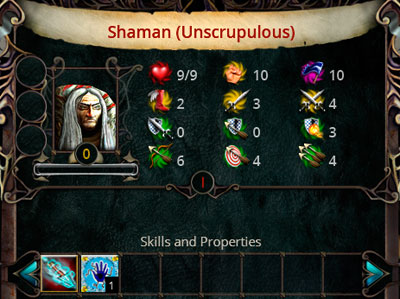
Recruitment Cost
25 gold, 10 crystals, 1 mandrake
Upkeep
5 gold and 1 crystal per round
Location/Recruitment
Totem 100 gold, 5 crystals, 1 mandrake
Requires Altar
Alignment
Evil
Skills
Magic Shot - deals magic damage to selected target
Curse Spell - lowers the target's Attack and Defense by 1. Using the ability uses up Ammo
Shamans deal substantial magic damage - and there aren't many rank I units that have enough Resistance to protect them against it. Unfortunately, low amount of ammo is a significant limitation to their potential. Once they run out of ammo, Shamans become practically useless - that's why ammo should be the first thing to upgrade on level up. Also, keep in mind that Shamans have only a handful of Health Points and a limited firing Range, so don't let enemies engage them in direct combat, though high-lever shooters can kill Shamans even from a safe distance.
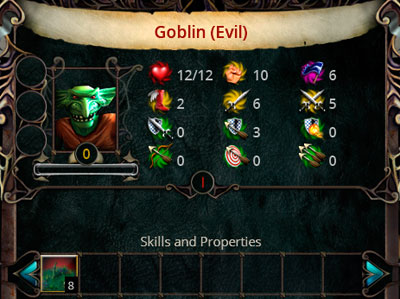
Recruitment Cost
5 gold
Upkeep
1 gold per round
Location/Recruitment
Sometimes appear in a Tavern as mercenaries
Can be added through an alliance on the world map
Alignment
Evil
Skills
Swamp Knowledge - the unit doesn't lose Stamina while crossing a swamp and can move over them as over plains. Receives a bonus to Defense when standing on a swampy terrain
Goblins are inconspicuous and not too powerful, but extremely irritating creatures. They don't pose much of a threat on their own, but on higher levels and during battles that take place in swamps they can make the hero's life a misery. Their strongest advantage lies in a high Ranged Defense, which not only makes them very hard to kill, but sometimes allows them to approach allied units and (if there are many of them) kill one of your creatures. It's not a major loss, but it can be annoying.
To form an alliance with Goblins and be able to recruit them into your army, you need to complete a quest involving killing a certain number of Elves (numbers vary). To begin negotiations, you need a large army and a negative karma. Alternatively, you can bribe them using a Ranger with high Diplomacy, though requires substantial amounts of money - usually around 1500 gold. The last option is to hire them in Tavern as mercenaries, but the chances of them appearing in one are random.
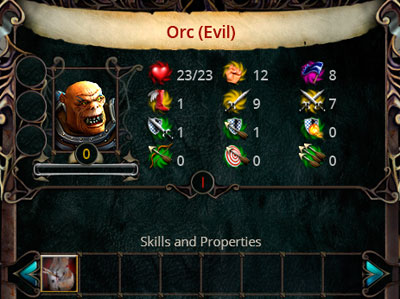
Recruitment Cost
15 gold, 1 iron
Upkeep
3 gold per round
Location/Recruitment
Sometimes appear in Tavern as mercenaries
Can be added through an alliance on the world map
Alignment
Evil
Skills
Damage Armor - when dealing damage in melee combat, lowers the target's Defense by 1. The effect lasts for 3 rounds
For rank I creatures, Orcs come as quite strong and good in melee combat, but with low Speed and Defense. This limits their offensive value a little, though it's worth mentioning that due to their special abilities they are the perfect choice against heavily armored enemies. On level up they may also gain the Forced March ability, which further increases their effectiveness.
To form an alliance with Orcs and be able to recruit them, you first need to complete a quest that involves plundering a province. To that end, you need a strong army and negative karma. You can also hire them in Tavern as mercenaries, but the chances of them appearing in one are always random.
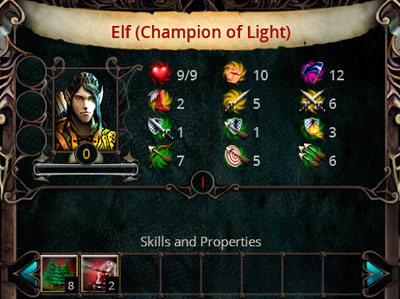
Recruitment Cost
100 gold, 5 crystals, 1 wood
Upkeep
20 gold and 1 crystal per round
Location/Recruitment
Sometimes appear in Tavern as mercenaries
Can be added through an alliance on the world map
Alignment
Good
Skills
Forest Knowledge - the unit doesn't lose Stamina while crossing a forest and can move over them as over plains. Receives a bonus to Defense when standing in a forest terrain
Precise Shot - Ranged Attack ignores max 2 points of the target's Ranged Defense
Elves are the best rank I shots. They have a long Range, deal serious damage and have useful special abilities. In case of emergency, they can easily retreat thanks to their 2 Speed points. All things considered, their only flaw is a low amount of Health Points, making a constant cover of melee units a necessity. On level up, they may gain Additional Shot, which is a great bonus to their effectiveness. If you have enough resources, invest in Elves without a second thought.
To form an alliance with Elves and be able to recruit them, you first need to complete a quest involving rescuing several maidens from the towers of mages. To that end, you need a strong army and positive karma. You can also hire them in Tavern as mercenaries, but the chances of them appearing in one are always random.
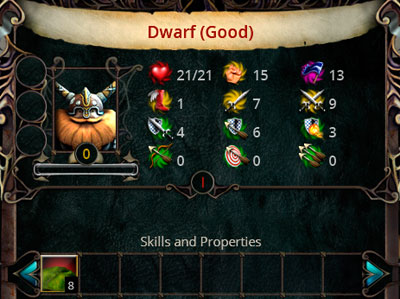
Recruitment Cost
80 gold, 1 iron
Upkeep
17 gold per round
Location/Recruitment
Sometimes appear in Tavern as mercenaries
Can be added through an alliance on the world map
Alignment
Good
Skills
Hills Knowledge - the unit doesn't lose Stamina while crossing hills and can move over them as over plains. Receives a bonus to Defense when standing on a hilly terrain
Dwarves are pretty good defensive units with a high Defense and a killer Counterattack. They also have plenty of Stamina and Health Points, making them highly resistant even against stronger enemies. Nevertheless, their biggest drawback is low Speed which limits the number of tiles to only 1. On higher levels Dwarves may, however, gain the Forced March ability, which neutralizes the problem.
To form an alliance with Dwarves and be able to recruit them, you first need to complete a quest involving extracting a certain item from a bandits' cache. To that end, you need a strong army and positive karma. Alternatively, you can bribe them using a Ranger with high Diplomacy and a lot of gold. You can also hire them in Tavern as mercenaries, but the chances of them appearing in one are always random.
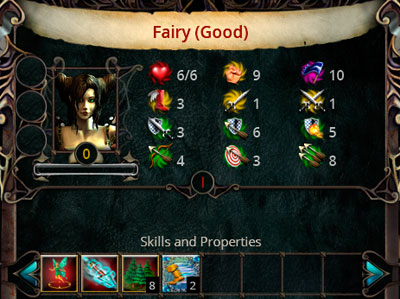
Recruitment Cost
20 gold, 15 crystals
Upkeep
4 gold and 3 crystals per round
Location/Recruitment
Sometimes appear in Tavern as mercenaries
Can be recruited while visiting special places on the world map
Alignment
Good
Skills
Floating - the unit can fly over any terrain using only movement points and not Stamina
Magic Shot - deals magic damage to selected target
Forest Knowledge - the unit doesn't lose Stamina while crossing a forest and can move over them as over plains. Receives a bonus to Defense when standing in a forest terrain
Haste Spell - temporarily increases Speed of a selected target and regenerates its Stamina
Fairies can fulfill various roles in the army. They're quite skilled magic shots and healers (they may gain healing abilities on level up), though their primary advantage is the ability to hasten allied units, which is a major tactical advantage for the whole army - slow and sluggish units can be surprised attacked and grievously wounded. With such abilities at their disposal, even a defensive army receives an offensive potential. Notice that Range at 3 allows Fairies to cast spells over a large area.
Fairies can be hired as mercenaries in Tavern (if you're lucky) of acquired in a one of the provinces during a special event. To activate these, go to a fairy cove and feast with them. Whether the hero can recruit them is, however, determined by a hidden roll of the dice.

Recruitment Cost
25 gold
Upkeep
5 gold per round
Location/Recruitment
Sometimes appear in Tavern as mercenaries
Can be added through an alliance on the world map
Alignment
Good
Skills
Collect Ammo - allows collecting several units of ammo in return for one round
Agility - avoids enemy counterattack
Halflings are moderately strong ranged units - and that's practically everything there is to say about them. Don't bring them into a melee combat battle since that their low amount of Health Points will obviously get them killed (even despite their natural Agility). As units, they're not really good at anything, but on the other hand they aren't a strain on the budget, either. In other words: Halflings are just slightly better Slingers.
To form an alliance with Halflings and be able to recruit them, you first need to complete a quest involving killing a certain number of Brigands. You can also hire them in Tavern as mercenaries, but the chances are random.
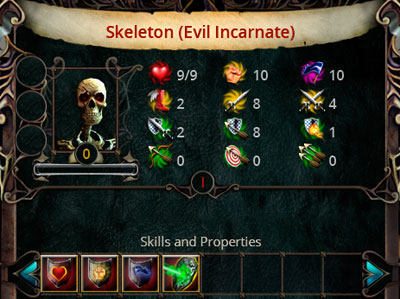
Recruitment Cost
None
Upkeep
1 crystal per round
Location/Recruitment
Can be summoned by the Raise Skeleton spell or the Walking Dead ritual
Alignment
Evil
Skills
Feels No Pain - wounds received don't affect the amount of dealt damage
Tireless - the unit won't lose Stamina while performing an action
Intrepid - Morale always stays on the same level
Poison Immunity - the unit is unaffected by poison
Skeletons are the basic force in any Necromancer's army. They have a surprisingly high Attack, good Speed, useful abilities, and - most importantly - due to their bony bodies they're a hard target for enemy shooters. Their greatest advantage lies in the fact that their Attack remains unchanged despite any wounds received in battle - which allows them to kill visibly stronger units. Don't forget, though, that since Skeletons are primarily offensive units, they don't do well in defense. Nevertheless, that shouldn't be much a problem given that they can be created out of any corpse left on the battlefield (and just after they're raised, they get a bonus free action). This is how you can corner enemy archers and dispose of them very quickly - sometimes even one raid is enough.
You can retain Skeletons in your army if your hero has the Necromancy ability at least on level I. The cost is in crystals and depends on the level of the creature.

Recruitment Cost
None
Upkeep
2 crystals per round
Location/Recruitment
Can be summoned by the Raise Skeleton spell or the Walking Dead ritual
Alignment
Evil
Skills
Feels No Pain - wounds received don't affect the amount of dealt damage
Tireless - the unit won't lose Stamina while performing an action
Intrepid - Morale always stays on the same level
Poison Immunity - the unit is unaffected by poison
If Skeletons are the Necromancer's primary offensive forces, Zombies are their primary defense. While their overall defensive statistics are not exceptionally impressive, a large amount of Health Points and satisfying Attack and Counterattack allow them to become a moving shield (and one that additionally wounds the enemy). Have them cover the Necromancer or use them to help the Skeletons - after all, you can create them out of corpses lying around the battlefield.
You can retain Zombies in your army if your hero has the Necromancy ability at least on level II. The cost is in crystals and depends on the level of the creature.
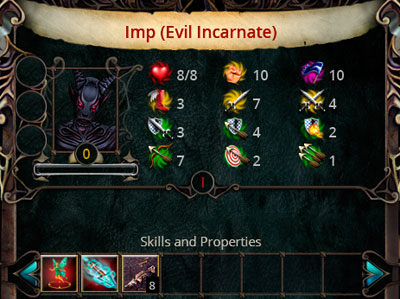
Recruitment Cost
None
Upkeep
1 crystal per round
Location/Recruitment
Can be summoned by the Summon Imp or Dark Pact spells or the Chaos Spawn ritual
Alignment
Evil
Skills
Floating - can fly over any type of terrain losing only movement points and not Stamina
Magic Shot - deals magic damage to selected target
Deadlands Knowledge - the unit doesn't lose Stamina while crossing deadlands. Receives a bonus to Defense and Counterattack when standing on a deadland terrain
Imps are quite unusual creatures, plagued by many contradictions. Examples? They can shoot, but only in low range; they punch strong, but have little Health Points; they can defend themselves, but aren't particularly good at counterattacking. All this makes them pretty average units that may seem quite universal at first, but in most cases they don't come to much use. They have the ability to quickly change positions and shoot a magic missile, but the problem is they die rather quickly. If you want to use Imps in battle, you need to be smart, keep moving around the map and deal as much ranged damage as possible.
To retain Imps after a battle, use the Chaos Spawn ritual or the Dark Pact spell.
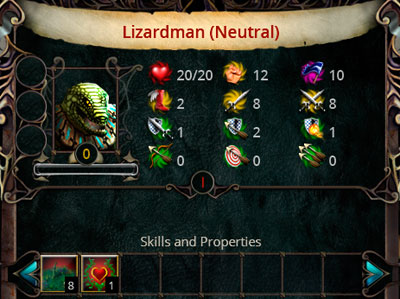
Recruitment Cost
30 gold
Upkeep
6 gold per round
Location/Recruitment
Sometimes appear in Tavern as mercenaries
Can be added through an alliance on the world map
Alignment
Neutral
Skills
Swamp Knowledge - the unit doesn't lose Stamina while crossing a swamp and can move over them as over plains. Receives a bonus to Defense when standing on a swampy terrain
Regeneration - regains 1 health point each round. Accelerates healing rate outside of battle
In the initial stages of the play, Lizardmen prove to be truly valuable units - their statistics are satisfactory at the very least, the Regeneration ability is highly useful, and their offensive potential doesn't leave a lot to wish for. They lose their value only later is the game when faced against stronger units. Nevertheless, it pays off to invest in them throughout the majority of the play because they give a lot in return - especially considering their surprisingly low costs.
To form an alliance with Lizardmen and be able to recruit them, you first need to complete a quest involving killing several Giant Slugs. You can also hire them in Tavern as mercenaries, but the chances are random.
Reaching rank II creatures is a major breakthrough for the entire kingdom. Rank II units are noticeably better than their lesser counterparts, but at the same time require more financial outlays. Nevertheless, it's extremely beneficial to expand your empire because the bonuses you receive give back quickly, and stronger armies allow for fighting more dangerous battles and exploring unconquered areas.
The division into offensive and defensive strategies remains in play, though rank II enables using more diversified maneuvers. This is because this stage in the game opens access to effective units with a large movement range - Horsemen, Horse Archers, Pegasi, Centaurs - with which you can easily surround your enemies or get behind them. If you wish for a lot more flexibility, it's the absolute minimum to invest in at least one of these units. They will allow you to quickly react to the enemy's actions and strike at their weak points, for example uncovered archers or spellcasters.
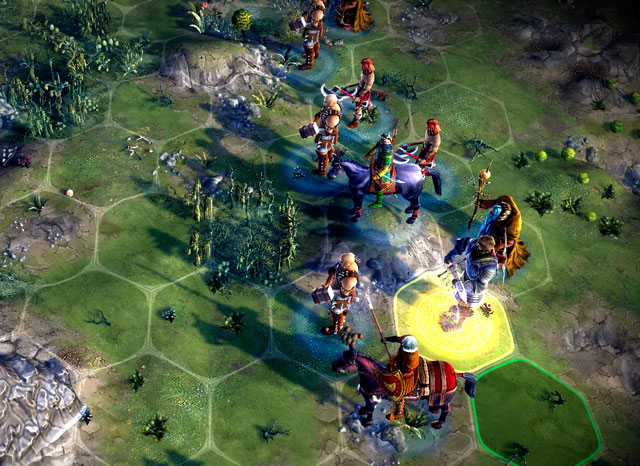
Those of you who prefer offensive strategies should focus mainly on Thugs, Horsemen and Horse Archers - with such forces you will be truly hard to stop. On the other hand, it doesn't pay too well to hire Warlocks, at least not at once, because they die easily and become useful only after they've leveled up a bit. If possible, try to add some Centaurs and Giant Slugs, but if you don't have access to them, that's ok. The point of the offensive approach is to provoke the enemy to attack (preferably with Horse Archers) and finishing them off once they get in your range. It the meantime, it's also a good idea to position at least one mounted squad behind the enemy's back to eliminate its archers. Obviously, if you have Barbarians and Shamans (and you should have them for some time now), don't hesitate to use them as well - after all, they're the basis and the most numerous part of your army.
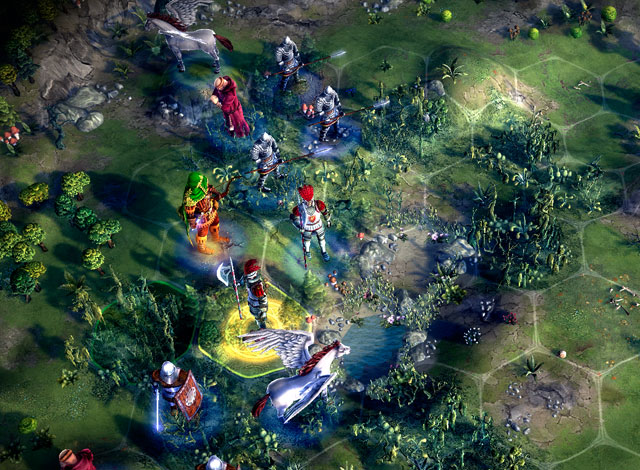
The situation is a little different if you're playing defensively. If so, invest most importantly in Monks and replace your Healers with Pikemen or ranged units. Surround your healing units with the aforementioned Pikemen, and fit the holes with Guardsmen. It would be also useful to have at least one Pegasus, which is perfect for flying over the enemy's army to strike its ranged or magic units. The whole point of the defensive strategy is to gradually break the enemy's forces using counterattacks and healing. The Monk's Inspiration ability also comes in handy if you want to regenerate the hero's Stamina (or an archer's leveled up to Bowman). An army constructed in such a way is characterized by low mortality rates and high effectiveness.
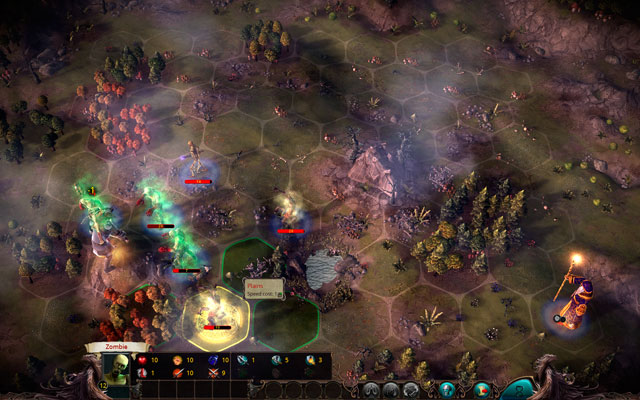
What about necromancy lovers? They should be happy about the new powerful units that come in the form of Ghouls. Ghouls can poison the enemy on attack, are pretty mobile and resistant, and deal some substantial damage. With its low requirements, it's a new quality to the undead army - simply level up Necromancy to level III and build a Necromancer's Guild to gain access to new spell. On the other hand, don't bother with the Chaos school of magic and its summoned demons; they're not too strong and suck the life out of mages themselves.
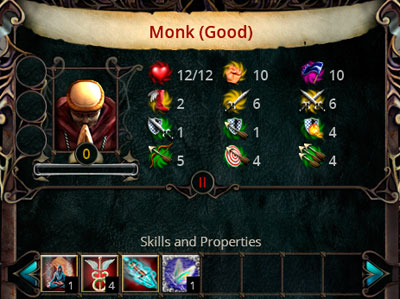
Recruitment Cost
75 gold, 10 crystals, 1 mandrake
Upkeep
15 gold and 2 crystals per round
Location/Recruitment
Monastery 350 gold, 35 crystals, 1 wood, 2 mandrakes, 1 arcanite
Requires Fort and Church
Alignment
Good
Skills
Meditation - while resting, the unit regenerates its magic ammo reserves
Healing - heals around 4 Health Points of an allied unit, as long as the unit is in range. Using the ability lowers the amount of Ammo. The presence of a Monk in the army increases the healing rate after battle.
Magic Shot - deals magic damage to selected target
Inspiration Spell - recovers 2 Stamina points of a selected target (despite the in-game description that mentions Morale!)
Monks are extremely useful and surprisingly universal units that allow healing allied units within the range of 4 tiles. But that's not all - the brethren are also keen on firing magic missiles and recovering Stamina to selected allies (not Morale, as the description suggests). As such, they're a great replacement for Healers, offering a much wider spectrum of possibilities. They're perfect for large defensive armies, in particular those led by Scouts or Wizards (don't forget to replenish their Stamina!). Obviously enough, protect Monks at all costs, seeing as they don't stand a chance in melee combat. Pikemen and Guardsmen are their ideal bodyguards.
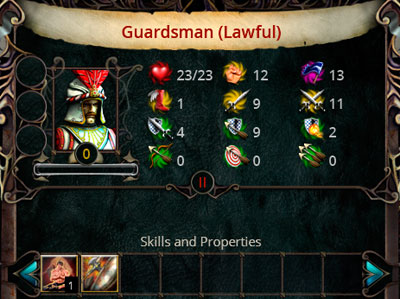
Recruitment Cost
90 gold, 2 iron
Upkeep
18 gold per round
Location/Recruitment
Guardsmen Barracks 470 gold, 1 wood, 2 iron, 1 mithril
Requires Fort and Practice Halls
Alignment
Good
Skills
Recuperation - during rest, regenerates 1 Stamina point more than usual
Armorpiercing Strike - ignores half of the enemy's Defense
Guardsmen are highly resistant soldiers of a visibly defensive nature. Due to their high Counterattack and thick armor, they're the perfect choice for covering vulnerable units and gradually depleting the enemy's attacking formations. On level up, they may gain the First Strike ability which gives them a gigantic edge on the battlefield (you can say they become truly useful only upon receiving it). If they do, your Pikemen will receive a helping hand on the front - practically a brand new quality for the entire army.
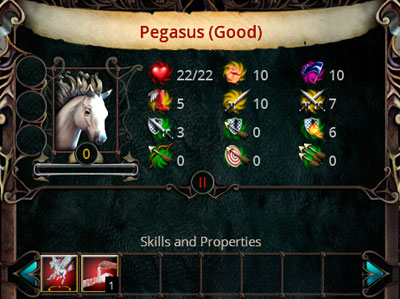
Recruitment Cost
80 gold, 10 crystals, 1 mandrake
Upkeep
16 gold and 2 crystals per round
Location/Recruitment
Pegasi Stable 420 gold, 25 crystals, 1 wood, 1 iron, 2 mandrakes, 1 arcanite
Requires Fort and Enchanted Grove
Alignment
Good
Skills
Flying - can move over other units and impassable terrain losing only the usual amount of movement points and not using Stamina. A flying unit cannot be trampled and is not affected by terrain modifiers
First Aid - regenerates 1 health point during rest. Regeneration also accelerates outside of battle
Pegasi are by far the best offensive units of rank II. Flying enables them to freely move around the battlefield and a good range lets them attack enemy forces in an instant (preferably archers or spellcasters). The majestic horses can also withstand quite a lot of damage, and in case of real danger may retreat to chosen positions to heal (Monks come in handy). Their basic strategy is to lure the enemy as far as possible from their actual target and attack their vulnerable ranged units. This way, enemy soldiers will be forced to pick a new target, and their ranged support will be eliminated.

Recruitment Cost
75 gold, 1 iron, 1 horse
Upkeep
15 gold per round
Location/Recruitment
Jousting Arena 400 gold, 2 iron, 3 horses
Requires Fort and Stable
Alignment
Neutral
Skills
Charge - Attack raises with each tile the units travels prior to dealing damage
Horsemen allow attacking far-off enemies and dealing them severe damage - the bigger the range, the bigger the damage. As such, they serve as great offensive units thanks to which you can avoid enemy infantry and attack their most vulnerable points (archers and spellcasters). A high amount of Health Points and a not too bad Defense take care of their survivability.
If the enemy army doesn't have ranged units, try the hammer and anvil tactic: stop hostile units with your defensive forces (such as Pikemen or Guardsmen) and flank them with Horsemen. This way you'll prevent the enemy's escape or regeneration, and be able to deplete their health with your forces.
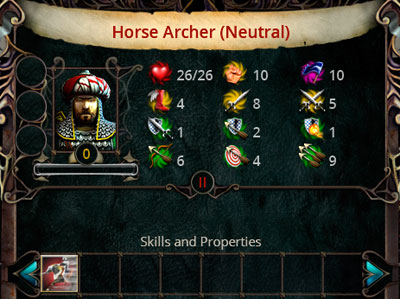
Recruitment Cost
70 gold, 1 horse, 1 wood
Upkeep
14 gold per round
Location/Recruitment
Riding Ground 360 gold, 2 wood, 3 horses
Requires Fort and Stable
Alignment
Neutral
Skills
Charge - Attack raises with each tile the units travels prior to dealing damage
Horse Archers are a lot more universal that regular Horsemen, but pay for that with their statistics. Their shooting range is good enough and the damage they deal isn't too bad (though it's a shame it doesn't pierce armor), but although they're quite effective in charging, melee combat is not their strong suit. All in all, they are moderate at everything, but not good at anything, which is a certain limitation to their potential - although it's worth mentioning that the Tatars tactic (shoot and run) is quite effective in this matter.
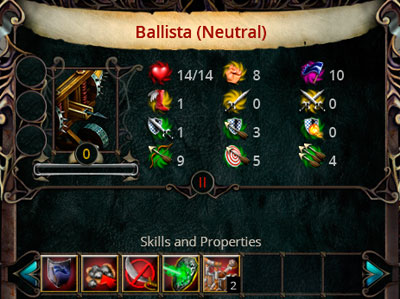
Recruitment Cost
150 gold, 1 iron, 2 wood
Upkeep
25 gold per round
Location/Recruitment
Siege Workshop 550 gold, 2 iron, 2 wood, 1 mithril
Requires Fort and Craft Shop
Alignment
Neutral
Skills
Intrepid - Morale always stays on the same level
Collect Ammo - allows collecting several units of ammo in return for one round
Poison Immunity - the unit is unaffected by poison
Does not fight - doesn't fight in melee combat
Siege - accelerates the destruction of enemy fortifications by 2
The only purpose of this unit is to fire at the enemy's formation. The Ballista's range and damage are pretty satisfying, but the lack of Armorpiercing Shot (which is gained only on further level ups) and a small amount of Ammo greatly diminishes the full effectiveness of this device. Also, since the Ballista is a machine, you can't heal it the conventional way - which is a serious drawback. In the long run, it's not particularly useful, especially considering the challenging costs.
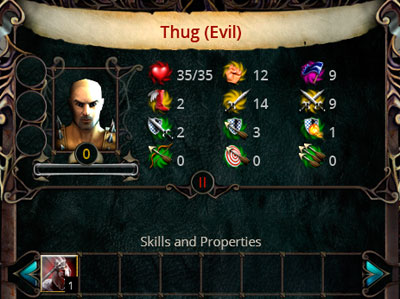
Recruitment Cost
60 gold, 1 iron
Upkeep
12 gold per round
Location/Recruitment
Fighter Barracks 300 gold, 3 iron, 1 wood
Requires Fort, Tavern and Armory
Alignment
Evil
Skills
Stunning Blow - lowers the Stamina of a hit target by 1
Thugs belong to one of the most powerful contact units of rank II. They are practically without a fault - all of their statistics are satisfactory at the very least, and the additional ability is very helpful against weaker foes. Their cost is also attractive, so the only drawback may come down to negative karma. Thugs work best in offensive (due to high Attack and good Speed), so make a good use of them.
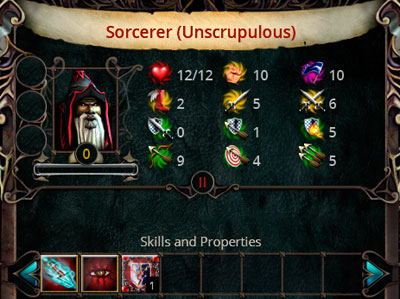
Recruitment Cost
90 gold, 15 crystals, 2 mandrakes
Upkeep
15 gold and 3 crystals per round
Location/Recruitment
Sorcerers' Circle 350 gold, 50 crystals, 1 wood, 2 mandrakes, 2 arcanites
Requires Fort, Armory and Sorcerers' Workshop
Alignment
Evil
Skills
Magic Shot - deals magic damage to selected target
Hex - targets hit by a Hex lose 1 Attack, Resistance and Defense point for 4 rounds. High Resistance may shorten the effects.
Vulnerability Spell - lowers the Defense of a selected target
Sorcerers - as all other mages - have one, very serious problem, rather easy to predict: they are extremely weak and powerless at first, and become useful only on higher levels. The whole issue lies in the fact that before reaching those levels (on which they gain additional spells and abilities), most Sorcerers die - all thanks to low amount of Health Points and poor Defense. Investing in Sorcerers is therefore a very risky business; one that pays off only if you're certain you can protect them. If so, all the advantages of the Sorcerer - in the form of high magic damage and a moderately useful set of spells - become a substantial asset.
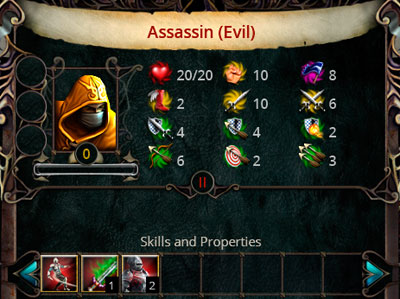
Recruitment Cost
70 gold
Upkeep
14 gold per round
Location/Recruitment
Assassins Guild 350 gold, 1 wood, 2 iron
Requires Fort, Armory and Inn
Alignment
Evil
Skills
Agility - avoids enemy counterattack
Poison Attack - deal 1 poison damage each turn for 3 rounds
Precise Strike - ignores 2 Defense points of a selected target
Assassins are nothing else than improved Thieves, and what makes them better are their enhanced statistics and starting abilities. Same as Thieves, Assassins can throw daggers at enemies, which is not a bad way to begin a battle. They are also perfect against defensive units (such as Pikemen or Guardsmen), but due to their low Speed they hardly ever manage to reach enemy archers or spellcasters. Before you dismiss them, though, take a look at their high defensive statistics and poisoning abilities, both of which make them a hard nut to crack. Nevertheless, make sure their Morale doesn't drop too far, or else they'll just flee the battle.
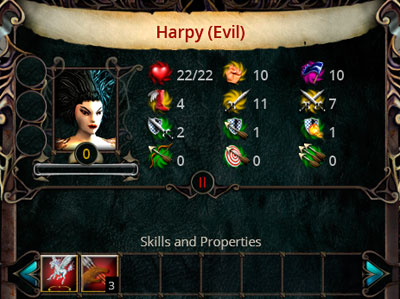
Recruitment Cost
70 gold
Upkeep
14 gold per round
Location/Recruitment
Sometimes appear in Merchant Court as mercenaries
Can be added through an event on the world map
Alignment
Evil
Skills
Flying - can move over other units and impassable terrain losing only the usual amount of movement points and not using Stamina. A flying unit cannot be trampled and is not affected by terrain modifiers
Steal Ammo - steals 3 items of Ammo on melee attack
Harpies can be a serious threat to careless adventurers who decided to invade their territory. They're very mobile and can fly, making the covering of ranged and magic units all the more difficult. Luckily, they're not very resistant, so it doesn't take too long to take them out. Don't underestimate their offensive potential, though, because their claws can rip apart even the most resistant warriors.
Harpies can be recruited as mercenaries in Merchant Court, but the chances of them appearing in one are slim. Alternatively, you can invade their territory on the world map and offer them a part in the adventure (requires a large army).
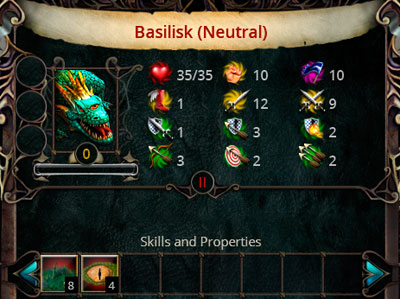
Recruitment Cost
75 gold
Upkeep
15 gold per round
Location/Recruitment
Can be hatched from a special egg usually found while conquering neutral locations. Requires Trappers Guild.
Alignment
Neutral
Skills
Swamp Knowledge - the unit doesn't lose Stamina while crossing a swamp and can move over them as over plains. Receives a bonus to Defense when standing on a swampy terrain
Petrification - turns a hit target into stone for 4 rounds. In that time, the target receives a bonus to defensive statistics, but cannot perform any action. High Resistance may shorten the effect's time
Basilisks seem to have solely benefits: they're pretty resistant, able to defend themselves, deal substantial damage and have a very useful ability. In reality, though, all this becomes irrelevant due to one serious drawback - minimal Speed. A decisive majority of these creatures die even before the proper battle begins, either stuffed with arrows or killed by some other means. Only higher level Basilisks may receive a bonus to movement points (as well as the useful Regeneration), but by then it's usually too late. The creature has some potential, but requires a lot of time and special care to make it work effectively.
To get a Basilisk, you first nee to acquire its egg while exploring the world map, and then bring it to the city in which you have a Trappers Guild. Open its recruitment screen and drag the artifact into the slot reserved for rank II units.
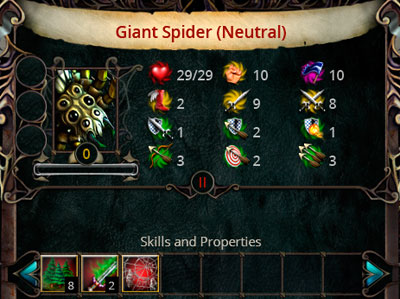
Recruitment Cost
80 gold
Upkeep
24 gold per round
Location/Recruitment
Can be hatched from a special egg usually found while conquering neutral locations. Requires Trappers Guild.
Alignment
Neutral
Skills
Forest Knowledge - the unit doesn't lose Stamina while crossing a forest and can move over them as over plains. Receives a bonus to Defense when standing in a forest terrain
Poison Attack - deals 1 poison damage each turn for 3 rounds
Web - ranged attack that immobilizes the enemy for 2 rounds (the target can't perform any action). The higher the target's Attack, the lower the immobilization time
The primary advantage of this unit lies in the abilities. The ability to immobilize the enemy with a Web is remarkably useful, especially in case of defensive units (which lose their biggest asset, a powerful Counterattack). Spiders are ideal in every role you give them - either to stand in the first line of battle (where they poison enemies) or support other units with their Web. It's worth giving them a chance and use them to as great an extent as possible.
To get a Giant Spider, you first nee to acquire its egg while exploring the world map, and then bring it to the city in which you have a Trappers Guild. Open its recruitment screen and drag the artifact into the slot reserved for rank II units.
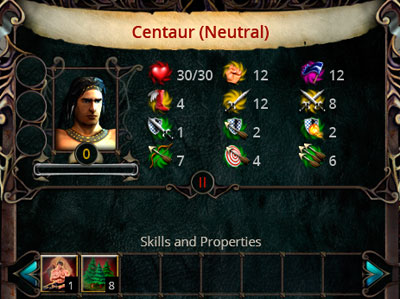
Recruitment Cost
75 gold
Upkeep
15 gold per round
Location/Recruitment
Sometimes appear in Merchant Court as mercenaries
Can be added through an event on the world map
Alignment
Neutral
Skills
Forest Knowledge - the unit doesn't lose Stamina while crossing a forest and can move over them as over plains. Receives a bonus to Defense when standing in a forest terrain
Recuperation - during rest, regenerates 1 Stamina point more than usual
A universal unit that is good either at hit-and-run ranged combat as well at melee combat. High offensive statistics and a solid Defense support both approaches, and high mobility is an added bonus. If you're facing slow enemies, you can toy with them for as long as you like; you're only problems will be archers and faster units. Luckily, the former can be easily eliminated, and the latter lose with only their statistics.
To form an alliance with Centaurs and be able to recruit them, you need a strong army and have to complete a quest involving killing a certain number of Ogres. As a last resort, you can also acquire Centaurs as mercenaries from the Merchant Court, but the chances of them appearing in one are completely random.
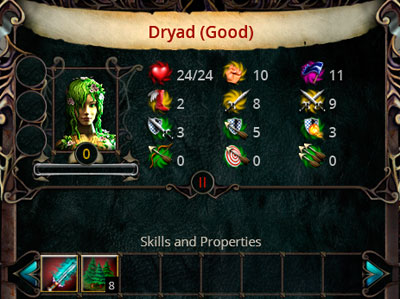
Recruitment Cost
35 gold, 15 crystals, 1 mandrake
Upkeep
7 gold and 3 crystals per round
Location/Recruitment
Sometimes appear in Merchant Court as mercenaries
Can be recruited while visiting special places on the world map
Alignment
Good
Skills
Forest Knowledge - the unit doesn't lose Stamina while crossing a forest and can move over them as over plains. Receives a bonus to Defense when standing in a forest terrain
Magic Strike - strikes have magical nature which ignores the enemy's Defense and can be reduced only by their Resistance
Dryads have much better statistics than Fairies, but not so many equally useful abilities, which in general diminishes their value to the army. In truth, they're only pretty average warriors which greatest strength lies in the fact that they deal magical damage instead of physical. This in turn makes Dryads useful against the majority of contact units, which generally have low Resistance - but this is where the usefulness of Dryads ends. The only moment it pays off to invest in them is when you don't have better options or wish to save up on gold.
Dryads can be hired as mercenaries in the Merchant Court (if you're lucky) or acquired in one of the provinces during a special event. To activate such an event, go to a fairy cove and feast with them. Whether the hero can recruit them is, however, determined by a hidden roll of the dice.
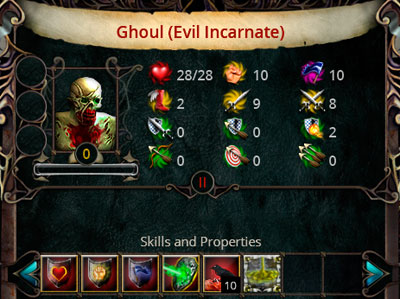
Recruitment Cost
None
Upkeep
4 crystals per round
Location/Recruitment
Can be summoned by the Raise Ghoul spell
Alignment
Evil
Skills
Feels No Pain - wounds received don't affect the amount of dealt damage
Tireless - the unit won't lose Stamina while performing an action
Intrepid - Morale always stays on the same level
Poison Immunity - the unit is unaffected by poison
Necrophage - by eating corpses on the battlefield, the unit can regenerate 10 health points
Cause Disease - a hit target becomes infected and loses 3 Health Points and 1 Stamina each round. All offensive statistics drop by 3, and Speed by 1. The effect lasts several rounds and may be reduced by the target's Resistance. Doesn't work on the undead and machines
Ghouls are extremely useful and very powerful undead creatures which have one of the best abilities in the game. The disease that they are spreading makes the enemy's units noticeably weaker and causes them to gradually lose Health. It becomes of key importance to infect as many enemies as possible and finish the remaining ones using regular troops (or by applying the Ghouls' fairly strong Attack). Their ok Speed also comes in handy, letting you move around the map quite freely. In case of real danger, you can feed your Ghoul on nearby corpses, but if your Necromancer has a few other raising spells under their sleeve, it's better to use them instead. Undead units don't get any weaker by receiving damage, so they remain a large threat at all times.
You can retain Ghouls in your army if your hero has the Necromancy ability at least on level III. The cost is in crystals and depends on the level of the creature.

Recruitment Cost
None
Upkeep
4 crystals per round
Location/Recruitment
Can be summoned by the Summon Fiend or Dark Pact spells or the Chaos Spawn ritual
Alignment
Evil
Skills
Intimidation - if hit, the target's Morale drops by 1
Deadlands Knowledge - the unit doesn't lose Stamina while crossing deadlands. Receives a bonus to Defense and Counterattack when standing on a deadland terrain
The primary advantage of Fiends lies in their statistics - it's practically impossible to find a flaw. Fiends can be used either as offensive or defensive units, though they're slightly better in the former due to their high Attack. Their special ability - Intimidation - doesn't come in handy almost at all, seeing as it's much more practical to kill the enemy instead of just scaring them. Fiends are, therefore, just good soldiers without any exceptional characteristics or additional bonuses.
To retain Fiends after a battle, use the Chaos Spawn ritual or the Dark Pact spell.
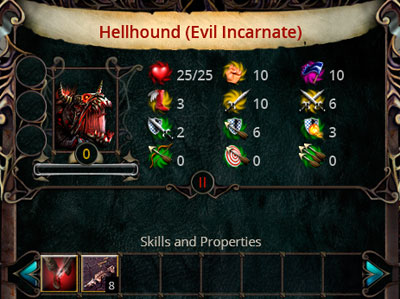
Recruitment Cost
None
Upkeep
3 crystals per round
Location/Recruitment
Can be summoned by the Summon Hellhound spell or the Chaos Spawn ritual
Alignment
Evil
Skills
Crippling Strike - lower the target's Speed by 1. The effect lasts for 2 rounds.
Deadlands Knowledge - the unit doesn't lose Stamina while crossing deadlands. Receives a bonus to Defense and Counterattack when standing on a deadland terrain
The primary goal of Hellhounds is to jump over to enemy forces charging on allied units in order to slow them down (and, obviously enough, deal them damage). Due to their high Speed and pretty good Ranged Defense, they are also useful during a raid on enemy archers and spellcasters. Unfortunately, they don't stand much chance against stronger enemy units, especially ones with a high Counterattack.
To retain Hellhounds after battle, use the Chaos Spawn ritual.
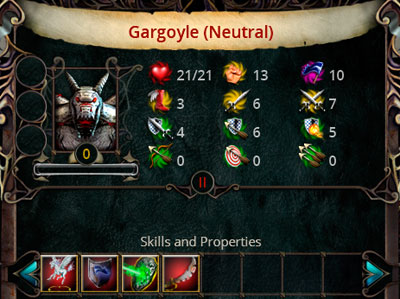
Recruitment Cost
100 gold, 15 crystals, 1 marble
Upkeep
5 crystals per round
Location/Recruitment
Can be summoned by the Create Gargoyle spell
Can be sometimes hired in special locations available on the world map
Alignment
Neutral
Skills
Flying - can move over other units and impassable terrain losing only the usual amount of movement points and not using Stamina. A flying unit cannot be trampled and is not affected by terrain modifiers
Intrepid - Morale always stays on the same level
Poison Immunity - the unit is unaffected by poison
Damage Weapon - in battle, melee units lose 1 Attack point for 3 rounds. The effects may accumulate
The strength of Gargoyles comes from their skin - made of stone - which keeps a portion of damage and protects them against hostile spells. Their offensive statistics, however, leave a lot to wish for. Despite pretty good movement and the ability to fly, Gargoyles are hardly able to kill an enemy archer or spellcaster - they're much too weak for it. What's worse, their recruitment costs is absurdly high, and the sole finding of a lair is a challenge in itself (creatures summoned by a spell are not retained after battle). In general, don't bother - there are better units to choose from.
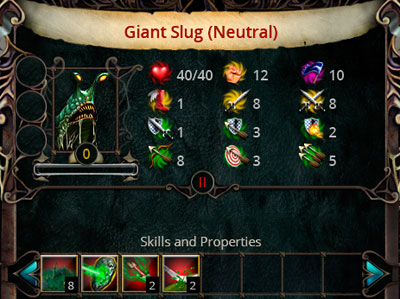
Recruitment Cost
80 gold
Upkeep
15 gold per round
Location/Recruitment
Can be hatched from a special egg usually found while conquering neutral locations. Requires Trappers Guild
Alignment
Neutral
Skills
Swamp Knowledge - the unit doesn't lose Stamina while crossing a swamp and can move over them as over plains. Receives a bonus to Defense when standing on a swampy terrain
Intrepid - Morale always stays on the same level
Poison Immunity - the unit is unaffected by poison
Poison Shot - poisons the target, dealing 2 damage each turn for 3 rounds
Poison Flesh - in battle, melee units are poisoned for 3 rounds (losing 2 Health Points each turn)
These inconspicuous, ugly creatures are one of the best units of rank II. Their spits are deadly not only in terms of physical damage, but also due to poison. They also work well in melee combat, dealing lots of damage and additionally poisoning the enemy with their poison flesh. They have quite a lot of health points and a pretty solid armor. What's more to wish for? Only a slightly better movement or wider range, which, sadly, aren't boosted on level up. Nevertheless, additional abilities gained on higher levels are truly useful (such as Damage Armor, Necrophage or Damage Weapon).
To get a Giant Slug, you first nee to acquire its egg while exploring the world map, and then bring it to the city in which you have a Trappers Guild. Open its recruitment screen and drag the artifact into the slot reserved for rank II units.
In later stages in the game, once rank III units become available, luck becomes the crucial factor. "Conventional" units (the ones recruited in the capital) are very strong indeed, but a true power comes from freelance creatures, which can be hatched from eggs, hired as mercenaries or recruited in special locations on the map. The availability of such units is, however, independent of the player, because their recruitment conditions are generated randomly. If you somehow managed to get access to these special units, exploit them relentlessly - they are much better than their "castle" counterparts.
Unfortunately, seeing as the selection of units becomes partially randomized, this causes a disturbance in the classic division into the offensive and defensive approaches. Therefore, instead of focusing on particular tactical approaches, the descriptions of units (found on further pages) contain information on how to use them in the optimal way. I will only mention that the best defensive units are Clerics, and the best offensive units are Executioners.
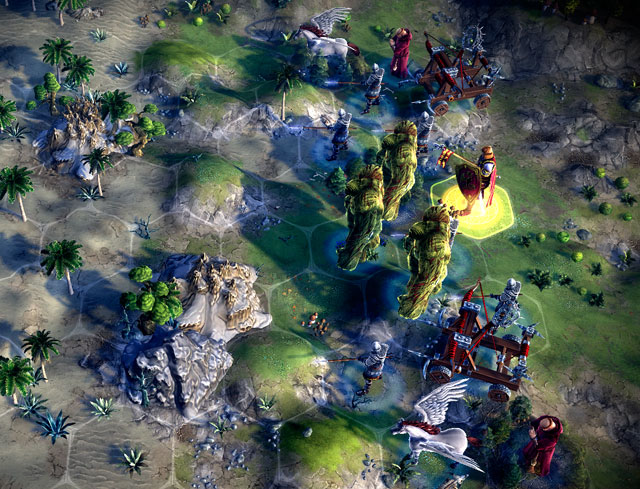
What about Necromancers? The change affects them the least - they should also add freelance units, but it's also a good idea to invest in Gryphons. It practically becomes a necessity, considering that the undead army isn't very mobile, and thus vulnerable to enemy archers. Gryphons, due to their Speed and the Flying ability, can easily reach and eliminate the enemy's ranged and magic units. Ghosts, available to Necromancers through a separate spell, also come in handy. Their impressive defensive statistics work well in defending the remaining troops.
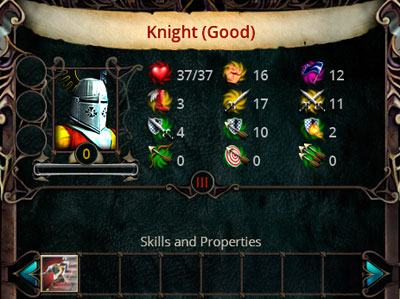
Recruitment Cost
400 gold, 1 iron, 1 horse, 1 mithril
Upkeep
80 gold per round
Location/Recruitment
Knightly Order 2500 gold, 2 horses, 1 marble, 3 mithril
Requires Citadel, Craft Shop and Military School
Alignment
Good
Skills
Charge - Attack raises with each tile the unit travels prior to dealing damage
Knights are slightly slower than Horsemen, but deal much greater damage and have much better armor. They're practically invulnerable to enemy archers, while also having a substantial reserve of Health Points. As such, they're pretty solid, but may be outmatched by other rank III adversaries.
Their biggest pain is the short range, which limits their chances of evading enemy infantry in order to reach their archers and spellcasters. Gryphons are a better investment in this regard.
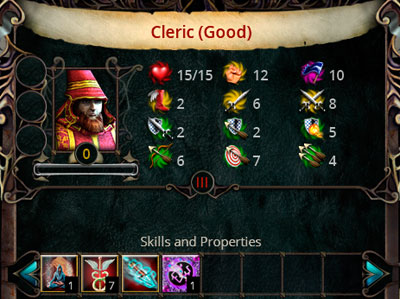
Recruitment Cost
300 gold, 50 crystals, 1 mandrake, 1 arcanite
Upkeep
60 gold and 8 crystals per round
Location/Recruitment
Temple of The Eagle 1800 gold, 100 crystals, 2 marble, 1 arcanite, 1 dionium
Requires Citadel, Temple of Immortals and Pharmacy
Alignment
Good
Skills
Meditation - while resting, the unit regenerates its magic ammo reserves
Healing - heals around 7 Health Points of an allied unit, as long as the unit is in range. Using the ability lowers the amount of Ammo. The presence of a Cleric in the army increases the healing rate after battle
Magic Shot - deals magic damage to a selected target
Dispell Spell - removes negative spells from a selected target or deals 7-9 damage to a creature summoned by the enemy
Clerics are commonly known for their healing abilities - they can regenerate up to 7 Health Points despite whatever range that may separate them from the target. Unfortunately, such an effort requires a lot of concentration, so the amount of magic ammo (used up in healing as well) quickly runs out and has to be replenished through Meditation. This is a significant limitation as to the Clerics' effectiveness, but they still pay off - even more so since they can remove enemy spells from allied units and deal serious damage to demons and the undead (while ignoring their Resistance). It's only important not to let them fight in melee combat. Make sure they survive because they gain great spells on higher levels, Resurrection included.
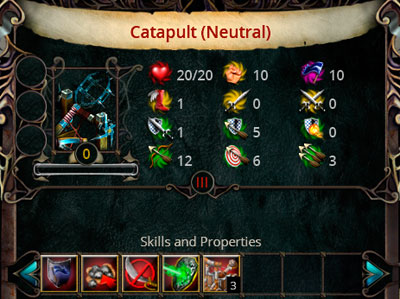
Recruitment Cost
500 gold, 1 iron, 1 wood, 1 mithril
Upkeep
100 gold per round
Location/Recruitment
Siegeworks 2700 gold, 1 iron, 3 wood, 1 mithril
Requires Citadel, Armory and Craftsmen Guild
Alignment
Neutral
Skills
Intrepid - Morale always stays on the same level
Collect Ammo - allows collecting several units of ammo in return for one round
Poison Immunity - the unit is unaffected by poison
Does not fight - doesn't fight in melee combat
Siege - accelerates the destruction of enemy fortifications by 3
Catapults are simply improved Ballistas, with better statistics and more damage to the enemy's ranks. They have very large firing range, deal some substantial amounts of damage, and after a few level ups also gain the Armorpiercing Shot ability, which allows them to partially ignore the enemy's Ranged Defense. They're great for eliminating level I units, spellcasters or archers. Make sure, though, to keep replenishing Ammo and shield it from a direct attack.
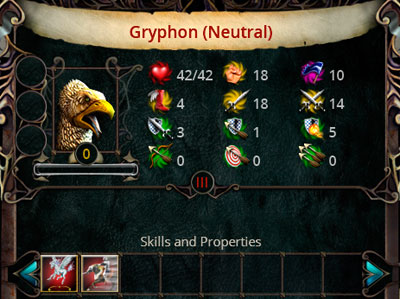
Recruitment Cost
350 gold, 20 crystals, 1 arcanite
Upkeep
70 gold and 5 crystals per round
Location/Recruitment
Gryphon Nest 2000 gold, 50 crystals, 2 arcanite, 2 mithril
Requires Citadel, Stonehenge and Trappers Guild
Alignment
Neutral
Skills
Flying - can move over other units and impassable terrain losing only the usual amount of movement points and not using Stamina. A flying unit cannot be trampled and is not affected by terrain modifiers
Charge - Attack raises with each tile the unit travels prior to dealing damage
Griphons are one of the best rank III units. They deal severe damage (further increased by Charges), are very mobile thanks to their Flying ability, and have enough movement range to attack and eliminate enemy ranged and magic units. In fact, that's their primary role - they're practically made for the dangerous flanking maneuvers. They also have quite a lot of health points, and if supported by Clerics they become virtually immortal. In case of real danger they can always retreat, flying over the enemy's forces. They are a true sky cavalry, able to eliminate the weaker units right at the first strike.
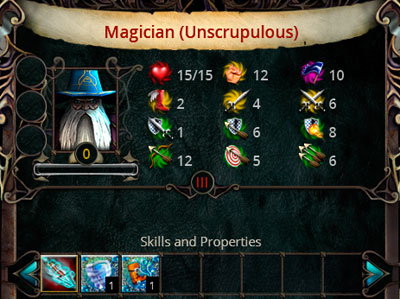
Recruitment Cost
300 gold, 70 crystals, 1 mandrake, 2 arcanite
Upkeep
60 gold and 10 crystals per round
Location/Recruitment
Mages Tower 1700 gold, 150 crystals, 1 marble, 3 arcanite, 1 black lotus
Requires Citadel and Alchemist Guild
Alignment
Evil
Skills
Magic Shot - deals magic damage to a selected target
Air Shield Spell - increases the target's Ranged Defense and Resistance for several rounds
Slow Spell - lowers the target's Speed by 2. The opponent loses 1 Stamina point every turn. If Speed should drop below 1, the opponent starts losing 1 Stamina on every step. The effect lasts for several rounds depending on the enemy's Resistance (max 6)
Just as any other spellcasters, Magicians have exactly the same problem: they are extremely weak at first, but become truly powerful on higher levels. Reaching those levels is, however, problematic due to their high mortality rates, so they need to be constantly covered by defensive units. Further in the game, once Gryphons and Catapults become available, such protection is virtually impossible, so it's not particularly worthwhile to invest in them altogether. The strength of their magic attacks, good Range and available spells are quite useful, but they don't change the fact that Magicians are most frequently the first units to die on the battlefield.
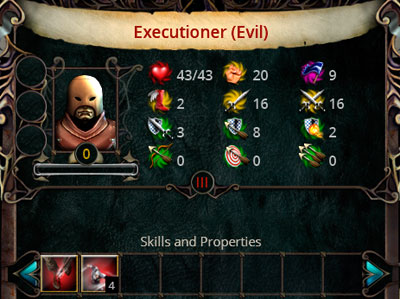
Recruitment Cost
200 gold, 1 iron, 1 mithril
Upkeep
40 gold per round
Location/Recruitment
Torture Chamber 1500 gold, 1 iron, 1 mithril
Requires Citadel, Practice Halls and Dungeon
Alignment
Evil
Skills
Crippling Strike - if hit, the target's Speed drops by 1. The effect lasts for 2 rounds
Round Attack - deals normal Attack damage to all enemies around. If hit, the enemy can't counterattack. Costs 4 Stamina points
Executioners are one of the best rank III melee units. The whole philosophy behind them is in stepping in between enemy units in order to perform the Round Attack, which isn't really hard to do due to their high Ranged Defense that allows them to approach enemies without practically getting hit. High offensive statistics and pretty good defensive capabilities make the Executioners pretty effective slayers, able to eliminate several enemy units at once. They are perfect against defensive units - such as Pikemen or Guardsmen - in that that they can ignore their counterattack and deal them severe damage.
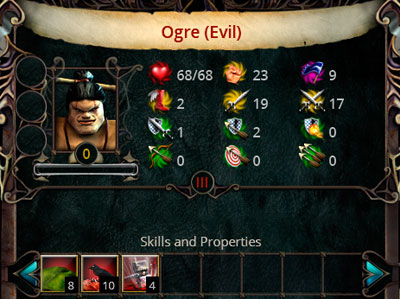
Recruitment Cost
200 gold
Upkeep
40 gold per round
Location/Recruitment
Sometimes appear in Palace as mercenaries
Alignment
Evil
Skills
Hills Knowledge - the unit doesn't lose Stamina while crossing hills and can move over them as over plains. Receives a bonus to Defense when standing on a hilly terrain
Necrophage - by eating corpses on the battlefield, the unit can regenerate 10 health points
Crushing Blow - deals 150% Attack damage. Costs 4 Stamina
Ogres are though boys. They can kill most units at first strike, and even without using their special ability. They also have high amounts of Stamina and Health Points, so it's not easy either to corner of tire them out. Luckily, their Defense isn't too impressive, so several skillful units should have no real trouble defeating them. The best way to kill an Ogre is, however, to shoot it with a skilled Archer or a Sharpshooter, though Wizards are a good choice, too. Nevertheless, keep in mind that Ogres are quite fast, so they can easily avoid your defenders and kill your most vulnerable units. The Necrophage ability also gives them an easy way to regenerate, so do what you have to not to let them out of your range.
You can recruit Ogres as mercenaries in Palace, but the chances of them appearing in one are small. Notice that their cost is twice as high then.

Recruitment Cost
180 gold, 3 crystals, 1 iron, 1 mithril
Upkeep
40 gold per round
Location/Recruitment
Can be sometimes hired in special locations available on the world map (Labyrinth)
Sometimes appear in Mercenaries Guild as mercenaries
Alignment
Neutral
Skills
Berserk - if a unit receives a mighty blow, their low health won't affect the amount of dealt damage and their Attack will raise by 2. As long as they are in this condition, they also can't be frightened (their Morale never drops)
Minotaurs are exceptionally powerful contact units with impressive offensive statistics and the incredibly useful Berserk ability, which allows them to deal lots of damage despite wounds received in battle. They are also quite resistant and able to acquire Round Attack on level up, an ability that lets them strike several enemies at once. If they do, they become deadly killing machines that hardly meet their match (even Executioners bow to their skills). Considering how cheap they are, they're an extremely beneficial choice.
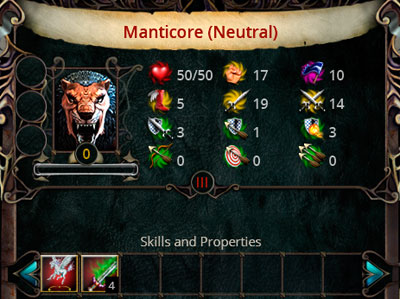
Recruitment Cost
170 gold, 15 crystals
Upkeep
35 gold and 3 crystals per round
Location/Recruitment
Can be hatched from a special egg usually found while conquering neutral locations. Requires Monstrologists Guild
Alignment
Neutral
Skills
Flying - can move over other units and impassable terrain losing only the usual amount of movement points and not using Stamina. A flying unit cannot be trampled and is not affected by terrain modifiers
Poison Attack - deal 4 poison damage each turn for 3 rounds
Manticore is the best "cavalry" option of rank III. Large movement range allows them to easily reach and instantly eliminate enemy archers and spellcasters, while Poison Attack is useful against other types of enemies - try to poison as many as you can. In case of real danger, they may quickly retreat in order to be healed by Clerics or the hero's healing spells. Given the problematic way of recruiting them, the survivability of your Manticores is of utter importance.
To acquire a Manticore, you first nee to acquire its egg while exploring the world map, and then bring it to the city in which you have a Monstrologists Guild. Open its recruitment screen and drag the artifact into the slot reserved for rank III units.
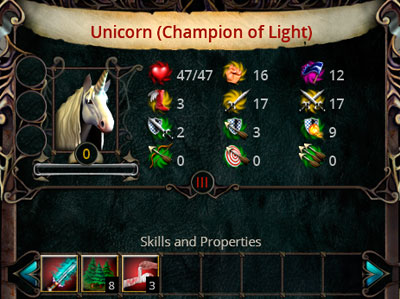
Recruitment Cost
150 gold, 20 crystals
Upkeep
30 gold and 4 crystals per round
Location/Recruitment
Can be sometimes hired in special locations available on the world map
Alignment
Good
Skills
Magic Strike - strikes have magical nature which ignores the enemy's Defense and can be reduced only by their Resistance
Forest Knowledge - the unit doesn't lose Stamina while crossing a forest and can move over them as over plains. Receives a bonus to Defense when standing in a forest terrain
First Aid - regenerates 3 Health Points during rest. Regeneration also accelerates outside of battle
Unicorns are slightly better than Knights - their primary asset is the magic attack and a high amount of Health Points. They're practically impossible to enchant (due to high Resistance), but their remaining defenses aren't impressive. They perform well in any role, but aren't particularly good at anything.
To acquire Unicorns into your army, go to their Meadow and impel them to approach. The chances of success are determined by positive karma, Diplomacy and a hidden roll of the dice.
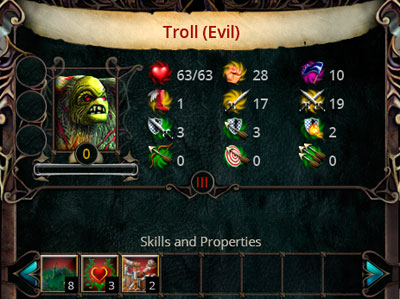
Recruitment Cost
250 gold
Upkeep
50 gold per round
Location/Recruitment
Can be sometimes hired in special locations available on the world map (Trolls Cave)
Sometimes appear in Palace as mercenaries
Alignment
Evil
Skills
Swamp Knowledge - the unit doesn't lose Stamina while crossing a swamp and can move over them as over plains. Receives a bonus to Defense when standing on a swampy terrain
Regeneration - regains 3 health points each round. Accelerates healing rate outside of battle
Siege - accelerates the destruction of enemy fortifications by 2
Trolls are especially hard to kill creatures. They have large amounts of Health Points, solid defensive statistics, can punch pretty well and regenerate rather quickly. This deadly combination means no more and no less that you need to focus most of your efforts on killing them as fast as possible. Let me repeat: Trolls heal in an instant, so you absolutely can't leave them wounded, but finish them off whenever you have the opportunity. Archers and Sharpshooters are their bane, considering the firepower they wield. If you have a Troll in your own army, use them any way you like - they perform well under any circumstances (though maybe apart from raids on enemy archers, but you have other units for that).
Trolls can be acquired as mercenaries in Palace, but the chances of them appearing in one are slim. You can also hire them in special locations on the world map, Trolls Caves.
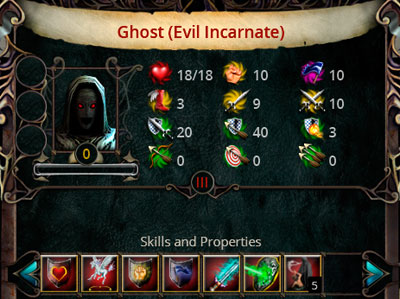
Recruitment Cost
None
Upkeep
13 crystals per round
Location/Recruitment
Can be summoned with the Raise Ghost spell
Alignment
Evil
Skills
Feels No Pain - wounds received don't affect the amount of dealt damage
Flying - can move over other units and impassable terrain losing only the usual amount of movement points and not using Stamina. A flying unit cannot be trampled and is not affected by terrain modifiers
Tireless - the unit won't lose Stamina while performing an action
Intrepid - Morale always stays on the same level
Magic Strike - strikes have magical nature which ignores the enemy's Defense and can be reduced only by their Resistance
Poison Immunity - the unit is unaffected by poison
Soul Stealing - after killing an enemy, the units recovers 5 Health Points
The Ghosts' primary advantage is that they can't be killed in melee or ranged combat. They should instead be fearful of spellcasters and all types of creatures that deal magic damage -against such units they don't stand a chance. Ghosts themselves don't have much to say for their offensive capabilities, so they wouldn't be the first choice for a direct strike. They can, however, be used as a distraction, a moving shield for other units, or as cavalry to attack the enemy's back (due to quite satisfactory Speed). Also, notice that each unit killed by a Ghost regenerates their Health Points, so it's a good idea to use them to finish off wounded enemies.
You can retain Ghosts in your army if your hero has the Necromancy ability at least on level IV or if you have chosen the Necromancer specialization (see Heroes: Wizard). The cost is in crystals and depends on the level of the creature.
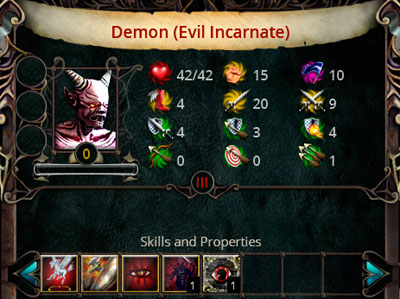
Recruitment Cost
None
Upkeep
8 crystals per round
Location/Recruitment
Can be summoned by the Summon Demon spell or the Dark Pact ritual
Alignment
Evil
Skills
Flying - can move over other units and impassable terrain losing only the usual amount of movement points and not using Stamina. A flying unit cannot be trampled and is not affected by terrain modifiers
Armorpiercing Strike - ignores half of the enemy's Defense
Hex - targets hit by a Hex lose 1 Attack, Resistance and Defense point for 4 rounds. High Resistance may shorten the effects
Intimidation - if hit, the target's Morale drops by 1
Fear Spell - decreases the target's Morale by 8
Demons are pretty effective offensive units that perform well against heavily guarded enemy troops (due to Armorpiercing Strike) and in attacking its archers and spellcasters. The problem is, they themselves don't have a lot of Health Points, so they fall to enemy attacks pretty easily. Their remaining skills aren't particularly useful as well, given that it's much more effective to kill the enemy rather than to scare it. The sole summoning process isn't a pleasant one, either, because it involves sacrificing a living allied unit. Militiamen and other weak creatures are good for that, but the whole strategy requires constant repetition (Demons don't stay after battle).
To retain Demons as units in the army, you need to perform the Dark Pact spell.
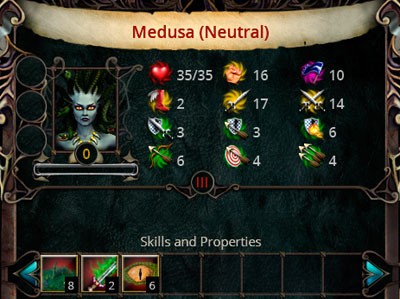
Recruitment Cost
300 gold, 40 crystals, 1 mandrake, 1 arcanite
Upkeep
60 gold and 8 crystals per round
Location/Recruitment
Sometimes appear in Palace as mercenaries
Alignment
Neutral
Skills
Swamp Knowledge - the unit doesn't lose Stamina while crossing a swamp and can move over them as over plains. Receives a bonus to Defense when standing on a swampy terrain
Poison Attack - deal 2 poison damage each turn for 3 rounds
Petrification - turns a hit target into stone for 6 rounds. In that time, the target receives a bonus to defensive statistics, but cannot perform any action. High Resistance may shorten the effect's time
Medusas are smart hunters - they approach their enemies from a safe distance, turn them into stone and deal a murderous blow (petrified targets cannot counterattack!). The ability to poison hit enemies is an additional asset that allows them to eliminate whole groups of enemies.
Their only drawback is their low survivability - a skilled Archer can eliminate a Medusa with a single shot, so it's best to use Medusas as support to other units and to petrify the most dangerous targets (ones that deal the most damage), then run immediately afterwards. Such tactic guarantees that even the strongest opponents, such as Hydras or Cyclopes, become a lesser threat.
You can acquire Medusas as mercenaries in Palace, but the chances of them appearing in one are small.
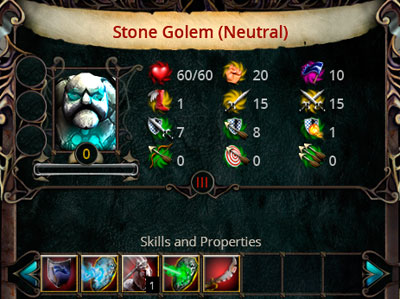
Recruitment Cost
200 gold, 50 crystals, 2 marbles
Upkeep
10 crystals per round
Location/Recruitment
Can be created out of a special bar [Golem Ingot] usually found in neutral locations. Requires Artifact Master
Can also be summoned by a special spell which is found only in the form of a scroll (very rare)
Alignment
Neutral
Skills
Intrepid - Morale always stays on the same level
Spell Immunity - can't be targeted by any type of spell. Regular magic attacks have the usual effect, same as magic abilities
Stunning Blow - lowers the Stamina of a hit target by 1
Poison Immunity - the unit is unaffected by poison
Damage Weapon - in battle, melee units lose 1 Attack point for 3 rounds. The effects may accumulate
Stone Golems should belong to rank IV, not III. Their defensive statistics are nothing short of amazing and the immunity to spells is a gigantic bonus. They hit really strong, and the amount of their Health Points makes them a hard nut to crack. Even magic dealing creatures (to which Golems are especially vulnerable), such as Unicorns or Ghosts, have trouble defeating them. Luckily, these stony nightmares are rare, so there are little chances of having to battle them. In case such an encounter takes place, though, remember that the Golem's weak points it its inability to heal.
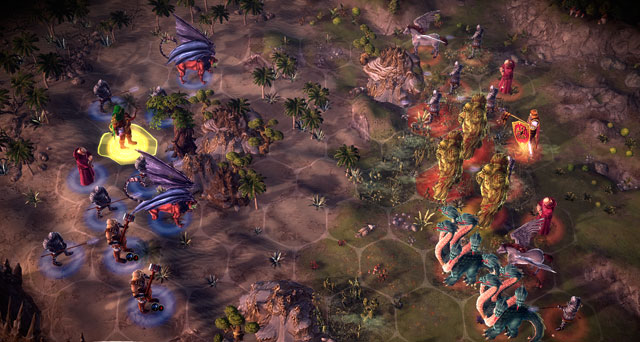
The selection of the best units in the game - of rank IV - rests mainly on luck. What kind of creatures we will encounter is determined by what kinds of eggs we find, what lair we enter (available on the world map) or what kind of money we pay to what kind of a unit. Naturally, we can focus only on units available via the capital city, but they're noticeably weaker than freelance creatures. The last stages of the game should be therefore devoted primarily to finding them. The division into offensive and defensive strategies doesn't make sense anymore - the only thing that matters are what types of creatures we find and how we want to use them. A good use of a Hydra may very well determine the entire outcome of a battle, as can a killer Devil or resistant Treant. The playing style plays an incomparably smaller role than the abilities and statistics of supermonsters. This goes for all hero classes, including Necromancers, who, up to this point, applied a separate strategy. Simply combine their usual approach with the power of new units.

Recruitment Cost
600 gold, 30 crystals, 1 horse, 1 mithril, 1 dionium
Upkeep
120 gold and 6 crystals per round
Location/Recruitment
Sacred Order 6000 gold, 150 crystals, 1 horse, 2 mithril, 3 dionium
Requires Military Academy, Castle and Cathedral of the Immortals
Alignment
Good
Skills
Healing - heals around 7 Health Points of an allied unit, as long as the unit is in range. Using the ability lowers the amount of Ammo. The presence of a Paladin in the army increases the healing rate after battle
Charge - Attack raises with each tile the units travels prior to dealing damage
Smite Evil - deals additional damage to evil units
The best thing about Paladins is that it's very hard to make them die. They may not have an impressive amount of Health Points, but make up for it with high Resistance and Ranged Defense. Archers and spellcasters practically don't stand a chance against them, while melee units will have to try really hard to defeat them. Due to their high Speed and the useful Charge ability, Paladins are the best way to start the battle: they can ride right in between the enemy's weakest forces and ram them right then and there (which usually ends in the target's death). They're also pretty good at being a moving shield (when fighting in the first line of battle) or for flanking the enemy.
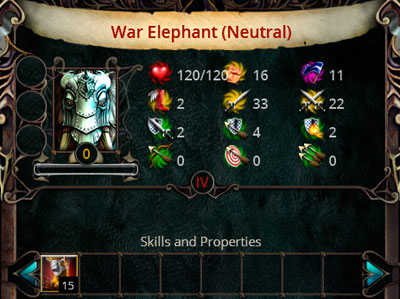
Recruitment Cost
700 gold, 2 mithril, 1 iron
Upkeep
140 gold per round
Location/Recruitment
Elephant Pen 7000 gold, 2 wood, 3 mithril, 1 marble
Requires Castle and Monstrologists Guild
Alignment
Neutral
Skills
Trample - if the Elephant kills the target on attack, it takes its place on the battlefield. Doesn't apply to flying units
Elephants are moderately useful rank IV units. Theoretically, they have a staggering amount of Health Points and a crushing Attack, but these advantages pale in comparison with their weak defensive capabilities and a fairly low amount of Stamina. All this means that the Elephant quickly loses its momentum and becomes weaker with each passing round: damage dealt decreases at an alarming rate, along with the loss of health and Stamina.
You shouldn't however, write the Elephants off completely - most rank I and II units will fall under their first strike. The War Elephant is therefore the perfect choice to quickly attack and eliminate the weakest of the enemy's units in as high numbers as possible. It doesn't perform that well in one-on-one battle, though, especially if the opponent has a heavy armor and high Attack.
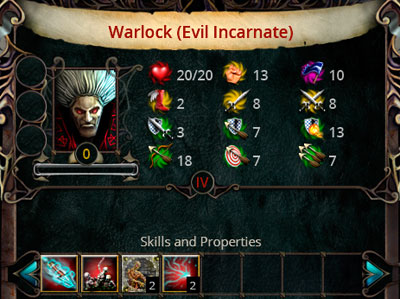
Recruitment Cost
450 gold, 100 crystals, 2 arcanites, 1 black lotuses
Upkeep
90 gold and 15 crystals per round
Location/Recruitment
Castle of Darkness 4200 gold, 300 crystals, 2 arcanites, 4 black lotuses
Requires Castle and Artifact Market
Alignment
Evil
Skills
Magic Shot - deals magic damage to selected target
Master of the Undead - targets killed by the unit are resurrected as skeletons
Raise Zombie Spell - creates a Zombie out of any killed unit (but not machines or the undead). Consumes 2 Stamina points
Energy Control - ignores the target's 2 Resistance points
Warlock is the most powerful spellcasting unit (apart from heroes, naturally). Thanks to an extensive Range and an impressive Ranged Attack, they're capable of killing virtually any rank I unit, and some of rank II. This is, in fact, the best thing about Warlocks, because killed enemies are instantly resurrected as Skeletons, which are additionally given a bonus round. This is something that becomes extremely useful against enemies with lots of ranged and magic units - the defeated enemies can be easily turned against their masters (the best to shoot are Healers, Monks and Clerics!). The rest of the Warlock's abilities have their uses as well, and the unit can acquire further useful spells as they level up (including Massive Curse). The only problem involves keeping them alive, as they're very fragile. Protect them with good defensive units and healing spells.
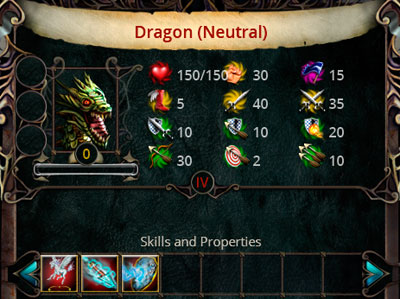
Recruitment Cost
None
Upkeep
None
Location/Recruitment
Can't be hired, but any allied unit can be turned into it using the Dragon Form spell
Alignment
Neutral
Skills
Flying - can move over other units and impassable terrain losing only the usual amount of movement points and not using Stamina. A flying unit cannot be trampled and is not affected by terrain modifiers
Magic Shot - deals magic damage to selected target
Spell Immunity - can't be targeted by any type of spell. Regular magic attacks have the usual effect, same as magic abilities
Dragons are legendary creatures that can be found only in the deepest caves where they guard their treasures. They're perfect predators, virtually without a fault - they are completely immune to magic, can fly over any type of terrain, breathe fire over two tiles and kill most units with a single strike. Their scales are thick enough to protect them against almost any kind of attack (and especially magic), so there's practically nothing that can challenge them. One Dragon is capable of defeating an entire army, as long as it's not led by a powerful hero (Warrior or Scout) or several rank III and IV units.
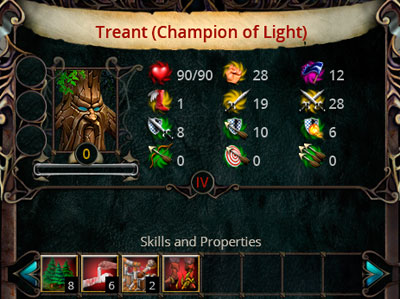
Recruitment Cost
350 gold, 30 crystals
Upkeep
70 gold and 6 crystals per round
Location/Recruitment
Can be grown from a special nut usually found while conquering neutral locations. Requires Stonehenge in the capital
Alignment
Neutral
Skills
Forest Knowledge - the unit doesn't lose Stamina while crossing a forest and can move over them as over plains. Receives a bonus to Defense when standing in a forest terrain
First Aid - regenerates 6 Health Points during rest. Regeneration also accelerates outside of battle
Siege - accelerates the destruction of enemy fortifications by 2
Roots - immobilizes a hit target for 3 rounds
Treants are powerful defensive units, with an impressive Counterattack, good defensive statistics and quite a lot of Health Points. It's best to put them directly on the enemy's route and they will take of the rest (Roots are useful here). A small range practically eliminates them from raids on enemy forces, but that's not their purpose anyway. In case of danger, heal them and put them back into the fight.
To acquire a Treant, you first nee to acquire its nut while exploring the world map, and then bring it to the city in which you have Stonehenge. Open its recruitment screen and drag the artifact into the slot reserved for rank IV units.
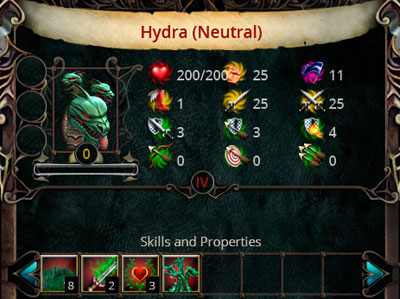
Recruitment Cost
800 gold, 40 crystals
Upkeep
160 gold and 8 crystals per round
Location/Recruitment
Can be hatched from a special egg usually found while conquering neutral locations. Requires Monstrologists Guild
Alignment
Neutral
Skills
Swamp Knowledge - the unit doesn't lose Stamina while crossing a swamp and can move over them as over plains. Receives a bonus to Defense when standing on a swampy terrain
Poison Attack - deal 2 poison damage each turn for 3 rounds
Regeneration - regains 3 health points each round. Accelerates healing rate outside of battle
Attack All Enemies - deals damage to all opponents on adjacent tiles
Hydra - right next to a Dragon - is the most powerful unit in the game. While they move a little sluggishly and their defensive statistics aren't that excellent, they don't have their match against groups of enemies. They not only attack all units within adjacent tiles, but also poison enemies and heal themselves every round. What's especially important, only one hit opponent can perform a counterattack, so target foes with the lowest Counterattack or ones that would die from a single strike.
To acquire a Hydra, you first nee to acquire its egg while exploring the world map, and then bring it to the city in which you have Monstrologists Guild. Open its recruitment screen and drag the artifact into the slot reserved for rank IV units.
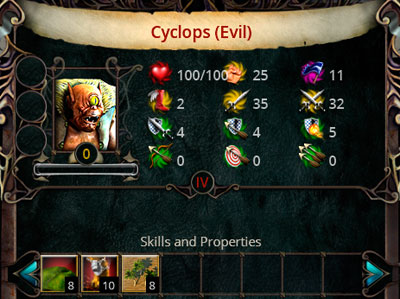
Recruitment Cost
400 gold
Upkeep
80 gold per round
Location/Recruitment
Sometimes appear in Palace as mercenaries
Alignment
Evil
Skills
Hills Knowledge - the unit doesn't lose Stamina while crossing hills and can move over them as over plains. Receives a bonus to Defense when standing on a hilly terrain
Trample - if the Cyclops kills the target on attack, it takes its place on the battlefield. Doesn't apply to flying units
Desert Knowledge - the unit doesn't lose Stamina while crossing hills and can move over them as over plains. Receives a bonus to Defense and Counterattack when standing on a desert terrain
Cyclops is simply an improved version of the War Elephant. They fulfill exactly the same role, but have better statistics. More Stamina allows them to act more frequently, deal more damage and have better armor. They're therefore perfect to eliminate basic and moderately advanced enemy units, but rather fail against stronger types of troops.
You can acquire Cyclopes as mercenaries in Palace, but the chances of them appearing in one are small.
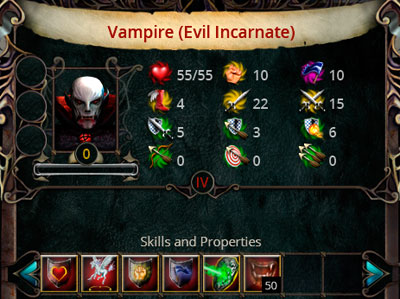
Recruitment Cost
None
Upkeep
15 crystals per round
Location/Recruitment
Can be summoned by the Raise Vampire spell
Alignment
Evil
Skills
Feels No Pain - wounds received don't affect the amount of dealt damage
Flying - can move over other units and impassable terrain losing only the usual amount of movement points and not using Stamina. A flying unit cannot be trampled and is not affected by terrain modifiers
Tireless - the unit won't lose Stamina while performing an action
Intrepid - Morale always stays on the same level
Poison Immunity - the unit is unaffected by poison
Bloodsucker - sucks Health Points on attack and counterattack in the amount equal to 50% of dealt damage
For rank IV units, Vampires aren't particularly strong. Their biggest asset is the ability to suck the life out of hit targets, which greatly prolongs their survivability (on the other hand, they can't be healed the regular way on account of being undead). It's a good idea, then, to improve their Attack and Counterattack to increase these effects. In themselves, they don't stand a chance against other rank IV units, so you'd be better off using them as a flying cavalry to dispose of enemy archers and spellcasters.
You can retain Vampires in your army if your hero has the Necromancy ability at least on level V or if you have chosen the Master Necromancer specialization (see Heroes: Wizard). The cost is in crystals and depends on the level of the creature.
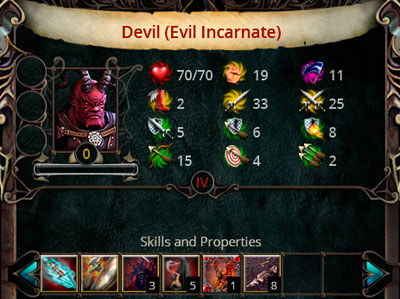
Recruitment Cost
None
Upkeep
20 crystals per round
Location/Recruitment
Can be summoned by the Summon Devil spell and the Dark Pact ritual
Alignment
Evil
Skills
Magic Shot - deals magic damage to selected target
Armorpiercing Strike - ignores half of the enemy's Defense
Intimidation - if hit, the target's Morale drops by 3
Soul Stealing - after killing an enemy, the units recovers 5 Health Points
Summon Imp Spell - summons an Imp on an adjacent tile. The Devil loses 3 health points. Uses up 1 Ammo point
Deadlands Knowledge - the unit doesn't lose Stamina while crossing deadlands. Receives a bonus to Defense and Counterattack when standing on a deadland terrain
Devils are made mostly to fight powerful and heavily armored units. With the Armorpiercing Strike, they easily defeat Paladins, Stone Golems or Treants. While they have solid defensive statistics, they aren't very mobile, so their usefulness in raids on enemy formations is limited. They are, however, great at killing single opponents one by one (with healing in between each next one) and facing off the enemy's most powerful beasts.
To retain Devils as units in the army, you need to perform the Dark Pact spell.
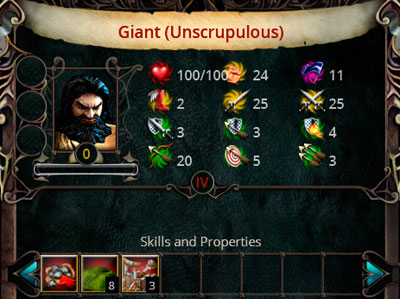
Recruitment Cost
450 gold
Upkeep
90 gold per round
Location/Recruitment
Sometimes appear in Palace as mercenaries
Alignment
Evil
Skills
Collect Ammo - allows collecting several units of ammo in return for one round
Hills Knowledge - the unit doesn't lose Stamina while crossing hills and can move over them as over plains. Receives a bonus to Defense when standing on a hilly terrain
Siege - accelerates the destruction of enemy fortifications by 3
Giants are ranged units which also perform quite well in melee combat. Their greatest flaw is a small amount of Ammo which has to be constantly replenished. In case of real danger, though, Giants can approach the enemy and deal some severe damage, often killing several units on the spot. They aren't fit for a frontal assault, though, because other rank IV units easily break through their weak armor.
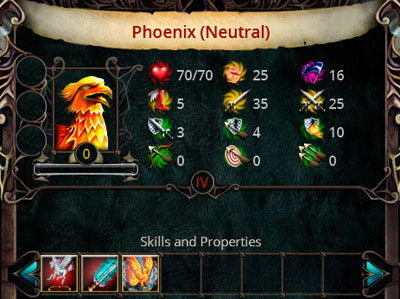
Recruitment Cost
2000 gold, 80 crystals, 1 arcanite, 2 dionium
Upkeep
400 gold and 15 crystals per round
Location/Recruitment
Can be hatched from a special egg usually found in neutral locations. Requires Monstrologists Guild
Can also be summoned by a special spell which is found only in the form of a scroll (very rare)
Alignment
Neutral
Skills
Flying - can move over other units and impassable terrain losing only the usual amount of movement points and not using Stamina. A flying unit cannot be trampled and is not affected by terrain modifiers
Magic Strike - strikes have magical nature which ignores the enemy's Defense and can be reduced only by their Resistance
Reincarnation - if the unit dies in battle, it's instantly resurrected with a maximum amount of health points. Available only once per battle. Doesn't work if the Phoenix is the last unit on the battlefield
Phoenixes fulfill the role of a sky cavalry which main purpose is to reach and eliminate enemy archers. They're also not bad against other rank IV creatures, all thanks to the extremely useful Reincarnation ability. Seeing as they deal magic damage, they perform well against frontal offensive and defensive units which don't usually have a high Resistance. All this makes Phoenixes skilled killers, which are very hard to kill, and even harder to keep. Their upkeep cost is incomparably higher than any other creature's.
To acquire a Phoenix, you first nee to acquire its egg while exploring the world map, and then bring it to the city in which you have a Monstrologists Guild. Open its recruitment screen and drag the artifact into the slot reserved for rank IV units.
The Broken World is inhabited by many different races, all of which struggle to survive on the planet's inhospitable fragments. Each of these races is characterized by a different lifestyle and numerous specific traits, which affect the terrain they live on. This, in turn, means that each tile making up the game's grid is governed by a different set of rules, depending on what type of creature it inhabits.

You must have noticed that heroes are always human, but the units recruited in the castle aren't race-limited. This is because each kingdom in universal by default, but you can affect the shape of the empire by forming alliances that give you access to racial units and buildings. How to do it? Enter the domain of another race (for example, halflings' or elves'), and negotiate a mission. Remember, though, that the mission can be only completed by the hero who received it. Once it's completed, return to the quest giver and collect your reward: access to a new race. Importantly enough, you get access not only to the specific tile inhabited by members of the new race, but to all analogical ones within the grid. Simply reach them with your hero and the annexation will be completed without bloodshed! Forming an alliance with elves is nothing short of forming an alliance with the entire race within the entire drifting fragment of the world - a considerable bonus.
Below you will find basic information on all races living in the land. It should help in effectively managing your politics and therefore winning battles with hostile lords.
Icon
Alignment
Location
Corruption Level
Description

Neutral
Everywhere
Average
Humans are a very common race. They inhabit all kinds of terrain and can serve under any type of master (both good and evil). They grow in an average rate and are affected by various random events. Unfortunately, you can't form a global alliance with them, but only bribe particular settlements.
Icon
Alignment
Location
Corruption Level
Description

Evil
Swamps
Gigantic
The presence of goblins means two things: small income from provinces and gigantic levels of corruption. Members of this race are bad to the bone, so only evil masters with evil inclinations are able to keep them under control.
To form an alliance with goblins, you need negative karma, a large army and a completed mission - involving killing a certain number of Elves. The green mongrels also love all kinds of shiny things, so instead of completing a mission you may bribe them - but that requires a hero with high-level Diplomacy and around 1500 gold.
Buildings received as part of the alliance raise income from swampy areas, but lower the citizens' Happiness.
Goblins as units are described in Units and Strategy: Rank I - Units.
Icon
Alignment
Location
Corruption Level
Description
Evil
Hills and plains
Below average
Orcs are addle-headed and violent creatures. Their presence lowers income from inhabited provinces and they tolerate evil masters only. They are, however, strong warriors worth keeping in the army.
To form an alliance with orcs, you need a strong army and negative karma. Their mission involves plundering a chosen province. Their buildings raise income from crystal tiles and allow the recruitment of the Horde as guards. From time to time, the more bloodthirsty tribes raid nearby enemy terrains.
Orcs as units are described in Units and Strategy: Rank I - Units.
Icon
Alignment
Location
Corruption Level
Description

Good
Plains
Average
Halflings are peaceful beings and forming an alliance with them is nothing difficult - you only need to defeat several dozen Brigands and return with proof of completing the mission. In return, you get buildings that raise population growth rate and give you income in gold.
Halflings as units are described in Units and Strategy: Rank I - Units.
Icon
Alignment
Location
Corruption Level
Description

Good
Forests
Low
Elves inhabit dense forests and are rather reluctant in inviting strangers. If, however, the hero has a large enough army and a pure heart, they may be given a mission to complete. Its nature is strictly heroic as it involves rescuing several maidens from mages' towers (sorcerers, necromancers, etc.). These are a little hard to come by (towers, not maidens), but the benefits of an elvish alliance are definitely worth the trouble. Elvish buildings raise crystal income and improve Happiness levels in all provinces by 1.
Elves as units are described in Units and Strategy: Rank I - Units.
Icon
Alignment
Location
Corruption Level
Description

Good
Hills and plains
High
Hardly anyone is able to gain the trust of dwarves or conquer their lands. The brave dwarves divide their time between working the mines and fighting monsters, and they've reached excellence at both.
Forming an alliance with them is not easy. To begin negotiations, you need a large army, then, during a random event, acquire a random artifact from a bandits' cache, and bring it to the dwarves. Alternatively, you can bribe the dwarvish lord, but this requires high-level Diplomacy and insane amounts of gold. Regardless of the way, the alliance gets you a significant boost of income (especially in mountain provinces) and the possibility to hire an elite Dwarvish Clan as guards.
Dwarves as units are described in Units and Strategy: Rank I - Units.
Icon
Alignment
Location
Corruption Level
Description

Neutral
Swamps and forests
Average
Lizardmen and a close-knit, religious community which can be impressed only with hunting skills. To form an alliance with them, you need a large army and have to kill several Giant Slugs. In return, you get buildings that raise crystal income. Keep in mind, though, that the presence of Lizardmen in the kingdom is problematic - their constant religious wars and bloody rituals invite frequent turmoil.
Lizardmen as units are described in Units and Strategy: Rank I - Units.
Icon
Alignment
Location
Corruption Level
Description

Neutral
Plain
Average
Centaurs aren't interested in grand politics or money - they're only interested in hunting. To negotiate with them, you need a very large army. Once it's covered, you get a mission in which you have to kill a certain number of Ogres. It's a pretty serious challenge, considering Ogres aren't too common and battling them is never easy. Nevertheless, it's worth the risk because Centaurs are excellent warriors, and their buildings raise both gold and crystal income.
Centaurs as units are described in Units and Strategy: Rank II - Units.
Magic is an extremely powerful tool that may well become the turning point in a losing battle. Wizards aren't the only ones who can use it, heroes of other classes have access to it as well. While they usually have it a bit harder, their simple tricks can sometimes cause a great deal of trouble (see: Heroes). Regardless of our likes and dislikes concerning magic, every adventurer should be equipped with at least several basic spells to give them a chance for a quick reaction to the enemy's doings - otherwise enemy spellcasters would have been practically undefeated!
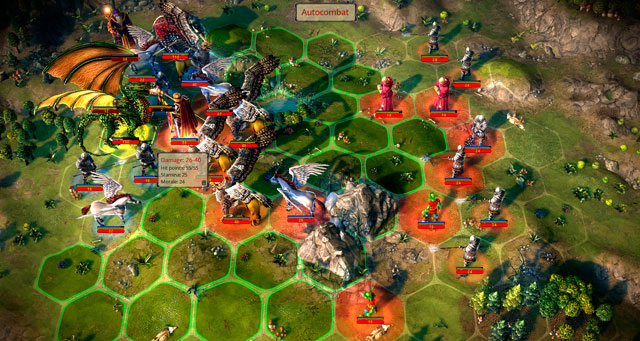
Casting spells comes with several restrictions. Most importantly, the spellcaster needs to know them - after all, they're not self-taught. This is where schools of magic, built in the capital, come into play. The first level (called "circle") allows you to build maximum four schools, the second three, then two, and finally only one ("of the highest circle"). The correlation is inversely proportional, as you can see in the table below. In practice, as far as a beginning spellcaster can have a rich base of spells, sooner or later they're going to have to specialize. This doesn't go for scrolls, obviously, but the chances of finding one are completely random.
Building Level (Circle)
Available Schools
I
4
II
3
III
2
IV
1
The modest amount of schools of magic isn't the only limitation: casting spells uses up Stamina and crystals. The former is one the caster's basic statistic, so any shortage may be resolved with proper advancement and picking the right equipment. The situation is a bit worse when it comes to crystals, which belong to the kingdom and which supply may run short very quickly. It's therefore paramount to secure yourself large crystals reserves: each spell uses up a certain amount, while summoned creatures and units retained after battle require additional and constant expenses (see: Units and Strategy). To gain more crystals, build adequate buildings and expand your kingdom over new areas.
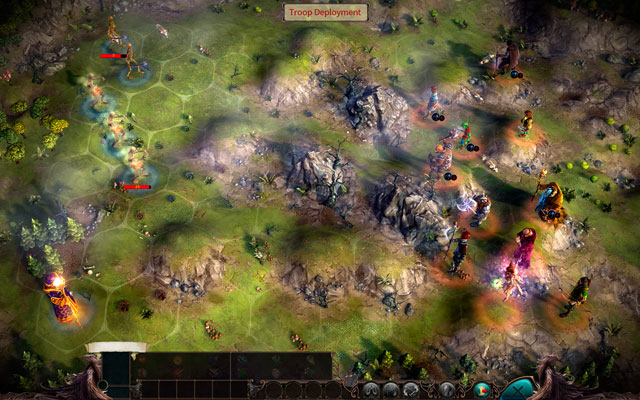
Further pages outline three most effective schools and spells combinations. They contain quite a lot of tips for both self-taught spellcasters, necromancy enthusiasts and amateurs of the illusionary arts. Each build has been thoroughly tested and well-thought-out, and detailed descriptions should provide answers to all uncertainties. The selection of spells for the hero is, sadly, limited (same as the number of available schools), so the summary below should prove helpful. The chosen wizard archetypes: Necromancer, White Mage and Illusionist, have been created solely for the purpose of this guide and serve as optimal choices for specific situations described in individual chapters. They also correspond to different styles of play, so everyone should find what they're looking for.

Some of you might notice that none of the summaries pertain to the school of Chaos Magic - it's all due to its noticeable weakness and many limitations, which lessen its effectiveness to a great extent. As such, it's not worth the notice (unless you're stubborn and play as a Dark Knight).
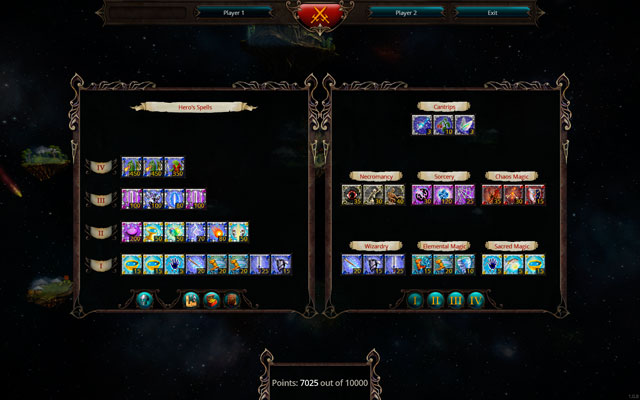
The complete summary of all spells is easily available to all players - simply select multiplayer in main menu, move to the hot seat mode and open the spells tab (see above). You can test your tactic and moves here.
Necromancers are heroes that specialize in summoning the undead and they're the best option for beginner players who are only starting they're adventure with magic. As lovers of the undead, they perform excellent against weaker opponents, all due to the fact that can raise new units from the bodies of fallen warriors (both allied and opposing). Wizards with the Necromancy ability are the optimal choice for Necromancers, though Mages aren't bad either. Their most important skills are Necromancy, Summoning, Wisdom and Concentration.
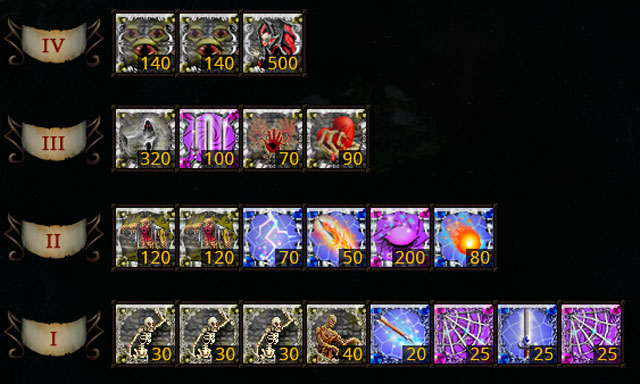
Battle strategy is quite simple. In most of the initial encounters, you only need to kill an enemy unit and turn it into a Skeleton or a Zombie - and the battle is practically won because you've just triggered an avalanche of the undead. The reason behind it is that each raised unit receives a free action and can, for example, immediately kill another opponent. Afterwards it's only enough to raise another undead, and another, and so forth. In essence, you create an army without losing anything in return. The only limitation here are the bodies on the battlefield (you can't raise the undead or machines!), the Necromancer's spells reserves and Stamina. Importantly enough, if the hero has the Necromancer ability, they can retain a portion of the raised units. It involves some substantial crystals expenses, but it's usually worth it.
I
Necromancy
Sorcery
Wizardry
Elemental Magic
II
Necromancy
Sorcery
Wizardry
III
Necromancy
Sorcery
IV
Necromancy
Necromancers can't rely solely on the creatures they raise - they also need a strong regular army to protect them against the enemy's actions. Defensive troops perform the best in this regard by slowly weakening the enemy and inflicting lots of damage over a longer period of time (see: Units and Strategy). Damage dealing spells also come in handy in that they greatly accelerate the process of raising new bodies. Use them against enemy archers - once they're made into the undead, they become a useful diverting force, raising hell at the enemy's rear. The other spells should be used to make the enemy's life a nightmare, enhance your own units and, obviously enough - to raise new and stronger undead. A suggested set of schools is listed above (optimal spells combinations can vary depending on the situation).
White Mages are wizards whose primary goal is to support their own army with special bonuses and pester the enemy with curses. It's easy to guess that they're perfect choices for heroes with large armies - especially the Enchanter. The Priest isn't bad either, but visibly weaker, so the former is a better option. Nonetheless, both allow to harmonize the Commander's special class bonuses with positive spells that affect the constitution of the entire army. Such a combination is giant bonus to the units' actual effectiveness. Even a simple peasant with a pitchfork in hand may become a ruthless killing machine - as long as you've invested in the following abilities: Wisdom, Magic Power, Concentration, Thaumaturgy, Wand Master, Maneuvering, Offensive Tactics, Defensive Tactics, Discipline, Leadership (if your army has a lot of archers, you may replace Wand Master with Ranged Tactics).
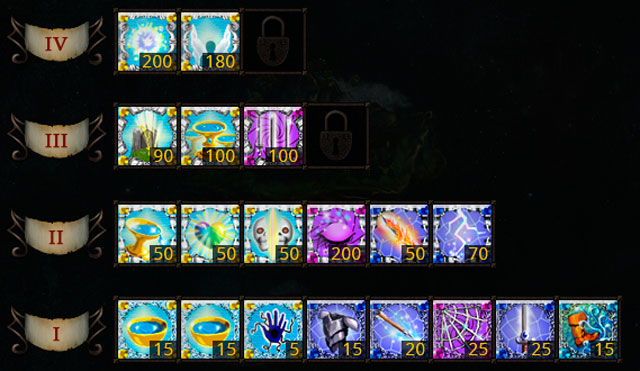
At the beginning of the game, the most important spells are healing spells thanks to which you can save your units from an untimely demise. The school of Sacred Magic, to which they belong, is the primary weapon of any White Mage. It lets you heal wounds, buff your units, even resurrect fallen ones and suck the life out of enemies to give it to your troops. It's a very powerful weapon, though it should be additionally supported by several offensive spells and buffers/debuffers found it the Sorcery and Wizardry schools. See the table below:
I
Sacred Magic
Sorcery
Wizardry
Elemental Magic
II
Sacred Magic
Sorcery
Wizardry
III
Sacred Magic
Sorcery
IV
Sacred Magic
The most important thing is not to enhance your units as much as possible, but to keep them alive. The cost of new units is insane and during longer campaigns reinforcements are hard to come by, so each healing and resurrecting spell is golden. A suggested set of schools is listed above (optimal spells combinations can vary depending on the situation).
The strength of the Illusionist lies in cleverness - they use spells that disturb the natural order of things and have no equals in messing with the enemy's mind. They are the ones that change the nature of individual units, lavishly play with their position on the battlefield, and even turn simple peasants into powerful Dragons, just to transform enemy Elephants into weak Goblins in the next round. The role of the Illusionist is, then, to control the situation and surprise the enemy with new and strange spells. Archmages play this part the best, given that they're the only ones who cast two spells per round. Preferred abilities include Wisdom, Magic Power, Concentration, Thaumaturgy, Wand Master and Summoning.
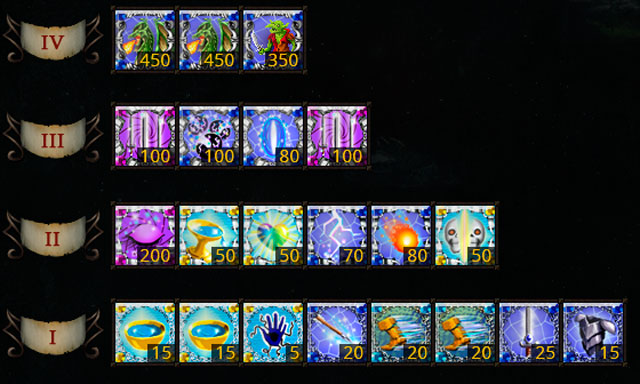
As you can see above, the Illusionist has a very diversified set of spells at their disposal - among them buffing spells, damage dealing spells and spells that affect the current situation. It's a good idea to invest in some healing spells as well, otherwise their army will start melting away pretty quickly. Teleportation is useful for transporting enemy archers or no-contact hostile heroes within the range of your units, while Sleep is effective against enemy spellcasters or their most powerful units. Once you reach the highest circle, you may turn your opponents into Goblins and kill them instantly. The trick with the Dragon also comes in handy, but it's best to use it on units with a high Stamina because it remains the same after transformation (so a peasant turned into a Dragon will still have only 10 Stamina points).
I
Wizardry
Sorcery
Sacred Magic
Elemental Magic
II
Wizardry
Sorcery
Sacred Magic
III
Wizardry
Sorcery
IV
Wizardry
Playing an Illusionist if a troublesome business up until reaching level IV spells - only then do they show their true potential. Until then they may expect lots of difficulties, especially due to the lack of summoning spells. Only ambitious players, who understand the rules of the game and are able to use them to their advantage, should consider choosing an Illusionist. A suggested set of schools is listed above (optimal spells combinations can vary depending on the situation).

 Euro Truck Simulator 2: Scandinavian Expansion Game Guide & Walkthrough
 Enemy Front Game Guide & WalkthroughEador: Masters of the Broken World Game Guide & Walkthrough
 Enemy Territory: Quake Wars Game Guide & Walkthrough
 Endless Legend Game Guide & Walkthrough