In front of you lies unofficial guide to the Dragonshard, the ambitious work being the combination of the real time strategy and RPG. Unfortunately, how you will notice it probably alone, authors of the game went for reliable simplifications so that this symbiosis of species was functioning on the decent level - however it doesn't mean that the game "sucks". Just the opposite, it is pulling in for long hours, although players who are looking for "clear" RTS whether RPG may feel a little disappointed. So lets get to the work gentlemen (and ladies of course) without redundant entries.
The game takes place on two plans (usually) - on the surface and in undergrounds. Simplifying, the surface is in the majority the strategic play and in undergrounds (Khyber) RPG events are going on (in the major part). The skillful combination of these two trends is our task, in order both to derive the fun from the game and to complete the next missions winningly. Main and secondary tasks are waiting for us in every chapter. Execution of main tasks is the necessary condition for completing the given chapter however secondary tasks are posing the marking of the main thread and the good way for getting experience, gold whether magic objects.
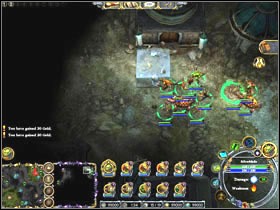
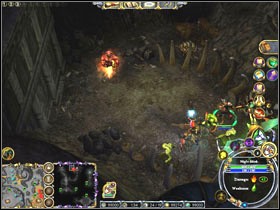
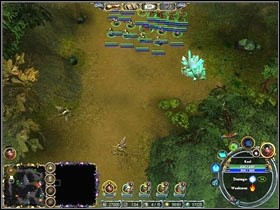
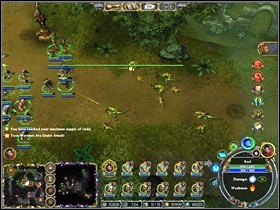
In the majority of the RTSes, in order to build buildings whether to train the army, we need resources. In this subject Dragonshard isn't legging behind from the species - we have two kinds of resources which serves development - gold and title dragon shards. Dragon shards are occurring exclusively on the surface in the form of light blue crystals. They may be collected by all our units apart from flying (and Juggernauts). Don't be afraid when the spare supply of dragon shards runs down on the board - they fall onto the earth during the storm from time to time and we are able again to start gathering. The completely other matter is with gold - we find it mostly underground (Khyber) where it occurs in chests or simply lies on the floor (sometimes remains after defeated enemies). The other way for collecting gold are taxes (dependent on the number of buildings) - you can see the proportional indicator at the bottom of the screen - as much grows within the second as the number points.
The RPG games are mainly associated with character development and with gaining experience. Dragonshard is not different. We get experience by defeating enemies, executing tasks and finding suitable scrolls. We are able to utilize amassed experience points for promoting our warriors to higher levels, which results in increasing life and magic points or in accessing to the more powerful spell.
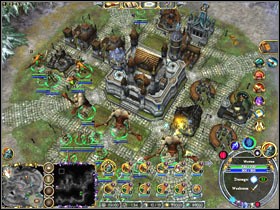
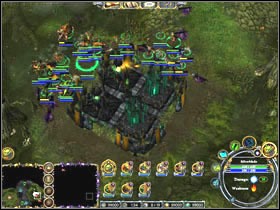
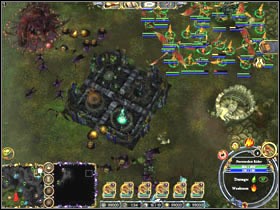
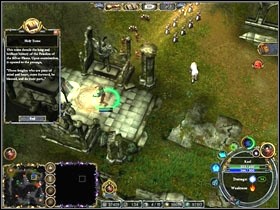
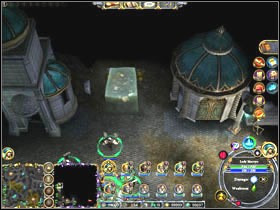
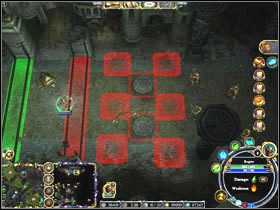
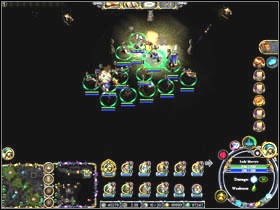
The starting point to the construction of our power is the main base (Nexus) where we put buildings enabling the enrolment of our army and far-away development. It is possible however to put buildings up only and exclusively in places assigned to it - the main base possesses 16 of them (4 groups of 4). It is possible to set buildings up within Expansion which is the reliable variation of the base, however it doesn't possess the main fortress and offers only 4 places to build in. Both Nexus and Expansion are surrounded with walls which are able to being improved, provided that we only possess the suitable quantity of gold and shards. And we are closing to plot elements of the game here - if we collect the suitable quantity of experience points we are able to promote our soldiers to the higher levels. Every building of the given kind lets us promote soldiers for one level higher, however here is the loop-hole - it is necessary to put buildings of the same kind up side by side. If so we want to promote Clerics for instance on 5 level, we have to utilize the whole group (four) of places under buildings and to put on them four Loreholds. However so that it wasn't so straight authors of the game made 4 kinds of buildings available to us additionally, which constructed nearby other buildings, gives us various kinds of bonuses. As in the previous example, we can then construct four Loreholds in order to promote Clerics on 5 level of experience or put only three Loreholds (limiting the level of experience to 4), however strengthened by monument of Clarity, which results that recruited Clerics will have the maximum quantity of energy points. It is necessary to add, that after destroying (either after the loss) of building, the obtained level of experience won't change.
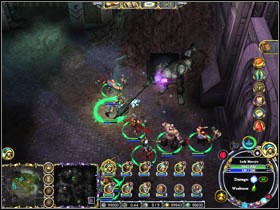
Captains pose the framework of our army - we are able to recruit and promote them in buildings. Every promotion is tied with increasing the maximum quantity of energy, hit and life points. It also comes in with increasing the number of soldiers who are subordinated to the commander - authors of the game prepared the quite interesting solution in the matter of number of the army. Each of commanders stands in the front of the unit consisting of soldiers in the number for one smaller than his present level of experience - i.e. commander on the level 1 remains solo, while commander on the level 5 gives orders to 4 soldiers. Apart from the fact that they pose as very helpful strength also in the attack or the defense, soldiers are kind of protective shield for their commander - enemies' blows gets up first on them, so it is necessary to try to maintain commanders unit on the maximum level. Soldiers' enrolment is trivially simple - it is enough that we will approach with commander to the neighborhood of the base and we will wait the moment (progress of the soldier's enrolment is visible as the yellow progress bar under bars pointing the level of the life and energy). The commander's promotion also affectis the improvement of the possessed talent either gaining extra one - on fifth (the last) level of advancement we get the really powerful power - the Cleric receives the ability to resurrect killed allies for instance. Champions and Juggernauts pose the separate category as powerful units spreading the terror in rows of enemy. Both these kinds are being recruited in the fortress, in the main base, and both are also very expensive. As for Champions, we are able in every chapter to possess only one of their representative, chosen at its beginning (in exceptional situations we can have more than one, for instance mission to rescue Lady Marryn). Since that Champions are powerful, they couldn't also possess soldiers and it isn't possible to promote them to higher levels. They have various, unique powers and skills additionally. Among them are constant gratuities (e.g. increased speed of the regeneration of units), the skills useful in the direct struggle and talents which require one's kind "of charging up" - they depend on amount of hits inflicted by Champion. It is necessary to remember also that hits inflicted by Champions belong to the special category - they ignore every defensive gratuities and enemies' resistance. Juggernauts are only of their kind, powerful creatures, also very expensive in the training but giving huge of injuries to enemies (e.g. Phoenix on the side Order of the Flame). They also counts themselves to units which aren't able to collect resources.
A few tips before starting the game
Building
Name
Gold/Dragonshards
Purpose
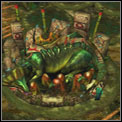
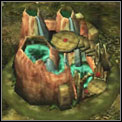
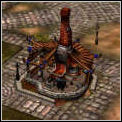
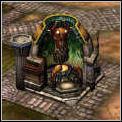
Great Mother
First
450/650
Second
250/200
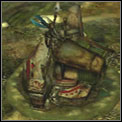
It is central building of your base which makes possible to put other buildings. It is possible to recruit Juggernauts and killed Champions here
Draconic Monument
75/100
We are able to recruit Fire Drakes here
Toxic Bog
75/100
Thanks to this building Archers using polluted arrows reinforces our army
Burial Grounds
75/100
We train Night Skinks here, warriors using help of one's dead co-brothers
Mystic Hut
75/100
Place of shaman's enrolment, irreplaceable if somebody became wounded
Hidden Mound
75/100
Extremely useful Chameleon Rogue are available here, helping us with traps or locks
Collector Burrow
75/100
Place of troglodytes' enrolment
Turtle Den
75/100
Turtles changes into war machines in this building
Pteranodon Roost
75/100
Riders bestriding Pteranodons ere famous for the big combative value
Verdant Cairn
75/100
Place of the Spirits of Nature enrolment
Fighting Arena
75/100
Lizardfolk Fighters, most frequent support of Lizards units, train here
Monument of Power
200/275
It adds the gratuity to given hits for all units which it is possible to recruit in close by buildings
Monument of Vitality
100/100
It raise to maximum the quantity of life points of all units which it is possible to recruit in close by buildings
Monument of Haste
75/75
It raises speed of moving of units recruited in buildings close by
Monument of Clarity
100/100
It raise to maximum quantity of energy points of all units which it is possible to recruit in close by buildings
Tip: we spend gold and Dragonshards for the Champions enrolment only when they die - they are available at the beginning of every chapter for free
(CH)

Inflicted by Champion
(PH)

Physical
(MA)

Magic
(FI)

Fire
(PO)

Poison
Resistances in tables below are given in such an order.
Champion
Description
Gold/Shards
Life/Energy
Hits
Resistances (%)
Abilities/Powers
 Blackclaw
Mysterious advocate of the passion for death and destruction fascinated with effects of effects of poisons and toxins
200/145
660/200
36 CH
75/25/75/75
Passive - Increased Energy Regeneration - all our units regenerates energy faster
Battle - Noxious Gas - releases the cloud of poisoning gases which wounds enemies being located in the given area
Charged up - Venomous Touch - all our units inflicts bigger poison injures
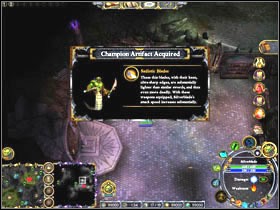
 Silverblade
Nimble and clever, of clear blood Yuan-Ti who devoted his life to the improvement the art of creeping and quiet killing
175/165
635/250
33 CH
75/75/25/75
Passive - Increased Resistances - strengthens all of resistances of our units
Battle - Coiled Death - coils into the ball after which he throws deathly blades all around
Charged up - Speed Boost - all units gains the gratuity to speed of moving and the attack
He is able additionally to hide in the shadow and to find and to disarm traps
 Redfang
He is the effect of the mutation caused by Heart of Siberys. Significantly bigger from others of his kin he may be a halfdragon
305/80
920/100
40 CH
75/75/75/25
Passive - Attack gratuity - our units gains the gratuity to inflicted injuries
Battle - Fire Breath - throws the stream of fire away in the pointed direction, making substantial injuries
Charged up - Battle Rage - all units receive the gratuity to the attack and increased life points
 Wowen
WowenThe highest Lizardfolk shaman, is posing the bridge between the pasta nd the Lizardfolk present
210/210
720/300
35 CH
25/75/75/75
Passive - Increased Hit Points Regeneration - regeneration of life points speed is increased
Battle - Call Lightning - calls the powerful lightning inflicted injuries to enemies being located in designated area
Charged up - Mass Regeneration - our units receives increased regeneration of life points for some time
War FelldrakeThey were called by Lizards one more time in order to wreak havoc in rows of the enemy
1250/1250
3700/100
100 CH
85/20/75/75
Ram - moves violently forward destroying everything on his way
Name
Gold/Shards
Life/Energy
Hits
Resistances (%)
Abilities/Powers
 Chameleon Rogue
75/40
290/80
20 PH
20/70/70/70
 Fire Drake
125/60
560/90
28 FI
65/0/65/65
 Lizardfolk Fighter
105/45
380/50
36 PH
70/20/70/70
 Night Skink
75/50
280/100
20 FI
65/65/65/0
 Poison Archer
110/55
360/45
30 PO
0/65/65/65
 Pteranodon Raider
105/40
380/50
30 PO
65/65/0/65
 Spirit of Nature
105/55
520/70
24 PH
70/70/20/70
 Spitting Turtle
115/50
355/40
28 PO
65/65/0/65
 Tribal Shaman
75/60
270/115
18 MA
0/65/65/65
 Troglodyte Surveyor
95/50
250/80
26 MA
65/65/65/0
He is able to amass resources faster than other and to detect invisible units
Main Quests
#1 - Defeat the Invaders
Side Quests
#1 - Find the True Killer
#2 - Reclaim the Bridge
#3 - Save the Night Skinks
#4 - Solve the Mummy's Tomb
#5 - Restoring Darroc's Monument
#5a - Find Right Eye
#5b - Find Left Eye
#6 - Bonus - Undead Hunter
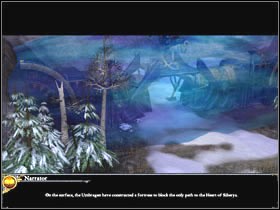
#7 - Bonus - Minotaur Slayer

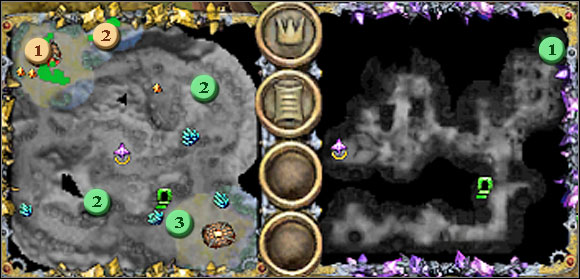
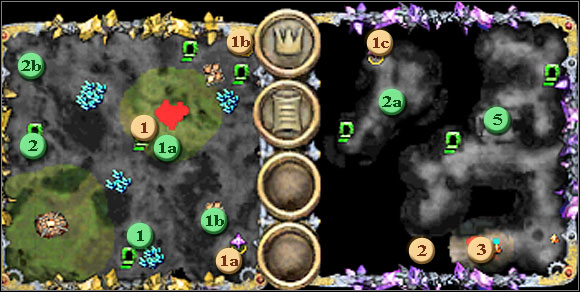
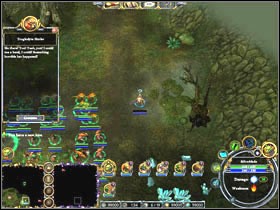
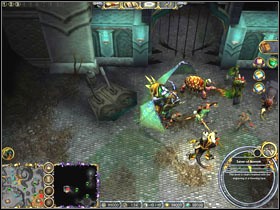
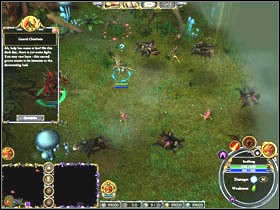
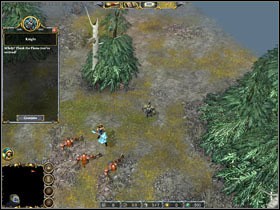
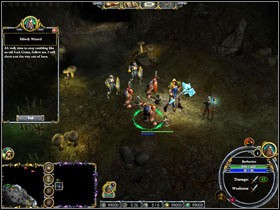
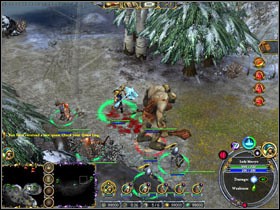
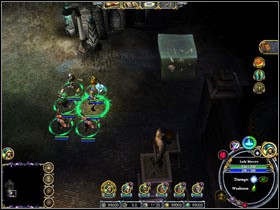
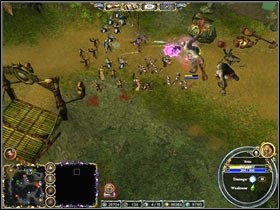
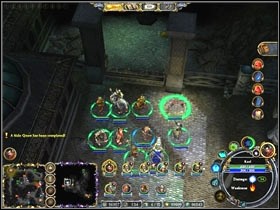
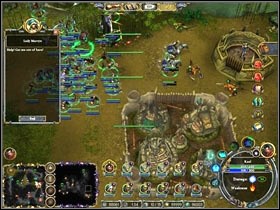
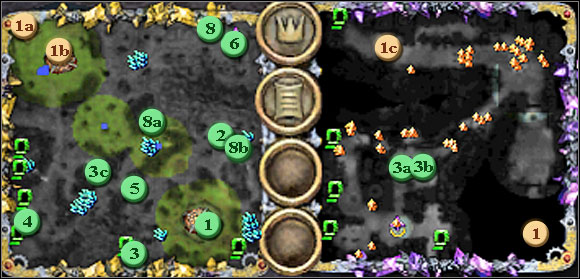
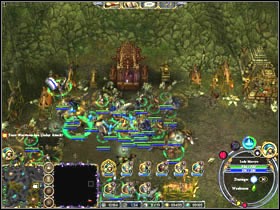
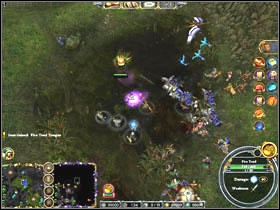
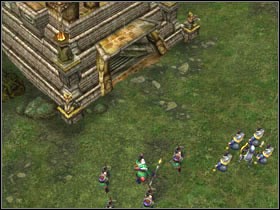
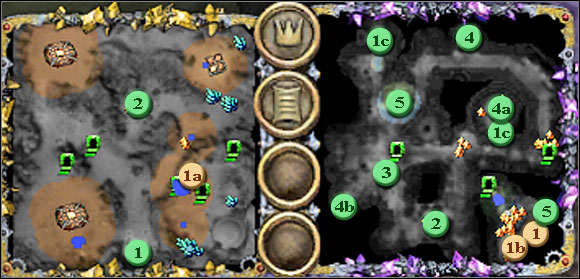
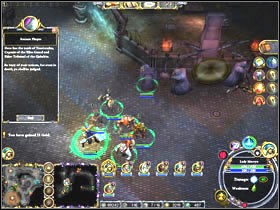
After many decades of the lonely life in peace, Lizardfolk tribes have to close together and turn up for armies which invaded their land. As it turns out, Lizardfolk are legitimate guards of Heart of Siberys and from ages they fought against all who were quite powerful to cross the Ring of Storms. During the meeting of leaders of all tribes, Silverblade appears. He informs us about the attack on the village. He also calls for help in fighting off that #1 attack, as warriors are few in the village. And we enter the game at this moment.
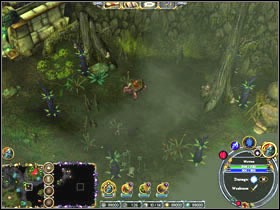
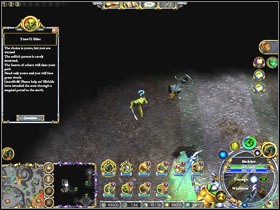
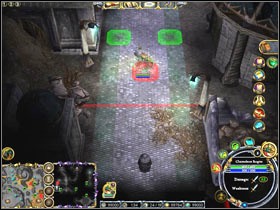
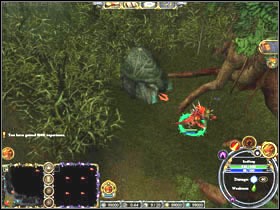
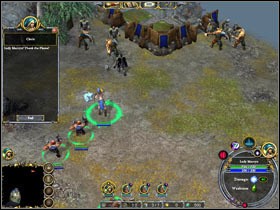
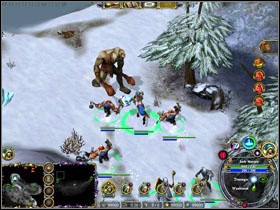
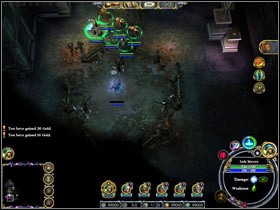
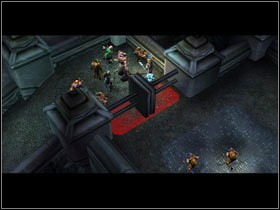
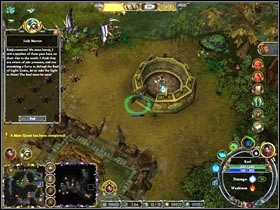
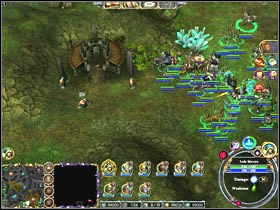
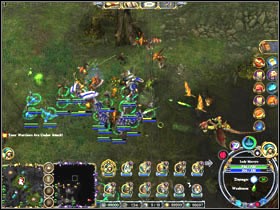
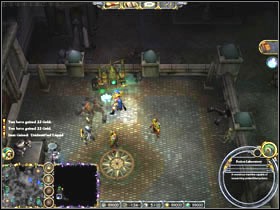
We proceed to the north-west after the Champion choice, with only possible way. We meet two warriors accusing each other for killing one from members of the elder of the tribe. It follows from the prompt that the true killer hid in one of visible #1 baskets (attention, there probably is a bug resulting that baskets are empty so we have to try the mission one more time). After unraveling the mystery we move further on, reaching the bridge, which the archer hid at. It turns out that the bridge is being guarded by Humans, whom the archer escaped - we attack them recovering the control of the #2 bridge. Unfortunately, the next bridge is unavailable for the time being so the only way left for us is through undergrounds.

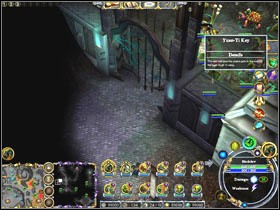
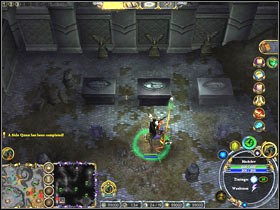
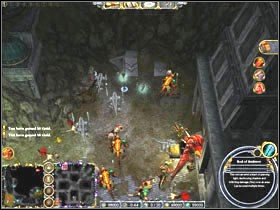
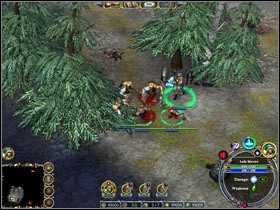
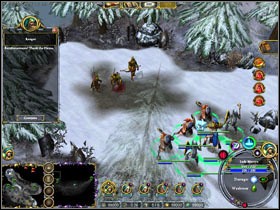
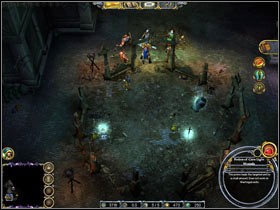
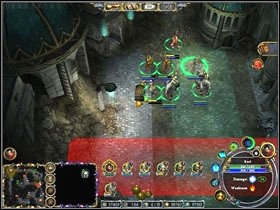
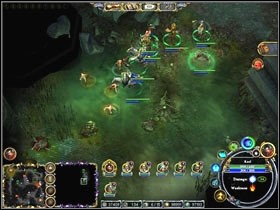
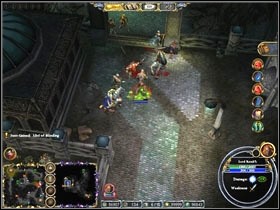
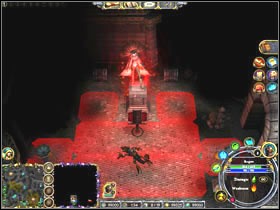
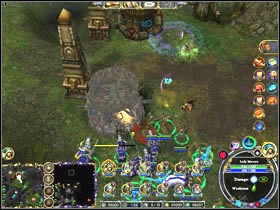
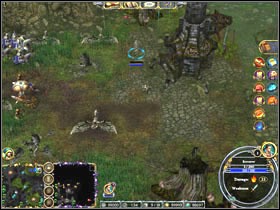
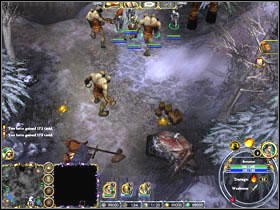
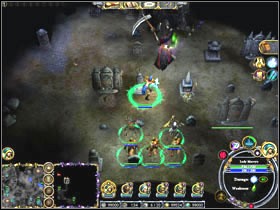
After went down we meet Night Skinks who call #3 for help fighting against enemy. After the fight we move east reaching the board with the ancient text in the language of elves. Such text may be read only by Night Skinks or also by the wizard, e.g. Blackclaw. We receive the next task - unraveling the secret of the crypt of the #4 mummy. In order to set oneself against her it is necessary to read the message one more time - hostile undead will show up then. After fight we return to the main corridor and we make for the south and then with way westward. The road is filled with undead minotaurs. We reach the chamber ruled by Grave Keeper - there is also a container which is able to enliven dead creature. We proceed to the eastern direction.
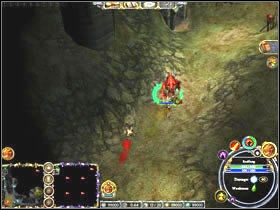
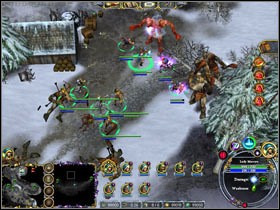
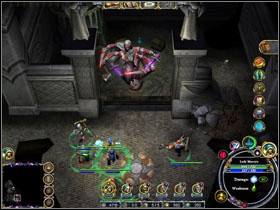
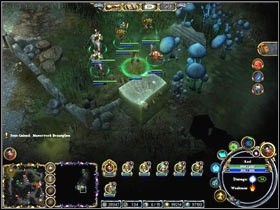
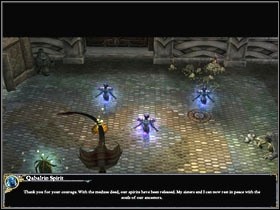
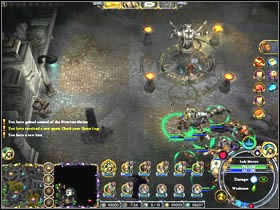
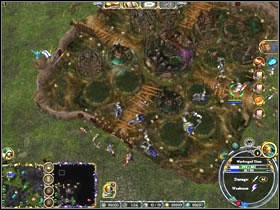
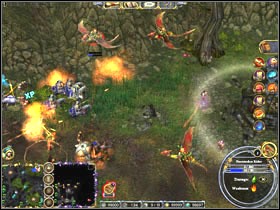
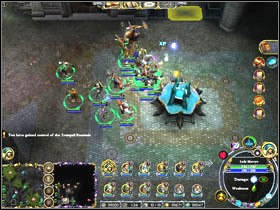
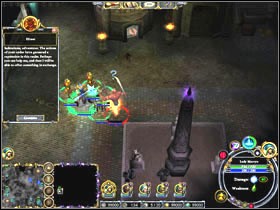
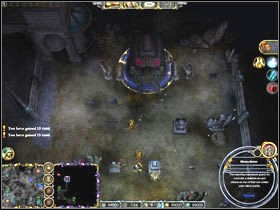
We reach the Tribal Shamans group who defend the Darroc's temple. Unfortunately, thieves have stolen eyes of the statue and of course we have to recover them back #5. Thief of the right eye escaped to the north from where shamans heard some voices, so we go in that #5a direction. After a while we overtake the thief who was found in the impasse. However he entered on some board which caused activating crypt with undead. Following thief's steps, we press the board and we kill undeads. When we put all to death we will receive the #6 gratuity (for killing all Zombie, Mummies and Undead Minotaurs in undergrounds). We move for the left eye which is being located, according to shamans, on the south, guarded by minotaurs #5b. Scouring southern corridors we are able to come across the Minotaur Monument. Killing all met minotaurs will result in gaining the extra #7 gratuity. Now we have only to take won eyes back to shamans after which we will gain the control on Shrine of Darroc. After fulfilling civil duties we are leaving for the surface with passage on the east.
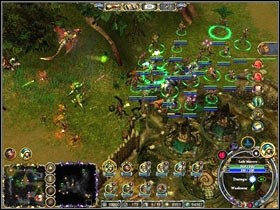
Here after the short struggle, we support warriors in the village and we fight off #1 humans attack.
Main Quests:
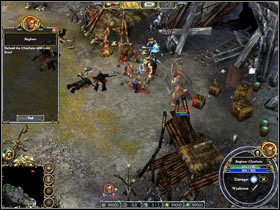
#1 - Destroy the Invaders' War Camp
#2 - Destroy the Bridge to Stop the Dark Beings
Side Quests:
#1 - Defeat the Necromancer
#2 - Help the Ettins
#2 - Find the Lost Duergar
#3 - The Final Battle
After defense of the village, the Lizardfolks had moment of time in order to regroup and to start offensive for attackers. Especially, that what they saw wasn't the common establishment of the Order - it is the war camp surrounded with walls and towers. Since there is no time in order to return for backup Lizardfolks begin the construction of an army. This army is to destruct the enemy's camp.
Moment after beginning of the mission, the scout shows up from undergrounds and warns us against traps and strange creatures. He speaks about the gritty place filled with death too. One of tasks is connected with it - to kill the Necromancer #1. But before we will go into the Khyber I am proposing to prepare the considerable army and go to the north-west where we will find mine being kept by Duergars #2. We will learn from them that there is a war between Duergars and Ettins and they need our help with the battle which is supposed to carry out soon (under walls of our town) #3. They also ask us for help in finding their companion who went under earth (there is an Ettins camp on the north-east #2 - we are able to accomplish a task for them but we won't get Duergars quests then). Duergars and Ettins participate in final battle as well as we, supporting one side of the conflict - we must not allow that our allies die.
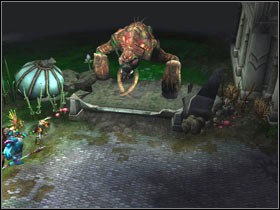
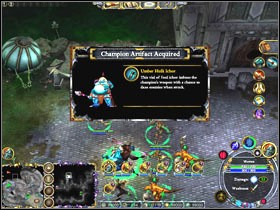
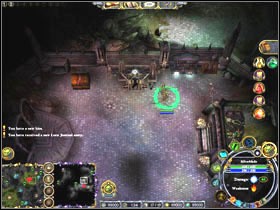
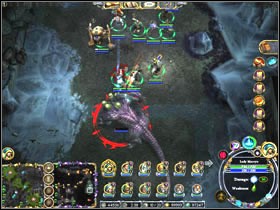
We are going down to Khyber. The quite long corridor is being found to the south where we can find minotaurs and their ruler. After defeating them we go to the north where we encounter Arctic Minotaurs after the short march. After defeating them we get Duergar Journal - evidence for it, that sent by his brothers, scout unfortunately died. We continue exploration of undergrounds going into the corridor to the west. After a few fights we go to the north where Umber Hulk is being revealed to our eyes. The horrendous beast is the very demanding enemy, however, after defeating him we are recompensed with artifact for Champion. We make our way to Necromancer lair #1, being located on the north-east. After the obstinate fight against his servants and himself, we are able to take up his treasures.
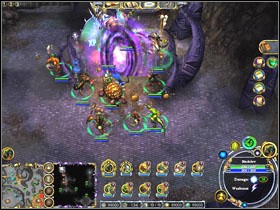
We are able now to move to the base of the Order, of course previously having strengthened our army. However when it turns out, destroying #1 it is only the beginning of our problems - Umbragen are joining the fight. Only method for avoiding the defeat is to destruct the bridge which they can use to get to us #2. In the face of the threat from two sides Wowen takes a decision to call warrior from the past - Darroc. What about it, we will see in the next mission.
At the end of the mission we can get extra gratuities - for collecting all objects from undergrounds and for the discovery of all areas on the map.
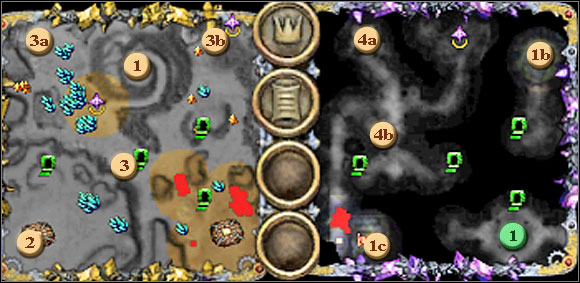
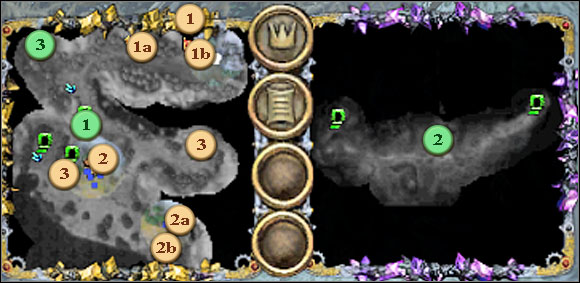
Main Quests:
#1 - Unlock the Entrance to Darroc's Tomb
#1a - Destroy the Dark Ones near the Black Dragon Statue
#1b - Destroy the Dark Ones near the Green Dragon Statue
#1c - Destroy the Dark Ones near the Red Dragon Statue
#2 - Find Darroc's Final Resting Place
#3 - Eye Tyrant Invasion
Side Quests:
#1 - The Turtle Trainer's Plea
#1a - Free the Spitting Turtles
#1b - Destroy the Turtles' Captors
#2 - Investigate the Keeper Hives
#2a - Destroy the Keeper Hives
#2b - Return to the Pteranodon Rider
#3 - Bonus - People Person
#4 - Bonus - Gentle Brother
#5 - The Obsidian Monk's Chest
#5a - Get a Sample of the Monk's Blood
#5b - Open the Chest
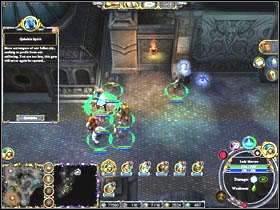
#6 - Answer the Draconic Spirit
#6a - Sacrifice Your Kin
#6b - Quell the Lizardfolk Uprising
#6c - Destroy the Lizardfolk Traitors
#6d - Destroy the Giant Wire Wasps
#6e - Gather the Giant Wire Wasps
In searching for help desperate Lizardfolk take a decision to revive their biggest Champion, Darroc. Unfortunately, saint earths where the place of his last rest is hidden, was desecrated by invaders. This activated the ancient spell and caused the closure of entries to the tomb. Only defeating enemies will make it possible to reach Darroc's remnants.
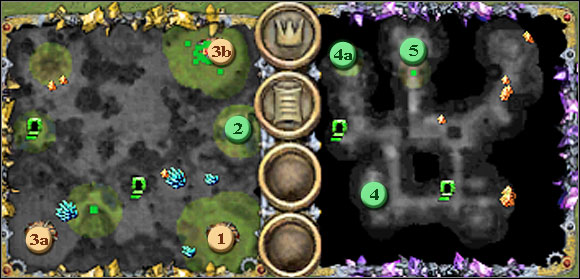
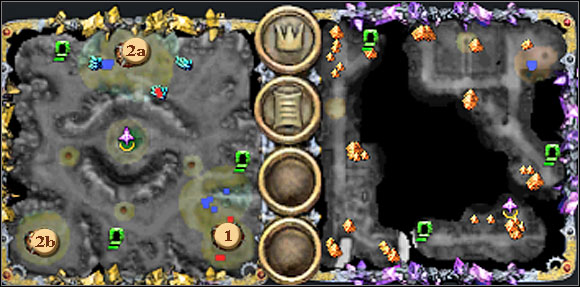
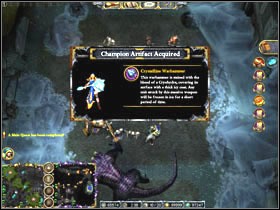
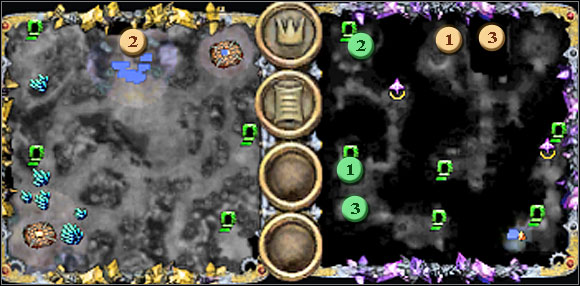
At the beginning I propose to improve walls of our camp and to train archers - one of Umbragen bases is located on the north-east. It is plateau and flying units attack us, so the combination of archers plus towers will be enough completely to the defense against them. After constructing the defense and the improvement in our army, we set off to the east in order to encounter the infected teleport after a while. His other end is located by the Umbragen base so he is unavailable for the time being. Continuing the march to the east we encounter Troglodyte Hurler #1 calls us for help in freeing #1a turtles locked up by Umbragen and destroying the post of dark elves #1b. So we move to the north in order to reach locked up turtles and their executioners. We settle matters with them and destroy the fence, so turtles are able to return to their coach. Now it is time for the Umbragen post, being located on the east. After the hard fight and defeating an opponent, it turns out that we have destroyed guards of Black Dragon Statue #1a (tip - if Blackclaw is our Champion we receive the extra #6 task. We have to choose one of possible options - to devote one's blood (blue stone) or of one's subordinates (red stone, we have to collect 4 of them in the #6a circle). We will receive Champion Artifact in both cases.). We are able now to return to the guard of turtles and to take the prize away and get to know methods of the training of these creatures.
Time for next statue. We move to the north-west. We encounter the enemy's strong resistance and strange slots attacking our units from the earth. The fight against them is pointless since they attain themselves after a while and they attack again. So we move to the more far-away way reaching the Pteranodon Riders village. They ask us for going down the earth and locating sources of strange #2 attacks. The entrance is located on the west. It turns out that slots seen earlier just have their roots here - so we have to destroy them #2a. We encounter guards of these strange structures - if we manage to kill them all before the elimination of roots of slots we will accomplish the secondary #3 task. We have to inform about entire situation Pteranodon Riders #2b who are joining our army in reward. It turns out additionally, that defeating of enemies is activating Red Dragon Statue #1c. (Tip - if Redfang is our Champion we receive the extra #6 task. We have to choose one of possible options - to kill traitors (blue stone) #6c or to burn the whole village (red stone) #6b. Enemies attack us in both cases and in both we will receive Champion Artifact.). So only one, being located in the neighborhood of the other camp Umbragen, is left.


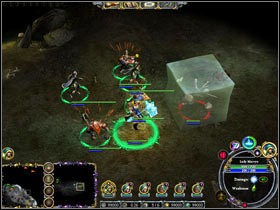
As you remember, the camp is located on the plateau, so we can attack it only with flying units. However destruction of plants which infected the teleport in the neighborhood of the enemy's camp will make it possible to transfer also ground army there. After we won the battle, the last statue, Green Dragon Statue #1b, is active opening the entrance to the area of #1 undergrounds where Darroc's remnants are located, of whom finding is our next task #2 (Tip - if Wowen is our Champion receive the extra #6 task. We have to choose one of possible options - to destroy wasps (red stone) #6d or to form the alliance with them (blue stone) #6e - we have to collect all wasps on the map, presented as yellow dots. We receive Champion Artifact in both cases.). However before we will go there I propose going down to undergrounds through entrance on the east. We will find gold and useful objects as well as Gelatinous Cubes there, which leave the acid, useful in execution of one of tasks.
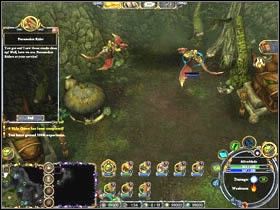
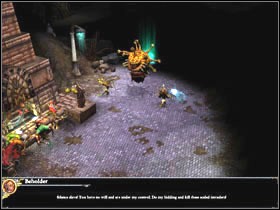
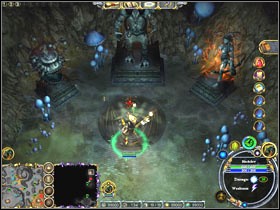
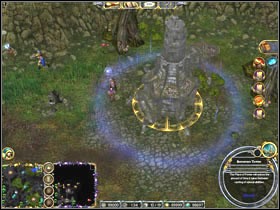
We move to the open passage to Khyber now. After went down we meet Tribal Shamans who try to warn us of some danger. We can see after a while in front of which - it is Beholder who overcame our people and commissions them now to kill us. In order to release them from under the curse we have to eliminate Beholder - if we manage to do it with killing none of shamans we will receive the extra #4 gratuity. We set off to the east where we find the chamber with jailed Obsidian Monk and probably containing the precious cargo in #5 chest. There are books which we can see in the corner of the chamber, with helpful prompts in opening it. It turns out that the monk's blood is the key opening the chest - now we have only to find out how to get it #5a. We learn from the other book that the acid is able to help us to tap blood for the mage and we have a kind of acid (if not, return to the paragraph higher). Now with usage of blood we are able to open the #5b chest. We will find Champion Artifact in it. We move through the corridor to the south.
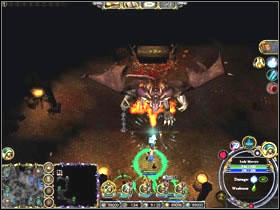
Proceeding down the corridor we encounter unexpected resistance - turns out that there are Beholders with their Lord who seized control on these tunnels and guard the access to Darroc's - it is heavy #3 fight. After defeating them finally we reach Darroc's tomb and resurrect him.
Main Quests:
#1 - Construct a Base
#2 - Save the War Felldrakes
#3 - Cleanse the Sacred Grove
#3a - Destroy the Order of the Flame's Encampment
#3b - Destroy the Dark One's Encampment
Side Quests:
#1 - Bonus - Felldrake Keeper
#2 - Restore the Nature Shrine
#3 - Bonus - Brief Revival
#4 - Restless Spirit
#4a - Stop the Dark Ritual
#4b - Hidden Spirits
#5 - Avenge Greathawk's Death
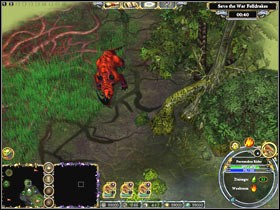
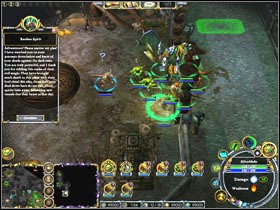
In accordance to the Darroc's piece of advice we go to swamps in order to gain powerful confederates. Admittedly leaders of tribes doubt combative usefulness of these creatures set by nature peacefully but Darroc appears to have a different opinion. But after coming to areas inhabited by Felldrakes, we can see that beasts are attacked by Umbragen. Scouts inform additionally about showed up army of the Order. Admittedly both our enemies conduct fights between themselves however it isn't excluding attacks on us. We are able to rotate this fact for our benefit and to free Felldrakes and get their support through.
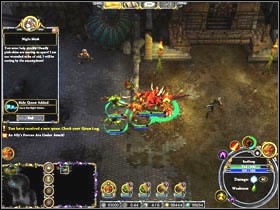
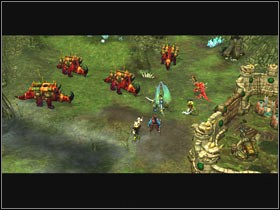
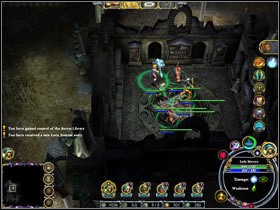
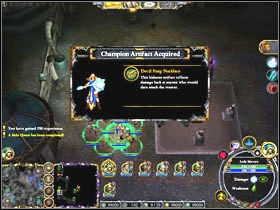
Our first task is to build the base what we do without unnecessary #1 problems. Exploring the map in the meantime gives us some knowledge that the source of the plague which kills Felldrakes is located on the north-west, probably underground. Using the passage on the west we go to Khyber. As we thought, Umbragen have polluted whole this area and additionally they call to the life Blood Queen. Killing her will free Felldrakes #2 but additionally if we do it within the minute after raising her from the dead, we will receive the #3 gratuity. It will be sufficient now to lead animals to our camp after which we will gain the chance of their enrolment (as Juggernaut).

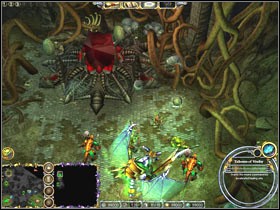
We return to the Khyber world, this time making for the south. We meet Restless Spirit who asks us for the break of the dark ritual executed by Umbragen #4a in one of chambers (we executed this task killing Blood of Queen and her minions) and find and destroy present shells of spirits killed under the earth of #4b (it is necessary to kill all living statues and golems whom we will find). Then we can take two of four scrolls offered to us. In the center of map, more or less, we encounter the spirit of shaman named Greathawk, who isn't able to move himself to the better world until his death is avenged (and of his students) #5. It is necessary in that purpose to defeat Marilith, whose lair is located to the north from here. Fight against the monster doesn't belong to most simple, but after winning her we will receive the totem which we are utilizing on the surface to restore the Nature Shrine #2 power (on the east).
It is left for us only to destroy the base of Order being located on the south-west of the #3a, and Umbragen base #3b in north-east end of the map. Tip - the clock counting 5 minutes is being found at the beginning of the chapter in the top corner. One Felldrake is dying after this time. If we manage to rescue them before first 5 minute, we will receive the extra #1 gratuity. There is a board located on the south of the map with the message which can be read only by Wowen or the shaman. It is Greathawk's Message, and reading it will cause strengthening of all our units.
Main Quests:
#1 - Awaken The Drakes
#1a - Find the Spirit of the Drake
#1b - Complete the Trial of Strength
#1c - Complete the Trial of Wits
#1d - Summon the Fire Drakes
#2 - Destroy the Umbragen
#3 - The Nomad's Safe Passage
#3a - Slay the Minotaurs
#3b - Retrieve the Navigation Tool
#4 - The Illithid Invasion
#4a - Destroy the Illithid Portal
#4b - Return to the Yuan-Ti Elder
Side Quests:
#1 - Claim the Minotaur's Hoard
#2 - Bonus - Puzzle Master
As it turns out, our efforts on purposing defense of the Heart of Siberys against invaders may be assisted by mythical beasts - Fire Drakes. However we have to wake them up, showing both with physical and spiritual strength.
We go down to Khyber through the passage being located closest to our base. It turns out that these locations are adopted as headquarters by a group of minotaurs who amassed huge wealth. Our task is to kill them #1 and to recover treasures back. There will be heavy fights (Minotaur lord in it), after which we return to the surface and we proceed to the north to the next entrance to Khyber.
Defeating units of Thri-kreen which attack us en route, we reach entrance to Khyber. There is Guardian of Strength waiting for us in underground who wants us to prove our #1a strength. We have to enter the chamber visible to the north and fight successively with the Medusa, Frost Beast and Beholder lord. Defeating them assures the guard, that you are the suitable person for waking up of dragons - you receive the half of Spirit of the Drake. Now it is time to get the other half, however this is quite complicated task.
We move towards the map center. Close by entrance under the surface there is a group of Nomads, who unfortunately can't leave these inhospitable areas since their way is occupied by minotaurs and additionally Thri-kreen have stolen their navigational tools. We are being asked for #3 help. We move to the north-west direction reaching minotaurs whom we defeat after longer (or shorter) #3a fight. Then we make for the north-east where the village of Thri-kreen is located. Destruction of their armies and the Barrow building leads to gain searched Navigation Tool #3b. We return to Nomads who open the passage to Khyber for us.
After leaving down we move westward and encounter Mind Flayer after a while. After the short fight, we reach the shut gate. To the left we can see two levers and to the right there is a board containing instructions how to open the door. Combination which open the gate it is left, right, left, right. After passing through we meet Yuan-Ti Elder who informs us that these chambers are run by Illithid #4 forces which grew magic portal and calls us for help. We will receive the chance to go through the Yuan-Ti territory in exchange for it. We move to the north where according to words for of interlocutor the portal is being found. We can see small forces of Yuan-Ti fighting against Mind Flayers. We have to destroy the #4a portal eliminating Mind Flayers showing up continuously (if we manage to save all Yuan-Ti we will receive the extra gratuity). Then we return to Yuan-Ti Elder #4b who presents us he key to the gate being located on the west and offers help of his people.
We proceed to westward, towards the gate which we open using the received key. The corridor full of traps is leads us for Guardian of Wits who wishes to test our #1c wisdom. We enter the chamber close by. We can see three boards with instructions which explain what should be putted on tables behind them. We can see these objects on tables on the right-hand side. Order of putting them is as follows Spear, Club and Fang. We return to the guard and we receive the other half of Spirit of the Drake #1 who is connected with other half (we receive the #2 additional gratuity for the solution to the mystery of opening the gate and just ended attempt). We leave to the surface and we make for the plateau on the north where we enliven Fire Drakes #1d. Only the one problem is left already - Umbragen.
Base of Dark Elves is being located on the south-west. We are able to attack it at the same time from air and through undergrounds. The attack assisted with new confederates is ending the Umbragen existence in this chapter.
Tip - we can find the mausoleum on the north of undergrounds guarded by zombie and an Efreet jailed in the bottle. We can free him casting the Dispel Magic on bottle but prepare yourselves for the fight - he lied to us saying he will endow us with wealth.
Main Quests:
#1 - Reclaim the City
#1a - Infiltrate the City Walls
#1b - Destroy the Dark Spires
#1c - Defeat Orobus
Side Quests:
#1 - Find the Secret Passage
#2 - Enshrine Darroc's Remains
#3 - Return the Toy to the Lizard Chieftain
#4 - Defeat the Drider
#5 - Defeat the Umbrascarred Beholder
The Lizardfolks army strengthened with allies acquired recently return to their capital, only to find that it is in the enemy's hands. Umbragen strength got powerful artifacts and now they are occupying the town. Unfortunately, during the shards rain, most obviously controlled by Umbragen, Darroc wa killed. We are on our own from this moment.
Our main task is to win back the #1 town, however first we have to destroy sources of the magic forming wrappers around Umbragen and to find the break-through in #1a. We move towards the gate defending the way to the town. We can see Darroc's remnants which we take with ourselves. In order to honor this great warrior we have to go to undergrounds and to find the temple which his #2 spirit will rest in. We also make sure that Umbragen wrappers have their sources in Khyber - it is necessary to eliminate them #1b. The gate to the town was sealed by magic - only Wowen or Blackclaw or also the artifact reissuing the powerful light may remove the blockade (however we are leaving the gate for now).
First however we set off to the east reaching Lizard Chieftain who was commanding the defense of the town. His adjutant guard was killed but he managed to get out of the slaughter. The shaman reveals to us that there is the mysterious passage on the north-west which leads underground to the town (we can encounter a broken wall on the east which can be broken by Felldrake or Redfang, however we leave it in intact condition). We move in the direction pointed by the shaman. We pass by next broken wall but also we leave it for now. We reach the shrubbery baring the way down to undergrounds - a few gardening blows clean the #1 way. After going down we proceed to the chamber laying on the east. We find notes of the traveller who died in undergrounds and the Rod of Sunburst, which can emit powerful light capable to defeat enemies borned from the shadow (we can use it also to destroy the gate of the town). A few steps for the south we overcome undeads who drop Shaman Doll - we carry it back to the #3 shaman met near walls.
We move to destroy generators of Umbragen wrappers - they are located in 4 #1b places marked on the map (they are also quite strong guarded). After knocking them down, the enemy's army commanded by Orobus, located in the town, are susceptible to our attacks. Being still in undergrounds we move to the center of map where we come across the ritual of calling Umbrascarred Beholder - it is necessary to defeat it #5. Beholder's power is being strengthened by spheres surrounding him so I propose to begin the fight with destroying them. Additionally in south eastern end of the map there is a lair of huge spider - Drider. Her #5 elimination will bring experience and the valuables. We are able now to move to the place of burying Darroc's remnants. After the fight against Umbragen who attacked guards of the Darroc's temple he thanks us for execution of the #2 task and he promises help in final defeat of an opponent (in southern western end of the map there is a temple controlling of which will add us gratuity in the attack). Now it is time to crack down an opponent.

We exit to the top at once in the town or in front of its walls. It turns out that some warriors are still left in the town and there are buildings where we are able to recruit new units in. We are moving against Orobus whom we defeat after the bloody #1c fight.
We are able to get an extra gratuities within this chapter
Main Quests:
#1 - Defend the Lizard City
#2 - Stop the Order and Umbragen Armies
#2a - Prevent the Order from Charging the Heart
#2a - Prevent the Dark Ones from Draining the Heart
Our last task is to protect Heart of Siberys against enemies. We come across the map known already (the last mission of the Order) and our guidelines are simple, at least theoretically. We have to defend our own #1 town as well as to prevent the Order from obtaining the access to the power of the #2 Heart (they mustn't put crystals in 3 altars surrounding the Heart) and to prevent Dark Elves from sucking energy up from the Heart (their Tainted Priestesses mustn't activate dark altars). We have to destroy their bases in this purpose - Order's on #2a on north and Umbragen's on the Southern #2b west.
Building
Name
Gold/Dragonshards
Purpose
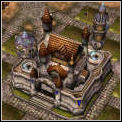
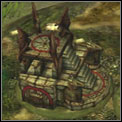
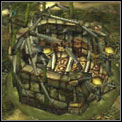
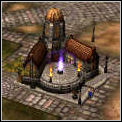
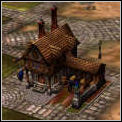
Keep
First one
450/650
Second one
250/200
It is central building of your base which is making it possible to put other buildings. It is also possible to recruit Juggernauts and killed Champions here
Dwarven Armory
75/100
It makes possible of Hammerfist barbarians
enrolment
Lorehold
75/100
Place of the enrolment of Clerics
Order of the Bow
75/100
It makes archers' enrolment possible (Rangers)
Artificer's Guild
75/100
Artificers recruits here for our call, helpful in amassing the bigger quantity of resources and at titans' repair
Titan Forge
75/100
"Smithy" of Warforged Titans, walking siege machines
Tavern
75/100
We are recruiting Rogues here
Archon Temple
75/100
It makes possible to enroll sole flying commanders of our army
Order of the Flame
75/100
Paladins recruits here
Henge of Ancients
75/100
It serves for calling Deathless Guardians
Sorcerer's Tower
75/100
As the name points it serves for training Sorcerers
Monument of Power
200/275
It adds the gratuity to given hits for all units which it is possible to recruit in close by buildings
Monument of Vitality
100/100
It raise to maximum the quantity of life points of all units which it is possible to recruit in close by buildings

Monument of Valor
75/75
All commanders trained in close by buildings recruit faster

Monument of Clarity
100/100
It raise to maximum quantity of energy points of all units which it is possible to recruit in close by buildings
Tip: we spend gold and Dragonshards for the Champions enrolment only when they die - they are available at the beginning of every chapter for free
(CH)

Inflicted by Champion
(PH)

Physical
(MA)
Magic
(FI)

Fire
(PO)

Poison
Resistances in tables below are given in such an order.
Champion
Description
Gold/Shards
Life/Energy
Hits
Resistances (%)
Abilities/Powers
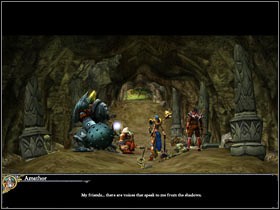
 Amathor
Legendary wizard who shares knowledge and skills to Order of the Flame
175/215
600/300
36 CH
25/75/75/75
Passive - Increased Energy Regeneration - all our units regenerate energy faster
Battle - Freeze - he is able to freeze enemies being located in the given area for some time
Charged up - Spell Mastery - all our units are able to use sorcery and the talent without decreasing energy for short time
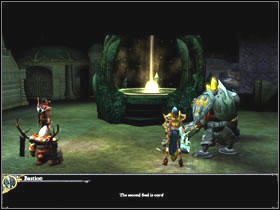
 Bastion
Powerful Warforged, one of the last representatives of this race
290/75
900/100
39 CH
75/25/75/75
Passive - Increased Resistances - it strengthens all of resistances of our units
Battle - Wrecking Ball - hits the earth with the ball making injuries and pulling back enemies
Charged up - Battleplan - our units gains the gratuity for injuries, mainly against buildings
 Kael
KaelOnce the leader to thieves guild, today servant of the Order. However the old ways aren't vanishing so fast so he has to earn trust amongst others.
155/150
620/200
30 CH
75/75/25/75
Passive - Attack gratuity - our units gains the gratuity to given injuries
Battle - Hail of Blades - "rain of daggers" falling onto enemies in the determined area
Loadable - Cheat Death - for some time units of whom life points fell to zero are left at the life and still fights
Additionally Kael possesses the ability to hide in the shadow and detects and disarms traps
 Lady Marryn
True leader of the Order. She was promoted very fast in its structures proving hers involvement to the fight and businesses of the Church. She doesn't consider lost fights.
180/180
720/250
30 CH
75/75/75/25
Passive - Increased Hit Points Regeneration - regeneration of life points speed is increased
Battle - Hammer of Justice - blow with the hammer which injures enemies by the bump and pulls them back
Charged up - Mass Heal - partly cures all our units
PhoenixThis mythical beast borned from blames helps the Order in sinister times. The phoenix wreaks havoc in rows of the enemy.
1065/1065
3200/200
100 CH
75/75/75/20
War Shriek - limits to the half the speed of moving and the attacking of hostile units in the given area
Immolation - all enemies being located nearby receives 5 hits per second
Name
Gold/Shards
Life/Energy
Hits
Resistances (%)
Abilities/Powers
 Artificer
100/70
250/100
26 FI
65/65/65/0
He is able assemble resources faster than other.
 Barbarian
125/50
420/50
35 PH
20/70/70/70
 Cleric
90/50
300/80
19 MA
65/0/65/65
 Deathless Gueardian
95/65
350/90
28 MA
65/65/0/65
He is able to find invisible enemies
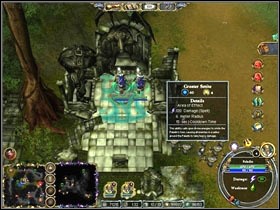
 Flame Archon
100/55
370/70
30 FI
65/0/65/65
 Paladin
130/40
560/60
28 MA
70/70/70/20
 Ranger
100/50
350/50
29 PO
0/65/65/65
 Rogue
Rogue85/50
310/50
20 PO
70/70/20/70
 Sorcerer
80/70
290/110
22 FI
0/65/65/65
 Warforged Titan
110/35
400/50
26 PH
70/20/70/70
Main Quests:
#1 - Enter the Ring of Storm
#1a - Clear the Ettins Camp
#1b - Slay the Frost Beast
#2 - Save the Outpost
#2a - Clear the Bugbear Mine
#2b - Reclaim the Outpost's Gold
#2c - Return the Gold to the Outpost
#3 - Traverse the Underground Cavern
Side Quests:
#1 - Cleanse the Teleport Circles
#2 - Bonus - Cube Survivor
#3 - Injured Ranger
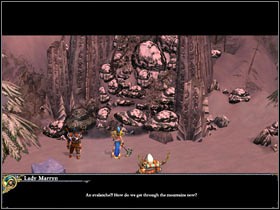
Searching for legendary Dragonshard called Heart of Siberys, Order of Flame's forces reached the border of mountain strip baring the way to the area called Ring of Storms, often infested by snowy storms. The journey by the air way was impossible so they decided to move by land and to meet pioneers sent earlier and to find the passage to the interior of Ring of Storms #1.
After beginning of the mission we encounter the knight of Order of the Flame, who informs us that camp set up earlier is being attacked by the Bugbears unit and the crew needs our #2 help. After the short fight with the enemy, we learn that it isn't first such an attack.
It turns out that Bugbears dug to the encampment region, but apart from plaguing it with attacks they stole gold. Our task is to destroy all Bugbears #2a and recover #2b gold back - their mine is located on the east. Going there we encounter few small groups of resistance and finally we reach the Bugbears' encampment. There is a tough fight - however their commander who entered the fight is falling fast under the pressure of our armies. After defeating enemies we break chests and we return to our #2c post with gold won back.
The conversation with the commander brings information about the Ettins' camp, being located on the north - we got to destroy #1a it. However the way to it leads through the #3 underground - we will find the cave entrance to it on the west. We get support for our small army - Clerics. Before we go to undergrounds I suggest to go to the cave westward to the entrance. We will find there Teleport Circle infected by Bloodroot. Pixie who guards the teleport asks us for help in destruction of Bloodroot #1. Now we can proceed to the cave.

We encounter the wizard who offers help in undergrounds in taking us to the other side of the cave. Unfortunately, he vanishes when Gelatinous Cube #2 stops on our way. If we manage to defeat it without the loss of team's member, we will accomplish a secondary task. After the fight we find the ring of Fireball useful on the powerful shrubbery blocking exit of the cave.
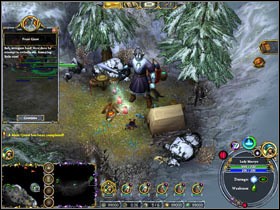
We can't rest on the surface - Frost Giant waits for us, who, how it is possible to conclude from the conversation, was irritated by earlier met wizard. Fight against the giant isn't most simple however after defeating him we are able to take 3 elixirs of the curing wounds - Cure Light, Moderate and Severe Wounds. We resumje the course westward - again we meet the wizard who explains his sudden vanishing with lack of suitable spells to the fight. He warns us of Ettins and the traces of the huge beast nearby the cave to the north. We also obtain the tip, that Ring of Fireball dropped by defeated Cube perhaps can help us in the fight against frosty enemies. Continuing our journey we encounter first Ettin.
After defeating him reach other Teleport Circle - quick fight results in possibility of passing between both Circles. We move further away - next Ettin is locking the way - however he should not cause bigger problems.

A few steps on the north-west we meet a group of archers, sent in order to eliminate Ettins. Unfortunately, they were cut from our encampment and they aren't able to return to it. Additionally, their commander is seriously wounded - but we have #3 Clerics. Quick spell of the curing of wounds and grateful Rangers join our army and we executed the next side quest. We proceed further to the north and after a while we find out that we obtain the possibility to improve armies' enrolment. I recommend to increase army, cause next fights are probably most serious in this mission. After that we move further to the north, entering the area where the Ettin's camp is located. We have stand up against 3 for their representatives - the fight isn't easy, but thanks to improved forces we are leading to the victory.
We move further to the north where the wizard saw traces of the huge beast. We reach the frosty cave where after a while we hear terrified roar from - Frost Beast attacks us with company of wolves. I suggest in this fight to take care of the main enemy - after killing the wolf the next is showing up, as long as Frost isn't defeated (tip: for defeating the beast without usage Ring of Fireball we will get the extra gratuity). But unfortunately further way is burdened by remains of the avalanche and our only chance to reach the heart of Ring of Storms is through the cave, which Frost Beast Frost emerged from.
Main Quests:
#1 - Traverse the city of Qualatesh
#2 - Return the Staff of Command
#2 - Defeat the Grave Keeper
Side Quests:
#1 - Collect 1000 Gold
#2 - Return the Key to the Tortured Spirit
#3 - Help the Elderly Wizard
#4 - Awaken the Golem
#5 - Find the Warforged Scraps
Traveling along the cave once inhabited by Frost Beast, our heroes reached the passage which appears to lead deep into the interior of the mountain. It is possible that thanks to it we can reach the Ring of Storms what significantly will bring Order of the Flame near getting Heart of Siberys.
It turns out that we come across remains of the Qalatesh town, the capital of the ancient empire of elves which vanished mysteriously. However it is only way in order to get the Heart of Siberys, so after choosing Champion we move across to the journey. We receive the main task - to wander around the town #1 and secondary - to collect 1000 pieces of gold which will result in 500 points of experience #1. Also the next commander reinforces our army - Artificer. We set off to the south checking every corridors. We pass by the room with the book but for now we don't have the access to it. We leave on and we encounter the aggressive Jelly after the short time, after defeating whom we are able to collect gold and valuables and scroll experience (+2500 points).
We continue the travel to the south - we reach the circle, where Tortured Spirit is imprisoned in. His soul was jailed for ages and only chance for winning the freedom back is killing his guards and recovering the key back #2. If we agree to help him it is necessary to talk to the prisoner again. Then 3 guards will show up whom we have to kill and to stop them from killing our employer. We will receive some gold and a few valuable objects and elixirs in reward.
Then move in the eastern direction - we find the jailed wizard who needs our help there #3. The repayment for help will be the access to the room with the book seen earlier - of secret library. The wizard's staff is located in the opposite room. We open the door with help of lever in the floor. I advise to prepare your team - wizard "forgot" to tell us that his equipment is being guarded by the powerful monster named Marilith. After the hard fight we may take the wizard's staff and gold. As he promised, the wizard is giving us the access to the library and from now on we will be scoring experience faster thanks to it.

We move to the north eliminating enemies who attack us. After reaching the end of the corridor we turn to the east and we reach the room where we find Potion Laboratory in. This device serves for identifying of every unknown elixirs which we will find in this chapter. Identifying of them all will give the extra gratuity to us after the end of the mission. Nearby there is a Tranquil Fountain which will speed up the regeneration of energy of our units. We can see also a statue covered with bats - when we pass by it undeads attack us - we move further away after the quick fight.
Two golems attack us near the next room however they not stand resistance of our armies. We obtain the next task - to wake up golem visible further in the room #4. After analyzing the tip, "golem will wake up when all looking at him they are blind", we arrange our soldiers on images of eyes in corners of the room - golem is under our orders. We make for east further away where we are being attacked again. After the fight we collect gold and Warforged parts, which leads us to the next secondary task #5.
We proceed with the road down and we come across the exit to surface leading to the calm and quiet valley where we are able to set our camp up. When we perform administrations (I suggest to leave some raw materials and experience for future investments), we return under earth and we continue the march to the south (earlier we collect the other Warforged part). Further we collect gold and valuables - when we come across the shut chest, don't be perturbated - the time will come for her.
We find murals in the more far-away part of the corridor telling history of the Heart of Siberys and guarded by Tomb Warriors. We'll have here quite long struggle - guards appear again after annihilating - however it is important not to destroy heads of dragons which cause them to appear. It is necessary to destroy heads when there are no more Tomb Warrior showing up - we will obtain bonus points after the end of the chapter and scroll of experience (+5000 of points). We return to the main corridor and we make for east. The short fight against undeads and the last chest of Warforged parts (and unidentified elixir) is ours. We move to the north - watch out for cut for scene to see the trap crushes the enemy.
Rogues join our team - they are able to disarm trap among other things or to open locks and chests (after improving Rogue at least to 2nd level we are able to open the earlier seen chest). Quick fight waits for us in the next room and chests with gold also - then we get further. We encounter the next trap but its disarmament is a bit difficult because undeads attack us. After defeating them, we make to the north where we encounter next trap and chests with gold (one of them has 3rd level of securities). There is a Grave Keeper who asks us for recovering Staff of Command #2. It is in Tomb Guardian possession, whom we will find going to the corridor to the south.
We have two options now - either we will kill Tomb Guardiana #2 (hitting to drum visible behind him and fighting against guards) and we will take the object to Grave Keeper or we will agree to help him and to liquidate Grave Keeper, using Scroll of Banishment received from Tomb Guardian. In both cases we will receive help in leaving undergrounds, but in my opinion, the fight against Tomb Guardian is more simple - if we liquidate Grave Keeper we have to fight with horned daemon visible in earlier cut scene. After fight we go further on to the south coming across the next trap, where we can find gold and the elixir. Further we have to fight against two stone warriors and then we get out to the surface. Tip: if we managed to keep woken Golem alive we will receive bonus points after finishing the mission.
Main Quests:
#1 - The Search for Lady Marryn
#1a - Find Lady Marryn
#1b - Rescue Lady Marryn
#2 - Claim the Seal of Light
#3 - Slay the Medusa
#4 - Destroy the Lizard Army
Side Quests:
#1 - The Archaeologist
#1a - Inform the Archaeologist of the Medusa's death
#2 - Lower the Drawbridge
#3 - Idol of Blinding
#3a - Free Lord Ratak'h
#3b - Return Lord Ratak'h to his Treasury
#4 - Escort the Archaeologist Assistant
#5 - Silver Flame Temple
#6 - Destroy Lizardfolk Outpost
#7 - Destroy Main Lizardfolk Village
#8 - Silver Flame Oratory
#9 - Bonus - Field Rescue

The army of the Order crossed mountains baring the way to Ring of Storm. First from three Seals of Light is located in the jungle which appeared in front of their eyes . Unfortunately how we find out from the film introducing into the mission, Lady Marryn is kidnapped. So apart from finding Seal of Light #2, we have to #1a find and free Lady Marryn #1b.
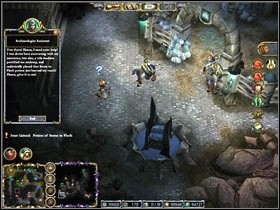
First we go to the south where we have seen Lady Marryn for the last time. We have short fight with flying enemies (Dire Giant Wasp) and the appointment with the #1 archaeologist. We find out, that he was exploring undergrounds with his assistant however he was attacked by the Medusa. He managed to escape however the assistant didn't have so much luck. In exchange for killing the #1a Medusa, the archaeologist will give us the powerful artifact. Certainly we accept the task and we move in the north eastern direction where according to his words to entrance to the undergrounds is located (earlier we can go to the Lady Marryn kidnapping place where scroll of experience is lying).
In the way to Khyber we are attacked again by flying enemies. After that we encounter the raised bridge. Its #2 lowering would facilitate significantly our moves on the map, unfortunately we have to give up this idea for the moment. We move further in order to encounter two Ettins. Then we encounter remnants of Paladins of the Silver Flame temple which still teems with life apparently - we are able from now on to train and to recruit these warriors. After strengthened the force of our army we go down to undergrounds (I advise to enclose the Rogue unit).
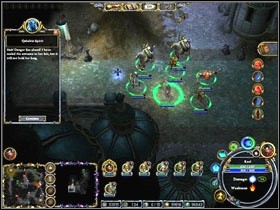
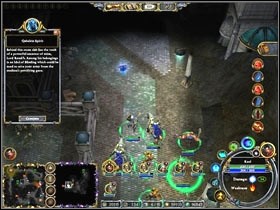
After entering the underground world we encounter the trap which we disarm using the Rogue skill (Kael also possesses such a talent). We make for the south, with only available way. First, undeads attack us, then we have a fight with gelatinous cubes. Then we have next fight against undeads - after winning it we move westward. We encounter here Neleyna (Qabalrin Spirit) who warns us against the medusa being located further on and asks us to kill #3 it. Following her we are supposed to receive the helpful object in this task - Idol of Blinding #3. However when it turns out the door of the vault only opens in presence of his owner, the lord Ratak'h who currently is in Beholder's power.
We move south-east to free the #3a Lord. Fight against Beholder isn't easiest however he will fall sooner or later under our swords. With the freed Lord Ratak'h we return #3b to the vault. The gate of the vault is open and we are able to take treasures. Unfortunately, Lord is not happy of looting of his property, so we have to fight him. We move now to kill the Medusa. Her death releases Neleyna's sisters from the trap and we enrich ourselves with the head of the Medusa. We obtain the access to the exit for the surface which leads to areas so far inaccessible to our armies.
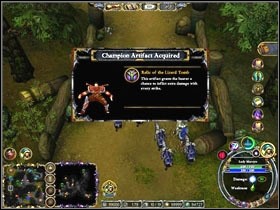
Bur before we go up we proceed for the south-west to unexplored parts of undergrounds. Struggling through corridors controlled by spiders we reach the room where half petrified archaeologist's assistant is located. We restore him to the world using the potion visible before him and after that in accordance to his request we convoy him to the #4 teacher (earlier we collect found objects). Now we convoy the assistant not letting to kill him and we receive quite useful objects for it. Additionally showing the head of the medusa to the archaeologist we receive the powerful artifact - Relic of the Lizard Tomb, which permits Champion to give better hits.

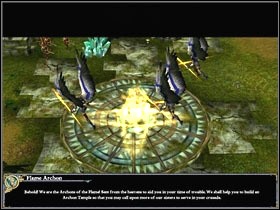
After exiting to the surface we can see the temple of Silver Flame - moving to its direction results #5 in gods attitude. Additionally, our army is strengthen by Archons of the Flame whom we are able to recruit from now on. After a while a Ranger shows up with information about finding Lady Marryn - she is located on the east, in the small Lizards #1a camp. We have to destroy the #6 encampment and the main Lizards #7 camp at the same time as well as to defeat their #4 army. But before we will go to the whirl of the battle, lets see the building located nearby ours current position - it is Silver Flame Oratory #8. We can see 3 figures here - of the wounded figure, the damaged titan and the evil spirit. It is necessary to use the ability to cure on them (Cleric), Warforged Titan repairs (Artificer) and of saint power (paladin). After executing this task (it results in the improvement in the weapon of our army) we are able to proceed in the northern direction and to lower the #2 bridge out.
We are able now to proceed to the east already in order to free Lady Marryn. Lizards forces aren't too large although they defend themselves brave and they grow still with new units. However, we manage to defeat them and to destroy the encampment (if we manage to free Marryn during the fight we will get the extra #9 gratuity). One of defeated Lizards leaves the key which opens the Marryn prison. I suggest to place the Expansion here and to increase our army, recruiting mainly Paladins, Rangers and Archons. We move with such prepared the army to the south, towards the main Lizard base.
However we have to remember that the enemy will be charging attacks on our positions from the south-west and will be trying to take up Place of Power being in our hands. After destruction of the enemy's base we move westward in order to stand up to the confrontation with the rest of the Lizardfolk army. The purpose of our travel is being found westward - first Seal of Light.

At the end of the mission we can receive the extra gratuity - Honorable Combatant for defeating the Medusa without usage of Idol of Blinding and defeating Blackclaw without the usage of the head of the Medusa.
Main Quests:
#1 - Acquire the Seal of Light
#1a - Find the Hidden Passage
#1b - Destroy the Lizard Citadel
#1c - Complete the Trials of Darroc
Side Quests:
#1 - Repair the City Walls
#2 - Cleanse the Ancient Graveyard
#3 - Plight of the Ancients
#3a - Investigate the Dwarven Shrine
#3b - Destroy the Umbragen
#3c - Illuminate the Dwarven Shrine
#4 - Free the Duergar
#5 - The Fortified River Fort
#6 - Free the Petrified Sorcerers
#7 - Build a new Sorcerer's Tower
#8 - Collect Reagents for the Elderly Wizard
#8a - Fire Toad Tongues
#8b - Bonecrafted Pauldrons
#8c - Duergar Bracers
After finding first Seal of Light, Order went in direction where may be located the second one, and then reached swamps. The ruined base there was discovered - scoring the remainder of the previous efforts the Order to gain control over Heart of Siberys. Traces point to the fact that the camp was looted by creatures who imprisoned Lady Marryn - Lizards. It turns out additionally that Lizardmen set up a camp on the north-west in the clear way guarding something - according to maps, this is entrance leading to other Seal of Light.
We start the mission in the destroyed base. The first secondary task is to repair #1 walls however if you are able to stop the enemy's attacks I suggest to hold the repair otherwise you will lose the extra gratuity after completing the mission. After amassing the reliable quantity of resources and creation of the small army we proceed to the north where you will find the ancient burial ground. I suggest to watch out of the shard cluster - the golem rises from it, who can quite pretty well mess up with our army. At the burial we receive the task of removing Night Skins from it and to destroy their Burial Grounds #2. Tip: monsters restores themselves as long as we don't destroy the building entirely. After killing them there should remain a Scroll of Stone is Flesh - Mass and 2 Bonecrafted Pauldrons (#8b necessary for execution).
We return to base and the proceed in the westward direction, where we meet mages, calling us for help in examining their #3 ancestors' temple. There is an entrance down to undergrounds nearby mages, which we use to get to Khyber. Being underground we collect gold located there (it's good to have a Rogue in a team, at least on 2nd level of experience). There is a statue of Queen Blood being found to the north of the entrance, but we have to be careful because the room is stuffed with traps. Collecting all treasures amassed there and avoiding traps will be rewarded with the gratuity after the end of the mission. We are moving westward.
We reach the place where the exit to the surface is being found however it is blocked with some shrubbery. So we collect gold and we go to the north. After a few fights and the disarmament of traps we come across the next exit to the surface, which we use. We are being attacked by the enemy's small unit. After defeating them we proceed to the south where we find the reason of blocking the previous passage with the shrubbery. There is a group of Duergar jailed by Lizards in "beetling" circle who ask us for #4 help. Grateful for freeing them they offer their wealth for us however it has been stolen by Lizards. Greedy Duergars join us. Somewhat strengthened we proceed to the east, towards the temple pointed by mages previously. It turns out that it is come over by Umbragen - we know what to do #3a,#3b. Apart from obtaining the control of Dwarven Shrine (increased range of all units) our army is enriched itself with next allies whom we are able to recruit - Deathless Guardians.
We return to the main corridor and we make for maximum to the north. After a few fights (among other things with gelatinous cube) we reach the next exit to the surface, which we use. Again we are being attacked by the enemy's unit, but after defeating it we are able to destroy roots which infected the teleport visible close by. Thanks to this operation, we have the open way to quick handspring our army to the enemy's backs. We return to mages to report execution of the #3 task.
The next moves depend on you - I chose the frontal attack of the enemy. We move in the direction where enemy's attacks on our base has been taken out from (west). We reach the only passage through the river, where Lizards #5 forces fortified themselves. It is abounding in the piranha additionally in the chin so I not recommend to take here units with low health. After short (or longer) fight, the enemy withdraws on positions singled out in advance and in the meantime we are able to destroy the watch-tower blocking the access of the light into the underground #3c temple. Having the calm moment we proceed to the north-east, where we can find a small lake nested by fire toads. We kill them all (5 pieces, they are restoring themselves), after which we continue the march to the direction of the main Lizards's fortress.
We have to prepare ourselves for really tough fights, since the enemy's units are leaded by the Redfang, their Champion. After defeating the enemy's army we move to destroy his #1b base. I recommend to send Duergars first - I know such a procedure isn't humanitarian, but look at secondary tasks charged by the wizard - it is necessary to bring 4 bracers of Duergars, and we have 4 of them in our army - the quick connection of facts is resulting in one effect - it is necessary to devote them in order to execute the #8c task. The next passage to #1a undergrounds opens up after destruction of the enemy's base.
Then we proceed to the east reaching the destroyed tower and the group of the figure turned to the stone. We cast the spell found previously on the Sorcerer #6 statue and... we begin the fight against Pteranadon Raiders. Sorcerer thanks for the help and joins our army however asks us to build Sorcerer's Tower #7. Only the conversation with Elderly Wizard #8 is left for us and giving necessary components to him.
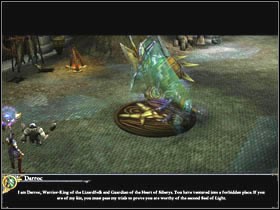
Now with simple, but not necessarily easy way, we move for other Seal of Light. We go down under earth and we move the corridor right ahead. We meet Darroc, the Lizardfolk warrior and guard of Heart of Siberys. In order to prove that we are worth winning the second seal we have to pass his attempts.
First test waits for us from under the shape of the trap. I suggest not to disarm the trap at once, but go to the passage to the north in front of the trap - we will find Lizards at the end of the corridor who were preparing the surprise for us - crumbling columns. We are able now to get rid of undeads who wait for us - it will be sufficient to pull the lever. Then we have to disarm traps and knock out remaining enemies. First test is done.
The fight against vampires is our next test - they die from the daylight and such one is located in this chamber so it will be sufficient to move them to the glittering circle and voila. The other test is accomplished. The third and last test is the challenge for true hardcore gamers - I recommend to rest and to prepare the good strategy - we are in to the fight with Cryohydra ("poor" 12,000 life points and hits at about 100, not resistant to fire). After defeating her, our Champion will receive the improved weapon (is freezing the enemy at the strike) and we will get second Seal of Light.
Main Quests:
#1 - Claim the Third Seal of Light
#1a - Defeat Woven and his Army
#1b - Defeat the Illithid Army
Side Quests:
#1 - Ressurect the Fallen Phoenix
#1a - Use the Torch of Honor
#1b - Use the Torch of Justice
#1c - Use the Torch of Righteous
#2 - Aid the Redbloods
#2 - Aid the Greenbloods
#3 - Save the Tortured Spirit
#4 - Gain Access to the Warden's Treasury
#4a - Find the Left Half of the Warden's Key
#4b - Find the Right Half of the Warden's Key
#4c - Return to the Warden's Treasury
#5 - Defeat Taen'cradus
#6 - Bonus - Horde Robber
#7 - Destroy the Elder Brain
Intro of this chapter says everything - Lizards wanting hide from us last Seal of Light, dumped it to undergrounds. We have to go down to lost City of Qalatesh facing new threat - Umbragen and horrifying creatures, Mind Flayers.
This chapter is more demanding than previous, so you need more leadership talents and the strategist's vein. The Umbragen base is located to the north of our base and Lizards have their post on the north-east. I advise initially not to take care of them since they are quite well guarded and fortified, however both nations don't like each other and they lead fights with themselves. So we are able to wait to their mutual bleeding oneself and to attack enemies weakened this way. I also not recommend to leave the base alone since the Umbragen have the ugly practice attacking at the not very suitable moment. So we move after Seal of Light.
We encounter the huge crater on southern east from our camp with remainders of the phoenix. We are able after the short fight to talk with Elderly Wizard who tells us about the possibility of reviving this legendary #1 beast. We have to find 3 torches in undergrounds. We move to the canyon on the north-east. We defeat Bugbears forces capturing some gold and the access to the another shard deposits and we make for westward where after a while the village of insectlike Redbloods appears. Here is small tip - we will meet Redbloods and Greenbloods (underground) in this mission who fight each other. Execution of the task for one of them automatically makes us the enemy to other. Additionally the task given from Greenbloods is tied with killing Beholder (look further) and it will make in turn us not obtain one of gratuities for the end of the mission. Returning to the game, Redbloods call us for help in destruction of Umbragen #2 village - it is personal vengeance, since their leader, Satros, killed the leader of the tribe. I not advise the attack at this moment (unless you got a really strong army) and I invite to go into the world of undergrounds - the entrance is located in the near distance from our base (in the northern direction).

Once after leaving down we encounter Tortured Spirit, tortured from years by Jailmaster. The spirit asks us for killing his oppressor and restoring calm. Jailmaster is located in the chamber westward from our current position - the short fight finishes his #3 life. As a reward we are given the way to enter the chamber with the equipment located on the east (the door will open automatically when we approach to them). We find the cemetery to the north of the passage. The short glance at the message tells us that there is rest place of Taen'cradus, captain of the elitist Quabalrin guard. Blow in the gong calls him to the vivid world, unfortunately with his servants. After defeating #5 them we are able to collect gold and objects being located on the cemetery.

We move further to the north and after struggling through a few enemies' units we find one of #1c torches. With corridor leading on the east we reach the mysterious, blocked door, with the next #1a torch is burning at. It turns out that the door bares the way to the Warden's #4 vault. In order to get to vault, it is necessary to collect two halves of the key - unfortunately, every of them is located in the powerful enemy's hands. The scorpion possesses first one, other rests in Beholder's lair. We will find the scorpion in south western corner of the map - he defends the right half of #4b and the Beholder Lord possessing the left half is located in the arena more or less in the center of the #4a map (tip: there is the trap in the entry). We will also find the last torch necessary to revive the #1b phoenix there. However we have to remember that if we want to get gratuity after the chapter it isn't allowed to kill none of #6 monsters. Having completed both halves of the key, we return to the vault and we collect #4 objects found there.


We will find Greenbloods #2 on the south who will attack us (if we have accomplished a task for Redbloods already) or will offer execution task for them. In the westward chamber we'll find the ancient laboratory. In Lore Journal we can see recipes for elixirs which we may execute using the laboratory. It will be sufficient to blend components in the suitable order and pulling levers. In the order from left there are Elven Blood, Blackseed Extract and Ashroot Mulch. (With creating elixirs gratuity is being bound after the end of the chapter, unfortunately despite many attempts i couldn't execute it positive. First pulling of any lever was showing up a text about "for breaking down" of elixir. Then I was managing to do 3 elixirs and the machine was going bad).
Now we ca revive the #1 phoenix. If we haven't done it earlier we are able to check whether Umbragen already weakened and to attack their town, executing the task charged by Redbloods. This is the last phase of searching Seal of Light. I recommend to strengthen forces - Lizards army is leaded by Woven, their Champion. Suitably prepared we output the attack on Lizards #1a positions. After defeating them we are able to clear teleport and leave again under earth. The other enemy's army, Illithid lurk there, #7 strengthened by Elder Brain holding power above Khyber. We take up fights against Mind Flyers (Illusionist is also being found here, of whom killing without destruction of none of his illusory forms should give the extra gratuity - unfortunately, this task was also left in spite of a few attempts not-executed - probably error of the application). After knocking all enemies out we move for last Seal of Light #1. When we reach it however it turns out, Satros takes it away from us and we have to look for the last seal again.

Main Quests:
#1 - Destroy the Umbragen Generator
#2 - Destroy the Umbragen Compound
#3 - Claim the Final Seal of Light
Side Quests:
#1 - Return the Cursed Scimitar
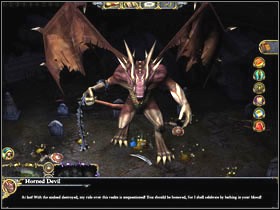
#2 - Sly the Horned Devil
#3 - Return the Horn of Devil Calling
As you remember from the previous chapter the Order forces had last Seal of Light in their hands already, unfortunately, it got in the Umbragen hand. What's more, their army is blocking the passage leading to Heart of Siberys - they put the cannon screened with the barrier on the north of the map.
As you probably noticed by yourselves, missions get more and more strategic. In this mission planning is fundamental for the ultimate success because the Umbragen became quite aggressive. Their base is located on the northern east of the map and they send soldiers to attack us from time to time. Additionaly at the center of the map is located a small army of Umbragen. I suggest to sightseeing nearest surroundings and collecting shards and gold scattered here and there (we have skirmishes with Ettins or giants). When we have forces which are able in our opinion to fight off the enemy's attacks we move to passage located by the near our base(in the northern direction).
After leaving below the surface we encounter Efreet who heard about our reputation. There is a Baatezu on the north, who rules these areas through ages and who amassed huge wealth. However only one object interests our interlocutor - Cursed Scimitar, of which winning back he would be delighted at #1. We proceed to the south where we encounter the chamber full of not moving golems. Wanting to watch them more closely we enter the chamber, but standing up on the board at the entry results in waking up guards. After the short fight Deathless shows up, who shouts on us for killing his bodyguards. However he charges us the task to kill Horned Devil #2, being located to the north from here. In this direction according to the interlocutor's words, there is a burial ground ruled by Grave Keeper. He possesses the Horn of Devil Calling which is able to help us to win the duel with Horned (it is necessary to bring Horn to the #3 interlocutor also). There is also the laboratory in this room, where we are able to re-examine found potions. We are able now to proceed to the north.
The first obstacle is Grave Keeper mentioned earlier, who will fight us along with his servants. After defeating him we win Horn of Demon Calling and control of the mausoleum. We move westward, towards the place where Horned Demon is. The fight isn't easy, but with aid of Horn of we send him to the #2 spirit world. It turns out that he possessed Cursed Scimitar also. There is also a passage to the surface in this chamber, where we can meet the familiar from first chapter - Frozen Beast. We are able now to return both Scimitar (we receive the artifact, different in dependence on Champion whom we chose to the game) and Horn (in exchange we are getting 10 Horn of Battle of Battle Fury) to suitable persons. We set off to the east.
We encounter the Umbragen unit leaded by Orobus who is defended brave but he finally escapes from the field of the fight. We find first (from three) Wand of Negation which will help us to destroy towers defending the access to the generator (maybe it results from bug in the game, but sometimes these towers simply... don't exist) and teleport. We move in the northern direction and practically from the run we enter the fight (there is other old familiar among enemies, Marilith). After defeating them, we find other Wand of Negation. We move to the north, walking by eastern corridor, full of traps. We'll have next fight, this time with cobras and medusas. After finishing it, we collect third, last Wand of Negation.
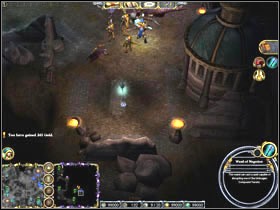
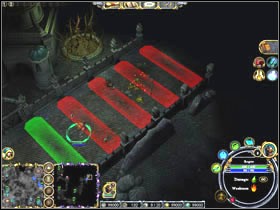
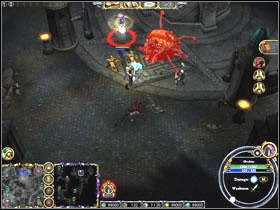
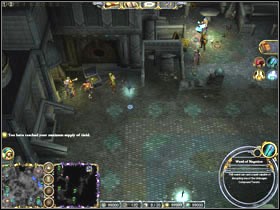
We return to corridor splitting, and we turn this time to the left. There are Umbragen forces at its end, baring the way to the generator. If the generator is guarded by towers we use collected Wands of Negation on them otherwise we attack the #1 generator itself. Wrapper of the Umbragen power field falls. Now we go to the middle branch of the corridor. But earlier I suggest earlier strengthen our units - the fight will be very desperate - we will face Orobus and Umbrascarred Beholder. However the victory will sweeten winning of last Seal of Light #3. Now we move for the cannon guarding the way for Heart of Siberys #2. Earnest may destroy the Umbragen camp mentioned earlier and the Lizards post on southern east (we obtain the access to it with the air road or also through the underground - the entrance is located on the east of the map).
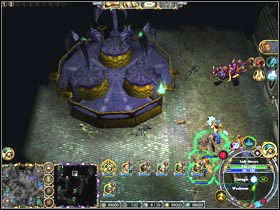
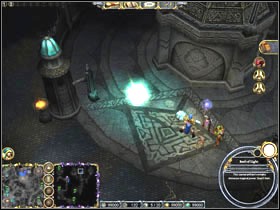
Main Quests:
#1 - Defend the Order's City
#2 - Place the Three Seals of Light
#3 - Protect the Seals of Light
#4 - Prevent the Umbragen from Siphoning the Heart
#5 - Slaughter the Umbragen and Lizardfolk
#5a - Umbragen Base
#5b - Lizard Base
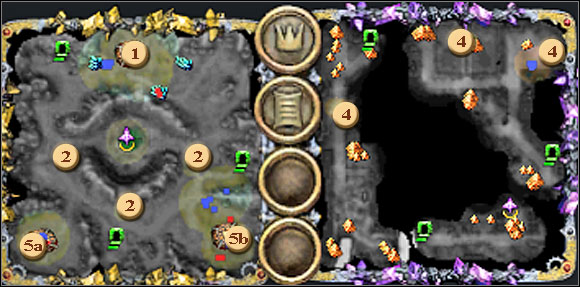
We are in possession of 3 seals which make it possible to obtain the control of Heart of Siberys. Unfortunately, they Umbragen also want the crystal and Lizards don't want to allow obtaining the control of it to anybody. In this chapter we execute all tasks on the surface and we go underground only in the search of gold, varieties and artifacts, and certainly of fights against monsters.
Presence of all Champions in this chapter is surely the surprise but I assure you that it isn't too much. Both Lizards and Umbragen if not fight between themselves they organize #1 raids on our base, which it is necessary at all costs to keep. The main task is of course to take control on Heart of Siberys and this goal we can reach by putting all three Seals of Light on altars scattered around the center of the #2 map. The problem is, that Lizards tries do steal seals from altars so we have to protect them against #3 Lizards. At the same time Umbragen wants to suck Heart of Siberys energy for themselves using dark altars in this purpose. We can't allow their Tainted Priestesses to activate dark altars #4. This task is simple and difficult at the same time - it is necessary to block passages to the underground on east and the north-west and to defend them against the enemy's forces. When we manage to put Seals on altars and to wait the determined time, the Heart of Siberys power will devolve onto our units and they will obtain powerful gratuities in the fight thanks to it - we are able so to start executing the #5 task and to sweep away Umbragen #5a and Lizard #5b bases from the earth's surface.
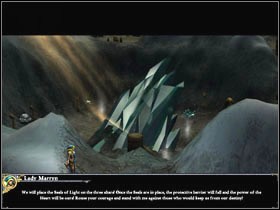
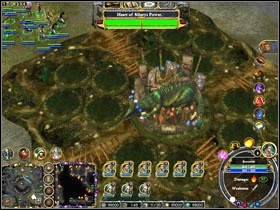
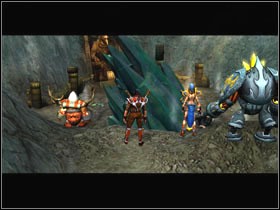

 Dungeons & Dragons: Dragonshard Game Guide & Walkthrough
 Dracula 4: The Shadow of the Dragon Game Guide & Walkthrough
 Dreamfall: Chapters Game Guide & Walkthrough
 Dragon Age: Inquisition Game Guide & Walkthrough
 Dragons Dogma Game Guide & Walkthrough