This guide focuses on quests' description. You will find here both quests connected with main plot and sidequests. There are 98 of them in total. If a mission can be completed in few ways, we list them all, along with consequences of a player's choice additionally. There are also maps which are very useful while playing. The guide is divided into three main chapters:
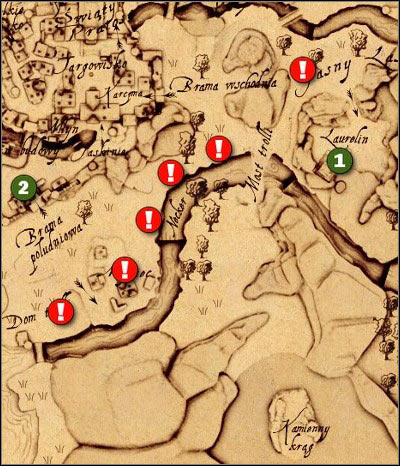
1. Maps: most locations with characters, enemies, items and important quest places marked on them.
2. Main quests: these are divided into sections based on the locations where they take place. The first few tasks depend on your hero's archetype, and this is also included in this guide.
3. Sidequests: these are divided according to both the locations where you can start completing them, as well as the time at which they become available for the player. You will also find here quests which are not shown in your journal and can be threaten as a curiosity.
Karol "Karolus" Wilczek
Translated by Maciej "Elrond" Myrcha
Red - enemies, monsters, e.g. wolves.
Green - characters, e.g. Alari.
Orange - items, e.g. a chest.
Blue - places, locations, e.g. a forest.
1 $ - 1 ducat
A tower (M1, 2) - it means that a tower is located on the map M1, at the point 2.
Skeletons (M3, !) - it means that we marked skeletons on the map M3 with ! sign.
Main quests are marked only with a digit, e.g. 1. A camp by night.
Sidequests are marked with a letter "Z" and a digit, e.g. Z11. Battle arena champion.
(mini quest) - it means that this quest won't be shown in your journal.
1. A camp by night
2R. Complete your training
3R. A novice in the service of Phex
4R. Like a shadow
5R. Tread carefully
2W. Complete your training
3W. An entrance exam
4W. A patrol
5W. A debate at the customs gate
2M. Complete your training
3M. Light
4M. Shadow
5M. Blood
2N. Complete your training
3N. A soft hand
4N. Dangerous hum of wings
5N. Traps
6. Gather information about the pirates
7. Mysterious Gerling
8. A night mission
9. Gerling's information about the pirates
10. A trip to the customs stronghold
11. Ship's crew
12. Brother Emmeran
13. A toll is not enough
14. Elves in danger
15. Find a way to cure Ardo
16. Pirates and elves
17. Do mischief
18. Negotiations
19. Elven supporter
20. Fight with the river pirates
21. Haunted ruins
22. Pirates in Hammerberg
23. In favor of the pirates
24. Golden obligations
25. A mysterious ghost
26. Petrified dwarves
27. Furry issues
28. Booze for the vote
29. Stolen loot
30. Dangerous liaisons
31. Compelling arguments
32. A confidential message
33. Hidden harbor
34. Entrance to the castle
35. In disguise
36. In search for the lost crown
37. Mysterious Mora
38. Final steps
Obtained: Automatically, after you start the game.
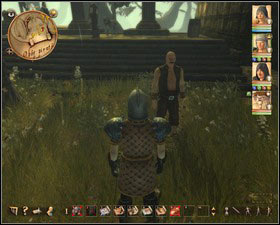
1) Go to see the captain
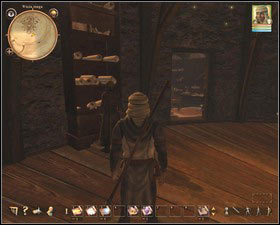
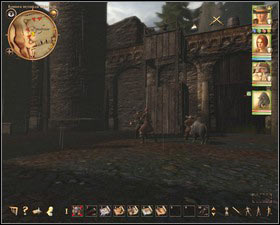
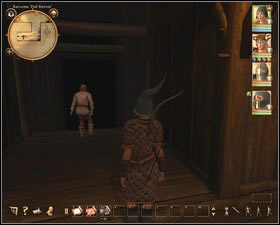
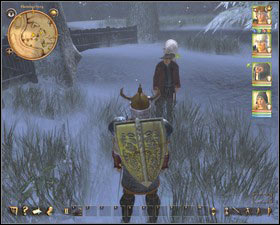
Talk to captain Albass (M1, 3), who can be found near the ship (M1, 1). He will remind you about your contract and will ask you to help Piet (M1, 5) with pitching the camp.
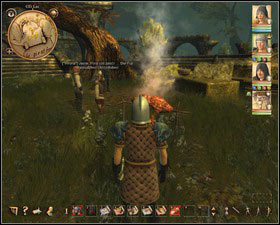
2) Offer Piet your help
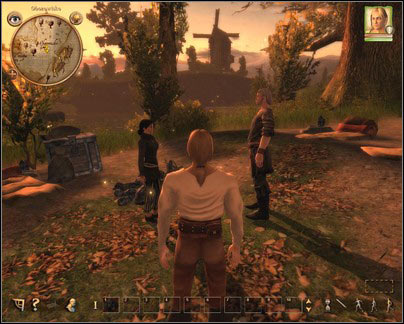
Go to the camp. You'll see Piet (M1, 5) and Janah (M1, 4) talking spontaneously. You can listen to their conversation and then join it. Piet will give you and Janah a task to find a dry tindermold, which is needed to make a bonfire.
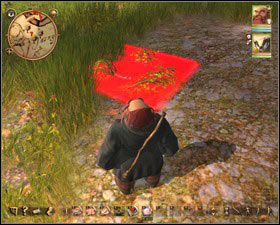
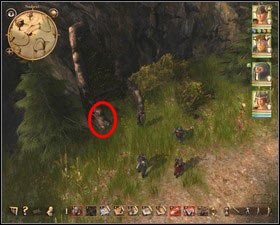
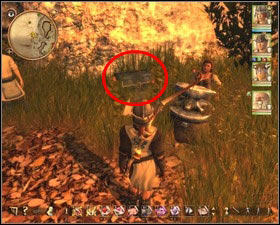
3) Find a dry tindermold
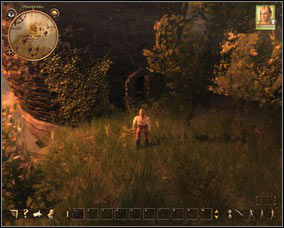
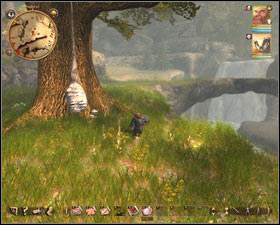
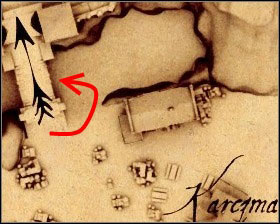
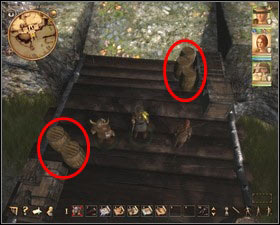
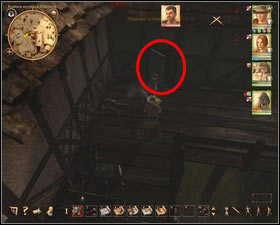
Follow Janah until you reach the ruins of the tower.
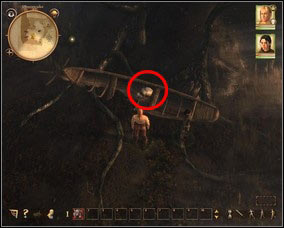
You'll find a tindermold inside the boat.
Follow Janah (M1, 4). She will take you to the ruins of the tower (M1, 2). Go inside and talk to Janah (M2, 2). No matter what you say, she will go with you. Prepare to fight and choose a weapon from your inventory - you will fight with bats (M2, 3). After you kill them, take a dry tindermold (M2, 4) and go outside the ruins.
4) Return to the camp
You can talk to Janah (M1, 4) about rest of the crew. When you're done, return to the camp and talk to Piet (M1, 5) and the captain (M1, 3).
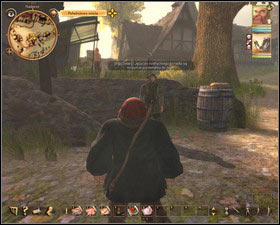
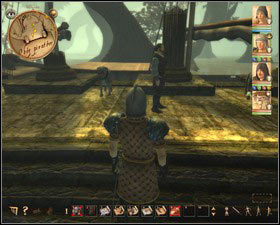
5) Inform three travelers
The captain (M1, 3) will ask you to inform traveling merchants (M1, 6) that the camp is ready. Go to merchants and tell them news. Return to the captain and tell him that your task is done.
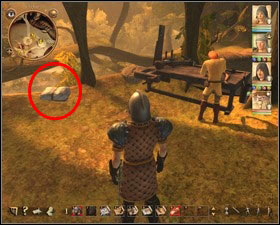
6) Go to sleep
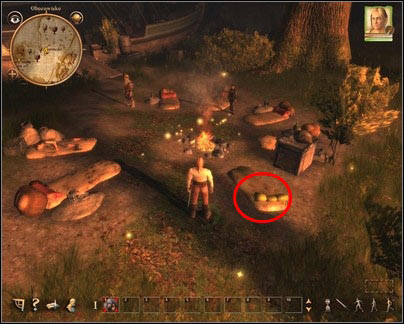
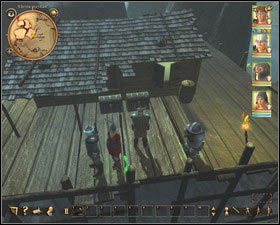
You can lie down and take some sleep. Click on one of mats (M1, 7), and you'll fall asleep after a while.
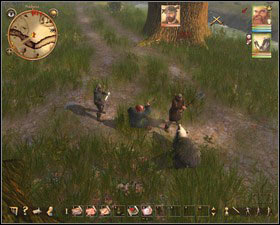
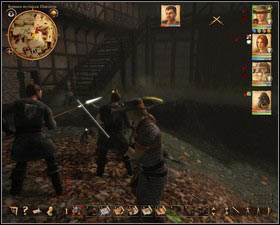
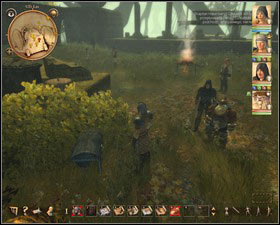
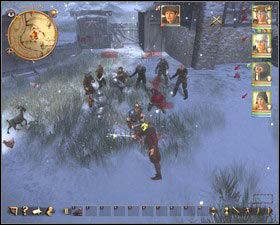
7) Fight with the river pirates
You will be awakened by the captain. The camp is attacked by the pirates. Help the crew with fighting with them. There will be a cut scene after few moments, when you can see your hero losing consciousness after being hit by one of the pirates.
Obtained from: Automatically, after you start the game.
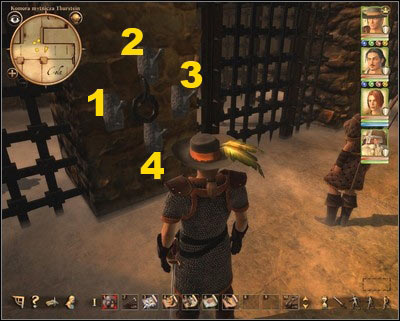
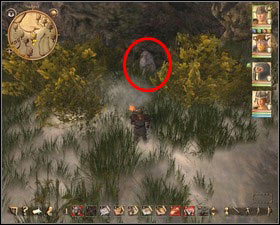
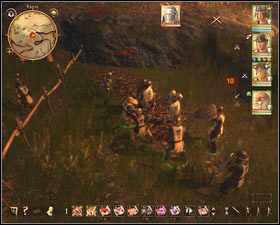
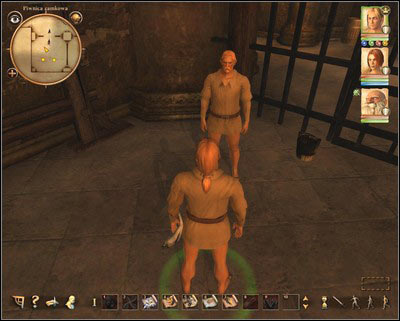
1) Talk to Medicus Moddlemash

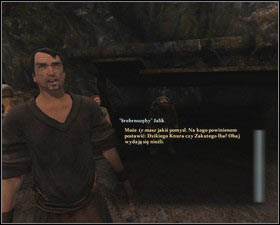
The entrance to the caves is situated right behind women.
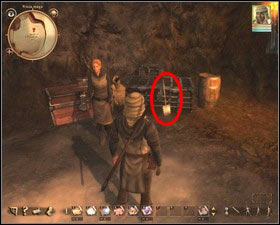
Medicus Moddlemash stands next to the cage.
Ask the harbor master (M3, 21) about Moddlemash (M6, 4). You will get some mark on your map - information about Moddlemash. Go there. You will meet three women - Washerwoman, Gossip girl and Chatterbox (M3, 10). Ask them about Moddlemash and they will point you to him. Go to the nearby caves (M3, 7). You'll find Medicus next to the cage where two warriors fight. Talk to him about Silvervixen and he will send you to Sandor (M6, 6).
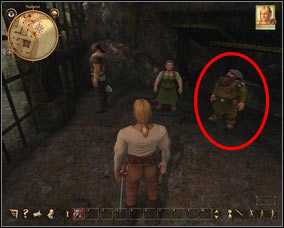
2) Meet Silvervixen
You will find Sandor (M6, 6) nearby. Give him passwords you've received from Medicus (M6, 4) and you'll get an access to the Thieves Guild. Now go along the corridor, where you'll be accosted by Dilga Panek (M7, 3).
3) The quest ending
To complete this quest you have to complete three more quests: 3R. A novice in the service of Phex, 4R. Like a shadow and 5R. Tread carefully.
Obtained from: Dilga Panek (M7, 3). During the quest 2R. Complete your training.
Notice! The more trials you complete, the more experience you receive. There is no material reward for completing this quest.
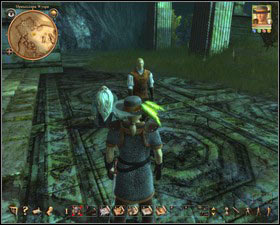
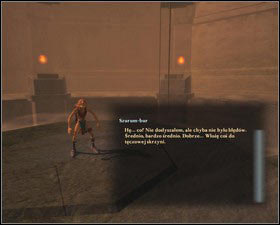
Dilga Panek (M7, 3), Silvervixen, wants to test your skills. To do this you have to pass three trials:
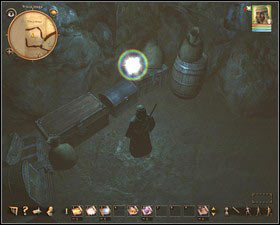
1) Rob the thief
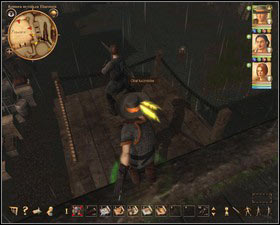
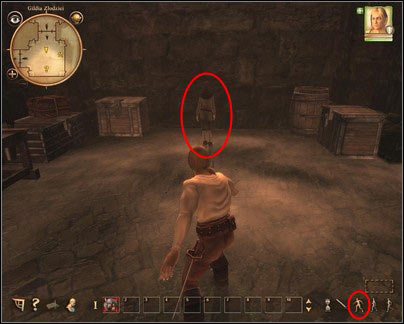 You have to approach the thief in the stealth mode, which can be selected from the menu at the right bottom corner.
Sneak to the thief named Odila (M7, 4) (turn on the stealth mode) and try to rob her. Whether you are successful, you will have to pass one more trial. She will test your persuasion strength, by pretending a situation when you will be caught red-handed. You have to use Fast Talk or Seduce in order to succeed.
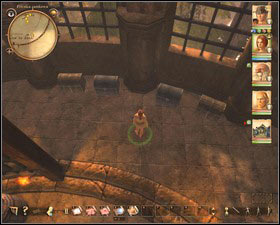
2) Open a chest
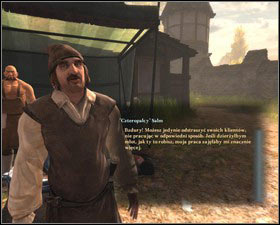
Your next task is to open a chest (M7, 7). There is a thief Bardo (M7, 5) standing near it. Ask him for the hair pins. You'll receive 10 of them (if you haven't them earlier). Try to open the chest lock using the pins.
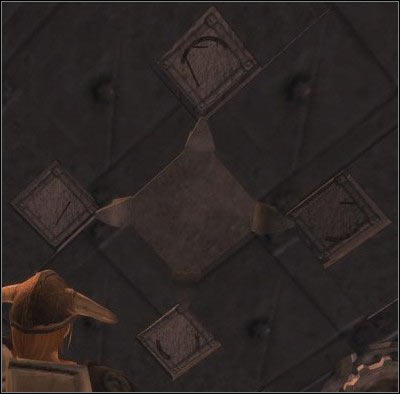
3) Find a trap and disarm it
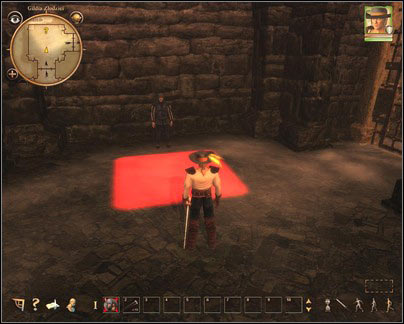 If a trap does not show itself right away, wait few seconds.
In the next room you'll find a thief named Wenner (M7, 6). He will warn you that there is a trap (M7, 8) in front of him. You have to disarm it.
Obtained from: Dilga Panek (M7, 3). After the quest 3R. A novice in the service of Phex.
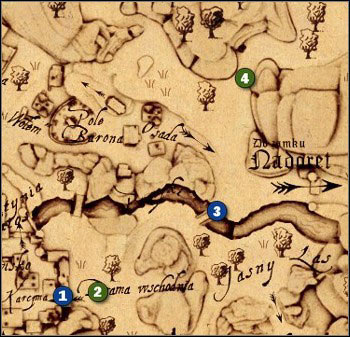
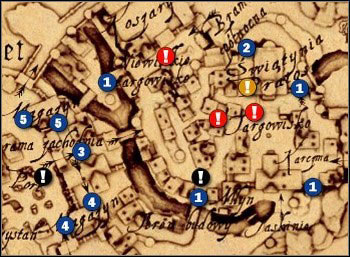
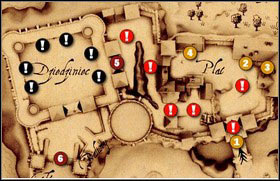
Nadoret by night:
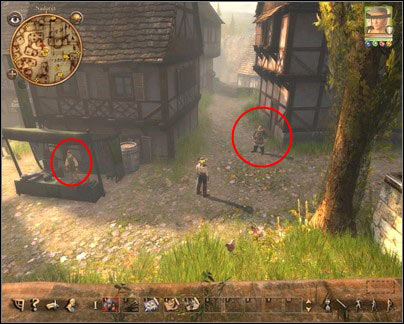
1. Bandits
2. A citizen
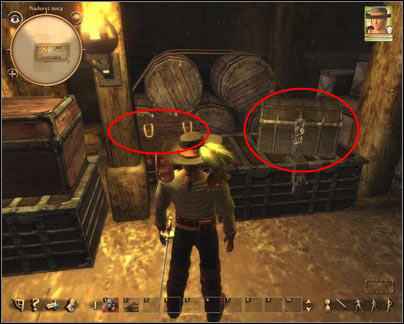
3. The warehouse
4. Guards
1) Talk to Dilga
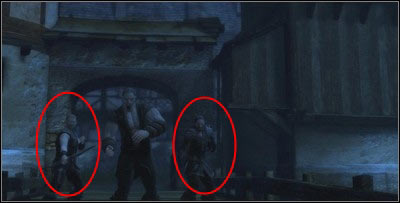
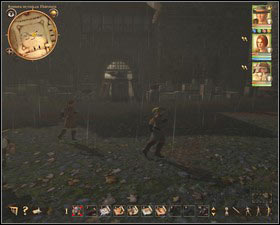
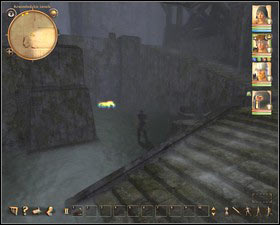
Tell Dilga (M7, 3), that you're ready - you'll be automatically moved to the city. You have to get with Bardo to the warehouse (3) without being noticed by guards (4). You can come across the bandits (1) and the man (2) trying to get inside the house on your way there.
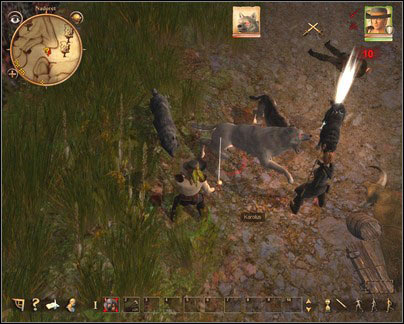
2) Bandits
You can deal with the bandits (1) in two ways:
a) You can give them 2 $ to leave you alone.
b) You can fight with them (they do not have any interesting items).
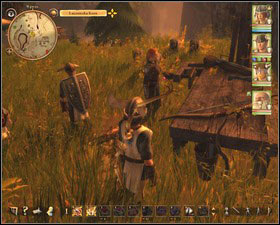
Bandits.
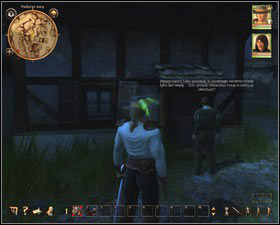
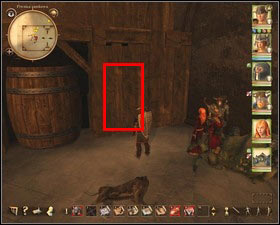
A man trying to get inside the house.
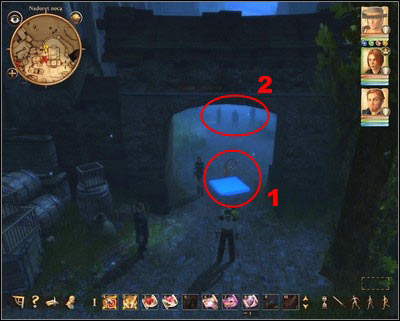
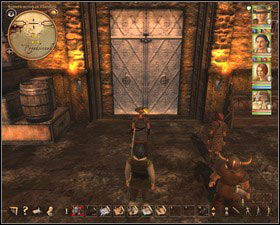
3) Open the front door
There is a man (2) standing at the door, whose wife doesn't want to let him in. You can convince him to go to the inn or open the door lock - you'll receive 0,3 $ or even 1 $ with skillful haggling.
4) Sneak next to the patrols
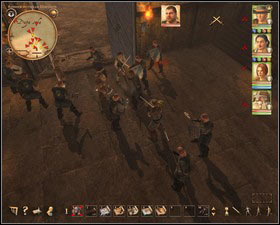
There are guards (4) near the entrance to the warehouse (3). Wait until they finish their conversation and leave. When you get too close and the guards will see you, you can still rescue yourself with a conversation using Fast Talk or Streetwise. If you can not fool them, you'll have to fight with them. However, finally you won't kill them, but only stun them.
5) Break into the warehouse
Open a door to the warehouse (3) using pins or lock picks and go inside.
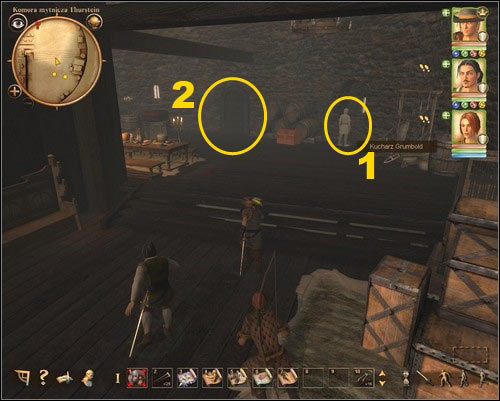
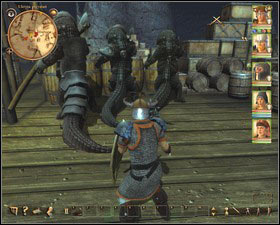
6) Take a look in the warehouse
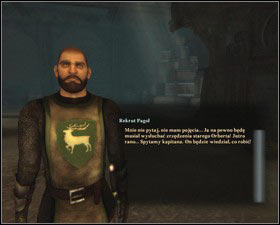
There are few chests in the warehouse, which you have to open and see what's inside. You can't take anything however, because every attempt ends with Bardo's reprimand. After you check a few chests, a rookie Pagol will come inside the warehouse along with the guard. After a short conversation Pagol will go out, leaving the guard alone. Now you can:
a) Convince him with Fast Talk to take 5 $ from you and let you go.
b) Intimidate him, so the guard will let you go out of the warehouse.
c) Fight with him. When you inflict the last blow, a rookie Pagol will show up again along with some thugs. Then he will leave and you'll have to kill the thugs.
7) Report back
After an automatic transfer to the guild, go to Dilga Panek (M7, 3) and tell her what happened.
Obtained from: Dilga Panek (M7, 3). After the quest 4R. Like a shadow.
Nadoret - the eastern gate area:
1. The eastern gate
2. Harbor master Orbert and helpers
3. The bridge
4. Hesindiane Zoltan
The thief Odila (M7, 4) tells you, that the harbor master (2) can be now found at the eastern gate (1).
1) Go to the eastern gate
Go outside the guild and take any route to the eastern gate (1). Go through it and you'll see the harbor master (2) who is giving orders to few men with a heavy-laden ox. Come closer and Bardo will start a conversation. He'll tell you that he will follow the harbor master and you have to follow the ox.
2) Watch the mysterious package
 Remember to keep a reasonable distance. You do not have to hurry, you always catch up with ox.
Follow the men (2) with the ox, but do not come to close to them. If you do so, one of the helpers will warn you not to do it again. If you won't listen to him you will have to fight with one of the helpers.
3) Go deep into the forest
This part of the task is available only if you have killed one of the helpers in previous part (2. Watch the mysterious package). It will close the opportunity to eavesdrop the helpers (point 4. Eavesdrop conversations and 5. Follow the traps will be unattainable).
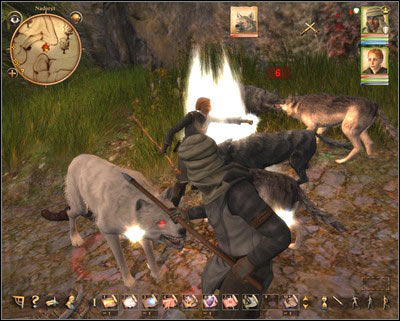
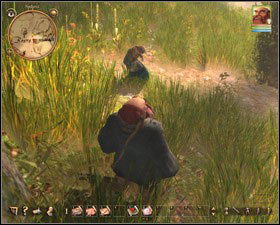
Head to the Dark Forest. Right at the border you'll see the sorceress (4) fighting with the wolves. Go there and talk to her. After a while your conversation will be disturbed and you'll be attacked by the wolves.
4) Eavesdrop conversations
This part of the task is available only if you've avoided the fight with one of the helpers in 2. Watch the mysterious package.
The men you follow will stop right after they cross the little bridge (3) which leads to the Dark Forest. They will meet another helper. Turn on the stealth mode and come closer to hear what they are talking about. If they won't notice you, you can hear their conversation. Then you'll be attacked from behind by Runko - one of the helpers. In case the sneaking failed, the helpers will notice you at once and they won't talk to each other. One of them will also attack you.
5) Follow the traps
This part of the task is available only if you've avoided the fight with one of the helpers in 2. Watch the mysterious package.
Head for the Dark Forest. Along your way you will be passing the traps set by the helpers. Right at the border of the forest you'll see the sorceress (4) fighting with the wolves. Go to there and talk to her. After a while your conversation will be disturbed and you'll be attacked by the wolves.
6) Kill the she-wolf
Kill all the wolves and the bloody wolf. After the fight talk to the sorceress (3). You'll receive the letter, which she has found among the bodies. Search the ox and rest of the bodies.
6) Return to the guild
Return to the guild and report to Dilga Panek (M7,3). Give her also the letter. This way you will complete the quest 2R. Complete your training too. Additionally you will get to know miracles (thieves' spells) which can be learned from Dilga from now on.
Obtained from: Automatically, after you start the game.
1) Talk to captain Nirulf
Ask the harbor master (M3, 21) about Nirulf (M3, 30). He will mark the barracks on your map. Go there and talk to captain Nirulf about joining the city guards.
2) The quest ending
To complete this quest you have to complete three more quests: 3W. An entrance exam, 4W. A patrol and 5W. A debate at the customs gate.
Obtained from: Captain Nirulf (M3, 30). During the quest 2W. Complete your training.
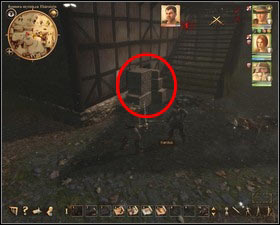
1. Destroy the training dummy
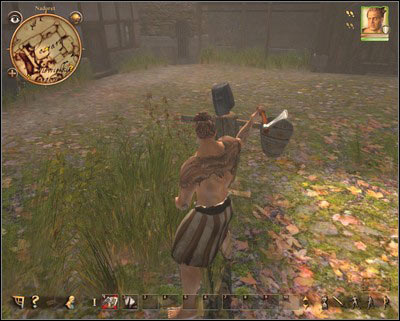
First you have to prove that you can use weapons. To do this you have to destroy the training dummy, located in the center of the barracks.
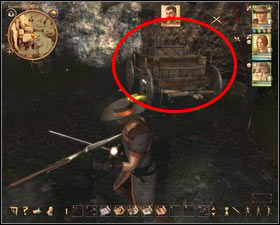
2. Defeat Pagol
Your next target is a real opponent. You will fight with Pagol. When the fight is over, you will obtain an access to your own chest. There are some city guards' equipment items. Take them.
Obtained from: Captain Nirulf (M3, 30). During the quest 3W. An entrance exam.
To start this mission, tell Pagol, that you're ready for a patrol. Time will pass and you'll find yourself along with the Pagol in front of the barracks' gates at night. Now you have to visit few places which will appear on your map one after another.

1. A citizen - convince him to stop knocking to his house and to go somewhere else.
2. You'll find only a cat behind the temple.
3. Two drunks - convince them to go somewhere else.
4. The eastern gate.
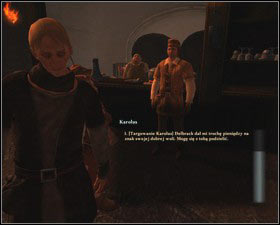
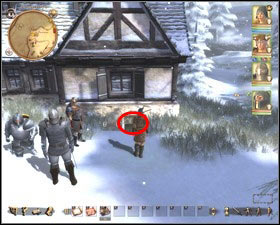
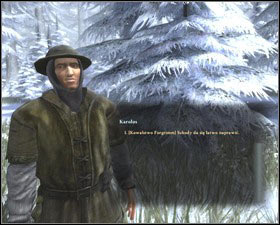
5. The guard named Karolus guarding the southern gate will argue with Pagol.
6. Robbers attack the citizen. You'll have to fight with them.
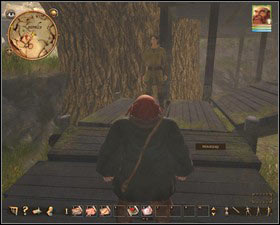
7. At the port gate Pagol will hear a noise.
8. Go to the warehouse - you'll notice some thieves going inside. Follow them.

You will catch the thieves red-handed. Pagol will tell you to watch them and will go to the harbor master. After he leaves the warehouse, the thieves will attack you. After you kill them, Pagol will return and you'll go together to captain Nirulf (M3, 30) and report to him.
Obtained from: Captain Nirulf (M3, 30). During the quest 4W. A patrol.
1) Put the order at the customs gate
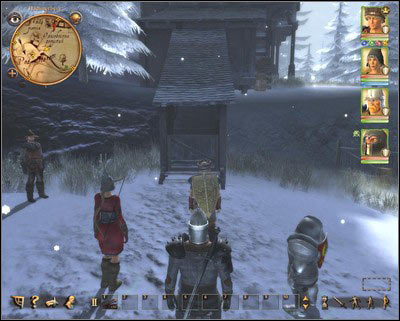
Some merchants cause problems at the customs gate (M5, 8), south of the city. Go there to solve the problem. There is a city guard Gardenwood (M5, 8), who will explain you the situation. Two merchants with an ox want to get through without showing the goods that they have. Talk to them and after a while the harbor master Orbert will come and he'll give merchants a letter, which allows them to pass without checking.
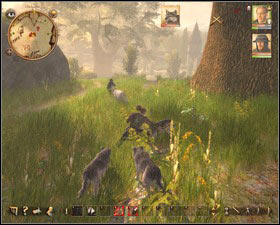
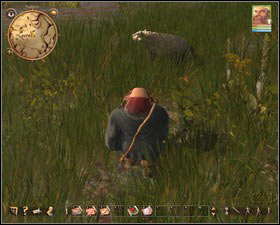
2) Stave off the threat from wolves
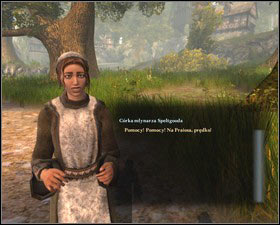
Now you can have only short conversation with a guard, seeing a miller's daughter running towards you. She'll tell you that merchants were attacked by the wolves. Run to the place of attack and deal with the wolves and their leader - the Bloody wolf.
Then go to the merchants' corpses lying nearby. A city guard Gardenwood will start to search them and will give you a letter he found. After a while elf Laurelin will come and tell you a bit about the wild wolves. Search the bodies and the ox - you'll find few valuable items.
3) Report back
Go back to captain Nirulf (M3, 30) and tell him what happened. This way you will complete the quest 2W. Complete your training too, and you'll receive Nadoret Escutcheon.
Nadoret Escutcheon

Left hand (2)
Weapon bonus: -2/3
Obtained from: Automatically, after you start the game.
1) Find Master Brookbeard
Ask the harbor master (M3, 21) about Master Brookbeard. He'll tell you to go to the northern gate (M3, 2) and talk to a guard there. Do so, and he'll point you to the mage's tower (M4, 2). Right after you go inside the tower, you'll be "attacked" by Hesindiane Zoltan - Master's apprentice. Then Master Brookbeard will appear himself and give you some simple task for the start.
2) The quest ending
To complete this quest you have to complete three more quests: 3M. Light, 4M. Shadow and 5M. Blood.
Obtained from: Master Brookbeard. During the quest 2M. Complete your training.
1) Follow the master
Master opens the door leading to the small chamber and tells you, that he'll make darkness there once you're inside. Your task is to create magical light and to find a key.
2) Create a light in the darkness
Being inside cast Light in the Darkness. Then take a look into one of the chests and take the key to open the door. After your task is complete, Hesindiane Zoltan will take you to your room. Take a look inside the chest there. You'll find few useful items there.
Obtained from: Master Brookbeard. After the quest 3M. Light.
Go upstairs. Master can be found on the top floor.
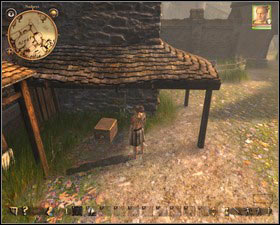
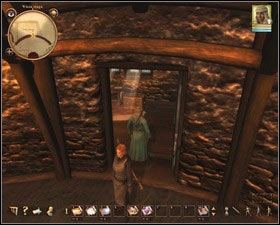
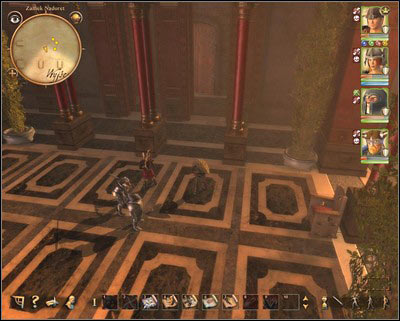
1) Get a shovel
Master wants you to dig out a corpse of villager. He was bitten by the Bloody Wolf and there is an agent inside his bones, which the mage needs. You can say that this is not moral, but you have to complete the task anyway.
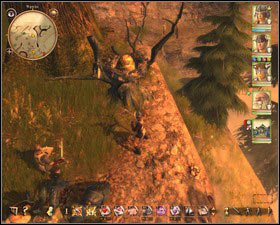
There are now open doors on the ground floor. Go down through them.
A shovel.
Go downstairs to the ground floor and then take next door leading down. Hesindiane stands there. Ask her for a shovel and then take it (it is right behind her).
2) Get bones
 A grave to dig.
Go outside the tower (M4, 2) and head for the cemetery (M4, 8). You'll find Boron Deont there. You can persuade him with Fast Talk or put a spell on him - Lightning Find You! (you've learned it from Master). Then click on the grave to dig out the bones.
3) Deliver the bones
Go back to the tower (M4, 2). You'll meet villagers on your way. They want to burn down the tower, but using Intimidate you can convince them no to do that. If you don't succeed, villagers will attack. You will not have to kill them however, because they will flee during the fight. Being inside the tower go to the top floor and give Master the bones.
Obtained from: Master Brookbeard. During the quest 4M. Shadow.
After you gave Master the bones and started talking to Hesindiane, the ground begins to shake. Run to the ground floor and then downstairs to Master. Something went wrong with the experiment and he wants you to get the Bloody Wolf's blood.
1) Get the wolf's blood
Exit the tower together with Hesindiane. Head to the Dark Forest (M4, 9). You will be attacked several times by the wolves. Being in the forest, you'll see bodies. Hesindiane will search them and will give you a letter which she has found.
Then you will be attacked by the Bloody Wolf and its pack of wolves. Kill them and you'll get a vial of blood.
2) Take the blood to the Master
Return to Master who awaits you in his laboratory (take the stairs down). Give him a vial and you'll finish your training. He will give you a staff named Soulsplitter.
Soulsplitter

Staff
1D+2
Strength bonus: 12/5
Weapon bonus: -1/-1
Range: 1.6
Astral Energy +10
Obtained from: Automatically, after you start the game.
1) Find master Laurelin
Ask the harbor master (M3, 21) about master Laurelin (M5, 4). He'll tell you to go outside the town and to talk to a woman gathering mushrooms (M5, 9).
Do so and you'll learn where you can find Laurelin. When he meets him, he'll order you a simple task.
2) The quest ending
To complete this quest you have to complete three more quests: 3N. A soft hand, 4N. Dangerous hum of wings and 5N. Traps.
Obtained from: Laurelin (M5, 4). During the quest 2N. Complete your training.
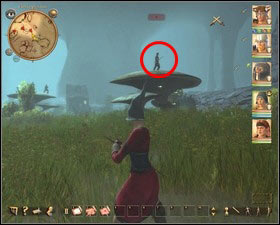
1) Earn trust of a badger
You have to earn trust of a Laurelin's badger first. He wanders somewhere in the area (he's marked with a question mark on your map). Turn on the normal walk mode, while running towards the badger frightens him. Then "talk" to him. Using Animal Lore you'll earn his trust.
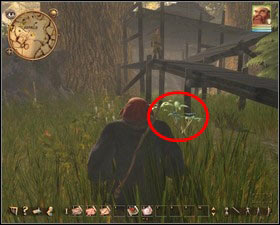
Oneberries can be found under a footbridge leading to the elf's hut.
The badger will accompany you in the subsequent tasks from Laurelin.
You can pick some oneberries earlier. By giving them to a badger, you can also earn his trust.
2) Return to master Laurelin
Return to master Laurelin (M5, 4) and report back.
Obtained from: Laurelin (M5, 4). After the quest 3N. A soft hand.
Laurelin (M5, 4) wants you to destroy fireflies' nests, while fireflies are too strong and too many because of a mad beekeeper.
1) Go along the river
1. Laurelin
2. Beekeeper
! Fireflies' nests
Go along the river and destroy all nests along your way.
2) Find the beekeeper in town
At one of the nests you'll meet a beekeeper's assistant. He'll tell you that a beekeeper can be found near the southern gate (M3, 4). Go there and try to convince him to stop his experiments with fireflies. Unfortunately, you won't succeed. The harbor master will come after a while and throw you out of the town.
3) Return to master Laurelin
Tell Laurelin (M5, 4) about your half-success.
Obtained from: Laurelin (M5, 4) . After the quest 4N. Dangerous hum of wings.
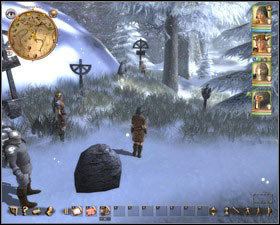
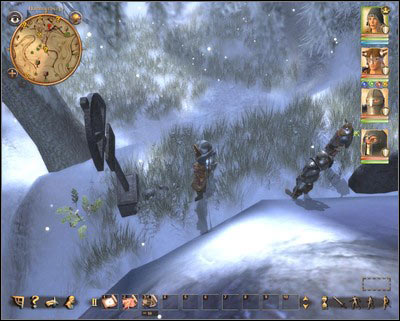
1) Disarm traps
Right after you cross the bridge, you will be attacked by trappers.
You can disarm traps after the fight with the Bloody Wolf.
Before you start the task, Laurelin (M5, 4) will teach you Disarm Traps. Head north, to the Dark Forest (M4, 9) and take care of traps which you find on your way.
2) Hunt for the Bloody Wolf
Before you enter the forest (M4, 9), you'll see the sorceress Hesindiane. You'll talk for a while and she'll give you a letter which she has found searching the bodies. Few seconds later the Bloody Wolf approaches. Together with the sorceress and the badger kill him and all the wolves.
3) Return to master Laurelin
After you disarmed all traps and killed the Bloody Wolf, return to Laurelin (M5, 4).
Obtained from: Ardo. After the quest 1. A camp by night.
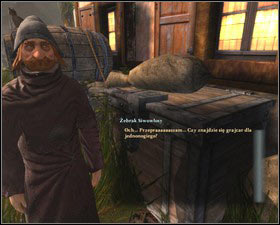
You can repay Ardo and his companions for saving your life by searching for information about the river pirates for them. To do this you have to talk to 3 persons:
1. Olbin, the huckster (M3, 16)
2. Rabig, the city guard (M3, 12)
3. Griese, the beggar (M3, 14)
Then go to the "At the Leaping Deer" inn (M3, 5) and tell Ardo what you know. You'll get 0,3 $ as a reward.
Obtained from: Gerling. After the quest 2. Complete your training.
After completing the quest 2. Complete your training, you'll be accosted by man named Gerling. It seems that he knows a lot about you and your actions. He wants to meet you in quieter place. Using Human Nature you can discover that there will be two more men waiting for you. But finally you'll agree to go for a meeting.
1) Meet Gerling
Go near the tailor Marcusi (M3, 18). Gerling stands right behind his booth. Tell him that you are ready and he will take you to his companion and explain you the whole situation. Then he will propose you to cooperate with him in getting information about what the pirates are up to. To do this you have to go with him and his friends to the port at night and take a closer look at stolen goods.
2) Meet Jaakon
In order to start the night trip to the port, you have to contact Jaakon. You can find him near the "At the Leaping Deer" inn (M3, 5). Before starting the quest, you can talk with him. It is worth to do it, because later you can have no such occasion.
Obtained from: Gerling. During the quest 7. Mysterious Gerling.
1. Blocked passage
2. The gate - an ideal place for a trap
3. Target
4. Fayris warehouse
5. Jaakon warehouse
! - first group of smugglers
! - smugglers with a mage
! - a large group of smugglers
Notice! Remember to use your new companions' talents. Fayris can use healing spells for example and Jaakon can cast offensive ones. Jaakon can use also Arcane Lore talent. If you posses any unidentified items, you can give ask him to identify them.
1) Free Gerling
You will be moved with Jaakon at the back of the temple, where Gerling and Fayris are supposed to wait for you. After a while elf will come and tell you that Gerling was kidnapped by the smugglers. From now on Fayris and Jaakon are in your team.
2) Go to the port
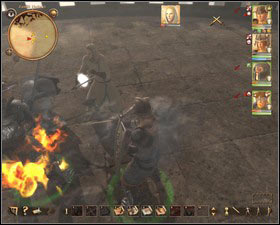
On your way to the port you will have to fight with groups of smugglers. During the first fight (!) you can use Fayris' talent to set the traps.
 1. A trap set by Fayris/ 2. The smugglers.
Use the snares, which she has in inventory. Put them on the ground, just under the arch, under which the smugglers will have to go to get you. With the next group of smugglers (!) you can use Jaakon's spell - Sleep of a Thousand Sheep, which can be very good against the mage.
When you get near the port (3) Jaakon and Fayris will split up and go in search of Gerling in separate warehouses (4 and 5).
 These archers have fire arrows.
You will be attacked by the smugglers and will find out that your companions have run into an ambush. After defeating the smugglers take the fire arrows from archers' bodies. You can use them later.
Notice! Now you have to make very important choice: whom to save. If you save Jaakon, Fayris will die. On the other hand, saving Fayris will result in Jaakon's death.
3a) Hurry up and save Jaakon
Go inside the warehouse (5). You'll see Jaakon being attacked by the smugglers. Help him with the fight and listen to his plan.
3b) Hurry up and save Fayris
Go inside the warehouse (4). You'll see Fayris being attacked by the smugglers. Help her with the fight and listen to her plan.
4) Go to the other warehouse
Now go outside to the gate leading to the port. You'll see the smugglers (!) and the warehouse you're heading to. You can:
a) Start the fight. It will be very tough to win though, while there are many smugglers in the port (!).
b) Pass by the smugglers (!). Turn on the sneak mode and go through the crates nearby. Try to walk in some distance to smugglers (!). They won't be able to see you but you have to watch out for the mage patrolling crates' area. When he is close to you, try to pass by him.
Your Sneak talent doesn't have to be very high in order to succeed with reaching the warehouse undetected.
You can attack the golem with fire arrows or with spells dealing fire damage.
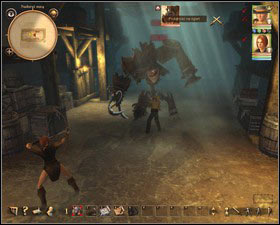
When you enter the warehouse you will see Jaakon or Fayris being killed by Regismund from Coldstone. The mage will go away quickly casting the spell which creates a golem made out of junk.
5) Defeat a golem
The golem is very vulnerable to fire. Such damages can be dealt with fire arrows (you could find them by smugglers - point 2) Go to the port). The easiest tactics is to attack the golem with one character, then run away, having other character shooting fire arrows at the golem.
When the golem is dead, go to talk to Gerling who is tied to the pillar. He will explain you many things and tell you to go to Ardo and tell him everything you know about the pirates. You can also ask about his employer, which turns out to be Count Growin Ferdok himself.
Obtained from: Gerling. During the quest 8. A night mission.
Go to the "At the Leaping Deer" inn (M3, 5) and tell Ardo, Cuano and Forgrimm about your last encounters. From that moment you won't meet them in the inn anymore. They can be found on a ship in the port.
Obtained: After the quest 9. Gerling's information about the pirates.
1) Meet Ardo in the port
Go outside the inn and you will be automatically moved to the port. Once you get there, a cut-scene launches presenting the ship.
You'll meet Ardo and captain Delbrack (M3, 22) near the ship. To continue with this mission, you have to complete 11. Ship's crew first.
2) Talk to the captain
After completing 11. Ship's crew talk to the captain (M3, 22). If you are done with all things in Nadoret and you're equipped enough, you can tell him that you are ready to go to the customs stronghold. You will be able to return to Nadoret after completing 13. A toll is not enough.
Obtained from: Captain Delbrack (M3, 22). During the quest 10. A trip to the customs stronghold.
Before you go for your first ship journey, you have to help captain Delbrack (M3, 22). You have to convince the renegade crew members to get back to the ship. You'll receive 10 $ for this mission.
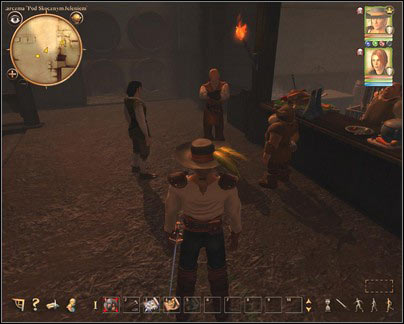
1) Convince Silvertooth Jalik
You'll find Jalik near the arena (M6, 2). You can convince him in few ways:
a) Use Fast Talk to persuade him that he should not have bet on fights, and then pay him $ 2 in advance.
b) Advise him on whom to bet money. You can also ask the spectators (M6, 5) who are the favorite to win. If you advice him to bet on this type, he will be pleased with the win and you'll have to pay him 2 $ to go back to the ship. If he bet on other fighter, he'll lose and it is enough to give him only 1 $ to make him go back to the ship.
Silvertooth Jalik bets on fights.
Fourfinger Salm discusses with a blacksmith.
2) Convince Fourfinger Salm
You will find him talking to the blacksmith Tarno (M3, 23).
a) If you Intimidate him, you won't have to pay him anything to get him back on the ship.
b) Fast Talk and Haggle result in paying him 1 $.
3) Convince Dumb Hummel
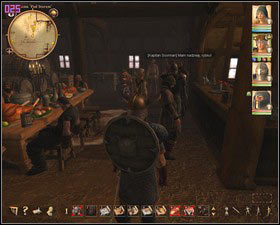
Dumb Hummel fuss in the "At the Leaping Deer" inn (M3, 5). Talk to him and use Human Nature or Fast Talk to find out what is going on. It turns out that Hummel didn't get his payment from the captain and he has no money.
a) Convince him with Fast Talk that you have money from the captain and you can pay him. Then use Haggle to lower the price to 1 $.
b) Use Intimidate and tell him that it is not worth to fuss and he has to go to the ship when he surely will get his payment soon.
c) If you can't convince him in any way, you'll have to fight with him. After few hits he'll agree to go to the ship.
Dumb Hummel fuss at the inn.
After leaving the inn you will meet Griese, the beggar, who turns out to be a secret agent.
After leaving the inn, Griese the beggar will speak with you. It turns out that he is Gerling's agent and has a message for you.
4) Return to captain
After convincing 3 sailors talk to the captain (M3, 22), to complete this quest.
Obtained: During the quest 10. A trip to the customs stronghold.
First episode with brother Emmeran (M3, 11) takes place shortly after your arrival to Nadoret. He says some mysterious sentences, gives you location of the Isle of Forgetfulness (his residence) and sails away.
When you sail to the customs stronghold, you will visit the Isle of Forgetfulness on your way, which is hosted by brother Emmeran. He wants to show Ardo the island and tell him its story. You can follow them to listen to the Emmeran's tale.
1) Ask brother Emmeran about the prophecy

At certain moment Ardo and Emmeran cease talking and stop. Talk then to brother Emmeran and ask him about explanations of the prophecy, he has said in Nadoret. After you get the answer, you can sail away from the island, by informing the captain about it.
Obtained: After arrival to the customs stronghold.
After your arrival to the customs stronghold you will have to get inside the fortress and find out what its commander is up to.
1) Make a decision
You can get inside the fortress in two ways. Forgrimm (M9, 2) suggests to enter through the main gate and use brute force in case of any troubles. Cuano (M9, 2) wants to sneak in and doesn't stand out. Talk to them and decide which way is better for you.
2 Cuano) Enter the fortress unnoticed
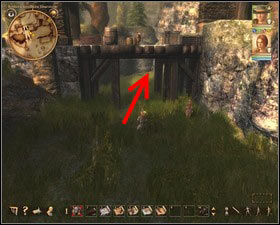
Follow Cuano, who runs the path leading under the bridge.
Go under the bridge and meet with Cuano who already awaits you.
Follow Cuano who will get you inside the fortress' canals using the secret passage.
3 Cuano) Leave the canals
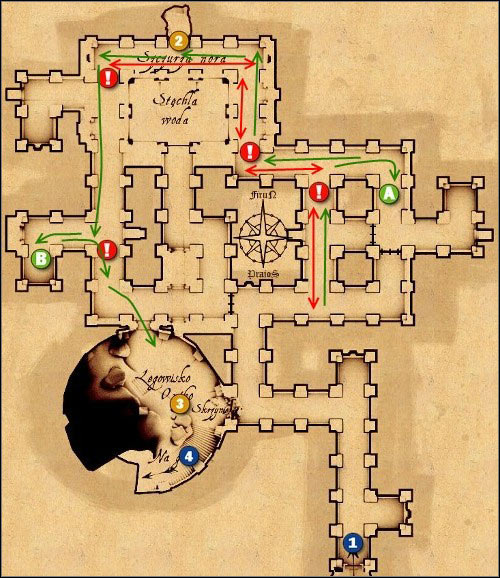
1. A closed gate
2. A hut
3. A stinking chest - the rat-catcher key
4. Stairs to the upper level
A. First hideout
B. Second hideout
! Red exclamations marks - the rat-catcher traps
---> Green arrows - the route you should take
<---> Red arrows - the route which rat-catcher patrols
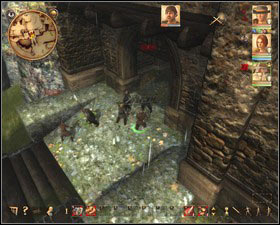
When you come close to the round chamber you see the cut-scene with the commander going down to the rat-catcher and telling him to deal with intruders. The Rat-catcher and his dog will start patrolling the canals. The problem with them can be solved in two ways:
a) Kill the rat-catcher and his dog. You won't find anything interesting by searching their bodies.
b) Outsmart the rat-catcher. Just pass him unnoticed. First make sure that the rat-catcher is in the northern part of canals. Then disarm the traps and hide with your companions behind the wall (A). Wait until the rat-catcher pass your hideout - he will go south. Now turn on the stealth mode, pass the corridor where the rat-catcher is (make sure he doesn't look in your direction) and go to the northern part of canals (normal walking mode). Destroy a hut (2), where the rat-catcher has his supplies and hide again (in the stealth mode - the dog can't see you) behind next wall (B). Wait for the rat-catcher seeing the destroyed hut - he will call for his dog. When the dog passes your hideout, go out and head to the round chamber.
Take the rat-catcher's key from the stinking chest and go upstairs (4). Open a next door and go upstairs again. Now you will have another cut-scene with Forgrimm fighting somewhere near. There is also a cook behind the door.
4 Cuano) Go through the tower
Enter through the door to the tower. There is a cook inside the room having his back to you. Now you can:
 1. A cook / 2. The door to the fortress battlements
a) Talk to a cook and convince him not to look with Fast Talk or giving him 0,5 $.
b) When the conversation with a cook doesn't succeed, he will call for the guards, which you will have to kill to move on.
5 Cuano) Help Forgrimm
1. Head customs officer Tashman
2. The entrance to main tower
! Archers
When you reach the battlements you'll see Forgrimm running around like crazy below, trying to escape the arrows from archers being at the top. You have to help him:
a) Kill the archers quietly. Come to them with one character (with highest Sneak talent value) - clicking on every archer results with killing him. You have to watch out for one thing though. The archers say from time to time that they are out of arrows and go backwards a little bit in order to replenish them. Then they go back to their positions. You can't be too close to them in that moment.
b) Kill the archers in the traditional way. When they notice you, they will call for additional guards - you will have to kill them too.
2 Forgrimm) Get inside the fortress.
1. Barrels
2. Crates
3. A door
4. A wagon
5. Tashman
6. Tashman - fight
! Customs officers
! Archery towers
Follow Forgrimm to the main gate. Customs officers laugh at dwarf, who wants them to open the gate. Destroy barrels with beer (1) which makes customs officers to go down and fight with you.
3 Forgrimm) Defeat the guards
Go through the gate. There are more customs officers waiting for you. In addition to fighting with them, you have to close three passages (2, 3 and 4), where new opponents are coming from.
By not closing the passages immediately and fighting with customs officers you can earn more experience points.
Close the door (3).
Push creates (2).
Move the wagon (4).
4 Forgrimm) Make your way through the second courtyard
Go through another gate and kill customs officers standing in your way to Tashman (5). When you get to him, talk to him and agree to go to the courtyard.
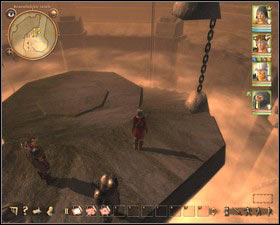
5 Forgrimm) Get out the trap
In the courtyard you'll be attacked by the archers and the ballista. Your task is to get close to archery towers and wait until the ballista destroys them aiming at you. After destroying the 6th tower start to running around (ballista will have some problems to hit you), waiting for Cuano to destroy the ballista.
6 Common) Go to the main tower
Now, head towards the main tower. Talk to the head customs officer (you will be joined by Forgrimm or Cuano - when the fight begins remember to give them some weapons, otherwise they will fight with bare hands). The fight is imminent, but you can use Fast Talk and convince his soldiers to go away. After a short conversation, the fight begins. Remember to search his body after it's over.
After entering the main tower, once again you have to make a choice of how you want to get to the commander. You can listen to Forgrimm and go through the main hall or listen to Cuano and try to surprise the commander.
7 Forgrimm) Get to the commander
Force open the door to the large hall (M10, 2) and deal with a big group of customs officers (M10, !). When you're done, go upstairs and open the door (M10, 11). You'll find yourself in a room occupied by two body guards (M10, !). Talking to them is useless so you have to kill them. Now open the door leading to the audience hall (M10, 12) and enter it. Talk with the commander (M10, 13) - you'll be thrown into the cave where a monster appears.
7 Cuano) Take the commander by surprise
Go down to the dungeons (M10, 3). You will be attacked by combat dogs (M10, !) released by the jailer (M10, 8). After you kill the dogs, go to talk to the jailer who is hiding in one of the cells. To open it you have to use one of the levers on the walls (M10, 9). Use them like this:
 1. Lever to: the boars' cell / 2. the wolves' cell / 3. the bear's cell / 4. the jailer
1. Pull the lever to the boars' cell.
2. Pull the lever to the wolves' cell - animals will pitch into each other.
3. Pull the lever to the boars' cell - you'll close it.
4. Pull the lever to the bear cell - the bear will join fighting animals and the jailer panics.
5. Pull the lever to the wolves' cell - you'll close it.
6. Pull the lever to the jailer cell.
The jailer will be free and you can:
a) Kill him.
b) Close him in the cell.
c) Let him free. Later he will attack you with bodyguards (M10, !).
Go outside the dungeons (M10, 7) and open the door (M10, 5) with a key you got from the jailer. Go to the commanders chambers (M10, 6). Open the next door (M10, 11). You'll find yourself in a room occupied by two body guards (M10, !). Talking to them is useless so you have to kill them. Now open the door leading to the audience hall (M10, 12) and enter it. Talk with the commander (M10, 13) - you'll be thrown into the cave where a monster appears.
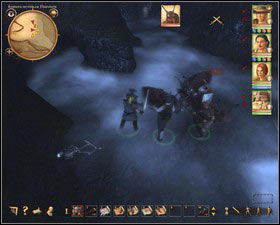
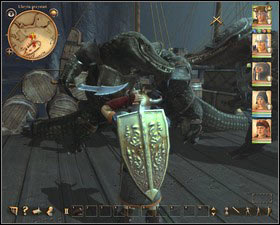
8 Common) Defeat the newtkraken
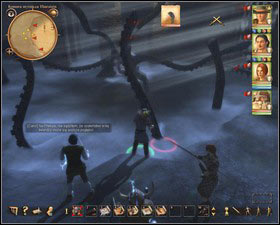
Damages you deal to the newtkraken add up, so you don't have to attack the same tentacle.
Morfus are much weaker than newtkraken, but do not ignore them.
Attack newtkraken's tentacles - it is best to split your team, so two characters attack one tentacle and other two characters attack different tentacle. The newtkraken will go under water after a while and you'll be attacked from behind by morfus. When you kill them, the newtkraken will show up again. This situation repeats several times and finally the monster will die, pulling the commander with him.
9 Common) Return to the shore
Go outside the cave and head to your ship (M9, 1). When you get close to it, another cut-scene starts. You'll see seriously wounded and unconscious Ardo. In order to cure him you'll have to go to the Elven Forest, but you don't have to hurry up. You can visit Nadoret and other locations first.
Obtained: During the quest 13. A toll is not enough.
You will learn about elves and the pirates' attack on their village from the commander in the customs stronghold.
1) Find the elven village
Head to the Isle of Forgetfulness first. Brother Emmeran will tell you where to find the elven village - they might help with curing Ardo. This mission is complete when you reach the Elven Forest.
Obtained: During the quest 13. A toll is not enough. After you find unconscious Ardo.
1) Talk to brother Emmeran
Head to the Isle of Forgetfulness first. Brother Emmeran will tell you where to find the elven village - they might help with curing Ardo.
2) Find elves
Sail to the Elven Forest now. When you reach it, you'll see a scene with the pirates and elves. You will be contacted then by Isaliel Wingstroke (M12, 19). Now you have to complete the quest 16. Pirates and Elves to go further with curing Ardo.
3) Talk to Isaliel Wingstroke
This point will be available after completing 16. Pirates and Elves.
Isaliel Wingstroke (M12, 19) will tell you a little about Ardo's illness and send you to Alari Springborn (M12, 25), who has much more knowledge on this subject.
4) Get a cure in the ruins
Alari (M12, 25) will tell you that the cure for Ardo's illness is probably located in the bosparian ruins (M12, 4). You have to complete the quest 21. Haunted ruins first.
Obtained: In the Elven Forest, at the start.
When you reach the Elven Forest, you'll see a scene with the pirates and elves having an argument. Pirates will leave and you can chat with elven leader - Isaliel Wingstroke.
1) Resolve the dispute
You have to deal with the pirates now. Go to their camp (M12, 3) and talk to the guarding pirate - Mate Bravethorn (M12, 6). During the conversation you can choose one of the possibilities:
a) Suggested by Cuano - dialog option "Do mischief" - it gives you most experience points.
b) Suggested by Fayris - dialog option "Negotiations" - at the end you'll receive two unique items: Ama and Zelja'ama and possibility to receive additional 10 $ or 20 $.
Ama

Value: 29 $
Necklace
Human nature +3
Zelja'ama

Value: 29 $
Necklace
Perception +3
Only for Fayris.
c) Suggested by Forgrimm - dialog option "Attack". The least profitable. Elves won't like this solution and some of them will be afraid to talk to you.
2) Find the location of pirates' hideout
Isaliel Wingstroke (M12, 19) will tell you where pirates' hideout is located, after you complete the quest 17. Do mischief or 18. Negotiations. After completing the quest 20. Fight with the river pirates you'll discover pirates hideout by taking the map from the pirates' captain body.
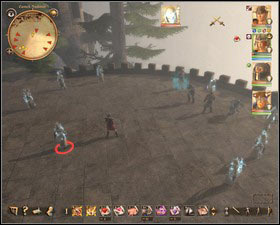
Obtained: During the quest 16. Pirates and Elves, if you decide to listen to Cuano.
1) Test the crew
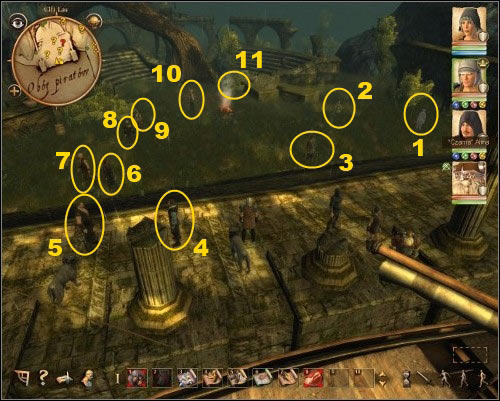 The pirates camp view.
1. Black Alma
2. A boy
3. Road Runner
4. Captain Hakensang
5. Flea
6. Spinning Jette
7. Shadow Fox
8. Conifer
9. Crow
10. Grinning Hanno
11. A chest from the sea
After you enter the camp (M12, 3) you will be accosted by Flea and the captain himself. Tell him that you want to be a mediator between the pirates and elves. Now it's time to talk to the crew and to build the most hostile atmosphere.
2) Steal the Shadow Fox's dagger
Talk to Road Runner. Using Human Nature and Fast Talk (or Intimidate), get information about Black Alma and overall discontent amongst the crew members. Then ask about Shadow Fox. You'll learn that Black Alma steals from the pirates and Shadow Fox possesses very valuable dagger.
Try to steal it. If you don't succeed, Shadow Fox will put the dagger into a chest from the sea. It is enough just to open it in order to get the dagger.
3) Slip Alma the dagger
Talk to Alma and sell her the dagger for 1 $ or with Haggle - for 2 $.
4) Dispose Grinning Hanno against deckhand
Persuade Conifer using Fast Talk or pay him 0,2 $ to bet who will hit the boy first: Crow or Grinning Hanno. The bet is 0,5 $.
Next go to Hanno and tell him that he should give the boy a lesson. He'll agree with you and will go to hit him. You can return to Conifer and collect your reward - 1 $.
5) Make the boy to make a joke to someone
Persuade the boy to make a joke to Crow. He'll agree and will go to the camp-fire to add something disgusting to the meal. After a while Crow appears and tastes such food.
6) Persuade the first officer to rebellion
Go outside the camp and talk to Mate Bravethorn (M12, 6) again. Try to convince him to start the rebellion and replace the captain.
7) Tell Crow the secret
Talk to Spinning Jette. You'll learn that Crow is a gossip girl. Go to Black Alma and using Seduce (for men) or Fast Talk convince her to tell you the secret. Alma will tell you about her illness and you can go and tell it Crow.
8) Get a key from Spinning Jette
Go outside the camp and talk to Mate Bravethorn (M12, 6) again. Tell him that the crew is against captain and that alcohol would make these emotions stronger. Mate will ask you to get a key to Spinning Jette's supplies. You can steal it or convince her to give it to you.
9) Give Bravethorn the key
Return to Mate Bravethorn (M12, 6) and give him the key. You'll see the cut-scene with arguing pirates are leaving the Elven Forest.
Obtained: During the quest 16. Pirates and Elves, if you decide to listen to Fayris.
After you enter the camp you will be accosted by Flea and the captain himself. Tell him that you want to be a mediator between the pirates and elves.
1) Offer elves your help with negotiations
Go to the elven tree (M12, 2) and tell Isaliel Wingstroke that you have to negotiate with the pirates on behalf of elves. She'll tell you that you have to know their culture first.
2) Earn trust of Elves
Talk to Linwen Owlflight (M12, 21) and ask him to tell you about the tribe. He'll order you with the task - discover what are the guardian spirits of his three kinsmen (see the quest 19. Elven supporter).
3) Mediation between the pirates and elves
This point is available after completing 19. Elven supporter.
Go to the pirates camp (M12, 3) and talk to the captain. You'll learn that if they receive some special canvas from the elves, they will sail away. You can tell the captain that you want some reward for your mediations. After you provide them with the canvas, you'll get some money from him.
4) Get the elven canvas
Return to elves and tell Isaliel Wingstroke (M12, 19) what the pirates want.
The canvas lies on the ground, next to the workshop.
Before giving captain the canvas, you may want to increase your Haggle talent to get additional 10 $.
She will agree for pirates' demand and will tell you that the canvas can be found near Lellindor (M12, 23). Collect it and go to the pirates.
5) Get the canvas to the pirates
Give the canvas to the captain. If you've told him earlier that you want some extra money for mediation, he will propose you 10 $. If your Haggle is high enough, you can raise this to 20 $. After the transaction is over, the pirates will sail away.
Obtained: During the quest 18. Negotiations. After talking to Linwen Owlflight (M12, 21).
You can ask about the guardian spirits the elves themselves and some other people:
Gwendala Suntouch (M12, 20), Shanaha Dreamviewer (M12, 22) and Mandavar Clawdance (M12, 24).
1) Find what is a guardian spirit of Calenleya
 Calenleya is the only one who is outside the elven tree.
Calenleya's (M12, 14) guardian spirit is an eagle.
2) Find what is a guardian spirit of Elbrenell
Elbrenell's (M12, 22) guardian spirit is magpie.
3) Find what is a guardian spirit of Lellindor
Lellindor's (M12, 23) guardian spirit is squirrel.
4) Return to Linwen
After finding all guardian spirits talk to Linwen (M12, 21). As a reward you'll receive two necklaces. You can tell about you success Isaliel Wingstroke (M12, 19).
Ama

Value: 29 $
Necklace
Human nature +3
Zelja'ama

Value: 29 $
Necklace
Perception +3
Only for Fayris.
Obtained: During the quest 16. Pirates and Elves, if you decide to listen to Forgrimm.
1) Take the pirates' camp
Go to the camp (M12, 3) first and deal with the pirates you find there.
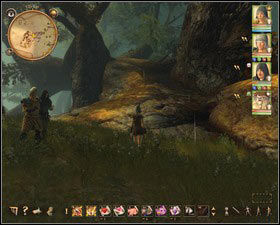
2) Defeat scouts
There are more pirates approaching in the camp. You'll meet two more groups of scouts - one right after you leave the camp and the other awaits you under the big tree in flooded gardens.
3) Run after the pirates
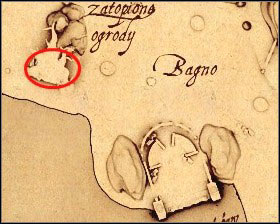
The tree can be found west of the camp.
You can climb up the tree using the branch.
The rest of the pirates hide in the big tree in flooded gardens. Prepare for the fight and climb it.
4) Fight with the pirates' captain
Kill the captain and the rest of his crew. Search his body and take a valuable saber and money - 21 $.
Obtained: After talk to Isaliel Wingstroke (M12, 19).
1) Search the ruins
Near the entrance to the ruins (M12, 4) you will meet Archon Megalon. With Human nature you will be able to find out that he carries out experiments on the relationship between fear and greed and their influence on mental degeneration, caused by irrational reasons.
2) Defeat the Dark Amazons
After entering the ruins you will see a group of Dark Amazons (M13, !). You can't deal with them peacefully, so you'll have to kill them.
3) Find the first missing element
Notice! If you do not want to solve the puzzle, it is enough to go outside the room (M13, 3). Archon Megalon shows up and tells you, that if you're not able to solve it, he can do it. If you agree, the puzzle will be solved but you won't receive any experience points.
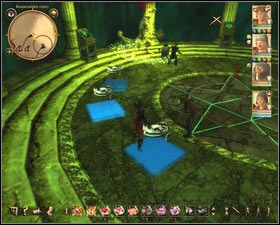
You will receive the first element by solving the logic puzzle in northern part of the ruins (M13, 3). There are two separated floorings in the room. You can walk on one of them, while there is a skeleton walking on the other. His steps are opposite to yours. Some tiles on skeleton's flooring are set with traps. You can't let him to walk on these tiles (in this case you have to repeat the whole operation). During your walk you'll be attacked by skeletons. Let the rest of your team deal with them and you should continue your task with one of the characters.
You can see how to solve this riddle, starting on the tile with 1 on it. If you succeed, the chest will appear (on the left side of the flooring) - there is the first missing element inside it.
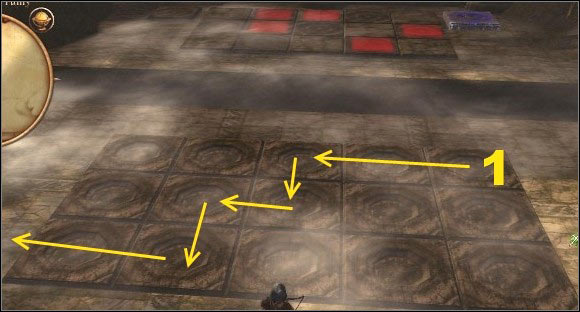 Walk carefully. Wait until skeleton walks on the next tile.
4) Find the second missing element
Another puzzle awaits you in the room westernmost (M13, 4). It's a mathematic riddle. You have to follow the rules and put iron and lead into 4 chests (M13, 15) (you can take bars from the 5th chest).
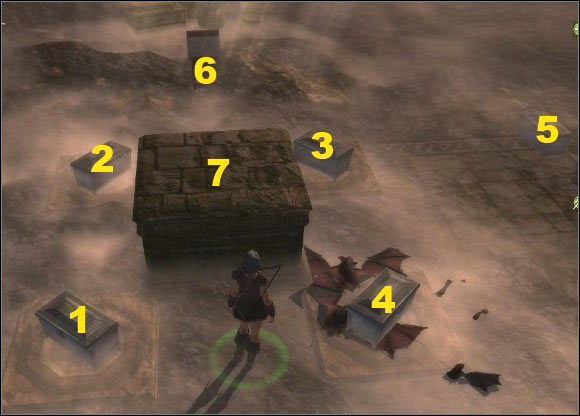 1, 2, 3, 4 - chests. 5 - chest with bars. 6 - book with rules. 7 - pedestal.
The solution to the riddle is:
1st chest: 4 iron and 2 lead
2nd chest: 5 iron and 8 lead
3rd chest: 1 iron and 4 lead
4th chest: 3 iron and 6 lead
When you put the bars properly, a chest will appear on the pedestal in the middle of the room. There is the second missing element inside it.
5) Find the third missing element
The third element is in possession of Dark Amazons (M13, 7). They can be found in the room easternmost. Kill them to get the item.
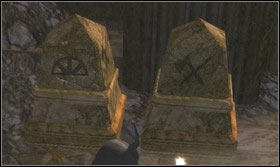
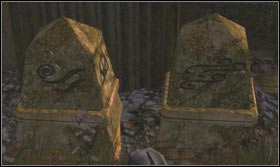
6) Solve the riddle at the door
At the gates (M13, 2) you meet the leader of the Amazons and some of her companions. Talking to them is useless, so you'll have to kill them. After the fight, insert the missing elements in proper place. You can rotate them by clicking them. Set them as follows:
Starting from the left: sun, warrior, river, wind.
7) Destroy statues
Passing through the door, you will go to the room with two statues (M13, 17). They are located in the baths, where skeletons are coming out. You have to destroy them simultaneously.
Skeletons are weak.
The statues have 500 hp each.
Use at least one character to destroy the statues (choose the strongest one, who can deal massive damage) and send the rest of your team to fight with skeletons. After you destroy all the statues, Archon Megalon (M13, 18) will appear at the next corridor entrance. Talk with him and proceed into ruins (M13, 5).
8) Find the seals
The seals of magic (M13, 28), power (M13, 29), curse (M13, 23) and manifestation (M13, 26) can be found in special chests in rooms near the main hall.
The seal of defense is in possession of one of the gargoyles group (M13, 24). Kill them in order to get it.
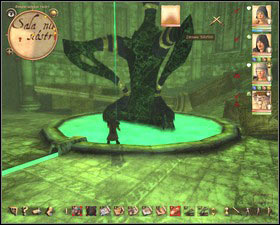
9) Activate the pentagram
Notice! Before you summon zant, think of how many seals you want to use in order to make your fight easier - and it is really hard. It is best to use all the seal (by clicking pedestals - you won't be able to take them later), but you won't receive any reward from Archon Megalon.
Set the pentagram as seen on the screen below. Start with outer circle, which has to be set in such way that pentagram's tops point the pedestals. Then match the rest to arrange a standard pentagram.
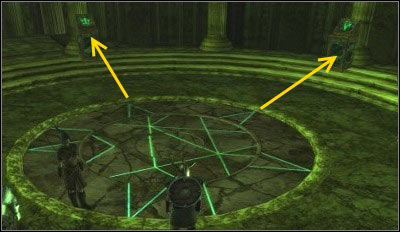 Outer pentagram's tops have to point the pedestals.
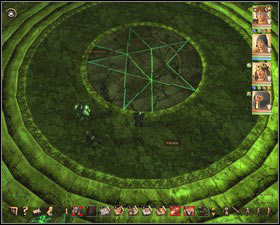
Final look of the pentagram.
You can set traps for zant.
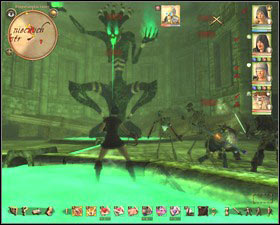
10) Defeat zant
When the pentagram is ready, zant will appear. Its strength depends on how many seals you've used. It is best to attack the demon with magic and thief miracle (Star Shower). It is also good idea to set some traps and use magic to summon the helper. You should deal with zant with your strongest character wearing the best armor (e.g. Forgrimm). Let him take all hit and cure him with potions or magic spells cast by e.g. Fayris.
It is enough to get there and the quest is completed.
Obtained from: Avarosh Goldentooth (M14, 6).
You'll learn from Avarosh (M14, 6) that in order to talk with the pirates' leader you have to win the favor of five powerful pirates.
1) Win the favor of Goldentooth
Complete the quest 24. Golden obligations and the quest 25. A mysterious ghost.
2) Win the favor of Bardbogie
Complete the quest 28. Booze for the vote.
3) Win the favor of Widowfriend
Complete the quest 30. Dangerous liaisons and the quest 31. Compelling arguments.
4) Win the favor of Hakensang
Complete the quest 29. Stolen loot.
5) Win the favor of Ironbite
Complete the quest 27. Furry issues and the quest 32. A confidential message.
Obtained from: Avarosh Goldentooth (M14, 6).
In order to win the favor of Goldentooth (M14, 6) you have to collect money from his debtors.
1) Barking debt
It is enough to have Ardo in your team, and he'll make Barking Bodo (M14, 16) to give money back. If you do not have Ardo as your companion, you can use Fast Talk or Intimidate to make Bodo pay his debt.
2) King has to pay
You can ask barmaid or Jadira about Radomir.
He will appear after a while and stand behind the bar.
You can meet Radomir (M15, 9) in the inn (M14, 2), although he is not there at the beginning. First you have to talk about him with alewife Jadira (M15, 7). After a while Radomir enters the inn. Use Fast Talk or Intimidate to make him pay his debt.
3) Collect money from a strumpet
You can convince Snow White (M14, 8) to pay her debt using Fast Talk, Seduce or Intimidate. If you do not succeed, try to get at least half of the debt.
4) Give Avarosh money back
After you give Avarosh (M14, 6) money back, you won't win his favor yet. You will have to complete the next task - 25. A mysterious ghost.
Obtained from: Avarosh Goldentooth (M14, 6). After the quest 24. Golden obligations.
Avarosh's (M14, 3) mine is haunted by a ghost. You have to solve the problem so dwarves can go back to work. In order to get to the mine, you have to talk to the bridge guard (M14, 7). Tell him that Avarosh wants you to check the mine. The guard will believe you and will lower the bridge.
When you approach the mine (M14, 3), merchant Ungram will come to you and will warn you not to go inside. Ask him about the situation and then ignore his advice and enter the mine or go to see Sanraya (M14, 21) first.
1) Ask Sanraya for help
Sanraya (M14, 21) can sell you an artifact for 3 $ or 7 Golmoon leaves. It can be used on petrified dwarves in the mine, to turn then back to live. It is not necessary though, because the same effect may be achieved by correct answers to kobold's questions.
2) Face the ghost
First petrified dwarf
Being deep into the mine, you'll meet the first petrified dwarf (M17, 2). When you get closer to him, the kobold will appear and engage you in his game. It is quite simple - you just have to answer correctly his questions. If you do so, the dwarf will get back to life and will give you the first letter of kobold's name.
A correct answer is: Niame.
The first letter of kobold's name is: N.
Second petrified dwarf
To get to the next petrified dwarf, you have to go down to the lower level (M17, 3). When you're near the stairs leading down, kobold will appear right in front of you. He got another game for you. You have to repeat after him some sounds: "murmurs" "chatter" "mumbles" "whispers" "croak". If one of your characters has high Perception skill, (s) he will be able to do it. When you succeed, at the end of this quest you'll find a colorful chest (M17, 9) with many precious items.
Being on the lower level enter one of the quarters. You'll find the second petrified dwarf (M17, 5) there. Click him and choose a dialog option which summons kobold. He will appear in front of you and will ask you a question:
A correct answer is: Ogres.
The second letter of kobold's name is: O.
Third petrified dwarf
Go to the eastern part of tunnels. You'll find the third petrified dwarf (M17, 6) there. Kobold will appear again and will ask you another question.
A correct answer is: Big River.
The third letter of kobold's name is: G.
Fourth petrified dwarf
The last petrified dwarf (M17, 7) can be found in the western part of tunnels. Kobold will ask you a last question, and if your answer is correct you'll get the last letter of his name.
A correct answer is: Otty.
The last letter of kobold's name is: O.
3) Use the kobold's true name

After saving four dwarves go to meet kobold (M17, 8). Tell him his name and ask to leave the mine. Before you leave, take precious items from the colorful chest (M17, 9).
4) Inform Avarosh
Return to Avarosh (M14, 6) and tell him that you got rid of the kobold in the mine. During the conversation you can get additional 10 $. Tell him that he shouldn't dig there and the something like "In worship of the coins united...".
Obtained: During the quest 25. A mysterious ghost.
You'll complete this quest with completing 2) Face the ghost point in the quest 25. A mysterious ghost.
Obtained from: Boatswain Orc Zutar (M14, 9).
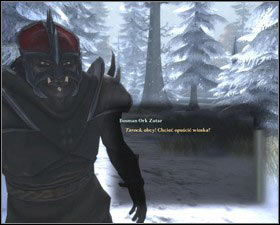
In order to talk to captain Soorman, you have to gain the trust of his boatswain (M14, 9) first. It is orc Zutar, who can be found behind the gate leading outside the settlement. Zutar wants you to find a group of goblins (M14, 12), who have escaped.
1) Follow the instructions
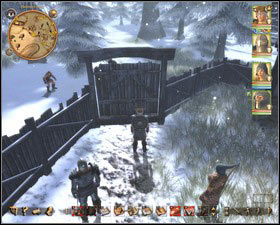
Head south and you'll see goblin Yobbo (M14, 11) near the tree. He will tell you about goblins' hideout (M14, 12) hoping for reward from Zutar. Go further south, as Yobbo said.
Yobbo hides behind the tree.
Helping a shaman will be worth later. In the quest Hidden harbor you'll be able to avoid fight with goblins.
You'll see a big group of goblins there and their shaman - Reshamama, who will speak to you once you get closer. You can now:
a) Attack goblins.
b) Choose a diplomatic solution. Tell the shaman, that you won't hurt her and goblins which follow her. Instead of that you will give Yobbo - goblin traitor, to orc. The shaman will give you a mage staff.
2) Take Yobbo to orc
Go to Yobbo (M14, 11) and tell him that the shaman (M14, 12) is dead and you take him with you to get a reward from orc (M14, 9). Goblin will join your team temporary. On your way back, you will be accosted by the search team (M14, 10). They want goblin. You can convince then to give up this idea with Fast Talk, Intimidate or by giving them 1 $.
3) Successful deception
When you come with Yobbo to Zutar (M14, 9), you have to convince him that this goblin is a traitor.
4) Talk to Soorman
Go to the inn (M14, 2). Soorman talks with the river pirate right at the bar. Try to talk to him - he will tell you that you have to earn the trust of the rest of pirates. Only then you will be worthy to talk to him.
5) Persuade the others first
First you have to earn the trust of Goldtooth, Bardbogie, Widowfriend and Hakensang (see the quest 23. In favor of the pirates).
Obtained from: Ale-wife (M15, 7).
Talk to Jadira (M15, 7) and ask her if she will take your side. She will agree but you have to check what is going on with her distiller (M14, 13). Go outside the settlement and find him. When you get there, you'll see trolls (M14, 14) demolishing the distillery. The distiller will run towards you and will ask for your help.
1) Deal with trolls
The problem with trolls (M14, 14) can be solved in 3 ways:
a) Outsmart trolls
There is a chest with salt in the back of the distillery.
After dealing with trolls, the character with high Blacksmith talent can repair the distillery.
Go to the back of the distillery and locate the supply chest (M14, 15). Take the bag of salt. Then talk to trolls, give them salt and tell them that this is a sweet powder, but too much alcohol was bad for them and now they do not recognize the taste. Trolls will believe you and will leave.
b) Talk some sense into trolls
Using Fast Talk convince trolls to leave.
c) Fight with trolls
Trolls are very challenging opponents, but you can beat them. Turn on the conversation with one of them and select the attack. Focus on a single troll in order to kill it as soon as possible.
2) Bring alcohol back to ale-wife
After dealing with trolls, the distiller (M14, 13) will give you a barrel of alcohol. Bring it back to Jadira (M15, 7). You'll receive 6x Ferdok pale ale.
Obtained from: Captain Hakensang (M15, 8).
Captain Hakensang (M15, 8) suspects that his mate (M15, 4) steals loot. He wants you to check if this is true.
1) Have a drink with first mate
Captain (M15, 8) will tell you that mate (M15, 4) can get drunk only with special kind of booze. Go to see the mate and drink with him. When he finishes his beer, suggest him something stronger and buy him booze. He'll get drunk and will leave the inn (M15, 1).
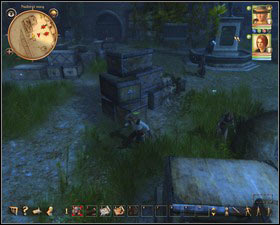
2) Follow Bravethorn
Leave the inn and follow him. Keep the distance, so he can not notice you. Following him will bring you to the cemetery. The mate will stop at the last grave. Come closer and he will attack you. After few blows he admits that he has stolen the loot and he will run away.
3) Get the loot
There are some loose stones at the grave. Click them and you'll get the hidden loot.
4) Return to captain
Tell the captain (M15, 8) that he was right - it was Bravethorn who was stealing. Captain will ask you if you've managed to find where he hides valuables. You can:
a) Lie and tell him that you didn't find it. You can then sell it at Jorgen (M14, 24) for 35 $.
b) Give him the loot back. The Captain will give you 10 $ as a reward.
Obtained from: Captain Rumpo (M14, 17).
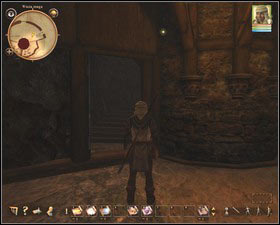
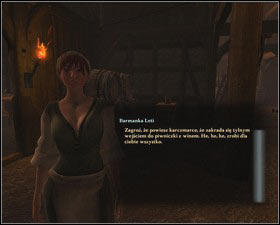
Captain Rumpo (M14, 17) will ask for your help in a delicate matter. During last meeting with barmaid Leti, he left a snuff box in her room. He wants you to get it back, because captain Soorman is a barmaid's lover and it would be better if he doesn't know about her meeting Rumpo.
You can use rear passage to get to the inn's lower level (M14, 4). Unfortunately it is guarded by Barking Bodo (M14, 16). Talk to him but he won't let you in. Go to captain Rumpo and he will tell you how to trick Barking Bodo. Return to Bodo and tell him that Rumpo delivers a Stonemelter to the inn and you have to bring it there.
 Rear entrance to the inn.
1) Find the snuff box
The snuff box can be found in 2 ways:
a) Let the barmaid (M16, 4) see you. Convince her with Seduce or Fast Talk to give you the snuff box. If you don't succeed, there is also another option - to pay her. Then tell her that you do not have money right now and you'll pay later (of course it means never).
b) Sneak to the chest (M16, 8) with the snuff box unnoticed (see point 2. Do not get caught).
2) Do not get caught
First of all, do not open the door to the bath (M16, 2). This prevents the possibility to leave unnoticed because the barmaid will stop at the door worried that it is open. It is also good to split your team for this task and sneak in only with one character.
Decorative pot with a key to the storeroom.
Being in Jadira's room hide behind the wall and wait until she passes by.
First take the key out of the decorative pot (M16, 3). Then hide in the Jadira's room (M16, 9). Once you get there, the barmaid will leave her room. Wait until she leaves this location. From now on you can move freely. Take the snuff box out of the chest (M16, 8) in the barmaid's room and also the snuff box from the casket (M16, 7). Having both, leave the inn (M16, 1).
3) Give Rumpo his snuff box back
Captain Rumpo (M14, 17) will give you 4 $ for the snuff box.
Bring the second snuff box to captain Hakensang (M15, 8) and tell him that you won't say anything if he can pay you. When he gives you 10 $, say that it is too less. You'll get 20 $.
Obtained from: Captain Rumpo (M14, 17). After the quest 30. Dangerous liaisons.
To earn captain Rumpo's (M14, 17) trust you have to complete one more mission for him. His companion, Alrico Farfara (M14, 18) has some problems and you suppose to deal with them.
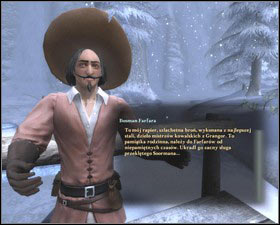
1) Talk to Alrico Farfara
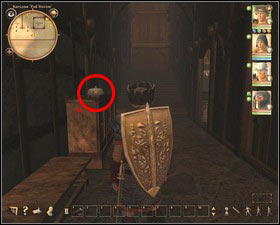
Alrico Farfara (M14, 18) is sad because his rapier is missing.
2) Stealing the rapier
Alrico wants back his rapier which was stolen.
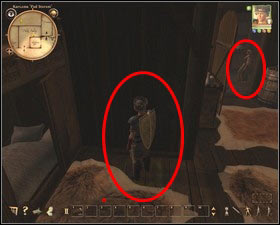
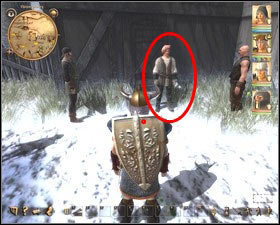
The pirate in the middle is named Wildapple Harad.
Wildapple Harad (M14, 20) has the rapier. Steal it from him
3) Take the rapier to its owner
Having the rapier get it back to Alrico Fanfara (M14, 18).
4) Inform captain Rumpo
Wait some time until Alrico comes to Rumpo (M14, 17) and says him that his rapier is back. Then talk to Rumpo and you'll earn his trust.
Obtained from: Soorman (M15, 3).
After earning the trust of Goldtooth, Bardbogie, Widowfriend and Hakensang (see the quest 23. In favor of the pirates), also Soorman (M15, 3) will have some work for you to do. You have to deliver a sealed letter to Conk Berwin (M14, 22).
1) Deliver the letter
You can do two things with the letter, which consequently have the same effect:
a) Bring the letter to Berwin (M14, 22).
b) Read the sealed letter. Soorman (M15, 3) writes there that Berwin has to kill you. Tell Soorman about this - he will only laugh and will tell you that you have to deliver the letter anyway because the fight with Berwin is your test.
Before you deliver the letter, decide if you want to fight or you want to choose more diplomatic solution. To make it peaceful you have to keep Cuano in your team and get rid of Forgrimm (he would start the fight). During the conversation with Berwin, Cuano will convince him for 5 $ that it is worth to fight with you. Berwin will give you a package with the loot.
If you want to fight just deliver the letter. The fight will begin and you will have to face Berwin and his helpers.
2) Return to the sender
After killing Berwin or receiving the package from him, return to Soorman (M15, 3). He will reveal you his plan about taking over the command among the pirates. You do not have to decide whether to accept his plan or not. The result will be the same in the future.
Obtained from: Soorman (M15, 3). After the quest 23. In favor of the pirates.
1) Go to the gate
After leaving the inn you will be accosted by the barmaid. She'll tell you that she has heard your conversation with Soorman. You'll find out that she was also a part of this plan but she didn't know about it. Head east. You'll reach a passage blocked by guards (M14, 23). They know that Soorman has sent you and will let you pass.
2) Talk to Thunder Fist
Enter the hidden harbor (M14, 5). Move forward until you reach the Thunder Fist's ship (M19, 2). You'll meet captain Eilif Thunder Fist there. Tell her that Soorman wants to attack her deceitfully. The conversation is interrupted because Soorman and his pirates just started the attack.
3) Fight with Soorman
Thunder Fist will join your team for this fight (you can't control her though). You'll have also marus (crocodile-like creatures) on your side. They are forming first line of the attack so follow them.
You'll be attacked by an orc (M19, !) with goblins. Having short chat with goblins you can suggest them to flee (this option is available only if you've helped goblins in the quest 27. Furry issues).
The next fights are with the pirates (M19, !). One of the pirates wants to talk with you at some point. You can propose them 100 $ to stop the fight (this is not very profitable while the pirates are not so strong).
When you are quite far, Thunder Fist will stop you and tell you to prepare before next fight. Search the chests (M19, 3) near the hut. There are some cure potions and ammunition.
Take everything from the chest. Even if you don't use it, you will be able to sell it.
There are some archers in the fungi forest. You can kill them only from the distance.
Go ahead. You have to go through the fungi forest and reach Soorman's ship (M19, !). When you get there, the cut-scene will start. After that you'll be attacked by bewitched marus, Soorman and the sorceress - Jasmine from Stream.
Deal with marus first - they are not too powerful. Then kill Soorman and fight with Jasmine, who will disappear when is wounded enough. Talk to Thunder Fist after the fight. She will explain you many things and tell you about a secret passage leading to Nadoret Castle.
Obtained from: Captain Eilif Thunder Fist. After the quest 33. Hidden harbor.
1) Talk to old Griese
Make sure that you've completed all side quests and you've bought the best equipment. There is no sense to save money now. Buy potions (especially cure ones), best ammunition, diamond whetstones etc. Choose your team members carefully because you won't have possibility to change it (you have to take Ardo with you while it is not possible to start the mission without him).
When you are ready, talk to Griese, who can be found near your ship in Nadoret. He will take you to the Dark Forest (M4, 9).
2) Find Orbert, the harbor master
Now you have to reach other end of the Dark Forest. Locate the Orbert's chest (M4, 11), take the smoke torch out of it and equip the main character with it. Thanks to the torch you'll avoid animals.
Orbert's chest.
Stone key.
When you get to Orbert, the fight begins. You have to face him and his helpers. After the fight click on the stone (M4, 12) - the secret passage to the ravine will be open.
Obtained: After the quest 34. Entrance to the castle.
When you are in the ravine you have to make a decision, how you want to get to the castle. You can just kill all mercenaries (it is faster solution for a strong team) or pretend to be recruits.
Force solution:
Cut through dozens of mercenaries and get to the door (M20, 4) leading to the castle. You can open it using a key obtained after killing the quartermaster (M20, 13), who guards the door
Walk unnoticed by the ravine:
After you enter the ravine you'll be accosted by a mercenary (M20, 5). Lie to him and then put on you and your companions mercenaries' clothes which you can find in chests (M20, 1). Pass through the open the gate (M20, 2) and lie to the next mercenary (M20, 6).
1) Follow the guard to the quartermaster
Follow now the mercenary, until you reach the quartermaster (M20, 7). He will talk to you for a while and send you further.
2) Report to sergeant Hargenstrike
Sergeant (M20, 8) wants you to being tested by two mercenaries.
3) Archer Keen's opinion
Archer (M20, 9) wants you to destroy two nests with harpy's eggs (M20, 10). Do it (you can equip on your own armors) and return to her. She'll give you a letter, which you have to give to sergeant Hargenstrike (M20, 8).
4) Sir Erund's opinion
After conversation with blacksmith, take a sword from the chest.
After bringing the sword you have to prove your value by fighting with mercenaries.
Sir Erund (M20, 11) orders you to bring him his sword, which can be found at blacksmith Ingrash (M20, 12). Talk to her and take the sword from the chest. Then return to sir Erund. To win his positive opinion, you have to agree to fight with his subordinates. After defeating them, you'll receive the letter which you have to give to sergeant Hargenstrike (M20, 8).
5) Go to the quartermaster Springdale
Head to the gate (M20, 3) and talk with mercenaries who guard it. Show them the permit and you'll be allowed to go further. Before conversation with the quartermaster (M20, 13) equip your own armor because you'll have to fight. During the conversation sergeant Hargenstrike appears - he already know that you're imposters. After killing the mercenaries head to the castle using the door (M20, 4).
Obtained: After the quest 35. In disguise.
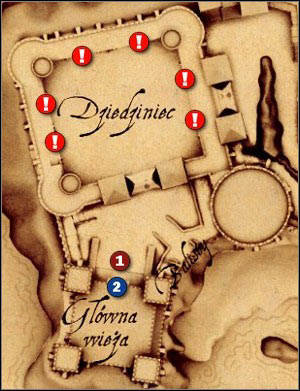
Being in the cellar you'll meet footman Wendell (M21, 1). Regardless of what you say, he will recognize Ardo. Your companion will explain him the situation and at that point the guards appear which you have to kill.
1) Follow Brewine to the ballroom
Follow now the footman and go to the ballroom.
2) Talk to Mina from Berg
First talk to Mina from Berg (M21, 3). Ask her about other guests.
3) Spoil the atmosphere at the banquet

Mina from Berg.
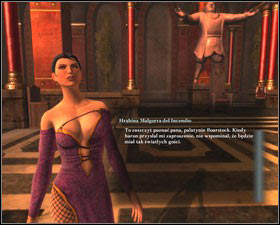
Countess Malgorra del Incendio.

Steward Enno from Vardock.
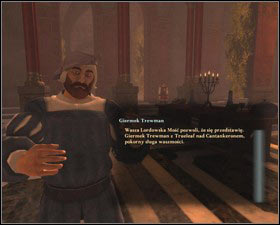
Squire Trewman.
Now it's time to talk to the guests and tell them what Mina from Berg (M21, 3) thinks about them. Talk to:
1. Countess Malgorra del Incendio (M21, 4)
2. Steward Enno from Vardock (M21, 5)
3. Squire Trewman (M21, 6)
4) Talk to baron Dajin
After you've spoiled the atmosphere, the baron (M21, 7) will appear. Talk to him and then follow him to some secluded place. Unfortunately you enter the trap and finally you will go to the cell.
5) Get out of the dungeon
 First, take fish from a bucket, and then talk to Ardo.
Take fish from the bucket (M22, 1) and equip your companions with them (fish is a normal weapon). Then talk to Ardo and tell him that you are ready for some action. Ardo will pretend to be sick - the guard (M22, !) will run into the cell. Attack him and search his body after the fight. Take his key and open the cell's door (M22, 2) with it. Go outside.
6) Find your equipment
Before you find your equipment (M22, 3) you will have to fight with guards (M22, !). It is best to use spells and magically summoned creatures. Your equipment is located in 4 chests in the semicircular room.
Make sure you took the whole equipment from the chests.
The door to the tower.
After regaining your equipment head through the large door and take stairs up. You'll reach the tower door finally. There is Mora inside, who will tell you about the secret passage (M22, 6) to the treasury, where the baron keeps the crown.
7) Search for the secret passage
Return to the dungeon the same way. You'll be attacked by the group of guards.

Cell with dogs.
The secret passage.
Open the door to the cell with dogs (M22, 5). After killing them, use the secret passage (M22, 6).
8) Open the door to the chamber with treasures
After using the secret passage (M22, 6) you will be in the vestibule of the treasury. To get further, you need to solve the puzzle located on the door. First, click the symbol in the middle. Then, place key-disks as on the image and click on the center square.
After entering the treasury it turns out that the crown is not here anymore. The new passage is open - stairs leading up. Use them.
Obtained: After the quest 35. In disguise.
You'll complete this quest during the quest 36. In search for the lost crown.
Obtained: During the quest 36. In search for the lost crown.
1) Get out of the ambush
When you leave the treasury you will be attacked by a group of mercenaries and a novice sorceress. Kill them and get ready for the final fight. When you're ready, use the door and go out to the terrace.
 This door leads to the final fight.
2) Defeat Jasmine
Jasmine summons some impersonators first.
After that "real" Jasmine appears for a moment.
At the beginning you have to face Jasmine. The fight looks in such a way that the sorceress summons more and more of their duplicates. You have to destroy them as soon as possible. Ideally is to attack a duplicate with two heroes and at the same time let the other two attacks the other duplicate.
3) Face the Jasmine's magic
When Jasmine has summoned 8 duplicates, and you've destroyed them all and deal some damages to the sorceress, the cut-scene starts. Immediately after it you will be attacked by duplicates of your team members summoned by Jasmine. It is best to kill the duplicate with weakest armor and a low number of HP first.
4) The final battle
After you destroy all duplicates, Jasmine will disappear and Coldstone will join the fight, animating a huge statue.
I round - Fight with the statue
At the beginning the statue stomps, which causes heroes to collapse. So you should quickly run away. It is also good to have a summoned monster on your side - it will attract few punches from the statue. When you deal some damage, the statue will stand still.
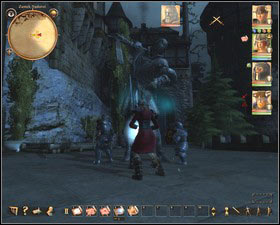
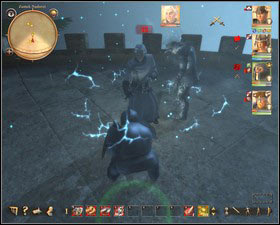
Magic is effective in this fight. You should use spells such Thunderbolt or Ignisphaero Fireball.
Attack the mage with high damage spells. He won't be able to cast all his own spells.
II turn - Magic blades
After the statue is defeated, Coldstone summons magic blades. They are not too tough so you should deal with them quickly.
III turn - Coldstone
Coldstone is your last opponent. When you take some of his HP, he'll cast Gardianum Magic Shield and will animate the statue once again.
Turns I, II and III will repeat two more times. During the third fight with Coldstone, you'll be able to kill him.
Z1. The shrine of River Father (mini quest)
Z2. Shopkeeper's Olbin parcels (mini quest)
Z3. Bring me a beer (mini quest)
Z4. Bounty hunting (mini quest)
Z5. Auralia and her decoction (mini quest)
Z6. Alrik looking for a prayer book (mini quest)
Z7. Poisoned girl (mini quest)
Z8. Lumberjack (mini quest)
Z9. Elegant lady (mini quest)
Z10. House of rats (mini quest)
Z11. Goatherd (mini quest)
Z12. Battle arena champion
Z13. What is in the crate?
Z14. The emblems of the four winds
Z15. Trolls at the bridge
Z16. Water nymphs Island
Z17. Mad beekeeper
Z18. Dumb Ox
Z19. Rat-catcher
Z20. In the moonlight
Z21. Failed experiment
Z22. Traveler
Z23. Vermin
Z24. Funeral meal
Z25. Undead in the village
Z26. The consequences of careless
Z27. The slave trade in Nadoret
Z28. Missing people!
Z29. Parzalon (mini quest)
Z30. Bounty hunter
Z31. Evil book
Z32. Missing mage student
Z33. For a few ducats more
Z34. Fairy (mini quest)
Z35. The bosparian recipe
Z36. Free the spirit
Z37. A cure for swamprancid
Z38. Lost treasures
Z39. Signs of power
Z40. Source of plague
Z41. Heartache of the alewife
Z42. The tavern King
Z43. Scales and teeth
Z44. Water pump
Z45. Secrets of digging dwarves
Z46. Temple of Effered
Z47. Hunting trip
Z48. Orc plague
There is a shrine (M2, 5) in the tower ruins. If you try to plunder it, Janah will talk to you. She believes in every superstition connected to River Father and asks you to leave the shrine in peace. You can persuade her with Fast Talk, that it is worth to see what's inside or ignore her and open the shrine or agree with her and leave. If you decide to plunder the shrine, you'll find some worthless junk inside and the big toad will come out of water and will attack you. After killing the toad you can talk about shrine with Piet (M1, 5) and the captain (M1, 3).
Obtained from: Shopkeeper Olbin (M3, 16).
Ask the shopkeeper (M3, 16) if he has any task for you. Oblin will give you a parcel, which has to be delivered to the owner of the "At the Cheerful Ox" inn. There are 8 such orders in total. After your task is complete, you'll receive 2,55 $ from Olbin.
Parcel
Recipient
Place
Reward
1
Innkeeper Roshead (M4, 7)
"At the Cheerful Ox" inn
0,13 $
2
Miller (M5, 2)
the mill
0,09 $
3
Tailor Marcusi (M3, 18)
the marketplace
0,07 $
4
Deont Irian
the Praios temple (M3, 6)
0,19 $
5
Laurelin (M5, 4)
Laurelin
0,16 $
6
Master Brookbeard
the mage tower (M4, 2)
Right at the entrance to the tower there is a chest with inscriptions. Put the parcel inside.
0,25 $
7
Steward Bornhelm (M3, 17)
barracks
0,12 $
8
Aunt Balmar (M4, 5)
the village
none
Obtained from: City guard Rabig (M3, 12).
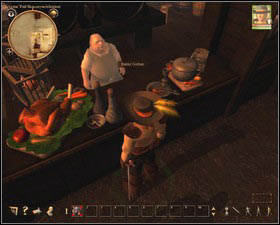
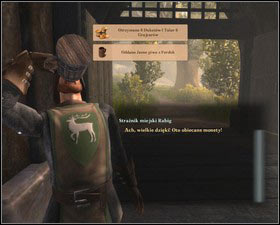
You can buy a beer at innkeeper.
You'll get from guard more money than you'll spend on beer.
Ask the guard (M3, 12) if you can help him anyhow. He'll ask you then to bring him Ferdoker beer. You can buy it in the "At the Leaping Deer" inn (M3, 5) for example. Once you give him the beer, the city guard will give you 0,1 $.
Obtained from: Steward Bornhelm (M3, 17).
Ask steward Bornhelm (M3, 17) whether you can do anything for him. You'll learn that guards are looking for a criminal Beckerbold family - Ma and her 3 sons.
1st arrest warrant - Odo
You begin with the arrest warrant for the first son - Odo (M3, 24). You'll find him outside the city walls. Tell him that you recognize him and the fight will begin. When you deal with the bandit, take the Odo Beckerbold ring from his body, which you have to show to steward Bornhelm in order to collect the reward - 0,25 $. If you do not want to fight with Odo, just steal the ring from him. Steward won't realize that the bandit is still alive.
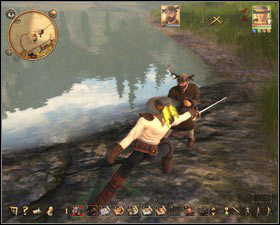
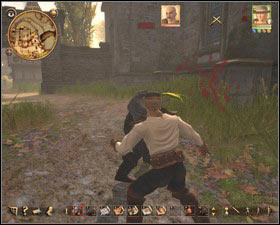
Odo - can be found by a river (western part of the location).
Bodo - stands right behind the temple.
2nd arrest warrant - Bodo
Steward Bornhelm will give you now the arrest warrant for the next bandit - Bodo (M3, 25). You'll find him behind the temple. When you deal with the bandit, take the Bodo Beckerbold ring from his body, which you have to show to steward Bornhelm in order to collect the reward - 0,5 $. If you do not want to fight with Bodo, just steal the ring from him.
3rd arrest warrant - Godo
You'll find Godo (M4, 4) near the "At the Cheerful Ox" inn. When you deal with the bandit, take the Godo Beckerbold ring from his body, which you have to show to steward Bornhelm in order to collect the reward - 1 $. If you do not want to fight with Godo, just steal the ring from him.
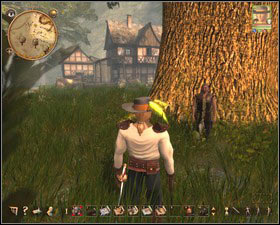
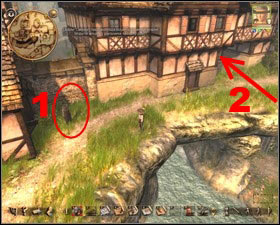
Godo - stands by the tree, near the "At the Cheerful Ox" inn.
1 - Ma / 2 - the marketplace.
4th arrest warrant - Ma
You'll find Ma (M3, 26) near the marketplace, on the ledge. When you deal with the leader of the gang, take the Ma Beckerbold ring from her body, which you have to show to steward Bornhelm in order to collect the reward - 2,5 $. If you do not want to fight with Ma, just steal the ring from her.
Obtained from: Alchemist Auralia (M3, 19).
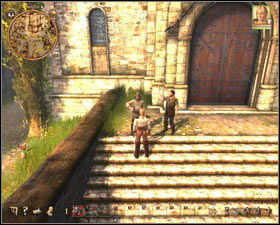
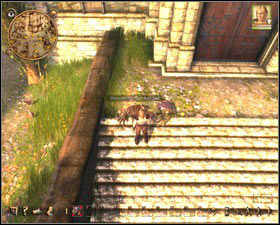
There are two lazybones (M3, 13) who harass her. Your task is to give them a decoction made by the alchemist. Talk to Babbler Brim and Coxcomb Cordo. Offer them beer - after drinking it, they will turn into toads, but they turn back to their normal form after a while. Return to Auralia, tell her what you've done and receive 0,1 $.
Obtained from: Alrik from the Spring (Temple of Praios M3, 6).
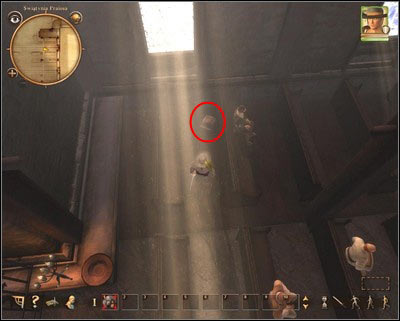
The novice has lost his prayer book. You'll find it between the benches (the last and the next to last).
Obtained from: Poisoned girl (M4, 3).
There is a poisoned girl (M4, 3) wobbling under the tree. Talk to her and you'll learn directly from her or by using Human nature that she has kissed a frog hoping that it will turn into a prince. The effect is tragic, because she is now poisoned. She needs Golmoon tea.
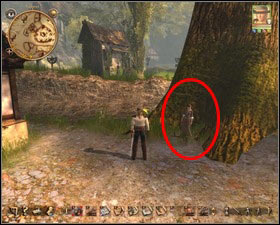
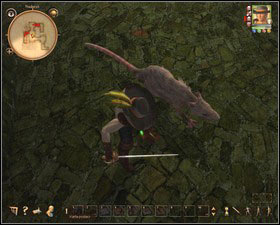
You'll find the girl under the tree, near the cemetery.
The Golmoon tea can be bought at Alchemist Auralia, Medicus Moddlemash or Sister Talind.
If you have the tea, click the girl to cure her. She wants you to have some money for curing her - 0,5 $. You can accept it or refuse nobly (which gives more experience points).
Obtained from: Lumberjack (M4, 6).
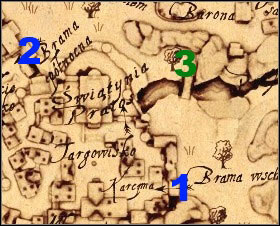
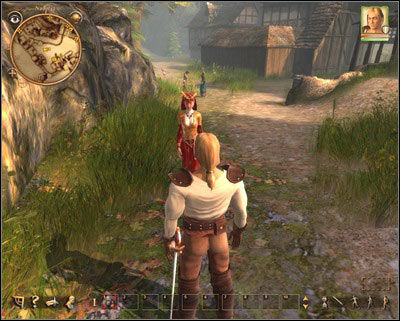
The fastest way to the lumberjack (3) is through the northern (2) or eastern (1) gate.
Remember to have a whetstone and someone who has Smithery talent with you.
Lumberjack (M4, 6) will ask you to sharp his axe. Only character who knows Smithery can do this (e.g. Forgrimm), using a whetstone (you buy it at blacksmith Tarno (M3, 23) or shopkeeper Olbin (M3, 16) for example). For sharpening the axe will receive 0,07 $ and 5x elm wood.
Obtained from: Tailor Marcusi (M3, 18).
For 5 $ the tailor (M3, 18) will sell you information about some elegant lady, that can be robbed. She has about 28 $ with her.
Elegant lady walks in the town (especially in its southern part). You can wait for her next to the blacksmith Tarno. She should go that way..Obtained from: Thief Odila (M7, 4). After the quest 2R. Complete your training.
Ask Odila (M7, 4) if she knows any special places. She will tell you about one, but you have to pay her 3 $. You'll learn then about the abandoned household (M3, 8) which is located in the northwestern part of the town. She'll warn you about traps which are inside this house.
You will find two locked chests in the house (about 18 $ and lot of valuables).
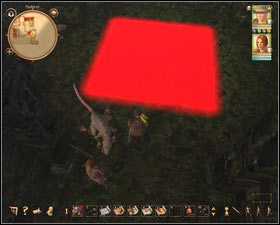
It is difficult to find some of the traps.
There are also wolf rats in the house.
Obtained from: Goatherd (M3, 31).
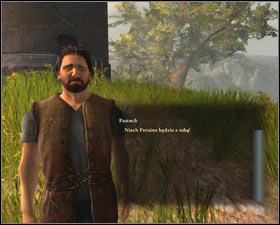
Goatherd (M3, 31) wants to buy a tindermold from you for 0,05 $. If you can get him a little more than 500 of it, you can see that he uses it as a fuel for his tower, which will soar in the sky like a space rocket.
Obtained from: Arena master Wolfgrim (M6, 3).
Talk to Wolfgrim (M6, 3) about bets on fights. Bet on any player and pay 1 $ for the bet. If you are lucky, you'll get 2 $ as a reward. Then ask Wolfgrim about possibility to fight in the arena (M6, 2). You have to pay for each fight. If you win, you'll money will be doubled. After the fight you can talk to the audience (M6, 5) - people will say some words about your duels.

1st opponent - Blockhead Barakor
Bid: 2 $
Reward: 4 $
2nd opponent - Connar
Bid: 4 $
Reward: 8 $
3rd opponent - Ifirnia
Bid: 6 $
Reward: 12 $
She will talk to you after the fight. She will be impressed with your skill and will give you an Amazonian helmet..
4th opponent - Tragash, son of Tulrox
Bid: 8 $
Reward: 16 $

5th opponent - Thurazz
Bid: 10 $
Reward: 20 $

6th opponent - Arena master Wolfgrim
Bid: 15 $
Reward: 30 $
He will talk to you after the fight. He will be impressed with your skill and will give you Wolfgrim's andergastian sword (3D+1, Strength Bonus: 16/2, Weapon Bonus: 0/-2, Range : 2m).
From now on Wolfgrim can teach you.
Obtained from: Dilga Panek (M7, 3). After the quest 2R. Complete your training.
Dilga (M7, 3) wants you to take a look at crates which are currently being unloaded at the port.
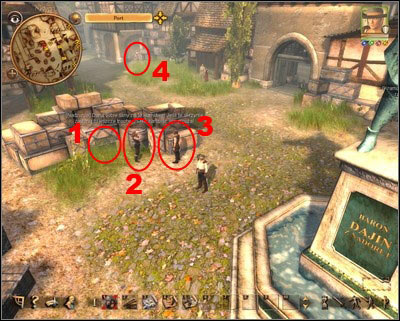 1. Crate / 2. Supervisor / 3. Worker / 4. Strumpet
1) Look around the port
Go there and you'll see that the crate is guarded by a supervisor.
2) Draw supervisor's attention away
A worker comes to the supervisor from time to time. Follow him and you'll see him talking to a strumpet. Talk to her and convince her (with Fast Talk, Seduce or 5 $) to drag a worker out to the warehouse. Next time a worker passes by her, she'll go with him to the warehouse. Go to the supervisor and tell her what her worker is doing. She'll get angry and will run to the warehouse. Open the crate to see what's inside.
3) Report back
Return to the guild and report to Dilga (M7, 3). You'll receive an elixir of dexterity.
Obtained from: Thief Odila (M7, 4). After the quest 2R. Complete your training.
Talk to Odila (M7, 4) and she'll propose you a game. You have to find four emblems located within the town. You'll find them by gates guards (M3, 9 and M3, 12): northern, southern, eastern and western. They have these emblems in their equipment so you'll have to steal them. Once you have all emblems, tell Odila about your mission. She'll congratulate you and send you to Dilga Panek (M7, 3) for a reward: a new miracle to be learned: "The better offer".
Obtained from: Trolls (M5, 3).
Trolls (M5, 3): Krolwum, Brulbu and Mombo block a way to the forest. You can deal with them in two ways:
1) Defeat trolls
Choose the aggressive way and attack trolls. The fight is very hard though. If you want to kill trolls, wait until you have more characters in your team (it will happen during the quest 13. A toll is not enough).
2) Get some sweets for trolls
Trolls can be bribed with Candied Kosh Bunting Tongues, You can buy them at Crooked Otto (M3, 20) for 50 $. This option is available only if you or one of your companions has high Animal Lore talent.
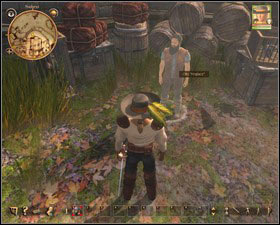
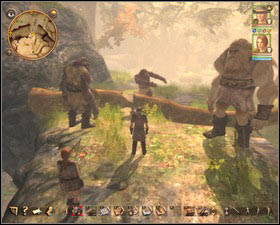
You can ask then Otto about his animals, getting an access to the special offer. Go back to trolls and give them Tongues. You can pass and also receive a reward:
Metal "something" (Tulamidian armor)
Can be sold for: 54 $

A piece of material (Brown travel robe)
Can be sold for: 0,5 $

Weight: 3
Special: Can't cast spells.
Chest 6, Belly 6, Back 6, Arms 1, Legs 3
Equipment slot: Torso
Weight: 0
Chest 1, Belly 1, Back 1, Arms 1, Legs 1
Equipment slot: Torso
Of course the first choice is better while the metal "something" means very valuable armor.
Obtained from: Water nymph (Island M5, 6). After the quest Z15. Trolls at the bridge.
You can get to the island (M5, 6) using the boat (M5, 5). You'll meet a water nymph there, who will tell you her tragic story and ask for help. She's trapper on the island with magic. Your task is to free her. In order to do so, you have to solve the mystery of magic circle. There are four large boulders. In front of each there is a place for herbs. Clicking the boulder makes it rotate.
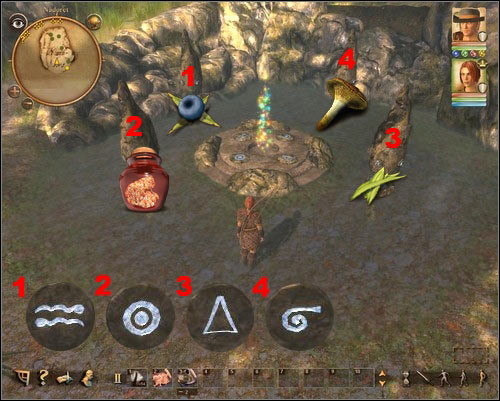 The character on the picture faces the north.
Put an oneberry to the boulder marked with 1, a firemoss (can be found near the boat M5, 7) to the boulder marked with 2, chonchinis to the boulder marked with 3 and a festering toadstool to the boulder marked with 4. Herbs disappear, so you can split them in your inventory, so you can put on a boulder just one piece. If you did it correctly, all colored light in the middle of the circle should disappear.
Turn boulders in a way that this marked with 1 has the symbol of two waves directed towards the circle, the boulder marked with 2 has to have the double circle symbol, marked with 3 - triangle, and the last one - helix.
After all is done the circle flashes and the curse is removed. The water nymph has nothing to give you but she can share her knowledge with you (you'll get some extra experience points).
Obtained from: City guard (M3, 15). After the quest 8. A night mission.
A city guard (M3, 15) wants you to destroy 10 fireflies' queens and their nests. All are located outside the town walls.
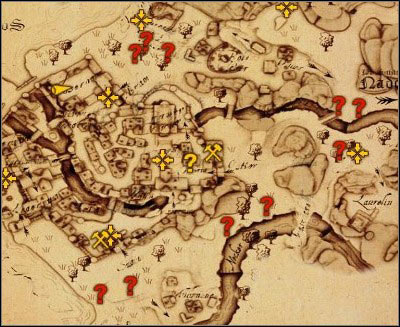 Red question mark (?) indicates a fireflies' nest.
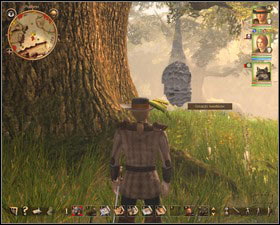
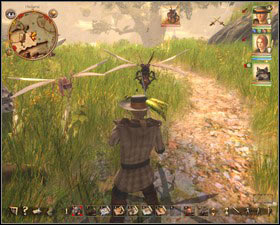
You have to destroy the nest first.
A firefly queen flies out of the nest - she's guarded by other fireflies.
After killing all the queens return to the guard, and he will give you 2 $.
Obtained from: Ox driver Hayo (M3, 27).
The ox driver Hayo (M3, 27) awaits his coworker - Bogumil (M4, 10) who supposed to be here long ago. He asks you to go to the "At the Cheerful Ox" inn (M4, 1) to see if Bogumil is there.
1) Find Bogumil
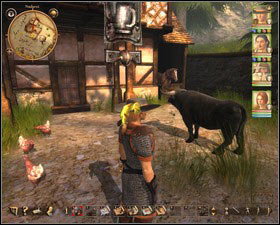
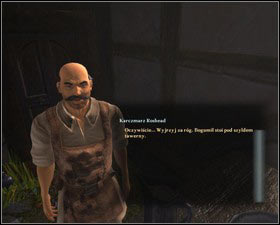
Ox Bogumil stands under the inn's sign.
The innkeeper knows most about the ox. You'll have to ask him about Bogumil few times.
Go to the inn and talk with innkeeper Roshead (M4, 7). You'll learn that Bogumil (M4, 10) is in fact an ox which stands now under the inn's sign. Try to get the ox to the ox driver (M3, 27) by clicking on it. It doesn't do anything though. Return to the innkeeper and ask him about Bogumil again. You both will agree that it is probably a helmet on the sign which draws ox's attention.
a) Use Fast Talk and convince the innkeeper that he should change the inn's sign and give you the helmet.
b) Use Haggle and but the helmet for 1 $.
Equip the helmet and click on the ox. It will be a bit confused but still won't move from the place. Ask the innkeeper again about what is going on and he will suggest putting the helmet on some dwarf. Put the helmet on Forgrimm's head, switch to him and click on the ox. Nothing will happen again but Forgrimm recalls the way how his uncle was solving similar problems. The first step is to drink a few beers.
2) Get a beer for Forgrimm
Go to the innkeeper (M4, 7) and order 5 Ferdok pale ale for dwarf (they cost 0,1 $ in total). After drinking beer, Forgrimm will undress to his underwear and start talking to the ox (M4, 10). After that you'll be automatically transferred to the ox driver Hayo (M3, 27). Now you can ask for a reward additionally:
a) If your Haggle talent is very high, you can negotiate 5 $.
b) You can also agree with Hayo's proposal, who offers you to repair the helmet. You will be able to buy the helmet for 1000 $ (or 999 $ with Haggle) at blacksmith Tarno after completing 15. Find a way to cure Ardo.
Bullhorn helmet of power

Weight: 0
Head (9)
Intimidate, Seduce, Fast Talk +10
-3 to SP for all spells
Obtained from: Citizen Kostan (M3, 28).
Walking around the town you'll meet citizen Kostan (M3, 28), who will ask you for some attention. Talk to him and using Human Nature, Intimidate or Fast Talk force him to tell you the whole truth. It turns out that Kostan was breeding bloodthirsty rats and now he can't deal with them. Your task is to go to the cellar and kill all rats. Before you start this quest, prepare very carefully and save game - the fight will be very tough. When you're ready tell Kostan to let you into the cellar. Once you're inside, the doors are closed and remain like this until you kill all rats.
1) Find rats and kill them
There is Papa Ratzi - boss of all rats, waiting for you inside, along with his security - giant rats and many small, normal rats (walking in the cellar - they are harmless but if you set any traps, they can destroy them).
2) Defeat the Rat King
Papa Ratzi is particularly dangerous because he summons other giant rats at times. So it is important to kill him as soon as possible. You have also to watch out for a poison (gangrene), which may be caused by rats' attacks. It is worth to summon some helper character during the fight to divert rats' attention away from your team.
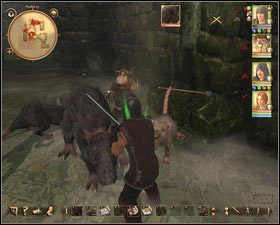
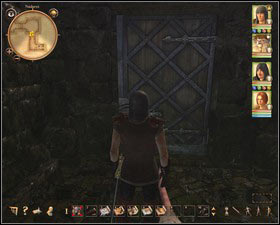
You should weaken Papa Ratzi with spells or special arrows (fire for example).
The exit door will be closed until you kill all rats.
After dealing with rats, it is worth to search the remains of Papa Ratzi, where you will find the ring of endurance (+10 EP) and the dead mercenaries (around 10 $ and a few useful items). When you've done everything in this location, go through the door. There are city guards waiting for you to tell you that the rat breeder has been locked. You will get 1 $ from them for killing rats.
Obtained from: Captain Nirulf (M3, 30).
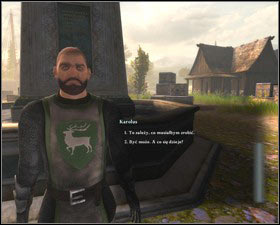
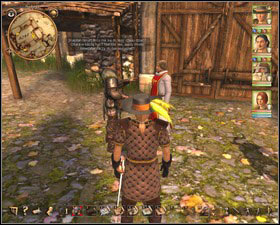
You can obtain first information about this task from rookie Pagol, who stands in the harbor next to the statue.
Before you start talking to captain Nirulf, listen to his conversation with Irian.
Being in the harbor you'll meet rookie Pagol who informs citizens about recruitment for the city police. You can talk to him for while but if you want to know something more, you have to go to the barracks. There you will witness an argument between captain Nirulf (M3, 30) and Irian - dront of Praios. Interrupt their conversation and talk to the captain. You'll learn about a werewolf which prowl the town and about recruitment to hunt down this monster. Be sure that you are well equipped and prepared for the tough fight and tell the captain that you want to join. The day/night mode will change automatically into the night and you'll stand next to the barracks along with the captain and guards.
1) Follow the guards to the ambush site
Go to the captain and he will reveal you his plan. If you have Fayris in your team, she'll revolt against his idea to use a goat as bait.
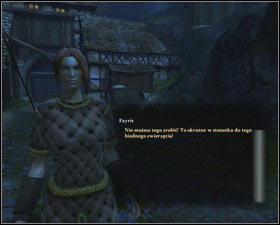
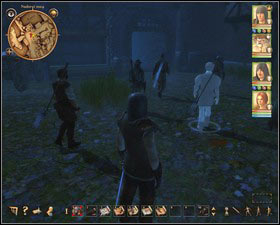
In this task Fayris proves to be a real fighter for animal rights.
Following guards you can listen to short conversation between them.
The captain won't take her words to heart. Follow guards, until you reach place where the captain will leave the goat as bait. Go to him to start a short conversation.
2) Hide
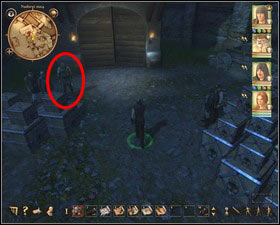
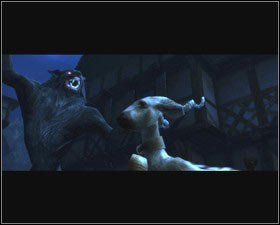
You have to hide behind the crates if you want the ambush to work. To do so go to the captain who already stands there. The cut-scene will start and you'll see the werewolf.
3) Hunt down the werewolf
Now you have to face the werewolf for the first time. When you take some of his life, he'll run away. Remember, that you do not have to chase him right away (he can't escape). First you have to heal your team and then follow the werewolf. When you catch him, you'll fight with him again - the fight is the same as the first encounter - he will run away again. Heal your team and prepare for very tough fight. Now run towards the temple of Praios. Another cut-scene will start and you can see that now you're in ambush and you're surrounded by black wolves and black werewolves.
4) Defeat pack of wolves
At the beginning you'll be attacked by the main werewolf and black wolves. First kill wolves, so they won't disturb you. Then deal with the werewolf. When he is seriously wounded he will flee to the temple. Then black werewolves and rest of wolves will attack you. Remember that the captain fights on your side. He is immortal so you can fight with only these wolves which attack you.
5) Put werewolf out of his misery
Captain will talk to you after the fight and order you to go to the temple. You can go there right away because there is no more fight awaiting you.
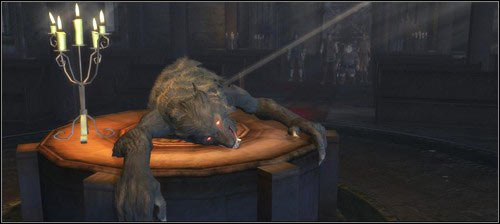
Being inside go to the altar. The cut-scene starts where you can see the dead werewolf transformation into Irian - deont of Praios. The captain appears and sums up your action. As a reward for you help you'll receive Andergastian sword (you can sell it for around 30 $).
Obtained from: City guard next to the mage tower (M4, 2).
Notice! Before this quest, get some Burn salve (you can buy it at Auralia (M3, 19)). It is best when each team member has at least one salve (the best is 2-3).
Right after your return to Nadoret from the customs stronghold, you'll see the purple glow on the sky, located directly above the mage tower (M4, 2). Walk outside the town and head there.
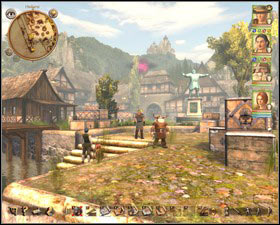
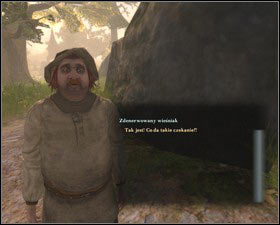
The magical glow can be seen from the harbor.
Villagers will be on your side while talking to guards.
Next to the entrance to the tower location you'll see guards and nervous villagers. Guards are blocking the passage but if you keep asking about entering the area, you'll be allowed to do so. Time to enter the mage tower.
1) Find Master Brookbeard
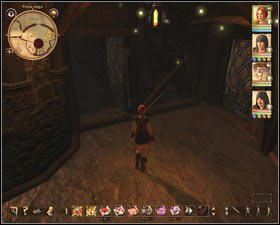
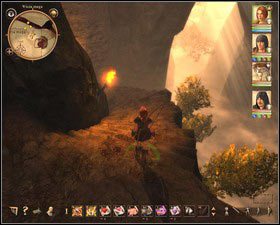
After entering the tower (M4, 2) use the stairs leading to a lower level. Then go one more level below with the next stairs. You'll find yourself in a room where you can see Hesindiane Zoltan and a block of ice, which in fact is frozen master Brookbeard.
2) Open the laboratory
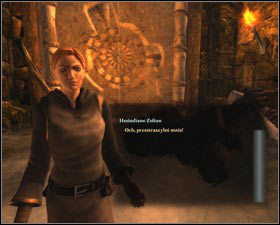
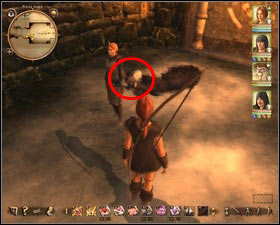
Talk to Hesindiane and she'll tell you that her master was working on summoning spell but it has ended badly. In order to help him you have to get to the laboratory and see what happened there. First you have to click on the key held by frozen master. This will move the key to the laboratory entrance locking mechanism. Now you have to solve the logical puzzle:
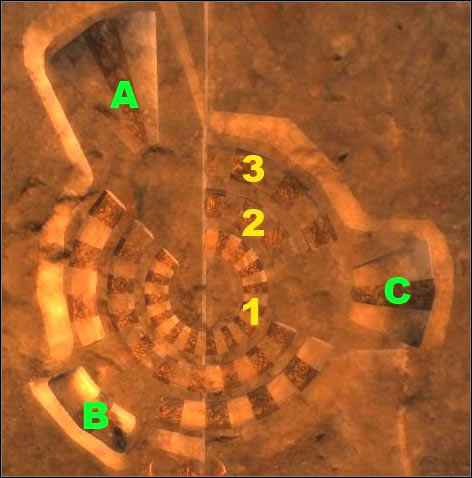
Set the circles in such way that they look as on the screen. First move the inner circle (1), then move the outer one (3) and at the end move this inside (2). When the circles are set, click the fragments (A - 3 clicks, B - 1 click, C - 2 click) so they can fit into the mechanism. The door will be open and you can enter the laboratory.
3) Defeat ghosts of fire
There is a circle in the center of the room. Before you enter it, prepare for the fight (summon a helper, cast some supporting spells etc.). When you enter the circle, you'll be attacked by the ghosts of fire. Now it is time for Burn salve - use it and kill the ghosts. Remember that the salve works only for 45 seconds. Use another one if you need it.
4) Defeat fire warrior
After defeating the ghosts you will have to face mightier fire warrior. It is worth to use the salve again, in order to defend yourself against his flames. After killing him you'll receive a ring of life and master will give you also a mage's hat. From now on you can buy new equipment from master Brookbeard.
Mage's hat

Weight: 0
Head (2)
Equipment slot: head
Ring of life

VP +10
Obtained from: Steward Enno from Vardock (M3, 29).
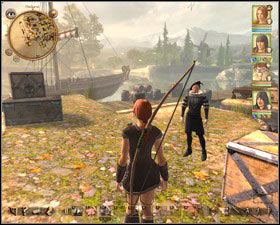
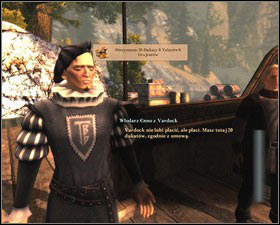
You'll meet steward near the ship.
You'll receive your reward when you reach the reservation.
Steward Enno from Vardock (M3, 30) stands near the ship. He is not always there, so if you can't find him, complete some side quests, go to other locations and return here later. He looks for a ship which can take him to the reservation. Agree and use Haggle - you can get additional 20 $. Then tell the captain that you want to go the reservation.
Obtained from: Miller Speltgood (M5, 2).
There are some grave louses in the mill (M5, 1). Kill them and talk to the miller who is nearby. It runs out that grave louses have taken over his mill. Your task is to get rid of the pests.
1) Deal with the rest of the pests
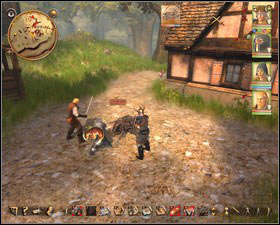

New grave louses appear from time to time, but their number is limited.
A barrel with strange drink is located in the back of the house next to the mill.
Go to the mill (M5, 1). There are new grave louses already. Kill them all and go to the back of the house next to the mill. You'll see a barrel there. Open it and get a strange drink.
2) Ask miller about the bottle
Go to the miller and ask him about a bottle with drink. He has no idea where it came from and will ask you to investigate it. Using Haggle you can get 4 $ for your help.
3) Gather information about liquid
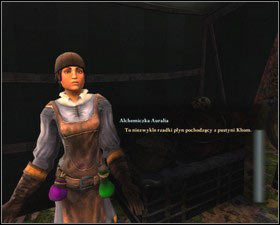
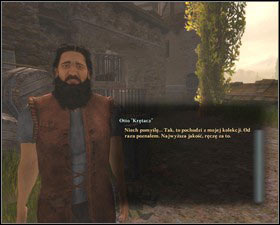
First talk to Auralia (M3, 19). She'll tell you that this liquid has special ability to attract grave louses and she'll suggest you to talk to Otto (M3, 20). You have to use Haggle or Intimidate while talking to him, in order to learn that he sold this bottle to some girl.
4) Talk to the miller
Return to the miller and give him description of a girl. He'll realize that this is his daughter. As a reward you'll receive a golden ring.
Obtained from: Boron Deont.
You'll meet Boron Deont on the cemetery (M4, 8). You'll notice that something is bothering him, so talk to him. You'll learn that something evil is happening in the crypt and you'll receive the key to personally check it out.
1) Look for the source of evil in the crypt
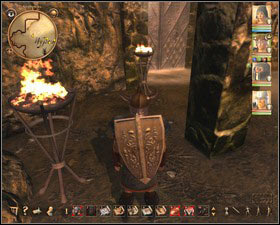
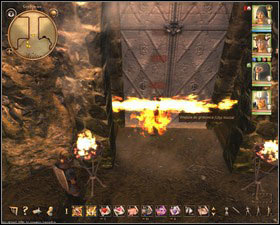
Click the torches to put them out.
If you try to open the door with torches on you'll trigger the fire trap.
After entering the crypt you have to put out all torches (M8, 2). This is the only way to open the door (M8, 3) leading inside the tomb.
2) Destroy ghouls
It turns out that ghouls (M8, !) prowl in the crypt (watch out for many traps too!). To complete this quest you have to kill all ghouls. After defeating one group of ghouls (M8, 6) you'll receive one piece of the badge. The next two are located in the sarcophagi (M8, 4 and 5).
3) Return to Boron Deont
Inform the Boron Deont what was in the crypt.
Obtained from: Lumberjack. After the quest Z24. Funeral meal.
Go to the mage tower (M4, 2). When you're nearby, a lumberjack will run towards you and tell that the village is attacked by undead.
1) Drive undead away
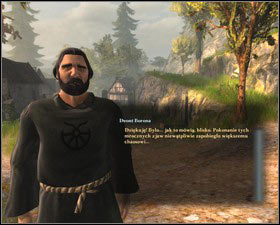
Go to the village, next to the cemetery (M4, 8). There is a magical monolith and the skeletons gather around it. You have to destroy the monolith first - it makes undead come out from the ground. When you have done this, Boron Deont will appear and ask you to check whether master Brookbeard has something to do with this.
2) Talk to the mage
Go to the mage tower (M4, 2) and talk to its host. You'll learn that the previous experiment could result in creating a break between spheres, which serves now as a source of undead. The mage will give you an artifact that allows seeing the energy from other spheres. You continue this mission in the next quest Z26. The consequences of careless.
Obtained from: Master Brookbeard. After the quest Z25. Undead in the village.
1) Destroy monoliths
Equip the artifact which mage has given you. When you exit the tower, you'll see a purple path. Follow it and you discover few monoliths. Destroy them and all undead and return to the mage.
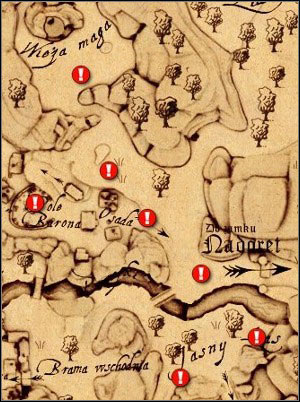 ! - places where monoliths appear.
2) Report back to the mage
As gratitude you'll receive mage's boots (Weight: 0, Legs 3).
Obtained from: Brother Emmeran (M3, 33). He will be here if you've completed the quest Z16. Water nymphs Island earlier.
The water nymph (M3, 33) was trapped by a greedy merchant who wants to sell it on the slave market. You can save her by:
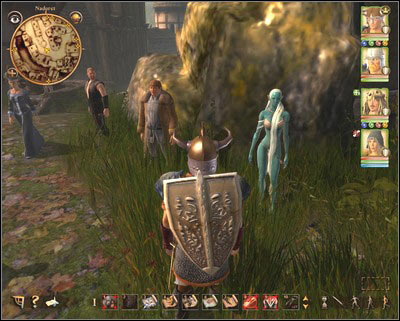 The water nymph and a greedy merchant.
a) Using Fast Talk and then Intimidate.
b) Joining the auction and paying for the nymph 150 $.
c) waiting as the nymph is bided and then convincing the auction winner, that he can't make a slave from the water nymph.
As a reward for saving the innocent being you'll receive a good geodent robe (Weight: 0.4, Chest 2, Belly 2, Back 2, Arms 2, Legs 2, Equipment slot: Torso and Arms).
Obtained from: Alewife Holscrub (M9, 3) or Lucia (M9, 4).
Recently people in the area are missing in mysterious circumstances. You'll be asked to find two of them: the alewife Neckubs (M9, 3) searches for her husband Gero, and Lucia (M9, 4) searches for her fianc. Both of them can be found during completing the quest 13. A toll is not enough.
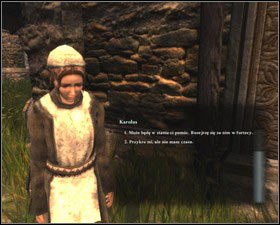
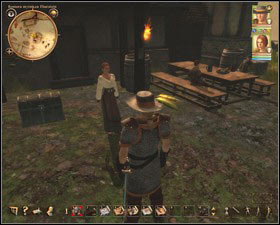
Lucia.
Ale-wife Holscrub and her husband's chest.
1) Find the innkeeper
Talk to the alewife Holscrub (M9, 3) about the chest which is located next to her. You'll learn that it belongs to her husband, Gero, who disappeared some time ago. It can't be opened because the key to its lock is wooden Gero's leg.
Gero, or actually that what is left of him - his wooden leg, can be found during completing the quest 13. A toll is not enough. After fight with the newtkraken it will pop out from its corpse automatically.
2) Bring the wooden leg to the ale-wife
Tell the alewife Holscrub (M9, 3) that you've found her husband's wooden leg. She'll ask you to give it back but do not do this now. You can get one of the rewards for it:
a) Use Human Nature or ask for a reward (say however that discount is not enough). She'll propose then a different deal - if you give her a leg back, she'll let you choose one item from Gero's chest and you can buy (or steal) other two. Agree for that deal, because keeping the wooden leg is worthless - you can't open the chest. 3 items you can choose one from are:
- a treasure map. It is the best choice. If you choose something else and will want to buy the map later, it will cost 10 $.
- a rusty key. You can open treasure chest with it, but you can also use Lockpick. If you choose something else and will want to buy the key later, it will cost 5 $.
- a purse of money. There is only 1 $ inside so it is not worth to take it.
b) Tell her that you want a reward for the leg. The alewife will offer you a discount in her shop (you can buy goods 10% cheaper and sell them 10% more expensive). This option is also good in a long term.
3) Find Gero's treasure
 A treasure is hidden under the tree.
You can find the treasure (M9, 5) under the tree in north-western part of this location. The chest can be opened with Gero's key or high Lockpick talent. You'll find inside: 16,9 $, a golden chain, 2x jewels, 9x small bales of fabric. You can return to the alewife (M9, 3) and tell her what you've found.
4) Find Lucia's fianc
Crying woman - Lucia (M9, 4) will ask you for a help when you meet her. Her fianc was lately taken to the fortress without a reason. In addition she couldn't see him. She wants you to search for her fianc in the fortress. You will recognize him easily - he got a golden engagement ring.
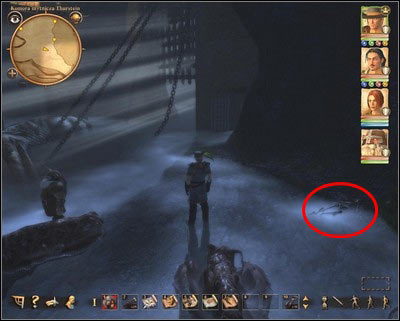 A skeleton of a boy.
You'll find his remains during completing the quest 13. A toll is not enough. After fight with the newtkraken you can search its den. There is a skeleton near one of the walls. Search it and you'll find a golden ring.
5) Bring the ring to Lucia
After completing the quest 13. A toll is not enough Lucia will run towards the ship. When she asks about her fianc, you can:
a) Tell her the truth about her fianc death and give her the ring. You'll get 1 $ as a reward.
b) Lie to her and tell her that all prisoners in the fortress are dead and you do not know anything more. Thanks to that you don't have to give her a ring, which can be sold for 3 $.
When Lucia finds out about the death of her fianc, she will decide to sail to Ferdok and tell people what happened in the customs stronghold. Merchant Castellani will join the conversation and propose her a place on the ship.
Obtained from: Parzalon (M9, 6).
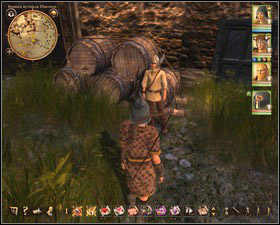
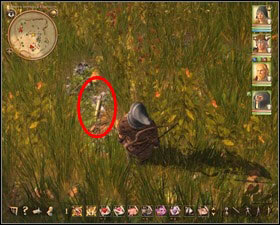
Parzalon stands near the inn.
The rolling-pin lies on the ground. It is difficult to see, so you must carefully search for it.
Listen patiently to the unbelievable story of Parzalon (M9, 6). After he finishes and tells you that this was not only a story but a truth and you can check the stone circle (M9, 8) by yourself - go there. You'll find a rolling-pin inside the circle (an average weapon which has special effect - it heals wounds with every blow 2 HP and 2 VP).
Obtained from: Commander Hasingen (M9, 7).
Talk to him and he will offer you a deal. For each silver badge (you can find them by bodies of the dead pirates) he will give you 0,5 $, and for each gold badge (worn by the pirates' leaders) you'll receive 10 $.
Pirates leaders:
1. Soorman - you'll get his badge during the quest 33. Hidden harbor.
2. Thunder Fist - her badge can be stolen during her stay in the in after the quest 33. Hidden harbor.
3. Hakensang - his badge can be found by his body if you've decided to complete the quest 20. Fight with the river pirates.
Obtained from: Commander Hasingen (M9, 7).
After your first conversation with the commander (M9, 7) he'll tell you about his problem. His nephew - Hubert (M9, 9) reads a book instead of training. You have to take the book away from him.
1) Take the book away from Hubert
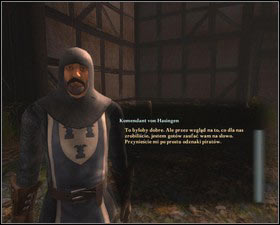
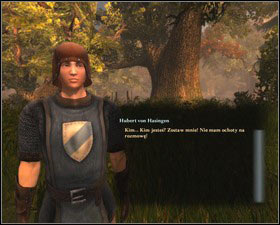
You'll meet Hubert (M9, 9) near the river. Now you can:
a) Ask him about the book. You'll learn that the real problem that distracts him is a girl. Use Seduce, Plant Lore or Fast Talk and convince him to give you a book and go to see the girl.
b) Be decisive and order him to give you the book. Hubert will run away than. Catch him and beat him - a lesson for the future.
2) Bring the book to the commander
Return with the book to the commander (M9, 7). You'll receive 1 $. It is worth to read the book, because there are few answers connected to the quest Z16. Water nymphs Island.
Obtained from: Arch mage Rakorium (M9, 10).
Arch mage Rakorium (M9, 10) talks to the river guards mentioning someone named Nottel. Talk to him and he will ask you to find Nottel - his student.
1) Find Rakorium's student
Go to the magical circle (M9, 8) (northwestern part of this location). The boy is in its middle, crying for help. Talk to him and you'll learn that some magic, which is located in the caves beneath the circle (M9, 11) keeps him here and he can't move. He also recommends you to go to see Rakorium (M9, 10) and tell him what's going on.
2) Ask Rakorium for help
Return to Rakorium (M9, 10) and tell him about Nottel. Arch mage can't go and help him because he is still questioned by guards. He'll give you instead a wonderful artifact to open the caves - a normal pickaxe.
3) Find source of magic
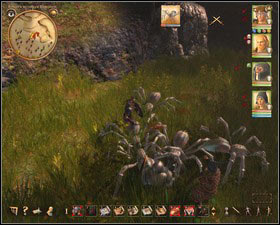
Return to the circle and head towards the big stone. Before you reach it, you'll be attacked by spiders which appear in magic way. Kill them and click the stone to destroy it. Now enter the cave (M9, 11).
4) Collect the components for the ritual
Near the cave exit (M11, 1) you'll meet mage Marawamir ay Elburum (M11, 2). In a short conversation he'll ask you to collect some magical components and teleport himself out.
Moving further in the cave you will come across at the second incarnation of Marawamir - his darker character. Also the mage - a skeleton, will tell you to find the necessary ingredients and bring them to the place of ritual.
Components are:
1. Strange bulb - you'll get it after defeating a big emerald spider (M11, 3).
2. Rare herb - you'll get it after defeating fireflies (M11, 4).
3. Strange berries - you'll get it after defeating a giant scorpion (M11, 5).
4. Strange leaf - you'll get it after defeating a giant crab (M11, 6).
5. Exotic flowers - you'll get it after defeating giant stag beetles (M11, 7).
5) Complete the ritual
After collecting 5 ingredients, go to the magical circle (M11, 8) in the middle of the cave. Talk to Marawamir standing in the circle and watch him transforming. As a skeleton he wants you to perform a ritual in accordance to a book lying nearby (M11, 9). As a human he wants you to perform a ritual in other way.
a) Complete the ritual as mage - skeleton wants.
Put the strange bulb into the ritual bowl lying next to the largest stone. Then head right and put into the bowls a rare herb, exotic flowers, strange berries and a strange leaf.
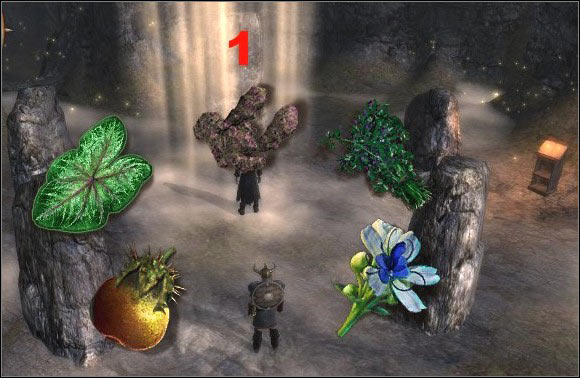 1 - the largest stone, the northernmost.
After putting down the ingredients talk to the mage. He finishes the ritual, and then attacks you. When you kill him return to Rakorium (M9, 10) and Nottel, who was saved by the ritual.
b) Complete the Reversalis ritual as mage - human wants.
To learn how to perform the ritual according to the mage - human, you have to rob the mage - skeleton. In his pockets you'll find the notification - a card on which it is shown how the ingredients should be placed in order to stop the mage - skeleton:
Put the strange leaf into the ritual bowl lying next to the largest stone. Then head right and put into the bowls strange berries, exotic flowers, a rare herb and a strange bulb.
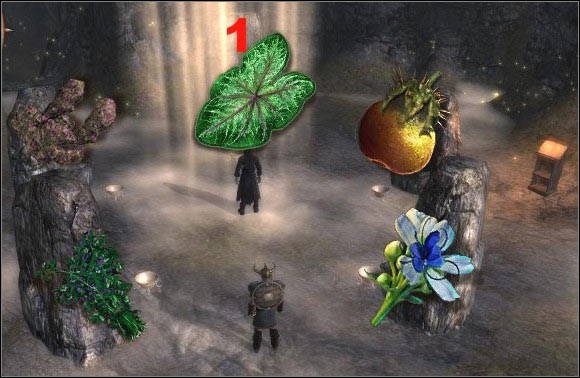 1 - the largest stone, the northernmost.
After putting down the ingredients talk to the mage. He finishes the ritual, and then the mage - human will appear. He'll give you a ring of life (+10 VP) as a reward. Return to Rakorium (M9, 10) and Nottel, who was saved by the ritual.
c) Place the ingredients in wrong order
You can also put the ingredients in wrong order. But this will cause mages to take over Nottel's body and disappear with him. This option results in least experience points. Return to Rakorium (M9, 10) and tell him about it.
6) Report back to Rakorium
If you've completed the ritual (options a and b in point 4), you'll meet Rakorium (M9, 10) and Nottel. Mage's student will be grateful and give you Nottel's Potion (endless bottle, which gives the drinker a random bonus).
But if you've placed the ingredients in wrong order (option c in point 5), Rakorium will teleport himself out when he learns about loss of his student.
Obtained from: Ulwina Neisbeck (M9, 12).
You'll meet Ulwina (M9, 12) next to the commander (M9, 7). She'll ask you about a way to pirates' hideout, because her brother was kidnapped by them. Once you've shown her where Hammerberg is, she'll leave and the commander will talk to you asking you to follow Ulwina and mind her.
1) Mind Ulwina in pirates' hideout
You'll find Ulwina in the inn (M14, 2). She's talking with Thunder Fist. Talk to them and the pirates' leader will tell you that Ulwina lie. She'll show you the place, where Ulwina's brother is kept.
2) Free Ulwina's brother
Go there (M14, 26) and kill the pirates guarding him. After the fight Vitold Neisbeck will show up and tell you that his sister in fact wants to kill him. He'll give you his watch and tell to give it to Ulwina as a proof of his death. You'll find Ulwina on the pier, neat the ship. Give her a watch and you'll receive 100 $.
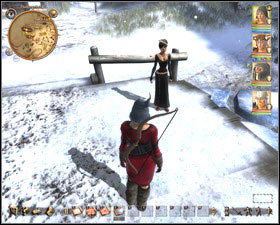
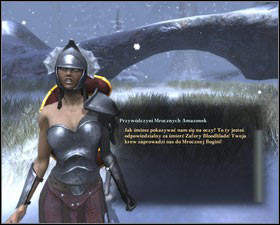
You'll find Ulwina on the pier.
You can be attacked by Dark Amazons on your way back.
3) Inform Eilif
Return to the inn (M14, 2) and tell Thunder Fist everything you know.
In the fairy forest, which can be reached only through the elven tree (M12, 16), you'll see a fairy (M12, 7). Your mission is to make her to enter the fairy circle (M12, 5).
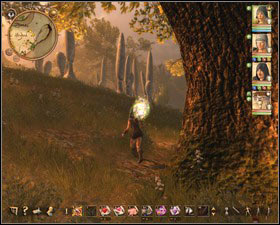
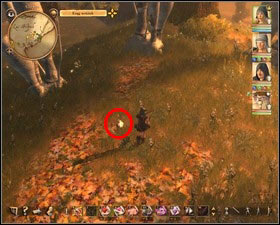
In order to do so, you have to sneak to her (turn on the Stealth Mode) in such way, that your character always faces the circle. Once the fairy is inside, go to her. The magic being disappears and there will be the fairy dust on the ground. Take it and sell it.
Obtained: During the quest 21. Haunted ruins. After discovering one piece of the recipe.
5 pieces of the recipe are located in 5 jeweled chests (M13, 8) in different locations of the bosparian ruins (M12, 4).
1) Identify fragments
Each fragment you found has to be identified.
2) Sell the recipe
After collecting and identifying all 5 pieces of the recipe, you can read it. However it turns out to be too complicated and useful. The only thing you can do is to offer it to Master Brookbeard (Nadoret, the mage tower). In return you'll receive instructions on how to make fire arrows or bolts or bullets.
Obtained from: Larys (M13, 12), during the quest 21. Haunted ruins.
During exploration of the ruins you'll meet one of the Dark Amazons - Larys (M13, 12). You can:
a) Convince her that she made a mistake by rejecting her goddess, Rondra, and keep her alive.
b) Kill her.
Whatever is your choice, you'll learn that there is a spirit of priestess of Rondra (M13, 13), trapped in the ruins.
1) Talk to the priestess of Rondra
The priestess (M13, 13)or to be more specific, her spirit, can be found in the chamber nearby. In order to bring her a peace you have to put in her tomb (M13, 14) 4 items connected with her.
2) Find bones and Leondril's equipment
You'll find them all below giant heads. These are: woman's bones (M12, 10 and M12, 13), amulet of Rondra (M12, 11) and Flame-bladed sword of Lion Rondra (M13, 10).
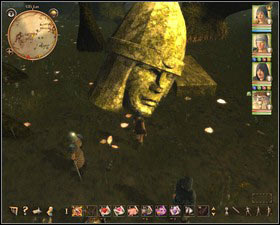
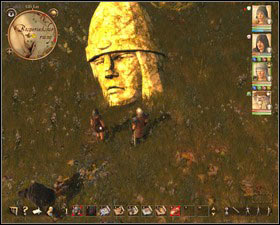
Woman's bones and amulet of Rondra can be found below heads in south-western part of elven forest.
Other bones are below the head in the ruins in elven forest.
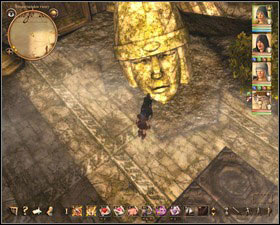
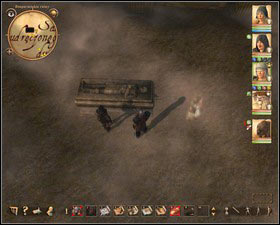
The last item - Flame-bladed sword of Lion Rondra is located below the head in bosparian ruins. In the northern chamber.
All items must be placed in the tomb near the spirit of the priestess.
3) Let the priestess has a peace
If you've killed Larys (M13, 12), you can now put all items in the tomb (M13, 14) and ensure the peace of the priestess (M13, 13).
But if you didn't kill her before, she will appear now and tell you that all of this was a trick and she was lying to you all the time. She needs all the items to keep desecrating the spirit of the priestess. Kill her and her helpers and then putt all items into the tomb.
As a reward you'll receive two items which you've put into the tomb: an amulet of Rondra and Flame-bladed sword of Lion Rondra.
Flame-bladed sword of Lion Rondra

Two-handed sword
2D+4
Strength bonus: 10/3
Weapon bonus: -1/-2
Range: 1.1 m
Courage +1, Charisma +1
Can't be sold
Amulet of Rondra

Courage +2
Obtained: After climbing the tree next to the bush (M12, 9).
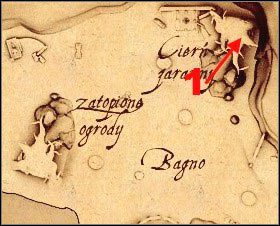

1 - entrance to the tree.
The tree is located next to the morning thornbush.
You'll see a big swamprancid sitting on the giant tree (M12, 8). He doesn't attack you though, but sits calmly. Your task is to find a cure that restores a real form to this cursed creature.
1) Find the cure
A bottle with potion to cure effects of prick with morning thornbush and a recipe to cure the swamprancid can be found in bosparian ruins (M12, 4), in one of the chests (M13, 16).
2) Use the recipe
In order to use a recipe, except a potion you have to have 1x mandrake powder, 2x root of joruga and 1x water from the spring. Use the recipe with all ingredients (in the elven workshop (M12, 2) for example).
3) Give the cure to a swamprancid
If you're ready with the cure, go and give it to the swamprancid (M12, 8).
4) Defeat the ungrateful ogre
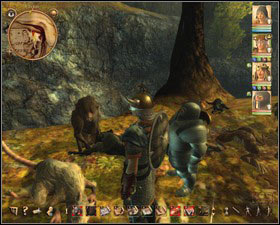
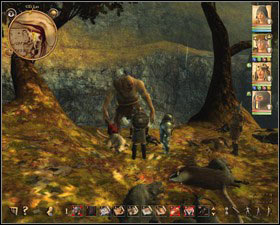
After drinking the cure, the swamprancid (M12, 8) turns into the ogre, which attacks you immediately. After killing him, when you leave the tree, you'll be accosted by Archon Megalon.
Obtained from: Alari (M12, 25).
Alari (M12, 25) will ask you to find Sanraya.
1) Find Sanraya
You'll find Sanraya (M14, 21) in the pirates' village - Hammerberg. She is walking in the northern part of this location, which can be reached during the quest 25. A mysterious ghost (only then you'll be able to cross the northern bridge).
2) Retrieve the soul instrument
Sanraya (M14, 21) will tell you a story about being in the den of water dragon (you'll learn this location now) and losing her harp. You'll find it in the den, in the treasure chest (M25, 3), which can be accessed after defeating the monster (see the quest Z43. Scales and teeth).
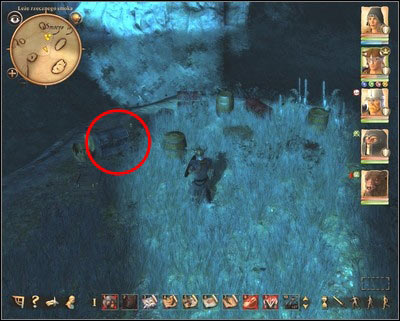 The harp is located in one of the chests.
3) Tell Alari about his sister
Return to the elven forest and tell Alari (M12, 25), that Sanraya (M14, 21) is healthy and happy in the pirates' village.
4) Give Sanraya the harp
Go to Sanraya (M14, 21) and give her the harp. You'll receive Jewel of Rahja (Charisma +2) in return.
Obtained from: Linwen Owlflight (M12, 21). After the quest 21. Haunted ruins.
For destroying the statues in the ruins Linwen (M12, 21) will offer you to create a powerful weapon. Before you get it, you will have to undergo several tests.
1) Tune
At the beginning you'll get some instructions how to make Linwen's arrows. Make them (the workshop is on the same floor) and return to Linwen (M12, 21).
2) Talk to other participants of the ritual
Your next task ordered by Linwen (M12, 21) is to talk to two elves. You have to talk to Ilcoron (M12, 26) and Calenleya (M12, 14).
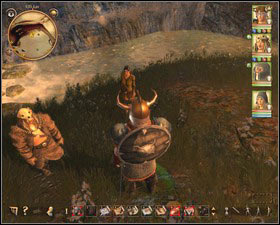

Calenleya walks between the tree and the Fairy Forest.
Ilcoron can be found on the second floor of the tree, near to the alchemical laboratory.
3) Listen to the melody of the forest
Calenleya (M12, 14) wants you to go to the Fairy Forest and count deers. Walk around the forest a little bit and return to the elf. Answer is: 9.
4) Make a balance
Ilcoron (M12, 26) wants you to create a hilt for him (blacksmith's workshop is on the top floor of the tree). When you are ready - return to him.
5) Sing with the elves
Go and talk to Linwen (M12, 21) again. The singing begins and you have to finish the phrases. The correct verses are:
a) 2nd dialog option "Fey'y ..."
b) 3rd dialog option "... Akaiya'mandra! Iama bian aya yara!"
c) 1st dialog option "... Thar feyiama feyra!
You'll receive bow of Yama's soul, dagger of soul and spear of soul and further instructions to make their ideal equivalents. To do so, you need Inspiration. This ingredient can be found in a tree stump, right at the fairy circle (M12, 5).
Obtained from: Isaliel (M12, 19).
1) Solve the problem with animals
Go to the lake in the forest (M12, 18) to check the cause of the stench Isaliel told you about. Deal with several groups of animals which have become very aggressive in this region.
2) Find the cause
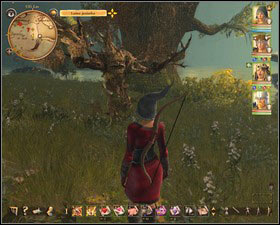
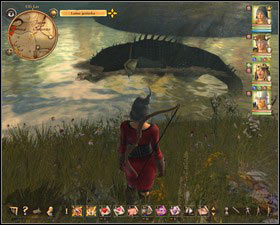
You'll meet Bugbear them, who will tell you that the cause of troubles is the animal that lies behind him in the water. Go there and take look at the huge reptile corpse.
3) Find the solution
The solution to the problem is amoebas, which you can buy in Nadoret at Otto (M3, 20).
4) Solve the problem
Return to the reptile body. Make sure that amoebas are in the main character inventory and click on the corpse. The cut-scene starts, after which you will be able to return to Isaliel (M12, 19).
5) Consequences
The elf will tell you that the problem is not solved yet. Return to the lake where you'll see huge amoebas. Kill them and you'll receive an elven long sword (1D+4, Strength Bonus: 11/4, Weapon Bonus: 0/-1, HP +4 and AT +1, 50% chances to inflict wounds) from the elf. After the fight Bugbear will talk to you. If you want you can attack him (you won't find anything interesting by searching his body). Go to Isaliel (M12, 19) and tell her that your mission is complete.
Notice! After completing this quest you can do one more thing - give Gwendala the long sword. In return you'll receive Forest Elf Robe (Weight: 0, Chest 2, Belly 2, Back 2, Arms 1, Legs 1, Equipment slot: Torso, CN +1, DE +1, AG +1).
Obtained from: Ale-wife Jadira (M15, 7).
The alewife (M15, 7) wants captain Rumpo (M14, 17) back - he has changed since his last trip. He got unusual charm, which attracts women.
1) Get a wisp of hair

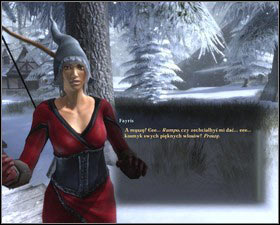
You can try to complete this mission only after the quest 31. Compelling arguments. it is easy to do if you have Fayris in your team. Just tell her to ask Rumpo (M14, 17) for a wisp of hair. The other option is to choose Pick Pocket from dialog options.
2) Make a love elixir
Go to Sanraya (M14, 21) and ask her to make a love elixir. She'll give you a bottle after a while.
3) Give Jadira the elixir
After giving the elixir to Jadira (M15, 7), you'll receive 5 $ and a Jadira's dress.
Obtained from: Radomir (M15, 9).
Ask Radomir (M15, 9) what is all about the Tavern King. He will tell you that it is his title and you'll be able to challenge him to drink (a bid is 1 $). You have no chances at the beginning. Talk now to captain Hakensang (M15, 8). Take a drink and you'll learn about very strong alcohol - a Stonemelter. Talk to captain and drink with him again. You'll get a solvent. Go to talk to barmaid Leti (M15, 5). Ask her if she could help you with drinking game with Radomir. Unfortunately she won't do anything but you can deal with this.
Challenge Radomir again. When you go to the second round, try to distract him and pour the solvent into the jug. You'll fail abut you'll get the second chance. Choose Pick Pocket from dialog options. Thanks to that you'll be able to pour strong alcohol to the Radomir's jug. After drinking it, he falls to the ground. From now on you're the Tavern King.
You can also search for the crown which will allow you to drink in the inn for free. Ask Elvira (M14, 20) about the crown, then ask goblin (M14, 19) near the pier, and finally buy it at Bento (M14, 25).
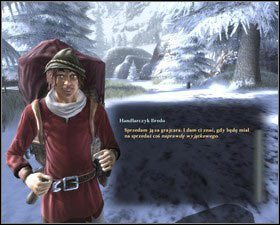
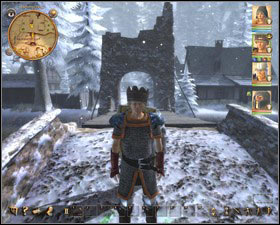
You'll buy the crown at Beno (stands right next to the bridge) finally.
The crown doesn't look too impressive, but thanks to it you'll be allowed to drink for free in the inn.
Obtained from: Sanraya (M14, 21). During the quest Z38. Lost treasures.
Sanraya (M14, 21) will reveal the location of the den of water dragon.
1) Trip to the cave
The cave can be reached with the ship. Being there head north, where you'll find the dragon's den (M18, 2).
2) Defeat the water dragon
When you come there, the water dragon (M25, 2) will emerge out of the water knocking down the huge stone and blocking you the escape route. This monster has a lot of life, but he fights alone so a group of experienced heroes should not have bigger problems with defeating him.
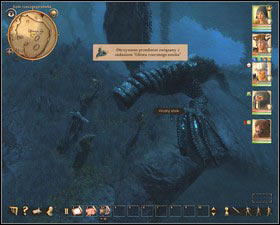
To cut off the dragon's head, just click it.
The head will be placed on the chest on your ship as a trophy.
After the fight cut off his head. It will be the trophy on your ship. Do not forget to search the chests (M25, 3) with very valuable items.
Obtained from: Pagrosh. During the quest 25. A mysterious ghost.
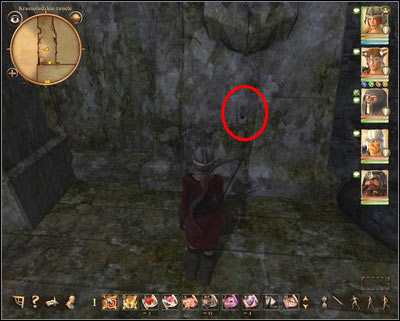 The lever.
You will be able to return to the mine only during the quest Z45. Secrets of digging dwarves. When you're inside the mien, use the lever (M18, 7) located on one of the walls and head to another part of the mine (M18, 8). You'll find there many valuable items on armor and weapons stands (M18, 15 and 16).
Obtained: The bridge guard. After the quest 33. Hidden harbor.
When you're back on your ship, the bridge guard will accost you and tell that dwarves have some problems in the mine (M14, 3). Go there. You'll meet dwarf prince Arom, who will join your team during this quest.
1) Get to the bottom of the mine
First talk to kobold (M18, 2). Then cut through groups of monsters (M18, !) and dwarves (M18, !) and go down to second part of the mine (M18, 3). Prepare for many fights there. Finally you'll face Avarosh (M18, 5) and his dwarves. After the fight go to the third part of the mine (M18, 6). You'll fight there with the stone golem and rock goblins and many more.
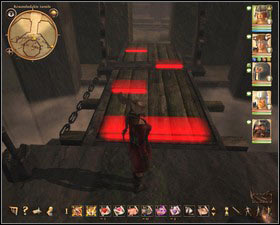
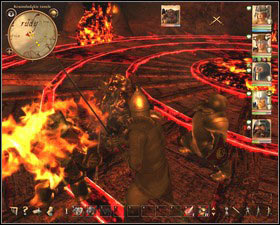
There are many traps inside the mine.
Fight with Torlosh is very hard. Prepare well.
2) Kill mutant dwarf
Go to the ore hall now, where you'll meet Torlosh (M18, 13) - former companion of a prince, who lost his mind. You have to kill him. It is worth to use Burn salve during the fight because Torlosh inflicts much fire damage.
3) Destroy the mine
After the fight talk to Arom and tell him, that he can blow up the mine. When he does it, you'll be automatically moved outside the mine and the mine will be destroyed (from now on you can't return there). Arom will give you Anglagorum axe (one-handed weapon, 50% chances to inflict wounds, 3D damage, Strength bonus : 14/2, Weapon bonus: 0/-1, Range: 1.2m).
Obtained from: Brother Emmeran (Isle of Forgetfulness). After the quest 13. A toll is not enough.
After the fight with the newtkraken during the quest 13. A toll is not enough you'll receive the artifact. Sail to the Isle of Forgetfulness and ask brother Emmeran about it.
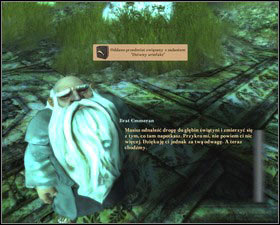
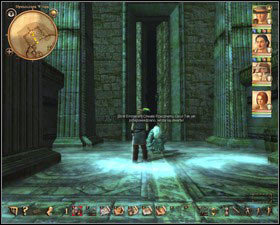
He will tell you that this artifact opens the door to the temple of Effered. Follow him - he will open the entrance and warn you, that a great danger lurks inside. Gather your whole team and enter the temple.
The temple consists of 9 parts. The navigation there is easier thanks to Transversalis (M23, 3) circles, which can be found in these parts of the temple: 1, 3, 5 and 8. Clicking the circle in 1st part of the temple moves you to the farthest discovered circle. Clicking the circles in parts 3, 5 or 8 moves the team to the 1st part of the temple.
The temple is occupied by giants crabs (M23, !) (they attack in groups and can be real challenge for an inexperienced team) and morfu (M23, !). If the fights are too hard, you can complete other quests and return here later.
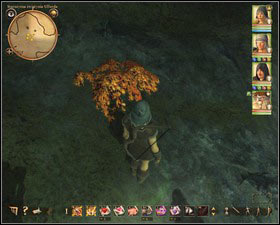

Firemoss is a very valuable plant, and there is a lot of it in the temple.
Several times you encounter an obstacle in the form of crab eggs. Just destroy it to move on.
1) Solve the puzzle with the mosaic
After reaching the 8th part of the temple you'll see a mosaic on the floor (M23, 18). You have to arrange the tiles in such way that they look like an image of the woman. Each tile has its number. You have just to move the mouse over it to see that number. Click the tiles in order you see below:
4-12-8-6
1-7-12-8
6-1-11-2
5-13-7-6
10-3-1-9
2-5-13-11
9-2-14-1
2-14-5-9
14-10-6-7
11-14-10-6
7-11-15
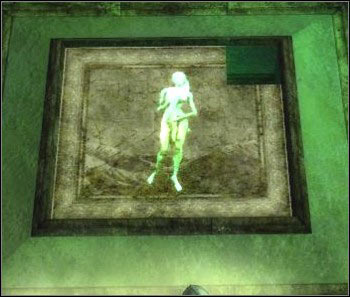
To complete the mosaic, you need one more element. You can find it after killing the water dragon in the quest Z43. Scales and teeth. Return then to the mosaic and click it. When you've done it, the passage to the next part of the temple will open. Take the stairs to the last chamber (M23, 19). Before entering it, make sure that you're good prepared for a hard fight.
2) Fight with the monster
Upon entering the last chamber (M23, 19), a crabmonster will attack you. The fight with him goes in three phases:
1. After dealing him some damages, he summons 2 Giants crabs for help. Kill them as soon as possible.
2. After losing about 1/3 of his life, he summons few morfu.
3. After losing about 2/3 of his life, he summons 3 Giants crabs and few morfu.
4. When he is almost dead, a cut-scene starts: you can see brother Emmeran freeing his brother's soul out of the monster.
After the fight you can ask Brother Emmeran about the whole situation. He'll give you changed geomant's staff (staff, 1D+6, CL +1). Do not forget to search the body of a crabmonster and take two magical rings out of it: the ring of magical power (AE +10, RM +10, Culminatio Ball of Lightning +5) and the ring of life (VI +10).
Obtained from: Huntsman Fenner (M24, 2) and Steward Enno from Vardock (M24, 3). After the quest Traveler.
1) Get rid of the giant beetles
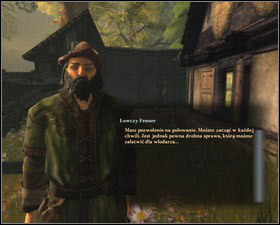
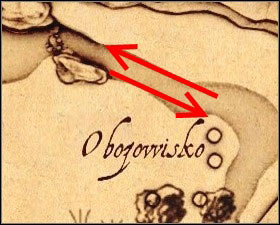
Talk to the huntsman (M24, 2) and you'll learn that there are giant beetles (M17, 5) in the reservation, which eat tree bark. Talk to the steward (M24, 3) about it and head south to kill the beetles. When you do this, return to the steward and get 5 $ as a reward.
2) Kill wild boars (available during your second visit in the reservation)
It is enough to sail out from the reservation (e.g. to Nadoret) and sail back to get next task from the steward (M24, 3). Now you have to get rid of wild boars (M24, 6) to the southwest. After killing the last one you'll get a trophy: hunter of wild boars, which you have to get to the steward. He'll give you 7,5 $.
3) Hunt down the bear (available after the quest 15. Find a way to cure Ardo)
The steward wants you to kill a boar for him (M24, 7). You'll get 10 $ for killing the animal.
4) Kill wolves (available after the quest 33. Hidden harbor)
You next task from the steward (M24, 3) is to kill wolves (M24, 14), which are wandering in the west part of this locations, next to the bridge. Get the trophy to the steward and you'll receive 15 $ from him.
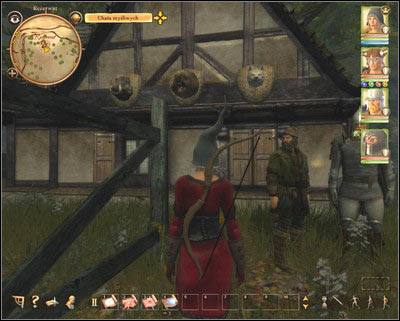 All trophies you won hang on the wall in the hut.
Obtained from: Steward Enno from Vardock (M24, 3). Available after first encounter with orcs in the reservation.
Notice! Remember to search dead orcs - archers. They are often equipped with a composite orc bow, which is worth a lot (you can sell it for around 8 $).
During exploration of the western part of the reservation, you'll meet orcs (M24, !). Kill them all and return to the steward (M24, 3). He knows about them already and will order you to get rid of them.
1) Get rid of the orcs
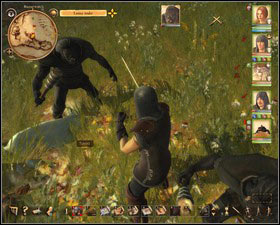
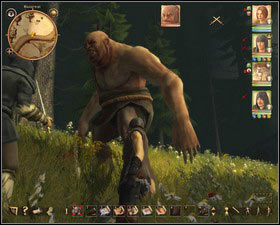
There are a lot of orcs (M24, !) in this location. But the most dangerous are ogres (M24, !). These creatures are very strong, especially when accompanied by orcs. The good idea is to fight with them one by one. A frontal attack usually ends with failure. Best choice is take a good archer and send him (her) for scouting. If the orc see your hero, run away shooting the orc. You'll be able to attack orcs one by one. When you kill all orcs, you'll see that the way forward is blocked by the tree (M24, 8).
2) Inform the steward
Inform the steward (M24, 3) and his farmhands (M24, 4) about the tree (M24, 8).
3) Remove the barricade
Removal of the tree (M24, 8) takes some time. It is no use to wait until farmhands (M24, 4) remove it. Sail somewhere and come back. When you're back to the reservation, the blockade will disappear. Talk to the steward (M24, 3) about orcs (M24, !) again. He'll order you to continue extermination of the orcs on the other side of the tree.
4) Get rid of the remaining orcs
Other orcs (M24, !) are located mainly in two camps (M24, 9 and M24, 12). The first camp is full of orcs and an ogre (M24, !). Try to pull out them individually.
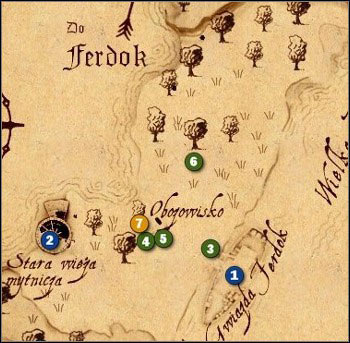 The passage to the second camp is hidden. You need to enter the gap between the rocks to get there.
You'll reach the second camp through the hidden gap between rocks (M24, 10). You'll run into the orcs' ambush (M24, 13), but you should manage to kill them. Now it is time to kill all orcs in the camp. There are many of them plus ogres in addition (one of them is extremely strong), the orcs' shaman and the orcs' chieftain (M24, !) (the latter two are not much stronger than normal orc).
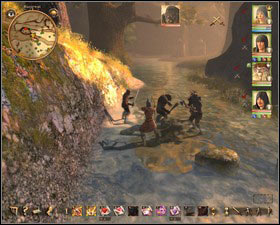
The easiest way to fight with orcs is to reach the camp from the river side. You can approach the camp, pull out few orcs and then run away by the river. You can also plant some traps on the way.
5) Inform the steward
When you're sure that all orcs are dead, return to the steward (M24, 3). He'll give you 25 $ as a reward.
1. The ship
2. The old customs tower - you'll reach it during the quest 1. A camp by night.
3. Captain Albass - connected with the quest 1. A camp by night.
4. Janah - connected with the quest 1. A camp by night.
5. Piet - connected with the quest 1. A camp by night.
6. The traveling merchants - connected with the quest 1. A camp by night.
7. The sleeping mat - connected with the quest 1. A camp by night. You have to use it at the end of the quest.
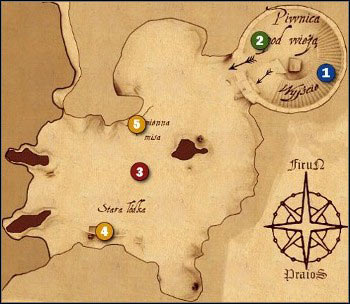
1. Exit
2. Janah - connected with the quest 1. A camp by night.
3. Bats - connected with the quest 1. A camp by night.
4. A dry tindermold - connected with the quest 1. A camp by night.
5. The shrine of River Father - connected with the quest Z1. The shrine of River Father.
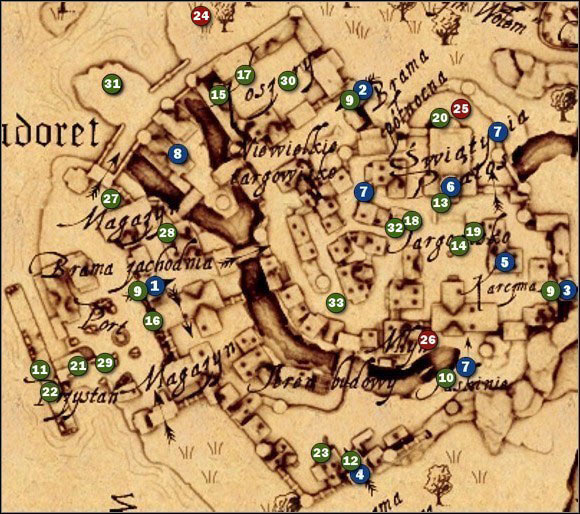
1. The western gate
2. The northern gate
3. The eastern gate
4. The southern gate
5. "At the Leaping Deer" inn - Ardo can be found there at the game beginning.
6. The temple of Praios - you'll meet Alrik there and obtain the quest Z6. Alrik looking for a prayer book. Inside the temple you'll find deont Irian, one of the addressees in the quest Z2. Shopkeeper Olbin parcels.
7. The cave - entrance to the town dungeons. The battle arena is located there.
8. House of rats - shows up during the quest Z10. House of rats.
9. Gates guards (western, northern and eastern) - connected with the quest Z14. The emblems of the four winds.
10. Gossip girl, Washerwoman, Chatterbox - they will tell how to reach Moddlemash during the quest 2R. Complete your training.
11. Brother Emmeran - he is here only when you come to Nadoret for a first time. You can meet him later on the Island of Forgetfulness.
12. The city guard Rabig - orders quest Z3. Bring me a beer. He is also connected with the quest Z14. The emblems of the four winds.
13. Babbler Brim and Coxcomb Cordo - connected with the quest Z5. Auralia and her decoction.
14. Griese, the beggar - connected with the quest 6. Gather information about pirates.
15. The city guard - beekeeper - shows up after the quest 8. A night mission. Connected with the quest Z17. Mad beekeeper.
16. Shopkeeper Olbin - orders the quest Z2. Shopkeeper's Olbin parcels.
17. Steward Bornhelm - orders the quest Z4. Bounty hunting. He is one of the addressees in the quest Z2. Shopkeeper's Olbin parcels.
18. Tailor Marcusi - orders the quest Z9. Elegant lady. He is one of the addressees in the quest Z2. Shopkeeper's Olbin parcels.
19. Alchemist Auralia - orders the quest Z5. Auralia and her decoction. Connected with the quest Z23. Vermin.
20. Crooked Otto - connected with quests Z15. Trolls at the bridge, Z23. Vermin and Z40. Source of plague.
21. The harbor master - he is here only at the game start. Right after you reach Nadoret he will show you a way to your teacher.
22. Ardo and captain Delbrack - they show near the harbor after the quest 9. Gerling's information about the pirates.
23. Blacksmith Tarno - connected with the quest Z18. Dumb Ox.
24. Odo Bickerbold - connected with the quest Z4. Bounty hunting.
25. Bodo Bickerbold - connected with the quest Z4. Bounty hunting.
26. Ma Bickerbold - connected with the quest Z4. Bounty hunting.
30. Captain Nirulf - connected with the quest 2W. Complete your training and Z20. In the moonlight.
31. Goatherd - orders the quest Z11. Goatherd.
32. Wolters Claas - talk to him in order to get an access to the Thieves Guild. You can get there if Cuano is one of your companions or if you're the thief.
27. Ox driver Hayo - orders the quest Z18. Dumb Ox.
28. Citizen Kostan - orders the quest Z19. Rat-catcher.
29. Steward Enno from Vardock - orders the quest Z22. Traveler.
33. Water nymph and Brother Emmeran at the slave trade - to trigger this situation (quest Z27. The slave trade in Nadoret), you have to complete the quest Z16. Water nymphs Island first.
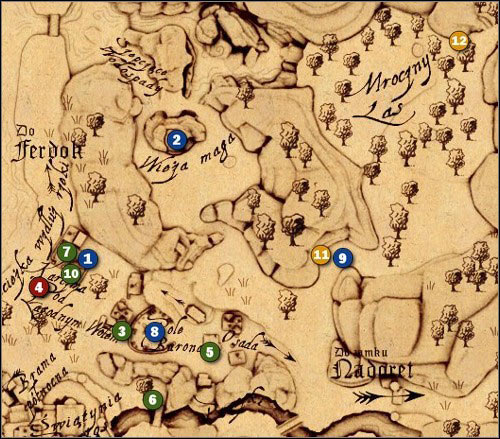
1. "At the cheerful ox" inn
2. The mage tower - you'll find Master Brookbeard inside along with his student Hesindiane Zoltan. They are connected with start quests for mages 2M. Complete your training. They show up later in quests Z21. Failed experiment, Z25. Undead in the village and Z26. The consequences of careless.
3. Poisoned girl - connected with the quest Z7. Poisoned girl.
4. Godo Bickerbold - this thug shows up here during the quest Z4. Bounty hunting.
5. Aunt Balmar - you have to bring her a parcel during the quest Z2. Shopkeeper's Olbin parcels.
6. Lumberjack - orders the quest Z8. Lumberjack.
7. Innkeeper Roshead - connected with two quests: Z2. Shopkeeper's Olbin parcels and Z18. Dumb Ox.
8. The cemetery - you should come here only after completing few main quests. You could obtain the quest Z24. Funeral meal then.
9. The entrance to the Dark Forest - enter the forest only during one of the last main quests 34. Entrance to the castle. It is not worth to visit this forest, while it is full of animals which can kill your team easily.
10. Bogumil, the ox - connected with the quest Z18. Dumb Ox.
11. Orbert's chest - connected with the quest 34. Entrance to the castle.
12. The stone key - connected with the quest 34. Entrance to the castle.
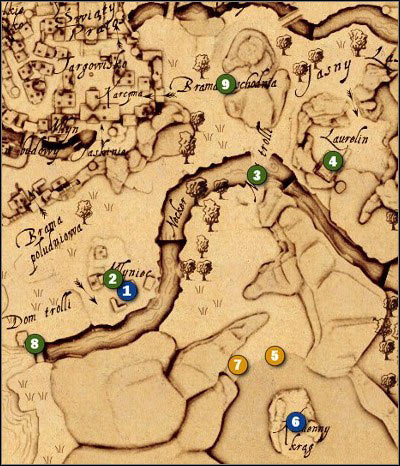
1. The mill
2. Miller - connected with quests: Z2. Shopkeeper's Olbin parcels and Z23. Vermin.
3. Trolls - connected with the quest Z15. Trolls at the bridge.
4. Laurelin - connected with starting quests for nature experts 2N. Complete your training. You have to deliver him a parcel during the quest Z2. Shopkeeper's Olbin parcels.
5. A boat - you can use it to sail to the island.
6. The island - you'll obtain the quest Z16. Water nymphs Island.
7. Firemoss - needed for the quest Z16. Water nymphs Island.
8. The city guard Gardenwood - connected with the quest 5W. A debate at the customs gate.
9. A woman gathering mushrooms - shows a way to Laurelin during 2N. Complete your training.
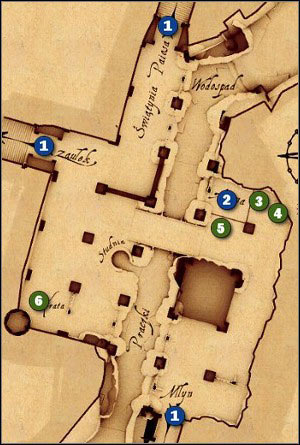
1. Exit
2. Arena
3. Arena master Wolfgrim - you can bet on fights here. He orders also the quest Z12. Battle arena champion.
4. Medicus Moddlemash - he'll show you a way to the Thieves Guild during the quest 2R. Complete your training.
5. Spectators - connected with the quest 11. Ship's crew.
6. Sandor - he'll let you in to the Thieves Guild during the quest 2R. Complete your training.
Notice! You can enter the guild only if you're the rogue or you have Cuano in your team. Talk to Wolters Claas who is located near the marketplace in Nadoret.
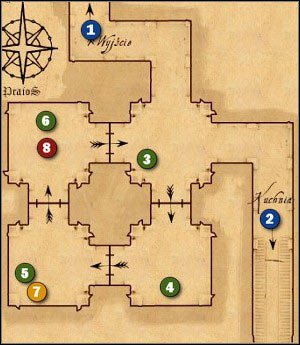
1. Exit
2. Stairs to the 1st floor - there are few thieves on the 1st floor. You can talk to them but there is no one connected with any quest.
3. Dilga Panek - the Guild leader. Connected with quests: 2R. Complete your training and Z13. What is in the crate?.
4. Thief Odila - connected with the quest 3R. A novice in the service of Phex. She'll order you later quests: Z10. House of rats and Z14. The emblems of the four winds.
5. Bardo - connected with the quest 3R. A novice in the service of Phex.
6. Thief Wenner - connected with the quest 3R. A novice in the service of Phex.
7. A chest - connected with the quest 3R. A novice in the service of Phex.
8. A trap - connected with the quest 3R. A novice in the service of Phex.
Notice! The crypt is available only during completing the quest Z24. Funeral meal.
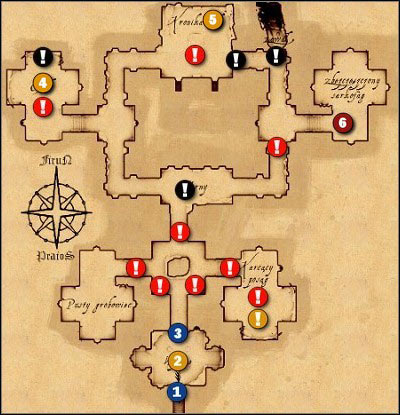
1. Exit
2. Torches - you have to put them all off in order to go further.
3. The door
4. The sarcophagus
5. The sarcophagus
6. Ghouls with a part of the badge
! Traps
! Ghouls
Notice! You can sail them after completing quests 11. Ship's crew and 12. Brother Emmeran.
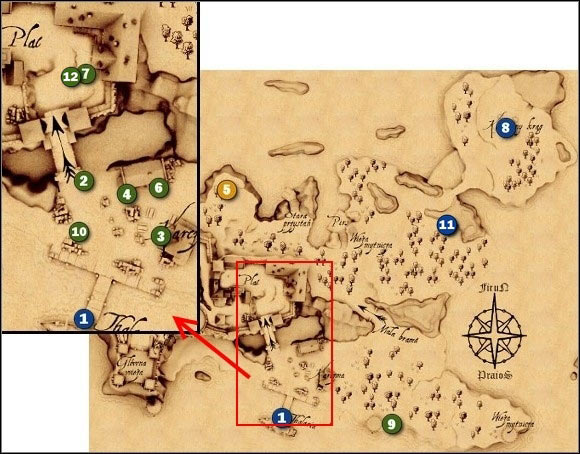
1. The ship
2. Cuano and Forgrimm
3. Ale-wife Holscrub and old sailor's chest - connected with the quest Z28. Missing people!.
4. Lucia - connected with the quest Z28. Missing people!.
5. The treasure - connected with the quest Z28. Missing people!.
6. Parzalon - orders you the quest Z29. Parzalon.
7. Commander Hasingen - order you quests: Z30. Bounty hunter and Z31. Evil book. He is also connected a little bit with the quest Z33. For a few ducats more.
8. The stone circle - You'll find Nottel there during the quest Z32. Missing mage student.
9. Hubert - connected with the quest Z31. Evil book.
10. Arch mage Rakorium - orders the quest Z32. Missing mage student.
11. A cave beneath the circle - available only during the quest Z32. Missing mage student.
12. Ulwina Neisbeck - connected with the quest Z33. For a few ducats more.
Notice! The main tower is available only during the quest 13. A toll is not enough.
The main tower:
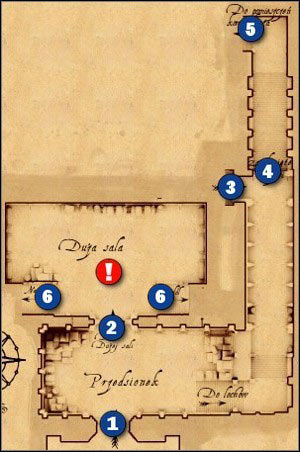
1. Exit
2. The door to the big hall - the hall is available only if you've chosen Forgrim's solution in the main tower.
3. Dungeons - available only if you've chosen Cuano's solution in the main tower.
4. The closed door
5. Commander's chambers
6. Stairs up
! Customs officers
Dungeons:
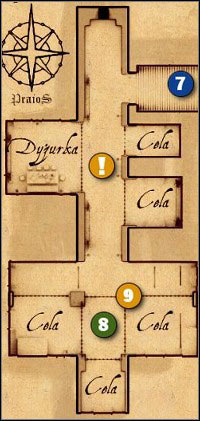
7. Exit
8. Jailer
9. Levers
! Fighting dogs
The main tower - upper part:
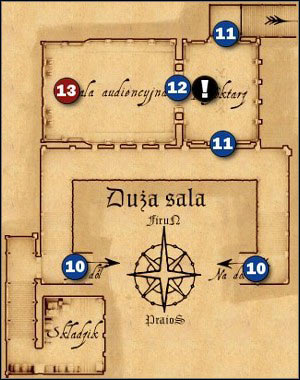
10. Stairs down
11. The door
12. The door to the audience chamber
13. Commander
! Bodyguards
Notice! The cave is available only during the quest Z32. Missing mage student.
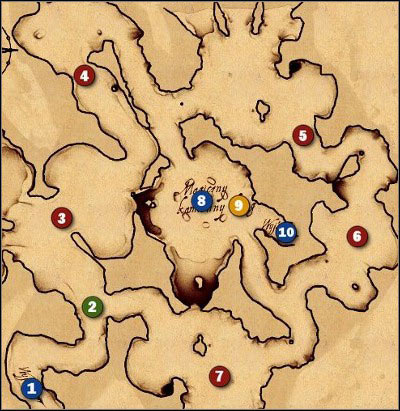
1. Exit
2. Marawamir ay Elburum
3. Emerald spiders
4. Fireflies
5. Giant scorpion
6. Giants crab
7. Giant beetles
8. The magical circle - go there after killing all animals inside the cave.
9. Notes of the black mage
10. Buried exit
Notice! You'll learn about this location from brother Emmeran during the quest 15. Find a way to cure Ardo.
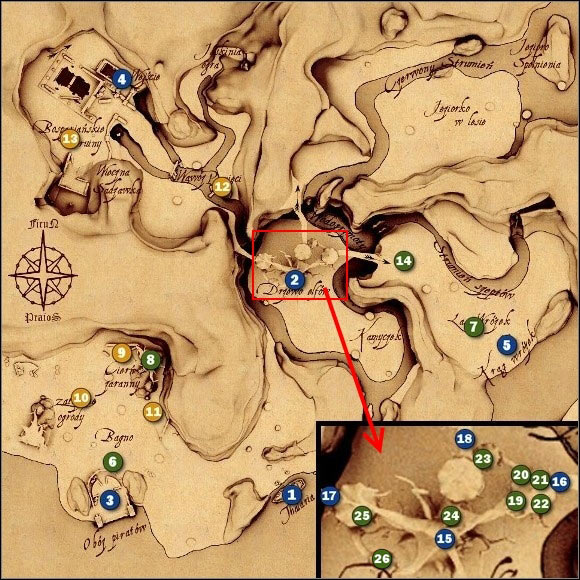
1. The ship
2. Entrance to the elven tree
3. Pirates' camp
4. Bosparian ruins - you'll get there through the elven tree. This location is available only during the quest 21. Haunted ruins.
5. The fairy circle - you'll get there through the elven tree.
6. Mate Bravethron - this pirate guards the camp. You have to talk to him during the quest 16. Pirates and Elves.
7. Fairy - connected with the quest Z34. Fairy.
8. A big swamprancid - connected with the quest Z37. A cure for swamprancid.
9. A morning thornbush
10. The suspicious place - woman's bones - needed for the quest Z36. Free the spirit.
11. The suspicious place - Amulet of Rondra - needed for the quest Z36. Free the spirit.
12. Decomposing remains - Thargazz's journal - it is not needed but you can find there some answers for you questions.
13. The suspicious place - woman's bones - needed for the quest Z36. Free the spirit.
14. Calenleya - walking around. Connected with the quest Z39. Signs of power.
Level 1
15. Entrance to the higher lever and descent to the lower level
16. Route to the fairy forest
19. Isaliel Wingstroke - leader of elves, connected with quests: 15. Find a way to cure Ardo, 16. Pirates and Elves and Z40. Source of plague.
20. Gwendala Suntouch - connected with quests: Z40. Source of plague, 19. Elven supporter. Sometimes she is walking on the way leading to the lake in the forest.
21. Linwen Owlflight - connected with quests: 18. Negotiations, 19. Elven supporter, Z39. Signs of power.
22. Elbrenell and Shanaha Dreamviewer - connected with the quest 19. Elven supporter.
23. Lellindor - connected with the quest 19. Elven supporter.
24. Mandavar Clawdance - connected with the quest 19. Elven supporter.
Level 2 (available after the quest 16. Pirates and Elves)
17. A route to bosparian ruins
25. Alari - connected with the quest 15. Find a way to cure Ardo. Orders you the quest Z38. Lost treasures.
26. Ilcoron - connected with the quest Z39. Signs of power.
Level 3 (available after the quest 15. Find a way to cure Ardo)
18. A way to the lake in the forest
Notice! Ruins are available during the quest 21. Haunted ruins.

1. Exit
2. Mighty gate - you can open it after collecting items from the chamber with puzzle flooring, chests and Dark Amazons bodies.
3. Chamber with the flooring - connected to the quest 21. Haunted ruins.
4. Chamber with chests - connected to the quest 21. Haunted ruins.
5. Descent to the lower level
6. The secret passage - you'll discover it by using Dwarfnose talent.
7. Dark Amazons with the missing element
8. The jeweled chest (there are 3 chests in this location) - fragments of the recipe - connected to the quest Z35. The bosparian recipe.
9. Mysterious verses - suggest how to arrange the pieces in order to open the gate.
10. The suspicious place - Flame-bladed sword of Lion Rondra - needed to the quest Z36. Free the spirit.
11. Rules of the puzzle
12. Larys - connected with the quest Z36. Free the spirit.
13. The spirit of the priestess - connected with the quest Z36. Free the spirit.
14. The sarcophagus - connected with the quest Z36. Free the spirit.
15. The book of the balance and chests
16. An intriguing chest - a potion to cure effects of prick with morning thornbush, a recipe to cure the swamprancid - connected to the quest Z37. A cure for swamprancid.
17. Statues - connected to the quest 21. Haunted ruins.
18. Archon Megalon - connected with the quest 21. Haunted ruins.
! Dark Amazons
! Skeletons
! Grave louses or giant beetles or bats
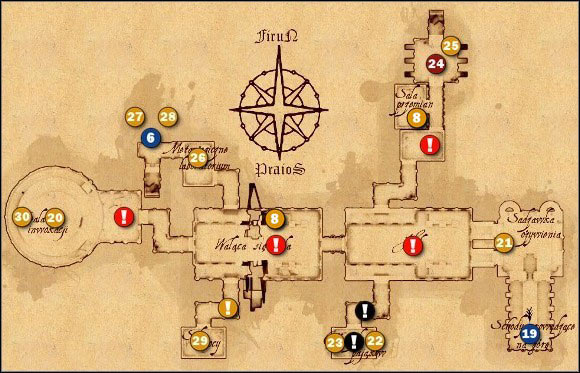
18. The jeweled chest (there are 2 chests in this location) - fragments of the recipe - connected to the quest Z35. The bosparian recipe.
19. Return to the 1st part of ruins
20. The summoning circle - connected with the quest 21. Haunted ruins.
21. Guide to the seals
22. The seal of manifestation - book
23. The seal of curse - book and the special chest - the seal of curse - connected with the quest 21. Haunted ruins.
24. Gargoyles with the seal of defense - connected to the quest 21. Haunted ruins.
25. The seal of defense - book
26. The special chest - the seal of manifestation - connected with the quest 21. Haunted ruins.
27. The seal of magic - book
28. The special chest - the seal of magic - connected with the quest 21. Haunted ruins.
29. he seal of power - book and the special chest - the seal of power - connected with the quest 21. Haunted ruins.
30. Codex Invocatio - describes summoning ritual.
! Gargoyles
! Emerald spiders
! Bats
Notice! The pirates' village is available after completing the quest is available after completing the quest Z15. Find a way to cure Ardo.
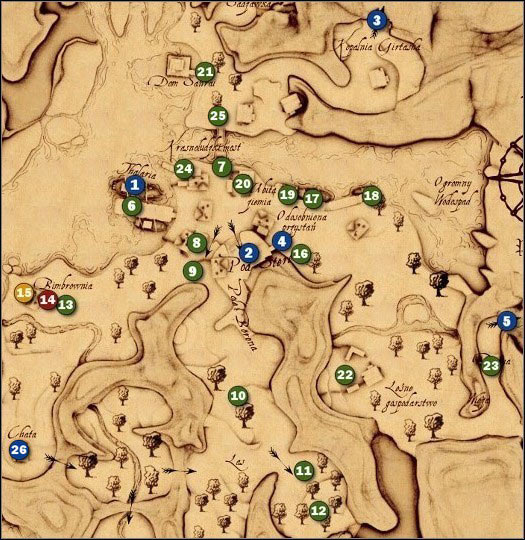
1. The ship
2. "At the steering wheel" inn - you'll find several important pirates here.
3. The mine - available during quests: 25. A mysterious ghost, Z44. Water pump and Z45. Secrets of digging dwarves.
4. Rear entrance to the inn - available during the quest 30. Dangerous liaisons.
5. Hidden harbor - available during the quest 33. Hidden harbor.
6. Avarosh Goldentooth - dwarf who welcomes you during your first visit in Hammerberg. Orders quests: 23. In favor of the pirates, 24. Golden obligations and 25. A mysterious ghost. He is also connected with the quest Z45. Secrets of digging dwarves.
7. The bridge guard - he'll let you pass during the quest 25. A mysterious ghost.
8. Snow White - you'll meet her here or on the other side of the house. Connected with the quest 24. Golden obligations.
9. Boatswain Orc Zutar - connected with the quest 27. Furry issues.
10. The search team - connected with the quest 27. Furry issues.
11. Yobbo - connected with the quest 27. Furry issues.
12. Goblins - connected to the quest 27. Furry issues.
13. Distiller - connected with the quest 28. Booze for the vote.
14. Trolls - connected to the quest 28. Booze for the vote.
15. The supply chest - bag of salt - connected with the quest 28. Booze for the vote.
16. Barking Bodo - one of the debtors in the quest 24. Golden obligations. He guards a rear entrance to the inn during the quest 30. Dangerous liaisons.
17. Captain Rumpo - order quests: 30. Dangerous liaisons and 31. Compelling arguments. Connected with the quest Z41. Heartache of the alewife.
18. Boatswain Farfara - connected with the quest 31. Compelling arguments.
19. Goblin Rumpo - connected with the quest Z42. The tavern King.
20. Elvira and Wildapple Harad - Harad has the rapier from the quest 31. Compelling arguments. Elvira will tell you something about the crown from the quest Z42. The tavern King.
21. Sanraya - connected with quests: Z38. Lost treasures, Z43. Scales and teeth and 25. A mysterious ghost.
22. Conk Berwin - connected with the quest 32. A confidential message.
23. The gate guards - they let you pass during the quest 33. Hidden harbor.
24. Jorgen - connected with the quest 32. A confidential message.
25. Bento - connected with the quest Z42. The tavern King.
26. The hut - you'll find Vitold here during the quest Z33. For a few ducats more.
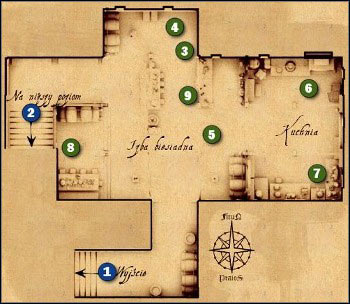
1. Exit
2. Descent to lower level - you can't use it now - the barmaid will stop you every time you try.
3. Captain Soorman - orders the quest 32. A confidential message.
4. Mate Bravethorn - connected with the quest 29. Stolen loot.
5. Barmaid Leti - connected with the quest Z42. The tavern King.
6. Bather "Trembling hand" - after the quest 30. Dangerous liaisons you can talk to him about his daughter.
7. Alewife Jadira - orders quests 28. Booze for the vote and Z41. Heartache of the alewife. During the quest 24. Golden obligations you can ask her about Radomir.
8. Captain Hakensang - orders the quest 29. Stolen loot. You can blackmail him during the quest 30. Dangerous liaisons.
9. Radomir - connected with quests 24. Golden obligations and Z42. The tavern King.
Notice! This part of the inn is available only during the quest 30. Dangerous liaisons.

1. Exit
2. Bath door
3. Decorative pot - a key to the storeroom
4. Barmaid
5. Storeroom door
6. Chest - pipe
7. Casket - snuff box
8. Chest - snuff box
9. Jadira's room
Notice! Tunnels are available during the quest 25. A mysterious ghost.
1st part:
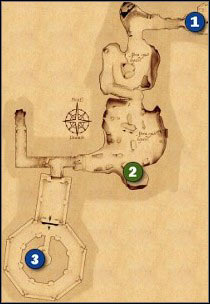
1. Exit
2. Kobold
3. Descent to second part
2nd part:
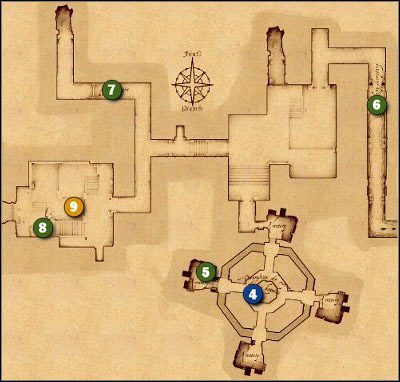
4. Exit to first part
5. Toppel - dwarf nr 2
6. Pagarosh - dwarf nr 3
7. Grimmnax - dwarf nr 4
8. Kobold
9. Colorful chest
Notice! Reentry to the tunnels is possible during the quest Z45. Secrets of digging dwarves.
1st part:
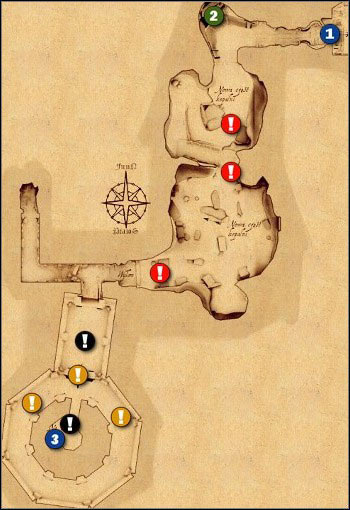
1. Exit
2. Kobold
3. Descent to second part
! Traps
! Dwarves
! Bats, grave louses and giant scorpions
2nd part:
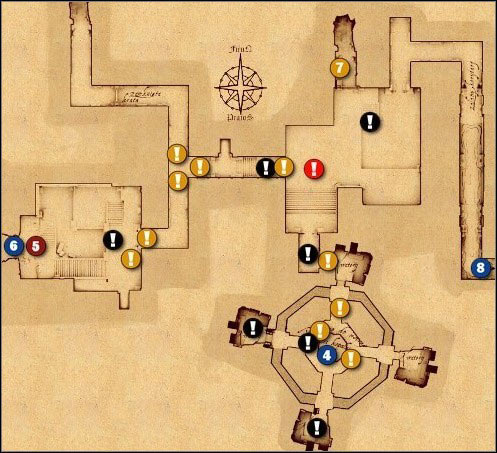
4. Exit to the 1st part
5. Avarosh
6. Descent to 3rd part
7. Lever
8. Descent to 4th part
! Traps
! Dwarves
! Bats, grave louses and giant scorpions
3rd part:
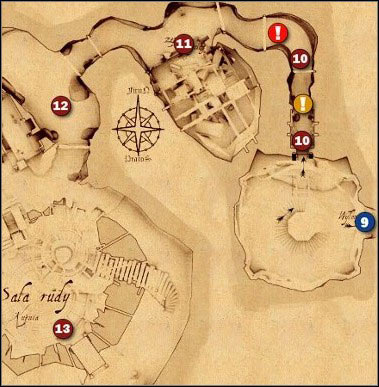
9. Exit to the 2nd part
10. Rock goblin
11. Stone golem and rock goblins
12. Emerald spiders
13. Torlosh
! Traps
! Bats, grave louses and giant scorpions
4th part:
Notice! This part is connected with the quest Z44. Water pump.
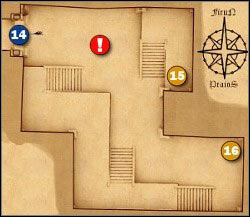
14. Back to the third part
15. Armor stand
16. Weapon stand
! Bats, grave louses and giant scorpions
Notice! This location is available only during the quest 33. Hidden harbor.
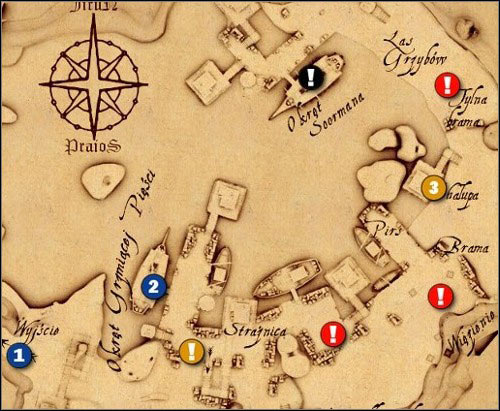
1. Exit
2. Thunder Fist's ship
3. Chests by the hut - do not forget to search them. There are few helpful items inside.
! Fight with orc and goblins
! Pirates
! Soorman
Notice! This location is available after completing the quest 34. Entrance to the castle.
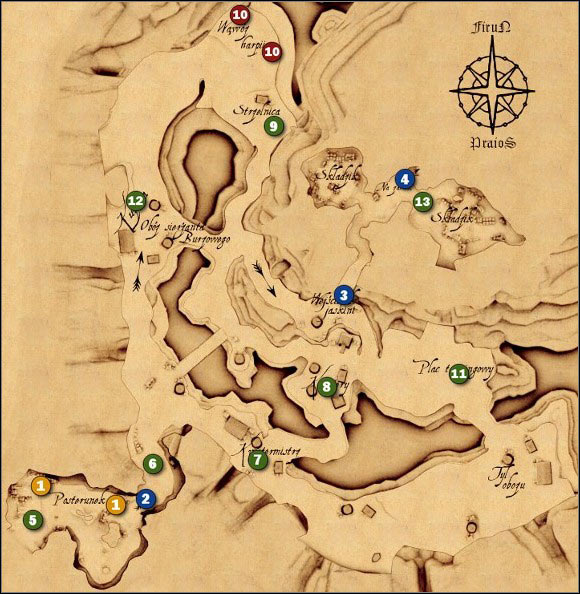
1. Chests with mercenaries' clothes
2. The gate
3. The gate
4. The castle doors
5. Mercenary - connected with the quest 35. In disguise.
6. Mercenary - connected with the quest 35. In disguise.
7. Quartermaster Derpel - connected with the quest 35. In disguise.
8. Sergeant Hargenstrike - connected with the quest 35. In disguise.
9. Archer Keen - connected with the quest 35. In disguise.
10. Harpy's nests - connected to the quest 35. In disguise.
11. Erund from Olmingen - connected with the quest 35. In disguise.
12. Blacksmith Ingrash - connected with the quest 35. In disguise.
13. Quartermaster Springdale - connected with the quest 35. In disguise.
Notice! This location is available after you exit the ravine during the quest 36. In search for the lost crown.
1st part:
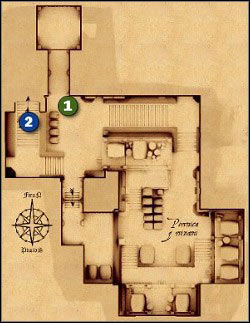
1. Footman - when you defend him, he'll take you to the ball hall.
2. Passage to second part
2nd part:

3. Mina from Berg - talk to her in order to spoil the atmosphere at the banquet.
4. Countess Malgorra del Incendio - talk to her in order to spoil the atmosphere at the banquet.
5. Steward Enno from Vardock - walks between the tables
6. Squire Trewman - talk to him in order to spoil the atmosphere at the banquet.
7. Baron Dajin - he appears after you've spoiled the atmosphere.
Notice! You'll get here following baron during the quest 36. In search for the lost crown.
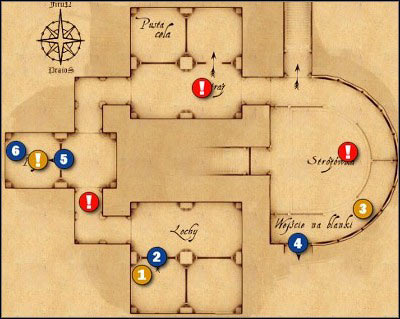
1. A bucket with fish - you can use fish during the fight.
2. Cell door
3. Chests with equipment - your team equipment.
4. Way out to stairs leading to the tower
5. The door to dogs' cell
6. A secret passage
! Guards
! Fighting dogs
Notice! Available during the quest Z46. Temple of Effered.
1st part:
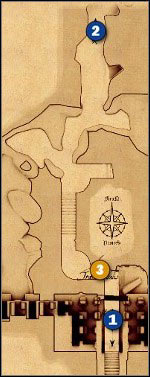
1. Exit
2. Passage to 2nd part
3. Transversalis circle - it becomes active after activating another circle in the 3rd part of the temple.
2nd part:
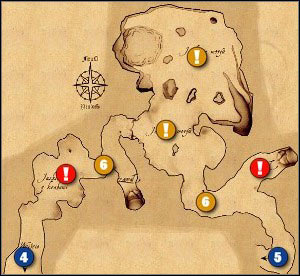
4. Exit to the 1st part
5. Passage to 3rd part
6. Giants crabs eggs
! Giant crabs
! Morfu
3rd part:
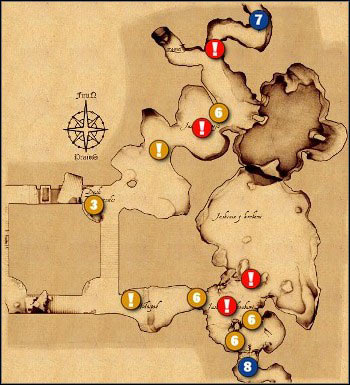
3. Transversalis circle
7. Exit to the 2nd part
8. Passage to 4th part
6. Giants crabs eggs
! Giant crabs
! Morfu
4th part:
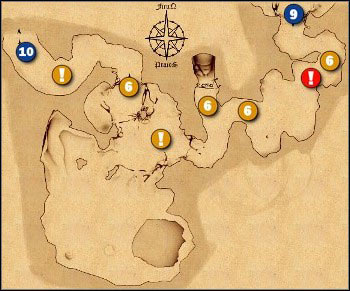
9. Exit to the 3rd part
10. Passage to 5th part
6. Giants crabs eggs
! Giant crabs
! Morfu
5th part:
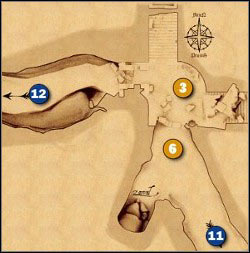
3. Transversalis circle
11. Exit to the 4th part
12. Passage to 6th part
6. Giants crabs eggs
6th part:
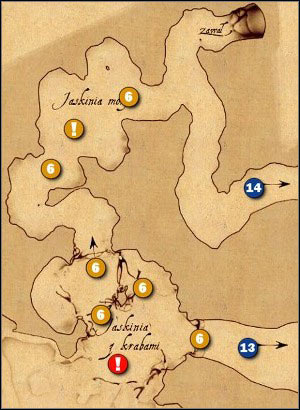
13. Exit to the 5th part
14. Passage to 7th part
6. Giants crabs eggs
! Giant crabs
! Morfu
7th part:
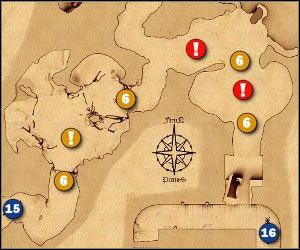
15. Exit to the 6th part
16. Passage to 8th part
6. Giants crabs eggs
! Giant crabs
! Morfu
8th part:
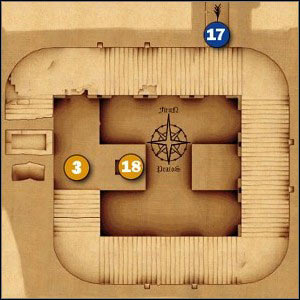
3. Transversalis circle
17. Exit to the 7 part
18. The mosaic
9th part:
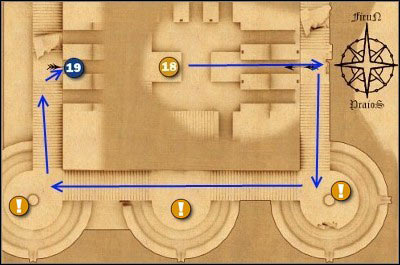
18. The mosaic
19. Entrance to the last chamber
! Morfu
--> A route from the mosaic to the last chamber.
Notice! Reservation becomes available after completing the quest Z22. The traveler.
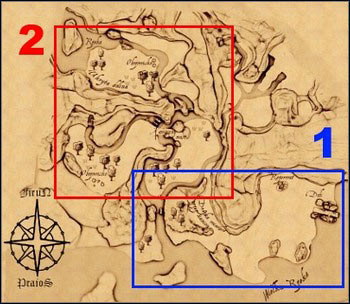
1. First part of the map
2. Second part of the map
Reservation - 1st part
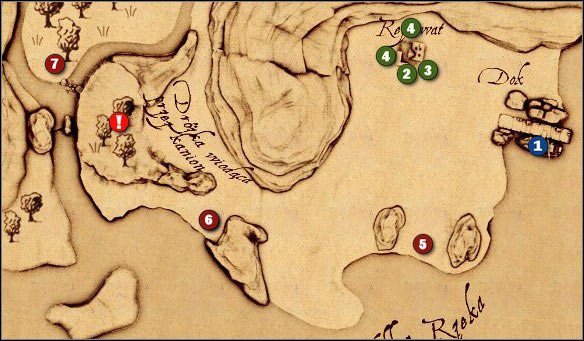
1. The ship
2. Huntsman Fenner - he takes a bit about the quest Z47. Hunting trip at the beginning.
3. Steward Enno from Vardock - orders quests: Z47. Hunting trip and Z48. Orc plague.
4. Two farm workers - connected with the quest Z48. Orc plague.
5. Giant stag-beetles - first target of the quest Z47. Hunting trip.
6. Wild boars - second target of the quest Z47. Hunting trip.
7. Bear - third target of the quest Z47. Hunting trip.
! Orcs - connected to the quest Z48. Orc plague.
Reservation - 2nd part

8. A tree - connected to the quest Z48. Orc plague.
9. 1st camp - connected with the quest Z48. Orc plague.
10. Entrance to the hidden valley - connected to the quest Z48. Orc plague.
11. Exit from the hidden valley
12. 2nd camp - connected with the quest Z48. Orc plague.
13. Orcs' ambush - connected with the quest Z48. Orc plague.
14. Wolves - fourth target of the quest Z47. Hunting trip.
! Orcs - connected to the quest Z48. Orc plague.
! Ogres - connected to the quest Z48. Orc plague.
! Orcs' chieftain and orcs' shaman - connected with the quest Z48. Orc plague.
Notice! This location is available during the quest Z43. Scales and teeth.
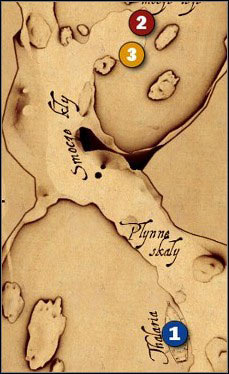
1. The ship
2. Water dragon
3. Treasure chest
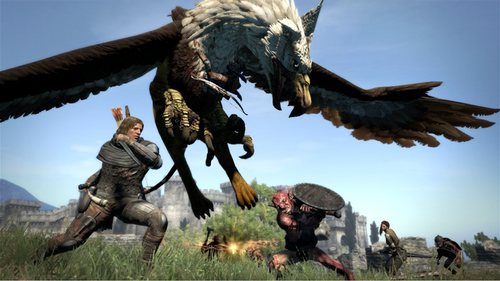

 Drakensang: The River of Time Game Guide & Walkthrough
 Darksiders II Game Guide & Walkthrough
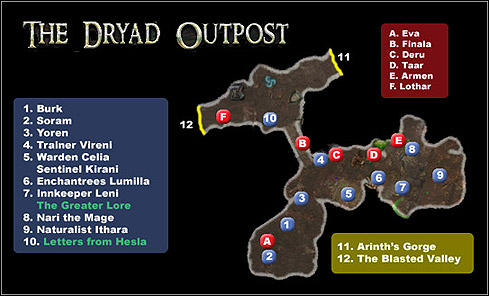 Dungeon Siege II: Broken World Game Guide & Walkthrough
 DMC: Devil May Cry Game Guide & WalkthroughDragons Dogma Game Guide & Walkthrough