This main guide to Dragon Age: Origins video game contains a detailed info on primary and secondary quests available in the game. Each quest has been described thoroughly. Possible solutions are shown and ways to defeat enemies are described.
All the quests in this guide have been divided into four main categories:
The first category contains all six origins stories played immediately after a new hero has been created (player is allowed to choose a story depending on race and class).
The second category contains all main quests tied to the Plague issue. Their completion is required to reach one of the endings of the game.
The third category contains all quests tied to certain locations. Some of these assignments are mandatory and some of them are optional.
The final fourth category contains small quests given to the main character by members of different guilds and organizations.
This game guide is also offering more than 80 large maps of certain areas of Ferelden and their role is to make the process of finding items, NPC's and monsters easier. The description of each quest contains links to these maps and here's how to use them:
(Mx, y) - x is the map number and y is the number on the certain map
For example, (M10, 5) means that the player should look at map number 10 and search for an area marked with a 5.
Different colors have also been used to designate some of the main features of the game. Red color shows characters and monsters, blue color shows locations, green color shows interactive items and orange color warns about additional dialogue options, including persuasion and intimidation.
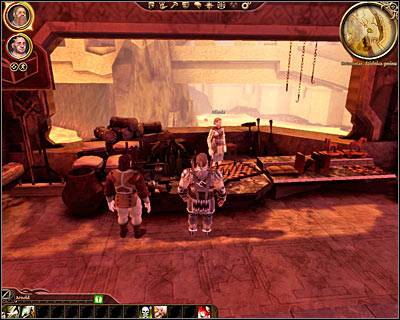
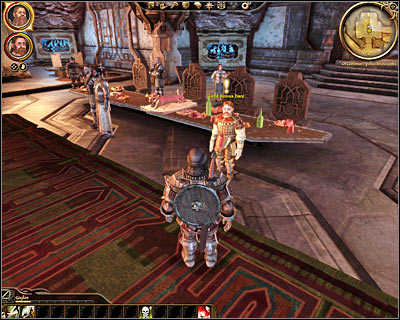
Received from: Tamlen [Forest clearing]
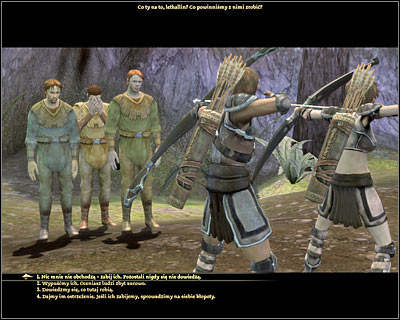
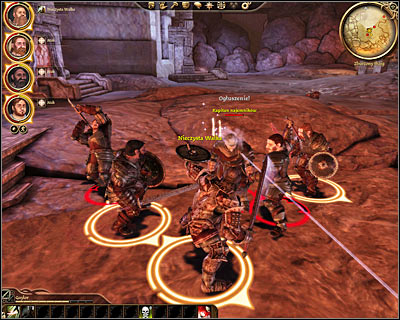
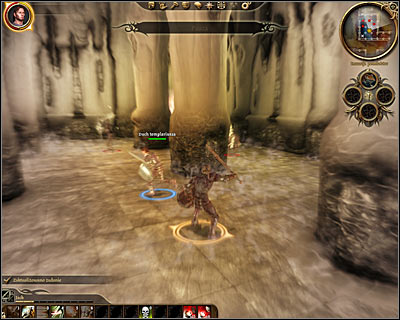
Description: Start off by interrogating three men you've encountered during your patrol with Tamlen. During this conversation you'll find out that the humans have been able to locate ancient elven ruins and that a powerful beast has scared them away. As a proof you'll receive an elven artifact. This meeting can have one of three endings. You can release all the humans, you can kill one of them to frighten the remaining two or you can assassinate all of them. Bear in mind that your decision won't have a big effect on the rest of this origin story, because only a few conversations in the future will be slightly changed.
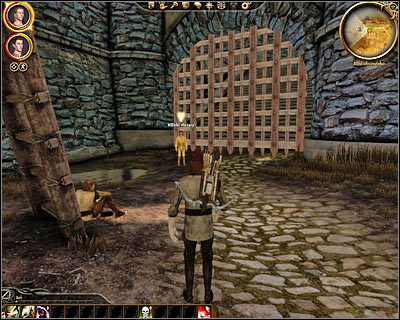
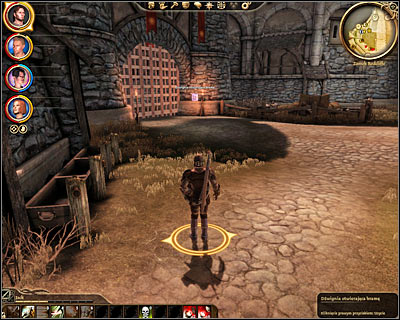
![You start off in the [Forest clearing] (M1, 1) and you'll have to travel a few hundred meters of a linear path to find the entrance to the ruins the humans were talking about - The lost mysteries of the Ancients - Origin story: Dalish elf - Dalish Elf Camp (Prologue) - Dragon Age: Origins - Game Guide and Walkthrough](https://game.lhg100.com/Article/UploadFiles/201512/2015121518192180.jpg)
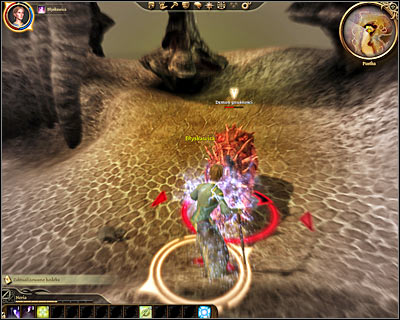
You start off in the [Forest clearing] (M1, 1) and you'll have to travel a few hundred meters of a linear path to find the entrance to the ruins the humans were talking about. You'll encounter a few wolves (M1, 2) along the way, however killing the animals should be an easy challenge. Don't forget to examine interactive objects found along the way, including a dead halla and a tree stump. You can also open a few crates, however you would have to be playing as a rogue (lockpicking skills required). Once you've found the entrance talk to Tamlen and proceed to the [Elven ruins] (M1, 3).
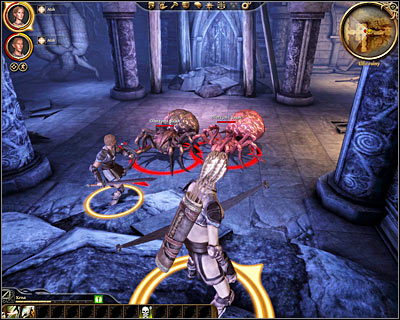
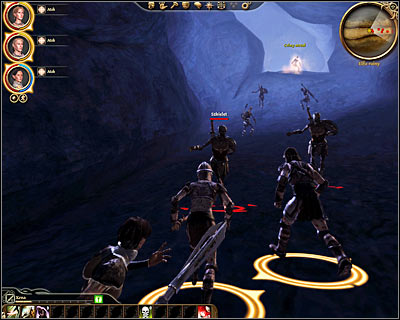
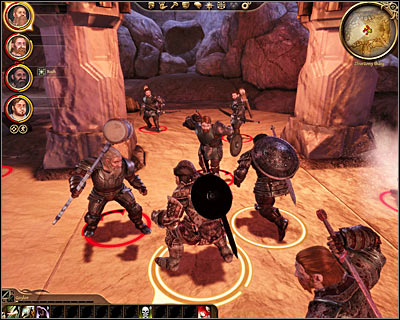
During the exploration of the ruins (M2, 1) you'll be travelling west and you'll be allowed to choose between a northern path and a southern path twice (M2, 2). The choice of a path won't affect the rest of your mission and in both cases you'll be dealing with a lot of giant spiders. Bear in mind that the spiders are capable of taking you or Tamlen down and you should rescue the other character if something like this ever happens. Aside from the spiders you'll also have to disarm a couple of traps (only if you have certain rogue skills).
Eventually you'll make your way to a large statue (M2, 3). Listen to what Tamlen has to say about the statue and continue exploring the ruins. When you'll try to open the western door a new trap will be triggered and skeletons will appear near your team. Retreat from the hazardous area and deal with the monsters in a safer corridor. Once you've won wait for both team members to regain health and proceed to the next room (M2, 4). You'll have to kill a mini-boss there. It's going to be a type of a bear called a bereskarn and you should keep using all available moves to defeat it. Thankfully you'll find a lot of potions in crates and near the monsters in case you'll need to heal.
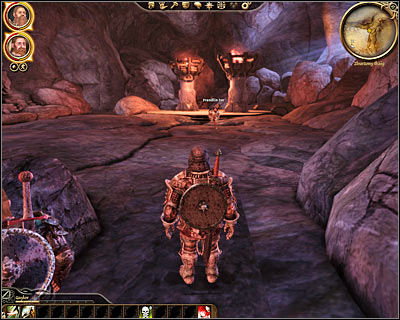
After you've eliminated the mini-boss you'll be allowed to explore the last room of the ruins. Look around if you want to, however you would be stopped by Tamlen if you'd move too far away. Sooner or later you'll have to examine a large mirror located in the center of the room. Sadly you won't be allowed to stop your teammate from touching the mirror and the whole scene will end with the main character waking up in the [Dalish elf camp] (M3, 1). You can now talk to Fenarel and Keeper Marethari to find out that you've been rescued by Duncan and that Tamlen wasn't so lucky.
If you want to talk to Merrill right away proceed directly to the southern area of the camp (M3, 3). Otherwise talk to Fenarel first. He can be found in [Dalish elf camp - children Aravel] (M3, 2) and you'll be allowed to ask him to join you in your quest. Either way you'll have to eventually go to Merrill and agree to return with her to the [Forest clearing] (M1, 1).
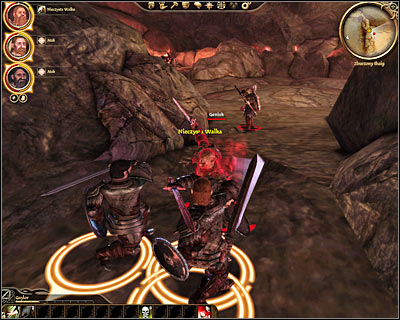
You'll be using the same path here, however this time you'll encounter several groups of genlocks along the way. Killing these beasts should be easy, however I would recommend focusing on eliminating the archers as soon as possible. Merrill will make a few stops along the route, but it's not a big deal. Once you've reached the [Elven ruins] (M1, 3) continue exploring the tomb. Genlocks will occupy the same spots as the spiders you've encountered the last time you were here.
The second pair of corridors will now contain bear traps and you probably won't be able to disarm them. The only solution will be to avoid the traps or to move back after receiving injuries. The statue (M2, 3) is now being guarded by a genlock emissary. This monster is a mage, so you'll have to eliminate it as soon as possible. Once the emissary has been killed deal with the rest of the monsters.
You may now enter to the last room with the cursed mirror (M2, 4) and you'll find Duncan standing next to it. This conversation will end with Duncan destroying the mirror and you'll have to choose between going back with him to the camp right away (M3, 1) or after exploring the ruins. If you choose to stay in the ruins you can explore the previously inaccessible western passageway. Break into a crate at the end of the corridor (M2, 5) and examine a strange statue to summon nearby skeletons back to life. Don't forget to use Merrill's abilities to kill the undead quickly (especially her ability to light her foes on fire).
![You can now return to the [Dalish elf camp] (M3, 1) and listen to what Keeper Marethari has to say - The lost mysteries of the Ancients - Origin story: Dalish elf - Dalish Elf Camp (Prologue) - Dragon Age: Origins - Game Guide and Walkthrough](https://game.lhg100.com/Article/UploadFiles/201512/2015121518192250.jpg)
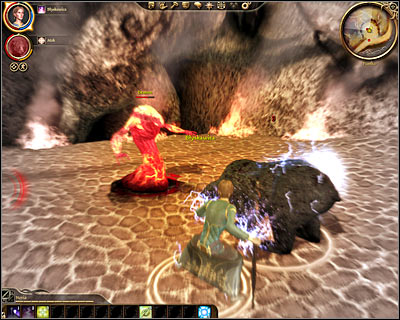
You can now return to the [Dalish elf camp] (M3, 1) and listen to what Keeper Marethari has to say. Go talk to Paivel in [Dalish elf camp - campsite] (M3, 4) in your spare time. It would also be wise to visit the local trader Ilen [Dalish elf camp - archers Aravel] (M3, 5). Once you're ready to end this quest approach Duncan (M3, 6) and you'll be given a chance to begin your journey with the Grey Warden (he'll recruit you by force if you decline his initial offer).
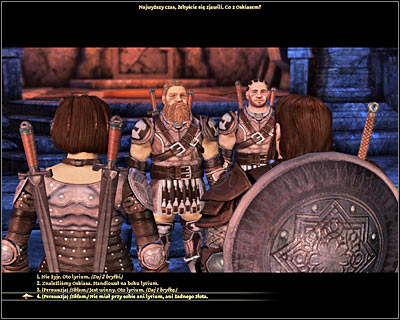
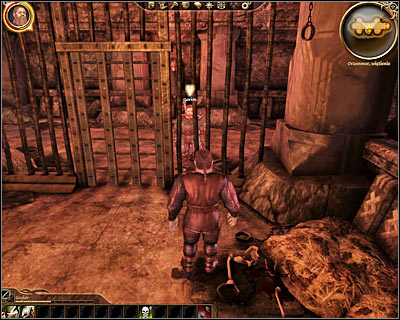
Received from: Beraht [Orzammar - Commons - Dust town - Home]
Description: Start off by talking to your superior Beraht and with your sister Rica (M4, 1). It doesn't really matter which dialogue options you'll choose, because you'll still learn a lot about your current situation and about your sister trying to find a husband. Beraht will order you to team up with Leske and to finish a new assignment for him. End this conversation and leave the hut (M4, 2) to find yourself standing in [Orzammar - Commons - Dust town] (M4, 3). Talk to Leske here - he'll automatically become a member of your team.
Leske will inform you that Beraht wants you both to locate Oskias and to find out if he's been trying to sell goods without sharing profits. Proceed to the northern area of the slums and it shouldn't take long to find a passageway leading to [Orzammar - Commons] (M4, 4). Here you'll have to travel to [Orzammar - Commons - Tavern] (M5, 1). Once you're inside you can either talk to the bartender first or you can proceed directly to Oskias. He'll be sitting next to one of the larger tables (M5, 2).
You can find the goods being sold by Oskias by using brute force and searching his bags (ignore his protests) or by using your persuasion skills. Either way you'll find out that he's been smuggling lyrium. You can now kill Oskias and take the lyrium from his dead body or you can persuade him to giving you these items. If you want to choose a peaceful solution you'll have to intimidate him to hand over the goods. End the conversation by killing Oskias or by letting him go.
During the conversation with Oskias you'll also be presented with a third solution - you can decide to keep the lyrium to yourself and avoid sharing it with Beraht. In this case you'll want to negotiate terms of splitting the profits with Leske (you can persuade him to take only 1/4 of the coins) and you'll have to think of a way to sell the lyrium. Leske will inform you that his friend Olinda in [Orzammar - Commons] (M5, 3) can buy the smuggled goods. Go and talk to her and you'll find out that she'll give you 30 silver coins for a single unit (this means you can earn up to 45 silver coins). If you don't want to lie to Beraht skip this step entirely. Finish this quest by heading over to [Orzammar - Commons - Beraht's shop] (M5, 4).
This conversation (M5, 5) can start and end differently, depending on the choices you've made so far. If you haven't killed Oskias you can lie about it, however Beraht would know that you're not telling the truth. In this case you would have to admit to letting him free or attempt to persuade him and come up with a story about how he's been killed. As for the smuggled lyrium, you can hand over all the goods to Beraht, give him only one object or lie that you haven't found anything. If you decide to keep the lyrium to yourself you'll have to sell the goods prior to entering the shop or use your persuasion skills, because otherwise you would be searched. Thankfully even if you fail in outsmarting Beraht he won't kill you and he won't even punish you. This conversation will end with your team receiving a new assignment. This time you'll have to help one of Beraht's men to win fights in the arena.
Received from: Beraht [Orzammar - Commons - Beraht's shop]
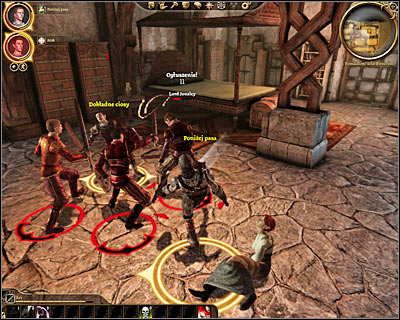
![Description: Start heading towards [Orzammar - Commons - Proving grounds] (M5, 6) - Proof of loyalty - Origin story: Dwarf commoner - Dust Town (Prologue) - Dragon Age: Origins - Game Guide and Walkthrough](https://game.lhg100.com/Article/UploadFiles/201512/2015121518192357.jpg)
Description: Start heading towards [Orzammar - Commons - Proving grounds] (M5, 6). You're going to be stopped by a guard, but all you have to do is to show him a pass given to you by Beraht. Once you're inside (M6, 1) proceed to the north. Eventually you'll have to get to the room where Everd is staying (M6, 2). You'll notice that he's completely drunk and therefore can't compete in the arena.
Leske will immediately think of a new plan - you'll replace Everd on the arena by wearing his armor. You can agree to this plan right away or you can convince Leske that Mainar should still be poisoned. If you decide to go on with the poisoning you'll be allowed to choose between asking Leske for help or applying the poison yourself. If you send Leske you'll have to talk to Mainar (M6, 3) and distract him for a short while. If you go in yourself you'll have to ask Mainar to allow you to check his room and poison his water supplies (M6, 4).
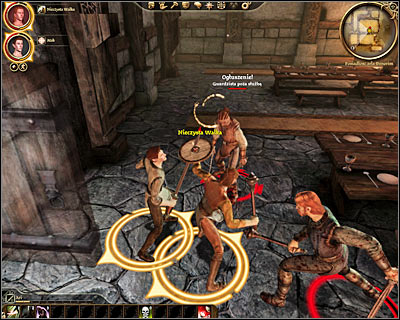
In order to disguise yourself as Everd you must wear his armor. All the necessary items can be found inside the chest in his room (M6, 3). Open your inventory and move all the items to their respective slots, including the helmet. Once you're ready to move on proceed to the eastern corridor and talk to one of the guards (M6, 5). Confirm that you want to enter the arena.
You'll have to defeat three enemies in the arena (M6, 6) - Mainar (fully healed or poisoned), Adalbo and Lenka. Each time focus on using your active skills and don't forget to heal your character whenever he loses a lot of health. After you've won the third fight Everd will show up on the arena unexpectedly and therefore he'll foil your plans. It doesn't really matter how you'll react to his appearance, because you'll be thrown into the dungeon by Beraht's men (M7, 1). Here you'll have a chance to talk to Leske and Jarvia, ending this second quest of the prologue.
Received from: automatically after being placed in a cell [Orzammar - Commons - Dust town - Beraht's hideout]
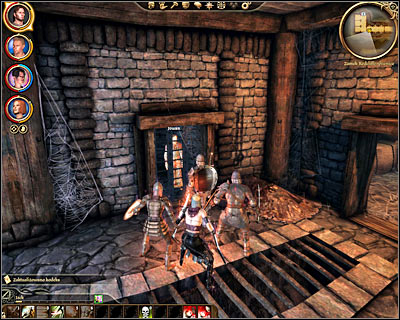
Description: Click on the cell door or on the guard to initiate a new conversation. There are three ways for you to leave the cell for good. If you've spent a lot of points on strength you can kill the guard with your bare hands, you can steal a key from him when he's not looking or you can win a speech challenge and convince him that you're sick. Either way you'll have to dispose of the guard. Free Leske from the second cell and take your things from a nearby chest (M7, 2).
You can now begin exploring the bandit's hideout. There's going to be only one main path leading to your current destination, because you won't be allowed to explore many of the rooms found along the way. Small groups of thugs will attack you occasionally and you should always focus on eliminating the archers as soon as possible. Don't forget to inspect crates, barrels and chests to collect supplies as you progress. If you have decent lockpicking skills you'll find even more collectible items, especially near the last room.

Enter the last room (M7, 3) once you're ready for the final battle. You'll have to defeat Beraht (he's a mini-boss), as well as two standard thugs. I would recommend that you eliminate Beraht's bodyguards in the first place, because otherwise you could sustain more injuries. Don't forget to heal your team members each time they've lost a lot of health, especially since Beraht's attacks will do a lot of damage. Once you've won you can spend some time looking around (it would be a good idea to visit Beraht's office and to open two chests) or you can proceed to the exit right away (M7, 4).
![Eventually you'll have to reach a passageway (M7, 5) leading back to [Orzammar - Commons - Beraht's shop] (M5, 7) - Enslaved - Origin story: Dwarf commoner - Dust Town (Prologue) - Dragon Age: Origins - Game Guide and Walkthrough](https://game.lhg100.com/Article/UploadFiles/201512/2015121518192435.jpg)
Eventually you'll have to reach a passageway (M7, 5) leading back to [Orzammar - Commons - Beraht's shop] (M5, 7). Ignore the storekeeper and exit the shop via the main door (M5, 4). You'll be stopped by other dwarves and this conversation will end with your character leaving the city with Duncan. Don't forget to say goodbye to Rica and once you've confirmed that you're ready to go you'll end this origin story.
Received from: Shianni [Denerim - Elven alienage - Home]
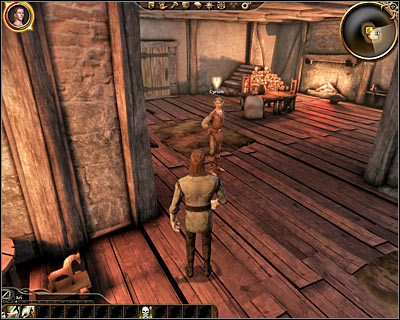
Description: You'll start this story after you've woken up (M8, 1). Shianni will inform you that it's your wedding day and that your fiance Nesiara (if you're playing as a male) or your fiance Nelaros (if you're playing as a female) has arrived at the alienage. Shianni will also tell you that your friend Soris is waiting for you outside. End the conversation and check a nearby footlocker to collect a few useful things. You can also talk to your father Cyrion and tell him that you're happy or unhappy about the marriage. I would recommend to choose the topic about the dead mother, because Cyrion will give you Adaia's boots.
![Exit the hut (M8, 2) to find yourself standing in [Denerim - Elven alienage] (M8, 3) - A Day for celebration - Origin story: City elf - Elven alienage (Prologue) - Dragon Age: Origins - Game Guide and Walkthrough](https://game.lhg100.com/Article/UploadFiles/201512/2015121518192403.jpg)
Exit the hut (M8, 2) to find yourself standing in [Denerim - Elven alienage] (M8, 3). You can spend some time looking around or you can meet Soris right away (M8, 4). Your friend will ask you to follow him and to greet the arriving guests together. Head on to the central area of the alienage (M8, 5) where you'll witness a very unpleasant scene involving Vaughan. It doesn't matter how you'll respond to his initial statement, because Vaughan is going to be knocked out by Shianni. You'll meet your future wife or your future husband right after this incident. Soris will then notice that an another human has arrived at the alienage.
The man Soris noticed a while ago is going to be a Grey Warden called Duncan (M8, 6). Thankfully even if you're hostile towards him you won't provoke him and you won't receive any other repercussions. Valendrian will soon join the conversation and explain the situation. You must now attend your wedding ceremony. Head over to the designated area located near elven houses (M8, 7). Starting from here you'll be completing different quests depending on the gender of your main character.
Walkthrough for a male character:
In this case Vaughan will interrupt the ceremony and take all the young elven women with him, including Shianna, Valora and Nesiara. After you've regained consciousness return to the main square and find Valendrian (M8, 6). Listen to what other elves have to say about the crisis. One of the slaves in arl's mansion will say that he can smuggle you and Soris inside. Once you're ready to move on with this assignment talk to your new friend near the northern exit (M8, 8) from the alienage.
![You'll be automatically transported to [Denerim - Arl of Denerim's Estate - Exterior] (M9, 1) - A Day for celebration - Origin story: City elf - Elven alienage (Prologue) - Dragon Age: Origins - Game Guide and Walkthrough](https://game.lhg100.com/Article/UploadFiles/201512/2015121518192425.jpg)
You'll be automatically transported to [Denerim - Arl of Denerim's Estate - Exterior] (M9, 1). Make sure that you're using the sword handed over to you by Duncan. The entrance for the slaves is located on the eastern wall of the mansion. You can choose the long northern path or take a shortcut through the southern parts (M9, 2). A lot of hostile guards and mabari will stand in your way. Try eliminating smaller groups each time and keep using the healing potions to stay alive.
![Click on the door (M9, 3) to find yourself in [Denerim - Arl of Denerim's Estate - Interior] (M10, 1) - A Day for celebration - Origin story: City elf - Elven alienage (Prologue) - Dragon Age: Origins - Game Guide and Walkthrough](https://game.lhg100.com/Article/UploadFiles/201512/2015121518192417.jpg)
Click on the door (M9, 3) to find yourself in [Denerim - Arl of Denerim's Estate - Interior] (M10, 1). Notice a sleeping guard in the first room (M10, 2). You'll have to wake him up and interrogate him. Once you have the info you needed you can either kill him or knock him unconscious (he won't wake up later on). A cook will stop you in the next room (M10, 3), but thankfully his elven assistant Adwen will neutralize this problem. There are some guards in the next room (M10, 4) and if you're playing as a rogue you'll have a chance to get rid of them without engaging them in combat. Go to the pantry and collect rat poison from one of the closets (M10, 11). After that return to the kitchen and break into a new cabinet (M10, 12) to collect brandy. Return to the guards (M10, 4) and offer them poisoned brandy by choosing a correct response from the list.
If you're playing as a warrior you won't be allowed to steal the brandy and therefore using poison won't be possible. As a result you can proceed to the dining room (M10, 4) without any additional delays. There are three guards here and they'll stop you as soon as you've entered the room. I would recommend killing the first one by choosing the correct answer during the conversation. Once this is done deal with the remaining two guards.

Be careful, because a new guard will attack you while trying to leave this room. I would recommend to explore one of the larger eastern rooms along the way (M10, 5), because it's going to be an armory. Defeat a new guard and take your time to collect new equipment. Continue heading north until you come across a guard captain (M10, 6). One of the women is going to be murdered here (you can't stop it from happening). You can avenge her death right away. Attack standard knights first and then deal with the captain.

Keep moving north and then choose the corridor leading to the western areas of the estate (M10, 7). There are a lot of rooms along the way. Exploring them is not mandatory, however I would recommend looking around. You can find a lot of items in plain sight or in crates, however most of the rooms will be guarded by 2-3 humans. Don't forget to use your lockpicking skills if you're playing as a rogue. One of the more powerful bodyguards will attack you near the last room (M10, 8). Make sure to check his body after the battle, because he was carrying a good shield. You should also look around to find medical supplies. The last part of this quest is identical for both genders, so you should check the Finale section.
Walkthrough for a female character:
In this case Vaughan will interrupt the ceremony and take you along with the rest of the elven women to his estate. Wait for the game to transport you to [Denerim - Arl of Denerim's Estate - Interior] (M10, 10). Talk to Shianni here and wait for arl's guards to show up. They'll kill one of the women (you couldn't prevent that from happening).
Listen to a short conversation between the main character and two guards. Thankfully you won't have to fight them alone, because Soris will show up. Wait for him to deliver a sword borrowed from Duncan, STOP the fight and equip this item in your inventory. You can now attack both guards and it shouldn't take too long for you to kill them. You may begin exploring the estate in the search for other women.
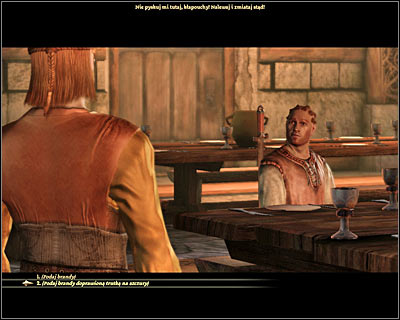
A cook will stop you in the next room (M10, 3), but thankfully his elven assistant Adwen will neutralize this problem. There are some guards in the next room (M10, 4) and if you're playing as a rogue you'll have a chance to get rid of them without engaging them in combat. Go to the pantry and collect rat poison from one of the closets (M10, 11). After that return to the kitchen and break into a new cabinet (M10, 12) to collect brandy. Return to the guards (M10, 4) and offer them poisoned brandy by choosing a correct response from the list.
If you're playing as a warrior you won't be allowed to steal the brandy and therefore using poison won't be possible. As a result you can proceed to the dining room (M10, 4) without any additional delays. There are three guards here and they'll stop you as soon as you've entered the room. I would recommend killing the first one by choosing the correct answer during the conversation. Once this is done deal with the remaining two guards.
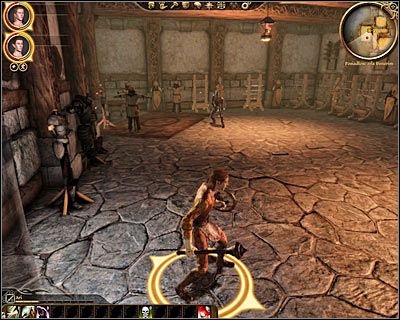
Be careful, because a new guard will attack you while trying to leave this room. I would recommend to explore one of the larger eastern rooms along the way (M10, 5), because it's going to be an armory. Defeat a new guard and take your time to collect new equipment. Continue heading north until you come across a guard captain (M10, 6). Your fiance Nelaros is going to be murdered here (you can't stop it from happening). You can avenge his death right away. Attack standard knights first and then deal with the captain.
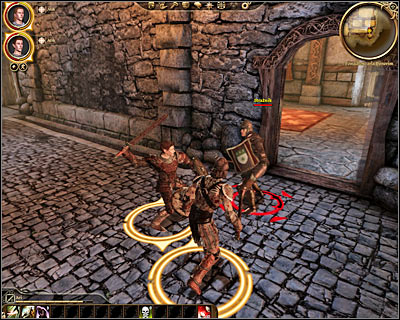
Keep moving north and then choose the corridor leading to the western areas of the estate (M10, 7). There are a lot of rooms along the way. Exploring them is not mandatory, however I would recommend looking around. You can find a lot of items in plain sight or in crates, however most of the rooms will be guarded by 2-3 humans. Don't forget to use your lockpicking skills if you're playing as a rogue. One of the more powerful bodyguards will attack you near the last room (M10, 8). Make sure to check his body after the battle, because he was carrying a good shield. You should also look around to find medical supplies. The last part of this quest is identical for both genders, so you should check the Finale section.
Finale:
Vaughan will be hiding in the last room (M10, 9) and there are two ways to resolve the situation involving him and kidnapped women. If you agree to his proposal you'll receive a lot of coins and you'll return with Soris to the alienage (don't forget to revisit the hiding spot the next chance you get). Otherwise you would have to defeat Vaughan and two lords. I would recommend dealing with the lords before attacking Vaughan. Talk to Shianni once the arl has been killed.
![Sooner or later you'll return to [Denerim - Elven alienage] (M8, 8) where you'll have a chance to talk to Valendrian and Duncan - A Day for celebration - Origin story: City elf - Elven alienage (Prologue) - Dragon Age: Origins - Game Guide and Walkthrough](https://game.lhg100.com/Article/UploadFiles/201512/2015121518192590.jpg)
Sooner or later you'll return to [Denerim - Elven alienage] (M8, 8) where you'll have a chance to talk to Valendrian and Duncan. If you decided to take the gold you'll have to come up with some kind of a lie. Otherwise you'll tell them the truth. It won't take long before guards show up and they'll be looking for someone to blame for the break in (and ransom) or for arl's death. The best way to end this quest is to blame everything on yourself, because Duncan will recruit you to join the Grey Wardens before you'll be thrown in jail. If you do something differently Soris will be apprehended. This will also occur if you decide to keep quiet, because Elva would interfere and point the blame on you and Soris. Say goodbye to all the elves and talk to Duncan when you're ready to start your journey.
Received from: First enchanter Irving [The Circle Tower - The Harrowing Chamber]
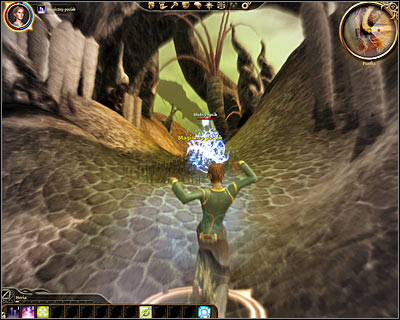
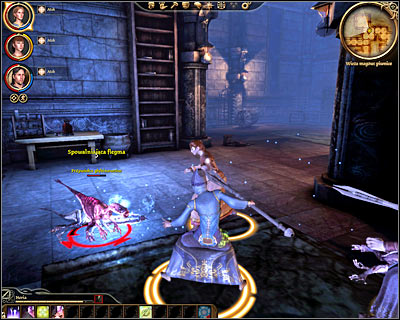
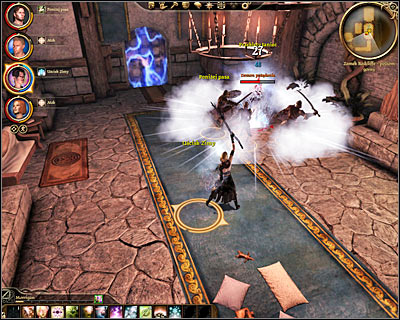
Description: You'll start the game by talking to Irving and Greagoir (M11, 1). They will both tell you that in order to become a mage you must survive a ritual called the Harrowing. During this ritual you'll be transported to a mystical realm and you'll have to defeat a powerful demon. Wait for the main character to end up standing in the [Fade] (M12, 1). Head forward and use your standard array of offensive spells to defeat weak wisp wraiths.
Continue moving forward until you come across a talking rodent, calling himself the Mouse (M12, 2). This creature will then transform to a human being and it will introduce itself as one of the people who didn't make it out of the Fade. Keep heading forward and killing the wraiths. You can also start opening vases found along the way to collect shimmering balls of light (replacement for standard healing potions).
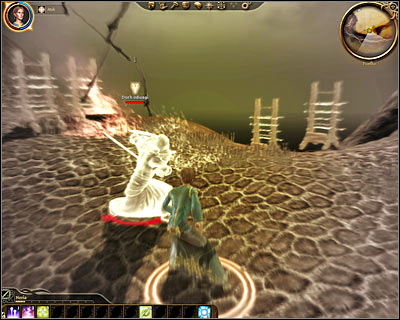
Eventually you'll have to locate the Spirit of Valor (M12, 3). Talk to the creature and ask it to give you an object to help you in defeating the demons. You can achieve the final result by using a high cunning skill (additional dialogue option) or by defeating the ghost in a duel. If you decide to start a fight make sure that you have powerful spells in your arsenal and at least a few of the balls of light. The reward for defeating the spirit will be Valor's staff. You can now leave the ghost alone or finish it off using your newly acquired weapon.
Continue moving forward and get ready to defeat several spirit wolves in the near future. Each time focus on eliminating one of the wolves instead of attacking all the spirits at the same time. Once it's safe proceed to the lair of a Sloth Demon (M12, 4). Initiate a new conversation and ask the demon to teach the Mouse how to transform into a bear. You can achieve the final result by defeating the demon in combat (it'll be harder to win this time) or by solving three of its riddles. The correct answers are the map, the tongue and the dream.
Notice that the Mouse has now transformed itself into a bear which will make winning the last battle in the Fade easier. You'll now have to return to a large area you've passed through earlier on (M12, 5). Watch out for new spirit wolves along the way, because they'll appear out of nowhere.
Locate the Spirit of Rage and talk to it. This time you won't be allowed to resolve the situation peacefully, because the battle will commence after a short introduction. Ignore ALL other monsters and focus your attacks on the main spirit. Once it is been defeated you'll automatically trigger a new conversation with the Mouse. It doesn't really matter which answers you'll choose, because the main character will soon understand that the Mouse is in fact a demon and that it's trying to escape the Fade. Wait for the game to transport you to [The Circle Tower - Student Quarters] (M11, 2) and for the main character to wake up. Jowan will greet you and you can tell him about the ritual or you can keep its details to yourself.
Received from: Jowan [The Circle Tower - Student Quarters]
![Description: Jowan will inform you that the First Enchanter Irving wanted to talk to you and this means that you must travel to [The Circle Tower - Mage Quarters] (M11, 3) - The Circle Mage - Origin story: Magi - The Circle Tower (Prologue) - Dragon Age: Origins - Game Guide and Walkthrough](https://game.lhg100.com/Article/UploadFiles/201512/2015121518192646.jpg)
Description: Jowan will inform you that the First Enchanter Irving wanted to talk to you and this means that you must travel to [The Circle Tower - Mage Quarters] (M11, 3). Once you've arrived at Irving's office (M11, 4) listen to a short conversation between him and Duncan. Irving will then inform you about the promotion and he'll give you mage's robes. Your final task here will be to escort Duncan to his quarters found on this level (M11, 5). Exit the room once you've completed this assignment and Jowan will to talk to you again.
Received from: Jowan [The Circle Tower - Mage Quarters]
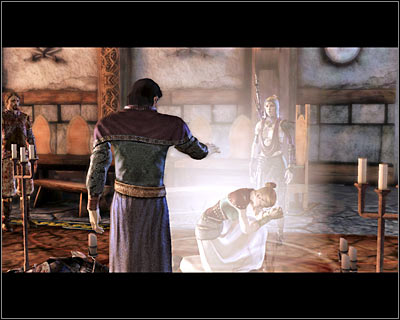
Description: Jowan will ask you to hear him out in a safe place. Once you've agreed to his request you'll be automatically transported to a nearby chapel (M11, 6) where you'll meet his partner Lily. Jowan will inform you that he plans on destroying his phylactery and escaping the tower. You can now agree to help him out or to refuse in aiding him in his escape. If you choose not to help him you must go to Irving (M11, 4) and tell him about the situation. The enchanter will then ask you to continue working with Jowan so he can ambush him at the right moment. Either way you'll be familiarized with the details of Jowan's plan and you'll start helping him in achieving his final goal.
The first part of this quest will be to find a way to disable a magical barrier in the tower's basement and in order for this to succeed you must talk to Owain (M11, 7). He can be found in the center of this level and you must ask him for a rod of fire. Sadly, during this conversation you'll find out that one of the enchanters must sign the form before he can give you the object you desire.
You can ask one of two enchanters to sign the form. If you've aligned yourself with Irving (M11, 4) then all you have to do is to explain the situation to him and a second later you'll have his signature. If you truly want to help Jowan and Lily you can't go to Irving, so instead you'll have to perform a sidequest for Leorah - Pests in the storage area. Once you've finished the assignment go to Leorah and remind her of a favour. Return with the signed form to Owain (M11, 7) and in return you'll receive the rod of fire.
You may now return to the chapel area (M11, 6 ) and show the rod to both Jowan and Lily. Notice that they've joined your team, so it would be a good idea to spend some time equipping them and managing their ability bars. Locate the stairs leading to [The Circle Tower - Student Quarters]. Here you'll have to proceed to the northern door to travel to [The Circle Tower - Basement] (M11, 8).
Once you're inside the basement (M14, 1) you can start moving forward right away. All you have to do here is to approach two doors (M14, 2). The first door is going to be opened thanks to Lily. As for the second door, you'll find out that your rod doesn't work on the magical barrier. As a result you'll have to choose the eastern corridor where you'll find the third door and have a chance to use the magical item for the second time (M14, 3).
Notice that using the rod to open the third door has resulted in a nearby sentinel coming back to life and there's going to be more of them in other areas of the basement. Each time you attack a new group of sentinels focus on eliminating one of the targets instead of hitting all of them at the same time. Lily can also stun them using one of her abilities which helps out a lot. As for Jowan, focus on using his fire spells, because they'll do a lot of damage.
You'll now have to explore the entire basement and you'll be moving counter-clockwise. Don't forget to search smaller rooms to find a lot of useful supplies and be ready to defeat other types of opponents. Robed sentinels will always have to go down first. Deepstalkers on the other hand are weak creatures, however one of these monsters will be a mini-boss, so you'll have to pay more attention to killing it quickly.
You'll have to make your way to the last room of the basement. Start off by opening a nearby chest and collecting a blackened heartwood staff. You may now click on a statue of an animal (M14, 4). Listen to what your team members have to say and click on a nearby bookcase (M14, 5). Ask one of the allies to move this object and click on the statue for the second time. The main character will automatically use the rod here to destroy a section of the wall.
You shouldn't be surprised to hear that more enemies will be waiting for you inside. Be careful, because one of them (sentinel guardian) is going to be a mini-boss. Keep using the spells to heal your team members if possible and prevent them from dying during the battle. Once it's safe again use the stairs to get to a new platform and click on a table to collect Jowan's phylactery (M14, 6). If you were working with Irving you can now confess that you betrayed him, but it won't change the outcome. Otherwise agree to leave the basement.
Head on to the northern door, because the magical barrier has been disabled (M14, 7). Return to [The Circle Tower - Student Quarters] (M11, 8) where your team is going to be stopped by Irving, Greagoir and other templars. If you've been helping Irving he's going to be happy with the outcome. Otherwise he'll be mad at you, but it won't change anything else. Irving will now ask you if you took any items from the basement and if you don't want to give him back the staff you can lie about it using your persuasion skills. This prologue will end with Jowan escaping the tower and the main character joining Duncan to set out on a new journey.
Received from: Senior Enchanter Leorah [The Circle Tower - Mage Quarters]
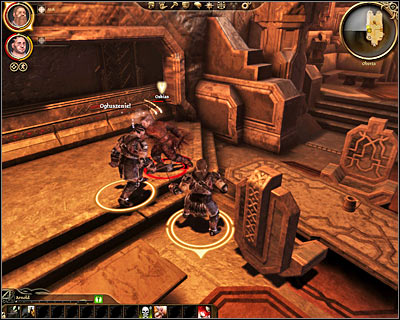
Description: You will be allowed to start this quest after you've finished the second assignment - Ties of blood and magic. Go to the second level of the tower and find Leorah (M11, 9). During the conversation you'll find out that she's having problems with the spiders in the caves and you can agree to help her. Leorah will give you the key which you can use to open a nearby door (M11, 10). Before you start the mission make sure to wear mage's robes given to you by Irving.
![You'll soon find yourself standing in [The Circle Tower - Mage Quarters - Caves] (M13, 1) - Pests in the storage area - Origin story: Magi - The Circle Tower (Prologue) - Dragon Age: Origins - Game Guide and Walkthrough](https://game.lhg100.com/Article/UploadFiles/201512/2015121518192893.jpg)
You'll soon find yourself standing in [The Circle Tower - Mage Quarters - Caves] (M13, 1). Head south and then choose one of two available corridors. I wouldn't recommend moving too fast so you won't be fighting more than two giant spiders at the same time. There are also going to be a lot of crates in the area and it would be a good idea to open at least some of them. The game will inform you once it's safe again and you can return to Leorah (M11, 9). She will tell you that she now owes you a favor.
Received from: Bryce Cousland [Cousland Castle]
![Description: Start off by talking to other characters standing in [Cousland Castle - Main hall] (M15, 1) - Fathers assignment - Origin story: Human noble - Castle Cousland (Prologue) - Dragon Age: Origins - Game Guide and Walkthrough](https://game.lhg100.com/Article/UploadFiles/201512/2015121518192870.jpg)
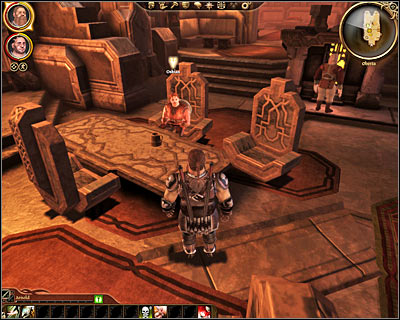
Description: Start off by talking to other characters standing in [Cousland Castle - Main hall] (M15, 1). Your father Bryce Cousland, Arl Howe and Duncan (he'll arrive later on) are going to be the people you need to meet. Bryce will soon ask you to go and find Fergus for him. Head west until you arrive at a corridor marked as the [Cousland Castle - Atrium]. Here's where you'll meet Eleanor, Lady Landra, Iona and Dairren (M15, 5). Have a little chat with them and continue your quest.
![Eventually you'll have to reach a small room marked on your map as the [Cousland Castle - Fergus's Room] (M15, 6) - Fathers assignment - Origin story: Human noble - Castle Cousland (Prologue) - Dragon Age: Origins - Game Guide and Walkthrough](https://game.lhg100.com/Article/UploadFiles/201512/2015121518192879.jpg)
Eventually you'll have to reach a small room marked on your map as the [Cousland Castle - Fergus's Room] (M15, 6). Talk to Fergus here, as well as to members of his family - Oriana and Oren. Bryce Cousland will show up here in a short while, along with his wife Eleanor. Exit this room to end the first quest of the prologue.
Received from: Sir Gilmore [Cousland Castle]
Description: Make your way to the kitchen area (M15, 2) before you end the first quest and you're going to be stopped by Sir Gilmore. He'll tell you that your mabari is running around the kitchen and wreaking havoc. Go to [Cousland Castle - Kitchen] and talk to Nan (M15, 3). During the conversation you'll be informed about the problem and you can now focus on solving it or you can talk to Nan again and use intimidation to calm her down.
![Use a nearby door to enter [Cousland Castle - Pantry] (M15, 4) - Chaos in the pantry - Origin story: Human noble - Castle Cousland (Prologue) - Dragon Age: Origins - Game Guide and Walkthrough](https://game.lhg100.com/Article/UploadFiles/201512/2015121518192827.jpg)
Use a nearby door to enter [Cousland Castle - Pantry] (M15, 4). Here you'll be presented with an opportunity to "talk" to your mabari, as well as to give it a name. You'll soon find out that your animal was in fact helping, because giant rats can be found in the pantry. Start attacking the rodents and don't be surprised to see more of them appearing in a short while. Once it's safe return to [Cousland Castle - Kitchen] and report to the Nan. Sir Gilmore will now leave your team, but thankfully the dog will remain as your faithful companion.
Received from: Dairren [Cousland Castle - Study]
![Description: You can initiate this short quest AFTER talking to Eleanor, Lady Landra, Iona and Dairren in [Cousland Castle - Atrium] (M15, 5) - Sweet Dairren - Origin story: Human noble - Castle Cousland (Prologue) - Dragon Age: Origins - Game Guide and Walkthrough](https://game.lhg100.com/Article/UploadFiles/201512/2015121518192858.jpg)
Description: You can initiate this short quest AFTER talking to Eleanor, Lady Landra, Iona and Dairren in [Cousland Castle - Atrium] (M15, 5). Return to the area where you've started the game and travel to [Cousland Castle - Study] (M15, 14). It shouldn't take long for you to find Dairren and you'll have a chance to talk to him in private. Make sure to choose the topics that will allow you to get to know him a little better. You can then change the subject to yourself and invite the young boy to join you later in your room. Notice that if you've already invited Iona (Sweet Iona quest) he'll refuse your offer to spend the night with you. This quest will officially come to an end after your conversation with Fergus and after returning to your quarters. As soon as Howe's betrayal quest has started Dairren is going to be killed by an enemy archer.
Received from: Iona [Cousland Castle - Study]
![Description: You can initiate this short quest AFTER talking to Eleanor, Lady Landra, Iona and Dairren in [Cousland Castle - Atrium] (M15, 5) - Sweet Iona - Origin story: Human noble - Castle Cousland (Prologue) - Dragon Age: Origins - Game Guide and Walkthrough](https://game.lhg100.com/Article/UploadFiles/201512/2015121518192898.jpg)
Description: You can initiate this short quest AFTER talking to Eleanor, Lady Landra, Iona and Dairren in [Cousland Castle - Atrium] (M15, 5). Return to the area where you've started the game and travel to [Cousland Castle - Study] (M15, 14). It shouldn't take long for you to find Iona and you'll have a chance to talk to her in private. Make sure to choose the topics that will allow you to get to know her a little better. You can then change the subject to yourself and invite the young girl to join you later in your room. Notice that if you've already invited Dairren (Sweet Dairren quest) she'll refuse your offer to spend the night with you. This quest will officially come to an end after your conversation with Fergus and after returning to your quarters. As soon as Howe's betrayal quest has started Iona is going to be killed by an enemy archer.
Received from: automatically after completing Father's assignment quest [Cousland Castle]
![Description: You start in [Cousland Castle - Your room] (M15, 7) and you'll be presented with a short cut-scene - Howes betrayal - Origin story: Human noble - Castle Cousland (Prologue) - Dragon Age: Origins - Game Guide and Walkthrough](https://game.lhg100.com/Article/UploadFiles/201512/2015121518192862.jpg)
Description: You start in [Cousland Castle - Your room] (M15, 7) and you'll be presented with a short cut-scene. Wait for the main character to stand up and pause the game before enemy forces show up. Open your inventory and equip your character with the best items you've got. If you have a moment you can also open a nearby chest and collect additional things. You should now wait for Howe's soldier to show up, so you won't be attacked by Howe's archer at the same time. Once the soldier is down take care of his colleague. Don't forget to loot both bodies, because you'll find gold and a short bow.
Exit your room and turn left where you'll have to defeat two other soldiers. They will be standing in front of [Cousland Castle - Teyrn's room] (M15, 8). Eliminating them will allow you to save your mother Eleanor and she'll automatically join your team (don't forget to give her some kind of a weapon). You can also explore her husband's quarters, collecting valuable items from one of the crates. Visit [Cousland Castle - Fergus's room] (M15, 6) if you have a spare moment and you'll make a shocking discovery.
You'll now be moving back to the main hall and it shouldn't come as a surprise that other enemies will be waiting for you along the way. Some of them will even respawn if you decide to revisit areas you've secured in the past. I would always recommend focusing on eliminating enemy archers and only when they're gone to attack the soldiers. A new cut-scene will be triggered when you're close to the atrium (M15, 9). Don't forget to ask your mother all the necessary questions, so aside from finding out about the secret passageway you'll also find out about the treasures and you'll start a new subquest (The Cousland treasury).
Head east where you'll meet one of the slaves. You can attempt to persuade him to rejoin the battle, but it won't be a big difference. Be careful, because there are a lot of enemies in the area and for the first time you'll also be dealing with other mabari. Keep heading towards [Cousland Castle - Main hall] (M15, 1). Notice that the northern passageway near the dining room is blocked, so as a result you'll have to move south-east, passing by [Cousland Castle - Library] (M15, 10).
![You can now decide to secure all nearby rooms (including the chapel) or you can proceed directly to [Cousland Castle - Main hall] (M15, 1) - Howes betrayal - Origin story: Human noble - Castle Cousland (Prologue) - Dragon Age: Origins - Game Guide and Walkthrough](https://game.lhg100.com/Article/UploadFiles/201512/2015121518192985.jpg)
You can now decide to secure all nearby rooms (including the chapel) or you can proceed directly to [Cousland Castle - Main hall] (M15, 1). Once you're inside you'll have to assist sir Gilmore and other guards in defeating Howe's men. It's extremely important to attack an enemy mage as soon as possible, because otherwise he would start using powerful spells. Once the mage is out of the picture you can attack other hostile units. Talk to Gilmore when it's safe and ask him about your father Bryce.
![Choose the northern exit from the main hall (M15, 13) and once you're in a corridor start heading towards [Cousland Castle - Kitchen] (M15, 3) - Howes betrayal - Origin story: Human noble - Castle Cousland (Prologue) - Dragon Age: Origins - Game Guide and Walkthrough](https://game.lhg100.com/Article/UploadFiles/201512/2015121518192983.jpg)
Choose the northern exit from the main hall (M15, 13) and once you're in a corridor start heading towards [Cousland Castle - Kitchen] (M15, 3). Be careful, because some of the remaining enemy units may attack you along the way. Once you're inside the kitchen click on the door leading to [Cousland Castle - Pantry] (M15, 4). Talk to your dying father, as well as to Duncan. You should know that even if you refuse to join the Grey Wardens Duncan will still recruit you by force. Finishing this quest will allow you to end the prologue.
Received from: Teyrna Eleanor [Cousland Castle]
Description: In order to activate this quest you must choose the correct answers while talking to Eleanor. This conversation will take place soon after you've started the second main quest - Howe's betrayal. Eleanor will share the knowledge with you about the family vault and she'll give you a key needed to open it.
![In order to get to the vault you must first make your way to [Cousland Castle - Guard post] (M15, 11) - The Cousland treasury - Origin story: Human noble - Castle Cousland (Prologue) - Dragon Age: Origins - Game Guide and Walkthrough](https://game.lhg100.com/Article/UploadFiles/201512/2015121518192914.jpg)
In order to get to the vault you must first make your way to [Cousland Castle - Guard post] (M15, 11). Enter the guard post and click on the door leading to [Cousland Castle - Treasury]. You can spend some time examining nearby poles or you can click on the main chest. Collect two unique items - a family sword and a shield of Highever (M15, 12).
Received from: Gorim [Orzammar - Diamond quarter - Royal Palace]
Description: Your friend Gorim (M16, 1) will inform you about an upcoming feast to celebrate the main character becoming an officer and he'll also tell you that you can spend free time by visiting local merchants in the Diamond quarter or by going to the arena to watch some fights. I would recommend that you agree to take a family shield with you and you should also pick up items from a nearby crate once you're done talking to Gorim. Proceed to the exit (M16, 2) to find yourself standing in [Orzammar - Diamond quarter] (M17, 1).
It won't take too long for you to meet your two brothers - Trian and Bhelen (M17, 2). You can be harsh during the conversation if you want to, because you don't have to worry about any repercussions. There are four traders in the diamond district (M17, 3) - silk merchant, armor merchant, weapon merchant and magic merchant. Once you're ready to move on with the quest head south-west and talk to a member of a royal escort (M17, 4). You'll find out that it's not safe to travel alone, so the guards will accompany you to the arena.
![It won't take long before you're escorted to [Orzammar - Proving grounds] (M18, 1) - The noble feast - Origin story: Dwarf noble - Diamond quarter (Prologue) - Dragon Age: Origins - Game Guide and Walkthrough](https://game.lhg100.com/Article/UploadFiles/201512/2015121518193079.jpg)
It won't take long before you're escorted to [Orzammar - Proving grounds] (M18, 1). Talk to Proving master here (M18, 2). You can decide to remain in the audience and to see a couple of duels or you can ask him to allow you to participate in arena fights (M18, 3). If you decide to challenge other dwarves you'll have to defeat Aller Bemot, Adal Helmi, Sir Backstone and Frandlin Ivo. Each duel will be harder than the previous one and it's also going to be important to keep using available abilities. The reward for winning all four duels will be a proving helm. You can keep this item to yourself or as a gesture of goodwill you can give it to your last opponent. Once you're done visiting the arena talk to the royal escort again (M18, 1) and confirm that you want to return to the Diamond district. Head on to the start area (M17, 1) and open the large gate to return to [Orzammar - Diamond quarter - Royal palace]. Proceed to the throne room (M16, 3).
Lord Ronus Dace (M16, 4) will want to talk to you and it would be a good idea to grant him with an audience prior to approaching king's throne. You can agree to his proposal to give the rights back to the surfacers or you can dismiss his idea. If you say yes you should also consider asking him about something in return and Ronus will offer you 100 gold coins (don't count on getting rich so soon, though).
If you talked to Dace you should also consider talking to Lady Helmi (M16, 5). She'll start the conversation with an unpleasant statement if you agreed to Dace's idea. Helmi will inform you that if you agree to his plan the entire kingdom will find itself in debt. You can ignore her concerns, you can agree to help her in dismissing Dace's idea during the conversation with the king or you can return to Ronus to find out more about his plan. If you choose the last option you can tell him that you know his real intentions. The most extreme solution in this case would be to challenge his royal house to a honorable duel in the arena (M18, 3). The goal here would be to defeat one of Dace's most skilled warriors - Mandar.

Approach the king's throne (M16, 6) to start the ceremony. During the ceremony Lord Dace will present his idea and you'll have to choose between backing him up and dismissing his plan. If you helped Dace talk to him after the celebration and he'll give you a note of credit with a promise of a payout in the near future. King Endrin will ask you to find Trian for him and in order to do that you must go to his quarters (M16, 7). Trian will leave soon after you've arrived and that'll leave you with Bhelen. Your brother will share his concerns that Trian is probably trying to kill you to have real chances in seizing the throne. You can agree to plan the murder of Trian or you can ignore Bhelen's idea.
Received from: King Endrin [Orzammar - Ruined thaig]
Description: Once you've ended your conversation with Bhelen you'll find yourself standing in [Orzammar - Ruined thaig] (M19, 1). The king will send you on a mission of finding an Aeducan shield. Thankfully you won't be travelling alone, because Gorim will accompany you in this journey. Make sure that both characters are using good weapons and armor before heading into the caves.
During your time spent in the thaig you'll be dealing mostly with giant spiders and deepstalkers, however winning most of the fights shouldn't be a big problem. Pay more attention to genlocks, because they'll be travelling in packs and some of them will be using bows. There are several traps in the caves and you can consider disarming them if you're playing as a rogue. Eventually you'll have to reach a much larger cave where Frandlin Ivo will join the team (M19, 2).
You can spend some time exploring smaller caves and nearby passageways, but it's all optional. In order to move on with the mission you'll have to be moving south-east until you enter a larger cave protected by a group of genlocks. Keep pushing forward until you come across a friendly scout (M19, 3). He'll also join your team for the purpose of finding the shield.
It shouldn't take long until you come across a passageway with a lot of dead bodies (M19, 4). Notice the fact that the royal signet ring must have been used to open this passageway. Head north-west until you meet the leader of the mercenaries (M19, 5). It doesn't matter how you'll respond to his threats (you can lie about the shield or tell the truth), because sooner or later you're going to be attacked by him and his men. Before you attack the leader make sure to eliminate all the archers.
Defeating all the bandits is going to be relatively easy. Check the dead body of the leader and take the signet ring. You must now find a door leading to [Orzammar - Ruined thaig - Thaig chamber] (M19, 6). Solve a simple riddle by ordering your three team members to stand on movable floor pieces. Once this is done use the fourth team member to open the sarcophagus (M19, 7). Doing this will allow you to get your hands on the Aeducan shield.
![Head back to [Orzammar - Ruined thaig] (M19, 8) - Noble journey - Origin story: Dwarf noble - Diamond quarter (Prologue) - Dragon Age: Origins - Game Guide and Walkthrough](https://game.lhg100.com/Article/UploadFiles/201512/2015121518193155.jpg)
Head back to [Orzammar - Ruined thaig] (M19, 8). Be careful, because you're going to be attacked by a new group of genlocks here, as well as by a Plague wolf (mini-boss). Deal with the wolf first, especially since the creature is capable of taking down your teammates and inflicting massive injuries. Once it's safe you'll have to start moving back to a large cavern where Frandlin has joined your team (M19, 2). Ignore a conversation about a possible ambush spot along the way.
If you ignored Bhelen's warning you'll discover dead bodies of Trian and dwarven guards upon your arrival in the cavern. If you conspired against Trian he'll still be alive and you'll be allowed to talk to him. During the conversation it'll soon become clear that Bhelen has told him the exact same story. Sadly you won't be allowed to find a peaceful solution, even if you decide to show him the signet ring or surrender (the scout in your team would provoke him).
Once the battle has started you should use the same tactics as before and focus primarily on defeating enemy archers. Once they're gone you may begin attacking Trian. Bear in mind that his death won't stop this battle, because you'll have to eliminate all enemy units. Either way you'll trigger a cut-scene, showing king Endrin's arrival. Sadly you won't be able to convince your father that it was all Bhelen's fault and that you've been betrayed by the scout and by Frandlin (you can take revenge on him by killing him). This quest will end with the main character being thrown into jail (M20, 1).
Received from: automatically after arriving in prison [Orzammar - Prison]
Description: Start off by talking to Gorim (he will be standing outside your cell). Your friend will inform you about the current status of both of you. He'll be kicked out of Orzammar and he plans on travelling to Denerim. You'll have to remain in the Deep Roads and the only rescue will be to find Duncan and other Grey Wardens. You'll soon be given an audience with Lord Harrowmont. If you tell him the truth about your innocence Harrowmont will give you an excellent dwarven longsword.
![Wait for the main character to be escorted to [Orzammar - Deep Roads Outskirts] (M20, 2) - Exile - Origin story: Dwarf noble - Diamond quarter (Prologue) - Dragon Age: Origins - Game Guide and Walkthrough](https://game.lhg100.com/Article/UploadFiles/201512/2015121518193185.jpg)
Wait for the main character to be escorted to [Orzammar - Deep Roads Outskirts] (M20, 2). You may start exploring the area to the south of where you started. Naturally it's not going to be safe here, because you'll encounter new giant spiders, genlocks and deepstalkers along the way. In addition to that you must also watch out for traps. Make sure to loot all the bodies of dead dwarves along the way to collect missing pieces of your armor.
You'll eventually locate the exit from the cave system (M20, 3). I wouldn't recommend going there unless you're absolutely sure that you want to end this prologue. Duncan will greet you here and will offer you a chance to become one of the Grey Wardens (he'll take you with him even if you refuse).
![Description: This first main quest of the game will be activated upon your arrival in [Lothering] (M25, 1) - Lothering and the Imperial Highway - Main quests - Dragon Age: Origins - Game Guide and Walkthrough](https://game.lhg100.com/Article/UploadFiles/201512/2015121518193167.jpg)
Description: This first main quest of the game will be activated upon your arrival in [Lothering] (M25, 1). I would recommend that you listen to a conversation which will take place after you've defeated the bandits (near the stairs). Several other quests will soon appear in your journal, but for now focus on spending some time in the city, trading items, exploring the area and completing side quests.
![In order to leave [Lothering] you'll have to travel north-west (M25, 13) - Lothering and the Imperial Highway - Main quests - Dragon Age: Origins - Game Guide and Walkthrough](https://game.lhg100.com/Article/UploadFiles/201512/2015121518193180.jpg)
In order to leave [Lothering] you'll have to travel north-west (M25, 13). Be careful, because the exit is being guarded by a large group of monsters and a hurlock alpha will be among them. Move back to a safe distance to encourage only some of the beasts to chase after you. Once it's safe locate Bodahn. You may talk to him, as well with his son Sandal. Notice that you can ask both dwarves for a reward for saving their lives (only if you have a high persuasion skill). This quest will come to an end once you've reached the [Campsite].
![Description: You can officially start this quest when you get to [Redcliffe] (M27, 1) - Arl of Redcliffe - Main quests - Dragon Age: Origins - Game Guide and Walkthrough](https://game.lhg100.com/Article/UploadFiles/201512/2015121518193199.jpg)
Description: You can officially start this quest when you get to [Redcliffe] (M27, 1). Approach the bridge where you'll have a chance to talk to Tomas (M27, 2). The next conversation will take place in [Redcliffe - Chantry] where you'll receive an update from Teagan (M27, 3), activating a local A village under siege quest.
You can resume the main quest after you've successfully defended the village from the undead. Talk to Teagan again (M27, 21), however this time Isolde will join the conversation. Teagan will give you a signet ring and a task to find a secret passageway to the castle. Proceed to [Redcliffe - Windmill] (M27, 22) and once you're inside move south. Find a hatch in the floor (M27, 23). Using it will transport you to [Redcliffe castle - Basement] (M28, 1).
Head forward until you'll have to deal with the first group of the undead. Killing the zombies shouldn't be a big problem as long as you remember about attacking single targets instead of all the monsters at the same time. Using abilities of your team members will also get you one step closer to victory. Jowan is being held in a prison cell nearby (M28, 2). Once you've heard his version of the story you may leave him in the cell, kill him or set him free. I wouldn't recommend killing him, because you would lose a chance of him helping you out later on and you would probably make some of your followers angry.
Be careful in the next room of the basement, because other zombies will surprise you once you're close enough to the stairs. I would recommend retreating to the corridor where Jowan was being held so that your team won't be attacked from several directions at the same time. Once you've dealt with all the monsters use the stairs to travel to [Redcliffe castle - Main floor] (M28, 3). Here (M29, 1) you'll also have to remain cautious, because a mini-boss (greater shade) will be guarding one of the nearby rooms. Try using different spells during all the battles with the shades, because they're more vulnerable to magic.
Start moving east and don't forget to inspect smaller rooms found along the way, especially since one of these areas is going to be an armory (M29, 2). Use your lockpicking skills to get in there and collect useful things. Watch out for other mini-bosses in the area, including a devouring corpse and a mabari (one of the northern rooms of the castle). There are also plenty of traps in the area, including a powerful trap in one of the main corridors. Eventually you'll have to reach a staircase leading back to [Redcliffe castle - Basement] (M29, 4). Use it instead of heading south, because you shouldn't attack the main group unless you've rejoined with allied units.
Take your time in the cellar (M28, 4) and once you're done exploring use the stairs leading to [Redcliffe castle - Courtyard] (M28, 5). I would recommend that you leave most of the team behind (M30, 1) and use a warrior or a camouflaged rogue here. Move this person to the north-west and pull the lever (M30, 2) before you're caught by the monsters. A nearby gate is going to be raised which will allow allied units to join the battle. Start attacking enemy forces and watch out for a mini-boss (revenant). I would recommend attacking this beast from a large distance and you should also prevent your team members from standing too close to each other, so they won't lose too much health if an explosion occurs near their position. Once the revenant is dead focus on eliminating hostile archers.
Eliminate all the monsters and once it's safe talk to Sir Perth (M30, 3). It would be a good idea to agree to his proposal and to join him and the other men on an assault on the castle. You'll soon automatically return to [Redcliffe castle - Main floor] (M29, 5) and you'll have a chance to talk to possessed Connor. This scene will end with the boy escaping to his room and you having to engage possessed guards in combat. In the early stages of this battle you should be focused on injuring Teagan who will act as a typical mini-boss. Achieving victory here shouldn't be a problem, so you should pay more attention to choosing how this quest should end. All the choices can be made during the conversation with Teagan.
ENDING 1: Killing Connor
If you decide to kill Connor without giving the boy a chance to survive proceed to the western room where you'll have to defeat a large group of animated knights. Killing these opponents won't be an easy thing, so you should consider retreating to the previous area where allied units can assist you in achieving victory. Once you've won entered the western room for the second time and use the stairs leading to [Redcliffe castle - Upper floor] (M29, 6).
You'll be moving east here and naturally new enemy units will stand in your way. Keep pushing forward and use a lot healing spells and potions to prevent team members from dying. Save your game prior to entering the last room where Connor will be waiting for you (M29, 7). He'll soon transform into a lust demon and you'll have to take part in a boss battle.
This battle will have several phases. Each time you've sufficiently injured the demon you'll be forced to take out a small group of weaker creatures. Keep using mostly ice spells on the main demon and the same goes with smaller rage demons. Don't forget to monitor health bars of your men and women, because it would be even harder to win if someone would to die here. After you've defeated Connor you'll be given a chance between killing him yourself and letting his mother to deal the final blow. Finishing this quest will activate the next one - Urn of Sacred Ashes.
ENDING 2: Sacrificing Isolde's life to save Connor
In order to unlock this ending you would have to keep Jowan alive and present Isolde with an opportunity to save her son's life. The next step will be to choose the person who will fight the demon. You can choose Wynne, Morrigan or yourself if you're playing as a mage. Watch a short cut-scene after which you'll find yourself standing in the [Fade] (M31, 1).
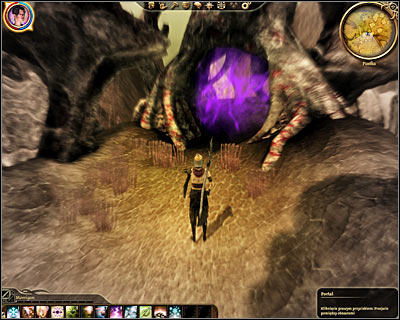
Start exploring this realm and ignore ghosts seen along the way, because they won't attack you. Arl Eamon will appear near the area where you've started (M31, 2), however talking to him is not mandatory. Use the nearby portal and keep heading forward until you locate Connor's hideout (M31, 3).
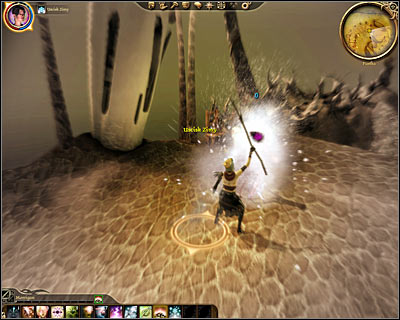
It's important how you'll respond to Connor's initial statement, because sooner or later you'll have to defeat a demon hiding in his body for the first time. This duel is going to be extremely easy, however you should try ending it as soon as possible. I would recommend using ice spells, because not only they'll deal a lot of damage but you'll also freeze your opponent.
You'll have to defeat the demon a few more times (M31, 4). Each time you'll be forced to use a portal and to find Connor's new hideout. Notice that later on the demon will not be alone, because smaller creatures will appear around him. Always focus on the main boss and once it's gone deal with the remaining enemy forces. Defeating the demon in the last location (M31, 5) will result in your character returning back from the Fade and finishing this quest will activate the next one - Urn of Sacred Ashes.
ENDING 3: Asking the mages for help in rescuing Connor
This is by far the most time-consuming solution, but if you manage to pull it off you'll save both Connor and his mother. During the conversation with Teagan, Isolde and Jowan you'll have to come up with a plan of asking the mages in [Circle tower] for help. Leave [Redcliffe castle], travel to [Lake Calenhad docks] and from there reach the tower. You can find more information on how to get there by reading the description of an another main quest - Broken circle. You can only ask the mages for help AFTER you've defeated Uldred (M40, 3) and it's also important that during your final conversation with Greagoir (M33, 1) you convince the templar that he should leave the tower under mage's control (otherwise Irving would be sent to prison). Talk to Irving and tell him about the boy. The enchanter will be more than happy to help and he'll immediately travel to the castle.
![You should follow Irving by returning to [Redcliffe castle - Main floor] (M29, 5) - Arl of Redcliffe - Main quests - Dragon Age: Origins - Game Guide and Walkthrough](https://game.lhg100.com/Article/UploadFiles/201512/2015121518193363.jpg)
You should follow Irving by returning to [Redcliffe castle - Main floor] (M29, 5). Approach the people standing here and initiate a new conversation. You'll have to decide who should travel to the [Fade] to rescue Connor and you'll be allowed to choose between Jowan, Irving and the mages in your team. It doesn't really matter which person it's going to be, because no one will die aside from the demon. Read the description of the second ending to find out how to locate the demon and how to kill it. Finishing this quest will activate the next one - Urn of Sacred Ashes.
You can rescue Arl Eamon once you've completed Urn of Sacred Ashes main quest. Make sure that the ashes are in your inventory and return to [Redcliffe castle - Main floor] (M29, 5). Talk to Teagan here and give him the ashes. It won't take long before Arl Eamon is fully healed. You can now talk to your new ally, however you won't be able to affect his decisions in any major way (you can only advise him what should happen with Jowan). Eamon will give you an elite Redcliffe shield. This conversation will end with you receiving a new main quest - Gather an army.
![Description: Start this quest by travelling to [Lake Calenhad docks] (M32, 1) and when you get there proceed directly to the pier to talk to templar Carroll (M32, 2) - Broken circle - Main quests - Dragon Age: Origins - Game Guide and Walkthrough](https://game.lhg100.com/Article/UploadFiles/201512/2015121518193375.jpg)
Description: Start this quest by travelling to [Lake Calenhad docks] (M32, 1) and when you get there proceed directly to the pier to talk to templar Carroll (M32, 2). You can convince him to take you to the tower by allowing him to have a chat with Morrigan. Don't worry about not being able to convince him if Morrigan is not a part of your team, because you can always show him the treaties at the end of this conversation.
![Carroll will transport you to [The Circle tower - Student quarters] (M33, 1) and you'll automatically trigger a conversation with Greagoir (templar in charge) - Broken circle - Main quests - Dragon Age: Origins - Game Guide and Walkthrough](https://game.lhg100.com/Article/UploadFiles/201512/2015121518193308.jpg)
Carroll will transport you to [The Circle tower - Student quarters] (M33, 1) and you'll automatically trigger a conversation with Greagoir (templar in charge). During this conversation offer your help in resolving the situation in the tower. Remember that once you've started exploring the tower you won't be allowed to go back, so you should stock up on supplies (especially on potions). Step through a nearby gate when you're ready (M33, 2).
![This lowest level of the tower is being occupied by several friendly mages (M33, 3) and a woman who goes by the name of Wynne will be among them (you've already had a chance to meet her in [Ostagar]) - Broken circle - Main quests - Dragon Age: Origins - Game Guide and Walkthrough](https://game.lhg100.com/Article/UploadFiles/201512/2015121518193397.jpg)
This lowest level of the tower is being occupied by several friendly mages (M33, 3) and a woman who goes by the name of Wynne will be among them (you've already had a chance to meet her in [Ostagar]). If you're playing as a VERY bad person you may decide that the only way to cure the disease is to not leave anyone breathing. The best solution is to keep Wynne and the rest alive, because Wynne will join your team. I would recommend switching her with Morrigan, because she has some very powerful healing spells in her arsenal and those which will come in handy in the near future. Approach a nearby force field and confirm that you want to enter an unsafe area of the tower (M33, 4).
You'll have to be very careful from now on, because you'll be dealing with different types of abominations. One of the most important things to know about these creatures is that they tend to explode shortly after they've been killed. Don't forget about that and try to stay away from their bodies to avoid unwanted injuries. As for the rest of the demons, try using ice spells to inflict major injuries if possible. The first mini-boss will attack you near the main area of this level (M33, 5) and it's going to be the greater rage demon. Once it's gone enter the last room and locate the stairs leading to [The Circle tower - Mage quarters] (M33, 6).
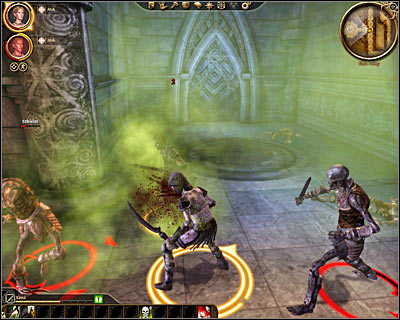
Shortly after you've arrived at the new area you'll have a chance to talk to Owain (M33, 7). He'll tell you some interesting things about Niall, however questioning him about all the details is not mandatory. Proceed to the next room of the tower where you'll encounter three blood mages (M33, 8). Make sure to always focus on one target and check if you have any spells or abilities which would allow you to repel possible curses. Once all the mages have been defeated you'll trigger a short conversation. You can now finish them off or spare their lives.
Continue exploring other areas of the tower, heading towards the largest central room. I guess you won't be surprised to hear that along the way you'll defeat other blood mages, as well as abominations, zombies and demons. At least one of the group of blood mages will be caught up in a big fight and it would be a good idea to wait for this battle to end before attacking them. Don't forget to visit Irving's office along the way to collect valuable items. Eventually you'll have to make your way to the stairs leading to [The Circle tower - The great hall] (M33, 11).
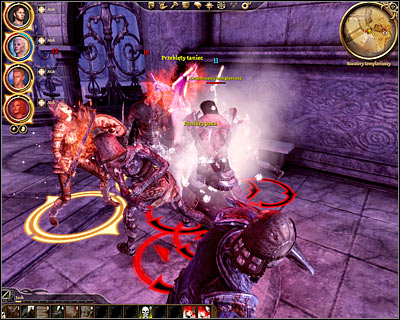
This is a large level (M34, 1) filled with a lot of hostile creatures. The first mini-boss you'll encounter is going to be an arcane horror and it would be a good idea to attack it from a larger distance (same idea with the standard zombies). One of the rooms further in the back will on the other hand be occupied by a demon surrounded by possessed templars (M34, 3) and I wouldn't recommend going there unless you're absolutely ready for combat. Aside from the monsters pay attention to new traps, because there's going to be a lot of them in the area.
Make sure that you've surrounded all smaller rooms, because you'll have to defeat a very powerful abomination in the largest central room. Don't forget to use all the spells you have, as well as good magical weapons. I would also recommend to encourage the beast to chase you, so no one else will join this battle. Once you've defeated the abomination enter the large room for the second time and this time travel to [The Circle tower - Templar quarters] (M34, 4). Continue exploring the tower (M34, 5).
Soon after your arrival in the templar quarters you'll come across a room with a demon and a bewitched templar (M34, 6). You won't automatically trigger a fight with either of them, because you'll have a chance to talk first. You can listen to what the demon has to say and to agree for the coexistence to continue or decide to stop it once and for all. If you choose to break their "relationship" you're in a lot of trouble, because aside from the demon and the templar (both mini-bosses) you would also have to deal with a large group of zombies. Continue exploring the tower and watch out for yet another mini-boss (blood mage).

The next area you'll visit is going to be a very large room where you'll trigger a cut-scene and take part in a "controlled conversation" with the sloth demon (M34, 7). Once again - you don't have to pay too much attention to your answers, because you'll fall asleep and wake up in the [Fade]. Make sure to read the description of Lost in dreams main quest to find out how to get out of the Fade. Once you've safely returned to the tower you'll find yourself standing in the exact same spot from where you were originally taken.
MAKE SURE to examine Niall's body and to pick up the litany of Andralla. Notice that this spell has automatically appeared on your quick actions bar and it should stay there, because you'll want to use it in a few minutes. Choose the only unexplored passageway (M34, 8) and continue heading towards the staircase to the next level. A couple of dragonlings will stand in your way and I would once again recommend using ice spells against them. One of the biggest rooms (M34, 9) is being occupied by two mini-bosses (greater rage demon and greater shade) and they'll take you by surprise, so you'll have to act quickly. Try to eliminate weaker creatures first and prevent the monsters from surrounding you.
When you get to the last room of this level (M34, 10) you'll automatically trigger a conversation with Cullen. He's one of the templars here and he's been trapped inside a magical field. Once you've convinced Cullen that you have good intentions you'll have to make a decision. If you decide to grant Cullen's wish you'll have to kill all the mages. Notice that Wynne will automatically become hostile, even if she's a part of your team. I would recommend convincing Cullen that he's wrong and that the remaining mages should survive. If you can't do that just don't give him any straight answers and it'll be sufficient. Make sure to SAVE your game before using the final staircase to reach [The Circle tower - The Harrowing chamber].
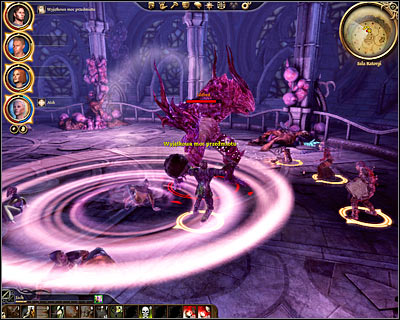
You'll have a chance to talk to Uldred here (M40, 3). It's not going to be a long conversation, because he'll soon transform himself into a beast and a huge boss battle will commence. I would recommend that you start off by eliminating all the abominations found in the chamber, because you'll have to deal with even more monsters soon enough. Once Uldred is the only one standing focus your attacks on him. Don't forget to use the newly acquired litany each time Uldred will try to take control over your team members or over other mages present in the room. Keep your mages and your archers away from Uldred, because some of his attacks are going to be extremely powerful. Use Wynne's abilities to heal your men or even to revive them and don't worry if you use a lot of health potions in the process. This battle will last a few minutes, so you'll have to be patient and avoid making major mistakes.
Once Uldred has been defeated you'll be allowed to talk to the First enchanter Irving. Confirm that you want to leave this area and you'll return with him to the [Circle Tower - Student Quarters] (M33, 1). You'll now have to choose your answers very carefully, because they will affect the final decision made by Greagoir. If you want the templars to take over the tower and to imprison all the mages you'll have to agree with him. If you want the mages to continue their dominance you must convince Greagoir that everything is now under control and that they're no longer a threat. You'll also have to decide what to do with Wynne. Naturally I'd recommend taking her with you, but if you decide that she should stay she'll remain here until you've changed your mind. Don't forget to ask Greagoir for the assistance in the upcoming battle with the Plague and he'll promise to show up on the battlefield.
![Description: The first area you'll visit in your dreams is going to be [Weisshaupt] (M35, 1) - Lost in dreams - Main quests - Dragon Age: Origins - Game Guide and Walkthrough](https://game.lhg100.com/Article/UploadFiles/201512/2015121518193513.jpg)
Description: The first area you'll visit in your dreams is going to be [Weisshaupt] (M35, 1). Head forward and proceed to an upper platform where you'll meet fake Duncan (M35, 2). This conversation will end with you having to kill Duncan and two other guards. The method to defeat them depends on the class of your character, but it shouldn't be too hard to succeed. Don't worry, because you'll learn other ways to harm your opponents in the Fade soon enough. Once you've won the battle use the pedestal to travel to the [Raw Fade].
INTRODUCTION TO THE FADE:
Before we'll get into details, there are a few important things and rules you should know about this place.
1) The only way to unlock the final battle with the sloth demon is to secure five major areas - [Raw Fade], [Darkspawn invasion], [Templar's nightmare], [Burning tower] and [Mage asunder]. By securing the area one understands reaching the final room and defeating a less powerful demon guarding it. Once you've killed all five demons the game will automatically unlock access to the [Inner Sanctum] where the sloth demon will be waiting for you. Before you engage this beast you should also visit separate nightmares of the three remaining members of your team.
2) It's not possible to explore each area during your first visit, because access to some of the corridors and rooms is restricted to a character with certain transformation abilities. As a result you'll have to keep unlocking new transformations instead and use them to explore previously inaccessible areas. You can visit the five main locations in any order you want and you can return to them without any problems.
3) Your character will learn how to transform into one of four forms. Each form is unlocked after you've helped a certain person and here's the list of the people you need to find:
- Mouse - Mage apprentice [Raw Fade] (M35, 5)
- Ghost - Templar spirit [Darkspawn invasion] (M36, 3)
- Burning man - Dreaming templar [Burning tower] (M38, 5)
- Golem - Cursed dreamer [Mage asunder] (M39, 6)
And here's the list of the types of obstacles these transformations can help to overcome:
- Use the mouse form to travel through mouse holes
- Use the ghost form to interact with spirit doors
- Use the burning man form to move through the flames without taking any damage
- Use the golem form to destroy massive doors
4) Aside from focusing on your main assignments you can also visit smaller rooms to find essences. Each essence will raise one of your attributes and here's the info on where to find them:
Bonus type
Location
Instructions on how to find it
strength
Burning tower (M38, 10)
The essence can be found in the exact same room where you've defeated Rhagos.
magic
Burning tower (M38, 12)
Check the area near the stairs leading to the northern section of the map. Use the golem form to destroy a massive door (M38, 11) and then transform yourself into a ghost.
cunning
Burning tower (M38, 2)
Soon after you've started exploring this area find a mouse hole and use it to gain access to the left room.
cunning, constitution
Burning tower (M38, 7)
Check the burning labyrinth to the south of the templar and find a spirit door (M38, 6). Use this door to travel to a new location where you'll find two bonuses.
cunning
Darkspawn invasion (M36, 2)
Go to the south-east and travel through a mouse hole.
strength
Darkspawn invasion (M36, 8)
Use the golem to destroy a massive door in the southern section of the map (M36, 7).
willpower
Mage asunder (M39, 10)
You'll have to wait until you've unlocked the golem form. Check the room to the north-west of where Slavren can be found and don't forget to transform yourself into a ghost.
dexterity, cunning, dexterity, constitution
Mage asunder (M39, 13)
You can find all these bonuses prior to fighting Slavren. Check the corridor with an arcane horror (M39, 11) and transform yourself into a ghost to use a spirit door (M39, 12). Once you're on the other side explore ALL nearby areas of the eastern complex. You'll have to use the mouse form once and one of the bonuses can only be collected while playing as a ghost.
strength
Mage asunder (M39, 2)
Use the mouse hole as soon as you've arrived here.
magic
Mage asunder (M39, 3)
This essence can be found in one of the rooms near the start area, but you can't collect it unless you know how to transform into a ghost.
strength
Mage asunder (M39, 9)
You'll have to wait until you've unlocked the golem form. Check the room to the north-east of where Slavren can be found.
dexterity
Raw Fade (M35, 7)
Keep using the standard portals until you come across a spirit door (M35, 6). Use the ghost form and once you're on the other side deal with a couple of whisps.
willpower
Raw Fade (M35, 9)
It's the going to be exact same room where you've defeated Yevena. Don't forget to transform yourself into a ghost.
cunning
Templar's nightmare (M37, 11)
The essence can be found in the exact same room where you've defeated Vereveel.
dexterity
Templar's nightmare (M37, 2)
Check one of the smaller rooms of the first circle and use the mouse hole to gain access to a new room. Kill the Plague wolf and collect the essence.
willpower
Weisshaupt (M35, 10)
You can find this bonus after you've unlocked the ability to transform yourself into a ghost.
SECURING THE RAW FADE:
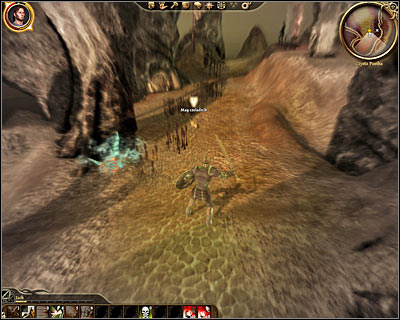
Make a few steps forward and talk to a friendly character Niall (M35, 3). Listen to what he has to say about the Fade and then use a nearby portal (M35, 4). Defeat a single demon and talk to the Mage apprentice (M35, 5). During the conversation he'll teach you how to transform yourself into a mouse and you can test this feature right away. Notice that you can also camouflage yourself. This may come in handy while trying to avoid more powerful creatures instead of fighting them.
Start off by transforming yourself into a mouse and use a nearby mouse hole to travel to a different location. You'll be encountering shades and demons along the way, so you should be careful. I would recommend defeating them instead of avoiding them, because killing them is going to be a relatively easy achievement. Keep using the portals until you've returned to Niall (M35, 3).
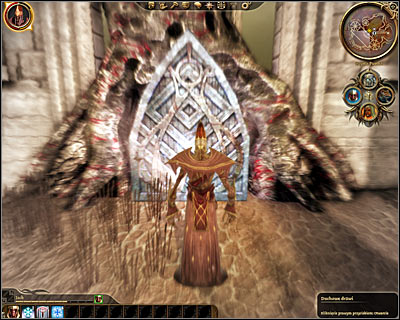
You won't be allowed to defeat the main demon of this location until you've learned how to transform yourself into a ghost. Once you have that ability in your arsenal use a spirit door located close to Niall (M35, 8). Using this passageway will transport you to an arena and you'll automatically start the battle with Yevena (M35, 9). I wouldn't recommend using the golem form here, because she's very agile. Instead remain as a ghost or transform into a burning man. Once you've defeated the demon use the spirit door and you'll end up standing next to the pedestal.
SECURING THE DARKSPAWN INVASION:
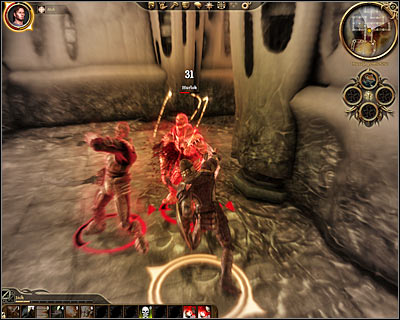
You'll have to be moving north here (M36, 1). If you haven't unlocked any useful transformations yet you can remain in your body and challenge the beasts or you can try moving as a mouse and rely on camouflage. The second method is quite interesting actually, because you'll find a lot of mouse holes along the way. If you decide to fight the monsters expect to encounter a lot of hurlocks and genlocks (including emissaries and alpha forms).
It's also a good idea to surprise some of your enemies from behind using the camouflage and to change form a second before the attack. Don't forget that you can receive bonuses to damage done to someone by stabbing them in the back. Choosing this method will also help you in preventing some of the enemy mages from throwing powerful spells before you get close enough to hit them. Keep pushing to the north until you end up inside a larger room with a friendly templar spirit (M36, 3). Help the templar to defeat all enemy units and in return he'll teach you how to transform yourself into a ghost.
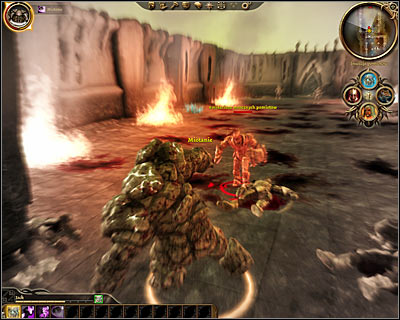
In order to reach the lair of the main demon of this location you'll have to transform yourself into a golem, because a massive door (M36, 4) will separate you from him. The door can be found to the north of the room where you've met the templar the last time you were here. Be careful, because the next corridor will be guarded by a very large of monsters and a mini-boss will be among them (darkspawn emissary).
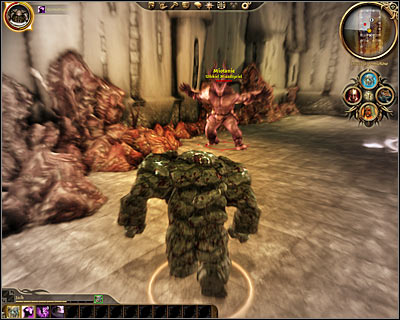
Eliminate all the hostile creatures before moving north. Destroy the last massive door (M36, 5) and head forward to find out that Uthkiel the Crusher is already waiting for you (M36, 6). Choosing the golem form here won't be the best decision you can make, because Uthkiel can harm you very quickly in direct combat and he even can knock you down. Notice that he's kind of a slow creature, so you should consider using the burning man form during this battle. Either way you'll have to defeat the demon after which you'll be allowed to use the pedestal to return to safety.
SECURING THE TEMPLAR'S NIGHTMARE:
You'll start exploring this area in the first circle (M37, 1) and if you can't turn yourself into a burning man or a golem you'll have to be very careful, because you'll be dealing with a lot of dangerous abominations, arcane horrors and traps along the way. Use one of the mouse holes (M37, 3) to travel to the second circle.
When you'll arrive at the second circle (M37, 4) you'll probably notice that an ogre is standing nearby, so be very careful. I wouldn't recommend fighting the ogre unless you can use the golem or the burning man form. Thankfully this beast will be easier to kill than most of the ogres you've encountered during your previous journeys. It is possible to ignore the ogre, however you would have to stay away from this area during some of the upcoming fights.
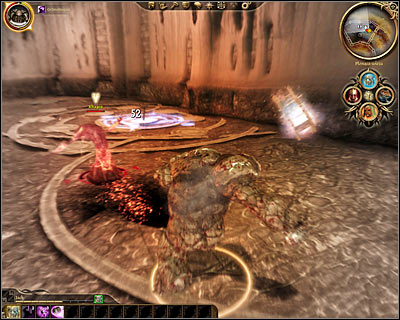
Your next area of interest in the alchemy lab (M37, 5) which can be found in the second circle. There are two ways of gaining access to the lab. The first solution is to use the burning man form to enter a nearby room after which you would have to turn yourself into a mouse and travel through a hole. The second solution is to use the golem form and to destroy a massive door. Either way you'll have to use the spirit door once you're inside to travel to the third circle.
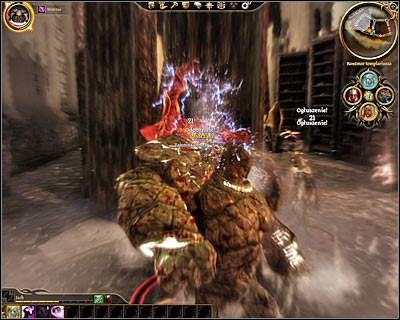
You'll end up standing in a new room (M37, 6) and I would strongly recommend using the golem form here, so it won't be a big problem to survive. Eventually you'll have to make your way to an isolated room (M37, 7) and once again you'll be allowed to choose between using the mouse hole and destroying the door. Defeat new enemies and step through the portal to travel to the final fourth circle (M37, 8).
I would strongly recommend activating the burning man form as soon as you've arrived at the last circle, because the area will be set on fire. Wait for new demons to show up, defeat them and head forward. As soon as you've left the burning room you can go back to being a golem. Head on to the last room (M37, 9), transform yourself into a mouse and use the hole to travel to the arena. Here you'll have to defeat Vereveel (M37, 10) - the main boss of this location. Using the golem form during this duel may be a little risky, because the monster be trying to slow you down. My recommendation is the burning man form. Use the pedestal once you've defeated the boss and collected all bonuses.
SECURING THE BURNING TOWER:
During your time spent in the tower (M38, 1) you'll have to watch out mostly for the flames, especially prior to unlocking the burning man ability. You'll also be dealing with a lot of burning templars, however defeating them shouldn't be a problem. You must make your way to the staircase (M38, 3) leading to a different section of the map.
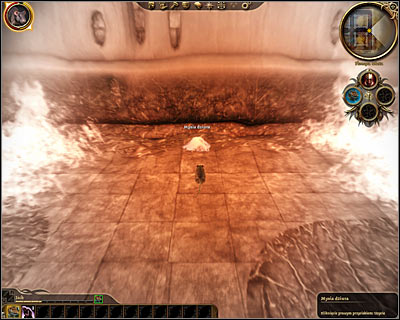
Don't be scared by the fact that you're standing in a burning labirynth, because it'll be next to impossible to get lost. Instead watch out for burning mabari. Eventually you'll have to get to a mouse hole found near the flames (M38, 4). Use this hole to travel to a new location where you'll be forced to defeat a burning demon and a dreaming templar (M38, 5). Eliminating the templar will allow you to unlock the burning man form.
In order to gain access to the demon's lair you must first become a golem, because a massive door will stand in your way (M38, 8). That's not all - in order to survive the next trap transform yourself into a burning man. Keep pushing north, eliminating all the undead standing in your way, as well as other burning templars. Rhagos will be waiting for you in the last room (M38, 9) and you should playing as a golem during the course of this duel. Once Rhagos has been defeated use the nearest pedestal to leave this area.
SECURING THE MAGE ASUNDER:
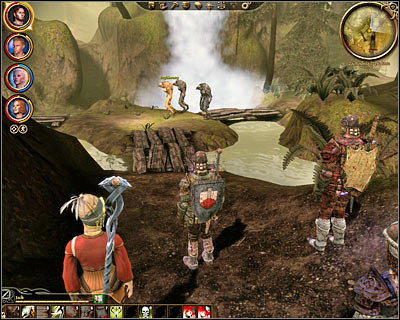
You'll be dealing mostly with enemy mages in this location (M39, 1) and you'll be allowed to surprise smaller groups using the camouflage feature, but sooner or later you'll be forced to attack enemy units and to defeat them in direct combat. I would recommend using the burning man form here, because most of his fire spells will be very effective. Focus on harming as many enemies with a single attack as possible, so you won't have to make too many stops along the way. Once you've reached a burning corridor (M39, 4) make sure to play as a burning man. Lesser rage demons will keep attacking you in the next room and you can fight back or ignore them.
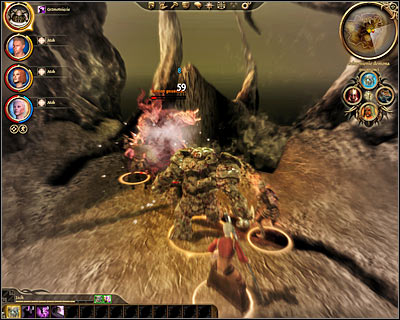
The next two rooms are heavily guarded by even more mages, so you should keep playing as a burning man in order to avoid trouble. Make your way to a new staircase (M39, 5) and use the stairs once it's safe to move on with the mission. Once you've arrived at a new area (M39, 6) start using the fireballs to defeat all enemies seen near your character, including powerful golems. Prevent the enemies from getting too close and avoid boulders being thrown at you by the golems.
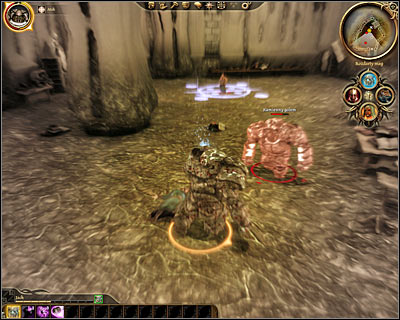
Defeating all the monsters in this room will allow you to talk to the cursed dreamer (M39, 6) and he'll teach you how to transform yourself into a golem. I would strongly recommend testing this new power right away. Use the stairs (M39, 7) to reach a new area of the map and begin by attacking enemy units. Don't forget to use some of the golem's skills, including the skill which tells it to smash the ground. Most of the attacks will be effective against larger groups of weaker beings, so you should always engage them in combat as soon as possible. After you've won approach a massive door (M39, 8) and destroy it with one of golem's attacks to unlock a new passageway.
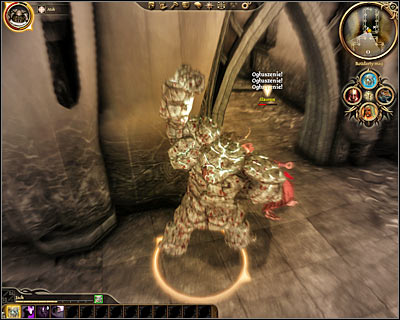
Deal with a new group of mages and head forward. There are three large rooms in the surrounding area. They're being guarded by mages and golems and they contain valuable treasures, so you might want to consider exploring them first. Head south if you want to focus only the main mission and destroy a new massive door (M39, 11). Deal with an arcane horror here and proceed to the next room to meet the main boss - Slavren (M39, 14). You can keep playing as a golem during this boss battle. Your enemy will die quickly as long as you remember to use all of golem's special attacks. Once it's safe again use the pedestal to get out of here.
SURVIVING THE NIGHTMARES:

Each member of your team will have an individual nightmare, however the common thing about them is that you'll have to convince your allies that they're living in a dream. Depending on a person this may be difficult, however you will have a chance to rely on persuasion or intimidation. Each nightmare will end in a battle with a demon and defeating this monster will allow you to free a member of your team. This is very important, because rescued team members will join you in the final battle.
DEFEATING THE SLOTH DEMON:
Make sure that you've rescued your allies and defeated five demons before you decide to take on a sloth demon. Use the pedestal and confirm that you want to travel to the [Inner sanctum] (M40, 1). Thankfully your opponent will give only a short speech this time and immediately after that the battle will start (M40, 2). Choosing the form to transform yourself into is not a crucial deal here, because all forms may come in handy. I was using a golem form for most of the battle, however you may also decide to use ghost's spells or burning man's fire attacks.
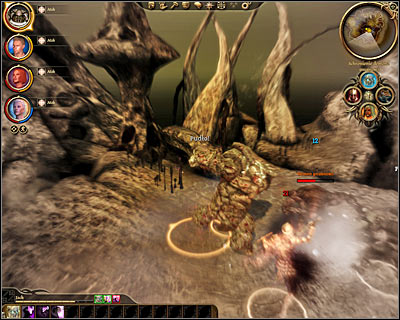
Ignore the initial health bar seen near the main boss, because each time he's lost enough health he'll regenerate and reappear in a different form. Keep attacking the demon and don't forget to heal your team members if they lose a lot of health. The boss will finally seize with the transformations and you'll defeat it. This quest will end with a conversation with Niall after which you'll return to the [Circle tower] (M34, 7) and resume Broken circle quest.
![Description: You're going to be stopped by Mithra upon your arrival in the [Brecilian forest] - Nature of the beast - Main quests - Dragon Age: Origins - Game Guide and Walkthrough](https://game.lhg100.com/Article/UploadFiles/201512/2015121518193788.jpg)
Description: You're going to be stopped by Mithra upon your arrival in the [Brecilian forest]. Don't worry about choosing the correct answers during this conversation, because sooner or later you'll be granted an audience with Zathrian. The meeting will take place in [Brecilian forest - Dalish camp] (M44, 1). Agree to help Zathrian to get rid of the werewolves by finding Witherfang, killing it and collecting its heart. Proceed to the edge of the camp when you're ready to leave and confirm that you want to travel to [Brecilian forest - Western part] (M41, 7).
During your time spent in the western section of the forest (M42, 1) you'll be dealing mostly with werewolves and Plague wolves. Eliminating both types of these creatures shouldn't be a big deal as long as you don't attack several larger groups at the same time. There are also going to be several mini-bosses running around the forest, but it's nothing you can't handle. Get to the only bridge leading to the eastern section of the map (M42, 3) and you'll automatically trigger a conversation with Swiftrunner. Once you've made the introductions you can use persuasion, lie to the werewolf or intimidate the beast to make the conversation last longer or you can attack the werewolves right now. If you choose to fight you won't kill Swiftrunner, because it'll escape when it's heavily wounded. Generally speaking you don't have to be too excited about this meeting, because it won't effect the rest of this quest.
Keep moving slowly, because you'll be encountering new monsters every few meters and a large ogre is going to be one of the creatures you'll have to kill. Try to provoke the ogre to chase after you, so you won't have to worry about killing any other beasts at the same time. You can also consider using traps, especially by placing them in narrow passageways. Your current objective is to get to a large clearing with a Grand Oak. Be careful, because the area is being guarded by wild sylvans and the trees will be coming back to life whenever you get close to them. Try attacking one sylvan at a time and watch out for the roots coming out of the ground, because they can immobilize your team members. Get rid of all nearby trees aside from the Grand Oak (M42, 6).
You will be allowed to talk to the Grand Oak once it's safe again and it'll probably take you a while to fully understand what the tree is trying to tell you. Naturally you can decide to destroy the oak, however I would recommend holding on with that idea until you explore all areas and meet other inhabitants of the forest. The best solution at the moment is to agree to help the oak in finding one of its missing acorns. In return the tree will agree to help you in finding the Witherfang. End this conversation and choose one of the passageways leading to [Brecilian forest - Eastern part] (M42, 7).
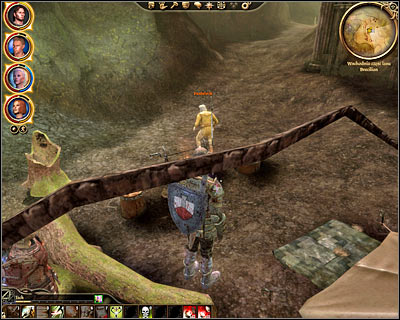
The eastern part of the forest (M43, 1) is going to be much smaller, however you will have to pay more attention to new monsters, including other wild sylvans. The biggest gathering of the walking trees can be found in the center of the map. You should go north-east, because that's where you'll meet mad Hermit (M43, 4). Save before you engage him in a conversation, because you'll have to choose the ending for this quest here.
RETRIEVING THE ACORN:
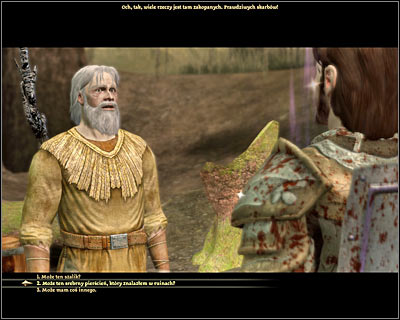
It won't take you long to figure out that it's Hermit (M43, 4) who stole the acorn from the oak and there are a few ways of retrieving it. If you want to avoid combat start the conversation and agree to his game of asking and answering questions. Focus on asking him what he wants in return for the stolen acorn and you'll find out that he would be interested in a ring you might have found in the ruins in the western part of the forest. Aside from trading the acorn you can also trade a book for an ancient elven helmet. Make sure to finish all transactions right now if you're planning on attacking Hermit later.
Attacking and killing Hermit on the other hand is not as easy as it sounds, because even if you force a duel he'll ignore you and you'll return to the conversation. The only way to provoke Hermit is to click on a nearby tree stump and to try taking something from it. This will make him angry and he'll start the battle himself. Make sure to attack Hermit first, because he's a powerful mage. Once he's dead check his body for the acorn. You can now return to [Brecilian forest - Western part] and return this object to the Grand Oak (M42, 6). In return you'll receive a mixture which will start working automatically, allowing you to get past a magical barrier in the forest.
DESTROYING THE OAK:
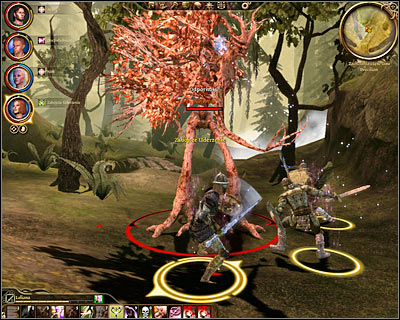
You can also comply to Hermit's wish (M43, 4), because during the initial conversation you'll find out that he wants you to kill the Grand Oak for him. This means you would have return to [Brecilian forest - Western part] (M42, 6). Inform the tree that you've arrived to destroy it and start the battle. Eliminating the oak shouldn't be a big problem, however you will have to spend about a minute fighting it. Once the dirty deed has been done return to Hermit and tell him about your success. Hermit will reply by telling you that he can help you in crossing the magical barrier if you deliver him a single werewolve's skin.
FINDING THE WITHERFANG:
![Both methods described above lead to this common solution which is to travel to [Brecilian forest - Eastern part] and to find the magical barrier (M43, 6) - Nature of the beast - Main quests - Dragon Age: Origins - Game Guide and Walkthrough](https://game.lhg100.com/Article/UploadFiles/201512/2015121518193855.jpg)
Both methods described above lead to this common solution which is to travel to [Brecilian forest - Eastern part] and to find the magical barrier (M43, 6). Now that you have a proper item from Hermit or the oak you can cross the barrier without being stopped. Save your game once you're on the other side and head forward.
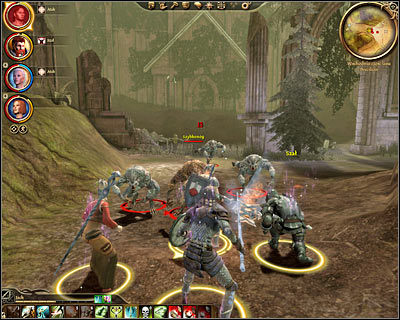
Keep going straight until you're stopped by the Swiftrunner again. You won't be allowed to skip this fight, so you'll have to be ready to engage the werewolves in a battle. As soon as the fighting has started focus your attention on the Swiftrunner, because once it's badly injured it'll escape and you'll be allowed to move on. Head forward until you meet the Gatekeeper (no fights this time). Choose the only passageway leading to [Brecilian forest - Upper ruins] (M43, 8).
The game starts in the eastern section of the ruins (M44, 1) and you'll be moving west. Make sure to inspect northern and southern corridors as you progress, however don't count on finding a lot of cool items. Soon after you've entered a larger section of the ruins you're going to be attacked by a small group of werewolves and it also won't take long until you come across spiders. Make sure not to move too fast, so you won't end up being surrounded by too many beasts for you to handle. Turn south-west at the end of the main corridor (M44, 2).
Watch out for a lot of dangerous traps in your vicinity, however they're not your biggest concern. As soon as you've entered a new room (M44, 3) and moved forward a few steps you're going to be attacked by a dragon. I would recommend that you return to the previous corridor, so that during this battle you won't step on any traps. Monitor your team members and their health bars and apply healing spells or potions each time their lives are in jeopardy. Prevent the dragon from stunning your allies too many items by using stun abilities and spells yourself or by freezing the monster with ice spells. Once the dragon has been defeated enter the large room again and spend some time looking for the dragon hoard (M44, 4), because you'll find A LOT of items there. You may now travel to [Brecilian forest - Lower ruins] (M44, 5).
This time you'll be heading south (M45, 1), however after a while you'll turn east. Notice that this level is swarming with different types of skeletons. It's a good thing, because these monsters won't deal a lot of damage and they'll be relatively easy to kill. Watch out for new spiders on the other hand, especially for a larger group which will take you by surprise near the first large room.
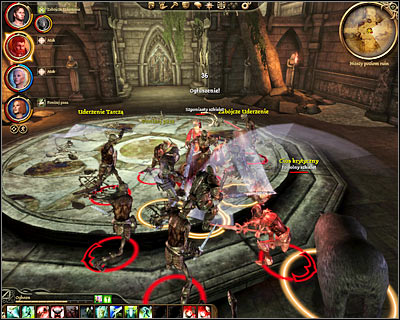
Your primary objective for the time being is to reach the second large room of the ruins (M45, 2). That's where you'll meet the ghost of a young boy, however the conversation will be cut short and it will result with a huge battle during which there are going to be more skeletons for you to dismember. Once it's safe proceed south-east and keep killing the undead creatures as you progress.
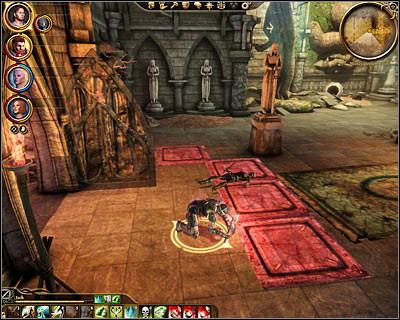
Continue eliminating all the monsters you encounter until you make your way to a much larger room of the ruins (M45, 5). I would recommend that you encourage enemy archers seen nearby to chase you to the previous corridor. Once they're gone enter this room with a rogue and disarm at least some of the nearby traps. When it's relatively save for the rest of the team to show up order everyone to head west. Enter yet another large room (M45, 7) and start off by eliminating closest targets. It would be a good idea to save your progress before using the stairs.
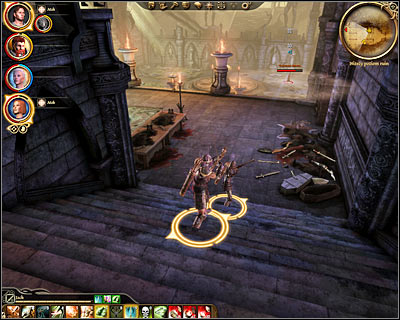
A new mini-boss (arcane horror) is waiting for you at the bottom of the stairs (M45, 8) and defeating this creature using standard methods won't be a simple thing. The boss would teleport itself a lot and it would inflict a lot of lightning injuries to the main character and to the rest of the team. The best way to get rid of this monster is to attack it with your archers or with your mages from a safe distance. Keep attacking the arcane horror until it dies and only then get closer to its body. More skeletons will appear (two groups), but winning now won't be a problem. The only passageway to the next area can be found in the northern room. Click on a small pool in the center of the room (M45, 9) and you'll travel to [Brecilian forest - Werewolves Lair].
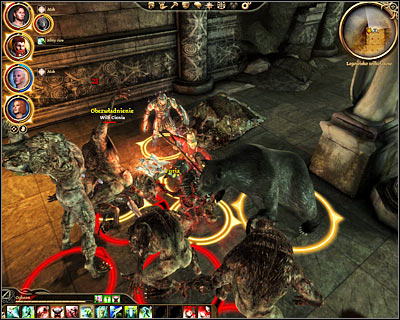
You'll start exploring the last level of the ruins in a bad spot (M46, 1), because there are a lot of monsters nearby. Move your team members away from the door and open the door by standing next to it in order to attract only some of the nearby werewolves. Wait for the beasts to show up and kill them before dealing with the next group. Be careful, because some of the werewolves will use camouflage similar to what your rogues can do. Kill them as soon as possible in order to prevent them from making any similar attempts in the future. Remain in this room until the area is safe.
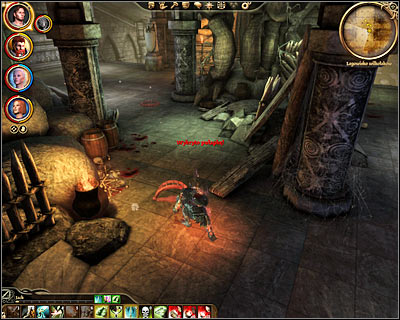
The next room will be guarded by a couple of werewolves and it would be a good idea to avoid fighting more than one beast at a time. You'll also have to watch out for deadly traps near the center of the room (M46, 2). Keep disarming these objects as you move forward to prevent your allies from stepping on them. Head south (M46, 3) and it won't take long until you meet the Gatekeeper. Make sure to SAVE YOUR GAME before talking to this werewolf, because this is where you'll have to decide how to end this quest (M46, 4).
HELPING THE WEREWOLVES TO GET RID OF THE ELVES:
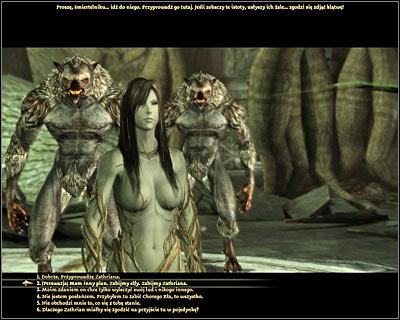
Choosing this ending will result in Dalish elves being exterminated and replaced with werewolves as your allies in dealing with the Plague problem. Notice that the werewolves will still be cursed, because the only hope for them will die along with Zathrian and the rest of the elves. This is an ideal ending for an evil hero and if you have good characters in your team they'll protest against what you're trying to achieve. In order for you to help the werewolves you'll have to convince the Gatekeeper (M46, 4) that you're friendly and then you must also convince Lady of the Forest (M46, 5) using persuasion that she shouldn't negotiate with Zathrian anymore.
![Your negotiations will result in you and other werewolves returning to [Brecilian forest - Dalish camp] - Nature of the beast - Main quests - Dragon Age: Origins - Game Guide and Walkthrough](https://game.lhg100.com/Article/UploadFiles/201512/2015121518193931.jpg)
Your negotiations will result in you and other werewolves returning to [Brecilian forest - Dalish camp]. Have a little chat with Zathrian and begin the huge battle between the elves and the werewolves. Focus all of your efforts on eliminating elven mages, however I would also recommend killing Zathrian sooner rather than later. Once you've eliminated all the elves you can talk to Lady of the Forest again and she'll agree to assist you when the time comes to defend the land against the Plague. It will also mean that you've successfully completed this quest.
LIFTING THE CURSE:
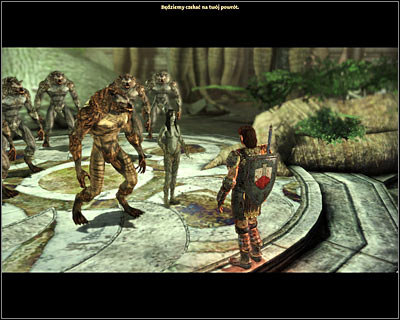
Achieving this ending is going to be quite difficult, however it's best you can hope for while playing as a good character. The biggest advantage of you choosing this ending is that both sides (elves and werewolves) will survive. Start off by talking to the Gatekeeper (M46, 4) and agree to have a meeting with Lady of the Forest (M46, 5). During this conversation you'll have to convince the leader of the beasts that she should invite Zathrian for a peace meeting and to ask him to lift the curse.
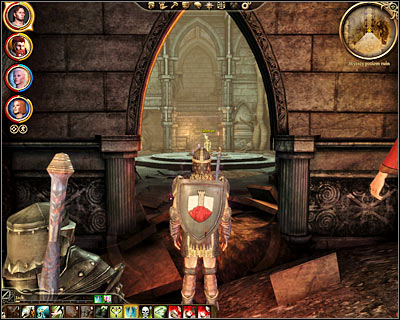
End the conversation with Lady of the Forest and follow her advise by heading towards a newly unlocked passageway (M46, 6). Use the stairs and open the door to find yourself standing in [Brecilian forest - Upper ruins]. All you have to do here is to make a few steps forward until you come across Zathrian (M44, 6).
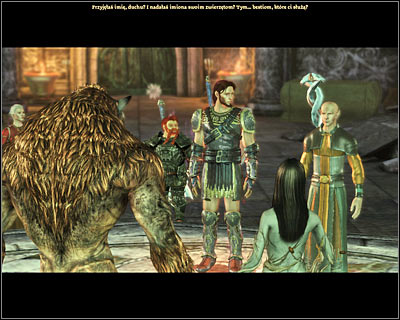
You won't be able to effect the outcome of this conversation in any major way, but thankfully Zathrian won't attack you when he finds out that the werewolves are still alive. He'll eventually agree to have a meeting with Lady of the Forest. You must be more careful from now on, because your decision will affect the ending of this quest. Wait for Zathrian to ask for your opinion and choose the first or the second dialogue option from the list to side with the werewolves.
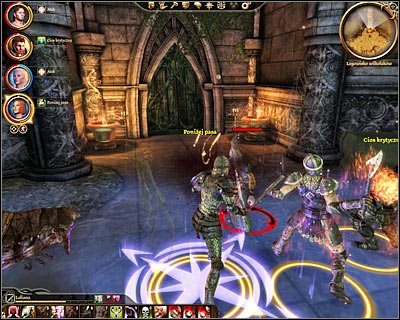
A huge battle is going to take place inside this cavern. You'll have all the werewolves on your side (including the Witherfang aka Lady of the Forest). Zathrian won't be alone, because shadows and sylvans will join him. The most important thing for you to know about is that you should IGNORE all the enemy units aside from Zathrian. Keep attacking him, because once he's lost all health points this battle will automatically end. The easiest way to defeat him is to surround him with at least two warriors to prevent him from casting too many spells.
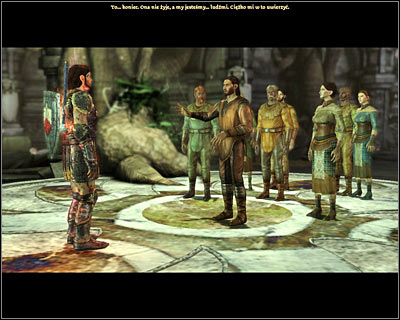
You'll now witness an interesting cut-scene during which Zathrian and Lady of the Forest will sacrifice their lives to lift the cruse and to transform the werewolves back to being elves. Talk to some of the civilians and when you're ready you'll return to [Brecilian forest - Dalish camp] where other elves will greet you (M41, 1) and promise their help against the Plague. Congratulations on completing this main quest.
HELPING THE ELVES TO GET RID OF THE WEREWOLVES:
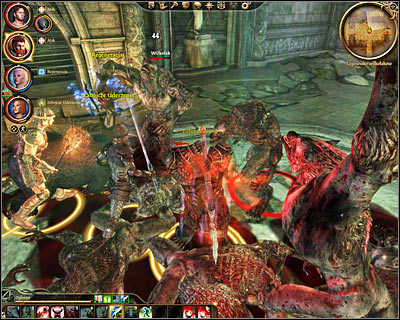
This is also an ending reserved for an evil character and your good followers this time will protest even more against the werewolves being exterminated. There are a few ways for you to reach the ending and the best one is to betray beast's trust at the very last moment. Start off by talking to the Gatekeeper (M46, 4). I wouldn't recommend attacking the keeper, because aside from the mini-boss you would also have to deal with a large group of standard werewolves.
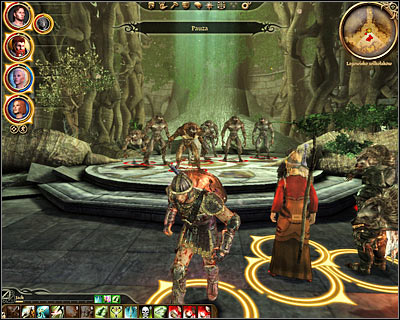
Thankfully even if you do manage to kill the Gatekeeper you won't turn all the other werewolves hostile towards you and you'll still be allowed to choose between several endings during your conversation with the Lady of the Forest (M46, 5). In this case you shouldn't start the fight right away, because you would be vastly outnumbered. Instead agree to help her in asking Zathrian for a peace meeting (M44, 6). Check the description of the previous ending (Lifting the curse) to find out exactly how this can be achieved.
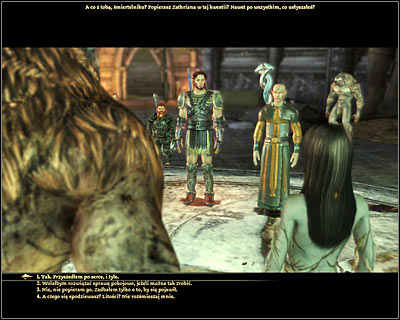
During the conversation with Zathrian you can agree to killing the werewolves right away or you can wait with your decision until you've returned to the Lady of the Forest. Once the werewolves find out that you're not their ally anymore a huge battle will start, but thankfully you'll have Zathrian on your side which will make things easier.
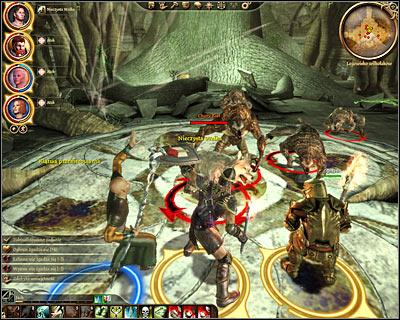
Having Zathrian to join the battle at your side is a crucial thing, because he's a powerful mage and he'll help you in defeating the werewolves. Notice that killing the Witherfang won't end this battle, because your objective will be to dispose of all the beasts in the lair. I would recommend killing some of the weaker werewolves as soon as possible, so you won't be surrounded by hostiles from all directions. Finish off by killing several mini-bosses and the Witherfang. Once you've won Zathrian will thank you for your assistance, he'll give you gryphon's nib and he'll promise to join the battle against the Plague. This is where you'll end your journey into the forest.
![Description: This quest will officially begin when you get to [Frostback mountains pass] (M47, 1) - Paragon of her kind - Main quests - Dragon Age: Origins - Game Guide and Walkthrough](https://game.lhg100.com/Article/UploadFiles/201512/2015121518194140.jpg)
Description: This quest will officially begin when you get to [Frostback mountains pass] (M47, 1). Start heading towards a dwarven fortress seen in the distance and once you've made your way to the main entrance (M47, 5) you'll witness a conversation between one of Orzammar's guards and Loghain's messengers. It won't take long for the messengers to recognize you, so you'll have to be ready to defend yourself. Watch out especially for one of the mages protecting Imrek. If you want to solve this problem without going into battle consider relying on intimidation during the initial conversation. Either way you'll have to get this obstacle out of the way in order to travel to [Orzammar - Hall of Heroes] and from there head directly to [Orzammar - Commons] (M47, 6). Watch a short cut-scene before moving on.
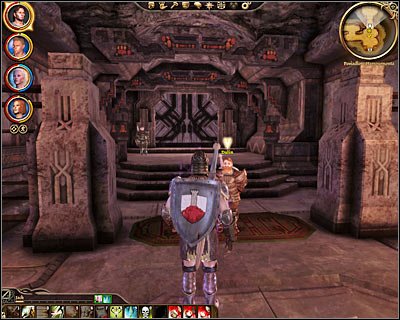
During your time spent here you'll soon find out that there are two challengers for the king's throne and you'll have to choose which one should win the election.
If you want to cooperate with Harrowmont you'll have to start off by completing Duling Forender quest. After that you'll be forced to solve two other quests - Lord's trust: first assignment and Lord's trust: second assignment.
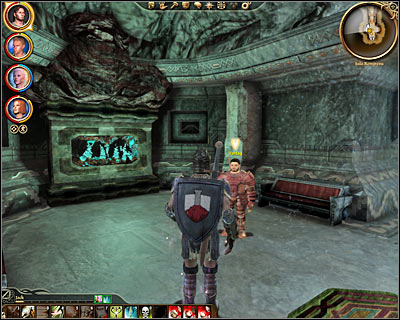
If you want to cooperate with Bhelen you'll have to start off by completing Vartag Gavorn quest. After that you'll be forced to solve two other quests - Prince's grace: first assignment and Prince's grace: second assignment.
You should also know that you'll be able to change your affinity during the course of the main quest by talking to the representative of the other group and agreeing to begin espionage. This would result in receiving additional quests - Unstable allegiance (given to you by Duling) or Enemy inside (given to you by Vartag).
All other missions are identical for both sides and the only thing that's going to change is the identity of the person which gave you the quests (Prince Bhelen or Lord Harrowmont). The quests I'm talking about are Jarvia's hideout, Anvil of the void and Paragon of her kind (identical name to the main quest but found in Orzammar category). Your journey will end with you receiving a crown from Caridin or from Branda (M59, 9). Once this item is in your possession you'll be allowed to return to [Orzammar - Diamond quarter - Chamber assembly].
When you get to the congress you'll automatically trigger a cut-scene (M53, 9). Notice that even now you'll be allowed to change your affinity, because your final response will affect the decision on who will become the next king of Orzammar.
If you choose prince Bhelen to be the next thing then his first order of business will be to execute lord Harrowmont and there's nothing you can do to stop it. Once the celebration has ended you'll return to [Orzammar - Diamond quarter - Royal palace] (M54, 3). Ask king Bhelen for assistance in dealing with the Plague. You can also ask him to build a statue in your honor and you can agree to take a reward for your efforts (Trian's hammer).
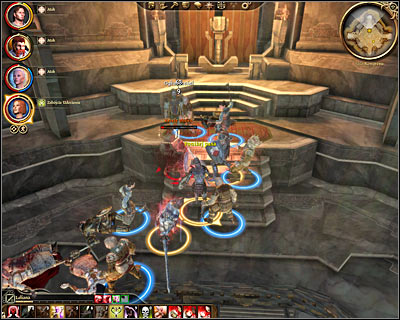
If you choose lord Harrowmont to be the next thing then prince Bhelen will show his objection and a huge battle is going to take place here. Bear in mind that Bhelen won't be the only dwarf you'll have to kill, because several of his servants will join the fight. Once it's safe again talk to king Harrowmont and ask him for assistance in dealing with the Plague. You can also ask him to build a statue in your honor and you can agree to take a reward for your efforts (Harrowmont's staff).
![Description: In order to begin this main quest you must travel to [Denerim - Market district - Brother Genitivi's house] Once you're inside talk to Weylon (M65, 10) and explain that you need to find the ashes to cure arl Eamon's disease - Urn of the Sacred Ashes - Main quests - Dragon Age: Origins - Game Guide and Walkthrough](https://game.lhg100.com/Article/UploadFiles/201512/2015121518194134.jpg)
Description: In order to begin this main quest you must travel to [Denerim - Market district - Brother Genitivi's house] Once you're inside talk to Weylon (M65, 10) and explain that you need to find the ashes to cure arl Eamon's disease. Weylon will send you to Lake Calenhad, however you can continue having this conversation. Use cunning and intimidation to back Weylon into a corner. He'll finally decide to attack you to prevent you from finding out his secret. Thankfully Weylon is a low level mage, so defeating him shouldn't be a big problem.
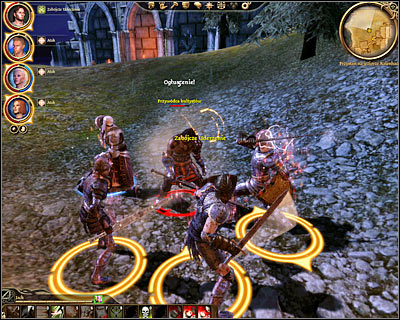
Remain inside brother Genitivi's home and check one of the rooms in the back. Open a chest (M65, 11) and collect Genitivi's research to find out that in order to retrace his steps you must travel to [Village of haven]. You can head on to that location right away or you can check the location recommended by Weylon which is going to be [Lake Calenhad docks - Spoiled princess]. After your arrival in the tavern you would have to talk to the innkeeper (M32, 7) and outside the building you would have been attacked by a band of cultists (M32, 8). This is all optional, so you should take the trip only if you want to earn additional experience points.
![When you arrive at [Village of haven] you'll find yourself standing outside of the town (M60, 1) - Urn of the Sacred Ashes - Main quests - Dragon Age: Origins - Game Guide and Walkthrough](https://game.lhg100.com/Article/UploadFiles/201512/2015121518194202.jpg)
When you arrive at [Village of haven] you'll find yourself standing outside of the town (M60, 1). Head forward and talk to one of the guards. This conversation is not a big deal, especially since he won't share any useful knowledge with you. Instead he'll tell you to find Eirik. You can now go inside [Village of haven - House] (M60, 2). Collect some of the useful items from nearby chests and then examine the altar (M60, 3).
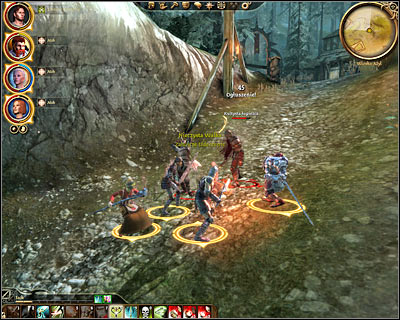
Once you're back outside you'll notice that you have been attacked by a large group of cultists. You'll be dealing mostly with peasants, so winning here should be an easy thing. You can now inspect a nearby pier or you can proceed directly towards a nearby hill. Be careful, because you'll encounter stronger opponents in a few moments. Each time a new battle has started make sure to focus on eliminating enemy mages first. I would also recommend attacking cultists from the distance, because you'll have to plenty of opportunities to injure them before they move closer to your team.
![You can explore a new hut along the way, marked on your map as [Village of haven - Village store] (M60, 4) - Urn of the Sacred Ashes - Main quests - Dragon Age: Origins - Game Guide and Walkthrough](https://game.lhg100.com/Article/UploadFiles/201512/2015121518194283.jpg)
You can explore a new hut along the way, marked on your map as [Village of haven - Village store] (M60, 4). You won't encounter any enemies inside the store, but on the other hand you'll have a chance to collect some really cool items from the nearby crates (M60, 5). Exit the store and continue heading towards the top of the hill. The only path is going to be guarded, but you shouldn't have any major problems reaching your final destination [Village of haven - Chantry] (M60, 6).
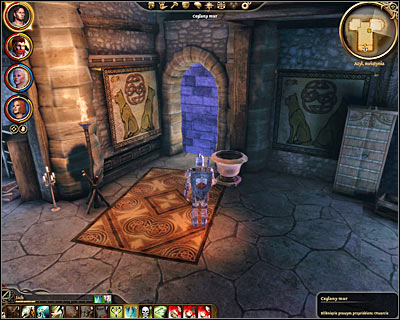
Once you're inside the chantry you'll have a chance to talk to Eirik (M60, 7) and a new battle is going to take place shortly after you've made the introductions. I would recommend that you attack Eirik first, so he won't have a chance to cast too many spells. Deal with other guards only when he's already dead. Check Eirik's body after the battle and collect the cultist's medallion. Once this is done click on a wall (M60, 8) in the north-western side of the room where you'll find brother Genitivi. This conversation has two endings. You can convince your new ally that you can continue on your own and that he should return to his home in Denerim or you an agree that he should help in gaining access to the temple. Wait for the entire team to be transported to [Ruined temple] (M61, 1).
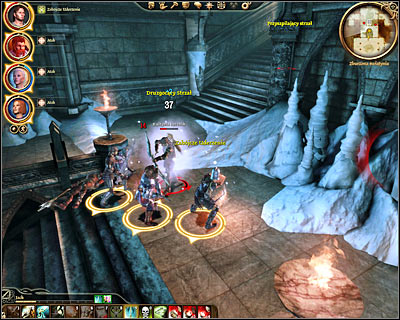
Make a few steps forward after your arrival in the temple. If brother Genitivi is a member of your team he'll automatically open the main gate for you. Otherwise you'll have to perform this action which shouldn't be a problem. Enter the temple (M61, 2) and be ready to defeat new cultists occupying the main room. Secure this largest area before moving on to smaller rooms.
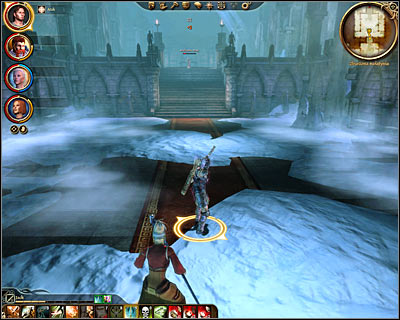
There are four corridors in the area and you should spend some time exploring each one of them. The corner in the south-west will contain a body of an adventurer and you'll also find a small room being guarded by the cultists. The corner in the south-east has a locked door and library with a lot of valuable documents. The corner in the north-east can be ignored for the time being and that leave us with a corridor found in the north-west of the main chamber.
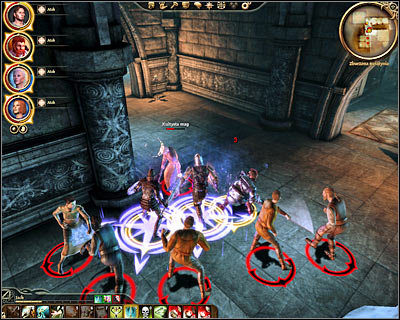
Approach this corridor slowly (M61, 5) and get ready to defend yourself against larger groups of cultists as you progress. The first group of hostiles will attack you as soon as you've opened a door. Aside from the cultists you'll also have to defeat a creature called a bronto which you might have already met in Orzammar. There are a lot of traps in the area, so it would be a good idea to keep using rogue's abilities to disarm them. Expect more resistance when you reach rooms located further away from the main chamber and each time you've engaged enemy units in battle start by killing their mages.
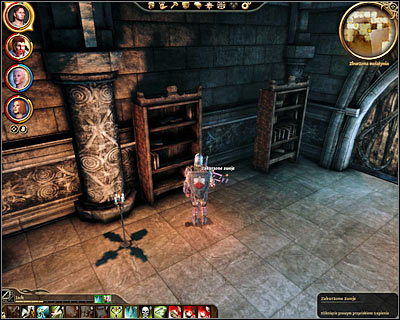
Make sure that it's safe and then enter the room located in the south-east. You'll have to click on some items lying on the ground to find a key (M61, 7). Once this is object is in your possession return to the main chamber and notice that new cultists have arrived in the meantime. Deal with all enemy units and then head on to the corner in the south-east. There's a locked door which you can now open using the newly acquired key (M61, 8). Find a chest inside. Opening it will allow you to get your hands on the main hall key.
Return to the main chamber for the second time and this time head north, because you'll be allowed to use the second key to open a new door (M61, 9). I would recommend saving your progress before moving on. There's a mage in the next room and it would be a good idea to eliminate him from a large distance. Once he's gone enter the room (M61, 10) and get ready to defend yourself against a surprise attack made by the ash wraiths. Use the stairs after the battle and click on the brazier.
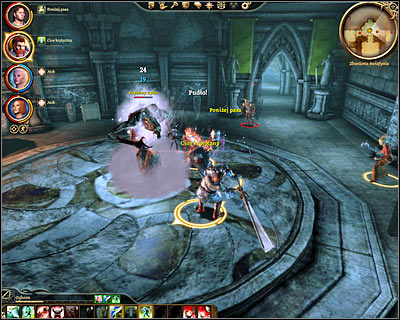
The next room of the temple is going to be occupied by a new group of cultists. I would recommend to encourage them to follow you to the southern room, so during the battle you won't have to worry about stepping on any traps. Deal with all the enemies and head north. Keep fighting the cultists, however ash wraiths will soon join the battle (M61, 11). Deal with the monsters once the cultists are dead and keep monitoring health bars of your team members.
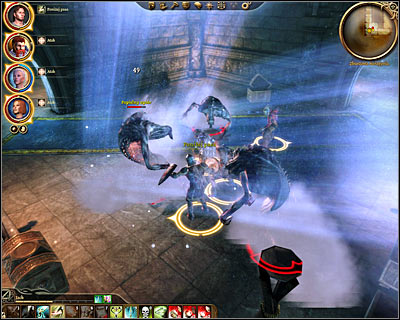
There are two passageways leading to the next section of the temple - the eastern one and the western one. It won't really matter which path you'll decide to choose, because eventually you'll make your way to [Ruined temple - Caves] (M61, 12). Notice that if you choose the western passageway you will find several chests along the way (M61, 13). Opening each chest will result in your team being attacked by powerful ash wraiths, so it's a good opportunity to score a lot of experience points. Make your way to one of the exits and leave the main temple.
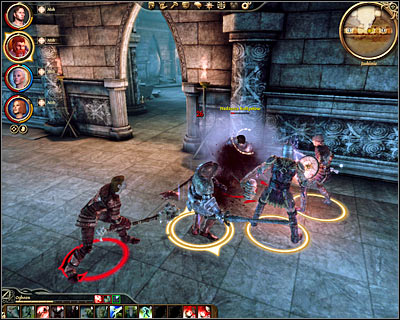
Soon after your arrival in the underground caves (M62, 1) you'll have to defeat the first mini-boss - cultist overseer (M62, 2). I would recommend that you encourage him to leave the room and to come and get you. Once he's gone deal with other threats and start exploring the caves. There's going to be only one passageway here leading to your current destination, so you shouldn't get lost. Instead focus on finding and disarming traps.
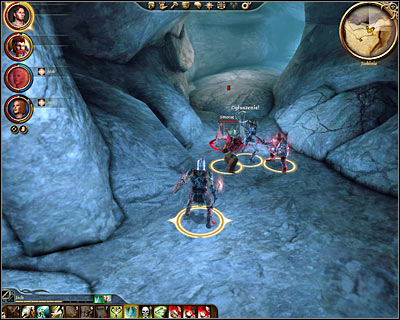
You'll soon start encountering dragonlings and you may know these creatures from your time spent in the mage's tower. Eliminating the tiny dragons won't be a big problem, however you should prevent them from surrounding your team. Keep moving slowly, so you won't have to fight too many of them at the same time. You'll soon enter a larger cave (M62, 3) and you should consider attacking new enemies from a larger distance. Watch out for cultist mages and prevent them from casting too many powerful spells by attacking them with your warriors as soon as possible.
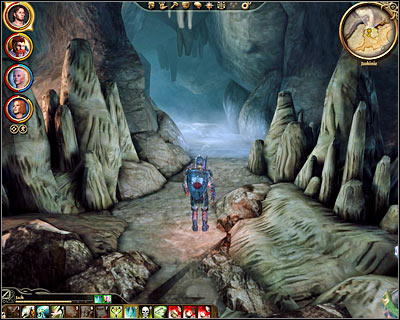
Keep pushing towards the northern areas of the cave complex. New dragonlings and cultists will stand in your way. Watch out especially while going through larger caves, because most of them are going to be heavily defended. One of the upcoming caves will have two exits. If you decide to choose the eastern exit (M62, 4) you would be given a chance to defeat a couple of larger dragons (subquest opportunity). Choosing the western corridor (M62, 5) will allow you to resume the main mission.
Be careful, because you'll soon start encountering cultist assassins and they'll be using camouflage much like rogues in your team. When you get to a new junction (M6, 7) you can head north to explore the caves or turn west to focus on the mission. If you go north you would have a chance to defeat other dragons, as well as a new mini-boss - cultist overseer (M62, 8). It would be a good idea to eliminate this boss before he shields himself with powerful defensive spells. Once he's gone kill two dragons and the remaining third creature would be waiting for you in the east (along with the last group of the cultists).
Choosing the western corridor (M62, 9) will get you one step closer to your current goal which is to find the urn. A large group of cultists is occupying one of the nearby caverns. You'll have to be careful here, because not only you'll be going against mages and assassins but you'll also have to avoid a lot of traps (M62, 10). Head west once you've won and it won't take too long before you get closer to the last cavern (M62, 11). I would recommend saving your progress before you approach Kolgrim and his men.
STOPPING THE CULTISTS:
Stopping the cultists is an obvious choice for a true hero and you can attack them right away or you can listen to what Kolgrim has to say first. Start the battle by sending your men to deal with two mages. It's extremely important to kill them in a short period of time before they injure your characters or make them weaker. Once the mages are gone start attacking normal warriors and finish off by defeating Kolgrim who obviously is going to be a boss here. Make sure to check Kolgrim's body after the battle to collect his horn.
![You may now use the nearby passageway to travel to [Ruined temple - Top of the mountain] (M62, 12) - Urn of the Sacred Ashes - Main quests - Dragon Age: Origins - Game Guide and Walkthrough](https://game.lhg100.com/Article/UploadFiles/201512/2015121518194316.jpg)
You may now use the nearby passageway to travel to [Ruined temple - Top of the mountain] (M62, 12). Notice that you'll be allowed to use the horn here by choosing this item in your inventory. Doing this will result in the arrival of a huge dragon. I have to warn you that it's going to be EXTREMELY difficult to kill this creature and you shouldn't blow the horn unless you're prepared for the battle. During the fight with the dragon your warriors should be focused on distracting the beast and your archers and mages should attack the beast from a larger distance. Focus on keeping your men alive, because dragon's attacks will inflict massive injuries. Having a lot of health potions in your disposal is also an important thing. If you manage to defeat the dragon check its body for a scale (needed for one of the subquests) and for powerful items. If you aren't skill enough ignore the dragon and focus only on completing the main task.
HELPING THE CULTISTS:

This is a decision you'll want to make if you're playing as an evil hero and it will result in the destruction of the urn by mixing the ashes with dragon's blood. If this is what you want confirm that you want to help Kolgrim and he'll give you a vial with dragon's blood. Don't forget to mention Eamon during the conversation, so that you'll be allowed to collect a sample of the ashes for yourself prior to destroying the rest. Bear in mind that your good-hearted followers will protest against what you're trying to do and it would be a good idea to leave them in the camp before instead of trying to persuade them.
![You may now use the path located near Kolgrim to travel to [Ruined temple - Top of the mountain] (M62, 12) - Urn of the Sacred Ashes - Main quests - Dragon Age: Origins - Game Guide and Walkthrough](https://game.lhg100.com/Article/UploadFiles/201512/2015121518194491.jpg)
You may now use the path located near Kolgrim to travel to [Ruined temple - Top of the mountain] (M62, 12). Make a few steps forward to see a cut-scene featuring a dragon and then head forward. You'll soon witness a second cut-scene and this time Kolgrim will "explain" the dragon that you're here to help.
COMPLETING FOUR TRIALS:

This is a common route, so you'll have to take it even if you agreed to help the cultists. Start off on the mountaintop by heading forward and opening a gate leading to [Ruined temple - Trials] (M63, 1). Here you'll also have to move forward, but it won't take long until you'll have a chance to talk to the Guardian (M63, 2). It doesn't matter how you'll reply to his questions, because the most important thing is to find out about the four trials. Confirm that you're ready to start and answer a personal question before leaving this area.
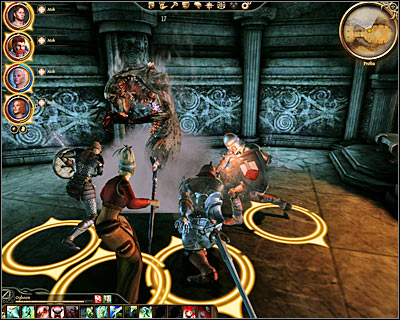
The first trial (M63, 3) will require you to talk to eight ghosts. If you answers their riddles correctly each ghost will turn itself into mist and become a part of the key. If you answer incorrectly the ghost will transform itself into a mini-boss (ash wraith) and it shouldn't be something to ignore. I would even encourage you to give bad responses, because you will receive more experience points for defeating the ghost rather than for making it go away. Here's the list of the ghosts along with correct answers to their questions:
1) Bronna - About the dreams.
2) Tan Shartan - About home.
3) General Maferat - About jealousy.
4) Archon Hessarian - About mercy.
5) Ealisay - About a tune.
6) Lady Vasilia - About vengeance.
7) Disciple Havard - About the mountains.
8) Disciple Cathaire - About the hunger.
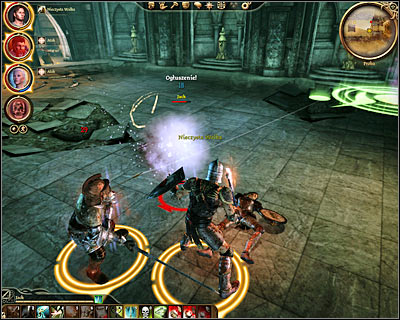
Once you've killed or satisfied all eight ghosts a large gate is going to open, allowing you to move towards the next room. Talk to a ghost of a familiar person along the way and then proceed to a new area (M63, 4). Here you'll have to defeat your... team. The only difference is that they're going to be ghosts, so you'll have to exploit their weaknesses based on your observations. I would recommend starting with the mage and then dealing with the rest. Winning this trial will unlock the next door.
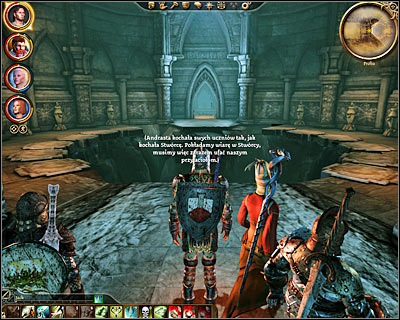
In this case smart planning is going to be a key to success (M63, 5). The idea of this riddle is to allow one of your team members to reach the other side of the room safely. Three remaining allies will have to assist in achieving that goal by standing on certain movable pieces located on both sides of the abyss.
Here's the full solution:
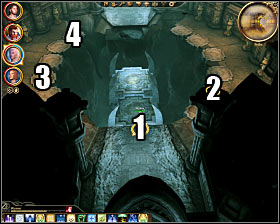
Step 1.
Character number 1 is standing somewhere in front of the abyss. Characters number 2, 3 and 4 take positions on different movable pieces in order to extend two stable segments of the bridge.
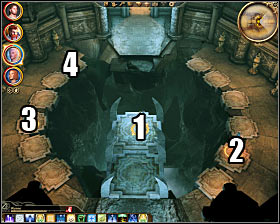
Step 2.
Character number 1 moves to the second stable segment of the bridge and stops there. Characters 2, 3 and 4 remain where they are.
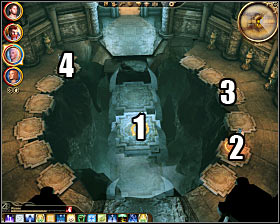
Step 3.
Character number 3 moves to a different floor piece. Characters 1, 2 and 4 remain where they are.
Step 4.
Character number 2 moves to a different floor piece. Characters 1, 3 and 4 remain where they are.

Step 5.
Character number 1 moves to the third stable segment of the bridge. Characters 2, 3 and 4 remain where they are.
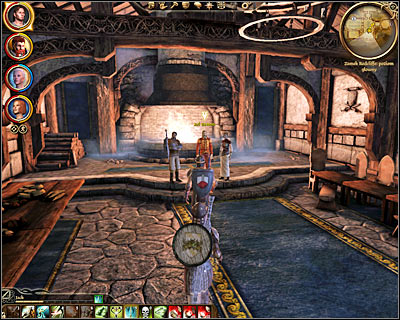
Step 6.
Character number 4 moves to a different floor piece AND THEN character number 3 moves to a different floor piece. Character number 2 is not moving the whole time. Once character number 3 has finished moving character number 1 can proceed to the exit.
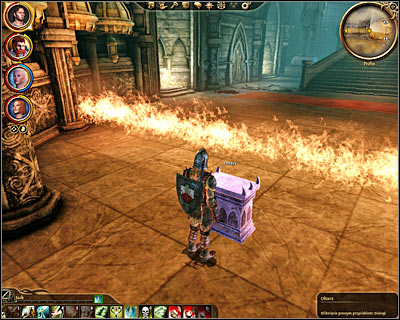
The last fourth trial (M63, 6) is going to be the easiest one. Approach the altar located in front of the entrance, click on it and confirm that you want to unequip your things. You can now step through the flames to complete this challenge. Wait for the Guardian to show up (M63, 7) and to congratulate you on a job well done.
CHOOSING THE ENDING:
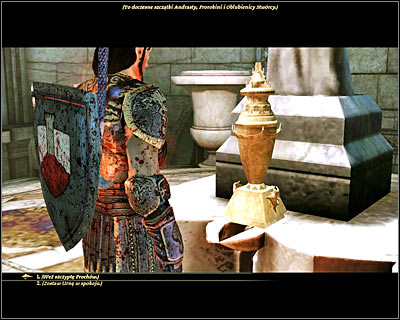
To be honest the ending has been decided a long time ago (during the conversation with Kolgrim to be more specific) and now you'll do what has to be done. If you've defeated the cultists you can take the ashes needed to heal Eamon right away. After that you will have to return to brother Genitivi in [Ruined temple] (M61, 1) or in [Denerim - Market district - Brother Genitivi's house] (M65, 10). If he was still in the temple don't forget to visit him in Denerim later on during her game, because he'll have a present for you (master dweomer rune).
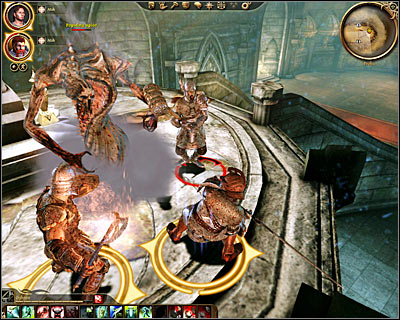
If you've decided to help the cultists in destroying the urn you can take the ashes needed to save Eamon and then you can use the vial with dragon's blood to destroy the rest. Your good-hearted followers will be so furious that they'll attack you on the spot, so as I've told you before it would be a good idea to ditch them before starting the trials. You'll also have to deal with the Guardian and two ash wraiths. You can leave this location after the battle. Kolgrim will be waiting for you in [Ruined temple - Top of the mountain] (M63, 8) and he'll reward you with a possibility of drinking dragon's blood.
Description: This quest will appear on your list of assignments after you've successfully completed Arl of Redcliffe mission. In order to move on with the main plot you'll have to complete three other primary quests - Broken circle, Nature of the beast and Paragon of her kind. Once you have all the major races of Ferelden at your side return to [Redcliffe castle - Main floor] (M29, 5), talk to Eamon and confirm that you want to travel to [Denerim]. Here you'll have a chance to witness a conversation with Loghain. Sadly you won't be allowed to choose how it ends. The meeting will result in your team receiving a new quest - Landsmeet.
![Description: This quest will begin in [Denerim - Arl Eamon's estate] (M71, 1) - Landsmeet - Main quests - Dragon Age: Origins - Game Guide and Walkthrough](https://game.lhg100.com/Article/UploadFiles/201512/2015121518194552.jpg)
Description: This quest will begin in [Denerim - Arl Eamon's estate] (M71, 1). Proceed to Eamon's office (M71, 2) where you'll have a chance to talk to arl himself and to one of the servants of queen Anora. Doing this will trigger Saving the queen quest (more on that in Denerim quests category). I would also recommend completing three other quests during your stay in Howe's estate - Tortured noble (Denerim category), Missing in action (Chanter's board category) and The lost templar (Denerim category).
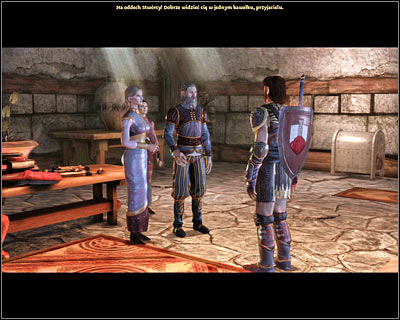
There are three ways for you to advance to the next part of this quest. The first method will require you to leave Howe's estate by successfully defeating Sir Cauthrien (M73, 7) and a dozen of other enemies (final part of Saving the queen quest). The remaining two solutions are tied directly to the fact of being captured by Cauthrien and having to solve Captured! quest by escaping from [Fort Drakon] (M79, 1). Here you'll have to choose between using your own skills to escape or by relying on the rest of the team. Either way you'll have to return to Eamon's estate after the visit in Howe's place. This time you'll want to talk to Eamon and to queen Anora (M71, 2).
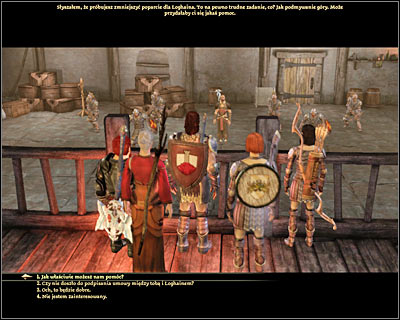
You'll eventually find out that you'll have to travel to the elven alienage to see what's going on down there and a new quest will be added to your list of assignments - Unrest in the alienage (Denerim quests category). Naturally this mission will have several endings, but your top priority will be to collect the documents (M68, 8) proving that Loghain knew about the elven slaves being sold by the slavers. Save your game before you hand over the document to Eamon (M71, 2), because you'll have to make some crucial decisions in the near future.
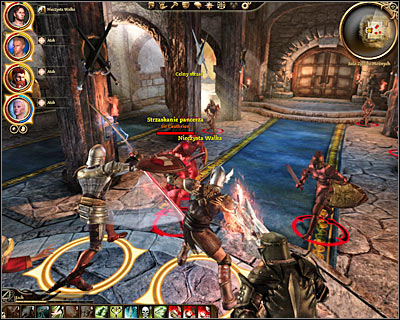
Start a new conversation with arl Eamon (M71, 2) and inform him about your findings in the elven alienage. You'll also have to give him the documents implicating Loghain in the slave trading business. You may leave the estate now. Notice that Alistair has to become a member of your team for the purpose of this quest, so don't forget to equip him properly if he was spending a lot of time in the campsite up till now. Open the map of the city and go to [Denerim - Royal palace - Hall of the Landsmeet]. Once you've arrived (M71, 4) you'll either head forward right away or meet Sir Cauthrien (if you didn't kill her while exploring Howe's estate - Saving the queen quest). If Cauthrien is present in the room you'll have to choose between fighting her and convincing her that she should let you through (successful persuasion or intimidation attempts). The landsmeet will begin as soon as you've clicked on the door leading to the main hall of the royal palace (M71, 5).
CRUCIAL FACTORS THAT CAN AFFECT THE QUEST:
This section contains a list of important factors which can affect the outcome of the landsmeet in your favor. Make sure to read everything to know what has to be done in order to play out everything as planned.
1) Talking to Anora (M71, 3) can have a serious impact on the outcome of the landsmeet. You can find the queen in one of the chambers of [Denerim - Arl Eamon's estate]. Start the conversation and agree to back her up in her efforts of becoming a queen, even if you plan on changing your mind in the future. You can also convince her that she should marry you or Alistair. Read the Possible endings section of this quest to find out more on how this can be achieved. If you ignore Anora entirely she'll align herself with Loghain during the landsmeet, increasing his chances of winning the vote.
2) It's important to fulfill two subquests tied to nobles from the landsmeet - Tortured noble and The lost templar. Doing this will give you 100% votes from at least two nobles present at the meeting.
3) Use your persuasion skills at the beginning of the conversation with Loghain (during the landsmeet).
4) Each time you're given a chance to say something (during the landsmeet) focus on exploiting subjects uncomfortable for Loghain instead of pointlessly arguing with him. You can ask him about the people he was holding in Howe's estate, about his knowledge of the elves being sold as slaves or about trying to use poison to kill arl Eamon.
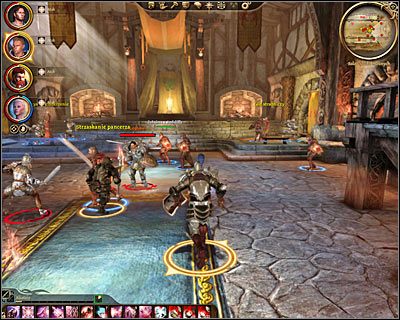
After the main character, Loghain and Anora have finished their statements a vote is going to take place here. In order to get the majority of votes you'll need to have Anora on your side, two nobles (from the subquests) and you'll need to convince at least one additional noble by sharing information on Loghain's dirty deeds. If you lose the vote a huge battle is going to take place in the palace (M71, 6). As soon as the battle has started focus all of your efforts on attacking Loghain (he's a mini-boss), because when he loses enough health you'll automatically advance to the next phase of this quest.
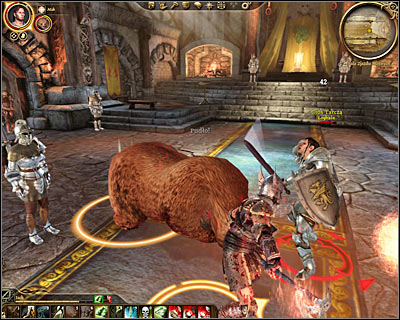
If you do manage to get the majority of votes Loghain will have hard time dealing with the defeat. In this case you'll be allowed to attack him and his men or to challenge him to a honorable duel. I wouldn't recommend the first option, because you would be dealing with a lot of enemy units. Instead ask him to fight alone and when he agrees choose the person from your team for the purpose of this fight (M71, 6). If you're playing as a warrior as a rogue you should be able to defeat him yourself. Otherwise choose Sten or Oghren, because Loghain's attacks are going to be powerful and a mage wouldn't survive them. The duel will also take place if you lost the vote but managed to defeat Loghain for the first time (during the huge battle).
Once you've defeated Loghain in a battle or in a duel you'll trigger a cut-scene and you'll have to make an important decision. You can choose to keep Loghain alive by listening to Riordan's plan, but this decision would have some serious repercussions in your relations with Alistair. To make it more clear - Alistair would leave your team and there's a chance that he would be executed. You could prevent this from happening by reminding Anora that she owes you a favor and in this case instead of being killed he would going to be banished from the kingdom. The only good news from this is that Loghain would become a member of your team until the end of the game. The best way to end this quest is to kill Loghain and you can do it yourself or you can ask Alistair to do the dirty work. Once that problem has been solved you'll have to decide who should become the next king (or queen).
POSSIBLE ENDINGS:
1) Anora becomes a queen - There are a few ways to get to this particular ending. Anora would automatically become a queen after unsuccessful negotiations, however you can also pick her yourself when at the end everyone will ask for your opinion. It's not a bad choice and besides Alistair is going to be happy that he won't have to play any major roles in the kingdom.
2) Alistair becomes a king - In this case you would have to show your support at the end of the meeting when everyone will ask for your opinion. You should know that Alistair won't be happy that he's been chosen to become a king, so you should calm him down a little during the conversation which will follow your initial choice (otherwise you'll lose a lot of relationship points with him). The interesting thing about this ending is that Anora is going to locked in a tower until further notice.
3) Alistair marries the queen - This is where it gets a little more complicated, because you'll have to perform several persuasion attempts. I would recommend that you make some preparations prior to going to the palace and even before you talk to Eamon to tell him about the situation in the alienage. Alistair will be reluctant to the whole idea, however he will agree to the offer if you use persuasion or cunning. Bear in mind that the queen at his side doesn't have to be Anora, because if you're playing as a female character you may step in her place.
4) Main character marries the queen - Naturally you'll have to be playing as a male character in order to pull this one off. Make sure to talk to Anora before going to the palace. During the conversation you can present her with an idea of getting married. Once this has been done perform all the actions described above and don't interfere until the last conversation has started. This is when you'll have to present everyone with your idea. The important thing here is not to kill Loghain, because otherwise Anora will not marry you. Thankfully this can be easily avoided by ordering Alistair to perform the execution.
5) Main character marries Alistair - Naturally this option will become available only if you're playing as a female character. I would strongly recommend talking about this with Alistair before the landsmeet, so he won't be surprised by your request, you won't lose a lot of relationship points and you won't have to use persuasion to convince him to your plan. In order to increase your chances of him agreeing to your plan you should be playing as a noble human, however other races also have a chance with him.
After the landsmeet has ended you'll automatically return to [Denerim - Arl Eamon's estate] (M71, 7) where you'll have a chance to talk to the new king, to the new queen or to the new couple and you'll find out that the next step will be to travel to Redcliffe in order to prepare for the final battle with the archdemon.
![Description: Start this quest by leaving Denerim and choosing [Redcliffe] as your next destination on the world map - The final battle - Main quests - Dragon Age: Origins - Game Guide and Walkthrough](https://game.lhg100.com/Article/UploadFiles/201512/2015121518194696.jpg)
Description: Start this quest by leaving Denerim and choosing [Redcliffe] as your next destination on the world map. You won't be allowed to travel directly to the castle and instead you'll end up standing near the entrance to the village. Make a few steps forward here (M27, 1) and listen to what one of the survivors has to say (M27, 2). You can now secure the rest of the village or you can proceed directly to [Redcliffe castle - Courtyard] using the well-known passageway (M27, 28).
Once you've arrived at the courtyard (M30, 4) you'll witness a huge battle taking place between the monsters and Redcliffe warriors. Start attacking the monsters and make sure to move your team away from the main gate (especially your mages), because that's where enemy reinforcements will be showing up. The best choice would be to order your team to stand on the side (M30, 5) to avoid trouble.
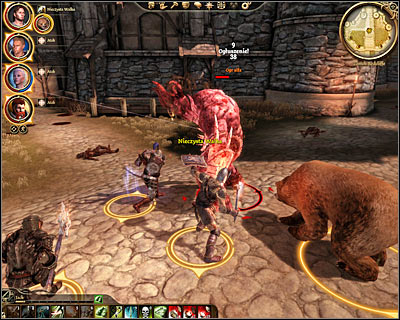
This battle may seem simple at first, however an alpha ogre will arrive here soon and that'll make the matters worse. Make sure to keep your team members alive while trying to defeat the ogre and order at least some of your allies to attack this beast from a larger distance. Once all the monsters have been defeated take your time to collect the trophies from the battlefield and then talk to the messenger (M30, 3). Confirm that you want to enter the castle with him and you'll be automatically transported to [Redcliffe castle - Main floor] (M29, 5). Witness a conversation taking place between arl Eamon, Riordan and Alistair. They'll talk about the archdemon and darkspawns marching on Denerim.
FINAL PREPARATIONS BEFORE THE INVASION:
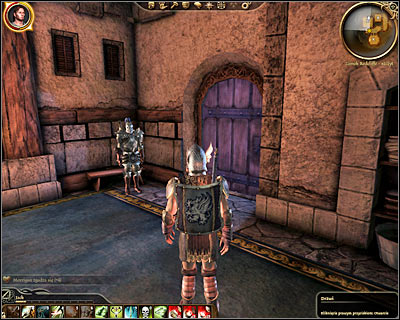
You can now spend some time talking to the men and women found inside the castle to listen to their opinions on what's happening in Ferelden. I would recommend talking to one of the bodyguards and to a dwarven commander. Don't forget about your followers, because some of them may have something interesting to share. Head on to [Redcliffe castle - Upper floor] (M29, 6) when you're ready to move on with this main quest. Here you'll have to proceed directly to Riordan's chamber (M29, 8). Talk to the Grey Warden and during this conversation you'll find out that the only way to kill the archdemon will be to sacrifice a life of one of the wardens. Thankfully you won't have to make a decision on who it's going to be right now.
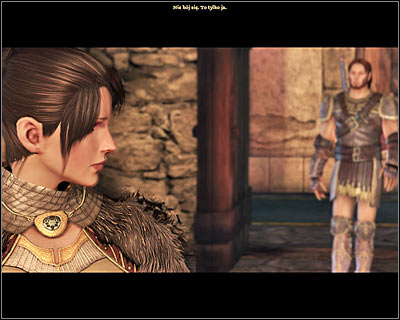
Once you've ended the conversation head back to your room where you'll find Morrigan (M29, 9). She'll offer you an alternative solution and it'll be to spend a night with a Grey Warden to transfer the essence of the archdemon to her unborn baby. If you're playing as a male you can agree to have sex with her or you can refuse. If you're playing as a female or if you refused while playing as a male you'll listen to her modified plan and that will be to spend a night with Alistair or Loghain. Notice that you would have to convince that person to have sex with Morrigan! You can agree to the modified plan or refuse for the second time. If you've managed to "seal the deal" Morrigan will remain with the team until the end, but if you didn't find a compromise she'll leave you right now and she won't return. Several new cut-scenes are going to be displayed after the conversation and then you'll end up in Denerim.
RETAKING CONTROL OVER CITY GATES:
![The final battle will begin in [Denerim - City gates] (M76, 1) - The final battle - Main quests - Dragon Age: Origins - Game Guide and Walkthrough](https://game.lhg100.com/Article/UploadFiles/201512/2015121518194715.jpg)
The final battle will begin in [Denerim - City gates] (M76, 1). Don't worry that only the main character is playable at the moment, because achieving victory here shouldn't be a problem. Just keep following your inactive team members and assist them in getting rid of the darkspawn. Thankfully all the beasts will die quickly and you won't encounter any mini-bosses. Try attacking the largest groups, because they're the only ones that may cause trouble. The monsters will be arriving in the northern, in the western and in the southern areas of the map (M76, 2), however it won't take long until they're dead (use your personal map to find them quickly).
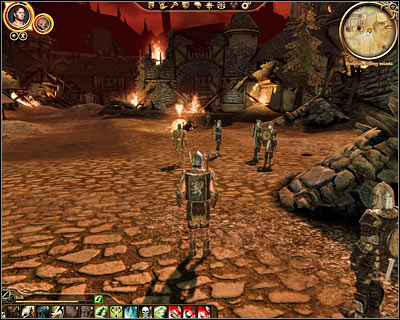
Return to the central area of the map (M76, 3) once all the beasts have been defeated and find Riordan (M76, 3). During your conversation with the Grey Warden you'll find out about the existence of two generals and you'll also have to decide who to take with you for the final battle. This is an important decision. You can't leave only the weakest members of your team behind, because they'll take part in a separate mission in the near future. On the other hand you'll want to have some of the best followers at your side, because most of the upcoming fights (including the last battle with the archdemon) are going to be tough. End the conversation and say goodbye to those who will stay here. After that proceed to the exit and choose [Denerim - Market district] (M76, 4) from the list of available locations.
SECURING THE MARKET DISTRICT:

This (M64, 16) is where you'll be given a chance to request help from an army. You'll be allowed to choose between all the fractions and races you've had a chance to convince to join your during the course of an entire game (Redcliffe warriors, dwarves, mages, templars, golems, werewolves, elves). I wouldn't recommend calling anyone unless it's necessary, because you'll need as many friendly units as possible for the final battles of the game, including the one with the archdemon. There are several ogres nearby (M64, 17) and it would be a good idea to provoke one creature at a time to follow you to the start area where you can defeat it with the help from the rest of the team.
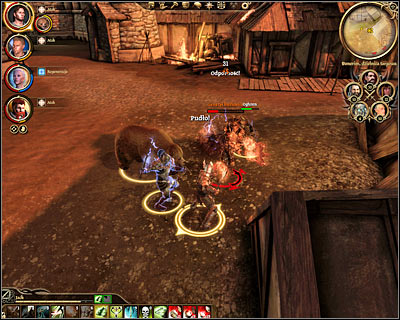
Aside from the ogres you'll also have to watch out for an enemy emissary, especially since the beast will have powerful spells in its arsenal. Once it's relatively safe here focus your efforts on finding and killing the hurlock general (M64, 18). Bear in mind that it'll be very resistant to your attacks, but on the other hand this boss is only a warrior. Once the general has been killed go back the same way you came before and choose [Denerim - Elven alienage] (M66, 14) from the list of active locations.
SECURING THE ELVEN ALIENAGE:
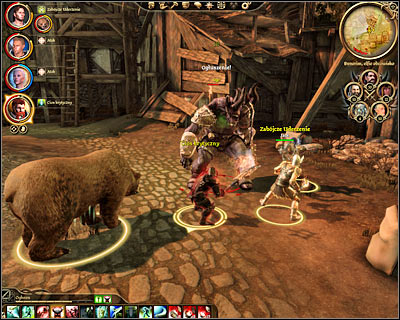
Start off by heading south-west and keep moving in that direction until you've reached the courtyard (M66, 15). You can talk to Shianni here and you can ask for her help in securing the alienage or you may decide that you'll be fine on your own. Enemy units are stationed near the southern exit (M66, 16) and you'll have to wait for a new ogre to break the wooden barrier. Move back to deal with this beast prior to engaging other enemy troops.
Use your archers to deal with some of the darkspawn from the distance. Sooner or later you'll have to attack the hurlock general and be careful, because this time you'll be dealing with a mage. Attack enemy positions and focus on defeating the boss before attacking any other creatures. Don't forget to use healing spells and potions, however you can also consider retreating if your followers take too much damage. More beasts will appear near the bridge, however it should be easier to kill them. Go back to Shianni (M66, 15) once it's safe again and she'll reward you with a Dawn ring. You may now head south (M66, 1). Ignore the cut-scene featuring the dragon and choose [Denerim - Palace district] from the list of locations. You won't get there right away, because you'll have to take charge of the group you've left behind near the city gates (M76, 3).
HOLDING THE CITY GATES:
![Notice that once again you're in [Denerim - City gates] - The final battle - Main quests - Dragon Age: Origins - Game Guide and Walkthrough](https://game.lhg100.com/Article/UploadFiles/201512/2015121518194849.jpg)
Notice that once again you're in [Denerim - City gates]. This time you'll take command over the second team and your objective will be to defend city gates against monster attacks. Make sure that your team is prepared for this battle and then talk to one of the officers to make the monsters appear (M76, 1). I would strongly recommend that you focus on eliminating an alpha ogre during this battle, however you'll also have to defeat several Hurlock emissaries. Ignore the normal monsters, because your allies will deal with those. Once you've won talk to the messenger again (M76, 5) and you'll return to commanding the main team.
REACHING FORT DRAKON:
![You shouldn't have any other problems reaching [Denerim - Palace district] (M77, 1) - The final battle - Main quests - Dragon Age: Origins - Game Guide and Walkthrough](https://game.lhg100.com/Article/UploadFiles/201512/2015121518194822.jpg)
You shouldn't have any other problems reaching [Denerim - Palace district] (M77, 1). Watch an interesting cut-scene showing Riordan fighting the archdemon after which you'll be allowed to continue your journey. There are two passageways (M77, 2) leading to the eastern section of the map and you can choose either one of them. Bear in mind that you'll have to kill at least one ogre along the way (mini-boss), as well as dozens of genlocks and hurlocks. Make sure to kill the archers first while fighting the darkspawn.
I would recommend that you call for backup once you're close enough to the royal palace (M77, 3). This area is also going to be defended by an ogre and there will be two passageways leading to the eastern section of the map (M77, 4). Watch out for new traps placed near the last courtyard. During the next battle with the darkspawn (M77, 5) you should focus mostly on eliminating enemy emissaries (mages), because otherwise your armies can lose a lot of men. Once you're ready to leave this area click on a gate nearby (M77, 6) and choose [Denerim - Fort Drakon] from the list of active locations.
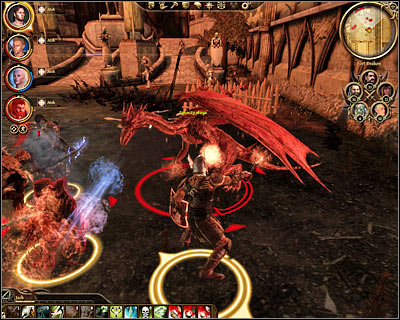
You'll start the game in front of the fort (M78, 1) and you should summon one of the armies as soon as possible. I would recommend choosing human or dwarven warriors to assist you in dealing with enemy archers hidden behind barricades. You on the other hand should focus on killing one of the smaller dragons at the same time. Once the beast has been eliminated start attacking other powerful creatures, including new hurlock emissaries. Keep fighting until you've defeated all hostile units and then click on the main gate of the fort (M78, 2) to travel to [Denerim - Fort Drakon - Main floor] (M79, 9).
REACHING THE ROOF OF THE FORT:
The biggest battle is going to take place inside the main room of the fort (M79, 14) which is going to be located to the south of the area where you've started the game. Watch out mostly for shades, especially since you'll encounter at least one mini-boss. Once the demons have been defeated start attacking a genlock conjurer (main boss). Head south once it's safe again to move on with the mission (M79, 11).
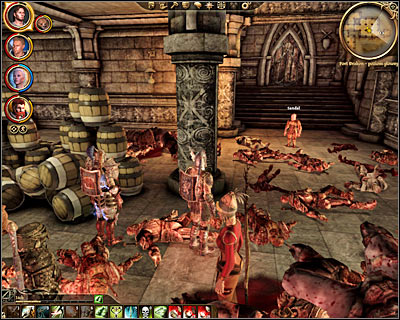
Keep going straight until you come across a large trap which must be disarmed. Get ready to defend yourself against a large group of the undead (M79, 15). You'll also have to watch out for two mini-bosses at the same time - an emissary (kill it as soon as possible) and a shapeshifter. Don't forget to loot bodies of fallen enemies for possible treasures, as well as to search nearby rooms. Head to the eastern warehouse (M79, 6) once you're done exploring. You'll meet Sandal here (M79, 16) and make sure to talk to him, because this will be your last opportunity to barter or to enchant weapons before the final battle takes place. Choose the passageway found behind his back to travel to [Denerim - Fort Drakon - First floor] (M79, 17).
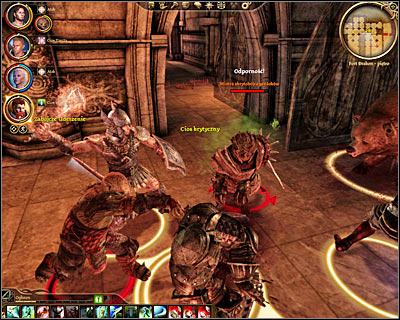
This time you'll begin in the north-western section of the fort (M80, 1) and you'll have to start moving east until you enter a room with two exits (M80, 2). Exploring the eastern room is optional - you would come across a lot of archers and after defeating them you would have a chance to look around. You must use the southern passageway if you want to get step closer to meeting the archdemon. Be careful here, because the next corridor contains a lot of traps and you'll be attacked by assassins, including a genlock master assassin. Prevent the creature from dealing too much damage and don't fight the genlocks near the traps to avoid potential trouble.
Once you've dealt with all assassins make sure to ask your rogue for help in disarming all of the remaining traps. You may now begin moving south until you make your way to yet another large hall (M80, 3). Attack the two ogres seen in the next room from a distance to make them chase you and stand somewhere near the door to fight with only one beast. Thankfully your team should be skilled enough by now to challenge even two ogres at the same time, but you should play it safe. Once you've defeated both ogres enter the large room again and this time focus on killing the emissary. Before you travel to [Denerim - Fort Drakon - Roof] (M80, 4) make sure to SAVE your game and to check nearby chests for additional treasures (M80, 5).
DEFEATING THE ARCHDEMON:

Start off by watching a short introduction after which you'll start the final battle with the archdemon (M81, 1). I assume that you've fought similar dragons in the past, so you should know the rules. Attack the archdemon with one or two warriors. The rest of your team should stay behind and use bows or spells to attack the dragon. Don't forget that healing your team members is a crucial thing, especially the ones in direct contact with the dragon. I would also recommend that you call for reinforcements as soon as the battle has started. Allied warriors (Redcliffe, dwarves) will do just fine, however you can also consider choosing golems, especially since the archdemon should ignore your archers and mages.
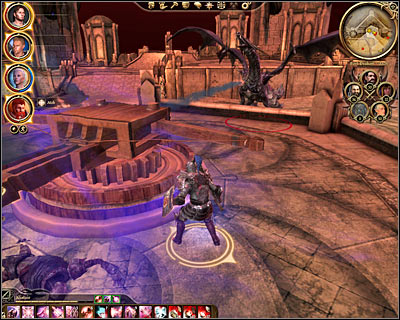
Naturally the archdemon won't stay in one spot during this battle, but you won't have to worry about any aerial attacks. If you do see the dragon landing on a small "island" (M81, 3) consider moving the mages and the archers closer, however you can also use nearby ballistae (M81, 2). Don't forget that the person using these devices should be skilled in reloading them once they run out of projectiles.
The only thing you'll have to worry about will be smaller monsters which will begin appearing in a few minutes. If you have allied troops at your side it won't be an important issue, however you should spend some time defeating the monsters. If you don't have a lot of reinforcements left you'll have to pay more attention to securing the roof. Watch out especially for shrieks, because they'll be harder to kill and they'll keep using camouflage to perform surprise attacks and to escape after receiving a lot of damage. This quest will end with archdemon's quest. Remember that if you didn't agree to Morrigan's proposal you'll have to be very careful at who makes the final blow. That person will die and it can be you or Alistair/Loghain. You'll now witness a series of cut-scenes and if you're still alive you'll also take part in a short epilogue. Congratulations!
Received from: Duncan [Ostagar]
Description: This quest will begin once you've ended one of six available origin stories. The first person you'll meet in [Ostagar] is going to be king Cailan and you won't have to be too kind for him, because you won't receive any penalties for being rude. Duncan (M21, 1) will inform you that you'll have to take part in a ritual to become of the Grey Wardens. Notice that your ally has given you a few basic pieces of equipment and it would be a good idea to examine them in your inventory. Follow Duncan's instructions by heading west and crossing the large bridge. You can now talk to Duncan again (M21, 2) or proceed directly to the north.
Once you've arrived at the northern ruins find Alistair and approach him (M21, 3). Wait for Alistair to end a conversation with one of the mages and then you'll be allowed to talk to him and to confirm that you want to take part in the ritual. During the conversation you'll find out about two other recruits (Jory and Daveth) whom you've might have already met and they're are also going to take part in the preparations for the ritual. Once you're done talking open a chest located close to Alistair to collect valuable runes. You must now return with Alistair to Duncan (M21, 2).

Talk to Duncan to find out that before taking the ritual you'll have to perform two impotant tasks. Your objectives will be to deliver three vials of darkspawn blood and to locate an area where Grey Warden's archive documents are being stashed. Ask additional questions about each task if you want to and after the conversation head west. Talk to one of the guards to let you through to [Korcari wilds] (M21, 4).
Received from: Duncan [Ostagar]
Description: This is a relatively simple quest. Keep eliminating hostile creatures during your time spent in the [Korcari wilds] and check their bodies after each battle to keep finding vials of darkspawn blood. You'll be dealing mostly with genlocks and hurlocks and it shouldn't be hard to kill them as long as you don't attack too many of them at the same time. You'll have to acquire only three vials for the purpose of this mission, however you'll find more of these objects and it'll be up to you if you want to keep collecting them.
![After you've collected three vials you could return to [Ostagar], however I would recommend to keep playing, because you'll have to complete the second quest (The Grey Wardens' cache) anyway - Ostagar - Tainted blood - Ostagar - Dragon Age: Origins - Game Guide and Walkthrough](https://game.lhg100.com/Article/UploadFiles/201512/2015121518194979.jpg)
After you've collected three vials you could return to [Ostagar], however I would recommend to keep playing, because you'll have to complete the second quest (The Grey Wardens' cache) anyway. Once you've returned from the [Korcari wilds] for good talk to Duncan (M21, 2) and assuming that you've completed both tasks you'll take part in the ritual. Don't worry about it, because you'll survive the process and automatically trigger a new important quest - After the ritual.
Received from: Duncan [Ostagar]
Description: In order to solve this quest you must keep moving to the south-east, eliminating all the monsters you encounter during your time spent in the woods. Make a stop once you're close enough to small ruins (M22, 6). It would be a good idea to prepare for a difficult battle by healing your team members, improving their equipment and saving the game.
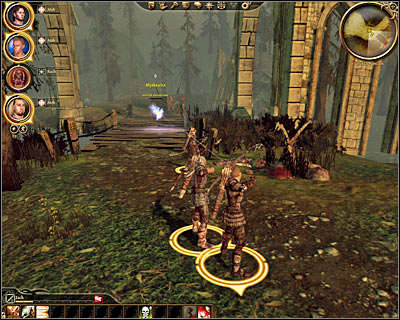
You should be able to notice a small wooden bridge in the distance (M22, 7). The bridge is going to be defended by monsters and you'll have to watch out mostly for a Hurlock emissary. Keep your team members far away from each other, because the emissary is going to be a mage and it'll throw a lot of fireballs at your men and women. You must keep attacking the mini-boss from the distance, because the area around the bridge is filled with traps. Keep attacking the monster until it's killed.
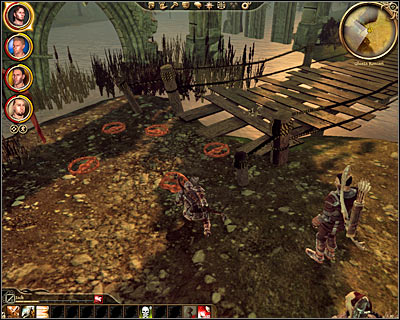
If you have a person in your team capable of disarming the traps you should spend some time doing that. Otherwise you'll have to be careful while moving your team to the other side of the river. Now you'll want to start moving north-east (M22, 9). I have to warn you that it's not going to take long before you encounter a new mini-boss. This time you'll be dealing with a powerful warrior (Hurlock alpha), so you'll have to watch out for followers losing a lot of health due to beast's attacks. Make sure to examine the body of the boss after the battle.
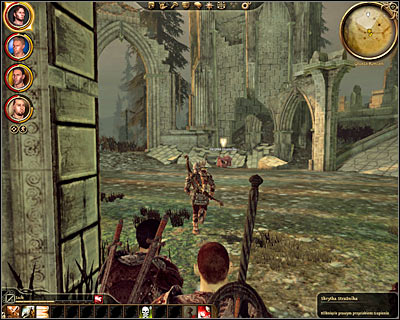
You'll have to make your way to a designated area of the map. Enter larger ruins and notice a stash with a yellow blinking arrow (M22, 10). I wouldn't recommend approaching the stash unless you've already completed Tainted blood quest, because doing so will trigger a cut-scene featuring the witch Morrigan. The conversation with Morrigan is going to be short and rather irrelevant, because she'll eventually guide you to a different area to meet your mother.
![You won't have to pay too much attention to your answers during the conversation with Flemeth, because sooner or later she'll give you the ancient treaties and you'll automatically return to [Ostagar] (M21, 4) - Ostagar - The Grey Wardens cache - Ostagar - Dragon Age: Origins - Game Guide and Walkthrough](https://game.lhg100.com/Article/UploadFiles/201512/2015121518195030.jpg)
You won't have to pay too much attention to your answers during the conversation with Flemeth, because sooner or later she'll give you the ancient treaties and you'll automatically return to [Ostagar] (M21, 4). Naturally you must go back with the treaties to Duncan (M21, 2) and assuming that you've completed both tasks you'll take part in the ritual. Don't worry about it, because you'll survive the process and automatically trigger a new important quest - After the ritual.
Received from: automatically after collecting the Korcari flower [Korcari wilds]

Description: In order to unlock this version of the quest you'll need to have the mabari as your follower when you reach Ostagar and this can occur only if you've chosen human noble origin. Explore the south-western area of the swamps to find the Korcari flower (M22, 3). Click on this object and listen to what one of your followers has to say.
![Return with the flower to [Ostagar] and go to the kennels (M21, 5) - Ostagar - The mabari hound - Ostagar - Dragon Age: Origins - Game Guide and Walkthrough](https://game.lhg100.com/Article/UploadFiles/201512/2015121518195038.jpg)
Return with the flower to [Ostagar] and go to the kennels (M21, 5). Here you'll have to talk to the Dog trainer. During the conversation you'll find out that he could really use the flower to heal other mabari. You can give him the flower for free, agree to his payment (20 silver coins) or ask for more money (50 silver coins).
Received from: Dog trainer [Ostagar]
Description: In order to unlock this version of the quest you can't have mabari with you after your arrival to Ostagar, so basically you can't be playing as a human noble. Go to the kennels (M21, 5) and talk to the dog trainer. He'll ask you to put on a muzzle on one of the mabari. It's a very simple activity, because all you have to do is to choose a correct action from the list. Once this s done you'll find out that he'll also need an herb to heal the animal for good.
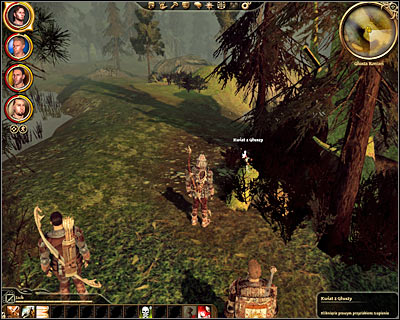
Explore the south-western area of the swamps to find the Korcari flower (M22, 3). Click on this object to add it to your inventory. You can now return with this object to the dog trainer. Show up what you found and you'll find out that the mabari will be ready for battle soon after the main battle has ended.
Received from: Deserter [Ostagar]
Description: A hungry deserter is being held in a cage (M25, 10) and the best moment to talk to him would be after fulfilling both quests for Duncan but before venturing to the Ishal tower. Naturally you can offer your assistance during your conversatrion with him to deliver food and water. I would recommend asking him a few additional questions about why he was imprisoned in the first place and you'll find out that he's carrying a key to a special chest. There are two ways of obtaining the key - you can comply to his wish of finding food or water or you can kill him by choosing a certain dialogue option. If you decide to kill him you'll be stopped by one of the guards, but you won't have to deal with any repercussions (he would let you go without any penalties).
If you've decided to help the prisoner you can now talk to a guard standing next to his cage. There are two ways of you getting your hands on food and water - you can give the guard 10 silver coins or you can rely on persuasion skills. Either way must acquire a key to mage's chest from the deserter.
A chest can now be opened and it can be found next to the stairs where one of the mages was standing (M25, 11). Notice that he won't leave his post and he won't allow you to touch the chest until you've completed both quests for Duncan and passed the ritual. This is why you should wait with this quest instead of starting it soon after your arrival. The chest will contain a lot of useful things, including medical supplies, mage's robe and gold.
Received from: Duncan [Ostagar]
Description: Take your time to make preparations for the main battle and notice that you've been given a powerful amulet as a reward for bringing the treaties. I would recommend that you visit the local quartermaster to sell some of the less useful things and to acquire supplies. In order to begin this mission you'll have to approach a large table located in the north-west (M22, 6). Listen to the plan and choose your answers carefully, so you won't role any relationship points with Alistair.
Received from: Duncan [Ostagar]
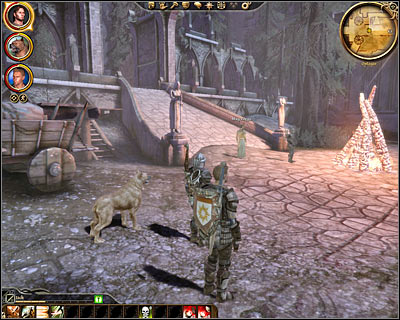
Description: Start off by travelling towards a nearby bridge (M22, 7) and once you're close enough you'll be rewarded with an interesting cut-scene. Head forward, ignoring all the fights and explosions taking place in your vicinity. You should be heading towards [Ostagar - Tower of Ishal]. Once you've arrived at your destination one or two NPC's will join the team (only the mage or a mage and a guard). Make sure to equip your new allies, because you'll need them to finish this quest. Enter the tower grounds (this is the area that was inaccessible up till now).
Keep heading north-east and don't be surprised by the fact that a lot of hurlocks and genlocks will stand in your way. Try using the mage in your team to cast powerful spells and don't forget to keep your archers and mages away from the main battles. Remain in one area until you've defeated each group and don't forget to spot and kill enemy archers sooner rather than later. Eventually you'll make your way to the main gate of the tower (M22, 9) and this is where you'll meet an alpha Hurlock. Use the same tactics as before and you should be fine.
![Opening the main door will result in your team travelling to [Tower of Ishal - Ground floor] (M23, 1) - Ostagar - Tower of Ishal - Ostagar - Dragon Age: Origins - Game Guide and Walkthrough](https://game.lhg100.com/Article/UploadFiles/201512/2015121518195912.jpg)
Opening the main door will result in your team travelling to [Tower of Ishal - Ground floor] (M23, 1). You'll have to be extremely careful here, because a Genlock emissary is waiting for you in the next room. I would recommend that you encourage the boss to come here instead of trying a frontal assault. You can also try putting out nearby flames using a proper spell. Don't forget to heal your team members frequently to prevent them from dying too many times.

Once you've taken out the mini-boss focus on securing this entire level. You'll have to explore one larger room and two smaller ones. Each time be careful and try showing yourself to enemies to make them come to you instead of entering new rooms to be surrounded by them. You must make your way to the stairs leading to [Tower of Ishal - First floor] (M23, 2).
The good news is that the first floor of the tower is not being guarded by any bosses. The bad news is that once you've reached the main corridor you're going to be surprised by two groups of monsters. I would strongly recommend using ballistae during your time spent in the tower (M23, 3), because this way you can harm enemy units easily. Once you've secured the main corridor proceed to a smaller room where the last fight will take place. Finish off by using the stairs to go to [Tower of Ishal - Second floor] (M23, 4).
The second floor of the tower contains more rooms and almost every area is going to be guarded by enemy forces. Make sure that you're not moving too fast or you can end up being overwhelmed by the number of enemy units. You'll come across a Genlock alpha in one of the rooms, but on the other hand you'll be allowed to make the process of securing the tower easier by opening cages with friendly mabari (M23, 5). Wait for the dogs to secure the area for you and then find the staircase leading to [Tower of Ishal - Top floor] (M23, 6). Make sure to SAVE YOUR GAME before heading up to the top.
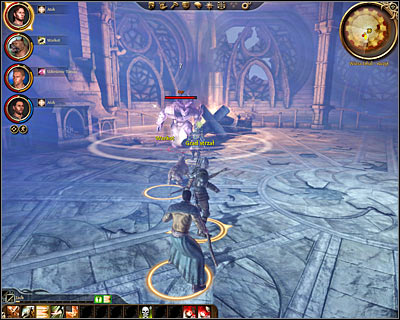
You'll now have to take part in your first serious boss battle and you'll be going against an ogre (M23, 7). I would recommend that at least two members of your team should begin attacking the beast from the distance, because ogre's direct attacks can take a lot of damage. Besides your mage or your rogue can stun/paralyze the opponent and it'll make the process of injuring the beast a lot easier.
Keep attacking the ogre with a team divided to mages/archers and warriors. Don't forget to take special care of less resistant members of your squad, because they can die almost instantly if the ogre gets to them. It's also important to keep using all the abilities you've unlocked so far to increase chances of scoring good hits or to make ogre's attacks less powerful. Once the ogre has been defeated check its body for precious artifacts and then click on the fireplace to start to start the fire.
![Once you've finished your mission in the tower you'll see a very important cut-scene after which you'll end up in [Flemeth's hut] (M24, 1) - Ostagar - Tower of Ishal - Ostagar - Dragon Age: Origins - Game Guide and Walkthrough](https://game.lhg100.com/Article/UploadFiles/201512/2015121518282915.jpg)
Once you've finished your mission in the tower you'll see a very important cut-scene after which you'll end up in [Flemeth's hut] (M24, 1). Wait for the main character to wake up and you'll be given a chance to talk to Morrigan. This conversation will continue outside the hut (M24, 2) and you should pay attention to what you say in order to prevent Alistair from hating you and to score first relationship points with Morrigan. At the end of the conversation you'll find out that Morrigan will join and your team and you'll also activate four main quests - Arl of Redcliffe, Paragon of her kind, Nature of the beast and Broken circle. You can find out more about these assignments in the Main quests category of this guide. Leave this area (M24, 3) and confirm that you want to travel to [Lothering].
Received from: automatically after finding the letter [Korcari wilds]
![Description: A letter (M22, 1) can be found near the passageway leading back to [Ostagar] - Korcari wilds - The missionary - Korcari wilds - Dragon Age: Origins - Game Guide and Walkthrough](https://game.lhg100.com/Article/UploadFiles/201512/2015121518282964.jpg)
Description: A letter (M22, 1) can be found near the passageway leading back to [Ostagar]. Search the swamps for a glowing object, click on it and read the letter if you want to by opening your personal journal.
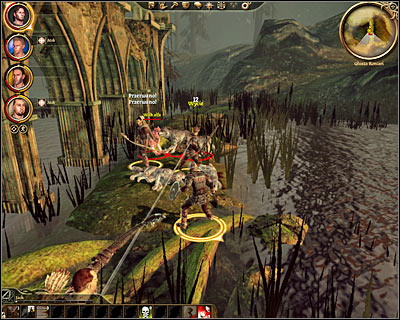
You won't have to follow the strict instructions described in the letter, because instead you may proceed directly to where the treasure has been buried. Check the southern area of the swamps to find a small bridge (M22, 4). Be careful, because this area is going to be guarded by a large group of wolves and by a mini-boss (alpha wolf). Once the animals have been killed head on to the other side and find a chest (M22, 5). There are some interesting items inside, including a farewell letter, an axe of the Ash Warriors and a Chasind blade.
Received from: automatically after finding Rigby's body [Korcari wilds]
Description: The body of missionary Rigby can be found in the middle of the forest (M22, 8) and this is where you'll notice genlocks and hurlocks fighting the wolves. I would recommend that you don't interfere until one of the groups has been exterminated. Examine Rigby's body and pick up his last will and testament.
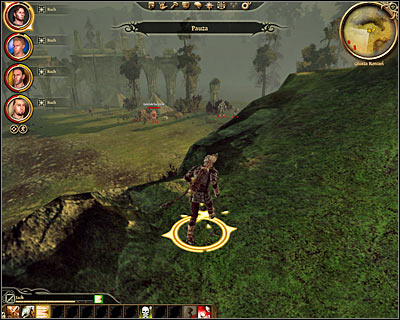
You'll now have to proceed to the ruins found in the western area of the swamps (M22, 2). Be careful here, because the area is going to be heavily guarded by the darkspawn. Attack the creatures from the distance if you can and prevent your team members from losing too much health.
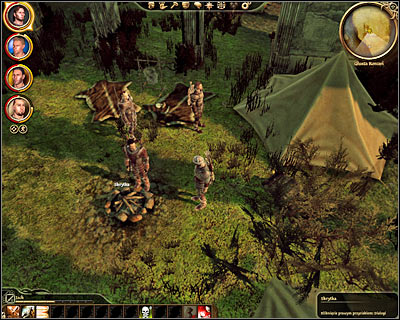
Once you've taken care of all hostile creatures you may examine the ruins a little closer. Click on the fireplace to find a hidden stash. You must now make a decision on how to end this quest:
1) You can open the lockbox right now to find fluorite, emerald, malachite, a note and an amulet. This would result in this quest coming to an end.
2) You can keep the lockbox untouched to keep the quest going. Your next step would be to find Jetta while visiting [Redcliffe - Chantry] (M27, 5). You would have to talk to Jetta and give her the lockbox to end the mission.
Received from: automatically after finding the last sign on the Chasind trail [Korcari wilds]
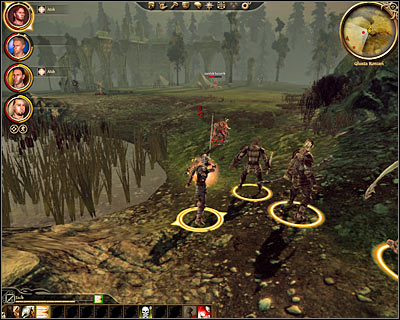
Description: Start off by exploring the western ruins (M22, 2) where you had a chance to complete a different side mission. Find a chest containing Rigby's field journal. Read the document to find about the existence of the signs on the Chasind trail. You may now start finding them. The first sign is located nearby (M22, 11).
Each time you've touched an object a new marker will appear on your personal map (in one case - two markers). Use this clue to find the next trail (keep "scanning" the area with your mouse until you find an interactive item). The last object will be hard to find - you'll have to search the bushes near the bridge where you've defeated one of the mini-bosses.
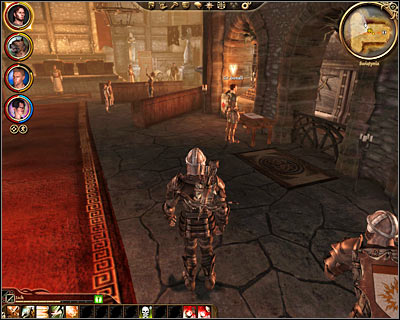
The game will now inform you that you've been able to figure out where to look for the treasure. Use your map and head south (M22, 12). Be careful, because when you approach the campsite you're going to be attacked by a small group of camouflaged assassins. Deal with the darkspawn and examine one of the trees to find barbarian's mace, Chasind crusher, Korcari bow and Thane's helm.
Received from: automatically after arriving in Lothering [Lothering]
![Description: As soon as you've arrived in [Lothering] (M25, 1) you're going to be stopped by a group of bandits and they will demand 10 silver coins before they'll let you through - Lothering - Bandits on the road - Lothering - Dragon Age: Origins - Game Guide and Walkthrough](https://game.lhg100.com/Article/UploadFiles/201512/2015121518283004.jpg)
Description: As soon as you've arrived in [Lothering] (M25, 1) you're going to be stopped by a group of bandits and they will demand 10 silver coins before they'll let you through. You can now decide how to deal with this situation:
1) If you pay them 10 silver coins you'll only make them more greedy and they'll request 20 silver coins.
2) You can use intimidation to prevent them from attacking your team. In addition to that you can also use persuasion to demand money for letting them go.
3) Once you've found out what they're up to you can use persuasion to convince them that a poorly defended caravan is heading this way.
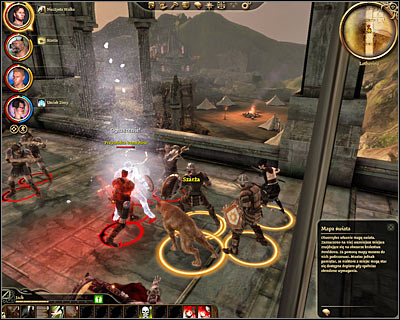
Sadly in order to solve this quest once and for all you'll have to get rid of the bandits by defeating them in battle. You shouldn't have any problems provoking them to attack your team members, even if you've been acting peacefully so far. As soon as the battle has started focus your efforts on defeating their leader who is going to be a mini-boss. Once the leader is almost dead he'll surrender and you'll trigger a new conversation. You can now decide to finish off the bandits or you can let them go. If you allow them to leave don't forget to order them to return all the stolen goods.
Received from: automatically after finding templar's body [Lothering]
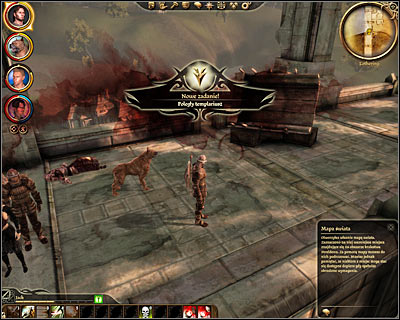
Description: The body of a templar can be found next to an area where you've encountered the bandits (M25, 1). Click on the body to collect two items - a knight's note and a knight's locket. Read the note to receive further instructions.
Travel to [Lothering - Chantry], find Sir Donall (M25, 3) and during the initial conversation with him mention the fact that you've found the body of the templar. You can give him the items you've collected from templar's body for free or after he's paid you a gold coin.
Received from: automatically after taking assignments from the chanters' board [Lothering]
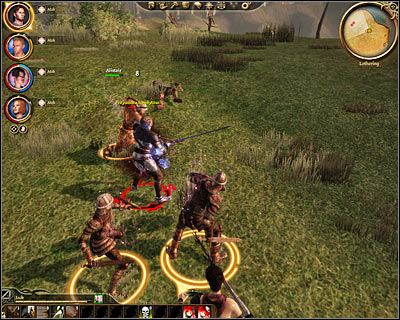
Description: Only one quest will appear in your journal, however you will be forced to perform several tasks in order to complete it. Start off by reading the board (M25, 2) and accepting all the missions. The first quest will require you to defeat three groups of bandits (M25, 9). The enemies will be marked on your map and you'll be allowed to defeat them in any order you want to. Be careful, because aside from the bandits you'll also encounter hostile peasants. Each time you're close enough to the bandits provoke them from the distance and watch out for their archers. The group stationed near the water will also have a leader and obviously you'll have to pay more attention to killing him. Once you've killed all the bandits return to Chanter Devons (M25, 2) and collect the reward (3 gold coins).
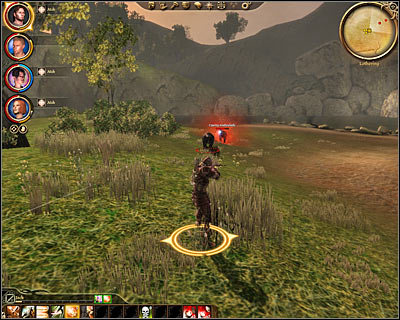
The second assignment will require you to get rid of a group of black bears (M25, 11). Exit the town and head north-east. The animals can be found near the water. Try attacking one bear at a time if possible. Once you've defeated all the bears return to Chanter Devons for your reward.
The final third assignment will require you to locate Sarha's remains (M25, 12). Exit the town and follow the instructions on your map by heading north. Be careful, because the rotting corpse is going to be surrounded by hostile wolves. Defeat the animals and examine Sarha's body to find a medallion. Return with this object to Chanter Devons.
Received from: Elder Miriam [Lothering]
Description: Miriam (M25, 5) will ask you to prepare three lesser health potions. The most important thing for you to know about is that you'll only be allowed to start this quest if either one of your team members knows something about Herbalism. The ingredients you'll need for the potion are: three elven roots (there are a lot of plants to the north of the city), three empty flasks (you can find the flasks on your own or buy them from Barlin (M25, 6)). Open the screen where you mix the potions and produce three units. You can now return to Miriam to give her the potions and in return you'll receive 50 silver coins.
Received from: Barlin [Lothering - Dane's refuge]
Description: Barlin (M25, 6) will have a job for you. The most important thing for you to know about is that you'll only be allowed to start this quest if either one of your team members knows something about Toxins. The idea here is similar to the previous quest (More than just plants), because you'll have to find the ingredients, mix them and deliver the toxins. This time you'll want to produce three bottles of venom. Empty flasks needed for this quest can be purchased directly from Barlin. As for toxin extracts, travel to the north-east of the city and find spider's lair (M25, 10). I would recommend killing the spiders in pairs by provoking them from the distance and getting rid of them with the help from an entire team. Once you have the ingredients use the Toxins screen to manufacture three units and deliver the venom to Barlin. He'll reward you with 75 silver coins.
Received from: Sten [Lothering]
Description: Check the area to the north of the city and you'll find a cage with Sten being held inside (M25, 7). Talk to the qunari and listen to his story. You may now ignore him or you can offer Sten a spot in your team. In order to free him you must return to [Lothering - Chantry] and talk to Revered Mother (M25, 8). The interesting thing here is that you don't have to rely on persuasion or intimidation, because if Leliana is a part of your team she's vouch for your good intentions. Once you have the key return to Sten and open the cage.
Received from: Allison [Lothering]

Description: Start this quest by talking to Allison (M25, 4). The most important thing for you to know about is that you'll only be allowed to start this quest if either one of your team members knows something about Traps. Head on to [Lothering - Dane's refuge] and purchase three trap triggers from Barlin (M25, 6). You can now open the window where you build new traps and confirm that you want to manufacture three line traps. Return to Allison with the items and she'll pay you 50 silver coins for helping her.
Received from: Sandal [Campsite]
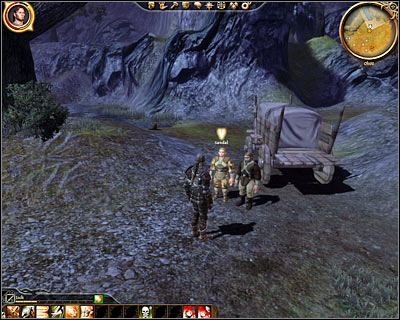
Description: This is more a tutorial rather than proper quest and it'll teach you how to enchant items. Start off by talking to Bodahn and then have a conversation with his son Sandal (M26, 1). In order to complete this quest you'll have to enchant one of your items with at least one rune.
Received from: Bann Teagan [Redcliffe - Chantry]
![Description: You can officially start this quest when you get to [Redcliffe] (M27, 1) - Redcliffe - A village under siege - Redcliffe - Dragon Age: Origins - Game Guide and Walkthrough](https://game.lhg100.com/Article/UploadFiles/201512/2015121518283143.jpg)
Description: You can officially start this quest when you get to [Redcliffe] (M27, 1). Approach the bridge where you'll have a chance to talk to Tomas (M27, 2). The next conversation will take place in [Redcliffe - Chantry] where you'll receive an update from Teagan (M27, 3). If you refuse the help in dealing with the undead you're going to be asked to leave the village. Otherwise you'll be allowed to assist in the preparations for the upcoming invasion.
![Start off by going to [Redcliffe - Tavern] (M27, 6) and talk to barkeep Lloyd (M27, 7) - Redcliffe - A village under siege - Redcliffe - Dragon Age: Origins - Game Guide and Walkthrough](https://game.lhg100.com/Article/UploadFiles/201512/2015121518283127.jpg)
Start off by going to [Redcliffe - Tavern] (M27, 6) and talk to barkeep Lloyd (M27, 7). Mention the undead during the conversation and listen to his reaction. Notice that you can convince him to join the defenders thanks to intimidation.
![Now travel to [Redcliffe - Smithy] (M27, 8) - Redcliffe - A village under siege - Redcliffe - Dragon Age: Origins - Game Guide and Walkthrough](https://game.lhg100.com/Article/UploadFiles/201512/2015121518283135.jpg)
Now travel to [Redcliffe - Smithy] (M27, 8). You won't be able to enter the building right away, however there are a few solutions to this problem - you can use persuasion, intimidation, break the door or use a lockpick to open it. Once you're inside talk to the blacksmith Owen (M27, 9) and you'll find out that he'll help in the preparation if you promise to help him. If you decide to help his daughter you'll automatically trigger a side mission (Lost in the castle).
![Make sure to go to [Redcliffe - Store] (M27, 13) and you'll find a couple of barrels - Redcliffe - A village under siege - Redcliffe - Dragon Age: Origins - Game Guide and Walkthrough](https://game.lhg100.com/Article/UploadFiles/201512/2015121518283258.jpg)
Make sure to go to [Redcliffe - Store] (M27, 13) and you'll find a couple of barrels. Click on the barrels to examine them more thoroughly. Your next stop is [Redcliffe - Dwyn's house] (M27, 14). Break open the door to gain access to this building and once you're inside talk to the dwarf Dwyn (M27, 15). You can convince him to join the battle using intimidation or you can attack him if he still refuses to help.
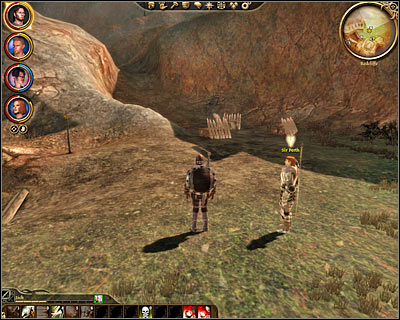
Once you've explored the village find Sir Perth (M27, 16) on the hill in the north-east and talk to him. During the conversation you should inform your ally about the oil found in the store. You can also offer your services and Perth will ask you to help the soldiers in receiving additional holy protection. Travel to [Redcliffe - Chantry] (M27, 12) and talk to Mother Hanna (M27, 17). You can get what you want if you use persuasion or intimidation. Hanna will promise to deliver "sacred" amulets to the troops. You can now return to Sir Perth and inform him about your successful attempt (don't forget to warn him that the amulets will be fake).
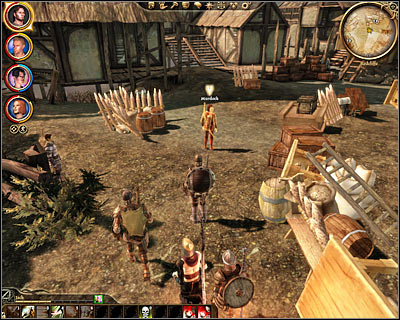
There's only one more thing for you left to do and that is to talk to Murdock (M27, 18) who can be found in the center of the village. This conversation may be a little longer if you've decided to recruit some of the villagers. End the conversation by confirming that you're ready to defend the village. This will automatically start a new quest - Attack at dawn.
Received from: Kaitlyn [Redcliffe - Chantry]
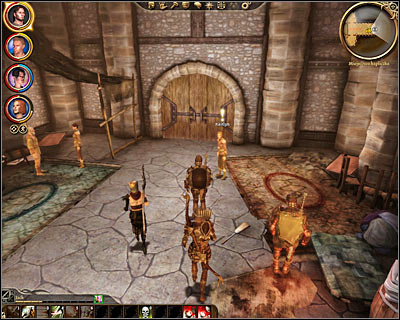
Description: Kaitlyn (M27, 4) will ask you to find her missing brother Bevin. In order to find the boy you must travel to [Redcliffe - Kaitlyn's home] (M27, 10). Enter the room found to your right and approach the closet (M27, 11). You can send the boy to his sister right away or you can ask him about his father's blade. If you play this all out correctly Bevin will give you a key to a chest.
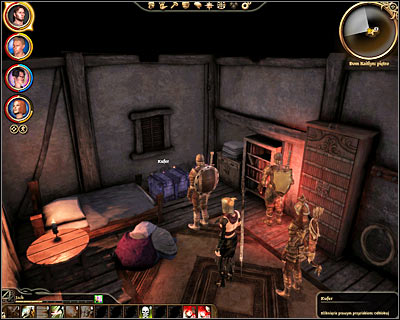
Use the nearby staircase to get to the first floor and once you're there spend some time looking for the chest. Open this object using the newly acquired key and take the Green blade. You may now return to [Redcliffe - Chantry] (M27, 12). During your final conversation with Kaitlyn (M27, 4) you can ask her for a kiss and you can talk to her about the family blade. If you want to be a hero you can offer her payment for the blade or promise to return it after the battle. If you want to keep the sword for yourself don't mention it to Kaitlyn and stop the conversation after she's thanked you for finding Bevin.
Received from: Owen [Redcliffe - Smithy]
![Description: Start off by travelling to [Redcliffe - Smithy] (M27, 8) - Redcliffe - Lost in the castle - Redcliffe - Dragon Age: Origins - Game Guide and Walkthrough](https://game.lhg100.com/Article/UploadFiles/201512/2015121518283299.jpg)
Description: Start off by travelling to [Redcliffe - Smithy] (M27, 8). You won't be able to enter the building right away, however there are a few solutions to this problem - you can use persuasion, intimidation, break the door or use a lockpick to open it. Once you're inside talk to the blacksmith Owen (M27, 9) and agree to save his daughter Valena during your stay in the castle. You can find the girl after you've arrived at [Redcliffe castle - Main floor] and she'll be hiding in a small room (M29, 3) near the passageway leading to the basement. Talk to Valena and send her away to Owen. Return to [Redcliffe - Smithy] after dealing with the crisis in the castle and he'll reward with a shielded dwarven armor.
Received from: automatically after completing A village under siege quest [Redcliffe]
![Description: This quest will begin with you standing in the eastern section of [Redcliffe] (M27, 19) - Redcliffe - Attack at dawn - Redcliffe - Dragon Age: Origins - Game Guide and Walkthrough](https://game.lhg100.com/Article/UploadFiles/201512/2015121518283281.jpg)
Description: This quest will begin with you standing in the eastern section of [Redcliffe] (M27, 19). If you've informed your allies about the existence of the oil the main path leading to the village will become a burning wall and that'll help you in defending Redcliffe against the undead. Wait for the zombies to show up and start attacking them. Make sure to focus on single targets each time instead of injuring random creatures. Thankfully the zombies won't pose a big threat and their attacks are going to be weak.
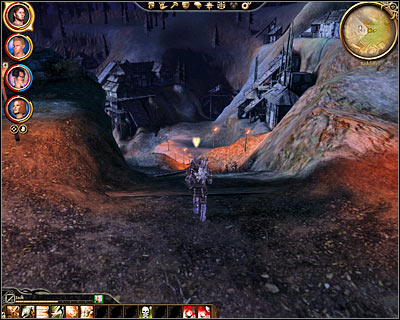
You'll have to deal with several groups of the undead, but thankfully you'll have plenty of time to heal before the next wave of monsters shows up. Keep defending this area until you'll be informed by one of the guards that more skeletons have been spotted near the water. Follow the guard to the main section of the village (M27, 20) and don't forget to heal your characters and to save your progress along the way.
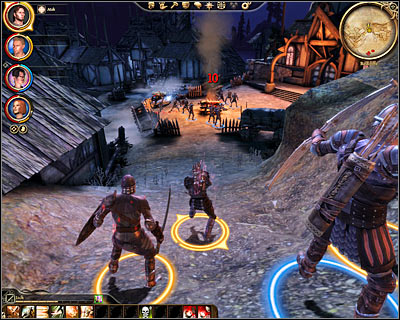
I would strongly recommend attacking the monsters seen in front of you from a distance. A nearby hill will do the trick, because you'll have a good view of the battlefield. Don't move too close to the monsters, because you would have been surrounded by the them in seconds. Keep fighting until all the undead have been defeated. The game will now display a cut-scene to inform you about your success.
Received from: automatically after finding all five pages [The Circle Tower]
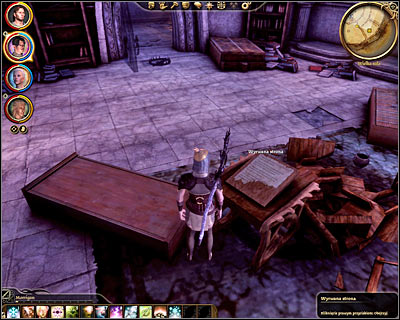
Description: This quest will appear on your list once you've collected all five pages and in order to do that you must start clicking on certain objects found inside the tower. Make sure to go to [The Circle Tower - The great hall] before you start looking (M34, 11).
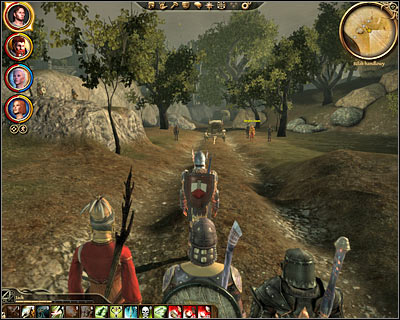
Once you've successfully collected all five notes leave the tower and head to a different location. You'll soon take part in a random encounter during which you'll have a chance to meet Beyha Joam. Have a little chat with him and then attack him. Don't forget to eliminate a mage seen on a nearby field before dealing with the main boss.
Received from: automatically after finding one of the summoning books [The Circle tower]
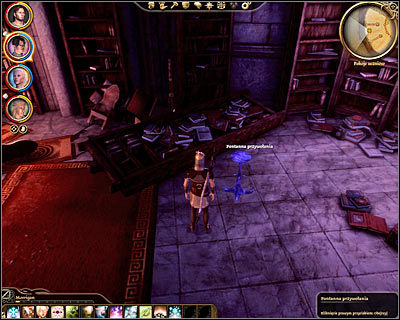
Description: This quest will be added to your list assignments after you've found one of the summoning books. I would recommend locating both parts, because this will help you in understanding what has to be done. Both parts can be found in [The Circle tower - Student quarters]. Look for them in the central hall (M33, 13) and in a destroyed library (M33, 14). Once you have the books in your possession find the summoning fountain (M33, 15) and start completing the exercises.
First exercise:

Step 1: Click on the summoning fountain (M33, 15).
Step 2: Find the first book located in the northern row of the northern section of the library (M33, 16).
Step 3: Click on a portal of summoning the First. A spirit hog will appear in the library. Check its body to find jewel (M33, 17).
Second exercise:

Step 1: Click on the summoning fountain (M33, 15).

Step 2: Find the first book located in the northern row of the southern section of the library (M33, 18).
Step 3: Click on huge statue of mage Gorvish (western wall of the northern section of the library) (M33, 19).
Step 4: Click on a portal of summoning the Second. A ghost will appear in the library for a short period of time (M33, 20).
Third exercise:

Step 1: Click on the summoning fountain (M33, 15).

Step 2: Find the first book located in the south-western row of the southern section of the library (M33, 21).

Step 3: Click on the wooden table in the northern section of the library (M33, 22).

Step 4: Find the second book located in the southern section of the library (M33, 23).

Step 5: Click on huge statue of mage Gorvish (western wall of the northern section of the library) (M33, 19).
Step 6: Find the third book located in the southern row of the southern section of the library (M33, 24).
Step 7: Click on a portal of summoning the Third (M33, 25). This should result in a mini-boss (Sailor of the Fade) appearing in the library. Kill the creature and examine its body to find electrical gauntlets and a spiky armor.
Even though you've officially ended this quest you may complete the final fourth exercise if you want to. The idea of it is very simple - you'll have to repeat all the actions from exercises 1-3 without clicking on summoning fountains and already closed summoning portals. Keep reading for a complete solution.
Exercise 4:
Step 1: Click on the summoning fountain (M33, 15).

Step 2: Find the first book located in the northern row of the northern section of the library (M33, 16).
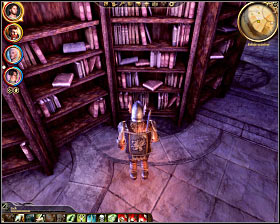
Step 3: Find the first book located in the northern row of the southern section of the library (M33, 18).

Step 4: Click on huge statue of mage Gorvish (western wall of the northern section of the library) (M33, 19).
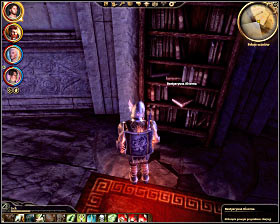
Step 5: Find the first book located in the south-western row of the southern section of the library (M33, 21).
Step 6: Click on the wooden table in the northern section of the library (M33, 22).
Step 7: Find the second book located in the southern section of the library (M33, 23).

Step 8: Click on huge statue of mage Gorvish (western wall of the northern section of the library) (M33, 19).
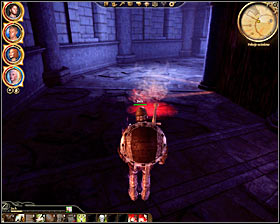
Step 9: Find the third book located in the southern row of the southern section of the library (M33, 24).
Step 10: Click on a portal of summoning the Fourth (M33, 26). Doing this will result in arl's foreshadow appearing in a few seconds. Attempt to steal an item from him to add a new entry to your journal.
Received from: automatically after finding one of apprentice's notes [The Circle tower]
Description: This quest will officially appear in your journal after collecting one of the notes and in order to advance to the second phase you'll have to find all six documents. Each time you'll have to locate an item with your mouse and click on it. Here's where you'll have to look:
- [The Circle tower - Student quarters] - click on two footlockers and on a note (M33, 28)(M33, 29)(M33, 30)
- [The Circle tower - Mage quarters] - click on two notes (M33, 31)(M33, 32)
- [The Circle tower - The great hall] - click on the last note (M34, 12)
![You've now advanced to phase two and it will take part entirely in [The Circle tower - The great hall] - The Circle tower - Watchguard of the Reaching - The Circle tower - Dragon Age: Origins - Game Guide and Walkthrough](https://game.lhg100.com/Article/UploadFiles/201512/2015121518283659.jpg)
You've now advanced to phase two and it will take part entirely in [The Circle tower - The great hall]. Your job will be to click on certain statues and MAKE SURE to interact with them in the exact same order as described here. Start off by clicking on a statue with a vessel (M34, 13).

Now click on a statue with a raised sword (M34, 14).
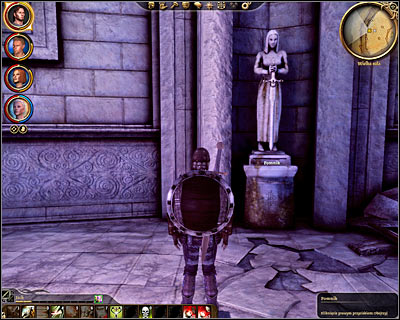
Next up we have a statue with a lowered sword (M34, 15).
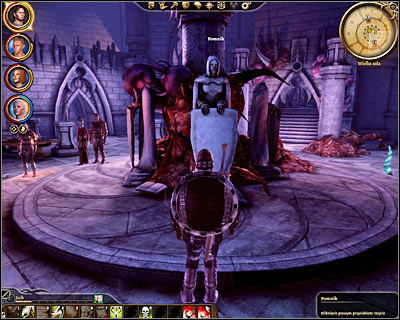
Last statue on the list can be found in the central room and it's the one with a shield (M34, 16).
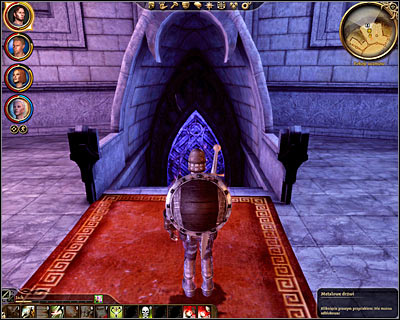
Congratulations on advancing to phase three. Start off by returning to the lowest level of the tower - [The Circle tower - Student quarters]. Your job will be to click on a door leading to the basement, found in the northern area of this level (M33, 33). Doing this will summon a powerful creature called Shah Wyrd. Thankfully defeating the monster won't be as difficult as it may seem, because other mages present in the room will provide assistance. Don't forget to examine creature's body after the battle to collect a unique Yusaris sword.
Received from: Sergeant Kylon [Denerim - Market district]
Description: Talk to Sergeant Kylon (M64, 2) and offer your assistance in getting rid of a group of mercenaries. Once you've officially started this quest travel to [Denerim - Pearl] and find the Veteran of White Falcon (M65, 3). If you decide to attack the mercenaries seen here focus on harming their leader, because once he's heavily injured he'll give up and you'll be allowed to choose between finishing him off and letting him go. If you decide to resolve this situation peacefully use persuasion or intimidation to scare off the mercenaries.
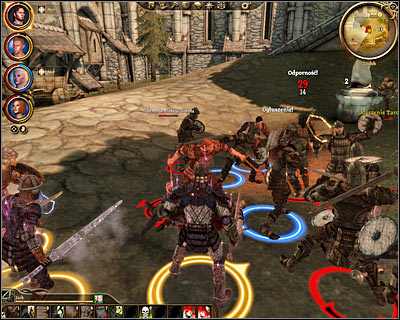
You'll soon notice that getting rid of the mercenaries didn't fully resolve the problem, because as soon as you use Denerim map to travel between locations you'll trigger a random encounter. Here you'll witness a huge battle taking place between Kylon's men and White Falcon mercenaries. Assist your allies and take special attention in getting rid off two mini-bosses (one of the mercenaries and Krisfof). After you've defeated all the bandits talk to Kylon. He'll thank you for your assistance and he'll ask you to talk to him later for more work.
Received from: Sir Landry [Denerim - Market district]
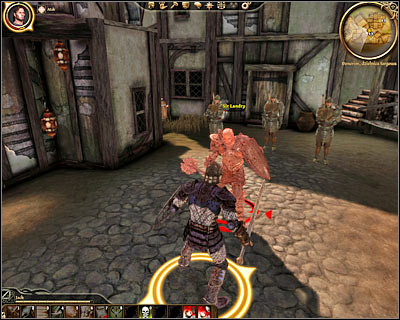
Description: While exploring the market district you're going to be recognized and stopped by Sir Landry (M64, 6). Bear in mind that this quest will appear in your journal if you fail in resolving the problem without resorting to violence. If you plan on fighting him follow him to a back alley (M64, 7). You can agree to take part in a honorable duel or you can betray his trust by asking your team members for help (Landry would also use his bodyguards to increase chances of a success). If you want to avoid fighting Landry you can dismiss his offer (it would only delay the problem), you can use intimidation (good choice if you're playing as an evil character) or you can use persuasion to convince him that you're innocent.
Received from: automatically after accepting a mission from the Chanter's board [Denerim - Market district]
![Description: In order to complete this quest you must secure three locations in Denerim - [Denerim - Dirty back alley], [Denerim - Dark alley] and [Denerim - Run-down back alley] - Denerim - Back alleys justice - Denerim - Dragon Age: Origins - Game Guide and Walkthrough](https://game.lhg100.com/Article/UploadFiles/201512/2015121518283693.jpg)
Description: In order to complete this quest you must secure three locations in Denerim - [Denerim - Dirty back alley], [Denerim - Dark alley] and [Denerim - Run-down back alley]. Each time you'll be forced to engage a group of bandits and the enemies will be under direct control of a leader (mini-boss). I have to warn you that it's going to be quite difficult to win each battle, so you should consider accepting this assignment only if your team is strong enough. Once you've defeated all three groups return to the board to receive a reward.
Received from: automatically after examining Sir Friden's body [Denerim - Run-down back alley]
![Description: You can start this quest after you've dealt with a group of bandits in [Denerim - Run-down back alley] - Denerim - The last request - Denerim - Dragon Age: Origins - Game Guide and Walkthrough](https://game.lhg100.com/Article/UploadFiles/201512/2015121518283760.jpg)
Description: You can start this quest after you've dealt with a group of bandits in [Denerim - Run-down back alley]. Search the area to find a corpse of Sir Friden (M69, 5). Examine the body, pick up Sir Friden's journal and read it to officially activate this quest. You can now comply to his wish by dealing with the blood mages issue. In order to move on with this quest you must travel to [Denerim - Abandoned building].
The building itself (M70, 1) consists of a large number of rooms and you'll have to start securing them one by one. Naturally the biggest threat are going to be blood mages, however you'll also have to watch out for qunari mercenaries and for deadly traps (use your rogue to neutralize them if possible). In order to begin your search you must click on a nearby bookshelf (M70, 2) to move the object and to uncover a secret passageway. Deal with the first group of enemies and examine the body of a mage after the battle to collect his key. Use this key to open a nearby door, gaining access to the rest of the building.
The first large battle is going to take place in the dining room (M70, 3). Make sure not to send your allies to a nearby balcony, because there are a lot of traps near the stairs. Try disarming those first before attacking the bandits. Some of the nearby corridors will also contain traps and if you fail in disarming them you'll be dealing with flames spitting out the mouths of statues.
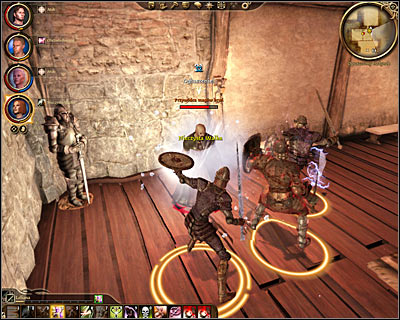
It shouldn't take long before you encounter a small barricade (M70, 4). Make sure not to move in a straight line, because there's a lot of oil nearby and you could lose balance. It's also important not to use any fire spells here or you'll ignite the oil. Naturally you can use this to your advantage if some enemies arrive here in the near future. The next room is being guarded by three groups and each group will have a blood mage in their ranks (M70, 5). It's very important to act carefully here, so your team members won't die or use too many potions. I would recommend that you leave the rest of the team somewhere near the oil and encourage each group to chase after you. Deal with the enemies on your turf and prevent the mages from using fire spells to avoid unwanted problems.
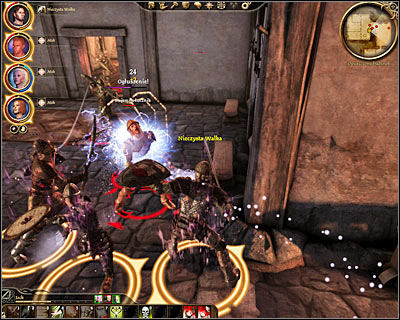
The next room of the building is also going to be guarded by a group of enemies. Start off by killing the blood mage and once he's gone focus on dealing with the rest of the enemies. Don't forget to kill archers hidden behind barricades. Once the room is safe head south and approach the door leading to the last room (M70, 6). SAVE your game before opening it!
Once you've listened to what the leader of the blood mages has to say you'll start the battle. Aside from this powerful mage you'll also have to defeat other enemies (including the captain of the mercenaries), so you'll have to be careful (M70, 7). I would recommend that you focus mostly on the main boss, because his powerful spells could inflict major injuries. Once all the enemies have been eliminated examine mage's body to find a key to his bedroom (M70, 8) and you should explore it to find additional treasures.
Received from: automatically after receiving a note from the messenger [Denerim - Market district]
Description: There's only one way to activate this quest and that is to wait for the messenger to approach you after you've returned to the market district from one of your journeys. The messenger will give a note with the instructions on how to find the Antivan Crows. Go to [Denerim - Market district - Gnawed noble tavern] and check one of the guest rooms to meet Master Ignacio (M65, 6). He'll be the representative of the Crows. You can confirm that you want to cooperate with him or you can dismiss his offer. If you agree you'll find out the details of your first assignment.
![Exit the tavern to return to [Denerim - Market district] and inspect the western wall to find a poster with a Grey Warden (M64, 13) - Denerim - Trial of the crows - Denerim - Dragon Age: Origins - Game Guide and Walkthrough](https://game.lhg100.com/Article/UploadFiles/201512/2015121518283747.jpg)
Exit the tavern to return to [Denerim - Market district] and inspect the western wall to find a poster with a Grey Warden (M64, 13). Read the note left on the poster and once it's been done travel to [Denerim - Pearl]. Here you'll have to approach the locked door (M65, 8). Knock on the door and tell the password (first dialogue option from the list).
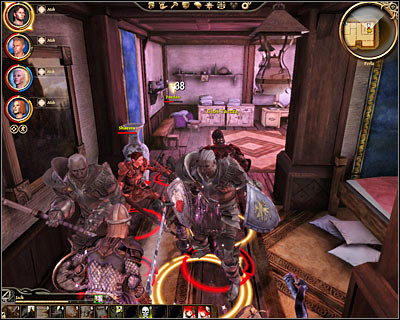
You may enter the guest room where you'll automatically trigger a conversation with Paedan and Shaevra. Ignore the fact that you can use persuasion during this conversation, because the only solution will be to defeat them in combat. Consider retreating to the main corridor once the battle has started, because the room is going to be very small. Once you've defeated all enemies return to Master Ignacio in [Denerim - Market district - Gnawed noble tavern]. Check the chest located behind him to collect two scrolls with new assignments.
![For the purpose of your next mission you'll have to leave Denerim and travel to [Kadan-Fe hideout] - Denerim - Trial of the crows - Denerim - Dragon Age: Origins - Game Guide and Walkthrough](https://game.lhg100.com/Article/UploadFiles/201512/2015121518283821.jpg)
For the purpose of your next mission you'll have to leave Denerim and travel to [Kadan-Fe hideout]. Notice a lot of qunari standing near the fireplace and it would be a good idea to provoke them by attacking them from a larger distance (bow, spells). Watch out for two mini-bosses during the course of this battle and keep your archers and mages away from trouble. Once you've defeated the mercenaries return to Ignacio (M65, 6) to collect your reward.
![In order to get to your third target you'll have to travel to [Orzammar - Diamond quarter - Royal palace] - Denerim - Trial of the crows - Denerim - Dragon Age: Origins - Game Guide and Walkthrough](https://game.lhg100.com/Article/UploadFiles/201512/2015121518283895.jpg)
In order to get to your third target you'll have to travel to [Orzammar - Diamond quarter - Royal palace]. Notice that entering the inner area of the palace will be possible only after you've started one of the main quests (Paragon of her kind - Main quests category in the guide). Ambassador Gainley can be found in a large room in one of the corners of the palace (M54, 4). Before you take him out make sure to kill at least several of his bodyguards. Thankfully Gainley will be a weak archer, so killing him shouldn't be a problem. Once he's dead go back to Ignacio (M65, 6) and collect your reward (Precise reflex crossbow).
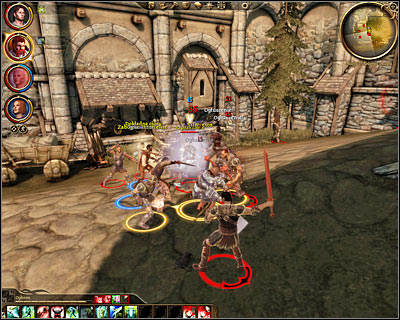
Talk directly to Ignacio instead of collecting a scroll to activate the last mission for the Crows. You'll find out that you'll have to assist in a ransom being handed over to a hostile party and that your job will be to murder captain Chase. Exit the tavern and choose [Denerim - Ransom drop location] from the city map. The battle (M69, 7) will begin as soon as you've approached men standing here and aside from the captain you'll also have to watch out for two of Howe's soldiers (mini-bosses). Start off by eliminating weaker opponents first and deal with the stronger foes once they're gone.
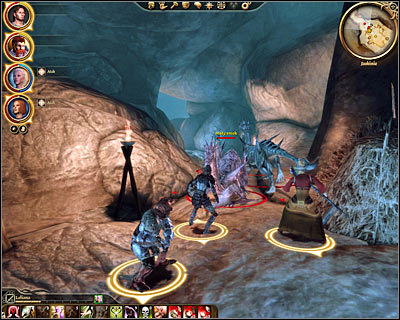
Make sure to examine captain's body after the battle. You may now return to Ignacio (M65, 6) and you'll find out that the ransom was never going to be dropped and it was only about you killing the captain. You can have your vengeance now by trying to kill Ignacio, however defeating him would be an EXTREMELY DIFFICULT task. Instead it's better to express thanks for working together. Don't forget to check the locker to collect Seekers of the Red Jenny. Ignacio will also promise to ask Caesar about lowering his prices for you and unlocking new items (M64, 14).
Received from: Sergeant Kylon [Denerim - Market district]
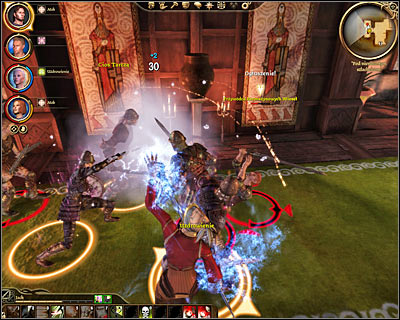
Description: This is Kylon's second mission and you'll be allowed to start it after you've successfully completed Pearls before swine quest. This time Sergeant Kylon (M64, 2) will ask you to deal with a group of mercenaries in a nearby tavern. Travel to [Denerim - Market district - Gnawed noble tavern] and find the leader of the Crimson Oars (M65, 7). Just as before you can convince him to leave this area peacefully (intimidation) or you may attack the mercenaries. Bear in mind that the leader won't give up at the last second, so you'll be forced to murder everyone hostile found inside the tavern. Once you've dealt with the bandits return to Kylon to claim your reward.
Received from: automatically after finding the encrypted scrolls [Ruined temple]
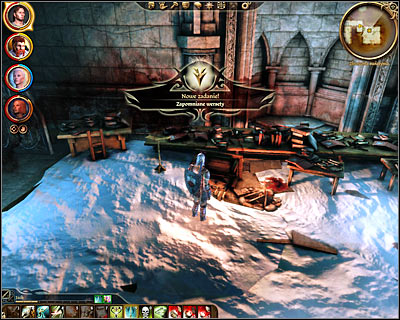
Description: You'll be allowed to begin this quest while trying to locate the urn of sacred ashes (soon after gaining access to the ruined temple). Start off by exploring the rooms located in the south-eastern corner of the main chamber. You should end up standing inside the library and you must click on an interactive object to collect ancient encrypted scrolls (M61, 3). You'll find out that you'll have to find someone capable of reading the scrolls.
![Travel to [Denerim - Market district] after you leave the temple and check the area near a well - Denerim - Forgotten verses - Denerim - Dragon Age: Origins - Game Guide and Walkthrough](https://game.lhg100.com/Article/UploadFiles/201512/2015121518283868.jpg)
Travel to [Denerim - Market district] after you leave the temple and check the area near a well. Talk to sister Justine (M64, 15). Show the woman all the scrolls you found and agree that she takes them for further analysis. You'll receive gold as a reward for successfully completing this mission.
Received from: automatically after collecting the first drake scale [Ferelden]
Description: This quest will appear in your journal after you've successfully collected the first scale of a small dragon (aka drake). The only area to find these creatures is [Ruined temple - Caves] (M62, 6)(M62, 8) and you'll be exploring the caves while trying to complete one of the main quests (Urn of Sacred Ashses). It's best to collect six scales by defeating all the drakes. Once you have these items in your possession go to [Denerim - Market district - Wade's emporium] (M65, 12).
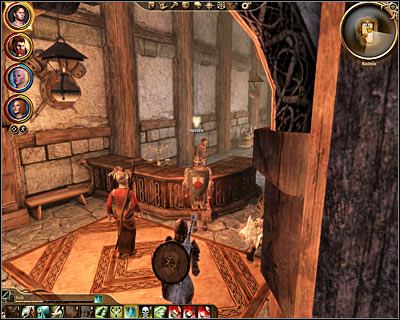
Once you've arrived at the emporium talk to Herren, however Wade himself will soon join the conversation. Inform the blacksmith about the fact that you've found the scales and he'll promise to make an armor for you. Notice that you can ask Wade to work faster by giving him 10 gold coins. Make sure to go to the emporium during your next visit to Denerim and he'll have three items for you - dragon's skin gloves, dragon's skin armor and dragon's skill boots. You can now ask Wade to make a second armor, however this time encouraging him to work faster will cost you 20 gold coins. Return later on to collect identical items and to finish this quest.
Received from: automatically after collecting a dragon scale [Ferelden]
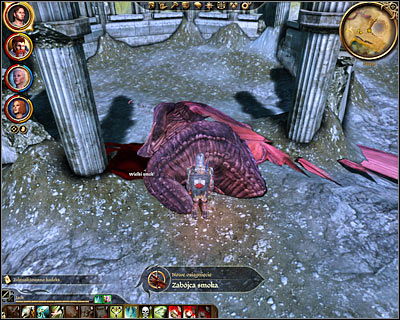
Description: This is a very similar assignment to Drake scale armor, however this time you'll be looking for only one scale and in order to acquire it you'll have to defeat one of the largest dragons found in the game. The place you'll want to visit first is [Ruined temple - Caves]. Make sure to collect the horn by killing the cultists and then go to [Ruined temple - Top of the mountain]. Summon the dragon, defeat it in combat and pick up the scale.
![Once you have the dragon scale in your possession travel to [Denerim - Market district - Wade's emporium] (M65, 12) - Denerim - Dragon scale armor - Denerim - Dragon Age: Origins - Game Guide and Walkthrough](https://game.lhg100.com/Article/UploadFiles/201512/2015121518283958.jpg)
Once you have the dragon scale in your possession travel to [Denerim - Market district - Wade's emporium] (M65, 12). Talk to Herren, however Wade himself will soon join the conversation. Make sure to inform him about finding this unique scale aside from the scales of smaller drogs. Wade can make an armor right away and you'll be allowed to choose between three sets - a weak set (34 strength points required to wear the armor), a medium set (38 strength points required to wear the armor) and a powerful set (42 strength points required to wear the armor).
Received from: automatically after finding a sufficient number of documents next to bodies of different adventurers [Ferelden]
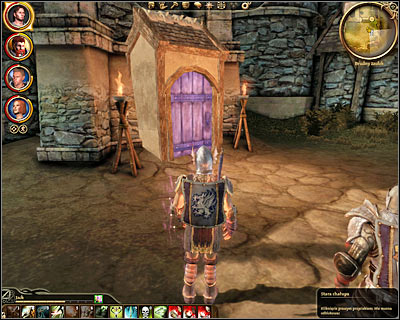
Description: In order to activate this quest you must start collecting notes found next to bodies of different adventurers. Doing this will expand your journal by several new entries. A key item to activating this quest will be to locate the last journal next to a skeleton in [Brecilian forest - Lower ruins] (M45, 6). Once you've activated this quest travel to [Denerim - Dirty back alley] (M69, 8) and find an entrance to a previously inaccessible building.
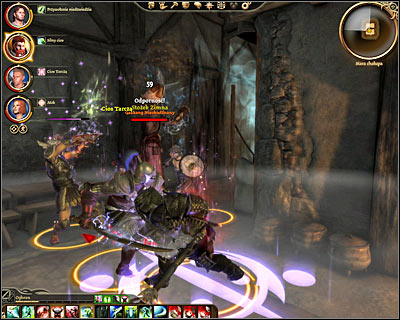
Click on the door and choose the second option from the list (the one involving Gaxhang). Doing this will allow you to enter [Denerim - Dirty back alley - Old hut]. Here you'll have a short conversation after which you'll trigger a boss battle with Gaxkang the Rampant. As soon as you've started the duel move back, so you won't have to keep standing in a narrow passageway. Don't forget to heal your team members frequently, especially since Gaxkang's spells are going to be very powerful. Once you've won examine the body of the creature to find an excellent sword (Howling blade) and open a nearby chest to collect wonderful gauntlets (Elementalist's grip) among other interesting things.
Received from: Erlina [Denerim - Arl Eamon's estate]
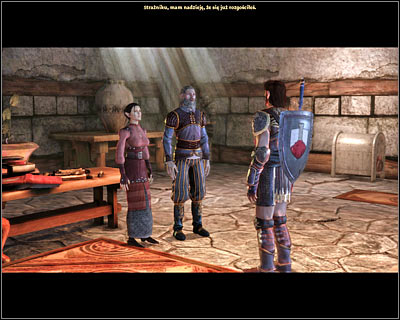
Description: You will be allowed to start this mission soon after one of the main quests of the game (The Landsmeet) has begun. Don't exit arl Eamon's estate. Instead proceed to Eamon's office (M71, 2) where you'll have a chance to talk to arl himself and to one of the servants of queen Anora. You'll find out that the queen has been kidnapped and that is being held in Howe's mansion. Your job will be to rescue her. Leave Eamon's mansion by heading back to [Denerim - Market district] and then choose [Denerim - Arl of Denerim's Estate - Exterior] from the city map.
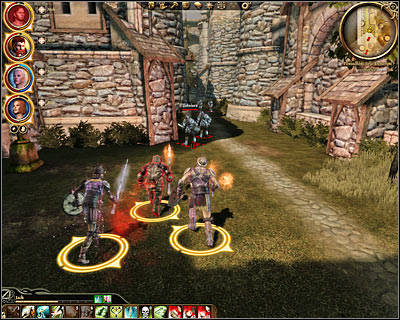
Once you've arrived at the estate grounds (M72, 1) make a few steps forward and you'll find out that you can get inside the mansion using the side door and to reach it you must start moving clockwise (M72, 2). Be careful, because at least one group of guards will stop you along the way. Eliminating them shouldn't be a big problem as long as you're careful. After you've reached a small garden (M72, 3) Erlina will stop you and tell you her plan. Notice that your team members are now wearing disguise and they should stay that way. Don't worry about them not being able to use their standard items, because this is only a temporary status.
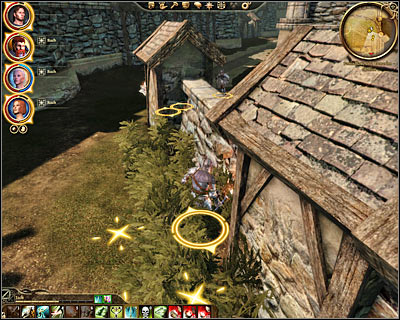
There are two ways for you to gain access to the mansion - you can follow Erlina's instructions by hiding in the bushes (M72, 4) or you can ignore the possibility of using a disguise and attack the guards. I would recommend playing it safe, because it'll be much easier to reach the queen without every guard attacking you on sight. Once the guards have been distracted or killed click on the door they were guarding (M72, 5) to travel to [Denerim - Arl of Denerim's Estate - Interior] (M73, 1).
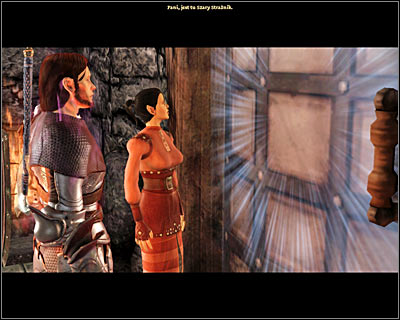
If you're still using a disguise you'll have to be extra careful, because Howe's men will be well trained and there's going to be a lot of them in the mansion. The largest group can be found in the dining room (M73, 2) and if you play it safe they won't even bother you (otherwise you would have to spend a lot of time trying to defeat them). Keep heading north until you find the chamber where the queen is being held (M73, 3). You'll find that the door is magically protected, so you'll have to figure out a way to break the spell.
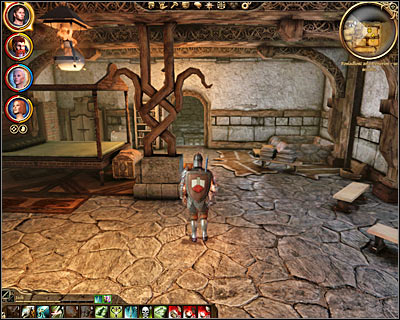
Start off by heading east (M73, 4). Avoid entering one of the northern rooms, because after finding a guard who's having a good time with one of the servants you would raise an alarm. Instead try breaking into a small vault located at the other end of the main corridor (southern wall). Thankfully even if you fail in opening a door now you'll get the key to it eventually. The next area is the bedroom (M73, 5) and you should open a chest here to collect documents of the Grey Wardens.
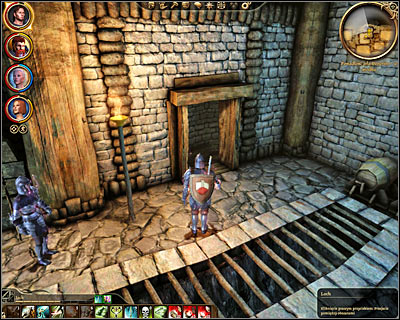
Once you've entered the next room you'll automatically trigger a cut-scene and you'll meet Riordan (one of the Grey Wardens). The good news is that he has left his cell, but the bad news is that you can no longer use your disguise. Talk to Riordan and don't forget to give him the documents found in the previous room. Once he's escaped use a nearby door (M73, 6) to travel to [Denerim - Arl of Denerim's Estate - Dungeon] (M74, 1). It would be a good idea to save your progress before moving on (a lot of difficult fights ahead!).
Howe's guards will stop you once you've entered the first area of the dungeon (M74, 2) and you won't be able to prevent them from attacking your team. More fights will take place in the dungeon and each time you should focus on keeping your teammates alive, because enemy units will be using powerful weapons to stop you. Don't forget to kill archers quickly, especially since some of their special attacks will stun your allies.
During your time spent in the dungeon you'll be moving counterclockwise and you'll come across a lot of smaller rooms along the way. I would strongly recommend exploring these areas. Don't forget to provoke enemies to chase after you and to attack them far away from the rest of the guards. Aside from the soldiers and from the archers you'll also have to watch out for mabari and for Howe's mages (they have to go down first). It's also going to be important to save a couple of civilians along the way (more on that can be found in the sections describing Tortured noble and Missing in action quests).
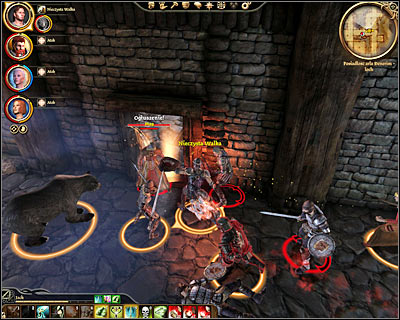
Before you proceed to the area where arl Howe can be found (M74, 7) make sure to save your game again, because you're about to start a very difficult boss fight. Once you're inside have a little conversation with him and then proceed with the attack. Once again, I would recommend moving back to the main corridor, because you'll have more room to move and there's a chance that some of Howe's men won't exit the room with him. Don't forget to heal your team members during the battle, because Howe's attacks will result in serious injuries.
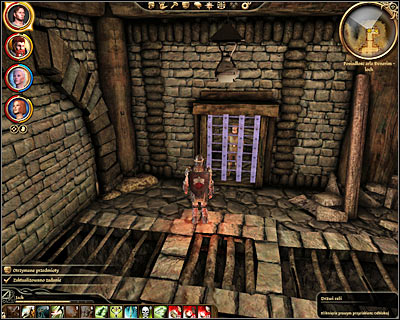
After you've defeated Howe check his body for a key and deal with the remaining enemies. You should also consider visiting nearby cells to complete one of the subquests (The lost templar) and to talk to Vaughan Kendells (M74, 9). Notice that you can ask Vaughan about a potential reward and he'll give you a key to the vault mentioned before. Once you have the key you can free him, kill him or leave him in the cell.
![You must now exit the dungeon to return to [Denerim - Arl of Denerim's Estate - Interior] - Denerim - Saving the queen - Denerim - Dragon Age: Origins - Game Guide and Walkthrough](https://game.lhg100.com/Article/UploadFiles/201512/2015121518284002.jpg)
You must now exit the dungeon to return to [Denerim - Arl of Denerim's Estate - Interior]. I wouldn't recommend choosing the passageway located near the room where you've fought Howe (M74, 10), because you would have been attacked by a very large group of enemy units after arriving in a small room. Winning the battle would require you to issue correct orders and to constantly monitor health bars of your team members. Instead backtrack your steps to return to the passageway you've used to enter the dungeon (M74, 1).
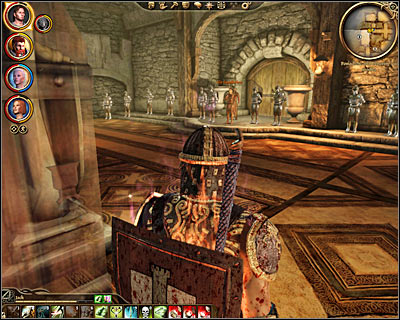
Either way your next objective will be to return to the chamber where the queen is being held (M73, 3). Approach the door and you'll be allowed to open it. Talk to Anora and notice that the only exit from the estate is located to the south-west. SAVE YOUR GAME before heading to that location (M73, 7), because you'll soon have to decide how this quest should end.
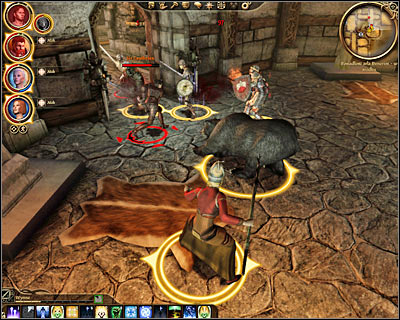
The most obvious way to get out of this situation is to fight Sir Cauthrien and to succeed in defeating all enemy forces. I have to warn you that winning this battle is going to be EXTREMELY difficult. As soon as the battle has started retreat and order your team to remain in one of the previous rooms or corridors (you may choose the chamber where Anora was being held). The idea is to escape from the mages and from the archers which shouldn't be a big problem, because they won't pursue you. Instead wait for Howe's warriors and for Sir Cauthrien herself to show up and start attacking them. Naturally defeating Cauthrien won't be easy, because she'll be very resistant to your attacks. Keep healing your allies or even bringing them back to life using resurrection spells.
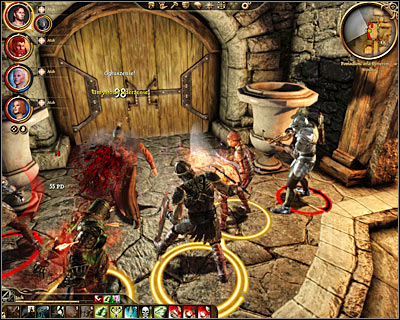
Sadly eliminating Sir Cauthrien won't resolve the problem, because in order to succeed you'll have to defeat ell enemy units, including the ones stationed near the exit. You can't provoke archers to chase you, so you'll have to organize an assault. Enter the room when you're ready and QUICKLY kill the only mage found in the room. Once he's gone retreat for the second time and heal injuries. You must now keep repeating these actions, but each time you'll want to kill only a handful of archers. Don't forget to escape once things get too tough. Once the room has been fully secured click on the door and return to [Denerim - Arl Eamon's estate] (M71, 2). You'll be allowed to resume your current main quest (The landsmeet) without having to pay a visit in [Fort Drakon].
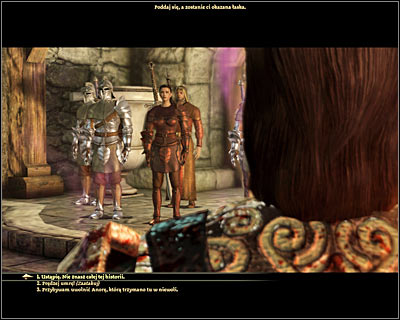
An alternative is to surrender during your initial conversation with Sir Cauthrien. This would result in the main character being captured and transported to [Fort Drakon] (M79, 1) and you would automatically start a new quest - Captured!. You would also be allowed to choose between organizing an escape on your own or waiting for rescuers to show up.
Received from: Oswyn [Denerim - Arl of Denerim's Estate - Dungeon]
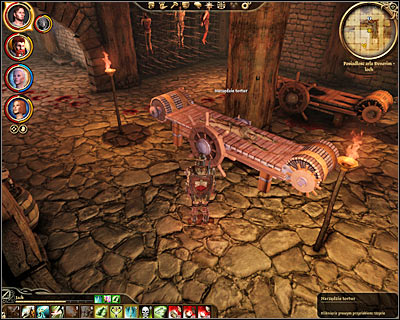
Description: You can meet Oswyn while trying to complete one of the main quests of the game - Saving the queen. He can be found in one of the larger rooms of the dungeon located directly beneath Howe's estate (M74, 3). Be careful, because he's going to be guarded by an torturer. Once you've defeated the mini-boss approach the machine the enemies were using to torture Oswyn with and talk to him. Oswyn will promise to show his support during the landsmeet in return for giving him back his freedom. After you've left the dungeon go to [Denerim - Market district - Gnawed noble tavern] and talk to Bann Sighard (M65, 13). He'll be very pleased with what you did and aside from getting his vote you can also ask him for a reward (up to 50 gold coins depending on your persuasion skills).
Received from: automatically after accepting a mission from the Chanter's board [Denerim - Market district]
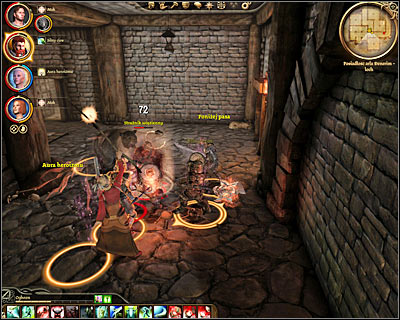
Description: You can complete this mission while trying to end one of the main quests - Saving the queen. To be more precise, you must make your way to [Denerim - Arl of Denerim's Estate - Dungeon] and start exploring the underground complex. Check one of the rooms located in the eastern section of the dungeon (M74, 4), marked as the lower prison level. Start off by eliminating a prison guard (mini-boss) and once he's gone check his body for a prison key.

You can now proceed to the next room where you'll find a couple of cells. Locate the cell where Rexel is being held (M74, 5). Naturally you shouldn't kill him during the initial conversation. Instead find out more about who he is. You can't do much to help him, however your journal is going to be updated. You can also meet the other prisoner while you're there (M74, 6), but it's optional. In order to end this quest you must return to [Denerim - Market district]. Go to the board and talk to Rosamunda to tell her about Rexel's fate.
Received from: Irminric [Denerim - Arl of Denerim's Estate - Dungeon]
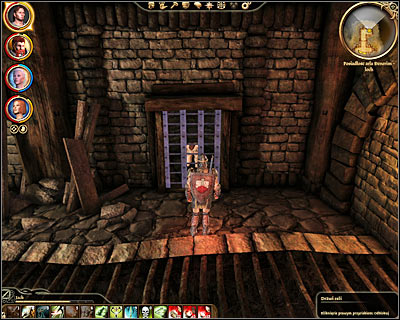
Description: You can complete this mission while trying to end one of the main quests - Saving the queen. Start off by killing arl Howe and taking a key from his body. Once this is done check the small room in the back (M74, 8) and open the cell where the templar is being held. Irminric will ask you to deliver a ring to his sister Alfstanna. You may now travel to [Denerim - Market district - Gnawed noble tavern]. Find Bannora Alfstanna (M65, 14) and give her the ring. She'll express her thanks, give you a reward and promise to show her support during the landsmeet.
Received from: automatically after ending up in the prison [Denerim - Fort Drakon]

Description: This mission will start immediately after completing Saving the queen quest (M79, 1) and only if you chose not to fight with Cauthriern or lost the battle to her. Begin by talking to a prisoner in the other cell. Choose your answers carefully, because they'll affect the rest of the quest. If you tell him that you'll escape on your own you'll remain here, but if you tell him that you'll wait for someone to rescue you things will get more interesting.
Escaping the prison on your own:
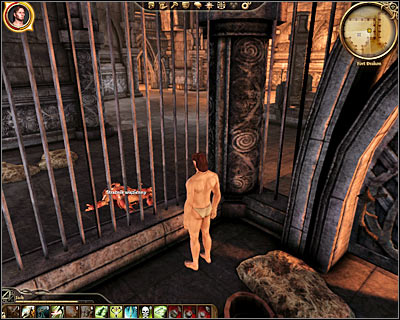
If you prefer to act alone then you'll have to escape the cell (M79, 1) without anyone's help. There are a couple of ways for you to get rid of the prison and the most obvious one would be to use your lockpicking skills to open the cell door. If you can't do that talk to the guard once he's close enough to the gate (wait for him to approach the metal bars). You can now snap his neck or perform a persuasion attempt to invite him to spend an intimate moment in the cell. Either way you'll have to get out and I would also recommend that you free the other prisoner.
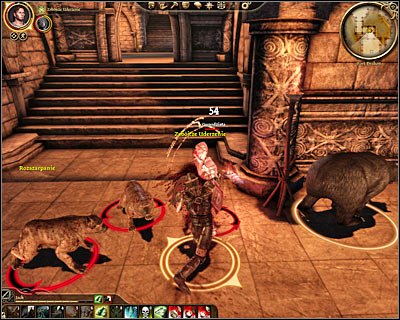
Thankfully you won't have to run around the fort half-naked, because you'll find your things in a nearby chest (M79, 2) and the main character will automatically wear them. You may now proceed to the next room (M79, 3) where you'll have to defeat a guard and two mabari. This may be a difficult fight for you if you're not playing as a warrior, but the good news is that no one else will show up. Once you've won move on to the next corridor and don't forget to save your game frequently.
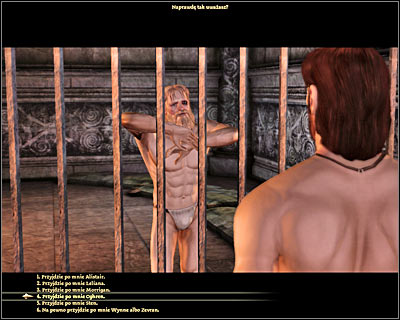
You'll soon end up standing in a long corridor and you should check the first room found to your right. Notice that you're now standing inside a small armory. Click on a nearby armor stand (M79, 4) and the main character will automatically put on a disguise. This is an excellent opportunity for you, because otherwise you would have to be dealing with A LOT of enemy units on your own.
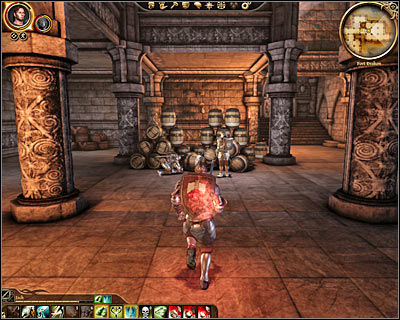
Proceed to the other end of the main corridor and choose the door on your left which is going to be colonel's office (M79, 5). Start the conversation and listen to what your superior officer expects from you (thankfully you won't be recognized by him as the prisoner). Leave the office and proceed to the eastern room which is going to be the storage area (M79, 6). Locate two guards here and talk to them to find out that the local quartermaster is mad at them.
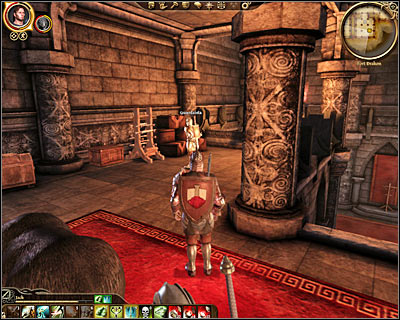
Use your personal map to find the officers' armory. Here you'll have to talk to the quartermaster (M79, 7). There are a couple of ways to acquire the swords needed for the next mission. You can rely on persuasion, intimidation, pay him for the swords or give him a few bottles of poison if your character has any. Either way once you have the sword return to the colonel (M79, 5) and you'll take part in an inspection and in a debriefing.
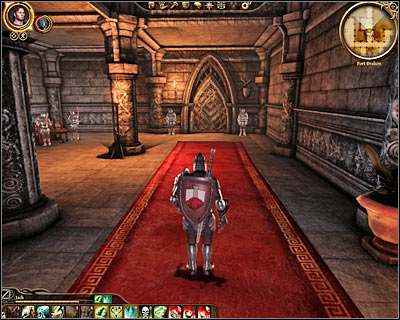
You may now proceed towards the door leading to the large northern room. Notice that the door is being guarded by two soldiers (M79, 8), but thankfully during the conversation one your allies will tell them the correct password. Keep heading north until you've reached the exit (M79, 9). Return to [Denerim - Arl Eamon's estate] (M71, 2) where you'll be allowed to resume the main quest (The landsmeet).
Waiting for rescue:
In this case during your conversation with the other prisoner (M79, 1) you would have to choose who should arrive in the fort. You can pick two members of your team. I would recommend choosing Wynne and one of the warriors (Oghren, Alistair or Sten). Your team will appear near the main entrance to the fort (M79, 9). Naturally you could attack enemy units right away, however I would recommend playing it safe for a few more minutes.
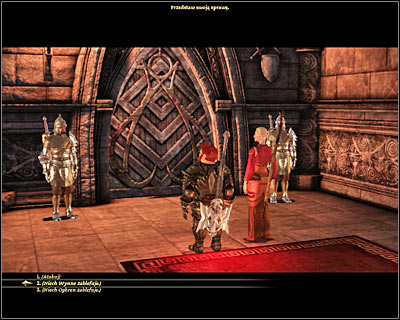
Start off by heading south until you're stopped by guards standing next to a door leading to the southern room (M79, 10). Wynne can now convince them that she brought gifts. You would have to wait for the captain to show up and to tell him about your peaceful intentions. If you've played it all out correctly you'll gain access to the large hall.
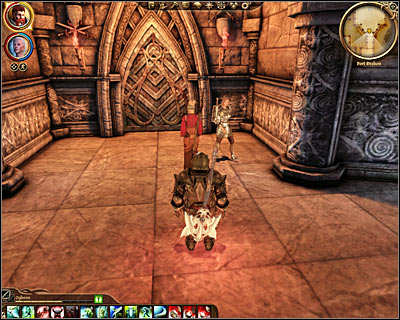
Keep moving south until the members of your team notice that the next door is being guarded by a single female guard (M79, 11). If you want to resolve this problem peacefully you can convince her (persuasion) that she should ask for a more important job than to guard a door. If you can't convince her you'll have to attack her along with the rest of the guards and I would recommend using nearby ballistae.
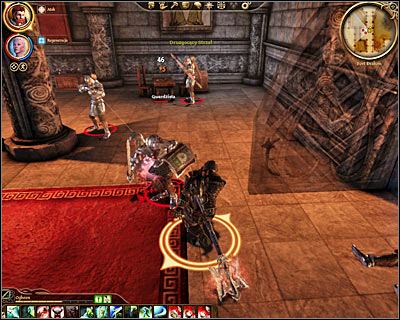
Sadly even if you convince the female guard to go away without starting a fight you're still going to be stopped by the guards in the next room (M79, 8). This time attacking them will be your only option. Don't forget to heal your warrior using Wynne's spells, because the warrior have to defeat them alone. Once the area is clear head south, turn west and then start moving towards a room located in the north-west (M79, 12).
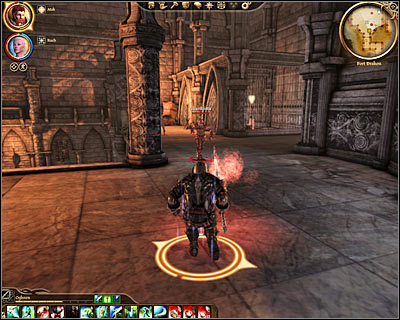
You'll have to eliminate two other groups of enemy units along the way. The first group (guard and two mabari) will be waiting for you in the large room (M79, 3) and the second group (two guards) will be guarding the cells (M79, 13). Make sure to check bodies of both guards to collect a cell key. Use this key to rescue the main character (M79, 1) and the other prisoner. You'll now have to return to the area where you've started exploring the fort (M79, 9) and you won't encounter any new enemies at first, however a large group will surprise once you're close to the exit (M79, 10). Defeat them and return to [Denerim - Arl Eamon's estate] (M71, 2) where you'll be allowed to resume the main quest (The landsmeet).
Received from: Arl Eamon [Denerim - Arl Eamon's estate]
![Description: After this has quest has officially appeared in your journal leave the estate and travel to [Denerim - Elven alienage] (M66, 1) using the passageway found in the market district or by choosing the correct location from Denerim map - Denerim - Unrest in the alienage - Denerim - Dragon Age: Origins - Game Guide and Walkthrough](https://game.lhg100.com/Article/UploadFiles/201512/2015121518284336.jpg)
Description: After this has quest has officially appeared in your journal leave the estate and travel to [Denerim - Elven alienage] (M66, 1) using the passageway found in the market district or by choosing the correct location from Denerim map. Head forward after your arrival. Don't forget to talk to civilians you meet along the way, including Soris found in [Denerim - Elven alienage - Cyrion's house]. The most important thing for you to do here is to proceed to the central area of the alienage where you'll witness a dispute taking place. Talk to Shianni the first chance you get to find out more about the plague and about the disappearances of other elves. You'll find out that weird things are happing inside the hospice and that there's a way of entering it using the back door.
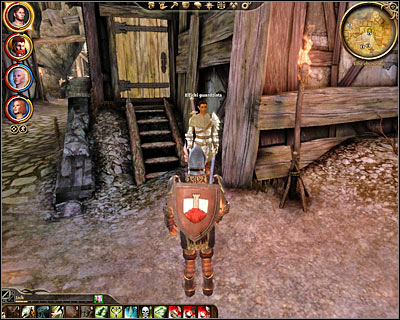
Naturally your first step will be to visit the hospice and there a few ways of gaining access to it. The most obvious solution would be to attack healer Veras and other of Loghain's men stationed in the surrounding area (M66, 9) and it would be easy to provoke them during the initial conversation. The less obvious solution is to proceed to the back of the building to talk to one of the guards (M66, 12). You could attack him (no one else will join the fight) or bribe him to leave his post. Either way you'll have to collect a key to the hospice.
![You may now enter [Denerim - Elven alienage - Tevinter hospice] (M68, 5) where you'll have to get rid of a small group of guards - Denerim - Unrest in the alienage - Denerim - Dragon Age: Origins - Game Guide and Walkthrough](https://game.lhg100.com/Article/UploadFiles/201512/2015121518284397.jpg)
You may now enter [Denerim - Elven alienage - Tevinter hospice] (M68, 5) where you'll have to get rid of a small group of guards. You must now explore a small room found in one of the corners of the hospice (M68, 6). Rescue some of the elven slaves being held here and once they're free head back outside. Don't forget to use the back door again, so you won't be seen, because otherwise you would have to deal with Loghain's men (including two mage mini-bosses). Return to Shianni (M66, 4), tell her about what you've discovered in the hospice and she'll respond by saying that the leader of their tribe wasn't among the rescued elves.
![Return to the back of the hospice, however this time check a nearby alley and eventually you'll locate a door leading to [Denerim - Elven alienage - Rundown apartments] (M66, 10) - Denerim - Unrest in the alienage - Denerim - Dragon Age: Origins - Game Guide and Walkthrough](https://game.lhg100.com/Article/UploadFiles/201512/2015121518284356.jpg)
Return to the back of the hospice, however this time check a nearby alley and eventually you'll locate a door leading to [Denerim - Elven alienage - Rundown apartments] (M66, 10). Once you're inside the building (M68, 1) proceed directly to the last room which is going to be guarded by Loghain's men (M68, 3). Defeat them and pick up a note found on a small table. You can now return with the note to Shianni (M66, 4) to share the news or you can continue your journey without leaving the building.
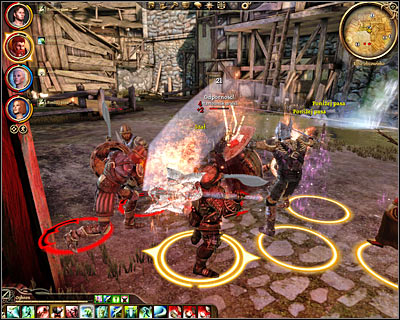
Focus on finding the next door (M68, 4) which you'll be allowed to open using a key found along with the note. Once you're back outside (M66, 11) you'll automatically start a conversation with one of the guards. Sadly you won't be allowed to convince him that you're one of the bad guys, so as a result you will have to attack him as well as his colleagues. Winning here shouldn't be a problem as long as you pay attention to enemy archers. Make sure to save your game before opening a door leading to [Denerim - Elven alienage - Tevinter warehouse] (M66, 13), because you'll have to make an important decision on how this quest should end.
![Once you're inside [Denerim - Elven alienage - Tevinter warehouse] (M68, 7) you'll automatically trigger a new conversation with Devera and her bodyguards - Denerim - Unrest in the alienage - Denerim - Dragon Age: Origins - Game Guide and Walkthrough](https://game.lhg100.com/Article/UploadFiles/201512/2015121518284380.jpg)
Once you're inside [Denerim - Elven alienage - Tevinter warehouse] (M68, 7) you'll automatically trigger a new conversation with Devera and her bodyguards. You should know that even if you kill her you won't lose a chance of choosing the ending, however I would recommend playing it safe, so you won't put your team at risk. If you plan on choosing an ending suitable for an evil character you should ask her to take you to Caladrius (M68, 8). If you plan on choosing an ending suitable for a good-hearted character you should scare her away using intimidation or attack her right now. Even if she's dead or not here anymore you'll still be allowed to go to Caladrius and he won't automatically attack you. The only difference is that you would have to travel through several rooms filled with enemy units and traps instead of being automatically transported to the last chamber.
Bribing Caladrius:

This is an ending for an evil character. Start off by travelling to the last chamber (M68, 8) and this can be done automatically (if you convince Devera of your good intentions) or after dealing with all hostile units met inside the warehouse. During the conversation with Caladrius you must express the feeling that you want to achieve some kind of a compromise. You can now bribe Caladrius by paying him 100 gold coins or convince him to change his mind by using persuasion. In both cases he would leave Denerim with his slaves and you would receive documents needed to implicate Loghain.
Defeating Caladrius:
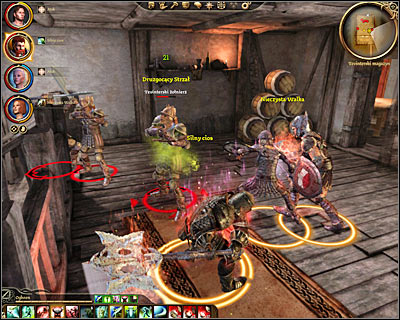
This is an ending for a good character. Before you reach the last chamber (M68 ,8) you should consider getting rid of Devera (M68, 7), because otherwise she would take part in the battle. After you've started the fight focus on defeating at least some of the bodyguards before attacking Caladrius himself. I wouldn't recommend retreating to any of the previous rooms, because Caladrius would still be able to use his spells to injure you or your teammates.
Start attacking the boss after you've dealt with most of his warriors and at least some of his archers. You won't have to kill all the bad guys, because this battle will come to an end once Caladrius is heavily injured. You can now choose between sacrificing all the lives of the remaining slaves in exchange for receiving a bonus to your attributes (last chance for an evil character) and dismissing his final offer. If you refuse to kill the slaves you can decide to let Caladrius go or you can finish him off. Either way you'll get your hands on documents implicating Loghain. If you've decided to keep the slaves alive you'll also be allowed to talk to Valendrian.
Received from: Sir Otto [Denerim - Elven alienage]
Description: Explore the area to the north-east of the main courtyard to encounter Sir Otto (M66, 5). You can agree to help the blind templar by locating a nearby source of evil. Start off by exploring the area to the west of Valendrian's house to find an insane beggar (M66, 6). Talk to her and ask her about her grandmother and about the bad people.
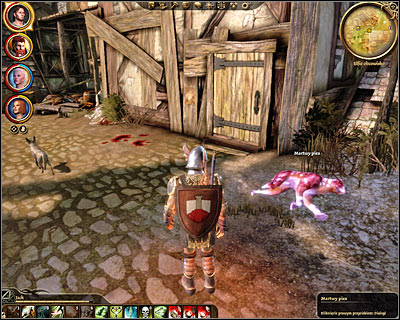
The next lead can be found to the south-east of Cyrian's house. Find a rotting corpse of a dog (M66, 7). Once you've examined the body return to Sir Otto (M66, 5) and share the information about all the clues you've discovered. You may now follow the templar to a door leading to [Denerim - Elven alienage - Abandoned orphanage] (M66, 8). Save your game after arriving in the orphanage (M67, 1), because there's a high probability of failing this mission if something goes wrong in the next few minutes.
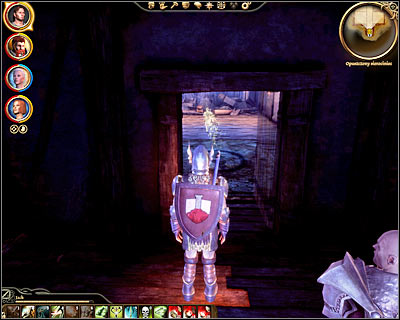
The biggest problem during the course of this mission will involve Otto himself. You won't be allowed to control him and Otto will want to join you in each fight. It's not a good thing, because he won't be too strong and therefore you'll risk a chance of losing him. If Otto dies you won't be allowed to finish the quest, so you'll have to figure out a way to deal with him. The best solution in my opinion is to turn off the feature which orders your team members to follow you and to close doors before Otto moves to the next room, because he won't be able to open any of the doors himself. I know it's not polite, but doing this will save him from the trouble and he'll only have to take part in two boss battles. Start off by moving forward and ignore the first ghost you encounter.
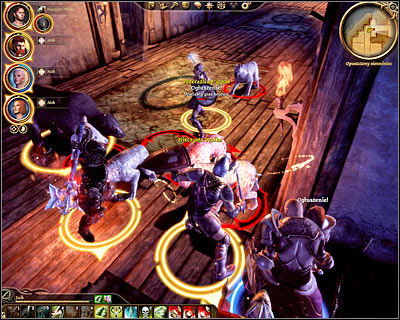
The first group of enemy units will attack you when you'll get to a new corridor (M67, 2) and you'll be dealing with a group of rabid attack dogs. The animals will be hiding in two of the nearby rooms, so you'll have to be ready for them. Bear in mind that their attacks will inflict more damage than what you usually get. Once you've dealt with the dogs proceed to the next room (M67, 3) and attack a mini-boss (ghost of a tormented woman). The easiest way to make the ghost less deadly is to quickly surround it with your warriors.
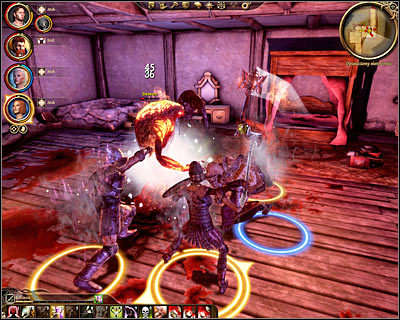
The next room is going to be occupied by several weak ghosts and by a powerful one (mini-boss). I would recommend standing near the passageway, so you won't be fighting more than two ghosts at a time. Once you've dealt with the spirits get ready for a proper boss battle (M67, 4) and this time Sir Otto will have to join the fight (he'll appear next to your team members as soon as the cut-scene has ended). Start attacking the main demon before other creatures appear near your position.
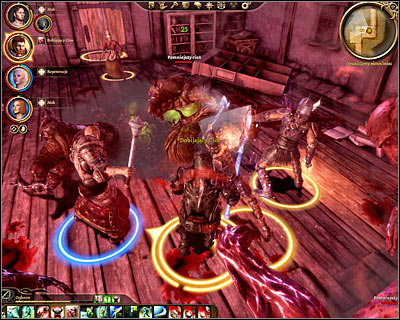
After you've taken care of the demon you'll have to start attacking lesser shades and the biggest problem will be the fact that you'll be dealing with a lot of them. Focus on attacking the creatures located close to Sir Otto, because otherwise he would start losing health very quickly. Once you've disposed of all the monsters listen to a new conversation and head north (M67, 5). Don't forget to lock Otto in a large room where the first boss battle took place.
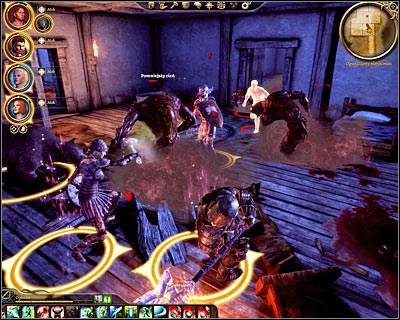
You'll be dealing with new ghosts and shades along the way, so you shouldn't be in a lot of hurry. Monitor health bars of your team members and make sure to explore all the rooms, so you won't leave any monsters behind. You'll come across several abominations (M67, 6) near the last room and don't forget to move back after each kill to avoid the explosion. I would also recommend that you increase your resistance to fire by using proper spells or items, because it will be an important issue during the upcoming final boss battle.
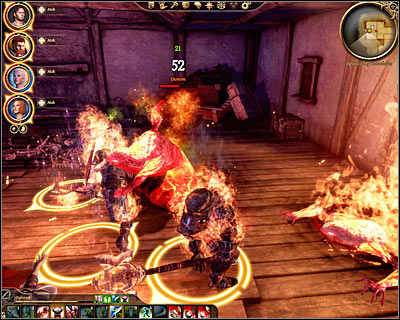
Make your way to the last room of the orphanage (M67, 7) where you'll start off by taking part in a battle with a mini-boss. This is merely an introduction, because Sir Otto will soon be murdered and you'll have to defeat a more powerful demon. Make sure to have a mage in your team with capabilities of healing other team members, because they'll be losing health very fast, especially if you won't make them more resistant to fire. Smaller creatures will appear inside the room in a short while, but I would recommend defeating the main boss first. This quest will officially end after you've killed all the monsters. Don't forget to start a new quest (Voices) before leaving the orphanage.
Received from: automatically after finding the amulet [Denerim - Elven alienage - Abandoned orphanage]
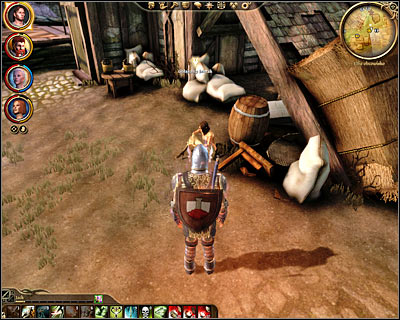
Description: You'll be allowed to start this mission after dealing with all the monsters in the orphanage at the end of Something wicked quest. Remain in the same room where you've defeated the demon and open one of the chests (M67, 8) to pick up an amulet. Once this item is in your possession you may return to [Denerim - Elven alienage]. Give the amulet to an insane beggar you've talked to before (M66, 6).
Received from: automatically after accepting a mission from the Chanter's board [Denerim - Market district]
![Description: You won't be allowed to start this quest until you've gained access to [Denerim - Elven alienage] - Denerim - Fazzils request - Denerim - Dragon Age: Origins - Game Guide and Walkthrough](https://game.lhg100.com/Article/UploadFiles/201512/2015121518284528.jpg)
Description: You won't be allowed to start this quest until you've gained access to [Denerim - Elven alienage]. Travel to [Denerim - Elven alienage - Rundown apartments] and explore one of the rooms in the center of the building to find a chest (M68, 2). Open the chest, pick up a sextant of a free sailor and return with this item to Rosamunda in [Denerim - Market district].
Received from: Slim Couldry [Denerim - Market district]
Description: Slim can be found in the market district (M64, 19), however you can meet him only if your main character has spent at least one point into learning pickpocketing and using camouflage. During your initial conversation with Couldry you'll find out that you'll have to pay him for telling you about new job opportunities and you'll be allowed to keep everything you found to yourself. Slim's tasks can be divided to pickpocketing missions and breaking & entering jobs. You'll be allowed to choose the category you're interested in at the start of each conversation.
Missions - stealing items from different people:
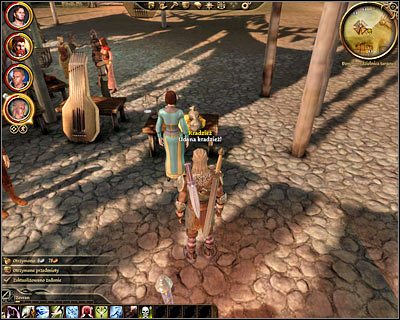
Payment: 50 silver coins. Proceed to the central area of the market district and locate lady's maid (M64, 14). You won't have to put too much effort here, because even a character with a low pickpocketing skill can succeed. Confirm that you want to steal maid's items. You'll acquire gold and a sacculus filled with different kinds of gems. You may then sell the jewels to one of the traders.
Payment: 1 gold coin. After Slim has explained the details of this assignment travel to [Denerim - Market district - Wonders of Thedas]. Proceed to the back of the store. The person you'll need to steal from is Landy Nancine (M65, 14) and she'll be more watchful, so you'll have to spend a maximum number of points to improve your pickpocketing skills or use camouflage. If you succeed you'll acquire an ornamental sword.
Payment: 3 gold coins. This time you'll want to steal from Master Tilver and he can be found in a nearby alley (M64, 20). If you're skilled enough you can wait for the guards to leave, activate camouflage, quickly approach Tilver and steal a key. Otherwise you would have to initiate a conversation with one of the guards. You may introduce yourself as one of Tilver's friends or mention a "problem with the lady". When you get close to him steal the key during the conversation by choosing one of the options from the list.
Either way you'll have to get your hands on Tilver's key. Once this item is in your possession travel to the central area of the market district and find two locked chests (M64, 21) which you may have already noticed before. Both chests will contain gold, valuable jewels and other interesting items.
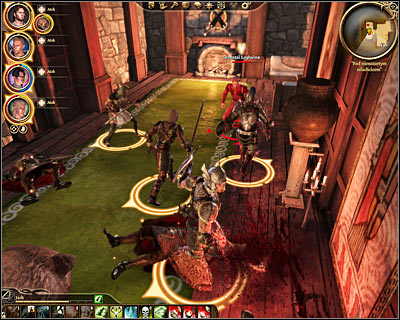
Payment: 6 gold coins. Completing this last assignment will allow you to get your hands on a crown being transported by Loghain's seneschal. Start off by travelling to [Denerim - Market district - Gnawed noble tavern] (M65, 7). You're going to be stopped by seneschal's guards when you'll try to enter one of the side rooms (even if you're using camouflage). You can attack them right away, because other methods would fail and you could even end up in a worse spot. The only exception is the intimidation which would result in them leaving. As for the seneschal himself, you can kill him or once he's given you the crown you can let him go.
Missions - breaking into different areas:
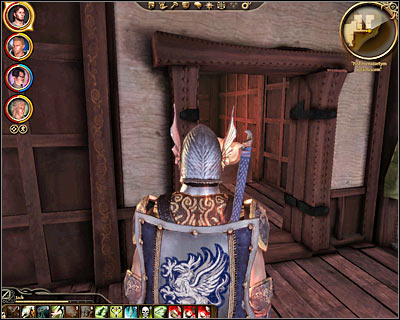
Payment: 1 gold coin. The objective of this mission will be to break into Lady Sophie's apartment found in [Denerim - Market district - Gnawed noble tavern] (M65, 15). You can outsmart Slim in this case, because if you get in there and steal all the items (including gold and a diamond) before talking to him he'll say that he is sorry and he'll return the coin he took to inform you about this mission.
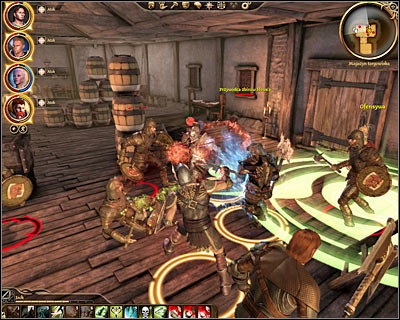
Payment: 4 gold coins. Start off by travelling to [Denerim - Market district - Market warehouse] which can be found next to the tavern and the magical shop. Once you're inside you'll automatically start a new fight with Howe's men. Watch out mostly for two mini-bosses. I would recommend attacking them after weaker opponents have been eliminated. Make sure to open nearby crates after the battle (M65, 16) to collect six silver bars.
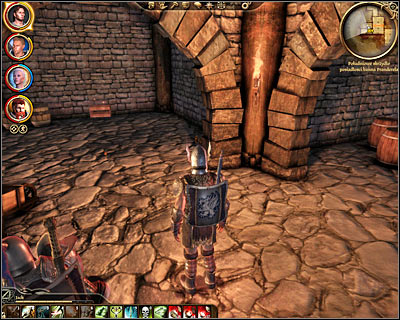
Payment: 10 gold coins. This is the last assignment from this group and in order to start your mission you'll have to open up the map and travel to [Denerim - Western Hill Bann's estate]. Once you've arrived (M75, 1) head south (don't forget to explore an armory found along the way) and then turn west. When you get to the last room you'll find out that it's a trap (M75, 2).
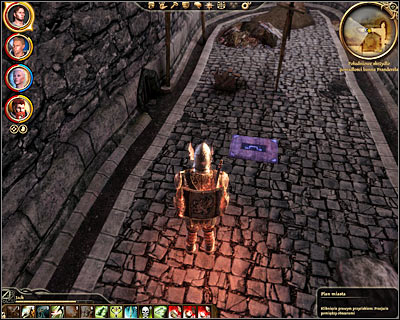
You'll now have to return to the place where you've started exploring the mansion (M75, 1), but sadly it won't be as easy as it sounds. You'll encounter several large groups of enemy units along the way. I would strongly recommend eliminating hostile archers sooner than usual, because their attacks are going to be more powerful this time. You'll also have to watch out for several mages (you'll encounter them near the armory) and for the traps. Click on an interactive object on the floor to leave this area. Travel back to [Denerim - Market district] and talk to Slim there (M64, 19). He'll apologize for putting you in danger, give you the coins back and he'll promise to look into the matter.

You'll have a chance to finish the last mission for Slim AFTER successfully completing Landsmeet quest and BEFORE starting The final battle quest. Return to [Denerim - Market district] and you'll notice that Slim can now be found in the same area where you've had a chance to talk to him the last time you were here (M64, 19). Start a new conversation and you'll find out that he wants to help you in gaining access to the mansion to steal tears of Andraste. You can agree to his offer or you can end your partnership right now. If you decide to steal the tears you'll have to choose [Denerim - Western Hill Bann's estate] from the city map. Notice that this time you're starting in the eastern section of the estate (M75, 3).
During your time spent in the estate you'll have to watch out for soldiers, archers, mages and for powerful traps. I would strongly recommend moving slowly to prevent more than one group from attacking your team and to find all the traps before someone steps one on them. The first serious battle will take place when you reach the crossroads (M75, 4). Don't get too comfortable, because you'll be dealing with elite units and their attacks will take a lot of damage. Explore rooms found along the way, including a southern chamber (M75, 5) filled with a lot of valuable treasures.
The northern room (M75, 6) is being guarded by a very large group of enemies, so it would be a good idea to choose the southern corridor if you don't want to fight them. Thankfully you can't get lost as long as you remember that you must be moving west. Watch out for an enemy mage in the next corridor (M75, 7). It would be a good idea to choose the southern corridor once he's gone. Proceed to a smaller room found to the south (M75, 8) where you'll have to defeat a mini-boss - captain of the mercenaries. Make sure to check his body after the battle to collect captain's key.
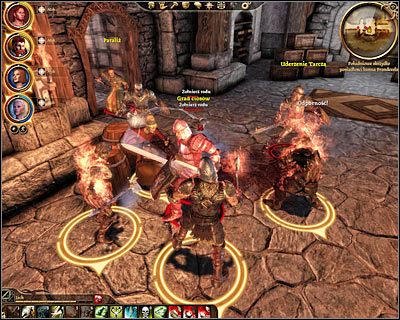
The newly acquired key can be used to open a nearby door (M75, 9), however watch out for a trap in the next hallway. Move back after opening the door and wait for enemy units to come to you. Start off by attacking soldiers, but don't forget to deal with the mages as soon as they've showed up. You'll be moving north from now on and you'll encounter at least one more group along the way. Notice that you can also break into a nearby armory (M75, 10). It's optional and the cost of collecting new treasures would be having to defeat a large group of enemies (including a new mini-boss).
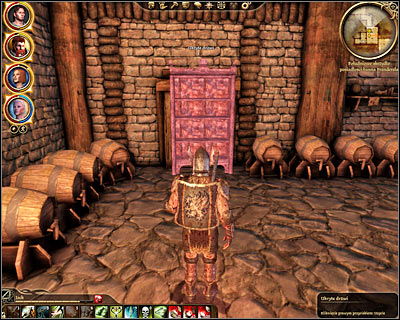
You may now choose the western corridor which leads to the exact same area you've had to explore the last time you were here (M75, 2). Attack a small group of enemies along the way and head forward until you find yourself standing in a wine cellar. You may now click on a cabinet found in the northern section of the cellar (M75, 11). Doing this will unlock access to a new room and naturally you should head inside (M75, 12). You must be extremely careful here, because there are five traps in the room and triggering either one of them will activate the golems. Use your rogue to disable all traps before allowing the rest of your team to get here.
After you've secured this room you'll be allowed to move to a northern storage area (M75, 13). Aside from collecting tears of Andraste you can also find a blessed hammer and a lot of gold. You may now return to the same exit you've used before (M75, 2). Head to [Denerim - Market district] to have the last conversation with Slim (M64, 19). You can choose between allowing him to return the tears, returning the tears yourself and keeping the artifact.
Received from: automatically after finding a small painted box [The Circle tower - Student quarters] and collecting a letter from traveller's body [Ferelden]
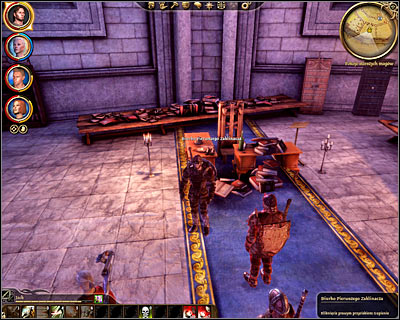
Description: This quest won't appear in your journal unless you've found both of the items mentioned above and it doesn't really matter in which order you'll be collecting them. A small painted box can be found in Irving's desk in [The Circle tower - Student quarters] (M33, 27) and you can collect this item during the course of Broken Circle quest or after finishing it.
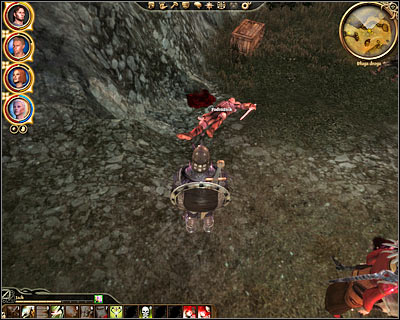
Collecting a letter is tied directly to having your first encounter with Zevran while travelling the world. Remember that this meeting will take place soon after completing one of the Plague quests and watching a short cut-scene featuring Loghain and a representative of the Antivan Crows. It doesn't matter whether you let Zevran live or kill him, because you'll only have to focus on examining adventurer's body (M26, 2). Collect the letter BEFORE leaving this area, because you won't be able to return for it!
![Once you have both items in your possession you can travel to [Denerim - market district] - Denerim - Friends of Red Jenny - Denerim - Dragon Age: Origins - Game Guide and Walkthrough](https://game.lhg100.com/Article/UploadFiles/201512/2015121518284798.jpg)
Once you have both items in your possession you can travel to [Denerim - market district]. Click on an interactive door found next to the entrance to the magical shop (M64, 23). Choose the first option from the list to give the box and in return you'll receive 3 gold coins.
Received from: Athras [Brecilian forest - Dalish camp]

Description: During your initial conversation with Athras (M41, 2) you'll find out why he's so eager to go to the forest. Athras will explain that his wife has probably been touched by the curse and turned into a werewolf, but he doesn't know exactly what happened to her. You can agree to help him. If you're playing as an evil character talk to him again and lie that you've found her body. Otherwise you'll have to travel to [Brecilian forest - Eastern part]. Notice that before you set off you can ask Athras about a potential reward and he'll promise to give you an amulet in exchange for information. You can also ask Zathrian (M41, 1), however if he tells you the truth you won't be able to say anything to Athras.
![Choose the northern passageway leading to [Brecilian forest - Eastern part], so it won't take long you until you come across Danyla (M43, 2) - Brecilian forest - Touched by the curse - Brecilian forest - Dragon Age: Origins - Game Guide and Walkthrough](https://game.lhg100.com/Article/UploadFiles/201512/2015121518284722.jpg)
Choose the northern passageway leading to [Brecilian forest - Eastern part], so it won't take long you until you come across Danyla (M43, 2). As expected she became a werewolf in the meantime, however she won't attack you on sight. Instead you'll be allowed to have a short conversation with her. You can attack her right away or you can allow her to give you a scarf. Killing Danyla will be your only option here, but thankfully she won't pose a big threat. You can now return to Athras (M41, 2) to give him the scarf and to collect the amulet he promised as a reward.
Received from: Cammen [Brecilian forest - Dalish camp]
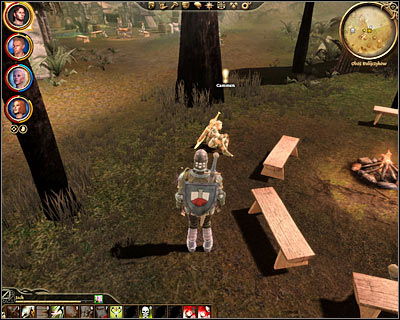
Description: Cammen (M41, 3) will tell you that he's in love with Gheyna (M41, 4), but she still treats him like a child. This quest can have several endings depending on how much you want to help him. If you're playing as an evil hero you can promise him to talk to Gheyna and then during the conversation with the girl to tell her that he hates her or that he only wants to sleep with her. This would result in a funny scene and you would end the quest.
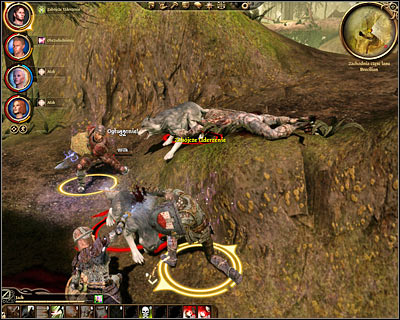
If you want to reach a positive outcome you can also respond that you'll look into the situation. You would then have to talk to Gheyna and convince her using persuasion that Cammen would be an ideal partner for her. The more tiresome solution would be to promise Cammen to deliver wolf's skin so that he could show it to Gheyna later on. In order to make that happen you would have to travel to [Brecilian forest - Western part] (M41, 7), kill at least one Plague wolf and check its remains for possible skin. Either way completing this quest in a good way will result in the main character receiving a precious book.
Received from: Varathorn [Brecilian forest - Dalish camp]
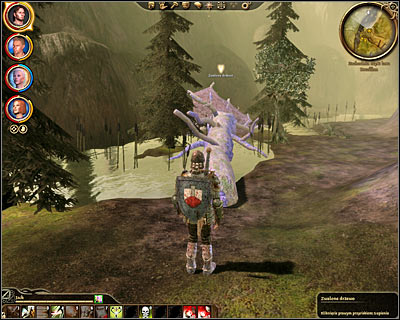
Description: Varathorn (M41, 5) will inform you that if you deliver him ironbark he'll craft a unique item for you. Leave the campsite and travel to [Brecilian forest - Western part]. Proceed to the north-western section of the map to locate a fallen tree (M42, 5) and click on this object to collect the ironbark. Be careful, because doing this will result in a nearby wild sylvan coming back to life and you would have to defeat the giant tree in direct combat. Make sure to move your archers and mages to a safe distance during this duel, so they won't receive any injuries. Return to Varathorn (M41, 5) and show him the ironbark you've collected in the woods. Notice that you can receive one of three different rewards - Varathorn's amulet (if you gave him the ironbark for free), Wolf slayer (if you choose a bow) or Varathorn's armor (if you choose a breastplate).
Received from: Elora [Brecilian forest - Dalish camp]
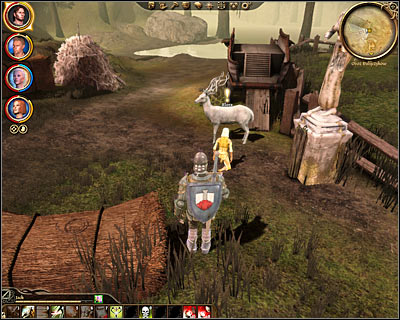
Description: Talk to Elora (M41, 6) and you'll find out that one of the animals she's taking care of is sick and that she can't do anything to help it. You can examine the halla even if you don't possess proper skills and then suggest that she should kill the animal. This would result in you receiving halla's antlers. If you now what your doing you can examine the halla properly and try to calm in down. In order to diagnose the disease you must have a person in your team with fully developed Survival skill. After examining the creature and telling Elora what is really going on you would end the quest.
Received from: automatically after encountering wounded Deygan [Brecilian forest - Western part]
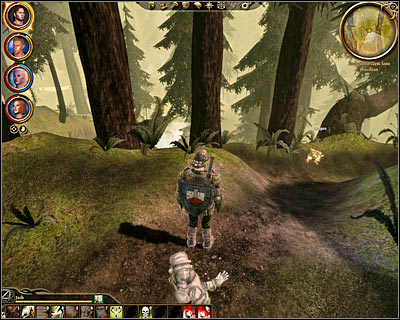
Description: Heavily wounded Deygan can be found in the center of the forest (M42, 4) and before reaching his location you would have to deal with a large group of werewolves. If you're playing as a good person the most obvious solution would be to deliver him alive to [Brecilian forest - Dalish camp] (ask him a few questions if you want to). If you're playing as an evil person you can kill him on the spot and then leave his body or deliver it to the elves. Don't forget that you can also steal all of his things, but if you deliver him to the camp in that state you would have to lie that it wasn't you who took his pouch.
Received from: automatically after touching one of four headstones [Brecilian forest]
Description: There are four headstones in both areas of the forest and you'll start this quest after touching one of them. Each time you've touched a headstone and confirmed that you want to break protection seals you would make the undead appear and they would be lead by a powerful boss (revenant). I wouldn't recommend touching any of the tombstones in the early parts of the game, because your team wouldn't be strong enough to survive the encounter with the revenant. It's also a good idea to leave the headstone area after interacting with each tomb, because not all of the undead will chase after you. Always start with the weaker creatures and deal with the revenant at the end.
![The first headstone can be found in the northern section of [Brecilian forest - Eastern part] (M43, 3) - Brecilian forest - Mages treasure - Brecilian forest - Dragon Age: Origins - Game Guide and Walkthrough](https://game.lhg100.com/Article/UploadFiles/201512/2015121518284835.jpg)
The first headstone can be found in the northern section of [Brecilian forest - Eastern part] (M43, 3). Notice that before getting closer to the tomb you would have to deal with TWO ogres, so you'll have to be extremely careful. Don't forget to make sure that you have enough potions in your inventory, so you won't run out of supplies during the battle. Defeating the revenant and all of the remaining undead will allow you to continue your search for three other headstones.
![The second headstone can be found as soon as you've disposed of the magical barrier in [Brecilian forest - Eastern part] (after defeating the oak or delivering the acorn and after meeting Swiftrunner for the second time) - Brecilian forest - Mages treasure - Brecilian forest - Dragon Age: Origins - Game Guide and Walkthrough](https://game.lhg100.com/Article/UploadFiles/201512/2015121518284855.jpg)
The second headstone can be found as soon as you've disposed of the magical barrier in [Brecilian forest - Eastern part] (after defeating the oak or delivering the acorn and after meeting Swiftrunner for the second time). Explore the ruins to find the tomb (M43, 7), click on the headstone and confirm that you want to brake the seals. Once again a large group of undead will appear and a revenant will be among them. It should be slightly easier this time, because the revenant will be joined only by the weakest types of skeletons.
![The third headstone is located in [Brecilian forest - Western part] - Brecilian forest - Mages treasure - Brecilian forest - Dragon Age: Origins - Game Guide and Walkthrough](https://game.lhg100.com/Article/UploadFiles/201512/2015121518284856.jpg)
The third headstone is located in [Brecilian forest - Western part]. This is the central area of the map where you've also found a place of mystical power (M42, 8). Be careful here, because the revenant will have a lot of undead creatures at its side.
![In order to get to the final fourth tombstone you must first complete one of the subquests in [Brecilian forest - Lower ruins] - Elven ritual - Brecilian forest - Mages treasure - Brecilian forest - Dragon Age: Origins - Game Guide and Walkthrough](https://game.lhg100.com/Article/UploadFiles/201512/2015121518284814.jpg)
In order to get to the final fourth tombstone you must first complete one of the subquests in [Brecilian forest - Lower ruins] - Elven ritual. Completing this mission will unlock access to a new room of the underground complex. Defeat a couple of skeletons, proceed towards the tomb (M45, 10) and attempt to communicate with the ghost. You'll find out that it was a trap and that aside from the ghost you'll also have to defeat two greater shades. Check the sarcophagus after the battle to complete the entire quest.
Received from: automatically after finding a tablet inside the sarcophagus [Brecilian forest - Lower ruins]
Description: You'll be allowed to start this quest after defeating a group of skeletons inside a large room where you've met the ghost of a young boy. Explore the southern room after the battle, open a sarcophagus (M45, 3) and pick up a tablet. It would be a good idea to read what the tablet says by opening your journal.
You can continue this quest after you've arrived in a large room located to the north and seen on the screen above (M45, 4). Make sure to locate the fountain and the altar before starting the ceremony. Here's a list of things you must do in order to succeed (you can't change the order and you can't make any mistakes):
1) FOUNTAIN: Pick up a jug.
2) FOUNATIN: Fill the jug with water.
3) FOUNTAIN: Leave the fountain alone.
4) ALTAR: Place the jug on the altar.
5) ALTAR: Kneel down before the altar and pray.
6) ALTAR: Examine the jug.
7) ALTAR: Drink water from the jug.
8) ALTAR: Pick up the jug.
9) ALTAR: Leave the altar alone.
10) FOUNTAIN: Pour out the rest of the water into the fountain.
If you've done everything according to the plan a nearby gate will open and you'll automatically end this quest. If you make something wrong not only you won't be allowed to explore a nearby room, but you would also have to deal with powerful monsters. Explore the rest of the ruins to collect treasures and to complete a small part of a different subquest (Mage's treasure).
Received from: automatically after examining the phylactery [Brecilian forest - Lower ruins]
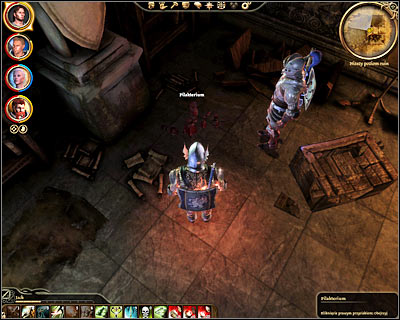
Description: An interactive object (phylactery) can be found in the lower level of the ruins and it'll be one of the darker side corridors. Make sure to scan the area thoroughly, because it'll be hard to find. Click on the phylactery (M45, 11) and ignore all the actions from the list except from touching the object. This will allow you to communicate with a trapped being and during the conversation you should ask this entity from something useful. You'll find out that the being can teach you an arcane warrior specialization and instead it'll want peace. After you've received the specialization you can comply to its wish by putting the object on the altar or you can betray its trust by doing something different.
Received from: automatically after arriving in Orzammar [Orzammar - Hall of Heroes]
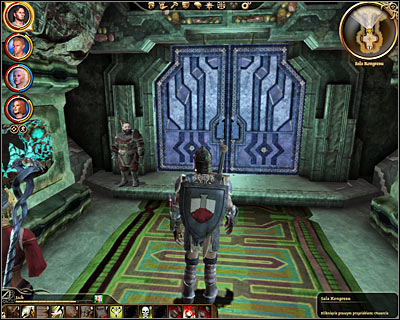
Description: You'll receive this quest automatically after entering the fortress through the main gate. This will result in your ending up in [Orzammar - Hall of Heroes] area (M47, 7). In order to move on with this quest you must head on to [Orzammar - Diamond quarter - Chamber assembly]. Once you're there click on the door leading to the main chamber (M53, 6) and after the meeting has ended you'll have a chance to talk to the secretary.
Received from: Captain of the guard [Orzammar - Commons]
Description: The first part of this assignment is to locate Bhelen's representative. In order to find him you must travel to [Orzammar - Diamond quarter - Chamber assembly] (M52, 2). If you agree to cooperate with Vartag (M53, 5) you'll start a new quest - Prince's grace: first assignment. This will also prevent you from dealing with Dulin Forender (and Lord Harrowmont) in the future.
Received from: Captain of the guard [Orzammar - Commons]
Description: The first part of this assignment is to locate Harrowmont's representative. In order to find him you must travel to [Orzammar - Diamond quarter - Harrowmont's mansion] (M52, 1). If you agree to cooperate with Dulin (M53, 4) you'll start a new quest - Lord's trust: first assignment. This will also prevent you from dealing with Vartag Gavorn (and Prince Bhelen) in the future.
Received from: Boermor, nug trainer [Orzammar - Commons]
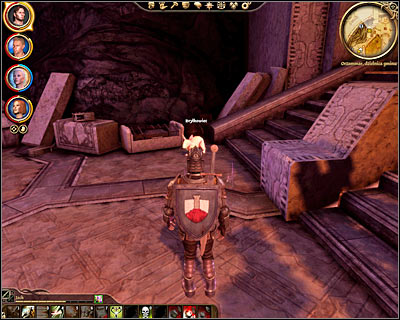
Description: Boermor (M48, 2) will ask you to find the missing nugs for him. In order to complete this quest you'll have to bring him only one animal (there are a lot of them nearby), however many more can be found in Orzammar and in other areas of Ferelden. For every additional nug being delivered Boermor can pay you 12 silver coins.
Received from: Dagna [Orzammar - Commons]
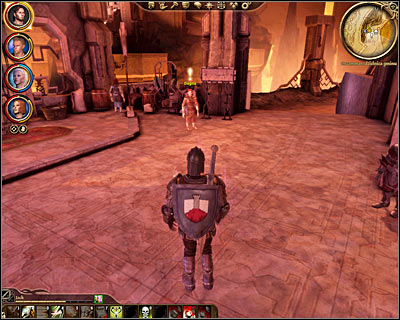
Description: During your initial conversation with Dagna (M48, 3) you can confirm that you've already been to the Circle tower and she'll ask you if she can join the mages to study the ancient books. You can agree to ask the mages if they'll take her in and don't forget to mention a possible reward. You can go to the mages right away or you can visit her father before leaving Orzammar and in order to do that you must go to [Orzammar - Commons - Janar's armory] (M48, 6). Talk to Janar (M48, 7) and you can ignore the subject of his daughter wanting to leave Orzammar or you can share the information. If you want to end this quest right now return to Dagna and convince her that she should stay.
![If you intend to help Dagna you'll have to start off by leaving Orzammar and choosing [The Circle tower] from the world map - Orzammar - An unlikely scholar - Orzammar - Dragon Age: Origins - Game Guide and Walkthrough](https://game.lhg100.com/Article/UploadFiles/201512/2015121518284951.jpg)
If you intend to help Dagna you'll have to start off by leaving Orzammar and choosing [The Circle tower] from the world map. Once you've arrived in the tower (assuming it's already safe here) talk to the person (M33, 1) in command. If Irving is in charge of the tower you won't have any problems convincing him to let Dagna in. You can now return to her (M48, 3) to share the good news and she can give you one of two objects - master dweomer rune or a powerful lyrium potion. If the templars have taken control of the tower (Irving is imprisoned or not in charge) they won't agree to your request. You can also return to Dagna, but in this case your only motivation will be to tell her the bad news.
Received from: Filda [Orzammar - Commons]
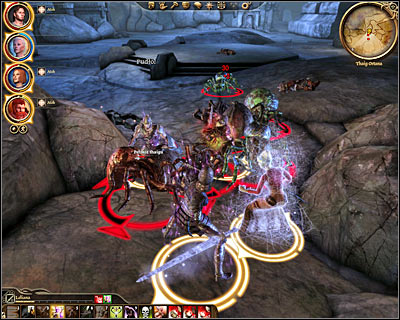
Description: Filda (M48, 4) will tell you a sad story of her son who went missing a few years ago in the Deep Roads. You can agree to find her son Ruck and you'll have to wait for the game to unlock [Orzammar - Ortan thaig] before you'll be allowed to resume this mission. Check the central area of the thaig and you should notice that Ruck (M57, 4) has escaped to a nearby passageway. Sadly if you follow him you'll end up standing in a trap, because a large group of spiders will attack your team. During this fight you should focus primarily on defeating the deadliest types of spiders, because the monsters will be capable of taking down your teammates. There's also going to be a mini-boss among the spiders and you should deal with it once all the other creatures are gone.
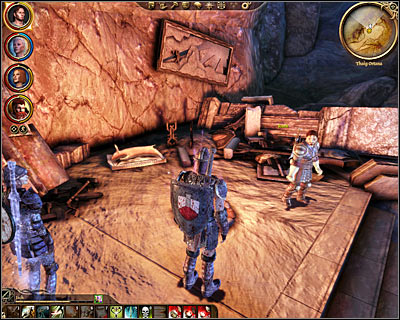
Once you've won you'll be allowed to use the northern passageway and thankfully you won't encounter any other monsters along the way. Approach Ruck (M57, 5) and initiate a new conversation with him. Once you've had a chance to hear his story you can decide to kill him, you can promise to lie to Filda about his current status or you can inform him that his mother will find out about everything you've discovered so far. I would recommend mentioning bartering goods during the conversation, because Ruck can also become a trader. End this quest after your return to [Orzammar - Commons]. Find Filda again (M48, 4). You can lie to her that you haven't found her son or that he's dead or you can tell her the truth (the whole truth or only some of it). If you've managed to comfort Filda she will reward you with Ruck's shield.
Received from: Brother Burkel [Orzammar - Commons]
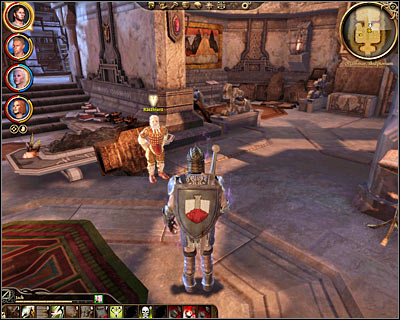
Description: Brother Burkel (M48, 5) will ask for your help as long as you won't make fun of his religion. Your job will be to acquire permission to open a church of the Creator in Orzammar. In order for that to happen you'll have to talk to the Shaper of Dreams. End the conversation and travel to [Orzammar - Diamond quarter - Shaperate]. Talk to the Shaper about the problem (M53, 3). You can convince him to give the permission by using persuasion, cunning or intimidation. Once he's agreed return to Burkel (M48, 5) and share the good news.
Received from: Rogek [Orzammar - Commons - Dust town]
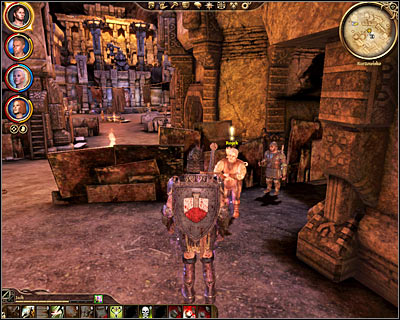
Description: You can start this quest when you agree to a deal proposed by the smuggler Rogek (M49, 1). Your job will be to deliver lyrium to [The Circle tower], however there's a hatch, because you'll have to pay him up front for the goods. A standard fee is 50 silver coins, however if you attempt to persuade him you may get down to 40 silver coins. Don't worry, because you won't get conned and you'll soon sell the lyrium with a very decent profit (you could do that even right here in Orzammar, but I would recommend waiting).
![Leave Orzammar when you're ready to start this mission and travel to [The Circle tower - Mage quarters] - Orzammar - Precious metals - Orzammar - Dragon Age: Origins - Game Guide and Walkthrough](https://game.lhg100.com/Article/UploadFiles/201512/2015121518285065.jpg)
Leave Orzammar when you're ready to start this mission and travel to [The Circle tower - Mage quarters]. Here you'll have to locate mage Godwin (M33, 12) and you can agree to his initial offer or you can use persuasion to ask for more. Once you've made the exchange you can find out what he needed the lyrium for (persuasion, intimidation) and then you can blackmail him that you'll tell the truth to the others. Once you've finalized the transaction return to Rogek (M49, 1) to receive an additional reward.
Received from: Zerlinda [Orzammar - Commons - Dust town]
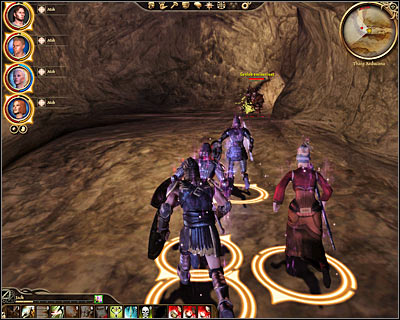
Description: Talking to Zerlinda (M49, 2) will allow you to find out about her horrible situation. You can convince her that she shouldn't leave Orzammar or you can encourage her to visit the world. If you plan on resolving the situation with her family promise to help her and then travel to [Orzammar - Commons - Tavern]. Here you'll have to find Ordel (M48, 8). Explain to him that you've been sent by Zerlinda. You can force him to change his mind about her using persuasion or intimidation. Once he's agreed to welcome her back return to Zerlinda and tell her the good news.
Received from: Shaper's assistant [Orzammar - Diamond quarter - Shaperate]
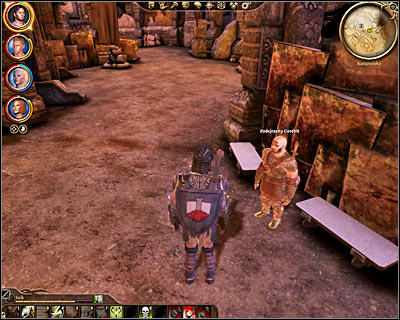
Description: Shaper's assistant (M53, 1) will inform that a valuable book has been stolen from the Shaperate and you can promise him to get it back. Follow his instructions by travelling to [Orzammar - Commons - Dust town]. The person you'll need to talk to here is a dwarf covered in tattoos - Shady Corebit (M49, 3). Don't worry about what you say to him, because you'll have to defeat him in combat to get the necessary information. Check his body and take a receipt.
![Exit the dust town and travel to [Orzammar - Commons - Proving grounds] - Orzammar - Thief in the house of science - Orzammar - Dragon Age: Origins - Game Guide and Walkthrough](https://game.lhg100.com/Article/UploadFiles/201512/2015121518285075.jpg)
Exit the dust town and travel to [Orzammar - Commons - Proving grounds]. Notice that reaching the dwarf responsible for stealing the book will only be possible if you've unlocked access to the arena by completing a part of Orzammar's main quest. Explore the northern area of the proving grounds, locate Fixer Gredin (M51, 1) and click on him to automatically start a fight with him and his gang of thugs. Once you've defeated all the dwarves check Gredin's body and collect A volume of shaper history. You can now return this item to Shaper's assistant (M53, 1) or you can sell the original to Jertrin (M51, 1).
Received from: Orta [Orzammar - Diamond quarter - Shaperate]
![Description: Orta (M53, 2) will ask you to find some kind of records about her lineage and you won't be allowed to resume this quest until you've unlocked [Ortan thaig] - Orzammar - Lost to the memories - Orzammar - Dragon Age: Origins - Game Guide and Walkthrough](https://game.lhg100.com/Article/UploadFiles/201512/2015121518285038.jpg)
Description: Orta (M53, 2) will ask you to find some kind of records about her lineage and you won't be allowed to resume this quest until you've unlocked [Ortan thaig]. Explore the central area of the map (this is where you might have encountered Ruck and the spiders from a different quest) and be ready to defend yourself against the ghosts and the golem. Once it's safe find a chest (M57, 6), open it and collect house Ortan records. You can now return with the documents to Orta (M53, 2). Give her the chronicles and agree to meet with her in [Orzammar - Diamond quarter - Chamber assembly] (M53, 8). Orta will want to give you a reward and you can choose between gold and receiving her support during the upcoming election. I would also recommend visiting her again after a new king has been elected, because she'll give you additional 10 gold coins.
Received from: Vartag Gavorn [Orzammar - Diamond quarter - Chamber assembly]
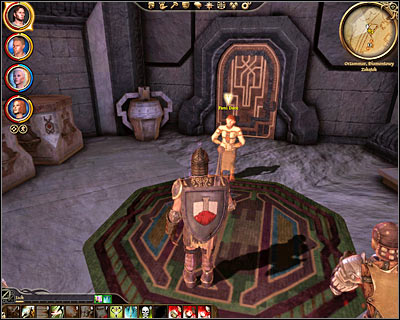
Description: This quest consists of two parts. The first part will require you to deliver the documents that would implicate Harrowmont to two other nobles. The dwarves you'll have to locate can be found in Orzammar. Lord Helmi spends his free time in [Orzammar - Commons - Tavern] (M48, 9) and Lady Dace is standing in [Orzammar - Diamond quarter] (M52, 3).
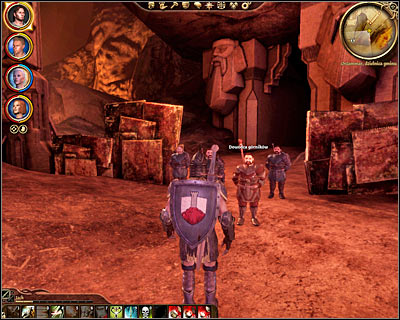
During you conversation with Lady Dace you'll find out that the person you'll need to talk to is her father and she can provide help in finding him. Notice that she gave you a pass and therefore you'll be allowed to travel to the Deep Roads. Start off by going to [Orzammar - Commons] and then head south-west until you're stopped by the miners guarding the exit (M48, 10). All you have to do here is to show them the pass and they'll let you through. Locate the exit (M48, 11) and choose [Aeducan thaig] from the map.
The location you're standing in (M55, 1) might seem like a labirynth at first, but you won't be spending a lot of time trying to find the correct path. Your target can be found to the south-west. Notice two additional areas to the south and to the south-east. Exploring them is optional, however you would be allowed to find a lot of cool items. As for the monsters, for most of the time you'll be dealing with different types of genlocks and hurlocks. Watch out for mini-bosses (genlock emissary, genlock alpha), because their attacks are going to be much more powerful. Don't forget about the possibility of encouraging the monsters to chase after you, so you won't have to deal with all of them at the same time.
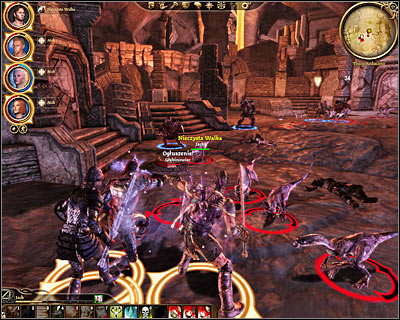
You'll also start encountering deepstalkers, however defeating these creatures won't be a big problem. Their attacks will inflict minimal damage, even if they manage to surprise and surround your team. Eventually you should make your way to a much larger cavern (M55, 2) where Dace's forces will be defending themselves against the monsters. Assist the dwarves in dealing with the deepstalkers. Notice that eliminating the first group won't solve the problem, because more deepstalkers will show up in a few seconds. Defeat them as well.
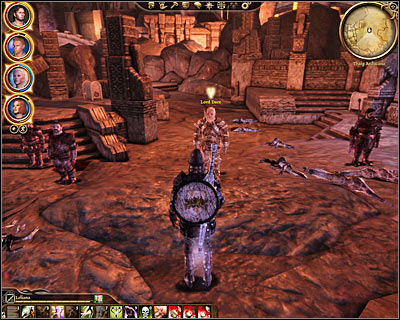
Once you've eliminated all the creatures you'll be allowed to talk to lord Dace (M55, 4) and to show him the documents. Your new ally will also inform you that you'll get lower prices from local traders as an act of gratitude for your assistance. You can now continue exploring the thaig or you can decide to return to the city immediately. Go back to Vartag (M53, 5) in [Orzammar - Diamond quarter - Chamber assembly].
Received from: Dulin Forender [Orzammar - Diamond quarter - Harrowmont's mansion]
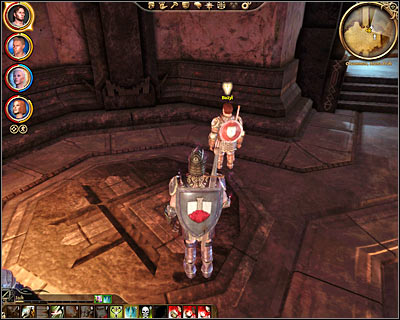
Description: This quest consists of three parts, however two of them won't be mandatory. Dulin (M53, 4) will inform you that in order to gain his master's trust you'll have to take part in a series of fights in his name in the arena. Leave the mansion and travel to [Orzammar - Commons - Proving grounds]. After your arrival you can focus on convincing two dwarves to change their minds about the resignation from the tournament. The first dwarf you'll want to talk to is Baizyl (M51, 2). Use persuasion or intimidation on him to find out that he's being blackmailed. Promise him to look into the matter and to retrieve the letters which could implicate him.
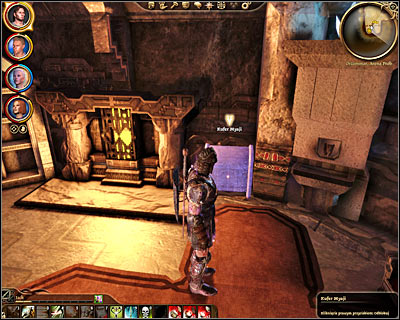
In order to retrieve the stolen letters you must travel to the southern section of the proving grounds. You'll meet Myaja here and even though she's the one responsible for blackmailing Baizyl you won't have to talk to her, because you couldn't convince her to change her mind. Instead choose a rogue in your team and use the ability to open locks to gain access to one of the southern quarters (M51, 4). Once you're inside open one of the chests and collect the love letters. You may now return to Baizyl to give him back the letters (M51, 2). Don't forget to ask him for some kind of a reward (up to 15 gold coins) aside from convincing him to enter the tournament.
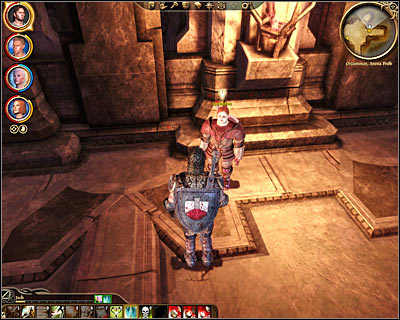
The second dwarf you'll have a chance to talk to is Gwiddon (M51, 3). Thankfully in this case you won't have to perform any additional activities, because in order to encourage him to join the tournament you must only use persuasion or intimidation. Once you're ready to start the fights yourself talk to the Proving Master (M51, 5). You can now tell him to give you more time for preparations, you can ask him to describe the rules and you can inform him that you're ready to begin (M51, 6).
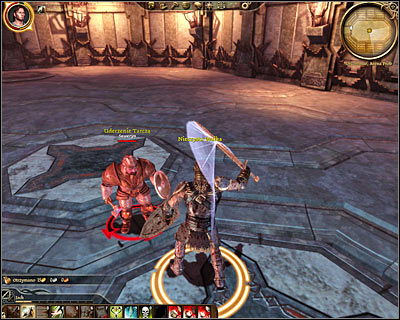
Your first opponent is going to be Seweryn. He's a weak warrior, so defeating him shouldn't be a problem even if your character is not fully developed yet.
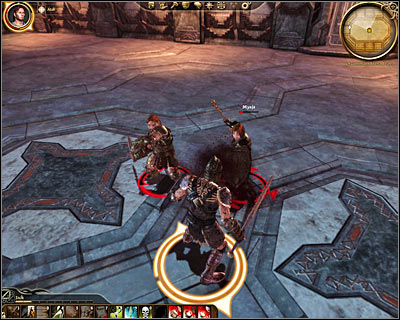
The second fight is going to be slightly more difficult, because you'll be going against two dwarves at the same time (Myaja and Lucian). Don't forget to stay focused on one target, because otherwise you would be receiving more damage throughout the course of an entire battle.
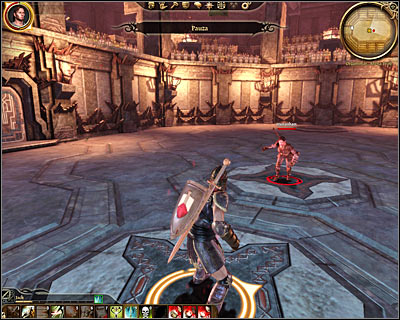
The third fight will put you against a single opponent, so it should be easier. Hanashan may be more resistant to your attacks, but on the other hand you won't have to worry about taking series of deadly blows.
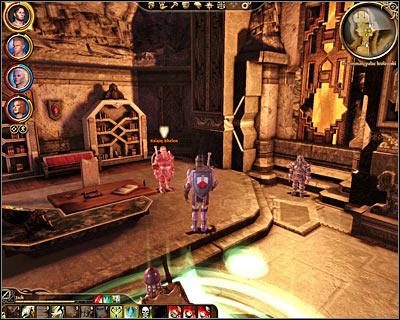
The fourth fight will be much more interesting, because each side will be represented by two characters. Your enemies are going to be Wojech Ivo and his assistant Velanz. You on the other hand will be allowed to choose a companion for this battle. I wouldn't recommend choosing any of the dwarves you've helped recently (Baizyl and Gwiddon). Instead pick someone from your team. Winning here shouldn't be a problem as long as you've chosen a good warrior to assist you.
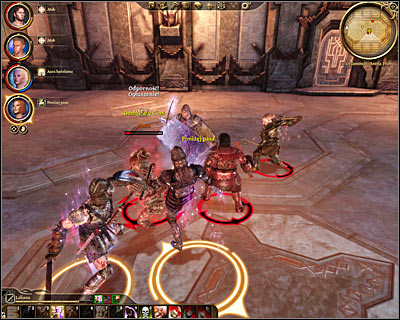
The fifth fight is going to be the last one and you shouldn't be to surprised to hear that it won't be easy to win. Your opponents are going to be Piotin (main boss), Piotin's right hand (mini-boss) and Piotin's henchmen. Notice that for the purpose of this battle you'll be allowed to choose between two dwarves you've helped recently and your team. I would strongly recommend choosing your team, especially since you'll want to have a good mage at your side. After the battle has started focus primarily on eliminating both bosses, because the damage done by their henchmen is going to be minimal. Once you've succeeded you'll named a champion and you'll be allowed to return to Dulin Forender for a debriefing. Notice that the dwarf has moved to a different location in the meantime and he can now be found in [Orzammar - Commons - Tavern] (M48, 12).
Received from: Vartag Gavorn [Orzammar - Diamond quarter - Chamber assembly]
Description: Confirm that you want to want to talk to prince Bhelen (M54, 1) and he'll give you further instructions. Your job will be to find and kill Jarvia, a woman responsible for running an illegal cartel in Orzammar. Make sure to read the description of Jarvia's hideout quest in order to find out how to locate her. Once you've defeated Jarvia you can return to [Orzammar - Diamond quarter - Royal Palace] (M54, 1). During your next conversation with Bhelen you'll receive two new quests - Anvil of the void and Paragon of her kind.
Received from: Dulin Forender [Orzammar - Diamond quarter - Harrowmont's mansion]
Description: Confirm that you want to want to talk to lord Harrowmont (M53, 7) and he'll give you further instructions. Your job will be to find and kill Jarvia, a woman responsible for running an illegal cartel in Orzammar. Make sure to read the description of Jarvia's hideout quest in order to find out how to locate her. Once you've defeated Jarvia you can return to [Orzammar - Diamond quarter - Harrowmont's mansion] (M53, 7). During your next conversation with Harrowmont you'll receive two new quests - Anvil of the void and Paragon of her kind.
Received from: Prince Bhelen [Orzammar - Diamond quarter - Royal Palace] or Lord Harrowmont [Orzammar - Diamond quarter - Harrowmont's mansion]
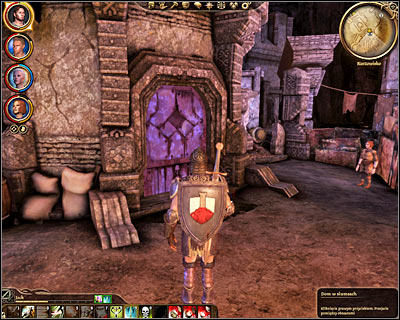
Description: This mission will appear in your journal after you've successfully completed one of two other quests - Prince's grace: Second assignment or Lord's trust: Second assignment. The only difference will be the person you'll need to talk to after dealing with Jarvia (Lord Harrowmont or Prince Bhelen). As soon as you've unlocked this quest travel to [Orzammar - Commons - Dust town]. Here you'll have to locate Nadezda (M49, 4). Ask her about Jarvia's hideout and you'll find out that you won't be able to get inside without a special key. You can now end this conversation or you can reward Nadezda for telling you the truth.
Your next area of interest is [Orzammar - Commons - Dust town - Alimar's emporium] (M49, 5). Talk to the storekeeper (M49, 6) and ask him about the location of the cartel. Once you're done talking exit the store and proceed directly to [Orzammar - Commons - Dust town - Slums household] (M49, 7). Once you're inside you're going to be automatically stopped by the bandits (M49, 8). As soon as they've attacked you focus on injuring their leader, because he'll give up when he's lost a lot of blood. He'll give you a key needed to enter the hideout and you can now let him go or you can finish him off.
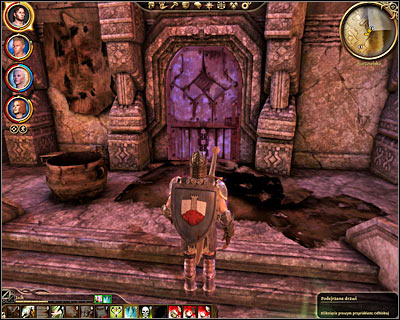
Either way you must now exit the building. Use your personal map to find the secret entrance to cartel's hideout (M49, 9). You'll have to approach a small door. Click on it and choose the proper action from the list in order to insert the key into the slot. You may now travel to [Orzammar - Commons - Dust town - Cartel hideout] (M50, 1).
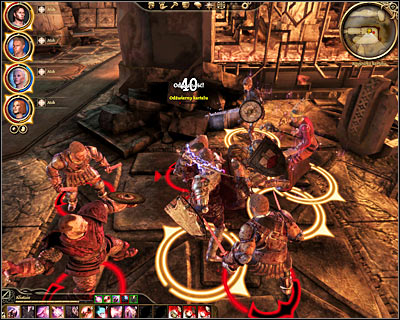
You'll have to start exploring a large underground complex and I would recommend to remain cautious, because you'll be dealing with hostile dwarves and for most of the time there's going to be a lot of them. Don't forget to spot and disable traps along the way if you can. Once you've arrived in the first room you'll trigger a short "conversation" with cartel's doorman (M50, 2). Attack the mini-boss and once he's gone deal with the rest of the thugs.

Keep heading south. You'll come across a lot of smaller rooms along the way and it'll be up to you to decide whether you want to secure them or move on with the mission. I would recommend exploring each room, because doing this will allow you to find a lot of valuable pieces of equipment. You can also explore a prison (M50, 9) in order to kill the guardian and to rescue a prisoner. Bear in mind that aside from the standard warriors you'll also be dealing with a lot of assassins, qunari mercenaries, elven mages and spiders. Make sure to adjust the style of play depending on who you have to kill at the moment.
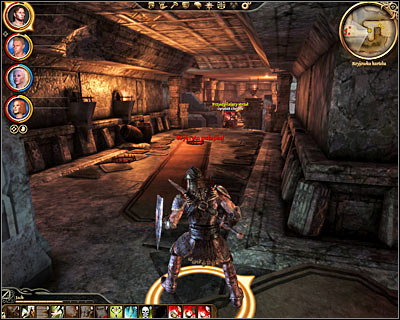
In order to reach Jarvia you'll have to use the passageway found in the last room on the eastern side of the main corridor (M50, 3). Bear in mind that you'll be finding even more traps from now on, including bear traps and line traps. Once you've arrived near the last room (M50, 4) make sure to save your current progress and to heal your team members.
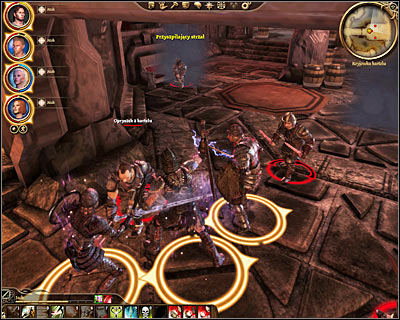
Entering the next room will trigger a conversation with Jarvia. You won't have to pay too much attention to what you're going to say to her, because sooner or later you'll trigger a fight (M50, 5). During the course of this battle you should remain near the door you've used to get in. The main reason is that there are a lot of traps nearby and you wouldn't be able to disarm them and to fight at the same time. Start off by attacking weaker opponents and assassins. Pay attention to the safety of your mage and use the spells you've got to heal or resurrect other allies.
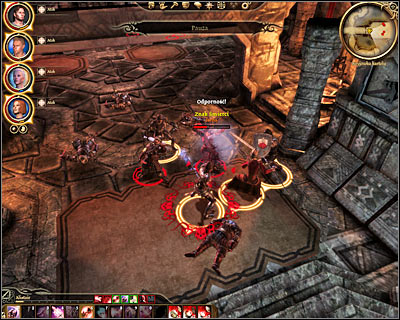
Jarvia is also going to be an assassin, so if you can't detect her yourself you'll have to wait each time until she drops the camouflage and attacks . As soon as it happened make sure to give your team members the order to attack her, because it may take a while before you'll have your chance to try again. Naturally you won't be able to kill Jarvia right away, so once she's disappeared again focus on eliminating other members of her cartel. Once Jarvia has been eliminated you may start attacking other assassins.
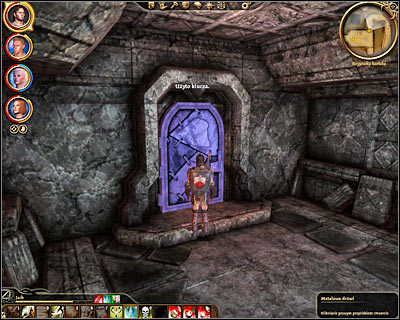
I wouldn't recommend attacking enemy archers unless you've already dealt with other hostile units. It would be a good idea to attack them from a large distance, however you should also consider disabling at least a few traps found near them so that the rest of your team could get closer. Make sure to examine Jarvia's body after the battle to take her key. You can use this key to open a small room or you can proceed directly to the exit (M50, 6). Head forward until you find a passageway to a different location (M50, 7). Using this passageway will transport you to [Orzammar - Commons - Janar's armory] (M48, 13). Talk to Janar and then leave his shop to end this quest.
Received from: Herbalist Widron [Orzammar - Diamond quarter - Royal palace]
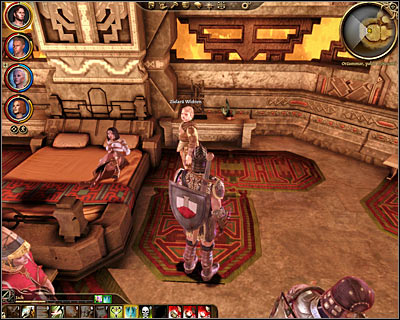
Description: You won't be able to start this quest unless you've already gained access to the royal palace and this can be achieved by completing Orzammar's main missions. Enter one of the larger chambers and talk to Herbalist Widron (M54, 2) to find out that one of the noble dwarven women has been poisoned and that he'll need a very rare antidote to save her. In order to move on with this mission one of your team members must fully develop Toxins skill. Open the screen used for mixing potions to find out what kind of ingredients you'll have to look for. The game will require you to find elven roots, lifestones, concentrator agents and an empty flask (Caesar from Denerim is a good source for these items). Once you have the antidote ready return to the chamber, but this time instead of talking to Widron click on Lady Brodens.
Received from: Prince Bhelen [Orzammar - Diamond quarter - Royal Palace] or Lord Harrowmont [Orzammar - Diamond quarter - Harrowmont's mansion]
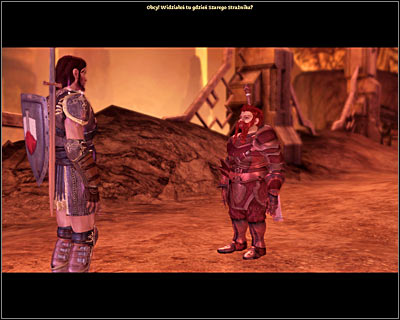
Description: This is a common quest for both Harrowmont and Bhelen and you shouldn't expect any changes depending on who gave you the order to start this mission. Once the quest has appeared in your journal travel to [Orzammar - Commons] and proceed towards an outpost being guarded by the miners (M48, 10). Notice that a friendly dwarf Oghren has stopped you and you'll have a chance to add him to your team. I would recommend that you start using his abilities right away, especially since he'll be wearing good armor. Once you've gone past the miners head to the exit (M48, 11) and choose [Caridin's cross] from the map of the Deep Roads. Continue by reading the description of Paragon of her kind (Orzammar quests category) quest. This will allow you to find out how to get to the anvil.
![You'll resume this quest after you've reached the last chamber of [Anvil of the Void] area (M59, 9) - Orzammar - Anvil of the Void - Orzammar - Dragon Age: Origins - Game Guide and Walkthrough](https://game.lhg100.com/Article/UploadFiles/201512/2015121518285388.jpg)
You'll resume this quest after you've reached the last chamber of [Anvil of the Void] area (M59, 9). It would be a good idea to save your game before entering the cavern, because you'll have to decide how this quest should end. The most obvious solution is to align yourself with Caridin, hoping of destroying the anvil forever. Doing this would result in a huge battle taking place between you and Branda. You should also know she would have several golems at her side and that Caridin would remain inactive during the battle.
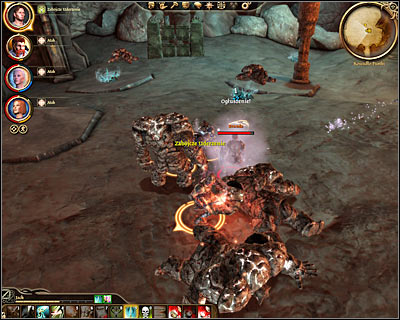
As soon as this battle has started focus on defeating less powerful creatures, because otherwise they would destroy friendly golems. Just as before focus on attacking single targets, so it won't take long before each golem id destroyed. Some of the attacked golems are going to be mini-bosses and you'll have to be more careful while trying to defeat them. Branda should be the last person you'll want to attack. Don't forget to heal your team members during the battle, especially since most of golem's attacks are going to be powerful. Once all the hostile units have been eliminated talk to Caridin and wait for him to forge a crown for you. He'll soon commit suicide and the anvil is going to be destroyed. Go to the Main quests category and keep reading the description of Paragon of her kind quest to find out what should be done next.
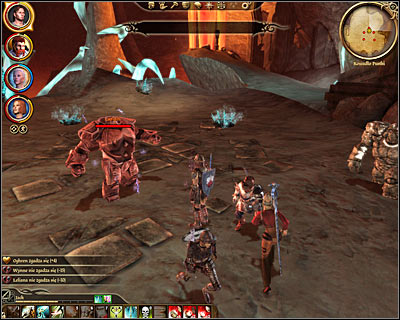
An alternative solution is to align yourself with Branda in hopes of preserving the anvil for further use. In this case golems would become your enemies and Caridin would be one of them (main boss). Notice that you would have several golems at your side, however Branda would remain inactive until the end of the battle.
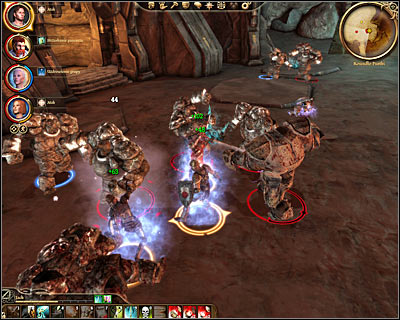
This version of the battle is going to be very similar to the one described above. Start off by eliminating mini-bosses attacking your golems. Once you've solved that problem focus on defeating some of the weaker golems. Caridin should the last entity you decide to attack. Once it's gone talk to Branda and she'll forge a crown for you. Notice that you can now allow her to keep using the anvil or you can convince her (persuasion, intimidation) that she should change her mind and destroy it. You can also encourage her to commit suicide if you want to. Go to the Main quests category and read the description of Paragon of her kind quest to find out what should be done next.
Received from: Prince Bhelen [Orzammar - Diamond quarter - Royal Palace] or Lord Harrowmont [Orzammar - Diamond quarter - Harrowmont's mansion]
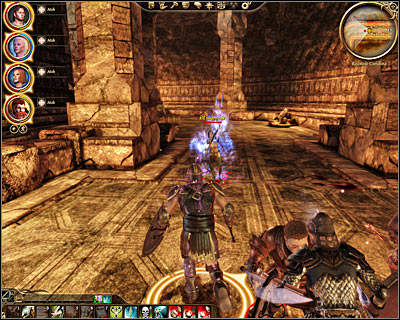
Description: This is a common quest for both Harrowmont and Bhelen and you shouldn't expect any changes depending on who gave you the order to start this mission. You can officially start this mission once you've arrived in [Caridin's cross] (M56, 1). Make a few steps forward here and get ready to defend yourself against a large group of bandits. Make sure to eliminate an elven mage as soon as possible. Once he's gone deal with the less deadly dwarven warriors.
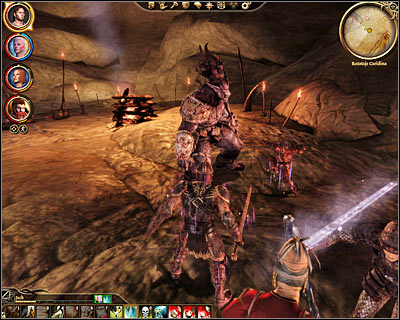
Your current objective is to reach the southern areas of the thaig and there are two main passageways (M56, 2) leading to that location. If you choose the western passageway you would have to be ready for difficult battles. A lot of powerful monsters would stand in your way, including herlock/genlock mini-bosses, shrieks (they stay in the shadows and attack by taking allied units by surprise) and an ogre (M56, 3). Soon after defeating the ogre you would find a passageway leading to the main hall area of the thaig (M56, 4).
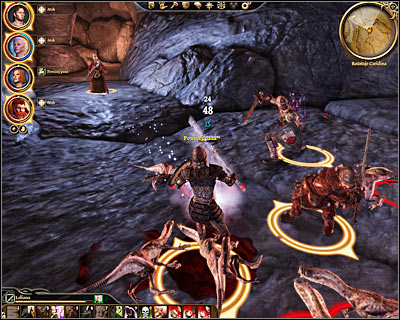
Choosing the eastern passageway would result in you having to battle very large group of deepstalkers. You should know by now that these creatures aren't powerful, even if they would manage to take you by surprise. As a result reaching the southern section of the map would be much easier in this case. After defeating the last group of monsters you would have to find a passageway (M56, 6) leading south.
Aside from the monsters you should also watch out for traps, because there's going to be a lot of them in the area. Try disarming as many of them as possible before the start of each fight. Both passageway will lead you to the crossroads (M56, 7) and you shouldn't be surprised to encounter even more monsters there. Use the ballistae to your advantage and don't forget to eliminate a new mini-boss sooner rather than later. You must head east in order to move on with the mission.
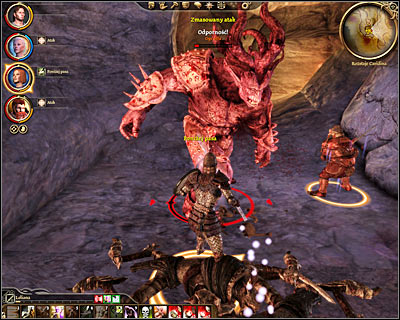
If you want to leave this area as soon as possible remain on the main path leading east and then turning south. Otherwise you may consider spending some additional time exploring two passageways found along the way. The first passageway leads south and choosing it would result in your team encountering an extremely powerful alpha ogre (M56, 9). In addition to the large beast you would also encounter other mini-bosses (including emissaries) and new shrieks.
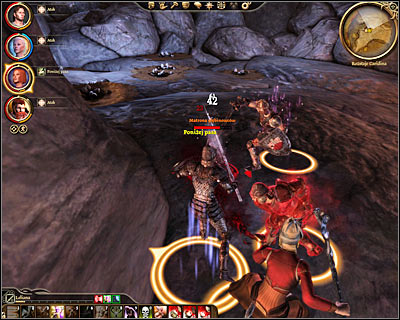
The second passageway leads to the east and it's the deepstalkers' lair. You would have to defeat a lot of these creatures, including a new boss - deepstalker matriarch (M56, 11). Thankfully eliminating this monster would much easier than fighting the ogre. When you're ready to continue the main mission head south until you'll find a passageway leading to the next area (M56, 12). Wait for the map of the Deep Roads to be displayed on your screen and confirm that you want to travel to [Ortan thaig].
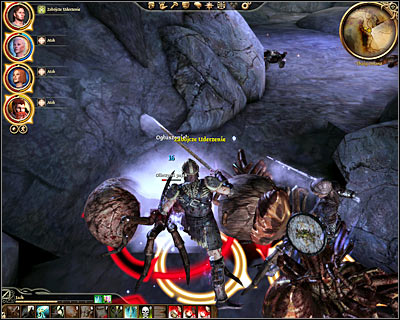
Start off by heading forward (M57, 1). Sadly you won't be allowed to remain on the main path for too long, because the passageway will be collapsed and you'll have to choose a nearby tunnel. During your time spent in this thaig you'll be dealing mostly with different types of spiders. I wouldn't recommend moving forward until you've dealt with all the monsters, so you won't encourage any other spiders to attack you. Having good spells and potions is also an important thing, especially when it comes to bringing back poisoned characters to full strength.
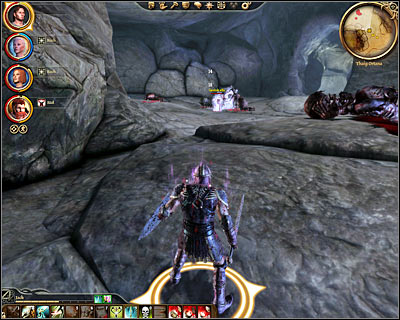
You'll witness two battles taking place along the way (M57, 2) and in both cases the darkspawn (including ogres) will be going against the spiders. I would strongly recommend to attack only the side with a huge advantage over the one. The main reason is that if the battle ends too quickly then the winning side would automatically attack your team. Naturally you can't expect both sides to be exterminated at the same time, but the winning side should have only a few units left after achieving victory.
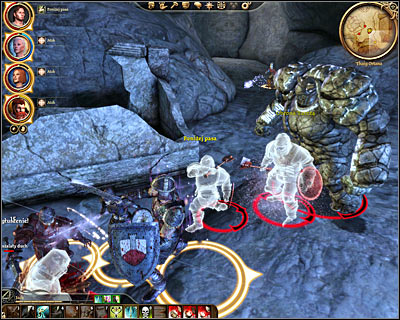
Keep heading north, however you'll soon have to turn west. It shouldn't take long until you leave the tunnels by ending up inside a huge cavern (M57, 3). Notice a lot of ghosts of fallen dwarves in the area. Thankfully the ghosts will also die if you use conventional weapons against them. It's the golems you should be more worried about, because most of their attacks will inflict serious injuries to one or more of your team members. Always try killing them first if you can.
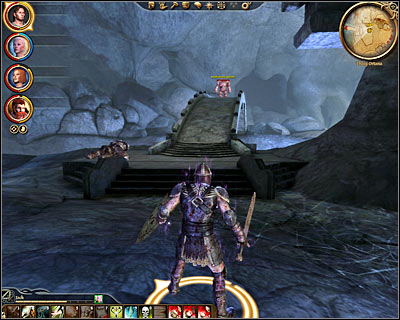
Keep heading forward and watch out for additional spiders near the area where you've seen Ruck. Two large bridges lead to the next area (M57, 7) and you can choose either one of them. Be careful, because these objects will be protected by ghosts and by golems (one golem for each bridge). When you're safely on the other side deal with the remaining ghosts and choose the only available tunnel. You'll be moving west here, but you'll soon turn to north-east.
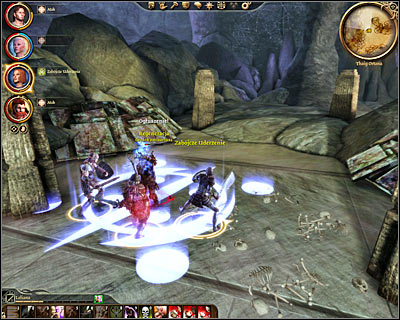
You should know that you're slowly approaching the area where you'll have to defeat the main boss of this thaig (M57, 8), so it would be a good idea to save your game before entering the last cavern. Once you're inside start off by eliminating some of the closest enemy units. Don't get too close to Branda's journal if you're not ready yet to trigger a boss fight. Watch out for new emissaries here, as well as for spiders.
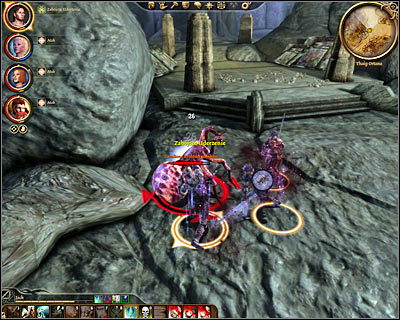
When you'll try to read the journal (M57, 9) you'll encourage the boss to appear in the cavern. The creature you'll have to kill will be the corrupted spider queen. Naturally team members should start attacking the queen right away, however it's also important to secure this entire area to prevent your allies from being bothered by other spiders. This battle will be divided into several phases. Each time you've noticed that the queen has escaped you'll have to deal with a couple of weaker spiders. Once they're gone the queen will appear again (thankfully she won't regenerate in the meantime) and you'll be allowed to resume the main battle. Don't forget to monitor health bars of your teammates and to use spells or potions to deal with negative effects of being poisoned.
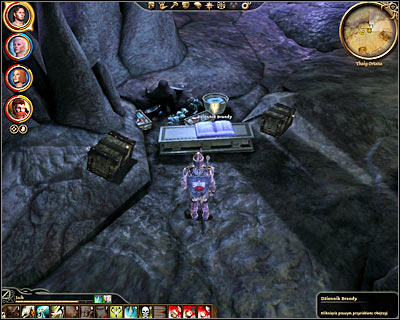
You can now approach Branda's journal without the risk of being interrupted again. Click on the journal to automatically read it and to update your mission status. Since you already know where to go you can use a nearby passageway to leave this area (M57, 10). Wait for a map of the Deep Roads to appear on your screen and confirm that you want to travel to [The dead trenches]. When you get to the trenches (M58, 1) make sure to watch the whole cut-scene before moving on.
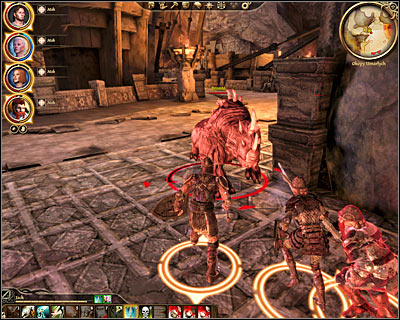
Start off by heading south and it shouldn't take too long until you come across allied units (M58, 2) defending themselves against the darkspawn. Naturally you should assist your dwarven friends in dealing with the monsters and it shouldn't be too hard for you to defeat all the incoming waves. You can even encourage some of the monsters standing in the back to come here, so you won't have to fight them on your own later on in the game. Once it's safe talk to Kardol, but he won't share any useful information with you.

As you've probably suspected your job will be to cross the large bridge (M58, 3). You'll have to be careful here, because you'll encounter new enemy units on the bridge, as well as on the other side. There's also going to be an ogre in the area. I would strongly recommend attacking the ogre from the distance and waiting for it to come closer, so you won't have to worry about any other threats while fighting the beast. Pay attention to shrieks and enemy archers while trying to secure this entire area. You'll soon notice that you won't be allowed to use the main gate, so instead you'll have to travel north to find an entrance to a new tunnel (M58, 4).
I guess you won't be surprised to hear that a lot of monsters must be defeated along the way. Try separating single units from the rest to increase your chances of winning and don't forget to heal members of your team each time they've lost a lot of blood. A larger battle will take place in the next cavern (M58, 5) and aside from the standard monsters you'll also have to defeat two mini-bosses (a Bronto and Genlock emissary). You've probably noticed by now that you won't be allowed to cross the next bridge, so instead you'll have to travel south.
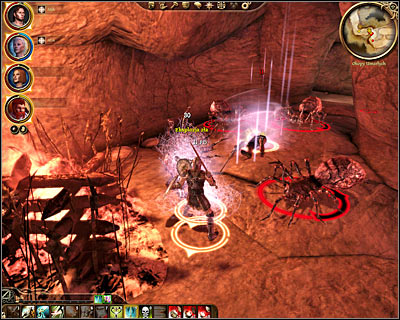
Watch out for a new trap located near the entrance to a new chamber (M58, 6). This isn't the only nasty surprise you can expect to find here, because other traps can be found in the area. Make sure to move slowly, so you won't end up being surrounded by larger groups of monsters. You'll also have to defeat new spiders and that can be quite tricky, because you'll be dealing with the strongest kind. Keep heading forward until you reach an area with a lot of pillars and sculptures (M58, 7).
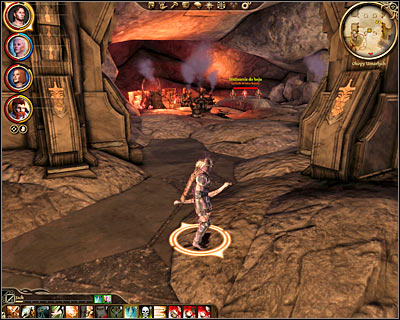
A forge can be found to the south of here. Securing this area is optional, however it's something you should consider if you're planning on earning additional experience points. The most important thing for you to know about is that the forge is being guarded by a lot of monsters, including genlock forge master (M58, 8). You can encourage this opponent to follow you quite easily and then you can kill him away from the other monsters. If you want to focus only on your mission proceed directly to the north to end up in the huge cavern again (the one with a destroyed bridge).
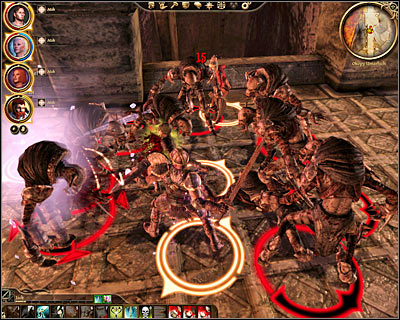
You'll have to be extremely careful while moving north, because once you're about a half way through you're going to be attacked by a very large group of shrieks (M58, 9). Don't forget to keep attacking single targets instead of random monsters at the same time and protect your less powerful teammates. After you've won you can start moving north again. Enter the next room and this time get ready to defeat a group of devouring skeletons. Thankfully it'll be a much easier task and they won't attack you by surprise. Wait until it's safe and choose the door located on the eastern wall of the room (M58, 10).
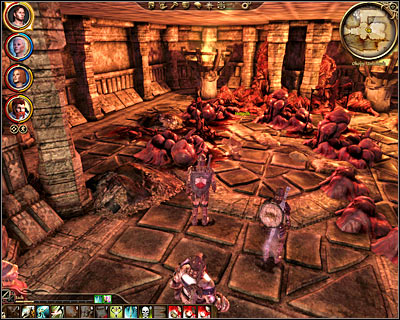
Keep heading east, however you will be presented with an opportunity to explore a northern corridor along the way. Doing so would result in a large battle with the spiders and find a new emissary. If you remain on the main path it shouldn't take long until you reach a new room where you'll meet Hespith (M58, 11). You're going to have a short conversation and afterwards the woman will escape. Proceed towards the western exit and SAVE YOUR GAME before leaving the room.
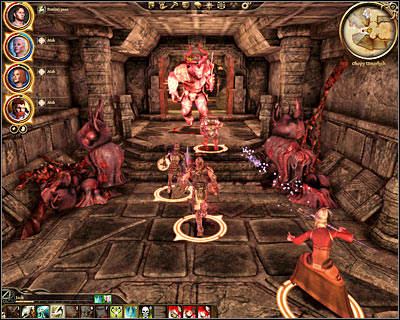
There are TWO ogres just around the corner (M58, 12) and you should focus on attacking them one at a time. Start off by attacking the ogre seen to the south. If you do this from a larger distance you should be able to get its attention without the second ogre showing up at the same time. Once you've defeated the first ogre check the eastern door to find a second beast. Make sure to heal your team after both battles and then head south (you can't use the eastern gate just yet).

Once you're inside a new room ignore all the ghosts seen nearby and instead examine two objects - Legionnaire's relic and Legionnaire's altar (M58, 13). Take the Legionnaire's key and notice that you've made the nearby ghosts angry and therefore you'll have to eliminate all of them. Once it's safe again return to the large gate where one of the ogres was standing the first time you've seen him. Open the door with the newly acquired key, but before you move forward SAVE your current game. The reason for that is simple - you'll very close to a new boss fight.

Get ready for a very challenging boss battle with the Broodmother (M58, 15) and I urge you to remember about three things here. In the early stages of the battle you should be focused mostly on destroying her tentacles. Each tentacle has its own health bar and won't be able to regenerate itself, so it should make the fight a little easier. Destroying all the tentacles will allow you to focus mostly on the main boss and that will make the difference near the end.
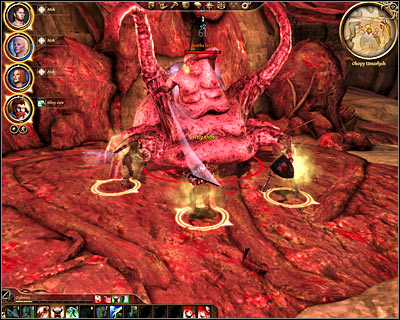
Keep attacking the tentacles until they disappear and that's when you should switch your attention to attacking the Broodmother. Make sure to keep your archers and mages in the back, because some of Broodmother's attacks will be nasty and will stun your warriors for a short period of time. Don't forget to heal your allies and to apply antidotes. Being poisoned will become an important factor near the end when the broodmother won't be able to defend herself using the tentacles.
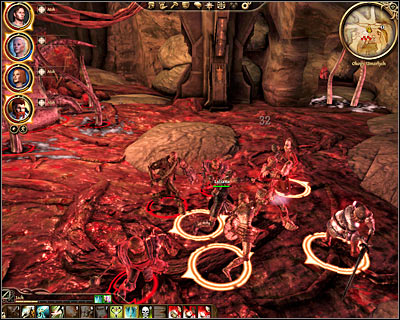
From time to time you'll also be dealing with standard enemy units and sadly you won't be allowed to ignore them, because they won't go away overtime. Remember that the faster you kill them the sooner you'll be allowed to focus on the boss again. This is going to be a long and a tiresome battle, but as long as you won't make any major mistakes you should win it in your first attempt, without having to repeat the entire scene several times. Once you've won you'll see a cut-scene and you'll have a chance to talk to Hespith again.

You may now use the passageway located directly behind Broodmother's body (M58, 16). I wouldn't recommend going to the last area of the Deep Roads right away, because it would be a good idea to return to Orzammar to restock. Once you're ready for the final part of this mission travel to [Anvil of the void] (M59, 1). Make a few steps forward here and notice that until this quest has come to an end Oghren will have to be a part of your team. You'll now have a chance to talk to Branda (M59, 2) and then you'll start exploring the labirynth.
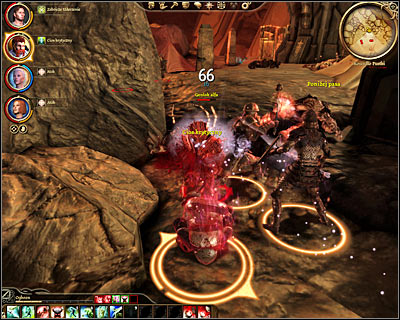
Start off by moving forward. In the first section of the caves (M59, 3) you'll be dealing with different types of hurlocks and genlocks, as well as with several mini-bosses (including a Genlock alpha and a Genlock emissary). Try hiding your team behind nearby objects to prevent distant archers and mages from attacking them and keep pushing forward. The last section of this cave will also be occupied by a new ogre (M59, 4) and I wouldn't recommend attacking this beast unless you've already defeated all of the remaining monsters.
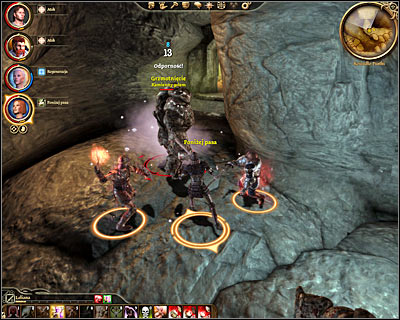
You'll soon reach a slightly larger room filled with deadly fumes (M59, 5). I would strongly recommend leaving your entire team outside. Enter the room alone in order to provoke the first golem to wake up and to chase after you. Return to the previous corridor quickly and wait for the beast to arrive. You can now kill the monster with the help from the rest of your team. Notice that each time you've killed a golem a new one will come back to life, however you can keep repeating all the actions described above without worrying about the rest. Once you've defeated the last golem enter the room again, however this time focus on finding four valves on both sides of the chamber. Interact with the valves to get rid of the toxins. I wouldn't recommend ignoring this problem, because you'll probably want to return here in the near future.
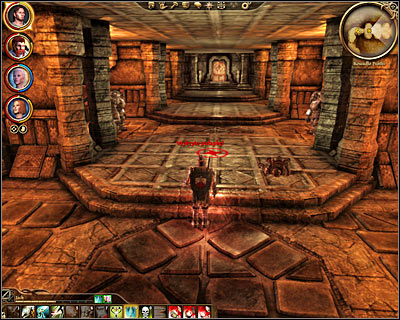
More surprises await you in the next large room of the underground complex (M59, 6). This time you should notice that the golems are standing on both sides of the long room and each time you've moved closer to them they'll return to life in pairs. I would recommend retreating to the previous room each time (the one with the valves), so you'll have plenty of room to fight without worrying about other problems, including new traps. Don't forget to pay more attention to your teammates and to their health bars. You'll have to eliminate two groups of golems and aside from the monsters you'll also have to watch out for traps. Once it's safe move on to the next area of this thaig.
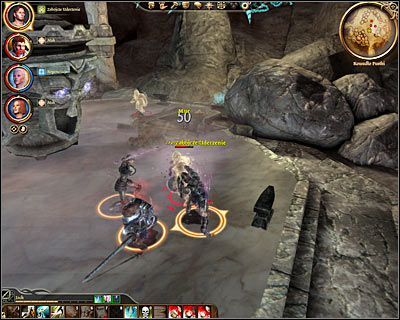
Get ready for a new fight (the last one before the grand battle) and take your time to understand its rules, because all the standard methods won't work this time. Approach a large statue with moving heads (M59, 7) and you'll be allowed to start the fight after seeing a short cut-scene. The objective here will be to destroy the statue, but it's the method of achieving this goal where it gets more interesting, Instead of the statue start this battle by attacking one (and ONLY one!) of the dwarven spirits.
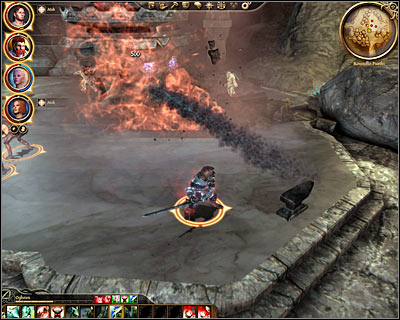
Notice that when the spirit you were attacking finally dies it creates a shockwave around its body, activating a corresponding spirit anvil. Click on the anvil quickly in order to send a projectile towards the statue. If you've done everything correctly you'll witness a fiery explosion. I would recommend that you move back after each attack to avoid the statue striking back and to heal your team members. Thankfully if you didn't attack other spirits they shouldn't pursue you.
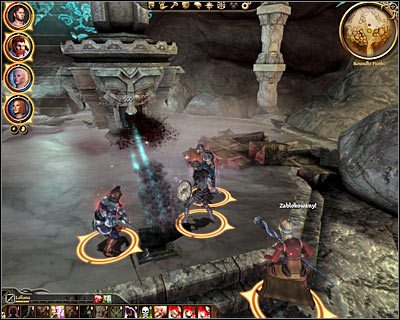
You'll now have to keep repeating all the actions described above to destroy four sides of the statue. Bear in mind that each side has to be hit twice. After the first hit the blue eyes of the statue will start bleeding and after the second hit it will stop glowing and the spirits will longer continue appearing in front of it. You don't have to be good at math to count that in total you'll have to perform eight successful strikes (two hits per side, four sides of the statue). I would recommend that you remain near the spirit anvil located close to the entrance to the room, because after each hit the statue will turn 90 degrees, allowing you to attack it from the exact same spot. Of course it's all up to you how to play this out, however once you fully understand the rules you shouldn't have any major problems (other than having to spend here at least a few minutes).
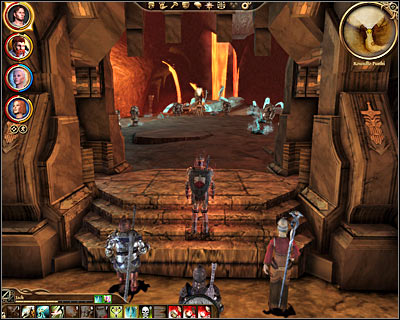
Once the statue has been destroyed you'll be allowed to proceed to a new passageway unlocked nearby (M59, 8). Before you enter the last cavern (M59, 9) MAKE SURE to save your current game., because going there will start an important conversation with Caridin and Branda. You can find out more about the possible endings of your journey in the section describing Anvil of the void quest.
Received from: automatically after finding Jammer's chest [Orzammar - Commons - Dust town - Cartel hideout] or automatically after finding Jammer's book [Orzammar - Commons - Dust town - Cartel hideout]
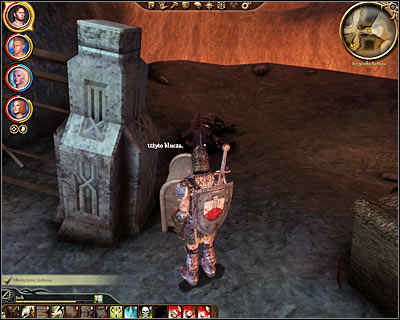
Description: You can activate and complete this short quest during your stay in the hideout of the illegal cartel. The objective of this mission will be to locate and collect some of the hidden items. There are free stashes you should examine - Kanky's box, Jammer's box and Pique's box. The quest will be completed after you open Jammer's stash (M50, 8) found to the north-west of Jarvia's location (near some of the tamed creatures).
Received from: automatically after finding the Legionnaire's altar [The dead trenches]
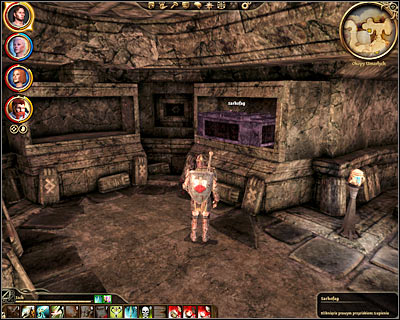
Description: Before you even officially start this quest you should spend some time searching for armor pieces of the Legion armor set. All the needed objects can be found in [The dead trenches] and you'll have to collect Legion's boots (M58, 18), Legion's gloves (M58, 19) and Legion's armor (M58, 20).

Next step is finding an altar. This is a part of Paragon of her kind quest, so you can't really miss it. You'll be allowed to examine the altar soon after dealing with two ogres (M58, 12). Notice that aside from the Legionnaire's altar you can also take a look at the Legionnaire's relic (M58, 13). Make sure to collect two items - Legionnaire's key and Legionnaire's helm. Be careful, because picking up these items will make the nearby ghosts angry.
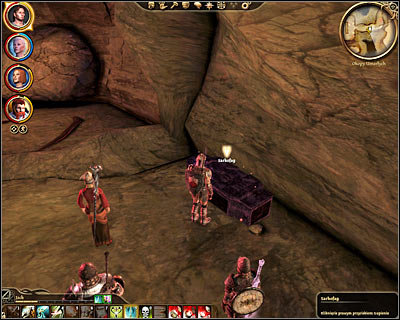
Deal with the spirits and return to the large gate which was being protected by one of the ogres. Use the key to open the gate and head forward. Make sure to explore one of the nearby corridors to find a sarcophagus (M58, 14). Open the sarcophagus to collect insignia of the dead caste. This is all you can do right now.

You'll be allowed to resume this quest after your return to the dwarven fortress. Travel to [Orzammar - Diamond quarter - Shaperate]. Here you'll have to locate a book marked as Memories (M53, 10). Click on the book to add all the information on the caste and to finish this quest.
Received from: automatically after finding the golem registry [Anvil of the void]
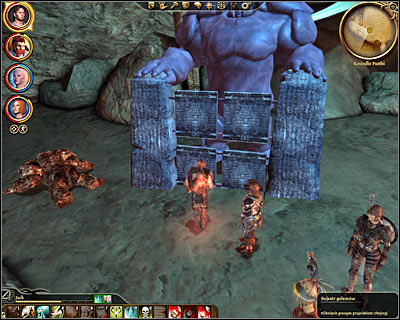
Description: You'll be allowed to start this quest soon after you've defeated Caridin or Branda and after receiving a crown. Look around the area to find a large panel made out of stone (M59, 10). Clicking on the registry will initiate this quest and you can also ask Oghren what he knows about the thing you've just discovered. Leave this area and travel to [Orzammar - Diamond quarter - Shaperate]. All you have to do right here is to talk to Shaper (M53, 3). He will reward you for your efforts with a master rune.
Received from: automatically after finding all demon parts [Orzammar]
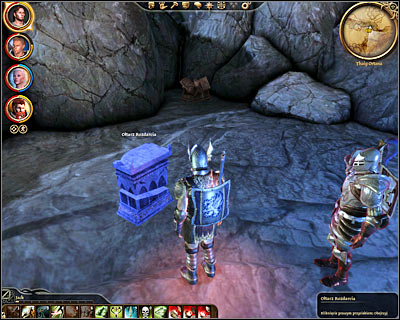
Description: This quest will appear in your journal only after you've successfully collected all three parts of the demon. You'll have to find a bag of limbs (M55, 3), a head in the bag (M56, 5) and a torso in the bag (M56, 10). Once you have all the parts go to [Ortan thaig] and find a small altar (M57, 11) located in the central area of the thaig. Click on the altar and confirm that you want to place the body parts on it. Doing this will summon a beast from the Fade. You can attack the creature (you would only gain experience points) or you can allow it to leave (you would receive a lot of gold).
Received from: automatically after finding topsider's pommel [Ortan thaig]
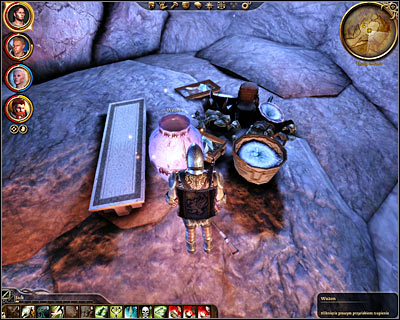
Description: In order to activate this quest you'll have to collect two items during your stay in the Deep Roads. Start off by defeating a genlock emissary in [Caridin's cross] (M56, 8), checking his body and picking up topsider's hilt. Once you have this item in your inventory go to [Ortan thaig] and check the area near Ruck's hideout (M57, 12). You'll have to click on an interactive vase to collect topsider's pommel.
![You may now travel to [The dead trenches] - Orzammar - Topsiders honor - Orzammar - Dragon Age: Origins - Game Guide and Walkthrough](https://game.lhg100.com/Article/UploadFiles/201512/2015121518285856.jpg)
You may now travel to [The dead trenches]. Head on to the southern area of this thaig and it shouldn't take long until you'll encounter a boss (M58, 17) - ancient darkspawn. I wouldn't recommend attacking this beast if your team isn't strong enough, because it will be very hard to kill and it will use powerful attacks to inflict injuries. Check the corpse after the battle to collect topsider's blade.
![Finish this quest by going back to [Ortan thaig] - Orzammar - Topsiders honor - Orzammar - Dragon Age: Origins - Game Guide and Walkthrough](https://game.lhg100.com/Article/UploadFiles/201512/2015121518285923.jpg)
Finish this quest by going back to [Ortan thaig]. In this case you'll want to explore the eastern section of the thaig where you've defeated spiders and darkspawn the last time you were here. Click on a grave (M57, 13) to end this quest and to receive a unique sword - topsider's honor blade.
Received from: automatically after examining all five documents [Orzammar]
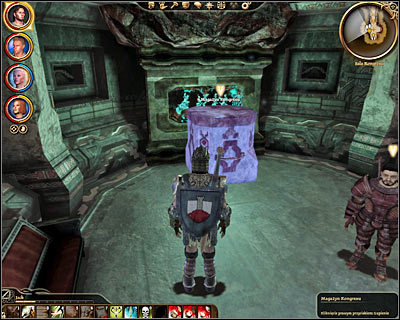
Description: This quest will officially appear in your journal after collecting all five documents and you should think about completing AFTER unlocking full access to the proving grounds. You'll have to find a Commission report in [Orzammar - Hall of heroes] (M47, 6), a Document in [Orzammar - Commons] (M48, 14), a Writ of censure in [Orzammar - Commons - Proving grounds] (M51, 7), an Assembly directive in [Orzammar - Commons - Dust town] (M49, 10) and a Council writ in [Orzammar - Diamond quarter] (M52, 4). You may now travel to [Orzammar - Diamond quarter - Chamber assembly]. A diplomatic cache can be found next to Vartag (M53, 5). Open the chest and collect the key to the city which will work similarly to magical rings (bonuses to all attributes, increased resistance to spells and faster healing).
Received from: automatically after examining all four piles of rubble [Caridin's Cross]
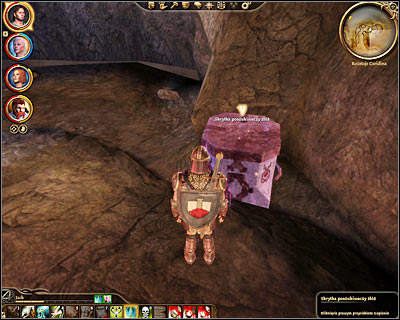
Description: This quest will officially appear in your journal after examining all four piles of rubble. These interactive objects can be found in [Caridin's Cross] (M56, 13) and you can complete this quest during your first visit to this location. You should also know that you can click on them in any order. Once you've examined all objects follow the instructions on your map to locate the cache (M56, 14). Opening the cache will allow you to pick up Thorn of the Dead Gods (dagger), Effort's Gloves, Ring of the Warrior, as well as other valuable items.
Received from: Morrigan [Campsite]
![Description: You can start Morrigan's quest by finding the black grimoire and in order to collect it you would have to gain access to Irving's office in [The Circle Tower - Mage Quarters] (M33, 10) - Followers - Flemeths grimoire - Followers - Dragon Age: Origins - Game Guide and Walkthrough](https://game.lhg100.com/Article/UploadFiles/201512/2015121518285977.jpg)
Description: You can start Morrigan's quest by finding the black grimoire and in order to collect it you would have to gain access to Irving's office in [The Circle Tower - Mage Quarters] (M33, 10). Once you have the magic book return to the camp and give Morrigan the grimoire to trigger a conversation. Morrigan will ask you to give her some time to study the book, so you'll want to talk to her again the next time you're in the camp. The witch will then tell you that Flemeth planned on using her to prolong her own life. Morrigan will therefore ask you to kill Flemeth and obviously she won't be allowed to accompany you in this quest. Exit the camp and travel with your team to [Flemeth's hut]. Talk to the old lady upon your arrival (M24, 2) and you'll be allowed to choose between letting Flemeth go or killing her. Notice that if you want to kill her she'll transform herself into a huge dragon which will make winning this fight extremely difficult.

If you decide to kill the witch don't forget that at least two members of your team should use bows, crossbows or spells to attack the dragon from the distance. In addition to that at least one warrior should remain close to the dragon to attack it and to distract its attention. Sadly you won't receive any additional rewards for killing Flemeth aside from experience points. Don't forget to collect a key by examining dragon's body before moving on.
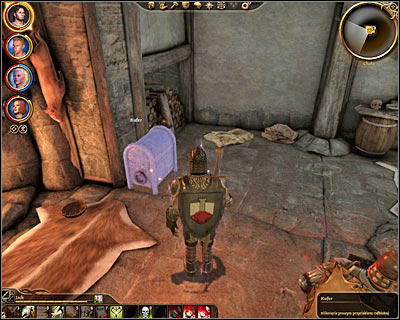
If you choose to allow Flemeth to walk away she'll also give you a key, so in both cases you'll have to enter her hut. Once you're inside find a locked chest and use the newly acquired key to open it and to collect Flemeth's grimoire (M24, 4). You may now return to the camp. Give the grimoire to Morrigan as a gift to end this quest.
Received from: Alistair [Campsite]
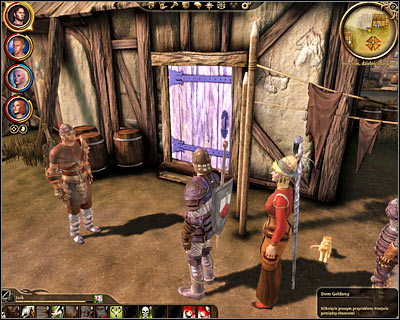
Description: This quest can only be activated if you've made friends with Alistair and after you've talked to him a lot in the camp. He'll then ask you for your help in finding his sister Goldanna. In order to locate the woman you'll have to travel to [Denerim - Market district] and to find a building marked on your map as [Goldanna's house] (M64, 3). Listen to a short conversation with Alistair and then enter the building to talk to her together. This quest can end in two ways. Alistair will ask you to give his sister 15 gold coins to improve quality of her life and you can agree to his request or you can use persuasion to prevent money losses. Don't worry, because he would still be happy that you've helped him find his sister. Either way you must leave the house after you've talked to Goldanna and you'll automatically complete this quest.
Received from: Oghren [Campsite]
Description: You won't be allowed to activate this quest until you've improved your relations with Oghren. He will then tell you a story of a dwarven woman he had a relationship with a long time ago and obviously you'll be allowed to help him in finding her. In order to locate her you must travel to [Lake Calenhad docks - Spoiled princess]. Once you're inside the tavern you can allow Oghren to talk to Felsi right away (M32, 9) or you can convince him that you should talk to her first. Don't forget to assist Oghren by choosing the best answers for him and to tell Felsi about his numerous accomplishments. In return you'll receive additional relationship points.
Received from: Sten [Campsite]
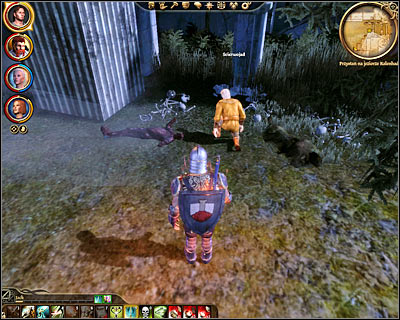
Description: You probably won't be able to start this quest in the early parts of the game, because gaining trust with Sten is going to be a long process. Make sure to build your relationship with him until he decides you to tell the story of the murders he committed. Sten will inform you that during his last battle he's lost his sword and naturally you can promise to find it for him. Start off by travelling to [Lake Calenhad docks]. You should remain near the passageway to the world map, because you'll come across a scavenger nearby (M32, 10). Talk to this person and you'll be directed to a trader named Faryn.
![Faryn can be found in [Frostback mountains pass] area (M47, 8) - Followers - Beresaad sword - Followers - Dragon Age: Origins - Game Guide and Walkthrough](https://game.lhg100.com/Article/UploadFiles/201512/2015121518290071.jpg)
Faryn can be found in [Frostback mountains pass] area (M47, 8). Start the conversation with him and don't forget to mention that the owner of the blade he stole is still alive. Faryn will send you to talk to Dwyn and in exchange for not telling Sten about him you may convince him to give you a bribe. Dwyn can be found in [Redcliffe - Dwyn's house] (M27, 15) and there are three ways of retrieving the sword. The easiest way to get the sword would be to have Sten as an active member of your team, because he wouldn't have any problems convincing the dwarf to return his possession. If you don't want to return to the party camp you can purchase the blade or convince the dwarf yourself that he should give the item voluntarily (persuasion, intimidation). Once you've received a key check a small room in the back, open one of the crates and take Sten's sword (M27, 27). You may now return to camp and give your friend the sword as a gift. Notice that Sten will be able to use this blade from now on and that it's going to be an ideal choice for his primary weapon.
Received from: Wynne [Campsite]
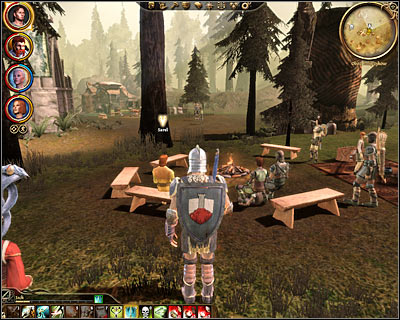
Description: Once you've sufficiently developed your relationship with Wynne the woman will tell you a story of her first apprentice Aneirin. You can offer to find out what's happened to him and in order to make that happen you must travel to [Brecilian forest - Dalish camp]. Talk to Sarel who can be found sitting next to the fire (M41, 8). The elf will inform you that Aneirin is still alive and that he likes to spend his time in the woods.
![In order to locate Aneirin you'll have to go to [Brecilian forest - Eastern part] and it's going to be a small camp (M43, 5) located near the place where you've encountered mad Hermit - Followers - Wynnes remorse - Followers - Dragon Age: Origins - Game Guide and Walkthrough](https://game.lhg100.com/Article/UploadFiles/201512/2015121518290036.jpg)
In order to locate Aneirin you'll have to go to [Brecilian forest - Eastern part] and it's going to be a small camp (M43, 5) located near the place where you've encountered mad Hermit. Naturally you should have Wynne in your team, so that she'll have a chance to talk to her apprentice. Once the conversation has ended you'll receive Aneirin's necklace and you'll finish this quest.
Received from: automatically while travelling between different areas of the city [Denerim]
Description: Make sure to develop your relationship with Zevran, because only then he'll tell you the story of one of his last assignments. Once you've heard the story start moving between different areas of [Denerim] until you'll be stopped by a random encounter. If you're lucky you'll meet one of Zevran's colleagues. Taliesen will be a member of the Antivan Crows and you'll witness a short conversation between Zevran and him. Your friend will then have to join your team and you'll start the battle with a group of assassins. I would recommend moving away from the stairs, because that's where you can find a lot of traps. Talk to Zevran again once you've defeated all the assassins (including Taliesen). You'll now have a chance to decide whether you want him to go away or if he should stay as a member of your team.
Received from: Leliana [Ferelden]
Description: Leliana's quest is among the most difficult ones to unlock, because you'll have to develop your relationship with her in a right way. Basically you'll want to find out the details from her past and you'll have your first chance to do that right after leaving [Lothering] and arriving in the [Campsite]. Start off by asking her a following question - What would someone like you be doing in Lothering's Chantry?. Next questions aren't that important and once the conversation has ended instead of talking to her again develop your relationship with her by choosing good solutions to quests or giving her presents. Achieve somewhere around 30 approval points and then talk to her (during your stay in the campsite, naturally). This time you should say that you've heard of minstrels from Orlais being often spies. End the conversation and leave the camp by travelling to the nearest location. Return to the camp and Leliana should automatically initiate a new conversation with you, apologizing for lying to you and explaining some things from her past. You'll find out about the existence of Marjolaine and that she is being hunted in Orlais.
Leave the campsite again and decide to travel to a different location in order to trigger a new random encounter. If you've done everything according to the plan you'll end up on a narrow path located close to a creek. Qunari warriors will attack your team, but assuming you've advanced a few levels since your first visit to [Lothering] you shouldn't have any problems killing them. Instead watch out for a witch capable of casting powerful spells. Kill her before moving forward and don't forget to heal your team members to avoid any of them falling in battle (especially if Wynne is not your ally just yet). Head forward, but don't forget to disarm a trap located close to a wooden bridge.

After you've dealt with standard enemy units you'll also have to get rid of a mini-boss carrying a bow - Assassin leader. The idea here is to injure him badly so that he'll surrender and you'll start a new conversation. During this interrogation you'll find out that someone from [Denerim] has ordered the hit and this is when the quest will officially appear in your journal. You may now finish off the assassin or let him go.
I wouldn't recommend going to [Denerim - Market district] with hopes of finishing this quest until your team has risen in strength, because one of the possible solutions will be to attack a large group of powerful enemies. If you feel like you're ready go to the city and click on a door found close to the arrival zone (M64, 22) to travel to [Denerim - Market district - Marjolaine's house]. Here you'll have to defeat two qunari warriors. SAVE YOUR GAME before going to the next room!
Marjolaine will be waiting you in the largest room of her house and you'll have a chance to talk to her. This conversation has two endings - you can either convince Marjolaine not to bother Leliana anymore and to leave the kingdom in peace or you can provoke Leliana to attack Marjolaine. Bear in mind that if you choose the battle Marjolaine won't be your only problem. Aside from her (she's a powerful boss) you would also have to deal with two qunari mercenaries and two adventurers (there are traps leading to their rooms!). Either way don't forget to explore the house after the battle and you'll have a chance to collect a unique armor, Marjolaine's bow and a rune.
Description: This job will require you to deliver recruitment letters to three men. Dernal Garrison can be found in [Redcliffe - House] (M27, 24), Patter Gritch can be found in [Lothering - Chantry] (M25, 15) and Varel Baern can be found in [Denerim - Elven alienage] (M66, 3). Make sure to talk to Patter BEFORE Lothering is destroyed by the Plague, because otherwise you won't be allowed to officially end this quest (even though you'll still be permitted to deliver two other letters).
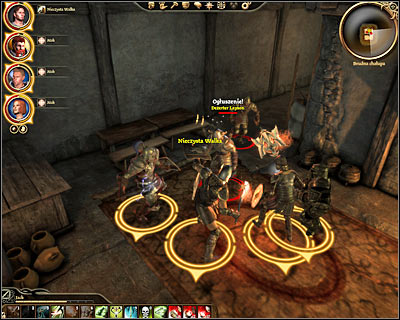
Description: Your job will be to locate three deserters. Each time you've talked to a deserter you'll start a fight with him (mini-boss) as well as with several of his colleagues. You'll also have to examine their bodies in order to collect guild supplies. The men you'll have to find are Sammael found in [Lake Calenhad docks] (M32, 4), Tornas found in [Frostback mountains pass] (M47, 3) and Layson found in [Denerim - Run-down back alley - Dirty house] (M69, 9).
Description: Your job will be to locate five hooded couriers of the city of Denerim and to talk to them. The first courier can be found in [Denerim - Market district] (M64, 1), the second courier can be found in [Denerim - Pearl] (M65, 2), the third courier can be found in [Denerim - Dark alley] (M69, 4), the fourth courier can be found in [Denerim - Run-down back alley] (M69, 6) and the final fifth courier can be found in [Denerim - Elven alienage] (M66, 2).
Description: Your assignment will be to deliver letters of condolences to four women. The widows you'll have to locate are Sara from [Denerim - Market district] (M64, 10), Tania from [Denerim - Dirty back alley] (M69, 1), Larana from [Lake Calenhad docks - Spoiled princess] (M32, 6) and Irenia from [Redcliffe - Chantry] (M27, 26).
Description: Your job will be to collect and deliver twenty healing potions. I would recommend that you focus on finding as many of the weakest potions as possible, because otherwise the game would automatically take stronger medicine from your inventory.
Description: Important! You will be allowed to start this quest AFTER completing all other missions for the irregulars. The idea here is to eliminate one of two future leaders of this organization - Raelnor found in [Denerim - Market district] or Taoran found in [Taoran's camp] (random encounter while exploring the world). You can to talk to each one of these individuals to listen to their ideas how to run the guild. It's recommended to do this before making a final decision.
Description: Your job will be to find and deliver 9 or 18 (additional reward) corpse galls. Ideal places to find the galls and [Redcliffe castle], [The Circle tower] and [Werewolves lair]. Each time you've encountered the undead make sure to check their bodies and it won't take long until you find enough galls to end this quest.
![Description: Open the map of Ferelden and confirm that you want to travel to [Caravan] - Guild quests - Chanters board - Guild quests - Dragon Age: Origins - Game Guide and Walkthrough](https://game.lhg100.com/Article/UploadFiles/201512/2015121518290141.jpg)
Description: Open the map of Ferelden and confirm that you want to travel to [Caravan]. After your arrival you'll have to deal with a large group of hostile creatures, including two mini-bosses (Genlock emissary and Genlock alpha).
![Description: Open the map of Ferelden and confirm that you want to travel to [Refugees] - Guild quests - Chanters board - Guild quests - Dragon Age: Origins - Game Guide and Walkthrough](https://game.lhg100.com/Article/UploadFiles/201512/2015121518290192.jpg)
Description: Open the map of Ferelden and confirm that you want to travel to [Refugees]. Once you've arrived you'll notice that the battle between the monsters and the refugees has already started. Don't even think about rescuing the civilians, because they don't stand a chance. Instead focus on eliminating enemy archers as soon as possible and then deal with the main boss (Hurlock emissary). Act quickly so you'll defeat as many creatures as you can before all the refugees are killed.
![Description: Open the map of Ferelden and confirm that you want to travel to the [Battlefield] - Guild quests - Chanters board - Guild quests - Dragon Age: Origins - Game Guide and Walkthrough](https://game.lhg100.com/Article/UploadFiles/201512/2015121518290125.jpg)
Description: Open the map of Ferelden and confirm that you want to travel to the [Battlefield]. Once you've arrived take your time to examine one of the nearby corpses and to collect soldier's journal. You'll now have to make your way to the other end of the field. You're going to be attacked by several groups of wolves along the way as well as by a very powerful bear (main boss).
Description: This is a very easy quest and therefore you can complete it as soon as it's been added to your inventory. Open the map of Ferelden and confirm that you want to travel to the [Civil war]. After your arrival you will have to assist allied units in getting rid of Loghain's knights, as well as of a new mini-boss (Loghain's sergeant).
![Description: Your job will be to locate a group of adventurers and you'll find out that they were on their way to [Denerim] to share the information on the blood mages - Guild quests - The mages collective - Guild quests - Dragon Age: Origins - Game Guide and Walkthrough](https://game.lhg100.com/Article/UploadFiles/201512/2015121518290114.jpg)
Description: Your job will be to locate a group of adventurers and you'll find out that they were on their way to [Denerim] to share the information on the blood mages. Thankfully you won't have to spend too much time looking for them. Exit the town where you got this mission (probably [Redcliffe]) and travel to Denerim. You'll trigger a random encounter showing your team being stopped by the leader of the adventurers. You can use intimidation, persuasion to change his mind or attack him and his friends.
Description: The collective will ask you to retrieve five scrolls of Banastor. Two of these objects can be found in [The Circle tower] (M33, 9)(M34, 2), two other scrolls are hidden in the [Ruined temple] (M61, 4)(M61, 6) and the final fifth scroll can be found in [Werewolves lair] (M46, 7).
Description: This quest will require you to leave blood marks on the doors of four houses belonging to the families of the blood mages. Each time you'll have to approach the door and to click on it to leave the bloody sign. Two buildings can be found in [Denerim - Market district] (M64, 4)(M64, 9), the third home is in [Denerim - Dirty back alley] (M69, 2) and the final fourth house can be found in [Denerim - Dark alley] (M69, 3).
Description: Your job will be to manufacture, buy or find at least ten lyrium potions. Once you have all the potions you'll have to deliver them to the collective. Notice that completing this quest will prevent you from finishing another one - Justice must be served.
Description: This quest is tied to another mission from this group - A gift of silence. Once you've collected all the lyrium potions for the collective don't go to their representative to hand them over. Instead give the potions to Commander Tavish in [Denerim - Market district] (M64, 5).
Description: Your job will be to inform three apprentices that the collective doesn't want them anymore. Apprentice Fayd can be found in [Denerim - Market district] (M64, 8), Apprentice Sheth can be found in [Denerim - Market district - Wonders of Thedas] and Apprentice Starrick can be found in [Frostback mountains pass] (M47, 4).
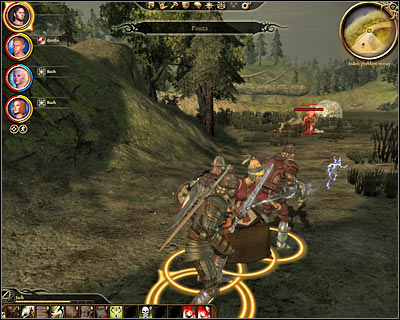
Description: The objective of this quest will be to locate Renold. Once again you won't have to pay too much attention to what you're doing, because sooner or later you'll trigger a random encounter linked to his disappearance. You should end up standing in area marked as [Out of the way] and your job will be to defeat a powerful abomination. Once the monster has been killed check Renold's body for his journal.
Description: In this case your job will be to locate places of mystical power. The areas you'll have to visit are Brecilian forest (check the tombstone in the western section of the forest), The Circle tower (examine the chair in the middle of the student quarters), Denerim (click on a large tree in the Elven Alienage) and Orzammar (click on an altar in Ortan thaig tied to Asunder subquest). Each time you've found the place of power you'll be informed about it.
Description: This quest will require you to find and deliver ten deep mushrooms. You can start collecting these items during your journeys (make sure to always scan the area for interactive plants) or you can buy them from one of the traders.
![Description: In this case your assignment will be to hunt down and kill Maleficarum mages and in order to locate them you'll have to travel to [Brecilian forest - Eastern part] - Guild quests - The mages collective - Guild quests - Dragon Age: Origins - Game Guide and Walkthrough](https://game.lhg100.com/Article/UploadFiles/201512/2015121518290163.jpg)
Description: In this case your assignment will be to hunt down and kill Maleficarum mages and in order to locate them you'll have to travel to [Brecilian forest - Eastern part]. The mages can be found in one of few possible locations and you'll probably be allowed to get to them only when you've already figured a way to cross the invisible barrier in the forest. Approach the mages, talk to one of them and start the fight. Make sure to eliminate weaker mages in the first place and once they're gone attack the two remaining mini-bosses.
Correspondence Interruptus
Received from: Bartender [Denerim - Market district - Gnawed noble tavern]
Description: Your assignment will be to retrieve twelve love letters. I would recommend starting this quest in the early stages of the game and to always explore nearby chests and shelves to keep finding the letters. Thankfully all the letters will be placed in the quest category of your personal inventory, so you can't sell them by mistake. Here are the exact locations of the letters: [Denerim - Market district - Wade's emporium] (one of the chests found inside the store), [Denerim - Pearl] (inside one of the smaller rooms of the brothel), [Denerim - Arl Eamon's estate] (Eamon's bedroom), [Brecilian forest - Dalish elf camp] (close to Varathorn), [Brecilian forest - Upper ruins] (hidden southern corridor), [Orzammar - Diamond quarter - Royal palace] (inside a small room in the eastern section of the palace), [Orzammar - Commons - Dust town - Cartel hideout] (Jarvia's office available after defeating her), [Lake Calenhad docks - Spoiled princess] (inside the tavern), [Redcliffe] (crate found inside the windmill), [The Circle tower - Mage quarters] (eastern room), [Village of Haven] (near a building wall), [Redcliffe castle - Basement] (area connecting the main floor with the courtyard).
Received from: Bartender [Denerim - Market district - Gnawed noble tavern]
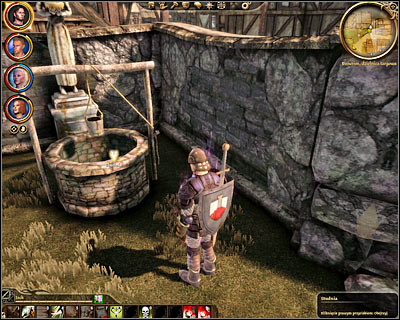
Description: Your job will be to reach unexperienced assassins in need of disposing the bodies of the people they've just killed. Each time you'll be required to pick up a body in a bag and then you'll have to transport the body to a well found in [Denerim - Market district] (M64, 11). Clicking on the well will allow you to dump the body and thankfully you won't be seen by anyone. The assassins can be found in [Denerim - Market district] (M64, 12), [Denerim - Pearl] (M65, 4) and [Denerim - Market district - Market warehouse] (M65, 5). Notice that the entrance to the warehouse won't be marked on the district map, so you'll have to search for it yourself.
Received from: Bartender [Denerim - Market district - Gnawed noble tavern]
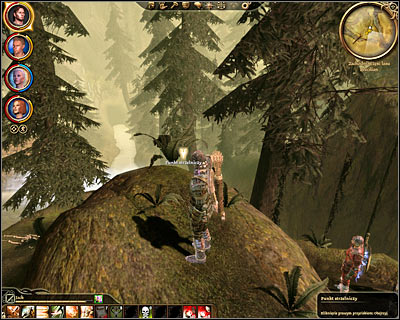
Description: Make sure that you have a bow in your inventory before starting this quest. Travel to [Brecilian forest - Western part], proceed to the clearing (M42, 2) where you've encountered the first group of werewolves and find a shooting spot. Open your inventory and choose a bow as your primary weapon and then click on the ground near the yellow icon. Sending the message will result in the arrival of the mercenaries from Denerim (including one mini-boss). Getting rid of the bandits shouldn't be a problem, but don't forget to switch weapons again before attacking them.
Received from: Bartender [Denerim - Market district - Gnawed noble tavern]
Description: Your job will be to find and murder three witnesses. Notice that each person will have a mini-boss status and will be surrounded by several bodyguards. The witnesses you'll have to kill are Cam of Redside found in [Denerim - Market district - Wonders of Thedas] (M65, 9), Skinny Frank found by the pier in [Lake Calenhad docks] (M32, 5) and Brian found in the middle of the square in [Frostback mountains pass] (M47, 2).
Received from: Bartender [Denerim - Market district - Gnawed noble tavern]
Description: In order to complete this quest you must deliver the bartender fifteen units of toxin extracts. You can keep finding the toxins during your journeys or you buy at least some of them from the traders (Caesar will have a lot of them but only if you've already completed Trial of the Crows quest).
Received from: Bartender [Denerim - Market district - Gnawed noble tavern]
Description: This time your mission will be to deliver the barkeep ten garnets. It would be a good idea to start this quest early during the game, so you won't sell any garnets by mistake. Otherwise you'll have to check the traders again to see who has the objects for sale.
Received from: Bartender [Denerim - Market district - Gnawed noble tavern]
Description: Your job will be to visit four different areas. To be more specific, you'll have to travel to [Denerim - Market district], [Frostback mountains pass], [Lake Calenhad docks - Spoiled princess] and [Redcliffe]. When you get to the last area you'll notice a trap. Deal with the situation and make a decision on how to end this quest. You may return to the Bartender for your reward or you can revisit three other locations to neutralize the traps. I have to warn you that if you decide to go to these areas you may prevent the main character from receiving new quests from this group.
Received from: Bartender [Denerim - Market district - Gnawed noble tavern]
Description: Your primary objective will be to hunt down and kill K. Before that happens you'll have to deal with his lieutenant and you'll meet this person automatically as soon as you've decided to travel to a different part of Denerim. Approach K's lieutenant and attack him. I guess you won't be surprised to hear that aside from him you'll also have to deal with a couple of other assassins. Once you've won examine his body and collect a map with the directions to the hideout. Leave this area and confirm that you want to travel to [Denerim - K's hideout].
Despite what you might think you won't have to spend a lot of time trying to hunt down K, because he'll be waiting for you inside a small room. Make a few steps forward to have a short conversation with him and then attack him and some of his last followers. Winning here shouldn't be a big problem, especially since K's men won't pose a big threat.
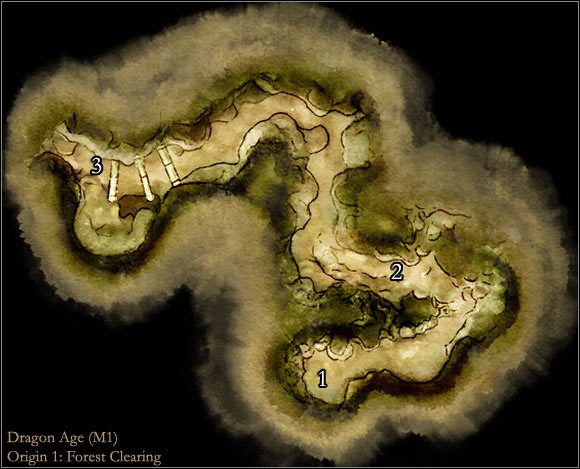
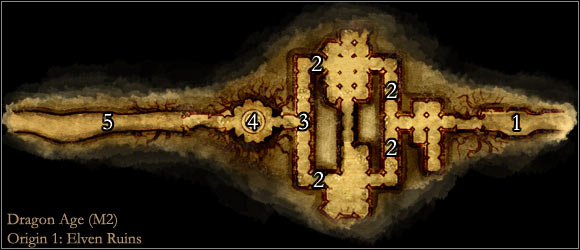

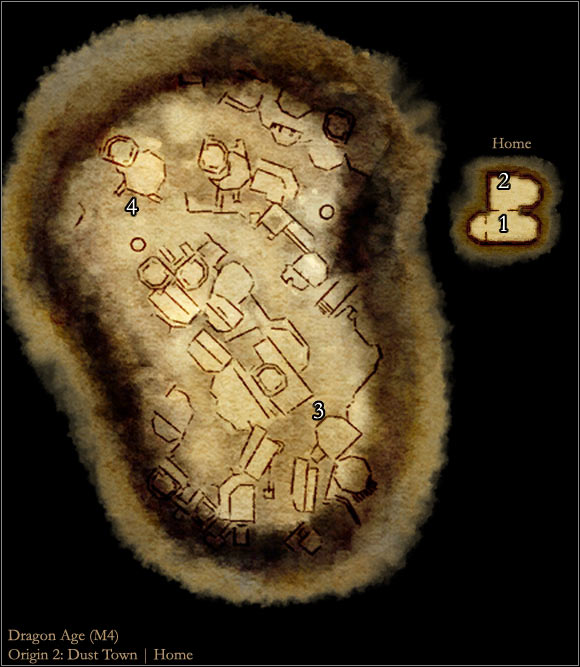
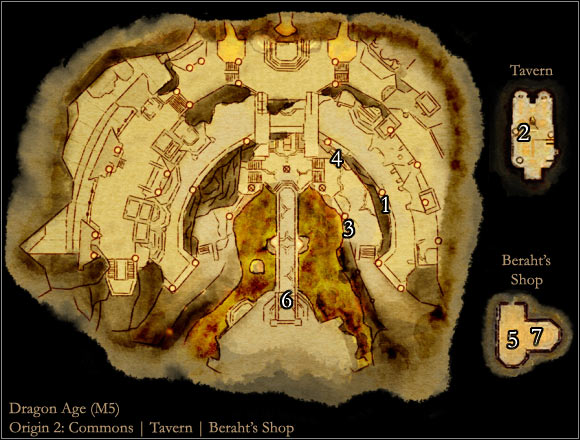


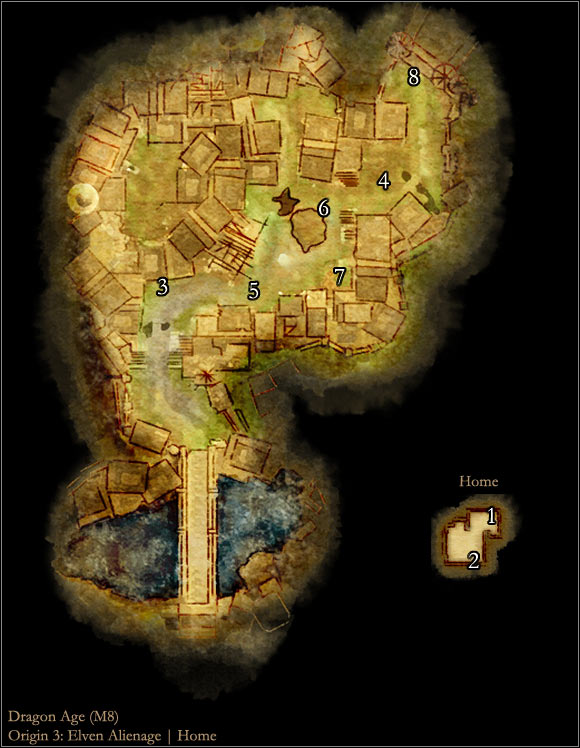
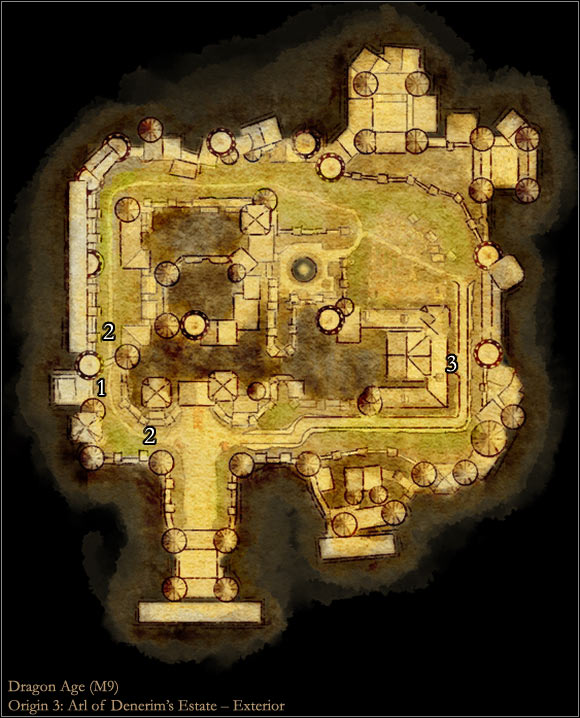
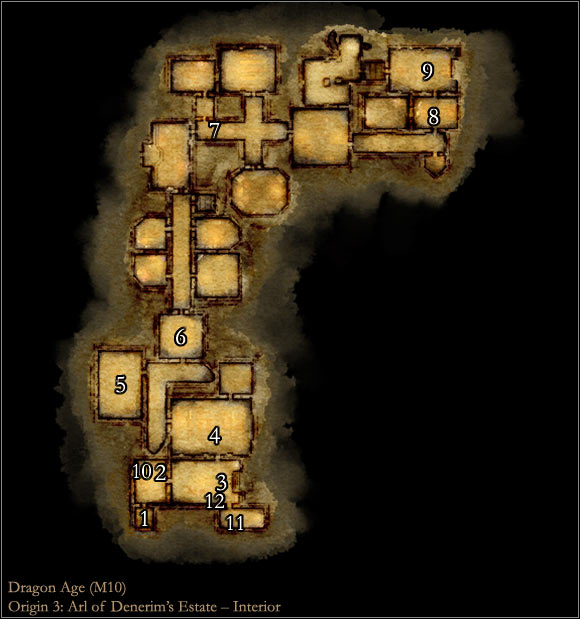
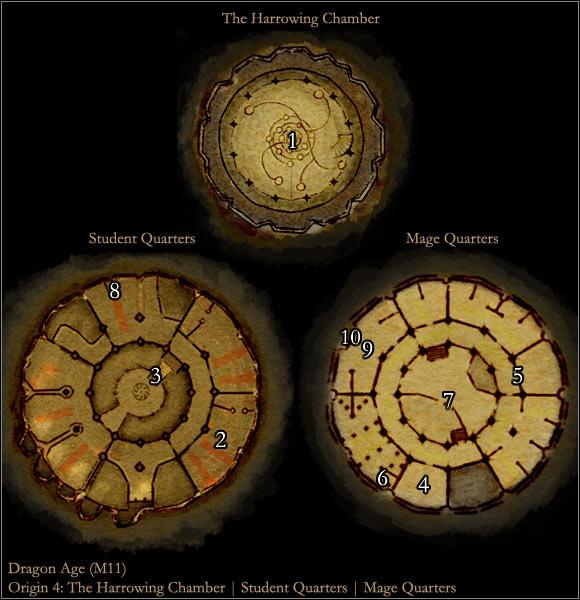
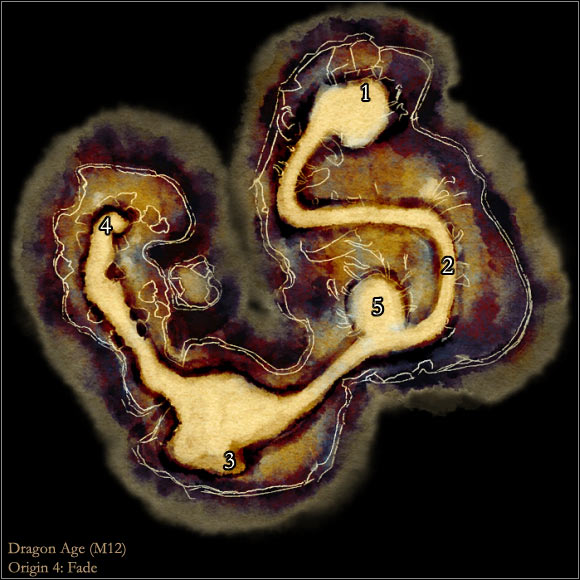
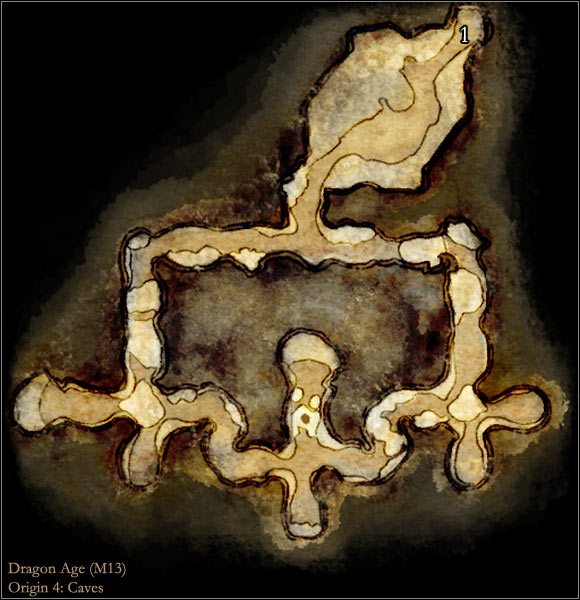

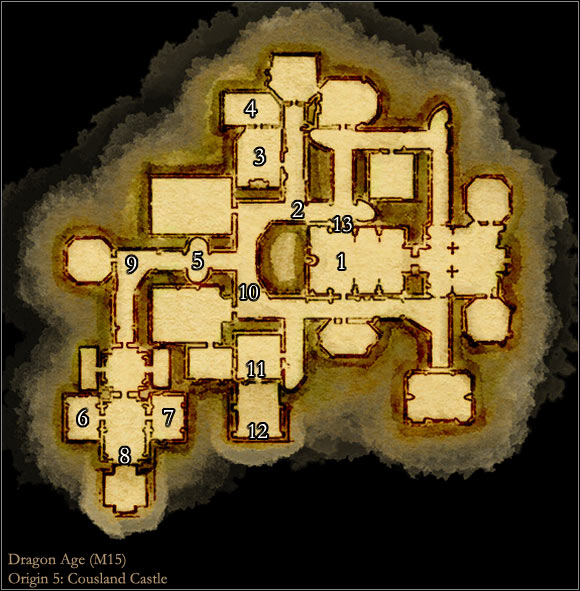
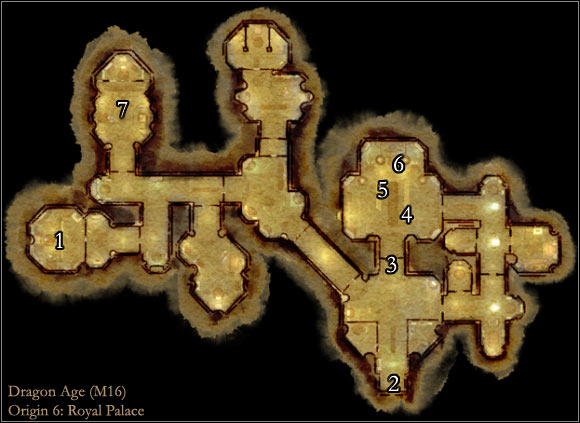
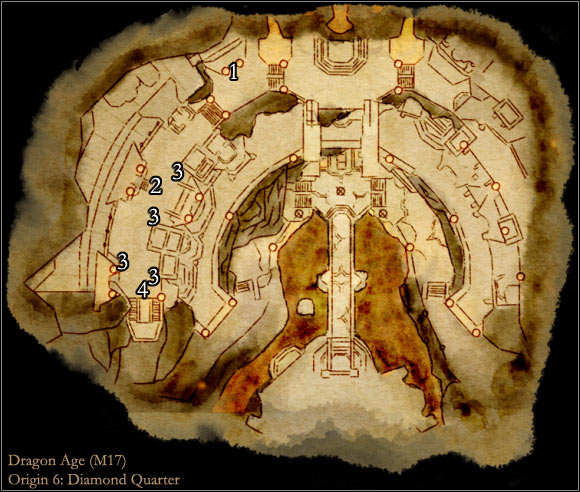
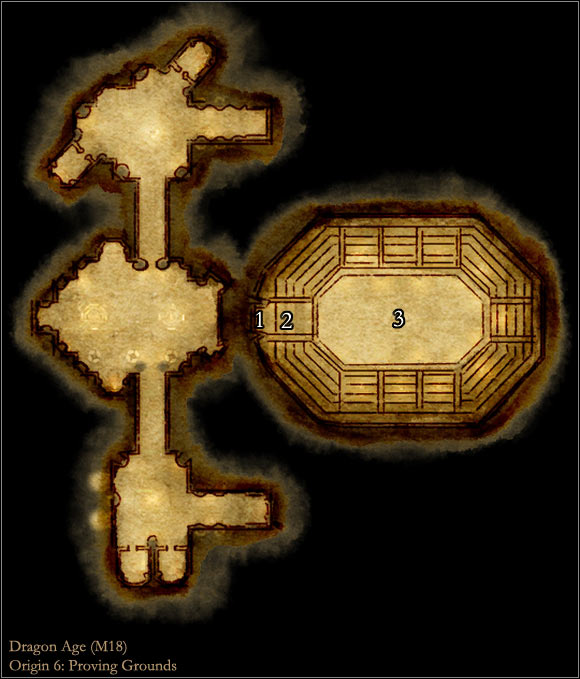
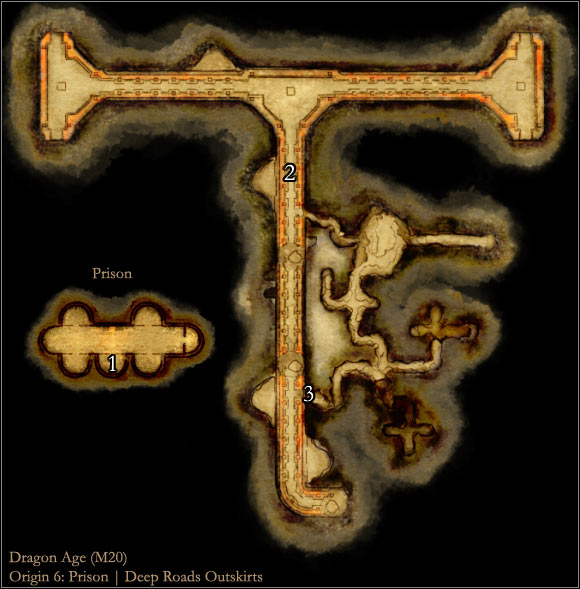

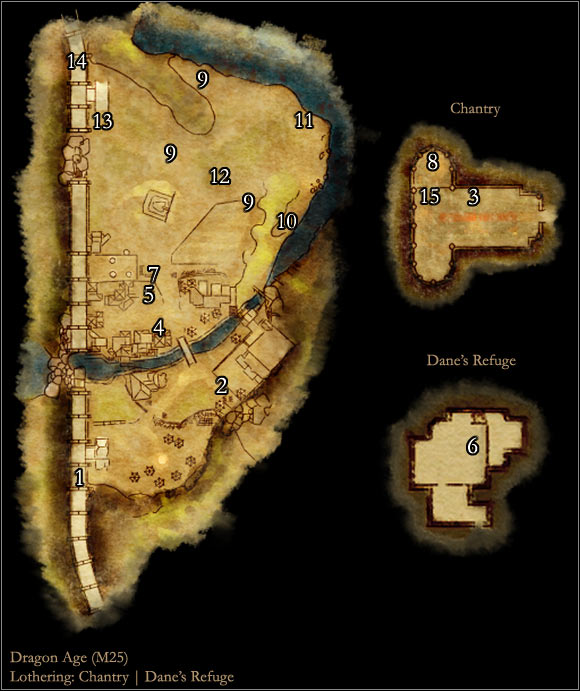
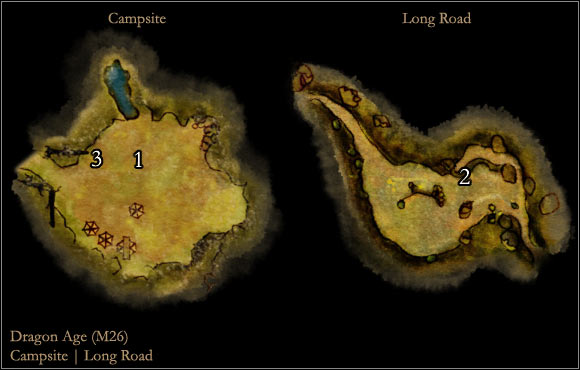
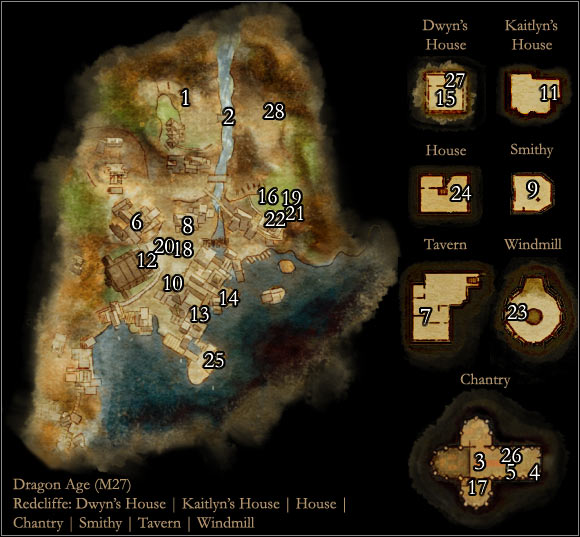
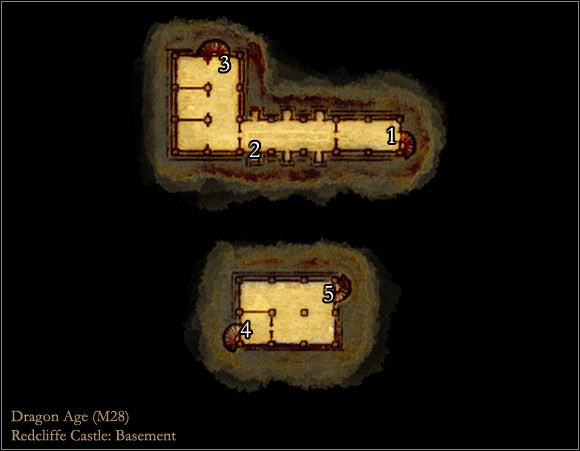
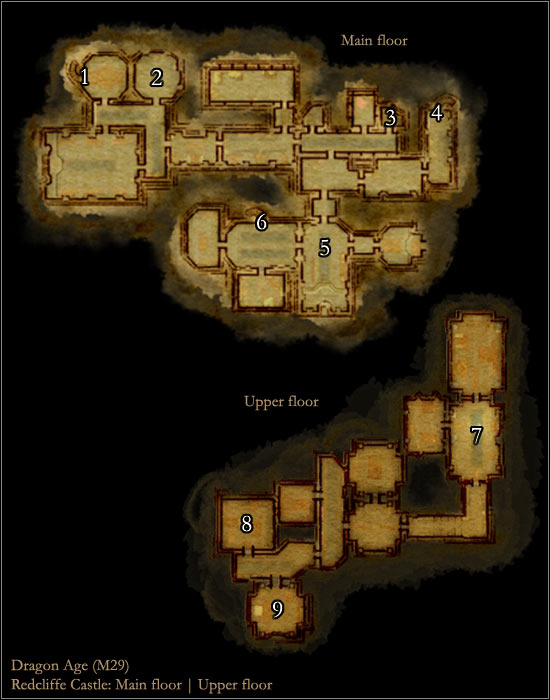
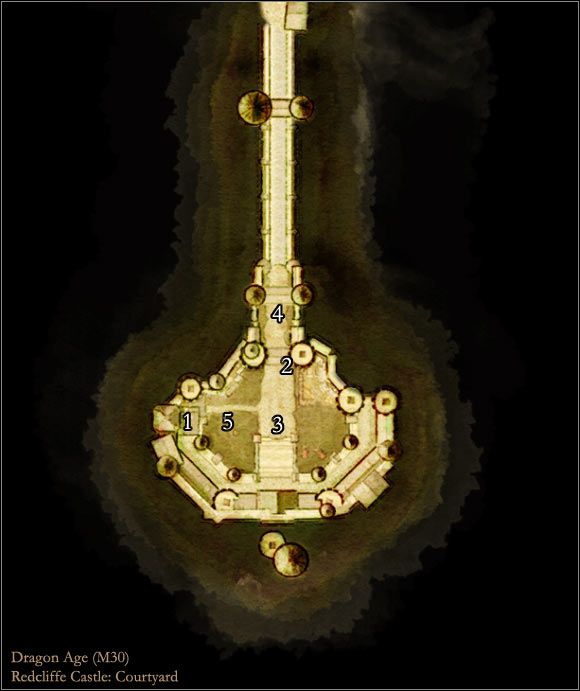

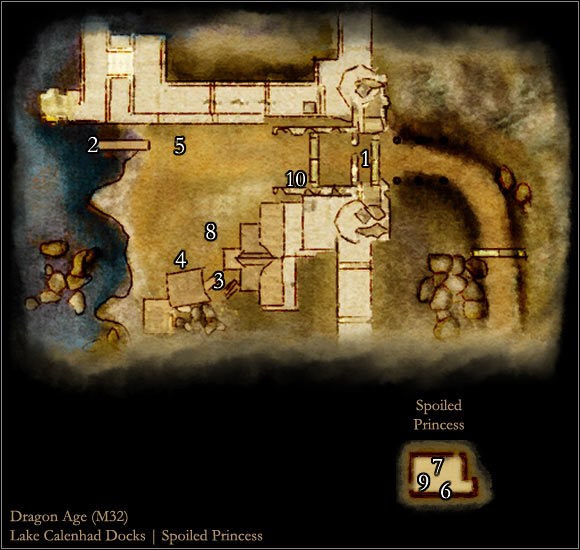
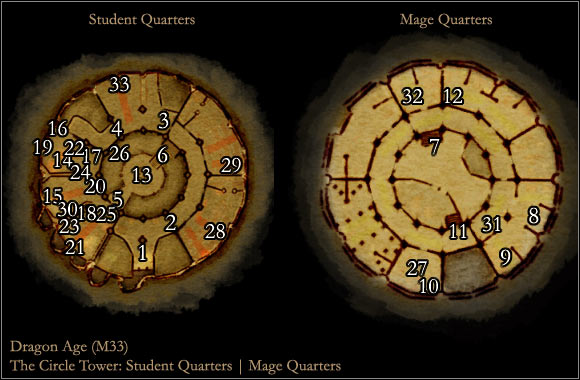
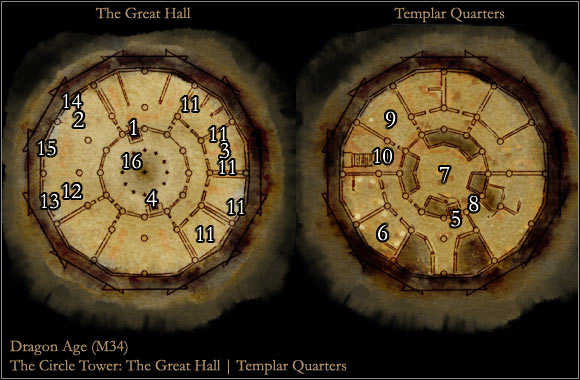
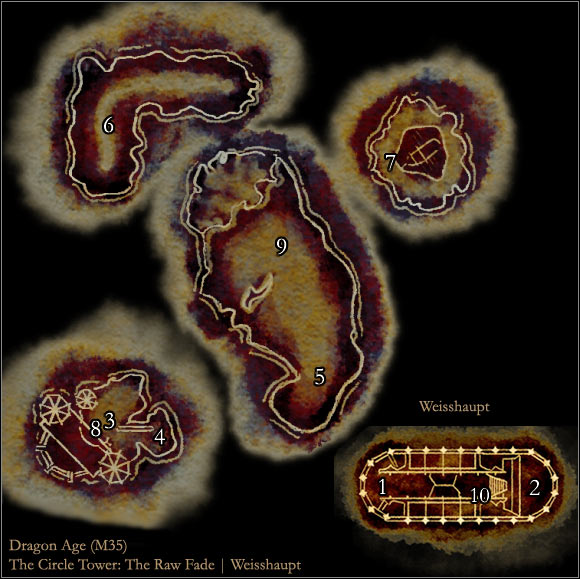


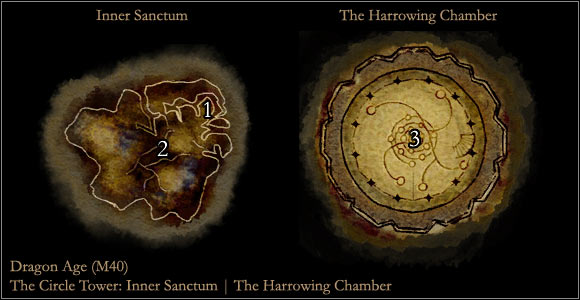


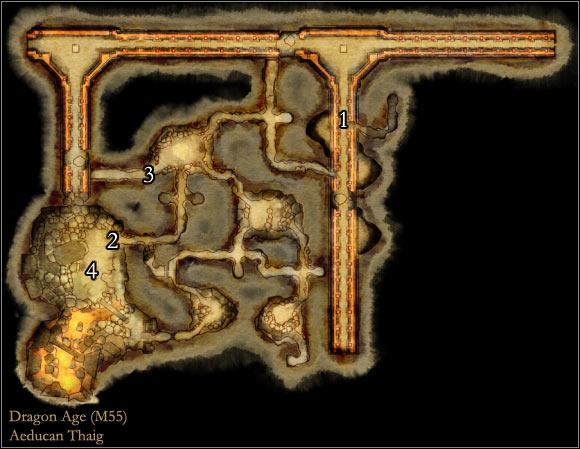
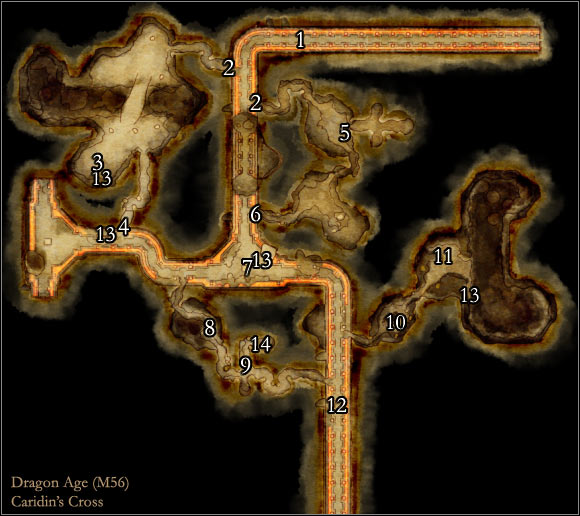
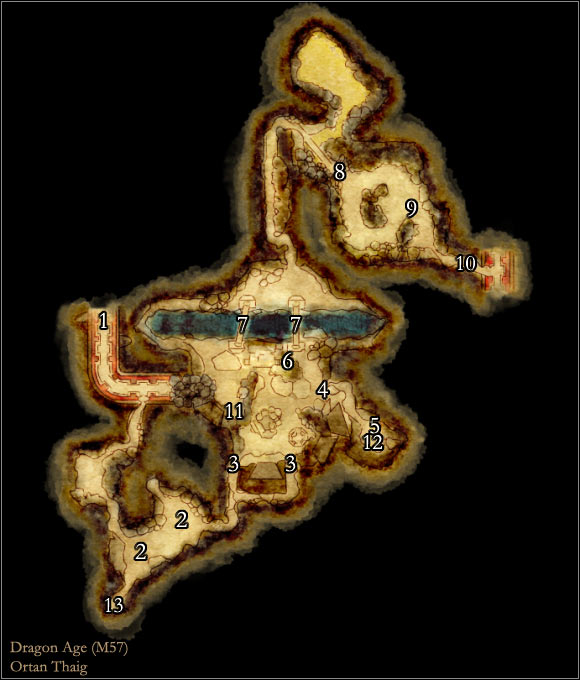
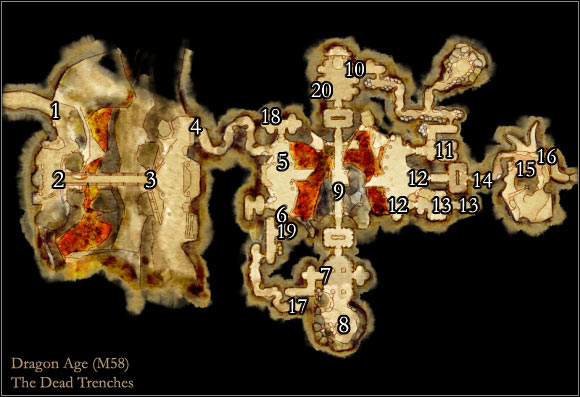
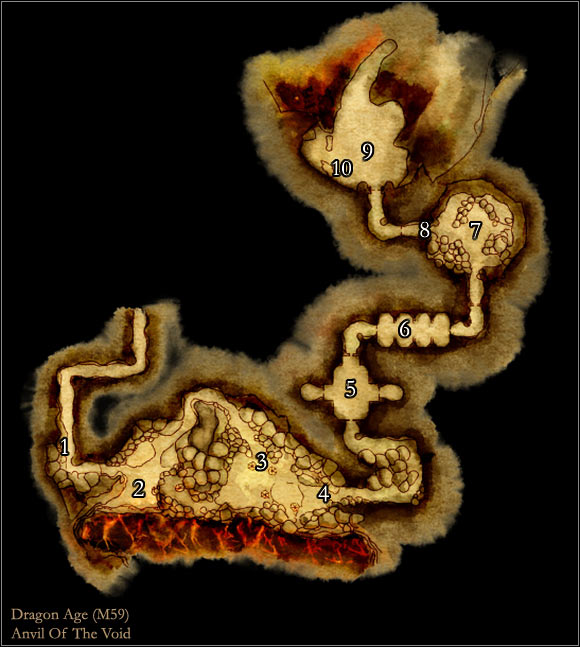
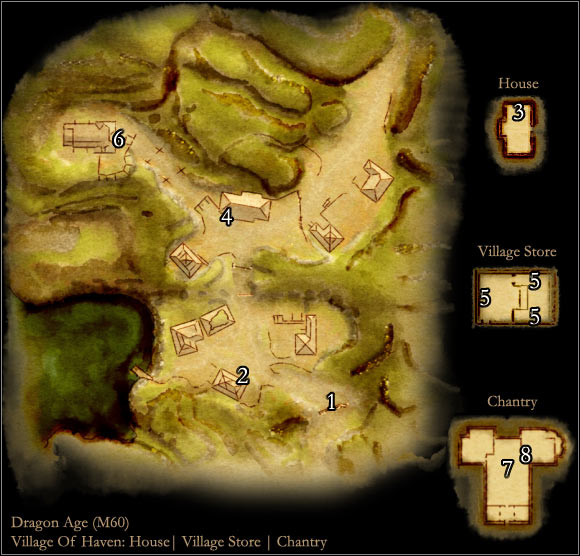
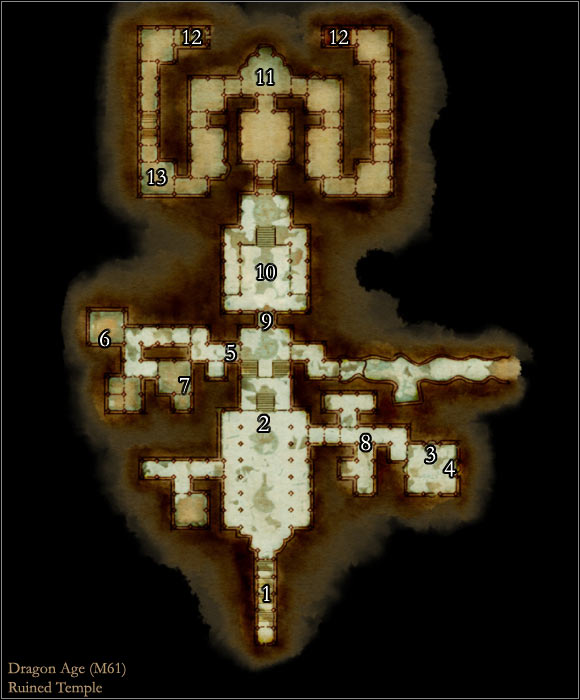
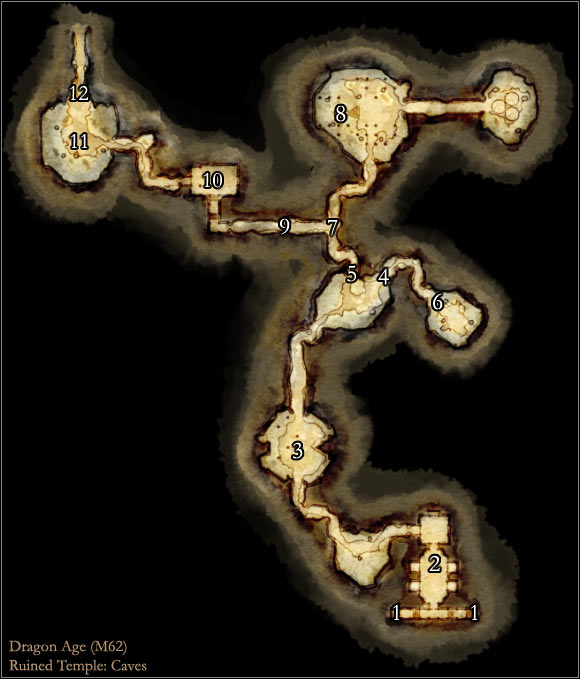
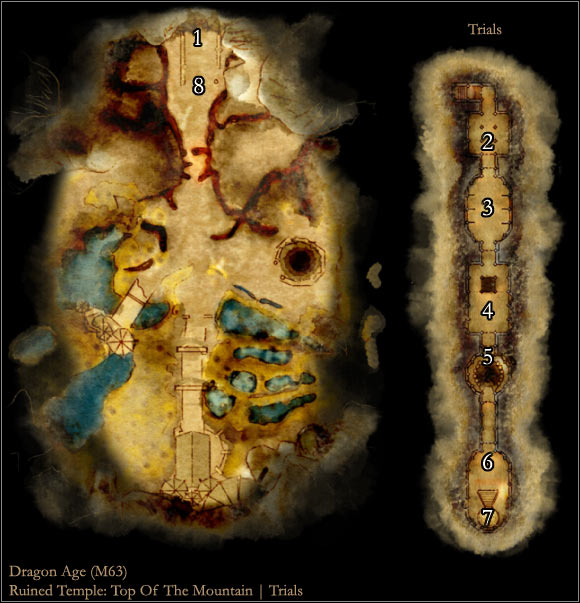
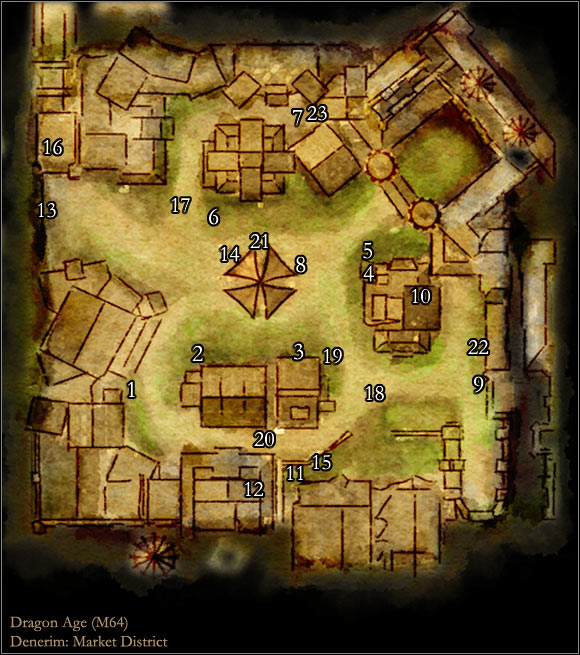
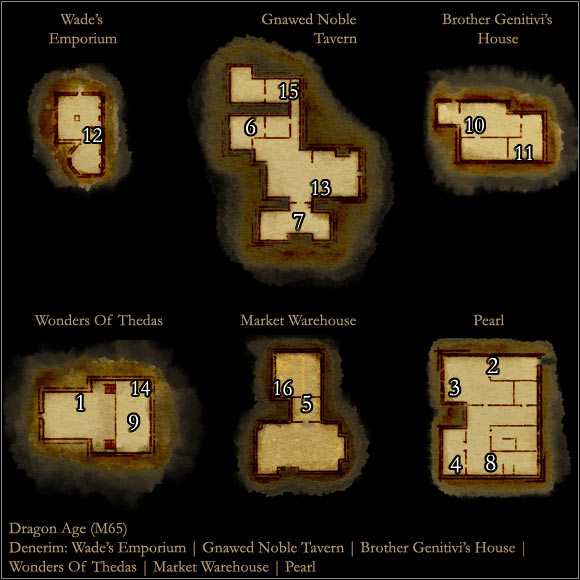

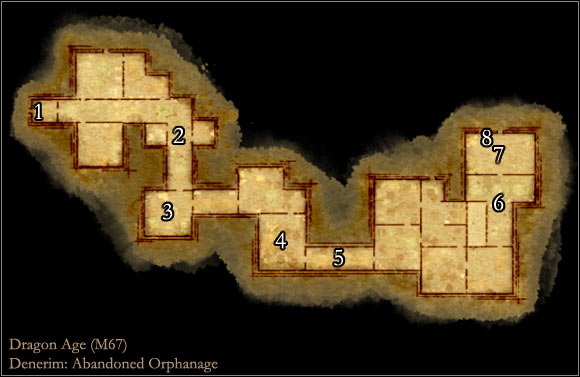
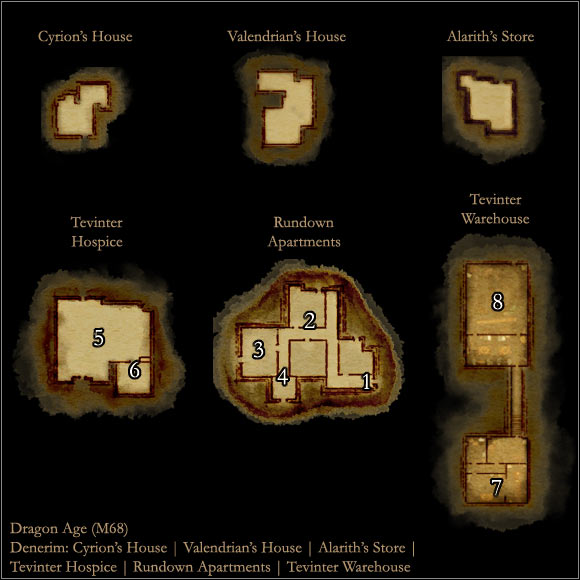
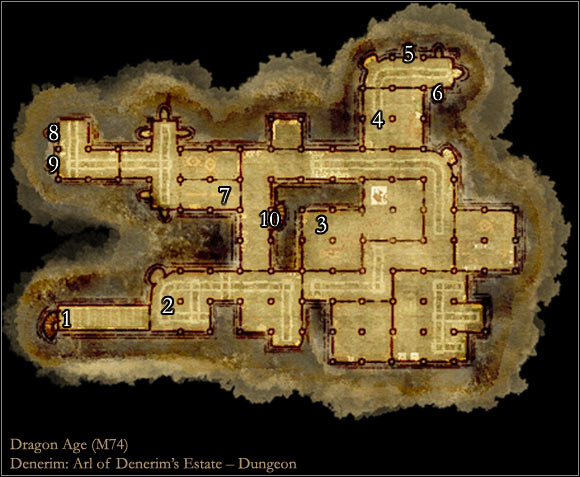
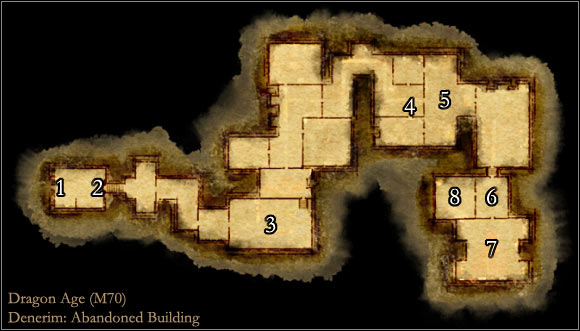
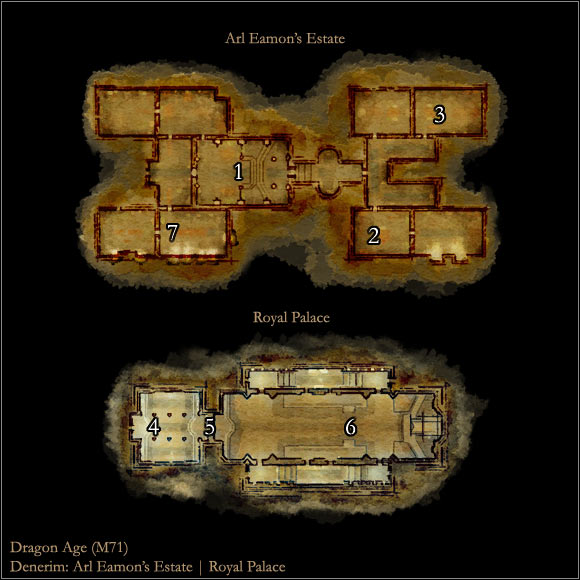

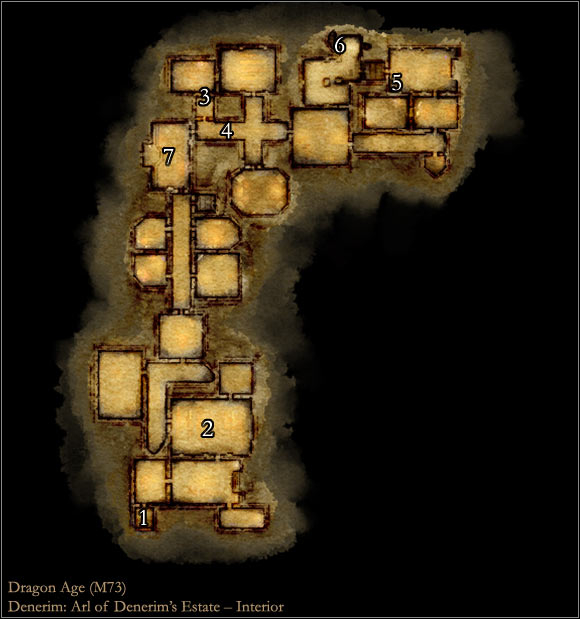
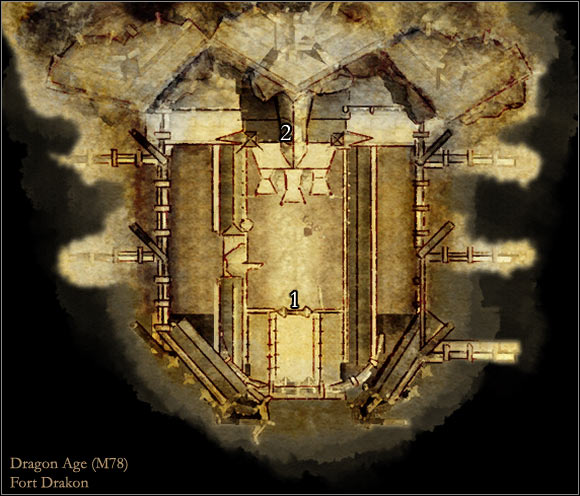
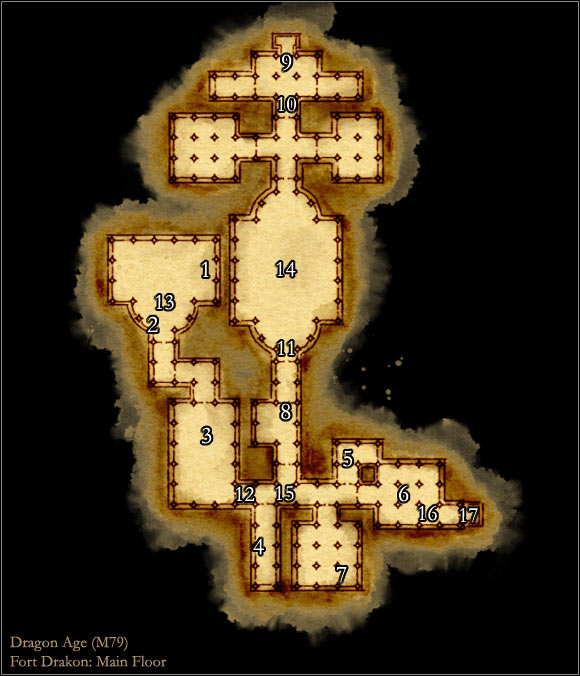

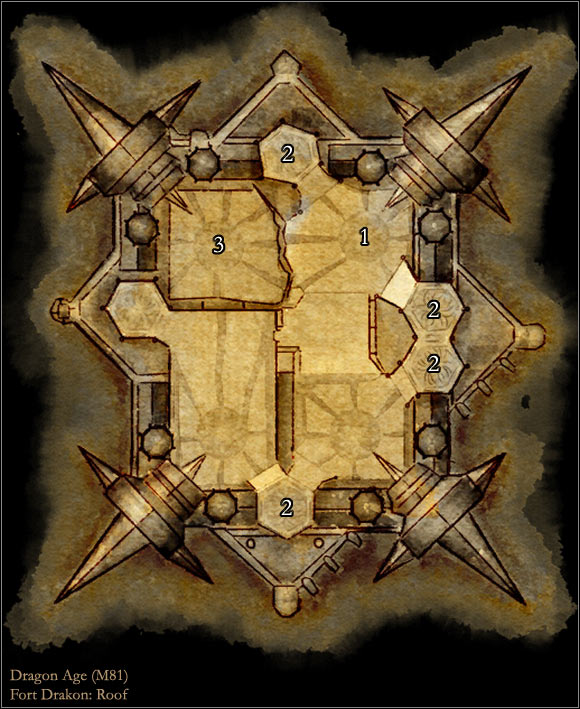
Main locations on the map:
1 - Denerim
2 - Brecilian forest
3 - Brecilian ruins
4 - Dalish elf camp
5 - Lothering
6 - Calenhad Lake docks
7 - The Circle tower
8 - Frostback mountain pass
9 - Orzammar
10 - Village of haven
11 - Ruined temple
12 - Redcliffe Castle
13 - Redcliffe
14 - Flemeth's hut
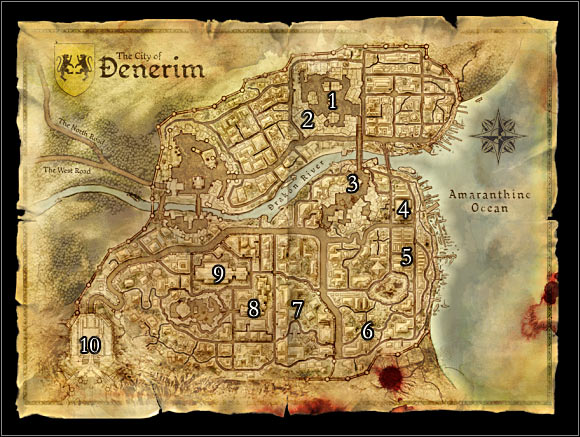
Main locations on the map:
1 - Market district
2 - Arl of Redcliffe estate
3 - Elven alienage
4 - Pearl
5 - Dirty back alley
6 - Dark alley
7 - Run-down back alley
8 - Arl of Denerim's estate
9 - Royal palace
10 - Fort Drakon

Main location on the map:
1 - Orzammar
2 - Aeducan thaig
3 - Caridin's cross
4 - Ortan thaig
5 - The dead trenches
6 - Anvil of the Void

This world atlas is a supplement to the main guide to Dragon Age: Origins PC video game and instead of explaining the quests it focuses primarily on describing the world and showing how to surviving in the harsh environment. There are five chapters to choose from:
The first chapter has two main topics - it explains the process of creating a new character and tells how to keep making the entire team stronger by choosing good attributes, skills, talents and spells depending on the race and class. As a bonus a description of hidden specializations has been added along with hints on how to unlock them.
The second chapter is definitely the biggest one. It offers a large set of maps of different parts of Ferelden. Each map has a lot of markers on it, informing about possible treasures, threats, vendors, guild members or areas of interest. Each group of maps has its own description written in text, making the process of finding certain items or characters easier.
The third chapter of this atlas lists a lot of useful things, including all traders found in Ferelden along with the best goods offered by them or places where precious tomes can be acquired. A lot of efforts have been put into describing the item crafting feature, featuring complex charts with available healing mixtures, poison and traps.
The fourth chapter focuses all of its attention on the followers being added to the team throughout the course of an entire game. Useful hints help in finding out how to improve relations with them and this chapter also tells where to find the gifts that would make them happier.
The final fifth chapter contains a bestiary and an index of intelligent enemies encountered during the game, as well as a full list of achievements available in the PC version and in both console versions of Dragon Age: Origins.
CHOOSING A GENDER
Bear in mind that the decision of choosing a gender won't affect any attributes of your future character, because they're all the same for both male and female characters. You can expect to notice the differences in other aspects of the game:
- possible quest solutions - in some cases playing as a male character will allow you to achieve a better ending, however there are some quests where the most interesting outcome is reserved for a woman
- relations with other team members - the differences can be seen especially when it comes to romance, because some of the followers will date only a man, some only a woman and some will date both
- course of some of the origin stories - the biggest change here involves the city elf character, because while playing as a male elf you'll want to rescue the women and when playing as a female elf you'll want to escape from the estate
CHOOSING RACE AND CLASS
Check the table below to find out about the differences between available races.
Race
Available classes
Available origins
Bonuses
Additional info
Human
warrior
mage
rogue
Human noble
Magi
+1 to strength
+1 to dexterity
+1 to magic
+1 to cunning
The most versatile race of all three, however there are only two available origin stories for a human.
Elf
warrior
mage
rogue
Dalish elf
City elf
Magi
+2 to willpower
+2 to magic
Three origin stories to choose from, however the initial bonuses involve only two attributes instead of three (dwarf) ore even four (human).
Dwarf
warrior
rogue
Dwarf commoner
Dwarf noble
+1 to strength
+1 to dexterity
+2 to constitution
10% chance to repel magic
Very useful attribute bonuses, however you're allowed to choose between two origin stories and only two out of three classes (dwarves can't become mages).
Check the table below to find out about the differences between available character classes.
Character class
Available to
Class bonuses
Available specializations
Mage
human
elf
+5 to magic
+4 to willpower
+1 to cunning
blood mage
arcane warrior
spirit healer
shapeshifter
Rogue
human
elf
dwarf
+4 to dexterity
+2 to willpower
+4 to cunning
bard
ranger
assassin
duelist
Warrior
human
elf
dwarf
+4 to strength
+3 to dexterity
+3 to constitution
berserker
champion
reaver
templar
Check the table below to find out how many attribute points you can get at the beginning of the game depending on the race and on the character class. Make sure to read other sections of the guide to find out more about each attribute.
Chart legend: ST - strength, DX - dexterity, WP - willpower, MA - magic, CU - cunning, CO - constitution. The green color shows the highest values for each class and the red color shows the lowest values.
Character race
Character class
ST
DC
WP
MA
CU
CO
Dwarf
Rogue
11
15
12
10
14
12
Dwarf
Warrior
15
14
10
10
10
15
Elf
Rogue
10
14
14
12
14
10
Elf
Mage
10
10
16
17
11
10
Elf
Warrior
14
13
12
12
10
13
Human
Rogue
11
15
12
11
15
10
Human
Mage
11
11
14
16
12
10
Human
Warrior
15
14
10
11
11
13
Suggestions:
Choosing a warrior offers a relatively problem-free gameplay for most of the game, however on the other hand you won't be able to use some of rogue's extremely useful abilities. Thankfully this will only be an issue in the early parts of the game, because as you progress two rogue companions will join your team and therefore you'll have a chance to rely on their skills instead. I would recommend choosing a dwarven warrior because of the fact that all members of this race receive a large constitution bonus at the beginning of the game, making it more difficult for the monsters to kill them.
My favorite class is the rogue and it's also what I would recommend for your first playthrough. Bear in mind that the rogue isn't as powerful as a warrior and he or she will have to rely on his warrior companions, but on the other hand you'll gain access to a large array of useful skills and talents. Lockpicking talent is one of the best in the game, because it will allow you to open most doors and chests from the first minutes spent in Ferelden. If you decide to play as a rogue you should choose being a human.
As for playing as a mage, I would recommend choosing this class only to more experienced RPG players, because you would have to pay much more attention to the development process of your character and it'll be easier to make a mistake by choosing wrong attributes or spells. You would also have to spend more time planning your strategy. There are a lot of options here and being a healer or an offensive spells caster are just two of the most obvious examples. If you do decide to choose this class then you should consider playing as an elf, because this race receives useful bonuses to magic and willpower at the beginning of the game.
CHOOSING THE ORIGIN STORY
My personal opinion is that you should pay more attention to choosing a correct class and race so that the final result would suit your preferred style of playing. Leave the decision of choosing the origin for last, especially since each combination will present you with at least two interesting options for a story. Check the table below to find out more about each of six available stories and you can find their walkthroughs in the main guide.
Origin name
Class requirements
Estimated time of play
Additional info
City elf
Elven warrior
Elven rogue
2 hours
This is one of the most interesting stories available in the game. Finishing this version of the prologue shouldn't be a huge challenge for you, however two last fights are going to be slightly more difficult. Don't forget that you'll perform different quests depending on the gender of your character.
Dalish elf
Elven warrior
Elven rogue
1 hour
The dalish elf story is without a doubt the shortest one from all six and it's also one of the easier ones. The main reason is that you'll always have at least one powerful follower at your side. In addition to that you'll explore small areas filled with not that powerful monsters and you'll have to dispose of only one enemy mage.
Dwarf commoner
Dwarven rogue
2 hours
This is one of the easier stories, mostly because you'll be going against other dwarves and you won't encounter any powerful beasts. I would recommend choosing a rogue class, because you'll encounter a lot of locked chests during your journey.
Dwarf noble
Dwarven warrior
Dwarven rogue
2,5 hours
Choosing this origin story will affect one of the main quests (the one tied to an election in Orzammar) later on during the game. As for the prologue itself, it's longer than most of the other stories and more difficult than the Dwarf commoner story.
Human noble
Human warrior
Human rogue
1,5 hours
The first part of this story offers a lot of conversations, exploration and easy quests, however the second half is much more challenging. Nevertheless you should have any problems advancing to the main game.
Magi
Human mage
Elven mage
2,5 hours
This is one of the longest introductions and it's also one of the most difficult ones. The good news is that you'll have a chance to earn a lot of experience points and to find at least a few interesting artifacts and weapons.
All the hints found in this section of the atlas apply not only to the creation process but also to the rest of the game, because you'll be spending new points each time you've advanced to a higher level of experience.
HINTS FOR WARRIOR CHARACTERS
I would strongly recommend spending most of the points on strength and constitution. Increasing your strength will result in the ability of inflicting serious wounds and on the precision of each hit. It would be good idea to build up this attribute to 30 or even 40 points, especially if you plan on wearing some of the best armors available in the game. The same goes with melee weapons, because most of them can't be used unless you're strong enough. As for constitution, raising this attribute will give you more health points, so you won't have to use healing potions or rely on your mages healing your wounds. This becomes especially important in the early parts of the game when every point spent on this attribute will make a difference on the battlefield.
As for other attributes, don't forget about dexterity to increase your chances of dodging enemy attacks, however naturally you should be spending less points here. You'll only want to spend a few points on cunning to unlock some of the more useful skills and you should totally ignore willpower and magic.
HINTS FOR ROGUE CHARACTERS
Two attributes you should be interested in the most are cunning and dexterity. Investing points in cunning will allow you to unlock new types of attacks and some of them are going to be crucial to your character becoming a useful member of the team. Make sure to achieve 20 cunning points as soon as possible by spending points on this with each advancement to a higher level. As for dexterity, developing this attribute will be an important thing even if you plan on using melee weapons instead of bows and crossbows.
Don't forget about strength, however this attribute won't be so important as it was with the warriors. I wouldn't recommend ignoring it or spending only a few points on it, though, because increasing strength will grant your rogue with a possibility of wearing better armors and using better weapons. The same goes with constitution, however you may decide to ignore it more often if your character specializes in attacks made from a distance. Spend only a few points on willpower and ignore magic, because you won't need it to become a great rogue.
HINTS FOR MAGE CHARACTERS
Two attributes you'll have to think about the most are magic and willpower. As for magic, your primary concern will be to increase power of your spells and that will play a very important role on the battlefield. Investing points in willpower, on the other hand, will grant you with more mana points needed to cast spells. This will prevent you from having to use lyrium potions too often, especially since aren't cheap to buy. Having a lot of mana is important especially in the early stages of the game or if you're playing on a higher difficulty setting. Both parameters need to be developed using similar amounts of points and you should be choosing them each time you've advanced to a higher level, even if it means spending 1 point on either of them.
I would recommend spending far less points on cunning and on dexterity needed to increase your chances of performing successful attacks. Strength and constitution should land on the bottom of your list of priorities, because as long as you play it right you won't have to worry about your mage not being strong enough in direct combat or not having too many health points. Spending 10 points on constitution throughout the course of an entire game should be more than enough and as for strength spend as much as you need to be allowed to wear a better mage armor. Don't forget about stamina, though, because a heavier armor may more of a burden rather than a life saver.
This section of the atlas describes all available skills (they're the same for all three classes).
Coercion is a skill reserved for the main character and I would strongly recommend reaching level 2 as soon as possible and reaching level 4 at about half way through the game. Persuasion is a very important feature of the game, because most of the conversations will contain special dialogue options reserved for such characters. In most cases using this skill will allow you to convince other people to change their minds, however in some cases high persuasion may result in receiving additional payment or even a special quest. You'll be dealing mostly with persuasion or intimidation attempts (high cunning or strength required), however from time to time a high cunning skill or knowing something about poisoning people may also come in handy.
Pickpocketing is a very interesting feature of the game, because it won't take too much effort to turn this into a very profitable business. The main reason why you should consider stealing from other people is that you won't be receiving any penalties if you fail in acquiring their items. I would recommend for one of your rogues to fully develop this skill and don't forget that the main character will also have to spend at least one point here if you want to unlock quests for the Denerim's thieves guild.
Trap-making, herbalism and poison-making abilities are also important, however you'll only have to ask one person to develop such skills (naturally it would be wise to choose different characters for each skill to speed up this process). The only objective is to unlock the ability of creating certain items and it won't even matter who'll possess such knowledge. Prevent two or more people learning similar things, because you would only waste precious points.
Survival skill is one of the less useful ones and I would recommend ignoring it entirely or choosing it only when you're close to the end of your journey. Developing this skill won't make the game any easier and you'll only want to spend all four points to be able to complete one of the subquests in the Dalish camp.
Combat training should become one of your top priorities, even when you're playing as a mage. Choosing this skill for a warrior or for a rogue will result in the ability of using new combat talents and will improve the speed in which the stamina will be regenerated. As for a mage, he or she can count on defense bonuses and on an improved mana regeneration.
The last category is Tactics and before you invest any points here you should spend some time thinking whether you'll rely on the artificial intelligence of your followers or maybe try issuing all commands by yourself.
Warrior
PRIMARY TALENTS
I would recommend that you focus primarily on acquiring main talents from the Warrior category (there are eight of them in total). Unlock a Powerful talent as soon as possible, because doing this will extend your life bar and will neutralize some of the negative effects of wearing a powerful (and heavy) armor. The same deal goes with a different talent from this group - Bravery. This ability will provide your warrior with very useful bonuses to damage being dealt to monsters, improve the overall resistance to enemy attacks and increase a chance of scoring a critical hit. As for the active talents (they're the ones requiring you to activate them manually), make sure to choose Perfect striking right after you've advanced to the 12th level.
As for other of warrior's talents, it really depends on how you want to play this game. My recommendation would be to choose between fighting with a blade and a shield or fighting with a two-handed weapon. Choosing two weapons or bows/crossbows is not a good idea for a warrior, because a rogue should specialize in these type of activities.
If you choose Weapons and shield category you should consider unlocking the Shield bash ability as soon as possible, because this attack can knock down your opponent and that comes in handy especially while going against more powerful monsters. Overpower is also an interesting idea for an active talent, however in this case you'll want to disorient your opponent along with inflicting some injuries. Sadly in order to unlock this ability you must first develop Combat training and you'll also have to invest a lot of points in strength. Once you've taken care of your offense don't forget about your defense. In this case you should consider unlocking the following talents - Shield block (active talent), Shield mastery (passive talent) and Shield tactics (passive talent). Don't forget to unlock Shield expertise ability later on during the game (12th experience level or later) and to spend points on improving your dexterity attribute.
If you choose Two-handed weapon category you should focus mostly on unlocking talents which will allow you to stun or knock down your opponent. Pummel strike is an interesting ability and it should be followed by Stunning blows and Two-handed sweep. Don't forget that it's important to continue spending points on strength, because otherwise you'll have problems gaining access to some of the best talents from this group. As for more direct attacks, choose Critical strike (your character will try to land one SERIOUS blow), Sunder armor (possibility of destroying or damaging opponent's armor) and Mighty blow (aside from dealing a lot of damage you can also make your opponent move slower).
SPECIALIZATION TALENTS
Each one of your warriors can have up to two specializations, becoming a berserker, a champion, a reaver or a templar. Notice that some of your warrior followers will already have one specialization chosen for you - Oghren will be a berserker, Loghain will be a champion and Alistair will be a templar.
Berserker: Choosing this specialization will grant you with a bonus to strength and your life bar will be extended by a decent number of health points. I would strongly recommend "testing" this specialization on Oghren and choosing it for your other warriors if you like what you see. You should always start off by choosing the sustained Berserk ability. The fourth talent from this group, called Final blow, is also very interesting, especially if your character is using a two-handed weapon.
Champion: Choosing this specialization will grant you with bonuses to willpower and cunning. To be honest it's not one of my favorites, especially since some of the active talents (War cry and Rally) have a similar effect to mage's spells (penalties to attack and to chance of being knocked over for your enemies and bonuses to attack and defense to your allies).
Reaver: Choosing this specialization will grant you with a bonus to constitution and you'll be more resistant to melee attacks. The interesting thing is that this specialization doesn't feature any passive talents, because two of them are active and the remaining two are sustained. Consider becoming a reaver if you want to become more deadly while going against group of enemies. You can start sucking out their life bars (Devour) or inflict spiritual damage (Aura of pain). This isn't the best category, but in my opinion it's a better choice than being a champion.
Templar: Choosing this specialization will grant you with a bonus to magic and you'll be more resistant to mental attacks. I'm sure that you'll appreciate all the good things this specialization can offer while going against enemy mages, because not only you'll resist more of their spells, but you'll also be allowed to steal their mana (passive talent Righteous strike). As for active abilities, I would recommend using Cleanse area often, because this talent will nullify all the negative effects of spells being casted on allied units.
Rogue
PRIMARY TALENTS
The basic principle remains the same, so you should be investing a lot of points to unlock talents from the main Rogue category. Some of the most important talents here are the ones involving lockpicking and disarming traps and if your main character is a rogue you should definitely acquire at least two of them as soon as possible. If you've chosen a different class start developing this tree after meeting Leliana and adding her to your main team. This isn't something you should ignore, because being able to open doors and chests will not only give you access to valuable objects but will also make some of the quests much easier. Notice that there are also four talents involving using camouflage and you can ignore them at first, but later on during the game you should unlock one or two. These talents may come in handy while trying to steal something or while trying to surprise a monster from behind. As for other talents, make sure to acquire Dirty fighting (EXTREMELY useful ability which allows you to stun an opponent easily for a few seconds), Coup the grace (after you've stunned the opponent your character will automatically start inflicting serious injuries) and Below the belt (a quick attack which often deals a lot of damage).
Two of the remaining categories are tied only to combat and you'll be allowed to choose between using two melee weapons and a weapon for ranged attacks. You'll also have to decide whether you want to unlock talents only from one group or from both groups. My recommendation is to mix things up a little, because in some situations you'll want to attack enemies from a distance and in some battles a bow or a crossbow just won't work (for example in narrow corridors, small arenas or while fighting fast moving creatures).
Dual weapons category has a lot of interesting talents and you should take special interest in all the abilities found in the first row. They're passive and it would be a good idea to choose at least two of them (if not more). As for active talents from this particular group, start off by choosing Dual striking and Riposte. Other interesting attacks include two talents ideal for dealing with a lot of enemies at the same time (Dual-weapon sweep and Whirlwind), but it's my recommendation to focus mostly on gaining access to talents handy in quick elimination of single targets.
Archery category also has some very interesting passive talents. Melee archer is an important upgrade which allows you to increase chances of a success while fighting the monsters in narrow corridors or small rooms. Master archer on the other hand offers valuable profits to almost all active talents of this category. As for manually activated abilities, you should unlock Aim (great way to start a new battle), Critical shot (possibility of inflicting major injuries, assuming that you've hit the target), Rapid shot and Scattershot (both of these talents may come in handy when trying to defeat larger groups of enemy units).
SPECIALIZATION TALENTS
Each one of your rogues can have up to two specializations, becoming a bard, a ranger, an assassin or a duelist. Notice that your rogue followers will already have one specialization chosen for you - Leliana will be a bard and Zevran will be an assassin.
Bard: Choosing this specialization will grant you bonuses to strength and cunning and it's one of the main reasons why you should choose it. These bonuses will make a difference especially in the early parts of the game and it would be a good idea to learn the specialization from Leliana as soon as she's joined your team. The talents themselves aren't great. Two of them are songs allowing you to influence the rest of the team in a positive way (Song of valor, Song of courage), the third one can make the enemies more vulnerable to your attacks (Captivating song) and the last one distracts enemies (Distraction). Not that useful and don't forget that the power of your actions depends on how many points you've spent on the cunning attribute.
Ranger: Choosing this specialization will grant you a bonus to constitution and you'll be more resistant to forces of nature. The bonuses alone are weak, but the good news is that you can count on a lot of interesting talents being added to your arsenal. Three of them will allow you to summon powerful creatures to fight at your side (Summon wolf, Summon bear, Summon spider) and the bear should be the one to choose for the purpose of most battles. Don't forget that you can issue orders to the creature and even activate its special attacks. The final fourth talent (Master ranger) should be purchased if you feel that the animals really make a difference. Doing this will make them even stronger.
Assassin: Choosing this specialization will grant you a bonus to dexterity and you'll also increase your chances of scoring critical hits. The most useful talent from this category is the first one - Mark of death. Make sure to use it against powerful creatures, so that your chances of winning will improve greatly. Three of the remaining talents are supposed to be used to attack enemies by surprise and in most cases you won't have time for that. Besides, you would have to spend some points developing camouflage to make this all work.
Duelist: Choosing this specialization will grant you a bonus to dexterity and to damage being dealt to monsters. In addition to that you'll increase your chances of performing successful hits. This is an ideal choice for a rogue with two blades and a light armor. You should always start off by activating a sustained Duelist ability and then activate Keen defense. As for the other two talents, Pinpoint strike is far better, because it improves your chances of performing critical strikes for a short period of time.
Mage
PRIMARY TALENTS
The Mage class is very unusual and one of the reasons is that there are only four generic talents to choose from. Arcane bolt will do its job only at the beginning of the game, however you shouldn't ignore this tree, because the passive Arcane mastery ability is very helpful for casting deadly spells.
There are four categories of spells in total and I wouldn't recommend acquiring abilities from more than two categories. Remember that in order to make the mage an essential part of your team you must gain access to the most powerful spells sooner rather than later. If you have more than one mage in your team (for example, main character and Wynne or Morrigan and Wynne) make sure that all these characters are using different kinds of spells, not the identical ones.
The first category of spells is called Primal and it contains four groups of abilities. Each row has spells of the same element - fire, ice, earth or lightning. My recommendation is to choose two groups and at least two spells from each group. Don't rely only on one group, because you may end up in trouble if you encounter a monster resistant to certain types of magical attacks. The lightning schools seems to be the most interesting one, because a lot of monsters will be vulnerable to electrical attacks and the spells themselves will deal great amounts of damage. It would be great if you would decide to unlock Blizzard, as it is one of the best spells in the game.
The second category of spells is called Creation and in this case you should carefully examine all the spells from the first row, because their purpose is to heal your team members. Make sure to have at least one mage with healing capabilities in your team, so you won't have to worry about carrying health potions nor about buying them constantly from the vendors. Naturally Mass rejuvenation is the best spell in this group, because it heals everyone and returns a large amount of health. As for the other categories, glyphs may prove to be interesting, especially when it comes to paralyzing the monsters using Glyph of paralysis or knocking them back using Glyph of repulsion.
The third category of spells is called Spirit and you should be interested mostly in the third and in the fourth row of spells. The third row contains a lot of abilities allowing you to suck the energy out of the monsters or to poison them. Virulent walking bomb does the job pretty well here, especially when used in a crowded area with a lot of potential victims. As for the last row of spells, Mind blast allows the mage to stun his opponents easily and in can be unlocked in the early stages of the game. Crushing prison on the other hand allows the mage to inflict massive spiritual damage.
The final fourth category is called Entropy and there's definitely something to choose from, especially from the first three rows. I would recommend ignoring only the last fourth row, because it contains a rather useless death magic spells. As for the more useful attacks, make sure to unlock Mass paralysis (possibility of paralysing or slowing down larger groups of monsters at the same time), Death hex (the targeted being keeps receiving critical hits) and Sleep.
SPECIALIZATION TALENTS
Each one of your mages can have up to two specializations, becoming a blood mage, an arcane warrior, a spirit healer or a shapeshifter. Notice that your mage followers will already have one specialization chosen for you - Morrigan will be a shapeshifter and Wynne will be a spirit healer.
Blood mage: Choosing this specialization will grant you a bonus to constitution and it will also raise the power of your spells. It's a relatively interesting specialization and I would recommend choosing it for Morrigan to pair it with her shapeshifting abilities. As for the available spells, consider using Blood sacrifice often, but make sure not to "take" too much health from the other members of your team. The final two spells from this group (Blood wound and Blood control) are also interesting, however you can't forget that they will affect only the creatures with blood flowing through their veins, so they won't work on most of the monsters.
Arcane warrior Choosing this specialization will grant you a bonus to dexterity and you'll also gain a bonus to your offensive capabilities. This is an excellent choice for a mage trying to gain at least some of the advantages of being a warrior. I wouldn't recommend ignoring this unique opportunity, because you may find a couple of cool items for an arcane warrior throughout the course of the game, including an excellent armor. As for the spells, make sure to use sustained Combat magic ability and to unlock two passive talents - Aura of might and Fade shroud.
Spirit healer: Choosing this specialization will grant you a bonus to magic and you'll allow the mage to regain health much quicker. This is an excellent choice for a mage whose primary concern and job is to protect the remaining team members using healing spells. Make sure to pair this with some of the abilities from the Creation category. As for the spells offered by this specialization, Revival is by far the most useful ability. This spell allows you to resurrect one of your fallen colleagues without having to wait for the battle to end. Make sure to select a correct spot on the ground, so you won't waste mana and time needed to recharge the spell.
Shapeshifter: Choosing this specialization will grant you a bonus to constitution and you'll also improve your armor. Being able to transform yourself into a different creature is an interesting alternative to typical spells. My favorite is the Bear shape, because the bear is an ideal creature for inflicting serious injuries. It's also very resistant and it has useful special attacks. As for the other abilities, don't forget to unlock Master shapeshifter talent before the game has ended, because not only your animals will receive various profits, but you'll also be given a chance to take bereskarn form instead of standard bear form.
Mabari hound
TALENTS
You'll want to have a mabari in your team in the early stages of the game, prior to encountering some of the best followers. It's important to keep unlocking new abilities for the dog, especially if you want to make the animal a good replacement for a warrior. There are eight talents for you to choose from and most of them are very useful.
The first row contains two interesting talents. Combat training is a passive ability and unlocking it will grant you bonuses to attack, "armor" and to chance of inflicting serious wounds. Overwhelm on the other hand is an active ability and the basic idea is similar to some of the monster behaviors you might have noticed during the game, because your hound will knock enemy down and start biting a helpless opponent.
The second row has two interesting active talents and you shouldn't take long until their unlocked and ready for use. Charge gives you a chance to knock down opponents which comes in handy while fighting stronger creatures and Shred provides the dog with a chance of scoring critical hits.
Either way don't forget to keep purchasing better items for your mabari hound. A collar works like an armor, increasing the overall resistance of the dog, and kaddis provides the animal with offensive bonuses.
Twelve specializations can be unlocked during the course of the game and they're divided into three groups - there are four specializations for a warrior, four for a rogue and four for a mage. Don't forget that each party member can have up to two specializations and the corresponding slots will be unlocked after advancing to 7th and 14th experience level. Sadly unlocking the slot is not everything, because you must first find a way to learn a specialization. This can be done by finding a teacher or buying a special book.
WARRIOR

1) Berserker - There are two ways for you to unlock this specialization. One of the solutions will become available after you've started completing main Orzammar quest - Paragon of her kind. Not long before your final trip to the Deep Roads in hopes of locating the anvil of the Void you're going to be stopped by a dwarf Oghren. This meeting will take place in the Commons area, near the miner checkpoint. After you've agreed to his request to join your team start building your relationship by talking to him and giving him presents (I would recommend doing this will resting in the campsite). Oghren will agree to teach other warriors in your team how to become a berserker after you've earned enough approval points.
If you don't wait to wait until Oghren joins your team or if you don't want to raise his approval rating you can choose an alternative solution and that is to buy a book from the merchant Gorim found in Denerim's market district. If you can't find the book among the things he is selling try visiting him later on when he'll have a new set of items.
2) Champion - In order to unlock this specialization you must finish one of the main quests of the game - Arl of Redcliffe. You will receive your reward after you've found the ashes (Urn of sacred ashes quest) and used them to heal arl Eamon. Talk to your new ally and the specialization will be unlocked during the conversation.
3) Reaver - In order to unlock this specialization you must start Urn of sacred ashes quest and choose an ending reserved for an evil character. This means you'll want to ally yourself with the cultists encountered in the caves. To be more specific - you must agree to destroy the ashes using dragon's blood. You would then have to complete all four trials and confirm using dragon's blood after approaching the urn. Don't forget that doing this will result in a battle with a powerful mini-boss (and with your team members if there are some good characters among them). Exit the urn room to end up at the top of the mountain. Talk to Kolgrim again and the specialization will become available after you've agreed to drink blood.
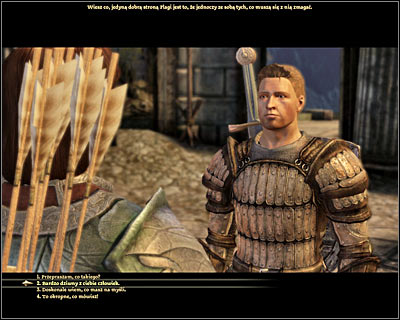
4) Templar - There are two ways for you to unlock this specialization. One of the solutions will become available after Alistair has joined your team and this will occur automatically while completing the main quests in Ostagar involving joining the Grey Wardens and travelling to the Ishal tower. Start building your relationship by talking to him and giving him presents (I would recommend doing this will resting in the campsite). Alistair will agree to teach other warriors in your team how to become a templar after you've earned enough approval points.
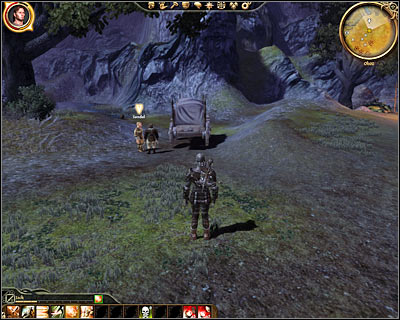
If you don't want to wait until you've raised your approval rating with Alistair you can decide to buy a book from a dwarven trader Bodahn. This person can be found in the campsite unlocked after your visit to Lothering, so thankfully you won't have to explore the world to locate him. If you can't find the book among the things he is selling try visiting him later on when he'll have a new set of items.
ROGUE
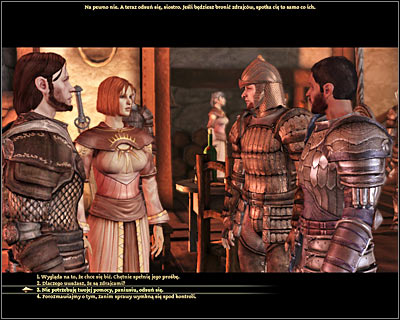
1) Bard - There are two ways for you to unlock this specialization. One of the solutions will become available after Leliana has joined your team and this will occur during your stay in Lothering (main quest Lothering and the imperial highway). In order to add her to your squad you must go to a tavern called Dane's refuge and defeat a group of soldiers. Leliana will automatically ask if she can come after the battle. Bear in mind that in this case scoring relationship points by talking to her and giving her presents won't be enough, because you'll also have to finish Leliana's quest. Once this is done she'll agree to teach other rogues from your team how to become a bard.

If you don't want to wait until you've raised your approval rating with Leliana or if you don't want to complete her quest you may decide to visit Alimar. This trader can be found in Orzammar and you'll have to go to his store located in Dust Town. If you can't find the book among the things he is selling try visiting him later on when he'll have a new set of items.

2) Ranger - This specialization can be unlocked very easily, because all you have to do is to purchase a certain book from a dwarven trader Bodahn. This person can be found in the campsite unlocked after your visit to Lothering, so thankfully you won't have to explore the world to locate him. If you can't find the book among the things he is selling try visiting him later on when he'll have a new set of items.

3) Assassin - There are two ways for you to unlock this specialization. One of the solutions will become available after Zevran has joined your team and you'll meet him in unusual circumstances. Start off by completing one of the main quests and you'll then witness a cut-scene informing you that Loghain has hired Antivan Crows. The next time you try to go to a different location you're going to be stopped by a woman asking for help. Once you've followed her you'll end up in a trap and being surrounded by the assassins lead by Zevran. Defeat all the hostiles to trigger a scene showing the main character standing next to unconscious Zevran. You must SPARE HIS LIFE and agree for him to join your team. Once he's on board start building your relationship by talking to him and giving him presents (I would recommend doing this will resting in the campsite). Zevran will agree to teach other rogues in your team how to become an assassin after you've earned enough approval points.

If you killed Zevran by mistake or if you don't want to develop any relationships with him you can choose an alternative solution and purchase a book from the elven trader Alarith. This person runs a store in the Elven alienage in Denerim and you should know that you won't be allowed to go there unless you've started Unrest in the alienage quest. Even then buying items from Alarith will only be possible after you've figured out what happened to the sick elves. If you can't find the book among the things he is selling try visiting him later on when he'll have a new set of items.
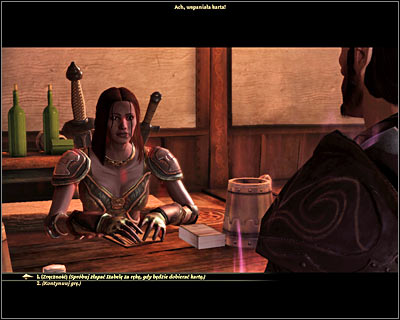
4) Duelist - You can unlock this specialization during your first visit to Denerim and it won't be tied to any quests. Open the city map and decide that you want to travel to a brothel called Pearl. Look around after your arrival and wait for a woman named Isabela to deal with a small group of hooligans. Talk to her once it's safe and ask her to teach you a few tricks. Isabela will respond that you'll have to beat her first, but you won't actually be playing. If you've sufficiently developed dexterity you'll be able to catch her cheating during the card game. If you can't make this happen return here after you've spent more points on that attribute.
MAGE

1) Blood mage - This is by far the most difficult specialization to unlock, mostly because you'll have to be playing as a mage to gain access to it. Otherwise it won't be possible, even if you have other mages in your team. Start off by completing the first part of Arl of Redcliffe main quest and save your game before deciding what to do with Connor. Inform the others that you want to defeat him in the Fade and pick yourself to travel to the Void to kill the demon (it can't be anyone else, even Jowan). After you've arrived in the Fade you'll have to step through a couple of portals and defeat several of Connor's demon forms. Eventually you'll initiate a final conversation with the demon and this is when you must agree to the situation being resolved peacefully. In exchange for allowing the demon to posses Connor again in the future you will be granted all the knowledge needed to unlock the blood mage specialization.

2) Arcane warrior - In this particular case you'll also be given only one way to unlock the specialization and this can be achieved while trying to complete Nature of the beast quest. Find a way to cross the magical barrier in the forest and start exploring the ruins. You'll have to make a stop when you've reached the lower level of the ruins (after exploring the upper level and prior to going to the lair). Explore the side corridors and eventually you'll find a phylactery in a dark area. Click on this object to trigger a subquest (Arcane warrior). Agree to help the being trapped inside the object and in return you'll acquire all of its knowledge. You can now hold on to your part of the deal or you can refuse to comply to its wish.
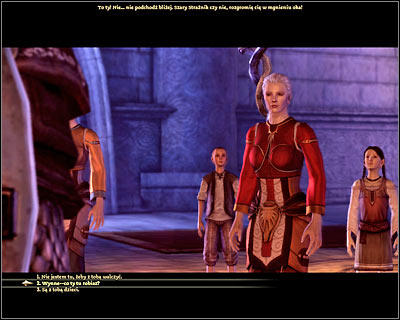
3) Spirit healer - There are two ways for you to unlock this specialization. One of the solutions will become available after Wynne has joined your team and this will occur at the beginning of the Broken circle quest (Wynne will join you in a small room located on the lowest level of the tower). It's important that you don't kill her during your time spent in the tower as a result of telling her that you're a blood mage or by letting her know that you plan on killing everyone you meet, including innocent mages. You'll also have to ask her to remain as a member of your team after you've successfully defeated the main boss at the top of the tower. Bear in mind that in this case scoring relationship points by talking to her and giving her presents won't be enough, because you'll also have to finish Wynne's quest by locating her first apprentice. Once this is done she'll agree to teach other mages in your team how to become a spirit healer.
If you don't want to wait until you've raised your approval rating with Wynne or if you don't want to complete her quest you may decide to visit the owner of Wonders of Thedas store located in the market district in Denerim. If you can't find the book among the things he is selling try visiting him later on when he'll have a new set of items.

4) Shapeshifter - There are two ways for you to unlock this specialization. One of the solutions will become available after Morrigan has joined your team and this will occur as soon as you've finished Tower of Ishal quest (last one in Ostagar and prior to heading on to Lothering). Start building your relationship by talking to Morrigan and giving her presents (I would recommend doing this will resting in the campsite). The witch will agree to teach other mages in your team how to become a shapeshifter after you've earned enough approval points.
If you don't want to wait until you've raised your approval rating with Morrigan you can ask the elven smithy Varathorn for help. You can find him by travelling to the Dalish camp located next to the Brecilian forest (this is also a part of Nature of the beast quest).
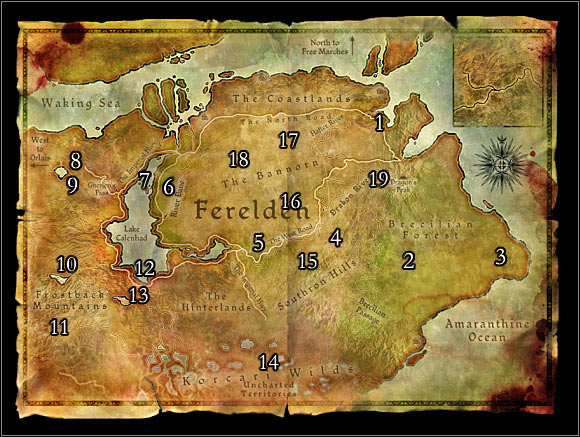
Locations on the map:
1 - Denerim
2 - Brecilian forest
3 - Brecilian ruins
4 - Brecilian outskirts (Dalish camp)
5 - Lothering
6 - Lake Calenhad docks
7 - The Circle tower
8 - Frostback mountains
9 - Orzammar
10 - Haven village
11 - Ruined temple
12 - Redcliffe castle
13 - Redcliffe
14 - Flemeth's hut
15 - Caravan
16 - Refugees
17 - Battlefield
18 - Civil war
19 - Kadan-Fe hideout

Locations on the map:
1 - Market district
2 - Arl of Redcliffe estate
3 - Elven alienage
4 - Pearl
5 - Dirty back alley
6 - Dark alley
7 - Run-down back alley
8 - Arl of Denerim's estate
9 - Royal palace
10 - Fort Drakon
11 - Abandoned building
12 - City gates
13 - Palace district
14 - Western hill bann's estate
15 - K's hideout
16 - Ransom drop location

Locations on the map:
1 - Orzammar
2 - Aeducan thaig
3 - Caridin's cross
4 - Ortan thaig
5 - The dead trenches
6 - Anvil of the Void
Red color was used to show the locations of traders on the map.
Green color was used to mark the locations of valuable items. The S letter means that you can find a special kind of treasure (most chests contain useless things) and the P letter means that you can find a present for one of your teammates. Make sure to skip to the chapter named Followers and to a section named Presents to find out more about finding and offering gifts.
White color was used to:
1 - inform about important areas
2 - tell the locations of the representatives of different guilds: B stands for Blackstone irregulars, M stands for Mages' collective, C stand for Chanter's board and F stands for Favors.
Orange exclamation marks warn about areas where it can get more difficult because of the presence of monsters or because of the existence of traps. Red exclamation marks warn about even more hazardous areas where you may end up getting killed easily unless you're prepared to go into battle. Note that these warning don't necessarily apply to your first visit in a location, because they may tell about future events. For example, the area around Ishal tower in Ostagar will become dangerous only when you've became a Grey Warden.
The description of each set of maps can be found in a section called Area description and you can find out about:
1) Areas of interest
2) locations of the representatives of different Guilds
3) places where you can go Shopping
4) areas with new members waiting to join your Team
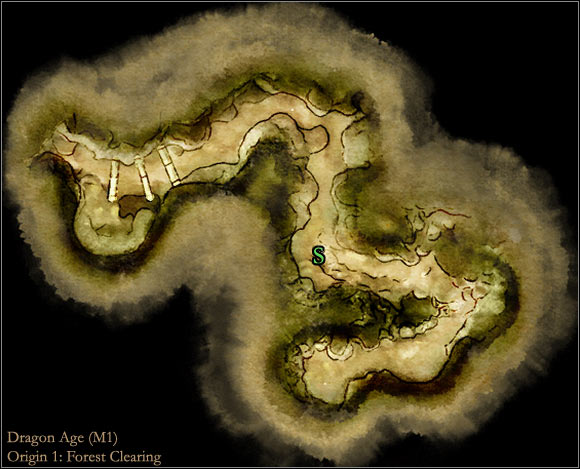
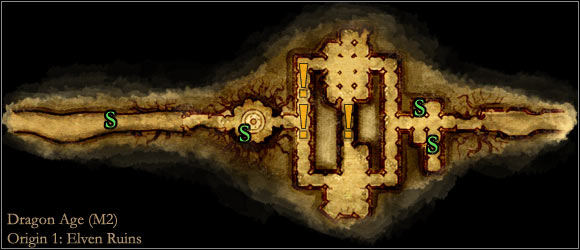
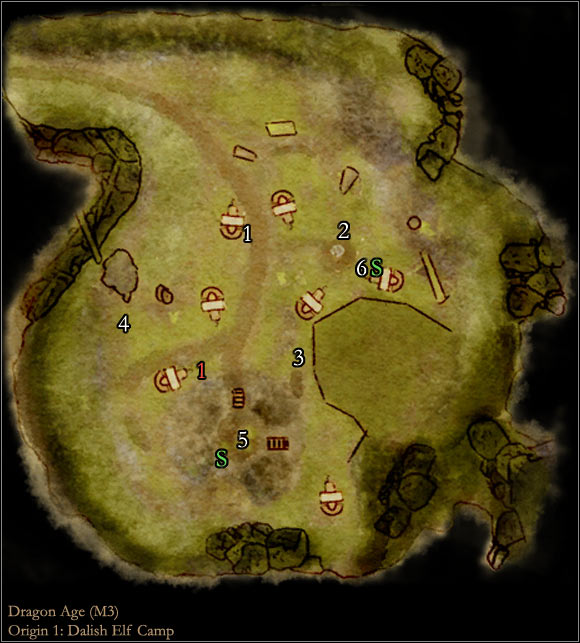
AREAS OF INTEREST
- Fenarel found in [Dalish elf camp - Children Aravel] (M3, 1) will ask you if he can join your team for the purpose of the second main quest. If you agree to his proposal you'll have to ask Keeper Marethari for permission. If you don't want to ask her you can also lie (persuasion) or rely on intimidation during the mandatory conversation with Merrill.
- Paivel [Dalish elf camp - Campsite] (M3, 2) will ask you to assist him in telling the elven children a story of Dalia's fall. You can also tell him about losing track of Tamlen in the ruins.
- You can talk to Maren [Dalish elf camp - Halla's enclosure] (M3, 3) about the animals she's taking care of.
- Ilen [Dalish elf camp - Archers Aravel] (M3, 1) can give you a bow for free assuming that you've managed to persuade him.
- If you decide to talk to Junar found in the western section of the camp (M3, 4) you'll be introduced to Pol and you would be allowed to ask him a lot of questions about how is it to live in other areas of Ferelden.
![- Ashalle can be found in the southern section of [Dalish elf camp] (M3, 5) and if you manage to pass a persuasion attempt you'll convince the elven woman to tell you a story about how your parents were killed - World Atlas - Maps - Main areas - Origin 1: Dalish elf - World Atlas - Maps - Main areas - Dragon Age: Origins - Game Guide and Walkthrough](https://game.lhg100.com/Article/UploadFiles/201512/2015121518291949.jpg)
- Ashalle can be found in the southern section of [Dalish elf camp] (M3, 5) and if you manage to pass a persuasion attempt you'll convince the elven woman to tell you a story about how your parents were killed. She'll also give you a key at the end of conversation. Once you have this item in your inventory go to [Dalish elf camp - Warehouse Aravel] and use it to open one of the crates (M3, 6). You can now collect an ancestral shield and an ancestral necklace.
SHOPPING
- Ilen [Dalish elf camp - Archers Aravel] (M3, 1)

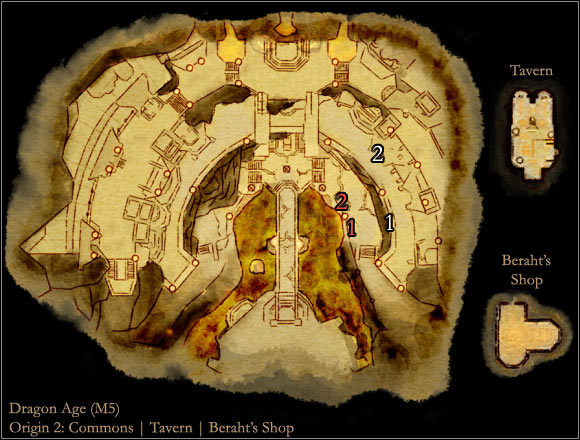

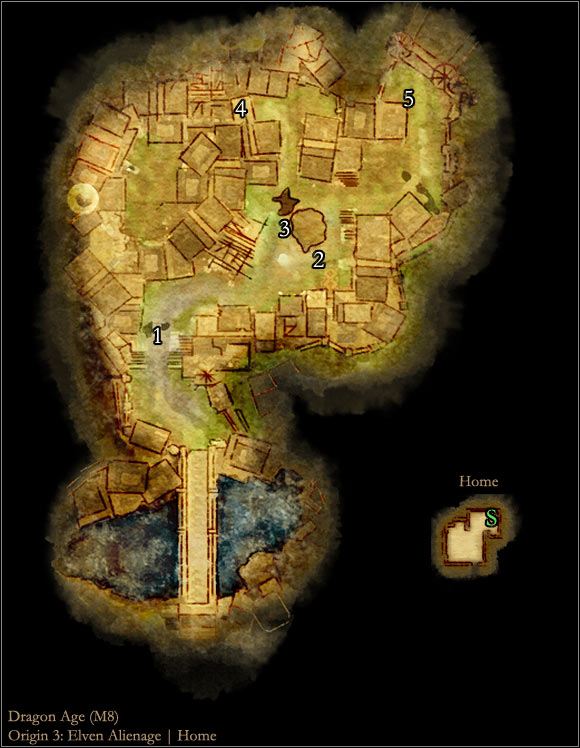
AREAS OF INTEREST
- You'll meet a beggar named Goilinar in [Orzammar - Commons - Dust town] (M4, 1) and he'll ask you for a few coins. He can tell you where Oskias can be found after giving him coins or after intimidating him.
- Kasch [Orzammar - Commons] (M5, 1) will have an interesting offer for you, because he'll want to buy your teeth. Sadly the transaction will never be closed.
- Unna [Orzammar - Commons] (M5, 2) can tell you some interesting things about the shapers (you can't visit them until you've officially returned to Orzammar later in the game).
- You can talk to a Grey Warden named Duncan long before this prologue has ended. He will be standing in front of the entrance to [Orzammar - Proving grounds] (M6, 1).
SHOPPING
- Olinda [Orzammar - Commons] (M5, 1)
- Ademaro [Orzammar - Commons] (M5, 2)
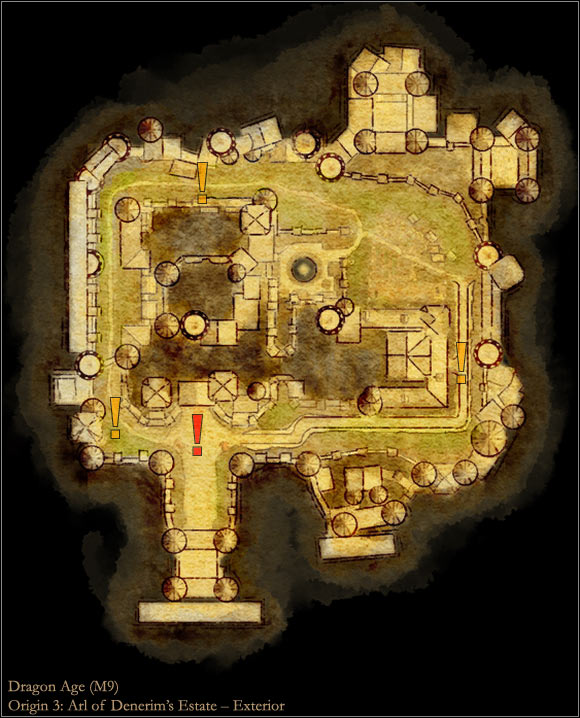
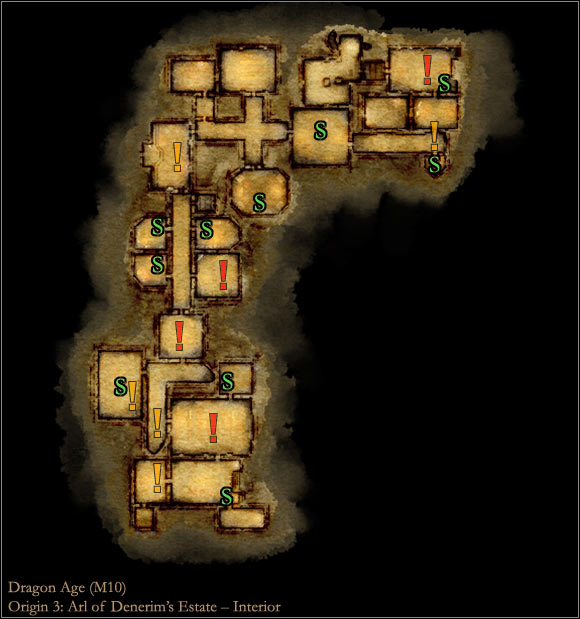
AREAS OF INTEREST
- During your time spent in [Denerim - Elven alienage] and prior to starting the wedding ceremony you can talk to a group of drunk elves found near the barricade (M8, 1). If you remind them about your upcoming wedding they'll give you 30 coins as a gift (or 40 coins if you decide to use persuasion).
- During your time spent in [Denerim - Elven alienage] and prior to starting the wedding ceremony you can talk to Dilwyn and Gethon (M8, 2). They are also here for your wedding and therefore they'll give you 15 silver coins as a gift.
![- During your time spent in [Denerim - Elven alienage] and prior to starting the wedding ceremony you can talk to Nessa's father (M8, 3) - World Atlas - Maps - Main areas - Origin 3: City elf - World Atlas - Maps - Main areas - Dragon Age: Origins - Game Guide and Walkthrough](https://game.lhg100.com/Article/UploadFiles/201512/2015121518292093.jpg)
- During your time spent in [Denerim - Elven alienage] and prior to starting the wedding ceremony you can talk to Nessa's father (M8, 3). During the conversation you'll find out that the elven family is low on cash and therefore is forced to leave the alienage. Your offer of providing help is going to be dismissed by the elf, however Nessa will want to talk to you alone. There are four ways of ending this miniquest:
1) you can agree to talk to her father again and you would have to convince him using persuasion that Nessa should remain in the alienage with the main character's father
2) you can refuse to help Nessa and her parents
3) you can give Nessa 3 silver coins so that her family can move to Highever
4) you can give Nessa 10 silver coins so that her family can stay in Denerim
- Elven kids will be playing in one of the alleys of [Denerim - Elven alienage] (M8, 4) and you can tell them a fake story so that they can think of a new game.
- There's a beggar near the main gate leading out of [Denerim - Elven alienage] (M8, 5). You can offer him a few coins and in return he'll tell you his sad story.
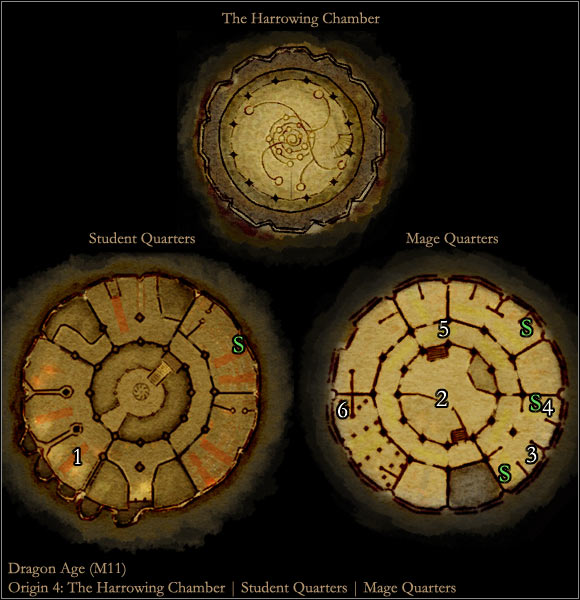
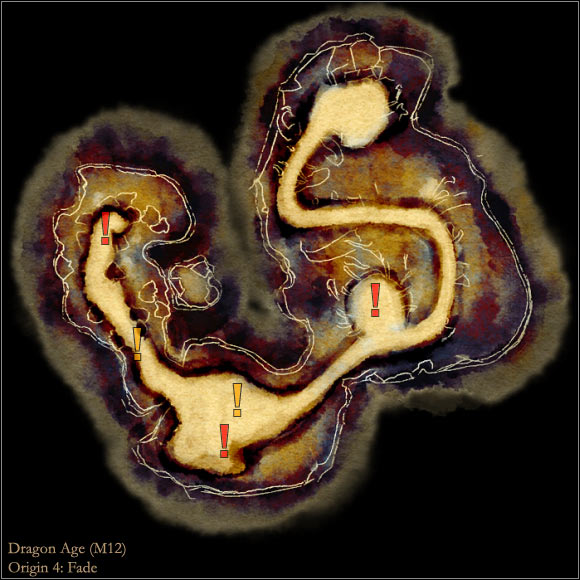
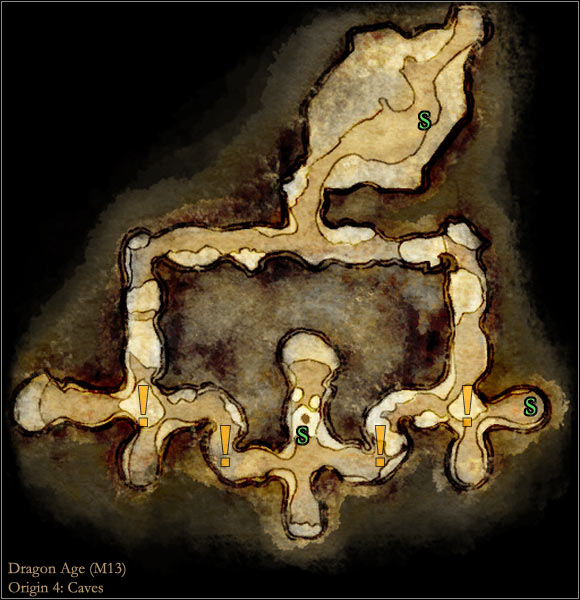
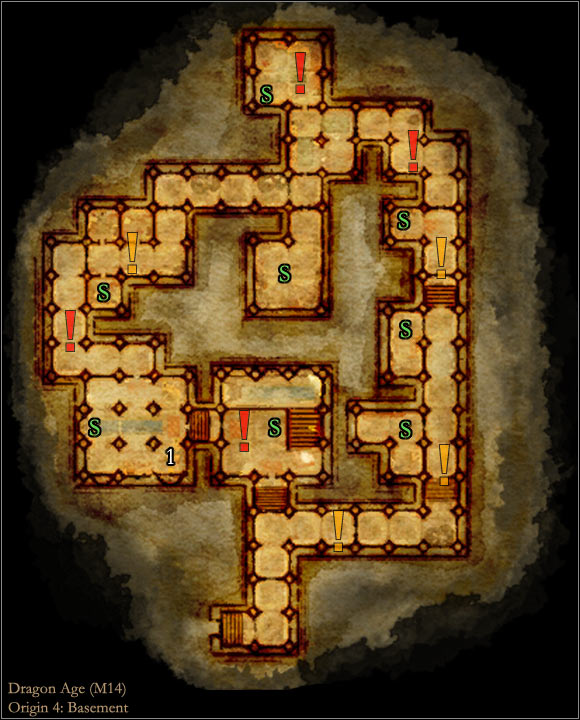
AREAS OF INTEREST
- Make sure to click on every chest, bookshelf, document and statue during your time spent in the tower. Most of these activities will be rewarded with small amounts of experience points and your journal will receive new entries.
- If you go to the library located in [The Circle tower - Student quarters] (M11, 1) you can witness mages giving lessons and even two of them having a sparring match.
- Owain found in [The Circle tower - Mage quarters] (M11, 2) can share the information on certain groups of mages.
- During your conversation with Eadric [The Circle tower - Mage quarters] (M11, 3) you'll be rewarded with additional dialogue options, but only if you're playing as an elf.
- Elder Enchanter Torrin and Niall found in [The Circle tower - Mage quarters] (M11, 4) can share the information on the brotherhood of the enchanters.
- If you're playing as a female character you may have an interesting conversation with Cullen [The Circle tower - Mage quarters] (M11, 5), forcing him to leave the area he was assigned to guard.
- Keili can be found in the chapel area in [The Circle tower - Mage quarters] (M11, 6) and you can talk to her about the Maker and about the possibility of losing all magical abilities.
- During your time spent in [The Circle tower - Basement] you'll encounter a living being that was turned into a stone statue (M14, 1). You can talk to this person, but you can't reverse the spell. The statue can be found in the exact same room where you have to destroy a section of the wall.
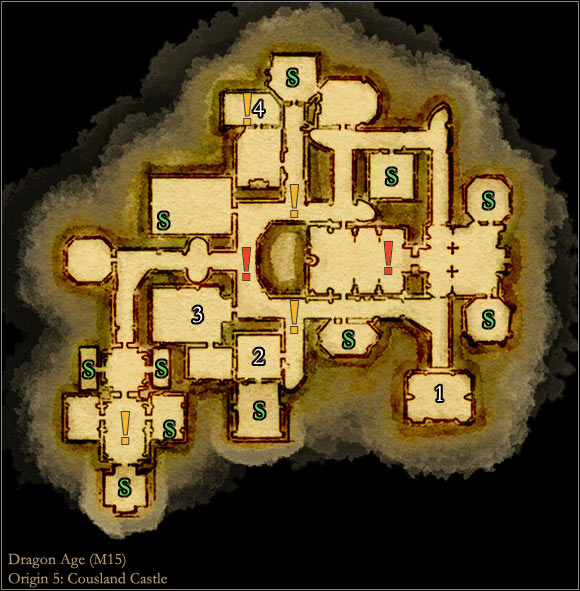
AREAS OF INTEREST
- Mother Mallol can be found in [Cousland castle - Chapel] (M15, 1) and you can pray with her, asking the Maker for a blessing.
- If you go to [Cousland castle - Guard checkpoint] (M15, 2) you'll see that two of the guards are playing cards instead of guarding the vault. You can allow them to keep playing or you can order them to get back to work.
- Aldous found in [Cousland castle - Library] (M15, 3) will ask you to assist him in giving a lesson to young squires. You can agree to his proposal and while telling the story you can also trigger a new dialogue option assuming you have high cunning skill. After you've discovered interesting things from your past Aldous will fall asleep and you'll be allowed to continue exploring the castle.
TEAM
- Your faithful mabari hound can be found in [Cousland castle - Pantry] (M15, 4) and it will automatically join your team after starting Chaos in the pantry quest.
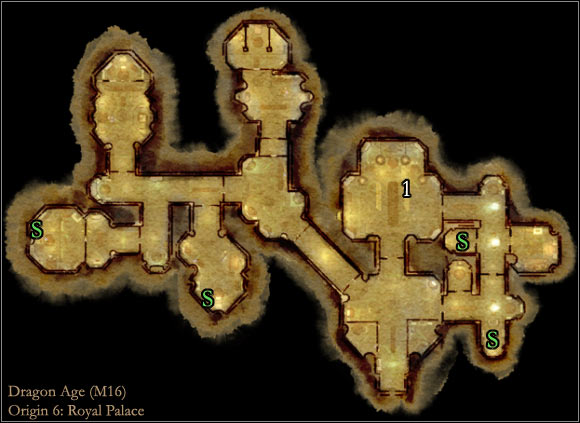

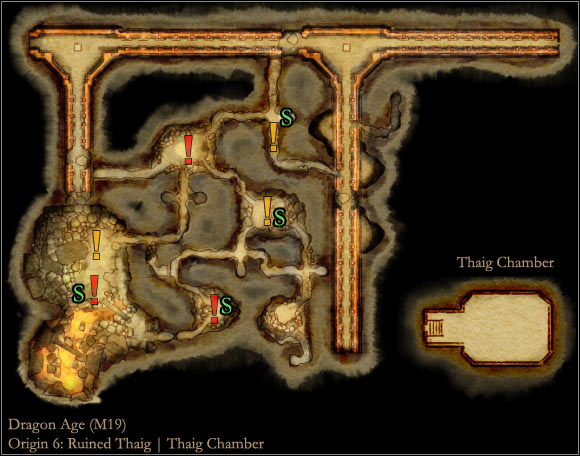
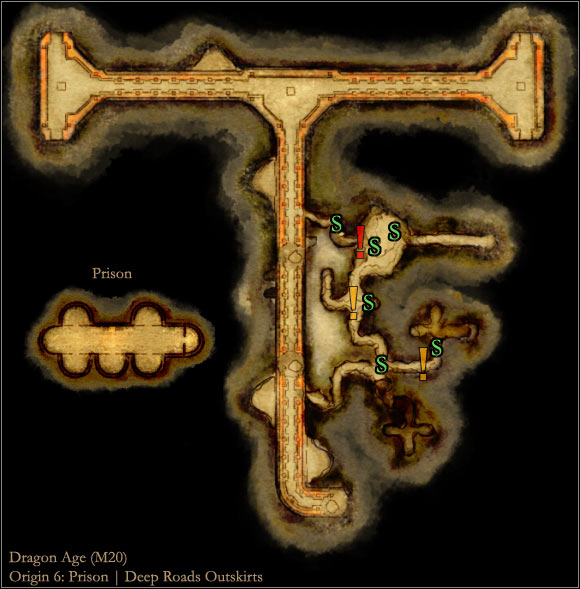
AREAS OF INTEREST
![- As soon as you've arrived in [Orzammar - Diamond quarter] explore the area near the main entrance to the palace and you'll meet two dwarves - Bruntin Vollney and Scholar Gertek (M17, 1) - World Atlas - Maps - Main areas - Origin 6: Dwarf noble - World Atlas - Maps - Main areas - Dragon Age: Origins - Game Guide and Walkthrough](https://game.lhg100.com/Article/UploadFiles/201512/2015121518292108.jpg)
- As soon as you've arrived in [Orzammar - Diamond quarter] explore the area near the main entrance to the palace and you'll meet two dwarves - Bruntin Vollney and Scholar Gertek (M17, 1). Approach them and it won't take long until you scoop the problem. It turns out that Gertek wrote a book that shows the negative side of a founder of Vollney's house. If you plan on siding with Gertek you can be more or less subtle while talking to Bruntin and you can even ask your buddy Gorim to kill him (it can be a public execution or a stealth kill away from crowded areas). You would then have to talk to Gertek and in return he would give you a precious book or coins. If you plan on siding with Bruntin you can allow him to kill the scholar, you can scare the scholar away, you can force Gertek to not publish his book or you can convince the scholar to change the overall shape of the book (best way to solve this dilemma).
- Mardy and Teli found in [Orzammar - Diamond quarter] (M17, 2) are known as women "hunting" for noble dwarves. You can ask only Mardy or you can ask both women to join you in your bedroom.
- A weapon merchant is offering items for sale in [Orzammar - Diamond quarter] (M17, 3) and during your initial conversation with him you'll find out that he has an interesting proposition. He'll offer to give you a noble dagger for free, but in exchange he'll want everyone to know that it was a gift from him. You can agree to his proposal, you can dismiss his offer and you can even treat this as an insult and order Gorim to execute him.
- You can talk to Duncan (he's one of the Grey Wardens) even before the ceremony has officially begun. He can be found inside a throne room in [Orzammar - Diamond Quarter - Royal Palace] (M16, 1).
SHOPPING
- Silk merchant [Orzammar - Diamond quarter] (M17, 1)
- Armourer [Orzammar - Diamond quarter] (M17, 2)

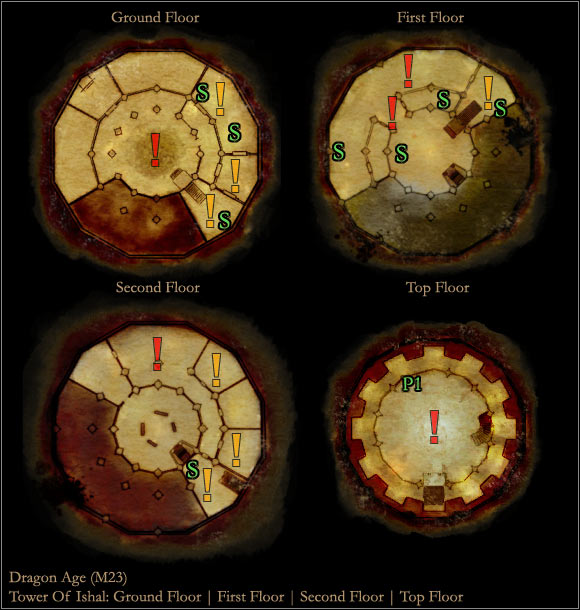
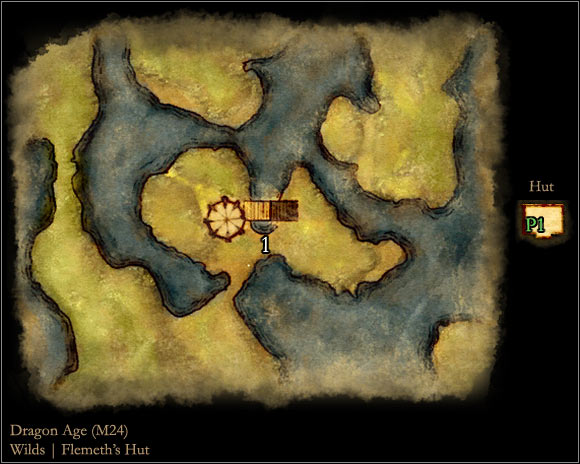
AREAS OF INTEREST
- A royal guardsman will be standing next to king Cailan's tent in [Ostagar] (M21, 1) and you can use persuasion to convince him to tell you interesting anecdotes about the king.
- Loghain's guardsman will be standing next to Loghain's tent in [Ostagar] (M21, 2) and once again you'll have a chance to use persuasion. In this case not only you can receive additional info on Loghain but you can even be granted an audience with him.
- A priestess found in [Ostagar] (M21, 3) can give you a blessing.
- Duncan will tell you that you're not the only person trying to become a Grey Warden. Two other candidates are Jory (M21, 4) and Daveth (M21, 5) and they can both be found in different areas of [Ostagar].
- Leader of the ash warriors can be found next to the dog kennels in [Ostagar] (M21, 6) and he can share the information on his clan if you're willing to hear his story.
- Wynne (M21, 7) can explain what Fade is and she can talk about the Black City.
- The Silent One (M21, 8) is a valuable source for information when it comes to enchanting items.
- During your time spent in the wilds explore a large clearing located to the south of the starting area and you should be able to encounter a dying soldier (M22, 1). Naturally you'll be allowed to choose how to respond to this situation - you can heal him yourself, ask Alistair for assistance or finish him off, knowing that he wouldn't make it anyway. Be careful, because if you choose to eliminate him you'll only make Alistair angry at you.
![- Check the area near the wooden bridge found in [Korcari wilds] (it's the same area where you had to defeat a hurlock emissary) - World Atlas - Maps - Main areas - Ostagar and Korcari wilds - World Atlas - Maps - Main areas - Dragon Age: Origins - Game Guide and Walkthrough](https://game.lhg100.com/Article/UploadFiles/201512/2015121518292222.jpg)
- Check the area near the wooden bridge found in [Korcari wilds] (it's the same area where you had to defeat a hurlock emissary). Locate a dead soldier (M22, 2) and check his body to find two items - a pouch of ashes and a fragment of a book explaining local myths and legends.
Once the pouch is in your possession travel north but remain close to the river bank. Find a pile of rocks (M22, 3), click on it and confirm that you want to open the pouch. Doing this will result in a powerful creature called Gazarath appearing nearby. If you do manage to slay this beast check its remains and pick up Enchanter's footing (unique mage boots).
TEAM
- Alistair can be found in [Ostagar] (M21, 9) and he will automatically join you once you've started one of the main quests - Joining the Grey Wardens. Notice that he will remain in your team, even though two other participants of the journey to the wilds (Jory and Daveth) won't.
- Morrigan will join the team after you've finished the last quest in [Ostagar] - Tower of Ishal. To be more precise - she'll be asked by her mother in [Flemeth's hut] (M24, 1) to set off on a new journey along your side.
SHOPPING
- Quartermaster [Ostagar] (M21, 1) - he's offering two types of goods - official and smuggled
AREAS OF INTEREST
![- You'll encounter a group of people while exploring southern areas of [Lothering] (M25, 1) and you'll discover that a Merchant is having an argument with the refugees demanding to lower prices on all of his wares - World Atlas - Maps - Main areas - Lothering - World Atlas - Maps - Main areas - Dragon Age: Origins - Game Guide and Walkthrough](https://game.lhg100.com/Article/UploadFiles/201512/2015121518292314.jpg)
- You'll encounter a group of people while exploring southern areas of [Lothering] (M25, 1) and you'll discover that a Merchant is having an argument with the refugees demanding to lower prices on all of his wares. There are a few ways how this can end:
1) You can force the refugees to leave the Merchant alone and he would reward you with 100 silver coins. In addition you can ask him to lower his prices only for you.
2) You can force the Merchant to leave Lothering or you can kill him. I wouldn't recommend doing this, because you won't gain any rewards and you'll lose a potential business partner.
3) You can use persuasion and convince the Merchant that he should lower his prices (for everyone).
4) You can use intimidation and force the Merchant to lower his prices (for everyone).
If you choose endings 3 or 4 he'll remain in Lothering, but you'll lose a chance of receiving a reward from him.
- A Doomsayer will stop you near the entrance to [Lothering - Chantry] (M25, 2). You can respond to his accusations, ignore him, listen to his sad story, convince him that he should leave peacefully or use intimidation/persuasion. In addition you'll have a chance to affect some of the townsfolk - you can assure them that everything is going to be all right, scare them away or even demand that they should hand over all their valuables in exchange for a promise of a safe future.
- Sir Donall can be found in [Lothering - Chantry] (M25, 3) and he'll inform you about arl Eamon's illness and you'll also find out that some believe the urn of sacred ashes to be the only cure.
![- Sir Bryant can be found inside [Lothering - Chantry] (M25, 4) and during your initial conversation with him you can mention the bandits you've met on the bridge - World Atlas - Maps - Main areas - Lothering - World Atlas - Maps - Main areas - Dragon Age: Origins - Game Guide and Walkthrough](https://game.lhg100.com/Article/UploadFiles/201512/2015121518292308.jpg)
- Sir Bryant can be found inside [Lothering - Chantry] (M25, 4) and during your initial conversation with him you can mention the bandits you've met on the bridge. Naturally you'll have several options on what to do next and a lot will depend on whether you've granted yourself a one-time passage or scared them away for good. The best solution is to announce their defeat or their escape, because you would receive a reward after your story has been checked out (use persuasion to demand additional help). Bryant will give you a key. use this object to open a small locker found in the western section of the chantry and collect medical supplies before leaving the area.
- You can ask the Revered Mother found in [Lothering - Chantry] (M25, 5) for a blessing, but you'll have to offer at least 30 silver coins to receive it.

- Be careful while exploring the area to the north-west of the village, because you're going to be stopped by a group of refugees (M25, 6) and they'll want to kill you hoping to receive a reward for your head. As soon as the battle has started head south to encourage only some of them to chase after you and to avoid getting too close to bandits found in the same area.
- Check the area near the northern exit from [Lothering] (M25, 9) and you should be able to find a body of a blood mage. Examine the body to collect a sealed letter and to find out about the existence of a secret stash in the Circle tower.
- [Lothering] is going to be destroyed by the Plague later on in the game, so it would be a good idea to complete all the missions tied to this village before finishing any of the main quests of the game (Lothering and the imperial highway is the only exception).
TEAM
![- As soon as you've entered [Lothering - Dane's refuge] (M25, 7) you're going to be stopped by a group of Loghain's men - World Atlas - Maps - Main areas - Lothering - World Atlas - Maps - Main areas - Dragon Age: Origins - Game Guide and Walkthrough](https://game.lhg100.com/Article/UploadFiles/201512/2015121518292380.jpg)
- As soon as you've entered [Lothering - Dane's refuge] (M25, 7) you're going to be stopped by a group of Loghain's men. You won't be able to talk your way out of this one, so sooner or later you'll have to engage them in combat. Focus only on attacking their leader, because once he's lost enough health points the battle is going to be stopped and you'll have to choose between finishing off the soldiers and letting them go (right away or after passing on a message to Loghain). You'll now a have a chance to talk to Leliana and she'll want to join your team.
- The second person you'll be allowed to add to your ranks is a qunari named Sten (M25, 8). If you don't possess proper skills to pick the lock on his cage you'll have to solve a short subquest - The imprisoned qunari.
SHOPPING
- Merchant [Lothering] (M25, 1) - only if you didn't kill or scare him away
- Barlin [Lothering - Dane's refuge] (M25, 2)
GUILDS
- Blackstone irregulars [Lothering - Dane's refuge] (M25, B)
- Chanter's board [Lothering] (M25, C)
AREAS OF INTEREST
- Talk to Bodahn during your first visit to the [Campsite] (M26, 1). Aside from allowing him to stay in the camp and to trade items you can also use persuasion to convince him to tell you his story.
- Each time you've managed to complete one of the main quests involving the Plague a member of a race or a fraction you've helped will appear in your campsite. Each representative will take gifts from you in exchange for experience points. Sadly you won't be allowed to give away the items you choose, because these people will be very specific on what they need. You can give gold to Redcliffe soldiers, different kinds of herbs to elves, nugs to werewolves (don't forget to complete a quest involving these creatures in Orzammar!), runes to mages and specific types of jewels to dwarves. Each time you want to offer something click on a chest and choose a correct option from the list of actions.
- If you intend to have a mabari in your team you should consider allowing the dog to mark its territory to express its dominance. Doing this will increase offensive and defensive parameters of the hound in the area. Each time you plan on marking the area choose the dog and click on an interactive element of the environment. Here's a list of territories you can mark during your journeys: Ostagar (pile of wood), Lothering (tree), Redcliffe (tree), Redcliffe castle (tree in the courtyard), Lake Calenhad docks (boat), Dalish elf camp (Zathrian's tent), Western Brecilian forest (tree), Eastern Brecilian forest (Hermit's tent), Denerim (wagon in the market district and tree in the alienage).
- During your journeys you may encounter a group of half-witted bandits and you'll start off by listening to their conversation while hiding in a bush. Don't stay hidden too long, because your position would be compromised. I also wouldn't recommend attacking them without making any preparations. Instead take them by surprise or escape the camp without attacking anyone. If you decide to choose a peaceful outcome keep heading to the exit while staying away from enemy units. Watch out for traps found along the way!
- You may encounter a large crater and you'll see a cut-scene showing an older couple finding Clar... a child. :-) Examine the crater to find a meteorite. Don't sell this item to any of the vendors, because you'll be able to use it in Warden's Keep DLC.
- If you've stolen something from one of the elves during your stay in [Dalish elf camp] you may be attacked by a mercenary Melora later in the game and the only solution will be to defeat all the hostiles. A similar situation will occur after stealing from templars during your visit to [The Circle tower]. In this case after you've left the tower you may be stopped by a templar. Thankfully fighting him won't be the only option, because you will be allowed to pay a fee for all the items you stole.
- Later in the game you'll witness Wynne passing out in a middle of the battle and you'll be allowed to find out about her true condition after you've returned to the camp. Not long after that you'll encounter an extremely powerful opponent and Wynne will use her magic to save the team from certain death. Defeat the beast (Omega hurlock) with her help in order to move on with the game.

- Approximately in the middle of the game you'll see a vision featuring the archdemon and soon after that your campsite is going to be attacked by the monsters. Ignore the fact that you won't be allowed to issue commands to any of your followers, because they'll kill all the beasts without your help.
TEAM
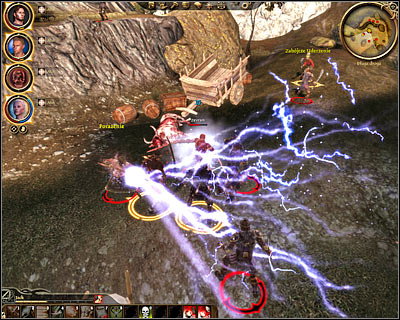
- After you've successfully completed at least one main quest tied to the Plague (the ones you receive after leaving Lothering) you'll witness a cut-scene informing you that Loghain has hired Antivan Crows. The next time you try to go to a different location you're going to be stopped by a woman asking for help. Once you've followed her to a small campsite you'll end up in a trap (M26, 1) and being surrounded by assassins lead by Zevran.
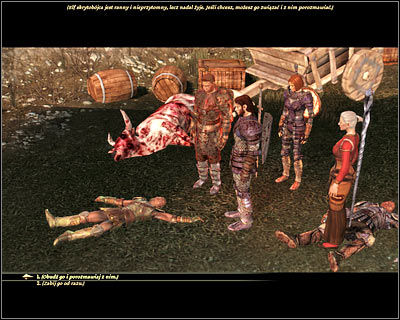
Once you've eliminated some of the closest targets focus on securing two nearby hills (M26, 2). Be careful, because passageways leading to both hills will contain deadly traps. Defeat all the hostiles to trigger a scene showing the main character standing next to unconscious Zevran. You can spare his life and then you can agree for him to join your team. If you kill Zevran or leave this area without waking him up you'll lose your only chance of him becoming a follower!
- If you haven't decided to become a human noble you won't have a mabari hound at your side right from the beginning of the game. Instead you'll have to wait for a chance to add the dog to your team. Before you leave [Ostagar] make sure to complete The mabari hound quest and you'll meet the dog while travelling to [Lothering].
SHOPPING
- Bodahn [Campsite] (M26, 1)
- Old Tegrin [Ferelden] - you can meet this person as a result of a random encounter
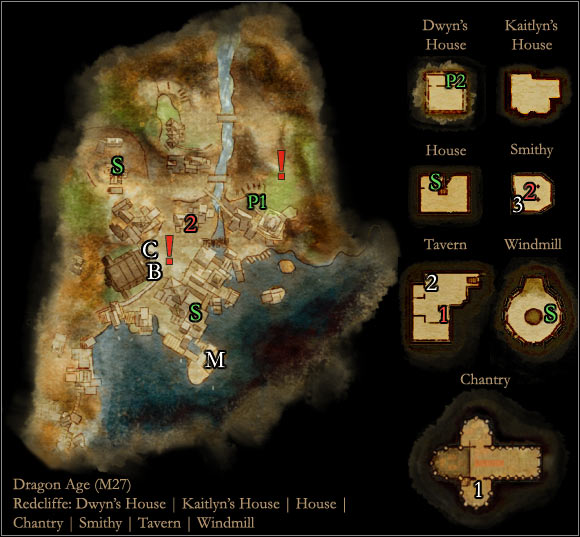
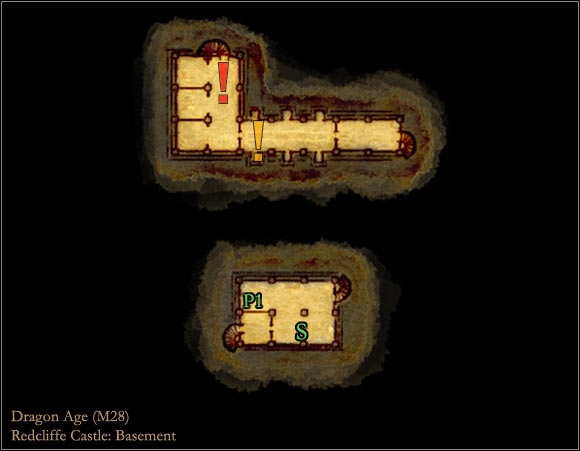
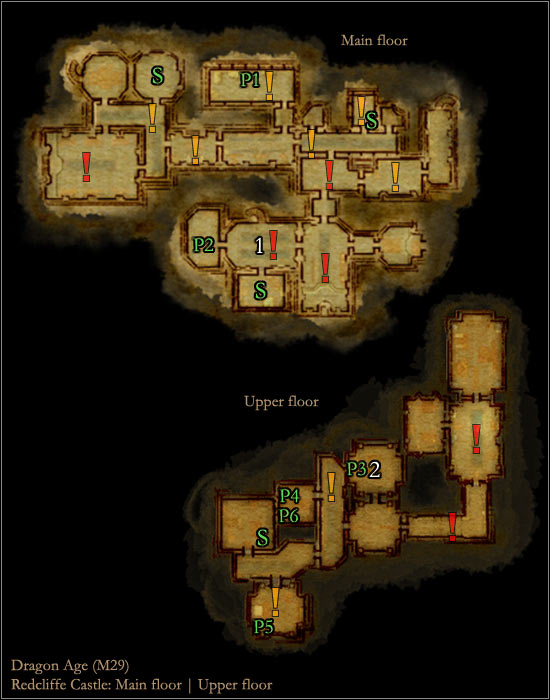

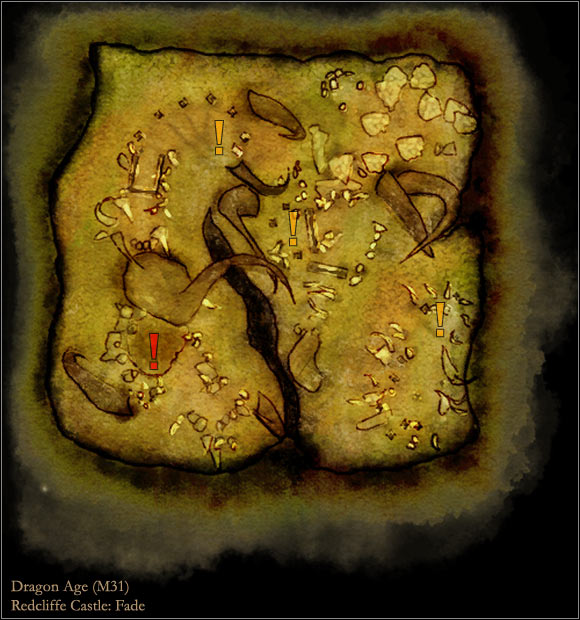
AREAS OF INTEREST
- Mother Hannah can be found in [Redcliffe - Chantry] (M27, 1) and she can give you a free blessing.
- Berwick can be found in [Redcliffe - Tavern] (M27, 2) and there are a few ways to blow his cover and to find out that he is one of Loghain's many spies. You can force him to tell you the real reason of staying in Redcliffe by using persuasion/intimidation or you can have Leliana in your team and hope that she'll recognize the spy. If everything else fails you can also try talking to Lloyd (or Bella) and asking the person in charge of the tavern about Berwick. Once he's confirmed that he's working for Loghain he'll give you a letter and you'll be allowed to order him to join the rest of the villagers to prepare for the upcoming battle.
- After you found a way to enter [Redcliffe - Smithy] click on a chest found to the right of the entrance (M27, 3) to uncover Owen's hidden cache. Assuming that you've agreed to rescue Owen's daughter he will open the stash, allowing you to collect weapons and armor pieces.
- Notice that you won't gain access to some of the quests and NPC's until you've successfully defended the village from the invasion of the undead.
- During your first visit to the castle and prior to resolving the situation with Connor you should kill the possessed chamberlain found in [Redcliffe Castle - Main floor] (M29, 1). Check his body after the battle to collect a vault key. You can now travel to [Redcliffe castle - Upper floor]. The key can be used to open one of the northern rooms (M29, 2). As suspected, it's going to be a vault filled with a lot of useful and expensive items.
SHOPPING
- Lloyd [Redcliffe - Tavern] (M27, 1) - if you convince him to join the defenders he's going to be replaced by Bella [Redcliffe - Tavern]
- Owen [Redcliffe - Smithy] (M27, 2) - he'll sell you goods only if you agree to rescue his daughter (Lost in the castle quest)
GUILDS
- Blackstone irregulars [Redcliffe] (M27, B)
- Chanter's board [Redcliffe] (M27, C)
- Mages' collective [Redcliffe] (M27, M)
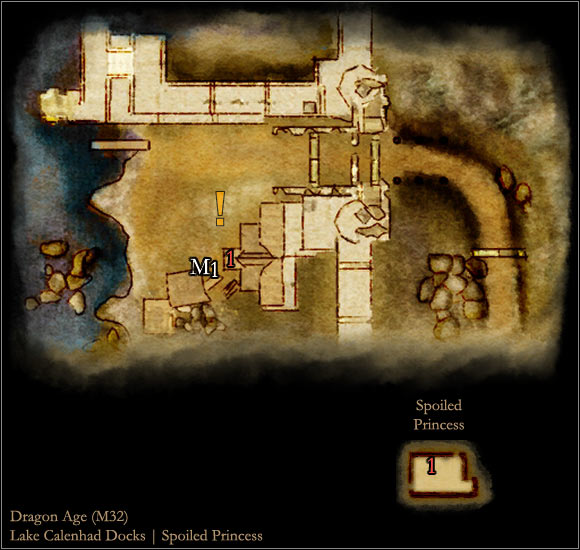
AREAS OF INTEREST
- Kester (M32, 1) can tell you that it's not easy to gain access to the tower, but he won't help you to get inside.
SHOPPING
- Innkeeper [Lake Calenhad docks - Spoiled princess] (M32, 1) - the tavern is not marked on your map, but all you have to do to get inside is to click on the door
GUILD
- Mages' collective [Lake Calenhad docks] (M32, M)
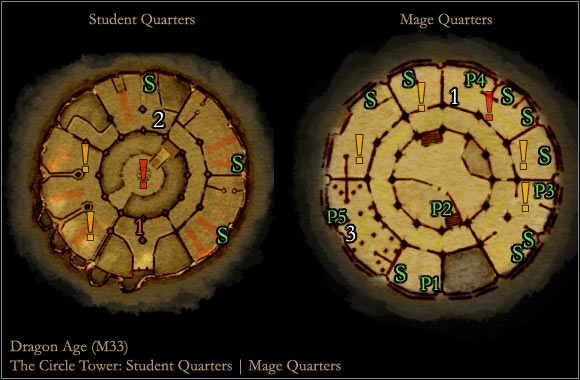
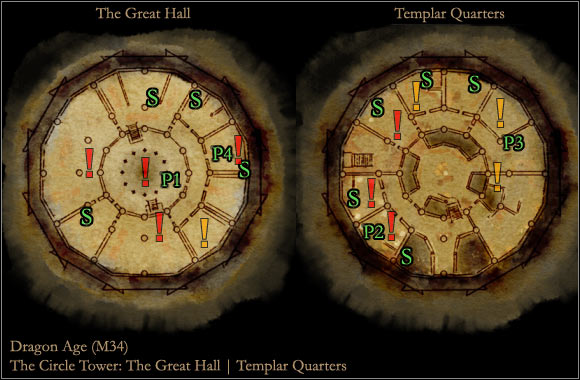
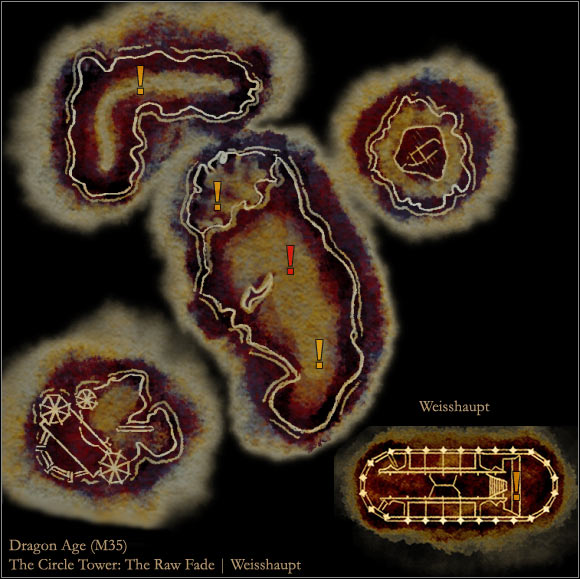
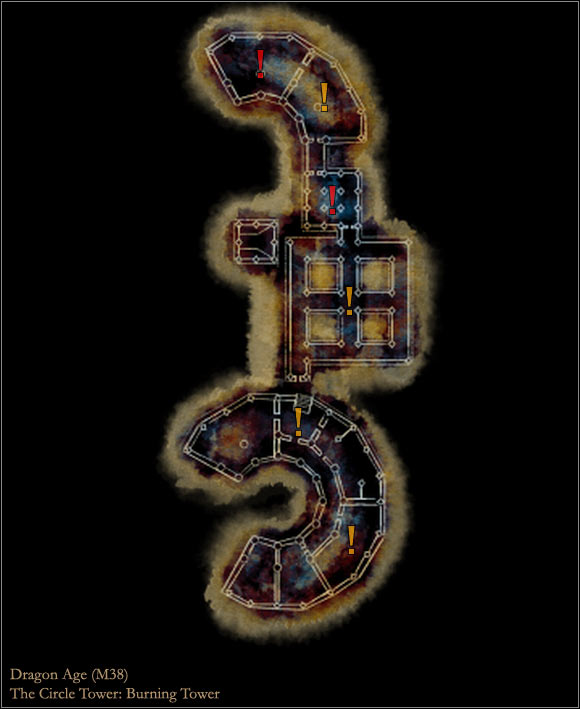
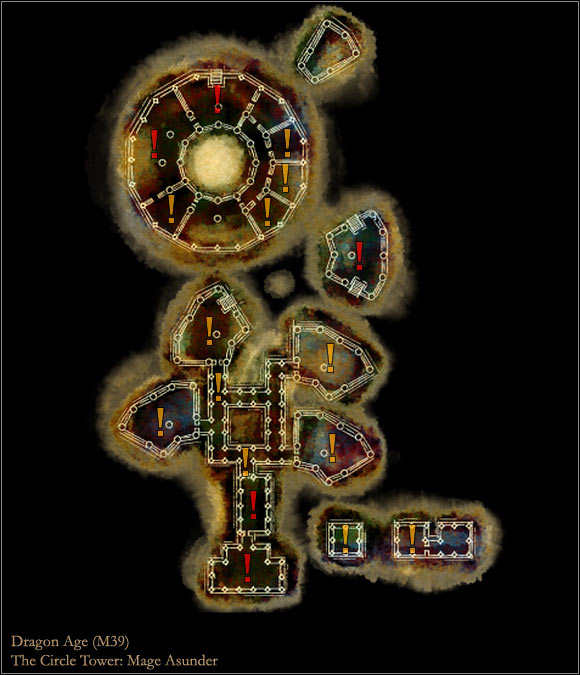

AREAS OF INTEREST
- You should be able to find a large closet in one of the rooms in [The Circle tower - Mage quarters] (M33, 1). Eliminate all nearby monsters and then click on the closet so that you'll have a chance to meet a cowardly mage Godwin.
- Click on a destroyed statue found in [The Circle tower - Mage quarters] (M33, 3). You're going to be attacked by a very powerful revenant if you decide to take a vial.
TEAM
- Wynne will stop you once you've entered one of the larger rooms in [The Circle tower - Student quarters] (M33, 2). Make sure not to upset her by telling her that you plan on killing everyone found inside the tower. Instead agree to her offer to join your team. She'll ask you if she can become a permanent member after you've defeated the main boss at the top of the tower.
SHOPPING
- Quartermaster [The Circle tower - Student quarters] (M33, 1) - make sure to buy all the things you need BEFORE you enter the tower for the first time, because you won't be allowed to return him until you've defeated Uldred


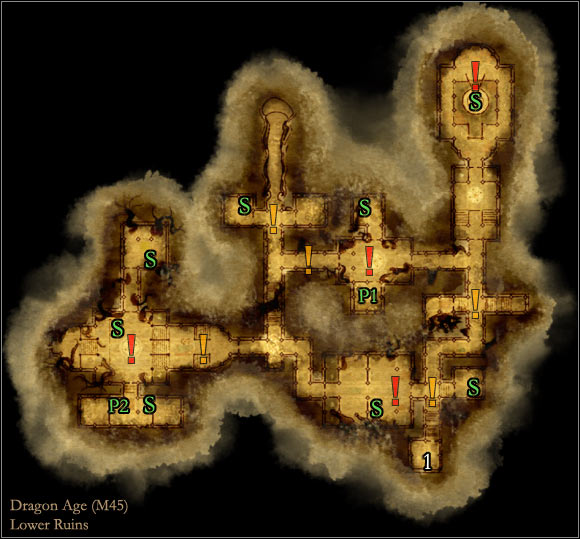
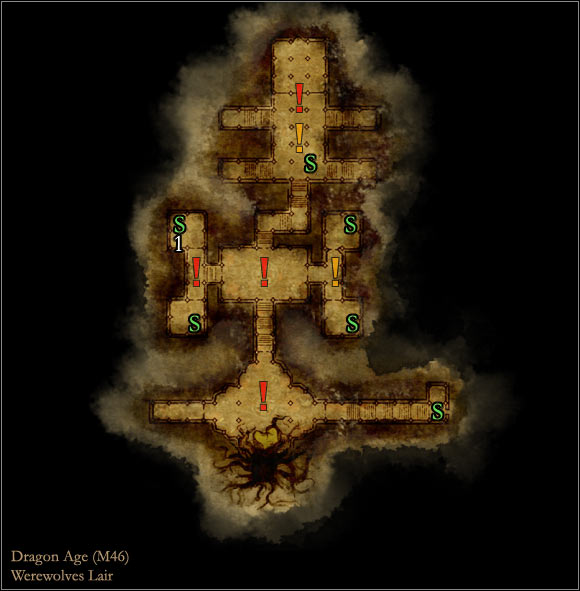
AREAS OF INTEREST
- Lanaya can be found in [Brecilian forest - Dalish elf camp] (M41, 1) and you can talk to her about the history of the race of elves and you can answer to some of her questions about how is it to live in different parts of Ferelden.
- You can agree to join Sarel and other elves by the campfire found in [Brecilian forest - Dalish elf camp] (M41, 2) and then take a part in telling a story about the important facts from the past. Finish the conversation by asking Sarel a couple of questions about the forest.
![- After you've successfully secured most of the areas in [Brecilian forest - Western path] you can decide to check a small road located behind the Grand Oak and eventually you would come across a small campfire (M42, 1) - World Atlas - Maps - Main areas - Brecilian forest - World Atlas - Maps - Main areas - Dragon Age: Origins - Game Guide and Walkthrough](https://game.lhg100.com/Article/UploadFiles/201512/2015121518292794.jpg)
- After you've successfully secured most of the areas in [Brecilian forest - Western path] you can decide to check a small road located behind the Grand Oak and eventually you would come across a small campfire (M42, 1). Check the tent upon your arrival and you'll soon notice that some kind of a spell prevents your team from leaving this area. In order to escape this trap the character with the highest willpower in your team will have to defeat a Greater shade. Make sure to use tons of medical supplies during the battle, especially if a mage was chosen to take part in this fight.
- During your future trips you'll have to acknowledge the fact that new monsters will continue appearing in certain areas of the forest. Watch out for larger groups found to the north of Hermit's tent (bandits) and to the west of the Grand Oak (hurlocks, genlocks and even an alpha ogre). A large group of elves will also stop you soon after successfully completing Nature of the beast quest and in this case the course of the conversation will depend on which ending you've decided to choose (killing the elves, killing the werewolves or curing the werewolves). Thankfully if you don't want to fight you'll have a chance to lie, use intimidation or persuasion. Don't worry, because even if everything else fails killing the elves won't be a big problem.
- After you've completed Wounded in the forest quest and assuming that you've saved an elf from certain death you can return to [Brecilian forest - Dalish elf camp]. The elf you've rescued is named Deygan and you can find him in the middle in the camp (M41, 3). He'll want to reward you with a sapphire and you can accept his gift or refuse politely.
- Three hidden doors can be found in different areas of [Brecilian forest - Upper ruins] (M44, 1). In order to uncover each door you must approach it and click on it. Aside from having to defeat new skeletons you'll find treasures in most of the secret corridors.
- Two glass phylacteries can be found while exploring the ruins and interacting with each of these objects will result in a very powerful revenant attacking your team. The first phylactery can be found in [Brecilian forest - Upper ruins] (M45, 1) and the other one in [Brecilian forest - Werewolves lair] (M46, 1).
SHOPPING
- Varathorn [Brecilian forest - Dalish elf camp] (M41, 1) - it would be wise to mention free goods promised to you by Zathrian during your initial conversation with Varathorn
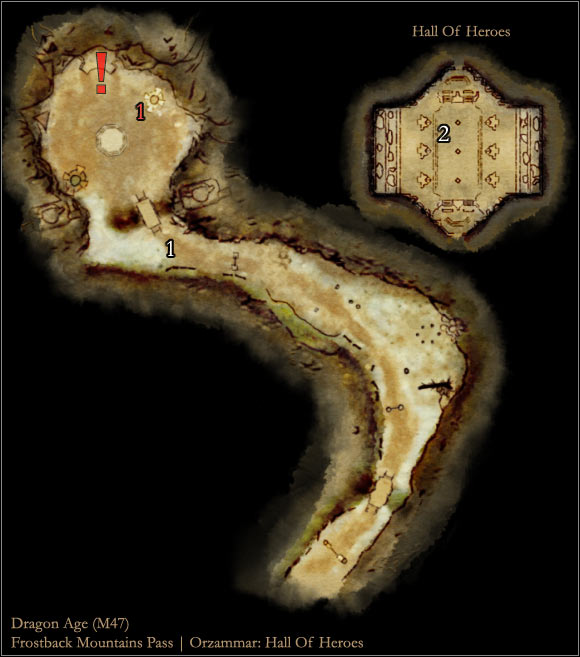
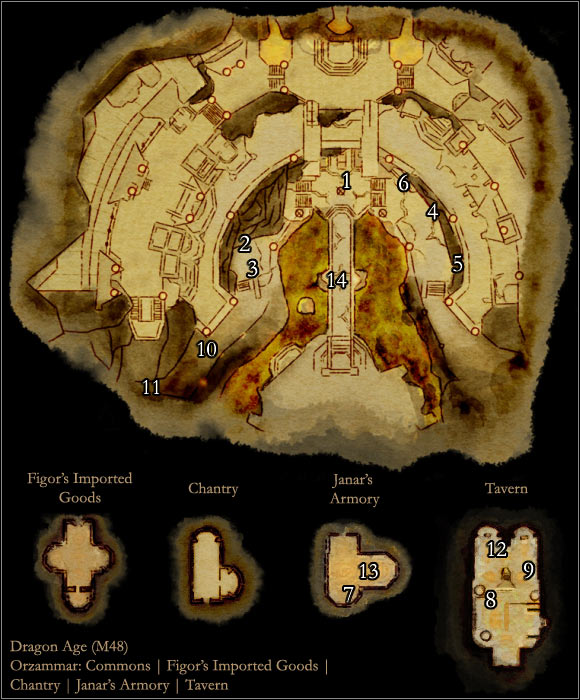


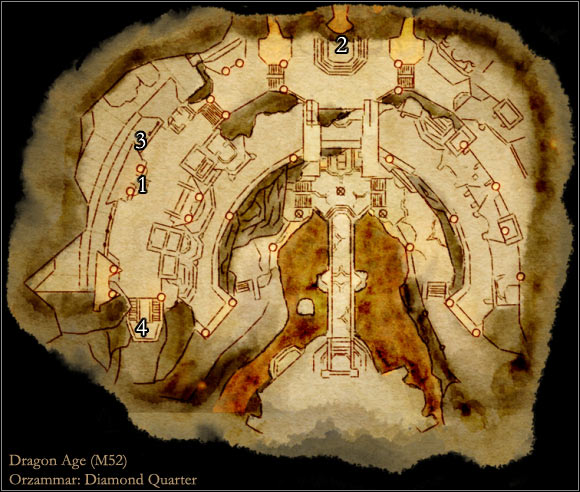
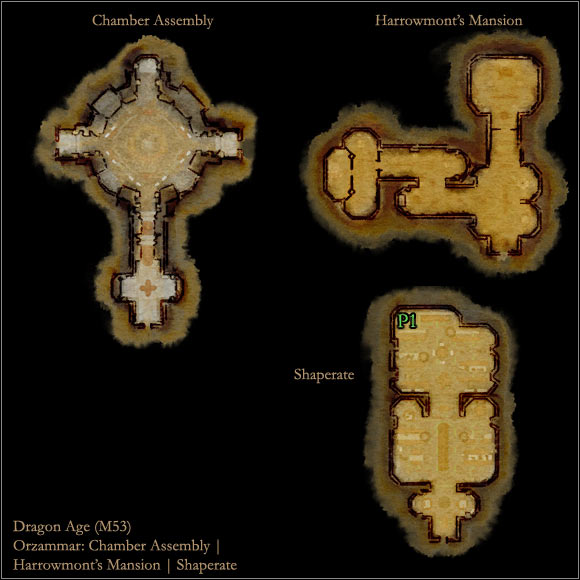
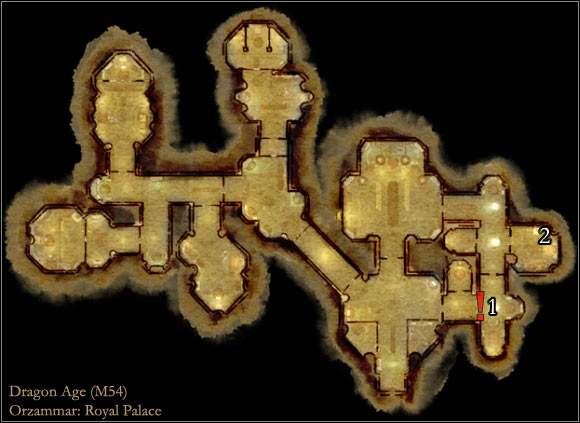


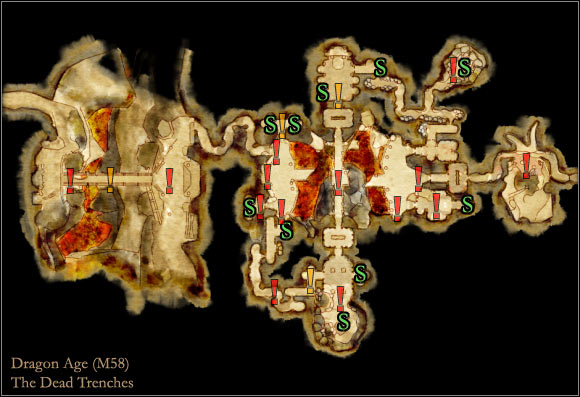

AREAS OF INTEREST
- During your first visit to [Frostback mountains pass] you'll have to be very careful, because you're going to be attacked by a large group of bounty hunters (M47, 1). Other attempts on your life will be made after showing up in [Orzammar - Commons - Dust town] for the first time (M49, 1) and after successfully defeating Jarvia as a part of one of the main quests. After you've aligned yourself with Harrowmont or Bhelen fanatics of the other contender will also start attacking you from time to time. Expect to meet them near the tavern (Commons) and near the entrance to the palace (Diamond quarter). Sadly peaceful negotiations won't be possible with any of these groups.
- It would be wise to spend some time in [Orzammar - Hall of heroes] clicking on each interactive statue to gain codex entries and experience points. You can even talk to a scholar if you want to (M47, 2). The same applies to rest of Orzammar, especially since you'll be finding a lot of dwarven objects worthy of examining them more closely.
- If you decide to explore [Orzammar - Diamond quarter - Royal palace] don't be surprised to encounter a group of dwarven thieves (M54, 1). Apparently they wanted to dig their way to a royal vault, but ended up in a wrong place. The only solution will be to attack them and sadly you can't count on any of the royal guards helping you.
![- If you decide to explore [Orzammar - Diamond quarter - Royal palace] you should check one of the smaller rooms in the eastern section of the palace to find a glass phylactery (M54, 2) - World Atlas - Maps - Main areas - Orzammar - World Atlas - Maps - Main areas - Dragon Age: Origins - Game Guide and Walkthrough](https://game.lhg100.com/Article/UploadFiles/201512/2015121518292946.jpg)
- If you decide to explore [Orzammar - Diamond quarter - Royal palace] you should check one of the smaller rooms in the eastern section of the palace to find a glass phylactery (M54, 2). Interacting with this object will result in you having to defeat a powerful revenant.
- A similar vial to the one described above can be found after you've started exploring Deep Roads and made your way to [Caridin's cross] (M56, 1). The idea remains the same so if you want to fight a boss (revenant) you must first interact with the vial.
![- You can talk to a Proving Armsman found in [Orzammar - Proving grounds] (M51, 1) and agree to take part in a series of team battles - World Atlas - Maps - Main areas - Orzammar - World Atlas - Maps - Main areas - Dragon Age: Origins - Game Guide and Walkthrough](https://game.lhg100.com/Article/UploadFiles/201512/2015121518292927.jpg)
- You can talk to a Proving Armsman found in [Orzammar - Proving grounds] (M51, 1) and agree to take part in a series of team battles. I have to warn you that these challenges are far more difficult than what you would have to sustain after complying to Harrowmont's wish. Don't count on winning a lot of money. Instead you'll want to fight mostly to earn experience points.
- After a new king has been crowned you can talk to Kardol found in [Orzammar - Diamond quarter] (M52, 1). If you succeed in a persuasion attempt you'll convince him that the Legion should take part in a battle with the archdemon.
- Soon after completing A chant in the deeps subquest you'll notice that Brother Burkel has founded a temple. You can visit him in [Orzammar - Commons - Chantry].
![- It would be a good idea to visit [Orzammar - Diamond quarter - Royal palace] before finishing Orzammar's main quest (finding the Anvil of the Void) - World Atlas - Maps - Main areas - Orzammar - World Atlas - Maps - Main areas - Dragon Age: Origins - Game Guide and Walkthrough](https://game.lhg100.com/Article/UploadFiles/201512/2015121518292984.jpg)
- It would be a good idea to visit [Orzammar - Diamond quarter - Royal palace] before finishing Orzammar's main quest (finding the Anvil of the Void). Enter the throne room and start off by clicking on the throne of Orzammar (M54, 3). Doing this will result in a new entry appearing in your codex (Caged in stone). Place two members of your team on movable tiles found to the left of the entrance to the throne room (M54, 4; check the screen seen above if you can't find them). As for the fourth member of your team, he or she must stand on a bigger interactive platform found in front of the entrance to the royal palace (M54, 5). Make sure no one has moved and use the main character to click on the throne again. If you've done everything according to the plan you'll notice that a dragon has appeared inside the throne room. It won't be easy to defeat it, but if you succeed you'll gain possession of an excellent Ageless blade.
TEAM
- A dwarven warrior Oghren will want to join your team soon after you've started two important quests in Orzammar - Anvil of the Void and Paragon of her kind. You'll meet him near the miner checkpoint in [Orzammar - Commons] (M48, 1) and naturally you should agree to his offer.
SHOPPING
- Faryn [Frostback mountains pass] (M47, 1)
- Garin [Orzammar - Commons] (M48, 1)
- Legnar [Orzammar - Commons] (M48, 2)
- Janar [Orzammar - Commons - Janar's armory] (M48, 3)
- Alimar [Orzammar - Commons - Dust town - Alimar's emporium] (M49, 1)
- Ruck [Ortan thaig] (M57, 1) - during your initial conversation with Ruck you must mention the fact that you want to trade goods with him (don't ask him about his treasures without offering something in return, because he may attack you)
- Figor [Orzammar - Commons - Figor's imported goods] (M48, 4) - you'll be allowed to visit his store and trade goods with him later in the game.
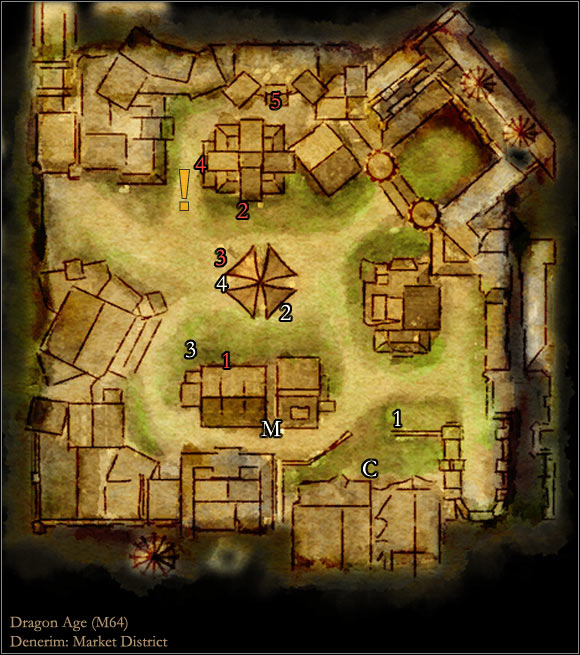
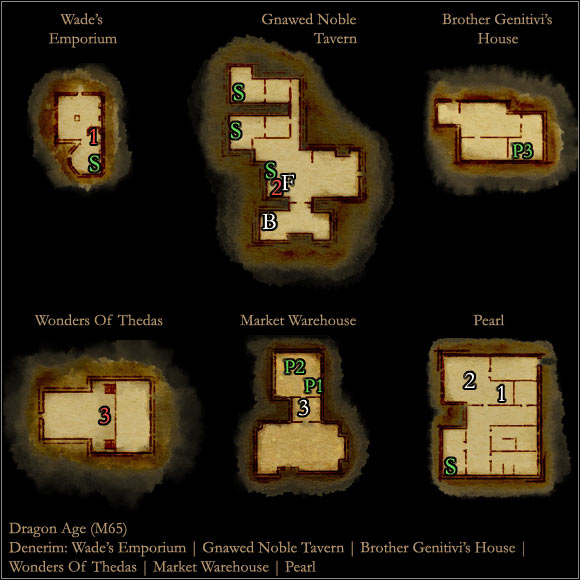
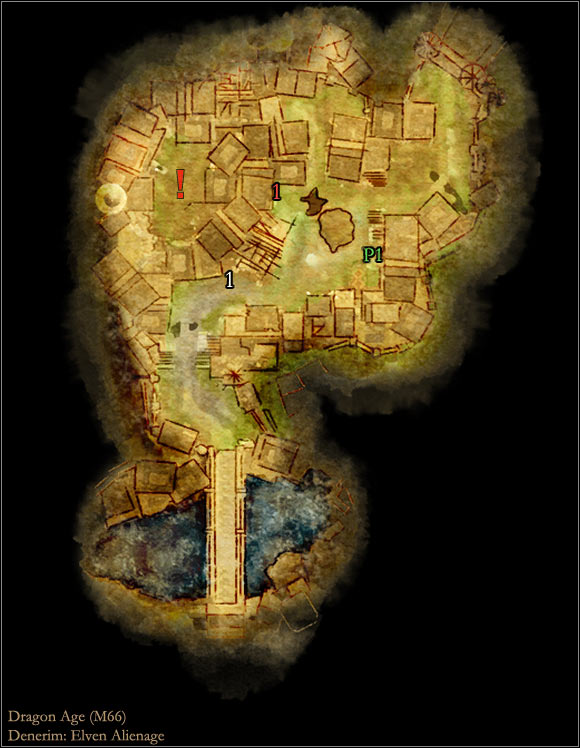
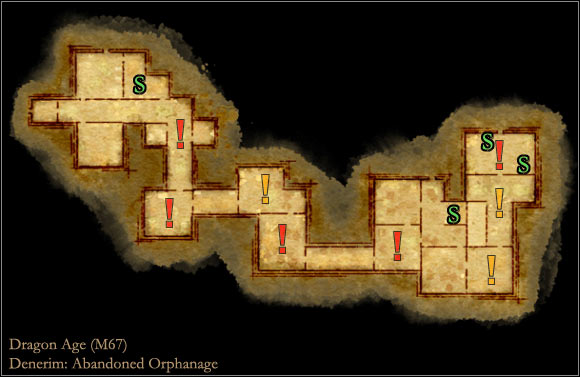
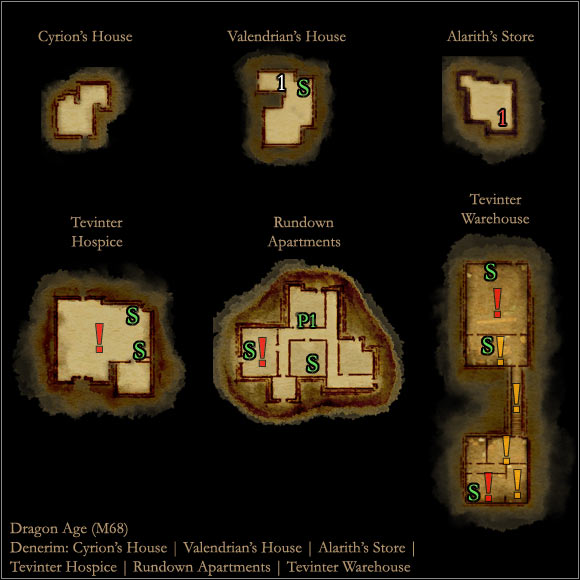

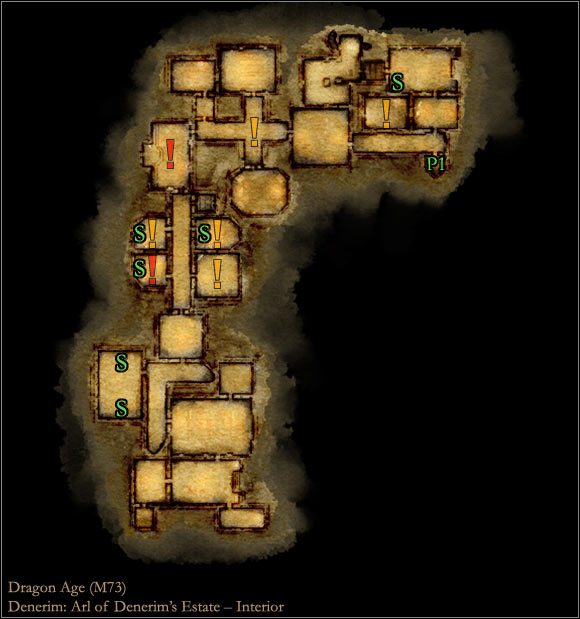
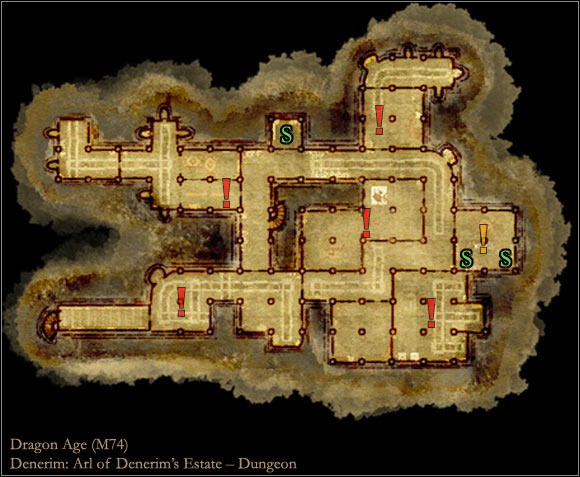
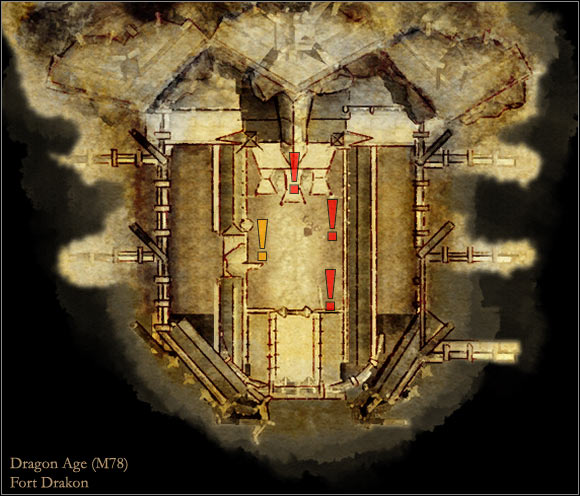
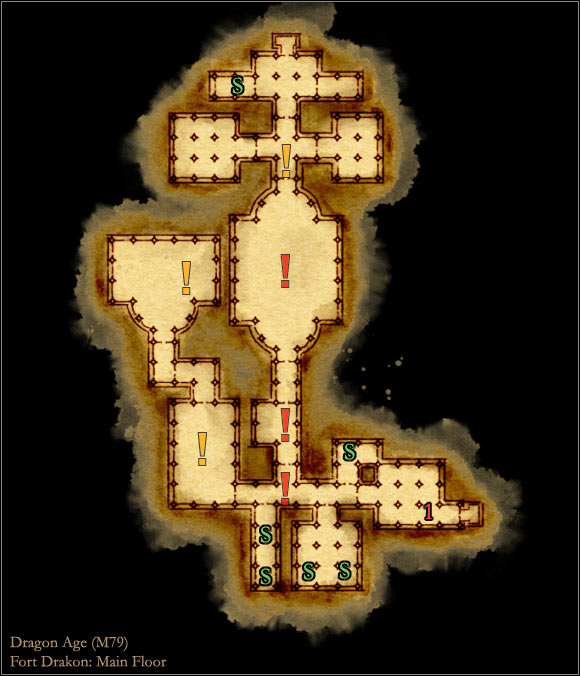

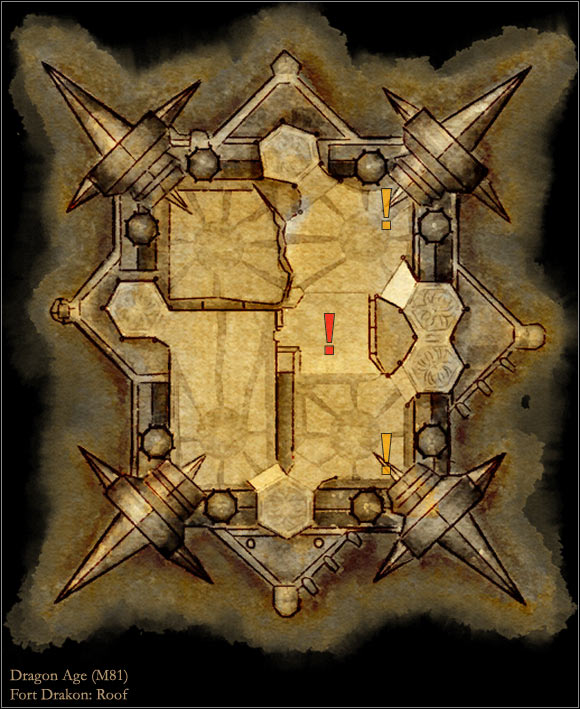
AREAS OF INTEREST
- Sister Teohilda and Mother Perpetua can be found in [Denerim - Market district] (M64, 1) and you can talk to them about the Song of the Light.
- Liselle is selling her goods in [Denerim - Market district] (M64, 2) and you can talk to her about flowers or about her home land.
- Sanga is running a brothel in [Denerim - Pearl] (M65, 2). You can pay 40 silver coins (or 30 silver coins if you use persuasion) for the services she is offering and you'll be allowed to choose between a man, a woman and a "surprise".
- After you've successfully completed both quests for Sergeant Kylon make sure to talk to him later in the game. He can still be found in [Denerim - Market district] (M64, 3) and he'll offer you additional gold as a token of his appreciation.
![- During your time spent in [Denerim] you can encounter Taliesen of the Antivan Crows - World Atlas - Maps - Main areas - Denerim - World Atlas - Maps - Main areas - Dragon Age: Origins - Game Guide and Walkthrough](https://game.lhg100.com/Article/UploadFiles/201512/2015121518293240.jpg)
- During your time spent in [Denerim] you can encounter Taliesen of the Antivan Crows. The meeting will occur only if you've already recruited Zevran and while travelling between different parts of the city. Listen to a short conversation between him and Zevran (your elven follower will automatically join your main team) and after that you'll start a battle with a group of assassins. Make sure to STAY AWAY from the stairs, because the entire area is booby-trapped.
- If you decided to become a city elf at the beginning of the game and if you agreed to take Vaughan's bribe instead of killing him you'll have a chance to retrieve the gold he gave you as soon as you've started Saving the queen quest. Wait for your team to end up in [Denerim - Arl of Denerim's estate - Exterior] and head north-west. Examine debris found near one of the walls of the estate (M72, 1).
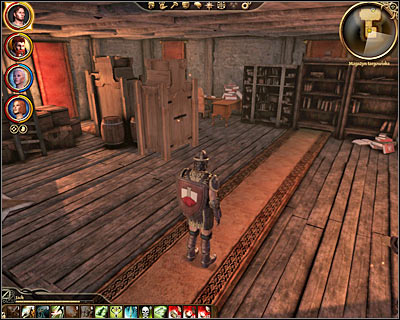
- Once you've successfully completed Saving the queen quest visit arl Eamon's room in his estate and you'll meet Riordan (M71, 1). He's the Grey Warden you've had a chance to rescue while exploring [Denerim - Arl of Denerim's estate - Interior] and in return for freeing him he'll mention a treasure. You may now travel to [Denerim - Market district - Market warehouse] (M65, 3). Clicking on a cabinet will unlock a secret room filled with a lot of valuable items.
- During your stay in [Denerim - Elven alienage] you may be stopped by a hungry veteran (M66, 1) and if you decide to give him money the next time you pass by this area you'll encounter more beggars and they'll also ask you for help. They will continue growing in numbers until you give coins to all of them. If you want to end this prematurely you can use intimidation and you can also uncover a wealthy elf who was trying to blend in with the rest of the beggars.
- Once you've successfully completed Unrest in the alienage quest and assuming that you've decided to help the elves instead of allowing them to become slaves you can visit their leader Valendrian in [Denerim - Elven alienage - Valendrian's house] (M68, 1). He will thank you for your help and offer you Grey Warden's gift.
- You may be attacked by the bandits while travelling between different areas of [Denerim] and they will stop you near a large gate. Notice that they will reveal their positions only if you've stepped through the gate, so you'll have to act quickly. Once they're gone head back to the stairs and look around to find a phylactery. Trying to interact with the vial will result in a powerful revenant attacking your team.
TEAM

- Loghain can join your team at the end of Landsmeet quest. Start off by heading to [Denerim - Royal palace - Hall of the Landsmeet] and click on the door to proceed with the quest (M71, 2). During the meeting you'll have to defeat Loghain, either in a honorable duel or in a huge battle. This will trigger a conversation with some of your allies, including Alistair. Most of the people in the palace will want to see Loghain's death, however you will have to ignore their demands and instead listen to Riordan's plan. Riordan will suggest that Loghain should take part in Grey Warden's ritual and if he survives he should join the others in the final battle against the archdemon. If you agree to this plan Alistair will not only leave your team forever, but he's also going to be executed. You can prevent this from happening by talking to Anora and reminding her of your agreement and in this case instead of being killed he would be banished from the kingdom. As for Loghain, you'll have a chance to talk to him and to equip him with better items after the landsmeet has ended.
SHOPPING
- Herren [Denerim - Market district - Wade's emporium] (M64, 1)(M65, 1) - notice that you won't be allowed to barter with him anymore after you've successfully completed both dragon armor quests
- Gorim [Denerim - Market district] (M64, 2)
- Cesar [Denerim - Market district] (M64, 3) - you can ask him about showing you special items after you've completed Trial of the Crows quest for Ignacio
- Bartender [Denerim - Market district - Gnawed noble tavern] (M64, 4)(M65, 2)
- Silent owner [Denerim - Market district - Wonders of Thedas] (M64, 5)(M65, 3)
- Alarith [Denerim - Elven alienage - Alarith's store] (M66, 1)(M68, 1) - you'll be allowed to trade with him after completing Unrest in the alienage quest
- Sandal [Denerim - Fort Drakon - Main floor] (M79, 1) - last chance before the final battle with the archdemon (aside from buying goods he can also enchant your items)
GUILDS
- Chanter's board [Denerim - Market district] (M64, C)
- Mages' collective [Denerim - Market district] (M64, M)
- Bartender (favors) [Denerim - Market district - Gnawed noble tavern] (M65, F)
- Blackstone irregulars [Denerim - Market district - Gnawed noble tavern] (M65, B)
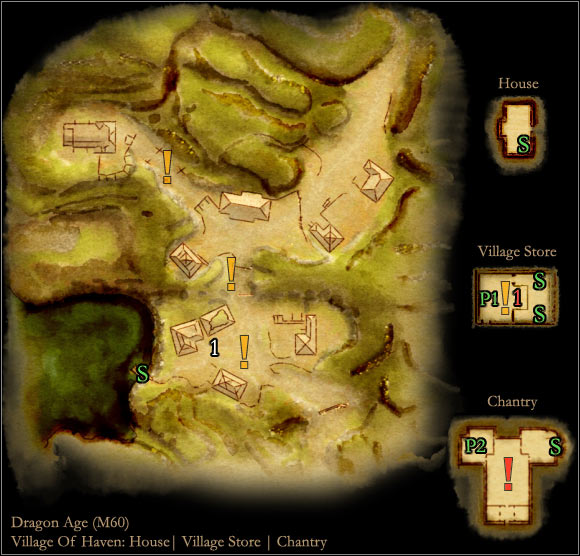
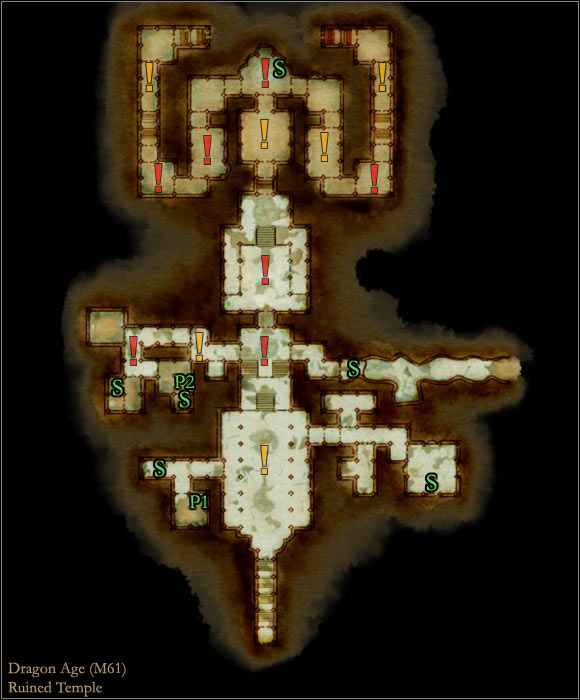

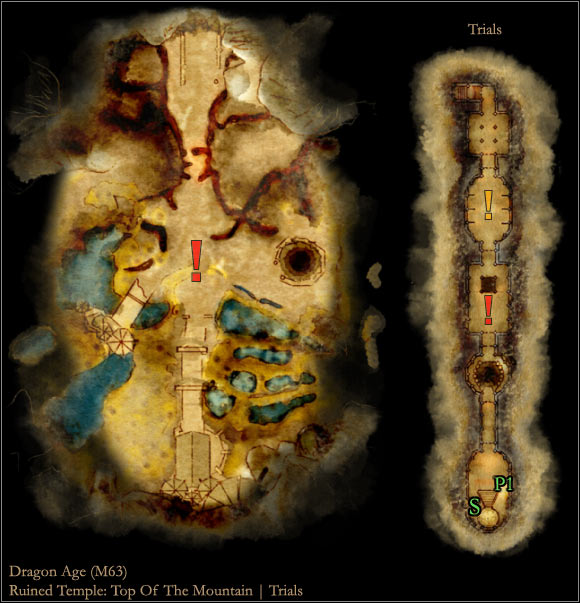
AREAS OF INTEREST
- You can explore the central area of the [Village of Haven] if you want to and you would encounter a young boy (M60, 1). Expect new dialogue options if you decide to rely on persuasion or intimidation.
SHOPPING
- Shopkeeper [Village of Haven - Village Store] (M60, 1) - purchase the goods prior to exploring one of the houses or going to the chantry and stay away from the back of the store; this person can be replaced by a new merchant later in the game
The table below contains a list of all vendors in the game and it also displays some of the best items in their stock. If you can't find the item mentioned in the guide try visiting this merchant later in the game (most of them will change or expand stock after the landsmeet).
Trader
Location
Additional info
Best items in stock
Bodahn
Campsite
-
Bergen's honor
Blackmetal torque
Conspirator's foil
Dalish hunter's belt
Earthheart's portable bulwark
Enchanter's arming cap
Imperial weavers
Par Vollen willstone
Proving helm
Silverhammer's tackmasters
Sylvan's mercy
Templar's shield
The spellward
The Veshialle
Ilen
Dalish elf camp
this merchant appears only in the origin story of a dalish elf
Dalish armor
Varathorn
Dalish elf camp
-
Chasind robes
Dalish armor
Dalish gloves
Dar'Misaan
Scout's bow
Alarith
Denerim - Elven alienage
you'll be allowed to look at Alarith's things AFTER you've unlocked access to the alienage and learned what happened to the sick elves
Senior enchanter's robes
Staff of the ephemeral order
Warpaint of the Waking Sea
Sandal
Denerim - Fort Drakon
Sandal will appear near the end of the game, giving you a chance to rearm yourself before the final battle with the archdemon
Heavy chainmail
Heavy chainmail gloves
Heavy plate armor
Heavy plate boots
Metal kite shield
Soldier's heavy helm
Warpaint of the Waking Sea
Bartender
Denerim - Market district
the same person can also give you side missions (Favors)
-
Cesar
Denerim - Market district
don't forget to ask Cesar about "special supplies" (after you've completed all tasks for Ignacio) and he'll have new items for sale
Crow dagger
Crow shield
Dar'Misu
Enchanter's staff
Executioner's helm
First enchanter robes
Knight-commander's helm
Orlesian bow
Qunari commander helm
Saw sword
Gorim
Denerim - Market district
-
Dwarven armored boots
Dwarven armored gloves
Dwarven heavy armor
Gorim's sword
Herren
Denerim - Market district
after you've completed both dragon armor quests Herren won't trade with you anymore, so make sure to purchase all the good things when he still shows a friendly attitude
Heavy chainmail
Heavy chainmail boots
Scale armor
Soldier's helm
Silent owner
Denerim - Market district
-
Apprentice's amulet
Enchanter cowl
Lend of the lion
Lightning Rod
Mabari dog chain
Reaper's vestments
Ring of ages
Robe of the witch
Tevinter mage robes
Torch of embers
Twitch
Old Tegrin
Ferelden
you can meet Tegrin while moving from one location to another - it's one of the random encounters and you can increase your chances of finding him in a certain phase of the game by triggering all other random encounters
Apprentice's amulet
Ceremonial armored boots
Faryn
Frostback mountains pass
don't kill Faryn while completing Sten's personal quest, because he's offering a lot of unique items
Chasind crusher
Chevalier's gloves
Dal'Thanaan
Dalish longbow
Heavy chainmail
Knight commander's plate
Lord's hunting jabot
Qunari infantry helm
Qunari sword
Scale boots
Throwback harness
Innkeeper
Lake Calenhad
-
Apprentice's amulet
Kaddis of the siege-breaker
Barlin
Lothering
you can talk to him after you've dealt with Loghain's men
Amulet of accord
Kaddis of the courser
Lightning rod
Sailor's crossbow
Thorn of the dead gods
Warpaint of the vanguard
Merchant
Lothering
make sure not to kill him or scare him away during your initial conversation in Lothering, because you won't be able to buy anything from him
Enchanter's staff
Chainmail
Scale armor
Ruck
Ortan thaig
make sure to ask Ruck about trading goods with him, not about him giving you his treasures without receiving anything in return
Armor of the divine will
Destructionist's belt
Dwarven heavy boots
Heavy dwarven helmet
Shield of the Legion
Ademaro
Orzammar - Commons
this merchant appears only in the origin story of a commoner dwarf
Dwarven longsword
Figor
Orzammar - Commons
Figor will open his shop later in the game (if you come too soon you won't find anyone inside)
-
Garin
Orzammar - Commons
-
Diamond maul
Dwarven armor
Dwarven heavy boots
Heavy metal shield
Lifegiver
Precision-geared recurve
The rose's thorn
Janar
Orzammar - Commons
-
Dwarven heavy armor
Heavy metal shield
Heavy dwarven helmet
Dwarven heavy boots
Dwarven heavy gloves
Rock-knocker
Dwarven longsword
Dwarven massive armor
Dwarven massive armored boots
Dwarven massive armored gloves
Legnar
Orzammar - Commons
-
Shadow of the empire
Quicksilver arming cap
Small metal round shield
Duster leather armor
Silverhammer's evaders
Olinda
Orzammar - Commons
this merchant appears only in the origin story of a commoner dwarf
-
Armourer
Orzammar - Diamond quarter
this merchant appears only in the origin story of a noble dwarf
Dwarven armor
Silk merchant
Orzammar - Diamond quarter
this merchant appears only in the origin story of a noble dwarf
-
Alimar
Orzammar - Dust town
-
Antivan crossbow
Ash warrior axe
Backhands
Crow dagger
Duster leather armor
Effort's boots
Kaddis of the trickster
Orlesian bow
Senior enchanter's robes
Quartermaster
Ostagar
don't forget that you won't return to Ostagar later in the game so make sure to visit this merchant for the last time before going to the Ishal tower || quartermaster can show you two types of goods - official ones and smuggled ones
Enchanter's footing
Enchanter's staff
Heavy chainmail
Heavy chainmail boots
Heavy chainmail gloves
Metal kite shield
Scale armor
Scale boots
Soldier's helm
Bella
Redcliffe
Bella is a replacement for Lloyd after you convince him to join the battle
-
Lloyd
Redcliffe
if you convince Lloyd to join the battle he's going to be replaced by Bella
-
Owen
Redcliffe
Owen will show you his goods only if you agree to find his missing daughter
Heavy chainmail boots
Scale armor
Soldier's helm
Quartermaster
The Circle tower
make sure to buy as much medical supplies from him as possible before venturing into the tower for the first time
Andruil's blessing
Chainmail
Heavy chainmail boots
Heavy wooden shield
Liberator's mace
Pocketed searing gloves
Polar gauntlets
Reinforced magus cowl
Scale armor
Soldier's helm
Staff of the magister lord
Shopkeeper
Village of Haven
make sure to visit his store before entering the chantry or one of the homes || this merchant may be replaced by someone else later in the game
Apprentice's amulet
Shortbow
Studded leather armor
Buying new backpacks from vendors is a very important thing, because your inventory can be filled very quickly, mostly by presents and powerful items that can't be used just yet. Make sure to have at least ten free slots throughout the entire game and to sell all the stuff you don't need before undertaking a new journey.
Important! Having Warden's Keep DLC installed helps out a lot, because this add-on unlocks a chest used to store items (for free).
Each backpack expands your inventory by ten slots and you can buy these items from:
- Quartermaster in Ostagar (M21, 1) - You can buy TWO backpacks from him and make sure not to miss out on this opportunity, because you won't be allowed to return to Ostagar in the future. Buy the first backpack BEFORE delivering all the items Duncan needed from the Korcari wilds. As for the second backpack, you can buy it AFTER the ritual but BEFORE going to the Tower of Ishal to finish the last quest in Ostagar.
- Bodahn in the Campsite (M26, 1)
- Quartermaster in The Circle Tower (M33, 1)
- Varathorn in Dalish elf camp (M41, 1)
- Gorim in Denerim's market district (M64, 2)
The table below contains a list of representatives of all four guilds. Each representative will have jobs for you and if you can't get any new jobs try visiting him later or try finishing the quests you've already started. Each time you've completed a mission you don't have to go back to the area where you've started it, because the reward can be received from other representatives. Check the main section of the guide to find descriptions of available guild quests.
Guild
Areas where you can find the representatives
Blackstone irregulars
Denerim - Market district - Gnawed noble tavern
Lothering - Dane's refuge
Redcliffe
Chanter's board
Denerim - Market district
Lothering
Redcliffe
Favors
Denerim - Market district - Gnawed noble tavern
Mages' collective
Denerim - Market district
Lake Calenhad docks
Redcliffe
The first column tells the name of the trap.
The second column tells where to buy a plan needed to construct a trap (otherwise you won't be allowed to do it, even with proper parts).
The third column informs how many points you have to spend on developing Trap-making skill to be allowed to construct a trap: 1 - Trap-making, 2 - Improved trap-making; 3 - Trap-making expert; 4 - Trap-making master
The last fourth column lists all the required parts.
Name of the trap
Plans for the trap
Requirements
Needed parts
Rope trap
available right away
1
trap trigger x1
Small caltrop trap
available right away
1
metal shard x1
Small claw trap
available right away
1
metal shard x1, trap trigger x1
Small shrapnel trap
available right away
1
metal shard x1, trap trigger x1
Large caltrop trap
Orzammar (Janar)
Redcliffe (Owen)
2
metal shard x2
Large claw trap
Lothering (Barlin)
Orzammar (Janar)
Ostagar (Quartermaster)
Redcliffe (Owen)
2
metal shard x2, trap trigger x1
Large shrapnel trap
Lothering (Barlin)
Orzammar (Janar)
Redcliffe (Owen)
2
metal shard x2, trap trigger x1
Mild choking powder trap
Kalenhad (Innkeeper)
Orzammar (Alimar)
Haven (Shopkeeper)
2
toxin extract x1, corrupter agent x1, trap trigger x1
Mild sleeping gas trap
Orzammar (Alimar)
Ostagar (Quartermaster)
2
deathroot x1, corrupter agent x1, trap trigger x1
Small grease trap
Frostback mountains (Faryn)
Kalenhad (Innkeeper)
Lothering (Barlin)
Dalish elf camp (Varathorn)
Ostagar (Quartermaster)
2
lifestone x1, distillation agent x1, trap trigger x1
Small lure
Lothering (Barlin)
Ostagar (Quartermaster)
Orzammar (Legnar)
Haven (Shopkeeper)
2
glamour charm x1
Acidic trap
Dalish elf camp (Varathorn)
3
lifestone x1, corrupter agent x1, trap trigger x1
Choking powder trap
Orzammar (Alimar)
Haven (Shopkeeper)
3
toxin extract x2, corrupter agent x2, concentrator agent x1, trap trigger x1
Fire trap
Kalenhad (Innkeeper)
3
fire crystal x1, corrupter agent x1, trap trigger x1
Freeze trap
Orzammar (Alimar)
Ferelden (Old Tegrin)
3
frostrock x1, corrupter agent x1, trap trigger x1
Large grease trap
Frostback mountains (Faryn)
Dalish elf camp (Varathorn)
3
lifestone x2, distillation agent x2, concentrator agent x1, trap trigger x1
Mild lure
Orzammar (Legnar)
Haven (Shopkeeper)
3
glamour charm x2
Poisoned caltrop trap
Redcliffe (Owen)
3
lifestone x1, metal shard x2, corrupter agent x1
Shock trap
Ferelden (Old Tegrin)
3
frozen lightning x1, corrupter agent x1, trap trigger x1
Sleeping gas trap
Orzammar (Alimar)
3
deathroot x2, corrupter agent x2, concentrator agent x1, trap trigger x1
Soulrot trap
Frostback mountains (Faryn)
Dalish elf camp (Varathorn)
3
spirit shard x1, corrupter agent x1, trap trigger x1
Acidic grease trap
Dalish elf camp (Varathorn)
4
lifestone x3, corrupter agent x2, concentrator agent x2, trap trigger x1
Choking powder cloud trap
Denerim (Alarith)
4
toxin extract x3, corrupter agent x2, concentrator agent x2, trap trigger x1
Overpowering lure
Denerim (Silent owner)
4
glamour charm x3
Sleeping gas cloud trap
Denerim (Alarith)
4
deathroot x3, corrupter agent x2, concentrator agent x2, trap trigger x1
The first column tells the name of the mixture.
The second column tells where to buy a recipe needed to create a mixture (otherwise you won't be allowed to do it, even with proper ingredients).
The third column informs how many points you have to spend on developing Poison-making skill to be allowed to create a mixture: 1 - Poison-making, 2 - Improved poison-making, 3 - Poison-making expert, 4 - Poison-making master
The last fourth column lists all the required ingredients.
Important! All the recipes needed to create the best mixtures can be bought from Cesar, however you will have to complete all of Ignacio's quests to unlock Cesar's "specials".
Name of the mixture
Recipe for the mixture
Requirements
Needed ingredients
Deathroot extract
available right away
1
deathroot x1, flask x1
Venom
available right away
1
toxin extract x1, flask x1
Acid flask
Dalish elf camp (Varathorn)
Ostagar (Quartermaster)
Haven (Shopkeeper)
2
lifestone x1, flask x1, corrupter agent x1
Concentrated deathroot extract
Frostback mountains (Faryn)
Lothering (Merchant)
Ostagar (Quartermaster)
2
deathroot x2, flask x1, distillation agent x1
Concentrated venom
Lothering (Merchant)
Orzammar (Alimar)
Ostagar (Quartermaster)
2
toxin extract x2, flask x1, distillation agent x1
Crow poison
Orzammar (Alimar)
2
toxin extract x2, deathroot x2, flask x1, distillation agent x1
Fire bomb
Lothering (Merchant)
Ostagar (Quartermaster)
The Circle tower (Quartermaster)
2
fire crystal x1, flask x1, corrupter agent x1
Freeze bomb
Lothering (Merchant)
Orzammar (Alimar)
2
frostrock x1, flask x1, corrupter agent x1
Shock bomb
Denerim (Silent owner)
2
frozen lightning x1, flask x1, corrupter agent x1
Soulrot bomb
Dalish elf camp (Varathorn)
2
spirit shard x1, flask x1, corrupter agent x1
Acidic coating
Dalish elf camp (Varathorn)
Haven (Shopkeeper)
3
lifestone x2, flask x1, corrupter agent x2, concentrator agent x1
Adder's kiss
Orzammar (Alimar)
3
toxin extract x3, flask x1, distillation agent x2, concentrator agent x1
Concentrated Crow poison
Denerim (Cesar)
3
toxin extract x3, deathroot x3, flask x1, concentrator agent x1
Demonic poison
Denerim (Cesar)
3
demonic ichor x1, flask x1, concentrator agent x1
Flaming coating
The Circle tower (Quartermaster)
3
fire crystal x2, flask x1, corrupter agent x2, concentrator agent x1
Fleshrot
Frostback mountains (Faryn)
3
deathroot x3, flask x1, distillation agent x2, concentrator agent x1
Freezing coating
Denerim (Alarith)
Orzammar (Alimar)
3
frostrock x2, flask x1, corrupter agent x2, concentrator agent x1
Magebane
Denerim (Cesar)
Haven (Shopkeeper)
3
lyrium dust x3, flask x1, corrupter agent x2, concentrator agent x1
Shock coating
Denerim (Silent owner)
3
frozen lightning x2, flask x1, corrupter agent x2, concentrator agent x1
Soldier's bane
Denerim (Cesar)
Haven (Shopkeeper)
3
deep mushroom x3, flask x1, corrupter agent x2, concentrator agent x1
Soulrot coating
Dalish elf camp (Varathorn)
3
spirit shard x2, flask x1, corrupter agent x2, concentrator agent x1
Concentrated demonic poison
Denerim (Cesar)
4
demonic ichor x2, flask x1, concentrator agent x2
Concentrated magebane
Denerim (Cesar)
4
lyrium dust x4, flask x1, corrupter agent x2, concentrator agent x2
Concentrated soldier's bane
Denerim (Cesar)
4
deep mushroom x4, flask x1, corrupter agent x2, concentrator agent x2
Quiet death
Denerim (Cesar)
4
toxin extract x4, deathroot x4, flask x1, concentrator agent x2
The first column tells the name of the mixture.
The second column tells where to buy a recipe needed to create a mixture (otherwise you won't be allowed to do it, even with proper ingredients).
The third column informs how many points you have to spend on developing Herbalism skill to be allowed to create a mixture: 1 - Herbalism, 2 - Improved herbalism, 3 - Herbalism expert, 4 - Herbalism master.
The last fourth column lists all the required ingredients.
Name of the mixture
Recipe for the mixture
Requirements
Needed ingredients
Lesser health potion
available right away
1
elf root, flask x1
Lesser lyrium potion
available right away
1
lyrium dust x1, flask x1
Mabari crunch
available right away
1
elf root x1, deep mushroom x1
Double-baked mabari crunch
Ostagar (Quartermaster)
Redcliffe (Lloyd)
2
elf root x2, deep mushroom x2
Health poultice
Denerim (Bartender)
Dalish elf camp (Varathorn)
Orzammar (Figor)
Ostagar (Quartermaster)
Redcliffe (Lloyd)
2
elf root x3, flask x1, distillation agent x1
Incense of awareness
Lothering (Barlin)
The Circle tower (Quartermaster)
2
lyrium dust x1, deep mushroom x1, flask x1, distillation agent x1
Lyrium potion
Lothering (Barlin)
The Circle tower (Quartermaster)
Haven (Shopkeeper)
2
lyrium dust x2, flask x1, distillation agent x1
Minor injury repair kit
Denerim (Bartender)
Lothering (Barlin)
Orzammar (Figor)
Ostagar (Quartermaster)
Redcliffe (Lloyd)
2
elfroot x2, deep mushroom x2, distillation agent x1
Rock salve
Denerim (Alarith)
Ostagar (Quartermaster)
2
deep mushroom x2, flask x1, distillation agent x1
Greater health poultice
Denerim (Bartender)
Dalish elf camp (Varathorn)
Orzammar (Figor)
3
elf root x4, flask x1, distillation agent x2, concentrator agent x1
Greater lyrium potion
Denerim (Silent owner)
Frostback mountains (Faryn)
3
lyrium dust x3, flask x1, distillation agent x2, concentrator agent x1
Injury repair kit
Denerim (Bartender)
The Circle tower (Quartermaster)
3
elf root x3, deep mushroom x3, distillation agent x1, concentrator agent x1
Lesser elixir of grounding
Haven (Shopkeeper)
3
frozen lightning x1, flask x1, concentrator agent x1
Lesser ice salve
Frostback mountains (Faryn)
Haven (Shopkeeper)
3
frostrock x1, flask x1, concentrator agent x1
Lesser nature salve
Denerim (Alarith)
Dalish elf camp (Varathorn)
3
lifestone x1, flask x1, concentrator agent x1
Lesser spirit balm
Dalish elf camp (Varathorn)
The Circle tower (Quartermaster)
3
spirit shard x1, flask x1, concentrator agent x1
Lesser warmth balm
Denerim (Alarith)
The Circle tower (Quartermaster)
3
fire crystal x1, flask x1, concentrator agent x1
Swift salve
Denerim (Silent owner)
Frostback mountains (Faryn)
3
lyrium dust x2, deep mushroom x2, flask x1, concentrator agent x1
Dwarven regicide antidote
receiving the recipe is tied to Exotic methods (Orzammar) side mission
4
elf root x4, lifestone x2, flask x1, concentrator agent x2
Greater elixir of grounding
Haven (Shopkeeper)
4
frozen lightning x2, flask x1, distillation agent x1, concentrator agent x2
Greater ice salve
Denerim (Silent owner)
4
frostrock x2, flask x1, distillation agent x1, concentrator agent x2l
Greater nature salve
Dalish elf camp (Varathorn)
4
lifestone x2, flask x1, distillation agent x1, concentrator agent x2
Greater spirit balm
Dalish elf camp (Varathorn)
4
spirit shard x2, flask x1, distillation agent x1, concentrator agent x2
Greater warmth balm
Denerim (Silent owner)
4
fire crystal x2, flask x1, distillation agent x1, concentrator agent x2
Major injury repair kit
Denerim (Alarith)
4
elf root x4, deep mushroom x4, distillation agent x2, concentrator agent x2
Potent health poultice
Dalish elf camp (Varathorn)
4
elf root x5, flask x1, distillation agent x2, concentrator agent x2
Potent lyrium potion
Denerim (Silent owner)
4
lyrium dust x4, flask x1, distillation agent x2, concentrator agent x2
Aside from a slow process of advancing to higher experience levels you can also use magical tomes of power to give certain members of your team free attribute, skill or talent points. I would recommend buying these books later in the game, because most of them are very expensive. Check the table below for a full list of the books along with the information where to find them.
Merchant
Location
Class requirements and bonus type
Alarith
Alarith's store
Any class, skills +1
Bodahn
Campsite
Mage, spells +1
Bodahn
Campsite
Warrior or rogue, talents +1
Bodahn
Campsite (pay him a visit after the landsmeet)
Warrior or rogue, talents +1
Garin
Commons
Warrior or rogue, talents +1
Legnar
Commons
Any class, attributes +1
Old Tegrin
Random encounter
Any class, skills +1
Quartermaster
The Circle tower
Mage, spells +1
Shopkeeper
Village of Haven
Any class, attributes +1
Silent owner
Wonders of Thedas
Mage, spells +1
Varathorn
Dalish elf camp
Any class, skills +1
Varathorn
Dalish elf camp
Any class, attributes +1
You can explore the world using a team of up to four characters in Dragon Age: Origins and this means that aside from the main hero you'll have three companions at your side. New followers will be joining your team as the game progresses and naturally later in the game you'll have to start choosing who should stay in the camp and who should be exploring main areas with you.
Here's a list of useful hints concerning having your own team:
- The most important thing when it comes to leading a team is the approval rating of each teammate. You can find out how much each person or entity likes you by opening character screen and looking at the bar found in the lower section of the screen. I would strongly recommend developing your relations with everyone so that by the end of the game each person in your team will show at least 70-80 points of approval.
- You're free to choose who should follow you, however my recommendation is to choose good followers for a good main character and evil followers for an evil main character. Doing this will prevent you from losing approval points as a result of killing someone or ending the quest in a way that a follower will not like. Naturally you won't be able to assemble a "100% good team" or a "100% bad team" in the early stages of the game, but you should be working on that or even using a mabari hound, because the animal is always going to be neutral.
- Don't forget about the possibility of using tactics screen to write scripts on how a certain member should react to different types of situations. Planning their actions will make the game easier if you don't want to be swamped in micromanagement, however I liked having as much control over them as possible, especially since the game can be paused easily to rethink current strategy or to examine the battlefield.
Here's a list of factors that can have a NEGATIVE impact on your relations with other team members:
- Making a quest decision which is not the right one according to the follower. This applies not only to choosing how the quest should end but also to starting a new quest and making other decision while it's still active. For example, an evil follower may not like the fact that you want to waste your time helping an innocent civilian, but a good follower will show support to what you're doing.
- Having an entirely different opinion and sharing it during the course of the game or while talking to the team member in the campsite.
Here's a list of factors that can have a POSITIVE impact on your relations with other team members:
- Making a quest decision which is the right one according to the follower. This applies not only to choosing how the quest should end but also to starting a new quest and making other decision while it's still active. For example, an evil follower may not like the fact that you want to waste your time helping an innocent civilian, but a good follower will show support to what you're doing.
- Giving the follower a present (make sure to keep reading the guide to find out more about this particular feature of the game). Notice that you can't lose relationship points here, because if a team member won't like the gift he won't accept it and nothing bad will happen.
- Having a similar or an identical opinion and sharing it during the course of the game or while talking to the team member in the campsite.
- Solving follower's personal quest. Each team member can have his unique mission and most of these quests involve finding something or someone. Notice that you won't be allowed to start some of the quests until you've earned enough relationship points, but on the other hand completing the quest will give you a huge boost of approval points. Check the main guide for descriptions of all personal quests (Followers section).
- Having a romance. In order to make this happen you'll have to start developing your relationship with the character who will be interested in you. After you've earned about 80 approval points you'll have a chance to spend a night. Don't forget that showing affection to one of the members of your team may have a negative impact on an another one also in love with you. The same goes with trying to kiss NPC's encountered during the course of the game.
Important! The game has a good point in suggesting that you should be developing relationships with all of your followers during your time spent in the campsite and not while travelling the world. It's not mandatory, however you can receive additional profits in the camp, allowing you to reach 100 approval rating much faster. As for the camp itself, you'll be visit it for the first time after leaving Lothering and after that you'll be allowed to return to it when you please (assuming you're not in a dungeon or completing an important quest).
Check the table seen below for a complete list of nine followers (not counting the golem from the DLC). Keep reading to find about the advantages of having them as your active team members and to find out how to locate them.
ALISTAIR (human, warrior)
He joins the team automatically during the course of Joining the Grey Wardens quest [Ostagar].
Info: You should have Alistair in your team even if you're also playing as a warrior, mostly because he'll have a lot to say during the conversations and he'll also be helpful in defeating monsters.
Bonus for good relations to: constitution
LELIANA (human, rogue)
She joins your team in [Lothering - Dane's refuge] after you manage to deal with Loghain's soldiers.
Info: I would recommend having them in your team for most of the game, assuming that you're playing as a good character. Leliana can be helpful while fighting enemy troops (give her a bow or a crossbow), as well as in opening chests and disarming traps.
Bonus for good relations to: cunning
LOGHAIN (human, warrior)
He can join your team in very unusual circumstances. During the Landsmeet quest you must defeat Loghain either in a honorable duel or in a battle with him and his men. Once he's defeated listen to Riordan's plan and agree for Loghain to go through the ritual, ignoring protests made mostly by Alistair.
Info: Loghain is a very similar character to Alistair and he'll replace him after Alistair has been killed (worst case scenario) or banished from the kingdom (best case scenario). Make sure to give him some of Alistair's things before moving on with the game.
MORRIGAN (human, mage)
She joins your team as soon as you've completed Tower of Ishal quest in [Ostagar]. This will occur during the conversation with her mother in [Flemeth's hut].
Info: Morrigan is an ideal choice for an evil character, however she's not that useful as a mage. The main reason is that she's using mostly offensive spells instead of healing the team, so you would have to change how she's being developed, rely on using potions or have a second mage in your team.
Bonus for good relations to: magic
MABARI HOUND (animal, dog)
Mabari will join your team either during your stay in [Cousland castle] (you must be playing as a human noble) or soon before arriving in [Lothering]. In this case you would have to complete a quest in [Ostagar] and wait for a random encounter.
Info: You'll definitely want to have a mabari in your team in the early parts of the game, because the animal is a great replacement to a warrior. Later in the game it's better to choose intelligent followers instead of the dog.
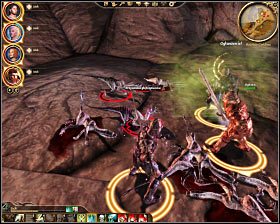
OGHREN (dwarf, warrior)
He joins your team soon after you've started Anvil of the Void quest in [Orzammar - Commons]. Oghren will stop you near the miner checkpoint and offer his services.
Info: I would definitely recommend having Oghren as one of the members of your team, because he's an excellent warrior. Consider choosing him even if you're playing as a good character, because he won't be offended easily.
Bonus for good relations to: constitution
STEN (qunari, warrior)
He can join your team after you free him from his cage in [Lothering]. You can do this either by relying on your lockpicking skills or by completing The imprisoned qunari quest.
Info: Sten should become a member of the team lead by an evil character. He will be very resistant to enemy attacks and he'll get even stronger if you retrieve his sword as a part of his personal quest.
Bonus for good relations to: strength
WYNNE (human, mage)
She will join your team not long after you've officially started Broken circle quest. All you have to do is to reach a larger room in [The Circle tower - Student Quarters].
Info: I would strongly recommend having Wynne in your team, especially if you're playing as a good character. She has a lot of healing spells in her arsenal and therefore she'll be every effective in saving other companions from certain death.
Bonus for good relations to: willpower
ZEVRAN (elf, rogue)
He can join your team soon after you've seen a cut-scene informing you about the threat from the Antivan Crows. Defeat him and other rogues in battle and make sure not to finish him off, because you wouldn't have a second chance of recruiting him.
Info: Zevran can be very helpful in opening locks and stealing items from various citizens of Ferelden. I wouldn't recommend using him in difficult battles, because you would have to be careful or spend money on equipping him with much better items.
Bonuses for good relations to: dexterity, strength
The table below shows my recommendations for team members depending on the class and on the affinity of the main character:
Character class
Playing as
Recommended teammates
Warrior
good character
Alistair, Wynne, Leliana
Mage
good character
Alistair, Leliana, Mabari hound (or Oghren)
Rogue
good character
Alistair, Wynne, Mabari hound (or Oghren)
Warrior
evil character
Morrigan, Sten, Zevran
Mage
evil character
Sten, Zevran, Oghren
Rogue
evil character
Sten, Oghren, Morrigan
1) There are three ways of obtaining new gifts:
- you can find them while exploring the world - make sure to open all chests and cabinets, especially if they're locked
- you can buy them from the vendors - some of the merchants will sell more than one present and don't forget to revisit them later in the game
- you can steal them from certain civilians - make sure to be on a look out for people marked with a yellow color
Don't forget to read the next section, titled List of gifts, to find out where to look for the presents and who should receive them.
2) I urge you NOT TO SELL any gifts you find, because you may not be able to buy them back. The same goes with giving them to a random person. Remember that if you give a present to a correct person you can usually gain 5-15 approval points. If you're unsure about who should receive a gift SAVE your game before handing it over and reload the game if you're unsatisfied with the result.
3) Avoid giving more than 2-3 presents in a row to the same person, because you would start receiving less points for every next present. Generally the best idea is to give one object per person for each stay in the campsite.
4) If most of your companions refuse to take a certain gift then there's a chance of this item being a unique present and you should "reserve it" for later or find the person that will be very happy to get it. In most of these cases finding the recipient will result in receiving at least 10 points and maybe even unlocking a new conversation topic.
5) Avoid handing over gifts while staying in the open world. Instead always return to the campsite and once you're in a safe zone start handing out presents.
The first column in the chart seen below tells the location of the gifts and you'll have to use maps from the atlas to find them. For example:
- M21, P1 means that you must look at map 21 and find P1 symbol
- M21, 1 means that you must look at map 21 and find a merchant marked with 1 (you must buy the gift instead of asking for it or stealing it)
- M21, 1 means that you must look at map 21, find the person marked with 1 and either start a conversation or steal the gift using pickpocketing skills
Aside from knowing the exact location you can also read the first column to find out which object or person you need to interact with (chest, desk, civilian etc.).
The second column displays the name of the gift.
The third column offers a suggestion on who should receive a gift in order to gain a maximum number of relationship points. In some cases (common gifts) it'll be more than one person of you'll be allowed to choose any member of your team.
Important! You can increase your chances of unlocking common gifts by visiting certain merchants many times. Wine is one of a few examples here. You can also obtain a few rare gifts by sending your mabari hound to find items from the environment and if you get lucky the dog will bring you something valuable.
Location
Name of the gift
Who should receive this gift
M25, 2 (merchant)
Ale
Oghren
M27, 1 (merchant)
Ale
Oghren
M65, 2 (merchant)
Ale
Oghren
M29, P2 (desk)
Alistair's mother's amulet
Alistair
M48, 2 (merchant)
Alley king's flagon
Oghren
M65, 3 (merchant)
Ancient map of the Imperium
Loghain or Sten
M27, P1 (flower)
Andraste's grace
Leliana
M42, P1 (flower)
Andraste's grace
Leliana
M66, P1 (flower)
Andraste's grace
Leliana
M60, P1 (chest)
Antivan leather boots
Zevran
M21, P1 (sack)
Beef bone
Mabari hound
M34, P3 (chest)
Beef bone
Mabari hound
M33, P1 (desk)
Black grimoire
Morrigan
M55, P1 (chest)
Black runestone
Alistair
M25, P2 (chest)
Bronze symbol of Andraste
Leliana
M33, P5 (corpse)
Chantry amulet
Leliana
M61, P2 (dusty scrolls)
Chasind sack mead
Oghren
M68, 1 (merchant)
Current map of Ferelden
Loghain
M42, P3 (chest)
Dalish gloves
Zevran
Found by the dog
Dirty pair of pantaloons (send your dog for a search while staying in Lothering)
Sten or Zevran
M61, P1 (bookshelf)
Discovering dragon's blood
Wynne
M65, P1 (armor stand)
Duncan's shield (in order to gain access to the chamber with the shield you must first complete Saving the queen quest and receive a key from a Grey Warden named Riordan)
Alistair
M57, 1 (merchant)
Etched silver symbol
Leliana
M45, P1 (sarcophagus)
Fancy scroll
Wynne
M24, P1 (chest)
Flemeth's grimoire
Morrigan
Found by the dog
Found cake (send your dog for a search while staying in Lothering)
Mabari hound
Found by the dog
Garbolg's backcountry reserve (send your dog for a search while staying in Lothering)
Oghren
M48, 1 (merchant)
Gemmed bracelet
anyone except for the dog
M48, 1 (merchant)
Gold amulet
Morrigan
M63, P1 (corpse)
Golden demon pendant
Morrigan
M48, 2 (merchant)
Golden earrings
anyone except for the dog
M48, 1 (merchant)
Golden mirror
Morrigan
M25, 2 (merchant)
Golden rope necklace
Morrigan
M26, 1 (merchant)
Golden rope necklace
Morrigan
M25, P1 (chest)
Golden scythe 4:90 black
Oghren
M48, 2 (merchant)
Golden symbol of Andraste
Leliana
M65, 2 (stolen from Sanga)
Headband
anyone except for the dog
M29, P1 (chest)
Lamb bone
Mabari hound
M45, P2 (sarcophagus)
Legacy white shear
Oghren
M60, P1 (chest)
Locket
Morrigan
M29, P4 (chest)
Map of occupied Ferelden
Loghain
M65, P2 (cabinet)
Map of the Anderfels (in order to gain access to the chamber with the gift you must first complete Saving the queen quest and receive a key from a Grey Warden named Riordan)
Loghain
M73, P1 (treasure pile)
Medium gold bar
Zevran
M59, P1 (chest)
Medium silver bar
Zevran
M49, 2 (dwarf)
Nug (Important! Make sure to complete A lost nug quest. After that you must find the missing nugs, talk to Leliana about these creatures AND THEN talk to the dwarf to receive a gift for her.
Leliana
M43, P1 (pile of bones)
Onyx demon statuette
Alistair
M42, P2 (rubble)
Ox bone
Mabari hound
M42, P2 (rubble)
Painted skyball
anyone except for the dog
Old Tegrin (random encounter)
Painting of a rebel queen
Sten
M47, 1 (merchant)
Portrait of a goosegirl
Sten
Old Tegrin (random encounter)
Satin shoes
Leliana
M25, 2 (merchant)
Shiny gold ring
Alistair or Leliana
M25, 1 (merchant)
Silver bracelet
anyone except for the dog
M41, 1 (merchant)
Silver brooch
Morrigan
M33, P4 (vanity)
Silver chain
Morrigan
M48, 2 (merchant)
Silver demon head ring
anyone except for the dog
M29, P3 (chest)
Silver framed still-life
Sten
M44, P1 (dragon's hiard)
Silver medallion
Morrigan
Old Tegrin (random encounter)
Silver sword of mercy
Leliana
M25, P3 (chest)
Small carved statuette
Alistair
M34, P4 (charmed templar)
Small gold bar
Zevran
M60, P2 (chest)
Small silver bar
Zevran
M28, P1 (chest)
Steel bracers
Zevran
M65, P3 (chest)
Steel symbol of Andraste
Leliana
M27, P2 (chest)
Sten's sword
Sten
M29, P5 (chest)
Stone dragon statuette
Alistair
M62, P1 (filth)
Stone warrior statuette
Alistair
M34, P2 (vanity)
Sun blonde vint -1
Oghren
Found by the dog
Tangled ball of yarn
Mabari hound
Found by the dog
Tattered notebook
Wynne
M29, P6 (bookshelf)
The Guerrins of Ferelden
Wynne
M33, P3 (pile of books)
The rose of Orlais
Wynne
M53, P1 (chest)
The search for the true prophet
Wynne
M64, 1 (stolen from Habren)
Tiara
anyone except for the dog
M56, P1 (chest)
Totem
Sten
M23, P1 (barrel)
Tribal necklace
Morrigan
M68, P1 (chest)
Veal bone
Mabari hound
M33, P2 (corpse)
Water stained portrait
Sten
M34, P1 (abomination)
White runestone
Alistair
M25, 1 (merchant)
Wine
Wynne
M32, 1 (merchant)
Wine
Wynne
Monsters
Check the table below to find out about the monsters you may encounter during your journeys. Naturally the chart doesn't list any bosses, because you'll fight them only once and the main section of this guide describes how to kill them.
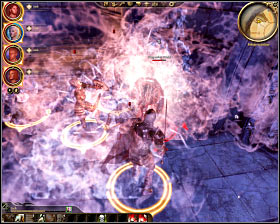
Abominations
Threat level: 6/10
The most important thing for you to remember is the fact that all the abominations will be exploding soon after their death. Don't forget to move away from the danger area to avoid unwanted injuries. This can be resolved by using protection spells or wearing items which increase resistance to a certain element (mostly it's about fire).

Arcane horrors / Ash wraiths
Threat level: 8/10 - 9/10
Large groups of arcane horrors and ash wraiths can be encountered during your stay in The Circle tower (including the Fade) and while exploring the elven ruins located next to Brecilian forest. Prevent fighting too many of these beasts at the same time, especially since a lot of them will be treated as mini-bosses. Keep trying different spells to harm them aside from sending warriors and archers into battle.
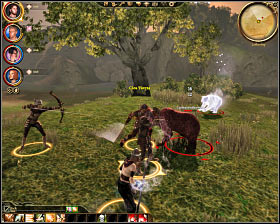
Bears
Threat level: 4/10 - 5/10
Bears can cause problems in early stages of the game (for example - while completing one of the side missions in Lothering) due to their high resistance to melee attacks and the ability of knocking down members of your team. Later in the game killing them won't be a problem, however a few bears will play roles of mini-bosses.

Bronto
Threat level: 5/10 - 6/10
You will be dealing with Brontos while exploring different areas near Orzammar and in most cases you won't have to make any additional preparations before engaging them in combat. Watch out for their frontal attacks at the start of each battle and once you've dodged them start attacking the beasts. Bear in mind that brontos are usually accompanied by hurlocks and genlocks, but you should focus on killing the beast before attacking the darkspawn.
Deepstalkers
Threat level: 2/10 - 3/10
Deepstalkers are small creatures which lack magical abilities so killing them won't be a problem. The only thing you'll have to remember about is that they like to perform surprise attacks, however even your less resistant team members shouldn't be afraid of encountering them. You'll meet stronger deepstalkers (leaders) in a few areas of the game, but for most of the time it'll only take a few moments to kill them.
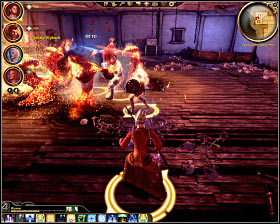
Demons
Threat level: 7/10 - 8/10
Demons appear in different forms, however for most of the time their arrival means trouble. Always start off by eliminating demons capable of inflicting massive fire injuries, especially if your team is not too resistant to those types of attacks. Avoid fighting larger groups of demons, because it may get ugly if they surround one of less resistant members of your team.
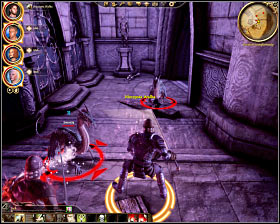
Dragonlings
Threat level: 4/10
You'll encounter these smallest types of dragons during your stay in The Circle tower and while exploring the caves located beneath the Ruined temple. Killing them should be easy, even though they will be more effective in large groups than deepstalkers or wolves.
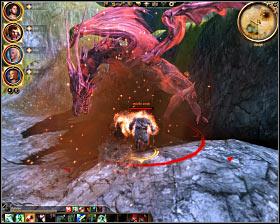
Dragons
Threat level: 10/10
You'll encounter only several dragons during the course of the game and in each case it's going to be an EXTREMELY difficult duel. I would recommend engaging the beasts in combat in the final stages of the game when your team has advanced to higher experience levels and received powerful weapons and armors. Don't forget to choose one mage with healing capabilities for each dragon battle and at least one archer to attack the monster from a distance.
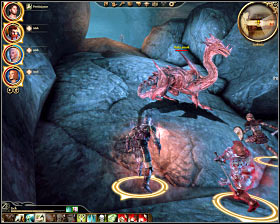
Drakes
Threat level: 6/10 - 7/10
Be careful while fighting these small dragons, especially if you're going to be surprised by a larger group. I would always recommend staying in narrow passageway to prevent them from surrounding your team. Increasing your resistance to fire via spells or magical items is also a good idea.
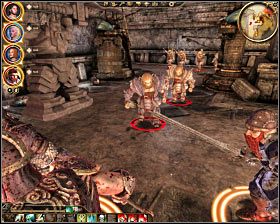
Genlocks
Threat level: 3/10 - 7/10
Genlocks are very common types of monsters, because they're one of two types of the darkspawn. You won't have to be afraid of genlock warriors, however you will have to watch out for their other variations. Emissaries are mages so they always have to go down first and you should also be on a look out for rogues (they perform surprise attacks using camouflage) and archers.
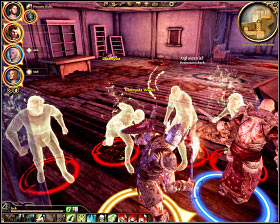
Ghosts
Threat level: 6/10
Ghosts can be found in The Deep Roads or in the Abandoned orphanage in Denerim. The good news is that you won't have to rely only on magic while fighting them, because your melee attacks can also injure them. Nevertheless you should be careful and avoid fighting larger groups.
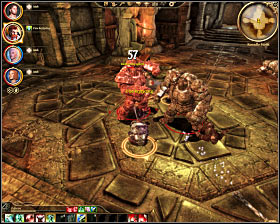
Golems
Threat level: 8/10
You won't encounter too many golems during your journeys. This is good news, because killing the stone beasts is always going to be a big problem. Try fighting only golem at a time to avoid unwanted problems. Use warriors to attack the golems and monitor their health bars, so they won't receive fatal injuries.
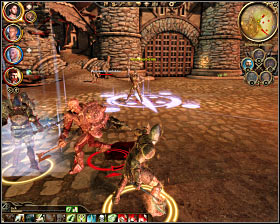
Hurlocks
Threat: 4/10 - 7/10
Hurlocks are the second type of darkspawn and you'll be encountering them as often as genlocks. You should know that usually they're going to be more resistant and their attacks will inflict more damage. Watch out for "upgraded" versions of the beasts, including emissaries, archers and powerful alpha hurlocks (warriors).
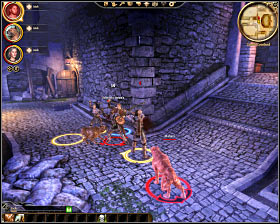
Mabari hounds
Threat level: 3/10 - 4/10
Mabari hounds will often accompany members of the intelligent races of Ferelden and you should always attack them after dealing with enemy mages. Protect your archers and mages so they won't be knocked out by any of the dogs.
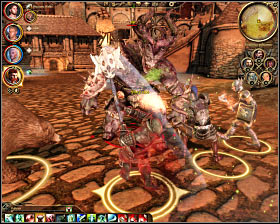
Ogres
Threat level: 7/10 - 9/10
The first ogre in the game can be encountered at the top of the Ishal tower, but thankfully other beasts are going to be much easier to kill (aside from new ogre bosses). Each time you've encountered an ogre send your warriors into combat, use an archer to aid them from a distance and a mage to heal them. Don't move your archers and mages too close, because one of ogre's attacks creates a deadly shockwave. Avoid fighting more than ogre at a time and if you see more of them try encouraging only one beast to follow you.
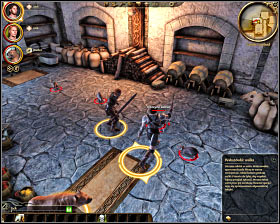
Rats
Threat level: 1/10
You won't find too many rats in the game and killing them won't be a problem. Even an inexperienced character can succeed easily.
Revenants
Threat level: 8/10 - 9/10
Revenants are among the most powerful types of the undead creatures encountered in the game and you'll be fighting them mostly after touching vials found in different areas of the world. Killing a revenant is always going to be a huge problem because of its strong attacks and high resistance, so you should consider challenging these monsters later in the game. A stronger team will have a chance to win instead of being slaughtered in a manner of seconds.
Shades
Threat level: 7/10 - 8/10
Most of these monsters can be encountered in areas also occupied by various types of demons. It shouldn't take long until you notice that shades are very vulnerable to magic so it would be a good idea to have a few good spells in your arsenal.
Shrieks
Threat level: 6/10 - 7/10
Shrieks can be encountered mostly while exploring Dead trenches in The deep roads, however you will also be fighting them in other areas of the world. Don't forget that they will always use camouflage to attack your team by surprise, so don't forget to protect your archers and mages if they do end up being attacked by more than one monster. Prevent the shrieks from surrounding your team if possible by moving back to small rooms or narrow corridors.
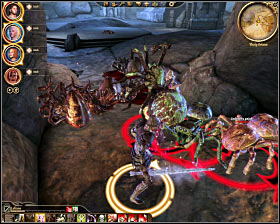
Spiders
Threat level: 4/10 - 7/10
You'll encounter many different types of spiders during the game and most of them are going to be relatively easy to kill. Watch out for rare types of these monsters, because not only they're going to be more resistant to your attacks but they'll also use spider webs or knockouts to stop or injure your teammates. Make sure to eliminate these threats as soon as possible, especially while fighting a larger group of spiders.
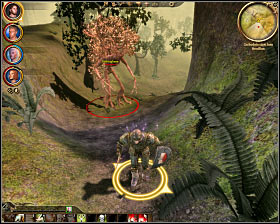
Sylvans
Threat level: 6/10 - 7/10
Big moving trees will be encountered for the first time during your stay in the western section of the Brecilian forest and you can expect to meet more of them in the future. Ignore the fact that all the trees are moving slowly, because one of their attacks uses roots to immobilize a target along with inflicting some injuries. Instead attack them with your warriors and make sure to have at least one mage to heal their wounds.
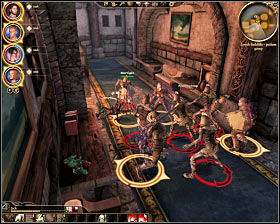
Undead
Threat level: 4/10 - 5/10
You will be dealing with different types of zombies and skeletons during the entire game, including your visits to Redcliffe castle, The Circle tower, Brecilian ruins and Fort Drakon (near the end of the game). Eliminating the undead shouldn't be a big deal, however you must prevent them from surrounding your team.
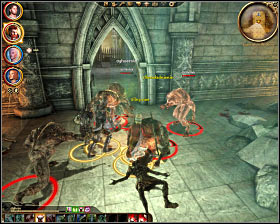
Werewolves
Threat level: 6/10 - 7/10
Eliminating most of the werewolves won't be a big problem, because your team should be powerful enough to defeat them when you start exploring Brecilian forest. Watch out for larger groups, especially after making your way to their lair found in the ruins. The same goes with plague werewolves, because they're going to be much more powerful than standard beasts.
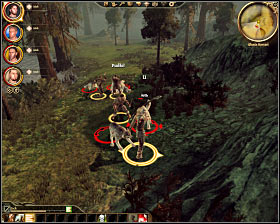
Wolves
Threat level: 3/10 - 7/10
You'll be dealing with weaker types of wolves in the early stages of the game, however you will start encountering more powerful beasts soon enough. I would strongly recommend paying attention to plague wolves, because not only those beasts are going to be more powerful than usual wolves but they will also be capable of knocking down members of your team.
Intelligent opponents
Check the table below to find out about the intelligent opponents you may encounter during your journeys. Naturally the chart doesn't list any bosses, because you'll fight them only once and the main section of this guide describes how to kill them.

Archers
Threat level: 3/10 - 6/10
In most cases enemy archers won't be a big problem and they won't endanger safety of your team, however later in the game (especially while completing Denerim's final quests) you may encounter their elite versions. Their attacks will inflict more injuries or even immobilize your teammates for a few seconds, so as a result you will have to focus on killing them quickly.
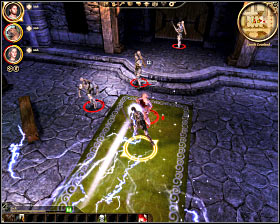
Mages
Threat level: 5/10 - 7/10
It's always a good thing to start each battle by eliminating hostile mages. This will prevent them from aiding other opponents or injuring your teammates with offensive spells. Use your warriors to get to the mages quickly, but watch out for glyphs that may be found nearby.
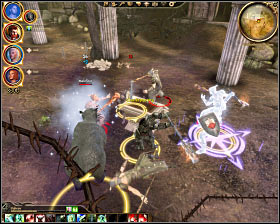
Blood mages
Threat level: 6/10 - 7/10
They're the special kind of mages and you'll have to pay even more attention to killing them as soon as possible. Thankfully blood mages often work alone, so you won't have to worry about attacking other enemies at the same time. You can meet some of them in the abandoned building in Denerim, in The Circle tower or in eastern Brecilian forest.
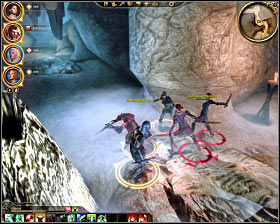
Assassins
Threat level: 4/10 - 5/10
You'll be dealing with three types of opponents here - mercenaries, assassins and rogues. Most of them will act like shrieks and attack the team using camouflage. Pause the game as soon as they've revealed their positions and plan your strategy to offer maximum protection to your mages and archers.
Qunari warriors
Threat level: 6/10
You won't encountered qunari mercenaries too often and it's not a coincidence, because killing them won't be easy. Expect huge health drops while dealing with them in close combat, not only because of their unique skills but also as a result of them using powerful melee weapons.
Warriors
Threat level: 2/10 - 5/10
There are three major types of enemy warriors - soldiers, knights and templars. Naturally, members of this class will take part in almost every large battle and in most cases defeating them won't be a big problem. You should only watch out for elite dwarven warriors and for templars (encountered mostly in The Circle tower).
Stars (*) found in the second column (Requirements) mean that you should check the main section of the guide to find a detailed walkthrough of the quest.
Orange color was used to mark achievements reserved only for the PC version of Dragon Age: Origins.
Achievement
Requirements
A Dark Promise (hidden achievement)
Agree to Morrigan's proposal during the course of The final battle* quest.
Accomplished Rogue
Unlock all talents reserved for a rogue.
Accomplished Warrior
Unlock all talents reserved for a warrior.
Annulment Invoker
Ally yourself with the templars during the course of Broken circle* quest.
Archery Master
Unlock all archery talents.
Archmage
Reach 20th experience level while playing as a mage. You'll have to play again if your main character is representing a different class.
Battery
Kill 50 enemies using Assault (warrior's talent; Weapons and shield category)
Bhelen's Ally
Help Bhelen in becoming the next king during the course of Paragon of her kind* quest.
Blackstone Auxillary
Finish all quests for Blackstone irregulars.
Blight-Queller
Kill at least 1000 darkspawn.
Bloodied
Finish one of six available origin stories without being knocked out even once (main character). You shouldn't have any problems here, because all the stories are relatively easy. Choose to become a dalish elf if you want to take part in the shortest and easiest story.
Bully
Perform at least five difficult and successful intimidation attempts. In order to make this happen you'll have to fully developed Coercion skill and invest a lot of points in raising strength attribute.
Casteless
Finish the origin story of a dwarf commoner.
Ceremonialist
Defeat all the cultists found in the caverns during the course of Urn of sacred ashes* quest.
Clever
Set up a trap using a device or a magical glyph and wait for an opponent to fall for your trick.
Conjurer
Unlock all spells from Creation category.
Conscripted
Finish the origin story of a city elf.
Corrupted
Finish the origin story of a dalish elf.
Crafty
Craft at least 25 items (it doesn't matter what it's going to be).
Crusher
Kill 50 enemies using Mighty blow (warrior's talent; Two-handed category).
Defender (hidden achievement)
Save lives of at least 50% soldiers responsible for defending city gates during the course of The final battle* quest.
Diabolist
Install Warden's Keep DLC and drink a potion found in Avernus's laboratory.
Dragonslayer (hidden achievement)
Defeat a high dragon encountered at the top of the mountain. This can be achieved during the course of Urn of sacred ashes* quest and the horn needed to call the dragon can be obtained after defeating the leader of the cultists.
Easily Sidetracked
Finish 75% quests of the game.
Easy Lover
Start a romance with Zevran.
Educated
Use at least one tome of magical power to raise an attribute or to unlock a talent, a skill or a spell. This is an easy achievement, because there are a lot of tomes in the game (sold by merchants) and you'll only have to acquire one book.
Elementalist
Unlock all spells from Primal category.
Elite
Choose the second specialization for the main character.
First Knight
Start a romance with Alistair.
Grey Warden
Kill at least 100 darkspawn.
Harrowed
Finish the origin story of a magi.
Harrowmont's Ally
Help Harrowmont in becoming the next king during the course of Paragon of her kind* quest.
Heavy Hitter
Perform a single attack that will inflict 250 damage points. The easiest way to do this is near the end of the game. Make sure to use a warrior and to rely on talents increasing your chances of scoring a critical hit.
Hero of Redcliffe
Finish Arl of Redcliffe* quest.
Hexer
Unlock all spells from Entropy category.
Hopelessly Romantic
Start romances with other members of the team (Alistair, Morrigan, Zevran and Leliana).
I'm Kind of a Big Deal
Finish the entire game without being knocked out even once (main character).
Indestructible
Finish the Landsmeet* quest without being knocked out even once (main character).
Insidious
Deploy at least 25 traps or glyphs.
Kinslayer
Finish the origin story of a noble dwarf.
Last of the Wardens
Finish Tower of Ishal* quest, leaving Ostagar for good.
Last of Your Line
Finish the origin story of a human noble.
Liberator
Assist in destroying the anvil during the course of Anvil of the Void* quest.
Lightning Reflexes
Disarm at least 25 traps left by enemy units.
Lockpicker
Use your lockpicking skill. You only have to open one lock so assuming that you're playing as a rogue you can earn this achievement during the course of the origin story.
Magic Sympathizer
Ally yourself with the mages during the course of Broken circle* quest.
Master Lockpicker
Open at least 50 locks.
Master of Arms
Reach 20th experience level while playing as a warrior. You'll have to play again if your main character is representing a different class.
Master of the Peak
Install Warden's Keep DLC and explore Soldier's Peak.
Master Warden
Kill at least 500 darkspawn.
Menacing
Perform at least ten difficult and successful intimidation attempts. In order to make this happen you'll have to fully developed Coercion skill and invest a lot of points in raising strength attribute.
Mercenary
Complete 15 quests for different guilds of Ferelden.
Nimble
Disarm at least one trap.
Perfectionist
Unlock all the endings of the game (main character dies, Loghain dies, Alistair dies, sealed a pact with Morrigan).
Persuasive
Perform at least five difficult and successful persuasion attempts. In order to make this happen you'll have to fully developed Coercion skill.
Pickpocket
Use your pickpocketing skill at least one (it doesn't matter what you steal and who you'll steal it from).
Pilgrim
Finish one of the quests from the Chanter's board. You can earn this achievement easily during your stay in Lothering or later in the game.
Poacher
Ally yourself with the elves during the course of Nature of the beast* quest.
Pragmatist
Assist in preserving the anvil during the course of Anvil of the Void* quest.
Rabble-Rouser
Finish the Landsmeet* quest.
Recruiter
Recruit all team members (you can find out where to look for them in List of companions section).
Redeemer
Allow Loghain to join your team and to sacrifice his life during the final battle with the archdemon.
Resilient
Finish all Ostagar quests without being knocked out even once (main character).
Rock and a Hard Place
Install The Stone Prisoner DLC and finish the first main quest.
Sacrilegious
Assist the cultists in destroying the ashes during the course of Urn of sacred ashes* quest.
Shadow
Reach 20th experience level while playing as a rogue. You'll have to play again if your main character is representing a different class.
Sharpshooter
Kill 50 enemies using Arrow of slaying (rogue's talents; Archery category)
Shield Master
Unlock all weapons and shield talents.
Silver Tongued
Perform at least 25 difficult and successful persuasion attempts. In order to make this happen you'll have to fully developed Coercion skill.
Slayer
Ally yourself with the werewolves during the course of Nature of the beast* quest.
Standard-Bearer
Use the ancient treaties acquired from Flemeth in order to recruit all the major forces living in Ferelden. This means you having to complete several main quests - Lothering and the imperial highway*, Arl of Redcliffe*, Urn of Sacred Ashes*, Broken Circle*, Nature of the beast* and Paragon of her kind*.
Stone's Lament
Install The Stone Prisoner DLC and finish the second main quest (Shale's personal mission).
Streetwise
Complete all the favors and report back to the bartender found in Denerim.
Tactician
Kill at least 250 enemies without receiving any injuries from them. The best way to make this happen is to use characters equipped with bows or mages with powerful spells in their arsenal.
Thaumaturgist
Unlock all spells from Spirit category.
The Collective Friend
Complete all mission for the Mages' collective (one of the guilds in the game).
The Punisher
Kill 50 enemies using Punisher (warrior's talent; Dual weapon category)
The Ultimate Sacrifice (hidden achievement)
During the course of The final battle* quest choose an ending that requires one of the Grey Wardens to die.
Tinkerer
Craft at least one item (it doesn't matter what it's going to be).
Traveler
Explore all the areas available in the game.
Two-Handed Weapon Master
Unlock all dual weapon talents.
Veteran
Choose the first specialization for the main character.
Warden-Commander
Allow Alistair to sacrifice his life during the final battle with the archdemon.
Whirling Dervish
Kill 50 enemies using Whirlwind (rogue's talent; Dual weapon category)
Wine, Woman, and Song
Start a romance with Leliana.
Witch Gone Wild
Start a romance with Morrigan.
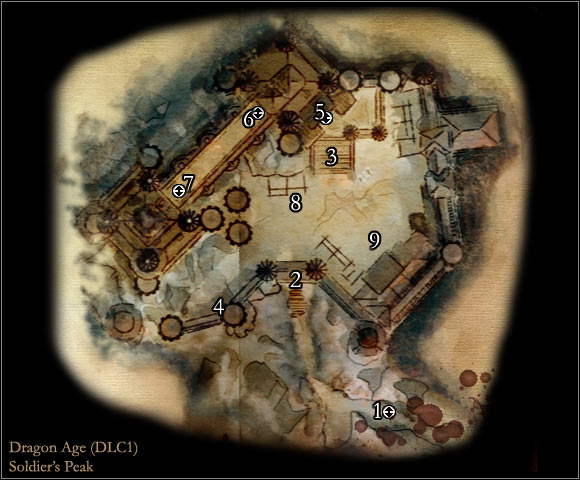
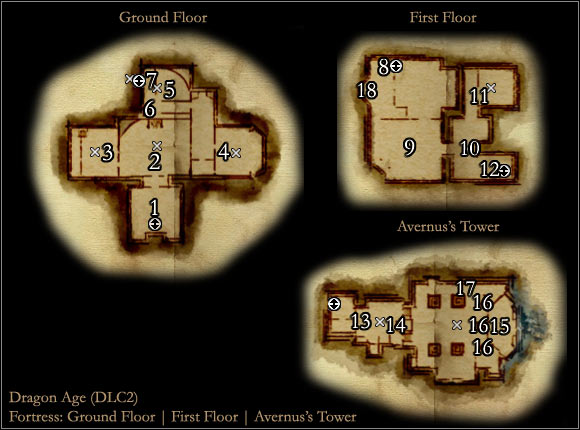

After you've installed this DLC you can load a saved game and you'll be informed about the possibility of starting a new quest. Important! You won't be allowed to move on with this mission until you've left [Lothering] and therefore completed Lothering and the imperial highway main quest!
An important thing about Warden's keep is that the difficulty level of this DLC will change depending on your current progress. I would recommend starting this quest after you've successfully returned from The Circle tower, because you'll want to have Wynne (as a healer) in your team. Don't forget to free some space in your inventory, because you'll have a chance to collect a lot of useful things in the near future.
Received from: Levi Dryden [Campsite]
Description: You can officially start this quest in the campsite by talking to Levi Dryden (M26, 3). Depending on how much you want to find out about Duncan's past you can agree to his request right away or you can ask him to tell his story and story of Duncan's promise. Dryden will inform you that he'll join your team after your arrival in the mountains. You can go there right now or you can leave this quest for later.
REACHING THE FORTRESS:
Choose a new location from the map of the world. It's called [Soldier's peak] and it can be found to the north-west of Denerim. After you've arrived (DLC1, 1) you'll witness a short cut-scene explaining a journey through the tunnels (you couldn't witness it in person). Once the conversation has ended start moving towards a fortress seen in the distance. Approach the main gate (DLC1, 2) where you'll witness an interesting vision. Notice that if you've already been to The Circle tower you can share the experience of being in the Fade.
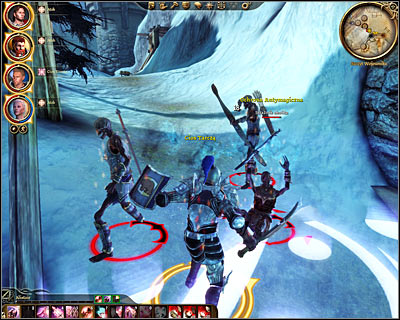
Make a few steps forward and you're going to be attacked by a large group of skeletons. I would recommend staying somewhere near the main gate instead of moving left or towards the stairs seen in the distance, so you won't be fighting more than one group at a time. Thankfully eliminating the undead is going to be a relatively easy challenge, aside from having to deal with one acolyte. Don't forget to protect your mage against enemy attacks, but I'm sure that you'll manage the situation.
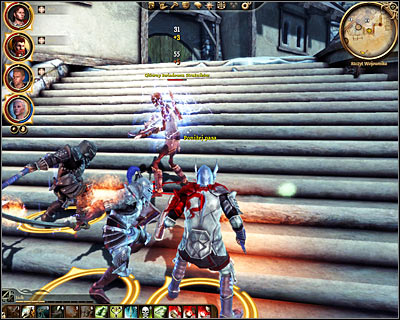
Head towards the stairs (DLC1, 3) after securing the surrounding area and you'll have to fight a mini-boss - Warden master scout. This creature is an archer, so it's important to approach it quickly and the same goes with standard archers seen nearby. Once you've defeated the boss make sure to examine its body to collect an Antique warden crossbow. Use the stairs and then click on the gate to travel to [Fortress - Ground floor] (DLC1, 5).
EXPLORING THE FORTRESS:
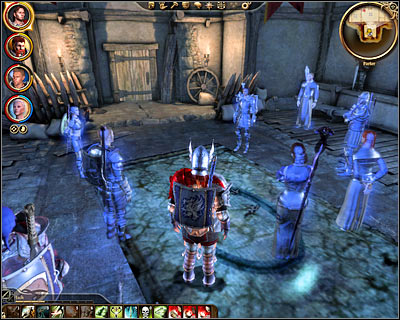
Once you're inside (DLC2, 1) you'll witness a new vision, however in this case you'll be allowed to move around. You can either listen to an entire conversation or you can start exploring the fortress without making any additional stops. Make sure to click on a statement of defiance found on the right wall to add a new entry to your journal.
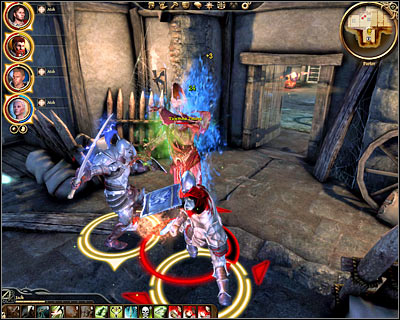
Open the door leading to the next room (DLC2, 2) and get ready to defeat a new mini-boss. This time you'll be going against an arcane horror and it would be a good idea to wait for the monster to come to you before starting this fight. Aside from the main beast you'll also have to deal with two lesser rage demons.
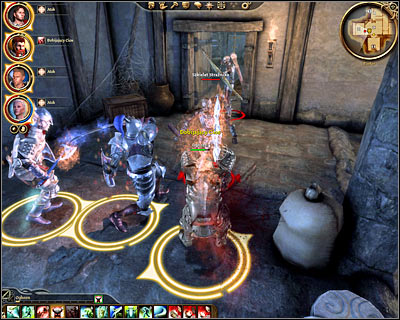
Check a small note found on the table and then proceed to the western room. You'll end up standing in the barracks (DLC2, 3) and it shouldn't be a surprise that you'll have to kill a new mini-boss - Commander Athlar. Once the boss is dead deal with a couple of skeleton archers and find a new note. It would also be a good idea to open several chests found in this room to collect items made of dragon bones.
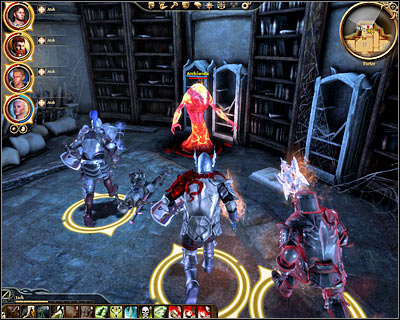
You may exit this room and proceed to the eastern hallway. Here you can either go north or visit a small kitchen found along the way (DLC2, 4). Open a chest, return to the main corridor and proceed to the last room found on this floor (DLC2, 5). Start off by attacking demons showing up in pairs (it would be a good idea to fight them in the main corridor) and finish this battle by defeating an Archivist. Remember that it's recommended to use ice and lightning spells against the demons. Once the battle has ended check Archivist's book found on the floor to trigger a new vision. Talk to Levi and then choose a passageway leading to [Fortress - First floor] (DLC2, 7).
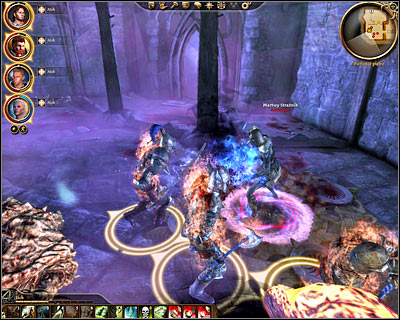
Save your game (DLC2, 8) before proceeding to the southern section of the room. Once you're there (DLC2, 9) you'll trigger a new cut-scene and when it's over you'll automatically start a fight with a new boss - Rage demon. Ignore the main boss and instead of attacking him start killing dead wardens (they're standing in magical circles). Once they're all gone you may focus your attention on the demon.

Sadly you won't be allowed to kill the rage demon after just a few seconds of combat, because after you've made it weaker new dead wardens will show up in the room. This means you must stop attacking the demon and eliminate the wardens as soon as possible. Start attacking the boss again when they're gone and this time you shouldn't be interrupted. Make sure to use a lot of healing spells during both battles, because demon's attacks will inflict a lot of injuries.
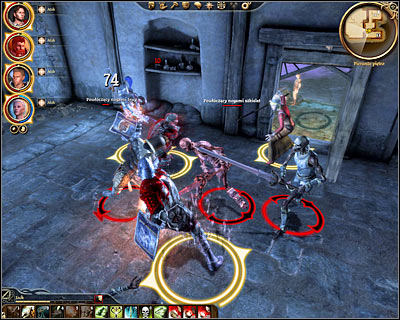
After you've successfully defeated the boss you'll trigger a new conversation with Levi and you'll be allowed to inform him that it's possible for Grey Wardens to become blood mages. Don't forget to examine the demon's body to collect Winter's breath staff. You may now proceed to a nearby chapel where you'll have to defeat a small group of the undead. Once it's safe head north-east (DLC2, 11). Save your game before entering new quarters, because you'll have to make an important decision on how this quest should end.
DECISION - SOPHIA:
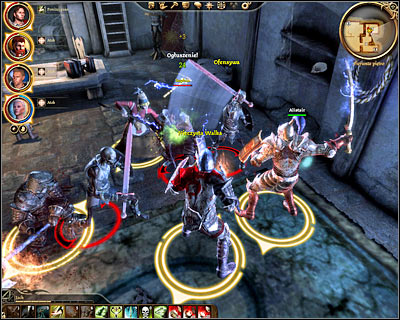
There are three endings to your conversation with possessed Sophia and basically you'll have to choose between killing her and cooperating with her. Bear in mind that if you decide to attack her right now you'll also have to deal with a small group of skeleton guardians. Killing Sophia would disable a force field that was active in the previous corridor (DLC2, 12). If you decide to get rid of her right now make sure to examine her body after the battle in order to collect new items (Warden commander gloves, Warden commander armor, Warden commander boots).
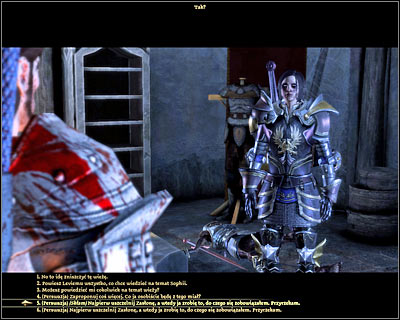
If your character has developed some serious persuasion skills you may start the conversation with Sophia and convince her that she should seal the Veil. Notice that you can't lie to her, because she would immediately know that something is wrong and in order to reassure her of your good intentions you would have to win a second persuasion attempt. Once she's agreed to seal the Veil you'll return to the main room where you've defeated the last boss (DLC2, 9). Your job here will be to protect Sophia when she's trying to complete a ritual.
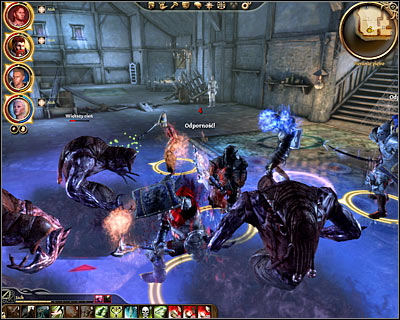
You'll have to defeat four groups of enemy monsters - first wave will feature lesser rage demons, second wave will feature greater shades, third wave will feature ash wraiths and lesser rage demons and the final fourth wave will feature a desire demon (main boss). Make sure to monitor health bars of your teammates and to heal them after each wave has been defeated. It's also important to use spells against the demons, because they'll be more vulnerable to attacks made by your mage than to standard melee hits. After you've defeated all the monsters talk to Sophia and agree to grant her wish. You may now head towards the door with a disabled barrier (DLC2, 12).
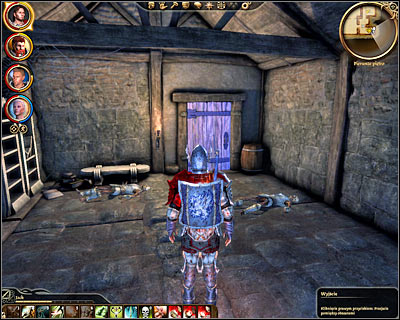
The best solution is to agree to cooperate with Sophia without asking her to seal the Void. Remember that you won't have to worry about honoring the deal, because you will be allowed to betray her trust in the future. Don't forget to use persuasion to ask for something in return (after sealing the deal). She'll allow you to choose between disclosing a location of the treasure and telling Levi about his past. Once again - this isn't the final choice, because you will have a chance to make her tell both things. Either way end the conversation and don't forget to click on Sophia's journal on the desk and to inspect nearby chests to find new treasures. You may now return to the corridor. Choose a previously inaccessible passageway leading to [Soldier's peak] (DLC2, 12).
FINDING AVERNUS:
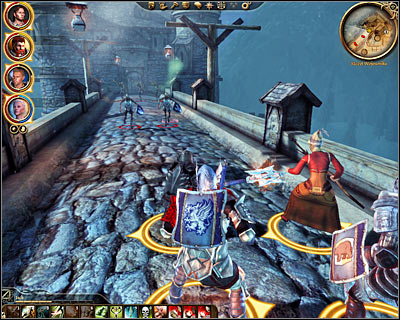
You'll end up standing on a bridge (DLC1, 6) leading to Avernus's tower. Instead of running to the other side wait for skeleton warriors to come to you. Order your teammates to attack the monsters and in the meantime use your rogue to disable at least a few traps to grant a safe passage for the rest of the squad. You may now deal with a small group of skeleton archers. Once it's safe open the door leading to [Avernus's tower] (DLC1, 7).
Watch out for new undead monsters waiting for you inside the laboratory (DLC2, 13). Kill them and once it's safe again take your time to explore your surroundings. Make sure to read a book found on the floor to read Avernus's journal concerning new skills and then click on his personal notes found on the table. Finish off by clicking on an alchemical concoction (DLC2, 14). Only the main character can drink the mixture and he or she will be rewarded with two unique talents (different talents depending on character class). SAVE your game before moving on to the next room.
DECISION - AVERNUS:
Avernus can be found here (DLC2, 15) and once again you will have to choose between three endings. If you want to grant Sophia's wish you can attack the mage right now, but you would have to acknowledge the fact that he will be prepared for your betrayal. Notice that new skeletons have appeared in the room and that Avernus himself is being protected by three glyphs (DLC2, 16). Use magic or one of the members of your team to dispose of one of the glyphs and then attack the mage with everything you've got. Finish the battle by dealing with the skeletons and don't forget to inspect Avernus's body to collect two interesting items - lightning rod and Avernus's robes.
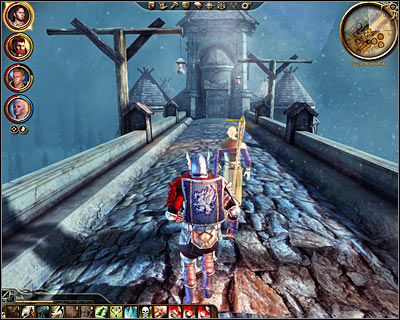
The best solution would be to talk to Avernus and to agree to provide assistance in dealing with Sophia. Remember that this isn't your final choice, because you'll soon have one more chance to decide who should become your permanent ally. Make sure to ask the mage about Levi's ancestors, but you won't find out anything important. Instead you can use persuasion to convince him that when this is all over he should pay for his crimes. End the conversation and follow the mage to the door you've used to get here (DLC2, 13) and then use the bridge to return to [Fortress - First floor] (DLC1, 6).
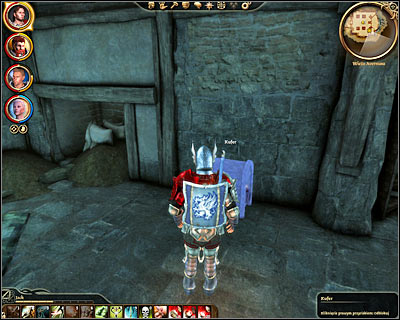
Unlocking the third ending will only be possible if you've already killed Sophia. In this case you can inform Avernus about your success and skip to Securing the fortress section. Either way it would be a good idea to explore Avernus's chamber after talking to him or killing him. There are two crates here and both contain useful objects.
CHOOSING AN ALLY:
If Avernus has been killed you can report back to Sophia and skip to Securing the fortress section. If Avernus and Sophia are still alive you'll witness a confrontation between them after returning to the tower (DLC2, 12). This is where you'll have to make a final choice of an ally by clicking on one of two dialogue options.

Choosing an ally won't affect the course of this battle, because either Avernus or Sophia will stand by your side and the other person will become hostile (and summon a few weaker creatures). Considering the fact that you'll have a new strong companion winning this battle should be easier than having to deal with Avernus or Sophia without additional backup.
SECURING THE FORTRESS:
After you've defeated Avernus or Sophia you'll be forced to protect your new ally and the new battle will take place inside a large room where you've defeated a rage demon not long ago (DLC2, 9). You'll have to kill four groups of enemy monsters - first wave will feature lesser rage demons, second wave will feature greater shades, third wave will feature ash wraiths and lesser rage demons and the final fourth wave will feature a desire demon (main boss). Make sure to monitor health bars of your teammates and to heal them after each wave has been defeated. It's also important to use spells against the demons, because they'll be more vulnerable to attacks made by your mage than to standard melee hits. After you've defeated the monsters loot all the bodies (including the body of Avernus or Sophia) and talk to your ally.
LAST CONVERSATION WITH THE ALLY:
If you've chosen Sophia to be your ally you should remind her that she promised you something in return for helping her. You can now find out about the hidden treasure (it would be possible to locate it without her help) or you can listen to a story about Levi's ancestors (notice that you'll be allowed to interrupt it at certain points). The interesting thing is that once Sophia holds up to her promise you can use intimidation to force her into telling you the other thing. Finish this conversation by letting the demon go, by informing Sophia that you give her one day before going after her or by attacking her.
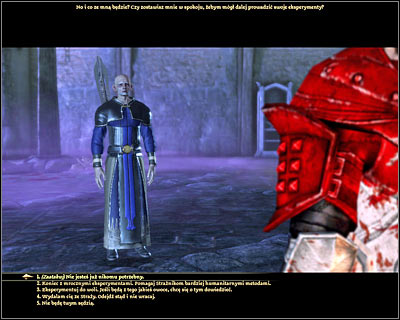
If you've chosen Avernus to be your ally you can decide what to do with the mage. If you've convinced Avernus earlier on to surrender you'll have an easier choice. Generally you can choose between killing him, convincing him to stop the experiments and discharging him from the Grey Wardens.
Finish this entire quest by talking to your friend Levi Dryden. He will thank you for your help, promise assistance in the future and tell you about his plans for the tower.
Received from: automatically after clicking on one of four interactive items [Soldier's peak or Fortress]
![Description: This is an easy quest and you'll have a chance to start it soon after arriving in [Soldier's peak] - DLC - Wardens Keep - Ancient history - DLC - Wardens Keep - Dragon Age: Origins - Game Guide and Walkthrough](https://game.lhg100.com/Article/UploadFiles/201512/2015121518294121.jpg)
Description: This is an easy quest and you'll have a chance to start it soon after arriving in [Soldier's peak]. Make sure to deal with all the skeletons before you start looking around. Explore the area to the west of the entrance to the tower and click on a large statue (DLC1, 4). You can read the first chapter of the story in your journal or you can focus only on finding other interactive objects.
![A second interactive object is a book found in the last room in [Fortress - Ground floor] (DLC2, 6) - DLC - Wardens Keep - Ancient history - DLC - Wardens Keep - Dragon Age: Origins - Game Guide and Walkthrough](https://game.lhg100.com/Article/UploadFiles/201512/2015121518294188.jpg)
A second interactive object is a book found in the last room in [Fortress - Ground floor] (DLC2, 6). Notice that before you pick it up you'll first have to deal with the main boss (Archivist). Read the second chapter.
![A third interactive object is the rasperry jam found in [Fortress - First floor] (DLC2, 10) - DLC - Wardens Keep - Ancient history - DLC - Wardens Keep - Dragon Age: Origins - Game Guide and Walkthrough](https://game.lhg100.com/Article/UploadFiles/201512/2015121518294178.jpg)
A third interactive object is the rasperry jam found in [Fortress - First floor] (DLC2, 10). You can get to this item only if you've successfully defeated the boss (Rage demon) and dealt with the undead. Read the third chapter.
![The last fourth item can be taken from a corpse found in [Avernus's tower] (DLC2, 17) - DLC - Wardens Keep - Ancient history - DLC - Wardens Keep - Dragon Age: Origins - Game Guide and Walkthrough](https://game.lhg100.com/Article/UploadFiles/201512/2015121518294131.jpg)
The last fourth item can be taken from a corpse found in [Avernus's tower] (DLC2, 17). This is the same room where you'll find Avernus, so you'll have to talk to him first before examining the body. Read the fourth chapter and return to [Fortress - First floor].
You'll be allowed to end this mission AFTER completing the main quest (after choosing an ally and successfully defending Sophia or Avernus). Remain in [Fortress - First floor] and inspect the area near the passageway leading to the ground floor. Clicking on Asturian's portrait (DLC2, 18) will uncover a chest. Open this object to collect Asturian's might (longsword), bolts, Shadow belt and gold.
![I would strongly recommend returning to [Soldier's peak] later in the game, because there are going to be several surprises waiting for you - DLC - Wardens Keep - Epilogue - DLC - Wardens Keep - Dragon Age: Origins - Game Guide and Walkthrough](https://game.lhg100.com/Article/UploadFiles/201512/2015121518294273.jpg)
I would strongly recommend returning to [Soldier's peak] later in the game, because there are going to be several surprises waiting for you. Notice that two characters can be found outside the fortress. You already know Levi (DLC1, 8) and you can trade goods with him (he's selling excellent runes, as well as recipes and plans).
The second interactive person is Mikhael Dryden (DLC1, 9). You can also purchase goods from him, including excellent armor pieces. In addition to that you can show him a meteorite found during your journeys (random encounter showing an elderly couple and a crater) and in return he would craft a unique item called Starfang (great sword or longsword).
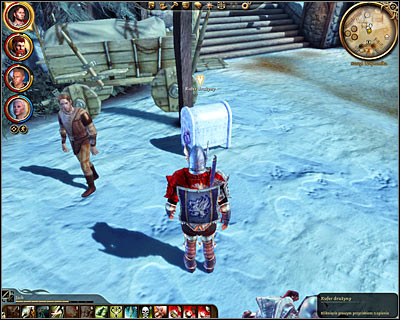
The last thing you should find out about is probably the most important one, because you'll be rewarded with a party chest. It can be found to the right of Levi (DLC1, 8) and you can use the chest to store items. I would recommend placing two types of objects in it - gifts and weapons or armors which you can't use at the moment.
After you've installed this DLC you can load a saved game and you'll be informed about the possibility of starting a new quest. Important! You won't be allowed to move on with this mission until you've left [Lothering] and therefore completed Lothering and the imperial highway main quest! I would recommend starting it as soon as possible and to install The Stone Prisoner along with the game, so that during its course you'll have a chance to begin collecting new types of crystal for your future companion (golem).
An important thing about The stone prisoner is that the difficulty level of this DLC will change depending on your current progress and an ideal moment to start the first mission would be prior to completing main Plague quest in Orzammar - Paragon of her kind. Otherwise you may encounter some problems activating golem's personal quest not long after the creature has joined your team. Don't forget to free some space in your inventory, because you'll have a chance to collect a lot of useful things in the near future, especially when it comes to finding crystals. A party chest provided by Warden's Keep DLC may come in handy here.
Received from: automatically after installing the DLC [Ferelden]
Description: This first quest is a short introduction to the main story. Open your world map and confirm that you want to travel to [Sulcher's pass]. Talk to merchant Felix there and he'll offer to give a golem control rod for free. Felix will also mention that an inactive golem can be found in one of the villages occupied by the darkspawn. You can go to there right now or later in the game. Choose [Honnleath] from the world map if you want to continue your journey.
Received from: Felix [Sulcher's pass]
Description: You'll start the game outside the village (DLC3, 1). Head forward, ignoring dead bodies and a small group of peasants. Eventually you'll start encountering group of genlocks and hurlocks (DLC3, 2). Each time you've spotted a new group attract it to your position and wait for the monsters to come to you in order to avoid fighting several groups at the same time. Naturally this method won't work with enemy archers, however you won't encounter a lot of them and you'll have a chance to use your mages or archers to kill them from a distance.
Continue eliminating monsters encountered inside the village and don't forget to inspect their bodies after each battle. You'll have to be moving south-west, towards a large working windmill seen in the distance. Notice a new group of monsters near the center of the village (DLC3, 3). Encourage them to chase after you instead of fighting them on their turf. Watch out, because aside from standard beasts you'll also have to defeat a mini-boss (hurlock alpha).
Once you've defeated the mini-boss move towards new archers seen in the distance (DLC3, 4). Be careful, because once you get closer you're going to be surprised by the last group of hurlocks and genlocks. Deal with all the beasts and don't forget to kill the archers mentioned above.
Before you decide to interact with the golem you should first spend some time exploring the village. Make sure to check bodies of all fallen enemies, as well as two crates (one in a good shape and one partially destroyed) and a body of a peasant (DLC3, 5). Collect a key from the corpse and return to the northern section of the village where you'll have a chance to use the key to open a new chest (DLC3, 6). Collect treasures, including Olaf's prized cheese knife and a small lightning crystal. You can also examine a letter found near the golem and read it in your journal.
Finish your exploration of the village by clicking on the golem found in the center of a small field (DLC3, 7). Sadly you'll fail in your attempt of awakening the beast using the newly acquired rod. As a result you'll have to find a door in one of the nearby buildings leading to [Wilhelm's cellar] (DLC3, 8).
Start off by exploring a small warehouse area (DLC4, 1). Interact with two objects here - with a chest and with strange crystals. Head towards the library (DLC4, 2) where you'll have to defeat a large group of genlocks and hurlocks. You can't encourage the beasts to come to you, so you'll have to come to them by dealing with archers first and then with enemy warriors. You may now explore the room (make sure to click on the corpse and to open a new chest).
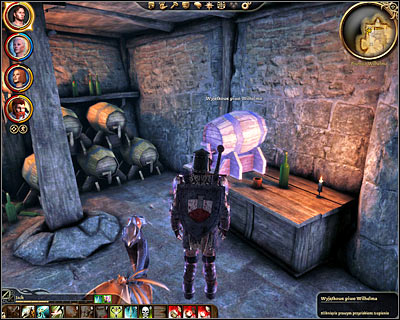
Head on to a small distillery and you should definitely consider clicking on a barrel here (DLC4, 3). Doing this will allow you to acquire a gift (Wilhelm's special brew). This is an ideal present for Oghren so make sure to store this item in your inventory if he's not a part of your team. Save your game before heading towards a nearby room.
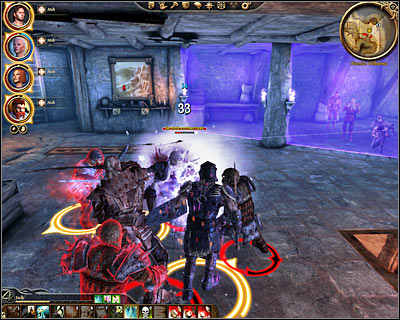
The next area (DLC4, 4) is being occupied by a very large group of monsters and it would be a good idea to encourage at least some of them to follow you to the previous corridor. Sadly sooner or later you'll have to take on the rest in direct combat and you should focus primarily on defeating a new mini-boss (Genlock emissary). Once the creature is dead deal with enemy archers and warriors.
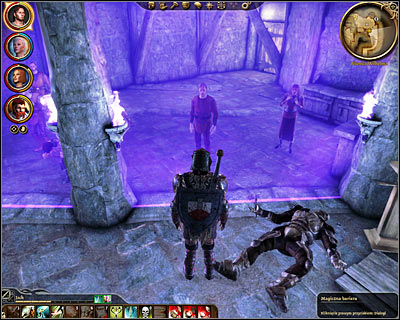
Look around a little after the battle, clicking on a shining crystal and on an old letter. Approach a magical barrier (DLC4, 5) when you're ready to move on with the mission and talk to Wilhelm seen on the other side. It won't take long until you agree to finding his daughter in exchange for him giving you the password. Sadly you can't convince him (even with high intimidation) to tell you the password right now. Instead you'll have to travel to a new part of the cellar.
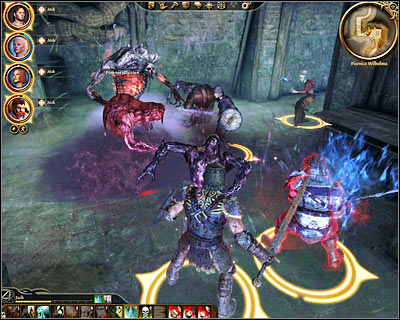
Keep heading south (DLC4, 6). Click on a fractured stone found nearby and then proceed directly to Wilhelm's office (DLC4, 7). Here you'll have to defeat a group of lesser shades and a mini-boss (Dust wraith). Eliminating standard creatures shouldn't be a problem, but you'll have to be more careful with the boss (I would recommend eliminating it at the end). After you've won check wraith's remains to find a harvest festival ring, click on a book found on the table and open a chest located in a corner of the room (large flawless fire crystal). You may now head south (DLC4, 8). Don't forget to collect new crystals found near the abyss.
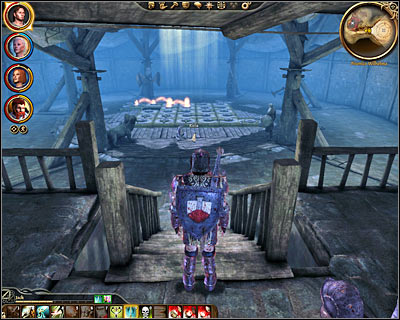
It shouldn't take too long until you reach the last chamber of the cellar. Step through the yellow barrier (DLC4, 9) and SAVE YOUR GAME, because you'll now have to make a choice how to resolve the situation with the missing daughter. Once you're inside you'll meet Amelia and Kitty (DLC4, 10). You should be able to recognize almost right away that the cat is in fact a desire demon and that it doesn't want to part ways with the girl.
After choosing an ending from the list seen below you'll have to return to Wilhelm (DLC4, 5) and don't be surprised to be attacked by two groups of shades. They will attack near the abyss and inside a small corridor close to Wilhelm's position.
List of endings:
Endings 1-2 - killing the girl
Endings 3-5 - returning to the father after talking to Kitty
Endings 6-8 - solving the riddle after talking to Kitty
ENDING NUMBER 1: Killing the possessed girl. Telling Wilhelm the truth about her death.
This is the most obvious way to end the quest which doesn't necessarily mean that it's a good one. If you refuse to negotiate with the demon Kitty will take control over Amelia's body and you'll start a fight with the possessed girl. It also means that defeating the demon will result in Amelia's death. As soon as the battle has started focus on killing lesser rage demons and attack Kitty only when there aren't any other creatures nearby. Don't forget to examine demon's body after the battle to collect Helm of Honnleath and a Cord of shattered dreams. You may now return to Wilhelm to tell him the truth about the demon possessing the girl and you having to kill her. He'll then tell you the correct password needed to activate the golem.
ENDING NUMBER 2: Killing the possessed girl. Lying to Wilhelm about the circumstances surrounding his death.
This is a very similar solution to Ending number 1 and the only change involves your final conversation with Wilhelm. After you've killed Kitty in Amelia's body report back to him and lie by telling him that you weren't able to find his daughter. He will believe in your story and therefore you'll find out the correct password.
ENDING NUMBER 3: Negotiating with the demon. Lying to Wilhelm that his daughter is dead.
This is a very interesting ending for an evil character. Talk to Kitty in the last chamber of the basement and promise to offer your help. You would then have to ignore the riddle and report back to Wilhelm. Use PERSUASION (you can't choose a lie from the list of actions!) and say that you're sorry. Doing this will convince Wilhelm that his daughter is dead. Notice that if you're unsuccessful in convincing him you'll be forced to choose between endings 4 and 5.
ENDING NUMBER 4: Negotiating with the demon. Allowing the demon to take control over Wilhelm's body.
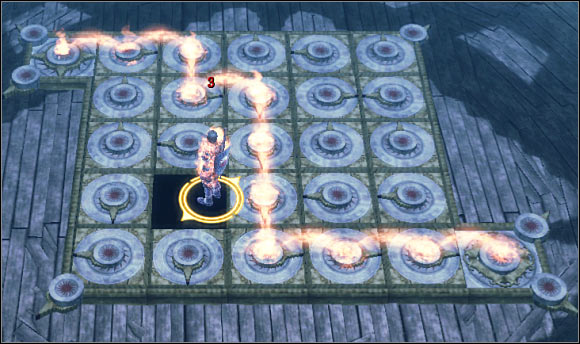
This version has an identical beginning to Ending number 3, so you'll have to agree to help the demon and instead of solving the riddle report back to Wilhelm. There are a few ways to encourage him to go to his daughter. You can lie (he won't believe you) or you can tell him the truth about what has happened to Amelia. Wait for Wilhelm to go to the last chamber and follow him there. After your return you'll notice that the demon has been successful in taking control over Wilhelm's body and you'll find out the correct password. You may now allow possessed Wilhelm to leave the basement along with Amelia.
ENDING NUMBER 5: Negotiating with the demon. Defeating the demon after it has taken control over Wilhelm's body.
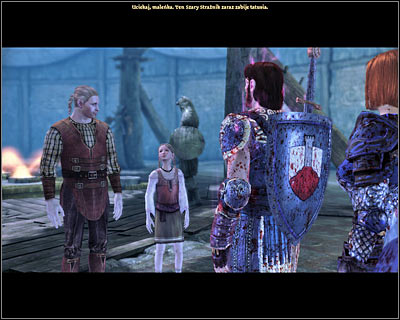
This version has an identical beginning to Ending number 3, so you'll have to agree to help the demon and instead of solving the riddle report back to Wilhelm. There are a few ways to encourage him to go to his daughter. You can lie (he won't believe you) or you can tell him the truth about what has happened to Amelia. Wait for Wilhelm to go to the last chamber and follow him there. After your return you'll notice that the demon has been successful in taking control over Wilhelm's body and you'll find out the correct password. This is where it gets different from Ending number 4, because instead of allowing possessed Wilhelm to leave you'll have to attack him. Notice that the girl has run away and you'll be forced to defeat Kitty. Don't forget to check demon's body after the battle to collect Helm of Honnleath and a Cord of shattered dreams.
ENDING NUMBER 6: Negotiating with the demon. Solving the fire riddle and allowing the demon to leave the basement in Amelia's body.
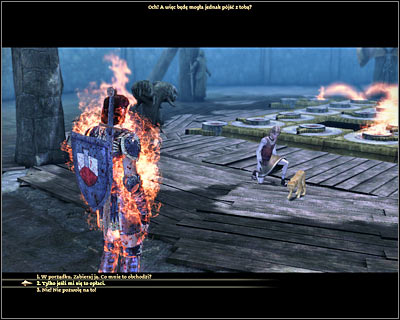
This is one of free endings where you decide to assist the demon in leaving the cellar. Check Solving the riddle section to find out how to disable the magical barrier. You'll now initiate a new conversation with Kitty and you can allow the demon to take control over Amelia's body and to leave the cellar. Notice that you ask Kitty for some kind of a reward and you would receive Wilhelm's magus staff. Report back to Wilhelm. He will notice that his daughter is acting a little strange, but he'll still tell you the password.
ENDING NUMBER 7: Negotiating with the demon. Solving the fire riddle and killing the demon in Amelia's body.
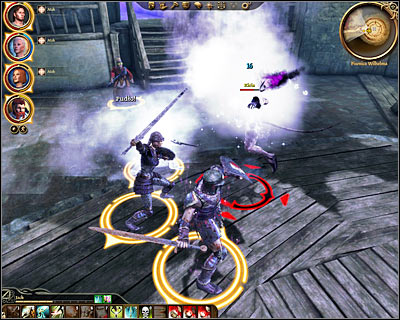
This is one of free endings where you decide to assist the demon in leaving the cellar. Check Solving the riddle section to find out how to disable the magical barrier. You'll now initiate a new conversation with Kitty and you must decide NOT to agree to the demon taking control over Amelia's body. I wouldn't recommend choosing this solution, because the outcome would be identical to Ending number 1 (don't forget to examine demon's body) and you would only lose precious time trying to solve the fire riddle.
ENDING NUMBER 8: Negotiating with the demon. Solving the fire riddle and rescuing the girl.
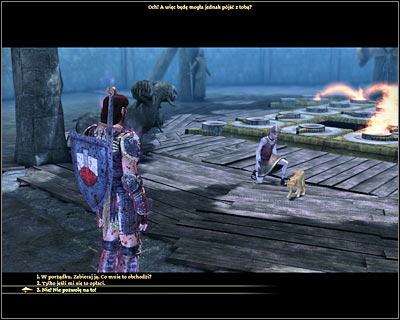
This is by far THE BEST ENDING, however it's also going to be the most difficult one to unlock. Start a conversation with the demon and before you agree to solve the riddle you'll have to force Kitty to agree to your plan of letting Amelia go in exchange for disabling the magical barrier. You may now finish the puzzle described in Solving the riddle section. You'll now initiate a new conversation with Kitty and start by reminding the demon of your agreement. Follow this statement by saying that you won't allow Kitty to take control over Amelia's body. If you've done everything according to the plan Amelia will run away to her father, so she won't die and she won't become possessed. You must now defeat Kitty in her true form which shouldn't be a big deal. Don't forget to check demon's body after the battle to collect Helm of Honnleath and a Cord of shattered dreams. Return to Wilhelm to receive the password.
SOLVING THE RIDDLE:
This section contains a description of the fire riddle. Solving it is mandatory if you plan on unlocking ending 6, 7 or 8.
In order to solve this riddle you must start clicking on interactive tiles to guide the flame to the other side of the board. Each tile can be moved in only one direction but to make things easier to read I've also added information on the directions in which these objects will be moved.
Here's a complete solution to this riddle: 11 (up), 16 (up), 17 (left), 22 (up), 23 (left), 18 (down), 19 (left), 20 (left), 25 (up), 24 (right), 19 (down), 18 (right), 13 (down), 8 (down), 9 (left), 14 (up), 13 (right), 18 (up), 17 (right), 16 (right), 11 (down), 12 (left), 13 (left), 18 (up), 17 (right).
Check the picture and compare it to your result.
ACTIVATING THE GOLEM:
Since you know the password you can exit the cellar. Thankfully you won't have to go back through the entire basement, because a ladder (DLC4, 11) can be found in the same room where you talked to Wilhelm.
![After your return to [Honnleath] (DLC3, 9) go to the small field again and click on the golem (DLC3, 7) - DLC - The Stone Prisoner - The Golem in Honnleath - DLC - The Stone Prisoner - Dragon Age: Origins - Game Guide and Walkthrough](https://game.lhg100.com/Article/UploadFiles/201512/2015121518294525.jpg)
After your return to [Honnleath] (DLC3, 9) go to the small field again and click on the golem (DLC3, 7). Since you know the correct password you'll be successful in awakening the beast and it would be a good idea to be polite during your initial conversation with the golem. Notice that you'll be allowed to modify your team right now and you can use this a chance to have Shale switching places with someone or you can stick with your old squad for the time being. Leave the village.
Make sure to read the description of A Golem's Memories mission (Shale's personal quest) and to find out more about the golem from the section titled New follower - Shale.
Received from: Shale [Anvil of the Void or Campsite]
Description: This quest won't start automatically and it may be problematic to unlock it if you make a bad decision in Orzammar. Here's how all of this can play out:
1) If you haven't finished Anvil of the Void quest (part of the main Plague quest Paragon of her kind) don't forget to take Shale with you to explore the last area of the Deep Roads. You'll have to reach the final chamber together (M59, 9) where you'll listen to a short conversation between the golems and you'll be forced to choose an ally. If you don't want any problems you should side with Caridin. This means you'll have to defeat Brenda and her minions. Make sure to talk to Shale after Caridin has handed over the crown and committed suicide. Your new ally will tell you a few things from its past and ask you for assistance in finding out if it really was a female dwarven warrior. A new location will appear in The deep roads ([Cadash thaig]) and you can go there before returning to Orzammar to hand over the crown.
2) If you've decided to side with Brenda after arriving in the last chamber (M59, 9) things will get more complicated. There is a chance to convince Shale that you're doing the right thing, but you would have to use a high persuasion skill. Otherwise Shale will align itself with Caridin and the death of the golem will not only prevent you from completing this quest but you'll also lose an important ally.
3) If you've activated Shale after your visit to Orzammar and after completing Paragon of her kind quest you should go to the campsite when your visit to [Honnleath] is over. Assuming that you've sided with Caridin earlier in the game (last part of Anvil of the Void quest) you'll only have to talk to Shale and the golem will tell you that in order to remember some things from its past you'll have to travel together to [Caridin's cross]. Go there and as soon as you've arrived you'll trigger a new cut-scene. You may now go to [Cadash thaig].
4) If you've already completed Paragon of her kind and Anvil of the Void quests, BUT decided to side with Brenda you'll have to play it all out correctly. Make sure to fully develop Coercion skill before talking to Shale, because you'll have to use persuasion or lie to prevent the golem from being mad at you and leaving the team.
![Assuming you've managed to activate this quest you'll start your new journey in a large location called [Cadash thaig] (DLC5, 1) - DLC - The Stone Prisoner - A golems memories - DLC - The Stone Prisoner - Dragon Age: Origins - Game Guide and Walkthrough](https://game.lhg100.com/Article/UploadFiles/201512/2015121518294579.jpg)
Assuming you've managed to activate this quest you'll start your new journey in a large location called [Cadash thaig] (DLC5, 1). Thankfully you won't have to spend too much time here figuring out next steps, because during your time spent in the thaig you'll be dealing mostly with linear corridors and a lot of battles. Expect to encounter the first group of opponents nearby (DLC5, 2). At first you'll be dealing only with genlocks and hurlocks (warriors and archers), however it won't take long for a group of shrieks to arrive from the north. Be careful while fighting these creatures, because they'll be using camouflage to perform surprise attacks.
Go through the rubble found nearby, watch a short cut-scene involving Shale and continue exploring this thaig. It shouldn't take long to reach a new large area (DLC5, 3). Don't be fooled by seeing only the darkspawn, because a bronto will show up as soon as you've moved closer to enemy troops. Attack bronto and once it's dead deal with the rest of the monsters. Once it's safe again check the area for crystals and open a chest. Start moving north-west.
You are soon going to be stopped by a mini-boss and in this case it's going to be a genlock emissary (DLC5, 4). Don't forget that you'll dealing with a mage, so killing the emissary should become your top priority. Watch out for glyphs during this battle, because they may stop you or even harm you if you touch them. Examine genlock's body after the battle to collect a blood gorged amulet and a large flawless crystal. Secure the area around the bridge before moving on, including opening a chest and examining a pile of junk.
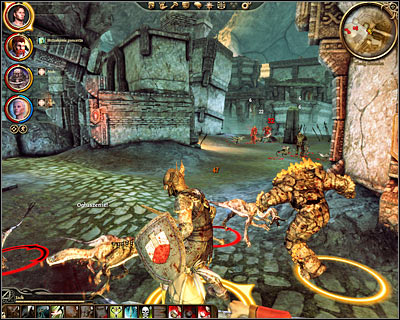
You're going to start encountering deepstalkers when you get to the other side and you should know by now that they aren't a big threat. Notice that at least in one area deepstalkers are going to be fighting the darkspawn and you shouldn't interrupt them. Watch out for single traps along the way (either avoid them or disarm them with your rogue). Check the entire area after the first big battle to find a wooden chest, a rubble, a pile of bones and a pile of junk. Keep heading south.
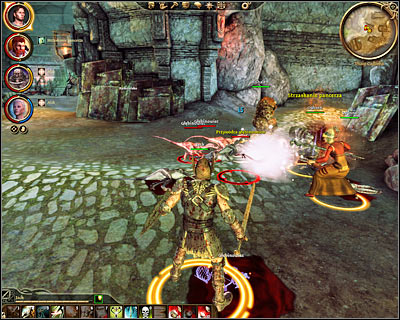
You'll be attacked by even more deepstalkers in the near future and as soon as you've dealt with most of them a leader of the deepstalkers will appear near your team. This isn't a serious problem, because it'll only take a few more hits to kill it. Instead of focusing on the deepstalkers watch out for genlock rogues, because they'll soon attack your team. Just as before you must wait for them to disable camouflage before attacking them. Check the area once it's safe again to find a pile of bones, a rubble and a chest filled with great runes.
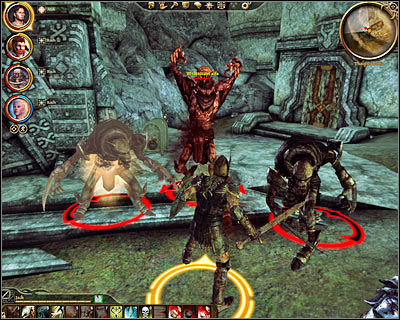
You can explore the western edge of the map if you want to (DLC5, 5). Doing this would result in your team being attacked by a couple of shrieks and by a single mini-boss - alpha shriek. I would recommend attacking the normal creatures first and dealing with the boss after they're dead. Make sure to rely on healing spells and potions during this battle, because your team members will probably lose a lot of health in a short period of time. Sadly it'll turn out that the monsters were guarding only a pile of bones and a chest. Head north.
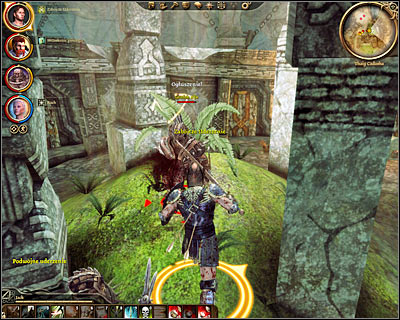
Get ready to deal with yet another boss in the near future and in this case you'll be going against an alpha genlock (DLC5, 6). This opponent is an archer, so it would be wise to encourage other beasts to follow you to the south before dealing with the main problem. Don't forget to look around after winning this battle (one locked chest). Save your game before heading up north!
Keep moving towards your current destination and when you get there (DLC5, 7) you'll notice that the object Shale was looking for is being guarded by an alpha ogre. Send at least one warrior into battle and move your archers and mages to a safe distance so they won't be affected by ogre's main attacks. Use a lot of healing spells and potions to keep your warrior (or warriors alive), especially since they'll be taking massive hits. Check ogre's body after the battle to collect Cadash stompers, a remarkable ruby (gift for Shale) and a large flawless crystal.
You may now explore the surrounding area by clicking on interactive objects and collecting additional crystals. You must click on the golem's statue to officially end this quest (DLC5, 8). Shale will thank you for your help and aside from earning a lot of experience points you'll also significantly improve your relations with the golem. Deal with the last group of shrieks and use a nearby passageway (DLC5, 9) to leave this thaig.
SHALE (golem, warrior)
It joins your team at the end of The Golem in Honnleath quest [Honnleath].
Info: I would recommend switching Shale with one of your warriors (Alistair, Oghren or Sten). The main reason is that the golem can be more effective in battle and that it has a large number of useful talents. You also won't have to worry about providing a lot of armor pieces, because only two crystals are needed to make the golem more resistant to enemy attacks and more useful on the battlefield.
Bonus for good relations to: strength
EQUIPPING ITEMS:
Shale is a very unique member of the team, however in some aspects (development of the beast and its usefulness on the battlefield) it can be similar to commanding a warrior. The biggest difference is that instead of using standard melee weapons and armors you'll be dealing with two types of crystals. Having to fill only two slots helps a lot, because you won't have to spend countless hours on finding good items for this follower.
Crystals found during the course of the game come in two different sizes. Small crystals are a replacement for standard weapons and large crystals are a replacement for armors (complete sets). Naturally each crystal offers a lot of bonuses after being placing in golem's slot. Both types of crystals (large and small) come in five different forms - as spirit, fire, ice, electrical and natural crystals. I would recommend choosing large and small crystals from the same kind (for example, two spirit crystals or two fire crystals), because doing this will grant you with a small bonus to overall statistics. The last thing you should know about is the quality of the crystals. The better the quality the more you achieve by mounting a crystal. Generally you should be interested only in clear, flawless and brilliant crystals.
As I've mentioned before, it would be a good idea to install The Stone Prisoner DLC along with the game, because doing this will allow you to start collecting the crystals long before taking a trip to Honnleath. These objects can be found in the same areas as valuable weapons and armors, so you shouldn't forget about opening interactive objects and examining bodies of fallen enemies. You can also purchase the crystals from various merchants and it shouldn't be a surprise that most of them can be acquired during your stay in Orzammar.
GOLEM'S TALENTS:
Shale doesn't have any skills, but on the other hand you will be allowed to choose between eight warrior talents and sixteen unique golem talents. I would recommend choosing one of two playing styles - you can be an offensive warrior or a defensive warrior. If you plan on using Shale to charge at enemy units and to deal with them using powerful blows you should consider unlocking talents from the first row and from the third row. If you plan on using Shale to take hits and to distract enemy units from attacking weaker teammates you should consider unlocking talents mostly from the second row followed by talents from the fourth row.
The first row of golem's talents is best suited for an offensive style of play and you should examine them more closely if you want your golem to deal with enemy units swiftly and in direct combat. You should always start a new battle by activating Pulverizing blows, because this talent offers valuable bonuses to other abilities from this row. Slam is an ideal talent while dealing with single enemy units, especially since aside from having a chance of inflicting a critical hit you'll also knock back the target. Quake on the other hand is a great choice if you have to defeat a large group of monsters. Don't forget that you should always start by moving the golem towards them and stopping it once you're among enemy troops. The idea here is for the shockwave to affect as many opponents as possible. The last talent found in this group is called Killing blow and it's an excellent choice for boss battles, giving you a chance of inflicting critical hits. Don't forget that using all the talents after activating Pulverizing blows increases your offense AND it lowers your defense. In addition, using Killing blow ability will drain your stamina bar, so it's an ideal choice only for the end of the battle.
The second row of golem's talents contains actions best suited for a defensive style of play and you should take interest in these abilities if Shale is supposed to take hits and distract enemies from other members of your team (especially from your mages and archers). Stoneheart is the first ability in this row and the idea is similar to Pulverizing blows from the first row. This is a sustained ability which provides great bonuses to defense and elemental resistance, as well as strengthens three other abilities. Bellow has two major features - it allows you to stun opponents found near the golem and it attracts their attention, allowing other members of the team to have a breathing moment and to heal injuries. This is especially important while fighting faster and more powerful creatures like shrieks, so you won't have to worry that much about protecting weaker members of your squad. Stone roar is very similar to Bellow, however in this case you'll want to attract the attention of a single monster of your choosing. Naturally the best moments to use this talent are while fighting powerful bosses. Don't forget to activate Stoneheart before using Stone roar to receive a very useful bonus to health regeneration. The last ability in this row is called Regenerating burst and the idea here is that not only you'll have a chance to stun your enemies, but you'll also knock them back. Sadly you won't be allowed to use this talent too often, because it takes a long time to recharge.
The third row of golem's talents contains offensive abilities, however unlike the first row it doesn't focus on melee attacks but on ranged combat. Just as before the first talent from this group (Rock mastery) is a sustained one, offering precious bonuses to three other abilities. You should notice that having this talent activated improves your ranged attacks and protects you from enemies. In addition you can influence other members of the team by improving their aim, chance of inflicting critical hits or speed, but in order for this to work they will have to be standing relatively close to the golem. You may remember Hurl rock from your time spent in the Fade and the idea is for the golem to throw a boulder at enemy units. The good news is that you can hit more than one target as long as enemies will be standing close to each other. Earthen grasp should be used when enemy forces manage to get closer to the golem, because not only you'll have a chance to temporarily immobilize them but you'll also increase chances of them attacking a different target after regaining full strength. The last talent from this group is called Rock barrage and it's basically an upgraded version of Hurl rock ability. The biggest difference is that you'll have a chance of throwing several stones instead of only one and in addition enemy units may receive penalties to movement. Don't forget that using all the abilities with Rock mastery being turned on lowers your defense and armor ratings. It's also important to know that both attacks involving throwing stones at enemy units may result in the golem hitting and injuring allied units, so you should be choosing targets with no friendlies seen nearby.
The last fourth row contains four defensive talents and they should be a supplement to the talents from the second row (assuming that you've chosen the golem to become a defensive warrior). This is an unusual group, because it contains one sustained talent and three passive ones. Stone aura affects not only Shale but also team members standing close to the golem and you can count on bonuses to attack, defense and health regeneration. Sadly there are side effects, because the golem itself loses defense points, its stamina bar is slowly being drained and you're risking a chance of paralyzing the creature. As for the remaining passive talents, it would be a good idea to unlock all of them as your golem continues to advance to higher levels of experience. Each talent offers new bonuses either for the golem alone or for the entire squad (team members in the vicinity of Shale).
GIFTS FOR SHALE:
Developing your relationship Shale works the same as with the other members of your team, so in order to receive approval points you can complete quests together and have conversations. Don't forget to complete Shale's personal mission (A golem's memories), because if you don't make any stupid moves your relationship will advance to somewhere around 70 approval points after the quest has been completed. In order to maximize golem's approval you can naturally offer gifts and there are new presents reserved for Shale. The objects I'm talking about are various types of remarkable jewels which will be offered by certain merchants. Here's a list of vendors specializing in selling gifts for Shale:
- Alarith in Denerim (Elven alienage)
- Alimar in Orzammar (Dust town)
- Faryn in Frostback mountains pass
- Figor in Orzammar (Commons)
- Garin in Orzammar (Commons)
- Legnar in Orzammar (Commons)
- Quartermaster in The Circle tower (Student quarters)
- Silent owner in Denerim (Wonders of Thedas)
You can also find one of the presents in Wilhelm's cellar by opening an interactive crate (this object can be obtained prior to waking up Shale).


 Drakensang: The Dark Eye Game Guide & Walkthrough
 Dead Island Riptide Game Guide & WalkthroughDiablo III Game Guide & Walkthrough
 DayZ - ArmA 2 mod Game Guide & Walkthrough
 Dracula 4: The Shadow of the Dragon Game Guide & Walkthrough