
This guided for Dragon Age: Inquisition is a sheer mine for knowledge on this RPG game, developed by BioWare. This guide has been divided into three extensive parts. The first part of the guide constitutes a strategy guide. Its basic assumption is to acquaint you with all the key elements of the game, thanks to which it is going to be easier, for you, to start your adventure with Dragon Age: Inquisition. The guide encompasses useful information on the creation and development of your character, obtaining new allies and commanding the party, conducting combat conducting conversations, closing the rifts and managing the Inquisition. Apart from that, the guide offers answers to the most frequently asked questions, which will help you solve most common problems. The second part of this guide constitutes a thorough walkthrough for all the quests available in the game. This, above all, means the quests that you perform within the framework of the game's storyline, although it also includes the walkthroughs for the quests connected with party members and minor tasks. The walkthrough takes into account all the possible choices and points out the consequences of those choices . Apart from that, the walkthrough has been enriched with maps of the locations in which you complete the quests. The final, third, part of this guide is a vast world atlas. The majority of the atlas has been devoted to high-resolution maps that have been marked appropriately. Successive maps have been marked for the most valuable loot, whereabouts of collectibles or vantage points. The rest of the world atlas comprises, among others, of the chapters on crafting (upgrades, schemes, alchemical ingredients, recipes and so forth), merchants, opponents that you encounter, trainers or the best of the items available in the game. Dragon Age: Inquisition is the third installment of the popular RPG series, which is a continuation of the events of Dragon Age: Origins and Dragon Age II. In the game, you control an entirely different character, although you are going to meet the characters known from the previous installments, during your journey.
The three main parts of this official guide to Dragon Age: Inquisition include:
& Patrick "YxU" Homa ()

This strategy guide to Dragon Age: Inquisition revolves around descriptions of all the key elements of this RPG game developed by BioWare. The primary aim of this chapter is to prepare you for the adventure that you are about to begin, although it also describes many advanced issues and, as a result, it may also be deemed useful by those of the players that have already had experience with the previous installments of the game. The beginning pages of this guide include information on the process of creation of the protagonist (race, class, looks, etc) and development of the character (attributes, abilities specialization and other). Of course, it is not the case that this guide focuses on the main character only, because the guide also includes an extensive chapter on the available companions. Much of the space, in the guide, has been devoted combat, where you can learn, among others, how to fight and the advanced command of the party. The guide explains a number of minor issues and raises, among others, the topics of conducting conversations, closing rifts, game world exploration and crafting. One of the most important points of this guide is the one that includes the most frequently asked questions and answers to those questions. Therefore, learning the contents of this guide lets you solve many potential problems, in an easy way, which concern, e.g. shortage of money, dealing with strong monsters that you encounter or leveling up not fast enough. The last, major part of the guide is the one that addresses management of the Inquisition. It plays an important role, because it is an entirely new element of the Dragon Age series. From that chapter, you will learn about how strongholds function, how to gain power and influences, how to send your advisors to missions or how to obtain perks from the Inquisition. In the third installment of Dragon Age, you take control of a completely new character and you take control of the titular Inquisition. During the game, you need to handle both the problem of the civil war, between the Templars and the mages, as well as a completely new problem - the rifts that keep appearing all around Thedas that form a bridge between the game world and the dimension called the Fade.
NOTE - This guide is one of the three parts prepared for Dragon Age: Inquisition. If you are looking for detailed information about the game world and maps of the available locations, see our World Atlas. If, on the other hand, you are interested in the descriptions of the quests available in the game, see out walkthrough for the game.
This strategy guide for Dragon Age: Inquisition includes:
& Patrick "YxU" Homa ()
When creating Dragon Age: Origins, the developers have built a big and rich fantasy world, which has grown even bigger over the years, thanks to new games, books, comics, etc. To prepare you for returning to Thedas after three years that have passed from the Dragon Age II premiere, in this article, we present a shortened version of the history of this world, by putting together the events that have led to the situation in which the Inquisitor finds himself. After the general history, we summarize the events from both previous games (in separate texts). Those of you who have not played them and intend to do it later, should not read too much because of huge spoilers that are in there.
The known history of Thedas starts about eight thousand years ago, when the elves built a legendary city called Arlathan. However, the events that are important for players to know, begin a few thousand years later, when humans who came from the north formed the Tevinter Imperium. This happened in year -1195 Ancient, about two thousand years after this race have shown up in Thedas. The people of the country worshiped the Old Gods, powerful creatures living in a mythical Golden City, which was supposed to lie in a parallel dimension known as the Fade. They are the ones that are believed to have given humans the ability to use magic, along with its most powerful and dangerous variety: blood magic. Exceptionally talented adepts of this school were called magisters and the most powerful among them became the ruler of the Tevinter Imperium and was called the Archon. Using their magic skills, the people of Tevinter started to expand their territory, turning the elven heritage into ashes and reaching Ferelden, the southern edge of Thedas.
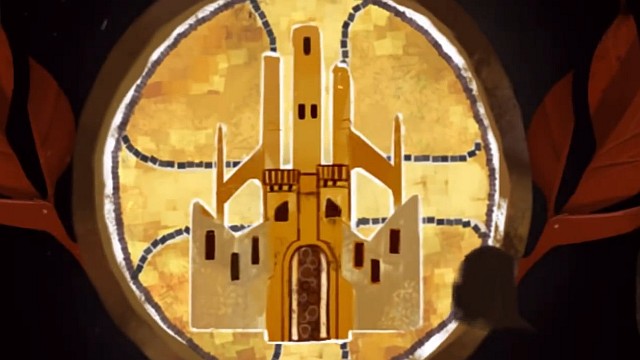 The Golden City
The rising pride and the magisters' craving for power led to a catastrophe that happened in year -395 Ancient, which effects are felt in the world even now, about one-and-a-half thousand years later. The mages from the Imperium conducted a ritual that was supposed to open a passage through the Veil, into the Golden City, and to give the people of Tevinter as much power as the Old Gods have. Stepping into the Fade, the mages saw that the city turned black and Old God Dumat (who taught them how to use magic before) have turned into an Archdemon, materializing in the form of a giant dragon. The magisters didn't manage to come back, as they were turned into mindless, bloodthirsty monsters, becoming the first darkspawn.
Soon, there were hordes of these creatures and a war known as the First Blight entered the world. It lasted for about two hundred years and during the battles, the underground kingdom of dwarves was broken into separate settlements (thaigs) and the Tevinter Imperium was close to falling apart. In the year -305 Ancient, in the Weisshaupt fortress in Anderfels, the veterans of battles with the darskpawn established the Grey Wardens order, an elite organization, which led the human race to fight the darskpawn over the next century and eventually won in the Battle of the Silent Plains in -203 Ancient. Dumat was annihilated and the darskpawn were crushed. People living on the surface were not trouble by the monsters for a next few centuries, but underneath it, in the Deep Roads, the battle with the darskpawn went on.
 Tevinter magisters turned into monsters
The First Blight ended in the same time that Andraste, a woman from the north of Ferelden, was born. Andraste was the first one to worship the Maker. She led her tribe, Alamarri, to fight the Tevinter Imperium and she could've even succeeded, if not for her husband's, Maferath, betrayal. Jealous of Andraste's fame and craving power, Maferath gave his wife away to Tevinter soldiers and they allowed him to retain the conquered lands (He ruled over Ferelden and gave Orlais, Nevarra and the Free Marches to his sons). Andraste's martyrdom and the amazing events that took place when she ruled over the people of Ferelden became a reason for her worshippers to collect her teachings in a holy text called the Chant of Light. A new religion was founded, known as the cult of the Maker. Over the years, the religion spread onto the whole of Thedas. About one hundred years before the end of the Ancient era, the first Inquisition was founded. Its task was to eliminate demons, mages and heretics. In the meantime, the fall of the Imperium went on and its territory became more or less the land that we know today.
The passiveness of the elves during the Second Blight brought a drastic increase in hostility between people of Orlais and the inhabitants of the Dales (they settled there, after Andraste freed them from captivity in Tevinter), at the beginning of the second century, known as the Glory Age. After a few smaller skirmishes, a regular war started. The Chantry, fearing that they might loose the fight, organized the Exalted Marches. They destroyed the Dales and the elves spread around the world to live among humans in their cities (in sort of a ghettos called the alienages), or in the wild (this group is known as the Dalish). Taking advantage of the fact that the world was still weak after the Second Blight, the Chantry built its facilities - temples, Circles and Templar posts - all over Thedas, to convert new countries to their religion.
The beginning of the next century (the Towers Age) brought the Third Blight, led by Archdemon Toth. The number of the darkspawn was much bigger, but the fights lasted relatively short - from 3:10 to 3:25 Tower, when the Battle of Hunter Fell took place. The conflict spread onto Orlais and the Free Marches, but people were once again led to victory by the Grey Wardens. At the end of this century (3:87 Tower) the schism in the Chantry took place - due to differences in beliefs between Tevinter and Orlais, concerning mainly the situation of mages, the first country parted from Val Royeaux and elected their own Divine (known as the Black Divine). During almost the whole fourth age (Black Age) and the beginning of the fifth (Exalted Age), crusades (Exalted Marches) were held to bring back unity in the Chantry. Not one of them succeeded in completing the task, but they only sealed the schism.
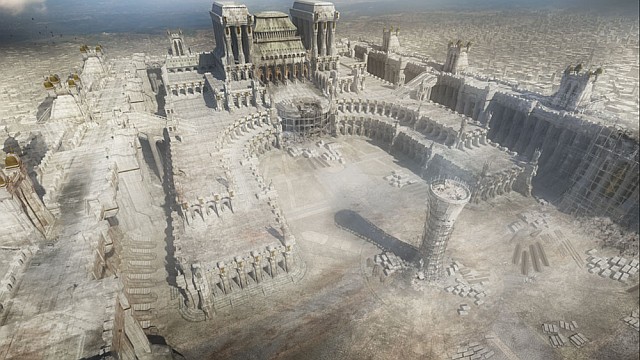 The Grand Cathedral - the seat of the Divine (source: Dragon Age Wiki).
In the year 5:12 Exalted, the Fourth Blight started on the surface, once again beginning in the northern part of Thedas. Despite the relatively small number of the darkspawn, the victory came only after a dozen-or-so years - after the Battle of Ayesleigh in 5:24 Exalted. Like before, the main role was played by the Grey Wardens, who managed to slay Archdemon Andoral. Twenty two years later (5:42 Exalted), the Ferelden country was officially formed. This event took place after Kalenhad's victory over his rivals and crowning him in Denerim, which became the capital of the country. The next century (Steel Age) brought a slaughter of dragons and the arrival of the Qunari. This race, with its characteristic massive built and following of a code knows as the Qun, came from the north and conquered Par Vollen island. After that, the Qunari started war with practically the whole of Thedas.
The conflict lasted for over one hundred years. During the war, both Chantries (from Orlais and from Tevinter) organized Exalted Marches and the Qunari were conquering and loosing a large pieces of land. After about one hundred and fifty years of fighting, at the end of the seventh century (Storm Age), peace was made. The invaders retained Par Vollen and one of the fortresses in the north of Thedas. Only the Tevinter Imperium did not agree to the truce and is in the state of war with Qunari even now (despite the battles taking place very rarely). In the meantime, at the beginning of the Storm Age, the Grey Wardens were banished from Ferelden, after they started involving into the fight for the throne in Denerim.
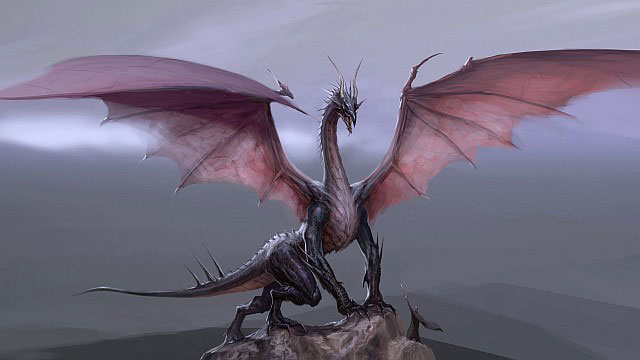 Urthemiel, the Archdemon who led the Fifth Blight (source: Dragon Age Wiki)
The first half of the eight century (Blessed Age) brought the end of Ferelden's sovereignty, as it was conquered by Orlais after two decades of fighting (the battles started in 8:24 Blessed). The Resistance tried to face the occupier, but a real rebellion took place only after over fifty years, in 8:98 Blessed. The leader was Maric Theirin, who had noble blood in his veins, as he was the descendant of Kalenhad. After four years of battles, the rebellion was successful and at the beginning of the Dragon Age (9:3 Dragon), Maric became the king of Ferelden. The ninth century got his name from the dragons that started to show up on the sky.
Seven years later (9:10 Dragon) the Grey Wardens were allowed to return to the country and after a next decade (9:20 Dragon) Ferelden and Orlais, represented by King Maric and Empress Celene I, made peace and retained status quo from before the invasion. During the next five years, Maric was gone missing at sea and the throne was given to his son, young and naive Cailan. His closest advisor and the person who in fact ruled the country was Loghain Mac Tir, one of the most eminent leader during the war with Orlais and a friend of Maric. What's more, one month after the succession, Cailan married Loghain's daughter - Anora. Ten years later (9:30 Dragon), the Fifth Blight appeared on the surface, this time led by Archdemon Urthemiel (the Old God of Beauty) and coming from the Korcari Wilds. This is the time when the action of Dragon Age: Origins begins.
The action starts in year 9:30 Dragon. No matter what choices have been made during the character creation (gender, race, class, descent), the player meets Grey Warden Duncan and joins the Grey Wardens. Later, he ends up in the south of Ferelden, in the fortress of Ostagar, where people are currently preparing themselves to a battle with the darkspawn, to stop the Plague. The protagonist meets his first companion there - it is Alistair, who is also a Warden. Both of them are sent into the Korcari Wilds to collect samples of darkspawn blood (necessary for the Wardens to prepare joining rituals) and to retrieve scrolls with treaties that the Grey Wardens once used to get help in fighting the Plague from the kingdoms of Thedas. Instead of finding the scrolls, the heroes meet Morrigan, a witch, who invites them to the house of her "mother", a powerful witch Flemeth. After a conversation with her, they obtain the scrolls and return to Ostagar.
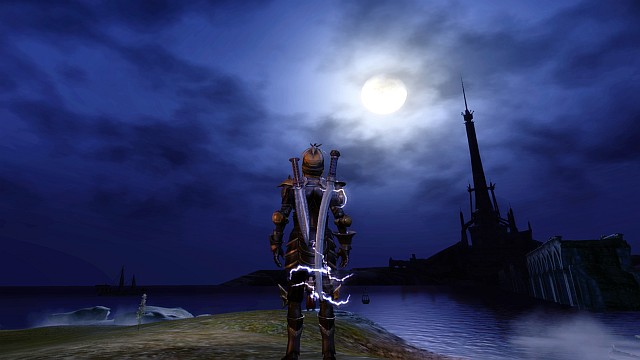
 Ostagar, the place of the first battle with the darkspawn, during the Fifth Blight
Soon, the dusk comes and the army takes its positions. The Warden and Alistair have to make it to the top of a nearby tower and light signal fire, which will mark the beginning of the battle. As they do that, Loghain commits treachery and backs up his forces. King Cailan and Duncan die in the battle, but our heroes are saved by Flemeth. She takes them to her house and allows them to rest there, before they set out on a mission to save the world from the Blight. They intend to use the scrolls to join the dwarves from the Frostback Mountains, the elves from the Brecilian Forest, the mages from the local Circle and the knights of Ferelden in one army (the Arl of Redcliff, Eamon Guerrin, who raised Alistair, helps them to convince the knights). The Warden, Alistair and Morrigan, whom Flemeth commanded to join the team, set out north.
In the meantime, Loghain returns to the capital city, Denerim, and lies about the battle of Ostagar, hiding his treason. Mac Tir outlaws the Grey Wardens and turns back the army that marches to Orlais to help, driven by his distrust towards former occupier. Controversial decision, with Loghain proclaiming himself regent, make the Ferelden aristocracy angry and lead to a civil war.
The heroes arrive at Lothering, which is their first stop on the way from Ostagar. Here, two more people join the team - Leliana, a saintly bard who has given her life to the Maker, and Sten, a Qunari held in a cage for crimes of passion. From this place, the game allows the player to visit various places in any order.
Redcliffe
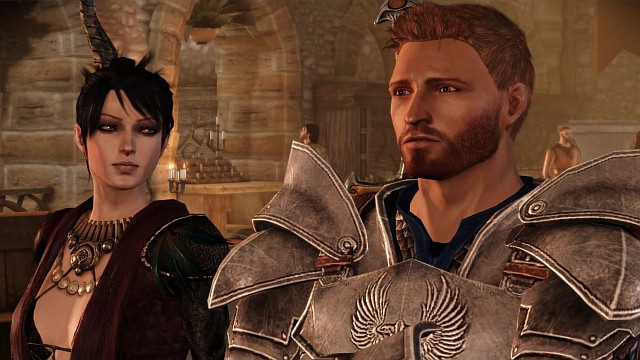
Alistair and Morrigan - two most important team members in Dragon Age: Origin
Let's assume that the player begins his journey from Redcliffe. After arriving there, Alistair reveals that he is a bastard of king Maric (Cailan's father) and has the right to the throne, because all of the descendants are dead. However, he doesn't want to rule over Ferelden. Redcliffe is currently being attacked by demons from the Fade. The cause of that is Connor, son of Arl Eamon. The boy has a wild magic talent, which stayed hidden with the help of his teacher, but now it got out of control and the boy used his powers, desperately trying to heal his father, who has been poisoned by Loghain's people. Having dealt with the demons, our heroes start searching for a cure for Eamon. They head to Denerim, to find Brother Genitivi. As he is currently not in his house, they follow him to the Frostback Mountains. There, they encounter a secret cult and the Urn of Sacred Ashes - a relict, which according to the legend, should contain the remains of Andraste that have healing powers. Using the artifact, the team manages to heal Arl Eamon and get his help. He proposes to call a Landsmeet, to expose Loghain's treachery to the elites of the country.
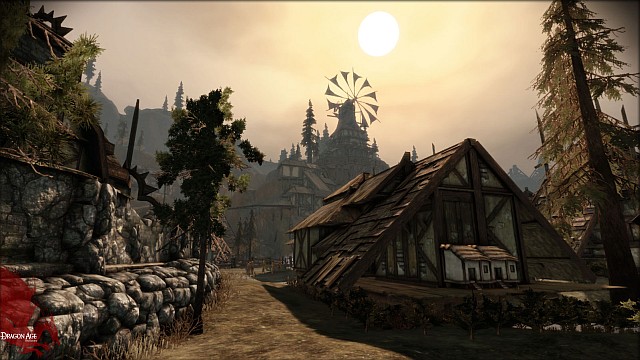 Redcliffe Village
Let the second destination of the team be the Circle of Magi, which has their quarters in a tower near Lake Calenhad. Problems arise once again, as the building is occupied by abominations (mages using blood magic, who lost control over it) and demons from the Fade. They appeared after Uldred, one of the most powerful mages, attempted treachery with Mac Tir and was exposed. He tried to run, but he was stopped by First Enchanter Irving (the leader of the Circle); a demon summoned by Uldred turned out to be too strong and took control over the tower. On the lower level, the heroes meet Templars, preparing to use the Right of Annulment (killing all of the mages to minimalize the damage that the catastrophe would cause). The team declares that they will solve the problem. They can either kill every mage, following the Templars' instructions, or eliminate only those that deserve it and the monsters. In the second case, Wynne, a respectable mage, joins the team. Depending on the decision that the Warden will make here, either Templars or mages will help him fight the Blight. At the end, it is worth mentioning that one of the characters that the Warden meets in the tower is Cullen, who will play an important role in Dragon Age: Inquisition.
 The Circle of Magi tower near Lake Calenhad
We move to the Brecilian Forest, home of the Dalish. The problem that the heroes face here are werewolves attack the elves continually. Zathrian, the keeper (leader) of the tribe, sends the team into the wilds, to find a creature called Witherfang and kill it. Obtaining its heart will stop the werewolves attacks and will cure the elves that were bitten. After reaching the center of the forest, the team finds out that the things are a bit different from what the keeper told them. The Warden and his companions meet a mysterious creature called the Lady of the Forest, who tells them that Zathrian is the one responsible for bringing werewolves into the world. Few hundred years ago, he cursed a group of people who attacked his children. After some time, the werewolves started to attack elves, to make the keeper take off the curse. Short after the truth is revealed, Zathrian appears and the Warden has to resolve the conflict. Depending on his decision, either elves or werewolves will help him fight the Blight.
 The Brecilian Forest
The last stop on the journey for gathering help is Orzammar, the capital of the underground kingdom of dwarves, which once was a network of stone cities (thaigs) connected by the Deep Roads, but now it consists of only one settlement that has to constantly deal with attacks from the darkspawn. The Warden has to resolve a conflict between two pretenders to the throne, after the late king Endrin Aeducan. They are: his son Bhelen (an apt young man, who however killed both his brothers to open his way to the throne) and Lord Pyral Harrowmont (the closest advisor of Endrin and a wise dwarf, whose relatively low descent would be against tradition). No matter who will the Warden choose, the heroes end up in the Deep Roads to search for Branka, a missing female smith who has became a Paragon, and an artifact known as the Anvil of the Void. Completing this task will allow the Warden to learn the mystery of creating golems. Another companion joins the Warden's team - it is Oghren, Branka's husband. After everything is done and the hero decides whether ancient knowledge should or should not be forgotten, the coronation ceremony takes place and the Warden gains the Orzammar's help in fighting the Blight.
 Orzammar - the city of dwarfs
Having realized the Grey Wardens treaties, the heroes set out to Denerim, to attend the Landsmeet. Before we speak about that, it is worth mentioning that in the meantime, the team is attacked by elite assassins hired by Loghain, known as the Antivan Crows. During the fight, one of them, elf Zevran, switches sides and joins the Warden. After arriving at his destination, the hero has to gain support of the nobility, before the Landsmeet starts. The most important task is to free Queen Anora, who has been locked by her own father in the dungeon of Arl Rendon Howe's residence, who is the most powerful ally of Loghain. The mission is half successful, as Howe is killed and Anora is rescued, but the Warden and Alistair end up in a cell in Fort Drakon. They free themselves (with or without help from the rest of the team), just in time to make it to the Landsmeet.
The heroes take part in a discussion with the regent, trying to save their good name, to expose Loghain's treachery and to convince the nobility that they should altogether fight against the darskpawn. No matter what they say during the conversation, it ends up in a fight - however, their diplomatic skills will decide whether it will be a bloodbath, or a honorable duel between the Warden and Loghain.
 Denerim, the capital of Ferelden
One more problem arises - Grey Warden Riordan, who joins the team in Denerim, reveals that killing the Archdemon will cost the person who strikes the last blow their life. Normally, when an Old God dies, his essences jumps onto the nearest darkspawn, which makes this creature practically immortal, but in a situation when it's a Grey Warden who fights with the Archdemon, the essence is drawn to his body (due to the darkspawn blood, which the Wardens drink during the Joining), which causes the death of both the Old God and the Warden. The same fate would await one of our heroes, if not for Morrigan, who proposes an alternative way. If a Grey Warden (either the main character, if he is a male, or Alistair, or even Loghain) will sleep with her, they will conceive a baby that will absorb the essence of the Archdemon and save the person who kills it.
No matter of whether we agree to the witch's proposal or not, we leave Denerim and set out to face the Archdemon's army. The horde is heading to Redcliffe, which is sort of a meeting point for all the monsters, but after arriving there, it turns out that the Warden's army has been misled. The forces have to go back to the capital, which is currently besieged by the enemy. When both armies fight on the streets of the city, the hero with a few companions makes his way to Fort Drakon, to climb its top and lure the Archdemon to him. We witness the final battle, which ends the Fifth Blight, as well as the plot of Dragon Age: Origins. After the fight, a new ruler of Ferelden is chosen and people start to rebuild their country ruined by the march of the darkspawn.
It should be remembered that the second part of the Dragon Age series is not a direct continuation of the first one. Despite the story starting in a similar place and time, it introduces a new hero and focuses on a different area of Thedas, showing events that are not connected to neither the Fifth Blight nor its consequences. It is also important to know that everything that happens in the second episode is narrated in a form of a retrospection, as the story is told by Varric, who is interrogated by Cassandra Pentaghast - a member of the Seekers of Truth order. The interrogation takes place after the end of the plot.
This time, the BioWare studio has defined the protagonist for us, restricting our choice options only to gender and class. Only for the purposes of this text, let's assume that the hero is a male. His name is Hawke and he comes from a city called Lothering, located in the south of Ferelden. He lived there with his mother Leandra (a disinherited daughter of the Amell family, from Kirkwall - a city in the Free Marches), father Malcolm (a hiding mage apostate, who died 3 years ago) and two siblings: Bethany (also a mage who has to hide) and Carver (a warrior and an ex-soldier from Ostagar).
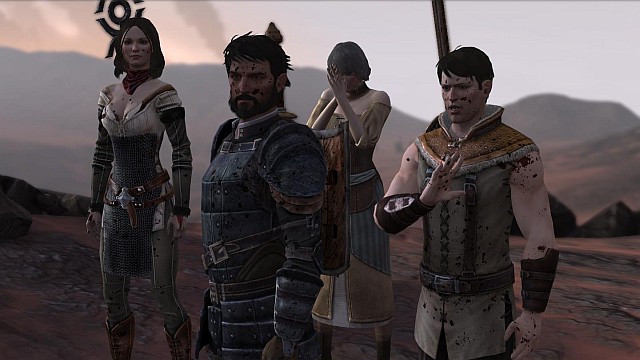 Hawke and his family during the escape from Lothering (prologue)
The action starts in 9:30 Dragon, short after the Battle of Ostagar (the one in which we participated in Dragon Age: Origins). Hawke and his family are running away from Lothering, heading north, with the darkspawn constantly following them. They meet Aveline, a female warrior, and her husband, Templar Wesley, who has been wounded and is slowly turning into a monster. The heroes become surrounded and Hawke's brother (or sister, depending on the class that we pick) dies, as well as sir Wesley. Our protagonists are saved by Flemeth, a which, who comes in the form of a dragon. The heroes promise to take an amulet to the Dalish in the Free Marches and Flemeth takes them to the nearest place from which they can sail to Kirkwall, which is known as the City of Chains (because of the slavery that thrived there before).
After arriving at their destination, our heroes find out that the city is besieged by refugees from Ferelden and its gates are closed. Fortunately, an opportunity to help the city guards shows up and the group makes contact with Gamlen, brother of Hawke's mother, who lives in Kirkwall. The man, despite disliking his sister, agrees to give the heroes shelter in his house in Lowtown. However, in return for this favor, Hawke has to work for either the mercenaries or the smugglers, for the next year.
The panorama of KirkwallThe action jumps to twelve months later [act I]. The news about the hero of Ferelden, who ended the Fifth Plague, is spreading around the world. This fact is the reason for Bartrand Tethras - a dwarf leading the Dwarven Merchant's Guild - to organize an expedition to the Deep Roads, which is supposed to be very profitable. Hawke and his sister/brother see it as an opportunity to become richer, but the organizer doesn't want them to take part in it. Only after talking to Varric - Bartrand's younger brother - a way of joining the expedition shows up. However, this will require our heroes to invest 50 sovereigns.
The gold fever, in which Hawke, his sister/brother, Varric and Aveline take part, becomes a good opportunity to look around Kirkwall and get to know the situation there. The hero participates in the search of runaway mages, organized by Templars, meets a strong group of Qunari with charismatic Arishok in charge (they live in the docks for an unknown reason), almost becomes a victim of a provocation planned by Sister Petrice from the Chantry that is supposed to make people fight against the Qunari, learns about maleficarum's plot against Templars and faces slave hunters. Moreover, the protagonist meets new companions - teasing and seductive Isabela, who is a pirate, and a gloomy elven warrior Fenris, who is a runaway slave from the Tevinter Imperium.
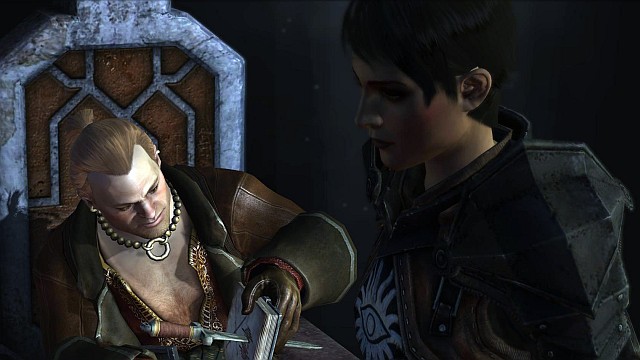
The interrogation of Varric, which is the base of the narration in Dragon Age II
Hawke and his companions visit a Dalish camp at the base of Sundermount. With the help of its Keeper - Marethari - the heroes use the amulet which they've obtained in the prologue to free Flemeth and thus save her life (which she could've lost in Dragon Age: Origins from the hand of the Grey Warden in result of a side quest given by Morrigan). A young elven mage named Merrill joins the group. She decided to live in Kirkwall's outskirts because of her desire to study blood magic, which is frowned upon among the Dalish.
The last thing that our heroes need to do before setting out on the expedition is to find the map of the Deep Roads, which is located in the Grey Warden's home in the Dustown (Kirkwall's slums). It turns out that the Grey Warden living there is Anders (a character from Dragon Age: Origins - Awakening), a mage apostate who leads a sort of a clinic and hides from Templars. Obtaining the map requires helping the Warden to rescue his friend from the Chantry temple. However, the heroes come too late and the prisoner has already been silenced (deprived of his magic skills and of all his emotions). It causes Anders to hate Templars even more, which will have its terrible consequences later.
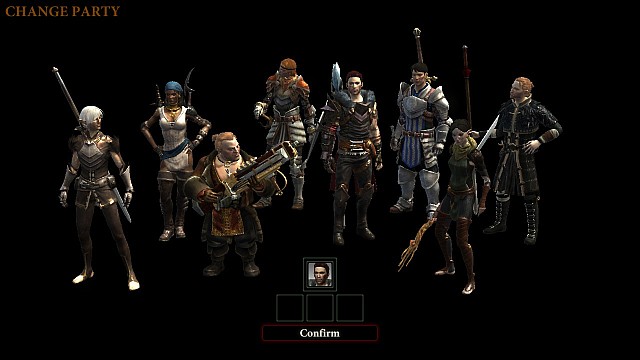
The Dragon Age II team (Hawke in the center and Carver to the right of him)
Hawke obtains the map and sets out to meet Bartrand with 50 sovereigns ready. During the expedition, the heroes find an unusual statue made of pure lyrium (a dangerous mineral with magic properties) of red color. The statue makes the leader of the expedition change his behavior to such extent that he blocks the group's way out and thus forces them to look for an alternative passage. On the way, the protagonists discover a pile of gold, which becomes a way for Hawke and his family to get back their nobility. However, the expedition is unfortunate for Hawke's sister/brother, because if they take part in it, they become infected by the darkspawn, which causes death or makes them join the Grey Wardens (if Carver/Bethany stayed in the city, they join respectively the Templar Order or the Circle of Magi).
A few years pass, during which Hawke and his family move to a mansion and gain the Kirkwall citizen's respect [act II]. Moreover, people start to distrust the Qunari that, for some reason, still live in the docks. The hero faces new tasks that require him to get involved in various events in the city and also his private life is full of new episodes (most importantly, the death of his mother, who is killed by an insane mage). As for the politics, Hawke is involved in the case of murdering Viscount Marlowe Dumar (the leader of Kirkwall), who sympathized with the Qunari. The person who killed him is Sister Petrice, who did this to prevent the citizens of Kirkwall to change their faith into Qun.
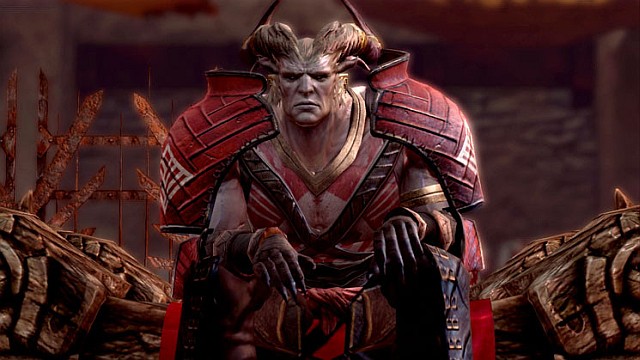 Arishok - one of the most noticeable characters in the game and also one of the main enemies of Hawke
Despite the Grand Cleric Elthina condemning Petrice's behavior (she can even let Qunari kill the murderer, depending on Hawke's actions), this incident becomes a turning point in the Qunari situation. Arishok, having witnessed Kirkwall become morally depraved, decides to mobilize his forces and seizes the Viscount's fortress, thus starting fights on the city streets. Hawke and his companions land in the middle of the conflict. The team makes its way to Marlowe Dumar's residence, with the help of Meredith Stannard (the leader of the local Templar Order) and Orsion (the First Enchanter of the Kirkwall's Circle of Magi). After arriving at the fortress, they witness Arishok beheading the leader of Kirkwall. Arishok declares that he and his subordinates will not leave this place until they regain the Tome of Koslun, a sacred scripture of Qunari lore, which has been stolen from them by Isabela. In most cases, this situation ends with Hawke killing Arishok (either in battle or in a duel).
When the battle is over, the main hero obtains the Champion of Kirkwall title and the action jumps into 3 years later, to the year 9:37 Dragon [act III]. Hawke is needed once again, this time to end the conflict that arises between Meredith and Orsino. Meredith is blocking the election of a new Viscount and seeks evidence that would allow her to liquidate the Circle of Magi. A chain of events makes the whole world notice the situation in Kirkwall, which makes Divine Justinia V (the leader of the Chantry, residing in the capital of Orlais) send her agent (Leliana) to decide whether the city should become a target of a crusade called Exalted March, to avoid the escalation of the conflict onto the whole of Thedas.
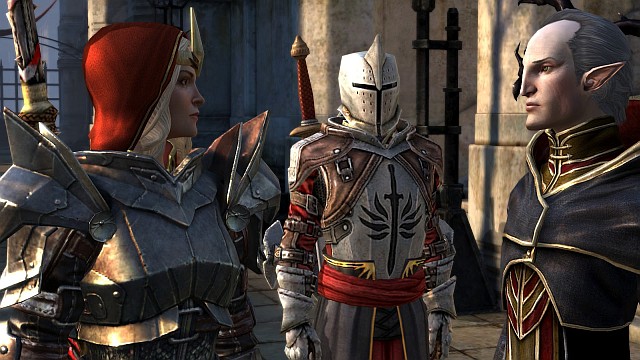
Meredith Stannard and First Enchanter Orsino - the conflict between them has started a global crisis, which we have to deal with in Dragon Age: Inquisition
However, Leliana's judgement turns out to have no meaning, as one night all fears come true. Anders, whose hatred towards Templars and the want for the mages to be free from the Circle, blows up the temple of the Chantry, killing Grand Cleric Elthina. Meredith, without hesitation, announces the Right of Annulment (liquidation of the Circle by killing all of its members) and the streets of Kirkwall once again become covered in blood.
In the epilogue, we find out the circumstances in which the narration took place. After the events in Kirkwall, the Circle of Magi in the whole of Thedas opposed the Templars, who have ended their relations with the Chantry to fight against the mages on their own. Thus, chaos stepped into the world. The Seeker came to the City of Chains short after the incident, to find the Champion of Kirkwall and get his help in dealing with the crisis. Because Hawke is not in Kirkwall, Cassandra's mission is unsuccessful and after her stepping out into the city streets, we see Leliana, who also reports about her failure to find the Hero of Ferelden.
As we now know, bringing peace into Thedas will depend on a different character - the one that we will control in Dragon Age: Inquisition.
Attention! This text may contain spoilers about the plot of the game and the previous parts of it.
After decreasing the scale of the story (which we have witnessed in Dragon Age II), the game goes back to its previous form and offers us the opportunity of participating in major events that affect the whole world. The action is set 10 years after the events in Kirkwall (with our hero's participation in it), leading to an open war between mages, who try to get their freedom by force, and templars, who want to solve the sorcery problem for good.
The war is raging in the moment when Dragon Age: Inquisition starts, throwing the whole land into chaos. What's even worse, the circumstances become a good opportunity for someone to break the Veil and open the way for the demons from the Fade.
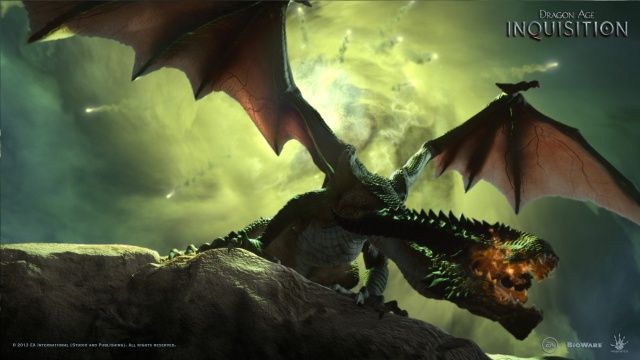 An invasion of demons, war covering the whole land... What else? A next Plague...?
It is quite obvious that the protagonist's task is to end the conflict between mages and Templars, close the passage to the other world and punish the person or creature that was the cause of this.
Fortunately, this time the hero doesn't start with nothing and also doesn't have to prove his value with some heroic deed before he is even noticed by the authorities of Thedas. No matter of what race or class we choose, we assume the role of the leader of the Inquisition, which is a quite young organization born to, simply speaking, heal the world from its problems. However, we will have to put a lot of effort in making our group famous. We will need to take care of our finances, human resources, rebuilding or placing new facilities, from which we can influence certain areas, and also achieving good relations with other factions and countries. We will strive to achieve this, so that in the end, the fate of the world would lie in the hands of the Inquisition.
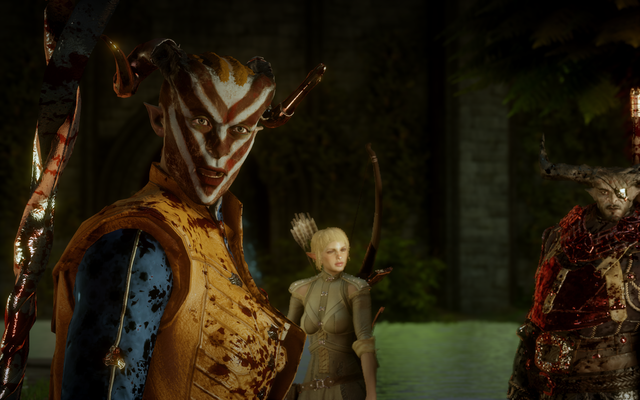
Of course, making the protagonist a leader of a powerful organization doesn't mean that we will explore the world while leading a huge army. As usual, we have a handful of companions - representing various races and factions - that help the hero and can, to some extent, influence the choices that he makes. Among them, we can mention the well-known Varrik and not less famous Seeker Cassandra.
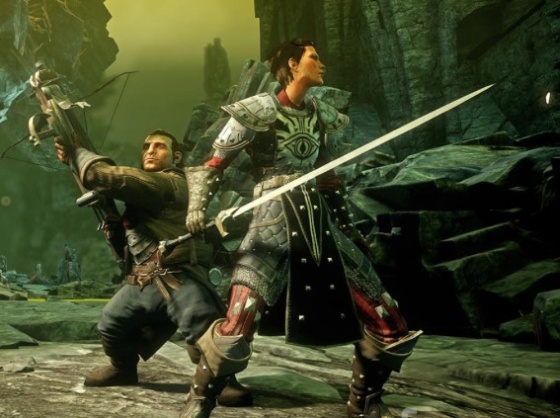 They've met when one of them interrogated the other and now they help the Inquisitor together. How will Varrik and Cassandra's cooperation work?
Coming to the end, it should be mentioned that a major part in the Dragon Age: Inquisition's plot is played by our old friends. We will meet the Warden, who was the hero of Dragon Age: Origins (assuming that he has survived the fight with the Archdemon in the first part's finale), as well as the protagonist of Dragon Age II. Also Morrigan will have an important place in the story. She accompanied the hero in Origins as a team member and disappeared at the end, not coming back in the second episode of the game. Unfortunately, her return doesn't mean that we will once again set off on an adventure with her. Despite her being and important character in the game, the player won't be able to invite her to join the team.
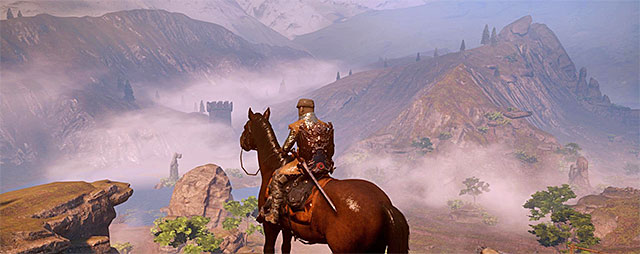
Having in memory the previous info about the third Dragon Age, one could think that the game provides a totally open world - like for example The Elder Scrolls - so we will start with a clarification. The regions in Inquisition will be divided into separate locations with loading screens in between them. However, all of these locations will be quite large, which will give a slight feeling of a sandbox game. Each of the already presented locations are claimed by the developers to be bigger then the total area of the first edition - Dragon Age: Origins. The announcements get even more impressive when we add the promise of placing various mounts in the game, as well as "secrets" and other attractions for exploration enthusiasts.
Moving now to describing the parts of Thedas, which we will visit in the game, once again we will need a clarification. According to early announcements, in the game, we were to see not only Ferelden, but also places like Orlais, Dalia, Nevarra, Antiva, Free Marches and even the Tevinter Imperium. Unfortunately, the developers changed their plans and the game will contain only three of these regions: Ferelden, Orlais and Dalia. If you want to find them on the map above, look at the southern part.
Ferelden - This area doesn't need to be introduced to those persons that have finished Dragon Age: Origins. It is a human kingdom, which has recently gained its freedom (from Orlesian occupation), safe from the demon plague, but still rising up from its knees after recent conflicts. This land represents a classic "European fantasy" style. The forest in the east is inhabited by aggressive elves that have to constantly face persecution from humans (the Dalish) and underneath the western mountains, you can meet dwarves that try to isolate themselves. In Inquisition, players will visit many of the well-known locations, like for example Redcliffe.
Orlais - An empire located in the south-western part of Thedas. In the previous century, it had a large territory, but overtime it began to decrease in size - one of the lands that parted from Orlais recently is Ferelden. Nowadays, Orlais is affected by anarchy caused by a civil war between Empress Celene and Grand Duke Gaspard de Chalons. As for the culture, Orlais can be compared to medieval France. The empire is bounded by the Frostback Mountains from the east and by the Sea of Ash from the west.
Dalia - Strictly speaking, it is one of the regions in Orlais, located in the east part of the land (at the foot of the Frostback Mountains), but it stands from the rest thanks to its extensive area and peculiar character. This region used to be a homeland of elves, who are now spread all over the world, persecuted in human cities or living in tribes and considered hostile savages (Dalish). Nowadays, Dalia is a dreary wasteland covered with ruins that witness the civil war.
As it was mentioned earlier, Dragon Age: Inquisition doesn't provide a fully open world, but a set of wide locations, between which the player will move using a menu in the shape of a map. In this article, we will look at some well known places that the developers prepared for us.
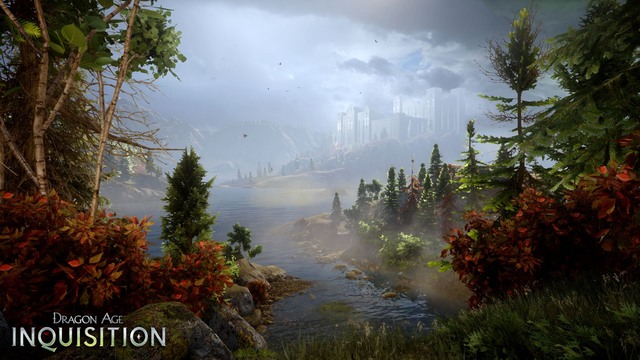
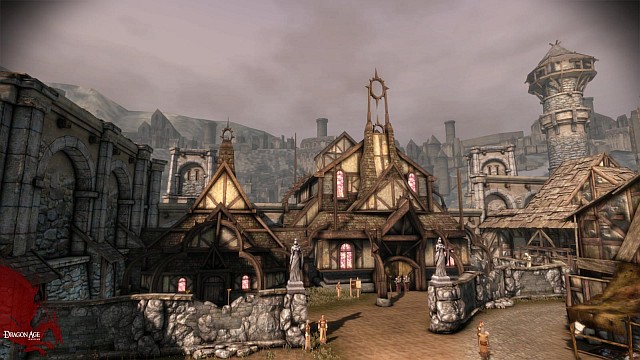
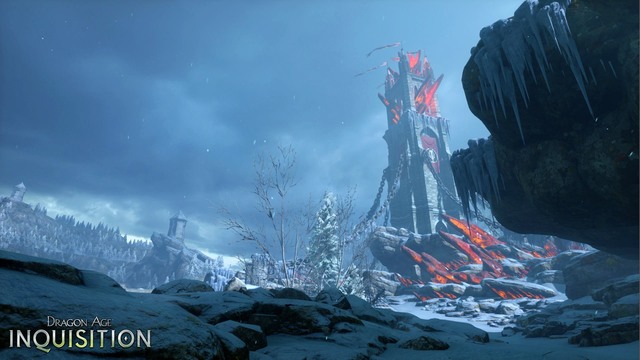
The Hinterlands - an area in the south of Ferelden, known also from Dragon Age: Origins. A green land with a temperate climate, offering meadows, woods and lakes, as well as plains and villages. This beautiful landscape is being ruined by the war between the Templars and mages. What's even worse, both sides of the conflict see the local people as allies of their enemies and commit a lot of crimes, hurting innocent civilians. Thus, the Hinterlands is currently a very dangerous area. The heart of the land is Redcliffe Castle, towering majestically over green plains. The fortress guarantees safety for the city lying at its feet, which prospers quite well due to shipping of goods from Orlais and dwarven cities in the Frostback Mountains. The castle is also the first line of defense for the whole of Ferelden.
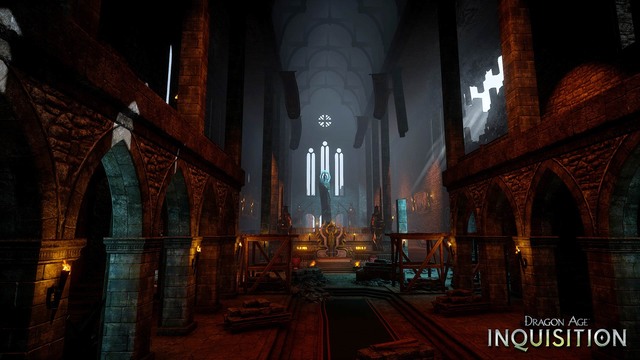
Theringal Redoubt - a fortress in Ferelden. Over the years, it served as the headquarters and a place of training for the Seekers of Truth order - an elite organization answering to the Chantry. The Seekers' task is to save the Chantry from dangers from outside, as well as from inside the order, using silent espionage techniques (one of the members of this group is Cassandra Pentaghast). The function of the Redoubt changed about forty years ago (in 8:99 Divine), when the Seekers lost their source of finances that allowed them to keep the fortress in a good state.
Exalted Plains - one of the areas that altogether are known as the Dales. Before centuries, this place witnessed the fall of the elven civilization, bending under the power of human forces fighting for the Chantry. Nowadays, it is an arena for another conflict, which is the Orlesian Civil War. However, nobody fights here for the moment, as the actions of both sides of the conflict were paralyzed by another danger - rising undead. Due to the informal ceasefire, the Inquisitor will be able to search for the cause of this mysterious phenomenon and look around the environment and wander through wide hill ranges and swamps, facing their dangerous inhabitants, with dragons involved.
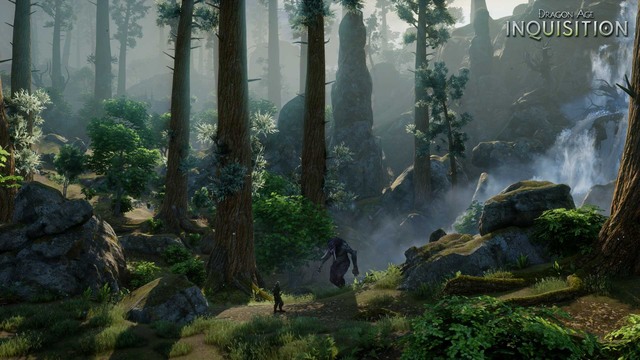
Emerald Graves - an area representing a typical landscape of the Dales. It's an ancient wilderness with streams and rocks covered with majestic waterfalls. This locations can be divided into two parts. The southern part is in the hands of the Orlesian nobility, which built roads and residences there. However, it is abandoned at the moment, due to the civil war (with the biggest battles taking place in the Dales). The northern part belongs to the nature and the original inhabitants of this land. Here, we can find elven ruins, which are the remains of an ancient necropolis. We will see refugee camps, wild animal lairs and passages leading to a network of caves, inhabited by creatures far more dangerous than wolves.
Emprise du Lion - an area located in the east of the Dales, on the mountainsides of the Frostback Mountains. It is an unpleasant land with freezing climate and dangerous paths. Like the Emerald graves, this area bares signs of elven presence, but here, they are much more distinct and do not have the graveyard character. The original citizens are of course long gone and their houses, majestic amphitheaters and a fortress towering above the land are currently in the hands of Red Templars, addicted to red lyrium, which turned them into people capable only of destroying and murdering. The Inquisitor will end up here trying to strengthen his organization and also fighting against the malefactors. Also, the hot springs located in Emprise du Lion, will give the Inquisitor the opportunity to meet a dragon or two.
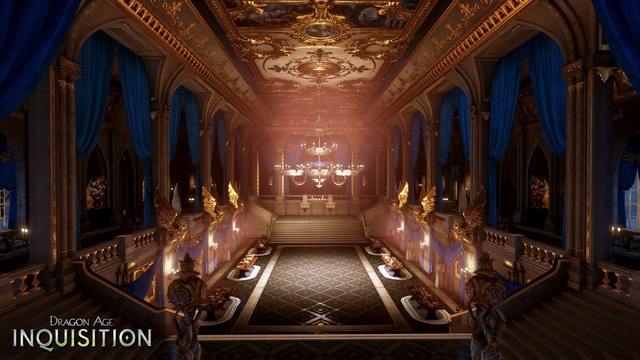
Halamshiral - A city in the north-eastern part of Orlais, near the feet of the Frostback Mountains and at the coast of the Waking Sea (northern edge of the Dales). It was built by the elves in ancient times, marking the moment in which their exodus ends, but a few centuries later, after an Exalted March, it became an Orlesian city. Despite the fact that humans rule in Halamshiral, the elves outnumber them still, as the original citizens of the place. The most important building in the city is the Winter Palace - a residence full of splendor, belonging to Empress Celene I. The palace is the place where peace talks will be conducted between the sides of the civil war. The Inquisitor and his subordinates will attend a ball organized for this occasion, to make sure that everything goes well and to prevent anybody from attempting assassination.

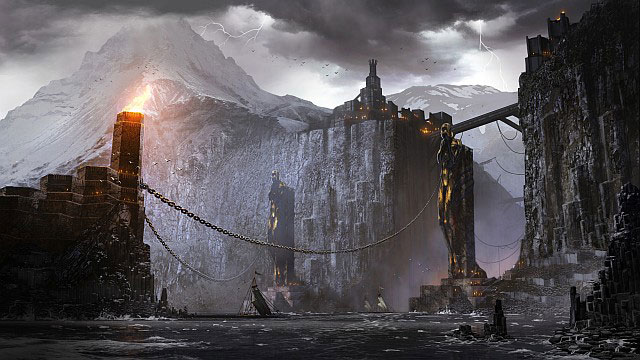
Western Approach - A desert area in the north-western part of Orlais. Nowadays, it is a wasteland, where you can here only the wind blowing above the dunes, rock formations, gloomy ruins and iron towers marking the only one, relatively safe place here. Life used to thrive here, but the Second Blight - the invasion of the darkspawn through the Abyssal Rift - forced the citizens to move. They didn't come back even after the humans' eventual victory and building a strong facility of the Grey Wardens there. The outflow of people made the Grey Wardens leave the Western Approach, abandoning the monumental Adamant Fortress, which guards the edge of the Abyssal Rift to this day. The fortress will be restored by the Inquisition, but the hero will have to clear the area from the darkspawn, before he can live in the castle.
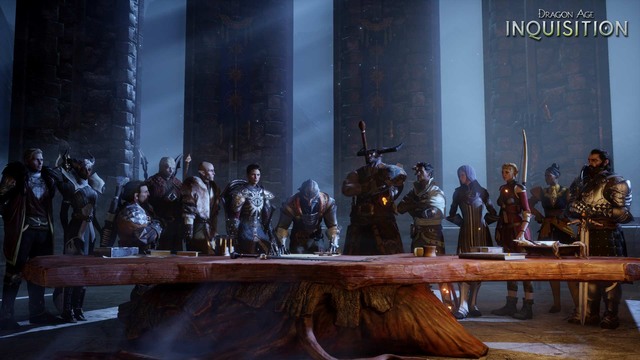
The most important characters in Inquisition - among them, our hero
As usual in BioWare's cRPG games, the key role in Dragon Age: Inquisition is played by a variety of heroes. Some of them will be our companions and others are totally independent. Below, you will find a brief description of the most important "actors" of the story, in which we will participate during the game.
The Inquisitor - The main hero. Most of the characteristics (race, appearance, class, our past, etc.) will be defined by the choices that we make at the beginning of the game, but every player will have something in common: the fact that the protagonist is the only one who survived the catastrophe of the Breach in the Veil, which gave him a special ability to close other rifts that would allow the demons from the Fade to enter his world.
Varric Tethras - We know him from Dragon Age II. A dwarf from a family of merchants that lives on the surface, who due to his rowdy nature, accompanied Hawke in Kirkwall and now stays close to the Inquisition. A versed story-teller and a humorous rogue, skilled in using his large crossbow named Bianca.
Cassandra Pentaghast - Another (and the last, if it goes for the team) one from our old acquaintances. We remember her as a member of the Seekers of Truth order. She interrogated Varrik to find out the truth about the beginnings of the war between mages and templars and about Hawke's role in that. Faithful to Divine Justinia V (the leader of the order), she joins the Inquisition to stop the chaos in Thedas. Cassandra is a potential romance option for a male hero.
Vivienne - The leader of Orlesian mages and personal enchanter of Empress Celene, the ruler of Orlais. A ruthless woman, who has achieved her high position thanks to her slyness and skillful political intrigues, earning the moniker "Lady of Iron". She does not support the rebellion of mages against Templars and joins the Inquisition to restore the order of the world.
Solas - An elven apostate mage, who has spent most of his life in the wilderness, avoiding hostile people and exploring mystical knowledge on his own. He has spent a lot of time studying the Fade and thus knows its nature better then most of the "professional" wizards. When the Breach appears on the sky, he decides to leave the shade and offers to help the Inquisition to stop the danger.
Iron Bull - A fearless member of the qunari secret police (Ben-Hassrath), who, starting to lose his motivation after years of service, has been sent to Orlais to organize a group of agents and mercenaries there (the Bull's Chargers) that would gather information and send it to the authorities. Having spent years far away from his homeland, fighting and sitting in taverns, the Iron Bull starts to wonder about his identity. He joins the Inquisition because of a prosaic reason: he wants to make money on killing demons.
Sera - An indicent, impulsive elf, who likes to play. She was once a member of an organization known as the Friends of Red Jenny, where she relished on humiliating the nobility. When the Breach comes, she feels it's her duty to fight the demons (because "their world has to be normal so she can play") and joins the Inquisition.
Blackwall - a member of the Grey Wardens, a faction known to all players of the first episode of the Dragon Age series. He is a warrior, who has committed his life to defending the world from demons and other dangers from the other world that show themselves during Plagues. Blackwall differs from his fellow Wardens, because he has joined the group of his own accord (many of the Wardens are murderers, outlaws or thieves who are recruited).
Dorian - A human mage from the Tevinter Imperium. He's so talented that he could serve as a model to follow for his peers, if not for one thing - Dorian thinks his homeland depraved and stands against the rules that govern it. It is why we get to know him as a proud outcast, who joins the Inquisition to get a chance of changing things in the Imperium. What's more, this character is the first one hundred percent gay character in the game.
Cole - At first he seems like a normal boy, who is skilled in sneaking. The reality is though, he is an entity of a far more complex nature. Cole is a lost spirit, caught between the Fade and the mortal world, gifted with an ability of sensing people who are in pain. Cole tries to find his place in the world by helping others and finally joins the Inquisition.
It should be mentioned that the number of playable companions in the game will probably be no higher than the nine described above, because BioWare has announced that they won't be introducing any new characters in DLCs.
Morrigan - a Witch of the Wilds. This character is well known as a companion in the first Dragon Age game, but absent in the second part. In Inquisition, we will see her in the role of an advisor to Empress Celene, arriving in the Orlesian court three years ago. Rumour has it that she has a major influence on the empress, teaching her dark magic. Developers announce that Morrigan will play a very important part in the Inquisition's plot.
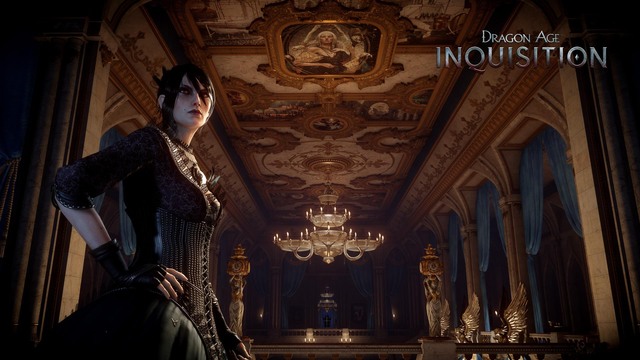
Morrigan will make a big comeback in Inquisition. Will players like her new role?
Leliana - a bard skilled in archery and sneaking. She is also an old friend from the Grey Warden's team. After the events from the first Dragon Age game, she remains a servant of Devine Justinia, offering her talents as a killer to fight the enemies of the Chantry. Like Cassandra, she joins the Inquisition to restore the order in the world, but unlike her, she is not a member of the Inquisitor's team. Instead, she leads the espionage of our organization and performs assassinations.
Of course, these are not all the characters that will play an important role in the events of the game, but as for now, we do not possess any further info about them. We can only suppose that we should meet characters from both previous parts again, in Inquisition, as well as people like Alistair or Flemeth.
Cullen - a Templar; our old friend, who showed up in Dragon Age: Origins (in the tower of the Circle), as well as in Dragon Age II (Knight-Captain commanded by Knight-Commander Meredith). After the bloody events in Kirkwall, he is recruited to the Inquisition by Cassandra and becomes a military advisor of the Inquisitor, leading the armed part of the his forces. Cullen is a practical and direct man, which makes his suggestions often very different than those of the rest of the advisors. Despite him showing up in the previous games, it is only in Inquisition where we will have the chance to know him better, which also means that he is a potential romance option for a female hero.
Josephine Montilyet - the third and the last advisor of the Inquisitor and one of the least militant characters in the organization. She comes from Antiva and serves as a diplomat. She is also the ambassador of the Inquisition, so her task is to constantly negotiate and represent the organization in talking to various important persons, as well as expanding the influence of the group. Josephine is a calm person, believing in the power of the word (either spoken or written) and doesn't really support military actions.
Of course, these are not all of the characters that will play an important role in the game, but for this moment, we do not possess any further information. We can only assume that among our old friends that appear in Inquisition, we will also meet the heroes from both previous parts, as well as character like Alistair or Flemeth.

Forward

Back

Pan camera left

Pan camera right
Go left

Go right

Auto run toggle on/off

Sprint

Jump

Interact

Search ("scan") the area

Switch between targets
 or
or
The basic attack

Pause

Tactical view

Command to attack the current target

Command to hold ground

Cancellation of all the currently active commands

Command to leave

The first slot on the quick bar

The second slot on the quick bar

The third lot on the quick bar

The fourth slot on the quick bar

The fifth slot on the quick bar
The sixth slot on the quick bar

The seventh slot on the quick bar

The eighth slot on the quick bar

Quick heal

The first potion slot

The second potion slot

Summon mount/get off the mount

Map

Journal

Inventory

Character card

Select the first character

Select the second character

Select the third character

Select the fourth character

Quick save

Quick load

Table of score (multiplayer)

Move

Change camera position

Switch character

Menu

Tactic Mode

Quick Menu

Activate second set of skills (hold)

Use ability

Basic Attack

Interact/Jump

Scan/Gallop (on horse)

Lock camera on target

Move

Change camera position

Switch character

Menu

Tactic Mode

Quick Menu

Activate second set of skills (hold)

Use ability

Basic Attack

Interact/Jump

Scan/Gallop (on horse)

Lock camera on target

Move

Change camera position

Switch character

Menu

Tactic Mode

Quick Menu

Activate second set of skills (hold)

Use ability

Basic Attack

Interact/Jump

Scan/Gallop (on horse)

Lock camera on target

Move

Change camera position

Switch character

Menu

Tactic Mode

Quick Menu

Activate second set of skills (hold)

Use ability

Basic Attack

Interact/Jump

Scan/Gallop (on horse)

Lock camera on target
 In the game, there are representatives of four different races
The first thing that you need to do at the beginning of the game is create your character. First, you need to decide which race you want to play as. Each of the available four races is predisposed for doing different things, which you can see in-game in the description. You can play as a representative of one of the four races: a human, an elf, a dwarf and a qunari. The features of each race are as follows:
You still have to pick the gender of your character: a man or a woman. Which gender you choose does not really matter and the difference lies in the characters that you can romance with. Also, the race you pick affects the dialogues in the game, especially if you are causing negative tensions when talking to others. You can be frequently offended by other NPCs if you play as a non-human character.
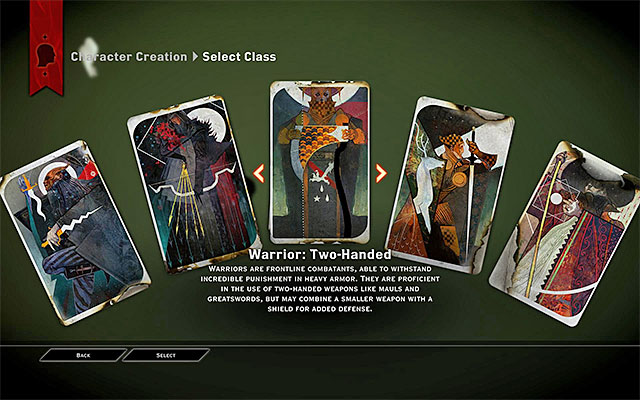 Class selection window
After you pick your race, you will have to pick the class of your character. The basic division into classes is as follows: a Rogue, a Warrior or a Mage. Each of these classes can also have an additional specialization:
Specialization selection does not oblige you too much, the points for the given specialization can be distributed, after you progress to the next experience level so, if you are not happy with using with a previously chosen type of weapon, you can always change that. Apart from the two combat-oriented categories that determine which weapon you use better, each class has a group of specific abilities, e.g. the Rogue can learn how to become invisible and perform surprise attacks. The warrior can encourage his companions to fight and provide them with additional buffs. Things are a bit different with mages,: here, you can distribute your points to four different spell types. Also, there are expert specializations, where you pick one out of the three available ones, later in the game. They are picked for your character only and the default specialization activates for your companions.
Note - Remember that there is one exception to these rules: dwarves cannot become Mages.
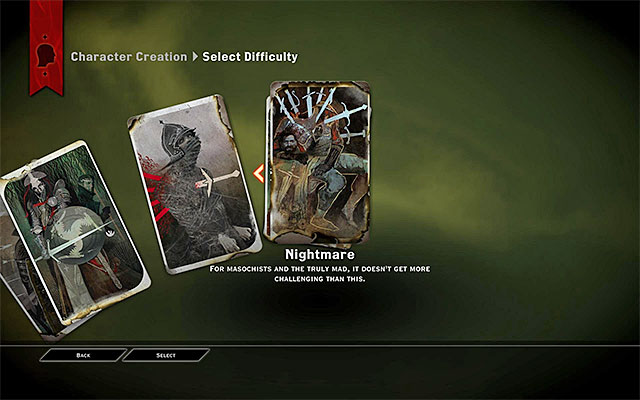 The first time you choose difficulty level s at the beginning of the game
Your choice of the difficulty level, which you make at the beginning of the game, can be altered at any moment, throughout the game (even during combat). There are four difficulty levels available and the main difference between them lies in the intelligence of the opponents - they become more importunate, more considerate in the case of massive attacks and lavishly use powerful special abilities.
For those who want to set the bar higher, there is also "friendly fire" option available - damage that you and your companions can take from the members of your party.
Note - Changing difficulty level during the game may disable some of the achievements!
If you had the opportunity to play the previous installments of Dragon Age, you can import the world characteristics. Then, all of the decisions that you have made so far will be implemented in the game world. Dragon Age Keep is a web-based service. It allows you to create the backstory for the past events in an easy way: while listening to stories of the events from the past, at the key moments, you can intervene - at that point, a button appears that allows you to make the same decision as you did when playing the game.
Using the above tool is completely optional - if you do not import anything, the game world is set to default.
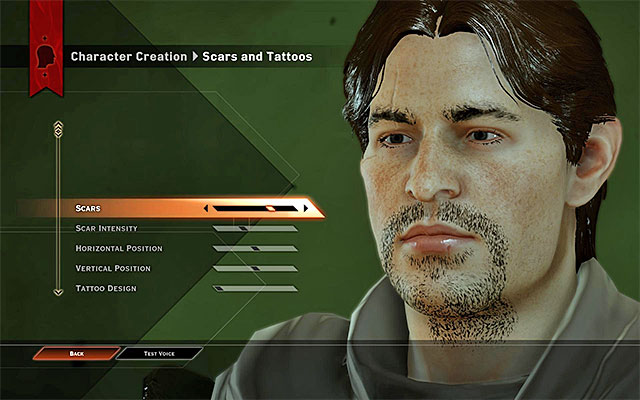 One of the creation windows
Once you picked your race, class and a difficulty level, it is time to customize the appearance of your character. The appearance creator offers you an abundance of options. You can either pick one of the ready-made faces or customize the one that you pick, starting with the shape of the head, complexion, through hairstyle and one of the two available voice schemes. Then, you need to pick the looks of the individual elements: nose, ears, eyes... all of these can be adjusted using the bars and the system of axes to adjust the distance/width, height/length. Additionally, you can add tattoos to your character's face (which are obligatory in case of elves), scars and, in case of the qunari - set the style of the horns. Finally, for both male and female characters, you can choose make-up using the color palette. Once you accept the changes, they are irreversible. Finally, you need to choose the name of your character. Once this is done, you start the proper game.
 After you are promoted to the next experience level, access the chard of your character
Leveling in Dragon Age: Inquisition is very similar to other RPG games. Once you obtain the required amount of experience points, your character is automatically promoted to the next level. What this means is that, first of all, the main statistics of your character are raised and your health bar is extended. Apart from that, you receive an ability point. I recommend that, each time you gain the next experience level, you access the character window to spend that point.
Note! Each character has a separate experience bar. This means that they are promoted to the next level independently of each other, not always at the same time.
Note! I recommend that you see the page entitled How to level-up fast? in the Questions and Answers chapter. There, you can find a number of hints on how to obtain experience points faster.
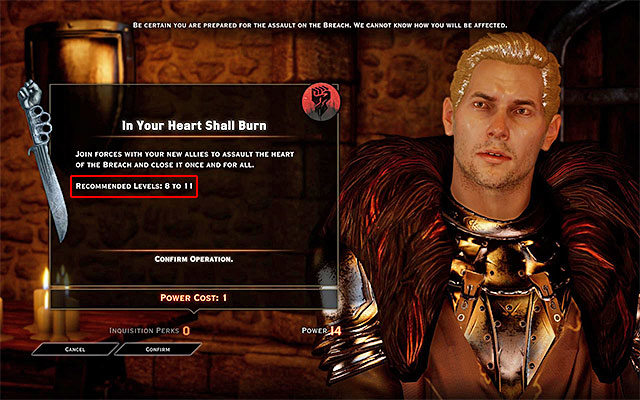
Leveling-up is very important when it comes to progressing in-game. The characters that are not developed well enough will have problems defeating stronger monsters or completing some of the quests. In the case of the storyline quests, the game sometimes offers you an additional hint, e.g. it suggests the experience level, at which your characters should be, to be able to complete that quest. An example of such a quest has been presented in the above screenshot - the recommended experience ranges between levels 8-11. This means that if your party experience is lower than 8, you may have serious problems completing that quest. On the other hand, a party with the level higher than 11 should have no problems with completing it.
Note! Information about the recommended level for some storyline quests has been provided in the walkthrough for the game.
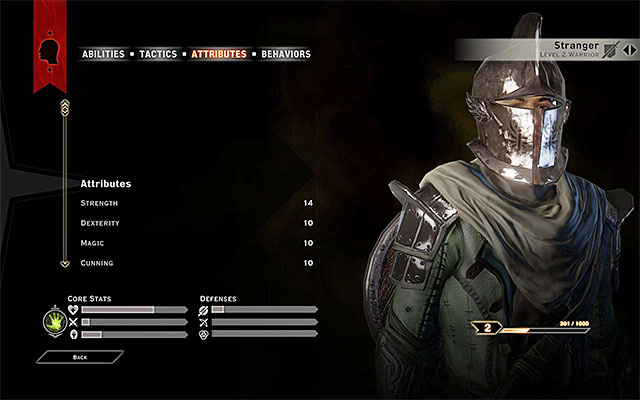 You can view your current statistics in the character window
Each of the playable characters in Dragon Age: Inquisition is described by a number of attributes. As I already mentioned, the development of attributes is an automated process, i.e. the selected ones are raised the moment you progress to the next experience level. This does not mean, however, that you should not pay close attention to them, keeping in mind that they can be modified, e.g. thanks to wearing elements of armor with specific features.
The main character attributes are:
The remaining important attributes are:
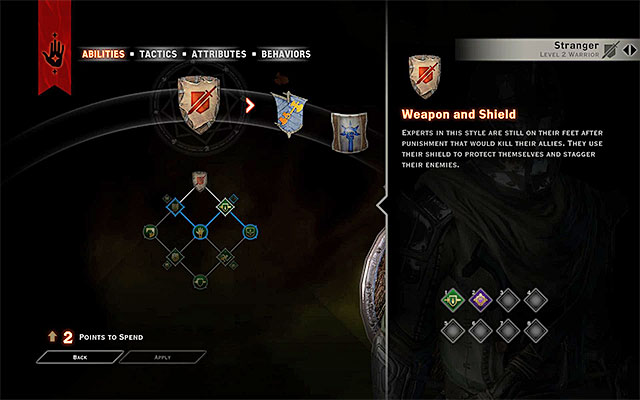
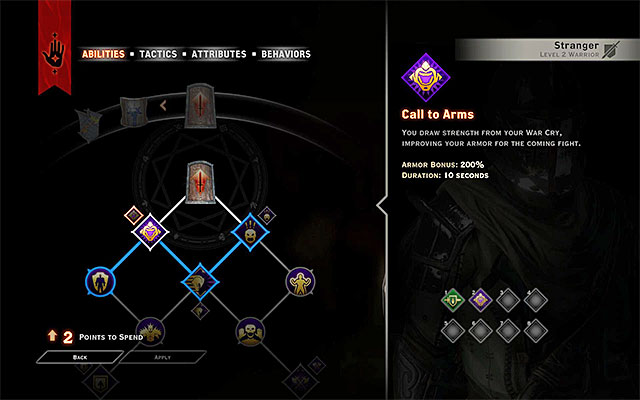 Example point distribution window
In Dragon Age: Inquisition there are many abilities available for unlock. The array of the available abilities depends, of course, on the character class that you choose at the beginning of the game, and they are presented in the form of skill-trees that represent various categories (e.g. Sword&Shield and Two-Handed weapons, in case of a warrior). The fact that these are presented as trees, means that you need to unlock them one after another. Reaching more advanced abilities may require you to unlock one, or several, of the previous ones.
In the first page of this guide, I mentioned that the abilities are unlocked with the available development points. You receive a point each time that your character progresses to the next level. There are three categories of abilities:
I recommend that you, early in the game, unlock at least 3-4 active abilities, so that it grants you with more room to maneuver, depending on the situation in the battlefield (e.g. if you encounter a strong opponent, or a group of the weaker ones). Also, it is a good idea to obtain several of the "strongest" passive abilities. I recommend that you take interest in the upgrades later and unlock them only for those of the passive abilities that you use the most frequently.
Note! If you do not want to lose time on reviewing abilities in order to find the most useful ones, you can leave that to the game. In such a situation, once you access the character window, you can press the button to level-up automatically (Auto Level Up). I won't recommend using this, because the game may attribute points to the abilities that do not conform with your path of development (e.g. unlock a defensive ability when, what you need, is a strictly offensive character).
Note! A detailed list of all the abilities can be found in the chapter of this guide entitled List of Abilities. This chapter only lists hints on the usefulness of the individual abilities.
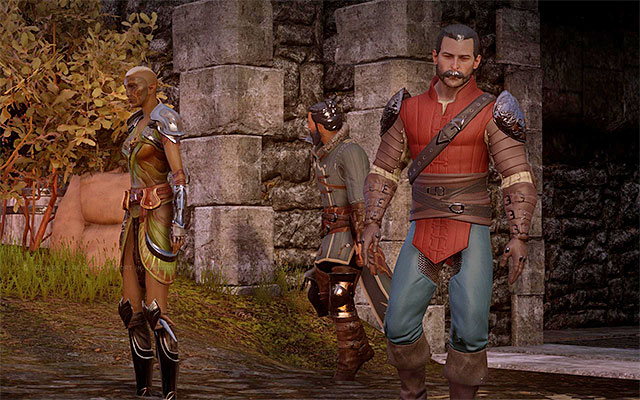 An example trainer
Just like in the previous Dragon Age games, your character can specialize in a selected area (while the rest of the party members receive it automatically), which increases his combat abilities (e.g. strength or constitution). It is highly probable that a specialization is initially unavailable and you can change that while you progress in the game. This means that you need to wait until a marking on the map appears (at the war room) which is connected with the option to play a quest of inviting trainers. Then, they appear at the Skyhold (to learn more, see the remaining guides for Dragon Age: Inquisition).
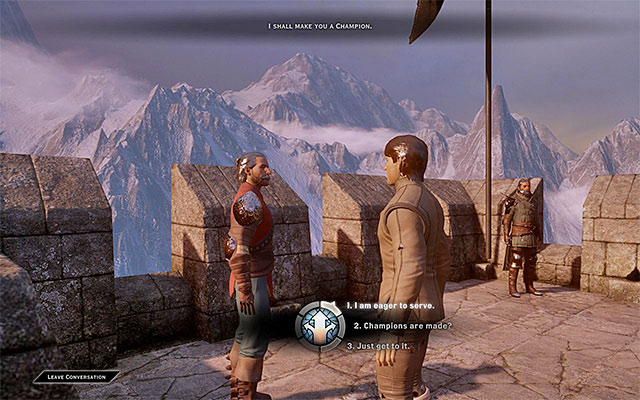 You need to perform all the activities tasked to you by the trainer
It does not suffice to identify the trainers, because they will be willing to share their knowledge with you only after you perform the tasks that they give you. Therefore, you need to meet the specific trainer, learn about the details of his task and complete it.
Note! It is a good idea to complete all of the challenges tasked with the trainers and, only then, decide which area you want to master.
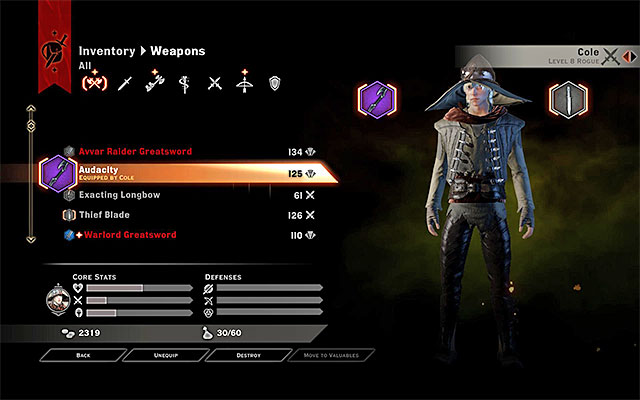 Get rid of the items that you do not want, on a regular basis, because the capacity of the inventory is limited
The management of the inventory in Dragon Age: Inquisition is not that complicated, but there are several points to remember. The game uses a color-coded system, e.g. weapons or armors of higher quality have different colors than the common ones. Of course, this is helpful while searching for the best available item. An even more important piece of information is that, by default, the capacity of the inventory is 60 slots. It is a very strict number so I recommend that you often visit merchants and sell all the items that nobody has any use for. The important information is that you can spend the Inquisition perk points, to buy perks called "Antivan Tailoring" and " Imperial Court Tailoring". Obtaining these perks expands the inventory up to 90 slots.
Note! While calculating the occupied slots in the inventory, the game does not include crafting items (i.e. herbs, materials or schematics). You can keep the unlimited number of these in your inventory.
The inventory has been divided into nine categories which make it easier to view it:
If you do not like collecting everything that you find and visiting merchants often, pick only items of the highest value. These are the legendary items and all sorts of valuables that, apart from the profit you can make by selling them, provide you with nothing else and they are not wanted by any of the NPCs. The items of the lowest value, on the other hand, are upgrades so, if you are not going to use them (e.g. you already have better ones or you prefer to craft them on your own), get rid of them in the first place. Sale prices, for each merchant, are the same which means that you can sell your items to the first merchant that you meet.
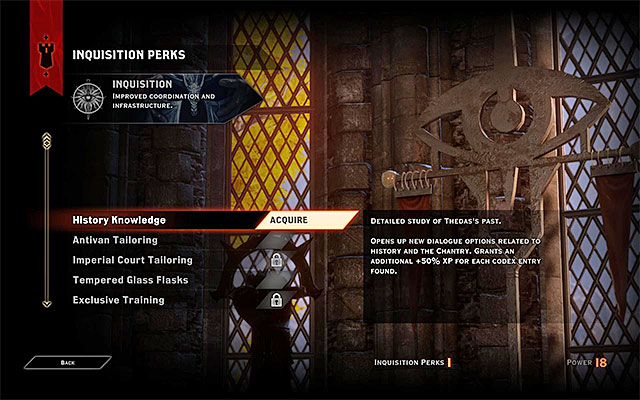 You should consider each decision to spend Inquisition Perks
In many aspects, Inquisition Perks are similar to passive abilities. From the moment of unlocking, they provide you with permanent bonuses and they do not require any further actions from you. The bonuses that the perks grant vary - they can, for example, increase the growth rate of experience points, provide you with better prices from merchants, make it easier for rogues to open locks or obtain rare materials. What perks have in common is that they have an effect on the entire party.
You can unlock perks by collecting perk points. The points are awarded for the successive Influence levels, which also are connected with the Inquisition activities. A detailed list of Inquisition Perks has been provided in the chapter entitled Inquisition Management. In that chapter, you can also learn about how to amass influence and unlock new perks, as well as suggestions on the usefulness of individual perks for the entire party.
In this chapter, you find all of the abilities (skills) available in the game. They have been divided into ones specific for the warrior, the rogue and the mage. Apart from that, the chapter also details the individual specializations, available for the individual character classes (they are available for your character only).
On each of the pages of this chapter, you find a table of abilities. The first column of the table lists the names of the abilities. The second column specifies the type of the ability: A stands for activated ability, U stands for the upgrade for an activated ability and P stands for a passive ability. The last column provides a brief description of the ability's effect as well as a concise commentary (usability, situation in which to use, etc.).
Note - To learn more about developing the abilities and how to obtain them, see Abilities in the Character development chapter.
NAME
TYPE
EFFECT AND COMMENTARY
Block and Slash
A
Prepares to repel the opponent's attack and counter. To use this ability, you of course need a two-handed weapon. Countering deals more damage than regular attacks with the given weapon.
Flawless Defense
U
This is the best of the Block and Slash abilities. It adds two, highly useful features - increase in the strength of the counter attack and bonus to guard (defense against the enemy attacks).
Mighty Blow
A
Deals a powerful blow and knocks down the opponent. It is one of the best abilities in this category, which you should use as often as possible. Remember to attack the downed opponent, because this will deal more damage to him.
Easy Target
U
This is the best of the Mighty Blow abilities. It is a good idea to obtain it early into the game, because it increases damage dealt to the downed opponents and reduces the cost to use the superior ability.
Flow of Battle
P
Decreases cooldown of the activated abilities, thanks to critical strikes and increases the value of strength. Especially the latter is useful, because it affects damage that you deal.
Shield-Breaker
P
Decreases defense parameters of the opponents' shields, thanks to critical strikes and the increased strength. Just like above. The main incentive to unlock this ability is the fact that you can boost the key attribute of the warrior.
Pommel Strike
A
Lands a strike that staggers the opponent. It is a perfect ability, especially that the enemy takes 300% damage. The only downside is that he remains in this state for the mere three seconds.
Lightning Jab
U
This is the upgrade to the Pommel Strike. Its main feature is that it extends the time, for which the opponent remains staggered, by one second. Apart from that, it decreases cooldown time of the ability.
Whirlwind
A
Starts a whirlwind attack. This ability is not as useful as the remaining ones, in this category, although it allows you to deal damage (unfortunately, of decreased strength) to bigger groups of opponents.
Rising Winds
U
This is the upgrade for the Lightning Jab. It only adds one more feature - increases damage dealt by the individual spins (you need to continue performing the superior ability to see the difference).
Guard Smasher
P
Increases damage against the opponent's guard and permanently increases the attribute of strength. The former gains in meaning while fighting stronger and better armored opponents.
Clear a Path
P
Regenerates stamina, thanks to attacking multiple opponents in one swing and permanently increases strength. This ability harmonizes perfectly with Whirlwind, which is perfect for dealing with multiple opponents.
Earthshaking Strike
A
The attack forms a seismic wave. The ability is useful only while fighting multiple opponents and, additionally, you always need to position yourself in the way that allows the attack to wipe as many opponents away as possible.
Shattered Ground
U
This is the upgrade for the Earthshaking Strike. It is perfect and it adds the effect of eruptions, where fissures in the ground occur. This creates the possibility of setting opponents on fire.
Summary: I recommend that you rely on Mighty Blow from the beginning of the game, thanks to which your warrior can effectively interrupt the attacks of the opponents and kill them effectively. Lightning Jab is just as useful, because it allows you to stagger the selected opponents and to exploit the fact that they are defenseless. If you want to use two-handed weapons to attack groups of opponents, you should also take interest in Earthshaking Strike. However, in such a situation, also get the upgrade for this ability, so you have more chance of setting opponent on fire. As for passive abilities, invest your points in 1-2 of them, at least (mainly for the sake of the additional strength points).
NAME
TYPE
EFFECT AND COMMENTARY
Shield Wall
A
Uses stamina to block the attacks of the opponents. Additionally, as a result of successful blocks, the value of guard rises. It is a good ability, if your warrior has been targeted by stronger opponents, or if you want to strengthen him up, before joining more open combat. Quite a downside is that activating this ability discernibly slows down your character.
Chevalier's Step
U
This is the upgrade for the Shield Wall. There are two exquisite features to this one - it increases defense of the party members around you and decreases the "penalty" to mobility of the warrior, after the ability is activated.
Payback Strike
A
Allows you to leave the state of immobility and land a shattering blow on the nearby opponents. This ability comes in handy, whenever your warrior has fallen victim to an attack that restricts your mobility or, after you have recently taken damage, thanks to which you can strike back.
Sweet Revenge
U
This is the upgrade for the Payback Strike. It increases damage dealt with the attack and allows you to stagger the attacked opponents for two seconds.
Bear Mauls the Wolves
P
Toughens you against flanking attacks, decreases the chance of getting staggered, during a frontal attack and permanently increases the attribute of Stamina. The passive bonuses to this ability decreases the likelihood of negative effects that may expose you to attacks of the opponents.
Warrior's Resolve
P
You regain stamina, while taking damage and receive a permanent increase to Constitution. This is an interesting ability, if you build your warrior with aggressive actions in mind, instead of hiding behind the shield.
Turn the Bolt
P
Cuts damage taken from ranged attacks by a half (various types of projectiles) and permanently increases Constitution. It is a good idea to take interest in this one, because warriors are often the target of archers and other ranged enemies.
Shield Bash
A
Attacks with the shield. It is an immensely effective attack, because it deals 300% regular damage and, additionally, breaks the guard of the attacked opponent. Try to use the attack on the strongest of enemies, because the cooldown is long.
Ring the Bell
U
This is the upgrade for the Shield Bash. It increases the bonus to the weakening of the opponent's defenses. Take interest in this upgrade, only if you use Shield ash only for that purpose.
Lunge and Slash
A
You lunge forward and spin with a slashing attack, if the first strike connects. This is a versatile ability that can be used both at short distance and at a greater range.
Great Lunge
U
This is the upgrade for Lunge and Slash. It increases the bonus to damage, depending on the distance that you have dashed/ It is of use, especially, in the case of opponents that are discernibly away, because the bonus may soar to 250% damage.
Turn the Blade
P
Parries frontal blows and increases the attribute of Constitution, permanently. It is a good ability, thanks to which the warrior takes less damage.
Summary: As a matter of fact, each ability in this group is unique, n its own respect and may be of use. Shield Wall is a good ability at the beginning of a battle, or when the warrior is in a tight situation. Payback Strike not only allows you to lift adverse effects imposed on the character, but also respond to the attacks with proportionate power. Shield Bash is an absolute opposite of the Shield Wall and it allows you to use your shield offensively. Lunge and Slash is also offensive and can be used in a variety of situations. As for passive abilities, invest in, at least, 1-2 of them. Preferably the ones that increase your resistance to specific attacks.
NAME
TYPE
EFFECT AND COMMENTARY
War Cry
A
Taunts the opponents with a cry. The main purpose of this is to attract the attention of the opponents, who are attacking the weaker party members. However, the warrior himself may also profit from this, because it increases his guard attribute.
Call to Arms
U
This is the upgrade for the War Cry. It provides you with an additional bonus (automatic) to your armor, at the moment at which you activate the ability.
Challenge
A
Taunts a specific opponents, Just like in the case of the War Cry, your character also receives a bonus to guard. Personally, I recommend the abovementioned ability, because you can profit more from that.
Throw the Gauntlet
U
This is the upgrade for the Challenge. It provides you with a bonus to the regeneration of stamina (15 points per second).
Untouchable Defense
P
Provides you with a bonus to guard points and permanently increases your constitution. It is a good offensive ability, thanks to which the warrior is more difficult to damage.
Charging Bull
A
Fortifies guard and starts a charge. It is a powerful ability, because any warrior is capable of knocking opponents down, thanks to charge, and deal increased damage. Using this ability is especially recommended, against bigger groups of opponents.
Bloody Charge
U
This is the upgrade for the Charging Bull. After the charge ends, you do not lose your stamina points.
Trust the Steel
P
It grants a bonus to armor, whenever your guard is activated and also permanently increases the attribute Constitution. The bonus is especially discernible if the warrior wears heavy armor.
It'll Cost You
P
Some of the damage taken is reflected back to the opponents and makes them bleed, and also permanently increases strength. It is one of the better passive abilities in this category, thanks to which you can eliminate the opponents faster, without the necessity to take additional actions.
Cutting Words
P
The party deals higher damage to the taunted opponents and it permanently increases strength. I recommend that you get this ability, especially that the bonus to damage is received by all of the party members.
Unbowed
A
You receive guard points per each opponent nearby. It is a good defensive ability, which may help the warrior in battle against multiple opponents.
Still Standing
U
This is the upgrade for the Unbowed. You should get it soon after you have obtained the main ability, because it guarantees high bonus to guard, regardless of how many opponents are around you.
Bodyguard
A
You accept some of the blows meant for your allies. It is an excellent ability that discernibly helps keeping allied archers and mages alive. You just need to make sure that your warrior can withstand damage taken both by him and the allies attacked by opponents.
Not Today
U
This is the upgrade for the Bodyguard. It is recommended that you get it quickly, because it allows you to ignore half of the damage that you receive from the attacked allies.
Summary: The above category is an auxiliary one, i.e. it should be developed after you have developed the ones in Two Handed or Weapon and Shield. What is common for all of the abilities is that their purpose is to focus attacks on the warrior and, at the same time, relieve the allies that do not do that well in direct combat. First of all, I recommend that you rely on War Cry, Unbowed and Bodyguard. It is also imperative that you get some of the passive ones, e.g. It'll cost you (faster killing of opponents) or Cutting Words (which increases offensive abilities of the entire party).
NAME
TYPE
EFFECT AND COMMENTARY
Grappling Chain
A
You pull the enemy towards yourself. This is one of the abilities that your warrior should be using often. It discernibly helps dragging stronger opponents away from weaker allies and in attacking the enemy archers and mages, who are trying to keep a safe distance, faster.
Give Them the Boot
U
This is the upgrade for the Grappling Chain. It is imperative that you unlock it as early as possible, because there are two perfect features to it - it increases damage dealt by the ability and adds the stagger effect to the dragged opponent (for 3 seconds).
Crippling Blows
P
Thanks to this, the critical attacks of the warrior weaken attacks by the opponents, and it permanently increases strength.
Hamstring
P
Slows down the enemy, after he is attacked from behind and it permanently increases strength. The slowing down effect is noticeable, because the attacked opponent moves 50% slower. Unfortunately, this effects only lasts for 3 seconds.
Coup de Grace
P
You deal more damage to staggered and downed opponents. This ability harmonizes perfectly with e.g. Mighty Blow of the Two-Handed Weapons category, thanks to which the warrior can knock down opponents without problems. The damage growth is decent - it amounts to 30%.
Combat Roll
A
You dive and roll. This is an unique ability, in that it does not deal any damage, nor does it strengthen the warrior. Its only purpose is to get you into a different area of the battlefield. You can use it, e.g. if your warrior is at the brink of dying or if you want to get an opponent quickly.
Roll with it
U
This is the upgrade for the Combat Roll. At the moment of the Combat Roll, negative effects connected with immobilizing your character, are lifted.
Deep Reserves
P
Increases the rate of regenerating stamina, after it falls to low levels and it permanently increases strength. You can take interest in this ability if you often use activated abilities that weigh on the stamina bar.
Horn of Valor
A
You blow a horn that increases bonus to damage and armor, for the warrior and his allies. It is a quite interesting ability, of auxiliary features, whose inarguable asset is that the entire party may profit from it.
That's the Spirit
U
This is the upgrade for the Horn of Valor. It raises the bonus to damage, from 15 to 35% so, you should take interest in it, if this is what you care for.
War Horn
A
Blowing the horn strikes panic into the hearts of the opponents. Your party may profit a lot from this ability, especially that the enemies remain panicked out for the next 6 seconds, at which point they are an easy target for your attacks.
Break Their Spirit
U
This is the upgrade for the War Horn. Now, there are two additional effects to blowing the horn - it lowers the value of the enemy armors and increases (considerably!) bonus against guard. You can profit a lot from both.
Summary: The above category has an auxiliary function, e.g. it should be secondary to abilities of the Two-Handed Weapon or Weapon and Shield categories. You can pick here, from many varying abilities. At the beginning of the game, I recommend that you use Grappling Chain. After you gain experience, take interest in the abilities that allow you to blow the horn, because the entire party will profit from it. As for passive abilities, the most interesting one, in my opinion, is the Coup de Grace, but you should not skip the rest of them either, while distributing your points.
NAME
TYPE
EFFECT AND COMMENTARY
Line in the Sand
A
It blocks off a given area and does not permit the opponents to get through. It is an unique ability, which may be of use only in narrow passages and other tight locations. Thanks to this, you can obstruct the enemies from reaching your allies that fight at a range.
And No Further
U
This is the upgrade for the Line in the Sand. It expands the blocked area from 6 to 9 meters. If you like using the above ability, you should also obtain the upgrade.
Bulwark
P
Adds a bonus to maximum guard and permanently increases the attribute of Constitution. Both of them are very useful for the warrior.
Adamant
P
Ensures a chance of staggering the opponents, after the warrior is attacked, and it permanently increases the attribute of Constitution. The chances of staggering the opponent are, unfortunately, low (5%). Apart from that, he remains staggered for 2 seconds only, and the ability only activates in the case of melee attacks.
Counterstrike
A
Regenerates maximum guard to its full capacity and provokes all of the nearby enemies to attack the warrior. Additionally, all of the melee attacks are reflected, for the duration of the ability. The important piece of information is that you require Focus to activate it so, leave it for the longest and the most demanding battles.
Resilience
P
It provides you with a bonus to your armor and it permanently increases the attribute of Constitution. Both of the bonuses are very useful for warrior.
Unyielding
P
You avoid a deadly attack and replace it with invulnerability to the attacks of the opponents, for several seconds. Additionally, it permanently increases the attribute of Constitution. Especially the former bonus is highly helpful,, although it is worth noting that you can escape death only once per 60 seconds.
To the Death
A
Encourages the opponent to burst in rage. The upside of this ability is that the opponent only focuses on attacking the warrior and he takes more damage. Te downside is that with time, the blows landed are stronger and stronger. Therefore, you need to apply consideration, while using this ability (if you decide to unlock it, in the first place).
En Garde
U
This is the upgrade for the To the Death. It adds a valuable feature - raises the value of the warrior's guard, each time you land a blow to the enraged opponent.
Walking Fortress
A
It grants absolute immunity to damage, for 8 seconds. It is an immensely helpful ability, if you often use your warrior to distract enemies, or when you simply need more time to wait through cooldown on other abilities.
Siege Breaker
U
This is the upgrade for the Walking Fortress. It provides you with two additional bonuses - to the cooldown and to the guard.
Summary: This specialization offers both defensive and offensive abilities. The former comprises of Line in the Sand and walking Fortress, thanks to which the warrior becomes, virtually, invincible, for a short time. As for offensive ones, try to use Counterstrike on a regular basis, for which you need Focus. Also, do not forget about the passive abilities, especially about Unyielding, which can often save you from losing your entire health bar and weaken the entire party.
NAME
TYPE
EFFECT AND COMMENTARY
Spell Purge
A
Lifts all of the spells cast around the warrior. This is one of the better abilities, in this category, which you should use regularly, each time you are fighting enemy mages. The range is 5 meters.
Spell Shatter
U
This is the upgrade for the Spell Purge. It allows you to deal severe AoE damage to the opponents, as long as the ability lifted a barrier or some other effect, which had salutary effect on the nearby enemies.
Blessed Blades
A
Provides the nearby allies with a bonus to damage, of 15%. It remains activated for, as many as, 24 seconds, which makes this ability useful and good-to-use frequently.
Lights in the Shadow
U
This is the upgrade for the Blessed Blades, although not directly related. Its functioning is about shortening cooldown, to a minimum extent, of two other, activated, abilities - Spell Purge and Wrath of Heaven.
Champions of the Just
P
A bonus to damage, for the entire party, and it permanently increases strength. Especially the latter is of value, and it helps you eliminate opponents faster.
Maker's Will
P
Provides you with a chance of weakening the opponents attacked by the party and it permanently increases willpower. The chances to weaken the opponent are low - 5%. The upside is that he can be weakened by any of the party members.
Rally
A
Guard, Stamina and Mana points regeneration, in your party, is facilitated. It also increases their resistance to damage. All of the bonuses are helpful. The important piece of information, however, is that you require Focus to activate the ability so, leave it for the toughest and the longest battles. Also, you should know that the amount of Focus that you spend affects the powerfulness of the ability.
The Last Sacrifice
P
At the moment of his death, the warrior bestows high bonuses, to health and damage dealt, on the rest of the party. Additionally, it permanently increases the attribute of Constitution. It is not too interesting an item, because you should strive for keeping your party member's alive.
There Is No Darkness
P
Raises the resistance of the entire party, to elements, and it permanently increases Willpower. It is a good idea to take interest in this one, because many of the stronger enemies (dragons included) rely on dealing damage from various elements.
Wrath of Heaven
A
It summons a pillar of light that stuns the enemies and deals four-fold damage. The bonus to damage concerns demons only but still, it is one of the best abilities in this category. It is a good idea to use it, although the cost to use it is high and the cooldown is more than 20 seconds.
Embrace the Light
U
This is the upgrade for the Wrath of Heaven. It is imperative that you unlock it, if you like the main ability, because it improves on its functioning - on damage dealt and the duration of the stun effect.
Summary: Many of the abilities in this specialization seem to be connected with the fact that Templars hate Mages, because the abilities are about casting breaker spells, which make casting difficult for mages (it is a good idea to take interest in Spell Purge, among others). A very much useful one is also the Wrath of Heaven, thanks to which it is easier for the party to deal with the weakened and stunned opponents (it is definitely a good idea to upgrade it). You also should unlock, at least, 1-2 passive abilities, especially that the majority of them take their effect on the entire party and not on the warrior with this specialization.
NAME
TYPE
EFFECT AND COMMENTARY
Ring of Pain
A
It marks part of the battlefield and all the enemies within the area take spirit damage. Apart from that, your attacks become stronger. The important piece of information is that the strength of the ability depends on the severity of the warrior's wounds. Sometimes, it is better to wait until he is healed, thanks to which the ability is more powerful.
Torrent of Pain
U
This is the upgrade for the Ring of Pain, although not connected directly. While active, it reduces cooldown and cost to use other two abilities- devour and Dragon Rage.
Blood Frenzy
P
Provides a bonus to damage, based on the drained health and it permanently increases strength. The bonus is 5% per each missing 10% of health and, for obvious reasons, you can profit most (or lose, if the warrior dies) after you lose a greater amount of health points.
Fervor
P
When an enemy dies near you, you receive a bonus to damage. It also permanently increases Cunning. It is a good idea to unlock this ability, because the damage growth is 30% and it holds for 5 seconds.
Rampage
A
It increases the speed of attack, life steal and damage dealt. To activate this ability, you require Focus so, leave it for the toughest and longest battles. You also need to know that the power of the ability is determined by how much focus you want to spend on it (the maximum amount of bonus to the abovementioned is 30%).
Terrifying Fury
P
A chance to cause fear in opponents, as a result of critical damage dealt. It also permanently increases the attribute of Cunning. It is a quite interesting ability, especially that the chance of the occurrence of the effect is 25% and it can hold for 6 seconds.
Scenting Blood
P
The warrior bursts in rage, whenever there is a bleeding opponent around and it permanently increases the attribute of Constitution. After the ability is activated, your character moves faster and gets a higher chance of dealing critical damage so, these are profitable bonuses. Still, you should ensure yourself with abilities and weapons that increase the chance of making the opponents bleed, thanks to which you can activate this one more often.
Devour
A
A strong attack that heals the warrior. The strength of the attack depends on the difference between maximum health and your current number of health points - it is the most effective when he is severely wounded. It is worth noting, at the same time, that activating the activated Ring of Pain can additionally strengthen this ability.
Consume
U
This is the upgrade for Devour, Although it is very tightly bound with the Dragon Rage. Using that ability, coupled with Devour, increases your chances of landing a critical hit by 25%.
Dragon Rage
A
The warrior lands strong attacks, whose strength depends on the damage taken (the higher the damage, the stronger the attacks). It is worth noting, at the same time, that activating the activated Ring of Pain can additionally strengthen this ability.
Ravage
U
This is the upgrade for the Dragon Rage. It discernibly improves on the main ability, because it increases the bonus for damage dealt and cuts down cooldown time.
Summary: This category is marked by the fact that many of its activated abilities are closely bound together. This means the Ring of Pain, Devour and Dragon Rage. It is a good idea to utilize those abilities simultaneously, thanks to which they gain in powerfulness and you can obtain new unique features that increase their combat value. Apart from the abovementioned, also remember about Rampage, which uses up Focus, as well as about the interesting passive ones. They often focus on playing a risky game and they make bonuses conditional on statistics and on the Warrior's remaining health points.
NAME
TYPE
EFFECT AND COMMENTARY
Flank Attack
A
Moves in shadows and lands an attack from behind. These are two consecutive blows that deal 200% damage. It is one of the most basic attacks of the rogue that uses two daggers (you cannot use any other weapons), although it should be noted that it takes more than 7 seconds to cool down.
Skirmisher
U
This is the upgrade for the Flank Attack. It harmonizes perfectly with the main ability, because it allows you to remain in hiding after the successful attack, up to the moment at which the opponent turns to face the rogue.
Twin Fangs
A
The Rogue performs an attack with both of the blades. You can land the attack in the standard way, but you can also decide to flank the opponent, at which point it deals even more damage. The only downside is that after each of successful attacks, you need to wait quite long, for the ability to recharge.
Ripping Fangs
U
This is the upgrade for the Twin Fangs. Take interest in it, if you like using Twin Fangs to land flanking attacks, because in addition to this, the attack rips the opponent's armor for 8 seconds.
Bloodied Prey
P
You deal more damage to the opponent that has less health points left than you. It also permanently increases the attribute of Cunning. The bonus to damage is quite good, although it may go up as little as 10 percent.
Riposte
A
You can block the opponent's attack and counter it. It is a good ability, if you like fighting a more aggressive fight, especially that each of the attacks deals more damage than the regular ones.
Effortless Riposte
U
This is the upgrade for the Riposte. You should take interest in it, after you have learned the main ability well. Successful performance of this ability is rewarded with the lack of the necessity to spend Stamina on the attack.
Dance of Death
P
The rogue receives Stamina back, thanks to killing opponents. It also permanently increases the attribute of Cunning. I recommend that you get this ability, if you like, mainly, killing opponents weaker opponents, instead of weakening the stronger ones.
Unforgiving Chain
P
Increases the chance of landing a critical hit, with each successive blow and it permanently increases the attribute of Dexterity. You will find yourself care more about the latter feature, because the increase in chances is low (+1% per blow).
Sneak Attack
P
Increases your chances of killing your opponent, with a flanking attack, or from behind, by 25%. Additionally, it permanently increases the attribute of Cunning. I recommend that you get this ability, especially if you rely on the activated Flank Attack and Twin Fangs.
Spinning Blades
A
It lands a chain of dagger slashes. In total, it is five attacks, where each one deals, nearly, 75% damage. All in all, you should consider buying this ability, because you can quickly weaken your enemies then.
Neverending spin
U
This is the upgrade for the Spinning Blades. It allows you to land four extra blows, if they have been combined with the previous attacks.
Deathblow
A
The rogue attacks the opponent and receives an additional chance of attacking the wounded enemy. It is a good ability, but the additional attack is landed only if the opponent has less than a half of his health left. Additionally, the strength of the attack depends on how much the opponent has been weakened.
Thrill of Victory
U
This is the upgrade for the Deathblow. It increases the bonus to damage, for the main ability. Moreover if the opponent dies, in the course of the Deathblow, you will not have to wait for the ability to recharge.
Summary: The activated abilities in this category can be divided into two groups. The first one is sneak attacks and flanking attacks, or from behind. If this is the way, in which you deal with the opponents, rely on the Flank Attack and Twin Fangs. The second group are the quick and risky chains of blows with daggers. In this case, consider using Spinning Blades and Riposte. As for passive abilities, pick them depending on your playing style and bonuses to main attributes that you care for most (it is a good idea to get 1-2 of them).
NAME
TYPE
EFFECT AND COMMENTARY
Death From Above
P
It ensures greater damage to the opponent, while shooting from above and it permanently increases the attribute of Cunning. Unfortunately, you receive the bonus (up to 25% of damage) only in the selected spots on the surface. The majority of the enclosed locations that you explore, unfortunately, do not offer too many elevated spots.
First Blood
P
You deal more damage to opponents in their full health, or to the slightly wounded ones. Also, it permanently increases the attribute of Dexterity. You receive this bonus to damage, when the opponent has, at least, 80% of his health left.
Leaping Shot
A
You dive out and send a hail of arrows towards the opponents. It is a good ability, thanks to which you can remain a difficult target for the enemies and, at the same time, deal high damage to them. In total, the rogue shoots 12 arrows, where each deals a half of the standard damage.
Rolling Draw
U
This is the upgrade for the Leaping Shot. It ensures a high bonus to damage, to the next attack, if the attack with the main ability was successful.
Long Shot
A
Shoots one powerful arrow. It is a perfect ability against single, strong opponents. Try to move away from the attacked enemy, because the distance between you and him affects damage that you deal. This way, you can deal as much as 600% damage, if the distance was, at least, 15 meters.
Archer's Lance
U
This is the upgrade for the Long Shot. It provides the main ability with one feature - the ability to penetrate the attacked opponent and reach the opponents behind him.
Explosive Shot
A
Shoots an arrow that explodes on impact. You can use this ability against single opponents, but you profit most by sending the arrow towards a group of opponents (the blast area is 4 meters).
Chain reaction
U
This is the upgrade for the Explosive Shot. It is imperative that you take interest in it, if you use the main ability against groups of opponents. It offers a high bonus to damage, which is determined by the numbers of the attacked opponents.
Strafing Shot
P
Faster movement while shooting and also, it permanently increases the attribute of Dexterity. It recommend that you obtain this one, because you are harder to get, while remaining in movement.
Pincushion
P
You deal more and more damage to opponents with each successive shot, and it permanently increases the attribute of Dexterity. Just like above, do not wait too long with unlocking this one, because you will find it useful, while fighting stronger opponents.
Full Draw
A
Shoots one sluggish, very powerful shot. It deals 800% of standard damage. Moreover, you can increase the bonus to damage, if the arrow was shot at an opponent in full health. As a result, I recommend using this ability at the beginning of each battle.
Stunning Shot
U
This is the upgrade for the Full Draw. It provides you with the feature of putting to sleep the opponent hit by the arrow
Summary: In this category, there are LOADS of excellent abilities and you should unlock the majority of them as soon as possible. If you prefer using the archer to shoot strong single arrows, you should take interest in Long Shot and Full Draw. If, however, you prefer to wound multiple enemies at once, pick Leaping Shot and Explosive shot. Also, it is necessary that you unlock several of the available passive abilities. The most interesting two, in my opinion, are Strafing Shot (the bonus to movement speed helps) and Pincushion (very useful against the more resistant opponents).
NAME
TYPE
EFFECT AND COMMENTARY
Lost in the Shadows
A
You hide in shadows. There are two ways to use this ability - to avoid being detected and to plan surprise attacks. In the case of the latter, you can expect that the strike from shadows deals 50% additional damage. The only downside is that you leave the shadows, after attacking the opponent.
Stealth
U
This is the upgrade for the Lost in the Shadows. It improves on the functioning of the main ability, as well as it removes all negative effects active on the Rogue, after you enter the shadows.
Evasion
P
Provides a chance to evade and it permanently increases the attribute of Dexterity. Evasion allows you to save the rogue from damage, but the chance to activate it is mere 5%.
Easy to Miss
P
Thanks to the ability, the opponents are more prone to ignore you, and it permanently increases the attribute of Cunning. It is a good ability if your Rogue does not do that well in direct fight. At the same time, it is worth noting that the opponents get even less interested in you, if you flank them.
Evade
A
Dodges the opponent's attack. It is a simple ability to avoid taking damage and its additional asset is that the cooldown is short (less than 2 seconds).
Hidden Step
U
This is the upgrade for Evade. It adds an excellent property, whereby the opponents believe that the rogue has not changed his position and additionally, they take (increased) damage themselves.
Knockout Powder
A
Throws a sleeping powder towards the opponents. The range of the attack is 6 meters and all of the attacked receive the sleeping effect for the next 10 seconds. You can either take the time to escape or to plan on the following attacks (note- attacking the opponent wakes him up!).
Deep Sleep
U
This is the upgrade for the Knockout Powder. It extends the sleep by another 10 seconds and makes them wake up slower, after being attacked. Both of these raise the usability of the ability considerably.
Ambush
P
Your attacks partially ignore the opponent's armor, if you attacked him while in stealth, or shortly after you left it. Additionally, it permanently increases Dexterity. This ability harmonizes well with some of the Two Daggers category, e.g. the Flanking Attack.
Shadow Strike
A
Launches a surprise attack. By default, the attack deals 400% damage. You can increase the bonus even further, if you decide to strike by surprise and if you have taken no damage, within the last 5 seconds.
Quick Blade
U
This is the upgrade for the Shadow Strike. It decreases the Stamina cost of the attack. If you used Shadow Strike in a flanking attack, you are additionally rewarded with shorter cooldown time, on other activated abilities.
Mercy Killing
P
Lands critical hits on the opponents that are panicked out or when they have been put to sleep. It also permanently increases the attribute of Cunning. It is best to unlock this ability along with the Knockout Powder, thanks to which you can deal damage more effectively.
Summary: any of the activated abilities in this group considerably increase the rogue's combat value. The majority of them harmonize well with the playing style that assumes using two daggers, but even if you are using the bow, you should not ignore this category. I recommend that you take interest, first of all, in the Knockout Powder, Lost in the Shadows and Shadow Strike. As for passive abilities, unlocking Mercy Killing, Ambush (it strongly fortifies dagger attacks) and Easy to Miss (less frequent enemy attack help you keep the rogue alive for longer) should profit you the most.
NAME
TYPE
EFFECT AND COMMENTARY
Poisoned Weapons
A
Coats your weapon with a toxin. The opponents attacked with the weapon take (low) damage, temporarily and it is a good method to weaken the stronger opponents that cannot be beaten quickly.
Infected Wounds
U
This is the upgrade for the Poisoned Weapons. It is a valuable one, because it makes the opponents take 25% damage more, from other attacks (also the strongest ones).
Caltrops
A
Scatters spikes on the ground which wound and slow down the opponents. Caltrops are distributed over the area of 3 meters and the slowing down effect is 25%. The upside of the ability is that the caltrops remain in the battlefield for 30 seconds.
Tread Lightly
U
This is the upgrade for the Caltrops. It expands the area from 3 to 5 meters. Apart from that, the opponents are slowed down by another 25%. Both of the bonuses considerably raise the usefulness of the ability.
Fighting Dirty
P
It extends the duration of toxins and sunder. Also, it permanently increases the attribute of Dexterity. Unlock this one if you use the activated abilities, in combination with the abovementioned effects, on a regular basis, because only then will you profit from it.
Looked Like It Hurt
P
Regenerates Stamina thanks to critical hits and it permanently increases the attribute of Cunning. The Stamina regeneration is of low value, because it regenerates the measly 10, per critical hit.
Explosive Toxin
P
The poisoned opponents that you kill, explode in a toxic cloud that holds for 8 seconds. Additionally, it permanently increases the attribute of Dexterity. Unlock this ability if you use both poisoning abilities on a regular basis.
Hook and Tackle
A
You hurl a hook towards the enemy and pull yourself towards him. For obvious reasons, this ability should be of interest to you, only if your rogue uses blades and activated abilities for melee combat.
It Beats Walking
U
This is the upgrade for the Hook and Tackle. It eliminates the Stamina cost on the main ability and also lifts cooldown.
Cheap Shot
P
Critical hits pierce armor of the opponents and sunder it. Additionally, it permanently increases the attribute of Cunning.
Poison Cloud
A
You unleash a poison cloud. It is 3 meters in diameter and it weakens all of the opponents within reach. It is noteworthy that the opponents do not get poisoned in the same way, as in the case of, e.g. Poisoned Weapons.
Contact Poison
U
This is the upgrade for the Poison Cloud. Its main characteristic is adding the poisoning effect of poisoning, instead of weakening the opponents within the area of effect. In addition to that, the cooldown time on the main ability is shorter.
Throwing Blades
A
Tosses daggers towards the nearby enemies and tears their armors asunder. In total, the rogue tosses four daggers. Also the ripping effect is useful, (especially in combination with other abilities), which lasts for 8 seconds.
Precision Targeting
U
This is the upgrade for the Throwing Blades. You can recognize its value especially while fighting single enemies, or smaller groups, because there is only one target for the daggers to reach, which deals higher, cumulative damage.
Summary: The abilities in this category may come in handy, regardless of whether you are using the daggers or the bow. The majority of the hinge on dealing damage to enemies, using toxin. (Poisoned Weapons, Poison Cloud) and ripping through the armor (e.g. Throwing Blades). The Hook and Tackle is an unique activated ability, thanks to which you can pull the opponent. Nevertheless, you should pick it only if it harmonizes well with your playing style. In the case of passive abilities, it is also recommended to pick successive abilities with consideration. It is worth considering, e.g. the ones that fortify the potency of toxins or sundering, such as Fighting Dirty or Explosive Toxin.
NAME
TYPE
EFFECT AND COMMENTARY
Spike Trap
A
Sets a trap that launches the opponents into the air. It is one of the more interesting traps available in the game, whose additional asset is that it deals 300% damage.
Watch Your Step
U
This is the upgrade for the Spike Trap. You will find use for it only if you like staying in shadows, because activating the trap does not make the rogue leave stealth.
Set Them Up
P
Increases damage dealt by traps, by another 25% and it permanently increases Willpower. You definitely should unlock this one, if there are, at least, several trap-oriented abilities, on your quick bar.
Opportunity Knocks
P
Decreases cooldown time on the rogue's abilities, after an ally deals critical damage and it permanently increases the attribute of Cunning. The cooldown is only half a second shorter, per critical hit, but the ability may provide you with a nice cumulative effect.
Hail of Arrows
A
Doubles the effect of all the archery-oriented abilities. You can profit from this, especially in the case of the best abilities in the Archery category. The important piece of information is that you need Focus to activate this ability.
Elemental Mines
A
Litters the battleground with elemental mines. Damage dealt depends on which element the individual mines are connected with - they can chill the opponents, set them on fire or shock them with electricity. If possible, use this ability, while fighting opponents that are vulnerable to individual elements, thanks to which no mine goes to waste.
Throw Everything
U
This is the upgrade for the Elemental Mines. It allows you to distribute more mines, around the battlefield, i.e. as many as are allowed by the Stamina bar. Just remember not to overdo and not to lose the ability to launch other Stamina-dependant attacks.
Fallback Plan
A
It sets lanterns that mark points of safe retreat, where you can return. This is quite unique an ability, which may prove useful during the more demanding battles. It helps the rogue with daggers retreat quickly. Remember that the retreat points remain active for a limited time.
Bait and Switch
U
This is the upgrade for the Fallback Plan. It extends the duration of points of retreat and it grants you with the option to drag one of the opponents out of the battle. In spite of the appearances, it is a very useful ability, because such an opponent is easier to kill then.
Take them Down
P
Increases the entire party's chances of landing a critical hit and it permanently increases the attribute of Dexterity. It is a helpful ability, from the perspective of the entire party, especially after it cumulates with the other abilities that increase the probability of a critical hit, in some party members.
Tricks of the Trade
P
A bonus for the entire party, to damage and the effects imposed on the opponents. Additionally, it permanently increases the attribute of Willpower. Especially the former makes a difference, by strengthening the party considerably.
Summary: The Artificer has many interesting and helpful abilities to offer, both activated and passive. The former includes, first of all, Hail of Arrows, which is a perfect choice for the ranged rouge, who fights with the bow. The other good abilities are Elemental Mines and Spike Trap, thanks to which you can thwart your opponents' actions. As for passive abilities, especially the last two, e.g. Take them Down and Tricks of the Trade deserve a mention. They provide you with valuable bonuses and, additionally, these are the ones that the entire party profits from.
NAME
TYPE
EFFECT AND COMMENTARY
Flask of Frost
A
Uses the potion that increases the rogue's resistance to damage and makes the opponents to attack him are frozen, temporarily. Both of these are immensely helpful in keeping the rogue alive, especially if he uses daggers, which makes him more vulnerable to damage.
Bitter Chill
U
This is the upgrade for the Flask of Frost. Thanks to it, activating the main ability makes opponents attack the rogue. The purpose of this is to freeze them, which makes them exposed to the attacks of the entire party. Personally, I would recommend against taking unnecessary risk.
Flask of Fire
A
Uses a potion that repels the nearby opponents and makes the rest of rogue's abilities are free of Stamina cost. The repelling is a good way to avoid being surrounded, as the rogue, by stronger enemies.
Unquenchable Fires
U
This is the upgrade for the Flask of Fire. It introduces an interesting feature - for the duration of the effect, other activated abilities do not need any cooldown time and can be used over and over again.
Flaskmaster
P
The ability to carry more potions, the chance to keep the potion, after the corresponding ability has been activated and it permanently increases the attribute of Dexterity. Unfortunately, the ability is ineffective on healing potions, for which reason it definitely loses in its usefulness.
Fury of the storm
P
Provides you with a bonus to damage, after you have depleted, at least, a half of your Stamina, and it permanently increases the attribute of Constitution. The bonus is not too high (10 percent), but if you often use abilities that require Stamina, you will be receiving the bonus on a regular basis.
Thousand Cuts
A
Dashes towards the target and strikes a powerful blow. The attack deals 300% standard damage and, additionally, the other opponents, in the line to the target, also take damage. This ability requires Focus so, leave it for the longest and the most demanding battles.
Ride the Storm
P
Expands the duration of potions, after another one is used, after the effect of the previous one wears out. Additionally, it permanently increases the attribute of Dexterity. Take interest in this ability, if you use potions often.
Killer's Alchemy
P
A temporary bonus to damage, after any potion has been used. Additionally, it permanently increases the attribute of Dexterity.
The abovementioned bonus amounts to 15% and the end effect cumulates, if you drink more than one potion.
Flask of Lightning
A
Using a potion decreases the movement speed of everybody, apart from the rogue. It is a strong effect, although it lasts only 5 seconds. In spite of that, it is a helpful one, for landing some quick blows.
Quicksilver
U
This is the upgrade for the Flask of Lightning. The rest of the participants of the battle are nearly stopped, for the duration of the effect, and in itself, the effect is slightly longer. If you have obtained the main ability, you should get the upgrade also.
Summary: The rogue with Tempest definitely likes a quick shot. The majority of activated and passive abilities here hinge on drinking potions that ensure various bonuses (to movement speed and weakening the opponents, among others). Pick those of the abilities that fit your playing style and try to upgrade the activated ones. The only exception here is Thousand Cuts. Just like in the case of the rest of the abilities that use up Focus, you can land some heavy attacks with it, but use it only in the case of more demanding battles.
NAME
TYPE
EFFECT AND COMMENTARY
Hidden Blades
A
It sends a hail of blades towards the target. The attacked opponent receives a total of three hits and takes 300% regular damage from each. It is a strong and useful ability, but you need to bear the cooldown of 30 seconds.
Overkill
U
This is the upgrade for the Hidden Blades. It adds three extra hits. Apart from that, it makes cooldown shorter. It is a must.
Throatcutter
P
You deal more damage to the weakened enemies and it permanently increases the attribute of Dexterity. Especially the former is interesting, thanks to which you can deal more than 10% extra damage to opponents.
I was Never Here
P
Automatically regenerates sneak-related abilities, at the moment, at which you kill an opponent. Also, it permanently increases the attribute of Dexterity. It is an excellent ability, thanks to which you will be able to go into sneak right after you kill an opponents, to hide from the rest of them.
Knockout Bomb
A
Throws a bomb that puts enemies to sleep, for 10 seconds. It is similar to Knockout powder in the Subterfuge category. Just like in the case of that ability, remember that attacking the sleeping opponent wakes him up.
Comatose
U
This is the upgrade for the Knockout Bomb. It alleviates the greatest downside of the main ability, which allows you to deal more damage before the opponents wake up. Additionally, there is a bonus to flanking attacks, here so try to deploy party members properly.
Cloak of the Shadows
A
Goes into sneak mode, with the entire party. It is a powerful and, at the same time, the best ability in this category. Its additional asset is that your allies remain in hiding even after they attack the opponent. This ability requires Focus so, leave it for the longest and the most demanding battles.
Knife in the Shadows
P
Deals critical damage, thanks to sneak attacks and it permanently increases the attribute of Dexterity. The former of the properties is an ideal choice of a rogue that moves about in shadows and attacks with daggers.
Armor Gaps
P
Some of your attacks ignore the opponent's armor and also, it permanently increases the attribute of Dexterity. This ability is similar to Ambush, in the Subterfuge category, where its obvious advantage is that the entire process is automatic.
Mark of death
A
Brands the opponent. Attacking the branded opponent charges the strength bar of this ability, which is released, after some time, in the form of a powerful attack. It is a powerful ability that is the most effective against tough and demanding opponents.
Mark of Doom
U
This is the upgrade for the Mark of death. It provides you with increased damage and decreased strength of the branded opponent's armor.
Summary: The assassin rogue can effectively kill, or at least maim enemies. He is capable of that, thanks to the very good activated abilities, such as the Hidden Blades or the Mark of death. Also, the passive abilities here are very interesting and in several cases, they offer valuable bonuses. What is meant here is, e.g. the Knife in the Shadows (critical damage) or Armor Gap (weakening of the armor), which make a valued addition to the collection. Finally, also the Cloak of the Shadows deserves a mention. It uses up Focus but, in return for the points, it allows the entire party go into stealth, as opposed to the rogue only. Do not forget about this ability, because it will make winning battles easier.
NAME
TYPE
EFFECT AND COMMENTARY
Chain Lightning
A
Fires a lightning. It hits the target and deals high damage from electricity, but its additional asset is that it can also arc to the neighboring opponents and weaken them also. As a result, it is an ability to be used against multiple opponents.
Arcing Surge
U
This is the upgrade for the Chain Lightning. It improves on the AoE effects of the main ability, because the lightning bolt may arc over from one opponent to another and cover more area, thanks to this.
Energy Barrage
A
Fires a series of twelve bolts that hit the opponents I front of the mage. This ability is quite strong, even though each of the bolts deals only 66% of the regular damage. It is a good idea to have it in your quick bar.
Energy Bombardment
U
This is the upgrade for the Energy Barrage. It adds the useful ability to decrease resistance to magic, in the shocked targets. As a result, using any other magic attack, right after the barrage ends, deals higher damage.
Stormbringer
P
It is probable that a lightning storm appears over the battlefield and deals damage from electricity to opponents. Also, it permanently increases the attribute of magic. The "automatic" lightning bolt deals 300% damage, thanks to which, even periodical discharges may discernibly weaken the enemies.
Lightning Bolt
A
It summons a lightning that strikes one opponent and deals high damage from electricity. This attack is best against a group of opponents, because you can then receive a bonus for the nearby ones and paralyze the target for longer.
Exploding Bolt
U
This is the upgrade for the Lightning Bolt. Attacking the individual opponents I a group is even more rewarded, because they receive higher damage and where the lightning struck, there appears a shockwave that repels the rest of the opponents.
Conductive Current
P
The more mana you use up, the more damage is dealt and it permanently increases the attribute of magic. This ability becomes especially useful after you gain access to the best of the spells that use up mana quickly.
Gathering Storm
P
Fills the area with magic, thanks to which cooldown on abilities is shorter, as a result of basic attacks. Additionally, it permanently increases the attribute of Willpower. This proves its value during longer battles, when you want to use a given ability more than once.
Static Charge
P
It surrounds the mage with lightning bolts, while casting a spell. Additionally, it permanently increases the attribute of Constitution. Each of the opponent, trying to interrupt the spell, receives automatic damage from electricity and is shocked for several seconds. It is a perfect ability, thanks to which you do not need to worry about your mage that much.
Static Cage
A
It encloses the opponent in a cage of electricity. Each opponent that tries to leave the cage, receives a 2 second long paralysis. It is a good idea to take interest in this ability, especially that the diameter of the cage is 9 meters.
Lightning Cage
U
This is the upgrade for the Static Cage. It increases penalty on those of the opponents that try to leave the cage, thanks to which it is easier for them to take severe damage. It is imperative that you unlock this one.
Summary: What is common for the abilities in this category is that all of them deal damage from electricity to opponents. Of course, it is desirable, but you should not forget about the other spells available for the mage, e.g. fire or ice-based. This is so, because some of the opponents are immune to electrical attacks, which would restrict your options. What you should use in the first place is the Lightning bolts, against single opponents, and Chain Lightning against multiple ones. Also, remember to unlock, at least, 1-2 passive abilities, thanks to which you can improve on your offensive (Conductive Current) or defensive (Static Charge) skills.
NAME
TYPE
EFFECT AND COMMENTARY
Barrier
A
It forms a protective barrier around the mage and it ensures a bonus to health. It is a good ability, especially that the barrier has a completely separate energy bar, which your opponents need to deplete first, before they can wound the mage. The downside is that you cannot change your position, if you do not want to lose the barrier's protection.
Elegant Defense
U
This is the upgrade for the Barrier. There is only one thing that changes - the main ability recharges faster and, as a result, you can form more barriers.
Peaceful Aura
P
It forms an aura around the mage, thanks to which the opponents are less likely to attack him. Additionally, it permanently increases Willpower. It is a good passive ability, thanks to which the number of the enemy attack on the mage goes down and, as a result, it helps him stay alive.
Guardian Spirit
P
A protective aura appears around the mage, after he takes severe damage and it permanently increases the attribute of Constitution. Just like in the case of the activated Barrier, you receive an additional energy bar,. It is a perfect ability, thanks to which the mage does not die that often.
Dispel
A
Dispels negative effects on the mage and his allies. It also removes positive effects active on the opponents. Contrary to appearances, it is a useful ability, because it enables you to help your allies return to health and make it impossible for the opponents to profit from buffs.
Transmute
U
This is the upgrade for the Dispel. It adds a bonus to the barrier's regeneration rate and to damage dealt by the mage. Both of the bonuses are welcome.
Mind Blast
A
Casts the opponents away, thanks to willpower. The result of this is discouragement, of the opponents, from further attacking and stunning them. The additional asset is that it requires mere 8 seconds to cool down.
Fortifying Blast
U
This is the upgrade for the Mind Blast, where it harmonizes with the Barrier. Repelling the opponents results in the regeneration of the barrier.
Rejuvenating Barrier
P
Ensure allies with active barriers, with a bonus to mana and Stamina regeneration. Additionally, it permanently increases the attribute of Constitution.
Revival
A
Allows you to revive the downed allies, i.e. the ones that lost their entire health bar. Inarguably, this is mage's most important healing ability. The only downside is that you can revive your allies only once per minute.
Life ward
U
This is the upgrade for the Revival. Temporarily, it increases resistance to damage to those of the allies that have just been revived. Additionally, if they are downed again (not later than 15 seconds after the main ability has been used) they will be revived again, for free.
Strength of Spirits
P
It increases the power of the formed barriers by 50 percent. Unfortunately, there are no bonuses to attributes in this case, but in spite of that, it is worth considering the ability, if you form barriers often.
Summary: Spirit is, inarguably, a support specialization. It should not be the only one to develop. Because it lacks in typically offensive spells, due to which you would be unable to engage opponents. Instead, there are many interesting, support-oriented, activated and passive abilities. In the initial phase of the game , take interest in the Barrier, It is a good idea to upgrade this ability, and unlock as many passive ones, to expand the Barrier, as possible. After you have done that, take interest in Revival, thanks to which you will be able to bring back to life the killed allies. This spell is immensely important, especially later into the game, when you get to fight stronger enemies.
NAME
TYPE
EFFECT AND COMMENTARY
Flashfire
A
Flames burn the opponents from within. He receives high damage from fire and panics out. The Panic effect lasts for 8 seconds, which is long enough to finish out the opponent, or perform another action (e.g. heal yourself).
Blistering Pain
U
This is the upgrade for the Flashfire. It extends the duration of the panic effect in the target, by another 8 seconds. It is a good choice, especially if you used the spell on a stronger opponent and you need more time to regroup or to kill him.
Immolate
A
Causes an explosion that sets the nearby opponents on fire. It is a perfect ability for AoE attacks. The explosion itself deals quite a damage to the opponents and, apart from that, they need to deal with immolation for 8 seconds (75% of the regular damage).
Wildfire
U
This is the upgrade for the Immolate. It is a good idea to get it, because it increases damage dealt to opponents. Also, it cuts down cooldown of the main ability.
Clean Burn
P
The spell cast after a successful critical hi does not require cooldown. Additionally, it permanently increases the attribute of magic.
Pyromancer
P
It extends the duration of the burning and fear, by 25 percent and permanently increases Willpower. Consider getting this ability, if you use ones, such as Flashfire or Immolate on a regular basis.
Clean Burn
P
Shortens cooldown time on active abilities, with each spell that you cast and it permanently increases Willpower.
Fire Mine
A
Forms a glyph on the ground, which explodes after it is stepped on, by an opponent. This ability is similar to the Rogue's mines, in its functioning. At the same time, it is excellent, deals high damage from fire and staggers the opponent.
Searing Glyph
U
This is the upgrade for the Fire Mine. Thanks to this, mines becomes even more lethal - the opponents are launched into the air and set on fire, for 8 seconds.
Chaotic Focus
P
Uses up half of the energy of your barrier on fire spells. Additionally, it permanently increases the attribute of magic. This ability works only if you make sure to form barriers (the Spirit category). The bonus to the potency of the spell, in itself, is welcome.
Wall of Fire
A
Forms a wall of fire. It sets on fire all opponents and causes them to panic. It is a very good ability, but it is effective only in small locations and narrow passages.
Lasting Flames
U
This is the upgrade for the Wall of Fire. It expands the wall of fire and makes the opponents have to deal with being set on fire, for another 4 seconds (i.e. 12 seconds, in total).
Summary: What is common for the abilities in this category is that they deal damage from fire. Of course, this is a desired effect BUT, do not forget about the other abilities available for the mage, such as ice, or electricity-based ones. This is so, because some of the opponents are immune to fire attacks, which would restrict your options. As for active abilities, at the beginning, it is a good idea to use Immolation often, thanks to which you can wound multiple opponents, in one take. Later into the game, also try to unlock the Fire Mine, which is an additional trap, as well as the Wall of Fire, which makes it more difficult, for the opponents, to reach your party, in arrow locations. Pick the passive abilities according to your own preferences, with the most frequently used spells in mind.
NAME
TYPE
EFFECT AND COMMENTARY
Winter's Grasp
A
Freezes the opponent over. It is a very simple ability and a perfect one, at that. Not only does it stop the opponent's progress, for the duration of 4 seconds, but also chills him and deals decent damage from frost. The only downside is the relatively high cost of this ability.
Winter's Chill
U
This is the upgrade for the Winter's Grasp. It enriches the main ability by dealing AoE damage. The opponents within close proximity of the target also take damage from frost.
Fade Step
A
Unleashes magic waves, which carry the caster over to a different spot. It is not too helpful an ability, especially that the caster is moved forward and not backwards (which would be more of a help, while e.g. trying to retreat quickly).
Frost Step
U
This is the upgrade for the Fade Step. It adds the offensive function to the ability and allows you to deal decent damage from frost, to the opponents, who the mage permeates, while moving. From this point on, the main ability becomes interest-worthy.
Mana Surge
P
Causes ice explosions at the moment of the destruction of barriers formed by the mage. Additionally, it permanently increases the attribute of magic. The abovementioned explosion freezes opponents over and makes it possible to cast another spell, without using up mana. It is a good idea to get this ability, as long as you rely on barriers.
Winter Stillness
P
Activates meditation state, while in a standstill. The state speeds up the mana regeneration rate and shortens cooldown on activated abilities. Additionally, it permanently increases the attribute of Willpower.
Frost Mastery
P
A bonus to the duration of freezing and chilling effects, and it permanently increases the attribute of magic. I recommend that you get this ability, if you use frequently spells that deal damage from ice.
Wall of Ice
A
Forms a wall of ice. It is less effective than the wall of fire, in the Inferno group, because its only purpose is to hinder the progression of opponents, e.g. in a narrow passage. The upside is that the wall itself is sizeable.
Glacial Strength
U
This is the upgrade for the Wall of Ice. It increases the wall in size (up to 9 meters) and allows you to cast the main ability more often. The changes are not too radical so, if you did not like the main ability that much, this upgrade is not going to make you change your mind.
Ice Mine
A
Places a glyph on the ground, which activates as soon as it is stepped on, by an opponent. This ability is similar to the mines, for the rogue. At the same time, it is excellent and it freezes the opponent for 6 seconds.
Brittle Glyph
U
This is the upgrade for the Ice Mine. Its function is to weaken the victim f the glyph, thanks to which, apart from being immobilized, he also loses all armor points. This, of course, makes for the opponent to be easier to kill.
Ice Armor
P
You receive less damage, if you are staying near the frozen opponent or, near the area under the effect of freezing spells. Additionally, it permanently increases the attribute of Willpower. It is a perfect ability, which rewards you if you use ice spells.
Blizzard
A
Summons a blizzard that chills and weakens opponents. The basic upside of this ability is that the area of its effect is as vast as 8 meters. As a result, it is perfect for battles against multiple opponents.
Ice Storm
U
This is the upgrade for the Blizzard. It is a good idea to unlock it, because it improves on the chilling effect, to the point where they can be frozen for several seconds.
Summary: What is common for abilities in this category is that they deal damage from frost. This is the desired effect BUT, you should not forget the other spells available for the mage, e.g. fire or electric. This is so, because some of the opponents are immune to fire attacks, which would restrict your options. As for active abilities, you should mainly rely on the Winter's Grasp (it is a good idea to upgrade it, as soon as possible), Ice Mine (perfect traps) and Blizzard (and excellent AoE spell). Additionally, invest in some passive spells, such as Frost Mastery (a bonus to all ice spells) or Ice Armor (easy bonuses to resistance to damage).
NAME
TYPE
EFFECT AND COMMENTARY
Veilstrike
A
Drives the nearby enemies into the ground. This is an AoE ability, which gains in value only during major battles. If you have decided to use it, it is advisable that you pick the moment of attack well, because it requires as much as 24 seconds of cooldown.
Punching Down
U
This is the upgrade for the Veilstrike. It decreases the cost to use the main ability and additionally weakens the opponents driven into the ground.
Stonefist
A
Summons a stone that hits the target. The opponent takes high damage to spirit. Additionally, the stone repels the target, on impact. It is a good ability to use.
Shatterstone
U
This is the upgrade for the Stonefist. It enriches the main ability by an explosion on impact. The explosion may weaken or debilitate, temporarily, the nearby enemies.
Restorative Veil
P
Improves on mana regeneration and permanently increases the attribute of magic. The rate, at which mana is restored depends on the damage dealt so, it is advisable that the more offensive spells are used.
Encircling Veil
P
Provides bonuses to the duration of spells, on weakened opponents and it permanently increases the attribute of magic. You should take interest in this ability only if you use weakening spells on a regular basis.
Firestorm
A
Summons a meteorite rain. This is an excellent ability. Meteorites rain over an area for as long as 15 seconds and deals quite damage from fire, over that time. Still, there is a catch here - this ability requires Focus so, leave it for the longest and the most demanding battles.
Smothering Veil
P
Decreases damage dealt by weakened opponents and it permanently increases Willpower. Take interest in this ability only if you use weakening spells on a regular basis.
Twisting Veil
P
Deals higher damage to the weakened opponents and permanently increases the attribute of magic. Take interest in this ability only if you use weakening spells on a regular basis.
Pull of the Abyss
A
It forms a small rift that pulls the nearby opponents (within the range of 6 meters) and deals damage. It is a good ability for neutralization of groups of opponents and for hindering their own attacks.
Shaken
U
This is the upgrade for the Pull of the Abyss. It decreases cooldown time of the main ability and adds the function of weakening the opponents pulled into the fade. I recommend that you get this upgrade, if only you like the main ability.
Summary: There is one common feature of the spells for the rift mage - apart from dealing regular damage, (e.g. to spirit or from fire), you can additionally weaken them, thanks to which they are easier to kill and deal less damage. If you like this playing style, you should make sure to unlock all of the passive abilities that provide bonuses to weakening the opponents, in the first place. Thanks to this, you make the most of using them. The unique item on the list is the Firestorm. This one is a powerful ability that comes in handy in battles. Unfortunately, the thing about the abilities that use up Focus, instead of mana, is that you cannot use them to often so, before each battle, consider whether it is difficult enough, for you to grant yourself with additional support.
NAME
TYPE
EFFECT AND COMMENTARY
Horror
A
Summons ghosts that spread panic in the enemy ranks, in a given area. The range of this ability, unfortunately, is three meters, but you should not ignore it altogether, because inducing panic in even several enemies may discernibly help you.
Despair
U
This is the upgrade for the Horror. Thanks to the upgrade, you receive two excellent abilities - the opponent targeted with the main ability, start receiving low damage to spirit and additionally, this deteriorates their armors.
Death Syphon
P
Regeneration of health points and mana, thanks to the opponents that die near you. Also, it permanently increases the attribute of Constitution. The first two bonuses provided by the upgrade require quite risky playing style, because you need to be close to the enemies, enough to receive them.
Blinding Terror
P
Deals higher damage to the panicked opponents and it permanently increases the attribute of magic. Take interest in this ability only if you often use spells that induce panic in enemies.
Haste
A
The ability slows down the opponents, if activated. This is a perfect ability, because the entire party may use, to their advantage, the fact that the opponents are slower (what is even more, by 85 percent). Unfortunately, this ability uses Focus so, leave it for the longest and the most demanding battles.
Power of the dead
P
You receive a bonus to damage, thanks to killing opponents and it permanently increases Willpower. It is an interesting one, if only you rely on the most powerful of spells that deal instant damage, instead of ones that deplete opponents' health bars gradually.
Simulacrum
P
After he blacks out, the necromancer is controlled by the spirit that he summons, which casts spells without bearing the mana cost. Additionally, it permanently increases the attribute of Willpower. This one is an interesting ability, although summoning the ghost means that the allies of the downed necromancer will be unable to revive him, for the duration of the ability. The spirit remains in the battlefield for 10 seconds.
Spirit Mark
A
It summons a spirit that deals damage to spirit, to the targeted opponent. The being remains in the battlefield for 12 seconds and if, during that time, you manage to kill that opponent, his spirit appears in the battlefield and he continues to fight for the necromancer, for the next 15 seconds.
Lingering Mark
U
This is the upgrade for the Spirit Mark. It fortifies the last of the abovementioned, i.e. the appearance of the enemy spirit. Thanks to this upgrade, the spirit deals more damage and remains in the battlefield for as long as 45 seconds.
Walking Bomb
A
Deals damage to spirit, to the target, over time. After that, an explosion takes place. This is one of the of the best abilities for attacking single strong opponents. The damage to spirit itself is decent and, additionally, the explosion deals 600% of regular damage.
Virulent
U
This is the upgrade for the Walking Bomb. It allows you to carry over negative effects of your abilities, from one opponent to another, if the spell killed the first opponent that you attacked (as opposed to depleting some if his health). This one is a must and a priority.
Summary: Contrary to what you might expect, necromancer mage does not command an army of skeletons, although some of his abilities allow him to summon spirits. I recommend that you take interest in Spirit Mark, here. Also, the activated Walking Bomb (it is necessary that you make sure to upgrade it) and Haste are very good. The latter of the two, unfortunately, requires you to have a supply of Focus, but, if only you have enough, you can considerably slow the enemies down. As for passive abilities, consider unlocking, at least, 1-2 of them, such as Simulacrum (a bonus after the necromancer dies) or Death Syphon (note - it requires toy to keep at a short distance of the enemies).
NAME
TYPE
EFFECT AND COMMENTARY
Spirit Blade
A
Summons a magic blade, which may deal high damage to spirit, to opponents (300% of regular damage) and is more effective when the barrier or guard, of a given opponent is being attacked.
Defending Blade
U
This is the upgrade for the Spirit Blade. It is a good choice, because it automatically deflects projectiles fired at the caster, after which it sends them back, in the form of a shockwave. You will appreciate it in nearly any battle, in which enemy archers are involved, or against mages with regular offensive spells.
Combat Clarity
P
It improves on the mana regeneration rate, by a half, if the caster is within 5 meters of an opponent, and it permanently increases the attribute of Constitution. It is a "trade-off" type of ability. If you are bothered by the risk of approaching opponents, it is a good idea to obtain this ability and use it.
Fade Cloak
A
You surround yourself with the magic of the Veil itself. For two seconds, you become invincible and you can pass through enemies. If the short duration of the spell does not bother you, it will help you get out of many tight situations unharmed.
Decloaking Blast
U
This is the upgrade for the Fade Cloak. It adds an offensive capability, i.e. deals, as much as, 1000%of regular damage, if the user of Fade Cloak is standing "on the opponent". As a result, you can use this ability not only to retreat, but also to weaken the mightiest of enemies.
Resurgence
A
It summons spirits that restore the caster, and the rest of the party, to their full strength. Additionally, there appears a healing glyph, next to the mage. Inarguably, this is the best healing spell in the game, but it requires Focus. Therefore, I recommend that you use it only when all the party members require healing.
Fade Shield
P
It fortifies the mage's barrier, as he is attacked by opponents. Additionally, it permanently increases the attribute of magic. Consider getting this one, if you use barriers often.
Veiled Riposte
P
It deflects 20% of damage with the barrier active and it permanently increases the attribute of magic. Consider buying this ability if you use barriers often.
Knight Protector
P
The mage's barriers take longer to decay and it permanently increases the attribute of Constitution. Consider this purchase if you often use barriers.
Disruption Field
A
It fills a given area with magic energy that weakens and slows down opponents (by a half). This is a quite good ability, but it should be noted that it is ineffective against the biggest of opponents.
Stasis Lock
U
This is the upgrade for the Disruption Field. It increases the strength of the slowing down effect within the field - the mobility of the opponents may be limited by, as much as, 99% (i.e. they will be nearly stopped).
Summary: Definitely, the best spell available for the Knight-Enchanter is Resurgence, i.e. the only spell that requires Focus. Since there are not too many healing spells in the game, the more you should appreciate it, but you need to remember to use it with consideration. The other activated abilities that are worth mentioning are Spirit Blade (it can both weaken opponents and strengthen the mage) and Fade Cloak (only after you get the upgrade!). As for passive abilities, there are three that are attention-worthy, i.e. Fade Shield, Veiled Riposte and Knight Protector, which are related to using barriers. If you like using them, you can profit a lot.

Apart from the abilities mentioned in the above pages, there is one more -Mark of the Rift. It is completely independent of the rest of the abilities, which makes it unique. It can be used exclusively by your character and regardless of the class picked at the beginning of the game, its functions remain the same.
You receive the Mark of the rift automatically, which takes place during the In Your Heart Shall Burn quest. It is added to the quick bar right after you enter the caves, after you escape Haven. This ability forms a rift that pulls the nearby opponents in and deals high damage.
However, using the ability is strictly limited. It is not fueled by Stamina or mana. Instead, you need to have Focus points, which are much slower to get. There are two ways, in which you can obtain the points - by killing opponents and by using chains of abilities, as the entire party.
Note - It is not necessary that you use Focus to activate the Mark of the Rift only. It is also used by the most powerful of abilities available for individual specializations (one ability per specialization). Therefore, you need to choose which one you are in greater need of.
In total, the game offers nine playable brothers (or sisters) in arms. You can only control three of them simultaneously and the rest of them join you as the game progresses and, what is important, depending of the choices that you make. However, there are no problems with recruiting all of the companions. The abovementioned choices are directly connected with the character in question, or in the presence of this character. Most of the times, you get a choice towards the end of the conversation to either accept or reject the character's offer to join you. If the characters already in your party annoy you, you can talk to them and expel them from the Inquisition. Only your decisions affect the unity of the party: for example, if you decline the help of the party that your companion comes from, he may ask you about whether he should stay in the party. Each of the party members can also be expelled during a conversation at the Skyhold.
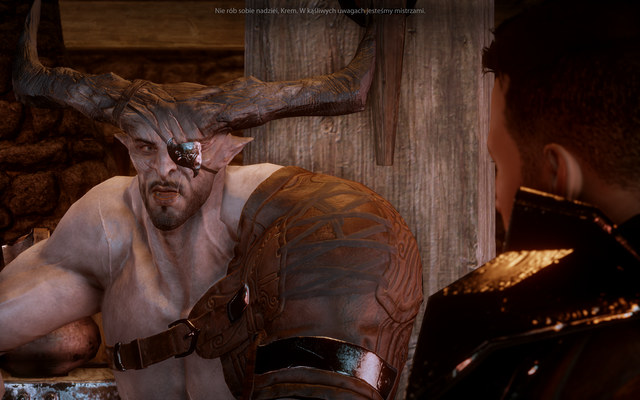 The Iron Bull
The Iron Bull - you receive a special quest to recruit him at The Storm Coast. He is a masculine representative of the Qunari and he is a warrior. He has a set of warrior's special abilities that amplify his melee attacks. He can romance with a representative of any other race and gender. In conversation, he prefers options based on aggression and forcible solutions. You win his favor thanks to battles that you fight with him on your side.
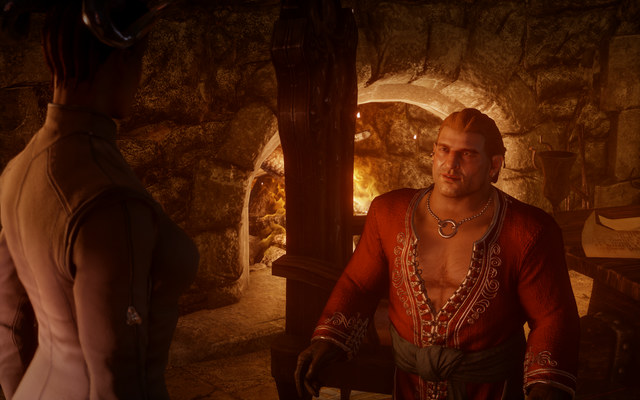 Varric
Varric - the first companion - a dwarf rogue. He has preference for combat with crossbow/bow. He has his own, unique crossbow- Bianca (that only he can use). As the representative of his race, he has a moderate armor (high dexterity) and quite a lot of health points. No option to start a romance.
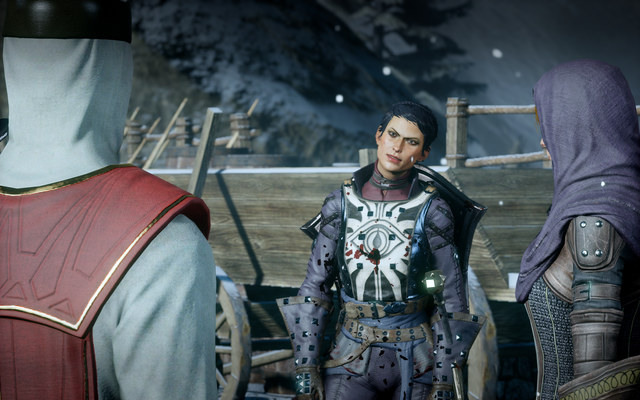 Cassandra
Cassandra - she is one of your first companions, a human warrior. She has a high strength ratio but, virtually, no additional resistances. She can romance with males of any race. The preferred dialogue options are moderate forcible solutions, self-confidence and fair judgment. She can leave your party if you lend your support to her as the heir of the Divine Justinia.
 Solas
SolasSolas - another one of the initial companions, an elf mage. His statistics are typical for his race and they are quite well balanced. He can romance only with elf women. In conversations, he especially supports your positive opinions on extraterrestrial creatures. An important note - he leaves the party forever once you finish the main storyline.
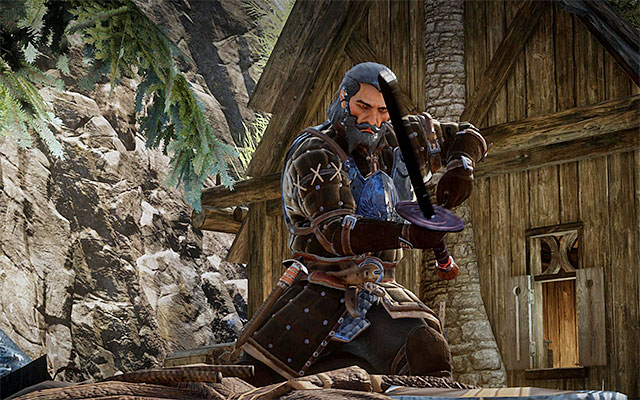 Blackwall
Blackwall - a human warrior, a former member of the Grey Wardens. He has high attack statistics and has quite a lot of health points. He can romance and, to win his favor, you need to make good and honest decisions.
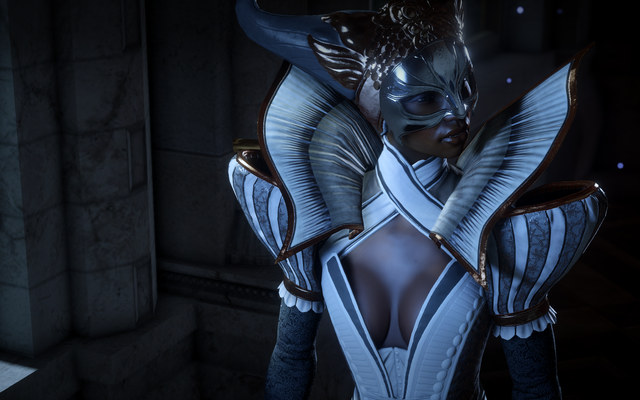 Vivienne
Vivienne - may become your companion after the events at Vel Royeaux. She is a human mage with high magic attribute. Still, the rest of them leave much to wish for. She cannot romance.
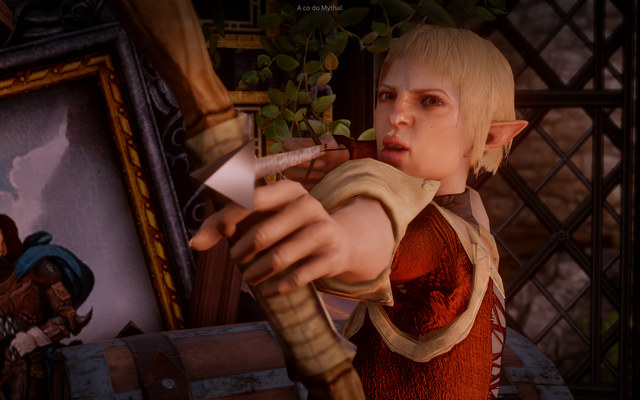 Sera
SeraSera - an elven rogue. She prefers ranged weapons (bows). During your first visit to Vel Royeaux, after the main event with the Templars, you notice an arrow stuck by the statue. Collect 3 items scattered around this location to meet her and enlist her in the group. She has high attribute of Dexterity, optimal attack and health points yet low defense. She has a group of special abilities, e.g. Blizzard, that require special vials, weaker than grenades but requiring no paying. She can romance with women. She prefers moderately-negative choices (e.g. theft, but not always murder), and she is a supporter of condemning all supernatural beings.
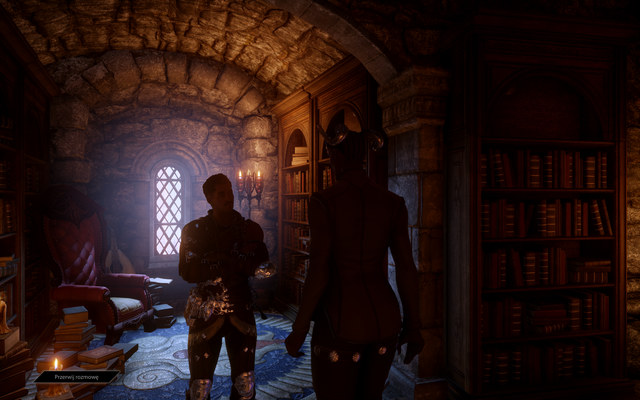 Dorian
Dorian - a human mage. You unlock the option to recruit him in the party once you defeat the master of mages in Hinterlands. He has high magic statistics and moderate resistances. He specializes in necromancy and can romance with males of any race. In his choices, he prefers negative actions. Also, you win his support by eliminating enemy mages in battles.
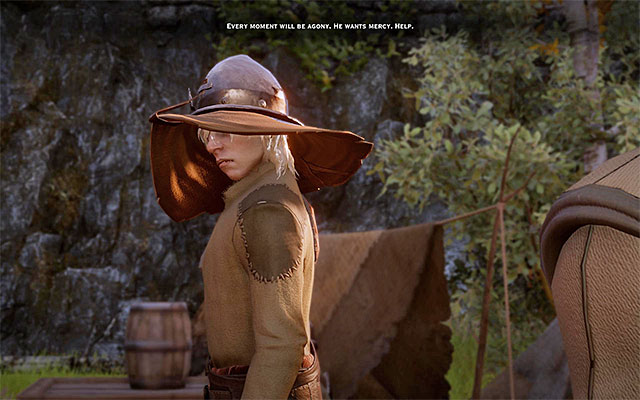 Cole
ColeCole - as a matter of fact, this character is a ghost, although he represents humans and the rogue class. As for this class, he has a quite high health ratio. You can find him while completing the first main quest, connected with winning support of the Templars, or later, during your stay at the Skyhold. No option to romance.
Each character has their own, predetermined class and attributes. Each party member gains experience along with you and, once recruited, receives the number of points that depends on your current level - the promotion is automatic. This is why, if you are bored with playing as a character of one specialization only, you can choose a new character with the same class and distribute the points again.
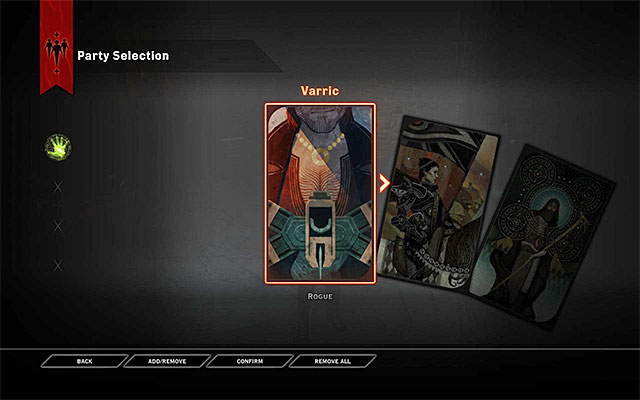 An example party selection window for the next quest
Up until you unlock new characters, you travel with Solas, Varric and Cassandra. However, there is no requirement that you need to travel with the full group. Who you want to travel with is completely up to you. It is highly recommended that there is a representative of each class in the party (rogues can open locks, warriors can force doors open and mages can handle magical barriers). The wrong choice is to pick the characters of one specialization and class - the entire party that fights in melee or using range attacks. During your journeys, your companions will also have random conversations, sometimes regarding the current events. You cannot voice your own opinion, but depending on the mood of a given character, the similarity of their opinions and temper, you can hear hilarious conversations and arguments between the companions. However, this only serves as an element to diversify the game and it does not influence the storyline.
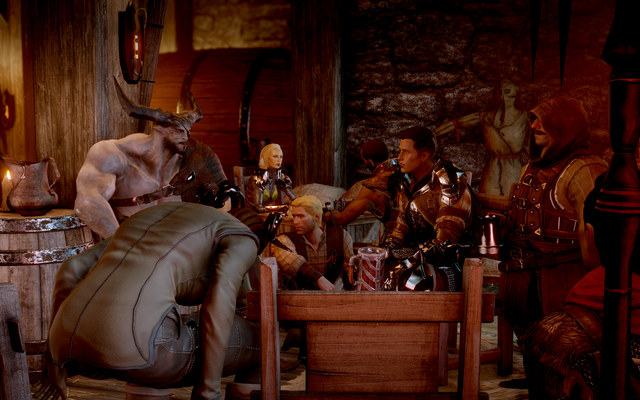 Free time spent on conversations
Each time that you return to your camp, you meet all of the companions there. You can always come by and talk to them. Throughout conversations, you learn more about the characters and about their views on the current events. Also, you can hear their life stories stories and learn more about the game world. Occasionally, you can also receive minor quests or actions to perform on the tactical map. Once you learn something, it is automatically included in your Codex - which will be brought to your attention. This is why it is advisable that you talk to each of the companions, preferably after each main quest. Once you get to know the characters well, some of them may task you with additional quests and unlock actions in the tactical view, which is why you should talk to them often and be inquisitive about the matters that have been brought up. During the conversations, you can pick those of the dialogue options that affect the relations between your character and your companion. These relations can contribute to the development of romance, which has been presented on the next page.
 Partying together guarantees improvement in relations
Just like in the majority of BioWare games, love relationships are an important and complex element of Dragon Age: Inquisition. It is best to get prepared for romancing NPCs already at the beginning of the game, because this is a time-consuming process that requires you to take many correct decisions. Throughout the beginning of the campaign, there is not much going on when it comes to this matter and only later things get in full swing.
First of all, the character that you want to romance with needs to have a high level of approval for you (based on your decisions in dialogues). Unfortunately, there is no way to look it up so the entire process is intuitive. Additionally, each time you visit Haven and, later on, the Skyhold after completing a main quest, talk to the specific character. Ask about current events, as well as personal matters, e.g. where they are from. Agree, be a yes-sayer and keep an eye on the available options. Occasionally, one marked with a heart will appear, which suggests the character's disposition towards you (at the same time, such an answer is never negative to approval).
Once your approval level is high enough, the "special' category of dialogue options appears. To be able to go from words to actions, you will still have to do several favors for the character (a tactical map operation and small quests in specific locations). It is worth noting that not all of the characters agree on a relationship if you are already involved with someone else. Of course, you can always break up with the previous one, but this will affect their support for you.
The table below informs of the sexual preferences of the individual allies, who your character can romance with. On the following pages of this chapter, you will find information and hints concerning winning the favor of the individual allies. Following pages also provide information on minor affairs and the "moments" with individual NPCs.
Men Only
Women Only
Bisexual
Women of a given race
Cassandra
Blackwall
Josephine
Cullen (humans and elves)
Dorian
Sera
The Iron Bull
Solas (elves)
 Blackwall
Who may enter a love relationship with Blackwall? You can enter a relationship with Blackwall only if you play as a woman, regardless of your race.
How to build positive relations with Blackwall? During all of the conversations that Blackwall takes part in (regardless of whether you talk eye to eye, or with more characters), pick the dialogue options that suggest sincere and just approach. Apart from that, try to be merciful towards others (e.g. when you need to decide the fate of a captured opponent). Also remember to pick all of the dialogue options marked with the heart.
More important steps:
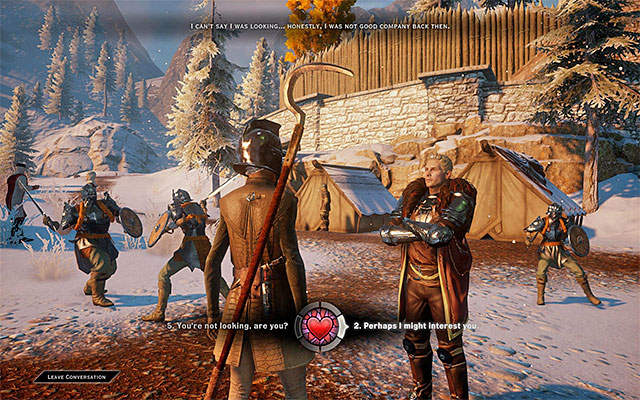 Cullen
Who may enter a love relationship with Cullen? You can enter a relationship with Cullen only if you play a human female or an elf female. In the rest of the cases, you will be able to flirt with him around, without any serious arrangements and this leads to no serious changes in relations with him.
How to build positive relations with Cullen? During all of the conversations participated by Cullen (regardless of whether you talk eye-to eye, or with more characters ), pick the dialogue options that suggest being positive towards the actions of the Templars. Also, remember to pick all of the dialogue options marked with the heart symbol.
More important steps:
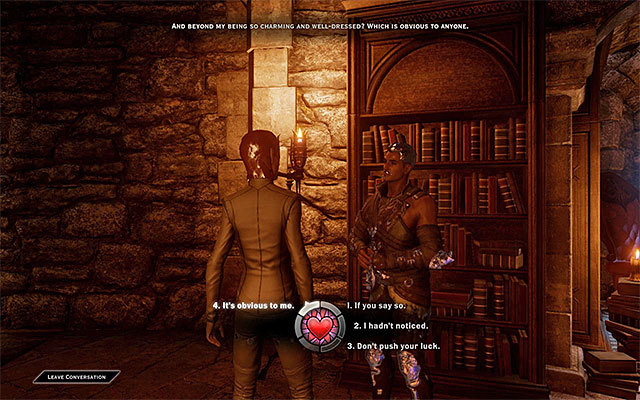 Dorian
Who may enter a love relationship with Dorian? You can enter a relationship with Dorian only if you play as a male of any race. This means that the relationship is going to be a homosexual one. If you play as a woman, you will only be able to flirt with Dorian without any serious effects to relations with this character.
How to build positive relations with Dorian? During all of the conversations participated by Dorian (regardless of whether you talk eye-to eye, or with more characters ), pick the dialogue options that suggest support for mages. Apart from that, it is a good idea to respond with witty ripostes, which he is going to like. Also, remember to pick all of the dialogue options marked with the heart symbol.
Note - If, during the main storyline, you have allied yourself with Templars, Dorian joins the party only after you move to Skyhold. Regardless of the course of action, is VERY IMPORTANT that you express your will to keep him as your ally, during one of the conversations. Otherwise, he leaves for good and not only will you be unable to enter a relationship with him, but also he will be lost for the party.
More important steps:
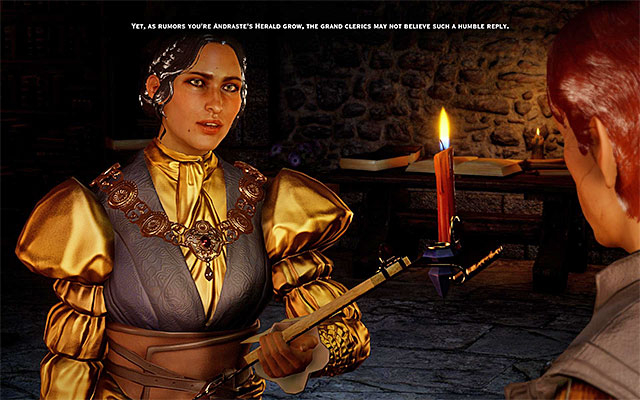 Josephine
Who may enter a love relationship with Josephine? You can enter a relationship with Josephine regardless of your sex (she is bisexual). You can also play as a character of any race.
How to build positive relations with Josephine? You do not need to watch your steps in any particular way, while meeting with her. Simply, try to exhaust your dialogue options and agree with her opinions.
More important steps:
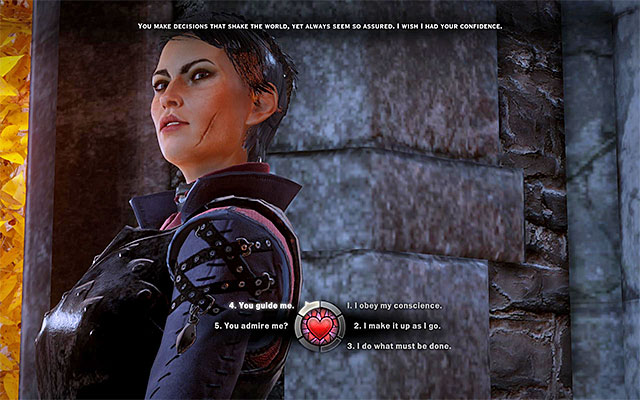 Cassandra
Who may enter a love relationship with Cassandra? You can romance with Cassandra only if you play as a male, regardless of your race. If you play as a female, you will only be able to flirt with Cassandra without any serious effects to relations with this character (after several attempts, Cassandra decides that she is not interested and suggests that you remain friends).
How to build positive relations with Cassandra? During all of the conversations participated by Cassandra (regardless of whether you talk eye-to eye, or with more characters ), pick the dialogue options that suggest your support of the Chantry. Apart from that, pick the dialogue options that convince others you believe in being the Herald of Andraste (the savior). Also, remember to pick all of the dialogue options marked with the heart symbol.
More important steps:
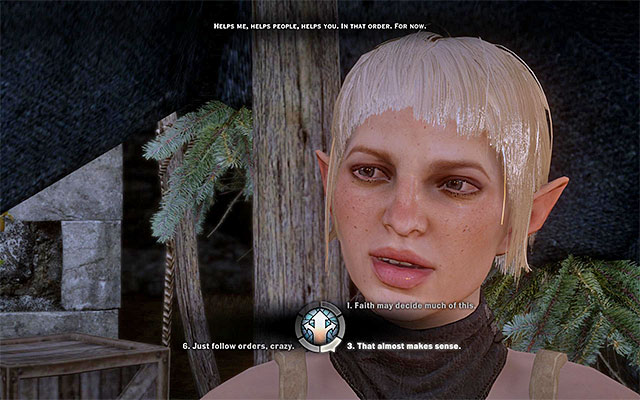 Sera
SeraWho may enter a love relationship with Sera? You can romance with Sera only if you play as a female, regardless of your race. This means that the relationship is going to be a homosexual one. If you play as a male, you will only be able to flirt with Sera without any serious effects to relations with this character.
Note - If your race is qunari, it is going to be easier to win points of positive relationship with Sera. Elves, on the other hand, are ones that gain favor with her the slowest, which does not mean that they are without chances.
How to build positive relations with Sera? During all of the conversations participated by Sera (regardless of whether you talk eye-to eye, or with more characters ), pick the dialogue options connected with solving problems by means of warring a punishment (sentences passed at the Skyhold). Sera also likes witty comments, especially ones that offend nobility. Also, remember to pick all of the dialogue options marked with the heart symbol.
Note - Avoid questioning Sera about her past. This is not the favorite of her topics and you can lose her favor in this way.
More important steps:
 Solas
SolasWho may enter a love relationship with Solas? You can enter a relationship with Solas only if you play as an elf-female.
How to build positive relations with Solas? During all of the conversations participated by Solas (regardless of whether you talk eye-to eye, or with more characters ), pick the dialogue options that showcase your refined intelligence, your support for mages and broadly-understood interests in the surrounding world (particularly when it comes to the Fade). Also, remember to pick all of the dialogue options marked with the heart symbol.
Note - Watch your tongue while discussing elven customs, because you can lose favor points as a result of inappropriate commentaries.
More important steps:
 The Iron Bull
Who may enter a love relationship with The Iron Bull? You can enter a relationship with The Iron Bull regardless of your sex (he is bisexual), or race.
How to build positive relations with The Iron Bull? You do not need to watch out, while talking to The Iron Bull, in any particular way, because he is very difficult to alienate. The only exception are main quests connected with Templars and rebel mages - in both cases, pick the variant that lets the faction act freely, towards the end of the quest (do not make them join the Inquisition). You can also gain the Bull's favor by killing Venatori cultists and High Dragons with his help. Also, remember to pick all of the dialogue options marked with the heart symbol.
More important steps:
You can meet with minister Belisse during the Of Somewhat Fallen Fortune side quest, i.e. one of the quests connected with Josephine (to learn more, see the appropriate page). During this quest, you can go to the party in Val Royeaux. Here, you get the opportunity to meet Minister Bellise and you will be able to try and seduce her, to your ends (restoring the aristocratic status to the Du Paraquette family).
 Vivienne
During some of the conversations with Vivienne, you should note dialogue options marked with the heart symbol. You can choose them and strive for the enchantress' attention, but you need to know that you cannot enter a relationship with her, nor start a fleeting romance.
 Harding
You will be seeing Harding, at the beginning, only after you reach a location for the first time. It is a good idea to be nice to her, each time, thanks to which you get dialogue options marked with heart, in the dialogue box. You can decide on a longer meeting with Harding some time after you reach Skyhold. You can find her near the tavern. During the conversation, you can state that you only wanted an innocent flirt, or tell her that you care for a more serious relationship. It should be noted that this mini-romance, does not stand in the way of any of the romances described above, because you can break up with her at any moment, without negative consequences (Harding is still going to welcome you in every location that you visit).
Below, you can find a list of the most important living creatures in the game world. In here, you can find:
CREATURE TYPE
IMPORTANT INFORMATION, COMMENTARY
Ram
Rams are not aggressive, nor do they respond to attacks from your party. Once the fighting starts, the animals may escape, but can be stopped with frost spells, e.g. traps. A defeated ram drops Ram Leather and August Ram Leather which is not used in crafting.
Bronto
Brontos are well-known beasts from the previous installments of the game. The majority of them ignore the party, by default. However, they will react when attacked. First of all, you should avoid their powerful charges which may deal quite a punch. Apart from that, use fire attacks which they are vulnerable to. A Bronto drops Bronto Hide that can be used in crafting.
Nug
Nugs are not aggressive towards the party. Killing the weakest of them is a piece of cake, but there are also bigger and tougher types. The nug drops Nug Skin that can be used in crafting.
Shade
Shades are most commonly encountered in dungeons and near Rifts that you need to seal. They are not too strong and I recommend that you eliminate them at the beginning of battle. Otherwise, they will be trying to drain your health.
Black Wolf
Wolves are highly aggressive towards the party and they always attack in packs. For that reason, it is advisable that you use AoE spells against them. Also, it will be best if you rely on fire attacks, which they are vulnerable to. The wolf drops Canine Leather that can be used in crafting.
Red Templar
Red Templars count as monsters, although they show lot of similarity to intelligent races. They can be of various classes - you should be, predominantly, careful with the overgrown behemoths (use ice attacks against them), shielded guardians (they are vulnerable to electrical attacks) and archers (position your party members near them, to make it difficult for them to attack).
Rage Demon
You can most often find them in dungeons and near rifts that you need to seal. I recommend against leaving them for the end of the battle, because they can effectively drain your life. Try to use ice attacks against them as they are more vulnerable to those. Also, before each battle, it is a good idea to increase resistance to fire within your party.
Pride Demon
Pride demons are most commonly found near the rifts that are the most difficult to seal, i.e. the ones protected by level 12+ monsters. Huge in size, Pride Demons deal lots of damage. Focus the entire party on them and do not use electrical attacks, because they are resistant to them.
Despair Demon
Despair demons are most common in dungeons and near the rifts that you need to seal. I recommend against leaving them for the end of the battle, because they can effectively drain your life. Try to use fire attacks against them as they are the most vulnerable to those.
Druffalo
These domestic animals do not showcase hostility towards the party, but they respond with attacks if they take damage. As Drufalloes are more resistant, use strong attacks. It would be best if you used fire attacks, which they are vulnerable to. Drufalloes drop Druffalo Hide that can be used in crafting.
Phoenix
Phoenixes are relatively rare and, for this reason, fighting them is a bit more of a challenge (first of all, increase your resistance to fire). Use electrical attacks against phoenixes, as they are vulnerable to this type of damage. A phoenix drops Phoenix Scales.
Fennec
Fennec is a type of fox, but - unlike wolves - they are not aggressive. Furthermore, the attacked fennec escapes and it is a good idea to use ice attacks if you want to stop one. A fennec drops Fennec Fur that you can use in crafting.
Ghoul
Ghouls can be encountered most often in dungeons and they have much in common with the standard types of the undead. Usually, they deal little damage, but it may take some time to drain their health bars.
Giant
Giants are ones of the most difficult monsters to defeat. They deal lots of damage in melee (it is necessary that you buff defenses of your party members!) and they toss large boulders (strafe from them, because there is sufficiently enough time to do that). Use the strongest attacks against them, preferably the ones charged with electricity as they are vulnerable to this type of damage.
Deepstalker
Deepstalkers are small monsters that also appeared in the previous installments of the game. They are most commonly found in caves, tombs and other underground locations. Very often they attack in groups. Use strong AoE attacks to eliminate them, preferably electrical ones, which they are vulnerable to. A deepstalker drops Deepstalker Hide that can be used in crafting.
Gurgut
Gurguts look like oversized lizards. It is not an easy task to drain the health of a gurgut, but you can make it an easier while using electric attacks - gurguts are vulnerable to this type of damage. Gurgut drops Craggy Skin that can be used in crafting.
Gurn
By default, Gurns are not aggressive, but they respond with aggression if attacked. Since they are tough, use strong attacks, preferably ones involving fire, which they are vulnerable to. A gurn drops Gurn Hide or Hardened Gurn Hide which you can use them in crafting.
Halla
Hallas are not aggressive and they do not respond to your attacks. They can easily escape if attacked, but you can stop them with ice attacks or, e.g. traps. A Halla drop Halla Leather that can be used in crafting.
Hyena
Hyenas are aggressive towards the party. They are similar in combat tactis to wolves, but a pack of them is not as frequent an occurrence. In combat, rely on fire attacks which hyenas are vulnerable to. A hyena drops Canine Leather that can be used in crafting.
Hurlock
Hurlocks are one of the two kinds of Darkspawns. You can encounter them both in dungeons and on the surface. While fighting them, watch out for alpha Hurlocks which are noticeably stronger. It is best to deprive them of health with electrical attacks.
Quillback
Quillbacks are one of the less common representatives of the fauna. Eliminating them is not an easy thing, because they are highly resistant to attacks and their health bars are long. Try, therefore, to use fire attacks that they are vulnerable to. A quillbacks drops Quillback Leather that can be used in crafting.
Archer
Archers appear in the game as representatives of various factions. Regardless of the circumstances, try to kill them at the beginning of the battle or, at least, hinder them from attacking (by using various abilities and positioning your allies near them).
Mage
Mages appear in the game as representatives of various factions. Regardless of the circumstances, try to kill them at the beginning of the battle or, at least, hinder them from attacking (by using various abilities and positioning your allies near them).
Bear
Bears are among the toughest types of wild animals. The weakest of them are at level 8-9, but their bigger variations (Great Bear) can reach levels 12-13. Since they are tough and deal lots of damage, try to attack them one-by-one. Rely on fire attacks, which they are vulnerable to and try to keep them at a distance. A bear drops Bear Hide or Great Bear Hide which you can use them in crafting.
Undead
The undead come in diverse variations in the game. You may need to deal with warriors and archers in the majority of cases. Fight them just like you would the living ones. Also, try to use spirit and fire attacks against them.
Mabari Hound
The hounds appear in this installment only as hostile beasts and you cannot subdue any of them. Use strong attacks against them, because they are highly resistant to damage. Also, rely on fire attacks which they are vulnerable to. A mabari drops Canine Leather that can be used in crafting.
Arcane Horror
Arcane Horrors are most commonly found in dungeons near the rifts (especially the ones most difficult to seal). Fighting each one of them is quite a challenge. Just like in the case of mages, try to prevent them from attacking and rely on fire and spirit attacks.
Assassin
Assassins appear in the game as representatives of various factions. Finding and eliminating them should be your priority. Otherwise, they may harass your rogues and mages with surprise attacks which deal quite a damage.
Dragonling
These small dragons usually appear near the lairs of high dragons. Do not underestimate them because of their size as they are tough and they can deal severe damage (e.g. from fire). Focus on using mainly electrical attacks against them, as they are vulnerable to this type of damage. A dragonling drops Dragonling Scales, Dragon Blood and Dragon's Tooth. You can use the items in crafting.
Snoufleur
Snoufleurs are not aggressive towards the party. You encounter them relatively rarely but, due to their low resistance to damage and short health bar, they are easy to kill. They drop Snoufleur Fur that can be used in crafting.
Varghest
Varghests are big and aggressive beasts that you encounter later in the game. Since eliminating them is almost always a challenge, try to lure them away from the rest of the beasts and attack when they are isolated. You can use electrical attacks against them as they are vulnerable to this type of damage. A varhgest drops Varghest Scales that you can use in crafting.
Giant Spider
You encounter spiders mainly in caves, tombs and other underground locations. You need to know that very often you will need to fight an entire group of these. During fights, try to avoid their attempts to poison you and slow you down. Also, if possible, use electrical attacks which they are vulnerable to. A spider drops Giant Spider Glands that you can use in crafting.
High Dragon
All sorts of dragons are the most difficult beasts to defeat in the whole game. In Dragon Age: Inquisition there are ten high dragons and fighting each one of them is a great challenge. Do not fight them before you strengthen your party and check the dragon, before each battle in the tactical mode. Thanks to this, you learn about the dragon's strong and weak points. A dragon drops Dragon Scales, Intense Dragon Blood, Dragon's Tooth, Dragon Webbing and Dragon Bone. You can use these items in crafting.
Warrior
Warriors appear in the game as representatives of various factions and in many different variations. Killing the regular ones is not too difficult and, additionally, they do not deal too much damage themselves. Still, you need to watch out for the elite types, especially the opponents with shields (try to flank them or approach them from behind) as well as the heavily armored ones with two-handed weapons (avoid their attacks when they are infuriated).
Wyvern
Wyverns are dragon-like beasts that you need to eliminate with care. First of all, try to keep the weaker party members away from them. Additionally, try to lure them away from the rest of the monsters and use electrical attacks to weaken them. A wyvern drops Wyvern Scales that you can use in crafting.
Wraith
Wraiths are most commonly found in dungeons and near the rifts that you need to seal. By default, they deal spirit damage, but, if there are monsters that deal different types of damage, they can use the same attacks as them. Due to this, you should treat eliminating them as a priority.
Tuskets
These animals are almost identical to Snouflers. However, they are more resistant (thicker skin) and cannot always be killed with one hit. They drop Hardened Tusket Skin and Teeth. You can use the Skin instead of the type obtained from Snouflers in the quests. Tuskets can often be found in Frostback Basin and are not aggressive.
Bogfishers
Not very aggressive animals, found in the coast and resembling Snouflers. They can use armor hardening, which makes them quite annoying enemies. After killing a Bogfisher, you can obtain Teeth and Craggy Skin.
Poison Spiders
Found in Frostback Basin, they are a different type of spiders and may cause you much trouble. They are small, live in groups near rivers and can spit poison when you're far away from them. They drop nothing and give low experience, which means that it is best to avoid fighting them.
Jaws of Hakkon
A new fraction found in Frostback Basin, appearing quite often until you complete the main story. You can frequently meet them in small camps, where they reside in groups of 4-5. Similarly to other fractions, there are various types of units among Jaws of Hakkon. They are aggressive and resilient. Most often, you can found Avvar Cotton or Avvar Twill near them.
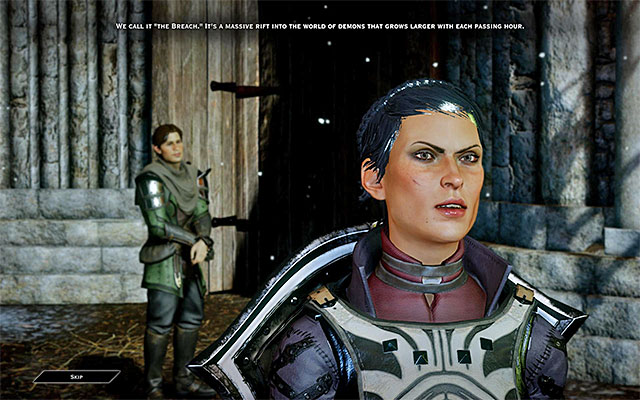 Cassandra is following the party from the very beginning of the game
Warriors play a vital role on the battlefield in Dragon Age: Inquisition and they considerably help your party during combat. You should always have at least, one warrior in your party, regardless of your preferred playing style. In case of your character being a warrior, you can even try having two warriors in your party. The good news is that from the very beginning of the game, there is already one warrior in your party - Cassandra. A bit later in-game, you get the opportunity to recruit other characters of this class - such as Blackwall or the Iron Bull.
 Use warriors to lure the opponents away from your archers and mages in the party.
From the chapter entitled Character creation, you already know that warriors can, somewhat, specialize in two fields: Weapon and Shield, or Two-handed Weapons wielder. The specialization that you pick determines the approach to combat that you need to adopt. First of all, warriors with shields are protected better, thanks to which they are capable of withstanding strong enemy attacks for longer. On the other hand, they can also use their shields in the offensive way by, e.g. activating the abilities that allow them to perform powerful shield bashes. As for the warriors with two-handed weapons, they are encouraged to strongly offensive actions. As a result, it is worthwhile to invest points into abilities that allow them to deal lots of damage. Warriors that use two-handed weapons may also try wearing heavy armors. However, this can considerably limit their mobility.
Regardless of the specialization, the purpose of warriors in your team is twofold:
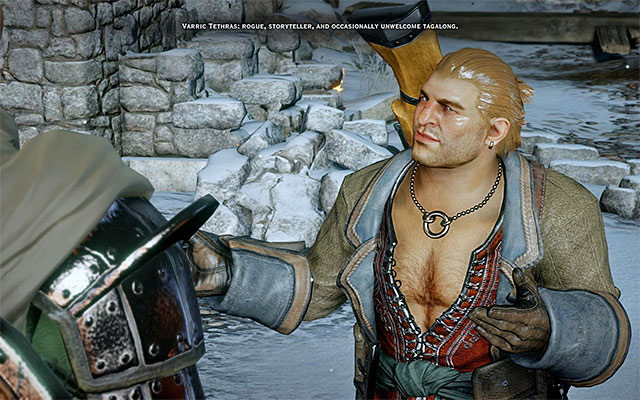 Varrik is the first rogue party member, who has his own weapon
Rogues are another character class that may be in your party. To be honest, when compared to mages and warriors, they are somewhat a compromise between the two classes. They fight quite well using daggers, they do well with bows and can use tricks that resemble magic. The compromise is also visible in terms of the equipment - weapons of moderate power and moderate level of defense. If you want to, you can leave out on rogues in your party. However, you may then have problems with opening locks in the game world. The technique of playing the rogue is not meant for everyone as it may be annoying to everyone who is easily thrown out of balance by the fact that you need to attack stealthily and be quiet if you want to land the strongest attack. What's more, not every attack handles enemies down immediately and there are also very few AoE attacks. Still, for those who can handle learning to control the rogue, he may prove to be an irreplaceable character. At the very beginning, you are joined by Varrik, who is the only one to have his own, unique weapon - the crossbow named Bianca. Later into the game, you can also enlist Cole and Sera as your party rogues.
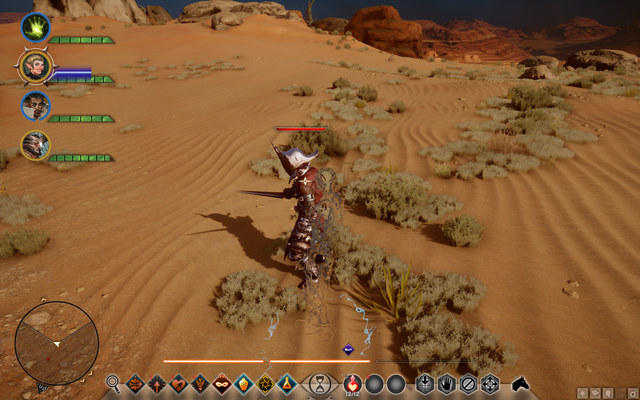 As a rule, rogues with daggers are offensive - they get around the enemy
As it was already mentioned, the rogues have been divided into two categories: those who fight at close quarters, with dual-wields, or over a distance, with a bow. If there is only one warrior in the party, you should rather opt for fighting with daggers. The upside of choosing two completely different weapons s optimal - it is a good idea to train the rogue in several abilities of both groups and use them depending on the current situation. An example here may be fighting a dragon who lands most of his, nearly unblockable, attacks against the opponents that attack him in melee. Archers can deal lots of damage from afar, also to several opponents at a time (e.g. by using explosive arrows). This class also has two groups of abilities, which rely on dirty tricks. You can become invisible, put the enemy to sleep with a special powder, poison the opponent and drain his health, or use a special elixir (ability) that boosts you with additional buffs.
Rogues play one of the following roles in the party:
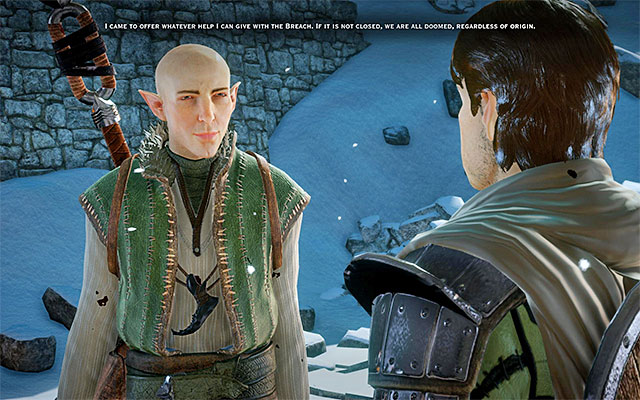 Solas is the first mage that you meet in the game
Mages are the class that causes the most turmoil in the world of Dragon Age: Inquisition. It soon becomes clear that it is much better to play as a mage or have one as your ally, than to fight against one. Depending on what playing style you prefer, you should have one or two mages in your party (best if they are of different specializations). If you use only one mage in your party, have him to be a supporter, i.e. a mage with the Spirit ability group including, first and foremost, the Barrier and Revive - this will make him helpful for the rest of your party. If you go for two mages, have the other one be as offensive as possible - this time around, it is best to draw on each category of abilities to be able to handle various opponents that are resistant/vulnerable to certain elements and make him as effective as possible. At first, you are going to be accompanied by the mage Solas (once the storyline ends, he leaves the party for good), but you can also recruit Dorian and Vivienne later in the game.
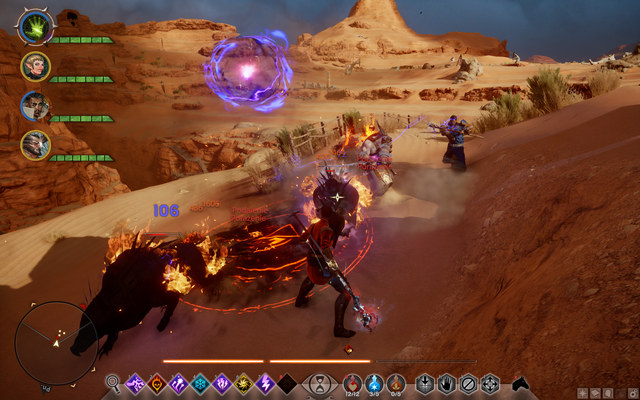 An AI controlled offensive mage is not going to match an experienced player
Mages come equipped with staffs and light armors, which is why they are not the best class of characters to be engaged in direct battles - it is better to keep them away from the heat of the fight. Since they have the lowest defense, they tend to have the strongest attacks; this, however, depends on the knowledge of the player, on the opponents against which you use the abilities, as well as on a good choice of abilities. An offensive mage is best if attacking multiple opponents. This is why you should consider choosing abilities such as the Electric Cage or Burn, because AoE may well emulate the effect of abilities directed against a single opponent. At the beginning of the game, it is best to equip the mage with the ability to freeze the opponents - especially useful against the Templars with shields.
Mages play two roles in the party:
 Demons are your staple enemies in the game
Constant fighting is, of course, the obligatory and the most important element of each RPG game. In this one, you either fight on your own or with the party, which can consist of up to three members. Each of the party members is controlled by the AI but, at any moment, you can switch to them by clicking the character portrait, or by using the appropriate button. Also, you switch automatically, to a different character in case of your own fall. Each fallen party member can be revived by another party member which regenerates half of their health bar of the revived, or by a mage who can do that over distance (the Revive spell). You can also use an amulet that falls apart at the moment of death and heals the wearer. To revive a character, you need to approach them and press the action button. The process takes about 5 seconds to complete and it may be interrupted by the attacking monsters. If possible, the AI also attempts to revive the fallen companions so do not risk crossing the entire battlefield to reach the party member if someone else is closer. Once all of the party members fall, the game ends and you need to load the last save. After you win the battle and exit the aggressive stance, all of your fallen characters get back to their strengths.
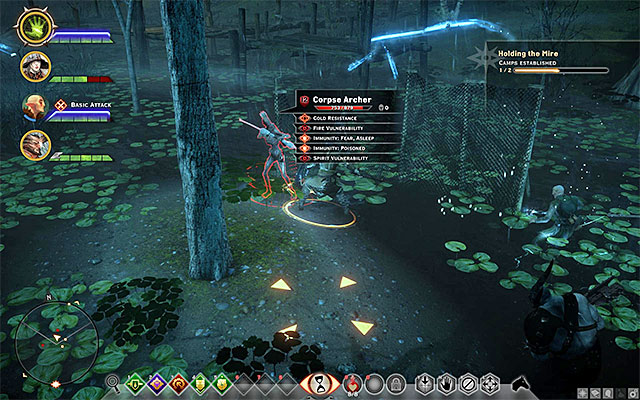 An example tactical view
Dragon Age: Inquisition introduces a bit more sophisticated model of tactical combat, but it is not too complex so it will not be a massive problem for the players who have had no previous experience with this mode. As the leader of the party, you can issue orders: to attack a specific target, to hold ground or to leave the combat mode (especially useful if you want to retreat from the battlefield or when enemies cannot see you but they are nearby). Also, you can use game pause option, which allows you to take a look at the entire battlefield and learn about your current situation. To activate it, you need to press an appropriate key or zoom out the camera away from the character as far as possible. While planning on a tactical attack, you can also plan the deployment of the characters. This is especially useful while fighting bosses (dragons, among others), who land many AoE attacks and pose a serious threat to the party members who are clustered together. Also, time stops when you land certain AoE attacks (e.g. the mark of the rift, electrification spell, cage or when you throw a grenade), at which point you see the radius of the blast and the functioning of the attack.
The game offers you the option to specify the behavior modes for the characters. There are four parameters that you can set:
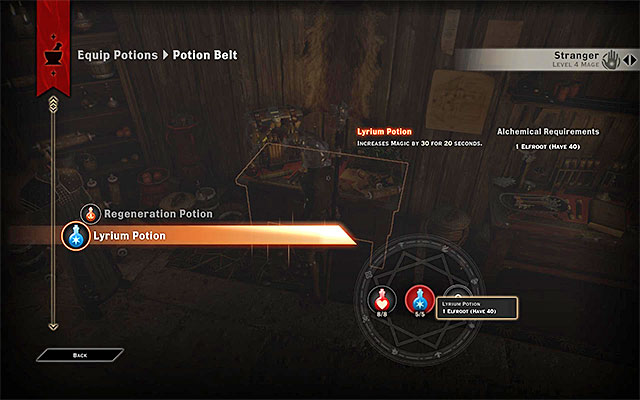 An example window for equipping potions
While in combat, all sorts of reinforcing substances become indispensible. By default, there are only two slots available for potions, but you can unlock the third one by using your Inquisition points. There are three categories of substances: potions with active functioning, such as healing, regeneration and increasing the amount of available mana, etc. Then there are tonics: these have a passive effect on the character and temporarily provide him with boosts to specified resistances, or increase the value of armor. The last category is grenades that you can use over an area during combat. By default, you only have one healing potion, which is free and can be replenished each time that you visit the base and take rest. As for the rest of the potions, they need to be crafted, using the ingredients that you find (you can learn more about it in the chapter devoted to crafting). To change the potions that you are using, you need to use the brewing table and drag the bottle that you want over to the storage. To brew a potion, once you drag it to the storage, you need to click it (you need to have a sufficient amount of ingredients specified on the right side of the screen).
What needs to be highlighted is that there is a limit as to the amount of potions that you can carry at a time (you can increase the number by spending your Inquisition points). A very important fact: all of the party members use the same potions storage. They only use health potions automatically, but it still disappears from the collective storage.
You obtain new potions by completing side quests, performing actions on the tactical map and as you progress in the storyline. You can find schematics hidden all around the game world. Each of the potions can be improved in order to increase its potency.
 A harmless, horned forest dweller
The world of Thedas is very diverse when it comes to opponents. Demons are not the only creatures that you will be fighting, often you will need to fight humans. Opponents can be divided into several groups that make it easier to classify them. Starting with the most common ones, you can encounter animals - ranging from harmless rams through black wolves, through desert gurguths, to bears and dragonlings. The majority of hostile animals are exceptionally resistant to fire, and they often have high defense values; however, their attacks are not as strong. Forest dwellers become a great opportunity to obtain valuable resources, such as hide and dragon blood (obtainable from dragonlings). Often, monsters drop other resources or valuables, while people can drop armor and weapons. Some of the monsters allow you to loot unique ingredients, such as spider blood from arachnid enemies, which is required, e.g. for requisition quests.
 A small group of Templars
Another type of opponents are people and associated races: elves, dwarves, qunari. As it is usually the case in the human dwellings, you can count on allies or, at least, on those that are neutral towards you. But, if you are exploring out in the wilderness, nearly every creature that you run into becomes a serious enemy. The classification here is abundant: just like your character, you can encounter opponents of all classes: starting with rangers and masked assassins, through mages, through shielded. The tactics that you use for each one of them is different. All sorts of AoE attacks and ice magic work here and they pin the opponent in their place quickly. Usually, the opponents attack in numbers as single units are easy to defeat. What is problematic, though, are the encounters with the shielded units. What works best here is distracting the opponent with one of your companions and attacking him from behind by yourself.
The next group of opponents consists of demons and all sorts of extraterrestrial creatures. They do not occur in the game world too often and, most frequently, you encounter them guarding Rifts. There is no unified fighting system in this case. The only option is to watch the opponent - most often, his strength is reflected by his size and weight. Additionally, red/blue color suggests the type of the unit as a fire/ice unit. In such cases, the best method is to use the attacks that contrast the given element.
 The giant - he can kill you with one attack
The last group of the rarest and strongest units are bosses - dragons and giants (who are a bit lower in the opponent ranking, but just as dangerous). Wyverns constitute to the group of the most powerful creatures as well. For example, giants are most commonly found by themselves, which is why they can almost be considered to be bosses - they are powerful, sluggish and are divided into attack areas: limbs and the head. By concentrating your attacks on one of the limbs you can paralyze the monster for a moment, at which point he ceases to attack. However, your target does not determine the number of damage that you deal. The case is a bit different with dragons, who are bosses in the full sense of the word. They can be encountered only once (i.e. up until the moment that you kill them) in specific locations. The method of fighting these has been described in a different chapter.
 Activating individual status effects may be paramount to the course of the battle
Winning battles in Dragon Age: Inquisition is not only about keeping an eye on health stamina and mana bars, because how allies and opponents perform in the battlefield, also depends on various Status Effects that they may be introduced into. Activation of a Status Effect may occur as a result of using an ability or a spell and it may affect both an opponent and a party member (in both cases, the effect may be either positive or negative).
The list below presents the most important status effects that you will see in the game:
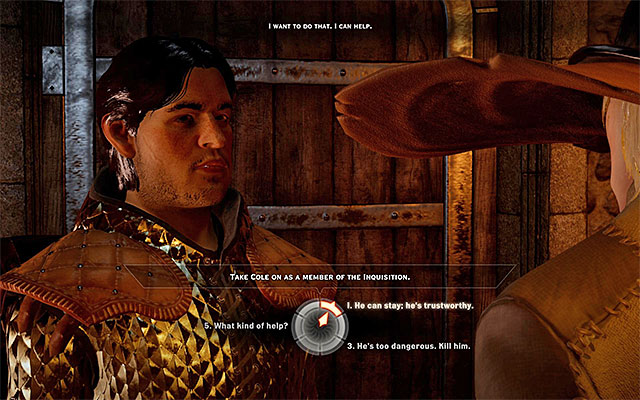 An example important decision to take, during a conversation
An important element of Dragon Age: Inquisition are dialogues that you have with NPCs. Some of the dialogues are elements of the storyline, during which you learn stories and other interesting facts about the world. However, what is the most important, there are decisions and choices that you need to make during conversations. When you are asked about something, you can pick the commentary, that you want to respond with, on your own. The selection menu has been presented as a dial where you pick the statement for your character to utter. The majority of your choices are merely opinions and commentaries but if you reply in the way that conforms with the views of the party members, you can win their support. However, there are some of the choices that will have consequences later in the game and they are reflected by the game world later on. Such decisions are, e.g. a decision to execute someone or the decision to choose the mages/ the Templars as your allies.
The process of making a more important decision is a bit easier: once you highlight a given item in the selection menu, an icon appears in the middle, which represents your disposition towards your interlocutor (e.g. approval, hostility, flirt). The final decisions, concerning the most important issues, change the selection dial and the commentary above each item. These decisions cannot be altered once made.
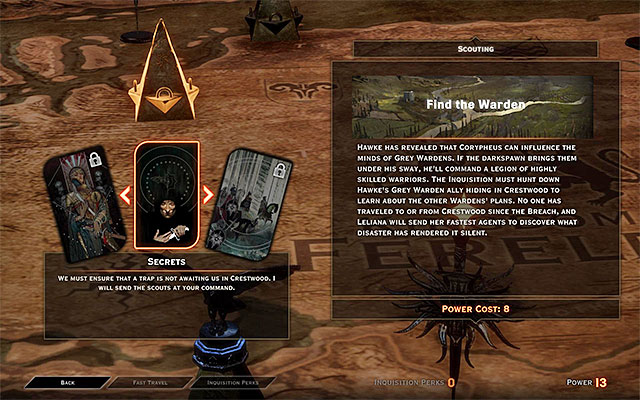 An example missions connected with unlocking an new map area
In the previous installments of Dragon Age, you had freedom to explore the game world, virtually from the very beginning of the game. In Inquisition, the game world is huge, BUT you gain access to the individual parts gradually. At the very beginning, your party can visit only several initial areas. In order to unlock more, you need to complete quests that you activate on the map at the war room. The most important are the missions connected with the storyline, although there also are several optional areas which you do not need to visit at all costs. To learn more about using the war table, see the War Room page in the chapter entitled Inquisition Management.
Note - to complete missions connected with unlocking new areas, you often require lots of Power points. To be able to do this easily, try to amass these points from the very beginning of the game.
Completing an appropriate mission from the level of the war room leads to unlocking a new area in the game world, which will be brought to your attention. An example of this type of message has been presented in the screenshot above. At the same time, it is worth highlighting that the game always suggests that you journey to the newly-unlocked location immediately. I recommend that you do that; however, make sure that your party is ready for new challenges (experience level of your party members is not too low as in new locations you often encounter stronger monsters).
In some locations, there are areas that are inaccessible (destroyed bridges, collapsed passages), and there may be a quite vast area beyond. Once you locate such a place, it appears on your map in the form of a rectangular flag. Go there and mark it, by setting a flag in the marked spot. From now on, you will be able to - as is the case with unlocking the entire locations - unlock that area from the level of the war map, at the war room. Of course, this is going to cost you a certain amount of Power points.
 The option to "scan" (search the area automatically) is incredibly useful
Exploration of the surroundings is very important in Dragon Age: Inquisition, especially that it is not as restricted (e.g. by invisible walls or blockades) as it was in the case of the second installment of the game. What's more, there are lots of loot chests, herbs, materials and documents hidden all around the game world. Collecting all of these is, to a greater or lesser extent, rewarded.
What is very useful while examining elements of the surroundings is the option to "scan" (i.e. to search automatically), which you can activate by pressing the appropriate key/button. Once a new element is found in the environment, it is signaled by a short sound and the items themselves are highlighted for a short time. What's more, you are free to use this option as much as you want as it is unlimited. It is a good idea to use it as often as possible. At the same time, I recommend that you unlock the "Eagle-Eyed" perk, which makes the search area wider.
Note - If you are searching for a quest item, it is a good idea to set that quest as active in your log. Thanks to this, your party will be directed towards the place where the item has been hidden.
 An example supplies crate
Scanning the environment can be done outside of exploring the game world freely. Sometimes, it is even advisable to do that while on quests - also ones that involve a big number of battles. What opts for this solution, is that many opponents drop valuable trinkets or gear. Walking away from the area of the most recent battle may result in disappearing of the loot, as a result of which it is lost forever and you lose the chance to obtain them. In many longer quests there also are supplies crates placed all around the area. It is a good idea to use such crates (you can interact with each one only once), mainly to replenish your supply of health potions.
 Using mounts makes your journey easier
You can explore the areas of the game world on foot but, due to the size of the majority of locations, this may prove time-consuming. This is where mounts come to your aid, which have been described in detail in a separate chapter of this guide. Using mounts makes it faster to travel. Additionally, they are a perfect choice if you want to get to a less accessible area, e.g. a village or an encampment in a mountainous area. Another upside of mounts is that they "cushion" falls from heights, as a result of which you do not need to worry that you will lose your health points once you take a misstep, e.g. near a cliff edge.
 Watch your steps in the areas, where there are powerful monsters
Of course, falling from heights is not the only situation in which a party member may die prematurely. Exploring the uninhabited areas carries the risk of encountering bandits, hostile animals and/or monsters. At the beginning of the game, it is advisable that you steer clear of stronger enemy groups and "elite" monsters like dragons or giants. Regardless of the level at which your party members are, it is a good idea to perform a reconnaissance, thanks to which you are able to assess the numbers of the enemy group or the strength of the individual opponent from a safe distance.
 In each location, there are many NPCs that are willing to task you with a quest
The opportunity to enrich your inventory is not the only reason for exploring locations thoroughly. Equal in importance is talking to new NPCs. This goes, especially, for the ones marked with the exclamation mark, because they are the ones interested in giving you side quests. In the majority of cases, those side quests are not too time-consuming and they add to your experience, power, influence and inventory.
 Thanks to fast-traveling, you can return, e.g. to safe villages and encampments in an easy way.
I have already mentioned that there are many vast locations around the game world and for this reason it is worth to remember about the fast-travel system in the game. The system makes it easier to return to the locations that you have already discovered, e.g. to meet with the quest-giver again. Fast-traveling allows you to travel to the camps, strongholds, keeps, cities and villages that you have already discovered. This action is free to use and, for obvious reasons, cannot be used in combat.
 You need to set up a camp to be able to use it
Exploration of areas in Dragon Age: Inquisition is not only about crossing wilderness inhabited by hostile creatures. On each map, there are unique locations that you can discover and/or unlock. First of all, it is worth to remember that you can set up camps in the pre-determined locations. These are symbolized on the map with the tent icon. Once you reach that location for the first time, you need to set up a camp which becomes an option if it is safe in the area. If the camp is active, you additionally receive an option to return to it from the world map level. The main upside of having camps is that you can replenish your supplies for free and regenerate your health. Apart from that, you can have short conversations with party members, or complete Inquisition's Requisition, which has been described in detail in the Inquisition Management chapter.
 In villages, you can meet many NPCs
As much as the largest cities have their blips on the world map, towns and villages are often only a part of a larger map (such as, e.g. Redcliffe that you visit early into the campaign). The general premises, in both cases, are similar so as long as you do not leave the area of a village, you can feel safe. Almost always in villages you can encounter merchants and NPCs that offer you side quests.
 Exploring caves, ruins and such is a good way to obtain rare loot
On the other hand, all sorts of ruins and caves in the game world are not a safe place to be. Very often, locations such as these have their own blips on the world map and they inform you of the location of the entrance to a given dungeon. Sometimes, these consist of one chamber, which you can comb through within several seconds, whereas there are also ones that are more complex that resemble labyrinths and are definitely much better manned by monsters. I recommend that you be wary while entering such locations and, as much as possible, make sure that they are not occupied by monsters that are too strong for you to fight.

Closing Rifts between the game world and the Fade is one of the additional activities that you will be doing very frequently. You can find Rifts while exploring the locations within the game world, but you will also need to close them as you progress within some of the main quests. As a result, it is a good idea to learn about this mechanism.
You can either search for Rifts on your own (they are marked separately on the map) or close them while exploring the area in question. An example of a Rift has been shown in the screenshot above. Once you approach a rift, a group of monsters will appear around it and you can exploit the fact that they do not attack you straight away (rifts in some of the main quests may be an exception). Therefore, it is a good idea to find out, from a safe distance, what kind of monsters you are dealing with and what are their experience levels. If the experience levels of these monsters are higher than those of your party members, it is better to deal with the Rift later, because it may prove to be very difficult to defeat all of the monsters that guard it.
 Attack monsters that appear around the rift
Once you come within vision of the monsters spawned by the Rift, the battle begins. Each battle of this type is a bit different and all of them have been described in detail in the walkthrough for the game. In general, it is best to start with the strongest demons that attack you at a distance. Leave the weaker ones, which deal less damage to you, for later.
While fighting at the Rifts, it is worth to remember two things. First, there are at least two groups of monsters that you need to eliminate, because more of them will come from the Rift once you defeat the first group. Secondly, you can additionally disrupt the functioning of the Rift, even before the fighting ends. You do that by interacting with the rift once disrupting becomes available (an example in the screenshot above). Thanks to the disruption, you will stun and weaken the monsters around the Rift, which will make it easier to win.
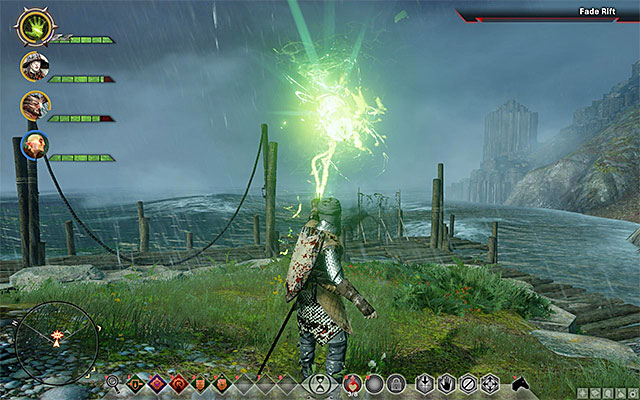 After you defeat all of the monsters, you can seal the rift
In case of closing the Rifts, the process is always the same: you need to defeat all the monsters that appear around the Rift; once you have secured the area, you need to face the rift and press the interaction key/button to close it. You are always rewarded with experience points, Influence and Power points for sealing the Rifts. The amount that you are awarded depends on the difficulty level of the battle that you had to fight.
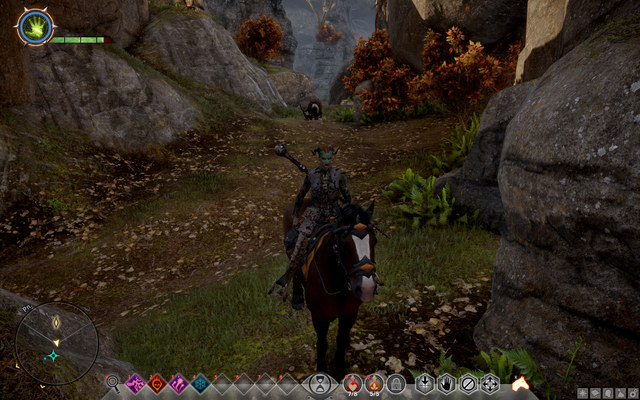 A regular horse, that's what it is
One of the means to explore the area faster is to use beasts of burden, horses, stags, dragonlisks and exotic mounts. Once you have obtained a mount, you need to summon it with the appropriate button and it will appear next to your character immediately. It is impossible to summon them in confined spaces like buildings or anywhere underground. Horses are immortal - thanks to this, you can, e.g. jump off high cliffs. Once obtained, it remains with you for the rest of the game. Out of the rest of the important features, it needs to be pointed out that they do not have the option to attack and, if you are hit by an opponent, the horse disappears up until you summon it again. Moreover, you cannot summon a mount while in the combat stance. Your party disappears once you mount the horse, thanks to which they do not obstruct your exploration, and they reappear immediately at the spot where you dismount. The great downside is that riding a mount disables the option to scan the area - if you are traveling across a new area, you need to search for new elements of the surroundings on your own.
The first horse that you obtain is in the Hinterlands, and this should be one of the first activities that you do. The Equerry mission can be done for Master Dennet - you can find him in the Eastern part of the map, in the farm cottage that looms over the area.
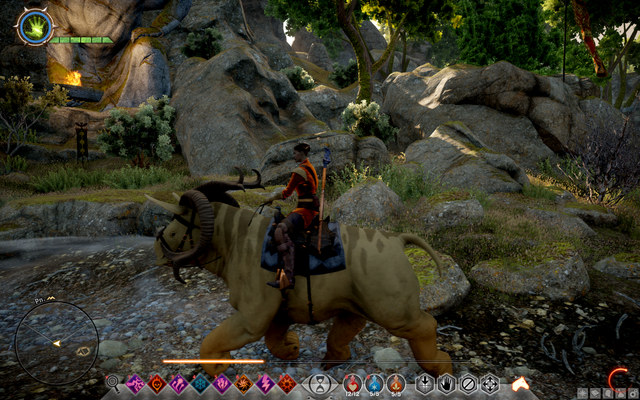 One of the unique mounts - its size ensures it with quite a resistance
At the initial stages of the game, once you obtain your first horse, you will be unable to change it but once you gain access to the Skyhold, you will find stables and a store. There, you will be able to buy a new mount. The specific mounts do not differ in any particular way, apart from the looks and the sounds they make. However, the damage they can take before you fall out of the saddle, is a bit different (this does not go for bow attacks). They also slightly differ in terms of the means in which they cross the country (however, the speed is constant for all of them).
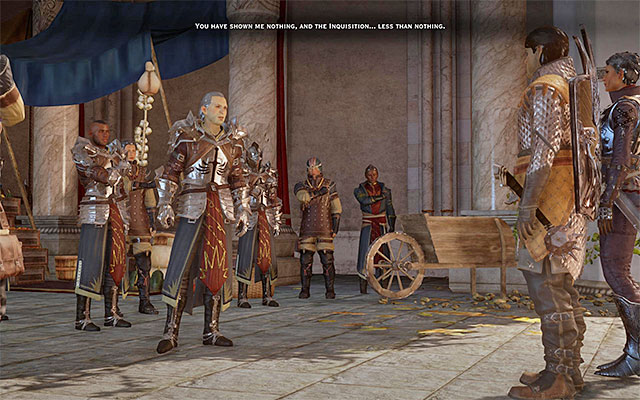 You get the most experience for completing main quests
Gaining experience points and - as a result - leveling up, is not as fast and devoid of any problems, as it might seem. Therefore, it is a good idea to focus, at the beginning at least, on those of the activities that guarantee you the highest income of experience. These are, predominantly, main quests which reward you with several hundred, or even several thousand, points if completed properly. As for side quests, things vary. There are ones that reward you with symbolic amount of points, as well as the more profitable ones.
 It is a good thing to explore the map thoroughly, for various documents, maps and notes
There are many ways in which the game encourages you to explore the surroundings carefully and it is a good idea not to skip that. As much as obtaining herbs does not carry any direct rewards in terms of points, searching for various documents and maps may reward you with quite a lot of experience points (several tens or even several hundred of points per item), which can be even further increased with the perks that you unlock for Inquisition points. These provide you with a 50% increase in experience per item - you can unlock four such elements in each of the groups of perks, which amounts to a total of a 200% increase in experience per every document/map that you find.
 Sealing of rifts is rewarded with experience points
A highly profitable method of obtaining experience is closing Rifts, which have been presented in one of the previous chapters in greater detail. Sealing a single rift involves obtaining several hundred experience points (the exact number of points depends on the difficulty level of the battle that you had to fight before closing the Rift). What's more, apart from the experience, you also receive power points and influence points that are extremely important in increasing the Inquisition strength.
 It is a good idea to seize the strongholds that you discover
After you progress some more in the campaign while exploring the area, it is a good idea to keep an eye out for strongholds and keeps that have been described in the Inquisition Management chapter. Seizing this type of locations usually provides you with lots of experience, both for seizing the location and for defeating the enemies that guard it.
 Only for killing the strongest monsters you are lavishly rewarded
Unfortunately, in Dragon Age: Inquisition killing the enemy units is not that well rewarded. At the beginning of the game, for defeating a single opponent, you are rewarded with not more than 30-40 points. It goes much better in the case of much stronger monsters - dragons, giants or bosses that you encounter while completing quests. Before you attack a strong monster, it is a good idea to consider if fighting the monster is a profitable exchange of time for experience.
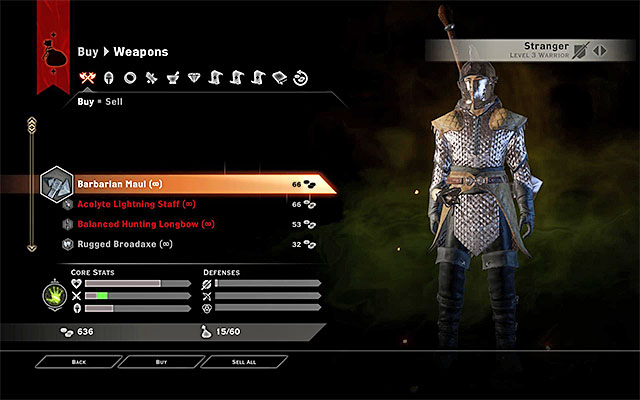 Find and sell rare items
The phenomenon of gold shortage is present in Dragon Age: Inquisition and you can experience it especially during the first hours of the game. At the time, you will not have too much gold on you and each purchase that you want to make needs to be well thought over. One of good ways to obtain money is to sell all of the items that the party does not need anymore to the merchants. Specifically, all the weapons and armor elements (e.g. the one marked in blue or violet), as well as valuables whose only purpose is to bring you profit (the exception are the unique items dropped by the monsters which you can leave for research at the Inquisition HQ).
The reason for which you should visit merchants often is that your inventory is limited to 60 slots only and it can be filled really fast. However, make sure that you do not sell a rare weapon that one of the party members could benefit from using.
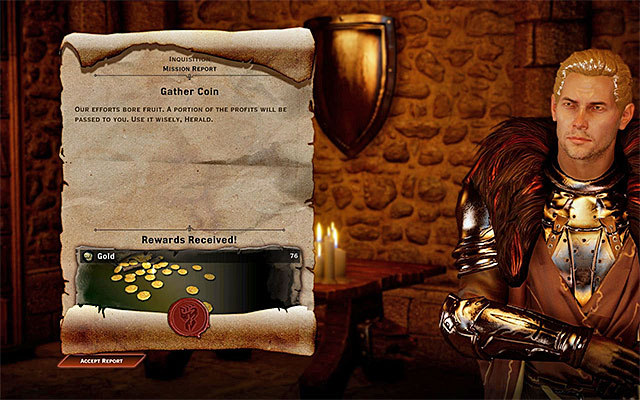
Another interesting way to earn money is to complete missions that you activate in the war room at the Inquisition HQ. However, this only goes for the quests that guarantee you gold (e.g. "Gather Coin), one of which has been shown in the screenshot above. The downside of this kind of quests is that you earn relatively little gold. Their upside, however, is that some of them can be repeated over and over again and that they are completed automatically. Therefore, once you receive an appropriate message about the completion of the mission by one of the Inquisition advisors, you simply need to return to the Inquisition HQ and claim your gold (and at the same time, task another errand).
Apart from the abovementioned, it is also a good thing to explore all the areas. Among others, you can find gold on the opponents and monsters that you kill, as well as in crates, containers and others.
 Only rogues can open locks
Often, you will encounter locked doors and passages. The only characters that are capable of opening them are rogues. The locks that you have found, but not yet opened, are marked on the map. However, the level of the locks is not the same. To be able to open the more demanding ones, you need to activate the "Deft Hands, Fine Tools" perk, of the Secrets category. However, some of the locks still won't open. These are going to require a key that you can often find near the locked door.
 Explore the entire Haven thoroughly
In chapter Exploration of the game world, I have mentioned, among other things, that the successive locations in Dragon Age: Inquisition become available gradually as you progress in the storyline. A good idea is to plan on your progress, thanks to which you will not progress too fast to the next location, where there are more demanding opponents to defeat and, on the other hand, you will not miss out on optional locations, where you can obtain more loot, experience or, e.g. new allies.
At the beginning of the game (after you complete the Prologue), try to explore the entire Haven thoroughly (the village that is the first HQ for the Inquisition). What speaks for this, is that you can find the first crafting materials there, complete quests or collect notes, thanks to which you will progress by 1-2 experience levels in the very beginning.
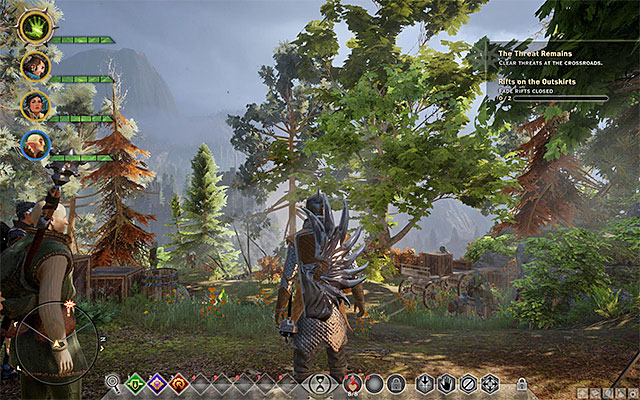 Explore as much of the Hinterlands as your current experience level allows you to
The first big location that you gain access to is the Hinterlands. Just like in the case of the Haven, it is a good thing to explore the location thoroughly and pay attention to loot chests and the exclamation marks that mark the starting points for side quests (there are lots and lots of them in the Hinterlands).
Unfortunately, not all of the Hinterlands will be available from the very beginning. Some of the areas in this location (e.g. the Redcliffe village) remain unavailable until you complete some of the main quests. An even greater handicap is the facts that the rims of the Hinterlands are being occupied by much stronger monsters (especially ones at level 8 or 12), which your party may not be able to go against. Therefore, it is better to leave the exploration and ultimate "securing" of the area for later.
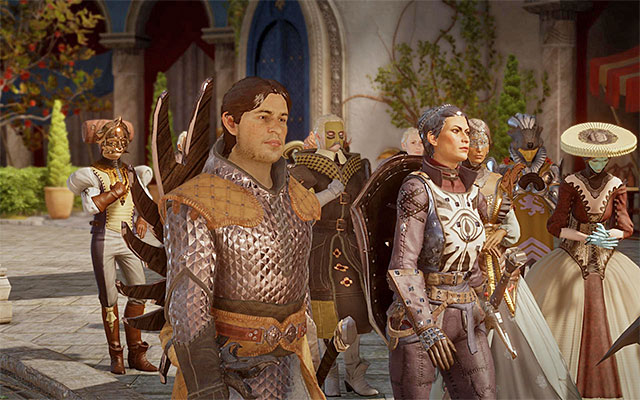 Deal with some of the initial quests and visit several optional areas.
If possible, I recommend that you complete several initial main quests quite early, at least up to the moment at which you decide whether to join the Templars or the rebellious mages. In the meantime, you will gain access to Val Royeaux and several bigger optional locations. I especially recommend that you journey to The Storm Coast, where you will be able to include the Iron Bull in your party. Apart from that, you can also visit The Forbidden Oasis.
I recommend that, later into the game, you explore the newly unlocked areas and complete new main quests. Each time, before you start a "big" main quest, make sure to check the experience level recommended for the quest. If, for example, it is not recommended to start a given quest below experience level 10, spend more time in the additional areas of the world to gain some experience. This will prevent (SERIOUS) problems with completing such a quest.
NOTE! You can also find the recommended experience levels for the individual missions in Dragon Age: Inquisition in the walkthrough for the game.
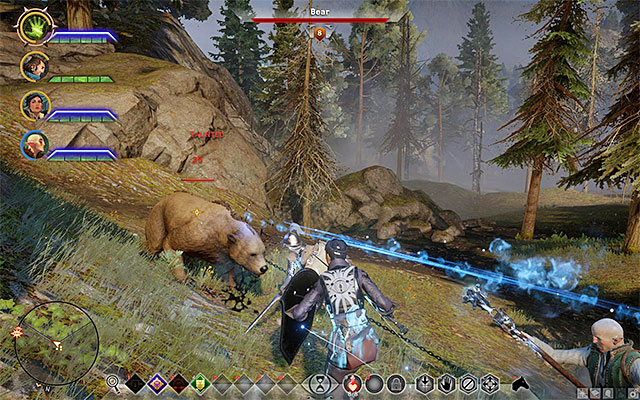 At the beginning, in the Hinterlands, you will have lots of problems with bears
There are several plains of division between opponents in Dragon Age: Inquisition and one of them is their experience level. In this particular case, opponents can be divided into two groups. The first one are the opponents with experience level similar to your party's. The other groups are the opponents with a higher, predetermined experience level. At the initial stages of the game, predominantly bears or the stronger demons make up this group - they may be on level 8 or 12. An attempt to attack such opponents often ends in failure, even while playing at one of the lower difficulty levels. In such situations, attempts to lure the opponents away, or using the best of spells and weapons are of little help, because of the high (or even crushing) disproportion.
The level of the nearby opponents can be looked up by clicking on them - best if it is done from a safe distance. If you note that their experience is higher, I recommend that you walk away or return to them later in the game (at least, once you progress to the same level) or take an alternative route to the destination. In certain situations, you can use the mount, thanks to which you will be able to dash by the opponents. Not always, however, the tactics of using the mount works as expected, because enemy archers or mages may attack the mount and throw you off the saddle, which compels you to fight. When the situation is tight, remember that you can command your party to stop attacking and flee. Use this method only in extreme situations.
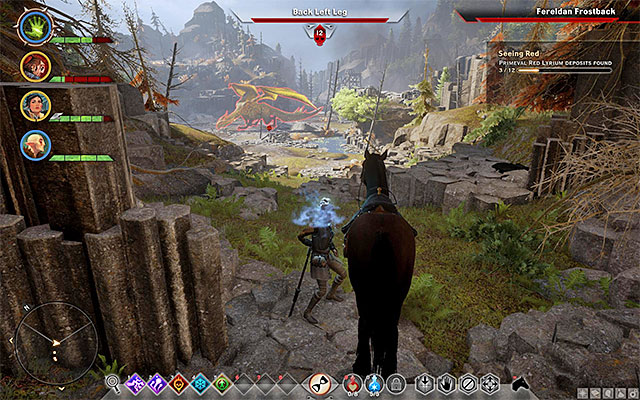 Dragons are counted among the strongest monsters in the game
The tactics against the elite monsters is a bit different from the one against the "regular" ones. This mainly covers the bosses that you encounter throughout the main quests and huge dragons. In such situations, being at the same experience level as the opponent (e.g. at level 12) may turn out to be insufficient for victory. I recommend that you take on the strongest of the monsters once you gain the advantage of 1-2 experience levels and when your gear is as good as it can get.
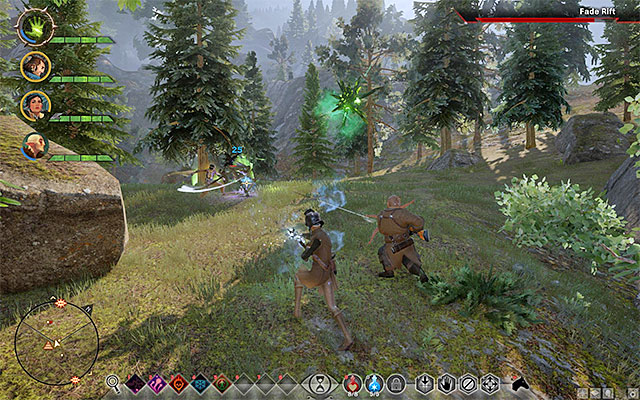 You can switch between the individual party members, ore leave controlling them to the AI
As you probably already know from the previous chapters of this guide, the active party in Dragon Age: Inquisition (i.e. the one that currently accompanies you on your journey) can consist of up to four characters. At any given moment, you can control one of the characters only and, by default, it is the protagonist. Of course, there is nothing in your way to prevent you from switching to the other characters, e.g. to command them to attack with certain abilities, to have them open an inaccessible door (as a rogue). In general, however, the game does not press you to control your entire party for the whole time, because the AI can just as well take care of that. The AI does not have major problems controlling the party members so, if you do not want to control battles in the most detailed way possible, you can easily leave it to the AI. At this point, I remind you that you can set patterns of behavior for the AI, which you can learn more about from chapters Battlefield and Combat.
NOTE - if you want to, you can also make the development process of the party members automatic. The moment they are promoted to a higher experience level, you can allow the system to pick the new ability automatically. Still, I recommend against this, unless you completely want to waive the interest in the development of a given character.
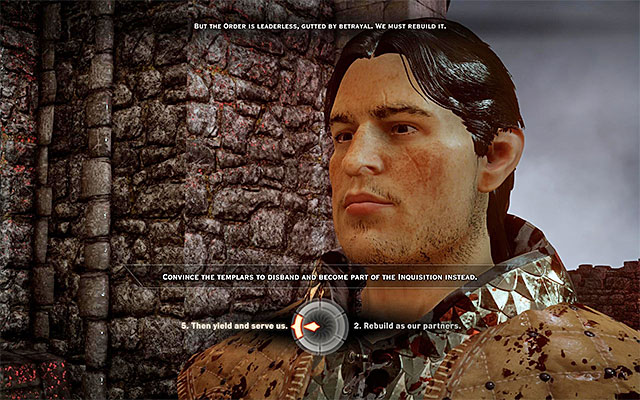
While completing the game, here and there you will have to make important decisions which concern nearly the entire storyline. The choices vary in their characteristics; they may concern picking the ally or determining the fate of a specific party member. Depending on the variant that you choose, results may either be instantaneous, or you can learn them only after some time has passed (e.g. during another meeting with a representative of a given faction).
The key element here is to be able to recognize the important choices, thanks to which you will know when you need to give it a deeper consideration. The most important choices are provided with short descriptions that display, after you highlight a given option (an example in the screenshot above). This is helpful because, by highlighting one of the options, you can learn what the result will be. Of course, the game does not lay everything plain and if you want to take precautions, you can save the game before making the important decisions and test the possible variants.
NOTE - All of the main storyline choices have been presented in the walkthrough for the game.
NOTE - To look up the results of the decisions that you take, you can use the Dragon Age Keep app, which allows you to reveal the most important choices and modify them. This has been described in the Character Creation chapter.
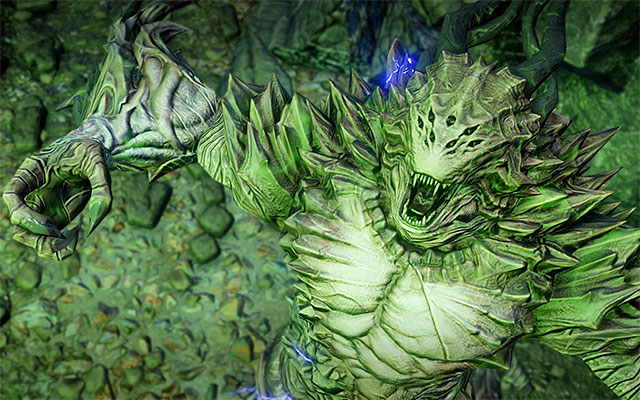 The Pride Demon
The Pride Demon is the first challenging opponent in the game that you will have to face. You encounter the monster towards the end of the Prologue and he is much more demanding opponent than it may seem at the first glance. Wrong tactics may result in a quick death of all the party members, and ending the game prematurely.

A very important information connected with the fight against the Pride Demon is that you cannot keep attacking him for the whole time. By default, he is capable of protecting himself against your attacks. His resistance to standard attacks is symbolized by his inactive health bar, highlighted on the screenshot above.
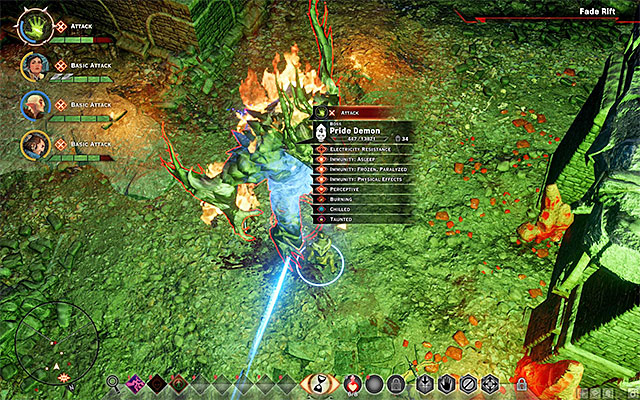 Disrupt the functioning of the rift
The key to winning with the Pride Demon is to disrupt the huge nearby rift. The method of disrupting rifts has been described in the "Closing of Rifts between the game world and the Fade" chapter. Jut to remind you, you need to be facing the rift and press the interaction key/button.
 Attack the weakened demon
Disrupting the Rift temporarily stuns the Pride Demon and exposes him to your attacks. This is the moment when you should focus on landing blows to the demon. The plan of the attack should be the same in this case as for the rest of the fights - your party members should land direct attacks and distract the demon from archers (rogues) and mages that attack him at a distance.
The important piece of information connected with the fight against the Pride Demon is that he is invulnerable to attacks with electricity. To learn about his strong points(e.g. immunity to attempts to put to sleep) you can read the information once you highlight him in the tactical view (an example in the screenshot above). This will allow you to plan on the battle and avoid landing blows that are ineffective.
 Eliminate the weaker monster on a regular basis
Later into the fight, against the Pride Demon, you need to disrupt the Rift and attack the weakened monster. There is one handicap to the battle, because there will occasionally appear groups of weaker demons. I recommend against ignoring them, because they may weaken rogues and mages of the party, and make it more difficult for your character to disrupt the Rift.
 Regenerate health of the fallen allies
If you perform all of the above steps in accordance with the presented plan, you should win without any major problems. Still, you need to keep an eye on the health bars of your party members, because the demon's attacks deal a lot of damage when he is in full health. Make use of health potions on a regular basis. If any of the party members loses the entire health bar, run up to him as quickly as possible with another character and try to help him up.
 It is not easy to fight dragons- remember about the wounded allies
Dragons are the most powerful bosses in the game. There is a total of 10 of them. You can find them in several locations marked on the map of locations, usually in the areas near the edges of the map. The recommended experience level to fight a dragon, so that you have high chances of succeeding, is 2 levels higher than the level of the beast (still, it depends on the skills of the player, equipment that you are using, the composition of the party, etc). The majority of dragons can be challenged to fight right at the beginning of the game by approaching their dens. Some of them, however, are connected with quests. The battles are difficult and they last between 5 and 20 minutes. Usually, you get rewarded for your efforts well - each dragon has, at least, one legendary item.
You need to get prepared before the battle with a dragon. Before the fight itself, it is a good idea to perform a little reconnaissance - see the arena and recognize the type of the dragon. The looks of the arena (the den or out in the open) determines whether the dragon is going to be flying above the arena and you will learn if there are any formations to hide behind. The type of the dragon determines the type of his attacks - if he attacks with fire, equip your weapons with a rune dealing ice damage (and use this type of spells as a mage) and if it is the other way around - attack with fire.
 Covers are not everything - the dragon crosses some of them effortlessly
While getting prepared, you need to remember about health potions in the first place. It is best to compose the party in such a way, that it consists mostly of ranged fighters. A good choice here are mages who attack with spells of the element that weakens the dragon, and one supporter - a mage with spells of the Spirit group: Barrier and Revive.
At the beginning of the battle, it is best to deploy the party members in the tactical mode in a curved line, because the majority of his attacks are AoE attacks and it is a good idea to keep the distance between the individual characters short, in case that you need to hurry to their rescue. You can attack any of the dragon's limbs and his maw. It does not really matter but, if you land multiple strong strikes against one of the elements, the dragon may pause his attacks, writhing in pain.
Dragons have the following abilities:
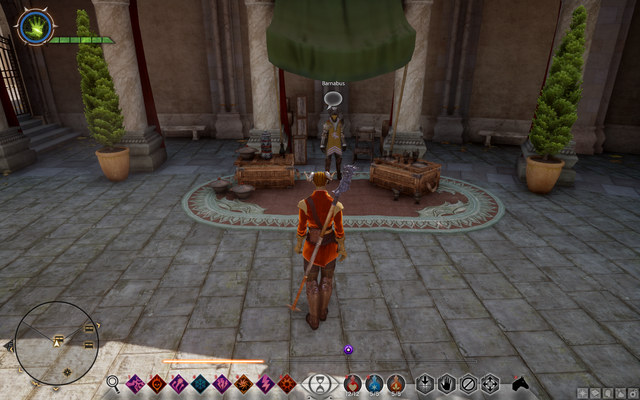 One of the merchants in Val Royeaux - thee capital city of commerce
Trade is the basic way of earning and obtaining additional gear. You can trade weapons, armors, accessories, crafting items and valuables. You can also buy recipes for crafting items. Apart from that, you can buy horses and treatises that increase your power level. The downside of the trade is that there are very few merchants that offer interesting items. Most of the times, you find much more interesting items in the game world. The upside, on the other hand, is that you do not need to search for the merchant that offers you a better price for the items that you sell - everywhere, the price is the same. Also, merchants have no limits on the money that they own and - often - on the number of items to sell.
 The workshop at the Skyhold is equipped with everything that you need to craft
Crafting in Dragon Age: Inquisition is very easy and it is available for everyone - no additional abilities or specialties needed. The only thing that you need to craft an item is schematics (you can either find them in the game world or buy them from merchants), materials (you can collect, buy them, breed animals and obtain them in the mode of tactical operations, as the Inquisition advisors) and the crafting table, which is available at the smithy and in strongholds.
Crafting and upgrading is based on schematics, which is the main indicator of quality. The basic items have at best third quality class, upgrades (e.g. pauldrons, etc.) have second at best.
The second factor that affects the quality and bonuses is the material that you use. Each item to craft requires an appropriate amount of material to make so, if you need a cloth, you can use both cotton and silk or, instead of iron, you can use obsidian. You can view before you craft, what parameters the item will raise and by how much. The same materials are used for upgrading both the armors and the weapons so it is a good idea to loot everything.
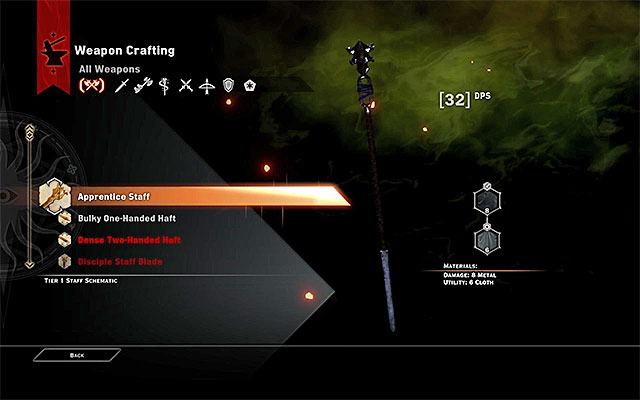 Weapons crafting window
To craft a weapon, everything you need is schematics and the materials that these schematics require. You also need a crafting station. Using specific materials affects the final result - it is best to use the best materials possible, to receive the attack/defense values as close to the top value as possible (it displays in the upper-right corner, after you highlight the schematic). Additionally, you learn the information on the available upgrades for the specific item. Is it worthwhile to craft your own weapons? Definitely, it allows you to make it fit your own needs. If you are not that picky, find interesting legendary weapons - the ones that are hand-crafted rarely match them. Armors? Here, with the appropriate schematic for you, they can far exceed the quality of the legendary ones.
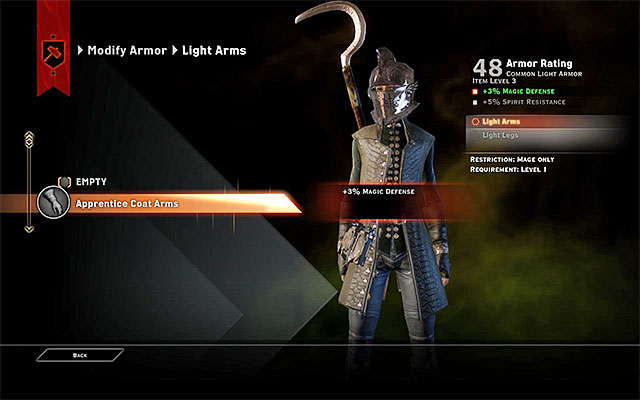 Armor upgrade window
Nearly every weapon and armor can be upgraded by fitting it with characteristic elements, e.g. greaves for the armor, or the blade for swords. You can also use runes, which are often available for both. Legendary items usually have, at least, one upgrade already. Elements can be both assembled as much as they can be disassembled. This means that if you find an interesting weapon which is worse than your current one, but may have an interesting rune/upgrade - remove it before you sell the weapon.
It is very important not to confuse the upgrades. Light pauldrons cannot be used in heavy armors and upgrades for the staff cannot be used in a two-handed axe. Always make sure that you are using the correct schematic.
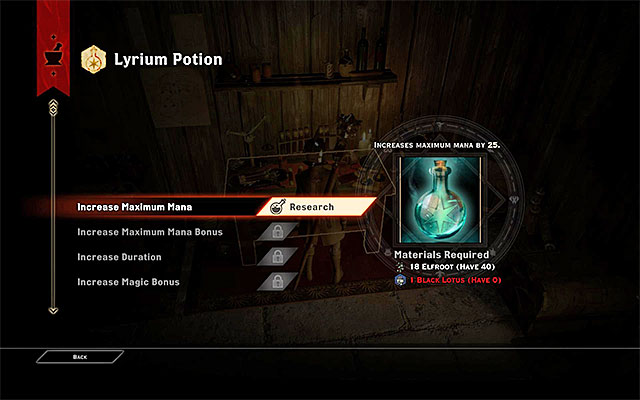 Potions upgrading window
The basic auxiliary equipment are potions. They are divided into basic (they improve regeneration, mana amount), tonics (resistances and constitution) and grenades. Each of the characters has his own set of two potions, where the regeneration potion is the only to be free and it replenishes after each stay at the camp. The number of potions and an additional potion slot are available to unlock with perk points and Inquisition points. To brew a potion, you only need to find a brewing table (at the herbalists in the HQ, at strongholds and in outposts) pick the potion (drag it over to the appropriate field) and click it. Above, you will see the amount of the material that you need to brew the potion. To be able to brew potions, you will need plants. Their occurrence depends on the region and on the nobility. Still, it is worthwhile to pick every plant, because each may be useful in the future.
Each potion can be upgraded, but it requires many plants of a given kind. To upgrade, you only need to pick the potion and see the details to learn about the list of the available upgrades. To speed up the process of gathering ingredients, you can use the Optimal Cutting Inquisition perk (Secrets category), which gives you a 10% chance of picking more plants at one cut. Also, you can enter the tactical mode and have the party pick the ingredients for you (this takes around 11 minutes).
 Pots in the garden with oversized plants in them
Another interesting option is to grow plants (it requires the Skyhold). In the garden, there are two plant pots - you can plant there any plants that grow from below the ground (as opposed to the ones that hang from above) - both the common and the unique ones. Of course, it is best to plant rare species. In the Inquisition tasks, you will also receive one that relates to the option to upgrade your garden. After you complete it, you can expand your garden - either receive more pots, to plant more plants, or turn the garden into one accessible to the citizens, who will offer the Inquisition gold and ingredients in return.
This is the basic potion that immediately restores health in a given party member. Below, you can find a list of available upgrades.
Note - You can replenish your supply of healing potions, for free, by returning to the Inquisition's HQ, or to any encampment and taking rest.
THE NAME OF THE UPGRADE
REQUIREMENTS
EFFECT
Increase Healing I (Increase Healing I)
Elfroot x29
Dawn Lotus x1
Restores greater amount of health points.
Increase Healing II (Increase Healing II)
Increase Healing I
embrium x34
Prophet's Laurel x5
Restores greater amount of health points.
This potion is also used to restore health. However, it does not restore health immediately, but regenerates points for the next 60 seconds, starting with the moment of use. Below, you can see possible upgrades.
THE NAME OF THE UPGRADE
REQUIREMENTS
EFFECT
Increase Duration I
Elfroot x18
Royal Elfroot x1
Increases the duration of the potion by 8 seconds.
Increase Duration II
Increase Duration I
Rashvine x11
Deep Mushroom x11
Prophet's Laurel x2
Increases the duration of the potion by 10 seconds.
Increase Healing I
Elfroot x18
Royal Elfroot x1
Restores greater amount of health points.
Increase Healing II
Increase Healing I
Rashvine x11
Deep Mushroom x11
Prophet's Laurel x2
Restores greater amount of health points.
Lifeward
Increase Duration II
embrium x9
Arbor Blessing x18
Amrita Vein x2
Doubles the regeneration effect if the hero has less than 25% of health points.
Proximity Heal
Increase Healing II
embrium x9
Arbor Blessing x18
Amrita Vein x2
Heals the nearby characters. It is a VERY useful upgrade.
This is a potion for the mage and it allows him to increase the attribute of magic, temporarily. The duration of the potion is 20 seconds. Below, you can see the list of available upgrades.
THE NAME OF THE UPGRADE
REQUIREMENTS
EFFECT
Increase Maximum Mana
Elfroot x18
Black Lotus x1
Increases maximum mana.
Increase Maximum Mana Bonus
Increase Maximum Mana
embrium x11
Deathroot x11
Rashvine Nettle x2
Increases the bonus to maximum mana.
Increase Duration
Increase Maximum Mana Bonus
embrium x11
Deathroot x11
Rashvine Nettle x2
Increases the duration of the potion by 20 seconds.
Increase Magic Bonus
Increase Maximum Mana Bonus or Increase Duration
embrium x9
Arbor Blessing x18
Amrita Vein x2
Increases bonus to magic by another 30 points (up to 60).
This tonic ensures a 40-percent increase of resistance to fire and its duration is 2 minutes. It can prove to be very useful, while fighting against beasts that rely on fire attacks (e.g. High Dragons). Below, you can see the list of possible upgrades.
THE NAME OF THE UPGRADE
REQUIREMENTS
EFFECT
Increase Duration I
Spindleweed x5
Crystal Grace x1
Increases the duration of the potion by 30 seconds.
Increase Duration II
Increase Duration I
Rashvine x5
Increases the duration of the potion by another 30 seconds.
Increase Potency I
Spindleweed x5
Witherstalk x1
Increases resistance to fire by 10 percent.
Increase Potency II
Increase Potency II
Rashvine x5
Increases resistance to fire by another 10 percent.
Proximity Resistance
Increase Duration II or Increase Potency II
Amrita Vein x5
felandaris x1
Ensures resistance to fire to those of the allies that stood nearby, at the moment at which the tonic was used.
This tonic ensures a 40-percent increase of resistance to cold and its duration is 2 minutes. It can prove to be very useful, while fighting against beasts that rely on ice attacks. Below, you can see the list of possible upgrades.
THE NAME OF THE UPGRADE
REQUIREMENTS
EFFECT
Increase Duration I
Spindleweed x5
Witherstalk x1
Increases the duration of the potion by 30 seconds.
Increase Duration II
Increase Duration I
Rashvine x5
Increases the duration of the potion by another 30 seconds.
Increase Potency I
Spindleweed x5
Witherstalk x1
Increases resistance to cold by 10 percent.
Increase Potency II
Increase Potency II
Rashvine x5
Increases resistance to cold by another 10 percent.
Proximity Resistance
Increase Duration II or Increase Potency II
Amrita Vein x5
felandaris x1
Ensures resistance to cold to those of the allies that stood nearby, at the moment at which the tonic was used.
This tonic ensures a 40-percent increase of resistance to electricity and its duration is 2 minutes. It can prove to be very useful, while fighting against beasts that rely on electrical attacks. Below, you can see the list of possible upgrades.
THE NAME OF THE UPGRADE
REQUIREMENTS
EFFECT
Increase Duration I
Spindleweed x5
Dawn Lotus x1
Increases the duration of the potion by 30 seconds.
Increase Duration II
Increase Duration I
Rashvine x5
Increases the duration of the potion by another 30 seconds.
Increase Potency I
Spindleweed x5
Witherstalk x1
Increases resistance to electricity by 10 percent.
Increase Potency II
Increase Potency II
Rashvine x5
Increases resistance to electricity by another 10 percent.
Proximity Resistance
Increase Duration II or Increase Potency II
Amrita Vein x5
felandaris x1
Ensures resistance to electricity to those of the allies that stood nearby, at the moment at which the tonic was used.
This tonic ensures a 40-percent increase of resistance to spirit attacks and its duration is 2 minutes. It can prove to be very useful, while fighting against beasts that rely on spirit attacks. Below, you can see the list of possible upgrades.
THE NAME OF THE UPGRADE
REQUIREMENTS
EFFECT
Increase Duration I
Spindleweed x5
Dragonthorn x1
Increases the duration of the potion by 30 seconds.
Increase Duration II
Increase Duration I
Rashvine x5
Increases the duration of the potion by another 30 seconds.
Increase Potency I
Spindleweed x5
Witherstalk x1
Raises spirit resistance by 10 percent.
Increase Potency II
Increase Potency II
Rashvine x5
Raises spirit resistance by another 10 percent.
Proximity Resistance
Increase Duration II or Increase Potency II
Amrita Vein x5
felandaris x1
Ensures spirit resistance to those of the allies that stood nearby, at the moment at which the tonic was used.
This tonic provides a bonus to damage and remains active for 20 seconds. IT is a good idea to use it before each major battle. Below, you can see the list of possible upgrades.
THE NAME OF THE UPGRADE
REQUIREMENTS
EFFECT
Increase Damage I
Elfroot x18
Dawn Lotus x1
You deal even more damage.
Damage Bonus vs. Guard
Increase Damage I
embrium x11
Deep Mushroom x11
Rashvine Nettle x2
You deal higher damage while attacking the opponent's guard.
Damage Bonus vs. Barrier
Increase Damage I
embrium x11
Deep Mushroom x11
Rashvine Nettle x2
You destroy barriers that the enemies are surrounded with, faster.
Critical Damage Bonus
Increase Damage I
embrium x11
Deep Mushroom x11
Rashvine Nettle x2
Critical hits deal twice as much damage.
Increase Damage II
Damage Bonus vs Guard, Damage Bonus vs Barrier bonus to damage against or Critical Damage Bonus
Deep Mushroom x9
Arbor Blessing x18
Amrita Vein x2
You deal even more damage.
This tonic strengthens your armor and remains active for 30 seconds. It is a good idea to use it before each major battle. Below, you can see the list of possible upgrades.
THE NAME OF THE UPGRADE
REQUIREMENTS
EFFECT
Improved Duration I
Elfroot x18
Crystal Grace x1
Extends the duration of tonics by 30 seconds.
Improved Duration II
Improved Duration I
Rashvine x11
embrium x11
Rashvine Nettle x2
Extends the duration of tonics by another 30 seconds.
Improved Potency I
Elfroot x18
Crystal Grace x1
Strengthens your armor.
Improved Potency II
Improved Potency I
Rashvine x11
embrium x11
Rashvine Nettle x2
Strengthens your armor even more.
Stun Enemies
Improved Potency II or Improved Potency II
Rashvine x9
Vandal Aria x18
50% chances of stunning the opponent that attacked the ally under the effect of the tonic.
This tonic allows you to poison the opponent (three successive attacks) and allows you to weaken stronger enemies. Below, you can see the list of possible upgrades.
Note - You need to land the attacks within 10 seconds of the moment at which you used the tonic or otherwise, your weapon loses its gained properties.
THE NAME OF THE UPGRADE
REQUIREMENTS
EFFECT
Increase Duration I
Blood Lotus x23
Dragonthorn x1
The attacked opponent struggles with the poison for longer.
Increase Duration II
Increase Duration I
Deathroot x14
Deep Mushroom x14
Rashvine Nettle x2
The attacked opponent struggles with the poison for longer.
Increase Damage I
Blood Lotus x23
Dragonthorn x1
Increases the effect of the poison on the enemies.
Increase Damage II
Increase Damage I
Deathroot x14
Deep Mushroom x14
Rashvine Nettle x2
Increases the effect of the poison on the enemies.
Enhanced Potency
Increase Duration II or Increase Damage II
Deathroot x11
Arbor Blessing x22
Amrita Vein x2
Increases the number of poisoned attacks that you can land (to five) and ensures more time to attack, before the poison wears off.
This grenade is use for slowing down opponents and it remains active for one minute. Below, you can see the list of possible upgrades.
THE NAME OF THE UPGRADE
REQUIREMENTS
EFFECT
Increase Duration I
Blood Lotus x16
Crystal Grace x1
Extends the duration of the grenade by 30 seconds.
Increase Duration II
Increase Duration I
Rashvine x9
Deathroot x9
ghoul beard x1
Extends the duration of the grenade by another 30 seconds.
Debilitate I
Blood Lotus x16
Crystal Grace x1
Opponents affected by the grenade take 25% more damage and deal 25% less damage.
Debilitate II
Debilitate I
Rashvine x9
Deathroot x9
ghoul beard x1
Opponents affected by the grenade take 50% more damage and deal 50% less damage.
Immobilize
Increase Duration II or Debilitate II
Deathroot x8
Vandal Aria x16
felandaris x2
Opponents affected by the grenade are additionally stunned for 10 seconds.
You use this grenade to set the enemies against each other. They attack each other for 20 seconds. Below, you can see the list of possible upgrades.
THE NAME OF THE UPGRADE
REQUIREMENTS
EFFECT
Increase Duration I
Blood Lotus x27
Black Lotus x1
Witherstalk x1
Extends the duration of the grenade by 10 seconds.
Increase Duration II
Increase Duration I
embrium x16
Deathroot x16
ghoul beard x2
Extends the duration of the grenade by another 10 seconds.
Rage I
Blood Lotus x27
Black Lotus x1
Witherstalk x1
Opponents affected by the grenade deal 25% more damage, while attacking their allies.
Rage II
Rage I
embrium x16
Deathroot x16
Ghoul beard x2
Opponents affected by the grenade deal 50% more damage, while attacking their allies.
Mind Wreck
Increase Duration I or Rage I
Arbor Blessing x14
Vandal Aria x14
felandaris x3
Deals high spirit damage to opponents.
This grenade sets on fire the area and deal damage from fire, to opponents that come into contact with it. The fire stays up for 30 seconds. Below, you can see the list of possible upgrades.
THE NAME OF THE UPGRADE
REQUIREMENTS
EFFECT
Increase Damage I
Blood Lotus x22
Dawn Lotus x1
Dragonthorn x1
Deals more damage from fire.
Increase Damage II
Increase Damage I
Rashvine x13
Deep Mushroom x13
ghoul beard x1
Deals even more damage from fire.
Increase Duration I
Blood Lotus x22
Dawn Lotus x1
Dragonthorn x1
Extends the duration of the grenade by 30 seconds.
Increase Duration II
Increase Duration I
Rashvine x13
Deep Mushroom x13
ghoul beard x1
Extends the duration of the grenade by another 30 seconds.
Shockwave
Increase Damage II or Increase Duration II
Rashvine x11
Vandal Aria x22
felandaris x2
Stuns, for 5 seconds, opponents that stood near the explosion of the grenade.
This grenade forms a mist that restores health to the allies within range. Below, you can see the list of possible upgrades.
THE NAME OF THE UPGRADE
REQUIREMENTS
EFFECT
Increase Healing I
Spindleweed x20
Royal Elfroot x1
Dawn Lotus x1
Your allies regenerate more health.
Increase Healing II
Increase Healing I
Rashvine x10
embrium x10
Prophet's Laurel x1
Your allies regenerate even more health.
Healing Mist
Increase Healing II
embrium x10
Vandal Aria x20
felandaris x2
You can revive the dead allies within the area of the mist's effect. It is a VERY useful upgrade.
This grenade summons a swarm of bees for 30 seconds. The opponents stung by bees take high damage and may panic out. Below, you can see the list of possible upgrades.
THE NAME OF THE UPGRADE
REQUIREMENTS
EFFECT
Increase Panic Chance I
Blood Lotus x25
Dragonthorn x1
Increases the chance of introducing opponents into panic by 10%.
Increase Panic Chance II
Increase Panic Chance I
embrium x15
Deep Mushroom x15
ghoul beard x2
Increases the chance of introducing opponents into panic by another 10%.
Increase Duration I
Blood Lotus x25
Witherstalk x1
Extends the duration of the grenade by 5 seconds.
Increase Duration II
Increase Duration I
Blood Lotus x30
Witherstalk x1
Dragonthorn x1
Extends the duration of the grenade by another 5 seconds.
And Some Wasps
Increase Panic Chance II or Increase Duration II
Deep Mushroom x13
Vandal Aria x25
felandaris x3
You can additionally attack the opponents that near the area, where the grenade was used.
By default, the potions, tonics and grenades mentioned on the previous pages of this chapter, are unavailable, i.e. you cannot craft them, even if you have the ingredients. The only way to change that is to obtain recipes. Each recipe is unique and unlike schemata, they can be obtained in specific locations. To learn more about the circumstances of finding them, see the below table.
Note - health potion is unique, because it is available from the beginning of the game. This means that you do not need to search for the recipe.
Note - The individual tables have been described in the game guide.
RECIPE
CIRCUMSTANCES, IN WHICH YOU OBTAIN THE RECIPE
Regeneration Potion
You need to meet the apothecary in Haven, while completing " Haven's best".
Lyrium Potion
You need to complete the "Passing Notes" side quest in w Haven.
Fire resistance
In Val Royeaux, you need to find the trader that offers recipes for sale (he may appear later into the game) and buy it.
Cold Resistance
In Val Royeaux, you need to find the trader that offers recipes for sale (he may appear later into the game) and buy it.
Electricity Resistance
In Val Royeaux, you need to find the trader that offers recipes for sale (he may appear later into the game) and buy it.
Spirit Resistance
In Val Royeaux, you need to find the trader that offers recipes for sale (he may appear later into the game) and buy it.
Mighty Offense Tonic
You need to complete "Glowing Key" side quest at the Storm Coast.
Rock Armor
Complete the "Sketch of Calenhad's Foothold" side quest, in Hinterlands, which is about finding a map and reaching the spot marked there.
Tears of the Dead
You need to complete the "Under the Mire" side quest in fallow Mire.
Pitch Grenade
You need to explore Valammar in Hinterlands, during "Deep Trouble" side quest. The recipe is behind one of the destructible walls
Confusion Grenade
During "Wicked Eyes, Wicked Hearts", you need to solve one of the puzzles in the Winter Palace. It is in the hidden chamber that you can enter from the Grand Library.
Antivan Fire
You need to find the trader in the central part of Hinterlands (crossroads). He sells the recipe, among others.
Healing Mist
You need to explore the caves under Caer Bronach in Crestwood. Defeat the spiders and loot the chests to find the recipe in one of them.
Jar of Bees
In the war room, you need to complete "Red Jenny: Bees for the Inquisition!". It becomes available after you recruit Sera (in Val Royeaux).
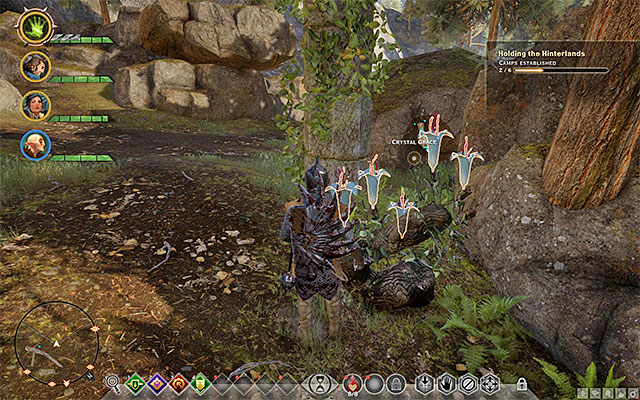 An example herb
Below, you can find a list of herbs available in the game. They are used as alchemical ingredients in crafting, for upgrading potions (among others) described on one of the previous pages of this guide. These are the best ways to obtain herbs:
HERB
TYPE
GROWS IN
Amrita Vein (Amrita Vein)
rare
In the game world: Hissing Wastes
Arbor Blessing
common
In the game world: Arbor Wilderness, Emprise du Lion
Black Lotus
rare
In the game world: Emprise du Lion, Emerald Graves, Exalted Plains, Storm Coast
Blood Lotus
common
In the game world: Crestwood, Fallow Mire, Emerald Graves, Storm Coast, Western Approach, Forbidden Oasis
Traders: Hinterlands, Crestwood
Crystal Grace
rare
In the game world: Emerald Graves, Hinterlands
Dawn Lotus (Dawn Lotus)
rare
In the game world: Fallow Mire
Deathroot
common
In the game world: Western Approach
Traders: Crestwood
Deep Mushroom (Deep Mushroom)
common
In the game world: Crestwood, Emerald Graves, Western Approach, Forbidden Oasis, Hinterlands
Traders: Crestwood
Dragonthorn
rare
In the game world: Hissing Wastes, Exalted Plains, Western Approach, Forbidden Oasis
Elfroot
common
In the game world: Haven, Crestwood, Arbor Wilderness, Emprise du Lion, Hissing Wastes, Emerald Graves, Western Approach, Forbidden Oasis, Hinterlands
Traders: Hinterlands, Crestwood
Embrium
common
In the game world: Crestwood, Hinterlands
Traders: Crestwood
Felandaris
rare
In the game world: Emerald Graves
Ghoul's Beard
rare
In the game world: Hissing Wastes, Exalted Plains, Western Approach
Prophet's Laurel
rare
In the game world: Emerald Graves, Storm Coast
Rashvine
common
In the game world: Emprise du Lion, Emerald Graves
Traders: Crestwood
Rashvine Nettle
rare
In the game world: Emprise du Lion, Emerald Graves, Exalted Plains
Royal Elfroot
rare
In the game world: Crestwood, Emerald Graves, Exalted Plains, Hinterlands
Spindleweed
common
In the game world: Crestwood, Emerald Graves Storm Coast, Western Approach, Forbidden Oasis, Hinterlands
Traders: Hinterlands, Crestwood
Vandal Aria
common
The game world: Hissing Wastes
Witherstalk
rare
In the game world: Hissing Wastes, Exalted Plains, Western Approach, Forbidden Oasis
An example materialBelow, you can find a list of materials. They are used for some crafting activities, e.g. for weapon upgrades. These are the best ways to obtain them:
NAME OF THE MATERIAL
TYPE
OCCURENCE IN GREATER QUANTITIES
Bloodstone
common
Emprise du Lion, Emerald Graves
Blue Vitriol
common
Fallow Mire,
Dawnstone
common
Emerald Graves
Dragon Bone
rare
The bones are dropped by High Dragons
Drakestone
common
Crestwood, Hinterlands
Everite
common
Crestwood, Emerald Graves, Exalted Plains, Western Approach
Iron
common
Haven, Crestwood, Frostback Mountains, Emerald Graves, Storm Coast, Hinterlands
Lazurite
common
Hissing Wastes, Exalted Plains, Western Approach
Nevarrite
common
Hissing Wastes
Obsidian
common
Crestwood, Emerald Graves, Exalted Plains, Hinterlands
Onyx
common
Crestwood, Hinterlands
Paragon's Luster
common
Western Approach, Forbidden Oasis
Pyrophite
common
Emerald Graves
Serpentstone
common
Hissing Wastes, Storm Coast, Western Approach, Forbidden Oasis
Silverite
Rare
Arbor Wilderness
Stomheart
common
Arbor Wilderness Emerald Graves
Summer Stone
common
Fallow Mire, Storm Coast
Veridium
common
Carious regions of the world
Volcanic Aurum
common
Hissing Wastes
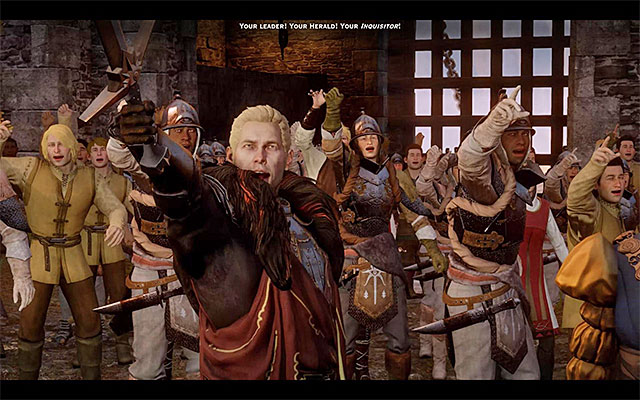 Your character, after you arrive at the Skyhold (this takes place later into the game) becomes the official leader of the Inquisition
Inquisition management is definitely the greatest innovation to this installment of Dragon Age in relation to the predecessors. How much this factor is, is reflected by how many key elements of the game it is integrated with. This means progressing into the storyline, unlocking new locations, gaining new companions or receiving support from major factions around Thedas.
A very important piece of news is that you become the leader of the Inquisition automatically, i.e. at a certain point into the storyline. After you reach the Skyhold, you are promoted for the official leader, although it has been possible to take decisions, connected with Inquisition, still before that. This does not mean that the entire process in question is automated, because your action have a real effect on the strength of the Inquisition, as well as do the progress pace into the main campaign and on which factions you can convince to cooperate.
Inquisition management has been described, in greater detail, later into this chapter. The following issues have been addressed:
 The Haven is the Inquisition's first HQ
Commanding the Inquisition's forces is a much larger operation than the standard commanding of the party and it is reflected in the game, e.g. in the matter of the "field bases" used by the members of this faction. The first major HQ of the Inquisition's forces is the village named Haven that you reach once you complete the prologue. Only later into the campaign, it is replaced by the Skyhold, which you are going to learn more about later in this chapter.
The current Inquisition's HQ is subject to its own regulations and the most important are:
 An example fortress that had to be seized
Apart from the Inquisition's main HQ, you can also set outposts at the locations visited by your party. Initially, these are small encampments only and their functioning has been presented in chapter Exploration of the game world. Later into the game, you also get the opportunity to seize the minor strongholds and keeps that you discover. The bad news is that the outposts are, by default, nearly always occupied by the enemy, e.g. monsters or bandits. This means that it is necessary to get rid of all of them, before it can be controlled by the Inquisition.
The features of the additional strongholds are very similar to the ones from the Inquisition's main HQ. From the moment that you take the full control of them, you can feel safe there. Also, you can rest and meet your allies, trade or craft there. Unfortunately, some of the actions, like e.g. dispatching envoys to missions can only be performed at the main HQ.
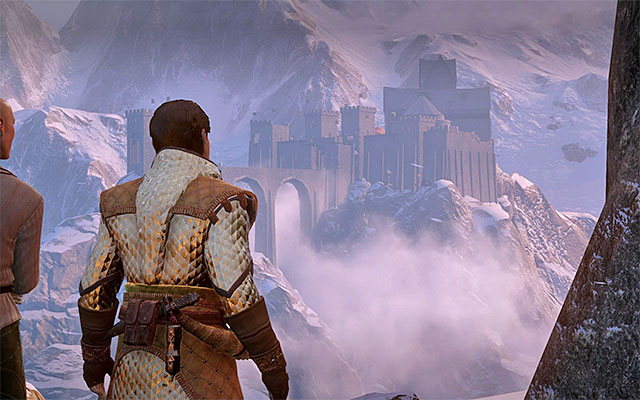 The Skyhold
The Skyhold becomes the Inquisition's primary HQ at a specific moment in the game and it replaces the Haven completely. Both of these locations have a lot in common. While at the Skyhold, you can take all the actions described on the previous page, i.e. meet people, trade, craft or dispatch your advisors on missions, at the war room. At this point, it is worth adding that the Skyhold is a three-story building and sometimes it may be difficult to find a specific station or a specific person. Therefore, it is a good idea to explore the entire location right after you arrive in it for the first time.
 At the throne room, you can pronounce verdicts
The stay at the Skyhold involves several additional elements of the game, which were unavailable at the Haven. Among others, it is the throne room. At some points, you are allowed to take your place in the throne and pass an important verdict that concerns beheading or imprisoning an alleged traitor. Since you pass all of the verdict as side quests, I encourage you to see the walkthrough for the game.
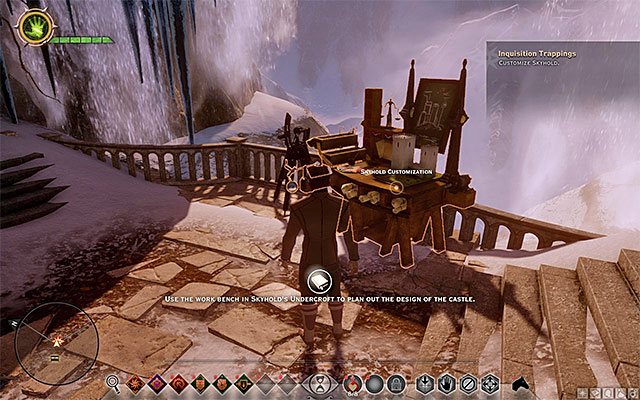
Another interesting innovation is the option to modify the looks of the Skyhold and you do that by interacting with the architect's table shown in the screenshot above (Customize Skyhold). The game allows you to change the Banner, your Bed, Drapery, Heraldry, Decor, the Throne and Windows. The important piece of news is that many of the elements of modification are unavailable, at first, and you can unlock it by either purchasing them or through careful exploration of the game world.
 It is not a good idea to decline help from the others
The Inquisition cannot seal all of the rifts and defeat the evil on its own and this is why obtaining new allies plays an important role in the game. This can be done in two ways. First of all, you can invite single characters to cooperate. This means both the characters that joined your party (they have been listed in the Companions chapter), as well as the ones that are going to support the Inquisition while staying at the stronghold (e.g. a new merchant or a minor advisor). I recommend that you accept all offers of help made by NPCs, unless you learn about the possible betrayal of a particular NPC in the walkthrough and you want to play it safe.
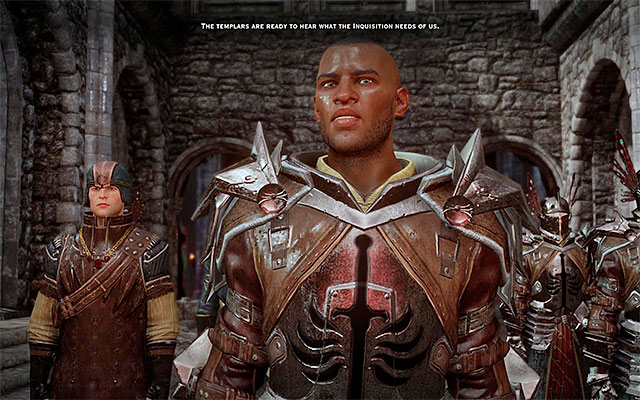 To allow the Templars to retain their autonomy is only one of the possible actions
Apart from including individual NPCs, you can also have entire factions to ally with you. An example of such a situation is one of the first quests, where you choose between the Templars and the mages. As you complete more and more quests for one of these factions, you can win their favor and continuing support. At this point, I want to address two important matters. First of all, read carefully all the descriptions for quests and dialogues. Thanks to this you may try to fight for the favor of the faction whose support you want. Sometimes, the game allows you to make a choice, e.g. whether a given faction may or may not remain independent and its representatives will be made into the Inquisition's forces. The decisions that you make may have different results and you can learn about these, among others, from the walkthrough for the game.
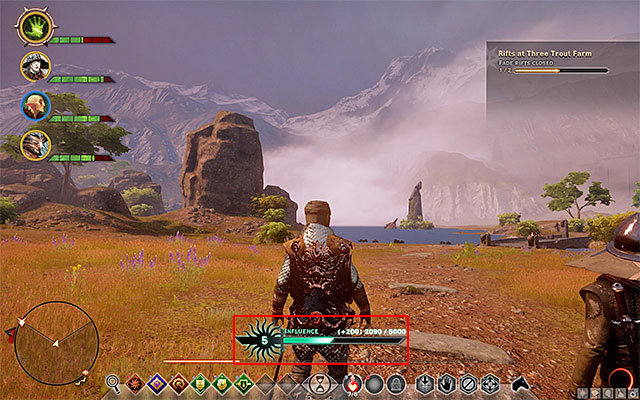
Power and Influence are two very important factors connected with the actions of the Inquisition. It is a good strategy to develop them from the very beginning of the game, because they are followed by certain profits that have been described further in the text. You will always be informed by the game that the party has gained some new points (an example of this kind of message has been presented in the screenshot above). You very often gain Power and Influence side by side, but their number is not unified. In case of power, you usually gain single points, whereas you can gain as many as several tens or even several hundred of influence points at a time (after you gain enough of them, you progress to the next level and receive an Inquisition perk point).
Below, you can see a list of the actions for which it is easier to obtain power and influence:
 You need power to unlock new, important quests on the war map
You use Power in the game to gain access to new missions at the war table (the functioning of this element has been described in the War Room chapter). This means, mainly, the missions that are connected with the main storyline and those that allow you to unlock new locations in the world map. At the beginning of the game, this kind of quests require one or several power points, but the requirements go up fast and to access some of the quests later in the game, you need to have as many as several tens of power points. This is why it is so important to gather them.
Note! If there are several quests available on the war map which require you to spend power points, and you do not have enough to unlock all of them, choose carefuylly. The power points that you spend are lost forever so it is best to provide yourself with access to the parts of the world where you can do most.
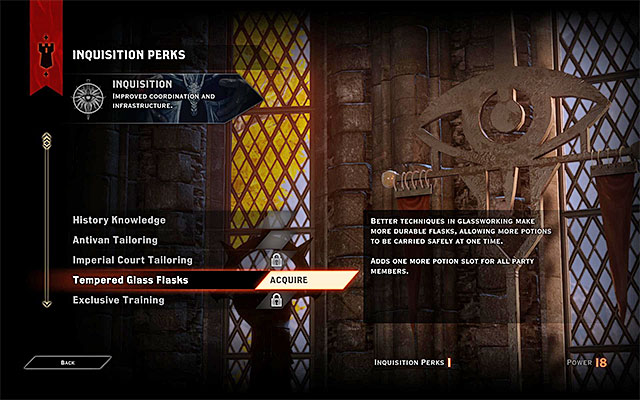 Thanks to expanding your influence, you can unlock new Inquisition perks
You use Influence to obtain new perks. Perks provide you with various rewards and they allow you, among other things, to unlock special dialogue options, obtain rare resources or get better prices from merchants. You can learn more about these from the Inquisition Profits (perks) chapter. Also in this case, it would be advisable to consider your each purchase, especially that it is time-consuming to obtain new points - just like in the case of experience, you are required to fill up the entire bar to progress to the next level of influence.
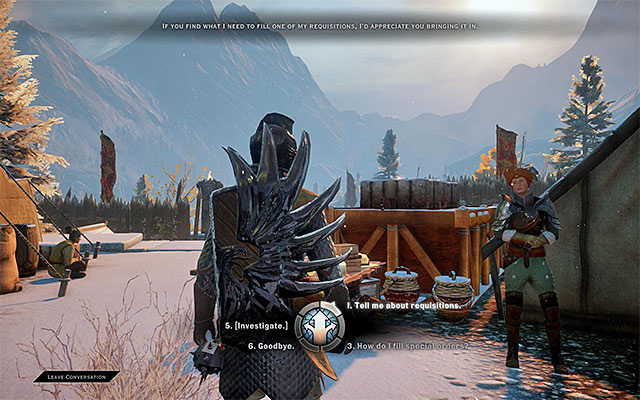 An example quartermaster in Haven
Inquisition's Requisition is one of the optional actions connected with this faction. Personally, I recommend against ignoring them because they are one of the more enjoyable ways of gaining Power points and Influence points. The entire mechanism hinges on supplying the Inquisition with the required materials and resources, thanks to which you contribute to, e.g. equipping the Inquisition's soldiers with better gear.
Each time, you need to start by locating the quartermaster. In the case of the current Inquisition HQ, he is staying in a predetermined spot. As for the rest of the locations, you can find a quartermaster in each encampment, a smaller stronghold and a keep.
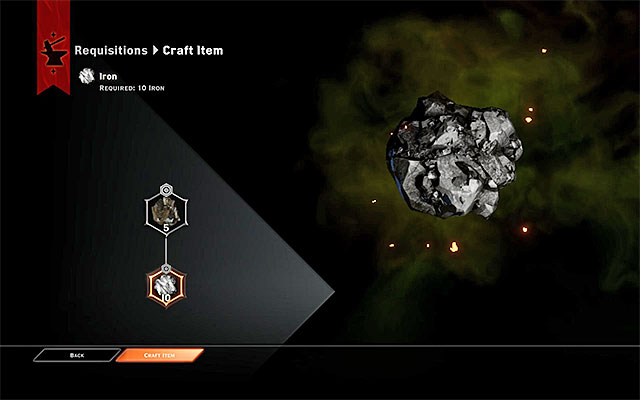 After you learn the requirements, you can set out to find the resources.
Once you meet with the quartermaster, you can interact with the Table of Requisitions (Inspect Requisitions) and learn which materials, resources and other ingredients are required for you to complete the current commission. You can then set out to find these materials. Once you have found everything that you need, you can return to the Table and complete the entire process.
Note! In various main locations of the world, you complete a variety tasks. Once you unlock a given area for the first time, you can meet with one of the quartermasters there, thanks to which you gain access to a new task. Completing a task in a given location does not do the job, because you can unlock more tasks and start looking for more ingredients. Since the tasks connected with Inquisition's Requisitions display in the log and are perceived as quests, they have been described in the walkthrough for the game.
In Dragon Age: Inquisition, the protagonist has three advisors and he can use their help from the very beginning of the game - from the moment that he reaches the Haven. Advisors can't be included in the party, but they take an active role in many of the quests that you complete (especially the ones from the storyline). Their main purpose is to be dispatched on missions, once you meet with them in the war room. This mechanism has been presented, on the following page.
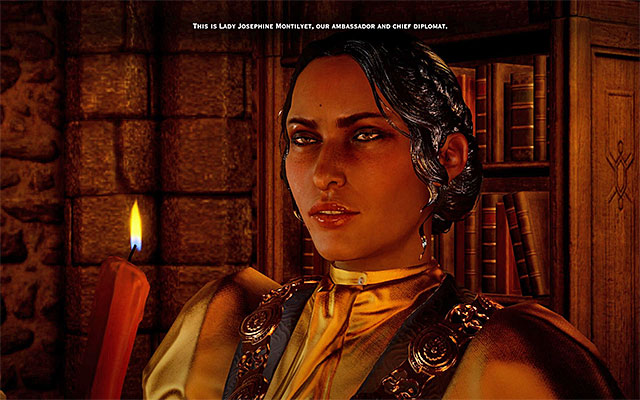 Josephine
Lady Josephine Montilyet plays two roles in the Inquisition- she is an ambassador and the main diplomat. In the missions that you task, she specializes in reaching goals in the diplomatic way (the Connections tab- Connections).
 Cullen
Cullen is a former Templar who should be well-known to the fans of the series. As of now, he plays the role of the Commodore, he commands the Inquisition's forces and struggles to reach his goals in the forcible way (the Forces tab- Forces).
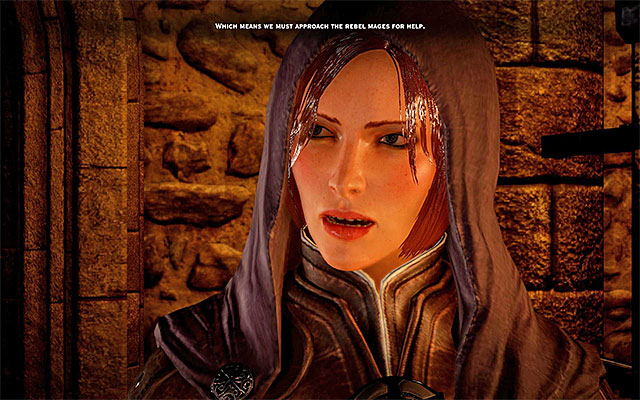 Leliana
Sister Leliana is also a character that is well-known to everyone, especially from the first installment of the Dragon Age saga. Her current specialization is obtaining inconvenient secrets about others and using that knowledge against them (Secrets tab - Secrets).
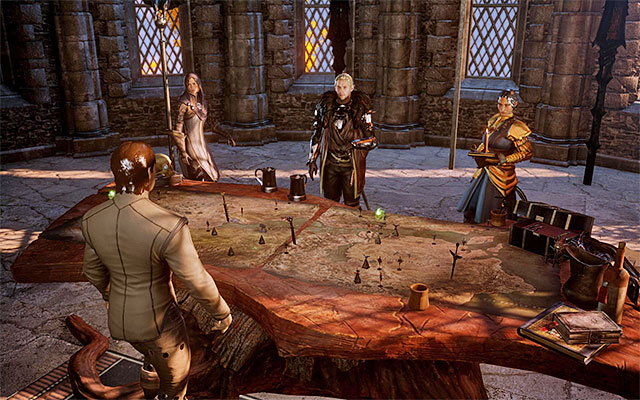 The war room at Skyhold
The war room is one of the most important locations in each of the Inquisition's HQs. It is here that all of the "global" moves are planned. What's more, visiting the war room is often required for the storyline to move forward, which makes ignoring this element of the game simply impossible.
You can visit the war room at any given moment when you're back at the Inquisition's HQ. Then, the council is automatically summoned and it is always participated, apart from the main protagonist, by Cassandra and the advisors described on the previous page.
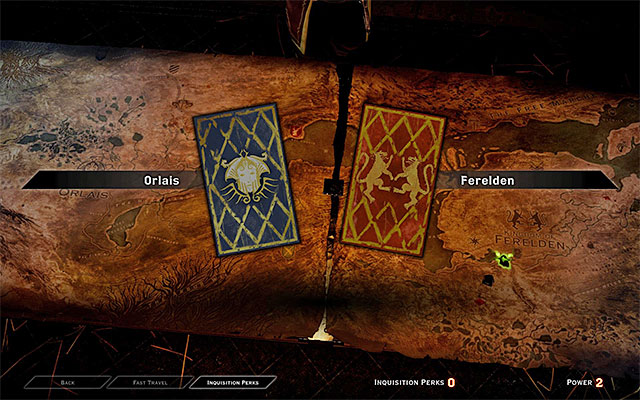 The main council window
Once the main council window is loaded, you can do either of the following:
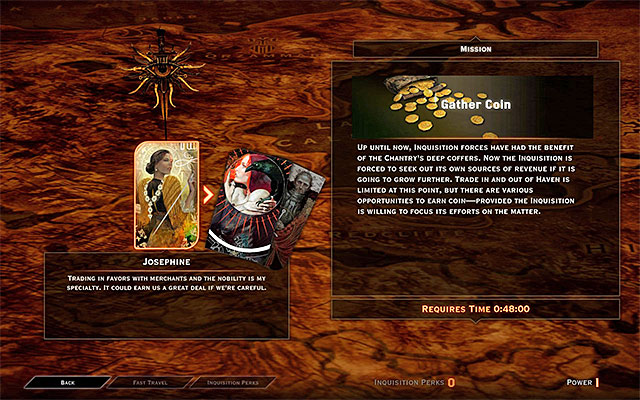 An example mission
The available missions are symbolized by the pawns on the world map. Once you select a mission, you can learn its main premises, but the most important step is to match the advisor to the mission. The majority of the missions offer you freedom as to whom to choose, although there are certain situations in which they can be completed only by a specific advisor. If the mission is available for several advisors, read the description under the cards of each advisor thoroughly, thanks to which you will learn about the way in which a given advisor would solve the problem.
Regardless of the circumstances in which you start a mission, you need to know three things:
1) Missions at the war room are completed automatically so you do not need to control them, nor supervise them.
2) Each mission from the war table has a certain duration (the time may vary, depending on the advisor that you have chosen). The easiest ones are completed within several minutes, but the more complex ones may take several hours to be completed.
3) Each advisor may be involved in only one mission at a time. Therefore, it is important that you return to the war room as often as possible and that you make sure that the advisors are involved in a mission at all times. A big facilitation is the fact that the game informs you about the completed missions while you are exploring the game world.
Note! If a mission is really long, (e.g. 24 hours) and you do not want to wait, you can change the system date after its starts. Thanks to this, it will be completed immediately. Of course, this trick also works for the missions for which you do not wait that long to be completed.
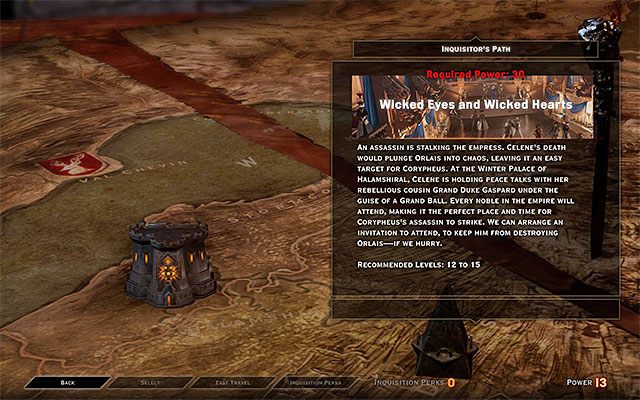
As much as your advisors can take on the simplest missions immediately, there is an additional restrictions on the more complex ones (this is especially true for the ones connected with the storyline and with discovering new locations). They may not be available up until you have gathered enough Power points. An example of such a mission has been presented in the above screenshot - in order to unlock that mission, you need to collect as many as 30 Power points.
Note! Remember that the points that you spend are gone forever. Therefore, you need to consider whether you want to complete the missions with lower requirements first or focus on amassing a higher amount of points for the most important mission at the war table.
 An example report screen
Each mission that you assign from the level of the war table, ends in a mission report. It is not displayed automatically. In order to learn about the summary, you need to return to the Inquisition's HQ, use the war table, find the pawn for that particular mission and select it. The rewards for completing the missions vary - you can unlock new areas, obtain crafting materials, gold, resources, Influence points, Power points, elements of the equipment or rare artifacts.
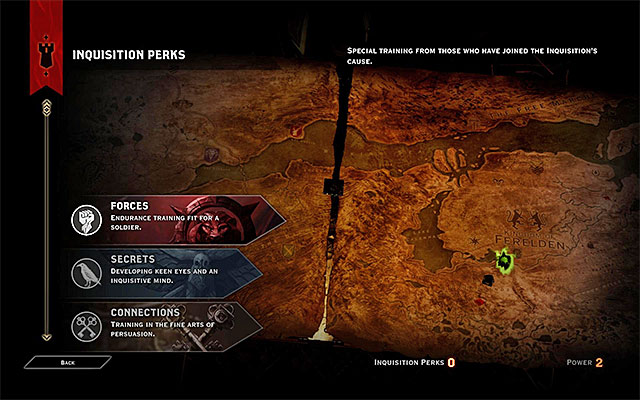 The Perk selection window
Inquisition's Perks are additional rewards that you can access by increasing your Influence. Each time you amass a required number of points, you progress to a higher level of this factor and you receive a Perk point. You can then spend that point on unlocking the perk of your choice; you can do that in the war room which has been described on the previous page. Perks provide you with various bonuses and allow you, for example, to unlock new dialogue options or to ensure that you get better prices when trading with merchants. They have been listed later in the text.
Note! It is quite slow to obtain Perk points so it is best to think carefully how you want to spend them.
Note! Some more advanced Perks become available only after you unlock the earlier ones in a given group.
Below, you can find a table with the four main categories of Perks. The tables provide you with the effect of a profit and with a commentary on each one. These of the profits that are worth obtaining in the first place, have been written in bold.
Note! The table lists only these Perks that are available from the very beginning of the game and require you to spend points on them. During the game, you can also automatically obtain more profits connected with your progress into the game.
PERK NAME
EFFECT AND COMMENTARY
Underworld Knowledge
Unlocks new dialogue options connected with the criminal underworld and a bonus to experience while obtaining new codex entries. This is a very useful perk, because new dialogue options allow you to complete quests (also main quests) in alternative ways.
Massache's Method
Provides you with a 5% bonus to experience for killing monsters. If you want to get the most out of this profit, try to obtain the perk early in the game.
Rider's Posture
Decreases the risk of being thrown off the saddle. In my opinion, it is not too useful a perk, because you fight all your fights off the saddle.
Antivan-Stitched Saddle
Considerably decreases the risk of being thrown off the saddle. Commentary as above.
Advanced Focus
Increases focus span from 100 to 200 points. This perk may prove useful while fighting.
Master Focus
Increases focus span from 200 to 300 points. Commentary as above.
True Gift
Increases the defense in all of the party members by 10%. This perk is very useful, especially at the highest difficulty levels, when your party members are low on defense (e.g. rogues or mages).
More Healing Potions
Allows you to carry four more healing potions. This perk may prove useful at the higher difficulty levels, because your supply of healing potions depletes faster during a single quest.
Mage Schematics
Obtaining of new schematics for the items crafted for mages. It is best to take interest in this profit towards the end of the game and only if you care for equipping the mages in your party with better equipment.
Rogue Schematics
Obtaining of new schematics for the items crafted for rogues. It is best to take interest in this profit towards the end of the game and only if you care for equipping the rogues in your party with better equipment.
Warrior Schematics
Obtaining of new schematics for the items crafted for warriors. It is best to take interest in this profit towards the end of the game and only if you care for equipping the warriors in your party with better equipment.
PERK NAME
EFFECT AND COMMENTARY
Arcane Knowledge
Unlocks new dialogue options connected with the Fade and the arcane knowledge. Additionally, you get a bonus to experience while obtaining new codex entries. This is a very useful perk, because new dialogue options allow you to complete quests (also main quests) in alternative ways.
Optimal Cutting
Increases your chance of obtaining more herbs by 10%. It is not too useful a perk when compared with the rest of the ones available in the game. However, it is easier to obtain rare herbs with this perk.
Eagle-Eyed
Expands the area that you "scan" after you press the appropriate button. It is a very useful function which, once upgraded, makes searching for the interactive objects easier.
Enhanced Studies
A 50% bonus to experience points that you receive for researching the monsters that you encounter. You can take interest in this perk if you like frequent returns with the monster remains to the Inquisition's HQ and handing them over to the NPC that analyzes them.
Deft Hands, Fine Tools
Allows all the rogues in the party to open master locks. It is a useful perk if you want to explore the environment thoroughly and gain access to the loot chests with the strongest locks.
Forward Scouts
Reveals additional viewpoints and important locations on the map of the location. You do not even have to take interest in this perk, because it is best to explore the entire map on your own.
Trainee Herbalists
Provides you with a collection of common herbs. You can consider unlocking this perk if you want to focus on crafting for good and you do not want to waste your time over searching for herbs on your own.
Veteran Herbalists
Provides you with the rarer herbs. You can consider unlocking this perk if you want to focus on crafting for good and you do not want to waste your time over searching for herbs on your own.
Master Herbalists
Provides you with a collection of rare herbs. You can consider unlocking this perk if you want to focus on crafting for good and you do not want to waste your time over searching for herbs on your own. This choice is especially recommended, since such herbs are usually hard to find.
PERK NAME
EFFECT AND COMMENTARY
Nobility Knowledge
Unlocks new dialogue options connected with aristocracy and politics. Additionally, you get a bonus to experience while obtaining new codex entries. This is a very useful perk, because new dialogue options allow you to complete quests (also main quests) in alternative ways.
Sterling Reputation
You receive 10% more gold from merchants for the goods that you sell. I recommend that you unlock this perk quite early in the game if possible so you can earn money faster.
A Favor for a Favor
Decreases prices on the goods that merchants sell by 10%. It is a very useful perk, especially later in the game, when merchants start to offer more valuable (and more expensive) goods.
Elite Clientele
You get prices better by 15% while selling and buying from merchants. This perk combines the best of the two above ones.
The Rare Stocks
Allows you to buy rare crafting materials. You can consider unlocking this perk if you are planning to focus on crafting for good and you do not want to waste your time over finding the ingredients on your own.
Exacting Buyers
Allows you to buy high quality crafting materials. You can consider unlocking this perk if you are planning to focus on crafting for good and you do not want to waste your time over finding the ingredients on your own.
Only the Finest
Allows you to buy top quality crafting materials. You can consider unlocking this perk, if you are planning to start crafting for good and you do not want to waste your time over finding the ingredients on your own.
The Short List
Provides you with an access to the rare stock offered by merchants. If you want to obtain this perk, it is best to take interest in it later into the game, because it is then that that owning rare items gains in importance and you will have enough gold to afford buying some of them.
Friends in High Places
Once you unlock this perk, merchants dispatch messengers with information about their discounts. Unarguably, this is not the perk of the highest urgency.
PERK NAME
EFFECT AND COMMENTARY
History Knowledge
Unlocks new dialogue options connected with the history of Thedas and a bonus to experience while obtaining new codex entries. This is a very useful perk, because new dialogue options allow you to complete quests (also main quests) in alternative ways.
Antivan Tailoring
Increases the capacity of your inventory by 15 slots. It is a very useful perk, because the default inventory capacity is only 60 slots and you can get fill it completely in no time at all.
Imperial Court Tailoring
Increases the inventory capacity further by 15 slots. Commentary as above.
Tempered Glass Flasks
Adds one additional slot for potions. You can take interest in this perk if you want your party members to have various potions in their quick bars.
Exclusive Training
Your character receives one additional ability point.
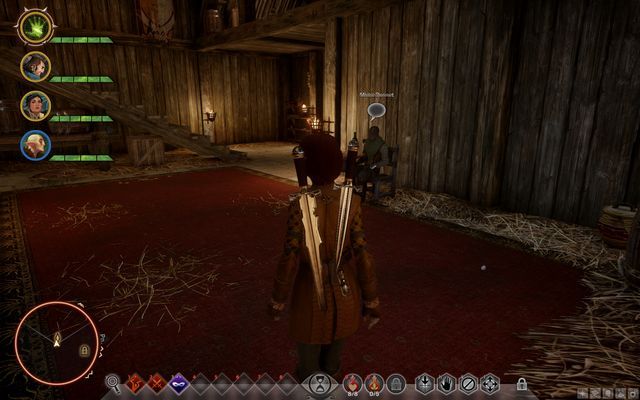 An example potential agent - Master Dennet
During the game, you can not only recruit new party members, but also recruit agents. These are NPCs that thanks to a conversation, or a completed quest, decide to join the Inquisition and start working for it. The most notable effects of this are shorter times necessary to complete an operation in the war room, in the Inquisition's HQ. It becomes more pronounced later into the game, because an operation may then take several tens of minutes less or, in extreme cases several hours. Apart from that, recruiting an agent may involve moving the NPC into the Inquisition's HQ (new dialogue options) or gaining access to completely new operations.
The below table presents all of the agents that you can convince to work for you. Some of them are connected with side quests and to learn more, see the walkthrough for the game.
NPC
STAYING PLACE
CIRCUMSTANCES
Jana
Crestwood
While competing the "Still waters" side quest, you need to reach the place, where Jana is being attacked by the undead. After you get rid of them, talk to Jana and select the special dialogue option that appears on the list, if Solas is traveling with the party.
Fairbanks
Emerald Graves
At the Emerald Graves, you need to complete all activities connected with the " Fairbanks' Trust" quest. Meet Fairbanks at the end and offer him to work for you.
Michel
Emprise du Lion
You need to complete "They Call Me Ishmael" side quest and decide to fight the battle, during the quest. After the battle ends, you receive the option to recruit him.
Loranil
Exalted Plains
You need to gain the trust of Loranil, who is staying at the dalish elf encampment. You do that by completing side quests that you receive from the elves. Sooner or later, you get the opportunity to recruit Loranil.
Avvar
Fallow Mire The Fallow Mire
You need to complete the "Lost Souls" side quest. After you win the battle and free the captives, try to exit the fort and you encounter the Avvar. Allow him to become the agent of the Inquisition.
Chief Movran
Skyhold
You can recruit the chef after you get the opportunity to try him, during the "Participate the trial" side quest. You need to decide to arm the chief and expel him.
Magister Alexius
Skyhold
You can recruit this NPC only if you have picked the "In Hushed Whispers" main quest, connected with the mages. Later into the game, you get an option to try Alexius, during the "Participate the trial" quest. You need to allow Alexius to work for the mages, under scrutiny. This is available only if you have the Arcane Knowledge perk.
Clemence
The Hinterlands
You need to find her in the tavern in Redcliffe, in the Northern Hinterlands. Talk to Clemence and offer him a job.
Corporal Vale
The Hinterlands
To recruit Vale, you need to complete six side missions in Hinterlands - "Hunger Pangs", "Apostates in Witchwood", "Templars to the West", "East Road Bandits", "Healing Hand" and "In the Elements". You can then meet Vale at the crossroads in the center of the map. Pick the dialogue option to recruit him.
Ellandra
The Hinterlands
You need to complete the "My Lover's Phylactery" side quest, i.e. supply Ellandra with the phylactery that you find in Hinterlands. During the final meeting with Ellandra, ask Vivienne to take part in the conversation (she must be on the party) or select the special dialogue option, which I available after you have chosen the Arcane Knowledge perk.
Lord Berand
The Hinterlands
Go to the southern citadel in Hinterlands. Complete a part of the "Praise the Herald of Andraste" side quest, thanks to which you can infiltrate the citadel. Find Lord Berand here and recruit him.
Master Dennet
The Hinterlands
You need to take quite a few steps to recruit Dennet. Start by completing four of his side quests, connected with the Hinterland farm - "Horses for the Inquisition", "Master of Horses", "Trouble with wolves" and "farmland Security". Finally, meet with Dennet. You can ask him to join the Inquisition in two ways - ask Cassandra to help you (she needs to be on the party) or pick the special dialogue option, unlocked by the History Knowledge perk.
Orator Anais
The Hinterlands
You need to complete the "Praise Herald of Andraste" side quest in the Southern citadel, in Hinterlands. During the final conversation with Anais, convince her to take the position of the Inquisition's spy (an appropriate dialogue option).
Ritts
The Hinterlands
You need to complete the "Strange Bedfellows" side quest and during the final conversation with Ritts, pock the special dialogue option that appears only if you have Varric on the party.
Sister Tanner
The Hinterlands
You need to complete the "Business Arrangements" side quest. During the final conversation with Sister Tanner, pick the dialogue option that appears only if you have Cassandra on the team.
Bandit
The Storm Coast
You need to complete the "House Clearing" side quest. It is VERY important that you do not skip the preparation and wearing the Mercy's Crest. This will allow you to fight a honorary duel against the bandit leader, towards the end of the quest. After the battle, wait for the conversation with one of the regular bandits to start (Hessarian Blades).
Alchemist Frederic
The Western Approach
You need to do a lot of things to recruit Frederic. Start by completing the five side quests in the Western Approach- "Frederic's Livelihood", "Draconology", "How to Lure a Dragon", "Hunting Patterns" and "Sharper White Fangs". Additionally, you need to defeat the High Dragon in this location. Finally, meet with Frederic again and invite him to the Skyhold.
Servis
The Western Approach
You need to do a lot of things to recruit Servis. Start with completing the "The Trouble With Darkspawns" side quest, in the Western Approach. Then, towards the end of the mission, pick the option to capture Servis alive. You then need to wait until there appears an option to try Servis. Make him a spy or a smuggler for the Inquisition.
Florianne
The Winter Palace
During the "Wicked Eyes Wicked Hearts" main quest, you need to win against Florianne. You get to recruit the agent, regardless of whether you captured or killed her. In both cases, you need to wait for Florianne's trail to become available in the Skyhold - the "Participate the Trial" quest.
Mercenary
The Winter Palace
During the "Wicked Eyes Wicked Hearts" main quest, you need to talk to one of the mercenaries in the main yard and recruit him. This becomes possible if you pick the special dialogue option that is made available by the Underworld Knowledge Inquisition perk.
Templar Barris
Therinfal Redoubt
You can recruit him only if you chose "Champions of the Just" main quest, connected with Templars. During the quest, make sure that Barris survives (do not leave him for too long in the huge chamber). You gain access to the option to recruit Barris after you win the battle against the Pride demon.
Belle
Val Royeaux
During your first visit to Val Royeaux, you need to find her (the "Threat Remains" main quest) and talk to her.
In Dragon Age: Inquisition there are 50 achievements/trophies to unlocks on the console, and on the Origin platform for PC. For the Xbox consoles, it is, in total 1000 points. The majority of items are a part of the game's storyline and several of them, which are more difficult to obtain, have been provided with a commentary.
Complete the above storyline quest.
Complete the above storyline quest.
Complete the above storyline quest.
Complete the above storyline quest.
Complete the above storyline quest.
Complete the above storyline quest.
Complete the above storyline quest.
Complete the above storyline quest.
Complete the above storyline quest.
Complete the above storyline quest.
Complete the above storyline quest.
Complete the above storyline quest.
Unlock five mounts (horses, stags).
Well-Prepared
Craft an armor or a weapon.
Use an upgrade on any equipment item (armor or weapon).
Complete a side Operation at the tactical table.
Find a place to set up a camp and set up one.
Find Ocularum and collect a shard, that you find, thanks to it.
Find a rune behind a magical cover.
Commentary: in spots, where you can see a blue-and-green flame, there is a secret hidden. Most usually, these are runes. You simply need to light the torch and find a symbol on the rock (three, nearly, vertical lines) and interact with it (while still holding the torch in your hand) to unlock the hidden rune.
Upgrade any ability, after you progress to the next level.
Select your class of specialization.
Commentary: to gain access to specialist teachers, once you are informed of the availability of the quest, you need to complete an action on the tactical map and then, at Skyhold there appear teachers of specializations. You then need to complete quests from any of them, which consist in supplying them with the items that they demand.
Receive a mount.
Commentary: it is best to go to Master Dennet in the Hinterlands, on the farms (the western part of the map), to receive a horse from him.
Perform a cross-class combo.
Collect 50 herbs from the garden at the Skyhold (it is best to upgrade the garden beforehand, to be able to plant more).
Kill a high dragon (outside of the storyline).
Buy any decorative item for the Skyhold.
During the ball at the court of the empress, fill the court approval bar (not required to complete the quest, although it displays as one of the objectives).
Deal 1000, or more, damage to an opponent.
Craft an item, sing tier 4 materials on all slots (with the exception of the slot for the master material).
Perform an upgrade at the Alchemist's table (a potion, a tonic or a grenade) 30 times.
Dragons' Bane
Kill 10 dragons.
Complete the game on the Hard level (without modifying the difficulty level, during the game).
Complete the game on the Nightmare level (without modifying the difficulty level, during the game).
Unlock 15 astraries.
Spend 10 ability points on a single specialization (in one abilities tree).
Earn 50000 gold during the entire game.
Enter the Solasan temple.
Find the spots to set up camps and set up at least one, in ten different locations.
Liberator
Liberate 3 keeps.
Complete 50 missions and/or operations.
Upgrade complete one select throne.
Obtain 10 agents.
Reach level 20.
Peerless
Level up in the Inquisition (the power level) to the rank of 10.
People Person
Make friends with, at least, three of your companions.
Collect 250 codex entries (letters, conversations, new places, etc.)
defeat 1000 demons.
Defeat 2500 various opponents.
Quartermaster
Complete 20 requisition requests during the game.
Commentary: you receive requests from quartermasters in each location. They consist in gathering an appropriate amount of the requested resources. After you complete a request, new ones are generated in the location.
Seal 75 rifts in the game world.
Dragon Age: Inquisition n the PC version, is a game of varying system requirements. TO start the game, even a several-year-old, middle-end computer will do, as l0ng as it has 4 GB RAM. Turning the highest possible details requires a high-performance computer, with 8 GB RAM and a graphics card comparable to, at least, GeForce GTX 660 with 3 GB VRAM. High system requirements are justifiable with the use of many advanced graphics technologies. Apart from that, during the game, you often
travel through sprawling locations and additionally, you have a wide field of vision. While preparing the guide for Dragon Age: Inquisition no major issues were noted (apart from slight problems with interface management), although the game seemed to slow down, discernibly, here and there. This occurred, mainly, during the greatest of the battles and in some locations with high details and/or numerous NPCs.
Single player: Yes
Offline Co-op (split screen/hot seat): No
Co-op over the internet: Yes
Multiplayer: Yes
This guide has been drawn up for the PC version, on the computer of the below specification:
On the above specification, it was possible to set the resolution of 1920x1200. The most graphical settings that demanded the most power, had to be lowered to the medium level, to ensure seamless animation, regardless of the situation on the screen.
Yes, playing Dragon Age: Inquisition on laptop computers is possible.

This walkthrough for Dragon Age: Inquisition offers a very detailed walkthrough for all the quests available in the game. In the first part of this walkthrough, detailed descriptions of the main quests, i.e. missions completed within the storyline, have been included. The second, vast, chapter, includes walkthroughs for the quests connected with your party, both ones that aim at gaining new allies, as well as quests tasked to you, directly, be the members of your party. Another vast chapter are side quests that abound in the game. They have been divided, in accordance with the locations, in which they take place. A very important element of this walkthrough is that it includes the decisions that you make and the consequences of those decisions (the ones, whose effects are immediate, as well as the ones with the effect on further events) Apart from the descriptions available in the walkthrough, there also are high resolution maps of all the locations that you visit throughout the game. What has been marked o the maps is, above all, the starting points for the individual quests, although they also inform you, in certain situations, of the other areas that you visit while completing those quests. Dragon Age: Inquisition is another installment of the RPG games, where you visit the colorful world of Thedas again. You need to take command of the Inquisition and lead it to victory, over the forces of evil, which appear as a result of tearing a rip between the world of the living and the Fade.
NOTE - This guide is one of the three parts prepared for Dragon Age: Inquisition. If you are looking for basic information about all the key elements of the game (character development, combat, exploration, etc.) see the guide for the game. If, on the other hand, you are interested in information about the game world and in maps of the available locations, see the World Atlas.
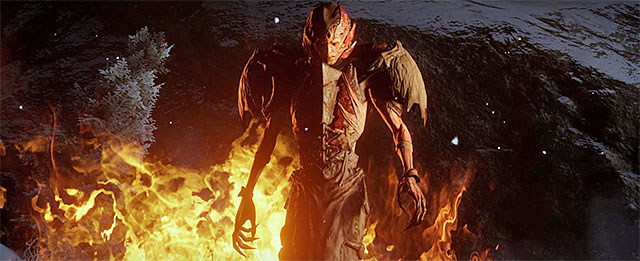
This walkthrough for Dragon Age: Inquisition includes:
& Patrick "YxU" Homa ()
This guide has been prepared at the normal difficulty level and with the default history of the world selected. However, certain parts of the text have been provided with commentary on the handicaps present in the battles, at the higher difficulty levels, and on the alterations in some of the quests, resulting from the choices that you made in the previous installments of the series.
This walkthrough has been color-coded in the following manner:
Walkthroughs for the individual quests also include numerous references to maps. All of the maps have been provided at the beginning of this walkthrough.
For example, a reference (M2,3) in the walkthrough, means that you need to see map 2 (the Haven) and find point 3 on that map.
Above, you can find the map for the Frostback Mountains, i.e. the location that you visit at the beginning of the game. This takes place during the Prologue, right after the character creation process. What is worth noting is that later into the game, you can easily return here. To do that, you need to take the pass between the Frostback Mountains and the Haven.
Above, you can find the map of the Haven, a village that you visit for the first time, after you have completed the Prologue at the Frostback Mountains (you can use the pass between both locations). The Haven is the Inquisition's first, rightful HQ. This means the you can meet your companions and the other important NPCs here. From the moment, at which you progress to one of the later quests, you can feel completely safe here, because you encounter no monsters around.
Above, you can find the map of the Hinterlands, i.e. the first big location that you explore during the game. While staying at the Hinterlands, you can complete main and side quests and also, among others, find numerous collectibles. Do not worry if you do not manage to explore this location thoroughly, the first time around (too strong monsters), because you will be able to return here later on.
Above you can find the map for Val Royeaux, i.e. the city that you visit early into the game. The main point of visiting this place is to meet up with the clerics of the local order, but you can also visit the local merchants and take up several side quests, while here Especially, you should take interest in quests that will allow you to include two new party members.
Above, you can find the map for the Storm Coast, which you can ensure yourself with access to, by spending four Power points on the map at the war room. It is completely optional to visit this location, but you can take up many side quests and find many valuable items. Just like in the case of, e.g. Hinterlands, do not worry if you are too weak to kill some of the stronger monsters here, at the beginning, because you will also be able to do that later.
Above, you can find the map of the area named Valammar. It is a middle-sized underground location that you can travel to after you find the door near the waterfall, in the Hinterlands. It is best to do so, while completing the Deep Trouble side quest, because it involves taking a journey there. In Valammar, you encounter many opponents, but also find many treasures.
Above, you can find the map of two buildings at the Redcliffe village - the Chantry and the Tavern. The Redcliffe village is located in the Northern part of the Hinterlands and you gain access to this location while making progress through the storyline. You can visit the Chantry and the Tavern either on your own, or while completing the In Hushed Whispers main quest, connected with gaining favor of the Rebel Mages.
Above, you can find the map for the Forbidden Oasis, which you can ensure yourself with access to, by spending four Power points on the map at the war room. Visiting this location is completely optional but, I recommend against ignoring it. You can find many collectibles here and, apart from that, there is a temple to explore here, and several tombs. Just like in the case of, e.g. Hinterlands, do not worry if you are too weak to kill some of the stronger monsters here, at the beginning, because you will also be able to do that later.
Above, you can find the map of The Fallow Mire, which you can gain access to after you spend eight Power points from the map level, at the war room. It is completely optional to visit this location,, but you should not ignore it. There are many collectibles that you can find here and also, you can seize the keep that is being occupied by the hostile barbarians. Note - many of the monsters here (e.g. the undead) may prove too strong for a party not strong enough.
Above, you can find the map of the Redcliffe Castle. You visit this location after you accept the In Hushed Whispers main quest, i.e. the cone connected with the attemts to win the favor of the Rebel Mages (the apostates). The castle has several levels and, due to the fact that nearly all of them hide lots of loot, thorough exploration is advised.
Above, you can find the map of the Therinfal Redoubt. You visit this location after you start the Champions of the Just main quest, i.e. the one connected with attempts to win the favor of the Templars. The Redoubt consists of three main levels and, apart from that, there are two additional Nightmare areas. While exploring the Redoubt, keep an eye out for plentiful loot.
Above, you can find the map of Skyhold, i.e. the location that becomes the Inquisition's main HQ later into the game. In here, you can feel completely safe. What you can find here is, first of all, the war room and the throne room. Apart from that, you can have conversations with NPCs, meet the members of your party and craft.
Above, you can find the map of Crestwood, which you can access by spending eight Power points, from the map level, at the War Room. Crestwood is connected with one of the game's main quests, but it is a good idea to stay here for a bit longer and complete side quests also. An important area in this location is also Caer Bronach Keep, which you can recapture and turn into the Inquisition's official field base.
Above, you can find the map of Flooded Caves. It is a quite big, underground location, which is connected with Crestwood. You visit the caves, while completing a side quest in Crestwood, connected with sealing a big rift on the lake. In the cave, you encounter many monsters, but there also are many treasures here, which are worth finding.
Above, you can see a map for the Emprise du Lion, location to which you can get by using twenty Power Points on the map at the war room. Emprise du Lion is a widespread location, but scrutinizing it is worth it. You may find yourself here whilst doing some quest, or you can simply come here from your own initiative.
Above, you can see a map of The Hissing Wastes. You cam access this location by spending 20 points of power in the war table menu. Explorations of the Wastes is not obligatory, as there are no main quests here. However, it is good to visit this place, as there are, for example, a few tombs with valuable treasures. Explore it only after your team is well developed, because you will encounter a lot of powerful enemies here.
Above, you can find the map of Emerald Graves, which you can access by spending eight Power points, from the map level, at the War Room. Emerald Graves is a sprawling location, whose full exploration will take you lots of time. It is optional to visit it, but I recommend against ignoring it. You should also remember to explore minor locations in the Emerald Graves.
Here is the map of the Exalted Plains area. You can get an access to this location by spending eight Power Points in the map menu in the war room during the Scout the Exalted Plains operation. Exploring the plains is not obligatory since there are no main quests related to this area. However it is worth to visit this place because of few interesting treasures (receiving some of them requires solving some puzzles with a various complexity).
Above, you can see a map for the Western Approach, location to which you can get by using eight Power Points on the map at the war room. The Western Approach is connected to one of the main quests, but spending here some additional time should be worth it. There are some side quests here, as well as the ruins which function as a different, also interesting, location.
Above, you can find the map of Maurel Villa. It is a medium-sized building that you can explore, during your stay at the Emerald Graves. This takes place during the "Corrupt General" side quest. At the villa, there are many valuable treasures and these are, among others, mosaic fragment and a standard so, remember to explore the area thoroughly.
This is the map of Chateau d'Onterre. You can visit this small location when staying in the Emerald Graves (when completing a side quest with the same name as the location). The most valuable item here is the levitating cube. It is guarded by a strong enemy.
Here, you can see a map for the Still Ruins. It is a middle-sized location, to which you can go whilst wandering around the Western Approach. There are many enemies inside these ruins, but there are many treasures there as well. Be careful not to miss anything while exploring.
Above, you can see a map for the ruins called Coracavus. Getting here is available from the north side of the Western Approach. Inside, you party will be encountering many enemies, and fining many precious items. Scrutinize every room, not to miss anything.
Above, you can find the map for the Winter Palace, i.e. the location that you visit during the Wicked Eyes and Wicked Hearts main quest. It should be noted that you can start this quest only after you spend 30 Power Points at the war Room. You visit the Winter Palace only once and it is quite linear in its course. Therefore, try to explore this location and complete minor quests on a regular basis.
Here is the map of The Lost Temple of Dirthamen area. You can get an access to this location during the exploration of The Exalted Plains. In the Temple you will participate in few pretty basic fights although this area also includes few side quests and allows you to find some valuable items which you should look for.
Above you can see the map of the Frostback Basin. You can get access to this location once you acquire the Jaws of Hakkon expansion. You will find many new tasks and opponents here, as well as a variety of new items, particularly legendary ones. To gain access to the site you will have to spend 8 power points. You can go there at any point in the game, provided that you have access to Skyhold.
In this chapter of the guide, you can find walkthroughs for all the quests connected with the main storyline. Those quests are listed in your log, in The Inquisitor's Path tab.
Several important points to make:
Way to unlock: Automatically, after the game starts.
The quest-giver: Cassandra (M1, 1)
 You need to talk to Cassandra and Leliana
After you create a new character, you start off in a cell, where you are up for a meeting in not too nice circumstances, with Cassandra and Leliana. It does not play any vital role, which dialogue options you pick, during the forthcoming conversations but, if you state your willingness to help, you obtain Cassandra's favor points. After the conversation, you will end up in the Eastern part of the Frostback Mountains (M1,1).
 Deal with the weak monsters
Follow the linear path, accompanied by Cassandra (she permanently joins your party). Right after the failed attempt to cross the bridge (M1,1a) you get to fight your first fight against the Lesser Shades. Depending on the character class that you initially picked, you can either join Cassandra and fight in melee (she is a fighter) or attack the enemies at a distance. After the fight, Cassandra demands that you return the weapon to her, which she has lent you and, if you consent to that, you win favor with her (regardless of the dialogue option that you pick, Cassandra does not reclaim your starting equipment).
 Help Solas and Varric deal with the new group of enemies
You can now head Westwards. Soon, you run into more monsters and apart from the demons that you have already encountered, you will also have to fight Wraiths. These monsters attack at a long range and it is always a good idea to attack them in the first place. A bit ahead (M1,1b), you encounter new allies - mage Solas and dwarf Varric. Help them eliminate the new group of monsters and see the first Rift being closed shut. At this point, Solas and Varric join your party (also permanently).
 The mountain pass
Head Westwards. After you reach the frozen lake, the game will suggest that you test the new fight in the tactical view (to learn more, see the guide), but it is completely optional to use this mode. After you have dealt with the monsters, you can either explore the area or take the Northern mountain pass towards a new encampment (M1,1c).
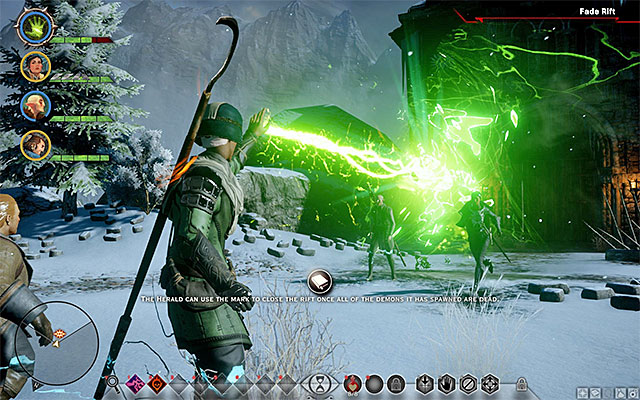 You need to seal the Rift
At the encampment, you will have to seal a Rift for the first time, on your own. Start by attacking the nearby monsters and wait for the opportunities to disrupt the Rift (the Disrupt option after you come close to the Rift), which results in the nearby creatures being stunned, temporarily. After you have dealt with all of the monsters, approach the Rift and seal it.
Note - most probably, after you win the fight, you will progress to the second experience level. To see the hints, concerning character development, see the game guide.
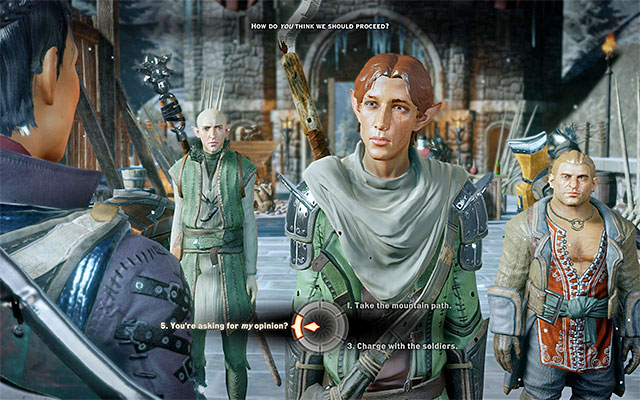
Open the gate at the encampment and walk onto the bridge, where you meet chancellor Roderick and Leliana. During the meeting, you will have to take the decision shown in the above screenshot. It concerns the suggested way to approach the main Rift in the temple. The two available options have been described below and, apart from different routes to take, they are no different from each other.
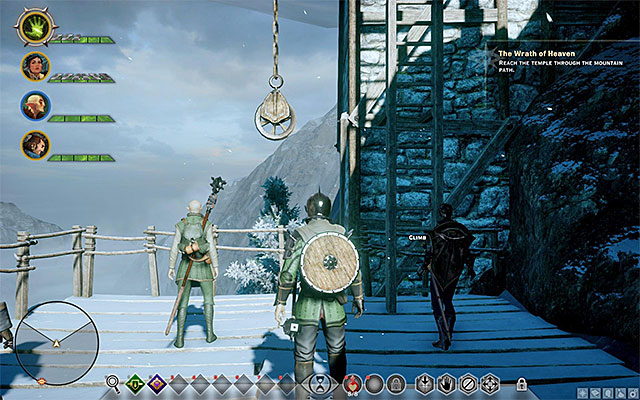 The point at which you start, after you pick the mountain pass
If you have chosen to take the mountain pass, (this is the choice that Varric likes) you start to the far South of the bridge (M1,1d). Take the ladder and follow the linear path. On your way, you will have to fight two fights, where the second is the more important one, because you will have to seal another rift (just to remind you, this only becomes an option after you have dealt with the nearby monsters).
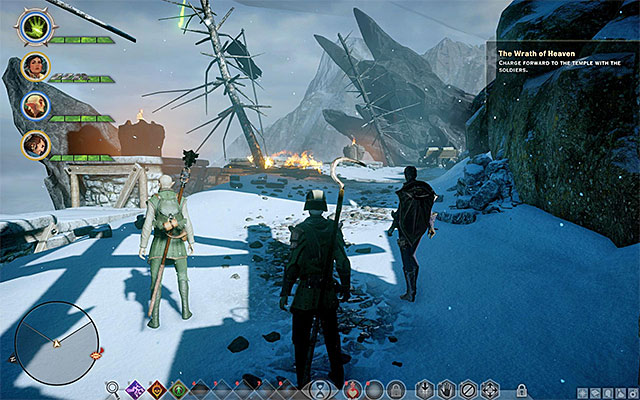 The starting point, after you choose to join the attacking forces
If you have decided to join the main onslaught (this is the choice that Cassandra likes), you start to the South-West of the bridge (M1,1e). Cross the destroyed encampment and reach the spot, where there is a new Rift. As you have probably guessed, also here, you will have to fight a fight, where you first need to defeat all of the monsters and seal the Rift afterwards. At the same time, it is worth noting that after this fight, you meet Cullen for the first time.
 The path to the temple
Both of the above variants take you to the same place, i.e. the temple entrance (M1,1f). I recommend that you save the game here, because it is here that you fight the first demanding battle. Follow the linear path to the spot, where you can jump down into the arena around a big rift. From the short cutscene, you learn that you need to take on the Pride Demon.
The most important piece of information, connected with the fight, with the Pride Demon is that you cannot keep attacking him for the whole time. By default, he is capable of protecting himself against your attacks. His resistance to standard attacks is symbolized by his inactive health bar, emphasized in the above screenshot.
 Disrupt the functioning of the rift
The key to winning with the Pride Demon is to disrupt the huge nearby rift, in the middle of the arena. The method of disrupting rifts has been described in the "Closing of Rifts between the game world and the Fade" chapter. Just to remind you, you need to be facing the rift and press the interaction key/button (if the action is unavailable, try changing your position).
 Attack the weakened demon
Disrupting the rift temporarily stuns the Pride Demon and exposes him your attacks. This is at this moment that you should focus on landing blows to the demon. The plan of the attack should be the same, in this case, as for the rest of the fights - your party members should land direct attacks and distract the demon from archers (rogues) and mages that attack him at a distance. The important piece of information, connected with the fight is that the Pride Demon is invulnerable to attacks with electricity. To learn about the other strong points of the demon (e.g. invulnerability to attempts to put to sleep) you can read if you highlight him in the tactical view. This will allow you to plan on the battle and avoid ineffective attacking.
 Eliminate the weaker monsters on a regular basis
Later into the fight, against the Pride Demon, you need to disrupt the rift and attack the weakened monster. There is one handicap to the battle, because there will appear groups of weaker demons, occasionally. I recommend against ignoring them, because they may weaken rogues and mages of the party and make it more difficult, for your character, to disrupt the rift.
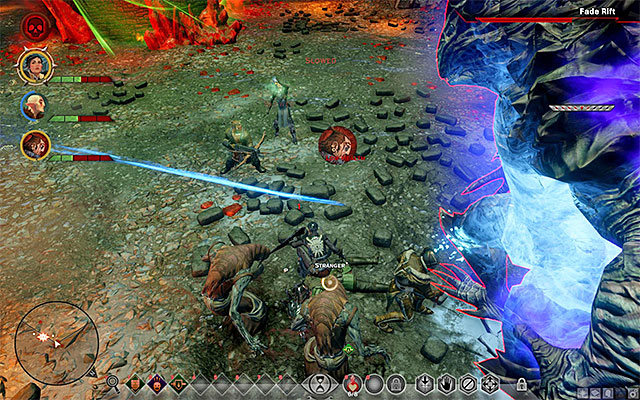 Regenerate health of the fallen allies
If you perform all of the above steps, in accordance with the presented plan, you should win without any major problems. Still, you need to keep an eye on the health bars of the party members, because the demon's attacks deal a lot of damage, when he is in full health. Make use of health potions, on a regular basis. If any of the party members loses the entire health bar, run up to him, as quickly as possible, as another character, try to help him up. After the battle, you will see a series of cutscenes and, after that, you will get to the Haven (M2,1).
Rewards for completing the quest:
Way to unlock: Automatically, after you complete The Wrath of Heaven main quest
The quest-giver: - (M2,1)
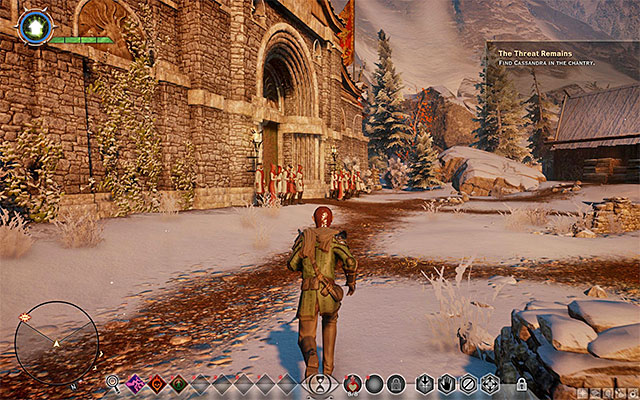 You need to reach the temple and go to the war room
You start this quest in one of the cottages at the Haven (M2,1). After you listen to the conversation, which is not too important, exit the cottage and go towards the chapel (M2,1a). Walk over to the war room and wait for the council to begin, which is participated by Cassandra, Leliana and Chancellor Roderick. After the council, you will see a cutscene, from which you learn about the new activities of the Inquisition, you receive 1 Power point and 40 Influence points (you can learn more about the meaning behind Power and Influence from the game guide - they are used to unlock Inquisition's Perks).
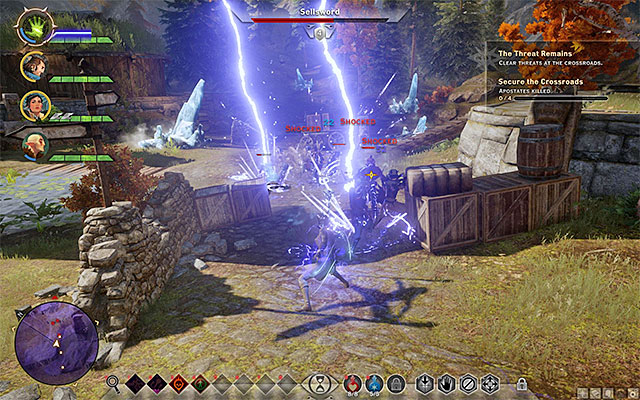 You will be allowed to learn more about your advisors
Again, enter the chapel, thanks to which you will see a cutscene. During the cutscene, you will be officially acquainted with the three advisors - Josephine, Cullen and Leliana. Apart from that, the war table loads up for the first time, where you can dispatch your advisors for operations (and where you unlock Inquisition's Perks). To learn more about the functioning of operations and the war room, see the game guide (the Inquisition Management chapter).
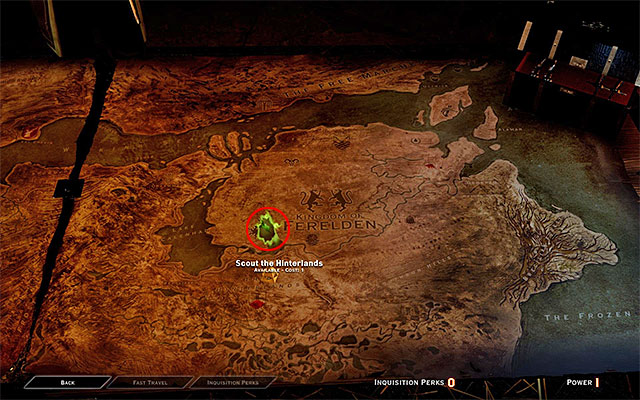
As of now, while at the war room, you only have to perform one action - pick the operation shown in the above screenshot (Scout the Hinterlands) and assign it to be performed (automatically). It needs to be pointed out that only Leliana can complete this operation. Doing the above automatically unlocks a new area of the world - Hinterlands. You can go there immediately, or only after you have sufficiently explored the Haven. If you go for the latter, you need to bring up the world map and select the Hinterlands.
 Talk to Harding
Reaching the Hinterlands automatically starts a short conversation with Scout Harding (M3,1a), who tells you more about the fierce fights between the Templars and the mages. Harding also tells you that Mother Gisele helps the outcasts near the nearby hill and she may require help. Climb down the hill and go towards the crossroads (M3,1b).
Eliminate the strongest of the Templars and mages as quickly as possibleAfter you reach the Crossroads, you will notice a big battle being waged and you will have to join in the fights. During the fight, you will both have to eliminate the Templars and the Rebel Mages. As for the Templars, pay the most attention to eliminating the ones hiding behind the shields, quickly (attack them either from the side or from behind). When it comes to the mages, eliminate the enemies that wield magic (it should be pointed out that they do not do well in melee). The fight is long and there will be reinforcements arriving, on both sides.
 Meet with Mother Giselle and Corporal Vale
After you win, you will see a short cutscene and you will meet Mother Giselle. During the conversations with Mother Giselle, you do not need to pay too much attention to the dialogue options that you pick. After the meeting, remain at the crossroads and find Corporal Vale (M3,1c), who you also need to talk to.

Before you take to completing the rest of this quest, you need to gather, at least, four Power points. The easiest way to do this is by completing side quests, or by sealing the rifts. After you obtain the required amount, return to the Haven and go to the war room at the chapel, to summon a new council. On the war map, find the figurine shown in the above screenshot, which symbolizes an activity connected with Val Royeaux. Confirm that you want to start quest "Address the Chantry in Val Royeaux", and spend the four Power points on it. You can now travel to Val Royeaux.
Note - The game recommends that you do not visit Val Royeaux, of your party members are not on, at least, the fourth experience level. However, you can ignore this suggestion, because there is no fighting in Val Royeaux. Still, if you want to, you can invest into perks that unlock new dialogue options.
 Approach the clerics and see the cutscene
You start the exploration of Val Royeaux in the western part of the location (M4,1). Listen to the conversations with Leliana's spy and head Eastwards, to the place, where the clerics are (M4,2). Here, you will see another cutscene. During the conversation, the Templar commander Lucius arrives. The dialogue options that you pick, during the (short) conversation with Lucius, do not affect your relations with the Templars, nor do they provoke any attack.
 Your party also meets Fiona
Try to leave Val Royeaux, by returning to the starting point (M4,1). You will be accosted by Fiona that represents the rebel mages and who commands them. Listen to the conversations with the enchantress (just like before, you do not need to pay too much attention to the dialogue options that you pick).
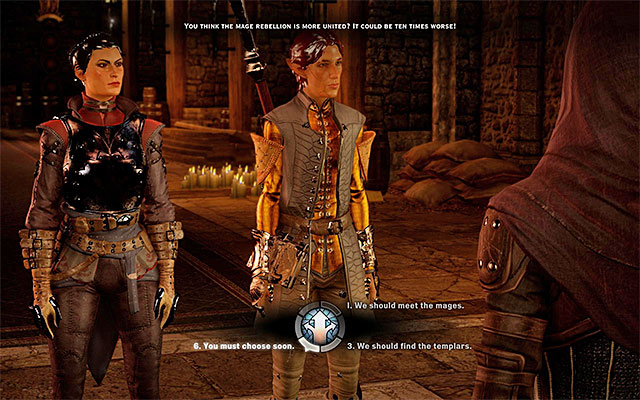 You can listen to the counselors, but you do not need to follow their suggestions
The last thing that you need to do is return to the Inquisition's HQ in the Haven. Enter the chapel, thanks to which you will see a cutscene of the conversation with your counselors. Cullen suggests that you try to win the favor with the Templars, whereas Josephine suggests a meeting with the rebel mages. Fortunately, you do not need to take the decision, of which ally to pick, right now, but you can voice your preliminary opinion.
Note - In your log, there appear, now, two new quests. You can only complete either of them and the other one will be cancelled. If you pick " Champions of the Just " means that you will be seeking favor with the Templars, whereas " In Hushed Whispers " makes you seek favor with the rebel mages.
Rewards for completing the quest:
Way to unlock: Automatically, after the meeting with Lucius during The Threat Remains, main quest.
The quest-giver: - (M4,2)
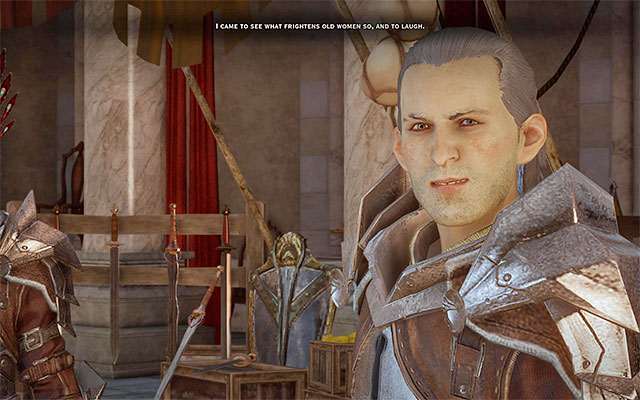 In spite of Lucius's brusque mannerism you should not give up the potential alliance with the Templars
This quest unlocks after you first come into contact with the Templars and Lucius who commands them. This (rather cool) meeting takes place after you arrive in Val Royeaux (M4,2).
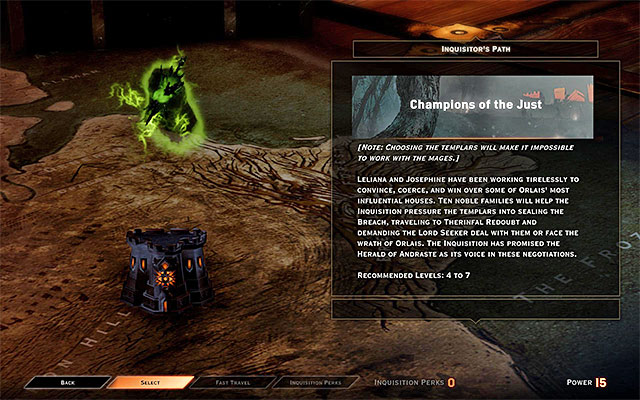
NOTE - taking further steps in this quest means taking up the attempts to obtain the support of the Templars. This means that you will not be able to ally yourself with the rebel mages (apostates) and, as a result, you will not be able to complete the "In Hushed Whispers" quest. Before you take to this quest, make sure that it is the Templars that you, in fact, want to ally yourself with.
To progress to the main part of this quest, you need to gather, at least, 15 Power points. Just like in the case of the previous main quest, I recommend that you complete several side quests, because the majority of them are rewarded with one, to several, Power points. After you have obtained the required amount of points, return to Haven and walk over to the war room. Find the "Champions of the Just" operation, shown in the above screenshot, and confirm that you want to spend 15 Power points on it.
Note - the experience level of the party that the game recommends, is around 4-7. I recommend that you go an extra mile and progress your party members to, at least, the eight experience level, because this is the level of the quest's final boss.
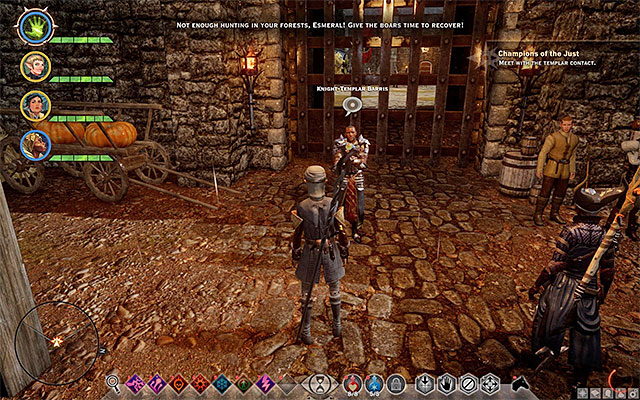 After you meet with Lord Abernache reach the staying place of Barris
After you see several cutscenes, the party gets to the bottom level of the Therinfal Redoubt (M11,1a). Listen to the conversation with Lord Esmeral Abernache, whose course you will not be able to affect, too much (you can pick the unique dialogue option if you have earlier unlocked the appropriate Perk). After the conversation, go West. You need to meet another important NPC here -Knight-Templar Barris (M11,1b). During the conversation, you can pick one of the "regular" dialogue options, or a special one, which becomes available if Cassandra is traveling in your party.
Soon, your party walks over to onto a bigger yard (M11,1c) and Barris offers you to take part in a Templar rite, which is expected to help your character determine his priorities. You can agree to take part or, follow the suggestion that lord Abernache makes, refuse your part and demand an immediate audience with Lucius (the decision-taking moment has been presented in the above screenshot).
 Interact with the knobs to raise the flags that you choose
If you agreed to take part in the rite, you now need to take interest in the three knobs. They are connected with the flags that symbolize Andrasta, the Templars and the regular people. Interacting with the knobs raises the flag, half the way, connected with it. Using a knob twice makes the flag return to the very top. As mentioned by Barris, in the previous conversation, there is nothing like a wrong choice here. Which flag is placed above the remaining two (using the knob twice) does not play any vital role in the struggle, just as much as whether you want to justify your choice or pass on commenting it. Only to a minimal extent, they may change the relations between your party and the party members that took the journey, with him, to the Templar HQ.
 You need to defeat Denam and the rest of the infected Templars
The next step is entering the Western building. After you get to the Lower Barracks, you encounter Knight-Captain Denam (M11,1d) and soon it will turn out that he is displaying hostile intentions. If you have taken part in the rite, lord Abernache will be annoyed and he will die, as a result. If you have passed on the rite, Abernache will remain alive. Regardless of the decision that you have initially taken, concerning the rite, you will now be attacked by Denam and the Red Templars. Right after the battle starts, focus on weakening Denam (attack him from the side or from the back, because he is, by default, hiding behind a shield), and also on eliminating the enemy Red Templar Marksmen.
 Keep killing the archers
After you win the battle, Barris will temporarily join the party and you will have to cross the Redoubt, towards Lucius' staying place. Take the only available exit, kill the new Templars, who have been hiding in the next corridor. While exploring the area, keep an eye out for chests and open locked doors (you are going to need the rogue for that). Head Southwards and find the stairs to the upper floor. Over the stairs, you will get to another yard (M11,1e). While exploring the yard, eliminate the archers, especially that they are more difficult to approach (many of them are standing on wooden scaffoldings).
 Join the fighting Templars
After you have secured the yard, enter the nearby building and deal with more Templars. Head South-Westwards, then, turn West and Northwards. Approach the area, where the Templars are fighting and lend your hand at eliminating the hostile ones (again, pay attention, especially, to archers). If you want to, after the fights, you can have a rogue break into the Western room, where you find a corpse of an officer (and a loot chest) and listen to the conversation with Barris.
 Climb up the stairs to meet with Lucius
Keep heading Northwards and, after you reach big stairs, turn, West. Lucius is already waiting for you, atop the stairs (M11,1f). After a short introduction, it turns out that it is the Envy Demon, who drags you into the Nightmare (M11,1g). Your new objective is to get out of this bizarre place, i.e. to restore your character to his senses (for quite obvious reasons, the rest of the party are not available here).
 Avoid the green flames
At first, you do not need to fear any threat so, head West and see the cutscene of the conversation with the Envy Demon, thanks o which you learn that his desire is to take control of your character's body. The choice of dialogue options is of no essence here. Keep heading West and take the door to the chamber with statues (M11,1h). Here, you need to watch your step, because any contact with the green flames drains lots of health points.
Crossing the chamber with the flames is less problematic than it might seem at first. Note that some of the statues spin, every now and then, by 90 degrees - you can use that to your advantage and dash towards the successive areas, when the flames appear elsewhere. This way, change sides between the Northern and the Southern end of the chamber. In the spot shown in the above screenshot, you will have to do one more thing - you need to climb here onto the crates to get ahead.

On the South-Western side of the chamber with flames (M11,1i) you will run into an unique obstacle (one of them in the above screenshot). If your character class is warrior, it is going to be a wall that you can smash, in the case of the rogue, it is a locked door and, in the case of the mage, it is a barrier. Overcome the obstacle and walk into small room, where you can start the Demonic Dogma side quest, which has been described in the chapter with walkthroughs for side quests.
 Talk to Cole
Now, for a change, walk into the North-Western end of the room (M11,1j). At the attempt to leave this location, there appears an opportunity to talk to the mysterious Cole. The apparition states his will to help you leave the nightmare. After the conversation, return to the main hall, wait for the flames to disappear and take the newly unlocked passage to the West (M11,1k), into the second part of the nightmare - the Prison.
 The spot where you meet Cole and kindle fire
After you get to the second part of the nightmare (M11,1l), head Eastwards. Just like earlier, you can either watch the short cutscenes or skip them. Here, you are going to encounter the Envy Demon again. Examine the nearby rooms and find Cole again, inside one of them (M11,1m). Listen to his suggestion and kindle Veilfire here. Now, you need to reach four other places, where you need start fires also (M11,1n). Finally, reach the point at the end of the main corridor - the flames that appear here unlock the passage onwards.
Note - Around, you can find the second inscription connected with the Demonic Dogma side quest. I recommend that you see that part of the walkthrough, for a moment, now.
 Watch out for the green signs of danger
Locate the stairs (M11,1o). Thanks to climbing them, you will progress to the third part of the nightmare and this time around, you start off in the Forest (M11,1p). After you listen to a short conversation, leave the starting location. While exploring this part of the nightmare, you need to remember about two things. Firstly, do not stop anywhere for longer, because the green signs on the ground fulfill a warning role and, if you do not change your position, your character will take damage. Secondly, expect that you will have to eliminate specters. Fortunately, in most cases, a single attack gets the job done.
You now need to follow the linear path to a lever. Pull the lever and walk into the Therinfal Redoubt Courtyard. Here, you need to search out the passage shown in the above screenshot (M11,1q), which has been hidden between bushes and a wooden structure. Take a look around for the third inscription, connected with the Demonic Dogma side quest and head on. Ultimately, you need to return to the point, where you met Lucius (M11,1f) at the beginning of this quest. This time around, you run into the Envy Demon here. See the short cutscene, in the course of which your character leaves the nightmare.
Talk to Barris before you head out to find the veterans and the lyrium cacheAfter you get to The Great Hall (M11,1r) listen to the conversation with Barris. You will learn that you need to find three veterans and a cache of lyrium.
Note - before you head out, learn about the new, very important, element of this quest. The bar that you can see in the upper-right corner of the screen, represents the current state of the Great Hall defense. After you leave the Great Hall and focus on exploring the adjacent areas, it starts to deplete gradually. You cannot let it deplete completely, or you will fail the quest. What is even more, after it drops below 30%, Barris dies later in this quest. In general, I recommend that you break the process into smaller chunks. Return to the Great Hall each time you locate each one of the three veterans and the lyrium cache OR, when the bar drops below 50%. Each time after you return, you will have to fight monsters, but it is not going to be too difficult to win.
Note - At the Great Hall, there is a Supply Cache. It is better to use it a bit later on, because you can do that only once.
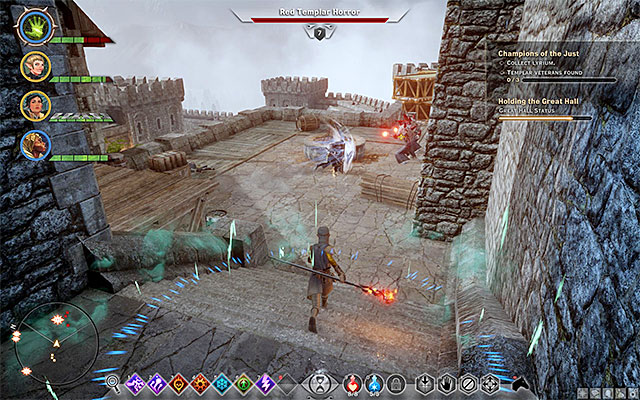 One of the veterans at the barracks
The areas adjacent to the Great hall can be explored in any order you want. To the South of the Hall, there are the Upper Barracks. You can get there by taking the door on the ground floor or, on the balconies above (M11,1s). Explore the barracks and, at the same time, eliminate the demons and the infected Templars. In the area, there are two veterans (M11,1t) - one of them is on the ground floor, in the North-Eastern part of the barracks, and one on the upper floor. After you reach each one, help him eliminate the hostile creatures and listen to a short conversation.
Note - You do not need to explore the barracks that thoroughly right now. You can do that later on, i.e. when you will not have to race against time anymore.
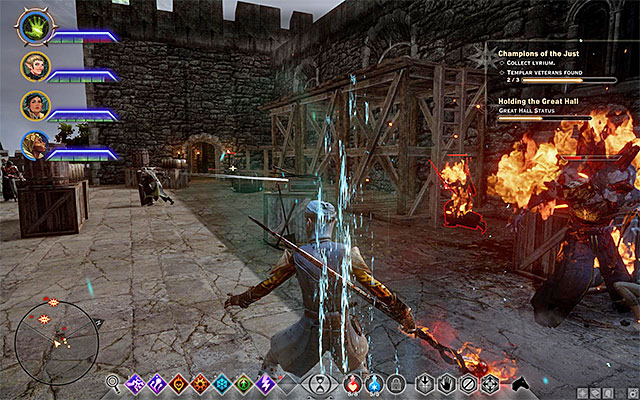 The last veteran
To the North of the Great Hall, there are the Officers' Quarters. Also in this case, you can decide whether you want to take the passage on the ground floor or the one on the balconies above (M11,1u). Similarly, be prepared to fight monsters and try not to take too long. I recommend that you, first, reach the last, third veteran (M11,1t). He is staying on a large balcony on the upper level and also in this case, you need to help him fight a small group of monsters.
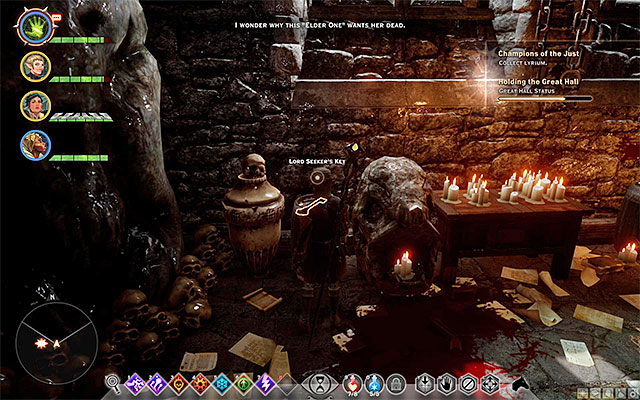 The place where you find the key
Go to the ground floor now and take the door in the middle, in the main yard. This way, you will get to Lucius' private chamber, where you meet Cole and find the Lord Seeker's Key. Apart from that, it is a good idea to explore the chamber thoroughly because, what you can find here, is a big chest with valuable loot.
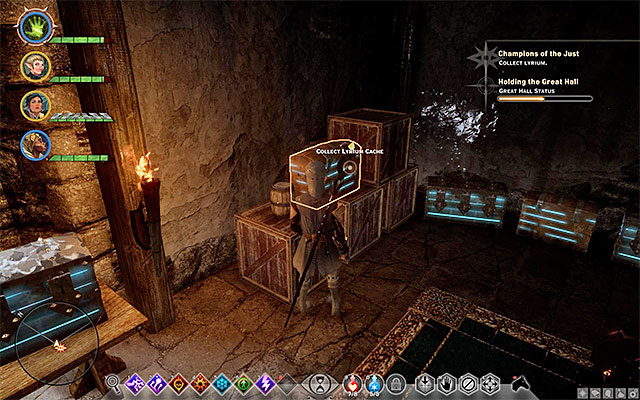 The lyrium cache
Exit Lucius' chamber and head towards the door a bit to the West. Since you already have the key, you can open it and gain access to a new chamber. Climb up the stairs and locate the Lyrium Cache (M11,1w). You can now head back to the Great Hall (M11,1r).
 Ranged characters may attack the Templars while standing on the scaffoldings
I recommend that you start by opening the Supply Cache. Then, talk to Barris, after which a big battle, in the Great hall, ensues. Your task is to eliminate the infected Templars, who cross the magical barriers on a regular basis (M11,1x). You need to keep fighting up until the energy bar of the barrier, which you can see on the screen, depletes completely. I recommend that you pay attention to the deployment of the party members, during the battle and, e.g. deploy the ranged ones higher, on the wooden scaffoldings.
 Before you head out to the lair of the Envy Demon, heal a little
If, in the previous part of this quest, you allowed the health bar of the Templar defenders to drop below 30%, towards the end of this battle Barris dies. Otherwise, he remains alive. Regardless of the course of the action, thanks to deactivating the magic barriers grants you access to the den of the Envy Demon (M11,1y). Head Westwards but, before you climb the stairs, take a look around for another Supply Cache. Entering the den starts a short cutscene and starts the battle with the Envy Demon.
 The boss' successful AoE attacks may paralyze your party, for a moment - avoid such situations.
How difficult fighting the Envy Demon is going to be to you, depends on the development level of your party, because this will affect the damage that they take. Regardless of how strong they are, remember to change positions frequently, because the green markings on the ground mean that spikes will spring up here, in a moment.
The Envy Demon himself does not have too vast an array of attacks at his disposal, but his attacks are sufficiently damaging and annoying. First of all, try to keep the ranged party members away from the monster. Also, try to spread them over a vaster area, because the demon tends to use AoE attacks which, apart from damage they deal, make your party members get into a panic. Apart from that, you need to keep in mind that the enemy will move around the entire arena so, follow his position, on a regular basis.
 Defeat the Templars
You can use all sorts of attacks to deal damage to the Envy Demon. OF course, you can try to slow him down, deal damage from fire or lightning. Of course, keep an eye on the health bars of your party and heal them whenever they sustain damage, and bring them back to life after their health bars deplete. After you deprive the demon of a quarter of his health, he hides behind a barrier and sends a group of infected Templars your way. Defeating the Templars is not difficult.
 Ignore the changes in the demon's looks and use the same attacks
Later into the battle, the Envy Demon takes on the form of your character, which under no circumstances means changing the tactic. Continue using the same attacks that you did. Keep fighting up until you kill the Envy Demon and, after the victory, remember to search the body to collect a legendary weapon, among others.
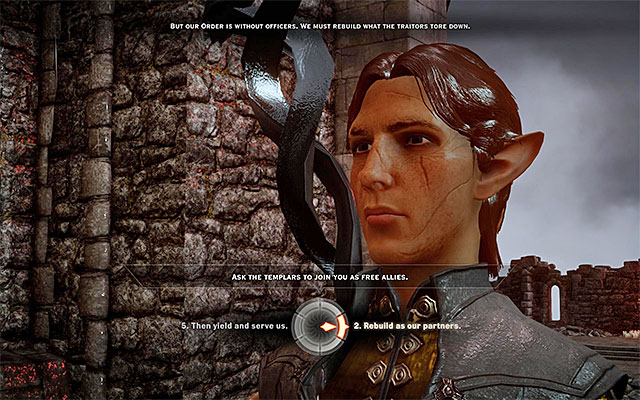
Try to leave the arena and you will meet the Templars. If Barris survived, it is him that you will talk to. Otherwise, you will talk to Fletcher. During the conversation, you will have to take an important decision (it has been presented in the above screenshot). You can:
Regardless of what you do, you cut back to Haven.
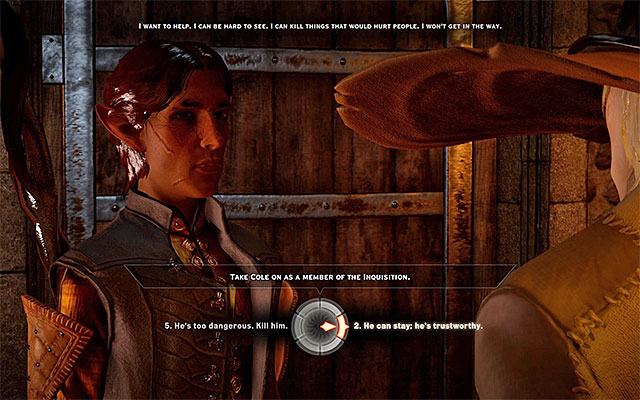 It is a good decision to include Cole into the party
After you return to the war room in Haven, listen to the conversations. One of them will be interrupted by Cole entering the room. You need to decide whether to take Cole into the party or try to kill him (this will end in a failure - he will erase that memory from the minds of the party members). I recommend, of course, that you allow him join the party. This is the end of this long quest.
Rewards for completing the quest:
Way to unlock: Automatically, after you meet with Fiona during The Threat Remains main quest.
The quest-giver: Fiona (M4,1)
 Fiona is much more amiable, towards the party, than Lucius
This quest becomes available after you first come into contact with the rebel mages (apostates) and Fiona, who commands them. You meet Fiona at your attempt to leave Val Royeaux (M4,1). The enchantress wants to convince the Inquisition that you should join your forces and she invites you for another meeting in the village of Redcliffe. Before you go to the meeting, you first need to return to Haven. Go to the chapel and talk to your advisors - Josephine wants to listen to what the mages have to offer, whereas Cullen is in favor of fighting for the Templar support. Fortunately, you do not need to take any binding decisions at this point.
 You need to seal the rift at the entrance to Redcliffe
Open the world map and travel to Hinterlands. Your task is to reach near the big gate in the Northern part of the map (M3,2a). You should notice an opened rift here so, attack the monsters gathered around. Ultimately, you need to get rid of all the demons and seal the rift. Wait for the conversation with Magister Alexius to start, who confirms that he wants to meet with the Inquisition, and he invites your party to the local tavern.
 The entrance to the Redcliffe tavern
Note that you can enter the village of Redcliffe for the first time so, head Northwards. After you enter the village, go towards The Gull and Lantern (M3,2b). After you enter the tavern (M7,1a), you will see a cutscene. The meeting will be participated by Fiona and Magister Alexius. You do not need to keep a close eye to your responses, because the dialogue options that you pick do not affect the relations between the Inquisition and the mages, too much. The meeting will be interrupted at the moment, at which the Magister's son, Felix feels bad.
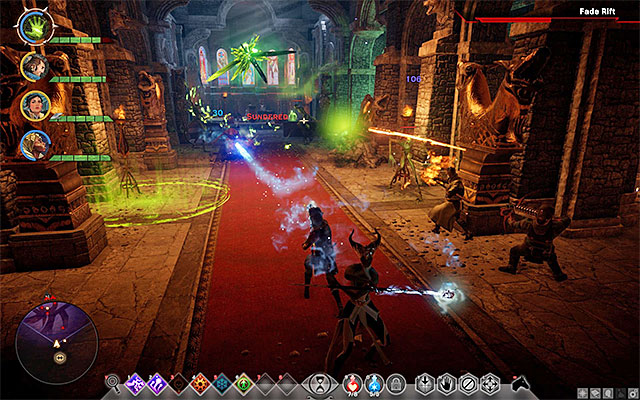 Defeat the monsters at the chapel and talk to your allies
Exit the tavern and, according to the note given to you in secret, go towards the Chantry in the village (M3,2c). Right after you enter the chantry (M7,1b), there will start another big fight with the monsters and, since you are restricted in your moves, do not let your archers and mages be cornered. During the fight, search for the opportunities to disrupt the rift and, after the fights, seal it. You can now talk to Dorian and Felix, who share quite surprising news with you.
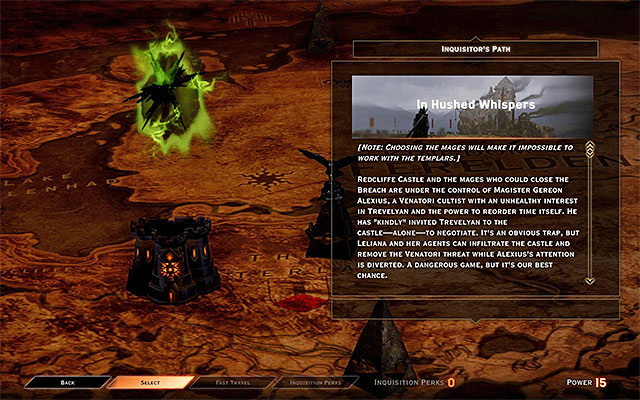
NOTE - taking further steps in this quest means taking up the attempts to obtain the support of the Rebel Mages (apostates). This means that you will not be able to ally yourself with the Templars and, as a result, you will not be able to complete the "Champions of the Just " quest. Before you take to this quest, make sure that it is the Rebel Mages that you, in fact, want to ally yourself with.
To progress to the main part of this quest, you need to gather, at least, 15 Power points. Just like in the case of the previous main quest, I recommend that you complete several side quests, because the majority of them are rewarded with one, to several, Power points. After you have obtained the required amount of points, return to Haven and walk over to the war room. Find the " In Hushed Whispers " operation, shown in the above screenshot, and confirm that you want to spend 15 Power points on it.
Note - the experience level of the party that the game recommends, is around 4-7. I recommend that you progress, with all of the party members, to level 7, because this quest abounds in demanding fights.
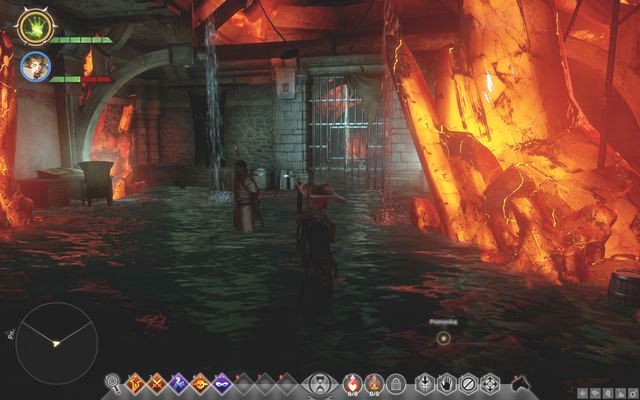 The first chamber, where you start this quest
After the council and after you pick your party members, you cut to the Redcliffe castle, where you have a conversation with magister Alexiusem. Regardless of your choices, you end up being sent into the future - this is where the quest proper starts.
You will be stuck in the future with Dorian (M10,1a). First of all, eliminate the two opponents that launch at you. One of them has a key to the door - collect it and open the door; then go to the stairs. Remember, in the meantime, to assign new abilities to Dorian. At the crossroads, take the door to the right (to the left, there is a chest behind the door) and after a while, you will reach another crossroads guarded by two opponents (Upper Cells).
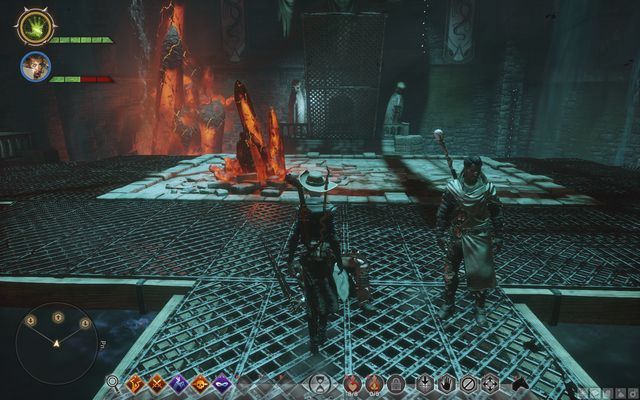 The upper fork
Now, it does not really matter which door you take - you need to comb through all of the cells on both sides. On the right, you find your party members in cells. Free them and they will follow you for the rest of the quest. On the right, at the same level, there is one of the picked party members (M10,1b). You find another one after you climb down (Lower Cells) behind the door on the right, in the last cell (M10,1d).
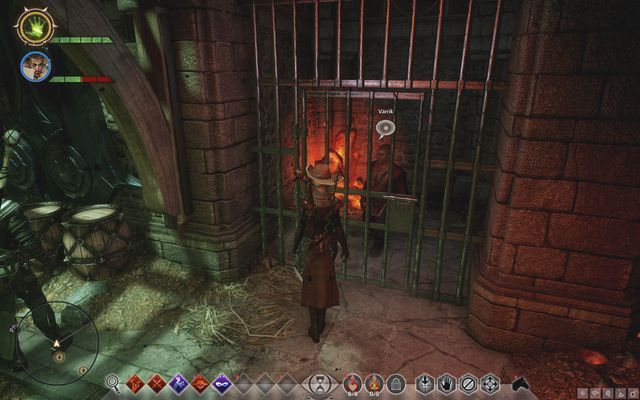 One of the imprisoned party members
Now, return to the Upper Cells and take the door at the other side. There, in one of the cells, you find Fiona (M10,1c), who tells you about the imprisoned Leliana, somewhere in the castle (this conversation is compulsory to continue). After you return to the Upper cells, the drawbridge will come down (M10,1e), where there are 5 enemies waiting - deal with the mage in the first place.
 The supply crate
As you climb the stairs, you get to the Guards' Barracks (Northern Dungeon). Pick the useful items (especially, find the supply crate - inside, there are healing potions) and take the stairs up, to the Torture Chambers (Southern Dungeon).
 The key on the floor of the torture chamber, where Leliana is being kept
After you hear the voices behind the door on the left, enter through that door (M10,1f)- this will start a cutscene and will Leliana join you. Pick up the key from the floor and go to the door at the end of the corridor. Behind the next door, you get into a small room, where there is a Rift (M10,1g) - deal with the Specters and seal it.
 The spinning wheel for the gate
Then, approach the closed gate - on the right, there is a spinning wheel (M10,1h), which you can open the gate with. Now, exit to the Harbor (Outside), where there are several demons, after the fight, you can replenish your supplies again, from the supply crate in the corner. Then, you will exit to the yard, where you need to seal two more Rifts (M10,1i; M10,1j). Then, you will get to the Royal floor, upper wing. Follow the corridor and climb down the stairs to enter the (Royal floor, lower wing) with another Rift, and Venatori Guards (M10,1k). one of them (the mage) has a red lyrium shard on him - you need to collect five such shards to open the door to the main chamber (M10,1p).
 The door to the Alexius's chamber
You now need to visit several places to find the rest of the red lyrium shards. Take the door to the left of the closed gate and climb up the stairs. Again, you will get to the Royal floor, upper wing, but in a different part of the castle. Take the first door on the right - you find a Venatori there and a mage with a shard (M10,1l). You find the second mage, with a shard, at the end of the corridor, behind the door (M10,1m). Exit the room through the next door and you will see three doors in one wall. Behind the door in the middle, there is another mage with a red lyrium shard (M10,1n). You can surprise him by getting him from the side, after you smash the wall behind either of the two remaining doors. After you retrieve this shard, return to the lower level.
 While scanning the area, you will see the wall that can be smashed
Eventually, go to the only room on this floor (M10,1o) (Royal floor, upper wing) and after you defeat the last mage, and collect the last shard, return to the main hall to open the locked gate.(M10,1p).
 Alexius likes hiding in corners and setting traps around him
Now, you are going to fight the final battle with Alexius. After a short conversation, the battle will ensue. First of all, Alexius uses traps so, be careful while approaching him. He is highly resistant to cold (he cannot be frozen), but he is vulnerable to knock downs. Twice, when his health drops to 2/3 and 1/3 respectively, he summons rifts that you need to seal. In the meantime, he will be invulnerable.
After the battle, you receive an amulet and a mage's staff. Now, a dialogue between the characters will take place - you can decide here what you want to do with the mages - an alliance or imprisonment.
Rewards for completing the quest:
Way to unlock: Automatically, after you have completed the Champions of the Just or the In Hushed Whispers main quests.
Quest giver: Cassandra (M2,2)
 Select and confirm your selection of the "In Your Heart Shall Burn" operation
You can start this quest right after you have completed the main quest, connected with securing your favor with either the Mages or the Templars, assuming that you have, at least, one Power point. Go to the war room in Haven (M2,2) and locate the operation connected with this quest.
NOTE - before you start the quest proper, make sure that you have completed all of the side quests in Haven, because it will be impossible later on. Fortunately, you do not need to worry about your party members, because their lives will not be threatened.
Note - The party experience level that the game recommends is 8-11. I recommend that you develop all of the characters to level 11, at least, because this quest consists of many fights that are quite challenging and long (especially towards the end).
 Reach the Haven's main gate
After you confirm that you want to start this quest, you will watch a longer cutscene of sealing the biggest rift. Problems appear after you return to Haven, because the enemy army will be spotted near the village. Head North, towards the Haven's main gate (M2,2a). After the gate opens, you will watch a cutscene. IF you have completed the "Champions of the Just" earlier, you encounter Dorian here and, if you have completed "In hushed Whispers" you meet Cole. From him, you learn that the army is being commanded by The Elder One.
 Fight near the first catapult
Your new quest is to defend the first trebuchet (M2,2b), i.e. a kind of a catapult. Approach the trebuchet and start fighting the enemy units off. If you have completed Champions of the Just, the fights will be participated by the members of the Venatori cult, and if you have completed the " In hushed Whispers " it is going to be the Red Templars. Regardless of the faction that you need to face, as usually, start by taking out the enemy archers, mages and fighters with shields. You need to keep fighting up until the moment, at which the progress bar in the upper-right corner fills up. After that, the catapult fires a projectile.
 Use the mechanism of the trebuchet
Your next task is to reach another trebuchet to the West of here (M2,2c). Along your path, also consider using the Supply Cache at the main road. After you come near the trebuchet, attack the opponents, and again, watch out for the ones that pose the greatest threat. After you have cleared the area, approach the mechanism of the catapult and hold down the interaction key/button. Do not release it, up until the catapult fires the projectile. Wait for another cutscene to start and collect the supplies.
 It is a good idea to help Harritt
Head back towards the main gate of Haven (M2,2a). Along your path, it is worthwhile to stop next to the former smithy (M2,2d), because you will be able to help Harritt here. You need to destroy all the crates that block the entrance into the house and the easiest way to do that is by launching a strong melee attack, or a spell. For this, you will be rewarded with experience and Influence points (you will also receive similar rewards later into the quest).
 Help Lysette win
After you approach the gate, you get another quest connected with returning to the Chantry building. DO NOT HURRY to complete this quest, because there still are several defenseless people in the Haven and it would be a good thing to help them also. Start by eliminating one, or two groups of opponents near the main gate. Then, haste to help Lysette, who should be busy fighting around here (M2,2e). Try to kill all of the opponents, before Lysette's health bar depletes completely.
Note - If you want to make sure that none of the party members dies before you enter the Haven, save the game and load it, in case of failure.
 Minaeve and Adan are lying next to each other
I recommend that you first go in the South-Western direction, Around, there are three people that need help and you need to hurry,. First of all, find Minaeve and Adan (M2,2f), because they may die earlier. Only after you save them, go to the burning tavern and help Flissa (M2,2g). Each time, you need to stand next to the wounded ally and hold down the interaction key/button, before flames, or an explosion, kill the NPC. At the same time, it is worth noting that close to Minaeve and Adan, there are supplies.
Now, head North-East. Merchant Seggrit has been trapped inside one of the buildings here (M2,2h) and it may be a bit difficult to reach him. Take the ladder shown in the above screenshot and climb onto the wooden structure. Take a jump and walk over the beams to jump into the burning building, through the roof. Save Seggrit and smash the crates at the door with a strong attack.
 You can find Threnn next to the chantry building
Finally, help Threnn. He is staying near the entrance to the chantry (M2,2i) and you need to eliminate all of the enemies around, before her entire health bar depletes (use strong attacks to win as quickly as possible). Find the Supply crate here and enter the chantry (M2,2) to listen to the further part of the battle plan. The plan is that you reach the third catapult to the West of the chantry. Go North and take a turn to the West. Engage the opponent only if necessary.
 In free time, interact with the mechanism of the trebuchet
In here, you are going to fight the most demanding fight of the entire quest. Attack the enemies, BUT do not focus on the entirely, because they will be incessantly coming here. You need to have your character, or any other party member (it would be best if it was the least useful one), on a regular basis to prepare the catapult to be fired (the interactive mechanism). Interrupt this process only when the operator of the mechanism is attacked, or when the mechanism becomes temporarily inactive. In between the enemy attacks, heal your allies. Also, you can find a Supply crate here, but do not open it until you have used up all of the vials you have.
 Enchanter Fiona
Towards the end of the fight, around the catapult, there also appears a miniboss. If you have earlier completed the "Champions of the Just", it is going to be the Grand Enchanter Fiona. You need to conduct your fights in the same way, as you would in the case of regular mages so, search for opportunities to stop her from casting her powerful spells. What may prove especially effective are attempts to freeze Fiona.
 Captain Denam
If, on the other hand, you have completed "In Hushed Whispers" earlier, there appears a mutated version of the Knight Templar Denam. He is going to try his strong melee attacks so, the key to succeeding here will be to keep the weakest party members away from the mutant. Also here, you can use freezing attacks to your aid.
Regardless of whom you had to fight, try to eliminate the weaker enemies in the first place and deal with the boss at the end. After a while, the opponents stop coming, fortunately so, you will have some time to get the trebuchet ready.
 Use the special attack to kill the monsters
You are going to see some more interesting cutscenes, of the meeting with The Elder One and the dragon subordinate to him (you do not need to attach too much care to the dialogue options that you pick). After you have seen more cutscenes, you will get to a new part of the Frostback Mountains. It is a very linear location, which additionally does not need any detailed exploration. Follow the narrow corridor and, after you enter a bigger cavity, attack the monsters. Soon, you will gain access to a new special attack (Mark of the Rift) and it is a good idea to use it immediately, to eliminate the demons without any problems.
Note - using special attacks is limited by the Focus bar, which you charge while fighting. Save it for the most demanding fights.
 Eventually, you find your allies
You can now exit the cave. Head Eastwards. As I have already mentioned, you do not need to explore the area, because nothing interesting is to be found here. After several minutes, you reach the campsite of the allies that managed to escape Haven. See the cutscenes of the journey to the Inquisition's HQ in Skyhold.
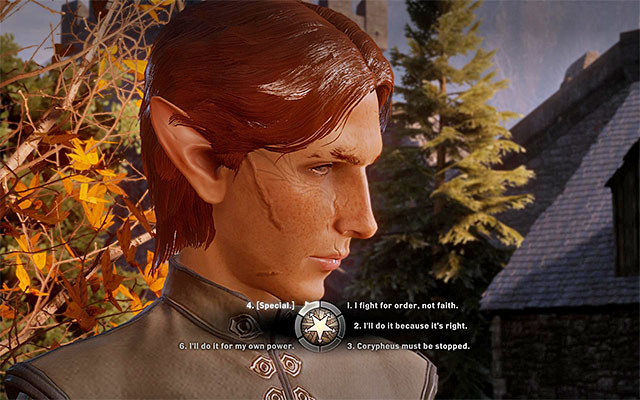 Consider the dialogue options, during the ceremony of appointing the Inquisition's leader
Outside of the Skyhold you are going to meet many people. The most important cutscene concerns the moment of appointing you for the Inquisition's leader. It is a good idea to consider your dialogue options, because it affects your relations with the individual party members (fortunately, to a slight extent). At the same time, it is worth noting that apart from the standard dialogue option, you may also have access to special ones (this depends on the race and the class of your character). Soon, this quest ends and you receive lots of new quests.
Rewards for completing the quest:
Way to unlock: Automatically, after you reach Skyhold.
Quest giver: -
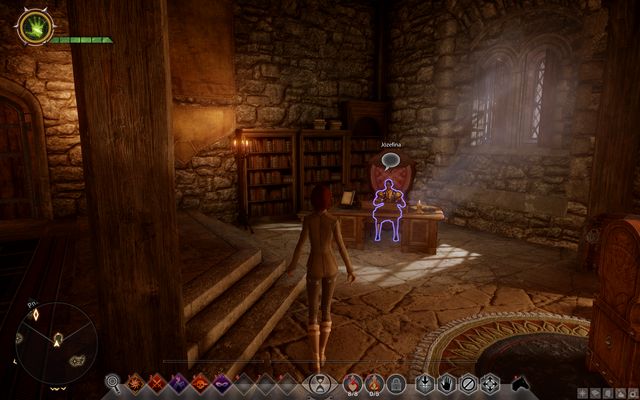 Josephine in her new house
After the escape from Heaven, you get to Skyhold. You need to learn about the new location and set up new priorities with the advisors. Walk over into the Stronghold, over the stairs from the courtyard. Inside the room, take the second door on the left - you walk into an antechamber with Josephine inside (M12,7a), and behind the next door, there is a council chamber. Talk to Josephine and conduct the conversation during the cutscene. After it ends, you gain access to a new quest "Wicked Eyes and Wicked Hearts", which you can start at the council room (cost: 30 Power points).
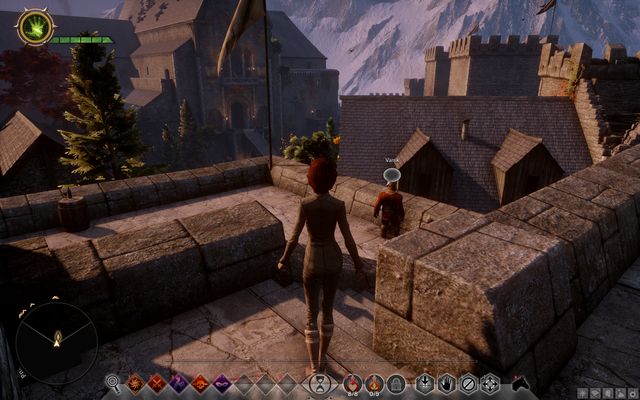 Varric waiting on the walls
Later on, you also need to meet up with Varric and the defense walls (M12,7b). He will acquaint you with Hawk, a Grey Warden. After the conversation, you gain access to Crestwood with the "Find the Warden" quest - you unlock the location at the council room, with 8 Power points.
Rewards for completing the quest:
Way to unlock: Talk to Hawke.
Quest giver: Hawke (M12,8)
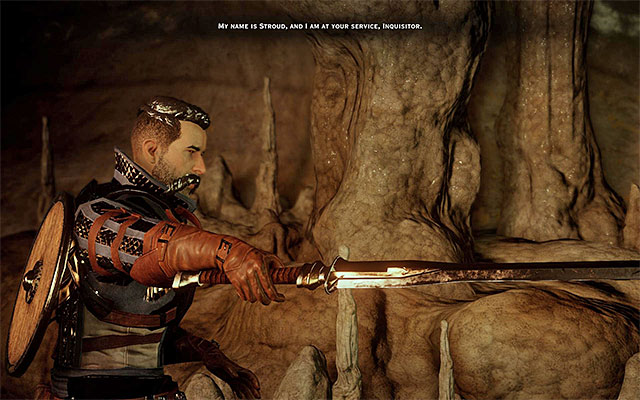
You can gain access to this quest, while completing the From the Ashes main quest. You need to talk to Varric on the ramparts (M12,8). This meeting will be participated by Gray Warden Hawke - the protagonist of the previous installment. He tasks you with this quest. The first thing that you need to do is visit the war room. Find the Find the Warden operation, on the war map. Spend 8 Power points to unlock it and confirm that you want to travel to Crestwood.
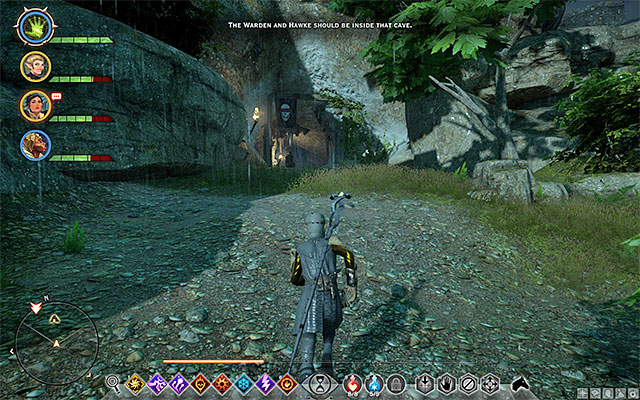 The spot where Hawke is waiting for you
After you get to Crestwood, you need to start a long walk to the South-East. Along your path, you will be attacked by the undead and highwaymen (always attack archers and elite enemies in the first place). Along your path you encounter the Gray Wardens, whom you can help eliminate monsters. Apart from that, you will most probably go past the Crestwood village and Caer Bronach, but you do not need to stop here. Your destination is the cave near the Eastern edge of the map (M13,1a), near one of the campsites that you can set.
Meet with StroudAfter you enter the cave, you will first meet Hawke, and walk over to the area, where there is another Gray Warden waiting - Stroud (M13,1b). You do not need to watch out, during the meeting, because the dialogue options that you pick do not play any vital role. If you want to, you can ask Stroud an additional question (it is a good idea to talk to him again, after the first conversation ends).
 A pawn on the map, connected to the Western Approach
Now you will have to go to the Skyhold and head back to the war room. Find the 'Investigate the Western Approach' option on the map and spend eight Power Points on it. By doing this, you will unlock the entrance to The Western Approach. Go there.
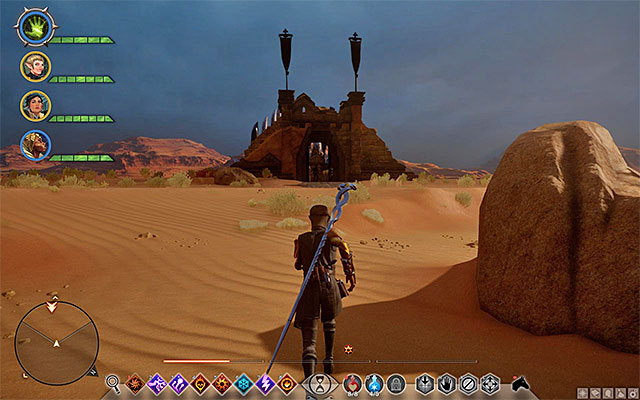 Hawke and Stroud can both be found by the bridge leading to the Ritual Tower.
After getting to The Western Approach start a long walk to the southern-west. Head to the area of the Ritual Tower (M19, 1a). There, you will have to meet with Hawke and Stroud. Wait for the cutscene depicting the entrance to the Tower (M19,1b) and the meeting with the Lord Livius Erimond. No matter which dialogue options you will chose, Erimond will flee. He will also send some monsters and enslaved Grey Wardens.
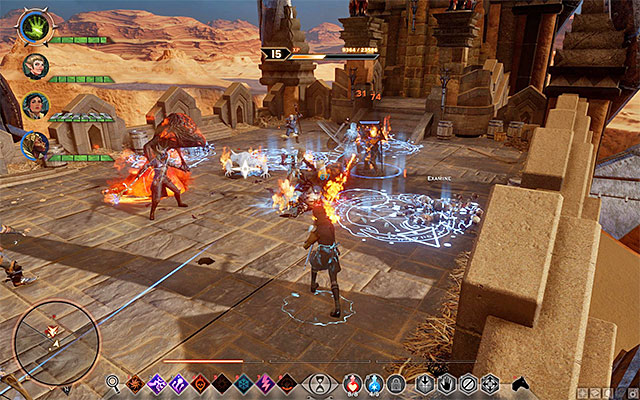 Quickly eliminate the mage guards.
While fighting, focus on eliminating the Warden Spellbinder first (note - they are immune to the ice attacks) and send some warriors on them in order to make it harder for them to cast spells. Watch out for the rage demon, it is the best to attack him with your whole party. The smaller monster can be left for the end, as they do not present much of a problem. After dealing with all of the enemies, talk to the Hawk and Stroud. In order to continue this quest, you will have to return to the Skyhold and walk over to the council room. Here, you unlock the passage to the Adamant Fort (cost: 20 Power points), where the main part of the quest starts.
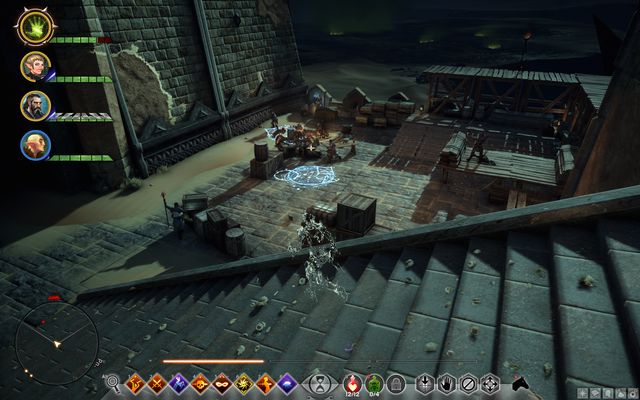 The wardens fighting demons
After the cutscene, you will get into the heat of the action (M27,1a) - deal with several demons and keep climbing up, over stairs. Next to the descent, you note the Grey Wardens fighting more Darkspawn (M27,1b). If you help them, you will be able to offer that they retreat, at which point they leave, but if you demand that they give up, you will have to fight them.
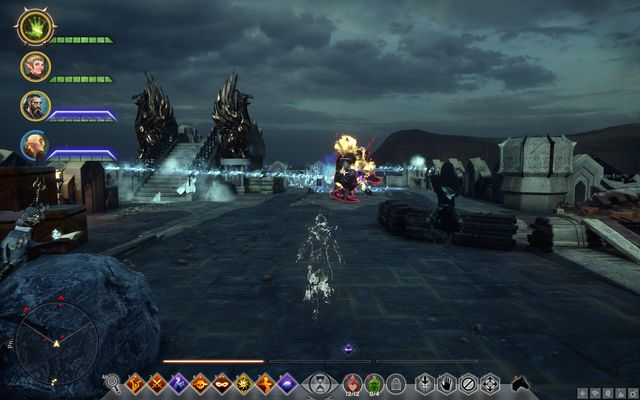 The Pride demon on the battlements
Cross the door and climb up the stairs. Now, you can complete the optional quest to clear points of besiegement. You will be able to tell them by the Wardens fighting demons, in groups. The first one is to the right, after you climb onto the battlements. (M27,1c). The remaining ones can be found, after you leave the tower behind (M27,1d), where there is the Pride demon fighting; and along the battlements to the right (M27,1e). For helping in the fights, you receive Power points and Influence points, as well as additional experience. Then, climb down the stairs.
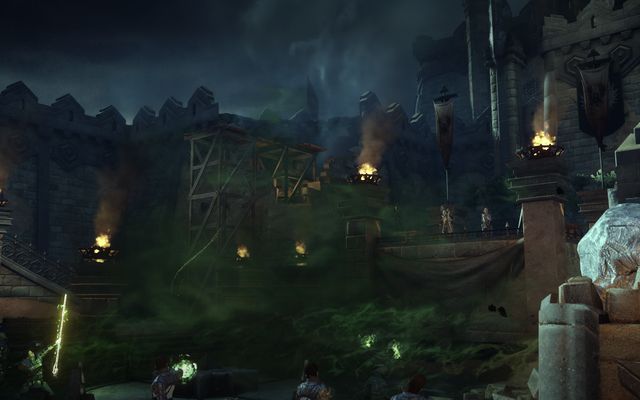 Clarel and Edimond on the fort's battlements
After you pass through the outer walls, you reach Clareel and the rest of the wardens. You will now have to make a choice: if you attack the wardens, both them and the demons will be hostile towards you. However, if you pick "I have already spared wardens" in the special menu, or if there is Blackwall on the party, there is a chance that some of the wardens will side with you (if you have talked to your party members often, you may have access to additional dialogue options). After the battle, climb up the stairs, where you see a cutscene, at the top.
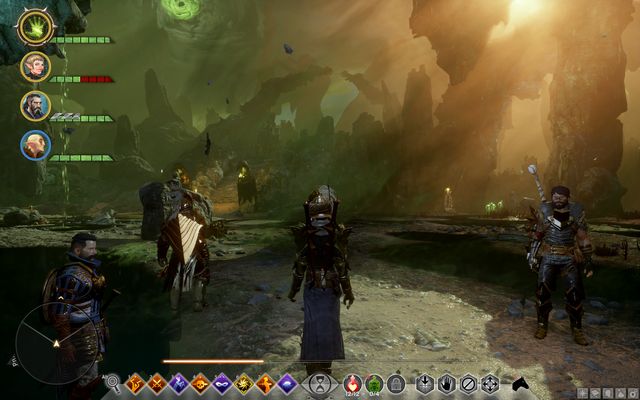 The Fade
You get to the Fade (M27,1f). This place is quite unique - you are going to fight demons and spiders only, here.
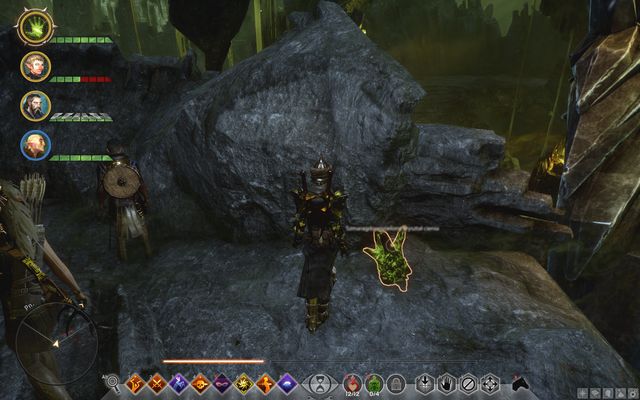 Emerald green shadow crystal
Also chests occur here as containers, the so called Emerald green shadow crystal. It is a good idea to loot them here, because they contain valuable items.
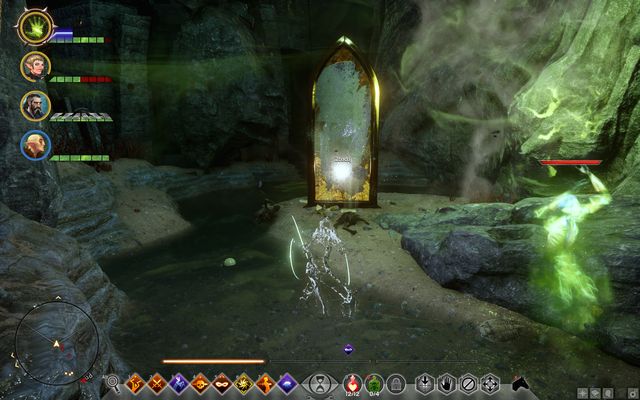 The mirror
The other elements that are worth collecting are mirrors. They permanently increase an attribute of your character, after you approach them and interact with them.
 Consumption of a memory
Head upwards, where you encounter the spirit of Justynia, which you need to talk to. Then, eliminate a small group of wraiths and, where there should be their corpses, you find memories - approach each one and hold down the action button to collect them - only then, will the passage be opened.
The last barrierHead onwards, up until you encounter another barrier. This time, you are going to fight stronger demons and the barrier falls down, as soon as you have defeated enough of them. The number of demons that you need to defeat depends on their type, and the type is randomly generated. This is why the fighting may take a while - as a consolation, next to the stone in the center, you find a supply crate.
 Nightmare
Follow the corridor and you will enter the last chamber. Here, you are going to fight the boss - Nightmare. The demon is at level 15 and he is slightly floating in the air, due to which not all blades are able to reach him. He often activates an additional magical barrier. After you deplete each 30% of his health, he summons spiders and demons to his aid, he himself becomes nearly invisible, then. Nearly, because he starts blinking then, at which point you can hit him then. He becomes visible again, after you defeat all of the summons.
 The cutscene that ends the Fade stage -Stroud has been singled out for survival
Now, you are going to face two important choices. The first one is which of the wardens is to stay behind, in the Fade, to secure the retreat of the rest of the party - Hawke or Stroud. Then, right after you leave the Fade, you will be able to either drive the Grey Wardens away, or include them in the Inquisition. Your choice determines what operations become available from the war table.
Rewards for completing the quest:
Way to unlock the quest: Find a Dreamer or the item that they want, in the Fade
Quest giver: -
 Flowers - one of the gifts for the Dreamers
The first side quest in the Fade. Your mission is to locate five Dreamers - yellow apparitions standing on various items. Each one has his requirements for the items that they want.
 A Dreamer
For giving each of the Dreamers the item, you are rewarded with an additional point of a random attribute. In total, you need to find five items (M27,2a,2c,2e,2g,2i) and claim 5 rewards (M27,2b,2d,2f,2h,2j).
 The rewards from the Dreamers
Finally, you also receive an additional reward (M27,2k) from the Dreamers which is the Essence of Perfectness - a valuable crafting material. You will be able to claim the reward after you destroy the last barrier, it is to the left, next to the rock, surrounded by Dreamers.
Rewards for completing the quest:
Way to unlock the quest: Approach the altar on the rock in the Fade.
Quest giver: - (M27,3)
 The altar in the Fade
Another side quest in Fade is very easy. On the rock, where there are two Pride Demons, there is an altar near the edge. You need to light flames there, in the correct order. The order is as follows: 4, 1, 3, 5, 2.
 The case on the altar
After you have lit them all, you will be rewarded with experience and a case appears on the altar. Inside, there is a legendary ring and an Amulet of Power.
Rewards for completing the quest:
This quest takes place at the Winter Palace of Empress Orlais. To start this quest, walk up to the council table and pick the option to unlock the location (the cost is 30 Power Points). After a short conversation, you will travel to the palace, with the selected allies, where you are welcomed by Prince Gaspard.
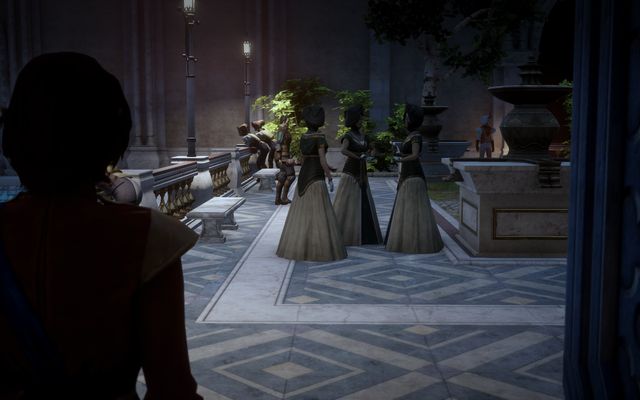 The Winter Palace is the meeting place of the nobility of Orlais
The key to handle the conversations, and raise your approval level is answer according to the ethics and culture, because even the least important conversations may have an effect on the points The number of points keeps going up during the conversations and the successive stages of quests, and they go down whenever you speak and behave inappropriately (any jumps onto the table are improper). Similarly, the amount of points goes down whenever you are not being observed within crowds (around 4 negative points per minute), i.e. whenever you wander off into an officially inaccessible part of the palace. If, however, you return quickly into the crowds, you receive the last lost point back. If you lose your approval points completely, you end the game, which is why you should not ignore that.
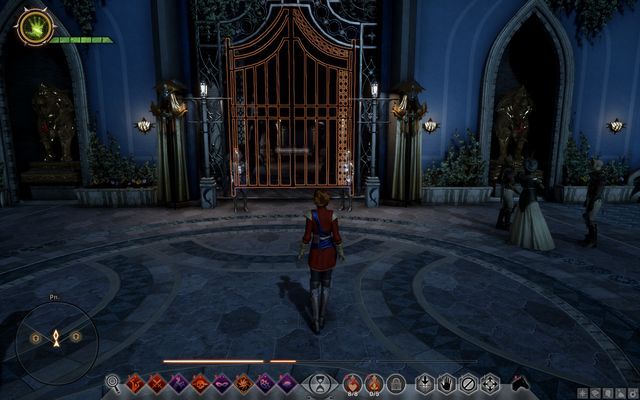 The palace entrance
In the first conversation with Prince Gaspard, try to agree to everything he says and respond according to his expectations. After that, you will start the game. Move among the people and talk to the more important ones. Also, collect documents that may cause affairs, and listen to gossips. You start off here with 40 approval points, a number that can be lower, depending on your race. After you fill up the approval bar to 100, you receive the Belle of the Ball achievement.
Now, complete the side quests in the courtyard and continue the storyline, by crossing the main gate, into the palace (M24,1a).
Montbelliard's Ring
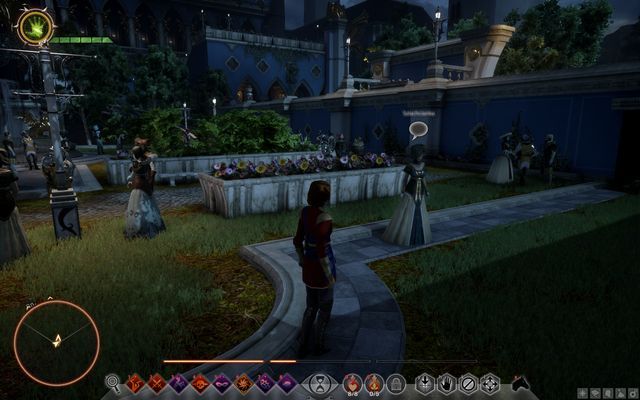 The noblewoman
In the courtyard, you can find a Noblewoman (M24,4). Talk to her and you will learn that she lost her ring. During the conversation, pick "Good going", to receive 5 approval points
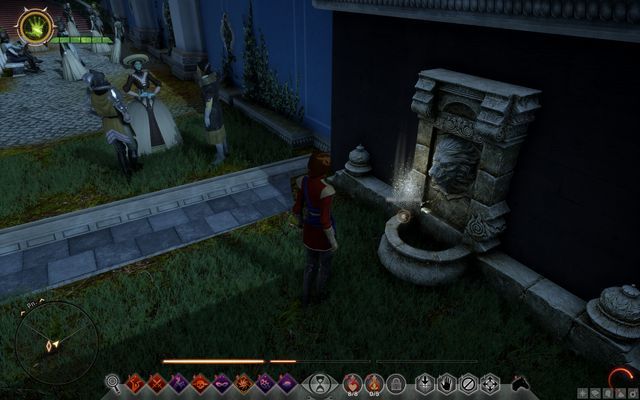 The lost ring
You can find the ring on the small fountain (M24,4a). After you collect it, return to the Noblewoman. You can decide, whether you want to give it back (additional 5 approval points), or to keep it for yourself (no effect on the approval).
Rewards for completing the quest:
Open West Storage
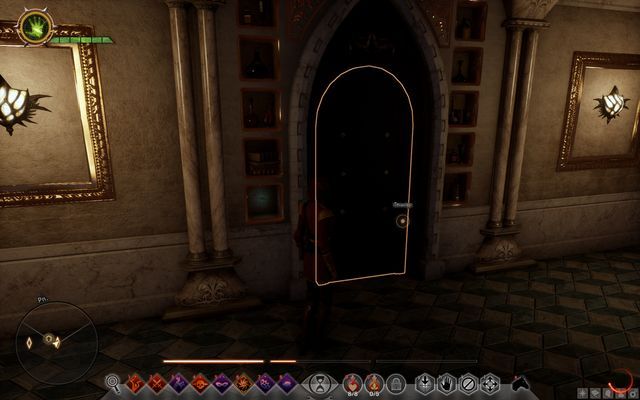 The entrance to the West storage
In the palace, there are many doors that cannot be opened in the customary way. To open them, you need Halla Statues, which you can find all around the structure. Once you approach the door to the East, you receive the quest to open the storage (M24,2).
 Halla Statue above the storage
The Statue to open the door can be found above the storage, after you climb to the upper floor. It is on the ground, next to the bench (M24,2a). In total, there are 10 Statues in the palace.
 The key to the East storage
You can also open the door to the second storage (M24,2c), which you can find opposite. This storage can be opened won with a statue, but with a key, which you can find above the storage, among the flowers (M24,2b). Inside, there is a document of the Scandalous Secrets.
Rewards for completing the quest:
Even Glided Walls Have Ears
 The conversing couple
Once you climb to the upper floor, on the courtyard, above the East storage, you notice a couple of conversing guests (M24,3). After you approach, they walk a bit away, disgusted by your behavior.
 The zone of eavesdropping
Stand within the red circle, next to the flowers, to eavesdrop on the conversation. While eavesdropping on what the guests are talking about, you can often obtain interesting information that you can later tell to Leliana. Providing her with more Scandalous Secrets also raises your approval.
Rewards for completing the quest:
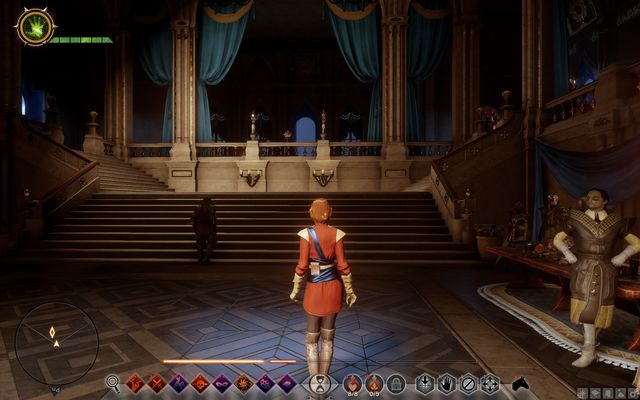
The presentation at the Grand Ballroom
The Vestibule is the first part of the palace. From here, you can access some of the remaining rooms. Some of them are locked, by default, and they will be unlocked as you progress into the storyline. Now, approach the main door and enter the Grand Ballroom. During the presentation, approach the Empress. This starts another conversation that affects your approval levels:
By selecting the "The weather may go bad" dialogue option adds +5 to your approval, whereas mentioning the planned assassination adds -15 approval points.
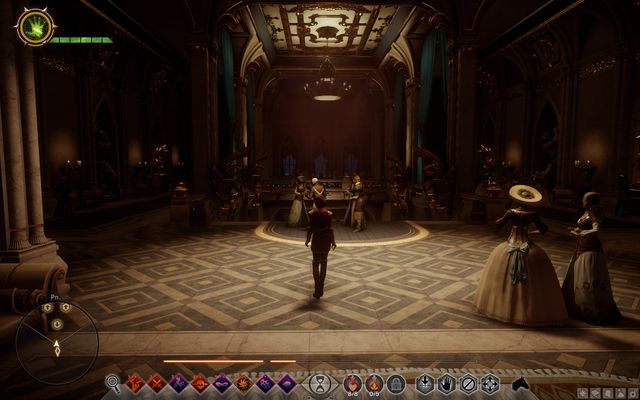 The vestibule
Return to the Vestibule, where you are going to talk to Leliana. From now on, you will be able to access the majority of the chambers in the castle, whereas the rest of them will be unlocked during the game.
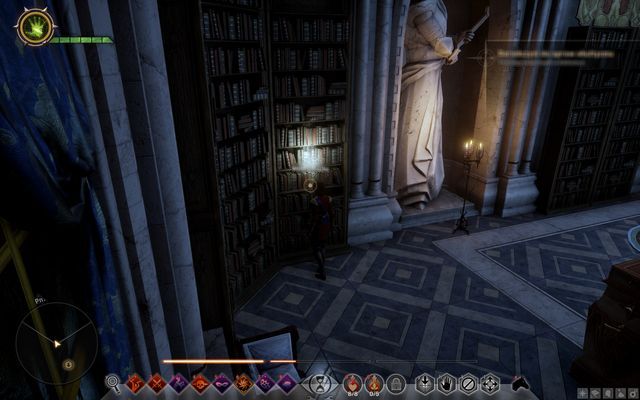 The bookshelf with the book that opens the passage
Go to the Guest Garden now(M24,1b) and climb up the ladder into the Grand Library. Opposite, there is the library entrance. Approach one of the bookshelves on the left and pull the book(M24,1c), which unlocks a secret chamber. There, on the desk, you find the secret documents (M24,1d) - read it.
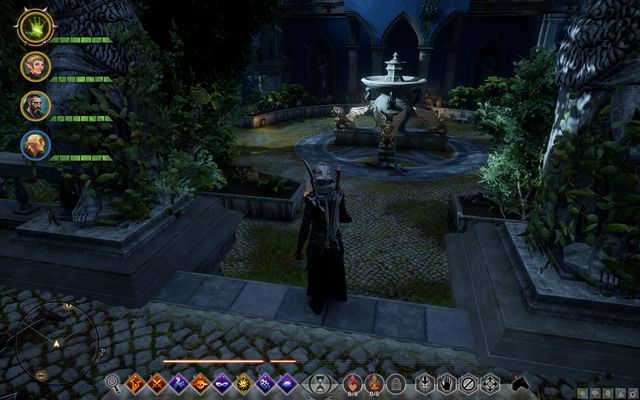 The torches in the library
Alternatively: Inside the library, there is a beacon. Take it and light up the flames above the statues, to the right of the entrance, and light them up as they follow in the row (the order is important here). Then, light up the first one on the left, starting from the entrance. Doing this opens the secret passage to the secret chamber. There, you find several items in the chests and the legendary grenade recipe.
 The seal on the balcony
Reach the end of the Western corridor and cross the door into the balcony - there, you find the cylindrical seal hidden on the floor - one of the key elements (M24,1e).
 Halla Statue above the Guest Garden
The,, on the upper level of the Garden, in front of the library entrance, on the left, there is a locked door (M24,1g) which requires a Halla Statue. The nearest one is on the balustrade opposite (M24,1f). Inside, you find important documents. After you collect them, return to the Grand Ballroom (if you are late, you lose the court's approval points).
 Morrigan
In front of the entrance, you talk to Morrigan - it does not matter which dialogue options you pick in this conversation, when it comes to approval points. Talk to the most important people of the court now: the ladies (in the corner of the room) - the empress's representatives, and ambassador Briala - she is on the balcony.
The fountain in front of the Servants' QuartersYou can now go to the Servant's Quarters (M24,1h). From now on, you can equip the armor and the sword, which are going to be of use here. Remember to act fast - the court's approval dwindles during your absence - but at a slow pace (around -1 point per minute).
Go towards the fountain. From now on, you will be running into the armed Venatori fighters. Reach the Servant's Quarters and climb to the upper floor (M24,1i).
 The treasure entrance
There, in the bedroom, you find a locked treasure (3 Halla Statues) and an elven medallion inside (M24,1p), which you are going to need later on, as a piece of evidence in the talks. After you reach the end of the corridor on the upper floor (M24,1j) and defeat the guards, another cutscene starts - again, your decisions do not matter here. After the conversation, return to the castle and get back to the Grand Ballroom across the exit gate (M24,1k).
 Florienne
You start the conversation with Florianne - agree to a dance to receive +10 approval points. Then, pick your answers in the following order to receive positive approval points:
 The widow
At the Grand Ballroom talk to the Widow (a member of the Orlais council) (M24,1o) and offer a dance - this way, you gain access to a new operation that becomes available after the quest.
 The guards in front of the Trophy Room
Now you can go to the Royal Quarters (M24,1l) and confront Florianne. Note - From now o, at the palace, there also appears a new portion of the Scandalous Secrets and several Caprice Coins. Before that, however, you can go to the Trophy Room. To gain access, stand behind the statue at the entrance to the Trophy room and eavesdrop on the guards' conversation. You can try an lure them away, by sending Cullen to them, or ask the maids at the other end of the corridor to handle them (this is not always an option).
 The assassination attempt in the Royal Quarters
Finally, go to the Royal Quarters (M24,1l). In the bedroom, you will witness the assassination of one of the empress' subjects. After the conversation, follow the narrow corridor (M24,1m) to the small yard.
 The rift in the yard
In the yard (M24,1n) Venatori soldiers and the monsters of the rift attack you, commanded by Florianne. After you defeat them, you can talk to one of the mercenaries and include him as an agent. Also, you receive an operation: "Help from Nevada". Finally, go to the Grand Ballroom across the last door and decide about the solution to the situation in the court...
The final decision dialYou can order Florianne to be captured, which exposes her crimes (support from the party), and take her away later on (no support) or turn her over to the guards. Later, during the conversation with the empress, you can decide if you are in favor of Briala or Gaspard - the arguments that affect your decision are constituted by the secrets that you have found out during the exploration of the palace. You can pass a judgment on the captured Florianne later on, at the Skyhold.
If you decide that you capture Florianne on your own, you will fail - the empress will survive, but you will have to fight her outdoors. The key to victory, in the first place, is to defeat the appearing Venatori soldiers in the first place, and attack Florianne at long range, because as a professional rogue, she is capable of fast movements, dodges, and she also puts your melee-fighting party members to sleep. After the battle, you can take her bow (legendary). After you return to the palace, you can also decide on the life of Gaspard.
If you let the empress to be killed (no support from the party) Briala or Gaspard may rise to power - you decide which one - picking Briala has a bad reception from the party members. Also, you will not avoid confronting Florianne in the courtyard.
Rewards for completing the quest:
Red Jenny's Stashes
 A Red Jenny stash at level -1
At the Winter Palace, there are three Red Jenny Stashes to be found. To start this quest, talk to Sera at the Grand Ballroom (she needs to be your ally).
Rewards for completing the quest:
Throwing Away Money
 One of the caprices
At the palace, apart from the Scandalous Secrets you can also find Caprice coins. Look out for them, whenever the radar is glowing orange, which lets you know of the items hidden nearby. Note - the radar only when you are very close!
 The Caprice coin fountain
The collected caprices need to be thrown into the water reservoir at the Guest Garden. For each Caprice coin that you collect and toss in, you receive an extra approval point.
Rewards for completing the quest:
Herd of Stone Halla
One of the Halla Statues
Stone Hallas are the small statuettes all around the palace. Apart from the collector's value, they have their purpose - you need them to open some of the locked doors and access hidden rooms. To complete the quest, you need to collect 10 statuettes.
 An example door that requires a halla statuette
Note - there only are 11 stone hallas in the palace - this is too few to open all of the doors, which is why you need to consider your decisions. For opening the first two doors from the below list, you receive a small amount of experience and 80 Influence points Below, you can find the list of rooms and what is inside.
Rewards for completing the quest:
The Great Blackmail Hunt
 An example book with a Scandalous Secret
From Leliana, you receive a side quest, which requires you to collect 30 Scandalous Secrets all around the palace. You can get them by finding the documents and letters in the locked and opened parts of the Palace. As for the remaining ones, you receive them by eavesdropping on conversations - stand within the red circle, near the talking guests and interact. Not always does it end in success so, keep trying until you succeed - there is a secret for each red circle.
Rewards for completing the quest:
The remaining actions that add approval points
Prince Germain (a council member) ask about Gaspard: +5 approval points and a Scandalous Secret.
Herald Council Vassal: there appear two dialogue options here:
Way to unlock the quest: Complete the Here Lies the Abyss quest
Quest giver: -
 Arabor wilds
After you have completed the Here Lies the Abyss quest, you can start another one, in the main storyline. It has been divided into several stages and the recommended level, to complete the quest is 16-19. To receive the quest, go to the war room and activate the operation with the name of the mission - cost: 40 Power points.
You will travel to the Arabor wilds (M29,1a). It is merely a transition area, which is the battlefield to various units of the Corypheus's army. You can even skip the battle and simply push forward, until you reach the Mythal Temple (M29,1b).
 The mosaic in the temple
At the Mythal Temple, approach the mosaic in the center (M29,1c). You note that these are slabs that glow blue, after you walk onto them. You need to light all of the slabs, but there are some rules, though:
As soon as you manage to solve the puzzle, door on the upper floor opens and you can proceed into the temple.
 Two paths: the door in the distance or the hole next to you
Now, there are two paths to choose from: perform the ritual (M29,1d-1f) and cross the main door (M29,1g) or enter from below (M29,1h) after the Red Templars. What makes the choice important is that the elven guards become turn hostile towards you, if you skip the rite. On the other hand, if you perform it, they become your allies and additionally, they guide you across the areas in the temple, away from the enemies, through secret passages that would be inaccessible to you, otherwise. Also, you can choose a compromise - perform the ritual in the temple and follow the tunnel behind the back of the Templars - also then you will gain the favor of the elves.
 The first ritual
To perform the rite, you need to solve puzzles to the one that you had to handle at the temple's entrance. The first ritual (M29,1d) is this: walk into the center of the mosaic and deactivate all of the slabs. Walk onto the second one, from the wall, turn left and walk over the outer rim, over the stairs down. Turn right and get to the end, where you walk over to the neighboring slab. Return over the outside rim. After you walk onto the stairs, go left and light the rest of the slabs. After the first mosaic is alit, hop over the low wall and make the pattern over the second mosaic, in a nearly identical way - start with the first slab in the very corner.
 The second ritual
The second ritual (M29,1e) is exceptionally easy: you simply need to stand on the slab on the stairs and go left. Zigzag ahead and walk around the second statue on the left. There, keep zigzagging up until you return to the starting slab.
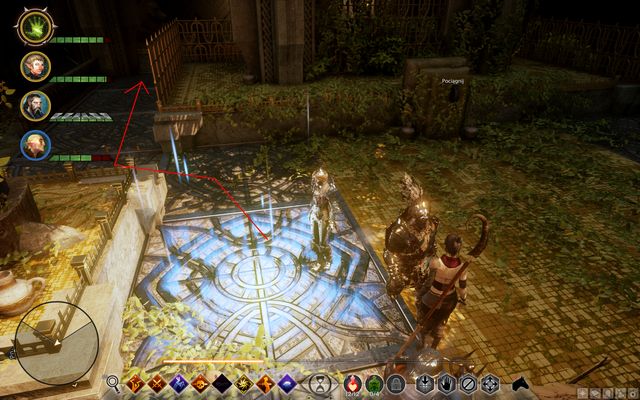 The third ritual
The last ritual (M29,1f) may be trifle troublesome. First, walk into the center and use the lever. Now, stand on the single slab on the left and head towards the opened gate. There, zigzag your way over all of the slabs. Return by keeping at the same height as the starting slab. Stand on the golden flooring and use the lever. Now, as you are standing on the rim, zigzag your way onto the opposite edge. Then, light all of the slabs around the statue in the center.
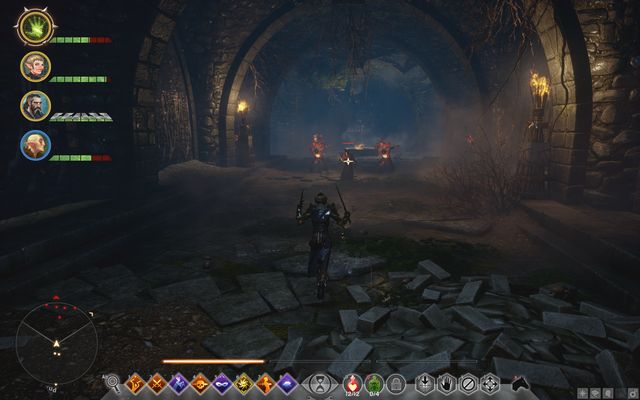 The sewers under the temple
If you enter the hole (M29,1h) you get into the sewers. You need to go leftwards of the entrance, as far as possible, to get to the other side of the sewers. Then, along the other side, you need to return to the other side again, but across the passage at the other end.
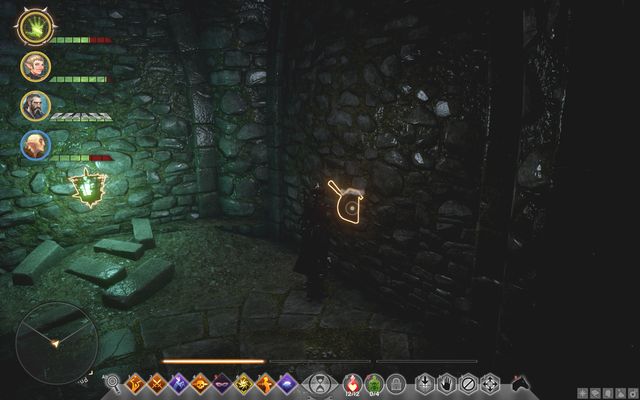 The lever for the grate
At the other side, there is a passage behind a grate - you can open it with the hidden lever (M29,1i) next to the veilfire torch.
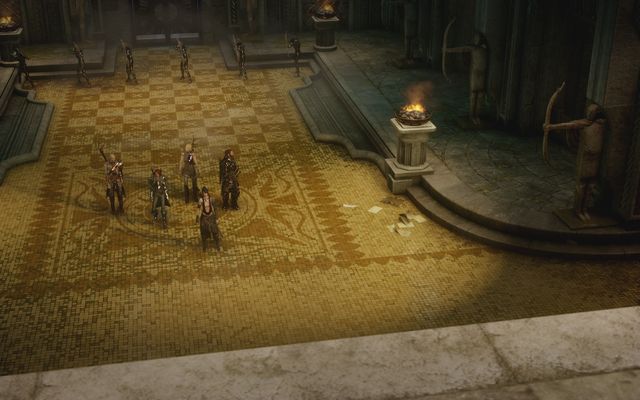 Surrounded by elven guards
Now, after you enter the main corridor, you will be surrounded by elves - if you do not want to/can't ally yourself with them, you will have to fight them. However, if you ally yourself with them, after the cutscene, follow the old elf guide with the cane. He will guide you to the last door (M29,1j) of this stage.
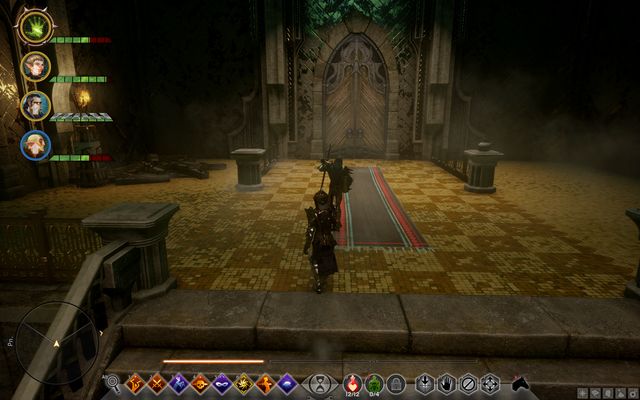 The elven guide
If you decide on passing on your own, you are up to quite a lot of fighting, both the elves and the Red Templars. If you see that they have a slight advantage over you, you can first let them fight each other and simply finish off the remnants.
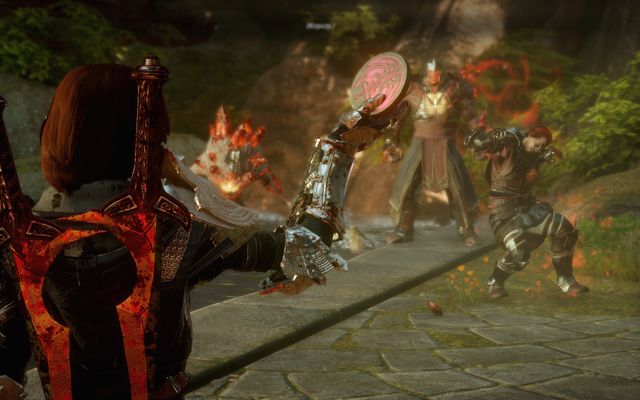 The artifact that you can use to destroy Samson's armor
After you reach the last door, climb down the stairs. There, you encounter Samson - Corypheus's right hand man. Note! If you have earlier completed, for Cullen, "Before the Dawn" quest, you will now be able to use the artifact to destroy Samson's armor.
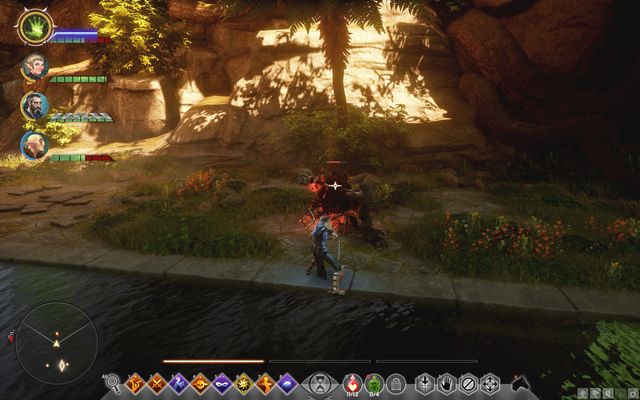 Samson
If you have allied yourself with the elves, Abelas is going to help you fight Samson. The enemy is sluggish, but he is tough and the battle may take a while. If you are playing as a ranged character, do not let him land attacks on you and do not interrupt yours. If, however, you fight at a short distance, watch out for Samson's swings and occasional spinning attacks, across the arena. As you deplete his health bar, he will become stronger and stronger, but also more and more sluggish, at the same time. His parameters go up every 25% of health.
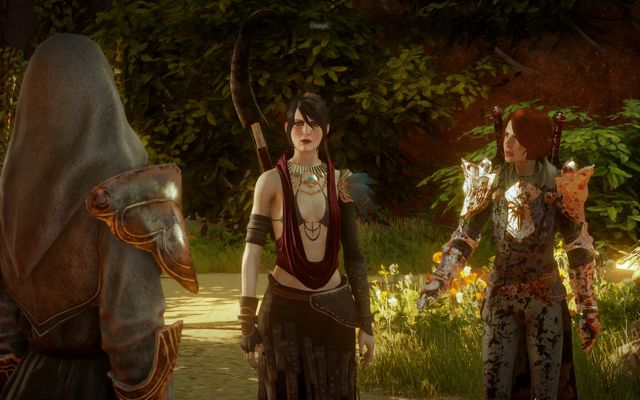 Make a decision at the well
After the battle, you see a cutscene, where you decide who is to receive the well's power. You can either point to yourself or to Morrigan. Your decision will determine who will handle conversations, until the end of the game.
There are no rewards for this quest.
Way to unlock the quest: Complete the What Pride Had Wrought quest
Quest giver: -
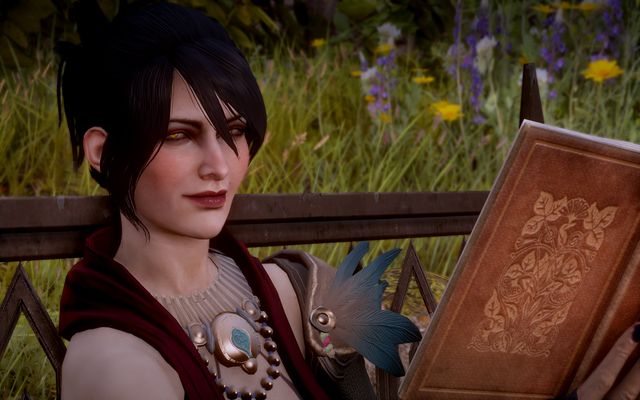 Morrigan at the hold's garden
You start this last-but-one quest automatically, after you complete the What Pride Had Wrought quest. Go to Skyhold and talk to Morrigan. Then, head to the temporary location of the game world: Altar of Mythal.
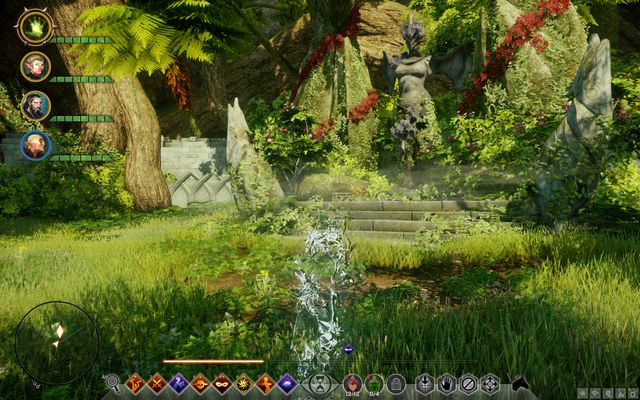 The Altar of Mythal
There, approach the altar and interact with it. During the conversation with the NPC that appears, you learn that they will agree to help you fight Corypheus. If it is Morrigan that received the power of the well, she will be able to weaken the dragon. IF it is you, who drank from the well, a dragon appears, who you will have to fight. You do not need to kill him completely, you only need to deplete the majority of his health.
Afterwards, return to Skyhold.
There are no rewards for this quest.
If you used the Dragon Age Keep tool and before playing changed the game world state from the previous installments of Dragon Age, it is possible that this task will look different.
If in Dragon Age: Origin, the first installment, you have decided for Morrigan to have a son - descendant of the gods, then after completing the "What Pride Had Wrought" task and returning to Skyhold you most go the room with eluvian (a mirror) where Leliana awaits for you. You will need to travel after Morrigan through the portal. There a cutscene will play which will differ on whether the Inquisitor or Morrigan drank a water from the Temple of Mythal.
Way to unlock the quest: Complete The Final Piece quest
Quest giver: -
You start the quest as operation of the same name (no cost of the operation) and the recommended level to complete this one is 16-19 but, on a difficulty level other than "easy", a higher experience level is recommended.
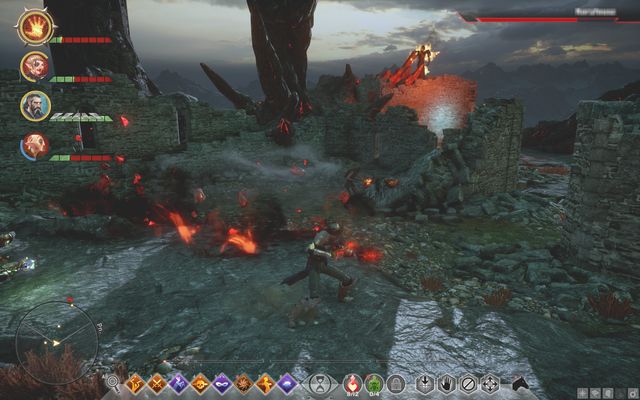 Corypheus attacking at a distance, at the second stage.
You get to an arena, with your party and Corypheus. The level of the boss is 23, he is resistant to any critical effects, but he takes miniscule damage from elements. At the critical moment, you can also use the power of the barrier (a special ability), which has a damaging effect on him. At the first stage, up until you deprive him of about 1 of health, you can use everything that you pack. Later on, he goes up in level.
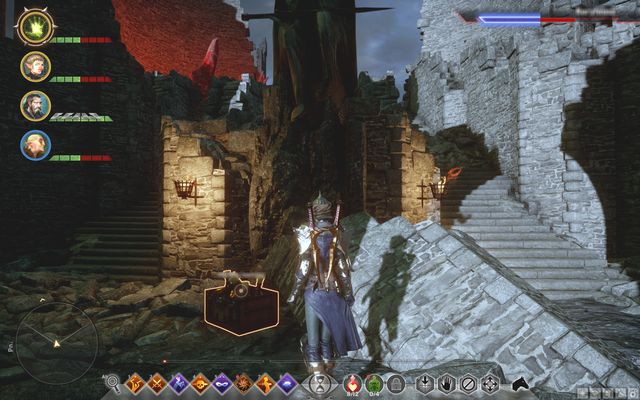 A supply crate
Climb up the stairs and remember to loot the supply crate - remember, however, that you should first use up all of the potions that you have, because you replenish your supplies after you open the crate, and you cannot use it for the second time. Once you climb up the stairs, only ranged party members will be able to fight, for some time. It is worth having a mage now, who can enclose those units within a barrier, or shielded characters, who will be taking on damage dealt by Corypheus. After you have depleted more of the enemy's health points, you get to fight the dragon (dependent on your choices within the storyline).
To defeat the dragon quickly, deal damage to all of his limbs, up to the point at which they start to bleed - then you stand a chance of flipping the beast over, because he will be defenseless then. Try to avoid all of the attacks aimed at you, because they deal lots of damage, but are easy to dodge.
 Corypheus's last moments
Then, climb to the higher level and, just like previously, attack Corypheus. He will often switch targets for his attacks so, you need to run after him, or switch between the individual party members to dodge the attacks. The end of the battle, ends the game's storyline and you return to Skyhold, where you can continue the game, save some of the Inner Circle quests, which may be unavailable now, if you have not completed them earlier.
There are no rewards for this quest.
How to unlock: After arriving to Skyhold and completing the Specializations for the Inquisitor operation.
Quest giver: -
 The teachers in Skyhold.
When you first arrive to Skyhold, you will be able to purchase new special skills, after completing the Specializations for the Inquisitor operation. When you complete it, three teachers will appear on the courtyard and they will present you their learning paths. Each class (rogue, mage, warrior) is divided into three special sub-classes. You can choose the specialization yourself. As you obtain the ability to become an expert in a certain field, your companions also reveal their predetermined specializations. Your choice depends only on your preferences and strategy, but bear in mind that it cannot be changed later (it is also not obligatory to choose a specialization). Besides a new skill tree, you obtain no additional perks from choosing a new path of development. The Skill list chapter will help you make the decision.
This quest looks the same in every case: After completing the operation, go to the courtyard and locate the teachers (they can be found in different places, depending on your class, but always on the courtyard). Talk to each one to be able to make the decision about your specialization. After choosing your path, collect the materials and items described in the quest log to craft the special item. You can do so near any crafting table (found in the camps or in Skyhold, near Sir Morris). When you have the required item, return to the appropriate teacher and enjoy your new skills. Below, you can find a list of the requirements of each specialization.
Reward:
Specializtion requirements:
 Rashvine
Infusion Primer is a special item that can be obtained by killing two-handed warriors in Crestwood . They travel in groups and are easy to found near the coast.
Rashvine is a kind of a liana hanging from trees and rocks in Exalted Plains , Emerald Graves and Emprise du Lion .
You can find Writings on Reaver methods in the tavern, near Iron Bull . You can also buy this item from a merchant in Val Royeaux .
Note - despite the name of the item you're crafting, you don't need Dragon Blood to make it.
Specialization requirements:
Heraldic Symbol can be obtained by killing three enemies in Exalted Plains , near the southern edge of the map. It is the beginning part of the swamp, north from the western camp.
Veridium is a commonly found mineral. You can find in for example in Exalted Plains .
Writing on Champion methods can be found near Blackwall in Skyhold stable. If Blackwall is not one of your companions, you can buy the item from a merchant in Val Royeaux .
Specialization requirements:
Broken Philter can be obtained by killing demons from the rifts in Hinterlands . It is more probable that you find the item when defeating powerful demons.
Embrium is commonly found in the whole Thedas. However, collecting 50 plants is quite a challenge. It is good if you have Inquisition perk - Optimal Cutting, which gives you 10% chance of collecting a few herbs with one cut. Look for the plant Hinterlands , Crestwood and in Emerald Graves .
Writing on Templar methods can be found near Cassandra . You can also buy them from a merchant in Val Royeaux .
Specialization requirements:
 Deathroot
Deathroot is a plant that can often be found near desert areas: Forbidden Oasis, Western Approach and Hissing Wastes. You can find it easily by looking for withered trees - Deathroot grows beneath them.
Assassin Weapon - they cannot be bought or found. You need to go to Crestwood and look for groups of enemy warriors. In every group, there is an assassin carrying this item. The less quests you've completed in a given location, the more of such groups you will meet.
Writing on Assassin methods can be bought from a merchant in Val Royeaux. You can also find it in Skyhold, if you've recruited Cole. It is lying next to him (on the attic of the tavern).
Specialization requirements:
 A Quillback
Alpha Quillbacks are slightly bigger than usual Quillbacks. They can be found i Western Approach, in the area where you leave the canyon leading west from the first camp and also in the northern part of the map.
You can find Obsidian in most of the locations, for example in Crestwood, Emerald Glaves, Exalted Plains and also in the north-eastern part of Hinterlands - on the path leading to the dragon.
Writing on Artificer methods can be found near your companion with the same specialization - Varrik. He stands near the entrance to the Keep. You can also buy the book from a merchant in Val Royeaux.
Specialization requirements:
Essence Containment Apparatus is a rather rare item. You can acquire it by searching the bodies of fallen demons in Storm Coast. It is important that the demons should not be connected with rifts. Such enemies can be found for example in the central part of the map, on the hill.
Spirit Essence is an item that drops from more powerful demons from the rifts.
Writing on Tempest methods can be found in Sera's room (if you've recruited her) or bought from a merchant in Val Royeaux.
Specialization requirements
Venatori Tome can be obtained only in Exalted Plains, near the bodies of killed Venatori enemies. The less quests you've completed in the location, the more Agents you will encounter.
Ring Velvet is a quite common material in the game. You can obtain it by killing various enemies as random loot. However, the easiest way to find it is to kill Venatori enemies, so you can look for it when searching for Venatori Tomes in Exalted Plains.
Writing on rift magic can be found near Solas in Skyhold, or bought from a merchant in Val Royeaux.
Specialization requirements:
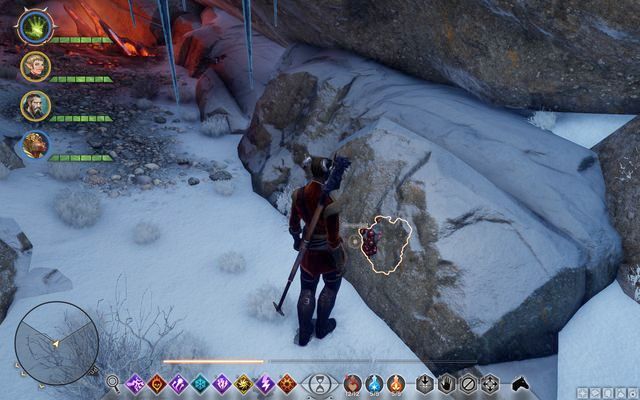 Bloodstone
Nevarran Skulls can only be found in Storm Coast, near Ghoul bodies. Ghouls are not very common, but you can find a few near the center of the map and when completing the Keeping the Darkspawn Down quest, where you will be closing rifts.
Bloodstone is very common in Emprise du Lion, so you shouldn't have any problems finding it. You can also find it in The Emerald Graves.
Writing on necromancy can be found near Dorian, on one of the floors of the tower in Skyhold. If Dorian is not in your team, you can buy this item from a merchant in Val Royeaux.
Specialization requirements:
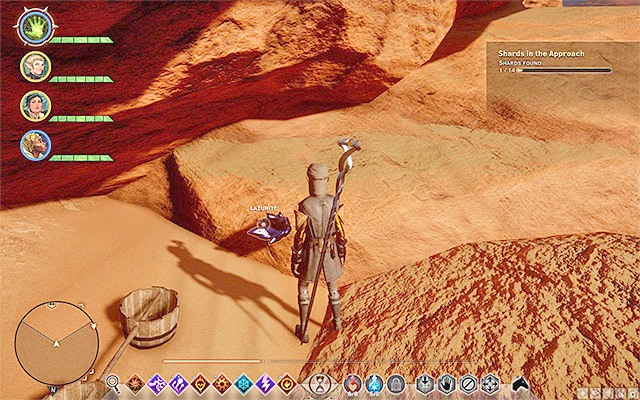 Lazurite
Wisp Essence (not to be mistaken with Spirit Essence) are not very common. To obtain it, go to The Fallow Mire and kill all the paranormal beings. This way, you should by able to quickly obtain the required amount.
Lazurite can be found mainly in the Western Approach and Hissing Wastes. You can also obtain in Exalted Plains.
Writing on Knight-Enchanter method can be found in Skyhold, near Vivienne. She stands on a balcony above the main entrance to the keep. If Vivienne is not one of your companions, go to Val Royeaux and buy the item from a merchant.
In this chapter of the guide, you can find walkthroughs for all of the side quests connected with your allies. First of all, these are quests that allow you to recruit new party members but, you can also find here, the quests tasked to you directly by the allies themselves, or connected with them, in some way. You can view these quests in your log, in The Inner Circle tab.
Several important notes:
Way to unlock: Meet with Varric.
The quest-giver: Varric (M2,6)
 During the conversation with Varric, raise the topic of the red lyrium
This quest becomes available after you meet with Varric in the central part of Haven (M2,6). While talking to the dwarf, it is necessary that you mention red lyrium, thanks to which you receive this quest., concerned with locating and destroying stashes of lyrium.
Note - If you have not started this quest at the beginning of the game, it is also available after you reach the Skyhold.
Note - This quest is considered as completed after you destroy twelve stashes of lyrium. There are more of them, in the game (eighteen, in total) so, it is not necessary that you find each of them. Personally, I recommend that you locate all of them, thanks to which you improve on your relations with Varric to the maximum extent.
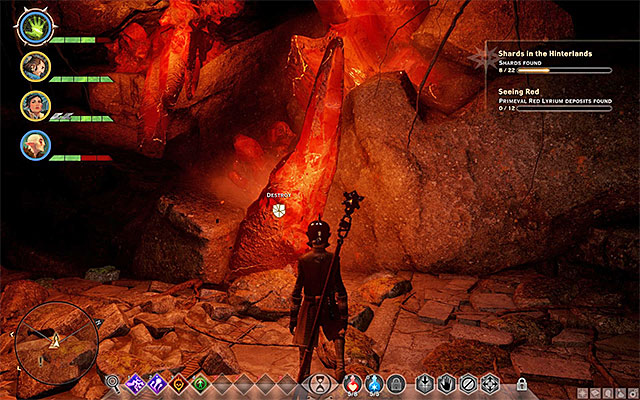 An example deposit
You can reach lyrium deposits in any order you want. After locating it, switch to any warrior and interact with deposit in order to destroy it.
In Hinterlands there are the following deposits:
In The Western Approach you can find following deposits:
In Emprise du Lion there are the following stashes:
In The Storm Coast, there are four stashes and you will be able to reach them only after you have unlocked the Red Water side quest. This is so, because you first need to gain access to the complex of caves in the North-Western part of the map. You find each of the stashes thanks to the exploration of the caves (M5,10b)(M5,10c)(M5,10d)(M5,10e).
In Emerald Graves there are the following stashes:
Rewards for completing the quest:
Way to unlock: Automatically, after you approach the Mysterious Arrow stuck in the ground.
The quest-giver: - (M4,1)
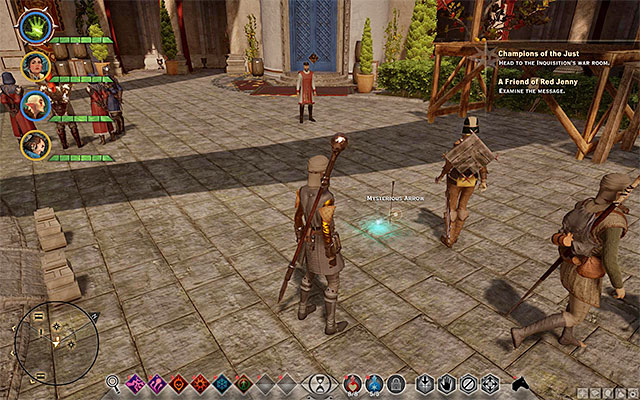
This quest becomes available during your stay in Val Royeaux, i.e. the location that you visit, among others, during one of the storyline quests. Explore the central yard in Val Royeaux. You need to find the Mysterious Arrow shown in the above screenshot (M4,1) and examine it. This will display a note on the screen and there appears a new item in your log.
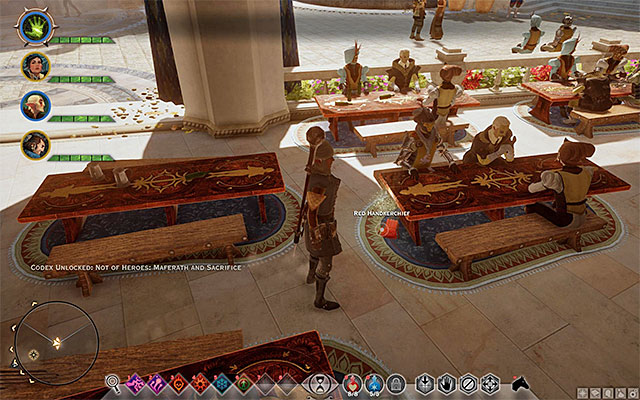 An example handkerchief
Your next task is to find three items hidden all around Val Royeaux. You can reach them in any order you want. At the bottom level, you need to explore the area around the cafe (M4,1a) and the docks (M4,1b). Additionally, you need to visit the upper level of the market place (M4,1c). At this point, it should be noted that you can reach the upper level by selecting one of the fast-travel points on the map. In each of the three cases, you need to press the scanning key/button and collect the Red Handkerchiefs.
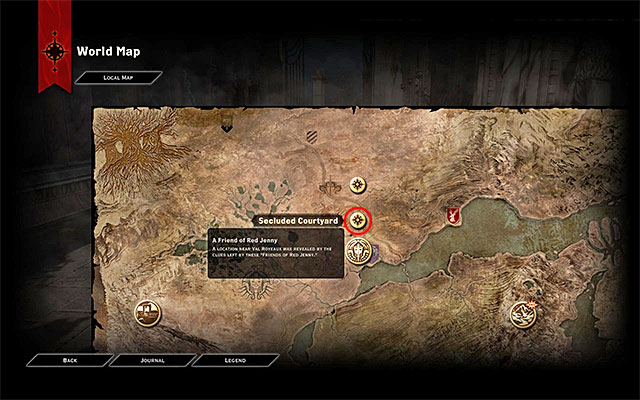
Obtaining all three handkerchiefs unlocks, on the world map, a location connected with Val Royeaux. It is the Secluded Courtyard marked in the above screenshot. Travel there.
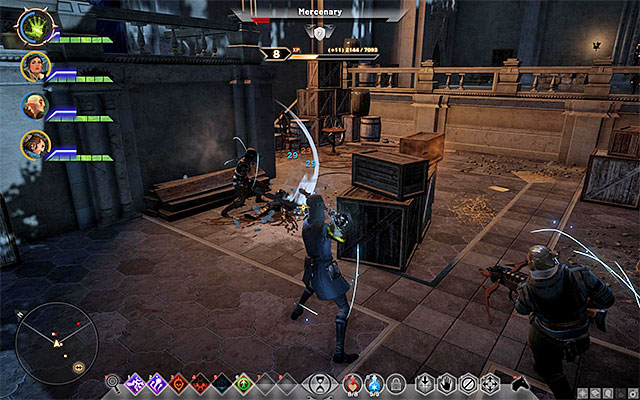 You need to kill all the mercenaries
After you get to a new location, you will have to fight an easy fight with a group of Mercenaries. If possible, eliminate the archers in the first place and only then, the bandits that want to fight in melee. After the fights, walk over into the neighboring area, where you encounter the elf archer Sera.
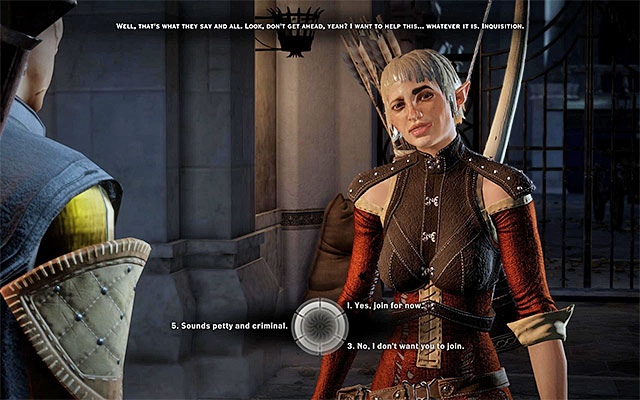 Pick the dialogue option to invite Sera into the party
The conversation with Sera is interrupted by more mercenaries. Also this time, the fights area easy. Watch out, while talking to Sera, because towards the end, you will have to decide whether you want her on the party, or to send her away. The better way to follow is the former, of course.
Rewards for completing the quest:
Way to unlock: Meet with the messenger.
The quest-giver: Messenger (M4,2)
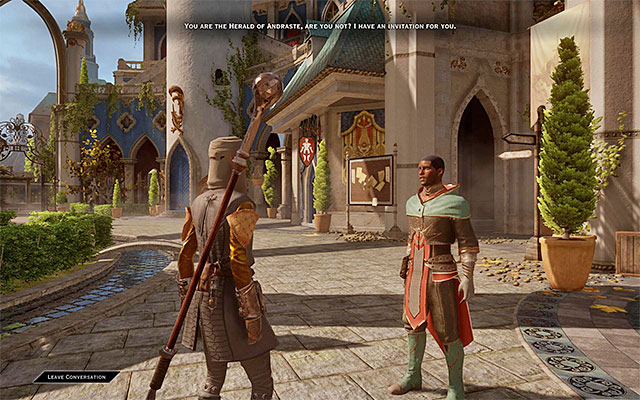 Messenger
This quest becomes available during your stay in Val Royeaux,
i.e. the location that you visit during one of the main quests of the game. Explore the central yard in Val Royeaux. You need to locate the messenger (M4,2) and talk to him. From the messenger, you receive an invitation to Vivienne de Fer's estate.
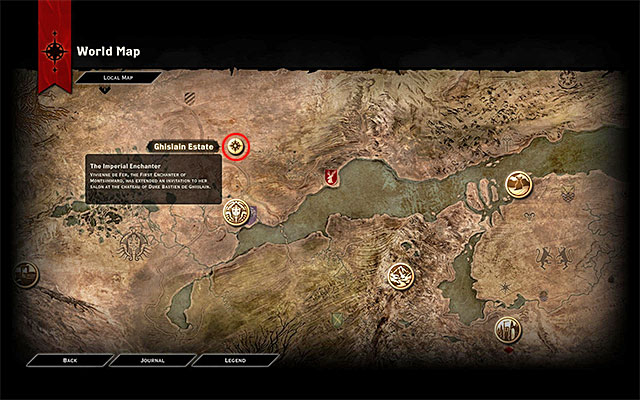
You can now leave Val Royeaux. Wait for the world map to load and pick the newly-unlocked point shown in the above screenshot. It is the Ghislain Estate.
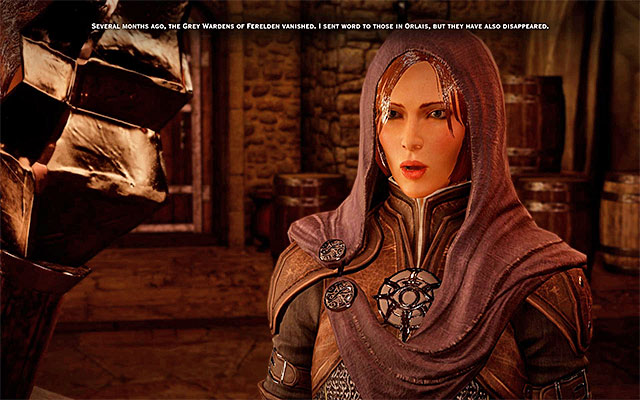 It is best to offer Vivienne to join the party
After you reach the estate, you will not be able to explore it, because immediately, you will see a longer cutscene of the meeting with Vivienne. During the conversation, you need to decide, whether you want Vivienne to murder the Marquis, who slandered the Inquisition in public, or let him live. However, you need to take the most important decision towards the end of the meeting - you need to decide whether you want to offer Vivienne to join the party or let her go. Personally, I recommend the former.
Rewards for completing the quest:
Way to unlock: Meet with Leliana.
The quest-giver: Leliana (M2,3)
Leliana brings up the Grey Wardens during the conversationThis quest becomes available after you complete your first journey to Val Royeaux, which takes place during The Threat Remains main quest. After you return to Haven (M2,3), a meeting will be summoned to discuss the situation with the Templars and the rebel mages. During the meeting, Leliana mentions the Grey Wardens and reveals that ward Blackwall has recently been seen in the Hinterlands.
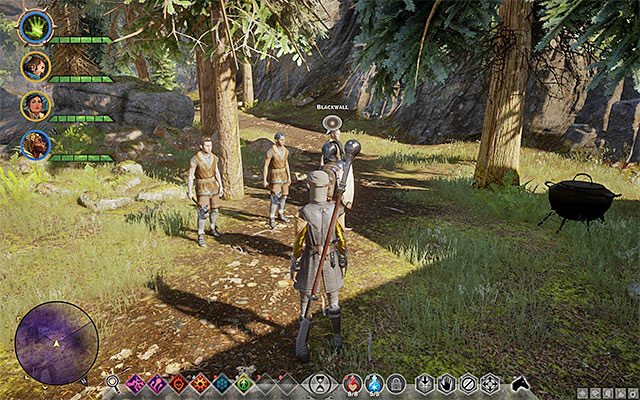 The place, where you find Blackwall
You can now travel to Hinterlands. Head towards the lake in the central part of the map (M3,14a). Here, you find Blackwall accompanied by a group of recruits. Try to talk to the warden, which will result in several bandits arriving at the scene. After you start fighting, focus on eliminating the archers quickly, and then deal with the enemy fighters.
 Offer Blackwall to join the party
After you win the battle, you can talk to Blackwall again. As usually, the most important is the final part of the meeting, where you can offer him to join you, or dismiss him. Of course, I recommend that you o the former, especially that Blackwall is a perfect warrior.
Rewards for completing the quest:
Way to unlock: Meet with Vivienne.
The quest-giver: Vivienne (M2,9)
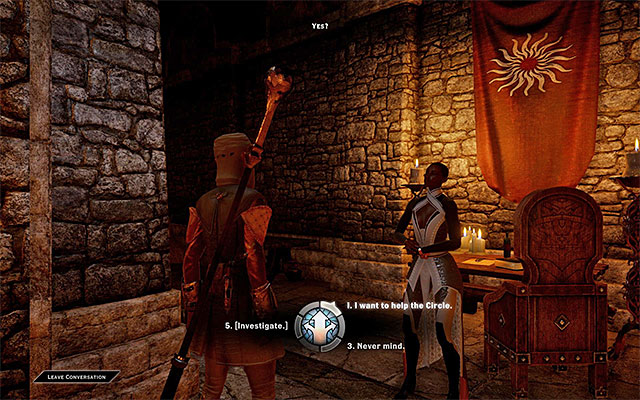 You need to express your willingness to help the Circle
This Quest becomes available only after you have recruited Vivienne, i.e. after the first side quest (The Imperial Enchanter). Return to Haven and locate Vivienne in the Chantry (M2,9). During the meeting with the enchantress, say that you want to help the Circle. As a result, the woman asks you to find three Circle Tomes - they have been hidden in the Hinterlands, The Western Approach and in the Exalted Plains.
Note - If you have not completed this quest at the beginning of the game, it will also be available after you reach the Skyhold.
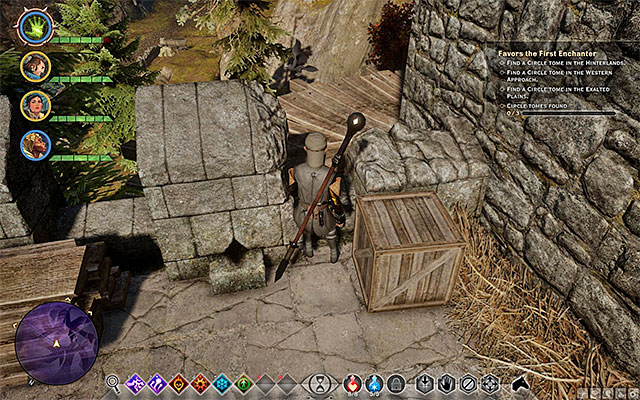
You can find the Circle Tomes in any order that you want. As for the Hinterlands, you need to explore the central part of that location (M3,15a), i.e. to the North of the Crossroads. You need to make it to the top of one of the towers next to the destroyed gate. First, take the ladder to climb the walls and in the spot shown in the above screenshot, jump over to the wooden balcony. Climb another ladder and after you get to the top, find the Circle Tome.
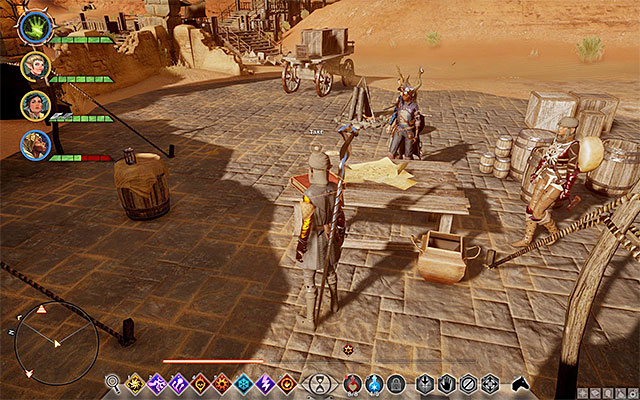 The tome on the table
The Western Approach is another location with one of the tomes. Go to the south of the map (M19,12a). Tome (Circle Tome) will be lying in the camp, where couple of bandits may be wandering around.
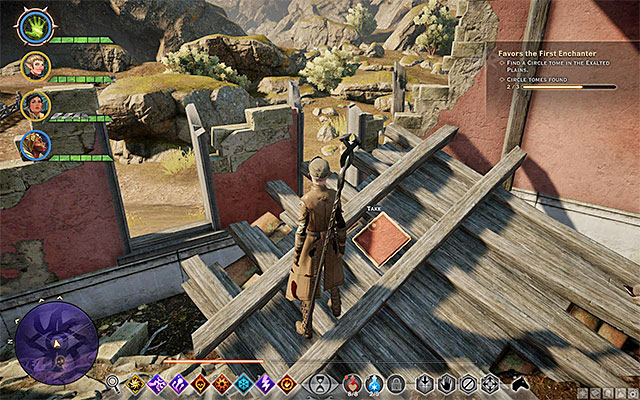 The last volume
The last, third tome can be found while exploring The Exalted Plains. It is in the central part of the map (M18,22a). Explore the red, dilapidated building to the North of the starting point, thanks to which you obtain the tome without major problems.
After you have found all three of them, return to Skyhold and meet up with Vivienne to tell her that you have found the books (the conversation is compulsory, even if the enchantress accompanied you on the journey).
Rewards for completing the quest:
Way to unlock: Spotkanie sie z Kremem.
Quest giver: Krem (M2,2)
 You can find the messenger in the encampment
You can receive this quest during your travel to Val Royeaux, during "The Threat Remains" main quest. After you return to Haven, and take part in the council, find messenger Krem anear the chapel entrance (M2,2). From him, you learn that the Chargers are interested in cooperation with the Inquisition. You will be asked to attend the meeting with their leader - the Iron Bull.
 Help the Charger eliminate enemy units
You can find chargers at The Storm Coast and, if you still have not unlocked this location on the world map, you need to complete the "Vigilance on the Coast" side quest that s connected with the location. After you get to the coast, head towards the beach (M5,4a). You should note that the Chargers are fighting Tevinter soldiers here. Start fighting the unwelcome guests and, just like in the case of the rest of the fights, deal with the enemy archers in the first place.
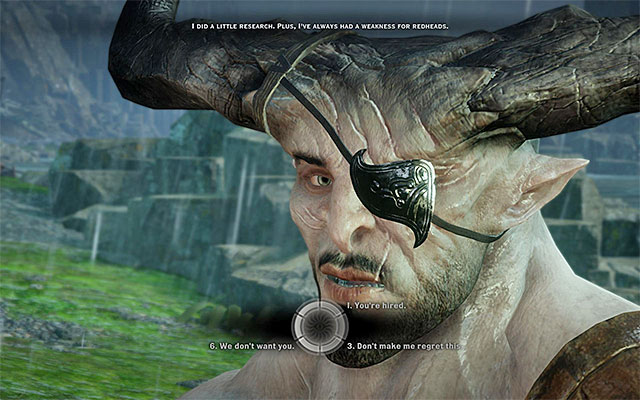 Enter a cooperation with the Iron Bull
Winning the battle activates a cutscene of the meeting with Krem and the Charger leader - the Iron Bull. Of course, during the conversation, you should express your interest in hiring the Chargers and in inviting the Iron Bull into the party.
Rewards for completing the quest:
Way to unlock: Meet with Blackwall.
Quest giver: Blackwall (M2,10)
 Ask Blackwall about the rest of the grey wardens
You receive this quest only after you have recruited Blackwall so, after you have completed The Lone Warden side quest. Return to Haven and find Blackwall - he is staying near the local blacksmith's place (M2,10). Start a conversation with Blackwall and raise the topic of the "missing" Grey Wardens. As a result, you receive this quest which is connected with finding artifacts that have been left by the members of the Wardens. In total, there are ten artifacts that you need to find - two of them are in Hinterlands, in Western Approach, Emprise du Lion, Fallow Mire and The Storm Coast. You can travel to the abovementioned locations in any order you want.
Note - if you have failed to complete this quest at the beginning of the game, it is also available after you reach Skyhold.
In Hinterlands, you can find the artifacts in the following locations:
In The Storm Coast, you can find the artifacts in the following locations:
In The Fallow Mire, you can find the artifacts in the following locations:
In The Western Approach, you can find the artifacts in the following locations:
In Emprise du Lion, both of the artifacts are in Vlaeska's Watch in the northern part of the map (M15,16a). The structure has been shown in the above screenshot and you can start the exploration of the watch only after you have found the key in the "Vlaeska's Keep" side quest. In the watch, you find:
 Obtaining the artifacts is beneficial to your relationship with the Grey Warden
Fir finding the artifacts, you will be reward with Blackwall's favor. If you have him on the party, this improvement in relations occurs automatically. Otherwise, you will have to return to him, during your stays in Haven to hand the artifacts over to him.
Rewards for completing the quest:
How to unlock: Talk to Cole in Skyhold.
Quest giver: Cole (M12,1)
 Area where you start the quest (near the stairs)
After arriving at the Skyhold for the first time, near the stairs in the courtyard you can start a quest (M12,1). After activating it, you will see a cut-scene, during which you can decide whether Cole should join the Inquisition or just walk away. If you agree, he will become a member of your team. If you'd like to talk to him, you will find him on the first floor of the tavern.
When you talk to him in the tavern and ask him about his life, you will unlock an operation: Locate Rhys and Evangeline and also Deploy Rhys and Evangeline.
Rewards:
How to unlock: Talk to Josephine in Skyhold.
Quest giver: Josephine (M12,6)
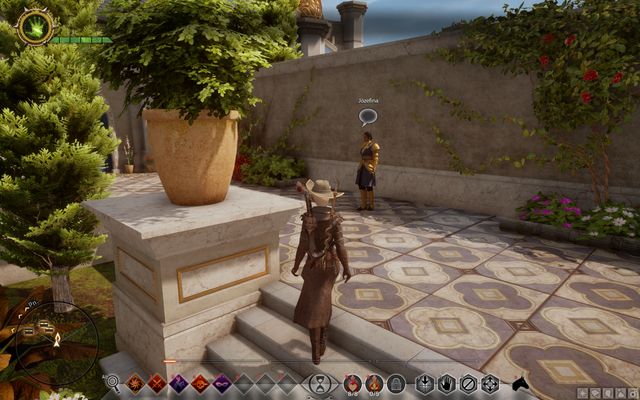 Josephine in Val Royeaux
In Skyhold, after you talk to Josephine (M12,6) about all the minor subjects, approach her later (simply walk out of the location and go back again) and she will tell you about some family problems. You can accept a new quest. First, you will have to go to Val Royeaux and find Josephine on a square in the southern part of the location (M4,3a). After the conversation, you will both go to talk to the comte.
 The comte's three warriors.
After the conversation, when the assassin is exposed, you can let him go or attack him. If you choose to fight, you will have to deal with another three enemies. Return to Skyhold and talk to Josephine. Now you can decide whether you support her or Leliana. She is suggesting you to send agents that will destroy the contract and you will complete the mission quickly (Operation: Destroying House of Repose's Contract). For completing the mission earlier, you will receive the same rewards.
The second option is more time-consuming. You have to talk to Josephine again and try to solve the problem without violence. First, you will have to complete the Find a Sponsor for the Paraquettes operation.
If you've the documents, return to Val Royeaux and talk to Josephine. You will find her in the eastern part (M4,3a). After the conversation, you will complete the mission.
 The Countess in Val Royeaux.
If you've chosen to solve the situation in a peaceful way, talk to The Countess in Val Royeaux (M4,3b), after the first operation. Then, return to Josephine. Go to the War Table and select: Getting a Judge's Favor. Return to the advisor and ask about the next step. You will receive a new operation: Speak with Minister Bellise at Party.
 Josephine in the eastern part of Val Royeaux (near the end of the mission).
After completing the operation, go to the party. You will discuss the final solution to the situation. Return to Josephine and she will tell you to meet her in the eastern part of Val Royeaux (M4,3a), You will complete the mission there.
Rewards:
How to unlock: Talk to Cassandra after talking to Varric in Skyhold.
Quest giver: Cassandra (M12,3)
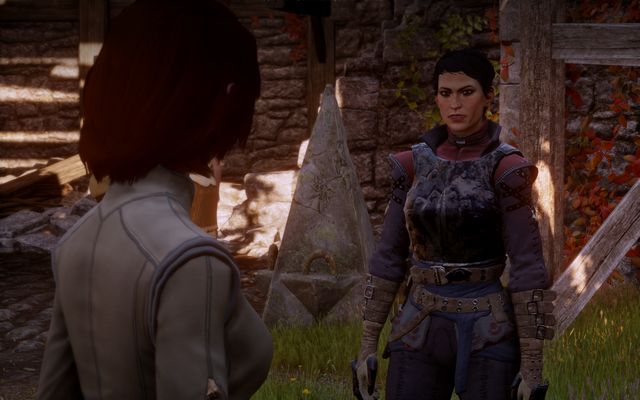 Talk to Cassandra near the tavern.
After arriving at Skyhold and talking to Varric (M12,2b) on the wall, go to Cassandra (M12,3). After a short cut-scene, you will be able to talk to her. She will give you a quest to kill a few important persons in various location. You can eliminate the targets in any order. After completing the task, you don't have to return to Cassandra.
 One of the targets in the Emerald Graves.
The first target is located in the Hinterlands. You will find him in old ruins located east from the southern campsite in the forest (M3,46).
The second target can be found in the eastern part of the swamp in Exalted Plains.
The next person is located in Emprise du Lion. After leaving the village, where you start the game, go to the frozen lake on the right and reach the island in the middle of it (M15,7a). Here, you will find a mage that you have to eliminate.
You can find the fourth person in the Emerald Graves. He is located in the north-eastern part of the map (M19,13a), where you can enter only after completing the operation and going through Coracavus.
The last target can be found in The Western Approach. You can find him in the eastern part of the map (M19,13a), where you can go only after completing the operation and going through Coracavus.
Rewards:
How to unlock: Talk to Sera in her room in the Skyhold tavern.
Quest giver: Sera (M12,16)
 Sera can be found in her room in the tavern.
Talk to Sera when she's in her room in the tavern (M12,16). She will ask you to prepare guards for the march of the battalion. To complete the quest, simply approach the Wart Table and finish the A Battalion for Sera and Verchiel operation.
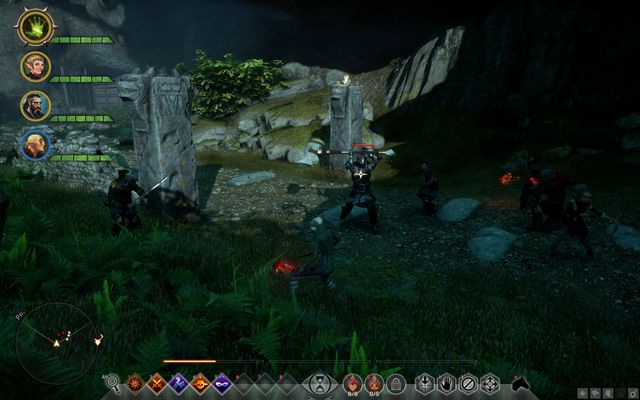 Not a very successful ambush.
After completing the operation, return to Sera and go to collect the reward. You will be ambushed - defeat the three bandits and talk to the nobleman. If you want to gain Sera's support, the only right option is to let her kill him. Don't ask too many question, because Sera will attack him by herself.
Rewards:
How to unlock: Talk to Cassandra in Skyhold.
Quest giver: Cassandra (M12,2)
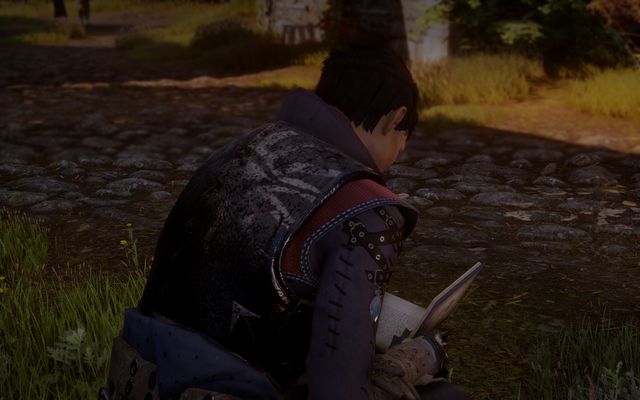 Cassandra loves Varric's books.
It is the next quest that you receive from Cassandra(M12,2). You can start it in the same time as Unfinished Business. After the conversation, go to Varric (M12,2a), standing right behind the entrance to the keep. Talk to him and return to Cassandra. Talk to here again and you will complete this short quest.
Rewards:
How to unlock: Talk to Solas in Skyhold.
Quest giver: Solas (M12,17)
 Go to Solas and he will tell you about his problems.
Talk to Solas (M12,17) in Skyhold. He will ask you to find his friend in Exalted Plains. Before receiving the quest, you will have to listen to a few other topics or go to another location and back again.
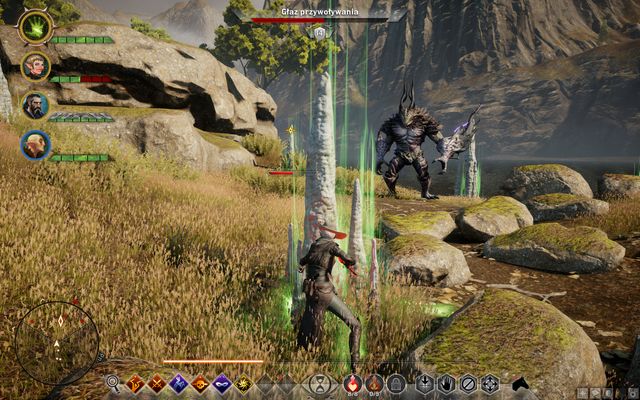 The demon in Exalted Plains
After going to Exalted Plains, head south-east, along the river (M18,5a). You will find a demon there. To gain Solas' support, don't kill the demon but destroy the summoning stones around him.
When the stones are destroyed, or after you end the fight, another conversation will begin - allow Solas to kill the mages to gain his support. At the end, go back to Skyhold and talk to him.
Rewards:
How to unlock: Talk to Dorian in Skyhold.
Quest giver: Dorian (M12,4)
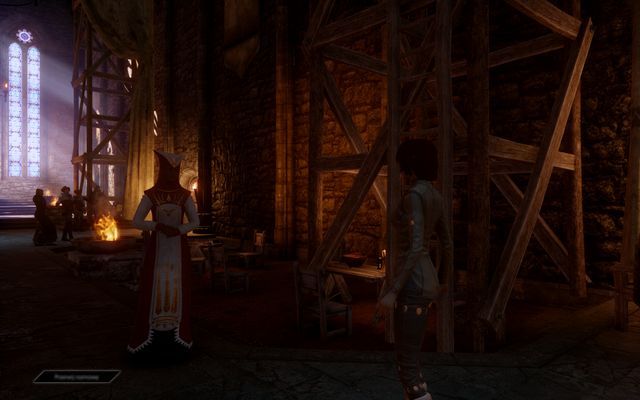 Mother Giselle in the main hall.
Talk to Dorian (M12,4). After the conversation, you can talk to Mother Giselle (M12,4a) in the main hall. She will tell you about a letter for Dorian and ask you to take him to Redcliffe tavern (Hinterlands) (M3,2b) for a meeting. Take him as your companion and go to the tavern.
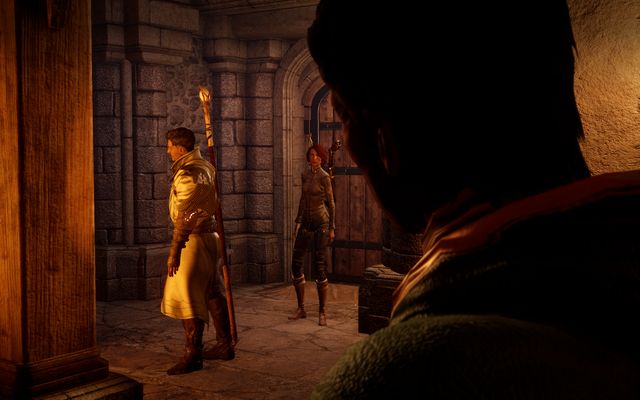 The cut-scene when walking into the tavern.
A cut-scene will start, during which the best way is to support Dorian all the time to gain his friendship. When the conversation is over, there's one more dialogue in the Skyhold and you will be complete the quest.
No rewards.
How to unlock: Complete the Dorian's Request operation and talk to Dorian.
Quest giver: Dorian (M12,4)
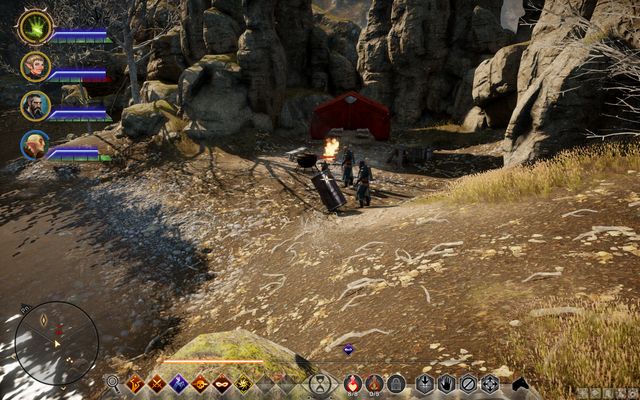 Venatori in the Exalted Plains.
Complete the "Dorian's Request" operation available at the War Table. First, go to Hinterlands and kill two Venatori Mages.
One of them can be found north from the farms, in the top-right corner of the map (M3,45a). You will find the second target south-east from the campsite in the forest (M3,45b).
Go to Exalted Plains and you will find the last Venatori near the camp on the swamp (M18,19a). After killing the last one, you will complete the quest and gain Dorian's support.
No rewards.
Way to unlock: Talk to Blackwall at Skyhold (the first conversation with this character in this location - requires a female!).
Quest giver: Blackwall (M12,18)
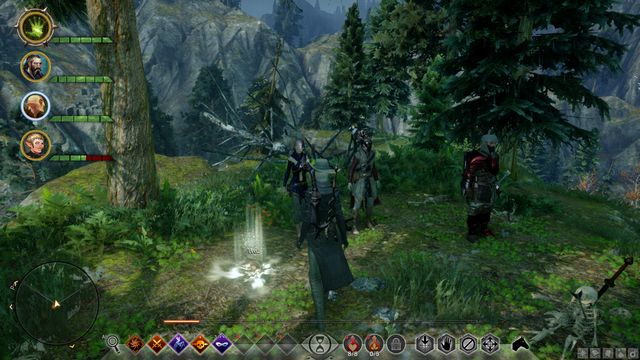 Your character and Blackwall on the Storm Coast
As soon as you reach Skyhold, you can start a love affair with Blackwall (if your character is a female and you have already flirted with Blackwall). If you want agree, after the conversation, in which you should pick the replies marked with the heart icon, you will be asked for a favor. Now, find him in the stables and talk to him to receive the quest. Now, go to the Storm Coast. There, reach the marked hill and find Blackwall's badge. After the conversation, you end the quest. After you return to Skyhold, you will witness a scene between your character and the ally, during which you can confirm your will to enter a relationship.
Rewards for completing the quest:
Way to unlock: Talk to Solas at Heaven.
Quest giver: Solas (M2,11)
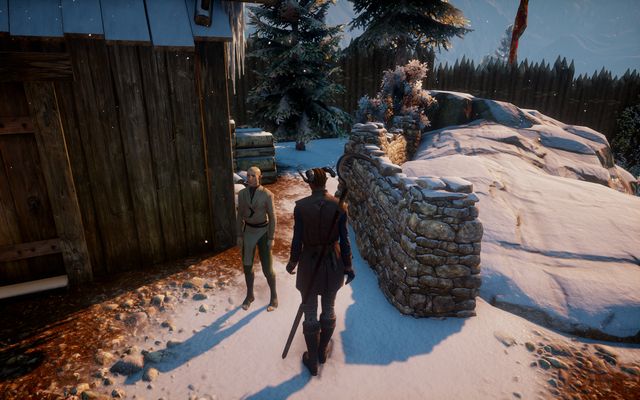 Solas at Haven
You receive this quest after you talk to Solas, while still at Heaven. Follow him into Hinterlands, to the cave to the East (M3,35).
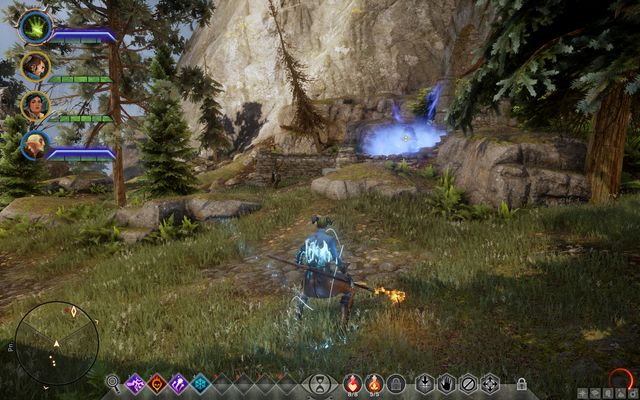 Mihris fighting a shade in front of the cave
In front of the cave, you encounter Mihris - an elven mage. She wants to join you in your exploration of the cave. You can either chase her away, thanks to which you win approval points with Cassandra, but it is better to allow her to go with you.
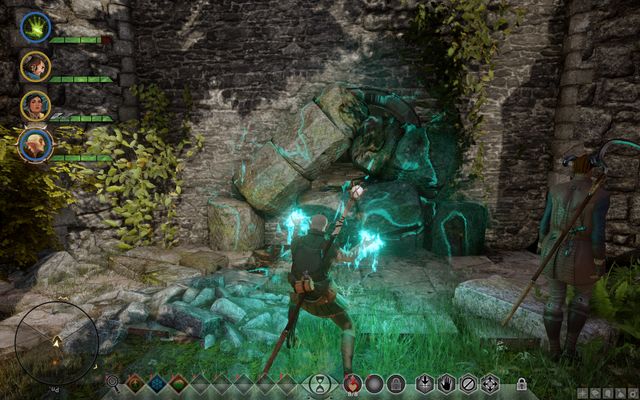 The cave entrance that requires some magic to open
To enter the cave, you need to use a mage (e.g. Solas). Inside, there is a corridor, two wraiths and a shade. To your left, there is a Veilfire torch - you can use it to collect a glyph later on- Fire Rune.
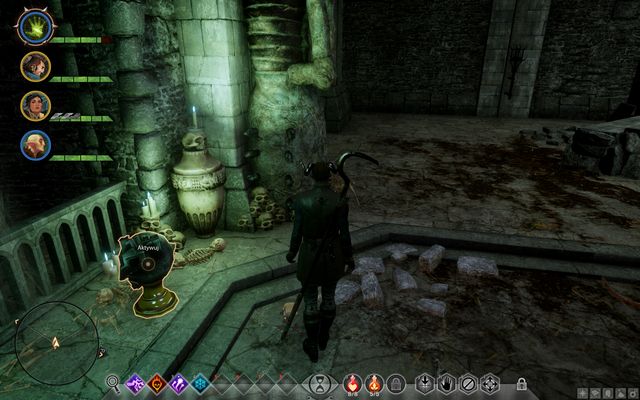 The elven artifact - barrier amplifier - to the left
Climb down the stairs into the main hall and locate the elven artifact in the middle - veil measuring device. After you activate it, you complete the quest. From now on, you can activate similar artifacts, while exploring the game world. For each artifact that you activate, you will be rewarded with some experience and Influence Points, as well as you will improve on your relations with Solas. As soon as you activate enough of them, you will be able to start the What Lies Dormant quest.
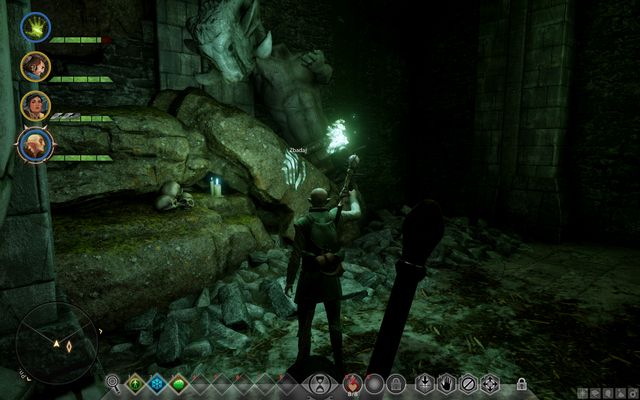 The glyph on the rock
You can find the abovementioned glyph on the rock to the left.
Mihris found a very interesting item in the cave. If Solas is on your party, you can ask him to convince the elf to give it to you - watch out if you are going to attack her - the elf is a level 16 mage. Otherwise, you can attack her and claim the item. The item is the Amulet of Power.
Rewards for completing the quest:
Way to unlock: Complete the Measuring the Veil quest, and then, activate around twenty elven artifacts (veil measuring devices).
Quest giver: Solas (M12,17)
You unlock the quest after you have activated enough elven artifacts (around twenty). You can activate them only after you have completed the first quest for Solas: Measuring the Veil. You then receive the Measure Veil Strength operation.
With the operation completed (note - it takes a dozen-or-so hours to complete) go to the Hinterlands, to find a new Rift past the village (M3,49). After you have sealed it, you complete the quest but, you need to watch out because the level is high.
Rewards for completing the quest:
Way to unlock: You need to be in a relationship with Josephine, ask her about the details of her life.
Quest giver: Josephine (M12,7)
This quest requires you to be involved with Josephine. Find her at the Skyhold. The quest is started by initiating a conversation - you need to ask questions. Then, Josephine tells you about her crest, which she would like to see. The quest is very short and it only requires you to complete the: "Find the Old Montilyet crest", and go to Val Royeaux.
 Trader Barnabus in Val Royeaux
There, on the main square, you find a trader with a stall - Barnabus (M4,5a). In the last tab of the items for sale, you can find a crest that is 0 gold. Buy it and take it back to Josephine. This is where the quest ends.
There are no rewards for this quest.
Way to unlock: Talk to Cullen in Skyhold. You can only complete this quest, before you start What Pride Had Wrought main quest, where you get to meet Samson.
Quest giver: Cullen (M12,7)
 Cullen in his chambers
Once Cullen returns to his office, visit him there and you receive a quest. It has been divided into several stages. In the first one, you need to go to Emerald Graves and collect three letters (M17,10a-10c).
 One of the groups of the Red Templars watching over the correspondence
Each one of the letters is being guarded by a small group of soldiers but, if you have a rogue on the party, he can enter stealth and sneak past them to steal the letter, without the fighting. After you collect the three letters, return to the quest giver.
 One of the letters on the scaffolding, in the Emprise du Lion mines
Now, Cullen tells you to go to Emprise du Lion, where you need to attack the Southern mines. Find there the hidden letters from the Red Templars correspondence (M15,20a,20b). Then, you are instructed to return to Cullen. All of the letters are on scaffoldings, guarded by Red Templars.
 Shrine of Dumat
After you return to Skyhold with the letters go straight to Cullen. After the conversation, he sends you to Dagna (in the Undercroft). Talk to her and go to the war room, where you start the newly-unlocked operation: Finding Samson's Weakness. After it ends, talk to Cullen again, and complete another operation: Track Down Samson. After you have completed both of them, return to Cullen. After the conversation, you can both go to Shrine of Dumat, a new location, which appears on the map, for the duration of the quest.
 Letters on the table
Kill all of the Red Templars on the main yards and a Behemoth will appear from behind the door. Defeat the opponent and enter. There, after you defeat several more groups of opponents, you encounter Samson's partner, at the end of the shrine - Maddox. After the conversation, take a look around the room. To the right of the corpse, there is a bottle and, on the desk in the middle of the room, there is a letter.
 Tools on the bench near the stairs
After you exit the room and go right, you find a small workbench with tools on it. After you pick them up, take a look around - there is a pouch on the other table - inside, there is a schematic for the excellent Rune of Decay. After you have collected those, you can return to the Skyhold. Finally, meet up with Cullen and Dagna in his chambers. This is where the quest ends.
Rewards for completing the quest:
Way to unlock: Talk to Cassandra in Skyhold. You need to have a high level of favor with her, flirt often with her and also have completed the previous quests connected with Cassandra. Zadanie dostepne jedynie dla postaci plci meskiej.
Quest giver: Cassandra (M12,3)
Talk to Cassandra in Skyhold. You receive the quest to find three elements that "romantic ambience" needs. Travel to the three locations, in any order":
From trader Pierre-Marie, to the left of your point of entry in Val Royeaux, buy candles - one of the quest items.
Val Royeaux - go to the Southern end of the location and find the elven female that you can talk to. After a positive conversation, you receive flowers.
Another location -Redcliffe village in Hinterlands. There, by the harbor, you find the book trader - a dwarf that tells toy where to find a tome of poetry. It is at the foot of the tree in Hinterlands, not too long way off to the South of the Western astrarium, next to the overturned cart.
With all of the items on you, return to Cassandra. After the cutscene, the quest ends and you start a relationship with Cassandra.
Rewards for completing the quest:
Experience (little)
80 Influence points
Way to unlock: Talk to Leliana in Skyhold BEFORE you start the "Here Lies the Abyss" main quest. To receive this quest, you need to have allied yourself with the Templars (instead of the Rogue Mages).
Quest giver: Leliana (M12,21)
Talk to Leliana in the tower in Skyhold. After the conversation, travel to Val Royeaux, where you gain access to one of the houses (enter from the dock side). Once inside, limb up the stairs and reach the end of the corridor. There, inside the room, deal with the Vetanori agents and search the corpse at the wall. Now, locate three crystals, by the walls of the room. Return to Leliana and, after a conversation with her, follow her to the Undercroft to meet with Dagna.
Approach the war table and complete: "Plant Crystals in Vetanori Headquarters" operation. After it is completed, return to Leliana and complete another operation: "Investigate the Shrine of Dumat". Then, travel to the new location
Enter the shrine. Inside, you are going to fight demons and get the opportunity to unlock a side quest: "Corypheus's Memories" by finding red crystals. Reach the other end of the building and you will encounter the Pride Demon along your path. At the very end, behind the grates, you find Magister Erasthenes. You can decide his fate, but any decision you take will be frowned upon, by various party members. Talk to him and finally, return to Skyhold and talk to Leliana to complete this quest.
Rewards for completing the quest:
A side quest whose goal is to collect six red crystals at the Shrine of Dumat during the "Under Her Skin" quest. This quest activates after you have collected any of the crystals. The crystals are to be found in the following locations:
Rewards for completing the quest:
Way to unlock: talk to Dorian at Skyhold, after you have completed his quests and entered the romantic relationship (males only).
Quest giver: Dorian (M12,4)
To receive this quest, complete the previous one for Dorian. In the main vestibule, where you can usually find Varrik, Bianka gives you a letter. After the conversation with Dorian, travel to Val Royeaux. Here, meet up with Ponchard, whom you find to the South of the location, by the store. During the conversation, you can decide what you think about Ponchard's conditions - this is an important part of the quest.
You can accept Ponchard's conditions - this unlocks a war table operation: "Help Ponchard de Lieux". After you complete the operation, you receive an amulet, return to Dorian in Skyhold once you have obtained it.
The other option is to intimidate Ponchard - for this, you need to meet several conditions:
If you have intimidated Ponchard, it also is an option to kill him, but this will result in completing the quest in the negative way - the love affair with Dorian will not be possible.
There are no rewards for completing this quest.
Way to unlock the quest: Talk to Vivienne after you complete the Wicked Eyes and Wicked Hearts quest, as well as the quests for the enchantress before that.
Quest giver: Vivienne (M12,1)
 Vivienne
In Skyhold, after you complete the Wicked Eyes and Wicked Hearts main quest, talk to Vivienne (M12,1). She will offer you finding the heart of a snowy wyvern, which she needs as an ingredient for her medicine. If you refuse her offer, you will lose the chance to complete the quest later on.
 The snowy wyvern
If you agree, on your map of the Exalted Plains, there appears a marking for the approximate area, where you can find the wyvern. It inhabits the areas of the marshes. It is easy to tell, by its white color. Kill the beast (level 15) and loot the corpse - you will pick up the wyvern heart. Return to Vivienne for your reward.
Rewards for completing the quest:
Way to unlock the quest: Talk to Cassandra in Skyhold after you complete the Here Lies the Abyss main quest.
Quest giver: Cassandra (M12,3)
 Caer Oswin
You receive this quest from Cassandra (M12,3) in Skyhold. First, you need to complete the "Locate the missing Seekers", and return to Caer Oswin. Upon your arrival (M25,1a) head towards the castle and enter through the wooden door.
 Opponents in the first room
Inside, you encounter several opponents. Loot the corpses thoroughly, because there is a key on one of them (M25,1b). Then, follow the corridor to the yard.
Defeat the rest of the opponents on the yard and find another key (M25,1c). Climb up the wide stairs to the big door. Past the door, you find several opponents more, this time shielded ones, as well. Climb up the stairs again, and find the dying Seeker (M25,1d), which activates a cutscene.
 The chamber with the big door
After it ends, climb upstairs and climb towards the next door. Behind this one, there is the Lord Seeker Lucius and his company. After the conversation, you will have to deal with him. He is not too much of a problem, nor are his minions. After the battle, search the corpse, thanks to which you find a legendary weapon and leave the location towards Skyhold. Now, see Cassandra again and talk to her to complete the quest.
Rewards for completing the quest:
Way to unlock the quest: Talk to Cole in Skyhold after you complete the Here Lies the Abyss main quest.
Quest giver: Cole (M12,19)
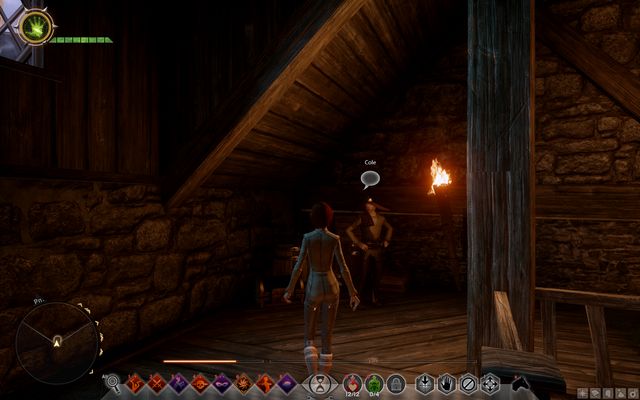 Cole
ColeIt is the only quest that you receive from Cole (M12,19) and which is recorded in your journal. After you complete Here Lies the Abyss, talk to the boy in the tavern, at the upper floor. He tells you about his fears and you receive a quest to find an amulet. You can do that by completing the Obtain Amulet for Cole operation. Then, return to talk to the boy.
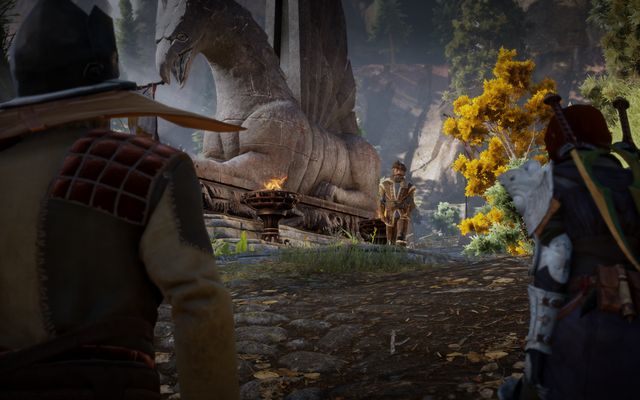 A fragment of a cutscene in Redcliffe
The rest of the mission is a long cutscene, where you have multiple conversations. Finally, you can decide whether Cole becomes a human or a ghost - your decision will affect the favor that you receive from Solas and Varric. After you complete your tasks, you can talk to Cole, to see one ore cutscene, connected with the decision that you have just taken.
Rewards for completing the quest:
Way to unlock: Find a note in the stable - Blackwall is not there at that time. Available after completing the main quest "Here Lies the Abyss".
The quest-giver: - (M12,18)
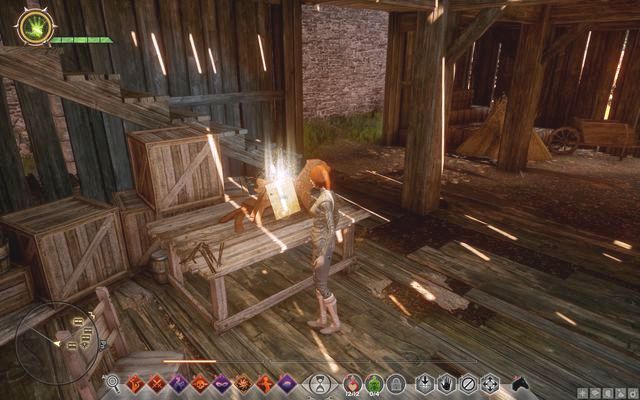 Letter in stable
After completing the "Here Lies the Abyss" quest, when you go to the Skyhold and then to the stable instead of Blackwall you should find a hidden letter there - unless first you must watch all cutscenes related to him - in that case it is possible that you will need to leave the location so that Blackwall "can disappear".
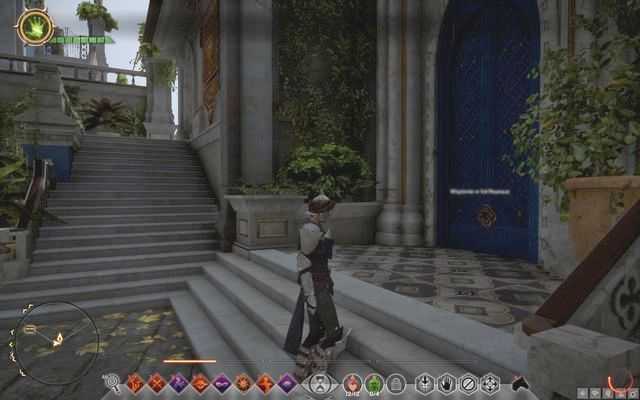 Entrance to prison in Val Royeaux
After you read the letter a messenger will show - talk to him and go to the Val Royeaux. There, on the main court a large group of people will gather around the gallows - walk towards them After cutscene go to prison in southern part beyond the gate, near stairs. In prison, talk to Blackwall and then with Cullen. Now you can go back to Skyhold and decide what to do with Blackwall.
Two operations are available: "Thom Rainier's fate" and "Rainier's Release: An Alternative". No matter which you choose, both of them will end with getting Blackwall to Skyhold for your judgment. No matter of the judgment you will unlock "The Consequences of Blackwall lies" operation.
There are three options of judgment available:
Rewards for completing the quest:
Way to unlock: Talk to Varrik in Skyhold after completing the "Here Lies the Abyss" main quest.
The quest-giver: Varrik (M12,20)
 Entrance to Valammar
You will recognize that the quest is available by an unknown female drawn standing next to Varrik in Skyhold. When you join the conversation, you will be given a quest. You must go to Valmmar (M3, 18a) in Hinterlands (if you don't have access to that location yet, you must take the key from the balcony in villa on west (M3,18). When entering Valmmar you will have to again choose your party members and Varrik is a mandatory companion during this quest.
 Secret passage below stairs
There is not much work for you in Valmmar. Go to the lower level, where you can find door unavailable before near the stairs. Bianca will open them.
A few dwarves reside inside, you must defeat them. Go to the end of the room and take key lying on the table. No all you must do is return to Skyhold and talk to Varrik (M12,20).
Rewards for completing the quest:
Way to unlock: Talk to Leliana in Skyhold after completing the main quest "Here Lies the Abyss".
The quest-giver: Leliana (M12,21)
 First switch
After you go to the tower in Skyhold and talk to Leliana you will unlock a new Inner Circle quest. Now you must go to the temporary location Valence Cloister accessible from the world map.
There you must find three hidden switches that activated will open hidden door. First switch is located on the right from the beginning point, in the corner of the room under a painting.
 Second switch
Second switch is on the left side from the entrance, under second painting.
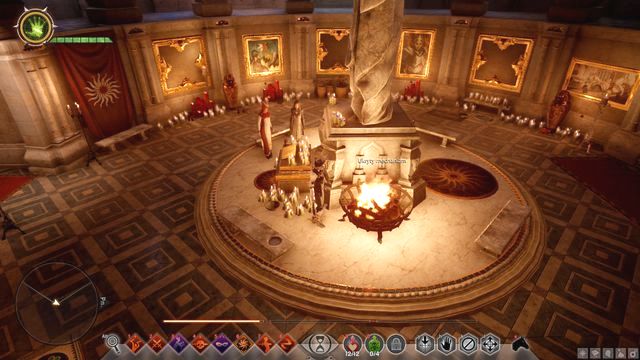 Last switch
And the last switch, which is in the middle on the pillar, behind fireplace.
After opening the hidden door cutscene will trigger. During it you can decide whether Leliana should kill sister Natalie or not - it doesn't matter since she will die anyway. After the movie loot the body - you will find a legendary weapon. After that, return to Skyhold and talk to Leliana.
Rewards for completing the quest:
Way to unlock: Talk to Iron Bull in Skyhold while having high approval level and after completing "The Captain of the Chargers" quest.
The quest-giver: Iron Bull (M12,22)
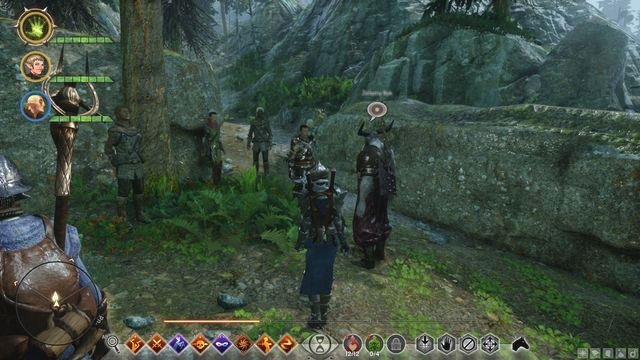 Tea gathering at the Coast
Talk to Iron Bull (M12,22) in Skyhold. You must have a high approval level and play all previous cutscenes before you can start this quest. Then go with Iron Bull (as companion) to Storm Coast to start the quest.
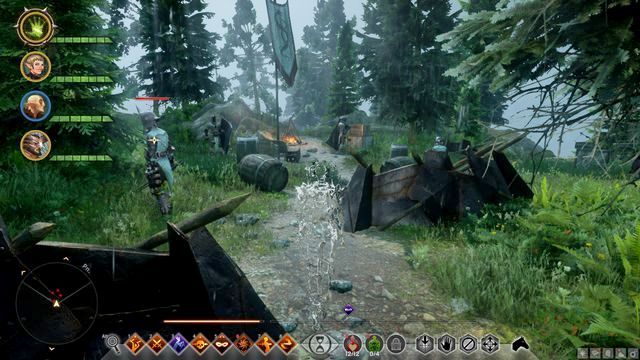 First Venatori camp
After cutscene talk again to Iron Bull and go to the marked point on the hill. Eliminate all Venatori in two camps on your way. Don't forget to search the chests - in one you will find legendary helmet.
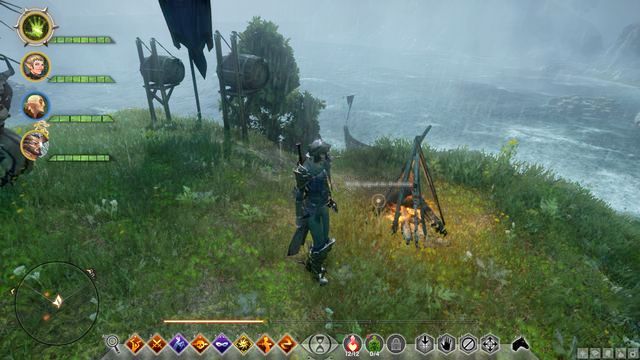 Signal fire
Then walk to the fire. Interact with it to give a signal for attack. During next conversation you must decide whether Bull warriors should retreat or try to hold the position. Holding the position is better option (you unlock the "Failed Assassination Attempt Inquiry" operation and get additional 400 influence points and more approval points from Iron Bull). It's the last thing you must do to complete the quest.
Rewards for completing the quest:
Way to unlock: Talk to Iron Bull in Skyhold, you must be in relationship with this companion.
The quest-giver: Iron Bull (M12,22)
Talk to Iron Bull (M12,22) in Skyhold. You must be in relationship with him. During the conversation in the tavern ask him about the seriousness of relationship and keep the conversation until you receive Kadan necklace receipt.
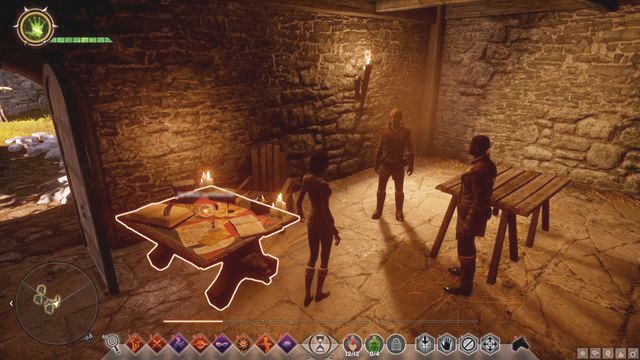 Morris near the order table in Skyhold
Now you must kill a dragon - or if you done it already - have an item: dragon teeth. It is the first item required for creating the necklace, second is 1x obsidian.
If you have both items, go to any order table to create the necklace. Then return to Iron Bull in Skyhold and give him the necklace, after a cutscene quest will end.
Rewards for completing the quest:
Way to unlock: Talk to Cullen's scout in Skyhold.
The quest-giver: Cullen's scout (M12,7)
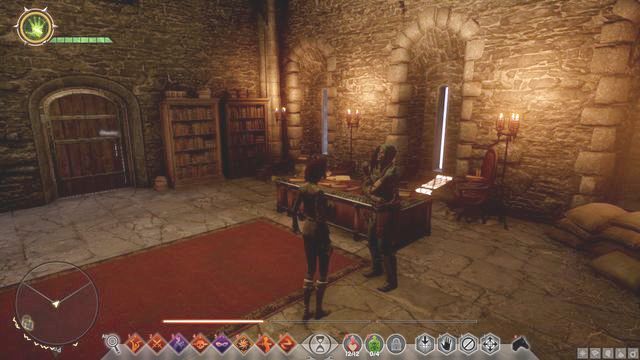 Scout in Cullen's office
At the beginning of this quest you will meet a scout in Cullen's office. You will learn that he went to talk with Cassandra.
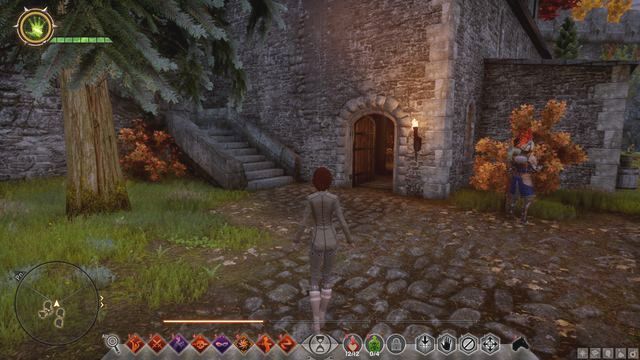 Door to armory
Go behind the tavern and enter the armory by the door near the stairs up the wall. After a cutscene return to Cullen to his office. Here you must decide whether Cullen - addicted to lyrium - should control himself and stop using it, or you give him free hand. No matter of choice you will complete the quest and the consequence will be seen only in epilogue.
Rewards for completing the quest:
Way to unlock: Talk to Cullen in Skyhold after completing "Perseverance" task and talking with him in the armory, relationship with Cullen is required as well.
The quest-giver: Cullen (M12,7)
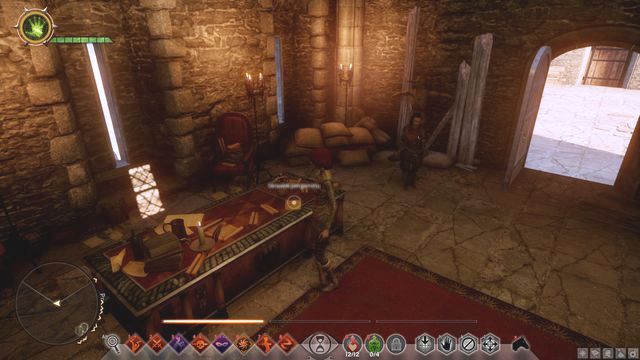 Letter in Cullen's office.
After completing the "Perseverance" quest you will find a note in Cullen office. He can be now found in the armory - go there to meet him - you will be able to change your decision about his addiction to lyrium.
After the cutscene go back to Cullen office. He will ask you to move with him to Ferelden - the quest will begin if you agree. You must be in relationship with Cullen to start this task. The whole quest is a cutscene in which Cullen will give you a memento coin - no matter if you decide to take it or not the quest will end in the same way.
No rewards for completing this quest.
Way to unlock: Talk to Josephine in Skyhold, relationship is required.
The quest-giver: Josephine (M12,6)
 When after the talk you return to the Hold, entering the Josephine office will trigger a cutscene
While being in relationship with Josephine (M12,6), talk to her about Antivia. After that, leave her, and after returning when you enter the office a cutscene will trigger. After it "Challenge Josephine's Fianc to a Duel" operation will be available, and during the conversation you can optionally select the crow icon that it will unlock "Gather Information on Lord Otranto" operation as well.
 Josephine's fianc from Val Royeaux
After completing the operation you will be given an order to go to Val Royeaux. When you arrive there, another cutscene will start. During it you can decide whether you want to start a relationship with Josephine for good, or not.
No rewards for completing this task.
Way to unlock: Talk to Sera in Skyhold, you must be in relationship with her.
The quest-giver: Sera (M12,16)
 The task will start with a short cutscene instead of a conversation controlled by you.
After starting a relationship with Sera and while having a high approval level, when you will go to talk to her a cutscene will start, in which you will learn of the gift from the girl. Wanting to repay her, you must learn of possible options by talking with all companions: Iron Bull, Cole, Vivienne, Cassandra, Blackwall, Solas, Varrik and Dorian (unless you don't have all of companions).
After that return to Sera and talk to her. After another cutscene the quest will end.
No rewards for completing this quest.
In this chapter, you find a list of the available operations, i.e. the missions that you task at the war room, at the current Inquisitions HQ. To learn more on how to visit the war room and dispatch your subordinates on operations, see the guide (the Inquisition Management chapter).
Several important notes:
It is a good idea to assign your advisors to the newly unlocked operations, on a regular basis, especially that many of them take several hours to complete.
Scout the Hinterlands
Requirements: 1 Power point
Availability: Operation connected with the main storyline
For whom: Josephine: no, Leliana: yes, Cullen: no
Commentary: Operation in connection with the storyline. It unlocks access to the Hinterlands.
Rescue Soldiers Missing in Ferelden
Requirements: 8 Power points
Availability: The first visit in Haven
For whom: Josephine: yes, Leliana: yes, Cullen: yes
Commentary: This operation unlocks access to The Fallow Mire.
Gather Coin
Requirements: -
Availability: The first visit in Haven
For whom: Josephine: yes, Leliana: yes, Cullen: yes
Commentary: You can replay this operation. Completing it is rewarded with a random amount of gold.
Scout the Storm Coast
Requirements: 4 Power points
Availability: The first visit in Haven
For whom: Josephine: no, Leliana: yes, Cullen: no
Commentary: This operation unlocks access to The Storm Coast.
The Teyrn of Highever
Requirements: -
Availability: The first visit in Haven
For whom: Josephine: yes, Leliana: yes, Cullen: yes
Commentary: -
Address a Nobleman's Concerns
Requirements: -
Availability: The first visit in Haven
For whom: Josephine: yes, Leliana: yes, Cullen: yes
Commentary: Completing this operation is rewarded with Influence.
Hard in Hightown 3: Varric's Revenge
Requirements: -
Availability: The first visit in Haven
For whom: Josephine: yes, Leliana: yes, Cullen: no
Commentary: -
Contact Clan Lavellan
Requirements: -
Availability: The first visit in Haven
For whom: Josephine: yes, Leliana: yes, Cullen: yes
Commentary: Completing this operation is rewarded with Influence points.
Investigate the Shards
Requirements: 4 Power points
Availability: Find any Shard.
For whom: Josephine: yes, Leliana: no, Cullen: no
Commentary: This operation unlocks access to The Forbidden Oasis.
Build Watchtowers
Requirements: -
Availability: During the "Farmland Safety" side quest.
For whom: Josephine: yes, Leliana: no, Cullen: yes
Commentary: Completing this operation is required for the completion of the "Farmland Safety" quest in The Hinterlands.
Address the Chantry in Val Royeaux
Requirements: 4 Power points
Availability: Operation connected with the main storyline
For whom: Josephine: yes, Leliana: yes, Cullen: yes
Commentary: Operation in connection with the storyline. It unlocks Val Royeaux.
Locate Weapon of Tyrdda Bright-Axe
Requirements: -
Availability: Unlocks a Landmark in the canyon, in The Hinterlands (Eastwards of the farm)
For whom: Josephine: yes, Leliana: yes, Cullen: yes
Commentary: The duration of this operation is very long (depending on the advisor that you assign, even 24 hours!) Completing it is rewarded with Tyrdda's Staff, which is a legendary item.
The Chantry Remains
Requirements: -
Availability: Automatically, as you progress into the game
For whom: Josephine: yes, Leliana: yes, Cullen: yes
Commentary: Completing this operation is rewarded with Influence points.
Red Jenny: The Inquisition Needs Beeees!
Requirements: -
Availability: The first meeting with Sera (a potential party member)
For whom: Josephine: yes, Leliana: yes, Cullen: yes
Commentary: Completing this operation is rewarded with an unique recipe (Recipe: Jar of Bees Grenade).
Champions of the Just
Requirements: 15 Power points
Availability: Operation connected with the main storyline
For whom: Josephine: yes, Leliana: yes, Cullen: yes
Commentary: Choosing this operation means agreeing to the alliance with the Templars. It makes the "In Hushed Whispers" operation unavailable.
In Hushed Whispers
Requirements: 15 Power points
Availability: Operation connected with the main storyline
For whom: Josephine: yes, Leliana: yes, Cullen: yes
Commentary: Choosing this operation means agreeing to the alliance with the Rebel Mages. It makes the "Champions of the Just" operation unavailable.
The Cult of Andraste
Requirements: -
Availability: Automatically, as you progress into the game
For whom: Josephine: no, Leliana: yes, Cullen: yes
Commentary: -
Truth or Dare: The Imperial Court
Requirements: -
Availability: The first time you meet Vivienne (a potential party member)
For whom: Josephine: yes, Leliana: yes, Cullen: yes
Commentary: Completing this operation is rewarded with Influence points.
Red Jenny Says: Drop and Grab
Requirements: -
Availability: Talk to Sera after she joins the party
For whom: Josephine: yes, Leliana: yes, Cullen: yes
Commentary: Completing this operation is rewarded with Influence points.
The Secrets of Andraste
Requirements: -
Availability: Completing The Cult of Andraste operation
For whom: Josephine: yes, Leliana: yes, Cullen: yes
Commentary: This operation can be replayed.
Utilize the Grey Warden Treaties
Requirements: -
Availability: Meeting with Blackwall (a potential party member)
For whom: Josephine: yes, Leliana: no, Cullen: no
Commentary: Completing this operation is rewarded with a random amount of gold and random resources.
Choose Successor in Lydes
Requirements: -
Availability: The first meeting with the Iron Bull (a potential party member)
For whom: Josephine: yes, Leliana: yes, Cullen: yes
Commentary: You can replay this operation and you will then obtain the Ancestral Shield of Lydes.
Investigate the Strange Chalk Markings
Requirements: -
Availability: Solve the astrarium puzzle on the Storm Coast.
For whom: Josephine: yes, Leliana: yes, Cullen: no
Commentary: Completing this operation is rewarded with Influence points.
An Offer from the Blades of Hessarian
Requirements: -
Availability: Complete the "Cleaning at the Storm Coast" side quest
For whom: Josephine: yes, Leliana: yes, Cullen: yes
Commentary: -
Upon the Waking Sea
Requirements: -
Availability: Complete "The secrets of Andrasta" operation.
For whom: Josephine: yes, Leliana: yes, Cullen: yes
Commentary: -
Secure a Route Through the Frostbacks
Requirements: -
Availability: Defeat the Hand of Korth on The Fallow Mire.
For whom: Josephine: yes, Leliana: yes, Cullen: yes
Commentary: Completing this operation is rewarded with Influence points.
Improved Stability
Requirements: -
Availability: After you complete the "In Hushed Whispers" or "Champions of the Just" main quest.
For whom: Josephine: yes, Leliana: no, Cullen: yes
Commentary: Completing this operation is rewarded with Influence points.
The Big One?
Requirements: -
Availability: Buying the Mysterious Box from merchant Deraboam in Val Royeaux.
For whom: Josephine: yes, Leliana: yes, Cullen: yes
Commentary: Completing this operation is rewarded with exotic mounts (Greater Nuggalope, Knuckled Thunderer, Gwaren Land-Hammer, Battle Nug, Tiddles Majoris).
Hunting the Shade Dracolisk
Requirements: -
Availability: After you deliver Dracolisk Scales for examination
For whom: Josephine: yes, Leliana: yes, Cullen: yes
Commentary: Completing this operation is rewarded with a new mount (Dragonlisk Hunter).
Grand Cleric Iona
Requirements: -
Availability: Completing the "In Hushed Whispers" main quest.
For whom: Josephine: yes, Leliana: yes, Cullen: yes
Commentary: Completing this operation is rewarded with the Amulet of Power.
In Your Heart Shall Burn
Requirements: 1 Power point
Availability: Completing the "In Hushed Whispers" or "Champions of the Just" main quest.
For whom: Josephine: yes, Leliana: yes, Cullen: yes
Commentary: Operation connected with the storyline. Unlocks access to the Skyhold.
Address Hasmal request
Requirements: -
Availability: Completing the "In Hushed Whispers" main quest.
For whom: Josephine: yes, Leliana: yes, Cullen: yes
Commentary: Completing this operation is rewarded with Influence points.
Explore Therinfall Redoubt
Requirements: -
Availability: After a thorough conversation with Crem (of the Iron Bull's party).
For whom: Josephine: yes, Leliana: yes, Cullen: yes
Commentary: Completing this operation is rewarded with Influence points.
Reports of the Spawns' Activity
Requirements: -
Availability: Completing the Cleaning House side quest on the Storm Coast.
For whom: Josephine: yes, Leliana: yes, Cullen: yes
Commentary: Unlocks a quest on the Storm Coast: Harness the Monsters.
Hunt Down the Therinfall Redoubt Demon
Requirements: -
Availability: After you complete Examine Therinfall Redoubt.
For whom: Josephine: yes, Leliana: yes, Cullen: no
Commentary: Completing this operation is rewarded with Influence points and Intensive Spirit Essence (3x), the operation takes long to complete (about 7h).
Shadows over Denerim
Requirements: -
Availability: Automatically, as you progress into the game
For whom: Josephine: no, Leliana: yes, Cullen: yes
Commentary: Completing this operation is rewarded with Influence points.
Strike a Bargain with Merchant Princes
Requirements: -
Availability: Automatically, as you progress into the game
For whom: Josephine: yes, Leliana: no, Cullen: no
Commentary: Completing this operation is rewarded with Influence points and a medallion.
Defend Clan Lavellan
Requirements: -
Availability: After the Contact the Clan Lavellan operation
For whom: Josephine: yes, Leliana: yes, Cullen: yes
Commentary: Completing this operation is rewarded with gold.
Conscript for the Inquisition
Requirements: -
Availability: Automatically, as you progress into the game
For whom: Josephine: yes, Leliana: yes, Cullen: yes
Commentary: Completing this operation is rewarded with a weapon upgrade.
On the Trail of the Hack
Requirements: -
Availability: Automatically, as you progress into the game
For whom: Josephine: yes, Leliana: yes, Cullen: yes
Commentary: For completing this operation, you gain access to the "Hard in Hightown: Hearty Parallels" operation.
Hard in Hightown: Hearty Parallels
Requirements: -
Availability: After you complete the " On the trail of the hack " operation.
For whom: Josephine: yes, Leliana: yes, Cullen: no
Commentary: Completing this operation is rewarded with the Amulet of Power.
Dorian's Request
Requirements: -
Availability: Automatically, as you progress into the game (with Dorian on the party)
For whom: Josephine: yes, Leliana: yes, Cullen: yes
Commentary: Completing this operation is rewarded with Influence points.
Power for a Price
Requirements: -
Availability: Automatically, as you progress into the game
For whom: Josephine: yes, Leliana: yes, Cullen: yes
Commentary: Completing this operation is rewarded with Influence points.
Gain Orzammar's Friendship
Requirements: -
Availability: Automatically, as you progress into the game
For whom: Josephine: yes, Leliana: no, Cullen: no
Commentary: Completing this operation is rewarded with Influence points.
Curb the Rebel Mages
Requirements: -
Availability: Automatically, as you progress into the game
For whom: Josephine: yes, Leliana: yes, Cullen: yes
Commentary: Completing this operation is rewarded with improved amulet of magic.
A Memorial for Haven
Requirements: -
Availability: Automatically, as you progress into the game
For whom: Josephine: yes, Leliana: no, Cullen: yes
Commentary: Completing this operation is rewarded with a weapon upgrade..
The Serpent of Nevarra
Requirements: -
Availability: Automatically, as you progress into the game
For whom: Josephine: yes, Leliana: yes, Cullen: yes
Commentary: Completing this operation is rewarded with a weapon Magister's Upgraded Staff..
Alliances: The Atmosphere of a Stalemate
Requirements: -
Availability: Automatically, as you progress into the game
For whom: Josephine: yes, Leliana: yes, Cullen: yes
Commentary: Completing this operation is rewarded with a random amount of gold.
Truth or Dare: Emperor's Court
Requirements: -
Availability: Automatically, as you progress in the storyline, after you complete "Truth or Dare: Imperial Court" operation.
For whom: Josephine: yes, Leliana: yes, Cullen: yes
Commentary: Completing this operation is rewarded with Influence points and unlocks the operation: "Truth or Dare: Lake Celestin".
Truth or Dare: Lake Celestine
Requirements: -
Availability: After completing the Truth or Dare: Emperor's Court operation
For whom: Josephine: yes, Leliana: yes, Cullen: no
Commentary: Completing this operation is rewarded with Influence points unlocks the operation: "Truth or Dare: See and Be Seen"
Truth or Dare: See and Be Seen
Requirements: -
Availability: After you complete "Truth or Dare: Lake Celestin" operation.
For whom: Josephine: yes, Leliana: no, Cullen: no
Commentary: Completing this operation is rewarded with Influence points or gold.
Investigate Hunter Fell
Requirements: -
Availability: Automatically, as you progress into the game
For whom: Josephine: yes, Leliana: yes, Cullen: yes
Commentary: Completing this operation is rewarded with gold. Also unlocks the: "Continue investigation" operation
Continue Investigation
Requirements: -
Availability: After you complete " Investigate Hunter's Fell" operation.
For whom: Josephine: yes, Leliana: yes, Cullen: yes
Commentary: Completing this operation is rewarded with Influence points and unlocks: Identify the Venatori agent operation
Identify Venatori Agent
Requirements: -
Availability: After you complete the " Continue Investigation operation.
For whom: Josephine: yes, Leliana: yes, Cullen: yes
Commentary: Completing this operation is rewarded with Influence points and vitaar. It is long and it takes up to 18 hours.
Acquire the Arcanist
Requirements: -
Availability: Operation connected with the main storyline
For whom: Josephine: yes, Leliana: yes, Cullen: yes
Commentary: After you complete this operation, an Arcanist appears in the keep.
Specializations for the Inquisitor
Requirements: -
Availability: Operation connected with the main storyline
For whom: Josephine: yes, Leliana: yes, Cullen: yes
Commentary: After you complete this operation, specialization trainers (various, depending on your character's class), appear in the keep.
Investigate the Western Approach
Requirements: 8 Power points
Availability: Automatically, as you progress into the game
For whom: Josephine: yes, Leliana: yes, Cullen: yes
Commentary: This operation gives you access to the Western Approach.
Western Approach Resources
Requirements: -
Availability: After you unlock the Western Approach.
For whom: Josephine: yes, Leliana: yes, Cullen: yes
Commentary: Allows you to obtain resources. Leliana: Deep Sea Mushrooms, Cullen: Paragon's Luster, Josephine: Deep Sea Mushrooms and Paragon's Luster.
Hinterland Resources
Requirements: -
Availability: Automatically, as you progress into the game
For whom: Josephine: yes, Leliana: yes, Cullen: yes
Commentary: A replayable operation. Allows you to obtain resources. Leliana: Elfroot, Cullen: Onyx, Josephine: Onyx and Elfroot.
Fallow Mire Resources
Requirements: -
Availability: Automatically, as you progress into the game
For whom: Josephine: yes, Leliana: yes, Cullen: yes
Commentary: A replayable operation. Allows you to obtain resources. Leliana: Elfroot, Cullen: Summer stone, Blue Vitriol, Josephine: Summer stone and Elfroot.
Find the Warden
Requirements: 8 Power points
Availability: Automatically, as you progress into the game
For whom: Josephine: yes, Leliana: yes, Cullen: yes
Commentary: This operation gives you access to Crestwood.
Crestwood Resources
Requirements: -
Availability: After you unlock Crestwood.
For whom: Josephine: yes, Leliana: yes, Cullen: yes
Commentary: A replayable operation. Allows you to obtain resources. Leliana: Embrium, Cullen: Obsidian, Josephine: Embrium and Obsidian.
Meeting in the Emerald Graves
Requirements: 8 Power points
Availability: Automatically, as you progress into the game
For whom: Josephine: yes, Leliana: yes, Cullen: yes
Commentary: This operation gives you access to the Emerald Graves.
Emerald Graves Resources
Requirements: -
Availability: After you unlock the Emerald Graves.
For whom: Josephine: yes, Leliana: yes, Cullen: yes
Commentary: A replayable operation. Allows you to obtain resources. Leliana: Embrium, Cullen: Pirofit, Josephine: Pirofit and Embrium.
Investigate the Exalted Plains
Requirements: 8 Power points
Availability: Automatically, as you progress into the game
For whom: Josephine: yes, Leliana: yes, Cullen: yes
Commentary: This operation gives you access to the Exalted Plains.
Exalted Plains Resources
Requirements: -
Availability: After you unlock Exalted Plains.
For whom: Josephine: yes, Leliana: yes, Cullen: yes
Commentary: A replayable operation. Allows you to obtain resources. Leliana: Itchvine, Cullen: Veridium, Josephine: Veridium and Itchvine.
Hold Venatori in the West
Requirements: 20 Power points
Availability: Automatically, as you progress into the game
For whom: Josephine: yes, Leliana: yes, Cullen: yes
Commentary: This operation gives you access to the Hissing Wastes.
Hissing Wastes Resources
Requirements: -
Availability: After you unlock Hissing Wastes.
For whom: Josephine: yes, Leliana: yes, Cullen: yes
Commentary: A replayable operation. Allows you to obtain resources. Leliana: Aria Wandala and Deadroot, Cullen: Lazurite, Josephine: Aria Wanda and Lazurite.
Secure More Lyrium for the Templars
Requirements: -
Availability: After you complete "Champions of the Just" main quest
For whom: Josephine: no, Leliana: yes, Cullen: no
Commentary: Completing this operation is rewarded with Influence points.
The Order's Obligations
Requirements: -
Availability: After you complete " Champions of the Just"
For whom: Josephine: yes, Leliana: yes, Cullen: yes
Commentary: Completing this operation is rewarded with Influence points.
The University of Orlais
Requirements: -
Availability: After you complete "Champions of the Just"
For whom: Josephine: yes, Leliana: yes, Cullen: yes
Commentary: Completing this operation is rewarded with Orlesian Army Warrior Armor schematic.
Nobility and Casualty
Requirements: -
Availability: After you complete "Champions of the Just"
For whom: Josephine: yes, Leliana: yes, Cullen: yes
Commentary: Completing this operation is rewarded with Influence points and the Amulet of Power.
Scout Haven Ruins
Requirements: -
Availability: After you talk to Crem at the tavern, in the Inquisition HQ
For whom: Josephine: yes, Leliana: no, Cullen: yes
Commentary: For completing this operation you gain access to another one "Find the Heretic Priestess", and Influence points.
Find the Heretic Priestess
Requirements: -
Availability: After you complete "Scout Haven Ruins"
For whom: Josephine: yes, Leliana: yes, Cullen: no
Commentary: Completing this operation is rewarded with Influence points a random amount of gold.
New man on the Staff: Young Tearaway
Requirements: -
Availability: After you talk to Sutherland at the tavern, in the Inquisition's HQ
For whom: Josephine: no, Leliana: yes, Cullen: yes
Commentary: Completing this operation is rewarded with Influence points a random amount of gold.
Find Rhys and Evangeline
Requirements: -
Availability: After you talk to Cole at the tavern, in the Inquisition's HQ
For whom: Josephine: yes, Leliana: yes, Cullen: yes
Commentary: For completing this operation you receive another operation "Deploy Rhys and Evangeline", as well as Influence points.
Deploy Rhys and Evangeline
Requirements: -
Availability: After you complete "Find Rhys and Evangeline"
For whom: Josephine: yes, Leliana: no, Cullen: no
Commentary: Completing this operation is rewarded with three units of Spirit Essence.
A Friend in Qarinus
Requirements: -
Availability: After you talk to Dorian at the Inquisition's HQ
For whom: Josephine: yes, Leliana: yes, Cullen: no
Commentary: For completing this operation you receive another operation "Tevinter Resistance", and an upgrade schematic.
The Tevinter Resistance
Requirements: -
Availability: After you complete "A friend in Quarinus"
For whom: Josephine: yes, Leliana: yes, Cullen: yes
Commentary: Completing this operation is rewarded with a ring.
Judgment: Use of Magic in Redcliffe
Requirements: -
Availability: After you pass a sentence on Alexius in Skyhold and send him to community work
For whom: Josephine: no, Leliana: yes, Cullen: no
Commentary: Completing this operation is rewarded with an amulet.
Judgment: Movran Arrives!
Requirements: -
Availability: After you pass a judgment on the avvar chief in Skyhold, i.e. after you decide to exile and arm him.
For whom: Josephine: yes, Leliana: yes, Cullen: yes
Commentary: Completing this operation is rewarded with Influence points.
The Eyes of the Maker
Requirements: -
Availability: After you upgrade the garden in Skyhold to the herb garden
For whom: Josephine: yes, Leliana: yes, Cullen: yes
Commentary: Completing this operation is rewarded with a medallion (a valuable).
Celebrate the Dragonslaying
Requirements: -
Availability: After you kill your first dragon (in any location)
For whom: Josephine: yes, Leliana: no, Cullen: yes
Commentary: Completing this operation is rewarded with a legendary amulet.
Liberate Emprise du Lion
Requirements: 20 Power points
Availability: Automatically, as you progress into the game
For whom: Josephine: yes, Leliana: yes, Cullen: yes
Commentary: New Location available: Emprise du Lion.
Emprise du Lion Resources
Requirements: -
Availability: After you complete "Liberate Emprise du Lion"
For whom: Josephine: yes, Leliana: yes, Cullen: yes
Commentary: A replayable operation. Allows you to obtain resources. Leliana: Forest Grace, Cullen: Sangwinite, Josephine: Sangwinite and Forest Grace.
Destroying House of Repose's Contract
Requirements: -
Availability: After you talk to Josephine (conversation about her family)
For whom: Josephine: no, Leliana: yes, Cullen: no
Commentary: Completing this operation is rewarded with Influence points. Note - choosing this operation makes it impossible to complete " Find a Sponsor for Du Paraquettes".
Find a Sponsor for Du Paraquettes
Requirements: -
Availability: After you talk to Josephine (conversation about her family)
For whom: Josephine: yes, Leliana: yes, Cullen: yes
Commentary: Completing this operation is rewarded with Influence points. Note - choosing this operation makes it impossible to complete "destroying House of Repose's Contract".
Getting a Judge's Favor
Requirements: -
Availability: After you complete "Find a Sponsor for Du Paraquettes" and complete Josephine's instructions
For whom: Josephine: yes, Leliana: no, Cullen: no
Commentary: After completing this operation and talking to Josephine you will unlock a new operation - "Talk to minister Bellise".
Talk to minister Bellise
Requirements: -
Availability: After you complete "Getting a Judge's Favor" and talk to Josephine
For whom: Josephine: yes, Leliana: no, Cullen: no
Commentary: Completing this operation allows you to resume "Their Regrettable Fate".
Expose the Double Agent
Requirements: -
Availability: After you complete the "High Stakes" quest in Crestwood.
For whom: Josephine: no, Leliana: yes, Cullen: no
Commentary: Completing this operation is rewarded with Influence points.
The Arl of Redcliffe
Requirements: -
Availability: Automatically, as you progress into the game
For whom: Josephine: no, Leliana: no, Cullen: yes
Commentary: Completing this operation is rewarded with resources.
Continuing Her Predecessor's Work
Requirements: -
Availability: After you talk to Helisma (researcher) in Skyhold.
For whom: Cullen: yes, Leliana: yes, Josephine: yes
Commentary: Completing this quest is rewarded with corrupting rune.
Continuing Research
Requirements: -
Availability: After you complete "Continuing Her Predecessor's Work" operation and talk again to Helisma (researcher) in Skyhold.
For whom: Cullen: yes, Leliana: no, Josephine: yes
Commentary: Completing this quest is rewarded with master corrupting rune.
Dispose the Loot of the Liberated
Requirements: -
Availability: After you complete "Noble Hearts Noble Deeds" quest and hand the documents over to Fairbanks in Emerald Graves.
For whom: Cullen: yes, Leliana: yes, Josephine: yes
Commentary: Completing this operation is rewarded with Influence points.
Draw Out the red Templar Lieutenant
Requirements: -
Availability: This operation is available as one of the stages in the quest for Cullen: "Before the Dawn".
For whom: Cullen: yes, Leliana: no, Josephine: yes
Commentary: Completing is required for the completion of "Before the Dawn". You also unlock: "Master of Puppets".
Find the Missing Explorers
Requirements: -
Availability: After you talk to Cassandra, when she tasks you with a quest of the same name.
For whom: Cullen: no, Leliana: yes, Josephine: yes
Commentary: Completing this operation is rewarded with Influence points and with completing the quest that this operation is connected with.
A Battalion for Sera and Verchiel
Requirements: -
Availability: After you talk to Sera, when she is staying at the tavern in Skyhold.
For whom: Cullen: yes, Leliana: no, Josephine: no
Commentary: Completing this operation is rewarded with Influence points.
Rumors of Maleficarum
Requirements: -
Available: Unlocks automatically, with game progress.
For: Josephine: no, Leliana:, yes, Cullen: yes
Note: Completing this operation is rewarded with a rune and unlocks another operation - "False Accusations"
False Accusations
Requirements: -
Available: After completing the "Rumors of Maleficarum" operation.
For: Josephine: no, Leliana: yes, Cullen: no
Note: Completing this operation is rewarded with influence points and unlocks another operation - "Confront Mages in the Wending Wood".
Confront Mages in the Wending Wood
Requirements: -
Available: After completing the "False Accusations" operation.
For: Josephine: no, Leliana: no, Cullen: yes
Note: Completing this operation is rewarded with a Schematic.
Investigate Ancient Laboratory
Requirements: -
Available: After completing the "A Strange Rift in the Ruins" side quest in The Western Approach.
For: Josephine: yes, Leliana: yes, Cullen: no
Note: Completing this operation is rewarded with a Staff.
Crossing the Sulphur Pits
Requirements: 5 points of power
Available: Find the operation flag in The Western Approach
For: Josephine: yes, Leliana: no, Cullen: yes
Note: Completing this operation is rewarded with being able to explore one of the parts of Death Drink Springs in The Western Approach (the one that was blocked before by toxic fumes).
Find the Source of Darkspawn
Requirements: 5 Inquisition power
Available: After finding the operation flag in The Western Approach.
For: Josephine: no, Leliana: no, Cullen: yes
Note: Completing this operation is rewarded with the opportunity to explore one of the parts of Death Drink Springs in The Western Approach (then one that was blocked by the poisonous gas).
Secure a Source of Water for Outpost
Requirements: -
Available: After taking control of the Griffon Wing Keep in The Western Approach.
For: Josephine: yes, Leliana: yes, Cullen: yes
Note: Rewarded with Inquisition influence and unlocking new operation - "Deal with the Angry Varghests".
Improving Morale
Requirements: -
Available: After taking control of the Griffon Wing Keep in The Western Approach
For: Josephine: yes, Leliana: yes, Cullen: yes
Note: Rewarded with Inquisition influence.
Deal with the Angry Varghests
Requirements: -
Available: After completing the "Secure a Source of Water for Outpost" operation.
For: Josephine: no, Leliana: yes, Cullen: yes
Note: Rewarded with Inquisition influence.
Gather Metals
Requirements: -
Available: After taking control of the Griffon Wing Keep in The Western Approach.
For: Josephine: yes, Leliana: yes, Cullen: yes
Note: Completing this operation is rewarded with resources. You can do it more than once.
Restore Judicael's Crossing
Requirements: 10 Inquisition power
How to unlock: Find the flag near the broken bridge in Emprise du Lion.
For: Cullen: yes, Leliana: yes, Josephine: yes
Note: After completing this operation, you will unlock a new area.
Gather Cloth
Requirements: -
How to unlock: Capture Suledin Keep in Emprise du Lion.
For: Cullen: yes, Leliana: yes, Josephine: yes
Note: You will obtain resources after completing this mission. You can do it more than once.
Gather Leather
Requirements: -
How to unlock: Capture Suledin Keep in Emprise du Lion.
For: Cullen: yes, Leliana: yes, Josephine: yes
Note: You will obtain resources after completing this mission. You can do it more than once.
Emprise du Lion Resources
Requirements: -
How to unlock: Capture Suledin Keep in Emprise du Lion.
For: Cullen: yes, Leliana: yes, Josephine: yes
Note: You will obtain resources after completing this mission. You can do it more than once.
A Golden Opportunity
Requirements: -
How to unlock: Capture Suledin Keep in Emprise du Lion.
For: Cullen: no, Leliana: no, Josephine: yes
Note: Completing this mission is rewarded with a weapon schematic.
Deal with Lord Basile Maron
Requirements: -
How to unlock: Capture Suledin Keep in Emprise du Lion.
For: Cullen: yes, Leliana: no, Josephine: yes
Note: Completing this mission is rewarded with Inquisition influence points.
Assigning Michel du Chevin
Requirements: -
How to unlock: Capture Suledin Keep in Emprise du Lion (Michel de Chevin has to survive).
For: Cullen: yes, Leliana: yes, Josephine: yes
Note: Completing this operation is rewarded with a staff schematic
Rumors of the Suledin Blade
Requirements: 10 Inquisition power
How to unlock: After starting the "Ruined Blade" quest.
For: Cullen: yes, Leliana: yes, Josephine: yes
Note: You will unlock The Cradle of Sulevin location after completing this operation.
Finding Samson's Weakness
Requirements: -
How to unlock: When completing the "Before the Dawn" quest, after completing the part in Emprise du Lion and talking to Cullen and Dagna.
For: Cullen: no, Leliana: no, Josephine: yes
Note: Completing this operation is rewarded with Inquisition influence points and allows you to continue the quest.
Judgment: Recover Sold Artifacts
Requirements: -
How to unlock: After making Servis from The Western Approach an agent (during trial).
For: Cullen: yes, Leliana: yes, Josephine: yes
Note: Completing this operation is rewarded with Belt of Focus
Judgment: Help the People of Sahrnia
Requirements: -
How to unlock: After judging Mistress Poulin (instruct her to rebuild the city).
For: Cullen: yes, Leliana: yes, Josephine: yes
Note: Completing this operation is rewarded with Inquisition influence.
Judgment: Playing to Win
Requirements: -
How to unlock: After judging Florianne from the Winter Palace (make her join the Inquisition).
For: Cullen: yes, Leliana: yes, Josephine: yes
Note: Completing this operation is rewarded with Inquisition influence.
Aid those Impacted by the Civil War
Requirements: -
How to unlock: After completing the "Wicked Eyes and Wicked Hearts" quest.
For: Cullen: yes, Leliana: yes, Josephine: yes
Note: Completing this operation is rewarded with Inquisition influence.
Investigate Elven Ruins
Requirements: 5 Inquisition power
How to unlock: After completing the "Wicked Eyes and Wicked Hearts" quest and discovering the ruins in Emerald Glaves.
For: Cullen: yes, Leliana: yes, Josephine: yes
Note: After completing this operation, you will unlock the ruins in Emerald Glaves.
The College of Magi
Requirements: -
How to unlock: Complete the "Wicked Eyes and Wicked Hearts" quest.
For: Cullen: yes, Leliana: yes, Josephine: yes
Note: Completing this operation is rewarded with Inquisition influence and a magic amulet.
Watcher in the Wings
Requirements: -
How to unlock: Complete the "Wicked Eyes and Wicked Hearts" quest.
For: Cullen: yes, Leliana: yes, Josephine: no
Note: Completing this operation is rewarded with a weapon schematic
Support from Nevarra
Requirements: -
How to unlock: Complete the "Wicked Eyes and Wicked Hearts" quest.
For: Cullen: yes, Leliana: yes, Josephine: yes
Note: Completing this operation is rewarded with Nevarran Toy Soldier.
Reparations for Redcliffe
Requirements: -
How to unlock: Complete the "Wicked Eyes and Wicked Hearts" quest.
For: Cullen: yes, Leliana: yes, Josephine: yes
Note: Completing this operation is rewarded with gold.
Delicate Negotiations
Requirements: -
How to unlock: Complete the "Wicked Eyes and Wicked Hearts" quest.
For: Cullen: no, Leliana: no, Josephine: yes
Note: Completing this operation is rewarded with Inquisition influence and an unique weapon (the operation takes over 18 hours).
The Arl's Invitation
Requirements: -
How to unlock: Complete the "Wicked Eyes and Wicked Hearts" quest.
For: Cullen: yes, Leliana: no, Josephine: yes
Note: Completing this operation is rewarded with Inquisition influence.
Truth or Dare: The Endgame
Requirements: -
How to unlock: After completing the "Wicked Eyes and Wicked Hearts" quest and completing "Truth or Dare: See and Be Seen".
For: Cullen: no, Leliana: yes, Josephine: yes
Note: Completing this operation is rewarded with Inquisition influence.
Alliances: Getting Things Moving
Requirements: -
How to unlock: Complete the "Wicked Eyes and Wicked Hearts" quest and "Alliances: Observing the Deadlock".
For: Cullen: yes, Leliana: no, Josephine: yes
Note: Completing this operation is rewarded with Inquisition influence.
Alliances; The Old Guard Forward
Requirements: -
How to unlock: After completing "Alliances: Getting Things Moving".
For: Cullen: yes, Leliana: no, Josephine: yes
Note: Completing this operation is rewarded with Inquisition influence.
Alliances: Falling Into Place
Requirements: -
How to unlock: Complete "Alliances: Old Guard Forward".
For: Cullen: yes, Leliana: no, Josephine: yes
Note: Completing this operation is rewarded with Inquisition influence.
Dance with the Dowager: Allemande
Requirements: -
How to unlock: Talk to Dowager Lady Mantillon at the Winter Palace and complete "Wicked Eyes and Wicked Hearts".
For: Cullen: yes, Leliana: no, Josephine: yes
Note: Completing this operation is rewarded with Inquisition influence and a Ruby.
Dance with the Doager: The Courante
Requirements: -
How to unlock: Complete "Dance with the Dowager: Allemande".
For: Cullen: yes, Leliana: no, Josephine: yes
Note: Completing this operation is rewarded with gold.
Dwarven Slaves in Venatori Hands
Requirements: -
How to unlock: Complete the "Wicked Eyes and Wicked Hearts" quest.
For: Cullen: yes, Leliana: yes, Josephine: yes
Note: Completing this operation is rewarded with gold.
An Offer of Help, on Their Terms
Requirements: -
How to unlock: Complete "Dwarven Slaves in Venatori Hands".
For: Cullen: yes, Leliana: yes, Josephine: yes
Note: Completing this operation is rewarded with Aiming Module III.
Break Venatori Hold on Wycome
Requirements: -
How to unlock: Complete the "Wicked Eyes and Wicked Hearts" quest.
For: Cullen: no, Leliana: yes, Josephine: yes
Note: Completing this operation is rewarded with Inquisition influence.
Restore Order in Wycome
Requirements: -
How to unlock: Complete "Break Venatori Hold on Wycome".
For: Cullen: yes, Leliana: yes, Josephine: no
Note: Completing this operation is rewarded with Inquisition influence and gold.
Investigate Lord Enzo of Antiva
Requirements: -
How to unlock: Complete the "Wicked Eyes and Wicked Hearts" quest.
For: Cullen: no, Leliana: yes, Josephine: yes
Note: Completing this operation is rewarded with Masterwork Imbued Staff Grip.
An Offer from the Crows
Requirements: -
How to unlock: Complete "Investigate Lord Enzo of Antiva".
For: Cullen: no, Leliana: yes, Josephine: yes
Note: Completing this operation is rewarded with Schematic: Masterwork Mabari Grip.
Hard in Hightown: Trouble in Skyhold
Requirements: -
How to unlock: Complete the "Wicked Eyes and Wicked Hearts" quest and "Hard in Hightown: Unsavory Parallels".
For: Cullen: yes, Leliana: yes, Josephine: no
Note: After completing this operation, you will unlock "Hard in Hightown: A Dagger in the Back".
Hard in Hightown: A Dagger in the Back
Requirements: -
How to unlock: Complete "Hard in Hightown: Skyhold".
For: Cullen: yes, Leliana: yes, Josephine: no
Note: After completing this mission, you will unlock "Hard in Hightown: A Worthy Dwarf".
Hard in Hightown: A Worthy Dwarf
Requirements: -
How to unlock: Complete the "Wicked Eyes and Wicked Hearts" quest and "Hard in Hightown: A Dagger in the Back".
For: Cullen: yes, Leliana: yes, Josephine: no
Note: Completing this operation is rewarded with Ornate Bianca Grip Schematic.
Red Jenny Attends a Party
Requirements: -
How to unlock: Complete "The Verchiel March", given by Sera.
For: Cullen: yes, Leliana: yes, Josephine: yes
Note: Completing this quest is rewarded with gold and unlocks "Red Jenny and the Bad Goods".
Red Jenny and the Bad Goods
Requirements: -
How to unlock: Complete "Red Jenny Attends a Party".
For: Cullen: yes, Leliana: yes, Josephine: yes
Note: Completing this operation is rewarded with Amulet of Power (Sera) and unlocks "A Trouble of Red Jennies".
A Trouble of Red Jennies
Requirements: -
How to unlock: Complete "Red Jenny and the Bad Goods".
For: Cullen: no, Leliana: yes, Josephine: yes
Note: After completing this operation, you will unlock "Red Jenny and the Tantervale Charade".
Red Jenny and the Tanterval Charade
Requirements: -
How to unlock: Complete "A Trouble of Red Jennies"
For: Cullen: yes, Leliana: yes, Josephine: yes
Note: -
Investigate the Elven Glyphs
Requirements: 5 Inquisition power
How to unlock: Collect all four glyphs in the Exalted Plains, in the "Scattered Glyphs" quest.
For: Cullen: -, Leliana: -, Josephine: -
Note: Unlocks a new area: Lost Temple of Dirthamen and the "God of Secrets" quest.
Red Templars on the Storm Coast
Requirement: 4 Power points
Available: After you complete the "Scout the Storm Coast" operation (it unlocks the location) abnd after you reach level 16
For whom: Cullen: -, Leliana: -, Josephine: -
Commentary: After you complete this operation, you gain access to the locked cave in the Southern part of the Storm Coast and the "Red Waters" quest, in this location.
Finding Samson's Weakness
Requirement: -
Available: During the Before the Dawn quest, after you talk to Dagna
For whom: Cullen: no, Leliana: no, Josephine: yes
Commentary: You need to complete this operation, to continue the quest.
Track Down Samson
Requirement: -
Available: During the Before the Dawn quest, after the Finding Samson's Weakness operation and after the conversation with Cullen
For whom: Cullen: yes, Leliana: no, Josephine: no
Commentary: You need to complete this operation, to continue the quest.
Measure Veil Strength
Requirement: -
Available: Activate enough elven artifacts (Barrier amplifier)
For whom: Cullen: yes, Leliana: no, Josephine: yes
Commentary: Completing this quest is rewarded with 120 influence points, and with the What Lies Dormant quest.
Translate the Dragon Text
Requirements: 5 Power points
Availability: During A Manuscript of Some Authority quest for Frederick (M19,11) in The Western Approach
For whom: Cullen: -, Leliana: -, Josephine: -
Commentary: After you complete this operation, you can continue the mission.
Learn more about Dragons
Requirements: -
Availability: The operation becomes available after you have killed all of the High Dragons (10)
For whom: Cullen: yes, Leliana: yes, Josephine: yes
Commentary: Completing this operation is rewarded with gold.
Sentence: The Tour of the duchess in the coffin 9:41
Requirements: -
Availability: It becomes available after you defeat Duchess Florianne in Wicked Eyes and Wicked Hearts, instead of capturing her without the fight
For whom: Cullen: yes, Leliana: yes, Josephine: yes
Commentary: Completing this operation is rewarded with Influence points.
Reconciliation of Celene and Michel
Requirements: -
Availability: It becomes available after you complete Wicked Eyes and Wicked Hearts, if Empress Celene remains in power, and Prince Gaspard dies.
For whom: Cullen: yes, Leliana: yes, Josephine: no
Commentary: Completing this operation is rewarded with Influence points.
Obtain Amulet for Cole
Requirements: -
Availability: It is connected to the Subjected to His Will quest
For whom: Cullen: no, Leliana: yes, Josephine: yes
Commentary: -
Destroy Adamant Fortress
Requirements: -
Availability: It becomes available after you complete the Here Lies the Abyss quest and after you have talked to Crem at the tavern
For whom: Cullen: no, Leliana: yes, Josephine: yes
Commentary: Completing this operation is rewarded with Influence points.
End to gossip
Requirements: -
Availability: Later into the game, talk to the Bard at the tavern
For whom: Cullen: yes, Leliana: yes, Josephine: yes
Commentary: -
Thom Rainier's Fate
Requirements: 1 Power point
Availability: During the Revelations quest, after talking to Blackwall in prison.
For whom: Cullen: -, Leliana: -, Josephine: -
Commentary: Completing this operation allows you to continue the quest (Rainier is moved for Inquisition judgment).
Rainier's Release: An Alternative
Requirements: -
Availability: During the Revelations quest, after talking to Blackwall in prison.
For whom: Cullen: no, Leliana: yes, Josephine: no
Commentary: Completing this operation allows you to continue the quest
The Consequences of Blackwall's Lie
Requirements: -
Availability:
For whom: Cullen: yes, Leliana: no, Josephine: yes
Commentary: Completing this operation is rewarded with gold.
Failed Assassination Attempt Inquiry
Requirements: -
Availability: After completing "Demands of the Qun" and deciding to defend the hill with the Iron Bull men.
For whom: Cullen: yes, Leliana: yes, Josephine: yes
Commentary: After completing this operation you unock next one - Follow Venatori Assassins.
Follow Venatori Assassins
Requirements: -
Availability: After completing "Failed Assassination Attempt Inquiry" operation.
For whom: Cullen: yes, Leliana: yes, Josephine: yes
Commentary: Completing this operation is rewarded with power points , a staff (weapon) and unlocking the "Stop Venatori Fire Ship" operation.
Stop Venatori Fire Ship
Requirements: -
Availability: After completing the "Follow Venatori Assassins" operation.
For whom: Cullen: yes, Leliana: yes, Josephine: yes
Commentary: Completing this operation is rewarded with power points , armor and unlocking the "Find Spies in Skyhold" operation.
Find Spies in Skyhold
Requirements: -
Availability: After completing the "Stop Venatori Fire Ship" operation.
For whom: Cullen: yes, Leliana: yes, Josephine: no
Commentary: Completing this operation is rewarded with power points and unlocking the "Track Spies in Val Royeaux" operation.
Track Spies in Val Royeaux
Requirements: -
Availability: After completing the "Find Spies in Skyhold" operation.
For whom: Cullen: yes, Leliana: yes, Josephine: no
Commentary: Completing this operation is rewarded with armor and unlocking the "Track Spies in Val Chevin" operation.
Track Spies in Val Chevin
Requirements: -
Availability: After completing the "Track Spies in Val Royeaux" operation.
For whom: Cullen: yes, Leliana: yes, Josephine: no
Commentary: Completing this operation is rewarded with blueprint and unlocking the "Track Spies in Nevarra" operation.
Track Spies in Nevarra
Requirements: -
Availability: After completing the "Track Spies in Val Chevin" operation.
For whom: Cullen: yes, Leliana: yes, Josephine: no
Commentary: Completing this operation is rewarded with power amulet and unlocking the "Track Spies in Vyrantium" operation.
Track Spies in Vyrantium
Requirements: -
Availability: After completing the "Track Spies in Nevarra" operation.
For whom: Cullen: yes, Leliana: yes, Josephine: yes
Commentary: Completing this operation is rewarded with blueprint and unlocking the "Destroy Venatori Spy Network" operation.
Destroy Venatori Spy Network
Requirements: -
Availability: After completing the "Track Spies in Vyrantium" operation.
For whom: Cullen: yes, Leliana: yes, Josephine: yes
Commentary: Completing this operation is rewarded with power points.
The Name of Our Enemy
Requirements: -
Availability: After completing the "Here Lies the Abyss" task and talking with Dorian.
For whom: Cullen: yes, Leliana: yes, Josephine: yes
Commentary: Completing this operation is rewarded with blueprint and unlocking the "House Amladaris" operation.
House Amladaris
Requirements: -
Availability: After completing the "Name of Our Enemy" operation.
For whom: Cullen: yes, Leliana: yes, Josephine: yes
Commentary: Completing this operation is rewarded with master spirit rune.
Gather Information on Lord Otranto
Requirements: -
Availability: Optional during "An Unexpected Engagement" task.
For whom: Cullen: no, Leliana: yes, Josephine: no
Commentary: -
Challenge Josephine's Fianc to a Duel
Requirements: -
Availability: During "An Unexpected Engagement" task.
For whom: Cullen: yes, Leliana: no, Josephine: no
Commentary: Completing this operation is required for completing the quest.
Requirements: 8 Inquisition Power
Availability: In DLC: Jaws of Hakkon
For: Josephine: -, Leliana: -, Cullen: -
Note: These operation is connected to the main story in the DLC. It is the first operation, which gives you access to Frostback Basin (the location where the events of the DLC takes place).
Requirements: -
Availability: After completing the Locate Weapon of Tyrdda Bright-Axe operation and completing the Avvar Allies quest.
For: Josephine: yes, Leliana: no, Cullen: yes
Note: For completing this operation, you will receive a legendary weapon and Inquisition Influence.
Requirements: -
Availability: After completing the Investigate Frostback Basin operation, only if you've recruited Avvar in The Fallow Mires.
For: Josephine: no, Leliana: yes, Cullen: no
Note: For completing the operation, you will receive Inquisition Power.
Requirements: -
Availability: After completing the Worthy of Publication quest.
For: Josephine: yes, Leliana: yes, Cullen: no
Note: For completing the operation, you will receive Master Demon Slaying Rune.
Requirements: -
Availability: When you recruit Sigrid, during the end of the In Exile quest.
For: Josephine: yes, Leliana: no, Cullen: yes
Note: For completing the operation, you will obtain Inquisition Influence.
Requirements: -
Availability: After recruiting Strovacker as agent, during the judgement in Avvar village.
For: Josephine: no, Leliana: yes, Cullen: yes
Note: For completing this operation, you will obtain Inquisition Influence.
Requirements: -
Availability: After completing the Ameridan's End quest, talk to Bram Kenric (it is not an objective of the quest).
For: Josephine: yes, Leliana: yes, Cullen: no
Note: For completing this quest, you will obtain 3 armor schematics.
Requirements: -
Availability:
For: Josephine: yes, Leliana: yes, Cullen: no
Note: For completing this quest, you will obtain Inquisition Influence.
In this chapter of the guide, you will find all of the side quests listed. They abound in the game and to make it easier for you, to find it, they have been organized in the same way as in your log in the game, i.e. in accordance with locations in which you start them (and usually complete them).
Several important notes:
Way to unlock: Automatically, after you complete The Wrath of Heaven main quest.
The quest-giver: - (M2, 1)
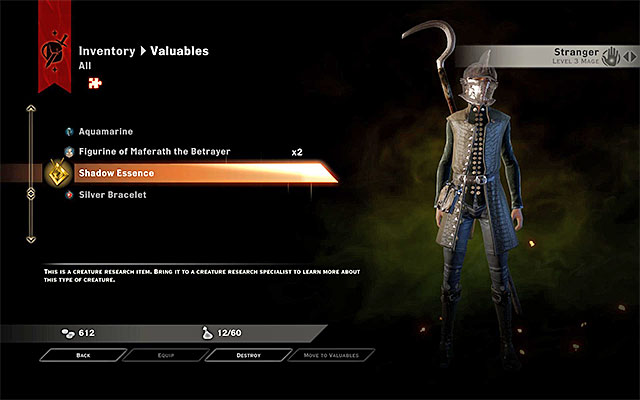
This quest becomes available automatically, after you reach Haven for the first time (M2,1). Your task is to supply Minaeve with items that some of the monsters drop, thanks to which they can be examined thoroughly. You can obtain these items by examining the corpses of the monsters that you slay and an example item has been presented in the above screenshot.
Note - make sure that you do not sell, inadvertently, one of such items to a merchant.
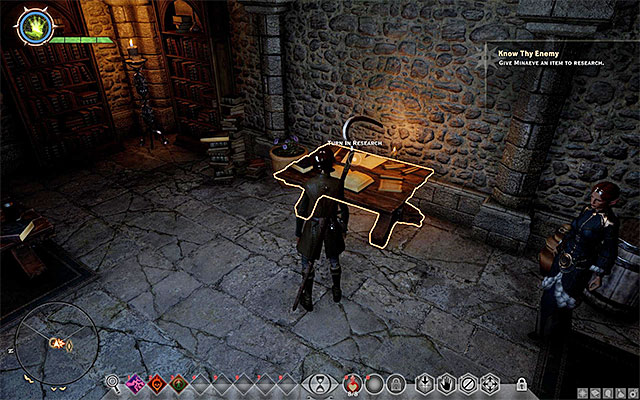 The research table
After you have obtained, at least, one such item, you can take it back to Minaeve in the Chantry (M2,1a) and interact with the research table, after you talk to her. This completes the quest but, this does not mean that you should forget all about this errand. It is best to supply Minaeve with new research subjects, thanks to which you gain more experience (ranging from several tens to several hundred points) and learn more about your opponents (thanks to which you, e.g. deal more damage to them).
Rewards for completing the quest:
Way to unlock: Automatically, during The Threat Remains main quest.
The quest-giver: - (M2, 2)
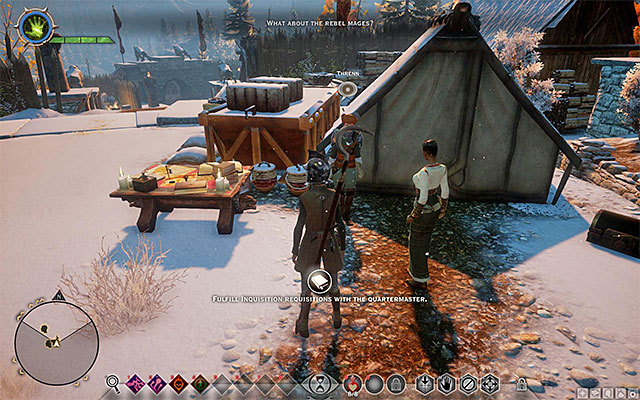 The quartermaster
This quest becomes available automatically, right after the first main council at the Chantry in Haven (Haven) (M2,2). This quest is about meeting up with three NPCs connected with side activities and you can see them in any order that you want. The Quartermaster is standing near the tents in the central part of the village (M2,4). From him, you can learn more about the Inquisition's Requisitions and at the same time, accept the first of such quests.
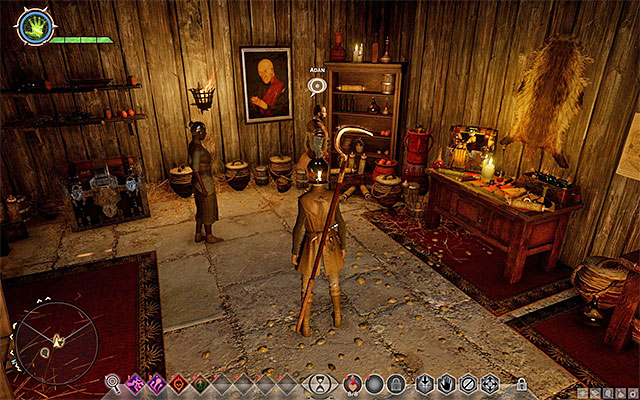 The Apothecary
The Apothecary is in the cottage in the South-Western part of the map (M2,5). Apart from seeing him and learning more about brewing potions, and buying some, you can also unlock two side quests. Apart from that, from the apothecary, you will obtain a free recipe.
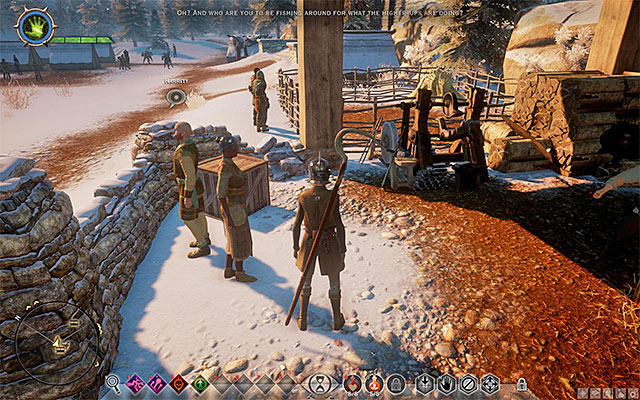 The blacksmith
The Blacksmith is staying to the North of the central part of the village (M2,7). From him, you can learn more about crafting and modifying weapons, and armors. Also, you get the option to complete two simple quests connected with crafting. Also, you receive a free schematic.
Rewards for completing the quest:
Way to unlock: Automatically, during the Haven's Best and Brightest side quest.
The quest-giver: Quartermaster (M2,4)
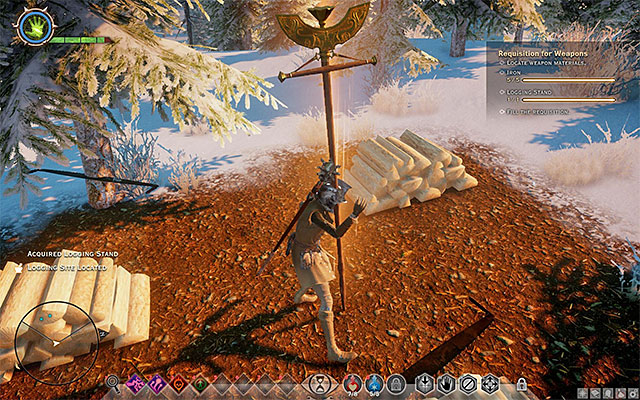 You need to put up a flag in the logging stand
This quest becomes available after you meet the Quartermaster in the central part of Haven (M2,4). Talk to the quartermaster about the Inquisition's Requisition and accept the first quest. You need to do two things:
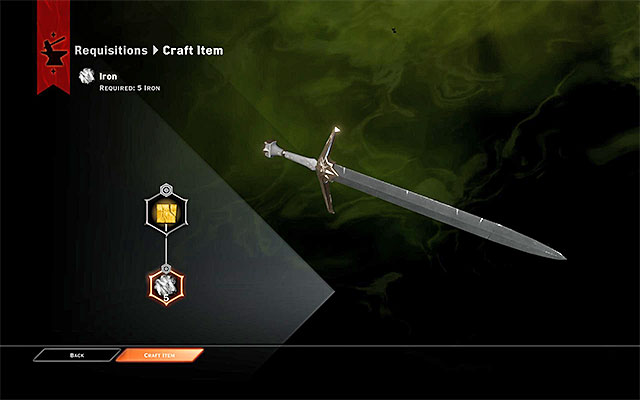 Realize the commission
After you complete the above activities, return where you have started this quest and Inspect Requisitions. Confirm that you want to realize the commission.
Rewards for completing the quest:
Way to unlock: Automatically, during the Haven's Best and Brightest side quest.
The quest-giver: Apothecary (M2,5)
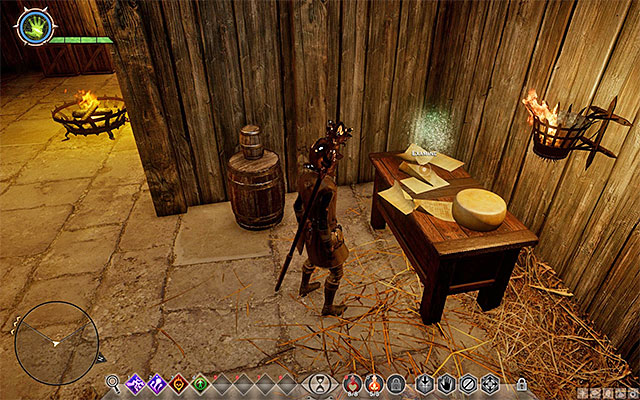 Use the scanning mode to locate the notes
This quest becomes available after you see the Apothecary in the South-Western part of Haven (M2,5). Talk to the apothecary about brewing and upgrading potions, and about equipping your party members with them. Apart from that, you can offer to help, which unlocks this quest. The apothecary asks you to find master Taigen's notes and you need to reach the cottage to the North of the village (M2,5a). Enter the cottage and start tapping the scanning key/button. Thanks to this, you will locate the notes on the table. You can now return to the Apothecary and hand the documents over.
Rewards for completing the quest:
Way to unlock: Automatically, during the Haven's Best and Brightest side quest.
The quest-giver: The Apothecary (M2,5)
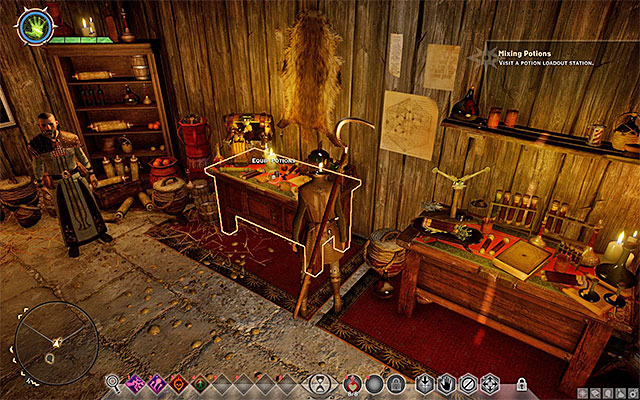 The table of assigning potions to party members
This quest becomes available after you see the Apothecary in the South-Western part of Haven (M2,5). Talk to the Apothecary about brewing and upgrading potions and equipping your party members with them. At the same time, you will receive a quest. It consists in finding out about the functioning of the equipping table (Equip Potions). The table is in the cottage, where you met the Apothecary.
Way to unlock: Automatically, during the Haven's Best and Brightest side quest.
The quest-giver: The Blacksmith (M2,7)
 Armor crafting station
This quest becomes available after you see the Blacksmith in the Northern part of Haven (Haven) (M2,7). From the Smith, you will learn the basics of crafting weapons and armors. At the same time, you receive this simple quest. It consists in checking out the armor crafting station (Craft Armor), right next to the Smith. The easiest thing to do is to use the schematic that you have received from the Smith (Schematic: Apprentice Coat), but you can, just as well, use any other.
Way to unlock: Automatically, during the Haven's Best and Brightest side quest.
The quest-giver: Blacksmith (M2,7)
 Armor modification station
This quest becomes available after you see the Blacksmith in the Northern part of Haven (Haven) (M2,7). From the Blacksmith, you learn how to upgrade and craft armors from the scrap. At the same time, you receive this simple quest. It consists in checking out the armor upgrading station (Modify Armor), right next to the Smith. Of course, you need to own an upgrade for the armor, which you can either find in the game world, or but from a Merchant.
Way to unlock: Meet with Mother Giselle.
The quest-giver: Mother Giselle (M2,8)
 The place where you find Mother Giselle
This quest becomes available after you save Mother Giselle in Hinterlands, during The Threat Remains main quest. After you help Mother Giselle, she goes to Haven and you will be able to find her at the Chantry (M2,8). Talk to her and offer to help, thanks to which you receive a recipe and you will be asked to obtain some herbs. The ones in question are:
After you obtain the herbs, take them to the requisition table in the central part of Haven (M2,4) and realize the commission.
Rewards for completing the quest:
Way to unlock: Meet with Master Dennett.
Quest giver: Master Dennett (M3,1a)
 The cottage of Master Dennett
This is a quest that you should complete in the Hinterlands, as quickly as possible, to gain access to a mount. Master Dennett Asks you to complete quests for the locals (Elaina (M3,3) and Bron (M3,4)), after which you will receive horses from him (the Horses for the Inquisition quest). The entire quest boils down to reaching the farm and talking to Dennett, after which you get to mount your horse at the stables.
Rewards for completing the quest:
Way to unlock: After the conversation with Dennett (the Master of Horses quest).
Quest giver: Seanna (M3,1b)
 Pass through all of the checkpoints
After the conversation with Master Dennett, you will be allowed to mount a horse. Talk to Seanna next to the stables and she will offer you taking a part in a race. Within the allotted time, you need to pass a distance, on horseback, and pass through all of the checkpoints (the vertical wooden poles). To complete this quest, you need to win three races.
Way to unlock: After the conversation with Dennett (the Master of Horses quest).
Quest giver: Bron (M3,4)
 Bron
BronBron lives on the farm, in one of the smaller houses, and he points you to three locations on the map, where you need to travel and mark them as spots, in which to put up watchtowers.
 The spot to mark for a tower
After you have marked all of the spots, (the order is up to you) [M3,4a; M3,4b; M3,4c] you unlock the Build Watchtowers Operation. Then, go to the stronghold in Haven and perform that operation, using the war table. Only after you complete it, will you be able to return to Bron and report to him on the completion of the quest.
Rewards for completing the quest:
Way to unlock: After the conversation with Dennett (the Master of Horses quest).
Quest giver: Elaina (M3,3)
 Elaina
Elaina is working in the garden, next to Dennett's house. She tasks you with the elimination of a pack of wolves that live in the cave to the North-West of the farmlands (M3,3a). To get there, you need to follow the river to the East of the farms.
 Wolves inside the cave
Once you get there, you find two groups of animals, one outside and one inside the cave. In the cave, there also lives a Minor Wraith, who joins the fights. After you have eliminated the threat, and kill all the wolves, return to Elaina.
Rewards for completing the quest:
Way to unlock: You need to complete Master of Horses, Farmland Security and Trouble with Wolves quests.
Quest giver: Master Dennett (M3,1a)
 Master Dennett
After you complete the quests for Elaina and Born, you can return to Master Dennett (M3,1a) and ask him for the horses for the Inquisition. Therefore, this quest boils down to a simple conversation.
Rewards for completing the quest:
Way to unlock: Find the letter on the corpse near the campsite.
Quest giver: - (M3,6)
 The crate in the cave
This quest is exceptionally easy - it is best to complete it while you are completing the Trouble with Wolves. You need to make it to the cave to the North of the farm. There, follow the rocky path, along the wall, and you will find a wooden crate (M3,6a) - there is an item inside and after you collect it, you complete this quest (you need to loot the crate).
Rewards for completing the quest:
Way to unlock: Read the letter at the dead body near the destroyed bridge.
Quest giver: - (M3,8)
 The corpse at the bridge
Close to the bridge traversing the main river, near the rocks, you find a corpse with a letter on it. After you read the letter, you receive the task to complete a ritual. To do that, you need to find an altar close to the villa in the West, in the corner at the rocks (M3,8a).
 The makeshift altar
There, interact with the small makeshift altar and, technically, this is it. You only need to defeat the Fire Demon summoned from the other world - this is not the problem though, because it is not too powerful.
Rewards for completing the quest:
Way to unlock: Find a map on the corpse near the campsite.
Quest giver: - (M3,10)
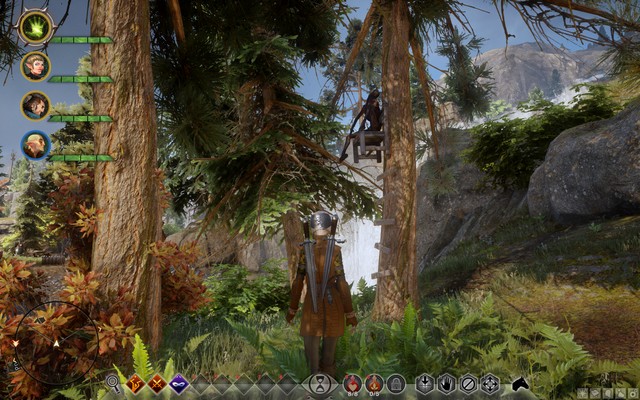 The corpse on the tree
Right next to the campsite, to the South of the Hinterland village, on a hill, there is a tree and a corpse on the tree. At the foot of the tree, there is a map to the waterfall, which shows the hidden passage behind one of the waterfalls. This particular one is at the beginning of the river flowing from the South to the North (M3,10a). There also is a Templar camp there (M3,11b), which is why you need to get there well-prepared.
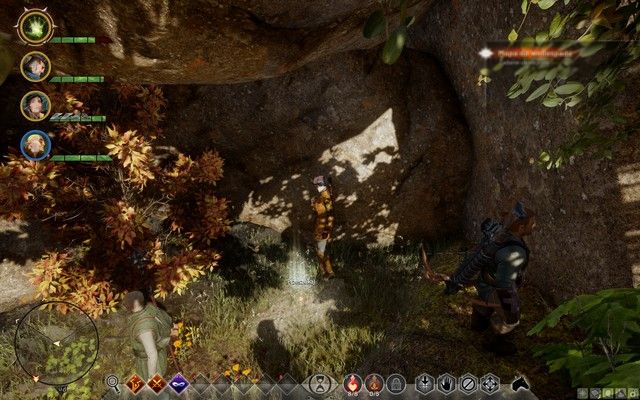 The treasure behind the waterfall
After you clear the camp, walk over the ledge towards the waterfall. You will find a stash there, which you first need to scan, to pick it up. Inside, there is a valuable crafting item.
Rewards for completing the quest:
Way to unlock: Read the note on the board, at the farm.
Quest giver: - (M3,7)
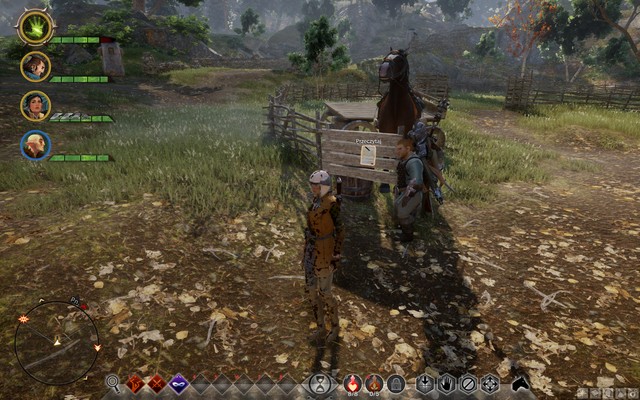 The notice board
You can take the quest after you read the note attached to the board on the road, next to the farm. You will learn that a farmer's Druffalo ran away and he asks to return it, whoever finds it. The animal is to the East of the farm, over the river, between the rocks (M3,7a).
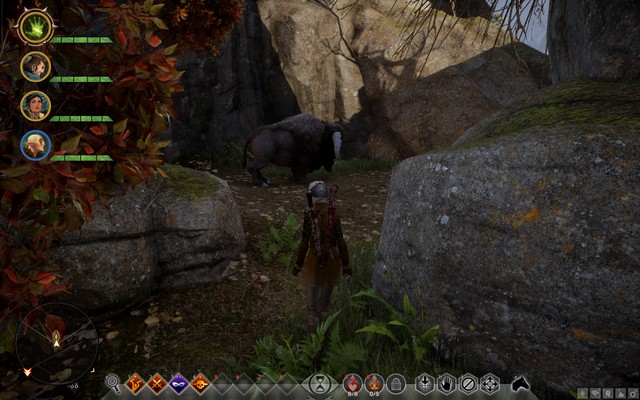 The missing druffalo
Once you approach the animal, it starts following you. Delivering it to the farm is a bit too troublesome, because it often stops and has problems walking over uneven terrain - also, watch out because you may be attacked by the demons from the nearby Rift, if this is the path that you have taken. Fortunately, the Druffalo is immortal so, it can even help you in battle. After you reach the farm, enter the pen with the notice board (M3,7b), and the Druffalo remains there and will not follow you anymore. Talk to the owner now and tell him that you have delivered the animal.
Rewards for completing the quest:
Way to unlock: Find the letter on the corpse near the river.
Quest giver: - (M3,9)
 The hidden package
Near the destroyed bridge to the destroyed Citadel,, to the West, you find a corpse at the foot of a tree, and a letter on him. You will learn about a package that has been hidden to the North of the farms (M3,9a). Get there and locate the package by scanning the area. After you pick up its contents, this quest will be completed.
Rewards for completing the quest:
Way to unlock: Find the letter at the destroyed Citadel.
Quest giver: - (M3,11)
 The letter at the destroyed Citadel
At the destroyed citadel, there is a letter, from which you learn about a Templar campsite neat the waterfall (M3,11a). Walk over the rock, along the river, to get there, Southwards. Along your path, you encounter several Templars and finally, a Templar Knight. He is a sort of a mini-boss but, he is not that powerful, if you eliminate his guards beforehand. After you deal with them all, you complete this quest.
Rewards for completing the quest:
Way to unlock: Meet with recruit Whittle after you liberate the village (The Threat Remains quest).
Quest giver: Recruit Whittle (M3,12)
 One of the supply storage points
Recruit Whittle, who is standing near the passage in the rock in Hinterlands, asks you to locate 5 supply storage points with supplies hidden by the apostates (M3,12a; M3,12b; M3,12c; M3,12d; M3,12e). In each such point, you need to set a flag and the order is up to you. After you mark all of the points, return to the man and report to him on the completion of the quest.
Rewards for completing the quest:
Way to unlock: Finding the cottage or the dead mage with a key.
Quest giver: - (M3,27a) or (M3,27)
 The cabin in the woods
To the North-East of the destroyed citadel, you find a destroyed cottage (M3,27a). The door is locked, but you can find the Key near the observation point to the south, on the corpse (M3,27).
 The corpse with the key to the cottage in the woods
You can also find the key beforehand, after which you get the location of the cottage marked. Once you get there with the key and open the door, the quest ends, but you will be attacked by a Major Wraith - with the entire party, however, you will have no problems dealing with it.
Rewards for completing the quest:
Way to unlock: Finding a letter at the tree to the North of the farms.
Quest giver: - (M3,17)
 The letter on the hill
Near the statue of a woman, to the North of the farms, at the tree, there is a letter. Its author asks you to collect three Big bear claws, which he failed to do.
A big bearBig bears can be found in the Western part of the map, on the grasslands (M3,17a). After you collect the claws, you do not need to take them anywhere - collecting them is the condition to complete this quest, in itself.
Rewards for completing the quest:
Way to unlock: Find a letter in the cave to the South.
Quest giver: - (M3,21)
 The entrance to a cave hidden behind a barrier
This quest is one of the easiest ones in the Hinterlands. the only thing that you need to do is read a letter and make it to the mines to the South, which you can enter after you smash a magical barrier. Find the vein of the Red lyrium at the end of the corridor (M3,21a), and the quest will be completed.
Rewards for completing the quest:
Way to unlock: Find a letter at the corps in the canyon or talk to Lord Bernard in the keep to the South-East.
Quest giver: - (M3,22) or Lord Bernard (M3,22a)
 Lord Bernard
Inside the South-Eastern canyon, there is a dead girl (M3,22) and a letter on her. Your task is to deliver that letter to Lord Bernard, who you find at the upper level of the Southern citadel (M3,22a).
 The dead girl in the canyon
You can learn from Bernard beforehand that his love is missing and you will then be sent to the canyon to find any information. In this quest, after you let Bernard know about his situation, you have two responses to his statement:
Way to unlock: Meet with Ritts or the guard at the road.
Quest giver: Ritts (M3,23a) or the guard at the road (M3,23)
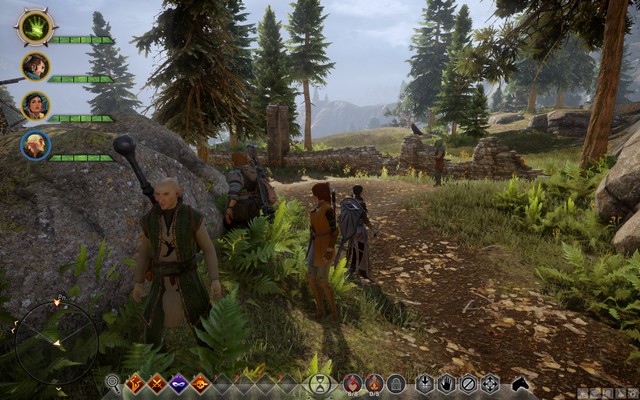 The lone guard
If you encounter the guard (M3,23), while going Southwards, you learn about his missing friend Ritts (M3,23a) and he asks you to find her. You do not need to talk to the guard beforehand, to get this quest. You can find Ritts at the tree, right in front of the Southern citadel that is being attacked by apostates.
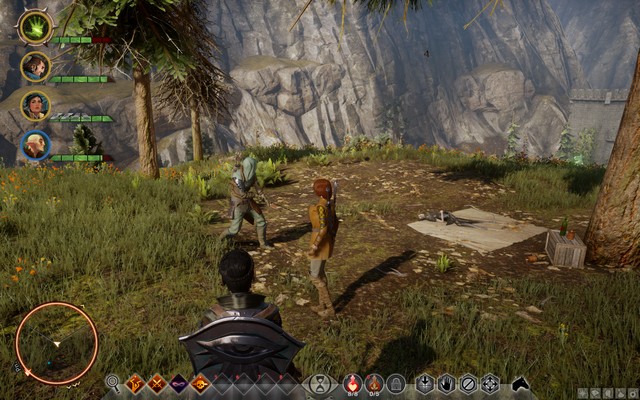 Ritts
RittsHelp her and then, scan the area in search of hints. Then, talk to Ritts - you can convince her to join the Inquisition and this way, you will gain an agent. Finally, tell about the entire situation to the sad guard.
Rewards for completing the quest:
Way to unlock: Meet with the elfish widow Maura.
Quest giver: Maura (M3,24)
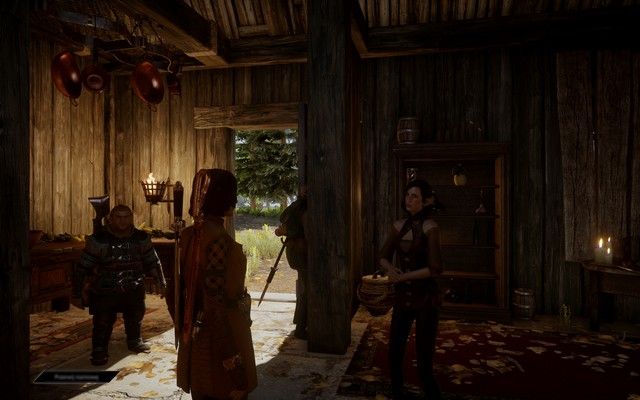 Maura
MauraIn a small cottage, near a rift, there lives an elfish widow Maura. She tells you about the stolen wedding ring, which she would like back.
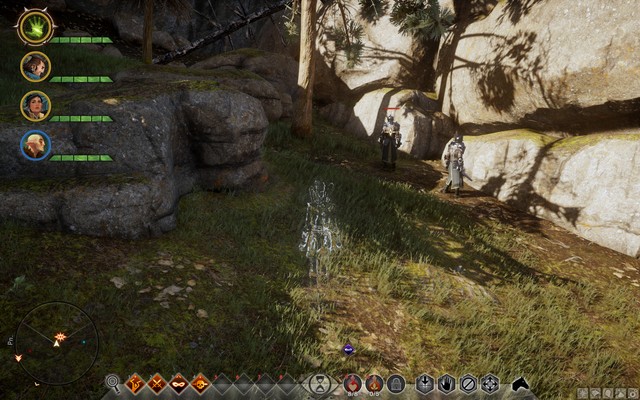 The Templars that stole the ring
You can find it by searching through the corpses of two Templars at the entrance to the Eastern canyon (M3,24a). After you retrieve it, return to Maura.
Rewards for completing the quest:
Way to unlock: Meet with Orator Anais.
Quest giver: Orator Anais (M3,26)
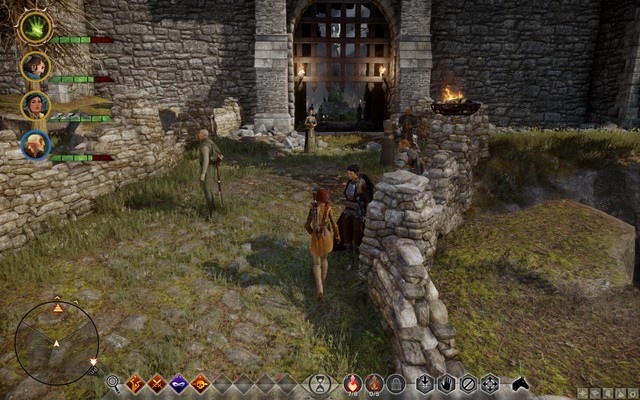 Orator Anais and the citadel entrance
In front of the entrance to the citadel, you are welcomed by Orator Anais. To prove that you are worthy, you need to seal the rift at the back of the village.
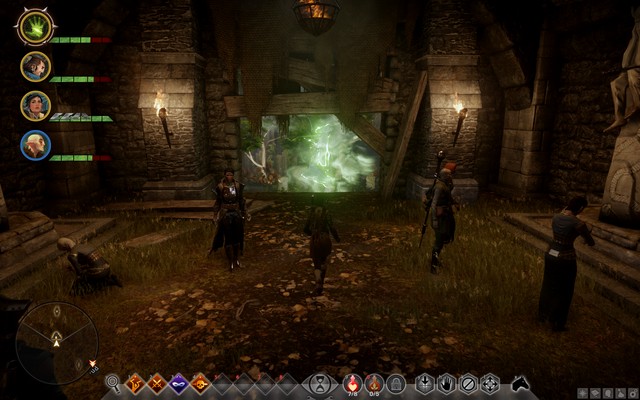
Get there, eliminate all the monsters and seal the Rift. Return to Anais. Here, you get to choose your reward - this depends on the way in which you task her with service to the Inquisition:
Way to unlock: Find the letter near the keep to the South-East.
Quest giver: - (M3,25)
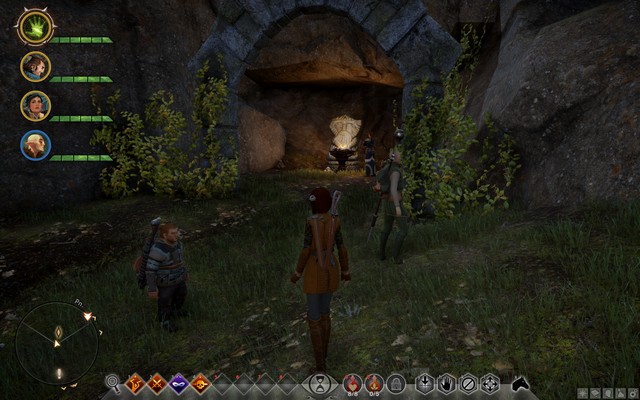 Ellandra
Next to a corpse, you find phylactery (M3,25). Take it to Ellandra (M3,25a) in the Hinterlands, inside one of small caves in the rock next to the chapel.
Rewards for completing the quest:
Way to unlock: Meet with a refugee.
Quest giver: Refugee (M3,28)
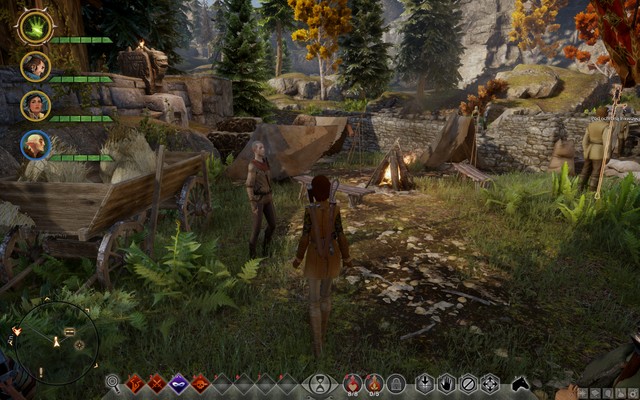 The refugee in the village
In the village, you will be accosted by a refugee who tells you about his problem. His wife requires medicine that cannot be obtained anywhere nearby.
 Hyndel
You will have to make it to the south, to the keep to see Hyndel in the Southern tower on the upper floor (M3,28a). He will give you the medicine that you need - you only need to return to the refugee and give it to him, now.
Rewards for completing the quest:
Way to unlock: Meet with Refugee hunter.
Quest giver: Refugee hunter (M3,29)
 The refugee hunter
Once you deal with the raiders in the main quest, people will be back to their daily business. One of them - the Refugee hunter - tells you about the hunger prevailing among people. He asks you to obtain 10 pieces of mutton.
 A ram
A ramOn the map, the places where you can encounter rams will appear - these are all the Southern grasslands on the map. After you collect the meat, take it back to the hunter.
Rewards for completing the quest:
Way to unlock: Find a letter in a cave.
Quest giver: - (M3,13)
 The entrance to the cave of the apostates
To the North-East of the destroyed citadel, near the small pond, there is a cave and a letter inside, with information on apostates and the whereabouts of their hideout. It is a bit to the North, inside the cave and separated from the world with a magical barrier (M3,13a). inside, there are several mages - it is better not to go there at the beginning of the game - they may be quite a challenge when you are at a low experience level.
Rewards for completing the quest:
Way to unlock: Find the key or the door to Valammar.
Quest giver: - (M3,18)
 The key to Valammar
Once you reach the villa to the South-West, climb to the first floor and onto the small balcony above the front door. On the table, there is the Valammar key, thanks to which you will be able to enter the underground (M3,18a).
 The cartel leader
There, go to level -1, where behind the first door, there are dwarves and Cartel Leader - your target (M6,1). After you kill him, you will be able to leave the underground but, you can perform the highly profitable task of opening the vault...
Rewards for completing the quest:
Way to unlock: After you kill the Cartel Leader in Valammar.
Quest giver: - (M6,2)
 The gate to the vault with the gear mounted
The entrance to the vault is in the same location, where you have defeated the Cartel Leader (M6,2), but to do that, you need to mount two gears.
 The first gear
One of them is in the same room, on barrels (M6,2a) and the second one in the buildings opposite, after you cross the bridge (M6,2b). The vault is not free of enemies, but there also are many valuable items, such as a mosaic fragment.
Rewards for completing the quest:
Way to unlock: Read the treasure map.
Quest giver: - (M3,20)
 The location, where you find the map
The sketch of the Calenhad Foothold is a simple map that shows the location of the hidden treasure. The sketch is close to the first campsite, in the valley below. The treasure itself is in the destroyed castle, on the nearby hill to the West of the map's location. (M3,20a).
 The treasure is inside the destroyed tower
To collect the treasure, you need to climb over the destroyed wall and get to the top portion of the destroyed tower. Collect all of the items to complete this quest.
Rewards for completing the quest:
Way to unlock: Read the journal.
Quest giver: - (M3,33)
 The apostate in the cave
You can complete this quest in any order you want - you need to meet two requirements though: read the journal on the cupboard in the cottage (M3,33) and kill the apostate in the cave to the South (M3,33a).
Rewards for completing the quest:
Way to unlock: Read the letter.
Quest giver: - (M3,31)
 The letter on the corpse
While in the canyon to the South, close to the lake, you find a letter next to the rocks. After you read it, you learn about the nearby statue (M3,31a). Get there and summon the dead.
 The statue
To do that, turn around the statue in the clockwise direction. Then, a corpse rises from the nearby grave - kill him to complete the quest.
Rewards for completing the quest:
Way to unlock: Talk to the guard at the gate.
Quest giver: Guard (M3,34)
 The guard at the gate
Once you get to Eastwards of the central village, you reach a gate with a guard at (M3,34). She warns you of the nearby highwaymen. Go deal with them, as you head Eastwards, to the campsite spot. In total, you encounter three bandit groups.
Rewards for completing the quest:
Way to unlock: Read the map.
Quest giver: - (M3,36)
 The cave map in the cave
To find the map, you have to seal a rift (M3,42d) in front of the entrance to a small grotto with the map inside. Of course, you can try to enter the grotto without putting up any fight, but this may be more difficult than it seems to be. After you read the map, go to the Northern edge of the map, above the farms. There, you will find a cave (M3,36a) with a treasure inside - collect the entire treasure to complete this quest.
Rewards for completing the quest:
Way to unlock: Take the letter to the mailbox.
Quest giver: - (M3,37)
 The letter on the corpse
After you seal the Rift (M3,42e) you can enter a small cave with a corpse inside. On the corpse, there is a letter.
 The mailbox at the farm
Collect it and deliver it to the mailbox next to one of the houses on the farm (M3,37a).
Rewards for completing the quest:
Way to unlock: Talk to the Storyteller in Redcliffe.
Quest giver: The Storyteller (M3,38)
 The storyteller
From the conversation with the Storyteller in Redcliffe, you learn about a spirit that is rumored to live in the lake to the South.
 The golden bowl on the lakeside
Go there and enter the pier (M3,38a). At the end, you notice a golden bowl - put the Blood Lotus inside and you will be rewarded with a sword.
Rewards for completing the quest:
Way to unlock: Talk to the Widower in Redcliffe.
Quest giver: The Widower (M3,39)
 The widower
A Widower in Redcliffe asks you to do him a favor - you will have to take flowers to the grave in the South-Western part of the map (M3,39a).
 The grave
You can get there fast if you set up a campsite there. After you complete the quest, return to the widower and let him know that you did what he asked of you.
Rewards for completing the quest:
Way to unlock: Talk to the Healer in Redcliffe.
Quest giver: Healer of The Hinterlands (M3,40)
 The healer
After you talk to the Healer, you learn that she has problems rendering medical help, due to her own safety. You need to convince her - you only need to have Cassandra on your party, and she will convince the girl automatically.
Rewards for completing the quest:
Way to unlock: The note on the cupboard at the Healer's in Redcliffe.
Quest giver: - (M3,40)
 The request list at the Healer's
After the conversation with the Healer in The Hinterlands you receive three personal requests for medicine. You need to supply her with:
Rewards for completing the quest:
Way to unlock: After the conversation with the farmer in Redcliffe.
Quest giver: One-eyed Jimmy (M3,41)
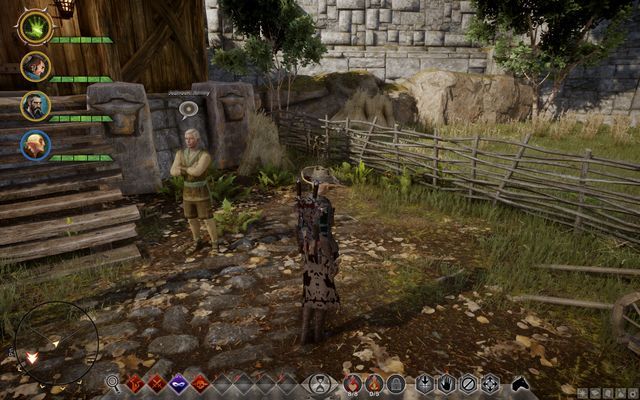 One-eyed Jimmy
After you talk to One-eyed Jimmy, you learn that one of his unique rams escaped - Lord Wolseley. Your task is to find it. To do that, go to the lake, to the South (M3,41a) and find the ram with the reddish-golden fleece.
 Lord Wolseley
Once you find it, come closer and your character speaks to the animal. Now, you only need to return to the quest giver.
Rewards for completing the quest:
Way to unlock: The letter on the corpse.
Quest giver: - (M3,30)
 The apostates at the corpse
After you kill the two apostates next to the cottage on the hill (M3,30), you will notice a third corpse that has already been here. There is a letter on the corpse, which tells about a network of smugglers.
 Sister Tanner
Go to one of the members - Sister Tanner in Redcliffe (M3,30a) and enter a trading agreement.
Rewards for completing the quest:
Way to unlock: Read the letter.
Quest giver: - (M3,19)
 The letter nailed to the wooden beam
In the abandoned cottage, there is a letter nailed to the beam. You learn about the approximate whereabouts of the author's brother (M3,19a).
 The corpse in front of the cottage
Search the corpse in front of the house to complete this quest.
Rewards for completing the quest:
How to unlock: Read the letter located in the northern part of the map, in the camp.
Quest giver: - (M3,5)
 A statue in The Hinterlands.
The author of the letter will ask you to bring some Felandaris to the statue on the west (M3,5a). It's a trap - after placing the plant there, you will be attacked by a specter, but it's an easy opponent.
 Felandaris
Felandaris can be found in only one location - Emprise du Lion, but it's a rare plant. However, you will surely encounter it when exploring this location.
Rewards:
Way to unlock: Find notes about the fort in a random location.
Quest giver: - (M3,32)
To the South, in the canyon, there is a small mercenary encampment - there is a letter there, from which you learn about the fort. You only need to read the letter to complete this quest. Also, you can find the letter in other locations on the map, in random small mercenary encampments.
Rewards for completing the quest:
80 Influence points
Way to unlock: The note on the cupboard at the Healer's in Redcliffe.
Quest giver: - (M3,40)
After you talk to the Healer in The Hinterlands you receive three private requests for medicine. In this one, you need to deliver:
1x Royal Elfroot
6x Elfroot
Rewards for completing the quest:
40 Influence points
Way to unlock: The note on the cupboard at the Healer's in Redcliffe.
Quest giver: - (M3,40)
After you talk to the Healer in The Hinterlands you receive three private requests for medicine. In this one, you need to deliver:
2x Crystal Grace
5x Spindleweed
Rewards for completing the quest:
40 Influence points
Way to unlock: Set up a camp in The Hinterlands.
Quest giver: -
To complete this quest, you need to set up campsites in six spots on the map of The Hinterlands.
Rewards for completing the quest:
80 Influence points
1 Power point
Way to unlock: After you complete the first astrarium in The Hinterlands.
Quest giver: -
Rewards for completing the quest:
Experience (little)
Way to unlock: Seal the Rifts at the farm.
Quest giver: -
For sealing the rifts (two) near the farm, you receive additional Influence and Power points.
Rewards for completing the quest:
80 Influence points
1 Power point
Way to unlock: Seal the rifts at the pass.
Quest giver: -
For sealing the rifts (three) near the farm, you receive an additional Influence and Power points.
Rewards for completing the quest:
80 Influence points
1 Power point
Way to unlock: Seal the rifts at the pass.
Quest giver: -
For sealing the rifts (two) near the farm, you receive additional Influence and Power points.
Rewards for completing the quest:
80 Influence points
1 Power point
Way to unlock: Seal the Rifts at the pass.
Quest giver: -
For sealing the rifts (two) near the farm, you receive additional Influence and Power points.
Rewards for completing the quest:
80 Influence points
1 Power points
Way to unlock: Talk to the Requisition Officer at any camp.
Quest giver: -
to complete this requisition, supply 10 Iron and 5 Onyx to the requisition table. Both of the materials can be found all around The Hinterlands but, if you have any problems finding Onyx, search in caves and grottos for it.
Another possible requisition is Dragon Stone instead of Onyx - you can find it on rocks to the West, or in the caves to the South.
Rewards for completing the quest:
100 Influence points
1 Power point
Way to unlock: Automatically, after you have acquainted yourself with the Scout the Storm Coast operation.
Quest giver: - (M2, 3)
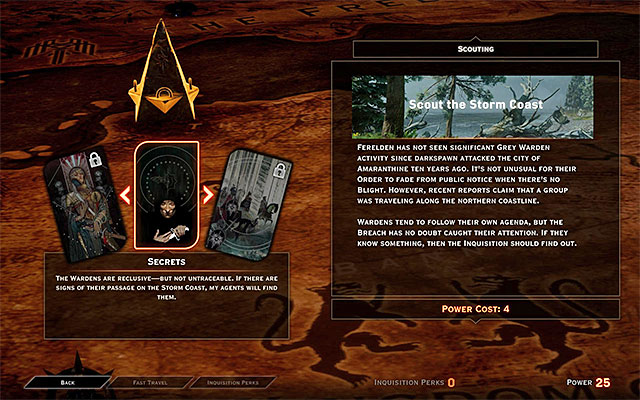 The operation connected with the Storm Coast
This quest may be added to your log after you have found the icon of the operation on the war map at Haven (M2,3), which is connected with it. In order to complete this operation automatically, you need to have, at least, 4 Power points. Spending the Power points results in unlocking access to The Storm Coast, which is where you need to travel. After you get to the Coast (M5,1) listen to the conversation with scout Harding, after which you will be able to start the exploration of this location.
Note - If you have not taken to this quest at the beginning of the game, it will still be available after you reach the Skyhold.
Rewards for completing the quest:
Way to unlock: Meet with Scout Harding.
Quest giver: Scout Harding (M5,1)
 From Harding, you learn about the missing members of the Inquisition
This quest becomes available right after you reach The Storm Coast for the first time, i.e. right after the meeting with Scout Harding (M5,1). From the scout, you learn, among others, that any contact with the members of the Inquisition has been lost. They were supposed to meet with the local bandits. You will be asked to look into the case of their going missing.
 Deal with the bandits and examine one of the nearby buildings
Head South. Ultimately, you need to reach a forest on a higher hill (M5,1b). Attack the nearby bandits, with the Hessarian Blades and Hessarian Archers among them. After the fights, find a dilapidating building. Inside, you will find the dead Inquisition soldiers. Remain here and find the map, thanks to which you will find the main HQ of the bandits on the coast.
 Find the bandits' notes
Before you head there, it would be a good idea to complete the secondary objective of this quest. The plan is that prepare a necklace with a crest, thanks to which you will be able to reach the bandit leader and challenge him to fight. Start by finding the Bandit Notes, in the building, thanks to which you will receive a Recipe: Mercy's Crest.
 You need to prepare the crest after you interact with the Requisitions table
You now need to do the same, as in the case of the Requisition quests so you need to obtain the ingredients. These are:
After you have obtained all of the items, return, e.g. to the Northern encampment and find the requisition table (M5,2). Interact with it and prepare the Mercy's Crest select it from the inventory and put it on (it will replace the amulet of your character).
 The entrance to the Hessarian Camp
Head South. Right after you go down the slope, you should reach the Hessarian Camp (M5,1c). If you have the Mercy's Crest on, you will not be attacked by the guards at the main gate and you will be allowed in, to meet with the Hessarian Leader.
 Defeat the Hessarian leader in direct fight
Save the game and start the conversation with the Hessarian leader, which will result in a honorable fight with him. While fighting, watch out for the Hessarian Hounds, and remember in the first place, to take proper care of the more poorly armored party members (keep them at a safe distance and heal them, if necessary). Defeating the leader ends this quest. What is even more, you win favors with the bandits and take over their encampment, which you will be able to return to by fast-travelling (e.g. to take rest).
Rewards for completing the quest:
Way to unlock: Automatically, after you reach The Storm Coast.
Quest giver: - (M5,1)
This quest becomes available right after you reach The Storm Coast for the first time. It is about finding two Rifts between the game world and the Fade, and sealing those rifts (the entire process has been described, among others, in the guide for this game).
The first rift is to the South of the starting point for this quest (M5,1a). The challenge posed by the rift is medium and has you defeat monsters on, around, level eight (the Fury Demon among others).
The second rift is at the water front, in the central part of the map (M5,1d). The challenge posed by the rift is medium and so, you will have no problems sealing it.
Rewards for completing the quest:
Way to unlock: Automatically, after you reach The Storm Coast.
Quest giver: - (M5,1)
This quest becomes available right after you reach The Storm Coast for the first time. It is about setting up three Campsites. In the first one, you start the exploration of the Storm Coast (M5,1). The remaining two are in:
Rewards for completing the quest:
Way to unlock: Automatically, after you reach The Storm Coast.
Quest giver: - (M5,1)
 An example trace
This quest becomes available right after you reach The Storm Coast for the first time. It is about finding four traces left by the Gray Wardens that visited the Coast. You find these be reaching the marked area and scanning it (the appropriate key/button), up until you reveal the exact object. You need to visit the following:
Rewards for completing the quest:
Way to unlock: Meet with the Requisition Officer.
Quest giver: Requisition Officer (M5,2)
 An example Serpentstone
You can receive this quest (requisition quests are random) as a result of meeting with the Requisition Officer at one of the camps (M5,2). You will receive a recipe and the following will be requested:
After you obtain these, return to the camp and interact with the requisition table to complete this quest.
Rewards for completing the quest:
Way to unlock: Meet with the Requisition Officer.
Quest giver: The Requisition Officer (M5,2)
 You can obtain Spider Ichor by killing spiders in caves
You can receive this quest (requisition quests are random) as a result of meeting with the Requisition Officer at one of the camps (M5,2). You will receive a recipe and you will be asked to supply the officer with the following:
After you obtain these, return to the camp and interact with the requisition table to complete this quest.
Rewards for completing the quest:
Way to unlock: Automatically, after you collect the Glowing Key from the Rebel Mage.
Quest giver: - (M5,7)
 Defeat the strong rebel mage and loot him for the key
This quest is activated in a quite unusual way. While exploring the central part of The Storm Coast (M5,7) you may find a strong Rebel Mage. You need to attack him and defeat him in direct battle. It is a good idea to assign two warriors to this battle, who will be obstructing the mage from casting strong spells. After you win the fight, examine the corpse of the mage and collect the titular Glowing Key.
 The cottage with the locked door
After you have obtained the key, you can go towards the small cottage on a nearby hill (M5,7a). Enter the cottage and use the key. Although the quest ends here, it is a good idea to explore the rooms in the cottage, which were inaccessible earlier, thanks to which you will obtain, among others, and unique recipe.
Rewards for completing the quest:
Way to unlock: Automatically, after you set up one of the campsites (M5,6) or, automatically, after you discover a Rift (M5,6a)
Quest giver: - (M5,6) or (M5,6a)
There are two ways to unlock this quest - by setting up a camp in the central part of the The Storm Coast (M5,6), or by approaching one of the Rifts connected with this quest (M5,6a).
This quest entirely concerns sealing of a single Rift between the game world and the Fade, which is located near the titular waterfall (M5,6a). It should be pointed out, here, that the entire process of sealing the Rifts has been described in the guide for the game. This particular rift is being guarded by strong level 12 monsters so, do not approach until you have made sure that your party is strong enough. After you start fighting, focus on slaying the Despair Demons, because they are the greatest threat here.
Rewards for completing the quest:
Way to unlock: Complete the "Reports of Darkspawn Activity"
Quest giver: -
 The entrance to the first cave to the North
After you have completed "Cleaning House" at the Storm Coast, the "Reports of Darkspawn Activity" operation activates,, in the council room. After you complete it, you gain access to the quest that consists in traveling to a location and sealing off four strategic passages, which monsters use.
 The tunnel in the first cave
At the Storm Coast, go to the first campsite to the North of the nearest grotto (M5,8a). Apart from several spiders, and, possibly, several monsters, there is a hole in the wall, inside. It is a tunnel that you need to use magic to seal. Find the spot, where your mage can use magic and move over the large boulder to shut the passage.
 The tunnel in the second cave
The second passage is in the cave between two fragments of the coast (M5,8b). You need to go even deeper into the cave, The opening is past the bonfire.
 The corridor projecting outwards
The third hole (M5,8c) in the wall is outside, cut into one of the slopes. It is being guarded not by monsters, but by Red Templars.
 The last tunnel to seal
The last tunnel (M5,8d) to seal is in the South-West-most cave, where the river starts. The opening becomes visible after you enter from the left (from the North).
Rewards for completing the quest:
Way to unlock: Reach level 16 and complete the "Red Templars on the Storm Coast" operation - you need to gain access to the Storm Coast first.
Quest giver: -
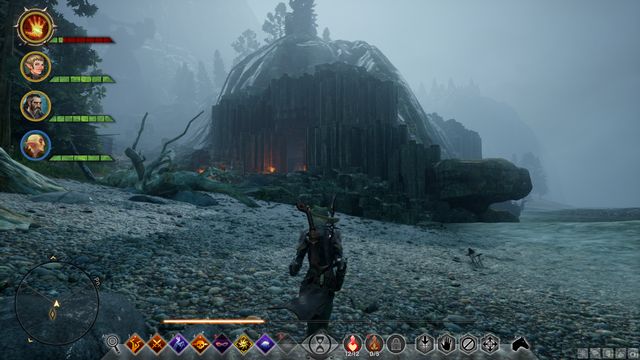 The cave to the South
If you have already visited the Storm Coast you must have noted the sealed cave to the South of the location. To get inside, you need to reach level 16 and complete the "Red Templars on the Storm Coast") operation. This is when the door swings open. To complete the quest, follow the corridors. Along your path, you encounter many Red Templars.
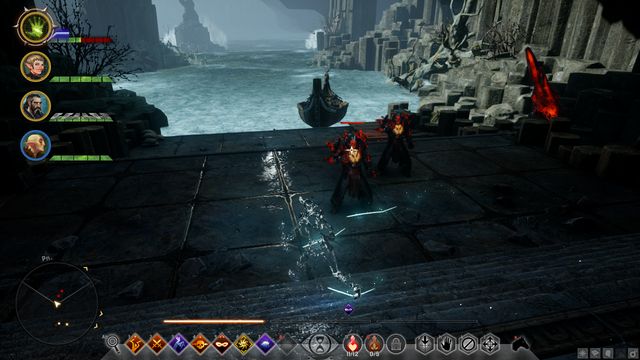 The harbor in the cave - your destination
At the end of the path, you find a small harbor. This is where the quest ends and you can use the harbor to get to the island, where there is the den of the dragon.
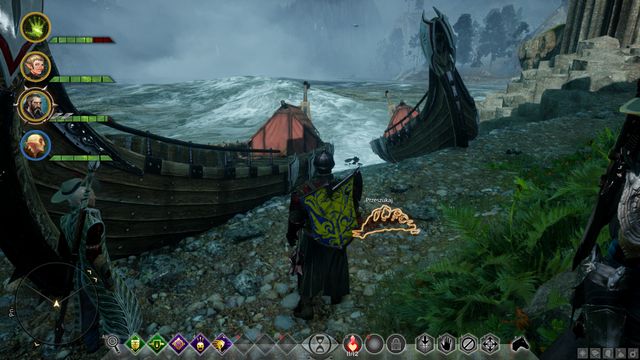 The corpse between the boats - this is where you find the key
At the same time, the large locked door in the middle of the chamber should be noted. It requires a templar key - you can find it near the cave entrance, next to the two boats on the shore, in the passage between corridors.
Rewards for completing the quest:
Way to unlock: Automatically, after you have acquainted yourself with the "Investigate the Shards" operation.
Quest giver: - (M2, 3)
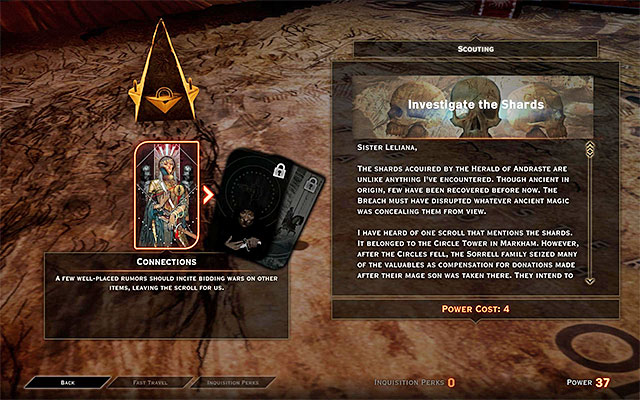 The operation connected with the Forbidden Oasis
This quest may be added to your log after you have found the icon of the operation on the war map at Haven (M2,3), which is connected with it. In order to complete this operation automatically, you need to have, at least, 4 Power points. Spending the Power points results in unlocking access to The Storm Coast, which is where you need to travel. After you get to the Coast (M5,1) listen to the conversation with scout Harding, after which you will be able to start the exploration of this location.
Note - The operation connected with this quest becomes available after you find any Shard in the game world.
Note - If you have not taken to this quest at the beginning of the game, it will still be available after you reach the Skyhold.
Rewards for completing the quest:
Way to unlock: Automatically, after you reach The Forbidden Oasis.
Quest giver: - (M8,1)
This quest becomes available right after you reach The Forbidden Oasis for the first time. It is about locating three Rifts between the game world, and the Fade and sealing them (the entire process has been described, among others in the guide for the game).
The first Rift is located within short distance Northwards of this quest's starting point, between rocks (M8,1a). There are weak monsters coming out of it, around level seven. Still, defeating them all may take you some time.
The second Rift is in the desert in the Southern part of the map (M8,1b). Its difficulty level is medium and it has you defeat monsters around the ninth experience level (the Fury demon among others).
The third Rift is in the desert area to the East of the starting camp (M8,1c). Just like in the case of the first Rift, defeating all of the monsters there is not too difficult.
Rewards for completing the quest:
Way to unlock: Automatically, after you reach The Forbidden Oasis.
Quest giver: - (M8,1)
This quest becomes available right after you reach The Forbidden Oasis for the first time. It is about setting up three Campsites. In the first one, you start the exploration of the Forbidden Oasis (M8,1). You need to set up the second one on your own and it is located Northwards of the point, where you started the exploration of the oasis (M8,5). Along your path there, watch out for the Hyenas that may jump the party.
Rewards for completing the quest:
Way to unlock: Meet with the Requisition Officer.
Quest giver: The Requisition Officer (M8,2)
 An example Paragon's Luster stone
You can receive this quest (requisition quests are random) as a result of meeting with the Requisition Officer at one of the camps (M5,2). You will receive a recipe and you will be asked to supply the officer with the following:
After you obtain the materials, return to the campsite and interact with the Requisition table to end this quest.
Rewards for completing the quest:
Way to unlock: Meet with the Requisition Officer.
Quest giver: The Requisition Officer (M8,2)
 You can find the nugs and tuskets out in the open and in caves
You can receive this quest (requisition quests are random) as a result of meeting with the Requisition Officer at one of the camps (M8,2). You will receive a recipe and you will be asked to supply the officer with the following:
After you obtain these, return to the camp and interact with the requisition table to complete this quest.
Rewards for completing the quest:
Way to unlock: Meet with the Requisition Officer.
Quest giver: The Requisition Officer (M8,2)
You can receive this quest (requisition quests are random) as a result of meeting with the Requisition Officer at one of the camps (M8,2). You will receive a recipe and you will be asked to supply the officer with the following:
After you obtain the materials, return to the campsite and interact with the Requisition table to end this quest.
Rewards for completing the quest:
Way to unlock: Automatically, after you reach The Forbidden Oasis.
Quest giver: - (M8,1)
 An example shard
This quest becomes available right after you reach The Forbidden Oasis and it consists in finding the titular temple. Before you set out to do so, make sure that you have obtained, at least six Shards, because they will be required for this quest. You find those shards while completing side quests in all of the locations of the game world and in the case of the Oasis, you need to complete the Shards in the Oasis side quest. Just to remind you, you need to reach an Ocularum use it to locate the shard and collect it.
 The temple entrance
The entrance to the Solasan temple is in the Northern part of the map (M8,1d), next to one of the "inactive" campsites. Reaching the entrance may be problematic, at first, because it is located at a higher level. Personally, I recommend that you follow the tunnels in the Western part of the Oasis and pass the Upper Walkway among others.
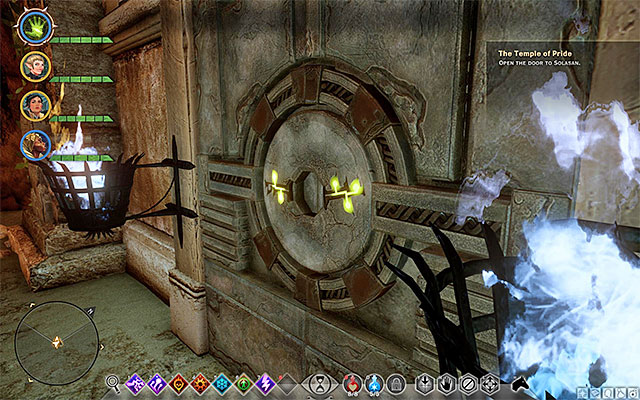 Slide the obtained shards into the slots in the entrance gate
After you locate the temple, head towards the locked entrance gate. To open it, you need to use six of the shards that you have found. If you have the required amount, interact with the stone gate (they will be automatically put into the slots). Entering the Solasan temple ends the quest, but it is imperative that you explore it, because you will find valuable loot inside and unlock several new side quests..
Rewards for completing the quest:
Way to unlock: Automatically, after you interact with any Ocularum.
Quest giver: - (M8,3)
You can obtain this quest after you interact with any Ocularum in The Forbidden Oasis (M8,3). Each time, you need to use an Ocularum to locate Shard after which you reach those shards. These are the hints, concerning the whereabouts of the shards (some of them are hard to obtain).
The first shard (M8,3a) is on a rocky ledge, right next to the base of the wooden structure.
The second shard (M8,3b) is on one of the big rectangular rocky blocks.
The third shard (M8,3c) is on the rocks, at the base of the wooden structure and to reach it, you need to walk over a small bridge.
The fourth shard (M8,3d) is on the rocks, in a quite accessible spot.
The fifth shard (M8,3e) is on a small rocky ledge. You can try to climb onto the ledge or jump off a ledge above.
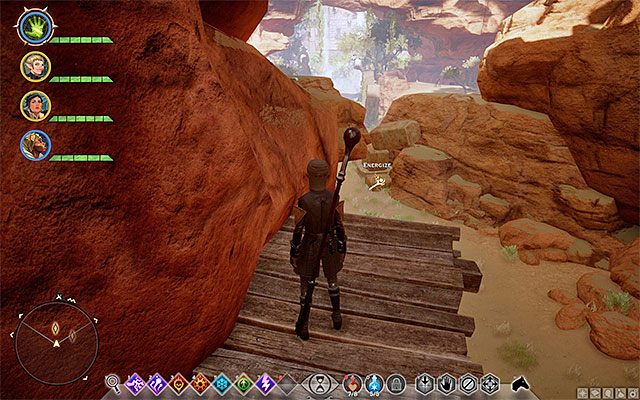
The sixth shard (M8,3f) is very well hidden. Find the wooden plank shown in the screenshot, to the South of this shard. You need to switch to the mage and press the interaction key/button to finish the path. Thanks to this, you will get the shard.
The seventh shard (M8,3g) is on the rocks at the upper level, right next to one of the small trees.
The eighth shard (M8,3h) is in the campsite in front of the entrance to the Solasan temple.
The ninth shard (M8,3i) is on a rocky ledge, under a wooden plank. You can reach it by jumping off a ledge above.
The tenth shard (M8,3j) is on the ground, next to the rocks.
The eleventh shard (M8,3k) is on the rocks OVER one of the campsites. The best way to reach the shard is from the South.
The twelfth shard (M8,3l) is on a rocky ledge above a small water reservoir. You can reach there only by jumping off a ledge above.
The thirteenth shard (M8,3m) is in one of the highest viewpoints in the oasis. You can only reach the shard from the North, by walking over the narrow wooden plank to the very top.
The fourteenth shard (M8,3n) is on a small rocky ledge that you reach from the Northern side. While along your path, take the upper paths and climb the ladders. This way you will find the shard.
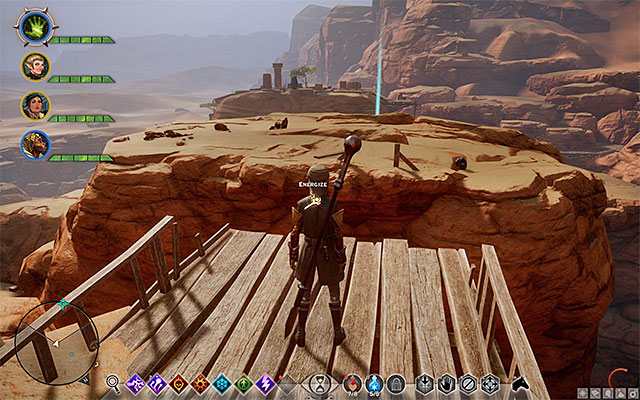
The fifteenth shard (M8,3p) is another one that is difficult to reach. You need to start on the rocks above this one. Locate the interactive point shown in the above screenshot (M8,3o). You need to switch to any mage, here, and finish the plank as him. After you are done, go West and jump down to the ledge below, where the shard is.
Rewards for completing the quest:
Way to unlock: Automatically, after you set up the second campsite (M8,5) or automatically after you discover a Rift (M8,5a)(M8,5b)
Quest giver: - (M8,5) or (M8,5a) or (M8,5b)
There are two ways, in which to unlock this quest - by setting up a camp in the central part of The Forbidden Oasis (M8,5) or by approaching one of the two rifts connected with this quest (M8,5a)(M8,5b).
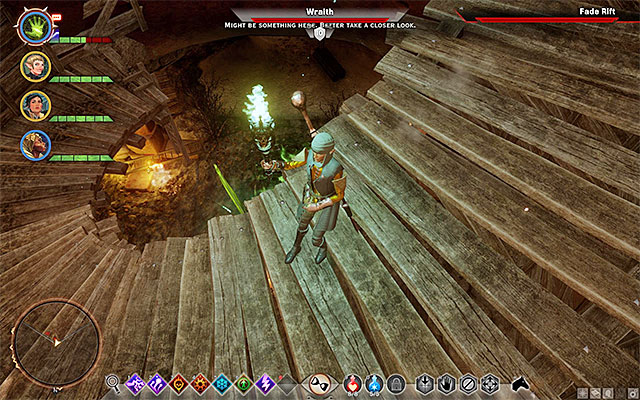
This quest concerns, entirely, sealing two rifts between the game world and the Fade. It should be pointed out that the entire process of closing Rifts has been described in the guide for this game. The first of the rifts is to the West of the second campsite (M8,5a). First, approach that rift, by using tunnels to reach the ledges above. Then, locate the spiral stairs shown in the above screenshot, which will take you to the Rift. You need to be prepared to deal with some stronger monsters, with the Fury Demon among them. In general, however, they are not too strong.
 The second Rift
The second rift is in the North-Western corner of the Oasis, close to where desert areas start. Try closing this Rift only after your party has progressed high enough, because by default, it is guarded by demons around the twelfth experience level. While fighting, try to kill the Despair Demons, in the first place, because they are the greatest threat.
Rewards for completing the quest:
Way to unlock: Automatically, after you approach the gate of the Solasan temple.
Quest giver: - (M8,6)
 Approach the gate and put the shards in the slots
You can obtain this quest only after you have gained access to the Solasan temple, i.e. after you have completed The Temple of Pride quest. Enter the temple and walk over to the main area, where there are three doors. Approach the one on the left (M8,6) to add this quest to your log. to open the door on the left, you need to use six Shards and, if you have not gathered that many, return here later into the game.
 Defeat the undead and open the sarcophagus
There are three chambers to secure and explore. In the first one, (M8,6a) you will have to eliminate Corpses around the seventh experience level so, it is not going to be that difficult to slay them. After you have dealt with all of the monsters, examine the contents of the sarcophagus in the middle, in the first place. This will raise your Spirit Resistance by 4 points. Apart from that, take a look around the chamber to find smaller containers with loot and pouches with gold.
 Eliminate the enemy archers quickly
To continue exploring the tomb, you need to have, at least, twelve Shards. Thanks to this, you will open the door to the second chamber (M8,6b). Inside, there are monsters around the 10th experience level and, in the first place, deal with the Corpse Archers. Just like earlier, after the fight, explore the chamber and open the sarcophagus in the middle. This will raise your Spirit Resistance by 6 points.
 Deal with the Arcane Horror in the first place
The door to the last, third, chamber (M8,6c) requires as any as 18 Shards. And this is not the only problem, because in the chamber, there are monsters of around the 12th experience level. Definitely, the most serious problem is the Arcane Horror and eliminating this monster should be your main priority. Although the actual quest ends before you enter the third chamber, it is worthwhile to explore the rest of the tomb. After you open the sarcophagus, you will receive 10 points of Spirit Resistance.
Rewards for completing the quest:
Way to unlock: Automatically, after you approach the door of the Solasan Temple.
Quest giver: - (M8,6)
 Chamber of Fire
Just like in the case of The Cold Endured and The Spirit Calmed quests, you unlock this one after you enter the Solasan Temple (after you end The Temple of Pride quest). This quest is represented by the temple's middle door (M8,6) and just like in the case of the remaining doors, you need to collect shards to open it (the first door requires 6 of them).
 You encounter many enemies in the chambers
In each of the chambers, there are reavers and demons, which represent the element specific to that chamber. In each room, pick gold and open the sarcophaguses in the center - thanks to this, you will permanently receive additional points to resistance to that element. To open the door to the next chamber, you require 12 shards.
Behind the last door, you find the most powerful mini-boss of a given element. After you defeat him and open the sarcophagus, you end the quest.
Rewards for completing the quest:
Way to unlock: Automatically, after you approach the door of the Solasan Temple.
Quest giver: - (M8,7)
 The chamber of Cold
Just like in the case of The Fire Captured and The Spirit Calmed quests, you unlock this one after you enter the Solasan Temple (after you end The Temple of Pride quest). This quest is represented by the temple's middle door (M8,7) and just like in the case of the remaining doors, you need to collect shards to open it (the first door requires 6 of them).
In each of the chambers, there are reavers and demons, which represent the element specific to that chamber. In each room, pick gold and open the sarcophaguses in the center - thanks to this, you will permanently receive additional points to resistance to that element. To open the door to the next chamber, you require 12 shards.
 The boss in the chamber of Cold
Behind the last door, you find the most powerful mini-boss of a given element. After you defeat him and open the sarcophagus, you end the quest.
Rewards for completing the quest:
Way to unlock: Complete quests: The Fire Captured, The Cold Endured, The Spirit Calmed - i.e., open all three doors at the Solasan Temple
Quest giver: - (M8,8)
 The entrance to the last chamber
To activate this quest, you need to open the three other doors of elements, at the Solasan Temple (M8,8). In other words, you also need to pick all of the shards available in the game. Then, you can open the middle door across the entrance. The chamber is not much different from the previous ones in the temple however, instead of three, there only is this chamber here.
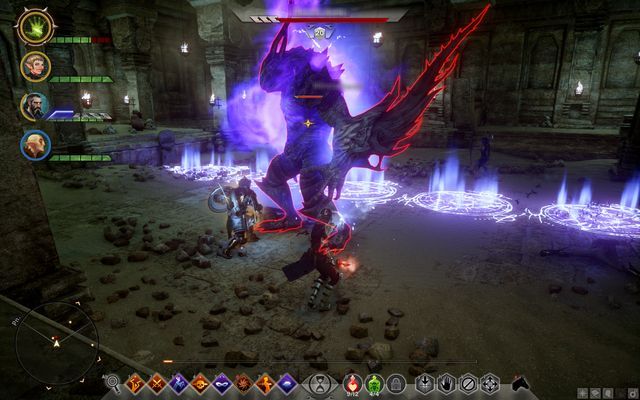 The Pride Demon in the last chamber
The floor is peppered with electric traps and your main enemy here is the Pride Demon and several undead. In the center of the chamber, just like in the previous cases, there is a sarcophagus, whose opening wins you Electrical Resistance points.
Rewards for completing the quest:
Way to unlock the quest: Talk to the miner in The Forbidden Oasis
Quest giver: The miner (M8)
 The miner
In The Forbidden Oasis, you can find a Miner. There is no specific spot in which to find him, he is somewhere around the map. You can find him by keeping an eye out for an exclamation mark icon on the map, which changes its positions.
 Par'as case
After a conversation, you learn that the miner lost his ring. It is in the Par'as Cavern (M8,4a) in the North-Eastern part of the map. In front of the cave, there are Venatori soldiers strolling and inside, there are multitudes of spiders. As soon as you have dealt with the enemies, walk into the Western corridor in the cave -at the end of it, there is a case (M8,4b) with the ring inside. Return to the Miner and give it back, for which you will be rewarded with a key to the locked door in the Par'as Cavern and you unlock another quest connected with opening the door: The Door in Par'as Cavern.
Rewards for completing the quest:
Way to unlock the quest: After you give the ring back to the Miner (M8), you receive a key, at the end of the What It's Worth quest.
Quest giver: The miner (M8)
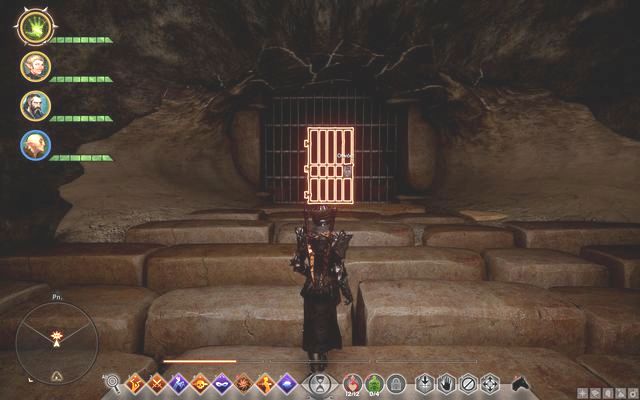 The door in the Par'as Cavern
After you, in the What It's Worth quest, return the ring to the Miner (M8), you receive a key to the locked door in the Par'as cavern (M8,9). Enter the cavern and open the door, which ends this quest. Inside, there also is a chest with precious stones.
Rewards for completing the quest:
Way to unlock: Automatically, after you acquaint yourself with the Rescue Soldiers Missing in Ferelden operation.
Quest giver: - (M2, 3)
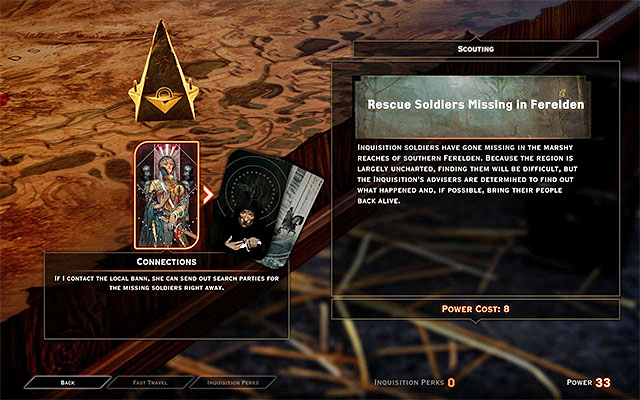 The operation connected with The Fallow Mire
This quest may be added to your log after you find the operation connected with it Rescue Soldiers Missing in Ferelden on the war map in Haven (M2,3). to complete this operation automatically, you need to have, at least 8 Power points. Spending the Power points results in unlocking the access to The Fallow Mire, which you need to travel to. After you get to the Mire (M9,9) listen to the conversation with scout Harding, after which you will have the opportunity to explore this location.
Note - If you have not completed this quest at the beginning of the game, it will also be available after you reach Skyhold.
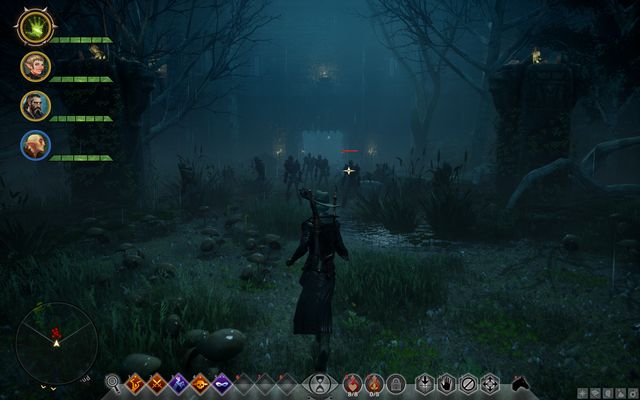 The undead in front of the castle entrance
You need to find the missing soldiers but, to get to them, you need to reach as far, as the other end of the map. There, you find the castle of the Avars - a hostile tribe that captured the warriors. Once you reach the end of the path across the map, you notice the castle. In front of it, there is a big group of the undead - you can either fight them or dash past them and enter the castle quickly, through the gate.
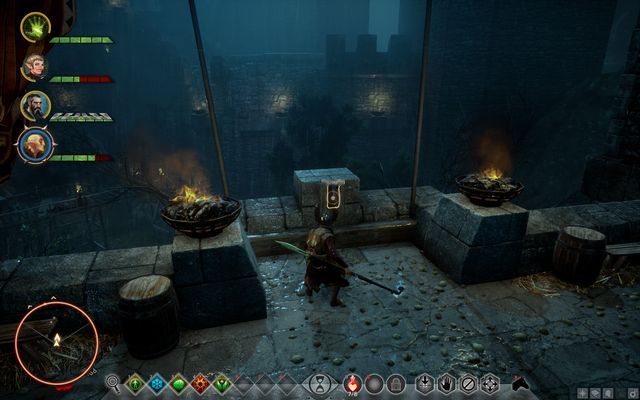 The lever for the gates
Inside, you will be attacked by several guards of the keep. After you defeat them quickly, climb onto the wall and pull the lever (M9,8a) - it will cut off the undead from the castle and open the other gate into the castle.
 The Hand of Korth and his guard
Inside, deal with three more opponents and, atop the stairs, you will see the boss - the Avar leader - The Hand of Korth (M9,8b). This opponent, who is backed up by several guards, is your main target but, in the first place, deal with the guards, especially all the archers. The boss is vulnerable to most of the magic attacks but, he can activate an armor. The key to defeating him, if your level is not too high, is to dodge, while fighting at close quarters, or keeping your distance, if you are a mage or an archer.
 The door with the imprisoned soldiers behind
After you have dealt with the opponent, take to freeing the imprisoned. They are behind the door on the left side of the throne (M9,8c). Also, remember to loot the opponent, because he drops the Gift of the Mountain Father.
 An Avar, a potential party member
And this is where, technically, this quest ends but, after you exit the main hall, there is one of the Avars waiting outside, who wants to join the Inquisition. You can agree and you will gain a new agent and additional Power and Influence points.
Rewards for completing the quest:
Way to unlock: Meet withthe Requisition Officer.
Quest giver: Requisition Officer (M9,10)
 The Summer Stone
You can start the analysis right after you reach The Fallow Mire. Search out the Requisition Officer (marked with the exclamation mark on the map), who reports to you about the current requests. This is a replayable quest and you should bring:
You will not have too much problem finding either. Both of the stones are the only ones in this location, on rock walls. The amount is also nothing to worry about because, at one discovery, you find several units of the stones.
Rewards for completing the quest:
Way to unlock: Meet withthe Requisition Officer.
Quest giver: Requisition Officer (M9,10)
Artifacts Requisition is the second quest at The Fallow Mire. The items that you need to obtain for the Requisition Officer are:
Both of the items drop from random monsters and demons so, it is best to take on this request as soon as possible, to be able to find these, during your explorations.
Rewards for completing the quest:
Way to unlock: Set up a campsite at The Fallow Mire.
Quest giver: - (M9,4)
This quest, just like in the other locations, requires you to set up campsites in specific spots and in predetermined numbers. What makes the quest at The Fallow Mire easier is that you only need to seize one campsite spot on the map (M9,4).
Rewards for completing the quest:
Way to unlock: Automatically, after you reach The Fallow Mire.
Quest giver: - (M9,9)
 One of the runes on the pillar
This is one of the first quests that you receive, after you get to this location. The only thing that you need to do is reach four spots (M9,2a; M9,2b; M9,2c; M9,2d) and light a beacon, as the mage. You will be attacked by demons and, after you deal with them, take the beacon and get to the other side of the pillar, where you find a rune - examine it. do the same in all four cases.
Rewards for completing the quest:
Way to unlock: Automatically, after you reach The Fallow Mire.
Quest giver: - (M9,9)
 After you light a beacon, you will be attacked by demons
In this quest, you need to cross the entire map, by following the routes, and light four beacons. This quest is connected with the previous quest: Beacon in the Dark, but here, you need to defeat demons that attack you, after you light the beacon. In each point that you secure, you will be able to fast-travel, which will make your journeys shorter.
Rewards for completing the quest:
Way to unlock: Find the tome at the pillar.
Quest giver: - (M9,7)
The hidden WidrisAfter you find the tome next to the second pillar with the beacon, you receive the quest to kill the apostate Widris, whom you find hiding behind the first Rift (M9,7a). The mage uses minor specters to his aid, but the fight is not too much of a problem. After you defeat him, in one of the crates, you find a scheme, and the barrier reinforcing device (interaction possible after the "Scouting the Cover" quest).
Rewards for completing the quest:
Way to unlock: Find the key near the cabin.
Quest giver: - (M9,6)
 The key in the thickets
After you get off the beaten tract, to the Eastern side of the path, you notice a hidden item marking. It is a key hidden in the water, next to the stone. Several meters ahead, there is a cabin that you can open with the key. The quest ends immediately after you enter the cabin.
Rewards for completing the quest:
Way to unlock: After you mark the first landmark.
Quest giver: - (M9,5a)
To complete this quest, you only need to mark all of the landmarks in The Fallow Mire. There are three of them (M9,5a; M9,5b; M9,5c), where the first one is next to the first base, the second near the second campsite, inside the stone circle and the third behind the fourth pillar with beacon, near the old mill.
Rewards for completing the quest:
Way to unlock: Automatically, after you reach The Fallow Mire.
Quest giver: - (M9,9)
There is a quest with the regions in each bigger location. They consist in reaching, at least for a while, each of the regions in each of the locations. In The Fallow Mire there are 8.
Rewards for completing the quest:
Way to unlock: Automatically, after you reach The Fallow Mire.
Quest giver: - (M9,9)
 The second Rift inside the stone circle
You receive this quest immediately after you reach the Mire. You need to seal all of the Rifts on the map: the first one behind the first pillar with beacon (M9,3a) - quite unusually, it is closed and you first need to open it to fight the demons. The level of this Rift is relatively easy. The second one is in the stone circle (M9,3b), and it can be quite a challenge, of your party is not developed well enough.
Note - sometimes, next to the second Rift, demons do not appear. If this is the case, try to fast-travel to the campsite and come here again.
Rewards for completing the quest:
Way to unlock: Automatically, after you examine the Inscription.
Quest giver: - (M11,1)
You can obtain this quest while completing the Champions of the Just main quest, i.e. of the one connected with winning support from the Templars. More precisely, this happens when the Envy Demon takes you to the Nightmare. Reach the chamber with the green flames, while in the nightmare, and examine the South-Western part of the chamber, after you get past the flames. Your characters runs up against an obstacle here (one of them has been presented in the above screenshot). If you are a warrior, it is going to be a wall that you can smash, in the case of the rogue it is the locked door that you need to open, and if you are mage, you need to deactivate a barrier.
 The first inscription
After you get past the obstacle, walk into the small room. Examine the boulder here (M11,1), i.e. the inscription on the boulder. Thanks to this, this quest will be added to your log. Apart from that, you also receive 1 point of Cunning. There are two more inscriptions to find. Also they can be found in the nightmare and their whereabouts have been provided below.
You find the second inscription while exploring the second part of the nightmare, i.e. the Prison. It is necessary that you reach the location where you kindle fires in several parts of the prison. Complete this part of the quest (Champions of the Just), but do not continue across the prison. Instead, return to the area where you started the exploration of this part of the nightmare. Take a look around, in the cells, for the Prison Key shown in the above screenshot (M11,1a).
 The door that requires the key
You can now go Eastwards. Stop after you reach the intersection and take the Southern door (M11,1b), which you can open with that key. Enter the room and kindle one more fire.
 The second inscription
Leave and note that there is a block on the Eastern wall (M11,1c), similar to the one that you had to force earlier. Overcome this obstacle, by interacting with it, and enter another room. You find the second inscription here (M11,1d). After you examine it, you are rewarded with permanent 2 Constitution points.
 The third inscription
You can find the third inscription while exploring the third part of the nightmare. This takes place soon after you leave the Forest and enter one of the Redoubt buildings (M11,1e). Do not go ahead and instead, climb up the stairs. Locate the boulder here and interact with it. As a reward, you receive 3 Willpower points.
Rewards for completing the quest: Additional points to your statistics - 1 Cunning point, 2 Constitution points and 3 Willpower points.
 The throne that you judge from
It is a sequence of quests that supplement the main storyline. After important events, you can pass your own judgment on the convicts. Making a judgment always gives you +80 Inquisition influence, no matter what the decision is, but you can easily win your allies over, after you take the correct decisions, and also unlock new operations.
The first one to try is the Avvar chief. You need to pick one out of the three:
Alexius, your former no. 1 enemy now is subject to your judgment (you can pass the judgment only if you have earlier completed the main quest connected with the apostates). . You can pick one of four sentence options:
You can pass the judgment on the Captain only if you have earlier selected the main quest connected with the Templars. The available sentence options are:
Servis is a mage to you could meet in The Western Approach. You can judge this person only if you've completed the "The Trouble with Darkspawn" side quest and you've decided to capture Servis in the battle. You can choose one of four options:
After completing the main story and a few side quests in Emprise du Lion, gather enough evidence to judge Mistress Poulin. Your options are:
This judgment is available after you capture her in the Winter Palace during the "Wicked Eyes and Wicked Hearts" quest (read the chapter describing this quest).
After completing "Here Lies the Abyss", you will be judging Lord Erimond. There are three options to choose:
After completing "Here Lies the Abyss", you will also be judging another person connected to the rebellion. It is one of the leaders - Ruth. There are fiver options:
At the end of the plot, you will be judging Samson, defeated in the Temple of Mythal, after completing the "What Pride Had Wrought" quest. To unlock this judgment, you first have to complete the "Being Samson to Skyhold for Judgment" operation.
 Here, you can pick the upgrade for your garden
On the note on the desk, in the living chambers, there is a list of available upgrades for Skyhold. The first one is the garden upgrade. After you gather all of the necessary ingredients, go to the quartermaster and complete the quest.
Required items:
Then, go to the garden (M12,13) and pick the structure that you want to craft. There are the Chantry garden, and the herb garden to choose from. The selection of the former allows you to receive temple donations and unlocks the Eyes of the Maker operation, and you also receive a standard. In the case of the latter, you will be able to grow more plants in your garden but you receive no rewards (3 additional pots in the garden).
Rewards for completing the quest:
To upgrade this tower you need the following resources:
Resources:
You will find Spirit Essence as random loot in some of the more powerful demons from the rift. As a reward, you will be able to build a Templar tower or a mage tower (M12,15). Your choice defines what banner you'll obtain.
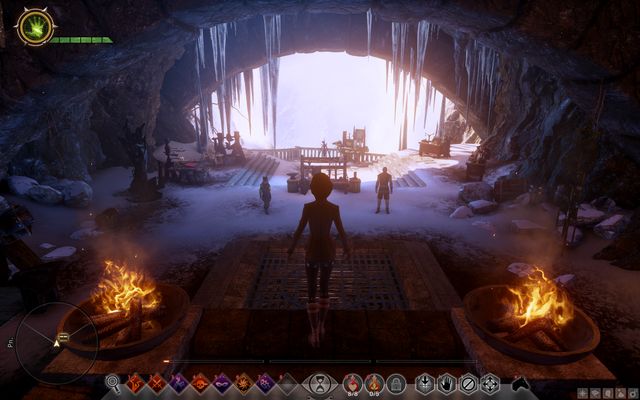 The casemates - this is where you find the blacksmith
In this quest, you need to visit the council room at the new stronghold (M12,8a) and the blacksmith (M12,8b). After you do these two, you receive another quest, connected with decisions concerning the stronghold.
No rewards.
After you complete the first quest, you unlock the operation of recruiting an NPC, who is an arcanist. Go to the council table and complete the operation. Walk over to the casemates, where you find Dagna. Thanks to her, you will be able to craft runes now.
Rewards for completing the quest:
In this quest, go to the casemates. There, at the very end, you find a table (M12,9), where you can now adjust the looks of the Stronghold. You obtain new elements as you progress into the game, by finding them in chests in various locations, or by buying them at the furniture shop in Val Royeaux. Exit the menu to complete this quest.
No rewards.
from now on, you can craft higher-level items - the archmaster items. Go to Harrit at the casemates and prepare an archmaster item at the table.
Rewards for completing the quest:
Just like in the Greener Garden quest, you need to find all of the required materials to complete the requisition at the quartermaster's.
Required items:
Then, head towards the stairs to the Stronghold (M12,14) and pick the improvements for the Courtyard: Arena or the Field Hospital. Neither of the two profits you in any direct way.
No rewards for this quest.
Way to unlock: Talk to scout Harding.
Quest giver: Scout Harding (M13,1)
 From Harding, you learn about the Rift on the lake
This quest becomes available right after you reach Crestwood for the first time, i.e. after a conversation with scout Harding (M13,1). You learn about the problems with the undead that the local villagers have been having, ever since a huge rift appeared on the nearby lake. She asks you for help solving this problem and restore peace to Crestwood.
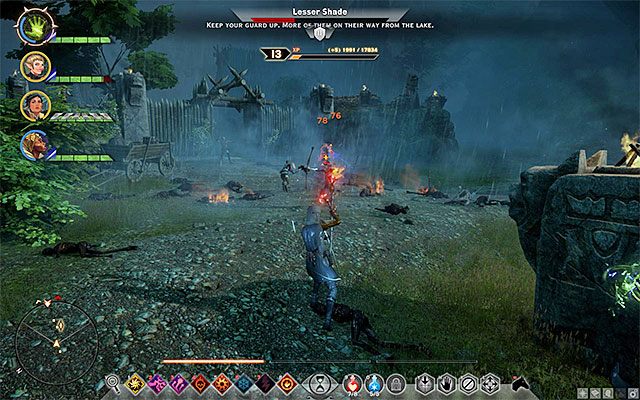 Help fight back the attack on Crestwood
Crestwood is close to the East of the place, where you started your exploration of this area. There are several directions from which you can approach, where it is best to approach through the main entrance (M13,1b) and help the villagers deal with the small group of monsters.
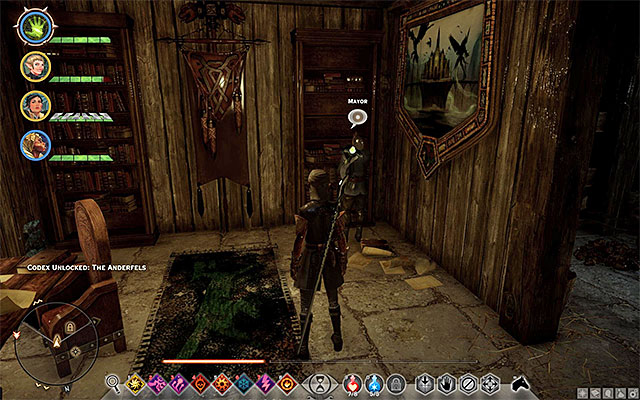 Meet the village mayor
Enter Crestwood and head towards the hill to the East. It is here where the house of the Mayor is (M13,1c). Enter the house and talk to him about the plans to seal the rift on the lake. The plan is that you reach the dam and interact with the mechanism to lower the water level in the lake. The problem is that the only approach is near the keep that is being occupied by bandits.
 Caer Bronach
You can now leave the village and head South-Eastwards. Your destination is Caer Bronach in the center of the map. You need to recapture the keep from the bandits and this has been described in detail, in the walkthrough for another side quest: Capturing Caer Bronach.
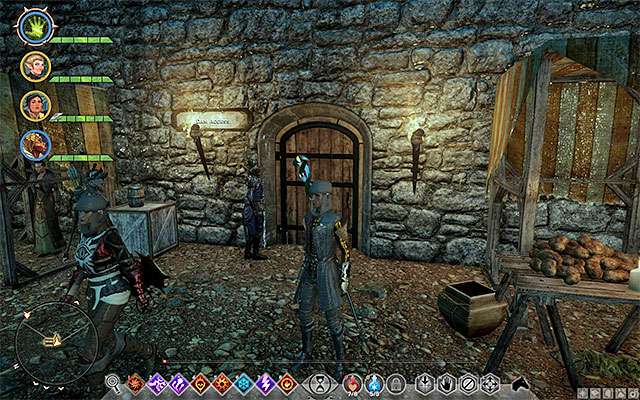 The door to the dam
After you capture Caer Bronach (complete " Capturing Caer Bronach") explore its main level, i.e. the one where the Inquisition soldiers unfolded most of the tents. Find the Dam Access (M13,1d) and walk in. Follow the corridor and after a while, you reach the dam and another door to the local tavern (The Rusted Horn) (M13,1e).
 The rotary mechanism
After you enter The Rusted Horn, you can ignore the villagers here. Head immediately towards the small room, at the ground level of the tavern (M14,1a). Interact with the mechanism here. This way, you will lower the water level in the lake and gain access to the rift connected with this quest. You can now leave the tavern.
You now need to return towards the gate, where you started your exploration of Crestwood. Note that thanks to lowering the water level in the lake, you can now access the Old Crestwood, located to the West of the Northern campsite. Enter the destroyed village and watch out, because there are many monsters around. You need to find the passage to the Flooded Caves shown in the above screenshot (M13,1f).
 Kill monsters and descend into the caves
You start the exploration of the Flooded Caves at the top level (M14,1b). Start exploring the area and be prepared to deal with the undead. Soon, you will reach a spiral staircase to the lower level. Also this part of the caves is not too complex but, apart from the undead, you also need to defeat the Despair Demon here. Finally, climb down the stairs to the Deepest Tier in the caves.
 The entrance to the chamber with the rift
The bottom level of the caves is a more complex location so, along your path, keep your eye out for loot and optional rooms that could be explored. Soon after you start the exploration, you run into a group of monsters, "commanded" by a Fury Demon (M14,2a). This monster is connected with the Burdens of Command side quest and as a result, defeating him may be a bit more difficult than usually. You need to locate the entrance to a big chamber with the rift (M14,1c). Open the Supply Chest (if necessary), before you walk inside.
 A long battle ahead
The rift in the caves should be occupied by monsters around levels 10-11 so, it is not going to be too difficult to eliminate single creatures. The problem is that you need to defeat groups of demons larger than in the case of the regular rift quests. Be prepared, therefore, to fight a long battle and remember to manage your supplies properly.
 The ladders are to an alternative route out of the caves
After the battle, explore the cave and leave. There are two ways, in which you can leave the Flooded Caves. Technically, you could cross all of the three levels of the caves, but it is going to be more convenient to take an alternative route (thanks to this, you will gain some unique loot). You need to go East, cross the chambers, where there are no more enemies. Locate the ladders in the caves (M14,1d) and climb one. You resurface in a different area (M13,1g).
 Instead of the mayor, you find the letter that he has left
The last thing that you need to do is head back to Crestwood. Go to the Mayor's house (M13,1c). You do not find him here, but you find his Letter of Confession. Reading the letter ends this long quest.
Rewards for completing the quest:
Way to unlock: Talk to the Requisition Officer.
Quest giver: Requisition Officer (M13,2)
 An example obsidian
You can gain access to this quest (requisition quests are random) as a result of a conversation with the Requisition Officer in one of the camps (M13,2). He gives you a recipe and asks you to supply him with the following:
After you obtain the materials. return to the camp and interact with the requisition table to complete the requisition.
Rewards for completing the quest:
Way to unlock: Talk to the Requisition Officer.
Quest giver: Requisition Officer (M13,2)
 You can find drufalloes, e.g. at the Crestwood farm
You can gain access to this quest (requisition quests are assigned at random) as a result of meeting with the Requisition Officer at one of the camps (M13,2). He gives you a recipe and asks you to supply him with the following:
After you obtain the materials. return to the camp and interact with the requisition table to complete the requisition.
Rewards for completing the quest:
Way to unlock: Talk to Gauld.
Quest giver: Gauld (M13,3)
 You can find Gauld in one of the cottages in Crestwood
you can receive this quest after you meet with Gauld. He is staying inside one of the cottages in Crestwood (M13,3), in the Western part of the map. Gauld asks you to find out whether his friend Judith is fine. You can now leave the village and head South-Eastwards.
 Find Judith's cottage and talk to her
Judith lives to the South-East (M13,9) of the spot, where you have met the quest-giver. Along your path, you need to watch out, because you may be attacked by highwaymen, monsters and black wolves. After you get there, talk to Judith to complete this quest and receive more (you do not need to report back to Gauld).
Rewards for completing the quest:
Way to unlock: Automatically, after you approach Caer Bronach.
Quest giver: - (M13,5)
Caer BronachThis quest appears in your journal automatically, after you approach Caer Bronach in the central part of Crestwood (M13,5). It consists in recapturing the stronghold from highwaymen. This will allow you to obtain experience, Influence and Power points, but another purpose of this is to gain you access to the dam, which is required for the completion of the Still Waters side quest.
Note - I recommend that you complete this quest after you progress to level 12, at least. The opponents inside are quite demanding and you are going to fight their leader.
 Watch out for the archers and mabari
Head towards the stronghold's main entrance and destroy the gate in any way (e.g. with your melee weapons or offensive spells). Depending on your preferences, you can either walk into the first yard straight away, or defend outside of the keep, at the destroyed gate. You will have to kill Highwayman Foot Soldiers, but you should also watch out for Highwayman Archers on rooftops and Armored Mabari, which you'd better slow down before they manage to reach the weaker party members.
 Set traps in spots, where reinforcements appear
After you eliminate the first wave, start the linear walk across the keep. You will have to fight more opponents, of course - you need to be prepared to eliminate big groups of highwaymen and additional reinforcements (it is a good idea to set traps on their routes, e.g. explosive runes. Again, watch out while fighting the enemy archers and try to kill them in the first place). Also, remember to attack Highwayman Guardsmen from the side.
 Avoid the strong attacks of the highwayman chief
Take the stairs to the upper level (around, there is a Supply crate) and attack the last group of opponents (M13,5a). This fight will be joined by the Highwayman Chief, after a while. Make sure that the weaker party members avoid the boss's stronger melee attacks. Also, rely on the attacks with electricity, which the boss is vulnerable to. After you have defeated the Chief, loot his corpse, where you should find a legendary weapon (The Last Stand Maul).
 The spot to set the flag
You now only need to make seizing Caer Bronach official. Take the last stairs to the North-Western part of the fort. Find the interactive point here and press the appropriate key/button to set the Inquisition flag.
Note - since you have already seized the keep, you can now resume the Still Waters side quest.
Rewards for completing the quest:
Way to unlock: Talk to Charter.
Quest giver: Charter (M13,6)
 Meet with Charter
This quest becomes available only after you have completed the Capturing Caer Bronach side quest, because you need to seize full control of Caer Bronach. Inside the keep, find spy Charter (M13,6) and talk to her. She asks you to locate the Butcher.
 The Butcher's corpse
Leave the keep and head Eastwards. Watch out, because you may be attacked, e.g. by highwaymen and Black Wolves along your path. Unfortunately, the butcher is dead and you can find his corpse near the Eastern edge of the map (M13,6a). After you read the note on the corpse, return to Charter.
Rewards for completing the quest:
Way to unlock: Talk to the scout.
Quest giver: Scout (M13,7)
 from the scout, you learn about highwaymen
This quest becomes available after you have completed the Capturing Caer Bronach side quest, because you need to seize full control of Caer Bronach. Return to the spot, where you have earlier drawn the Inquisition's flag (M13,7) and find the scout. From him, you learn that there are several more highwaymen around the area. You receive the quest to locate and kill them.
 An example group of bandits
It is impossible to give the exact locations of every bandit, because they keep moving around for the whole time. Simply, follow the instructions in the journal and explore the area to the South-East of Caer Bronach. After you encounter a group of highwaymen, attack them in any way. In this manner, you need to eliminate a total of eight opponents (of course, there are more of them around the fort, but you will not be additionally rewarded for eliminating them).
Rewards for completing the quest:
Way to unlock: Automatically, after you set up one of the camps (M13,8) or, automatically, after you discover one of the Rifts (M13,8a)(M13,8b)
Quest giver: - (M13,8) or (M13,8a) or (M13,8b)
There are two ways to unlock this quest - by setting up a camp in the Eastern part of the map of Crestwood (M13,8) or by approaching one of the two new rifts connected with this quest (M13,8a)(M13,8b).
This quest concerns sealing two Rifts between the game world and the Fade, at the farm. The first rift is near the Eastern exit from the map (M13,8a). The level of this rift is medium and you need to defeat an ancient wraith among others.
You can find the second rift in the Southern part of Crestwood (M13,8b). It is much more of a challenge and for this reason, it is a good idea to take time and progress your party considerably, in terms of experience, before you try to seal this one. Around the rift, there are monsters of high levels, including the Fury Demon.
Rewards for completing the quest:
Way to unlock: Talk to Judith.
Quest giver: Judith (M13,9)
 Raise the topic of the wyrm, during the conversation
This quest becomes available after you talk to Judith, who lives in the cottage in the Eastern part of Crestwood (M13,9), at best, while completing The Naturalist side quest. During the conversation, raise the topic of the wyrm, thanks to which you receive the quest to hunt it down.
Find the cave entranceLeave the cottage and head Northwards. You need to reach the cave entrance (M13,9a), to the North-East of Caer Bronach, close to one of the astraries and a campsite.
 After you reach the den, attack the monsters
Cross the entire cave to reach the den that you are looking for (M13,9b). Deal with all the wyrms here, but pay the most attention to the biggest one. It is very strong so, if it kills your party quickly, return here later on. After you slay all of the monsters, examine the corpse of the biggest wyrm, which should drop a legendary staff (Fade-Knocker). You can now return to Judith.
Rewards for completing the quest:
Way to unlock: Automatically, after you reach Crestwood.
Quest giver: - (M13,1)
This quest becomes available right after you reach Crestwood for the first time. It is about locating one of the rifts between the game world and the Fade and sealing it (the entire process has been described in the guide to the game, among others). The rift is at the Northern edge of the map, to the North of Crestwood (M13,1a). The level of the rift is medium, and it requires you to defeat, Fury Demon and ancient wraith among others.
Rewards for completing the quest:
Way to unlock: Automatically, after you reach Crestwood.
Quest giver: - (M13,1)
This quest becomes available right after you reach Crestwood for the first time. It is about setting up two campsites (Campsites). In the first one, you start your exploration of Crestwood (M13,1). You need to reach the other one on your own. It is on the Eastern edge of the map, close to where you meet Stroud during one of the main quests of the game (M13,8).
Rewards for completing the quest:
Way to unlock: Talk to Sister Vaughn.
Quest giver: Sister Vaughn (M13,4)
 You can find Sister Vaughn on the hill
Sister Vaughn is on the hill to the North-East of Crestwood (M13,4). It pays off to talk to her, to receive this quest. Sister Vaughn asks you to locate a corpse at Old Crestwood, which has been flooded 10 years earlier.
 An example heap of corpses
You can start the key part of this quest only after you lower water level in the lake and you do that while completing the Still Waters quest. Go to Old Crestwood in the North-Western part of the map. Start exploring the location and watch out for the nearby monsters. You need to find and examine three heaps of corpses (M13,4a) and return to Sister Vaughn to report to her.
Rewards for completing the quest:
Way to unlock: Automatically, after you seize Caer Bronach (M13,6) or automatically, after you discover the rift (M13,6b)
Quest giver: - (M13,6) or (M13,6b)
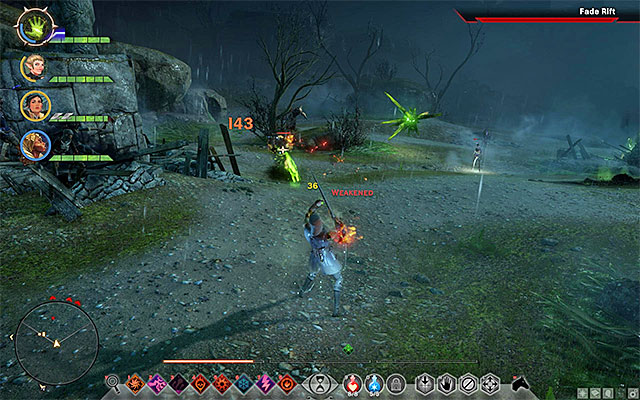 You can reach the rift only after the water level, in the lake, drops
There are two ways, in which to unlock this quest. The first one is to seize Caer Bronach (M13,6) and you can do it during the Capturing Caer Bronach quest. Variant two is to find the rift connected with this quest (M13,6b).
This quest concerns sealing the rift between the game world and the Fade, near the abovementioned fort. You can set out to find the rift only after the water level in the lake lowers, which unlocks access to Old Crestwood. To learn how to do this, see the walkthrough for the Still Waters side quest. After you reach Old Crestwood, go South to find the rift near water (M13,6b). The level of this rift is medium, and it requires you to defeat a Fury Demon, among others.
Rewards for completing the quest:
Way to unlock: Talk to the Wraith.
Quest giver: Wraith (M13,10)
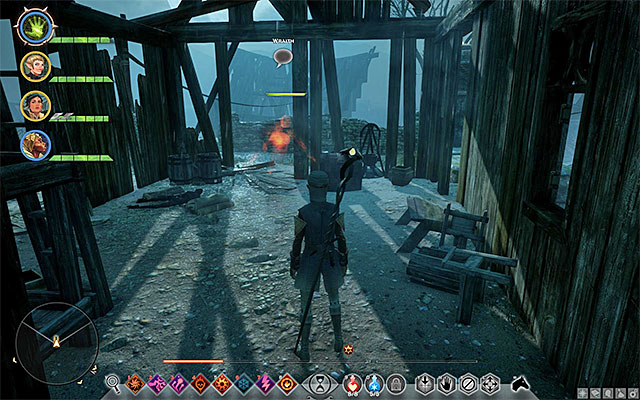 Explore the destroyed cottages to find the wraith
You can start this quest after water level in the lake drops and you gain access to Old Crestwood. To learn how to do this, see the walkthrough for the Still Waters side quest. After you reach Old Crestwood, find the cottage with a friendly Wraith inside (M13,10). Talk to the wraith and take the quest to kill a Fury Demon in the Flooded Caves. You can now take the passage into the caves (M13,1f).
 Defeat the Fury Demon
Fury Demon is staying in the Deepest Tier of the Flooded Caves (M14,2a). Remember not to attack with fire that the demon is resistant to (he is vulnerable to ice attacks, though) and deal with the weaker monsters as quickly as possible. You can now return to the surface and talk to the wraith again.
Rewards for completing the quest:
Way to unlock: Automatically, after you reach Crestwood.
Quest giver: - (M13,1)
This quest becomes available right after you reach Crestwood for the first time. It is about locating one of the rifts between the game world and the Fade and sealing it (the entire process has been described in the guide to the game, among others). The rift is located on the Northern end of the map, to the North of Crestwood (M13,1a). The level of the rift is medium, and it requires you to defeat a Fury Demon and an ancient wraith among others.
Rewards for completing the quest:
Way to unlock: Automatically, after you reach Crestwood.
Quest giver: - (M13,1)
This quest becomes available right after you reach Crestwood for the first time. It is about setting up two Campsites. In the first one, you start the exploration of Crestwood (M13,1). As for the second campsite, you need to reach it on your own. It is on the Eastern edge of the map, close to the point, where you meet Stroud, while completing one of the game's main quests (M13,8).
Rewards for completing the quest:
Way to unlock: Automatically, after you arrive in the Emerald Graves
Quest giver: - (M17,4)
 The passage to the refugee caves
Go to Watcher's Reach to the West, at the bottom of the near canyon. In front of the cave entrance, you find Fairbanks. He is going to be your main quest giver at the Emerald Graves. Talk to him and the quest will end. At the same time, you receive some more quests, connected with each other: The Freemen of Dales and A Fallen Sister, whose purpose is to bring about the liberation of Dalia, from the enemies.
Rewards for completing the quest:
Way to unlock: read the documents from Fairbanks
Quest giver: Fairbanks (M17,4)
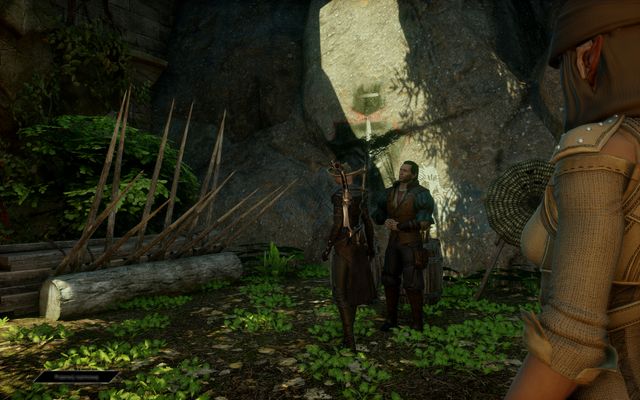 Fairbanks
This is the quest after the Watcher's Reach Refugees. After you talk to Fairbanks, he shows you to the caves, where you see the poster on the wooden wall - a warrant. (M17,4a). This way, you complete this quest and receive the next one: A Fallen Sister.
Rewards for completing the quest:
Way to unlock: Read the list arrest warrant on the notice board in Watcher's Reach
Quest giver: - (M17,4a)
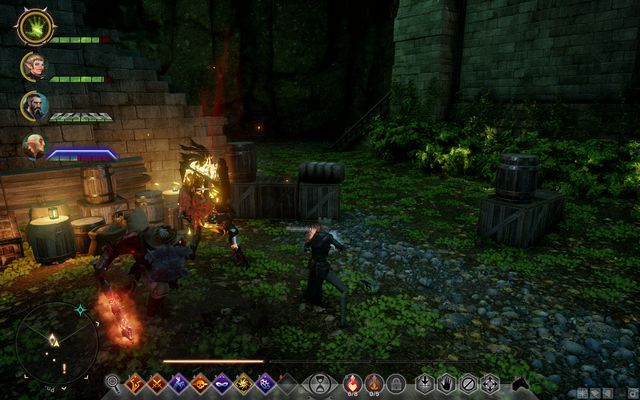 The fallen sister
After you read he note at the Watcher's Reach (M17,4a), you receive the quest to kill a certain woman that defected to the enemy side. To do that, head towards the Eastern side of the map, where there is a cave entrance (M17,4b). There, among several mercenaries in front of the entrance, there is your target that stands out thanks to the armor. After you kill the target, the quest ends in success. At the same time, you find another warrant here, a map and also you will have the option to free the prisoners.
Rewards for completing the quest:
Way to unlock: Read the map of the cave (during A fallen sister quest)
Quest giver: - (M17,7)
 The murder request
Inside the cave (where you killed the Fallen Sister) you can find a map (M17,7) that you learn the location of Argon's cottage from (a small fort to the West) [M17,7a] as well as the information of a knight there- who is your next target. Go there and kill all of the opponents there.
The knight that you need to fightIn the larger cluster of houses, on the plan of a circle, in the square in the center, there is a knight. First, deal with his men, because fighting him is not an easy task. Still, after you kill him, you will be able to bring here your friends from the Watcher's Reach.
Rewards for completing the quest:
Way to unlock: Read the arrest warrant in the cave (during A fallen sister quest)
Quest giver: - (M17,6)
 The arrest warrant on the thug
On the note (M17,6), inside the cave in which you killed the fallen sister, there is a warrant for a warrior.
 The thug (in the background)
You find him at the entrance to Villa Maurel (M17,6a) guarding the entrance with his men. It is easy to tell him apart - it is the tallest one. After you kill him, you can collect a key and enter the villa. At the same time, you receive the Corrupt General quest.
Rewards for completing the quest:
Way to unlock: After you complete the Vicious Thug quest and collect the key to the villa
Quest giver: - (M17,6b)
 The entrance to Villa Maurel
After you defeat the thugs in front of the villa and obtain the gate key (M17,6a) you can attack the general inside (M17,6b). The area in the villa, available to you, is small. There are 3 minor groups of opponents here, and a bigger one, commanded by the general - a characteristic tall guy that can punch. It is easy to knock him down so, do that several times. This will save you lots of effort. After you kill him, go to his study and find a key fragment. This unlocks the Safe Keeping quest.
Rewards for completing the quest:
Way to unlock: After you complete the Corrupt General quest
Quest giver: - (M17,15)
 The passage in the study, into the secret room
Inside Villa Maurel (M17,15), after you kill the thugs, walk into the main study. You will notice a marker for a hidden treasure, which is a key fragment on the table, next to the bookshelf. Also, collect two more in the side wings of the building. With all three fragments, smash the wall in the study, as the fighter, behind which there is a device to fix the key. With the key, go to the door opposite and, after you enter, you can collect the loot.
Rewards for completing the quest:
Way to unlock: Read the list at the second landmark
Quest giver: - (M17,3)
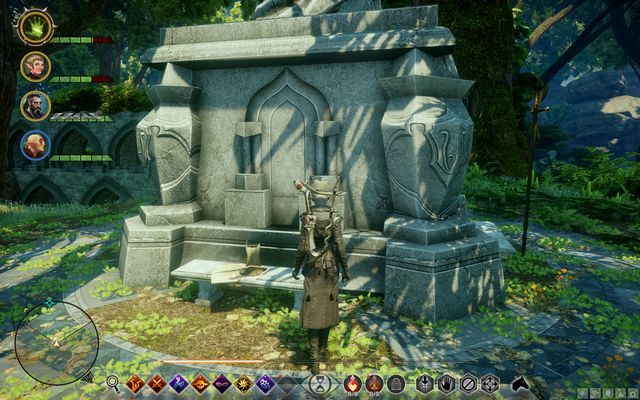 The letter on the bench
Next to the second landmark, from the second campsite, there is a letter on the bench (M17,3). The author asks to honor the dead person by lighting a candle next to the chapel n the center of the map (M17,3a).
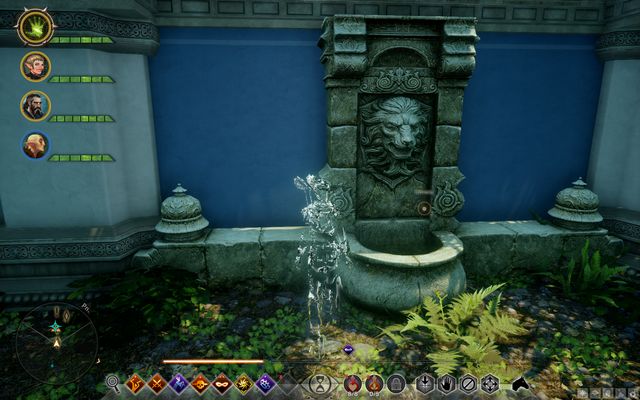 The spot where you put the candle
Get there and approach the stairs opposite the building - this is where you need to place the candle, by pressing the interaction button.
Rewards for completing the quest:
Way to unlock: Inside the chapel, read the notes attached to the wall
Quest giver: - (M17,15)
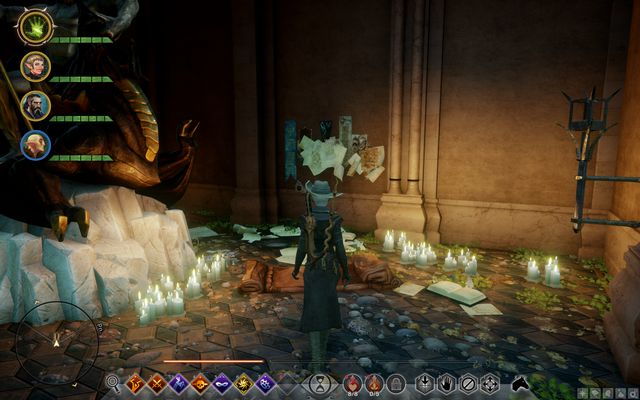 The notes on the wall
Inside the chapel (M17,15), where you also light a candle (the Devotion quest), you find notes on the wall, from which you learn about a meeting in the forest, near your current location (M17,15a).
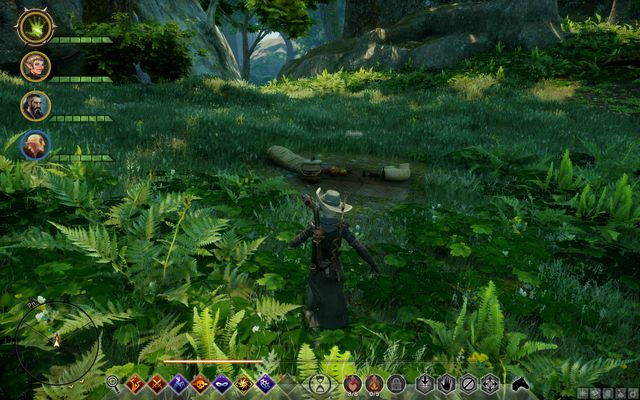 A picnic - that is the way to go
Go there and examine the site. You find nobody there because, after you explore the area, the quest ends but, after a while, you are attacked by a huge spider - not too demanding an opponent.
Rewards for completing the quest:
Way to unlock: After you complete A Fallen Sister quest
Quest giver: Gertrude (M17,8)
 Prisoners behind bars
After you kill the Fallen Sister, in the same cave, you notice imprisoned people behind bars (M17,8). Talk to one of them - Gertrude. You can free them with the key that you find in the Southern part of that cave (M17,8a). The woman behind the bars hints you about the right way, by saying "warmer", "colder".
 The key
After you collect the key, return to the woman and free the imprisoned. The woman - Gertrude - returns to Watcher's Reach and the becomes a trader there.
Rewards for completing the quest:
Way to unlock: Examine the corpse in the river
Quest giver: - (M17,11)
 The corpse in the river
Near the river, close to the landmark, there is a man's corpse (M17,11). Your task is to identify the circumstances of his death.
 The jumping spot - escarpment above the river
To do that, go to the spot, which the man could jump down off - there, you find a small camp and a letter, from which you learn about the causes of his actions (M17,11a).
Rewards for completing the quest:
Way to unlock: After you complete: A Fallen Sister, Vicious Thug and Deluded Chevalier quests
Quest giver: Fairbanks (M17,4)
After you kill the Fallen Sister, the Vicious Thug and the Deluded Chevalier, return to Fairbanks in Watcher's Reach (M17,4) to report to him. At the same time, this is going to be information for him that the location is secure. He and the rest of the people of the Watch goes to Argon's cottage - the small fort to the West - where they are going to live. This will unlock the Noble Deeds, Noble Heart quest from Clara, in the Watch.
Rewards for completing the quest:
Way to unlock: Complete Victims of War and talk to Clara
Quest giver: - Clara (M17,12)
 Clara
ClaraAfter you complete the Victims of War quest, for Fairbanks go to Clara near the barriers at the waterfall (M17,12). She lets you in on her plan - she wants you to obtain the documents that specify Fairbanks's descent.
 The first document
The first document for Clara is inside one of the buildings of the small fort (Argon's cottage) behind the locked door (M17,12a). It is on the bookshelf.
 The second document
The second document is inside one of the small pavilions (Northern) near Villa Maurel (M17,12b). It is next to the paintings, in the corner.
 The third document
The third, last, document is in the second pavilion (Southern) near Villa Maurel (M17,12c). There is a locked door leading inside, and the document is in the corner of the room.
After you find the documents, you can both give it to Clara, or to Fairbanks (now, they are in the small fort, instead of in the caves):
Rewards for completing the quest:
Way to unlock: With your progress into the game, in the first campsite, talk to Johnson
Quest giver: - Johnson (M17,18)
 Johnson
After some time, after you have explored the Emerald Graves sufficiently enough, in the first campsite, there appears Johnson (M17,18). He lets you know about the great white bear living nearby (M17,18a) with its cubs and he asks you to get rid of them, because they are a threat to the locals.
 The dangerous bears
Do not ignore the threat this time, because the bear is really demanding an opponent - try not to use fire-based attacks, because they are not too effective.
Rewards for completing the quest:
Way to unlock: Pick up the urn next to the landmark
Quest giver: - (M17,17)
 The urn with the ashes
Near Argon's cottage, there is a landmark, a huge urn with ashes and a letter(M17,17). The author asks you to spread the ashes over the Northern area of the map. You will have to approach the edge of the map where, near the destination, there appears a marker on the map, which shows you where to stand (M17,17a).
 The spot to spread the ashes
In the marked area, press the interaction button to complete this quest. Watch out for the nearby dragon.
Rewards for completing the quest:
Way to unlock: Read the letter near the rift
Quest giver: - (M17,16)
 A letter next to the stone
Close to the rift, to the North of the small Western fort, there is a rift. Next to the rift, near the boulder, there is a letter (M17,16), from which you learn that some person has been taking detailed notes that you are interested in. Go to the three locations, marked on the map [M17,16a, M17,16b, M17,16c] to find the pages from the journal. After you collect the last one, the quest ends.
Rewards for completing the quest:
Way to unlock: Collect the map near the North-Western campsite
Quest giver: - (M17,13)
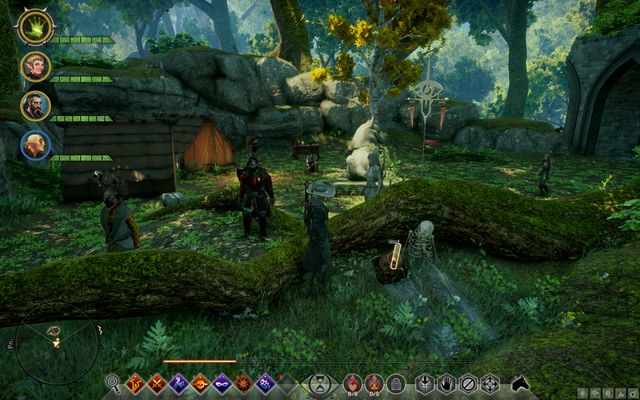 The map near the campsite
Near the campsite to the North-West, there is a map stuck in the trunk of the tree (M17,13). The treasure from the map is close to the entrance to the elven ruins in the Northern part of the map.
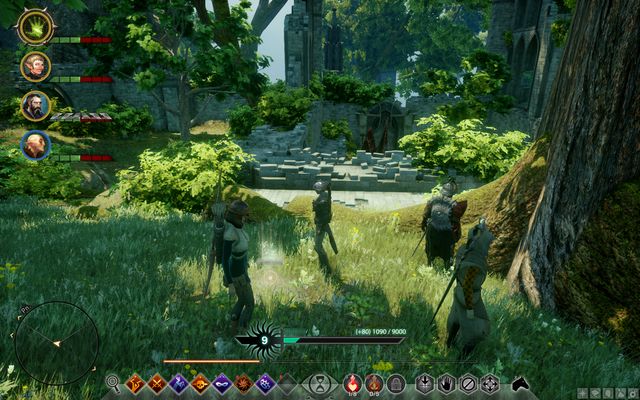 The treasure hidden near the tree
Once you get there, search for a wide tree - the treasure is in the roots of the tree (M17,13a).
Rewards for completing the quest:
Way to unlock: Collect the map in the Watcher's Reach
Quest giver: - (M17,5)
 The map in the refugee cave
Once you get to the Watcher's Reach, take a look around for a small shack, inside of which there is a map on the ground (M17,5). Collect it and get to the spot near a rift (M17,5a). On the big, slanting stone there, there is a buried treasure with a legendary item.
Rewards for completing the quest:
Way to unlock: After you kill the knight (the Deluded Chevalier quest) and collect the sketch, which you find on him
Quest giver: - (M17,20)
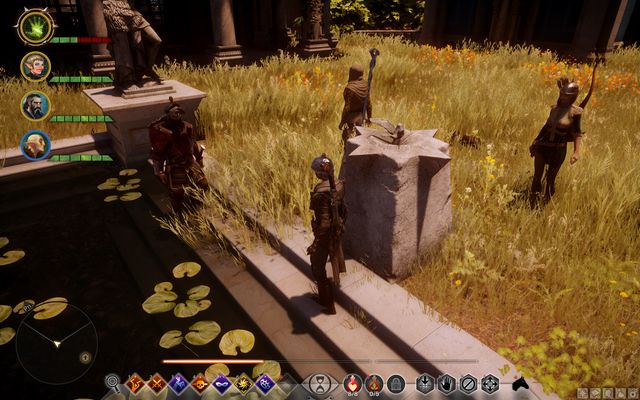 The first sketch
In Chateau d'Onterre, you need to solve a puzzle and get to the balcony on the upper floor. To start the quest, you first need to collect the sketch, which the knight (the Deluded Chevalier quest) drops. Once you enter the estate, go to the center of the yard - there, you can find a small statue (M21,1a). Scan the area around it to find another sketch.
Note - if you want to collect the hidden items, do that before you collect the drawing - enemies do not appear, until you start solving the puzzle.
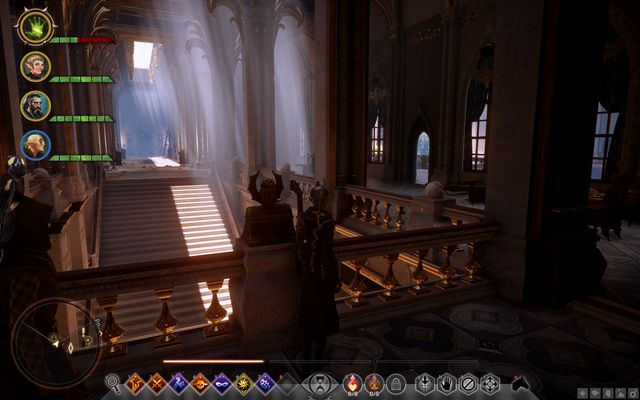 The statue from the second drawing
The second sketch points to the statue (M21,1b) above the stairs to the left of the entrance to the villa. You need to turn the statue to collect the drawing underneath.
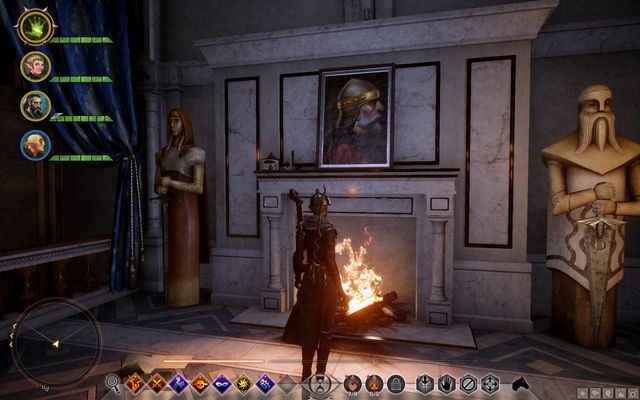 The third sketch behind the painting
Another sketch is behind the painting in the bedroom on the upper floor (M21,1c). You need to scan the area and move the painting with the interaction key. Then, collect the drawing behind it.
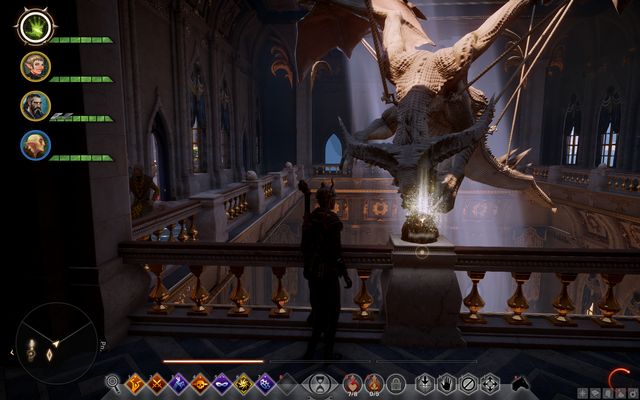 The statue of the dragon and the button
The last drawing takes you to the room with the dragon figurine (M21,1d). Approach the barriers, from the side of the head, and turn the head on the balustrade. Thanks to this, the tail of the dragon straightens up. Hanging on the tail, are the sketch and a key to the balcony (M21,1e).
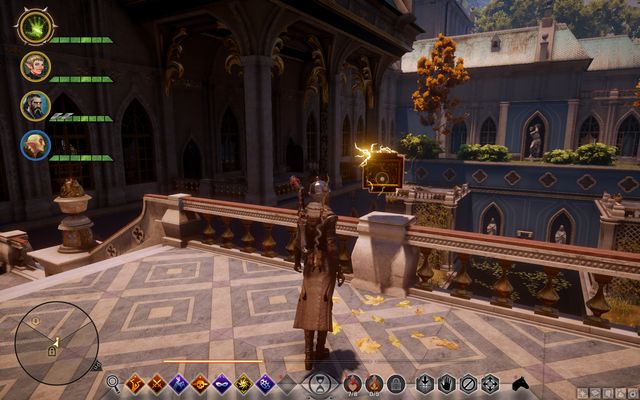 The reward on the balcony
Once you walk onto the balcony, you note a levitating cube - collect it and you will receive additional attribute points. This does not end the quest, because there will be a mysterious wraith that appears from the pond, in the yard. You need to defeat it. You cannot leave the location without defeating the opponent. However, it is not too difficult an opponent, but you need to watch out for its teleporting. After the fight, you will be rewarded for completing the quest.
Rewards for completing the quest:
Way to unlock: Random spots around Emerald Graves
Quest giver: -
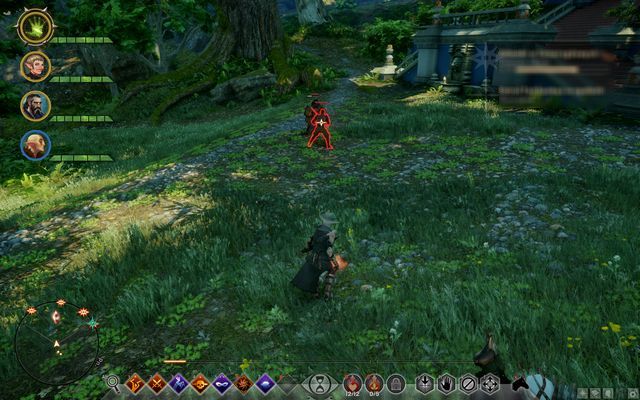 One of Fairbanks's soldiers - in front of the pavilion, in the center of the map
In random spots around the Emerald Graves map, you find Fairbanks's people fighting rebels. Your task is to prevent the death of the attached soldier. Most often, there are two assailants. This quest does not appear in your journal and it can be replayed. It activates whenever you come close to the fighting people and it is deemed as completed, if the soldier does not die.
Rewards for completing the quest:
Way to unlock: After you complete the Wicked Eyes and Wicked Hearts quest
Quest giver: -
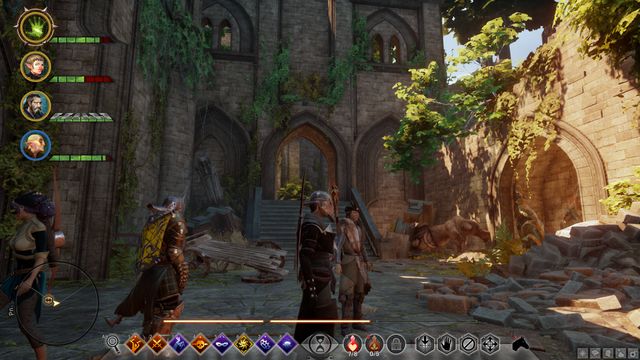 Din'ah Hanin ruins
After you complete the Wicked Eyes and Wicked Hearts main quest, you gain access to an operation at the war room, thanks to which Din'ah Hanin in Emerald Graves becomes available. After you enter the tomb (M28,1a), you will have to find nine Emerald Seals.
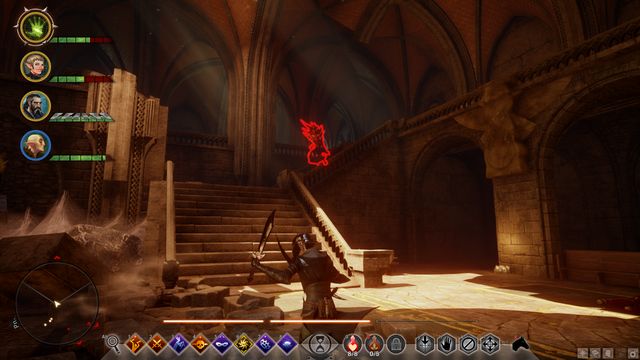 One of the Behemoths with an Emerald Seal
You are going to need them to open the door at the end of the path. They have been hidden all around, or they have been found already by those who explore the Red Templars location. This is why, you should kill every Behemoth that you encounter, because they are in possession of the remaining seals (M28,1b-1j).
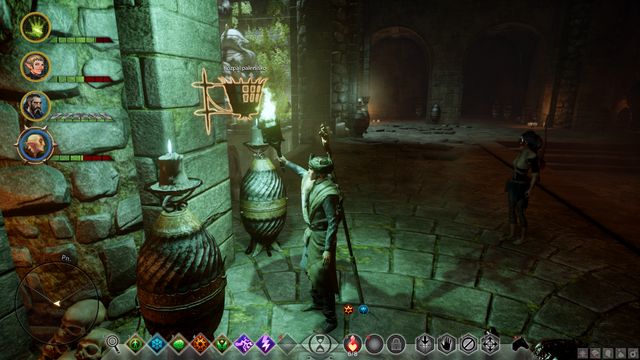 One of the torches that you need to light
After you have collected them all, go to the closed gate and open it (M28,1k). You will walk into a big chamber, where you need to light four torches on the pillars in the center.
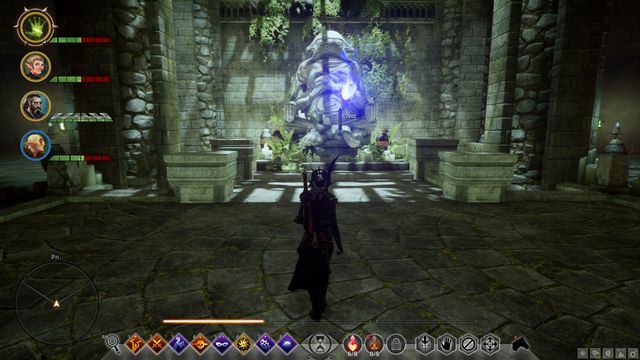 The ancient scroll
After you light each one of them, there appears a group of demons here, who attack you. When all of the torches are lit, a platform appears, thanks to which you will be able to collect the scroll (M28,1j).
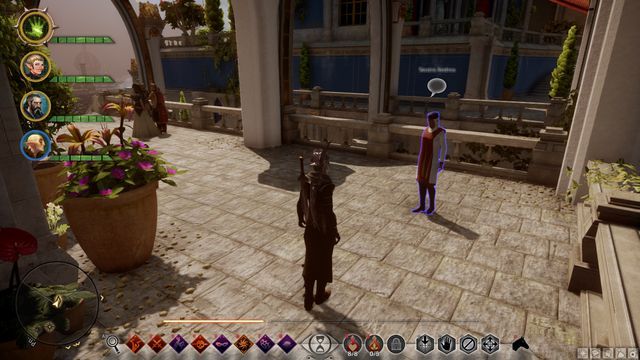 Sister Andrea in Val Royeaux
You may deliver the scroll to the Chantry, or deliver it to the Dalish in the camp, at the Exalted Plains. You can find the representative of the Chantry - Sister Andrea - in Val Royeaux at the upper level (M4,4).
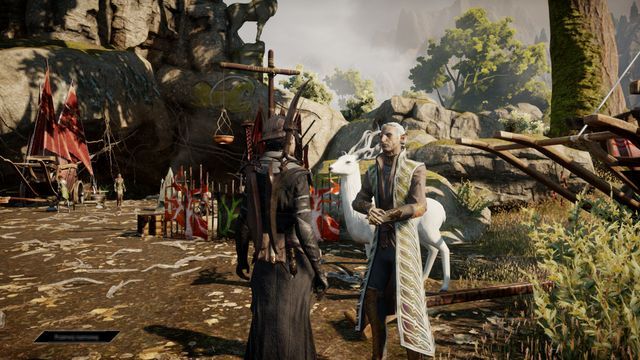 Keeper Hawen at the Dalish camp
At the Dalish camp, take the scroll to Caretaker Hawen. In both cases, for completing the quest, you are rewarded, but the Dalish additionally reward you with 3 influence points in the camp (connected with the "By the Grace of the Dalish" quest). You also get to unlock an operation.
Rewards for completing the quest:
Way to unlock: Unlock access to the Emerald Graves.
Quest giver: -
You receive the quest after you reach Skyhold for the first time. To complete it, you only need to unlock the Emerald Graves at the war room. The cost to complete this operation is 8 Power Points. With the location, you also unlock the opportunity to receive supplies from replayable operations.
There are no rewards for this quest.
Way to unlock: Complete the Victims of War quest and complete the unlocked operation
Quest giver: - (M17,4)
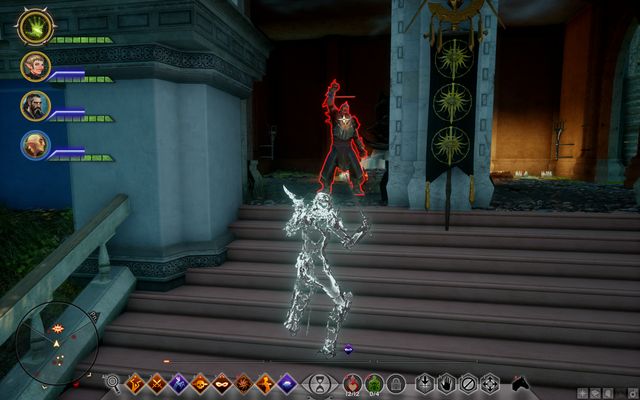 Carroll
After you complete the Victims of War for Fairbanks, a new operation unlocks: Draw Out the Red Templar Lieutenant. After you complete it, you need to go to Emerald Graves, to deal with Carroll. You find him in the pavilion in the center of the map (M17,15). You need to defeat him and all of his minions, after which you complete the quest.
Rewards for completing the quest:
Way to unlock: Seal one of the rifts specified in the quest
Quest giver: -
to unlock this quest, seal one of the rifts Near the pavilion in the central part of the map. To complete this quest, you need to seal 4 specified rifts.
Rewards for completing the quest:
Way to unlock: Seal one of the rifts specified in the quest
Quest giver: -
to unlock this quest, seal one of the rifts near the river along the map. To complete this quest, you need to seal 2 specified rifts.
Rewards for completing the quest:
Way to unlock: Seal one of the rifts specified in the quest
Quest giver: -
to unlock this quest, seal one of the rifts near the Watcher's Reach. To complete this quest, you need to seal 2 specified rifts.
Rewards for completing the quest:
Way to unlock: Seal one of the rifts specified in the quest
Quest giver: -
to unlock this quest, seal one of the rifts near the Watcher's Reach. To complete this quest, you need to seal 3 specified rifts.
Rewards for completing the quest:
Way to unlock: Automatically, after you arrive in the Emerald Graves
Quest giver: -
Set up campsites in all the possible locations, in the Emerald Graves. You need to set up four additional campsites to complete this quest.
Rewards for completing the quest:
Way to unlock: Automatically after the briefing to the operation (Investigate the Western Approach).
The quest-giver: -
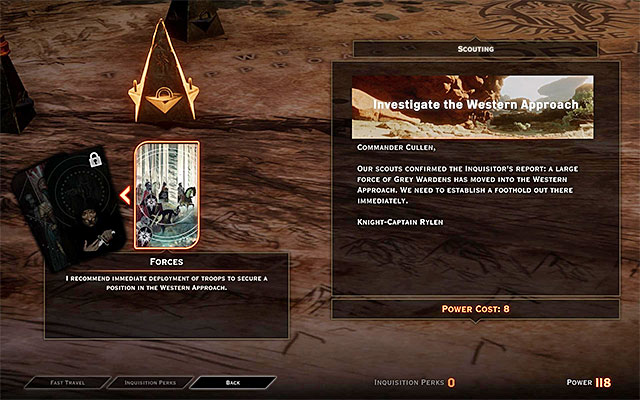 Operation connected to the Storm Coast
This quest can be added to your journal after finding an icon connected with it on the map in the Skyhold. In order to automatically pass this operation, you will have to have at least 8 Power Points. This will allow you to unlock The Western Approach, to which you will have to head. Once you reach the coast (M19,1) listen to the scout Harding. After that, you will be able to start the exploration.
Rewards for completing the quest:
Way to unlock: After meeting with the scout Harding.
The quest-giver: scout Harding (M19,1).
 Find the report in the camp.
This quest unlocks after getting to The Western Approach for the first time and meeting with the scout Harding (M19,1). She will tell you about the cult on the Western Approach. Stay in the camp and look for the detailed report (Intercepted Venatori Message), which you will have to inspect. It tells about the Servis and about a mine which is a place of interest for the cultists.
 The cave entrance.
The cave mentioned above lies to the West of the starting spot of the quest. You shouldn't have any problems with finding and entering it (M19,1e). Be watchful of the nearby Poison Spiders.
 The tome which you will have to inspect.
Enter the cave and start the exploration. You will have to get to the main cavern and get rid of the Giant Spider. Clear everything and look for the Note from a Templar. Inspect it to finish the quest.
Rewards for completing the quest:
Way to unlock: Automatically after reaching The Western Approach.
The quest-giver: - (M19,1)
Quest unlocks after reaching The Western Approach for the first time. It concerns finding two Rifts connecting the world with the Fade and closing them. The description of the Rift closure can be found in the game guide.
The first Rift lies not far to the North from the starting camp (M19,1d). It offers mediocre level of difficulty, just beware of the rage demon, which will be accompanied by some smaller monsters. The second Rift lies to the South from the starting camp (M19,1g). It presents similar challenge and it also has the rage demon.
Rewards for completing the quest:
Way to unlock: Automatically after reaching The Western Approach.
The quest-giver: - (M19,1)
Quest unlocks after reaching The Western Approach for the first time. Its object is about setting up four Campsites. In the first one you are starting the exploration of the Western Approach (M19,1). Other three have to be reached individually. You can find them in the following areas:
Rewards for completing the quest:
Way to unlock: Meeting with the Requisition Officer.
The quest-giver: Requisition Officer (M19,2)
 Check the bodies of the defeated cultists
Quest can be taken (these jobs appear in a randomized order) from the Requisition Officer in one of the camps (M19,2). He will give you the recipe and ask for the delivery of the following items:
After collecting the items, go back to the camp and interact with the table to finish the job.
Rewards for completing the quest:
Way to unlock: Meeting with the Requisition Officer.
The quest-giver: Requisition Officer (M19,2)
 Lazurite Ore
The quest can be taken (these jobs appear in a randomized order) from the Requisition Officer in one of the camps (M19,2). He will give you the recipe and ask you to deliver the following resources:
After collecting the items, go back to the camp and interact with the table to finish the job.
Rewards for completing the quest:
Way to unlock: Meeting with the Requisition Officer.
The quest-giver: Requisition Officer (M19,2)
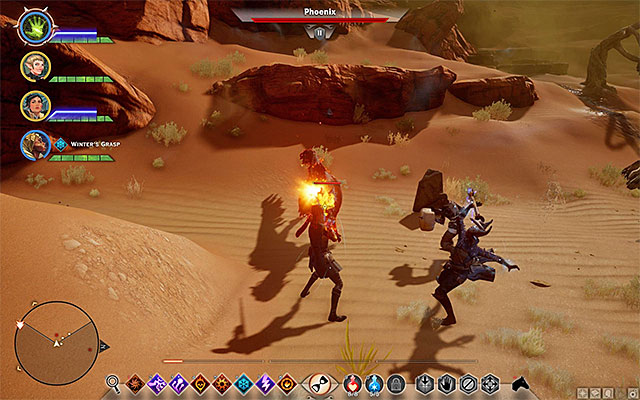 Phoenix is one of the creatures you will have to hunt for
The quest can be taken (these jobs appear in a randomized order) from the Requisition Officer in one of the camps (M19,2). He will give you the recipe and ask you to deliver the following ingredients:
Rewards for completing the quest:
Way to unlock: Automatically after interacting with oculara.
The quest-giver: - (M19,3)
Quest can be unlocked by interacting with any oculara in Western Approach (M19,3). Every time you will have to use an oculara to locate nearby Shards and get to them. Here are the hints for the shards (some of them are hard to get):
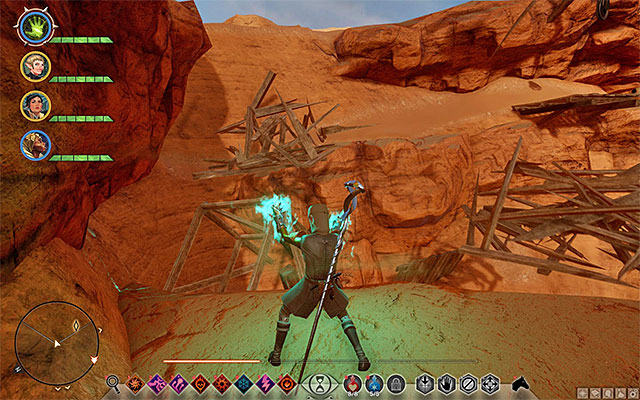
The first shard (M19,3a) is one of the hardest to locate. It lies on a ledge on heights, so you will have to find a ladder. Stand on the place shown above and use a mage to create a bridge. Now you can pass the gap to get the shard.
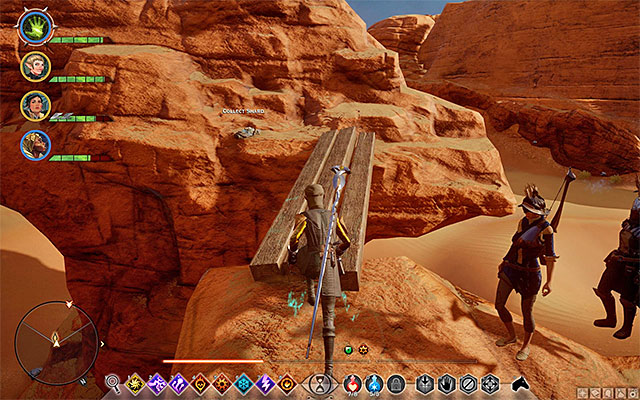 Use a mage to create a bridge
Getting the second shard (M19,3b) looks similar to the first one. Find the place where the mage can create a bridge and reach the shard.
The third shard (M19,3c) lies on the rocks. Find a ladder to get it.
The fourth shard (M19,3d) (and the two following described below) awaits you on the ledge in the Echoback Canyon in the northern part of the map. This area can be explored only after passing through Coracavus ruins while doing the side quest: "The Trouble with Darkspawn".
The fifth shard (M19,3e) lies on the distnctive hill in the canyon.
The sixth shard (M19,3f) is hidden on one of the balconies in the Echoback Fort and can be reached via a ladder.
The seventh shard (M19,3g) lies in an easy-to-get place to the North of the Griffon Wing Keep.
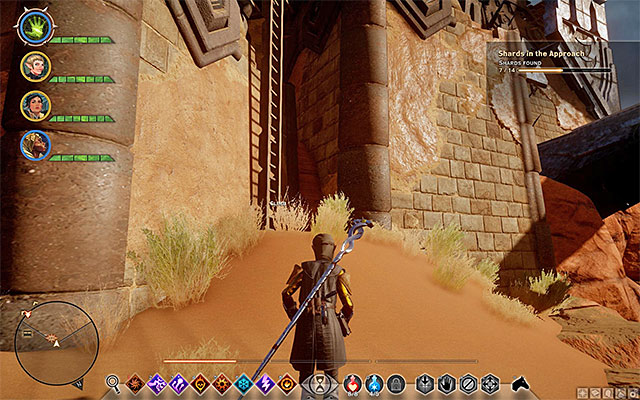
The eighth shard (M19,3h) lies on one of the balconies in the Griffon Wing Keep. A ladder leading there is shown above.
The ninth shard (M19,3i) can be found in the Southern part of the map. It lies on the rocks that you will have to climb.
The tenth shard (M19,3j) is also hidden in the Southern part of the map. It is lying on a big rock block.
The eleventh shard (M19,3k) can be found in the South-Western part of the map. You can find it near the Rift that has to be closed (climb the destroyed wall to get there).
The twelfth shard (M19,3l) can be found in the central part of the map. It lies on the rocks that you will be able to climb or jump onto.

The thirteenth shard (M19,3m) is well hidden in the central part of the map. You will have to start from the North. Locate the ladder shown above and use it to reach a small wooden balcony. Go through it and climb on top of the rocks where the shard awaits you.
The fourteenth shard (M19,3n) lies in a visible place, near the Western camp.
Rewards for completing the quest:
Way to unlock: Automatically after finding the Research Supplies or automatically after meeting with Frederic (M19,x).
The quest-giver: - (M19,8) or Frederic (M19,x)
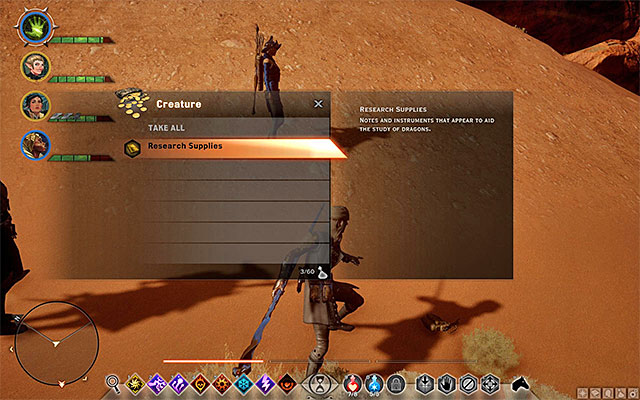 Check the corpses to find the resources
Quest can be unlocked in one of three ways. The first - the most random - implies the attack of the White Claw Raider bandits. They are travelling around The Western Approach. Killing them will result in one of them dropping Research Supplies, which will activate the quest.
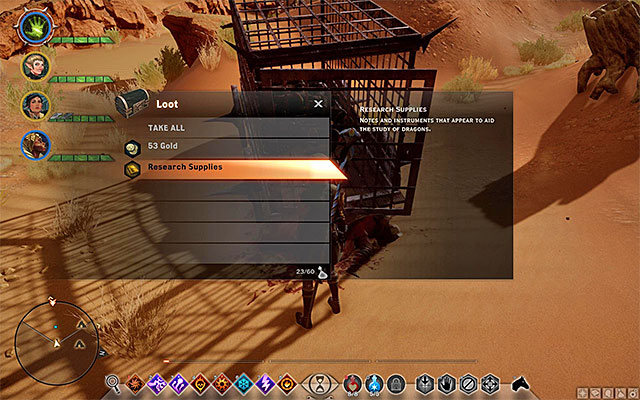 Search the bags by the destroyed cart.
The second way implies finding the Research Supplies in the area where the caravan had been attacked (South-West of the starting camp). (M19,8). Be careful as there are wild beasts wandering around. After reaching the place, search the bags by the destroyed cart.
 Frederic
The last and the third way implies a simple talk with Frederic. It is also a mandatory way if you didn't choose the previous ways. Frederick can be found in the southern part of the Western Approach, near to the upcoming camps (M19,11).
Rewards for completing the quest:
Way to unlock: Automatically after finding three Research Supplies.
The quest-giver: - (M19,8)
 Collect 3 research supplies
Quest starts basically in the same way as the Draconology, as it is based around finding three Research Supplies. You will have to find three kits. You can do it by defeating the White Claw Raider bandits and searching their bodies afterwards. One of the kits can be found in the sacks by an attacked caravan (M19,8). After getting all three, the quest will be added to your journal.
Give the supplies to FredericYou can also meet with Frederic. He can be found in the southern part of the Western Approach, near to the upcoming camps (M19,11). Give him the supplies which will unlock two side quests concerning luring the dragons.
Rewards for completing the quest:
Way to unlock: Automatically after finding the manifesto or automatically after approaching the keep.
The quest-giver: - (M19,4)
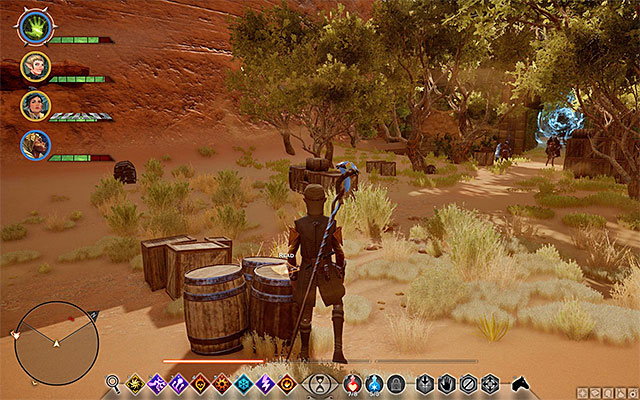 Manifesto and the keep
Quests object requires taking control of the keep which is currently taken by the Venatori cultists. The keep can be discovered by finding the manifesto lying on the barrel in the central part of The Western Approach. Other way of discovering it requires being near the Griffon Wing Keep - in the western part of the map (M19,4).
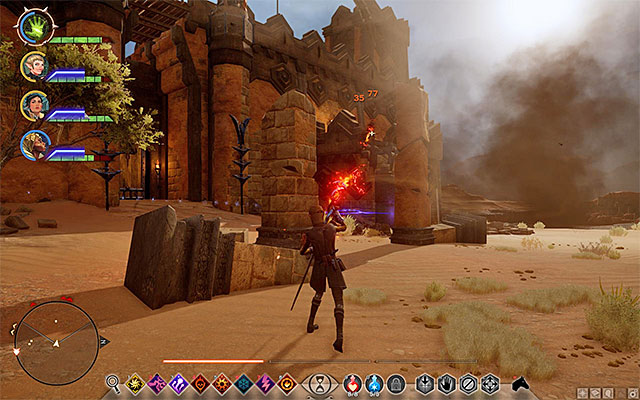 Main entrance is guarded.
There are two ways to get inside the keep. The first implies choosing the main gate on the north-eastern side of the keep (M19,4a). This entrance is protected by the cultists and you will have to be watchful of the mages, archers and the Venatori Gladiator. After killing them, you will have to additionally destroy the main gate (any type of attack).
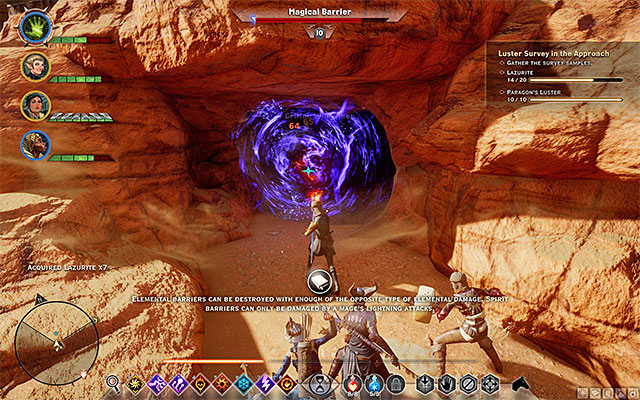
The latter way is less obvious but it allows skipping the fight with the guards (M19,4b). Go through the southern wall and find the cave depicted above. Its entrance is by default protected with a magic barrier, but it can be easily destroyed with electric attacks (i.e. particular spells). Once you enter the cave, you should be able to find a well which will get you to the first courtyard.
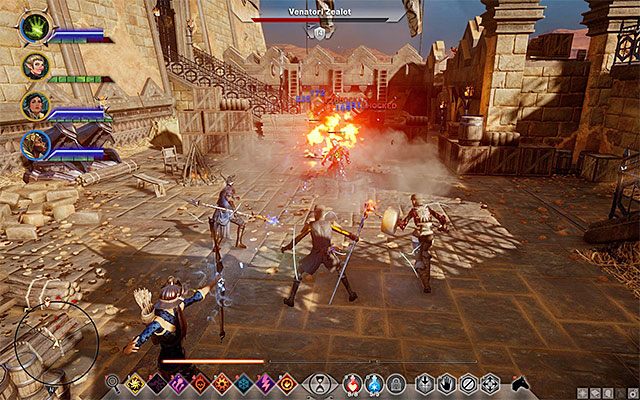 Eliminate the Venatori
No matter which way you choose, you will have to start a linear walk through he keep. Don't rush because you may be suddenly approached by a big group of Venatori cultists at once. Eliminate the enemies one by one, remember about the mages and the archers. Enemies on the wall should be attacked from a distance, or you can simply order your party to quickly use the ladders or stairs.
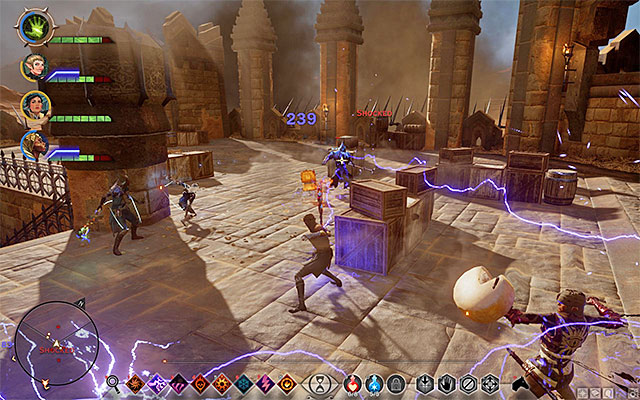 Defeat the Macrinus and hoist up the flag
Macrinus is the head of this cultists group. He is a powerful wizard who is resistant to fire attacks. Quickly send you warriors and rogues to engage him and order your mages not to use the fire spells. After the fight, check his corpse and take the Cowl of the Overseer and the Amulet of Power. Finally, locate the interactive mast (M19,4c) and stick the Inquisition flag in it.
Rewards for completing the quest:
Way to unlock: Automatically after approaching the entrance to the Still Ruins.
The quest-giver: - (M19,5)
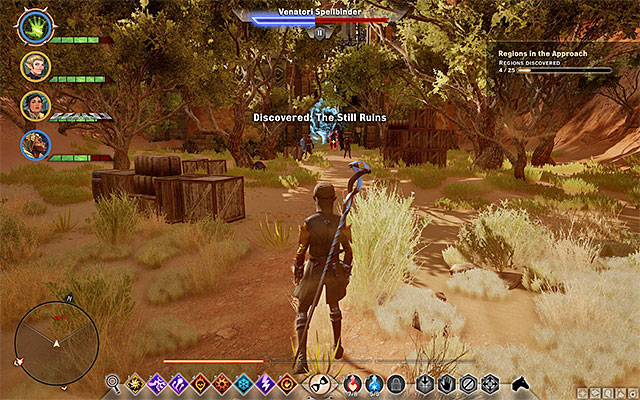 Attack the cultists by the ruins
This quests unlocks itself automatically after approaching the entrance to the Still Ruins. These can be found in the central part of the Western Approach, to the West of the first camp. After getting to the place, you should be able to find the Venatori cultists wandering around. Attack them, focusing the Venatori Spellbinder first.
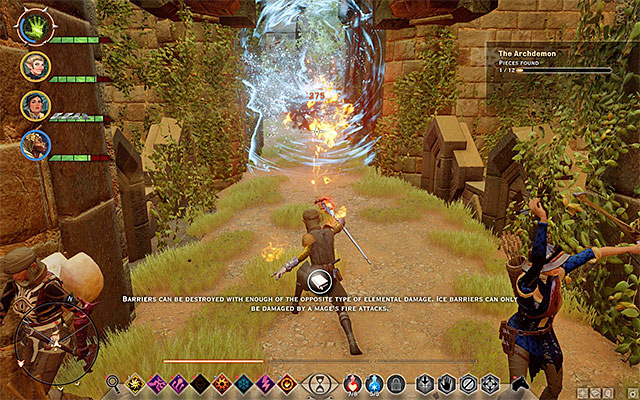 Destroy the barrier and use the door
After the fight, find the ice barrier. Let the mages destroy it by ordering them to use fire spells. After that, go and deal with another group of cultists. Head North and use the gate to enter the Still Ruins. Now you can start the exploration of the additional location (M22,1a).
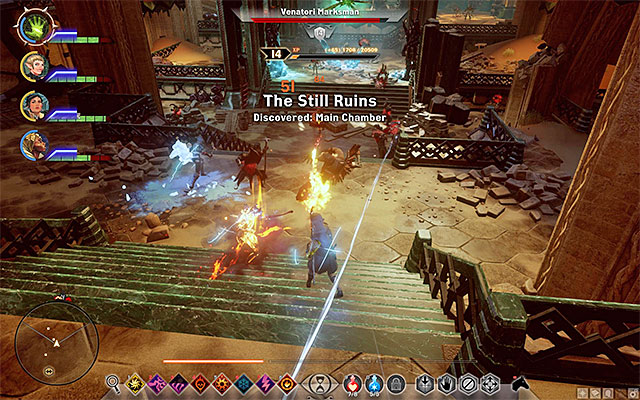 Attack another cultists.
Attack the Venatori cultists first while keeping in mind the Venatori Marksmen. After the fight, continue going North. Ignore everyone and take a closer look at the Rift in the main room. It will unlock "A Stranger Rift in the Ruins" quest (M22,2). Investigate adjoining, smaller rooms (to enter some of them you will need a rogue) because there are interesting items to find inside.
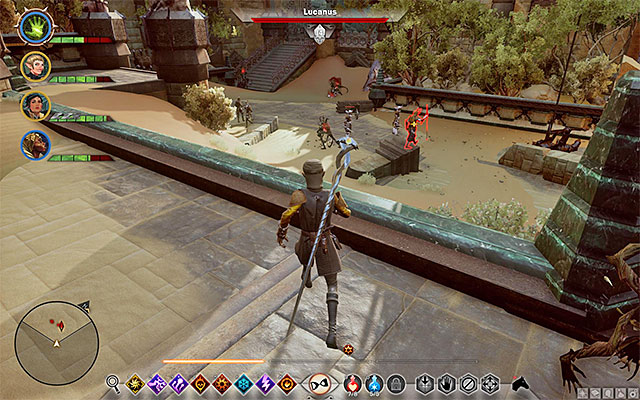 Attack Lucanus and his henchmen
More enemies can be encountered after reaching a big room in the northern part of the ruins (M22,3). Watch out for the powerful mage, Lucanus, who is commanding a small group of cultists. While fighting them, focus on eliminating the leader in the first place. Try not to use any fire attacks as Lucanus is immune to them. Be watchful of the mages and the cultists-marksmen. Killing all of the Venatori will end this quest. Search the body of Lucanus and take the Keystone, which will unlock another side quest.
Rewards for completing the quest:
Way to unlock: Automatically after approaching the Still Ruins.
The quest-giver: - (M22,2)
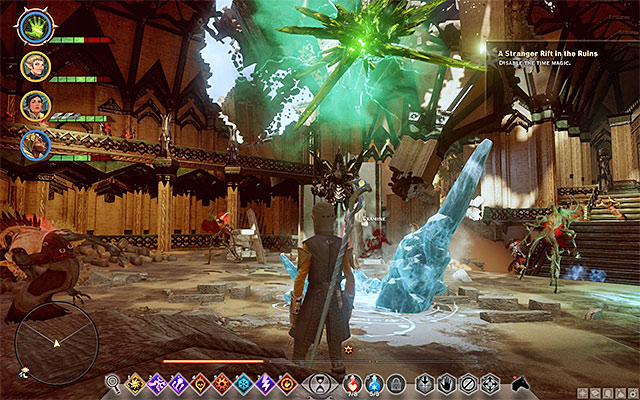 "Still" rift in the ruins
This quest can be unlocked while dealing with "A Tevinter Relic Hunt" task. Opportunity will appear after reaching the Still Ruins in The Western Approach. Go to the big hall of the ruins (M22,2) and take a closer look at the Rift, noting that the whole location is trapped in time.
 Tempest location
The plan is to break the spell which stops the time. In order to do so, go North and kill Lucanus as well as the other cultists. A detailed description on how to do that can be found in the "A Tevinter Relic Hunt" part of the guide. Apart from that, you will have to find five Keystones and use them on the locked doors - this is described in the part "The Heart of the Still Ruins". This will grant you an entrance to the secret chamber in the ruins (M22,2a). Take the Tempest from the pedestal which will lead to breaking the spell.
 Attack the monsters you encounter
Now you can go south, where the quest has begun. Breaking the spell made all the still creatures return to their activities. This may case some problems. The first monsters can approach you right after exiting the sealed chamber. Try not to use too much of your supplies, as you will need them later.
 Survive a challenging fight in the ruins
You will have to get back to the Rift in the southern part of the ruins (M22,2) - it should be active now. Fight the nearby monsters, eliminating the stronger enemies first (i.e. despair demons). You will have to eliminate everything which will allow you to close the Rift, and thus, end the quest.
Rewards for completing the quest:
Way to unlock: Automatically after retrieving the first Keystone
The quest-giver: - (M22,3)
 Lucanus has got the first key
Quest can be activated doing other one, named: "A Tevinter Relic Hunt". The opportunity will appear after reaching the Still Ruins located in the central part of The Western Approach. Head to the northern part of the ruins (M22,3) and defeat the Lucanus. After the fight, search his corpses for the Keystone.
 Place to use the keys
The game will show the location of the other four keystones (M22,3a), so that you will have to begin the searching right away. You shouldn't have any problems with finding these items, they are not guarded by anyone either. Having all keys, head to the closed door (M22,3b) and use them to enter the sealed chamber.
Rewards for completing the quest:
Way to unlock: Automatically after investigating a stone plate.
The quest-giver: - (M19,7)
 Check the stone plates
Quest can be activated after investigating one of the stone plates in The Western Approach, preferably the one that can be found by an attacked caravan to the South-West of the starting camp (M19,7).
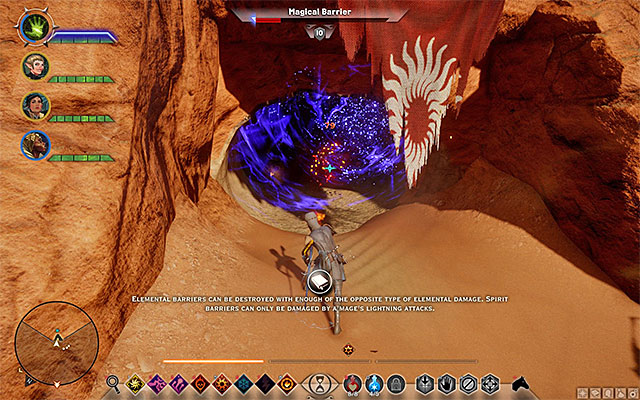 Destroy the barrier and enter the cave
Now you can continue with finding another plates (M19,7a) with the marks of the order trail. Those will lead you to a cave in the southern part of the map (M19,7b). Use the electric attacks to unlock the entrance. It is worth searching the cave as some interesting items can be found inside.
Rewards for completing the quest:
Way to unlock: Automatically after setting up the camp (M19,2) or automatically after discovering one of the Rifts (M19,2a)(M19,2b).
The quest-giver: - (M19,2) or (M19,2a) or (M19,2b)
This quest can be activated in one of two ways. Either by setting up a camp in The Western Approach (M19,2) or by approaching one of the two Rifts (M19,2a)(M19,2b).
The quests object is to close both Rifts connecting the game world with the Fade. The first Rift can be found in the western part of the map, between the camp and the keep (M19,2a). This one won't cause you any problems, every monster you will encounter is of an easy level. The second Rift can be found to the South of the western camp (M19,2b). It is guarded, but only the rage demon may be of any problem to you.
Rewards for completing the quest:
Way to unlock: Automatically after setting up the camp (M19,2) or automatically after discovering one of the Rifts (M19,2c)(M19,2d)
The quest-giver: - (M19,2) or (M19,2c) or (M19,2d)
This quest can be activated in one of two ways: either by setting up a camp in The Western Approach (M19,2) or by approaching one of the two Rifts (M19,2c)(M19,2d).
The quest's object is to close both Rifts connecting the game world with the Fade. The first Rift can be found in the Echoback Canyon, which you can check after passing the Coracavus while doing "The Trouble with Darkspawn" quest. The first Rift (M19,2c) can be found to the West of the camp in the canyon. It is guarded by high - leveled monsters, so be sure that your party is properly leveled up. Beware of the despair demon and the rage demon. The second Rift (M19,2d) lies to the South-West of the Echoback Fort. This one is guarded by rather weak monsters, except for the rage demon.
Rewards for completing the quest:
Way to unlock: Automatically after setting up the camp (M19,2) or automatically after discovering one of the Rifts (M19,2e)(M19,2f)
The quest-giver: - (M19,2) or (M19,2e) or (M19,2f)
This quest can be activated in one of two ways:eEither by setting up a camp in The Western Approach (M19,2) or by approaching one of the two new Rifts (M19,2e)(M19,2f).
The quest's object is to close both Rifts connecting the game world with the Fade. The first Rift can be found to the South-West of the camp (M19,2e). There are some powerful monsters around (such as the despair demon and the rage demon), which requires you to be leveled up before approaching them. The second Rift lies not far to the West from the southern camp. (M19,2f). Closing it is much easier and does not require any preparation - just beware of the rage demon.
Rewards for completing the quest:
Way to unlock: Meeting with the Knight-Captain Rylen.
The quest-giver: Knight-Captain Rylen (M19,9)
 Talk about the water supply
Quest is activated after taking control over the Griffon Wing Keep which is located on the western edge of The Western Approach - it becomes available after completing the "Assault on Griffon Wing Keep" side-quest. There, find the Knight-Captain Rylen (M19,9) and in the conversation, mention the problem with the water suppliers. You will be asked to get rid of the varghests from the nearest creek.
You will have to fight at least one varghestThe abovementioned Lost Wash Creek can be found to the South-East of the keep (M19,9f). After approaching it, use the ladders if you have come from the West. If you have come from the North, simply get down the hill. There, you should find at least one varghest. Get rid of the monster/s which will automatically lead to finishing the quest.
Rewards for completing the quest:
Way to unlock: Meeting with the Knight-Captain Rylen
The quest-giver: Knight-Captain Rylen (M19,9)
 Ask about the darkspawns.
Quest can be unlocked after taking over the Griffon Wing Keep to the west of The Western Approach - it becomes available after completing the "Assault on Griffon Wing Keep" quest. Look for the Knight-Captain Rylen (M19,9) and listen to his report concerning the darkspawns. You will have to investigate the case closely.
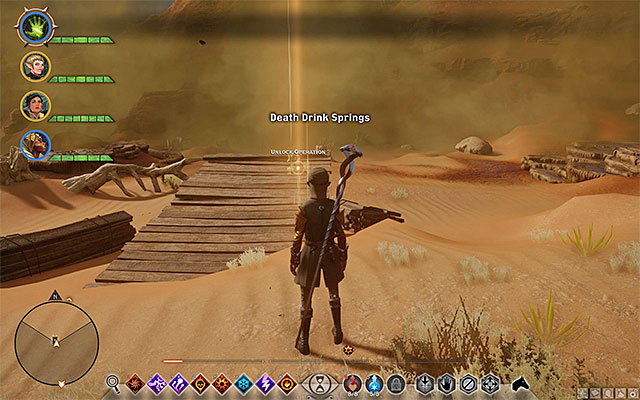
Exit the keep and head South-West. You have to get to the Death Drink Springs, where the poisonous gas will prevent any further exploration. Locate an interactive point depicted above (M19,9a) and stick a flag there. It will result in unlocking a new operation, which can be performed in the war room - "Find the Source of Darkspawn". Return to the Skyhold, find this option on the map, and then use 5 Power Points for its finalization.
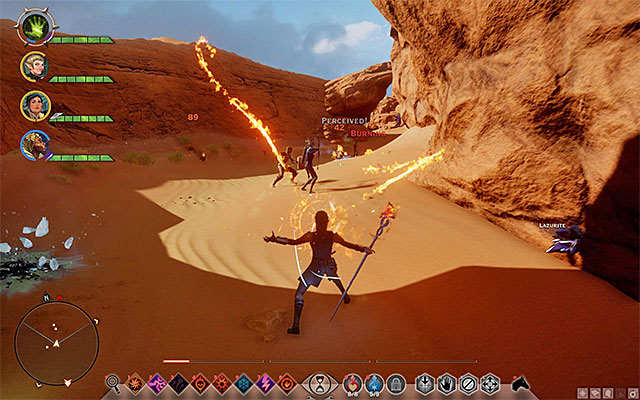 Route filled with darkspawns
Now you can return to The Western Approach. There won't be any fumes anymore. Explore the new area (M19,9b). Eliminate all of the Darkspawns, Hurlocks and Ghouls.
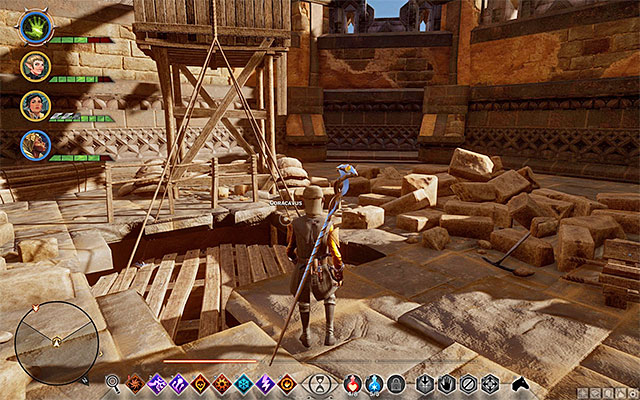 Coracavus ruins entrance
Head to the Prison Ruins. Use a ladder and approach the new group of monsters. Watch out for the Hurlock Alpha, keeping him at bay, and use your range-skilled party members. After dealing with the opponents, find the passage to the Coracavus ruins (M19,9c).
 In the ruins you will have to fight more darkspawns
After eventually getting to the ruins (M23,1a), head South. The first darkspawns will approach you near the crossing. Deal with them and optionally investigate the large, eastern area (it is fully optional). If not, turn West and later South.
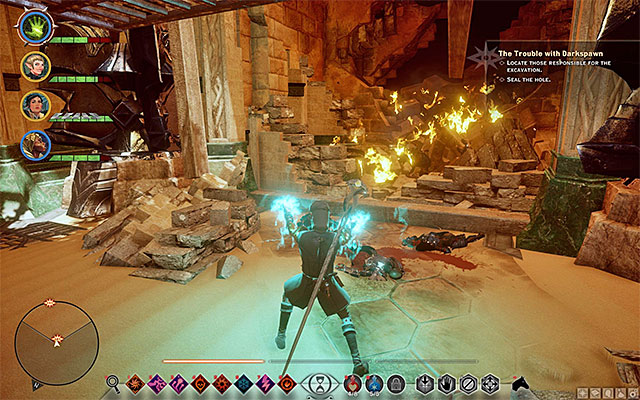 Place where you have to plug the hole.
Go South until you get yourself to the point where you will have to close a hole in the ruins (M23,1b). Use a mage in order to do so. After that, continue the exploration of the ruins. In the next room, apart from the usual darkspawns, another hurlock alpha will be waiting for you. Don't forget about investigating the area and getting a rogue to open locked rooms with some worthy treasures.
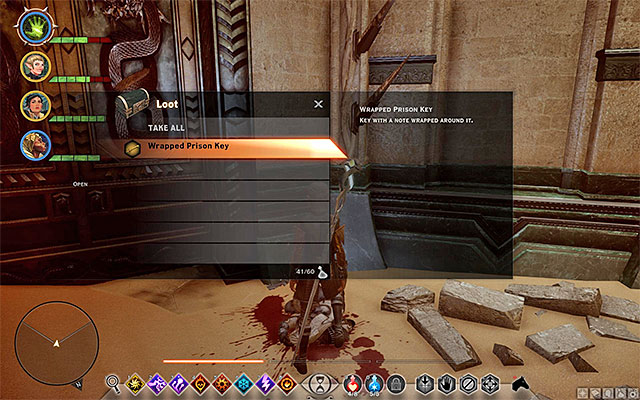 Key location
A while later, you will get to the long corridors. Look for the corpses (M23,1c) that will have a Wrapped Prison Key. Take it and head to the room South of the ruins. Save the game, as a tough fight awaits you.
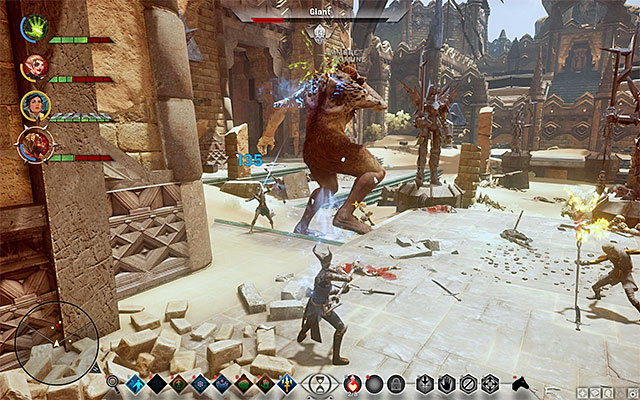 Fight the giant
There is a giant in the room (M23,1d). If this is your first time encountering this creature, you must keep in mind to protect the weaker party members. Don't let the giant get close to them and move them away when the beast is about to throw a rock. Use the warriors to get the giant's attention. Attack the legs which will make him kneel and will decrease his mobility. After dealing with this enemy, head to the southern exit (M23,1e).
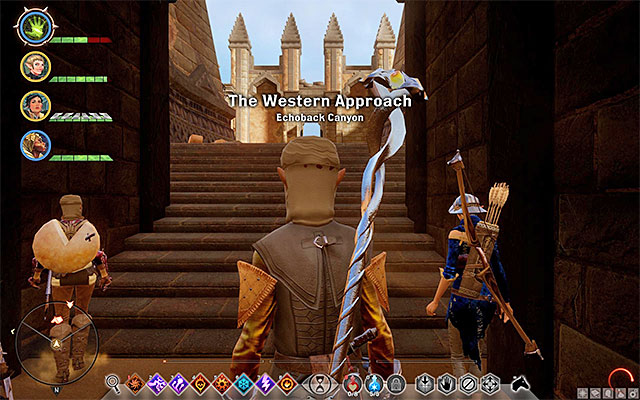 After exiting the ruins you will find yourself in the camp
After returning to The Western Approach (M19,9d) you will find yourself in a new part of the map, which is the Echoback Canyon. Go to the South-West and unlock a new camp. Watch out for the cultists and other monsters. There are also some giants wandering around. Avoid them if you don't want getting involved in a challenging fight.
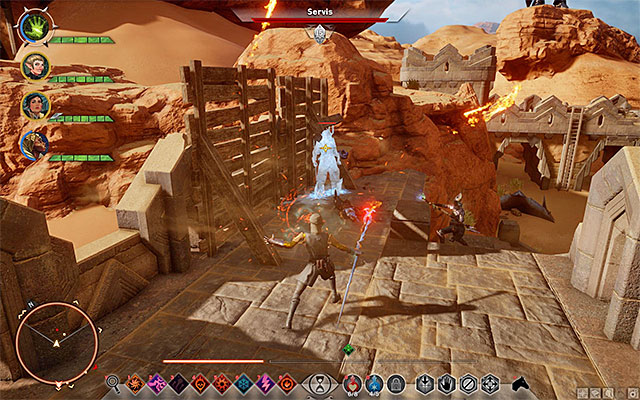 Servis arrives in the fort
Now you can return to the Echoback Fort, which can be found to the South-West from the exit (M19,9e). The fort is easily approachable from the north-western side, so that you will have walk around it a bit. Inside, find Servis and attack him. He is resistant to fire attacks. Warriors can be useful to overwhelm him and his helpers.
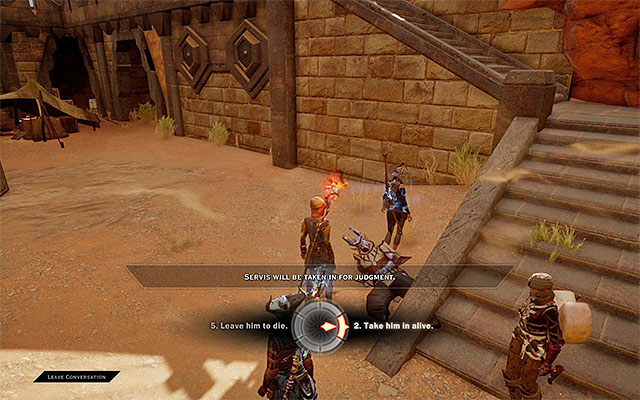
The game won't let you simply kill Servis. After getting rid of his entire health bar and defeating all of the cultists, go away from him and press the interaction button. Now you can decide whether you want to spare him or kill him. Letting him live will cause another side-quest in the Skyhold to appear.
Rewards for completing the quest:
Way to unlock: Meeting with the Knight-Captain Rylen.
The quest-giver: Knight-Captain Rylen (M19,9)
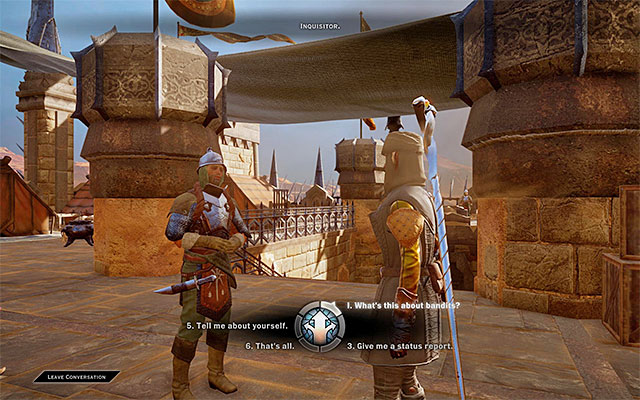 Ask Rylen about the bandits.
Quest becomes available after taking control over the Ritual Tower in The Western Approach, whilst doing the quest "Here Lies the Abyss". Meet with the Knight-Captain Rylen in the Griffon Wing Keep (M19,9). Mention the bandits.
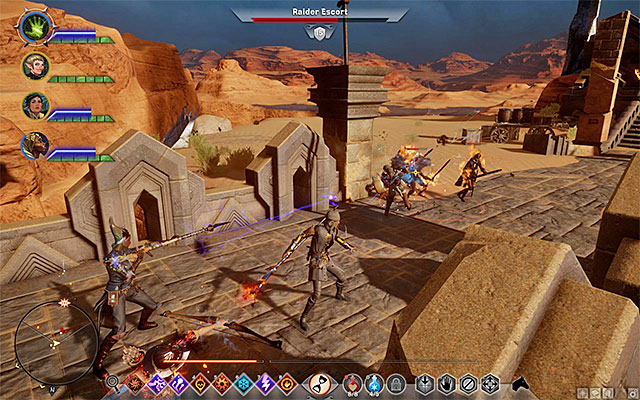 Eliminate all of the bandits
Now you can head to the Ritual Tower, which is on south (M19,9g). There, locate the bandits and be prepared to be involved in a bigger fight, as they are high levelled. To end the quest you will have to eliminate all of them.
Rewards for completing the quest:
Way to unlock: After you complete the Frederic's Livelihood quest and after you talk to Frederick
Quest giver: Frederick (M19,11)
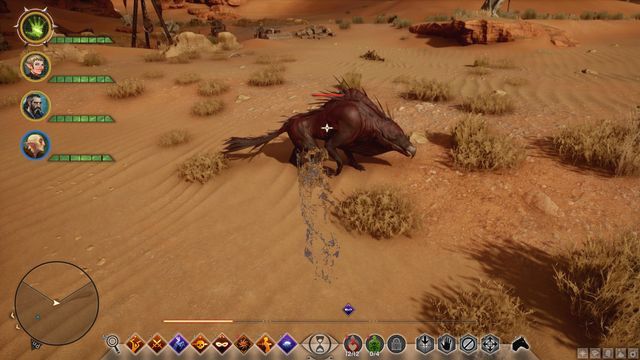 A quillback
Frederick (M19,11) asks you to find two valuable ingredients for him, which you find after you kill random beasts. These are:
After you collect both, return to Frederick.
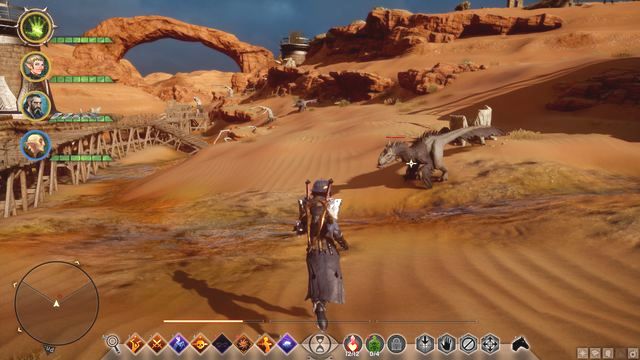 The phoenix
Quillbacks are commonly found near Frederick, in the deser North of him. Phoenixes are to be found only in the areas, where there are sulfur fumes - you can remove them in the course of an operation - to the West of the keep, along the rocky ridge.
Rewards for completing the quest:
Way to unlock: After you complete the Frederic's Livelihood quest and talk to Frederick
Quest giver: Frederick (M19,11)
 Frederick
In the next quest that you receive from Frederick (M19,11) you need to find four dragon traces. They come in the form of animal skeletons all around the desert. There are more of them, but four is enough to complete the quest.
 Remains - traces of a dragon
As soon as you enter the quest's area, where the remains should be, a mark appears on the map that points you to the traces. While next to the remains, use the action button to identify it and go find other ones.
Rewards for completing the quest:
Way to unlock: The quest starts after you collect the first note
Quest giver: (M16,4a-4h)
 A note in the wyvern den
The above quest activates after you collect a note in the desert. You can pick them in any order. You can find the majority of them as hidden items, i.e. to find them, you need to scan the area. In total, you need to find 8.
You find the first note (M16,4f) at the same moment as the Let's Slay the Beast quest in the wyvern den, under one of the withered trees.
 Two notes next to the tall rock
Near the rock, more or less in the center of the map (next to the viewpoint), there are two notes (M16,4b-4c). One of them is hidden - scan the area - you need to find the other one in the sand.
 The fourth note
You find the next note in front of the dragon's den, to the East (M16,4e). After you cross the cave, go past the row of pillars to the right of the entrance. The note is in the corner.
 The fifth note
Another note is to the North-West of the central campsite (M16,4h). It is behind one of the stones in the ruins, on its Eastern side.
 The sixth note
The sixth note is behind the huge statue of the dwarf, in the central desert (M16,4h). The easiest way to find the statue is to leave the central campsite in the desert and head South-West. The note is in the sand, on the northern slope of the hill.
 The seventh note
The seventh note is nearby, to the West, next to the descent into the underground (M16,4a). You need to walk behind the wooden device, next to the descent. The book is next to the mechanism.
 The final note in the underground
You can find the last note in the underground, close to the north-eastern encampment in the mountains. Climb onto the rocks, deal with the Templars and descend a few levels below the ground, where you find the notes in the corner of the room, opposite the ladder.
Rewards for completing the quest:
Way to unlock: Find the Hunter and talk to him
Quest giver: Hunter (M16,6)
 Hunter
To start the quest, you need to find the Hunter (M16,6) in The Hissing Wastes. He appears in random spots, most often near campsites. The only spot where you are sure to find him, is to the West of the first campsite, where you start your exploration of this location. After the conversation, you learn that the Northern part of the map is being haunted by a large beast - a Varghest (M16,6a).
 Varghest
You find him in the big depression, near the edge of the map. He is easy to tell, thanks to his greenish skin. Also, there are several weaker wyverns around. After you slay the Varghest, you complete this quest - you do not need to go searching for the Hunter. It is imperative that you search the beast, because it is a legendary animal and you can find interesting crafting materials thanks to this.
Rewards for completing the quest:
Way to unlock the quest: After you complete "How to Lure a Dragon" and after you have talked to Frederick
Quest giver: Frederick (M19,11)
 The entrance to Still Ruins
Again, meet up with Frederick (M19,11) after you complete the "How to Lure a Dragon" quest. In this mission, you need to find a manuscript in the Still Ruins.
 The manuscript in the Still Ruins
It is in the Western part of the building, in a small room (M22,4a). After you collect it, you can leave the ruins and return to Frederick. He then asks you to translate the manuscript. You do that by completing the Translate the Dragon Text operation - cost: 5 Power points.
Rewards for completing the quest:
Way to unlock the quest: After you complete the Hunting Patterns quest and talk to Frederick
Quest giver: Frederick (M19,11)
 The trap in the desert
After the conversation with Frederick (M19,11) and the "Hunting Patterns" quest, you will have to go to the Southern end of the desert to disarm five traps of the enemy hunters (M19,15a-15e). They look like regular traps for animals, but they contain a big bait inside.
 The enemy hunters
As soon as you disarm the traps, hunters will attack from the North. The group consists of several archers and several people with blades. After the battle, return to Frederick.
Rewards for completing the quest:
Way to unlock the quest: After you complete the "Sharper White Claws" quest and talk to Frederick
Quest giver: Frederick (M19,11)
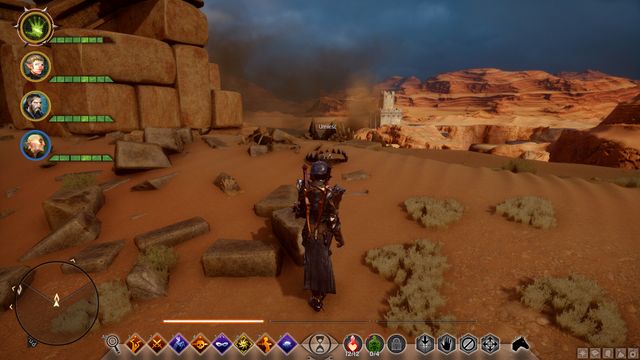 The dragon trap
After you meet all of Frederick's (M19,11) requirements, you can talk to him again to start the quest, in which you deliver the Abyssal High Dragon. This is the only way to deal with the dragon in this location. Just like in the previous quest, you need to locate five traps (M19,15a-15e), but this time it is you who sets the bait.
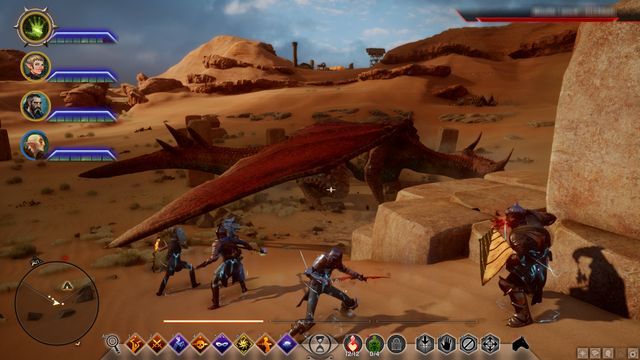 The Abyssal High Dragon
The dragon is not too powerful: it is a fire dragon of level 14. Vulnerable to cold, resistant to fire and slowing down, and restricting spells/effects. After you kill the dragon, return to Frederick. After the conversation, you will be able to include a researcher into the agents of the Inquisition.
Rewards for completing the quest:
Way to unlock: Automatically after entering Emprise du Lion
The quest-giver: - (M15,1)
Once you enter Emprise du Lion, you will notice that the area is overrun by Templars. You need to head to a massive keep in the middle of this region and deal with the hostile intrusion. The road is full of enemy forces, so you need to take on enemies gradually.
 Location taken over by the templars
At first, head towards the cave - a tunnel leading forth - guarded by a group templars (M15,9a). Set up a camp in this spot once you have defeated them. Repeat this procedure in (M15,9b; and M15,9c). Once you finish with the last camp, you will receive another quest - an order to head to the Suledin keep.
Rewards for completing the quest:
Way to unlock: After setting up three camps in Taking Back the Lion quest
The quest-giver: - (M15,9c)
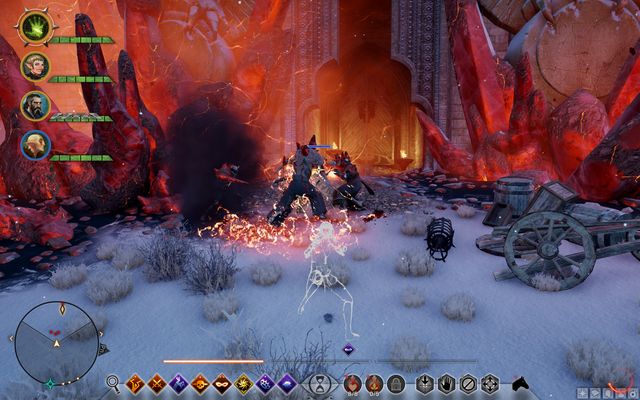 Help Michel
This quest will be given to you automatically once you set up the third camp in the previous quest. Your task is to head to the Suledin keep and take it back. Near the entrance (M15,13) you will find Michel fighting with the red templars. Help him to ensure his return to his village. After that, he won't be helping you anymore. Then, you need to fight your way through the keep's corridors. Here, you will encounter some templars, few Behemots and a single Giant. At the end, you will have a choice to either fight Imshael (M15,13a) or strike a deal with him. Only then will you be able to enter the keep's balcony.
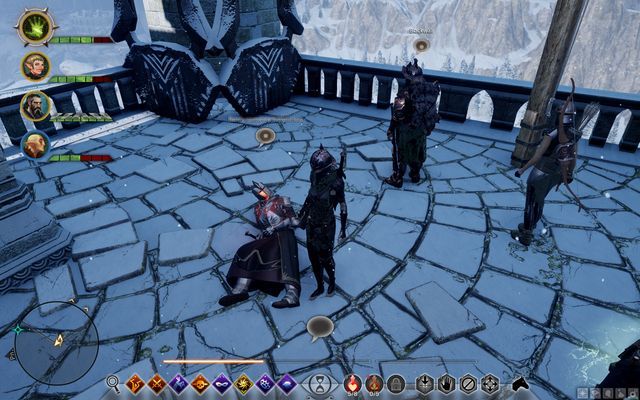 A dying knight by the flag mast
On the balcony, you will find a dying templar. You can't do anything for him - you can only have a short conversation. Put the flag of the Inquisition on the mast (M15,13b) to end the mission.
Rewards for completing the quest:
Way to unlock: After talking to Michel by the entrance to the Suledin keep (quest: Capturing Suledin Keep)
The quest-giver: Michel (M15,13)
 Michel
You will finish this quest simultaneously with the one concerning taking over the keep. Imshael will be guarding the only way to a place where the flag is to be put, on the main courtyard (M15,13a).
 Imshael on the courtyard
However, there is a different way to finish this quest: the demon will be interested in negotiating with you and you will be able to make different choices with different outcomes. None of them, however, will be approved by your team members and neither will you get any additional experience/influence. Every choice will result in Michel's death.
 Imshael will be transforming himself into various demons
The fight is challenging even on a higher level - Imshael has high endurance and he will transform into three different demons. First, focus on defeating all of the smaller enemies such as spiders and red templars. Then, you will be able to focus on the boss himself.
 Dead Michel
Return to Michel - if your choice was to fight the demon, he will join you (as an agent). You can find him in the city near the first camp (M15,2).
Rewards for completing the quest:
Way to unlock: Automatically after entering Emprise du Lion
The quest-giver: - (M15,1)
 Mistress Poulin
Right after the beginning of the quest, head to the village directly ahead of you. Next, enter the first yellow house, right of the tall tower (M15,3). Inside or in the front of the building, you will find Mistress Poulin. Talk to her to complete the quest. You will also receive another quest - "Rocky Rescue".
Rewards for completing the quest:
Way to unlock: Read the diary on an island on a frozen river.
The quest-giver: - (M15,6)
The quest will begin after reading a chapter from the diary on an island on a frozen river in Emprise du Lion. To complete this task, simply go to the elven ruins in the northern part of the map, near the river.
 Note inside the ruins
There, to the left of the statue, you will find a note. Read it to finish the quest.
Rewards for completing the quest:
Way to unlock: Investigate the box on a bench in the blue building.
The quest-giver: Granny Mae (M15,4)
 Ring box in the granny's house
Once you investigate the ring box, you will receive a quest to find the lost jewelry. Head to the third camp under the tower. From there, head towards the destroyed village behind the bridge.
 Ring by the furnace
Look for a raggedy blue house to the north (M15,4a). Inside, by the furnace, you will find the ring. Head back to the village and return the ring to the granny (M15,4). She may not be home; if so, look for her near the village's main square.
Rewards for completing the quest:
Way to unlock: Pick up the key
The quest-giver: - (M15,10)
 A corpse with the key
This is one of the shortest quests. First, find the key to the stronghold - it should be near one of the corpses by the rocks. If you notice the door to the stronghold first, the corpse lies more or less in front of it.
 Main door to the Valeska's Stronghold
Then, open the door to the stronghold and enter it. The quest will end, but no one forbids you from venturing deeper into the building!
Rewards for completing the quest:
Way to unlock: Read the book located under the tree, near the ruined village.
Quest giver: - (M15,11)
 The first book under the tree.
Read the book lying under the tree. On your map, you will notice the location of the next note that you need to find. It's located under the tree to the south, close to the tower located near the quarry (M15,11a).
Rewards:
Way to unlock: Read the book on the desk.
Quest giver: - (M15,12)
 The book in the yellow house
In the southern part of the village, near the tower, you will find the ruins of a yellow house with a book lying on the desk. Read it and you will receive more clues.
 The rubble near the bridge
The next step leads you to the eastern part of the location, behind the bridge, where you will notice a small pile of rubble (M15,12a). Investigate it to find the item that will end the quest.
Rewards:
Way to unlock: After completing the "The Corruption of Sahrnia" quest.
Quest giver: - (M15,3)
The cage with prisonersAfter the conversation with Mistress Poulin, you will learn that the imprisoned workers are held somewhere in Emprise du Lion. Your task is to locate and rescue them. In total, you will find 7 cages guarded by the red templars. Opening each cage will give you Cole's support.
Rewards:
Way to unlock: Get close to the mine entrance
Quest giver: - (M15,19)
 Red templars in the quarry
Once you approach the mine in the Southern part of Emprise du Lion, you will activate a quest, during which you have to eliminate all the red templars in the quarry. You have to defeat five groups of invaders to complete this mission.
Rewards:
Way to unlock: Talk to a woman lying on the ground.
Quest giver: Infected woman (M15,21)
 The dying woman
On a hill, near one of the cages with prisoners, you will find an infected woman. Talk to her and she will ask you to place a letter inside a tree by the river.
 The tree
The tree is in fact a big fallen branch located near the bridge (M15,21a). This is where you should place the letter, as the woman requested.
Rewards:
Way to unlock: Take the letter located on the scaffolding.
Quest giver: - (M15,22)
 You will find the letter on the boxes
On a wooden scaffolding, you will find a parchment lying on top of the boxes, containing the prisoner's testimony. Deliver it to Sahrnia, where you will find Louis (M15,22a) and talk to him.
 Louis and Linette
You can give the testimony either to Louis or to Linette. However, this choice has practically no influence on the gameplay. The only difference is that when you deliver the testimony to Linette, one of the companions may disapprove of your actions.
Rewards:
How to unlock: Read the documents on the table.
Quest giver: - (M15,23)
 The documents.
On a wooden scaffolding, on a table, you will find some documents. Once you read the documents, you will receive a task to talk to Mistress Poulin. The quest ends when you talk to her.
Rewards:
Way to unlock: Talk to Baron Edouard Desjardins at Suledin Keep.
Quest giver: Baron Edouard Desjardins (M15,14)
 The Baron
The Baron will request that you investigate the Eastern part of Emprise du Lion and free three towers, currently being in the red templars' possession (M15,14a; M15,14b; M15,14c).
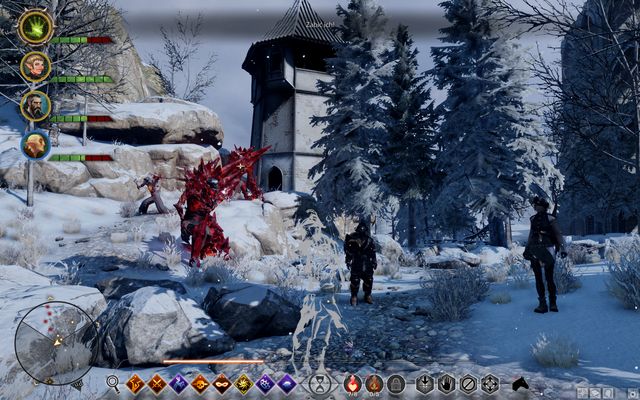 The last tower and the Behemoth guarding it
Near each of the towers, you will encounter four units of various types that you need to defeat. Then, place a flag to capture the building. You will receive a part of the quest's reward after capturing each of the towers.
Rewards:
Way to unlock: Once you come across the rift
Quest giver: - (M15,5d; M15,5f)
In the second part of the map, beyond the bridge to the East, you will find two more rifts. One of them is located to the North (M15,5d), between the tower and the dragon's lair. The second one can be found near the western edge of the map, somewhere in the middle (M15,5f).
Rewards:
Way to unlock: Recapture Suledin keep and talk to baron Edouard Desjardins
Quest giver: Baron Edouard Desjardins (M15,14)
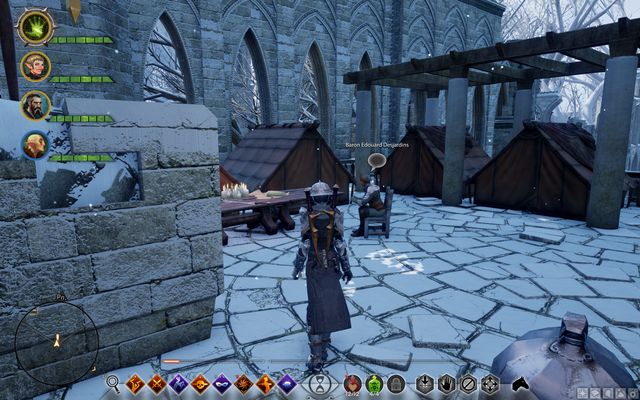 The Baron at the Suledin keep
This quest is easy to miss. It concerns crossing the bridge in the Southern part of Emprise du Lion. On the bridge, there is a flag, which allows you to unlock an operation, and - as a result - repair the passage. You receive this quest from Baron Edouard Desjardins (M15,14) at the Suledin keep that you previously captured. From him, you will learn about the new bridge but, what is important, the quest will not appear in your journal if you have already completed it on your own.
There are no rewards for this quest.
Way to unlock: Recapture Suledin keep, fix the bridge to Eastern Emprise du Lion, talk to baron Edouard Desjardins
Quest giver: Baron Edouard Desjardins (M15,14)
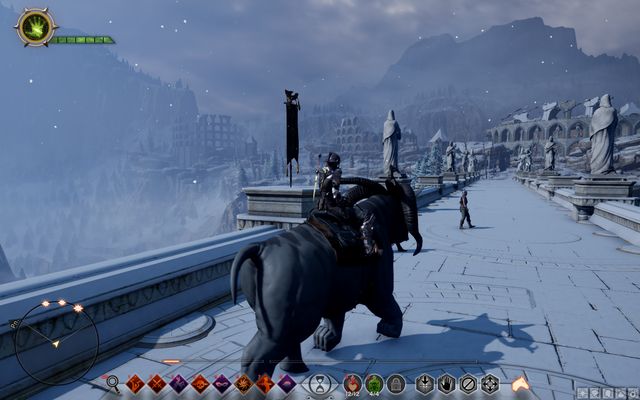 The view onto the three Coliseums- dragon breeding grounds
At the Suledin keep, you find Baron Edouard Desjardins (M15,14). From him, you will receive a quest to secure the passage in the Eastern part of Emprise du Lion, once the bridge is fixed. It is one of the most difficult side quests in the game, as it requires you to eliminate three dragons of varying difficulty levels, in three Coliseums. The most powerful dragon is at level 23 so, you need to be well prepared if you want to complete this quest.
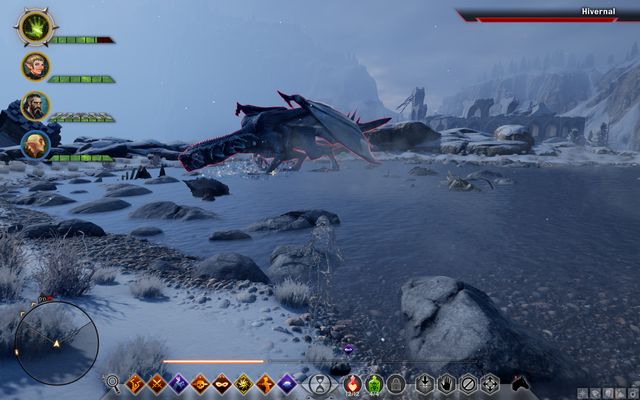 The first dragon
There are three dragons to defeat: the first one at level 19, ice type. To defeat this one, use fire as much as possible. Every 1/5 of his health that you deplete, he launches into the air and casts ice balls. Once his health level drops to approximately half, he will start summoning dragonlings to his aid.
The second dragon: at level 21, as above - ice type. This one also attacks from above and summons dragonlings. Moreover, he will be activating a protective shield very often.
The third one is a fire dragon, at level 23. He is quite vulnerable to poisons as well as the power of the Fade. The dragon has lots of health points and occasionally, he performs a quite specific attack: circles will appear around each of the characters, and if they don't leave the circles fast, the characters will receive severe burns when they erupt in fire. This dragon does not fly, but he also summons dragonlings. Very often, the dragon activates a magic shield. It is best not to attack the dragon, if your experience level is not equal to or higher than the dragon's level.
Rewards for completing the quest (chunks of it are awarded to you after you kill each dragon):
Way to unlock: Find the letter in the abandoned tent
Quest giver: - (M15,17)
 Cradle of Sulevin
In Emprise du Lion near the rocky edge and close to Valeska's Watch, there is a tent at the tree. Next to the tent, you find a note, from which you learn about the Sulevin Blade. Thanks to reading it, you also learn where to find the blade. To do that, get to Cradle of Sulevin.
 The first altar - activate it with the Veilfire in your hand
After you get there (M26,1a), you will have to gather four fragments of the sword. You find them near the altars (M26,1b-1e) in the center of the rooms that you enter. To activate them, you need to interact with them, while holding the Veilfire torch.
 One of the revenants with a fragment of the blade
After you activate each one of the altars, you will be attacked by a Revenant. Only after you kill him and loot him, do you find a sword fragment on him.
 The stone opposite the entrance underground
To activate the last underground altar, you need to light Veilfire on the stone opposite the entrance (with two torches on the left and on the right). Then, al of the remaining torches burst into flames. In the same manner, approach the altar with the torch in your hand, kill the summoned demons and collect the last fragment of the blade.
After you collect all of the fragments, go to Skyhold, talk to Dagna in the Undercroft.
Rewards for completing the quest:
Way to unlock: Automatically after entering Emprise du Lion
The quest-giver: - (M15,5a)
You can go to the frozen river by the village in which you start the game. There, you can find a rift (M15,5a), a closure of which will complete the quest. This rift is fairly easy to close.
Rewards for completing the quest:
Way to unlock: After finding the rift
The quest-giver: - (M15,5b)
Go to the northern part of the lake. There, you will find a rift with fairly low level of difficulty, and a really nice reward (M15,5b).
Rewards for completing the quest:
Way to unlock: After finding the rift
The quest-giver: - (M15,5c)
On the road to the keep, you will find a rift between the rocks (M15,5c). You can either walk around it or close it right away. Be careful as its difficulty level is much higher in comparison to the last two on the lake. To complete the quest, you will have to close the one to the east from the previous one as well. (M15,5e).
Rewards for completing the quest:
Way to unlock: Talk to The Quartermaster
The quest-giver: The Quartermaster (M15,2)
At The Quartermaster's in any camp, you can look for the item requests available in Emprise du Lion. In the sanguinite request you will have to deliver 10 units of Sanguinite (common) and 20 units of Autorite (also common, but in the deeper parts of the map). Both materials can be found on the rocky slopes.
Rewards for completing the quest:
Way to unlock: Talk to The Quartermaster
The quest-giver: The Quartermaster (M15,2)
 Snoufleur
At The Quartermaster's in any camp, you can look for the item requests available in Emprise du Lion. Another quest is a request for a shelter. You will need: 3x August Ram leather and 10x snoufleur skin - both animals can be found near the first village. Snoufleurs can only be found on ice.
Rewards for completing the quest:
Way to unlock: Talk to The Quartermaster
The quest-giver: The Quartermaster (M15,2)
At The Quartermaster's in any camp, you can look for the item requests available in Emprise du Lion. One of these is a request for coats:
Rewards for completing the quest:
Way to unlock: Talk to The Quartermaster
The quest-giver: The Quartermaster (M15,2)
 Great Bear
At the Quartermaster's in any camp, you can look for the item requests available in Emprise du Lion. Yet another request concerns heavy coats:
Everknit Wool can be also taken from the dead bodies of the templars. Great Bears can rarely be found by the lake.
Rewards for completing the quest:
Way to unlock: Unlocks automatically after completing the "Stop Venatori Activity in the West" operation.
Quest giver: -
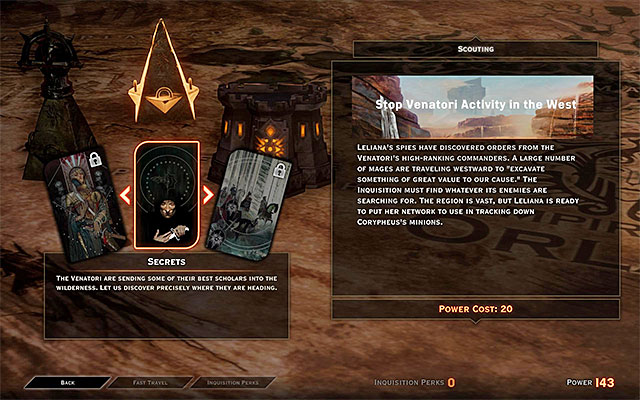 The operation in The Hissing Wastes.
This quest can be added to your journal after finding the icon connected to it on the war table, in Skyhold. To complete this operation automatically, you have to have at least 20 points of power. Spending the points will unlock The Hissing Wastes, where you have to go. When you're there (M16,1), listen to Lace Harding, who will tell you about the nearby dwarven ruins. After the conversation, you can start exploring this location.
Note - The Hissing Wastes is a location, in which you will encounter a lot of opponents that are difficult to defeat. Visit this place only when your team members are at least at level 16-17.
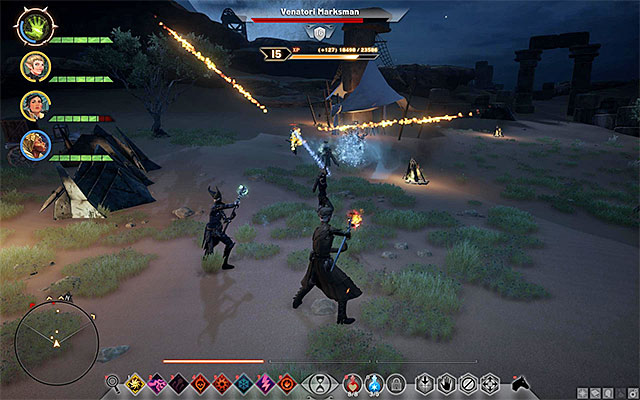 Attack the cultists and search the camp.
The next part of this quest concerns visiting Venatori camps located in different parts of the Wastes. One of such camps can be found in the western part of the map (M16,1d). Once you arrive at the location, attack the cultists located here, focusing on Venatori Mages and Venatori Stalkers. After securing the camp, search for two books connected with the "The Tomb of Fairel" side quest.
 The cultists in the second camp.
You will find another camp in the central part of the Wastes (M16,1f). The strategy is similar - kill all the cultist (watch out for the elite enemies, like Venatori Brute) and search for the book. It's also worth mentioning that one of the five additional tombs from the "The Tomb of Fairel" quest is located right near this camp.
 Choose one of the paths leading up the mountain.
The third camp is located near the vantage point, on top of the mountain. It is the north-eastern part of the map (M16,1j). You can get there using one of several paths available and you should have no trouble climbing to the top. After arriving at the camp, attack the Venatori and kill the Mages first. Once the battle is over, search the place to find two books (one with a sketch). Moreover, you can set up your own camp here.
 Get rid of the cultists in the first part of the camp.
The last and the biggest camp can be found in the eastern part of the Hissing Wastes (M16,1k). You can approach the first part of it from the west. Attack the cultists and watch out for the archers on the fortifications (try to eliminate them quickly). The next part of the camp is protected by the barricades, but you can go past them from the south (you can choose from several narrow passages).
 Get past the barricades and attack the group led by the Overseer.
In the second part of the camp, a large group of opponents awaits you. In this battle, you have to be careful when attacking the Overseer, who is the leader of the group. This enemy is resistant to fire attacks, so you need to use other elements in this fight. Once the battle is over, search the Overseer's body to collect the Bloodwake (staff). Also, search for the last book.
Rewards:
Way to unlock: Meet with Lace Harding.
Quest giver: Lace Harding (M16,1)
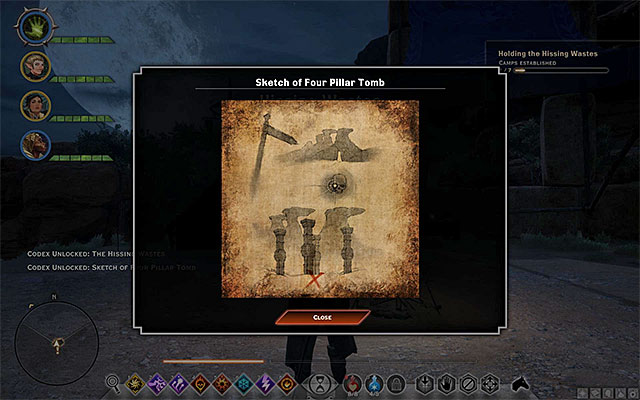 A sketch of one of the extra tombs.
This quest is unlocked after arriving to the Hissing Wastes for the first time (when talking the Lace Harding (M16,1)). The main hero will learn about a dwarven tomb and receive a Sketch of Four Pillar Tomb, containing hints on where to find one of the five additional tombs. Visiting these smaller tombs will turn out to be necessary when searching for keys to the Tomb of Fairel. The order in which you visit the tombs doesn't matter. You can find information about where to find them below.
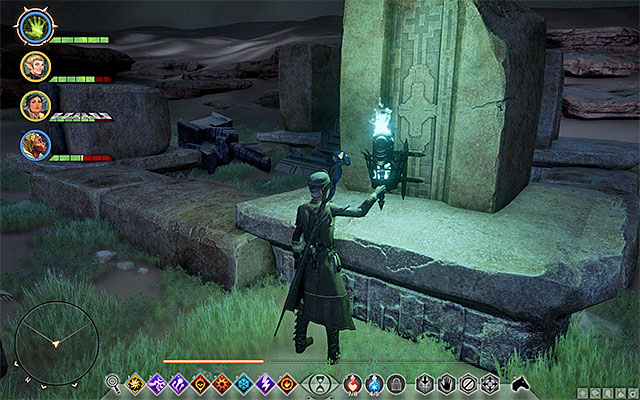 One of the Braziers - you have to light them in the order in which the game requires.
The first one of the five tombs is located in the south-western corner of the map and there is a large square in front of it (M16,1b). To gain access to this tomb (and to any other tombs), you have to light the Braziers located nearby in the proper order (you can figure out the order by reading the inscriptions around, but if you're using this guide, you don't need to do that). If you make a mistake, a couple of strong enemies will appear near the tomb. You will have to defeat them and start all over. The right order of lighting the Braziers is:
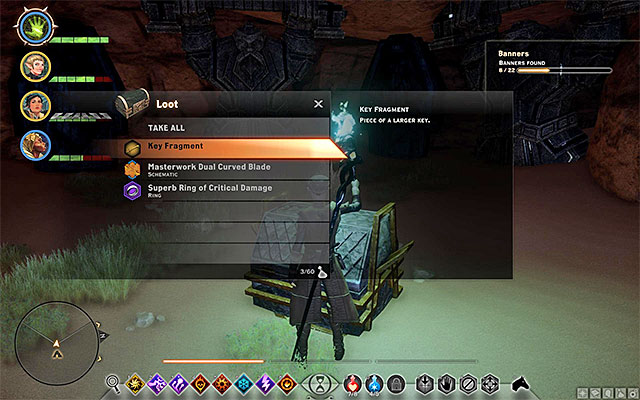 Enter the tomb and reach the chamber with a large chest.
You can now start exploring the first tomb. The most important thing is to find a large chest located in the main hall. Inside the chest, you will find few very valuable items and a Key Fragment (one of five).
 Go down the stairs, to the tomb.
The second tomb is located near a cultist camp in the central part of the wasters (M16,1e). Theoretically, you could try to sneak behind their backs, but as they are connected to the "Sand and Ruin" quest, it is best to eliminate them. After the battle is over, search the area on the surface (there's a book nearby, containing a sketch) and find the stairs leading down. Go to the main hall and find another book.

Just like before, you have to interact with the Braziers in the right order, as it will prevent the enemies from spawning. The right order is marked on the screen above (start from 1 and end on 4). After lighting all the Braziers, go to the last chamber of the tomb and open the large chest to find the next Key Fragment.
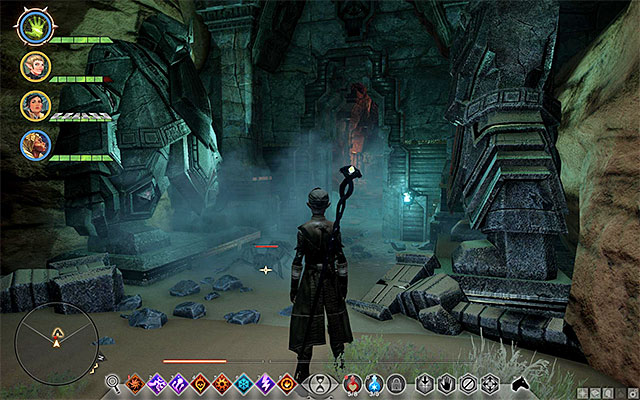 The entrance to the third tomb.
The third tomb is located at the bottom of the canyon, west from the place when you've found the second tomb (M16,1g). To safely get to the bottom, use a mount (you can also take a longer path). Be careful, as there are Poison Spiders around and inside the tomb, which can poison you and your team members.
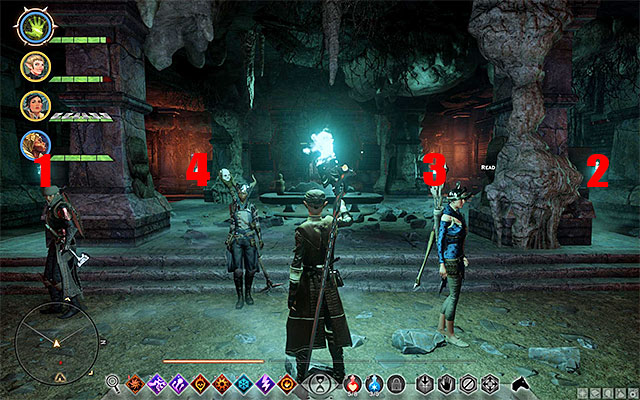
You have to do the exact same things in this tomb as in the previous ones. The right order of lighting the Braziers is marked in the picture (start from 1 and end on 4). After lighting them all, go inside and open the chest to collect the third Key Fragment.
 Find the hole in the ground and use the ladders.
The fourth tomb can be found in the eastern part of the map, north from one of the camps in this area (M16,1i). You have to be careful, as there are Venatori around the tomb. You can try to sneak past them, but the best thing to do is to eliminate them all. The tomb itself is quite well hidden. Locate a large hole in the ground and use the ladders to go all the way to the bottom.
After some walking, you will reach the hall with Braziers in it. Light them in the right order (shown in the picture). After going inside, find the large chest and collect the fourth Key Fragment.
 The stairs leading to the fifth tomb.
The last tomb is located near the camp in the Northern part of the Wastes (M16,1l). Like in the previous tombs, be very careful here, as there are Poison Spiders near the entrance.
Reach the main hall and start lighting the Braziers. The proper order is shown in the picture above. Find the chest and collect the fifth Key Fragment.
 It is best to leave the dragon alone.
Now, you can set out to the Tomb of Fairel, which is located in the eastern part of the Wastes (M16,1m). You don't need to hurry, as there is a dragon (Sandy Howler) flying near the tomb (M16,1n). However, fighting the beast is not necessary to complete the quest. You can go past it using the path to the South. It is the best thing to do if your team is below level 22-23.
 The entrance to the Tomb of Fairel
After reaching the tomb, the main hero will use the key automatically. Go inside and explore the whole tomb. Open the large chest and collect the treasures to end this long quest.
Rewards:
Way to unlock: Unlocks automatically after arriving to the Hissing Wastes.
Quest giver: - (M16,1)
This quest is available right after setting your foot in the Hissing Wastes for the first time. The quest concerns finding three Rifts that connect this world with the Fade, and closing them. The process of closing the Rifts is described in the game guide.
The first Rift is located North from the starting camp (M16,1a). When attempting to close it, watch for Despair Demons and try to kill them first. The second Rift can be found North-West from the starting position (M16,1c). You have to be prepared for a challenging battle, as you will be facing strong very strong Pride Demons. Focus on these enemies and avoid using attacks that they are resistant to (for example electricity and paralysis). The last, third Rift can be found North of the starting camp, quite far away (M16,1h). Just like in the second case, you have to watch out for Pride Demons. Kill them first and protect weaker companions from their attacks.
Rewards:
Way to unlock: Unlocked automatically after setting up one of the camps (M16,2) or discovering one of the Rifts (M16,2b)(M16,2c)(M16,2e).
Quest giver: - (M16,2) or (M16,2b) or (M16,2c) or (M16,2e)
You can unlock this quest in two ways - either by setting up one of the camps in the Hissing Wastes (M16,2) or by approaching one of the three Rifts connected to this mission (M16,2b)(M16,2c)(M16,2e).
This quest concerns closing three Rifts that connect this world with the Fade, located on the farm. The first Rift can be found in the central part of the Wastes, between two camps that you can set up (M16,2b). You have to be prepared for a difficult battle, as you will encounter Pride Demons. The whole team should focus on these monsters and you should avoid using attacks based on electricity or paralyzing ones. The second Rift is located South from the camp in the central part of the map (M16,2c). Again, you will fight Pride Demons which should be eliminated first. The last, third Rift can be found North-East from the central camp (M16,2e). The battle here is a bit easier, but you need to quickly eliminate the Despair Demons located there.
Rewards:
Way to unlock: Unlocked automatically after setting up one of the camps (M16,2), or after discovering one of three Rifts (M16,2a)(M16,2d)(M16,2g).
Quest giver: - (M16,2) or (M16,2a) or (M16,2d) or (M16,2g)
This quest can be unlocked in two ways - either by setting up one of the camps in the Hissing Wastes (M16,2) or by approaching one of the three Rifts (M16,2a)(M16,2d)(M16,2g).
This mission concerns closing three Rifts that connect this world with the Fade, located on the farm. The first one (M16,2a) can be found in the Western part of the map. It is guarded by high level Greater Shades, so remember about preparing your team properly before the battle. The second Rift can be found in the Western part of the map, on the desert (M16,2d). You have to be prepared for a fight with Pride Demons. Focus your team's attention on eliminating these enemies and avoid using attacks based on electricity or paralyzing ones. The third Rift is located in the central part of the map (M16,2g). Just like in the case of the second Rift, you will have to fight a group of demons led by several Pride Demons.
Rewards:
Way to unlock: Unlocked automatically after setting up one of the camps (M16,2), or after discovering one of the three Rifts (M16,2f)(M16,2h)(M16,2i).
Quest giver: - (M16,2) or (M16,2f) or (M16,2h) or (M16,2i)
This quest can be unlocked in two ways - either by setting up one of the camps in the Hissing Wastes (M16,2) or by approaching one of the three Rifts connected to this mission (M16,2f)(M16,2h)(M16,2i).
This mission concerns closing three Rifts that connect this world with the Fade, located on the farm. The first Rift can be found to the East of the North-Eastern camp (M16,2f). Prepare for a challenging fight as there are few Pride Demons there. Focus your attacks on them and don't use attacks based on electricity and paralyzing ones. The second Rift is located to the East of the northernmost camp (M16,2h). It is guarded by high level Greater Shades, so remember about preparing your team for the battle properly. The third Rift can be found North-West from the northern camp (M16,2i). Just like in the case of the first Rift, you have to face a group of enemies led by Pride Demons.
Rewards:
Way to unlock: Unlocked automatically after arriving at the Hissing Wastes.
Quest giver: - (M16,1)
This quest is unlocked right after arriving to the Hissing Wastes for the first time. It concerns setting up seven Campsites. You begin the exploration of this location in the first Campsite (M16,1). You have to reach the remaining six on your own. You shouldn't have much trouble completing this quest, as the location of the Campsites is marked on the map connected to this chapter of the guide (M16,2). Some of the camps may be guarded by groups of cultists, so you will have to eliminate them.
Rewards:
Way to unlock: Talk to Requisition Officer.
Quest giver: Requisition Officer (M16,2)
 Search the tombs and the bodies of fallen enemies.
This quest may be unlocked (requisition quests are given randomly) when meeting the Requisition Officer in one of the camps (M16,2). He will give the hero a Recipe and ask him to find the following items:
Each one of these items can be obtained in two ways - either by opening chests (especially those located in dwarven tombs) or by searching the bodies of fallen enemies. Once you collect all the artifacts, return to the camp and interact with the requisition table to finish the quest.
Rewards:
Way to unlock: Talk to Requisition Officer.
Quest giver: Requisition Officer (M16,2)
This quest may be unlocked (requisition quests are given randomly) when meeting the Requisition Officer in one of the camps (M16,2). He will give the hero a Recipe and ask him to find the following materials:
Rewards:
Way to unlock: Talk to the Requisition Officer.
Quest giver: Requisition Officer (M19,2)
This quest may be unlocked (requisition quests are given randomly) when meeting the Requisition Officer in one of the camps (M16,2). He will give the hero a Recipe and ask him to find the following resources:
Once you obtain the resources, go back to the camp and interact with the requisition table to finish the quest.
Rewards:
Way to unlock: Talk to the Requisition Officer.
Quest giver: Requisition Officer (M19,2)
This quest may be unlocked (requisition quests are given randomly) when meeting the Requisition Officer in one of the camps (M16,2). He will give the hero a Recipe and ask him to find the following resources:
Both the resources mentioned above are quite rare. Search for them mainly in caves and mountain areas. After obtaining all the materials, go back to the camp and interact with the requisition table to finish the quest.
Rewards:
Way to unlock: Unlocked automatically after interacting with any ocularum.
Quest giver: - (M16,3)

You can unlock this quest by interacting with any ocularum from the ones located in the Hissing Wastes (M16,3). You should have no troubles reaching most of them. The one exception is the ocularum located in the northern part of the map, near one of the camps. As it is placed on top of a mountain, the best way to get to it is to use the ladders shown in the pictures above.
Each time, you have to use the ocularum to locate the nearby Shards. The locations of the Shards are marked on the map (M16,3a).
Rewards:
Way to unlock: Unlocked automatically after finding A Sand-Covered Note.
Quest giver: - (M16,5)
 The place where you find the note.
You can unlock this quest after arriving at one of the Campsites located in the central part of the Hissing Wastes. After setting up your camp, find A Sand-Covered Note, lying on one of the tables (M16,5) and read it.
 The convoy.
Head South-West from the place where you've found the note. After a while, you will reach the attacked convoy (M16,5a). There are a lot of Poison Spiders and Giant Spiders in this area - you have to deal with all of them. Once you're done, find a chest near one of the carts and take all the items from inside. This will end the quest.
Rewards:
Way to unlock: This quest activates when you enter this location.
Quest giver: - (M18,1)
 Corporal Rosselin on the west ramparts
Go to the west ramparts which are the first wall that you can see when coming directly from the first camp. You will see Corporal Rosselin (M18,30d). Kill everything that gets anywhere near to her.
Rewards for completing this quest:
Way to unlock: Get to the beset fort and talk to Marshal Proulx.
Quest giver: Marshal Proulx (M18,4)
 Marshal Proulx in the fort
When you pass the ramparts and head North, you will see two towers behind which you will find the bridge to the fort. On this bridge you will see the battle taking place between the fort soldiers and some demons. After the battle, you can walk through to the gate. The first person you will see inside will be Marshal Proulx (M18,4). He will unlock four quests in total for you. One of them focuses on conquest of the Victory Rise.
 The first hole surrounded with a magic barrier
Similar to other quests from Marshal Proulx, this one focuses on getting behind the flanks and getting to the hole filled with bodies of the dead soldiers (M18,25a). These holes are guarded by an Arcane Horror which you don't have to fight with to complete this quest. Every hole is also protected from any interaction by a magic barrier which may be destroyed by a mage in your team.
 The second hole set on fire
Go to the opposite extremity of the battle area (irrespectively of the side from which you have started this quest) (M18,25b). Set the second hole on fire.
 The horn visible on a dais
Now you need to go to the middle of the fortifications and blow the signal horn (M18,25c). Doing this will complete this quest and the friendly forces will start to patrol this area.
Rewards for completing this quest:
Way to unlock: Get to the beset fort and talk to Marshal Proulx.
Quest giver: Marshal Proulx (M18,4)
 A mage guarding a hole with the dead bodies
To complete this quest, you have to get to the area close to the fort where you will see a hole with the dead bodies surrounded by a magic barrier (M18,24a). Additionally, this area is guarded by a powerful mage and his minions. Defeat the enemy and set the hole on fire afterwards.
 The signal horn of the eastern fortification
The last thing you need to do is to go to the wall and find an exit leading to the place where you can find the signal horn (M18,24b) which you have to use.
Rewards for completing this quest:
Way to unlock: Get to the beset fort and talk to Marshal Proulx.
Quest giver: Marshal Proulx (M18,4)
 A barrier separating you from the hole
This quest is similar to the one related to the eastern fortifications. The main thing you need to accomplish is burning the bodies inside the holes, as well as dealing with the nearby enemies. You will find the first hole with the bodies in the northern part of the fortifications (M18,30a) and the second one in the western part (M18,30b). They are both guarded by the Arcane Horrors.
 The signal horn in the eastern fortifications
Now you need to blow the horn (M18,30c) and then go to Corporal Rosselin and speak to her (M18,30b).
Rewards for completing this quest:
Way to unlock: Complete the "Lay Rest the Western Ramparts" and talk to Corporal Rosselin.
Quest giver: Corporal Rosselin (M18,31)
 Corporal Rosselin
Once you complete the "Lay Rest the Western Ramparts" quest, you can talk to Corporal Rosselin (M18,31). Now you need to get to the fort. Speak to Marshal Proulx (M18,4) and inform him about conquering the fortifications. You will be rewarded immediately.
Rewards for completing this quest:
Way to unlock: Get to the beset fort and talk to Marshal Proulx.
Quest giver: Marshal Proulx (M18,4)
 The northern garrison
One of the next quests unlocked by Marshal Proulx (M18,4). You need to get to the small building northwest of the fort. Right now there is no information about soldiers patrolling this area.
 The signal horn in the garrison
Once you get to this area, blow the horn (M18,4a) to inform about your arrival to this place. You may also find one of the gaps in the basement.
Rewards for completing this quest:
Way to unlock: Get to the beset fort and talk to Sergeant Meursault.
Quest giver: Sergeant Meursault (M18,3)
 Sergeant Meursault
You will receive this quest from Sergeant Meursault (M18,3) in the beset town. She will ask you to find few letters from the soldiers that died in the battle. You have to look carefully to find them, even though you will receive some information about their location.
The list of letters to find:
The first letter (M18,3a) you may find close to the fort while taking the path North. There, you will find a wagon which stands on the sidelines. The letter is inside a book that you can see on the ground.
The second letter (M18,3b) is under the carcass of a dead animal, also next to the road.
The third letter (M18,3c) is on a barrel next to the road that leads to the eastern fortifications.
The fourth letter (M13,3d) is next to the corpses in the eastern fortifications, close to a catapult.
The fifth letter (M18,3e) you will find on a small glade next to the fortifications, next to a wooden wagon.
The sixth letter (M18,3f) is behind a catapult in the western fortifications.
The seventh - and the final - letter (M18,3g) you can find next to the arranged boards in the western fortifications
Finally, you need to deliver all the letters to Sergeant Meursault.
Rewards for completing this quest:
Way to unlock: Get to the Dalish Camp and talk to the elves.
Quest giver: Master Taniel and Loranil (M18,14)
 Master Taniel
Talk to Master Taniel and Loranil to unlock this quest. Completing this quest allows you to receive enough Favor Points from the elves to be able to recruit one of the members of their camp and to trade with them. You have to receive about 16 Favor Points to complete this quest.
 Loranil
Once you receive the necessary amount of points, you can talk to Loranil. From now on, you can also trade with Master Taniel.
Rewards for completing this quest:
How to unlock: Get to the Dalish Camp and talk to their leader.
Quest giver: Keeper Hawen (M18,12)
 Keeper Hawen
Talk to Keeper Hawen in front of the Dalish Camp. He will ask you to deal with a few demons on the elven cemetery. This area is behind the glades north of the camp (M18,12a).
 Elven cemetery
Go to this area and eliminate every demon which you can find and then return to the elf. You can focus entirely on the demons which are on the cemetery itself. You don't need to enter the crypt since it is not related to this quest.
Remember! The cemetery also allows you to unlock another quest named "The Spoils of Desecration". Nevertheless, you shouldn't try to complete it when you are completing "From The Beyond" quest since in result you will not receive the Dalish Favor Points. You should also avoid opening any graves on the barrows.
Rewards for completing this quest:
Way to unlock: Get to the Dalish Camp and talk to the elf named Emalien.
Quest giver: Emalien (M18,13)
 Emalien
Emalien (M18,13) in the Dalish Camp will ask you to find a specific person who, unfortunately, is already dead.
 The burned corpse in the destroyed building
You will find the body in the remains of a burned down building, close to the Victory Rise (M18,13a). There, you will also find a talisman related to the "Something to Prove" quest and you can give it to the elf later.
Investigate the body and return to Emalien. Now you need to be careful since the dialogue path which you will choose will decide if you will receive or lose the Dalish Favor Points. Choose the "He was brave" option to receive the highest amount of the Dalish Favor Points.
Rewards for completing this quest:
Way to unlock: Find the burned corpse in the destroyed house on the Victory Rise.
Quest giver: - (M18,13a)
 The burned corpse in the destroyed house
Close to the Victory Rise, you will find one more destroyed house where you can find the burned corpse. Search it to find a talisman. Take it to Emalien (M18,13) in the Dalish Camp. This quest is directly related to the "Someone to Lose" quest which you will unlock once you talk to Emalien.
Rewards for completing this quest:
Way to unlock: Get to the Dalish Camp and talk to the elf named Ithiern.
Quest giver: Ithiern (M18,16)
 Ithiren
In front of the elven camp, you will find Ithiern (M18,16). He will ask you to find the golden halla and bring it back to the camp.
 The golden halla in the southern part of the plains
You will find this animal in the southern part of the map, browsing on the plain (M18,16a). Its color only slightly distinguishes it from the other hallas. You have to follow it and provoke it to run in a direction of the Dalish Camp, which may be a bit annoying, but it will reward you with a lot of the Dalish Favor Points.
Rewards for completing this quest:
Way to unlock: Get to the Dalish Camp and talk to the elf named Nissa.
Quest giver: Nissa (M18,12)
 Nissa's Ledger
The elven woman named Nissa (M18,12) will ask you to deliver some resources and components to the camp. These orders may be viewed in the Ledger, the open book next to the girl. Things that you must to collect, you need to put in the wooden box nearby. Every delivered order will result in one point of Dalish Favor.
The orders:
Rewards for completing this quest:
Way to unlock: Go to the elven cemetery and find the part of a key.
Quest giver: - (M18,17a-17c)
 One of the graves which you need to open
On the elven cemetery (M18,12a) you will find a locked door. The key to open them is constructed from three parts which are hidden in three different graves which you need to open.
The first grave (M18,12a) which contains a part of the key, is under the second tombstone in the first barrow counting from the entrance on its left.
The second part of the key (M18,12b) is in the second barrow counting right of the entrance, in the grave closest to the entrance.
The third part (M18,12c) is in the second barrow on your left, in the grave which is the closest one to the entrance.
 The entrance to the underground
The last thing to do is to get close to the door at the end of the road (M18,12d). You can open the door using the renovated key.
Notice! If you are trying to complete the "From The Beyond" quest for Keeper Hawen at the same time, you will lose one Dalish Favor Point for opening the graves and another one for creating the key and entering the underground. The most beneficial way to go is to start this quest after completing the Dalish quest.
Rewards for completing this quest:
Way to unlock: Find one of the glyphs.
Quest giver: - (M18,11a-11d)
 One of the glyphs. Looks like any other rune
In every cave marked by this quest, you may find a glyph (a rune) on a wall, although you can read them only under the light of the nearby torches. Find four of these glyphs to unlock the quest focused on studying them and unlock a new area at the same time.
Places where you can find the glyphs:
The first glyph (M18,11a) is in the ruins of the temple in the southern part of the map, on the northern wall in front of the rift.
The second glyph (M18,11b) you may find while taking a path upstream the river which you can find in the old plain. Behind the waterfall, you will find a cave in the northern rock. The rune is on the western wall.
The next glyph (M18,11c) is North of the first one. On the field you will see the only different ruined building. The glyph is on the western wall of the balustrade.
The last glyph (M18,11d) you may find close to one of the rifts next to the damaged row of arches. The glyph is at the bottom of the stairs on one of the stones.
Rewards for completing this quest:
Way to unlock: Rebuild the bridge in the northern area.
Quest giver: - (M18,20)
 One of the pits in front of the stronghold
In this quest, you have to get to the imprisoned squad of soldiers. First thing you need to do is rebuilding the bridge by using the Power Points in the War Room. After that, you need to set on fire two pits filled with corpses in front of the stronghold (M18,20a,20b). They will be protected from your access with a magic barrier and each one of them will be protected by one Arcane Horror which may summon new undead to the battle.
 The entrance to the stronghold
After completing this quest, go to the gate (M18,20c) where you will be attacked by a strong demon who, once defeated, will drop a legendary weapon. Once you enter the stronghold, you will need to clear your way through the corpses. Moreover, you have to avoid the defense mechanism - the moving strip of light that sets on fire everything it touches.
 The defense system mechanism
Once you get to the very peak, you need to use the ladder on the square. There, you will find a massive mechanism which you need to spin (M18,20d). It will turn off the defense system and open the door leading to the inside of the stronghold's room.
 Imprisoned soldiers
Behind the grating, you will find the warriors you are looking for (M18,20e).
Rewards for completing this quest:
Way to unlock: Release the imprisoned warriors from the stronghold during the "For the Empire" quest.
Quest giver: Commander Jehen (M18,21)
 It is easy to notice the supplies thanks to the barrels and chests
After releasing the imprisoned soldier squad from the stronghold, you will be asked by Commander Jehen (M18,21) to find the army supplies. You need to visit 10 hiding places with supplies in total (M18,21a-21j), scattered all over the map. You just need to walk to the chests and stick a flag into them to mark them. Find another group of chests and repeat.
Rewards for completing this quest:
Way to unlock: Talk to the Wounded Chevalier behind the closed door on the Victory Rise.
Quest giver: Wounded Chevalier (M18,28)
 The closed door behind which you will find the Wounded Chevalier
On the Victory Rise (ramparts in the middle of the map), you will find a door which is locked. If you open them, you will meet the Wounded Chevalier (M18,28). If you ask him about what happened to him, he will tell you about a unique ring and he will ask you to take it and deliver it to the Commander Jehan (M18,28a) in the freed stronghold. Before completing this quest, you have to first rebuild the bridge which leads to the stronghold and complete the "For the Empire" quest to have an access to the commander.
Rewards for completing this quest:
Way to unlock: Take the book from the table in the destroyed building which is close to the road nearby the Victory Rise.
Quest giver: - (M18,29)
 The farmer's destroyed house
Close to the road next to the Victory Rise, you will find an almost completely burned to the ground building, in which you will find a book (M18,29) lying on a table. It contains few tips leading to the treasure hidden by a local farmer.
 The hidden farmer's treasure
You will find the treasure on the western part of the plains, under a big withered tree. The chest is almost invisible and it is hidden between the few bushes. You need to scan the area once you get under the tree (M18,29a). The quest will be completed once you take what is inside the chest.
Rewards for completing this quest:
Way to unlock: Find and take the parchment with a sketch. It can be found in the East, next to the corpse between the stones.
Quest giver: - (M18,27)
 A map among the stones
Look around one of the Rifts in the eastern part of the map. It's not far away from the fort which is North from it. You will find a corpse between the stones and next to the body - a sketch (M18,27) which shows a way to the treasure hidden close to the river.
 The treasure hidden close to the river
You will find the treasure in the middle of the coast, next to the river on the very south of the map (M18,27a). This treasure is surely worth looking for, since it contains both gold and a legendary armor.
Rewards for completing this quest:
Way to unlock: Read the map in the hideout in the northern part of the wetlands.
Quest giver: - (M18,8)
 The map in the shelter behind the dragon
To unlock your way to the place containing a map, you need to fight a local dragon - unless you want to try to get there unnoticed or you will succeed in avoiding the battle. The map is in the provisional shelter among the rocks, behind the dragon's lair.
 The treasure on the hill
The treasure itself is hidden in the opposite part of the map on one of the hills in the southern part of this area (M18,8a). Unfortunately, the items hidden there are not very valuable.
Rewards for completing this quest:
Way to unlock: Take the map hidden in the bunker on the Victory Rise.
Quest giver: - (M18,26)
 The map in the bunker
Among the wires behind the door leading to the bunker, you will find a parchment on the table (M18,26). It is the map which will show you a way to the hidden treasure in Enavuris.
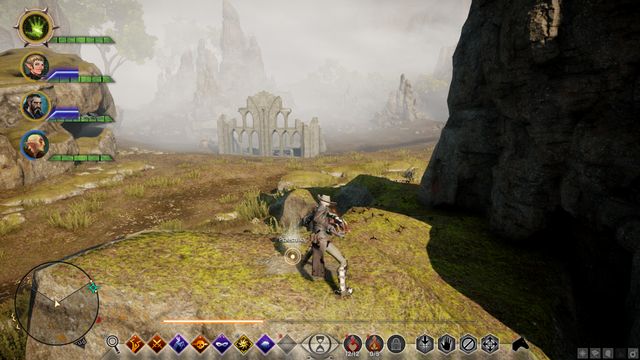 The treasure on the rock
Visit the surroundings of the ruins in the eastern part of the map and then go straight North to the nearest big rock. On one of these rocks, you will see a clod of earth (M18,26a) which hides a treasure - a legendary weapon.
Rewards for completing this quest:
Way to unlock: Unlock Ghilan'nain's Grove, and go to the Eastern part (past the Rift), where there is a descent into the underground.
Quest giver: - (M18,33)
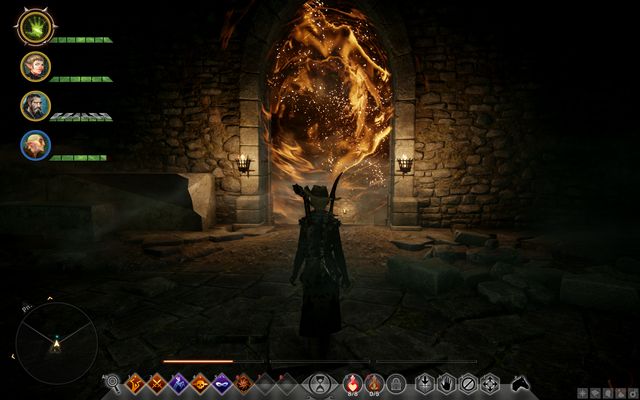 The entrance to the room with the puzzle, sealed off with a magic barrier
This mission is not an official quest, but it is rewarded and it poses quite a problem to players. The puzzle is in the Exalted Plains, in the area of the same name -Dead Hand on the marshes in the Eastern part of the map. The corridor with the puzzle leads up to the main part of the marsh, but you can take the other passage, to the West. However, behind the gate, there is a legendary item.
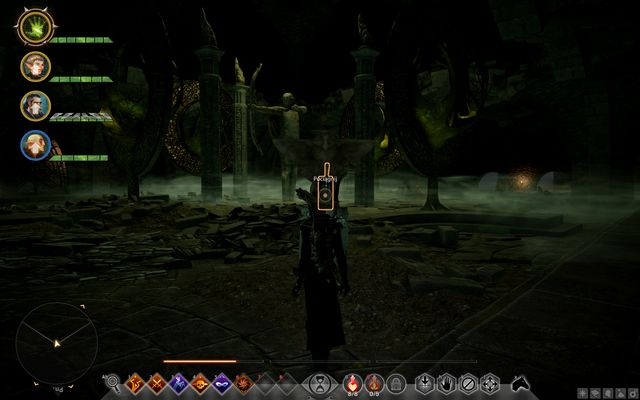 The switch that spins the archer
After you get there, you note a small chamber with statue of an archer in the middle. At the other side (to the left), there is a small pillar with a switch. Once you use it, the archer spins and shoots. Your task is to shoot all 4 spheres and in order to do this, you need to lower the pillars standing in the way. One of the spheres is exposed - start by shooting this one down, to test the mechanism.
 The switch to the grate, to the right of the entrance
First of all, use the switch on the pillar to the right of the entrance. This opens a grate on the right, where you will find a torch. This part here is important: leave one of the party members here. You can do that by using the button on the HUD's bottom panel, or by entering the tactical view and clicking twice on the spot, where you want the character to remain.
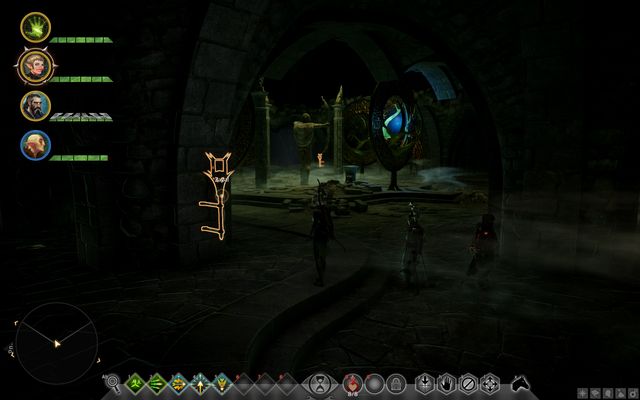 A torch to the left and one in the distance, at the end of the location
Another torch is at the opposite side, in front of the grate - also here, leave one of the party members. The last torch is at the other side (diagonally), also on the pillar next to the grate.
 Press the switch to have the statue spin and shoot
Now, as one of the character that is not standing near one of the torches, approach the switch that spins the statue. Switch between the individual characters, at the torches, and light them, in any order that you want. You need to be quite fast while doing this, because the pillar returns to its initial position if they go out. As soon as you light all of the torches, use the switch and shoot down another sphere.
 The pressure plate behind the switch
To shoot down another sphere, go past the switch, as one of the characters, to the corner of the room (North-Western one). There is a pressure plate there - have the character walk onto it and stay there, as you press the switch with another character.
 The switch behind the grate, to the right of the passage
There is one more sphere left. First, approach the first torch (the one behind the grate), have the party member remain there and shut the grate with the switch that you used to open it (the first pillar of the entrance, to the right), which locks the character in. There, you find another a lever that you can use. After you do this, a grate will open at the opposite side (to the left of the entrance).
 The valve behind the grate to the left of the entrance
Inside, there is a valve. Leave one of the characters here and go to the lever. Have the character at the valve give it a turn as much as possible and use the switch. With 4 orbs lit, you can leave the room through the passage that opens up after a while.
Rewards for completing the quest:
Way to unlock: Activates automatically once you get to this location.
Quest giver: - (M18,1)
One of the orders in the Exalted Plains requires you to find the five volumes of the Orlesian Tome and 3 volumes of the Ancient Writings. Both of these items are randomly spread among the enemy soldiers.
No reward for completing this order.
Way to unlock: Activates automatically once you get to this location.
Quest giver: - (M18,1)
In the northern part of the map, just before you enter the wetlands, you will find four Rifts which you need to close (M18,9a-9d).
Rewards for completing this quest (for each rift):
Way to unlock: Get to the Ghilan'nain's Grove and set up a camp.
Quest giver: - (M18,7)
Once you set up the camp on the wetlands behind the blocked passage (you can unlock it through the War Room), you will receive the quest of closing the Rifts in this area (M18,7a-7c). Here, you will find three Rifts in total and closing them is not easy.
Rewards for completing this quest (for each rift):
Way to unlock: Activates automatically when you will get to this location.
Quest giver: - (M18,1)
In this area, you will be asked to close theRrifts (M18,10a-10d) which are in the southern part of the map (known as the Old Plains). To complete this quest, you need to close all four of the Rifts which are intermediately difficult.
Rewards for completing this quest (for each rift):
Way to unlock: Unlock the access to Ghilan'nain's Grove through the War Room.
Quest giver: - (M18,6)
 The beasts living in the wetlands
Get to the entrance to the Grove which is blocked with a bunch of rocks. Activate the operation of clearing the path in the War Room in the Skyhold. Now you can return to the entrance, get inside and defeat the local monsters.
Rewards for completing this quest:
Way to unlock: Activates automatically when you will get to this location.
Quest giver: - (M18,1)
After getting to the Exalted Plains, take care of unlocking new camps. In this area you will find two camps which you can set up. The first one is in the middle of the map (M18,1a), and the second one behind the blocked passage to the wetland (M18,1b).
Rewards for completing this quest:
Way to unlock: After completing the "Scattered Glyphs" task in Exalted Plains and finishing the operations at the War table.
The quest-giver: - (M30,1)
 First shrine
The Quest focuses only on the Lost Temple of Dirthamen location, in which you must perform a ritual to unlock a battle with boss and get to hidden chamber with treasures. The rite is about gathering six body parts located at the shrines in temple (M30,1a-1f). To be able to take item you must hold veilfire in your hand.
 Lever on a wooden element.
You must watch out for water dropping from the ceiling that can turn off the torch. You can find out about it for the first time when trying to get to the second shrine (M30,1b), where water is falling all the time in the entrance. You must use the lever on the left (M30,1g) to stop the water.
 One of the killed Undead can have a key.
After taking the artifact in the northern part of the complex keep attention to the new task marker that will point to one of the XXX (M30,1h). He will be marked because one of them will have a key to the southern gate (M30,1i).
 Stone platform in central room.
After collecting all elements return to the middle room. There you can find six stone platforms (M30,1j) on which you must place all items. After that an artifact will show in the middle of the room - after interacting with it you will summon The High Priest - the boss of this location. Although he look commonly he is far more powerful than other demons that looks similar to him. He has not only great strength, but resistance as well. And it's not about the amount of health points, but his barrier strength, that he activates when he has about 30% health left.
General combat tactic is use the fire element if possible and most of all incessant attack - when attacked, demon rather runs away that fights back. The combat is easy, but toilsome.
 Last gate
After eliminating the demon you can open the previously locked door at front from the main entrance that lead to secret room (M30,1k). The quest will end after taking everything from the chest.
Rewards for completing the quest:
Way to unlock: During the "God of Secrets" quest in Lost Temple of Dirthamen, after reading one of runes.
The quest-giver: - (M30,2a-2g).
 One of runes
Inside the Lost Temple of Dirthamen you will find seven runes, gathering of which gives you additional influence points. They can be found most commonly on walls, sometimes on other objects (M30, 2a-2g).
 A room with the rune, broken wall on the right
Two runes can be troublesome. First, to which access is open through the water in the entrance (M30,2e). You must break the wall nearby to read the rune.
 Hardly visible rune on the large rock
The second rune can be hard to find even if you know its position on the map (M30,2f). It is masked on one of the large, specific rocks near the wall.
Rewards for completing the quest:
How to unlock: Unlocked automatically, after arriving to the location.
Quest giver: - (M31,1)
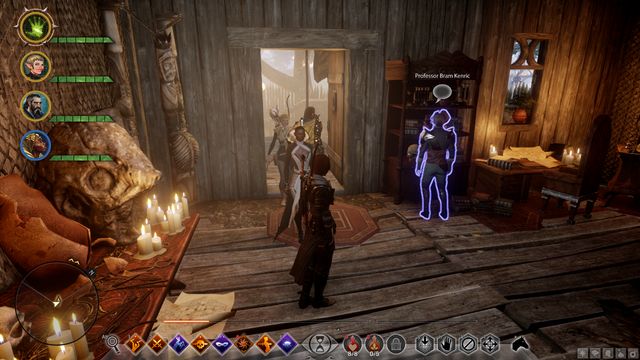 Bram Kenric in the camp in the Basin.
After arriving to a new location called Frostback Basin, talk to Harding in the main camp (Basin Floor Camp). Next, go to the only building around and talk to Bram Kenric (M31,2) to complete this quest.
No reward.
How to unlock: Unlocked automatically after arriving to the location.
Quest giver: - (M31,1)
 Wait until the climbing contest in Avvar village ends.
This quest is added to your quest lot automatically after. You just need to go to Avvar village (M31,2a) on the east. It is called the Stone-Bear Hold. You will some contestants climbing a rock. When they finish, talk to the leader of the place to complete the quest.
Reward:
How to unlock: Talk to Bram Kenric in the camp.
Quest giver: Bram Kenric (M31,2)
 Bram Kenric will give you two quests.
You will obtain this quest after the first time you talk to Bram Kenric or to the owner of the boat - Arvid. You have to get to the island, which is not so easy. First, locate Avvar village (M31,2a) in the eastern part of the map, near the coast. You will find the leader - Svara Sun-Hair in a cave (M31,10). Ask her for permission to use the boat.
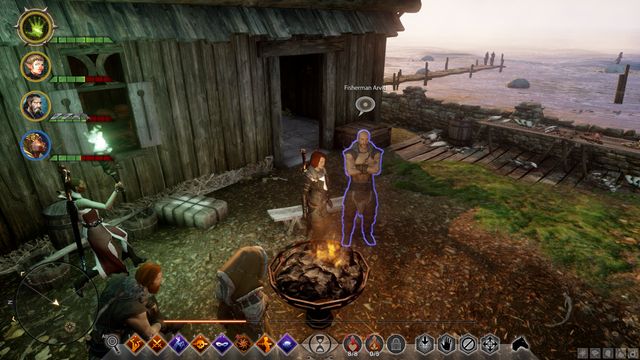 Arvid in his hut.
Go to Arvid's hut (M31,2c) and interact with the nearby boat. You will get to a small island in the south. Go straight ahead and you will reach the only hut around (M31,2d).
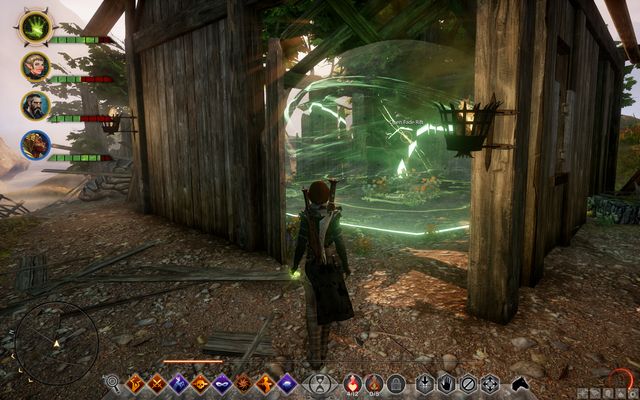 The rift on the island.
Inside, there is a close rift. After you use it, a conversation will begin. When it ends, search the nearby skeleton to find a legendary weapon. You will also obtain a new skill: Aegis of the Rift, which allows you to create a magic field that reflects enemy distance attacks (arrows, magic projectiles). Go back to the boat and swim to the first camp. Talk to Bram Kenric (M31,2).
Reward:
How to unlock: Talk to Bram Kenric in the camp.
Quest giver: Bram Kenric (M31,2)
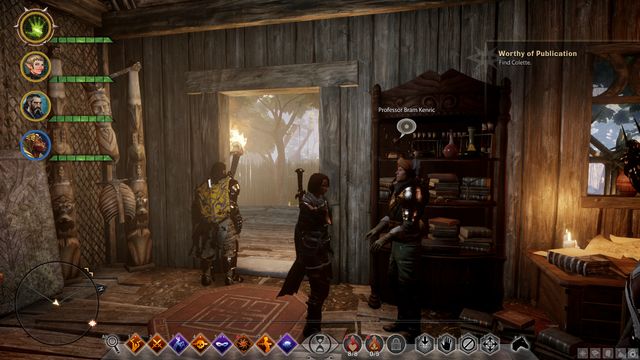 Talk to Kenric to receive another quest.
During the first conversation, Kenric will mention Colette, who is lost. You can find her in the southern part of the swamp (M31,3a).
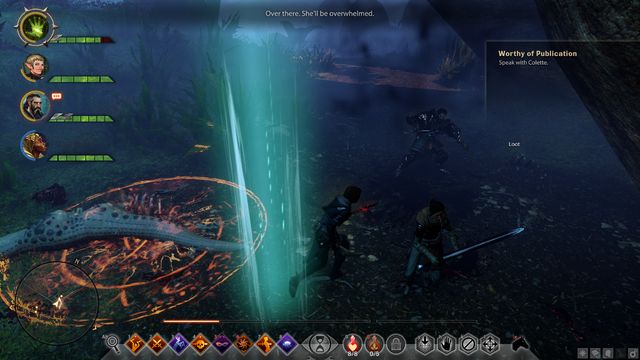 Colette in the swamps.
Help Collete fight a Gurgut and meet her in the ruins in the north (M31,3b). She will tell you some very interesting things.
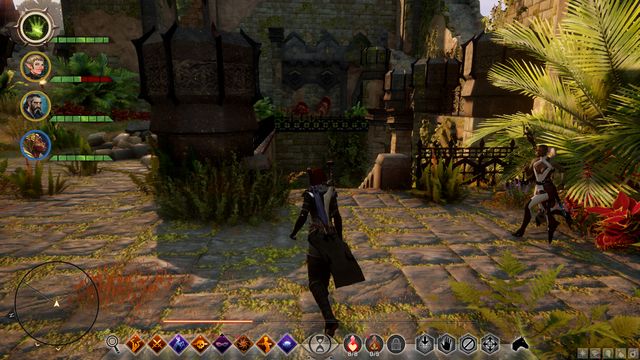 The stairs in the ruins.
You will find the girl by going inside the ruins and downstairs. She stands near a shrine.
Reward:
How to unlock: Talk to Harding in the camp.
Quest Giver: Harding (M31,4)
 Harding in the first camp.
When talking to Harding (M31,4) in the first camp, you will learn about a lost man, Grandin. She will ask you to look for him.
 The dead bodies will show you the way.
Go to the place shown on the map, where Grandin was last seen. Next, follow the path marked by dead bodies. At the end, you will reach a cave (M31,4a), where you will find the possessed scout.
 Grandin in the cave.
Now you can decide whether you want to kill him or let him go. Your companions will not like the second option, but you will receive 150 Inquisition Influence. If you choose to fight, your enemy will change into a demon. You will earn a lot of experience for defeating him and also obtain Master Fire Rune. Return to Harding after you complete the quest. The way of completing it that you choose will not change the reward.
Reward:
How to unlock: Talk to Baron Henri-Pieree d'Amortisan, north of the first camp.
Quest giver: Baron Henri-Pierre d'Amortisan (M31,5)
 Baron Henri-Pierre d'Amortisan
You will find the Baron near the road, north of the camp (M31,5). He will ask you to put some herbs in four places on the map (M31,[5a,5b,5c,5d] to repel wild animals.
 The herbs in the right place.
You don't need to fight the monsters near that places where the herbs should be placed. Just hang the plants and return to the quest giver.
Reward:
How to unlock: Finish the Beasts at Bay quest.
Quest giver: Dunwich (M31,6)
 Soldier Dunwich
Dunwich (M31,6) will give you another quest concerning animals. You are to find a legendary beast called the Nox Morta. The quest is divided into two parts.
 Evidence - a trap.
Go near the river (M31,6a) to find evidence. There may be two Gurguts nearby. Give the evidence to Baron d'Amortisan (M31,5) who will give you another task.
 The beast is approaching, you better find a place to hide.
Next, you have to go to the swamp and place the bait in the right place (M31,6b). After a while, a huge Bogfisher will appear with a few youngs. You can watch them from distance to better prepare for attack. After defeating the monster, go back to the Baron (M31,5) to complete the quest.
Reward:
How to unlock: Reach the outpost near the river.
Quest giver: - (M31,7)
 Eliminate enemy forces to protect the outpost.
Walk along the river from the southern camp. You will find a small ally outpost in the place where the river turns (M31,7). The leader is Lieutenant Farrow. When you arrive at the outpost, you will see that it is being attacked.
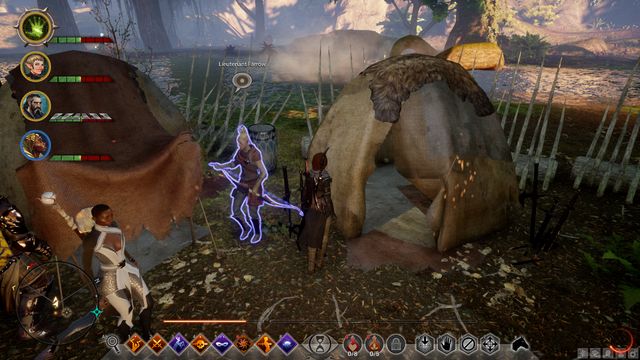 Lieutenant Farrow
Help defeating the enemies and talk to Farrow (M31,8). After a while, you will complete this quest and receive another one.
Reward:
How to unlock: Talk to Lieutenant Farrow in the outpost after completing the Jawbreaker quest.
Quest giver: Lieutenant Farrow (M31,8)
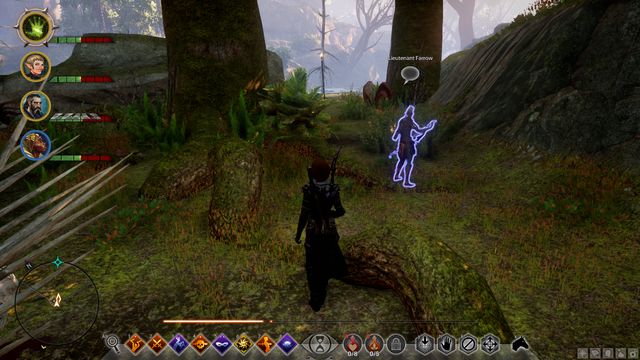 Talk to Farrow - during the conversation, you will receive a new quest.
After completing the Jawbreaker quest and talking to Farrow (M31,8), you will receive another quest. Your task is to destroy three enemy camps by the river (M31,[8a,8b,8c]). Head north along the river and you will find enemy forces.
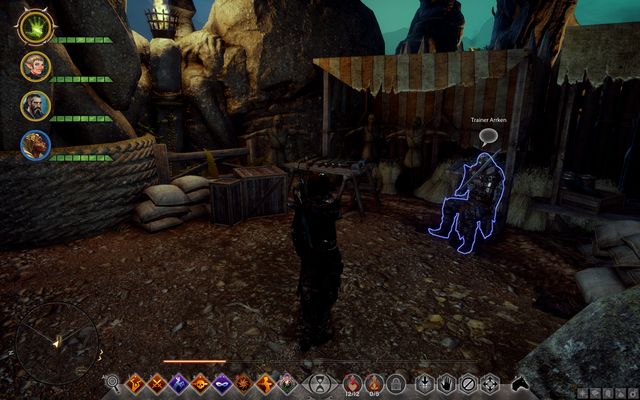 One of the enemy camps by the river.
In each camp, there are 4-5 enemies. Defeat all the Hakkonites in each one of the three camps. Return to Farrow (M31,8) to complete the quest.
Reward:
How to unlock: Talk to Sigrid.
Quest giver: Sigrid (M31,9)
 The quest giver - Sigrid.
North of Lieutenant Farrow's outpost, near one of the ocularum in the central-west part of the map (near some rocks), you will find Sigrid's (M31,9) house. She will tell you that she is an outcast, but she won't give you any details.
 The Augur
To learn more, talk to the Augur (M31,9a), a mage in an Avvar village in the west. He will tell you to go to a ritual place (M31,9b) under the southern entrance to the village.
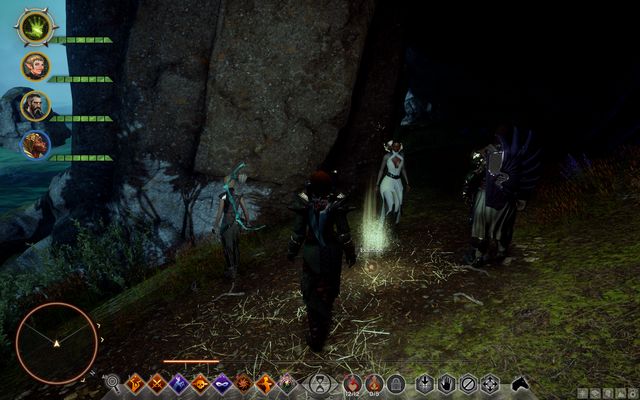 The ritual site - examine the objects.
Examine a few objects shown by the game. Return to Sigrid, who is now in the Augur's hut. You can now listen to her talking about her past (you will receive 1 Avvar approval points), or suggest her to join the Inquisition as an agent. Your team will dislike this decision, but you will receive 100 Inquisition Influence and 1 Inquisition Power. You will also unlock a new operation.
Reward:
How to unlock: After completing the Avvar Allies and Hakkon Wintersbreath quests.
Quest giver: Svara Sun-Hair (M31,10)
 Svara Sun-Hair
After completing the previous quest, talk to Svara (M31,10) in Avvar village, to obtain another task. You have to gain 5 points of approval. Below, you can see a list of the quests for which you can earn them. Each quest gives you 1 Avvar approval point.
Reward:
How to unlock: Avvar Allies and talking to Svara Sun-Hair
Quest giver: Arrken (M31,11)
ArrkenHead to the north-eastern part of the village. You will see an arena and Trainer Arrken Feldsen (M31,11) sitting in front of it. You can ask him to let you participate in the trail, but first, he will ask you to get an offering.
 Craft the offering after collecting all the require items.
You will need:
Go to the table in the camp to craft the item. Once you have it, return to Arrken. He will let you onto the arena (M31,11a) and you will have to resist three waves of Avvar warriors. Each wave is more difficult than the previous one.
 You don't kill the enemies on the arena, but their hp has to fall to zero.
Save your best tricks for the end. There is no break between the rounds, so you have to win them in a row. You will have your whole equipment and also your companions will be there. After the fight, return to the trainer trainer to finish the quest.
Reward:
How to unlock: After completing the Avvar Allies quest.
Quest giver: Svara Sun-Hair (M31,10)
 The Huntsman
In Avvar village, talk to the Huntsman (M31,12) in the northern part of the village. He will show you the place where the bear is - a cave in the swamp (M31,12a).
 The entrance to the prison in the swamp.
You will notice that a door is unlocked in the northern part of the swamp. Inside, there are a few Hakonnite warriors.
 The lever with which you can free the bear.
After eliminating them, activate the lever on the wall to free the bear. Do it quickly so that she can help you. Get out of the cave and watch out for another group of enemies. When you deal with them, you will be able to go back to Avvar village. Talk to Svara Sun-Hair (M31,10) to complete the quest.
Reward:
How to unlock: After collecting one of the artifacts in the swamp.
Quest giver: -
 One of the artifacts hanging from a tree.
When you reach the swamps, you will see some triangular wooden constructions inside which there are artifacts. There are five of them (M31,[13a,13b,13c,13d,13e]) and they are all located in the swamp. Look for a yellow glow to find them.
 The Augur's hut.
When you collect all five artifacts, go back to Avvar village. The Augur lives in the hut that's located on the highest place around (M31,9a). Talk to him and take the veil fire torch from the wall.
 Runes in the cave in Avvar village.
Take the torch to a cave located on the lowest level. You will meet Gyda Myrdotten (M31,15). In the cave, there are three runes which you should examine using the light. Go back to the Augur (M31,9a) to finish the quest.
Reward:
How to unlock: Talk to Linna near the fisherman's hut on the coast.
Quest giver: Linna (M31,14)
 Linna
LinnaA woman named Linna will give you a task to find her relative - Rune, who is not coming back from the mountains. You have to complete a few checkpoints when searching for the girl.
 One of the items that you should examine.
Near every checkpoint, there are some climbing tools that you should examine. Go up and look for next checkpoints, until you reach the peek (M31,14a). Near the last checkpoint, you will find Rune fighting a Lurker.
 Runa fighting a Lurker.
When the beast is dead, you can stay and wait until the girl gives you a blessing to thank you. Your companions will not support your decision, but you will receive an extra random attribute point.
Reward:
How to unlock: Talk to Gyda Myrdotten in Avvar village.
Quest giver: Gyda Myrdotten (M31,15)
 Gyda Myrdotten
In Avvar village, go to the lowest level, where the cave is. You will find Gyda Myrdotten (M31,15). Talk to her and then to the Huntsman (M31,12) (optionally, you can talk to Caldan).
The HuntsmanYou are to kill three fade-touched beasts. Each is surrounded by similarly afflicted animals. The beasts are a Gurgut, a Lurker and a Giant spider. There are stronger than the usual versions of the enemies and drop valuable materials and items.
 Fade-touched Gurgut
The Gurgut (M31,15a) can be found in the swamp, in the south-western part of the Basin. It's there alone, so the fight should not be a big challenge.
 Fade-touched Lurker
The Lurker (M31,15b) will be accompanied by usual Lurkers. You can find them in the western part of the map, in a small concavity.
 Fade-touched Giant spider
The fade-touched Giant spider (M31,15c) resides in the river, near Tevinter ruins. There will be more Giant spiders there. When you eliminate all three beasts, go back to the Huntsman or to Finn.
 Finn lies on a bed in the hut, next to the Huntsman.
If you give Finn (M31,15d) the items, you will receive more support from your team. You can find Finn lying down on a bed in a hut next to the place where the Huntsman (M31,12) stands.
Reward:
How to unlock: After completing the What Yet Lingers and Avvar Allies quests.
Quest giver: Svara Sun-Hair (M31,10)
 Svara Sun-Hair
Talk to Svara (M31,10) in Avvar camp. Next, reach the point shown on the map and walk along the river, passing the checkpoints on your way.
 Tevinter ruins.
The path leads to the ruins in the north (M31,16) which are guarded by Jaws of Hakkon. Get inside and eliminate all the enemies. Next, approach the small camp and wait for Kenric. After the cutscene, go to the northern part of the stronghold.
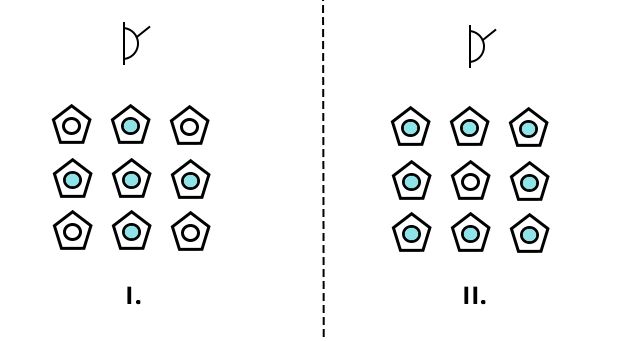 The puzzle with plates.
In the middle, you will find a puzzle (M31,16a). When you solve it, you will be able to go through the door on the right and on the left, to collect valuable treasures. You need to press the plates in such way, that the combination looks exactly like the one in front of the door.
To do that, follow the order described below:
If you want to reset the switches, use the nearby lever. To continue the quest, go up the stairs.
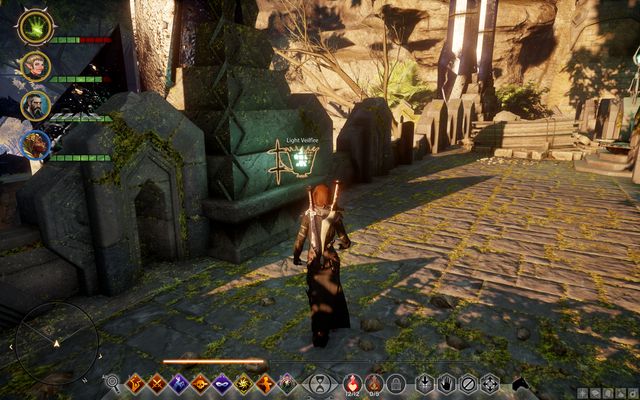 Veil fire.
You will notice a green magic barrier, which you should destroy using the veil fire located on top of the wall (when standing in front of the barrier, turn left and use the wooden scaffolding to get to the top of the wall) (M31,16b). Once you get rid of the barrier, go inside. You will find another veil fire. Using it, examine the two runes in the corners of the room (M31,[16c,16d]).
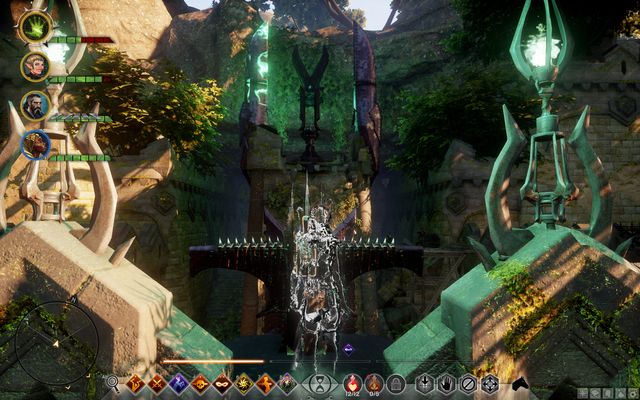 Use the lever on the wall.
Leave the chamber now and go on to of, to the place where the veil fire was. You will find a lever. Use it to activate the spire (you will see green lightnings).
 A lever on the trail marker.
Approach the spire (M31,16e) and use the lever. A short cut-scene will show you the direction towards the next trail marker. Head in this direction until you reach a large gate of a hold in the eastern part of the map (M31,16f). After you activate the last spire, the barrier in the gate will be destroyed. Return to Svara Sun-Hair (M31,10). In the next quest, you will be assaulting the gate.
No reward.
How to unlock: Complete the On Ameridan's Trail quest.
Quest giver: Svara Sun-Hair (M31,10)
Note - before beginning this quest, it is best to first complete all the other quests and activities in this location. After triggering this mission, darkness will cover the whole location and only an aurora will be giving some light. If you decide to take up some new tasks after this quest, it may take you more time to finish them.
 Fight the enemy to reach the gate.
When you start this mission, you will go to the northern gate (M31,17a) with Avvars. Keep eliminating enemies under the gate until it's open. Behind it, you will find some more opponents and a way down, with three assassins on it. At the bottom, you will be attacked by a few more enemies.
 These small orbs generate cold.
You will notice small orbs that generate cold and they may cause you some trouble. Destroy them first. Locate the door to the ruins (M31.17b) and go inside.
 Bonfires will keep you warm.
When in the ruins, you must keep an eye on the cold bar. When it reaches the end, you and your whole team will start losing hp. You can regenerate the bar near bonfires. Some of them require to be activated. Head straight through the ruins or turn right on the first fork, where you will find veil fire torches to activate (M32,1a). It will allow you to examine several runes (M32,[1b,1c,1d,1e]) that hide interesting blueprints from one set.
 The key on the crate.
When the path forks for the second time, turn right. At the end of the corridor, you will find a key (M32,1f). It is required to open another door (M32,1g).
 Strange names are quite frequent in this location.
Go down the stairs and follow the path until you reach a large hall. Inside, you will face a boss - Gurd Harofsen (M32,1h). First, look around the arena, because you need to locate bonfires. The enemy will be extinguishing the nearby ones with his breath. Before starting to attack the boss, eliminate all Jaws of Hakkon. If you're a melee fighter, watch out for the cold breaths. Try to dodge them, because these attacks can freeze you. When the fight is over, you will watch a cut-scene and receive another task. You will also have some time to collect the loot. The cold will not bother you from now - it will leave the place along with the dragon, whom you will be fighting in a while.
No reward.
How to unlock: After completing the Ameridan's End quest.
Quest giver: -
 One of the memories near the altar.
This quest is optional, but it is good to complete it before fighting the dragon. You have to visit five places (M31,[18a,18b,18c,18d,18e]) and catch memories in the shape of flying green orbs. For each memory, you will receive +5 points in random attributes. The orbs can be found in several locations on the map.
Reward:
How to unlock: After completing the Ameridan's End quest.
Quest giver: - (M31,19)
 The dragon's new lair.
After completing the previous quest, head to the fisherman's hut on the coast (M31,19). You will be facing the dragon in the final battle. The dragon is one of the ten beasts from a side quest and it will be on the same level as the hero.
 Hakkon Wintersbreath
As you may guess, the dragon is an ice-type beast, so all fire-based attacks and weapons are highly recommended. Aegis of the Rift will also be of use, as it may serve as protection from the opponent's ice projectiles. Hakkon will be also summoning lesser dragons to help him, so be careful and eliminate them first. They are particularly dangerous to your companions. When the battle is over, don't forget to collect the loot from the beast's body.
Reward:
How to unlock: Unlocked automatically after arriving to the location.
Quest giver: - (M31,20)
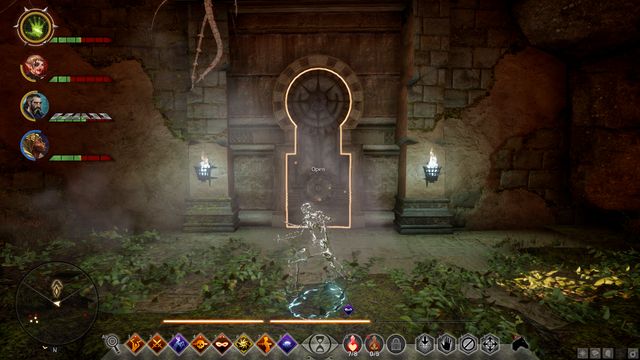 The entrance to the mysterious chamber.
The Mystery of Winter quest is connected to shards, similarly to quests of this type in other locations. You need to collect 12 shards, using ocular, to open a gate (M31,20). If you already have enough shards, you can go straight to the door. After opening it, you will find a chest. Collect the loot to complete the quest. Inside, there is a legendary weapon and Master Frost Rune.
Reward:
How to unlock: Unlocked automatically after arriving to the location.
Quest giver: -
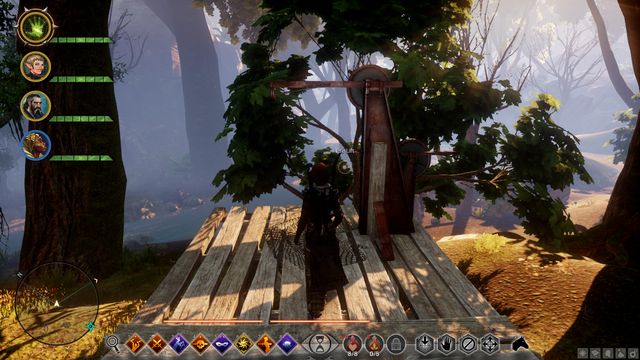 The lift makes it easier to get to the tree-camp.
This type of quests is triggered in every location. It consists in setting up five camps in the places shown on the map (M31,[21a,21b,21c,21d,21e]). Some of the camps are build among the crowns of trees. The first time, you will have to reach them using a spiral platform, but later you will be able to use a lift.
Reward:
How to unlock: Close one of the rifts described in the quest.
Quest giver: -
To unlock this quest, close one of the rifts near the pavilion in the central part of the map. To complete this mission, you need to close 2 rifts (M31,[22a,22b]).
Reward (for each rift):
How to unlock: Close one of the rifts described in the quest.
Quest giver: -
There is only one rift to close in this quest (M31,23a).
Reward:
How to unlock: Close one of the rifts described in the quest.
Quest giver: -
To unlock this quest, close one of the rifts near the pavilion in the central part of the map. To complete this mission, you need to close 3 rifts (M31,[24a,24b,24c]).
Reward (for each rift):
How to unlock: Close one of the rifts described in the quest
Quest giver: -
To unlock this quest, close one of the rifts near the pavilion in the central part of the map. To complete this mission, you need to close 2 rifts (M31,[25a,25b]).
Reward (for each rift):
The world atlas for Dragon Age: Inquisition includes a plethora of information that may prove useful, while exploring the virtual world of Thedas. It is important, since in the third installment of the Dragon saga, the world is vast and offers you to visit various corners of the Empire of Orlais and Ferelden. Unarguably, the most space has been devoted to chapters about main locations that your team can visit in the game. Every chapter has been further split into few parts, each part focusing on different topic like important characters and locations (including merchants), treasure chests, places where you can unlock new codex entries, the localization of secrets, astrariums and ocularums or optional dungeons and additional locations to visit. Every page includes a high quality map with the most important locations marked. Another important part of this atlas is a chapter about localization of the quarries and logging stands. They're useful when building the Skyhold later in the campaign. This has been rounded up with a full list of quests, including the main story quests, additional quests connected to locations you visit and companion quests. Dragon Age: Inquisition is a complex game of the RPG genre. Here, you take control of a completely new character and you take control of the Inquisition, travel around interesting locations and fight frequent battles.
NOTE - This guide is one of the three parts prepared for Dragon Age: Inquisition. If you are looking for basic information about all the key elements of the game (character development, combat, exploration, etc.) see the guide for the game. If, on the other hand, you are interested in the descriptions for the quests available in the game, see the walkthrough for the game.
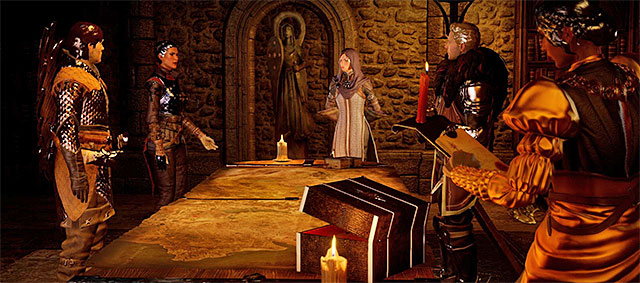
This atlas for Dragon Age: Inquisition includes:
& Patrick "YxU" Homa & Marcin "Xanas" Baran ()
The world map for Dragon Age: Inquisition marks all of the main locations that you can visit with your party. At the very beginning, there only are several locations available and you need to unlock more on your own. Information about the way to access the successive locations of the game, can be found in the guide for the game, in the chapter entitled Exploration of the game world.
Note - the map lacks markings for some of the minor locations that you visit only briefly, while completing the individual quests.
Below you will find a list of all main storyline quests. They have been sorted in the order of unlocking them. It is worth mentioning that "Champions of the Just" and "In Hushed Whispers" quests exclude each other. This mean that you will be only able to complete one of those tasks. "Specializations for the Inquisitor" quest is unique as well since it is up to you to decide when will you gain a specialization for your character.
The Wrath of Heaven
The Threat Remains
Champions of the Just
In Hushed Whispers
In Your Heart Shall Burn
From Ashes
Specializations for the Inquisitor
Here Lies the Abyss
Wicked Eyes and Wicked Hearts
What Pride Had Wrought
The Final Piece
Doom Upon All the World
Below you will find a list of all companion quests that are added to the journal under the Inner Circle tab. Those quests include recruiting new party members and completing tasks given by them.
A Friend of Red Jenny
A Woman Who Wants for Nothing
All New, Faded for Her
An Unexpected Engagement
Before the Dawn
Bring Me the Heart of Snow White
Demands of the Qun
Explanations
Favors the First Enchanter
Guilty Pleasures
Happier Times
Heraldry from a Herald
Last Resort of Good Men
Measuring the Veil
Memories of the Grey
Of Somewhat Fallen Fortune
One Less Venatori
Perseverance
Promise of Destruction
Revelations
Seeing Red
Subjected to His Will
The Captain of the Chargers
The Forgotten Boy
The Ideal Romance
The Imperial Enchanter
The Left Hand of the Divine
The Lone Warden
The Magister's Birthright
The Verchiel March
Tough Love
Under Her Skin
Unfinished Business
Well, Shit
Below you will find a list of all side quests that you can add to your journal while you're visiting Haven.
Haven's Best and Brightest
Know Thy Enemy
Lotus and Root
Mixing Potions
Passing Notes
Piece by Piece
Requisition for Weapons
The Right Armor
Below you will find a list of all side quests that you can add to your journal while you're visiting the Storm Coast.
A Glowing Key
Antivenom Requisition on the Coast
Cleaning House
Holding the Storm Coast
Iron Survey on the Coast
Keeping the Darkspawn Down
Landmarks in the Storm Coast
Red Water
Regions in the Storm Coast
Rift at the Falls
Rifts on the Coast
Salvage Requisition on the Coast
Vigilance on the Coast
Wardens on the Coast
Below you will find a list of all side quests that you can add to your journal while you're visiting the Forbidden Oasis.
A Prideful Place
Alloy Requisition in the Oasis
Holding the Oasis
Luster Survey in the Oasis
Mining Requisition in the Oasis
Rifts High and Low
Rifts in the Oasis
Serpentstone Survey in the Oasis
Shard Collector
Shards in the Oasis
The Cold Endured
The Fire Captured
The Spirit Calmed
The Temple of Pride
Below you will find a list of all side quests that you can add to your journal while you're visiting the Hinterlands.
A Common Treatment
A Rare Treatment
A Spirit in the Lake
Agrarian Apostate
An Advanced Treatment
Apostates in Witchforest
Astariums in Hinterlands
Bergrit's Claws
Blood Brothers
Business Arrangements
Conscientious Objector
Deep Trouble
East Road Bandits
Failure to Deliver
Farmland Security
Flowers for Senna
Healing Hand
Hinterland Who's Who
Hinterlands Geological Survey
Holding the Hinterlands
Horses for Inquisition
Hunger Pangs
In the Elements
In the Saddle
Landmarks in the Hinterlands
Letter from a Lover
Love Waits
Map of Farmland Cave
Map to Waterfall
Master of Horses
My Lover's Phylactery
Open a Vein
Playing with Fire
Praise the Herald of Andraste
Regions in the Hinterlands
Return Policy
Rifts at Dwarfson's Pass
Rifts in the Woods
Rifts on the Farm
Rifts On The Outskirts
Safeguard Against Looters
Shallow Breaths
Sketch of Calenhad's Foothold
Stone Dreams
Strange Bedfellows
Templars to the West
The Ballad of Lord Woolsley
The Mercenary Fortress
The Vault of Valmmar
Trouble with Wolves
Where the Druffalo Roam
Below you will find a list of all side quests that you can add to your journal while you're visiting the Fallow Mire.
Artifacts Requisition
Beacons in the Dark
Beneath the Mire
Cabin Fever
Fallow Mire Geological Survey
Holding the Fallow Mire
Landmarks in the Fallow Mire
Lost Souls
Regions in the Fallow Mire
Rifts in the Fallow Mire
These Demons Are Clever
There is only one side quest available in Therinfal Redoubt - Demonic Dogma. You should complete it the very first time you have a chance to (while you're exploring further parts of the nightmare) - you won't be able to return to this location later in the game and you won't have another chance to complete this quest (and hi is very well rewarded).
Below you will find a list of all side quests that you can add to your journal while you're visiting Skyhold.
A Better Courtyard
A Superior Tower
Advanced Crafting
Inquisition Trappings
Rune Crafting
Scattered in Skyhold
Sit in Judgment
The Greener Garden
Welcome to Skyhold
Below you will find a list of all side quests that you can add to your journal while you're visiting Crestwood.
Burdens of Command
Capturing Caer Bronach
High Stakes
Holding Crestwood
Homecoming
Landmarks in Crestwood
Longbow Requisition in Crestwood
Obsidian Survey in Crestwood
Regions in Crestwood
Rift at Caer Bronach
Rift Near the North Gate
Rifts at the Trout Farm
Still Waters
The Naturalist
Weeding Out Bandits
Wyrm Hole
Below you will find a list of all side quests that you can add to your journal while you're visiting Emerald Graves.
A Bear to Cross
A Corrupt General
A Deluded Chevalier
A Fallen Sister
A Lover's Promise
A Puppet Master
A Vicious Thug
Chateau d'Onterre
Devotion
Fairbanks Patrol Under Attack
Holding the Emerald Graves
Landmarks in the Emerald Graves
Last Wishes
Map of Elgar'nan's Bastion
Map of Watcher's Pass
Motherly Encouragement
Noble Deeds, Noble Heart
Not Everyone's Free
Observing the Menace
Regions in the Emerald Graves
Rescued from Dalia
Rifts in the Watcher's Reach
Rifts Near the Cove
Rifts Near the Pavilion
Rifts Near the Sighs
Safekeeping
The Knight's Tomb
Victims of War
Watcher's Reach Refugees
Below you will find a list of all side quests that you can add to your journal while you're visiting the Western Approach.
A Stranger Rift in the Ruins
A Tevinter Relic Hunt
Assault on Griffon Wing Keep
Code Requisition in the Approach
Draconology
Fauna Requisition in the Approach
Fortress Squatters
Frederic's Livelihood
Holding the Western Approach
How to Lure a Dragon
Hunting Patterns
Into the Approach
Landmarks in the Western Approach
Lazurite Survey in the Approach
On the Chantry Trail
Regions in the Western Approach
Rifts in Echoback
Rifts in Sand and Dust
Rifts in the Canyons
Rifts off the Pass
Shards in the Approach
Sharper White Claws
The Heart of the Still Ruins
The Trouble with Darkspawn
The Venatori
This Water Tastes Funny
Below you will find a list of all side quests that you can add to your journal while you're visiting Emprise du Lion.
Breeding Grounds
Caged Confession
Call me Imshael
Capturing Suledin Keep
Coat requisition in the Emprise
Heavy coat requisition in the Emprise
Landmarks in Emprise du Lion
Mamas's Ring
Quarry Quandary
Red Captors
Regions in Emprise du Lion
Rift At Elfsblood Tower
Rift on Frozen River
Rifts At Drakon's Cleft
Rifts In The Springs
Rocky Rescue
Securing Safe Passage
Shelter requisition in the Emprise
Sifting Through the Rubble
Stalker
Taking Back the Lion
The Corruption in Sahrina
They Shall Not Pass
Turning the Tables
Vlaeska's Watch
Words Not Hollow
Below you will find a list of all side quests that you can add to your journal while you're visiting the Hissing Wastes.
Artifact Requisition in the Wastes
Field of Bones
Holding the Hissing Wastes
Landmarks in the Hissing Wastes
Lazurite Survey in the Wastes
Let's Slay the Beast
Nevarrite Survey in the Wastes
Regions in the Hissing Wastes
Rifts at the Sunstop Mountains
Rifts Near the Canyon
Rifts Near the Cove
Rifts Near the Sand Crags
Sand and Ruin
Shards in the Wastes
Shelter Requisition in the Wastes
The Tomb of Fairel
Below you will find a list of all side quests that you can add to your journal while you're visiting Exalted Plains.
A Familiar Ring
A Father's Guidance
A Well-Stocked Camp
Another Side, Another Story
By the Grace of the Dalish
Calming Victory Rise
Dalish Point of View
For the Empire
From the Beyond
Ghilan'nain's Grove
Holding the Exalted Plains
Landmarks in the Exalted Plains
Lay Rest the Eastern Ramparts
Lay Rest the Western Ramparts
Left to Grieve
Map of Enavuris
Map of Halin'sulahn
No Word Back
Pressed for Cache
Regions in the Exalted Plains
Rifts in the Battlefield
Rifts in the Old Plains
Rifts in the Swamps
Scattered Glyphs
Sketch of Enavuris River
Someone to Lose
Something to Prove
The Golden Halla
The Spoils of Desecration
Undead Ramparts to the West
Below you will find a list of all side quests that you can add to your journal while you're visiting Winter Palace. Remember to complete them all the moment you have the chance - later it won't be possible.
Herd of Stone Halla
Red Jenny Caches
The Great Blackmail Hunt
Throwing Money Away
The below table presents the list of location maps in this world atlas, as well as the numbering used. In the right-hand column, you find information on the chapter that a given map has been assigned to (e.g. M2 map is for the Haven). In some cases, a location has only one map, but there also are ones with several various maps (e.g. the Hinterlands; the main one and the ones related to side locations, such as dungeons or larger buildings). Information in the table should be helpful, while finding the individual maps.
MAP
CHAPTER IN THE ATLAS
M1 Frostback Mountains
Frostback Mountains
M2 Haven
Haven
M3 The Hinterlands
The Hinterlands
M4 Val Royeaux
Val Royeaux
M5 The Storm Coast
The Storm Coast
M6 Valammar
Hinterlands
M7 Redcliffe
Hinterlands
M8 The Forbidden Oasis
The Forbidden Oasis
M9 The Fallow Mire
The Fallow Mire
M10 Redcliffe Castle
Redcliffe Castle
M11 Therinfal Redoubt
Therinfal Redoubt
M12 Skyhold
Skyhold
M13 Crestwood
Crestwood
M14 Flooded Caves
Crestwood
M15 Emprise du Lion
Emprise du Lion
M16 The Hissing Wastes
The Hissing Wastes
M17 Emerald Graves
Emerald Graves
M18 Exalted Plains
Exalted Plains
M19 The Western Approach
The Western Approach
M20 Villa Maurel
Emerald Graves
M21 Chateau d'Onterre
Emerald Graves
M22 Still Ruins
The Western Approach
M23 Coracavus
The Western Approach
M24 Winter Palace
Winter Palace
M25 Caer Oswin
Caer Oswin
M26 Cradle of Sulevin
Cradle of Sulevin
M27 Adamant Fortress
Adamant Fortress
M28 Din'an Hanin
Emerald Graves
M29 Temple of Mythal
Temple of Mythal
Note! I recommend that you read the legend for the map, before you read the map itself. Thanks to this, you will learn the types of markers used.
Note! In the World atlas, there is no information on the quest starting points. Maps related to the individual quests can be found in the walkthrough for the game!
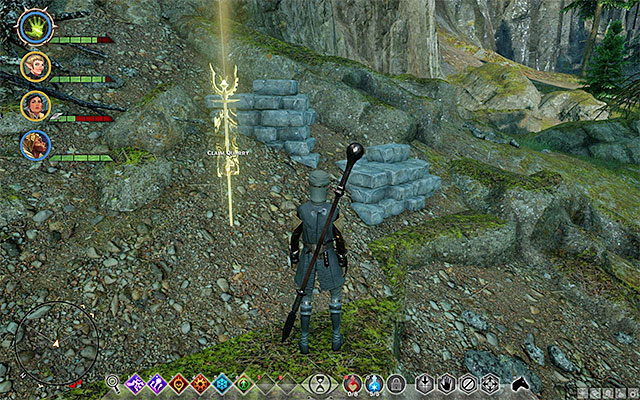
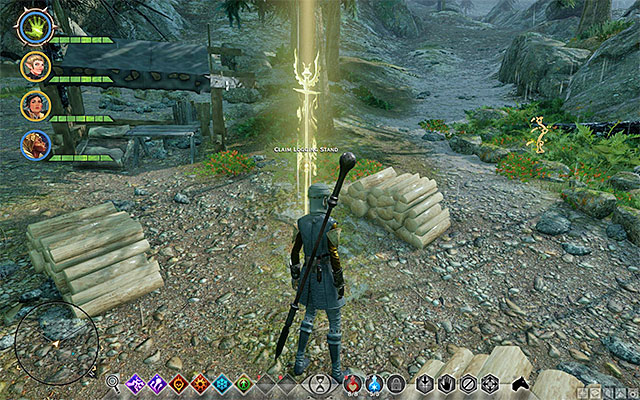 An example of quarry and a logging stand
In his chapter you will find information about the localization of Quarries and Logging Stands. They can be found in most of the main game locations. Finding them will secure access to upgrades of the Skyhold, to which the Inquisitions moves in the later part of the game. After you get to a Quarry or Logging Stand you must go the marked place and press the interaction button for your character to leave a flag. The location found from now on belongs to the Inquisition and you don't have to do anything more.

The only Logging Stand in Haven has been marked with green color. It is connected with the side quest available in this location (although you can find it without completing the quest).
There are no Quarries in Haven.
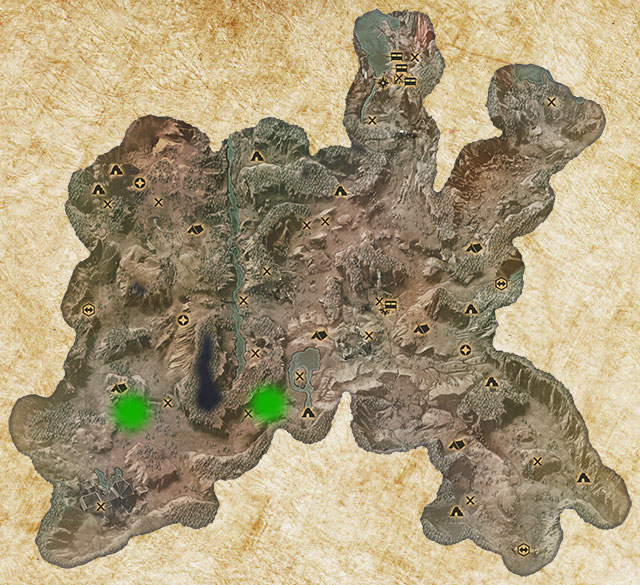
Two Logging Stands have been marked with green color.
There are no Quarries in the Hinterlands.
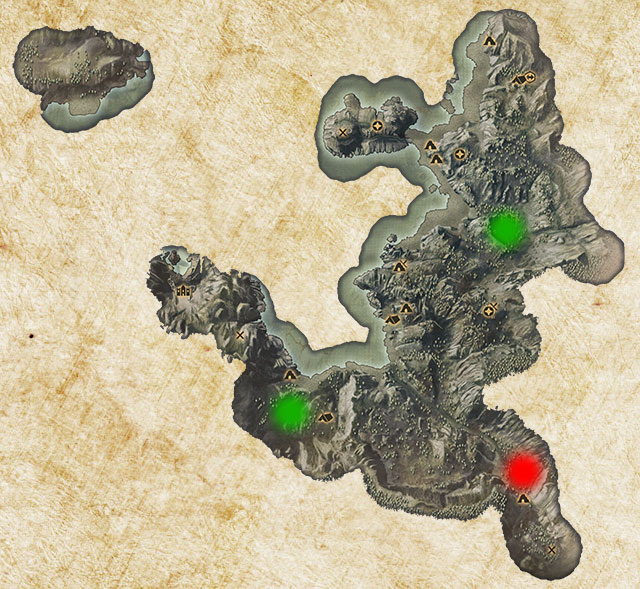
Two Logging Stands in the Storm Coast have been marked with green color.
The only Quarry in the Storm Coast has been marked with red color.
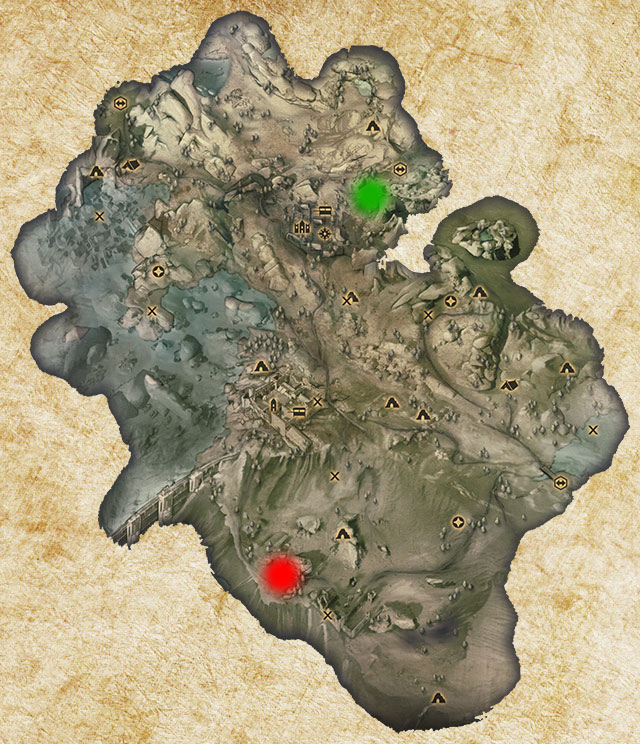
The only Logging Stand in Crestwood has been marked with green color.
The only Quarry in the Crestwood has been marked with red color.
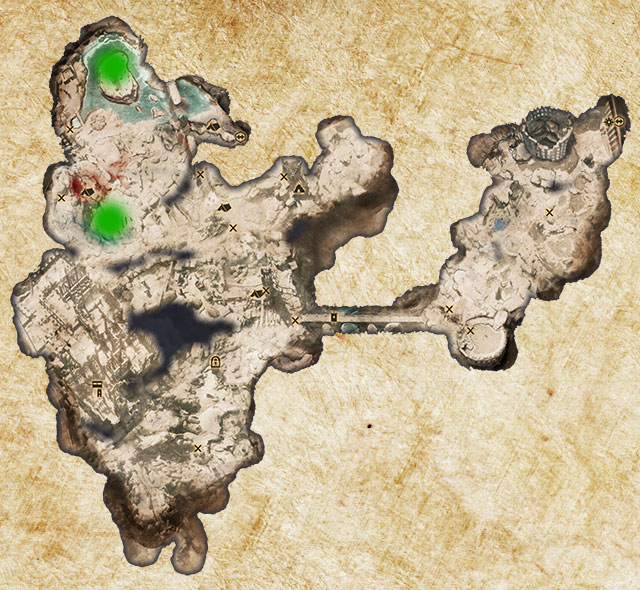
Two Logging Stands in Emprise du Lion have been marked with green color.
There are no Quarries on Emprise du Lion.
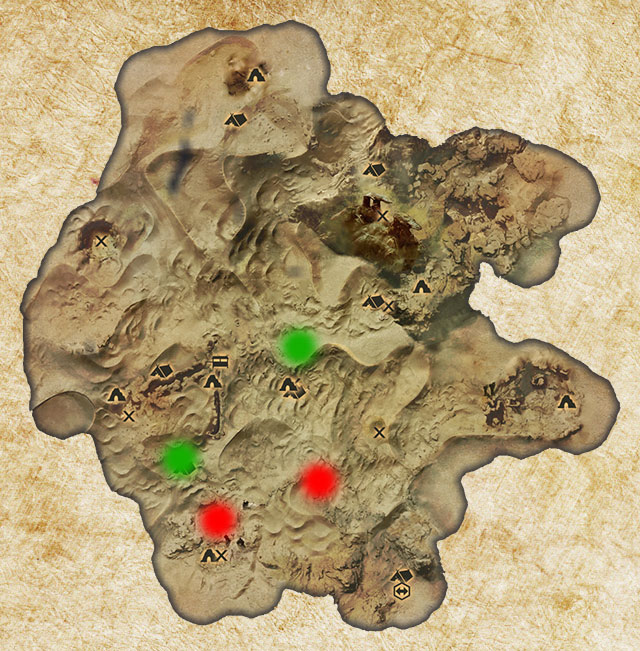
Two Logging Stands in the Hissing Wastes have been marked with green color.
Two Quarries in the Hissing Wastes have been marked with red color.
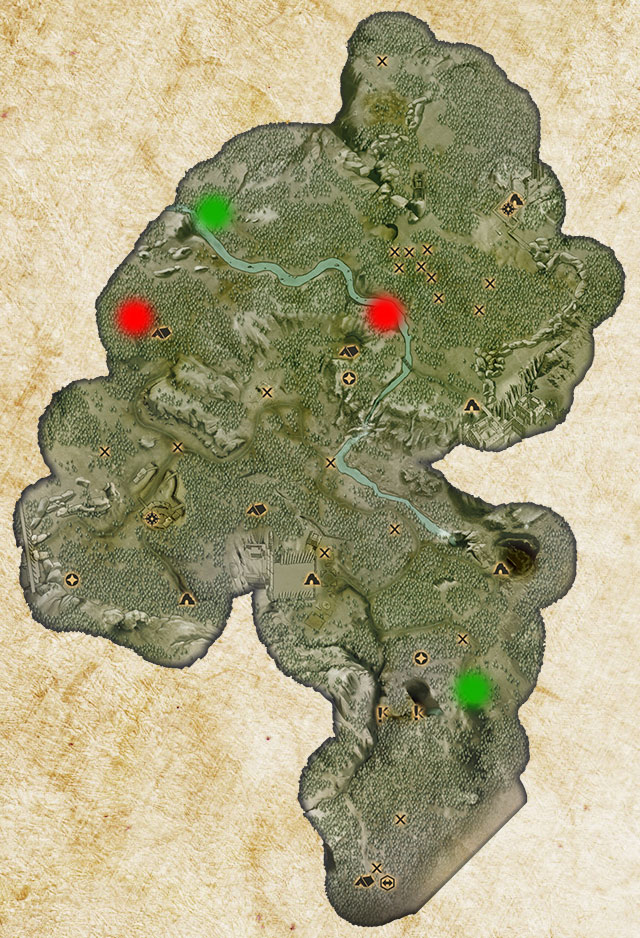
Two Logging Stands in Emerald Graves have been marked with green color.
Two Quarries in Emerald Graves have been marked with red color.
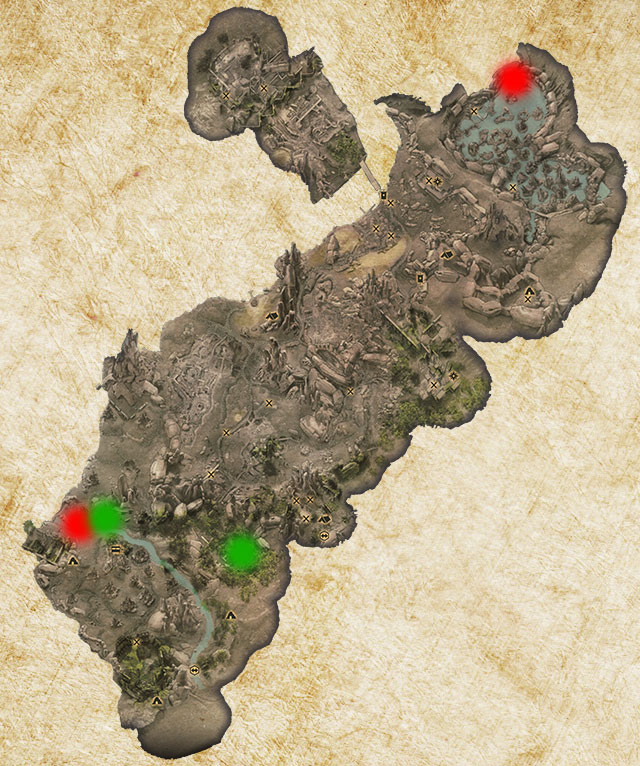
Two Logging Stands in Exalted Plains have been marked with green color.
Two Quarries in Exalted Plains have been marked with red color.
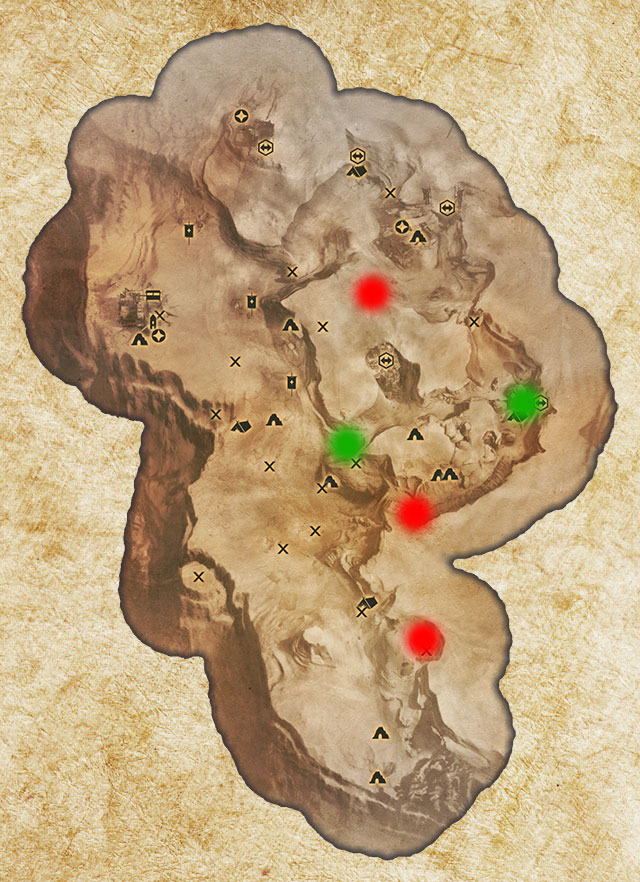
Two Logging Stands in the Western Approach have been marked with green color.
Three Quarries in the Western Approach have been marked with red color.
 You explore Frostbacks during the game's prologue
Frostback Mountains is a small, quite linear location, where you start the game and complete the prologue. Since the Mountains are connected with the game's storyline, as soon as during your first visit to the location, you explore quite a portion of it, although in some of the locations, you will be able to decide whether you want to stay there for a little longer, or progress the storyline.
The way to unlock this location: Automatically, after you start the game.
Recommended experience: You get to the Frostback Mountains at the beginning of the game so, you do not need to bother about leveling up.
Important notes:
1) As early as during the prologue, you will have to decide on your route. As a result, you may visit two different area s in the Frostbacks. Fortunately, you do not need to worry about what to do here, because in this location, there are no treasures to obtain and, as a result, you miss nothing.
2) Frostback Mountains do not appear on your map after you complete the Prologue, which does not mean that you cannot return here. You can visit the location later into the game, i.e. after you pick the access to this location at the Haven (the Haven chapter - M2 map). This becomes available after you start the Haven besiegement main quest.
On the above map, you can find all of the important characters of the Frostback Mountains. While exploring the Frostbacks, you will be joined by several followers for the first time. Their whereabouts have been presented in the walkthrough for the game. As for the remaining characters, the most important ones are chancellor Roderick and Leliana, who have been marked on the map. As for the locations within the Frostbacks, the only important location here is the chapel, where you fight the final battle of Prologue.
The above map presents the whereabouts of chests in the Frostback Mountains. I have already mentioned, in the introduction to this chapter that there are no unique artifacts, nor legendary items in here. The loot in the chests that have been provided here, is randomly generated, in the majority of cases. Still, I recommend against ignoring the chests, because it is thanks to them that you obtain your initial gear, or items for sale.
 Haven is the initial field base for the Inquisition
Haven is a small village, which your party reaches automatically after you complete the prologue and leave the Frostback Mountains for the first time. From that point, the location constitutes the Inquisition's main base. This means that you encounter no opponents here. Apart from that, Haven is good for planning on your next steps, meeting new allies and crafting.
The way to unlock this location: Automatically, after you complete the prologue (the "Wrath of Heaven" main quest).
Recommended experience: In the Haven, there are no opponents. The only exception is the final main quest connected with the siege of the village- "In Your Heart Shall Burn". Do not start this quest if your party members have not progressed to, at least, experience level 11.
Important notes:
1) The central part of the Haven is the Chantry. It is here that the war room is located, thanks to which you can plan on the sojourns of the Inquisition (many of them are connected with the main storyline), spend your Profit points or complete operations and unlock new areas of the world. To learn more about the management of the Inquisition and using the war room, see the guide for the game.
2) Haven is where you can meet many amicable characters. First of all, these are party members, but also NPCs, who play a vital role in the game (e.g. Cullen and Leliana). I recommend that you have a longer conversation with each one of the allies, right after you reach Haven for the first time, and do that each time each time after you complete each main quest, because there is a high chance that new dialogue options become available. Note - some of the characters are not to be met in Haven from the beginning of the game. They may appear in the village only after you complete the quests connected with them, or after you progress in the storyline.
3) During your stay in Haven, you can craft and see the stock of the local traders. As for the traders, the acting pattern is similar to that of the majority of regular NPCs. Some of the traders appear in the village later into the game, after you have progressed in the storyline, or after you met specific characters in the other locations of the game world (e.g. Chargers in the Storm Coast).
4) Apart from the village, Haven encompasses the surrounding areas also. You visit those areas, mainly, while completing side quests, but you can also find logging stands here and wild animals. Apart from that, it is worth noting that you can find the approach to the Frostback Mountains there (Frostback Mountains chapter - M1 map), i.e. the location where you started the main campaign. You can take the pass if, for some reason, you want to visit that location again.
5) In Haven, there are no secret, difficult-to-access areas, although you are not free to visit every location straight away. In the Chantry basement, there are dungeons with several cells on the sides, where many of them are locked, at first. If your character is a rogue, you can pick the locks on the cells. Otherwise, wait for Sera to join your party and talk to her, to learn that she has opened the cells, which allows you to access them.
6) Haven does not remain the Inquisition's HQ until the end of the game- I remains one up until you start the "In your Heart Shall Burn" main quest. As a result of this quest, Haven is buried by an avalanche and the HQ is moved to Skyhold. Therefore, do not start this quest if you are not ready. This mainly means that your party needs to be at an appropriate level (the recommended experience level is 11, or higher), but you also need to make sure that you have completed side quests connected with Haven, or they will be lost forever. Fortunately, you do not need to worry about the quests of the remaining groups (including the ones tasked to you by your party members), because they remain in your log, after you move to Skyhold.
7) During the quest of the Haven attack, mentioned in 6), you get an opportunity to save some of the NPCs that you have met earlier, e.g. the trader or the blacksmith. Do not worry if you fail to do that, because this will not disable any of the interactions at Skyhold. What is even more, some of the allies (e.g. traders) will be replaced by other NPCs, even if you save them.
The above map presents important characters and locations in Haven. In the village, you can meet various characters, both party members and NPCs, who play some role in the game. An important piece of information is that many of them appear in Haven as you progress into the game and you do not encounter them during your first visit to the village. As for the interesting locations, the most important object in Haven is the Chantry. Apart from that, there is a passage to the Frostbacks here, as well as the map exit (you do not need to take it, because you can bring up the map at any point of the game).
The above map presents chests in Haven. Inarguably, you can find the majority of them at the village, but there are some treasures outside, too. Unfortunately, these mainly are randomly generated items. You do not find any unique artifacts, or legendary items there.
Note - Some of the chests are in the dungeons, under the Chantry. To access them, you need to open the holding cells (if your character is a rogue) or ask Sera to help you (if your character is a fighter or a mage).
The above map presents locations, where you obtain new codex entries in Haven. First of all, be on a lookout for all sorts of notes, letters, books and tablets. The tavern in the Western part of the village is a separate story. Successive visits to the tavern unlock new codex entries connected with songs (approach the bard to receive them). It is a good idea to visit the tavern each time you are in Haven.
Note - Several codex entries are in the dungeons, under the Chantry. To access them, you need to open the holding cells (if your character is a rogue) or ask Sera to help you (if your character is a fighter or a mage).
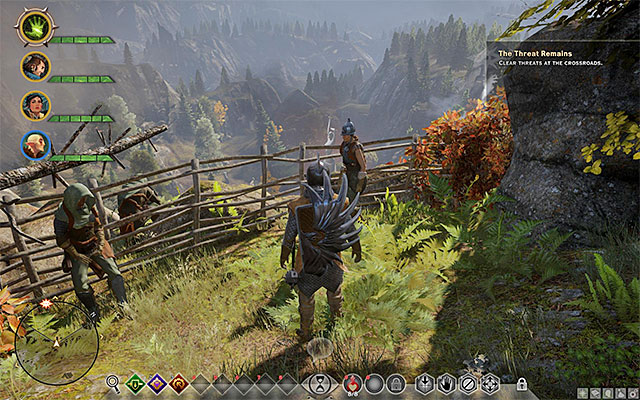 Hinterlands is one of the biggest locations in the game
The Hinterlands is a very broad place, which you can explore almost from the beginning of the game, specifically after completing a short visit to Haven. While visiting the Hinterlands you will complete few main quests, although the main attraction of this location is an opportunity to enjoy a wide variety of optional activities. It is a perfect place to strengthen your team, but you must know that not every place should be visited on low levels as you can encounter challenges that you won't be able to overcome.
How to unlock this location: Automatically while completing the "Threat Remains" quest - You must complete the "Scout the Hinterlands" operation available at the war table.
Suggested level: Many of the Hinterlands quests can be dealt with even by the weakest team. However, moving away from places occupied by friendly characters can get you into trouble. There you can meet enemies and monster on 8-9 or even 11-12 level. Visiting regions controlled by such strong enemies should be left for later. You should ignore the dragon that lives in the northeastern corner of the map until you reach level 13-14 as well.
Important information:
1) Very thorough exploration of the Hinterlands is advised. That way you won't miss any interesting quests, secrets or items useful in crafting. The size of this location encourages to use a mount (first one can be unlocked by visiting master Dennet's stable), although you should have in mind that while riding you can't scan your surroundings. You should wait with using mounts until your later visits to Hinterlands, when every important locations will be found out and explored. What's interesting, you can decide not to use any mounts at all since there are a lot of camps in Hinterlands and occupying them all allows you to quickly travel through interesting locations.
2) Don't be too impatient with exploring all of the Hinterlands since, as mentioned before, you can suddenly face much stronger enemies and easily die. At the beginning of the game you should focus on the central parts of the Hinterlands - the village on the crossroads. You should visit early the farms that can be found in the western part of the map and the Redcliffe village in the north (you must unlock access to it, it has been described at the Hidden areas page).
3) While exploring, try to make as much activities that are rewarded with experience points as possible. Search for codex entries, go to the landmarks and search for fragments that can be found using the glasses.
4) You will find lots of merchants in the Heartlands (most of them can be found in Redcliffe) and you should visit them regularly. It is especially advised if you're thoroughly exploring the location - your inventory will be full in no time.
5) Some of the buildings found will be closed and it might be hard to understand how to open them. You must have an rogue in your party and the "Deft Hands, Fine Tools" perk unlocked - only then unlocking doors to those buildings will be possible.
6) While traveling, you will often encounter a fight between various fractions. If your team isn't strong enough, you should use this opportunity to avoid fighting. Otherwise, you should join the battle and gain some experience points by defeating weakened enemies.
7) You can find maps that shows the location of hidden treasures. You can treasure hunt by your own (the better you know Hinterlands, the easier it will be) or use our guide, in which all treasure-related tasks have been thoroughly described.
The above map presents all of the important characters and locations in The Hinterlands. It is a sprawling location, which comprises both uninhabited areas and villages, where you can encounter some amicable characters. Apart from that, there are many caves here, which are worth exploring. To travel around the individual locations in the Hinterlands, you can use the fast travel points marked on the map. Apart from that, it is a good idea to set up campsites and expand the influence of the Inquisition. I recommend against exploring the entire area, the first time around, because you encounter some strong monsters near some of the rifts and the dragon's den. If your party is too weak, you will lose to them.
The above map presents chests in The Hinterlands. Due to the vast area that the Hinterlands occupy, you can find, and loot, many chests here, where in the majority of cases, they contain standard (and randomly generated) loot of low value.
Note - Some of the markings on the map refer to chests in caves and dungeons. If you cannot find an individual chest, find out if there is an entrance into an underground location around.
The above map presents locations, where you obtain new codex entries in The Hinterlands. Be on the lookout for various notes, letters, books and tablets. The tavern at Redcliffe deserves a separate mention.
Successive visits to the tavern unlock new codex entries connected with songs (approach the bard to receive them). It is a good idea to visit the tavern each time you are in Redcliffe.
Note - Some of the markings on the map refer to codex entries in caves and dungeons. If you cannot find an individual entry, find out if there is an entrance into an underground location around.
The above map presents astrariums and ocularums in The Hinterlands. The solutions to the puzzles in astraries have been presented below. As for Ocularums, the quest related to them has been described in the walkthrough for the game.
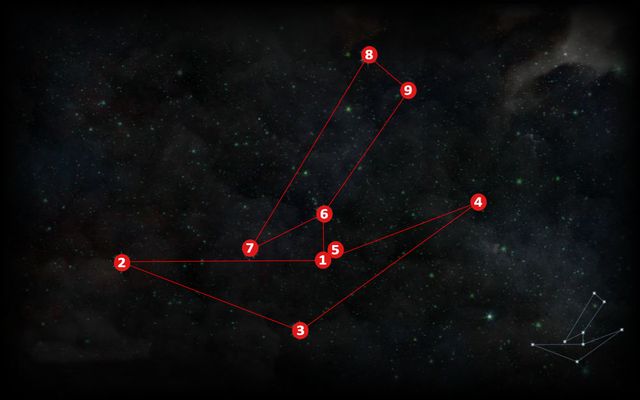
The first astrarium (M3,1a) in Hinterlands is on the hill to the North of the farms. The puzzle here is exceptionally easy.

The second astrarium (M3,1b) is to the South of the farms, in the middle of the map's height. You can reach it along the slightly inclined approach from the south.
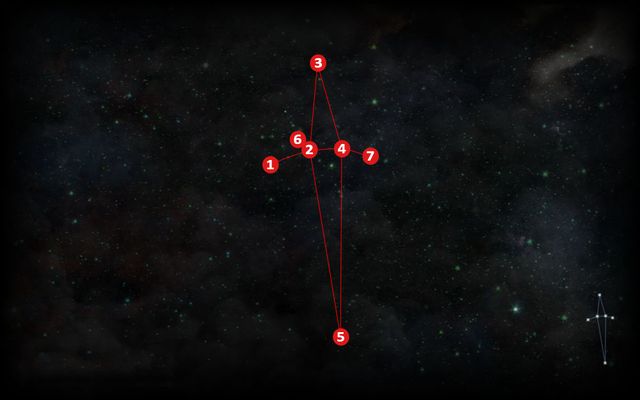
The third, and the last astrarium (M3,1c) is to the South-East of the first campsite, where you start the game. You simply need to leave the camp Southwards, along the stone wall and you will not miss it.
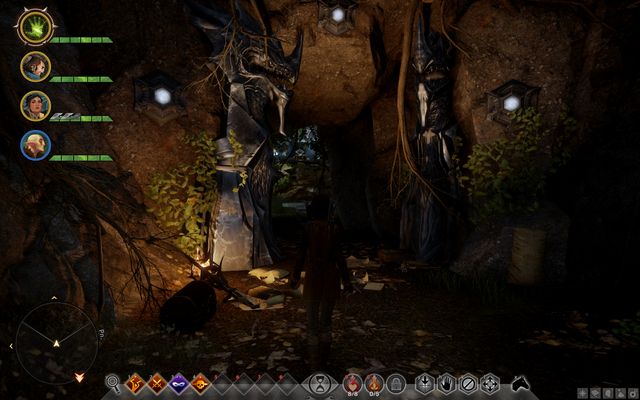 The cave entrance
The unlocked cave is in the, hideout of the Apostates. At the top of the stairs, after you have unlocked all of the astraries, you can cross a passage behind a boulder. Inside, there are several interesting items.
The above map presents all of the most important collectibles in The Hinterlands. This means, first of all, the mosaic fragment, bottles of Thedas and glyphs (runes). Apart from that, the map also presents the whereabouts of standards.
Note - Some of the map markings refer to the collectibles that you find in caves and dungeons. If you cannot find a collectible, find out if there is a passage to an underground location around.
The above map presents locations that are more difficult to access, which you can visit while exploring The Hinterlands.
 You can enter Valammar only after you have obtained the key
Point 1 refers to the hidden passage behind the waterfall, to Valammar, i.e. the Deep Paths. The map for this location (M6) has been provided on the next page of this chapter. You visit Valammar while completing the "Deep Trouble" side quest. Note - Before you reach the passage behind the waterfall, you need to obtain the key to Valammar, which you can find in the villa in the South-Western part of the map (point 1a on the map). To learn more, see the walkthrough for the above quest.
 Secure the Redcliffe entrance
Point 2 on the map marks the Redcliffe entrance. At first, you cannot enter the village and this does not change, up until you complete the "In Hushed Whispers" main quest. You need to eliminate the monsters spawned by the rift near the gate, for which you will be allowed into the village.
Above, you can see the map of the Valammar area. It is a medium-sized underground location, which you can enter after you find the key in the Hinterlands and reach the hidden door behind the waterfall (to learn more, see the Hidden locations page). You explore Valammar while completing the " Deep Trouble" side quest and it is worth knowing that you encounter many opponents in this location (members of the cartel and Darkspawns, among others). Also, you can collect numerous items here and the most important ones are in the large treasure.
Above, you can find the map of two buildings in Redcliffe -the Chantry and the Tavern. Redcliffe is in the Northern part of the Hinterlands and you gain access to it, while progressing in the main storyline. You can visit the Chantry and the tavern on your own, or while completing the "In Hushed Whispers" main quest, connected with gaining approval of the Rebel Mages (to learn more, see the Hidden locations page).
Note - Apart from the agent marked on the map, at the tavern you can also talk to the less important NPCs. Also, try to approach the bard, thanks to which you obtain new codex entries connected with songs.
 You visit Val Royeaux during one of the main quests, but it is a good idea to return here later into the game
Val Royeaux is a city that you need to travel to, early into the game. This takes place during the "The Threat Remains" main quest. It is a vast location, although it is worthwhile to explore it in detail, especially that you encounter no enemies here. It is a good idea to take a look around for the NPCs that you can talk to and trade with, as well as for the new codex entries, thanks to which you obtain lots of experience easily.
The way to unlock this location: Automatically, during The Threat Remains main quest.
Recommended experience: In the main part of Val Royeaux, there are no opponents to fight. The only exception are the minor locations connected with the city (e.g. the alleyway, where you meet Sera), but even in this, you do not require any additional preparations.
Important notes:
1) Val Royeaux is a two-storey location, but there are no stairs to the upper level, here. The only way to get to the balconies above is to bring up the map of the location and select one of the available fast travel points.
2) In Val Royeaux, there are many traders and during the first visit in the city, it is a good idea to take a look at their stock. An important piece of information is that not all of the traders are in Val Royeaux from the very beginning of the game. Some of them appear here as you progress into the game. Therefore, it is a good idea to drop in here, later into the campaign (e.g. after you unlock the Skyhold) Val Royeaux and find new NPCs.
3) During your visit in Val Royeaux, you get an option to recruit two new party members- Sera and Vivienne. Since it is not an obvious matter to recruit them (they do not appear on the main map directly) I recommend that you see the walkthroughs for "A Friend of Red Jenny" and "Imperial Enchanter" quests (the quests of the Inner Circle).
The above map presents all of the important characters and locations in Val Royeaux. Apart from traders, you cannot find any important characters here, which would play a key role in the game. Still, it is a worth adding that some of the NPCs (traders, mainly), appear in Val Royeaux, as a result of your progress into the storyline and you cannot meet them the first time around. You can leave Val Royeaux through the interactive Western passage, or by bringing up the world map.
The above map presents locations, where you obtain new codex entries in Val Royeaux. First of all, these are plaques, which ABOUND in the city. It is recommended that you wait with reading them, up until you have unlocked profits that increase experience obtained from codex entries. This way, you will obtain lots of experience, the easy way. Apart from the plaques, all around Val Royeaux, there are notes , letters and books.
 At the coast, there are many attractions for you to find, but you do not discover them all, straight away.
The Storm Coast is one of the bigger locations in the game world, but you should know that it is optional to explore. This means that visiting the Coast is not required to push the story forward. Personally, I recommend that you do not skip it, because you can get many side quests here and find many interesting items. Note - You will not be allowed to explore the entire Coast straight away. Some of its parts (e.g. the great dragon's den) become available later into the campaign mode.
The way to unlock this location: On the war map, select " Scout the Storm Coast" operation and complete it. It is possible if you can spare , at least, 8 Power points.
Recommended experience: As I have already mentioned, you cannot explore the entire Storm Coast during the initial visit. Before you travel to this location for the next time, it would be considerate to reach level 8-9, with your party. Otherwise, you may have problems defeating the great dragon and sealing some of the rifts with heavier guard.
Important notes:
1) One of the first things that you should do, after you visit the Storm Coast, is meeting the Iron Bull on the beach, close to the starting point. Thanks to this, you will obtain a valuable party member, who may be helpful while scouting the area.
2) What sets the Storm Coast apart, from e.g. the Hinterlands is the possibility of encountering a bandit camp (the central part of the map). A good idea is to seize this field base (the "House Cleaning" side quest), thanks to which you are well-rewarded and gain a new foothold for the Inquisition.
3) The Western part of the Storm Coast is initially inaccessible. The same goes for the North-Western islet that is the den of the dragon. Exploring these areas (along with the other ones with strong monsters in) becomes possible only later into the game. Therefore, do not worry if you cannot reach all of the locations where you complete side quests (e.g. the one connected with destroying lyrium caches).
4) While exploring the Storm Coast, search for logging stands and the quandary. Setting flags there turns out to be a good action, after you move to the Skyhold, when you need to expand it.
5) The Storm Coast is full of mountainous areas and this may be an element that hinders your exploration of the area. I recommend that you use your mount as often as possible and search for cave passages, which may help you skip the burdensome climbing.
The above map presents all of the important characters and locations in z Storm Coast. With the exception of the Chargers mentioned above, there are not too many friends here. As for the location itself, note the sprawling bandit encampment that you can seize. Apart from that, it is a good idea to reach campsite locations and landmarks.
The above map presents chests in z Storm Coast. Since the location is sizeable, reaching all of the chests marked on the map may take some time. Unfortunately, they o not hold too many valuable items. In most cases, you find standard, randomly generated loot.
Note - Some of the map markings refer to chests that you find in caves and dungeons. If you cannot find a chest, find out if there is a passage to an underground location around.
The above map presents locations, where you obtain new codex entries on The Storm Coast. Be on the lookout for various notes, letters, books and tablets.
Note - Some of the map markings refer to codex entries that you find in caves and dungeons. If you cannot find an entry find out if there is a passage to an underground location around.
The above map presents astrariums and ocularums on The Storm Coast. The solutions to the puzzles in astraries have been presented below. As for Ocularums, the quest related to them has been described in the walkthrough for the game.
Note - You can reach one of the astrariums only after you have gained access to the Western part of the Storm Coast.
The first astrarium on the Storm Coast on the isle to the West, connected with the mainland with an exposed layer of sand (M5,1a). This puzzle is quite difficult.
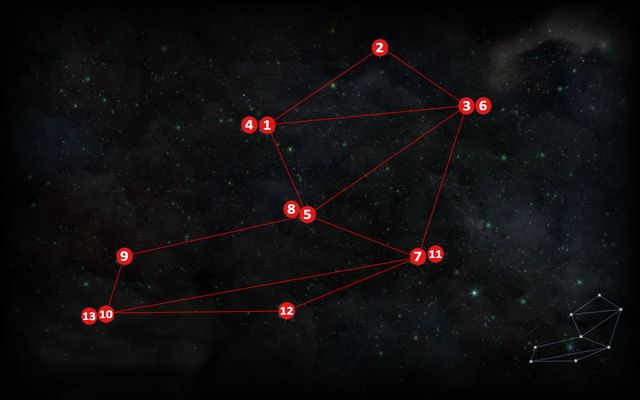
The second astrarium is on the highest peak (M5,1b), right next to the cliff descending into the sea, towards the isle.
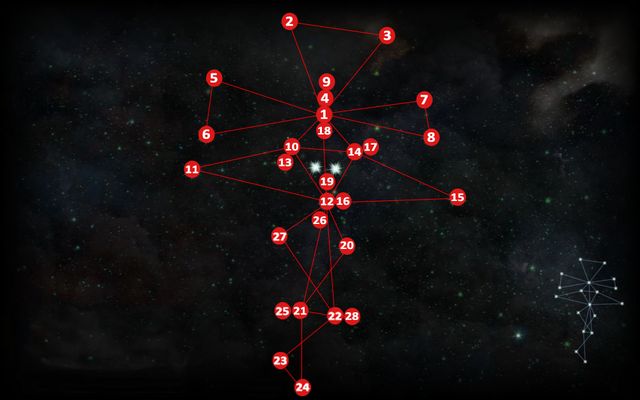
The last astrarium is on the hill (M5,1c), in a nearly straight line to the West of the second campsite. To reach the device, use the big slanting stone.
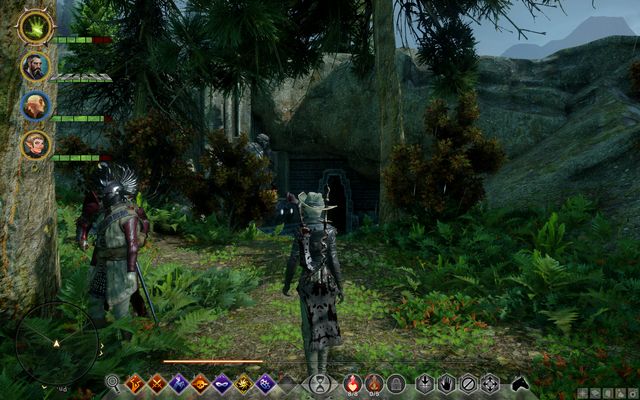 The cave entrance
The cave is a bit Southwards of the last astrarium, on the hill to the West of the second campsite. The entrance is overgrown and it looks like a hill, from afar, but you should be able to find it without major problems. Apart from regular crates, inside there also is a legendary item and a standard crown.
The above map presents all of the most important collectibles in Storm Coast. This mainly refers to mosaic fragments, Thedas bottles and glyphs (runes). Apart from that, the map presents the locations of standards, among others.
Note - Some of the map markings refer to the collectibles that you find in caves and dungeons. If you cannot find a collectible, find out if there is a passage to an underground location around.
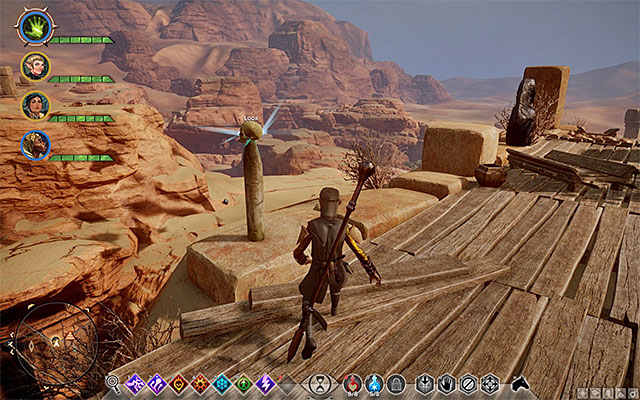 The Oasis is a multi-storey location, which makes it difficult to explore it
The Forbidden Oasis (The Forbidden Oasis) is a medium-sized location of the game and one of its features is that it is optional to explore it. This means that visiting the Oasis is not required to push the storyline forward. Personally, I recommend against skipping it, because you can get new quests here and find many valuable items. Still, you need to keep in mind that access to some of the areas within the location may be difficult, or restricted, at first, as a result of too low an experience level of your party, or to few shards (to learn more, see further into the text).
The way to unlock this location: On the war map, pick the "Investigate the Shards" operation, which becomes available after you have obtained any of the shards in one of the remaining locations, in the game world. Complete this operation, by spending 4 Power Points.
Recommended experience: It is best to explore the Oasis to its fullest after you have progressed to, at least, level 12, because there are many monsters here, around rifts, and spiders in the South-Eastern cave. Even stronger monsters can be encountered in the chambers of the temple, although you can always retreat from there and return later into the game.
Important notes:
1) The Forbidden Oasis is a location of multiple levels and it takes some time, before you master traveling between the individual levels. First of all, search for various paths on the brims of the oasis (especially in its Eastern part). What also helps, while moving between the individual levels, are narrow cave tunnels, but it is easy to get lost there. Apart from that, search for ladders and spots, where mages can use their unique abilities, e.g. to complete a bridge. Also, watch out for the spots where you can drop from a height - if you want to reach a lower level quickly, consider summoning your mount.
2) While exploring the Oasis, You do not find too many unique places. The exception is the Solasan Temple, which is connected to several side quests. If you want to access the temple and its successive chambers, you need to have shards on you. Just to remind you, you obtain shards by using ocularums in various areas of the game world. To access all of the chambers in the temple, you really need to have lots of them on you so, you are bound to return here, at least, several times. As an aside, it is very profitable because, apart from experience, Power Points and Influence, you also obtain many valuable items.
The above map presents all of the important characters and locations in The Forbidden Oasis. Unfortunately, there are not too many people at the oasis - nearly all of them occupy the starting campsite in the central part of the map. There are many areas to explore, though - you can explore caves, unlock new landmarks or reach locations where you seal rifts. At the same time, it is worth adding that exploring the desert in the Southern part of the map can be done to a minimum extent, i.e. explore the small ruins with one of the rifts.
The above map presents chests in The Forbidden Oasis. There are not too many of them, although reaching some may be troublesome. Most of them hold standard, randomly generated loot. The only exception are the ones in the locked chambers of the temple, which hold more interesting, and more valuable, items.
Note - Some of the map markings refer to chests that you find in caves and dungeons. If you cannot find a chest, find out if there is a passage to an underground location around.
The above map presents locations, where you obtain new codex entries in The Forbidden Oasis. Unfortunately, there only are few of them. Still, search for notes, letters, books, tablets and such.
Note - Some of the map markings refer to codex entries that you find in caves and dungeons. If you cannot find an entry find out if there is a passage to an underground location around.
The above map presents all of the ocularums in The Forbidden Oasis. It may be quite a challenge to reach some of them so, remember the hints provided at the first page of this chapter and search for various ladders, corridors in caves, wooden planks or spots, where mages can form a passage.
Note - In the Forbidden Oasis, there are no astraries.
The above map presents all of the most important collectibles in The Forbidden Oasis. This mainly refers to mosaic fragments, Thedas bottles and glyphs (runes).
Note - Some of the map markings refer to the collectibles that you find in caves and dungeons. If you cannot find a collectible, find out if there is a passage to an underground location around.
The above map presents locations that are more difficult to access, which you can visit while exploring The Forbidden Oasis.
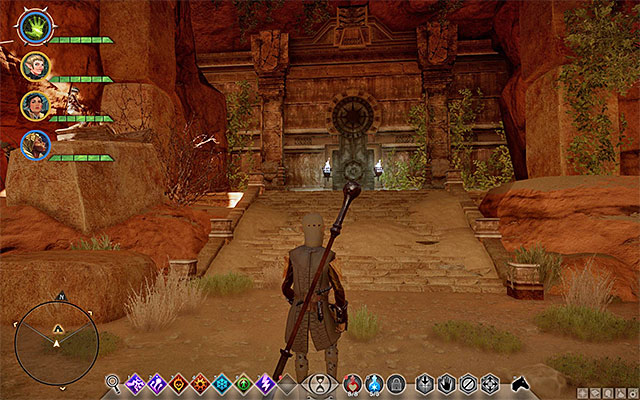 The temple door swings open after you use the shards
Point 1 on the map marks the entrance to the Solasan temple, which is connected with "The Temple of Pride" side quest. To access the temple, you need to spare six shards and to learn more, see the walkthrough for the quest mentioned above.
 Accessing the individual chambers of the temple also requires shards
Point 2 on the map presents the inside of the Solasan temple, where you find locked doors. The pattern of behavior here is similar as in the case of the main gate in point 1 - you need to spend shards that you find in the game world, to open new rooms. Each room of a given group requires you to spend more shards and defeat a group of stronger monsters. On the other hand, it offers better loot. Most probably, you will finish the exploration of the temple towards the end of the game, after you have collected shards in the other locations of the game world.
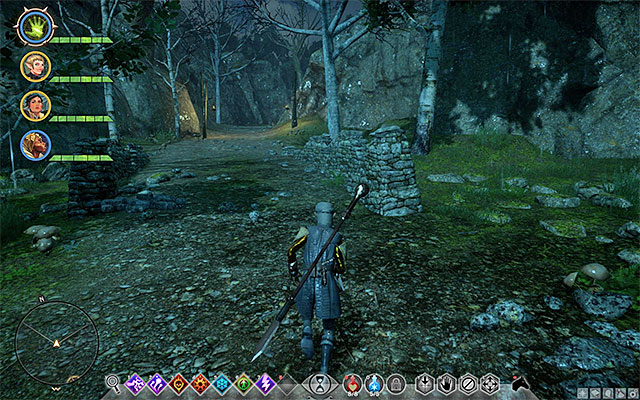 You often fight the undead in the Mire
The Fallow Mire is a quite vast location, where you mainly encounter all sorts of the undead and hostile barbarians. It is fully optional to visit this location. This means that it is not required to visit this location to push the story forward. Personally, I recommend against skipping this location, because you can obtain lots of experience, Influence and Power Points here, and you can also obtain many valuable items here. Still, you need to realize that many of the monsters here may pose a big challenge for a beginning party.
The way to unlock this location: On the war map, select the "Rescue Soldiers Missing in Ferelden" operation and spend 8 Power Points to complete it.
Recommended experience: I recommend against going to the Mire before your party reaches, at least, level 9-10. Optimally, it is best to reach level 12, at least, thanks to which you will not have too much trouble killing the undead, nor with dealing with the barbarians in the local fort.
The above map presents all of the important characters and locations in The Fallow Mire. Apart from at campsites, there are, virtually, no friendly characters here. The only ones here are the bloodthirsty barbarians. As for the locations, the most important one here is the fort occupied by the abovementioned savages, which you reach while completing the "Lost Souls" side quest. Apart from that, it is a good idea to note the fast travel points and landmarks.
The above map presents chests in The Fallow Mire. If you want to reach all of them, you need to explore the map carefully, because some of them are quite well-hidden. All of them, however, should be well-exposed, because in the Mire, you visit no caves, nor dungeons. Unfortunately, the chests mainly hold standard, randomly generated loot. The only exception is the chest in the fort, behind locked doors (requires a rogue to open).
The above map presents locations, where you obtain new codex entries in The Fallow Mire. Since there are no caves in the location, nor dungeons, all of the objects, all of the entries-related objects are exposed. Keep an eye out for notes, letters, books and such. You may only have problems reaching one of the entries at the fort - it is behind a locked door that can only be opened by a well-trained rogue.
The above map presents all of the most important collectibles in The Fallow Mire. This mainly refers to mosaic fragments, Thedas bottles and glyphs (runes).
Note - One of the collectibles is in the fort occupied by barbarians. To get to the items, you need to open the door with a well-trained rogue.
 Redcliffe Castle
Redcliffe Castle is not too big an area, but it may seem a bit complex, at first. The location is tied to the "In Hushed Whispers" quest and it is about starting the cooperation with the mages, instead of with the Templars. At the same time, it makes it impossible for you to access Therinfal Redoubt later into the game. To get to the last chamber, you will have to free your party members from prison (the compulsory character that is helping you is Dorian), and Leliana. The, you need to collect all of the fragments of the key that fits the door to the last chamber, where you square up against the magister.
The way to unlock the location: On the war map, select the " In Hushed Whispers " operation. To start it, you require as many as 15 Power points. It should be noted here that the operation makes it impossible to complete the operation connected with winning the favor of the Templars- "Champions of the Just".
Recommended experience level: It is best to travel to the castle after you have progressed to, at least, experience level 8, thanks to which you will have little problems defeating the head mage in this location. Also, fighting against the regular opponents may prove quite difficult, at times.
Important notes:
1) Traveling to Redcliffe Castle determines your further path in the storyline - the alliance with the mages makes it impossible, for you, to ally yourself with the Templars and to travel to the Therinfal Redoubt.
2) You take the successive steps in a linear fashion, but they have been divided into four stages: free your allies, free Leliana, seal the rift in the main chamber and collect the key fragments, defeat the magister. Only within this division, are you allowed freedom, when it comes to the order of steps that you take.
3) After you have completed the entire quest, you will not be able to return to the castle! This is why you should be collecting all items and valuable on a regular basis. The best thing to do is sell all of the items that you o not need anymore, before you start this quest, to be able to collect as many items, at the castle, as possible.
The above map presents all of the important characters and locations in Redcliffe Castle. As a matter of fact, you should only take interest in supply chests, here, thanks to which you can replenish your potions. Return to the chest each time after you fight a major battle and before the battle with the final opponent of the quest connected with the Redcliffe Castle.
The above map presents chests in Redcliffe Castle. Try to loot all of the chests that you find, on a regular basis, because it may prove difficult to return to the ones that you missed earlier, or even impossible. Mostly, they hold standard, randomly-generated loot. The only situation, in which you can hope for something better, is after you deal with the strong opponent in the Southern dungeons of the castle.
The above map presents locations, where you obtain new codex entries in Redcliffe Castle. Unfortunately, there only are a few of them. Keep an eye out for notes, letters, books and such. Remember also to add all of the entries to your log, because it is impossible to return to the castle, later into the game.
The above map presents all of the most important collectibles in Redcliffe Castle. This mainly refers to the standard of the Circle of Magi that you can obtain, while exploring the upper wing of the royal castle. Remember to collect it at the first opportunity you get, because it may be impossible to return here, later on.
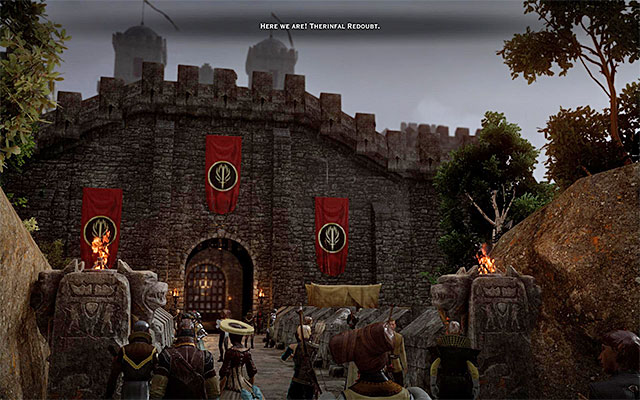 You visit the Redoubt at the main Templar city
Therinfal Redoubt is a location that is not too big, and is connected with the storyline. You can visit it while completing the "Champions of the Just" main quest, i.e. the one concerned with obtaining the support from the Templars. There are three main levels in the Redoubt and, apart from that, you will also get to explore two parts of the Nightmare. Usually, you visit all of the locations in a predefined order.
The way to unlock this location: On the war map, select the "Champions of the Just" operation. It requires you to spend, as many as, 15 Power points. Also, it should be mentioned that this operation makes it impossible to obtain the support of the Rebel Mages- in "In Hushed Whispers".
Recommended experience: It is best to travel to the redoubt only after you have reached the eighth experience level , at least, because this is the level of the final opponent in this location. The fights against standard opponents here may also be challenging, especially the one in the chamber, at the top level of the redoubt.
Important notes:
1) Traveling to the Therinfal Redoubt makes it impossible to travel to Castle Redcliffe (M10). This results from the potential ally that you pick (you can pick only one faction) - the Templars stay at the redoubt, whereas the mages occupy the Redcliffe Castle.
2) A very important piece of information is that you cannot return to the Therinfal Redoubt later into the game. You need to collect all of the loot on a regular basis, because it will be impossible later on (it is important that you take interest in the loot dropped by the main opponent in this location). The exploration of the Redoubt itself is, in the majority of cases, linear. The only exception is the upper level, because you can decide here about the order in which you want to explore the adjacent wings (the Northern and the Southern ones).
3) There are two parts of the Nightmare, connected with the Therinfal Redoubt. You explore them while completing the quest connected with the Templars. While in the Nightmare, you do not find any physical objects that you can take along, into the world of the living. This does not mean that you should skip the exploration of the area, because thanks to examining the inscriptions ("demonic Dogma" side quest) you raise the statistics of your character. To learn more, see the walkthrough for the game.
The above map presents all of the important characters and locations in Therinfal Redoubt. It is profitable to take interest in supply chests that you find along your path, here, thanks to which you can replenish your potions. It is best to return to the chests after each major battle and before the battle against the main opponent of the main quest connected with the Redoubt. Apart from that, the map also presents destructible walls and locked doors. Whenever possible, get to the optional locations, because, almost always, do you find valuable loot there.
The above map presents chests in the Therinfal Redoubt. Try to loot them on a regular basis, because returning to them may be more difficult, or even impossible later on. Mostly, they hold standard, randomly-generated loot. As a matter of fact, you can hope to get something of more value, after you defeat the strong Demon of Envy towards the end of the exploration of the redoubt.
Note - Some of the chests are more difficult to reach. To gain access to them, you may have to use the skills of the rogue (lockpicking) or the warrior (after you smash a wall).
The above map presents locations, where you obtain new codex entries in Therinfal Redoubt. Unfortunately, there only are a few of them here. Still keep an eye out for notes, letters, books and such. Also, remember to add all the entries to your log, on a regular basis, because you cannot return to the redoubt later into the game.
The above map presents all of the most important collectibles in Therinfal Redoubt. This mainly refers to the Standard of the Templar Order, which you can obtain thanks to exploring the upper level of the redoubt. The collectible is on the balconies above and remember to collect it, before you set out for the Demon of Envy, because it will be impossible later on.
 Skyhold becomes the Inquisition's HQ after the escape from Haven
Skyhold is the second main HQ for the Inquisition, and it remains one until the end of the game. The location is unavailable at the beginning of the game and it becomes available only with your progress into the storyline. Just like in the case of Haven, you do not need to worry that you run into any opponents here. You can plan on your next steps while here, without being bothered, have conversations with your companions, trade, craft and beautify the hold itself.
The way to unlock the location: Automatically, after you complete the "In Your Heart Shall Burn" main quest.
Recommended experience level: At Skyhold, you encounter no enemies.
Important notes:
1) Skyhold is a much bigger location than Haven and exploring all of the corners here is going take you some time. I recommend that you start your exploration only after you have spent some time at the hold, because some of the locations here (e.g. the garden or your character's quarters) are inaccessible the first time around and you will not be able to talk to all the NPCs here.
2) There are two levels to the hold. At the upper level of the yard, you find, among others, the war room, the throne room and the garden. At the lower level, there is, among others, a tavern (explore all of its floors) and there are many companions around. Apart from that, there is a separate part of the hold, called the Undercroft. You can get there across the door in the throne room. In the Undercroft, you can, among others, talk to the NPCs that dwell in crafting.
3) Unlike in the case of Haven, you can change the looks of Skyhold, and work on the shape of windows there, for example. You alter the looks of the hold while at the Undercroft. Apart from that, you can expand the fort, to a limited extent, and build, e.g. an arena there, where your warriors can train. It is possible to expand Skyhold thanks to the logging stands and quarries that you find all around the game world. To learn more, see the guide for the game.
4) I have already mentioned that all of the Inquisition members move to Skyhold. This means that you should take the same steps as you did in Haven and meet with your companions whenever possible. I recommend that you talk to them each time, after a longer journey and after each main quest that you complete. Often,. This will allow you to unlock new quests, improve on your relationships with them, or pick dialogue options that were unavailable earlier. Also, each time you return to Skyhold, visit the war room and hand over new specimen for examination (they are analyzed by Helisma) and make sure that there are no new judgments to pass, in the throne room (they have been described in the walkthrough for the game).
5) In Skyhold, there are no unique treasures, but you can collect new Codex entries. It is worth mentioning here that you get the opportunity to obtain some of them, only after you have sufficiently progressed in the storyline, e.g. after you invite new specializations trainers to Skyhold.
6) The abovementioned specializations trainers reach Skyhold after you complete the "Specializations for the Inquisitor" operation. What they specialize in depends on the character class that you initially chose for yourself. I recommend that you see all three of the trainers to unlock the quests related to them (they have been described in the walkthrough for the game). As for decisions on specializations, you can decide on them later and, after you take all of the steps within the quests that you receive.
The above map presents all of the important characters and locations in Skyhold. In this Inquisition's HQ, you can meet many various characters, both party members and NPCs who play varying roles in the game. An important piece of information is that many of the characters appear at Skyhold as a result of your progress into the game, and after you reach the hold for the first time (after a long journey), you do not meet them. The hold itself comprises many levels. At the upper court, there are the throne room and the war room. At the lower court, you find dungeons and the tavern. You can also access the Undercroft, which is a separate location, to craft and furnish your fortress.
The above map presents locations, where you obtain new codex entries in Skyhold. Be on the lookout for various notes, letters, books and tablets. An important piece of information is that not all of the entries are available straight away. Some of the books, or documents, appear in the spots, marked on the map, only after you have sufficiently progressed into the main campaign, found new party members or, e.g. expanded the hold.
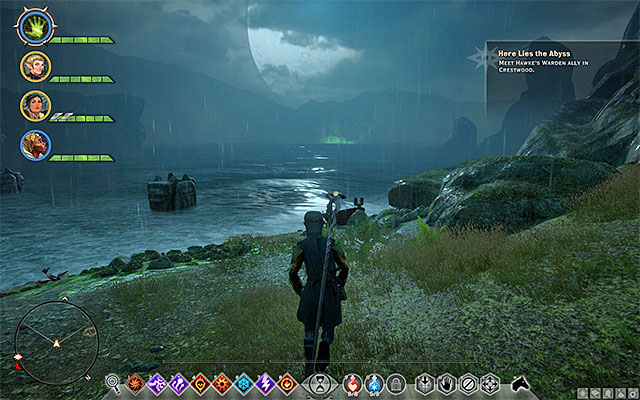 One of the attractions of Crestwood is be big rift on the lake
Crestwood is one of the bigger location of the game. In theory, you explore is only during one of the main quests of the game (quest "Here Lies the Abyss"), but this is a short-lasting one. Fortunately, also in this location, there are many side quests to complete and many valuable treasures to obtain. Therefore, I recommend that you spend here some more time. Still, it should be pointed out that some of the fights with monsters and other opponents (e.g. bandits from the fort) require a well, experienced party.
The way to unlock this location: On the war map, select the "Find the Warden" operation and complete it, by spending 8 Power points.
Recommended experience: If you are planning on a short visit to Crestwood only, during one of the main quests of the game, you do not need to prepare in any specific way. If you want to complete side quests also, I recommend that you reach experience level 11-12, as the party. If you want to "clear" the entire map, progress with your party to level 13-14, at least. Thanks to this, you will not have any problems taking Caer Bronach, or defeating the wyvern in one of the side quests.
Important notes:
1) The element that makes Crestwood different from, e.g. the Hinterlands, is the option to seize Caer Bronach. By default, the fort is being occupied by bandits, but thanks to completing the "Capturing Caer Bronach" side quest, it may be seized by the Inquisition and become its foothold.
2) In the central part of the map, there is the titular Crestwood village, where you can meet the mayor, among others and take several optional quests. In the North-Western corner of the map, you can find the Old Crestwood (and the entrance to the Flooded Caves), but it is flooded at first and you cannot explore it. The situation changes after you complete the "Still Waters" quest. To learn more, see the Hidden locations page.
3) While exploring Crestwood, you find a cave with frozen door. Do not worry if even your rogue fails to open it. You will be able to explore the area behind the door, on your way back from the Flooded Caves.
The above map presents all of the important characters and locations in Crestwood. You can encounter friendly characters in the Crestwood village, among others, located in the central part of the map. Allies also appear in Caer Bronach, after you recapture it from the bandits and you will find, e.g. a trader among them. Apart from the two locations mentioned above, there aren't too many areas to explore here. You can visit the dam, the Old Crestwood (only after you lower the water level in the lake) and a number of caves. Just like usually, you can find campsites and landmarks here.
The above map presents chests in Crestwood. Due to the size of the location, reaching some of the chests may take some time. The majority of them hold standard and randomly generated loot, but there are a few exceptions. The chests with the more valuable loot can be found, e.g. in the cavern under Caer Bronach.
Note - Some of the map markings refer to chests that you find in caves and dungeons. If you cannot find a chest, find out if there is a passage to an underground location around.
The above map presents locations of new entries in Crestwood. Be on the lookout for various notes, letters, books and tablets.
Note - Some of the map markings refer to codex entries that you find in caves and dungeons. If you cannot find an entry find out if there is a passage to an underground location around.
The above map presents astrariums and ocularums in Crestwood. Solutions to the quests connected with them have been presented below.
Note - In Crestwood, there are no ocularums (which means that there also are no shards here).
The first astrarium (M13,1a) in Crestwood is on the hill to the South of the starting point of this map
The second astrarium (M13,1b) is to the East, close to the entrance to the cave with wyverns.
The third, and the last, astrarium (M13,1c) is on the Southern hill, at its end, close to the single cottage.
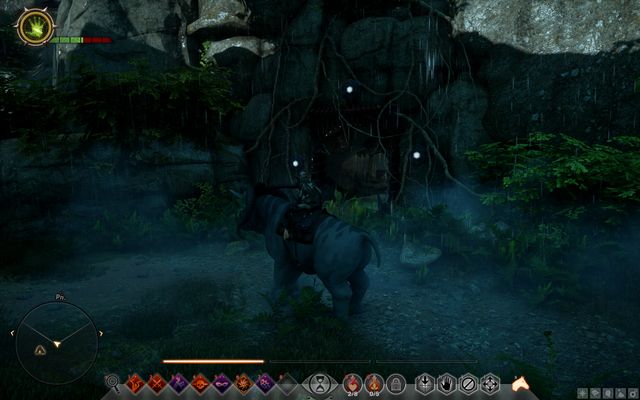 The cave entrance
The cave is in the big canyon in the center of the map. There, opposite one of the entrances to regular caves, one of the boulders is removed, which reveals the entrance.
The above map presents all of the most important collectibles in Crestwood. This mainly refers to mosaic fragments, Thedas bottles and glyphs (runes). Apart from that, the map presents the locations of standards, among others.
Note - Some of the map markings refer to the collectibles that you find in caves and dungeons. If you cannot find a collectible, find out if there is a passage to an underground location around.
The above map presents locations that are more difficult to access, which you can visit while exploring Crestwood.
 The passage to the dam in Caer Bronach
Point 1 on the map shows the door to the dam in Caer Bronach. You get there while completing the "Still Waters" side quest. Interacting with the dam's mechanism lowers the water level in the lake and grants you access to the unique locations mentioned below.
 Old Crestwood
Point 2 on the map is the Old Crestwood. By default, the area is inaccessible, because the village is, almost entirely, under the water. The only way to gain access to the Old Crestwood is lower the water level in the lake (the "Still Waters" quest) and it has been described in description for point 1.
 The entrance to the Flooded Caves
Point 3 on the map marks the entrance to the Flooded Caves, i.e. the additional underground location. Just like in the case of the Old Crestwood, the only way to access it is by lowering the water level.
Above, you can find the map of the Flooded Caves. It is an underground location connected with Crestwood and the Still Waters side quest. In the cave, there is a rift that is being heavily guarded by monsters, but this is not the only attraction awaiting you here. You can also find many valuable treasures in this place - some of them are in the spots that you need to cut your way into (as the fighter) or burgle into (as the rogue).
Note - While leaving the Flooded caves, remember to take the alternative way out (the ladder), thanks to which you reach a cave in Crestwood that cannot be accessed in any other way.
 In Emprise du Lion there are many regions to explore and many demanding battles to fight
Emprise du Lion is one of the major locations in the game. In theory, you explore this location during the main storyline of the game, but you can stay here for longer, than required by the storyline. In fact, this is what is recommended. In Emprise du Lion, there are many interesting side quests to complete and many valuable items to obtain. You are going to fight exciting battles here, especially that there are several (!!) great dragons around. Remember to make proper preparations before you take the journey there and to get to Emprise du Lion only after you have progressed the party to a higher experience level.
The way to unlock the location: On the world map, you need to select the Emprise du Lion operation and complete it. It is possible only if you have, at least, 20 Power points.
Recommended experience level: As already mentioned, you should not travel to Emprise du Lion with too weak a party. You should be able to deal with the majority of quests if your party members are at 17th-18th experience level. A separate issue are battles against the great dragons in the Eastern part of the map. Take interest in them only after your companions exceed level 20.
Important notes:
1) The element that makes Emprise du Lion different from, e.g. the Hinterlands is the option to seize the Suledin keep.
By default, the keep is being occupied by the red Templars but, after you complete the " Capturing Suledin Keep" side quest, it can be captured for the Inquisition and become its foothold. Apart from that, capturing the keep provides you with access to new quests and new NPCs (including a trader).
2) By default, the Eastern region of Emprise du Lion is inaccessible. To access it, you need to reach the flag near the narrow passage, interact with it to unlock an operation and return to the war room in Skyhold, to complete it. Do not start exploring the new regions too early, because, in the Eastern region of Emprise du Lion, there are dens of three great dragons and each battle against the beast is exhausting for the party (or even impossible to win, if your party is too weak).
The above map presents all of the important characters and locations in Emprise du Lion. Apart from in the campsites, you cannot find any friendly characters here (the only exception is the trader in the Southern part of the map). As for the locations, you should, first of all, take interest in SEVERAL dens of great dragons, which you should visit, but only after your party reaches appropriately high experience level. Apart from the dens, you can also visit logging stands and landmarks.
The above map presents chests in Emprise du Lion. Due to the size of the location, reaching all of them may take you some time. Unfortunately, you do not find too many valuable items in them. The majority of them hold standard and randomly-generated loot.
Note - Some of the map markings refer to chests that you find in caves and dungeons. If you cannot find a chest, find out if there is a passage to an underground location around.
The above map presents locations, where you obtain new codex entries w Emprise du Lion. Be on the lookout for various notes, letters, books and tablets.
Note - Some of the map markings refer to codex entries that you find in caves and dungeons. If you cannot find an entry find out if there is a passage to an underground location around.
The above map presents ocularums that you can visit, while in Emprise du Lion, to reveal the whereabouts of shards. Some of the ocularums and shards may be better hidden than the others and, if necessary, see the additional information in the walkthrough for the game.
Note - In Emprise du Lion, there are no astraries.
The above map presents all of the most important collectibles in Emprise du Lion. This mainly refers to mosaic fragments, Thedas bottles and glyphs (runes). Apart from that, the map presents the locations of standards, among others.
Note - Some of the map markings refer to the collectibles that you find in caves and dungeons. If you cannot find a collectible, find out if there is a passage to an underground location around.
 The biggest attraction of the wastes are the graves that can be looted
The Hissing Wastes as a medium-sized location, whose exploration is optional, because you receive no main quests here. Still, I recommend that you travel there, because you can obtain lots of experience in the Wastes (e.g. for defeating the great dragon), receive many side quests and obtain valuable and useful items. The most valuable loot is in the six, quite vast tombs.
The way to unlock this location: On the war map, select the "Stop Venatori Activity in the West" () operation and complete it. This is possible if you have, at least, 20 Power points.
Recommended experience: The Hissing Wastes are the area that is meant for a well-trained party. Even the standard monsters around rifts may be a problem if your party is too weak. Also, you will have to fight challenging fights with Venatori cultists and hostile creatures on the surface and in the tombs. You should be able to win the majority of the fights, with a party at level 17-19. The only exception is the great dragon that you encounter in the Eastern part of the Wastes. He is powerful and you should not attack him, if you haven't reached level 22-23, at least.
Important notes:
1) definitely, what is the most interesting in the Wastes are the tombs scattered all around the area. There are six of them. You explore the tombs during the "The Tomb of Fairel" side quest and there is a simple puzzle that you need to solve for each one. Solutions to the puzzles have been provided in the walkthrough for the game. I recommend that you take a peek into each tomb, because you can obtain rare items here.
2) Near the main tomb of Fairel, in the Eastern part of the map, you run across a great dragon. If your party is very strong, you can try and slay the beast. A very important piece of information, though, is that it is an optional thing to do. You can navigate around the dragon without any problems, on the North or on the South. An additional facilitation is the fact that he is sleeping and, as a result, he does not spot you sneaking.
The above map presents all of the important characters and locations in The Hissing Wastes. In the wastes, there are not too many characters and nearly all of them stay at the camps that you seize. As for interesting locations, in the wastes, there are the tombs mentioned above. Apart from that, you can find landmarks, which you should be able to reach without major problems.
The above map presents chests in The Hissing Wastes. While exploring the areas on the surface, you do not find too many chests to loot. Things get more interesting after you enter the tombs - there are, at least, a few in each. Additionally, many of them hold the more valuable items. If you cannot find a chest, find out if it is located underground.
The above map presents locations, where you obtain new codex entries in The Hissing Wastes. Unfortunately, there only are a few of them. Still, keep an eye out for notes, letters, books and such.
Note - Some of the map markings refer to codex entries that you find in tombs. If you cannot find an entry, find out if it there is a passage to a tomb, or an underground location, nearby.
The above map presents all of the ocularums in The Hissing Wastes. The most problematic thing may be reaching the one in the mountains, in the Northern part of the wastes - you need to search out the ladders around and climb up them to find the ocularum (to learn more, see the walkthrough for the game).
Note - In the Hissing Wastes, there are no astraries.
The above map presents all of the most important collectibles in The Hissing Wastes. This mainly refers to mosaic fragments, Thedas bottles and glyphs (runes). Apart from that, the map presents the locations of standards, among others.
Note - Some of the map markings refer to collectibles that you find in the tombs. If you cannot find a collectible, find out if there is a passage around, into a tomb or another underground location.
The above map presents locations that are more difficult to access, which you can visit while exploring The Hissing Wastes.
 The dragon guarding the entrance.
Point 1 on the map points to the forgotten tomb. You should know that the entrance is being guarded by a sleeping dragon, at level 20. You can sneak past the beast, though, without waking it up. To open the door, however, you need a key that has been smashed into five parts. All of them are in the chests in the smaller tombs, and you can find them after you solve interactive puzzles. After you obtain all five fragments, the key is assembled automatically and you will be able to access the main tomb. The locations of the tomb, where you find the fragments, have been marked on the map as red dots.
 You can explore both the Emerald graves and some minor regions within it
Emerald Graves is a quite big location and toy can start exploring it right after you appear in Skyhold for the first time. An important piece of information is that it is fully optional to explore the Emerald Graves. This means that traveling here is not required to push the storyline forward. Personally, I recommend against skipping this location, because you can complete side quests here, reach many interesting places and obtain quite valuable items.
The way to unlock the location: On the war map, you need to select the "Meeting at the Emerald Graves" operation and complete it. It is possible only if you have, at least, 8 Power points.
Recommended experience level: It is best to travel to the Emerald Graves not earlier than before you reach experience level 13-15, because you will have to walk around many of the regions with stronger opponents. Just like usually, get prepared for the battle against the great dragon at the Emerald Graves and try not to attack him, if your party members have not yet progressed to level 19-20.
Important notes:
1) While exploring the Emerald Graves, you get to visit two major locations that you explore on separate maps. The ones in question are Chateau d'Onterre in the Eastern part of the map and Villa Maurel to the South. There are side quests connected with those places and you can find descriptions for them in the walkthrough for the game (as well as detailed information on how to get to those places). Another important location in the Emerald Graves is the guard's outpost to the West of the map. Seizing this location, not only gains you a new foothold, but it also unlocks the option to barter with Gertrude, among others.
2) Explore the Northern part of the Emerald Graves as the last one, because this is where the dragon's den is located. Fortunately, around, you do not complete any side quests so, you lose nothing if you postpone reaching the den.
The above map presents all of the important characters and locations in Emerald Graves. In this location, there are not too many characters and nearly all of them are staying in the seized campsites. As for interesting places, note that in the tombs, there are passages to two optional locations described later in this text. Apart from reaching them, you can also find landmarks, logging stands and quandaries.
The above map presents chests in Emerald Graves. Due to the size of the location, reaching all of the chests, marked on the map will take some time. The majority of the chests hold standard and randomly-generated loot, but you can also find something interesting, in some of them, such as unique and legendary items.
Note - Some of the map markings refer to chests that you find in caves and dungeons. If you cannot find a chest, find out if there is a passage to an underground location around.
The above map presents all of the locations, where you obtain new entries in the Emerald Graves. Be on the lookout for various notes, letters, books and tablets.
Note - Some of the map markings refer to codex entries that you find in caves and dungeons. If you cannot find an entry find out if there is a passage to an underground location around.
The above map presents astraries and ocularums in the Emerald Graves. The solutions to the puzzles in astraries have been presented below. As for Ocularums, the quest related to them has been described in the walkthrough for the game.
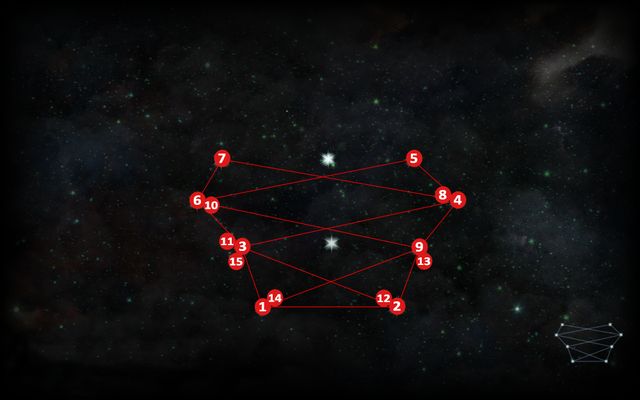
The first astrarium in Emerald Graves is in the South-Western part of the map, close to the one of the landmarks, to the east of it (M17,1a).
The second astrarium is near the rocks, in the Western corner of the map (M17,1b).
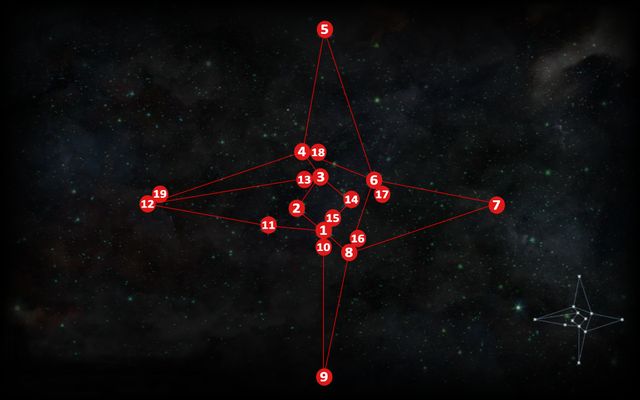
The last astrarium is on the hill (M7,1c), right above the campsite in the central part of the map.
 The cave entrance
The cave is to the West, near the small fort and the second astrarium. You need to enter the gorge and follow it up until you find he cave entrance at the end. Inside, there are several useful items and a legendary weapon.
The above map presents all of the most important collectibles in the Emerald Graves. This mainly refers to mosaic fragments, Thedas bottles and glyphs (runes). Apart from that, the map presents the locations of standards, among others.
Note - Some of the map markings refer to the collectibles that you find in caves and dungeons. If you cannot find a collectible, find out if there is a passage to an underground location around.
The above map presents locations that are more difficult to access, which you can visit while exploring the Emerald Graves.
You open the door to Villa Maurel with the key that you retrieve from banditsPoint 1 on the map marks the entrance to the Villa Maurel. It is one of two additional locations in the Emerald Graves. With this one, however, you may have bigger problems. By default, the villa is locked and you need a key to access it. You can find the key on one of the bandits in frond of the villa so, after the fights, loot the corpses.
Point 2 on the map marks the entrance to Chateau d'Onterre, i.e. the second of the additional locations in the Emerald Graves. Unlike in the caves of the Villa above, you do not need to take any additional steps to enter it.
Above, you can find the map of Villa Maurel. It is a medium-sized building that you can explore while at the Emerald Graves. It takes place during the "Corrupt General" side quest. At the villa, there are several puzzles to solve and opponents to defeat. Also, you will find lots of valuable loot here, with a mosaic fragment and a standard among them so, do not forget to explore the area in detail.
Above, you can find the map of Chateau d'Onterre. You can explore the location while at the Emerald Graves. It takes place during one of the side quests of the same name as the location. The most valuable items to obtain at the castle is the levitating cube, but it is being guarded by a quite strong monster so, too weak a party may have problems fighting it.
Above, you can see the map of Din'an Hanin. It is a small location to the North of the Emerald Graves. To get there, you will have to complete the operation that becomes available, as you progress into the storyline. Inside the ruins, there is a tomb, where there is a scroll with the actual story of the elves, which both sides of the conflict take interest in. To get into the tomb, you require 9 emerald seals 0 you can find them in containers or on enemies - after you defeat Behemoths. The location is being guarded by the red Templars so, level above 12 is recommended. This will let you eliminate the opponents easily. However, you can leave and return to this location at any point, if you decide that the opponents are too challenging.
Exalted Plains is a relatively big location that you can visit at any point of the game, after you gain access to Skyhold. It is optional to explore this location, because there are no storyline quests here. This does not mean that you should entirely ignore the Exalted Plains. You can receive many side quests here and obtain many valuable items.
The way to unlock this location: On the war map, select the "Scout the Exalted Plains" operation and complete it. It is possible only if you have, at least 8 Power points.
Recommended experience: Exalted Plains are not too demanding a location, when it comes to the recommended experience level. You can explore the majority of areas, even with a party at level 10-11. Only the fights against the stronger monsters require a party at level 12-13.
Important notes:
1) Exploring the major part of the Exalted Plains should not be to problematic, save the necessity to deal with numerous opponents. The only problems that you may have is with the bigger underground temple and in this case, see the walkthrough for the game.
The above map presents all of the important characters and locations in the Exalted Plains. In here, you encounter surprisingly many NPCs that you can have a conversation with. The biggest group is in the camp to the South of the map (this is where you also meet a trader). As for the major locations, make sure that you explore the underground ones in detail. Apart from that, as usually, you can also find logging stands campsites and landmarks.
The above map presents chests in the Exalted Plains. Due to the size of the location, reaching all of the chests, marked on the map will take some time. The majority of the chests hold standard and randomly-generated loot, but you can also find some with the more interesting contents, such as unique legendary items.
Note - Some of the map markings refer to chests that you find in caves and dungeons. If you cannot find a chest, find out if there is a passage to an underground location around.
The above map presents all of the locations, where you obtain new entries in the Exalted Plains. Be on the lookout for various notes, letters, books and tablets.
Note - Some of the map markings refer to codex entries that you find in caves and dungeons. If you cannot find an entry find out if there is a passage to an underground location around.
The above map presents all of the ocularums in the Exalted Plains. You should not have any major problems reaching ocularums and finding all sixteen shards, but in case of any problems, you can always take a look into the walkthrough for the game.
Note - There are no astraries in the Exalted Plains
The above map presents all of the most important collectibles in the Exalted Plains. This mainly refers to mosaic fragments, Thedas bottles and glyphs (runes).
Note - Some of the map markings refer to the collectibles that you find in caves and dungeons. If you cannot find a collectible, find out if there is a passage to an underground location around.
The above map presents locations that are more difficult to access, which you can visit while exploring the Exalted Plains.
 The revealed passage
Point 1 on the map points to the passage covered with rubble, which blocks passage. To remove the rubble, you need to seize the point and return to the council room, at the hold. There, you can decide that your men should make passage to the location available. In there, you find swamps and a dragon.
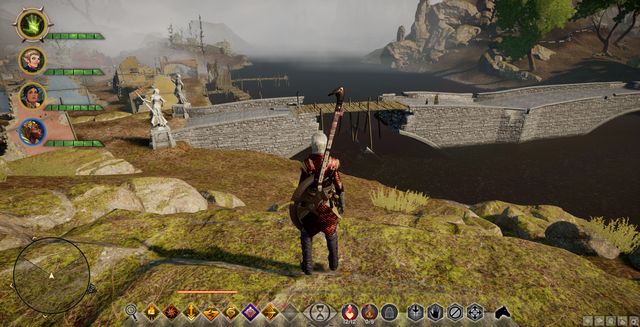 The fixed bridge
Point 2 on the map marks the broken bridge. Without fixing it, you cannot access the nearby isle. You need to seize this point and return to the council room at your hold. There, you can decide that your men should fix the bridge to the isle. On the island, there is a fort full of the undead.
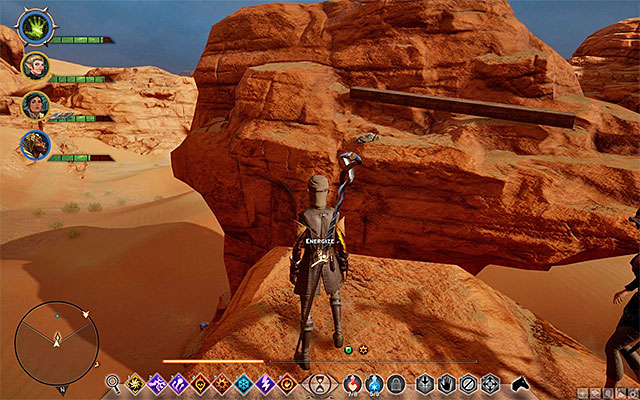 In the Western approach, you can see many interesting places
The Western Approach is one of the larger locations in the game. In theory, you explore this location during one of the main quests of the game (the "Here Lies the Abyss" quest), but it is a short visit and it only consists of a major battle. Fortunately, there also are many side quests here and lots of loot to obtain (some of them in additional, smaller regions) so, I recommend that you stay here longer.
The way to unlock this location: On the war map, select "Investigate The Western Approach" operation and complete it. It is possible only if you have, at least, 8 Power points.
Recommended experience: The majority of regions in the Western Approach can be secured by a party around level 12. You should prepare better for three expeditions - assault on the Griffon Wing Keep (a party at level 13-14 recommended , thanks to this you will easily defeat the bandit leader), a visit to the Coracavus ruins (requires you to fight a giant at level 14) and for the battle against the great dragon (the recommended level is around 15).
Important notes:
1) The element that makes The Western Approach different from, e.g. the Hinterlands is the option to seize the Griffon Wing Keep. By default, the keep is being occupied by bandits but, after you complete the Assault on Griffon Wing Keep side quest, it can be captured for the Inquisition and become its foothold (this additionally makes new side quests available).
2) In the Northern part of the Western Approach, there are poison fumes and a large, locked gate. Do not worry about the fact that the initially locked areas cannot be explored, because you will be able to access them later on. To learn more, see the page entitled Hidden locations.
3) In the Western Approach there is a great dragon, but you will be able to pick the exact moment, when you want to fight it. The battle takes place during one of the side quest from alchemist Frederic, whom you can find in the Southern part of the map. Descriptions of the quests from this character, and the ones connected with the dragon, can be found in the walkthrough for the game. Additionally, in the Northern part of the Western Approach (the region behind the locked gates) you encounter several giants. A weak party may have some problems defeating them but, in case of any problems, you can walk around them.
The above map presents all of the important characters and locations in The Western Approach. In here, there are not too many characters and almost all of them occupy the seized campsites (and the stronghold, after you capture it). As for the regions, the most important one is the Griffin Wing Keep, Still Ruins and Coracavus. The last two are explored on separate maps and they have been described later in this chapter.
The above map presents chests in z Western Approach (The Western Approach). Due to the size of the location, reaching all of the chests, marked on the map will take some time. Unfortunately, you do not find too many valuable items in them. Mostly, it is standard and randomly generated loot.
Note - Some of the map markings refer to chests that you find in caves and dungeons. If you cannot find a chest, find out if there is a passage to an underground location around. The chests at the Griffon Wing Keep appear there only after you capture it.
The above map presents locations, where you obtain new codex entries w Western Approach (The Western Approach).Be on the lookout for various notes, letters, books and tablets.
Note - Some of the map markings refer to codex entries that you find in caves and dungeons. If you cannot find an entry find out if there is a passage to an underground location around. The entries at the Griffon Wing Keep appear there only after you capture it.
The above map presents astraries and ocularums in Western Approach (The Western Approach). The solutions to the puzzles in astraries have been presented below. As for Ocularums, the quest related to them has been described in the walkthrough for the game.
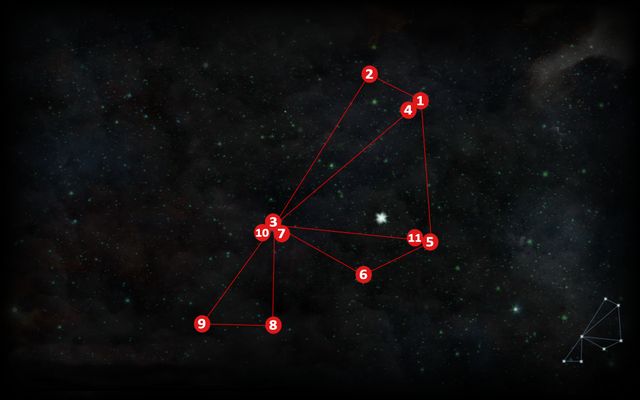
The first astrarium in The Western Approach is in the keep to the West (M19,1a). To solve the puzzle, you need to capture the keep first and climb to the top, where you find the astrarium.
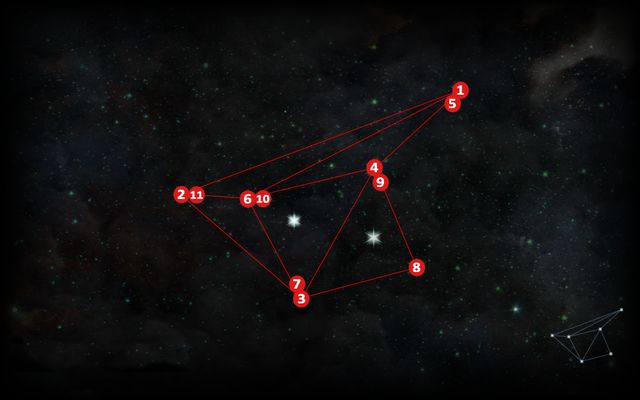
The second astrarium is to the very North of the map (M19,1b). To get there, you need to complete the "Trouble with Darkspawn" side quest) - thanks to this, you can get to this region of the map.
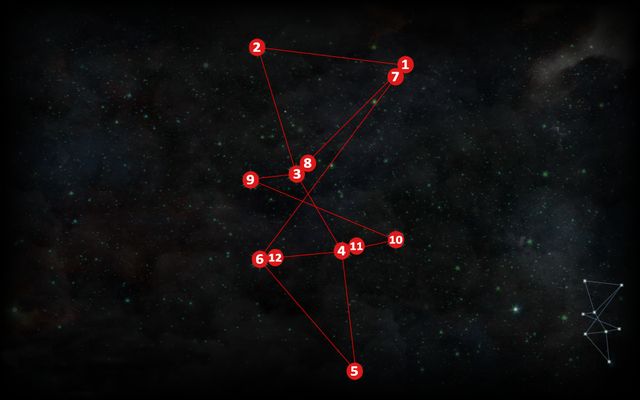
The last astrarium is on the elevation (M19,1c). You get there by crossing Coracavus, and reach Fort Echo, where you find a cave, thanks to which you get to the region of the astrarium.
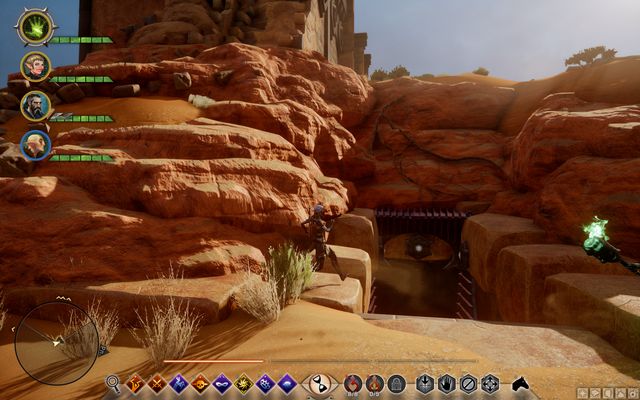 The cave entrance
The unlocked cave is to the West, near the encampment at the ruined tower. Inside, there are several interesting items and a scheme for the Master Fire Rune on the wall.
The above map presents all of the most important collectibles in Western Approach (The Western Approach). This mainly refers to mosaic fragments, Thedas bottles and glyphs (runes). Apart from that, the map presents the locations of standards, among others.
Note - Some of the map markings refer to the collectibles that you find in caves and dungeons. If you cannot find a collectible, find out if there is a passage to an underground location around.
The above map presents locations that are more difficult to access, which you can visit while exploring Western Approach (The Western Approach).
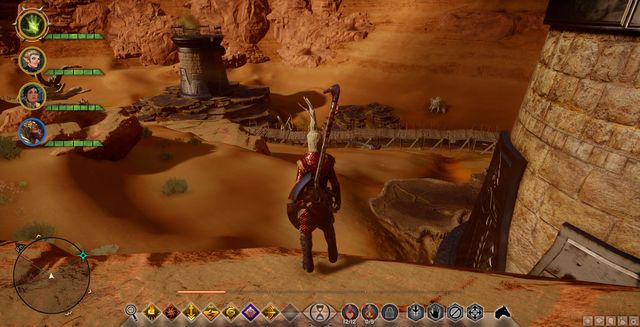 The region of the poison fumes, after your subjects removed it.
Point 1 on the map marks the location of the poison fumes region. To remove the fumes, you need to approach the region and set the flag of the Inquisition in the appropriate spot. Then, return to your stronghold and have your subjects remove the fumes. Thanks o this, you will be able to cross the area.
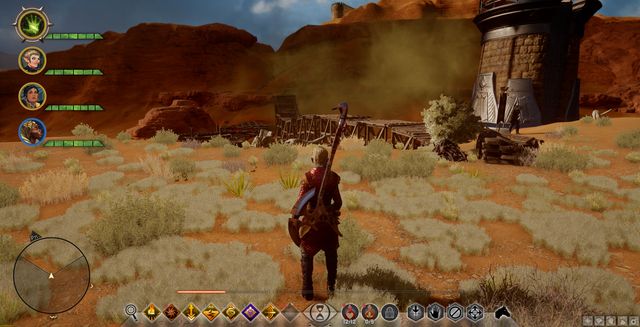 The built stairs
Point 2 on the map marks the locations of the darkspawn in this region. To find out where the monsters come from, you need to complete this operation. After you seize it, return to your stronghold and have your subjects take appropriate steps. Thanks to this, you will be able to climb higher and find out where the darkspawn come from. (Coracavus ruins - point 2a on the map).
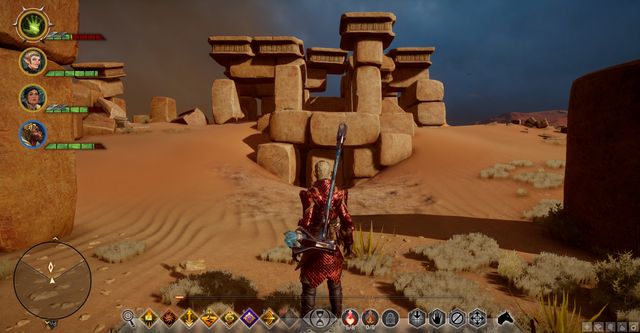 The locked cave entrance (as of now).
Point 3 on the map marks the cave entrance. To open it, you need to fight and defeat the dragon that appears after you have completed a number of quests on this map. The passage should open during the battle with the beast.
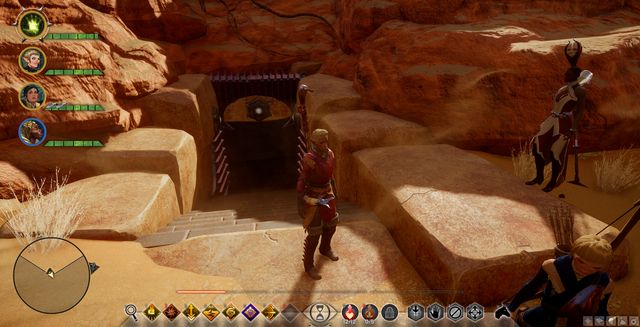 The opened cave entrance.
Point 4 on the map marks the cave entrance. To open it, you need to solve all of the astraries in this location. After you solve the last one, the passage opens automatically. The astraries are scattered all around the map and they can be found in three regions.
Above, you can find the map of Still Ruins. It is a medium-sized location that you can explore after you reach The Western Approach, during the A Tevinter Relic Hunt side quest. In the ruins, you encounter many opponents, but you also find many valuable items. Therefore, it is a good idea to keep an eye out for them, while exploring the area (some of the places need to be broken into).
Above, you can find the map of the Coracavus ruins, which you can access after you get to the Northern part of the Western Approach. You visit the ruins during The Trouble with Darkspawn side quest. Here, you encounter many opponents, but you also find lots of valuable items here. Therefore, it is a good idea to keep an eye out for them, while exploring the area (some of the places need to be broken into).
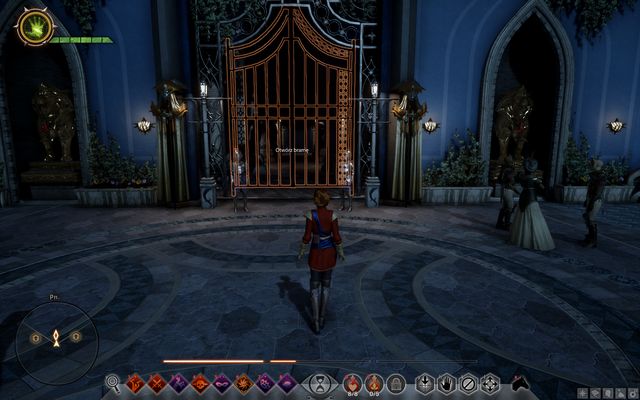 Entrance to the Winter Palace
The Winter Palace is a location restricted only for the purpose of the "Wicked Eyes and Wicked Hearts" main quest. You won't be allowed to return to the palace later on in the game so you will have to do all the things during your first visit. It's also important to know that the game will prevent you from going back to previous areas of the castle (like the outside part or the eastern courtyard) while you're completing the main quest so always make sure to explore your surroundings before talking to new people. There aren't any standard collectibles in the castle like mosaic pieces or bottles. Instead you will be discovering new, unique types of secrets.
The way to unlock the location: On the war map, you need to select the "Wicked Eyes and Wicked Hearts" operation. Complete this operation by spending 30 power points on it. This operation becomes available after completing "From the Ashes" quest.
Recommended experience level: You won't have to participate in frequent fights during your visit to the Winter Palace. There's only battle you must win and one rift you must close. Depending on your choices you may also have to fight a boss, however it is possible to avoid the boss fight. The suggested experience level of the team members is 12-15, but if you plan on avoiding optional fights you may go to the palace even if your teammates are on level 10-11.
Important notes:
1) There are special types of collectibles in the Winter Palace. They provide experience points when you find them, however they're also used for palace's optional quests. Completing side missions and gathering additional objects (like the elven medallion int the quarters) will also provide you with new dialogue options at the end of the main quest.
2) You must take Sera with you to the Winter Palace if you want to gain access to Red Jenny's Stashes found on site.
3) The palace can be divided into two parts - there's a part available for everyone and there are areas reserved only for the special guests. While you're visiting restricted areas your approval points will gradually drop and when they're all gone you'll end the mission with a failure. You can renew approval by collecting specific collectibles and completing conversations with important NPC's.
4) You will encounter a bunch of closed doors in the Winter Palace. They can't be open using standard methods and instead you must Halla statues on them. Sadly there are more closed doors in the palace than available statues. This means you should read the guide to find out which doors lead to the rooms with best loot.
The above map presents important characters and locations in The Winter Palace. There are a lot of NPC characters in this location. The main character can talk to most of them and sometimes it's required to move on with the main quest. It's worth mentioning that some of the characters are constantly on the move so don't worry if you won't find them after getting to the area displayed on the map. Take some time to look for them.
The above map presents chests in The Winter Palace. Many of the chests can be found in free-to-access areas of the palace, but reaching some of them may prove more demanding. Just as it has been said in the introduction to this chapter, it may be necessary to use the Halla Statues in some cases, to unlock a passage to a new location in the palace.
The above map presents where you obtain new Codex entries in The Winter Palace. Many of the objects connected with the entries are in the free-to-access parts of the palace, but reaching some of them may prove more demanding. Just as it has been said in the introduction to this chapter, it may be necessary to use the Halla Statues in some cases, to unlock a passage to a new location in the palace.
The above map presents all of the most important collectibles The Winter Palace. It is a unique location because, instead of mosaics or bottles of Thedas, you find completely different items here. While at the palace, keep an eye out for Halla statues (green color on the map), caprices (blue color on the map), scandalus secrets (red) and Red Jenny stashes (black).
The above map presents locked doors all around The Winter Palace. You do not open them in a standard way, i.e. as the rogue. Instead, you need to have the required number of Halla Statues (to learn details, see the descriptions for each point). Locations of all the available statues have been presented on the map in the Secrets chapter.
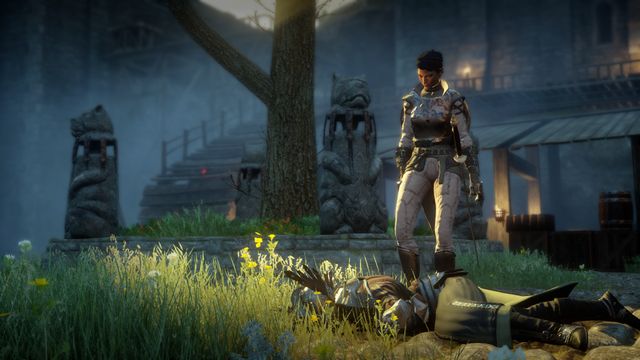 Caer Oswin
Caer Oswin is the HQ of the Seekers. You visit it for the first time while completing the Inner Circle quest for Cassandra- "Promise of Destruction". It is another quest that you will be able to complete for that party member so, you do not receive it in the first place. The castle is a simple location with no items and no collectibles. The only thing here is the numerous hostile Seekers.
The way to unlock the location: Keep completing quests for Cassandra (Inner Circle quests, available after you reach Skyhold), up until you receive "Promise of Destruction". Use the war map, then, to travel to Caer Oswen.
Recommended experience level: You can start the quest only after you reach Skyhold, at which point your experience level will be sufficiently high. The recommended level is 13-15, but due to the low number of enemies, you could start it at level 10.
Important notes:
1) You will not be able to return here so, collect all the loot on a regular basis.
2) Cassandra is your compulsory companion, during this quest. If she is not a regular member of your party, equip her with armor and a weapon.
3) In spite of the low level of the majority of opponents here, towards the end, you are going to fight Seeker Lucius, who may prove a challenging opponent so, be prepared for the battle.
The above map presents chests in Caer Oswin, i.e. the Seekers' HQ that you visit during the side quest connected with Cassandra. In this location, there are no unique items. All of the chests that you find in Caer Oswin hold standard loot that is often randomly generated. Open them on a regular basis, because you will not be able to return to Caer Oswin later into the campaign.
The above map presents the only entry that you can find in Caer Oswin. Just to remind you, it is the Seekers' HQ that you visit during the "Promise of Destruction" side quest connected with Cassandra. Obtain the entry before you leave Caer Oswin, because you will not be able to return here, later into the game.
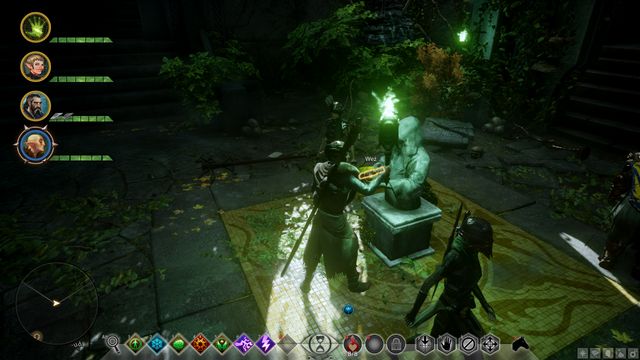 The statue in the Cradle of Sulevin
Cradle of Sulevin is a mini-location, which you can access after you find a piece of information, at Emprise du Lion about the Sulevin Blade. Here, you need to find 4 fragments of a sword that can later be crafted into a legendary sword for you, by Dagna in Skyhold. The only opponents here are skeletons and the undead, who are summoned by the light lit on the statues and are in the possession of the fragments.
The way to unlock the location: In Emprise du Lion, find the notes on the Sulevin Blade - the "Ruined Blade" quest (to find the description of this quest, see the walkthrough for the game).
Recommended experience level: In the ruins, there only are the undead and skeletons. The level that is sufficient for completing the quest without problems, is 11.
Important notes:
1) Unlike many other minor locations, you will be able to return to this one at any moment, using the world map. This is why, if you decide that your experience level is too low to defeat the opponents, you can retreat and come back later.
2) To collect the blade fragments, you need to use the beacon to light four statues in the ruins and kill the summoned undead.
3) In this location, there also is one type of glyph (rune) and a mosaic fragment.
The above map presents chests in Cradle of Sulevin, i.e. the small location that you visit after you find notes on Sulevin Blade. Unfortunately, in this location, there are no unique items. All of the chests that you find in Cradle of Sulevin hold standard loot that is often randomly generated. You do not need to open them all immediately, because you will be able to return here later into the campaign.
The above map presents three codex entries that you can find in the Cradle of Sulevin. Just to remind you, it is the small location that you visit after you find notes on Sulevin Blade. Do not worry if you cannot find all of them the first time around, because you will be able to return here later into the campaign.
The above map presents two of the most important collectibles in the Cradle of Sulevin, i.e. the small location that you visit after you find notes on Sulevin Blade. The two are the glyph (rune) and a small mosaic fragment. You do not need to obtain them all the first time around, because you will be able to return here later into the campaign.
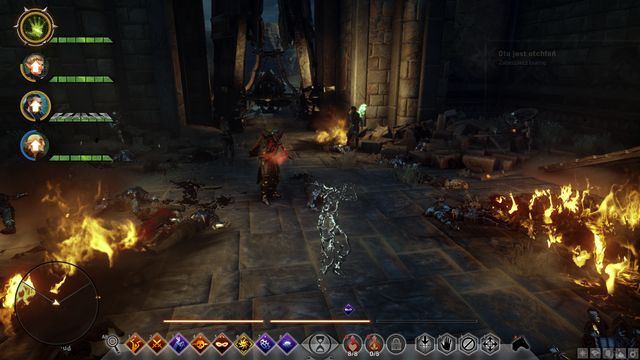 Adamant Fortress
The Adamant Fortress is one of the locations that you visit during the "Here Lies the Abyss" main quest, along with the Fade that you get to, after you complete the quests at the Fortress. You start this quest during the siege of the fortress, as a passer-by. The main sides to the conflict are the Red Templars and Gray Wardens - you can either side with the Wardens or kill them all - you will have to take this decision before you get to the Fade. There, you fight against spiders, wraiths and sometimes, Demons of Pride. Sometimes, you will also have to pick the memories dropped by the wraiths, to be able to continue on your path. Finally, you are also going to fight the boss.
The way to unlock the location: With your progress into the campaign, after you complete "Here Lies the Abyss", which costs 20 Power points.
Recommended experience level: The suggested character's level is 12-15, but at the lower extremity, you may have problems defeating the final boss of the Fade so, I recommend that you exceed level 12.
Important notes:
1) You cannot return here so, pick all the loot as you go.
2) At the Adamant Fortress, you can either side the Wardens, or fight against them - you decide on that after you encounter the first group of combatants - you can either fight on their side or have them retreat - in such a situation, you avoid fighting.
3) In the Fade, instead of chests, there are "emerald containers" that perform the same role. You find many accessories and valuables inside so, you had better start this quest with your inventory empty.
4) Apart from the containers, there are mirrors in the Fade - find all of them, because each one raises your attributes permanently.
5) While in the Fade, note the "Fears of the Dreamers" side quest - for completing each stage, you also are rewarded with a boost to your statistics.
The above map presents chests in the Adamant Fortress. The majority of chests hold, unfortunately, standard and randomly generated loot. The only exception is the chest marked in red, which holds a legendary shield.
The above map presents all of the codex entries that you can obtain at the Adamant Fortress. You should be able to reach all of the objects without major problems.
The above map presents the most important collectibles in the Adamant Fortress. In here, there are no mosaic fragments, bottles or glyphs. Still, there are other, interesting collectibles. This means the standard of the Grey wardens and five mirrors that you can interact with.
 The ruins of the Temple of Mythal
The Arbor Wilderness and the Temple of Mythal are, virtually, the last locations that you visit along the main storyline. In the wilderness, you will witness the fights between the Orlais and the Red Templars. You do not need to pick sides, because your task is of greater importance. After you reach the end of the forest corridor, you reach the Temple. Here, you can either do the ritual, or follow Corifeo's factotum. If you know how to perform the rite, it is going to be faster this way and additionally, more profitable 0 you can then ally yourself with the ancient elves. The last stage of the journey is the battle against Samson, who is then taken away to Skyhold where you pas judgment on him.
The way to unlock the location: After you complete the "Here Lies the Abyss" main quest, you gain access to the "What Pride Had Wrought" main quest, the cost is 40 Power points.
Recommended experience level: The recommended level of the party, to complete the quest without major problems is between 16, a 19. The only problems you may have is during the long battle against Samson, towards the end of the quest- first, you need to remember to loot the corpses on the ground, thanks to which you often replenish your health potions.
Important notes:
1) In the Arbor Wilderness, you do not need to fight all of the opponents- dash ahead and maneuver around the fighting groups, to reach the Temple quickly.
2) You will be unable to return to the Wilderness, or the Temple so, pick all the loot on a regular basis.
3) In the temple, you can choose whether you want to start the chase, or perform the rite - after you pick the rite, you will then be able to get around the fighting Templars, along the secret paths that the elves show you.
4) Towards the end of the quest, you can choose who should wield the power of the well- you can either pick yourself or Morrigan - this choice will affect the available dialogue options, later into the game, as well as the support from your party members.
The above map presents chests in the Temple of Mythal . The majority of chests, unfortunately, hold standard loot, which is mainly randomly generated. The only exception are two chests marked on the map in red. In them, you find more valuable, legendary items.
The above map presents all of the Codex entries that you can obtain, while exploring the Temple of Mythal. The majority of the objects are easy to access. The exception are some of the symbols on the walls of the fort - use a torch to read them.
 Frostback Basin
The Frostback Basin is the location provided by the DLC entitled Jaws of Hakkon. It is a medium-large coastal area where you will find plants, minerals, and monsters that you mostly already know. The location contains few hidden codex entries or chests, but these scarce treasures are often highly valuable. You will also find many legendary weapons and armor here. That's why you should make sure to visit this location early to continue your journey with the best possible equipment. You will spend a lot of time here, because in spite of its moderate size this location offers a variety of side quests.
How to unlock this area: when you install the expansion Jaws of Hakkon at any point in the game (provided you have Skyhold) the task "Jaws of Hakkon" will activate and you will gain access to the operation Investigate Frostback Basin. Once it's completed, go to the location.
Suggested experience level: it's best if you have level 25. However, you won't have any problems at level 20 either. You can easily gain a lot of experience in this location. Tasks are highly rewarded with experience points. Therefore, if you skip a task that you initially find too difficult, soon it will no longer present a great challenge.
Important information:
Above you can find the map of the Frostback Basin. It shows important sites, as well as key characters and traders. It also shows all rifts, with approximate levels of difficulty ascribed to them. Most of the key characters can be found in the Stone-Bear Hold (in this guide, it's also referred to as the "Avvar village", after the tribe that inhabits it). In this location you will find many caves; some of them are not accessible right away. However, these are the ones that usually hide the most precious treasures.
The above map shows the chests located in the Frostback Basin. Despite the rather large size of the map, you won't find many chests or treasures there. However, many of them contain valuable, legendary items and precious raw materials. Apart from chests, the map also shows elements such as corpses, containers with interesting items and several unusual elements, such as a stack of gold coins hidden on the island.
The above map of the Frostback Basin shows codex entries. Most of them are books or notes, but sometimes they are objects that you can explore, like statues and stones with entries written on them. Not many entries in these forms are hidden in the location. If you want to find all of them, it shouldn't take you long. Many entries can be found next to camps or in specific locations, such as ruins or houses.
On the map above, you can see the astrariums and oculara located in Frostback Basin. Below, there are also solutions to quests connected with the astrariums. The details of the reward obtained for collecting all the shards, using oculara, are described in the walkthrough (quest: Mystery of the Winter).
The first astrarium (M31, 1a) in Frostback Basin is located in the central part of the map, to the west, near the camp. Puzzle difficulty level: hard.
The second astrarium (M31, 1b) can be found to the north of the first camp (the one where you begin your journey). You can reach the rock on which it is located from the south. Puzzle difficulty level: easy.
Astrarium 3
The third and the last astrarium (M31, 1c) is located north-west from the Avvar village, near a large gate. Puzzle difficulty level: medium.

 Dragon Age II Game Guide & Walkthrough
 Dark Souls Game Guide & Walkthrough
 Daylight Game Guide & Walkthrough
 Dragon Age: Origins Game Guide & Walkthrough
 Divinity II: Ego Draconis Game Guide & Walkthrough