This guide includes the walkthrough for, both, the main and side quests available in Divinity: Original Sin, along with numerous illustrations that present the individual stages of the game. What can be found here are author's suggestion's concerning completion of the individual quests. Also, this guide includes hints on the general combat mechanics which concern the individual aspects of the gameplay. Apart from that, the guide lists abilities and talents available in the game, along with their descriptions, which will aid you in the process of selection of these. An important element of the guide is the description of the spell combination process, including the lists of the useful combinations discovered by the author himself. Divinity: Original Sin is a classical RPG game, developed by the Larian studio, presented in the top-down view. The exploration of the world, full of magic and monsters, is conducted in the real time however, after a fight starts, the game turns into turn-based, where you can analyze both your chances and the battlefield. The world that you are going to visit is full of objects that you can interact with. What spices this game up is the co-op mode, thanks to which you can invite a friend to take control of one of the characters. Such a character is an independent one and they can even travel the world on their own, without bothering about the other player. The game comes complete with the relationships with the other characters, through their conversations, which take place pretty often while exploring the world, and even with NPCs. Under the description of an individual quest, there is a table that includes the reward that you receive. Experience is the sum of any experience points awarded by the game at each instance of journal update.
The guide for Divinity: Original Sin includes:
Marcin "Xanas" Baran ()

Movement / Action

Camera spin

Camera controls

Take all/ End turn

Chat

Show descriptions above the hero's items

Unstack items/ Create movement queue

Combat mode
Details about the opponent

Highlight all characters

Sneaking mode

Tactical camera

Map

Journal

Abilities

Inventory

Game menu

Quick save

Quick load
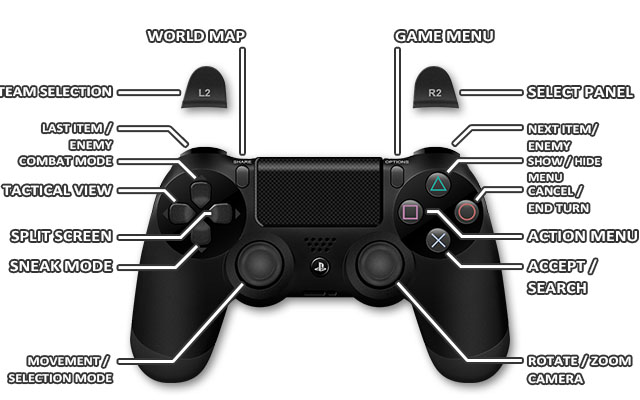

Movement

Selection Mode

Rotate / Zoom Camera

Show / Hide tips

Accept / Active Search

Cancel / End turn (hold)

Action Menu

Show / Hide menu

Tactical View
Combat Mode

Sneak Mode

Split Screen

Previous item / enemy

Team Selection

Next item / enemy

Select panel (hold))

World Map

Game Menu


Movement

Selection Mode

Rotate / Zoom Camera

Show / Hide tips

Accept / Active Search

Cancel / End turn (hold)

Action Menu

Show / Hide menu

Tactical View

Combat Mode

Sneak Mode

Split Screen

Previous item / enemy

Team Selection

Next item / enemy

Select panel (hold))

World Map

Game Menu
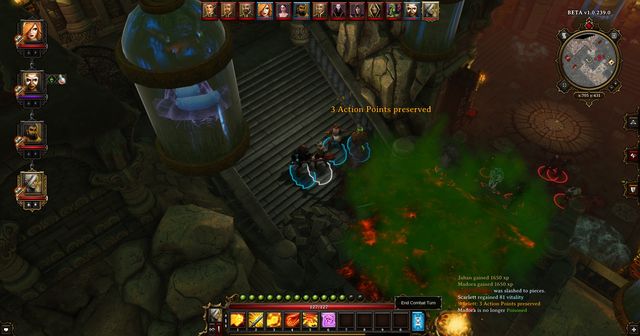
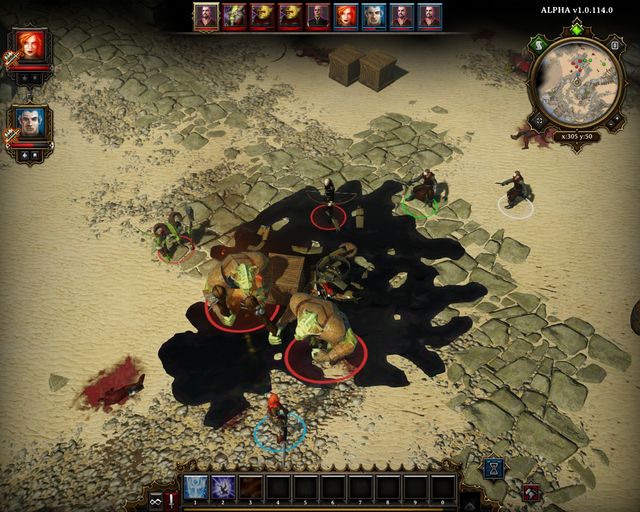
 Combat in Divinity is turn-based
Combat in Divinity: Original Sin is played in the turn-based mode. In the course of the combat, each of the participating characters has its turn and it adheres to its place in the queue.
Each attack of a character requires action points, which replenish after a turn begins. It should be noted here that the unused action points are transferred to the next turn, up to a certain limit. Sometimes, it happens that you have five AP, where your ability requires seven. You can then move, or attack, so that you have, at least, two AP left. Then, in the next round, due to accumulation, you will be able to launch the attack that requires seven AP.
The fight is also joined by all the NPCs within sight. If you are close to a city, and you are not sure if you will be capable of defeating an enemy, you can try to lure them closer to the city gates, so that the guards help you.
An important factor is your chance to score the hit. This appears whenever you aim at the enemy with an ability or an attack. You need to be careful though because, even if you have 100% chances of scoring a blow, and there is an obstacle in the line of fire, you will not hit the opponent. This mainly concerns ranged attacks.
 After you spill oil under somebody's feet, it is a good idea to set the slick on fire
If your chances at successful attack are low, it is worth to consider changing position that your character is currently in.
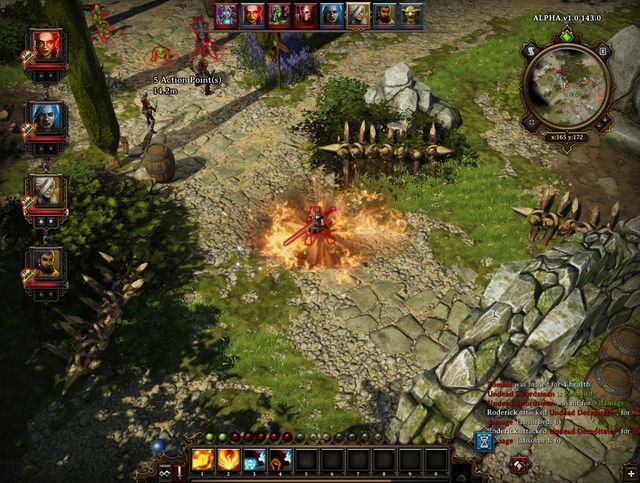
Many characters have quite an array of AoE attacks, i.e. the ones that, if launched, affect a certain area. You need to remember, though, that such attacks will also harm your characters, if misused, which may determine the outcome of the battle.
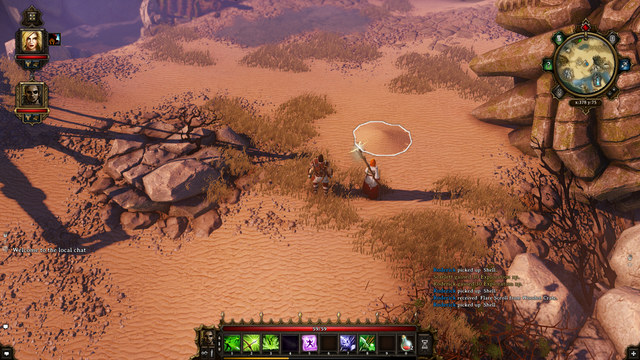
If you want to move to an area, all you need to do is click that area. Some of the enemies are capable of attacking if you pass near them. At that point, there appears a circle around them, which informs you, at which moment of your move the attack will be launched. It is ten worth reconsidering your decision to move there.
If any of your characters dies, you can resurrect them with rejuvenation. Characters remember things and if there is anyone to keep being hit by your spells, they will go angry and attack you. It is important that you make sure that you do not attack, inadvertently, your character.
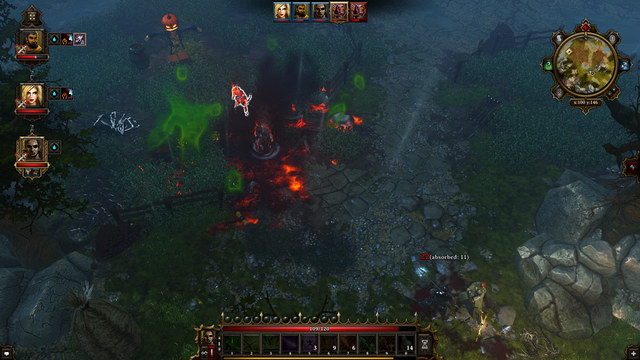
The developers have implemented an interesting system of combining elements, thanks to which interesting effects can be created, which will aid you in combat. This happens thanks to the fact that using an element against a target, usually leaves the opponent in a certain state, like e.g. wet or blazing. Thanks to that, they are more vulnerable to the other elements.
For example, if you get a character wet, due to having used a spell of rain, you can then cast an electricity spell that will inflict more damage. If, however, you are standing in the puddle of water, just like the opponent, then you will shock both yourself and the opponent. If you freeze water, under yourself and the opponent, all of the characters may fall, which may help the opponent get to your weaker characters.
 An electrified cloud
Developers have introduced an interesting system of interdependence between elements. Thanks to this, if you know the mechanics of the game, you can easily raise the effectiveness of your attacks. Apart from the four basic elements, also derivatives, such as acid, electric discharges or oil have been introduced. The dependencies are not one-staged ones, e.g. water puts out fire. If you have the appropriate spells and scrolls, or abilities, you can create more complex mixtures e.g. flood the enemy with acid, cause it to explode by setting it on fire, then put out the fire, which creates vapor, which you can then turn into an electrostatic cloud. That is why, it is recommended that you have, at least, two mages on your party, who are versed in the elements that complement each other.
 An explosion of poisonous gas may result in a half-burned cloud
The below table presents the main interdependencies in the game, which you can easily exploit, while planning on your tactics. They are worth remembering and using with each opportunity.
Element I
Element II
Effect
Liquid (water or blood)
Electricity
Shocks everyone standing in the puddle.
Water
Fire
Vapor - limits visibility and makes some attacks impossible.
Water
Freezing
Ice - Freezes the enemies and makes them slip (knock down) over its surface.
Acid
Fire
A powerful explosion, possibility of burning and poisoning, as well as lots of smoke that limits visibility.
Oil
Fire
Sets on fire for a long time and explodes, possible to carry over the fire onto the enemies clustered together.
Vapor
Electricity
Creates a storm cloud that paralyzes the enemies within its reach.
Of course, as you can figure out, the majority of these can be used to alleviate a given effect (by using fire, you turn ice back into the water or, by using water on the burning enemy, you put them out). Also, it is worth remembering that there are exceptions, e.g. Acid or Oil do not conduct electricity. Also, there may occur a problem with using some of the spells, directly on the elements - you need to find out if the spell allows for that, or whether you can only use it against enemies and objects, or even enemies only.
Important! Using an element of a kind, on an opponent of the same kind heals that opponent (e.g. using fire on a fire elemental, or poison on zombie).
 Effects are shown in the form of the small icon to the right of the hero's icon
Using spells, food, potions and some abilities may cause setting certain effects - these are called buffs, in the gaming jargon. Also, debuffs are frequent. These are additional bonuses that last during combat, and outside of it, like e.g. raising of statistics or poisoning, which lowers the amount of health points, temporarily.
In the case of food and potions, the success of setting an effect always equals to 100%. This is not true for spells and abilities. Each ability, if it is capable of setting an effect, comes with the percentage possibility of setting that effect. You need to lower that amount by the partial, or full, resistance of the target to that effect (e.g. you cannot poison skeletons) or the dependency of the other, current, effects (e.g. an attempt to freeze a burning opponent). The majority of the effects that are worth remembering have been provided below. Apart from them, there also are the effects set by potions and food, which set their own effects, depending on the item type.
The name of the effect
Result
Warm
Resistance: Water +10, Fire -10, using Warm again sets on fire
Burn
Resistance: Water +40, Fire -20, additional damage from fire for the pre-determined amount of turns
Chill
Resistance: Water +40, Fire +20, using Chill sets the Freezing effect
Frozen
The target cannot move, Armor +65, Resistance: Fire +40, Water -20
Charmed
The target is controlled by the opponents for a predetermined number of turns
Poisoned
The possibility of explosion of the poison, for the given number of turns, it lowers health.
Invisible
The target is invisible, also while attacking (a scroll spell)
Stunned
The target cannot move for a given number of turns
Blinded
The target cannot move, cannot target/attack
Knocked down
The target cannot move for a given number of turns
Wet
Resistance: fire +10, air -20, increased vulnerability to Stun and very high to Chill/Freezing
Fear
The target cannot attack and moves away from the caster.
Crippled
Movement -84, AP restoration -4
Slowed
Movement -64, AP restoration -2, The starting AP -4, Max AP -4
Immune...
Resistance to certain effects can be partial or full, depending on the opponent type, the potions used, etc.
Raged
Agility -4, Initiative +4%, Damage +30%
Hasted
Movement +64, Max AP +4, Starting AP +4, AP restoration +3
Encumbered
Appears whenever the character carries too much equipment and slows down.
Leader in sight!
Initiative +5, Damage +10% (by default, depends on the level of the Loremaster)
These are not all of the effects that occur in the game, but rather the ones whose value is constant and which occur the most frequently. For example, healing, in itself, is also an effect, but it depends on the spell/potion used.
 You will quickly accumulate vast amounts of grenades - there's plenty to choose from!
Grenades are one of the two main additions to equipment (aside from wands), in the Divinity Original Sin Enhanced Edition. Grenades are best described as "throwable elemental arrows", as they have almost identical effects to arrows available to the ranger class - with some notable exceptions.
Grenades are available from the very beginning of the game - during the encounter with the two drunken guards on the bridge, you will be able to acquire one of those (or get hit by it, if you're not quick enough and if you start a fight with them). The only major difference between grenades and elemental arrows is the fact, that you can't retrieve them (there's no talent for that) - they are gone as soon as you throw them.
Grenades are best used by a character that lacks any long-distance attacks, as well as refrains from using spells in combat. The ideal choice is either a warrior, a paladin, or a rogue, basically classes that are fighting in melee range - grenades will help them to affect enemies with crowd control effects, as well as allow them to reach an annoying foe, hidden behind a firewall, or a poison cloud.
 Grenades are easy to craft - components can be found throughout the world, hidden in containers.
Grenades can be found scattered around the world, often hidden in common places (like barrels, chests, boxes, desks, and so on). Additionally, enemies you fight during your journey can be carrying them as well - to acquire them from your foes, you have to defeat them before they are able to throw them (which often happens as soon as the fight starts). The last method is, of course, acquisition through crafting - details can be found in the "Crafting" section of this guide.
There's over a dozen of different grenades in the game, most of which deal a specific type of elemental damage, and almost every single one has an additional effect, such as stun, setting the target on fire, or even charm. Below you can find a table describing each and every grenade available in the game.
Icon
Name
Effect

Armor-piercing grenade
Piercing damage
Chance to decrease the armor of the target

Plague Grenade
Chance to disease the target, decreasing the constitution and bodybuilding.

Poison Grenade
Creates a poison cloud, which can poison enemies, or explode when exposed to fire.

Frost Grenade
Water damage
Chance to freeze the target
Creates a frozen surface

Firestorm Grenade
Fire damage
Chance to set Burning status

Nail Grenade
Piercing damage
Chance to set Bleeding status

Thunderbolt Grenade
Air damage
Chance to stun the target

Nightmare Grenade
Chance to terrify the target, causing him to flee from your character

Tremor Grenade
Blunt damage
Chance to knock the target down (Knockdown effect)
Flashbang
Chance to blind the target (Blinding effect)

Smoke Grenade
Creates a smoke screen, which decreases the visibility of characters inside of it

Love Grenade
Chance to charm the target, who will then fight on your side

Holy Grenade
Restores a certain amount of health points to your allies

Poison Flask
Creates a poison surface

Oil Flask
Creates an oil surface

Water Balloon
Creates a water surface
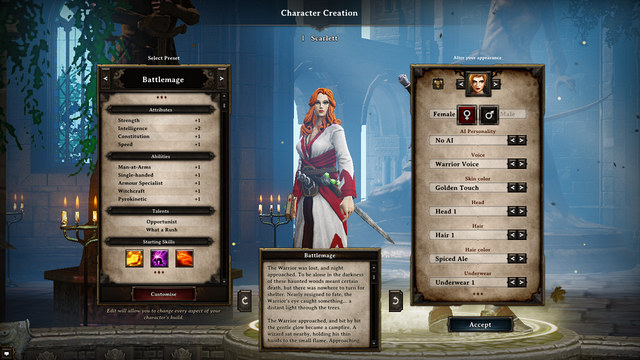
Just like in nearly every RPG game, you start off by creating your character, select its looks, class and the base skills/attributes. In Divinity, there is no direct division into classes - what you can find here is just a suggestion from the developers in which way to develop your character. Still, this is absolutely player-dependent. The class that you pick determines the initial equipment, skills and attributes, which can be modified, by pressing "Customize" in the character creation screen.
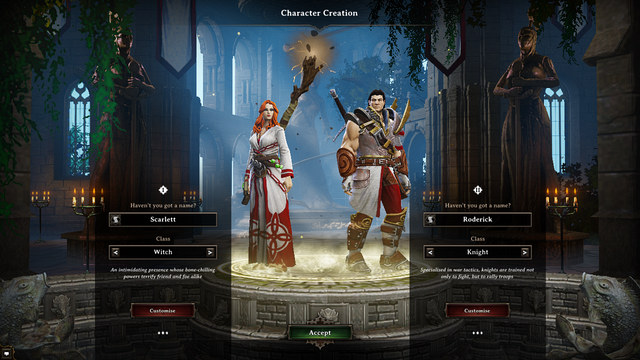 The character creation screen
First of all, you create two main characters. Already here, decide whether you want to play as a part of a bigger party (of up to 4 characters), or you will stick with the initial couple. In the case of the latter, select the "Lone Wolf" talent, thanks to which your character will receive more health points, will be faster (more AP) and receives an additional point, while leveling up.
The most effective party should include two wizards where one of them wields fire and earth, whereas the other wields water and air. Looking through the prism of the two allies that can join you - Jahan is the water wizard and Madora is a fighter. Also, if you stick to the assumptions, one of the characters that you create should specialize in fire and earth magic, whereas you should define the other according to your preferences. Still, it is a good thing if the character classes are not too similar, which is why the battlemage, archer rogue, or another melee fighter, with an additional specialty, is chosen.
Right at the very beginning, you should decide which character is going to handle the additional activities, such as Crafting, Blacksmithing or Loremaster - identification). Of course, you do not need to teach these skills to any of the characters but, it is a good thing if one of the characters has them. You can also distribute these skills to the individual characters. Still, the preferred thing is that you have one less character that you develop (e.g. the archer is good for that, whose talents, apart from the bow/crossbow specialization, as well as Expert Marksman, you do not need to develop), because clothes and talents improve these talents in group. It is good for one of the characters to become the leader (the Leadership skill). This skill, when raised to its maximum, provides very strong buffs for all the characters around the leader - the buffs for this skill do not accumulate.
All of the skills, apart from the weapon and defense specializations can be raised, at most, to the fifth level. Therefore, all the surplus, once the character is fully developed in his specialization, should make it into those two categories. Unless you decide to start a new specialization for the character.
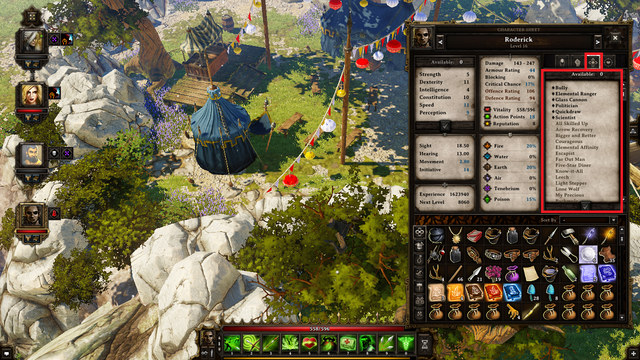
 Selecting of base categories
With time, as your character progresses, you will be receiving additional attributes, skills and, sporadically, talents to distribute. It is important to distribute them with consideration and make the character the specialist in its own field. What the individual parameters refer to, can be read in the chapter entitled "Abilities, talents and attributes" - the chapter focuses entirely on which attributes should be selected to make the character as good as possible. The division has been simplified to 5 character classes: fighter, archer, wizard of the elements, battlemage and the rogue. OF a character has more than one class, try to develop, in the first place, the abilities that are common to these classes and then, the parameters characteristic to a given class.
The first thing that you need to do, while creating the fighter class, is select his equipment. Depending on whether it is going to wield a two-handed weapon, a on handed weapon and a shield. One-handed weapons are, usually, weaker than the two-handed ones but, they often are cheaper and they require 3 AP to deal a blow, whereas the two-handed ones consume 4 AP. Depending on which weapon you choose, you need to develop the specific ability to receive high bonuses to attack.
The main attribute of the fighter is Strength, which influences his ability to deal more damage, carry tougher armors and swords. Then, there is the movement speed, because you need to reach the opponent and have enough points left to deal a blow. That is why, you need to develop Speed and Constitution also. As for abilities, - the leading one is Man-at-Arms which allows you to use books and new abilities. Then, it is a good idea to ensure that the character is capable to endure in the battlefield, which is why the Body Building and Armour Specialist skills are irreplaceable. Also, it is a good idea to put some points, occasionally, into Willpower. If you are playing as a character with a one-handed weapon and a shield, from time to time, you should also add points to Agility and the Shield Specialist skill.
The talents that it is a good idea to attribute, apart from the ones that depend on the ability, are: Bully, Lech, or Courageous - this provides you with resistance to Fear, but makes you unable to flee from the battlefield. It is a bad idea to add the attributes connected with magic (like, e.g. Elemental Affinity), or My Precious that is attributed by default - it provides you with a 50% chance not to damage the armor after a blow - the repairs are cheap and they do not wear off that quickly.
While creating a ranger, you need to decide whether you want to play as the archer or the crossbowman. The bow requires 3AP to attack and the crossbow requires 4 AP. Additionally, the range of the bow is longer and there are much more of them in the game world, however that attack value can be, even, three times as low, at the same weapon level.
Archery uses the Expert Marksman ability, which is in turn based on Agility. At the same time, you need to develop Perception, for your attacks to be more accurate. Additionally, this ability needs to be raised, depending on the preference for bow/crossbow. Apart from that, the archer character dies nit require any additional attributes/abilities. By default, he has the abilities of blacksmithing, crafting and identification- abilities which are good if developed because, unlike the other characters, he often has quite a few spare Ability points to distribute. If, however, you decide not to go for that option, it is a good idea to dual-class this character - the rogue or the battlemage.
The preferred talents (apart from the ones that come with the Expert Marksman) are Arrow Recovery, Bully, Light Stepper - because the character, usually, has a well-developed perception and Stench - so that a character with lower constitution and resistance is not attacked too often. Also, choose Scientist, if you still you decided to develop the Blacksmithing and Crafting abilities.
Rogue is a minor specialization that can be combined with another character class. The class is based on Agility, but also Speed is of high value. The preferred weapon is daggers, which is why you should raise the Abilities to fight with one-handed weapons and the leading ability - Scoundrel. What is also preferred by this class is Sneaking, used to perform sneak attacks from behind.
Apart from the talents connected with the development of the Abilities, it is worth assigning Bully, Leech, and Stench talents - often, the character's constitution is not too high and it is better if it is not cornered by multiple opponents.
As it has been stated earlier, it is best if the wizard specializes in two related elements, i.e. earth and fire, or water and air. Thanks to this, he will be able to poison an opponent and blow up the poison within one turn, using fire. The wizard, if he uses two elements, most often does not require development of additional abilities not related to these specializations.
Mages should develop abilities connected with their element(s). At a later stage of the game, after you obtain the highest possible level for those abilities, it is a good idea to add by 1 witchcraft point - this allows you to wield some very useful spells, like e.g. Destroy Summon or Resurrection, with the penalty to AP, which are sill profitable, due to the potency of these spells.
The selection of talents, apart from the specializations is wide for these characters. It is a good idea to obtain, initially, the Elemental Affinity talent - it provides you with -1 AP, if you are standing on a surface that is the same as the spell that you use. Then, Know-it-All that adds 1 Intelligence, at the cost of contacts with NPCs - which is why, you should not choose the character that most often talks to people, for that reason. Additionally, Far Out Man that allows you to use spells and scrolls at the distance of +2m.
Just like wizards, he bases on the Intelligence attribute, but it is a good idea to combine that class with another one, like e.g. fighter, rogue or even the ranger. Then, you can distribute the additional points to the other specialization, where in the Battlemage specialization you develop Intelligence and Witchcraft only. Battlemages have several specific abilities, like the Destroy Summon and Resurrection, in the first place. This is why, even if you do not create the Battlemage as the character class, determine, at least, one point for the character with lots of spare points, e.g. rogue or ranger.
Talents that can be well attributed to this character are Far Out Man, Know-it-All, Bully and Courageous.
The weapons category determines the effectiveness of a character with a specific type of weapon, and it includes Bows, Crossbows, Single-Handed weapons, Dual Wielding, Wands and Two-Handed weapons. It is good to define what weapon will the character use at the start, to master using it. Crossbows are available only from about level 10, so make sure that you know what type of ranged weapon you want to use in the future.
The Single-Handed, Bow and Wand skills increase the amount of damage a character is able to deal with weapons of those categories by 10%. Two-Handed and Crossbow increase the chance for a critical hit, as well as the amount of critical hits as well, whereas Dual Wielding decreases the penalty to the amount of action points required to attack, as well as give a 10% bonus to damage.
The last ability is using weapons made of Tanebrium. This ability is not available from the start, but only after completing a quest for Brandon is Silverglen, in which you have to bring him Tanebrium ore (you can find it in Luculla Mines). After doing this, every character in the team unlocks the ability and gets +1 point. You cannot buy tanebrium weapons if you do not have this ability.
Defence abilities increase you protection against attacks. It is very important for melee classes and not so important for ranged classes (like enchanters). The abilities are: Armour Specialist (increases defence by 5% every level and reduces the movement penalty from heavy armour by 20%), Shield Specialist (increases shield defence by 5% every level), Bodybuilding and Willpower (both protect the player from debuffs; Bodybuilding protects from physical status effects and Willpower from mental status effects).
The largest category, from which everyone should choose no more than 2 abilities and develop them to level 5. Five of them increase the number of available spells/skills with each level (Attention - at the fifth level, you can learn all of the spells/skills from a given category, so don't throw away older spells as long as you have space for them) and reduce the AP penalty for using spells/skills from higher level. The abilities are: Aerotheurge, Geomancer, Hydrophist, Pyrokinetic, Witchcraft, which are connected to following elements: air, earth, water, fire and the last one is mainly necromancy (summoning dead creatures to fight for the hero).
The remaining three categories are important for characters that use weapons: Expert Marksman, Man-At-Arms and Scoundrel, which are the skills of a ranged fighter, melee fighter and a rogue, who specializes in ambushes and backstabs, preferably using a dagger.
A thing worth noting is the fact, that having 5 points in a given skill won't allow you to memorize all the abilities from that skill - 5th level allows you to learn 6 abilities of the Novice level, 4 of Adept and 2 of Master. You will have to decide which abilities you will use and which will be forgotten.
We can distinguish three abilities here. It is enough when one of our team members (preferably the leader or one of the main characters, because of the dialogue options that they have) has these abilities. The are: Bartering (the ability to buy for less and sell for more), Leadership (all of the team members obtain the Leader in Sight! status when close to the leader, which gives them +10% damage and +2 initiative) and Lucky Charm, which increases your luck in the battle (critical hits, dodges) and helps you find better treasures.
Main characters also have the ability called Charisma, which defines the first impression that they make and sets the number of points during a conversation.
We can find four abilities here and it is enough if only one character is good at them. They are: Blacksmithing (the ability to repair weapons; it is useful for making sure that your weapon won't break during a fight and reduces the cost of repair; requires a hammer) Crafting (the ability to create items; increases the number of items that can be created and their quality) Loremaster (allows you to identify items; requires a magnifying glass; items are usually more valuable when identified and at first you can do this at a vendor, but later you will have to do it yourself) and Telekinesis (important particularly to the character who collects the loot - it speeds up the process and allows the player to reach remote items; if you don't have a strong person in your team, it is good to develop this ability to move objects on the battlefield, like barrels with oil).
The three abilities here are: Lockpicking (not every lock can be opened without a special key and those that can be, usually can also be destroyed, but it damages the weapon and makes a lot of noise, which makes it impossible to stay unnoticed), Pickpocketing (higher level allows you to steal from richer people, like for example merchants and also to steal heavier and more valuable items) and Sneaking (useful when you want to spread your forces over the battlefield, steal from guarded places or perform ambushes).
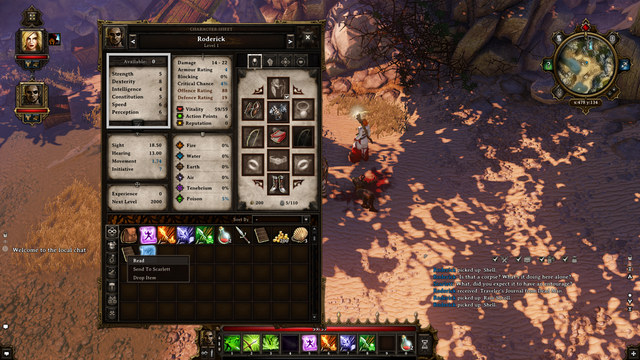 The attributes tab
Attributes are kind of a character's parameters. Represented by Strength, Dexterity, Intelligence, Constitution, Speed and Perception. You obtain points to distribute with every new level and it is important to choose you attributes according to your class and style of playing. Most of them are required to use specific equipment and increase your base damage, defence, hp, movement speed and initiative. With a proper equipment, you can increase your attributes for the time that you're wearing it. Some potions also do that.
Strength is the basic attribute for melee fighters. It enhances the Man-At-Arms ability by increasing the value of attack points modifier and your chances of hitting. Additionally, it allows you to carry heavy equipment and powerful weapons or armors. It also describes the total weight of equipment that a character can carry and allows one to move or throw objects.
Dexterity has a positive influence on the Expert Marksman and Scoundrel abilities. This attribute is particularly important for protection classes, as it increases the defence, and for ranged fighters, using bows and crossbows, because it increases their chances to hit.
Intelligence is an attribute mainly for magic classes, as it enhances the quality of Elemental and Witchcraft spells. It also allows one to wear specific mage equipment.
Constitution should be developed in every character, besides their main attributes. It describes the maximum hp and also, what's very important, the maximum amount of Action Points during combat.
Speed, just like constitution, should be developed in characters that attack a lot. It sets the value of initiative at the beginning of the battle, is responsible for movement speed and the number of Action Points at the start. It is good when the number of the Speed attribute is similar to the number of Constitution and if these numbers are rather high.
Perception should be developed to a high level in at least one team member. Besides increasing the starting AP amount, it also increases the chances of critical hit and hitting from distance, as well as initiative. Thanks to this attribute (you should be at about 8+ level of it), you will be able to uncover traps, which are very dangerous in Divinity, and also find treasures, switches and secret passages.
 Talents
Talents are obtained once every few levels. They are valuable, because they become passive abilities that change our heroes permanently. Besides some talents that are available for all the characters, most of them (particularly those more powerful) depend on the number of points in a given specialization. For example Arrow Recovery allows an archer to recover 20% of his magic arrows and Elemental Affinity reduces the cost of AP of a spell of the type on which a mage is standing. You should pay attention to what talents you choose, because some of them might actually do harm, if you plan a specific strategy.
Each character, whether the hero or an opponent, may perform special attacks and cast spells. This requires special Ability points and obtaining special Abilities/Spells (Skillbooks). Depending on how many ability points your character has, you can learn a limited number of spells. Also, thanks to this, the penalty to Action Points drops, for using the Ability, in the case in which the character has a lower Ability level than required by the spell used - per every level below the required one, the number of AP increases by 2. Some of the abilities require an appropriate character level to be used and, until it is reached, a given spell/ability cannot be obtained.
Ability (level)
The number of spells/abilities that can be learned
The maximum ability level
1
3
4
2
5
8
3
7
12
4
9
16
5
Unlimited
20
Abilities also depend on certain attributes where, e.g. for the archer it is agility and for the mage intelligence. They should be developed at a par with the character development - they have their effect on appropriate modifiers - hits, receiving of an effect (if the ability can provide it, it raises as the attribute goes up).
After the spell is used (does not concern abilities), you need to wait for a certain period of time before you can use it again (Cooldown). This parameter depends on the amount of intelligence, which decreases cooldown by 1 turn, per each 2 points of that Attribute.
 Skillbooks for the archer
The archer is a ranged unit based on Agility. Also, it is a good idea to develop the Perception, which influences the hit modifier. He can use both bows and crossbows, although it is a good idea to specialize in either and develop the appropriate ability for it, which increases damage dealt.
Ability
Required level
The number of AP (Action Points)
Description
Arrow Spray
13
6
Shoots arrows that deal damage dependent on the level of the character
Barrage
7
8
Shoots arrows towards the target. Deals 60% damage from weapon.
Doctor
4
4
Heals Weak, Blind, Mute and Infectious Disease.
First Aid
1
3
Heals Bleeding, Crippled and Diseased.
Infect
10
6
Sets the Disease effect on the nearby target.
Minor Charm
1
5
Sets status Charm (the opponent fights for your character) on the specified target (used only from the scroll!)
Mute
7
5
Sets status Mute - prevents from using magic.
Ranged Power Stance
1
+1
Increases damage from bow/crossbow (toggle on/off).
Ranged Precision Stance
4
+1
Increases the chance of hit with bow/crossbow(toggle on/off).
Rapture
10
5
Sets status Charm (the opponent fights for your character) on the specified target.
Ricochet
1
6
Deals 70% damage from weapon (piercing) to the first selected target and jumps over onto the nearby opponents.
Survivor's Karma
7
8
Increases the Luck of your character and the nearby allies.
Tactical Retreat
1
4
Allows you to dash away (15m at most) from tight situations.
Treat Poisoning
4
5
Heals the Poison effect.
 Skillbooks for the fighter
The fighter is the easiest and the most powerful character in the game. He can use one handed and two-handed weapons, ranging from staffs through axes, through swords, which is why the appropriate Abilities for certain one- and two-handed weapons should be developed early in the game. He also has diverse abilities. Damage dealt is dependent on the strength attribute, which also takes effect on the modifiers of individual abilities. Thanks to this, he can also wear the heaviest armors of high parameters. That is why, it is also a good idea to develop the Armour Specialist ability and, if you prefer one-handed weapons and shields, also Shield Specialist.
Ability
Required level
The number of AP (Action Points)
Description
Battering Ram
1
6
Dashes towards the determined target in a straight line and deals 50% damage from weapon to everyone in the line of the charge and has a chance of knocking down the target.
Crippling Blow
10
5
Sets status Cripple on the target and deals 30% damage from weapon.
Crushing Fist
1
5
A huge fists slams the target and knocks him down, deals crushing damage that depends on the character's attributes.
Cure Wounds
1
6
Heals an ally or self, by the number of health points that depend on the character's parameters.
Divine Light
1
3
Decreases the target's Willpower and Bodybuilding, and sets effects Warm, and Willpower Loss.
Draw Blood
4
6
Deals 50% damage from weapon and sets the effect Bleeding on the target.
Dust Devil
1
6
Attacks the enemies around the character and deals 90% damage from weapon to each.
Encourage
1
5
Adds Courage to the nearby allies.
Eroding Strike
13
5
Deals 30% damage from weapon to the target and sets effect Weak.
Flurry
10
8
Lands several blows, of 100% damage from weapon each, for one target.
Helping Hand
4
3
Removes effects Knocked Down, Burning.
Inspire
13
6
Sets effect Inspired on the nearby party.
Lower Resistances
7
5
Decreases all physical and magic resistances around the character.
Melee Power Stance
1
+1
Increases damage dealt (toggle on/off).
Melee Precision Stance
4
+1
Increases chances at a hit (toggle on/off).
Nullify Resistances
16
5
Decreases all physical and magic resistances of the enemies around the character (stronger than Lower Resistance)
Phoenix Dive
7
6
Dashes from one spot to another to avoid traps/attacks.
Rage
10
4
The effect Rage decreases agility and armor points, but it increases damage dealt and chances at a critical hit.
Terror
16
7
Sets effect Fear, which makes enemies flee.
Whirlwind
7
6
Rotary attack that deals 120% damage from weapon to the enemies around.
 Skillbooks for the Rogue
Rogues prefer surprise attacks and tricks. The weapon of their choice is daggers and knives. The abilities to wield them are governed by Agility. It is a good idea to develop a high Resistance and Speed levels, to be able to get enemies from behind and perform silent assassinations.
Ability
Required level
The number of AP (Action Points)
Description
Charming Touch
4
6
Sets effect Charm on the target.
Cloak and Dagger
10
6
Dashes towards the selected place and leaves a smokescreen behind.
Daggers Drawn
10
8
Deals multiple damage with the knife, which deals 100% damage from weapon.
Eye Gouge
7
4
Deals 30% damage from weapon to the target and sets the effect Blind.
Fast Track
1
4
Temporarily speeds up the target.
Lacerate
1
5
Deals to the target 50% damage from weapon an sets the effect Bleeding.
Precise Incision
7
5
Deals 30% damage from weapon and sets the effect Weak.
Razor's Edge
1
4
Deals to the target 50% damage from weapon and sets effect Stunned.
Self Medicate
7
6
Lifts the effects Bleeding, Crippled, Blinded and Weakened, but only from self.
Trip
4
4
Knocks down the target and deals damage that depends on the character's parameters.
Venomous Strike
4
5
Deals to the target 30% damage from weapon and sets effect Poison.
Walk in Shadows
1
3
Activates invisibility.
Wind-Up Toy
13
8
A remotely controlled bomb that explodes on demand.
 Skillbooks for the wizard of the air
The wizards of the air do not only wield wind (e.g. the tornado), but also magic of electricity, lightning. They harmonize best with water magic, where water, or vapor, can be electrified. The most useful spells are tornado, teleportation, and invisibility.
Ability
Required level
The number of AP (Action Points)
Description
Air Shield
10
5
Summons an air shield for himself or the ally, which protects from stunning.
Become Air
4
3
Absorbs a half of physical damage.
Bitter Cold
1
3
Sets effect Chilled, or Frozen if the target is Wet.
Blitz Bolt
1
6
Strikes the target with lightning - damage depends on the character's parameters.
Chain Lightning
18
9
Lightning that, apart from the target, also strikes the nearby opponents and deals damage that depends on the character's parameters.
Farseer
4
3
Improves Sight.
Feather Drop
10
4
The spell allows for lifting an object, or a character, and teleporting anywhere without dealing damage.
Headvice
1
6
A magic slam whose damage depends on the character's parameters, with a chance to blind.
Immune to Electrified
7
4
Makes the target immune to electricity (Electrified).
Invisibility
7
6
Provides the character with invisibility for 4 turns, unless he attacks beforehand, or is casting a spell.
Lightning Strike
7
8
An electric attack that carries the target over to the specified spot, while electrocuting the enemies in the line to the destination point.
Lightning Bolt
10
6
A stunning strike that deals damage from air, which depends on the character's parameters.
Make Invisible
16
8
Sets effect Invisible for the selected ally. It is interrupted when the ally attacks or starts casting a spell.
Remove Petrification
13
6
Removes the effect Petrification.
Shocking Touch
4
3
Shocks the target with electricity (effect Stunned).
Storm
18
9
Summons a thunderstorm that attacks random targets, with damage that depends on the character's parameters.
Summon Air Elemental
13
7
Summons an air elemental. Each of its attacks has a chance to paralyze the target and leaves an electrified puddle, if hit.
Teleportation
1
7
The spell allows you to lift an object, or a character, for teleportation into any spot, while dealing crushing damage which depends on the character's parameters.
Tornado
10
7
Removes any surface of an element (poison, fire, etc) from a given field.
 Skillbooks for the wizards of water
Wizards of water handle spells connected with this element, as well as with the ones connected with ice. Nearly every offensive spell gives you the opportunity to freeze the enemy. They harmonize well with magic of water air, which gives the opportunity to electrify water. The frozen target becomes more resistant to attacks, which is why it is often better to use the spells on those of the allies, who are at the brink of dying, who cannot heal themselves. The most useful general spells are Rain and regeneration spells (Minor Heal, Strong Regenerate, Restoration).
Ability
Required level
The number of AP (Action Points)
Description
Cleansing Water
10
6
Removes effects Blind, Mute, Disease, Infectious disease, Bleeding, Crippled.
Freezing Touch
7
3
Freezes the selected nearby target (if wet or chilled, this increases the chance to freeze).
Hail Attack
18
9
Icicles fall from the sky, over a given area, freeze water and blood, and deal damage deal damage that depends on the character's parameters.
Ice Shard
4
6
Fires an ice shard that deals damage dependent on the parameters of the character, with a chance to freeze up to 3 enemies in the line of shot.
Ice Wall
10
8
Creates an ice wall that separates the enemies or imprisons them.
Immune to Burning
4
4
Sets resistance to the effect Burning.
Mass Disease
13
7
Sets Diseased to all the enemies within range.
Mass Slow
16
8
Slows down the enemies around you.
Minor Heal
1
4
For 3 turns, heals with the amount of points that depend on the character's parameters.
Piercing Ice Shard
7
6
An ice shard shot that deals damage from water whose damage depends on the character's parameters.
Rain
1
4
Summons torrential rains over a given area and creates a puddle in the center. At the same time, everyone within the area receive effect Wet.
Restoration
16
4
Heals for 3 turns with the amount of points that depends on the character's parameters.
Slow Current
1
4
Slows down the target.
Strong Regenerate
7
4
For 2 turns, heals the target with the amount of points that depends on the character's parameters.
Summon Ice Elemental
7
7
Summons the ice elemental - each of its attacks has a chance to chill the target and then freeze.
Water Shield
10
5
The selected target receives a water shield that protects from stunning.
Water of Life
1
4
The character receives increased value of the Constitution attribute.
Winterblast
16
8
Summons dragon breath directed in a specified direction whose deals damage depends on the character's parameters, with a chance to freeze.
 Skillbooks for wizards of the earth
The wizards of the earth wield, first of all, poisons. IN a very effective way, they combine with fire magic, which causes poisons to explode. The wizards also can summon up to four kinds of creatures, which makes them good summoners. The most useful general spells are Earthquake that give the chance to turn toxins into gas, Fortify - increases resistance not only from elements, but also increase the overall value of armor points.
Ability
Required level
The number of AP (Action Points)
Description
Acid Breath
10
8
Poisons and deals damage that depends on the character's parameters, within a specified area.
Bless
4
3
Blesses the nearby allies and increases the chance to hit.
Blessed Earth
13
7
Blesses the specified ally and increases his chance to hit.
Boulder Bash
4
6
The falling boulder hits the enemies within an area and deals crushing damage, with a chance to knock down and crumbles around the area.
Boulder Dash
4
7
A stone throw - deals damage depends on the character's parameters - in a straight line.
Deadly Spores
10
8
Shoots several poison projectiles that deal damage which depends on the character's parameters.
Earth Shield
7
5
Summons a shield for the specified character.
Earthquake
18
9
Causes an earthquake, may knock down and turn poison into gas.
Fortify
1
6
The target receives a magic armor.
Immune to Poisoning
4
4
Makes the target immune to effect Poisoned.
Magical Poison Arrow
7
6
A poison arrow that can be aimed against the ground, whose damage depends on the character's parameters.
Magical Poison Dart
1
6
Magical dart whose damage depends on the character's parameters.
Midnight Oil
1
3
Creates an oil slick in the specified point.
Nature's Curse
16
7
Sets effect Cursed on the nearby enemies.
Petrifying Touch
7
3
Turns the nearby target into stone.
Summon Bloodswarm
13
7
Summons Blood Wasps for the character to control.
Summon Earth Elemental
16
8
Summons earth elemental for the character to control.
Summon Spider
1
6
Summons huge spider for the character to control.
Summon Wolf
10
7
Summons the wolf from the North. It is fast and has high AP but, it can only be summoned near the character.
 Skillbooks for fire wizards
Fire wizards are best to work with the earth magic. Poisons can easily be set on fire and cause chain explosions. Apart from the fact that the spells are very effective, (they deal high damage to the majority of enemies) they are, most often, easy to use as AoE spells, in combination with oil, apart from poison. Each offensive spell has a chance to set effect Burning. The most useful general spells are Burn My Eyes that increases the target's perception to traps and treasures, Wildfire that rises, to a high level, the maximum, and regeneration of action points (AP) of the target, and Smokescreen that allows you to hide from the enemies and makes them to shorten the distance.
Ability
Required level
The number of AP (Action Points)
Description
Burn My Eyes
7
3
The target receives, temporarily, additional perception points and the effect Burning.
Burning Blaze
7
6
Fires two fire projectiles that can be aimed at any surface and whose damage depends on the character's parameters.
Burning Touch
1
4
The nearby target bursts in flames and receives damage that depends on the character's parameters.
Explode
10
3
Causes explosion whose damage depends on the character's parameters for the heron and the characters within the radius of 6m.
Fire Shield
10
5
Summons a fire shield for the target that adds resistance to effect Burning.
Firefly
4
5
Creates a fiery surface over a given area. A good way to separate yourself from enemies.
Flare
1
6
Summons magic warmth that deals damage from fire, which depends on the character's parameters. May be used over a surface.
Immolation
13
6
The selected target immediately bursts into fire and receives damage that depends on the character's parameters.
Immune to Freezing
1
4
Makes the target resistant to freezing.
Infectious Flame
16
9
Summons a magical fire that jumps over from one target to another, within reach (also allies).
Lava Core
20
10
Creates a surface of lava over a given area, starting with the hero's position.
Meteor Shower
18
9
Summons a hail of meteorites, over a given area that deals damage do random characters in the area and deals damage that depends on the character's parameters.
Purifying Fire
10
6
Removes effects Burning, Frozen, Stun, Charm, Petrified, Healing and Shields from the selected target.
Self-Immolation
7
3
Creates a fire surface around the hero.
Small Fireball
4
7
Launches a fireball whose damage depends on the character's parameters, within the radius of 4m.
Smokescreen
7
4
Creates a screen of black smoke.
Summon Fire Elemental
4
7
Summons a fire elemental that can set effect Warm with the attack, and set he target on fire. (Burning).
Wildfire
1
6
Speeds up the target, increases the regeneration and the maximum amount of AP.
 Skillbooks of witches
Witches, who delve in black magic, are the masters of controlling life. They can bring the dead back to life, and send the undead into the afterlife. They can also influence the non-magical attributes of men and creatures (e.g. Blinding). They are not bound with any of the elements but, it is a good to have one in your party and use several of his useful abilities. The most useful general spells are Destroy Summon which allows you to send away the summoned undead, Resurrection that allows you to bring the dead party members to life and Invulnerability which provides you with temporary invincibility.
Ability
Required level
The number of AP (Action Points)
Description
Absorb the Elements
4
6
The hero receives higher resistance to damage from elements.
Blind
4
4
Blinds the target.
Bloodletting
1
6
Deals cutting damage, depending on the character's parameters and sets effect Bleeding.
Death Punch
16
9
Deals crushing damage that depends on the parameters of the character, to the selected enemy nearby.
Destroy Summon
7
8
Sends away the summoned creatures and deals damage to them, equal to their health points.
Drain Willpower
10
3
Deprives the target of Willpower.
Enfeebling Touch
1
3
Sets effect Weak on the target.
Horrific Scream
13
6
Makes the nearby enemies scared and makes them flee.
Invulnerability
18
9
Makes the hero invincible
Malediction
1
4
Sets effect Cursed on the enemy.
Mass Weakness
10
6
Sets effect Weak on the enemies within the area of effect.
Oath of Desecration
1
3
Increases damage dealt by an ally.
Resurrect
16
10
Resurrects the ally within the radius of 10m and restores 20% of his health points.
Soulsap
16
8
Decreases all of the abilities and powers of the target (the name in the skillbook is "enfeeble")
Summon Armoured Undead Decapitator
10
8
Summons an undead soldier with a two-handed sword, who has 10% of chances to knock the enemy down.
Summon Undead Warrior
7
7
Summons an undead fighter.
Unlock Magic
-
3
Unlocks magi locks (scroll only!)
Vampiric Touch
7
4
Drains the enemy and heals you.
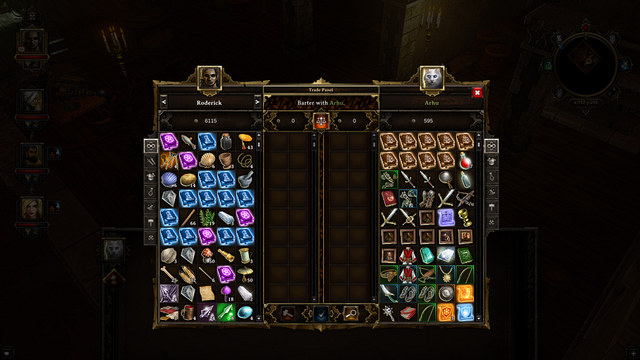
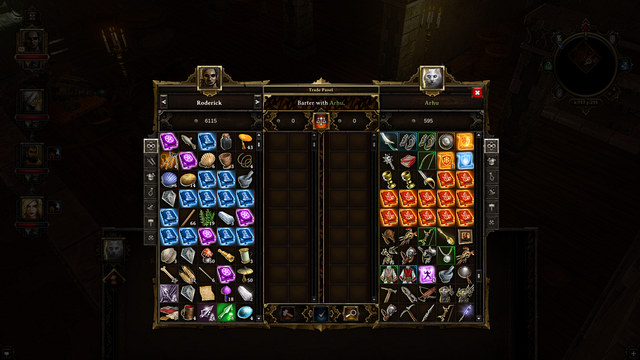
In Divinity: Original Sin, the gold pays a crucial role. If you don't want to be losing gold to bad deals with the merchants, the first thing for you to do is to invest a couple of points into the Bartering skill, which will have a positive impact on the increase of your sales revenue, as well as lower the prices of merchant's products. Additionally, remember to sell items after you've identified them. If you lack the skill (or it's too low) used in the item identification (Loremaster), most of the vendors can offer you the service of identification for a small price, increasing their bid on the item by a great deal.
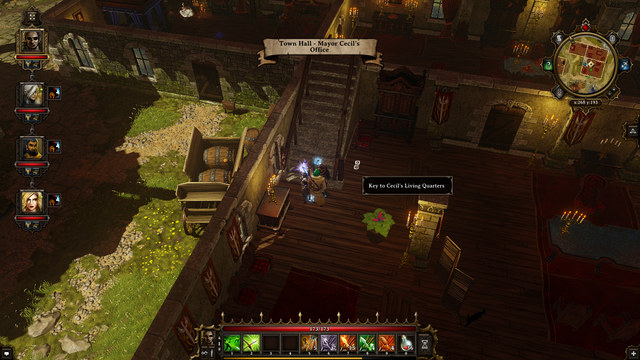 Cecil's apartment and the key hidden under the pot.
Robbery - without a doubt, the best method of earning gold. It's quick, often of almost no risk and it guarantees you huge profits. The game allows you to enter each and every house, search every chest and pick up almost every item. Additionally, you can find hidden / closed rooms in the houses of residents, where you will find a chest. Remember - the key to the room is always inside of the house. It will either be in the possession of the owner of the house, and, if not, in some of the adjoining rooms. Use the button responsible to highlight surrounding items, because the key is often hidden under furniture or recesses. If you still can't find the key, try searching under various objects - under a bucket, or a pot. The most valuable items, besides the contents of chests, which can be found inside of houses, are paintings, golden cups and tableware (plates and cutlery). It's recommended to buy the spell of invisibility (from the school of air magic), so you can avoid spending money on scrolls and potions.
Collecting - contrary to your first thought, collecting everything you can find and selling it for nothing isn't really a very effective way of earning money. Remember, that your characters have a limited amount of weight they can carry, and sometimes it's not worthy to go back to town to just sell some junk. What you should be collecting, are weapons and armors (especially those magical), potions (even the ones you won't even bother using - you can sell them for some good amount of gold), golden elements (especially tableware), gems and, most of all, paintings, which are extremely valuable. If you are willing to craft, you can make more valuable items from those which aren't very profitable to sell.
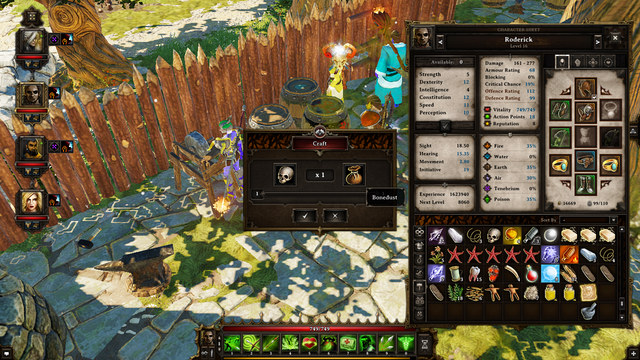 Every item in the game can be processed to something else.
Crafting - it's one of the methods to process ingredients of low value into more valuable (or extremely valuable) products, like magical potions (which can be easily replaced by using magic, like spells for regeneration instead of using healing potions) from mushrooms, or crafting pieces of armor from ores, which are common and free. Remember, that the higher the level of the character and it's crafting skills, the better the end products of crafting will be - and the more valuable they become.
Pickpocket - this skill becomes useful only when you max it. However, it's still hard to find any NPC with a decent amount of gold or any valuable item in their inventory - there's also a limit on how many items you can steal from somebody. Additionally, without developing your sneaking skill, or having an invisibility spell, the whole process of pickpocket is pointless. It's recommended to buy / find a spell of invisibility (in the school of air magic), to not use gold on scrolls and potions. Because of that, pickpocketing isn't really the best way of earning gold, even when there are times when you will find some valuable loot.
 A mound on the ground signaling a hidden treasure.
Secrets - secrets in this game are the legendary chests, with a very valuable loot hidden inside. They are often buried in the ground, or you need to do something specific to put your hands on the treasure. Maps of secrets can be bought from the special NPCs, like Geronimo in Cyseal. After reading the map, the location of the secret will be marked on your map and in your journal (in the secrets tab), sometimes with a little hint on how to get it. All of the secrets were marked on the maps in the next chapters of this guide.
Crafting in Divinity is based on merging two ingredients into one object. Some of these products can be further used as ingredients. Many types of items can be crafted: food, potions, magic scrolls, books, armors, weapons, etc. Some items can be created in any place, but some require an anvil/forge and tools. An anvil with a forge can be found in every city and the tools are frequently found during exploration of the world. They can also be bought from merchants and are rather cheap. Crafting can be done in the inventory tab, by dragging one item onto another - if they can be merged together, a window showing the result will appear, and if not - they will go back to their places in the inventory.
To create most of the items, especially those more complex, you will need a particular level in the Crafting ability. It is good to choose one team member and develop his Crafting ability to its maximum (5) or enhance it with the equipment. This will benefit not only in increasing the number of items that can be crafted, but also in better quality of the items from lower levels.
Blacksmithing consists of first creating metal ores and then items like swords or armors. It is a separate skill that should also be developed. You will find more information below, in a proper chapter.
In this chapter, you will find information about the products of crafting that can be used later. First, make sure that you have the necessary tools. As for objects that are not in your inventory, besides the forge, you will sometimes also need a whetstone and a source of water (a barrel or a well). The most important tools though, are: a hammer, a knife, mortar and pestle, an axe, a vessel (Empty Bottle/Mug/Cup/Bucket). If you have that, you can start crafting items.
Below is a list of the most basic products that are later used in other categories or doesn't fit any particular category:
Ingredient I
Ingredient II
Product
Mortar & Pestle
Bone / Skull
Bonedust
Mortar & Pestle
Stardust Herb
Stardust
Mortar & Pestle
Moonstone
Moondust
Moondust / Bonedust
Stardust
Pixie Dust
Log
Axe
Wood Chips, Branches x2
Knife / Dagger
Animal Hide
Leather Scraps
Knife / Dagger
Pillow
Feather
Empty Bottle/Mug/Cup/Bucket
Water source (Well/Barrel)
The same object with water
Needle
Needle
Lockpick
Needle
Wooden Figurine
Inert Voodoo Doll
Inert Voodoo Doll
Pixie Dust
Voodoo Doll
Hammer
Nails
Lockpick x4
Hammer
Skull/Bone
Destroying the item
Attention! To create lockpicks, you need level 2 of Crafting.
Blacksmithing is the art of creating weapons and armors from metal ores and it is connected with crafting, but developed separately. From every ore that you have, you can create a bar. There are 4 minerals in the game: iron, silver, steel and tenebrium. The first two can be obtained from deposits, steel is made from iron and as for tenebrium, you have to either find, steal or buy it. To melt an ore, you just have to simply drag its icon onto an oven/furnace. Then, using an anvil, you can create weapons or armors. Below you will find the basic combinations of materials that are used later in crafting.
Ingredient I
Ingredient II
Product
Furnace
Ore (Iron, Silver, Tenebrium)
Bar (Iron, Ore, Tenebrium)
Furnace
One-handed or two-handed sword, or an axe made yourself
Bar (depending on the material used)
Furnace
(Large) Iron Bar
(Large) Steel Bar
Iron Bar / Steel Bar
Iron Bar / Steel Bar
Large Iron / Steel Bar
Weapons are made by merging two items, but also using Blacksmithing. Most of the weapons can be created on level 1 of crafting and the level of the weapon is adequate to the level of the hero. The higher the level of crafting skill, the better the weapon's parameters and on level 5, a random boost is added to the weapon permanently.
Ingredient I
Ingredient II
Product
Dagger (from a Knife)
Branch
Spear
Branch
Branch
Elemental Staff (random element and boost)
Branch
Nine-inch Nails
Nail-Fortified Branch
Knife / Dagger
Log
Wooden Stake
Branch
Tenebrium Ore
Shambling Oak Death Wand (single use wand that destroys Shambling Oak - guardian elementals)
Sinew
Sinew (not Strong Sinew!)
Bowstring
Bowstring
Branch
Bow
Iron Bar
Branch
Crossbow (without String)
Crossbow (without String)
Bowstring
Crossbow (complete)
Inert Wand
Fire Essence
Inert Fire Wand
Inert Wand
Water Essence
Inert Water Wand
Inert Wand
Air Essence
Inert Air Wand
Inert Wand
Earth Essence
Inert Earth Wand
Attention! The name of a weapon (e.g. Homemade, Polished, Superior) represents its quality and defines also the damage dealt by the weapon. It depends on the level of Crafting/Blacksmithing. Merging weapons of low quality, even if you have a high level of crafting, will give you a weapon of the same quality as the weapons used. Thus, always try to achieve the highest quality, starting from the first elements.
The list below contains weapons that require the Blacksmithing skill and here, the quality of the weapon depends on that ability. These weapons are created using other basic weapons (e.g. a Dagger from a Knife). In Blacksmithing, the quality of the ingredient doesn't affect the quality of the product.
Ingredient I
Ingredient II
Product
Anvil
Knife
Dagger
Anvil
Iron Bar
Sword [one-handed]
Anvil
Large Iron Bar
Sword [two-handed]
Anvil
Silver Bar
Axe [one-handed]
Anvil
Large Silver Bar
Axe [two-handed]
If you have an archer/crossbowman in your team, you will certainly feel the need of using arrows with additional effects. Such arrows can be simply bought from a merchant, but you can also create them yourself. Arrows are universal and fit a bow as well as a crossbow. Only special arrows can be crafted, because default attacks are unlimited. To create arrows, you need at least level 2 of crafting (some of them require level 3 or 4).
Ingredient I
Ingredient II
Product
Anvil
Silver Bar
4x Silver Arrowhead
Knife / Dagger
Branch
Arrowshaft
Knife / Dagger
Antler
Knockdown Arrowhead
Knife / Dagger
Tooth
Stunning Arrowhead
Arrowhead (grot)
Arrowshaft
Arrowshaft
Arrowhead
Oil
Slowdown Arrowhead
Arrowhead
Ooze
Poison Arrowhead
Arrowhead
(Medium/Large) Poison Potion
Poison Arrowhead
Arrowhead
Rotten Eggs
Poison Arrowhead
Arrowhead
Drudanae Herb
Charming arrowhead
Arrowhead
Fire Resistance Potion
Explosive Arrowhead
Arrowhead
Water Resistance Potion
Steam Arrowhead
Arrowhead
Air Resistance Potion
Static Cloud Arrowhead
Arrowhead
Strength Debuff Potion
Lowers the target's Strength
Arrowhead
Dexterity Debuff Potion
Lowers the target's Dexterity
Arrowhead
Intelligence Debuff Potion
Lowers the target's Intelligence
Arrowhead
Constitution Debuff Potion
Lowers the target's Constitution
Arrowhead
Speed Debuff Potion
Lowers the target's Speed
Arrowhead
Perception Debuff Potion
Lowers the target's Perception
Arrowhead
Debuff All Potion
Lowers all of the target's attributes
Attention! If you have a lot of arrowheads, but don't use arrows, you can earn some money by crafting modified arrowheads. Don't search for a second ingredient, but simply use a barrel of oil or poison to quickly modify a large amount of arrowheads.
Armors are usually expensive and their parameters are not always satisfying. However, an armor made yourself is cheap and its parameters are similar or higher than what you can normally find in a shop.
Ingredient I
Ingredient II
Product
Knife / Dagger
Animal Hide
Leather Scraps
Wool
Wool
Yarn
Yarn
Yarn
Rope
Rope
Leather Scraps
Backpack
Hair
Hair
Thread
Thread
Needle
Needle & Thread
Needle & Thread
Pixie Dust
Magic Needle & Thread
Needle & Thread
Cloth Scraps
Cloth Chest Armour
Magic Needle & Thread
Cloth Scraps
Robe
Needle & Thread
Leather Scraps
Leather Chest Armour
Magic Needle & Thread
Leather Scraps
Leather Chest Armour
Hammer
Metal Scraps
Metal Armour
Anvil
Cloth Scraps
Cloth Boots
Anvil
Leather Scraps
Leather Boots
Anvil
Metal Scraps
Metal Boots
Knife / Dagger
Pumpkin
Pumpkin Helmet
Hammer
Cooking Pot
Battered Cooking Pot
Crafting magic scrolls and books is a bit more difficult. The basic elements are Pixie Dust, some paper (Sheet of Paper/Parchment, or any other, even if something is written on it, but it's not essential to the plot), and a magic quill (Quill/Quill & Ink Pot). The element and type of spells that you create is random.
Ingredient I
Ingredient II
Product
Knife / Dagger
Pillow
Feather
Knife / Dagger
Feather
Quill
Quill
Ink Pot
Quill & Ink Pot
Quill & Ink Pot
Pixie Dust
Magical Quill & Ink Pot
Wood Chips
Source of water / Bucket with water
Wood Mush
Oven
Wood Mush
Paper
Paper / Parchment etc.
Pixie Dust
Elemental Scroll of random element
Magical Quill & Ink Pot
Elemental Scroll
Skill Scroll - random spell of the same element
Elemental Scroll
Elemental Scroll of the same element
Blank Skillbook of the same element
Blank Skillbook
Skill Scroll with a spell of the same element
Skillbook with the spell from the Skill Scroll
#1 Attention! You can only create elemental spells (fire, water, air, earth) and witchcraft spells.
#2 Attention! To craft spells, you should have at least level 2 of Crafting and the power of spells increases with the level of your ability.
#3 Attention! You can craft green Unlock Magic spells that open magic locks! The are from the Witchcraft category and the probability of creating them is about 20%. You cannot create a skillbook with it though.
What counts as accessories is the minor equipment, i.e. necklaces, rings and bands. As you know, each of these elements is, almost always, soaked with magic, which is why you need magic components to create that item, i.e. the rabbit paw, eye or feather - still, they need to be enchanted in the first place. All of the elements named as "Magic" need to be combined with the Pixie Dust in the first place, to endow it with magical properties.
The first column of the below table presents the component that needs to be combined with the Thread which you make by joining two hairs together. The second one presents the boosts provided by the crafted items (the multiplier depends on the character's level and the crafting skills).
Component I
Boost
Creepy Eye
+perception, vision
Magic Eye
+perception
Magic Feather
+agility
Magic Fancy Feather
+agility, health points
Magic Rabbit Paw
+luck (Lucky Charm)
Magic Lucky Rabbit Paw
+ luck (Lucky Charm), movement
Magic Chicken Claw
+initiative
Magic Big Chicken Claw
+initiative
Magic Rat Tail
+minor resistance to poison
Magic Long Rat Tail
+major resistance to poison
Magic Skull
+intelligence
Magic Ancient Skull
+intelligence
Magic Tattooed Skull
+intelligence
Magic Starfish
+health points
Magic Glowing Starfish
+health points
Magic Claw
+strength
Magic Sharp Claw
strength
Magic Tooth
+charisma
Magic Sharp Toot
+charisma, resistance: fire
Magic Tusk
+identification
Magic Large Tusk
+intelligence, identification, resistance: air
The first column of the below table presents the component, Jeweller's Kit Ring - you cannot craft it. You need to find it, or buy it from the merchants. The second column presents the boosts that the item provides, after it is crafted (the multiplier depends on the character's level and the crafting skills).
Component I
Boost
Magic Chicken Claw
+movement
Magic Big Chicken Claw
+movement
Magic Skull
+constitution
Magic Ancient Skull
+constitution
Magic Tattooed Skull
+constitution
Magic Tusk
+resistance to poison
Magic Large Tusk
+intelligence, resistance: air, poisons
Magic Rabbit Paw
+speed
Magic Lucky Rabbit Paw
+speed, movement
Magic Rat Tail
+minor resistance to poison
Magic Long Rat Tail
+major resistance to poison
Magic Claw
+constitution
Magic Sharp Claw
+constitution
Magic Feather
+telekinesis
Magic Fancy Feather
+telekinesis, health points
Magic Tooth
+charisma
Magic Sharp Toot
+charisma, resistance: fire
Amulet (Super Rabbit Paw) [made of the Magic Rabbit Paw]
+speed, movement
Amulet (Super Lucky Rabbit Paw) [made of the Magic Lucky Rabbit Paw]
+speed, movement
The first column of the below table presents the component that you need to combine with the Rope that you craft by combining two strains of yarn which, in turn, are crafted by combining two units of wool. The second column presents the boosts that the item provides, after it is crafted the multiplier depends on the character's level and the crafting skills).
Component I
Boost
Magic Skull
+constitution
Magic Rabbit's Paw
+luck (Lucky Charm)
Magic Chicken Foot
+initiative
Magic Tooth
+charisma
Magic Tusk
+Body Building
Rat Tail
+minor resistance to poison
Magic Claw
+strength
Magic Sharp Claw
+strength
Magic Feather
+initiative
Amulet (Super Lucky Rabbit Paw)
+luck (Lucky Charm)
Potions are the basic element in the equipment of each character. The most basic, and the most frequently used is the potion of healing. However, the game also offers a variety of other potions, which, e.g. boost temporarily the parameters of the character, resistance, or ones that can be used directly against the opponent - debuffs. Some of the potions can be used with arrows to create, e.g. a poison arrow. Nearly all of the potions is based on two basic ingredients: a plant and an empty bottle. The majority of potions, of a given size (minor/medium/large/huge) can be combined, to create a medium one out of two small ones, a big one out of two medium-sized ones, etc. In combat, using the potion uses up action points and, most usually, it is 3 AP. The effect has not been described, because it depends on the character's level and crafting skills.
Component I
Component II
Product
Healing Potion (minor / medium / large / huge)
Apple
Antidote
Fire Resistance Potion
Water Resistance Potion
2x Empty Potion Bottles
Earth Resistance Potion
Air Resistance Potion
2x Empty Potion Bottles
Herb Augmentor
Any potion
Potion level +1 (size: minor -> medium)
Empty Bottle
Penny Bun Mushroom
Minor Healing Potion
Empty Bottle
Fly Agaric Mushroom
Minor Poison Potion
Empty Bottle
Rotten Eggs
Minor Poison Potion
Empty Bottle
Ooze Barrel
Minor Poison Potion
Empty Bottle
Whisperwood
Magical Armor Potion
Empty Bottle
Drudanae
Poison Resistance Potion
Empty Bottle
Guepinia
Fire Resistance Potion
Empty Bottle
Bluegill
Water Resistance Potion
Empty Bottle
Earth Tongue Mushroom
Earth Resistance Potion
Empty Bottle
Yellowroom
Air Resistance Potion
Empty Bottle
Essence - Void
Invisibility Potion
Empty Bottle
Eye
Minor Perception Potion
Empty Bottle
Fanny Blossom
Speed Potion
Empty Bottle
Farhangite
Constitution Potion
Poison Potion
Bonedust
Debuff STR Potion
Poison Potion
Sinew
Debuff DEX Potion
Poison Potion
Tormented Soul
Debuff INT Potion
Poison Potion
Tooth
Debuff CON Potion
Poison Potion
Essence - Void
Debuff SPD Potion
Poison Potion
Eye
Debuff PER Potion
Minor Fire Resistance Potion
Minor Earth Resistance Potion
Minor Resist All Potion
Minor Water Resistance Potion
Minor Air Resistance Potion
Minor Resist All Potion
Minor Magical Armor Potion
Minor Air Resistance Potion
Minor Invisibility Potion
Minor Resist All Potion
Drudanae
Minor Telekinesis Potion
Minor Constitution Potion
Bonedust
Minor STR Potion
Speed Potion
Sinew
Minor DEX Potion
Minor Perception Potion
Essence - Void
Minor INT Potion
Food can be considered as an alternative to potions. It is not entirely true - food can also provide you with additional, temporary, boosts to attributes of the character. The majority of them are easy and cheap to make and the ingredients can be found, nearly, everywhere - at most shops, as well as in barrels, crates. Consuming food uses up 3 AP and the effect lasts for 3 turns. The effect has not been described here, because it depends on the level of the character and crafting skills.
Component I
Component II
Product
Mortar & Pestle
Wheat
Flour
Water [cup, mug, bottle, bucket]
Flour
Dough
Oven / Furnace
Dough
Bread
Tomato
Hammer
Tomato Sauce
Tomato Sauce
Dough
Pizza Dough
Oven / Furnace
Pizza Dough
Pizza
Dough
Cheese
Cheese Dough
Oven / Furnace
Cheese Dough
Cheese Bread
Dough
Apple
Apple Pie Dough
Oven / Furnace
Apple Pie Dough
Apple Pie
Dough
Any fish
Fish Dough
Oven / Furnace
Fish Dough
Cyseal Pie
Oven / Mobile Kitchen
Raw Meat
Dinner
Mobile Kitchen / Oven / Furnace
Any fish
Dinner
Tomato Sauce
Dinner
Elven Stew
Mug of Beer
Dinner
Dwarven Stew
Knife / Dagger
Potato
Cold Rivellon Fires
Mobile Kitchen
Cold Rivellon Fries
Cooked Rivellon Fries
Hammer
Potato
Cold Mashed Potatoes
Mobile Kitchen / Oven / Furnace
Cold Mashed Potatoes
Cooked Mashed Potatoes
Mobile Kitchen
Pumpkin
Pumpkin Soup
Empty Cup
Orange
Orange Juice
Empty Cup
Apple
Apple Juice
Cup/Mug of Water
Tea Herb
Cup of Tea
Mobile Kitchen
Potato
Boiled Potato
Bucket of Milk
Empty Cup
Cup of Milk
Jar
Beehive
Honey
Honey
Cup of Milk
Milk Honey
Milk Honey
Wheat
Porridge
Milk Honey
Potato
Potato Porridge
Cooking Pot
Campfire
Mobile Kitchen
Bottle of Beer/Wine
Empty Mug/Cup
Mug/Cup of Beer/Wine (ready to be consumed)
Beer/Wine Barrel
Empty Mug/Cup/Bottle
Mug/Cup/Bottle of Wine/Beer
Fly Agaric/Poison Potion/Ooze Barrel
Any food
Poison food
Note! You can obtain milk, by talking to the cow and selecting the milking option. The bucket appears by itself but, after you use it, you will not be able to empty it.
Nearly every weapon/armor can be upgraded with appropriate items/substances that improve on their parameters - the so called boosts. Thanks to this, you can obtain equipment that suits your needs and, additionally, increase its value. A good news is that you can apply more than one boost to a given piece of equipment. The below table presents the boosts, alongside with the effects that it provides. Of course,, by how much a piece of equipment is improved, depends on the crafting/blacksmithing level and on the character's level.
Component I
Equipment type (Component II)
Boost
Essence [Air / Earth / Fire / Water / Void]
Shield/armor
Increases resistance to the applied type of essence
Pearl
Shield/armor
Increases value
Dye
Armor
Changes the color
Ruby
Armor
Increases resistance to all the elements
Leather Scraps
Any material-made armor
+to defense (low)
Metal Scraps
Any material-made or leather armor
+ to defense (medium)
Plate Scraps
Any metal armor
+ to defense (medium)
Whetstone / Whetstone Wheel
Any blade
+damage
Essence [Air / Earth / Fire / Water / Void]
A weapon
+damage from the element
Tenebrium bar
A weapon
+ damage from Tenebrium
Poison Potion
A weapon
+ damage from poison
Tormented Soul
A weapon
+strength, +agility
Joshua Spice
A weapon
+high damage from fire
Scope / Sextant
A ranged weapon (bow/ crossbow)
+perception
Bowstring
A ranged weapon (bow/ crossbow) [only self-crafted]
+damage
Moonstone
Club/staff
+medium damage
Component I
Component II
Boost
Anvil
Metal shield
+blocking
Scrap Metal
Wooden shield
+ blocking
 Grenades can be easily crafted - components can be found in containers scattered throughout the world.
Grenades, just as the rest of the items in the game, are crafted by combining two ingredients. Majority of them can be crafted with just a single point in the Crafting skill, and you should have no problems with it, as there are dozens of items in the game giving either +1 or +2 to the crafting skill - allowing a character with literally 0 points invested in that skill to reach the 5th level with items only.
Ingredient I
Ingredient II
Product
Bottle
Hammer
Broken Bottle
Broken Bottle
Empty Canister
Armor-piercing grenade
Intestines
Empty Canister
Plague Grenade
Poison
Empty Canister
Poison Grenade
Poison
Oil Barrel
Oil Bottle
Rope
Rope
Fuse
Oil Bottle
Fuse
Firestorm Grenade
Tormented Soul
Empty Canister
Nightmare Grenade
Pixie Dust
Empty Perfume Bottle
Love Grenade
Magic Star Fish
Empty Holy Grenade
Holy Grenade
Air Resistance Potion
Empty Canister
Flashbang
Jellyfish Mushroom
Empty Canister
Flashbang
Bottle, Cup, Barrel, Water Bucket
Intestines
Water Balloon
Earth Essence
Empty Canister
Tremor Grenade
Water Essence
Empty Canister
Frozen Grenade
Fire Essence
Empty Canister
Fire Grenade
Oil Barrel
Empty Canister
Oil Bottle
 The Teller of Secrets in the Hall of Secrets portal
The authors of Divinity: Original Sin have prepared a whole lot of secrets and hidden treasures on the map. The first ones often connect with the second, but in the game guide, secrets marked on the map with numbers are "more important" and more valuable. You can get the maps to these secrets from Geremo, in the Cyseal's market, or from Teller of Secrets in one of the portals in The End of Times, after completing the "Healing the Mount" quest (Luculla Forest).
Most of the secrets contain buried chests, but you may sometimes encounter something else, like for example skill books. After buying and reading a map, info about the secret appears in the "Secrets" tab and the localization is marked on player's map (an icon of a small chest). When you mouse over the icon, a short description of the secret will appear.
 A pile of dirt covering the place where a treasure is hidden
Usually, you will have to dig in a pile of dirt to get to the chest (the content of a chest is always random, but the items are of similar value). In order to do that, you will need a shovel. You will find one in the Cyseal's graveyard. If you happen to lose it, you can buy one from a merchant, but it's a rather rare item. After arriving at the location of the treasure, look for a small pile of dirt and start digging by clicking on it (the shovel has to be in the equipment of the person digging, not in the companion's).
Important! To locate a treasure, you don't have to buy a map. However, to notice it, you will need a lot of Perception (preferably more than 7). Thus, if you intend to look for treasures, develop the skills needed in one of your party members and equip him with items that increase perception value. You can also use potions that enhance perception, if you still do not see the treasure.
 The burning chest doesn't count as a treasure
Some treasures are not marked as secrets, but have similarly valuable content and may be difficult to open. On your map, you can see treasures that require more effort than jus opening a chest.
 Entrance to the first cave
The elements riddle (marked with green color on the map) is not difficult, but if you are not careful, you will have to walk a lot. After finding the entrance to the first cave, guarded by undead, you will see four columns with switches and a board, on which the order of the switches for the second cave is described. Analogically, in the second cave, you will find the order for the first one.
The columns in the first caveThe order of the switches in the first cave is as follows: earth, water, air, fire.
 The entrance to the second cave
In the second cave, with its entrance guarded by fire elementals and a mage, you have to use the following order: water, earth, air, fire.
 Your enemy in the cave
Leave the cave. Enemies will await in both caves now. After defeating them, each one will drop a medallion. Also, a passage to the lower level will open.
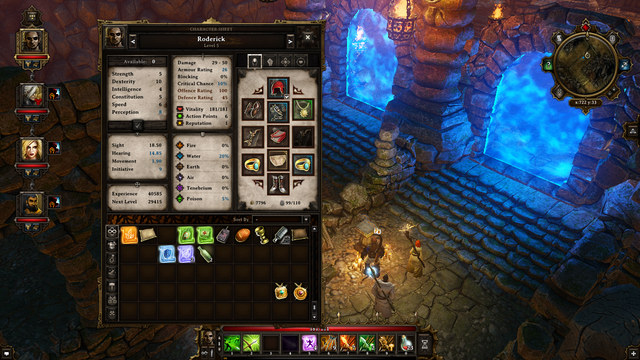 Barriers in the dungeon
In the lower level, you will see two passages blocked by a blue barrier. To deactivate it, you have to place the medallions on the pedestals on both sides. Then, you will be able to go inside and collect the treasures that await you there.
 The key
This riddle is not difficult, but it requires you to walk a lot. First, dig out the key (1) from the first grave near the stairs. It will allow you to open the first chest (2).
 The chest with the key
Later, you will find more keys that fit only one lock. The order of chests with keys that fit the next one is marked on your map. The treasure is hidden in the very last chest.
 The chest near the throne
After defeating baron Diederick in castle ruins, you can open a chest with a reward, using a key that you will find by highlighting the items nearby. The chest is located to the left of the throne. It is slightly smaller than usual, but contains valuable items.
 The chest behind the monument
Near the talking monuments, behind the earth monument, there is a chest that is difficult to notice. You will find the key to it near the water monument, inside a torch. Use items highlighting to find it.
 A chest on fire
The burning chest is located in the middle of the map, on a hill, and contains valuable items. To open it, instead of a key, you will need a spell that will extinguish the fire. You can for example freeze it or summon rain.
 Exoskeleton
Now be careful, because an exoskeleton will jump out of the chest and attack you. It is good to teleport him far away from the team.
Finding the treasure number (7) may be difficult for some. You need to have a lot of perception (preferably +8), get inside the chapel and head to the left wing. There, in the left corner, you should find a passage outside.
 A pile of dirt near the tree
Now you just have to get close to the tree and dig in the pile of dirt.
 Key
KeyTo see the key (2) use the item highlighting button (default - Alt). You have to go behind the ship - the object will be lying in the corner, near some bushes. You won't be able to open the chest (1) without it. The key fits the one located in front of the wooden bridge. Three crabs will attack you when you will try to collect the key.
When pressing the wrong switch, most of the times something bad will happen. There is however one switch, located on the south, to the right of the stairs, which causes a chest the fall near you. It is not a trap - the items in the chest are random, but usually quite valuable.
 The ruby on the pier
At the end of the platform, you will find a ruby. You may have some trouble noticing it, so use the item highlighting button (default - Alt). You can either sell the ruby for quite a lot of money, or use it for crafting.
Rewards: new rooms at your disposal.
The Imp, residing in the End of Time, asks you to find and retrieve similar stones to the one that Evelyn used. The more of them you find, the more rooms will be unlocked.
To get out of this room, look through the telescope, and then the Imp should open up a portal to the main hall. He will show you around for a short while. Afterwards, speak with the woman standing near a golden paining, and then with the Imp again - he will award you with a portable portal, which will allow you to teleport to the second pyramid.
 After using the teleporting pyramid, you will be moved to a bathroom, in which a woman takes a bath.
To leave this place, use the icon on the right side of the screen and teleport to a different place.
After getting back to the city, you can use the pyramid to find the second stone. If you are playing co-op, give the stone to your partner, and keep the original one for yourself. This way, you will be able to teleport to each other at any time.
The first stone can be found during the "A Mysterious Murder Mission" in the tavern, on the crime scene.
The second stone can be found by the captain of the undead pirates, in the "Crabs vs Skeletons" quest.
The third stone can be found to the east of the city, where you will encounter hostile fiery undead. Go along the way all the time, and after passing a huge magma monster, you should be able to see it lying on the road.
The fourth stone is in Evelyn's possession, who will be selecting a patient in a medical quest: "The Apprentice of the Stone".
The fifth stone is in King Braccus Rex's possession, who resides in the dungeons of a church, to the north from the first city. You will gain access there after finishing the "A mysterious Murder" quest.
The sixth stone can be unlocked in "The Initiation" quest, after you've solved all the riddles.
The seventh and eight stone can be found after finishing "The Initiation" quest - after that look inside Loic's hideout, located under the flap in the church.
The ninth stone can be found in the King Boreas' Treasury.
The tenth stone can be found in the temple, where you need to go to get the Leandry's blood.
The eleventh stone can be found in the prison, in Hiberheim, in which the witch resides, in the "Find the Witch" quest. It will be dropped after destroying the "Iron Maiden".
The twelfth stone can be found after destroying the totem in the goblin village, in Luculla Forest.
The thirteenth stone can be found in the Maradino cave, required in the "Fredrick's Blood Stone" quest.
The fourteenth stone can be found in "Temple of Dead", by Cassandras grave. You will collect it during the "A Forge of Souls" quest.
 The spot to take the jump in
4 - to get to the fourth chest, you need to take a jump, or use a teleportation spell. The only spot, where the distance is small enough to pass, is the pass across the river on the Southern side, near the tree with the beehive.
5 - the buried chest is at the end of the stone-paved road.
 The chest behind the waterfall
6 - the sixth collectible in the village of the immaculates is behind the waterfall, to the north, next to the red river.
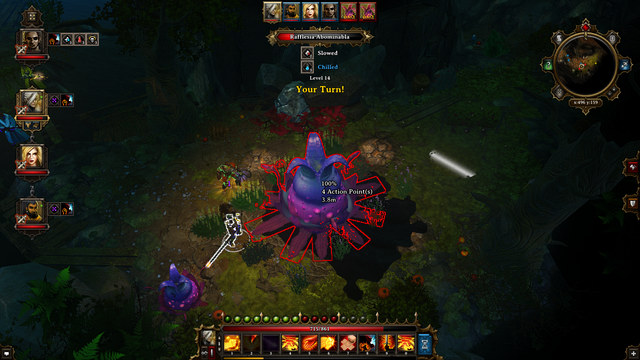 The deadly plant with the digging spot behind it
9 - a hideout - it is connected with the "Fredrick's Bloodstone" and the "Slaves and Masters" quests. You will find there an imp with lots of items on him (most of them are useless or of low value). On the right, there is a small garden, where there is a bloodthirsty plant guarding the buried key to the room locked with the magic lock. Inside, after you press the button on the wall, there opens a library to the office, where you will find a Bloodstone.
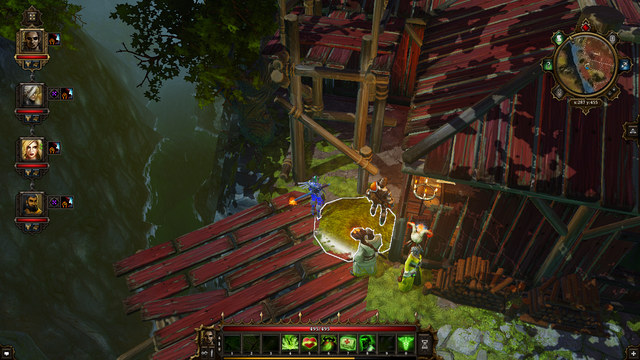 The digging spot
4 - behind one of the houses marked on the map, there is a buried chest, right next to the escarpment.
 The third chest
Chest 3/4 - the third chest, of the ones that you need to find to open the Last Chest in The End of Time. To get to it, you need to go to the passage hidden in the slope of the mountain/ Inside, reach the room with portals. Now, enter the portals in the following order:
Take the portal on the left (winter) and, in the next room, the portal on the right (rocks). You will get to the main hall, where you will notice that the portal is highlighted in green. Walk over to the opposite one, on the right (fire) and to the portal on the left (waterfall) . Finally, enter the third portal (to the North-West, covered with a white cloth) and go straight ahead to the portal in the room with the pipes. You will get to the library.
 The highlighted portal
There, you will find chest 3/4 in the bottom corner of the room, and a skillbook book to choose from among three skillbooks.
1 - it may be quite problematic to reach the secret skillbook. Once you walk onto the flooring, you will notice the changing "warm" and "cold" effects. Approach the stairs, as close as possible to make the effect change to "cold" and throw the orange teleportation triangle onto the top of the stairs, as a character with high strength factor. On top, there is no threat of lightning anymore - it is enough that you now use the blue triangle, so the entire party can reach the collectible.
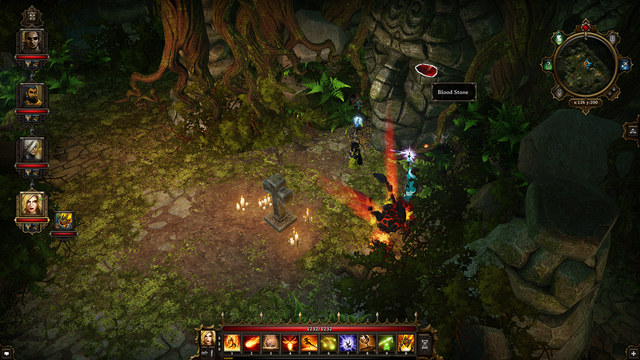 A Bloodstone behind the tombstone
2 - inside the grave, after you pass by the wooden drawbridge, on the fork, do not take the right turn and go straight ahead, instead. Behind the pillars, you will notice a secret skillbook and lots of natural resources for crafting. After you return to the fork, go towards the turn, but do not take it yet, and go through the opposite wall. There, you will find a grave and, in the right eye of the skull behind it, a bloodstone.
8 - here, you meet wizard Bellegard - he will tell you to pick one of the three barrels. Each one of them contains a valuable - up until you collect, you can see the contents of the remaining two barrels. An attempt to collect quickly and destroy the barrels results in the disappearance of all of them, which leaves you with nothing.
 The discovered passage
3 - while in the tavern cellars, you must have noticed the other room with valuables in it. to access it, go to Grutilda's room and pull the torch on the fireplace. Then, there will appear a hidden passage into that part of the cellars. Also, you can teleport from the first, to the second part of the cellars, by using the small window between them and an appropriate spell.
 The fourth chest
Chest 4/4 - in the wizard's garden among the bushes, there is the last, fourth chest that you need to find to be allowed to open the Last Chest in The End of Time. If you have opened all of them, you will be able to open the last one, which will make questions, concerning the chests, appear in the dialogue. The answers to these questions are encrypted on the old parchments that you find inside the chests. If the last chest does not ask questions, this will mean that you must have missed one of the four sisters.
Abandoned house - In the abandoned house (14) you can find a ruby. You character needs to have some level of perceptiveness to discern it. It is on the floor, next to the fireplace.
Garden at the back of the clinic - Behind the building (11), where you can meet Evelyn, there is a sheep and a grave next to it. In the beta version, you need to dig it open, because it will otherwise explode, which always ends in death.
The Inn - In the inn's basement (8) there is a large chest surrounded with traps. If you have the ability of telekinesis, you can, simply, move the chest over the traps, without springing any. Otherwise, you need to cover both of the buttons on the ground with some items. The key for the chest is also in the basements, in the other room.
Harbor storage (15) - To access the room guarded by the soldier, you need to buy the "Unlock Magic" spell, which can be obtained from the merchant at the upper floor of the "King Crab" tavern. Then, you need to return and talk to one of the patrolling guards, and tell him that the other one is deriding him. The enraged guard will go to have a word with the other one. Finally, they will be approached by the sergeant, who is keeping watch at the door that you want to open. After you open the lock, you can enter.
 There is a tunnel at this cemetery
City cemetery - At the cemetery (9), if you dig open the largest grave, in the center, you will gain access to a tunnel with a multitude of the undead inside. Inside, there also is a boss waiting for you and, if you reach the fork, one of the branches goes to the surface and the other to the chest in the city, which you cannot access from outside. The spade is at the cemetery.
Forging station - Behind the abandoned house (14) there is an anvil, which you can forge weapons on.
Madora - Madora is a character of the Knight class, who uses a two-handed sword in fight. You can encounter her at the "King Crab" tavern (8) and she will gladly join your party. She occupies the first line in combat and it would be good if she had a healer.
Jahan - Jahan is a Wizard and he uses spells like teleportation, healing and rain. Thanks to this, he is perfect for a healer and the character that pulls enemies towards you or pushes them away. Since you do not have too many of your own spells, he is an indispensable part of the party. You can meet Jahan at the first floor of Cecil's office (7) next to the "King Crab" tavern.
Crabs versus Skeletons - after entering the cave, you will gain a quest. On a plaza, after you've crossed the bridges, you will stumble upon a group of skeletons and orcs fighting each other. You don't have to engage them - you will earn experience either way. The mission ends when you defeat Pontius and his party on the second level.
Headless Nick - after speaking with the ghosts, you will gain a quest. Nick's head is located in Cyseal, on one of the tables on the festival. Before that, you need to complete a quest, which will cause the crowd to move to the second man, leaving the head unprotected. You can then choose if you want to leave the head there or to get it to the cave - both of them end the quest.
Another Crazed Mage - a single-threaded mission awarding you with experience points. After speaking with the ghost of a mage, don't move - teleport that character to the exit, to avoid the trap.
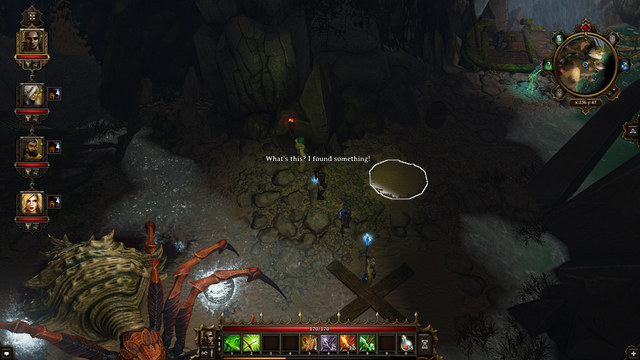 A spider and a small treasure nearby.
The spider and Sam's cellar - to collect the cellar for the Sam's cat from the tavern in Cyseal, you will have to defeat a gigantic spider. After eliminating it, this specific item will be dropped. The spider has a water affinity, that's why spells from that school of magic won't work on it and will heal it.
Desmonda - speak with the ghost of a woman. It's the person who Samson from the lighthouse in Cyseal is looking for. To complete the mission, you will have to get back to the lighthouse and speak with Desmonda.
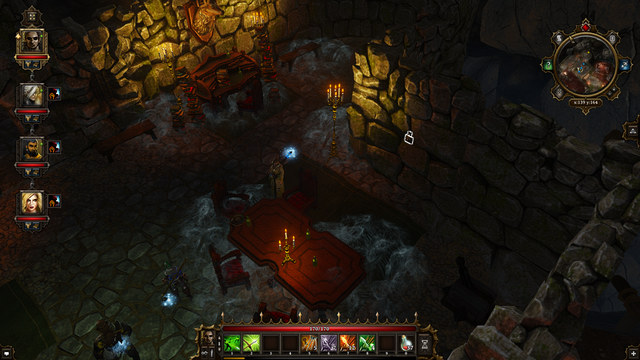 The location of the switch and the lever in the corner.
Entrance to level II - the entrance to the office is protected by a huge crab. To defeat him, teleport him away from you, or move away from him during combat - he's fairly slow and he probably won't be able to get close to you during one turn. Inside the office, look for a level in the corner of the room. After flipping it, a painting on a wall will move, revealing a switch. After you press it, a secret entrance to the second floor will appear.
Reward: 8250 exp
At the beginning of the game, this is your only quest in the journal. You need to solve the case of a mysterious murder, but you first need to access the city attacked by the orcs.
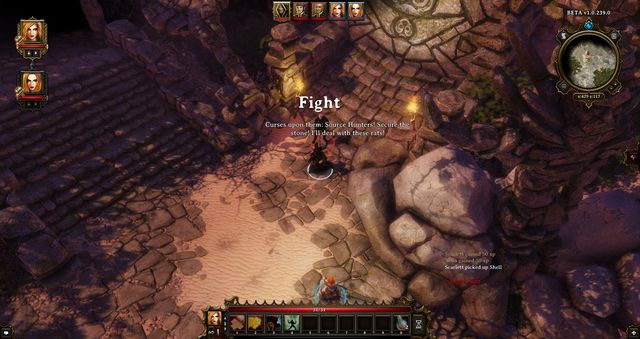 In the underground, on the right, there is an optional tutorial
Continue along your path and, after several moments, you will watch a cutscene in which necromancers escape the crypt. After they notice you, they summon the undead and take it to the heels. The opponents are not too strong and you will be able to deal with them quickly.
You can now proceed ahead or turn to the tomb. Inside, there is a tutorial, which presents to you the basics of the game and, additionally, you will be able to gain some gold. After you take the tutorial, you will end up several meters away from the exit so, you will not get lost.
If you take the other path, turn left after a while and you will reach a guarded bridge. While talking to the drunken guards, you will be able to kill them , or let them escort you to the city. If you choose to fight, you will receive additional items from their corpses. In the opposite case you will receive their help in the incoming fight with orcs.
 Here starts the fight on the beach, in front of the city gates
Either way, cross the bridge and go ahead. After a while, you will watch a cutscene of the orcs landing at the beach. Help the soldiers that fight them. It is worthwhile to take out the shaman in the first place, because he can heal the rest.
Watch out for the barrel of oil, which is standing in the middle of the battlefield. If you treat it with fire, it will explode over a large area. Remember that the orc shaman can also blow up the barrel.
After the battle, approach the city gates and you will meet Ahru there - the man on the murder case. He will ask you to meet him and the watch captain, in the North-Eastern part of the city.
After you get there, climb up the stairs and talk to the cat, which is Ahru. Then, he will tell you what happened on the night of the murder and suggest to you, that you talk to the undertaker and see the corpse.
 Ahru is a cat
Also, it is a good idea to check out on the captain, who is occupying the lower floor, to be allowed to the murder scene and receive several side missions.
First, it is a good idea to visit the local tavern, where the murder took place. The room is on the ground floor and the guard will open the door for you, as soon as you tell him that you have the permission. Once the door is opened, you will be attacked by a magical discharge, which will not harm you, though.
It is in this room that murder was perpetratedYou need to open the chest and, if you do not have any lockpicks on you, you can always smash it, which will take a bit longer. Apart from that, above the floor, you will find a stone for "The Story of The Stones" quest. If you still do not have it, you will be teleported to another location and the quest will start. After you read the letter from the chest, you will receive a new quest: "The Councillor's Wife" quest, which is worth completing, after you have seen the corpse.
Go to the undertaker now, who is staying to the North-East and, in the room on the left you will find notes, from which you will learn that the corpse has been stolen. The undertaker himself suspects four people: Mayor Cecil, Captain Aureus, Evelyn the healer and Esmeralda, the wife.
You now need to complete the "The Councillor's Wife" quest.
After you have completed that quest, go to the Evelyn's place but Thelyron, whom you meet there, will tell you that she's has been out in a hurry. She will tell you where Evelyn's house is, which you should go to now. Before that, however, you should take Evelyn's bag from the other room, at the window, and find the key inside.
After you get inside, open the chest on the right to find there a spell that reveals the entrance to her hidden lab. A bit ahead, on the shelf, there is her journal, from which you learn that that place is to the North.
 Here, the party members realize that they are where they should be
The lab itself is on the Northern beach. It is important that you have the spell on you. Leave the city through the Eastern exit and go Northwards. Soon, you should run into a big group of the undead (about ten of them). After you defeat them, enter the cave that they have been guarding, where you find the boss that you need for "The Fabulous Five" quest side quest. After you have defeated him, leave through the other exit and go to the Eastern beach. There, keep exploring the Southern rocks, until the party members tell you that you are there. Use the spell and you will have cleared the way for yourself.
Inside, you will encounter a cultist, who will take it to the heels, after he sees you, in order to alarm the others, Kill him, if possible, before he reaches them and collect the key from the corpse. If he manages to reach the orcs, they will attack you. If you kill him and you play your cards well,, the orcs will leave, thinking that you are on their side but, you can meet them in the future, then. You can also slay them.
Inside, there are lots of cultists but, they will be low on health so, each blow that you land will be lethal for them. Still, it is best not to make it unnecessarily long, because it can really get on your nerves.
 First the acid, then fire - nothing shall pass
After killing them, go down, where the real battle starts. You will meet Evelyn, who will summon two burning rams, a demon, a sorcerer and a burning legion's leader. It is good to place an elemental between them at the start. Fire elemental will do best. By doing this, you will get most of the enemies to focus on him and not on your team. The rams should be your priority, as they explode when they die. Attack them with everything besides fire and acid, because these spells actually heal them. Remember also about keeping your distance. If you make them explode during first few rounds, they will deal serious damage to their companions and additionally heal your elemental. Next is Evelyn, who casts three spells in a row. After the rams explode, she should be at approximately 50% of her HP.
After the battle, talk to Zombie Jake, and he will tell you who killed him. This mission will draw to an end.
Reward: 1800 exp
After you have seen the site of the murder and the letter from the chest, in "A Mysterious Murder" quest you will receive a quest, in which the victim's wife is considered the suspect.
You can find Esmeralda at her shop. After you show the letter to the guard, he will be surprised that there is one more lover, apart from himself. Esmeralda will say that this does not prove her involvement.
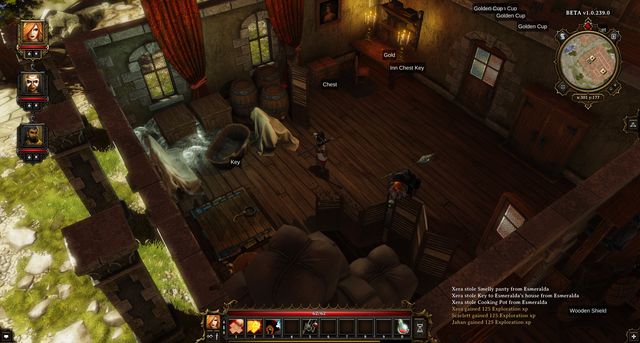 The trapdoor leads to the slaughter house
To make sure about her guilt, climb up the stairs and find the key to her apartment. Climb downstairs and open the nearest door. First, search through the ground floor and you will find a book on how to plan a murder, on the desk. Return to the adjacent room and climb to the basement, through the trapdoor.
On the left of the stairs, there are rashers of ham hanging. Remove them to find a switch. Press it and the door to a secret room will open. Demand explanation from her. However, she will tell you that it is her husband's book and the knife to cut swine. She will also recommend that you take a better look at Evelyn.
You can ask the captain to arrest, or not to arrest Evelyn, for the duration of the investigation, which ends this thread and you will be able to focus again on "A Mysterious Murder" quest.
Reward: 3400 exp
Along your path to the city, at the beginning of the game, you will notice a corpse with a journal on it. From the journal, you will learn that a secret statue granted him the ability to fly, which turned out not to be true. You decide to solve this mystery but first, you need to reach the city.
While in the city, go North and find the entrance to the cave. The entrance is guarded by ten enemies. It is best to attack in the way that you kill one boar, which bursts in acid, and treat the two nearby ones with fire. They should be quick to die and, thanks to the explosions, the area covered by the cloud of acid and fire should expand. Now, you simply need to retreat with your part and wait for the rest to start chasing after you through that area. They should not be able to reach the end and, even if they do, finishing them off should not be problematic.
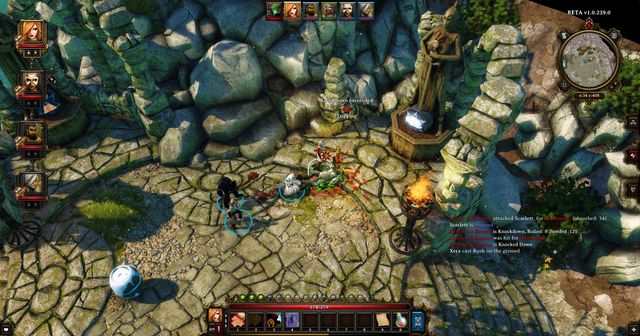 The talking statues
Inside, you encounter a robot that is a part of "The Fabulous Five" quest side quest. From this chapter, you will also learn how to fight it.
After you defeat the robot, go towards the other exit and keep going West. Eventually, you should reach the four talking statues.
To complete this quest, you need to use the spells of water, fire, air and earth. Each time you use such a spell, there should appear a demon of a given type. In themselves, they are not too tough but you need to remember that spells of their types will heal them. Additionally, the elementals leave damaging areas, which are characteristic to them, after dying: fire elemental leaves a burning area, earth - acid, water - water and air - a storm.
After you kill them, the entrance to the cave will be revealed, where you meet the imprisoned wizard.
 The teleporting well
Walter Mc Wishing Well will ask you to find his brother William, who has been abducted by the king of Winter. Walter can teleport you to him right away. Ask him to do that and you will arrive at a location with three doors and a chest.
It turns out that you actually arrived straight into the abducted well. Destroy the chest and talk to William, who will tell you that you have to find a way to him from outside to rescue him. Go back to Cyseal and search for it.
You will continue this mission only after obtaining the "Find the Witch" quest and teleporting to Hiberheim. You have to reach the snowy region of this location. Stick to the southern part of the map and go past a trap with falling icicles. There is another one nearby. One person from your team should stand on the switch and the rest should go to the other side. Then, you teleport the remaining person to you. Somewhere in this area, you should find spikes that mark the entrance to the winter region. Do it the same way as with the icicles, only this time, instead of teleporting the person to you, pull the lever located behind the trap, so that the passage wouldn't close anymore.
 The Guardian
Go straight and turn right on the fork. When you see the Guardian, it means that you are close to the three gates. Now, you have to defeat him. He's rather slow and doesn't attack very often, but he's immune to practically everything. The only element that deals some damage here is fire. Attack him with every fire spell that you have until he dies. It is also good to summon a fire elemental. After defeating him, go up and stand on the three switches. Dig out the fourth one and place items that will together weigh at least seven kilos on it. After you've done that, the remaining team member will be able to go past the lava and pull the lever below the door. Now you only have to find the king of frost.
His location is described in the "Find the Witch" quest. After defeating him, you have to go past the barrier that is blocking your way. To deactivate it, you have to give the right answer to the statue's riddle. It is: "Lurrean". After a while, you will find yourself in a corridor full of statues that can't be destroyed, which won't let you through. You need someone with invisibility spell or good hiding skills to be able to go further. Let the person sneak past the statues and pull a chain on the wall at the end. It will deactivate the guards. Finally, you are in the treasury. On one of the desks, you will find the "Well teleportation scroll". Use the scroll near the well and it will be teleported to the brother. Now you just need to visit them to complete the quest.
Reward: 125 exp
At the market, you will meet Reginald, who is entertaining the crowds by showing the talking head. After you have investigated in to the matter, by talking to Gallagher, who is cheering the crowds nearby, you will learn that Reginald paid him to do that job.
 The highlight of the night - a talking head
Now, go to the opposite side of the square, where you see Cedric, who has no spectators. Inform him that Reginald paid Gallagher for the fake crowds and he will ask you to bribe him.
During the conversation, use your best attribute to convince him, to change sides. If you succeed, Gallagher will work for Cedric.
Return to Reginald and tell him that his employee is now working for the competition. He will not take kindly to that and the quest will end.
Reward: 13500 exp
A quest in which you have to trace the reason of the plague of undead, obtained from the commander or right after leaving the church. However, you cannot complete it until you complete the "A Mysterious Murder" quest.
You will get the quest about Rex after killing Evelyn in "A Mysterious Murder" quest. Remember to take her amulet. When you have both quests (or only the second one), make your way to the city and then head north, to the church.
You will find a group of cultists there. As soon as they see you, their leader will run to the tomb below and you will have to fight his companions. The first fight is not difficult. Actually, a fire elemental and a solid fireball will be enough to crush everyone.
To open the passage to the lower level, you have to find four paintings and press the buttons behind them. The key to the gate where one of them is, is located near one of the benches by the wall. When the passage opens, go down and head through the portal, using the amulet that you've taken from Evelyn. You will see a scene between Zombie Jake and Thelyrone.
In the next chamber, you will find king Braccus Rex, who has been resurrected. You should not fight if you're below level nine. It is because he summons the lighthouse guardian, the undead knight - baron and the double elemental, such as the one north of Cyseal. Moreover, Rex himself has a spell that can kill a whole team with its members having 400 life each.
 The king summons other bosses from around the town.
Before the fight starts, prepare fire and ice elemental summoning spells. It will be your most important spells in the battle. It would be good also, if someone in your team had acid spells, because Rex is vulnerable to them. The fight itself looks like this: As soon as the battle starts, you should retreat to the door through which you got there and place two heroes on each side of it. Now, exactly at the entrance, you can place two elementals next to each other, or first fire elemental and then ice elemental. The fire one will be absorbing Rex's spells and Twins by Fire attacks. If you have explored the vicinities of the city, you should know all the bosses and their attacks. Only the guardian now has a new acid attack.
Because of their size, twin elementals and Rex will not be able to go through the door and will be forced to attack your fire elemental, who won't take any damage (as long as you place the elementals in the right place). The only one that can go through, is the baron. When he does, attack him with the whole party and he should die rather quickly. Next in line should be the guardian, because he shoots from distance. Use your elementals' range attacks to kill him. When he dies, you have only the twins and the main boss left. Don't attack the twins with fire because it will only heal them. Use ice attacks, which will massacre them. If, by some miracle, the twins or Rex have managed to go through your barricade, your water mage should teleport them back to the chamber.
After your ice elemental kills the twins, it will be only Braccus left. Don't attack him with fire, but use ice, acid, water or earth. He is also immune to stuns, but he can fall down on ice, so it is good to place some under his feet. When he is enraged and near you, you have to teleport him back. This way he won't be a problem.
After killing him, return to the commander to receive the reward.
Rewards: new rooms at your disposal.
The Imp, residing in the End of Time, asks you to find and retrieve similar stones to the one that Evelyn used. The more of them you find, the more rooms will be unlocked.
To get out of this room, look through the telescope, and then the Imp should open up a portal to the main hall. He will show you around for a short while. Afterwards, speak with the woman standing near a golden paining, and then with the Imp again - he will award you with a portable portal, which will allow you to teleport to the second pyramid.
 After using the teleporting pyramid, you will be moved to a bathroom, in which a woman takes a bath.
To leave this place, use the icon on the right side of the screen and teleport to a different place.
After getting back to the city, you can use the pyramid to find the second stone. If you are playing co-op, give the stone to your partner, and keep the original one for yourself. This way, you will be able to teleport to each other at any time.
The first stone can be found during the "A Mysterious Murder Mission" in the tavern, on the crime scene.
The second stone can be found by the captain of the undead pirates, in the "Crabs vs Skeletons" quest.
The third stone can be found to the east of the city, where you will encounter hostile fiery undead. Go along the way all the time, and after passing a huge magma monster, you should be able to see it lying on the road.
The fourth stone is in Evelyn's possession, who will be selecting a patient in a medical quest: "The Apprentice of the Stone".
The fifth stone is in King Braccus Rex's possession, who resides in the dungeons of a church, to the north from the first city. You will gain access there after finishing the "A mysterious Murder" quest.
The sixth stone can be unlocked in "The Initiation" quest, after you've solved all the riddles.
The seventh and eight stone can be found after finishing "The Initiation" quest - after that look inside Loic's hideout, located under the flap in the church.
The ninth stone can be found in the King Boreas' Treasury.
The tenth stone can be found in the temple, where you need to go to get the Leandry's blood.
The eleventh stone can be found in the prison, in Hiberheim, in which the witch resides, in the "Find the Witch" quest. It will be dropped after destroying the "Iron Maiden".
The twelfth stone can be found after destroying the totem in the goblin village, in Luculla Forest.
The thirteenth stone can be found in the Maradino cave, required in the "Fredrick's Blood Stone" quest.
The fourteenth stone can be found in "Temple of Dead", by Cassandras grave. You will collect it during the "A Forge of Souls" quest.
Reward: 6000exp (if you say that the soldiers have cleared the lighthouse) / 3000exp (if you say that you've done it)
The watch leader told you that he has recently heard rumors that the old lighthouse is haunted. He dispatched several of his men there but they have not reported, for a long time. You should find out about them.
 In here, you will find a dead soldier
Go towards the Western gate (the higher one) and you will soon be attacked by the undead. You need to remember the Zombie burst with acid, after they die. Therefore, it is best to finish them off at range, or leave only one party member within range. In the first house, you will find the corpse of a guard, who will have the orders, concerning the lighthouse, on him. Follow the road to the West and fight more undead. Some of them will have bombs attached to their backs. Do not let them approach and, which is better, kill them when they are close to their allies, because they will then be caught in the blast radius. Usually, they yield to one shot. You will also pass a farm and a house and, finally, you will meet two surviving guards, who will tell you that they are too scared to enter the lighthouse.
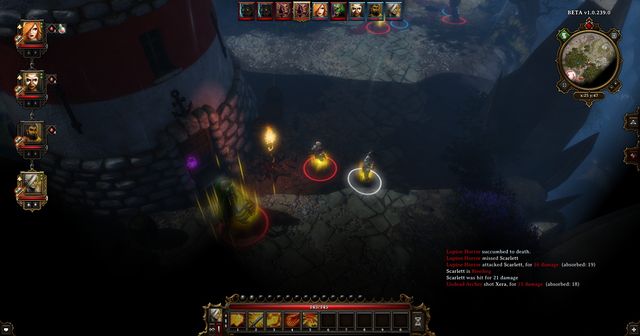 Although the boss himself is not too demanding, he has a lot of minions
Keep following the road until you reach your destination. In front of the entrance, you will fight a miniboss, his dogs and archers.
The boss himself is easy to kill, but reaching him is much more difficult. Also, another difficulty is that he keeps bringing back to life the units that you have already killed. Therefore, you need to dispatch two party members to kill him, whereas the other two to lure the dogs away and kill them. They cannot kill them, until the boss himself falls, because you will then be fighting in vain. After you have the lighthouse guardian himself, you can deal with the rest.
After you enter, you will meet Samson, a ghost, who will task you with "Lost Love At the Lighthouse" and tell you his story. You can now return to the two surviving guards and either tell them what you have seen, or not. If you tell them your story, they will return to the Captain and steal your achievements for themselves. You can then interrupt them and tell the Captain what has really happened. Then, the guards will be sentenced to interminable potato-scrubbing.
If you do not tell the guards what you have seen, they will dash into the lighthouse, to dash out petrified, a bit later. Either way, the quest will be completed after you return to the Captain.
Reward: 3150 exp
This quest is given by the ghost of Samson (the "The Scaredy Pact" quest), who tells you about his love for a woman. You resolve that you find her. You need to return to the city and leave through the South-Western exit, near the harbor. You will find orc and human corpses there and you need to find footprints leading to a big orc with his guards. The battle with this opponent has been described in "Crabs versus Skeletons" quest. Then, enter the cave.
Inside, you will witness a fight between orcs and skeletons. Join the fights or wait for them to finish each other off. Then find the key owned by the pirate leader (the lower level) in the "Crabs versus Skeletons" quest. Locate the stairs, which is a meter away from the battlefield and climb downstairs. After you notice the remains of dragons, you will know that you are going in the right direction.
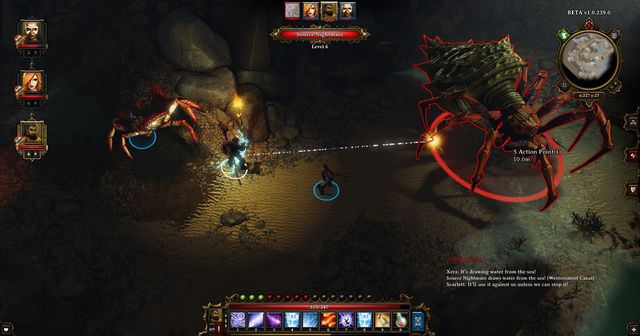 There is a difference, isn't there?
You will reach a place where a giant crab will attack you. During the fight, mages should keep their distance and warriors should not stand close to each other. The crab has a strong AoE water attack. Moreover, he can summon lesser crabs. You can send one of your companions to deal with them, as they are not particularly strong. This boss is vulnerable to fire, lightning and acid attacks.
After you defeat it, proceed ahead and talk to the ghost of the woman that you meet there. You will point her to Samson, after which you return to the lighthouse. You can now decide if they leave together or separately.
Reward for full completing: 3100 exp
Aureus asks you to find the archeologist that he sent to explore the underground ruins in the forest, to the North-West.
Leave through the Northern exit and turn left. Wulfram the archeologist is hiding in one of the derelict houses there.
 Wulfram in one of the houses
The man asks you to escort him to the city If you consent, he will start running and you will have to keep up with him. Apart from that, the undead appear here and they will try to kill you. It is best have the heavily armored party member run ahead of the rest. You will be nagged at, by the undead, twice.
After you are done, you can meet the archeologist n the tavern.
Even if he dies, you need to report that to the Captain. He is not going to be too satisfied with that but, the mission will be completed. You do not receive any experience if you refuse to escort the archeologist.
Reward: 1590 exp
To receive this quest, your character needs to have the "Pet Pal" skill, which allows him to speak to animals.
 You are tasked, with this quest, by the cat. If you can communicate with it.
You receive this quest in the "King Crab" tavern, from the cat there, named "Sam". He will ask you to find out why the cat named Maxine is not interested in him.
You can find the other cat in the library. It turns out that the pussy is not interested in that old a cat, because she fears that this union will yield no kittens.
After you tell that to Sam, he will decide to dress up and convince here. Of course, you need to find an appropriate collar for him.
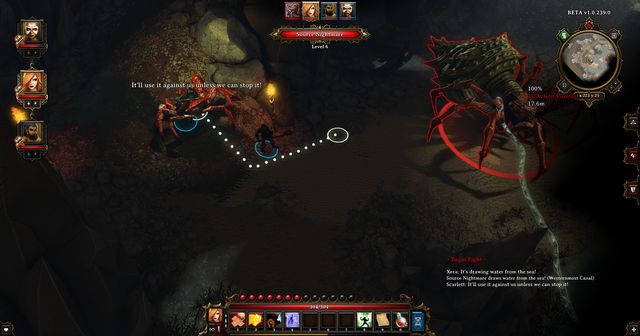 The collar is dropped by the smaller one
You can find the collar in Black Cove and it is dropped by the big crab that is the boss here. The cave itself is located on the beach that the Western exit from the port goes out to. Near the beach, there are Orcs. Inside, you will notice skeletons fighting orcs. After the battle, find the key, owned by the pirate captain (the lower level) in "Crabs versus Skeletons" quest. At one of the walls, at which the parties are fighting, there is a massive door. Open it and climb down. After a while, you will notice dragon remains, and then another. Something must have killed them and, most probably this gigantic crab must have done it. Keep following the path and you will finally find it. In itself, the crab is not too tough, but it deals water AoE damage. Therefore, the best tactic is to surround it and attack. Once you kill it, the collar will fall out, with the rest of the loot. After you have collected everything, watch out because there is another crab here, twice as big. However, it is the guardian of the ghost from the "Lost Love At the Lighthouse" quest.
 You will be offered membership in the guild, by the character at the door.
Reward: 2975 exp
In front of the entrance to the tavern, you will meet Mendinus, who will ask you whether you would like to join his guild. If you accept right away, you will get a quest for destroying a robot in a cave on the north.
It is good to go to Arhu and talk to him about the robot. He will give you a pilot and tell you that the manual is somewhere in the office (you will get the "Arhu's Failed Experiment" sub-quest, which is connected to this one). You will find it on one of the desks. You should read it and memorize the codes.
Leave through the eastern gate and go North. The entrance to the cave is being guarded by ten level five enemies. The best idea is to attack in a way that allows you to kill one boar, which will then burst with acid, and cast fire over that, to make the nearby two catch on fire. They should be quick to die and, thanks to the explosions, the acid and fire cloud will expand. You now only need to retreat with your part and wait for the rest to start chasing you across this area. They should be unable to reach the end and, even if they do, finishing them off should not be problematic.
Inside, you meet a soldier who asks you to help him fight the robot.
You can fight him the normal way or using the pilot. If you use it however, you won't get any experience or loot. You can however, deactivate his armor, which will make him weaker. Remember that the codes do not always work, even if you press the right combination. Sometimes you have to press it two or three times so that it could finally work.
The boss himself is resistant to knocking down, but vulnerable to freezing. You will find use for spells like Rain and Bitter Cold here, which will freeze the robot. An additional bonus to this combination is that you are wet, as a result, and the robot's attack threaten you with burning. Rain weakens this effect. After it is frozen the robot is tougher but, it cannot attack, thanks to which you stand a chance of rescuing more soldiers.
After you kill the boss, go to Cecil's office, next to the tavern, to complete "The Fabulous Five" quest.
To complete the "Arhu's Failed Experiment" quest, enter the basement in Arhu's building and find the treasury.
Reward: 4500exp
Cecil asks you to find a powerful relic for him, which has been stolen from him. He suggests that you start searching at Conrad's who is collecting wares at the docks.
 Conrad is aboard the ship
Conrad is standing on a large, surviving vessel, with one of the sailors. He will tell you that he knows nothing, but someone in his crew might know something more and that that is where you should ask.
Marv the sailor, tells you that, during the attack, Captain Dietmar escaped with a packet under his arm. Once you tell Conrad about that, he will tell you that he must be on one of the beaches. You need to search them through.
Dietmar is on the beach past the tunnel, where you complete "The Fabulous Five" quest, to the North of the city. In front of the tunnel, there are ten opponents and inside, a giant robot. You can learn about the way to defeat them in the abovementioned chapter.
After going through the cave, head to the teleport on the west and then to the beach. You will find Dietmar with his sailors.
He will attack you as soon as you get near. He can use the invisibility spell, but in the time that you can't see him, you can deal with his companions. After killing him, collect the artifact and take it to Cecil.
You can then decide whether you want to give him the artifact back or not. If you do not do that, the item will remain in your inventory.
Reward: 3150 exp
On the beach to the West of the city, where there are orcs and their corpses, you found a strange cave which you decide to explore. Its entrance is guarded by a gigantic orc, who is firing magic bolts.
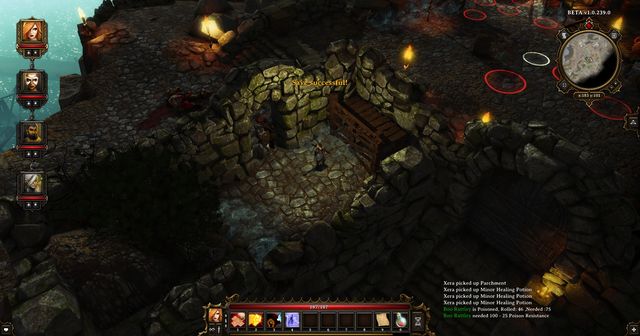 The conflict of interests Orcs vs. Zombie
The first obstacle inside is the electric field that you can disable by putting a barrel on the circular device in the middle of the field.
Ahead, you will encounter an orc that is bleeding to death and, even further, you run into a battle between the undead and orcs. I recommend that you wait for them to finish each other off and finish out the survivors. You will receive experience for each killed creature anyways.
After you win the battle, climb down, through the billows of smoke and reach the boss at the end of the path. In this fight, you need to remember about a few things. First of all, the boss is resistant to freezing and quite mobile. Remember that your companions cannot stand too close to each other, because his strongest attack is a stream of water that deals damage to everybody in front of him. It is best to surround him and then attack. What works well against him is setting on fire and there is no point in attacking the crabs, because they are too weak to deal any damage.
After you defeat him, enter the room behind him. Find the painting over the table, destroy it or expose it. Then, pull the lever next to it. You will find a hidden button, press it and, in the other corner of the room, next to the grate, there will appear a hatch. Climb down to the lower level.
 The correct lever
At the lower level, there are some mines and crabs that you need to kill. Still, any of the routes will take you to the chamber in the middle, with multiple levers. You need to find the right lever because the incorrect ones trigger various events that deal damage (e.g. a fireball).
The appropriate lever is the one at the stairs on the right, at the external side of the room. It is among the ferns at the external side.
Thanks to this lever, you will unlock passage ahead, thanks to which you will finally reach the end-boss - the skeleton captain. Of course, it does not attack without its guards but, it is best to kill it in the first place, because it revives the ones that you kill.
It is also a good idea to smash the oil barrel in the middle and set it on fire, at a distance. Thanks to this, the fight will be shorter. You need to remember that, just like the other undead, these are resistant to cid.
You need to remember to collect the blood crystal from the chest on the ship. By using it, you will unlock the next room in "The End of Time".
Reward: 4100 exp
While completing the Crabs versus Skeletons quest, while in the central room, ransack it, in search of a key next to the table, which opens the next door. In the corridor that you follow, you need to watch out for traps on the planks. With appropriate spot, you will be able to notice them. If not, it is best to throw something at them, which detonates them, even if you fail to notice them. The acid cloud can be stopped with nearby crates.
At the very bottom, you will find several exploding zombies that are, additionally, standing in a big puddle of oil. It is a good idea to cast rain over your part and launch something at the, which will make them explode.
 The two ghost looking for the head
Below, you will encounter ghosts of a father and a daughter, where the former is headless. The girl asks you to find her father's head. If you have explored the city thoroughly, you can remember that one of the guys had a talking head.
Return to the city and find the man that entertains the crowds with the talking head. To collect it without any problems, you need to complete the "Warming the Crowd" quest, because everybody will walk over to the other side of the square, then.
Unfortunately, to convince the head that it needs to go with you, you need to defeat it. As soon as you succeed, return to the cave and give the head back to the daughter. This way, the quest will be completed.
 This is where you meet Elgandaer for the first time
Reward: 1075 exp
Eglandaer, an elf that you can encounter close to the graveyard, asks you to meet him at the first floor of the King Crab tavern. Walk inside and climb upstairs. Take a look into the room with the opened door and listen to what the elf has to say.
It will turn out that he wants you to kill Victoria, a female orc that can be found at the first level of the library. Allegedly, she belongs to the tribe that murdered his family.
Now:
You can convince Victoria to give back the amulet that the elf wants, as a proof that the orc has been killed.
You can kill the elf and inform Victoria of your deed.
You can kill Victoria and take the amulet away from her. After several blows - while holding down the ctrl key - she will start attacking you.
You can tell the orc that you try to arrest the elf. In this case, you need to pickpocket (2+) for the bloody amulet, and give it to the watch commander. Return then to the elf and watch him arrested. After that, go to Victoria and inform her of the arrest.
 The flaming ship
Reward: 550 exp
After you enter Cyseal, once you walk onto the pier to the South of the gate, you will find a flaming ship. People will be trying to put the fire out, in vain, and it is only with your help that they will succeed. You need to know that, if you wait for too long, the quest ends in failure. A good way to perform this quest is run to the library and recruit the dark-skinned mage with the rain spell. An easier way is to use the rain scroll, which you should have on you, because you can find it at the corpse, along your way into the city. After you put out the fire, people will start to thanks you.
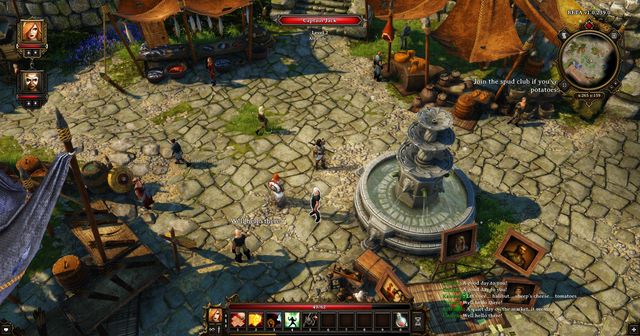 The captain that can recruit three sailors
After the orc attack, the ship of the three sailors has been destroyed. They ask you to help them find a job, because they have nothing to support themselves with.
At the market, next to the fountain, you meet captain Jack. Ask him if he is willing to recruit them and he will agree. Return to them and tell them where they need to go, to complete this quest. You can also start the "Fabulous Five" quest earlier and make them go to work in that organization.
Reward: 325 exp
At the market, above the docks in the first city, you will meet a man who wants to take advantage of the fact the merchant is not around and "borrow" a fish. You can convince him not to or let him steal, by initiating a conversation.
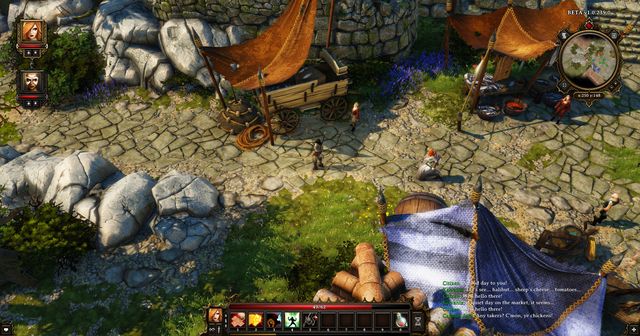 This is at this stand that they steal fish
If you decide to go with the latter, you will be approached by a guard who will ask you if that man stole a fish. You can say that he did not, because he paid for it, or that he stole it, at which point he will be carried away to prison.
Reward: 650 exp
Evelyn, the healer that you can meet at the clinic, close to the market, asks you to decide which one of the patients she is to heal with the magic stone. She can heal only one of them and the other one dies, then.
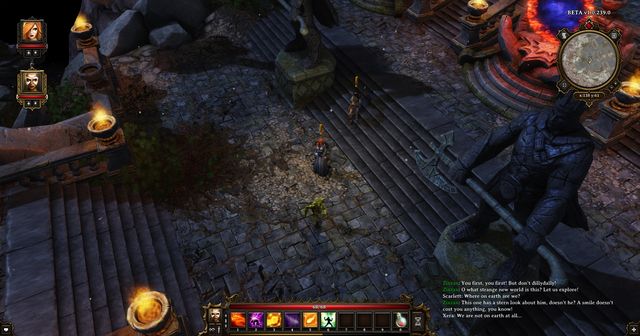 You will be transferred here, after you choose either of the patients
You can choose:
Steave - an old man, who already lived long and has many grandchildren.
Boris - a young man with a knack for business.
If you still have not explored the crime scene of the main quest, then the game teleports you to the land of the end of time, after you choose either. This way, you start "The story of the Stones" quest.
Reward: 600 exp
Aureus, the watch commander, dispatched a unit of guards to the old church of Cyseal, but he has not heard from then ever since. He asks you to look into the matter.
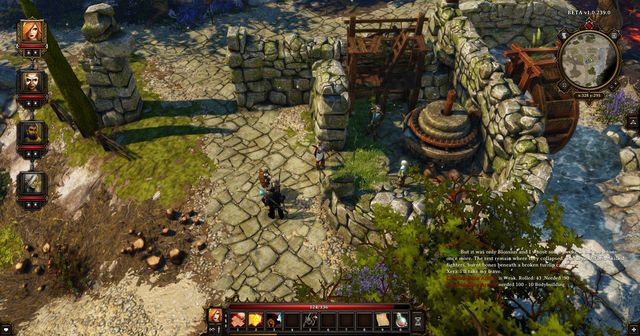 That is how the watch nit ended up
Leave the city through the eastern gate and follow the road a bit further. In the ruins, you will encounter two undead, who turn out to be a part of the unit. Talk to them and return to the captain to report. The man will be dissatisfied with that, but the quest will end.
Reward: 1500 exp
Charlene, who you can meet at the first floor of Cecil's office, is looking for her brother, who has always wanted to be an adventurer.
 Tom has been pushing up the daisies for a long time now
You can find Tom in the cave to the North, where you fight Ahru, the robot, in "The Fabulous Five" quest. Before you enter the cave, you will have to fight lots of the undead first. The fight tactic has been described in the abovementioned chapter. Unfortunately, Tom is long dead. Search through the corpse for the journal to be updated and return to his sister.
At this point, you can tell her the truth, which she will be unable to accept, or lie to her, at which point she will be happy that he is safe and sound.
Reward: 550 exp
On the Eastern beach, you encounter an orc, who is mourning for his brother. He tells you that he buried the brother along with his equipment. You can try to find the grave and dig it up but, if the orc notices that, he will launch at you.
 The orc will be disappointed with you digging up the graves
To dig up graves, you need a spade. Around, there are many graves but you can convince the orc to tell you where his brother's grave is. The grave is located behind the puddle, on the left. You have to have quite a lot of Perception to see the place where you should dig.
All in all, if you start digging with the orc around, he will attack you and you will have to kill him. Then, you can collect his brother's equipment, once you find it.
 The ghost that set a trap - you only need to teleport
Reward: -
While completing Crabs versus Skeletons, you encounter a ghost that imprisoned you in a room, telling you that the room is a trap and that it blows up, after you make a too violent move. Slowly collect everything that you find in the room and use the teleport to the "Black Cove". You will appear at the beginning of the cave system and, after you approach the room again, it explodes, but you will not be harmed. Mission accomplished.
Reward: 1250 exp
To complete this quest, you need a spade, which you can find in Cyseal, at the graveyard.
 The philosopher's ghost appears after you dig up his grave
Go to the graveyard in the North-Western corner of the city and dig up Nemris's grave. A ghost, which will want to conduct a test on you, will appear. He authored many works and you claim that you read them all.
The correct answers to his questions, in the order in which they are asked, are:
Answer 2
Answer 2
Answer 1
If you give the correct answers, you will receive experience and a chest. If not, the ghost will simply disappear.
Reward: 1525 exp
Berta, who is crying at the market, asks you to find her sheep. To complete this quest, you need a spade that you can find in Cyseal, at the graveyard.
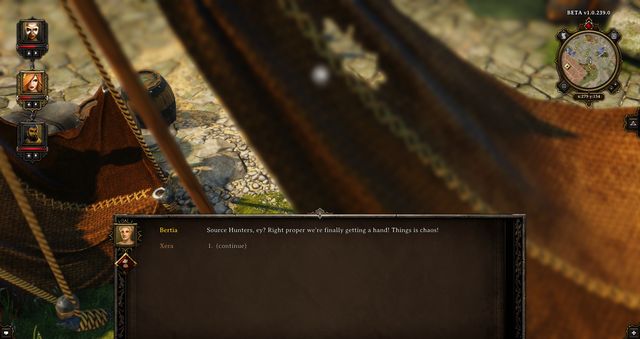 Berta is at the market. The camera does not show her
Once you have obtained one, go to the North-Western end of the city and enter the graveyard. Find Jake's grave and start digging. You will find a coffin with the sheep inside. Tell Bertha about that and she will take the corpse from you, and go to the captain to tell him a word or two about the undertaker.
Reward: 225 exp
After going to Cyseal, turn right towards the warehouse. Go through the building and leave through the right door. You will meet a female orc and two soldiers. It turns out that she's been affected by a love potion and fell in love with one of them. One of the soldiers wants to kill her and the other one says it's destiny. You have to choose whether to kill her or not.
Reward: 100 exp
West from the first teleport, on the beach, you will find a big shell that wants to be thrown back into the ocean. You can either help it or sell it to the nearest merchant. If you decide to help, the shell will make a chest appear in the place where it's been lying.
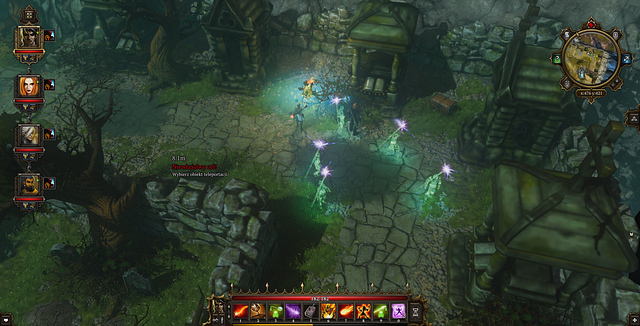 Ghosts in the graveyard
Reward: 3240 exp (if you leave Ebenezer alone) and a chest / 1080exp + experience for killing ghosts (if you decide to kill them)
In the graveyard, north of Cyseal (near the church), you will meet a ghost, who doesn't want to go to the Hall of Echoes, because he prefers to still be in this world. He tells you about a cat named Oscar, who was a faithful companion of his. It turns out that the cat in now called Sam and can be found in the "King Crab" tavern. After talking to the cat (requires the Pet Pal skill), you learn that the guy liked the passions of live so much that he had troubles with the law.
When you already know the story of the ghost, return to him and decide whether you want to leave him be or force him to go to the Hall Of Echoes. If you do, all of the ghosts nearby will attack you. They use ice magic mostly, so it is good to drink some potions that increase your resistance to ice damage.
Reward: 3375 exp
The ghost of a soldier that you've met in the mill near the church have given you his testimony, which you have to deliver to his wife. The widow lives at Silverglen, in the north, and you have to go through a forest to get there. The ghost also says that you mustn't open the testimony. If you are evil, open it and change it in such way that the fortune would be yours. If not, then just deliver it to the woman. To get to Silverglen, you have to take the road to the right from the wasteland in the north and make your way to the forest. Then, walk down the path and turn left when you see a sign. After a while, you should see the gate of the village. There shouldn't be any problems with entering it and you will find Marisa in the tavern.
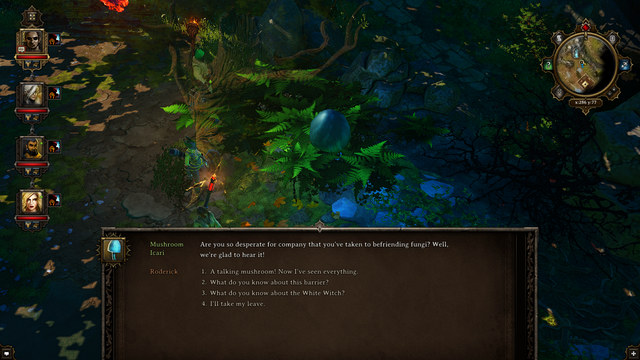 The Icari mushroom
The Witch's cottage- the cottage is surrounded by a magical barrier. The fastest way to remove it is to destroy the two Icari mushrooms (without using magic - this is what clones them) to the South and to the North of the cottage. Inside the cottage, there is a descent into the underground and a passage to a tunnel, which is activated with the button on the left wall. The tunnel goes to the rift that teleports to Hiberheim.
Goblin Village - you can talk to the goblins amicably and you will be granted a safe passage across the village but, if you want to take the Bloodstone hidden in the totem, you will have to fight for it, against the entire village.
The Tavern - at the tavern of Silverglen, you can buy virtually all of the useful items. Do not forget to check out the cellars (the entrance under the stairs and in the room, behind the counter). On the first floor, in the room on the left, you will start the "Bicky the Bomber" quest -do not enter the room, but use the bucket with water or the rain spell - you will then prevent the suicide detonation and you will save the girl.
The passage to the Phantom Forest - the Northern and the Southern passage are accessible for all. They end in nearby places, in the next location so, they do not matter that much but, if you do not want to fight the troll or pay him through the nose, , take the passage on the North, next to the village of the Immaculate.
Void Bloodstone - in the "Closing the Rift" quest, you need to destroy the stone behind the lines of the immortal demons. Make it over there, without being seen (use the spell, or the potion of invisibility). This quest is necessary to push the storyline forward. The Bloodstone itself can be destroyed ONLY with a Tenebrium weapon. If it deals additional damage from magic, they will heal the stone. That is why, you should find, or purchase, a version of the weapon without enchantments on it. Later on, you will not have to fight monsters - they die with the stone itself.
8 - Madam Loenestra - she will sell to you secrets, not in the form of maps, but rather ones that become apparent from the conversation. They are quite expensive and many of them concern further locations. Note to remember - during the conversation, she will also offer to tell you the future - do not use that option. It will prevent you from buying more secrets, and also you do not profit from it. The fact is not even included into your journal.
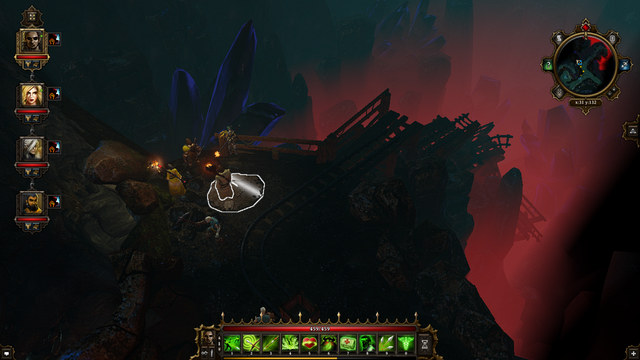 The hidden treasure
The hidden treasure- At the turn, the character with a high level of perception notices a chest buried in the ground.
Katherine - (1) she offers very good gear but, to be allowed to barter with her, you need to convince her that you also belong to the covenant. Still, if you leave them alive, you will be attacked, once you try to use the detonator "A Long Fuse" (1) - for using it, even if there is nobody in the prison, you will be rewarded with lots of experience. If you do not want to fight, and you still want to use the object, use an invisibility spell/potion.
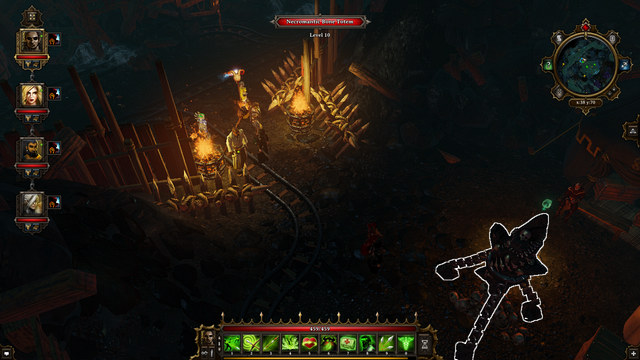 The Totem
Miner Control - (2) after you enter the mines, you will receive a quest to free the skeletons that work inside. In order to do that, you need to destroy the totem of the Immaculates. Of course, at the first attempt to destroy it, you will be attacked but, the fight should not be too much of a challenge. After you destroy the object, go to the North, a bit, where you will notice the skeletons, clustered together, who want to thank you. The problem, for some, may be the fact that to reach the totem, along the corridor, you first need to destroy the rubble in the tunnel.
 The gate to the temple
The gate to the old temple - you will open it with a password that you learn from the undead that you freed, in the Miner Control quest. To reach the gate, head Eastwards - you need to avoid the Death Knights, because they remain indestructible, at this stage of the game and the only option is to reach the gate, while remaining undetected. Do that by using invisibility spells/potions. Walk over there, as one of the characters, who has the teleportation triangle and join in, as the rest of the party, using the other one, as soon as you get there.
Tenebrium - the scattered Tenebrium can be collected - you may need it for crafting or to sell. Still, you need to watch out - carrying it around, without the Tenebrium skill causes the "Rot" status, which drains 1HP per second. You can heal it by using the Bloodstone in the party. A Tenebrium fragment is also wanted by Brandon on the square of Silverglen, who rewards your entire party with the Tenebrium skill, after you bring it to him.
 Almina
Almina - go here as soon as possible. You need to talk with Almina, to continue on with the Find the Witch! quest.
 One of the elementals attacked by the snowmen.
Captives in a Crystals - the only quest which begins and ends in Hiberheim. After setting the elemental-slaves free, a group of snowmen, being the guardians of the place, will appear. You can either cooperate with them, or help the elementals. In exchange for you help, they will provide valuable information about the land and the quests.
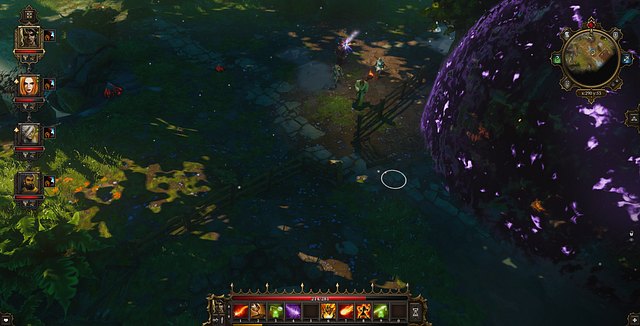 The lever in front of a gate, located to the left, between the bushes.
Second well - if you've started The Wishing Brothers quest in Cyseal, you had a chance to get into Hiberheim for a short while. Now, you can release the second well and choose a wish - get rid of the never-ending blizzard or the flame hail in Hiberheim. To release the second well, you will need a scroll from the King Boreas' Treasury (the entrance to the treasury is unlocked by the statue). Before that, you must defeat the Guardian (a slow, and extremely durable creature). Afterwards, open the door - the lever is hidden between the bushes, on the left.
Conduit location - you must travel here in order to continue with the main quest. You will also find there a document (Orders), unlocking the passageway to the King Boreas.
Stove - you must destroy the King Boreas' staff in this stove, to continue on with the Find the Witch! quest.
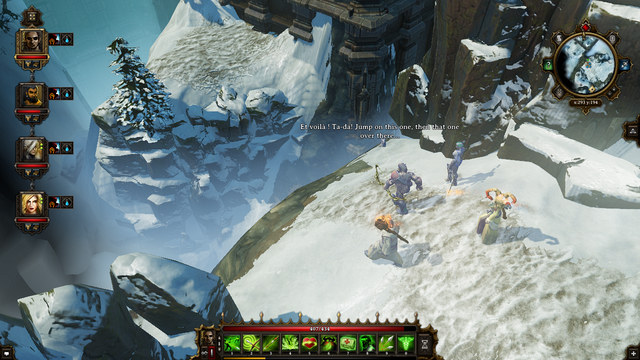 A hare will lead you to the place marked on your map as an optional passageway.
A hare chased by a snowman - if you attack and destroy the snowman, you will be able to talk with the hare called Hopper (provided that one of your characters have a Pet Pal trait). In gratitude, he will show you a secret passageway leading to the castle, through the rocks near the wall. However, you will need a character with an ability which allows him to jump that distance (an archer, for instance). Afterwards, you can open the gate from the inside and enter the castle with your whole team.
A barrier extended over the witch's cottageYou receive this quest right after you have defeated Evelyn and talked to zombie Jake. It is best now, to backtrack to the city, exit through one of the North-Eastern gates and follow the road. You will be then passing by the site of the fire, where you fight the burning legion. Follow the road until you reach the Luculla forest. To find the witch, you need to cross the bridge on the right after which, you should see a cultist telling you that his order captured the witch. You can try and convince him to let you through, but if you fail, you are up for a fight with his minions. They are resistant to shocking but, fire and acid works well against them, as well as the weapons of warriors. After you have defeated them, approach the barrier in front of you.
You now have two different methods to get rid of the barrier:
1. After defeating the ghosts, look around for one of the two talking mushroom, with which you will have to start a conversation to solve their puzzle (you have to do this once only). During the conversation choose the following dialogue options:
After answering in this manner, the mushroom will tell you how to dispel the barrier, giving you a spell scroll required to complete the task.
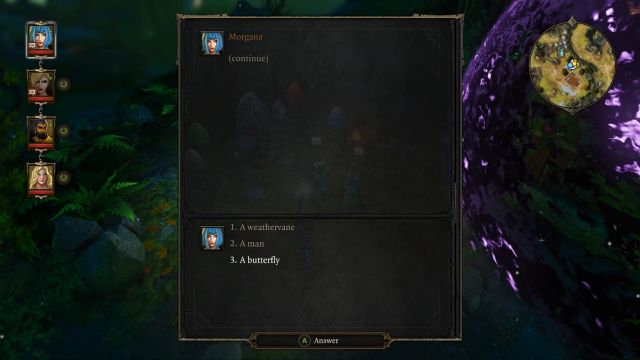 You have to select the appropriate answers to complete the puzzle.
2. To destroy the barrier, you can kill both talking mushrooms. It's not as simple as it sounds - this is without a doubt one of the most difficult encounters in the entire game! During it you will only be able to use physical attacks, and only with weapons that have no elemental affinity. Unfortunately, this does not work all the time - sometimes the mushroom will receive elemental damage, even when your weapon does not deal it.
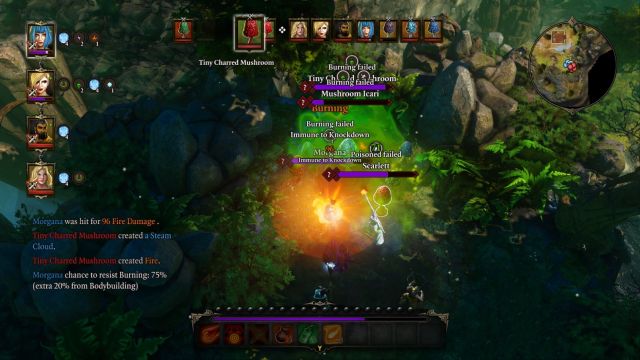 The encounter with the mushrooms is one of the worst in the entire game!
When a mushroom is damaged by any element, another one will pop up nearby, and it will happen each time you use an elemental attack on them. Additionally, each mushroom uses spells from different schools of magic (depending on the element of the mushroom itself), which, after a few attacks, will lead to a situation in which your whole party is stunned, on fire and poisoned.
Using area of effect spells won't be effective either, as mushrooms have high resistances to almost every element (and those associated with a given one are completely immune to it) and each one of those attacks will summon more enemies.
Fighting them is futile, because it's extremely annoying, and the mushrooms won't give you any decent reward, not experience for that, and the barrier can be dispelled through a short conversation. Which is why it's highly advised to choose the diplomatic approach.
Note - you won't be able to find the scroll (like in the "normal", non-enhanced edition version of the game) buried deep in the forest. The only methods to acquire the scrolls are to either kill the mushrooms, or to solve their puzzle.
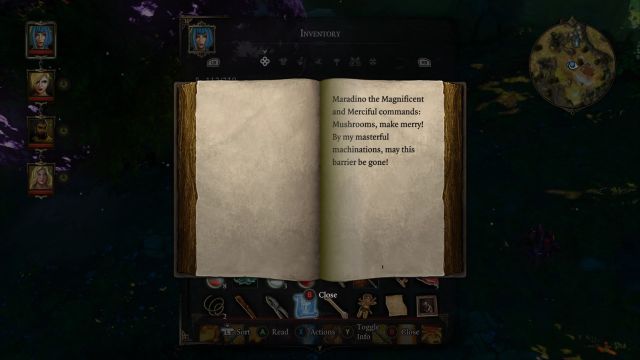 You must read the spell for the barrier to disappear
After you remove it, there appears the summoner again and this time you need to fight it. However, it is by no means tougher than the minions. After you defeat him, enter the cottage and teleport through the green mirror. As you are below, find the corner in dark and one of your characters should notice a button there. Press it to unlock the path.
Now, run along the tunnel, until you meet up with a band of cultists, who do not want to cooperate. Kill them, take the scroll with the spell, which they had on them. The friend of the white witch asks you to use it at the edge of the lake. Do as she says and enter the water to teleport to Hiberheim.
While there, keep going ahead, following the flaming statues. Once you see the stone spikes, there should be a button on the ground, nearby. Have one of your characters stand on it, have the rest run across and teleport him to you.
At the next spikes you will notice a lever that requires a key. It needs to be dug out from the nearby hole. Your character will let you know that he found something and, after you find the key, use the lever. Then, two robot birds will appear which are resistant to fire, and they themselves belch it. They are not too tough and, after several turns, you should be able to continue along your path.
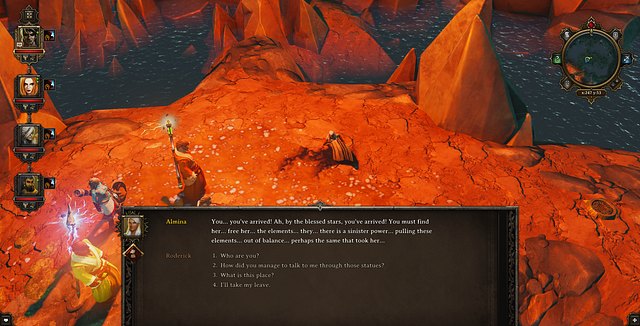 The dying woman
Finally, you will see Almina, who used to be the white witch's assistant. The woman dies but first, she asks you to free the witch herself. You now need to walk into the winter land of this location. Keep to the Southern part of the map and cross the trap that drops white icicles on you Nearby, there is another button on the ground. Use it in the same way that you did previously. One of the characters stands on it and the rest cross and teleport the one on the button to themselves. Nearby, you should find the spikes to the winter area. The button that opens the door is on the hill, on the right. Do the same as you did previously with the icicles but, instead of teleporting the character to the rest, pull the lever with another character past the spikes, for the passage not to shut again.
 The hatch to the castle prison
Now, follow the road to the North and you will find the main entrance to the castle. Go to the West, near the castle's walls and find a hatch, which is a secret passage into the castle.
Once you take the manhole, you will only have a short tunnel to go through, which is filled with traps. However, you only need a good fireball to blow them all up, at one take. After that, you only need to use the tornado to remove fire and acid.
You emerge at the prison level and it is here that you need to look for the white witch. You can exit the holding cell by digging up some dirt, or by destroying the door. Climb up the stairs but, do not enter the first chamber. You need someone with the skill of sneaking, or someone who knows the invisibility spell. This character needs to enter and activate the portal on the left. If someone, who can be seen, entered that room, lava would pour over them.
After you have activated the portal, have everyone use it. The name of the portal is Hiberheim Prison. Then, keep following the corridor, until you reach the big ice crystal, which the witch is trapped in.
Now, you only need a tool to break the ice with. What you need is the Frost King Staff, which you can find past the main entrance to the castle. At the entrance, you will have to face two waves of ice elementals. The best strategy here is to use fire. After you defeat them, you will have to cross the barrier that cannot be destroyed in a conventional way. You need to go North, where fire is shot against ice. There, you need to locate the entrance to a large forge, where the entrance is being guarded by a big group of cultists. What proves helpful for killing them is an AoE spell. After you defeat them, enter and run along the corridor to the forge itself, where a sorceress is creating a blood gem. You fail to catch her, but she will leave four demons for you to play with. They are not too strong, but they are tough. After you defeat one of them, it should drop a scroll named "Orders". In the actuality, this is the spell that removes the barrier.
Return now to the castle entrance and use the spell to bring down the barrier. Enter and you will find the frost king there, who will attack you, right after a short conversation. It is a good idea to teleport him to the edge of the arena, where there are no grates, because he will be using them in a later phase of the fight.
You need to remember that Boreas is resistant to fire, ice, air, knocking down or shocking. All three types of the elements heal him additionally, so, you should not use them. Still, what affects him are physical attacks and damage from poison, although it is impossible to poison him. Some time into the battle, he summons an ice elemental and two smaller minions. You need to deal with them in the first place, because they deal even more damage than the king himself. After a while, he summons fire elementals. Additionally, the grates mentioned above start pouring lava and, if you are not standing on a patch of snow, you will be set on fire over and over again. You can use rain to alleviate the effect, partially. Just like previously, you need to deal with the summoned beasts, in the first place, and then attack the kin, because he himself, is not too willing to attack.
 The entrance to the forge, where you need to destroy the staff
After the battle, pick up his Elemental Staff, after which you learn that, if you destroy it in the forge, you free the mages that help you free the witch. So, go for the forge, where you have obtained the scroll to the barrier, and throw the staff into the large furnace.
After you destroy the staff, there will appear elementals that used to be trapped in the staff. The fire one gives you a rune, which can summon him, while near the witch's prison Teleport to her prison and use the stone.
The elemental unfreezes the witch and the quest will be complete. After you free the witch, she will be taken to your plane by ZixZax, where you need to visit her.
Icara, known as the white witch, tasks you with this , after you complete: "Find the Witch". Go Southwards, in the Lucalla forest, and take the path to the North-East, into the mines. If you encounter goblins along your path, this will mean that you are on a good way. They should not be too much of a challenge, because you encounter a larger group of these only once, but they are asleep. Then, try to sneak past, quietly without waking them up. In front of the mines entrance, you encounter the cultists from the village, who cooperate with the goblins. Kill them and enter the mines. You need to explore the mines but, you need to watch out, because there are death knights around, who are immortal. To pass them by, you need a good rogue, or an invisibility spell, which you can buy in your domain, if you bought the hall of the wind.
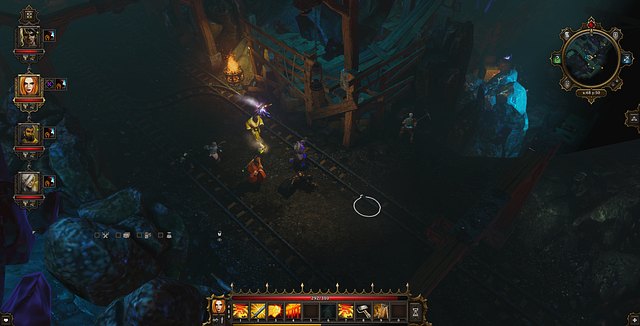 The mines
First of all, you need to complete the "Miner Control" quest, to obtain the password for the gates to the temple ahead. Then, choose one of the characters to sneak to the South-East (while looking at the map) to find the huge gate. Once you find it, say "Sadakandras", and the gate will open. Inside, you meet a woman who created those knights.
After a conversation, she summons three more but, they are terribly slow and you will be able to escape from them. Climb up the stairs, until you see a passage blocked with some junk. Quickly, smash the junk and run up to the green portal. First, choose the portal to the library, run ahead towards the other mirror. There, take the portal to the officer's office, you will get there, without any problems but, soon it will turn out that it is the laboratory of the creator of the knights of death.
Search the room for the "Leandra's Spell", which should be on the desk. Collect it and return to the portal. Now, select "Crypt", and then immediately "Entrance hall", on the same portal.
Finally, keep running ahead, along the narrow passage up to the last teleporter, which will take you outside. In order to find the flask with blood, you need to complete "The Initiation/Infiltration the Imaculates".
After you enter the mine in the forest and see the undead miners, find a spot where you can cut through the wall with the sword (close to the entrance) and you should soon see the cultists guarding a totem. You can convince them that you are on their side but, a battle will probably ensue even though, because you need to destroy the totem.
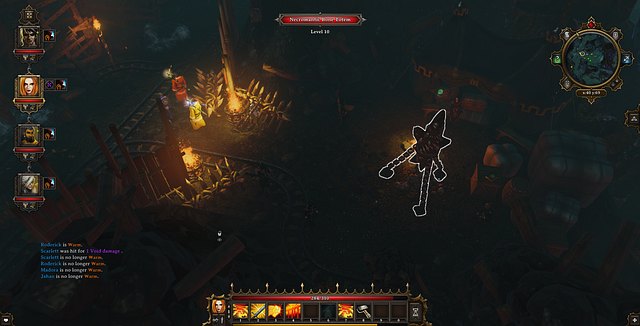 The Totem to destroy
After you destroy the totem, return to the mine entrance and talk to the undead. In exchange for freeing them, they give you a password to the temple entrance: "Sadakandras", which you need for the "Investigating the Mines" quest. The temple entrance is in the mines, to the East.
Priest Loic of the Silverglade gave you a book that allows you to become the Immaculate Follower. Read it and then, talk to him again and take the test. The answers are:
Answer 1
Answer 2
Answer 1
Then, the priest wants to subject to another trial. You need to go West. This starts "Infiltrating the Immaculates".
 The talking statue, during the test
Exit through the Northern exit and go West. After you pass the outpost, you will walk into the desert Keep following the left bank, until you reach the skull cave. Inside, walk behind the statue, through the middle door and then, ahead. After a while, you will contract rottenness and you will walk into the next room. There, you need to collect any items and arrange them in the following order:
1 - 1kg
2 - 2kg or 1.5kg
3 - 5kg
4 - 7.5kg
In the next room, there are four levers.
The solution is on the Northern wall. There are three levers, next to each other, and the first two, from the left, need to be leaning to the right, as far as possible. The last one needs to be straight. Pulling the lever opposite them, in the last place, opens the passage ahead.
In the last chamber, at its end, you find a blood gem , which unlocks another hall in your "house". Then, climb up the stairs and you will find a priest that dislikes the fact that the stone healed you, along the way. After a while, he returns with guards and a battle ensues. IF your level is lower than theirs, this is going to be an ordeal, but you can handle it. The main thing to remember is that the elementals summoned around them and a combination of fire and acid. If your chances at a hit with a sword are low, try to knock the enemy down with magic, because you will then have a 100% chance to hit. Additionally, always kill the Priest, at the beginning/ It is best to teleport him among your characters, right at the beginning, because he will otherwise, be healing his allies, and also rejuvenating them. Loic's self-healing is strong so, leave him for the end.
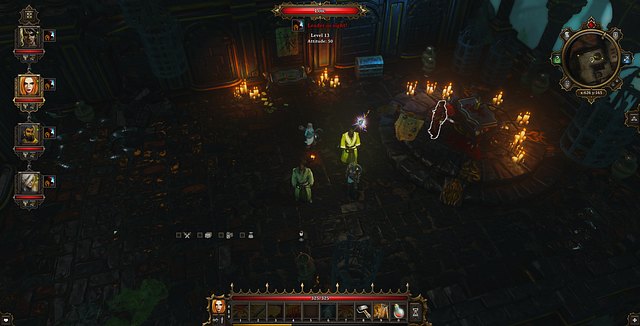 After the conversation with Loic, the battle begins
After you have defeated your opponents, take the key to the hatch in the church and teleport into the village. Enter Loic's office and through the portal.
Now, go South-Eastwards and you should find an entrance to the hidden cultist village. To enter, you need the amulet that you collected from Loic. Once you show it to the guard, he will have no problems with that. You can explore the village but, there is nothing of interest there. Leave and go West, towards the ruins. If you do not have anyone with good perception, it is better to cast spells to your feet, because there are lots of traps in the ruins.
Find a descent to the temple there and try to convince the guards to let you through. Inside, it turns out that the stairs are collapsed. Light all of the four nearby torches to unlock the passage to the lower level.
There, you encounter a priest that wants to make a sacrifice of several people. Once you approach, he disappears and summons two demons: of fire and of acid. Against them, you can only use water, air and physical attacks. It is a good idea to summon a fire elemental to block them off. Additionally, they will be supported by two archers, which are best if eliminated in the first place. You can try to backtrack, so that they approach. The fight in a larger area is much more difficult, than if you had them all clustered together - especially that the demons do not worry about people and their attack may also affect their allies.
 The entrance to the secret temple
After you defeat them, find a lever on the right side of the chamber and the altar will slide away. Thanks to this, you will be able to climb down. You need to find four switches there, to unlock the passage to the secret chamber with the woman's blood. The buttons need to be pressed in the provided order. If in need, you can always find "The Necronomicon of Cooking", where the right order is provided. When it comes to cardinal directions, use the compass on the ground, close to the door.
The first one is on the stairs, next to the floor with the compass painted on it. Directly under the coal stand, where you can light and put off the fire.
The second one is behind the candlestick, on the right of the entrance, next to the bookshelf.
The third one is on the left, on the wall behind the columns.
The fourth is on the last wall to the North of the entrance, opposite the columns.
After you enter the middle chamber, there will appear the priest again, who summons his minions. It is a good idea to hide, then, in the smaller chamber and wait for all of them to approach, and then attack. The demons are very tough, though and invulnerable to fire so, if you do not have any water AoE spells which deal high damage, this may be an ordeal for you. Once they enter the chamber, it is a good idea to stun them and freeze them, as often as possible. If you, still, cannot make it, and you know that you are going to lose, you can run up to the blood bottle, snatch it and escape the fight (separately, as each of the characters).
Return then to the white witch to end this quest and start "A Forge of Souls".
Brandon who is staying at Silverglade, next to the tavern, asks you to deliver tenembriu, which is kept by the troll king.
To complete this quest, you need to be at, around, 14th level. Exit through the Northern gate and go North. Cross the bridge and you should get to the desert. There, you need to go Eastwards and find the entrance to Maradino's hideout (close to the Spider Queen). The entrance is overgrown with bushes, next to the tree, where there is the NPC Fredrick standing.
Inside, get a bit lower and where there are many fruits, you should find the place where to start digging. You will find the "Study Key" there.
Return to the beginning, now, and open the door to the study. There, leave the undead, for now, collect Mardino's books. One of them (Book) opens the passage to the neighboring hidden chamber. There, you will find a blood gem that you need to heal Frederick, for "Fredrick Blood Stone", and a book "Maradino Secret Files", which tells you to take it to the mushroom circle, close to the troll cave.
You can teleport to the city, or simply leave the cave. Still, after you try to do that in the conventional way, Maradino's ghost and his undead company appear. Maradino himself is quite powerful so, it is a good idea to remember to knock him down often. First, deal with his company, who he will summon once again, after you kill them. The upside is that you will be receiving additional experience for them, they are much weaker and the ghost performs no other move, but summon them. After you defeat them twice, attack Morodino himself. Freeze him, knock him down and set on fire. Then, he is not going to be that tough anymore. He is resistant to earth and air magic so, use the other elements.
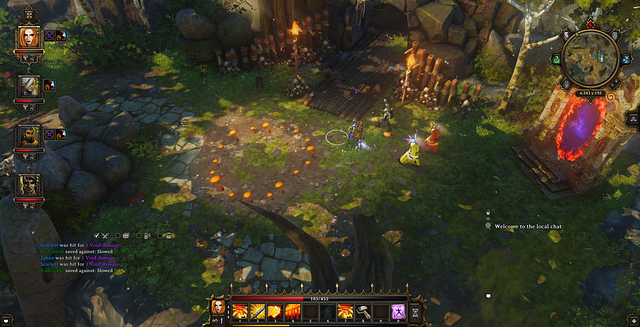 The mushroom circle
Now, you need to go West of the city and head towards the bottom of the map. If you encounter a troll, along your path, at the collapsed bridge, you will get the opportunity to convince him that he should show you the location of the king, on the map (there are two such trolls on the map; what is meant is the one farther away from the city). As soon as orcs start appearing, you will know that this is the right way. Once you notice the conversing orcs (a male and a female) you can choose between two ways to fight them. The more difficult is that you give the first turn to them after which, they summon six helpers, due to which the difficulty level will rise. The other, easier, way is to knock her down, to prevent her from summoning them. After you knock her down, kill her, before she gets back to her feet. Then, the battle will be fought between you and two orcs, instead of eight.
After you kill them, go over the bridge, to the right and use the book in the mushroom circle,. Then, enter the cave. There, you will encounter the troll king and his party but, you do not need to fight him, if you have someone skilled in invisibility, or with the skill to sneak. Then, as that character, cross the chamber with treasures and find the location, where tenembrium is to be mined for. Mine, around ten ingots and take them back to Brandon. Once you talk to him again, this quest will end and "The Naked truth" will start.
 The drunken goblins. You either need to wake them up or sneak past
Lawrence of the Silverglade told you about goblins that seized the mines. Go West and take the road to the North-East, to the mines. If you encounter any goblins along your path, this will mean that you are on the good way. They should not be too much of a challenge, because you encounter them only once, as a larger group. Still, they will be asleep. Try then to sneak past, without waking them up. In front of the mines entrance, you will encounter cultists from the village, who work with the goblins. Kill them and enter the mines. There, find Dreksis, who is being held captive in a holding cell. There are two ways in which you can kill the goblins. Open the door with the lever close to the grates, kill them and take his head (the little imp does not die). Take it to Lawrence to complete this quest.
The other way is to enter the previous door. You can either destroy it with the sword, after which you will be talked to, by the soldiers that locked themselves up there. Again, you will be able to convince them that you are with them. Either way, you need to kill them, because there is a detonator at the end of the room., which blows up the goblin cell (the imp dies). Open the cell with the lever close to the grates, then, and take the head.
After you complete "The Troll's bounty" you will receive a quest from Brandon, who tells you that Lawrence realized the adverse effects of and he still sent the miners to the mines.
You can now go to Lawrence or to Nadia, who lost her husband in the mines and start a conversation about Brandon. If you go to Lawrence first, he will try to bribe you, so that you do not tell anyone. If you refuse the offer, your reputation will go down Even if you accept the bribe, you will be able to go to Nadia and tell her the truth about the mine manager. Still, she is going to need a strong proof of that. In the mines, you can find the "Mining Office's Letter"(you need to remember to collect it before you complete "Investigating the Mines"). With the letter in your hand, go to her and show it to her. She will run to Lawrence to confront him.
 The dead Lawrence massacred by the crowd
He will want to bribe her, to prevent her from telling the truth to the people and, you will be able to choose again. You can tell her to take the money, or not to. If you go for the latter, she will dash out and start shouting all over the place, and the manager will have to answer to the people.
Another decision to take appears here. You can allow the crowds to lynch the manager, or to let him go. If you decide on the latter, you will find his body in Northern Cyseal.
Fredrick, a cultist in the desert, was pushed off a cliff, by his own imp. You need a blood stone to heal him, and he asks you to find his associate also. Both the stone and the imp can be found in the nearby cave.
 The hatch to Marandino's lab
Climb the cliff that Fredrick fell off, where at the tree, one of your character should notice an entrance to a cave. Inside, you need to go a bit deeper to find him and, finally, you will have to decide whether he should return to the wounded man, or stay here. Regardless of what you say, he will not go to meet his master. You need to craft a potion of valor for him, so that he goes. You can do that by mixing an apple and a pumpkin (you can find them in the cave, below). Now, go down a bit and should start digging, in the location, where there are lots of fruits. You will find there the "Study Key".
Return to the beginning, now, and open the study door. Leave the dead there alone and collect Mardino's books. One of them (Book) opens the passage to the neighboring hidden chamber. There, you will find the blood gem that you need to heal Fredrick.
You can teleport to the city, or simply leave the cave. Still, after you try to do that in the conventional way, Maradino's ghost and his undead company appear. Maradino himself is quite powerful so, it is a good idea to remember to knock him down often. First, deal with his company, who he will summon once again, after you kill them. The upside is that you will be receiving additional experience for them, they are much weaker and the ghost performs no other move, but summon them. After you defeat them twice, attack Morodino himself. Freeze him, knock him down and set on fire. Then, he is not going to be that tough anymore. He is resistant to earth and air magic so, use the other elements.
 It is here that you meet Fredrick's imp for the first time
After you obtain the gem and give the potion to the imp, return to Fredrick. Once you give him the gem, he will go mad and attack you. It is best to knock him down and beat him up, with impunity, until he dies.
 Boomer - one bad move and ka-boom
At the tavern, at the upper floor, courtesan Bonnie has been trapped inside one of the rooms with an explosive skeleton, which threatens to kill blow up and you will not be able to use the teleportation spell. If you select the second option, he will not blow up and you will be able to use the teleportation spell, to take him to the antechamber, where he explodes and the quest will be completed. If you go for the first option, you will receive the trait "Valiant" but, the girl will die and you receive no experience for this quest.
 The wounded animal - you can either try to help, or not
To the West of the Silverglen, you meet Bjorn, whose horse is wounded. You can help escort Bjorn, and leave the animal, or try to heal it first. To heal, you are going to need a strong source of healing magic.
You can use the blood gem, which you can find at Loic's study, after you complete "The Initiation". You will then lose one of the rooms at your home location.
After you heal (or not) the animal, you will have to escort them to the village. If, during the journey, the man dies, the woman becomes the new smith in the village. If the horse dies, the man becomes the smith there, but the loss of his horse is going to sadden him. The same happens, if the woman dies. If all of them survive, they will be all happy.
In the South-West of the forest, you meet a troll, who wants a toll of you, for passing the destroyed bridge. After you ask enough questions, you will learn where the troll king is hiding. Finally, you can either fight him, or pay the toll.
In Hiberheim, in the frozen part of the area, to the East, you can find a frozen troll. Cast a spell over him to unfreeze him. Still, you will then be attacked by two snowmen. Just like any snowman, they melt under fire.
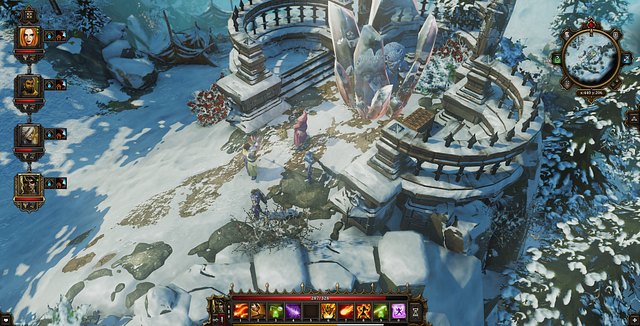 The frozen troll
After you defeat them, the troll asks you to bring him the teleportation scroll. You can either agree to do that, or fight him If you agree to bring the scroll, you will find him in one of the cultist groups, which is roaming this land.
To the North, it is possible to find a frozen ice elemental. If you unfreeze him and help him fight, he will tell you that you can receive the ring of winter, using a secret medallion. All you need to do is put it on, in the center of Boreas's chamber with treasure. You can find the medallion in the chest, next to the woman trapped in the wall, from "The Wishing Brother".
To the South, you will find a trapped earth elemental. After you rescue him, he will go away happy.
Under the exit from Silverglade, you will find troll Fumble, who asks you to help him find a girl. return to the village and find a woman named Ruby, who is a courtesan, and tell her about the lonely troll. Remember to start this conversation, as the character that has more than 2000 gold, because this is as much as Ruby requires for her services. Once you pay her, she will go away, to the troll. Visit them to receive your reward.
To the East, behind the goblin village in the Luculla Forest, you will find Roy, who is leading the animals to the village, where they are to be slaughtered. The task is to prevent that from happening. You can convince Roy, to let the animals free, you can buy them from him, or you can simply kill him.
After making up your mind, you gain possession of the animals and you can decide of their fate - if they are to be brought to Cyseal or set free. If you decide for the latter, you need to skill to speak with animals.
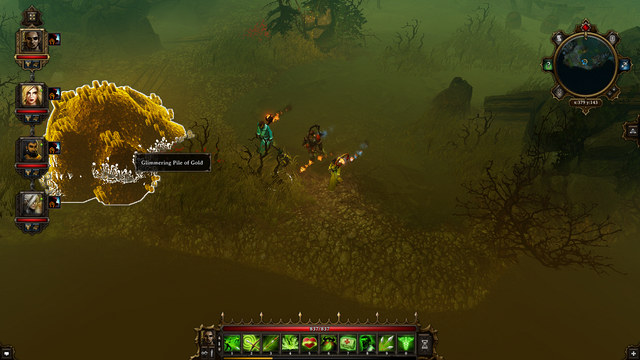 The heap of gold in the swamps
9 - the heap of gold with wizard Bellegard hiding under it. After the conversation, you will gain access to a new teleportation point- Bellegard's Maze. After you get to the maze, you will notice a chessboard and three levers. Each of the levers frees another animal: a rat, a cat or a dog. Your task is to conduct the swaps of the animals so as to reach the field highlighted in green, with any of them. Each of the points opens one door with valuables behind it.
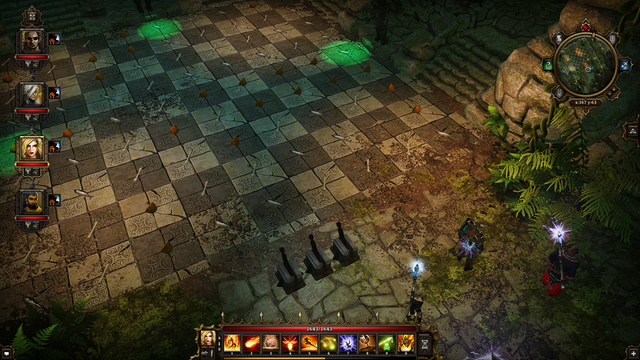 The chessboard
Strategy is the key to solve the puzzle. The cat eats the fish, the dog eats the bone and the rat eats cheese. After the animal eats food and progresses to the next field, there appears another food, at random, in its place. Therefore, there is no one right solution to this puzzle and the player needs to try on his own.
10 - Knight's Tomb. To get inside, you need to pull the three levers on the left, on the right and in the middle, next to the statue. Do not enter if you do not have the "Titan Dictionary" on you, because you will then have to fight a very demanding fight with the stone guardians (still, you get lots of experience after you defeat them).
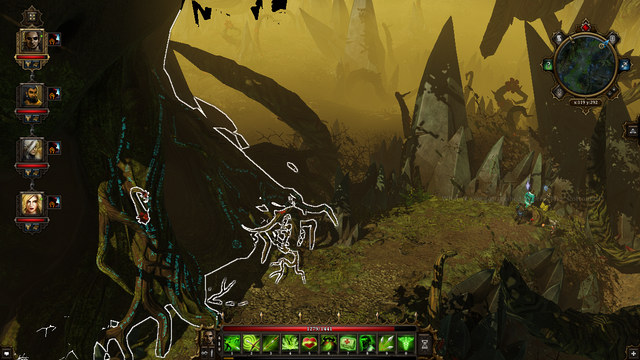 The stone covering the manhole
1 - the hiding place of the villagers appears on the map after you complete The Hun in the Hunter's Edge quest. It is a manhole hidden behind a large boulder, at the Western wall. You need to destroy the stone, because the manhole is under it.
The Kickstarter tree4 - The Kickstarter tree, the place where Weresheep appears. There are several steps that you need to take, to complete this quest, but the matter of the fact is that you only need to get to this tree and place the Stardust Herb right in front of it. Then, there will appear the sheep, which you can convince to lend you its fleece, or kill it and take the fleece yourself.
Merchant Nurt - a Tenebrium weapon merchant hiding under the roofing (2). After the conversation, you will be able to tell on him to Grutilda. If you intend a lasting exchange of goods, do not do that because he will not be capable to barter after you turn him in.
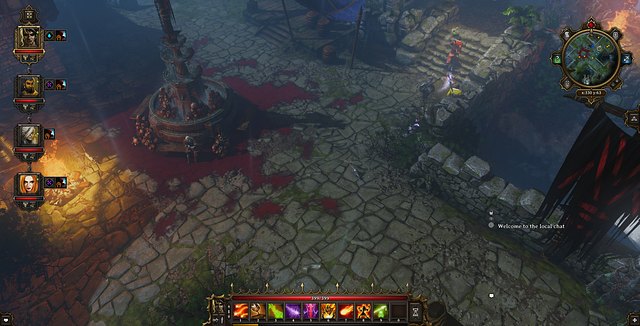 Catching mice.
From the orc named Ratcatcher, who can be found near the tavern, you can learn about him trying to find the citizens with the help of rats.
By using the trait Pet Pal, speak with the cat named Jinxika (which will simply be called as "Cat"). The cat will ask you to kill those rats. The problem is, that the locals won't like this, so you must resort to a little trick. Take cheese and poison flask (both of them can be bought on the market in Cyseal), combine them and place it near one of the burrows - after a short while, the king of rats will emerge. All you have to do now is to kill it. If you've done that, you can just go back to Jinxika, and the cat will tell you where to find the citizens. Skip the next three paragraphs.
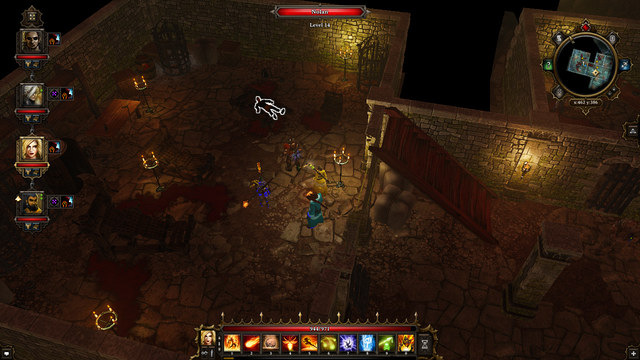 A prisoner inside of a torture chamber.
After the conversation with the cat, go to Jahrl in the Tribesmen's Warehouse, opposite the tavern. After speaking with him about the hiding citizens, he will inform you, that one of them is located in their dungeon. Afterwards, you can go below via a hatch on the floor. There, behind grating, you will see a torture chamber, and a prisoner called Nolan, with two characters torturing him. After a short conversation, you will be able to convince the watchmen that you know how to torture and to let you have the prisoner for yourself for a while. After a successful persuasion (an unsuccessful one ends in the watchmen attacking you), you will be able to speak with Nolan for a short while. Note: a conversation between the main characters will commence - you will have to select the second option, to try to silence Nolan, before he attracts attention. Of course, it will cause the watchmen to attack you.
 A switch to a secret tunnel.
After the fight, speak with the captive - he will inform you, that he will tell you the information you seek only after you've gotten him and his two co-captives from the nearby cell outside the dungeon. To do it, go to the end of the corridor - between the spider web, you will be able to see a switch opening a secret passageway. Clear the corridor of the enemies. Afterwards, you will stumble upon a group of five mushrooms - all of the elemental attacks heal them, and non-magical attacks make them explode. To avoid it, use the rain scroll / spell - wet mushrooms won't explode anymore.
After clearing the passageway, get back to Nolan. He will tell you to get the prisoners from a nearby cell outside. The key can be found by the corpse of a watchman. After setting them free, follow them - after they've stopped, you will learn about the location of the key and the entrance to the hideout.
The refugees are hiding behind the hut, close to the gate (marked on the map). The key to the hatch can be found in the bee hive behind the house of the wizard, on the east side of the city (the brighter part). After destroying the rocks and getting inside, you will find a group of refugees hiding from the orcs. If you convince them that you're on their side, you won't have to go to the white witch to get a proof that you're the wizard's friend.
 The wizard's apartment.
After convincing them, they will give you a portal activator, which will teleport you to the wizard's apartment, which is full of traps. To avoid them, move with a single character at a time.
By going up, you will find a room on the right side - go through the portal located in the middle of the room (to activate it you must light up all the candles). Flip the lever in the next room, which is located in the flooring, and after that do the same in the next room. The defense systems should be now turned off, so go tell the hiding refugees about it.
The white witch will help you to find a way to repair her forge. You can do that after you've completed "The Hunt in Hunter's Edge" quest and collecting the protective amulet from the wizard's house. Additionally, you must find a book called "Titan Dictionary", and move to the beginning part of the location. Go to the right side of the map, and you should soon stumble upon a felled tree, which allows you to enter the forest. Select the character who has an invisibility spell / scroll, teleportation pyramid and "Phantom Protection Amulet" and use him / her to get inside.
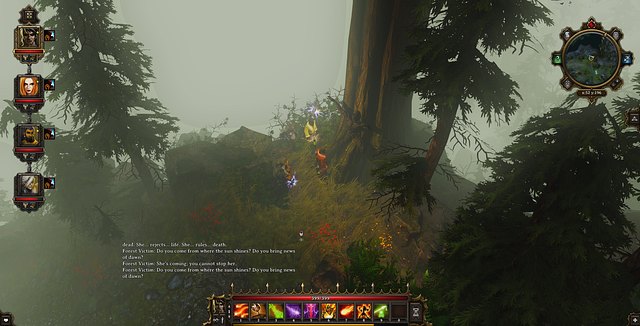 Even the trees are weird in this forest.
After going to the north, you should be able to see a pack of hostile ghosts. Call the rest of your party before engaging them and defeat the threat. Afterwards, go along the North-East road, where you will find Cassandra, Rex's sister, who will give you the scroll to repair the forge, if you kill Arhu. You can choose now - you can either kill her, or him. If you want to kill the wizard, go back to Cyseal and fight him in his office.
If you don't want to kill him, the case is a little bit more complicated, because the witch is immortal. You must find the head of a titan in the South, which will tell you (if you have the previously mentioned book about titans in your inventory), that you must burn her real body, which is hidden beneath the "Temple of Dead". Go back to the ruins in the forest, where you've met Sentinels (defense turrets) and destroy them, using the same spell that destroys the invulnerability of Death Knights.
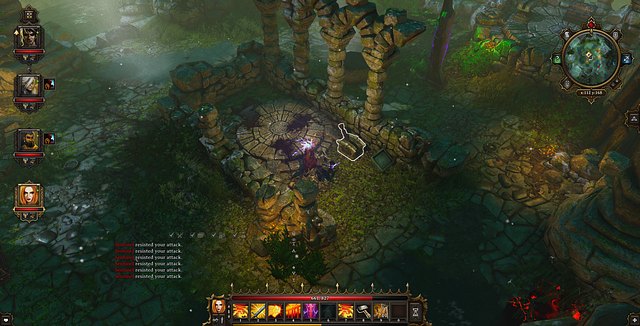 A platform on which you must die.
Afterwards, get in the middle of the room, where a lever is located - the character with a teleportation pyramid in inventory should stand in the middle of that platform. There, all of your other characters should kill that one, and flip the lever. The body should be moved to the catacombs. All you have to do now is to use the second pyramid to get to the first character to resurrect him / her. The whole party will be now underground.
Go straight to the crossing and turn to the right. You should see a raised bridge there. Near the bridge, there will be a skull, that you can use - afterwards, the bridge will descent, and you will be able to cross it. Do the same thing with the second bridge, and you will be attacked by a pack of demonic wolves. They won't pose any challenge to the group on the same level. After you've dealt with them, go further and turn to the right. In front of you there will be a desk, with a lot of different potion ingredients. Turn to the right, go through the smoke, and ignore the passage to the right - get to the wall and try to "enter the wall" on the left. You should be able to go through the wall (an illusion) and found yourself inside a room with Cassandra's grave.
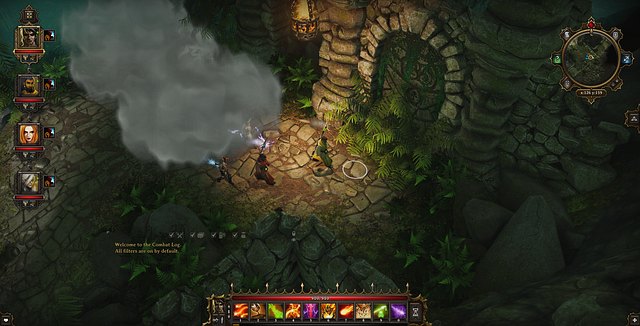 This wall isn't real.
Dig her bones, get a key from it and use a fire spell on them, to burn them. Afterwards, get back to Cassandra and defeat her. Cassandra herself isn't a boss (each boss have a specific outline to their health bar), but she has an additional guard with her. It's a good idea to knock her down, destroy all the small fry and then attack her. The undead are immune to poison, so don't use it on them. Instead, use fire-based magic in them. After you've defeated all the enemies, get the scroll from the woman's corpse, and the quest will end.
After completing the quest, in which you had to find the witch, she will task with finding a specific wizard, and will give you a ring, which may help you with it. Go to the location called "Dark Forest" and the city in there.
Inside of the wizard's house, located to the Easy, there will be a set of barriers, impossible for you to cross - you will first have to complete "The Hunt in Hunter's Edge" quest. Afterwards, you must find the "Phantom Protection Amulet" inside of his house, located on the second floor, in a gem chest. The amulet will protect you from the negative influence of the forest.
Get back to the very beginning and set your steps towards the right side of the map. You should be able to see a felled tree, which will allow you to enter the forest. Select the character who has an invisibility spell / scroll, teleportation pyramid and "Phantom Protection Amulet" and use him / her to get inside. You must find a rune, which is in possession of the ghost of the forest. The rune itself will allow you to enter the "Source Temple".
 The ghost of the forest held captive.
In the Southern parts of the forest, you can meet an elemental, who was an apprentice of the ghost of the forest. From his words you will learn that a demon called Balberith holds the ghost captive. The demon can be found to the West, on the swamps.
During the conversation with him, you will learn about the connection between your companion mage and this demon. If you have Jahan in your party, you can exchange him for the rune, or simply defeat the demon. Sometimes, the demon may propose to kill another demon (Raazen Az'aroth), who resides in the North. It's a demon of fire affinity, and each element, besides fire, obviously, works on him. Additionally, you must first kill his underlings, because they explode upon death. The quest to kill the second demon will be given to you if you mostly didn't agree with Jahan during the conversation, or when your character is egoistical / heartless.
If you decided to fight the Balberith itself, this fight is a little bit different. The demon will summon 4 souls, which will make him almost invulnerable to everything. Your weapons and spells should be able to do something, but it's rather minor damage - besides, the demon will heal himself as long as the souls are there. The three of your party members should keep the demon occupied, and the fourth one should go and deal with the souls. They won't attack, but Balberith itself will summon Cyclops from time to time, and you should deal with them constantly (he will summon a total of 4 of them). After killing the fourth soul, the fight will gain momentum, as the demon itself will be more aggressive, but he will finally start losing his life a lot faster.
After killing the demon, collect the rune and release the ghost of the forest from the prison. Thanks to that, you will be able to enter the temple.
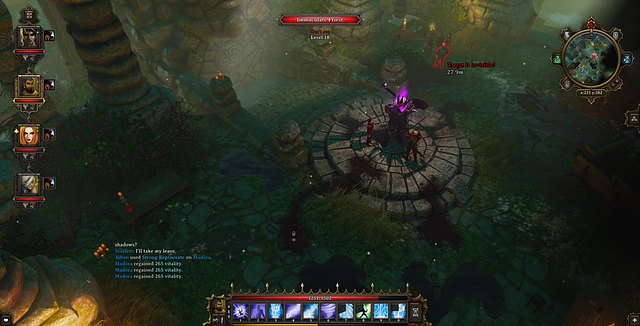 One of the three bosses protecting the entrance to the temple.
The entrance to the temple is located in the ruins between the forest and the swamps. There are demons, goblins and death knights there as well. Additionally, there are three bosses there - an orc, a goblin and a huge death knight.
The first one to encounter will be the orc Kallgruda Cloudpiercer, using a crossbow. The best tactic is to lure her into a side alley, where you can see a destroyed wagon, and kill most of them in one go by combining ooze and fire. The orc boss isn't really different from al the ranged-based enemies and most spells work on her.
The next one is the goblin Zuridraskaz, who is invulnerable to the elements - they simply heal him. Here, your warrior(s) will have to approve themselves. Send the warrior(s) to fight the boss, and use the mages to kill of the underlings. It's a good idea to begin the battle by dropping some AoE spells and move back a little. The enemies will come to you, huddled together in a group. Also, there's a mage in their group, who uses a teleportation spell - if you would have fought them from the distance, it's almost certain that one of your companions would be teleported inside of their group. It's recommended to kill the enemy mage as soon as possible, to prevent him from healing the boss.
The third boss is the huge death knight. He is invulnerable to water and ice, so he must be swarmed with spells from fire and earth. In some point of the fight, one of his underlings will make him invisible - use a summon to intercept the sneaking enemy. It's crucial to do so, as the boss hits extremely hard in melee range, so you should avoid him hitting your party members directly. The death knight is easily knocked down and stunned, so it's worth to keep him in one of those states. From the underlings, you should primarily focus the priest, who can resurrect the fallen ones.
After defeating the third boss, open the gate with the character who possesses the rune. The "Inside The Temple" quest will be unlocked, which is the continuation of the current one. After opening the door hidden behind the shelves, all you have to do now is to run straight ahead, to find the wizard. Afterwards, go back to the End of Time and Zixzax will lead you to the last portal, leading to the "First Garden".
During the "Follow the Wizard" quest, you will enter the source temple, it's also then when this quest activated.
Inside, go all the way forward, until you reach a broken teleportation mirror. Go back a little, and get close to a pile of stones, to the North from the waterfall, blocking a passage. Press the switch on the right side of the rubble and go through the new passageway.
 The last variant of the candles.
At the end of the corridor, you will meet a door, which will tell you, that you need a number of star stones in order to enter, or that you have enough of them. You need to have all the 14 star stones collected. Their places can be found in the "A Source Hunter's Journey" section of this guide.
After entering the room, a lot of doors should attract your attention. You don't have to do anything with them, fortunately, as solving the riddles connected with them will award you with three books, which tell you how to set the candles on the circle at the end.
Leave the doors and go upstairs. Light all the outside candles, and, as soon as the journal is updated, the one in the middle. Finally, light the middle one, the one in the upper right corner, and the one in the lower left corner (so that the candles are lit diagonally). The door should be now opened.
After finding the mage in the Source Temple, during the "Follow the Wizard" quest, you have to get back to the End of Time, where Zixzax will lead you to the last room, called "First Garden". When you go through the portal there won't be coming back - that is why you must make sure that you are absolutely prepared, and that you have plenty of potions (especially resistance ones) in your inventory. You can purchase potions from the merchant, in the End of Time.
 Incorrect answer will teleport your whole party to the very beginning.
Go through the portal, and after a short while you will find yourself in a dark room. You won't have to fight with anyone here, and the area is clear off traps. Your only task here is to select the appropriate dialogue options during a "conversation" by subsequent portals - should you select the incorrect answer, your party will be teleported to the very beginning of the area.
Select:
After a short while Leandra will show up. When you regain control over your party, go through the portal the witch used to escape, and you will soon arrive at a new location.
 Direct methods are sometimes the most effective ones...
Go to the building located to the north of your actual position. Speak with everyone inside and ignore all the barrels and items scattered around, as you won't need any of them, and then go to the southern section of the building. The doors on the left side are closed, which is why you have to approach the ones on the right and bust through them with attacks. Get inside the room, wait for the cutscene to end and then leave the room, heading straight ahead, where you will be visited by the witch yet again.
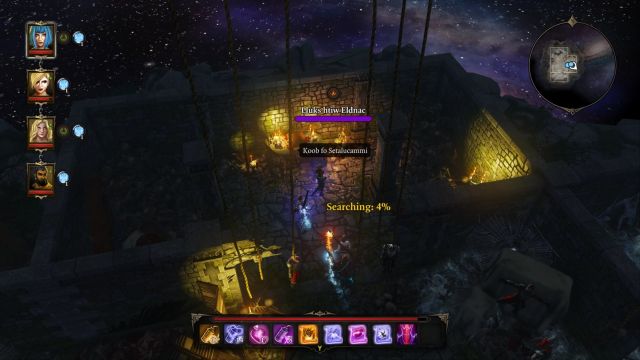 While highlighting items in the area, you will be able to locate a book with quite a peculiar name.
Go to the underground level and head to the eastern section of the room. A book called "Koob fo Setalucammi" can be found next to the wall. Open it and collect the key hidden inside. The witch will appear yet again, and when you regain control over your party you must get back to the upper floor. As you've probably guessed, you have to go through the previously locked doors on the left side. You now have to go through a couple of rooms, by going through portals highlighted with a purplish outline - "click through" them until you get to a room with portraits of fish hanging on the walls, and a passageway blocked by a barrier.
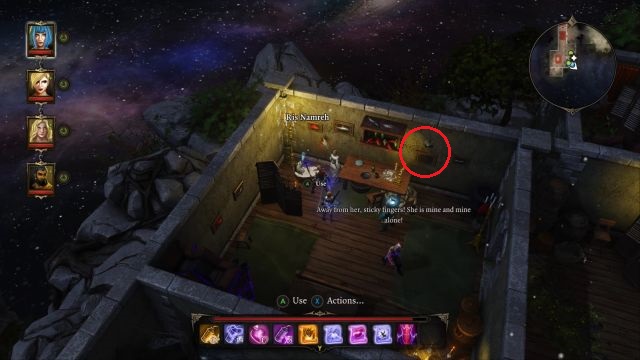 The button which allows you to lift the barrier.
The button that allows you to lift the barrier can be found behind one of the paintings, or to be more specific, the one located to the right of the table. Interact with the painting and wait for the button to show up, after which you have to press it. Go through the freshly opened passageway and head north. Don't run to the end of the corridor - turn to the right (or left, depending on your camera settings), leave the building and continue straight ahead, until you reach an altar with Astarte lying on it.
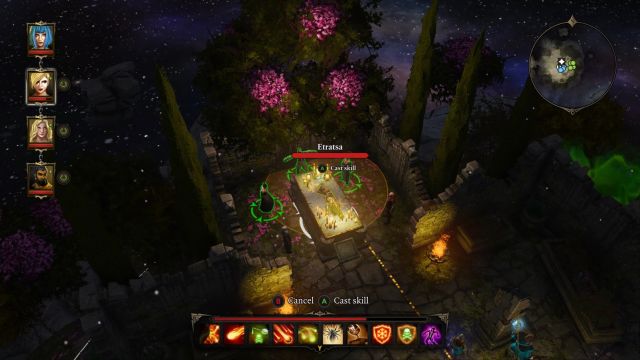 To acquire the key, you have to burn Astarte's body with a fire spell.
Speak with the woman and then use a fire magic, to set her dead body ablaze. After a short while you will be able to collect the key from her burnt corpse. Do that, get back to the corridor and head all the way to the north, while opening the doors at the end of the corridor with that freshly acquired key. Make sure that you are well prepared - after getting to the upper floor via the stairs, you won't be able to get back, and you will soon face a boss called Trife.
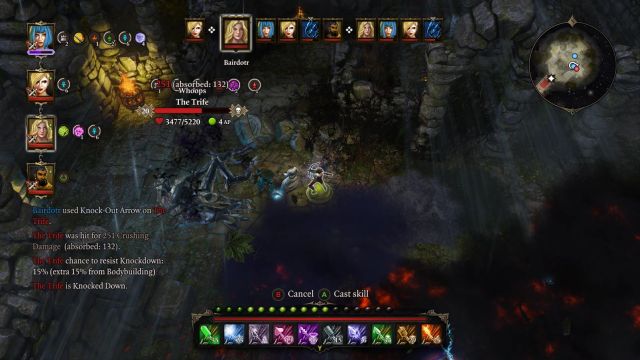 There's a lot going on the battlefield during the boss fight.
At the very beginning of the encounter, the boss will summon three demons - it's important to refrain from attacking them with characters using Tenebrium weapons, because they are highly resistant to that metal and will be healed instead. The best approach is to use your mages to get rid of the summoned foes, while your warrior and other "physical" classes are engaged in combat with the boss itself. If you are able, you can try to "clutter" the summoned enemies together (with the help of, for instance, a teleport spell and/or scrolls) and then unleash a powerful AoE spell (like Meteor Shower). A single, top-tier spell will almost always kill them all.
Trife itself is not all that powerful, because he lacks any serious damage, but on the other hand he's fairly resistant and can stun your characters with his lightning-oriented attacks (which is why a high resistance to electricity is crucial here). The boss is complete immune to air magic (as well as stuns from lightning), but all the other resistances are quite low, which means that you will be able to do a large amount of damage with the help of remaining elements.
The biggest threat is the ability of Trife to summon assistants. Those are (summoned each turn, in this very sequence): Arhu, Icara, Zandalor and Zixzax. Each one of those characters can use their respective abilities, which in turn means that they are more troublesome than the boss himself. In general:
During the encounter you should focus on eliminating the ghosts summoned by Trife (use your mages and/or a ranger with a lot of elemental arrows), and use your tank to keep the boss' attention off your party. Remember to use all knockdown effects available - the boss is surprisingly vulnerable to it, and a stunned boss won't be able to summon any assistance, making the whole encounter a lot easier.
If the encounter drags on for too long and there are several summoned heroes on the battlefield, you should focus your attention on Icara and Zixzax, who can heal others, and when they are down take care of the rest.
 When the encounter ends, destroy the "Rorroh Latsyrc" object to move on.
When the encounter ends, pick up the items dropped by enemies, heal your party, redistribute elemental resistance potions between your character and head north, where you have to destroy an object called "Rorroh Latsyrc". After a short while your party will be transferred to the proper section of the gardens. Go upstairs and through the portal, and in the next area run down, where another boss fight, with Leandra and her underlings, awaits.
 During the encounter you have to kill demons in a specified order.
This encounter is definitely one of the most difficult in the entire game. The Witch will begin by summoning three demons, Vaeg'rym, Aern'vuul and Yarl'oggoth. What is more, those demons will cast an invulnerability spell between themselves - at the beginning, those will be cast on two demons and Leandra herself, making her immune to your attacks.
To be able to inflict any damage on the boss, you have to eliminate the demons one by one, in a specified order, starting from Yarl'oggoth. When the demon is dead, one of the other two will have to use his invulnerability spell on Leandra, meaning that he will now be vulnerable to your attacks. Now you must get rid of Aern'vuul, and then the last one, Vaeg'rym. When you accomplish this, the Witch will be vulnerable again.
 You can get rid of Death Knights with a single, powerful AoE spell or attack.
As you've probably guessed, it won't be that easy. Leandra, aside from demons, will also summon a group of Death Knights (which are, fortunately, without their typical invulnerability). It's worth to get rid of them as quickly as possible, when they are still grouped - a single, powerful AoE spell (like Meteor Shower, or Hail Storm) is more than enough to get rid of them. The Witch needs two more rounds to be able to summon them again.
Don't forget about your own defense - most of the enemies will try to get to your back line, so it's generally a good idea to summon a couple of monsters / elementals to keep the enemy attention off your mages / ranger.
 Use the spell acquired from Icara, to activate the portal.
When the encounter ends, Icara will alter her appearance, as well as give you an item - Death Knight Control Wand. Use it to learn a spell, that will allow you to dispel the barrier on the portal. Use it to go to the other side and continue your journey along the only pathway, until you reach a group of Death Knights. Use the recently acquired spell to get rid of enemies with a single strike.
 Your last merchant in the game - use this opportunity.
When everyone is dead, collect the items they dropped and continue. You should soon stumble upon a merchant, Brian. Use the opportunity, as you won't have the chance to trade after this point. When you're done, go to the lower floor, where, after activating the God Box altar, you will encounter the last boss in the game, the Void Dragon.
This is the last fight in the game, so use your equipment, potions, arrows and grenades, as you won't be needing them anymore. As soon as the encounter starts, the dragon will attack Astarte and summon a large amount of monsters. You have two objectives during this encounter - protect Astarte (if she dies, you will lose) and kill the dragon. Remember to use your summons to aid yourself in battle.
Send your warrior (or two of them, if you have a party like that) to the dragon, so that its kept away from the rest of your team. Remember to make sure that your warrior has extremely high elemental resistances, especially the air one, so that he won't be stunned by the boss' attacks. Astarte will support your party during the encounter, mainly by healing and casting Bless, which will allow your characters to hit the boss more frequently.
 The Earthquake spell is probably the best one for this encounter.
When your warrior(s) keeps the attention of the dragon away from your team, use the rest of your party to eliminate the summoned monsters. It's worth to use earth-based spells and attacks here, as the enemies are highly vulnerable to them (-50% resistance to earth). If you have the Earthquake spell at your disposal, use it now - it will be able to reach from one side of the arena to the other, and will deal huge amounts of damage to the enemies. Additionally, this spell has an extremely high chance (300%!) to knockdown enemies, meaning that majority of them should probably be lying on the ground (or dead). Don't mind the oil surface that you've just created - almost no one uses fire spells here (and you won't need them as well), so you should be relatively safe.
 A good attack, when lucky enough, is able to take 1/3 of the boss' health.
Surprisingly enough, the Void Dragon is vulnerable to stuns and knockdowns, which is why you should use those abilities as often as you can, to reduce the effectiveness of the lizard. The enemy will summon more monsters every few rounds, so remember to use Charm Arrows, and the charming effect in general to take control over at least some of them. When the enemy is down, a short cutscene will initiate, after which you will be moved to a new location.
 After speaking with Zandalor, go to the exit located to the west to finish the game.
Go straight ahead, and you should reach a building guarded by two soldiers. When the conversation with them ends, get inside the building and speak with Zandalor. If you wish to, you can speak with the remaining characters, and when you are read, go through the passageway located to the west. After a number of steps, your two main characters will start a conversation, and when it ends, the game will be completed.
During your journey, Jahan will tell you about his task to kill a certain demon called Balberith. The demon can be found in the Dark Forest, but only during the "Follow the Wizard" quest. During the conversation with the demon, you can either give Jahan to him, kill another demon for him (if he asks for it), or to kill the beast itself. In the first choice, Jahan leaves the party, and the demon will turn him into a Cyclops on his services. The second choice ends the quest, too, but Jahan won't be satisfied, and in the third scenario - killing the right demon - Jahan will be pleased with his revenge.
 The fight with Balberith.
If you received a proposition to kill Raazen Az'aroth, who can be found in the North, and you accepted it, go to the upper parts of the map. Between the ruins, you should be able to find your target. It's a demon of fire affinity, and all the elements, besides fire, work on him perfectly fine, especially water. Additionally, it's a good idea to take care of some fire resistances. Finally, you should first focus his underlings, because they explode upon death. It should be done from a safe distance.
If you decided to fight the Balberith itself, this fight is a little bit different. The demon will summon 4 souls, which will make him almost invulnerable to everything. Your weapons and spells should be able to do something, but it's rather minor damage - besides, the demon will heal himself as long as the souls are there. The three of your party members should keep the demon occupied, and the fourth one should go and deal with the souls. They won't attack, but Balberith itself will summon Cyclops from time to time, and you should deal with them constantly (he will summon a total of 4 of them). After killing the fourth soul, the fight will gain momentum, as the demon itself will be more aggressive, but he will finally start losing his life a lot faster.
Your companion, Madora, told you her story, in which she was responsible for a village called Hunter's Edge, but she couldn't protect it when it was attacked by the orcs. Regardless of that, she promised herself that she will get her revenge and you can (and should) help her with that.
 Norok did a real massacre on the 1st floor.
Get inside the Hunter's Edge and find a tavern. While inside, go to the upper floor, where an orc called Norok just massacred a lot of people. Madora, as a revenge, will want his head.
The fight is rather easy, as the orc can be knocked down, or frozen, and then attacked relentlessly. You should be careful, though, and prevent him from getting close to your mages, as he can easily and quickly kill them off. He is susceptible to fire and poison based attacks. After killing him, the quest ends.
Hershel, the bartender from the tavern, will ask you to make a strong whiskey for the orcs, to reduce their strength in fight. To do so, you will need:
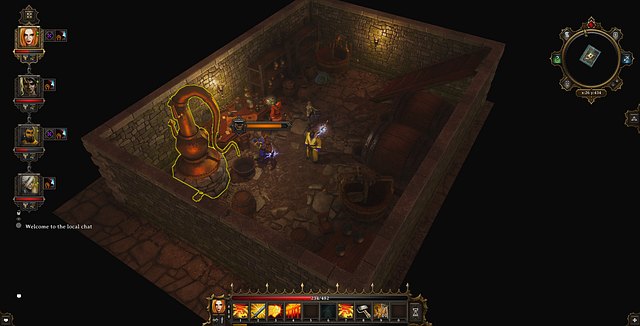 The distillation process.
When you have all the required ingredients, find a well, near the entrance to the city, and use a bucket on it. You will receive a bucket of water, which will be needed later. Near the well, there should be a mill - grind your barley there, and use it on a bucket of water. You should receive "Wort", which must be processed by using a Pot Still, which can be found in Glen's House. Finally, you should receive a barrel of spirit, which should ferment, a decade or two, but you have no time for that. Zixzax can help you with that - go to the End of Time, speak with the Imp, give him the barrel and he will change it into a thirteen years old whiskey. Give the barrel to Hershel.
Jahrl of Hunter's Edge told you about the mysterious disappearance of one of his men. You need to exit the building and follow the bloody marks, up to the entrance to the "King Tomb", which is being guarded by an orc band. You can convince them to let you through but, if you fail, they will attack.
To open the gate to the tomb, you need to pull three levers. One of them is next to the gate, the other one is on the right, below, between the statues. The third one is behind the illusion of a tree, on the left - also between the statues of women.
 You will find the missing man at these stairs
After you enter, you will be greeted by the guard. If you do not know his language, he will disappear and leave statues with swords after him. They are resistant to fire and have high health level. The worst news is that their attacks are very strong and it is best for elementals to take damage from them. If you know the titan language, you can try and convince the guard to let you through. To talk to him, you need to have the "Titan Dictionary" on you , which can be collected at the mage's house, in "The Hunt in Hunter's Edge"
Above, there is a surface that can shock you with electricity and kill you. You need to stand only where your character receives the "Warm" effect. If it receives the "Chilled" effect, the next step in a wrong direction will be fatal. It is best to let a character, with the teleportation pyramid, do that. Still, there is a way to avoid this "warm-chilled" play.
The first one is to have a high perception level. Thanks to this, there will appear footsteps that you need to follow. If there is nobody like that, in your party, you only need a level 19 fire elemental. If you summon him, he will detect the footsteps also.
You need to get to the middle door, which is behind the four statues of knights. You will get there over the footprints, and behind the door, you will find the body of a dead cultist. Collect the note and the horn, and return to the city.
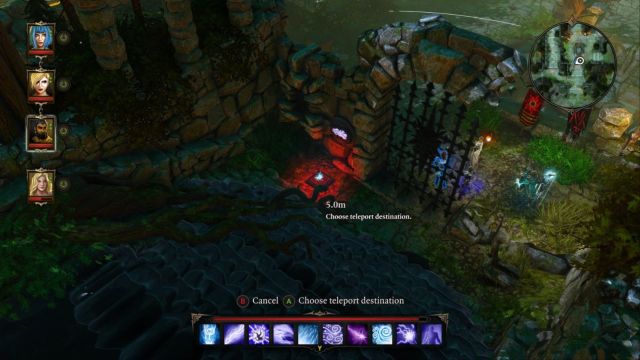 The fight between the humans and the orcs was unavoidable
After you show the horn to the Jahrl, he will gather his men and dart to the tavern. After the conversation with the mother of orcs, the battle between men and orcs will start. The mercenaries will be running all around the city, until all the orcs fall to the ground. After that, one of your characters will say that this was the last one. Talk to one of the mercenaries and the quest will be completed.
To get near the gate leading to the Source Temple, you will have to solve a rather easy, but kind of annoying puzzle. Both gates leading to the entrance to the Source Temple are marked with four symbols, representing the elements - water, fire, air and earth. You have to activate four pressure plates scattered around the temple, so that each of the symbols is highlighted, which in turn opens the gate.
Below you will find detailed description on how to activate each one of the symbols - the order is not important, but it is advised to activate the pressure plates in this sequence, as it will be easier to navigate.
Note - points on the map mentioned in this chapter refer to the map, which can be found in the "Dark Forest - Maps" chapter.
Prepare a heavy item before you start your search (you can collect several boxes as well), because you will need it to get rid of a trap.
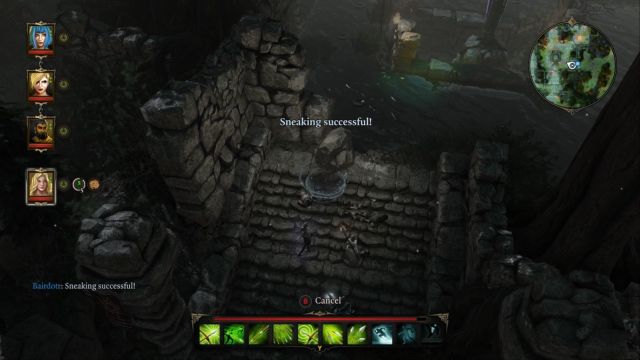 You can either use the invisibility spell (or ability giving the same effect), or stealth to get to the button.
Teleport to the Dark Forest - Swamp waypoint. Head north, and turn left on the crossroads. The area is guarded by two Sentinels, and there are two ways to get past them - you can either teleport them away, to deactivate the trap, or (which is a lot simpler) use a character with the invisibility spell (or with high enough stealth) to get past it.
It's best to use a character with a lot of Perception (like a ranger, or a rogue, which can move in stealth as well), because there's a lot of traps hidden in the oil, which will explode, igniting the surface. You don't have to disarm them - just don't step on any of it.
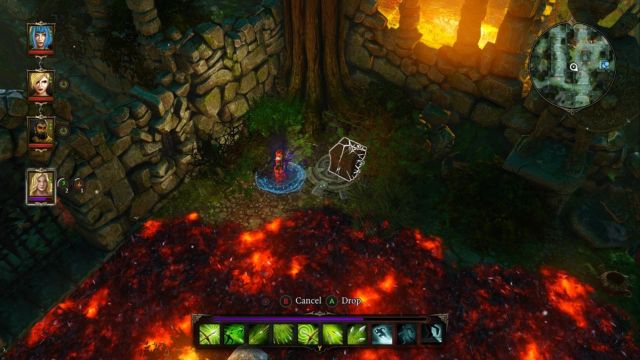 Here's the pressure plate, which opens the passage to the Earth button.
Sneak to the south-west (go straight ahead, looking from the stairs you've just climbed). Ignore the passage on the left side (but remember its location) and find the pressure plate in front of you - it's hidden in the bushes. Place the box (or any heavy object) on top of it, and the doors, located diagonally from your position, will be opened. Go there, while avoiding traps along the way.
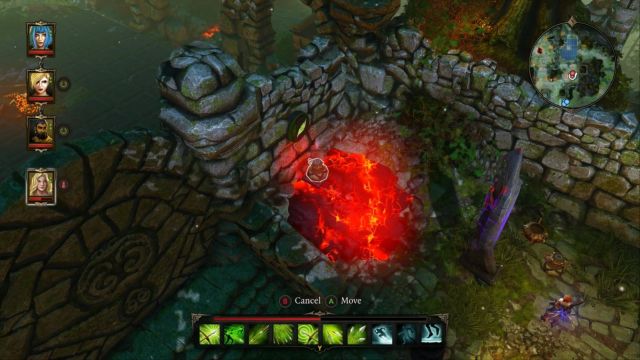 Teleport, or simply throw an item on the button to activate it.
In the small room you've just unlocked, there's another Sentinel and a few traps, so watch your steps. Additionally, there's the earth button located in the corner of the room (point SB 1 on the map) - unfortunately, you can't walk there, as the button is surrounded by lava. Instead, throw an item (a box, or something heavy) on top of it to activate the button - you can also use one of the two teleport scrolls (or a Teleport skill, if you have it at your disposal) lying nearby, but it's a better idea to keep them.
You can cheat the game a little, to get to the air button a lot quicker.After you've activated the earth button, get back to the passageway on the left side, near the first pressure plate. Behind the closed doors you will be able to see the air button - getting there is quite troublesome, as you will have to run across almost half the map, so we will "cheat" a little to do it quicker. Use the teleport scrolls you've just picked up (or the Teleport skill itself) and drop someone from your party on the other side of the door (you can also teleport a box, but there's a high chance that it will be destroyed in the process). Press the button (point SB 2 on the map) (you don't have to hold it) and then teleport your character back to the rest of the party).
Note - teleport one of your main characters, as the companions won't be happy about you damaging them with the teleport skill, and in the worst case they might even leave your team.
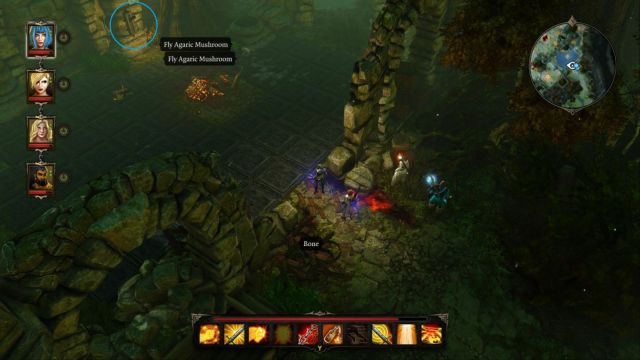 A lever deactivating the traps can be seen on the screenshot.
Teleport to the Dark Forest - Swamp waypoint. Head north, and on the crossroads turn right. You should soon arrive at the entrance to a room with stone slabs on the floor - don't even think about stepping on those, as the character will die instantly. You have to deactivate the trap, with the help of a lever, located directly in front of the entrance. You can do that by:
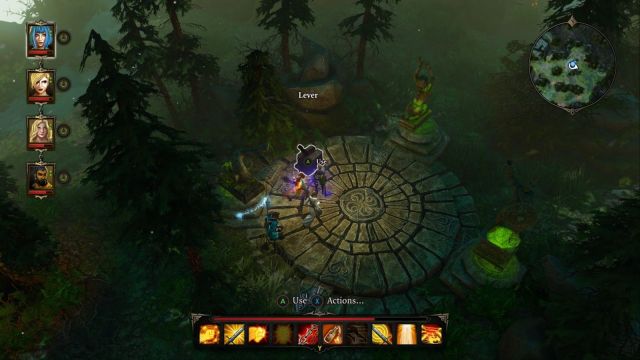 After you've placed the statues on the pedestals, all you have to do is to flip the lever and the portal will appear.
After flipping the lever, the trap will be deactivated and you will be able to walk around the room. Additionally, a gate located to the east will unlock - as you've probably guessed, you have to go through it. Head north, until you reach a stone circle, with three pedestals - a fish, a praying woman and a warrior. You have to place the appropriate statues on top of each of them. Statues can be found:
When you've placed the statues on the pedestals, flip the nearby lever and a portal will appear. Go through it and press the water button (point SB 3 on the map).
In the area where you've activated the water button, you will have to divide your group into two teams. Leave three characters near the water button, and head to the (SB 4.1) point on the map with the remaining one.
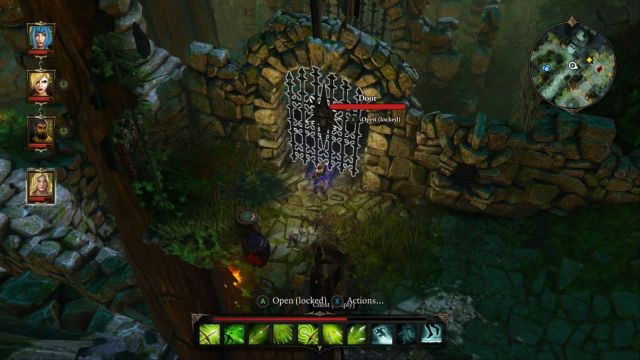 After arriving, you will have to constantly switch between your characters to activate different levers to get to the button.
After arriving, switch to the 3-man team and use the levers to open the first door near the separated character. Each time you flip the lever a different door (or set of doors) will open, which means that you will have to open the doors, move a little bit with the separated character and repeat the process until you reach your destination. This can be done via trial and error, and it shouldn't take long before you get to the fire button. When you reach it, activate the pressure plate (point SB 4 on the map).
Alternative approach: you can make the whole process a lot simpler with the help of the teleport spell. Go to the (SB 4.2 point on the map) with your whole team - you should arrive near a closed gate. Teleport one of your characters to the other side and activate the fire button.
You should now have all 4 buttons activated, so just head to the temple entrance, where a boss fight awaits you.
 An argument with a troll
After you enter the Dark Forest, you will notice a troll to the South. As soon as you approach, you will have a choice. Either pay the toll for everybody, or fight everybody. If you choose the first option, you will receive a medallion from the commander, which will allow you to enter the city and, if you take the second one, simply collect the medallion from his dead body.
Hortun - the skeleton mage, who is hanging around the entrance to the village, warns you that the cultists have seized the city. To enter, you need to win the paper, scissors rock game, against the guard, or show to him the amulet that you can receive in the "For Whom the Troll Tolls" quest. After you enter the city, the quest ends.
At Hunter's Edge you can meet a skeleton that is considering the replacement of his skull. You can help him choose one, or tell him to go in peace. In this case, he will turn to dust.
Orc Gural tells you that he lost his armory key and asks you to help him find it.
 You can take the key back to the orc leader
The key is in Hershel's chest, who is the bartender at the orc tavern. The chest is in the cellar and it bears his name. To get inside, you need to either convince the proprietor to give it back, or destroy the chest with your weapon. You can either take the key back to the orc leader, or to the orc that lost it. If you do the former, she will be happy to get it back and she will go to kill her soldier.
You overheard that one of the orcs is in love with a human male. You can tell it to the orc leader and, thanks to this, you will improve on your relations with her. The quest will be complete.
In the swamps, close to the Phantom Forest, you can find a heap of gold. After you interact with it, it disappears and the wizard known to you appears instead (most probably, only if you have saved him in the "Talking Statues" quest). He adds a new location to your list of teleports, called Bellegar's Maze.
Once you get there, you will see a huge playing board and three levers. On the board, there are three different items: a bone, a fish and cheese. The levers are for turning a piece, in succession, into a dog, a rat and a cat. De relationship is this: the dog eats the bone, the cat eats the fish and the rat eats cheese. As you turn your piece into something else, you need to attain three glowing points, which open the three chambers with treasures. Once you do that, the quest will be over.
 You meet the warrior at this sarcophagus
During the "War of the Stones" quest, while paying a visit to the tomb, you will encounter two warriors, who are looking for imps. You can tell them that there are imps at your plane of existence and they will teleport there. You can also lie and tell them to look at the Cyseal beach. If you select the latter, you need to get to the beach, in order to complete this quest. Use the teleporter to the "Cyseal Beach South", and you find them behind the bridge, which used to be guarded by the two drunken guards, at the beginning of the game. If, however, you choose the former, you will find them in "End of Time", where they take your imps and fly away.
Below you can find the list of all the 54 achievements available in the Divinity Original Sin: Enhanced Edition. All achievements are acquired automatically, by completing various quests and advancing in the storyline.

Shell Shock
Description: Meet a talking shell called Ishmashell.

Trick Bag
Description: Find the legendary teleportation devices of Rivellon!

Suspicious Minds
Description: Make Esmeralda as your primary suspect.

Memory Motel
Description: Find a silky souvenir.

The mirror inside
Description: Solve the Mirror Dungeon puzzle.
Captain Jack
Description: Find a fitting job for the unemployed.

The mind is a terrible thing to test
Description: Pass the test! Well, one of many.

I talked with a zombie
Description: Defeat Evelyn and find Councillor Jake.

Keelhauled
Description: Kill the ghost of Pontius Pirate.

Fabulous Disaster
Description: Get the Fabulous Five out of town.

Is anyone home?
Description: Defeat the four elemental demons.

Push it
Description: Pull the wrong lever in the Pontius Pirate's lever puzzle in the Black Cove.

Hey Hey Do The Zombie Stomp
Description: Make Zombie Nick do your bidding.

You and me
Description: Arrange a marriage between Sam and Maxine.

The world needs guts
Description: Find an unconventional job for the unemployed.

Live undead
Description: Inform Selenia about the source of the undead.

Leave my girl alone
Description: Save Bonnie!

Peace sells
Description: Find a way to open the barrier without harming any mushrooms.

Mister nice guy
Description: Deliver Blossius' will to Marisa totally unaltered.

Into the void
Description: Meet Leandra in Hiberheim.

Forged in fire
Description: Release the elements from Boreas' staff.

Find the White Witch
Description: Find the White Witch!

Caught in the game
Description: Try to sneak past Junius and Bibius...
Note: you have to sneak past (by using the Sneak ability) the two drunken guards on the bridge leading to Cyseal.

Escape
Description: Safely return to the surface.

Truth be told
Description: Make Brandon tell you the truth about the mining guild.

Sacrifice
Description: Come face-to-face with Mangoth himself.

Sleeping Village
Description: Make it into Hunter's Edge.

Time to kill
Description: Create a spell that makes Death Knights vulnerable.

Gimme shelter
Description: Save the Homestead on the Shelter Plane at the End of Time.

Headlines
Description: Talk to Icara to learn more about her sister's plans.

Feeble screams from forests unknown
Description: Safely enter Phantom Forest.

The one that got away
Description: Free Esmeralda from prison.

You've got that something special
Description: Learn all the skills within one skill tree.

The Deal
Description: Help Jahan face his demons.

Father Luficer
Description: Talked to Catherine Chun

Grizzled Finale
Description: Enter the Source Temple.

Whisky in the jar
Description: Brew a fine whisky for Hershel.

King Crab
Description: Enter the Gnik Barc Nni.

The Wizard
Description: Find Zandalor.

Skull Crushing Finale
Description: Finish the Trial of Ascension.

Grande Finale
Description: Totally, completely, and utterly finish the game.

To hell with the devil
Description: Kill Cassandra to get hold of the soul forge repair ritual.

The Grimmer Twins
Description: Forge the sisters' souls.

Kingdom come
Description: Make Archibald king of the trolls.

Amazing
Description: Solve Bellegar's maze.

Baaaah.
Description: Meet the legendary weresheep!

That Voice Again
Description: Give Wolgraff his voice back.

Kill With Power
Description: Finish the game in Tactician Mode.
Stray Cat Strut
Description: Make Arhu a cat forever

You keep me rockin
Description: Keep the Tenebrium for yourself.

Wolfpack
Description: Finish the game with the Lone Wolf trait.

Wicked young man
Description: Decide Arhu is better off human.

Never Say Die
Description: Finish the game in Honour Mode.

Sister of Mercy
Description: Teach Madora the value of mercy.
Divinity: Original Sin is a 3-D game with the isometric view. Thanks to this, the system requirements are not high, both for an older PC and for a middle-end laptop computer. However, if you want to enjoy the full potential of the engine, it is going to be necessary to obtain a bit better, medium/high-end graphics card. With the below specifications of the laptop computer, the game worked at the frame rate of 30FPS, at medium graphics settings. The developers have implemented an enjoyable multiplayer mode for up to four players per game on a map, in the co-op mode, as one party, as smaller parties, or even playing individually, independently of each other.
Singleplayer: Yes
Offline co-op (split screen/hot seat): No
Internet co-op: Yes
Multiplayer: Yes, up to 4 players (a party of up to 4).
This walkthrough has been drawn up for the PC version, on a computer of the below specs:
The above specs allowed for a comfortable and smooth gameplay at medium graphics settings
 Dying Light Game Guide & Walkthrough
 Dead Space 3 Game Guide & Walkthrough
 Dark Souls Game Guide & Walkthrough
 Daylight Game Guide & Walkthrough
 Dracula 4: The Shadow of the Dragon Game Guide & Walkthrough