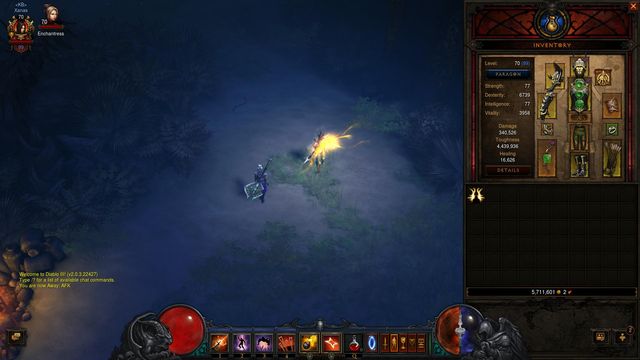
Diablo III Reaper of Souls is a hack'and'slash game, developed by Blizzard studios, in 2014. The game is an add-on to the third installment of the series and contains the V Act and the Crusader class, who is another armored, melee character in the game. It should be noted, that the developers introduced a new adventure mode, which gets rid of all the quests, dialogues and cut-scenes, so that the player can delight in the gameplay entirely. Additionally, this mode allows the player to teleport to each and every act, without leaving to the menu, as it was before. The gameplay is all about fighting never-ending swarms of monsters by using ample arsenal of abilities, to advance your character to higher levels and to collect better and better elements of attire. The V Act takes place in Westmarch, and as always, the well-being of the land depends on the actions of the player. Malthael must be stopped. The ending of the game is just a beginning, as there are numerous difficulty levels the player can choose from, depending on the might of his character.
Diablo III: Reaper of Souls guide contains all the information about the novelties brought with the new expansion to Diablo III. Inside, you will find a section describing all the fights with all of the Bosses in Act V, as well as tips & tricks, which will make the whole process a lot easier. Additionally, the guide contains information about the new NPC - Mystic - which will allow the players to enchant their equipment. Thanks to a section dedicated to that mechanism, you will learn everything about adjusting specific items to your own personal needs. The further part of the guide has been devoted to the process of farming. Here, you will find a lot of interesting information, which will surely enhance your chances to find various legendary and set items. The guide also contains detailed information about Nephalem Rifts, as well as Greater Rifts. The guide is complemented with descriptions of every new class abilities, as well as an exemplary builds for each and every class.
The guide has been prepared for the 2.1.0 version of the game.
Diablo III: Reaper of Souls guide contains:
Marcin "Xanas" Baran ()
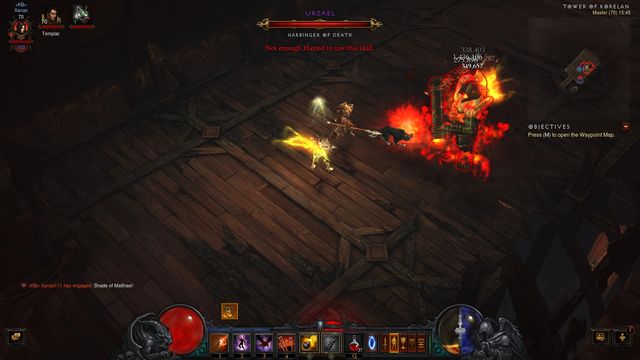
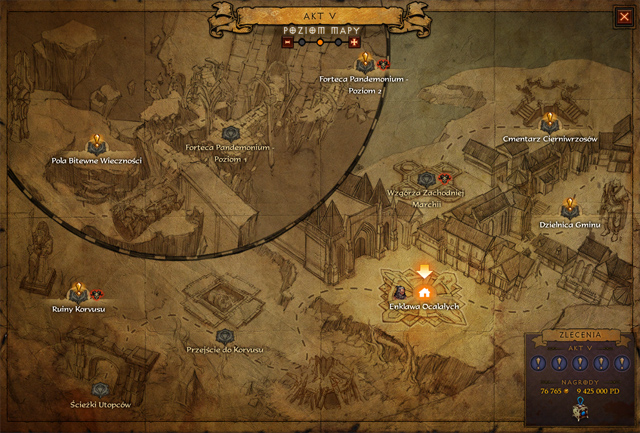
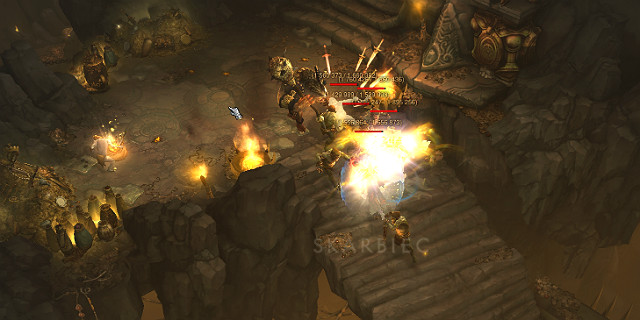
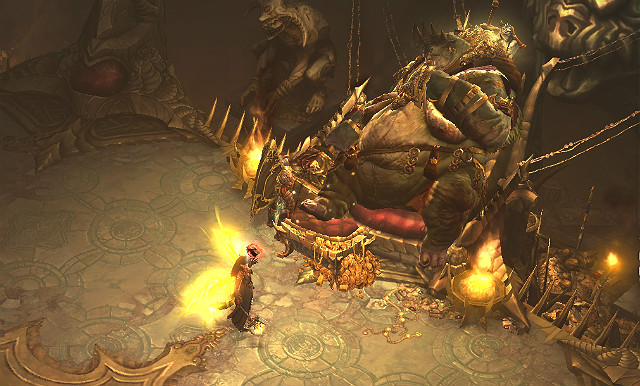
Urzael is Matael's pupil who, just like the master wants to destroy the whole essence of demons. She is armed with a projectile launcher with an in-built flame thrower. You can encounter him at the cathedral on the hills of the Western Marchia. Urzael is not the fastest and most intelligent foe you've encountered, but he can't be underestimated, as he has several abilities, which can easily end your life if you don't react in a proper way. The encounter focuses on avoiding his attacks, being his flamethrower, rocket jump and burning planks, falling from ceiling.
There are two phases to the battle:
Phase one:
In this phase, Urzael attacks with a cannonball and a jumping kick. She does not use her flame thrower, yet and the dropping planks are circular in shape. They also do not fall down that often and over the area as large as in the second phase.
Phase two:
After you've depleted about a third of the enemy's health, the enemy will stun you for a brief moment (just like Diablo does at the end of Act IV), after which he will set the whole floor of the cathedral ablaze. During this phase Urzael will attack more frequently, and he will start using his flamethrower ability. As soon as you notice him breathing fire in your direction, the best solution is to avoid the attack - get out of it's line of fire, or jump behind the enemy's back. The dropping planks are now rectangular in shape and they drop more often.
You need to remember that there are healing shrines at both sides of the arena. You can use them whenever you feel the need to.
Cannonball - Urzael fires the projectile towards your character. The cannonball moves slowly and it leaves a fire trail behind, which deals damage when someone gets in its line of fire. The projectile can be easily avoided, so it's better to do so, instead of taking the hit.
Flamethrower - after one dialogue during the battle, Urzael starts using the flamethrower, which fires flames at an angle of 45 degrees. You need to watch out for this attack and get back, as soon as Urzael starts firing, or get past him.
Leap attack- Urzael stands on his rocket like on a pogo stick and highlights to circles on the arena - the first one if the one from which the enemy will jump, and the second marks his landing place. You can stun the enemy as he starts preparing for this attack, which will interrupt the whole maneuver and the enemy won't be going anywhere.
Crumbling ceiling- Urzael lifts her cannon into the air and after a while, flaming planks start falling onto the arena. After a short while, numerous burning planks will start falling on the arena, which will deal damage to your character if they hit, or if you step into the burning area left after a plank. It is worth adding that this attack cannot be broken and even if you stun Urzael, the planks will drop anyways.
Fire in Your New Boots - Kill Urzael.
Set Fire to the Pain - Kill Urzael in co-op. This means that you need to kill her with any players, instead of solo.
Light it up - Kill Urzael at the highest level, without using any skills that limit crowd control, while playing at the Torment level, or higher. The skill that limit crowd control are that ones that, in one way or another, limit the opponent in their attacks, i.e. slowing, stunning, blinding, etc. The important thing is that it is you that this restriction concerns and not your friends. Even if they use them and you do not, you will get the achievement anyways.
Fanning the Flames - Kill Urzael at the maximum level, within 90 seconds, at the Torment level, or higher.
Boing, Clash, Boom- Kill Urzael without being hit with her leap attack, cannonball or the crumbling ceiling. To learn more, see above
Cinder, My Regards - Kill Urzael at the maximum level, without crowd controlling enemies, at the Torment level, or higher, in the hardcore mode. The mode can be activated only when you create a new character. This means that if the character dies, it is erased immediately.
Catching Fire- Kill Urzael at the maximum level, within 90 seconds, at the Torment level or higher in hardcore mode. The mode can be activated only when you create a new character. This means that if the character dies, it is erased immediately.
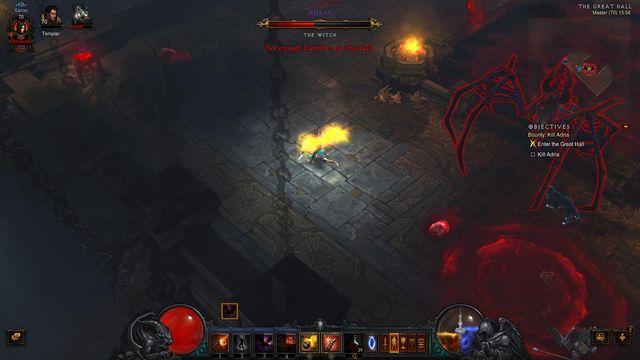
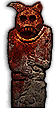
Adria is Diablo's servant, who is obsessed with freeing him from the stone of souls. Before the battle begins, Adria will show you her true form - a winged, spider-legged demon.
Single blows should do no damage to her but, she cannot be taken lightly. You need to attach the most attention to the larvae of her blood, which abound towards the end of the battle. Even if you take damage from one, you quickly need to leave the field of the puddle that appears there. During the encounter, you should move around the arena carefully, as her larvae will get under your feet constantly. Adria summons the larvae many times and apart from that, she also use the whirlwind and the ball of blood, attacks that need to be avoided like the plague.
Wing Slash - Adria performs a wing swing and deals damage to the characters in front of her. It is recommended that you hop back from that.
Whirlwind - Adria starts spinning, drills into the ground and appears next to the character of her choice. Deals medium damage.
Blood Ball- Adria charges the attack and places a ring of violet flames under your feet. The effect of this skill is the same as that of the Defiler, which some of the elite mobs have at their disposal.
Blood splash - Adria starts using this skill as soon as her health bar drops to a predetermined level. The larvae of blood appear then, and they start crawling into random directions. They do not attempt to approach any of the characters with premeditation so, you can avoid stepping on them. Whenever they touch to you, they explode, which deals low damage but, under your feet, there appears a pool of blood, which deals high damage, if you stand on it for too long.
I Knew You Were Trouble - Kill Adria.
Group therapy - Kill Adria in the co-op mode. This means that you need to kill her with any players, instead of solo.
Really, Most Sincerely Dead- Kill Adria at the highest level, without crowd controlling enemies, while playing at the Torment level, or higher. The skill that limit crowd control are that ones that, in one way or another, limit the opponent in their attacks, i.e. slowing, stunning, blinding, etc. The important thing is that it is you that this restriction concerns and not your friends. Even if they use them and you do not, you will get the achievement anyways.
A Witch in Time - Kill Adria at the maximum level, within 60 seconds, at the Torment level, or higher.
Move For Me - Kill Adria without being hit with her blood splash, blood ball or wing slash. To learn more, see above
Her? - at the maximum level, without crowd controlling enemies, at the Torment level, or higher, in the hardcore mode. The mode can be activated only when you create a new character. This means that if the character dies, it is erased immediately.
What the Hex? - Kill Adria at the maximum level, within 60 seconds, at the Torment level, or higher, in the hardcore mode. The mode can be activated only when you create a new character. This means that if the character dies, it is erased immediately.
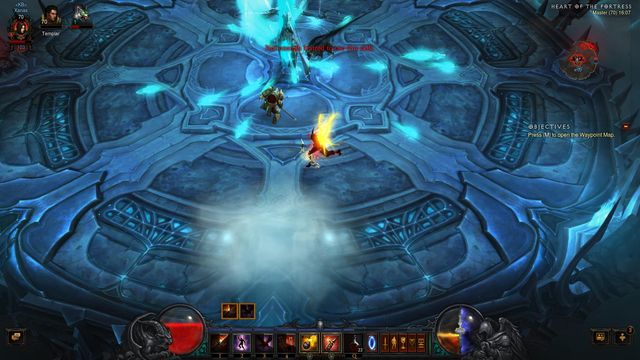
Malthael is the last foe you will encounter in your journey throughout the V Act. He's a strong and mobile enemy, who can be cause some problems on some of the higher difficulty levels - especially if you are fighting him for the first time. The whole encounter with Malthael is divided into three phases, and in each of them the enemy will act differently.
Phases:
Phase one - From time to time, Malthael will stand in the centre of the arena to send a torrent of souls in every direction. The souls are travelling relatively slowly, so it's easy to avoid them, and for the duration of this attack, the boss is susceptible to ranged attacks. Try to deal as much damage as you can, because the boss won't be able to retaliate. Additionally, during the whole phase one, fog of death will appear in various places on the arena, impeding movement.
Phase two - During the second phase, Malthael will summon some support units, in the form of Exorcists, who are quite durable and can be annoying, as they can teleport around the arena freely. It's worth to take them out first, before you continue to attack your primary target. During the second phase, Malthael will change his behavior, instead of standing in the centre of the arena to swarm you with souls, he sends skulls, which are first swirling on the edges of the arena, and after a while they are directed to the center. Try to stand on the edge of the map and avoid them when they are doing their first circle to the center, and you should come out of it without sustaining any damage.
Phase three - During the third phase, Malthael will create even more fog of death, and, from time to time, he will stand in the centre of the arena, sending beams of energy, circling with it around the arena - fortunately for you, he won't be able to cover the entire arena with that, and you will always be able to find a hiding place behind his back. You can be sure that by standing behind his back you won't be dealt any damage. As soon as you notice the enemy teleporting to the center of the arena, stand behind him - use this opportunity to deal some free damage.
Death Shroud - Malthael's basic attack. The enemy summons a circle of fog on the arena, which will deal damage and slow down any player standing on it. The fog moves slowly, when there is too much of it, but it may be problematic. Malthael uses this ability in the initial and the final phase of the battle. It is important that you do not walk into the fog and remain in the empty fragment of the arena.
Tormented Souls - In the middle phase of the battle, Malthael summons skulls on the edges of the map numerous skulls, which will then swirl in circles and move towards the center of the arena. After a while, the skulls fly back outside of the arena so, it is best to wait through this. When the enemy starts summoning them, the best method is to stand on the edge of the map and avoid them when they do the first circle.
Soul Sweep - Malthael appears in the middle of the arena and fires multiple souls into various directions, which deal medium damage and slightly knock up. It is best to summon an ally then, who will attack Malthael, while you will stand behind him. The souls are moving slowly, so you can easily avoid them and attack the enemy in between.
Drain Soul - Malthael surrounds himself with a barrier of souls, which deal damage if you are standing too close to the enemy, and reflects your ranged attacks. The duration of the ability is quite short so it's best to just wait it out.
Wings of Death - Instead of firing the souls, Malthael will stand in the centre of the arena and launches fireballs into random directions. After that, he shoots red beams of energy. The only safe place during this attack is the area behind the enemy's back. For the sake of safety, once you are behind his back, it is a good idea to move away towards the edge of the map.
Death Do Us Part - Kill Malthael.
Small Moments Like These - Kill Malthael in the co-op mode. This means that you need to kill her with any players, instead of solo.
Memento Mori - Kill Malthael at the highest level, without crowd controlling enemies, while playing at the Torment level, or higher. The skill that limit crowd control are that ones that, in one way or another, limit the opponent in their attacks, i.e. slowing, stunning, blinding, etc. The important thing is that it is you that this restriction concerns and not your friends. Even if they use them and you do not, you will get the achievement anyways.
Sudden Death - Kill Malthael at the highest level, within 3 minutes, while playing at the Torment level, or higher.
Cheating Death - Kill Malthael without getting hit with his Fog of Death, Drain Soul, Skull Spiral, Soul Nova or Soul Sweep. See above to learn more.
I am become Death- Kill Malthael at the highest level, without using the abilities that limit control, while playing at the Torment level, or higher, in the Hardcore mode. You can turn on the mode only while creating a new character. This means that, if the character dies once, it is erased immediately.
Defying Death - Kill Malthael at the highest level, within 3 minutes, while playing at the Torment level, or higher, in the hardcore mode. You can turn on the mode only while creating a new character. This means that, if the character dies once, it is erased immediately.
 White items are often dropped by stands
Of course, there are no better, or worse, spots where to farm legendary items. Still, there are places where you are more likely to encounter larger groups of opponents. The items can be quickly obtained in small locations and small locations, where there are many monsters. This prevents the situation, in which you run across the entire map and you have to fight single opponents and a larger group appears only occasionally. My favorite places to farm items are:
Act I
Festering Woods - a small location with a decent amount of monsters and at least 2-3 elite packs. What is more, there are also 2 crypts here, where you can encounter additional elite packs, as well as shrines. Another benefit of this location are numerous quests and events, which will reward you with a lot of experience points.
Northern Highlands - this location is divided into two parts. Each one of them has at least 3-4 elite packs, as well as a possibility of finding a shrine. What is more, there are numerous chests, boxes and other destructible elements of environment which can be destroyed to find a legendary item inside. Cursed Chests are a common sight - you can activate them to start a quick event, which will reward you with a lot of experience points and loot. You can transit from Northern Highlands directly into Leoric's Mansion, where an additional elite pack, as well as a shrine, awaits.
Weeping Hollow - a relatively small place with high mob intensity. The monsters are encountered in large groups, so it's easier to eliminate them. What is more, you can also find a Cursed Chest, or get inside a Scavenger Narrow - on the second level of that cave you can find a Resplendent Chest! Another benefit of this location is the nearby Cemetery, with 3 Defiled Crypts. Each one of them hold at least 1 elite mob pack, in addition to massive amounts of containers.
Act II
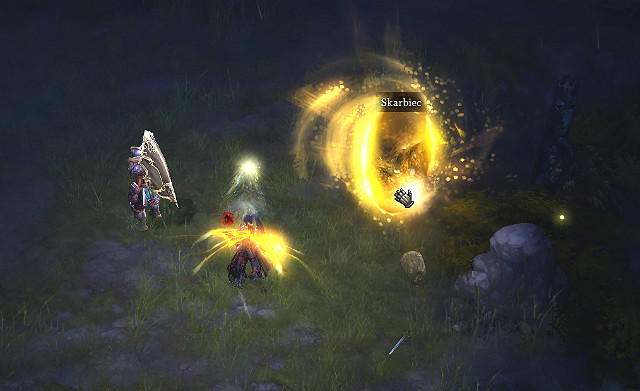
Dalgur's Oasis - a relatively large location, holding massive amounts of mobs and well above 10 elite mob packs! What is more, you will frequently stumble upon chests, goblins, Cursed Chests and events here. Another benefit of Dalgur's Oasis is the possibility to kill a Keywarden, as well as the access to two tombs - Tomb of Khan Dahab and Sandar's Tomb. You can increase the amount of elite monsters by activating numerous shrines while wearing Nemesis Bracers.
Act III
Keep Depths (levels 1 to 3) - one of the best places, with insane amounts of easy to kill mobs. What is more, given a relatively small size of it, there's a huge amount of elite mobs here (well over 10) and unique champions. Your drop will be additionally increased by numerous chests and goblins, who can be frequently found here. By selecting this area to farm, you should stick to one rule: begin your journey on the 1st level and run around it until you find an entrance leading to a lower level. Keep Depths are like a maze, so it's not worth to clear the whole area - finish your run and start from the very beginning. Keeping up to this rule will save a lot of time, and, as we all know time = money.
Bridge of Korsik - another interesting place. You should start your journey from a Waypoint (Bridge of Korsik) and scan around the surrounding area, which, usually, holds some elite mob packs (from 3 to 5). What is more, you can stumble upon Barracks and/or various caves, where you will be able to find a Resplendent Chest. After finishing this location, you should transit to Rakkis Crossing - another pleasant place, as you will be running through a straight, narrow corridor. You will stumble upon additional elite mob packs and/or Cursed Chests here. If it's open, you should always enter Bridge Stores, which ALWAYS hold a single elite mob pack.
It should be noted, that each and every mentioned location in Act III holds (almost always) an act-specific task, which can be done for additional, huge experience bonus.
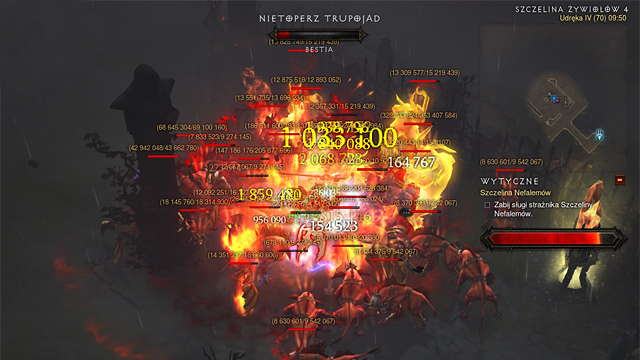
Nephalem Rifts
Nephalem Rifts are the most popular farming places at the moment. They can be done swiftly and they offer a huge elite mob pack intensity. What is more, your legendary item drop chance is increased while being inside a Rift (compared to "normal" locations). At the end of each Nephalem Rift (after filling Rift's progress bar) you will have to deal with a Nephalem Guardian, who has a relatively high chance to drop a legendary item upon death.
The following table represents the percentage bonus to legendary item drop chances in Nephalem Rifts and outside of them. Remember, that it's only a bonus, and the overall chance for a legendary item drop is the second value. Those values can change in the future. The table is updated to the February 2015 version of the game.
Difficulty level
Outside of the Rift (bonus percentage/ general chance for the drop)
The Rift (bonus percentage/ general chance for the drop)
Normal - Master
0% = 1%
25% = 1.25%
Torment 1
15% = 1.15%
44% = 1.44%
Torment 2
32% = 1.32%
65% = 1.65%
Torment 3
52% = 1.52%
90% = 1.90%
Torment 4
75% = 1.75%
119% = 2.19%
Torment 5
101% = 2.01%
151% = 2.51%
Torment 6
131% = 2.31%
189% = 2.89%
Nephalem Rifts +tasks
You select a game with an accurate difficulty level, that is the one in which you will be able to execute orders without too much trouble. Familiarize yourself with tasks available in the chosen act and decide if they suit you or not. Start with using the Keystone of Trials to get a keystone to Greater Rift.
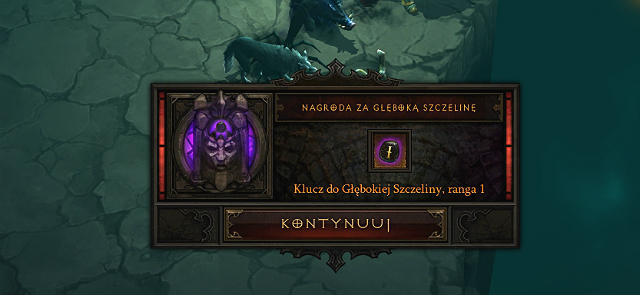 You have to get the keystone rank 1.
Try to avoid as many fights as possible to complete the trial within the first wave of the monsters and obtain the Greater Rift Keystone rank 1. Having talked to Orek in the town, you can open the Greater Rift with the keystone.
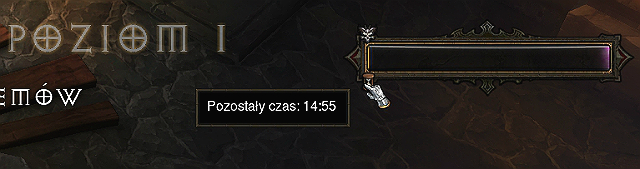 You've got 15 minutes to complete the Greater Rift.
Having entered the Rift, you've got 15 minutes to complete it. It's not a big challenge so don't worry - in fact, it will go smoothly. The important thing is to OMIT the first fragment of the map (generally the first group of elite adversaries). You will need them a bit later.
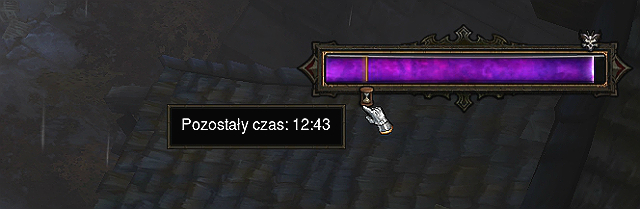 Try to keep the progress bar at about 95%
Remember to finalize the Rift's progress at about 95%!! This is of great importance so it is better not to overlook it! Then check how much time is left until the completion of the Rift. In the picture of a screen above you can see that there are 12 minutes 43 seconds left. Your aim is to complete the Rift in not less than 4 minutes 30 seconds to upgrade the Rift Keystone to an only ONE LEVEL higher keystone and that is level 2!! If you complete the Rift too soon, the keystone level will be much higher. Count time to make sure it's 4:30 and take care of completing tasks.
 Map with available tasks.
A couple of minutes should be enough to complete not less than about 2 to 3 tasks but pay attention not to overlook the right moment to come back to the Rift opened before! When the left time runs out, come back to the Rift by the opened portal in the town.
 The Greater Rift should be completed not earlier than in the moment when you've got 4 minutes 30 seconds left!
Now the opponents left at the beginning will come in handy. Kill them to complete the event and evoke a Boss. After killing him, collect loot and upgrade the keystone to next level.
 The Greater Rift Keystone should be upgraded to rank 2.
You can now complete the event, open the next Greater Rift level 2 and pursue the scheme until you complete all tasks you want within the Acts chosen by you. This is a very efficient way of farming - you collect legendary items, Rift Keystones, Blood Shards and, what is more, you get a chance to obtain exclusive items that you want from Horadric Caches.
Farming while completing tasks
You can also farm legendary items by joining, or creating a game in Adventure Mode. Each player teleports in a specific place to complete a mission associated with it. After each mission is complete, you can simply teleport to any location which held those missions and scan around the map to see if a mob dropped a legendary item. Despite the fact that a player wasn't in the area when it was cleared off mobs, the game still selected a random drop for him/her for the mere fact of being in the same game as the player clearing the area. This way, not only that each player gets huge amount of experience from act-associated missions, a Horadric Cache, which hold an act-specific legendary item, he/she also has a chance for a legendary item drop.
During your exploration, you will surely stumble upon small creatures called Goblins, lugging a bag of loot. After attacking a goblin, he will, after a brief moment, start running in a random direction - the further away from you, the better. If you won't kill him quickly enough, he will open a portal and escape, taking his precious bag of loot with him, leaving you empty handed. Goblin Farming is extremely profitable, as they have a high chance of dropping a legendary item, not to mention huge amounts of hold, mats and gems they drop upon death. There are two kinds of Goblins in the game:
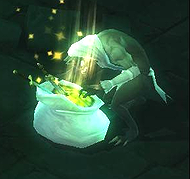
Goblin - he will appear randomly in even the most bizarre places, inside of crypts, dungeons, or even in an open area. During your exploration you should check each and every corner, as there's a chance that a Goblin is lurking there. Additionally, you can find those little creatures inside Nephalem Rifts - if you stumble upon one during your trip there, there's still a chance to find another (or more of them) inside.

Rainbow Goblin - this type of Goblin is considerably more rare, but upon death he will ALWAYS open a portal leading to Whimsydale. Aside from getting an epilepsy attack from being inside this colorful location, you can stumble upon several elite packs, with a decent chance for a drop.
On very rare occasions (>5% chance), after killing a normal Goblin, there's a chance for him to open a portal leading to The Vault (it will appear after a short delay near the corpse of a recently killed Goblin, in the company of the sounds of falling coins).
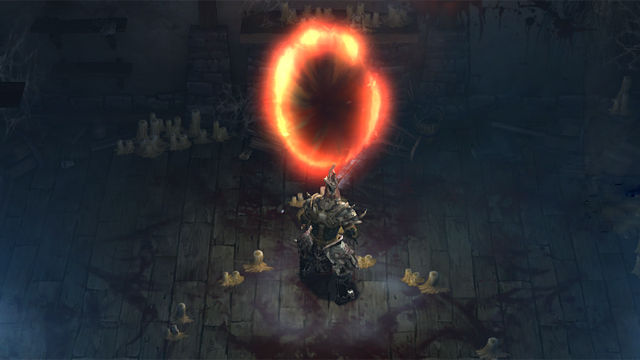
 A portal leading to The Vault.
The portal can ONLY be opened while playing the Adventure Mode. You won't be able to open it during the campaign and/or inside of Nephalem Rifts. Increasing the difficulty level does not impact the chance to open a portal as well. This location gives you an opportunity to collect insane amounts of gold, gems, mats and legendary items - you will find more info in the "The Vault" section of this guide.
Where to farm Goblins?
As long as the selection of location for Goblin farming goes, the Northern Higherlands are the best choice! The location is relatively small, you can scan around it fast and it also offers a great deal of chests, shrines and elite mob packs to kill.
 The map of the Northern Highlands.
As can be seen on the above screenshot, the location is divided into two smaller parts. You will always start on the lower part. While scanning the area, you should always move according to a specific order to ensure that you won't be leaving an part of the map unchecked. You should first scan around the edges of the map, circle around it and then move to the inside. Goblins tend to hind on the outskirts of the map, and very rarely can they be found out in the open, in the middle of the map. After you've scanned the area, leave the game and repeat the process. There's a goblin in 1/3 of created games, but there's a chance of encountering him a few times in a row as well.
If you made up your mind about the farming location, it's worth to equip adequate items. Finding them may take up some time (you can also buy them from Kadala by using your Blood Shards), but they can fasten the whole process by a great deal. What is needed for an effective farm? Items which increase your chances for a drop, increase the mobility of your character, as well as the abilities allowing you to run across the map more freely. The following items should be at EVERY character disposal:
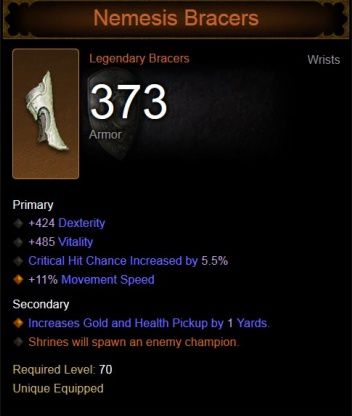
Nemesis Bracers - bracers which should always be "at hand" (in your inventory, or equipped on your character). Thanks to them, you will be able to summon additional elite champions by using shrines. Not only that you will be getting a buff, you can also drop an interesting item! Remember that they work with shrines only, so activating a life-restoring fountain, or an experience pool won't yield any effect at all. Another important factor is the arrival of the enemy pack - they will appear as soon as you activate the shrine, so be on your guard.
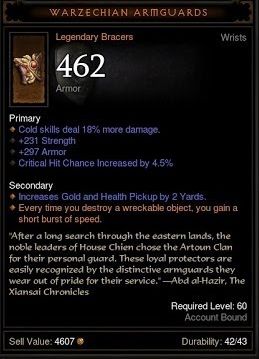
Warzechian Armguards - those bracers will increase the mobility of your character. Thanks to them, whenever you destroy a wreckable object, you will gain a short movement speed boost. Destroying barrels, chests, tree chunks, etc will now be even more profitable!
Afterwards, it's a good idea to seek the services of the Blacksmith and create Cain's set. If you are lucky, you will draw out some interesting attributes, and thanks to the set you will gain an additional experience, as well as a chance to find magic items.
Abilities should be chose accordingly to your class, for instance a Wizard can use the Teleport skill, while a Barbarian can use his Sprint skill. Each and every character class has a number of abilities increasing their mobility, allowing them to move around the map quicker and swifter.
Experience farming can be divided into two categories. The first one is the acquisition of 70th level, while the other is Paragon Level farming, allowing you to further increase the attributes of your character(s).
Level 1-70 farming tips & tricks
- Merchants offer a great deal of various items, but, unfortunately, most of them are of no real use, especially if you don't have abundant amounts of gold at your disposal. It's generally a better idea to save the money and use the items you get from mob drops. However, you shouldn't forget about one fact - after you've reached level 6, you can buy rings with +damage attribute from merchants. Amulet version is available after you've reached level 10. Buying those items will significantly increase the offensive capabilities of your characters.
- If you happen to find a weapon with a socket, insert a RUBY of the best quality you can afford. This gem will significantly increase the weapon damage, increasing the DPS (damage per second) of your character.
- If you happen to find a helm with a socket, insert a RUBY of the best quality you can afford as well. This way you will give your character a huge experience gain boost.
- Try to salvage any unnecessary pieces of equipment. They will come in handy when you decide to use the services of the Blacksmith. Crafted items are way more powerful than those you can find from monster drops (especially on lower levels).
- If you no longer use a socketed item, don't use your gold to remove the previously socketed gem! You can simply salvage it at a Blacksmith, and a gem will be automatically returned to you.
- Your priority should be increasing the primary attribute of your character:
Barbarian - Strength
Wizard - Intelligence
Demon Hunter - Dexterity
Crusader - Strength
Monk - Dexterity
Witch Doctor - Intelligence
This way you will increase the damage output of your character. Another important factor is "Vitality", which will increase the health pool of your character, increasing the survivability in the process. Try to make sure that both of those attributes are on each piece of your equipment.
- Try to select the difficulty level accordingly. Your goal is to kill the mobs as quickly as possible, so you can't afford a situation in which you have to fight a single, white mob for 5 minutes.
Paragon Levels
If you want to maximize your experience points per hour value, you should choose the proper location. The following places are only a recommendations, as each and every player can (and should) find his own best place to level up.
Act I
Quest 6 (The Broken Blade), speak with Alaric part. The game should be created on a normal difficulty, so that you can swiftly activate a checkpoint, from which you will then start your farm. Look for the Crypt of the Ancients in the Festering Woods and as soon as you enter it, you should activate a checkpoint.
 Crypt of the Ancients checkpoint.
You can now leave the game, increase the difficulty level according to your preferences and continue the game. Use the portal located in the town to swiftly get to the Crypt of the Ancients. It's a rather small location, filled with large amount of mobs, at least 1 elite mob pack and a shrine.
Old Ruins - you can either select a further quest, or do this short run in the Adventure Mode. Teleport to the Old Ruins on the proper difficulty level, which should be selected according to your capabilities.
 A swarm of zombies on the Old Tristram Road.
Go to the right until you reach Old Tristram Road. There you should kill a swarm of zombies, get back to the town and repeat the process. Zombies give a decent amount of experience points and are really easy to kill.
Nephalem Rifts
You can also join a game in which other players complete Nephalem Rifts on higher difficulty levels. During your playthrough with other players, you will gain an experience boost. Joint completion of Nephalem Rifts is a quick process, and you can gain huge amounts of experience this way, not to mention a chance for an interesting loot.
Bounties
It's worth to do those short Bounties, in which you don't have to look around for mobs and/or locations around the whole map. The best ones are those which are about killing some of the bosses, like Azmodan, Khul or Mahda, because they are located extremely close to the Waypoint and you don't have to look around the map. Completing a Bounty on Torment difficulty will reward you with a lot of experience points, and some of those bounties are associated with simple events. Doing event-associated Bounties is very profitable, as it gives you the experience for the bounty, the event itself, as well as all the mobs you kill there.
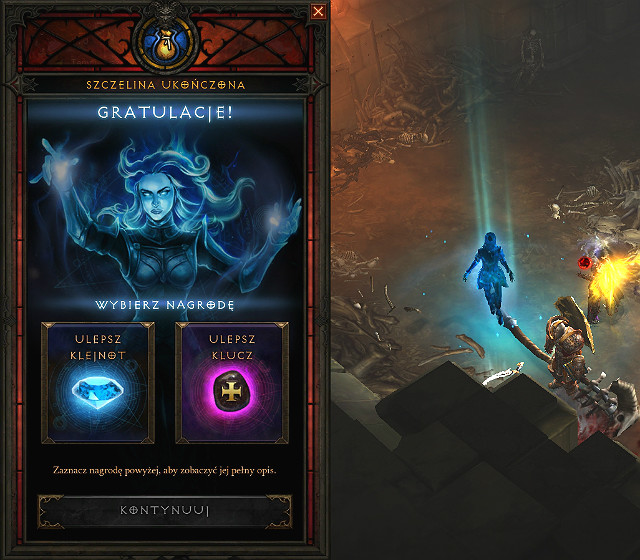
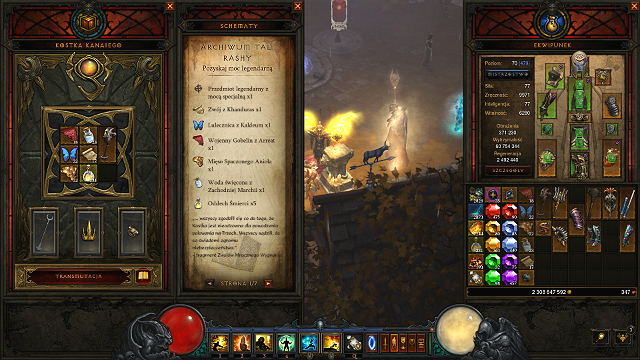
Mystic is a new artisan added in the expansion: Reaper of Souls.
To gain access to the services of a Mystic, you will have to rescue her during one of Act V missions. In exchange for your bravery, she will offer you special services: Enchanting and Transmogrification.
Enchanting is basically changing one property of a magic item into another. This process is performed by the Mystic - an artisan added in the Reaper of Souls expansion. As the rest of the artisans, she needs to be unlocked (specifically one of the first quest in the act V) to be available in other camps and in the Adventure Mode.
 Visiting the Mystic.
Enchanting is very simple. To start the whole process go to the Mystic and put a particular item in the first slot of the first tab. The game will automatically make a valuation of the operation, depending on the class of given item it will give you a list of items that will be irreversibly lost. Blue and yellow items require Arcane Dust and Veiled Crystals. Orange will require sacrificing Forgotten Souls. Amulets and rings require using a high leveled jewels, this also increases the cost of the process.
This is one of the rarest materials. You can obtain the Forgotten Souls by:
After placing an item in a slot, you will be given the list of its properties. Each one of them can be swapped by another, from a set list, which can be checked by clicking on a question mark (at the right side of each item stat).
 List of properties, that we can change and the prices given in materials.
Given the ring, which can be seen on the above screenshot, it's worth to enchant stat number 4, which is Life on Hit. If you want to increase the damage output of your character, the best one you should be aiming for is Critical Chance (from 4,5 to 6%). Enchanting is like gambling - after selecting a stat, the system will randomly select two new ones to select from.
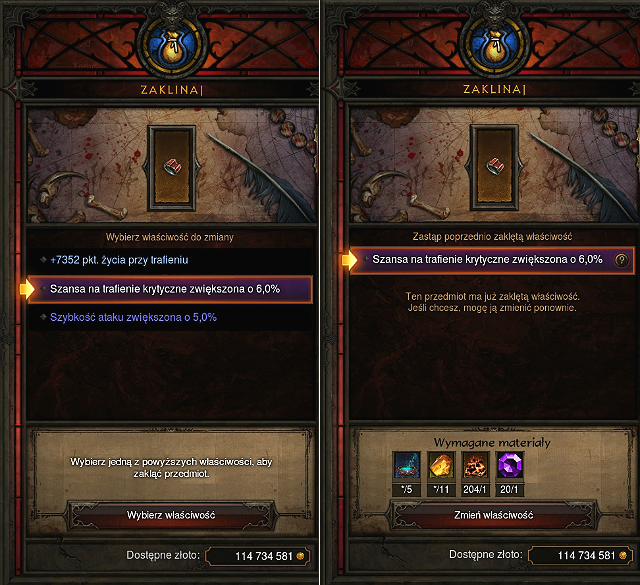
If you, for some reason, aren't satisfied with the new stat, you can always stick to the old one and start the whole process from the very beginning. In this case we were lucky, having randomized a perfect, 6% Critical Chance attribute! All you have to do now is to highlight the attribute you want to select and accept the choice by pressing the "Select Property" button. Voila! What happens at the enchanting process, is making the item Account Bound, preventing you from giving it to anyone.
Once chosen property, blocks the others. It means that up from that point, you can change only this particular option and no other. It is also worth remembering that further enchantments will cost more money. You can manipulate with the properties as long as you have the materials needed to perform the process of enchanting. The game does not limit you in any other way.
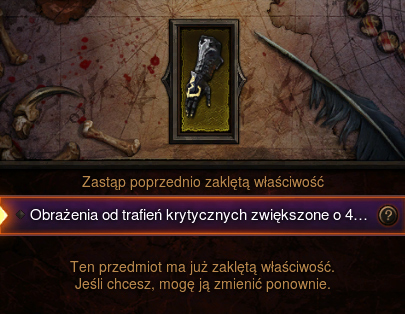 This object has already been enchanted, so that only one option is available to change.
There is a simple answer for that - to make the items more suitable for your character. Looking through all of the equipment very often you can find a weapon or a piece of armor that would fit your character perfectly if it only had one other property. This is the moment when the Mystic comes. It may not be very cheap, but it is definitely worth the price.
These operations need to be thought out though. Enchanting changes the item itself, so that we need to reconsider whether we are ready to take a risk or not. It is possible that few hours after the process, our plan for modifying the skills of our hero will change but then we will not be able to fully back off. Of course, you will be able to choose some other property, but your options will be limited.
Transmogrification is the second use for the Mystic. It gives you the ability to modify the appearance of your items in return for money. Although you may not be having a big choice on the beginning, you will be able to unlock more options.
All you have to do in that matter is to find an item which design you've never seen before. This design will be then available in the transmogrification menu, so that you will be able to change the look of your item to the look of an item you have just discovered. Price you will need to pay for that may vary depending on whether you want to use the normal or legendary look.
Of course not every piece of equipment can be visually changed. This option applies only for the: armors, helmets, gloves, shoes, pants and bracers.
IN the expansion pack for Diablo 3 all of the craftsmen can be promoted to level 12. To do that, you need to own the item called "death breath", which is rarely dropped by regular opponents and chests, and often after defeating elite opponents.
After you promote them, new recipes unlock and you will be able to each them new ones, for levels 61+.
 This gentleman drops Cartographer's tools
The most important innovation is the fact that, in order to craft a legendary you only need the recipe and the materials that you receive by recycling the other items. Additionally, you need materials that can be obtained at certain locations, from certain monsters or from certain elements of the surroundings that you can interact with, e.g. shelves.
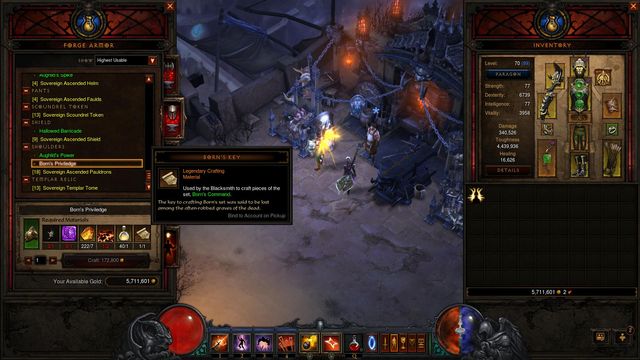 To craft this item, you need the born's key, which you obtain in Act I
The way to obtain these item is to attack unique elite opponents, which do not have the names of abilities, under their health bars and whose names are in violet. Of course, not each unique opponent drops each material. See below to find the list
Percentage chance of a drop, as of April 2014.:
Normal: 5 %
High: 6 %
Expert: 7,2 %
Master: 8,6 %
Torment I: 10,4 %
Torment II: 12,4 %
Torment III: 14,9 %
Torment IV: 17,9 %
Torment V: 21,5 %
Torment VI: 25,8 %
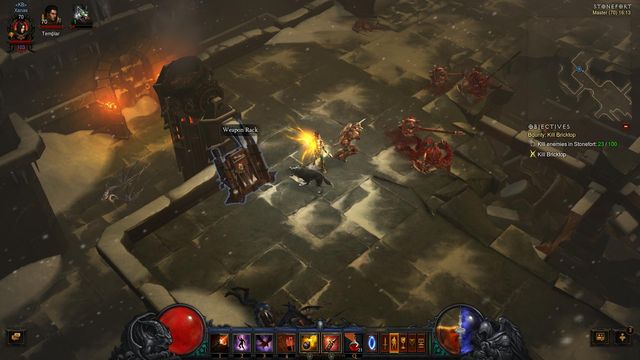
After you found the right type of material, this is not yet it. You then need a white item. The best location to farm these are the Stone fort of Act III, due to the fact that there are many weapon stands there and this is what drops lots of white weapons. Sometimes, you are also going to need a high-quality gem, which has, so far, been used in slots of other items.
The list of materials that you can find in the game, along with the possible (although not the only) locations where you can find unique opponents, which drop them:
Skull of Raylend
Unique Golgor
Act III, Core of Areat
White Oak Splinter
Unique Mountain Wayfarer
Act I, ' Misery (usually, after you open a specific chest)
Shuddering Demon Bone
Unique Morlu
Act IV, Gardens of the Hope Level I, II
Lyekurn's Diary
Azmodan
Act III
Adventurer's Journal
Interactive items
Act I-IV (mainly Act I)
Phial of Weakness
Unique Herald of Pestilence
Act III, Battlefields (both solo and during an event)
Rydraelm Tome
Unique Summoner of the Dead
Act II, Dalgur's Oasis
Eternal Power Capsule
Unique Bear
Act I, Pony level
Skelon's Dice
Unique Oppressor
The Unique Demons kept in the cells at the battlefields
Act IV, Gardens of Hope Level 2
Act V, Battlefields of Eternity
Sydury Bone
Unique Sower of Pestilence
Act I, Fields of Misery , the event with destroying four nests on the farm.
Cultist Blood
Unique Cultist
Act II, Alcarnus
Bloody Pincer
Unique Stygian Crawler
Act III, Tower of the Damned Level II (often a Bounty)
Reaper's Fear
Matael
Act V
Shiny thorn
Unique Monsters
Act I, Cellars on your way to the Old Tristram
Human Cartilage
Manglemaw
Act I, Quest: A Shattered Crown at the Defiled Crypt Level 2.
Cartographer's Toolkit
Unique Ghoul
Act I, Festering Woods, Event: Ancient War
Eyes of the Dead
Unique Skeleton
Act I, Cathedral Level II
Wooden Stake
Unique Skeletal Archer
Act I, Cathedral Level IV
Element of Celerity
Unique Dreadclaw the Leaper
Act I, Fields of Misery
Captured Soul
Unique Soul Ripper
Act III, Keep's Depth Level II
Captured Nightmare
Each Enslaved Nightmare
Terror Demon
Act IV, Silver Spire Level I, II
Hilt of the Silver Wolf
Growlfang
Arreat Crater Level II
Torn Soul
Chupa Khazra
Act I, Southern Highlands
Quaking Vial
Mallet Lord
Act IV, Hellrift
Glowing Ore
Unique Primordial Scavenger
Act V, Battlefields of Eternity
Behistun Rune
Unique Cultist Summoner
Act II, The way to Alcarnus (sometimes a bounty)
Defiled Doll
Unique Succubus
Act IV, Silver Spire Level I
Steel Weave
Skeletal Shieldbearer
Act I, Festering Woods (Event: The Last Stand of the Ancients)
Shattered Core
Rockgut
Act II, Zoltan Kulle's Archives - The Unknown Depths,
Urn of Quickening
Unique Lacuni Huntress
Act III, Ice Cave in the Fields of Slaughter
Act II, Sands
Frozen Blood
Unique Lacuni Huntress
Act III, Ice Cave in the Fields of Slaughter
Griswold's Scribblings
Bookshelves
Act I, The cellar under the chapel.
Living Flame
Unique Morlu Caster
Act IV, Silver Spire Level II
Angelic Shard
Izual
Fallen Angels
Pyres
Act IV, Silver Spire Level I
Izual is on the large bridge, right past the Silver Spire Level I
Iron Wolves Doctrine
Sstrahss
Act II, The bridge to the Aqueducts in Dahlgur's Oasis.
Essence of Twin Seas
Unique Dune Threshers
Act II, Mines above the Black Canyon
Born's Key
Unique Specter Undertaker
Unique Specter Murderer
Act I, Cemetery of the Forsaken
Act I, Defiled Crypts at the Cemetery of the Forsaken
Mystic Source
Unique Pony
Act I, Pony level
Shard of Esteig Plate
Unique Enraged Specter
Act I, Festering Woods
Demon Skin
Unique Armored Destroyer
Act IV, Gardens of Hope Level I,II (at the second level, only during the Light of Hope Quest)
Symbol of the Guardian Brotherhood
Dragus
Act III, Stonefort (the initial event while completing quests)
Maghda's Tormented Soul
Maghda
Act II
 The system calculates 340000 damage, but it does not include bonuses marked with the orange point
You often stumble across lots of trash, during battles, which are considered worse, after being compared automatically. This is not necessarily true, however. It is all about the orange diamonds in front of properties, which are placed in the items. Even on the loading screen, you can sometimes read that the properties of items, whose names are preceded with orange diamonds are not included in the damage, on the character card.
If you follow that reasoning, also while comparing items you need to take a closer look at the orange points. The math is simple here.
If the item that you examine is worse, when it comes to damage, e.g. by 1%, and it reads at the orange point that "damage from fire is higher by 15%" you need to calculate that, at the cost of 1% you receive 15% to all damage from fire. If it is the only kind of damage that you deal, then the worse weapon becomes better, automatically., even if it reads on the card that you deal less damage than you used to.
You need to remember that the damage on the card is the mean damage, which you can deal. Neither the highest, nor the lowest. What is also important is where the system gets these mean numbers from because, if your chances of a critical hit are low, so what that you have high damage on it, when your chance to land a hit is once per twenty swings. Mean chances are higher, but this does not mean that you will be dealing such damage each time you swing the weapon. In spite of that, you need to enter the details tab yourself and consider what you still need, and what you do not. In such cases, you can see the Bard, who will replace, for you, the specific property with another one, which you deem more useful.
Additionally, if you do not an option in a, theoretically, better item, you should make sure that the bard can replace that property with something more interesting. To do that, see her and check out what she has to offer, by clicking the question mark next to the property.
What is also important is that it is not only the abilities that deal damage from elements. Also weapons can deal damage, e.g. from poison. So, if you have such a weapon and additionally, it deals higher damage from fire, it is a good idea to replace damage from poison with the other type.
IF you want to test a new piece of equipment, it is good idea to take on a boss on your own (best the Ghnome in Act III) at the Master level, find out how fast you can deal with him, save the results, replace the items and go to the boss again. If you manage then, to kill the boss faster, this means that. Of course, this is not the perfect method, but it works.
Jobs are one of the two basic activities in the Adventure After selecting Adventure Mode and starting your playthrough, the game will randomly select 5 tasks for each act, giving you a total of 25 missions. You can freely use the portals in the town, to teleport to the selected area, which is possible thanks to the modified world map. The diagram also allows you to teleport to another player, for several seconds. You simply need to click the icon that represents them, on the map.
Two acts, of the five, always provide additional bonuses. This means that, for completing missions in these acts, you receive a doubled number of Blood Shards- the currency that you can spend to buy randomly generated items at Kadala's camp (a new NPC merchant who can be found in every town).
 A job almost complete.
The game generates several types of jobs, which can be divided into the following types:
Apart from the high number of experience points and a bit more modest reward in gold, completing of jobs lets you obtain Blood shards - a form of currency which is available only in the Reaper of Souls expansion pack. You use it to buy items from Kadala (the merchant in the camp). The amount of shards that you are charged for each item varies, depending on the type of weaponry/armor that you are using however, you cannot be sure, what you will get into your inventory, as a result. What you receive, at random, are only magic items, yellow (rare) in the majority of cases, blue, a bit less frequently and orange (very rare, legendary).
You receive an additional reward after you have completed all five jobs in the given Act. It is the Treasure of Horadrims, which you receive from Tyrael after you return to the city (note! - here, you need to talk to him, before you leave the game, or else the valuable reward is gone for good). The chest contains several items - crafting materials, keys for Nephalem Rif, additional Blood Shards and, or course, magical weapons .
There is a low probability that the Treasures of Horadrim drop legendary items. Legendary items found in Horadric Cache are exclusive to act, you can't acquire them from any other source. It's worth noting, that completing tasks on the highest difficulty level - Torment VI - you have a 100% chance to get a legendary item out of a Horadric Cache
Farm Split
Completing jobs is time consuming so, the smarter players had the idea to split the responsibilities among themselves. Each participant of the game performs one of the jobs on their own and then, together (or not) they complete the fifth one. The name for this process is split farming.
The game is much more difficult, in this form, but also more profitable . A well-harmonized party is capable of obtaining the Treasures of Horadrimms faster and, at the same time, max out on their chances for rewards, legendary items predominantly.
Below, you can find a list of all of the legendary items, which you can find only in the Treasures of Horadrims. Under the original name of the weapon, there also is a bit of information on which Act it is available in. The only exception is Act IV, where there is a chance that all of the below items drop.
Note! The numerical and percentage values, in the below descriptions, are for the 9 April 2014. There is a chance that they are changed a little, in the future versions of the game.
Mad Monarch's Scepter

Boots of Disregard

Illusory boots
Soulsmasher

Sanguinary Vambraces

Pauldrons of the Skeleton King

Insatiable Belt

Pandemonium Loop

Avarice Band
Cloak of Deception

Death's Bargain

Ring of Royal Grandeur

Helltrapper

Overwhelming Desire
Gloves of Worship
Coven's Criterion
Pride's Fall

Burst of Wrath

Envious Blade

Salvation

Golden Gorget of Leoric
One of the two activities that you can take part in an Adventure Mode are The Nephalem Rifts. They are simply, randomized dungeon systems that consist of random areas and monsters. To complete a Rift, you will need to annihilate every hostile creature and defeat the Guard in the final boss-fight.
A Rift can be activated in any encampment by clicking on Nephalem Obelisk in it. Opening the Rift is completely free and doesn't require any additional items or keys. The dungeon stays open until all players leave. The portal can be closed after killing the Guardian and talking to Orek in town. It's good to remember about the last activity because it's the conversation which provides you with task completion and with quite a lot of experience points.
 A Rift has been opened - the blue spiritual being nearby is Orek.
The dungeon consists of several levels, usually there are five or six of them. Its size depends on the quantity of monsters inside of it. It can happen, that the Rift will be made of only one location and instead of the stairs, leading to the next level, you will find an obelisk that will teleport you right to the point of exit. It means that this area is inhabited by the amount of monsters which is enough for summoning the Guard. So, whether you want it or not, you will have to explore undiscovered parts of the map and kill found enemies.
 A Rift Guardian won't stand a chance against such a damage.
The Rift challenges are made easier by implementing new environmental objects, Pylons. They are somewhat different from the standard ones. Their bonuses are staggering, but they do not last long - you can use them only for several seconds, so use them smart. For the sake of example, Conduit Pylon can be very useful when used before the final fight.
 A new type of shrines in Nephalem Rifts.
Here, the list of the Pylons is presented:
Before you meet the Guardian, you have to kill a certain number of basic monsters (regular ones as well as elite ones). The progress bar can be seen on the right side of the screen - when it's full, a boss will invade the current location. Killing it guarantees you only regular rewards (items); experience for completing the task can be obtained after talking to Orek.
Among rewards dropping from Guardians of Nephalem Rifts you can find: gems (marquise and imperial), basic materials (the only legendary material can be Forgotten Soul), magic weapon, blood shards, plans and gold. There is also a chance of looting a special Key that will give you access to Greater Rift!
 Such battles in Nephalem Rifts are nothing spectacular.
Clearing the Nephalem Rifts is a time consuming process, but it is also worth-doing, as in this mode, the Reaper of Souls noticeably increases the chance of getting the legendary items - that is implying, the player plays on the Torment difficulty level.
From the tests, done by the fans, it seems that the chance of dropping the legendary items in the Rifts can be increased. It would appear that putting the particular items (those which increases the chance of dropping a legendary item) on a hero may be of some help. Although, there are no solid proof for that thesis yet.
To open a Greater Rift, you just have to select this option in Nephalem Obelisk. It costs you one key to enter a rift every time. You can obtain the key by killing a Guardian in a regular rift. In the rift menu, you can choose to difficulty level. As you progress in the game and complete higher levels of rifts, the list will get longer.
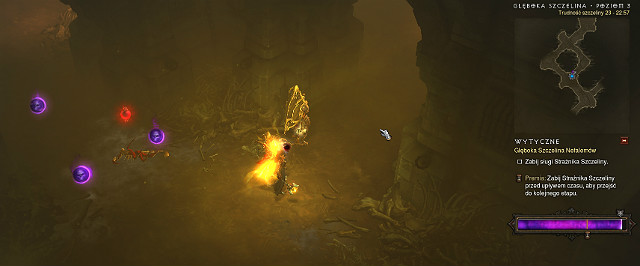 A purple Greater Rift progress bar.
Monsters in the Greater Rift are much stronger than regular mobs and they don't drop anything while elite monsters drop only progress globes - you should pick them up to fill up your progress bar. When you complete the whole bar, it's time for a standard fight with Rift Guardian.
 A drop after killing a Greater Rift Guardian.
The reward for defeating the Greater Rift Guardian is however greater than for defeating an equivalent guardian in a regular Nephalem Rift. You can really often find there legendary items and special gems which have a particular effect when you put them in jewelry. Beyond getting a drop, you will also be enabled to meet a new NPC - Urshi. The ghost, as a reward for your bravery, can upgrade the Gem that you've just obtained.
 The reward for completing a Greater Rift.
In return for your courage and prowess, this ghost will do for you one of two special things. She may upgrade the Gem you've just found or upgrade the Greater Rift Keystone used earlier. By upgrading the Gem you will improve its properties so it's the best option. Gems rank 25 get an additional attribute so it's worth upgrading them. There are quite many gems - 13 - and each of them has its unique attributes which will certainly match with your character's build.
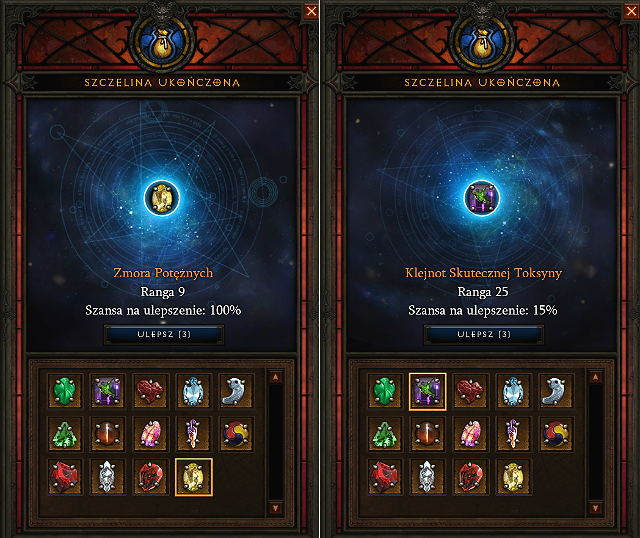 A comparison between leveling gems at different ranks.
If you decide to upgrade the gem, you will get three chances in order to do it. The success depends on two factors: current gem rank and greater rift rank you've managed to accomplish. The higher the level of Greater Rif is and the smaller the gem rank is, the more chances you've got to improve the gem. The exact correlation is presented in the table below. The first column contains the difference between rift level and gem rank. The other one - chance of improvement in percentage.
Difference between rift level and gem level
Gem upgrade chance
+10
100%
+9
90%
+8
80%
+7
70%
+6
60%
+5
60%
+4
60%
+3
60%
+2
60%
+1
60%
0
60%
-1
30%
-2
15%
-3
8%
-4
4%
-5
2%
-6
1%
-7 and less
0%
Having successfully completed the Greater Rift, you should go to town and talk to Orek who will reward you with a huge number of experience points and with gold.
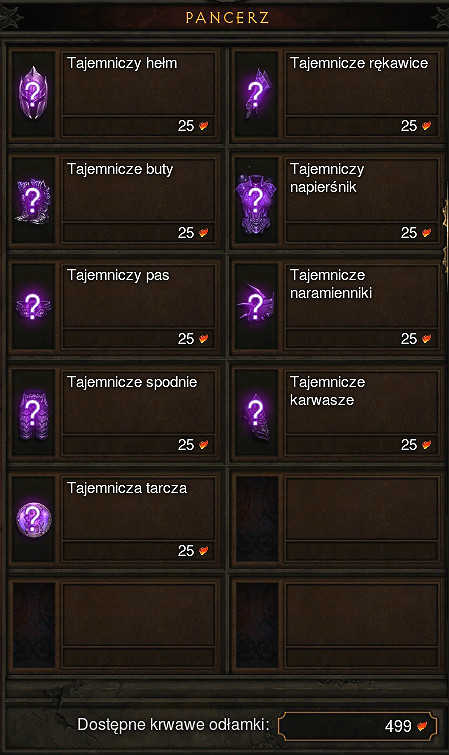
Blood Shards are the new currency implemented in the Reaper of Souls. They can be obtained in the Adventure Mode by performing and completing one of the two activities: Bounties or Nephalem Rifts. It is much faster to get them through the second way, for the Guardians will drop several dozen Blood Shards. In the case of Bounties it is better to take those with bonus that gives you twice as many Blood Shards.
 You can find Kadala in every camp.
You can spend your Blood Shards at Kadala, a new trader, who appears in all of the camps. The players refer to trading with her as a gambling, and indeed, this process has a lot in common with it. As opposed to the other traders, Kadala won't allow you any insight on items you are buying. They are only divided by category (weapon, chest piece, pants, etc.) - it's a blind purchase and only after spending your Blood Shards you will learn if the purchase was of any worth.
 No wonder that the players call trading with Kadala a gambling.
So far Blizzard has not revealed any percentage chance to draw a specific item class (like a legendary), so we won't be able to give any certain data. What we do know, however, is that recently the price for each item was increased, but at the same time the chance to draw out a legendary item was SIGNIFICANTLY increased as well. How does it look? It depends. Some people claim that they have acquired a lot of legendary items from Kadala, while the others say that they are hardly getting any. Gambling is all about the luck, but it's definitely worth a try, as it's the easiest and fastest way to get your desired equipment!
 The inside of the Treasure Realm pokes the eyes with valuables!
In the section about effective farming, you can read about a mysterious entrance to a Treasure Realm (The Vault). What is this dimension? It's an extra location, which was recently introduced to the game, in which you can stumble upon pots full of gold and gems, Goblins, and other easy to kill monsters. Obviously, a boss will be waiting for you at the very end of it. During your exploration, you will also stumble upon a certain, rather unique foe.
 Gorgon Gekko, an enemy specific to this realm.
You shouldn't be worried, as this enemy won't be causing you any problems - his hits are weak, and he lacks any special ability. It's still worth to kill it, as he counts towards the "rare enemy to kill" pool (achievement). Gorgon Gekko is the penultimate enemy who stands in your way to the desired treasure. Just as you deal with him, you will stand before a gate leading to the center of the action - Boss Room.
 The Sleeping "Beauty" Greed.
The mistress sitting on the throne is certainly not a beauty, but she sure is rich! You can wake the boss up by kicking the chest she is resting her foot on. She's not the most difficult boss to deal with, but on higher difficulty levels she can land a punch. Greed has a couple of abilities at her disposal - she can smash the ground, which causes treasure chest to fall in random places, which deal minor damage to the player if he/she is hit by them. She can send a shockwave in a given direction, as well as charge at the player, to smash him/her with her body (a resemblance to the Butcher, perhaps?)
 She releases Goblins from her treasure sack.
It should be noted, that upon hitting an obstacle with her charge (a wall, for instance), the boss will release a Goblin from her sack! You can force her to drop up to 10 of those small creatures during one encounter, if someone has enough patience to do so. It's worth doing so - each Goblin she releases is a chance for some epic loot. After you get her health to 5%, a treasure chest will fall on her head, killing the boss and releasing a sea of treasure!
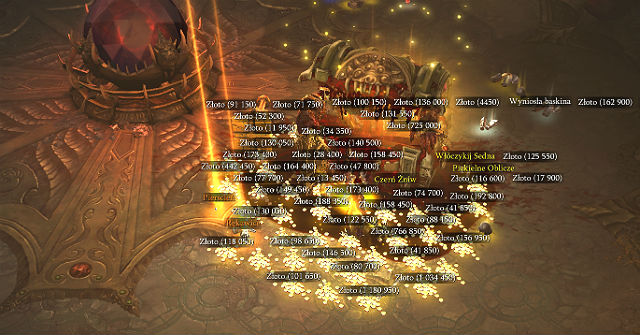 Your reward for clearing the Vault.
The Chest ALWAYS contains AT LEAST two randomly generated Legendary Items. You can, however, find more of them there, 3 or 4, for instance, depending on your luck. Additionally, you will be flooded with a rain of gold coins!
Increase the amount of gold gained from the Vault!
To increase the amount of treasures received during your visit in the Vault, you should always farm the Goblins on the highest possible difficulty level (highest meaning that on which you are able to kill them). The higher the difficulty level, the bigger the amount of gold you will receive. Additionally, you should also equip yourself with items increasing gold gain, like Sun Keeper or Kymbo's Gold. It's worth to keep those Magic, Legendary and/or Set items which also have the same bonus (extra gold from monsters). Before you enter the Vault you should equip any item increasing your gold gain and smash all the urns. If you have difficulties with the enemies in this realm, you can quickly swap those items to your "normal" attire. This will allow you to maximize the gold income! You should also remember, that this bonus will also work on the "final" treasure chest.
With the introduction of 2.1.0 patch to Diablo 3, a special season mode was introduced. To take part in seasonal game, you must first create a new character. The whole process is no different than a normal character creation.
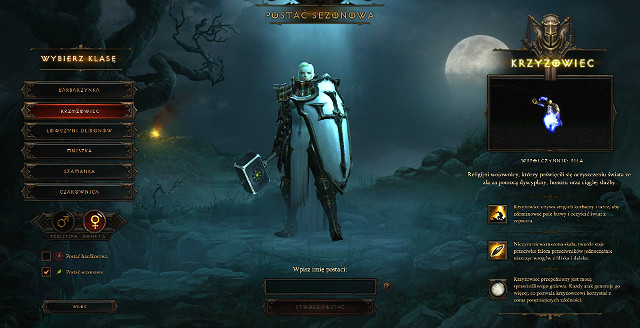 Seasonal character creation.
Select your character class and gender, and check a little checkbox, located at the bottom left corner of the screen (Seasonal Hero). Seasonal character creation has been completed!
What are Seasons in Diablo III?
It's no different than starting your playthrough from the very beginning, but with one exception - you won't have any gold, gems, nor items from "non-seasonal" characters. You won't have your Paragon Levels as well. You will have to expand your chest from scratch, and the same goes with Artisans - all the recipes, formulas will have to be accumulated anew. In return, thanks to playing in the seasonal mode, you have a chance to acquire new, powerful, legendary items, which cannot be found in the "non-seasonal" mode! It also awards you with new special banner and transmogrification options. Seasonal mode adds a number of special achievements, called "Conquests".
Leaderboards
You can also compete with other players in several areas - who will be the first one to achieve the maximum experience level, to complete an important event, to finish a Greater Rift in the shortest amount of time, to collect the highest score for achievements, and so on.
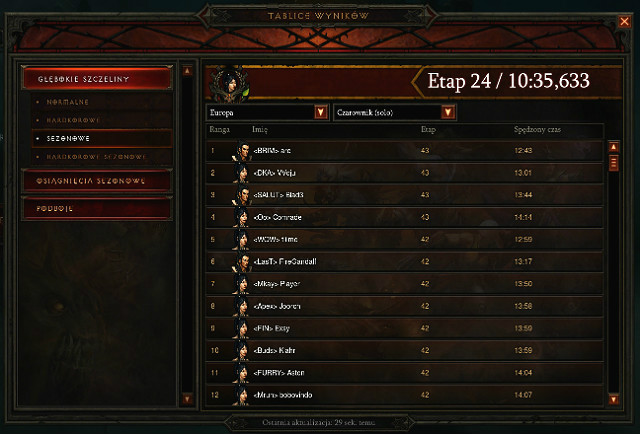 Leaderboards
All the scores can be tracked on the Leaderboards, which can be accessed from the main menu. Each and every player who manages to get a very good result, or at least better from others, will be placed on the leaderboard as a reward. Your results can be compared with your friends and/or members of your clan.
In Diablo 3, you can complete special season quests, for which you can obtain additional rewards, like for example an unique portrait frame or animal companion. In the future, there will certainly be more various rewards. Your progress can be tracked in a new interface tab.
Progress is tracked by acts and there are different quests in each one of them. The tasks get more difficult as you go through the acts. You will for example have to reach level 60 of Greater Rift, so you shouldn't be bored.
During seasonal game you can gain interesting loot, a lot of gold, recipes, gems etc. What is more, you level up additional characters and gain paragon points. What happens to all this when a season ends?
All seasonal heroes will become non-seasonal ones. You don't have to make room for them on your characters' list to make them fit.
After the end of season, the amount of experience points earned by you will roll over, not the paragon levels. This results in the fact that non-seasonal and seasonal paragons don't sum up. Instead you will obtain the amount of paragons corresponding to experience points earned by you.
If the level of your seasonal artisans is higher than the non-seasonal ones, the level will transfer to non-seasonal mode when the season ends. It's the same for all recipes. All of the gold and items that your seasonal character was equipped with as well as what you have in the stash will transfer to non-seasonal mode. Blood shards will transfer in the same way.
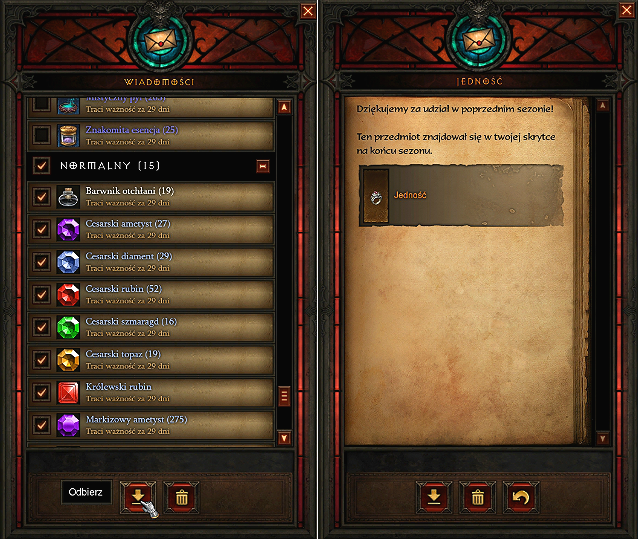 Items earned in a season will be sent by e-mail.
All items will be sent to you by email and the message will be divided into categories. You can decide yourself what you want to receive. You can also view the information on the item sent. You can transfer chosen items to your equipment by clicking "Claim".
All achievements you've earned in seasonal mode apply also on an ongoing basis in non-seasonal mode.
In exchange for participating in seasonal gameplay and reaching level 70 with at least one character (it doesn't matter if the mode is regular or hardcore), player receives access to unique transmogrification set: 2 parts for each season. Following parts of the transmogrification set will be available in next seasons.
Blizzard tries to introduce changes in each season. There certainly will be new legendary items to gain during season. New conquests, banners, next parts of transmogrification set and much more!
 There are a lot of dangers awaiting you in the new location.
With patch 2.3.0, new location is introduced to the game - Ruins of Sescheron. People who played Diablo 2 certainly remember the frozen wasteland from act V. In Diablo 3, we can see how the Barbarians live after destroying Mount Arreat. New location means, above all, new mobs to kill, but also more deadly traps and quests that can earn you a lot of experience. In Ruins of Sescheron, you can also complete quests in adventure mode.
 Kanai's Cube is located in the Elder Sanctum.
If you successfully go through the harsh climate of the location, you will have to face a crowd of enemies at the very end (in the Elder Sanctum). A very unique reward - Kanai's Cube, which has been guarded by the Barbarians for many years, awaits you.
 Kanai's Cube is a powerful ancient artifact.
Remember the Horadric Cube from Diablo 2? In Diablo 3, it has a successor! The Kanai's Cube is a very useful gadget that can be obtained in the new location - Ruins of Sescheron. Using this item, you can draw unique effects from a given legendary item (the orange ones) and save them in the cube. This way, you will be able to use one effect of your choice, without having to wear the item. In the cube, you can choose one item of each category: weapon, armor and jewelry. Thanks to that, the possibilities of enhancing your hero's power will largely grow.
In Kanai's Cube, you can reforge items using recipes. Most of them require crafting materials, Forgotten Souls, Death's Breaths and items obtained from Horadric Cache after completing the quests in every act.
To do that, you need to have a given legendary item and 5 materials from every act + 5 Death's Breaths. Remember that after the operation the item gets destroyed.
To do that, you need to have a given rare item, 25 Death's Breaths and 50 crafting materials(?). The rare item will be turned into a random set item or legendary item of the same kind. There is a chance of creating an ancient item.
For this recipe, you will need a set item + 10 Forgotten Souls and 10 Death's Breaths. The item will be converted into another item of the same set, but it cannot become a legendary item.
Thanks to this operation, you can try to reroll the statistics of a given item. If you cannot get a different one and the one you have is not so good - you have a chance to change it! What's more, There is a 10% chance that you will obtain a legendary item. The ingredients that you will need are: 5 special materials from every 5 acts + 50 Forgotten Souls. It costs a lot, but may bring you a lot of profit.
Using this operation, you can completely remove the level requirements on an item, which will allow your low level characters to use very powerful pieces of equipment. The required material is Gem of Ease (rank 25 or higher).
You can turn 9 gems of any kind into one of your choice. To do that, you have to buy an appropriate essence from Squirt in at II (it costs 500000 gold) and mix it with the 9 gems and 5 Death's Breaths.
You can also create crafting materials using other kinds that you for example won't need. To do that, you need 100 pieces of a given material, one item (white, blue or yellow) and depending on the material that you want to obtain, 1 Death's Breath.
Kanai's Cube, like a proper ancient relic, has it secrets. Besides basic recipes, there are also hidden ones:
 Muuuuu!
All Diablo fans will be certainly glad that they will be able to visit the world of cows with bardiches again! To open the portal to the level, which apparently "does not exist", you will need a legendary item - Bovine Bardiche. Put the weapon in the cube, accept and you're ready! Not The Cow Level is full of mobs, which allows you to earn a lot of experience. It is good to visit the whole map and search the edges of it, because you can find large chests with items. The cows have their queen, which you can kill or spare. On every map, there is an event during which your task will be to eliminate as many cows as you can. The portal to Not The Cow Level can be opened only once a gameplay, so if you have more than one Bardiche to use, you will need to create a new game.
 Greed's treasures in all their splendor.
You no longer need to chase Goblins in adventure mode to get to Treasury Realm! Now, using Kanai's Cube and Puzzle Ring, you can instantly open a portal to this place. Inside, you will find a huge amount of gold, more Goblins and a chamber with Greed, Baroness of the Treasure Realm at the end. After killing the boss, you're guaranteed to obtain 2 legendary or set items.
As you can see, Kanai's Cube has a lot of uses and will most probably be upgraded in later patches. Thanks to this item, your hero can receive powerful effects from items that he/she doesn't even wear! What's more, it makes it easier for you to collect a specific set, obtaining the weapon that you need or other legendary item.
Infernal Machine is a device which is able to teleport you to the four alternative realms, for the sake of collecting particular items. They are later needed for crafting the Hellfire Ring or Hellfire Amulet- unique legendary, 70-level items. As far as Infernal Machine and Hellfire Ring goes, which were both added in the vanilla version of the game (as one of the major patches), they have been altered slightly with the addition of Reaper of Souls. Hellfire Amulet was added to the game fairly recently.
To find an Infernal Machines, you first have to kill a Keywarden located in acts: I, II, III and IV. Each one of them can give you a specific Infernal Machine.
 Odeg is one of the Keywardens you will need to kill and hope for good luck.
The machines can be obtained from the following opponents:
In the Reaper of Souls expansion, just like in the basic version of Diablo III, nothing is guaranteed. There is a specific percentage of chance that you loot the ingredients and the plan. It varies according to the level of difficulty.
The chance of looting the keys is as follows: (numbers from September 2015
Difficulty level
Chance
Torment I
25%
Torment II
28%
Torment III
33%
Torment IV
38%
Torment V
43%
Torment VI
50%
Torment VII
60%
Torment VIII
70%
Torment IX
80%
Torment X
90%
As you can see, finding a Machine can be quite difficult on lower difficulty levels. Starting from Torment VIII, you can even obtain two Machines at once!
Infernal Machine opens the portal in the Heretic's Abode - a building located in the New Tristram. Entering this location by default is blocked, so you will need to approach the door and hit them - only then, a yellow glow will appear indicating the entrance. The Machine itself can be activated directly from the equipment menu - all you have to do is to click on it with the right mouse button.
 Portal to the Realm of Chaos.
After entering each realm, you will need to fight two bosses at once. The only exception from that is in Realm of Fright, where you will have to fight Diablo. When his energy bar hits 50 and 25% a new random uber bosses are being summoned. So this is why they should be taken down on the first place, as further bloodshed of Diablo will effect with having more opponents to fight at once. It is strongly advised to focus on one enemy at a time.
 This time we got lucky. Boss dropped the component for the ring.
When the fight is over and the last boss is killed, items will drop from him. Among them, you may find one of the ingredients for crafting Hellfire Ring or Hellfire Amulet. The chance of looting it is exactly the same as the chance of looting keys for Infernal Machines (you can find the table above). Starting from Torment VIII, you can obtain several ingredients at once!
Each Machine has its own item:
Infernal Machine
Item
Icon
Machine of Gluttony
Vial of Putridness

Machine of Bones
Leoric's Regret

Machina of War
Idol of Terror
Machina of Evil
Heart of Evil
Having all the four components, you can craft:
Hellfire Ring or a Hellfire Amulet - unique legendary, 70-level items, which cannot be acquired by any other means. The schematics to craft either of them can be bought from Squirt, who can be found in Hidden Camp in Act II - they both are very expensive, as you have to pay 5 million gold for each, but you have to buy them once only.
The Hellfire Ring selects 5 random stats, in addition to 2 permanently-assigned: bonus to received experience, which gives a 45% boost, as well as a chance to flood the area with lava, dealing 200% weapon damage in 6 seconds.
The Hellfire Amulet has one permanent stat to choose from: Dexterity, Intelligence or Strength. Additionally, when crafting, 4 stats will be randomized, in addition to a class-specific passive ability.
Vengeance - active skill
For a dozen-or-so seconds, you turn into vengeance incarnate. The character gets shrouded with a black halo and it grows horns. While attacking, you additionally fire four arrows that pierce the enemies, and fire missiles.

Required level: 61.
Cost: Free
Runes for Vengeance:

Personal Mortar- Instead of Homing Rockets, launch 2 Grenades at random enemies outside melee range on every attack that explode for 150% weapon damage as Fire.
Required level: 62.

Dark Heart - Vengeance pours out of you, continuously dealing 325% weapon damage as Lightning per second to enemies around you.
Required level: 63.

Side Cannons - Instead of Homing Rockets, the side guns are powered up into slower-firing cannons that deal 225% weapon damage and heal you for 3% of maximum Life per enemy hit.
Required level: 65.

Seethe - Gain 10 Hatred per second.
Required level: 67.

From the Shadows - Instead of Homing Rockets, summon allies from the shadows that attack for 120% weapon damage as Cold and Freeze your enemies for 2 seconds.
Required level: 69.
Icon
Required level
Description

64
Ambush
You deal 40% additional damage to enemies above 75% health.
66
Awareness
When you receive fatal damage, you instead vanish for 2 seconds and regenerate 50% maximum Life. This effect may occur once every 60 seconds.
68
Single Out
Gain 25% Critical Hit Chance against enemies who are more than 20 yards away from any other enemies.
Avalanche - active skill
You cause an avalanche of rocks, which deals huge damage to everyone that they hit.

Required level: 61.
Cost: Free
Runes for Avalanche:

Volcano - Chunks of molten lava are randomly launched at nearby enemies, dealing 4400% weapon damage as Fire over 5 seconds.
Required level: 62.

Lahar - Cooldown is reduced by 1 second for every 15 Fury spent.
Required level: 63.

Snow -Capped Mountain - Cave-in from both sides pushes enemies together, dealing 1800% weapon damage as Cold and Slowing them by 60% for 3 seconds.
Required level: 65.

Tectonic Rift - Store up to 3 charges of Avalanche.
Required level: 67.

Glacier - Giant block of ice hit enemies for 1600% weapon damage as Cold and Freeze them.
Required level: 69.
Icon
Required level
Description

64
Earthen Might
Gain 30 Fury when activating Avalanche or Earthquake.

66
Sword and Board
Blocking an attack generates 6 Fury.

68
rampage
Increases Strength by 1% for 8 seconds after killing or assisting in killing an enemy. This effect stacks up to 25 times.
Epiphany - active skill
Boosts your Spirit regeneration and allows you to leap towards the opponent in each melee attack.

Required level: 61.
Cost: Free
Runes for Epiphany:

Desert Shroud - Infuse yourself with sand, reducing damage taken by 50%.
Required level: 62.

Ascendance - Charge yourself with lightning energy, causing your next attack after moving 10 yards to stun enemies hit for 1.5 seconds.
Required level: 63.

Soothing Mist - Imbue yourself with water, causing your abilities to heal yourself and allies within 30 yards for 40232 Life. Heal amount is increased by 25% of your Health Globe Healing Bonus.
Required level: 65.

Windwalker - Increases the bonus Spirit regeneration from Epiphany to 45.
Required level: 67.

Inner Fire - Engulf yourself in flames, causing your attacks to assault enemies for 353% weapon damage as Fire.
Required level: 69.
Icon
Required level
Description

64
Unity
Each ally affected by your Mantras increases your damage by 5%, up to a maximum of 20%, and has 5% increased damage.

66
Momentum
Moving 25 yards increases your damage by 20% for 6 seconds.

68
Mythic rhythm
Every third hit from a Spirit Generator increases the damage of your next damaging Spirit Spender by 40%.
Piranhas - active skill
You summon a swarm of piranhas, which deal damage from poison, for a limited period of time. The opponents that are affected by this skill receive more damage.

Required level: 61.
Cost: Mana
Runes for Piranhas:

Bogadil - You summon a giant bogadile from the pool of water, which bites an enemy dealing 1100% weapon damage as physical damage.
Required level: 62.

Zombie Piranhas - Turn the piranhas into zombie piranhas. They leap out from the pool and attack nearby enemies.
Required level: 63.

Piranhado - The pool of piranhas turns into a tornado of piranhas, lasting 4 seconds. Nearby enemies are periodically sucked into the tornado. Increases the cooldown to 16 seconds.
Required level: 65.

Wave of Mutilation - Each cast of piranhas summons a wave, which crashes forward, dealing 475% weapon damage and causing all enemies affected to take 15% increased damage for 8 seconds.
Required level: 67.

Frozen Piranhas - Changes the damage dealt to 400% weapon damage as cold damage over 8 seconds, chilling enemies for the duration.
Required level: 69.
Icon
Required level
Description

64
Creeping Death
Your Haunt, Locust Swarm and the damage amplification from Piranhas last almost forever.

66
Physical attunement
You gain 70 Physical Resistance for every enemy within 20 meters radius. The rage of this effect is increased by your gold pickup radius.

68
Midnight Feast
You can have 1 additional Zombie Dog summoned at one time. The damage of your Zombie Dogs and Gargantuan is increased by 50%.
Black Hole - active skill
You summon a black hole that sucks the enemies in and deals damage to them.

Required level: 61.
Cost: Arcane power
Runes for Black Hole:

Supermassive - Increases the Black Hole radius to 20 meters and damage to 1290% weapon damage as lightning over 2 seconds. Black Hole will now deal lightning damage.
Required level: 62.

Absolute Zero - Each enemy hit increases the damage of your Cold spells by 3% for 10 seconds. Black Hole will now deal cold damage.
Required level: 63.

Event Horizon - The Black Hole also absorbs enemy projectiles and objects from Elite monster abilities within a range of 15 meters.
Required level: 65.
Blazar - Conjures a Black Hole at the target location that draws enemies to it and deals 700% weapon damage as fire over 2 seconds to every enemy in a range of 15 meters.
Required level: 67.

Spellsteal - Enemies hit by Black Hole deal 10% reduced damage for 5 seconds. Each enemy hit by Black Hole grants you 3% increased damage for 5 seconds.
Required level: 69.
Icon
Required level
Description

64
Unwavering Will
Standing still for 1.5 seconds increases the following attributes:
Armor: 20%
Resistances: 20%
Damage: 10%

66
Audacity
You deal 15% more damage to enemies within 15 meters of your character.

68
Elemental Exposure
Damaging enemies with Arcane, Cold, Fire and Lightning will cause them to take 5% more damage from all sources for 5 seconds. Each different element type applies a stack, up to 4 times (20% increased damage).
Elemental damage from your weapon contributes to Elemental Exposure.

Crusaders are armored warriors, fighting in melee range on the frontlines. Their weapon of choice is a flail. They are especially proficient with shields, making them able to block most of enemy attacks directed at them. During combat Crusaders generate Wrath, which they use to attack their enemies with powerful abilities, or to summon holy powers.
The Hammerdin build, which was popular in Diablo 2. It focuses on dealing damage using Blessed Hammer, which has a large attack range and deals AoE damage. To make the build work properly, you will need the Seeker of the Light set, which will increase the hammer damage and you will also get a damage reduction after using Falling Sword. You should wear Unity and Convention of the Elements on your fingers (remember that your companion also has to wear Unity so that it works properly). Put on Gabriel's Vambraces and The Witching Hour.
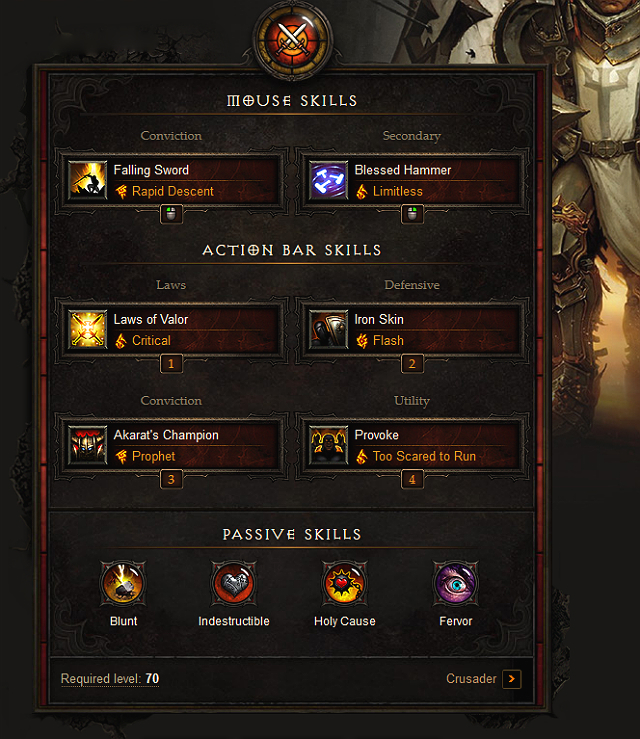
Left mouse button. Falling Sword + Rapid Descent
Thanks to Falling Sword, you will be able to jump between the enemies and deal a lot of damage. It is grate for starting a melee battle.
Right mouse button. Blessed Hammer + Limitless
This is the most important skill in the build. After activating it, you create magic hammers that swirl around the character and each one of them deals damage when in contact with an enemy.
1. Laws of Valor + Critical
This buff works great when playing solo, as well as in multiplayer. You will always make use of a bonus to attack and critical damage.
2. Iron Skin + Flash
A great defensive skill that will increase your endurance and your mobility by using the Flash rune.
3. Akarath's Champion + Prophet
After activating this skill, the whole power of the crusaders order enters your hero and increases his damage 35%, as well as increases Wrath regeneration by 5 points for 20 seconds. Moreover thanks to the Prophet rune, you get an armor bonus.
4. Provoke + Too Scared to Run
Provoke works well when fighting a large group of mobs. It makes the enemies attack your hero and you obtain Wrath every time an opponent hits you. Moreover, you will slow the mobs down, which will allow you to hit them multiple times using Blessed Hammer.
1. Blunt
Increases damage dealt by Blessed Hammer by 20%.
2. Indestructible
Thanks to this skill, you will escape death more than one time.
3. Holy Cause
Increases the damage dealt by your weapon by 10%. Moreover, every time you deal Holy damage, you are healed 1% of your total hp. Considering that this build focuses on dealing Holy damage, this is the perfect choice.
4. Fervor
You can reduce your cooldowns by sacrificing 15% of your attack speed.
1. Bane of the Trapped
2. Gogok of Swiftness
3. Bane of the Powerful or Bane of the Stricken
1. Johanna's Argument
2. Hexing Pants of Mr. Yan
3. Obsidian Ring of the Zodiac
Core: Movement Speed / Strength / Vitality / Maximum Resource
Attack: Cooldown Reduction / Critical Hit Damage / Critical Hit Chance / Attack Speed
Defensive: All Resistances / Life / Life Regeneration / Armor
Utility: Resource Cost Reduction / Area Damage / Life Per Hit / Gold Find
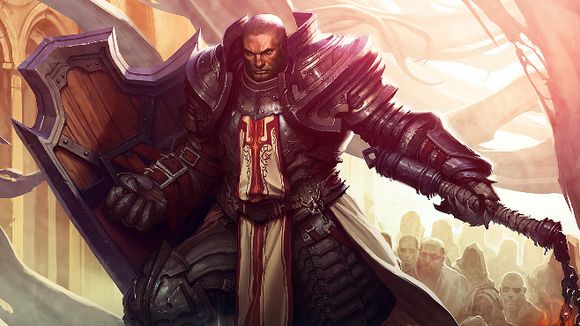
In spite of his plate armor and shield, the Crusader does not have the skill to decrease damage, unlike the Monk or the Barbarian. In spite of that, you can notice that he has the skills to fight over long distance. This build is designed to enable effective combat over long distance. To use this combination of skills, to its fullest, you should be using a two-handed weapon, which doubles the number of bombardments and the shield. As soon as you are equipped with such a set, you can focus on the skills. The main intent is to immobilize the targets and pepper them with Bombardment and Fury.
Left Button. Justice + Charged Up
The Crusader's basic attack that regenerates Wrath and, thanks to the rune, stands a chance at stunning the opponents. With frequent use, this may stun the opponents really often, which slows them down before they manage to reach you.
Right Button. Blessed shield + Shattering Throw
The main skill to spam, right after Justice. Thanks to the rune from Single Out, it hits several enemies, which helps you eliminate them. You use it mainly in a situation, in which the rest of the skills are still awaiting to cool down. You need to remember that the higher the chance of blocking, the highest damage this skill deals. It is a good idea to equip a good shield, in order to max out on damage.
1. Bombardment + Annihilate
The cooldown of this skill is too long and it last too short, for it to be kept in this build, for an extended period of time. Still, thanks to an appropriate passive skill and weapon (Flail: The Mortal Drama) it increases the rate of regeneration and the duration, thanks to which it becomes the main asset of this build. Thanks to the rune, each blow that you land, is going to be a critical hit so, it is perfect against the elite opponents.
2. Judgment + Deliberation
Immobilizes the enemies for ten seconds. The cooldown is twenty long, thanks to which you can make the enemies stand still, every ten seconds. Always cast it before Bombardment, because thanks to this, more projectiles will reach the enemy.
3. Phalanx + archers
There is not much to tell here. Thanks to the passive skill from Bombardment, damage from Phalanx is greater and additionally, they have a quite short cooldown time. You need to remember that you are summoning four avatars, instead of one, thanks to which the additional damage is quite high.
4. Heaven's Fury + Ascendancy
Second most important skill for dealing damage. You cast it over distance, thanks to which you do not need to approach the opponents. Fury itself hops from one opponent to another, which increases its effective range and you do not need to shorten the distance between you and the opponents.
1. Heavenly Strength
Required for an effective use of this build. The flail that Bombardment is based on, is a two-handed weapon and it is required by the Blessed Shield.
2. Divine Aegis
Compulsory as well. Decreases cooldown for Bombardment and increases damage from Phalanx. Without it, waiting for the main offensive skill would be too long.
3. Finery
If you have many slots for stones, this choice is very good. Additionally, it increases your base damage, through raising your strength.
4. Blunt
Increases damage from Justice and, since it is the basic for generating Wrath, raising damage is always a good thing.
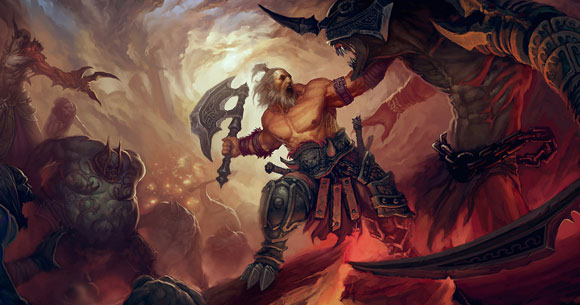
The Barbarian is a typical adventurer - he jumps in the middle of the fight, hacking and slashing everything and everyone who dares to come close to him. While playing the Barbarian, you will constantly balance between life and death, because you will have to fight in close combat and that means that you will be constantly attacked. Do not worry, however, as Barbarians (like Monks and Crusaders) receive 30% less damage than Wizards, Witch Doctors and Demon Hunters.
This build is focused on using Whirlwind and puts a lot of emphasis on mobility. Using Whirlwind, you will be able to deal AoE damage and move through crowds of enemies freely. To make the build work properly, you will need the Wrath of the Wastes set (it will enhance the effect of Whirlwind). Moreover, you will need two weapons from the Bul-Kathos's Oath set. Wear the Bastions of Will set on your fingers. You can choose the amulet by yourself, but it is recommended that you wear one with a bonus to physical damage. Lastly, you should have Chilanik's Chain and Lacuni Prowlers.
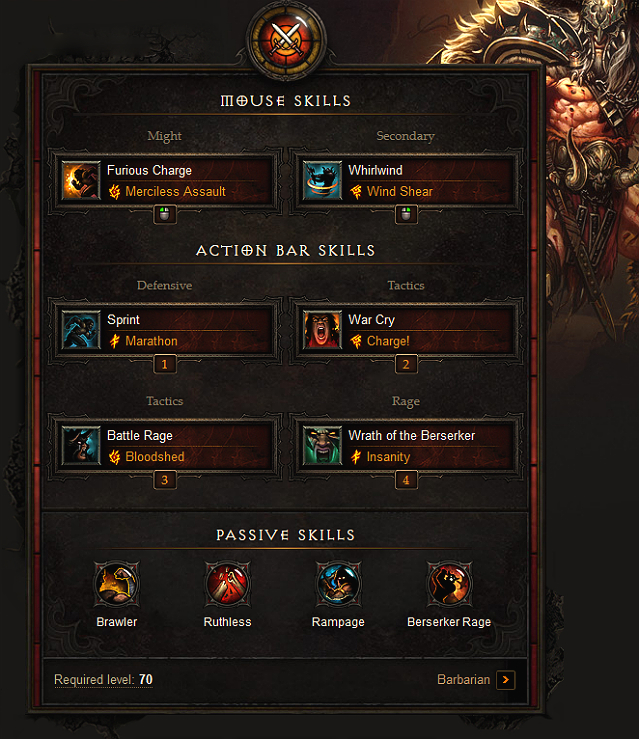
Left mouse button. Furious Charge + Merciless Assault
Furious Charge is a good source of damage and a very nice movement skill. The hero charges and knocks back nearby enemies dealing 600% weapon damage. Thanks to the Merciless Assault rune, you can reduce the cooldown of this skill.
Right mouse button. Whirlwind + Wind Shear
Whirlwind is your basic source of damage. Your hero will spin around and deal damage to all the enemies on his way. Thanks to this skill, you can move through a crowd of enemies with no trouble.
1. Sprint + Rush
Mobility is very important in this build and using Sprint, you will be able to increase the speed with which your hero travels across the map.
2. War Cry + Charge!
Armor is an important statistic for melee fighters. War Cry will increase your hero's armor level by 20%. Thanks to that, it will be easier for you to survive the fights on higher levels of difficulty. Moreover, using the Charge! rune, you will increase Fury regeneration.
3. Battle Rage + Bloodshed
Battle Rage will increase the damage dealt by your hero and will also cause a blood explosion when a critical hit occurs. This explosion deals 20% of damage to all the nearby enemies.
4. Wrath of the Berserker + Insanity
Wrath of the Berserker is a powerful buff for a Barbarian. After activating this skill, your hero will be enraged for 20 seconds and it will increase statistics like: critical it chance, dodge chance, attack speed, movement speed. Thanks to the Insanity rune, you will also increase your damage by 50%.
1.Brawler
Brawler works perfectly when in the middle of a fight. As long as you have at least 3 enemies around you, your damage is increased by 20%.
2. Berserker Rage
Thanks to Berserker Rage, you deal 25% more damage when your Fury level is close to maximum.
3. Ruthless
Your hero will deal additional 40% of damage to enemies that have less than 30% hp.
4. Rampage
Rampage increases your strength by 1% for 8 seconds after killing an enemy or helping someone to kill an enemy. This effect can stack up to 25 times.
1. Bane of The Trapped
2. Wreath of Lightning
3. Bane of the Powerful or Bane of the Stricken
1. The Furnace
2. Hexing Pants of Mr. Yan
3. Obsidian Ring of the Zodiac
Core: Movement Speed / Strength / Vitality / Maximum Resources
Attack: Cooldown Reduction / Critical Hit Chance / Critical Hit Damage / Attack Speed
Defensive: All Resistances / Life / Life Regeneration / Armor
Utility: Resource Cost Reduction / Area Damage / Life per Hit / Gold Find
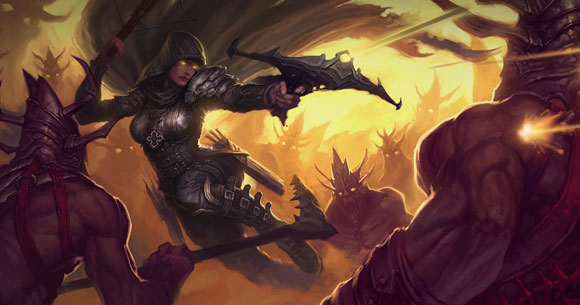
Demon Hunter specializes in ranged combat. Using her reliable bows and crossbows, dancing between groups of enemies, who are unable to lay a finger on her. The key aspect of playing this character is to plan your actions beforehand, because, despite dealing huge amounts of damage, Demon Hunter is the most fragile character in the game. One wrong move and you will be biting the dust.
This build works well if you want to deal AoE damage, which makes farming fast and effective. To use this build properly, you will need all the elements of the Unhallowed Essence set. This will make your Hatred generators provide Discipline as well. Moreover, you will increase the amount of damage you deal and reduce the damage you get. Another important thing is the Bastions of Will set. You can choose the amulet by yourself, but look for the statistic that gives +% fire damage. Wear Will of the Light, Hunter's Wrath on your belt, Dead Man's Legacy as your quiver and Yang's Recurve.
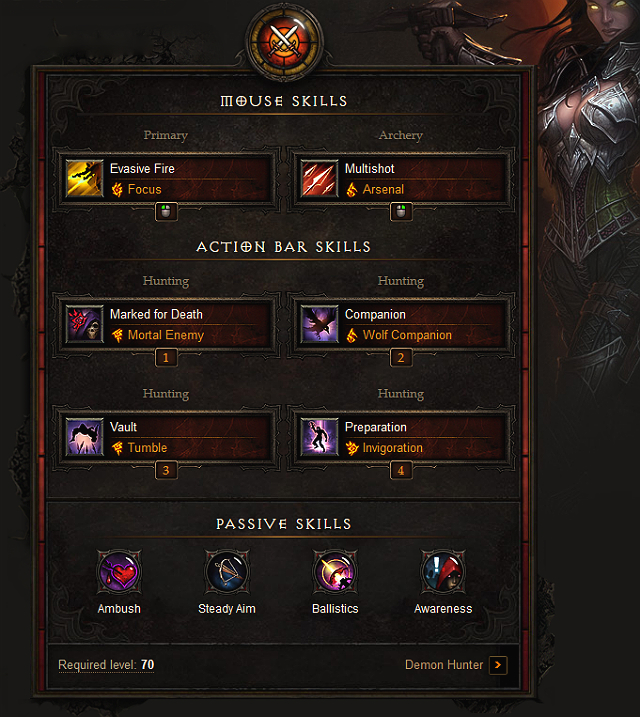
Left mouse button. Evasive Fire + Surge
Evasive Fire deals quite a lot of damage, but the most important thing is the regeneration of Hatred obtained from the Surge rune.
Right mouse button. Multishot + Arsenal
Multishot is your basic skill for dealing a huge amount of damage. Using the Arsenal rune, you will be able to shoot additional missiles at closest enemies.
1. Marked for Death + Mortal Enemy
This skill triggers automatically as you attack your enemies. It is possible thanks to Calamity from Kanai's Cube. Using Mortal Enemy rune, you will increase your Hatred regeneration.
2. Companion + Wolf Companion
Choose Wolf as your companion, because then you will be able to increase the damage dealt by you and your enemies by 30% for 10 seconds!
3. Vault + Tumble
Vault is the only skill that can help you get out of a difficult situation, so it is good to have it. Using the Tumble rune, you will be able to use Odskos again after 6 seconds for 50% of the normal discipline cost.
4. Preparation + Invigoration
Preparation will give you the possibility of regaining discipline points and thanks to the Invigoration rune, you will increase this statistic by 15 points permanently.
1. Ballistics
Our hero will mainly deal damage by shooting rockets and the Ballistics skill increases the damage dealt by rockets by 100%! Therefore, the choice of this ability is obvious.
2. Ambush
You will be able to deal 40% more damage to targets that have more than 75% hp.
3. Steady Aim
When attacking targets from at least 10 meters, you will deal 20% more damage.
4. Awareness
This build focuses on dealing a huge amount of damage, but not on survival abilities. Because of this, it may so happen that you will get in some serious trouble. Thanks to Awareness, you can save yourself even from a critical situation, because when your hp comes to 0, instead of dying, you disappear for 2 seconds and regenerate 50% of your hp.
1. Bane of the Trapped
2. Zei's Stone of Vengeance
3. Bane of the Powerful or Bane of the Stricken
1. Calamity
2. Cindercoat
3. Convention of the Elements
Core: Movement Speed / Dexterity / Maximum Resources / Vitality
Attack: Critical Hit Chance / Critical Hit Damage / Attack Speed / Cooldown Reduction
Defensive: All Resistances / Armor / Life Regeneration / Life
Utility: Resource Cost Reduction / Area Damage / Life per Hit / Gold Find
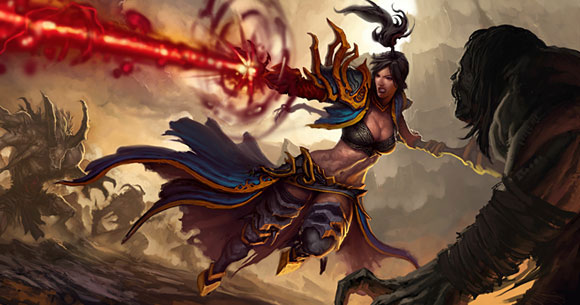
Wizard is probably the most popular character class throughout all MMORPG games. I think that everyone sometimes likes to "play magic", even if it's only a virtual world. Wizards are known for the fact that they tend to attack from afar with their extraordinary abilities. What is more, thanks to their skills, they can disorient enemies, or swiftly teleport themselves out of danger. Unfortunately, they are quite fragile, so they have to make sure to don't get dragged in the center of combat, with no way to escape.
A build that focuses on the Archon form. You will need some time to warm up, but after you reach Archon form with a proper amount of stacks, you can quickly clear the map of all the mobs. To make this build work properly, you will need the whole Vyr's Amazing Arcana set. Moreover, you will need the Chantodo's Resolve set. You can choose the amulet by yourself, but it would be good to have one with a bonus to lightning damage. The rings that you should wear are Convention of the Elements and Halo of Arlyse. Fazula's Improbable Chain is the best choice for your belt and you should wear Ancient Parthan Defenders on your wrists. Remember to activate Archon form ONLY AFTER collecting enough stacks from Chantodo!
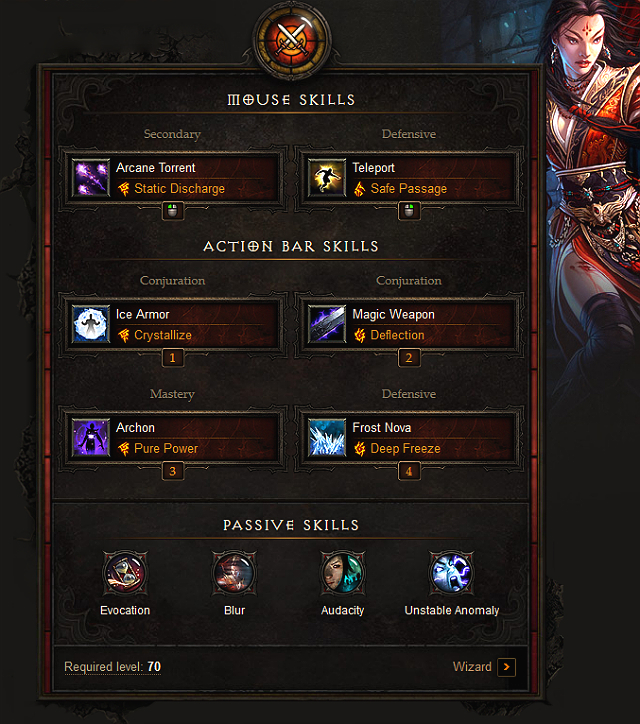
Left mouse button. Arcane Torrent + Static Discharge
Thanks to Arcane Torrent you will be able to produce chain lightnings and stack Chantodo charges faster. This will allow you to enter Archon form and deal more damage quicker. ALWAYS remember about it.
Right mouse button. Teleport + Safe Passage
Teleport is the basic skill of every Wizard. Thanks to this ability, you can quickly move to a safe place, which will often save your life! Thanks to Safe Passage, you will receive less damage after teleporting.
1. Ice Armor + Crystallize
Ice Armor will increase your defensive abilities and will also freeze the enemies that attack you.
2. Magic Weapon + Deflection
Magic Weapon will increase the damage that you deal and also provide a nice protection in the form of an absorbing shield. Thanks to that, you can feel a bit safer when the enemies attack you suddenly.
3. Archon + Pure Power
Archon is a special form of the Wizard, in which you can deal huge AoE damage (especially with a maximum amount of Chantodo stacks!). Because you want to use this skill as often as you can, it is good to choose the Pure Power rune to reduce the cooldown. This rune will also make you deal lightning damage when in Archon form.
4. Frost Nova + Deep Freeze
Frost Nova not only freezes your enemies, but also, thanks to Deep Freeze rune, increases your chance of critically hitting a frozen enemy.
1. Evocation
Reduces all your cooldowns by 20%.
2. Audacity
You will be able to deal 30% more damage to all the enemies within 15 meters from you.
3. Blur
Blur will reduce the damage you receive by 17%.
4. Unstable Anomaly
This is your rescue plan if you have some trouble during the gameplay. Instead of dying, you get a shield that will hold you alive long enough for you to react properly.
1. Bane of the Trapped
2. Pain Enhancer
3. Bane of the Powerful or Bane of the Stricken
1. Furnace
2. The Swami
3. Obsidian Ring of the Zodiac
Core: Movement Speed / Intelligence / Maximum Resource / Vitality
Offensive: Cooldown Reduction / Critical Hit Damage / Attack Speed / Critical Chance
Defensive: All Resistances / Armor / Life / Life Regeneration
Utility: Area Damage / Life per Hit / Resource Cost Reduction / Gold Find
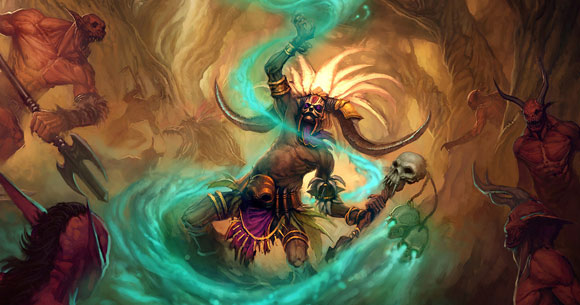
Witch Doctor is the equivalent of a necromancer, who can summon and command various undead creatures and demons to fight by his side. That is why a Witch Doctor with literally dozens of creatures swarming around him is a pretty common sight. What is more, those spiritual warriors have some of the most potent poisons at their disposal. Witch Doctors can also control their foe's behavior, by restricting their movements, or even seizing control over them.
This build focuses mainly on dealing huge AoE damage in a short period. The following combination of skills will allow you to quickly clear rifts and complete quests. To make this build work properly, you will need the Helltooth Harness set, which will allow you to deal more damage and reduce the damage that you receive. Bastions of Will set is very important for this build. Choose any amulet that you like. Thanks to Belt of Transcendence, you will be able to summon extra Fetishes for free. Jeram's Bracers will increase the damage deal by Death Wall. The most important item in your equipment is the weapon - Suwong Diviner, without which it would be difficult for you to use Acid Cloud effectively.
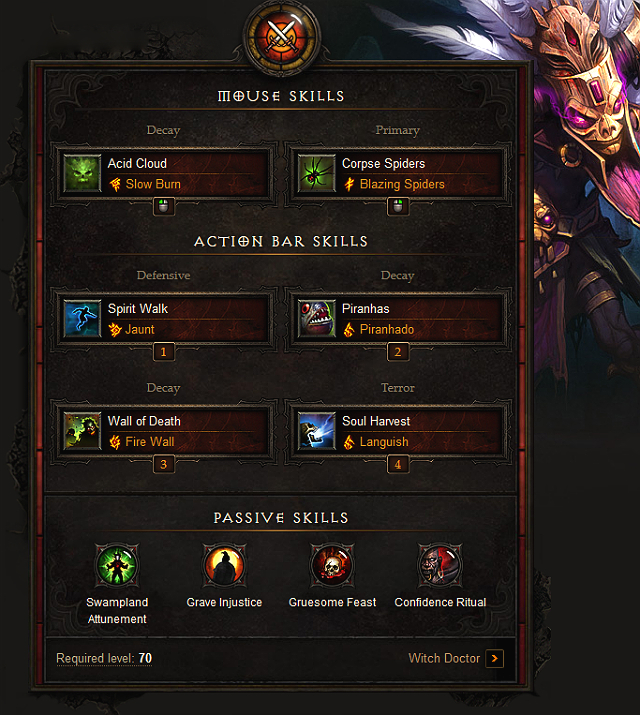
Left mouse button. Acid Cloud + Slow Burn
This skill will allow you to deal a lot of AoE damage over time. Moreover, you can stack the skill in one place to increase the damage dealt to mobs.
Right mouse button. Corpse Spiders + Blazing Spiders
Corpse Spiders not only deal damage, but also regenerate your hero's mana.
1. Spirit Walk + Jaunt
Using Spirit Walk, you can leave your body and enter the spirit realm for 2 seconds. When you're there, you can move freely, which increases the hero's mobility. Thanks to the Jaunt rune, you can stay in this form longer.
2. Piranhas + Piranhado
Piranhas deal a lot of damage and also put a debuff on your enemies, which increases the damage they receive by 15%. Using the Piranhado rune, you can create a spinning tornado that lasts 4 seconds and pulls your enemies into it.
3. Wall of Death + Fire Wall
Wall of Death deals a huge amount of damage to targets in its range of attack. Using this skill the proper way will require a lot of practice, but when you learn to position it well, your enemies will start disappearing.
4. Soul Harvest + Languish
Soul Harvest will increase your intelligence and thus, your damage. Moreover, you will increase your armor and you will be able to slow your enemies down. This will make it easier for you to position the Wall of Death.
1. Swampland Attunement
This skill gives you a large bonus to your endurance.
2. Grave Injustice
A great skill that regenerates 1% of your total hp and mana every time an enemy dies within 20 meters from you. Moreover, the cooldown of all the skills is reduced by 1 second. It will make you last much longer on the battlefield.
3. Gruesome Feast
When collecting health orbs, you will get an extra intelligence buff.
4. Confidence Ritual
It will increase the amount of damage that you deal to enemies within 20 meters from you.
1. Bane of the Trapped
2. Esoteric Alteration
3. Bane of the Powerful or Bane of the Stricken
1. Furnace
2. The Grin Reaper
3. Convention of the Elements
Core: Movement Speed / Intelligence / Vitality / Maximum Resources
Attack: Critical Hit Chance / Critical Hit Damage / Cooldown Reduction / Attack Speed
Defensive: All Resistances / Armor / Life Regeneration / Life
Utility: Area Damage / Resource Cost Reduction / Life per Hit / Gold Find
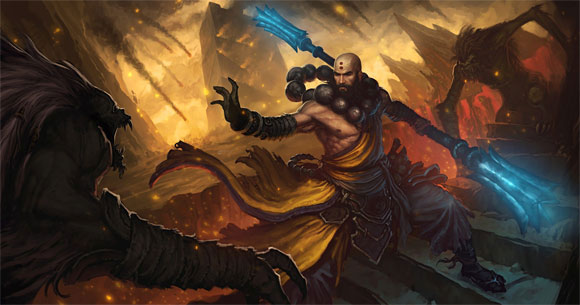
The Monk is a spiritual warrior, who is well acquainted with martial arts. They have perfected the art of fighting with the Fist Weapons, as well as two-handed Daibos - a class-specific staves for Monks. During combat, Monks generate Spirit, which they then use to power up their special attacks. Those holy warriors are based on dexterity and evasion.
This build is focused on using Exploding Palm and Seven-Sided Strike as the "detonator". It works great when farming solo or playing in a group. To use this build properly you will need the whole Uliana's Stratagem set. The rings that you need is the Bastions of Will set. Other important items are two weapons: Lion's Claw and The Fist of Az'Turrasq (with as much % damage from Exploding Palm as possible). The most suitable belt will be Binding of the Lost and you should wear Gungdo Gear on your wrists. The choice of an amulet is up to you. You need to have cooldown reduction on every item that you can.
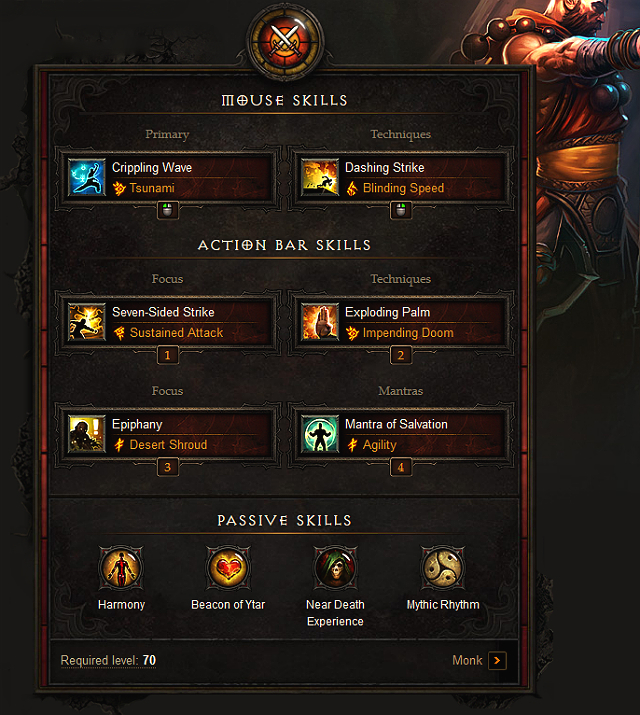
Left mouse button. Crippling Wave + Tsunami
Your base skill that generates charges is Crippling Wave. This skill has a large range of attack and it freezes the enemies within 17 meters every third hit, as well as triggers the Mythic Rhythm passive skill.
Right mouse button. Dashing Strike + Blinding Speed
Dashing Strike is a very useful skill, thanks to which you can quickly move across the map. Moreover, after using this skill, you increase your chance of dodging so try to always use it during battles.
1. Seven-Sided Strike + Sustained Attack
Seven-Sided Strike will detonate the Exploding Palm charges, which will be put on your enemies. Using the Lion's Claw, it will trigger 14 hits instead of 7, which will highly increase the damage.
2. Exploding Palm + Impending Doom
This ability will be put automatically on your enemies thanks to the items that you wear. You just need to have Impending Doom rune on your bar.
3. Epiphany + Desert Shroud
After using Epiphany, you receive additional Spirit regeneration and you also trigger a sand barrier, which reduces the damage you receive by 20%. This skill greatly increases your defensive, so try to use it as often as it is possible.
4. Mantra of Salvation + Agility
The Monk is a melee fighter, so it's good to increase his chance of dodging. The Mantra of Salvation with the Agility rune will help you do that. Thanks to this skill, you will passively increase your chance to dodge by 35%.
1. Harmony
When you deal damage to your enemies that have more than 75% hp, you receive a 30% attack speed bonus for 4 seconds. It practically means that every new enemy that you hit triggers the bonus - a great skill to have.
2. Beacon of Ytar
A Monk has to often use various skills, so it's good to reduce their cooldowns. Using Beacon of Ytar, you can reduce them by 20%.
3. Near Death Experience
This skill will save your life when you're in a difficult situation.
4. Mythic Rhythm
After using a skill that triggers Spirit 3 times, the next attack will deal more damage.
1. Bane of the Trapped
2. Gogok of Swiftness
3. Bane of the Powerful or Bane of the Stricken
1. The Flow of Eternity
2. Spirit Guards
3. Convention of the Elements
Core: Movement Speed / Dexterity / Vitality / Maximum Resources
Offensive: Cooldown Reduction / Critical Hit Chance / Critical Damage / Attack Speed
Defensive: All Resistances / Armor / Life Regeneration / Life
Utility: Area Damage / Life per Hit / Resource Cost Reduction / Gold Find

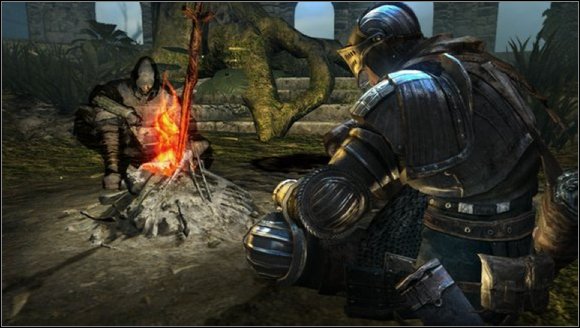

 Dust: An Elysian Tail Game Guide & Walkthrough
 Duke Nukem Forever Game Guide & Walkthrough
 Dracula: Origin Game Guide & Walkthrough
 Divinity: Original Sin Game Guide & Walkthrough
 Dragon Age: Origins - Awakening Game Guide & Walkthrough