
The Crysis 3 game guide contains a thorough description of how to beat the campaign mode, alongside with the additional mission objectives. It also includes the whereabouts of all hidden items and kits that can be used to upgrade the nano-suit. Those of the players, who have never had any previous experience with the game, will also find a handful of hints on how to play.
The capabilities of the nanosuit in Crysis 3, offers several ways to approach a given problem, and complex levels give the opportunity to take a multitude of paths to achieve the goal. This guide presents one of the easier ways to complete missions, and it focuses on the effective means of eliminating enemies or, if the possibility exists, to avoid coming into contact with them. This guide will make it considerably easier to switch to the highest difficulty level.
This guide includes:

Michal Rutkowski

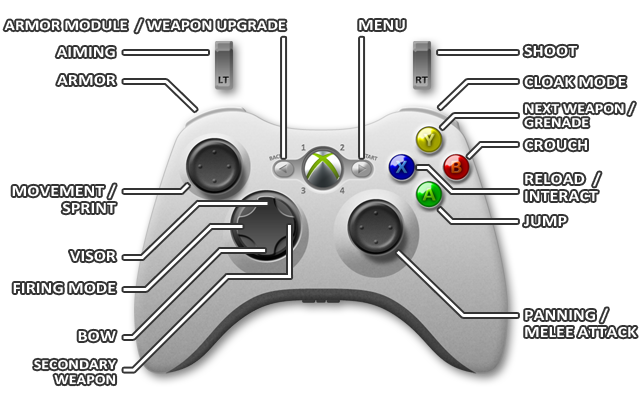
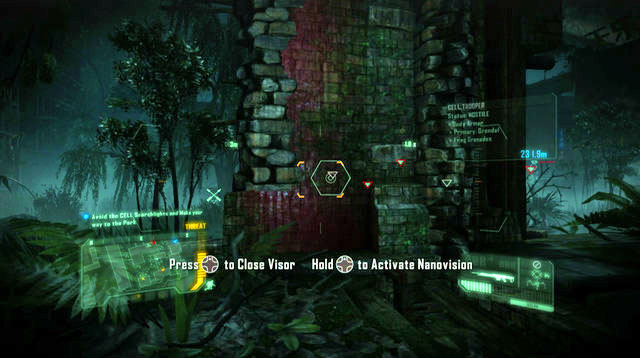
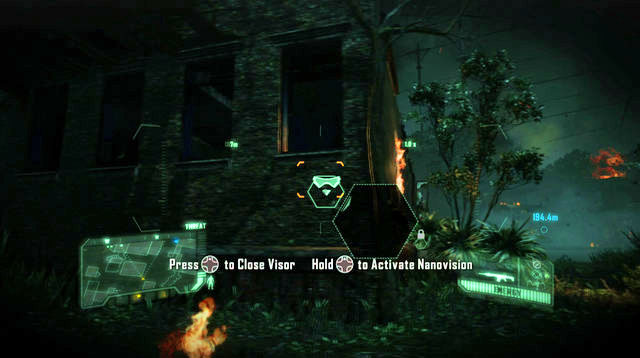
Movement

Cloak mode

Armor

Sprint

Armor Module Menu

Zoom in

Shoot
Jump

Crouch

Previous/Next weapon

Firing Mode Switch

Bow

Secondary Weapon

Interact

Reload

Melee attack

Visor

Nanosuit adjustment

Weapon upgrade menu

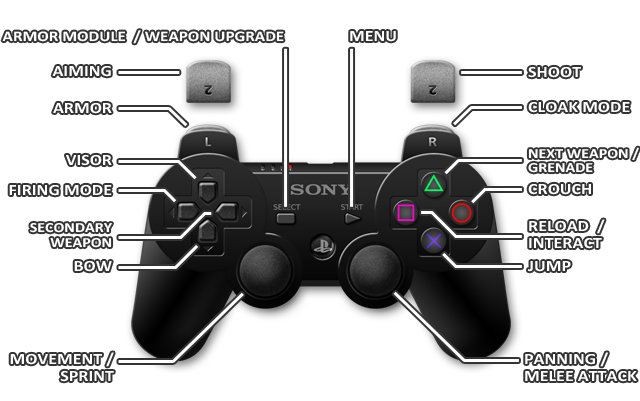
Movement

Sprint

Panning

Melee attack/sneak kill

Jump

Crouch

Reload
Interact (press and hold down)

Previous/Next weapon
Toss a grenade (tap twice)

Firing Mode Switch

Bow

Secondary Weapon

Visor

Armor

Aiming

Cloak mode

Shoot

Armor Module Menu
Weapon Upgrade menu (press and hold down)

Menu
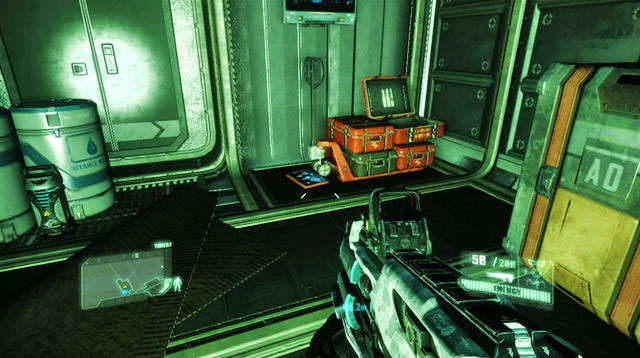
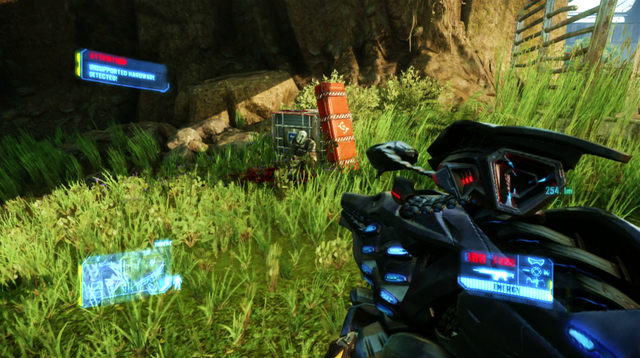
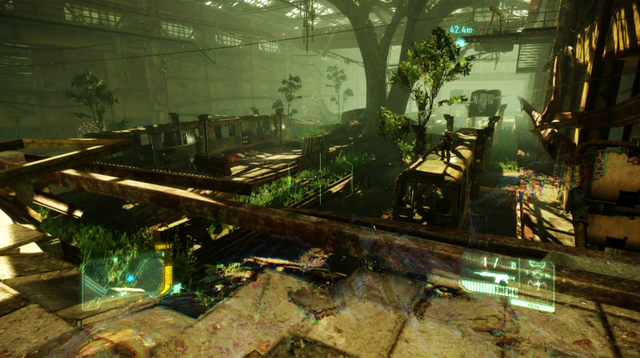
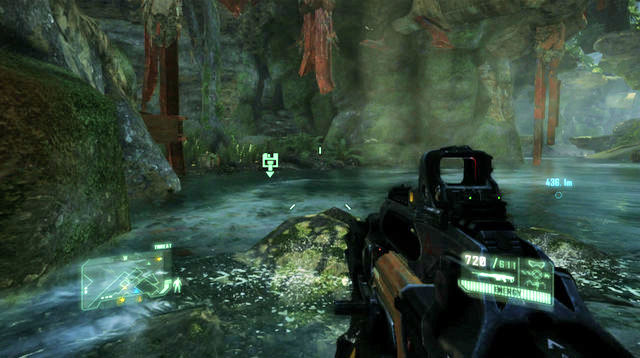
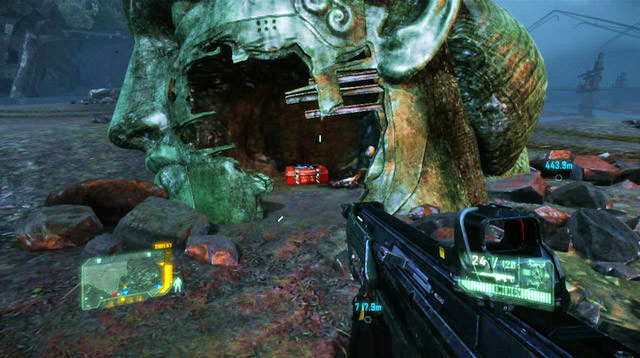
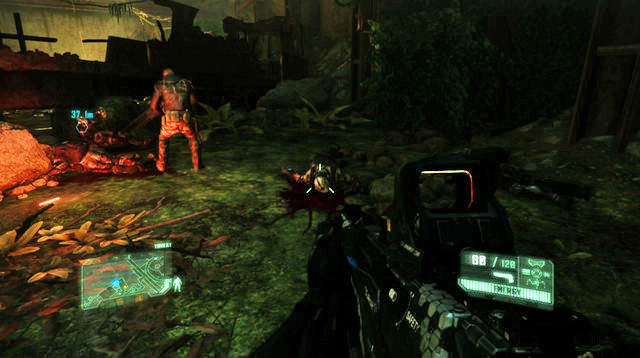
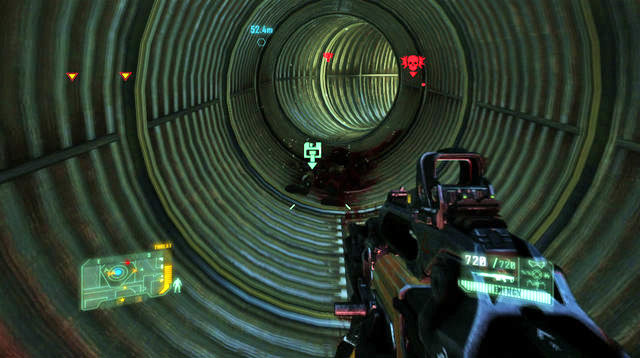
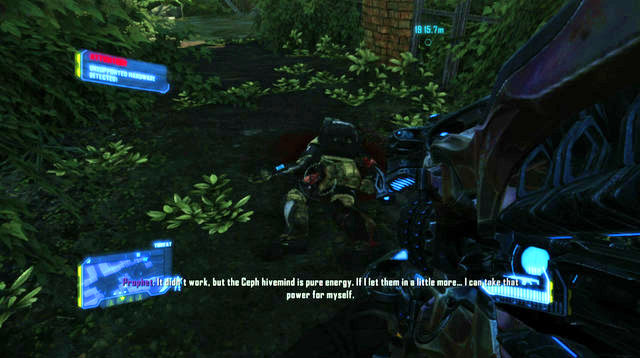
After you gain control over your character, go straight ahead and turn left. Walk down the bridge. On the corpse to your left, you will find the first Blackbox 1/2.
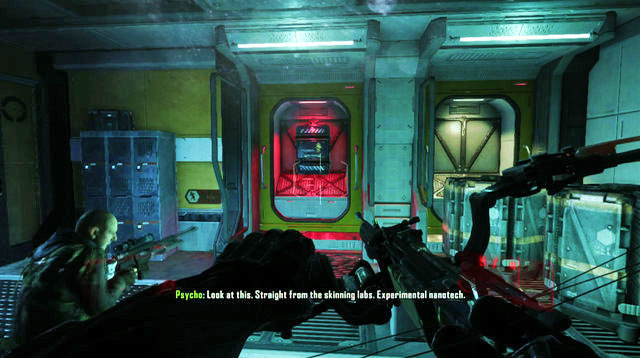
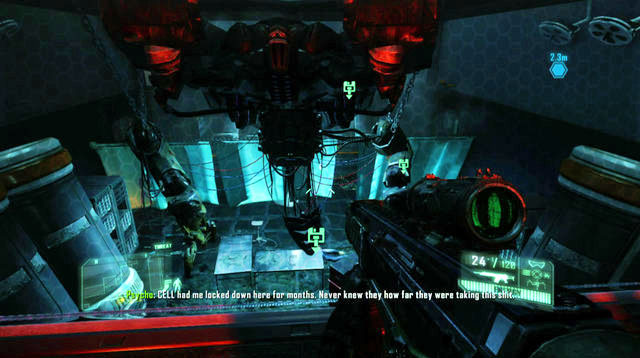
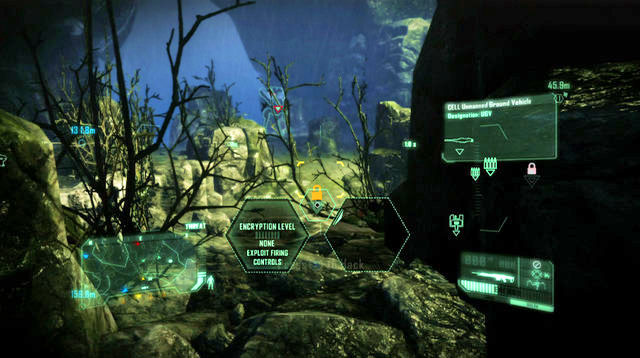
After you collect data, follow Psycho, until you reach CELL headquarters. Once inside, apply silencer to the pistol, using gun menu. After the door to the next room opens, sneak-kill the enemy to the left. Collect his weapon (Feline). In the next room, there are another three enemies (two of them are on the lower level and one of them at on balcony, at the door).
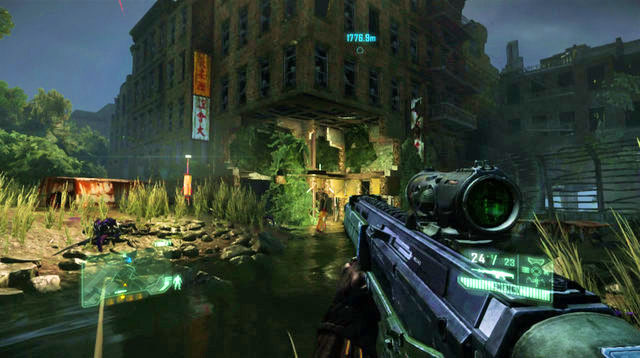
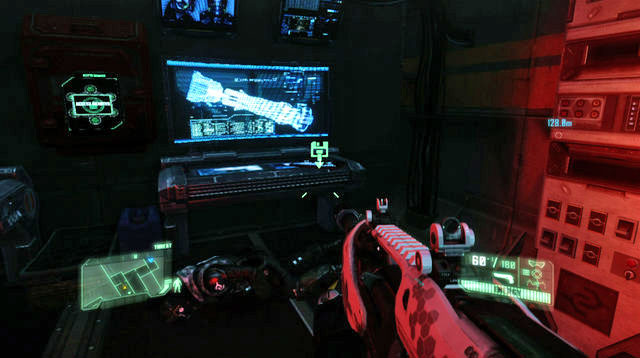
Climb up the stairs and enter the next room. Eliminate an enemy there. On the computer console, you will find a Datapad 1/7.Walk on, and open the designated door to let Psycho in. As you follow him, after a cutscene, you will obtain a Bow. From now on, this should be your basic means of eliminating enemies. Before you climb down the stairs, on the piece of equipment next to the staircase, there is another Datapad 2/7. Go down the stairs and leave through the door.
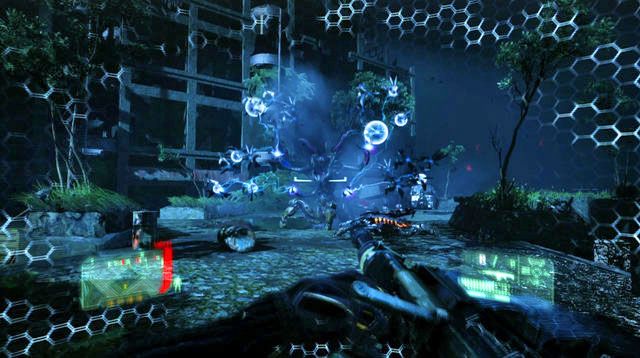
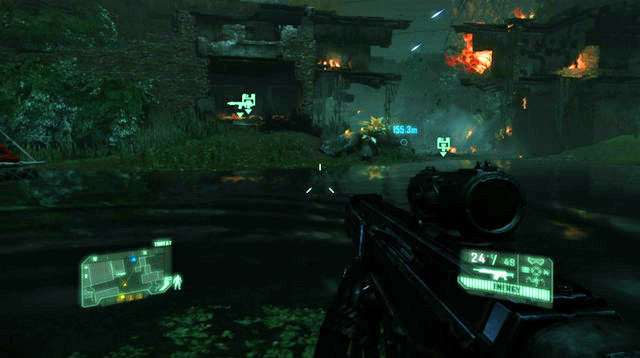
You will be out in the open now, facing numerous enemies. In the manner of your choice get to the designated area,. Inside the room, there will be a Datapad 3/7 on the computer console. Collect it and go through the door, which will slam behind you.
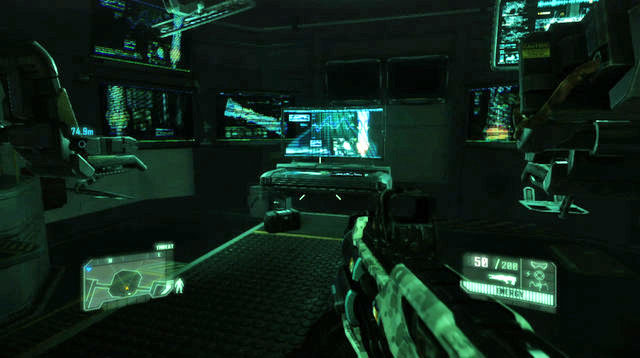
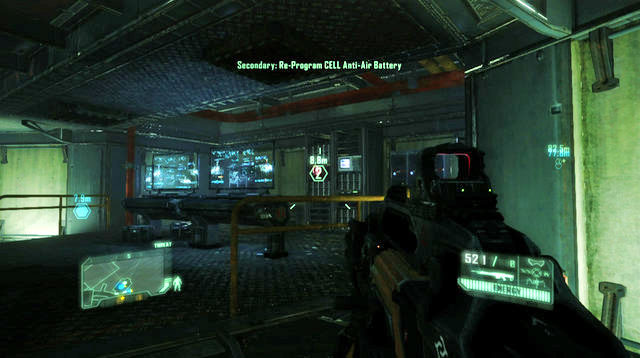
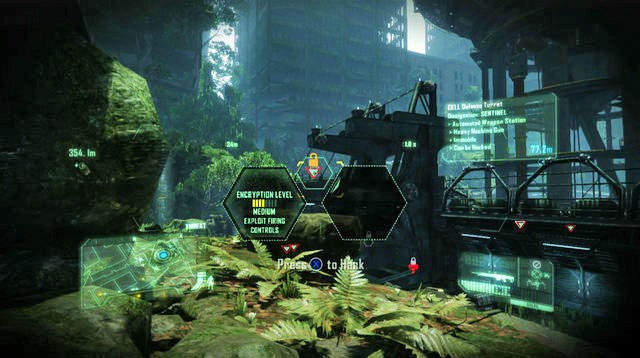
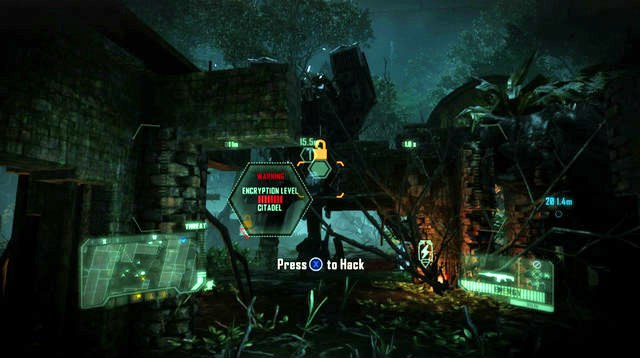
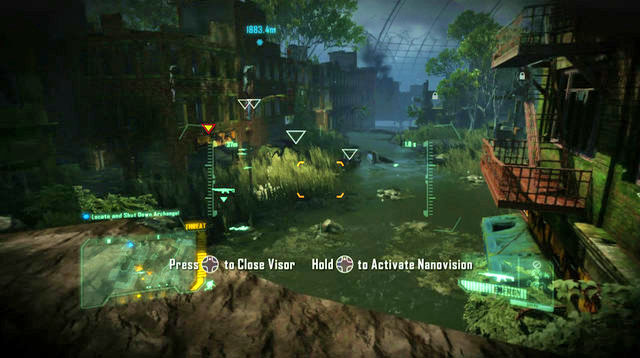
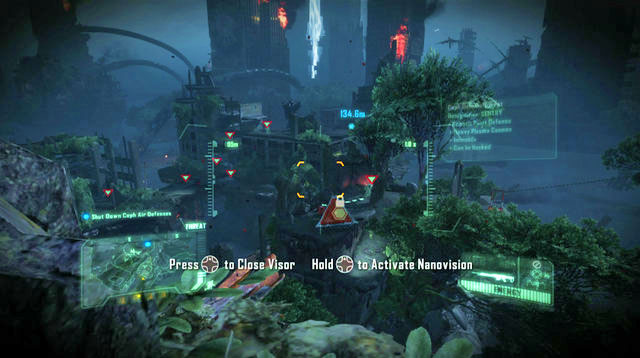
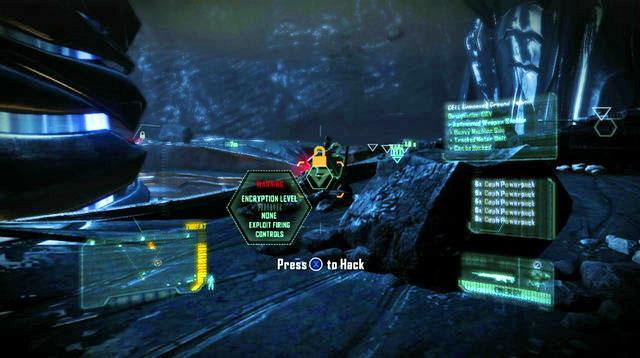
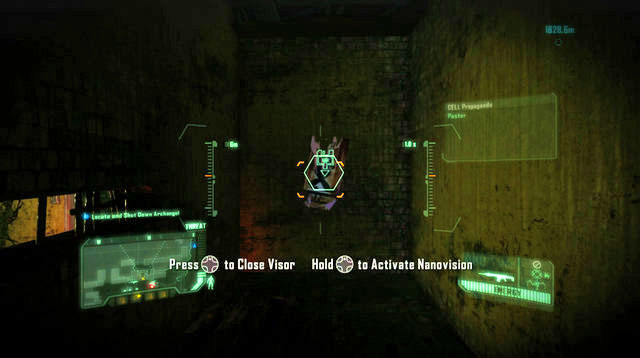
After you leave, follow Psycho to reach the locked door. Switch your VISOR on and reprogram the computer to the left..

After the door opens, walk over to the room to the left, where there is the computer you have just been hacking into. You will find a Datapad 4/7 here. Leave the room and climb down the stairs. As you follow the corridor, you will reach a room with an ammo box and a Datapad 5/7, on the panel of the computer next to Psycho.
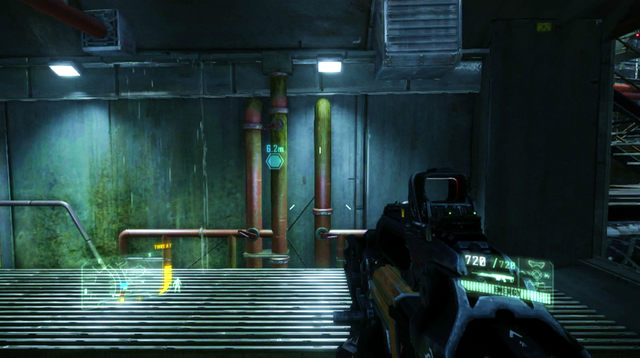
After you leave, you will have to reach quickly the other side of the guarded bridge. If you area spotted, reinforcement helicopters will arrive, and circle around over the place where you have been spotted. To your left, you will find a room where you will be able to stay while sneak-killing your enemies, and replenish the nanosuit's power level. Once you reach your destination, reprogram the door to gain access.
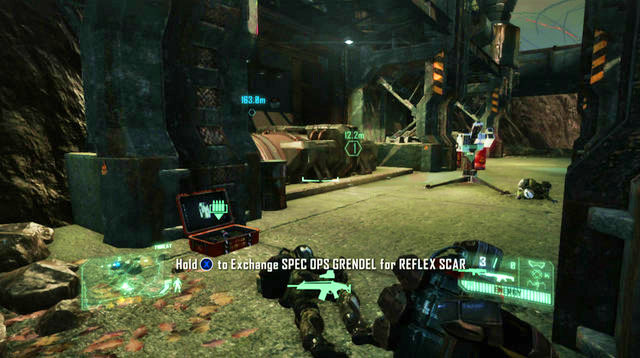
Follow the corridors to reach the rooms with two cores in it (on your way there, you will find a box with the Reflex K-Volt rifle in it). Walk over to the right side and go towards the far end of this area, while paying attention to the enemies. To your right, you will find a room with an ammo box in it, and another Datapad 6/7.
Go now to the left side of the room with the cores, where there is your current objective. Walk over, now, to the room's far end and enter the room to the left. You will enter the control room, where there is a Datapad 7/7 on the computer panel.
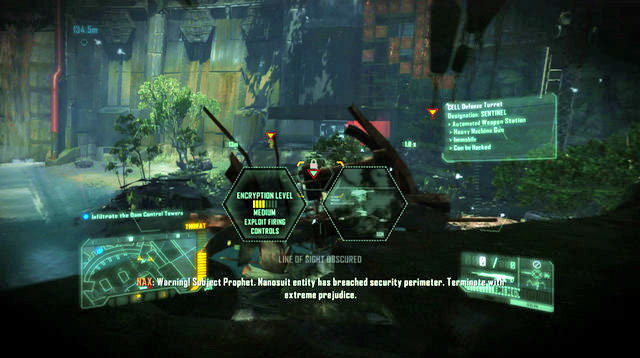
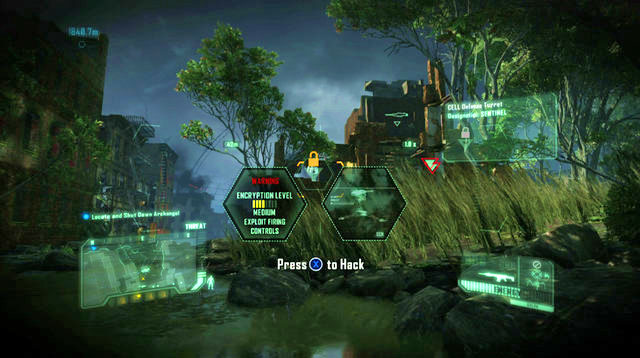
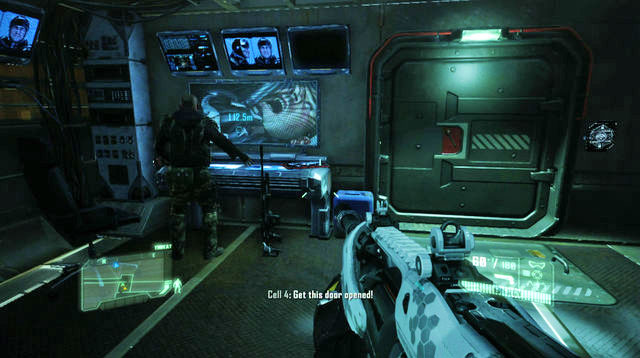
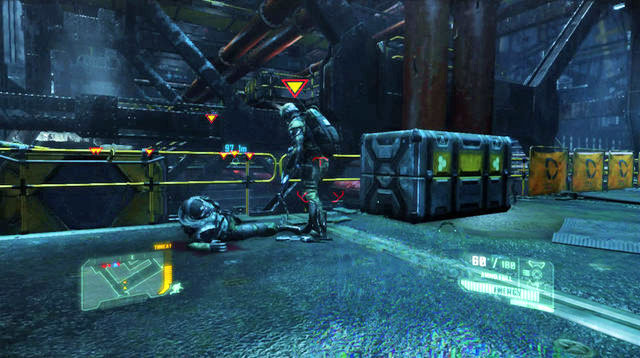
As you walk towards your objective, you will reach another room filled with enemies. Eliminate them in the manner of your choice and reach the door. Open it to face two enemies right behind the door, and a turret.
Reprogram the door to the right of the turret and walk on. When you meet up with Psycho again, collect the Blackbox 2/2 from the corpse on the ground. Enter the elevator to end this mission.
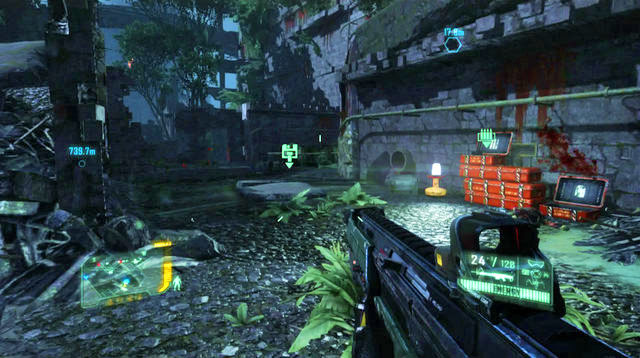
A few steps further, you will experience problems with the suit. Collect the upgrade kit on the wall, which Psycho will point you to After you purchase the modules of your choice, follow the man.

After you leave, keep running ahead and around the shattered armored vehicles. After you reach the traffic lights, make a few steps forward and turn left. Reach the last building to the left to find a poster 1/1. Initiate the VISOR to add information about the poster to your database.
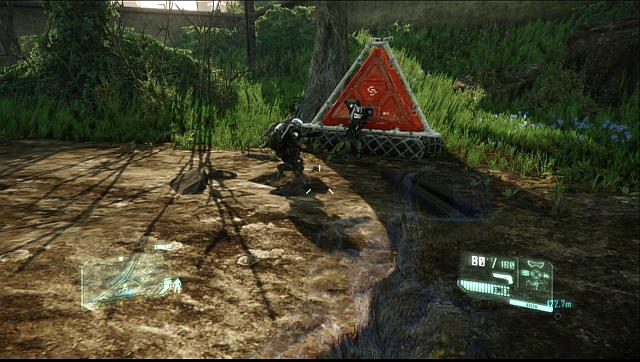
Get back now and reach the designated mission objective. Soon you will reach a mall mine field. Use the VISOR to reprogram the mines to disarm them (aim at the skull icon). After you succeed, diodes on the mines should turn from red to green. Follow Psycho and help him open the gate.
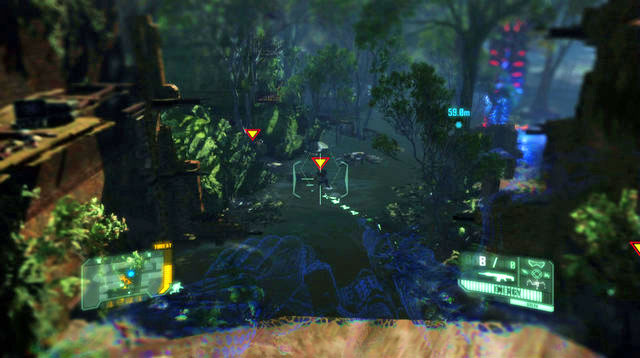
After you see the cutscene, jump down to the area protected by the turret tower. Your objective now is to check the four spots determined by Psycho. Move around with your cloak on (best by crouching to minimize the energy consumption) at short distances from cover to cover. Whenever you are hidden from the tower (it needs to be on your left at all times), regenerate the suit's energy.
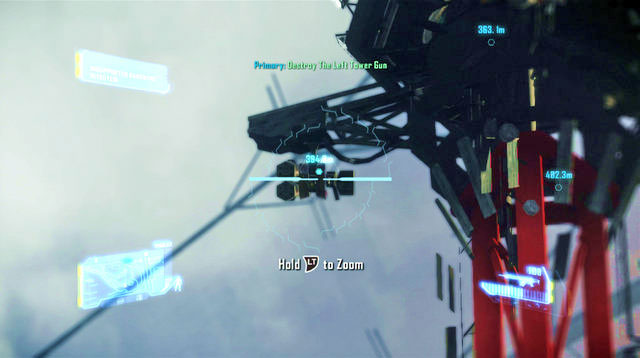
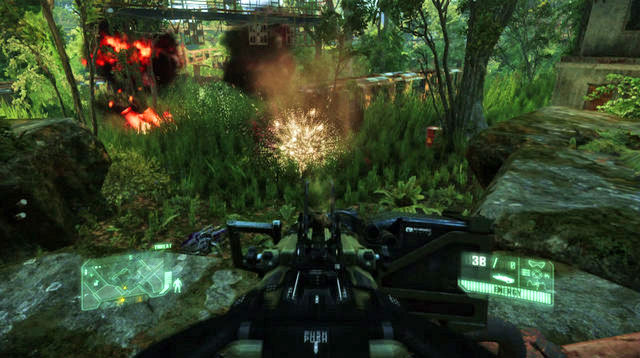
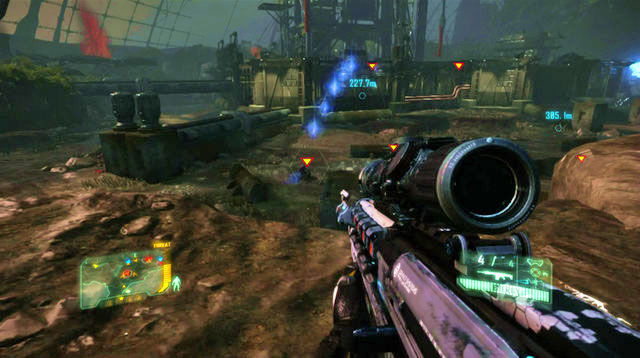
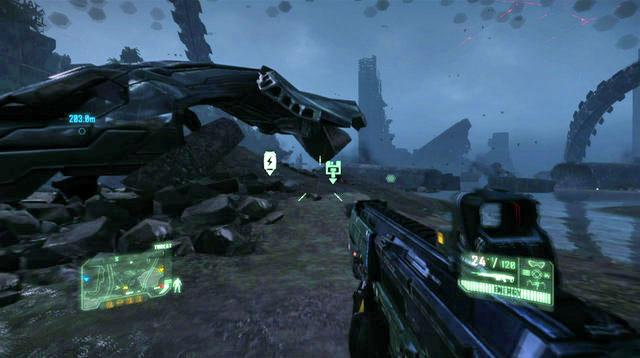
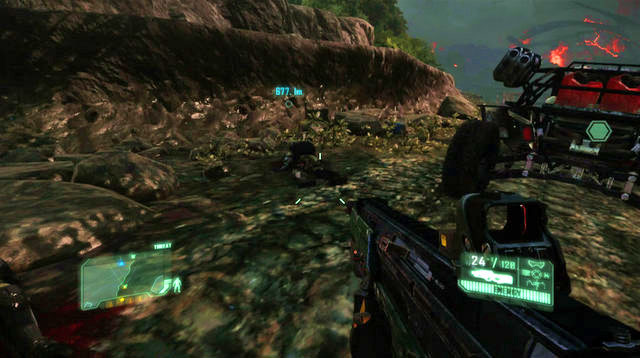
After you check four of the five locations, Psycho will point you to the next one. Choose the best path to reach the Bolt Sniper weapon, and collect it. Zoom in and shoot with your in the cloak mode. Make sure that you destroy three turrets before they start shooting. If you fail to do that, initiate armor and wait behind a cover, by to shoot whenever it is safe to do that.
Go now away from the tower, from the place where you've found the gun. To your right, you will notice a small elevation, which you need to mount. On the crate there is a Datapad 1/3.
As you walk towards your objective, you will bump into a mine field. Use the VISOR and disarm the devices. Next to destroyed railway cars, you will find the bow ammo chest. Further on, you will bump into a group that has been patrolling areas around the tower.

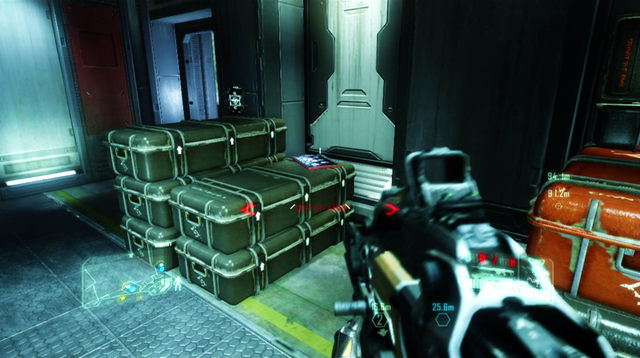
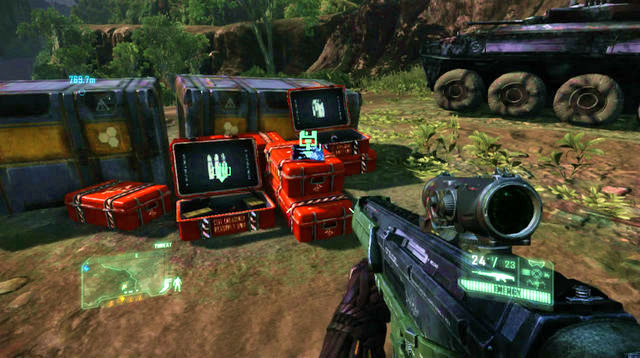
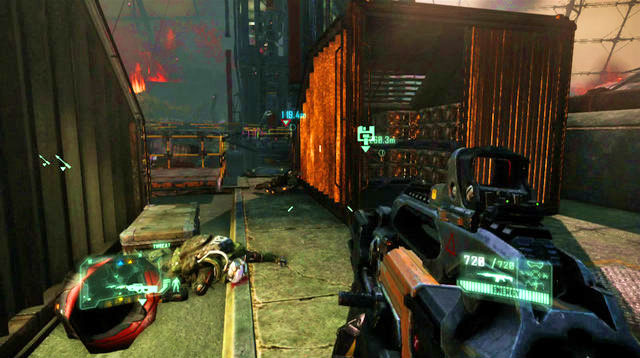
To the left of the blue hangar, there is a demolished bridge. Walk under it and straight ahead. Psycho will let you know about weapon airdrop for CELL. You will reach chests guarded by two enemies, one of them armed with (Alpha Jackal). To the left of the crate, there is a Datapad (2/3), and in the crate itself (you need to reprogram it first) there is an upgrade kit for the suit.
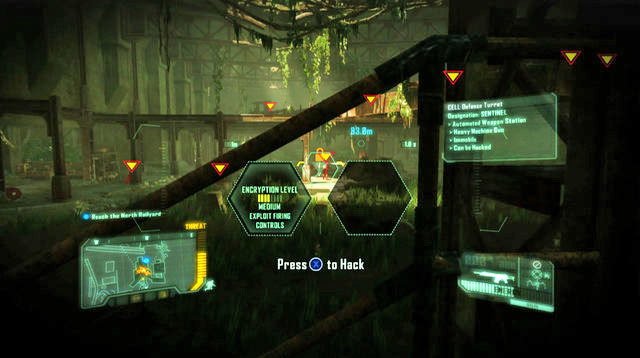
Go now towards the mission objective, where you will meet up with Psycho. Jump down to the sewers (turn the suit on just in case, to prevent taking any damage) and follow the man. Open the door to enter a station filled with enemies. After you mark your enemies, hack into the turret and reprogram it so that it takes to the enemies. Keep using it until it is destroyed, or your enemies are outside of its reach. To the right you will find a grenade box.

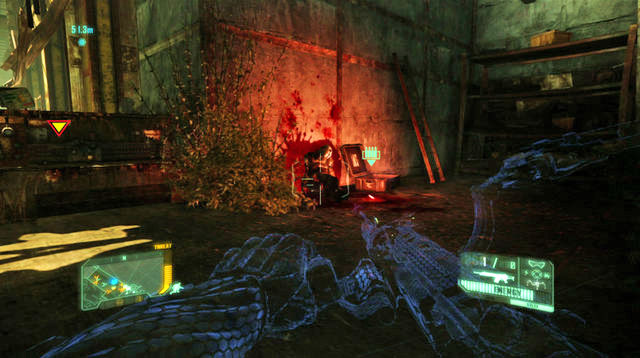
Walk over to the room's other end and climb up the stairs. Eliminate/walk around all of the enemies and jump over the rift. After you meet Psycho again, Enter the room with the four dead soldiers in it. At one of the corpses, you will find a Blackbox 1/2.
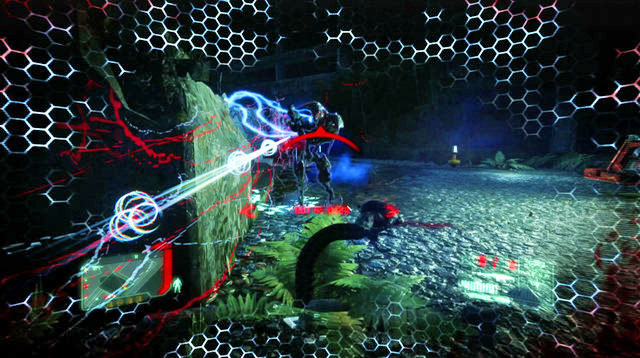
After you've taken another door, and seen another cutscene,, jump down. Cloak now and climb the elevation to the right. Wait for two Stalkers here. Try and stealth-kill them. If you fail, cloak again and take them out.
Open the door and follow the tunnel. On your way there, you will bump into mines which will explode if you cross the red laser beam. Jump over the beams of defuse the mines. Next to the entrance to the next building, you will find a grenade box and ammo. Climb up the stairs. You will reach a station. As you stay on the highest possible level, try and eliminate as many enemies as possible, without being spotted. Further on in the same room, on a platform, there are two turrets.
Once you clear the area, jump down to the ground and keep to the right side of the room. Behind you, there is a small room with an ammo crate and a corpse with a Blackbox (2/2) on. As you keep to the right, walk over to the far end on the room. On your way, you will notice two flooded basins. Enter underneath the platform to the left, at the second one of the basins (relative to the entrance), and find a small passage to the right. Inside, you will find a crate with a Datapad 3/3 on it.
Walk over to the station's other end and climb up the stairs. Reach the designated area and take the zipline down. At the corpse of a soldier, you will find an MK 60. Leave now, and go left to find the interference source. On your way there, you will get attacked by Stalkers. It is a good idea to jump over the railway cars' roofs to gain a vantage point against the creatures. Additionally, to attack you, they will have to jump onto a car, which will buy you some time to react. Put the interference system offline, collect ammo from the crates and walk towards the another target .
Once you get there, you will meet Psycho. There is also another airdrop for the CELL. Inside there is an L-Tag grenade launcher. Now, you will have to cover Psycho against waves of Stalkers, with a turret. After you fend off most of the attackers, dismount the gun and follow Psycho.
After you reach the blocked door, follow Psycho again, and ignore the Stalkers you pass. You will reach a railway car that needs a push. As you ride atop the car, keep shooting at the creatures down below. After you make it through the last one of the barriers, the mission will come complete.
After the cutscene, follow Psycho. Behind your back, there is an ammo crate, and some Bow arrows. Follow the destroyed corridor until you reach a room, where Psycho will open elevator shaft. Jump down onto the elevator roof and then, jump over to the roof of the elevator to the left. Leave from the elevator to a large open area. If you decide to fight, remain in this area and eliminate as many enemies below as possible.
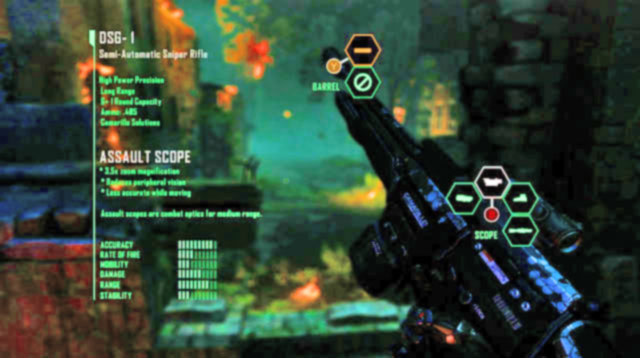
You may also decide to walk around everybody, by taking the remains of the corridors to the left, and to the right.. On the right side of the building in the middle, you will find a DSG 1 sniper rifle. In front of the entrance to the building that is your objective, you will find a turret that can be taken over.
After you enter the building, watch out for the laser beam, whose crossing will trigger another turret, which you will have to take over. After you go further, press the button and enter the elevator.
Once the elevator stops, wait for the grate in its ceiling to open and climb there. Take the venting shafts to sneak above the enemies, and eliminate them. In the same location, there is a weapon locked in an orange crate that needs reprogramming. Further on, there is an exit with laser beams. You can neutralize them with the panel to the left.
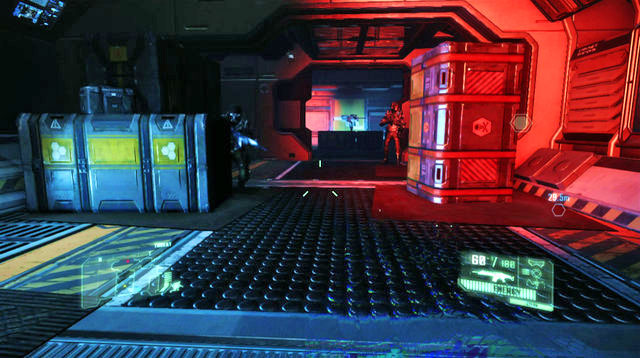
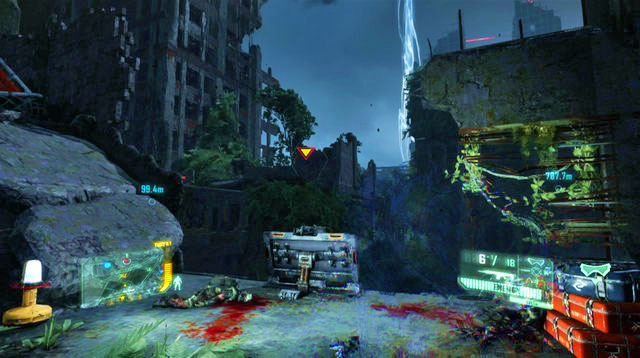
To the right of the exit, there is a DSG 1, if you want to - eliminate the enemies on the dam at a distance. In the middle part of the dam, there is a turret, which you can reprogram. To the right of the dam, there are two buildings, which is where you are going. The entrance is guarded with laser beams that can be deactivated by using the control panel next to the door. After you go down to the lowest level, you will find a control panel to reprogram, to the right, which is your secondary objective. The defense system will destroy the helicopter that will appear after you leave.
After you reprogram the defense system control panel, you need to switch on the first one of the generators, and leave. Keep walking towards the next building, where the next generator is located. Right after you enter, on the crates to the left, you will find a Datapad 1/4. Climb to the lower level and switch on the power supply for the second generator. Before you climb back up, collect the rocket launcher from one of the room's corners.
After you leave, jump into water and set explosives in the designated area.
Climb the elevation to the right and go straight ahead. When you approach a road block, jump over to the other side. On here, on the building, you will find a poster 1/1.
Jump down now and go straight ahead. In the first basin to the left, near the corpse, you will find a Blackbox 1/3.

As you go straight ahead, you will encounter an enemy patrol. After you walk around them, you will reach a forking road (some 180 meters of the destination point). Turn into the tunnel to the right, where you will find another Blackbox 2/3. There also is an ammo crate here.
Once you leave into an open area, near the CELL headquarters, turn left, while remaining atop the elevation. Walk over to the left side of the building and jump down from the elevation. On your way, you will walk past a turret, which can be reprogrammed.

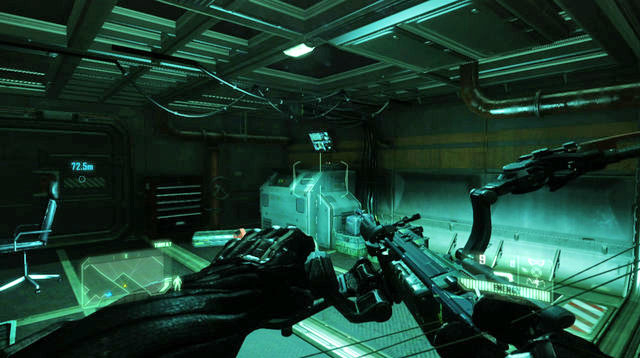
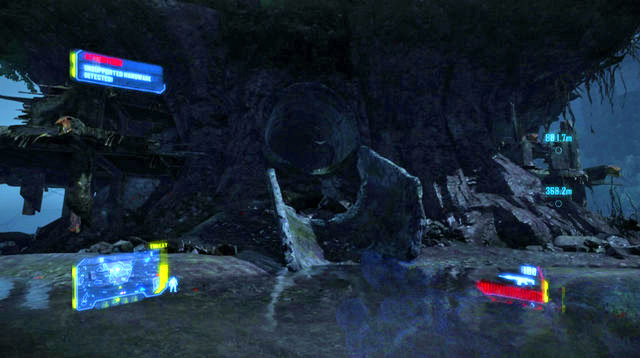
Ahead of you, there is an empty container, and a sewer entrance, shown in the screenshot. Right next to the entrance, there is a corpse with a Blackbox (3/3) on it.

At the end of the sewer, disarm a mine that has been blocking further passage. After you gain access to the base, climb up the stairs. The elevator that you need to take to get to the core, is at the far end and is guarded by a mobile turret that cannot be reprogrammed. You need to squeeze behind it or destroy it.
After you take the elevator, to the left, to get to a lower level, on the computer panels you will find Datapad 2/4 and Datapad 3/4.
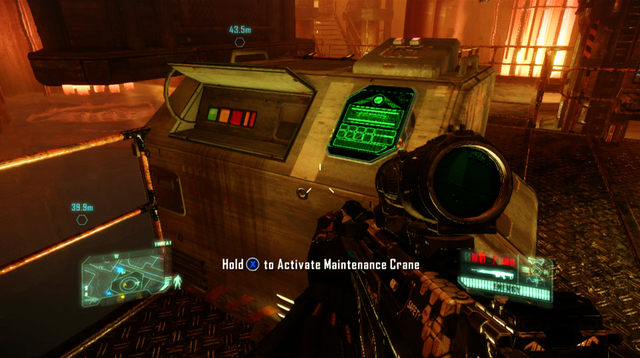
In order to reach your target to the left, you need to make use of the crane controls (next to Datapad 3/4), which will result in the formation of a new platform that you can jump onto.
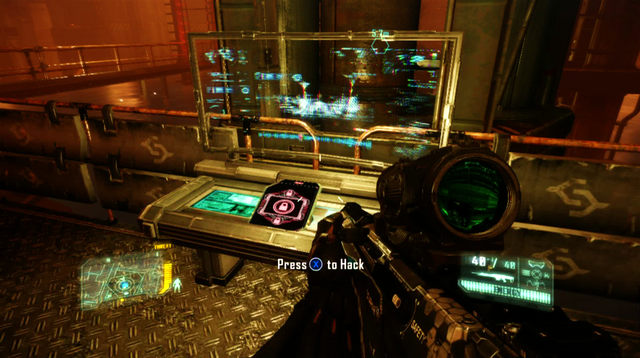
After you restore pressure in both pieces of equipment, on your way back from the elevator, a turret will activate. In order to reprogram it, you need to reprogram the panel opposite the crane's controls, which you have used earlier.

After you deactivate the turret, walk into the elevator to go back up. After you leave the turret, you will be attacked by the enemy. Before you climb up the stairs, collect the Datapad 4/4 from the computer panel. Climb to the higher level and use the computer to finish this mission.
Right after you start the mission, go into cloak mode and take the lift to the higher level of the demolished building in front of you. You can replenish your armor power level as soon as you find some cover. If you disable the cloak mode out in the open, you will be spotted immediately and all enemies will be alarmed to your presence. There are several enemies I the building to your right. Opposite, in another demolished building, you will be able to replenish your Bow arrows. Clear the area of enemy units, or walk around them by keeping to the right. If you decide to walk around, keep to the right, thus ensuring yourself with plenty of covers to hide behind as you replenish your suit power level.

As you walk forward, you will encounter another big group of enemies. There is a stationary turret behind their backs which you can reprogram. In order to find six Datapads 6/11, you need to walk over to the left of this area and get near the place marked as your secondary objective (Psycho will let you know about it). You will find a destroyed helicopter there. To the left of the wreck, there are first three datapads. On the first floor of the second building to the right of the data, and ahead of the primary objective, there is a suit upgrade kit.
The remaining three, and the data for Psycho, can be found on the table inside the first demolished building, near the helicopter wreck. One of the datapads is a part of your secondary objective.

As you walk forward, you will reach the area shown in the above screenshot. To the right of the demolished building, there is a stationary turret, the reprogramming of whose can help you clear the area of the majority of enemies here.
Jump onto the floor of the demolished building, through the recess in the left corner. Next to the passage shown in the above screenshot, there is a Poster 1/1. Walk through the passage to the right of the poster, and then turn left to take the staircase.

As you climb higher and higher, pay attention to the enemies that were out of reach of the turret that you reprogrammed. Before you take the zipline, enter the room to the left, where there is a Datapad 7/11 on the table. You will also find a suit upgrade kit here.

After you zipline to the other building, keep making your way through, and open the door. After the cutscene, before you jump down, locate the dead soldier in the toilet. Collect the Blackbox 1 from his corpse.
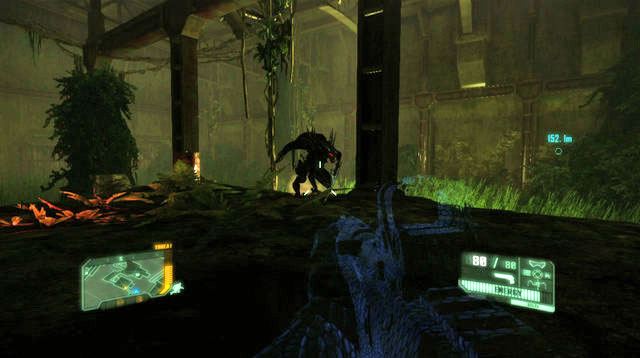
In the area below, you will encounter a new enemy type. All around the area, they come in large numbers. After you kill one of Cephs (best by remaining invisible), collect the Pinch Rifle from the corpse What the weapon lacks in terms of ammo availability, it makes up for in terms of its range. If you want to walk around the enemies, keep to the right side of the area. In the upper-left corner of the area, you will find a DSG 1.

Reach the designated building in a manner of your choice. Jump onto the higher floor and walk over to the room behind the relay. There is a Datapad 8/11 on the shelf there.
Walk forward, where you will encounter CELL soldiers, flying out of the building. Jump through the window into the room in the corner of the building, to find a suit upgrade kit on the wall.

Some 150 meters ahead of the objective, you will find an ammo box (a L-Tag grenade launcher, which will come in handy for the time being, if you do not have one) and two pieces of data. Datapad 9/11 is in the building, to the left, and the Blackbox 2/4 next to the corpse to the right of the building.
Before you approach the blue double door, equip the grenade launcher or rocket launcher. After the cutscene, you will have to battle a Scorcher. Destroy it and move forward. After you make it through the demolished building, you will make it to the area full of Scorchers. On the radio, you will get a message that lets you know of the possibility to reprogram Pinger. Enter the cloak mode and walk over to the right of the area. Make your way from cover to cover to replenish your power level. As soon as you are close enough, reprogram Pinger. You can also continue among your enemies without bothering about Pinger.
After you make your way through the next building and leave, you will encounter Spotter. You can try and reprogram it, or walk over to the right side (watch out for Cephs) and walk around it while in the cloak mode. You can get inside the buildings by jumping onto the container, and then, into the hole in the upper part of the enclosure (shown in the first screenshot). You can also walk around the base on the right side and use the lever to open the gate.
After you infiltrate the base, there is a Blackbox 3/4 next to the elevator (in front of the door to the elevator with Psycho inside) and a suit upgrade module to the left of the elevator door.
After the ride on the elevator, follow Psycho. Once you reach a room with a large glass pane (mark three data pieces from this spot) that you will be able to see the labs through, turn right and climb down the stairs. In the flooded area to the left, there is a Blackbox 4/4. Backtrack to the corridor and jump over the obstacles to the left. As you follow the corridor, enter the small room to the left, where there is a Datapad 10/11.

As you keep forward on your path, climb down the stairs. In the room to the right of the door, at which Psycho is waiting (you will have to open it for him by using the panel, but do not enter), you will find a Datapad 11/11. After you collect the data and the suit upgrade on the wall, follow Psycho inside the room, which will complete the mission.
After you regain control of the character, go straight ahead. You will reach a passage between the buildings, which you need to take twice to reach the building with Datapad 1/5 in it. Next to the data, there also is a grenade box. Behind the wall to the left of the data you will find a suit upgrade kit. You can get there through the ceiling of the room with the kit.
To the right of the room, take the zipline to reach the building to the right. Jump down to the ground and reprogram the crate lock, to gain access to MK. 60 Mod 0. You can also replenish your ammo from the crate here. On the lower level of the demolished building, there is a suit upgrade kit. To access it, jump down the hole in the floor, in the middle of the building.
Return to the higher level of the building and go back out. To the left of the building, on the remains of the floor, there is a crate with bow arrows. After you collect them, return to the building, in which you found the suit upgrade kit and enter the cloak mode and kill all the Cephs below, while hiding behind the building itself.

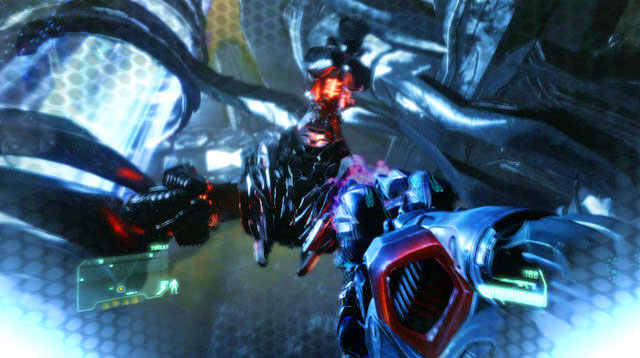
After you clear the area, use the Mindcarrier panel. After the cutscene, you will receive an armor reinforcing upgrade. Collect the Pinch Rifle from the ground next to the car behind which you are hiding at present, and kill the Cephs. Once you do that, a larger Ceph will appear. If the upgrade mode has already worn off (screen corners stopped blinking blue) terminate the cloak mode. Select the Rocket launcher or C4 and take a shot/attach the explosive to its back. You can also walk around it by taking the hole in the spot in which he landed.

After you make it through the hole in the enclosure, turn right. Follow the path between the buildings, and take the first turn to the left (you will be going past the arrow crate here). After a dozen or so meters, you will find a corpse with a Blackbox 1 on it.
After you reach an open area, walk over to its left side. While in the cloak mode, approach the verge that leads down and wait for Ceph and CELL have their battle.


After they kill each other, get down and enter the first building to the left i.e. the one the CELL soldiers stayed in. Eliminate/avoid the remnants and climb up the stairs. In the first room, on the green crates, there is a Datapad 2/5 . Walk to the left, into the narrow room and find the Poster 1/1 at its far end.
Leave now. You will probably encounter several Stalkers here, which you need to look out for. On the top of the building in the center of the area, there are two turrets, on the left and on the right. Reprogram them so they aid you in your battle.
As you march down your path, you will encounter another group of Stalkers. You can avoid meeting them by dashing into the building in the upper-right corner. You now need to walk over to the right side and climb the stairs to the building's higher level. Go right again to leave the building.
Next to the APC, you will find a Datapad 3/5 . Behind the second APC, to the right, there is a suit upgrade kit. After you collect the data and ammo from the crate, get into the car and drive towards the objective.
Some two hundred meters ahead of the target, you will have to drive onto the toppled building to get to the other side. Accelerate as soon as you drive over the building.
After you jump down, drive onto the destroyed bridge and continue on your path until you see a bus blocking further passage. There is a soldier equipped with a rocket launcher on top of the bus, which you need to eliminate at a safe distance. On top of another bus in the distance, there will be another launcher-wielding soldier. In between the busses, there are several more which you should eliminate next.

As you go further, you will find a staircase to your left. Climb down the stairs, and jump down when it ends with your cloak mode on, in to the water. After you see the cutscene, force the door open. There is an ammo box to your right. As you go lower and lower, you will see an orange crate with Typhoon and a rocket launcher in it, which you need to reprogram to open. After you get to the very bottom, search through the corpse next to the vehicle to find a Blackbox 2/3.
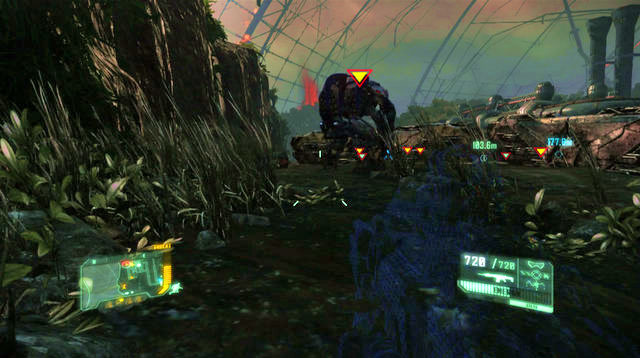
Get on the car and drive towards your objective. Soon you will be attacked by a helicopter, which you need o destroy. To the right, on the shipwrecks, there will be some enemies equipped with rocket launchers. You can either kill them all, or ignore them completely. After you drive over the broken hull of a ship, you will run into an APC. Once you reach the precipice, ignore the Ceph ship and drive down. Try and kill all of the enemies, and especially the Pinger, by using the cannon mounted on the car.


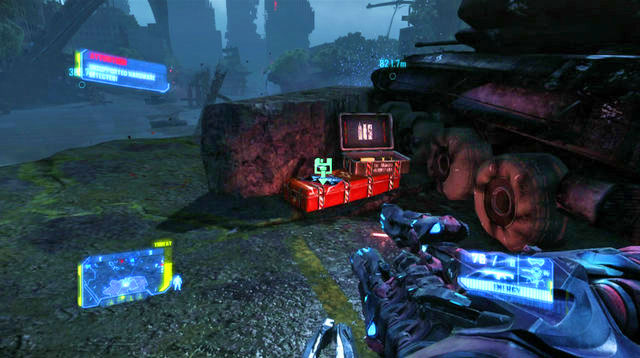
To the left of the large closed gate, there may be a few CELL soldiers remaining and a turret. Also here, will you find a Blackbox 3/3 on the corpse leaning against the container, and a Datapad 4/5, at the other side of the containers. Now you need to climb the stairs opposite the containers, in order to find a control console to open the gate with.
Cross the gate and take one of the vehicles to the left. Keep killing/passing enemies until you reach a big tunnel which you need to drive into. After you reach the tunnel's other end, you will have to leave the vehicle behind after covering several hundred meters, due to a road block. At the other side of the block, there is a Gauss Sabot Gun. Put it to use and kill the enemies below.
You will receive a piece of information from Psycho informing you about your secondary mission. Jump down now and go left. You will reach a narrow passage that leads to your destination point. After you reach the passage's other end, you will notice Ceph attacking the CELL base. You can wait, in hiding, for a moment and let them kill each other out. On the Ceph attacking the base to the left, Use a weapon of a larger caliber. Collect his X-Pac Mortar and fire at the remaining enemies.
After you clear the area, approach the base and use grenades (there is a grenade box to the left of the target) to destroy the generator. Opposite the generator, there is a suit upgrade kit. Backtrack now to the passage that you took to get here, and continue towards your destination point.
On your way there, you will encounter several enemies and, underneath the pipeline, you will find an APC to get on. While driving, you will notice CELL vehicles trying to fight Ceph back. Kill everybody and destroy all equipment. Enter now the opened pipeline to infiltrate the base.
After you exit the pipe, enter the cloak mode. If you failed to destroy the defense system, there will be a lot of enemies here. Use the Bow, to take them out silently. There also is a turret to the left, which you can reprogram.
Right after you exit the tunnel that you have taken to get here, climb down the stairs to the left. Right next to the staircase, there is an opened container with a Datapad 5/5 in it.
On the base's left side, climb the stairs to mount the platform shown in the above screenshot, to reach the control panel that you need to use to lower the bridge. Get across the bridge and enter the elevator to complete the mission.
After the cutscene plays, replenish your ammo (including Arrows). Get across the room and move the concrete block on the left. Take the door it reveals. As you pass through the ruined buildings, you will be able to collect a DSG-1, which will come in handy soon. You will reach a spot, across of which there are Ceph guarding your target. Take your vantage point and start eliminating them silently, with your Bow and DSG-1, while proceeding to the left at the same time (watch out for the turret in the corner).

As soon as there are no more enemies within sight, cross to the other side (defuse the mines in the plank between the buildings) and enter the building that has been occupied by the enemy. Watch out for possible remnants and walk over to the left to climb to a higher level. That's where Ceph reinforcements will arrive. You should especially pay attention to snipers. After you kill every last of them, walk over to the right of the Ceph defense system (opposite to where your target is) and jump two levels higher. There is a Poster 1/1 hanging on one of the walls.
Approach the generator located opposite (there is a suit upgrade kit in the room next to the generator) and disengage the first anti-aircraft system. As soon as you do that, Ceph units will appear in the building to the right. Wait for the enemy to enter the building that you are occupying at the moment, and kill them silently. Dispose of the enemies that stayed in the building to the right at a distance, in the cloak mode.

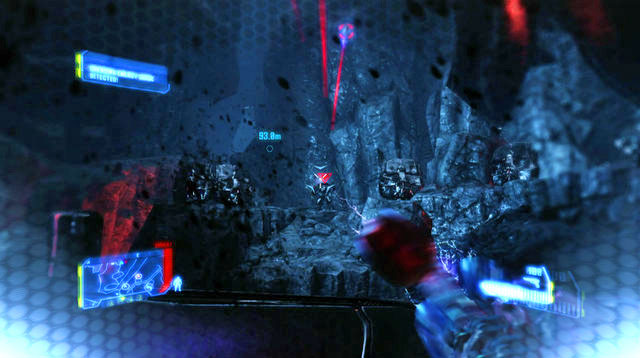
On the plank to the building that the enemy units landed in, turn left. In the distance, you will notice the head of the Statue of Liberty. Go in that direction to find Datapad 1/5.

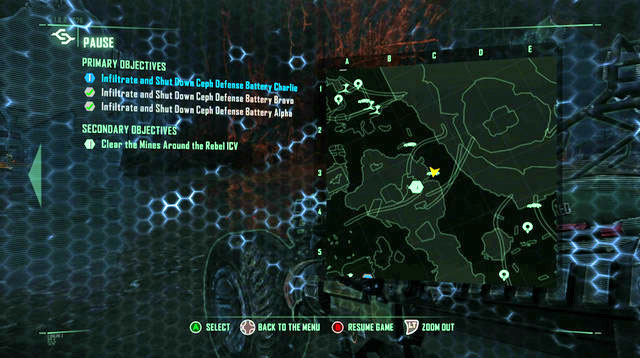
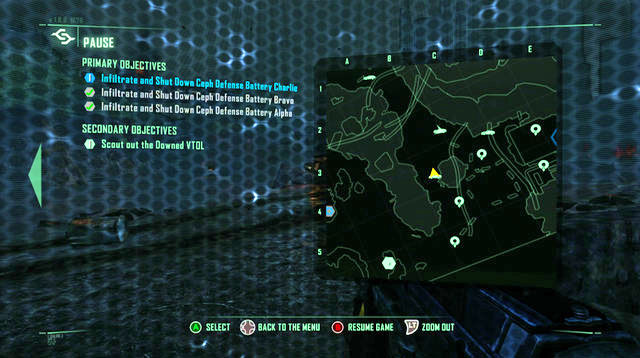
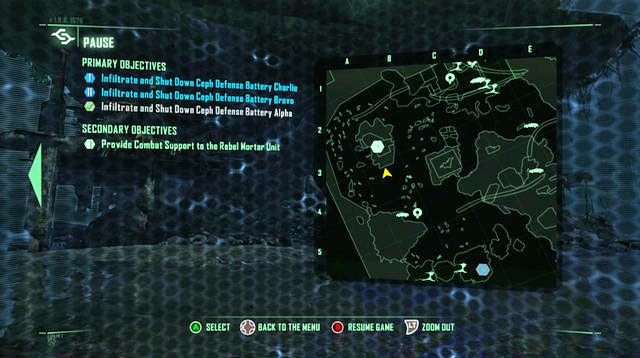
On your way to the data, you will receive a radio message with a request for help in fighting Ceph back. Approach the area marked on the map (shown in the first screenshot; the yellow arrowhead). This will take you to the tunnel's entrance, which you need to jump into. After you emerge from the tunnel, you will notice two rebels that you need to help fight Ceph off.
Once the area is clear, collect Datapad 2/5 to the left of the APC.
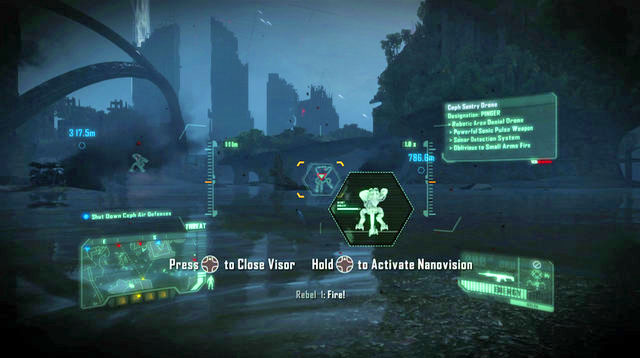
In return for your help, the rebels will offer to rake the Pingers marked by you with your visor. Leave the cave and go towards the next defense system. (south-east). On your way there, you will be able to mark two Pingers to be destroyed by the rebels. Unfortunately, that is when they will run out of ammo.
Before the path leading up to the next objective, you need to disarm, or walk around the mines. Climb to the higher level of the destroyed building. To the right of the turret, there is a suit upgrade kit. In the building opposite, there is a sniper and a turret which you can hack into.

Before you go over to the next building, disarm further mines . There is a sniper next to the defense system that you need to take down with suppressed weapon or with the Bow. A bit lower, there are two Scorchers . Try to either ignore them or walk around them. Make your way to the building housing the power supply system for the defense system. Below the console, to the right of the AA cannon, you will find Blackbox 1/2.
There will appear further Ceph units coming your way, after you disable the second defense system. Enter cloak mode and return the same way you took to come here. On your way, you will notice a zipline that will take you to the very ground, where there is a car. The zipline may be guarded by two enemies, so kill them at a distance with your Bow or the suppressed sniper rifle.
After you zipline to the ground, there may be a Pinger waiting for you. Enter cloak mode and get into the car. Destroy the Pinger using the onboard weaponry.
On your way to the last defense system (the yellow arrowhead in the screenshot), you will receive another help request. This time around, you will have to disarm the mines blocking the rebel ICV's progress.

After you disarm the mines, go to the plane wreck. Inside, you will find Datapad 3/5, suit upgrade kit and Arrows. Return to your vehicle now.
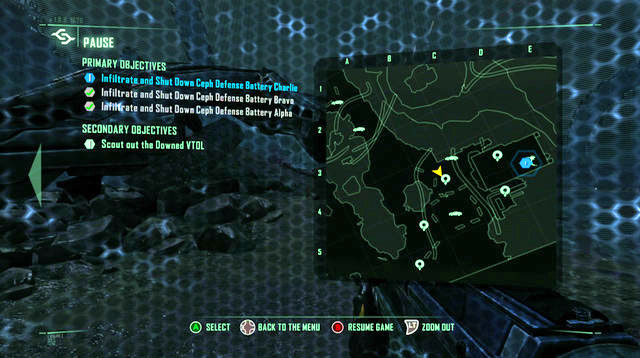
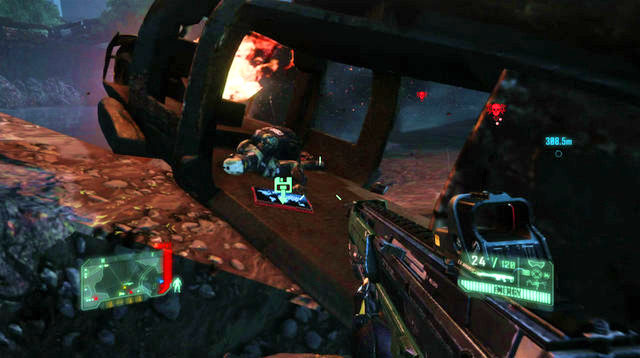
As you proceed, you will reach a place guarded by two enemy aircraft. You will also receive a secondary objective, which is the examination of a VTOL. There's also a Datapad and a Blackbox here. You can now try to knock down the aircraft with the mount cannon, which I recommend against, or ignore them and proceed to the next data. You can do that by entering the cloak mode and replenish power level behind the concrete tunnel parts.. Blackbox 2/2 is located next to the plane wreck, right behind the minefield (opposite the yellow arrowhead in the screenshot).
Datapad 4/5 is to be found inside the blazing helicopter wreck, which you can find opposite the yellow arrowhead in the first screenshot above.
Drive in the direction opposite to the last AA system, into the area in which you found the last Datapad (4/5). You will reach an area with a crashed plane. Move the object that has been blocking the crate at the exit, so rebels can leave. Onboard the aircraft, there is a lot of ammo and a suit upgrade kit.
Go now to the last remaining Ceph defense system. Ignore the enemy planes once again and pass, quickly, through the entrance leading to the target. Take cover inside the concrete tunnel element and initiate the cloak mode. While staying here, disarm the mines blocking entrance.
As you keep climbing to the top, you will encounter a big group of enemies and a mine field on your left. Dispose of the enemies, or walk around them, and proceed to the top. You are now close to the defense system power supply, where you can reprogram a turret. Disengage the last power supply and get ready for a wave of Ceph.
I recommend that you eliminate them quietly, while in cloak mode, with your Bow and the rocket launcher, in the case of the larger Ceph (it is possible that Psycho manages to kill him for you). Go to the area where Psycho landed and take the vehicle. You now need to destroy the enemy aircraft with the onboard cannon.
When you have no other choice but perform an emergency landing, use the side cannon to repel Ceph. While trying to get airborne again, you will be surprised by a Ceph, who will toss you out of the aircraft. Your main target now are the little elements on the sides of the enemy. Keep shooting at them as long as the enemy is not firing at you.
As soon as the elements start gathering energy (they will start to glow red or blue), take cove immediately, and wait through the attack. When the enemy stops shooting, resume your fire at the objects. All over the area, there are ammo crates and weaponry like Typhoon or MK. 60.
After you destroy all of the small objects twice, the Mastermind will start pulling you his way. Keep pressing the jump button to break free. Once you succeed, the Mastermind will be bringing the surrounding Ceph corpses back to life, which you need to kill.

After you kill the Ceph, the small objects on the Mastermind's sides will reappear. Repeat the sequence of destroying them, and jumping to kill the enemy once and for all. Before you approach the breach in wall, collect Datapad 5/5 to the left, next to the ammo crate.

After you get out of the rubble, initiate the visor. You will notice three data units ahead of you. Blackbox 1/4 can be found at the soldier corpse, after you cover several steps. Then, at the burning fragments, there is Poster 1/1. You can terminate the visor and look up, where there is Datapad 1/3 in a container. Crouch under the container and jump onto the elevation to the right, to collect data.

Once you reach the blazing car wreck on your left, initiate the visor once again. Behind the wreck, there is another piece of data. Jump onto the car, walk over another one jump down and collect the Blackbox 2/4. As you keep walking, you will notice a car slipping into the void. Approach the spot and initiate the visor. In the corridor to the left, you will mark another Blackbox 3/4.
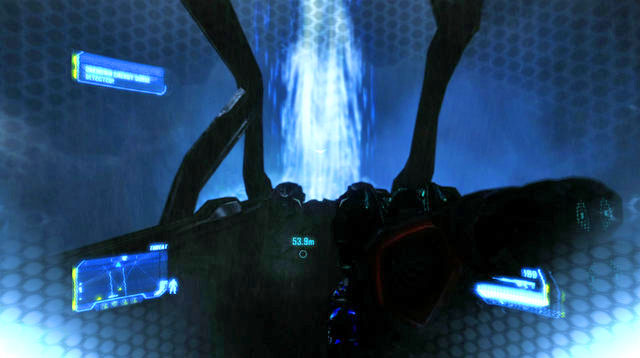
Proceed along the tunnel and avoid obstacles. Once you fall into the tunnel below, get out of water and go straight ahead. Walk over the makeshift bridge ahead. Keep descending and enter another small tunnel which will take you outside.
Walk over to the left side and go ahead. Take the first turn right and you will reach several ammo crates, grenade boxes and a rocket launcher. You will also find a Datapad 2/3 inside one of the crates. To the left of the data, there is an elevation with a suit upgrade kit on it. As you go along the tunnel, you will also find Arrows.

Turn right when you reach the fork and ignore the enemy to the left. From the corpse to the right, collect Reaper Cannon. In the further part of the tunnel, you need to reprogram the mines quickly, so you kill a nearby Ceph. Go ahead and keep to the right wall. Reach the spot where you will have the turret to your left within reach. Reprogram it, wait until it is destroyed and finish off the remaining Ceph. Approach the marked device now.
After the cutscene plays, you will be attacked. As of now, you are in the charge mode, which makes you nearly invincible for a limited period of time. Make sure to kill as many enemies within the period, as possible, using Ceph weaponry.
Take the passage that spawned enemies earlier. You will reach a cave with further ammo crates and Arrows in it. Inside one of the crates, there also is a Blackbox 4/4. In the crate that needs reprogramming to open, you will find a DSG-1. It is here that you will receive message of the possibility of examining the CELL relay.
Take the tunnel to the right of the crate, in which you found the most recent Blackbox 4/4. As you keep to the right side of the tunnel, jump over the chasm. Then, jump onto the elevation to the left, where there is a Pinger to the right. Enter cloak mode and take over the turret underneath. A bit further, there is another one to the right. If the Pinger still isn't destroyed, take the APC that is the secondary objective.

Jump down after eliminating the Pinger. There, in a crate, there is the last one of the Datapads 3/3. First go to the target to the right. On your way there, disarm three mine fields. Do not enter the Mindcarrier, yet. Instead, go towards the other target.
On the elevation ahead, there is a sniper, which you need to take down in the cloak mode, with the suppressed DSG-1. Below, there is a turret, which you need to reprogram. Finish out the remaining enemies and enter the Mindcarrier. You will be boosted again, so use the opportunity to reach the last one on the Mindcarriers.
In the boost mode, which will last for a long time this time around, keep going towards the target. Walk over the bridge that the enemies will be using to get to you. Turn left now and approach the Ceph tunnel.
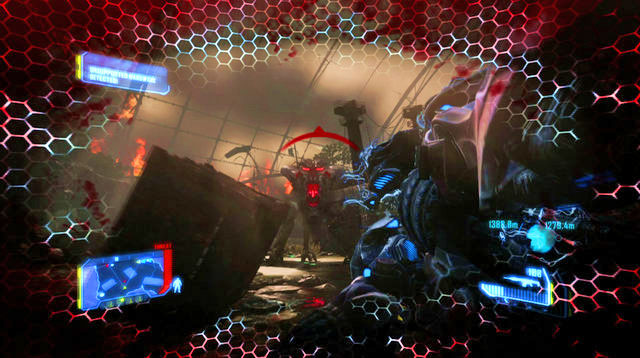
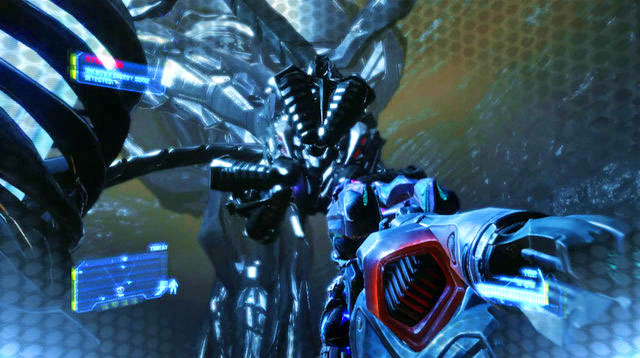
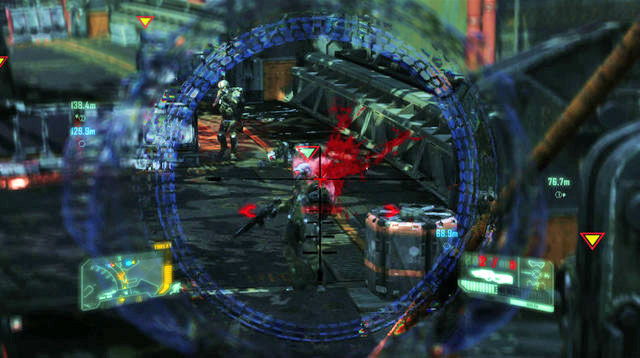
It is time now for the final battle with the Alpha-Ceph. Jump onto the elevation ahead. You will find yourself in a circular arena, which is your battlefield. Keep firing at the boss and when he covers his head with the three whirling elements, start running away from him.
When the enemy starts to gather the blue energy in the three appendages, it is a sign to take cover. After the attack finishes, turn your attention to the middle parts of the appendages, and find out if it glows orange. It is the boss's only weak point, which you need to rake.
If you manage to hit the weak point, you will destroy the appendage, and the boss will start sucking you in. In this situation, keep pressing jump, to break free. After the boss falls, other Ceph will appear on the stage, which you need to kill. You can make it easier for you by reprogramming the nearby turrets.
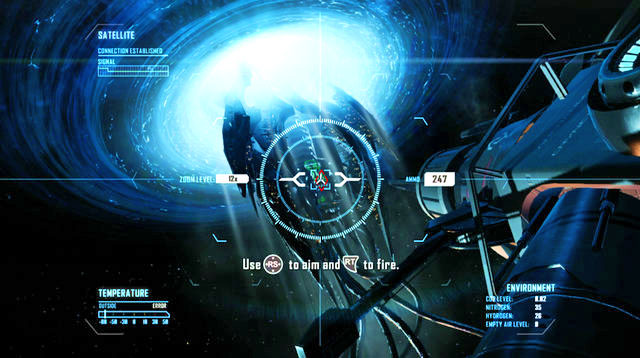
After you dispose of all the Ceph, the boss will return. Pay close attention to the messages the suit gives you. It will let you know of attacks and moments when the boss' appendage is most vulnerable to attack. After you destroy the third limb, you will have to repeat the sequence involving jumping and eliminating the other Ceph. Take advantage of the moment, and mark with your visor the weapons that you will use during the last phase of the battle. After you destroy the last one of the appendages, keep pressing jump, and then shoot, to finish the battle. After the cutscene, reprogram the satellite. Lock it onto the target and press and hold shoot.
Collectibles in the "Post Human" mission.
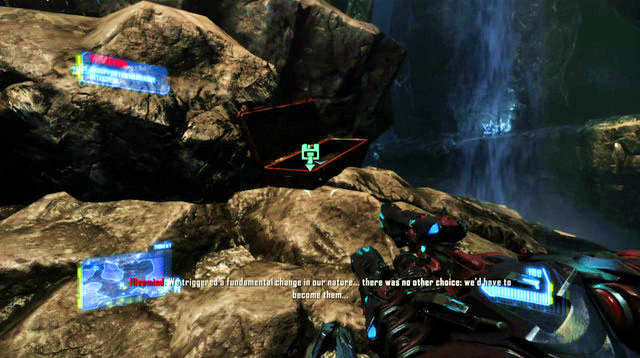
Blackbox (2)
Datapad (7)
Blackbox 1/2

After you start the mission, walk down the platform to the left. At the enemy corpse, there is the first data.
Datapad 1/7

After you gain access to the headquarters, reach the control room's far end (the earlier room in which you open the door for Psycho). On the computer control panel there is another data.
Datapad 2/7
When Psycho gives you the Bow, at the stairs down, there is a piece of equipment with the data on it.
Datapad 3/7

After you find the previous data, climb down the stairs and leave. Walk over to the other end of this location. Walk into the room, where there is another data on the computer console. Collect it before you proceed onward, as the door will slam behind you.
Datapad 4/7
After you reprogram your first computer and open the door, enter the room with the computer in. The data is on the computer console.
Datapad 5/7
As you walk on, you will find a room with an ammo crate in it, and another data on the panel of the computer next to Psycho.
Datapad 6/7

In the room with the two cores, take the corridor to walk over to the room's right end. On the right, there is a room with an ammo crate in it, and the data.
Datapad 7/7

Also in the room with the two cores, walk over to its left end. On the left, there is a control room. On the computer panel, there is another data.
Blackbox 2/2

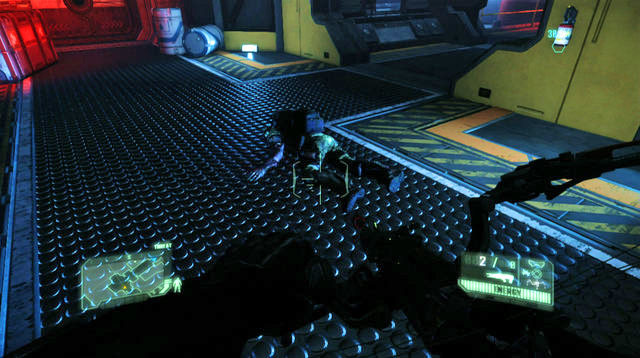
When you meet Psycho again (you will hear him killing CELL soldiers across the door), collect the data from the corpse.
Collectibles in the "Welcome to the Jungle" mission. In this mission, you get the opportunity to find posters. You need to examine them with your VISOR to add them to your database.
Poster (1)
Blackbox (2)
Datapad (3)
Poster 1/1
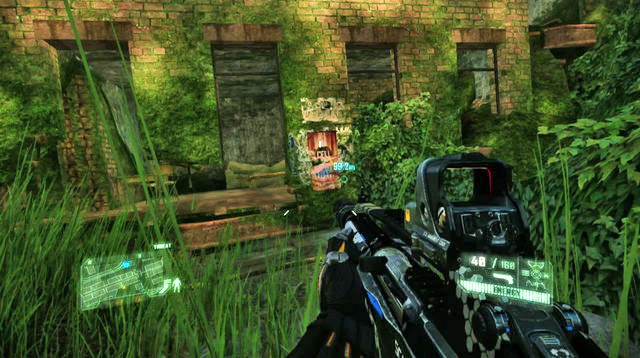
After you leave from the building, at the beginning of the mission, keep straight ahead until you reach traffic lights. Turn right to reach the demolished buildings. At the entrance to the last one of them, there is a poster. Use the VISOR to add new data.
Datapad 1/3

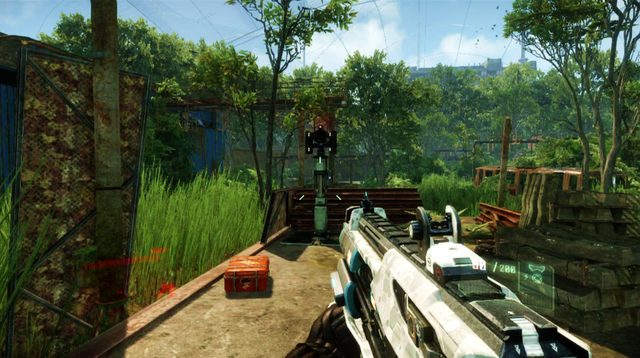
In the spot where you find the weapon that you use to destroy the tower, walk away from the tower. To your right, you will notice a small elevation, which you need to climb. In the crate with the corpse leaning against, you will find data.
Datapad 2/3
As you walk towards your objective, and under the demolished bridge. Psycho will inform you about an airdrop for CELL, over the radio. Go straight ahead to reach the crate guarded by two enemies. The data is to the left of the crate.
Blackbox 1/2
After you jump over the broken railway and meet up with Psycho, you will enter a room with four CELL soldier corpses. The data is on one of the corpses
Blackbox 2/2

After you meet your first Stalkers, and walk along the mined tunnel, you will meet the station. Jump down onto the ground in the room's right corner. Behind you, there is a small room with a corpse in it. The data is on the corpse.
Datapad 3/3
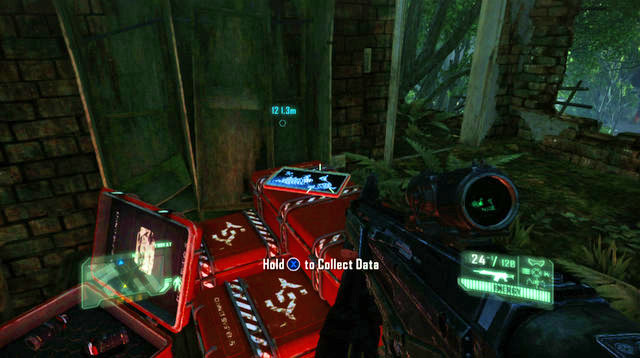
In the same room, as Blackbox 2, while keeping to the right, you will notice two flooded basins (the first screenshot). Near the basin that is further away, in relation to the entrance, walk underneath the platform on your left, and find a small passage to the right. Inside, there is a crate with the Datapad on it.
Collectibles in "The Root of all Evil" mission.
Posters (1)
Blackbox (2)
Datapad (4)
Datapad 1/4

In the second building on the dam (the northern one), you need to disable the generator. You can find the data right after you enter, on the green crates.
Poster 1/1

After you destroy the dam, go towards the mission target. When you encounter an obstacle blocking the road, jump over to the other side. You can find the poster right next to the entrance to the demolished building.
Blackbox 1/3

After you find the poster, jump down. Go straight ahead until you notice the first basin on your left. You will find the data at the corpse.
Blackbox 2/3
Some 180 meters away from System X headquarters, you will reach a fork in the road. Take the tunnel to the right to find data.
Blackbox 3/3

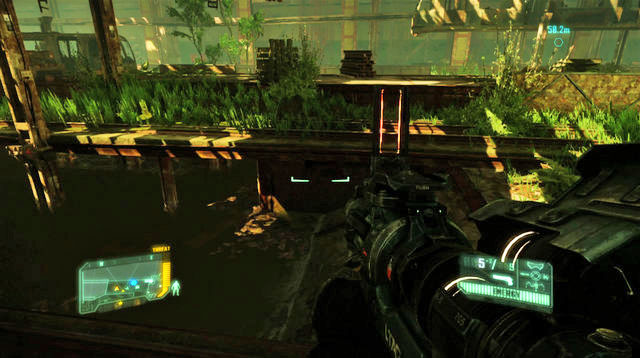
After you reach the System X headquarters, walk over to the left side of the building. You will notice an empty container and a sewer entrance, shown in the first screenshot above. Right after you enter, you will find data at the corpse.
Datapad 2/4 and Datapad 3/4

After you take the lift down to System X's headquarters, you will find the data on the computer panels.
Datapad 4/4
After you restore the pressure and disable the turret, you will be carried, in the elevator, to the control room. You can find the data right after you exit the elevator, to the left on the computer panel.
Collectibles in the Safeties Off mission.
Posters (1)
Blackbox (3)
Datapads (11)
Datapad 1,2,3,4,5,6
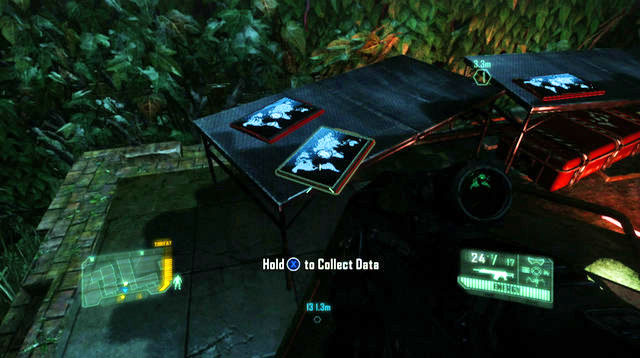
At the beginning of the mission Psycho will let you know about your secondary objective, which is data collection. After you walk over to the left of the first big area, you will find a helicopter wreckage near the target mark. On the left side of the wreck, you will find three pieces of data. The remaining ones are on the building's first floor marked as the target.
Poster 1/1

After you reach the spot shown in the above screenshot, jump inside the building through the recess in the left corner. At the passage shown in the second screenshot, you will find a poster.
Datapad 7/11
Once you reach the zpiline that is your target, walk over to the room to its left, before you actually take the zipline. Inside the room, there is data on the table
Blackbox 1/3
After the cutscene featuring an Alpha-Ceph destroying a helicopter, before you jump down, walk deeper into the room, where you will find data.
Datapad 8/11
After you reach the building with the Ceph Mindcarrier in it, jump up to the first floor and walk over to the room behind the Mindcarrier. On the shelf there, you will find data.
Datapad 9/11 and Blackbox 2/3
Right before the battle with the first Scorch, some 150 meters of the mission objective, you will find a building, inside of which there is a Datapad. To the right of the building, next to the corpse, there is a Blackbox.
Blackbox 3/3
Before you descend to the CELL lab, before you enter the elevator, you will notice a corpse with data on.
Blackbox 4/4 and Datapad 10/11

After you take the elevator to the research facility, follow Psycho. Once you reach the room with a large glass pane (mark the data from here) that you will be able to see the labs through, turn right and climb down the stairs. In the flooded room, to the left, on the corpse, there is a Blackbox. Backtrack to the corridor and go left, jump over the obstacles and enter the small room on your left, where there is a Datapad.
Datapad 11/11
After you reach the labs' lowest level, to the right of the door that Psycho is standing at (do not enter before you collect the data), you will find a room with the data on the table.
Collectibles in the Red Star Rising mission.
Posters (1)
Blackbox (3)
Datapad (5)
Datapad 1/5

After the mission starts, go straight ahead to reach the passage among the buildings. Take the identical passage in the next building to find data.
Blackbox 1/3
After you reach the Mindcarrier's panel and receive the boost, kill out the nearby Ceph, to make the next flying Ceph destroy the enclosure and make further passage available. After you walk past the enclosure, turn right and keep going among the buildings. Take the first left turning to find a corpse and data on it after a dozen or so meters.
Datapad 2/5 and a Poster 1/1
After you reach the location with the CELL soldiers fighting Ceph, enter the first building to the left, where the CELL soldiers used to be. Climb to the first floor and walk over to the room o the left. On the green crates, there is data. Walk into the narrow room even further to the left, to find a poster.
Datapad 3/5

Next to the first APC that you can use. The Data is on the crates.
Blackbox 2/3
When Psycho talks to you for the first time in this mission, start climbing down the cliff. At the very bottom, near the car, there is the data.
Blackbox 3/3 and Datapad 4/5
To the left of the large gate, which you can open with the console. The Data are on the dead soldier and on the crates at the other side of the container stash.
Datapad 5/5

After you infiltrate the base with the command center in, climb down the stairs to the left. Right next to the stairs, there is an opened crate with the data in it.
Collectibles in the Only Human mission.
Posters (1)
Blackbox (2)
Datapad (5)
Poster 1/1
Right next to the first AA system, walk over to its right side (opposite to the mission objective). Jump two floors up to find the poster.
Datapad 1/5

After you destroy the first AA system, Ceph reinforcements will appear in the building to the right. On the plank between the buildings, turn right. In the distance, you will notice the head of the Statue of Liberty. You need to enter the head to find data.
Datapad 2/5
On your way to the previous Datapad, you will receive a distress signal from the rebels. Reach the location marked on the map in the screenshot. This will take you to the entrance to a tunnel, which you need to jump into.

To the right of the cave, there is an APC with the data on its left.
Blackbox 1/2
Between the cannon and the control panel of the second AA system, in the south-east, you will find the data on the corpse.
Datapad 3/5

Reach the area marked with the yellow arrowhead in the first screenshot. Where you will receive a distress call from rebels. After you disarm the mines, walk over to the plane wreck, inside of which there is data.
Blackbox 2/2


Reach the area marked with the yellow arrowhead in the first screenshot. You will notice a crashed plane in front of you. The data is underneath its tail.
Datapad 4/5


Reach the area marked with the yellow arrowhead in the first screenshot. Ahead of you, there will be a flaming plane wreck. Inside, at the corpse, there is data.
Datapad 5/5
In the area in which you fight the Ceph Mastermind, in one of the corners of the room, there is an ammo crate with the data next to it. You can collect it either during or after the battle.
Collectibles in the Gods and Monsters mission.
Posters (1)
Blackbox (4)
Datapad (3)
Blackbox 1/4 , Poster 1/1 and Datapad 1/3

After you start the mission, cover several steps in order to find the Blackbox on the ground. A few steps further, next to the burning fragments, you will find a poster. Turn your visor on now and look up. You will notice a Datapad on a container. Walk under the container and jump onto the elevation to find data.
Blackbox 2/4 and 3/4
Once you reach the burning car wreck, on its left hand side, turn on the visor again. Behind the wreck, there is another data. Jump over the car and walk over the roof of the next one. Jump down and collect a Blackbox 2/4 from the corpse. As you go ahead, you will notice a car slipping into the void. Reach the spot and turn the visor on. In the corridor to the left, you will mark another Blackbox 3/4 .
Datapad 2/3
When you reach the first big open space along the tunnel, take the first turning to the right, (there will be a Ceph spaceship flying overhead a bit earlier). You will reach crates with data in one of them.
Blackbox 4/4

Once you enter the first Ceph Mindcarrier, an enemy-spawning passage will open up. Enter the tunnel to reach a cave with data in it.
Datapad 3/3

Take the tunnel to the right of the crate in which you found the last Blackbox 4/4. Keep to the right of the tunnel and jump over the chasm. Jump onto the elevation to the left. As you keep to this side, you will emerge from the tunnel into the open. Walk over to the right side and jump down. You will find the data in the crate.
Below you can find a list of weapon upgrades and one of their whereabouts. Where you find an upgrade depends on where you kill an enemy equipped with the upgraded weapon. Once you reach a location that the guide points to, kill all of the enemies there and use your visor to mark all weapons on the ground. Then, start checking them. Once you pick an upgrade, it will be available until the end of the game in the weapon menu. Numbers in brackets signify the sequence in which the upgrades can be found.
Hammer II
-Iron Sights, Silencer, Rifle Laser Sight (1, 2, 3): you will get automatically at the beginning of the mission.
Scar Mod 2
-Reflex Sight, Single Shot (4, 5): to collect both of them, you need to collect Reflex Scar, that you can find on the bridge among the buildings of the base. It is the bridge where the enemy calls for helicopter support if you are spotted.
- Assault Scope (6): win the room with the two large generators/drills. Walk over to the right side of the room. At the first passage to the left, you will notice a guard equipped with the upgrade.
Scarab Mod 2
-Foregrip, Extended Ammo Box (7, 8): after you destroy the turret tower and you are supposed to meet up with Psycho. Before you receive the secondary objective, you will encounter a small enemy patrol in the flooded area. Search the enemies, after you kill them, to find the upgrade.
Feline X3
-Double Magazines, Extended Magazine (9, 10): in the room, where you will have to jump over the broken railway track to reach Psycho (there is also one turret that you can hack into).
Hammer II
-Match Barrel (11): in the room where you need to use the zipline to get further.
DSG-1
-Sniper Scope (12): take the passage to the right to get to the dam and you will get stuck in the elevator. After you get out through the elevator shaft, kill two enemies in the room below and jump down into it. You will find here an orange crate .
-Tech Scope (14): In the base, where you are supposed to take the elevator, to reach lower to system X. Right net to the elevator, there is a mobile turret. In the right opposite corner, there is a crate that you need to reprogram. The upgrade itself is on the floor next to the crate.
SCAR Mod 2
-Muzzle Brake (13): next to one of the enemies on the dam
Scarab Mod 2
-Mini-Typhoon (15): Right after you begin the mission, walk over to the building to the right. There should be three enemies walking away towards the remaining enemies. One of the three has the upgrade on him.
Marshall
-Bayonet (16): also at the beginning of the mission, in the first location. Walk ahead a bit where there is a larger group of enemies. It is a rare weapon and upgrade (there are only two such in the entire area), that is why you should have a really careful look around for this one.
Alpha Jackal
-Double Magazines (17): at the beginning of Red Star Rising, instead of going down, walk over two makeshift bridges to the next buildings. You will, eventually, reach an area where you will have to use a zipline (there is also a Datapad here). The weapon and the upgrade are on the crates.
-Extended Ammo Drum (19): in the base, where you have to take the elevator to get to the command center, which will finish the Red Star Rising mission. Al over the base, there are a lot of enemies so make sure that you killed all of them and search the area.
SCAR Mod 2
-Grenade Launcher (18): in Red Star Rising, after you have reached and used the Mindcarrier, you will reach a location where there are CELL soldiers, who have been staying in the building to the left, fighting Stalkers. The upgraded weapon is carried around by one of the soldiers.
M12 Nova
-Flashlight (20): You will get the last upgrade at the beginning of the last mission, Gods and Monsters.
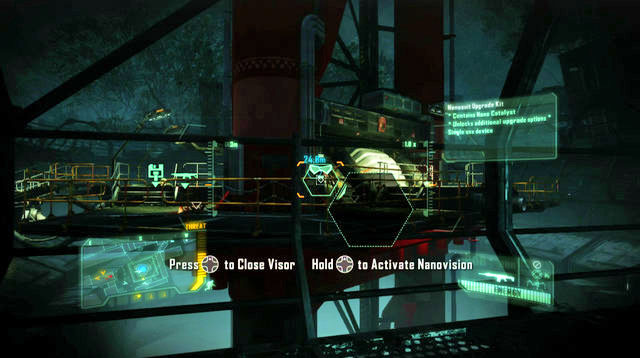
The nanosuit allows you to adapt your gameplay to your own, individual style. You can initiate the armor mode and jump right into the battle, or enter the cloak mode to kill them from hiding or squeeze past them. It is recommended that, at the higher difficulty levels, the latter one be utilized, as long as it is possible. Every action, connected with the suit, drains the suit for some of its energy, whose level can be checked in the bottom right corner of the screen. The energy level replenishes automatically, as long as none of its functions is active.

Right at the beginning of the first mission, you will receive a Bow. It's a formidable piece of weaponry that allows you to shoot while cloaked, without using up large amounts of energy, unlike the other weapons. It is a good idea to keep an eye open for high-located vantage points, where you can easily take your enemies out. When the energy level falls, cue to cloak mode, retreat into hiding and wait for the energy level to replenish. If you run out of arrows for your bow, switch it into any other weapon that you can apply a silencer to. The more powerful a weapon, the higher the consumption of energy by the cloak. After you secure an area, collect arrows from the dead enemies.

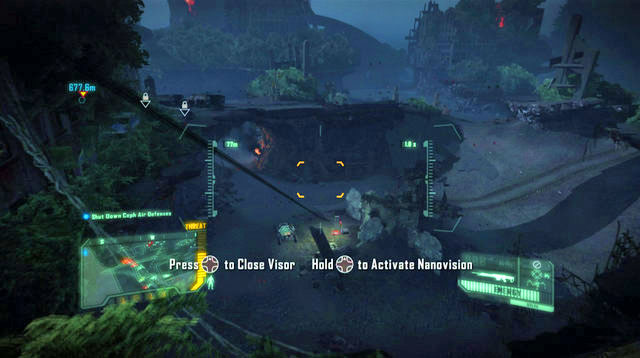
The visor is a very useful piece of equipment. It allows you to mark both the enemies and useful items (ammo, weaponry and intel data) located in a given area. It suffices to focus for several moments on a given item to make it visible also after you disable the visor. You can also use it to reprogram turrets, crates mines and enemies over a distance. The visor operation hinges on a mini-game, whereby you stop a moving pointer in a pre-determined position within a limited window of time. The number of spots, in which you are supposed to lock the moving pointer, as well as its speed, depend on the level of the given security system .
The marked enemies display a triangle above their heads. The color of the filling depends on how much alarmed to your presence they are. Grey color means that they are oblivious to your presence. Yellow appears when they spot a corpse, or you yourself are spotted. The enemies will not know about your whereabouts at this point. Red appears when the enemy sees you.
Immediately after you pick up your first points kit for suit upgrading, in the "Welcome to the Jungle" mission, you will be able to unlock additional suit modules. The amount of points necessary to unlock a module displays on the padlock symbol. The modules have been divided into four columns, and at any time, you can use only one module in a given division. The selected module upgrades the suit in a predetermined way. This may mean, e.g. power replenishment faster by 20%.
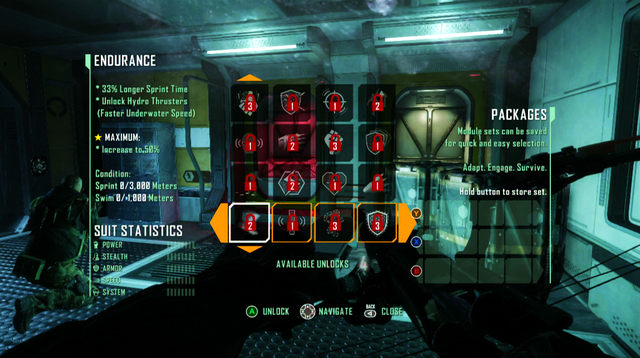
Each module can be upgraded if you meet the conditions specified on the left. After you meet the condition, the module will be upgraded. Depending on how you want to play the game, you should choose only the modules that facilitate the adopted gaming style. If you prefer open warfare, modules that that reinforce the armor will be a better choice. There are, of course, more universal modules like, e.g. modules that boost power regeneration.
Table below presents all modules and requirements necessary to acquire maximum level. Some of these have identical or overlapping requirements.
Note! All requirements are added and recorded on the checkpoint-to-checkpoint basis. What this means is that if you die, or leave the game between checkpoints, all the requirements that you met will be lost. Modules, as well as their statistics are transferred between games played on one save.
Module name
Maximum level requirements
Endurance
Cover 3000 meters sprinting or 1000 meters swimming A good place to do the swimming part is near the dam in The Root of All Evil mission.
Super Stealth
Remain in the cloak mode for 100 seconds near the enemies.
Sensor Upgrade
Mark 25 objects (enemies, items), with your visor.
Brute Force
Kill 15 enemies with both Air Stomp (press crouch above the enemy) and Power Kick (items like car wrecks, which can be used to kill enemies, glow green).
Deflection
Initiate your armor and take a total of 150 thousand damage. You can take cover where you will be inaccessible for the turret or your enemies, initiate armor and take damage until you run out of energy, Retreat, then, into safety and replenish the power level. Then repeat
Threat Detector
Mark 20 objects (enemies, items), with your visor.
Energy Upgrade
Regenerate 5000 suit energy units.
Reflex Boost
Kill 50 within one second of zooming in. Enter the cloak mode, approach the enemy as much as you can and kill him quickly after you initiate zoom in.
Weapon Handling
Kill 50 in any way you want.
Super Strength
Kill 25 by grappling (approach an enemy and press reload, once the message displays) and 25 with melee attack.
First Aid
You need to survive the moment when you see message of low/critical power level. Another requirement is to regenerate 25 thousand health points.
Extended Cloak
Remain in the cloak mode for 100 seconds, near enemies.
Heavy Armor
You can take cover where you will be inaccessible for the turret or your enemies, initiate armor and take damage until you run out of energy, Retreat, then, into safety and replenish the power level. Then repeat
Verticality
Perform 30 reinforced jumps (press and hold down the jump button ) and grab onto 30 edges.
Light Armor
Initiate your armor and take a total of 150 thousand damage. You can take cover where you will be inaccessible for the turret or your enemies, initiate armor and take damage until you run out of energy, Retreat, then, into safety and replenish the power level. Then repeat.
Assassin
Perform 25 sneak kills. Enter the cloak mode, approach the enemy and press melee attack, when the message urges you to.
The below table presents the list of achievements available in the Xbox 360 version. They are the same as the PlayStation 3 Trophies. All told, there are fifty achievements in this game, thirteen out of which are to be gained in the multiplayer mode (you can gain them via the Public match). The achievements, in themselves, are not that difficult to obtain. They only require a bit of perseverance and good luck. .
Achievement name
Means of unlocking
Staying Sharp
Complete the tutorial.
Welcome to the Jungle!
Complete the Post-Human mission.
A Flawless Getaway
Complete the Welcome to the Jungle mission.
Off the Grid
Complete the The Root of All Evil mission.
Turning the Tide
Complete the Safeties Off mission.
Brink of Apocalypse
Complete the Red Star Rising mission.
Belly of the Beast
Complete the Only Human mission.
The True Measure of a Hero
Complete the Gods and Monsters mission.
Nanosuit Veteran
Complete 3/7 of missions on the Veteran difficulty level.
Halfway to Hell
Complete 3/7 of missions on the Supersoldier difficulty level.
World Saver
Complete the game on any difficulty level.
Bring it On
Complete the game on the Veteran difficulty level.
Professional Superhero
Complete the game on the Supersoldier difficulty level.
Perk Of The Job
At the beginning of the second mission, you will have to collect the suit upgrade kit. Open the suit module menu and buy any. Then map it onto any button, press and hold that button for several seconds.
Geared-up
Unlock all weapon upgrades . Additional elements are unlocked by collecting the weapon that already has an upgrade installed. Once collected upgrade is associated with that weapon forever. Keep checking weapons of all CELL soldiers you kill, for any new elements. The achievement should be unlocked at the beginning of the seventh mission
Suited-up
Upgrade all the suit's modules. Open the armor module menu. With the upgrade kit, unlock a module of your choice. When the individual module is upgraded, a star symbol will appear next to its icon. You do not have to upgrade all modules during one play of the game.
Be a Pro, use a Bow!
Kill ten enemies with every available arrow kind.
Maximum Strength
Kill 25 enemies using the suit. Initiate the suit, approach the enemy and press reload, and then shoot. Melee attack works also..
Hunter-Gatherer
Retrieve 10 arrows from enemies nailed to the wall. Draw the bowstring as far back as you can. Release the string, while making sure that there is an obstacle behind the enemy that he can be nailed to. Once you manage to do that, collect the arrow from the corpse.
The Gibson
Complete 20 mini games of reprogramming. Turn your visor on and pick a target to reprogram. After 20 successful attempts, the achievement unlocks .
I'll Have That!
Collect and use every Ceph weapon. There are five types of alien weapons: Pinch Rifle, Bolt Sniper, Reaper Cannon, X-Pac Mortar, Incinerator (you need to kill with the Scorcher's melee attack). All of them can be obtained in mission seven.
Taste Of Your Own Medicine
Kill 25 enemies in the boost mode. The fact is confirmed by blinking rims of the screen. You receive the mode once you come near a Ceph Mindcarrier, which is an objective of several missions.
Breaking the Lore
Find all CELL intel data and propaganda posters. See the CELL intel data and posters.
Bang For The Buck
Kill a buck with an explosive arrow. The buck can be seen when out in the open at the very beginning of the second mission. Enter the cloak mode in order not to shy it away..
Can You Hear Me Now?
Towards the end of the second mission your visor will start getting interference. The interference transmitter is in the middle of the rail track (marked on your map as a secondary objective), at the other side, you will be attacked by Stalkers. Approach the transmitter and shut it down.
Who Needs Rockets?
In the first mission, when you reach the bride, let yourself be spotted by the enemies. Let them find the corpse. At the same moment, there will appear a helicopter, which you need to take down with your bow and explosive arrows.
White Rider
After you destroy the dam in mission three, you will be going down a small stream. Some 190 meters of the target (System X base), you should be looking for a yellow on the right bank. Jump onto it and remain on it for 20 seconds. Jump over obstacles. This does not need to be consecutive 20 seconds so don't worry if you fall.
Roadkill
In mission five, run over five enemies while in the car.
Ping Pong!
In the sixth mission, you need to destroy three Pingers. If you perform the side mission, i.e. if you help the rebels, this might help. In exchange for your help, they will destroy two Pingers that you mark with your visor.
Inside Job
Reprogram a turret (stationary). A reprogrammed turret needs to kill 10 enemies.
Post-Human Warrior
Kill 10 enemies during one boost. This will be possible towards the end of the seventh mission, after you make use of the third Mindcarrier. That's when your way will be blocked by a multitude of enemies., and the boost will be much longer than usually.
Arrow to the Knee!
Wound a CELL soldier's knee. In the cloak mode, approach the enemy as much as possible and pull the string to a minimal extent. Hold the string for a really short period of time, and release the arrow. If the enemy doesn't die, the achievement will unlock.
Improviser
Kill two enemies with one object. Throughout your gameplay, you will encounter a lot of explosive barrels. Take a shot on one with more than one enemy near it.
Nanosuit Ninja
Perform 20 sneak kills without raising alarm. Enter the cloak mode and get an enemy from behind. Press melee attack when you see a sneak attack icon display. Repeat 20 times..
Stick Around
Nail 10 enemies with an arrow. Pull the bow string as far back as you can. Shoot at the enemy when there is an obstacle behind him. This will nail him to the object.
Clever Girl!
Perform a sneak kill on Stalker. The first enemies of this kind appear in mission two. Enter cloak mode and get the Ceph from behind to perform a sneak kill.
Poltergeist
Kill 10 enemies with tossed object, while staying invisible at the same time. .
RisingStar
Reach level twenty in multiplayer.
Block Party
Play on all maps of the multiplayer mode. In total, there are twenty of them. The maps that you have already played can be checked in Player Profile: Skill Assessments, Traveler
Odd Job
Kill two players in multiplayer with one tossed object.
Lord of the Pings
Kill 25 enemies in multiplayer using a Pinger will appear on the map in the first half of the gameplay. Approach the machine and press and hold reload to mount it. Maps that allow using Pinger are: Airport, Brooklyn Bridge, Financial District, Museum.
The Specialist
Sneak kill, kill with a tossed object and perform aerial strike during a single multiplayer session.
Bird of Prey
Kill someone with aerial strike by jumping from the altitude of at least 15 meters, in multiplayer. Choose Spear as your game and Airport as the map. One of the relays is underneath the aircraft tail. Wait for an enemy to come around, jump onto the top and then press crouch.
Going Commando
Kill an enemy with the primary weapon, secondary weapon and an explosive during one spawn, in multiplayer. As a gameplay mode, I recommend Spear. Start by killing someone with grenade. Then, in the cloak mode, wit for an enemy to pass by. You can kill them with your primary weapon. Change places and weapon to the secondary one. Repeat the procedure.
Hit me baby one more time
While in multiplayer, playing spear, collect the relay dish and kill someone with it. Collect the dish, enter cloak mode and wait for an enemy to approach the relay. You can kill them with the melee attack.
Rudely Interrupted
When the enemy is inside the Pinger, press and hold down the reload button to throw them out from the cockpit, and take the machine over.
Would you kindly ...
Complete 25 various challenges in multiplayer. Before each session, you can select a challenge out of four available categories. You are allowed a limited number of attempts at each challenge. If you fail, another one will appear in its place. .
I See Cloaked People
Kill 10 Hunters as a CELL soldier in the Hunter multiplayer mode.
Aerial Support
While playing maps Airport, Brooklyn Bridge, Central Cavern, East River or Hydro Dam, there will be a VTOL flying overhead. Jump onto the plane and kill 10 enemies using its guns.
Kicking off the training wheels
After you gain several levels in the multiplayer mode, change the auto-armor mode to any other. Complete the session in the class so created, to gain an achievement.


 Call of Duty: Black Ops Game Guide & WalkthroughCall of Duty: Black Ops II Game Guide & Walkthrough
 Chronicles of Mystery: The Tree of Life Game Guide & Walkthrough
 Call of Duty 4: Modern Warfare Game Guide & WalkthroughCar Mechanic Simulator 2015 Game Guide & Walkthrough