
Welcome to the unofficial guide to "CSI: Crime Scene Investigation: Hard Evidence" PC game. This is the fifth (if you include "CSI: Miami") installment of the CSI series. Once again, you will have to solve five different CSI cases. This guide contains a very detailed description of all available scenarios. First and foremost, I've displayed where to look for evidence. You will also find out how to collect new objects and how to process them in the CSI lab. Also, it's very important to ask a lot of questions to potential suspects. Make sure that you check this guide to find out whether you've used up all available dialog options. I'd also recommend following my instructions from the start. Otherwise you may have some problems finding out what exactly you've missed. It may be an important part of evidence or a clue that would allow you to figure out your next move.
I've used three colors in my guide to point out some of the most important things:
The red color is directly tied to gathering evidence. This occurs throughout the course of each mission. You will find most of the objects near the crime scene or while searching apartments of potential suspects. Additionally, some of the pieces of the evidence material are going to be handed over to you automatically. This usually happens when you visit Robbins in the morgue or Brass in his office.
Blue color represents potential suspects for each case, however I've only used this color once - when you meet such a person for the first time. Obviously you will be meet those suspects again later during the course of each scenario.
Last, but not least, we have green sections of the text. This color was used to show you what kinds of equipment must be taken from your task bar. This is a CSI game and you can't pick up everything with your bare hands. You will have to follow a certain procedure.
Have fun playing the game and good luck solving all cases!!
Stranger
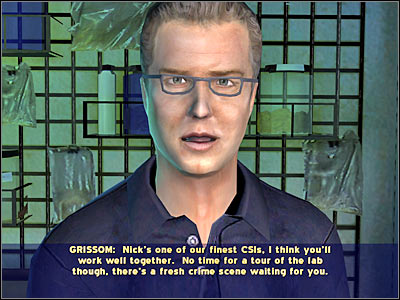
If you've played a CSI game before, you should be familiar with how it goes. This first scenario will begin with a short briefing. You will have to listen to what Grissom has to say. You will also find out about your partner for this case. It's going to be Nick Stokes. Once this conversation has ended, choose your first location from the PDA - Alley: Crime Scene.
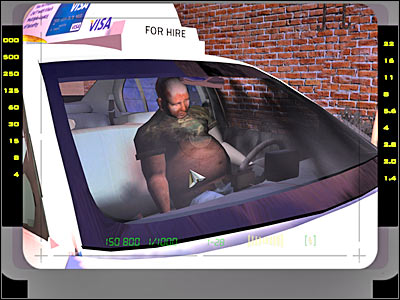
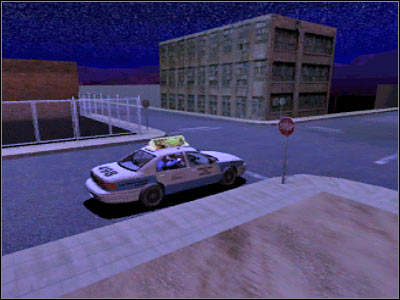
Don't worry that you won't be allowed to look inside the cab right away, because we'll deal with this problem once the cab has been successfully towed to the CSI garage. For now, you should click on the cab. Wait for the game to zoom in the view on the dead driver (near the hood). Click on him and choose Digital SLR Camera from the inventory.
New evidence: Photo of Burnt Cabby
Now you may go back to the previous view, so you'll be able to see the entire cab. Once again, you will have to choose Digital SLR Camera, however this time you will take a picture of the car.
New evidence: Photo of Crime Scene
You should also take a look at the plasters. You will find them near the doors. Listen to what Nick has to say about this.
Your next move is to click on a small spot on the ground. Check the screen if you want to know where it is. Wait for the game to zoom in the view. You will find a small red object here. Pick it up with Tweezers.
New evidence: Red Plastic
You will also have to perform a second action here, so you'll be able to process this footprint in the lab. Click on it and choose Casting Plaster and Frame from the inventory.
New evidence: Footprint from Crime Scene
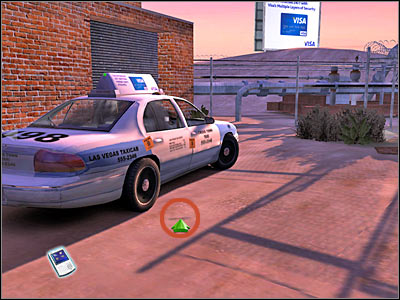
Once this is done, turn left. There's a large blue container here. You should be able to notice a small gas can here. Click on it. This time you will have to use Latex Gloves.
New evidence: Gas Can from Crime Scene
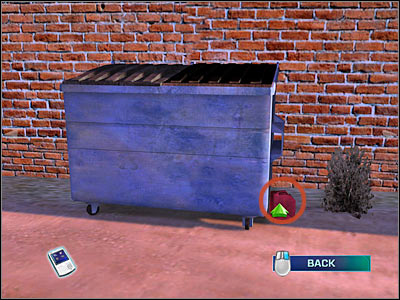
You should consider clicking on the blue container as well. Open the lid (the right one) and take a peek inside. Listen to what Nick has to say about an insect. Click on the bug. You won't have to use Latex Gloves here. It's going to be collected automatically and it won't appear in your main inventory. I'd strongly recommend collecting all insects, especially since it's not going to be difficult to find them.
Now you should check the area to the right of the cab. There's a hole in the fence here (screen). Click on it and wait for the game to zoom in the view. Once again, you will have to use Latex Gloves. Click on the small blue object.
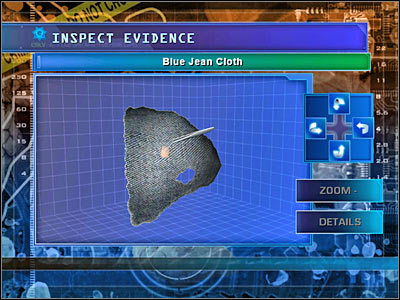
New evidence: Blue Jean Cloth
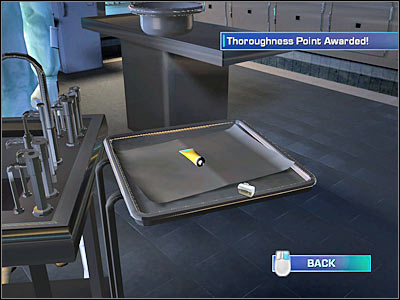
Now you will have to inspect this part of the evidence, so don't close the new window just yet. Make sure that you're using four buttons to check this object from various angles. You will have to find a small yellow object (screen). Click on it and choose Tweezers from the inventory.
New evidence: Flake From Blue Jean Cloth
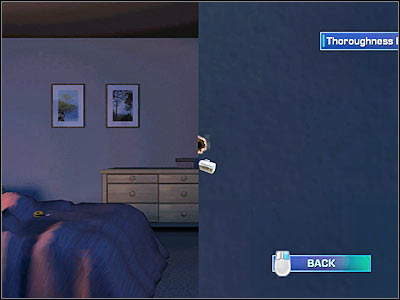
You may go back to the main view of the crime scene. Click on the sewer entrance to receive a point for thoroughness. This is a new addition to the series. You will be rewarded with these points for inspecting areas that could contain valuable objects (but they don't). Obviously I'll show them to you in this game guide.
Now you will have to turn to your right. Make sure that you're looking at the fence. There's a small blue can here. Zoom in the view on it and use Latex Gloves.
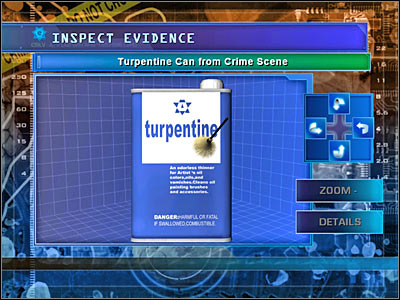
New evidence: Turpentine Can from Crime Scene
Once again, you shouldn't close this window right away. There's a fingerprint on the turpentine car. You will have to find it. Next, you must use Fingerprint Brush and Powder. Once the fingerprint is more visible, choose Adhesive Lifting Tape from your tools bar.
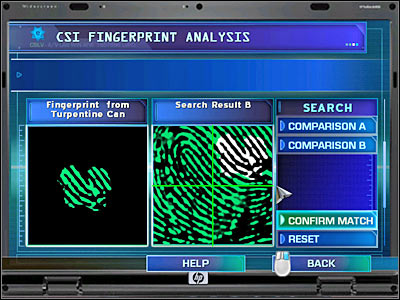
New evidence: Fingerprint from Turpentine Can
There are two other thoroughness points here. Click on the right door and on the newspaper. You may leave this area. Head on to the Mobile Lab.
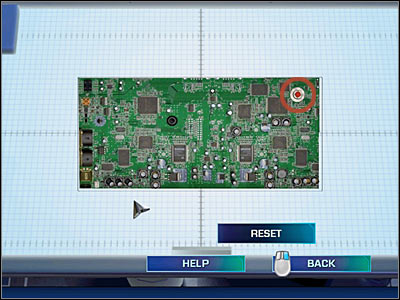
You will have to analyze only one thing here, because we'll deal with the rest of the collected objects once we're inside the CSI lab. Choose the computer and open the first category (Fingerprints). You will have to drag a Fingerprint from Turpentine Can to the left window. As for the right one, you will have to find a match in LVPD Records. Choose the second set of fingerprints (Search Result B). Now you will have to drag the partial left print to the right window. It's going to be the upper right one (screen). As a result, you will be allowed to read police file on Edsel Danville. Go to Morgue.
New evidence: Ed's Fingerprints
First of all, you will have to ask Doc Robbins to recover the body of the cab driver:
- Can you recover the victim's body for us?
Click on the body of the killed cab driver and listen to a short comment regarding his tattoos. Now you will have to ask some new questions:
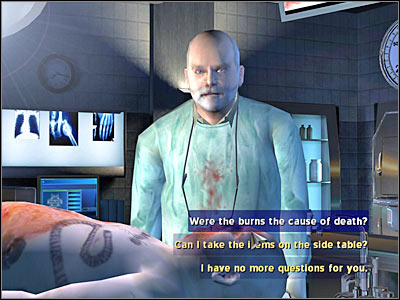
- Were the burns the cause of death?
- What about the time of death?
- Has the family been notified?
Robbins will grant you with some new evidence.
New evidence: Victim's Fingerprints
New evidence: Victim's DNA
You will have to talk to Doc Robbins once again:
- Can I take the items on the side table?
Obviously these items belonged to the deceased. Click on a small table which is going to be located to your right. Use Latex Gloves here.
New evidence: Cab Driver's Shirt
Don't close this window just yet. Once again, you will have to use Latex Gloves. You should be able to notice a small object in one of the pockets of the shirt (the left one). Pick it up.
New evidence: Burnt Flyer
There's only more question left:
- What about items in the pants? Wallet?
You may proceed to the Lab.

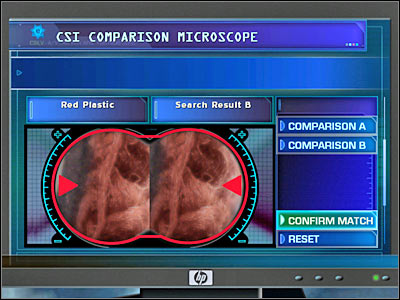
Start off by using a comparison microscope which is located to your left. You will have to perform a single comparison here. Drag the Red Plastic to the left field. Click on Comparison B and CSI Samples. You will have to choose a second sample. Once this is done, click on Confirm Match. You may close this window. Listen to a short conversation between Nick and Sara.
Now you're going to have to use a computer. Choose the first option from the menu - Fingerprints. You will have to drag the Fingerprint from Turpentine Can to the left field. Compare it to Ed's Fingerprints. Once again, you will have to drag the partial print from the left field to the right window (upper right corner). Now you must proceed with the second analysis. Compare Victim's Fingerprints to one of the files from LVPD Records. You'll find out that the victim has been convicted in the past. You may exit this menu. Choose the second option - Shoeprints/Tire Treads. You will have to drag the Footprint from Crime scene to the left window. Look for something to compare it to in the CSI Samples category. You will have to choose the fourth sample (Search Result D). Listen closely to what Nick has to say about your progress.

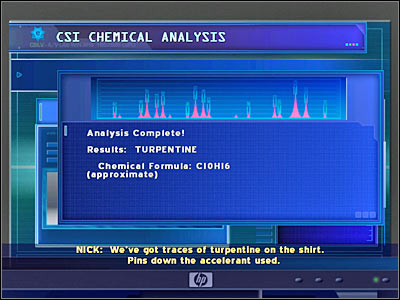
Your last stop here will be a CSI chemical analysis machine. It's located to your right. You will have to choose some of the objects from your inventory and analyze them. It's going to happen automatically, so you won't have to perform any other actions. Analyze Gas Can from Crime Scene, Blue Jean Cloth, Turpentine Can from Crime Scene and Cab Driver's Shirt. Once this is done, you will have to listen to what Nick has to say about your findings. Next, go to Brass' Office.
You will have to start off by asking Brass a few questions regarding this case:
- Do we have info on Edsel Danville's current whereabouts?
- Has the cab been transported to the garage yet?
- Can you locate any old miniature golf courses that used red putting greens?
You should also ask him for an interrogation warrant on Edsel:
- Can I get a warrant? -> Ed Danville? -> Can we get a Suspect Warrant to bring Edsel Danville, if we can find him?
Theoretically, you can't make any progress here, so you should consider going back to Brass' Office once again by choosing this location from your PDA. This will allow you to continue one of the previous topics of the conversation:
- Any luck finding our miniature golf course?
You may proceed to this new location. It's going to be an Abandoned Mini Golf Course.
Ignore Nick and a new suspect for the time being. I'd strongly recommend taking a closer look at the left side of the mini golf course. Check the screen. These are the thoroughness areas, so you should click on them right away, especially since you won't have to collect any evidence. Once this is done, talk to Edsel Danville. He's going to be your first suspect for this case. Ask him a few questions:
- We'd like to ask you a few questions. Is your name Edsel Danville?
- You do realize that you're trespassing?
- Are you aware that you look exactly like an Ed Danville who has a police record?
Once you've completed this part of the conversation, you will have to wait for the game to automatically transport you to the Interrogation Room which is located inside the CSI building. There are still a lot of questions that need to be asked:
- Let's try the name one more time. Are you Edsel Danville?
- How did your fingerprints turn up on a can of turpentine that was used to set a cabby on fire?
- Art project?
- Do they have names?
- So Mr. Danville, where were you between 9 and 10 last night?
- Did anyone see you at the "Windmill Suite"?
- One more question. Do you own a pair of athletic shoes?
Edsel mentioned a new location, so that's where you'll have to go right now. Choose Tribal Leader House from your locations list.
Once you've arrived at the tribal hose, you will come across a second suspect - Debra Finch. Ask her some new questions:
- Do you know an Edsel Danville?
- Maybe an Ed Freeborn?
- Mr. Freeborn claims that he was working for you on an art project - is that right?
- Did you say we could take a flyer?
Click on the fridge which can be found to the left of Debra. There's a small note here. Wait for the game to zoom in the view. Once this is done, use Latex Gloves.
New evidence: Debra's Flyer
Continue with the conversation:
- Any idea how one of your flyers got in the shirt pocket of a dead cabby last night?
- Yes. Someone burned him alive.
- That's all for now. Could you tell us where to find Liz Sunderland?
Head on to a new location - to the Fire Temple.
Before you're going to talk to a new suspect, you should take your time and explore the surroundings. You won't be allowed to pick up any valuable objects, because you don't have a search warrant for this location. As a result, we'll focus mostly on thoroughness areas. Click on the yellow objects which are located to the right of the stage. You should also take a closer look at the burnt fence. Once this is done, click on the large statue and find a second insect (screen).

Now you will have to talk to your third suspect for this case - Liz Sunderland. Once again, this is going to be a long conversation:
- This has nothing to do with your neighbors. Is this your Fire Temple?
- Were? But you aren't now?
- Did you know an Edsel Danville, possibly under the name Ed Freeborn?
- Why is that?
- But you do use turpentine in your work?
- Did you know Bob Castner?
- He's dead. He's the murder victim.
- Where were you between 9 and 10 last night?
- Did you see anyone walking?
Once the conversation is over, you should receive a phone call from Brass. He'll inform you that the cab has been towed to the CSI garage. You may also zoom in the view on the turpentine can (it's to your right), but you can't pick it up just yet. As a result, go to the Garage.

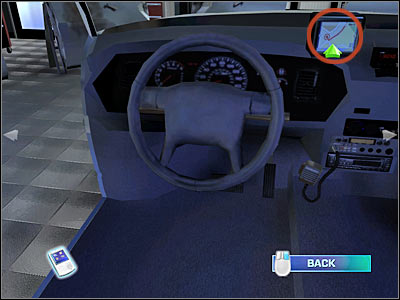
Let's start by looking at the main part of the disassembled vehicle. Head on to the main console and look at the dashboard. You will have to zoom in the view on the GPS Device which is located to the right of the steering wheel (screen). Pick it up with Latex Gloves.
New evidence: GPS Device
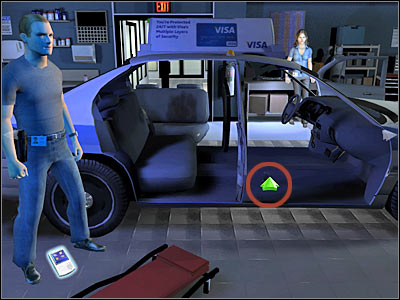
Now you will have to explore the area around passenger's seat. Check the screen, because that's where you'll have to zoom in the view. You should be able to notice a small object here. Nevertheless, you must use a High-Powered Flashlight, so you won't have any problems picking it up. I'm sure that you know by now that you must use Latex Gloves here.
New evidence: Matchbook from Cab
Don't close this window just yet, because you will have to take a closer look at the matchbook. You should be able to find a single fingerprint. Click on it and choose Ninhydrin from your inventory.
New evidence: Fingerprint from Matchbook
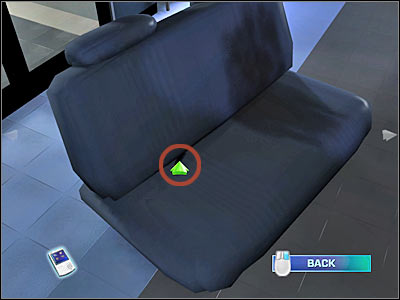
Next, you must click on the rear couch. The game should automatically zoom in the view on the only available object here. Once again, you will have to use High-Powered Flashlight. Make sure that you're shining on the small match. Click on it. You can't use Latex Gloves, because this object is too small. Instead, choose Tweezers.
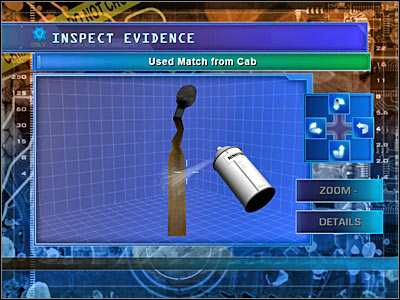
New evidence: Used Match from Cab
Now you will have to use the buttons in order to rotate the match. Your goal here is to locate a partial print. Once again, you must use Ninhydrin.
New evidence: Partial Print on Used Match
The inside of the vehicle is secure. Now you will have to click on the front couch which is located to the left of the cab (check the screen). Just as before, you will have to use a High-Powered Flashlight here, because it's going to be too dark. There's a lighter here. Pick it up with Latex Gloves.
New evidence: Lighter from Cab
Once again, I wouldn't recommend closing this window right away. There's a third fingerprint on the lighter. This time you will have to use a Fingerprint Brush and Powder. Next, choose Adhesive Lifting Tape from your inventory.
New evidence: Fingerprint from Lighter
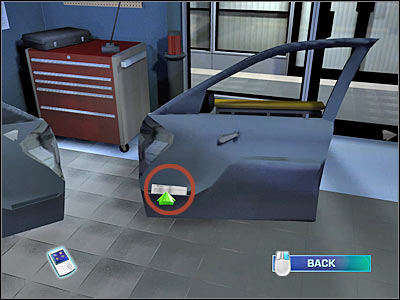
Your final task here will be to inspect two doors. These objects can be found to your right. Check the second door from the right. You will have to click on the white object (screen). Wait for the game to zoom in the view. Use Latex Gloves.
New evidence: Bank Receipt
Now you will have to look at the first door from the right. There's a new insect here. I'm sure that you won't have any major problems finding it. Pick up the insect and go to the Lab.
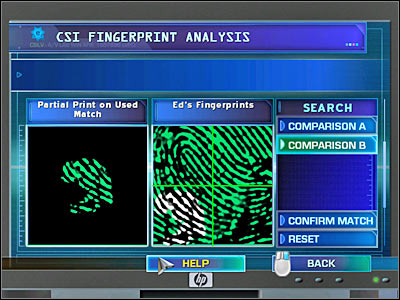
Let's start off with the CSI computer. You will have to choose the first option from the main menu - Fingerprints. Drag the Fingerprint from Matchbook to the left window. Once this is done, click on the LVPD Records search. You will have to choose the first set of fingerprints (Search Result A). Click on Confirm Match and you'll find out that those fingerprints belong to Liz Sunderland. You will also unlock a new warrant, but you won't have to go to Brass' Office right away. Now you will have to drag Partial Print on Used Match to the left window. Compare it to Ed's Fingerprints. You will also have to drag the partial print to the lower left field of the second window. You should receive a match here. Once you've listened to what Grissom has to say to you and your partner, use the Fingerprints option once again. You will have to perform one more test. Drag the Fingerprint from Lighter to the left window. Now you will have to go to FBI Records. Choose the second result (Search Result B). You must drag the partial print to the lower right corner of the second window. Click on Confirm Match and read the results of this analysis.
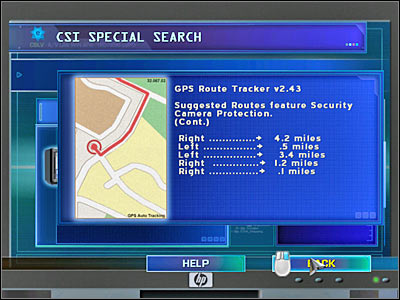
Go back to the main menu and choose the third option - Special Search. You will have to examine two items here. Start off by dragging the GPS Device to the main field. As a result, you will be rewarded with the cab route (screen). Now you will have to take a closer look at the Bank Receipt, so you'll find out about recent transactions. You may go back to Brass' Office.
You will have to ask Brass for an opportunity to ask more questions to one of the current suspects:
- Can I talk to a suspect again? -> I'd like to question Ed Danville again.
You will have to wait for the game to load an Interrogation Room area. Here are the topics of this new conversation with Edsel:
- When and why were you in Bob Castner's cab?
- The cabby who was set on fire last tight?
- What's a homeless drifter doing in a cab?
- What bar?
- What time was that?
- How did you singe your eyebrows?
- Mind if we take a few hairs?
New evidence: Singed Hair from Ed
Ask him a final question:
- Anything else you want to add?
Since you've acquired a singed hair, you should consider heading back to the Lab.

This time you will have to use a DNA analyzer which is located to the right of the computer. Drag the Flake from Blue Jean Cloth to the left field. As for the right window, you will have to place a Singed Hair from Ed there. Obviously you will receive a positive match here, so you must go back to Brass' Office.

You will have to ask Brass to grant you with a new search warrant:
- Can I get a warrant? -> Debra Finch? -> Can we get a location warrant to search Debra Finch's house and grounds?
Once you've acquired this document, go back to Tribal Leader House.

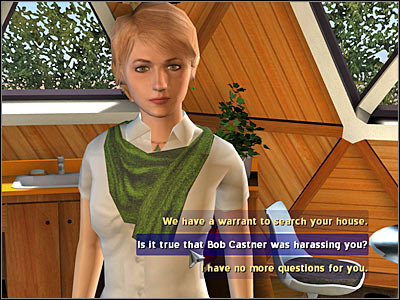
Start off by asking Debra a few important questions:
- Is it true that Bob Castner was harassing you?
- What did he have against you?
- Did you file a complaint against Castner?
- Why did you write Bob a check for five hundred dollars?
- We have a warrant to search your house.
Let's start from the right. Click on a small shelf. You will be able to spot an insect here (screen). Obviously you should consider picking it up. You will also receive a thoroughness bonus. A second thoroughness point is going to be given to you once you've inspected the fireplace. It's located to the right of Nick.
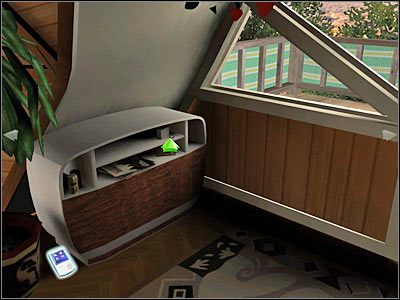
You will have to zoom in the view on the matchbook. It's going to be located to your right, near the window (screen). Obviously you must use Latex Gloves to pick it up.
New evidence: Matchbook from House
Next, go to the kitchen area which is located to the left of Debra. You won't have to pick up anything. Just make sure that you've explored this area.
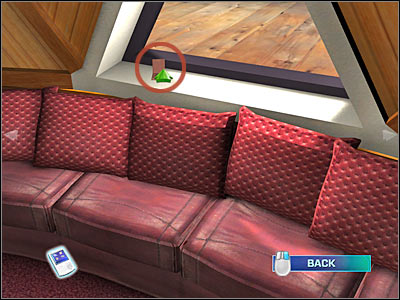
Your next step is the bedroom. As a result, you will have to click on a small entrance (screen). Start off by going towards the small storage area. There are some shoes there. Make sure that you've zoomed in the view on them. Once you've listened to what Nick has to say, check both night stands. You may go back to Debra, because you will have to ask her one more question:
- Do you have any other shoes like those in your closet?
You may leave this area. Go back to the Fire Temple.
Start off by asking Liz a few questions:
- We found your fingerprint on a matchbox in Bob's cab.
- What time was this?
- A can of your turpentine with Ed's prints on it was at the crime scene.
- Did Ed Danville know that Bob was harassing Debra?
- When did Ed give that flyer to Bob?
- What was Ed's attitude about Bob?
- We have a warrant to search the premises.
Once the conversation is over, turn right. I would recommend zooming in the view on the turpentine can (screen). I'm sure that you've noticed it before, but you couldn't take it back then. Now's your chance. Use Latex Gloves.
New evidence: Turpentine Can found at Fire Temple
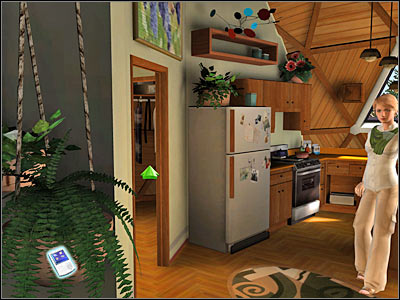
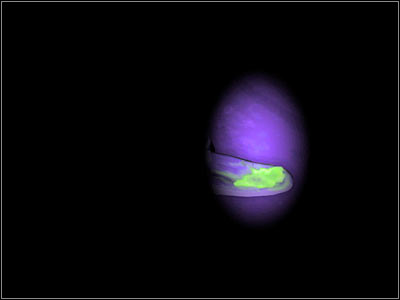
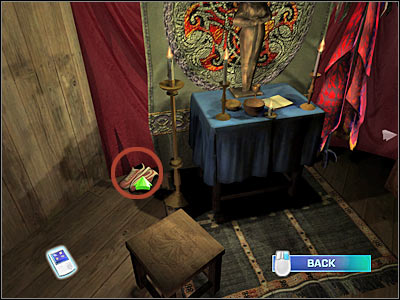
Now you will have to go back to the large statue. You won't have to investigate the sculpture itself. Instead, click on a yellow curtain which can be found behind it. As a result, you'll end up inside a small tent. Start off by clicking on a small chest. It's located near the bed. There's a blue shirt here. Click on it, so you'll get rid of it. Click on a new area and choose an Ultraviolet Tool from your inventory. Check the screen, because that's the area you have to illuminate. Choose Tweezers from your inventory.
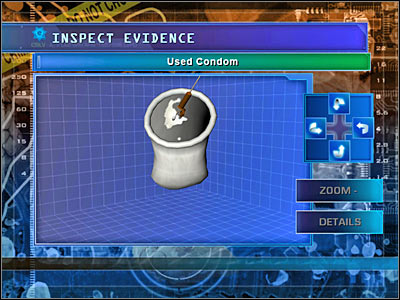
New evidence: Used Condom
Obviously you will have to examine this object more closely, so don't exit this window right away. Start off by seeing what's inside the condom. Click on the semen and choose IntegriSwab from your tools bar.
New evidence: Swab from Inside of Condom
Now you will have to inspect the outside part of the condom. Once again, you must use an IntegriSwab in order to gather some new evidence for this case.
New evidence: Swab from Outside of Condom
You will have to inspect four other areas here. Start off by clicking on a mask. There's also a smaller figurine here. Click on the ritual table. Your last object of interest are athletic shoes. They can be found to the left of the altar (screen). Listen to what Nick has to say about this discovery. You've got all the evidence you could find, so go back to the Lab.
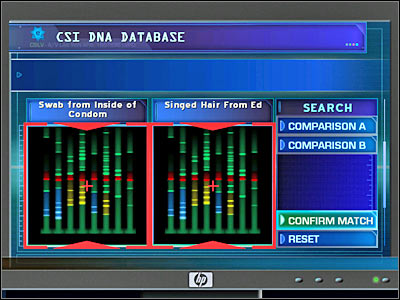
We're going to have to use a DNA analyzer here. You will perform only one action, however it's going to be very important, so make sure that you achieve a correct outcome of the analysis. You will have to compare Swab from Inside of Condom to Singed Hair from Ed. It turns out that it's his semen. Once you've acquired this knowledge, head back to the Fire Temple.
Liz will have to answer you to a new question:
- Can you tell us how a used condom got in your back room?
- We'd like to take a DNA sample from you.
Liz will be reluctant to give you a sample of her DNA, however you should be able to receive it.
New evidence: Liz's DNA
You will also receive a new phone call from Brass. Head on to the Lab.

Once you've arrived at the laboratory, you will have to witness a short cut-scene with Sara. You will receive some new evidence from her.
New evidence: Security Camera Video
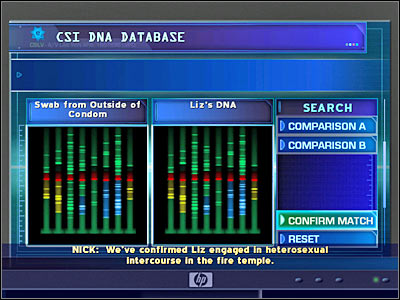
Before we'll deal with the security camera issue, you should consider using a DNA analyzer once again. This time you will have to compare Swab from Outside of Condom to Liz's DNA (you received it a few moments ago). Obviously you will be rewarded with a positive result.
Now you will have to listen to a short conversation between Nick and Grissom. Start off by using a computer. You will have to choose a new feature - Video/Image Enhance. Obviously you must place the Security Camera Video in the central field. Nick will suggest to play the tape before analyzing it. It's a good idea, so go ahead and press PLAY. After that, you will have to investigate it frame by frame. Start clicking on FRAME+. You will have to repeat this action several times. Check the screen, because that's the frame you have to analyze. Once it's on your screen, press the ENHANCE button. This will allow the computer to find something important. It's going to be a poncho of the passenger of the cab. It's almost identical to the one from the Fire Temple.
New evidence: Image of Poncho from Video
I'm sure that you won't be surprised by the fact that you have to return to the Fire Temple.
As you've probably suspected, you will have to proceed towards the tent right away. Head on to the bed area. You shouldn't have any problems finding the poncho. It's still inside the chest. Click on it and choose Latex Gloves from your inventory.
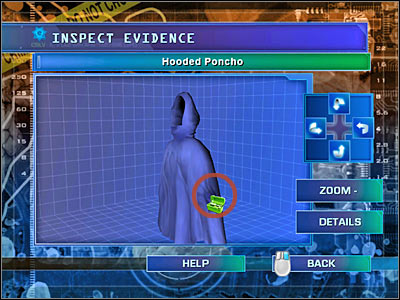
New evidence: Hooded Poncho
This will also allow you to unlock a new interrogation warrant on Liz. Don't close this window, though. You will have to inspect the designated area (screen). Use an Adhesive Mount and click on a darker fragment.
New evidence: Singed Fibers from Poncho
Go back to the Lab.
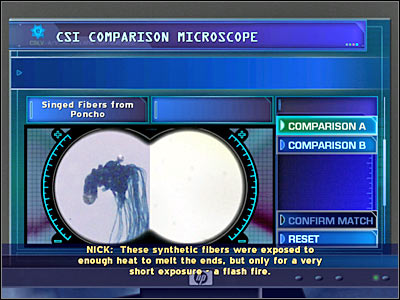
You will have to use a comparison microscope. Start off by dragging the Singed Fibers from Poncho to the left window. You won't have to compare it to anything else. Just make sure that you have listened to what Nick has to say to you. Go back to Brass' Office.
You will have to ask Brass to give you a new warrant:
- Can I get a warrant? -> Liz Sunderland? -> Can we get a Suspect Warrant for Liz Sunderland?
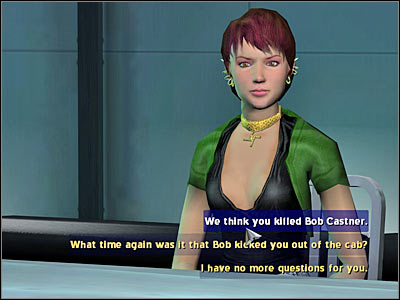
Wait for the Interrogation Room to be displayed on your screen. You will have to interrogate Liz:
- We think you killed Bob Castner.
- What time again was it that Bob kicked you out of the cab?
Ask Brass (by clicking on him; you won't have to go back to his office) to allow you to question Ed Danville again:
- I'd like to question Ed Danville again.
Here are the questions:
- We know you were intimate with Liz, the Fire Goddess...
- Maybe you helped Liz kill Bob Castner?
- You tore your jeans on the fence...
- Why were you at the foundry?
- Could be you and Liz smoked the cabby as a favor to Debra.
Once the conversation is over, head on to the Tribal Leader House.
You won't have to pick up any additional items here. Just make sure that you've talked to Debra:
- Does this poncho belong to you?
- In the temple back room. Do you know how it got there?
- Is there anything else you can tell us?
- Any idea who took it?
- We'd like to have a DNA sample from you.
Thankfully, Debra will cooperate with you. As a result, you will receive a sample of her DNA.
New evidence: Debra's DNA
Head on to Brass' Office, because you will be able to fully interrogate Debra in the station.

You will have to ask Brass for a new warrant:
- Can I get a warrant? -> Debra Finch? -> Can we get a Warrant to bring Debra Finch in for questioning?
Just as before, you will have to wait for the interrogation to begin. Here's the list of available questions:
- Then where were you between 9 and 10 on Tuesday night?
- What time did Liz leave the house?
- Any witnesses for the 9 and 10 time period?
- Exactly what happened between you and Bob Castner that caused him to harass you?
- How would you describe the relationship between Liz and Ed?
Once again, you will be rewarded with a new warrant. As a result, you will have to go back to Brass' Office, because you won't be able to ask him while standing inside the interrogation room. Here's what you'll have to say:
- Can I get a warrant? -> Ed Danville? -> Can we get a location warrant to search the miniature golf course?
You may proceed to the Abandoned Mini Golf Course.

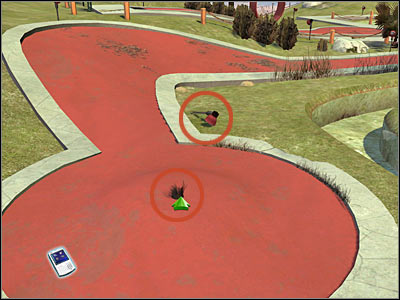
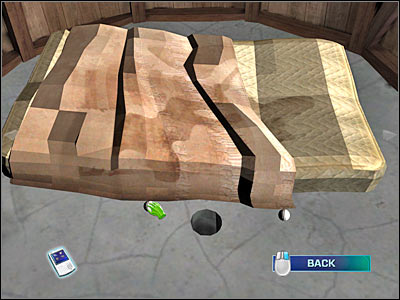
Once you've arrived at the mini golf course, listen to what Nick has to say about Edsel. You will have to click on a small windmill. There's a mattress here. Click on it as well. This will allow you to reveal a small hole. You won't be able to inspect the hole yourself. Instead, click on one of visible golf balls. The object will automatically be moved to the hole. Once again, Nick wants to comment your progress, so listen to his short statement. There's also a bucket here. It's to your right. Make sure that you've clicked on it. Once this is gone, go back to the main view.
Now you will have to turn right. Use the stairs to reach a new section of the map. You should be able to reach Nick. You won't have to click on him. Instead, check the second hole which is located to his left. Once this is done, locate a small pipe. Check the screen if you're having some problems finding it. Listen to Nick's statement. According to what he just said, you will have to go back to the windmill structure. Click on the second golf ball, so it'll enter the upper hole.
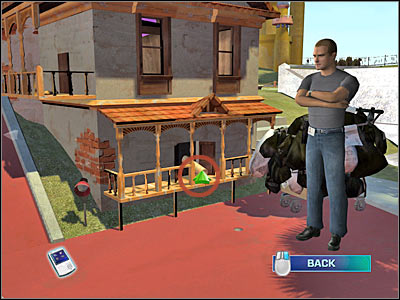
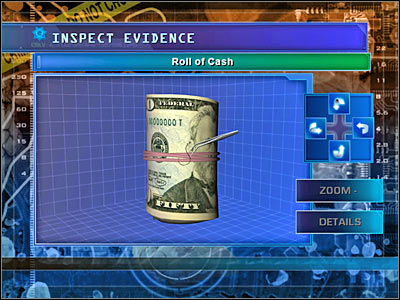
Now you will have to click on a new object which can be found near the pipe. Wait for the game to zoom in the view and use Latex Gloves on the roll of cash.
New evidence: Roll of Cash
Don't close this window right away. You will have to locate a single hair. Check the screen if you're having some problems with this action. Obviously you must use Tweezers here, because the hair is far too small for the gloves.
New evidence: Hair from Roll of Cash
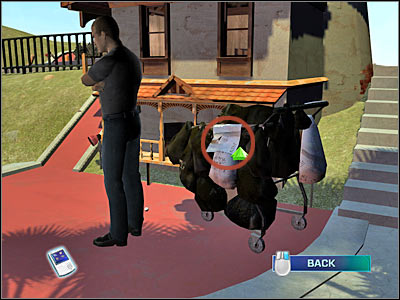
There's only one more thing to do here. Turn right. There's a shopping cart behind Nick. Click on it. You will have to wait for the game to zoom in the view. I'm sure that you'll know exactly what has to be done here. Pick up a new insect. Once this is done, go back to the Lab.
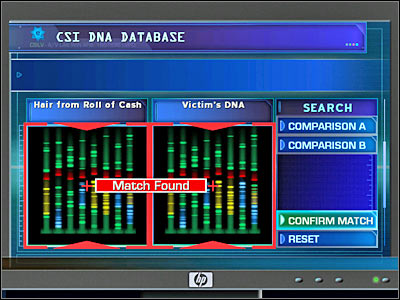
You will have to use a chemical analysis device. Choose the Roll of Cash from the inventory and wait for the computer to analyze this object. There are traces of turpentine on the cash. Now you will have to use a DNA analyzer. You will have to fill the left field with Hair from Roll of Cash. As for the right one, choose Victim's DNA. Doing this will allow you to unlock an arrest warrant, so head back to Brass' Office.
You will have to earn your last warrant for this case:
- Can I get a warrant? -> Ed Danville? -> Can we get an Arrest Warrant for Edsel Danville?
Wait for the game to transport you to Interrogation Room. You will have to talk to Edsel for the last time:
- A funny thing happened at the miniature golf course today, at hole number eight.
- Let me help you out. I got a big pay-off. You following yet?
- Neither is theft - or murder, for that matter.
You will be rewarded with a full reconstruction of this crime. Congratulations! You've just finished your first CSI case!
Listen to what Nick has to say to you. Once he's done talking to you, Grissom will evaluate your progress. If you've followed my instructions, you won't have any problems scoring highest (Master) ranking.

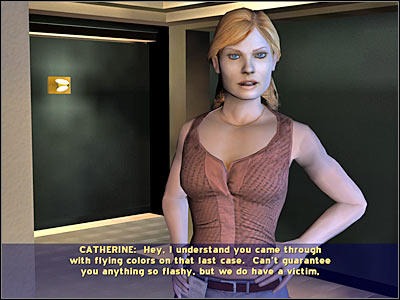
This time you won't have to talk to Grissom. Your partner for this mission will be Catherine Willows. Obviously you should hear what she has to say, especially since she'll tell you more about this new case. Once the conversation is over, go to Apartment: Crime Scene.
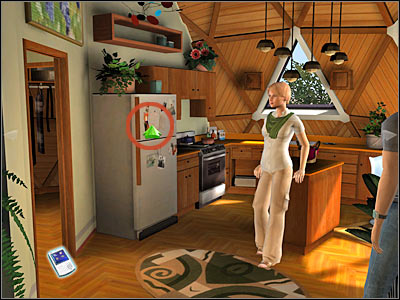
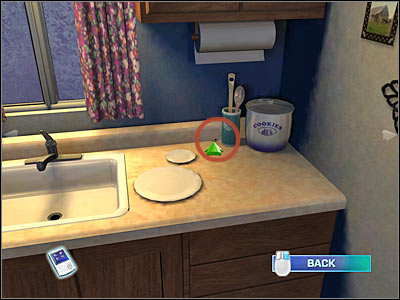
Once you've reached your destination, listen to Catherine once again. She'll tell you something about tenants. Before you'll proceed to the main bedroom, you should consider turning left. There are a few interesting areas here. Check the note on the freezer. Next up, we have a sink. You will have to move the camera to your right in order to see it. There's also an insect here (screen). Take it for Grissom.
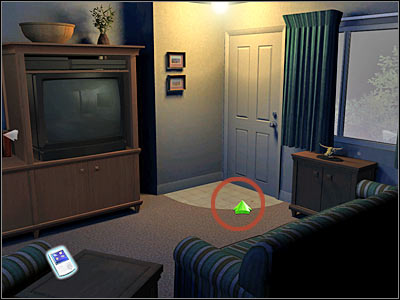
Go back to the main view and turn the camera to your right. There are some blood drops on the floor. You will have to click there. It's near the door to the apartment (screen). Wait for the game to zoom in on this location. Click on the blood once again. This time you will have to use your CSI equipment. Choose Leuko Crystal Violet and IntegriSwab.
New evidence: Blood Drops from Apartment
You should also click on the door handle while you're there. Listen to what Catherine has to say about it.
Now you should click on a small table which is located to your right. There's a golden figurine there. Zoom in on this object and should notice that there's a bullet stuck in the wall (screen). Click on the bullet and choose Tweezers from your inventory.
New evidence: Bullet from Wall
You should inspect this object right away. Click on the green material. This time you will have to use an Adhesive Mount in order to acquire a sample of this material.
New evidence: Material from Bullet

Before you decide to go to the bedroom, there's one more thing here for you to find. Click on the right wall (screen). As you've probably suspected, the bullet went through here. Once again, you will have to listen to Catherine and her thoughts on this one. You may enter the bedroom. Don't click on visible objects just yet. The first thing you need to do here is to make a photo of the crime scene. As a result, click on the bed and use Digital SLR Camera.
New evidence: Photo of Crime Scene
Let's start with the left night stand. There's a cell phone lying on the floor (screen). You may not notice it at first glance. Click on the phone. You will have to take it, so use Latex Gloves.
New evidence: Phone from Apartment
Don't close this window, because you will have to take a closer look at the phone. You will notice some blood on it. Click on the blood and use IntegriSwab.
New evidence: Blood from Phone
Now you should consider clicking on the left night stand. Listen to what Catherine has to say about it. Next, you will have to click on the bed. Choose one of the blood stains and use an IntegriSwab in order to collect a sample.
New evidence: Blood from Bed
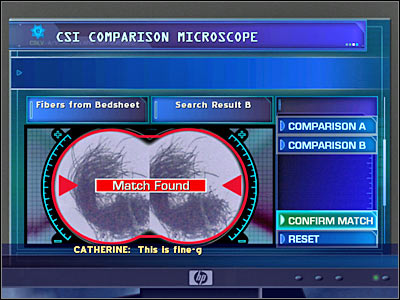
Your next area of interest is the bedsheet which is located slightly to the right. There's a small object there, but you won't have to pick it up. Just make sure that the game will zoom in on the bedsheet. Click on it once again and choose Ultraviolet Tool from your inventory. Check the screen, because that's where you'll find your new evidence. You will have to use Adhesive Lifting Tape here.
New evidence: Fibers from Bedsheet
You will also have to inspect the right case which is also located inside the bedroom. There's a small object here and you will have to zoom in on it (screen). Once you're close enough to the object, use High-Powered Flashlight and find it. Once this is done, choose Latex Gloves from your inventory.
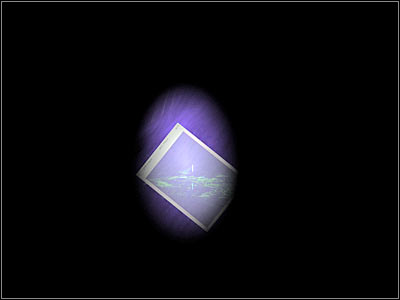
New evidence: Photo of Couple
You should receive a phone call from Sara right about now. This will allow you to go somewhere else. You will have to visit the Hospital.

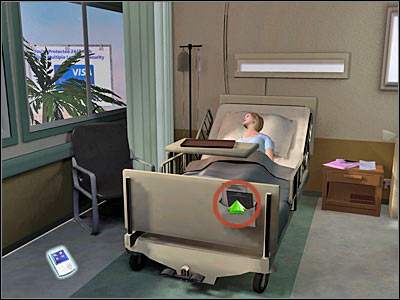
Sadly, you won't be allowed to talk to the victim, because she's unconscious and in bad condition. As a result, you will only have to look around. There aren't too many objects here and you won't pick up anything important. Nevertheless, you can't skip past this. Click on the victim and listen to a short statement by Catherine. Now you will have to click on the patient card which is located in front of you (screen). Your next areas of interest are medical objects - to the left and to the right of the bed. Both of them will allow you to score additional points for thoroughness. You aren't able to inspect the clothes, because you don't have a proper warrant for that.
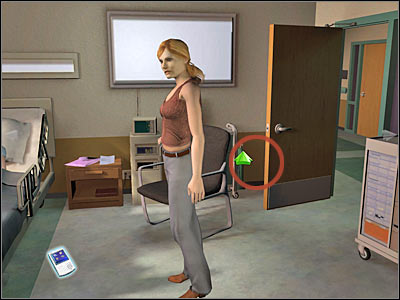
Now you should see what's hidden behind the right door (screen). Make sure that you click there. You will probably see an insect here. Pick it up for Grissom. Your last objective here will be to click on a third medical device which is located to the right. Once this is done, you will be allowed to leave this area. You've gathered a lot of evidence, so you should go to the Lab.
Your first task here will be to use a comparison microscope. You can't inspect all of the carried objects right away, but don't worry about that, because we'll deal with these problems in the future. For now you should only consider dragging Fibers from Bedsheet to the left field. You will have to compare them to one of the CSI Samples. Choose the second sample (Search Result B) from the list and listen to what Catherine has to say here.
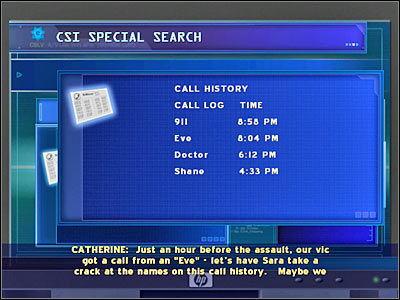
Your next step is the lab computer. You will have to choose the third option from the main menu - Special Search. You must analyze two items here. Start off by dragging Phone from Apartment to the main window. Once you've analyzed it, you will find out about recent call history (screen). Your next object of interest is the Photo of Couple. Once the computer has ended its task, you will find out where exactly Connie and Shane work. Now you should head on to the DNA analyzer. We're going to make a single comparison and it's not going to be important. Nevertheless, you should do it right away, especially since it'll only take a few seconds of your time. You must compare Blood from Phone to Blood from Bed. You may exit the lab. Go to a new location - Casino High Rollers' Room.
Before you decide to talk to the casino employee, you should take your time and look around. Click on the large construction which is located in front of the aquarium in order to score a thoroughness point. You should also click on the bar counter, because you'll find a new insect there (check the screen if you're having some problems finding it). Your next goal areas are the entrance to the high rollers' pit and a large plant. You can also inspect the Blackjack table, but you won't find anything of interest there. Last, but not least, we have the gold barriers which are located to your right.
Once you've searched the area, you may consider talking to your first suspect. It's Shane Michaels. He's a fiance of the attacked women. You will have to begin the conversation by asking following questions:
- What is your relationship with Connie Roth?
- When did you last see her?
This conversation will automatically end and you will go to the Hospital.

Once you've arrived at the hospital, you will have to continue your conversation with Shane:
- Mr. Michaels... are you all right?
- Were you at her apartment last night?
- Did the two of you have an argument?
- So you were aware that she is pregnant?
- Know anyone who'd want to do this to Connie?
- Does Connie know an Eve?
- Do either of you own of gun?
- We found a bullet in your wall. Was it there before?
You should receive a new phone call from Sara. She will tell you more about Eve from the call history. It turns out that Eve stands for Everett Brower. He's one of the multimillionaires staying in Vegas. You will unlock a new location, but don't go there right away. Keep talking to Shane:
- Does Connie know Everett Brower?
- Any reason he'd call her?
- Out of respect to you?
- One more thing: can we take a DNA sample to exclude you?
New evidence: Shane's DNA
You may finally proceed to a new location. It's going to be a Luxury Suite.

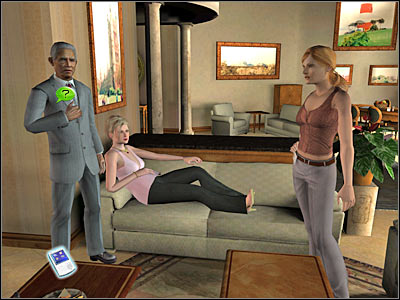
Once you've arrived at the Luxury Suite, you will come across TWO new suspects - Everett Brower and his wife Nicole Watt. Let's start by talking to Everett. Here's the list of questions you have to ask him:
- Do you know Connie Roth?
- Her phone records show you called her last night.
- About that phone call...
- Is it normal to fraternize with casino employees?
- What was so urgent you had to call before his shift?
- Mind if we take a look around?
You won't receive a clearence to search the suite, so go ahead and talk to Nicole:
- What happened to your hand?
- Do you know Connie also?
- She's in critical condition.
- How well do you know Shane?
- Can we take a DNA sample, to exclude you?
Connie won't cooperate with you as well. Go to Brass' Office.
This time you will have to ask Brass only for one thing. Here's the question:
- Can you request security photos of the suspects at the casino?
It's going to take a while, so you should head back to the Lab.

Once you've arrived at the lab, you will have to listen to a short conversation with Sara. As a result, you will find out more about Connie's past. Start off by using a DNA analyzer. You will have to perform a single comparison here. Drag Shane's DNA to the left field. As for the window on your right, you will have to place Blood Drops from Apartment there. Obviously you will receive a positive outcome and you will be able to interrogate Shane. Go back to Brass' Office.
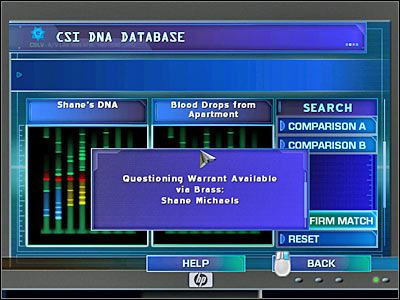
Ask Brass to give you this new warrant:
- Can I get a Warrant? -> Shane Michaels? -> Can I get a warrant to interrogate Shane Michaels?
Obviously you will have to wait for a few seconds. Once Shane is inside the interrogation room, ask him a few questions:
- Why don't you tell us again what happened last night.
- What was the argument about?
- You're not telling us everything.
- We've got a trail of your blood leading out of the apartment.
- Do you always leave for work at 8:45?
- So you why did you show up late for work?
You will receive a phone call from Sara. It turns out Connie is awake, so you will be able to ask her what happened inside her apartment. Don't leave the interrogation room just yet. You will have to ask Shane one more question. Here it is:
- What is your relationship with Nicole?
You may go back to the Hospital.

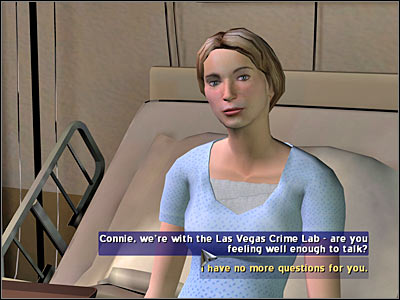
Once you've arrived at the hospital, you will have to talk to Connie:
- Connie, we're with the Las Vegas Crime Lab - are you feeling well enough to talk?
- We're here to help. Can you tell us what happened?
- You say it was a man. Can you be sure?
- Everett? Why do you think he would want to do that?
Connie will grant you with new evidence. You will also be able to receive a new warrant from Brass.
New evidence: Testimony Implicating Everett
Ask her three new questions:
- Was there a gun involved in the attack?
- Where is the gun now?
- Can we take a sample of your DNA, for comparisons?
New evidence: Connie's DNA
You will have to ask Connie for cooperation:
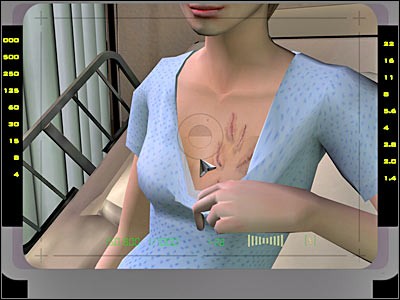
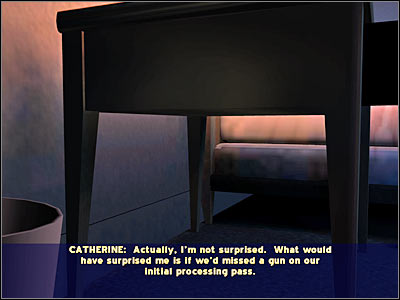
- Can we take a photo of your wounds?
You will have to click on Connie. Wait for the game to zoom in on the wound. Choose Digital SLR Camera from your inventory and take a picture.
New evidence: Photo of Wounds
Ask Connie a few more questions:
- Can you remember anything about the weapon that was used?
- Mind if we take a look at your clothes and personal items?
- Anything else you can think of?
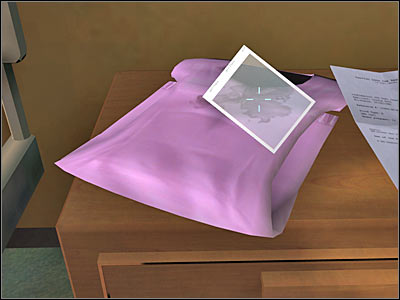
Once this conversation is over, you will have to click on a small stand which is located to the right of Connie's bed. Start off by zooming in on the pink dress. Click on the dress once again, however this time you will have to choose a darker stain. Choose Adhesive Lifting Tape from your inventory.
New evidence: Fibers from Connie's Dress
There's also a document here. It would be wise to pick it up. Obviously you will have to use Latex Gloves here.
New evidence: Pregnancy Diagnosis
Once you've listened to what Connie has to say about the diagnosis, go back to the Apartment: Crime Scene.
If you've listened to what Connie had to say, you will know where to search for the gun. You will have to go to the bedroom. Click on the left night stand, the same one that allowed you to score a thoroughness bonus. It's near where you found the cell phone. I think that you won't be surprised by the fact that the gun isn't there. Head on to the Lab.
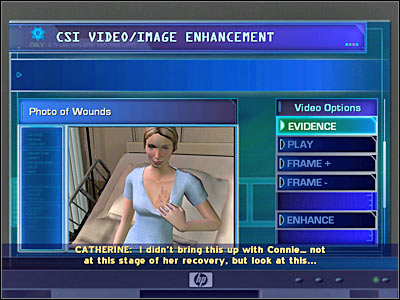
Use the lab computer. You will have to choose the fifth option from the main menu - Video/Image Enhance. Click on Evidence button. You will have to choose Photo of Wounds for further analysis. This is all going to happen automatically, so all you have to do is to listen to what Catherine has to say about the wounds. She will suggest a suicide attempt.
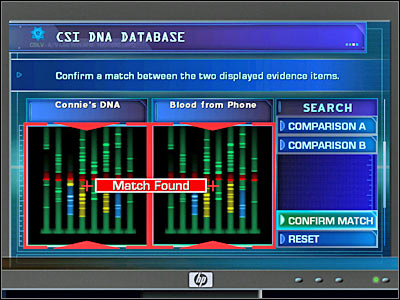
Now you will have to use a DNA analyzer. You must perform two comparisons here. Each of the comparisons will require you to place Connie's DNA in the left field. As for the right one, you will have to check two different samples - Blood from Phone and Blood from Bed. This will allow you prove that both blood stains originated from the victim's body. Head on to Brass' Office.
You will have to ask Brass for a previously unlocked search warrant:
- Can I get a Warrant? -> Everett Brower? -> Can I get a warrant to search the luxury suite?
Once you've acquired this document, go to Luxury Suite.

Once you've reached the Luxury Suite, you will have to show the warrant to Everett:
- We've got a warrant to search your hotel room.
New evidence: Everett's DNA
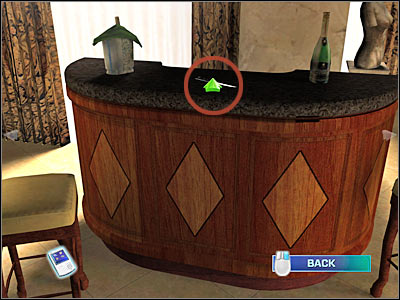
Start off by clicking on an area that's located behind the left sofa. Turn left here. There's a piece of art on the wall, near the door. Click on it in order to acquire a thoroughness point. Sadly, you won't be able to look at the table with the laptop, because you'll need a second warrant for that. Instead, zoom in on the kitchen table. You should be able to find a knife here. Zoom in on this object. Click on the blood stain and choose Leuko Crystal Violet from your inventory. Once this is done, use an IntegriSwab and listen to Catherine's analysis on the blood.
New evidence: Blood from Steak Knife
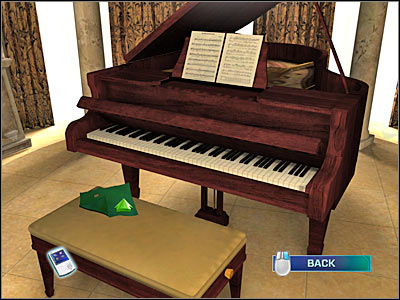
Go back to the main view and start turning the camera view to your right. There's a large statue to the left of the piano. Click on it for a new bonus. You may also consider playing the piano for a funny scene with Catherine, however this won't be necessary. There's a large handkerchief near the piano. You need to pick it up. Obviously you must use Latex Gloves here.
New evidence: Green Handkerchief
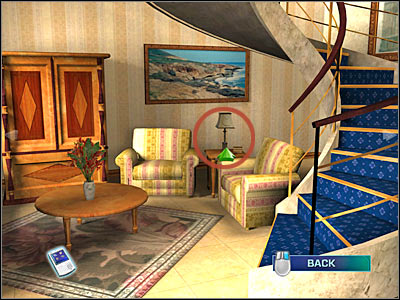
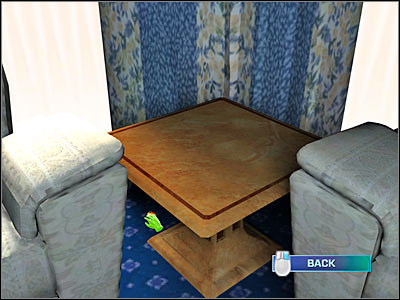
Keep turning right. You will have to advance to a second room (screen), because that's where you'll find more objects of interest. Start off by clicking on a round table (the one with the flowers). Once this is done, check a small cupboard that's located between two armchairs. You should be able to find an insect there. Pick it up.
Now you will have to use the nearby stairs in order to reach the upper level of the suite. Once you're there, click on the left plant for a well known bonus. After that, enter a small bedroom. We'll secure this room starting from your left. You may click on the golden object, however you won't receive any bonuses here. Now you should focus your attention on the revolver case. There's a gun there and you must take it with Latex Gloves.
New evidence: Everett's Revolver
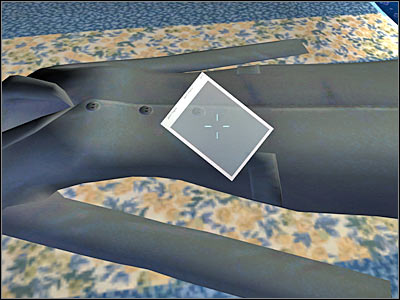
Turn right and look at the bed. There's a blue coat here. You don't have to take the coat to the lab. Instead, click on it and choose Adhesive Lifting Tape from your inventory.
New evidence: Fibers from Nicole's Overcoat
Your last task here will be to click on a second cupboard (screen). There's a new insect here and you should take it. I'm sure that you won't have any problems finding it. Once this is done, you should consider returning to the Lab.
Start off by using an assembly table which is going to be located to your left. Wait for the game to zoom in on the table. After that, click on a revolver. This will allow you to receive a new bullet which you'll need for your case.
New evidence: Bullet from Everett's Revolver
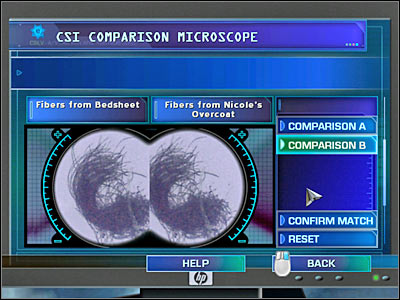
Now you will have to use a comparison microscope. Start off by taking a closer look at the Green Handkerchief. You won't have to find a match for this object. Just make sure that you've listened to what Catherine had to say. Now you will have to compare Bullet from Wall to Bullet from Everett's Revolver. You probably won't receive a positive result right away, so make sure that you've used Rotate A and Rotate B buttons. Your last comparison will require you to place Fibers from Bedsheet in the left field. As for the right one, you will have to choose Fibers from Nicole's Overcoat. Performing this analysis will allow you to unlock a new warrant. Head on to Brass' Office.
You will have to ask Brass for a new warrant:
- Can I get a Warrant? -> Nicole Watt? -> Can I get a warrant to interrogate Nicole?
Just as before, you must wait for the game to load a new area. Nicole will already be waiting inside the interrogation room. Ask her three important questions:
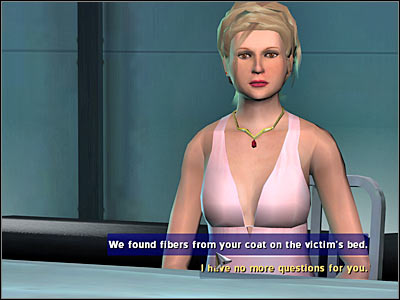
- We found fibers from your coat on the victim's bed.
- So why would you lend her your jacket?
- Why don't you tell us where you were the night of the attack?
Once the conversation is over, you should receive a new phone call from Sara. She will inform you that Connie has miscarried. As a result, go to the Hospital immediately.
Talk to Connie:
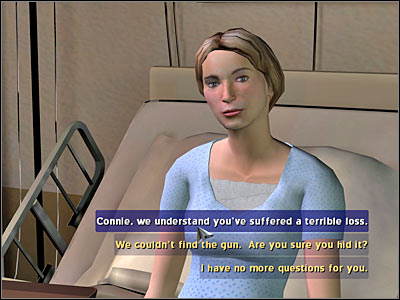
- Connie, we understand you've suffered a terrible loss.
- You have our sincere condolences.
- We found fibers from Nicole's coat on your bed.
- Is there a report from the doctor we could take a look at?
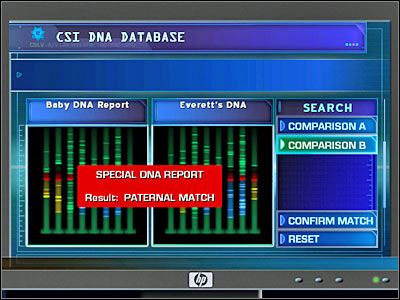
New evidence: Baby DNA Report
Proceed with the second part of the conversation:
- We couldn't find the gun. Are you sure you hid it?
You will receive a revolver from Connie.
New evidence: Connie's Revolver
Ask her one more question:
- So what happened with it at the scene?
Now you will have to return to the Lab.
Once again, you will have to use an assembly table. Click on a new gun (the same one you've received directly from Connie). This will allow you to acquire a new bullet.
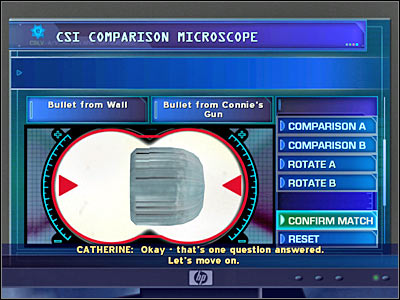
New evidence: Bullet from Connie's Gun
I'm sure that you know what our next move is. You will have to use a comparison microscope. Compare Bullet from Wall to Bullet from Connie's Gun. Just as before, you will have to use one of the available buttons (Rotate A or Rotate B) in order to find a match. Once this is done, listen to what Catherine has to say.
Don't exit the laboratory just yet, because you will have to use a DNA analyzer as well. Start off by dragging Baby DNA Report to the left field of the analyzer. You will have to compare it to Everett's DNA. You won't receive a positive match here, but you'll find out that Everett was probably father of the baby. Now you will have to witness a short conversation between Catherine and Sara. Once it's over, go to the Hospital.
You will have to ask Connie a few obvious questions:
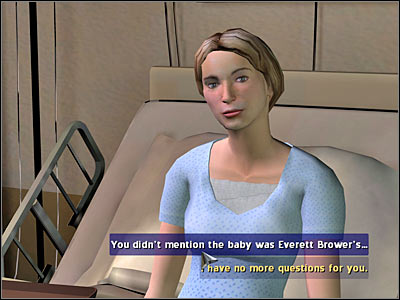
- You didn't mention the baby was Everett Brower's...
- Did you tell Shane at least?
- Do you still feel Everett made the attack?
Go to Brass' Office.
You will have to talk to Brass:
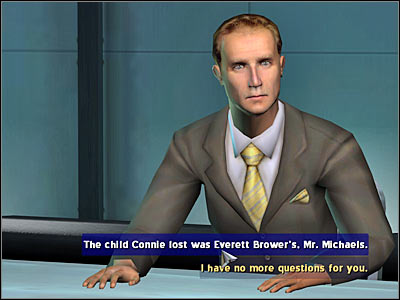
- Can I talk to a suspect again? -> Can we talk to Shane again?
Shane needs to hear one thing from you:
- The child Connie lost was Everett Brower's, Mr. Michaels.
Click on Brass:
- Can we talk to Nicole again?
Start interrogation Nicole. You must ask her three questions:
- What do you know about Connie's pregnancy?
- Nicole, Connie was pregnant with Everett's child.
- Unfortunately it's no joke.
Now you must go to the Luxury Suite.
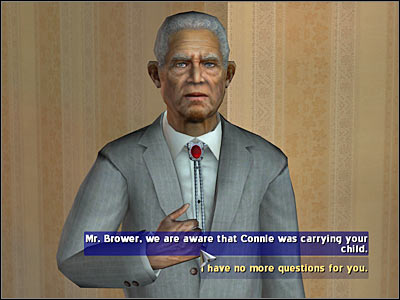
Obviously you will have to talk to Everett Brower:
- Mr. Brower, we are aware that Connie was carrying your child.
- I'm sorry to bring you this bad news, Mr. Brower. Connie has miscarried.
- What exactly is your relationship with Connie?
- And what would Connie get in exchange?
- What are Nicole's thoughts on this?
- How can you be sure Nicole doesn't know already?
- Why choose Connie?
- Isn't Nicole pregnant with your heir?
Go back to Brass' Office.
You will have to ask Brass to organize a new meeting with Shane:
- Can I talk to a suspect again? -> Can we talk to Shane again?
Tell him only one thing:
- Connie wasn't having an affair, Mr. Michaels.
Shane will give you a valuable piece of evidence.
New evidence: Ripped Photo
Once you've acquired the photo, head on to the Lab.

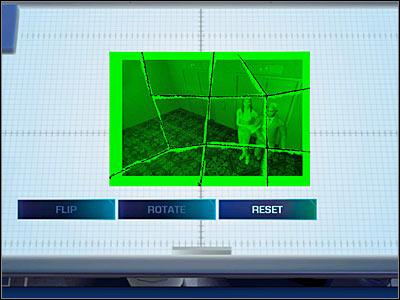
Obviously you will have to use an assembly table right now, because you will have to put all the pieces together in order to find out what exactly is on the picture. Click on the Ripped Photo. This will trigger a very easy mini-game. If you have played "CSI" games before, you will be very familiar with the basic controls. Start off by flipping some of the pieces, so you will be able to connect them to each other. You can do this automatically by clicking on the Flip button. You will also have to Rotate (second button) some of the available pieces. I'm sure that you won't have any problems here, especially since correct elements of this puzzle will automatically stay together. Check the screen for a full picture. Once you've finished your work here, go back to the Hospital.
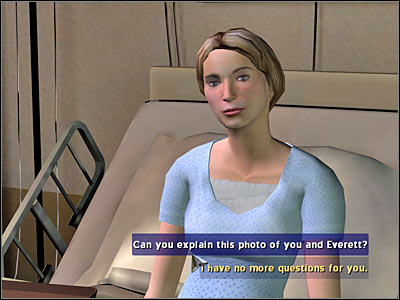
Connie must answer you to some new questions:
- Can you explain this photo of you and Everett?
- Maybe "Grandpa" wanted more, but you wouldn't give it?
Go back to Brass' Office.
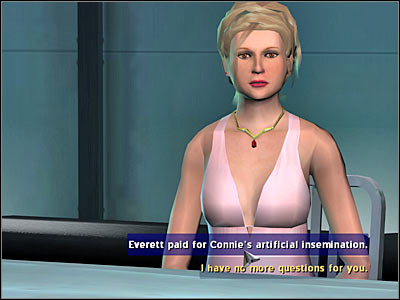
You will have to interrogate Nicole once more:
- Can I talk to a suspect again? -> Can we talk to Nicole again?
This conversation is going to be very short:
- Everett paid for Connie's artificial insemination.
Head back to the Lab.
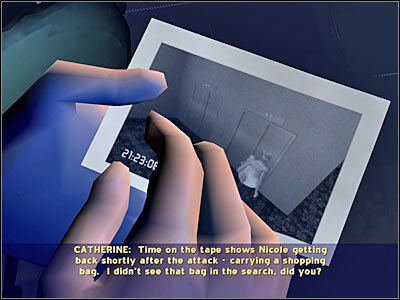
Once you've reached the lab, you will have to listen to Sara. It turns out that she has a photo from the security camera. You will be allowed to take a look at it right away. Catherine will also point out Connie on the picture. This will allow you to unlock a new search warrant.
New evidence: Security Photo of Nicole
Go to Brass' Office.
You will have to ask Brass for a search warrant:
- Can I get a Warrant? -> Everett Brower? -> Can we have a warrant for Everett's computer and papers?
You shouldn't have any problems acquiring this document, so you may proceed to the Luxury Suite without any other delays.

You won't have to show the warrant to anyone, so you may as well proceed to the large table right away. It's located to the left of the piano. Zoom in the view on the table. There's a document to your left (screen). Pick it up. Obviously you will have to use Latex Gloves.
New evidence: Printed Email
Catherine will want to comment on this one. Once she's done, pick up a small envelope. Once again, you must choose Latex Gloves from the equipment window.
New evidence: Prenuptial Agreement
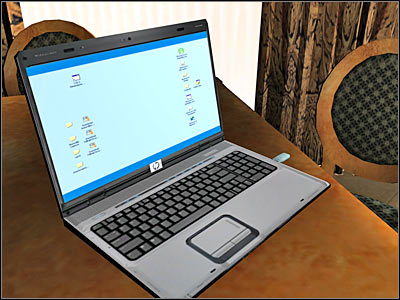
Last, but not least, we have the laptop. Before you decide to interact with this device, click on the medicine bottles. As for the laptop, you won't have to take the entire computer to the lab. Instead, choose USB Data Drive and click on the laptop in order to upload data.
New evidence: Encrypted File from Laptop
Go back to the Lab.
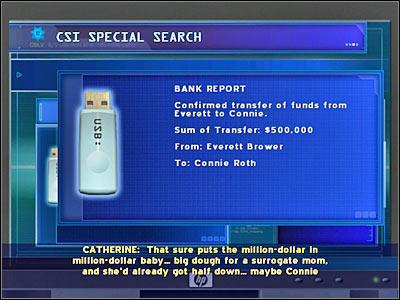
You will only have to use one device from the lab - the CSI computer. Choose the third option from the main menu - Special Search. You will have to drag Encrypted File from Laptop to the central area of the searching engine. As a result, you will find out about a very interesting transaction. You will also unlock a new warrant, so go to Brass' Office right away.
Just as before, you will have to ask Brass for a new warrant:
- Can I get a Warrant? -> Everett Brower? -> Can we have a warrant to interrogate Everett?
You will have to ask Everett some very important questions. Here they are:
- How do you explain this picture of you and Connie embracing?
- Why was this such a happy moment?
- But then you found out she was leaving town...
- Maybe she used the male pregnancy to extort more money from you.
- One more thing - does your wife always dry clean clothes she buy?
Once you've ended the conversation with Everett, Catherine will have something to say. Head on to the Luxury Suite.

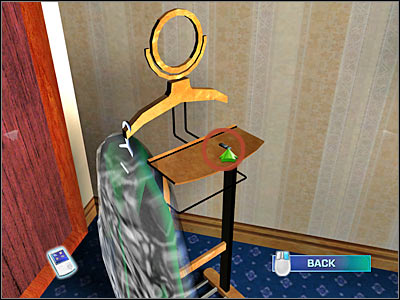
Once again, you will have to search the suite for additional evidence material. You won't find anything of importance near the entrance, so you may proceed to the bedroom right away. There's a hanger to your left. You didn't find anything here before, but now you'll come across a dress. Before you click on it, you should also find a memory drive. Check the screen if you're having some problems with that. Use Latex Gloves to pick it up.
New evidence: USB Memory Drive
Now you should consider taking the blouse. Once again, you must use Latex Gloves.
New evidence: Green Blouse
Don't exit this window just yet, because you will have to inspect this evidence. There are two areas you should be interested in. Check the screen for additional clues. Start off by clicking on the lower area. You will have to use Adhesive Lifting Tape here.
New evidence: Fibers from Green Blouse
Now you should consider clicking on a small blood stain. Before you'll be able to tag it as evidence, you will have to use Luminol. Now you must choose IntegriSwab from your equipment window.
New evidence: Luminol Reaction from Blouse
Once you've collected all new objects, return to the Lab.
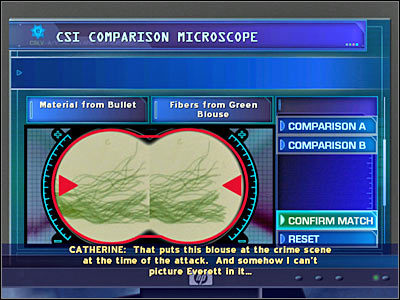
Start off by using a comparison microscope. You will have to drag Material from Bullet to the left field and Fibers from Green Blouse to the right one. Once you've compared both samples, you should receive a positive result (screen). Next up, we have a chemical analysis machine. You will have to analyze Luminol Reaction from Blouse.
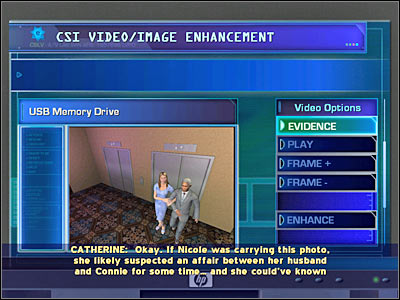
Your last step should be the main CSI computer. You will have to choose the fifth option from the main menu - Video/Image Enhance. Once this is done, drag USB Memory Drive to the central window. It turns out that Nicole knew about the picture with her husband and Connie. This will allow you to unlock an arrest warrant. You won't have to analyze any other items, so you may proceed to Brass' Office.
You will have to ask Brass for an arrest warrant:
- Can I get a Warrant? -> Nicole Watt? -> Can I have an Arrest Warrant for Nicole?
Now you must wait for the game to load a new area. You will have to address Nicole in a very specific way:
- We know you attempted to kill Connie.
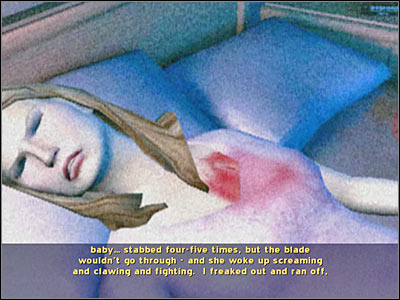
Your reward for solving this case will be a full reconstruction of the crime. You'll find out exactly what has happened inside the apartment.
Catherine will congratulate you on a job well done. After that, you are going to be transported to Grissom. Obviously he will evaluate your progress. Once again, you should be able to score the highest ranking available (Master).

Just as before, you will have to take part in a short briefing. This time you will have an opportunity to talk to Grissom. You will also meet your new partner for this case. It's going to be Warrick Brown. Together you will have to solve a very interesting crime, involving deaths of four different people - a young girl and members of the famous 80s rock band. They've been electrocuted while performing on a stage. You will have to go to the crime scene, so choose Hot Rod Casino - Auditorium: Crime Scene from the list.

You will have a few seconds to look around. I wouldn't recommend proceeding to the crime scene right away. Instead, talk to your first suspect. His name is Todd Hinkley and he's standing next to Warrick. You will have to ask him a few questions:
- Sir, can you tell us who you are and what you saw here?
- So you were here when this happened?
- Tell us about the show. What was this rehearsal for?
- Was the woman onstage one of the contestants?
- What there a fierce rivalry between the two?
- What's your relationship to the victims?
Ignore the information about a new location, because for obvious reasons this crime scene is considered to be your top priority at the moment.
Once the conversation is over, head on to the stage. Click on the bodies of dead musicians. You will have to take a picture of the crime scene, so choose Digital SLR Camera from your inventory.
New evidence: Photo of Crime Scene
I'd recommend that you start inspecting the crime scene from your left. Click near the microphone stand. Next, zoom in on cowboy shoes and a rock guitar (screen). You will be rewarded for thoroughness.
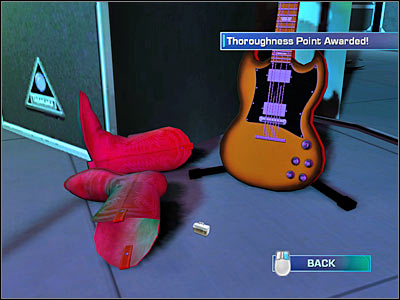
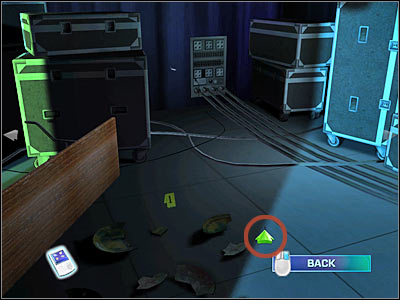
Check the screen, because that's where you'll have to click. It's a darker section of the stage. Wait for the game to zoom in on that location. Warrick suggests that you catch the bug. Do as he says and pick up your first insect for this particular case. You may go back to the previous view. Now you will have to click on a area that's located to the right of the cowboy shoes.
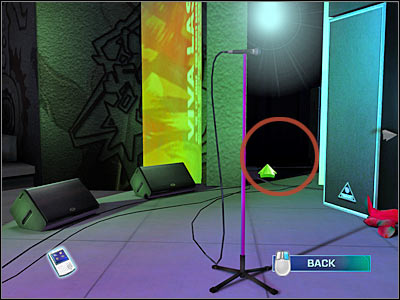
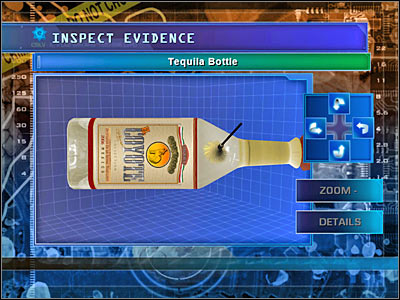
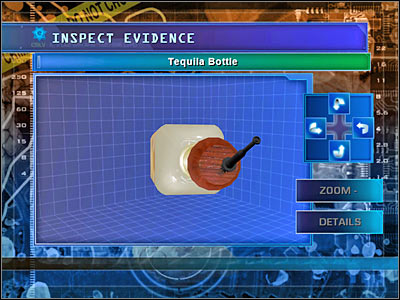
You will end up near a much darker corridor. Sadly, you will have to find a few important objects here, so you can't leave this area right away. Let's start with the bottle. Check the screen if you want to know where to look for it. You will have to use the High-Powered Flashlight before you'll be allowed to pick up the bottle. Use the Latex Gloves to take it.
New evidence: Tequila Bottle
There are THREE different sets of fingerprints on the bottle and you will have to find them all. Let's start with the label. I'm sure that you won't have any problems finding this fingerprint, especially since you'll be allowed to rotate the view. Use Ninhydrin.
New evidence: Print from Bottle Label
The second fingerprint is located directly on the bottle. Check the screen for additional bearings. In this case you will have to start with Fingerprint Brush and Powder. Once the fingerprint is more visible, use Adhesive Lifting Tape to collect a sample.
New evidence: Print from Bottle Neck
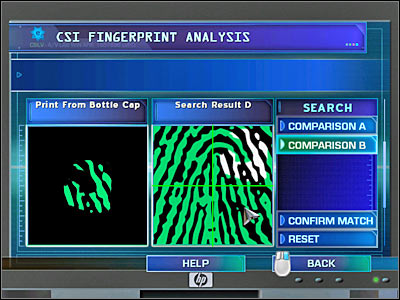
The third fingerprint can be found on the bottle cap. This means you will have to rotate the camera in order to find it. As for collecting it as evidence, you will have to start with a different tool than before. It's going to be Magnetic Brush and Powder. Your second step is more obvious, because you have to choose Adhesive Lifting Tape from your equipment bar.
New evidence: Print from Bottle Cap
You may return to the main view, but don't leave this area just yet. There are other objects here you will have to find.
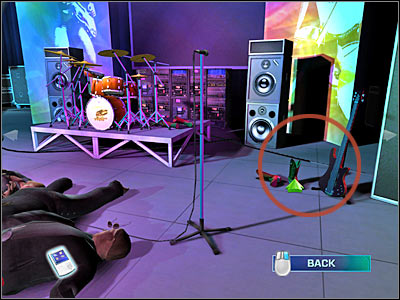
There's a second item nearby. I'd strongly recommend taking a closer look at the screen, mostly because it's going to be a very small object. Once again, you must begin with a High-Powered Flashlight. Once you've located this item, use Latex Gloves to pick it up.
New evidence: Makeshift Straw
Just as before, you shouldn't close this window right away. You will have to find some blood. Use Leuko Crystal Violet on it and follow it with IntegriSwab. This will allow you to acquire a new evidence item.
New evidence: Blood from Straw
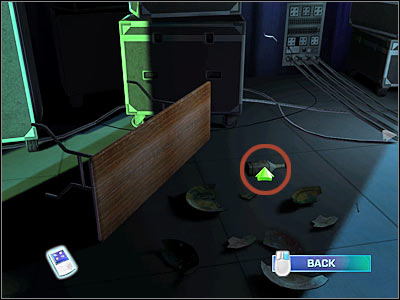
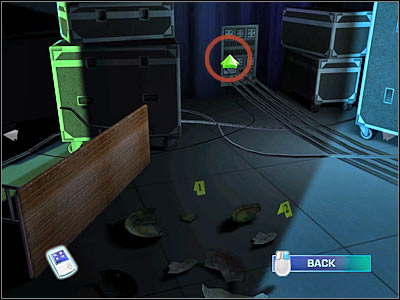
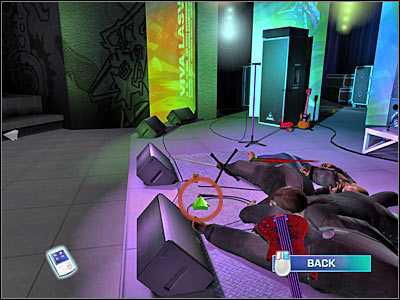
You've probably noticed some discharges in the back of the room (screen). Don't worry about your safety, because you won't risk your life by clicking there. Once the game has zoomed in, choose the High-Powered Flashlight. You will have to find a power cord. Once this is done, use Latex Gloves from your equipment window.
New evidence: Power Cord
I'd strongly recommend listening to Warrick, because he has something important to tell you. Go back to the main stage.
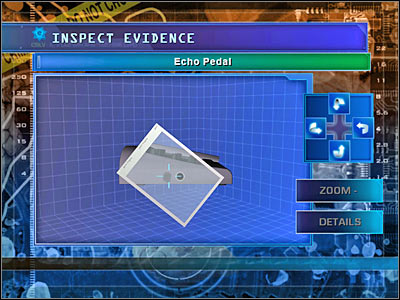
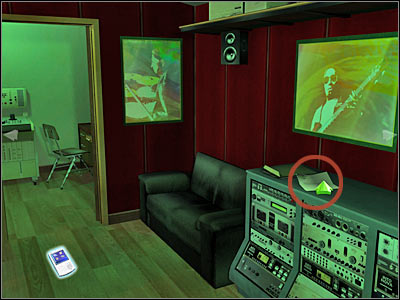
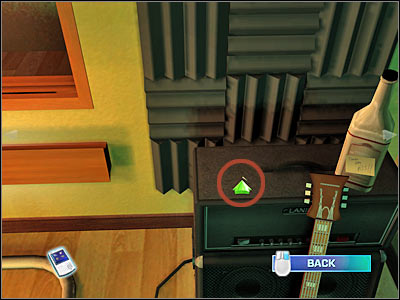
Now you will have to click on the echo pedal. Check the screen if you're having some problems understanding what it is. The game will zoom in on this device. Once again, Warrick will have something to say. You will have to pick up this item, so make sure that you've used Latex Gloves.
New evidence: Echo Pedal

I guess you won't be surprised by the fact that you shouldn't close this window right away. You will have to inspect two spots on the echo pedal. Start off by rotating the camera, so you'll be able to take a look at the left side of the device. You will notice a single fingerprint here. Click on it. Use Fingerprint Brush and Powder and follow it with Adhesive Lifting Tape.
New evidence: Fingerprint from Echo Pedal
Now you will have to inspect the bottom side of the echo pedal. Click on a very characteristic screw and choose Tweezers from your inventory.
New evidence: Screw from Echo Pedal
You will also find a microphone here (screen). It can be found near the echo pedal. Pick up the microphone with Latex Gloves.
New evidence: Andrea's Microphone
I'm sure that you won't have any problems finding a new fingerprint on this newly acquired microphone. Click on the fingerprint. Use Fingerprint Brush and Powder and Adhesive Lifting Tape.
New evidence: Fingerprint from Microphone
You won't collect any new evidence from the crime scene, however you will have to take a closer look at some of the interactive areas of the stage. Start off by clicking on each of the killed musicians. You will only receive two comments from Warrick, but it's OK. He won't comment every dead body he's seen so far. Next up, we have the percussion. You will receive a point for thoroughness here. The second bonus will be awarded to you for zooming in on the right guitar. There are also other cowboy shoes there (screen). Once all of this is taken care of, go back to Warrick and click on a large camera which is located to your right.
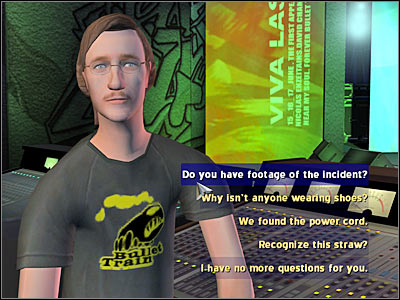
You will have to talk to Todd once again, because based on your evidence and findings, you will ask him a few additional questions:
- Do you have a footage of the incident?
You will receive a video tape.
New evidence: Video Footage of Band
Keep talking to him:
- Why isn't anyone wearing shoes?
- We found the power cord.
- Recognize this straw?
Once the conversation has ended, go to Morgue.
Your first task is very simple. You will have to ask Doc Robbins to recover all four bodies:
- Can you recover the victims' bodies for us?
We'll start with Andrea's body. Look at her left arm. Once this is done, talk to Robbins:
- Can you confirm the cause of death?
- What did you find on Andrea Stevenson?
You will receive your first set of fingerprints. They'll belong to Andrea.
New evidence: Andrea's Fingerprints

You will have to ask Robbins to show up a second body:
- May I see one of the other victims? -> Ray Brown
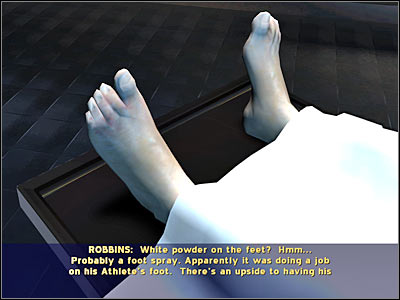
In this case, you will have to take a closer look at the feet of the victim. Listen to a short comment on the white powder. Also, zoom in on his left hand. Talk to Robbins:
- What can you tell me about Boogie Feet?
Ask for the third body to be delivered to the examination table:
- May I see one of the other victims? -> Marty Party
Just as before, you should look at the left hand. As for Robbins, you will only have to ask him one question:
- What's the story with Marty Party?
The Doc will suggest that you take a look at the tube. Move the camera to the right and click on it for a thoroughness bonus (screen). You won't have to pick up this object.
Let's take a look at the last (fourth) body:
- May I see one of the other victims? -> Steve Olacheck
This time not only you will have to inspect his left hand, but you should also take a closer look at his chest. Listen to a short statement by Robbins. After that, ask him a single question:
- Find anything interesting on Steve Olacheck?
You may leave the morgue. Head on to a well known location. It's going to be a Luxury Suite, however this time it's going to be occupied by someone else.
I'm sure that you're familiar with the surroundings, because you were here while trying to solve the second case. This time you'll meet a new person, though. It's going to be your first suspect -Kathy Cantanta. You must ask her three questions:
- Kathy Cantanta?
- You and Andrea were competing for a spot in the band, correct?
- Who else is staying here?
You may go to the Lab.

You will have to go to the assembly table, because that's where you'll find the echo pedal collected at the crime scene. Click on the echo pedal. Your first task here will be to remove the front cover. Hold the left mouse button and start dragging the cover towards one of the corners of the screen. Now you will only have to click on a small object, located in the upper right corner of the echo pedal. Check the screen if you're having some problems finding it. Warrick will say a few important things about the newly acquired switch.
New evidence: Polarity Switch
Don't close this new window just yet, because you will have to examine the polarity switch. Find a very characteristic residue. Click on it and use an IntegriSwab.
New evidence: Residue from Polarity Switch
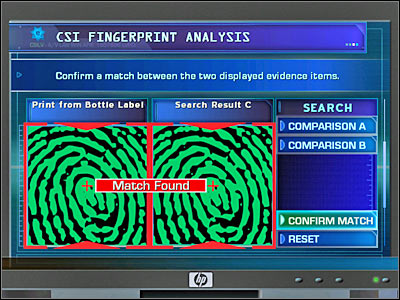
Now you will have to use a comparison microscope. You won't compare any items. Instead, you will have to drag the power cord towards one of the windows. Once this is done, use the CSI computer. Choose the first category (Fingerprints), because we'll have to compare some of the collected fingerprints. You will have to drag Fingerprint from Bottle Label to the left field. Now you must find a match, so go to Civil Records. You will have to choose the third set of fingerprints (Search Result C). You'll find out that those are Ray Brown's fingerprints.
This isn't over yet, because you will have to examine other fingerprints. Place Fingerprint from Bottle Neck in the left field. Once again, you will have to open Civil Records. This time choose the fifth set of fingerprints (Search Result E). You'll find out that the fingerprints belong to Martin Salznick. Now for the final comparison. Drag Fingerprint from Bottle Cap to the left window. It's a partial print, but you'll find a match. Head on to the Civil Records and choose the fourth set (Search Result D). Now you will only have to drag the partial print to a correct square (screen). Those fingerprints belong to Steven Olacheck.
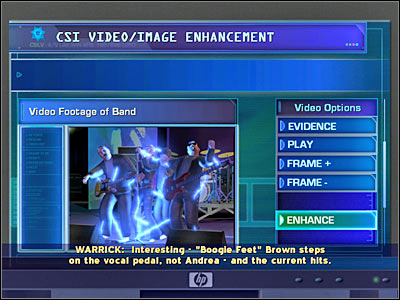
Now you will have to choose the fifth option from the main menu of the computer - Video/Image Enhance. Obviously you will have to analyze one of your new objects - Video Footagre of Band. Before you decide to analyze it, play the tape by pressing a correct button. Once this is done, you will have to start pressing FRAME+. Check the screen, because that's the frame you'll have to analyze. Click on ENHANCE and wait for the computer to do all the dirty work. You will receive results of this analysis very shortly. Now you must use chemical analysis machine in order to take a closer look at the Residue from Polarity Switch. Once this is done, you may go back to the Luxury Suite.
You will have to talk to Kathy:
- Can you think of anyone who wanted to hurt Andrea or the band?
- Mind if we look around?
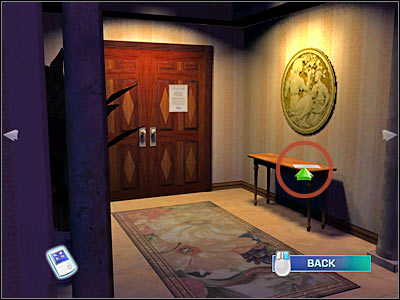
Kathy won't have anything against your request, so you may search the suite right away. Just as before, let's start from the left. Click on an area near the large door. You won't have to inspect the large piece of art. Instead, click on a small table and zoom in on a note. Pick it up. Obviously you will have to use Latex Gloves here.
New evidence: Threatening Note
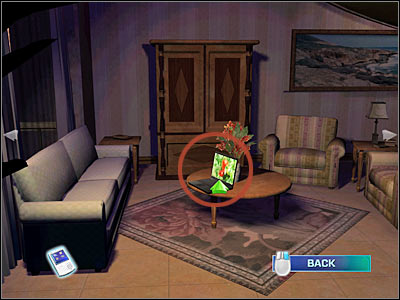
Now you will have to turn right. Click on a small table that's located between two armchairs. You will also have to inspect a statue which can be found to the left of the piano. Your next step is to move to a second room. It's the one near the stairs. You should notice a laptop here (screen). Zoom in on it and choose USB Data Drive from your equipment bar.
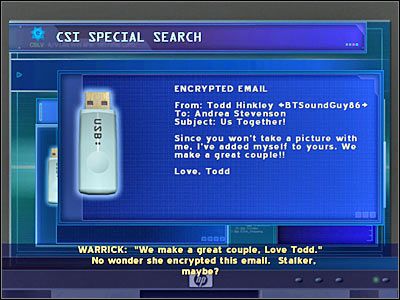
New evidence: Deleted Email from Todd
You may proceed to the upper floor of the suite.
Turn left here. There's a small table in front of you and you will have to pick up a new insect. I'm sure that you won't have any problems finding it. You will also have to click on a plant in order to score a new thoroughness bonus. You may proceed to the bedroom area. First of all, you will have to locate a trash bin. Click on it twice, so you'll be able to take a peek inside the bin. You must use Latex Gloves in order to collect some new evidence.
New evidence: Photos of Todd and Andrea
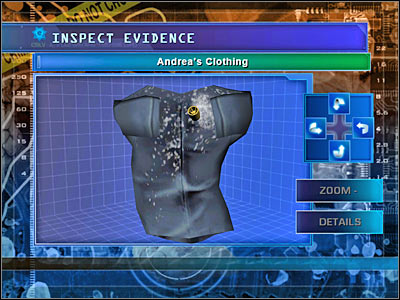
Click on the piece of clothing. You will find this blouse near the chairs. Once again, you will have to use Latex Gloves in order to follow proper procedure.
New evidence: Andrea's Clothing
Don't close this window right away. Instead, use the buttons to rotate the dress. You will have to click on the white residue. I'm sure that you won't have any problems spotting it. Use Adhesive Mount, so you'll be able to collect a sample.
New evidence: Residue from Andrea's Clothing
There's also a large bar in the bedroom. Click on it for a thoroughness bonus. Go back to the Lab.
You will have to use a CSI computer. Choose the third option from the main menu - Special Search. Place Deleted Email from Todd in the main window. This will allow you to read this email (screen). You may exit this window. Your next step is the chemical analysis device. This time you will have to analyze Residue from Andrea's Clothing. Doing this will unlock a new warrant, so go to Brass' Office right away, because you won't perform any other actions inside the lab.
You will have to ask Brass to give you this new warrant:
- Can I get a Warrant? -> Todd Hinkley? -> We need to bring Todd Hinkey in for questioning.
Now you will have to wait for the game to transport you to an interrogation room. Todd will have to answer you to some very important questions:
- You and Andrea had a fling?
- What kind of changes did Andrea promise to make for you?
- Who's Eddie Tillis?
- What do you know about this vocal pedal?
- You have the skills to do something like that.
Todd mentioned Eddie Tillis during the conversation, so you'll have to meet him right away. As a result, go to a new location. It's going to be a Recording Studio.

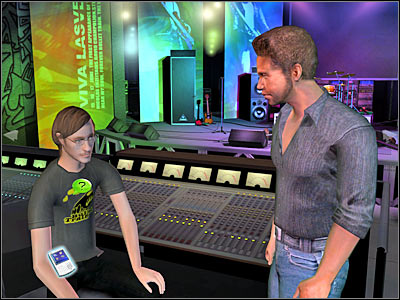
Once you've arrived at the recording studio, you will have to talk to a new suspect. It's going to be Eddie Tillis. He is the owner of this recording studio and he was also a manager of the band. You will have to ask him a few questions:
- Eddie Tillis?
- Did the band have any enemies?
- Anyone have a reason to harm Andrea Stevenson?
- Todd Hinkley had a thing for Andrea, correct?
- We hear you were fighting with the band over the song rights...
- They were going to fire you?
- Mind if we look around?
Eddie won't allow you to search his recording studio, however you will be able to take a look at a few things right now. Let's start from the left side of this room. Click on an active monitor. You should also inspect some of the CD's. Listen to what Warrick has to say. Click on the figurine in order to receive one of the available thoroughness bonuses. The figurine is located on the top shelf of the large case which can be found to the right of Eddie. Now you will have to check the objects to your right. Click on a document (it's very important). You will also spot a tape, but you can't pick it up or analyze it without a proper warrant. Once this is all done, ask Eddie a few additional questions:
- Was the contest fixed so that Andrea Stevenson would win?
- Your demo CDs only have Kathy's vocals on them...
- We're not accusing you of anything, Mr. Tillis.
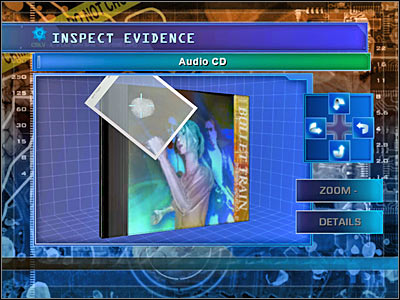
Warrick will trick Eddie into giving him a free CD. The interesting thing is that you'll be able to add his fingerprints (without Eddie's knowledge) to your list of available samples.
New evidence: Audio CD
I guess you won't be surprised by the fact that you shouldn't close this window, because you will have to take a closer look at the CD. Find a single fingerprint. Click on it and choose Fingerprint Brush and Powder from your inventory. Once you've used the powder, choose Adhesive Lifting Tape. This will allow you to collect new set of fingerprints.
New evidence: Eddie's Fingerprint
You may go back to the Lab, because we'll have to analyze some of the carried evidence.
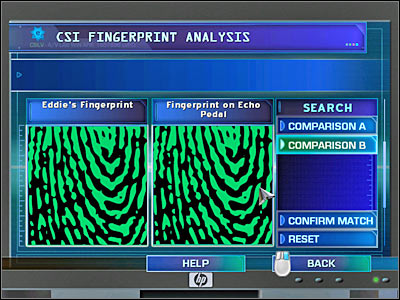
Start off by using a CSI computer. You must choose the first option from the menu, because we'll analyze some of the available fingerprints. Drag Eddie's Fingerprint to the left window. As for the right one, you will have to choose Fingerprint on Echo Pedal. You shouldn't be surprised by the fact that the fingerprints will match. You can also listen to an Audio CD from Eddie. You would have to choose the fourth option from the menu - Audio. Next up, you would have to drag an Audio CD to the left window and click on Play A. Comparing the fingerprints allowed you to unlock a new warrant, so go to Brass' Office without any unnecessary delays.
You will have to ask Brass for a search warrant for the recording studio:
- Can I get a Warrant? -> Eddie Tillis? -> Can we have a warrant to search Eddie Tillis' recording studio?
Once you've successfully acquired this document, head back to the Recording Studio.

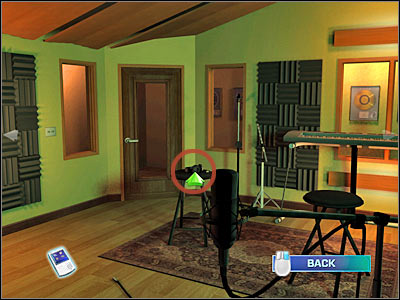
Let's start with the recording room. The entrance is located to your left, next to Warrick. Once you're inside, click on a second door in order to receive a thoroughness bonus. Now you will have to zoom in on a small stool. Check the screen if you don't know which one it is. There's an insect here and you will have to pick it up. You should also check the keyboard. Press the green button if you want to (it's optional).
Turn right, because you'll find other interesting objects here. Check the screen, because that's where you'll have to zoom in on a very small object. You probably won't notice it at first glance. Once you're close enough to it, use the Tweezers.
New evidence: Ground Prong
Once you've collected the prong, click on two other objects for thoroughness bonuses. It's going to be a guitar and a bottle. You may go back to where Warrick is currently standing.
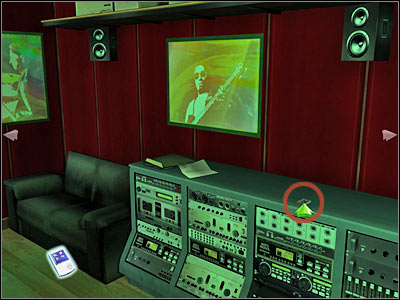
Now you will have to check the main room of the recording studio. Turn right. You will have to pick up the tape. I'm sure that you've noticed it before, but you couldn't take it back then. You will have to use Latex Gloves.
New evidence: Audio Tape from Recording Studio
You may proceed to a back room of the recording studio. The entrance is located to the right of where Eddie is currently sitting. You will have to start off by clicking on two large objects. There are some devices to your left and in front of you. Once this is done, click on a working desk and on a drawer. This will allow you to open this drawer. There's a single object inside. Click on it (screen) and use Latex Gloves.
New evidence: Letter from Jet Charter
Your last object of interest is the laptop. Click on it and choose USB Data Drive from your inventory.
New evidence: File from Eddie's Laptop
You've collected a lot of evidence, so you should consider heading back to the Lab.
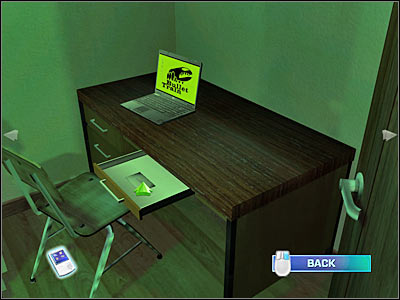
Your first task here will be to use a CSI comparison microscope. You will have to place the Power Cord in the left field. As for the right window, you will have to place Ground Prong there. Obviously you will receive a positive result that will implicate Eddie. Next up, you should use a computer. Choose the third option from the main menu - Special Search. You will have to analyze one object - File from Eddie's Laptop. Once this is done, you will have to listen to a short conversation. Grissom and Warrick will discuss the case. You will also unlock a new interrogation warrant, but don't leave the lab just yet. Instead, choose the fourth option from the computer menu - Audio. You will have to place the Audio Tape from Recording Studio in the left field. Click on Play A and listen to the recording. You may proceed to Brass' Office.
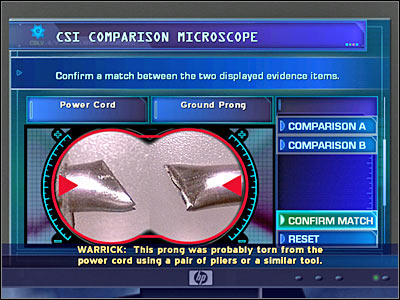
Your task here will be to ask Brass for a new warrant:
- Can I get a Warrant? -> Eddie Tillis? -> I'd like to brine Eddie Tillis in for questioning.
Once again, you must be very patient, because it's going to take a few seconds before you'll be allowed to question Eddie:
- How did your fingerprints end up on Andrea's echo pedal?
- Who else has access to your studio?
- Any idea who trashed your set?
- Where can we find Jill?
Go back to Brass (or click on him while standing inside the interrogation room) and ask him to organize a new interrogation:
- Can we talk to the sound technician again?
This time you will only have to ask one question:
- Eddie says the band picked on you frequently.
Once you've ended this conversation, go back to the Luxury Suite.
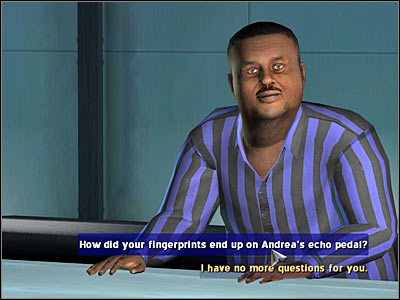
Kathy will have to answer you to some new questions:
- Was Todd Hinkley obsessed with Andrea?
- Do you know where this threatening letter came from?
- Tell us more about Jill Wilde.
- Was Todd a jealous person?
- The TV viewers votes didn't matter...
- We got a demo CD from Eddie.
- Yours is the only demo CD.
Kathy will suggest that you go and meet with Jill Wilde and that's exactly what you should do. As a result, go to Casino High Rollers' Room.

Your first task here is going to be quite obvious. You will have to talk to your new suspect - Jill Wilde. Here's the list of questions:
- We need to ask you some questions.
- Did you write this note to Andrea Stevenson?
- Did the band have any enemies?
- We've heard that Ray was sleeping with Andrea.
Warrick will once again successfully trick a suspect into giving him a valuable piece of evidence. This time you will receive an autograph.
New evidence: Jill's Autograph
Ask her one more question:
- What can you tell us about Eddie Tillis?
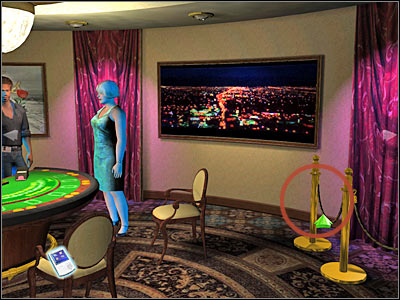
Once the conversation is over, click on a coffee cup. I'm sure that you won't have any problems finding it, especially since the game will automatically zoom in on it. You will have to take the cup, so use Latex Gloves.
New evidence: Jill's Coffee Cup
Don't close this window just yet. You will have to click on the upper part of the cup, because that's where you'll see traces of lipstick. Use an IntegriSwab.
New evidence: Jill's DNA
You should also check the surrounding area. You won't find any objects of interest, so you should only click on a barrier (screen). Pick up an insect and head back to the Lab.
Your first task here will be to use a comparison microscope. Drag the Threatening Note to the left field. You will have to compare it to Jill's Autograph. Click on Confirm Match and you'll find out that the same person wrote this. Now you must use a DNA analyzer. Compare Blood from Straw to Jill's DNA. Once again, you will receive a positive result. You will also unlock a new warrant, so go to Brass' Office right away.
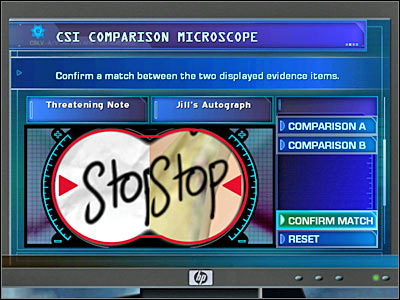
Just as before, you must ask Brass for this newly acquired warrant:
- Can I get a Warrant? -> Jill Wilde? -> We'd like to talk to Jill Wilde.
Once you're inside the interrogation room, ask Jill a few important questions:
- Were you ever at the crime scene?
- You don't want anything to do with them?
- We know you wrote the note to Andrea.
- There is something on your dress...
Asking the final question will allow you to receive new evidence.
New evidence: Residue from Jill's Dress
You will have to process this evidence, so go back to the Lab.
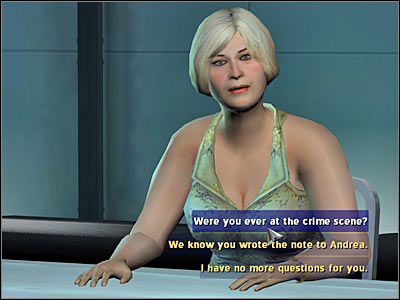
You will have to use a chemical analysis machine. Place Residue from Jill's Dress in the main window and analyze this evidence. Once you've read the results (screen), go back to Brass' Office.
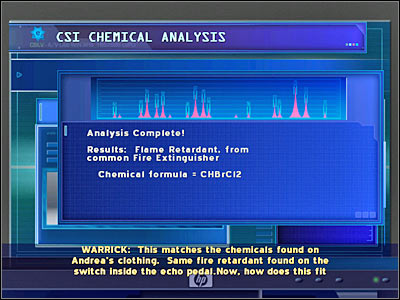
You will have to talk to Jill again, so ask Brass for a proper permission:
- Can I talk to a suspect Again? -> Can we talk to the original singer again?
Once you've arrived at the interrogation room, you'll witness a longer conversation. You must wait patiently for this conversation to end. Ask Jill a few questions:
- How about the coke straw we found at the scene?
- Did you find Todd on the jet?
- What happened after you and Ray "rekindled"?
- We found an interesting substance on your shirt...
Click on Brass and him to bring another suspect:
- Can we talk to the band's manager again
As for Eddie, you will have to ask him for a permission to search his jet:
- We'd like to take a look around your private jet.
You will have to go there now, so choose Private Jet from the list.

Once you've arrived at the new location, exit the jest for a few seconds and click on the benches which are located to your left. Obviously this will allow you to receive a new bonus for thoroughness. Go back to the jet. Turn left and click on the pilot's cabin. You will have to find an insect here. Check the screen if you're having some problems locating the bug. You won't find anything else here, so go back to where Warrick is currently standing.
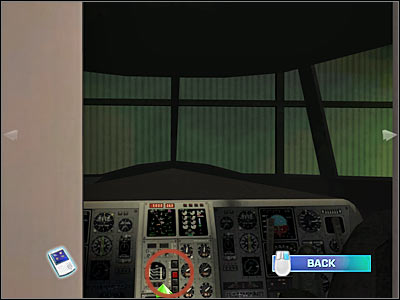
You will have to click on a small table (the one with champagne bottles). You should be able to find a fire extinguisher here. Pick it up with Latex Gloves.
New evidence: Fire Extinguisher
You won't have to inspect the extinguisher, so focus your attention on other sections of the jet. There's a large TV on your right. You'll also notice a drawer there, but you can't open it without a proper warrant. Head on to the next room of the jet. Turn left. Check the screen, because that's where you'll have to click. The game will automatically zoom in the view. Use the Latex Gloves to pick up a camera.
New evidence: Hidden Video Camera
Don't close this window, because you'll have to take a tape from the camera. Click in a correct spot and use Latex Gloves.
New evidence: Video Tape from Hidden Camera
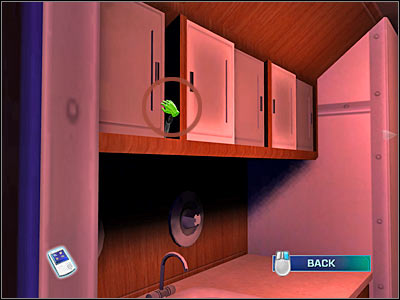
Now you will have to turn right. Click on the bed. Once the game has zoomed in the view, click on the white residue and choose Adhesive Mount from your inventory. This will allow you to collect a much needed sample.
New evidence: Residue from Jet
There's also a small locker to the left of the bed. Click on it in order to receive an additional point for being thorough.
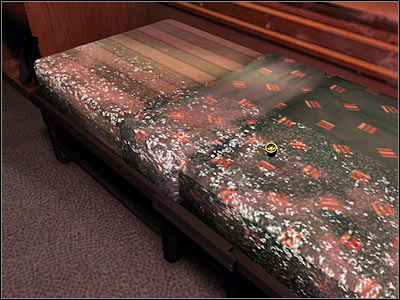
You'll probably notice a small screw on the floor. Look at my screen if you're having some problems finding it. You will have to zoom in on the screw. Once this is done, pick it up with Tweezers.
New evidence: Screw from Jet
Head on to the last area of the jet. You won't find any evidence here, so just make sure that you've clicked on the chair. You may return to the Lab.
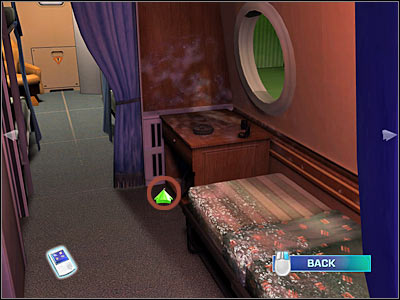
Your first task here will be to use a CSI comparison microscope. You will have to compare Screw from Echo pedal to Screw from Jet. I guess you won't be surprised by the fact that both screws are the same.
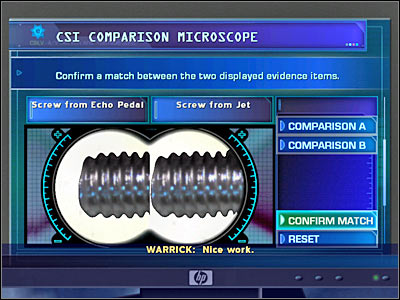
Now you must use a CSI computer. Choose the last option from the main menu - Video/Image Enhance. Click on Evidence and choose Video Tape from Hidden Camera. Like always, before analyzing the tape you should play it by pressing one of the available buttons. Once this is done, start pressing FRAME+ button until you've reached a certain frame. Look at the screen if you want to find out which one it's going to be. Once you've reached that frame, click on ENHANCE and let the computer analyze it. Warrick will want to comment on the results. Now you should use a chemical analysis machine. Analyze the Fire Extinguisher. You will have to take a closer look at the Residue from Jet as well. You may return to Brass' Office.
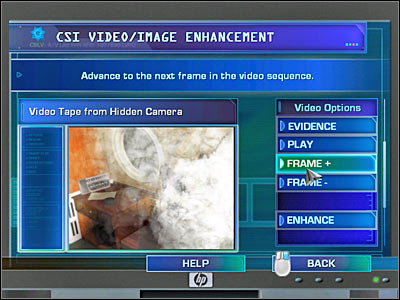
You will have to ask Brass for a permission to question Todd again:
- Can I talk to a suspect Again? -> Can we talk to the sound technician again?
Todd will have to answer you to five new questions:
- So, you like to get in front of the camera from time to time?
- Your video was a big help.
- With video enhancement, we could, and did.
- Why would you want to kill Andrea?
- She? Who - Jill Wilde?
Todd will suggest that you open the locker inside the jest, so that's where you'll have to go right now - to the Private Jet.
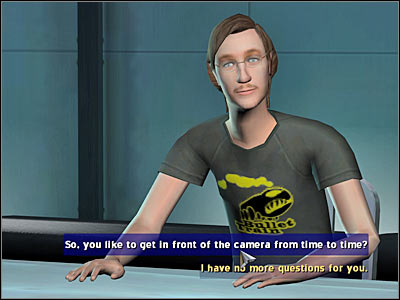
You won't collect any other evidence, so you should proceed to the locker right away. It's located near the TV. Check the screen if you can't find it. Take a look inside. You will have to use Latex Gloves here.
New evidence: Audio Tape from Jet
Before you'll take a look at the tape, go back to the Luxury Suite for a few minutes.
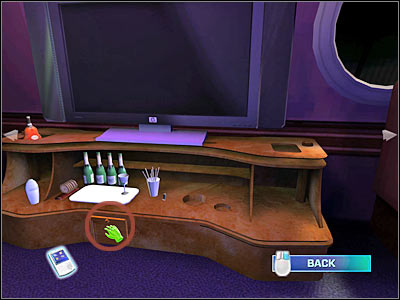
You will have an opportunity to ask Kathy about two new things:
- I hear you like to party with the band.
- Did you know that Andrea slept with Todd?
Return to the Lab.

Your main task here will be to use a CSI computer. Choose the first option from the main menu - Fingerprints. You won't perform an important comparison here, but it'll only take a few seconds of your time. Drag the Fingerprint from Microphone to the left field. As for the right one, you will have to choose Andrea's Fingerprints. You will also have to drag the partial print to the upper left corner of the right window. Check the screen for confirmation of that action.
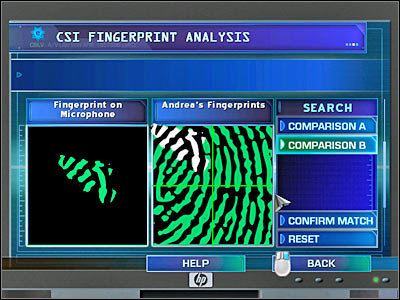
Now we'll have to process the audio tape. This analysis is going to be very important, so make sure that you've followed my instructions. Start off by dragging the Audio Tape from Jet to the left window. You will have to play this tape, so click on Play A. The recording will implicate Kathy, but you must be 100% sure that it's her voice on the tape. Leave the audio tape and drag an Audio CD to the right window. Once this is done, click on Confirm Match. This will allow you to unlock an arrest warrant. You've inspected everything, so you may proceed to Brass' Office without any other delays.
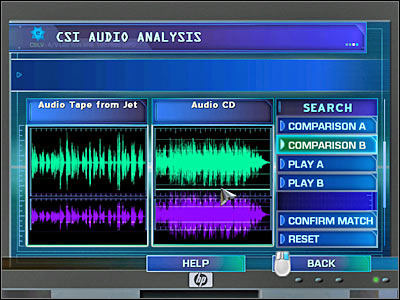
Brass will have to grant you with an arrest warrant. Here's what you have to say:
- Can I get a Warrant? -> Kathy Cantanta? -> I'd like an arrest warrant for Kathy Cantanta.
You will have to confront Kathy:
- Todd Hinkley has confessed to the killings...
You will be rewarded with a full reconstruction of the crime and this case will come to an end.
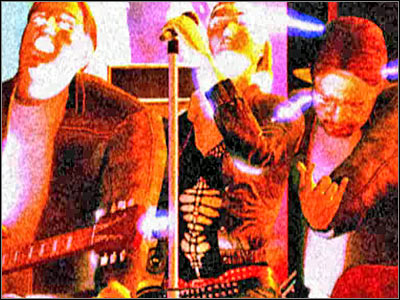
Just as before, you will be able to talk to your partner before proceeding with the evaluation. Warrick will congratulate you. As for Grissom, you shouldn't have any problems scoring a Master ranking, especially if you've followed my instructions.

This case is going to start in a very similar way to some of the previous scenarios of the game. You will have to take part in a short briefing. Grissom will inform you that a local surgeon has been killed. As for your partner for this mission, you will be working with Greg Sanders. He's kind of a newbie, but that won't change anything. Go to the crime scene - Dr. Bandereet's House: Crime Scene.
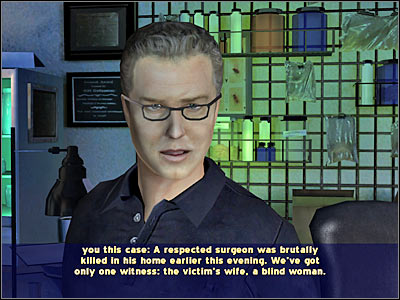
Once you've arrived at the estate, listen to what Greg has to say to you. Your first goal here will be to talk to a blind wife of the killed surgeon. Her name is Amita Bandereet and obviously she's going to be our first suspect. You will have to ask her a few standard questions:
- Do you remember what time your husband went to bed?
- We understand that you are vision impaired.
- Did you hear anything unusual during the crime?
- Did you make physical contact with your husband when you discovered him?
Amita will give one of her pyjamas.
New evidence: Clothes from Amita
Don't close this window right away, because you will have to examine this object. You should be able to find some blood on the clothes. Click on the blood and choose an IntegriSwab from your inventory.
New evidence: Blood from Amita's Clothes
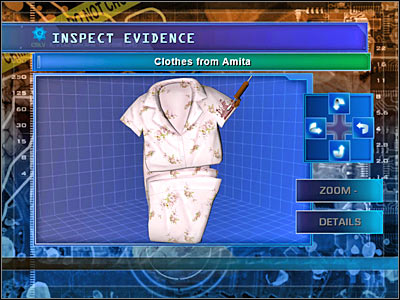
You will have to ask Amita two more questions:
- Was the door locked when your husband went to bed?
- Would anyone have reason to harm your husband?
You may proceed with your search, because you won't find out anything else from Amita. Let's begin with the ground floor, starting from your left. There's a phone near the small lamp (screen). Click on the phone. Greg will notice that someone has removed the tape with the recordings. Also, you should click on the headphones. You can find this object near Amita.
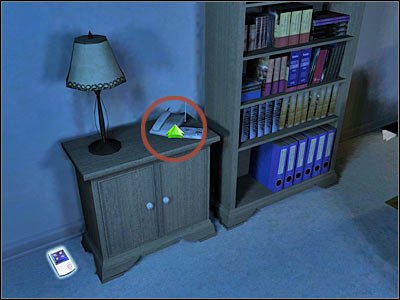
Your next area of interest is the fireplace. Click on it and move the camera to your right. As you've probably noticed, a fire poker is missing, however Greg won't inform you about that. Click on the wood pieces, because you'll find an insect there. Pick it up. You may return to the main view.
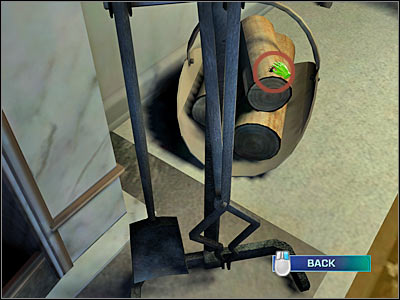
Now you will have to turn the camera to your right, so you'll be able to see the stairs. There's a shoeprint on the stairs. Check the screen if you're having some problems finding it on your own. Click on the footprint and choose Digital SLR Camera. You will have to photograph it.
New evidence: Photo of Bloody Footprint
You may proceed to the upper floor.
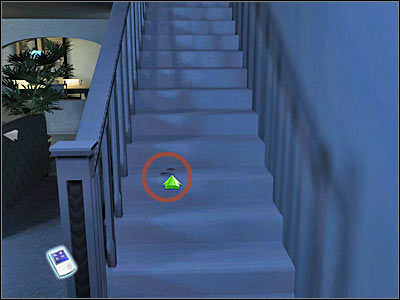
Once you've reached the upper floor, make sure that you've turned left. There's a single fingerprint here and it's very easy to miss it. Click on the fingerprint. You will have to use an Adhesive Lifting Tape on it in order to gather new evidence.
New evidence: Bloody Fingerprint
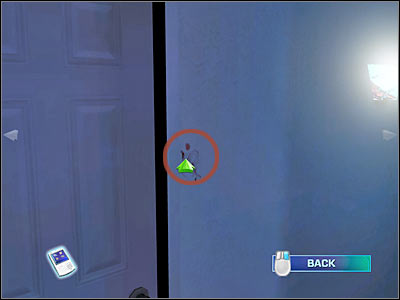
Now you have to inspect the main corridor leading to the crime scene. You shouldn't have any problems finding the fire poker. Click on it. Obviously you will have to pick it up with Latex Gloves.
New evidence: Fire Poker
Don't close this window right away. There are two active areas on the fire poker and you have to find them. Look at the screen if you're having some problems with that. Let's start off by clicking on a fingerprint. You will have to use a Fingerprint Brush and Powder here. Follow it with an Adhesive Lifting Tape.
New evidence: Fingerprint from Fire Poker)
Now you will have to click on the bloody tip of the fire poker. Choose Leuko Crystal Violet from your equipment bar. Once this is done, use an IntegriSwab to collect a sample of the blood.
New evidence: Blood from Fire Poker
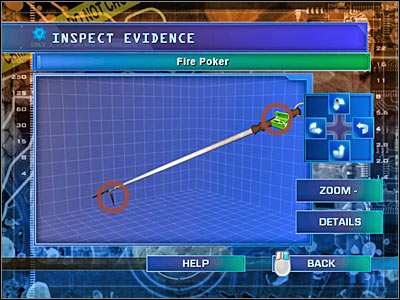
Click on the cupboard which is located at the far end of this corridor. This will allow you to score a bonus for thoroughness. Enter the bedroom which is your crime scene. Before you decide to touch anything, you will have to make a few photographs. Start off by clicking on two blood stains. One of them is on the ceiling and the second one can be found on the left wall. In both cases, you will have to use a Digital SLR Camera. You will be rewarded with two new pieces of evidence material.
New evidence: Photo of Ceiling Spatter
New evidence: Photo of Wall Spatter
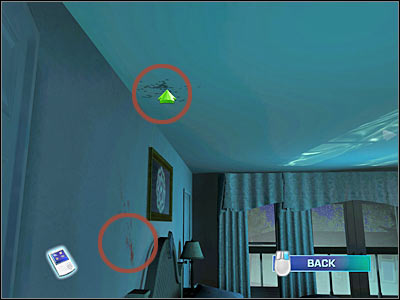
Now you should consider clicking on the left night stand (screen). Wait for the game to zoom in on that location. You will have to pick up a broken teacup. In order to do that, you must use Latex Gloves.
New evidence: Broken Teacup
That's not all. There was a yellow substance underneath the broken cup. You will have to take a sample of it as well, so choose an IntegriSwab from your equipment bar.
New evidence: Liquid from Teacup
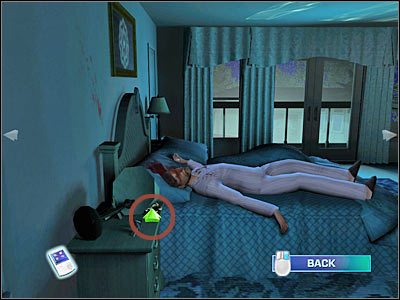
Click on the body of the killed surgeon. Obviously you won't be allowed to take any samples right away. Instead, choose Digital SLR Camera, because you'll need a photograph of the victim's body (upper part of it, to be exact).
New evidence: Photo of Victim
Once you've taken a photo, click on the head of the victim. This time you're going to have to choose an IntegriSwab from your inventory. Click on one of the blood stains in order to collect a sample of victim's blood.
New evidence: Dr. Bandereet's DNA
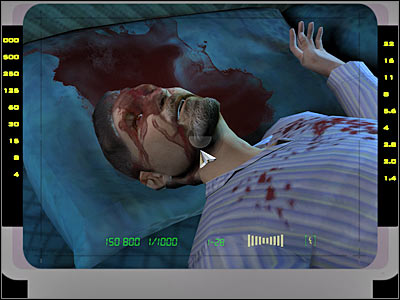
Now you will have to inspect other area of the bedroom. Click on a family photo which is located near a small lamp. You should also investigate a nearby closet (screen). You won't have to click on the clothes. Instead, go back to Greg and Amita. You will have to ask Amita two new questions:
- Your answering machine is missing the tape...
- What size shoe do you wear?
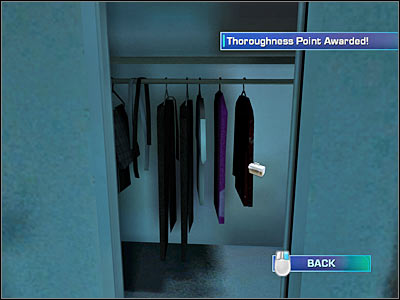
Amita will give you her slippers.
New evidence: Amita's Slippers
I guess you won't be surprised by the fact that you will have to examine the slippers. Use the rotation buttons, so you will be able to examine the sole of each shoe. Click on the black residue and choose Adhesive Mount from your equipment bar.
New evidence: Residue from Slipper
That's it for now. You've gathered all the evidence there was to find. Now you must go to Morgue.

You will have to ask Doc Robbins to recover the body of the victim:
- Can you recover the victim's body for us?
You won't have to examine the body of the surgeon on your own, because you won't come across any interesting discoveries. Instead, talk to Robbins:
- What do you make of the cause of the death?
- Did the tox report show prescription sleeping aid in his system?
Head on to the Lab.
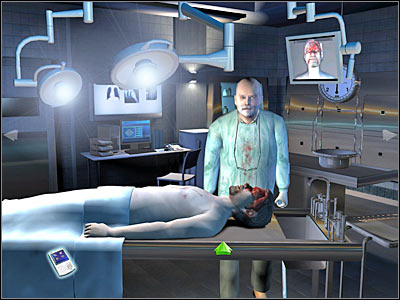
Your first task here will be to use an assembly table, so you'll be able to put all pieces of the tea cup together. The most important thing here is that you have to put the pieces in good order. Otherwise you probably wouldn't be able to finish the mini-game. If it happens, press the RESET button and try again. Take a look at all four screens in order to find out about the choice of the pieces. Once you've finished this mini-game, Greg will notice that there is a small piece missing from the cup. We'll find in the near future, so don't worry about it right now.
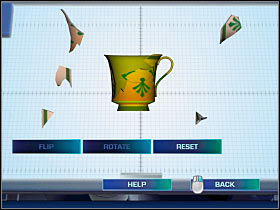
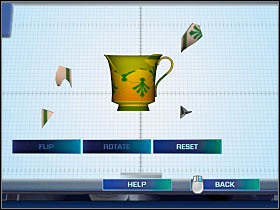
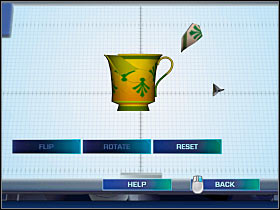
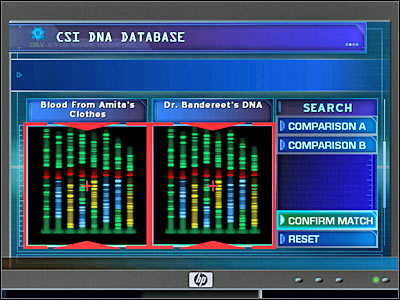
Your next target area is the CSI computer. You will have to choose the first option from the main menu, because we'll be looking at fingerprints. Choose Fingerprint from Fire Poker from the evidence list and place it in the left window. As for the right one, you will have to search for a match. Choose Civil Records and the first result (Search Result A). You will also have to drag the left print to the lower left square (screen). Click on Confirm Match.
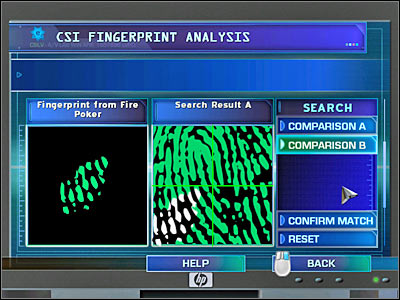
Go back to the main menu of the computer and choose the second option - Shoeprints/Tire Treads. You will have to drag the Photo of Blood Footprint to the left field. As for the other window, choose Amita's Slippers. Greg will want to comment on your discovery, so listen to what he has to say.

Your next step is the DNA analyzer. You will have to compare Dr. Bandereet's DNA to two other DNA samples. Start by putting Blood from Amita's Clothes in the right window. After that, choose Blood from Fire Poker. You will receive two positive results, however you won't discover anything out of ordinary here. Nevertheless, it was important to compare all three DNA samples.
Your final goal is to use a chemical analysis machine. Once again, you will have to perform two actions. Analyze Liquid from Teacup and Residue from Slipper. It turns out that it's fresh asphalt. You may leave the laboratory. You will have to go back to the crime scene, so choose Dr. Bandereet's House: Crime Scene for your next destination.
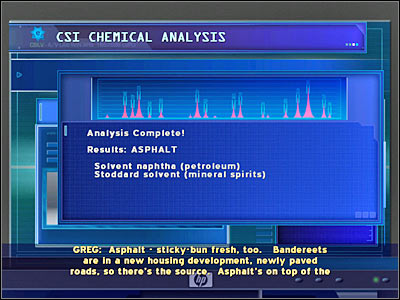
Amita will have to answer you to three new questions. Here they are:
- Did you leave the house after you found your husband?
- What can you tell us about Aadarsh Diwan?
- Does he own a car?
As a result of this conversation, you will unlock a new location. Go to the Driveway.

Just as before, you should explore this area starting from your left. You will be able to score two thoroughness bonuses here - for taking a closer look at the hydrant and the door leading to Amita's house. Once this is done, click on the grass. You will notice some tire treads here. Choose Casting Plaster and Frame from your equipment bar.
New evidence: Tire Tread from Driveway
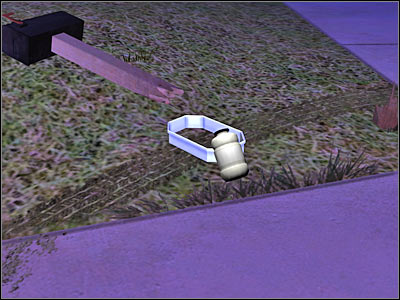
Turn right, so you'll see the driveway leading to the left house. Look at my screen, because that's where you'll have to zoom in. There are some blood stains there. Click on them. Start off by choosing a Leuko Crystal Violet from your inventory. After that, choose an IntegriSwab to collect a sample.
New evidence: Blood from Driveway
There's also a small cactus nearby. Click on it for a thoroughness bonus.
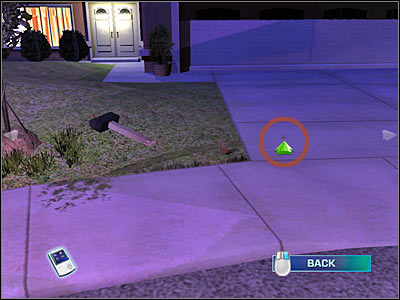
Keep turning right. This time you will have to zoom in on a large container. There are some smaller pieces on the ground (screen). Zoom in on them. It turns out that those are some broken taillights. You will have to collect them, co use Latex Gloves.
New evidence: Red Plastic Fragments
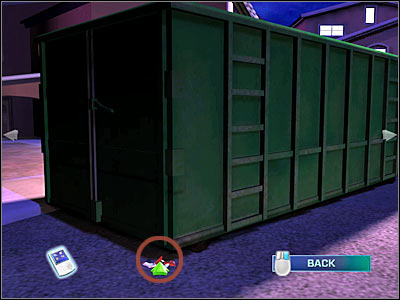
Don't leave this area just yet. Instead, try moving the camera to your right while facing the container. This will allow you to look inside the container. Click there in order to receive a new thoroughness bonus. Your last area of interest is the entrance to the sewers (screen). By clicking on a metal object you will be able to pick up an insect. Once this is done, head on to Brass' Office.
You won't have to talk to Brass about any warrants. Instead, ask him for something else:
- Did the victim have a prescription for a Sleeping Aid?
- Can you find the vic's business partner, Aadarsh Diwan?
You may go to the Lab.
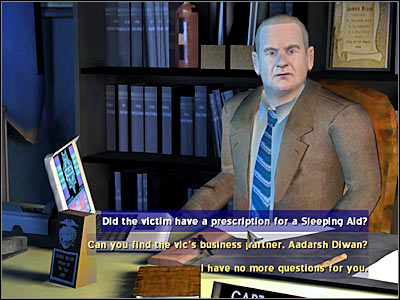
Your first stop should be the assembly table. You will have to put the pieces of the broken taillight together. It won't solve your problem right away, but it'll make your life easier once you've returned to the lab in the near future. You shouldn't have any problems completing this mini-game. Check the screen below for a complete structure.
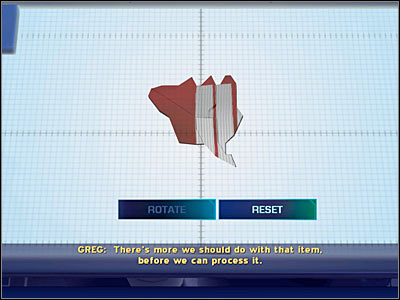
Now you will have to use a CSI computer. You won't be examining any footprints, so you should proceed with the second option - Shoeprints/Tire Treads. You will have to place the Tire Tread from Driveway in the left field of the analysis program. You don't have any objects for comparison in your inventory, so you'll have to use CSI Samples. Your match is the first tire tread from the list (Search Result A). You'll find out that this is a Chrysler Town and Country. Next up, we have a DNA analyzer. Compare Blood from Driveway to Dr. Bandereet's DNA. Once this is done, head on to the Morgue.
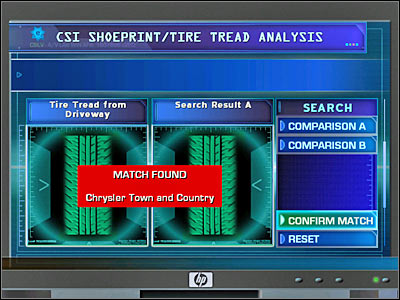
This time you will have to ask only one question. Here it is:
- Does the poker match the victim's head wound?
You may proceed to the Lab. Once you've arrived there, you will have to listen to a short conversation. Grissom and Greg will exchange their thoughts on the case. You won't have to stay in the laboratory any longer, so return to the Driveway.
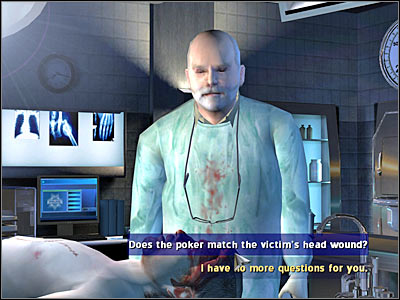
Greg will notice that some new trash bins have appeared near Amita's house. You weren't able to examine them before, so make sure that you've zoomed in the view on those objects. You will have to find a small tape (screen). Click on it and pick it up with Latex Gloves.
New evidence: Answering Machine Tape
You will have to analyze this tape right away, so you must return to the Lab.
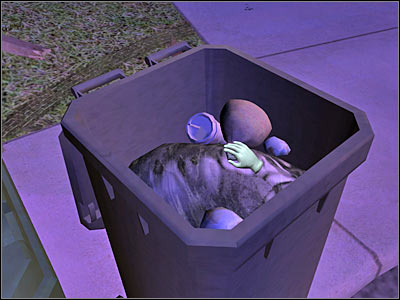
I think it's fully understandable that you have to analyze the tape in order to be able to advance with this case. Activate the CSI computer and choose the fourth option from the main menu - Audio. Now you will have to drag the Answering Machine Tape to one of the fields. After that, press the Play button. Once you've listened to the recording, go back to Dr. Bandereet's House: Crime Scene.
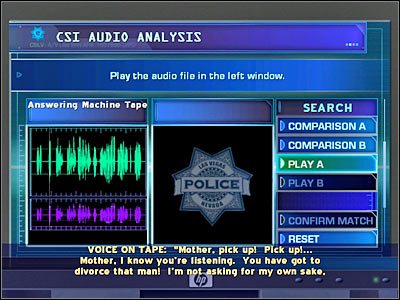
Amita will have to answer you to some very important questions regarding the tape and her daughter:
- We found an answering machine tape in your trash outside.
- Your daughter seemed pretty distraught on the tape...
- Do you know where we can find your daughter?
Since you know where to find Adya, go to her house. You will have to choose Adya's House from the list.
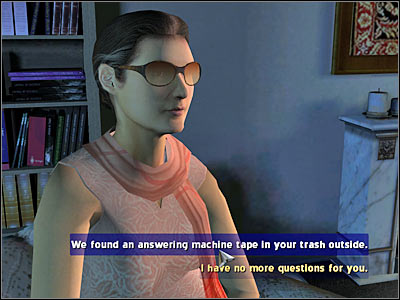
Once you've arrived at Adya's House, you will have to listen to short arguement. Your new suspect is Adya Bandereet. You must ask her three questions:
- Whom did he wish you to marry?
- He's been stealing?
- Mind if we look around?
You should receive a phone call from Brass. He will inform you about a new location and a warrant. Sadly, you can't search Adya's House right now, so you will only have to look around. Click on a large table which is located between Greg and Adya. Now you will have to turn left. There's a shoeprint near the door (screen). Click on it and wait for the game to zoom in the view. After that, choose Digital SLR Camera from your inventory
New evidence: Picture of Muddy Footprint
Go to the Garage.
You will have to examine the vehicle. You can't look inside, but it's not a huge problem, because you'll collect enough evidence anyway. Start off by clicking on a right front tire. Listen to what Greg has to say. Now you will have to examine the broken taillight (screen). Use Latex Gloves to pick up this object.
New evidence: Broken Tail Light
Your last area of interest is the front grill of the car. Once you've zoomed in on it, you should be able to find an insect. Take it and go to the Lab.

Head on to the assembly table. I assume that you've already put the pieces from the driveway together. Otherwise you would have to do this right now. Click on the Broken Tail Light. You will have to place the fragments inside the large lab which was collected in the garage. You shouldn't have any problems doing that (screen). Listen to what Greg has to say. You'll unlock a new warrant.
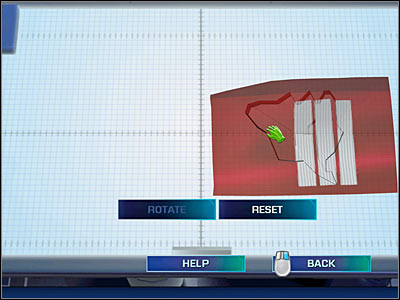
Don't leave the lab just yet, because you will have to perform one more comparison. Use the CSI computer and choose the second option from the main menu - Shoeprints/Tire Treads. You will have to drag the Photo of Muddy Footprint to the left field. Compare it to Amita's Slippers and you'll receive a positive result. This will allow you to unlock a second warrant. This is it for now. Head on to Brass' Office.
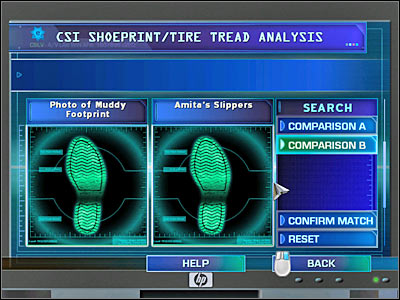
You will have to ask Brass for one of the unlocked warrants:
- Can I get a warrant? -> Aadarsh Diwan? -> Can we get access to the Town and Country?
You shouldn't have any problems acquiring the document, especially since you've already examined the tail light. Head back to the Garage.

I'd suggest that you start the examination process with the trunk of the SUV. Once you're there, click on a large chest. As you've probably noticed, there's a padlock here, so you can't open the chest. Listen to what Greg has to say about it. Now you should move on to the second row of seats (screen). You'll find a laptop there. Click on it and choose USB Data Drive from your inventory. You won't have to pick up the laptop.
New evidence: Dr. Diwan's Encrypted Files

Move the camera to your right. You will have to click on the front passenger seat. There's a document under it. I'm sure that you won't have problems finding it (screen). Click on the document and wait for the game to zoom in the view. Pick up this object with Latex Gloves.
New evidence: Memo from Adya
Go back to the Lab.
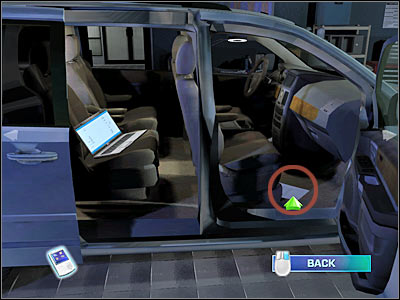
Head on to the CSI computer right away. You will have to choose the third option from the main menu - Special Search. Drag Dr. Diwan's Encrypted Files to the main field of the program. You will have to wait for the results to be displayed on your screen. Once this is done, head on to Brass' Office.
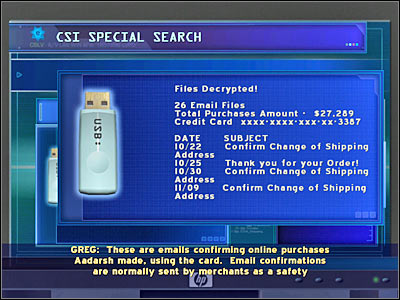
You will have to ask Brass one question regarding the case:
- Did you contact Visa about Mr. Diwan's fraud?
Now you must ask him to allow to interrogate Diwan:
- We'd like to talk to the Business Partner now.
Wait for the interrogation to begin and start asking questions:
- We found evidence of fraud on your laptop.
- Did you say you were to be the victim's son-in-law?
- Where were you between the hours of seven and nine p.m.?
- We have the evidence that puts your vehicle at the victim's home.
- Can you explain the memo from Adya that we found in your vehicle?
- We have your prints on the fire poker used to kill Dr. Bandereet.
- Your vehicle looks like it's been thoroughly cleaned.
- Where do you keep the vacuum cleaner?
Since you've acquired the key to the chest, go back to the Garage.
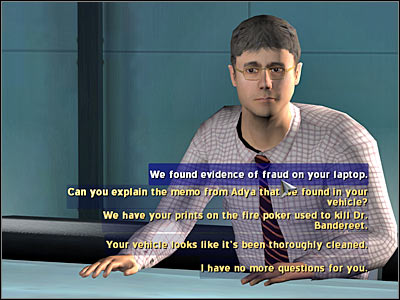
Head on to the trunk of the vehicle right away. Greg has already opened the chest for you, so go ahead and take a peek inside. You will find a very large device here. Click on it in order to take it out from the trunk. Click on the object once again. This time you will have to use Latex Gloves.
New evidence: Dyson Root 6
Greg will suggest that you go to the Lab. I'd recommend listening to him.
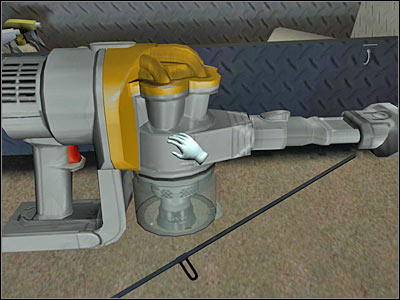
Turn left. You will have to click on the assembly table. Once this is done, click on the device taken from the vehicle. You will have to remove a few objects from this device. Click on them in order to automatically remove them. Your final piece taken from the device is going to be a small fragment of the teacup (screen). Listen to what Greg has to say about this.
New evidence: Porcelain Chip
Don't exit this window just yet. Instead, click on the teacup. You will have to rotate the collected fragment, so you'll be able to place it with the rest. Go to Brass' Office.

You will have to ask Brass to let you go back to the interrogation room:
- May I talk to a suspect again? -> I'd like to question Aadarsh Diwan again.
This time you will have to ask some very specific questions:
- We've got evidence that puts you at the scene the night of the murder.
- Your fingerprint on the murder weapon, that's just a coincidence?
- Why do you suspect Adya Bandereet of killing her father?
Go back to Brass' Office and ask Brass for a new warrant:
- Can I get a warrant? -> Adya Bandereet? -> Can we have a warrant to search Adya Bandereet's home?
Don't go there right away. Instead, choose Dr. Bandereet's House: Crime Scene for your next destination.

Amita will have to answer you to two new questions:
- Was there any tension between Dr. Diwan and your husband?
- Can you confirm that Dr. Diwan visited your house socially?
You may proceed to Adya's House.
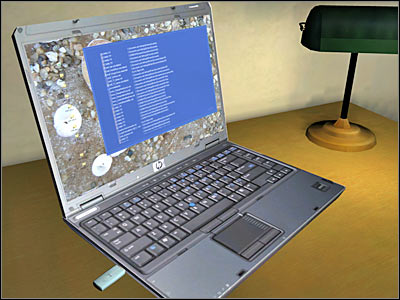
You won't have to show the warrant to Adya, because will take care of this problem for you. As a result, you should proceed with searching her house. You will also receive fingerprints from Adya.
New evidence: Adya's Fingerprint
Just as before, let's start from the left. You will have to click on a laptop. It's located to the right of the main entrance to the house (screen). Once the game has zoomed in on the laptop, click on it once again and choose USB Data Drive from your inventory.
New evidence: Adya's Encrypted Files
Now you should click on a large painting. It's located above the laptop. Once this is done, turn light and click on some of the visible cardboard boxes. You should be able to find a new insect here (screen). Pick it up and return to Greg and Adya.

Your next area of interest is the sink which is located to your right. You'll probably notice some stains here (screen). Click on them and use Luminol. This will allow you to collect a sample of the blood with an IntegriSwab.
New evidence: Blood from Adya's Sink
Move the camera to your left. There are some objects in the corner (of the kitchen area). Click on them for a new thoroughness bonus.
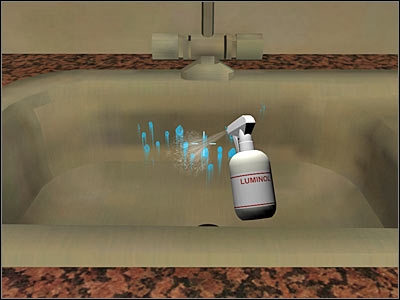
Move the camera to the right. You will be looking at a small round kitchen table. There's a very small object near the left chair (screen). You will have to zoom in on it. Once this is done, use Latex Gloves to collect this piece of evidence.
New evidence: Torn Fabric
Don't close this new window right away, because you will have to examine the fabric. Use an Adhesive Mount to collect a new sample.
New evidence: Residue from Silk Fabric
Once you've collected this new evidence material, go back to the Lab.
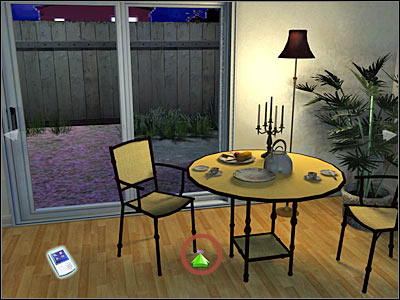
Your first goal area is the CSI computer. You will have to drag the Bloody Fingerprint to the left window. As for the right one, choose Adya's Fingerprint from your list of available fingerprints. You will receive a confirmation that both samples are a match. This result also implicates Adya, because now you know that she was inside Amita's house.
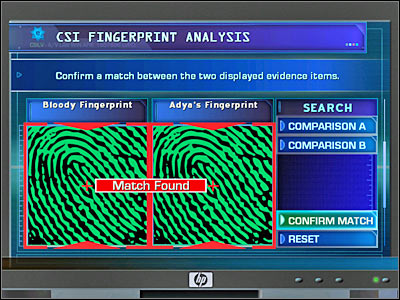
Go back to the main menu of the computer and choose the third option - Special Search. You will have to analyze one item here - Adya's Encrypted Files. As a result, you will be allowed to read a very interesting note (screen). Shut down the computer and head on to the DNA analyzer. You must compare Blood from Adya's Sink to Dr. Bandereet's DNA. Once this is done, use the chemical analysis machine. You will have to analyze only one item here - Residue from Silk Fabric. You may go back to Dr. Bandereet's House: Crime Scene.
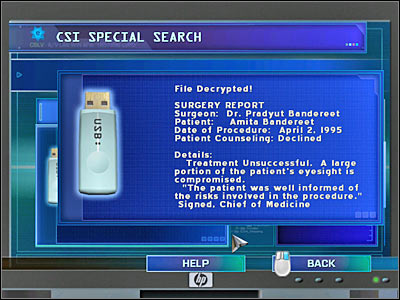
Once again, you will only have to talk to Amita. Ask her a few questions:
- Can you tell us how you lost your eyesight?
- Was your daughter angry with your husband at the time of the murder?
You will unlock a new location, so you should go there right away. It's going to be Dr. Bandereet's Pool House.
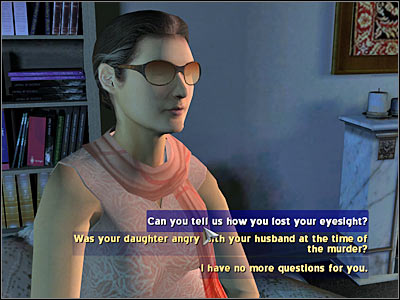
You will have to inspect the area outside of the pool house. You don't have a proper warrant, so you won't be allowed to go inside. Thankfully, you'll find plenty of evidence here. Click on an area in front of you. There's a large can on your right. Click on it and move the camera to the left. This will allow you to locate a new evidence. Look at my screen if you're having some problems finding it. Click on the residue and choose an Adhesive Mount from your equipment bar.
New evidence: Residue from Pool House
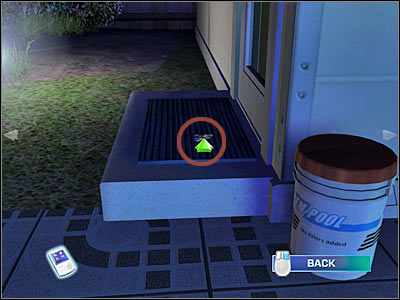
You may go back to the previous view. There's a hammock to your left. I'd strongly recommend clicking on it, because you'll find a new insect here (the last one). Pick it up. Go back to the main door leading to the pool house. Click on the door and locate a blood stain (screen). Click on the blood and choose Leuko Crystal Violet from your inventory. Follow it with an IntegriSwab.
New evidence: Blood from Pool House Door
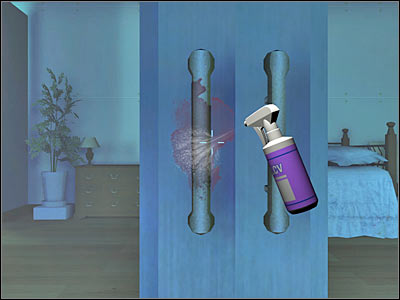
Your last area of interest is one of the windows of the pool house. It's located to the right of the main entrance. You should be able to locate a damaged section of the window (screen). Click on it and choose Mikrosil from your inventory.
New evidence: Scratch Impression from Pool House
Once you've acquired these new objects, go back to the Lab.

Your first task here will be to use a DNA analyzer, because you will have to analyze the blood found near the pool house door. Drag the Blood from Pool House door to the left field of the analyzer. As for the right one, you will have to choose Dr. Bandereet's DNA. Obviously you will receive a match (screen). Now you should proceed to the chemical analysis machine. You must examine only one object. It's going to be the Residue from the Pool House. Once this is done, head back to Brass' Office.

I'm sure you've noticed that a new warrant is available to you. Ask Brass to give it to you:
- Can I have a warrant? -> Amita Bandereet? -> We need a warrant to search the pool house at the Bandereet home.
Obviously you will have go back to that location in order to inspect the interior of the pool house. Go to Dr. Bandereet's Pool House.
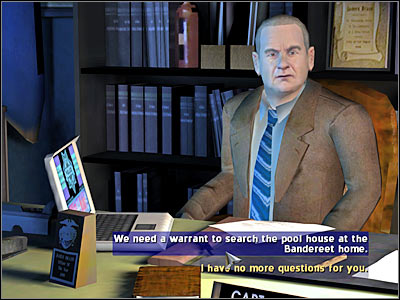
Head on to the main entrance to the pool house (the one with blood stains on the handle). Click on the door and enter the pool house. Turn left, because that's where we'll have a look. There are some kitchen plates above the sink. Click on them for a thoroughness bonus. You should check the sink as well. Turn right and click on a small screwdriver. You will have to take it for a further analysis, so you must use Latex Gloves.
New evidence: Flat Head Screwdriver
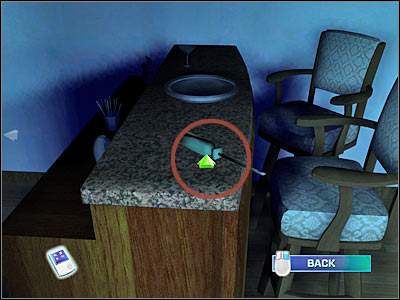
Turn right and click on the entrance leading to the bathroom. It's located to the left of Greg. There's a small crate on the floor. Check the screen if you're having some problems finding it. Click on it TWICE. The first click will allow you to open it and the second one is needed to take a peek inside. Use Latex Gloves here.
New evidence: Silk Robe
Don't close this window, because you will have to examine the robe. You will have to click on a blood stain. Use an IntegriSwab to collect a sample.
New evidence: Blood from Robe
Go back to where Greg is currently standing. There's a large bed here. Click on it for a thoroughness bonus. You won't have to examine the bed closer, because you won't find any evidence here. Once this is done, go back to the Lab.
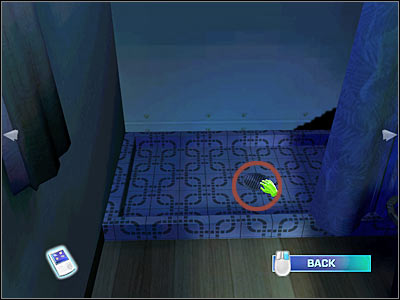
Your first step should be the CSI comparison microscope. You will have to perform two separate actions here. Start off by dragging the Torn Fabric to the left field. You will have to compare it to Silk Robe. Make sure that you've listened to what Greg had to say. Now you will have to compare Flat Head Screwdriver to the Scratch Impression from Pool House. Once again, you should listen to Greg (screen).

Now you will have to use a DNA analyzer. Place the Blood from Robe in the left field. As for the other one, you will have to choose Dr. Bandereet's DNA from your inventory. Performing this analysis will unlock a new warrant. As a result, you should proceed to Brass' Office right away.
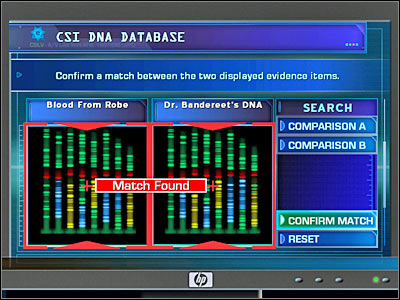
You will have to ask Brass to bring a suspect for questioning:
- Can I get a warrant? -> Amita Bandereet? -> We need to bring the wife for questioning.
The first part of this interrogation is going to be very interesting, because Amita will confess to killing her husband. Nevertheless, you will have to ask her one question:
- Are you admitting to the murder of your husband, Mrs. Bandereet?
Once the conversation is over, listen to what Grissom has to say to Greg (and to your character). It turns out that Adya Bandereet has confessed to comitting the same crime. You will have an opportunity to talk to her briefly:
- Is there something you want to tell us, Ms. Bandereet?
Once again, listen to a short conversation with Grissom. He will suggest to go back to the crime scene in order to find new evidence. You will have to follow his instructions, so choose Dr. Bandereet's House: Crime Scene from the list.

Once you've arrived at Dr. Bandereet's House, you will have to proceed to the bedroom (crime scene) right away, because you won't find anything else here. Once you've entered the bedroom, a short cut-scene is going to be displayed on your screen. Greg will examine the blood spatters and he will come to a conclusion that the killer is left-handed. You may proceed to Dr. Bandereet's Pool House.

You will have to perform only one action here. Enter the pool hose building and turn right. There's a small round table here (screen). Click on it (you weren't able to do this before). You should be able to find a crossword puzzle here. Pick it up with Latex Gloves.
New evidence: Crossword Puzzle
You may go back to the Lab.
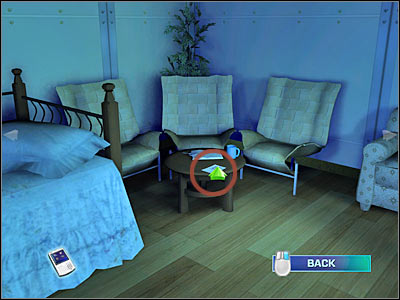
Head on to the CSI computer right away, because you won't have to use any other tools. Choose the third option from the main menu - Special Search. You will have to analyze one time - a Crossword Puzzle. Once the analysis is done, you will find out that Amita Bandereet is left-handed. Go to Brass' Office.
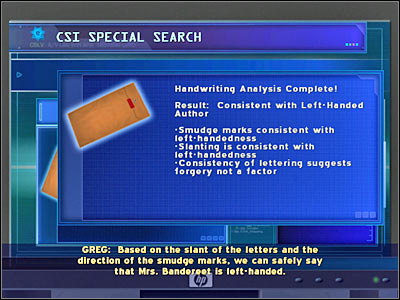
Your first task should be interviewing Adya again:
- May I talk to a suspect again? -> I'd like to question Adya Bandereet again.
You will have to ask her to withdraw her confession:
- Ms. Bandereet, we would like you to withdraw your confession.
Click on Brass and ask him to bring Amita for questioning:
- I'd like to question Amita Bandereet again.
You won't have to choose any questions here, because this conversation will end automatically. You won't see any reconstructions, because you've already seen one before. Amita's final confession will end this case. Congratulations and get ready for the final scenario of the game!

I guess you won't be surprised by the fact that you'll be able to talk to Greg. Once this conversation is over, your progress is going to be evaluated by Grissom. If you've followed my instructions, you won't have any problems scoring a Master ranking for this case.

Your final case will begin with a short briefing. This time you'll be dealing with a more complex crime scene. As a result, Grissom will accompany you there and he'll also be your partner for this case. You will have to investigate a shoot out which ended with one dead body. The crime took place inside one of the shops of the Wild West museum. You will have to go there now, so choose Old West Tourist Museum: Crime Scene from the list.
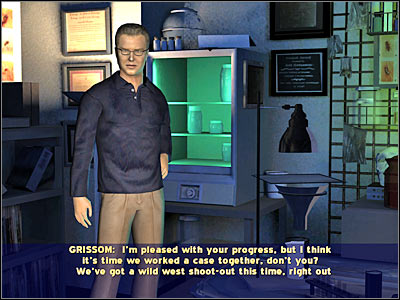
Once you've arrived at the crime scene, you'll find out that the alleged killer has already been apprehended by the police. As a result, you will be allowed to talk to him. His name is Keith Wilde. You will have to ask him a few questions:
- Tell us who you are.
- Why did you shoot him?
- We'll need your fingerprints.
New evidence: Keith's Fingerprints
You'll also need to ask him for a sample of his DNA:
- We'll also need your DNA.
New evidence: Keith's DNA
Once the conversation has ended, you'll be allowed to proceed with the examination process. I'd strongly recommend that you follow my instructions, because it's going to be very easy to miss something important here. You'll collect a lot of evidence, especially bullets (and they'll be well hidden).
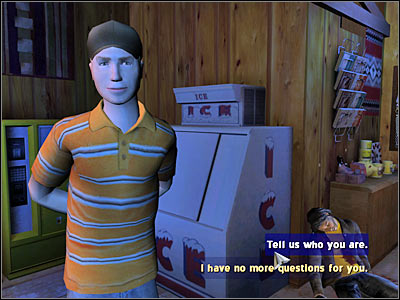
Start off by moving the camera to your left. There are some vending machines here. Click on one of these objects in order to receive a thoroughness bonus (only one). Now you will have to click on the victim's body. I'm sure you know by now that you're going to have to take a photo of the crime scene before collecting any evidence. Choose Digital SLR Camera from your inventory.
New evidence: Photo of Crime Scene at Tourist Museum
Zoom in on the upper part of the victim's body. Once again, you will have to use Digital SLR Camera.
New evidence: Photo of Victim
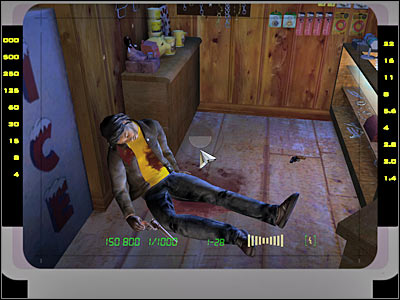
Click on the revolver which is located near the right hand of the victim. You will have to wait for the game to zoom in on the gun. Don't take the weapon right away. Instead, you should take a closer look at one of the fingernails of the victim (screen). You'll find a small fiber there. Pick it up with Tweezers.
New evidence: Pink Fibers
You may take the revolver. Obviously you will have to use Latex Gloves here.
New evidence: Single Action Army Pistol
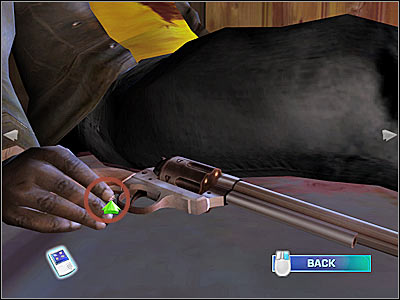
There's a second gun nearby. Look at my screen if you're having some difficulties finding it. Click on the gun and use Latex Gloves to pick it up.
New evidence: .38 Special
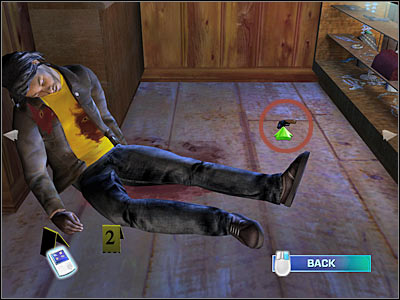
Now you will have to inspect the left wall, so make sure that you've moved the camera properly. Your objective will be to find two bullet holes. Check the screen if you can't/don't want to find them on your own. You will have to click on each hole. Use Tweezers twice in order to gather two bullets from the crime scene.
New evidence: Bullet found in Wall
New evidence: Bullet found Near Postcards
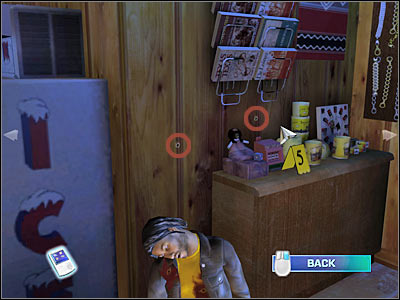
Let's focus on the body for a little while longer. Click on the left leg of the victim and wait for the game to zoom in on it. Now you must click on one of the blood stains. Choose an IntegriSwab from your equipment bar and collect a sample.
New evidence: Swab of Victim's Blood
You may return to the main view of the crime scene.
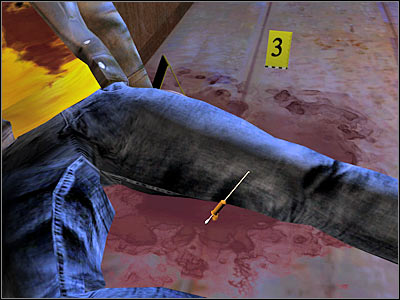
Your next area of interest is the large counter. Check the screen if you don't know where you'll have to click. You should be able to find two other guns here, however you will be taking them one at a time. Click on the first gun and choose Latex Gloves from your inventory.
New evidence: First 9mm from Crime Scene
Don't close this window, because you're going to have to find a fingerprint. It's on the left side of the gun. Use Fingerprint Brush and Powder on the fingerprint and follow it with an Adhesive Lifting Tape.
New evidence: Fingerprint from first 9mm
Pick up the second gun. Once again, you must use Latex Gloves.
New evidence: Second 9mm from Crime Scene
This gun will also contain a fingerprint. I'm sure that you won't have any major problems finding it. Use the exact same tools as before - Fingerprint Brush and Powder and Adhesive Lifting Tape.
New evidence: Fingerprint from Second 9mm
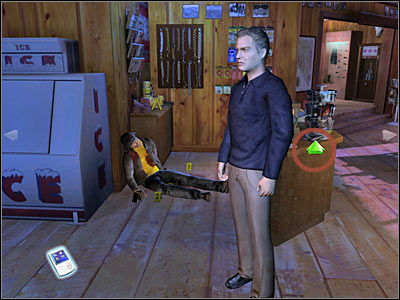
Move the camera to your right. You will have to click on a destroyed exposition. Grissom will notice that one of the guns is missing. It's a famous Peacemaker that belonged to Wyatt Earp. Once you've listened to his short statement, click on the cash drawer. You should be able to find a new bullet here (screen). Click on the bullet and use the Tweezers to pick it up.
New evidence: Bullet found in Cash Register
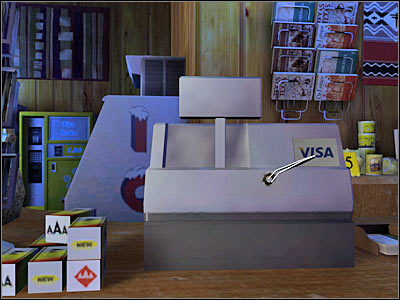
There's a new bullet in this area, however you will have to zoom out in order to see it. It's in the floor. Check the screen in order to find out where exactly you need to zoom in. Just as before, you must use Tweezers to add the bullet to your inventory.
New evidence: Bullet found in Floor
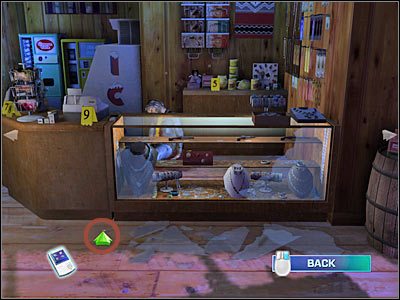
Now you should consider exploring a second room. Look at my screen, because it shows where you have to go. You won't find any real evidence there. Nevertheless, you should take your time to look around. Click on the left basket. After that, zoom in on the carpets. You'll find an insect there. Obviously you will have to pick it up. Now you should click on two smaller figurines. Your final area of interest is the cowboy costume. Once you've been everywhere and looked at everything, head back to Grissom.
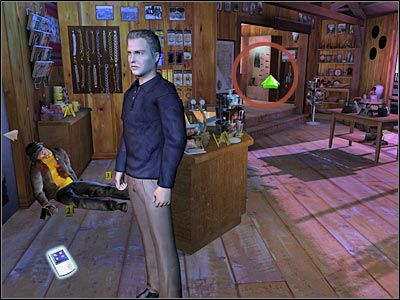
I'd recommend that you move the camera to your right. Click on a single barrel that's located to the left of the large windows. Turn right and click on the rack. You should be able to see a new bullet hole from here (screen). Zoom in on the bullet hole. Once this is done, use the Tweezers to collect a new bullet.
New evidence: Bullet found Behind Sales Rack
Don't leave this area just yet. If you take a closer look at the floor, you should be able to find a small blood stain (screen). Zoom in the view on the stain. You will have to start with a Leuko Crystal Violet. After that, choose an IntegriSwab in order to collect a sample of the blood.
New evidence: Blood from floor of Crime Scene
The last bullet can be found between two large windows. Take a closer look at my screen if you're having some problems finding it. Just as before, you will have to zoom in on the bullet. After that, use Tweezers to pick it up.
New evidence: Bullet found in Window Sill
You won't find anything else at the moment, so you may proceed to the Mobile Lab.
You will have to perform only a few preliminary tests here. We'll deal with the rest of the evidence material once we've returned to the CSI lab. Start off by using a comparison microscope. You will have to drag Pink Fibers to the left field. You don't have anything for a comparison, so choose CSI Samples. Pick the second result (Search Result B) and click on Confirm Match.
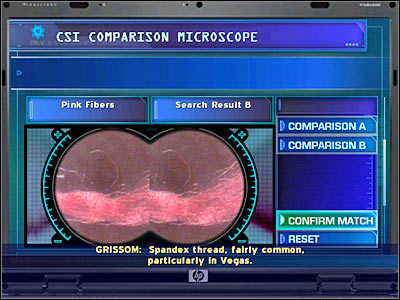
Your second step is the lab computer. You will have to analyze fingerprints, so you must choose the first option from the main menu. Compare Keith's Fingerprints to a Fingerprint from first 9mm. Since this is only a partial print, you will have to drag it to the upper left corner of the left field (screen). Now you must compare Keith's Fingerprints to a Fingerprint from Second 9mm. Once again, you will have to place it in a correct square (lower right).
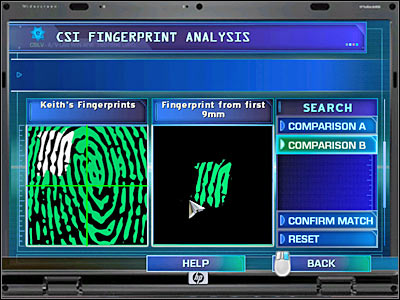
Your final task will require you to use a DNA analysis machine. You will have to place Keith's DNA in the left field. As for the other window, you will have to choose Blood from floor of Crime Scene. You'll find out that this is Keith's blood. Once you've ended your work here, head on to the Morgue.
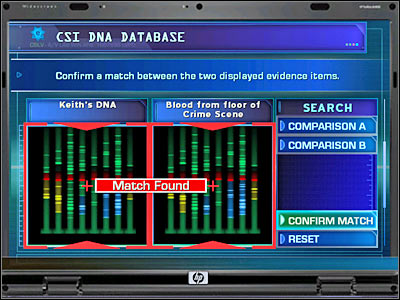
You will have to ask Doc Robbins to deliver the body:
- Can you recover the body?
I'd strongly recommend taking a closer look at the victim's body. There's a mark on his left hand. You should also click on his chest. Talk to Robbins:
- What is the COD?
- Did you collect a set of prints?
New evidence: Ed's Fingerprints
Ask Robbins for the first bullet:
- Did you recover the bullet from the chest wound?
New evidence: Bullet from Victim's Chest
You will have to ask him for the second bullet as well:
- Did you recover the bullet from the shoulder wound?
New evidence: Bullet from Victim's Shoulder
You must ask Robbins three more questions:
- Can you determine the angles of entry?
- What is the time of death?
- Anything else about the vic?
Go to Brass' Office.
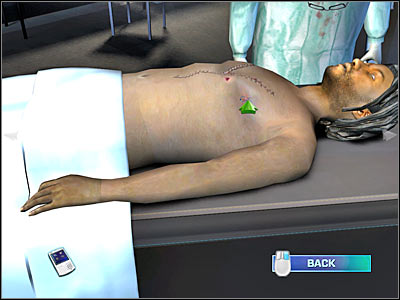
You will have to ask Brass for a few favors:
- Can you track down info on the families of the victim and the confessed shooter?
- Did Keith have anything else in his possession?
New evidence: Shell Casings found in Keith's Pocket
Now you must ask him to allow you to interrogate Keith Wilde:
- Can I get a warrant? -> Keith Wilde? -> Can I have a warrant to question Keith?
Keith must answer you to a series of questions:
- We found your blood at the scene. Where were you injured?
- Where did you get the guns?
- Do you remember how many shots you fired?
- What time did you get to the store?
- You seem eager to help us.
- Why did you collected the cartridge casings?
Head on to the Lab.
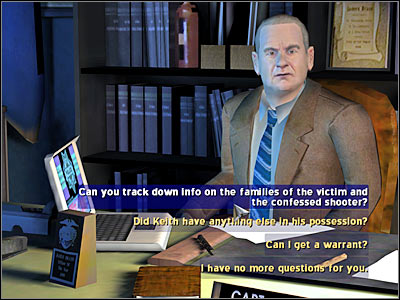
Grissom wants to tell you something important, so make sure that you listen to him. Start off by using an assembly table. You should have EIGHT bullets in your inventory at the moment. Make sure that you have them all, because you're going to need them very soon. There are four guns on the table - two 9mm's, .38 and a revolver. You will have to click on each of these weapons. Some of your choices are going to be commented by Grissom. Also, you will receive four new bullets (one bullet from each gun).
New evidence: Bullet from First 9mm
New evidence: Bullet from Second 9mm
New evidence: Bullet from .38 Special
New evidence: Bullet collected from Peacemaker pistol
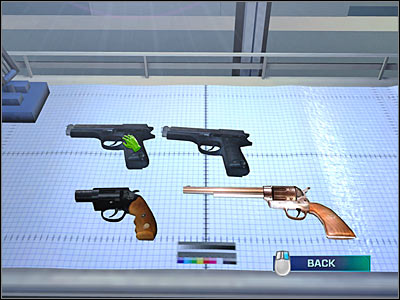
Once you've acquired four new bullets, you will have to use a comparison microscope. You'll perform a lot of actions here. Once again, I urge you to follow my instructions. Here's what you'll have to compare (left field - right field):
1) Bullet from First 9mm - Bullet found in Cash Register
2) Bullet from First 9mm - Bullet found in Floor
3) Bullet from First 9mm - Bullet from Victim's Shoulder
4) Bullet from Second 9mm - Bullet found in Wall
5) Bullet from Second 9mm - Bullet found Near Postcards
6) Bullet from Second 9mm - Bullet from Victim's Chest
7) Bullet collected from Peacemaker pistol - Bullet found Behind Sales Rack
8) Bullet collected from Peacemaker pistol - Bullet found in Window Sill
Remember that sometimes you will also have to rotate one of the bullets by pressing Rotate A or Rotate B. Once you've compared all bullets, listen to what Grissom has to say to you. He will suggest that you go back to the crime scene. Follow his instructions. As a result, choose Old West Tourist Museum: Crime Scene for your next destination.
Once you've returned to the crime scene, you will probably notice that Grissom brought a few toys. You won't have to click on the laser devices. Instead, you will have to click on bullet holes in order to activate certain lasers. There's going to be eight of them. Two spots are located on the dummy (screen). As for the rest, here's where you can find them: wall behind the dummy (3 & 4), cash register (5), floor (6), windows (7) and wall behind the rack (8).
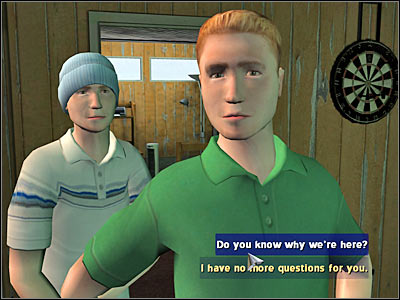
Once you've activated all eight lasers, you will have to listen to what Grissom has to say to you. He will suggest to collect broken glass. You will have to follow his instructions. You shouldn't have any major problems finding the glass shards (screen). Pick them up with Latex Gloves.
New evidence: Glass Shards from Tourist Museum Case
You may return to the Lab in order to analyze the shards.
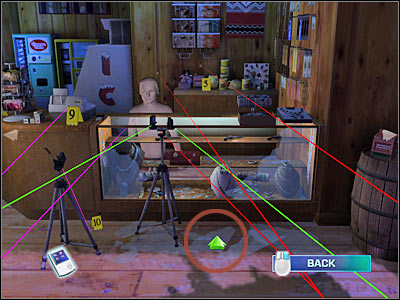
Once again, you will have to use the assembly table. This time you will have to click on the glass shard collected from the crime scene. Your objective here is going to be quite obvious. You will have to put all the pieces together, Check the screen if you want to find out how it should look like. There are two small holes in the wall. Grissom will comment on that. After that, Catherine will show up in the laboratory. Listen to what she has to say. You may go to the Casino.
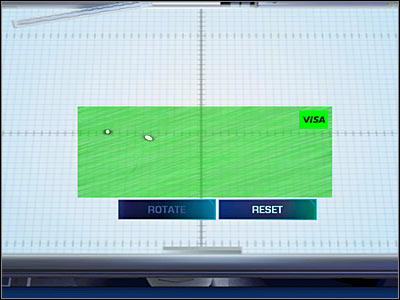
You will have to talk to your second suspect for this case. It's going to be Jill Wilde. I'm sure that you remember her from your third case. Here are the topics for this conversation:
- Are there any differences between the boys we should know about?
- What do you know about Ed Tellis?
- Any idea why this might have happened?
- We need to know where your sons live.
Once the conversation has ended, you should find a large plant (screen). Zoom in on the plant and pick up a new insect. You may proceed to the next location. I'd recommend that you choose Eddie Tillis' Recording Studio from the list.
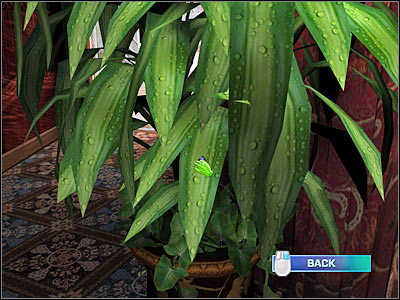
You will also see a familiar face here. Your next suspect is Eddie Tillis. He must answer you to a few questions:
- We're very sorry for you loss, Mr. Tillis.
- Where were you at nine p.m. last night?
- Any reason Ed and Keith might have a disagreement?
Once the conversation is over, you should consider clicking on the top shelf. Check the screen if you can't find it. There's an insect there. Take it. After that, go to Triplet's Apartment.

You will meet two new suspects here. Anthony Wilde and Billy Wilde will have to answer you to some very important questions. Let's begin by talking to Anthony:
- Do you know why we're here?
- When was the last time you saw him?
- We've got Keith downtown. He's alive and well.
- Where were you at nine p.m. last night?
- Any ideas why he did this?
- What's on the laptop that's co important?
- We'd like your fingerprints.
New evidence: Anthony's Fingerprints
Continue:
- We'd like to take a look around.
Now you should talk to Billy:
- When do you remember seeing Keith last?
- We'd like your fingerprints.
New evidence: Billy's Fingerprints
You will be allowed to explore the apartment. The only exception is going to be the bedroom. Let's start from your left. Click on the kitchen area and zoom in on the kitchen stove. You will receive a thoroughness bonus. Now you should turn right. You'll find an insect here (screen). The last interactive area is the sink. Once you've secured the kitchen, go back to the main view.

Your next area of interest is the pool table. You will have to move the camera to your left in order to search it. Look at my screen, because that's where you'll have to zoom in. You will find two important objects here. Obviously you must pick them up with Latex Gloves.
New evidence: Photo of Kathy Cantanta
New evidence: Pink Bra
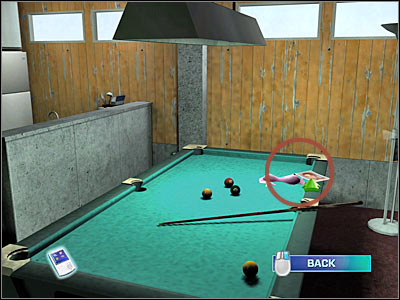
Next up, you should zoom in on the TV in order to score a new thoroughness bonus. You will also have to take a closer look at the laptop case. You won't be allowed to open it, however you'll find a fingerprint here. Click on the fingerprint. Use Fingerprint Brush and Powder. After that, choose an Adhesive Lifting Tape from your inventory.
New evidence: Fingerprint from Laptop Case
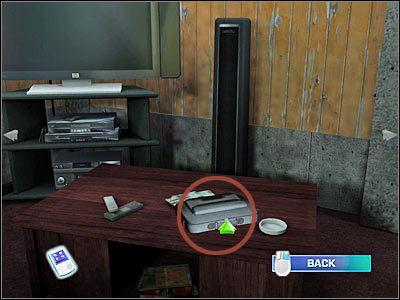
There's also a cardboard box on your right. Make sure that you've clicked on it. Now you'll have to go to the bathroom. Look at the screen, because I've pointed out the entrance. You should be able to find an insect here. Obviously you must pick it up. Go back to Grissom and ask Anthony two more questions:
- Where did this ripped bra come from?
- Who was this "chick"?
You'll also have to talk to Billy again:
- What do you know about this ripped bra?
You've collected a lot of new evidence, so you should return to the Lab to analyze some of these items.
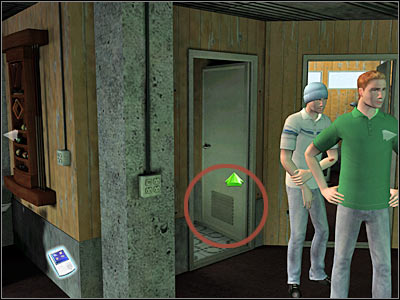
Start off by using a comparison microscope. You will have to perform one action here. Move the Pink Fibers to the left field. As for the right window, you will have to place Pink Bra there. You'll receive a match and you will unlock a warrant to interrogate Anthony and Billy. Close this window and use a CSI computer. You will have to compare Fingerprint from Laptop Caset to Ed's Fingerprints. Once this is done, go back to Brass' Office in order to interrogate the boys.
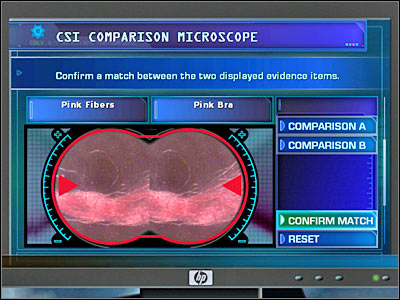
Before you'll proceed with the interrogation, you must ask Brass for a few favors:
- Can you check Eddie's alibi?
- Can you check the alibis for Anthony and Billy?
Let's begin by talking to Kathy:
- Can we talk to Kathy Cantanta?
I'm sure that you remember Kathy from one of the previous cases. She was prosecuted back then, so you won't have to ask for any warrants, because she's already in jail. You must ask her three new questions:
- How well do you know Jill's triplets?
- What about Ed Junior? Did you party with him?
- Is this your bra?

Click on Brass and ask him to allow you to interrogate Keith again:
- I'd like to talk to Keith again.
Keith will have to answer you to some new questions:
- Why bring two semiautomatic guns?
- You're not a gangster - or a cowboy.
- We have evidence that there was another shooter with you.
- Which did you hit first - Ed's shoulder or his heart?
- You have to twin brothers. Why didn't you tell us?
- Are you saying they weren't involved in any way?
- We linked your brothers to the crime scene.
Now we can focus on the triplets. You won't be able to interrogate them right away. Instead, go back to Brass' Office and ask him for a proper warrant:
- Can I get a warrant? -> Anthony and Billy Wilde? -> Can I have a warrant to question Anthony and Billy?
Wait for the game to load a new area. Once you're inside the interrogation room, you will have to click on one of the triplets. Here's the list of questions:
- Tell us what really happened at the shop.
- No guarantees. There's a man dead.
- You left your brother behind at a gunfight?
- Was anyone else at the store?
- We're going need to look at your laptop.
- Billy, there's a scab on your arm. How did that happen?
You may go back to Triplet's Apartment.

You will have to perform only one activity here, because you still aren't allowed to enter the bedroom. Instead, click on the area where you examined a TV set. The laptop case should already be opened. As a result, you may click on the laptop right away. Obviously you won't take it to the lab. Instead, you will only have to upload some data with a little help from the USB Data Drive.
New evidence: Encrypted File from Laptop
Once you've acquired new files, head back to the Lab.

Head on to the CSI computer right away, because you won't need to use any other lab devices. Choose the third option from the main menu - Special Search. You will have to drag Encrypted File from Laptop to the main window. Once this is done, decrypt the files in order to be able to read a note from Eddie. This will also unlock a new warrant, so you should proceed to Brass' Office.
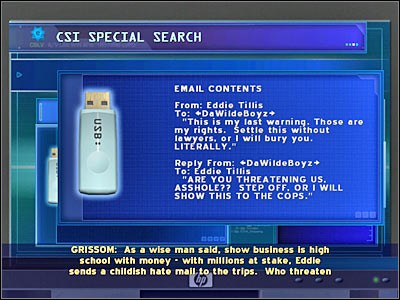
Brass will have to grant you with a new interrogation warrant:
- Can I get a warrant? -> Eddie Tillis? -> Can I have a warrant to question Eddie?
Eddie will only have to answer you to two questions:
- We found the letter you sent to the triplets.
- A bad idea, but maybe it didn't end there...
Once the conversation is over, go back to the Casino. We'll only be there a few seconds.

Jill must answer you to three new questions. Here's the list:
- Did the triplets have any girlfriends?
- Did they ever mention Kathy Cantanta?
- How do you and your sons get along, Ms. Wilde?
Go back to Brass' Office.

Brass will have to assist you in a new interrogation of Anthony and Billy:
- I'd like to talk to a suspect again. -> I'd like to talk to Anthony and Billy again.
Now you will only have to ask two questions:
- We found the threatening letter from Eddie.
- Is this why you boys brought the guns?
Once the conversation has ended, you'll automatically end up inside the laboratory. You will have to listen to a short conversation between Catherine and Grissom. Gil will suggest that you should analyze the crime scene for more clues. You will have to follow his instructions, so choose Old West Tourist Museum: Crime Scene for your next destination.
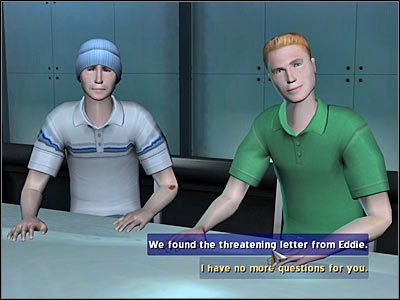
As you've probably noticed, some of the tables have been knocked over. This will allow you to examine them more thoroughly. Start off by clicking on the left objects that's located closer to Grissom. Once the game has zoomed in on the table, move the camera to the right. After that, you will have to click on the scratch marks (screen). Use Mikrosil in order to prepare an impression of the marks.
New evidence: Impression of Stratch Marks
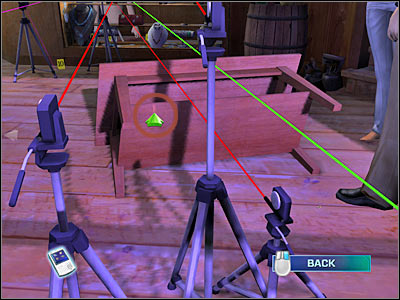
There's a small object on the floor. You probably won't see it at first glance, so check the screen if you're having some difficulties finding it. You will have to zoom in on this object. After that, pick it up with Tweezers.
New evidence: Metal Fragment
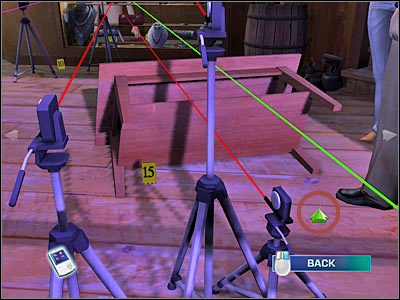
You may proceed towards the second table. Just as before, you will have to examine this table very closely. You should be able to find a new fingerprint mark here. Click on it and wait for the game to zoom in. You will have to use Magnetic Brush and Powder. Follow it with an Adhesive Lifting Tape.
New evidence: Fingerprint from Shirt Rack in Tourist Museum
Once you've acquired these new objects, head back to the Lab.
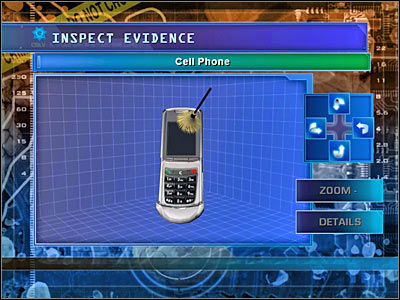
You will have to perform two separate comparisons. Start off by using a CSI microscope. Drag the Impression of Scratch Marks to the left field. You will have to compare it to a Metal Fragment. Once this is done, head on to the CSI lab computer. Choose the first option from the main menu - Fingerprints. You must compare Fingerprint from Shirt Rack in Tourist Museum to Billy's Fingerprints. Doing this will allow you to unlock a new search warrant. You should and try acquiring it, so go to Brass' Office.
Brass will have to give you the warrant:
- Can I get a warrant? Anthony and Billy Wilde? Can I have a warrant for the Triplet's house?
You shouldn't have any problems acquiring this document, especially since you've already been to the lab. Once you have the warrant, go to Triplet's Apartment.
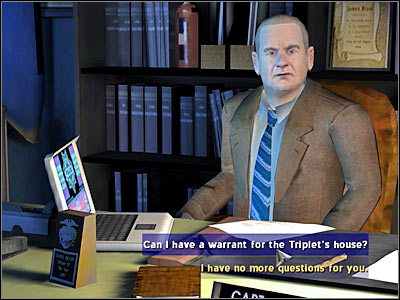
You won't find anything new in the main apartment, because you've already searched these rooms. Instead, go to bedroom right away, because this is the only room you weren't able to explore before. Let's start from the left. There's an empty gun case on the bed. Click on it for a thoroughness bonus. You should also examine a small storage. Despite what you might think, you'll find a very important object here. Check the screen, because that's where you'll have to zoom in. Click on the pants and use a High-Powered Flashlight. Once you see the pants, click on this object again. This time you will have to choose Latex Gloves from your equipment bar.
New evidence: Pants with Broken Zipper
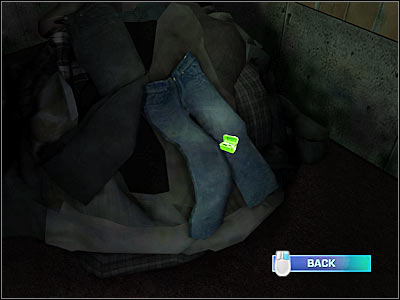
Don't close this window right away. One of the pockets contains a cell phone. Obviously you will have to take it for further analysis. Click on the phone and choose Latex Gloves from your inventory.
New evidence: Cell Phone
Now you will have to examine the phone. There's a fingerprint on the main display (screen). I'm sure that you won't have any problems finding it. Click on the fingerprint. Use Fingerprint Brush and Powder and Adhesive Lifting Tape.
New evidence: Fingerprint found on Cell Phone
Check the second gun case. Look at my screen if you want to know exactly where it is. This time you'll find a gun. Obviously you will have to take it for further analysis inside the lab. As a result, click on the gun and choose Latex Gloves from your inventory.
New evidence: 9mm from the Triplets Apartment
There are also a few thoroughness bonus areas inside the bedroom. Look under the bed. Click on the writing desk and on the third (empty) gun case. Once you've searched the apartment, go back to the Lab.
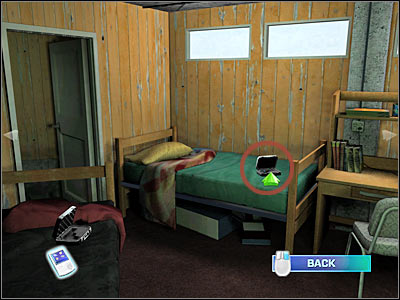
You won't have to use an assembly table, because you won't acquire any bullets from the weapon acquired in the bedroom. Instead, choose a comparison microscope. You will have to compare two items here. Drag Pants with Broken Zipper to the left field. As for the other one, you will have to choose a Metal Fragment from your inventory. You'll receive a match (screen). Listen to what Grissom has to say.
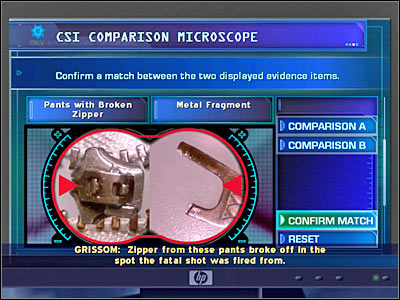
Use a CSI lab computer. Let's start with the first option from the main menu - Fingerprints. You will have to perform a single comparison here. Drag Fingerprint found on Cell Phone to the left field. As for the right one, you will have to choose Anthony's Fingerprints. Compare both prints by dragging the partial print to the lower left corner of the second window (screen). You will receive a positive result. Now you will have to choose the last option from the menu - Video/Image Enhance. Choose Cell Phone from your inventory and you will be allowed to take a look at the picture. You'll also unlock an arrest warrant, so go to Brass' Office without any delays.
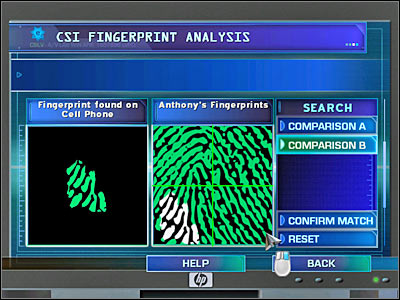
You will have to ask Brass to give you an arrest warrant:
- Can I get a warrant? -> Anthony and Billy Wilde? -> Can I have a warrant to Arrest Anthony and Billy?
Anthony and Billy will have to answer you to some of the final questions:
- We know you both shot Ed Junior. Keith covered for you.
- How did it happen?
- What about Keith?
- Why did you let Keith try to take the fall?
You'll be awarded with a full reconstruction of the crime in the meantime. You'll also be allowed to talk to mother of the arrested boys - Jill Wilde. You will have to choose new questions from the list. Here they are:
- Your sons will be locked up for some time.
- Why were you sleeping with Eddie's son?
The final part of this investigation will require you to listen to a short dialog between Catherine and Grissom. After that, you will proceed to your final evaluation. If you've followed my instructions, once again you will be rewarded with a Master ranking.

Congratulations! You've just finished the game. If you had achieved a Master ranking for all five cases, the game will unlock all available bonuses. You can enjoy them by choosing the second button from the load menu. Rewards have been divided to two separate groups. By opening the lockers in the morgue you can choose to view bonus materials, such as concept arts or movies. The right wall of the morgue contains jars with all of the collected insects. By clicking on a specific jar, you can zoom in on an insect in order to take a closer look at it. Your final reward is the casino chip which can be found on the small table. It will become available to you only if you managed to score a Master ranking for all five cases. Clicking on the chip will allow you to trigger a simple Blackjack mini-game. Enjoy!

Stranger


 Crysis Game Guide & Walkthrough
 Company of Heroes Game Guide & Walkthrough
 Cities XXL Game Guide & Walkthrough
 Call of Duty 2 Game Guide & Walkthrough
 Crackdown Game Guide & Walkthrough