
This guide contains a detailed walkthrough of the single player campaign in Command & Conquer 3: Kane's Wrath. Each of the thirteen missions of this campaign is described in detail and apart from basic information and the listing of both main and bonus objectives it contains advice on how to perform them.
It's also worth noticing that there isn't a single strategy on how to get through the missions. Base development, capturing the Tiberium spikes and fields, the choice of units - all of these factors are crucial and decide on the outcome of your battles. The author of this guide focuses on using airborne units, especially Venom helicopters which are extremely effective in large groups, but they can hardly be considered "the best" choice of units.
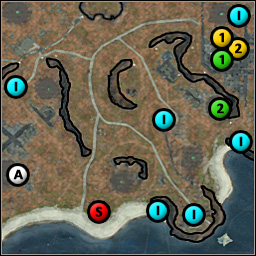
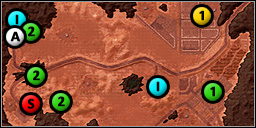
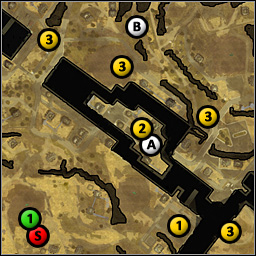
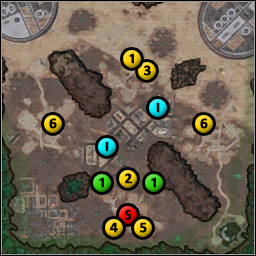
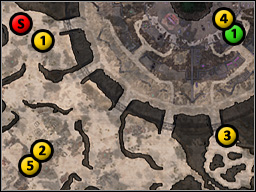
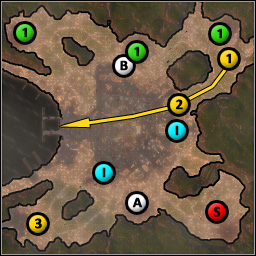
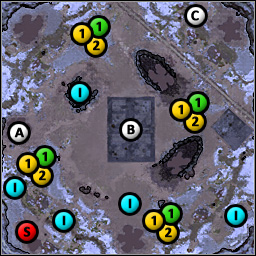
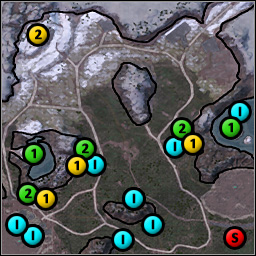
Each mission description contains a map allowing you to find objects of interest. The numbers in the yellow circles point to the number of the main objectives they're connected with and those in the green circles are connected with bonus objectives. The red S marks the starting point, while the blue I show the Tiberium spikes. Apart from these marks the maps may contain alphabetical marks (A, B and C) which are mentioned in the mission descriptions.
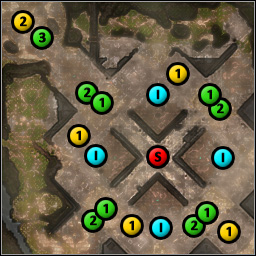
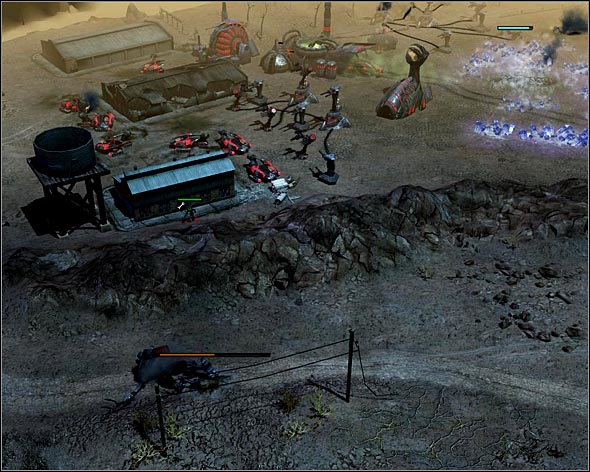
Your first scenario takes you to Brazil. Kane wants you to provoke an insurrection in Rio de Janeiro by attacking GDI administration buildings. By destroying your targets you should be able to attract attention of local fanatics who will gladly join your forces in the fight against the GDI.
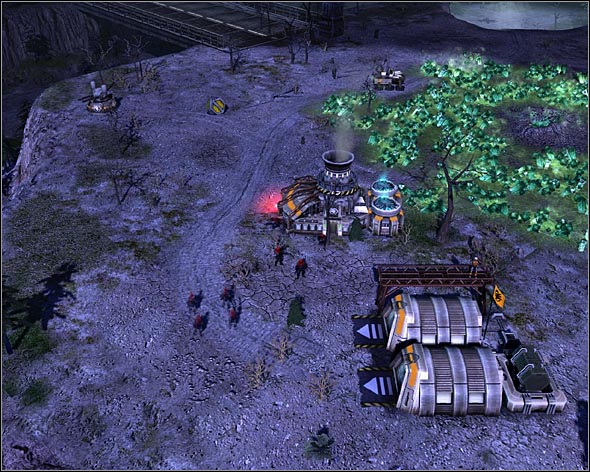
You start off in the middle of the map with nearly-complete base - you have two Tiberium refineries at your disposal, a War Factory and a Hand of Nod. Using the 25000$ from your account you can start building up your forces right away.
Before you start developing your army however, secure your base by constructing Shredder and Laser Turrets at all entry points. Don't expect too much action around your base in the first few minutes, but the situation will change as you progress through the mission. With turrets you shouldn't trouble yourself too much with defending your base.
Once you're done with security issues construct about twenty Attack Bikes and Raider Buggies (focusing on the Bikes) and a few infantry units
 If you secure your base early on you should be able to roam the map freely without bothering yourself with pushing away enemy attacks.
1 - Take over the GDI radio stations
There are four radio stations near the administration buildings - taking control of them isn't necessary, but if you will, Kane will reward you with the ability to produce Scorpion Tanks that should make further struggle much easier.
Start by attacking the buildings in the lower right corner. Clear the area of enemy troops, but don't take over the building yet, instead focus on the administration building and its defenders, but watch out, as the enemy is likely to use metro tunnels or airdrop reinforcements.
After destroying the first administration center secure the radio station by placing shredder and laser turrets around it. Those turrets will come in handy later in the mission
1 - Destroy GDI administration centers
Keep on producing new units and destroy next centers start with the southernmost building, then go west. The northern complex has the highest security - there are several grenadier squads placed in the buildings near your target.
As you're progressing through the mission be sure to secure the radio stations. Don't waste resources on securing them - the only one that needs defending is the first you took over, the one in the south-east.
 The northern center is defended by grenadier squads hidden in civil buildings.
During exploration you should uncover the location of four Tiberium spikes (marked with I on the map) which you can take over with saboteur to speed up resource gathering process. This extra cash will come in handy when you'll start building Scorpion tanks
2 - Defend the captured radio stations
Splinter faction will be attacking your radio stations. You can try and secure each and every of the buildings by building turrets around them, but it's not really necessary - in order to pass this objective you'll only need one of the buildings so the one you secured earlier in the mission should be enough.
3 - Use the power signature scan
Splinter faction uses Disruption Towers scattered all around the map to hide the location of its base, but Kane gives you access to power signature scan that will reveal the locations of enemy power plants. In order to fulfill the third and final bonus objective you will have to scan the map.
 Once the enemy Construction Yard is down, the Splinter Faction will surrender.
2 - Destroy the Splinter Faction's Construction Yard
Splinter Faction's Construction Yard is situated in the north-western corner of the map. In order to fulfill this objective you'll only need to destroy the Yard and that shouldn't be much of a problem with troops you gathered so far. Enemy defenses consist of turrets and bunkers mounted with zone raiders - an all new unit that's quite heavily armed - you'll need several Scorpion tanks to get through them.
If you want to play around with your pray a bit destroy enemy power plants scattered all over the map instead of just marching into the north-west base. Without energy Splinter Faction will be an easy target.
Your main objective here is the GDI laboratory where some valuable information is stored. Before you'll be able to take over the complex you will have to deal with enemy troops who will start attacking your positions since the beginning of the mission.
You'll start off with refinery so create a saboteur to gain control of the spike in the eastern part of the beach. Construct Operation Center and War Factory and start producing Scorpion tanks, but also spend some times securing the perimeter with SAM turrets. Expect the first wave of GDI attack after less than a minute - a wave of Hammerheads supported on the ground by Wolverines should zoom in and attack.
From this point on you might expects groups consisting mainly of Pitbulls, Titans and Wolverines, so build some tanks and reinforce your base with laser turrets. While focusing on the defense be sure to prepare a second group of Scorpion tanks and send them to a Tiberium field to the west (marked with A on the map).
 Your second base should be well defended.
Construct an Emissary and send him to the second Tiberium field. Deploy it near the field and construct refinery. Reinforce this position with SAM and Shredder turrets and bring additional tanks to this location. Enemy will split his forces between your bases so you have to stay put and bring reinforcements when necessary.
1 - Capture the covert GDI Research Laboratory
With two refineries and at least one spike (check the map for locations of the spikes) you can start preparing your strike force. Don't miss and construct another War Factory to speed up the production process.
Begin your assault from the south-east, where enemy defenses are the weakest. Destroy the turrets and get rid of enemy units. When the coast is clear construct another Emissary and send it near the laboratory. You'll also need a saboteur whom you can then airdrop to the complex.
When your account gets filled with resources take over the building and set the Emissary near the lab. In a few seconds all hell will break lose.
2 - Hold the Laboratory until the Upload Completes
You will have to maintain your position for four minutes - that's the time Brotherhood needs to upload all the data. The enemy will send ground and air troops, so prepare to push them back and set up turrets around the perimeter. If you're short on tanks build some laser turrets apart from the SAM.
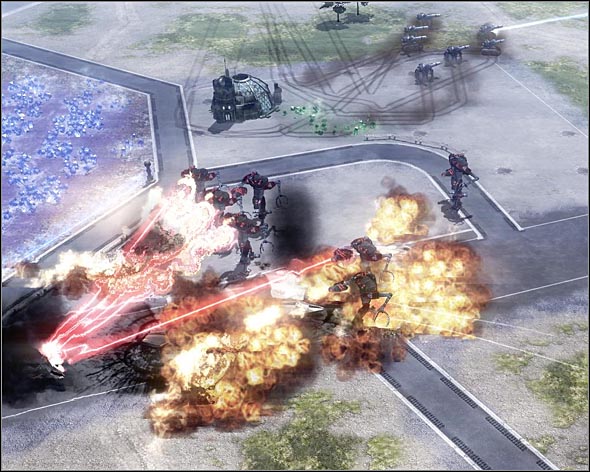
 With such defenses the GDI won't be able to break the perimeter.
1 - GDI Research Laboratory takes less than 50% damage
After four minutes the mission's complete - if you defended the laboratory well enough and it got hit for less then 50% of its health you'll receive the bonus.
Kane wants you to persuade Marcion to contribute to the rebirth of the Brotherhood. The problem with the heretic is that he considers Kane to be a heretic himself. You'll need to force Marcion into obedience, but it's not an easy task since Marcion cowers in his stronghold.
You will start in the south-east corner of the map. Construct a power plant and a refinery near the Tiberium field. Place one or two shredders near the buildings and send some units to another field in the north-west (marked with the white A).
Send Emissary to the field and set up a base camp here - construct a refinery and two shredders facing the derelict buildings. For now, few units and turrets should be enough to hold the enemy back, but you'll need to reinforce your defenses later - Scorpion should be the best for the job.
By the time the enemy starts attacking your position you should have a War Factory and a lab working on laser cannons in order to improve Scorpion firepower. Don't waste resources on toys such as the stealth tanks and maintain a number of ground units to hold the enemy at bay. Turrets and Purifiers are a good addition to your defenses but in order to get the latter you'll need to salvage the remains of the enemy Purifiers and repair them with saboteurs.
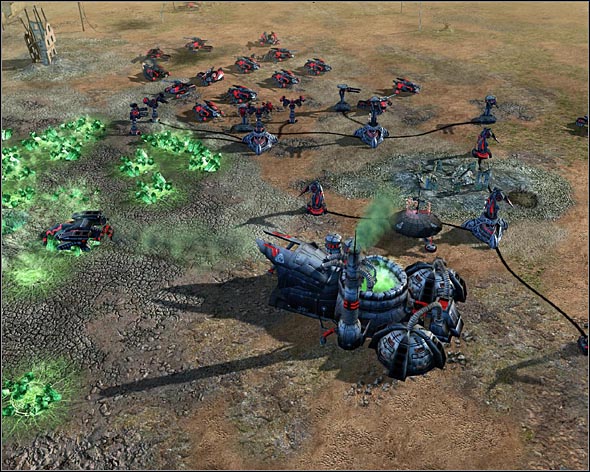
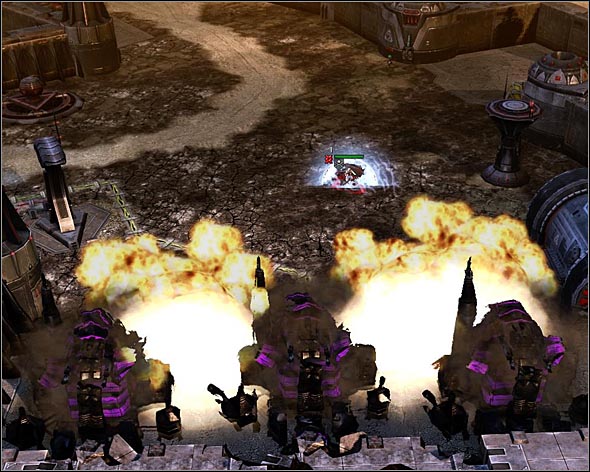
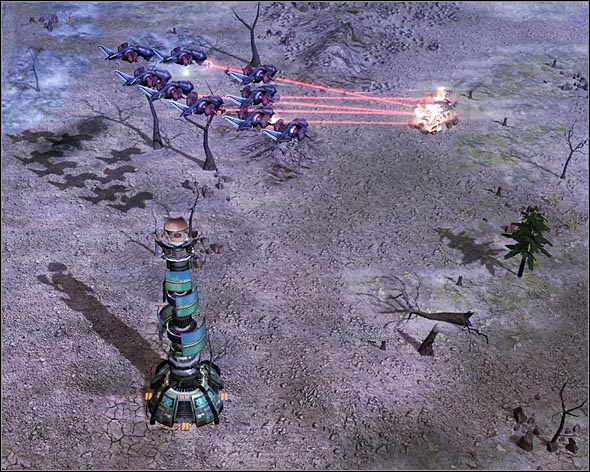
 Use the leftovers from enemy Purifiers to build your own.
You should devote all of your resources to Venom helicopters. When attacking in large groups they're extremely deadly and their mobility is also their great asset. They'll also come in handy in the last minutes of the mission when you'll have to chase running enemy units.
1 - Locate and Destroy the Steel Talon Pulse Scanners
Once you produce some helicopters start exploring the map. You should quickly run into one of the GDI turrets that scan the area for enemy troops and once they lock onto them they send a distress signal drawing GDI units into the fray.
With several helicopters you should be able to destroy the scanners before they send the signal - with that problem out of the way send a few saboteurs to the south-western corner of the map and secure the spikes - you don't even need to defend them, as Marcion won't send his troops to this area.
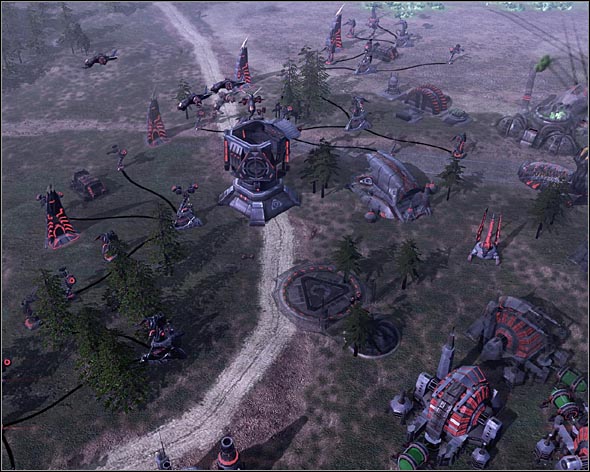
1 - Destroy Marcion's Stronghold
Time to draw Marcion away from the safety of his stronghold. This objective shouldn't be a problem with the great numbers of Venom you should have under your control by now. Wipe the enemy base (starting with SAM turrets, obviously). With the steady flow of cash you should have by now you won't have to worry about using too many units, as you should be able to easily replace them with new ones.
2 - Destroy Marcion's Statues
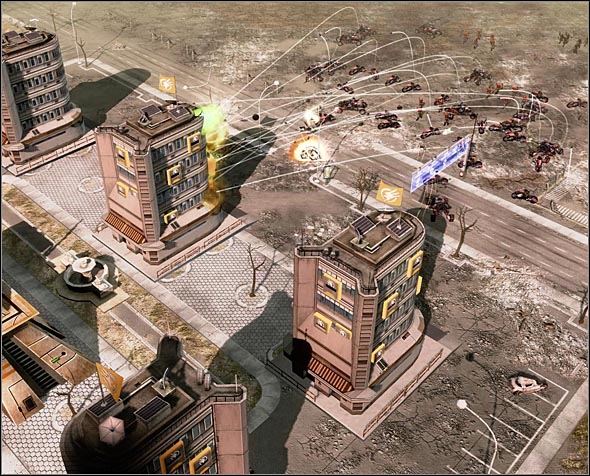
While sweeping through the Marcion's base be sure to destroy three statues that represent the heretic brother. After bringing down the enemy base assault the stronghold in the north-western part of the map and then pull back to the middle of the map.
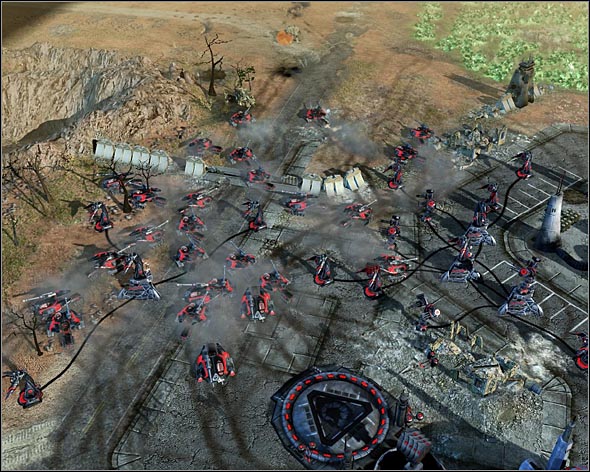
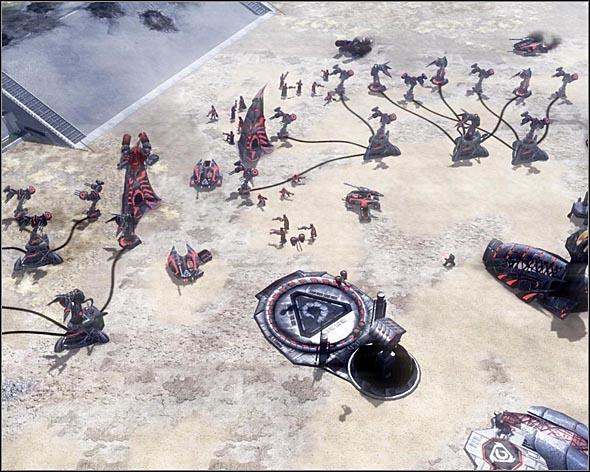
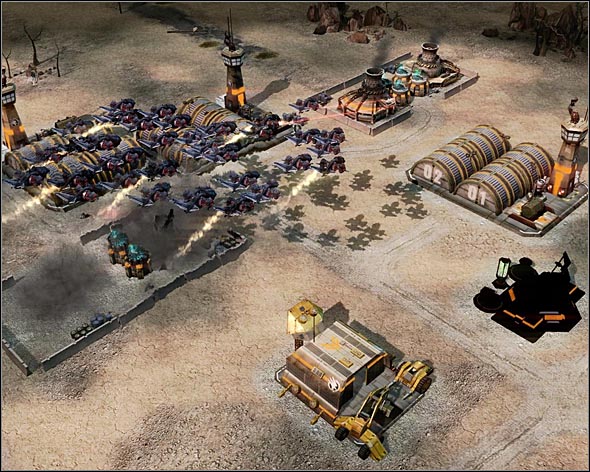
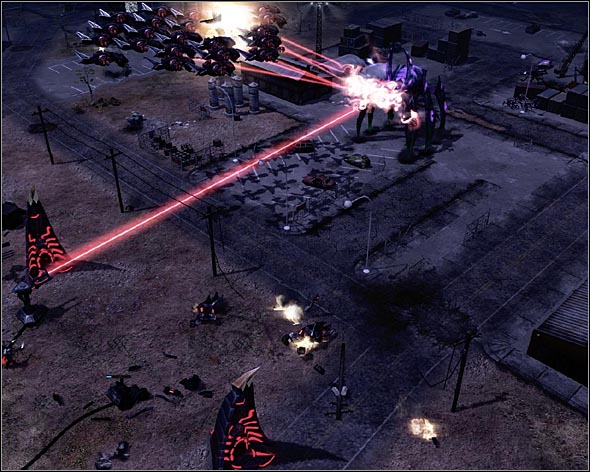
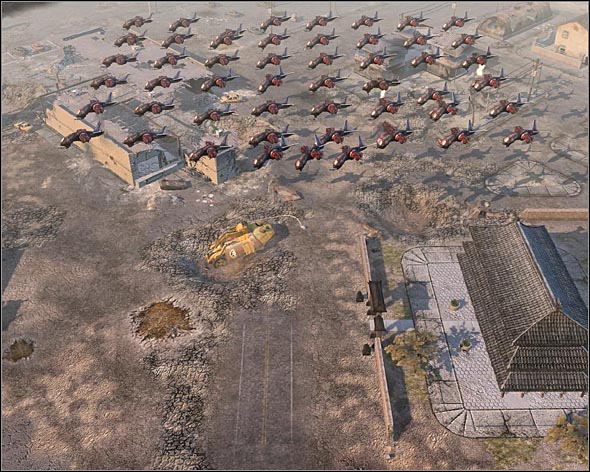
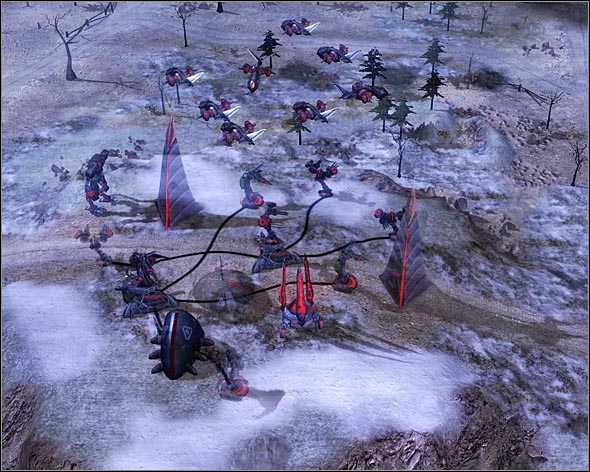
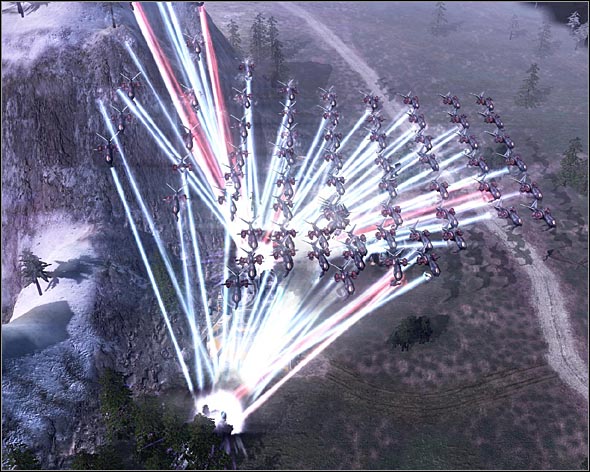
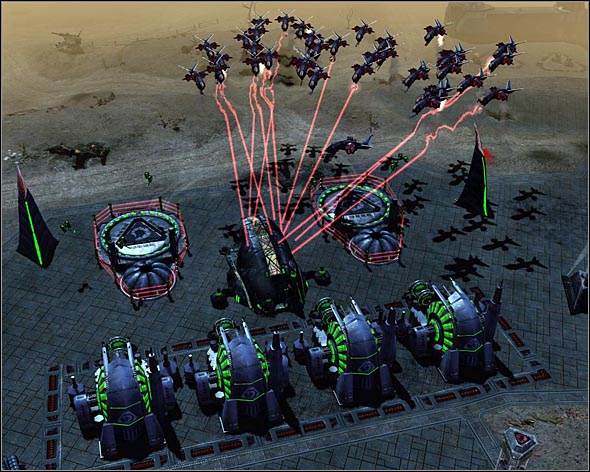 Venom Helicopters attacking Marcion's base
2 - Destroy Marcion's Escort
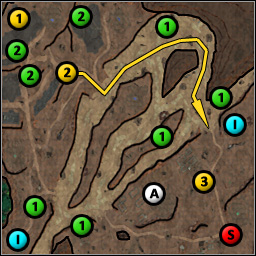
Marcion will try to escape in a transporter covered by a group of other units (including two Purifiers) - gather your helicopters and stop him as he progresses along the yellow line on the map. Without his escort Marcion will surrender.
3 - Escort Marcion's Transport to the Evac Zone
It's your last objective in this mission - you'll have to get the transport into the evac zone. Since you got rid of enemies earlier on, you should get there without any disturbances.
In the last mission of the first Act your target will be GDI science lab conducting research on liquid Tiberium. Before you bring the complex down, however, you'll have to work hard as enemy presence is pretty strong in the vicinity of the lab.
The first few minutes are crucial here. GDI starts attacking early on and unless you'll gain an edge in the very beginning, you'll have a real hard time winning this one. The best defensive tactics seem to be deployments of turrets and Purifiers.
2 - Capture the Purifier Husks
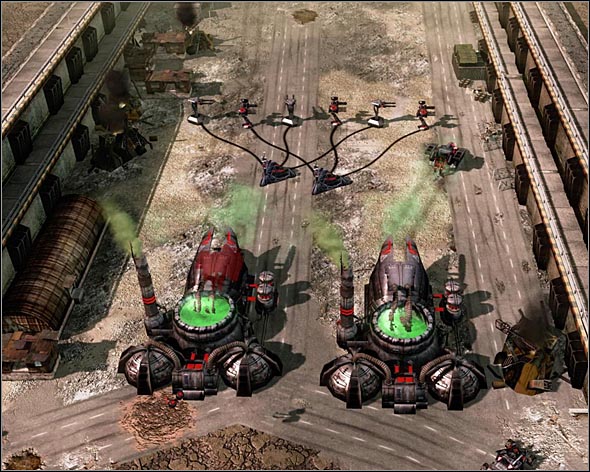
After deploying quickly create an operation center and two sets of SAM turrets. In the meantime build Hand of Nod and produce three saboteurs. After the second attack send your engineers to the west and restore three purifiers laying inactive just behind the hilltop and return to base.
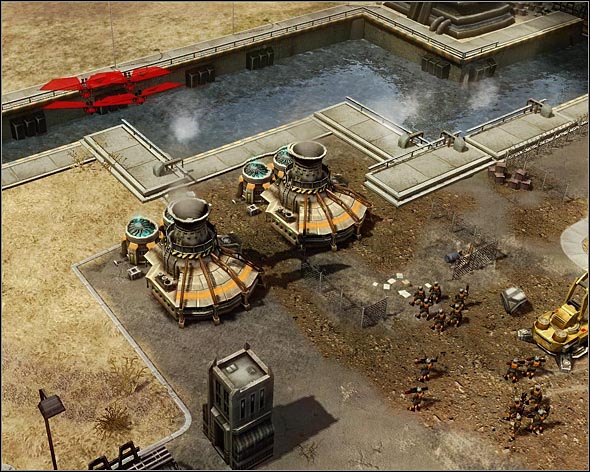
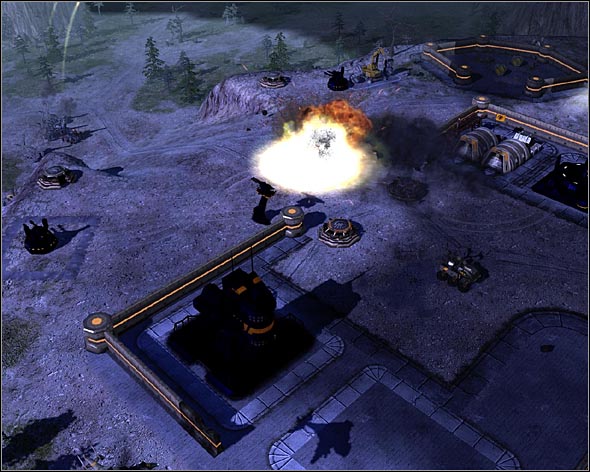
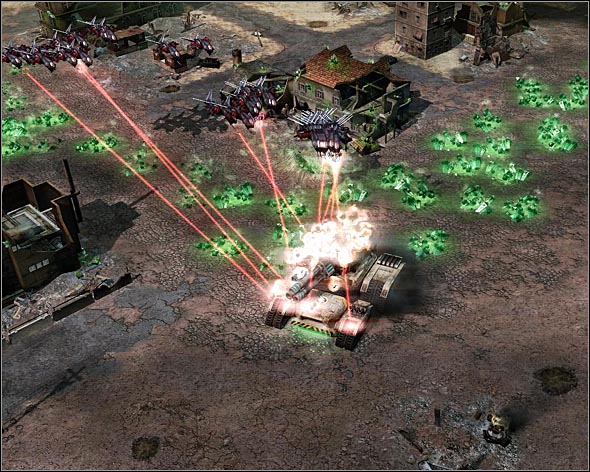
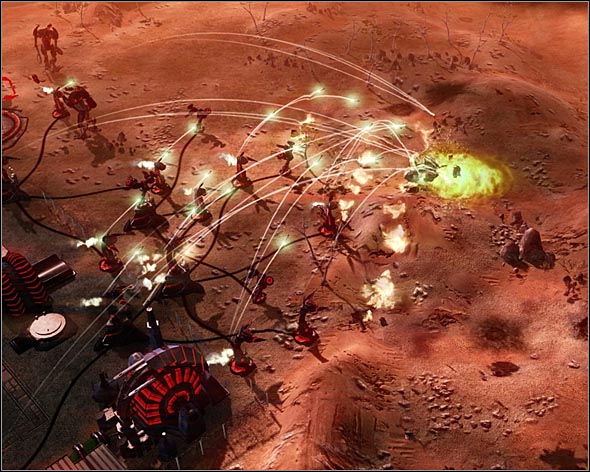 Not a fly gets through these SAM defenses.
Create a War Factory in order to get access to repair units and bring the Purifiers to full health. In the meantime secure your base with more SAM turrets and add a few shredders. Turrets should deal with enemy forces without your further help - you'll only need the assistance of Purifiers to take down large numbers of ground units.
Reinforce base defenses by upgrading your turrets and create four more saboteurs and send them to the north, to recover next Purifiers which you should bring back to the factory and repair as soon as possible
In the north-western end of the map (marked with A) you will find more husks and two spikes and a blue Tiberium field. Send an Emissary there and create an outpost and Hand of Nod where you should train five saboteurs to recover last five husks and two more for the spikes. Your last addition to this base should be the refinery and some turrets. You might also consider building a War Factory here, so that you can repair the Purifiers on the spot.
By now you should control the western part of the map and your enemies shouldn't be able to get through your defenses giving you the opportunity to start preparing your offensive.
1 - Knock Out the Research Complex's Power Stations
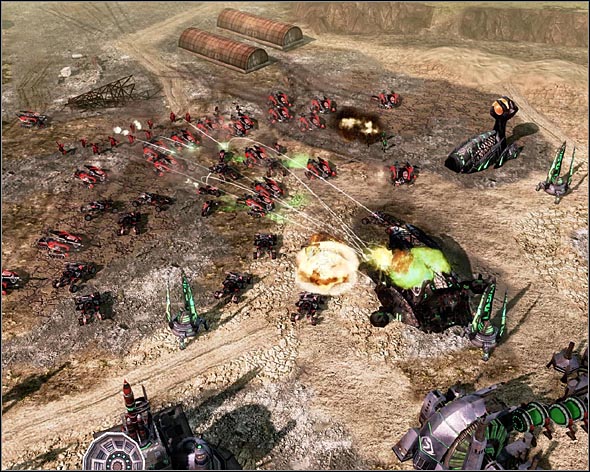
Start by building ground units to support your Purifiers in the final assault. Use Scorpion tanks as base, but consider adding some Mantises to defend against air attacks.
With large army at your disposal move out and head south-west for the power stations. Bring them down along with the refinery and barracks. Without power the enemy base should be an easy prey.
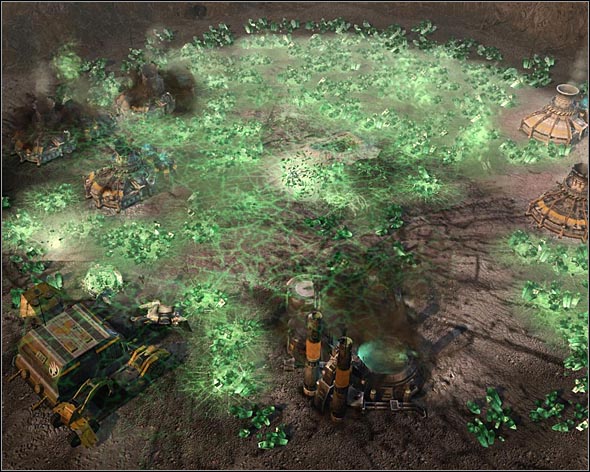
 Can you find GDI base on this picture?.
1 - Destroy GDI's Liquid Tiberium Research Lab
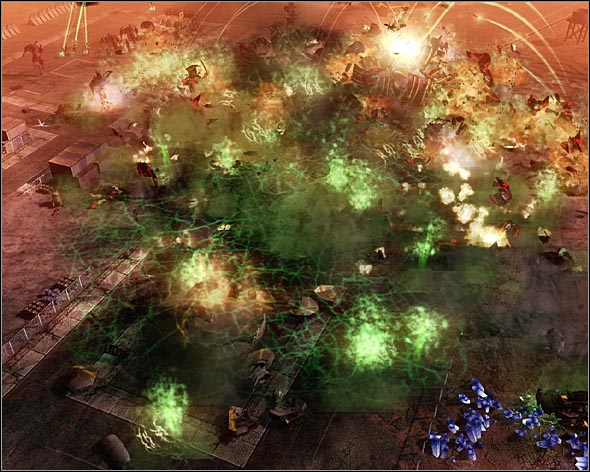
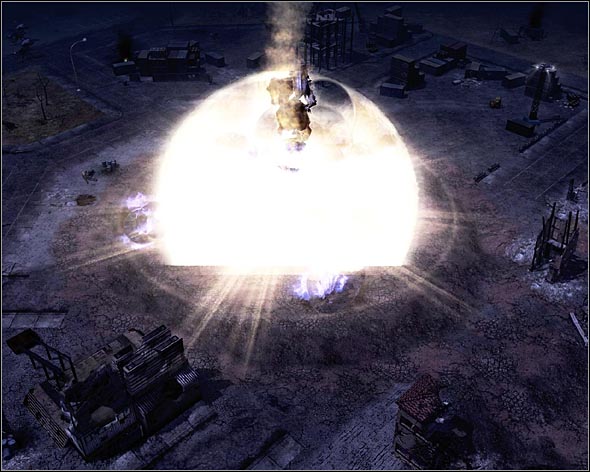
Enter the GDI base and start the onslaught. Ignore the regular buildings and focus on the science lab. Do you remember the explosion of liquid Tiberium in Sarajevo? The effects should be very similar here - both the base and your units will be wiped out in one flashy explosion.
Time for some commando action. Kane wants to gain an edge over GDI by neutralizing their most powerful weapon - the Ion Cannon. In order to bring it down you are sent to the Republic of South Africa where the weapon controls are situated. The Brotherhood has managed to scramble the cannon for five minutes and that's exactly the amount of time you have to get in and disable it permanently.
Select the commando and head east towards the first of the marked buildings. Don't worry too much about getting hurt - in time, commando regenerates her wounds.
1 - Destroy GDI's Network Communications center
After getting inside take down enemy infantry and blow up the barracks to prevent GDI from producing more units. Rig the other buildings and the Communications center but stay away from the harvester or it'll tear you to shreds.
 Since commando has the regeneration ability feel free to engage enemy troops.
2 - Destroy GDI's Ion Cannon Uplink
Your next target is the Uplink. In order to get past the two watch towers your commando will need some help. Select your shadow team and fly over to the power plants (marked with A on the map) land on the platform and blow them up. Energy shortage will bring down the towers and allow your commando to get inside.
After you bring the structures down reinforcements will arrive in the south-western corner of the map - MCV and four Reckoners with troops on board. New objective will appear - you'll have to capture Network Research centers before the time runs out.
Deploy the Reckoners near the Tiberium field (remember, once you deploy them, you can never revert them) and start constructing your base here - create a power plant, refinery, operations center, war factory, tech lab, hand of nod and air tower. Troops in bunkers should cover the defense, while you focus on building Scorpions.
Develop laser cannons and wait until you get somewhere around twenty tanks. Send them northward towards the first of target buildings. Destroy the barracks and the turrets and enter enemy base via entrance marked with B.
Destroy the construction yard and take down the power plants. Forget about AA turrets - without energy they're useless anyway. Press forward destroying the refineries, war factories and barracks. Clear the area around your four targets so that you avoid any unpleasant surprises.
 Shadow team should get to the power plants unnoticed.
3 - Capture the Network Research centers before the Ion Cannon re-aligns
Create four saboteurs and get them onto a carryalls. Send your aircraft to each of the buildings and capture them. If you'll manage to do that before the time runs out this mission will be a success.
1 - Capture the Network Research centers 3 minutes prior to Ion Cannon Re-Alignment
In order to get the bonus here you will have to capture the research centers before the timer shows 3 minutes. If you played fast and listened to my directions this shouldn't be much of a problem to you.

Extremely interesting mission, quite different from what you've seen until now. You'll gain control over two shadow teams that will have to place shadow beacons in front of enemy buildings so that the artillery can take them down. Both teams have stealth, however the mission is not as easy as it may seem. There are a lot of detector units in GDI bases and most of the turrets placed on this map also seem to possess that ability.
1 - Tag Treasury Power Plants with Shadow Beacons
Get both teams airborne and send them to the power plant to the east paying attention to hammerhead patrols in the area. When you manage on the hilltop tag the first building.
Get through the bridge to the north killing the enemy troops in the area. Tag the next power plant and head westward trying to avoid enemy patrols (even if you kill them the enemy will get a new one in their place quite fast. Tag the last two buildings and wait for the situation to develop.
 If you get airborne after placing the first tag, the turrets will notice you and bring you down.
The Brotherhood will destroy the power plants and send in reinforcements. Apart from stealth tanks you'll receive Specter artillery. Their cloak ability and huge firepower make them a very powerful base destroyers.
Pull your shadow teams back towards the second of the destroyed power plants (marked with A) and destroy the airstrip with explosives preventing the enemy from producing more air units which can prove to be crucial later in the mission.
1 - Steal Gold Bullion
The only bonus in this mission is about retrieving the gold bullion. The precious cargo lays around in both northern and eastern part of the map. You can gather them with shadow teems, but you'll have to get rid of Pitbull patrols in the south (preferably by covering some point on their patrol track with continuous artillery fire) - the bullion in the north isn't guarded at all.
The bonus is complete only once you manage to get 15 thousand dollars and that means you'll have to pick up 15 bullions
2 - Destroy the GDI Network Communications center
Send your units towards the hill where the center is located, but don't get on top of it. Target the war factory with your artillery, wait for the hammerhead to appear over the building and give the fire order.
Use the forced attack (leftmost icon in the order bar) to destroy enemy Pitbull patrols. It shouldn't be much of a problem, as you'll have to attack some point of their patrol route. Once the vehicles turn into dust destroy the bunkers and bring down the hammerheads using stealth tanks.
 Watch the Pitbull movement path and attack them at some point of their route.
Get on the hilltop and destroy the remaining defenders and the barracks, then focus on the communications center. Near the crane you should find two crates that can repair your damaged units.
3 - Destroy the GDI Treasury
Move your units to the north towards the hill where your last target is situated. Destroy the bunkers with artillery fire and get to the top. Wait for the hammerheads to get on top of you and destroy them with stealth tanks.
Select the artillery and level the area around the treasury - don't be picky just take everything down. Once there's nothing around to disturb you, attack the treasury.

Kane wants to kidnap a GDI scientist, dr. Giraud who's doing research on Tiberium. The scientist hides in a well protected laboratory.
Again, your first few decisions will decide the outcome of the whole mission. GDI won't toy with you so expect them to send waves and waves of attacks. You'll have to get defensive in the first few minutes or you won't get the chance to get to the doctor.
You'll need to be very fast. Create an operations center, war factory and a Hand of Nod. Create a second harvester and a reckoner along with two saboteurs. Start building up your defenses starting with SAM towers. Flame tanks should be enough to stop the first few waves, but without support, they'll get destroyed by the pressing enemy.
 Defending your base is your first objective.
Get the saboteurs onto the reckoner end send them to the Tiberium spike, making a short stop in the port (marked with A) to pick up the crates. Take over the spike and one of the silos and send your reckoner back to the base. Now you'll need one saboteur and one infantry unit - get back to the spike and take over the second silo. Deploy the reckoner and use the infantry to defend this outpost against possible attacks.
During the capturing of the spike and silos you should continue building up your base. Build tech lab as soon as possible and create four Obelisks of Light which will become the backbone of your defenses. Add some shredders and upgrade them and your defenses should be impenetrable.
1 - Capture the Spaceport Control Center
Once your position is secure you can start getting offensive. Your first target should be the military outpost defending the space port. Build an army consisting of Purifiers, Mantises, flame tanks and few artillery units. Flame tanks should defend your army from zone troopers who are the biggest threat to you.
Attack from the north-west slowly pushing forward. Destroy every enemy in sight and level the buildings with artillery. Soon, the construction yard and the unit production buildings should be down. Don't forget to take down enemy refineries.
Once the area around the Spaceport Control Center is clear. Create and Emissary and start building your second base here. Focus on the defenses (the enemy will switch to your new outpost) and the refinery. Your harvester will gather Tiberium from the field to the north (marked with B) which should greatly improve your war funds.
Repair the remaining units and add some new if you need. For the second assault your need mostly Purifiers and artillery - the more the merrier. After forming a strike force head westward, towards the city. Move carefully destroying every building on your way, as many of them may hide missile squads. Specters should be the best for that job, while Purifiers should stay back defending the artillery if necessary.
Clear the area around Giraud's lab and level the base to the north-west (marked with C). When there is no enemy in sight move your troops towards your main base. Near the airstrip there are a few remaining GDI buildings.
 Destroy everything that gets in your way.
1 - Capture Giraud's Lab
After the area is secure create some Mantises and a few new Purifiers. Send your army to the lab. Capture the building and wait for the situation to develop.
2 - Escort Dr. Giraud's Transport
The Brotherhood will send in a transport vessel to get the scientist out of the area. The aircraft will move to the south-east (the exact route is marked on the map) and you should escort it. Move your troops towards the base eliminating every enemy that tries to take down the transport. Be wary for the Slingshots and pick them as your primary targets.
Once the aircraft gets to the ship the mission is complete.
Your enemies have managed to create MARV - a powerful tank that can also gather Tiberium. The Brotherhood of Nod wants to analyze the vehicle and create one of its own. As usual it's up to you to get the "samples".
You'll start off in the southern part of the map. From the very start you have two refineries and a few Obelisks of Light and a few other buildings at your disposal. Create a second air tower, tech lab and a few SAM turrets to defend yourself against air attacks. Spend some funds on developing laser capacitors and improvements for turrets.
 MARV's armor is highly resilient and even several dozen of Venoms may have problems penetrating it.
Start producing Venom helicopters which will become the core of your army in this mission. When MARV starts attacking your base you should have at least a thirty of them in the air.
2 - Destroy MARV
MARV is highly resilient to damage and has tremendous firepower so you'll need to throw everything you've got at him. The Venoms will only be able to damage him a bit, but the Obelisks of Light and the Avatars should be able to fulfill this objective.
Gather your Venom helicopters and head northwards. Eliminate every enemy in sight and enter the enemy base. Start the assault with construction yard and the power plant. Remaining buildings will become an easy prey when you cut the off from power sources.
1 - Capture Reclamator Hub
There shouldn't be any enemies in the vicinity so take over both Tiberium spikes in the middle of the map. Once the additional funds start filling your account. Create a saboteur and capture the Reclamator Hub - the building marked with the yellow marker.
3 - Defend Reclamator Hub until Upload completes
Move all your Venoms to the Hub. The Upload will take six minutes during which the enemy will attack from both east and west. Your helicopters should easily deal with this threat, but if the building suffers from enemy attack, just repair it.
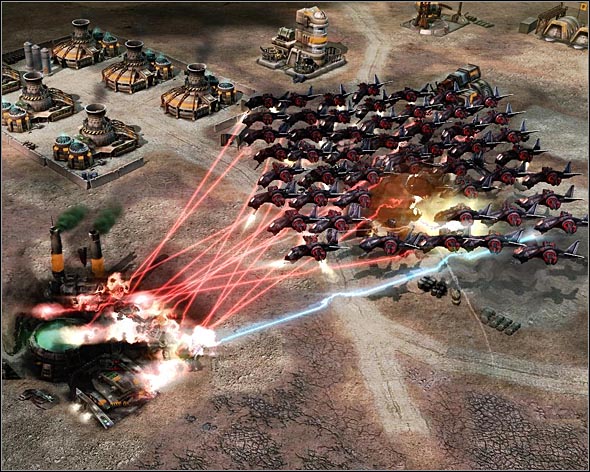
 Start attacking the enemy base with the power plant.
During the Upload make sure to reinforce the defenses of your main base. Add new Obelisks and Avatars. When the Upload completes, your position should be an impenetrable fortress.
4- Construct Redeemer Engineering Facility
The Brotherhood's scientists have managed to create a Redeemer - a new powerful unit that can stand ground to the MARV. Your orders are to construct the Engineering Facility and build the prototype mech. The building is very expensive, but required to complete the mission.
1 - Destroy ZOCOM's reinforcement MARV's
Meanwhile the GDI will start a continuous attacks from the two bases revealed by the broadening of the map. Apart from regular units the GDI forces will contain Behemoths and two MARVs. Destroy the artillery with Venoms and send your helicopters to stop the huge units. Try to focus on one, then switch to the other Avatars and Obelisks of Light will surely come in handy.
5 - Construct Redeemer
Once the Engineering Facility is ready you can start constructing the Redeemer. This giant Mech should reinforce your troops in the final assault, but you don't have to use him. If you managed to create a large enough Venom strike force and replaced the destroyed ones with new machines you should have enough power to wipe out any GDI existence in this area.
 No building can withstand such firepower.
6 - Destroy ZOCOM Bases
Gather all of your units and give the attack order. In order to finish the mission you'll need to destroy both construction yard. Taking into account your superiority both on the ground and in the air it's a mere formality.
On Alexa's orders you're going to Sarajevo where your allies are protecting the Brotherhood temple from the GDI attacks. During the mission you'll try to destroy your enemy's base but the Abbes has a more important mission for you.
1 - Destroy Anti-Aircraft Batteries
Your first target will be a small GDI outpost with three AA batteries . Head south-east, enter the base and eliminate enemy infantry. With the defenders out of your way blow up the power plant and then proceed with leveling remaining buildings. After destroying the last battery make a run for the Brotherhood's HQ. If you're fast enough your commando won't suffer from the bombardment allowing you to use him later in the mission.
Construction Yard will appear at your starting location along with few buggies, Scorpions and bikes. Machine gun units will allow you to defend yourself from enemy commandos and engineers. You should be especially wary of commandos as they can blow up any of your structures if you let them come close enough.
 Vertigo bombers over GDI base.
Now you should expand your base - build a power plant, two refineries, operation center and at least three SAM turrets. Then build air tower and tech lab and start researching laser capacitors.
GDI is very much on the offence pushing you to defense from the very start. Fire Hawks may come as a problem as they usually get to drop their bombs before being taken down by the AA defense. That's why you'll need several Venoms to support the turrets, and remove the airborne threat before the bombers reach their target.
2 - Destroy GDI Base
The only GDI base in the area is in the southern portion of the map. Despite the fact that the Brotherhood continuously attacks this outpost GDI does not seem to plan a quick surrender. You may want to support your brothers and bring the complex down with Venom helicopters, but you can just sit back and wait for the Vertigo bombers to appear exactly twenty minutes after the mission starts and level the whole area.
3 - Destroy Laser Fence Control Tower
After the GDI base is out of your way your brothers will take over the base and you will move to the east where commando and saboteur will appear. Select both and head to the north removing the infantry patrolling the area, then blow up the Fence Control Tower. Keep the saboteur out of harm's way, because if he dies, the mission is over.
Continue forward removing more enemy patrols and blow up the next tower. Turn right and go along the only available road until you reach another tower and crossroads. Turn left.
Stay away from the Obelisks of Light and head for the three power plants and destroy them by shooting at the red barrels. Once the buildings are down head back to the crossroads and turn east. There's another set of power plants near the edge of the map. Once you bring them down, the Obelisks will become useless.
4 - Infiltrate Ion Shield Research Center
Destroy the only remaining control tower and remove last of the patrols. Once the coast is clear select the saboteur and send him to the Research Center.
 Once the power plants are down the Obelisks of Light will cease to be a threat.
5 - Reach Evac Point
After few seconds the saboteur will leave the building and get on the assault bike - you now have to get to the evac point situated in the south-western corner of the map. Taking into account the fact that Brotherhood controls most of the area getting there in one piece shouldn't be a problem.
1 - Saboteur reaches Evac Point unharmed.
In order to get the bonus in this mission you'll have to watch out so that the bike doesn't get hit (not even once) by the enemy troops, so you'll probably need the commando to scout and clear the area ahead.

Time for the first meeting with Scrin. You'll start off with a small outpost and a few units to defend it. Quickly create a Hand of Nod and train a saboteur to capture the Tiberium spike to the west. Use your remaining funds to build some turrets - you'll need a full package of shredders, laser turrets and SAM turrets.
Once you'll secure the base create an Emissary and send it to the blue Tiberium field to the east (marked with A). After deploying there build a refinery and secure it with turrets. Extra income should improve your position, however pay close attention to your second base as Scrin may start sending their units their instead of your main base.
 Let the Eradicator get into the range of your turrets before attacking it at full scale.
Construct a tech lab and develop new technologies. Scrin attacks will become stronger and stronger so reinforce your defenses with a few Obelisks of Light. You shouldn't save on your lasers - in few minutes Eradicator will appear, and all your spent money will pay you back.
1 - Eliminate Cultists to rescue Nod combatants.
Time for some offence. Your first target should be the cultists controlling some Brotherhood units. This task shouldn't be too hard, especially if you'll use your air units. Once you'll rescue the combatants pull them back and use them to boost your defenses.
Spend some resources on the construction of the Temple of Nod (nukes will come in handy in destroying enemy bases at points B and C) and devote the rest on developing your army. Once you're ready for battle, attack one of the Scrin construction yards.
2 -Destroy Traveler-59 Eradicator
The Scrin will send in their most powerful unit - the Eradicator. It's another heavy armored unit with gigantic firepower. Once it's on the battlefield it should become your top priority. You can attack when it's far from your base, but the most reasonable solution seems to be to engage it at full strength once it gets in the range of your turrets.
 Nuke sent on one of the Scrin construction yards.
2 - Construct Redeemer to battle Traveler-59 Eradicator
If you want to pass the second bonus objective, you'll need to crate the Redeemer, but you don't have to send it against the Eradicator - you just need to construct it before the mission is over.
1 - Destroy Traveler-59 Drone Platforms.
At this point there should be only two Drone Platforms remaining. Destroy them and the mission is over.
Tacitus is being transported by the MCV with GDI escort to the port. Kane wants you to capture the precious cargo before it gets on the ship, so time is of the essence here.
You'll start off in the south-eastern corner of the map, with a small and undeveloped base. Apart from some basic buildings you'll get several units including Scorpion tanks, buggies and assault bikes. Despite how powerful your starting army may seem it's not wise to test the GDI escort with just them - they'll serve you better if you assign them to base defense.
1 - Damage ZOCOM MCV before it reaches docks
For starters you'll have to immobilize the vehicle as it approaches the port on the shortest route possible - the yellow arrow on the map.
GDI will stop the vehicle if it receives any damage so build an air tower and construct a single venom to attack the MCV. Corsairs should bring your unit down, but you should get at least one hit and MCV should deploy.
 Destroying the Tiberium fields should initiate a chain reaction that should damage all nearby buildings.
Now's the time to focus on developing your base - again you should focus on your defenses. Create a line of shredders with some addition of Obelisks of Light. The units you received at the beginning of the mission should be enough to compliment the base defenses.
Two harvesters should exploit the Tiberium field in the south-east quite fast so you'll have to look for a new source of resources - capture the spike to the west and set some defenses around it as GDI will surely try to send some engineers to capture it. Few Venom helicopters should solve that problem.
You should also create another base near the second Tiberium field (marked with A), but you'll have to surround your new refinery with large set of turrets. The GDI will focus its attacks on your new base, so you'll probably need to sell some part of the turrets defending your original base.
1 - Use Tiberium Vein Detonation to destroy GDI Tiberium Fields
The base for your offence should be the construction of Tiberium Chemical Plant, which will grant you access to special missiles to destroy the Tiberium Veins. Test the missiles on the fields in the northern part of the map. This will not only complete your bonus objective, but also cut your enemies' funds.
 During the MCV evac you should keep some units in the back, preferably the Venoms.
After destroying the Tiberium fields enemy attacks will lose their momentum. Create the Temple of Nod gaining access to nuclear weapons and start building up your army. Once you're ready sent your troops northward eliminating the enemies cowering in civil buildings.
You should start the assault on GDI base with the construction yard situated near the center Tiberium field (marked with B). Once the enemy's unable to build new buildings attack the power plants to the east and west, and then level the remaining structures.
2 - Capture ZOCOM Conyard
Once the GDI base's out of the way, create an saboteur and send him to capture the construction yard. The building will revert back to MCV and will come under your control.
3 - Escort ZOCOM MCV to Evac Zone.
Your last objective shouldn't be much of a problem - send the MCV to the evac zone located in the south-west corner of the map. Keep some of your troops nearby, as the Scrin will start attacking from the north and the might consider a lone MCV an easy pray.
Kane wants you to awaken the Marked of Kane, his cybernetic army waiting in the Control Nodes. Taking over this strategically important buildings is your number one priority.
You'll start your mission in the south-western part of the map with a small base and a single Tiberium refinery at your disposal. GDI forces surprisingly won't disturb you as you're building your main base, so don't waste your resources on the turrets. The only real threat are the enemy patrols.
The blue Tiberium field will shrink almost instantly, so you'll have to look for another source of funds. Taking over the four spikes in the southern part of the map seems to be a good idea, but you'll have to set defenses around them, as GDI will try to reclaim them using engineers. Venoms seem to be an optimal solution to this problem, so send a few to each of the spikes.
 Protect the spikes from enemy engineers and patrols.
Once you take over the spikes you may construct and additional refinery near the field in the north-west (marked with A). If you decide to do it, prepare to defend your position, as this area is being patrolled by GDI tanks that will attack your structures on sight.
Once your financial position is secured consider your next actions. You main objective here are the control nodes, but before you embark on that task you might want to attack the GDI base in the center of the map (marked with B). Getting through its defenses may not be an easy task, but when you get rid of it the rest of the mission will be a piece of cake.
The GDI base's defenses are really impressive. Once you'll get through the numerous turrets (of all kinds) you'll have to face a large strike force accumulated inside. Air attack seems to be a very bad idea (unless you want to do it with about a hundred Venoms), as GDI has a lot of Pitbulls and Slingshots around.
Before you launch a frontal attack you'll need to get rid of enemy construction yard and crane. To do that you'll need to scout the enemy base with your Venoms (obviously losing them in the process) and once you know the locations of the buildings, nuke the spot with most power plants and then send about eight Vertigos at the construction yard.
Once the building becomes rubble reinforce your army by filling the losses and attack again, focusing on the crane. This way you'll rid the GDI off the chances to rebuild their lost buildings.
 Before launching a full-scale assault nuke the GDI base.
Now focus on destroying GDI's key installations - the power plants, barracks and war factories. Without power the turrets will become useless and without the production structures the enemy will brake under your attacks. Ignore the structures such as tech lab or operation center as they don't have any value to the GDI right now.
With the main GDI base out of the way attack a small outpost in the north-eastern portion of the map (marked with C). Here lies the war factory that's the source of enemy patrols. By destroying these structures you'll deliver the final blow to the GDI.
1 - Capture Marked of Kane Control Nodes
After the destruction of GDI you may start capturing the control nodes. In order to do that you'll have to send a saboteur to each of the yellow marked buildings.
2 - Protect Control Nodes until Marked of Kane awaken
The awakening process takes three minutes thirty seconds. During that time the Nodes are vulnerable to enemy attacks but only if you haven't destroyed the GDI bases. Since you leveled them before the awakening this is going to be quite calm period.
1 - Control Nodes take less than 50% damage
In order to fulfill the bonus objective you'll have to keep nodes' health above 50% - if at least one of them gets below that value, the bonus is gone.
 If you don't decide to take the GDI base down you'll need to ensure the proper security of the Nodes.
If you want this mission to be a bit more demanding don't attack the GDI bases and instead just go for the Nodes. After capturing all of them GDI will send everything it's got to destroy the Nodes so you might want to set up a perimeter of Obelisks of Light and shredder turrets around each of the buildings.
In the last scenario the Brotherhood will get it's chance at regaining Tacitus. The precious artifact is kept at a GDI base guarded by energy barriers. Before you'll be able to send in the saboteurs you'll need to get rid of the force fields.
Your base is situated in the south-eastern portion of the map. Start your mission by building a second refinery to speed up the Tiberium-gathering process of the nearby field. Your remaining funds should be spent on crating defensive perimeter consisting of Shredders, Obelisks of Light and SAM turrets. Cyborg units you have received at the beginning of the mission will also come in handy - get your units onto the reckoners and then deploy them near your turrets.
 Obelisks of Light, shredders and Venoms should be able to stop all enemy attacks
The enemy will send loads of units at your base, so make sure your defenses don't have weak links and start producing Venom helicopters. Several Venoms with super charged particle beams should be placed near the turrets as a support against missile infantry.
With the defenses in place it's time to prepare a counterstrike. Build every building you might need and start developing new technologies. Build more Venoms and send them to scout the area.
Try to reveal as much as you can - focus on revealing enemy structures and Tiberium spikes. During this process you should also reveal two bonus objectives. Ignore them for now and continue building up your army. My choice would be the Venoms as they are fast and perfect for quick strikes and hit and run strategy, but they are not a necessity here.
Before launching your offensive you should secure the Tiberium spikes and a silo west from your positions. They should improve the income rate and the process of building up your forces. GDI will try to recapture these structures, so you'll need to send in some troops to defend them.
 Helicopter attack.
1 - Destroy GDI Power Plants
Start your offensive by attacking the power plants marked by Kane. You can't get to them through lands, so your best option are the Venoms or Vertigos. If you're high on resources you may also consider nuking the power plants.
2 - Destroy GDI Bunker Entrances
Unpowered turrets will become an easy target allowing you to move more freely around the map. Start the GDI units and structures of the map but don't miss the Bunker Entrances set between the rock formations. Destroying them will fill your last bonus objective.
After several minutes GDI forces in the area should become a sad memory. The enemy will send various troops at your base, but they shouldn't be much of a problem. Split your army into three parts and send them to defend the GDI communication centers marked with yellow dots on the map.
1 - Capture and Hold GDI Communication Centers
Create three saboteurs and send them to the buildings. The command will initiate the process of disrupting the energy barriers which takes about ten minutes. (If you capture all three centers the process is thrice as fast). GDI will send troops to reclaim the buildings, but if you destroyed the bases defending the barriers they shouldn't be much of a threat. If the situation gets hot remember that you can repair the damaged structures.
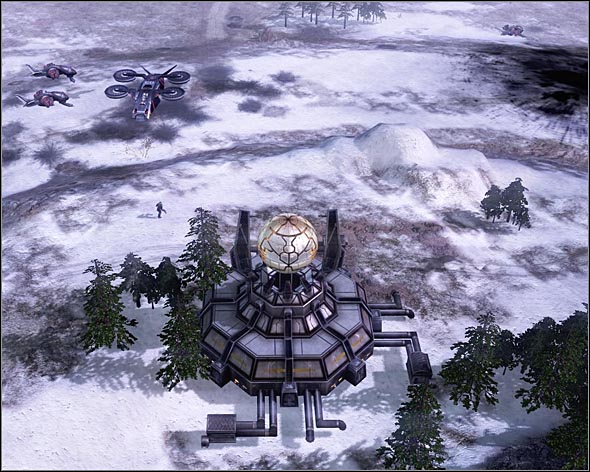 This building hold the Tacitus.
After five minutes the first barrier will drop, allowing you to attack previously inaccessible GDI structures. This part of the map will be defended by MARV so focus your attacks on it before it manages to deal some real damage. With the firepower of all of your units it should soon become history.
2 - Capture Tacitus Containment Structure
After the next five minutes second barrier will drop - destroy all remaining buildings and create a saboteur to capture the marked building. This should conclude both the mission and the campaign - Congratulations!


 Crysis 3 Game Guide & WalkthroughCrysis Game Guide & Walkthrough
 Call of Duty: Modern Warfare 2 Game Guide & Walkthrough
 Cities XXL Game Guide & Walkthrough
 Call of Duty: Black Ops II Game Guide & Walkthrough