This guide to Chronicles of Mystery: The Tree of Life contains a complete walkthrough of this sometimes quite demanding game.
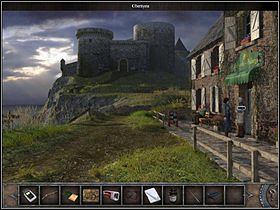
Sylvie Leroux receives a proposition of working for a museum in Brittany. After arriving there, she learns that her predecessor has died in mysterious circumstances and many people are interested in the 17th century chest that he was researching, with count Saint-Germain among them.
The controls in the second Chronicles of Mystery are the same as in the first game. You move following an arrow-shaped pointer, a big arrow indicates a new location. The items which you can use or interact with are marked with a hand pointer and those at which you can only look - with an eye. Double clicking the left mouse button causes the character to run and double clicking the big arrow speeds up changing locations. You can skip cutscenes with Esc and dialogues with the left mouse button. After moving the pointer to the top of the screen, a menu will appear. The last option is important, as it contains the dialogues Sylvia had, items she obtained and her diary.
The inventory is at the bottom of the screen. After clicking on one of the findings with the right mouse button, you will get a zoom and a commentary, sometimes containing some clues. Rarely will you have to do something with the object while in zoom mode. At the lower right corner of the screen there is a question mark whish reveals all the important items and passages in a given location. The items which should land in your inventory are marked green, as the riddle solutions - red.
There are two moments in the game during which you have a time limit. I will warn you about the first one and suggest saving the game. During the second one Sylvie can die, but the game will automatically save.
Katarzyna "Kayleigh" Michalowska
Translated to English by Jakub "cilgan" Lasota
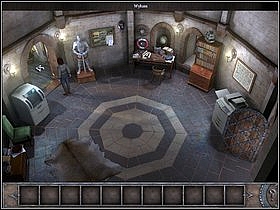
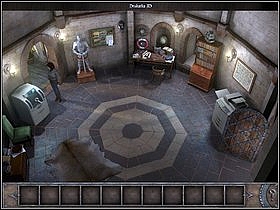
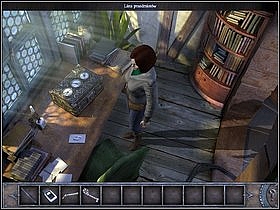
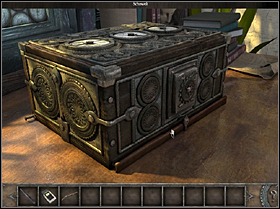
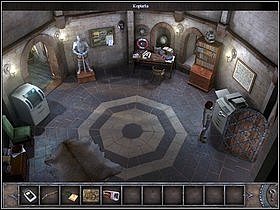
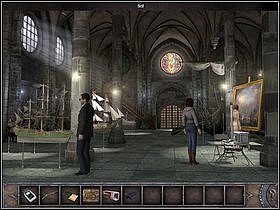
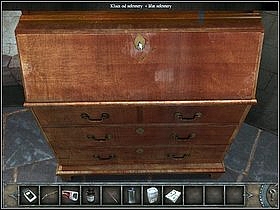
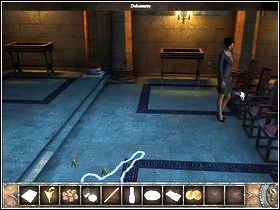
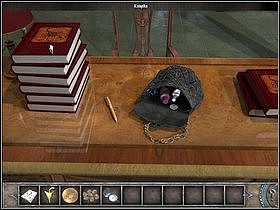
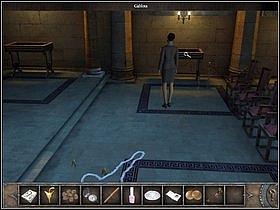
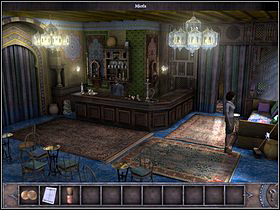
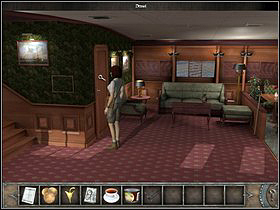
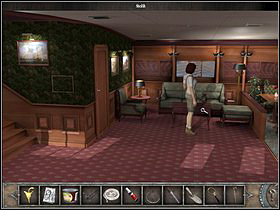
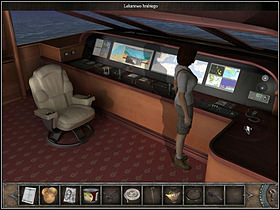
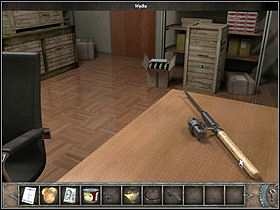
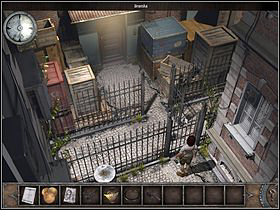
Talk to the director about Marcel's workroom, the box, the accident and Venice. After he leaves the office, head to the bay on the left and take a look at the chest on the desk (zoom). Try to open the lid - the chest is locked with a digital lock. Blindly manipulating the discs won't do, you have to know the code.
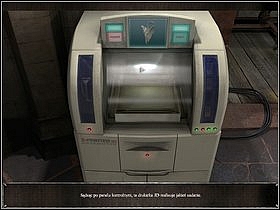
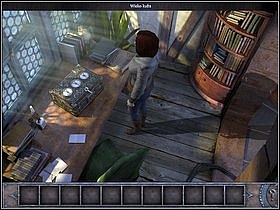
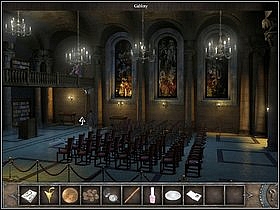
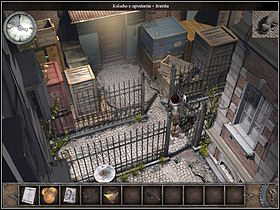
Leave the bay and take a look at the 3D printer beside it (zoom). The machine is obviously doing something. It's worth getting to know what exactly. Go right and to the exhibition hall.
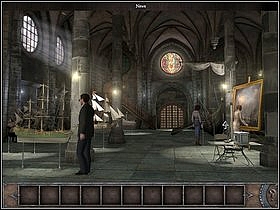

At the end of it, talk to the director about the code and the printer. Afterwards go to the aisle on the right and talk to Claire, the warden, about the work, Marcel, chest and the dictaphone.

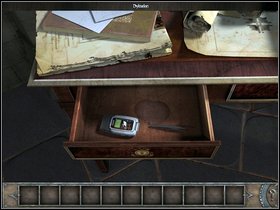
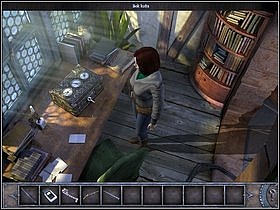
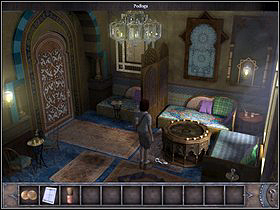
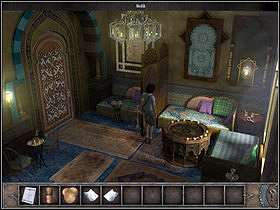
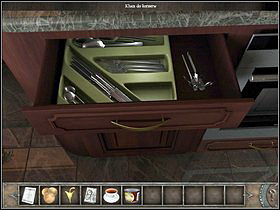
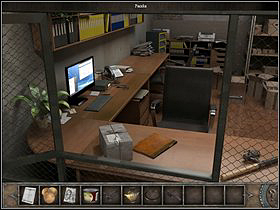
Go back upstairs to the office (stairs on the depth of the screen) and open Marcel's desk drawer (zoom). Take the dictaphone and tweezers. Take a closer look at the Dictaphone (right mouse button in the inventory) and notice that there is no memory card inside. Go back to the exhibition hall and talk to Claire about this. You will receive the card with Marcel's recording. In order to listen to it, go to the office and put the card into the Dictaphone (combine both items in the inventory - if you wish to listen to it again, click the Dictaphone in the inventory with the right mouse button and left button while in zoom). The message is quite intriguing and it seems that Claire knows the 3rd number of the code - so you have to ask her about it.
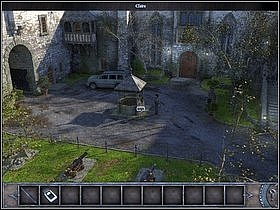
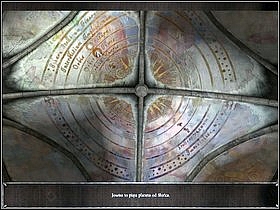
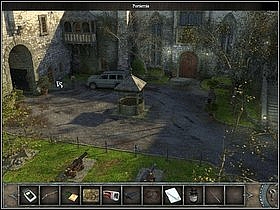
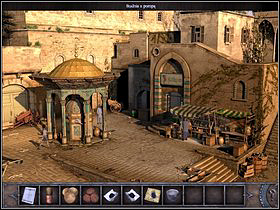
Go down to the exhibition hall, but the warden won't be there, so go out to the courtyard (pointer at the bottom of the screen). Talk to her (she's by the well) and ask her about the recording, code lock and the 3rd number. Return to the exhibition hall and take a closer look at the ceiling (zoom).

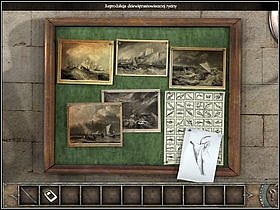
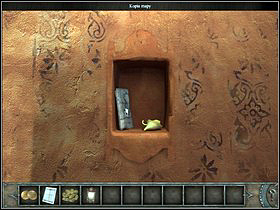
Go up to the office and examine the board to the left of the desk (zoom). Take a look at the reproductions, especially the one showing a storm; also examine the hand drawing in the corner, showing a fragment of ceramics.
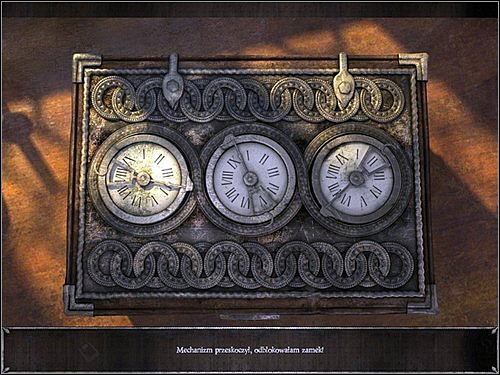
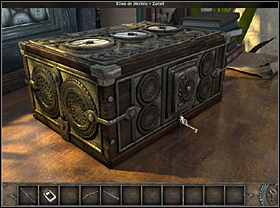
Go to the bay - you have all the data needed to unlock the chest. Marcel said: storm (8 in Beaufort's scale), Jupiter (5th planet of the Solar System) and the number received from Claire (2 - the day they've met). Place the hands (starting from the left one) on 8 (click 2 times on the left side of the 1st clock face), 5 (4 times on the right side of the clock face, moving the pointer down as the hand moves) and 2 (1 time on the right side of the clock face). The way in which you turn the hands is irrelevant really, it's just important for the numbers to be in the "window" of each hand.
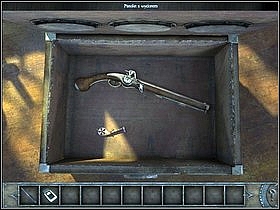
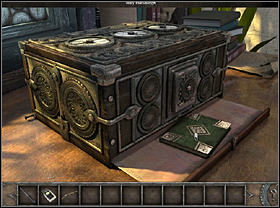
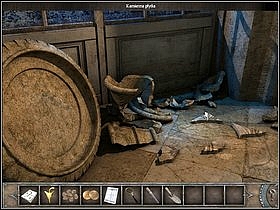
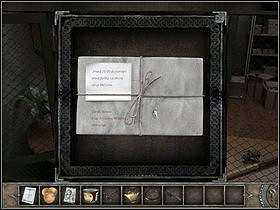
Open the lid and take 16th century pistol with a ramrod and a key. Now take a look at the piece of paper lying on the desk, to the left of the chest. It's the list of items which Marcel found inside the chest. It seems that the antique ceramics fragment is missing. It should also wonder you why the pistol and the ramrod are written separately.
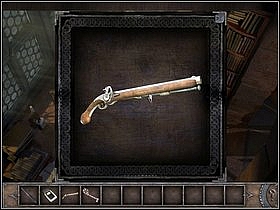
Take a look at them (right mouse button in the inventory) and take the ramrod from beneath the pistol. Afterwards examine the side of the chest (zoom).

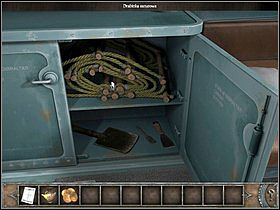
Localize the lock and use the key found in the chest. You will notice that there is a hidden drawer there, but the lock is blocked. Take a look at the hole on the side of the chest (on the left). Put the ramrod inside it and unlock the mechanism. Now just open the drawer and take the old manuscript.
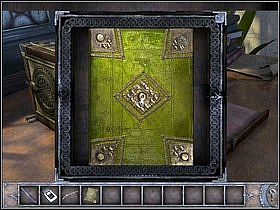

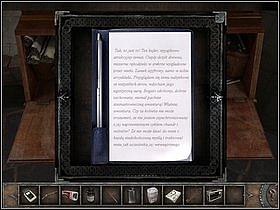
Of course take a look at it while in zoom (right mouse button in the inventory). Look at the pages (arrows at the right and left edges or by clicking at the next page) - you will see that fragments of a map are sewed to the pages. Go out of the zoom and use the tweezers to get the threads out of the book (combine the two in the inventory). Now open the manuscript in zoom once again and click on the first map fragment. This way you will take all of them out of the book. Now you can read the clear manuscript and get to know something about the Tree of Life.

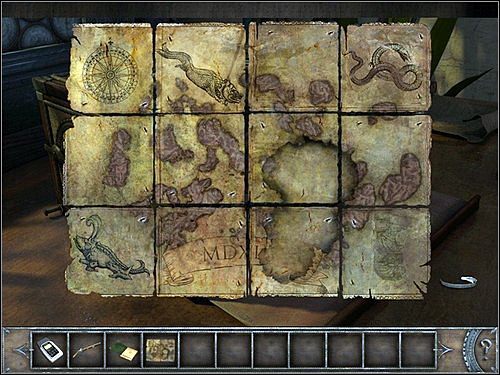
It's time to put the map fragments into one (right mouse button in the inventory). You can drag it with the left button and place them on the board and turn 90 degrees with the right button. Additionally at the edge there will be an icon letting you see the other side of a piece, as the map has two sides and it's worth to turn all the pieces so they show the same side (the right way to assemble the both sides is shown above, you choose which is easier for you).
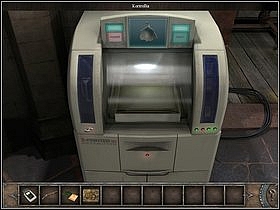
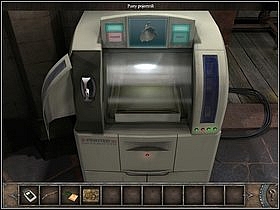
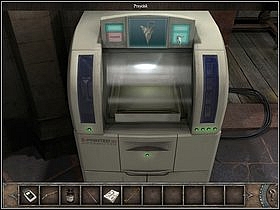
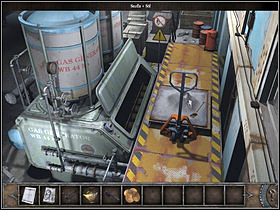
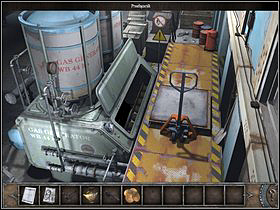
Leave the bay and take another look at the 3D printer (zoom). Check each of the red lights. You will learn that the machine is missing powder, resin and dye. Open the left side and take the empty container.
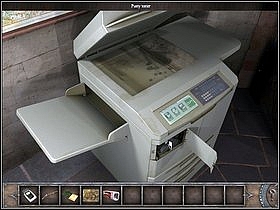
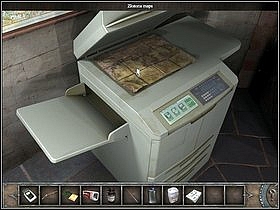
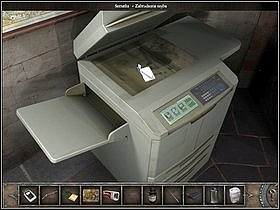
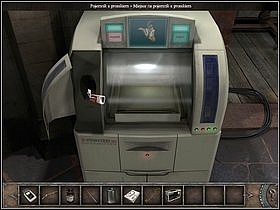
Go to the right side of the room at take a look at the photocopier there (zoom). Raise the lid - you will see that it's dirty. Also open the cover on the front and take an empty toner. If you want to copy the map, you will have to find a new one.

Go to the exhibition hall and talk to the director. He will tell you to go to the porter - Antoine. Take a look at the table and try to open the box, but Sylvie will want to ask the conservator for permission first.
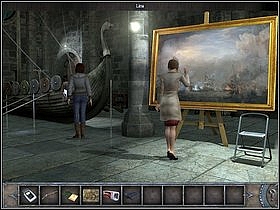
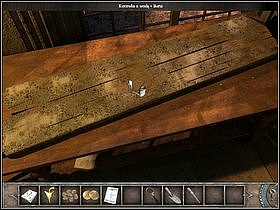
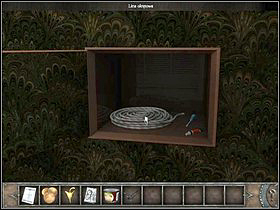
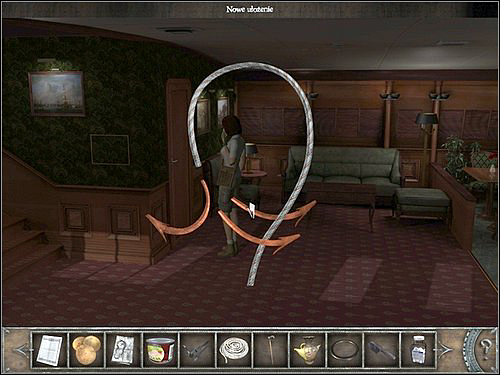
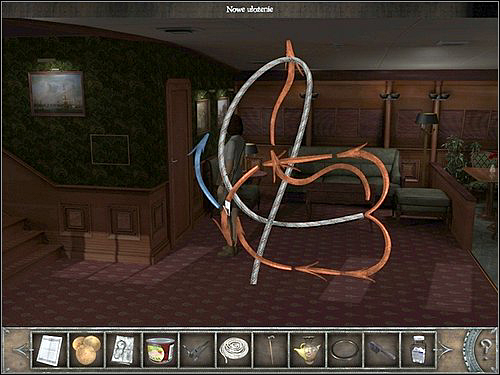
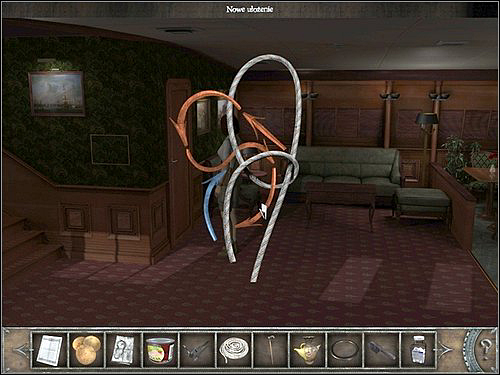
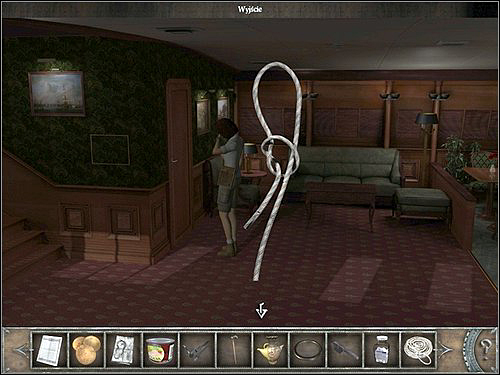
Go to the aisle and ask Claire for permission to use her tools. After the conversation, take the line hanging on the side of the Viking boat (left from Claire). Now go to the table with tools and take the cloth, varnish and brush from the box.
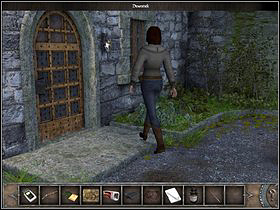
Eventually head to the left side of the courtyard and ring to the porter's lodge. Talk with Antoine - if you want to ask him about everything before he leaves for a while, ask about Marcel in the end. This way you will receive a full toner and an advice to use flour as the powder. Once the porter will excuse you for a while, go left and leave the museum.
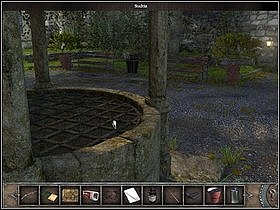
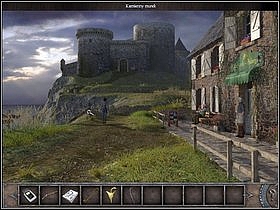
Once on the cliff, go right and talk to the innkeeper. Ask him for some flour and he'll tell you that he needs water from the well at the courtyard. You will receive a bucket; return to the museum. You will be automatically called by the porter who will give you a container.
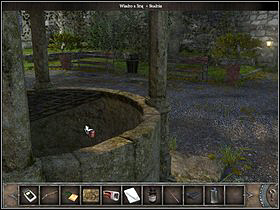
Approach the well (zoom) and push the bars covering it. Combine the line with the bucket in the inventory and lower it into the well. Once you have a bucket full of water, go back to the inn. Give it to the owner (or just talk to him) and you will receive the starch.
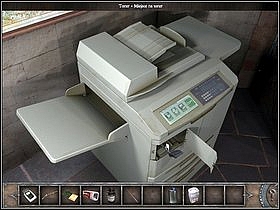
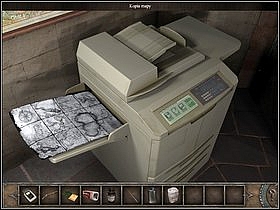
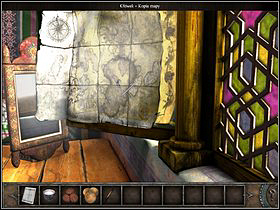
Go to the museum and into the office upstairs. Approach the photocopier (zoom), raise the top lid and clean the glass with the cloth. Place the map on it and close the lid. Open the front lid and insert the toner. Press the green button and after a while you'll receive a map copy. Open the top lid and take the original map (however Sylvie will do it herself if you forget to). Go to the exhibition hall. Talk to the director and Claire - you will a key.
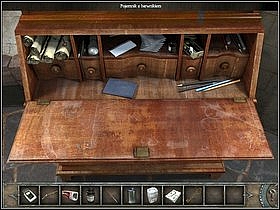
Return to the office and approach the secretaire (to the right of the desk; zoom). Open it with the key and take to dye container (second compartment from the right). Also take a look at Marcel's notebook.
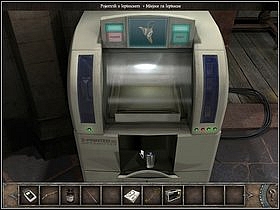
Go to the 3D printer (zoom). Put some starch to the empty red container (in the inventory), open the left lid and put the container into the right place. Open the lower lid and insert the binder container. Open the right lid and put the dye container into the empty hole. Push the green button.
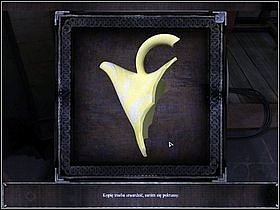
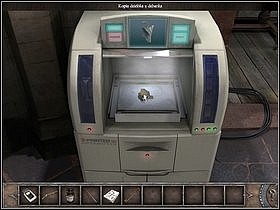
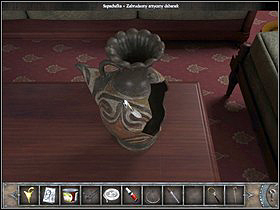
After the copying is finished, move the transparent lid and take the jug lip copy. Take a closer look at it (right mouse button in inventory). You need to harden it. Put the brush into the varnish and paint the lip with it (inventory). Go to the exhibition hall and from there through the courtyard to the cliff.

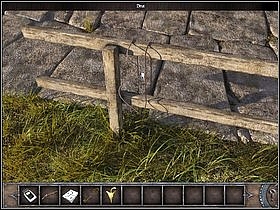
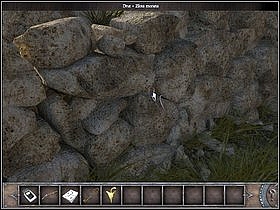
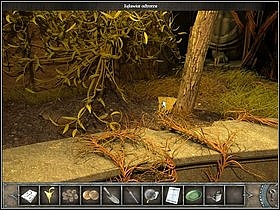
Talk to the innkeeper about Marcel. In effect Sylvie will want to take a look around the place. Take a look at the fence by the inn (zoom) and take the wire hanging from it. Go a little to the left and look at the stone wall (zoom). Notice a golden coin in between the stones and take it out with the wire. Look at its both sides (right mouse button in inventory). Return to the museum and talk to the director about going to Venice.
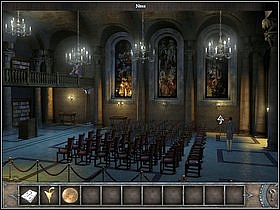
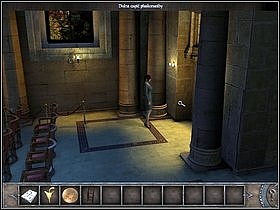
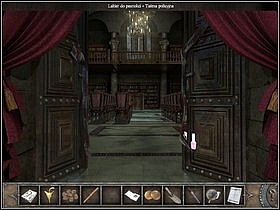
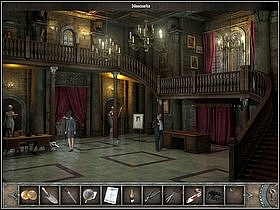
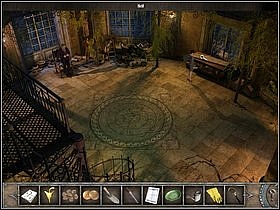
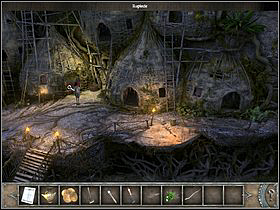
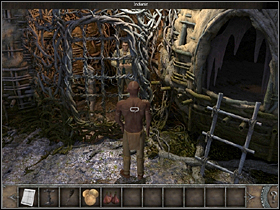
After talking about everything you can with the organiser, go to the meeting hall (in the depth of the screen). Once there go to the niche (forward). Take the ladder and look at the lower part of the sculpture on the right (zoom). Place the ladder in front of the sculpture, thanks to which you can reach its upper part (zoom).
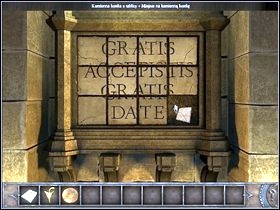
There a riddle waiting for you - you have to arrange the sign on the stone tablet by moving the squares. Start with making a free space by taking away the lower right square. After arranging the sign, put it back to its original place (you can view the properly arranged sign on the screen below).
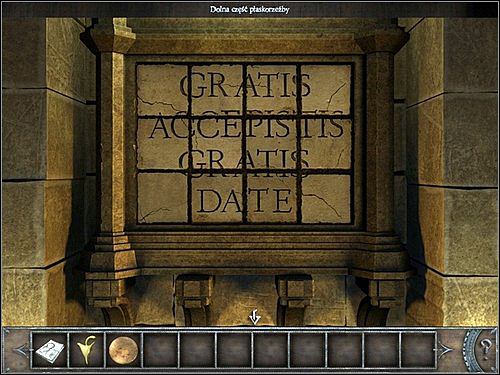
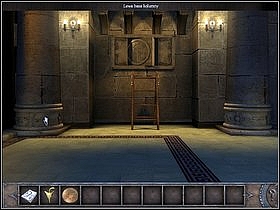
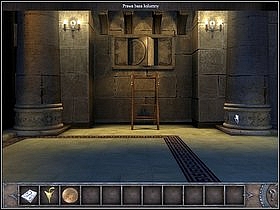
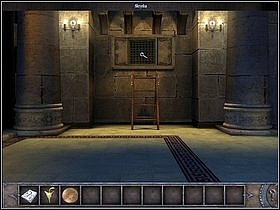
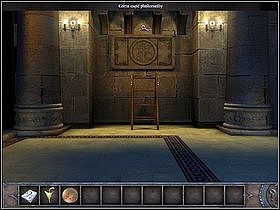
This way you will unlock the mechanism which will let you rotate the bases of the two columns on both sides of the sculpture. Their movement causes the centre part of the sculpture to turn left or right accordingly. Turn the left column 2 times and the right 4 times - this way you will reveal a hole. Take a look at it (zoom). Move away the grating and take the dry seed.
Leave the niche and go to the meeting hall (pointer at the bottom of the screen). A messenger from count Saint-Germain is waiting for you there. However during your conversation there will be an unexpected accident. Fortunately the man will give Sylvie the chronometer.
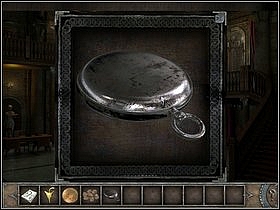
Afterwards talk about the situation with the organiser. You will receive permission to use the tools from the cabinet in the hall, if only you will manage to get there without leaving any trace despite the tapes. After the conversation, take a look at the chronometer (right mouse button in the inventory) and open its lid - Sylvie will notice an inscription - unfortunately you're unable to read it at this moment.
Approach the desk on the left (zoom). Take a copy of your book, a pen and from the bag: nail varnish, a remover and a cotton pad.
Approach the sealed door (zoom) and use the remover on the tape. Go inside and approach the display cases on the left.
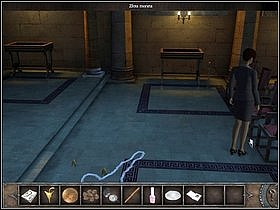
Pick up the golden coin lying by one of the chairs and the documents from the third chair. Approach the right display case (zoom) and try to open it - it's locked. Return to the hall and talk to the organiser about the keys. As Sylvie did recover his documents, the man will give them away without hesitation.
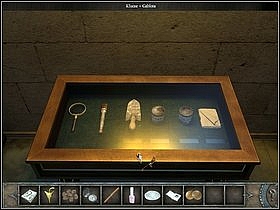
Go to the display case and open it with the received key. Take the tools from inside: brush, cloth, silver cleaner, silver patiniser, spatula and a magnifying glass.
Exit the meeting hall and glue the tattered tape with the nail varnish. It's time to read the inscription on the watch. Firstly put some silver cleaner on a cotton pad (in the inventory) and use it on the chronometer. Take a closer look at it (right mouse button in the inventory) - it seems Sylvie overdid it and the inscription is unreadable. Take some of the silver patiniser on the brush and put in onto the chronometer. Then use the cloth. Take the magnifying glass and read the inscription (right mouse button in the inventory).
Inform the organizer about what you have learned. You will receive the chest's description and will be told that someone has called you. After a while the count will call again and ask Sylvie to meet him.
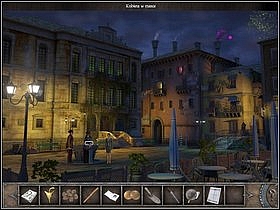
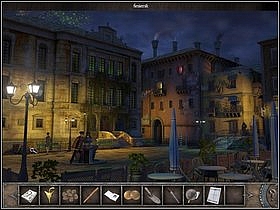
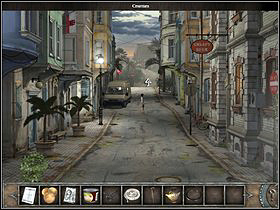
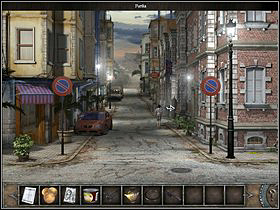
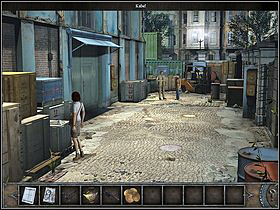
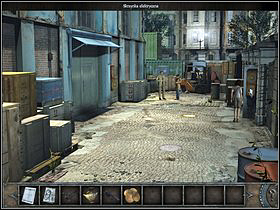
Go outside the building (pointer at the bottom of the screen) and go to the square (bottom of the screen once again). Talk to the couple in carnival suits by the well. In effect Sylvie (while not unveiling her identity) will obligate to get an autograph of the book's author. In order to do that, you have to move away a bit. Approach the rubbish bin (behind the carnival couple).
Take the empty champagne bottle. Open the green box left to the right of the bin and take the forceps and scissors. Finally sign the book with a pen (if you haven't looked at it before, open it in zoom). Return to the square and give the pair. In return you'll receive a carnival mask and a flare.
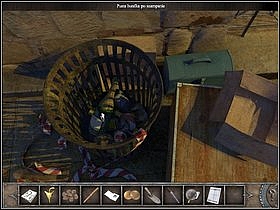
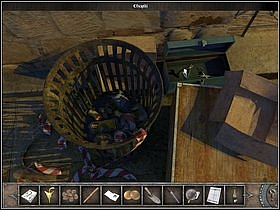
Return to the building and approach the shredder in the hall (right side of the desk; zoom). Insert the mask and after a while open the lid and take the cut mask fragments.
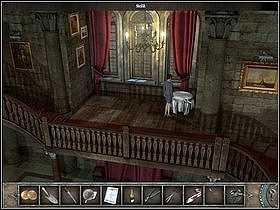
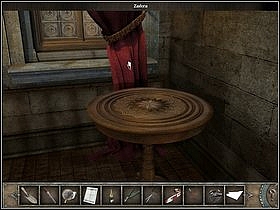
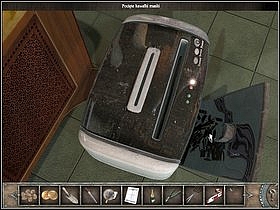
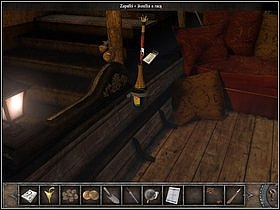
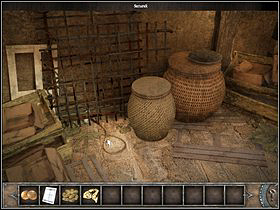
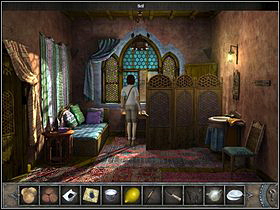
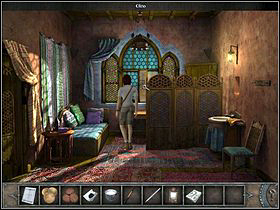
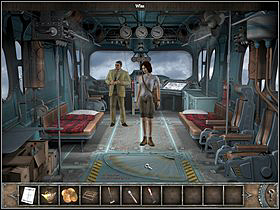
Now go up the stairs to the bay. Take the white tablecloth from the table (zoom) and also the curtain hanging by the windows (together with curtain tape).

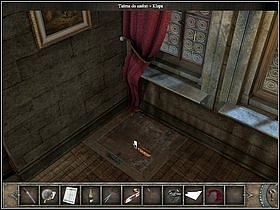
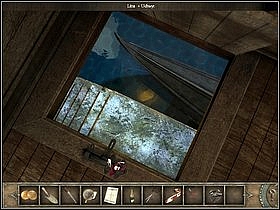
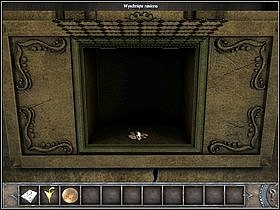
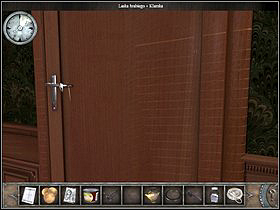
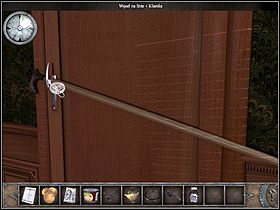
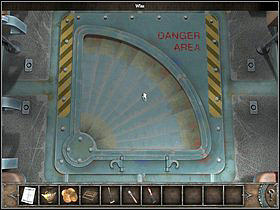
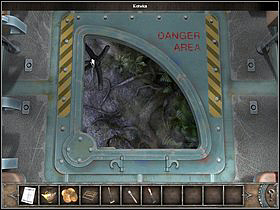
Notice the hatch on the left (zoom). Try to lift it - it's nailed down. Get rid of them with the forceps. Raise the lid - unfortunately it will fall back down so tie it to the curtains with the tape and look into the opened hatch. Of course you can't jump down from such height, so tie (in the inventory) the tablecloth with the curtain. Attach the receive line to the handle in the floor and lower yourself to the pier.
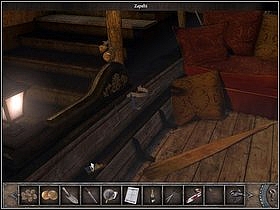
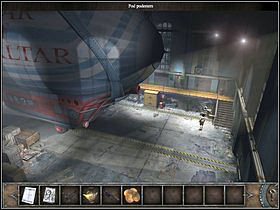
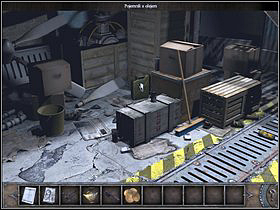
Take a look at the gondola docked there (zoom). Take the matches, door key (use it to open the door by the pier and getting to the building if you don't have the needed items) and the broken paddle. You won't get far using the paddle, so take the stick from the pier and connect them with the police tape (in the inventory).
Now cut the top of the flare with the scissors and put in the cut mask fragments. Put the flare with mask fragments into the champagne bottle. Place the bottle with a flare in the bottle handle (zoom onto the ship) and light up the flare with the matches. This way Sylvie will be able to safely swim next to the man on the bridge.

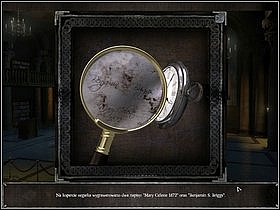
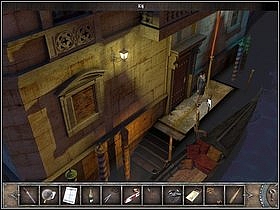
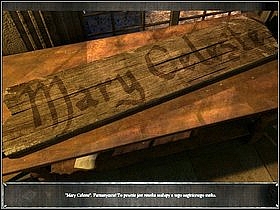
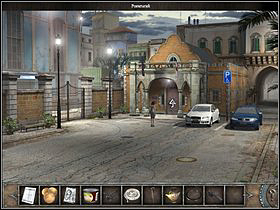
Once you arrive, approach the bars blocking the way to the count's house (zoom). In order to raise it, you have to use the hands by the bells to set a code on the counter below. The count said to Sylvie on the phone that she knows his address, so you must search for the code like for the square, in the chronometer inscription: "Mary Celeste 1872". So pull the bell hands and set the code: 1-8-7-2. The mechanism budge but the gate won't open - something is obviously blocking it. Take a look at the edge of the wall at the very top of the chain - there's a stone which you have to remove with the paddle.
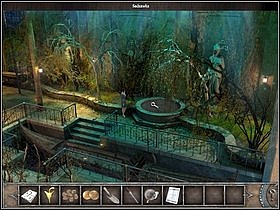
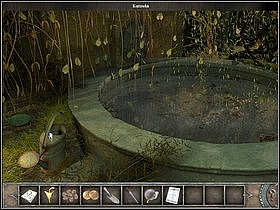
Once in the count's gardens, before going to the apse, take a look at the pool (zoom). Take the watering can and the green bowl. Take some water into the can from the pool.
Also take a look at the grass to the left from the pool (zoom). Take the gardening gloves lying by the tree stump. Afterwards head to the count (left).

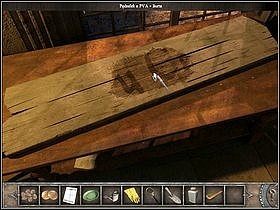
After an interesting conversation about Briggs, Mary Celeste and the chronometer, Saint-Germain will order Sylvie to investigate a certain plank. Approach the table on the right (zoom) and investigate the remaining fragment of a ship. Use the spatula at the spot where the paint has cracked - you will unveil a part of the sign.
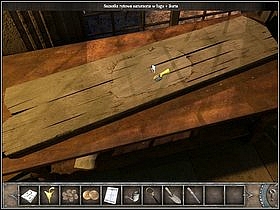
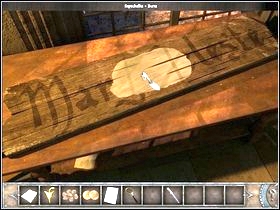
You need the right tools to continue, so search the shelf under the table. You the lye, polyvinyl acetate and a rice brush. First you must secure the unveiled part of the sign - take some polyvinyl acetate on the brush (inventory) and spread it on the plank. Now pour some lye into the bowl, combine the gloves with the rice brush - which means that Sylvie has protected her hands - and scrub the plank. Afterwards wash off the paint with the water from the can and unveil the sign with the spatula.
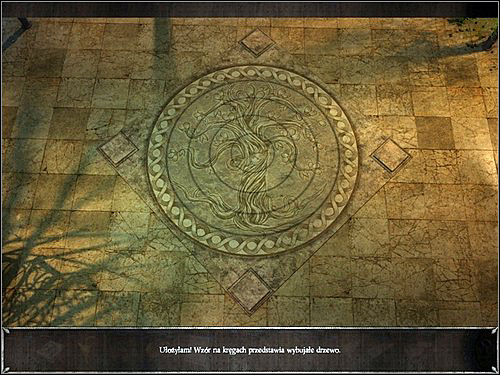
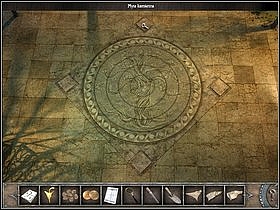
Report the count, this time the man insists that Sylvie becomes his private expert and find the chest for him. Eventually he'll ask her to solve floor relief problem - a part of it is missing. Check behind the net on the left ("under the window"; zoom). Take the stone tiles (the important one is the one above the three others).
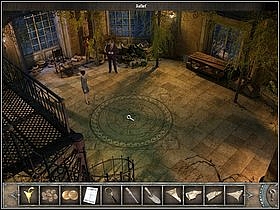
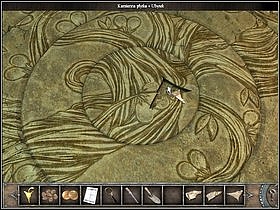
Take a look at the relief (zoom), at its centre to be exact (another zoom). Put the missing tile in the hole (there are four of them and the matching one is mentioned above). Return to the previous zoom.

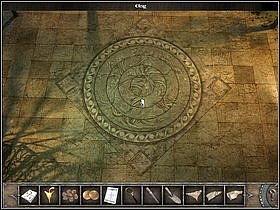
Your task is to arrange a certain pattern on the relief. Notice that the circles can be moved (by pulling them, not clicking) in pairs - the 1st (middle one) with the 3rd and the 2nd with the 4th. You move them by moving the pointer a bit and letting go off the button each time. Starting with the default relief, you have to move 3x middle, 1x 2nd and 4x 2nd or 4th, all of them counter clockwise (in the end, after moving one of the two circles, the count should make a comment). A correctly completed task (in each of the three stages) will be signalised by a mechanical rattle (don't mistake it with the sound of the circle moving). If you have already make changes to the circles and can't use the hints (and you haven't saved your game before starting the riddle), just move the circles in the order I gave you (1st, 2nd, 2nd or 4th) with small breaks between the moves. Below there is a properly arranged relief:

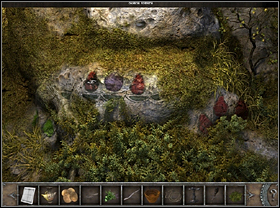
Notice that the four stone tiles situated around the circles. Investigate them (zoom), after removing each one of them you will find an urn with seeds but three of them are different than the one found before. The right seeds are in the urn under the upper tile. Take them and inform the count about the finding.
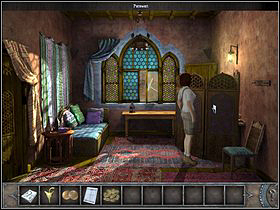
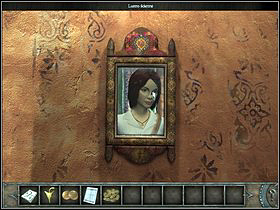
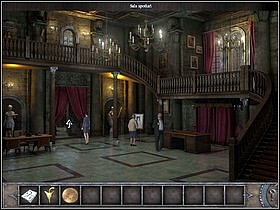
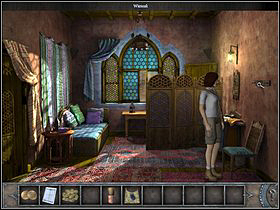
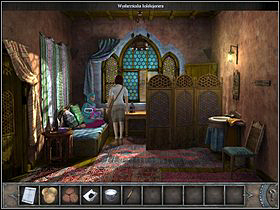
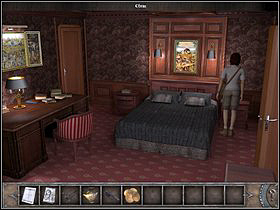
Once in the hotel, talk with the landlady's son. You will learn that the room has hiding place, which, taking into consideration that Sylvie has been robbed at the airport, will be the deciding factor. After agreeing on the accommodation (and a couple other things), go to your room (the door in front). Inside push the screen on the right and take a look at the mirror hanging on the wall (zoom). Take it off and put the jug lip and map copy into the hole. Put the mirror back onto the wall and leave the room. From the reception, go to the street (door on the right).
Go deeper into the street to get to the square. Go to the part with the well and talk to the antique dealer nearby. As a result of this conversation, you will receive a scarf which needs to be cleaned. Return to your hotel room. Approach the pile of junk in the street on the left and take the string lying on the ground there.

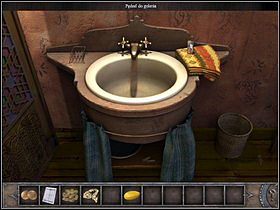
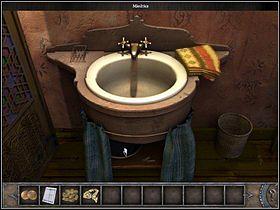
Enter the hotel and go to your room. Approach the sink under the mirror (on the right; zoom) and take the soap (on the left) and the shaving-brush (on the right). Afterwards take the bowl and some clips. Pour some water into the bowl and put in the soap. Wash the scarf in the soap-suds.
Now you need to dry it so approach the hook on the right wall (zoom). Attach the clips to the scarf, stretch the string across the hooks and put the wet scarf onto it. Once again go outside.
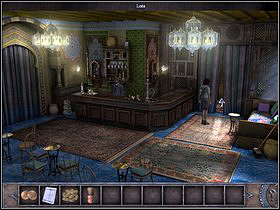
Talk to the owner, standing in the street in front of his cafe. After a conversation regarding the collector Sylvie is searching for, go to the square with the well to inform the antique dealer about what you managed to achieve with the scarf. Return to the street and go to the cafe. After another conversation with the owner, go to the room behind the curtain (in the front).
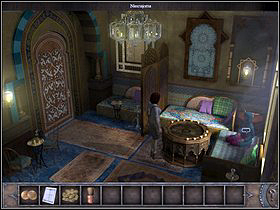
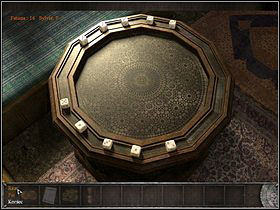
You will meet a messenger from the collector there. However before the woman will tell you anything, she will offer a game of dice. You have to win in order to talk with her about what Sylvie wants to. In the game, you have to achieve a score as close to 50 as possible. Press "New game". Once the woman throws her dice, go out of the zoom (pointer in the lower part of the screen) and choose all 5 dices on your side of the table (the dices which will be thrown are marked lighter) and then press "Throw". Wait for the end of the woman's turn (after which go out of the zoom) and make your move (notice that all the dices are selected already).
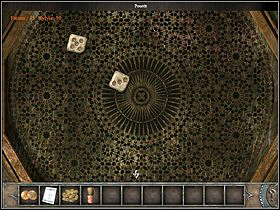
During the first two throws you can throw all 5 dices at the same time and do so until you reach a score of about 30, after which lower the number of dices thrown by 1 (unselect one of them before throwing). Remove another one once you reach 35 and leave just two once near 40 points (after 45 - one). Of course everyone can have their own system - basically you need to look out not to throw more than 50. The dices can be nasty and you can get 12 points with 2 dices when you need it the least and get 2 and 3 points when you want to throw the as much as possible.
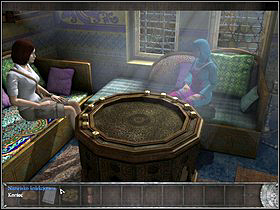
Of course you can pass when you have a higher score than Fatima, hoping that the woman will throw too much. Generally it's easier to win when the rival gets a higher score than you than by pushing up your own score (however it is possible). Even when you have 50 points, the game can end with a draw. Naturally when you reach a score of 48 - 50, just pass and hope for the enemy to throw too much.

After the conversation with Fatima, go to the main part of the cafe (cursor on the lower part of the screen). You will have to pay for the coffee, but it seems Sylvie has no money with her. Return to the room behind the curtain to ask Fatima to pay, but the woman won't be there anymore. Return to the owner and Sylvie will come up with a brilliant idea repaying the sum with work. Take the broom on the right and go behind the curtain. Clean up the garbage in front of the table.
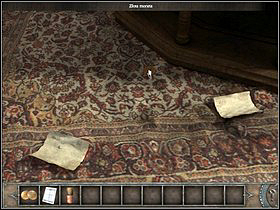
Afterwards take a look at the floor there (zoom) and pick up the golden coin lying there (and automatically two paper pieces - whichever you click as the first, you will get all the "junk" at once).
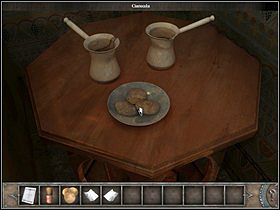
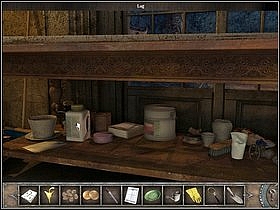
Now approach the small table in the right corner (zoom). Take the cookies from the plate. Take the two sandwiches as well (with normal and sweet leaves). Pour out the leaves from each one to papers sheets in the inventory. Return to the cafe and after a short conversation with the other, go to the hotel.
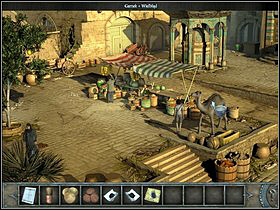
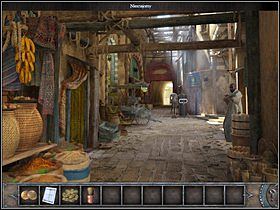
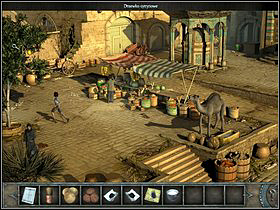
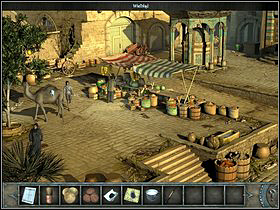
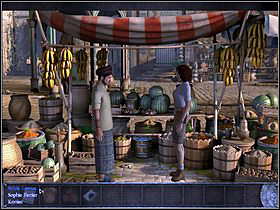
Take the dry scarf from the string (zoom). Now you need to get rid of the ink stain, so ask Ali for milk and a lemon. Unfortunately there aren't in the hotel, so you need to go to the bazaar. This time go to the market square and ask the camel trader for milk. It seems you have to milk it yourself; you'll even get a pot for it. Approach the animal and try to milk it (use the pot on it). Sylvie will conclude that the animal will get peaceful after slaking his thirst.
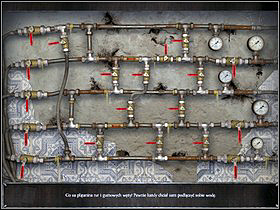
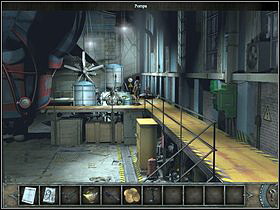
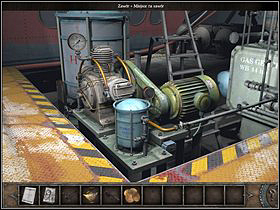
Go to the square with a well and take a look at the well with a pump (zoom). You have to open the valves (an open valve has the handle set along the pipe, as a locked one - perpendicularly) and get the water from the lower left valve to the upper right. In order to do that you have to open the first lower horizontal [1] and second lower vertical [2]. Afterwards the first vertical [3] on the upper level and the second vertical on the next level [4]. Eventually open both horizontal [5] [6] on the higher level. This task has to be done with a trial and error method, opening the wrong valve will result in flooding the antique and camel trader, so you can systematically eliminate the valves which shouldn't be opened. It's important to begin from the lowest ones, then you will know if you're following a correct path. Below is a screen of correct solution:

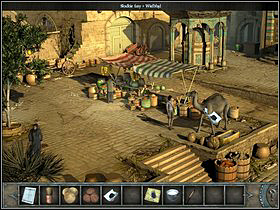
Now, using the pot, you can peacefully milk the camel and get the milk. Afterwards go left and take a look at the lemon tree (zoom). Try to pick a lemon from it, but it's too high to reach. Talk to the trader - you'll receive a whip. Try to knock down a lemon using it - unfortunately it's still too high. Talk to the trader once more and he will suggest to try and do it from atop of a camel.
Approach the animal and lead it to the tree using the sweet leaves. Get on it (zoom) and pick a lemon using the whip.
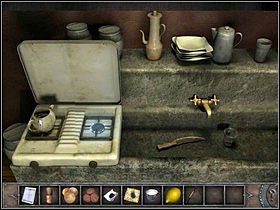
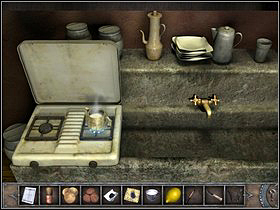
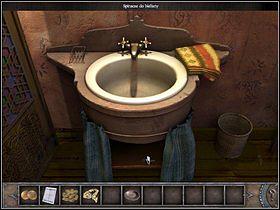
Return to the hotel and go to the kitchenette (to the left of the reception desk; zoom). Take the jug from the cooker and a knife and a glass from the right. Pour some milk to the jug and place it on the cooker. After a while you'll get some warm milk.
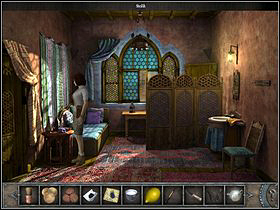
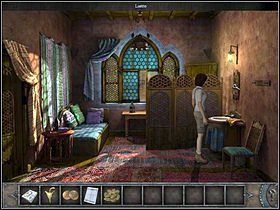
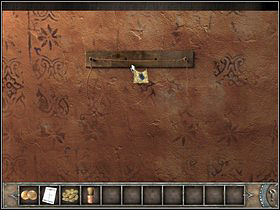
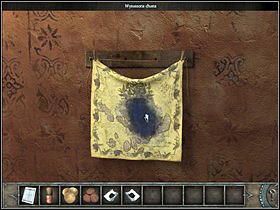
Go to the room and take a swab from the table by the bed (on the left, in the purple beautician; zoom). Go to the table by the window (zoom). Place the dry scarf on its top.
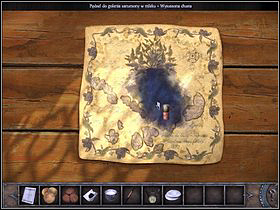
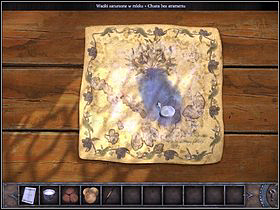
Cut the lemon with a knife and squeeze the juice to the glass. Soak the shave brush (or the swab) in it and spread in onto the scarf. Afterwards soak the swab (or the brush, depending on which you've used before) in the milk and clean the scarf. Take the clean scarf from the table. It would be nice to copy the missing fragment from the scarf onto the map, but you need a pencil to do that. Leave the room for a while and ask Ali for a pencil.
Once back in the room, approach the mirror (zoom), take it off and take the map copy. Press the clear scarf against the window. Put the window on the table, the map copy on the scarf and draw the missing fragment with the pencil. Afterwards take the map and scarf from the window, take the mirror and head to the door (Sylvie will automatically hide the precious items). Leave the room and head to the square to give back the scarf to the antique trader, afterwards return to the hotel.
In your room you will meet Fatima, with who you will finally get a chance to talk about everything you want. During your conversation you will be called by Ali, so excuse your guest and go to the reception to find out what the boy wanted. It will turn out that the camel trader has a message for Sylvie. Go to the market square and talk with him. The man will ask for Sylvie's surname (he's in possession of Sylvie's passport) - you can give him the real one. However if you choose the second option, you will have to go to the square with the well and ask the antique trader for help.
After returning to the hotel, talk to Ali and the document will finally return to its rightful owner (if Sylvie didn't get it from the trader). Now all you have to do is go to sleep, so return to your room.
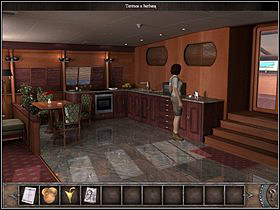
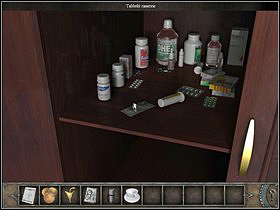
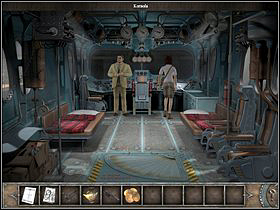
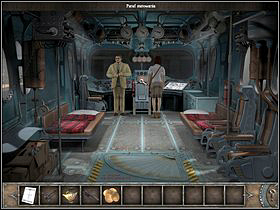
In effect of an unexpected turn of events, Sylvie will end up on the count's yacht. Additionally she just started suspecting that the count is in fact the person about who she should be very careful. The man asked for tea, so go to the mess (right). There is a thermos with tea on the right and a cup. Take them and (in the inventory) pour the tea into the cup. Take a look at the cupboard (beneath Sylvie's legs; zoom), open the door and take the sleeping pills. Of course put them into the cup of tea.
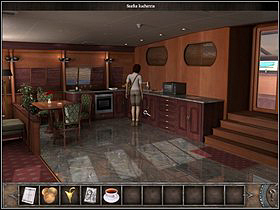
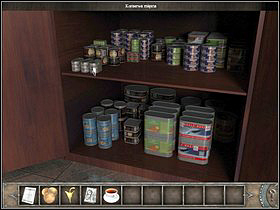
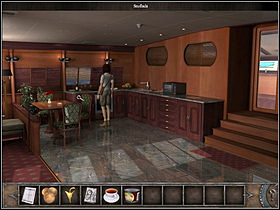
Now check the drawer on the left (zoom) and take the canned meat from the upper shelf. Eventually take the tin opener from the drawer to the left of the cooker.
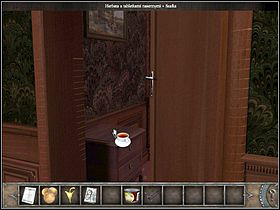
Return to the room (left) and to the door (zoom) behind which the count disappeared. Open them slightly and put the tea on the cupboard behind them.
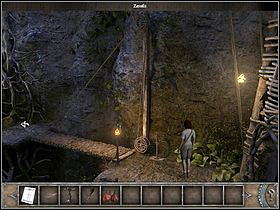
Move to the stairs (left) and check the cubby in the wall. Take everything from it: a sip line, screwdriver and resinous glue. Go to the mess and use the glass door on the right to get to the bridge.
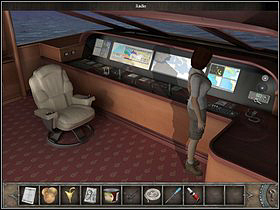
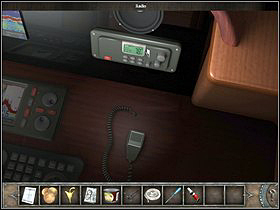
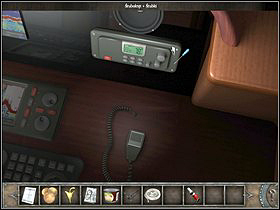
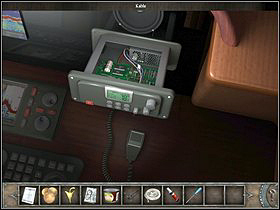
Approach the radio (in the right corner; zoom) and report to the police about your suspicions about the count (you just need to click the radio lid). After finishing, take screwdriver, take out the screws, tear out the cables and put the lid back on. Put the screws back in. Go back to the room and take a look into the count's cabin - it turns out that he hasn't touched the tea. Sylvie has to somehow lure him out.
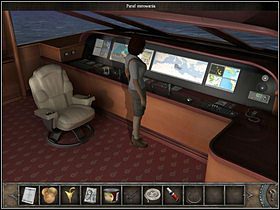
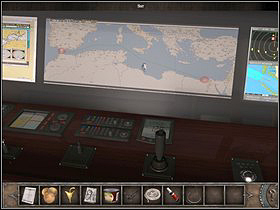
Go back to the bridge and take a look at the control panel (zoom). Change the ship's course (you just have the click on the middle screen - "helm"). Afterwards go inform the count about it. This way Sylvie will gain free access into his cabin.

Take a look at the desk on the left (zoom). Take the tools lying on the black case: brush, spatula and a magnifying glass. Open the drawer on the right and take the pistol. Go to the bridge. Talk with the count about your suspicions, his amnesia and trust.
Sylvie will want to repair the jug taken from Fatima. Go to the room, take the count's stick leaned against the railing on the right. Approach the table (zoom), on which the jug is.
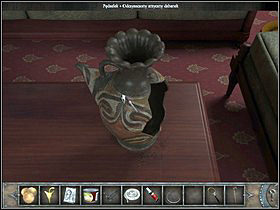
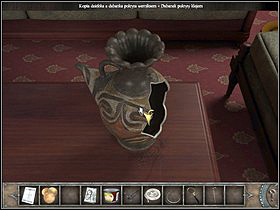
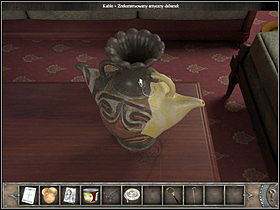
It's dirty, so clean it with the spatula and brush. Afterwards put some glue on the crack and attach the lid copy. Eventually bind with the cables taken out of the radio and take the antic jug from the table.
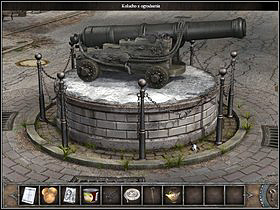
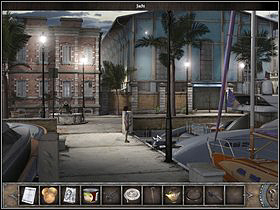
After taking the count the police station, go to the cannon monument (zoom). Take the fence fragment lying on the ground (on the right). Afterwards go left (from the square) and down the screen (from the monument) to the marina. Go left on the intersection and go up the mountain to reach the cemetery.
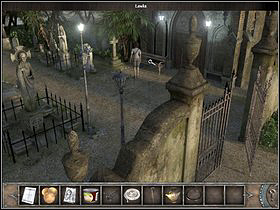
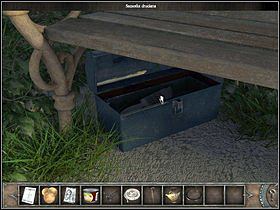

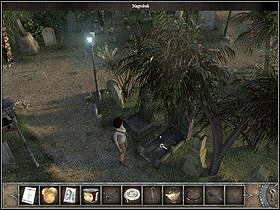
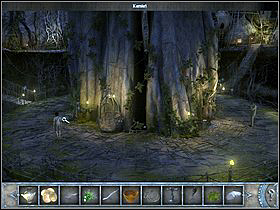
Behind the gate, approach the bench (zoom), open the chest that's lying on it and take the wire brush. Go along the main alley (up the screen). Once you reach the intersection, head down. Take a look at the gravestone under the big palm (zoom).
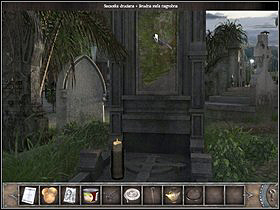
There's a candle burning on this grave and the tombstone is dirty (as most of them in fact). Clean it with the brush. Unfortunately the name is still not visible - the palm is giving too much shadow. Take the candle from the grave and light the tombstone. This way you will learn that it's Brigg's grave.
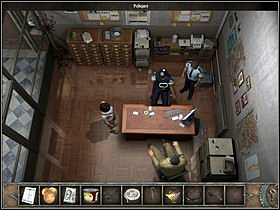
Leave the cemetery and go to the square by the harbour. The police station is localized there. Go to the first section (police section) and talk to the policeman and Saint-Germain. It seems the count needs his medication.
Go back to the yacht. You won't find the meds in the kitchen, so go to the bridge and take count's medicine from the control panel (next to the radio). Once Sylvie leaves the room, she will realize that there's someone else on the yacht. It's probably the murdered and it would be nice to immobilise him somehow.
You will use the line taken from the cubby-hole on the yacht. Take a look at it (right mouse button in the inventory) and tie a know (you have to press the arrows: red right pointing up behind the line, red left pointing down and the red one pointing down.
Approach the count's cabin door (after the cutscene, click on the once more; zoom) and block them with the cane (taken earlier from the passage from the room to the mesa). Afterwards put the knot on the door handle and run to the bridge exit (above the stairs, on the left). You have a time limit, but fortunately the game is saved automatically so if you don't make it in time just load the last saved game and try once again. If you deal with the knot before opening the door to the count's cabin, you shouldn't have any further trouble.

Of course go to the police station and inform the policemen about the intruder. Once they leave the station, give the count his medicine and approach the second section (customs) window. You have to get the address of the woman who pays visits to Brigs' grave. The customs officer mentioned that there's a package waiting for her. Open the window and take a look at the table right next to it (on the right; zoom). There is a fishing rod - borrow it for a while. Go out of the zoom ant take a look at the table on the left (zoom). Try to reach the package, but it's too far. Use the newly gained fishing rod to reach it.
Take a look at the package and notice the annotation telling to deliver the parcel to a different address (it seems that you can get to the woman's house from two sides).
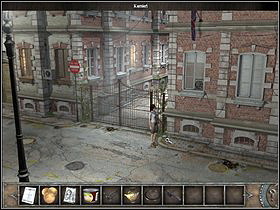
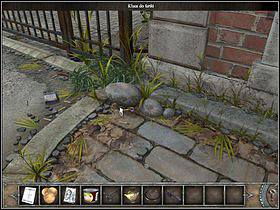
You know where to go, so leave the police station and head towards the marina. Go into the street leading to the cemetery but stop by the gate on the right. It's locked, but take a look at the pavement on its right side. There's a stone lying there (zoom), below which you'll find the gate key. Of course use it to open the gate and enter the narrow street with another gate at its end. Behind it there is a dog about which the customs officer mentioned. You have to lure it somewhere else.
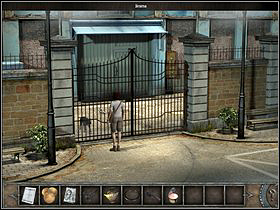
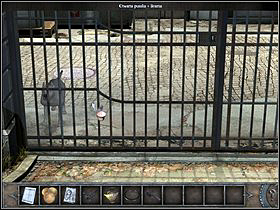
Return to the square and approach the gate on the left (right next to the police station; double zoom). Use the tin opener taken from the yacht to open the tinned meat (save your game). Give the opened tin to the dog through the gate and quickly (before the dog eats it) run to the street where Sylvie was before (square - marina - street on the left - gate - passage - outhouse).
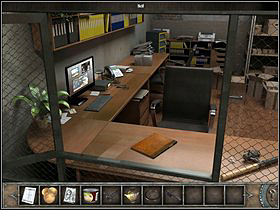
Open the gate and block it with the fence fragment on the middle rail on the right, so that the dog won't be able to get to the part in which Sylvie is (if you won't make it in time and haven't made a save at the right moment, you'll have to go back to the yacht for another tin and repeat the process from the beginning). Knock to the door and talk with Sara, who will tell Sylvie a long and interesting story and afterwards invite her to the hangar (go there), in which she keeps an airship (behind the gate by which you fed the dog). Go back to the count. The man will decide to buy the machine from Sara and will send Sylvie to the yacht to get the money and cheques.
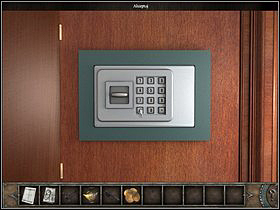
Once on the deck, go to Sain-Germain's cabin, take the golden coin left by the killer on the desk (zoom) and afterwards take a look at the painting above the bed. Move it and you will see a safe. The code, at the count said, is Briggs' year and month of birth, entered from the end (538140). Enter it and accept with #. Take the money and blank cheques.


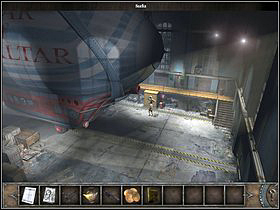
Return to the hangar, where the count is already waiting for you. Talk to Sara to finalize the airship purchase. You will learn that the ship has to be filled with has to be filled with gas and you're out of hydrogen, you'll need to produce it. Sylvie will have to, not too legally, connect to an electricity source.
Go to the boxes on the left and take the cable. Connect one end to the electricity box by the hangar and the other to the box by the entrance gate. Afterwards go into the hangar.

Inside, Take a look below the platform by the stairs (zoom) and take the oil container. Check the locker (zoom). Take the empty oiler from the upper right shelf and a rack from the left one.


Now go to the crates on the left of the airship (zoom), pick up the chain lying on the ground (between the planks on the right) and a link by the crate on the left.

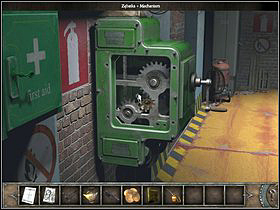
Go up the stairs onto the platform. Take a look at the green mechanism (zoom). Put the chain into the proper place (on the left) and add the missing link. Inside the mechanism, put the rack between the two that are already there. Fill up the oiler in the inventory. Oil the whole mechanism and turn the crank on the right.
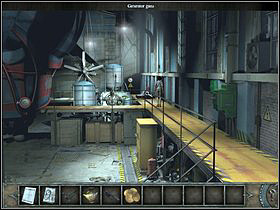
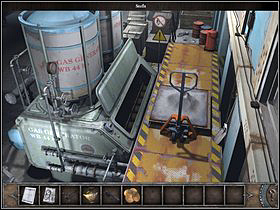
Afterwards go to the end of the platform to the gas generator (zoom). Take the shovel standing on the right and take some salt from pile in front. Try to press the switch on the left. The device won't work, so go to Sara to learn that you need a valve which has been ordered and is waiting in a package in the customs office. The woman will give Sylvie a wad of banknotes, with which you should head to the police station and talk with the man in the customs section. After a while you will receive the package. Unpack it (click it in zoom) to get the valve.
Return to the hangar and onto the platform. This time turn left (to the pump) right before the generator. Put in the valve in the empty spot between the pipes. Return to the generator and press the button (on the left). Go outside to say goodbye to Sylvie and after a while you'll be in the airship with the count.
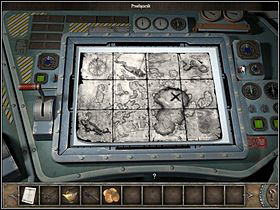
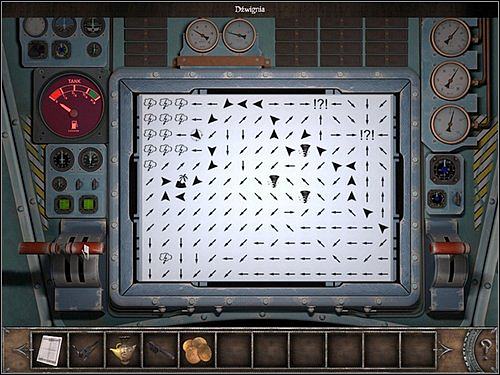
Approach the console (on the right; zoom). Spread the map on its screen and turn the red switch on the right. Check the objects marked on the map: Bimini island in the middle (more or less), the anomalies in the upper right part, the storm in the middle upper part, the airship in the lower right corner and the tornado at the lower left part.
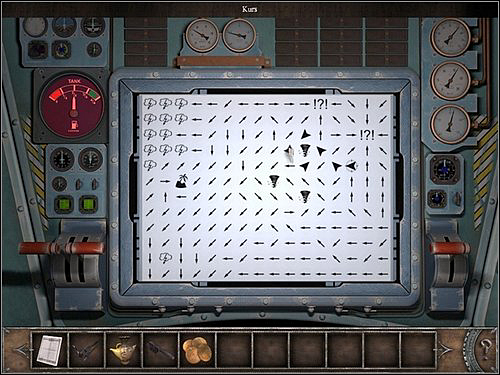
Now move to the control panel (in front, zoom). You have to set the airship (marked with a circle on the right) route so that it won't run out of fuel and will avoid all the obstacles (anomalies, storms or tornadoes) on its way to the island (marked with a palm on the left). Of course you have to consider the wind's direction, represented by the arrows.
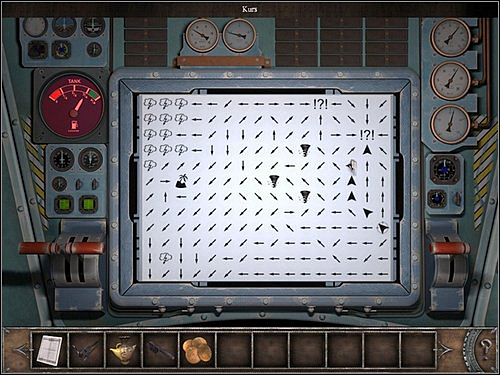
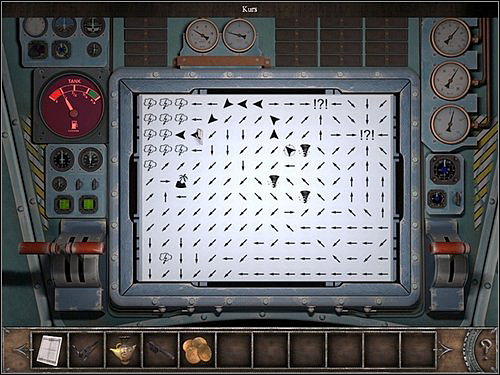
Taking all of that into consideration, press the circle representing the airship 8x (leave the 8th route variant on the screen - count from the moment you hear a distinctive sound). Afterwards click the next to last big arrow of the selected route (you should be near the anomalies) and when a circle representing the airship will appear on it, press it 5x. Once again mark the next to last big arrow of the route's next fragment (you should be near the tornado now) and press the airship symbol 4x. Once again select the penultimate big arrow of this fragment of the route and press the circle on it 5x (you should land on the island). The correct route is showed at the screen below. In the end pull the lever on the left and voila - you set off.
After reaching the destination, go to the cabinet on the right (zoom), open it and take the rope ladder, camp shovel, brush and spatula.
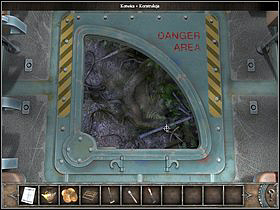


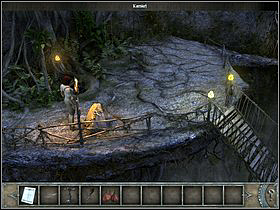
Approach the hatch in the floor (zoom) and open it. You have to moor the ship at the landing field. In order to do that, take the anchor from the left side of the opened hatch and hook in to the part which is visible on the right from time to time (the hand pointer will change into something resembling a gunsight. Now mount the ladder to the lower part of the opened hatch and lower yourself to the landing zone.
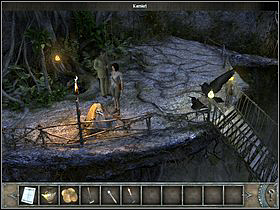

Talk to the count and approach the big rock by the torch (zoom). Take a look at the inscription on it (it's worth to take a photo of them).
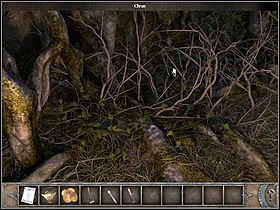
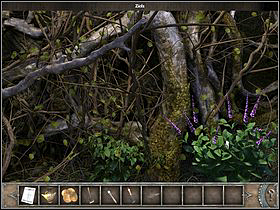
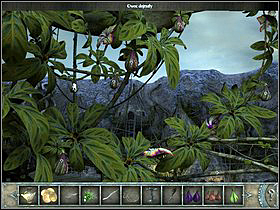
Head to the bushes on the right. Take a look at the shrubs ant take some firewood. Move a bit to the right; pick some herbs (zoom) and a dry branch (on the left). Return to the landing zone (left).
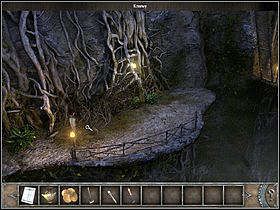
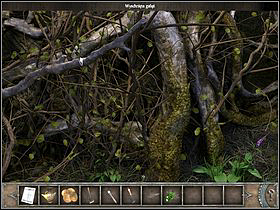
Try to head to the bridge - two large birds will disturb you. Chase them off with the branch and you will be able to go further - to the platform.
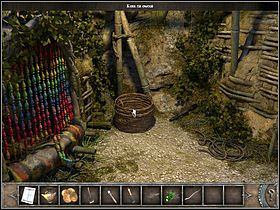
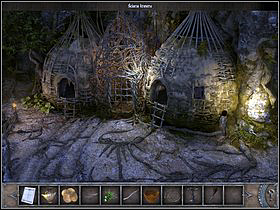
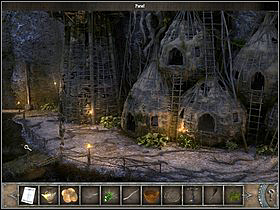
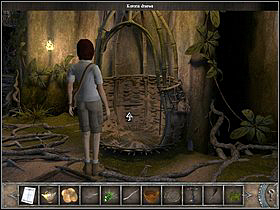
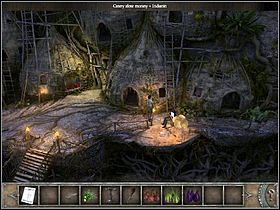
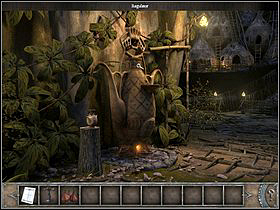
After a short conversation with the count during which you will learn how to prepare a juice out of the Tree of Life fruits, head right to the fork in the road in the road. Take a look at the junk lying by the hut on the left (zoom). Take the wicker fruits basket, a rope and a torch (on the right).

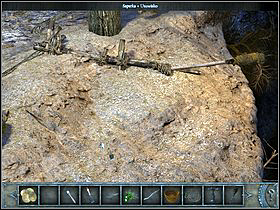
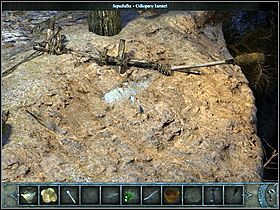
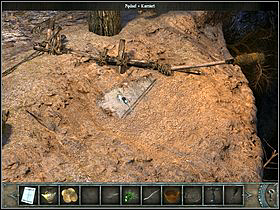
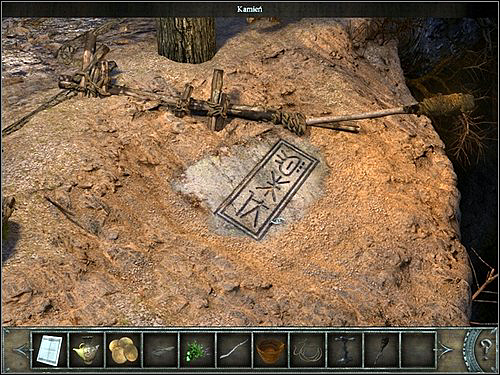
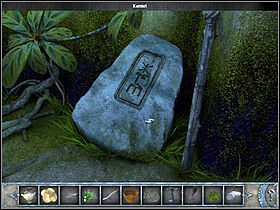
Now head to the stone covered with sand on the right (zoom). Get rid of the landslip using the camp shovel and afterwards treat the uncovered stone with the spatula and brush. Take a look at the signs on the rock.
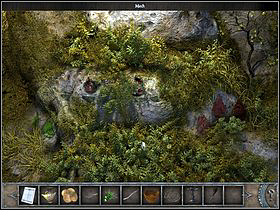
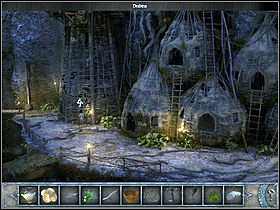
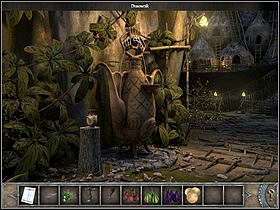
Head to the outskirts of the village (right) and examine the crater's wall (zoom). Pick up some of the moss that's covering it. Notice the fruit drawing you have unveiled this way. Go back to the fork in the road and head to the village (left).

Go to the very end until you reach a bridge on the left. Pick up the worn out wind sleeve. Use the lever by the bridge, lower it and cross it to the other side. This way you will get to the already examined bushes, from where go to the landing zone (left) and through the bridge to the platform.
Head to its left part and take a look at another stone (behind the lift; zoom). There are also inscriptions on it, similar to the ones seen before. Check the lift; it's out of order at the moment. Sylvie will inform the count that the mechanism has to be activated in the village.
Go to the intersection (right) and to the village (left). Go up the ladder to the windmill's platform (the last building in the village). Set the wind sleeve on the flagpole on the left. Thanks to it Sylvie will be able to determine the wind's direction.
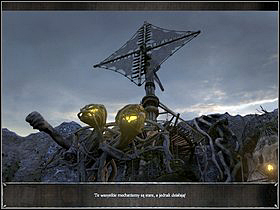
Go down to the village and approach the panel (by the bridge, in front of the huts; zoom). Use the lever (on the left) and two amber buttons to set the windmill front to the wind direction, which practically means to turn it 180 degrees from the default position (you can see it on the screen above). The buttons turn the windmill right and left, the lever regulates the height of the sails (three levels). At some settings the buttons and lever are blocked - that means you can't turn or raise/lower the windmill anymore. Probably everyone tried to solve this riddle on their own before taking a look into this guide, so before you use the solution given here, set the windmill maximally to the left and at the highest level (lever at the lowest position).
From this position, you have to:
7x press the right button, 2x raise the lever (maximally lower the windmill);
2x press the right button (turn the windmill maximally to the right), 1x lower the lever (rise the windmill to the middle position);
2x press the right button (turn the windmill maximally to the right), 1x raise the lever (maximally lower the windmill);
2x press the right button (turn the windmill maximally to the right), 1x lower the lever (set the windmill to the middle position);
1x press the right button. The windmill should start moving.
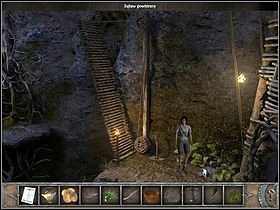
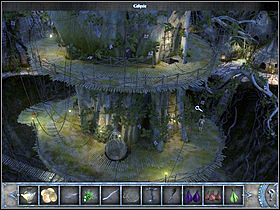
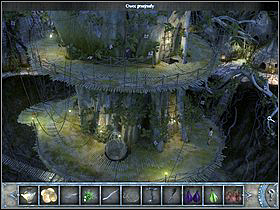
Go up the ladder once more and turn the lever on the right maximally to the left to start the elevator (turning it to the right turns on the water flow). Return to the platform, go into the elevator and ride it to the tree's crown.

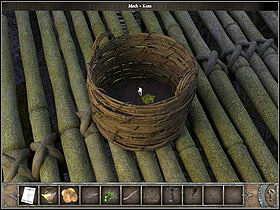
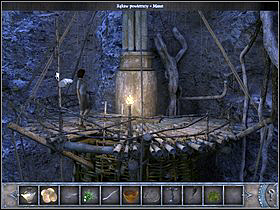
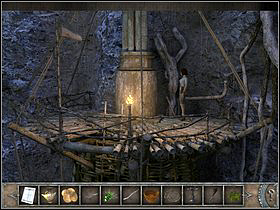
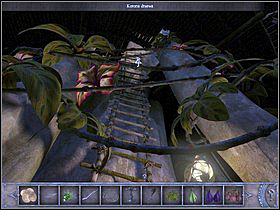
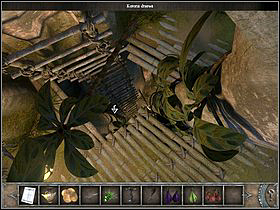
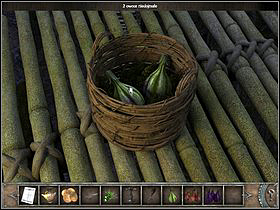
Once there, go to the bridge on the left (zoom). Put the basket on it place the moss at its bottom. Take a look at the branches at this side of the tree (zoom). Pick all 7 fruits (2 overripe, 4 ripe, 1 unripe).
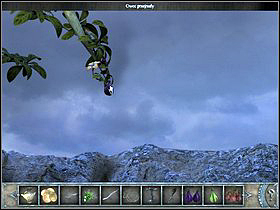
Afterwards check the branches on the right side of the tree and pick all the fruits (5 ripe). Notice (zoom) a single overripe fruit in the distance - (click on it) Sylvie won't be able to reach it.


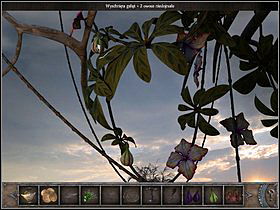
Go up the ladder (zoom) to the higher level, go to the left side of the tree and take z look (zoom) at the branch with two fruits. You won't reach it normally, so knock them down with the branch into the basket filled with moss below.

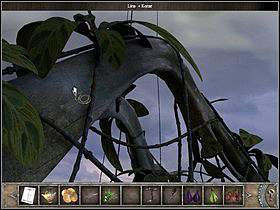

Go to the right side of the tree and investigate the bough (zoom). Tie the rope found in the village to it. Go down the ladder (zoom) to the lower level.
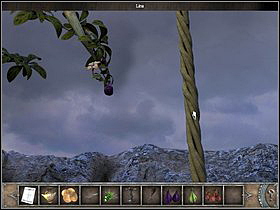
Take a look at the overripe fruit on the right once more (zoom). Grab the line next to it and this way Sylvie will gain yet another fruit (overripe). Finally go to the bridge on the left (zoom) and take two unripe fruits from the basket. In total, Sylvie should have 3 unripe fruits, 3 overripe and 10 ripe). Return to the elevator and ride it down to the platform.
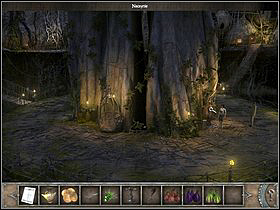
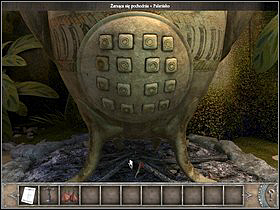
Head to the pot (on the right, by the tree stump near the count; zoom). Put the glued jug on the stump next to it. Take a look at the proportioner (top part of the pot; zoom). Try to put whichever fruit to a hole. Sylvie will come to a conclusion that she should know the recipe first. Talk with the count and he will tell the girl to go to an Indian in the village.
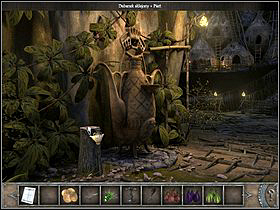
Head to the fork in the road and turn right to the uncovered stone by which you will find the man. You will learn that the relation between the unripe and ripe fruits on one side of the pot should be the same as the relation between ripe and overripe on the other side. After finishing the conversation, return to the platform and take another look at the pot (zoom).
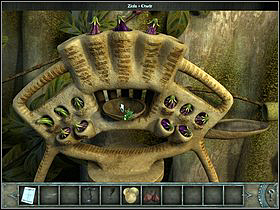
Put 3 unripe fruits into the upper holes on the left and 2 ripe to the lower ones. Place 3 ripe fruits in the upper right holes and 2 overripe to the lower two. Time for the upper holes - the fruit drawing seen on the crater's wall after taking the moss is a hint. As you probably remember, there was 1 overripe fruit and 2 ripe ones, so put them into the upper holes.
In the end put the herbs collected from near the landing zone to the bowl in the centre.
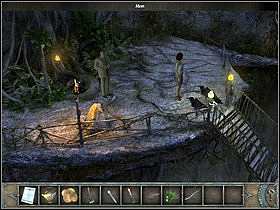
In effect of meeting the Brotherhood members, Sylvie and Saint Germain will get imprisoned. Fortunately, not for long. Talk with the count and then with the native, who will let you out. After getting out of the prison, speak with the count again and he'll send Sylvie to the airship to get a pistol.
The platform passage is inaccessible so go to the village (left) and to the lowered bridge at its end (if you haven't lowered it yet, do so with the lever next to it). Head left all the time until you reach the landing zone.
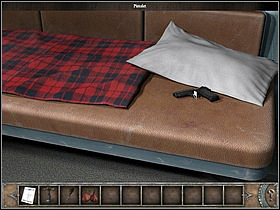
Climb up to the deck and approach the bunk on the left (zoom). Raise the pillow and take the count's pistol. Lower yourself to the ground where Sylvie will hand over the gun to the man.
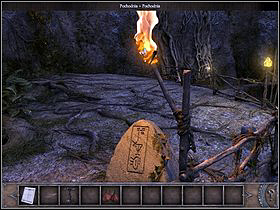
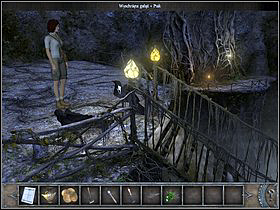
Head right on the platform after which there will be a long conversation with the members of the Brotherhood. Eventually Sylvie will be sent to continue the production of the juice. Head to the fork in the road and turn left to the village. Climb the windmill and turn the lever maximally to the right to activate the water flow. Afterwards head to the landing zone, approach the stone with signs (zoom). There's a torch burning beside it, so light up your own which you have found in the junk at the village.

Return to the platform, approach the pot (zoom) and this time take a look at its lower part, the filter (zoom). Put the brushwood under it and light it with the torch. From now on Sylvie will be disturbed with scenes with the members of the brotherhood starting from the next activity, return to work after each.
Your next task is to regulate the steam flow in the pot by pressing every button on the filter in the right way. The trick is to now press the buttons which are next to each other horizontally, vertically or diagonally. The easiest way is to press alternately press the buttons in the first and third column and then in the second and fourth.
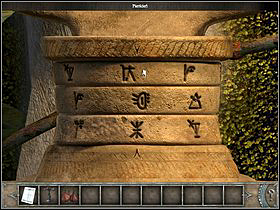
Once you're done with filtering the juice, Sylvie should move to setting the proportions using the moving rings. Take a look at the neck of the pot, which is the regulator. You have to turn them in such a way to set three symbols in the central part (between the two arrows). The hint which symbols you should be interested with are carved into the three stones that Sylvie has seen around the island: by the landing zone, at the fork in the road in the village and near the elevator.
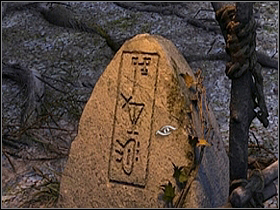
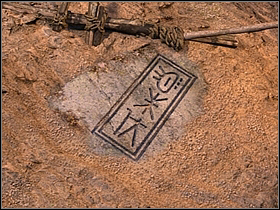
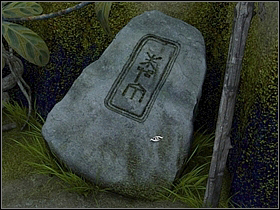
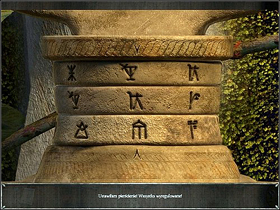
If you haven't taken photos off them during the game, do it now. You have to pick up the signs that aren't repeating and set them on the rings in the order in which Sylvie has discovered them (landing zone, fork in the road, platform). The upper one is similar to a cocktail with an umbrella, the middle resembles a man with a spear and the lowest - a hut. If you haven't touched the rings yet and they're in the default positions, lick the upper 1x, middle 2x and the lower 2x. You can see the correct solution on the screen below.

And that's everything you could have done for Sylvie Leroux in this part of Chronicles of Mystery.


 Call of Duty: Modern Warfare 2 Game Guide & Walkthrough
 Crime Scene Investigation: Hard Evidence Game Guide & Walkthrough
 Cube World Game Guide & WalkthroughCall of Duty 3 Game Guide & Walkthrough
 Colin McRae: DIRT Game Guide & Walkthrough