
Welcome to the unofficial guide to "Brothers in Arms: Hell's Highway" PC video game. This guide consists entirely of a very detailed walkthrough of all ten missions of the singleplayer campaign of the game. I've focused most of my efforts on explaining how to deal with enemy troops. Most of the time you'll only have to remember about two things - issuing correct orders to your squad members and using available covers wisely. There are some levels, however, where you'll have to be more creative to get the job done or merely to survive. I've also described in detail how to fulfill mission objectives and where to search for bonus areas. Each map (the only exception is the introductionary first chapter) has two recon points (green color) and three kilroys (blue color). Good luck in finding them and in surviving in the battlefield!
Stranger
TIME AND PLACE:
September 20th, 1944 (D+3)
Eindhoven, Holland
0030 hours
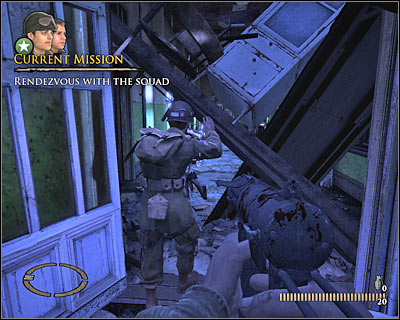
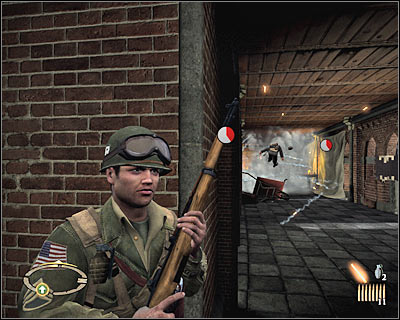
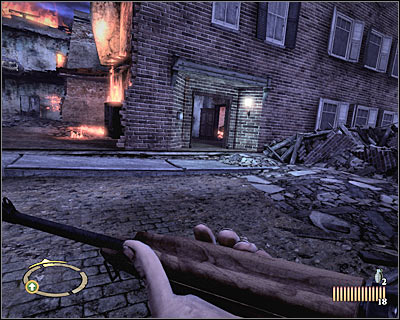
Obviously you must wait for the first cut-scene to end. Listen to what Hartsock has to say to you and use your mouse to look up. Wait for Baker to stand up and start following your teammate. You will have to use the crouch key in a short while [#1], because it's the only way to get to the next area of the map.
#1
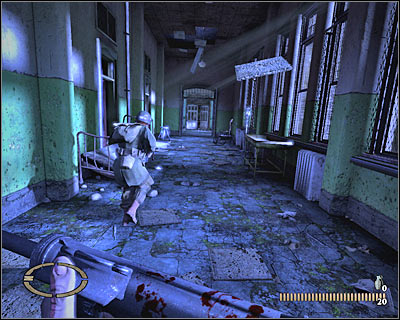
Make a few steps forward and notice that a large explosion has taken place in the area. Thankfully, this blast won't kill you. Keep following Hartsock [#2]. You might want to consider pressing and holding the sprint key, however it's optional. Turn left once you've reached a new room of the hospital.
#2
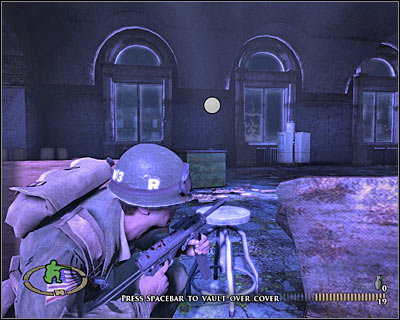
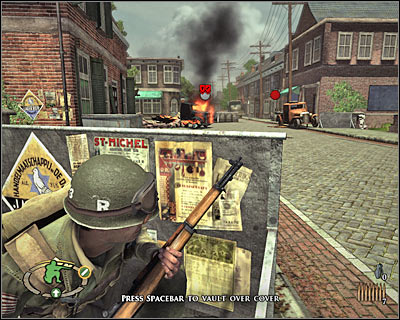
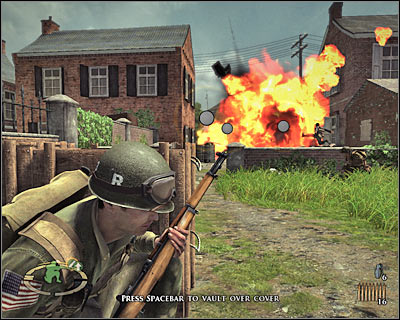
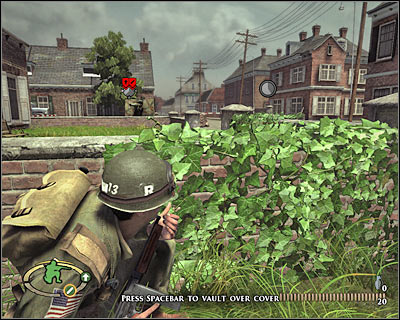
Approach the nearest bed quickly [#3]. You will have to take cover behind this object and you can do this by pressing the Q key (by default). Wait for one of the German soldiers to show up and use your machine gun to kill your opponent. Now you'll have to suppress the rest of the enemy soldiers and this means you'll have to start firing at them. This will allow Hartsock to move to the left room. You won't have to be precise here, however you may try aiming for their heads. Once you've won, press the SPACE key to vault over this cover. Head on to the left room.
#3
Keep following your teammate, especially since you won't explore the hospital on your own. You should be able to reach the first checkpoint area in a short while. Run forward and kill a single enemy unit [#4]. It would be a good idea to prevent him from taking cover. Turn left and take cover behind the left wall. Kill his colleague from here and wait for Red to get here.
#4
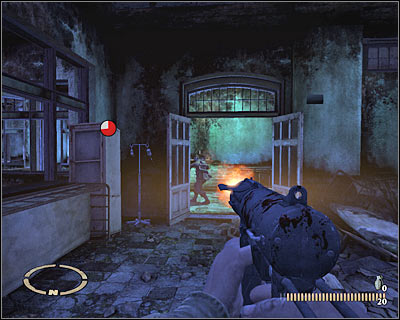
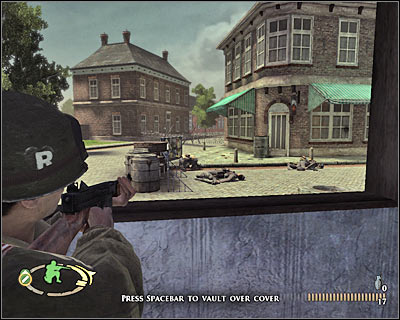
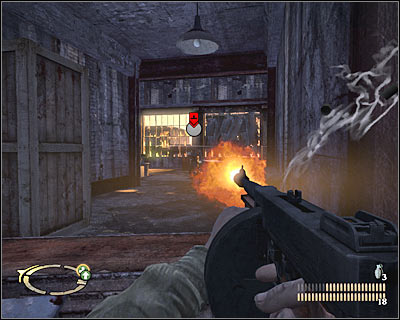
Notice that Hartsock has turned right. Don't follow him. Instead, keep moving forward and take cover under the windows. As you've probably figured it out by now, you will be able to surprise enemy soldiers from here [#5]. Kill them and return to Hartsock. Proceed towards the next corridor and ignore a soldier on fire. Head on to the right corridor and eventually you'll get to a new checkpoint.
#5
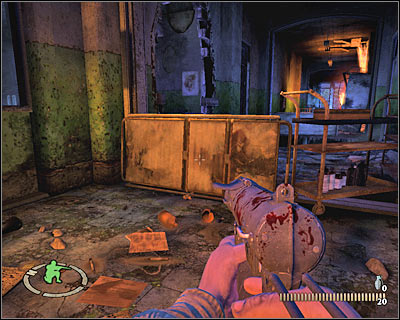
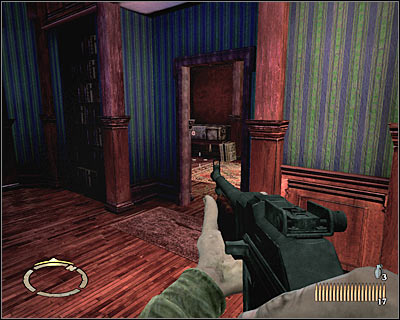
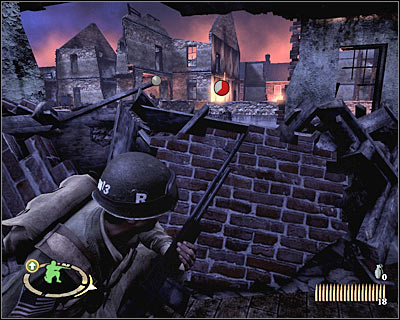
Turn right. There are some new soldiers ahead and I'd strongly recommend attacking them right away, so at least one of them won't make it to the nearest cover. Take cover behind some of the nearby objects, move forward and surprise the German soldier [#6]. Thankfully, he won't suspect your attack, so it's going to be extremely easy to get rid of him.
#6
There's probably a second group of enemy soldiers nearby and obviously you will have to watch out for them as well. German units are hiding to the north [#7]. Just as before, you should focus primarily on finding a good cover. Attack them from a larger distance. Once they're gone, proceed towards a new corridor. This mission will end after reaching a larger room of the hospital.
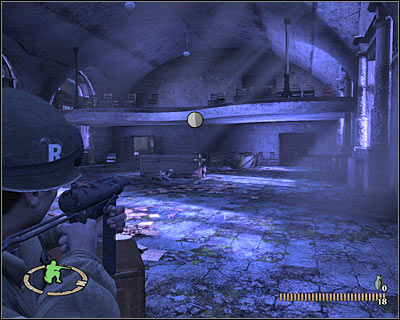
#7
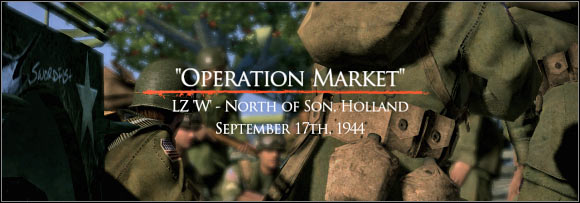
TIME AND PLACE:
September 17th, 1944 (D-Day)
North of Son, Holland
1300 hours
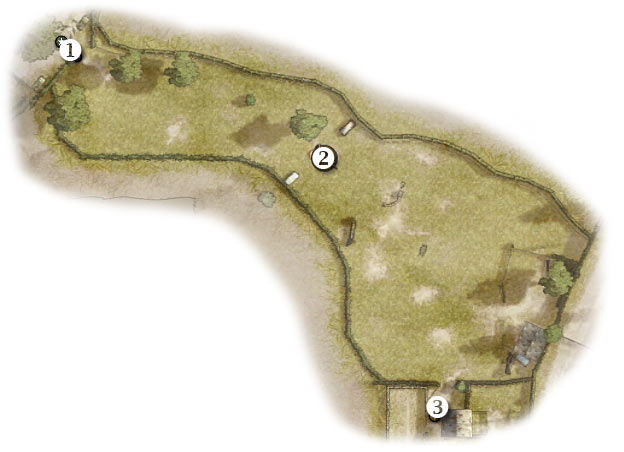
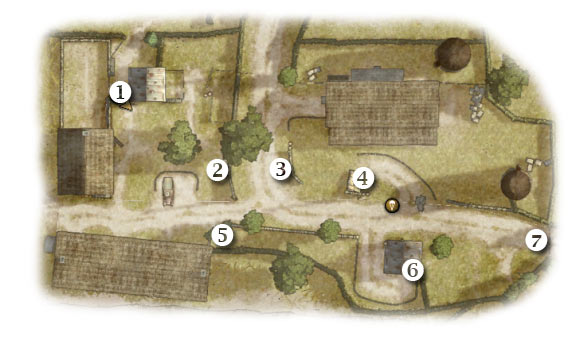
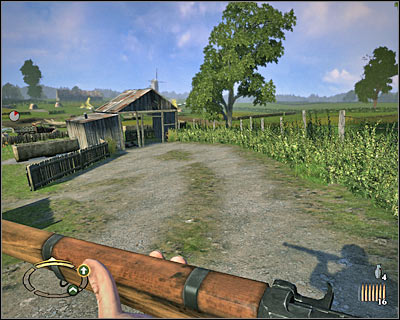
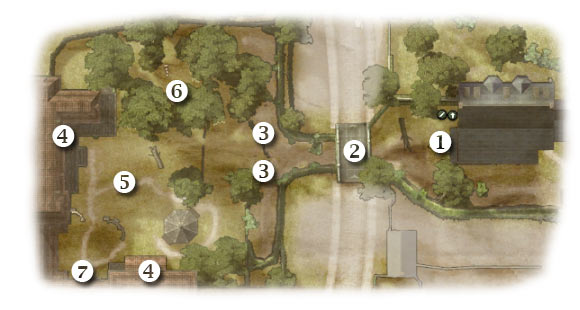
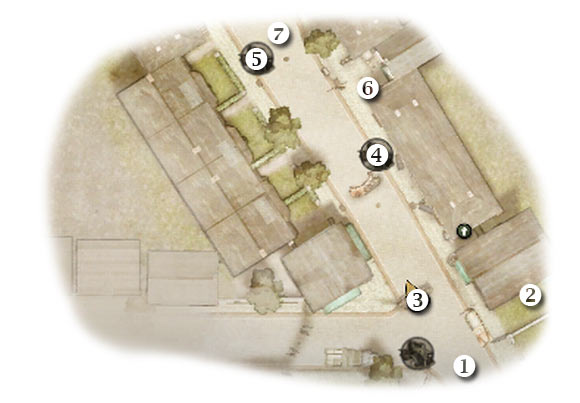
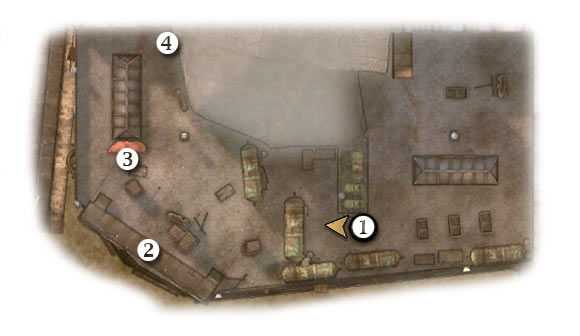
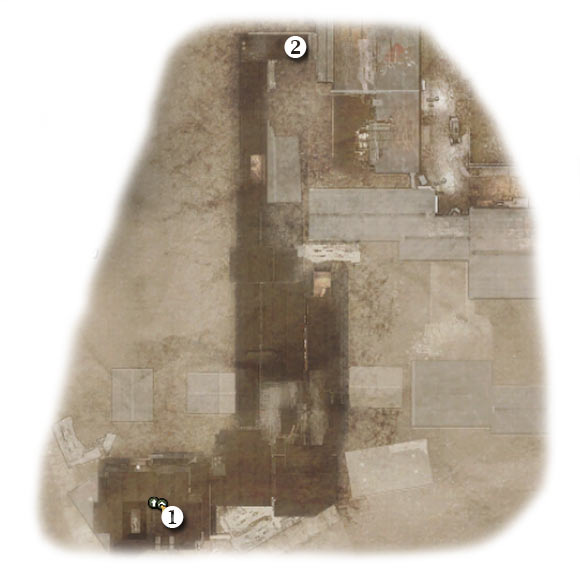
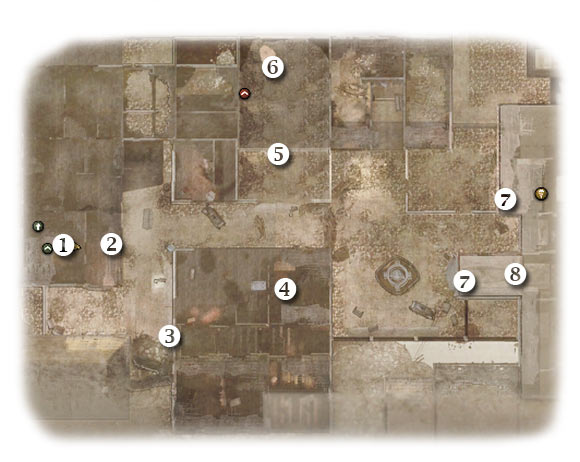
Map legend: 1 - starting area; 2 - ammo stash; 3 - destination
I guess you don't need to read too much about this particular assignment, especially since you won't encounter any enemy units. You should treat this goal as a short tutorial. You can agree to some hints being displayed on your screen if you want to. Make sure you understand how to command your team. Once the training is over, head on to the south-east. There's only one path leading to your destination, so you can't get lost. Notice an ammo stash in front of the starting area (2 on the map) [#8]. Resupply and continue moving south. You'll be rewarded with a new cut-scene once you're close enough to the village (3 on the map).
#8
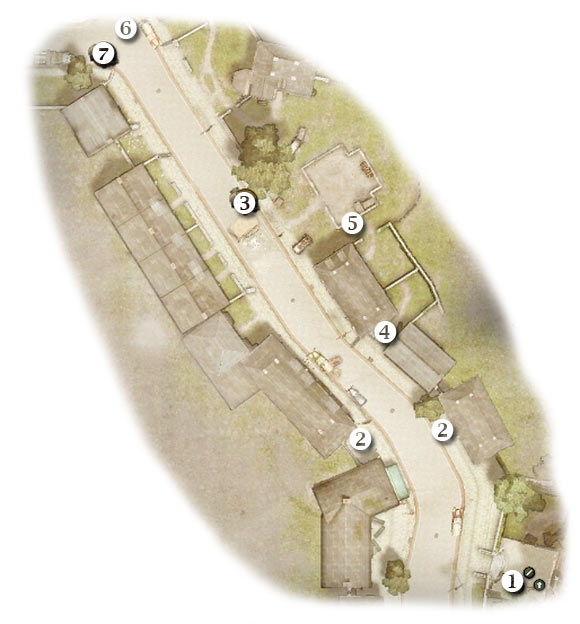
Map legend: 1 - starting area; 2 - cover point for your squad; 3 - first group of enemy soldiers; 4 - second group of enemy soldiers; 5 - side alley; 6 - large building; 7 - destination
For the first time during the course of this mission you will be allowed to use your team for something more than following your lead. You start the game in the western section of the village (1 on the map). Order your men to take cover near the sandbags (2 on the map) [#9]. Once they've arrived at their destination, press and hold the right mouse button to issue an attack order. Target a nearby group of enemy soldiers (3 on the map). Notice that a grenade icon has appeared above their heads. This means your colleagues not only will be able to use their guns but also throw grenades at enemy troops. Order your men to proceed with the assault. It's only going to take your colleagues a few seconds to get rid of German soldiers.
#9
You will probably notice that a second group of German soldiers has appeared in the area (4 on the map). Order your men to remain where they are. They should also begin firing at German troops. Head on alone to the southern passageway (5 on the map) [#10]. Press the crouch key, take cover behind the sandbags and start moving east. You should be able to outflank enemy units in a short while. Make sure to kill all of them before they're able of returning fire.
#10
There's one more group of enemy units in this area. Travel east quickly, because otherwise you would find yourself under heavy fire. Take cover behind the southern wall of a small building (6 on the map). Obviously you will have to lean out to dispose of enemy forces [#11]. Gather the rest of the team around your position and proceed east (7 on the map).
#11
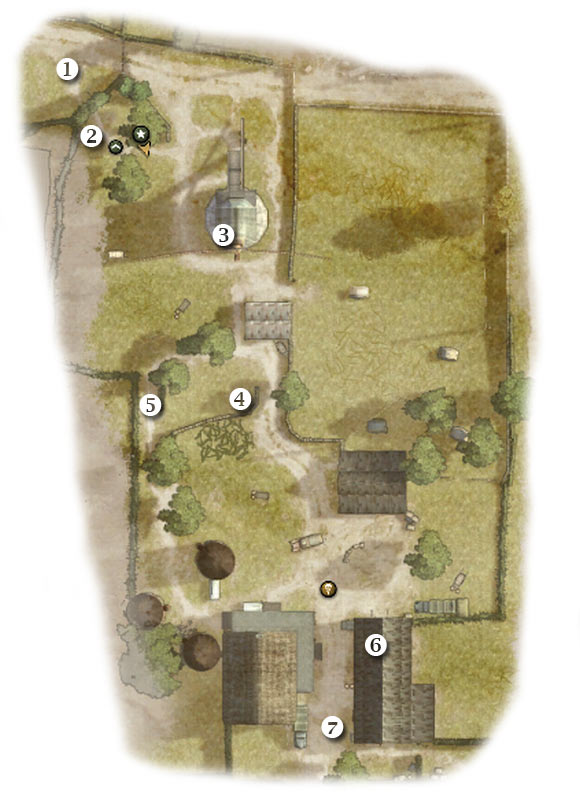
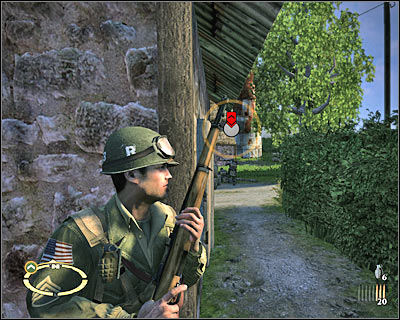
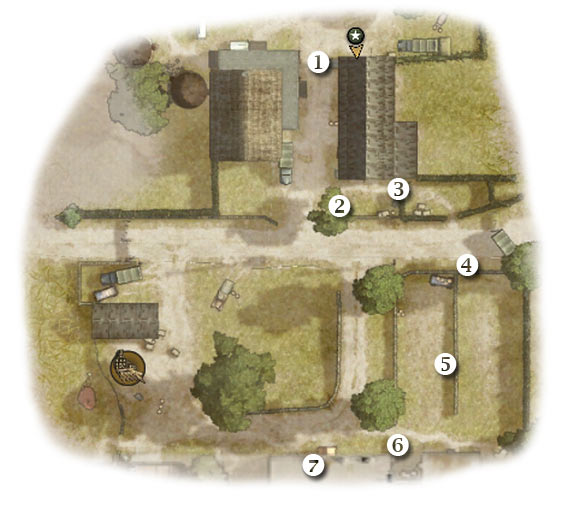
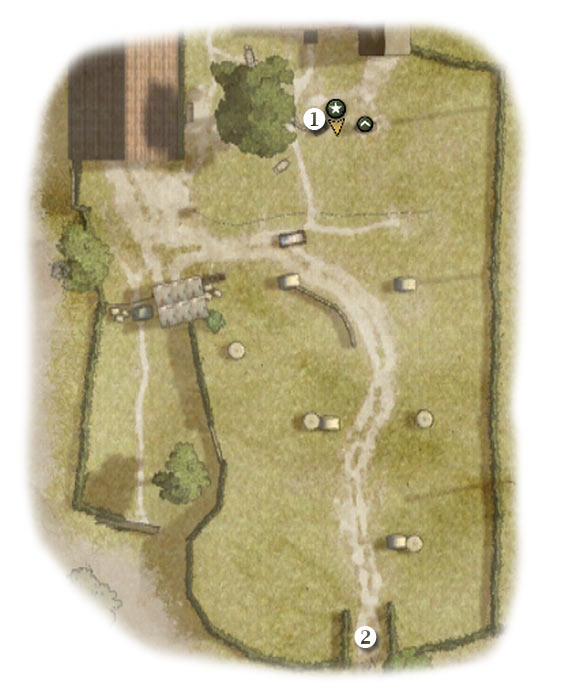
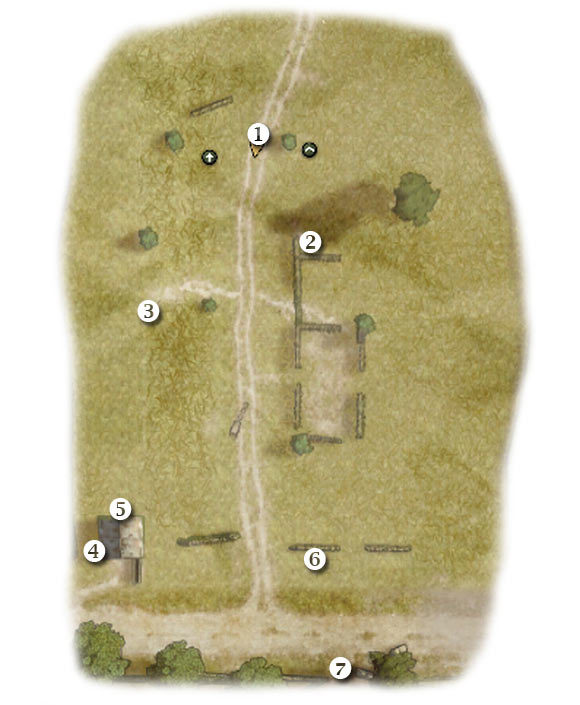
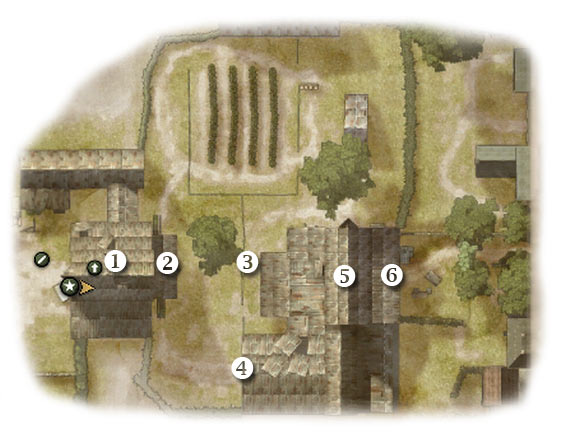
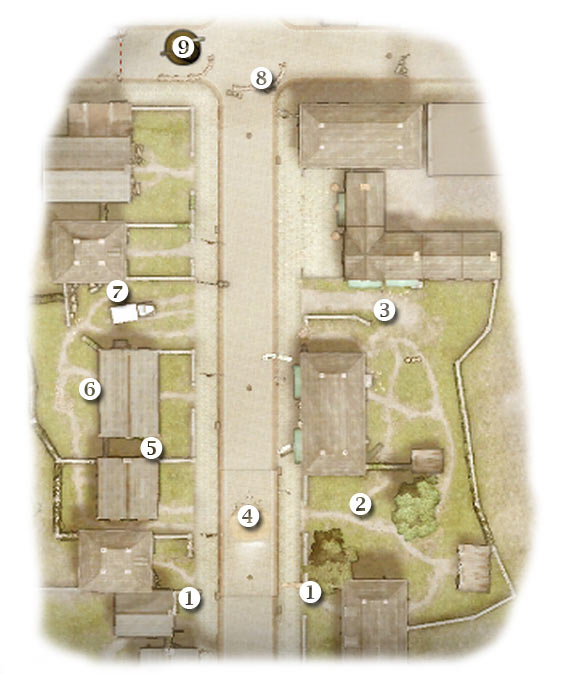
Map legend: 1 - starting area; 2 - first kilroy; 3 - first recon point; 4 - cover point for your squad; 5 - unguarded passageway; 6 - building taken over by enemy units; 7 - destination
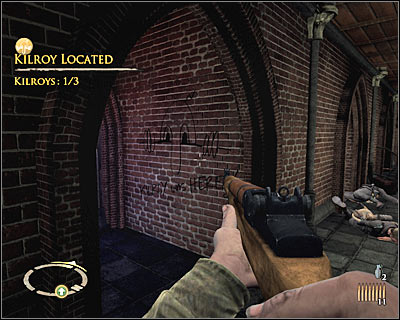
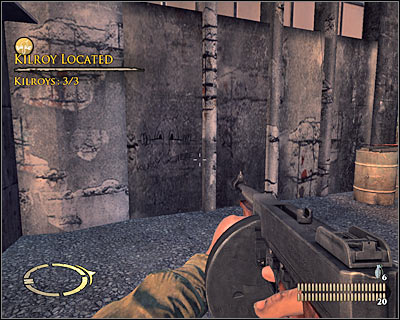
It should only take you a few seconds to reach a new area (1 on the map). Turn right, because you'll find your first kilroy here (2 on the map). There are three kilroys hidden on each map and you can spend some time trying to get to all of them. Check the "Bonuses" section of my guide for some info on where to look for them. All you have to do here is to approach the wall and to press the action key to finish painting the kilroy [#12].
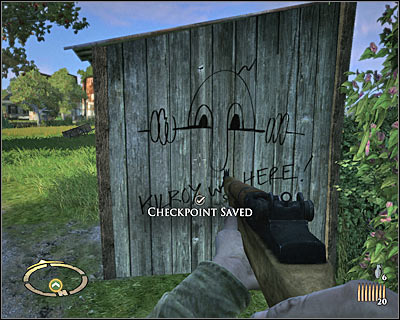
#12
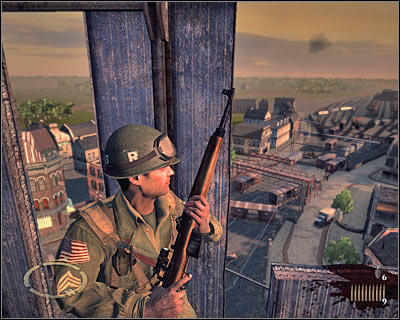
There's also a first recon point (3 on the map) in the vicinity. Finding these areas will allow you to unlock valuable mission reports. In order to get to the first recon point you'll have to enter a nearby windmill. Order your men to remain where they are. Once inside the windmill, use the stairs to proceed to the top. Approach a small opening [#13] and press the action key to scout the area. You may exit the windmill right away or you can read your first report (Windmill).
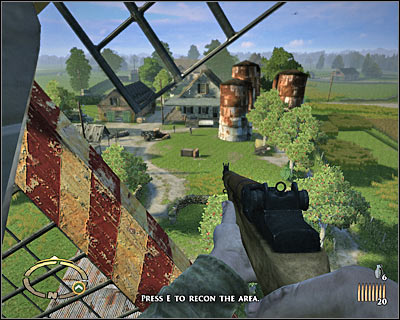
#13
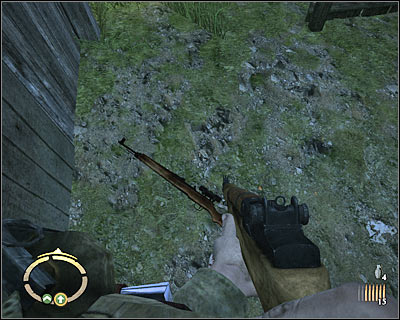
You may proceed towards your current target. Order your men to take cover behind the sandbags which can be found to the south of your current position (4 on the map). Once they've arrived, order them to open fire on nearby enemy troops. You should proceed alone to your right. There's an unguarded passageway here (5 on the map) [#14]. Make sure you're crouching all the time. Keep moving south.
#14
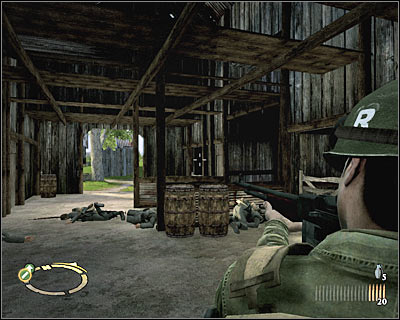
Now you'll have to start attacking enemy soldiers from the flank. You shouldn't have any major problems eliminating them. The final group is defending itself inside a large barn (6 on the map). Approach this building carefully [#15]. Place your men somewhere in front of the barn. You should surprise the Germans from the west. Once they've been killed, proceed south (7 on the map) to get to the next area. Don't forget to order your men to follow your lead.
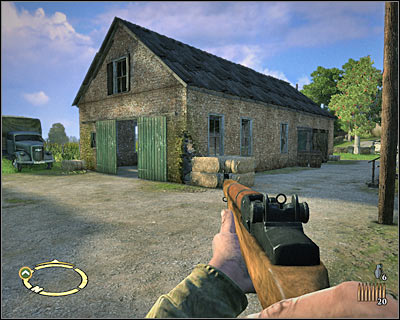
#15
Map legend: 1 - starting area; 2 - cover point for your squad; 3 - small passageway; 4 - sandbags; 5 - group of enemy soldiers; 6 - sandbags; 7 - entrance to the southern building
You'll have to be more careful from now on, mostly because a gun emplacement can be found in the area. You start the game near the barn (1 on the map). Move with your men to the south. Order your colleagues to take cover near the sandbags (2 on the map) [#16]. You should also choose targets for them - order them to attack nearest enemy units. Proceed east alone. It shouldn't be a problem, because there's a small passageway here (3 on the map). Obviously you should be crouching all the time to avoid sustaining any injuries.
#16
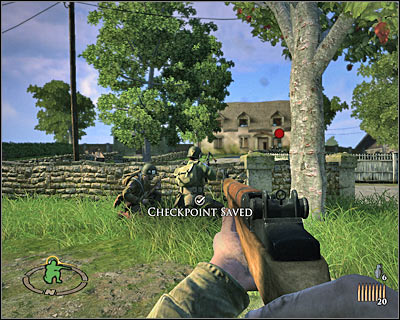
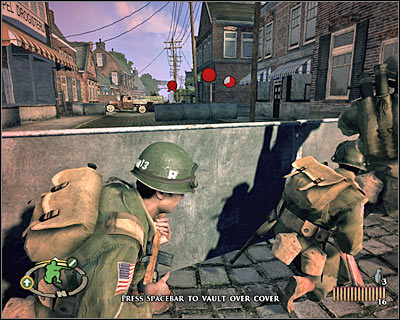
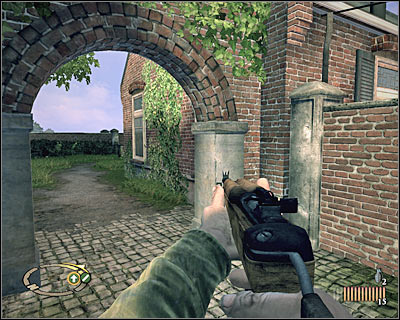
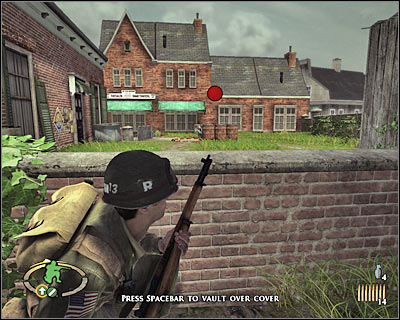
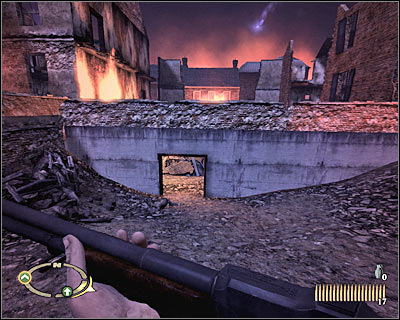
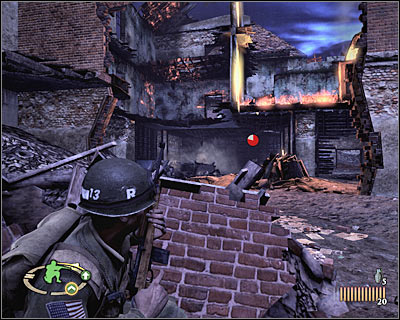
You should be able to get to the main road in a few seconds. There's a brick wall in front of you (4 on the map) [#17] and you must get to it as soon as possible. Stop there and make sure that nearby enemy soldiers (5 on the map) have been eliminated. Jump over the wall and take cover behind the sandbag to your right. This will protect against attacks made by other German soldiers. Keep heading towards the main building.
#17
You'll have to make a run for it once you're close enough to the building. Your objective is to take cover behind the sandbags, next to the house (6 on the map) [#18]. You won't have any problems getting rid of the second group from here. Approach the entrance to the house carefully (8 on the map) and make sure that no one occupies the ground floor. Use the grenades if you see any Germans. Enter the building and proceed to the left room.
#18
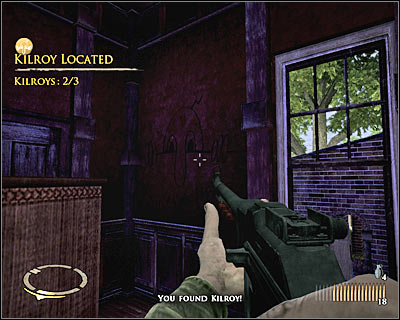
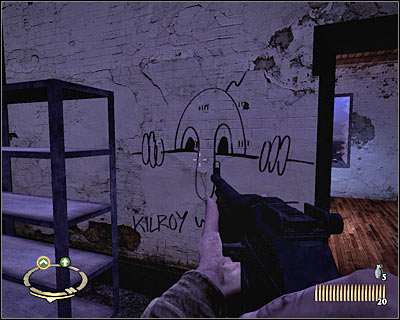
You may finally use the stairs to get to the first floor. Once you're there, start shooting at the remaining enemy units. Some of the Germans will probably take cover and you'll have to do the same thing. Make sure you've killed all of them and proceed forward to find a small bathroom. Turn around and you'll notice a second kilroy [#19] on the right wall. You may go back to the ground floor.
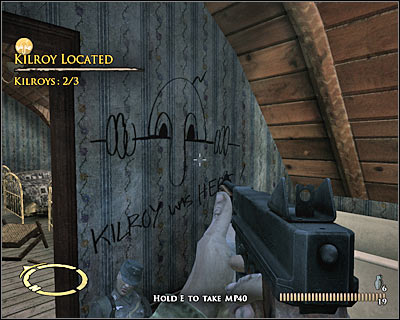
#19
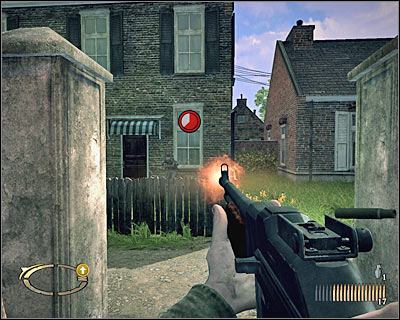
I wouldn't recommend trying to leave the house too fast, because new German soldiers have appeared in the first room. The easiest way to get rid of them would be to use grenades. After that, kill the remaining units with a rifle [#20]. Order your teammates to get here and proceed towards the southern exit.
#20
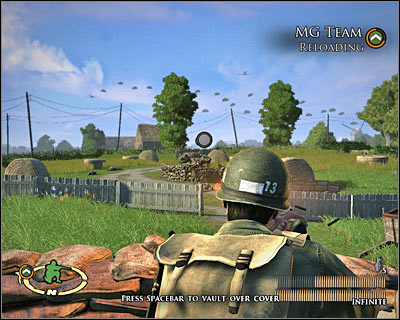
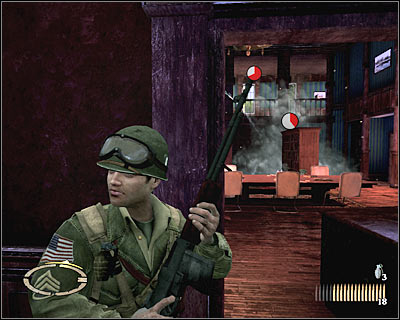
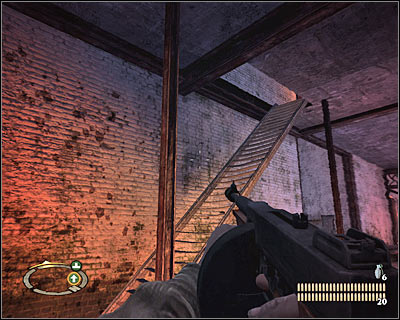
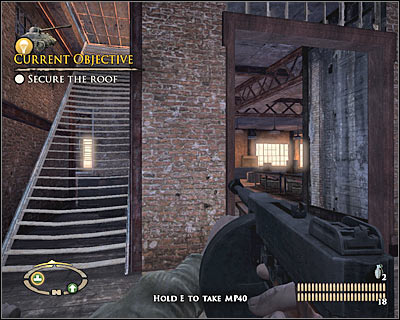
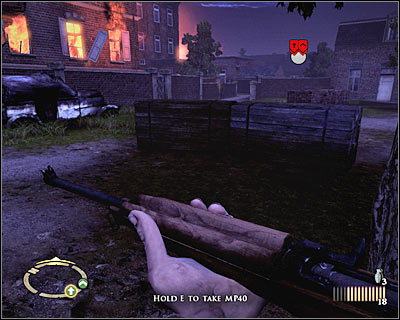
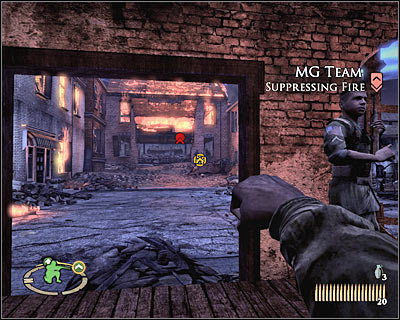
You won't have to use your personal map here, because you won't leave this area for the next few minutes. Send your men somewhere to the left. You should proceed forward, because you'll find an MG outpost here [#21]. Press the Q key to use this weapon. Notice that Baker has automatically hidden himself behind a cover. Now you must wait for enemy troops to arrive in the area.
#21
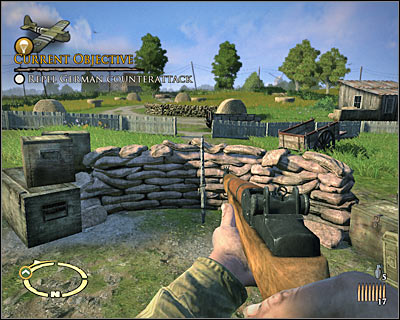
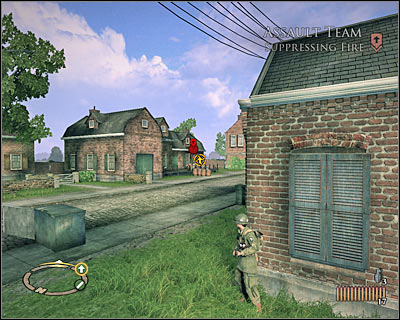
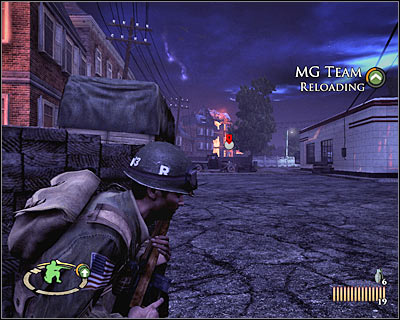
This is an easy objective. All you have to do is to use your newly acquired weapon to get rid of incoming enemy troops. Prevent German soldiers from getting too close to the farmhouse building. Notice that your MG has an unlimited supply of ammunition, however you must reload it from time to time. The best moment to do that is each time you've killed a larger group. Keep firing until you've taken care of all enemy soldiers.
#22
Map legend: 1 - starting area; 2 - destination
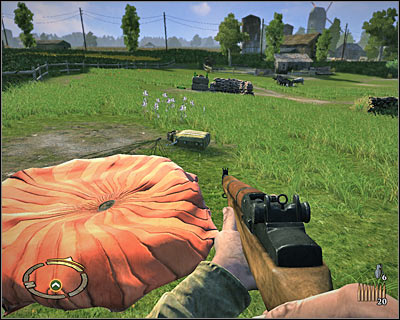
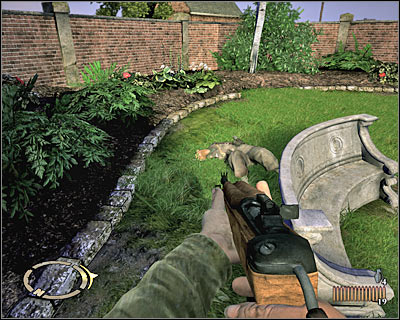
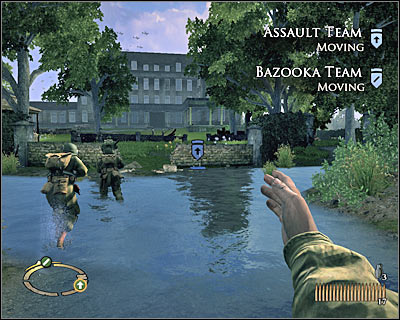
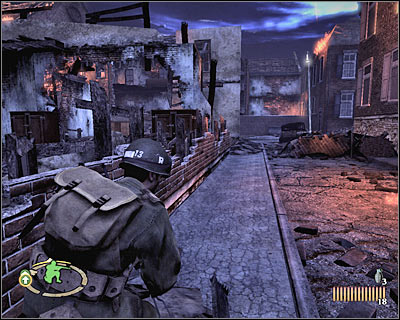
This is going to be strictly a formality. You'll probably receive this assignment the second you've defeated the last German soldier. Obviously you will begin your journey in front of the farmhouse building (1 on the map). All you have to do is to reach the next area by going south (2 on the map) [#23]. You must jump over a small wall there and this will trigger a new cut-scene. Thankfully you won't encounter any new hostile units along the way.
#23
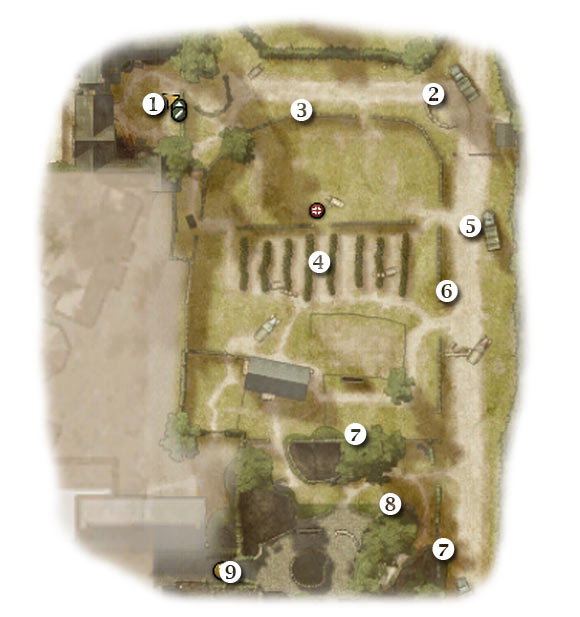
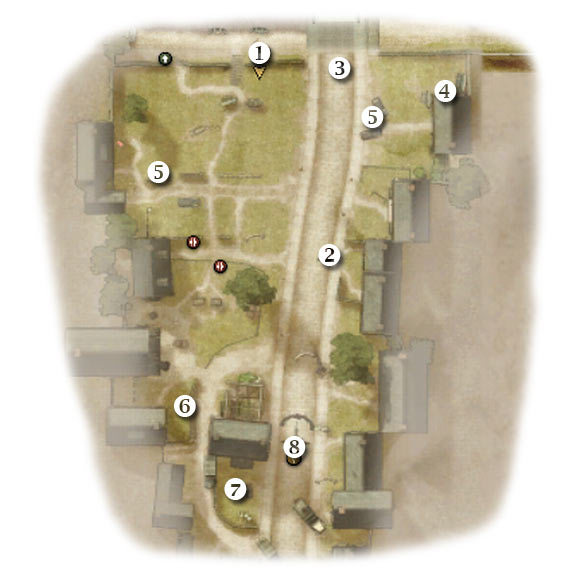
Map legend: 1 - starting area; 2 - cover point for your squads; 3 - wooden fence; 4 - small hut; 5 - third kilroy; 6 - sandbags; 7 - next area
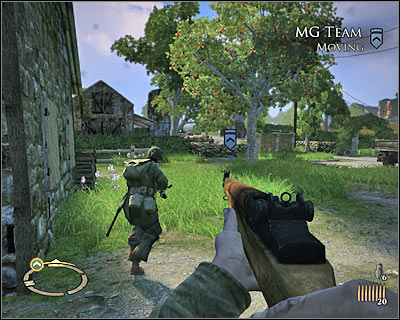
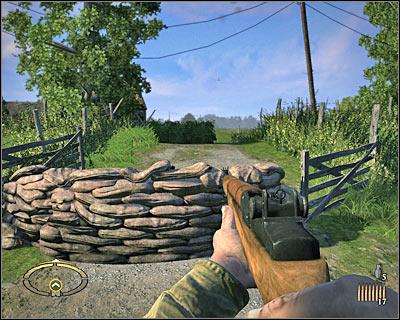
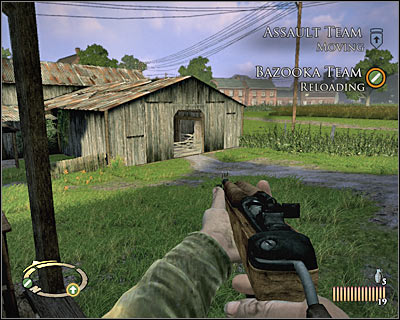
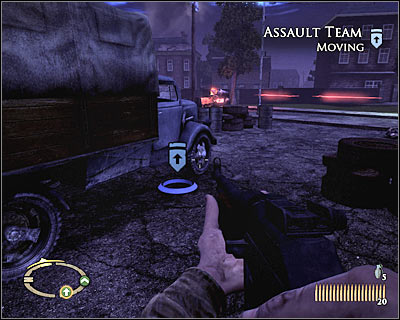
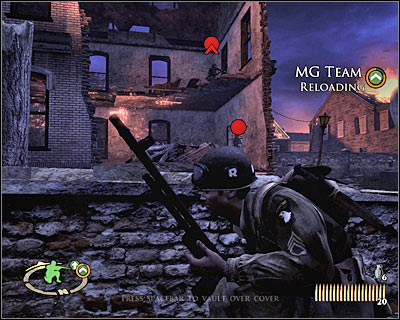
You'll start the game to the north (1 on the map) of your current destination. I'd strongly recommend acting quickly here if you plan on surprising enemy soldiers. Notice that you now have two teams under your command, however you shouldn't split them up for the time being. You could send only the MG team towards a nearby wall (2 on the map) [#24], however leaving an Assault squad alone is too risky.

#24
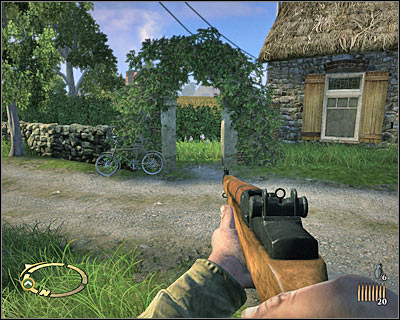
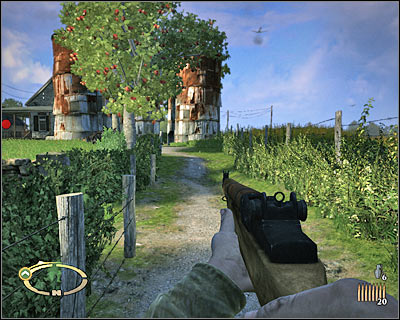
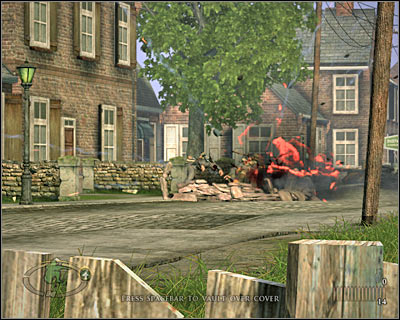
Start running south-west and eventually you'll get to a wooden fence (3 on the map). I wouldn't recommend trying to hide here, because the fence can be destroyed (and fast!) during an upcoming battle. Instead you should focus on getting to a nearby hut (4 on the map) [#25]. If you're lucky, you'll be able to take cover behind this building without having to worry about your character getting killed.

#25
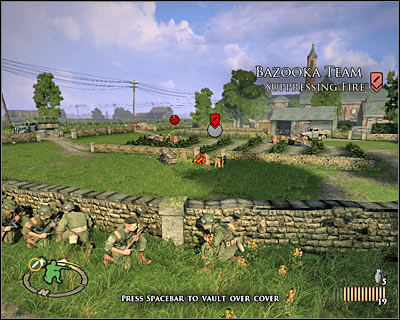
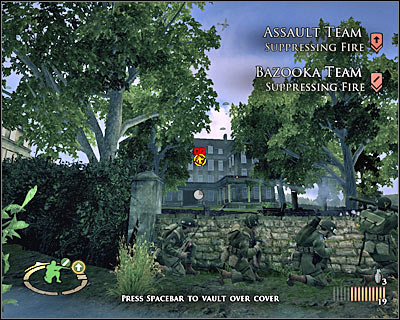
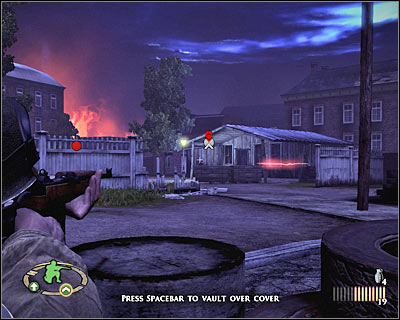
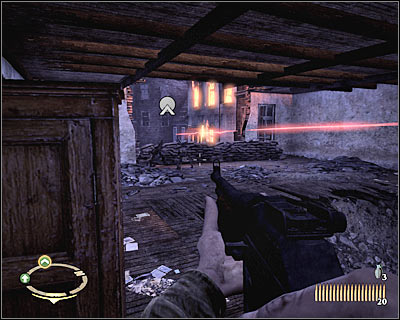
I guess you'll know how to act from now on. Take cover behind the wall and start leaning out carefully. Use your primary rifle to kill enemy soldiers [#26], however prevent them from surprising you from the north. You can move forward once you've dealt with the first group in order to take cover behind the sandbags (6 on the map). This will allow you to surprise some of the remaining enemy units. They'll be trapped, because from one side they'll have you and from the other your teammates.

#26
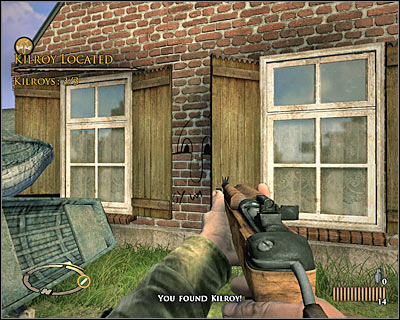
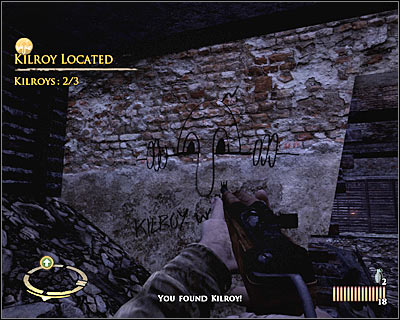
Before you decide to proceed to the next area (7 on the map), you should take some time to explore your surroundings. Go back to the small hut and inspect the northern wall (5 on the map). Approach the hole in the wall and find the final third kilroy [#27]. You may order your men to start following your lead. Proceed to the crash site which can be found to the south.
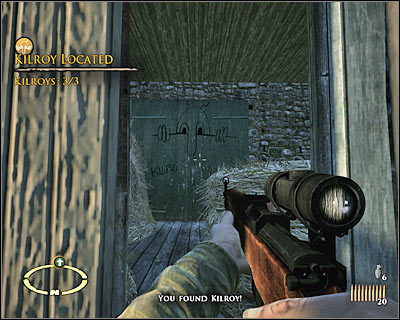
#27
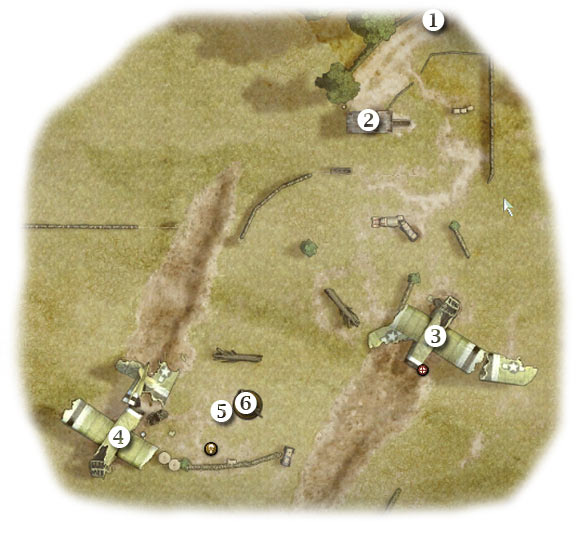
Map legend: 1 - starting area; 2 - hut with a sniper rifle; 3 - eastern wreck; 4 - western wreck; 5 - second recon point; 6 - ammo stash
Once again, you'll begin your journey to the north (1 on the map) of your destination. Order your men to take cover behind some of the nearby brick walls. You should also choose targets for them. You'll want your colleagues attacking the area around a nearby hut (2 on the map). Once it's safe, try running towards the hut [#28]. Obviously you shouldn't stop.
#28
Make sure that the hut isn't guarded by anyone else. Enter it carefully and find a sniper rifle on the ground [#29]. It would be a good idea to exchange this weapon for a standard rifle which you've been using until now. Once you've acquired this new weapon, go back to your teammates. Obviously you should be heading the same path you've used before.
#29
Things are going to get much easier from now on. You won't have to worry about sending your teammates to right places, because instead you'll kill all opponents with your newly acquired sniper rifle [#30]. You don't have to conserve the ammunition too much, however you should focus on eliminating soldiers who are standing in one place. The reason for that is simple - it's always much harder to hit a moving target.
#30
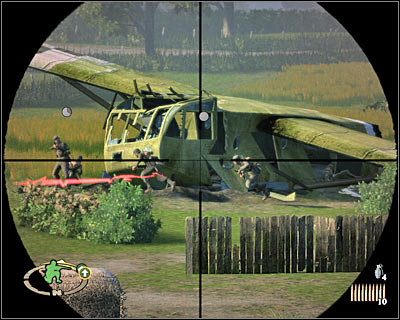
You'll have to secure this entire field, however you should focus primarily on the areas around both wrecks (3 and 4 on the map). Notice that reinforcements have arrived from the south [#31]. Thankfully it's not a big problem, especially if you still have a plenty of ammunition for the sniper rifle. Keep moving south, but make sure that you've left no one behind. Don't forget about your teammates. They can help you a lot, but they must be hiding near larger objects all the time.
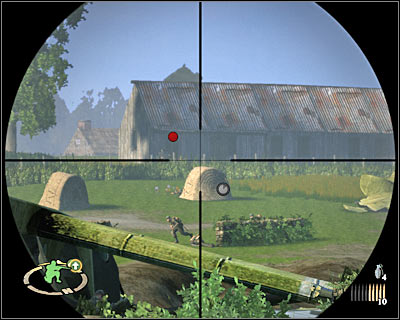
#31
The final phase of this battle is going to be even easier. I would recommend that you focus on performing a few other activities. There's a second recon point (5 on the map) [#32] near one of the wrecks. Unlock this bonus and read the report (Crash site). You will also come across an ammo stash here (6 on the map), however I'm sure you won't need to get your hands on supplies. Keep firing at the soldiers until you've killed all of them.
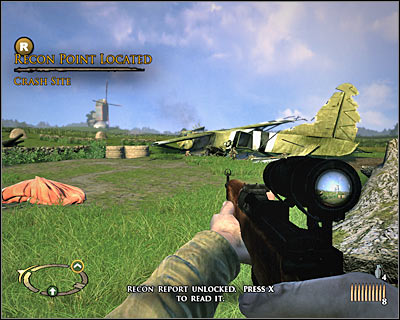
#32
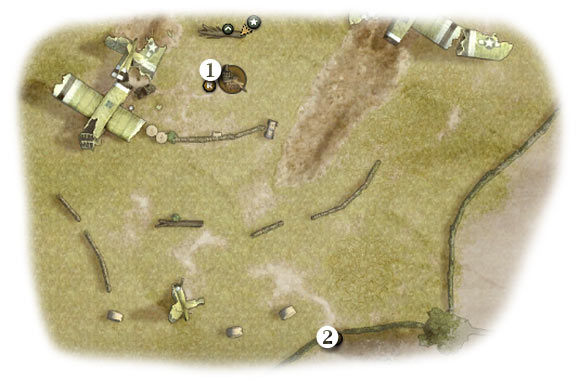
Map legend: 1 - starting area; 2 - destination
This final assignment is an extremely easy one. You'll start probably somewhere near the recon point (1 on the map). All you have to do is to get to a place where Hartsock is waiting for you (2 on the map). Approach the jeeps [#33] and you'll automatically going to be rewarded with a new cut-scene. Get ready for the next mission.
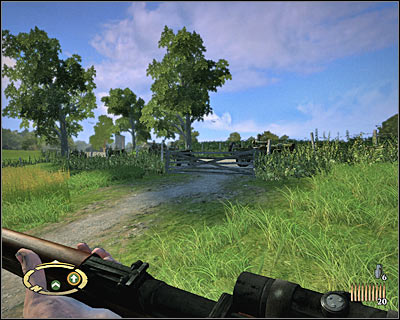
#33
TIME AND PLACE:
September 17th, 1944 (D-Day)
Northern Son, Holland
1500 hours
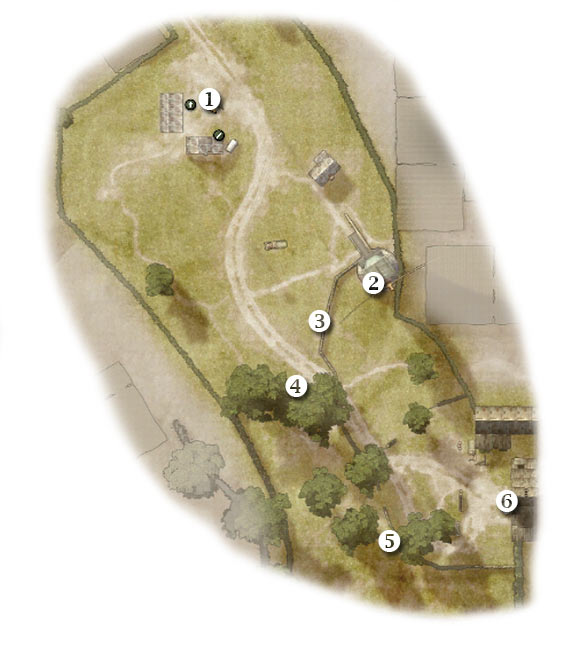
Map legend: 1 - starting area; 2 - first recon point; 3 - cover point for your squad; 4 - alternative route to your destination; 5 - area where you'll surprise enemy units; 6 - entrance to the shed
You'll start the game near allied forces (1 on the map), so you won't have to worry about being attacked by anyone. Ignore your colleagues for the time being and proceed directly to a nearby windmill (2 on the map) [#34]. Just as in the previous mission, you'll have to get to the top. Approach an opening and press the action key to unlock the first recon point. Read the report (Windmill) and head back to your teammates.
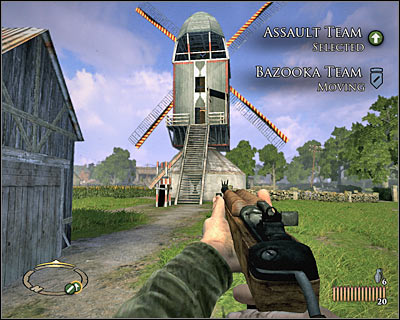
#34
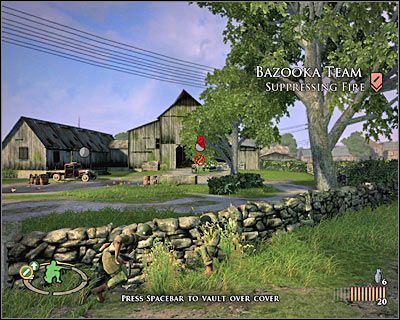
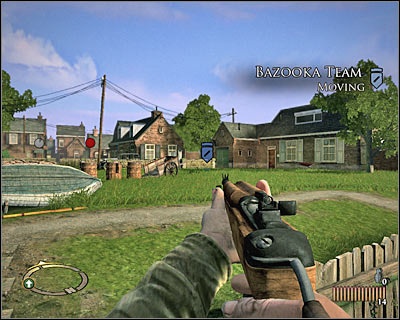
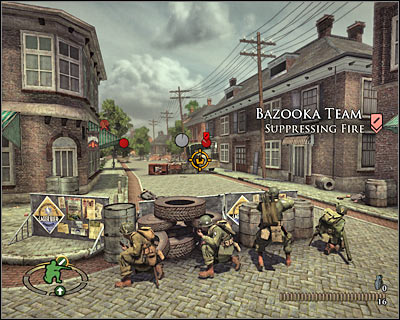
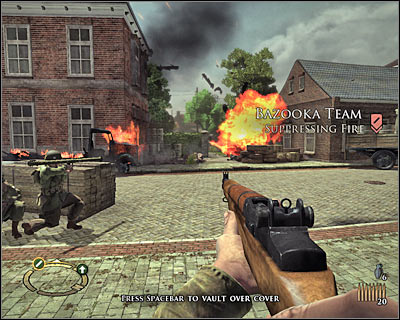
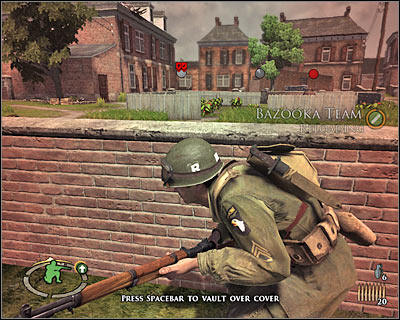
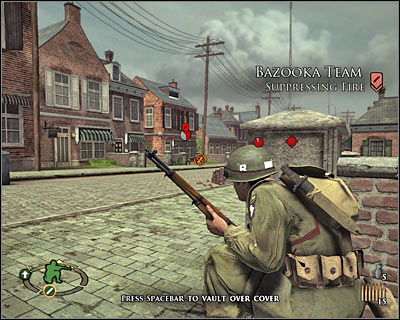
Order both teams to follow your lead. You should also notice that an MG Team has been replaced with a Bazooka Team. I'm sure that you'll find this new squad to be extremely useful. Start off by ordering both your teams to move towards a nearby brick wall (3 on the map) [#35]. You should proceed alone to your right in the meantime, because you'll find an unguarded passageway there (4 on the map). Press the crouch key and start moving south (slowly!).
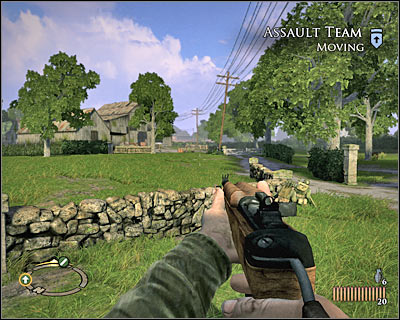
#35
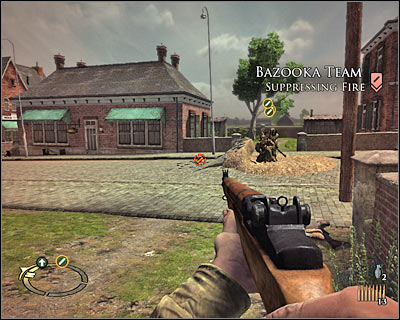
It's really up to you on how you want to proceed with this objective. You can decide to attack enemy units right away or you can take your time to find a good spot from where you'll be able to surprise them. Make sure that you use all the benefits of having a rocket team at your disposal. You can consider ordering one of your teams to move closer to the shed once you've eliminated a few soldiers (5 on the map) [#36]. Your colleagues shouldn't have any problems eliminating enemy units.
#36
Your final task here will be to clear the entrance to the shed. It's shouldn't be too difficult. Start off by approaching this area from the west (6 on the map). As for enemy soldiers, the easiest way to get rid of them will be to use grenades. It's also important to find a good cover. Make sure you've killed all of them [#37] and allow both of your teams to get here.
#37
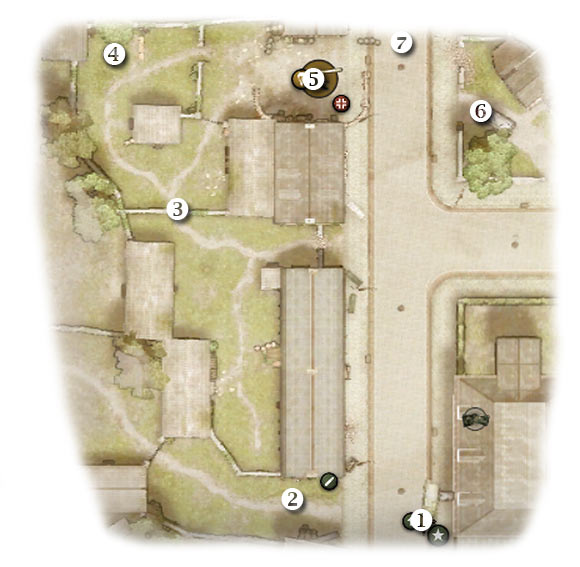
Map legend: 1 - starting area; 2 - area where you'll place your bazooka team; 3 - enemies near the fence; 4 - unguarded entrance to the barn; 5 - largest group of enemy soldiers; 6 - destination
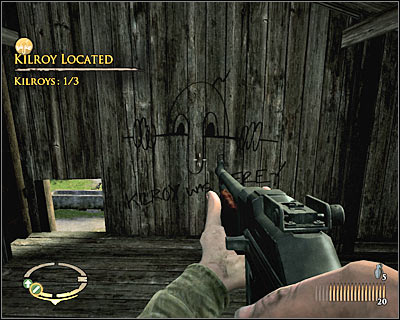
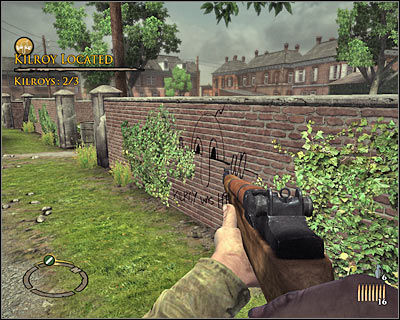
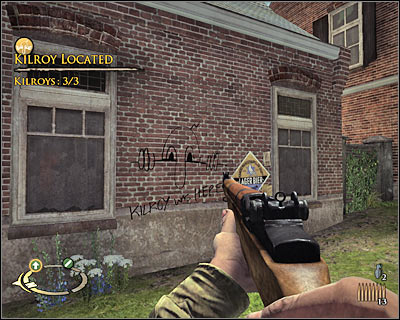
Don't exit the shed (1 on the map) right away. Instead, use the stairs to get to an upper balcony. Order your Assault squad to take cover near a large opening. This will allow your colleagues to open fire on some of the visible enemy troops. You should explore the inside of the barn in the meantime. You will come across your first kilroy here [#38].
#38
You may finally focus on eliminating enemy units near the wooden fence (3 on the map). Your assault squad can only suppress enemy fire, so you should consider giving orders to your bazooka team as well. Send this squad over to a nearby brick wall (2 on the map). Obviously you can keep firing at your foes at the same time [#39]. The most important thing here is that you eliminate hostile units rather quickly.

#39
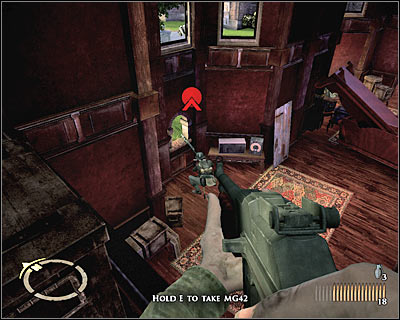
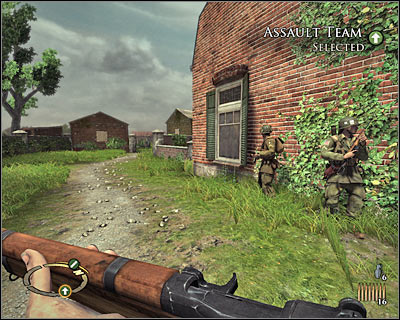
The next group of enemy soldiers is stationed inside a large barn and obviously your Assault team won't be able to provide assistance. As a result, you must order them to return to the ground floor. Send this team to the bazooka squad and order it to suppress enemy fire. You must go to your right at the same time, because you will come across an alternative entrance to the barn (4 on the map) [#40]. Vault over an obstacle and choose a machine gun from your inventory.
#40
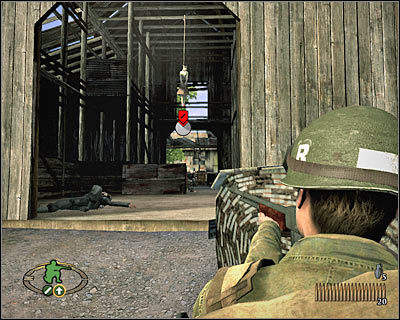
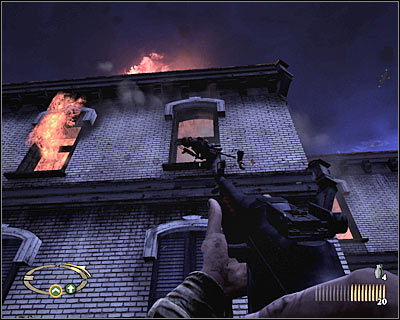
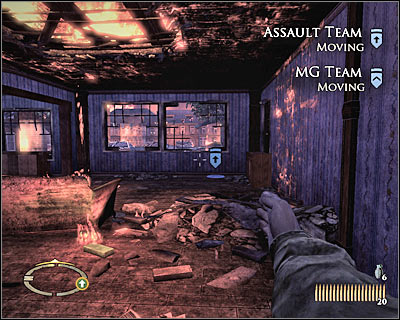
Start off by eliminating soldiers near the windows, because they're attacking your men at the moment. There may be a lot of them, so you must be ready to kill them all within a short period of time. Proceed to the next room of the barn. It would be a good idea to use grenades here, because you'll encounter a much larger group of German units (5 on the map) [#41]. You should use nearby walls for cover. Ignore your teams for the moment, because you can safely secure this area on your own. Once you've dealt with enemy units, order your men to follow your lead and proceed towards the eastern exit (6 on the map). Watch a new cut-scene after a short walk.
#41
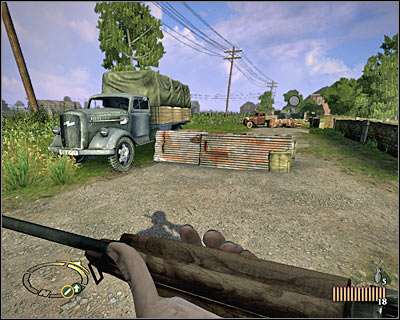
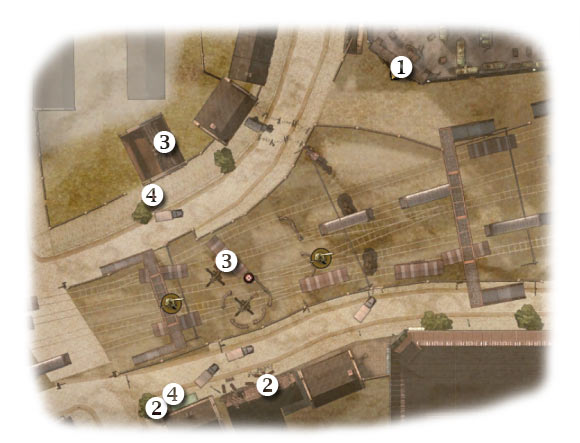
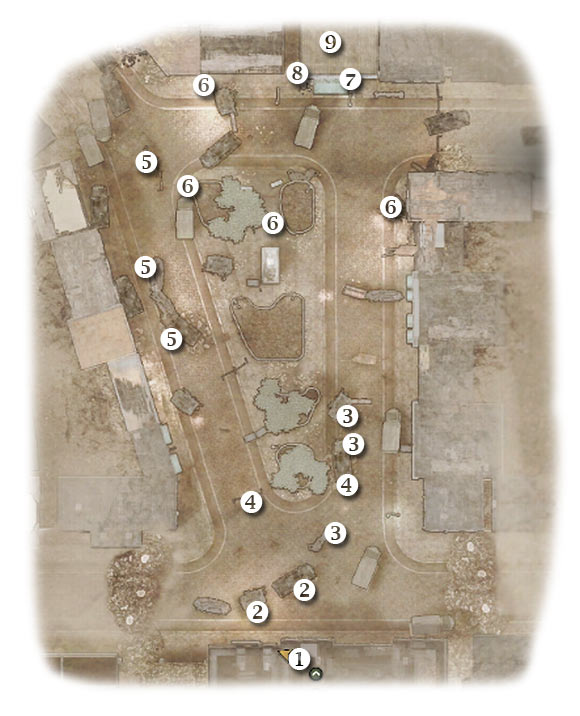
Map legend: 1 - starting area; 2 - MG42 emplacement; 3 - cover point for your squads; 4 - field occupied by German forces; 5 - cover area near the truck; 6 - area where you'll surprise enemy troops; 7 - cover points for your squads; 8 - ammo stash; 9 - destination
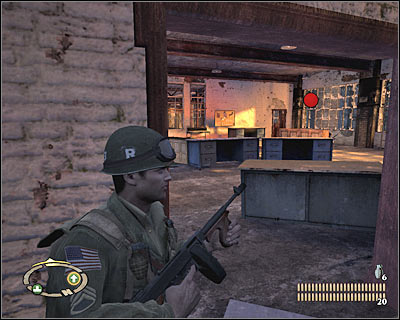
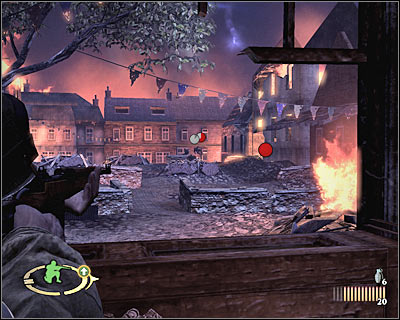
You'll start the game to the north (1 on the map) of your current destination. It's far from safe here, so you shouldn't give any orders to your teammates for the time being. Approach the left wall quickly. You should notice an MG42 emplacement in the distance (2 on the map). Use your standard rifle to get rid of the gunner and his colleague from here [#42]. Obviously you should hide after each successful shot, so you won't sustain any injuries here.

#42
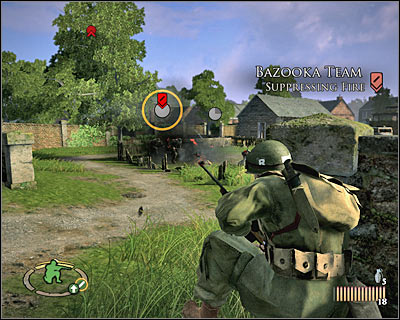
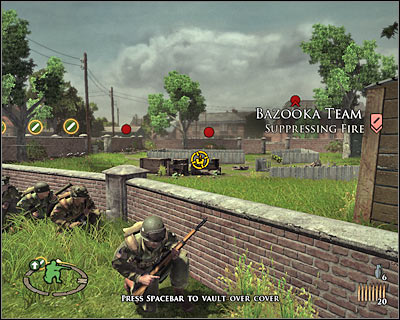
Now you may decide to send both of your teams towards a brick wall which can be found to your right (3 on the map). Join them and take some time to observe the area. You should notice that the southern field (4 on the map) is being defended by a large number of German troops. Also, reinforcements will arrive in this area in the near future. Use your bazooka team to eliminate enemy units [#43]. Alternatively you could use grenades, but it won't be necessary.
#43
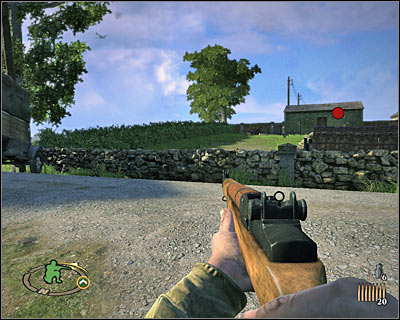
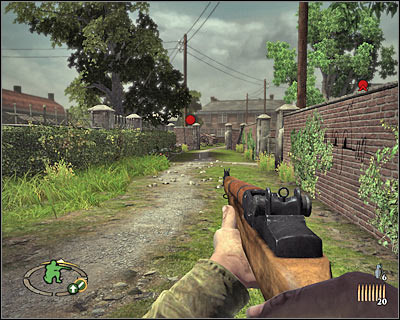
Notice a large tower in the distance. There's a gunner on top of the tower, but sadly you can't get him from here. Proceed alone to the eastern section of the map. There's a dirt road here and you must secure it. Take cover near the truck (5 on the map) [#44]. Eliminate all visible enemy units and allow the bazooka team to join you.
#44
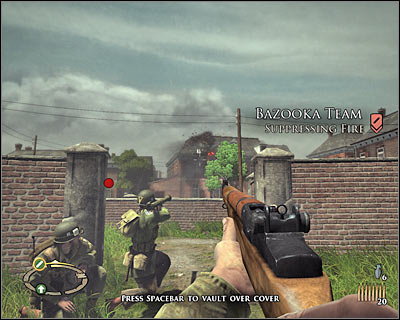
Make a few steps to the south and take cover behind the brick wall (6 on the map). You shouldn't have any major problems eliminating German soldiers from here [#45]. Consider using grenades to kill them quickly. Once they're gone, allow your bazooka team to move closer. Order this squad to destroy the tower. One rocket should be more than enough to eliminate this threat.
#45
There's only one more group of German soldiers for you to take care of. Enemy units are defending themselves in front of the mansion and it would be a good idea to perform a simultaneous attack from the north and from the east. Send your bazooka team to the north-west [#46] and your assault team to the south (7' on the map). Order them to begin firing at enemy troops. Obviously you should assist them by throwing all remaining grenades.
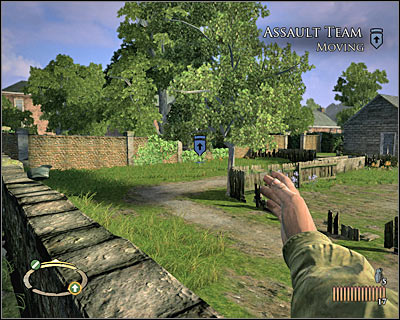
#46
Wait for this battle to end and approach the southern section of the map carefully. You won't have to issue any new orders to your teammates, because you'll split up in a short while. Notice an ammo stash to your left (8 on the map) [#47]. Resupply and proceed west. You will be rewarded with a new cut-scene once you're close enough to the entrance to the mansion.
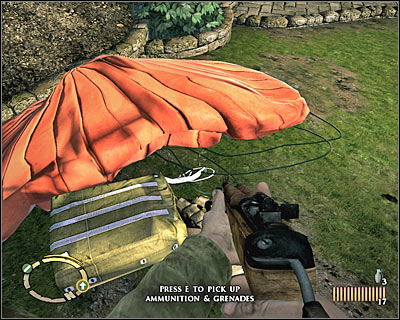
#47
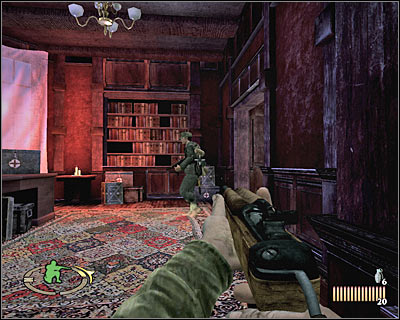
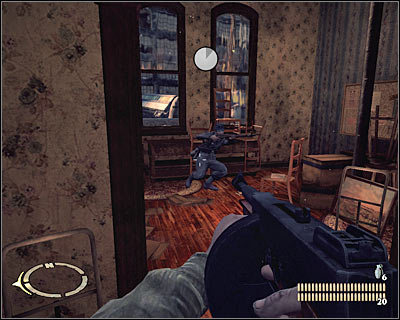
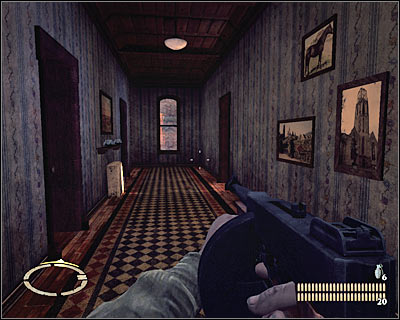
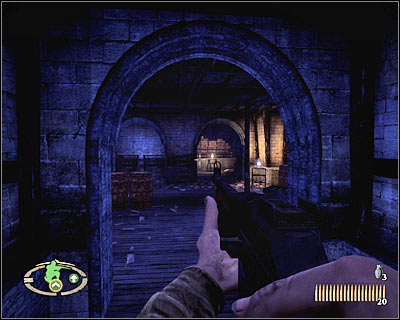
You won't need a map for the purpose of this assignment, because you'll be exploring small rooms and for the most of the time there's only going to be only path leading to your destination. Notice that you'll have to fight alone. Proceed to the next room and use the stairs to get to a different floor. Approach a new room carefully and wait for one of the soldiers to show up [#48]. Kill him before he's able to fight back.
#48
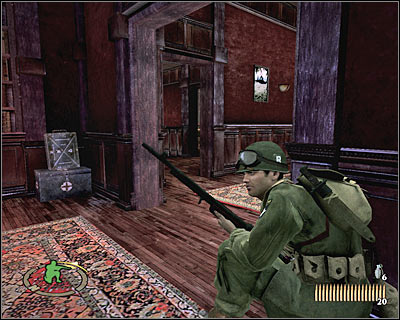
Get closer to a new corridor very carefully. There are some German soldiers at the other end of this corridor and you can't kill them from where you stand. Consider running towards the left room [#49]. Once you're there, throw a grenade to the next room and proceed south. Take cover behind a door and kill new German soldiers.
#49
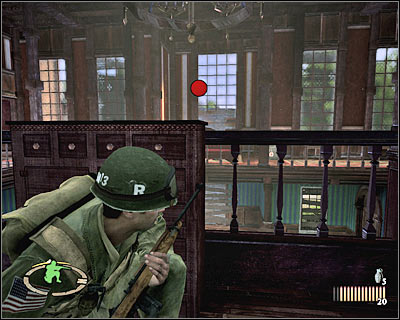
Jump over the door and immediately take cover behind the pool table. This should allow you to get rid of new enemy units safely. Just as before, you should consider throwing a couple of grenades at them [#50]. Last but not least, we have a small group of soldiers at the other end of the corridor. Attack them near the windows and prevent them from inflicting major wounds.

#50
You may proceed to the next section of the mansion. You'll get to a much larger room in just a few seconds. There is a possibility of attacking German soldiers from a large distance, but it would be better to move forward and to hide behind a good cover [#51]. Either way, you'll have to get rid of them before moving on. Use the stairs to get to the ground floor.
#51
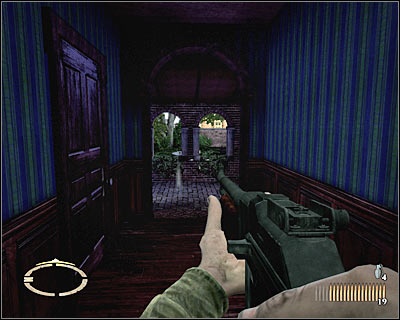
You must be careful here, because one of the German soldiers will block access to a new corridor. Get to a nearby wall quickly and use your standard rifle to get rid of him. Head on to that location. Make a stop once you're close enough to the exit to the courtyard [#52]. Take cover behind the right wall and lean out carefully. Locate enemy troops and try eliminating at least two of them from here.
#52
You'll have to be very careful from now on. German soldiers are defending themselves near your location and if you make a move one of them may run to your left [#53]. You have to be ready for that, so he won't surprise you in the near future. Secure this entire courtyard and proceed to a new entrance.
#53
You should be able to get to the first heavy machine gun post in a few seconds. Kill the gunner before he leaves his post to kill you. Make sure he wasn't with anyone else. Head on to a room to your right before moving on. You will find your second kilroy [#54] behind the dresser. Press the action key to finish painting it and head on to the next corridor.
#54
Get to a new junction. Head on to the left corridor and take cover behind the left wall quickly. You can kill at least three German soldiers from here [#55]. The first soldier is guarding the ground floor and you can use a grenade to get rid of him safely. Once he's gone, focus on securing the upper balcony. Use your rifle and lean out only for a short period of time to avoid any unwanted injuries. Once it's safe, enter this room and head on to the stairs.
#55
Get to the balcony and turn right quickly. One of the gunners will be standing in front of you and it's up to you to eliminate him quickly. Proceed to that location. There are two additional gunners below you [#56]. The first one is standing beneath your position and the second one is in the distance. You can use your standard rifle or the MG42 to kill them. Go back to the ground floor.
#56
Don't exit this room just yet. Instead, turn left. You should notice an unexplored passageway in front of you [#57]. Go there now and you'll end up standing near a previously secured MG42 nest. Turn left and head on to a new corridor. Use the stairs and exit the building. You'll receive new orders there.
#57
Map legend: 1 - starting area; 2 - small bridge; 3 - cover points for your squad; 4 - MG42 nests; 5 - area occupied by German forces; 6 - area from where you'll surprise enemy units; 7 - destination
You start the game near your allies (1 on the map). Order your teammates to follow your lead and start moving west. You will have to go under the bridge along the way (2 on the map). Once you're close enough to the sanitarium building, issue a new order. Your men will have to take cover near brick walls (3 on the map) [#58]. You may allow them to fire on enemy troops right away or you can take your time and go north-west (alone).
#58
You'll probably notice that the sanitarium is being defended by two MG42 nests. The posts are located inside two buildings (4 on the map). Soon after you've begun attacking enemy units, you should order your bazooka team to take out the western nest [#59]. Obviously you can keep attacking standard soldiers at the same time (5 on the map). Be on a look out for ground machine gun posts. You can also use your bazooka team to destroy sandbags, so your enemies won't be able to hide anymore.
#59
The second phase of this battle will require you to move the rocket team to the north-west (6 on the map). Place this squad directly in front of the southern machine gun post. Just as before, you'll have to give the order to destroy it [#60]. Once this is done, focus on eliminating some of the remaining enemy units. You don't have to be in a lot of hurry. Gather the teams around your position and proceed towards a large gate (7 on the map).
#60
Map legend: 1 - starting area; 2 - cover point for your squads; 3 - tower; 4 - cannon; 5 - cover point for your squads; 6 - enemy units; 7 - next area
This time you'll begin your progress in front of the sanitarium (1 on the map). Send your teams immediately to your left and order them to take cover near the sandbags (2 on the map). Notice a sniper in the tower in front of you (3 on the map). Obviously you must order your bazooka team to deal with this problem [#61].
#61
Now you may focus on eliminating other German soldiers. Start off with the closest groups and make sure that you're using your bazooka team to destroy potential covers. Most of the enemies will gather around a cannon (4 on the map). There is also a machine gun post to the south-east and obviously you must destroy it as soon as possible [#62]. If your bazooka team can't hit the nest from the distance, consider sending it towards a brick wall (5 on the map).
#62
Obviously you'll have to make sure that it's safe before moving south. The final group of enemy soldiers is taking cover to the east of a small building (6 on the map). Send your assault team to that location and attack the soldiers at the same time from the north [#63]. If you're lucky, they'll die almost instantly.
#63
You may proceed towards the main area of the town which is to the south (7 on the map). Order your bazooka team to take cover in the middle of the road, behind a concrete barrier [#64]. It would also be a good idea to join them. As for your assault squad, your men should take cover behind the wall of the left building.
#64
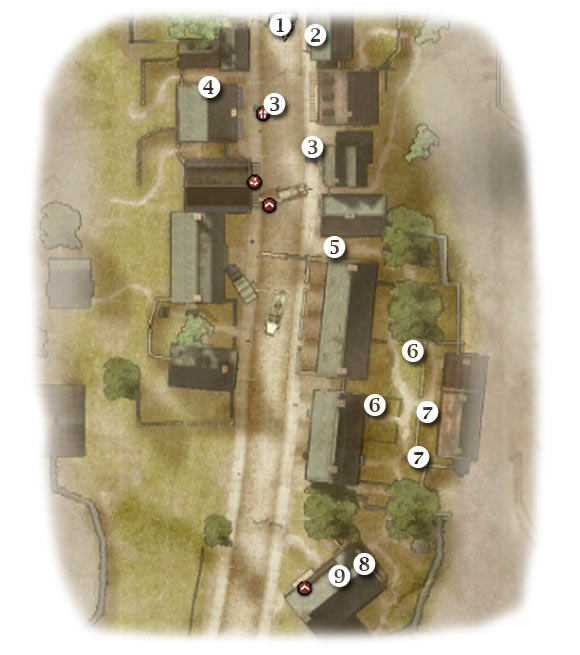
Map legend: 1 - starting area; 2 - entrance to the left building; 3 - cover points for your squads; 4 - entrance to the right building; 5 - small alleyway; 6 - enemy troops (they may retreat during the course of the battle); 7 - areas from where you'll surprise enemy troops; 8 - MG42 nest; 9 - destination
You shouldn't be in a lot of hurry, because you'll probably find yourself pinned down. It would be a good idea to disable a heavy machine gun post from here (1 on the map), so you won't have to worry about avoiding it later on [#65]. You can also choose several larger targets for your bazooka squad. Proceed to the entrance of the left building (2 on the map). Once you're safely inside, order your assault squad to join you.
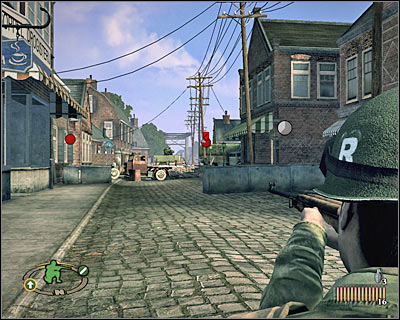
#65
Proceed to the next building. Set up your assault team near the windows [#66] and order your bazooka them to get here as well (after a short while). After that, you can send your teams towards new cover points (3 on the map). Allow them to remain there for a few minutes. You can inspect the right building at the same time (4 on the map). It should be guarded by at least one soldier, so you'll have to be careful and prevent him from making a surprise attack.

#66
Once you feel it's safe to move on, send your teams to the south, but prevent them from getting shot at. Now you'll have to go left. There's a small alleyway here (5 on the map) [#67]. Take your time to reach the new area and order your men to take cover behind some of the nearby objects. Your colleagues should start firing at enemy troops. There are at least two groups of German soldiers to the south of your position (6 on the map).
#67
I would recommend that you deal with German troops on your own, because your squad members could die easily here. Use the left wall for cover and you can also approach enemy units much easier that way (7 on the map) [#68]. Use grenades if you want to, however you focus primarily on being able to surprise your opponents.
#68
Don't move to the west while trying to get rid of enemy units, because you would have been attacked by a nearby MG nest (8 on the map). The easiest way to destroy the post is to use grenades [#69]. If you don't have any of those with you, try killing the gunner with a single bullet to his head. Order your men to get here and enter this new building.

#69
Map legend: 1 - starting area; 2 - machine gun post; 3 - second recon point; 4 - third kilroy; 5 - cover points for your squads; 6 - good cover; 7 - enemy units; 8 - 88 cannon
This is going to be a very challenging assignment. First of all, you have to acknowledge the fact that you'll be surrounded by enemy units and they'll start firing at you and your colleagues right away. You should also know that the wooden fence won't take too much damage. You start near the river bank (1 on the map). Order your bazooka team to disable an MG nest which can be found to the south-east (2 on the map) [#70].
#70
It would be a good idea to find two remaining bonus areas, because if you destroy the 88, you won't be able to return here. The second recon point (3 on the map) is much easier to find. All you have to do is to approach the destroyed bridge. Press the action key to unlock a new report (Son Bridge). As for third kilroy, you will have to inspect one of the walls of the eastern building (4 on the map) [#71]. Go back to your colleagues or reload the checkpoint (you won't lose these achievements) if it's already too late.
#71
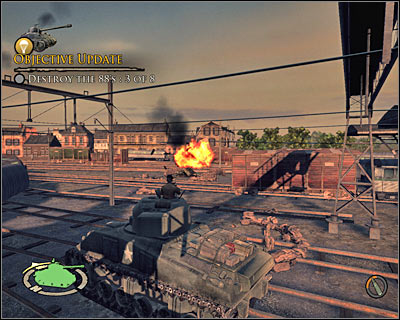
Now you should focus all your efforts on finding good cover points for your teammates. Send the assault team to the east and order it to take cover behind parked vehicles (5 on the map) [#72]. You should also order this squad to begin firing on the cannon. Hopefully this will distract the soldiers operating the cannon (8 on the map).
#72
Your bazooka team should perform other activities at the same time. Your colleagues should begin firing on enemy troops located to the south of the river. Once you've secured this area, send your bazooka squad towards a brick wall (5 on the map) [#73]. As long as your assault team is doing its job (attacking the cannon), your other teammates should be safe while travelling to a new location. Obviously you must join them, because eventually you'll want to get closer to the 88.
#73
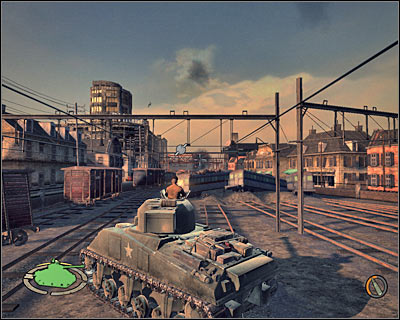
I would recommend staying near the brick wall for a longer period of time. Focus on eliminating some of the nearby enemy units. As for ways of reaching your goal area, obviously you shouldn't choose the main road. Instead, head on to a smaller passageway, located to the west of your target. Take cover behind a brick wall (6 on the map) [#74] and keep heading towards your current destination.
#74
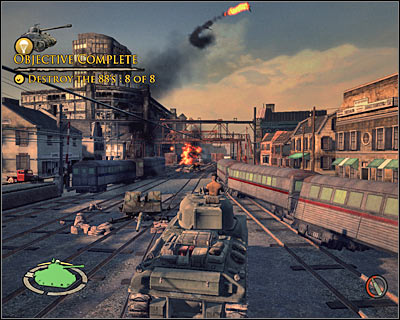
A large group of enemy soldiers (7 on the map) is guarding the access to the 88. I'd strongly recommend using grenades to kill them, especially since you're near the end. You can also take cover behind the truck and lean out with a machine gun in your hands. Vault over a small cover and approach the cannon (8 on the map) [#75]. Press the action key to place a satchel charge and move back to a safe distance. Destroying the cannon will allow you to finish the mission.
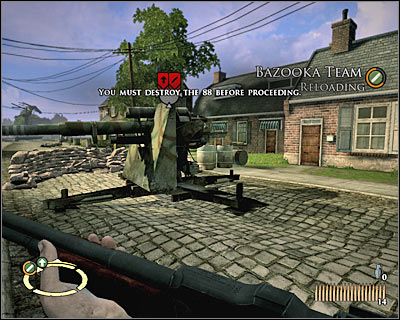
#75

TIME AND PLACE:
September 18th, 1944 (D+1)
Outskirts of Eindhoven, Holland
1300 hours
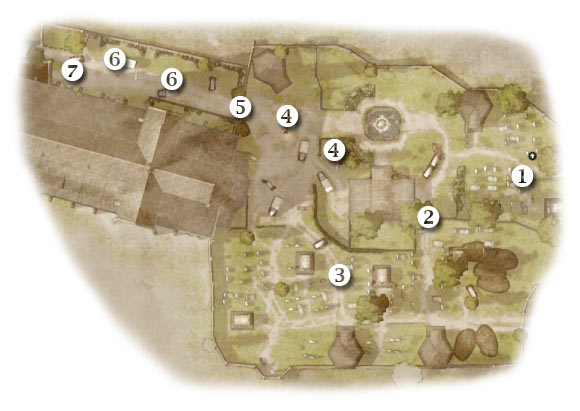
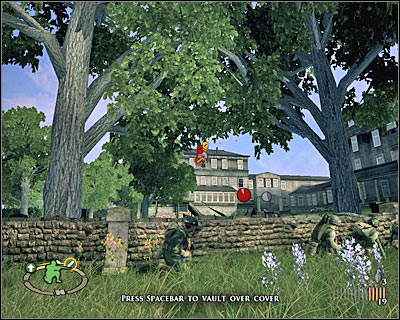
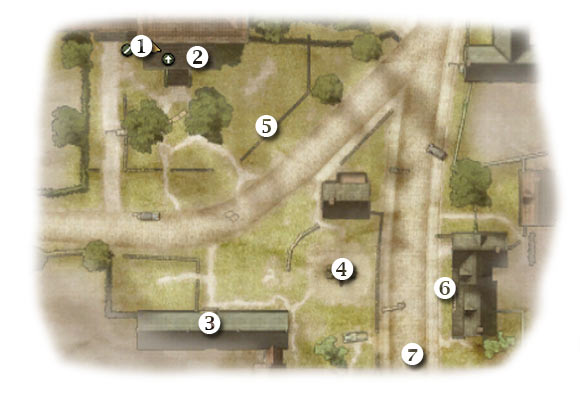
Map legend: 1 - starting area; 2 - entrance to the cemetery; 3 - enemy units; 4 - MG42 emplacements; 5 - small passageway; 6 - enemy units; 7 - destination
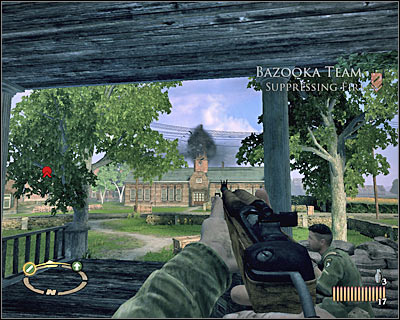
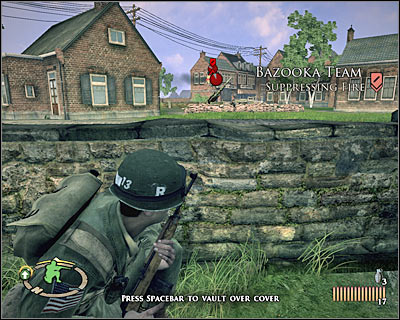
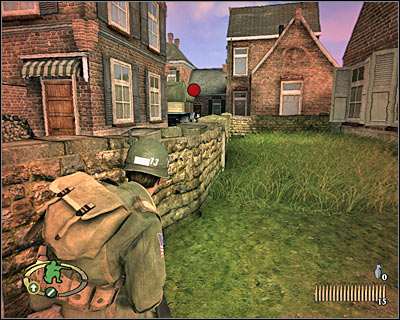
You start the game near your colleagues (1 on the map), however you can't feel entirely safe here. There are two MG42 nests (4 on the map) to the east of your position and they'll keep firing at you and your allies. Notice that only one person is under your command for the purpose of this objective. Order your teammate to follow you and start moving towards the entrance to the cemetery (2 on the map) [#76]. Sadly, you'll have to go around instead of jumping over the wooden fence. Make sure you're crouching while trying to get there, so you won't get shot.
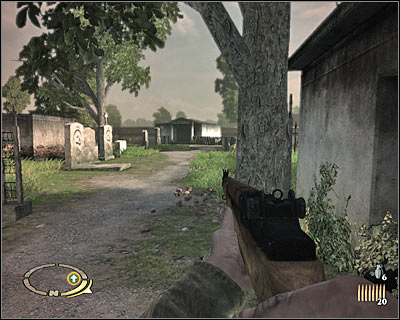
#76
3-5 German soldiers are hiding amongst the tombstones (3 on the map). Thankfully you can eliminate them one by one, instead of fighting with larger groups at the same time. I'd strongly recommend exploring this area slowly. You should also split up. Allow your colleague to remain closer to the start area and move to the north alone. This should allow you to surprise enemy units [#77]. Remember to use the tactical map to locate them on the battlefield.
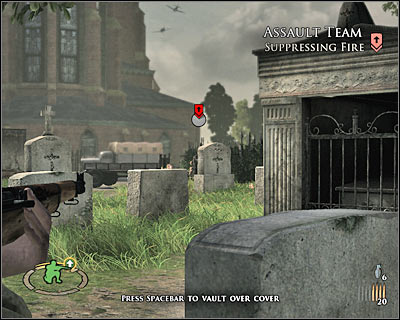
#77
Eventually you should be able to get to an area where both MG nests are located (4 on the map). Start off by attacking the northern heavy machine gun post. Once it's gone, switch to a machine gun and travel north-east. You shouldn't have any problems finding the second gunner [#78]. Act alone here, so your colleague won't die as a result of the attacks.
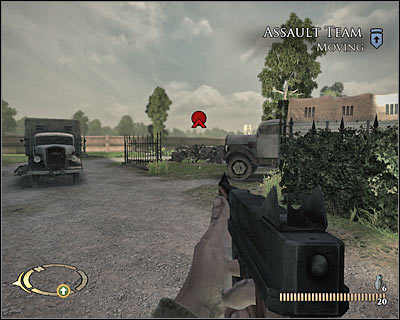
#78
You may start moving north-west, because that's where your current target area is located (5 on the map). Take cover behind the left wall and notice enemy units in front of you (6 on the map). You can attack German soldiers from here [#79] or you can try moving closer to them a little bit. Don't waste your grenades on them, especially since you're not alone. Choose your targets carefully. Get to an entrance to the church (7 on the map) and you'll trigger a new cut-scene.
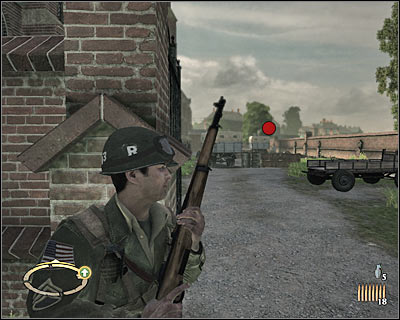
#79
I guess you may be a little disoriented with this assignment. Thankfully, you won't have to avoid being shot by the sniper. Instead, you'll only have to get to him. Notice that your ally has automatically found himself a good cover [#80]. You should move to your right. Search for a good cover. Don't hide near any of the benches, because they can be easily destroyed.
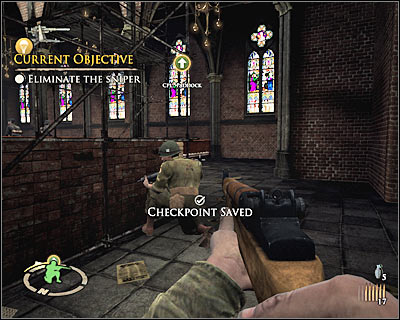
#80
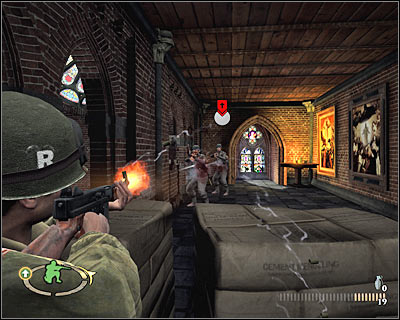
Two enemy soldiers will be standing in front of you. It would be a good idea to kill them while they're still close to each other. Otherwise they would find themselves good covers. Don't leave this area and focus on eliminating German soldiers from a large distance. Notice a group of units appearing at the other side of the church. They will set up an MG emplacement, so they must die quickly [#81].
#81
Once you've eliminated most of the enemy units, you may consider moving towards the middle section of the church. You and your ally would find good cover spots there [#82], but you must remember about two things. First of all, enemy soldiers will occupy the other end of the church. Second of all, more German units will arrive later on, however they won't be coming indefinitely. Prevent them from surprising you and your teammate.
#82
It would be a good idea to proceed with a full scale assault once you've cleared out most of the church [#83]. You could also stay hidden until the end, but you would only lose a lot of time trying to eliminate hostile units from a large distance. Once it's over, order your teammate to follow you and proceed towards the staircase. Wait to be transported to a new location.

#83
It's important that you send your colleague forward quickly, because enemy units will appear on the opposite balcony. You can choose the usual methods to get rid of them or you can throw grenades for a more exciting solution. Get closer to a wooden platform. There are some new soldiers in the background and must defeat them with a well-placed grenade [#84].
#84
DON'T send your teammate to this new location. Instead, get to the platform on your own and reach the new balcony. Take cover behind the left wall quickly. Start shooting at enemy soldiers. Some of them will probably have the time to hide, but you may use grenades to get rid of them [#85].
#85
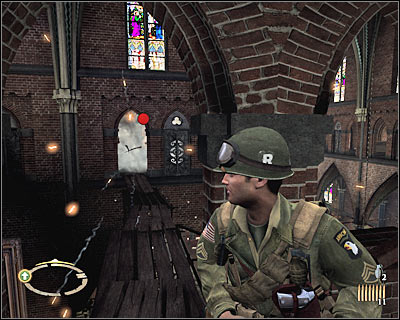
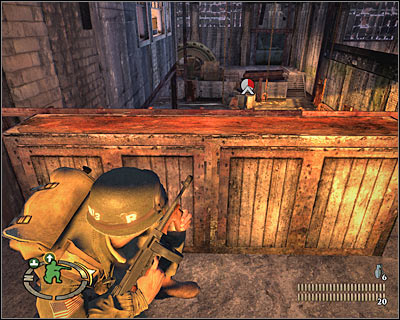
BEFORE you decide to move forward, you should inspect the left wall. You will come across your first kilroy here [#86]. Head on to the next section of the church. Watch out for enemy soldiers. They will be standing on an opposite balcony. It's going to be the same with the second wooden platform. Secure the surrounding area before deciding to use it.
#86
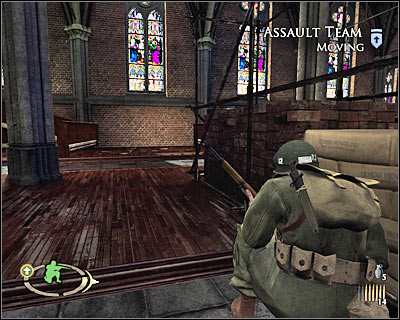
Cross the platform to get to a new balcony. Once you're there, make sure that you and your teammate find a suitable cover quickly. More enemy units are heading your way and it'll be up to you to get rid of them. Try eliminating them from a larger distance. Keep heading forward until you reach the third wooden platform. There are some enemy units in front of you. Order your colleague to suppress them, cross the platform quickly and surprise them [#87]. Proceed to the exit and watch a new cut-scene.
#87
Map legend: 1 - starting area; 2 - cover points for your squads; 3 - first truck; 4 - side alley; 5 - brick wall; 6 - MG emplacement and the next area; 7 - second truck
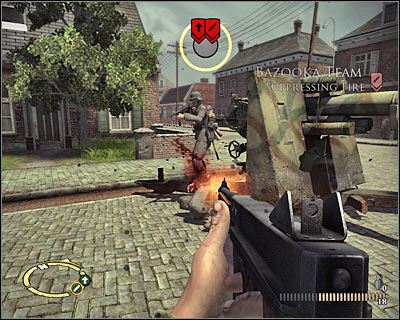
I guess you'll be happy to hear that once again you've been give a command of two teams (1 on the map). Proceed towards the main road. Send your bazooka team to the right (2 on the map) [#88]. As for the assault team, they should take cover behind one of the nearby buildings. It's not crucial to your success, because most of your future achievements will depend solely on using the team with a rocket launcher.
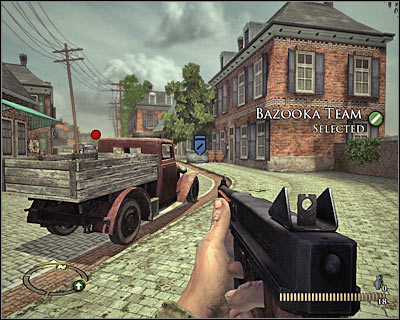
#88
It would be a good idea to keep hiding until the first attacks have taken place, so the enemies won't be aware of your plans and they won't scatter around the area. Choose your bazooka team and order your men to destroy the first truck (3 on the map). A large explosion [#89] not only will destroy the vehicle, but it will also kill some of the nearby soldiers. You can keep firing at them from here if you want to, but it's optional.
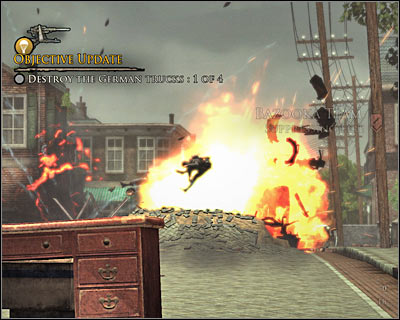
#89
Choose your bazooka squad once again and order it to go to a small alleyway which can be found to your right (4 on the map) [#90]. Vault over a small wall and keep heading forward until you've reached a larger area (5 on the map). Send your men to one of the nearby covers and order them to start firing at enemy units. You should also hide here for a while, because you'll be able to eliminate a few soldiers.
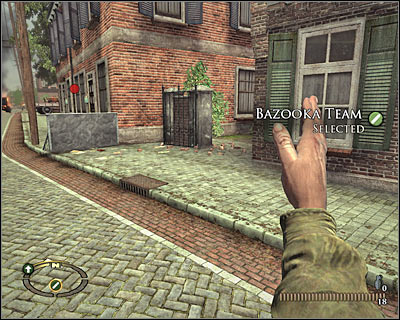
#90
I assume you may have some problems getting rid of the enemies stationed to the north of the truck, near the junction (6 on the map). Consider sending your assault team forward, however prevent them from entering a dangerous area. You can destroy the second truck in the meantime (7 on the map) [#91]. Keep pushing north (with your teams), however you shouldn't be in a lot of hurry.
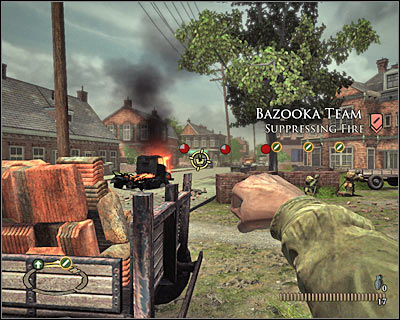
#91
Map legend: 1 - starting area; 2 - entrance to the right building; 3 - good cover; 4 - third truck; 5 - fourth truck; 6 - enemy units; 7 - destination
Like I've already said, you should take your time to plan your moves. You start somewhere the south of the junction (1 on the map). The surrounding area is swarming with enemy troops, so you must be extremely careful to survive. Keep pushing forward. Use nearby objects for cover [#92] and eliminate enemy soldiers from there.
#92
Instead of choosing the most obvious passageway to the junction, you could also surprise enemy soldiers by going inside one of the buildings (2 on the map). They wouldn't expect your attack and you would have a clear shot at them (3 on the map) [#93]. Order your squads to get to the junction, especially the bazooka team.
#93
Notice that a third truck is parked directly in front of you and your men (4 on the map) [#94]. Obviously you must issue an order to get rid of it. If you're lucky, you'll take care of a few soldiers at the same time. Eliminate a new heavy machine gun post while you're at it. The MG is located on the first floor of the left building.
#94
You can also disable the final fourth truck from here, without having to relocate your men (5 on the map). Once it's destroyed, remain here for a few more seconds instead of running towards the exit. The reason is that enemy units may be hiding to your right (6 on the map) [#95]. Eliminate them alone, without risking lives of your teammates. Head north (7 on the map).

#95
Map legend: 1 - enemy units; 2 - first recon point; 3 - path leading to your destination; 4 - ammo stash; 5 - area where you'll surprise enemy troops; 6 - German soldiers; 7 - fuel dump
The only route to your current destination is being guarded by enemy troops (1 on the map). Once again, you should take it slow, because otherwise you may end up losing your teammates. Allow your bazooka crew to attack enemy forces from a larger distance [#96]. At the same time you should be moving forward. Stay near the left wall for much needed cover.
#96
You should be able to get to a blocked section of the road in a short while. Stay here for a few seconds, because you'll find your first recon point (2 on the map) [#97]. Turn right (3 on the map) once you've read the report (Butcher shop). Keep heading towards your current destination along with the rest of your team. You will come across an ammo stash along the way (4 on the map). Collect much needed supplies before moving on.
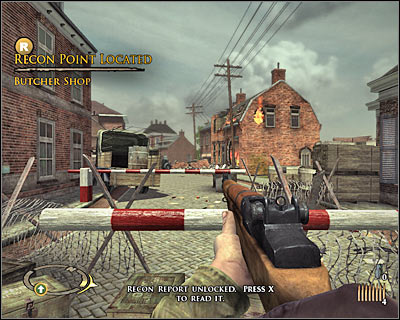
#97
Get closer to the brick wall and be prepared to defend yourself against an attack made by new German soldiers (5 on the map). You must get rid of them quickly to avoid any problems. Once you're close enough to your target, order your men to take cover behind brick walls. Attack enemy positions (6 on the map) [#98].
#98
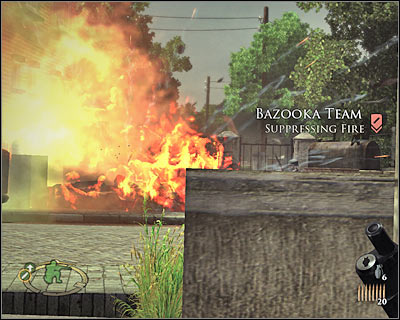
I assume you may have some difficulties figuring out what has to be done in order to succeed. Your main objective is a large fuel dump (7 on the map) which can be found next to dead soldiers. I would recommend ordering your bazooka squad to destroy this object [#99]. Wait for the explosion to occur and proceed to a new area. You can also go back for supplies if you've used a lot of grenades recently.
#99

Map legend: 1 - starting area; 2 - cover points for your quads; 3 - enemy units; 4 - large brick wall; 5 - MG emplacement; 6- brick wall; 7 - largest groups of enemy units; 8 - second kilroy; 9 - entrance to the main building
You start the game near a destroyed fuel dump (1 on the map). Order your men to take cover behind some of the nearby brick walls (2 on the map). Join them and notice that a nearby field (3 on the map) is being occupied by German forces. Obviously you must encourage your squads to start firing at hostile units [#100]. Your bazooka team will come in handy here, especially when it comes to destroying wooden fences. As a result, enemy units won't have anywhere to hide.
#100
Ignore some of the more distant machine gun posts (5 on the map). Instead, move south-west and make sure that this area has been fully secured [#101]. Order your assault squad to get here. Your colleagues must begin shooting at the MG emplacement in order to distract the gunner for a short while.
#101
While your assault team attacks the gunner, order your bazooka squad to get closer to a large brick wall (4 on the map). I would strongly recommend that you join them. Once you've arrived, order your men to fire a rocket at the machine gun post (5 on the map) [#102]. Wait for the MG to be destroyed and move your teams to a smaller brick wall (6 on the map). Obviously your men must begin firing at hostile units.
#102
You should act alone from now on. Try attacking your enemies from the south. The entire area near your destination is being guarded by enemy troops. You'll find the largest groups in the middle and near the northern building (7 on the map). You should also be ready to engage new enemies, because some of them may exit the left building. Use a small brick wall for much needed cover [#103] and check your map often to prevent enemies from surprising you.
#103
BEFORE you decide to proceed with the task at hand, you should consider going back to the middle section of the map. You will find a second kilroy in this area (8 on the map) [#104]. Finish painting the picture. Once this is done, enter the western building (9 on the map). Ignore the fact that you're cut off from your teams.
#104
Choose a machine gun from your inventory and start moving forward. You won't be surprised by any enemy soldiers, so you don't have to be moving slowly. The radio station is being guarded by a single German soldier [#105]. Kill him and then fire a single bullet at the radio. Proceed to your left and wait for one of your allies to open the door. You may exit the building.
#105
Map legend: 1 - starting area; 2 - side alley; 3 - passageway leading to the northern area of the map; 4 - second recon point; 5 - 88 cannon; 6 - enemy units; 7 - next area
You start the game near the building from which you've just left (1 on the map). Remain hidden and don't try choosing the main road, because you would find yourself under heavy fire. Instead, try moving to the west. You should be able to find a small road here (2 on the map) [#106]. Turn north when you have the chance. Thankfully you won't encounter any resistance. Make sure that both teams are following your lead.
#106
Proceed towards a narrow passageway (3 on the map). There's a large building and you must go around it from the western side. Choose your bazooka team and give the order to destroy the first cannon (5 on the map) [#107]. Once this is done, send your colleagues towards a nearby cover, so they won't stay in the open.
#107
You can perform two other activities while you're here. There are enemy soldiers to the east and it would be a good idea to get rid of them right away (6 on the map). You should also take notice of the second recon point (4 on the map) [#108]. Read the recon report (Kloosterdreef 88mm) and get closer to the main road (7 on the map). Sadly, you won't be allowed to use any side alleys for the time being.
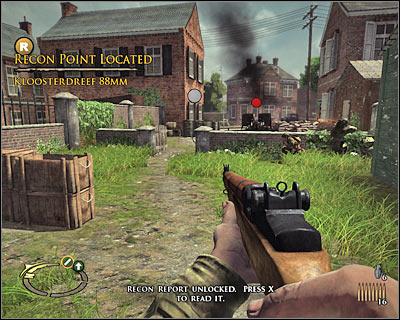
#108
Map legend: 1 - possible cover areas; 2 - road leading to the back of the eastern building; 3 - enemy forces; 4 - obstacle in the middle of the road; 5 - road leading to the back of the western building; 6 - third kilroy; 7 - wall of the eastern building; 9 - cannon
I'm sure that you'll have A LOT of problems trying to finish this objective, mostly because the cannon can hit you from a very large distance and you won't be able to flank it or to get close it without being seen. Start off by getting closer to the main road. Take cover behind the left wall and use your standard rifle to get rid of nearby enemy units [#109].
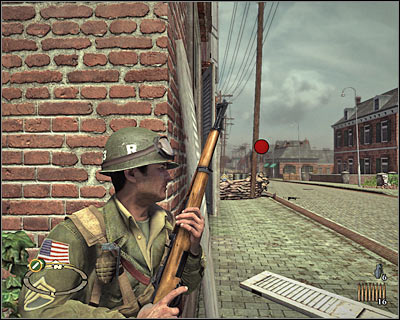
#109
Don't even think about sending your teams to the east, because your colleagues would become very easy targets for the cannon. Instead, move north alone. Use some of the nearby objects for cover (1 on the map) [#110] and focus on eliminating enemy soldiers. I wouldn't recommend staying in one place for too long. Pressing the sprint key is equally important here, especially if you plan on going to the other side of the road.
#110
Start off by heading north-east. You will find yourself heading to the back of the large building (3 on the map). Two small groups of German soldiers will be waiting for you there [#111]. Thankfully, a well-placed grenade can solve this problem in a manner of seconds. Order the assault squad to get here and send them to where the German soldiers were staying. Your colleagues should automatically begin firing on other enemy units.
#111
As for your bazooka team, you've got two options. If you don't want to take unnecessary risks, leave it where it is and don't use it. If you don't have anything against risking their lives, move them to the assault squad or place them behind a large obstacle in the middle of the road (4 on the map) [#112]. Your colleagues should begin firing at the cannon. You can go towards the western building in the meantime (5 on the map).
#112
Leaving the main road not only will allow you to stay safe, but you'll also find the last bonus here. Inspect the wall and you'll come across the third kilroy (6 on the map) [#113]. Now you may consider moving north. Take cover behind the wall of the western building (7 on the map). Kill a few soldiers from here, but avoid being seen by the crew of the big cannon.
#113
The final part of this mission is by far the most difficult one. Try placing your teams correctly, so that they can fire at the cannon. It's also important that they must remain safe at the same time. Approach the cannon from the south-west. Use nearby brick walls for cover and jump over them whenever you have the chance [#114]. There's a military checkpoint to your right (8 on the map). Disable it with a gun (risky) or with the remaining grenades (you won't need them anymore).
#114
The most important thing is that you aren't hit by the cannon rounds while trying to get to other brick walls. Get closer to the 88 (9 on the map) and you'll notice that both gunners have left their posts [#115]. Use your machine gun to kill them. Once this is done, place a charge on the cannon and wait for the explosion to occur. This is the end, so you can finally relax.
#115
TIME AND PLACE:
September 18th, 1944 (D+1)
Eindhoven Industrial District, Holland
1830 hours
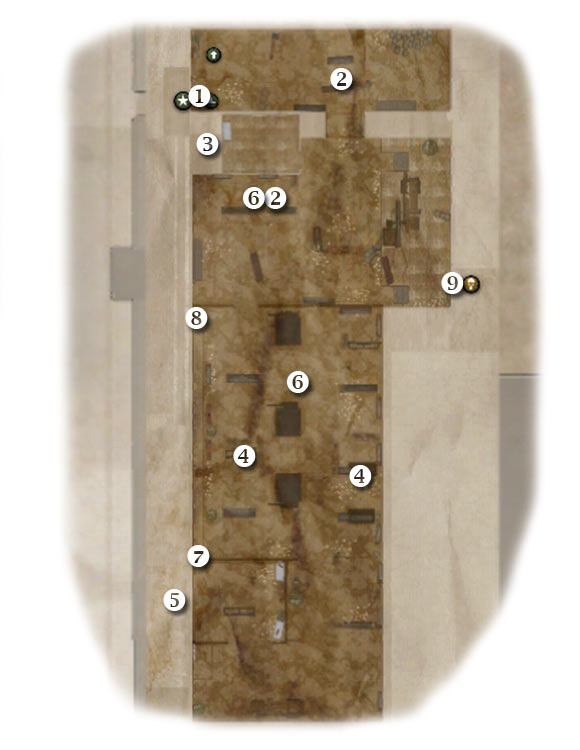
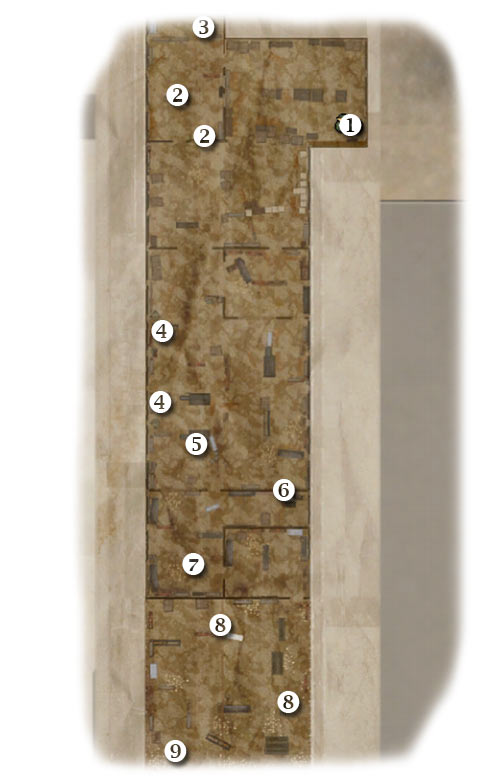
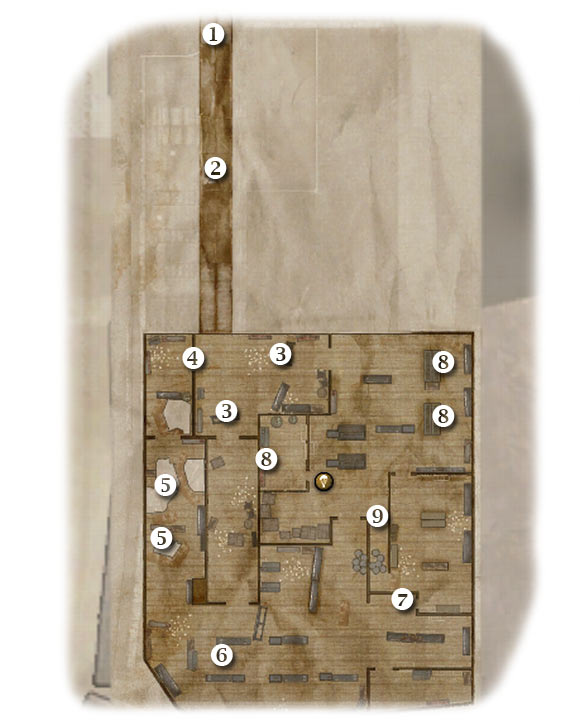
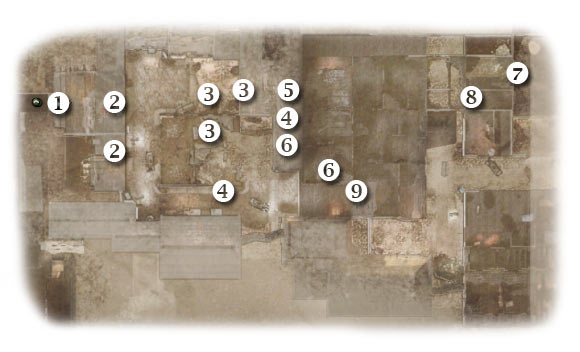
Map legend: 1 - starting area; 2 - cover points for your squads; 3 - first recon point; 4 - enemy troops; 5 - enemy cannons; 6 - MG emplacements; 7 - narrow passageway; 8 - first kilroy; 9 - destination
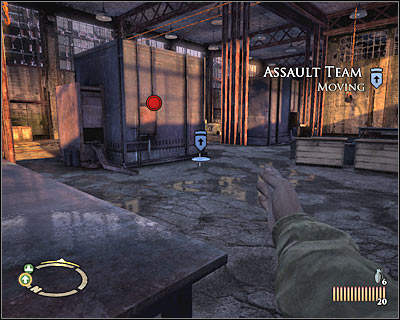
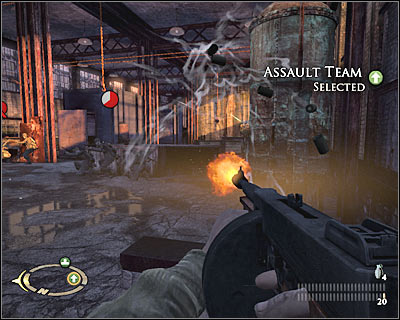
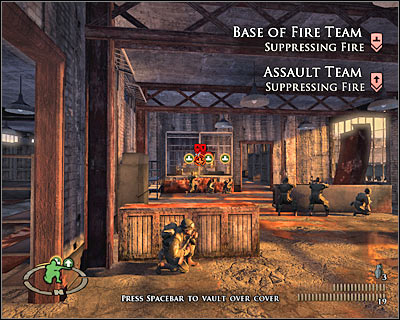
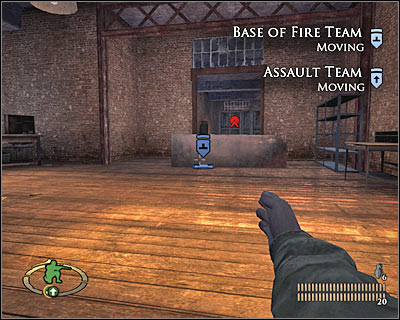
You'll start this mission in the vicinity of allied units (1 on the map), however once more you can't feel safe here. Almost the entire factory is overrun by German forces and you'll have to start eliminating them very soon. Notice that your bazooka team has been replaced with a much worse base of fire team. It's a combination of MG & assault squads. This groups start the mission behind a very good cover (2 on the map), so I wouldn't recommend moving them. Instead order the assault team to follow you and proceed towards the stairs [#116].
#116
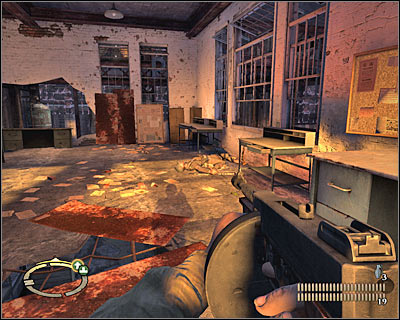
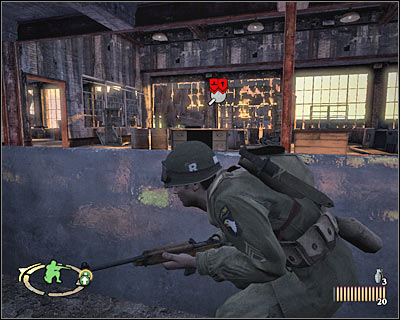
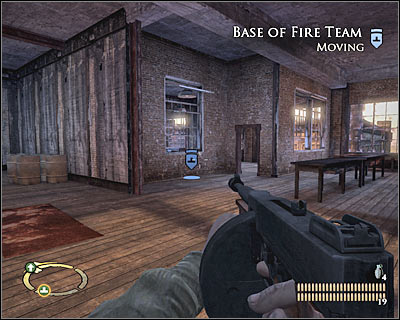
You'll have to be careful, because the room you're about to enter is being occupied by a small group of enemy units [#117]. You could use grenades here, but it would be better to take cover behind the left wall. Shoot them with your standard rifle. Once this is done, order your assault squad to get to the windows. They should start firing at enemy troops. Check the northern part of the room in the meantime. It's important, because you'll come across the first recon point (3 on the map). Read the report (Complex map) before dealing with your current assignment.
#117
I would recommend that you start out by securing the area located to the south of your base of fire team and to the south-east of the assault team. Proceed south and use nearby objects for cover [#118]. Assist your men in securing this area. Once it's all done, gather the teams around your position and head on to a small passageway.
#118
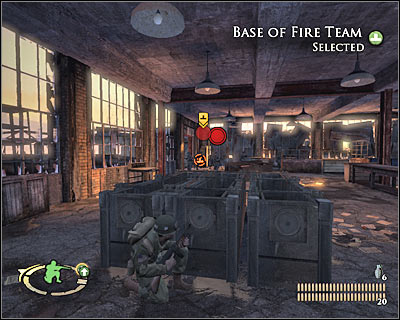
There are two groups of enemy soldiers (4 on the map) to the south of your current position. If you don't have anything against performing risky maneuvers, consider sending your base of fire team towards a nearby cover point [#119]. You should suppress the Germans at the same time, so your team won't receive any casualties.
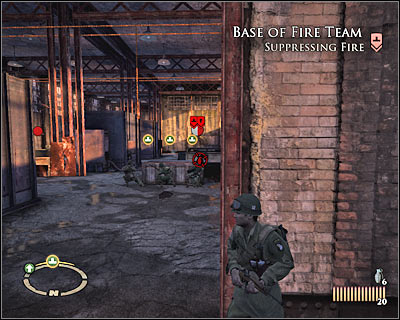
#119
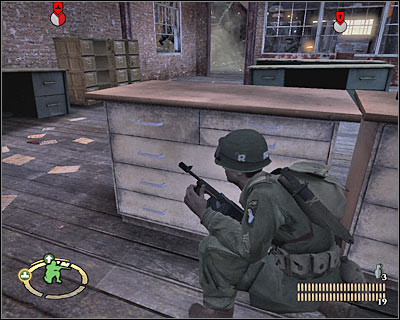
As for the group located to the east, it would be a good idea to surprise the Germans by attacking them from two directions. Place your assault team in front of enemy troops [#120] and attack from the north at the same time. Getting rid of them shouldn't be a problem. Start moving south, but be careful, because this area is being guarded by one more group. Throw a grenade to get rid of enemy soldiers or wait for them to lean out and use your standard rifle.
#120
You must get to the southern wall of the factory. Make sure that both teams are following your lead. Now you must proceed north-west. You will come to an area where two cannons have been set up. Surprise the gunners [#121]. Attack them alone or ask one of your teams for help. If you're lucky, they won't even fight back. Wait for the cannons to be destroyed (automatically).
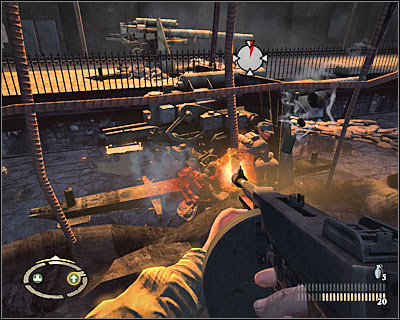
#121
It's going to be extremely important now to issue correct orders, because powerful enemies have appeared in the northern section of the factory. Order your base of fire team to take cover next to the northern window. There are two MG nests in the distance (6 on the map) and your colleagues must suppress the gunner located on the first floor. As for your assault squad, order them to follow you and proceed towards a narrow passageway (7 on the map) [#122] which has been unlocked to your left.
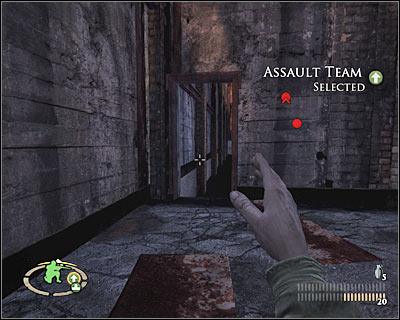
#122
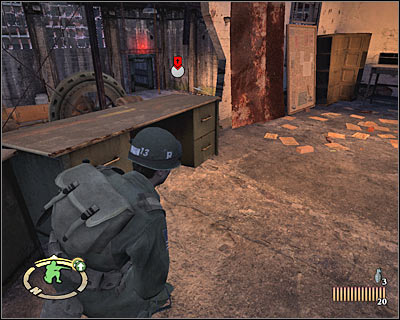
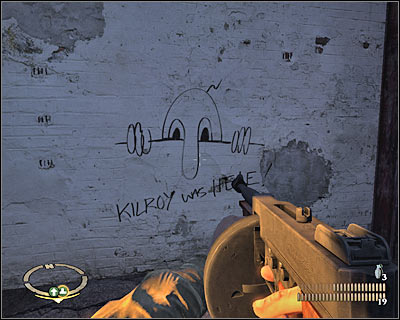
You will find yourself standing inside a long corridor. Thankfully, you'll be safe here against enemy attacks. Keep heading north until you've found the first kilroy (8 on the map) [#123]. Press the action key to finish painting it. Once this is done, approach the stairs CAREFULLY. Get ready to engage enemy troops.
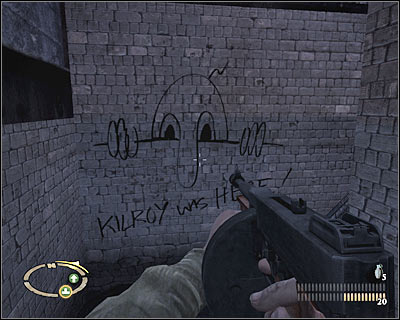
#123
If you act swiftly, you should be able to surprise most of the enemy units. German soldiers will be standing next to the first MG nest [#124]. I would also recommend using grenades here. You must prevent enemy units from escaping to the north, because they would hide there, making their assassinations much harder. Order your assault team to stay here for a while.
#124
Run to the north and proceed to your left. Use the stairs to get to an upper balcony. Enter the room where you found the first recon point. There's a machine gun post here and you must neutralize it [#125]. Don't be surprised if the soldiers are already dead. The important thing is that you get here safely.
#125
Notice that new enemy soldiers have left the eastern elevator. Order your squads to take cover in front of the elevator and help them in getting rid of enemy troops. You should be able to find an opening in the wall [#126]. Once they're gone, go back to the ground floor, order your men to follow you and go to the elevator (9 on the map). You'll watch a new cut-scene here.
#126
Map legend: 1 - starting area; 2 - cover points for your squads; 3 - second kilroy; 4 - enemy troops; 5 - enemies with bazookas; 6 - area where you'll surprise enemy troops; 7 - ammo stash; 8 - cover points for your squads; 9 - next area
Once you've left the elevator (1 on the map), you must be very careful, because you and your teammates are going to be attacked by an enemy equipped with a rocket launcher. Don't stay in the open. Instead, run to a nearby room (west of the elevator). Order your men to take cover (2 on the map) [#127]. I would recommend sending the base of fire team closer to the windows.
#127
Obviously your men should begin firing at enemy troops. Don't help them and don't leave this room just yet. Inspect the northern wall and you'll come across a second kilroy (3 on the map) [#128]. Collect the bonus. You may finally rejoin with your squads. Stay with them for at least a few seconds. Kill a few Germans and examine the area around you.
#128
Your base of fire team should remain where it is. Instead, choose the assault them and go with it to your left. You will come across an entrance to a new room [#129]. You may start moving south, however you must be very careful. There are enemy units to the west (4 on the map) and you'll surprise them along the way.
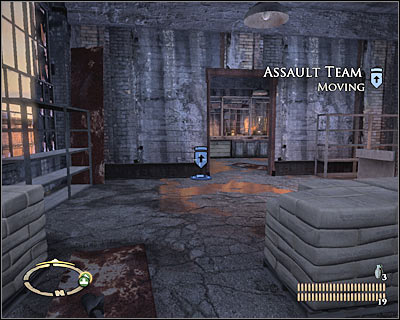
#129
Disabling the bazooka team (5 on the map) should be your final objective. Make sure that your base of fire team is suppressing the Germans. This should allow you to get closer and to outflank them [#130]. Use the grenades if you want to get it done quickly or wait for them to lean out and aim for their heads. Order the assault team to get here and move the base of fire team more to the south.
#130
You will probably notice that one more team is defending itself to the south of your current position. It would be a good idea to surprise the Germans by using a small opening in the left wall (6 on the map) [#131]. Once they're gone, order your colleagues to follow you and enter a new room. There's an ammo stash here (7 on the map) and obviously you must collect supplies.
#131
Head on to a much larger room. After making a few steps you'll be presented with a short cut-scene. Notice that an enemy patrol is heading your way. You must act quickly if you want to surprise the Germans. Send your teams to the west and to the south (8 on the map). Wait for the Germans to get here and take them by surprise [#132]. You may proceed to the next area (9 on the map) right away or you can go back for additional supplies.
#132
Map legend: 1 - starting area; 2 - second recon point; 3 - cover points for your squads; 4 - long corridor; 5 - enemies equipped with bazookas; 6 - enemy units; 7 - windows; 8 - enemy units; 9 - destination
Order your teams to follow your lead and proceed to a long tunnel (1 on the map). You won't have to worry about being attacked by enemy units. Instead, you'll come across a second recon point (2 on the map) [#133]. Press the action key, especially since you'll be rewarded with an interesting cut-scene. You may also read a new report (Irish guard). Proceed south.
#133
You will get to a new part of the factory. Order your men to take cover quickly. Send your assault team to the east and your base of fire team to the south (3 on the map) [#134]. You should go to your right. There's an unguarded corridor here (4 on the map) and you'll have to explore it.
#134
You will soon notice that the lower floor of the factory is being guarded by two bazooka teams (5 on the map) and obviously you'll have to get rid of those [#135]. Prevent enemy units from firing missiles at you, because it would be very difficult to avoid them. Once they're gone, proceed south and eliminate one more team of German soldier (6 on the map). Use nearby walls for cover if you have to.
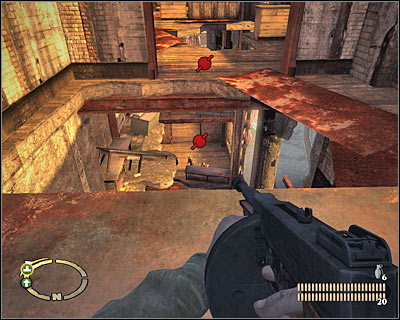
#135
Once you've defeated enemy units, order your base of fire team to join you. The assault team should remain where it is, so it'll attack enemy soldiers in the eastern section of the factory. Travel north-east and order the base of fire team to take cover next to one of the windows (7 on the map) [#136]. Join them and choose some of the closest targets for your colleagues.
#136
Now you will have to focus on eliminating some remaining groups of enemy units (8 on the map). Use both of your teams to suppress the Germans and you'll have to plenty of time and space to surprise your enemies. It would be a good idea to use all available grenades [#137], because you'll find a new ammo stash soon enough.
#137
Watch out for the final group of enemy units. They're located in the western room. You should order your colleagues to get closer to ensure that you won't have any problems getting rid of the Germans. Once you've succeeded, proceed to the stairs (9 on the map) [#138]. You will be automatically transported to a roof of this building.
#138
Map legend: 1 - starting area; 2 - enemy sniper and your destination; 3 - ammo stash; 4 - third kilroy
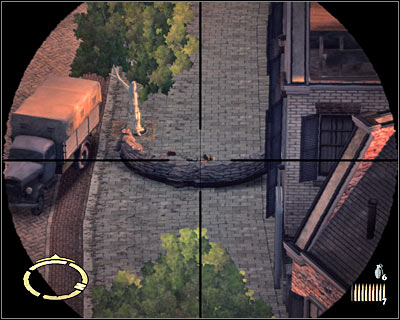
Completing this particular mission objective is only going to take you about one minute. You start the game to the east (1 on the map) of your target. Choose a machine gun from your inventory and start moving forward. You must eliminate one sniper (2 on the map) [#139]. DON'T examine his body right away, because you'll be able to perform two other activities in the meantime.
#139
Travel north-west and you'll come across a new ammo stash (3 on the map). Obviously you should collect much needed supplies. Move to the north and you'll find a third kilroy (4 on the map) on the eastern wall [#140]. Now you may go back to the body and you'll be rewarded with a new cut-scene.
#140
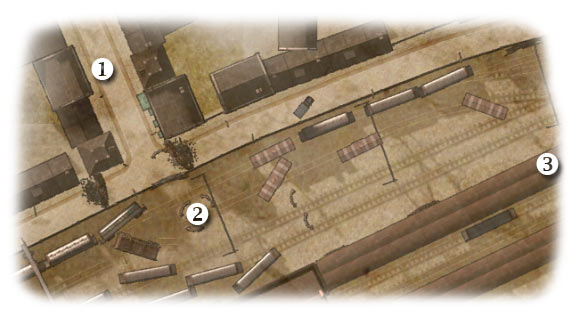
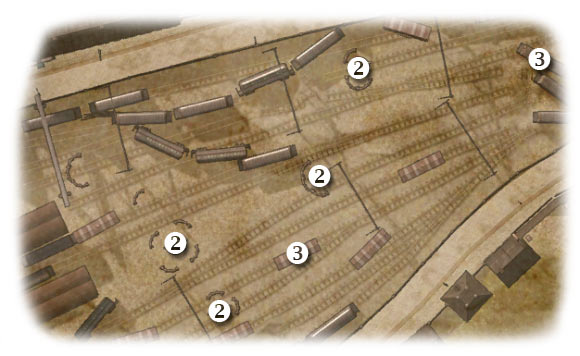
Map legend: 1 - starting area (you can't leave it); 2 - important targets of the first wave; 3 - important targets of the second wave; 4 - important targets of the third wave
You will be standing in the exact same spot where the sniper was hiding (1 on the map). This objective is divided into three parts. You will have to defend against three waves of enemy attacks and you'll watch short cut-scenes between the waves. Before you even start attacking enemy units, you should think about how to play this out. It's much easier to be standing behind a small wall [#141], however you will have problems if someone manages to get closer to the factory. If this occurs, you'll have to leave the cover for a second or two to make the shot.
#141
The first phase of this battle is going to be the easiest one. Start off by eliminating standard enemy troops. They will be gathering near the carriages. The only thing you'll have to watch out for are two MG emplacements (2 on the screen). The southern nest can deal a greater amount of damage, so it'll have to go first [#142].
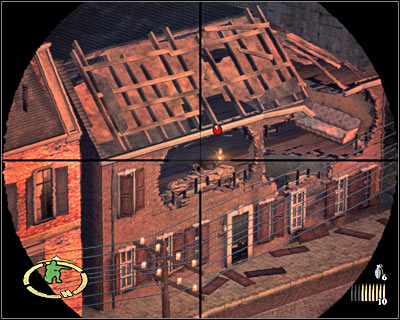
#142
The second phase is very similar to the first one. Just as before, you will be dealing mostly with standard enemy troops. Notice that new machine gun posts have appeared in the area (3 on the map). Eliminating the northern nest is very important [#143] to your overall success.

#143
The final third phase will familiarize you with the threat of soldiers using bazookas to hunt you down (4 on the map). They must die as soon as they've appeared near the factory [#144], because a single rocket may kill you instantly. Finish them off and you'll be rewarded with a longer cut-scene.
#144
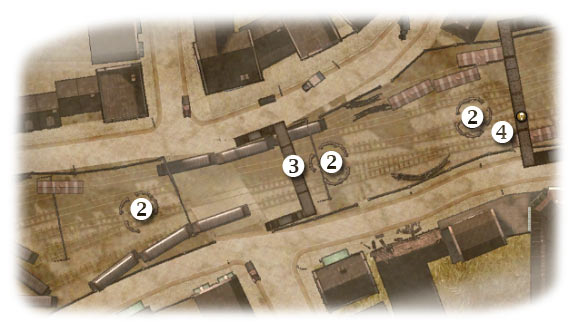
Map legend: 1 - starting area; 2 - cannons; 3 - enemies with bazookas; 4 - destination
For the first time during the course of this campaign you will be given a chance to drive a tank. Thankfully, there's nothing you should be worried about, because destroying cannons and killing soldiers is going to be very easy. Just make sure that you aren't in a lot of hurry and you'll be fine. You start in an alley (1 on the map) and the first 88 is located in front of you (2 on the map). Fire the main cannon (left mouse button) to destroy your target [#145].
#145
Drive forward and you'll notice enemy soldiers heading your way [#146]. It's important that you focus your attention on enemies equipped with bazookas (3 on the map), because the rockets can inflict serious damage to your tank. You can use the primary weapon to kill them or you can fire the turret by pressing the right mouse button. You'll also encounter a lot of MG nests along the way, but it's going to be easy to destroy them. Keep heading east.
#146
Watch out for the second bazooka team which can be found in the area. Eventually you should be able to get to FOUR cannons [#147]. Start destroying them, however don't forget to be on a look out for enemy troops at the same time. You may ignore standard soldiers, but you must neutralize every bazooka squad you'll encounter.
#147
A new bazooka team is going to be hidden inside one of the carriages, so you must be ready to engage them. Also, two other squads will appear in the distance [#148]. Enemy units will use a small bridge and you'll have to kill them from here.
#148
There are three more cannons for you to destroy and they're located to the east. Thankfully, you can fire at the 88's from a large distance [#149]. Nevertheless, you will have to get to the eastern section of the map (4 on the map). Wait for the game to display a new cut-scene.
#149
This final assignment is a very easy one and it's also extremely short. Choose a machine from your inventory and proceed to the next room. One of the enemy soldiers will be hiding to your left [#150]. Kill him before he turns around and fights back. Once he's gone, proceed to the stairs to get to the first floor.
#150
Keep heading forward. You won't encounter any enemy units along the way, so you don't have to act carefully. Turn right at the junction. Ignore all of the surrounding rooms. Your objective is the last room to your right [#151]. Try entering it and you'll watch a new cut-scene. This is the end of the mission. Get ready for the next one.
#151
TIME AND PLACE:
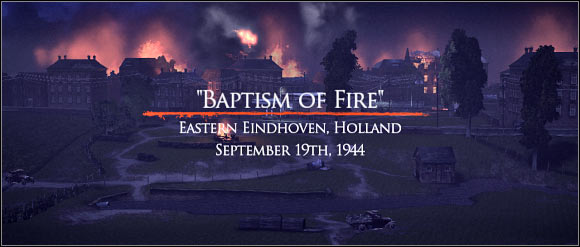
September 19th, 1944 (D+2)
Eastern Eindhoven, Holland
2300 hours
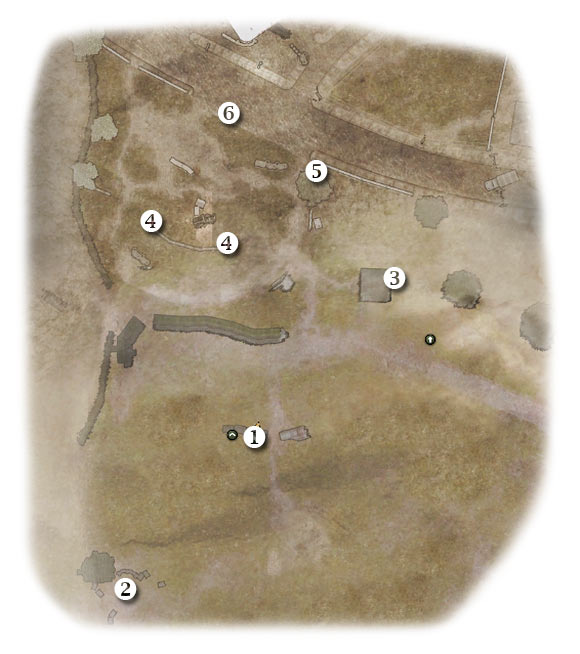
Map legend: 1 - starting area; 2 - first recon point; 3 - small building; 4 - enemy units; 5 - second recon point; 6 - next area
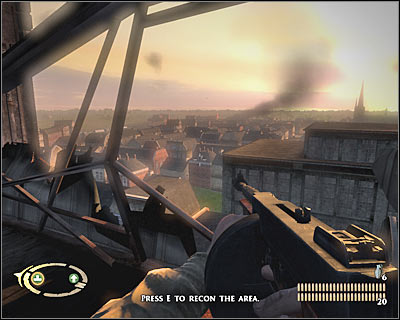
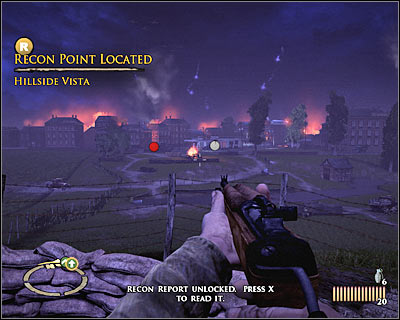
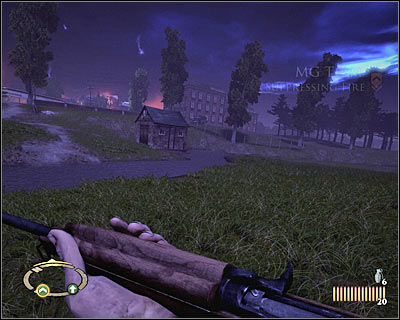
You start this mission in a very scenic location - near a hill which leads directly towards the town (1 on the map). Don't leave the cover you've been assigned to, because you and your allies are being attacked by enemy forces. You may proceed to the south if you want to. You will come across your first recon point here (2 on the map) [#152]. Read the report (Hillside vista) and go back to the start area.
#152
Order both of your teams to suppress enemy units. Your men must attacked German soldiers stationed to the north of your current location (4 on the map). Leave your colleagues and proceed alone to the north-east. You should be able to find a small building here (3 on the map) [#153] and obviously you must use it for much needed cover.
#153
Take cover behind the eastern wall. Lean out and use your rifle to deal with the first group of enemy units. It shouldn't be a problem. Getting rid of the second group is more tricky. You'll probably have to get closer to their positions. Order your teams to get here once you've dealt with enemy units. Proceed north alone and find a second recon point (5 on the map) [#154]. Read the report (Gas station) and get closer to new buildings (6 on the map).
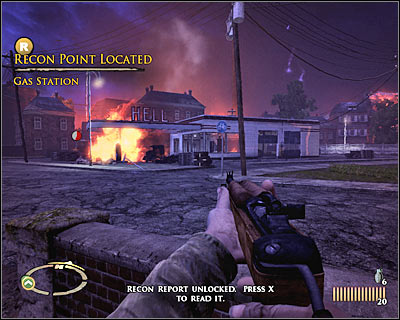
#154
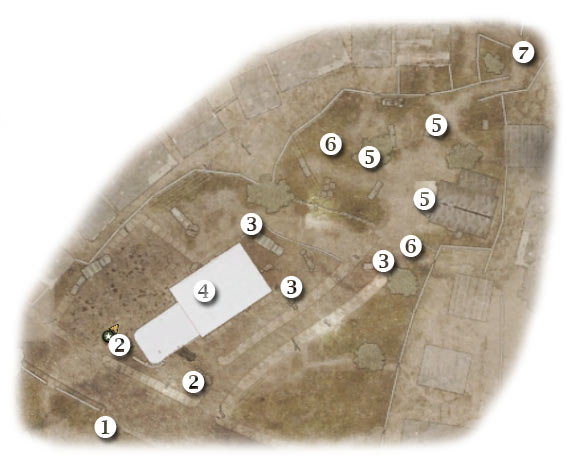
Map legend: 1 - starting area; 2 - cover points for your squads; 3 - enemy units; 4 - first kilroy; 5 - enemy soldiers; 6 - area from where you'll surprise enemy troops; 7 - destination
You start the game to the south (1 on the map) of the gas station. Notice that you can target fuel tanks for destruction. An explosion will probably kill a few German soldiers. You'll also have to deal with a small group stationed to the west of the gas station [#155]. Send your assault team there once it's safe. As for your MG squad, they should go somewhere to your right (2 on the map).
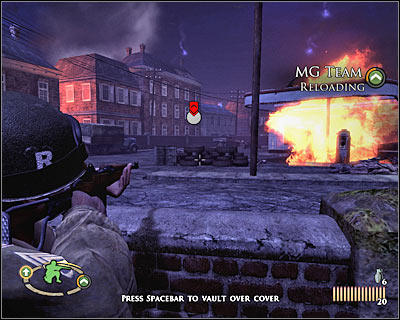
#155
Order your men to begin firing at enemy troops which are located to the north (3 on the map). Sadly, it's not going to be easy to surprise enemy units. Travel west and take cover near the truck [#156]. Try eliminating a few enemy soldiers from here. Use your rifle, however you could also consider throwing a grenade at the German troops.
#156
Travel north once you've dealt with the first group of enemy soldiers. Take cover behind the wall of the gas station. Lean out carefully and attack the team which is exchanging hits with your MG squad. It would be a good idea to explore the inside of the gas station. The entrance is located near burning tanks. One of the rooms contains the first kilroy (4 on the map) [#157].
#157
There's only more team to eliminate from the previously encountered groups (3 on the map). You can attack enemy soldiers from the inside of the gas station or you can decide to go back outside. You could hide near the truck [#158]. Once they're gone, order your assault team to get here. MG squad should stay where it was.
#158
It's going to get much harder from now on, mostly because there aren't any side alleys or unguarded passageways leading to enemy troops. Don't even think about hiding next to the white fence, because it's going to get destroyed. Order your assault squad to stay near the truck and consider moving towards the tires. Three enemy units have gathered to the north of your position (5 on the map). For now focus on eliminating a heavy machine gun post [#159].
#159
You should now consider running towards the brick wall which can be found to your right (6 on the map). You'll be able to inflict more damage from there. As for the last group, move to the west and outflank them [#160]. Make sure it's safe and order your teammates to get here. Proceed north (7 on the map) and you'll watch a cut-scene after a short walk.
#160
Map legend: 1 - starting area; 2 - destination
You won't have to worry about going through the cellar area, because you won't encounter any hostile units along the way. The cellar isn't guarded by anyone and there's only path you can take [#161]. Make sure that your teams are following your lead. Find the exit and notice that a checkpoint has been automatically created.
#161
Map legend: 1 - starting area; 2 - cover points for your squads; 3 - enemy units; 4 - areas where you can surprise enemy units; 5 - entrance to the second cellar; 6 - enemy units; 7 - MG nest; 8 - second kilroy; 9 - next area
You start somewhere near the cellar exit (1 on the map). I would strongly recommend staying out of sight, because you'll be given a unique opportunity to surprise enemy troops. Order your MG crew to set up near the exit (2 on the map). After that, order your colleagues to fire on nearby enemy troops (3 on the map) [#162]. If you're lucky, a few Germans will die almost instantly.
#162
Take your time to plan your next moves. Order the MG crew to start firing at a heavy machine gun post. As for your assault squad, move it to the south (2 on the map), but make sure your colleagues will stop near a good cover. Proceed alone to the south-east. Take cover behind a wall of a destroyed building [#163] and start moving east. Eventually you will be able to surprise a new group of German soldiers (4 on the map).
#163
Now you should travel north-east. Walk through the entire destroyed building and you'll find yourself standing behind the crew of a machine gun post (4 on the map) [#164]. Take these soldiers by surprise and get to the sandbags to take out some of the remaining enemy troops. Order both teams to get here.
#164
You will find yourself standing close to the entrance to a new cellar (5 on the map). Head down, but this time you must be very careful, because the entire cellar is swarming with enemy troops. There are at least two groups of German soldiers in the vicinity (6 on the map). You must also watch out for a machine gun post (7 on the map). Try surprising some of the German soldiers [#165]. Once they're gone, order your men to remain near the exit (9 on the map), but don't leave the cellar area just yet.

#165
You've probably noticed that you've been attacked by an MG nest while exploring the cellar. You could ignore this fact, however if you plan on finding all bonus areas, you will have to go back to it in order to neutralize it. You must do this before leaving the cellar, because you won't be allowed to return here later on. Use one of the walls for cover and aim for the head of the gunner. Go there now. You should notice a second kilroy to your right (8 on the map) [#166]. Finish the picture and rejoin with your squad. You may finally leave this area.
#166
Map legend: 1 - starting area; 2 - cover point for your squads; 3 - entrance to the southern building; 4 - area where you can surprise enemy units; 5 - entrance to the northern building; 6 - ammo stash; 7 - MG nests; 8 - destination
Once again, you'll start near the exit from the cellar (1 on the map). Send your teams to the east (2 on the map) and order them to start firing on the closest targets. There are some MG nests in the distance, but you may ignore them for the time being. You should separate from your squads. Proceed to the southern building (3 on the map) [#167].
#167
Be careful, because enemy soldiers are hiding inside this building. You may deal with them right away by taking cover behind the wall and using grenades. You can also proceed towards the southern room in order to surprise them from the flank. Either way, you must secure the building and head north. Duck behind a cover (4 on the screen) and start shooting at enemy troops [#168]. Prevent them from retreating if possible.
#168
You may finally allow your teams to suppress enemy machine gun posts. Get ready for a dangerous maneuver. Start running towards a small entrance of the northern building (5 on the map) [#169]. Don't stay in the open too long. There are a few enemy units inside and they must be killed. You will also find an ammo stash (6 on the map).
#169
You should find a good cover quickly, because more enemy units will arrive from the east. The easiest way to get rid of them would be to use grenades [#170], especially since you can rearm easily once they're gone. Head on to that location and turn south.
#170
There's a small brick wall in front of you and you should get to it quickly. Start off by securing the ground floor of a nearby building. Once this is done, use your rifle to take out the first gunner. He is standing on the first floor of the partially destroyed building (7 on the map) [#171]. Thankfully you don't have to worry about him fighting back.
#171
Notice that you're standing directly under the second heavy machine gun post (7 on the map). You can eliminate it by throwing a grenade inside the building [#172]. Once it's safe, order your colleagues to get here. You can also go back for additional supplies. Enter the nearest building (8 on the map) and after a short walk you'll get to a new zone.
#172
You won't need a map for this particular mission objective, because you won't be allowed to leave this area and enemy units will appear in different areas in front of you. Get to the windows and order your teams to hide here [#173]. I would recommend that you take cover near the left window. Choose a standard rifle and wait for first group to show up.
#173
I think you won't be surprised by how this battle is played out. Obviously your main objectives are to eliminate enemy soldiers [#174] and to prevent them from getting too close to the building. Don't forget about the opportunity of choosing targets for your teammates. You can also use a couple of grenades, however throwing them would probably take too much time.
#174
If one of the enemy soldiers gets too close to the building, he will probably go to your right. You must prevent this from happening, because German units would have a clear shot at your colleagues. Once you've won, turn around and proceed towards an unexplored passageway [#175]. This corridor leads to a new battlefield.

#175
Map legend: 1 - starting area; 2 - cover points for your squads; 3 - available cover points; 4 - cover points for your quads; 5 - available cover points; 6 - enemy units; 7 - MG42 nests; 8 - window; 9 - destination
You start the game inside the southern building. Don't exit the building just yet. Instead, issue a few orders from here. Your teams should take cover behind some of the nearby objects (2 on the map). You don't have to worry about their safety, because allied units are stationed in this area. Proceed alone to the north-east [#176].
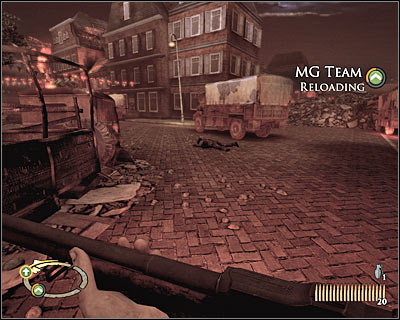
#176
Enemy soldiers tend to change their locations a lot and sadly you must be ready for that, because I can't give you an exact info on where to find them. At the beginning you will probably have to deal with groups located to the north and to the north-west of your allies. As a result, you should inspect the eastern part of the map. There are some large objects here which you can use for cover (3 on the map) [#177]. Remember to avoid MG nests (7 on the map)!
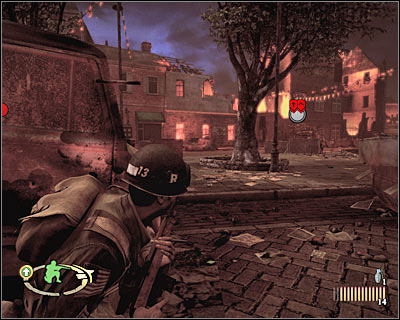
#177
Eventually you will have to secure the entire southern section of the map. This will allow you to send your teams a little to the north (4 on the map). Your MG team should take the east side and the assault team the west side. I would recommend that you move alone. Go north-west, because that's where you'll be able to surprise enemy troops.

#178
You must find new objects here to use for cover (5 on the map) [#179]. Keep pushing towards the northern building at the same time. The entire area to the east of your position will be occupied by German forces (6 on the map), so you'll have to be extremely careful in order to prevent German soldiers from making surprise attacks.
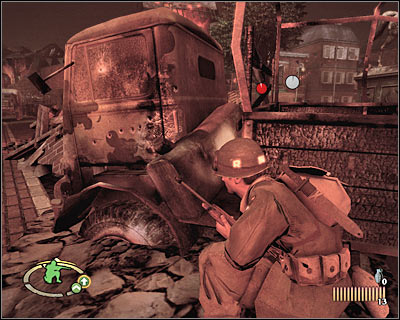
#179
Obviously you shouldn't be in a lot of hurry. Some of the soldiers will be hiding next to a burning truck [#180]. Deal with them when you've already secured the rest of the map. Try running there once they're gone, however make sure that you stay away from MG42's. Wait there for a while, just in case new enemies might have left the building.
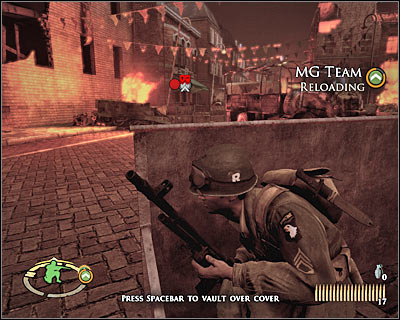
#180
You've only got one more thing to worry about - machine gun posts (7 on the map). I would recommend getting closer to the western window (8 on the map). Use the machine gun to kill the gunners [#181]. Once they're gone, allow your teammates to join you and enter this building (9 on the map). Keep moving north until you're rewarded with a cut-scene.
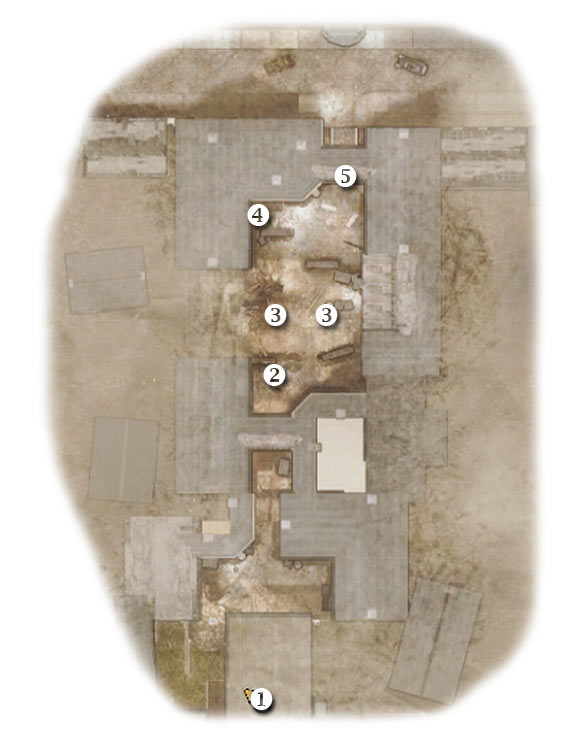
#181
Map legend: 1 - starting area; 2 - cover point for your squads; 3 - enemy units; 4 - third kilroy; 5 - destination (you will have to spend a few minutes inside the burning house)
You start near the southern building (1 on the map). Move north along with both of your squads. It shouldn't take too long for you to reach a new area. Send your men forward and order them to take cover (2 on the map) [#182]. Proceed with the assault. You will have to attack two groups of enemy units (3 on the map). It shouldn't take too long for your men to eliminate all threats.
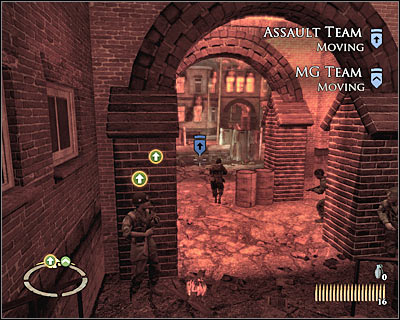
#182
BEFORE you decide to leave this area, inspect the western side of the map. You will come across a final bonus object here - third kilroy (4 on the map) [#183]. You may finally proceed towards the northern building (5 on the map). Watch a new cut-scene. Once it's over, you'll be automatically transported to the burning building.
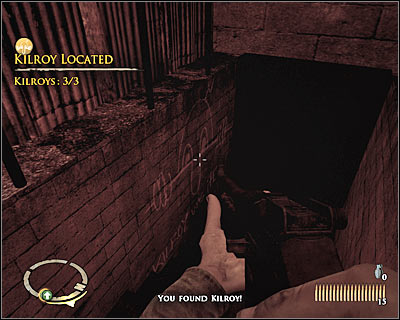
#183
It's fairly obvious what has to be done here - you must travel through a burning building, avoiding flames and fire traps at all costs. You can't stay in place for more than few seconds, because the flames would have killed Baker. Start off by moving forward. Jump over a small obstacle [#184] and proceed towards the stairs.
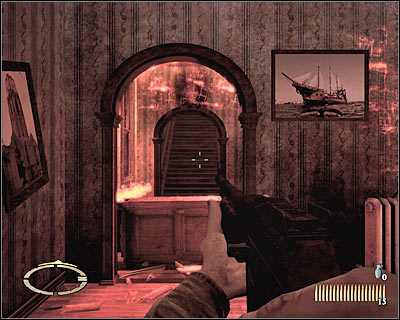
#184
Jump over a second obstacle and turn right. You will have to press the crouch key [#185] to get to the next area safely. Turn left and enter a new room. Head on to your right, crouch once again and go through a burning hole. Ignore minor injuries, because you can't avoid them entirely.
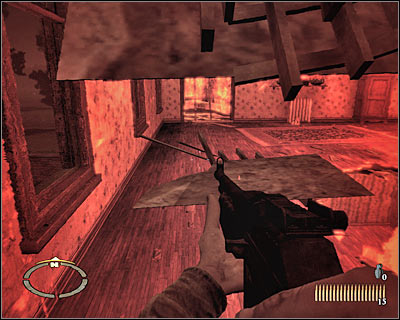
#185
Keep heading forward. You shouldn't have any problems finding the correct path. Make sure that you've jumped for the third time. The final part of this assignment will require you to move upwards [#186]. Get closer to one of the windows of the mansion and you'll be rewarded with a cool cut-scene. That's it for this mission.
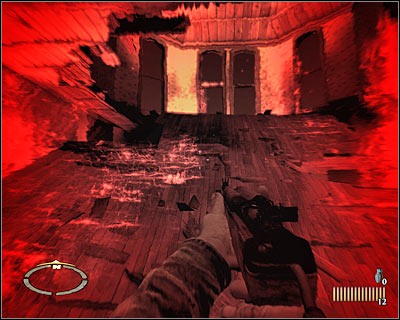
#186
TIME AND PLACE:
September 20th, 1944 (D+3)
Northeastern Eindhoven, Holland
0030 hours
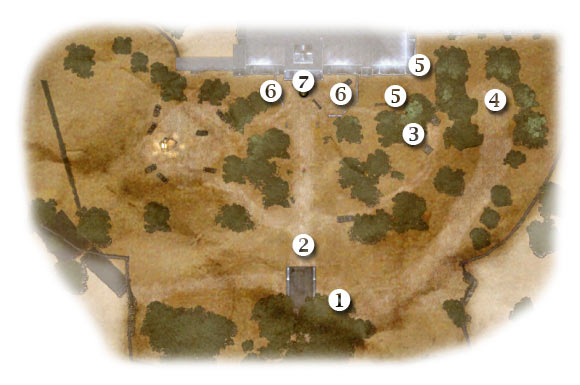
Map legend: 1 - starting area; 2 - first patrol; 3 - small hut; 4 - ammo stash; 5 - available cover points; 6 - enemy units; 7 - main entrance to the hospital
This level is tied directly to the ending of the previous mission. This means Baker has to start the game without his usual equipment. You only have a pistol in your inventory [#187] and obviously this weapon won't be enough to eliminate larger groups of enemy soldiers. The first group will appear to the north (2 on the map) and it's important that you avoid being seen.
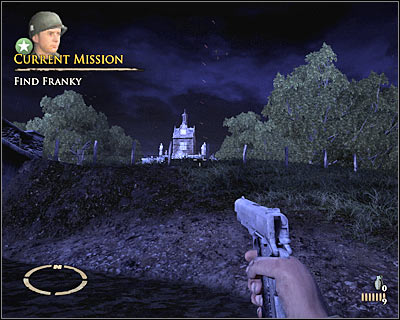
#187
Your first assignment will be to acquire a more powerful weapon. I'd strongly recommend that you start running towards a hut (3 on the map) which can be found to the south-east of the hospital. Stay near the river at first, but then you'll have to turn north [#188]. Try getting there before one of German soldiers arrives near the hut.
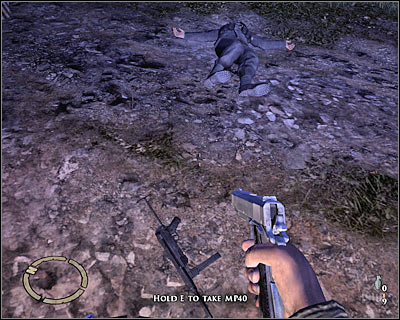
#188
Take cover behind the eastern wall of the hut and wait for the German soldier to arrive. Use your only weapon to kill him. You CAN'T allow him to return fire nor to find a good cover. He must die instantly, so you can approach his body and take his weapon. It's going to be a standard machine gun used by German soldiers - MP-40 [#189].
#189
Notice that you only have one clip for your newly acquired weapon. As a result, you will have to travel to an ammo stash which can be found to the east [#190]. You must be extremely careful here, because the stash is in the open. Approach this area from the south and hide immediately after collecting supplies.
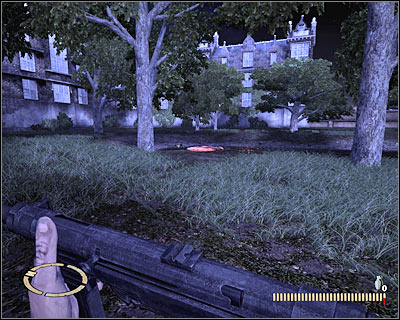
#190
Notice that you've only been given ammunition. You won't be allowed to use grenades during the course of this mission. Enemy soldiers have probably gathered in front of the entrance (6 on the map). Attack them from the west. You can take cover behind the southern wall of the building or you can approach the sandbags (5 on the map) [#191].
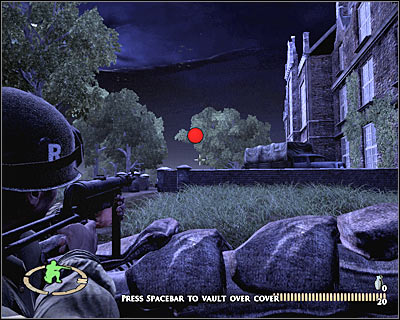
#191
Now you must start eliminating enemy units one by one. The most important thing for you to remember about is that you must lean out for a short period of time. Try getting closer to the entrance after defeating the first group [#192]. Monitor enemy movements with your tactical map and prevent them from surprising you.

#192
This objective will appear on your list once you've defeated all German soldiers. You won't have to spend a lot of time and effort in order to complete it. All you have to do is to get closer to the main gate [#193]. You will be transported to a new area automatically. Ignore the ammo stash, because you will find a new one inside the hospital.
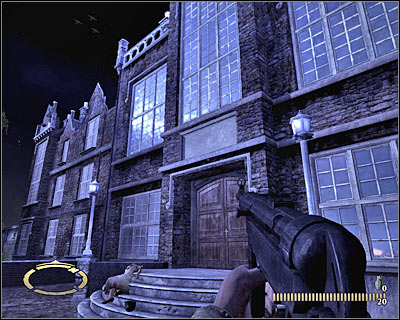
#193
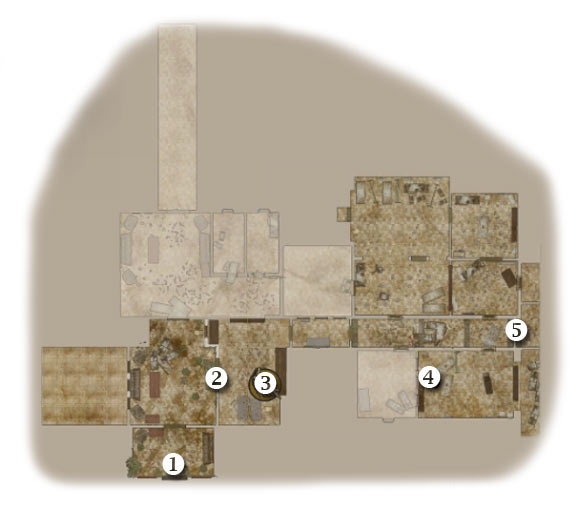
Map legend: 1 - starting area; 2 - gap in the wall; 3 - ammo stash; 4 - first kilroy; 5 - next area
The hospital may look like a maze to you, but it's very difficult to get lost here. You should also know that you won't have to explore all rooms. Obviously you can find locations of all bonus areas in my guide. You start the game near the main gate (1 on the map). Make a few steps forward, turn right and jump over a small obstacle (2 on the map) [#194]. Explore the new room and you'll find an ammo stash (3 on the map).
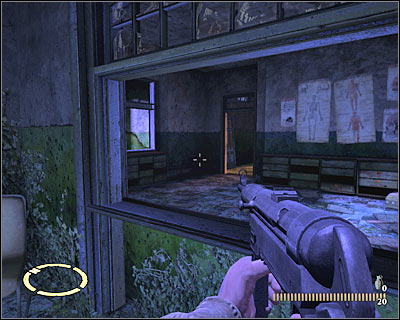
#194
Now you must start moving east. Turn north once you've encountered some obstacles. Get around them and travel south. Thankfully, you won't encounter any enemy units in this particular section of the hospital. Inspect the southern rooms, because one of them contains the first kilroy (4 on the map) [#195]. Finish painting it and proceed to the east. Jump over a large bed (5 on the map) to get to the next area of the hospital.
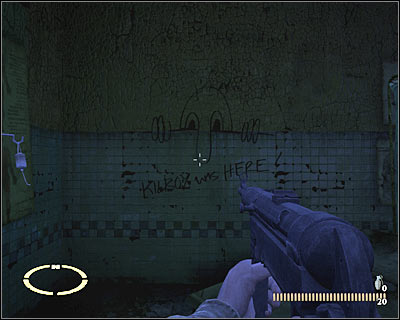
#195
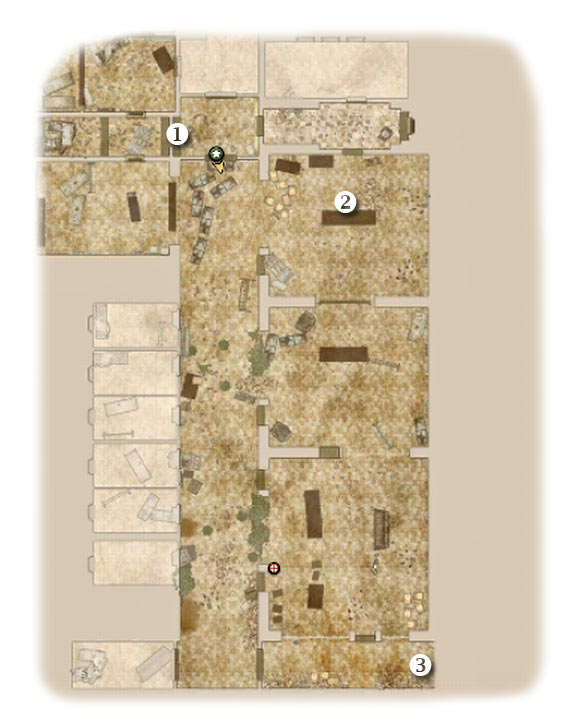
Map legend: 1 - starting area; 2 - room where you can surprise enemy units; 3 - next area
This time you'll begin near the bed (1 on the map). You will have to eliminate a single patrol. Enemy units are heading your way as we speak, so proceed to the eastern room quickly. Take cover behind the table (2 on the map) [#196]. Wait for German soldiers to get closer and open fire on them. If you're lucky, they won't be able to hide. Proceed to the south. You will have to get to a new corridor (3 on the map) which will lead you to the east.
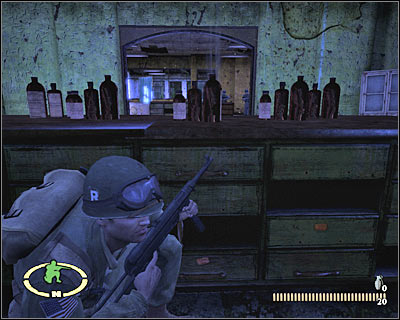
#196
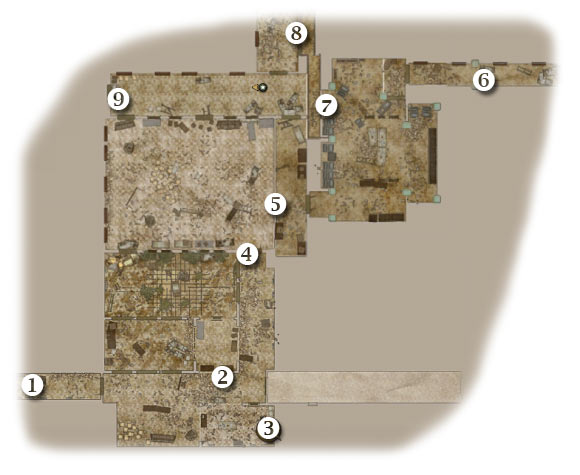
Map legend: 1 - starting area; 2 - obstacle which you can use to surprise enemy units; 3 - ammo stash; 4 - main entrance to the northern room; 5 - windows; 6 - second kilroy; 7 - large hole in the wall; 8 - wooden wall and the next area; 9 - first recon point
You start in the long corridor (1 on the map). Ignore the radiator, because you won't sustain any permanent injuries. Keep heading forward. Take cover behind one of the windows (2 on the map) [#197] and wait for a new patrol to arrive. Open fire at the last second, so your enemies won't be given a chance to escape.
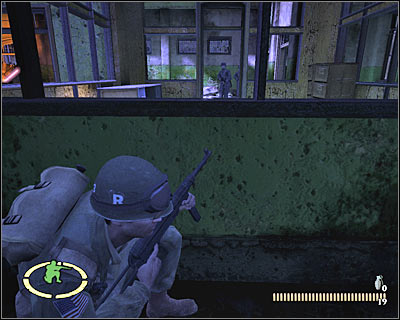
#197
Notice that an ammo stash can be found to the south of your current location (3 on the map). Go there only if you're running low on supplies. You should also remember that you won't be given any grenades. Proceed to the north. Be careful near the entrance to the northern room (4 on the map). Enemy units are hiding in the vicinity and must kill them before they start firing at you. Once they're gone, proceed to your right and jump over an obstacle to get to a new area (5 on the map) [#198].
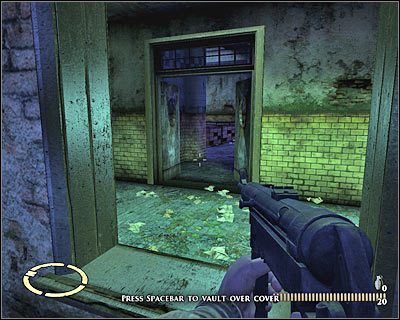
#198
You must now move to the east. Enemy soldiers are hiding inside one of the nearby rooms. Take cover behind the left wall and kill them from a safe distance. Head on to the north. Turn right at the junction and inspect the eastern corridor. There's a second kilroy here (6 on the map) and obviously you should find it [#199].
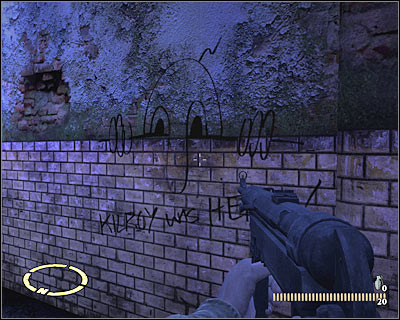
#199
You may go back to the western area, because that's how you'll be able to reach your current destination. Your first goal here is to find a large hole in the wall (7 on the map). Press the crouch key and move forward (7 on the map) [#200]. Head north. You should consider making a stop along the way, because otherwise you'll miss one of the bonuses.
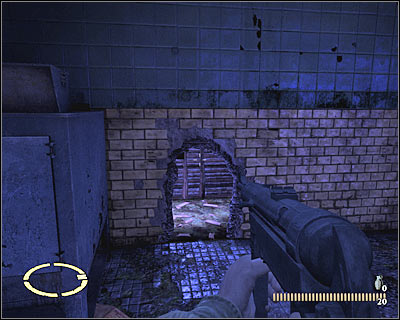
#200
Make sure that you're standing next to a wooden wall (8 on the map) [#201]. Use your machine gun to destroy the wall, as well as to kill one of the enemy soldiers. Jump over an obstacle once you're done and proceed to the south. Turn west and eventually you'll get to an area where you'll find the first recon point (9 on the map). Read the report (Dead end room) and go back to the tunnel.
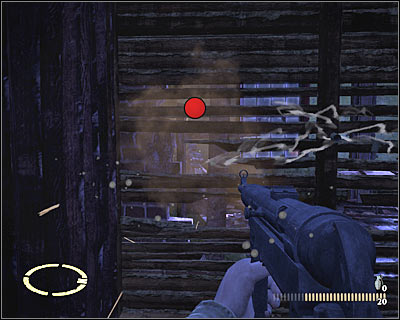
#201
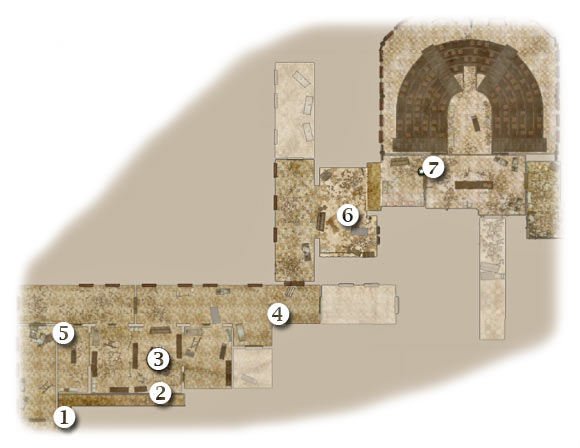
Map legend: 1 - starting area; 2 - exit from the tunnel; 3 - ammo stash; 4 - enemy soldiers; 5 - third kilroy; 6 - second recon point; 7 - next area
You're still inside the tunnel (1 on the map). Start moving towards the only available exit (2 on the map). You'll end up standing in front of an ammo stash (3 on the map). Rearm yourself and use your gun to eliminate troops which will appear in front of you [#202]. Prevent enemy soldiers from leaving your line of sight.
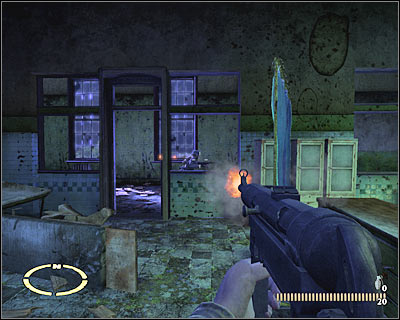
#202
The second group will make appearance to the east of your current location (4 on the map). You should be ready for their attack, because otherwise they could surprise you easily. Ignore your target area for the time being and focus on exploring the western part of the map. There's a third kilroy (5 on the map) here [#203].
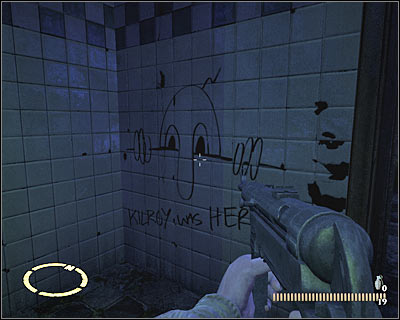
#203
Head on to the next section. You shouldn't encounter any additional units along the way, however you can still inspect the surrounding rooms just to be safe. Check the table in one of the rooms (6 on the map) and you'll unlock your final bonus for this mission - second recon point [#204]. Read the report (Photographs) and proceed to a new hole in the wall. Eventually you'll get to an area (7 on the map) where you'll be rewarded with a cut-scene.
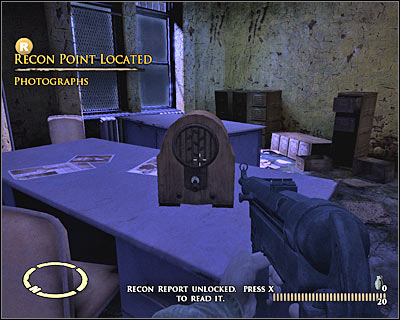
#204
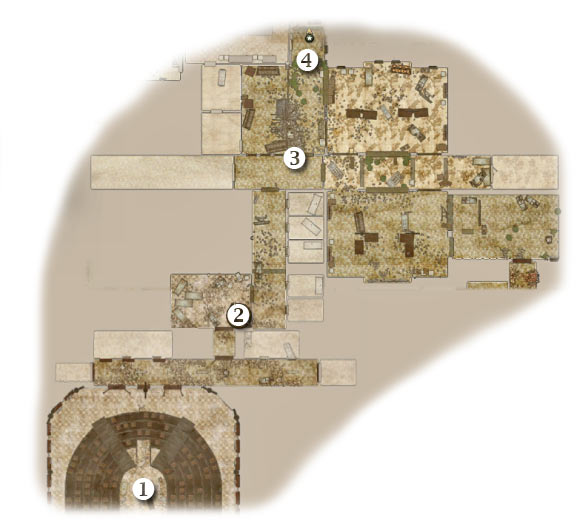
Map legend: 1 - starting area; 2 - ammo stash; 3 - hideout; 4 - next area
This time you're starting inside the amphitheater (1 on the map). Head north and eventually you'll come across a new ammo stash (2 on the map). Collect supplies and continue moving north. Stop near the northern room (3 on the map) [#205] and wait for German soldiers to show up. Kill them and head on to the northern exit (4 on the map).
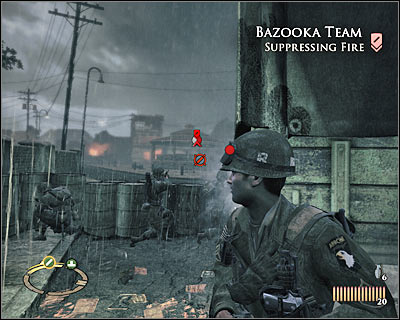
#205
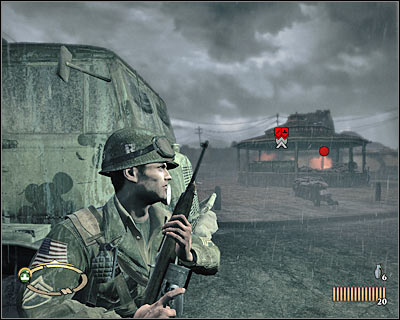
Map legend: 1 - starting area; 2 - large holes in the walls; 3 - passageway; 4 - destination
I'm sure that you're familiar with the layout of the surrounding rooms. You've been here before, but this time you're moving in an opposite direction. Proceed to the north (1 on the map) and then turn west. You will have to go through several large holes along the way (2 on the map) [#206].
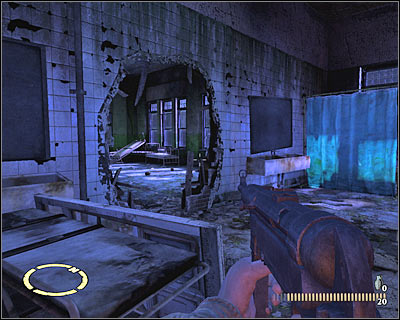
#206
Thankfully, you don't have to worry about encountering enemy units. Focus only on finding your destination. You will have to crouch near the long tunnel (3 on the map) [#207]. Once this is done, turn south and get to the stairs. You'll be presented with a cut-scene you've already seen before.
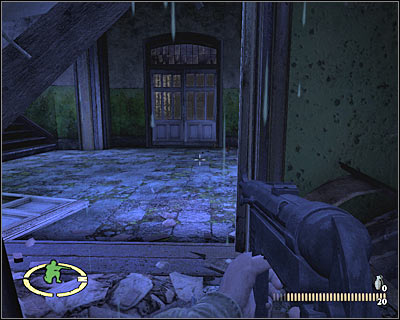
#207
Check the description of the first chapter of the campaign if you want to find out how to fulfill this particular mission objective. Almost nothing will change since your last visit. The only exception is one of the corridors [#208] where you may be surprised by a larger group. Just as before, you will have to get to the amphitheater. Don't skip the cut-scene, because it's going to be longer this time (and more revealing :)).
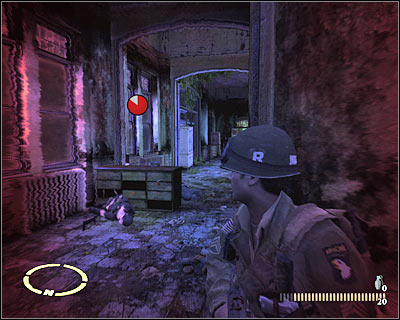
#208
TIME AND PLACE:
September 22nd, 1944 (D+5)
Southwest of Veghel, Holland
1100 hours
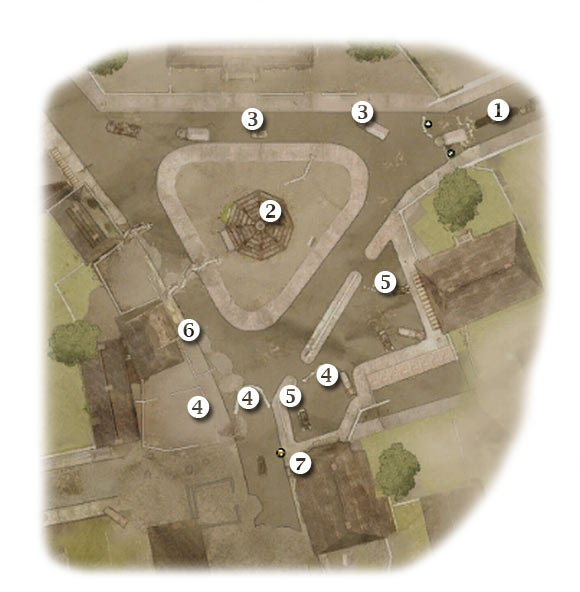
Map legend: 1 - starting area; 2 - MG nest; 3 - hideouts (northern side); 4 - enemy troops; 5 - hideouts (southern side); 6 - first recon point; 7 - entrance to the southern building
You start this mission in a very bad spot (1 on the map), because you and your men are being attacked by German forces. Notice that once again you have a bazooka team at your disposal. Both of your teams start the game behind good covers, so you shouldn't move them for the time being. Order your bazooka squad to take out a nearby MG nest (2 on the map) [#209]. This heavy machine gun post is located in the center of the plaza.
#209
Don't worry if your team is having some problems getting rid of the heavy machine gun post, because you'll have to change your location anyway. I would recommend that you move alone. Head west and use some of the nearby vehicles for much needed cover (3 on the map) [#210]. You shouldn't have any major problems surprising enemy soldiers and killing them. Consider sending one of your teams to this area, however it's not a requirement.
#210
Return to the start area and consider moving to the south. This area is being guarded by new groups of enemy soldiers (4 on the map). Don't be afraid if you see more of them heading your way, because eventually they won't get more reinforcements. Obviously you should use your bazooka team to back you up. This will allow you to get closer to enemy units. Take cover behind one of available obstacles (5 on the map) [#211].
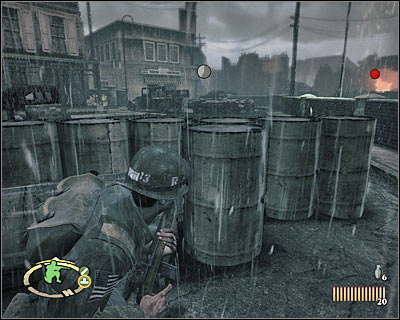
#211
You must keep pushing south. Attack enemy units from the flank whenever possible and don't forget that your teammates can suppress the Germans anytime. It would also be a good idea to send one of your squads to the north. There's a first recon point in this area and you should unlock it when you have the chance (6 on the map) [#212]. Obviously you can also read the report (Market square).
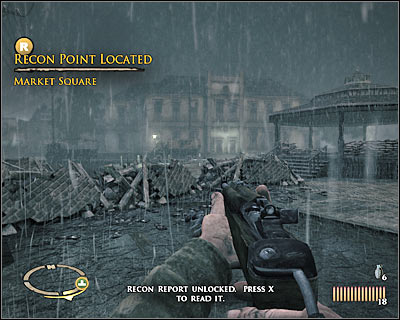
#212
The final group of German soldiers will take cover inside the southern building (7 on the map) [#213]. The easiest way to get rid of them would be throw a grenade, especially since most of the soldiers are standing close to the entrance. Order both teams to follow you, enter the building and proceed to the south. Find the exit and await further instructions.
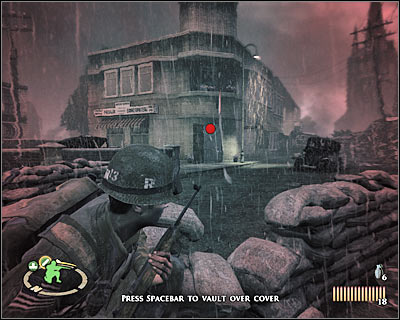
#213
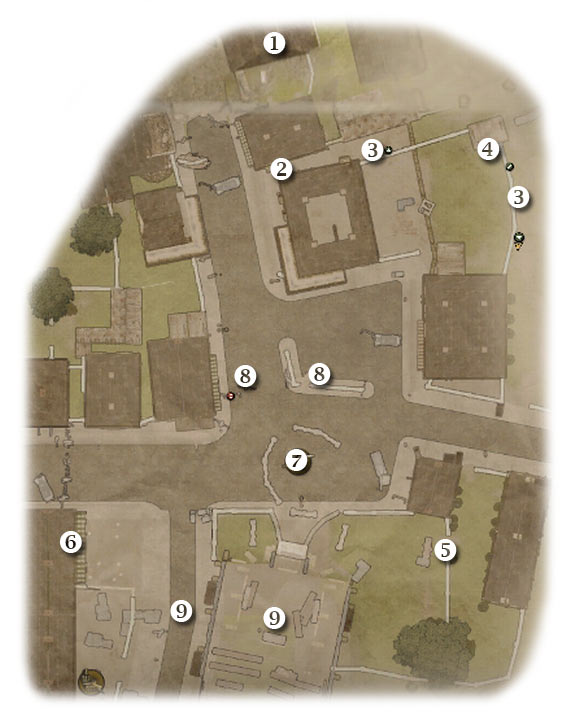
Map legend: 1 - starting area; 2 - side alley; 3 - cover points for your squads; 4 - first kilroy; 5 - cover point for your bazooka squad; 6 - MG42 nest; 7 - cannon (main target); 8 - cover points for your squads; 9 - enemy units
You will have to be extremely careful while trying to complete this objective, because you will find yourself under constant attacks by the crew of the cannon. You start somewhere near the northern building (1 on the map). Get closer to the main road and take cover behind the left wall. Use a grenade or your rifle to kill an enemy soldier [#214]. Travel south quickly. Turn left when you have the chance (2 on the map). Make a stop here and wait for your colleagues to join you.
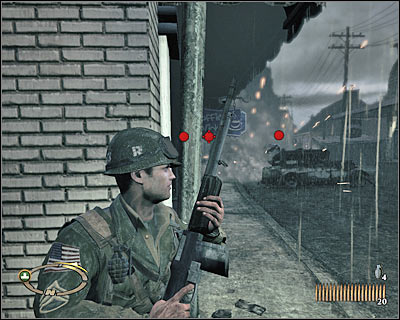
#214
It's very important to plan your next moves, especially when it comes to moving your teams. It might seem that choosing the side alley allowed to you avoid the cannon, but it can still hurt you or your teammates. Order one of your teams to take cover behind a small brick wall. As for the other squad, send it to the east (3 on the map). Begin firing on enemy troops [#215].
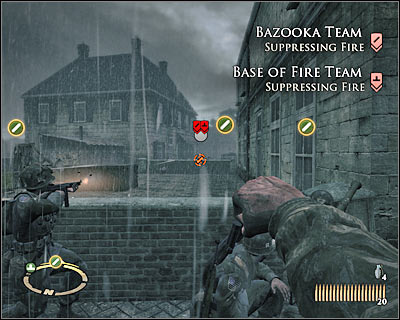
#215
Once you've eliminated all enemy units, you will be allowed to find a bonus area. Approach one of the huts from the south and you'll find your first kilroy (4 on the map) [#216]. Do this slowly, because this still may be an area of interest for enemy soldiers and gunners. You could also go back to the kilroy later on during the course of the mission, however it would be easy to forget about it.
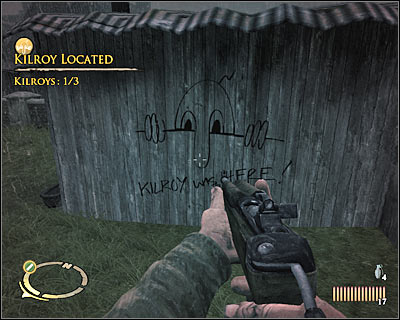
#216
Order your bazooka team to follow your lead and proceed to the south. You should stay close to eastern walls of the buildings. You will eventually get to the main road. Don't try attacking the cannon from here. Instead, run to the south [#217] and take cover behind a wall of a new building. Wait for the bazooka team to get here.
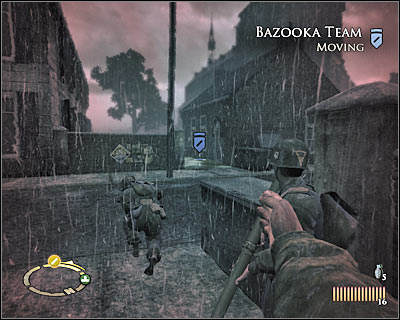
#217
You will have to keep moving south. Get closer to the church and order your colleagues to move towards a small cover (5 on the map) [#218]. You may finally give your bazooka team an order to destroy an enemy heavy machine gun post. Once this is done, leave them here, because they won't assist you in eliminating any other targets. They'll also be safe from the 88.
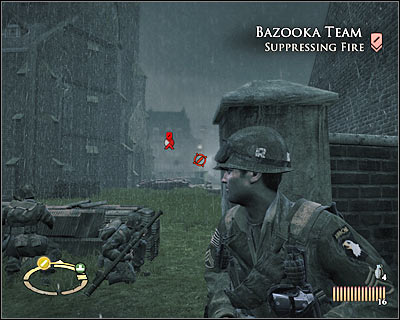
#218
Choose a machine gun and start moving north-west. There's a small brick wall here and you should use it for cover. Keep heading towards the cannon. Eliminate the gunners and prevent them from leaving your line of fire. There are also enemy units to your left. Use the grenades to kill them [#219], especially since you'll rearm in the near future. Don't forget to place an explosive charge on the 88. Move back and wait for an explosion to occur.
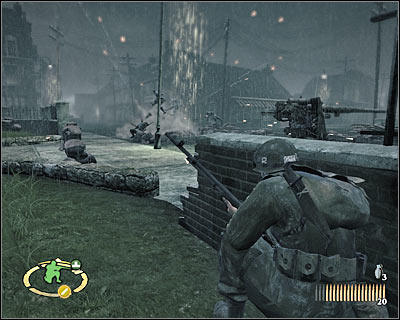
#219
Notice that the destruction of the 88 is not enough. You will also have to deal with all remaining enemy troops. German soldiers are hiding to the south and they'll appear when you go there. Take your time and set up your teams near the cannon (8 on the map). Try going south. Enter the church and take care of a small group (9 on the map) [#220]. Your colleagues will deal with a second squad of German soldiers. Once it's safe, order your teams to follow your lead.
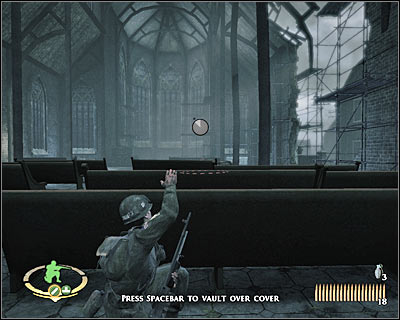
#220
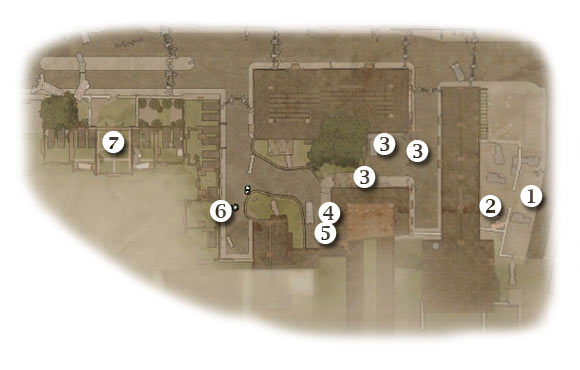
Map legend: 1 - starting area; 2 - ammo stash; 3 - hideouts; 4 - exit from the southern building; 5 - second kilroy; 6 - entrance to the municipal building; 7 - destination
Find an alley which leads to the western part of the map (1 on the map). It's important that you approach a small tunnel carefully, because a group of German soldiers will appear in front of you. Use the grenades to kill them. Once they're gone, make sure that you visit a nearby ammo depot (2 on the map) [#221]. You may proceed to the next section. Turn right and wait for your teams to arrive.
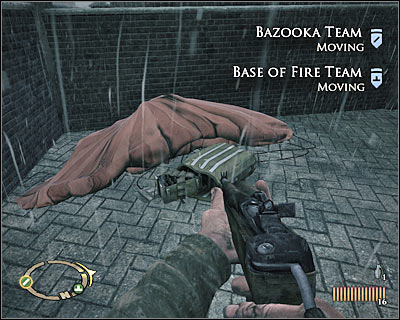
#221
Order both of your squads to take cover. There are suitable obstacles in front of you (3 on the map), so it shouldn't be a problem. It's important that your bazooka team has a clear shot, because it will be capable of inflicting huge amounts of damage. Order your men to move forward a little [#222] once they've dealt with initial groups, but don't risk their lives.
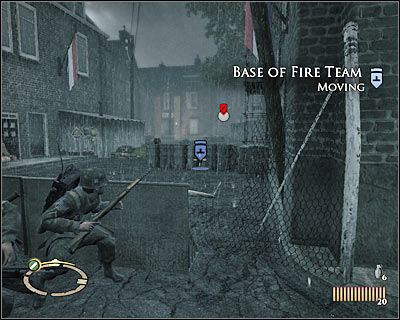
#222
You can get to enemy troops quite easily, because there's an entrance to your left [#223]. Proceed to this building and head over to the exit. Take cover and use some of the carried grenades to take out enemy units. You could also shoot them with your rifle. Either way, you should be able to eliminate the resistance from here.

#223
Don't leave this area just yet. Inspect the left wall once you've left the building. A second kilroy (5 on the map) [#224] can be found here. Finish painting it. You may finally proceed to the east. Find the entrance to the municipal building (6 on the map). Go in ALONE, because you don't want to risk lives of your teammates.
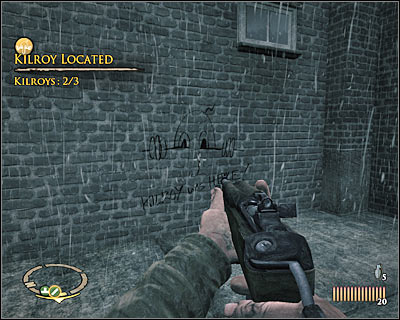
#224
Once inside, run over to the left wall (quickly!). Take cover and use one of the grenades to kill enemy soldiers [#225]. A second group of German units is stationed just around the corner. This time you may only use your rifle. Make sure it's safe and order your squads to get here. After that, place your men near the windows before receiving a new assignment.
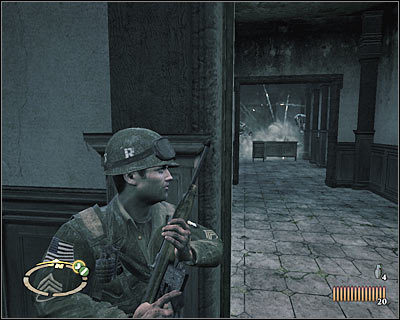
#225
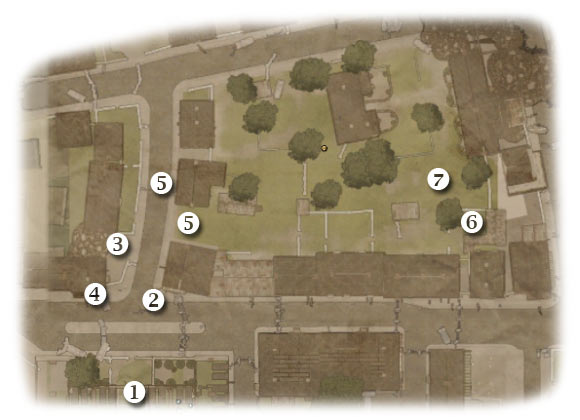
Map legend: 1 - starting area; 2 - enemy soldiers; 3 - area where the first tank appears; 4 - second recon point; 5 - paths leading to the second tank; 6 - third kilroy; 7 - second tank (probable location)
This objective won't appear on your list right away, however this doesn't mean you shouldn't be prepared. Try leaving the building (1 on the map) and you'll notice that a new group of enemy soldiers has appeared in front of you (2 on the map). An enemy tank will also arrive from the west (3 on the map). Order your men to use nearby objects for cover. Your teammates must begin firing on enemy troops [#226]. Outflank the Germans or use a grenade to kill them.
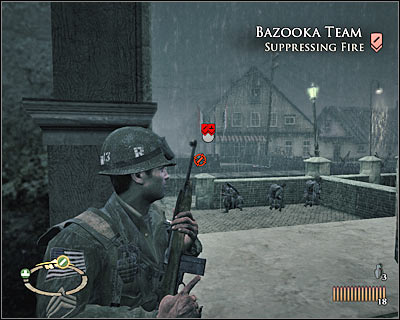
#226
Now you must travel north-west. There's a second recon point here (4 on the map) [#227]. You may read the report (M9 "Bazooka" Cache), but it's even more important to acquire one of the bazookas. I would recommend exchanging the rocket launcher for the BAR rifle, because you'll need the standard one to take out more distant targets. You may choose the bazooka from your inventory, because you'll need it in just a few seconds.
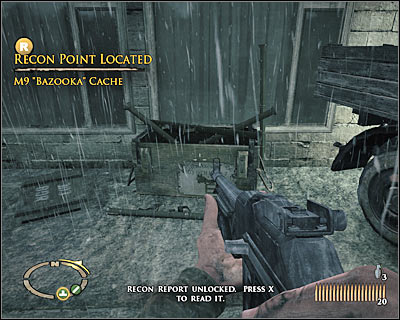
#227
The first tank is patrolling the area closer to your position. Obviously you will have to avoid being seen, but you'll also be to surprise the tank. I would recommend that you stay hidden somewhere near the area where the metal beast has appeared for the first time. Make sure that you're crouching behind a brick wall. Wait for the tank to appear in your line of fire. Press the middle mouse button to zoom in and fire a rocket at the side/rear armor of the tank [#228].
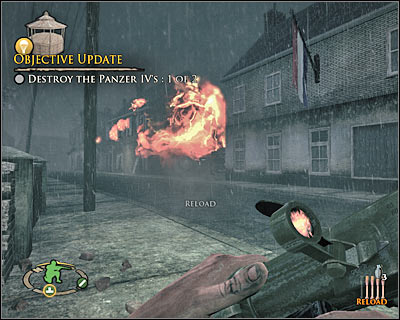
#228
Destroying the second tank is going to be harder, especially if you plan on finding the last bonus area. Remember that if you destroy the tank, you won't be able to collect this achievement. If you plan on choosing a more subtle approach, proceed to the north. Otherwise head east (5 on the map). The tank is circling one of the larger buildings to the east. Make sure that you aren't seen by its crew before the attack [#229].
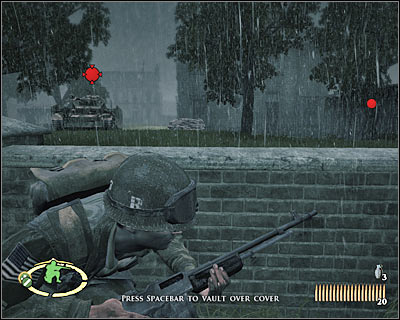
#229
The final third kilroy (6 on the map) is located to the east of the start area [#230]. Watch out for enemy soldiers while trying to find it. Remember that you can use nearby brick walls for cover. Once you've unlocked the achievement, ready your rocket launcher and wait for the tank to get here (7 on the map). Destroy it with a single missile. You will be rewarded with a new cut-scene in a short while.
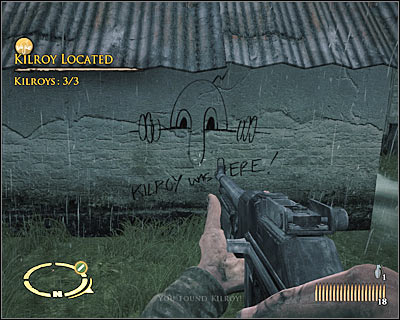
#230
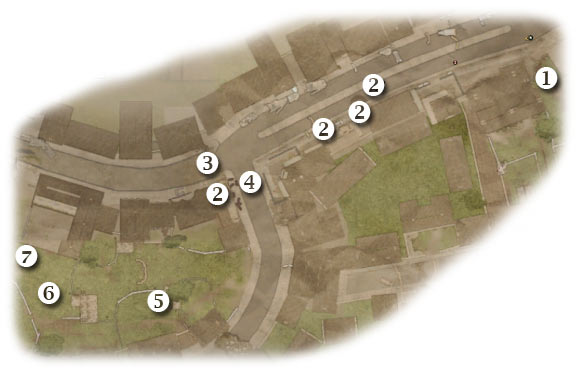
Map legend: 1 - starting area; 2 - enemies with bazookas; 3 - German tank; 4 - southern road; 5 - enemies with bazookas; 6 - cannon; 7 - next area
Once again you'll be given command of an allied tank. This time it's going to be more challenging, mostly because you'll be surprised by a lot of soldiers equipped with rocket launchers. The basics are the same - move slowly and focus on eliminating enemy units from larger distances. Drive forward and neutralize the first group of German soldiers, as well as a heavy machine gun post [#231].
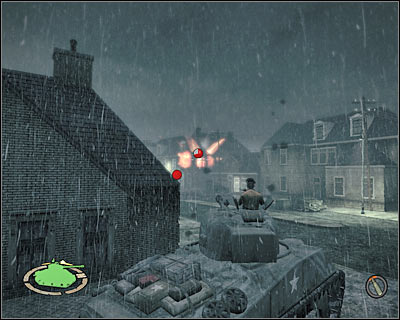
#231
I wouldn't recommend driving towards your destination in a straight line. Choose a slalom instead and you'll be a difficult target for your enemies. The first bazooka team will attack your early during the course of this mission (2 on the map) [#232]. Remember not to move forward unless they've been eliminated.
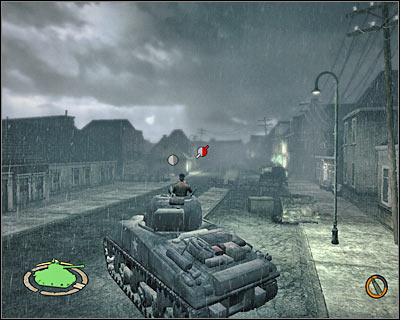
#232
Be careful, because an enemy tank will eventually appear in front of you (3 on the map). Act quickly [#233] in order to prevent your tank from being damaged or destroyed. One hit won't be enough to send your machine in flames, but it's best to play it safe. You should also be on a look out for new bazooka squads. At least one team will appear to your left and you'll have to eliminate it as soon as possible.
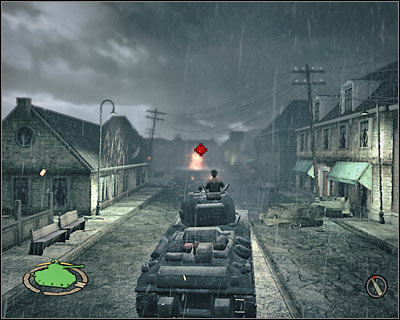
#233
A new bazooka squad is hiding in front of you, near the crossroads. Destroy it from a larger distance. Get to the crossroads. You can't stay on the main road, so you'll have to turn left (4 on the map). Notice that you're getting closer to the cannon. Drive towards the field, but stay close to the southern section of the map [#234].

#234
You will have to act quickly here, because one of the bazooka teams is hiding behind the barn. Surprise the soldiers (5 on the map) [#235]. You can also get rid of standard German units while you're at it. Keep heading west. Destroying the cannon (6 on the map) should be easy. Drive north-west (7 on the map).
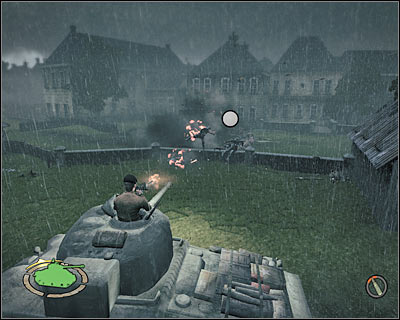
#235
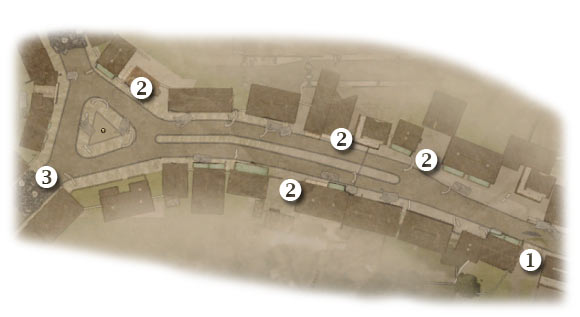
Map legend: 1 - starting area; 2 - enemies with bazookas; 3 - German tank
Your first objective here is to return to the main road (1 on the map). Just as before, you will have to deal with a lot of enemies equipped with rocket launchers (2 on the map) [#236]. You should be fine as long as you don't risk too much.
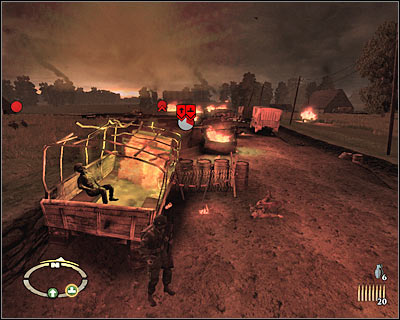
#236
Your final assignment is to secure a small plaza. Start off by eliminating soldiers equipped with bazookas (2 one of the team). One of the teams is taking cover inside the northern building - don't ignore them. Once the bazooka squads are gone, focus your efforts on disabling a second German tank [#237]. Eliminating all threats will allow you to win the mission.
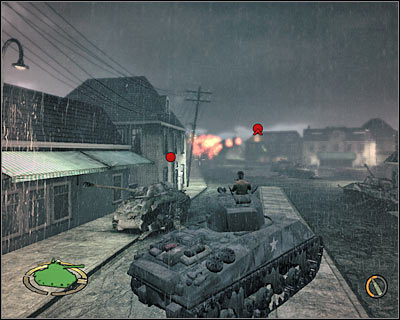
#237
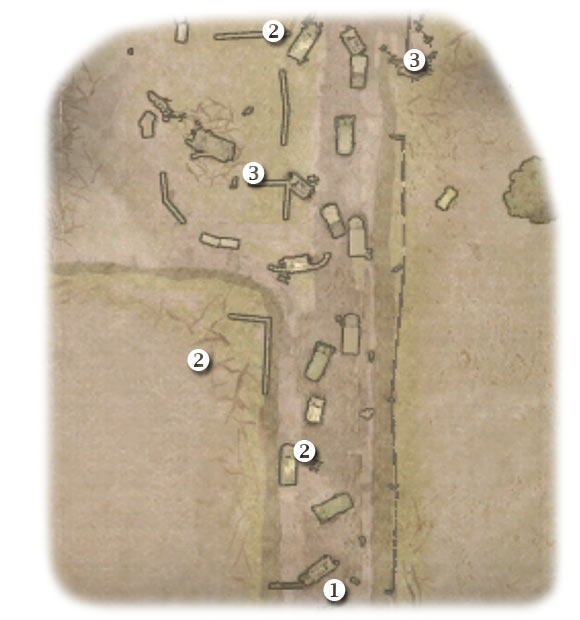
TIME AND PLACE:
September 23rd, 1944 (D+6)
Southwest of Uden, Holland
1500 hours
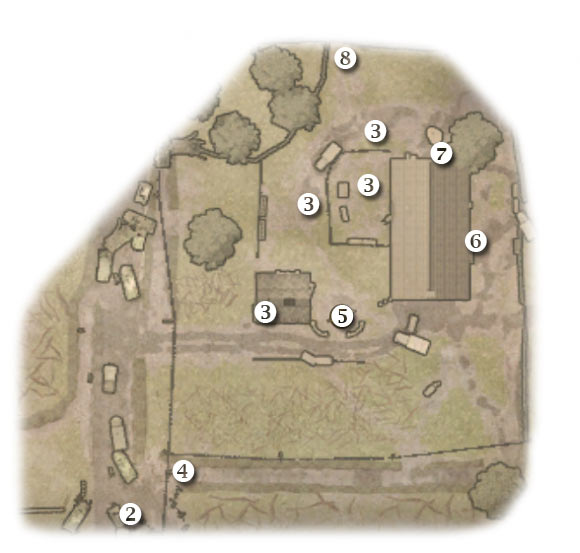
Map legend: 1 - starting area; 2 - enemy units; 3 - MG nests; 4 - long ditch; 5 - cannon (main objective); 6 - first kilroy; 7 - ammo stash; 8 - destination
This is by far the most difficult mission of the entire game. You will have to be extremely careful while exploring the area, because you'll be surrounded by enemy troops for most of the time. I would recommend securing some of the areas alone, because you would have to spend too much time trying to protect your men from danger, rather than use their abilities in combat. You start standing behind a large truck. Order your men to suppress the Germans and then lead at least group towards the first target (2 on the map) [#238].
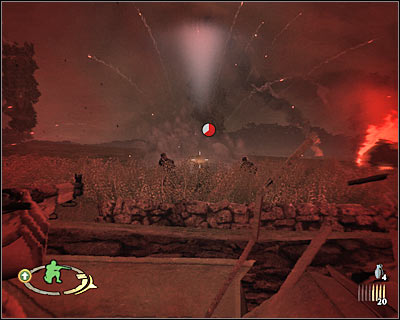
#238
Enemy soldiers are hiding to the north of your current position. You can kill them by aiming at them from a longer distance or you can get closer and hide next to a burning truck. If you decide to get closer, you must make sure that your men will suppress your enemies, so they won't have a chance to attack you [#239].
#239
Don't leave this area, even when you take care of the first group of German soldiers. The reason for that is a quite obvious one - new enemy soldiers have appeared in the area and you must plan what to do next. The toughest group occupies the western field (2 on the map). You can't get to them, so you'll have to take them out from a larger distance [#240]. You could use grenades here, however rifle seems like a better idea, because you would have to be very precise.
#240
Avoid the first heavy machine gun post at the same time. This nest is located to the north (3 on the map). Consider sending one of your teams to your location and ordering it to suppress the MG42. I would recommend approaching the heavy machine gun post from the south-east. Find a good position to fire [#241], get rid of the gunner and then kill his colleagues.
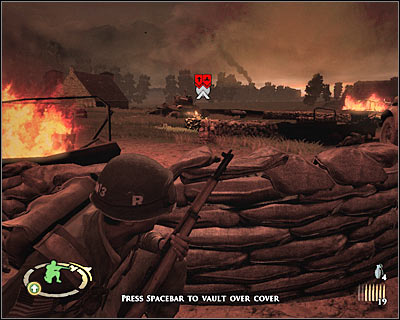
#241
Consider sending base of fire team towards your location. Your colleagues should begin firing at enemy troops, located to the north (2 on the map). You should surprise the Germans from the west [#242]. Be careful here, because the 88 (5 on the map) may be able to hit you if you remain in the open.
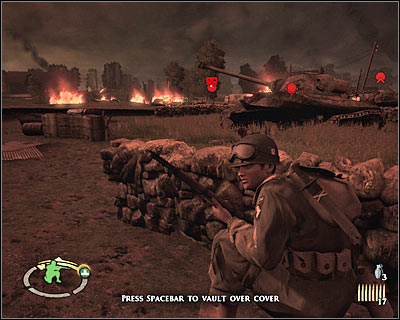
#242
Finally you will have to eliminate enemies standing near parked trucks. You'll also encounter a second heavy machine gun post (3 on the map). It would be wise to act alone, so you won't have to endanger lives of your teammates. You can get to the MG nest from the west. Use grenades or [#243] a rifle to kill the gunner.
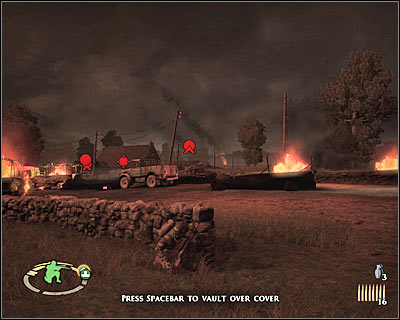
#243
After securing the area you will have to get closer to a long ditch (4 on the map) [#244] which is located to the south of the 88. Wait for a right moment to make a move and start running forward. Notice that you won't be allowed to take cover right away. You'll have to get further into the ditch. Ignore the cannon and nearby enemy units for the time being.
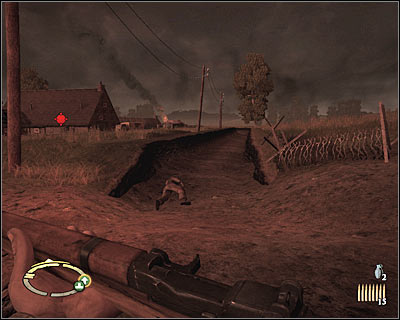
#244
Once you've made it to the ditch, start moving east. Don't even think about exposing your position. Exit the ditch near the eastern end of the map. You will have to make a run towards the northern building [#245]. Obviously you should go to the back of the house. Thanks to that, you will avoid enemy soldiers entirely.
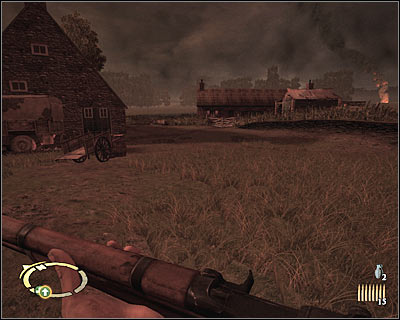
#245
Make sure you've explored the surrounding area, because you will come across the first kilroy (6 on the map) [#246]. Collect this achievement and proceed north. Turn west when you have the chance. Make sure you've collected supplies using an ammo stash (7 on the map). You should also consider returning here each time you've used up all grenades.
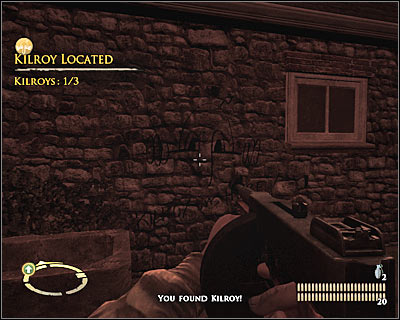
#246
Get closer to the cannon and take cover behind one of larger objects. Notice that the 88 is being surrounded by MG nests (3 on the map) and obviously you will have to avoid them to succeed. Thankfully, enemy soldiers won't see you coming and you may also throw grenades at them [#247] to get rid of them faster than usual.
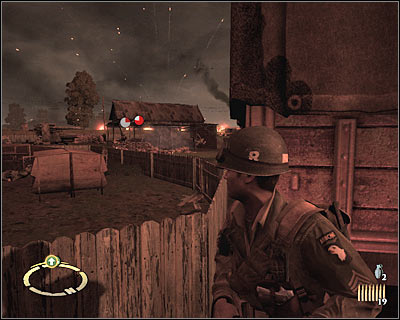
#247
I would recommend leaving the cannon for later. Eliminate all MG nests and then focus on killing the gunners. They will probably leave the cannon in the meantime, so you won't have any problems getting rid of them. Once this is done, go back for supplies, order your men to get here and place an explosive charge on the cannon. After the explosion proceed north (8 on the map) [#248].
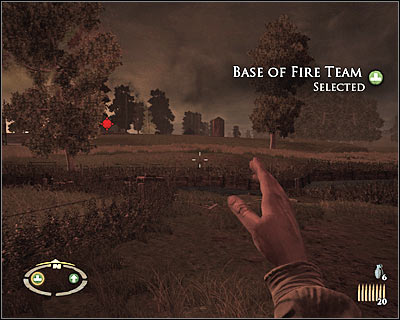
#248
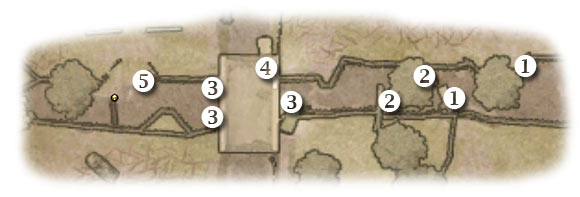
Map legend: 1 - starting area; 2 - cover points for you and your squads; 3 - enemy units; 4 - enemies on the bridge; 5 - destination
This is a relatively difficult assignment, mostly because you'll have to stay near the canal and you won't be allowed to surprise enemy units nor to outflank them. You should also know that many of the surrounding objects may be destroyed by enemy units. Order one of your teams to move back. As for the other squad, it should take cover behind a large truck (1 on the map) [#249]. Your colleagues should be standing next to the hood, because the back of the vehicle may be destroyed easily and that would automatically expose them to enemy fire.
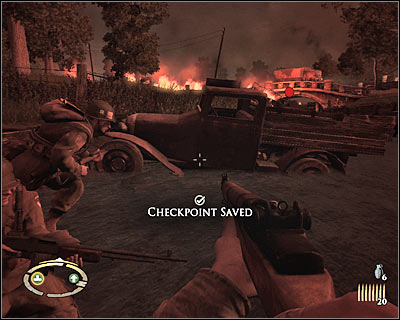
#249
Start firing at enemy troops. You will have to deal with soldiers standing in front of you (3 on the map), as well as with enemy units on a nearby bridge (4 on the map). The group occupying the higher round seems like a priority, because they have a good view at the surrounding area [#250].
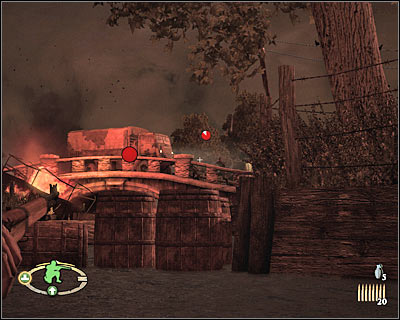
#250
Keep pushing forward, but don't risk too much. There are some large obstacles near your position (2 on the map), but remember that you can hide near wooden objects only for a few seconds. A tree to your left is a better idea [#251]. Go west once you've dealt with German soldiers and eventually you'll receive new orders.
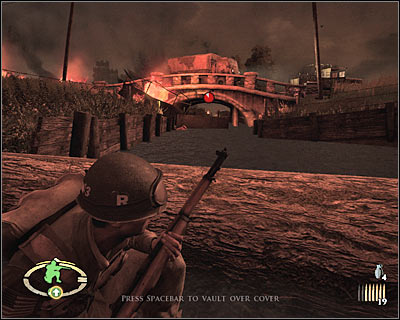
#251
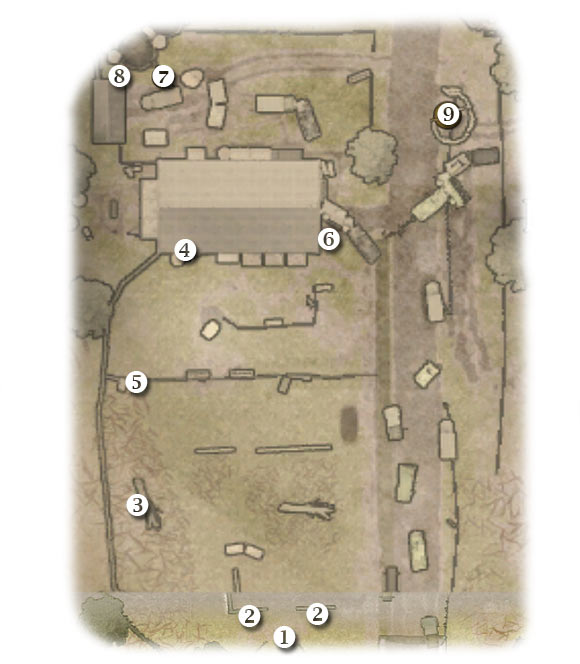
Map legend: 1 - starting area; 2 - cover points for your squads; 3 - tree; 4 - MG nest and first recon point; 5 - wooden fence; 6 - entrance to the barn; 7 - ammo stash; 8 - second kilroy; 9 - cannon (main objective)
This time you won't have to worry about being attacked by the 88 too much. Instead, you'll have focus all your efforts on avoiding being shot by enemy soldiers. You start near the river (1 on the map). Order your teams to move forward and to find suitable covers (2 on the map) [#252]. Your colleagues should begin firing on closest enemy units. I would recommend choosing different targets for your squads.
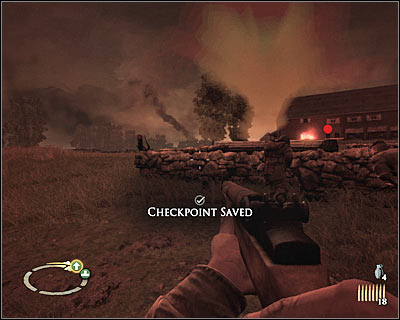
#252
Once you've suppressed the Germans, proceed alone towards a nearby tree (3 on the map) [#253]. This is an excellent cover, because you'll be safe here and you'll also be able to surprise enemy units. Watch out for an MG nest to the north. Try eliminating all hostiles standing to the east of your position.
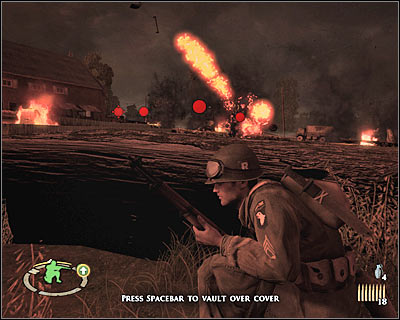
#253
You'll probably notice that new soldiers have left the barn. Enemy units will take cover near a wooden fence. I would recommend using grenades to get rid of them [#254], however make sure that you spared at least two grenades for later. You're going to need those to secure the barn in a few minutes from now.
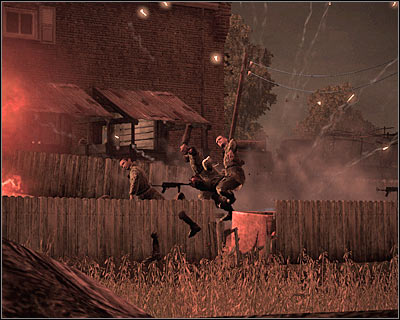
#254
You can clear most of the area from where you're hiding. This will allow you to get to a new cover. Hide in front of the building [#255]. Start off by eliminating the gunner with a precise shot to his head. You can also kill some of the remaining enemy units. Don't forget to use your teams to suppress the Germans each time you plan on doing something risky. Watch out for the 88 here and leave the area if you're under attack.
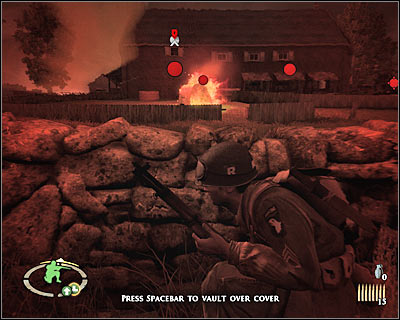
#255
Go back to the tree. Use this time to scout the surrounding area. You will have to eliminate all hostile units before moving on. Start running north, but stay close to the western part of the map. Jump over a wooden fence (5 on the map) [#256]. Approach the wall of the barn and go east. You will encounter a few windows along the way. See if you can score some kills from there.
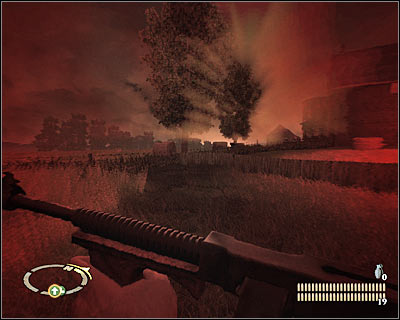
#256
Eventually you should be able to get to an entrance to the barn (6 on the map). Go inside quickly and take cover behind a nearest obstacle. Enemy units are standing in front of you and you must use grenades to hunt them down. Watch out for an upper balcony [#257]. It's guarded by at least one soldier. This threat has to be neutralized as soon as possible.
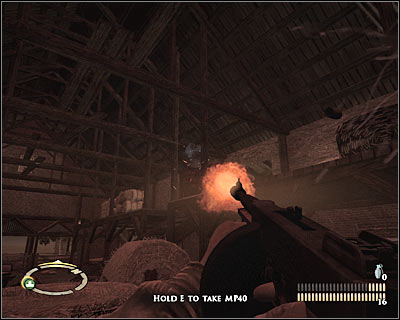
#257
Don't exit the barn just yet. Use the stairs to get to an upper balcony. Go west and then turn south. Eventually you will get to an area where a heavy machine gun post was located (4 on the map). Unlock the first recon point [#258]. Read the report (Wrecked convoy), return to the ground floor and proceed to the northern exit.
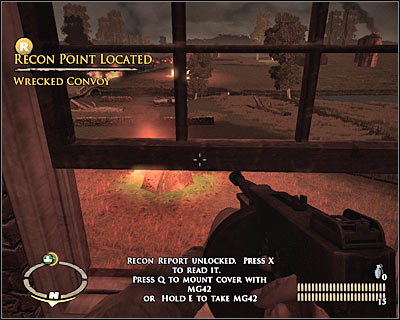
#258
You won't have to spend too much time figuring out what has to be done. Go north and find an ammo depot (7 on the map). You can also find the second kilroy (8 on the map) while you're there [#259]. Now you must travel east. Find a good cover and throw a couple grenades at enemy units. You will have to disable the cannon (9 on the map), as well as to eliminate enemy groups. Finish off by placing an explosive charge on the 88. Your colleagues should arrive here in the meantime. Collect new supplies before moving on to the next area.
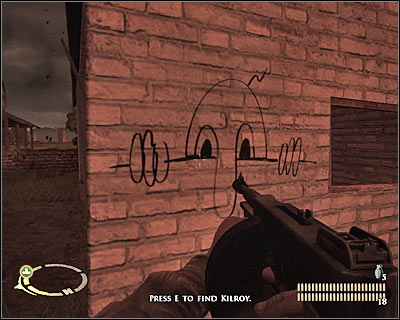
#259
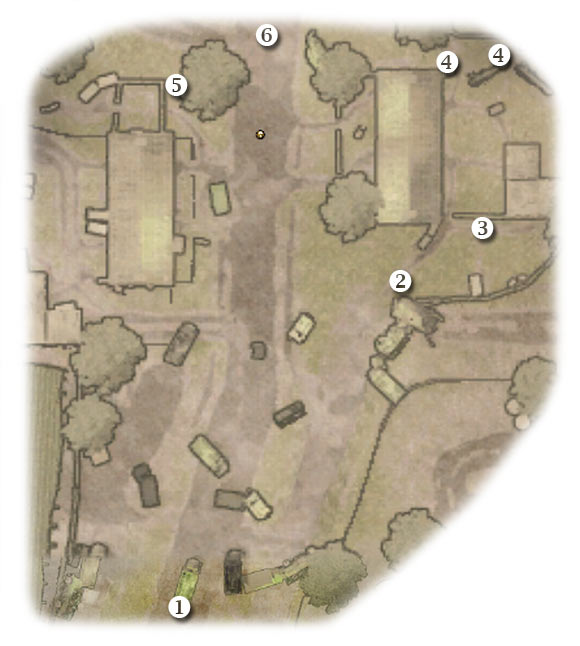
Map legend: 1 - starting area; 2 - side alley; 3 - hideout; 4 - enemy soldiers; 5 - enemy troops; 6 - area where you can attack the tank
I would recommend that you act alone until the tank has been destroyed. Your men will only help you in securing this area once it's all over. You start to the south (1 on the map) of your target. Start moving north and use nearby obstacles for much needed cover. Proceed to the north-east. This means you will travel to the back of one of the buildings (2 on the map) [#260].
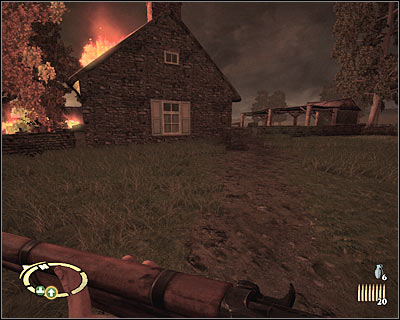
#260
Once you've arrived at your new destination, find a cover quickly. I would recommend hiding near the brick wall (3 on the map). There are two groups of enemy units in the area (4 on the map). Use grenades to dispose of enemy troops [#261]. Travel north once the resistance has been eliminated.
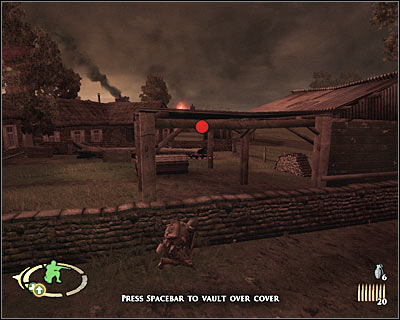
#261
You must be extremely careful from now on, because you're getting closer to an area patrolled by the tank. You should also know that more enemy units are stationed next to the western building (5 on the map). Wait for the metal beast to move to the north, approach the tank quickly (6 on the map) [#262] and press the action key to place an explosive charge on it. Once it's gone, focus on eliminating enemy units. Once again you should use grenades.
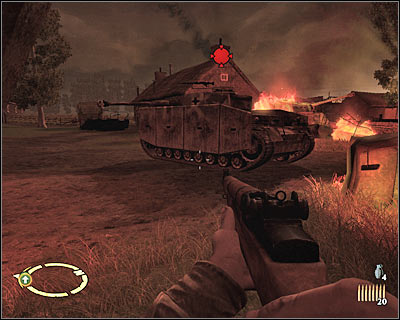
#262
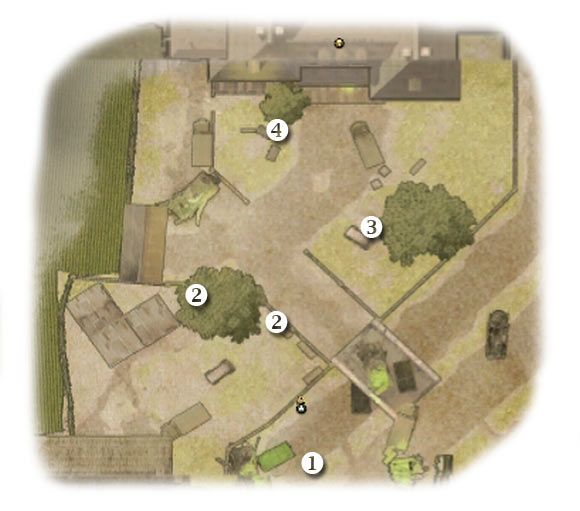
Map legend: 1 - starting area; 2 - cover points for your squads; 3 - enemy soldiers; 4 - MG nest
You won't spend too much time in front of the train station, however you'll have to be careful here. You are moving towards a small area and this will make the next fight more challenging. You start to the south of the station (1 on the map). Order your men to take cover behind brick walls (2 on the map) [#263]. Wait for the Germans to reveal their positions.
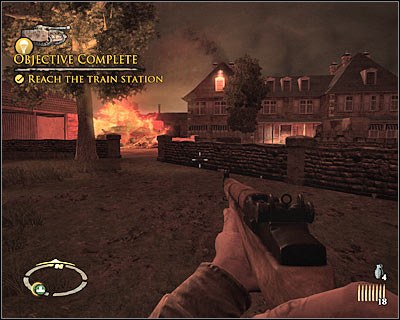
#263
Take cover behind the right wall and spend a while trying to figure out how to eliminate enemy troops. Obviously the most important thing here is to disable a new MG nest (4 on the map) [#264]. I'd strongly recommend using grenades. As for the other group (3 on the map), your standard rifle should do the trick, as long as your teams are suppressing the Germans. You will be transported to a new area once you've dealt with both groups.
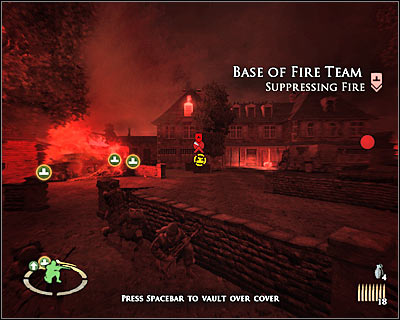
#264
Ignore the fact that you don't have the map of the building, because there's only path leading to your destination. Proceed to the stairs and head on to the upper floor. Find a good cover once you've arrived. I would recommend choosing a wall [#265]. There are enemy soldiers in front of you and you must kill them from here.

#265
The second group is hiding near the bar. This time you should consider using grenades, especially since you'll come across supplies in the near future. Find a table with a map on it [#266] and unlock the second recon point. Read the report (Station map) and proceed to the next room. Go back to the ground floor, exit the building and await further instructions.
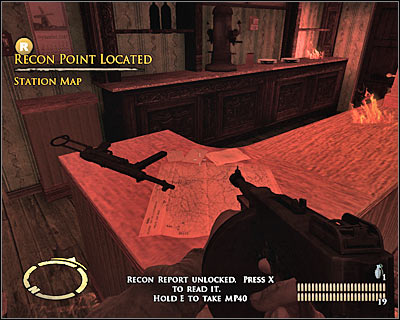
#266
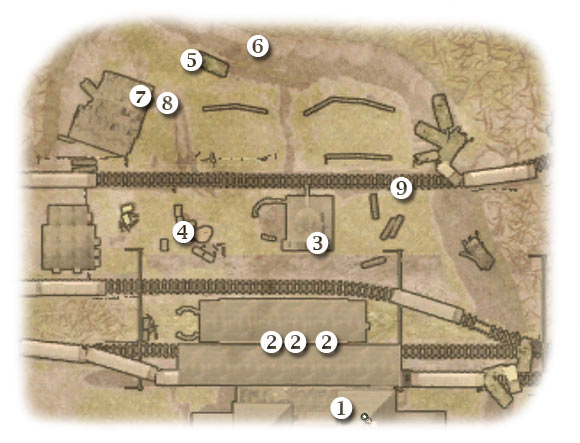
Map legend: 1 - starting area; 2 - allied teams; 3 - third kilroy; 4 - ammo stash; 5 - destroyed truck (cover); 6 - area where you destroy the first tank; 7 - enemies; 8 - area where you destroy the second tank; 9 - area where you destroy the third tank
Important! You should notice that you've been assigned to a different objective (Clear the train station), but it's going to be completed automatically. You may proceed with the current assignment the second you've left the building (1 on the map). Notice that your men are taking cover to the north-west of your position (2 on the map) [#267]. I'd strongly recommend that you leave them there, because they'll be safe against enemy attacks.
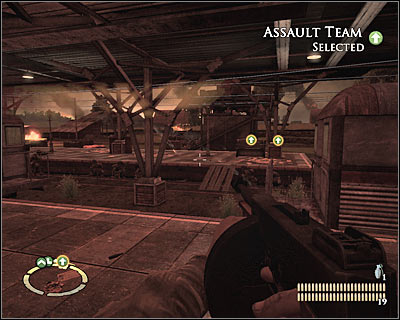
#267
Before you decide to focus your attention on completing the main objective, you should spend some time trying to find the last bonus area. A large tower is located to the north. Go there, use the stairs, but stop at about a half way through. The third kilroy (3 on the map) can be found to your left [#268]. Don't worry if you die trying to get back to your colleagues, because you won't lose this achievement, even if you reload the last checkpoint.
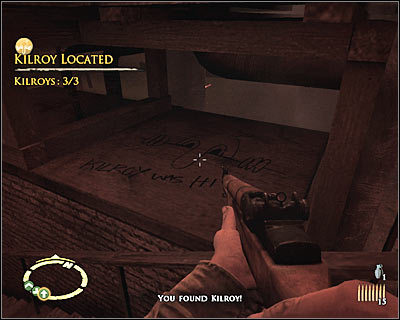
#268
Your teams should be focused on attacking enemy units in the central and in the eastern area of the map. You should move to the western side of the train station. Your first assignment here is to find a new ammo stash (4 on the map) [#269]. I would recommend that you memorize this location, because you'll want to return here each time you've used up all grenades. You will also find good cover here and it'll be important when you'll find yourself under heavy fire.
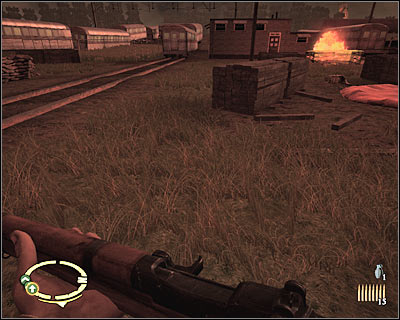
#269
Obviously you should keep shooting at the Germans. Eventually you'll notice that a tank has arrived in the area. A metal beast will stop directly to the north of your position. Order at least one of your teams to distract the tank. Start running north at the same time. Avoid being hit and take cover behind a large truck (5 on the map) [#270].
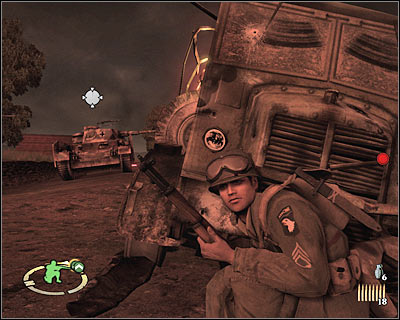
#270
Wait for the tank to focus its attacks on your squads. Start running towards the machine and press the action key to place an explosive charge on it. Go back to the hideout. Once the explosion has occurred [#271], consider going back to the ammo stash. Collect new supplies and take cover behind a northern object, because that's where more enemy units will show up.
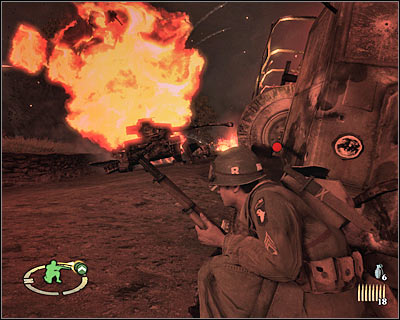
#271
You can try and eliminate a few other soldiers in the meantime, however I wouldn't recommend leaving this area. Obviously you should be using grenades to eliminate enemy units [#272]. They're very effective against German troops and you have unlimited supplies. Watch out for a bazooka team. Take it out as soon as possible.
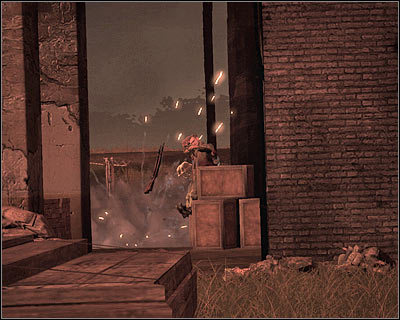
#272
This time TWO enemy tanks will appear near the train station. Thankfully, enemy vehicles will separate before they even get to this area. Obviously you should start off with the tank located in the western side of the map. Notice a small group of soldiers to the left of the metal beast. Use your grenades to kill them (7 on the map) [#273].
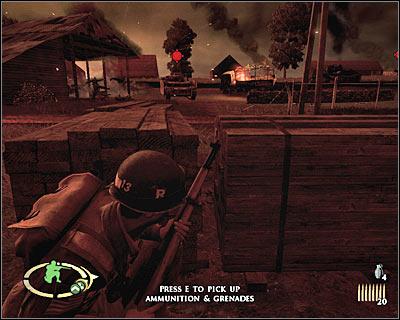
#273
Order at least one of your teams to begin firing at the tank. Start running towards the machine. If you don't want to risk too much, consider taking cover inside the left building. Approach the machine when it's safe. Place an explosive charge, move back and wait for an explosion to occur [#274]. You may go back to the ammo stash.
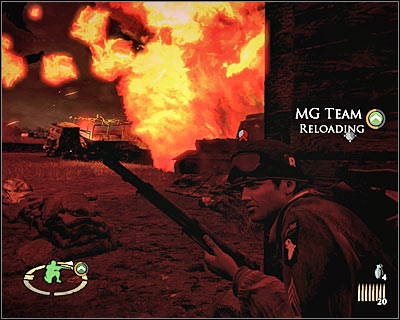
#274
Obviously you must travel east to get to the second tank. Don't forget that you must eliminate enemy troops along the way. Hide under the big tower [#275] and wait for a right moment to get closer to the tank. Place an explosive charge and move back to a safe distance.
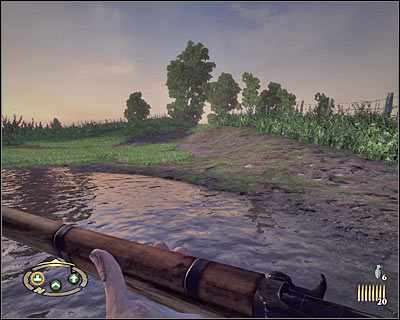
#275
You can either go back to the ammo stash or you can rejoin with your squads to the south. Either way, you will notice more German tanks heading your way [#276]. You'll be fine as long as you stay hidden. You won't have to destroy these tanks, because allied units will arrive here in a short while. Wait for a new cut-scene to be displayed on your screen. Get ready for the final mission!
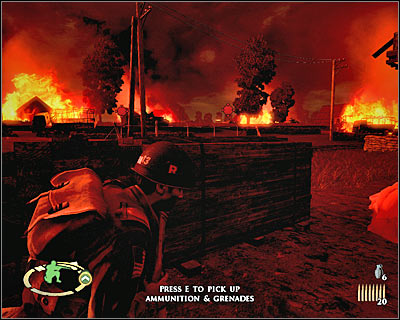
#276
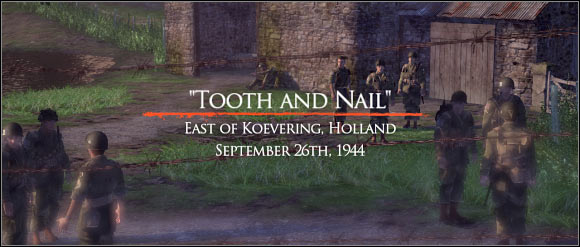
TIME AND PLACE:
September 26th, 1944 (D+9)
East of Koevering, Holland
0830 hours
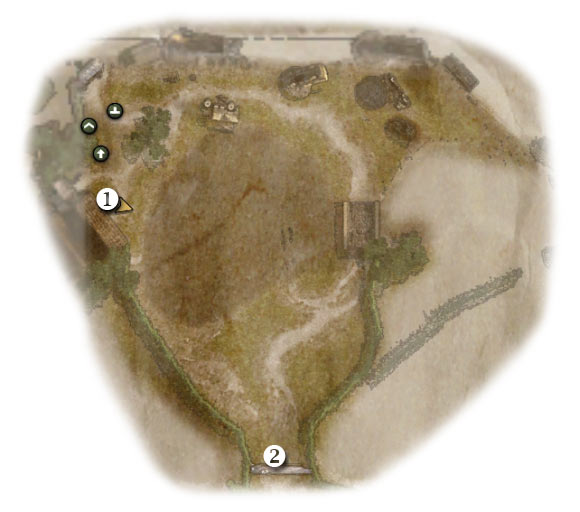
Map legend: 1 - starting area; 2 - next area
Thankfully, you don't have to worry about being attacked by anyone, because you start this mission in a safe area and far away from enemy forces (1 on the map). Notice that for the purpose of this mission you've been given command of three squads. Sadly, bazooka team isn't among them, so it's not going to be that easy as it may have seemed. Order your squads to follow your lead and proceed towards the southern hill (2 on the map) [#277].
#277
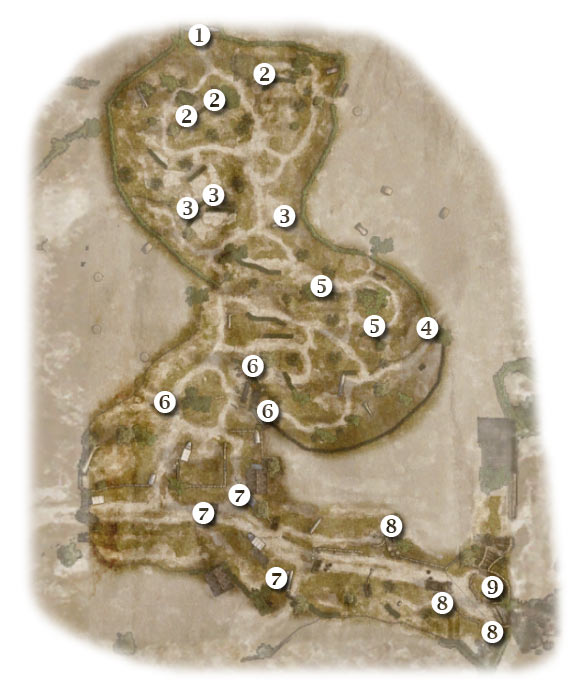
Map legend: 1 - starting area; 2-3 - cover points for your quads; 4 - first recon point; 5-8 - cover points for your squads; 9 - first cannon
You should be standing on top of a small hill (1 on the map). You can't stay here for too long for obvious reasons. Find good cover for you and your teammates. There are some large obstacles in front of you. Send your squads there (2 on the map) [#278]. You should also spend some time choosing the closest targets for them.
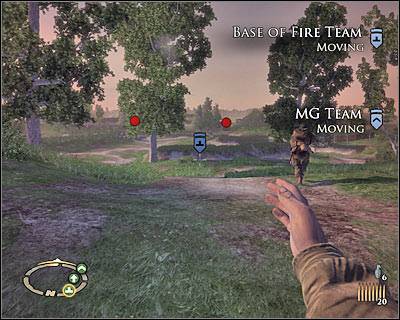
#278
I guess you won't have any major difficulties getting through this entire field. Each time you'll have to begin by ordering your teams to suppress enemy units. Next up you'll have to surprise enemy soldiers. You'll be going alone or with an assault squad. I would recommend that you start off by moving to your right, because you'll have an opportunity to attack the first group [#279]. Prevent the soldiers from leaving their cover, because they would take cover behind a wooden fence and they would be able to kill you from there.
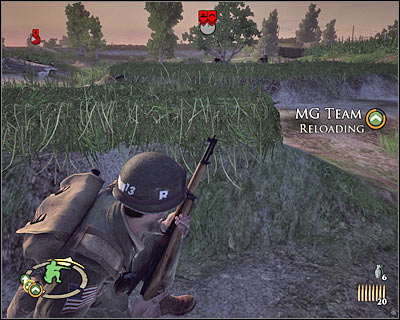
#279
A second group of German soldiers is taking cover next to a fallen tree. Get rid of them. Once they're gone, allow your teams to move forward (3 on the map). Two squads should stop in the central area [#280]. Send the remaining one to your left. Make a few steps forward and allow new groups of enemy units to reveal their positions.
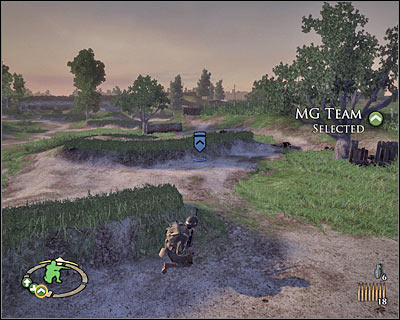
#280
At least one of your teams must begin firing on a heavy machine gun post which can be seen in the distance. Obviously you will have to surprise the nest somehow. Travel south-east and use large obstacles for cover along the way. Find a good place for a surprise attack and kill the gunner [#281]. There's also a second group in this area and you should be able to neutralize it as well.

#281
You may order your men to move to new locations (5 on the map). This time your colleagues must face the western section of the map, because that's where more enemy units are hiding. Allow your men to open fire. You should consider exploring a nearby hill in the meantime, because the first recon point (4 on the map) is located there [#282]. Read the report (Sand dunes) and rejoin with one of your squads.
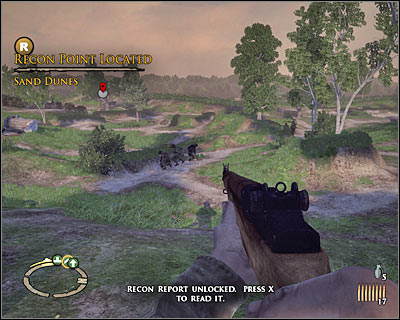
#282
Make sure that your teams are still firing on enemy troops. Travel south-west alone and take cover behind a large object which can be found on top of a small hill (6 on the map) [#283]. You have an excellent view of the surrounding area from here and obviously you should use this to your advantage. Use grenades or your rifle to dispose of enemy soldiers.
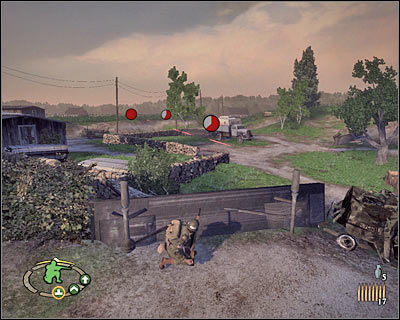
#283
Order one of your squads (MG or Base of Fire) to get here after dealing with a few enemy soldiers. Your men must suppress the rest of the Germans from this location. Try moving to a second cover (6 on the map). Order a new group to join you. Finally you should consider moving west. Find a good spot from where you can continue firing on enemy units [#284].
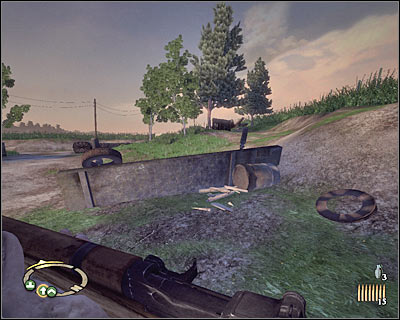
#284
Notice that your current progress has been saved here. This doesn't mean you shouldn't continue attacking German soldiers. Thankfully, there's going to be only a few of them left and you can also surprise some of the Germans. Keep heading east. Take cover behind the barrels, next to a truck [#285].
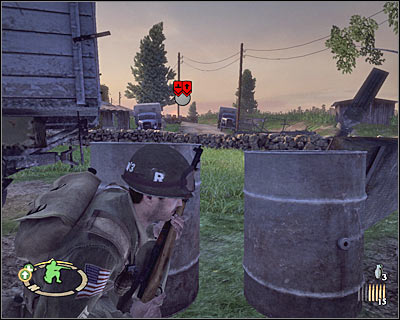
#285
Consider allowing one of your teams to get here after you've dealt with enemy units. Keep pushing east. Order your men to take cover behind a new object (7 on the map) [#286]. Prevent them from getting shot at by enemy troops, because they may die while trying to get to this new area.
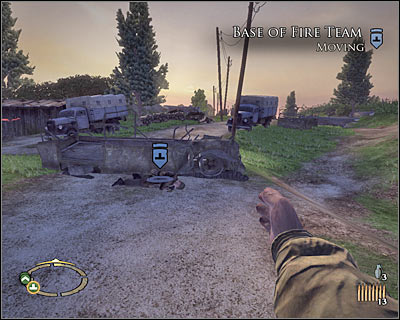
#286
Notice that you're getting closer to the first cannon. This means you'll have to be even more careful, because the 88 will obviously attack you if you find yourself standing in the line of fire. For now you should consider taking cover behind a tree (7 on the map) [#287]. You should be able to kill at least a few soldiers from here. You can also consider moving to your left if you're having some difficulties finding them. Neutralize one of the machine gun posts before moving on.
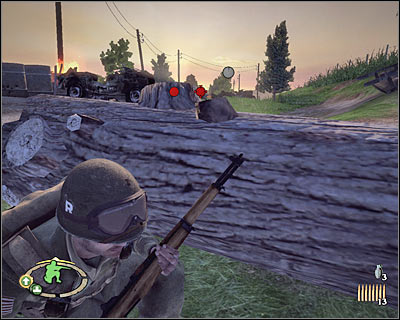
#287
I would recommend moving alone towards the 88. Choose a cover located to the north (8 on the map) of the cannon or proceed directly to the south. I guess you won't be surprised to hear that you should use grenades here [#288]. Remember to keep moving, so you won't be an easy target for German troops.
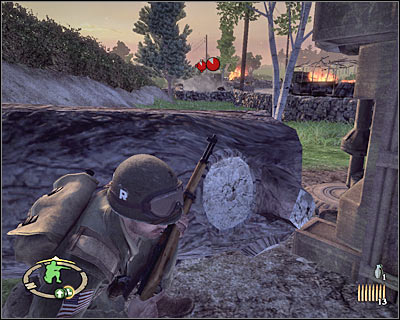
#288
Try getting as close to the 88 (9 on the map) as possible before proceeding with the assault. Prevent the cannon from turning towards your location, because it would be extremely difficult to leave the cover safely. Take out the crew, place an explosive charge and wait for an explosion to occur [#289]. You can ask your teams to get here in the meantime.
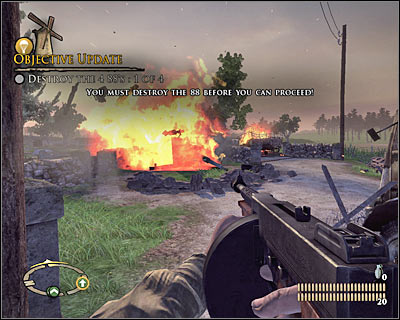
#289
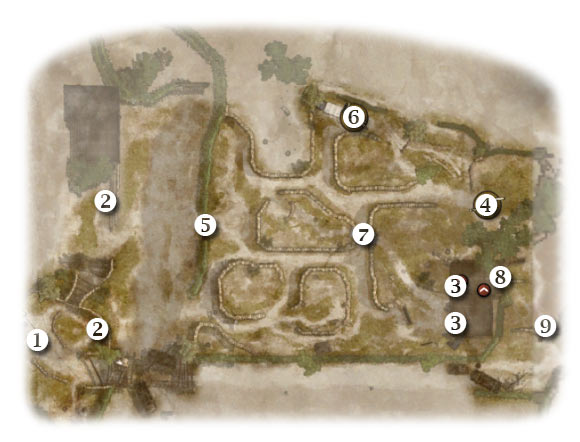
Map legend: 1 - starting area; 2 - best cover points for your squads; 3 - MG nests; 4 - second cannon; 5 - passageway near the river; 6 - ammo stash; 7 - small bridge; 8 - first kilroy; 9 - next area
Obviously you begin near the first cannon (1 on the map). Travel to the east and you'll notice that you're getting closer to a second 88. The first decision you'll need to make is to where set up your teams. I would recommend that you keep your squads to the west of the river, because advancing with them would be very risky. You can order your teammates to hide on top of a small hill [#290] or closer the river (2 on the map).
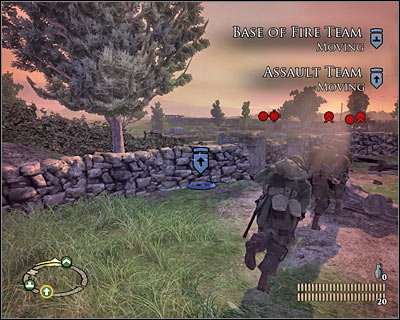
#290
Either way, you should spend some time scouting the surrounding area. Order your squads to suppress two heavy machine gun posts which are located to the south (3 on the map) of the main cannon [#291]. Obviously you will also have to remember about avoiding the cannon itself (4 on the map), because one successful shot will be more than enough to kill Baker. You don't have to ask your teams to suppress the cannon, because it wouldn't do you any good.
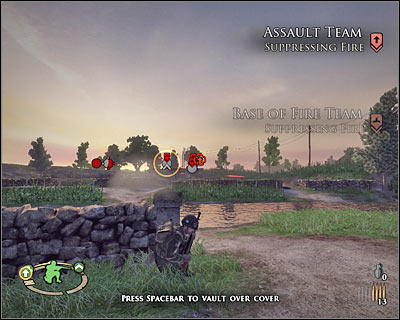
#291
Before you decide to leave cover, make sure that the area in front of MG nests isn't occupied by any German soldiers. It's important, because otherwise they could have surprised you in the future. Start RUNNING east. Cross the river and keep heading towards the northern passageway (5 on the map) [#292]. Press the crouch key once you've arrived to avoid injuries.
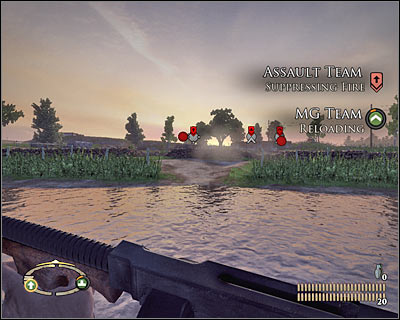
#292
You must start moving north-east. Your objective at the moment is to reach an ammo stash (6 on the map). This area was guarded by enemy troops, but they'll probably retreat to the cannon. Before you decide to get to the stash [#293], order your men to suppress the cannon, so you won't be attacked by the 88 in the meantime. Otherwise it would be next to impossible to get the supplies safely.
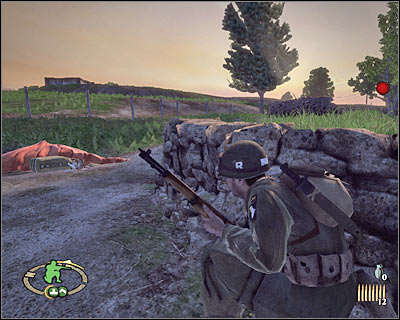
#293
Once you've collected grenades, start moving south. Your colleagues should once again focus on suppressing enemy machine gun posts. Make sure that you're crouching all the time and prevent German soldiers from surprising you. Go under the bridge [#294] and get closer to the MG nests. Obviously you must use grenades here.
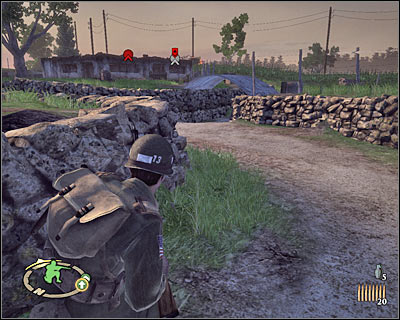
#294
Focus on securing the room to your right, because disabling this nest will allow you to get to the building [#295]. Choose a machine gun from your inventory, move forward and take cover behind the left wall. Lean out and disable the gunner. Don't exit the building just yet, because you'll find your first kilroy here (8 on the map). Collect this achievement before moving on.
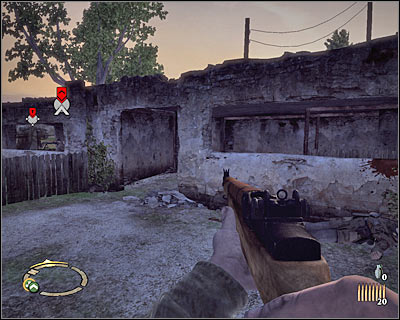
#295
I guess you won't be surprised to hear that you'll have to focus your attention on destroying the second cannon [#296]. Thankfully you'll be given a freedom of choice. You can use grenades, lean out and fire or surprise the gunners. Don't forget to blow up the 88. Collect supplies from the ammo stash and proceed south (9 on the map). This is where you'll find two remaining cannons.
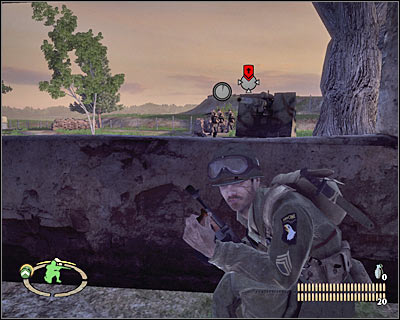
#296
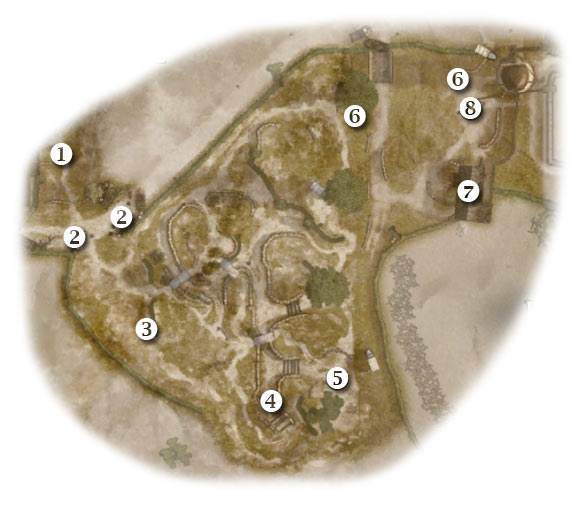
Map legend: 1 - starting area; 2 - cover points for your squads; 3 - area from where you can surprise enemy troops; 4 - route to the third cannon; 5 - third cannon; 6 - MG nests; 7 - small hut; 8 - fourth cannon
Start moving south. A nearby field is being defended by two of the remaining cannons and this will mike your job more difficult. We'll start off with the southern cannon, but the first thing you need to do is to place your teams correctly. There are some concrete barriers here (2 on the map) [#297] and obviously your men must use them in order to stay safe. Ignore attacks made by both cannons. As long your colleagues remain here, they won't die.
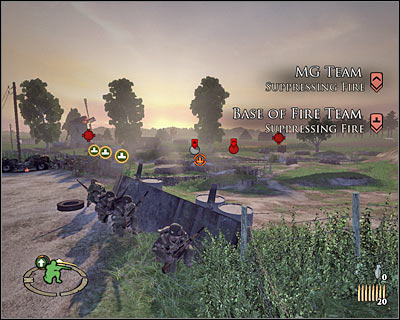
#297
I would recommend that you join your teams and help them to eliminate a few groups from the top of the hill. Like I've already said, you'll want to get to the southern 88 in the first place, so you'll have to clear your path. Once you're ready, start running in a straight line and you use a small ditch for cover (3 on the map) [#298].
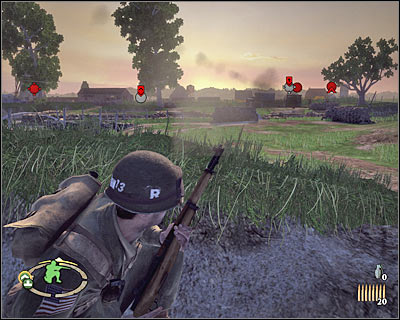
#298
You should be able to eliminate a few enemy soldiers from where you're standing. It's important that you secure the surrounding area, because otherwise you couldn't continue with your journey. Use your men to suppress enemy troops. It's very important that you eliminate a heavy machine gun post (5 on the map) [#299] which is located near the third cannon.
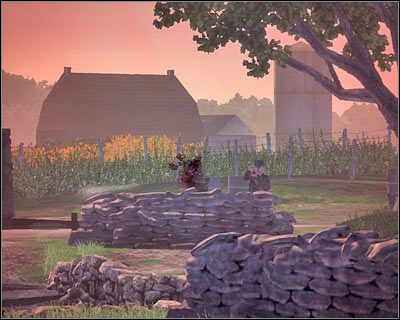
#299
Get ready for a challenging assignment. Order at least two of your teams to start firing at the cannon. Run towards the 88. Once you're close enough to the cannon, you should notice a ditch in front of you (4 on the screen) [#300]. Hide there and make sure no one from the north attacks you while you're planning your next move.
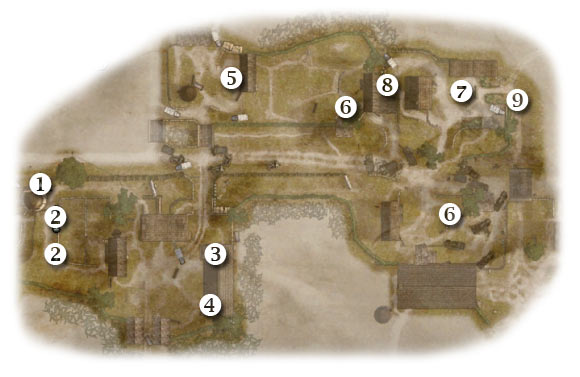
#300
You may proceed towards the cannon. I wouldn't recommend approaching it from the north for obvious reasons. Instead, choose a small path located to the south-west of the cannon. This will allow you to surprise its crew [#301]. Kill the Germans and place an explosive device on the 88. Find a good cover while waiting for an explosion.
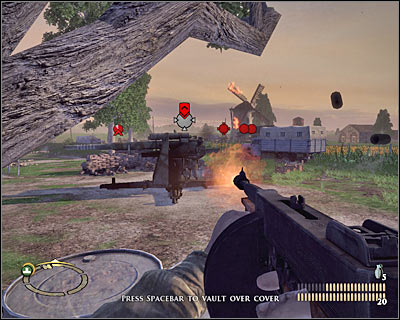
#301
Destroying the second cannon (8 on the map) is going to take you less time, but you still have to be extremely careful while trying to eliminate enemy units. Your teams may remain on top of the hill, however you must choose new targets for them [#302]. You could consider sending one of your squads to the south (3 on the map), but it shouldn't be necessary.
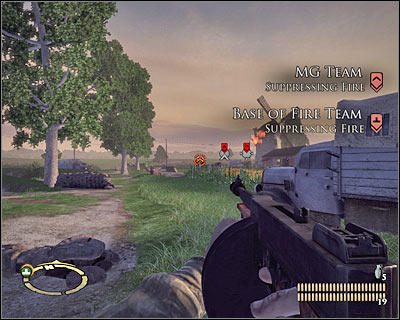
#302
Access to the final fourth cannon is hindered by two MG nests (6 on the map), however you should only focus on eliminating the western heavy machine gun post. Keep heading north and stay close to the eastern edge of the map. You should be able to find a large obstacle which you may use for cover [#303].
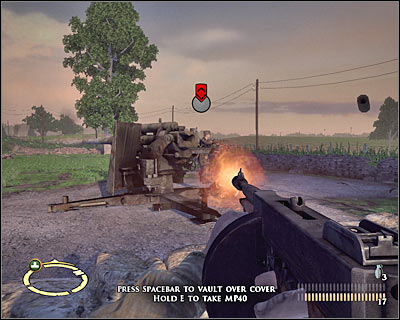
#303
Order one of your teams to suppress the Germans hiding inside a small hut (7 on the map). Wait for the right moment to make a move, leave your cover quickly and proceed towards this building. Kill the Germans with a machine gun without giving them a change to fight back [#304].
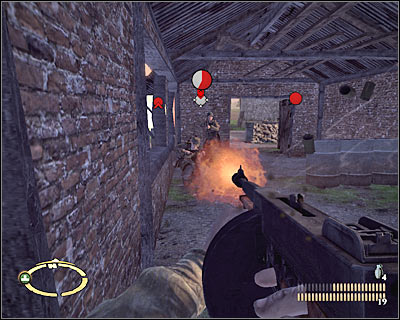
#304
There are only two more targets for you to eliminate. Obviously you must take out the cannon, but there's also a second MG next to it. Use grenades or lean out carefully. Either way, you must destroy the cannon [#305]. Doing this will trigger a new cut-scene. Get ready to be transported to a new location.
#305
Map legend: 1 - starting area; 2 - cover points for your squads; 3 - MG nest and suggested hideout; 4 - second kilroy; 5 - cover point for your squads; 6 - MG nest; 7 - cannon (main objective); 8 - third kilroy; 9 - road leading to the next area
You start the game to the west (1 on the map) of your destination. Sadly, you won't be able to get to the final 88 by moving in a straight line. You will have to visit a farmhouse which is located to south-west of your current position. Notice that your men are taking cover behind brick walls (2 on the map) and they should remain there for at least for a few minutes. The first group of enemy soldiers is stationed inside a small barn [#306]. Try killing them from here. They must die in order for you and your colleagues to be able to move on.
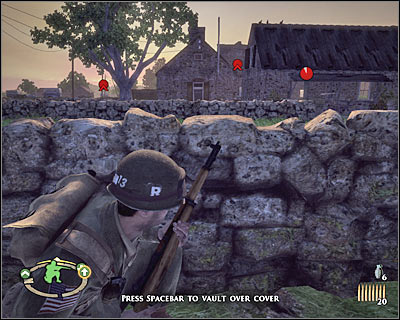
#306
You will probably notice two MG nests to the east of your position. Eliminating the northern nest is very easy, but the one is south is far more difficult to neutralize (3 on the map). I would recommend that you move closer to the farmhouse building. You can go alone or you can take one of the teams with you. Eliminate the gunner [#307] before you decide to go inside.
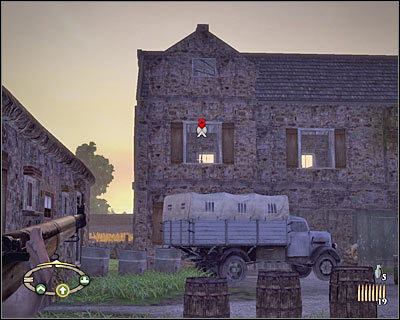
#307
Make sure that the entire area is secured. It shouldn't be a problem, because only a few soldiers are defending the farmhouse. You can also use grenades to get rid of them faster. Enter the main building and inspect your surroundings. You will find the second kilroy (4 on the map) near the southern wall [#308].

#308
I would recommend that you order your MG and Base of Fire squads to follow you. Lead them to the first floor of the building. Your colleagues should set up near the northern windows (3 on the map) [#309]. As for your assault squad, leave them outside. You may also order this squad to move north, however you would have to find a good cover for your teammates.
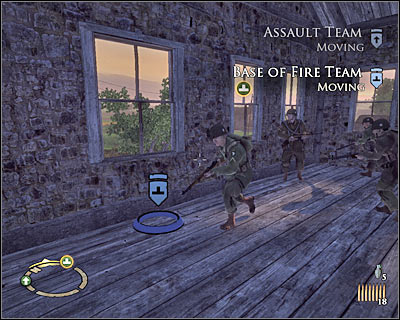
#309
Notice that enemy soldiers have appeared to the north of your position [#310]. Thankfully, your teams won't have any problems eliminating hostile troops. You can give the orders from the first floor or you join your assault squad and decide for a more direct approach. It shouldn't be necessary, because you'll only have to with two small groups. Order everyone to follow you and head north.
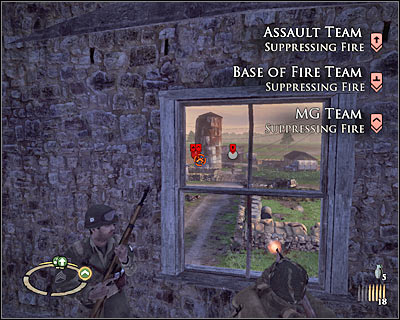
#310
You will have to be ready to send your colleagues to new obstacles (5 on the map) once you've arrived at a new area [#311]. Enemy units will appear to the east of your position. Focus most of your efforts on disabling a heavy machine gun post (6 on the map). You can keep moving forward, but don't forget to order your men to suppress the Germans. Avoid wooden obstacles, because most of them are going to be destroyed almost instantly.
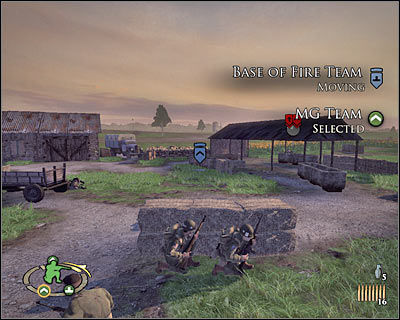
#311
The next group of enemy soldiers is stationed inside a small building, located near the MG nest. Order your teams to suppress enemy soldiers and approach the building from the north. Surprise your enemies and kill them with your machine gun [#312].

#312
You should now consider allowing your MG squad to get here. Place your men near the sandbags [#313] and give them the order to start firing at the final MG nest which is located to the south (6 on the map). Make sure it's gone and go there now. You must avoid being seen by the 88, because it's very easy to die here.
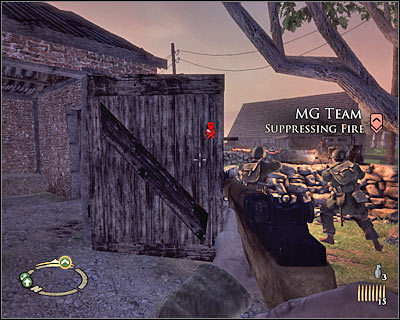
#313
I think it's about time you've handled the problem with the final cannon (7 on the map). Sadly, it's not possible to get there from the north. Instead, you should consider taking cover behind the wall [#314]. Use some of the carried grenades to neutralize enemy units. Approach the 88 from the south and kill the crew. Once this is done, use an explosive charge to blow up the cannon.
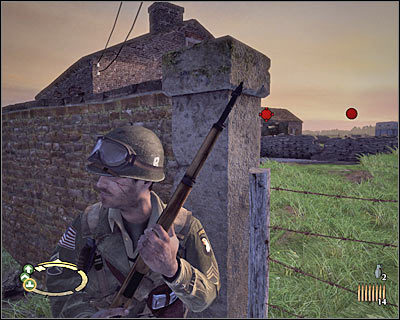
#314
Notice that you've been given a new assignment (Rendezvous with the 502D), however you won't have to leave this area. You will remain near the cannon. Move to the north and inspect the western wall. You will come across the final third kilroy (8 on the map) [#315].
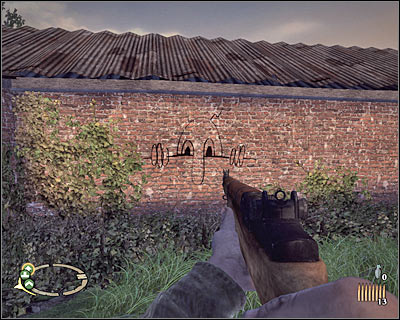
#315
The final task you must accomplish is to meat up with a new team. Go back to the cannon. Start moving east and turn south when you have the chance. There's a small road here which leads to the bridge (9 on the map) [#316]. Go there and you'll eventually trigger a new cut-scene.
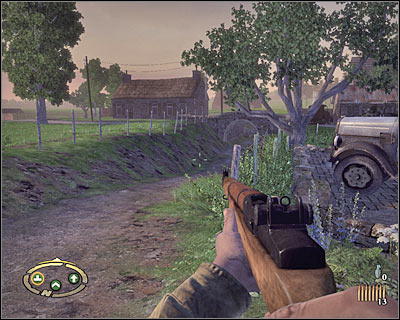
#316
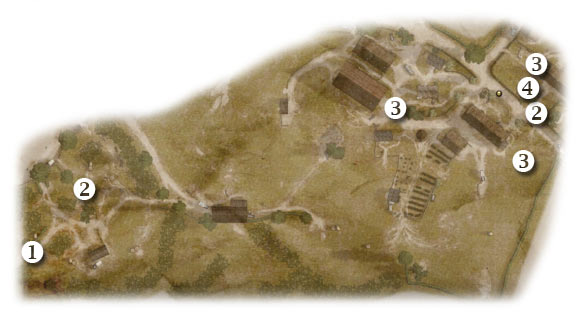
Map legend: 1 - starting area; 2 - enemies with bazookas; 3 - German tanks; 4 - cannon
It's about time for your final trip. The good news is that you won't be surprised with anything new. Just as before, you'll have to eliminate enemy tanks, cannons and bazooka crews. You should also know that you'll be exploring larger fields instead of narrow passageways and this'll make your job a lot easier. Start off by moving east [#317].
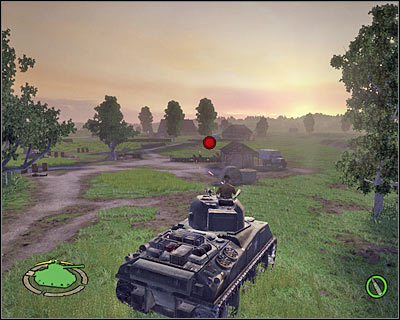
#317
I guess you won't be surprised to hear that you'll encounter A LOT of standard soldiers along the way [#318]. Killing them is extremely easy. Only one bazooka team will stand in your way (2 on the map). I would recommend that you approach the village from the south-west.
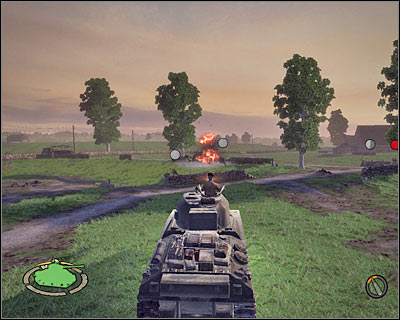
#318
Be careful, because you'll encounter the first German tank in just a few seconds (3 on the map) [#319]. Destroying the metal beast shouldn't be a problem, as long as you keep moving. The second tank can be found to the east. Don't let it surprise you, because you may not notice it at first glance.
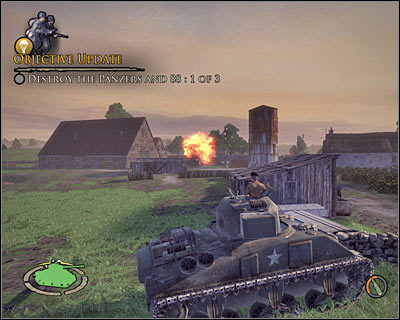
#319
You must proceed north, because that's where the cannon is located (4 on the map). You have to be more careful here, because the 88 is being guarded by bazooka crews, as well as by the third tank. Destroying the 88 [#320] will allow you to complete this particular mission objective.
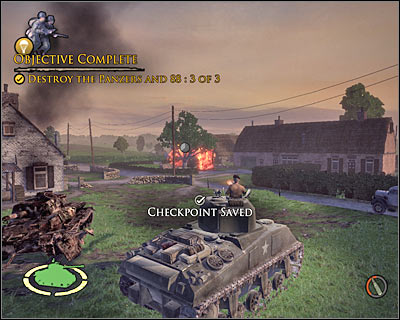
#320
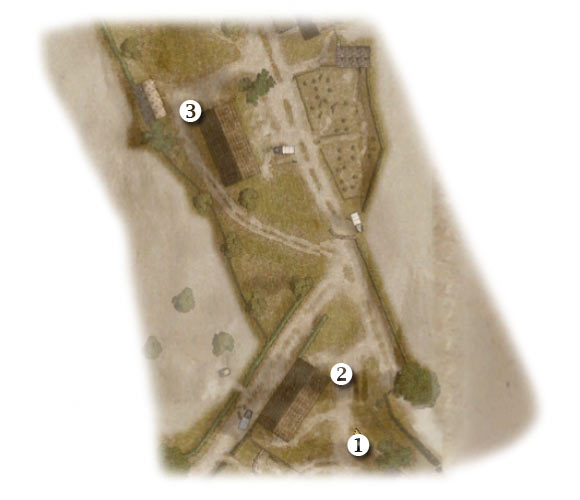
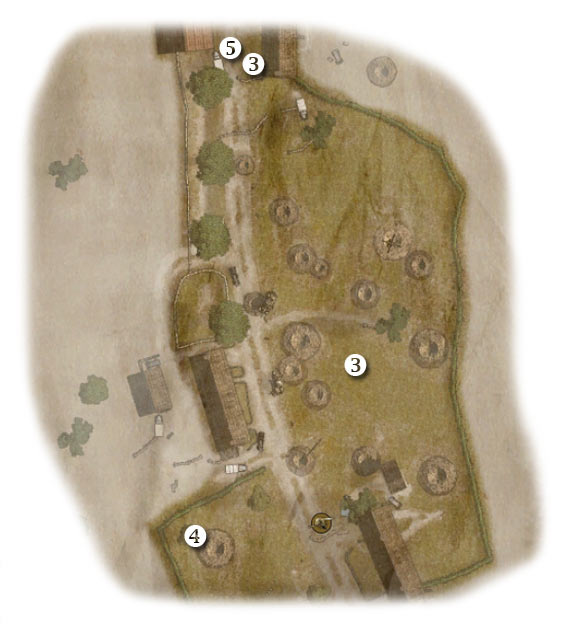
Map legend: 1 - starting area; 2 - cannon; 3 - enemies with bazookas; 4 - second recon point; 5 - destination
You start near the first cannon (1 on the map). A second 88 can be found to the north (2 on the map) and you should consider destroying it from a safe distance [#321]. Make sure that you're not moving in a straight line, so you won't be an easy target.
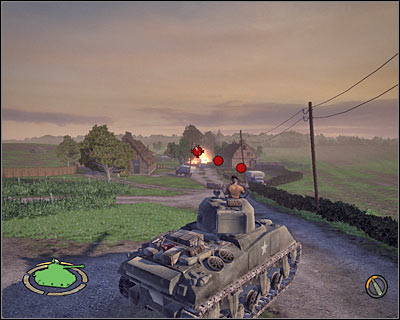
#321
Keep heading north. I would recommend staying close to the western side of the map. You will encounter several bazooka crews along the way (3 on the map). You should be fine, as long as you remember to attack them from a large distance. One of the bazooka crews will appear to the north, outside the map [#322]. Neutralize it as soon as possible.
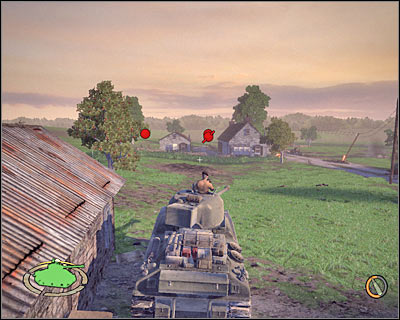
#322
You will soon arrive at the second recon point (4 on the map). All you have to do is to get closer to the designated area of the map and you'll be rewarded with the final report (The link-up) [#323]. Notice an allied tank in the area. It'll help you in getting rid of German infantry.
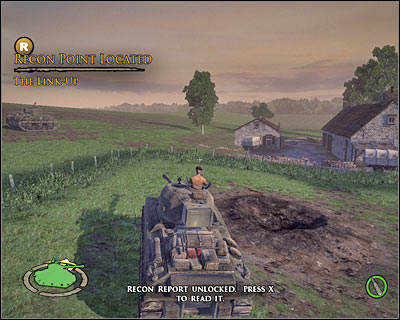
#323
You may start moving towards the northern village (5 on the map). Don't forget to eliminate bazooka crews. The northern part of the map is being guarded by two such teams [#324]. Eliminate them and get to your destination. This will allow you to fulfill this mission objective.
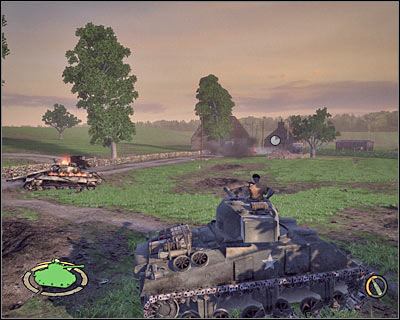
#324
Congratulations! You've just finished the game!
Check the main guide for additional info on where to find these bonuses.
CHAPTER 2
First recon point - assignment number 3
Second recon point - assignment number 7
CHAPTER 3
First recon point - assignment number 1
Second recon point - assignment number 6
CHAPTER 4
First recon point - assignment number 4
Second recon point - assignment number 6
CHAPTER 5
First recon point - assignment number 1
Second recon point - assignment number 2
CHAPTER 6
First recon point - assignment number 1
Second recon point - assignment number 1
CHAPTER 7
First recon point - assignment number 3
Second recon point - assignment number 3
CHAPTER 8
First recon point - assignment number 1
Second recon point - assignment number 4
CHAPTER 9
First recon point - assignment number 3
Second recon point - assignment number 5
CHAPTER 10
First recon point - assignment number 1
Second recon point - assignment number 4
Check the main guide for additional info on where to find these bonuses.
CHAPTER 2
First kilroy - assignment number 3
Second kilroy - assignment number 4
Third kilroy - assignment number 7
CHAPTER 3
First kilroy - assignment number 1
Second kilroy - assignment number 3
Third kilroy - assignment number 6
CHAPTER 4
First kilroy - assignment number 2
Second kilroy - assignment number 5
Third kilroy - assignment number 7
CHAPTER 5
First kilroy - assignment number 1
Second kilroy - assignment number 2
Third kilroy - assignment number 3
CHAPTER 6
First kilroy - assignment number 1
Second kilroy - assignment number 3
Third kilroy - assignment number 6
CHAPTER 7
First kilroy - assignment number 3
Second kilroy - assignment number 3
Third kilroy - assignment number 3
CHAPTER 8
First kilroy - assignment number 2
Second kilroy - assignment number 3
Third kilroy - assignment number 4
CHAPTER 9
First kilroy - assignment number 1
Second kilroy - assignment number 3
Third kilroy - assignment number 6
CHAPTER 10
First kilroy - assignment number 1
Second kilroy - assignment number 2
Third kilroy - assignment number 2


 Bulletstorm Game Guide & Walkthrough
 Black and White 2 Game Guide & Walkthrough
 Broken Age Game Guide & Walkthrough
 Battlefield 2142 Game Guide & WalkthroughBeyond: Two Souls Game Guide & Walkthrough