
This guide for Borderlands the Pre-Sequel is a richly illustrated walkthrough for the game developed by the American-based Gearbox Software. This guide comprises all of the aspects of this excellent game, of the FPS genre, with elements of an RPG. What you will find here is a comprehensive walkthrough for all of the missions available in the game, both when it comes to main and side missions. Also, this guide includes a detailed description for the mechanics present in the game. The initial chapters of this guide present lots of information for those, who only start their adventure in this universe. You will find here descriptions of tactics, concerning the ways to deal with difficult opponents, elite opponents and bosses themselves. The guide also advises you on what type of equipment to use. Also, the text provides you with example builds foe the individual characters, as well as descriptions of skills, so you can easily find your way among them. Later in the guide you will also find description of the game's mechanics,, such as using vehicles or obtaining items, thanks to the in-game currency. The following chapters present descriptions of the individual missions, of the game's storyline, and side missions. Also, all of the descriptions have been provided with descriptions of rewards that you receive for completing them, and you will learn how to navigate across the individual levels, thanks to the maps provided for each of the locations. All of this has been rounded up with a separate description of the individual bosses that you encounter in the game, accompanied with descriptions of how to defeat them.
This guide for Borderlands the Pre-Sequel includes:
Jacek "Ramzes" Winkler ()
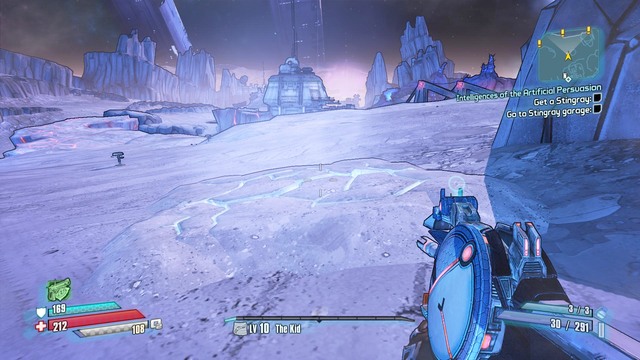
Borderlands the Pre-Sequel is an FPS with elements of an RPG interwoven, which is why it revolves around completing main and side missions. Foe each mission, available in the game, you will be receiving experience points and with an additional reward, in the form of an element to your equipment, the in-game currency or upgrades. Unlike in Borderlands 2, the majority of the missions take place on Pandora's moon, which is why you will also experience lowered gravity, which makes for longer and higher jumps. The events of the Pre-Sequel, unlike in the predecessor, take place in the locations with no natural atmosphere, which is why an innovative breathing system has been introduced.
This guide has been color-coded in the following manner:
The breathing system is very complex in this game. Although this sounds quite restrictive, in reality, you should have no problems with it. In situations, in which you run out of oxygen to breathe in, your health points start declining slowly. As soon as this happens, you should find a source for oxygen, because you die, as soon as your health level reaches zero. This system works, due to several factors:
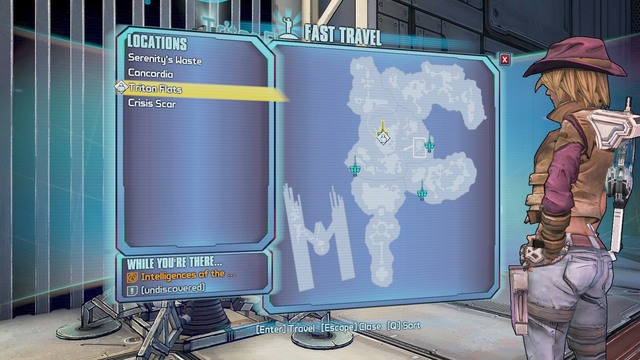
In the Pre-Sequel you will be finding Fast travel stations. In other words, it is a system of fast travels that you take between the individual locations. To het to another location, you need to find a nearby station and select the name of the location that you want to travel to, from the menu. The important thing is that, as long as you do not discover a location that you want to travel to, you cannot teleport to it. In other words, you first need to reach that location and find the station, to be able to teleport there later on.
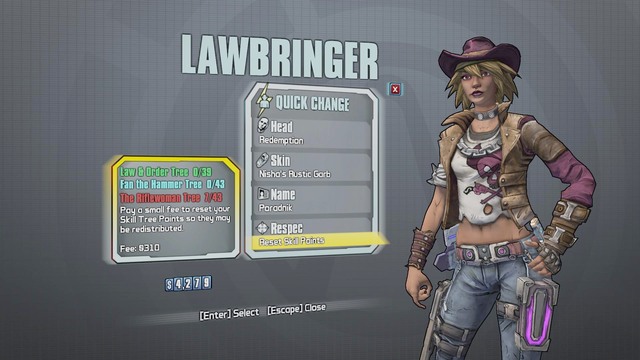
In Quick-Change stations, you can change the looks of your character to suit your liking. While completing missions, or killing opponents, you will obtain skins for your character. This may be different facial features or different outfit colors. At the stations, you can also change the name of your character, at any time and, reset skills, for a small pay. Respec Skills, i.e. resetting your skills allows you to allot skill points again. If you want to experiment, or simply you are dissatisfied with your character's skills, you can change this any time. You can find, such a station, e.g. in Concordia.
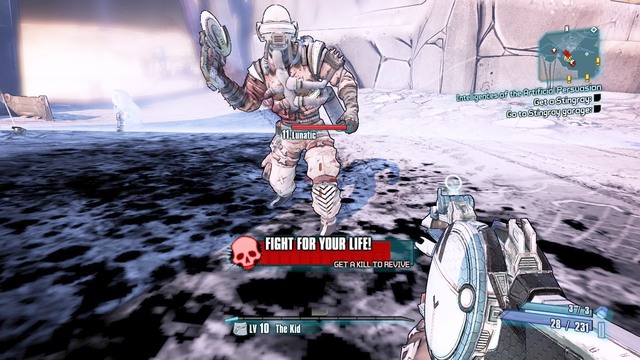
The Fight For Your Life mode activates when you are killed by the opponent (it does not work if you jump down from an escarpment). It is a more, in which you have a dozen-or-so seconds to return to the world of the living. Within this time, you need to kill an opponent. If you do that (Second Wind), you are back to fight, with your shield full. If you fail, you die and respawn at the nearest station. In this more, you cannot walk o foot, aim or throw grenades. The duration of each successive Fight For Your Life, when it is possible to you for obtain the Second wind, shorter. This slowly brings about the situation, in which you respawn automatically. Each instance of dying resets the time and, after that, you receive the time to obtain Second wind of the standard duration. Dying in the game is quite costly, because the station collects a payment, in dollars, for each respawn. The amount to pay is not determined by the level, and it isn't even fixed. It changes, depending on how much money you currently have on you (the percentage value is calculated).
Borderlands the Pre-Sequel is fully based on the experience system and character levels. You gain experience, mainly, by completing main and side missions, as well as by killing opponents. The experience that you receive is determined by the difference in levels, between you and the opponent, and his rank. The lower level of the opponent, the less experience you get for killing him. You obtain the most experience points by completing main missions and by killing the elite opponents, bosses. The fast way to obtain experience is done by means of "farming bosses". You go to the location, where there is the boss that you want to kill, you kill him, exit the game and do that again. However, you are going to reach the moment, in which the difference in experience levels is so high that you are not going to profit from that, too much. The best way to reach high level is, simply, to complete missions. With each consecutive of a higher level, you will be gaining more and more experience and, at the same time, your character will get to the higher level.

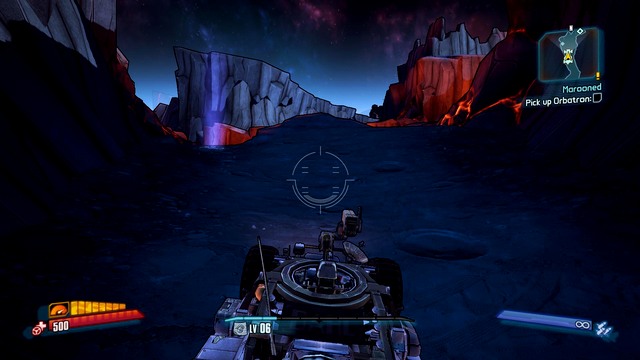
Vehicles in Pre-Sequel is another means of transport that you can use as much as you want. To gain access to the Moon Zoomy system, because this is what vehicle depots are called, you need to complete the Marooned main mission. In these vehicles, there is room for two characters (where one of them is driving and the other handles the weapon). While driving, you can use boosters which, for a limited period of time, raise the vehicle's performance. In Moon Zoomy, you can choose the looks of the vehicle and its armament. If you drive alone, you can also control the weapon. You can find skins for vehicles by killing opponents, or by searching crates. Just like in the case of weapons, you can divide skins into regular ones and rare (ranging from white to violet).
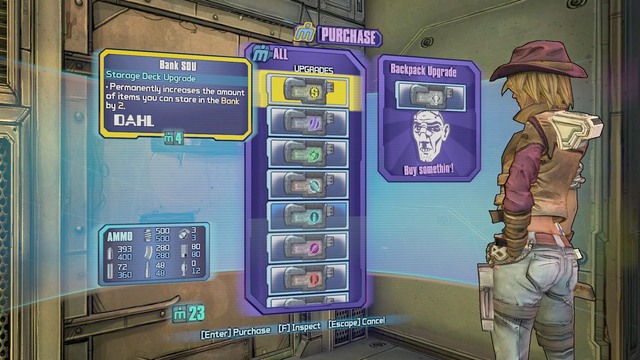
In Borderlands the Pre-Sequel there are two currency systems. For dollars, you can buy arms at regular stores (machines and NPCs). Dollars are the standard currency dropped by, nearly, every opponent or crate. The other currency are the, so called, Moonstones, which you can redeem for, among others, upgrades. These upgrades include inventory capacity, or bank, enlargement and upgrades to the maximum ammo capacity that you can carry. For each type of weaponry, you can buy an upgrade. The store with upgrades are in Concordia and it is run by Earl. For Moonstones, you can also open chests scattered all around the game world and also buy drinks at Moxxi's bar.
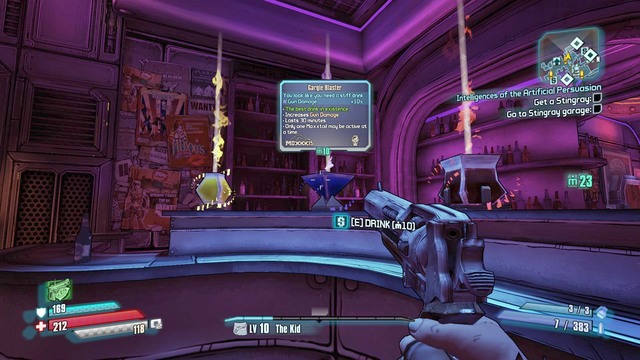
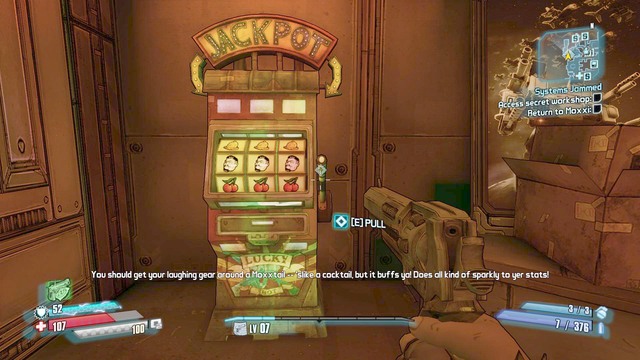
Drinks are nothing else than special boosts for your character. Moxxtail's, which is the name of the drinks, can boost the damage factor, defense factor or health regeneration, for 30 minutes. At each time, you can only have the effect of one such during on you and each successive one replaces the effect of the previous one. Drinks can be found at the main counter in the bar and they cost 10 Moonstones each. You can receive Moonstones themselves, by killing opponents, from crates, toilets and everything that can be opened. Some of the side missions provide you with Moonstones as a reward. This currency is quite rare so, spend it with consideration.
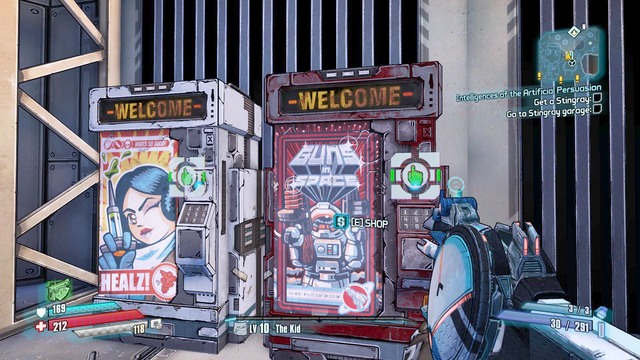
In Pre-Sequel, there also are stores. These are vending machines and NPCs, where you can buy arms. In the machine on the left, in the screenshot, you can heal, but a shield and Oz Kits. From the one on the right, you can buy weapons and ammo. In these stores, you pay with dollars. Each one of them also has an offer of the day. Each such offer provides you with a rare item that is better and, which follows, more expensive than the remaining ones on offer.
In Pre-Sequel, you can also have your private locker, where you keep your weapons. You can find, such a bank, in the main city of Concordia. The capacity of the bank is, unfortunately, strictly limited but, you can always enlarge it, by buying upgrades to the bank on the black market. For that, you need Moonstones, which you can learn more about in the chapter entitled The Currency.
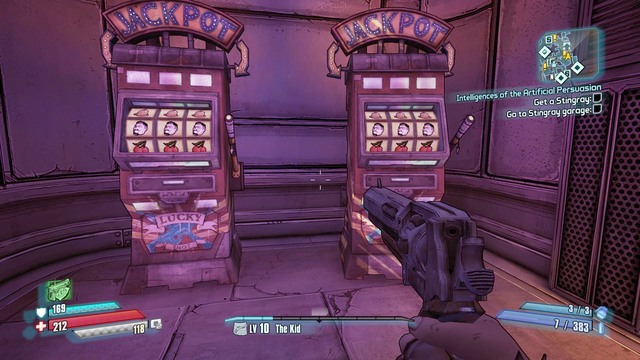
In Pre-Sequel you can see one hand outlaws. The first machines of this type, that you run into, are in Miss Moxxi's bar in Concordia. Rewards vary from a bomb (if you lose) to legendary, rare weapons (for three Borderlands symbols). The amount to pay is strictly correlated with your experience level. The weapons that you can win are also determined by your current level (the level of the weapon is the same, or lower than your own).
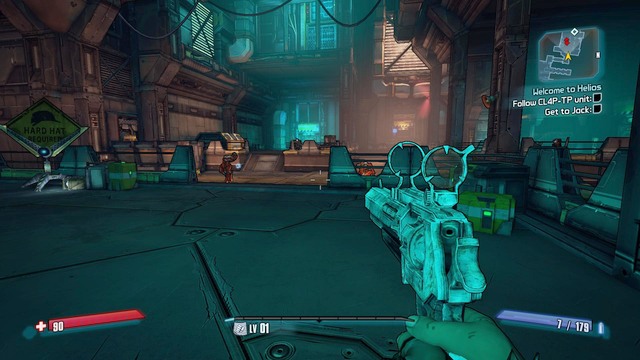
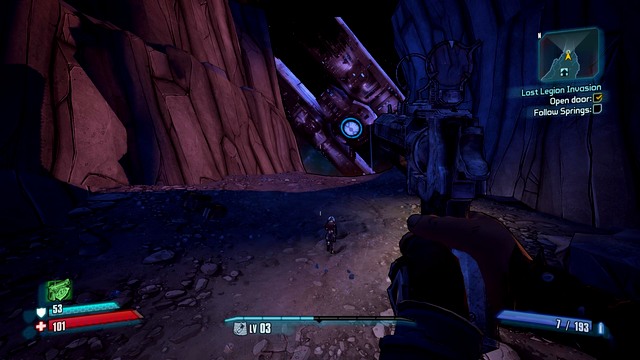
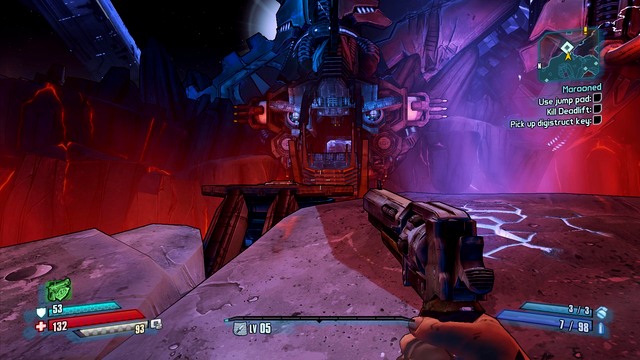
As soon as you gain control of your character, follow the robot.

Wait for Cl4p-TP to open the door and walk into the next room.
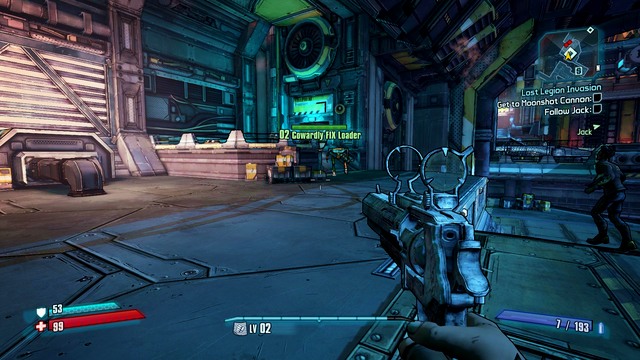
In the next room, you will have to protect Cl4p-TP'a from raiders. Kill them all and follow the robot.
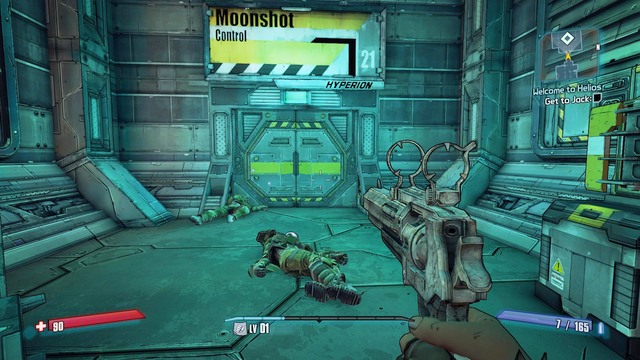
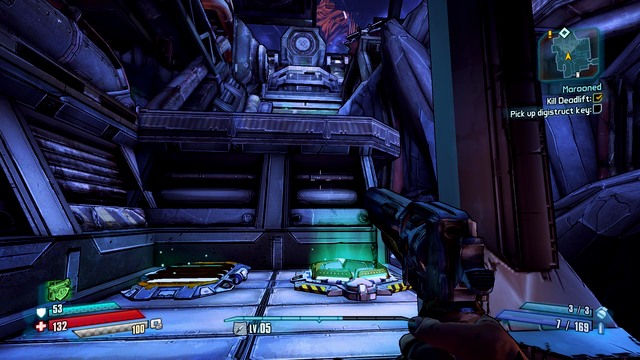
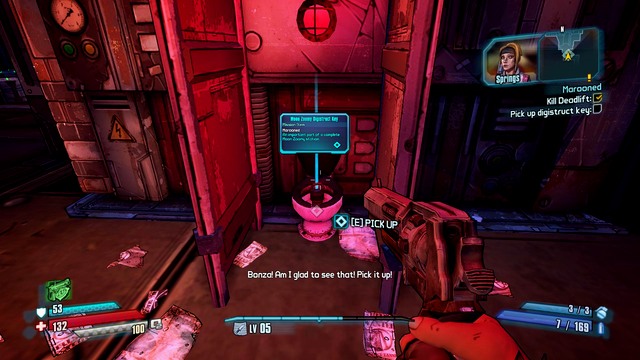
Walk through the door, where CL4p-TP was killed and eliminate the opponents. Before you walk ahead, collect the ammo from the nearby chest.
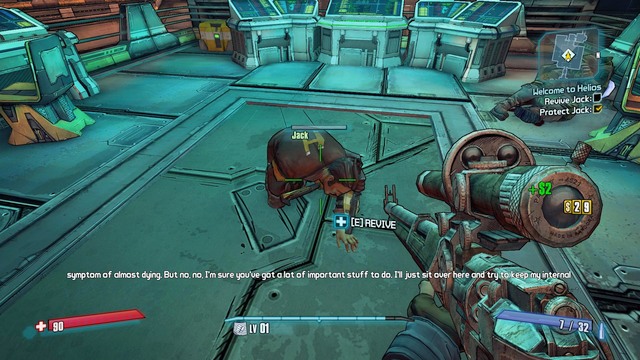
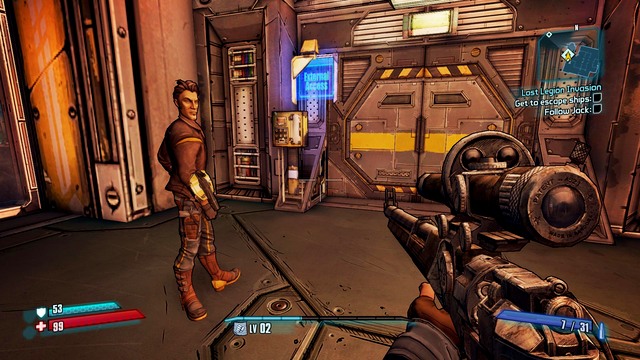
After you regain control of your character, you will have to protect Jack. Deal with the outlaws that attacked him.
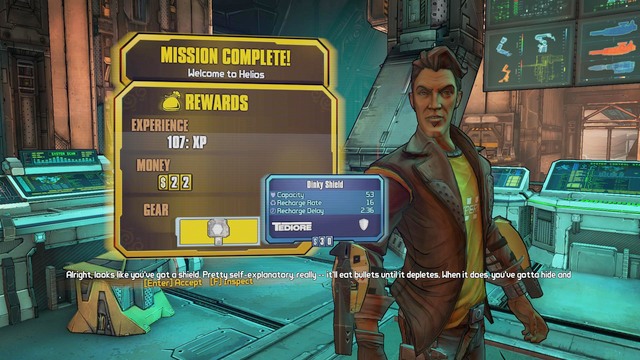
After you have dealt with everyone, approach Jack, revive him and report on the completion of the mission. You will be rewarded with a shield.
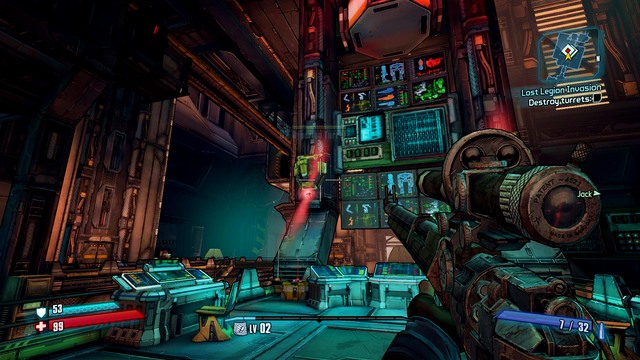
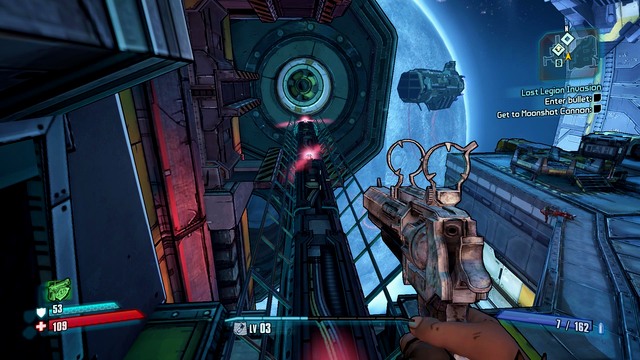
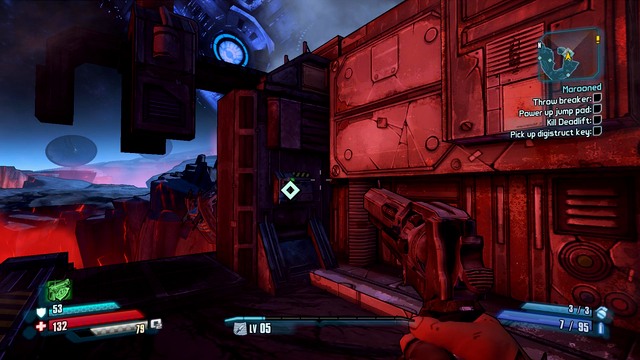
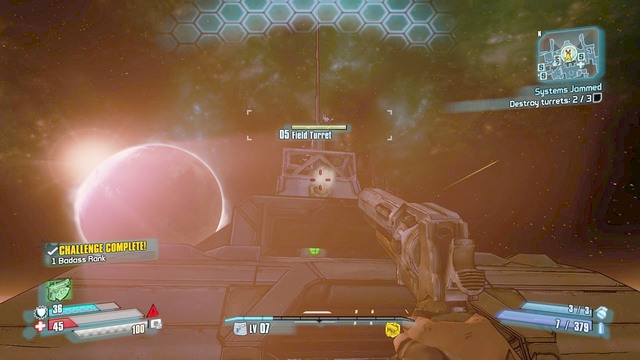
Wait for Jack to activate the systems, using the main console and destroy the two cannons above (one on each side).
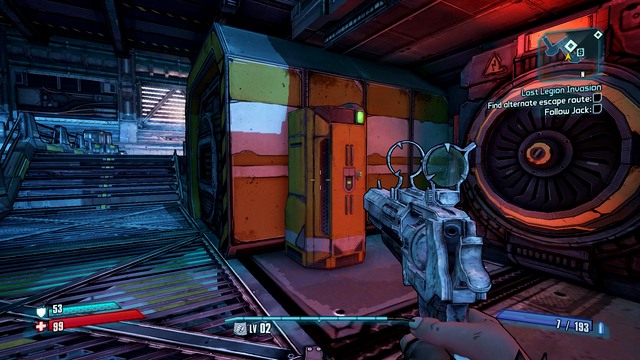
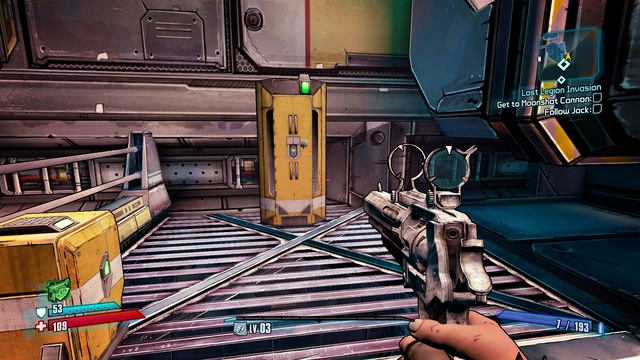
After that, follow Jack and wait for him to open the door. Take advantage of the moment and collect ammo and money, from the nearby crates.
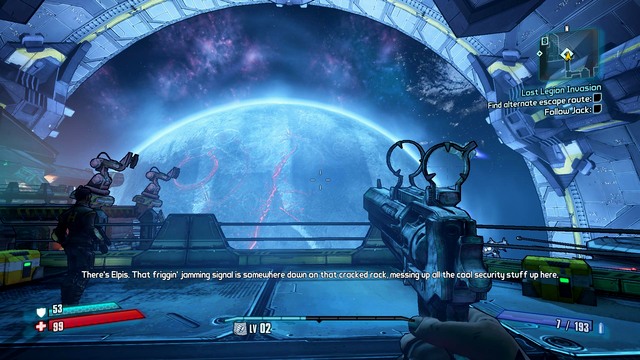
Follow Jack, up until you see the view of the Pandora moon. Eliminate the opponents here. They will be appearing n your left.
As soon as you have dealt with them, head towards the lower level and you will find a weapon chest here. Pick something that you like and keep moving.
Keep following Jack. At the moment, at which you cross the next door, you will have to kill the outlaws.
After you do, climb up the stairs and you will find another weapons crate.
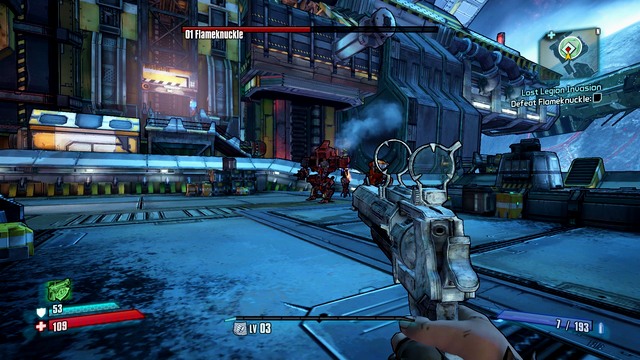
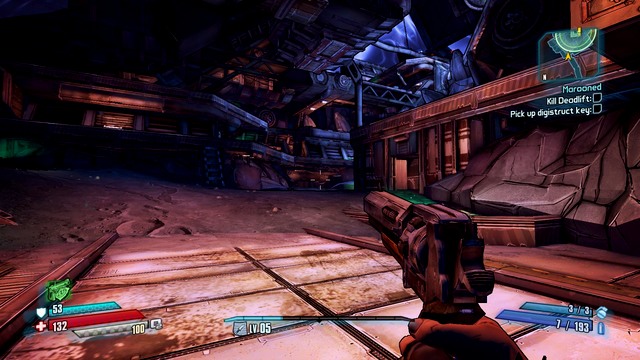
Follow Jack into the next location, where you run into Flameknuckle.
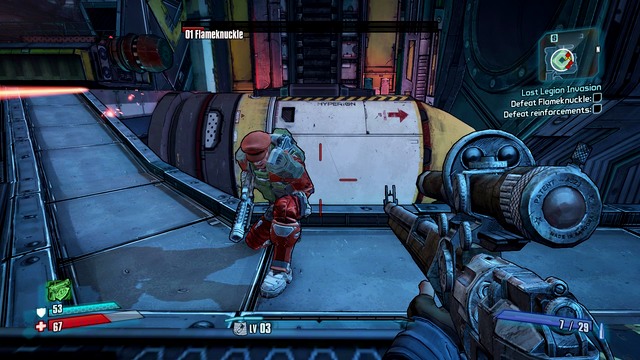
Flameknuckle is inside of his robot (with a half of his maximum health). The best tactic here is to aim at his body, or at fuel tanks on his back. After you destroy the robot, Flameknuckle regenerates his entire health and obtains a shield. Keep eliminating his men and, at the end, deal with the boss. The most effective here are headshots. After the fight is over, follow Jack.
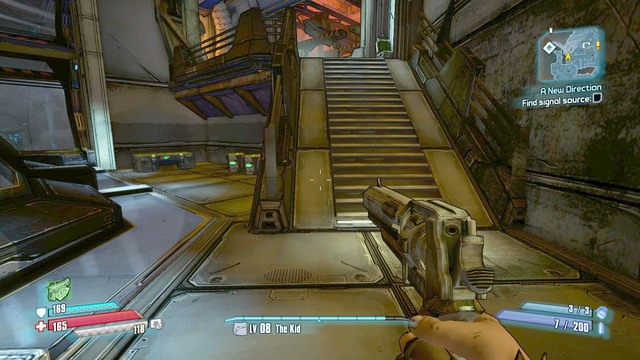
Follow Jack into the lift and, as soon as he finds out that it does not work, jump onto the nearby mechanical arm to get to the higher way another way around.
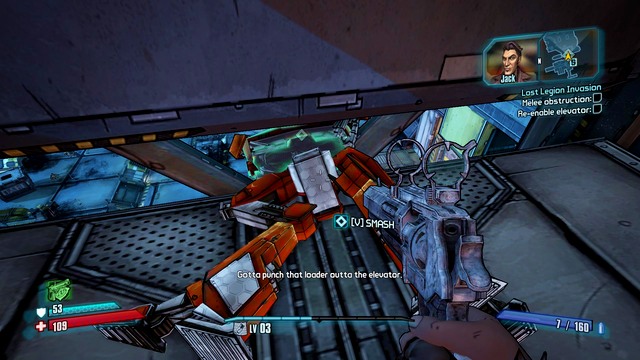
Approach the lift and destroy the robot that is standing in the way, with a melee attack ("V" by default).
Wait for Jack to approach the control panel. In the meantime, you can walk into the room that the enemy came from, where you will find more weapons crates.
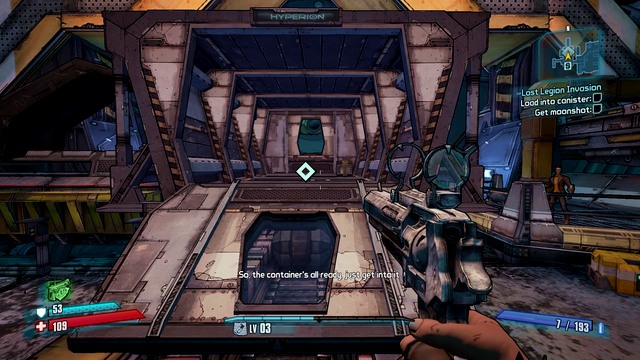
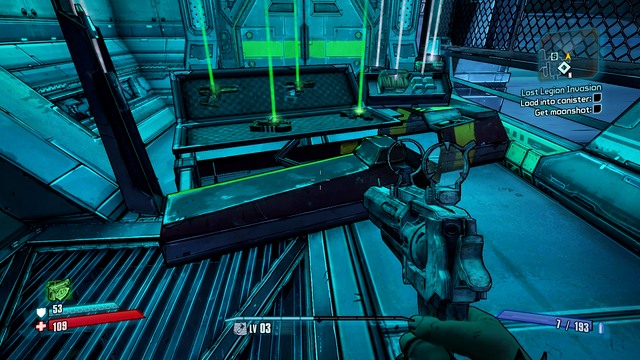
Climb down and enter the container. wait for Jack to start the procedure and walk over to Serenity's Waste.
After you meet up with Janey, open the container and head towards the nearest oxygen station.
In spite of what it may seem, lack of oxygen is not as painful, on the Moon but, the longer you are standing still, with your oxygen running out, the faster you lose your health points. Oxygen stations have been marked as O2, and a small square, on the map.
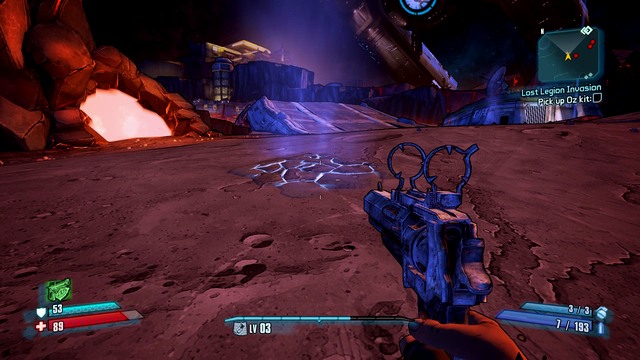
After you talk to Janey exit the station and follow the path ahead. Along your way, you will be running into the oxygen stations shown in the screenshot. At the first one, you will be jumped by enemies. Keep along your path, as soon as you deal with them.
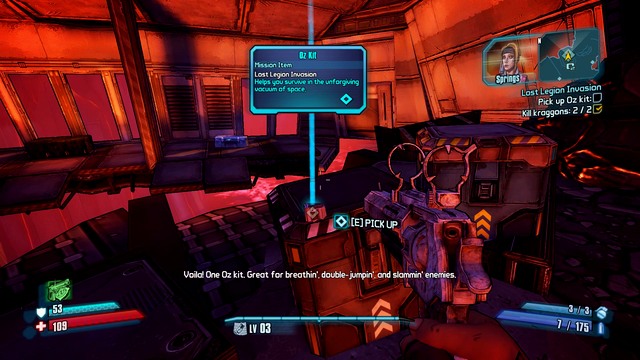
Walk over to the nearby station. Activate it, smash the four locks ("V" by default), deal with more enemies and collect the Oz Kit from the crate. You do not need to return to Janey, because she is right next to you. Report to her and you will be rewarded with a fully functional Oz Kit.
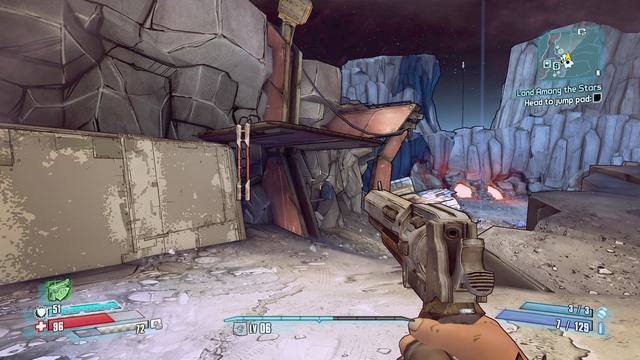
You receive this mission automatically, after you complete Lost Legion Invasion. Head towards the other end of Serenity's Waste and reach Regolith Range. Along your way, you will run into enemies that you need to deal with.
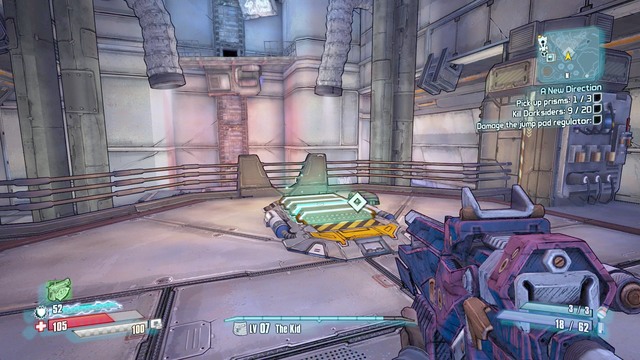
After you enter the location, replenish your ammo and keep moving. Approach the escarpment and jump into the center. The jumping device is inactive, which is why you need to find another way around.
Go left and towards the very end of Regolith. Deal with the outlaws and, after the fight, approach the lever and activate it.
Enter the electricity generator and return to the jumping device. You can take a shortcut and open the weapons crate, in the middle.
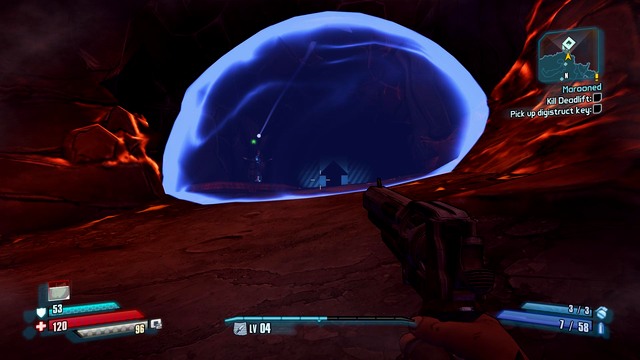
Walk into the room and watch the cutscene. To get the key, you need to defeat the boss.
During the fight, avoid the metal plating on the ground, because you will be electrocuted. This will, quickly, bring down your shield to zero. Try to eliminate his guards.
After the fight, collect the loot and jump to a higher level. Trampolines are in every part of the location. Approach the toilet, then and collect the key.
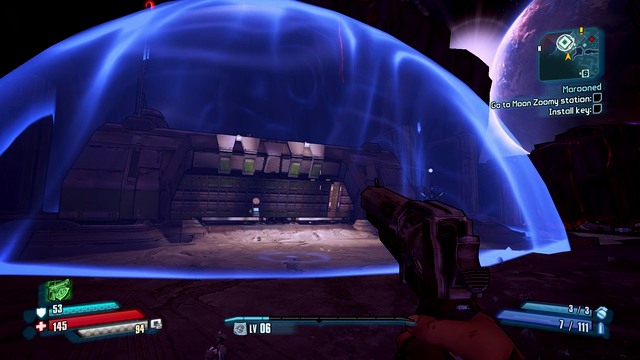
Cross the successive parts of the location, eliminate the enemies, up until you reach the end of the location. Here, you will find the Moon Zoomy digital vehicle reconstruction system. Slide the key into the main panel.
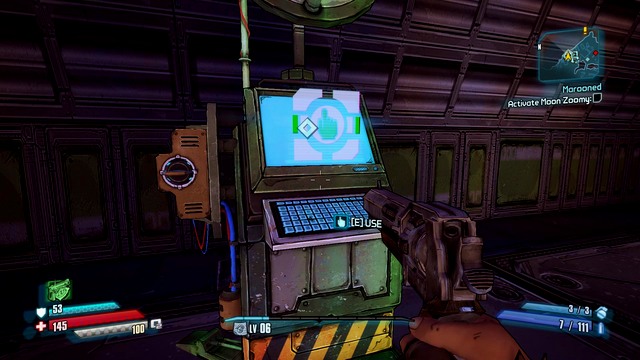
After you do, wait for the system to react and land a melee strike ("V" by default).
After you pick the vehicle, head to the right. You will reach the spot shown in the above screenshot. To jump the chasm, you need to use the boosters ("F" by default).
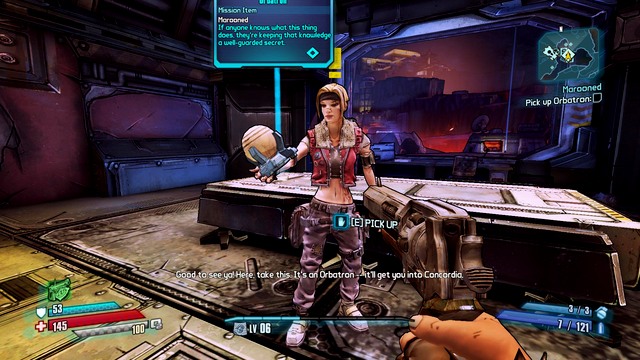
Return to Janey (Serenity's Waste) and claim the Orbatron. Janey is in the main station, at the ground floor. You will be rewarded with a pistol.

Accept the mission from Janey in Serenity's Waste tale the vehicle and jump the escarpment in the Northern part. This way, you will reach Concordia.
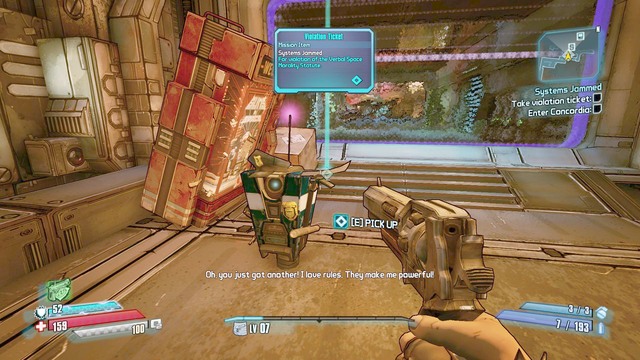
After you get there, follow the corridor, where you find a Cu5tm-tp. Wait for him to give you the ticket and take it.
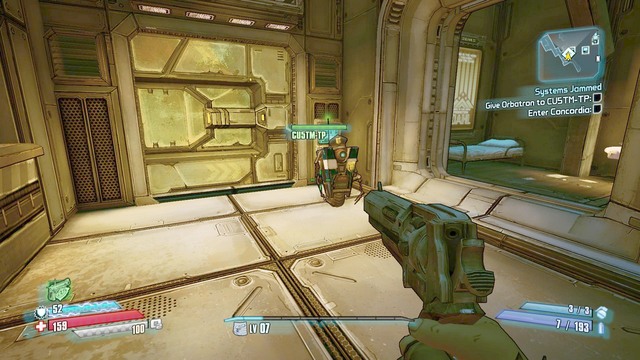
Follow the robot along the corridors, and finally give the Orbatron to it.

Meet up with Nina, in the next part of the location and enter the decontamination device.
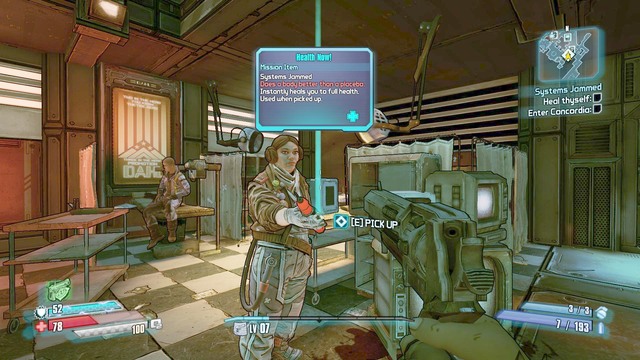
After the procedure is over, take the health now vial, from Nina and keep along your path.
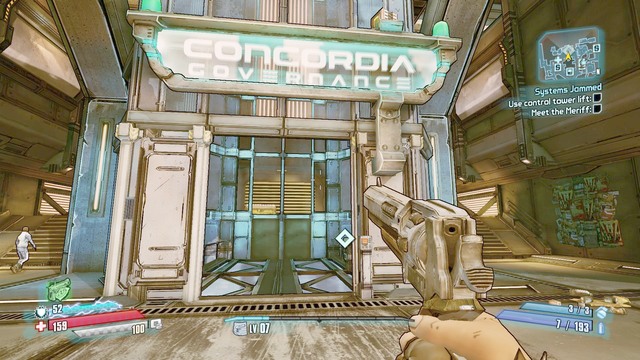
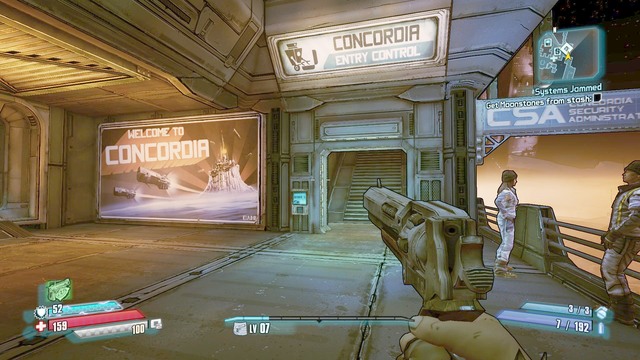
Reach the lift in the center of Concordia and use it. After you see what has happened, head towards the Northern part of the location.
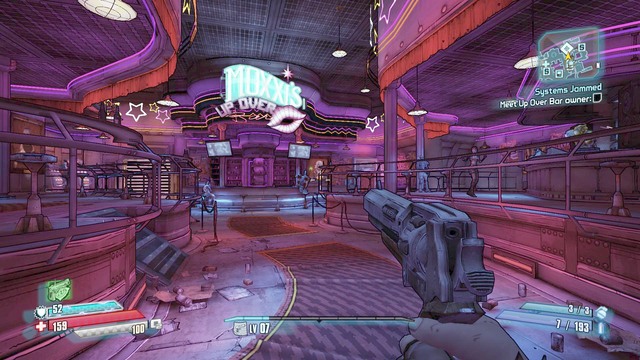
After you reach Moxxi's bar, talk to Roland and Lilith. Then, approach the counter and talk to Moxxi.
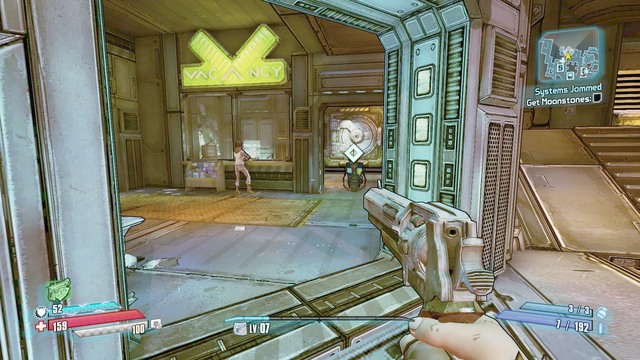
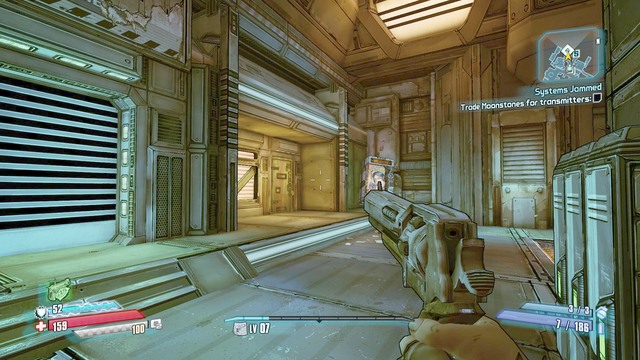
Head Northwards and, in one of the rooms, you will find custom claptrap. Talk to him and use the safe. You can collect the weapon from inside.
Follow custom claptrap and you will find a crate to collect moonstones from. The way to the stash is up the stairs shown in the screenshot.
After you collect the moonstones, go to Earl. You can find him in the North-Western part of the city. Buy an upgrade from him (any one that you like) and head towards the first transmitter.
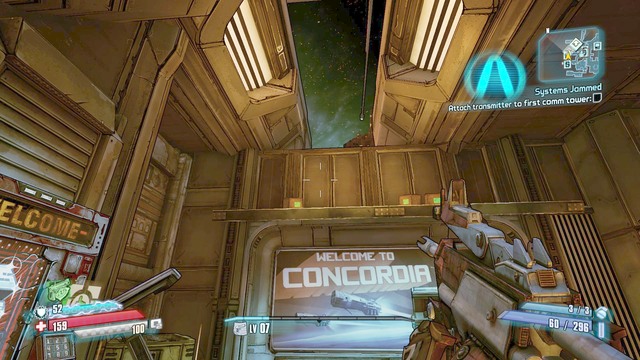
Reach the location shown in the above screenshot and, thanks to this, you will get to the rooftops.

After you have activated the first transmitter, go West, towards the second one. Walk over the rooftops.
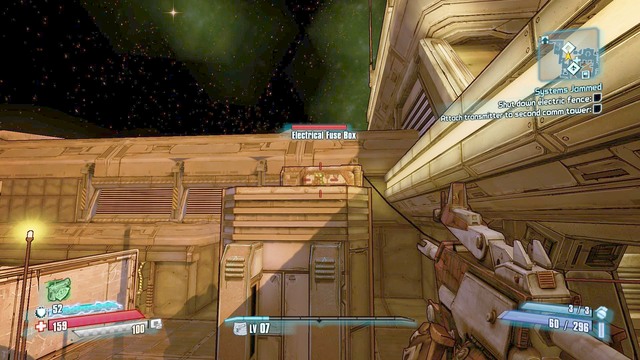
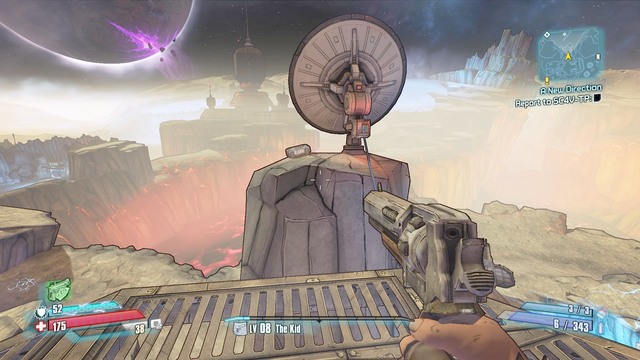
The second transmitter is electrified. Turn around and jump onto the nearby roof. You will spot a generator that you need to destroy (shoot at it). Then, return to the transmitter.
The third transmitter is on Concordia's main roof. Jump over to the nearby rooftop (where you have destroyed the generator) and then, onto the main roof. Destroy the turrets, along your path. After you deal with the transmitter, collect the remains of the turrets to repair the damaged transmitter.

After you have activated it, climb down and use the main console. Then, head towards the Concordia's exit. The exit is blocked off so, go to Moxxi's bar and talk to the waiter claptrap.
After the conversation with the robot, turn around to face the one hand outlaw. Use it and press the button. Enter the room and talk to Moxxi. Then, head towards the exit. Before you leave, you can report to her on the mission and collect your reward, i.e. class mod for your character.
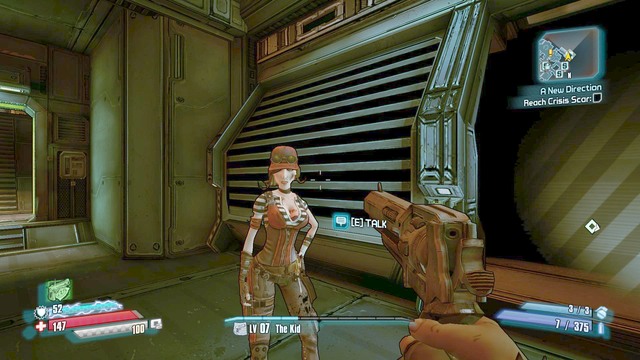
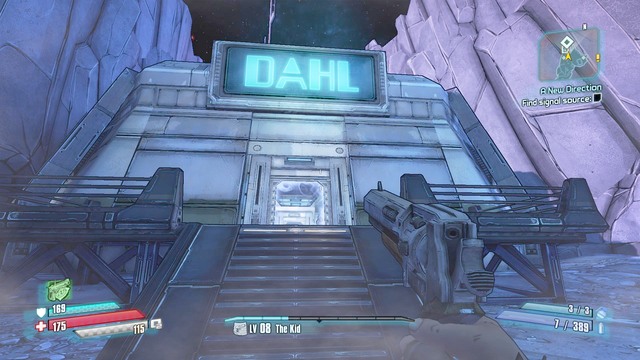
You receive the New Direction main mission from Moxxi, right after you have completed Systems Jammed. Talk to Moxxi, who opens the door to Triton Flats for you, and get to your destination.
Approach the Moon Zoomy and activate the vehicle to get to the other end of Triton Flats. You will find claptrap there, who updates your objectives.
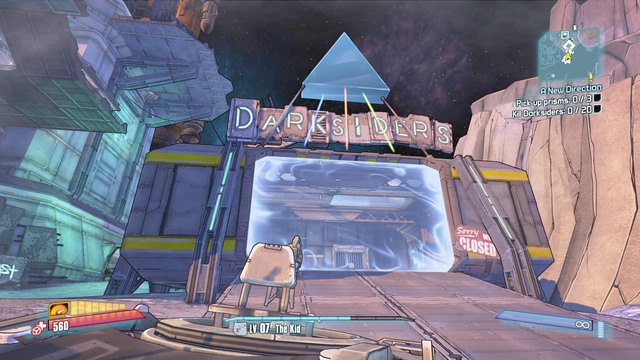
Return to the vehicle and go northwards. You will reach Darksiders and, inside the building, you will find a fast travel station, thanks to which you can teleport to the locations that you have already discovered.
Eliminate the outlaw in the first room and collect the Darksider's Prism from the ground.
To reach the higher level, shoot at the device next to the trampoline and walk onto it.
At the higher floor, eliminate the opponents and collect the second Darksider's Prism. The third Prism is on one of the opponents in the incoming wave. Before you return to claptrap, walk onto the trampoline next to the platform. After you take the jump, walk onto the next trampoline and you will reach the location shown on the map. Ahead of you, there is a high rock that you can jump onto. On the rock, there is a weapons crate.
Return to claptrap and you will learn that you need to find another way out. Head Southwards and the, Westwards. You will reach the location shown in the above screenshot. Take a jump and eliminate the incoming opponents.

Before you go to another location, climb to the higher level and head towards the spot shown in the above screenshot. Thanks to the trampoline here, you will get to the other end and you will find another weapons crate there.
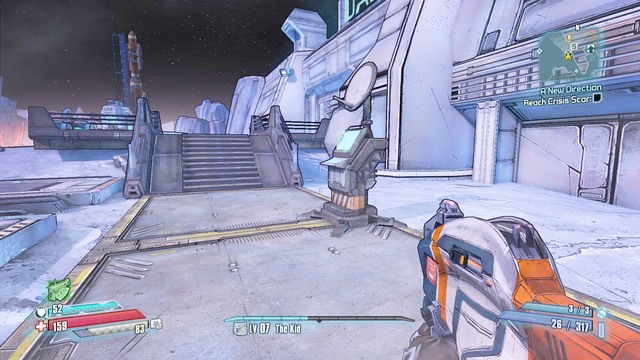
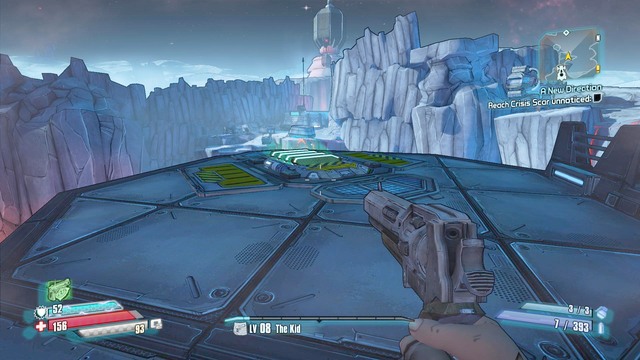
After you search the crates, return to where you took the jump and go ahead. After you cross the zone, you will be able to go to Crysis Scar.
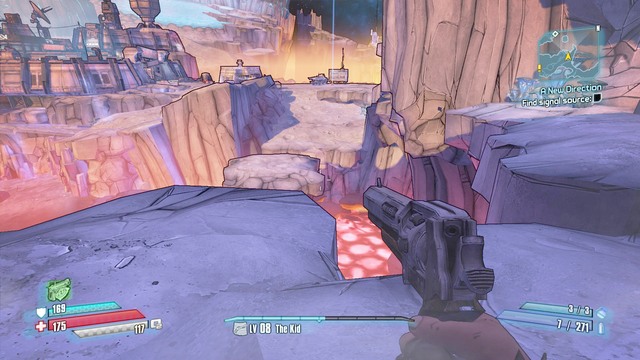
Reach the location shown in the screenshot (right next to the exit) and take a jump to the other side.
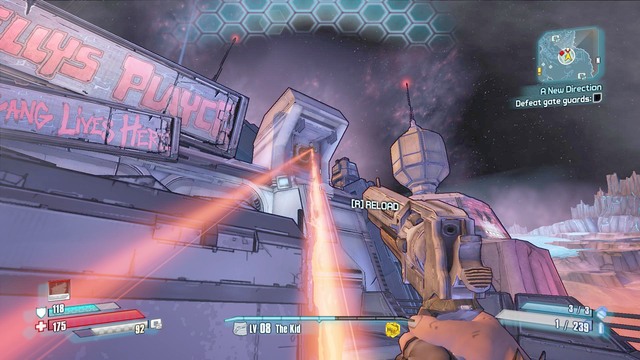
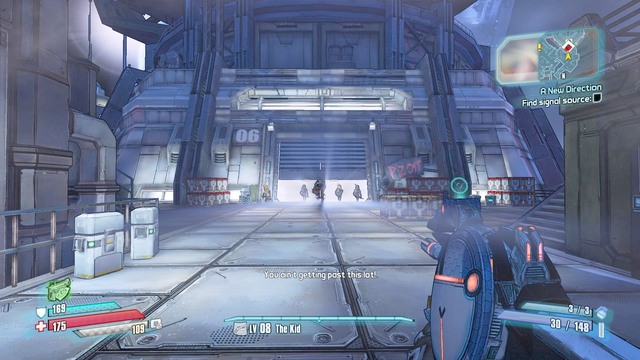
Eliminate the opponents and head towards the gate. Above you, there will appear laser cannons, which you need to destroy.
After the door opens, kill the opponents. Then, reach the stairs and kill the elite outlaw (the Badass prefix). The opponent himself is not too demanding, which is why you will have no problems dealing with him.
Walk through the door and you will see the stairs to the higher level. Before you take the stairs, take interest in the nearby weapons crate. After you have collected the items, climb to the higher level and eliminate the opponents.
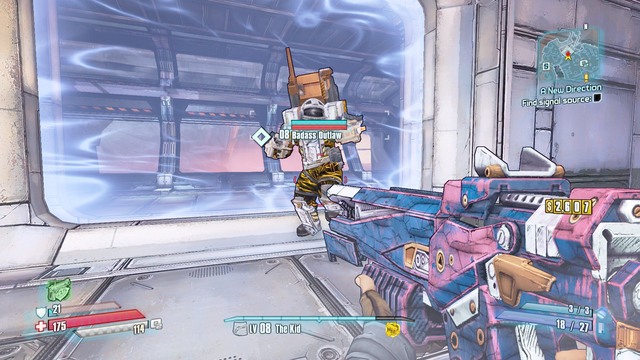
After you get to the location shown in the above screenshot, you will have to deal with another Badass Outlaw.
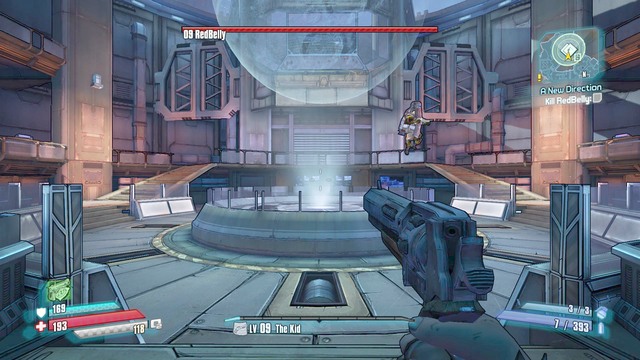
After the fight, replenish the supplies in the machines there and keep moving. You will reach a bigger room, where you will have to face a miniboss. The fight itself has been divided into two stages. The first one is the RedBelly fused together. Avoid direct contact with the opponent, because he is using a fire nova.
The second phase is a fight against the separated Red and Belly. One of them is fighting on the ground, whereas the other one is flying. The best tactic here is to eliminate the boss on the ground, after which you conduct fire against the airborne one. Take cover behind one of the nearby pillars, to avoid damage from Red, and kill Belly. After the fight, collect the loot and reach the location shown in the screenshot. On the right, there is a button that opens the door. In the following rooms, there are several crates with loot, and a panel.
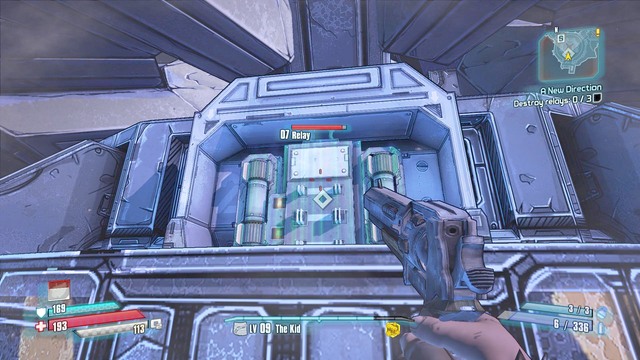
After the objectives have been updated, go to the nearby rooftop and use the second panel. After it explodes, you will have to destroy three relays. Each one of them is guarded by guards and with laser cannons. That is why, you should destroy them one-by-one
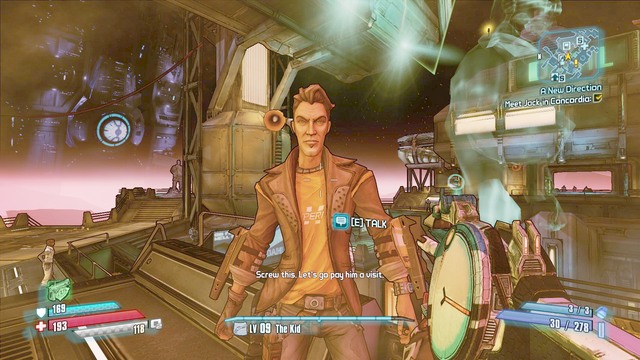
Return to Concordia, now, and talk to Jack. You can use the fast travel station at Triton Flats and go to Serenity's Waste and from there, to Concordia. After you return, walk over to the central part and talk to Jack. As soon as your objectives are upgraded, find out the police claptrap.
After the conversation, follow claptrap and Jack, up until you reach the lift. After you get to the higher level, walk over to the Meriff's Office.
Eliminate the laser cannons and the opponents, and get to the room, where there is Meriff. After a short cutscene, return to Concordia and meet up with Janey to report on the mission. For this, you will be rewarded with experience points.
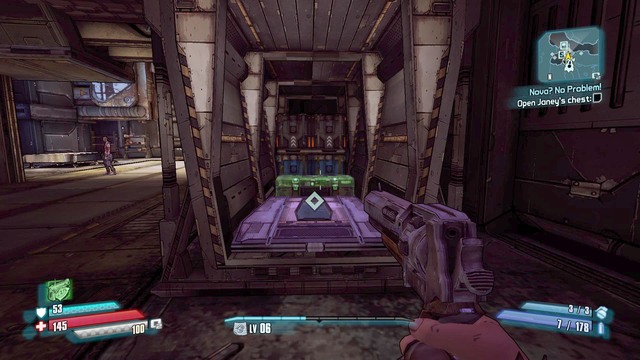
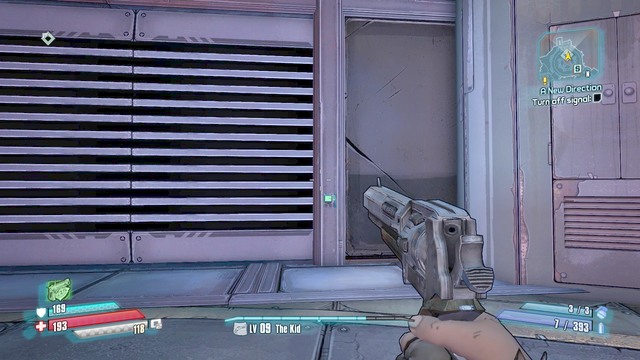
Talk to Janey to take the mission and approach the container next to her. Fire, or hit the door of the container to open it. Inside, there is Janey's crate. Collect the Nova blast shield and head towards Regolith Range.
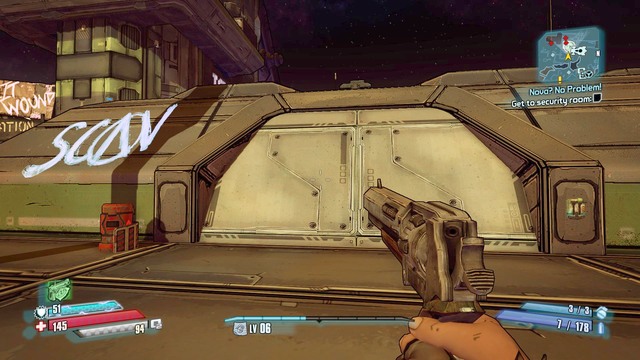
Reach the location shown on the map and use the lever on the right to open the door.
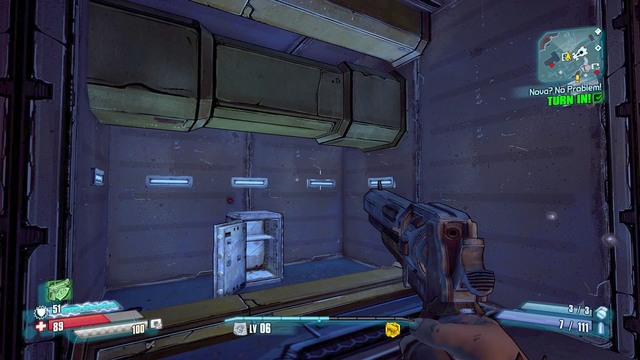
Your task now is to open the safe. To do that, you need to shock all of the cameras here at the same time. There is a special property to the shield that you have collected from Janey's crate. If its factor drops to zero, it releases an electricity nova, which wounds everybody round you. Walk into the blue streams of electricity that protect the safe and walk into the center of the room. When the shield is about to release a nova, jump. This way, you will shock all of the cameras simultaneously, which will gain you access to the safe. After you have collected the safe's contents, return to Janey in Serenity's Waste, for which you will be rewarded with Moonstones.
Go to Janey and take the mission. Go to the second floor and take the exit on the left.
You will reach an escarpment that you need to jump onto. Stand at the trampoline and wait for the objectives to be updated.

After Janey tells you what to do, walk onto the trampoline and take a jump. With your next jump, you need to shoot down two items, up in the air. With the third jump, you need to land in the specific area (hold "C" down, while above that spot).
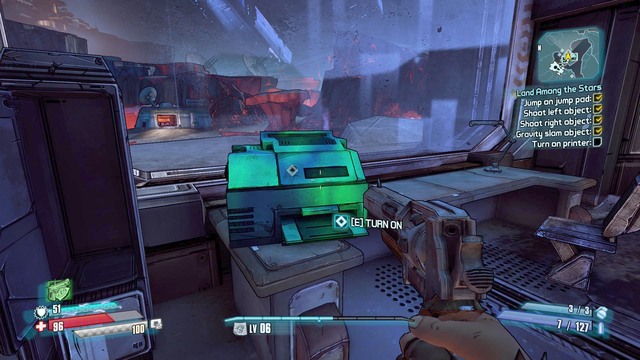
After you complete several tasks, take your reward money and return to Janey. Janey will tell you that you need to print your performance so, approach the printer and interact with it. After you do that, return to Janey for the reward.
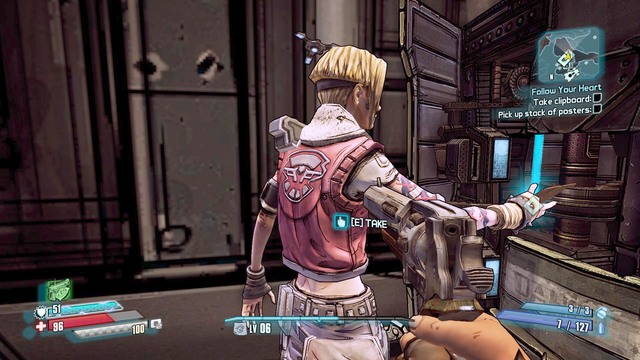
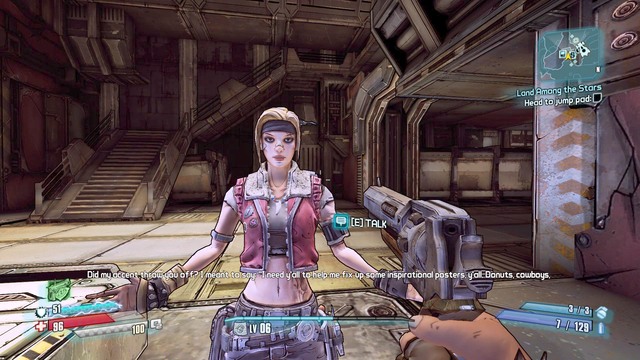
The mission becomes available after you complete Land Among the Stars. You gain access to this mission after you talk to Janey at Serenity's Waste. Take the posters that she gives you and also take the ones lying next to the printer. Then, head towards Regolith Range.
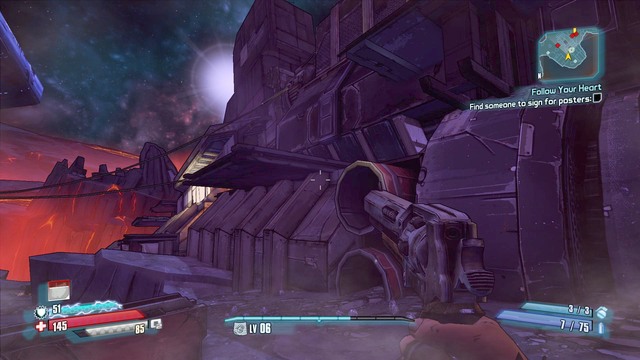
Get to the location shown in the above screenshot. You will need to get to a higher level, to someone who can sign the posters, and you can jump there, from the spot on the screenshot.
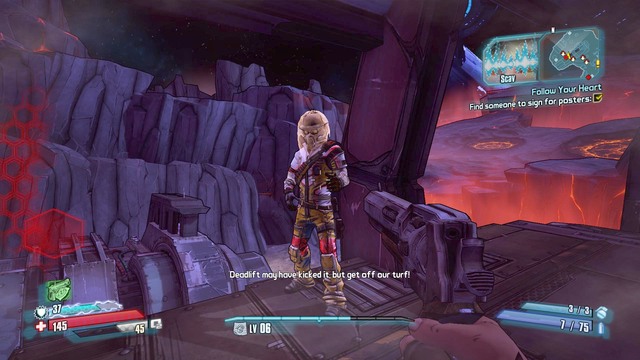
Talks to the NPC and give him the posters to sign. As soon as you receive information from Janey, shoot him and collect the posters from the ground.
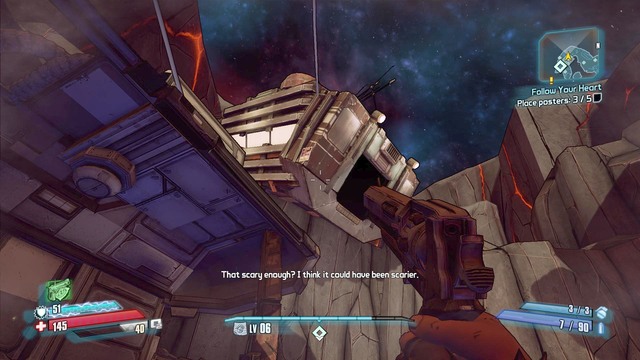
Head Northwards and hang the posters. Some of the spots are difficult to access, like e.g. the one shown in the above screenshot. You simply need to jump onto the nearby rooftop to get there. After you get the job done, return to Janey at Serenity's Waste and you will be rewarded with experience points and a weapon of your choice (assault rifle or pistol).
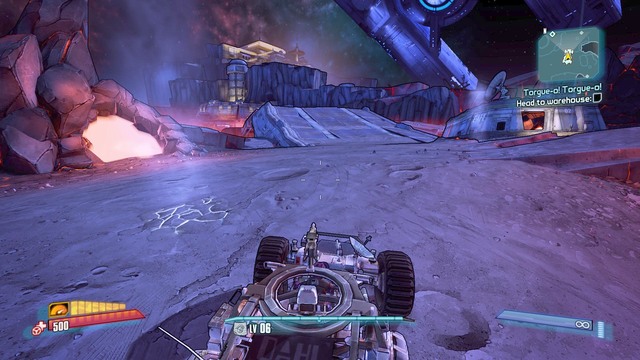
Take the mission from Janey at Serenity's Waste and use Moon Zoomy for the vehicle. Get to the location shown in the screenshot and take the jump (it is necessary that you use boosters, "F" by default).
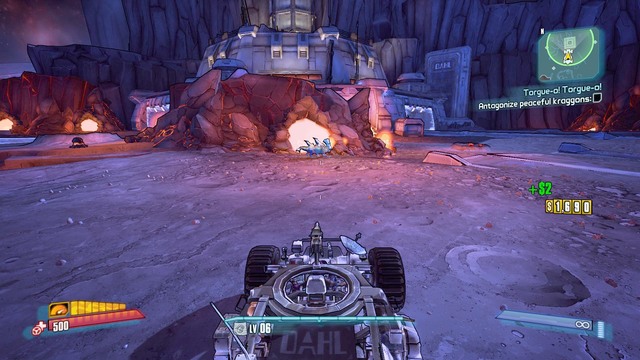
You will reach a building with blocked entrance. To gain access, you need to antagonize the nearby Kraggons. To do that, you need to access your inventory and equip the weapon from Moxxi, Miss Moxxi's Probe and fire it towards a Kraggon.
The enraged Kraggon will start charging at you. This is why you need to stand right next to the collapsed entrance and, as soon as you see him charging, jump. After the Kraggon smashes the rubble, you can kill him and enter.
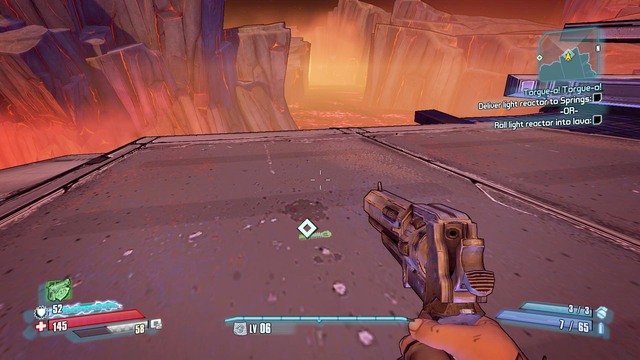
Note! There are two possible endings to this mission. The difference lies in the reward that you obtain for completing it. If you do what Mr. Torgue tells you to, you receive an explosive shotgun and if you follow Janey's instructions, you receive a laser gun.
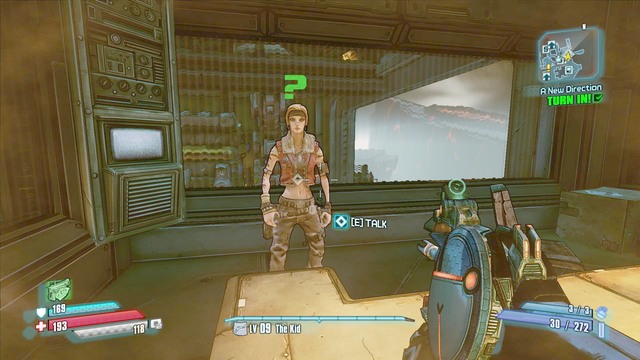
Go to Serenity's Waste and talk to Janey to obtain this mission.
Approach the escarpment and you will notice the first journal. To collect it, you need to jump down and destroy the block on the geyser. Walk into its area of effect, to reach the appropriate height and collect the first journal.
Go up (you can use the geyser for that) and kill the Kraggons there. After you have eliminated them, approach the door and activate the lever to get to the second journal.
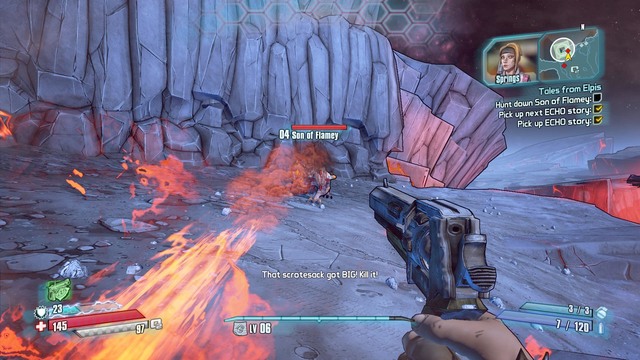
The last, third, journal is on the Kraggon Son of Flame. You need to kill him to get it. After you complete the mission and listen to the journals, return to Janey for your reward - a pistol.

To start this mission, you need to go to Regolith Range and find the corpse (the exclamation mark on the map).
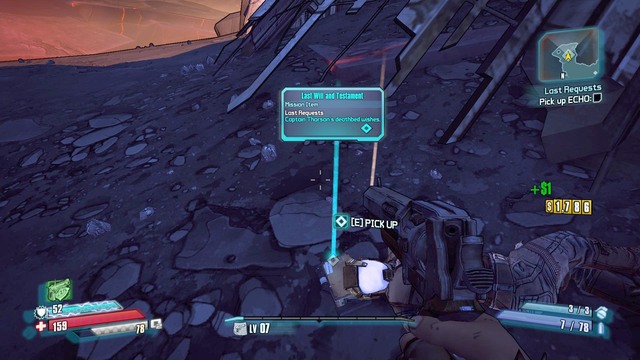
Search the corpse and collect the Echo com from the ground. Then, listen to the message from the killed soldier.
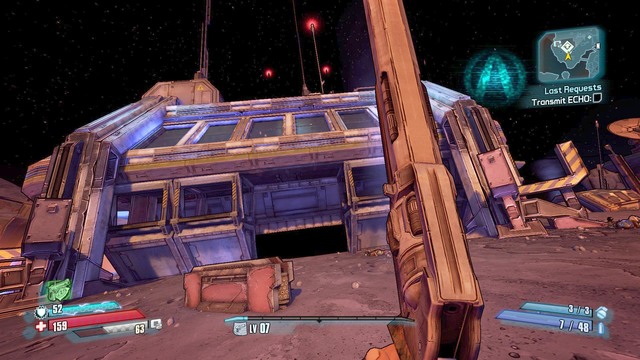
After you listen to the second message, go Northwards. After you kill all of the enemies, walk over to the other side of the building shown in the screenshot and you will see a podium. Your task is to get to the very top and place the Echo in the transmitter. On the top, you will also find a weapons crate. After you listen to the message, go Westwards.
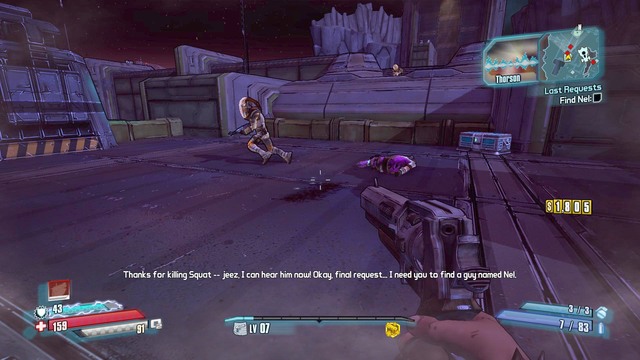
Reach the location shown in the screenshot and kill Squat. After you do, your objectives will be updated. Go Eastwards to find Nel.
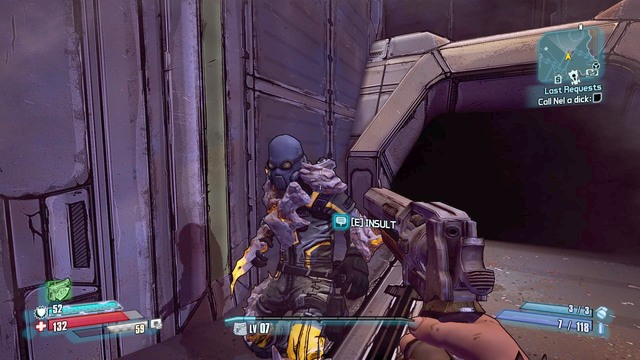
Nel is on the podium. Approach him and taunt him ("E" by default).
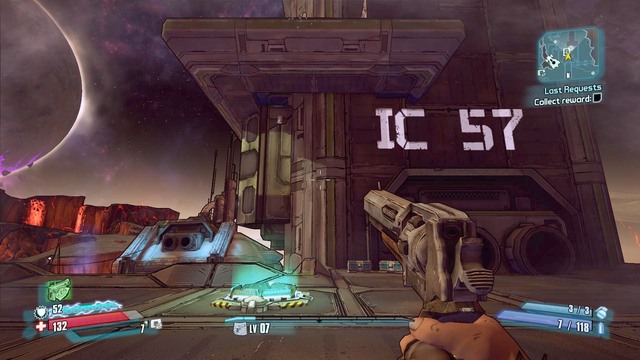
To end the mission, you need to go Eastwards. Reach the location shown in the screenshot. You will find a trampoline here, which you should use to get to the higher level. On the rooftop, there is an opened door and a crate. Open it to get your reward (a skin that alters your character's looks).


 Banished Game Guide & Walkthrough
 Batman: Arkham Origins Game Guide & Walkthrough
 Bionic Commando Game Guide & Walkthrough
 Bulletstorm Game Guide & Walkthrough
 BioShock: Infinite Game Guide & Walkthrough