
The guide to Borderlands 2 contains a richly-illustrated walkthrough of the main story, as well as side missions. Beginners will also find a handful of hints, thanks to which they will learn the basics of the game. Additionally all missions contain maps which will help you navigate between omission objectives.
The Borderlands 2 contains:
The guide contains the following colours:
Michal Rutkowski
Translated to English by Jakub "cilgan" Lasota
In return for completing mission and killing enemies, you will receive experience points. Depending on your current level, mission difficulty and enemies' level, their amount may vary. The bigger the difference, the less (lower level enemies/mission) or more (higher level enemies/mission) experience you will gain. Killing an enemy while driving will additionally lower the amount of points received. A good way of gaining experience is weakening enemies with the vehicle and afterwards killing them on foot.
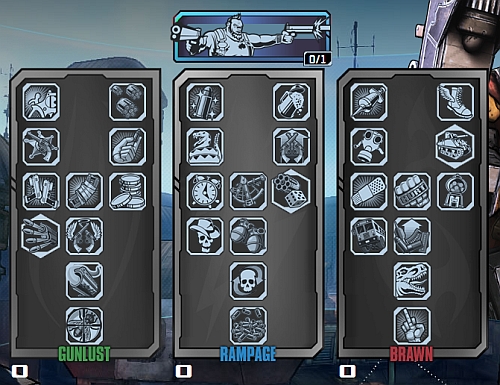
Experience points will let you obtain new levels. As you reach level 5, you will also receive your first skill point. From now on, each new level will give you an additional point. The first one will have to be spent on the Action Skill. It's a special skill, unique for each character. In the brackets you will find the cooldown time.
Axton
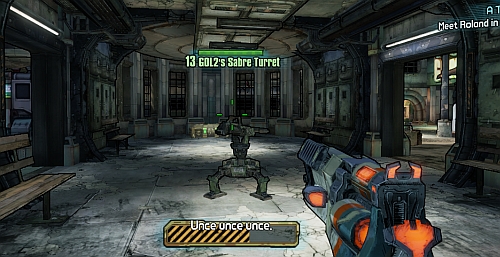
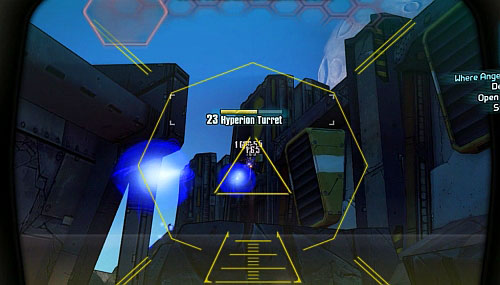
Sabre Turret (42 seconds) - a stationary turret which will automatically attack nearby enemies for a given time or until it gets destroyed. When there are no enemies around, it is worth to "take it" by pressing E (by default) while nearby. That way you will shorten the cooldown time.
Zero
DecapitiOn (13 seconds) - you create a hologram of yourself and become invisible for a couple seconds. The longer you remain in that state, the more powerful your next attack will be. However if you decide to exit invisibility sooner, it will shorten the cooldown time.
Maya

Phaselock (13 seconds) - locks an enemy inside a special sphere which slows him down for some time. Some enemies are resistant to this skill and will only receive damage if you use it against them.
Salvador
Gunzerking (42 seconds) - you can use two weapons at the same time. While it this state you regain 50% of your health, receive less damage and regenerate ammunition and health.
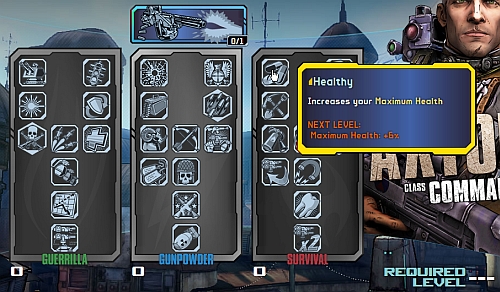
After spending your first skill point, you will gain access to skill trees. Each of them represents a different specialty. In case of Axton, the Survival tree focuses on increasing your maximum health or shield points. You can of course develop each tree simultaneously, but that way you will reach the last, most powerful skill very late or never. Remember that you will have 44 points to spend in total.
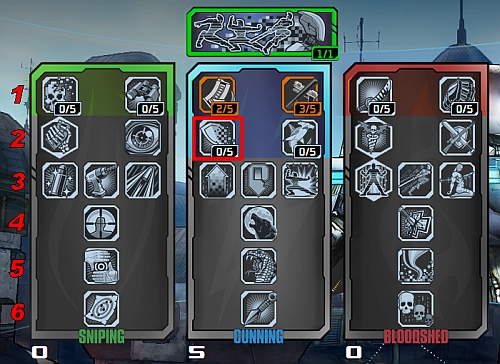
Further levels of the tree, marked with digits in the above screenshot, are unlocked after spending at least five points on the previous level. For example, in order to unlock the Fearless skill from the second level for Zero (marked with a square), you will first have to spend a minimum of five points on Fast Hands/Counter Strike from level one.
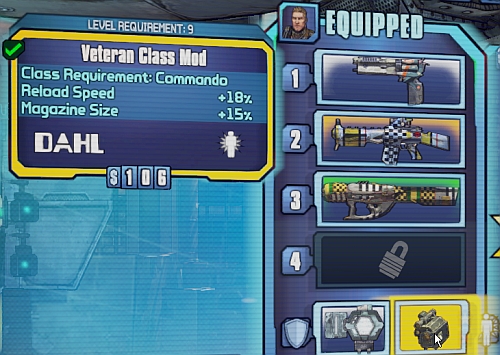
In the game you can also find Class Mods, which after being equipped, for example, increase the firing rate of the whole team.
After you reach the city of Sanctuary, you will be able visit Crazy Earl (square on the map) and buy upgrades to ammo capacity, weapons, grenades, and inventory and bank capacity. Each next upgrade of the same kind is more expensive. The capacity upgrades are however limited.
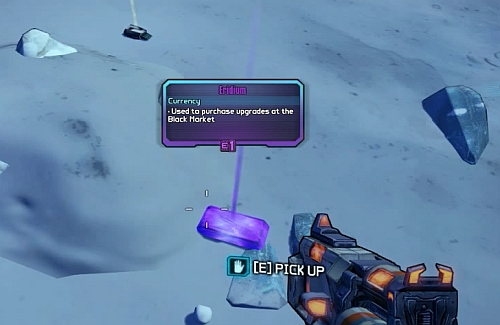
The currency for each upgrade is Eridium. It can be found pretty much everywhere: in lockers, ice, for killing enemies or completing missions. It's therefore worth to search the map thoroughly.
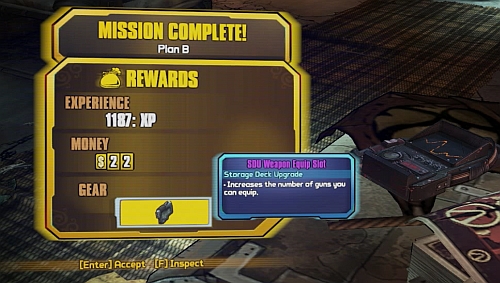
Finishing given missions (for example Plan B) unlocks further weapon slots. You can equip four of them at maximum.
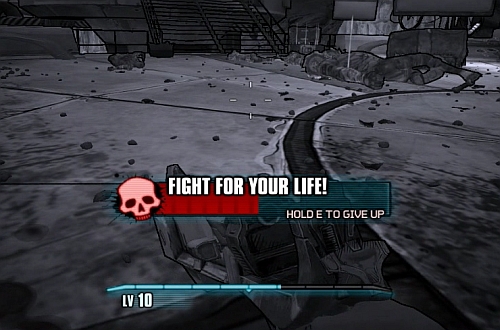
When your health and shield fall to zero, the Fight for Your Life mode will launch. At the bottom of the screen a gauge showing time to your death will appear.
Before the gauge fall to zero, you have to kill an enemy or get reanimated if you're playing with somebody else (by holding down E by default). If one of the above conditions is fulfilled, you will be resurrected. Your shield will recover to 100% and you will be able to continue the game.
If you however won't be able to kill anyone or no one will heal you, you will begin back at the nearest checkpoint and lose some of your money. If you know there are no chances of returning to the living, hold down E to respawn.
All weapons in the game are described with the following statistics:
Below the statistics you can find additional attributes, for example increased stability.
Additionally, some weapon cause bonus damage elemental damage. Each weapon of such kind has, for example, a chance of setting an enemy on fire and causing damage over time. Effects can be divided into the following types:
Elemental Effects can be also used in grenades (a proper modification) and shields.
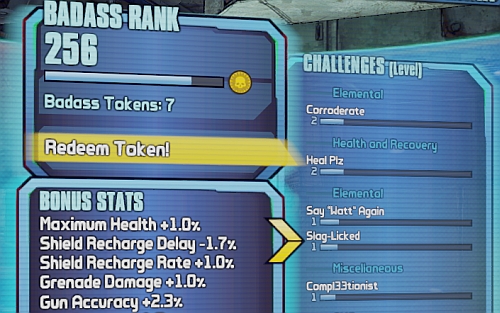
In return for completing given challenges, your Badass rank will increase. The challenges are divided into categories, in which you advance onto further level (with a maximum of five). Generally there's an easy rule: the higher the level, the harder it is to complete it.
After obtaining a proper Badass rank, you will receive a Token which you can spend on one of five random improvements (Redeem Token). They permanently influence your statistics, for example by improving your health or damage.
Throughout the whole map you can find Fast Travel devices. After activating one of them, you will be able to travel between all activated devices. On the map they are marked with a monitor symbol.
Another travelling option is using vehicles. After you find a Catch-a-Ride station (first one during Road to the Sanctuary), you will be able to use a vehicle of your choice. Each car offers a Boost option (by default F) which greatly increases speed and can be used for jumping out of ramps. Catch-a-Ride is marked with a steering wheel icon.
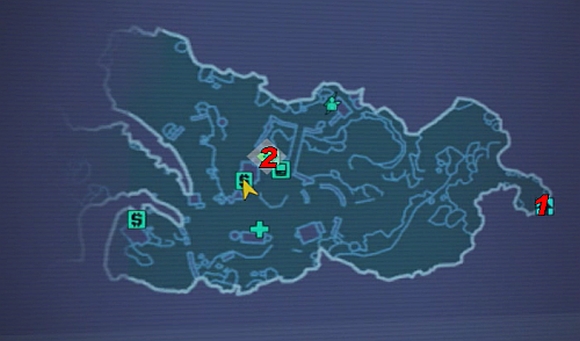
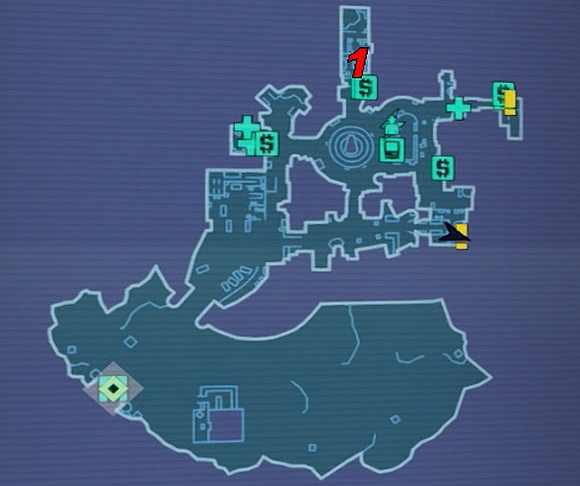
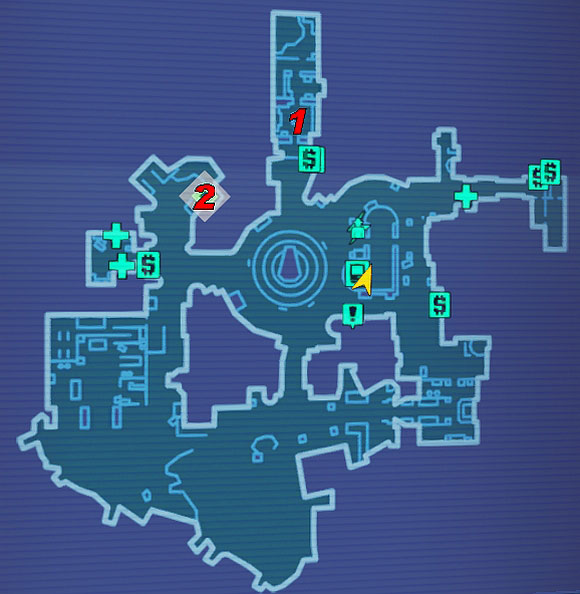
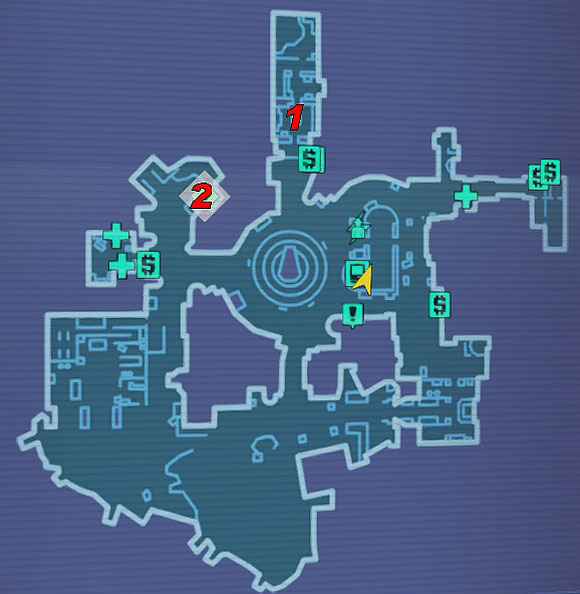
1) Starting point
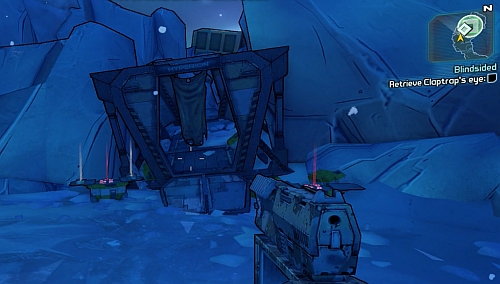
2) Claptrap's hideout
3) Weapon
4) Claptrap Eye
5) Claptrap (mission completion) and a teleport to Southern Shelf
![After gaining control over your character [1], follow the Claptrap south west [2] to his hideout - My First Gun/Blindsided - Main missions - Borderlands 2 - Game Guide and Walkthrough](https://game.lhg100.com/Article/UploadFiles/201512/2015121216574002.jpg)
After gaining control over your character [1], follow the Claptrap south west [2] to his hideout.
![After you get there [2], wait for the robot to open the door and head inside as well - My First Gun/Blindsided - Main missions - Borderlands 2 - Game Guide and Walkthrough](https://game.lhg100.com/Article/UploadFiles/201512/2015121216574098.jpg)
After you get there [2], wait for the robot to open the door and head inside as well. Follow the tunnel deeper into the cave.
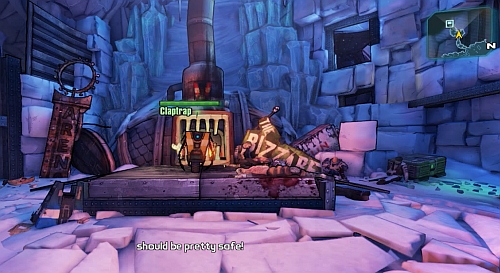
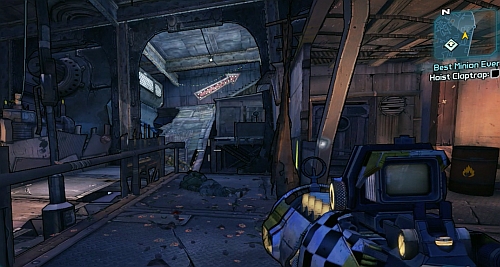
After you reach the middle of the cave, approach the Claptrap in front of the oven to watch a short cinematic.
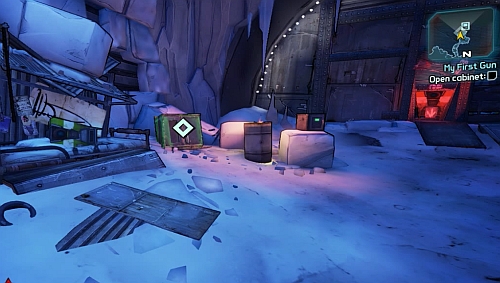
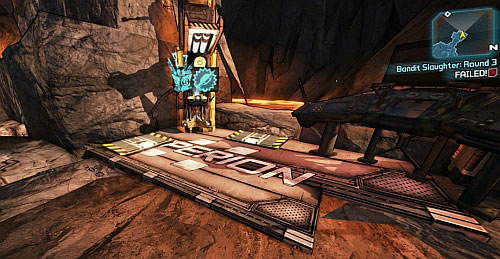
Claptrap will lose its eye. Your first objective will be obtaining weapon from the locker in the southern part of the cave [3].
After picking up the weapon, wait for the Claptrap to open the next door in the southern part of the cave. Search the chests in the room and turn on the Fast Travel. Go through the next door in the south of the cave to reach an open area.

Follow the Claptrap while opening chests and breaking the ice which you will come across. After reach the place visible in the screenshot, you will be attacked by the first group of Monglets.
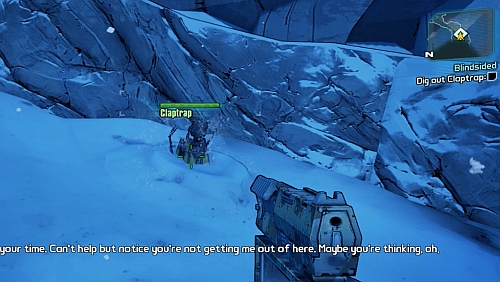
After getting through the cave, you will reach a precipice by which you will get attacked by Monglets again. After defeating all of them, jump down and help the Claptrap to get out of the snow.
Afterwards head further to the passage where you will find a few chests. Search them.
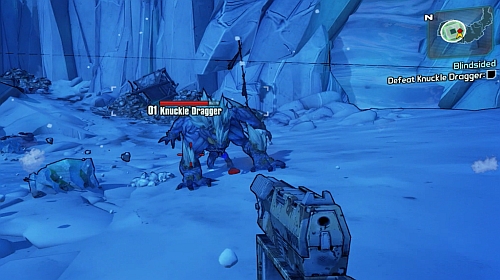
Move onwards and you will be attacked by a Knuckledragger and Monglets. Keep your distance and shoot the enemies while looking out for stones and jumps made by the Knuckler. Break ice to get more ammo and restore health. You can also retreat to the previous area to find item you didn't pick up before.
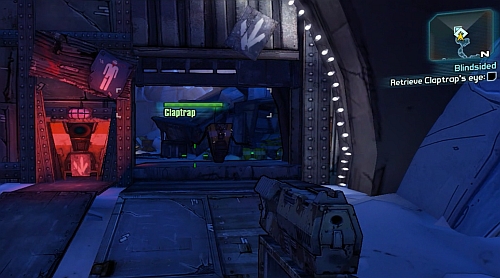
![After killing the Knuckler, pick up the Claptrap's Eye [4] - My First Gun/Blindsided - Main missions - Borderlands 2 - Game Guide and Walkthrough](https://game.lhg100.com/Article/UploadFiles/201512/2015121216574227.jpg)
After killing the Knuckler, pick up the Claptrap's Eye [4]. The item might be invisible at first, but you should be able to pick it up if your get close enough.
Now follow the Claptrap up and eventually the door will be unlocked. Inside you will find an item chest and will be able to finish the mission by speaking to the Claptrap [5].
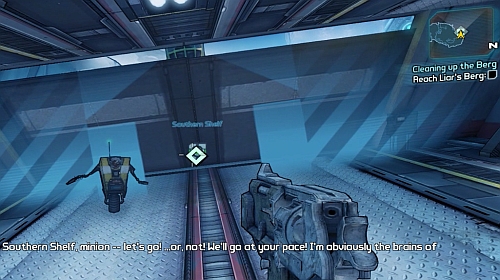
Now approach the door to move to Southern Shelf.
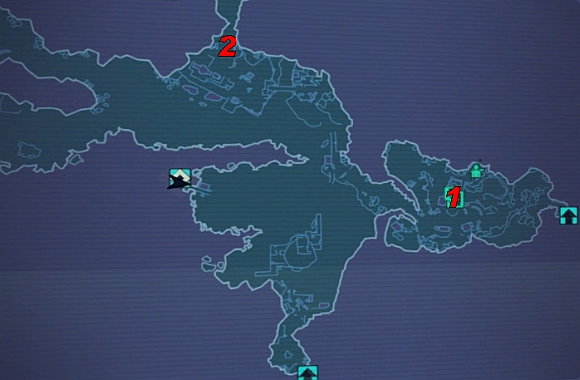
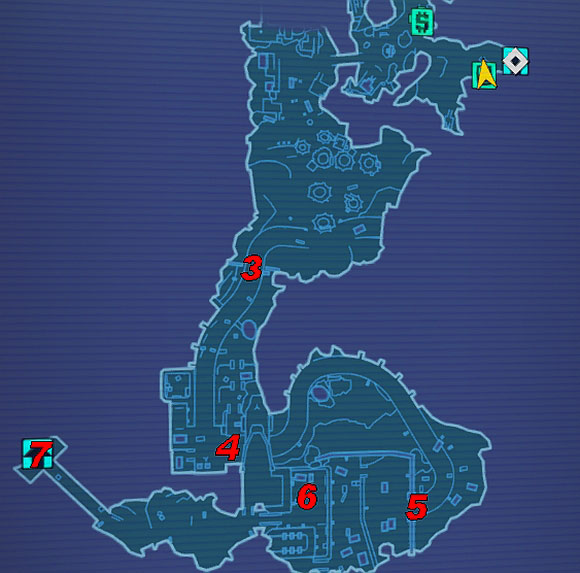
1) Starting point (teleport to Windshear Waste)
2) Hammerlock (they're beside each other)
![After you reach the destination [1], follow the Claptrap towards the settlement - Cleaning up the Berg - Main missions - Borderlands 2 - Game Guide and Walkthrough](https://game.lhg100.com/Article/UploadFiles/201512/2015121216574209.jpg)
After you reach the destination [1], follow the Claptrap towards the settlement. As you go lower, you will be attacked by Monglets. After you get rid of all the enemies, approach the main gate.
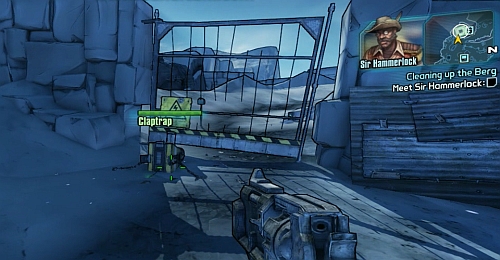
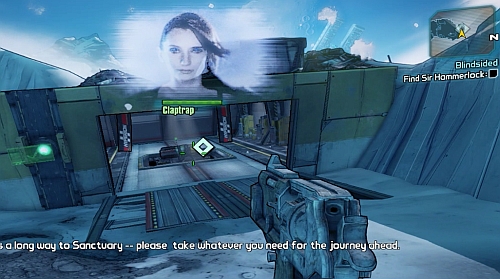
With the gate open, head inside and get rid of all the Bandits. At some point, a Brat Bullymong will join the fight. If you back out, the Bandits will start fighting with it. Once the area's clear, approach the gate in the south-west part of the camp and you will meet Sir Hammerlock. Give him the Claptrap Eye and wait for the robot to be repaired.
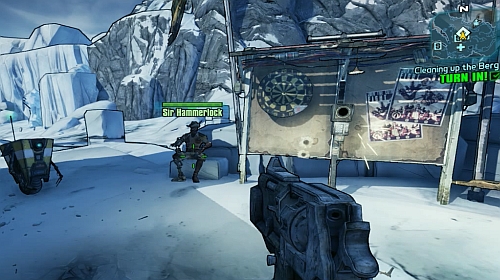
Now follow Hammerlock to the generator. Eventually, to the right of the generator, a Fast Travel will be activated. Speak to Hammerlock [2] to finish the mission (you will receive a Shield which will give you additional protection against damage) and be able to begin side missions.
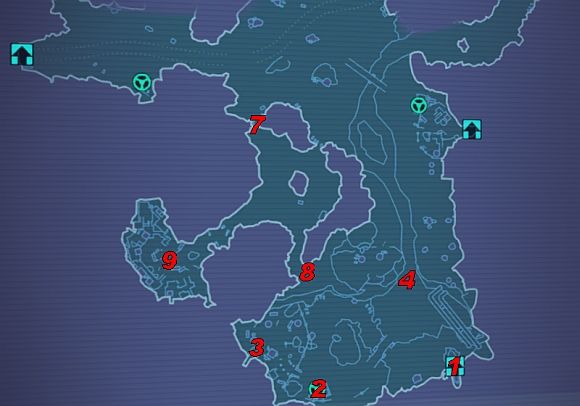
1) Claptrap
2) Gate
2) Gate which you need to destroy with the cannon.
3) Trapped Claptrap
4) Flynt
![Approach the Claptrap [1] and press the use button (by default E) - Best Minion Ever - p. 1 - Main missions - Borderlands 2 - Game Guide and Walkthrough](https://game.lhg100.com/Article/UploadFiles/201512/2015121216574434.jpg)
Approach the Claptrap [1] and press the use button (by default E). Follow the Claptrap towards the lever in the western part of the camp which you can use to open the nearby gate (head further west afterwards). Follow the Claptrap to the west of the map towards the first small camp. There you will come across Bandits which you have to eliminate.
Now approach the bridge seen in the screenshot and wait for the Claptrap to lower it. With the bridge down, prepare yourself for a fight with Bandits.

Head across the bridge, jump below and prepare yourself to meet with Boom and Bewm. The first one will be operating the Big Bertha and the second flying around the area on a jetpack. You need to stay behind the cover seen in the middle of the area (as seen in the screenshot) and get rid of Bewm first.
After you get rid of him, start shooting at the cannon. Bandits will also join the fight. Wait for a gap between the shots and shoot at it yourself. Afterwards quickly hide behind a cover, for example the one seen in the above screenshot, found to the right of the last one.
Once you deal enough damage, Boom will leave the cannon. Finish him off while moving between covers. You can also run to a safe spot and wait for your shield to regenerate if needed. After the fight, pick up the Grenade Mod from Boom's corpse.
Now approach the gate in the northern part of the camp where the Claptrap will be standing. He will suggest using the cannon to destroy the gate [2]. After getting rid of the gate, stay inside the cannon and attack the Bandits coming from behind it.
Once you don't have what to shoot at, go through the game and head north-west. That way you will reach a locked gate seen in the screenshot. It will rise after you approach it and Bandits will attack you.
Head up the camp while eliminating the enemies you come across. Eventually you will find a Claptrap [3] in the northern part of the camp. Get rid of the bullies and approach it.
Following the Claptrap, you will reach a staircase from the above screenshot. The Claptrap will order you to find a lever of the elevator on which it will be waiting. Go up the stairs and turn left.
You will reach the above location, where you will be once again attacked by Bandits. After clearing the area, go up as the arrow suggests.
Here you're in for another fight. Go up the stairs and you will reach the lever you're looking for. Use it and the Claptrap will join you.
![Head up the camp along the Claptrap to reach an entrance to an arena, on which you will have to fight Captain Flynt [4] - Best Minion Ever - p. 2 - Main missions - Borderlands 2 - Game Guide and Walkthrough](https://game.lhg100.com/Article/UploadFiles/201512/2015121216574645.jpg)
Head up the camp along the Claptrap to reach an entrance to an arena, on which you will have to fight Captain Flynt [4]. Behind the descent there's a vending machine from which you can buy ammo in case you need some.

Bandits will also join the fight. Be sure not to stand on the grate seen above, as from time to time fire will burst from between them. At the beginning of the fight, Flynt will be on a balcony at the very end of the arena. Shoot him a bit and he'll come down to you. After he reaches your level, use the buildings at the edges of the arena as covers to regenerate your shield.

After defeating Flynt, head to the north-east side of the arena where the Claptrap will open the gate for you. Inside you will find a weapon chest, among others.
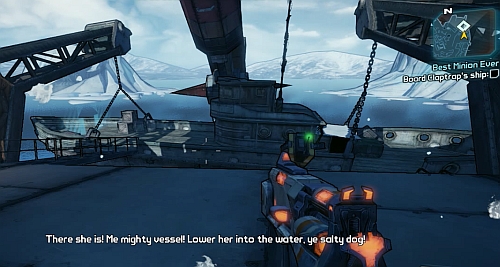
Follow the robot further to its ship. Head onboard finish the mission by speaking to the Claptrap. Afterwards use the portal leading to Three Horns Divide.
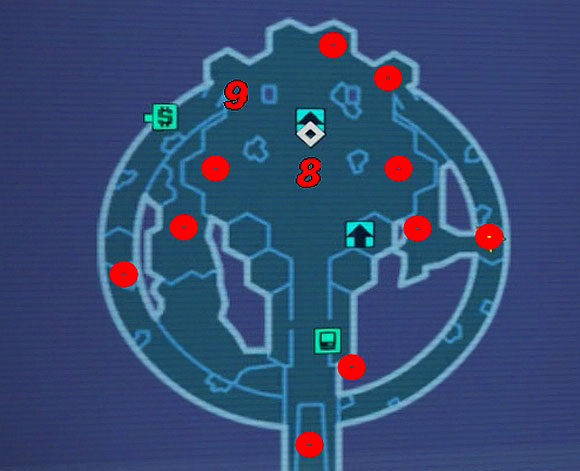
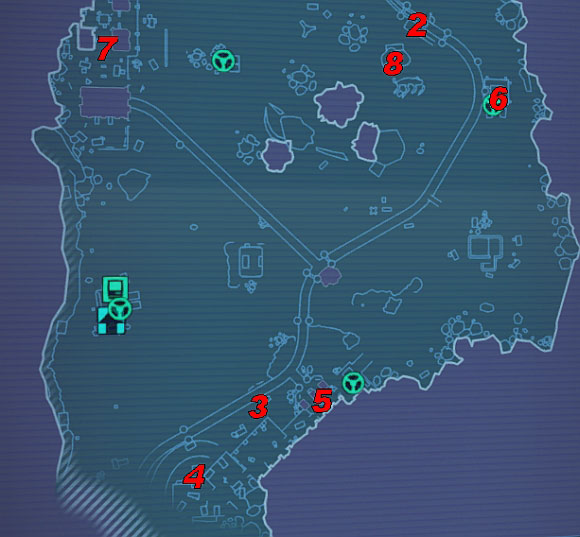
1) Starting point/teleport to Southern Shelf
2) Catch -a- Ride
3) Hyperion Adapter
4) Tunnel entrance/exit
7) Passage leading to Reiss
8) Reiss
9) Bandits camp
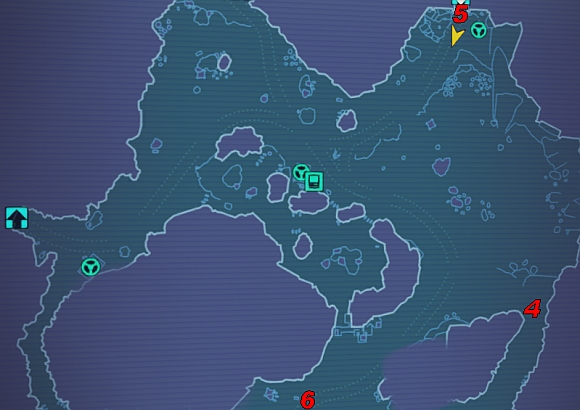
4) Tunnel entrance/exit
5) Sanctuary
6) ECHO Recorder

After you reach the destination, get off the ship and head towards the bridge in the west. As you move closer, you will witness it getting destroyed. Cross the demolished bridge and head up the path, where you will be attacked by Monglets and a Bullymong.
When you reach the top, head south towards Catch-a-Ride [2] and try using the device. It will be blocked by Scooter.
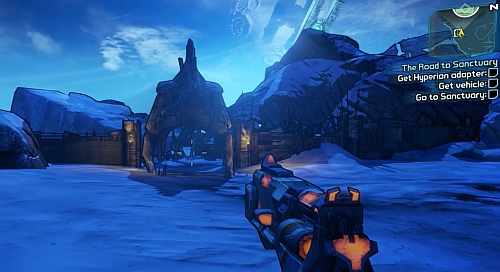
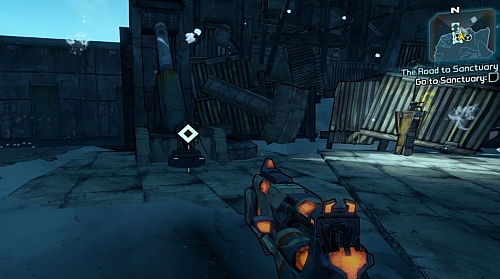
Now head to the camp in the north-west (the entrance is pointed on screen).
After eliminating the Bandits found inside, in the middle of the camp you should come across the Hyperion adapter.
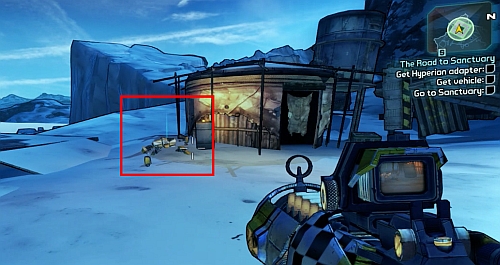
![Return to Catch-a-Ride [2] and install the Hyperion adapter - The Road to the Sanctuary - p. 1 - Main missions - Borderlands 2 - Game Guide and Walkthrough](https://game.lhg100.com/Article/UploadFiles/201512/2015121216574876.jpg)
Return to Catch-a-Ride [2] and install the Hyperion adapter. Use Catch-a-Ride and choose to Deploy Vehicle.
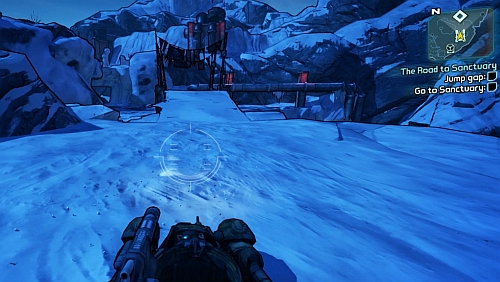
Enter the vehicle and use it to jump to the other side of the precipice from the ramp north-east of Catch-a Ride. Remember to use boost (by default F).
![Once on the other side, follow the tunnel [4] north of the landing spot, as seen in the above screenshot - The Road to the Sanctuary - p. 1 - Main missions - Borderlands 2 - Game Guide and Walkthrough](https://game.lhg100.com/Article/UploadFiles/201512/2015121216574944.jpg)
Once on the other side, follow the tunnel [4] north of the landing spot, as seen in the above screenshot.
![After you exit the tunnel, head further north towards Sanctuary [5] - The Road to the Sanctuary - p. 2 - Main missions - Borderlands 2 - Game Guide and Walkthrough](https://game.lhg100.com/Article/UploadFiles/201512/2015121216574957.jpg)
After you exit the tunnel, head further north towards Sanctuary [5]. When you reach your destination, you should see a Bandit knocking on the gate. Attack him and more Bandits will come in running from the camp on the left.
With the area clear, approach the button to the right of the gate. From a short conversation you will learn that a certain Reiss has gone missing and you have to find him.
![Enter the vehicle (if your previous one got destroyed, there's a Catch-a-Ride to the right of the gate) and head south-west [6] - The Road to the Sanctuary - p. 2 - Main missions - Borderlands 2 - Game Guide and Walkthrough](https://game.lhg100.com/Article/UploadFiles/201512/2015121216575041.jpg)
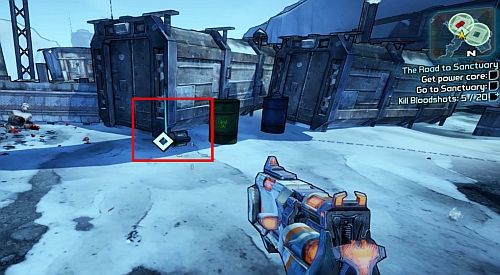
Enter the vehicle (if your previous one got destroyed, there's a Catch-a-Ride to the right of the gate) and head south-west [6]. Eliminate the nearby Monglets and pick up the ECHO Recorder from the road.
![From the place where you found the ECHO Recorder, head a bit to the south-west [7] - The Road to the Sanctuary - p. 2 - Main missions - Borderlands 2 - Game Guide and Walkthrough](https://game.lhg100.com/Article/UploadFiles/201512/2015121216575095.jpg)
From the place where you found the ECHO Recorder, head a bit to the south-west [7]. There you will find a passage by which you'll have to leave your vehicle.

Keep heading south while looking out for any Monglets. Eventually you will reach a spot where 3 Bandits will be kicking Reiss [8]. Eliminate them and speak with Reiss.
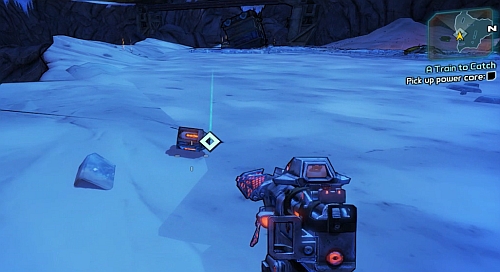
Now head back north and take the first turn west. Following the tunnel you will reach a Bandit camp [9]. Here you have to kill 20 enemies and retrieve the Power core. The item will be dropped by one of the killed Bandits.
If you will still need to kill some bandits and there will be none around, head up the stairs in the middle of the camp. That will cause them to respawn. After completing the mission objectives, return to Sanctuary [5]. Press the button to the right of the gate and this time you will be able to head inside Sanctuary.
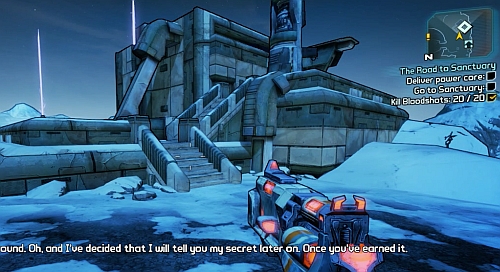
Go up the stairs of the building on the right.
On the terrace, first speak to Davis. Afterwards remove the old Power core from the reactor and install the new one. Speak to Davis again to end the mission. As a reward, you can choose one of the weapons.
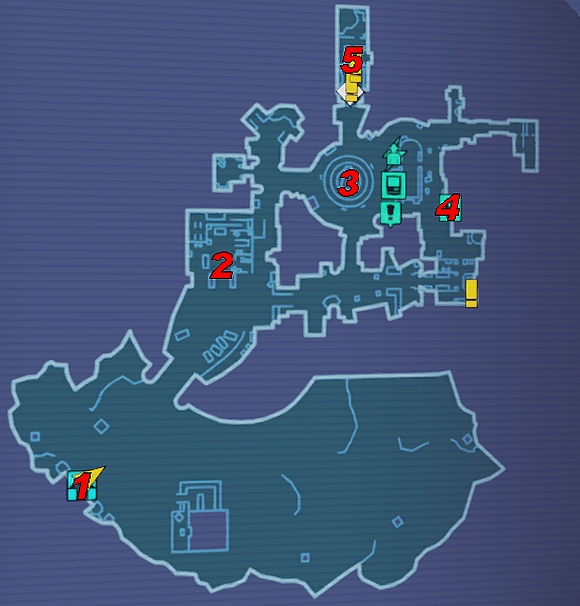
1) Starting point/teleport to Three Horns Divide
2) Scooter's workshop
3) Monument
4) Crazy Earl's shop
5) Roland's headquarters
Head towards the gate in the north. Approach Jessup and he will open the entrance to Sanctuary for you. Right after going through it, you should see Scooter's workshop in front of you [2]. Head inside through the gate (it will open when you approach it).
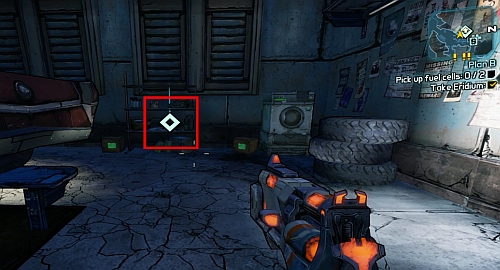
Inside, speak with Scooter. Take 4 pieces of Eridium from him. Now you will need to collect two Fuel cells. The first one is to the left of Scooter, behind the car.
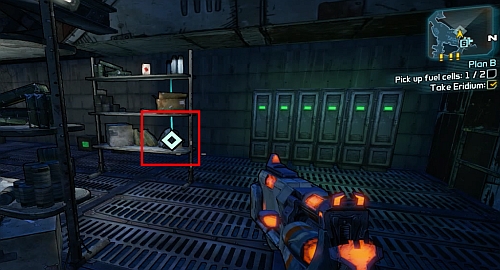
For the second one, you will need to go up the stairs to the right of Scooter. The item will be lying on a shelf, beside some locker which you should search (you can find some Eridium there).
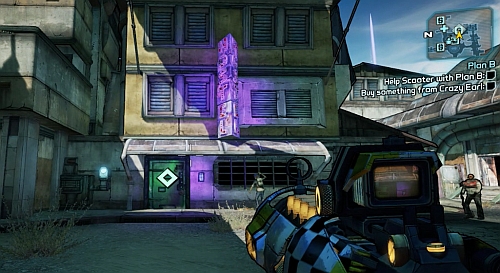
![Now head out of the workshop and go back to the centre of Sanctuary [3] - Plan B - Main missions - Borderlands 2 - Game Guide and Walkthrough](https://game.lhg100.com/Article/UploadFiles/201512/2015121216575264.jpg)
Now head out of the workshop and go back to the centre of Sanctuary [3]. Place the Fuel cells north and south of the monument. Afterwards head to the eastern part of town, to Crazy Earl's [4].
Approach the door and buy any affordable upgrade for Eridium.
![Return to the centre [3] and install the last Fuel Cell to the west of the monument - Plan B - Main missions - Borderlands 2 - Game Guide and Walkthrough](https://game.lhg100.com/Article/UploadFiles/201512/2015121216575286.jpg)
Return to the centre [3] and install the last Fuel Cell to the west of the monument.
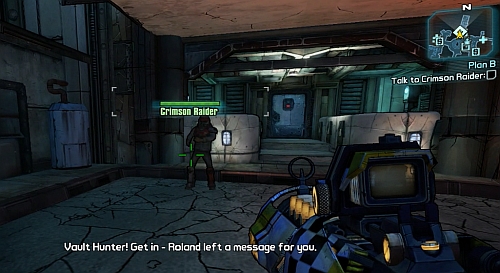
Now head north and speak to Crimson Rider who standing in front of the door. He will give you a key to Roland's headquarters [5]. Use it and head inside.
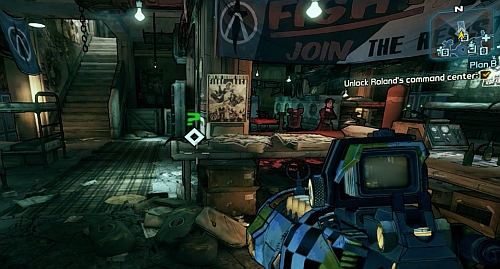
Inside, pick up the ECHO Message from the desk. In return for completing the mission, you will receive an upgrade, giving you one additional weapon slot. Take a good look around both floors, as you can find Eridium in the lockers.
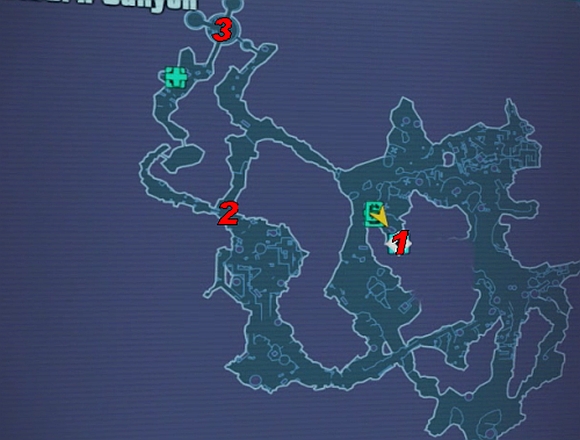
1) Starting point/teleport to Three Horns Divide
2) Fork in the road
3) Firehawk

Go up the stairs to the first floor of Roland's headquarters (north of Sanctuary). Approach the vault and take the ECHO Recorder from inside. Inside the vault you can also store other items which you don't need at the moment.
Leave Sanctuary and head to Three Horns Divide. Drive south, to the Frostburn Canyon passage. In order to get there, you will have to cross the bridge seen in the screenshot. The road to the teleport leads through a camp filled with Bandits, who you can eliminate from inside the vehicle.
Head onwards a bit and afterwards turn right. Stick to the left side of the canyon, as from there you will have a good position to shoot enemies in the below camps.
Head to the east of the canyon and afterwards enter the cave leading south.
After a few steps you should see an entrance to a cave branch on the left, which will take you to a chest with Class Mods. Take it and head back. Follow the cave south, clearing more Bandit camps and groups of Spiderants.
Follow the road pointed on the map. If you want to get additional experience points and items, you can of course check the other paths. However keep in mind that they don't connect with each other, as the map would suggest.
![Keep heading deeper into the cave until you reach a fork in the road from the above screenshot [2] - Hunting the Firehawk - Main missions - Borderlands 2 - Game Guide and Walkthrough](https://game.lhg100.com/Article/UploadFiles/201512/2015121216575585.jpg)
Keep heading deeper into the cave until you reach a fork in the road from the above screenshot [2]. Take the left path.
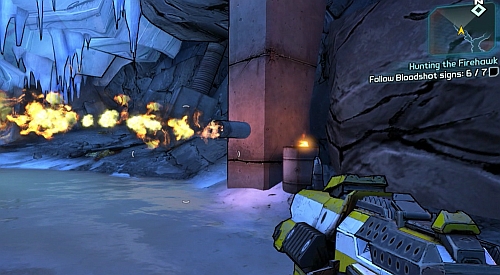
Now you will have to look out for pipes coming out of the walls, ceiling and floor. Fire will start coming out of them when approached, so be sure to avoid it.
![Cross the footbridge to the other side of the precipice and follow the tunnel to the cave with Firehawk [3] - Hunting the Firehawk - Main missions - Borderlands 2 - Game Guide and Walkthrough](https://game.lhg100.com/Article/UploadFiles/201512/2015121216575530.jpg)
Cross the footbridge to the other side of the precipice and follow the tunnel to the cave with Firehawk [3]. Approach her and hold down the use button (by default E) until the Reviving gauge fills up. Afterwards head north, take the Eridium nugget from the shelf and give it to Firehawk. You will have to team up and fight off incoming waves of Bandits.
After eliminating the last enemy, Firehawk will ask you for another Eridium nugget, this time found in the western part of the room. Give her the item to finish the mission. In return, you will receive a Class Mod. You will be teleported onto a path which you need to follow south-east, to a passage leading to Three Horn Divide [1].
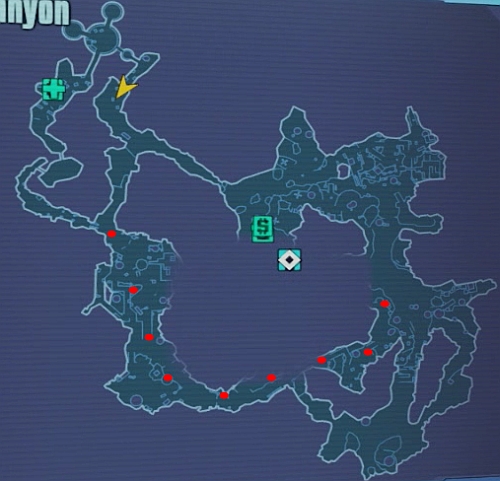
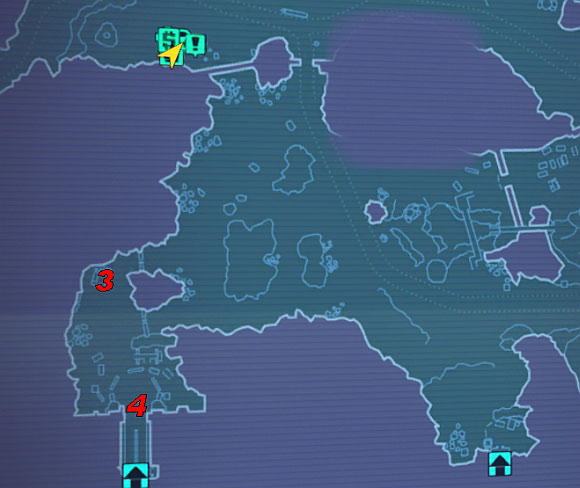
1) Passage to Frostburn Canyon
2) Catch -a- Ride
3) Southern passage to Three Horns Valley
4) Northern passage to Three Horns Valley
4) Northern passage to Three Horns Divide
5) Bandit camp
6) Passage to The Dust
7) Ellie's workshop
![Once you reach Three Horns Divide [1], use the Catch -a- Ride [2] found to the right of the Bandit camp exit - A Dam Fine Rescue - p. 1 - Main missions - Borderlands 2 - Game Guide and Walkthrough](https://game.lhg100.com/Article/UploadFiles/201512/2015121216575693.jpg)
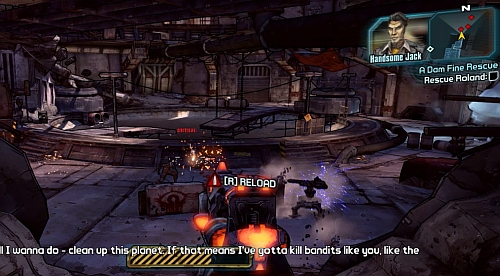
Once you reach Three Horns Divide [1], use the Catch -a- Ride [2] found to the right of the Bandit camp exit. The next location can be reached by following road [3] or [4]. Both will take you to the exact same place, so the choice is up to you. In Three Horns Valley, head to the Bandit camp gate [5]. Drive near it and use the horn (by default Z). Get rid of a few Bandits who will jump from behind the fence. Afterwards head to the passage leading to The Dust [6].
![Head to Ellie's workshop [7] and speak with her - A Dam Fine Rescue - p. 1 - Main missions - Borderlands 2 - Game Guide and Walkthrough](https://game.lhg100.com/Article/UploadFiles/201512/2015121216575617.jpg)
Head to Ellie's workshop [7] and speak with her. On your way there you should be prepared to be attacked by flying vehicles and cars.
You will now have to drive around the area and destroy Bandit vehicles. After destroying one, you should find Vehicle Parts (screenshot). Once you have five of them, return to Ellie [7].
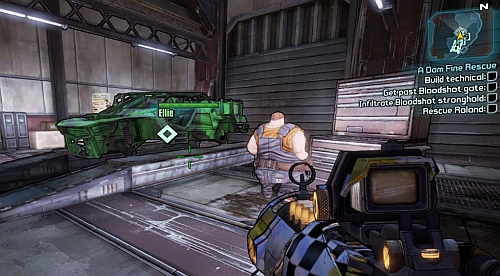
Speak to Ellie, approach the car wreck from the screenshot and press Use (by default E). when the car is ready, approach the Catch -a- Ride inside the workshop and choose Bandit Technical. Get inside the vehicle and drive it back to the Bandit camp [5].
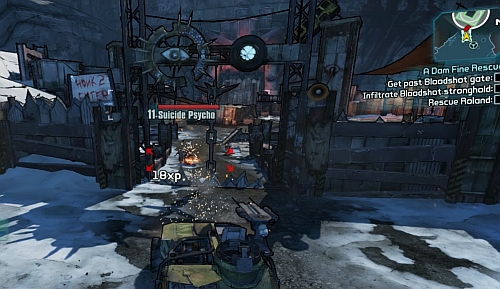
Once again stand in front of the entrance gate and use the horn (by default Z). The gate will open. Unfortunately you won't be able to drive inside the camp, however you can still kill any Bandits in range of the mounted gun. Kill the others on foot.
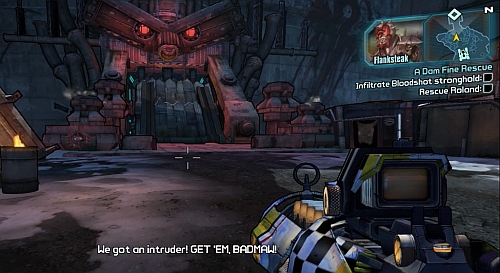
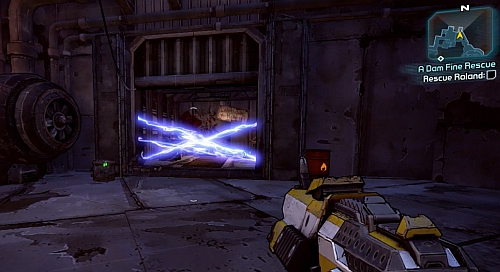
Head towards the passage to Bloodshot Stronghold, which you will eventually find to be blocked. When you approach close enough, the bridge will be lowered for a short while ad you will have to fight with Bad Maw.
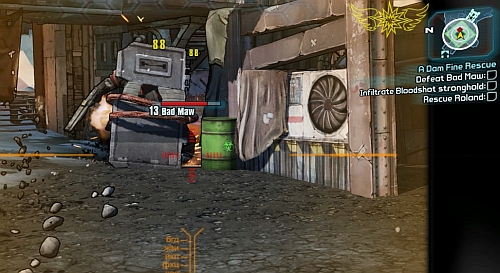
Bad Maw uses a shield, so you will have to attack him from the back. Keep circling around one of the buildings and shoot the enemy in the back/side when he comes out of the corner or stops. You can throw grenades at him as well. There are also explosive barrels in the camp which you should use (screenshot). Corrosive or Explosive weapon types are best for this fight.
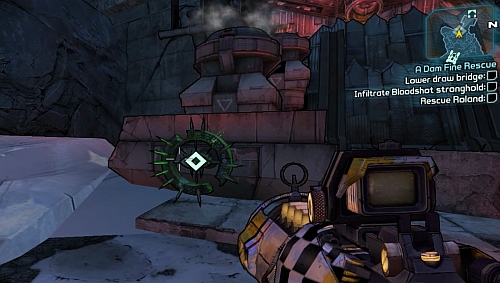
Once Bad Maw is dead, take the Bridge key from his body and use it on the lock right next to the bridge, shown on the above screenshot. The bridge will come down and you will be able to enter Bloodshot Stronghold.
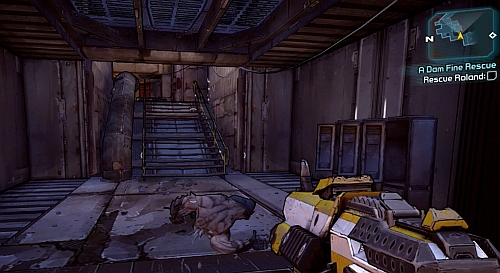
The stronghold itself is a long tunnel leading to prison cells, where Roland is being held. Keep going north until you reach the building from the above screenshot. Search the lockers inside to find some Eridium.
By going further north you will reach a big open room shown in the screenshot.
As you start climbing to the upper level, Mad Mike will show up. he might be a challenging enemy because of his powerful gun which can kill you in a couple shots. You also need to look out for his incendiary grenades. Keep out of range of his attacks at all times, hiding behind covers or running to previously cleared rooms.
Once you defeat him and move onwards, you will reach a chest behind a force field show in the above screenshot.
In order to reach it, you will have to head deeper into the stronghold. Eventually you will get to a staircase from the above screenshot, in the passage on the left side of the corridor.
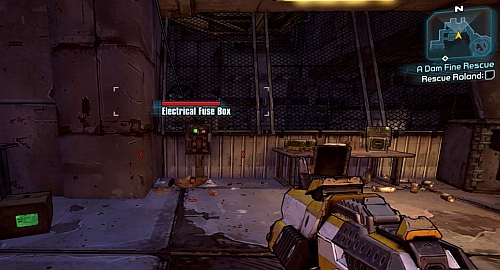
Climb it, go to the end of the room and destroy the above fuse box. The field will disappear and you will be able to open the chest with a very useful rocker launcher (save ammunition for the upcoming boss fight).
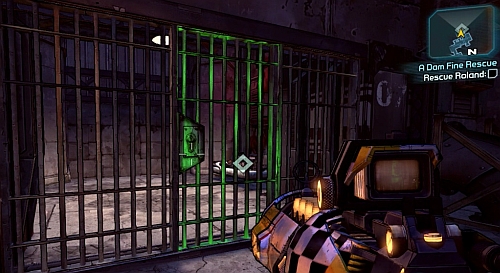
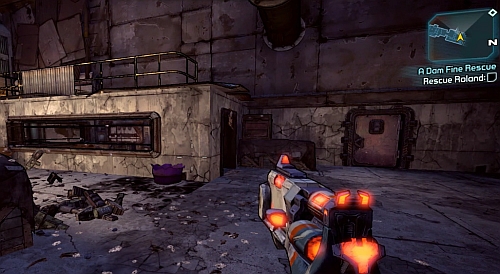
At the end of the path you will find a cell in which Roland is being held. Try opening it and head back after the cinematic, as a robot will explode there in a moment.
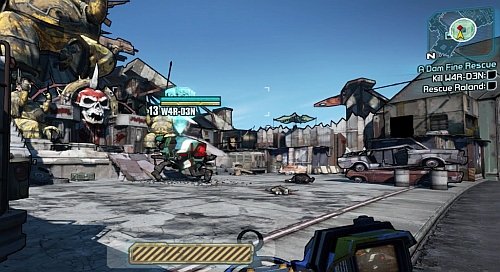
Follow the abducted Roland, destroying the Robots you come across on your way. You will reach a passage leading to Bloodshot Ramparts. Only one path leads to Roland, follow it and you will have to confront W4R-D3N. If you have previously obtained the rocket launcher, the fight shouldn't be hard. Before being able to damage the robot, you will have to destroy its shield, which regenerates rather fast. Corrosive type weapons can deal additional damage here. Small vehicles will be circling around the robot, trying to regenerate its shield. Destroy them as fast as you can.
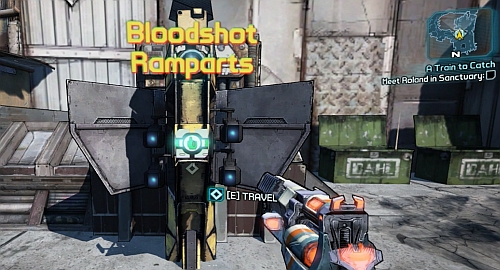
After defeating the boss, you will have to fight off incoming waves of Robots together with Roland. With the last enemy defeat, speak to Roland to finish the mission. Now head back to Fast Travel and return to Sanctuary.

1) Roland
7) Davis
2) Varkid ranch
3) Tina
4) Western Bandit camp
5) Eastern Bandit camp
6) Passage to End of the Line
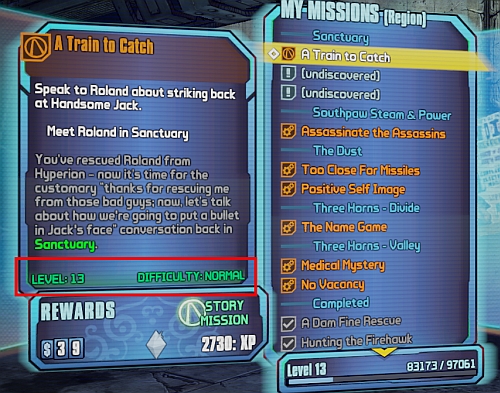
![In Sanctuary, head to Roland's hideout [1] and find him at the balcony on the first floor of the building - A Train to Catch - Main missions - Borderlands 2 - Game Guide and Walkthrough](https://game.lhg100.com/Article/UploadFiles/201512/2015121216580081.jpg)
In Sanctuary, head to Roland's hideout [1] and find him at the balcony on the first floor of the building. Speak to him and go to Tundra Express through the passage in the northern part of Three Horns Divide. From there, go to the Varkid ranch [2]. You need to set three Varkids on fire in a very short period of time in order to wake up Roland's spy. Equip a weapon with a Fire Elemental Effect with a Chance to Ignite and shoot the enemies seen in the above screenshot. It's best to gather a few Varkids in one place and ignite them all at once.
![Once you manage to complete the previous objective, head to the cave [3] (the entrance can be found in the northern part of the mountain) where you will meet Tina - A Train to Catch - Main missions - Borderlands 2 - Game Guide and Walkthrough](https://game.lhg100.com/Article/UploadFiles/201512/2015121216580050.jpg)
Once you manage to complete the previous objective, head to the cave [3] (the entrance can be found in the northern part of the mountain) where you will meet Tina. Speak to her and head to the Bandit camp [4]. The area is well protected, including air vehicles, so stock up on ammo. You need to gather two Badonkadonks (screenshot).
The first one can be found in front of the building, on the hill to the right of the camp entrance (screenshot). The second missile is in the western part of the camp. After obtaining both, return to Tina [3]. Give them to her, leave the garage and shortly after you will be able to collect two Tina's Damsel. Now head to the next Bandit camp [5] in the east.
Climb up the ladder onto the roof of the building visible in the above screenshot, place both missile in their places and arm them. The destroyed bridge will create a passage to End of the Line [6].
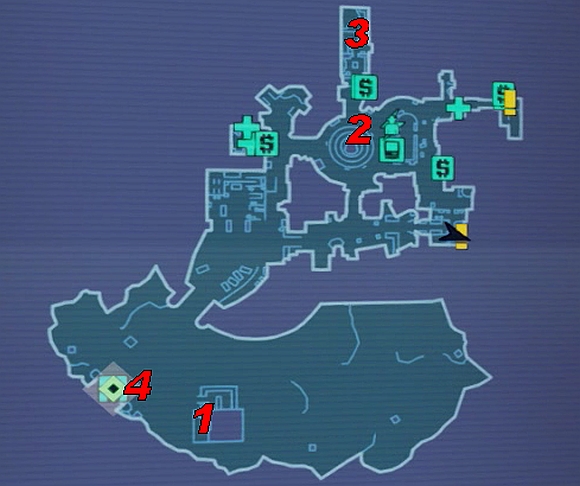
At the beginning of the path you will find Vending Machines. Buy ammunition from them, as it will come in handy during the upcoming boss fight. Follow the only possible path, destroying further groups of Robots on your way, until you reach an open area which you need to jump down to. Here you will have to face Wilhelm. Prepare your biggest guns and start shooting at him when only he appears, as much as possible before his shield renews. Afterwards destroy the robots flying around the boss and repairing his shield, as seen in the above screenshot. If you have a rocket launcher, focus solely on the boss, destroying his shield and afterwards depleting his health. After a few series he should be dead.
Now pick up the Power Core and use Fast Travel by the descent to this area to return to Sanctuary. Head to Davis [7] and speak to him to finish the mission. As a reward you will receive a Relic which can modify the stats and skills, including those in vehicles.
Notice! After you begin the next mission, Sanctuary side missions will become blocked for some time.
1) Power Core
2) Sanctuary centre
3) Roland
4) Passage to Three Horns Divide
5) Passage to Three Horns Divide
6) Passage to The Fridge
![Remove the old Power Core and install the new one [1] - Rising Action - Main missions - Borderlands 2 - Game Guide and Walkthrough](https://game.lhg100.com/Article/UploadFiles/201512/2015121216580295.jpg)
Remove the old Power Core and install the new one [1]. Now head to the centre [2], where Scooter will order you to start the ignition (screenshot) in the southern and afterwards western part of Sanctuary downtown.
![Afterwards go to Roland's hideout [3] - Rising Action - Main missions - Borderlands 2 - Game Guide and Walkthrough](https://game.lhg100.com/Article/UploadFiles/201512/2015121216580240.jpg)
Afterwards go to Roland's hideout [3]. You will find fir on the upper floor of the building, under a pile of debris. Pick up five Eridiums scattered around the floor and return downtown [2].
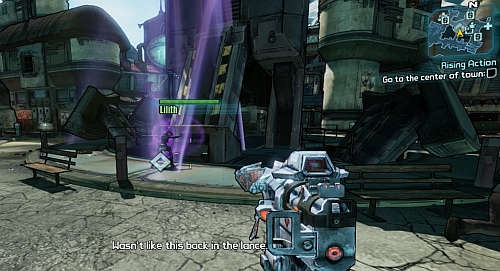
Give the Eridium to Lilith. You will be moved to the Three Horns Divide passage [4], which you should go through after hearing out the dialogues.
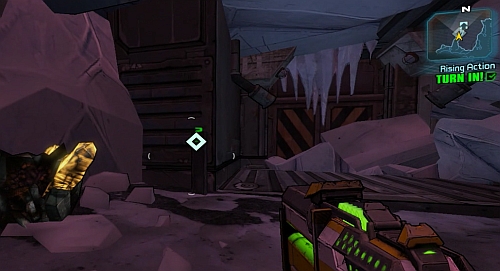
Use Catch -a- Ride on the left side of the gate and drive to Three Horns Valley (if you have activated Fast Travel in this area during No Vacancy, you will save yourself some time). Afterwards head to the passage leading to The Fridge [6]. Use the button in the above screenshot to finish the mission and open the passage.
1) Fast Travel
2) Factory entrance
3) Elevator
4) Thresher
5) Northern and southern passage to The Highlands
6) Camp
After reaching The Fridge, head to the passage to The Highlands Outwash, eliminating Mutants on your way there. Reach the destination and Sanctuary will appear in the sky, while you will have to use Fast Travel found right by the passage [1] (screenshot).
Fast Travel will unfortunately turn out to be broken. Go towards the factory entrance [2]. Destroy all the Robots and go up the stairs from the screenshot to call in an elevator [3] which will take you to the other side.
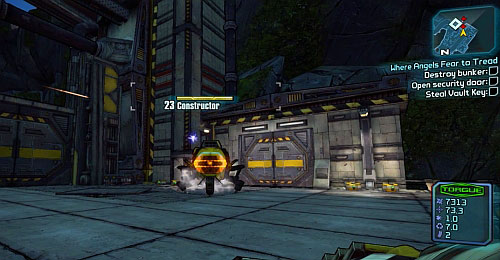
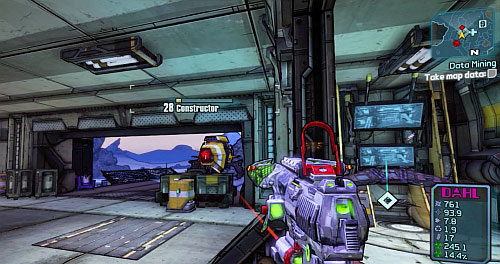
On the other side, by the gate, you will have to face Constructor. A Rocket launcher or Corrosive weapon should prove very effective here. Look out for the turret which the Robot can place and destroy it as fast as possible (it has very little health, but deals lots of damage).
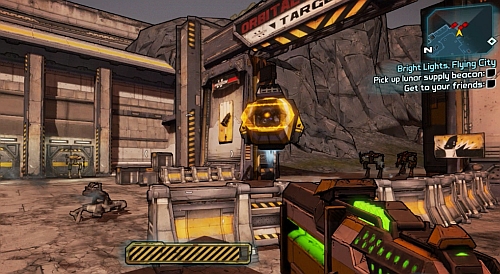
![Keep heading deeper into the factory and eventually you will encounter the Thresher [4] - Bright Lights, Flying City - Main missions - Borderlands 2 - Game Guide and Walkthrough](https://game.lhg100.com/Article/UploadFiles/201512/2015121216580474.jpg)
Keep heading deeper into the factory and eventually you will encounter the Thresher [4]. Try to deal as much damage as possible before the enemy can restore his shield. Try to keep him at distance and shoot the spots marked in the above screenshot for critical damage.
From time to time, Robots will join the battle. Left alone, they will attack the boss and you can also use them to get Second Wind. By retreating to the position showed in the above screenshot, you can shoot Thresher while staying out of range yourself.
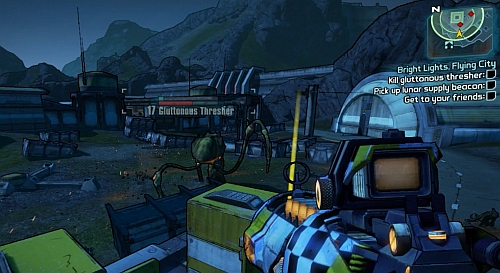
![After you've dealt with the enemy, pick up the Lunar Supply Beacon and head to the northern or southern passage to The Highlands [5] - Bright Lights, Flying City - Main missions - Borderlands 2 - Game Guide and Walkthrough](https://game.lhg100.com/Article/UploadFiles/201512/2015121216580510.jpg)
After you've dealt with the enemy, pick up the Lunar Supply Beacon and head to the northern or southern passage to The Highlands [5]. Right beside the passage, use Catch -a- Ride and head to the camp marked on the map [6]. Place the Beacon in the marked spot and prepare to fight with incoming waves of Robots. If the Beacon becomes damage, repair it with Use (by default E). if you run out of ammo, there's a nearby Vending machine in which you can restock. If you manage to hold them off long enough, you will be able to use Fast Travel to return to Sanctuary. Speaking with Roland will end the mission. As a reward, you will an upgrade letting you carry one more weapon with you.
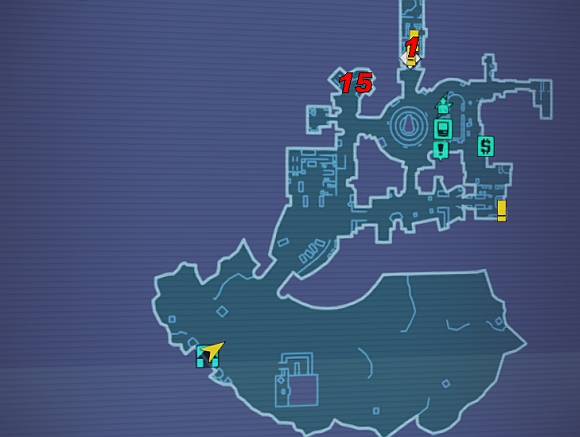
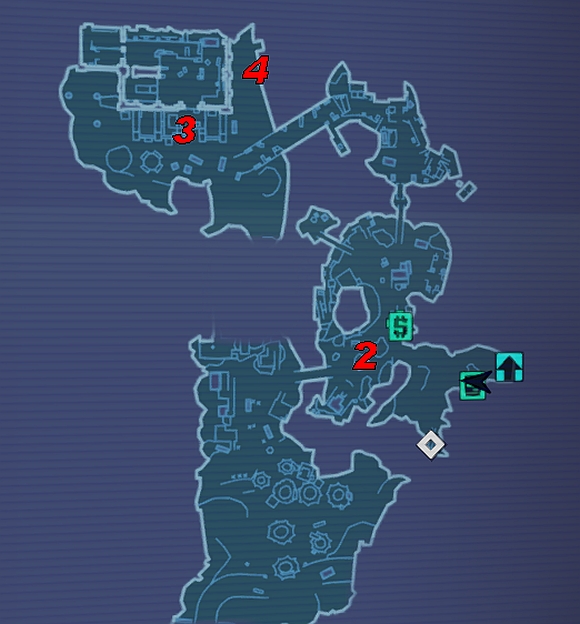
1) Roland
15) Claptrap
2) Most
3) Mordecai
4) Gate
5) Observatory
6) Hyperion headquarters
7) Slag Sample 1, 2
8) Gate/Super Badass Loader
9) Slag Sample 3, 4
10) Bloodwing's cell
11) Slag Sample 5, 6
12) Hyperion warehouse
13) Slag Sample 7, 8
14) Bloodwing
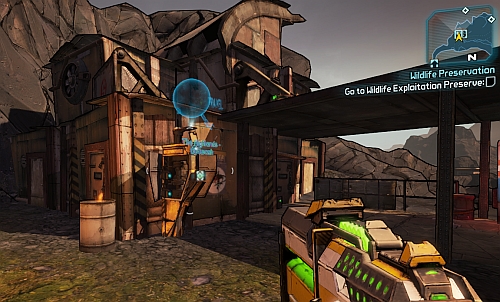
![Speak to Roland [1] and use Fast Travel to get to The Highlands Hyperion Bridge - Wildlife Preservation - Main missions - Borderlands 2 - Game Guide and Walkthrough](https://game.lhg100.com/Article/UploadFiles/201512/2015121216580517.jpg)
Speak to Roland [1] and use Fast Travel to get to The Highlands Hyperion Bridge. Follow the passage in the south-east part of the map to reach Wildlife Exploitation Preserve. Cross the stone bridge from the above screenshot [2] and head up the path to reach Mordecai's hideout [3].
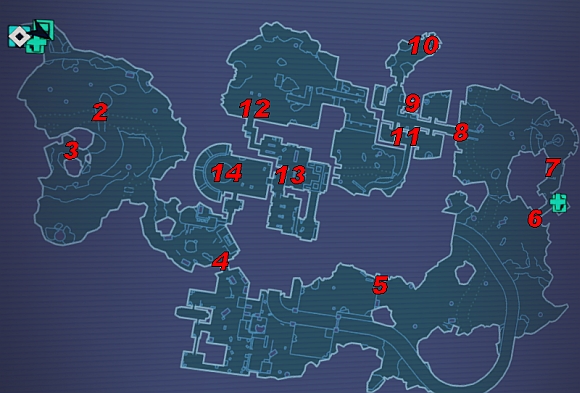
![After you learn about the plan, head to the gate [4] in the first camp - Wildlife Preservation - Main missions - Borderlands 2 - Game Guide and Walkthrough](https://game.lhg100.com/Article/UploadFiles/201512/2015121216580664.jpg)
After you learn about the plan, head to the gate [4] in the first camp. When you try to open the passage with the button, the door will be blocked and you will have to critically damage three GUN Loaders. Reduce their health to around 20% and the passage will become unlocked.
![Head deeper into the preserve, towards the observatory marked with [5] - Wildlife Preservation - Main missions - Borderlands 2 - Game Guide and Walkthrough](https://game.lhg100.com/Article/UploadFiles/201512/2015121216580646.jpg)
Head deeper into the preserve, towards the observatory marked with [5]. Head through the room and you will once again reach an open space. Eventually you will reach Hyperion headquarters [6]. Open the door with the button on the left side. Inside one of the rooms you will find two Slag Samples [7]. In return for finding 10 samples you will receive bonus experience points. Samples can also fall out of defeated enemies.
![You will reach a locked gate [8] - Wildlife Preservation - Main missions - Borderlands 2 - Game Guide and Walkthrough](https://game.lhg100.com/Article/UploadFiles/201512/2015121216580642.jpg)
You will reach a locked gate [8]. Keep fighting with all the appearing Robots and Stalkers (including a Badass) until a passage opens and a Super Badass Loader appears. Hide behind covers when it shoots and wait for the gun to overheat. Use the time between them to attack the Robot.
![In the room marked as [9] you will find two more Slag Samples - Wildlife Preservation - Main missions - Borderlands 2 - Game Guide and Walkthrough](https://game.lhg100.com/Article/UploadFiles/201512/2015121216580666.jpg)
In the room marked as [9] you will find two more Slag Samples. One can be found after killing the Loot Midget which will jump out of the cardboard box on the right side of the room.
![As you reach Bloodwing's cell [10], it will turn out to be empty - Wildlife Preservation - Main missions - Borderlands 2 - Game Guide and Walkthrough](https://game.lhg100.com/Article/UploadFiles/201512/2015121216580692.jpg)
As you reach Bloodwing's cell [10], it will turn out to be empty. Pick up the Feather and return to the previous room. All the cages will become unlocked which will also let you reach the further locations. Inside room [11] you will find two more Slag Samples.
![As you reach the Hyperion warehouse [12], the entrance will turn out to be locked - Wildlife Preservation - Main missions - Borderlands 2 - Game Guide and Walkthrough](https://game.lhg100.com/Article/UploadFiles/201512/2015121216580792.jpg)
As you reach the Hyperion warehouse [12], the entrance will turn out to be locked. You will need to open a proper amount of Skags for the passage to open. Inside, in room [13] you will find two more Slag Samples (you should have collected the missing ones from dead enemies).
![Go up the stairs onto the bridge leading to a room with an elevator which you have to use to reach Bloodwing [14] - Wildlife Preservation - Main missions - Borderlands 2 - Game Guide and Walkthrough](https://game.lhg100.com/Article/UploadFiles/201512/2015121216580706.jpg)
Go up the stairs onto the bridge leading to a room with an elevator which you have to use to reach Bloodwing [14]. The battle can be divided into three phases. Firstly the bird will surround itself with fire. When it flies onto you, run to the sides and shoot after dodging the attack. The bird can also hang in the air and shoot fireballs at you, but you should be able to easily dodge them.
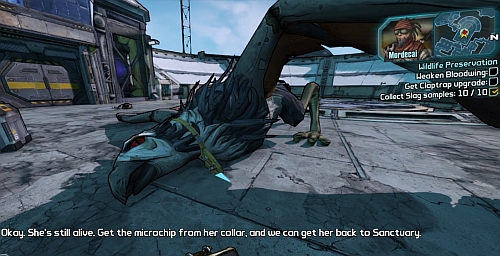
After losing enough health, it will switch to an electric cover. Skags will also appear on the arena, you can use them for Second Wind. The last form will be acid. The tactic stays the same: dodge the charge and shoot at Bloodwing. When the boss finally falls down to the ground, take the Microchip from its neck. Now quickly head back to a safe distance. Eventually a shortcut will open up on the left side of the arena, leading to gate [4]. Use Fast Travel, return to Sanctuary and head to Claptrap [15]. Install the new chip and return to Roland [1] to end the mission.
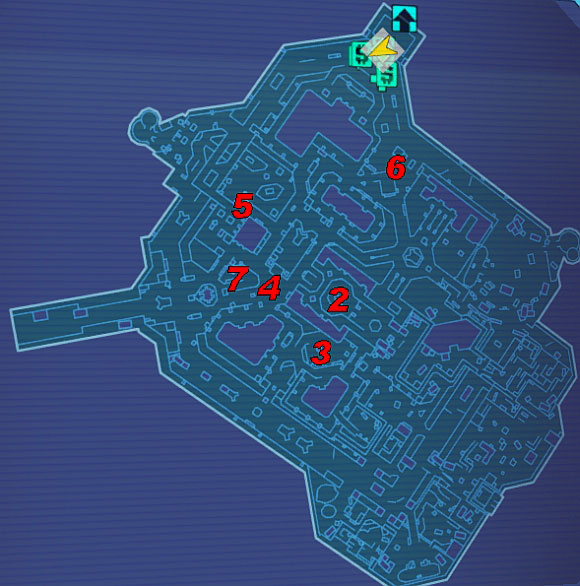
1) Roland
2) Bandit camp
3) The Slab King hideout
4) Chest
![Take Roland's Note from Roland [1] - The Once and Future Slab - Main missions - Borderlands 2 - Game Guide and Walkthrough](https://game.lhg100.com/Article/UploadFiles/201512/2015121216580899.jpg)
Take Roland's Note from Roland [1]. Use Fast Travel downtown and teleport to The Highlands Hyperion Bridge. Head to the western part of the map, where you will find a passage leading to Thousand Cuts. Enter the first Bandit camp [2], eliminate all the enemies and head north.
![Fight your way through the camps and eventually you will reach The Slab King hideout [3] - The Once and Future Slab - Main missions - Borderlands 2 - Game Guide and Walkthrough](https://game.lhg100.com/Article/UploadFiles/201512/2015121216580848.jpg)
Fight your way through the camps and eventually you will reach The Slab King hideout [3]. Before you use the stairs on the left, head to the right side of the building to find a ladder from the above screenshot [4]. Below you will find a chest.
![Now return to the entrance to The Slab King hideout [3] and go up the stairs on the left - The Once and Future Slab - Main missions - Borderlands 2 - Game Guide and Walkthrough](https://game.lhg100.com/Article/UploadFiles/201512/2015121216580882.jpg)
Now return to the entrance to The Slab King hideout [3] and go up the stairs on the left. there you should find a descent visible in the screenshot.
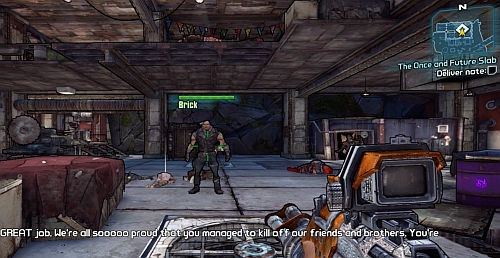
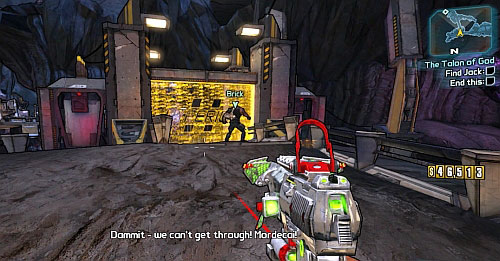
Below you will have to fight a couple Bandits. In the end, take care of Slab King's underlings (the passage up is in the left side of the room). With just Slab King left in the room, give him Roland's Note.
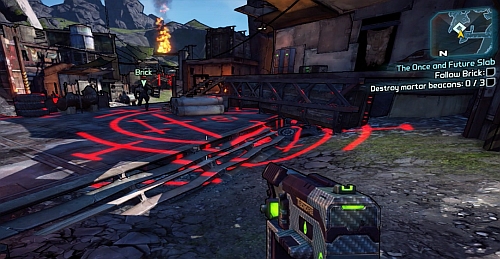
Head out through the door which Brick will open. Start following him and destroy all the Robots that you come across. If any is left, Brick might "get stuck". While you're taking care of the Robots, look out not to stand on the marked from the above screenshot.
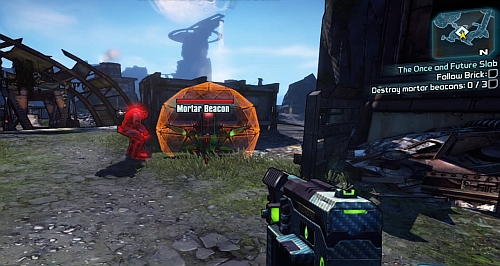
Your goal will be destroying three transmitters. Wait for Brick to destroy the target's shield and destroy it afterwards. With all three transmitters and Robots destroyed, use Fast Travel and return to Sanctuary. Speak to Roland [1] to end the mission.

1) Roland
2) Jack's double/Info Kiosk
3) Info Kiosk 2
4) Info Kiosk 3
5) Info Kiosk 4
6) Info Kiosk 5
![Speak to Roland [1] and head to The Highlands Hyperion Bridge - The Man Who Would Be Jack - Main missions - Borderlands 2 - Game Guide and Walkthrough](https://game.lhg100.com/Article/UploadFiles/201512/2015121216581059.jpg)
Speak to Roland [1] and head to The Highlands Hyperion Bridge. Afterwards go to the bridge in the western part of the map where you should find a passage to Opportunity. There, look for Jack's Double [2] and kill him. He will have some guards underlings with him who you can use for Second Wind. After defeating him, pick up his Pocketwatch.
![Now approach the Info Kiosk nearby where you fought with the Double [2] - The Man Who Would Be Jack - Main missions - Borderlands 2 - Game Guide and Walkthrough](https://game.lhg100.com/Article/UploadFiles/201512/2015121216581048.jpg)
Now approach the Info Kiosk nearby where you fought with the Double [2]. Listen to the recording and head out to find four Kiosks [3], [4], [5], [6].
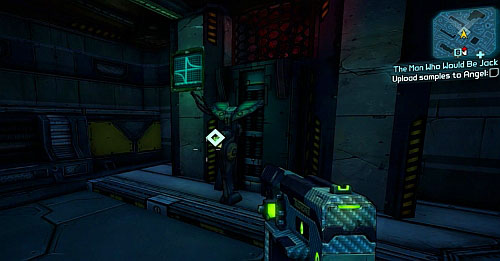
After you collect the voice samples, you will have to send them to Angel. In order to reach the computer, you will have to go down to the underground passage. The tunnel entrance can be found by the spot marked as [7]. As you're transferring the files, the room will be attacked by enemies from time to time. With the process complete, take the Voice Modulator. Now you can return to Roland [1] in Sanctuary to finish the mission.
1) Roland/Mordecai
2) Claptrap
3) Energy field
4) Gate 1
5) Gate 2
6) Badass Constructor
7) Passage to The Bunker
8) Arena
9) Cover from BNK3R's attacks
![Accept the mission from Roland [1] and speak to Claptrap [2] - Where Angels Fear to Tread part 1, 2 - Main missions - Borderlands 2 - Game Guide and Walkthrough](https://game.lhg100.com/Article/UploadFiles/201512/2015121216581041.jpg)
Accept the mission from Roland [1] and speak to Claptrap [2]. Convincing him to help will turn out to be much easier than assumed. Use Fast Travel and head to the gate from the above screenshot, located in the south part of the map [3]. Wait for Claptrap to switch off the field so you can safely head through.
Follow the road up, eliminating the Robots and Hyperion Soldiers that you come across. As you reach the end of the street, on your left you should notice a locked gate [4]. In order to pass through, you will have to destroy a Constructor. Firstly take care of the turrets which it sets, as they can deal considerable damage.
Head through the open gate and Hyperion Soldiers will come out. Follow the road once again, avoiding the red markers on the ground, pointing where mortar fire will hit. As you reach the next gate [5], destroy the turrets on both sides of the gate.
![Take a few steps behind the gate and on the upper part of the opposite building you should see a Badass Constructor [6] - Where Angels Fear to Tread part 1, 2 - Main missions - Borderlands 2 - Game Guide and Walkthrough](https://game.lhg100.com/Article/UploadFiles/201512/2015121216581160.jpg)
Take a few steps behind the gate and on the upper part of the opposite building you should see a Badass Constructor [6]. If you have a rocket launcher with a scope, try attacking it from as far as possible. After the fight, head to the passage leading to The Bunker [7].
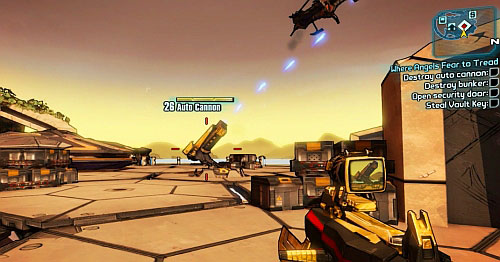
Follow the path up. Use the Vending machines on the left to restock on ammo and head onwards. After reaching the main arena [8], destroy the Auto Cannon shown in the above screenshot. Afterwards you will have to destroy 11 more. They will be appearing around the bunker, some of them mounted on the ceiling/wall. An approximate location has been marked with dots on the map.
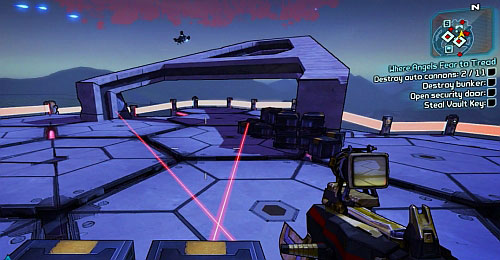
Sometimes lasers will appear on the map. As they turn on, jump onto the crates placed throughout the place.
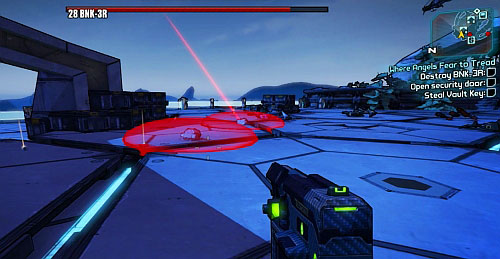
After destroying all the Auto Cannons, the fight with BNK3R will appear. The boss will for most time keep flying around the arena, at a distance which will make it impossible to shoot at it. Often it will also place mines, as shown in the screenshot.
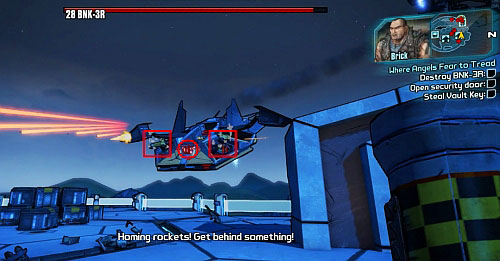
The boss should eventually hang in the air to shoot rockets at you. Hide behind a pillar [9] and destroy the turrets on its sides (square). For critical damage, aim at the spots marked with a circle. Keep repeating this each time BNK3R stops to fire another series of rockets.
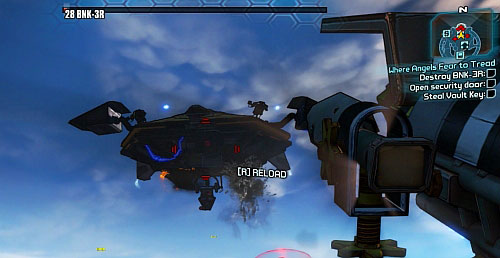
After depriving the boss of 50% of its health, it will start using a bigger gun. Use the Robots which will appear on the arena for Second Wind. Sometimes ammunition will be dropped onto the arena as well. However if you will be still low on it, you can use the Vending machine by the entrance to the location.
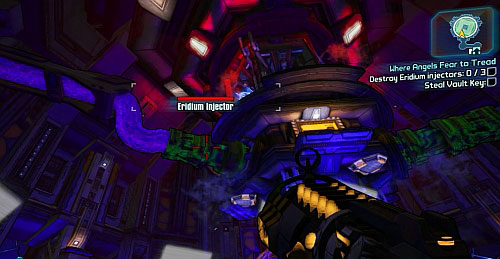
After you destroy the robot, you will be able to use the passage on the lower level. Go through the scanning process and use the elevator to get to Control Core Angel. Use the button to open the entrance to Angel's room. Inside, land a few shots on the Eridium Injector.
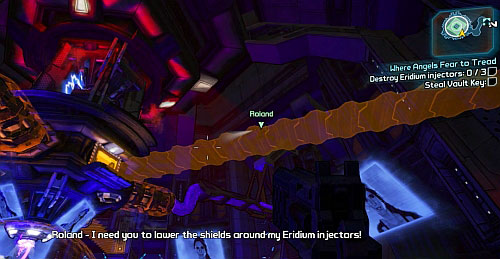
Eridium Injectors will be surrounded by a shield and Robots, Core Defense Turrets (above the shield protecting Angel) and Shock Field Generators will start appearing in the room. The latter ones have to be destroyed as fast as possible, at best from a safe distance. Ammo crates will also appear around the field protecting Angel. After some time, Roland will also join the fight. If you last long enough, Roland should remove the shield from one of the Eridium Injectors. Destroy it.
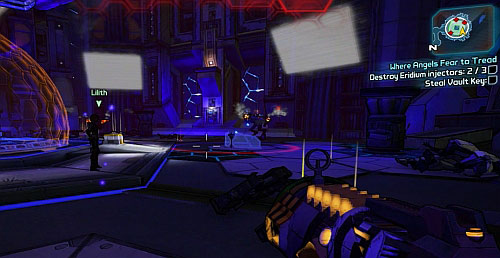
Destroy enough Robots and Roland will start removing another Eridium Injector shield. Once again fight off the Robots to destroy another unprotected Eridium Injector. Now Lilith will also join the fight and help you remove the last shield.
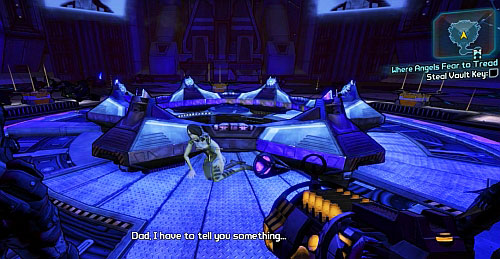
With the last Eridium Injector destroyed, approach Angel and finish the first part of the mission by speaking with Roland. After the cutscene, you will find yourself in Sanctuary, at the back of Marcus' shop. Open all the crates which you find here. Head out of the room and return to Mordecai [1] to end the mission.

1) Mordecai
2) Bridge
3) Bandit camp 1
4) The path
5) Bandit camp 2
6) Entrance to Smoking Guano Grotto
7) Elevator
8) Passage to Main Street
9) Bandit camp 3
10) Bridge
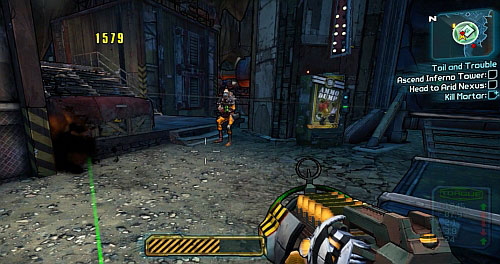
![Speak with Mordecai [1] and use Fast Travel to get to The Dust - Toil and Trouble - Main missions - Borderlands 2 - Game Guide and Walkthrough](https://game.lhg100.com/Article/UploadFiles/201512/2015121216581200.jpg)
Speak with Mordecai [1] and use Fast Travel to get to The Dust. Drive north-west, where you will find a passage to Eridium Blight. Head south-east to the bridge [2]. As you reach it, the further road will be cut off. Head north-east, to the passage to Sawtooth Cauldron.
![Fight your way through the first Bandit camp [3] and go down the path marked as [4], to the camp in the lower part of the map [5] - Toil and Trouble - Main missions - Borderlands 2 - Game Guide and Walkthrough](https://game.lhg100.com/Article/UploadFiles/201512/2015121216581277.jpg)
Fight your way through the first Bandit camp [3] and go down the path marked as [4], to the camp in the lower part of the map [5]. Here you should find an entrance from the above screenshot, leading to Smoking Guano Grotto [6].
![Head inside and turn right to reach the elevator [7] - Toil and Trouble - Main missions - Borderlands 2 - Game Guide and Walkthrough](https://game.lhg100.com/Article/UploadFiles/201512/2015121216581202.jpg)
Head inside and turn right to reach the elevator [7]. Use the button on one of the walls beside the elevator and you will be attacked by a group of Bandits. Fight them off, killing four Ambush Commanders.
![Head to the passage marked as [8] - Toil and Trouble - Main missions - Borderlands 2 - Game Guide and Walkthrough](https://game.lhg100.com/Article/UploadFiles/201512/2015121216581250.jpg)
Head to the passage marked as [8]. As you get outside, go to the camp marked with [9]. Fight your way through Bandits and eventually you should reach a bridge [10] which you need to cross to the other side. Destroy the stationary turrets placed on the roofs of the buildings. Use the lever [11] (square on the screenshot) and destroy the Boombringer. Now you will have to return to the elevator which has been blocked [7]. You can find the shortcut marked on the map as [12].
As you approach the elevator, a Mortar will exit tit. Kill him and use the elevator to get onto the roof.
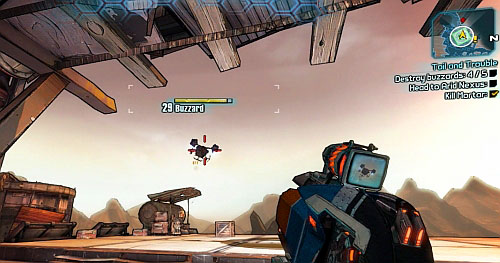
Upstairs, you will have to destroy five Buzzards. I'd suggest staying by the elevator entrance, under the roof and destroy the vehicles from there. That way you will avoid being hit. If none flies nearby you, head outside for a while to provoke an attack.
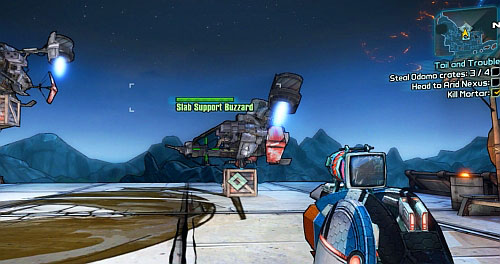
With all the Buzzards destroyed, place the transmitters on the four crates. Wait for them to be taken by Brick's men and jump down (eastern part of the construction) for a shortcut to the Fast Travel. Move to Eridium Blight and return to the previously blocked bridge [2]. Cross it to Arid Nexus. There, turn left and Use the button to finish the mission.
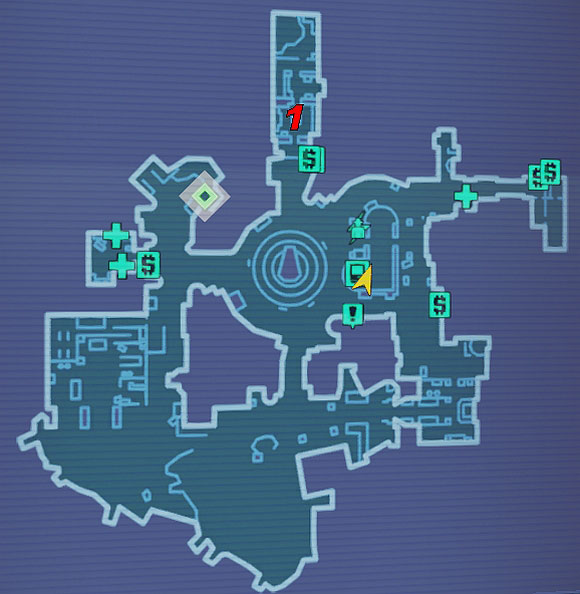
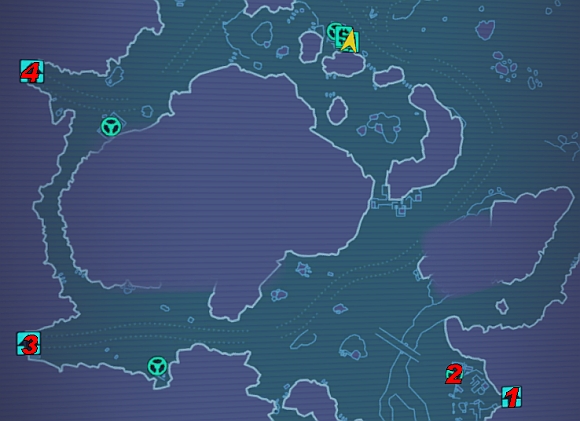
1) Mordecai
2) Pipeline
3) Pump Station 1
4) Stairs
5) Valves
6) Pump Station 2
7) Pump Station 3
8) Ramp
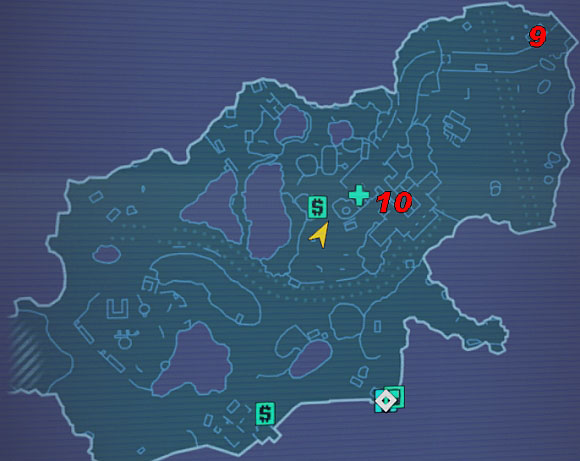
9) Elevator/Saturn
10) Database
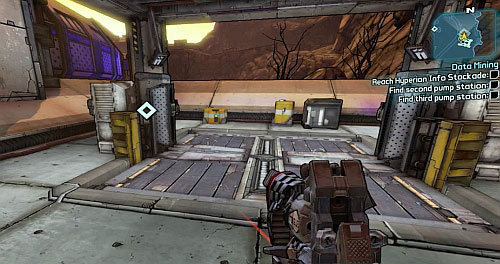
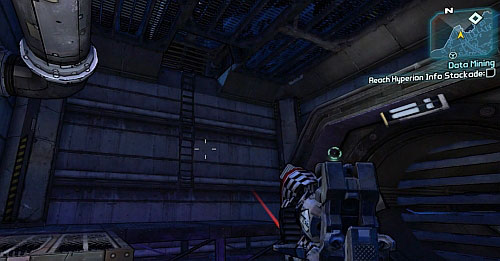
![After you receive this mission from Mordecai [1], head to Arid Nexus Boneyard - Data Mining - Main missions - Borderlands 2 - Game Guide and Walkthrough](https://game.lhg100.com/Article/UploadFiles/201512/2015121216581316.jpg)
After you receive this mission from Mordecai [1], head to Arid Nexus Boneyard. Use Catch -a- Ride and drive to the pipeline at [2]. Try getting up the ladder from the above screenshot.
![As the ladder falls down, return to your vehicle and drive to Pump Station 1 [3] - Data Mining - Main missions - Borderlands 2 - Game Guide and Walkthrough](https://game.lhg100.com/Article/UploadFiles/201512/2015121216581336.jpg)
As the ladder falls down, return to your vehicle and drive to Pump Station 1 [3]. Go up the stairs [4] onto the upper floor, head towards the two valves [5] and Use them. On your way you will come across a strong Robot and Hyperion Soldiers resistance. After overloading Station 1, head to Pump Station 2 [6].
After getting there, use the elevator from the above screenshot which will take you to the underground. Follow the tunnel till its end while eliminating the enemies on your way and you will find two more valves. On your way back to the elevator, look out for the self-detonating Robots.
![Go to the last station [7] - Data Mining - Main missions - Borderlands 2 - Game Guide and Walkthrough](https://game.lhg100.com/Article/UploadFiles/201512/2015121216581385.jpg)
Go to the last station [7]. Head inside the room there the valves are from the eastern side of the building (screenshot). You can quickly Use the valves and run out of here, ignoring the enemies.
![Now return to where the ladder has fallen off by the pipeline [2] - Data Mining - Main missions - Borderlands 2 - Game Guide and Walkthrough](https://game.lhg100.com/Article/UploadFiles/201512/2015121216581406.jpg)
Now return to where the ladder has fallen off by the pipeline [2]. Make use of the ramp from the screenshot [8] to jump and hit the marked part of the pipeline.
Jump inside through the newly created hole. Keep heading left to the pipeline exit and use the ladder (screenshot) to get above. Head to the passage in the north which will lead you to Arid Nexus Badlands.
![Go to the elevator in the north-east part of the map [9] - Data Mining - Main missions - Borderlands 2 - Game Guide and Walkthrough](https://game.lhg100.com/Article/UploadFiles/201512/2015121216581424.jpg)
Go to the elevator in the north-east part of the map [9]. Try using it and Saturn will appear. It's best to back out and attack the boss from a safe distance. When Saturn starts firing rockets, hide behind any cover and wait for the attack to end. Destroy the gun on robot's arms for Second Wind. Whenever you get in Saturn's range of attack, back out even further.
![After destroying the robot, use the elevator [9] and head towards the data base [10] - Data Mining - Main missions - Borderlands 2 - Game Guide and Walkthrough](https://game.lhg100.com/Article/UploadFiles/201512/2015121216581495.jpg)
After destroying the robot, use the elevator [9] and head towards the data base [10]. Inside the building, go up the stairs to the last floor to find the computer. If you go up the ladder even higher, you will find a weapon chest.
After Using the terminal, you will be attacked by two Constructors. Use the terminal room as cover from their attacks. After some time, you will be able to pick up the Map Data from the terminal. Return to the Fast Travel by the entrance to Boneyard and travel to Mordecai [1] to end the mission.
1) Mordecai
2) Claptrap
3) Claptrap
4) Gate
![After receiving the mission [1] and before speaking to Claptrap [2], pay a visit to all the NPCs (Tannis, Zed, Scooter, Moxxi, Hammerlock, Marcus) - The Talon of God - Main missions - Borderlands 2 - Game Guide and Walkthrough](https://game.lhg100.com/Article/UploadFiles/201512/2015121216581403.jpg)
After receiving the mission [1] and before speaking to Claptrap [2], pay a visit to all the NPCs (Tannis, Zed, Scooter, Moxxi, Hammerlock, Marcus). You will receive additional experience points and useful items. When you're ready to move on with the mission, talk with Claptrap and use Fast Travel to move to Eridium Blight.
![Drive to the south-west part of the map and speak with Claptrap again [3] - The Talon of God - Main missions - Borderlands 2 - Game Guide and Walkthrough](https://game.lhg100.com/Article/UploadFiles/201512/2015121216581462.jpg)
Drive to the south-west part of the map and speak with Claptrap again [3]. Follow the robot to the gate [4] which he will try to open, while Robots will attack you. Increasingly powerful waves of enemies will attack you, but at some point on both sides of the gate turrets will appear (screenshot). Don't destroy them and they will start attacking your enemies.
With the gate finally open, go up the stairs to the passage leading to Hero's Pass. Fight your way through waves of Robots and Hyperion Soldiers. As you reach a gate protected by a force field, Mordecai and Brick will join the fight. Eventually, Mordecai will manage to destroy the field generator and you will be able to head through.
From now on, try to keep a safe distance and let Brick focus most of the attacks on him. In the mean time, you should take out enemies from afar. After reaching the next force field, you will be unfortunately left alone again.
Continue fighting your way through the following bases and enemies. The passage to the next location will be protected by a Badass Constructor. Keep a safe distance, at best near a cover against rockets. Use the spawned Robots to get Second Wind. After destroying the enemy, head to Vault of the Warrior.

Ride the elevator down to the Vending Machines and Fast Travel. Keep in mind that it works only one way, so you won't be able to return afterwards. Restock on ammunition and jump down onto the arena below. Watch the cutscene after which you will have to face Jack. He will be creating copies of himself and teleport throughout the arena. He can also stand beside the computer to call in a Robot. It's a good time to deal considerable damage.
Damaging him enough will start the fight with the last boss. His weak point is his chest - shoot the area marked with the square on the above screenshot to destroy the shield protecting his weak spot. The shield will regenerate each time the boss dives into lava.
When Lilith starts screaming that the lava level is about to raise, quickly jump onto any higher point on the arena. Is the boss starts climbing onto the rocks, he's about to throw a rock at you (screenshot). In order to avoid damage, hide behind a cover. From time to time he might also breathe fire and swing his tail. Both attacks can be dodged by moving sideways.
Around the arena you can find devices which will give you an ammo crate when Used. Each use blocks the machine for 100 seconds.
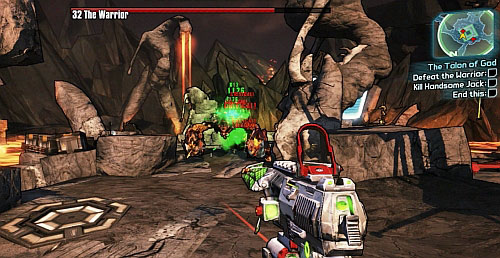
Volcanic Crystalisks which you can use for Second Wind will also appear on the map. When you defeat the Warrior, press the button on the panel to make sure he's dead for sure. Now just shoot Jack and Use the key at the middle of the arena to end the mission.
In Southern Shelf, all side missions are handed out by Hammerlock after you complete the Cleaning up the Berg main mission, with an exception of Handsome Jack Here!, which activates after you find the ECHO Recorder.
1) Hammerlock
2) First Monglets group
3) Second Monglets group
After talking with Hammerlock, head to one of the two spots marked on the map: [2] or [3].
![In order to reach [2], you need to jump down from a bridge shown above - This Town Ain't Big Enough - Southern Shelf - Borderlands 2 - Game Guide and Walkthrough](https://game.lhg100.com/Article/UploadFiles/201512/2015121216581695.jpg)
In order to reach [2], you need to jump down from a bridge shown above.
![The second group of enemies [3] can be reached by going north-west of Hammerlock - This Town Ain't Big Enough - Southern Shelf - Borderlands 2 - Game Guide and Walkthrough](https://game.lhg100.com/Article/UploadFiles/201512/2015121216581680.jpg)
The second group of enemies [3] can be reached by going north-west of Hammerlock. There you will have to fight a group of Monglets. After clearing both places, return to Hammerlock to receive the Angry Rifle. Two more missions will become available. Accept them both and head to the western gate.
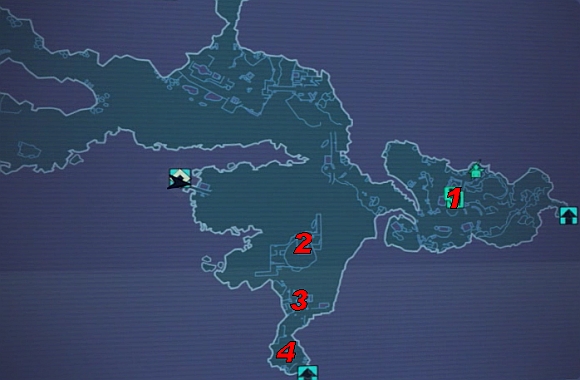
1) Bandit camp
2) Audio Log 1
3) Audio Log 2
4) Audio Log 3
5) Hammerlock
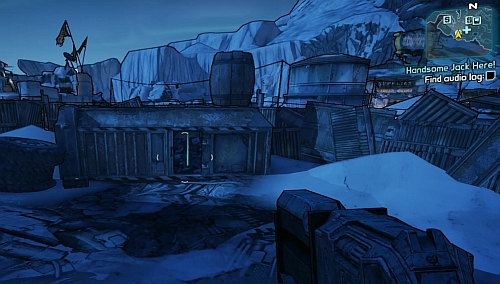
![Before taking on Hammerlock's missions, head to the Bandit camp [1] - Handsome Jack Here! - Southern Shelf - Borderlands 2 - Game Guide and Walkthrough](https://game.lhg100.com/Article/UploadFiles/201512/2015121216581683.jpg)
Before taking on Hammerlock's missions, head to the Bandit camp [1]. One of the killed enemies might drop an ECHO Recorder. Picking it up will start Handsome Jack Here!.
Now return to Hammerlock's place. The first Audio Log can be found in the container [2]. Destroy the padlock with a melee attack (by default V).
![The second Audio Log [3] can be found on the roof of a building which you can enter by using the ladder shown above, on the left side of the building - Handsome Jack Here! - Southern Shelf - Borderlands 2 - Game Guide and Walkthrough](https://game.lhg100.com/Article/UploadFiles/201512/2015121216581788.jpg)
The second Audio Log [3] can be found on the roof of a building which you can enter by using the ladder shown above, on the left side of the building. Climb onto it and destroy the ice to find the item.
![The last Audio Log [4] can be found by opening the container - Handsome Jack Here! - Southern Shelf - Borderlands 2 - Game Guide and Walkthrough](https://game.lhg100.com/Article/UploadFiles/201512/2015121216581761.jpg)
The last Audio Log [4] can be found by opening the container. Finish the mission by speaking to Hammerlock.
1) Hammerlock
2) Western Bandit camp
3) Southern Bandit camp
4) Monglets lair
![Leave Hammerlock's place through the western gate and head to the Western Bandit camp [2] - Shielded Favors - Southern Shelf - Borderlands 2 - Game Guide and Walkthrough](https://game.lhg100.com/Article/UploadFiles/201512/2015121216581753.jpg)
Leave Hammerlock's place through the western gate and head to the Western Bandit camp [2].
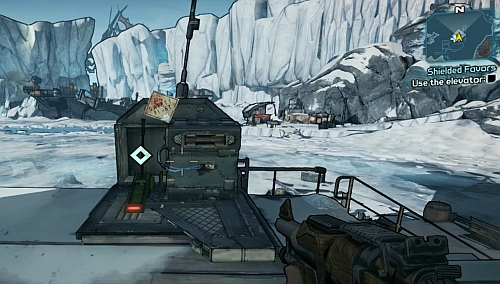
Clear it and go up the stairs to use the lever pictured in the above screenshot. Afterwards head to the camp in the south [3].
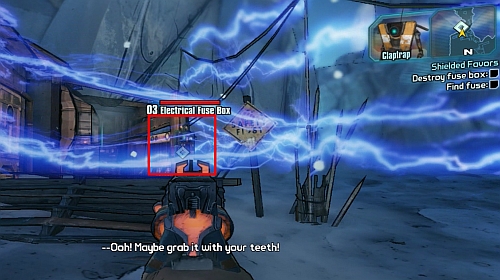
Here you will once again have to eliminate all the Bandits. Further road will be blocked by an electric fence. The Claptrap will suggest trying to run through it quickly. After a few failed attempts you will be able to shoot the fuse box (screenshot).
![Take the Fuse (screenshot) and return to the western camp [2] - Shielded Favors - Southern Shelf - Borderlands 2 - Game Guide and Walkthrough](https://game.lhg100.com/Article/UploadFiles/201512/2015121216581858.jpg)
Take the Fuse (screenshot) and return to the western camp [2]. Place the Fuse beside the lever and use it. At this point you can also complete Bad Hair Day (skip to a proper part of the guide).
Ride up the elevator. Inside the building, use the vending machine shown in the above screenshot and buy any affordable shield to finish the mission.
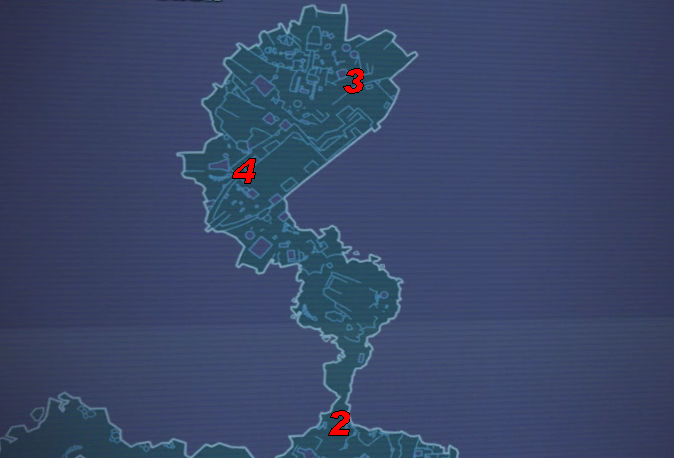
1) Monglets lair
2) Monglets lair
3) Monglets lair
4) Monglets lair
5) Hammerlock
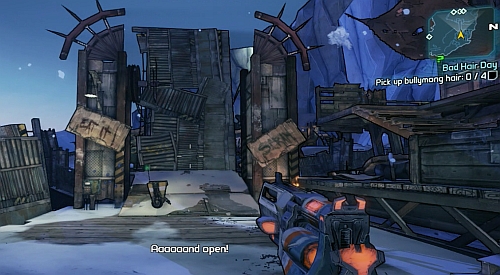
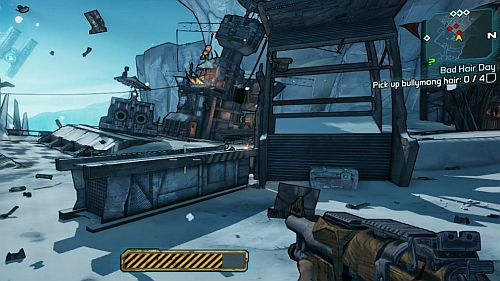
![Go behind the Bandit camp in the south [1] (after destroying the electric fence), where you will find a Monglets lair - Bad Hair Day - Southern Shelf - Borderlands 2 - Game Guide and Walkthrough](https://game.lhg100.com/Article/UploadFiles/201512/2015121216581908.jpg)
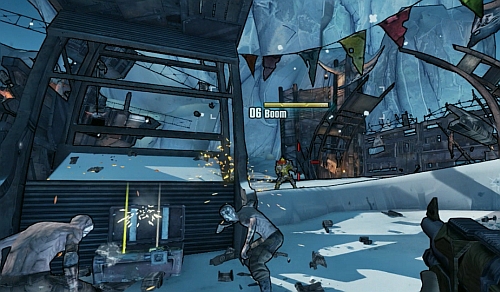
Go behind the Bandit camp in the south [1] (after destroying the electric fence), where you will find a Monglets lair. There are three additional places marked on the map where you can complete this mission. You have to weaken the Bullymong by its health to 10-15%. When the enemy starts crawling, finish it off with a melee attack (by default V). That way it will drop a Bullymong Fur which you have to pick up. Repeat this four more times and return to Hammerlock [5] or Claptrap (different prize) to complete the mission.
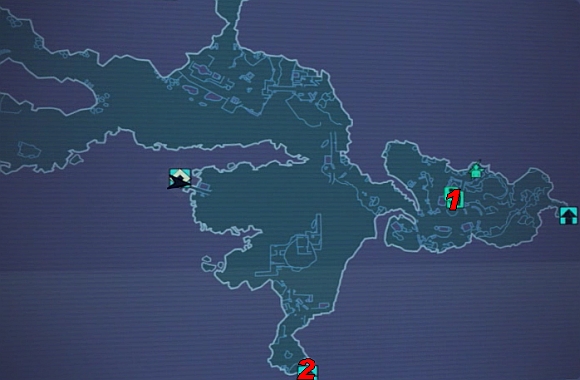
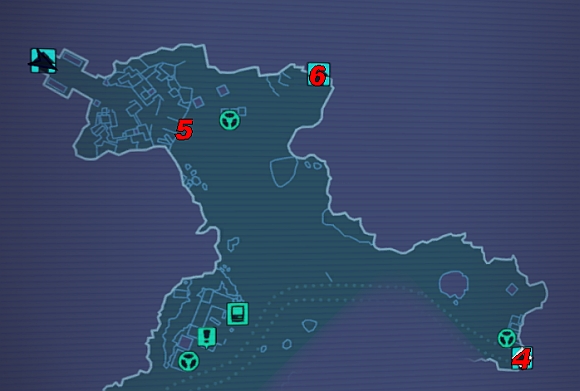
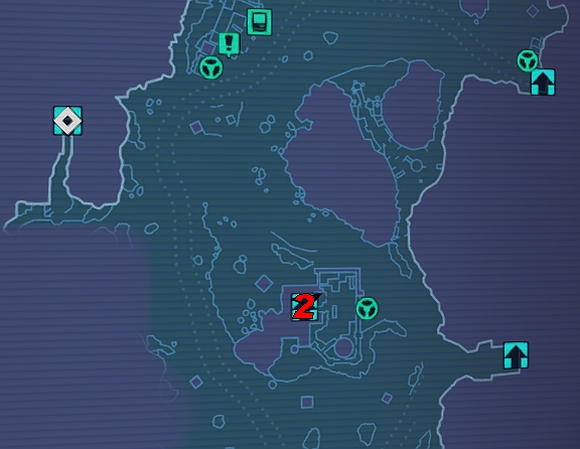
1) Hammerlock
2) Passage to Southern Shelf Bay
2) Passage to Southern Shelf
3) Bridge
4) Bullymong and Midget
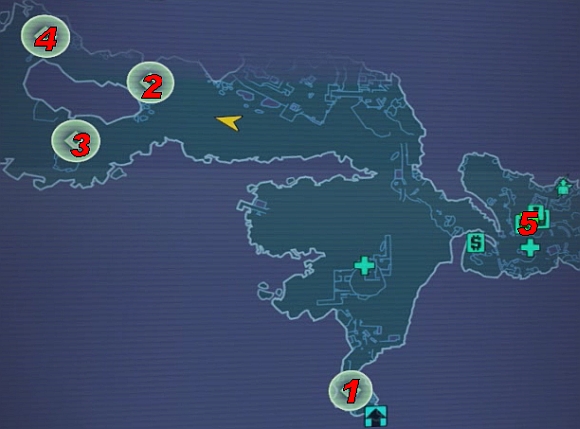
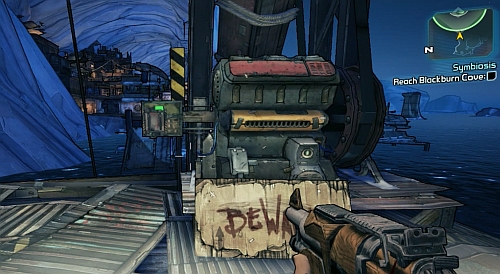
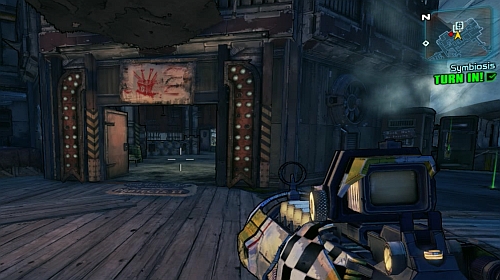
![After completing Bad Hair Day and Shielded Favors, you will be able to take on the last mission from Hammerlock [1] in this region - Symbiosis - Southern Shelf - Borderlands 2 - Game Guide and Walkthrough](https://game.lhg100.com/Article/UploadFiles/201512/2015121216581903.jpg)
After completing Bad Hair Day and Shielded Favors, you will be able to take on the last mission from Hammerlock [1] in this region. Head to the passage to Southern Shelf Bay [2]. After getting there, head towards the bridge [3] and use the lever shown in the above screenshot to activate the bridge. You can also use the ladder to get across the water to the other side.
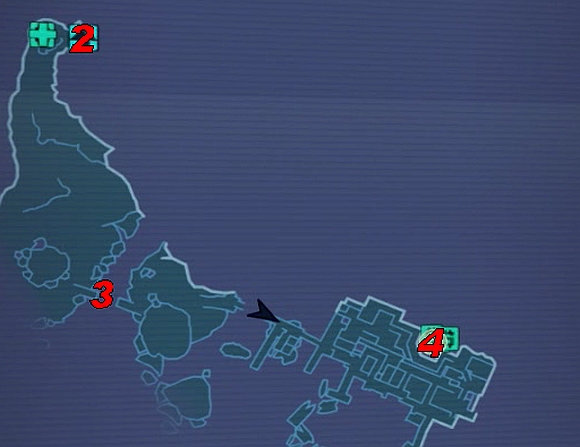
On the other side of the bridge you will come across another lever which will open a further passage.
Head through the Bandits camp to the south-east, eliminating all resistance you come across. Eventually you will reach a staircase shown in the above screenshot. Climb up and keep going north-west.
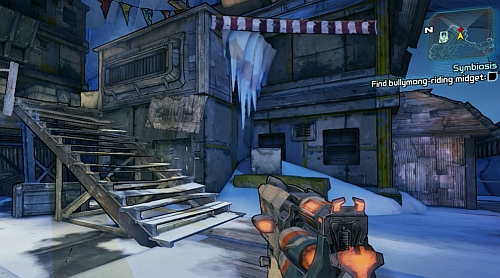
Eventually you will reach another staircase. Climb them up and you should see the above door [4]. Approach them. They should open and you will see your goal.
![Kill the Bullymong and the Midget riding on it, take the items they drop and return to Hammerlock [1] to end the missions - Symbiosis - Southern Shelf - Borderlands 2 - Game Guide and Walkthrough](https://game.lhg100.com/Article/UploadFiles/201512/2015121216582013.jpg)
Kill the Bullymong and the Midget riding on it, take the items they drop and return to Hammerlock [1] to end the missions.
You can receive this mission during your first visit to Sanctuary.

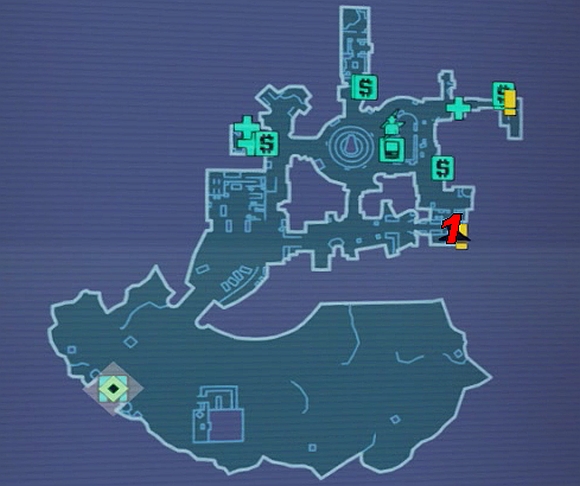
1) Bounty board
2) Bandit camp/passage to Southpaw Steam & Power
3) Assassin Wot (first floor)
4) Assassin Oney (first floor)
5) Assassin Reeth (ground floor)
6) Assassin Rouf (first floor)
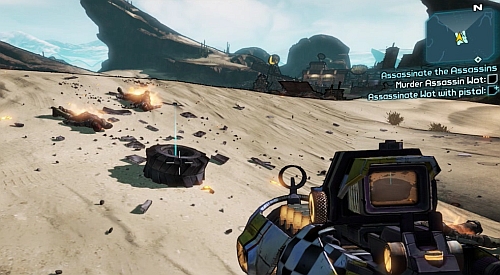
![Approach the Bounty Board and accept the mission [1] - Assassinate the Assassins - Sanctuary - Borderlands 2 - Game Guide and Walkthrough](https://game.lhg100.com/Article/UploadFiles/201512/2015121216582165.jpg)
Approach the Bounty Board and accept the mission [1]. Head to Three Horns Valley and to the Bandits (the entrance can be found in its eastern part), where inside a building you will find a passage to Southpaw Steam & Power [2]. Right beside the entrance there's a Fast Travel, so if you've already been here before, you can save yourself some time. Follow the corridor and you will reach a big room from the above screenshot. Don't go down, instead get on the bridge on the left.
![Approach the gate from the above screenshot [3], from behind which Assassin Wot and his Bandit guards will come out - Assassinate the Assassins - Sanctuary - Borderlands 2 - Game Guide and Walkthrough](https://game.lhg100.com/Article/UploadFiles/201512/2015121216582149.jpg)
Approach the gate from the above screenshot [3], from behind which Assassin Wot and his Bandit guards will come out. Once you kill him (do it with a pistol of your choice for additional experience), he will drop Assassin's Orders which you should pick up.
![Go to the next gate shown in the screenshot [4], where you will have to face Assassin Oney (you can get additional experience for finishing him off with a sniper rifle) - Assassinate the Assassins - Sanctuary - Borderlands 2 - Game Guide and Walkthrough](https://game.lhg100.com/Article/UploadFiles/201512/2015121216582221.jpg)
Go to the next gate shown in the screenshot [4], where you will have to face Assassin Oney (you can get additional experience for finishing him off with a sniper rifle). By his corpse you will find another Assassin's Orders.
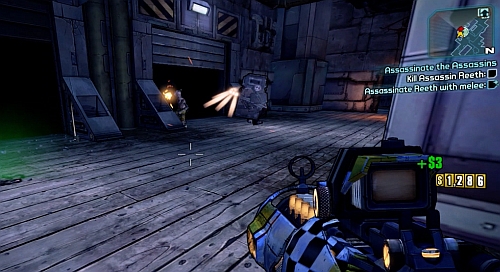
Head through the newly opened passage to the right of the gate, from which Oney came. Follow the corridor to a room with two gates, where Assassin Reeth is waiting for you (bonus for killing him with a melee attack). Pick up another ECHO Recorder and go through the door on the right side of the gates.
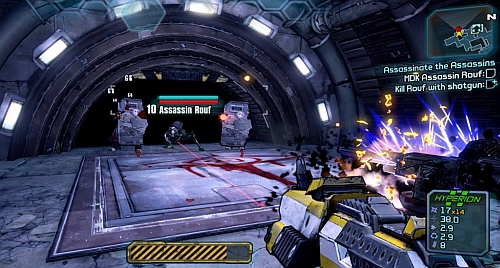
You will reach a room with the last gate and Assassin Rouf (killing him with a Shotgun will earn you more experience points). Picking up the ECHO Recorder from his corpse will end the mission which you can turn it in Sanctuary [1]. To the right of the gate you can find as shortcut leading to the exit from this location.
You can receive this mission during your first visit to Sanctuary.
1) Moxxi's place
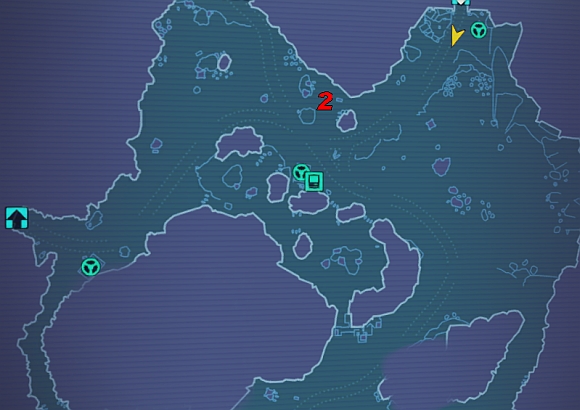
2) Bullymong lair
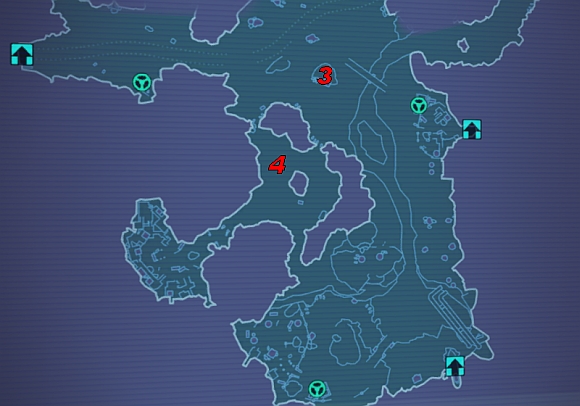
3) Bullymong lair
4) Bullymong lair
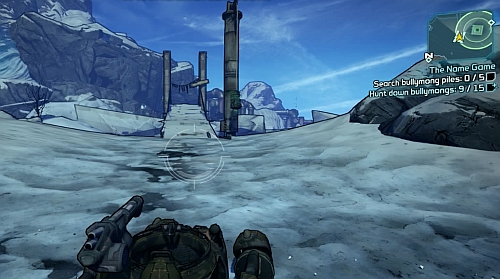
![Head to Moxxi's [1] and speak with Hammerlock to receive this mission - The Name Game - Sanctuary - Borderlands 2 - Game Guide and Walkthrough](https://game.lhg100.com/Article/UploadFiles/201512/2015121216582359.jpg)
Head to Moxxi's [1] and speak with Hammerlock to receive this mission. Head to Three Horns Divide and drive to one of three Bullymong lairs [2], [3], [4]. You need to kill 15 bests and search 5 piles shown in the above screenshot, which can be found near the lairs.
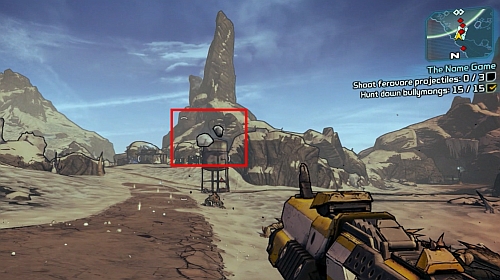
If you complete this errand, Hammerlock will tell you to kill a Bullymong with a grenade. Your next task will be shooting down three rocks thrown by Bullymongs, in mid-air. Keep the enemies at distance to provoke them to throw rocks. With three rocks shot down, you will still need to kill a couple more Bullymongs to finish the mission.
You can receive this mission during your first visit to Sanctuary.
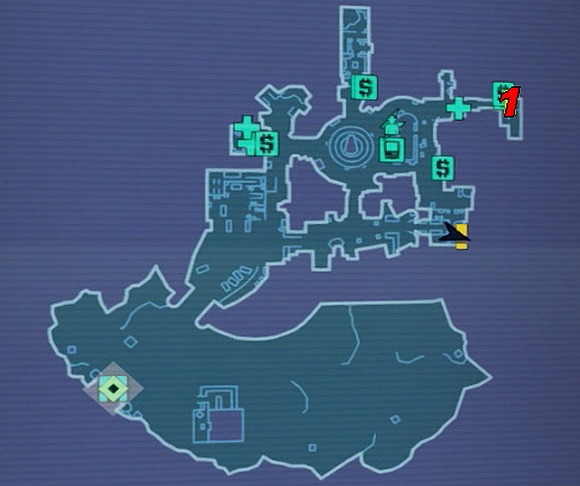
1) Marcus' shop
![Go down the stairs to Marcus' shop [1] - Rock, Paper, Genocide: Fire/Shock/Corrosive/Slag Weapons! - Sanctuary - Borderlands 2 - Game Guide and Walkthrough](https://game.lhg100.com/Article/UploadFiles/201512/2015121216582499.jpg)
Go down the stairs to Marcus' shop [1]. Speak to him and head to the shooting range at the back of the shop through the door on the right. Use the Fire Elemental Effect weapon on the Bandit. Afterwards speak with Marcus to get another task, this time with the use of a weapon with Shock Elemental Effect. You can find one I your inventory. Turn in the mission to get another one.
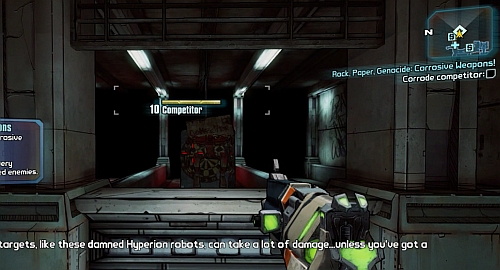
Now you will have to shoot a Robot with a Corrosive Elemental Effects weapon. Finally, you will need to use a Slag weapon followed by any other with an Elemental Effect.
You can receive this mission after completing Plan B.

1) Claptrap and Stash
![Find Claptrap [1] and speak to him twice - Claptrap's Secret Stash - Sanctuary - Borderlands 2 - Game Guide and Walkthrough](https://game.lhg100.com/Article/UploadFiles/201512/2015121216582426.jpg)
Find Claptrap [1] and speak to him twice. Once he's done with his monologue, turn around 180 degrees and approach the stash shown in the screenshot. When you get close enough, the steel covering it should fall down. Use the stash and finish the mission be speaking with Claptrap. Using the stash, you can transfer items between all your characters.
You can receive this mission after completing Plan B.
1) Zed's clinic
2) Tannis
![Head to Zed's clinic [1] and speak to him - Do No Harm - Sanctuary - Borderlands 2 - Game Guide and Walkthrough](https://game.lhg100.com/Article/UploadFiles/201512/2015121216582529.jpg)
Head to Zed's clinic [1] and speak to him. Melee attack the patient (by default V) shown in the screenshot and pick up an Eridium Shard which will fall out of him. With it, go to Tannis who can be found at the ground level of Roland's hideout [2]. Speak to her to end the mission.
You can receive this mission after completing Do No Harm.
1) Zed's clinic

2) Southern entrance to Dr. Mercy's hideout
3) Northern entrance to Dr. Mercy's hideout
4) Dr. Mercy
5) Bandit camp
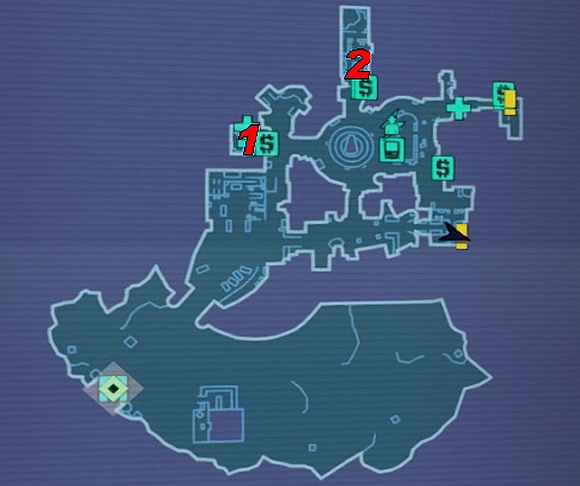
![Zed [1] will ask you to find the source of the strange wounds - Medical Mystery - Sanctuary - Borderlands 2 - Game Guide and Walkthrough](https://game.lhg100.com/Article/UploadFiles/201512/2015121216582501.jpg)
Zed [1] will ask you to find the source of the strange wounds. Head to Three Horns Valley. Enter Dr. Mercy's hideout through the southern [2] or northern entrance [3]. Head towards where Dr. Mercy is [4], killing Bandits who cross your way. Mercy will be using a shield, so if you're using Explosive ammo, shoot at his legs. A Corrosive type weapon will also do fine. If you don't have such a weapon, you will need to try to approach him from behind.
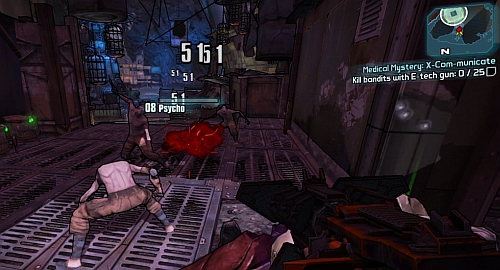
After defeating Dr. Mercy, approach his corpse to end this mission and begin another one. In your inventory, you will find the Blaster which you should equip. You will now have to kill 20 Bandits by using this weapon. In order not to run out of ammo, try firstly weakening them with other weapons. You should be able to kill enough enemies in this location, though if for some reason you won't make it, head to the nearby Bandit camp [5] to finish the task. Return to Dr Zed [1] to finish the mission. In return you will receive a very good pistol with a Fire Elemental Effect.
You can receive this mission after completing A Dam Fine Rescue.
1) Tannis
2) Moxxi's place
3) Passage to the Mutant hideout
4) Mutant leaders
5) Sewer exit
![Head to Roland's hideout and speak with Tannis on the ground floor [1] - Splinter Group - Sanctuary - Borderlands 2 - Game Guide and Walkthrough](https://game.lhg100.com/Article/UploadFiles/201512/2015121216582625.jpg)
Head to Roland's hideout and speak with Tannis on the ground floor [1]. She will tell you of a group of fugitives who you should take care of. Firstly head to Moxxi [2] and pick up the Pizza from the screenshot.
Now go to Bloodshot Stronghold by using Fast Travel. Follow the corridors you will reach the place shown in the above screenshot which leads to the Mutant hideout [3].
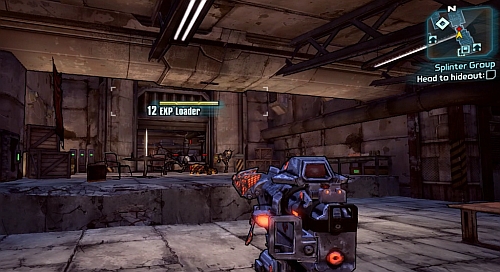
If you're visiting this area after completing A Dam Fine Rescue, there's a chance you will come across a Robot from the above screenshot, which will explode and kill two Bandits. Approach its wreck and take Loader #1340 AI Core to begin Out of Body Experience (details on this mission can be found in the proper chapter).
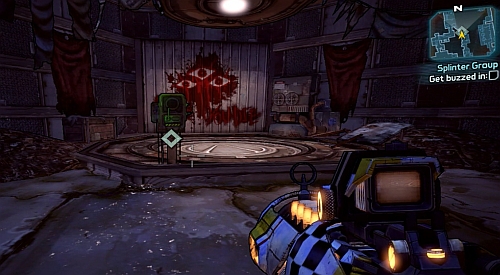
Keep heading onwards and eliminating enemies until you reach a hatch shown above. After the conversation, the hatch will open and you will have to jump down. Place the Pizza on the table [4] to begin the fight.
You will have to face four Mutant leaders one after another. After losing 70-80% of their life, they will run away. With the fourth of them (Mick) seriously wounded, they will all appear on the arena. Finish them off to open up the passage through which you can get out of the sewers [5]. Return to Sanctuary to finish the mission by speaking with Tannis [1].
You can receive this mission after completing A Dam Fine Rescue.

1) Lilith

2) Clayton/Fire Effigy
3) Bandit camp
4) Scorch
5) Fire Effigy 2
6) Fire Effigy 3
![Inside Roland's hideout, climb to the first floor and speak with Lilith on the balcony [1] - Cult Following: Eternal Flame - Sanctuary - Borderlands 2 - Game Guide and Walkthrough](https://game.lhg100.com/Article/UploadFiles/201512/2015121216582888.jpg)
Inside Roland's hideout, climb to the first floor and speak with Lilith on the balcony [1]. You will have to investigate the case of a cult, which worships her as a goddess. Head to Frostburn Canyon by using Fast Travel. Go north and speak with the cult leader, Incinerator Clayton [2]. Your first task will be killing five Bandits in the camp [3] by setting them on fire with a weapon with Fire Elemental Effect. Some of the enemies will be resistant to fire. In such case, firstly reduce their health with another weapon and finish them off with one with a Chance to Ignite. If you manage to do it, you will be able to pick up the Bandit ashes shown in the screenshot. Collect five of them and return to Clayton [1].
![Now you will have to kill Scorch [4] - Cult Following: Eternal Flame - Sanctuary - Borderlands 2 - Game Guide and Walkthrough](https://game.lhg100.com/Article/UploadFiles/201512/2015121216582865.jpg)
Now you will have to kill Scorch [4]. Head to the tunnel and follow the eastern branch at the first fork, in accordance with the dots on the map. You will reach an open space where you will face your target. The enemy is of course resistant to fire and can also create a force wave which will set you of fire (screenshot). Whenever you see a ring of fire around him, run as far away as you can. With Scorch killed, return to Clayton [1].
After the conversation, open the toiler to the right of Clayton and "pick up" Matchstick. Now return to Fast Travel and move to Southern Shelf.
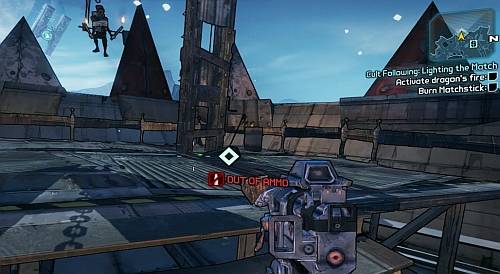
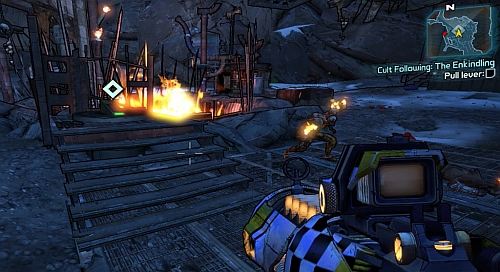
You will have to reach a ship in the north of the map, where you fought with Flynt. Once on board, head to the right side, where you will first have to hand hang Matchstick and afterwards pull the lever shown in the screenshot. Now return to Clayton [2]. For a quick shortcut to Fast Travel, you can jump down from the right side of the ship deck.
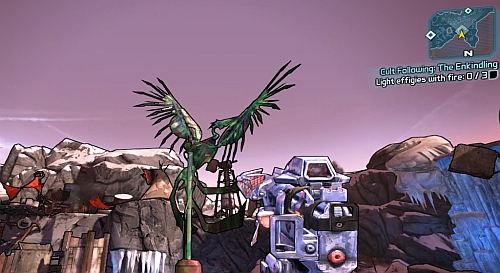
The next stage of this mission requires you to light up three Fire Effigies shown in the above screenshot. The first one can be found in the camp, nearby Clayton [2]. The other two are hidden in Bandit camps [5] and [6]. You however don't have to approach them very close if you have a weapon with a good magnification. With all targets on fire, Clayton will contact you through radio and give another task [7].

Head through the tunnel along the dots.
Once you reach the destination point, kill all the enemies around and use the lever shown in the screenshot. Afterwards kill Clayton and all the Cultists to end the mission. Turn it in to Lilith [1].
You can receive this mission after completing A Dam Fine Rescue.

1) Lilith
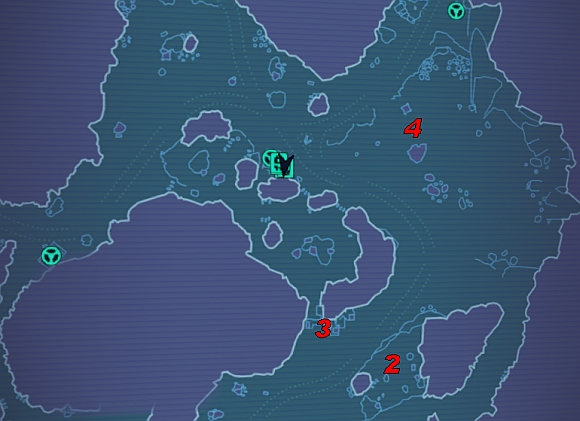
2) Boll's camp
3) ECHO Recorder 1
4) ECHO Recorder 2
5) ECHO Recorder 3
![After speaking with Lilith [1] inside Roland's hideout and accepting the mission, head to Three Horns Divide by using Fast Travel - In Memoriam - Sanctuary - Borderlands 2 - Game Guide and Walkthrough](https://game.lhg100.com/Article/UploadFiles/201512/2015121216583052.jpg)
After speaking with Lilith [1] inside Roland's hideout and accepting the mission, head to Three Horns Divide by using Fast Travel. Now approach Boll's camp [2] and kill him. By his corpse you will find an ECHO Recorder. Pick it up.
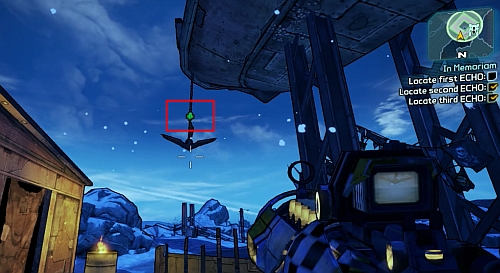
After listening to the message, you will have to find three more recordings. Head to the first Bandit camp [3]. Before the entrance, on the right side, shoot down the anchor shown in the above screenshot by shooting the marked point. After it falls to the ground, pick up the attached ECHO Recorder.
![Now head to spot marked as [4] on the map and turn the valve from the screenshot - In Memoriam - Sanctuary - Borderlands 2 - Game Guide and Walkthrough](https://game.lhg100.com/Article/UploadFiles/201512/2015121216583107.jpg)
Now head to spot marked as [4] on the map and turn the valve from the screenshot. The ECHO Recorder will be thrown to the ground beside you.
![Another ECHO Recorder can be found in the southern part of the map [5] - In Memoriam - Sanctuary - Borderlands 2 - Game Guide and Walkthrough](https://game.lhg100.com/Article/UploadFiles/201512/2015121216583197.jpg)
Another ECHO Recorder can be found in the southern part of the map [5]. After you get below the pipes, you should see a container shown in the screenshot. Climb onto it, jump forwards and climb onto another container.
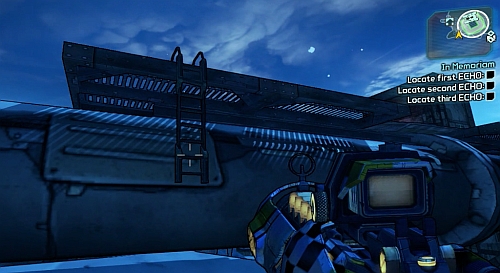
Turn right and jump onto the above ladder.
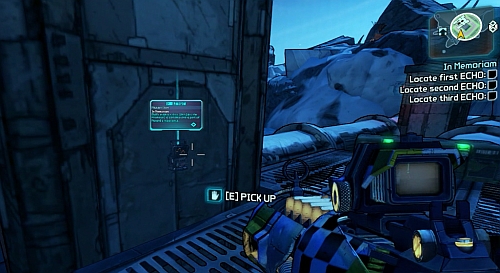
Once you're above, turn right and on the pillar you will find an ECHO Recorder. Now you can return to Lilith in Sanctuary [1] to end the mission.
You can receive this mission during your first visit to Three Horns Valley.
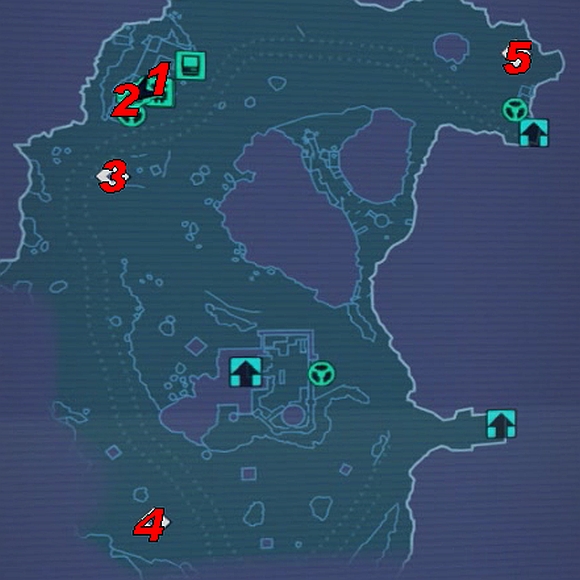
1) Bounty board
2) Steam pump
3) Central steam pump
4) southern steam pump
5) Frozen pump
![Approach the Bounty Board [1] and take the ECHO Recorder shown above to begin this mission - No Vacancy - Three Horns Valley - Borderlands 2 - Game Guide and Walkthrough](https://game.lhg100.com/Article/UploadFiles/201512/2015121216583216.jpg)
Approach the Bounty Board [1] and take the ECHO Recorder shown above to begin this mission. Now head to the vale by the pump [2] and use it. You will have to collect spare parts in order to repair the pump.
![Start off by heading to the pump in the middle part of the map [3] and shoot the ladder shown in the screenshot to lower it - No Vacancy - Three Horns Valley - Borderlands 2 - Game Guide and Walkthrough](https://game.lhg100.com/Article/UploadFiles/201512/2015121216583269.jpg)
Start off by heading to the pump in the middle part of the map [3] and shoot the ladder shown in the screenshot to lower it. Climb to the very top and take the Steam valve.
![Now drive to the southern pump [4] - No Vacancy - Three Horns Valley - Borderlands 2 - Game Guide and Walkthrough](https://game.lhg100.com/Article/UploadFiles/201512/2015121216583235.jpg)
Now drive to the southern pump [4]. Once you reach it, it will turn out that the Capacitor has been taken by Skags. Keep killing them until one of them drops the part you're looking for.
![Head to the eastern pump [5] and kill the Bullymong who's holding the Gearbox - No Vacancy - Three Horns Valley - Borderlands 2 - Game Guide and Walkthrough](https://game.lhg100.com/Article/UploadFiles/201512/2015121216583388.jpg)
Head to the eastern pump [5] and kill the Bullymong who's holding the Gearbox. Having collected all the parts, return to the pump by the Bounty Board [2].
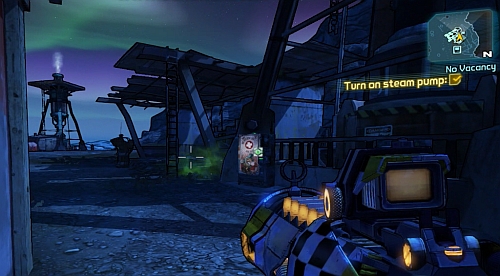
Place the parts in the marked spots. In order to reach the upper level, use the ladder shown in the screenshot. After you install the last part, turn the valve to start the pump and finish the mission. From now on you will be able to use Fast Travel in this area.
You can receive this mission after completing No Vacancy.
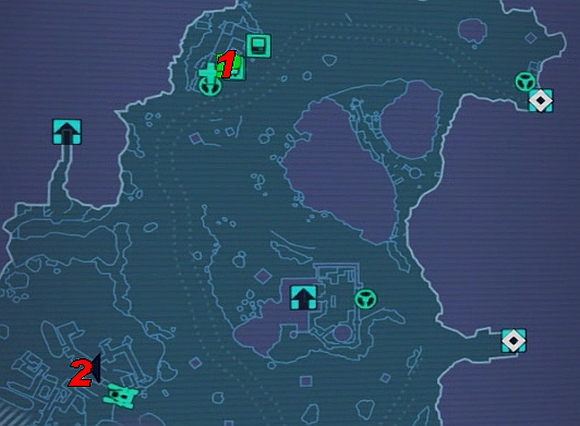
1) Bounty board
2) Bandit board
![Approach the Bounty Board [1] to begin the mission - Neither Rain nor Sleet nor Skags - Three Horns Valley - Borderlands 2 - Game Guide and Walkthrough](https://game.lhg100.com/Article/UploadFiles/201512/2015121216583386.jpg)
Approach the Bounty Board [1] to begin the mission. start off by taking the package from the roof of the bus, reaching it through the roof of the car shown above. From the moment you pick up the package, you will have 1:30 minutes to reach the Bandit camp [2] and place letter in the designated post boxes. Before picking up the package, place the car nearby the bus to save some time. Driving to the camp, be sure to use boost (by default F) to get there faster [2].
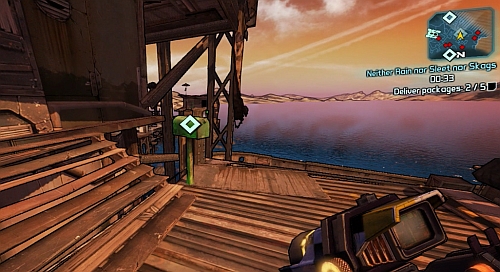
Some chests are found in the upper parts of the camp, accessible by stairs found somewhere around the building. If you won't make it in time, you will have to return to the bus and take another package.
You can receive this mission after completing No Vacancy.
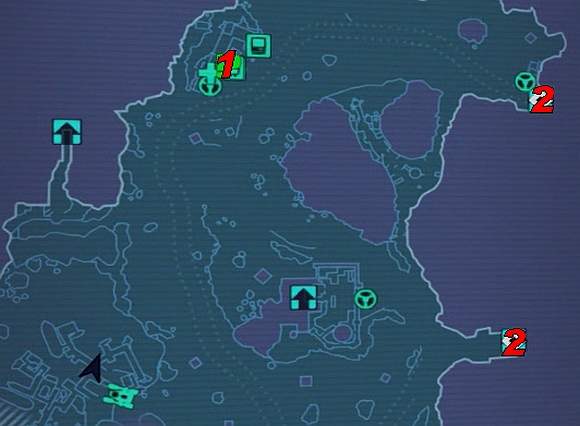
1) Bounty board
2) Passage to Three Horns Divide

2) Passage to Three Horns Valley
3) Bandit camp
![Approach the Bounty Board [1] to begin this mission - The Ice Man Cometh - Three Horns Valley - Borderlands 2 - Game Guide and Walkthrough](https://game.lhg100.com/Article/UploadFiles/201512/2015121216583546.jpg)
Approach the Bounty Board [1] to begin this mission. Pick up the Dynamite found to the right of the board. Now drive to the northern or southern passage leading to Three Horns Divide [2] and from there to the Bandit camp [3].
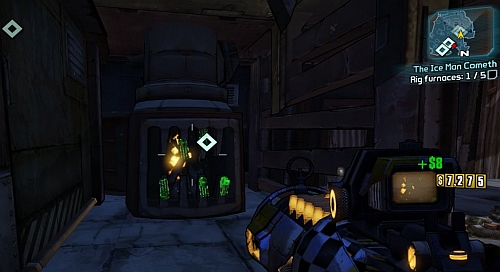
Your task is planting five explosive charges by the by the furnaces. After you plant all of them, activate the transmitter in the middle part of the camp. The last thing you need to do is killing eight Freezing psychos. Afterwards you can return to Three Horns Valley and finish the mission by the board [1].
You can receive this mission after completing the part of A Dam Fine Rescue where you collect part for the Bandit vehicle.
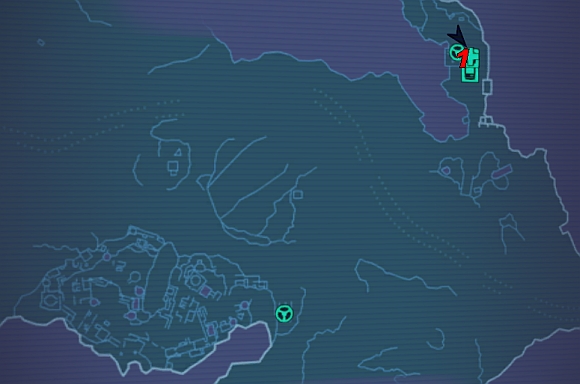
1) Ellie's workshop
![Speak with Ellie in her workshop [1] to accept this mission - Positive Self Image - The Dust - Borderlands 2 - Game Guide and Walkthrough](https://game.lhg100.com/Article/UploadFiles/201512/2015121216583543.jpg)
Speak with Ellie in her workshop [1] to accept this mission. Your task will be destroying Bandit vehicles driving around the area. From their wreck you can collect Ellie Ornaments (screenshot). After gathering six of them, return to Ellie [1].
Now place the figures in the designated places in the middle of the workshop. When you do, speak with Ellie to end the mission. As a reward you will receive a Relic which enhanced Boost in vehicles.
You can receive this mission during your first visit in The Dust.
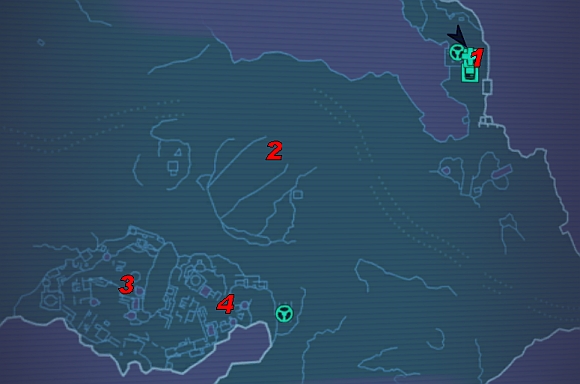
1) Loggins
2) Ramp
3) Bandits camp
![To the right of Ellie's workshop you can speak with Loggins [1] who will give you this mission - Too Close For Missiles - The Dust - Borderlands 2 - Game Guide and Walkthrough](https://game.lhg100.com/Article/UploadFiles/201512/2015121216583696.jpg)
To the right of Ellie's workshop you can speak with Loggins [1] who will give you this mission. Enter a vehicle and drive to the ramp from the above screenshot [2]. You need to jump across it (remember about Boost, by default with F) to reach the Bandit camp [3].
There you will have to collect four Volleyballs and two Gas cans. The items are scattered throughout the whole camp, including the roof of the building from the above screenshot.
![After collecting all the items, Use Gas cans on the net from the screenshot [4] - Too Close For Missiles - The Dust - Borderlands 2 - Game Guide and Walkthrough](https://game.lhg100.com/Article/UploadFiles/201512/2015121216583665.jpg)
After collecting all the items, Use Gas cans on the net from the screenshot [4]. Afterwards shoot the net with a Fire Elemental Effect weapon to set it on fire and get attacked by three Shirtless Men. Kill all of them and return to Loggins [1] to end this mission.
You can receive this mission after completing Clan War: First Place.

1) Jimbo
2) Ellie's workshop
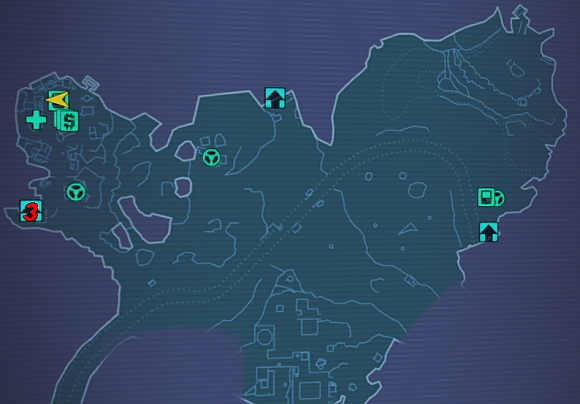
3) The Holy Spirits
![Head to the Hodunk camp, where you will receive this mission from Jimbo [1] - Clan War: Reach the Dead Drop - The Dust - Borderlands 2 - Game Guide and Walkthrough](https://game.lhg100.com/Article/UploadFiles/201512/2015121216583712.jpg)
Head to the Hodunk camp, where you will receive this mission from Jimbo [1]. Return to Ellie's workshop [2] and use Fast Travel to move to The Highlands Overlook. There, enter The Holy Spirits [3]. Go up the stairs onto the balcony of the pub, where under the table you should find the ECHO Recorder. Use it to finish the mission.
You can receive this mission after completing Clan War: End of the Rainbow.

1) Steve
2) Hodunk camp
![Speak to Steve [1] and head to the Hodunk camp [2] - Clan War: Trailer Trashing - The Dust - Borderlands 2 - Game Guide and Walkthrough](https://game.lhg100.com/Article/UploadFiles/201512/2015121216583706.jpg)
Speak to Steve [1] and head to the Hodunk camp [2]. You will have to open the gas tanks like the one from the above screenshot and then shoot them with a Fire Elemental Effect weapon. After destroying four trailers like that, return to Steve [1] to end the mission. For additional experience points, enter the camp during the night.
You can receive this mission after completing Clan War: Trailer Trashing.
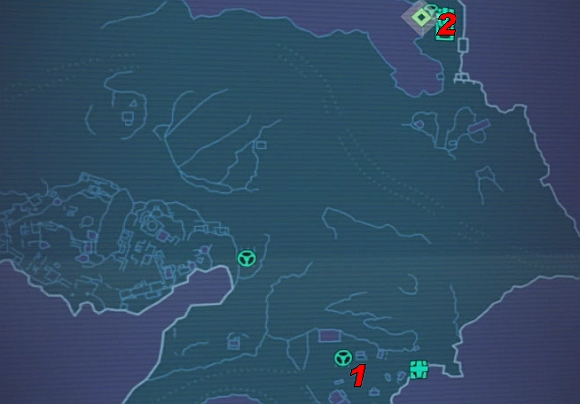
1) Jimbo
2) Ellie's workshop

3) The Holy Spirits
![Speak with Jimbo at the Hodunk camp [1] and accept the mission - Clan War: Wakey Wakey - The Dust - Borderlands 2 - Game Guide and Walkthrough](https://game.lhg100.com/Article/UploadFiles/201512/2015121216583856.jpg)
Speak with Jimbo at the Hodunk camp [1] and accept the mission. Head to Ellie's workshop [2] and use Fast Travel [2] to get to Sanctuary. Go to Moxxi's and order three Lagers.
![Properly drunk, once again use Fast Travel to move to The Highlands Overlook and head inside The Holy Spirits [3] - Clan War: Wakey Wakey - The Dust - Borderlands 2 - Game Guide and Walkthrough](https://game.lhg100.com/Article/UploadFiles/201512/2015121216583849.jpg)
Properly drunk, once again use Fast Travel to move to The Highlands Overlook and head inside The Holy Spirits [3]. Inside, take a good position (for example on a balcony) and get rid of all the guests. Return to Ellie's workshop [2] to end the mission.
You can receive this mission after completing Clan War: Wakey Wakey.
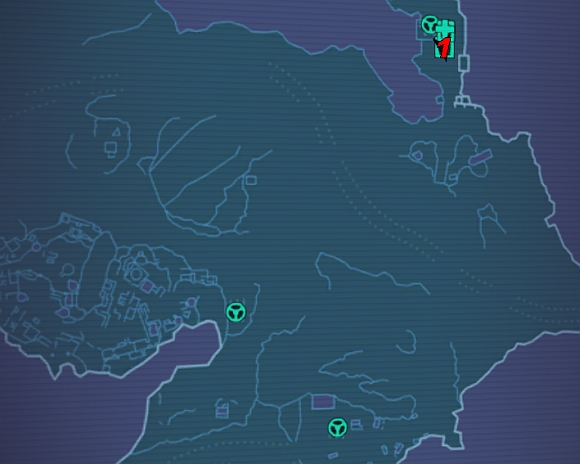
1) Ellie
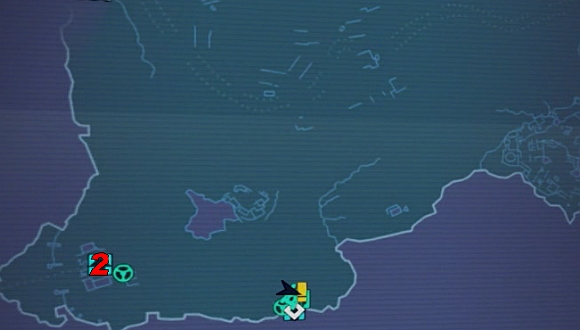
2) Peron
![Speak to Ellie [1] and head to the place of the battle of the two families [2] in the western part of the map - Clan War: Zafords vs. Hodunks - The Dust - Borderlands 2 - Game Guide and Walkthrough](https://game.lhg100.com/Article/UploadFiles/201512/2015121216583903.jpg)
Speak to Ellie [1] and head to the place of the battle of the two families [2] in the western part of the map. You will need to choose which side to support. The left side of the platform is Zafords' and the right Hodunks'. Make a choice, stand on the proper side and attack the clan on the other. Kill all the family members to finish the mission and get your reward.
You can receive this mission after completing A Dam Fine Rescue.
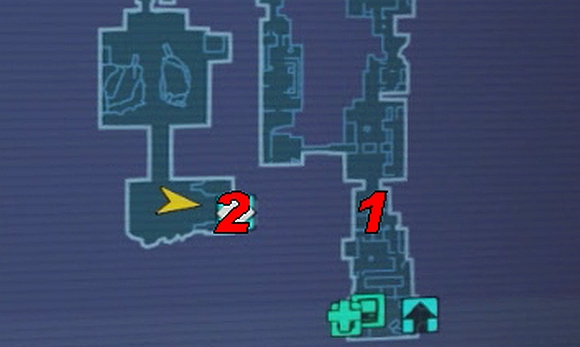
1) Robot
2) Passage to Bloodshot Ramparts

3) Moxxi's place
4) Marcus
5) Zed
![When you visit Bloodshot Stronghold after completing A Dam Fine Rescue, in the place marked on the map with [1] you will see a Robot from the above screenshot - Out of Body Experience - Bloodshot Stronghold - Borderlands 2 - Game Guide and Walkthrough](https://game.lhg100.com/Article/UploadFiles/201512/2015121216584021.jpg)
When you visit Bloodshot Stronghold after completing A Dam Fine Rescue, in the place marked on the map with [1] you will see a Robot from the above screenshot. When you approach, the Robot will explode and you will be able to pick up the Loader #1340 AI Core. Now head to Bloodshot Ramparts [2].
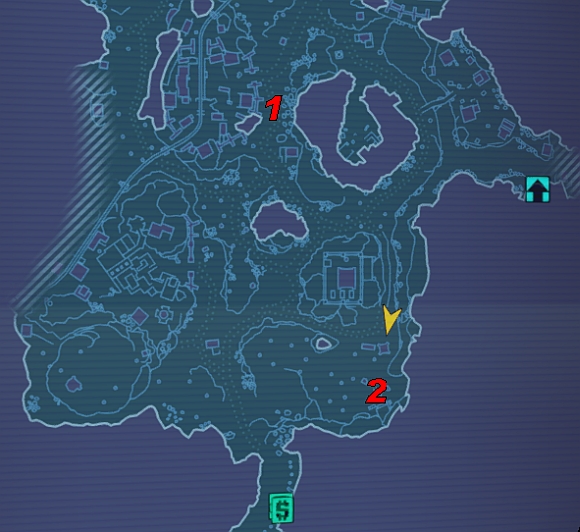
Soon after getting onto the street you should see the Robot from the above screen, into which you have to put the AI Core. When you do it, the Robot will activate and start attacking you. Once it's destroyed, pick up the AI Core.
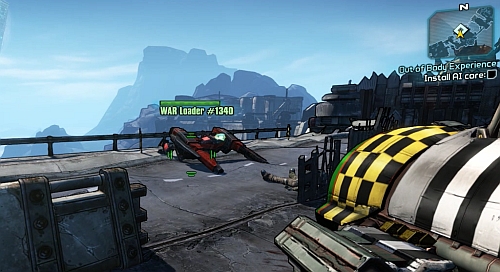
Head to the next Robot shown above, once again install the AI Core, destroy it and take back the AI Core. Now head back to Bloodshot Stronghold and use Fast Travel to return to Sanctuary.
![Go to Moxxi's [3] and place the AI Core in the radio - Out of Body Experience - Bloodshot Stronghold - Borderlands 2 - Game Guide and Walkthrough](https://game.lhg100.com/Article/UploadFiles/201512/2015121216584062.jpg)
Go to Moxxi's [3] and place the AI Core in the radio. Listen to the hit, destroy the radio and take the AI Core. Now you can decide whether to give it back to Marcus [4] and receive a gun or Zed [5] in return for a shield.
You can receive this mission during your first visit to Tundra Express.
1) Tundra Patrol
2) Stash
![As you travel through Tundra Express, around the Bandit camp [1] you can come across the Tundra Patrol - No Hard Feelings - Tundra Express - Borderlands 2 - Game Guide and Walkthrough](https://game.lhg100.com/Article/UploadFiles/201512/2015121216584130.jpg)
As you travel through Tundra Express, around the Bandit camp [1] you can come across the Tundra Patrol. Kill him and collect the Data Log that he drops to begin the mission.
![Listen to the recording and head to the stash [2] - No Hard Feelings - Tundra Express - Borderlands 2 - Game Guide and Walkthrough](https://game.lhg100.com/Article/UploadFiles/201512/2015121216584144.jpg)
Listen to the recording and head to the stash [2]. Open it and run away right afterwards, as it's going to explode. Bandits will then show up, kill them to finish the mission. once again approach the stash [2] and collect a weapon of choice.
You can receive this mission after getting two Damsel rockets from Tina during A Train to Catch.
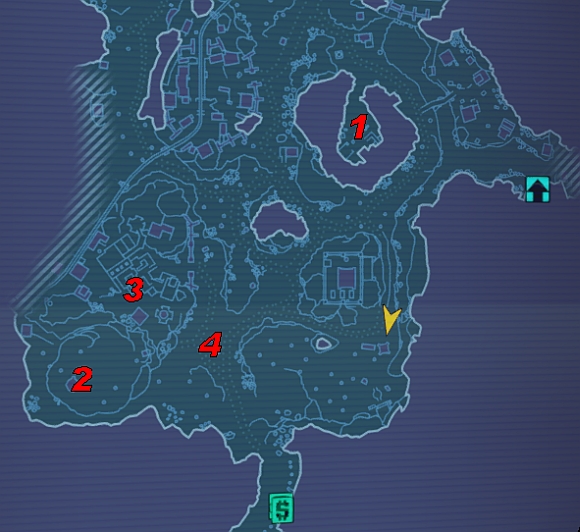
1) Tina
2) Madame Von Bartlesby/Sir Reginald
3) Bandit camp/Crumpets
4) Princess Fluffybutt
![Tina [1] will ask you for help in preparing a party - You Are Cordially Invited: Party Prep - Tundra Express - Borderlands 2 - Game Guide and Walkthrough](https://game.lhg100.com/Article/UploadFiles/201512/2015121216584188.jpg)
Tina [1] will ask you for help in preparing a party. Firstly you will need to visit Sir Reginald. Head to the hill [2], where you will have to defeat Madame Von Bartlesby from the above screenshot.
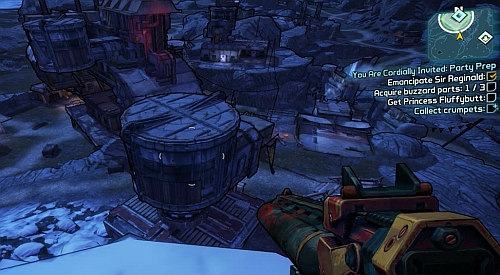
After the fight, approach the nest and take Sir Reginald. The second step involves collecting three parts from Buzzard wrecks. Machines will fly out of hangars in the Bandit camp [3], see above screenshot for reference.
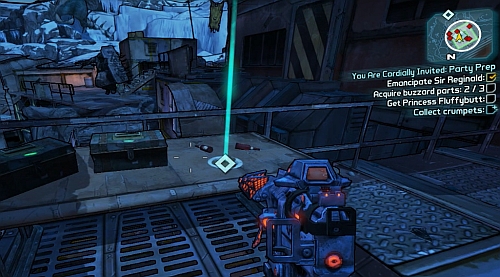
In the camp you can also find Crumpets, collecting which can give you additional experience points.
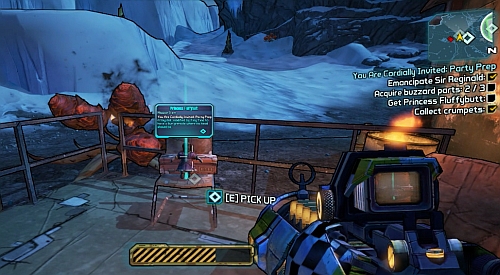
Now you need to get Princess Fluffybutt. She can be found on a chair nearby a single building [4]. Having all the items, return to Tina [1] and place the "guests" on their proper places. Finish the mission by speaking to Tina.
You can receive this mission after completing You Are Cordially Invited: Party Prep.
1) Tina
2) Bandit camp/Flesh-Stick
![After talking with Tina [1], head to the Bandit camp [2] - You Are Cordially Invited: RSVP - Tundra Express - Borderlands 2 - Game Guide and Walkthrough](https://game.lhg100.com/Article/UploadFiles/201512/2015121216584372.jpg)
After talking with Tina [1], head to the Bandit camp [2]. Clear the area of enemies for Flesh-Stick to appear. You cannot kill him or the mission will end with failure. When Flesh-Stick heads out of his hideout, shoot beside him a couple times so that he start to chase you. Lure him towards Tina's hideout [1]. If for any reason he stops, shoot around him a couple times again. If you have a weak weapon, you can just shoot him directly.
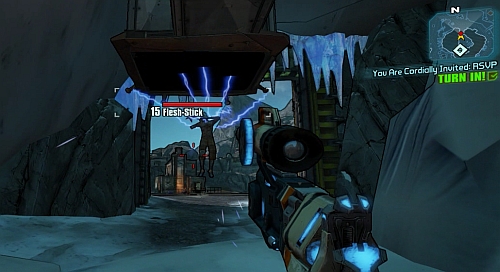
When you reach the cave, Flesh-Stick will be caught into a trap. Return to Tina to finish this part of the mission and choose one of the prices.
You can receive this mission after completing You Are Cordially Invited: RSVP.
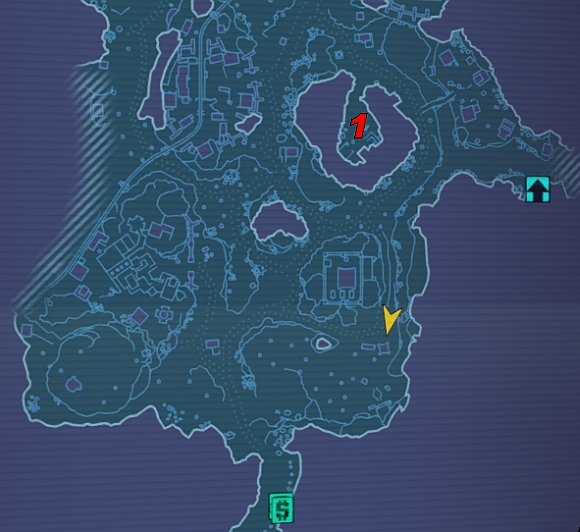
1) Tina

After accepting the mission, start up the generator by the entrance to Tina's garage. Flesh-Stick will take the place of honour by the table. Approach and hit him with a melee attack (by default V). now head to the cave entrance, where you will have to stop three waves of Bandits from destroying the generator. After eliminating the last enemy, return to Tina to finish the mission.
You can receive this mission after completing Mine, All Mine.
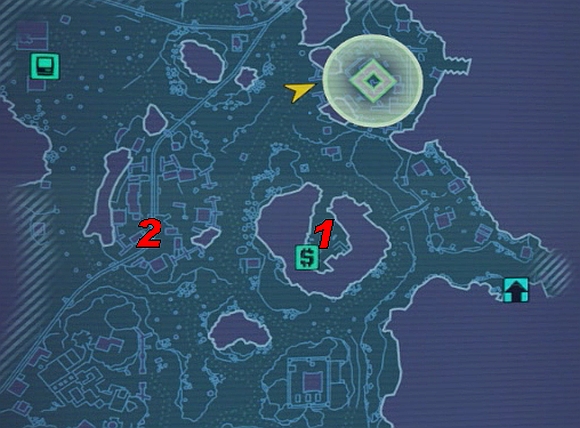
1) Tina
2) Bandit camp
![Talk with Tina [1] and accept the mission - The Pretty Good Train Robbery - Tundra Express - Borderlands 2 - Game Guide and Walkthrough](https://game.lhg100.com/Article/UploadFiles/201512/2015121216584406.jpg)
Talk with Tina [1] and accept the mission. Collect four Tina's Dynamites from her garage and head to the Bandit camp [2]. Clear the area, and plant the Dynamite by the lever shown in the above screenshot to lock the gate.
Now head to the train platform and Use the radio to call in the train. When it arrives, plant Dynamite onto the three safes shown in the above screenshot. After the explosion, pick up the money and turn in the mission to Tina [1]. If you wait by the train for a while, three Auto Cannons will appear on the train, which you can either destroy or ignore.
You can receive this mission after completing A Train to Catch.

1) Lilith
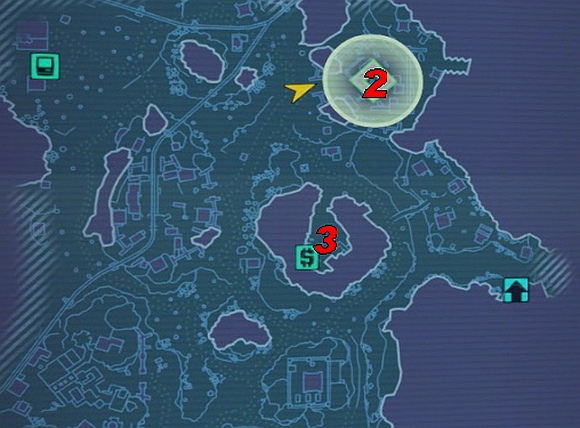
2) Mine
3) Tina
![Talk to Lilith [1] in Roland's hideout and accept the mission - Mine, All Mine - Sanctuary part 2 - Borderlands 2 - Game Guide and Walkthrough](https://game.lhg100.com/Article/UploadFiles/201512/2015121216584544.jpg)
Talk to Lilith [1] in Roland's hideout and accept the mission. Use Fast Travel to move to Tundra Express. There head to the northern part of the map, to the mine [2]. As you enter the area, you will be attacked by Miner Rats and Bandits. After you kill 10 Miner Rat, you will have to take care of Prospector Zeke. To reach him, you need to get to the upper part of the mine by using the line from the above screenshot. Be careful not to get crushed.
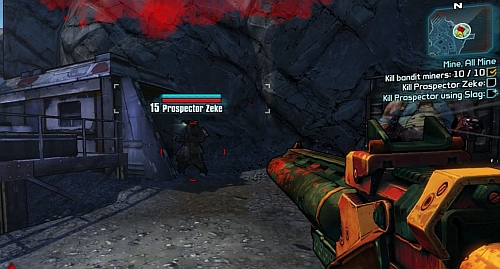
As you reach the upper level, you will have to fight with Zeke. You can receive bonus experience by killing him with a Slag Elemental Effect weapon. After clearing the area, pick up the ECHO Recorder "The Deal". Head back to Tina [3] and talk with her to end the mission.
You can receive this mission after completing A Dam Fine Rescue.

1) Hammerlock
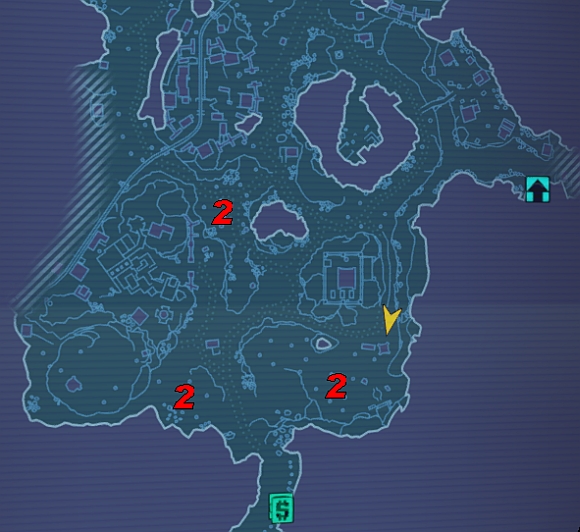
2) Varkid nests/mounds
![Speak with Hammerlock [1] and take the Evolutionary injector - Mighty Morphin' - Sanctuary part 2 - Borderlands 2 - Game Guide and Walkthrough](https://game.lhg100.com/Article/UploadFiles/201512/2015121216584667.jpg)
Speak with Hammerlock [1] and take the Evolutionary injector. Afterwards head to Tundra Express and approach one of the Varkid nests/mounds [2]. Shoot the bugs to reduce their life to around 30%. You don't want to kill them, so choose a weaker weapon. Larval Varkids should enclose themselves in a cocoon, as shown in the above screenshot. Quickly approach the cocoon and press Use (by default E).
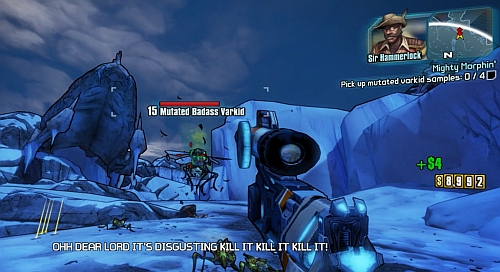
The Varkid will then transform itself into a Mutated Badass Varkid. Kill it and take the Mutated Varkid Sample from its corpse. Hammerlock will then ask you to collect four more Varkid Samples. Repeat the whole process again - reduce a Larval Varkid's health to around 30%, use the Injector on the cocoon, kill the enemy, take the sample. After you collect enough samples, return to Hammerlock in Sanctuary [1] to end the mission.
You can receive this mission after completing Bright Lights, Flying City.
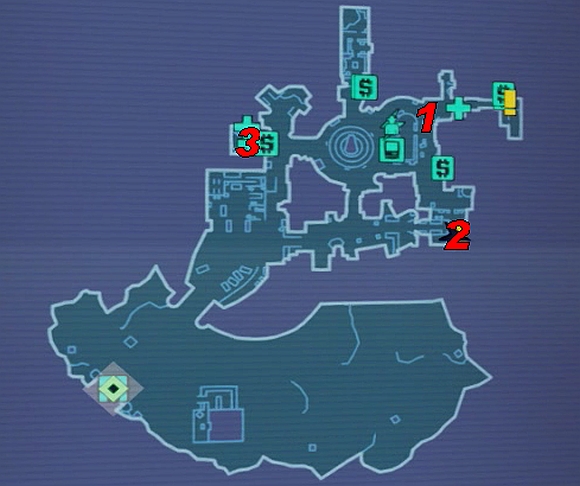
1) Marshall Friedman/Suspects
2) Moxxi
3) Zed
![Take the mission from Friedman [1] - Won't Get Fooled Again - Sanctuary part 2 - Borderlands 2 - Game Guide and Walkthrough](https://game.lhg100.com/Article/UploadFiles/201512/2015121216584789.jpg)
Take the mission from Friedman [1]. Interrogate Friedman [1], Moxxi [2] and Zed [3]. After hearing them out, you will have to point the culprit. That should be Barlo Gutter (second form the right). Speak with Friedman to end the mission.
You can receive this mission after completing Bright Lights, Flying City.
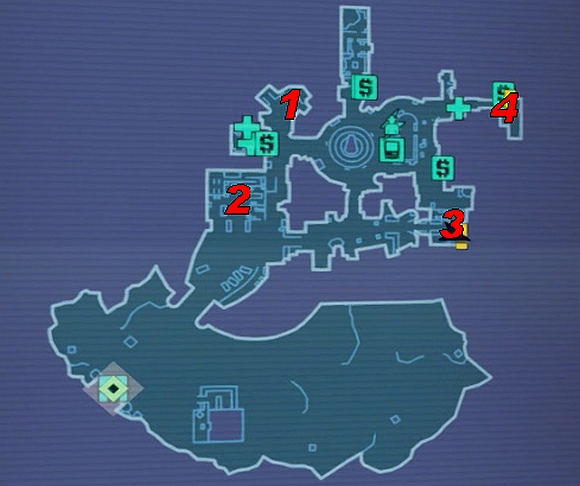
1) Claptrap
2) Scooter's workshop
3) Moxxi's place
4) Marcus' shop
![Accept the mission from Claptrap [1] and take the Invitations - Claptrap's Birthday Bash! - Sanctuary part 2 - Borderlands 2 - Game Guide and Walkthrough](https://game.lhg100.com/Article/UploadFiles/201512/2015121216584708.jpg)
Accept the mission from Claptrap [1] and take the Invitations. Give them to Scooter [2], Moxxi [3] and Marcus [4]. With the invitations distributed, return to Claptrap [1]. Turn on the radio found on the shelf behind Claptrap and a timer will start. With over one minute in, take a slice of Pizza shown in the screenshot. Around 40 seconds till the end, Use Party Favor. Afterwards turn in the mission to Claptrap.
You can receive this mission after completing Mighty Morphin.
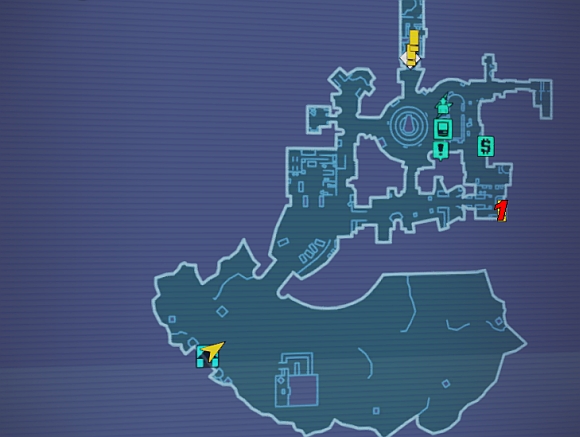
1) Hammerlock
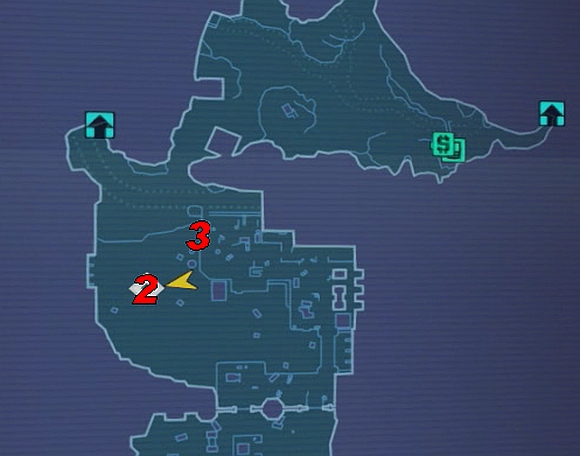
2) Pillar for Hammerlock's Arm
3) Exit from the water reservoir
![Hear out Hammerlock [1], take Hammerlock's Arm and use Fast Travel to get to The Highlands Outwash - Slap-Happy - Sanctuary part 2 - Borderlands 2 - Game Guide and Walkthrough](https://game.lhg100.com/Article/UploadFiles/201512/2015121216584812.jpg)
Hear out Hammerlock [1], take Hammerlock's Arm and use Fast Travel to get to The Highlands Outwash. Jump into the water and place Hammerlock's Arm in the designated place [2].
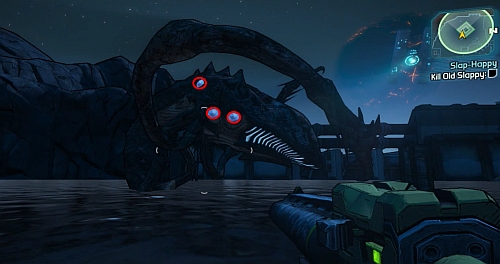
Eventually you will attract Old Slappy. Shoot the marked appendixes/eyes on the enemy/s body and tentacles to score critical damage. The tentacles themselves should be used for Second Wind. Once you defeat the enemy, pick up Hammerlock's Arm [2] and head out of the water using the ladder [3]. Now return to Sanctuary [1] to collect the prize for completing the mission.
You can receive this mission in Sanctuary, during your visit there as part of Bright Lights, Flying City.

1) Hammerlock
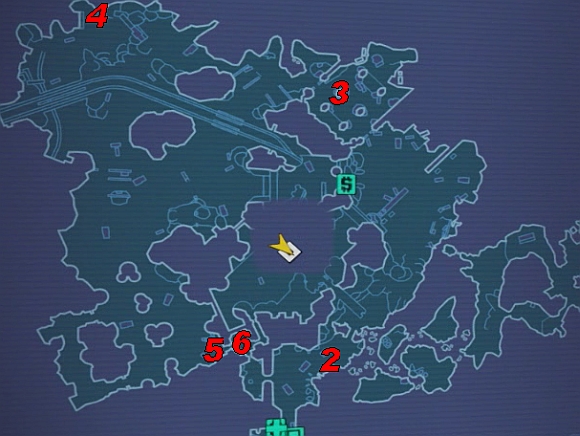
2) ECHO Recorder 1
3) ECHO Recorder 2
4) ECHO Recorder 3
5) Building entrance
6) ECHO Recorder 4
![Speak to Hammerlock [1], use Fast Travel and move to Three Horns Divide - Perfectly Peaceful - Sanctuary part 2 - Borderlands 2 - Game Guide and Walkthrough](https://game.lhg100.com/Article/UploadFiles/201512/2015121216584961.jpg)
Speak to Hammerlock [1], use Fast Travel and move to Three Horns Divide. Afterwards approach the old location of Sanctuary (Sanctuary Hole). Reach the elevator from the screenshot at the end of the location, eliminating all Bandit resistance you come across on your way. Use the valve to reach the lower level.
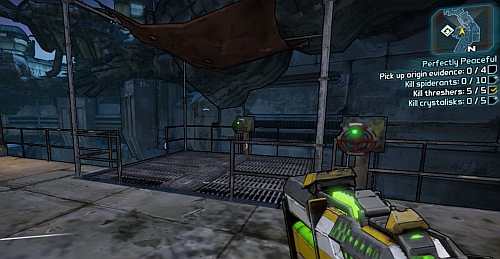
Below, head through the warehouse to the other end, where outside, on the right you should find another elevator. Afterwards use the passage leading to Caustic Caverns.
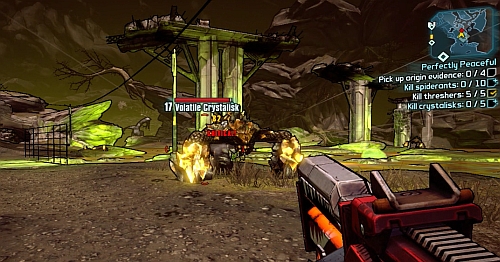
Use the valve on the left side of the large gate to open the passage. On the other side of the gate you should quickly find the first ECHO RECORDER [2] and encounter a Volatile Crystalisk. Killing five enemies of this kind will give you additional experience. For critical hits, aim at the crystals on the enemies' limbs.
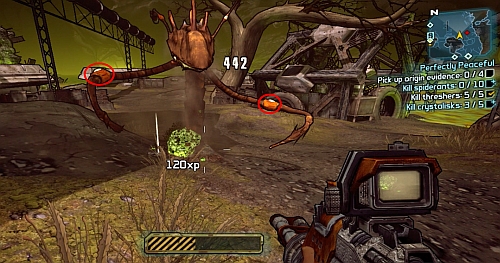
Another type of enemies that can earn you additional experience are Threshers. In this case their weak points are the bright spots marked on the above screenshot.
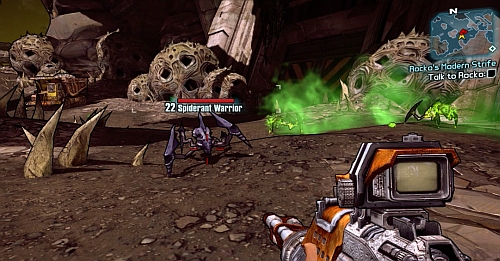
The last enemy type worth killing for the sake of bonus experience are Spiderants. Critical damage can be dealt by shooting their abdomens.

After eliminating enough enemies to receive the additional experience, collect the other Echo Recorders. The last one [6] can be found inside the building accessible though the door from the above screenshot [5].
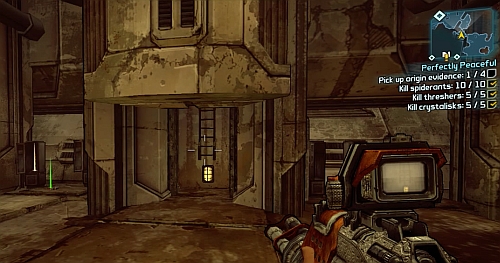
Pick up the item and on the right side of the same room you will find a ladder which will take you to a shortcut to the exit from this location. Return to Sanctuary and speak with Hammerlock [1] to finish the mission.
You can receive this mission in Sanctuary, during your visit there as part of Bright Lights, Flying City.
1) Marcus
2) Moxxi
3) Safe entrance
4) Marcus' safe/Blue
5) Exit
6) Fast Travel
![Speak to Marcus [1] in his shop to accept the mission - Safe and Sound - Sanctuary part 2 - Borderlands 2 - Game Guide and Walkthrough](https://game.lhg100.com/Article/UploadFiles/201512/2015121216585121.jpg)
Speak to Marcus [1] in his shop to accept the mission. Use Fast Travel, move to Three Horns Divide and head to Sanctuary Hole. Fight your way though groups of Bandits (kill 25 for additional experience) to reach the elevator from the above screenshot.
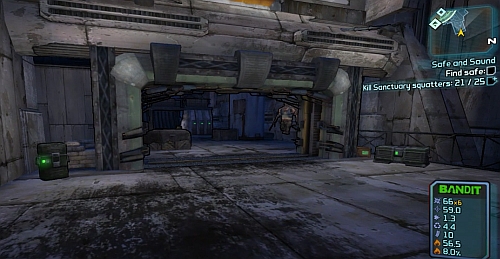
Take it down and the warehouse gate (screenshot) will open up and enemies will come out from inside. Head to the other side of the warehouse and use the elevator on the right side. On the lower level you will find a passage leading to Caustic Caverns.
![Go to the eastern edge of the map though the tunnel [3] - Safe and Sound - Sanctuary part 2 - Borderlands 2 - Game Guide and Walkthrough](https://game.lhg100.com/Article/UploadFiles/201512/2015121216585177.jpg)
Go to the eastern edge of the map though the tunnel [3]. At the end of path you will have to fight with Blue [4]. His weak points are the crystals on his limbs, shoot them for critical damage. Blue can summon Exploding Mini Crystalisks which you should use for Second Wind. Once he's dead, open the chest and take its content. The exit can be found by using the descent marked as on the map [5]. Use Fast Travel [6] and return to Sanctuary. Now you will have to decide whether to hand over the items to Moxxi [2] in return for a weapon or Marcus [1] for a Relic.
You can receive this mission in Sanctuary, during your visit there as part of Bright Lights, Flying City.

1) Bounty Board
2) Ramp
3) Corpse/ECHO Recorder
4) Passage to Friendship Gulag
5) Passage at the back of the workshop
6) Church/chest
![Accept the mission [1], use Fast Travel and move to The Dust - The Good, the Bad, and the Mordecai - Sanctuary part 2 - Borderlands 2 - Game Guide and Walkthrough](https://game.lhg100.com/Article/UploadFiles/201512/2015121216585205.jpg)
Accept the mission [1], use Fast Travel and move to The Dust. The first corpse can be found in the Bandit camp. In order to get there, you will have to use the rock ramp from the above screenshot [2] (don't forget about using Boost).
![Get rid of the enemies and find the corpse [3] hidden under a sheet of steel - The Good, the Bad, and the Mordecai - Sanctuary part 2 - Borderlands 2 - Game Guide and Walkthrough](https://game.lhg100.com/Article/UploadFiles/201512/2015121216585247.jpg)
Get rid of the enemies and find the corpse [3] hidden under a sheet of steel. Beside the corpse you will find an ECHO Recorder with an audio log which you should listen to. Now drive to the passage leading to Friendship Gulag [4].
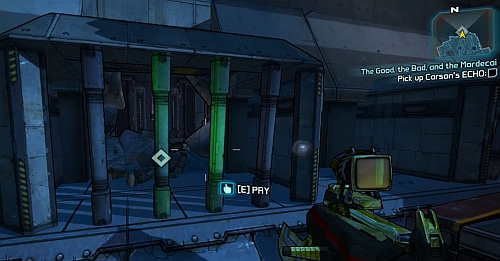
Head to the northern edge of the map where you will find the prison. Remove the bars to get inside and take the ECHO Recorder. Return to The Dust.
![Drive to the back of Ellie's workshop and follow the passage [5] to the hill [6], where the chest is buried - The Good, the Bad, and the Mordecai - Sanctuary part 2 - Borderlands 2 - Game Guide and Walkthrough](https://game.lhg100.com/Article/UploadFiles/201512/2015121216585367.jpg)
Drive to the back of Ellie's workshop and follow the passage [5] to the hill [6], where the chest is buried. Search the grave to get the treasure to the surface and cause Mobley and Gettle to appear. An offer of a duel will appear. You can retreat to a safe distance and finish off the enemy who will survive. After the fight, search the chest to end the mission.
You can receive this mission in Sanctuary, during your visit there as part of Bright Lights, Flying City.

1) Bounty Board
2) Ellie's workshop
3) Hodunk camp
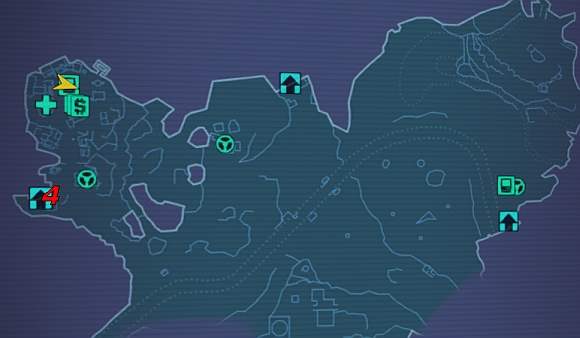
4) The Holy Spirits
![Use the Board [1], accept the mission and Fast Travel to The Dust - Clan War: Starting the War - Sanctuary part 2 - Borderlands 2 - Game Guide and Walkthrough](https://game.lhg100.com/Article/UploadFiles/201512/2015121216585370.jpg)
Use the Board [1], accept the mission and Fast Travel to The Dust. There, speak with Ellie [2]. After the conversation, take two pieces of Dynamite from her garage. Head to the back of the garage and take the Hodunk and Zaford Emblem from the scrap yard. Now you have to move to Hodunk camp [3] and plant the Dynamite on the pillars of the sign from the above screenshot.
The falling sign will create a passage to the camp, so head inside. Place the Zaford Emblem in the designated place and return to Ellie [2] to use Fast Travel and get to The Highlands Overlook. Plant another dynamite on the Zaford distillatory [4] shown in the above screenshot and afterwards put the Hodunk Emblem in its remains. Head into The Holy Spirits pub [4] beside the distillatory and speak to Mick Zaford to end the mission.
You can receive this mission in Sanctuary, during your visit there as part of Bright Lights, Flying City. In order to open some of the passages, you firstly need to complete Wildlife Preservation.

1) Tannis
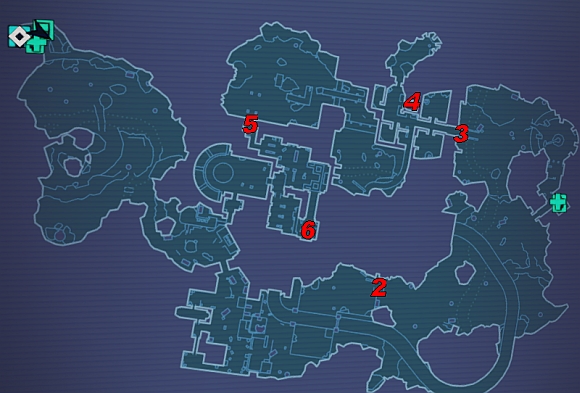
2) Slag Experiment Note 1
3) Gate/Super Badass Loader
4) Slag Experiment Note 2
5) Hyperion headquarters/Slag Experiment Note 3
6) Slag Experiment Note 4
![Accept the mission [1] and use Fast Travel to reach Wildlife Exploitation Preserve - Doctor's Orders - Sanctuary part 2 - Borderlands 2 - Game Guide and Walkthrough](https://game.lhg100.com/Article/UploadFiles/201512/2015121216585407.jpg)
Accept the mission [1] and use Fast Travel to reach Wildlife Exploitation Preserve. If you haven't activated Fast Travel there yet, head to The Highlands Hyperion Bridge and to the passage in the eastern part of the map. The first note can be found in the office [2] shown in the above screenshot, on a desk.
![You will reach a locked gate [3] - Doctor's Orders - Sanctuary part 2 - Borderlands 2 - Game Guide and Walkthrough](https://game.lhg100.com/Article/UploadFiles/201512/2015121216585493.jpg)
You will reach a locked gate [3]. Keep fighting with all the appearing Robots and Stalkers (including a Badass) until a passage opens and a Super Badass Loader appears. Hide behind covers when it shoots and wait for the gun to overheat. Use the time between them to attack the Robot.
![The next Slag Experiment Note can be found in the room marked as [4], inside a cardboard box from the above screenshot - Doctor's Orders - Sanctuary part 2 - Borderlands 2 - Game Guide and Walkthrough](https://game.lhg100.com/Article/UploadFiles/201512/2015121216585547.jpg)
The next Slag Experiment Note can be found in the room marked as [4], inside a cardboard box from the above screenshot. Be ready for a fight with a Loot Midget after opening the box.
![After reaching the next Hyperion base [5], you will have to kill a certain amount of Skags before the entrance opens - Doctor's Orders - Sanctuary part 2 - Borderlands 2 - Game Guide and Walkthrough](https://game.lhg100.com/Article/UploadFiles/201512/2015121216585512.jpg)
After reaching the next Hyperion base [5], you will have to kill a certain amount of Skags before the entrance opens. Head inside and you will see a Robot behind a desk. Climb onto it and press the button from the above screenshot. Open the locker behind the cover which was raised and inside it you will find Slag Experiment Note 3.
![In the warehouse, head up the stairs to a room with cages [6] - Doctor's Orders - Sanctuary part 2 - Borderlands 2 - Game Guide and Walkthrough](https://game.lhg100.com/Article/UploadFiles/201512/2015121216585549.jpg)
In the warehouse, head up the stairs to a room with cages [6]. Use the lever from the screenshot to open them. In the last one you will find the fourth Slag Experiment Note. Now return to Tannis in Sanctuary [1] and collect your prize.
You can receive this mission in Sanctuary, during your visit there as part of Bright Lights, Flying City.
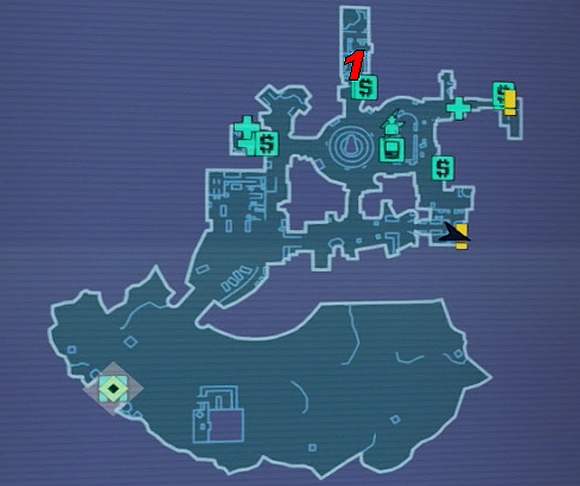
1) Tannis
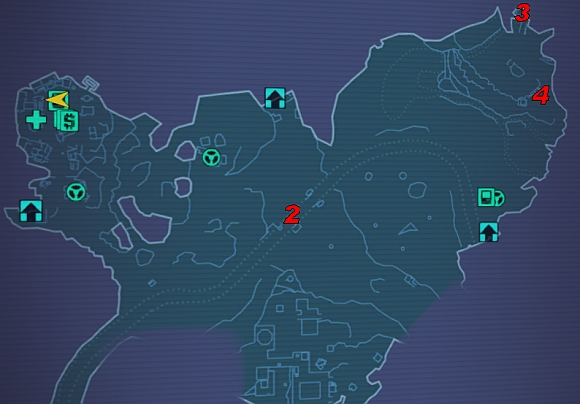
2) Hidden Journal 1
3) Hidden Journal 2
4) A safe position to fight with Pyre Thresher
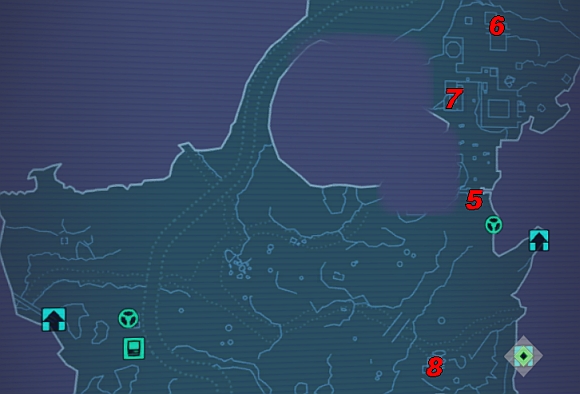
5) Entrance to the Robot camp
6) Path to the upper part of the camp
7) Hidden Journal 3
8) Hidden Journal 4
![Tannis [1] will order you to find her journals - Hidden Journals - Sanctuary part 2 - Borderlands 2 - Game Guide and Walkthrough](https://game.lhg100.com/Article/UploadFiles/201512/2015121216585622.jpg)
Tannis [1] will order you to find her journals. Use Fast Travel and head to The Highlands Overlook. The first Journal is below the bridge [2]. Go down the stairs on the left side of the bridge shown in the screenshot.
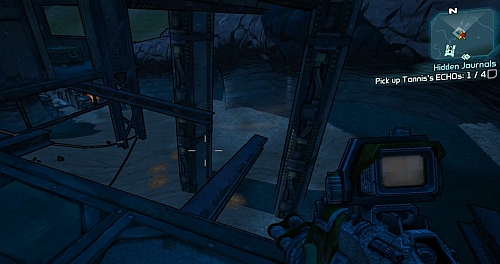
Below the bridge, head to the end of the platform. there you will find a building inside of which a Journal is. In order to get there, jump between the metal elements shown in the screenshot.
![The next Journal can be found in the house marked as [3] on the map - Hidden Journals - Sanctuary part 2 - Borderlands 2 - Game Guide and Walkthrough](https://game.lhg100.com/Article/UploadFiles/201512/2015121216585624.jpg)
The next Journal can be found in the house marked as [3] on the map. As you approach the bridge, you will be attacked by a Pyre Thresher. If you retreat to the passage from the screenshot [4], you will be able to attack it from a safe place.
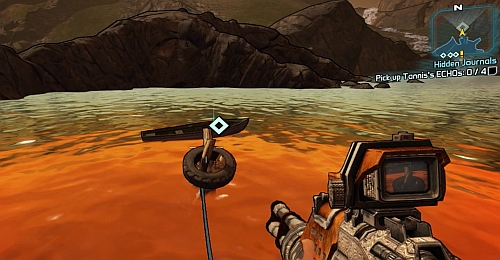
After eliminating the enemy, you should be able to find the journal on a boat, behind the house on water. Jump between the poles coming out of the water to safely reach it.
![Now head to the southern part of Highlands and through Robot camp entrance gate [5] - Hidden Journals - Sanctuary part 2 - Borderlands 2 - Game Guide and Walkthrough](https://game.lhg100.com/Article/UploadFiles/201512/2015121216585733.jpg)
Now head to the southern part of Highlands and through Robot camp entrance gate [5]. Head to the end and of the right you should find a path leading to the upper part of the camp [6]. The passage to the journal will be heavily protected, so be ready for a hard fight. Once you reach the entrance to the room with the Journal [7], shoot the fuse box shown in the above screenshot to disable the force field.
![Having collected three journals, head to the south-east part of the map, to the location marked with [8] on the map - Hidden Journals - Sanctuary part 2 - Borderlands 2 - Game Guide and Walkthrough](https://game.lhg100.com/Article/UploadFiles/201512/2015121216585710.jpg)
Having collected three journals, head to the south-east part of the map, to the location marked with [8] on the map. The last Journal will be inside a container. Show through the grates into the faces hanging at its end to open the passage on the other side. Take the last journal and return to Tannis [1] in Sanctuary to collect your prize.
You can receive this mission in Sanctuary, during your visit there as part of Bright Lights, Flying City.
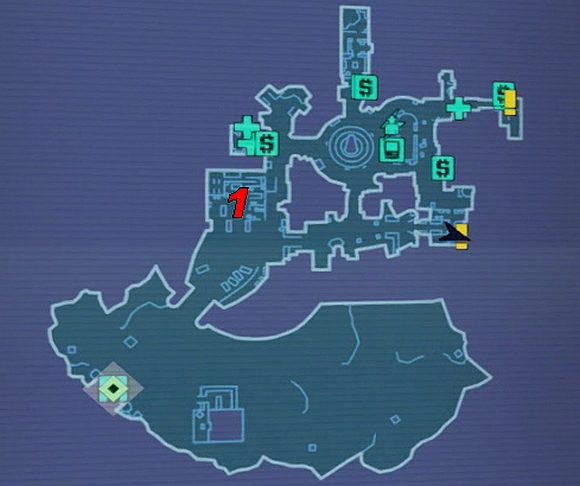
1) Scooter
2) Passage to Shorty
3) Branch leading to Shorty
4) Sinkhole/Shorty
![After talking with Scooter [1], use Fast Travel and move to The Fridge - Swallowed Whole - Sanctuary part 2 - Borderlands 2 - Game Guide and Walkthrough](https://game.lhg100.com/Article/UploadFiles/201512/2015121216585887.jpg)
After talking with Scooter [1], use Fast Travel and move to The Fridge. Head towards the passage marked on the map with [2], eliminating the enemies on your way. Eventually you should see a levitating head of Sinkhole which you have to chase.
![Choose the path on the right at the road fork [3] - Swallowed Whole - Sanctuary part 2 - Borderlands 2 - Game Guide and Walkthrough](https://game.lhg100.com/Article/UploadFiles/201512/2015121216585876.jpg)
Choose the path on the right at the road fork [3]. At the end of the path you should catch up with Sinkhole [4]. Kill the animal to free Shorty and then kill him as well. Now you can return to Scooter [1] to end the mission.
You can receive this mission in Sanctuary, during your visit there as part of Bright Lights, Flying City.

1) Scooter
2) Girly Magazine 1
3) Girly Magazine 2, 3
4) Girly Magazines 4
5) Flowers
6) Moxxi's van
![Scooter [1] will order you to find his ex - The Cold Shoulder - Sanctuary part 2 - Borderlands 2 - Game Guide and Walkthrough](https://game.lhg100.com/Article/UploadFiles/201512/2015121216585999.jpg)
Scooter [1] will order you to find his ex. Use Fast Travel to move to The Fridge. Start off by collecting three Girly Magazines for which you will receive additional experience points. The first one can be found on the elevation on the left [2].
![The second one can be found inside the car wreck [3] - The Cold Shoulder - Sanctuary part 2 - Borderlands 2 - Game Guide and Walkthrough](https://game.lhg100.com/Article/UploadFiles/201512/2015121216585972.jpg)
The second one can be found inside the car wreck [3].
![In the same area [3], behind the radio right behind the car wreck in which you found the last number there's another warehouse - The Cold Shoulder - Sanctuary part 2 - Borderlands 2 - Game Guide and Walkthrough](https://game.lhg100.com/Article/UploadFiles/201512/2015121216585909.jpg)
In the same area [3], behind the radio right behind the car wreck in which you found the last number there's another warehouse.
![The next one is on the elevation on the left [4] - The Cold Shoulder - Sanctuary part 2 - Borderlands 2 - Game Guide and Walkthrough](https://game.lhg100.com/Article/UploadFiles/201512/2015121216585983.jpg)
The next one is on the elevation on the left [4].
![Having collected the magazines, head to the frozen lake [5] - The Cold Shoulder - Sanctuary part 2 - Borderlands 2 - Game Guide and Walkthrough](https://game.lhg100.com/Article/UploadFiles/201512/2015121216590072.jpg)
Having collected the magazines, head to the frozen lake [5]. Here you will have to gather five Flowers shown in the screenshot. They can be found at the shore all around the lake, so you shouldn't have problems locating them.
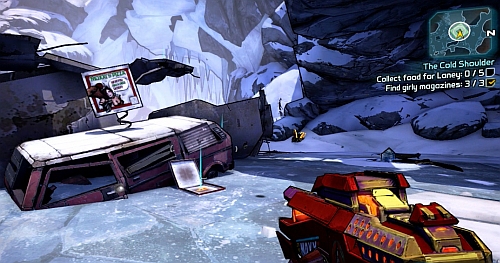
Your next objective is finding five Pizza pieces. They can all be found around the wreck of Moxxi's van [6].
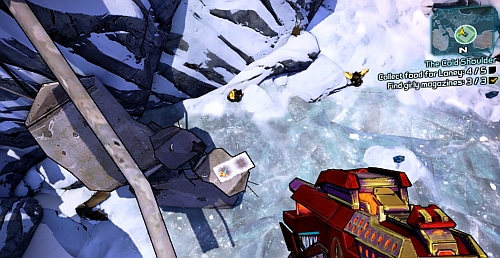
Collecting the last Pizza slice can be a bit tricky. Head onto the destroyed bridge above the Pizza and jump down when standing as shown in the above screenshot. That way you should land on the shelf with the last Pizza.
![With all the items in your possession, head to where you found Girly Magazine 1 [2] - The Cold Shoulder - Sanctuary part 2 - Borderlands 2 - Game Guide and Walkthrough](https://game.lhg100.com/Article/UploadFiles/201512/2015121216590059.jpg)
With all the items in your possession, head to where you found Girly Magazine 1 [2]. Place the bait in the designated spot beside the door. After the conversation the door will open up and you will have to fight with Laney White. Defeat her and return to Scooter [1] for your prize.
You can receive this mission in Sanctuary, during your visit there as part of Bright Lights, Flying City.

1) Scooter
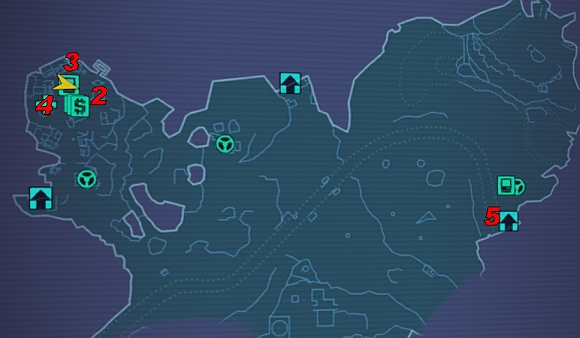
2) Karima's house
3) Clocktower
4) Vending machine
5) Merchant
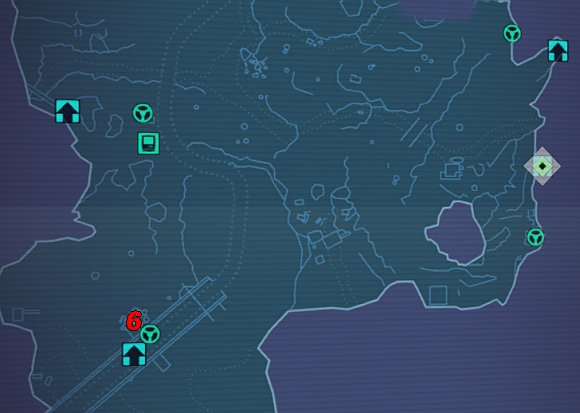
6) Container with Shivers Medicine
![Accept the mission from Scooter [1] and use Fast Travel to get to The Highlands Overlook - The Overlooked: Medicine Man - Sanctuary part 2 - Borderlands 2 - Game Guide and Walkthrough](https://game.lhg100.com/Article/UploadFiles/201512/2015121216590109.jpg)
Accept the mission from Scooter [1] and use Fast Travel to get to The Highlands Overlook. There, approach the house in which Karima lives [2]. She will ask you to activate the Vending machine. For that, you will have to head to the top of the clock tower [3] using the ladder shown in the above screenshot.
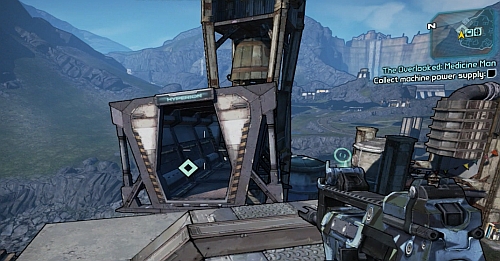
From the roof, head to the container (screenshot) where you should find the Power Supply. With it in hand, start the Vending machine [4] and buy Shivers Medicine. Now leave the area and head to the north-east part of the map [5].
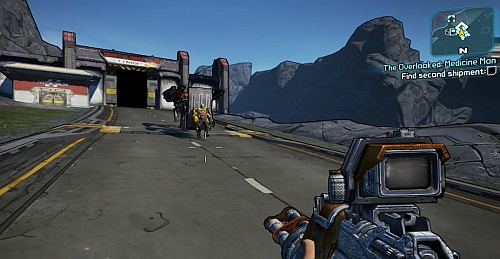
Here you will meet the merchant from the above screenshot, together with Robot guards. Eliminate them all and use the Vending machine on the merchant's back to buy another Shivers Medicine.
![The last medicine can be found in a container by the bridge in the southern part of The Highlands [6] - The Overlooked: Medicine Man - Sanctuary part 2 - Borderlands 2 - Game Guide and Walkthrough](https://game.lhg100.com/Article/UploadFiles/201512/2015121216590226.jpg)
The last medicine can be found in a container by the bridge in the southern part of The Highlands [6]. In order to get inside, use the button on the right side of the door. The whole area is protected by Threshers who you can either ignore or kill. Having gathered all the Medicine, return to Overlook [2] and deliver the medicine to the marked houses. Speak to Karima to end the mission.
You can receive this mission after completing Hidden Journals.
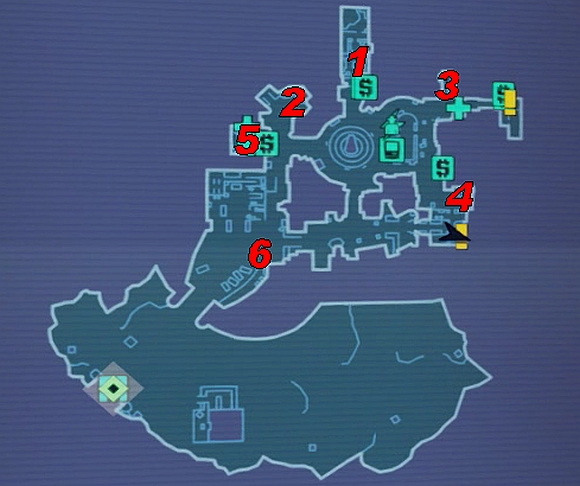
1) Tannis
2) ECHO Recorder 1
3) ECHO Recorder 2
4) ECHO Recorder 3
5) ECHO Recorder 4
6) ECHO Recorder 5
![Accept the mission from Tannis [1] - Torture Chairs - Sanctuary part 2 - Borderlands 2 - Game Guide and Walkthrough](https://game.lhg100.com/Article/UploadFiles/201512/2015121216590247.jpg)
Accept the mission from Tannis [1]. You will have to gather all the ECHO Recorders marked on the map. The first one is behind Claptrap, on a shelf [2]. The second one can be found in a dumpster shown in the screenshot [3]. The third one is to the right of the entrance to Moxxi's [4]. The fourth ECHO Recorder can be found inside Zed's clinic [5].
![The last recording is beside the entrance to Scooter's workshop [6] - Torture Chairs - Sanctuary part 2 - Borderlands 2 - Game Guide and Walkthrough](https://game.lhg100.com/Article/UploadFiles/201512/2015121216590258.jpg)
The last recording is beside the entrance to Scooter's workshop [6]. Having collected all five, return to Tannis for your prize.
You can receive this mission after completing Wildlife Preservation.

1) Scooter/Scooter's Camera
6) Daisy
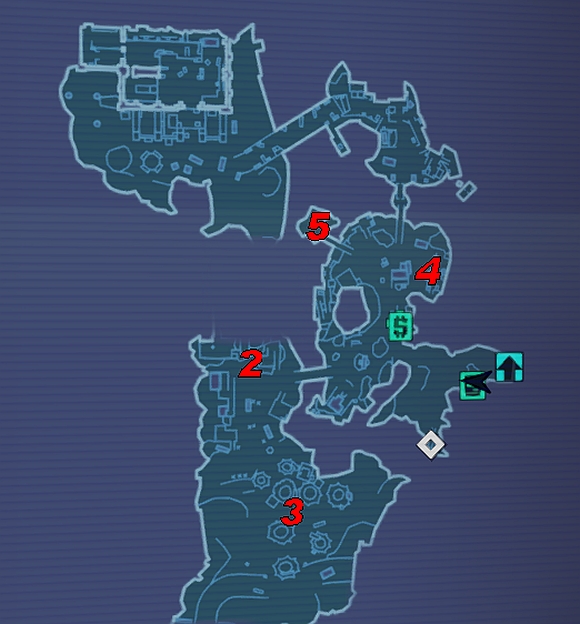
2) Inspiration for Scooter 1
3) Inspiration for Scooter 2
4) Nudie Magazine
5) Inspiration for Scooter 3
![Talk with Scooter [1] and take Scooter's Camera from his workshop - Poetic License - Sanctuary part 2 - Borderlands 2 - Game Guide and Walkthrough](https://game.lhg100.com/Article/UploadFiles/201512/2015121216590353.jpg)
Talk with Scooter [1] and take Scooter's Camera from his workshop. Use Fast Travel to reach Thousand Cuts. If you haven't yet activated Fast Travel there, move to The Highlands Hyperion Bridge and head to the western part of the map where you will find a passage to Thousand Cuts.
![Keep going west and you will find the first inspiration for Scooter [2] - Poetic License - Sanctuary part 2 - Borderlands 2 - Game Guide and Walkthrough](https://game.lhg100.com/Article/UploadFiles/201512/2015121216590487.jpg)
Keep going west and you will find the first inspiration for Scooter [2].
![Afterwards go south, where among explosion craters you will find another source of inspiration for Scooter [3] - Poetic License - Sanctuary part 2 - Borderlands 2 - Game Guide and Walkthrough](https://game.lhg100.com/Article/UploadFiles/201512/2015121216590405.jpg)
Afterwards go south, where among explosion craters you will find another source of inspiration for Scooter [3].
![For additional experience, pick up the Nudie Magazine [4] shown in the above screenshot - Poetic License - Sanctuary part 2 - Borderlands 2 - Game Guide and Walkthrough](https://game.lhg100.com/Article/UploadFiles/201512/2015121216590404.jpg)
For additional experience, pick up the Nudie Magazine [4] shown in the above screenshot.
![The last inspiration can be found in a small cemetery [5] - Poetic License - Sanctuary part 2 - Borderlands 2 - Game Guide and Walkthrough](https://game.lhg100.com/Article/UploadFiles/201512/2015121216590438.jpg)
The last inspiration can be found in a small cemetery [5]. With all the pictures taken, return to Sanctuary and talk with Scooter [1]. Head to Daisy [6] and give her the poem. Wait for her reaction and get back to Scooter [1] to get your prize.
You can receive this mission during Bright Lights, Flying City, after successfully protecting Beacon in Highlands.
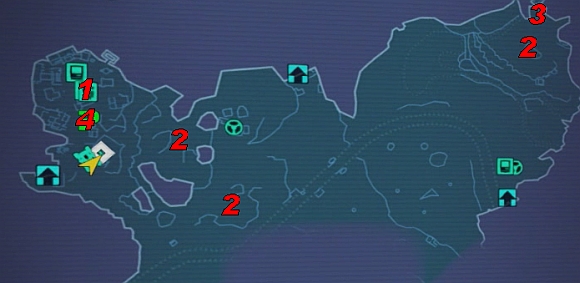
1) Bounty board
2) Stalkers' terrain
3) Badass Pyre Thresher
4) Mailbox
![You can receive this mission from the Bounty Board [1] in the northern part of Highlands - Stalker of Stalkers - The Highlands - Borderlands 2 - Game Guide and Walkthrough](https://game.lhg100.com/Article/UploadFiles/201512/2015121216590507.jpg)
You can receive this mission from the Bounty Board [1] in the northern part of Highlands. You will have to search Stalker food remains shown in the above screenshot [2], found in the area inhabited by those animals. After searching the proper remains, you should find a ECHO Recorder. Be very thorough and search every pile, including the ones hanging from rocks. Apart from three places in the northern part of the map, there's also one in the south. However if you're lucky enough, you might not have to go there. Additional experience points can be received for killing fifteen Stalkers.
![Be sure not to approach the above house when searching the north-east nest [3] - Stalker of Stalkers - The Highlands - Borderlands 2 - Game Guide and Walkthrough](https://game.lhg100.com/Article/UploadFiles/201512/2015121216590535.jpg)
Be sure not to approach the above house when searching the north-east nest [3]. If you get too close, you might be attacked by a Badass Pyre Thresher.
![After finding five recordings, approach the mailbox in the camp [4] to end the mission - Stalker of Stalkers - The Highlands - Borderlands 2 - Game Guide and Walkthrough](https://game.lhg100.com/Article/UploadFiles/201512/2015121216590568.jpg)
After finding five recordings, approach the mailbox in the camp [4] to end the mission.
You can receive this mission during Bright Lights, Flying City, after successfully protecting Beacon in Highlands.
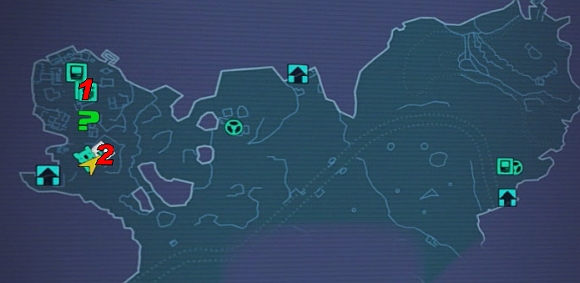
1) Bounty Board
2) Mailbox 1
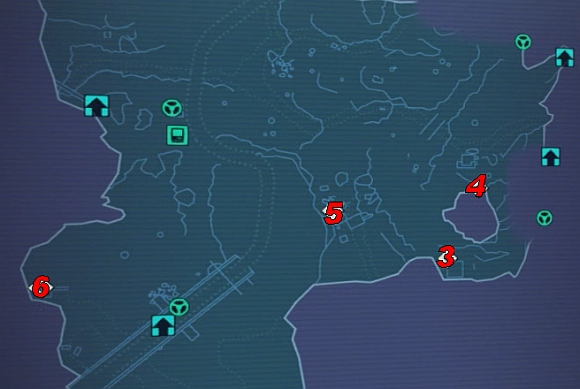
3) Mailbox 2
4) Mailbox 3
5) Mailbox 4
6) Mailbox 5
![You can receive this mission from the Bounty Board [1] in the northern part of Highlands - Arms Dealing - The Highlands - Borderlands 2 - Game Guide and Walkthrough](https://game.lhg100.com/Article/UploadFiles/201512/2015121216590696.jpg)
You can receive this mission from the Bounty Board [1] in the northern part of Highlands. Pick up the first package [2] from the mailbox (screenshot) in the camp nearby the board and the timer will start. You will have two minutes to collect all the packages, each giving you some additional times. You should consider visiting the spots beforehand and clear the area. You can also equip a Relic which improves vehicle Boost.
![Beside mailbox 3 [4] you will have to jump below and then head up along rocks on the right side of the building to reach the mailbox - Arms Dealing - The Highlands - Borderlands 2 - Game Guide and Walkthrough](https://game.lhg100.com/Article/UploadFiles/201512/2015121216590660.jpg)
Beside mailbox 3 [4] you will have to jump below and then head up along rocks on the right side of the building to reach the mailbox. In order to get out of there, jump onto the crate beside the building shown in the above screenshot.
![Beside mailbox 4 [5], exploding Robots will keep coming from behind the door - Arms Dealing - The Highlands - Borderlands 2 - Game Guide and Walkthrough](https://game.lhg100.com/Article/UploadFiles/201512/2015121216590669.jpg)
Beside mailbox 4 [5], exploding Robots will keep coming from behind the door.
![The last mailbox (number 5) [6] will be protected by Threshers who you should just ignore and climb up the ladder from the above screenshot - Arms Dealing - The Highlands - Borderlands 2 - Game Guide and Walkthrough](https://game.lhg100.com/Article/UploadFiles/201512/2015121216590670.jpg)
The last mailbox (number 5) [6] will be protected by Threshers who you should just ignore and climb up the ladder from the above screenshot. The last package can be found above.
![Now return to the vehicle and quickly drive to the Bounty Board [1] (the timer is still on) - Arms Dealing - The Highlands - Borderlands 2 - Game Guide and Walkthrough](https://game.lhg100.com/Article/UploadFiles/201512/2015121216590689.jpg)
Now return to the vehicle and quickly drive to the Bounty Board [1] (the timer is still on). Beside the Board you should find a mailbox (screenshot) into which you have to put the packages. If you make it in time, you will be able to choose one of two rewards.
You can receive this mission after completing Clan War: Starting the War.
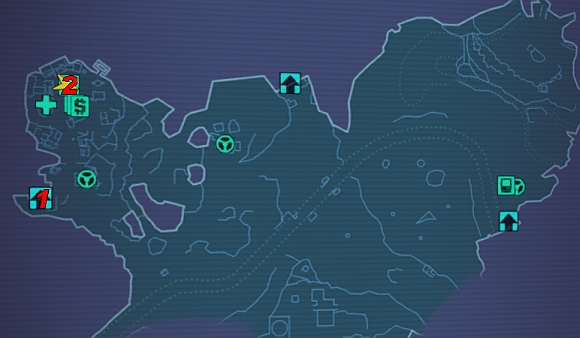
1) The Holy Spirits
2) Fast Travel
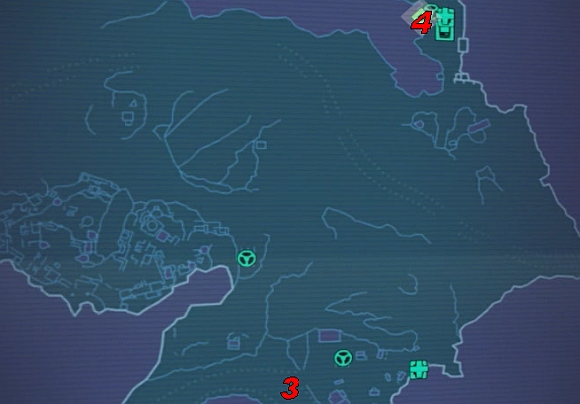
3) Race track
4) Ellie
![Talk with Mick Zaford at The Holy Spirits [1] to begin this mission - Clan War: First Place - The Highlands - Borderlands 2 - Game Guide and Walkthrough](https://game.lhg100.com/Article/UploadFiles/201512/2015121216590772.jpg)
Talk with Mick Zaford at The Holy Spirits [1] to begin this mission. Follow him to the pub cellar, take four Zaford Explosives and head outside the pub. Use Fast Travel [2] and move to The Dust. Get to the racing track [3] and plant four explosives in the designated spots on the bridge/ramp.

Now return to the beginning of the bridge and climb the ladder to the vantage points shown in the above screenshot. Get rid of the operator who's there.
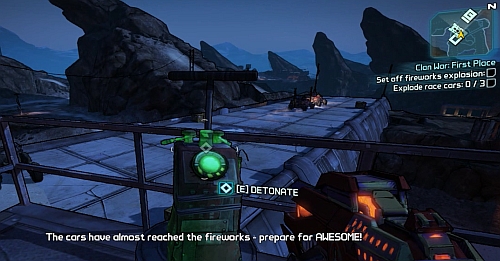
With him dead, the race will begin. You need to wait for the three participating cars to reach the bridge (or at least be nearby) and detonate the explosives. Afterwards return to Ellie [4] to finish the mission.
You can receive this mission after completing Clan War: Reach the Dead Drop.
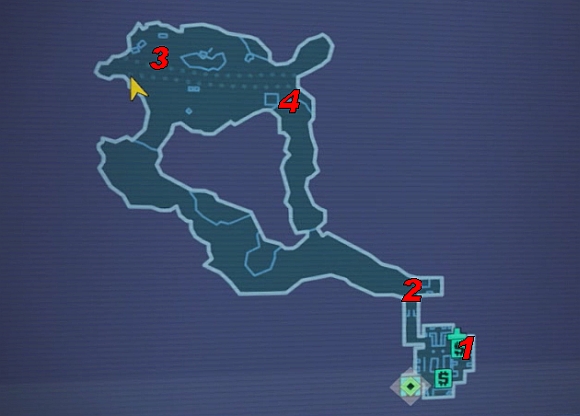
1) Echo Recorder
2) Bagman
3) Money stashing place
4) Shortcut
5) Jimbo
![The Echo Recorder [1] which can you find in The Holy Spirits (The Highlands Overlook) will let you begin this mission - Clan War: End of the Rainbow - The Highlands - Borderlands 2 - Game Guide and Walkthrough](https://game.lhg100.com/Article/UploadFiles/201512/2015121216590864.jpg)
The Echo Recorder [1] which can you find in The Holy Spirits (The Highlands Overlook) will let you begin this mission. Head to the ground floor and open the door on the left side of the bar. A Bagman will enter through the door on the other side of the room [2] (screenshot).
Your task will be to follow him through the mine shaft while staying unnoticed. You don't necessarily have to see him at all times, as there's only one road leading to the target and there's no way of losing him. Eventually you will reach the place where the money is stored [3]. Kill Bagman and take his key.
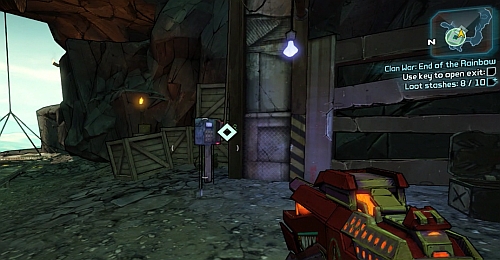
In order to gain additional experience points, you have to open 10 chests with money. Afterwards approach the panel from the above screenshot and Use it to open a shortcut to the exit [4]. Now return to Jimbo in the Hodunk camp [5] to finish the mission.
You can receive this mission by picking up Taggart's Gift for Mom.

1) Taggart's Gift for Mom
2) Stalker nest/Henry
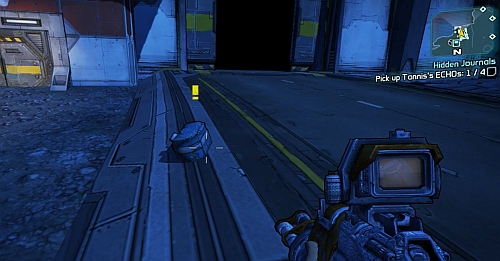
There is a chance that one of the Stalkers will drop a Taggart's Gift for Mom after being killed, picking up which will activate this mission. Personally I got it from a Stalker killed during The Overlooked: Medicine Man, around the area marked on the map as [1].
![After you obtain the required item, drive to the Stalker nest in the northern part of the map [2] - Best Mother's Day Ever - The Highlands - Borderlands 2 - Game Guide and Walkthrough](https://game.lhg100.com/Article/UploadFiles/201512/2015121216590989.jpg)
After you obtain the required item, drive to the Stalker nest in the northern part of the map [2]. Kill six Ambush Stalkers to lure out Henry. As the enemy is surrounded by a shield, a Shock Elemental Effect weapon would by a good choice. Henry will from time to time summon Slagged Stalkers (use them for Second Wind) and teleport to regenerate his shield. Once he's head, pick up Taggart's Fist. Now place the chest in the designated spot and open it to collect the prize and finish the mission.
You can receive this mission after completing The Overlooked: Medicine Man.

1) Karima
2) The grinder
After you accept the mission, you will have to drop five shields into the grinder [2] from the above screenshot. If you don't have enough of them, you can buy some from the nearby Vending machine. Destroy the shields, pick up the Shield Core and bring it beside Karima's house. Speak to her through the door to end the mission.
You can receive this mission after completing The Overlooked: Shields Up.
1) Karima
2) Robot camp
3) Mortar panel
![Accept the mission from Karima [1] and head to the southern part of The Highlands, to the Robot camp [2] - The Overlooked: This Is Only a Test - The Highlands - Borderlands 2 - Game Guide and Walkthrough](https://game.lhg100.com/Article/UploadFiles/201512/2015121216591054.jpg)
Accept the mission from Karima [1] and head to the southern part of The Highlands, to the Robot camp [2]. Fight your way to the other end, where you will find the panel from the above screenshot [3]. Use the button on the left side of the panel, set the coordinates and shoot. After the training round, input the new coordinates and shoot again. Now you can return to Karima and collect your prize.
You can receive this mission after completing Wildlife Preservation.
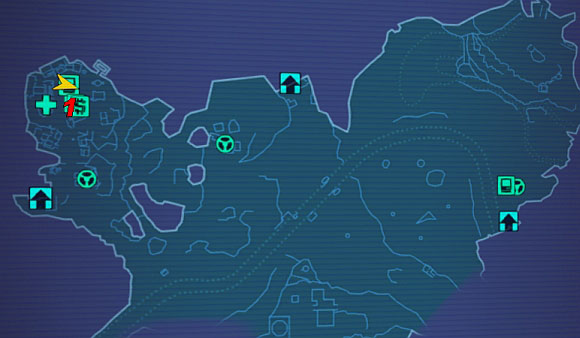
1) Bounty Board
![Accept the mission [1] of killing 100 Bandits from the Bounty Board - Hyperion Contract #873 - The Highlands - Borderlands 2 - Game Guide and Walkthrough](https://game.lhg100.com/Article/UploadFiles/201512/2015121216591128.jpg)
Accept the mission [1] of killing 100 Bandits from the Bounty Board. Additional experience points can be gained for killing 25 enemies with a Fire, Corrosive, Shock and Explosive Elemental Effect weapon. I however wouldn't recommend treating this mission separately, as you can will face multiple Bandits during most side and main missions. If you're nearing the end of the game and still lack a few kills, head to Opportunity where most of the enemies are Bandits.
You can receive this mission by picking up the Old ECHO in Caustic Caverns.
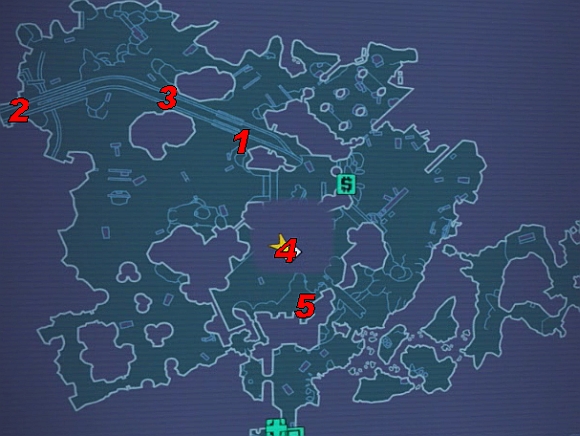
1) Old ECHO
2) Mine cart
3) Locked gate
4) Storeroom
5) Shortcut to Fast Travel
![On the pole you will find the Old ECHO [1], picking up which will activate this mission - Minecart Mischief - Caustic Caverns - Borderlands 2 - Game Guide and Walkthrough](https://game.lhg100.com/Article/UploadFiles/201512/2015121216591169.jpg)
On the pole you will find the Old ECHO [1], picking up which will activate this mission. Head to the mine cart [2] through the bridge from the above screenshot. Stand behind the cart at the end of the bridge and start pushing it.
![As you approach the locked gate [3], you will be attacked by a group of Volatile Crystalisks - Minecart Mischief - Caustic Caverns - Borderlands 2 - Game Guide and Walkthrough](https://game.lhg100.com/Article/UploadFiles/201512/2015121216591172.jpg)
As you approach the locked gate [3], you will be attacked by a group of Volatile Crystalisks. Get rid of them and open the gate with the lever on its left side.
![Keep pushing the cart while opening the locked gates until you reach the storeroom [4] - Minecart Mischief - Caustic Caverns - Borderlands 2 - Game Guide and Walkthrough](https://game.lhg100.com/Article/UploadFiles/201512/2015121216591157.jpg)
Keep pushing the cart while opening the locked gates until you reach the storeroom [4]. Push the cart down onto the belt, Use the lever from the above screenshot and prepare for a fight with Varkidams. Once the cart gets crushed, you will be able to pick up five Raw Eridiums. At the spot where you picked up the Eridium you will also be able to end the mission.
In the room you can find a few weapon chests which are worth searching. In order to save up some time, head to the passage shown in the screenshot [5] which can serve you as a shortcut (the gate at the end can be opened with a valve on its left side).
You can receive this mission after completing Wildlife Preservation.

1) Mordecai
3) Moxxi
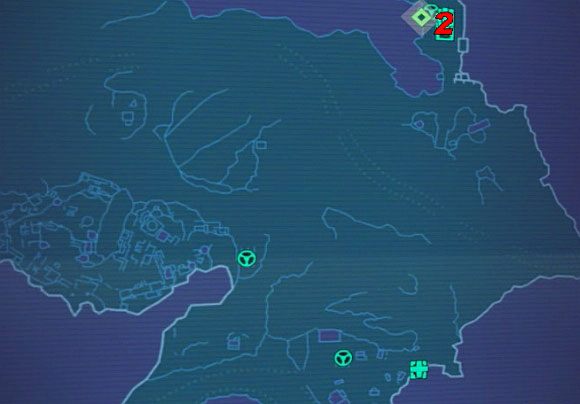
2) Ellie's workshop
![Accept the mission from Mordecai [1], use Fast Travel and move to The Dust - Rakkaholics Anonymous - Sanctuary part 3 - Borderlands 2 - Game Guide and Walkthrough](https://game.lhg100.com/Article/UploadFiles/201512/2015121216591256.jpg)
Accept the mission from Mordecai [1], use Fast Travel and move to The Dust. Inside Ellie's workshop [2], use Catch -a- Ride. Open the map and locate the vehicle from the above screenshot. It will be moving throughout the whole map and your task will be shooting the barrels on its roof.
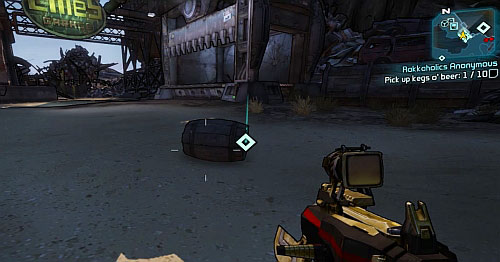
After an accurate series, Kegs o'beer will fall down from the roof. Collect 10 of them and return to Sanctuary. Now you can decide who to give the alcohol to. Moxxi [3] will offer you a pistol and Mordecai [1] a sniper rifle.
You can receive this mission after completing Wildlife Preservation.
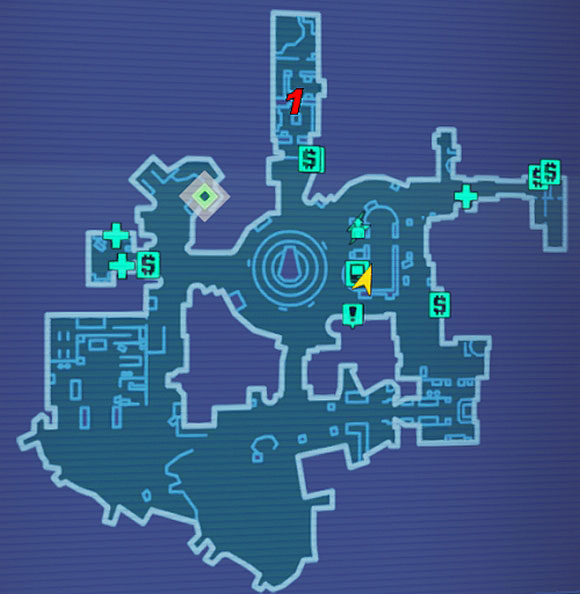
1) Mordecai
2) Stalkers
3) Skags
4) Gate
5) Hyperion warehouse
6) Badass Stalker
7) Shortcut
![After speaking with Mordecai [1], use Fast Travel and move to Wildlife Exploitation Preserve - Animal Rights - Sanctuary part 3 - Borderlands 2 - Game Guide and Walkthrough](https://game.lhg100.com/Article/UploadFiles/201512/2015121216591388.jpg)
After speaking with Mordecai [1], use Fast Travel and move to Wildlife Exploitation Preserve. Head where Stalkers are stored [2]. Use the lever from the above screenshot to free the animals. With the cages open, you will have to kill twelve Stalker Handlers while protecting the Stalkers. If seven animals make it alive through the fight with the guards, you will receive additional experience points.
![Your next target are Skags [3] - Animal Rights - Sanctuary part 3 - Borderlands 2 - Game Guide and Walkthrough](https://game.lhg100.com/Article/UploadFiles/201512/2015121216591356.jpg)
Your next target are Skags [3]. Open the cages and once again kill twelve guards (Skag Handlers), trying to protect the Skags.
![As you reach a locked gate [4], eliminate all the Robots and Stalkers - Animal Rights - Sanctuary part 3 - Borderlands 2 - Game Guide and Walkthrough](https://game.lhg100.com/Article/UploadFiles/201512/2015121216591396.jpg)
As you reach a locked gate [4], eliminate all the Robots and Stalkers. The passage will open and you will have to face a Super Badass Loader. As it start to shoot at you, hide behind a cover and wait for his gun to overheat. Aim at the guns for critical damage.
![After reaching the warehouse entrance [5], you will once again have to kill a certain number of enemies to open it - Animal Rights - Sanctuary part 3 - Borderlands 2 - Game Guide and Walkthrough](https://game.lhg100.com/Article/UploadFiles/201512/2015121216591382.jpg)
After reaching the warehouse entrance [5], you will once again have to kill a certain number of enemies to open it. Inside, head towards the big magazine, where on the ground floor you should find a lever opening the Badass Stalker cage [6]. Free the Stalker and kill twelve guards (Badass Stalker Handlers). Use the shortcut opened after the fight with Bloodwing [7] to get to Fast Travel quicker. Return to Mordecai [1] to collect your prize.
You can receive this mission after completing The Once and Future Slab.
1) Lilith
2) Moxxi

3) Hyperion Supply Beacon
4) Surveyor Lures
5) Jack's cardboard copies
6) Transmitter spot
7) Bridge
![Accept the mission from Lilith [1] and head to Moxxi's [2] to collect the Dirty Camera - Home Movies - Sanctuary part 3 - Borderlands 2 - Game Guide and Walkthrough](https://game.lhg100.com/Article/UploadFiles/201512/2015121216591341.jpg)
Accept the mission from Lilith [1] and head to Moxxi's [2] to collect the Dirty Camera. Move to Opportunity with Fast Travel. If you haven't activated the device yet, travel to The Highlands Hyperion Bridge. Afterwards go to the bridge in the western part of the map to find a passage to Opportunity. Start off by getting the Hyperion Supply Beacon. The item can be found in the western part of the map, inside a vehicle [3].
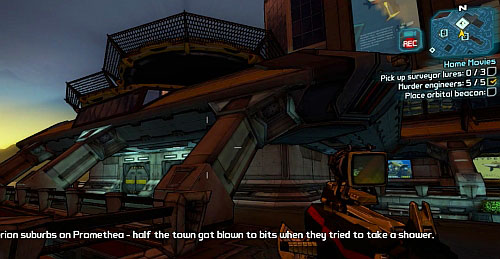
Now you will have to gather three Surveyor Lures. They can be found on the roof of the building [4] which you can access by using the sloped pillars around the building, visible in the above screenshot.
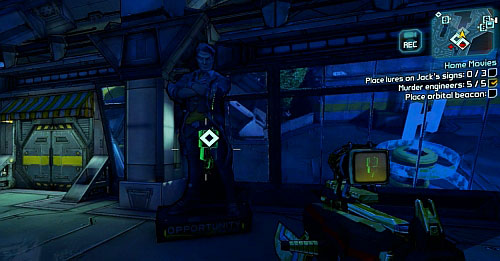
Place the Lures on three cardboard Jacks from the above screenshot. They all can be found nearby [5].
![Now head to the end of the bridge and place the transmitter in the designated place [6] - Home Movies - Sanctuary part 3 - Borderlands 2 - Game Guide and Walkthrough](https://game.lhg100.com/Article/UploadFiles/201512/2015121216591483.jpg)
Now head to the end of the bridge and place the transmitter in the designated place [6]. The crane on the right will be destroyed and a container will fall down beside you. Inside you will find a chest.
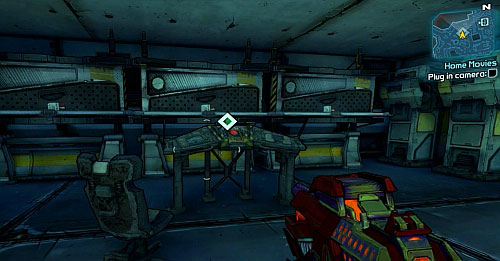
Head to the Co-Opportunity Center. In order to get there, you will have to jump down below the bridge marked as [7]. Inside, kill two Snipers. Install the Camera on the panel and Use the button to upload the files and finish the mission. Return to Sanctuary and speak with Lilith [1] to collect your prize.
You can receive this mission after completing The Once and Future Slab.
1) An Old ECHO Recorder
2) Marcus
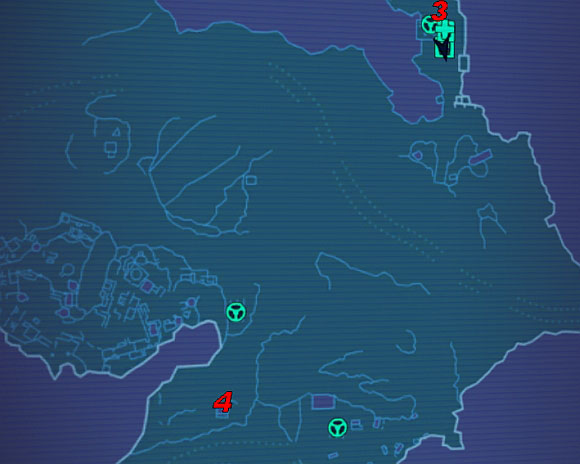
3) Passage north
4) McNally

5) Tunnel
6) Fuse
7) Elevator
8) ECHO Recorder
9) Chest
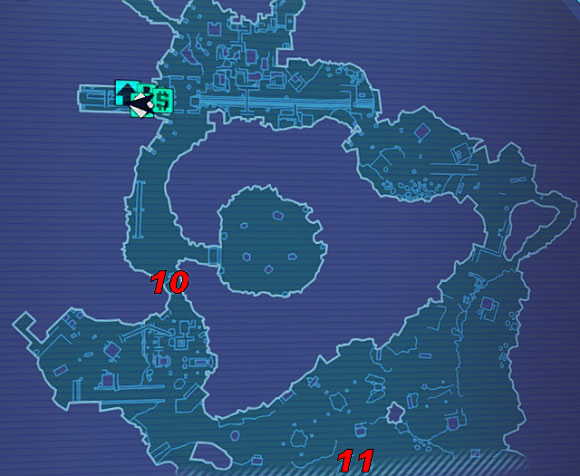
10) Elevator
11) Grave
![To the left from the entrance to Moxxi's place, you will see a dead NPC [1] from the above screenshot - The Bane - Sanctuary part 3 - Borderlands 2 - Game Guide and Walkthrough](https://game.lhg100.com/Article/UploadFiles/201512/2015121216591441.jpg)
To the left from the entrance to Moxxi's place, you will see a dead NPC [1] from the above screenshot. Beside his body, you should find An Old ECHO Recorder. Pick it up, head to Marcus [2] and speak with him. Use Fast Travel and travel to The Dust.
![Head north behind Ellie's garage [3] - The Bane - Sanctuary part 3 - Borderlands 2 - Game Guide and Walkthrough](https://game.lhg100.com/Article/UploadFiles/201512/2015121216591422.jpg)
Head north behind Ellie's garage [3]. There you will find the corpse and ECHO Recorder of Horace. Head back to Ellie and use Catch -a- Ride. Go to McNally's house [4] and eliminate him. By his corpse you will find another ECHO Recorder.
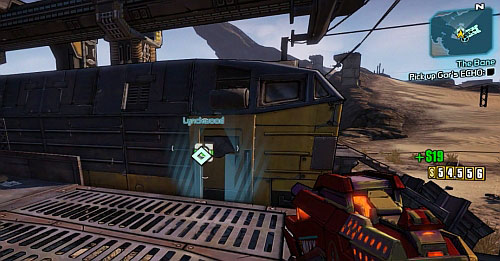
Now head to the western end of the map. On the platform there will be a train, acting as a passage to Lynchwood. Afterwards follow the tunnel to the northern part of the area [5].
![After getting out of the tunnel, on the left you should see the shack from the above screenshot [6], inside of which you have to destroy a fuse box - The Bane - Sanctuary part 3 - Borderlands 2 - Game Guide and Walkthrough](https://game.lhg100.com/Article/UploadFiles/201512/2015121216591525.jpg)
After getting out of the tunnel, on the left you should see the shack from the above screenshot [6], inside of which you have to destroy a fuse box. That way you will open a open a further passage to a chest [9].
![At the end of the next tunnel you will find an elevator (screenshot) [7] which will take you to the upper part of town - The Bane - Sanctuary part 3 - Borderlands 2 - Game Guide and Walkthrough](https://game.lhg100.com/Article/UploadFiles/201512/2015121216591531.jpg)
At the end of the next tunnel you will find an elevator (screenshot) [7] which will take you to the upper part of town.
![Clear the area and head to the building marked as [8] - The Bane - Sanctuary part 3 - Borderlands 2 - Game Guide and Walkthrough](https://game.lhg100.com/Article/UploadFiles/201512/2015121216591511.jpg)
Clear the area and head to the building marked as [8]. On the ground floor you will find the ECHO Recorder. On the same level of the town you will also find a chest in the trunk of a car [9].
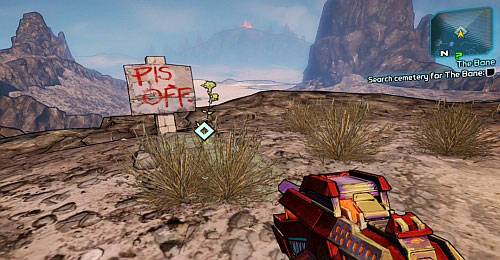
Now head to the southern part of the area. In order to get above, use the elevator marked as number [10]. Head south until you reach a grave [11] from the screenshot. Search it to end the mission.
You can receive this mission after completing The Once and Future Slab.
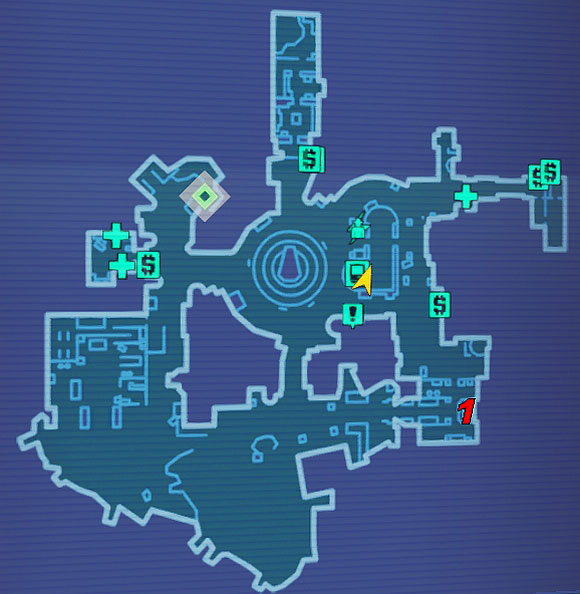
1) Moxxi
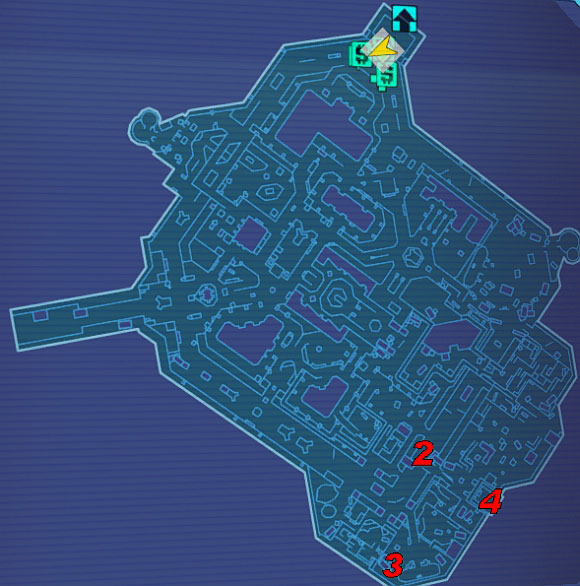
2) Foreman Jasper/Supply key
3) Container
4) Dam
![Speak with Moxxi [1] and travel to Opportunity with the Fast Travel - Hell Hath No Fury - Sanctuary part 3 - Borderlands 2 - Game Guide and Walkthrough](https://game.lhg100.com/Article/UploadFiles/201512/2015121216591589.jpg)
Speak with Moxxi [1] and travel to Opportunity with the Fast Travel. If you haven't activated the device yet, move to The Highlands Hyperion Bridge. Afterwards go to the bridge in the western part of the map, where you will find the passage to Opportunity. There, find and kill Foreman Jasper [2] and pick up the key which he drops.
![Head to the container marked as [3] and open it - Hell Hath No Fury - Sanctuary part 3 - Borderlands 2 - Game Guide and Walkthrough](https://game.lhg100.com/Article/UploadFiles/201512/2015121216591661.jpg)
Head to the container marked as [3] and open it. Inside you will find Foreman's Explosives. On the way to the place where you're supposed to plant it, you will get attacked by a Constructor and Robots.
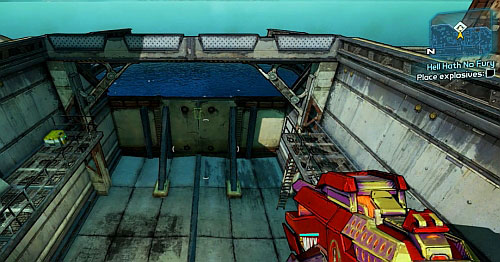
Head below and place the explosive on the dam (you need to jump and quickly press Use). Head up, using the ladder on the right. The charge will soon afterwards explode and water will flood the building site. Return to Sanctuary and speak with Moxxi [1] to finish the mission.
You can receive this mission after completing The Once and Future Slab.

1) Brick
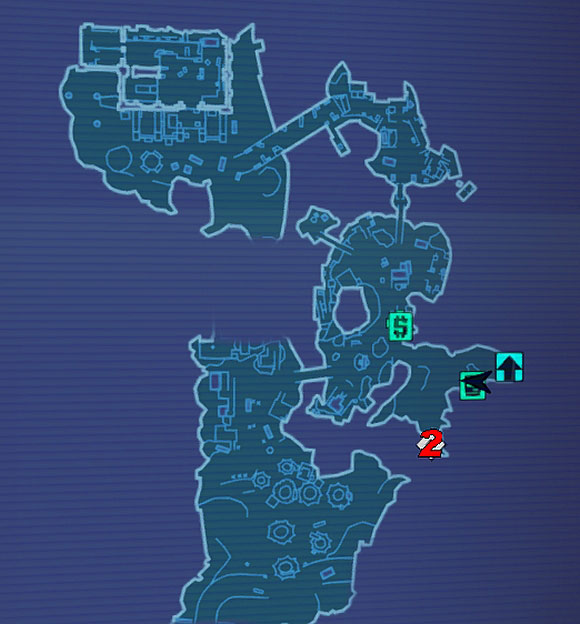
2) Rocko
![Brick [1] will ask you to help out Rocko in Thousand Cuts - Rocko's Modern Strife - Sanctuary part 3 - Borderlands 2 - Game Guide and Walkthrough](https://game.lhg100.com/Article/UploadFiles/201512/2015121216591635.jpg)
Brick [1] will ask you to help out Rocko in Thousand Cuts. Use Fast Travel and head to the meeting point [2]. Speak with him to end the mission.
You can receive this mission after completing Where Angels Fear to Tread.

1) Bounty Board
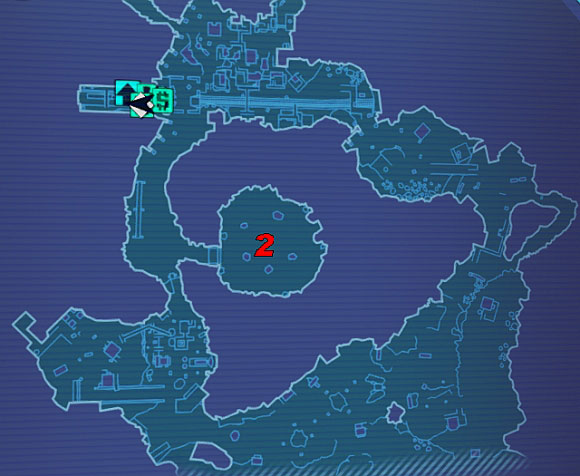
2) Old mine
![Accept the mission from the Board [1] and use Fast Travel to move to Lynchwood - Demon Hunter - Sanctuary part 3 - Borderlands 2 - Game Guide and Walkthrough](https://game.lhg100.com/Article/UploadFiles/201512/2015121216591657.jpg)
Accept the mission from the Board [1] and use Fast Travel to move to Lynchwood. There, head to the old mine [2] using the elevator. below you will be greeted by Dukino's Mom and a couple Bandits. Keep a safe distance so that Dukino's Mom focuses on the Bandits. They however won't keep appearing infinitely, so you have to act fast.
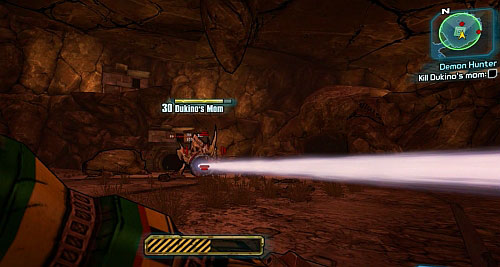
The weak point of the Skag is its head and open mouth when it attacks. Your bullets might just bounce off the rest of its body. Dukino's Mom will attack with energy projectiles which can be easily avoided and a beam which you have to jump over. When the animal will jump into the air, it will create a shock wave which you have to move away from. Corrosive weapons will be handy in this fight, dealing damage regardless of which part of the body you hit.
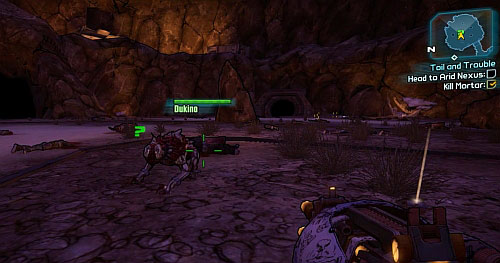
After defeating the overgrown Skag, Dukino will head out of his hideout. Speak to him to finish the mission.
You can receive this mission after completing Where Angels Fear to Tread.
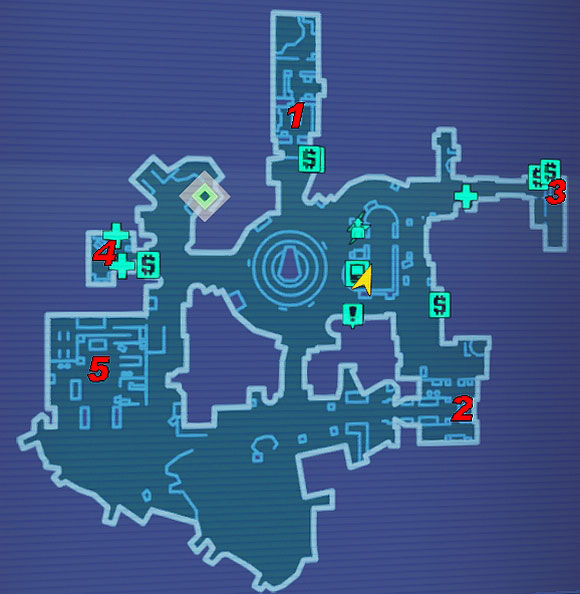
1) Mordecai/Tannis/Brick
2) Moxxi
3) Marcus
4) Zed
5) Scooter
![After speaking with Mordecai [1], you will have to pass on the bad news to Roland's friends - Bearer of Bad News - Sanctuary part 3 - Borderlands 2 - Game Guide and Walkthrough](https://game.lhg100.com/Article/UploadFiles/201512/2015121216591765.jpg)
After speaking with Mordecai [1], you will have to pass on the bad news to Roland's friends. Inform Moxxi [2], Marcus [3], Zed [4], Scooter [5], Tannis [1] and Brick [1] about the death of their friend. After visiting all of them, return to Mordecai [1]. Head to the ground floor, where you will be able to open Roland's weapons stash. Search the chests and return to Mordecai [1] to end the mission.
You can receive this mission after completing Where Angels Fear to Tread.
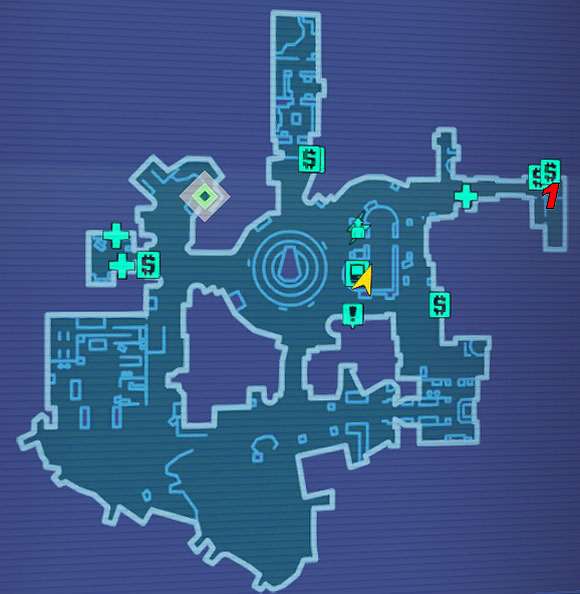
1) Marcus
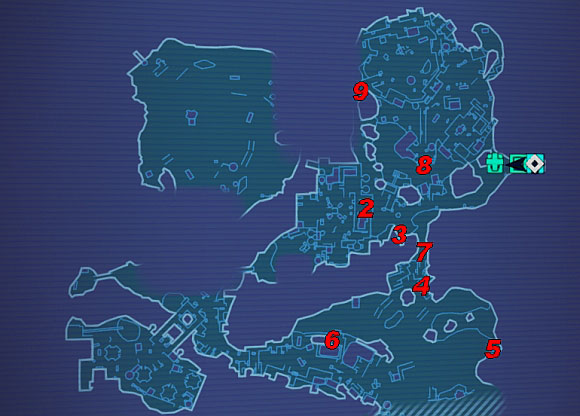
2) ECHO Recorder 1
3) Shortcut
4) ECHO Recorder 2
5) Kai
6) ECHO Recorder 3
Head to Marcus' shop [1] to receive a mission of finding his debtor. Use Fast Travel and move to Sawtooth Cauldron. If you haven't yet activated the device there, travel to The Dust. From there head to Eridium Blight through the passage in the west. In Eridium Blight, in the north-east part of the map, you will find a passage to Sawtooth Cauldron. The first ECHO Recorder can be found in the camp in the upper part of the map [2].
![In order to save time on unnecessary travel, jump into the camp below (screenshot) in the spot marked as [3] - The Chosen One - Sanctuary part 3 - Borderlands 2 - Game Guide and Walkthrough](https://game.lhg100.com/Article/UploadFiles/201512/2015121216591762.jpg)
In order to save time on unnecessary travel, jump into the camp below (screenshot) in the spot marked as [3]. Below, on one of the chests you will find another ECHO Recorder [4].
![Inside the container marked as [5] you will find the corpse of Kai - The Chosen One - Sanctuary part 3 - Borderlands 2 - Game Guide and Walkthrough](https://game.lhg100.com/Article/UploadFiles/201512/2015121216591703.jpg)
Inside the container marked as [5] you will find the corpse of Kai. If you want to receive additional experience points for finding three ECHO Recorders, you will firstly have to head to the spot marked as [6] for the last recording. After finding the body, return to Marcus [1] to end the mission. the way back to the Fast Travel lead through passages [7] and [8], underground or along a road up [9]. That way you will find yourself in the camp where you collected the first recording [2].
You can receive this mission after completing Where Angels Fear to Tread.

1) Brick
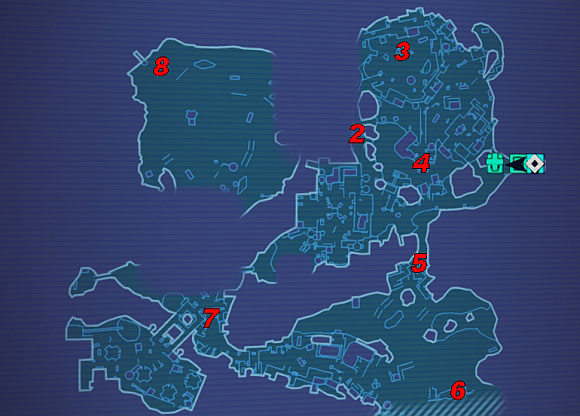
2) Path
3) Bandit camp/Generator
4) Tunnel entrance
5) Tunnel exit
6) Generator 2
7) Bandit camp 2
8) Generator 3
![Brick [1] will give you a mission of capturing three flags of the rival gang - Capture the Flags - Sanctuary part 3 - Borderlands 2 - Game Guide and Walkthrough](https://game.lhg100.com/Article/UploadFiles/201512/2015121216591826.jpg)
Brick [1] will give you a mission of capturing three flags of the rival gang. Use Fast Travel and move to Sawtooth Cauldron. If you haven't yet activated the device, head to The Dust and to Eridium Blight through the passage in the west. In Eridium Blight, in the north-east part of the map, you will find a passage to Sawtooth Cauldron. When you get to the right place, head down into the camp below [3] by following the path marked as [2]. There you will find the device from the above screenshot. Place the flag in the marked spot and Use the lever on the generator.
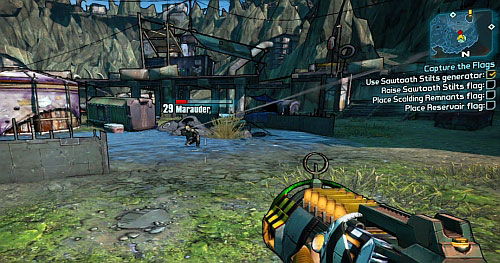
The flag will start raising and you will have to protect the generator from incoming Bandits. If the generator gets damaged, Use the lever once again. If you don't kill enemies in a given group, the next one won't appear. Therefore it's worth to keep a single Bandit alive and avoid his attacks. With the flag raised, destroy the generator.
![Go through the underground passage number [4] (entrance) and [5] (exit) - Capture the Flags - Sanctuary part 3 - Borderlands 2 - Game Guide and Walkthrough](https://game.lhg100.com/Article/UploadFiles/201512/2015121216591880.jpg)
Go through the underground passage number [4] (entrance) and [5] (exit). Run to the next generator [6], place the flag and turn on the power. Once again you will have to fight off the Bandits (including airborne ones). You can retreat to a safe distance and assuming everything goes right, the Bandits will be busy with the local Threshers and not the generator. Remember about turning the power back on should the generator get damaged and stop raising the flag. With the flag raised, destroy the generator.
![The last flag has to be placed in the north-west part of the map [8] - Capture the Flags - Sanctuary part 3 - Borderlands 2 - Game Guide and Walkthrough](https://game.lhg100.com/Article/UploadFiles/201512/2015121216591872.jpg)
The last flag has to be placed in the north-west part of the map [8]. You can get there through the camp marked as [7]. Beside the generator, you have to repeat the whole process with placing the flag on the top. When you're done with that, destroy the generator. Return to Brick [1] in Sanctuary and collect the prize.
You can receive this mission after completing Where Angels Fear to Tread.
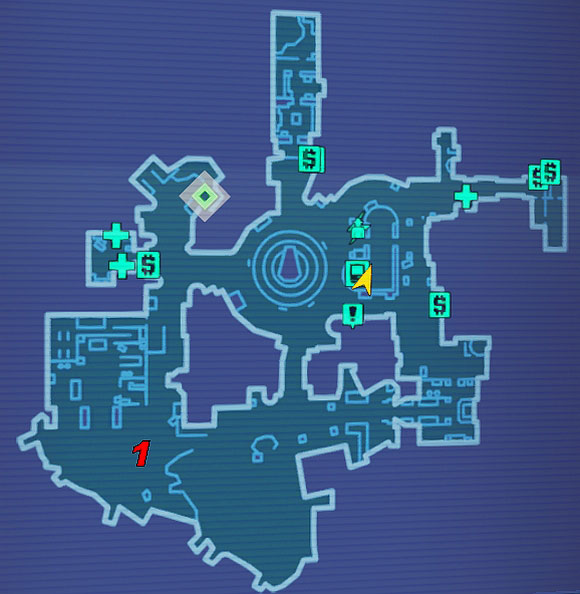
Sanctuary
1) Sam Matthews
![In front of Scooter's garage you will see four NPCs aiming at each other [1] - BFF's - Sanctuary part 3 - Borderlands 2 - Game Guide and Walkthrough](https://game.lhg100.com/Article/UploadFiles/201512/2015121216591842.jpg)
In front of Scooter's garage you will see four NPCs aiming at each other [1]. Accept the mission of determining who's the thief from Sam. Talk with all the NPCs for additional experience points. It however won't give you any substantial evidence. Aim at any NPC and shoot at him/her (I'd recommend Jim). Afterwards finish the mission at Sam.
You can receive this mission after completing Where Angels Fear to Tread.
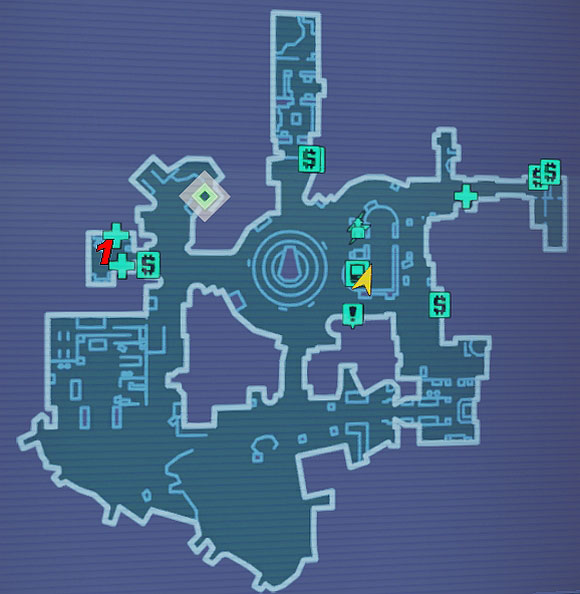
1) Zed
2) Spiderant nests
3) Skag group 1
4) Skag group 2
5) Skrakk nests
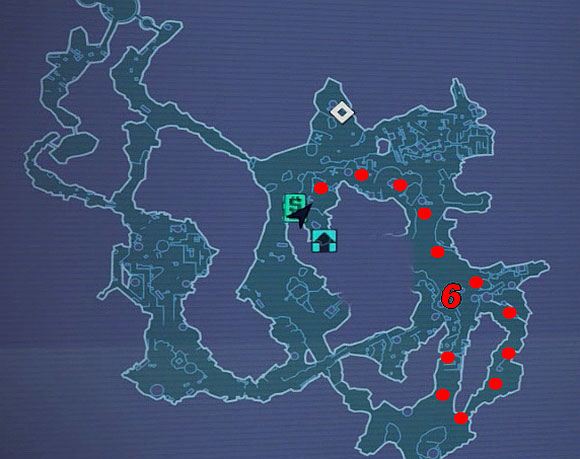
6) Spycho
![Zed [1] will order you to collect parts of bodies of certain animals inhabiting Pandora - Monster Mash (Part 1, 2, 3) - Sanctuary part 3 - Borderlands 2 - Game Guide and Walkthrough](https://game.lhg100.com/Article/UploadFiles/201512/2015121216591922.jpg)
Zed [1] will order you to collect parts of bodies of certain animals inhabiting Pandora. Start off by travelling to The Dust by using Fast Travel. Head north behind Ellie's garage to find the passage to Spiderant nests [2]. Keep killing them until they drop four Spiderant Parts which you need to take to Zed [1].
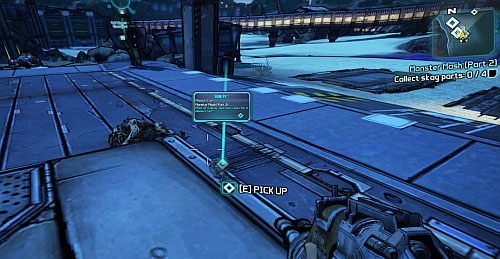
In the second part of this mission you will have to head to Arid Nexus Boneyard. If you haven't activated Fast Travel there, move to Eridium Blight and in the south-east part of the map, look for a bridge leading to Arid Nexus (you still need to complete Toil and Trouble to gain access to this passage). After getting there, right to the left of the passage [3] you should see a group of Skags. If you're lucky enough, you might get the required amount of Skag Parts from this group alone. If not, head to the next spot where Skags can be found [4].
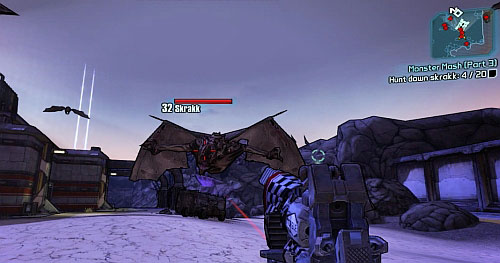
After ending this part of the mission and accepting the next one, you will have to once again return to Arid Nexus Boneyard. Your objective will be killing twenty Skrakks which will start attacking you as you approach the area marked as [5].
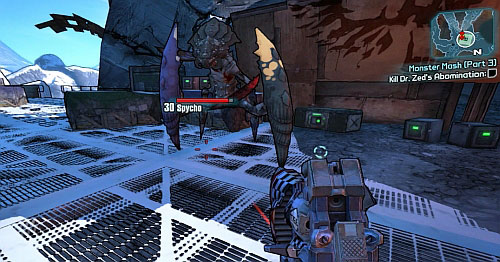
After completing this task, return to Fast Travel and move to Frostburn Canyon. Follow the dots on the map from Fast Travel to the destination point [6]. Here you will have to face Spycho. Look out for the shock wave that it can create after raising its limbs. The creature is very resistant to Corrosive type attacks. After defeating the enemy, you can return to Zed [1] to collect your prize.
You can receive this mission after completing Toil and Trouble.

1) Mordecai
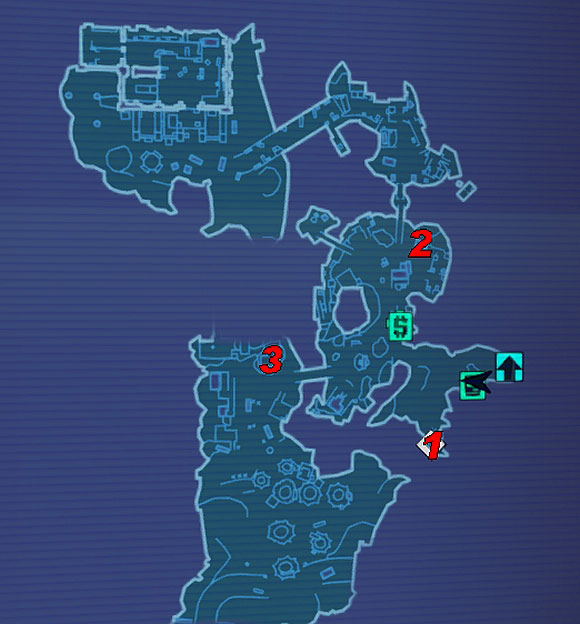
2) Radio station
![Accept the mission from Mordecai [1] in Sanctuary and use Fast Travel to move to Arid Nexus Boneyard - This Just In - Sanctuary part 3 - Borderlands 2 - Game Guide and Walkthrough](https://game.lhg100.com/Article/UploadFiles/201512/2015121216592079.jpg)
Accept the mission from Mordecai [1] in Sanctuary and use Fast Travel to move to Arid Nexus Boneyard. Approach the [2] radio station and use the elevator from the screenshot to get higher (Use the lever).
Above, open the door on the right or left side on the small building. Inside you will find Hunter Hellquist which you have to kill. During the fight Hunter will also receive support in the form of a couple Robots. After eliminating the Hunter, return to Mordecai [1] to end the mission and collect your prize.
You can receive this mission after completing Rocko's Modern Strife.
1) Rocko
2) Slab Beacons
3) Turret
![Speak with Rock [1] and head to the container by which you will find three Slab Beacons [2] - Defend Slab Tower - Thousand Cuts - Borderlands 2 - Game Guide and Walkthrough](https://game.lhg100.com/Article/UploadFiles/201512/2015121216592076.jpg)
Speak with Rock [1] and head to the container by which you will find three Slab Beacons [2]. Pick them up and place in the designated spots. Each Beacon is a line of defence, by which you will receive Bandit support.
![After placing the last Beacon, quickly head onto the roof of the building where the turret is mounted [3] - Defend Slab Tower - Thousand Cuts - Borderlands 2 - Game Guide and Walkthrough](https://game.lhg100.com/Article/UploadFiles/201512/2015121216592040.jpg)
After placing the last Beacon, quickly head onto the roof of the building where the turret is mounted [3]. On the field before you, increasingly powerful waves of Robots will appear. You can't let them reach the container [2].
As mentioned above, you will be aided by Bandits, including a Goliath. If his helmet gets destroyed, he will become furious and level up each time he kills an enemy. Let him continue his killing spree, as he'll be a very powerful ally. Just remember to stay out of his way.
If the turret gets destroyed or one of the defence lines broken, continue destroying the Robots on foot. With the end of the assault, return to the [2] and press Use (by default E) on it. That way you will end the mission and collect your prize.
You can receive this mission during your first visit in Thousand Cuts.
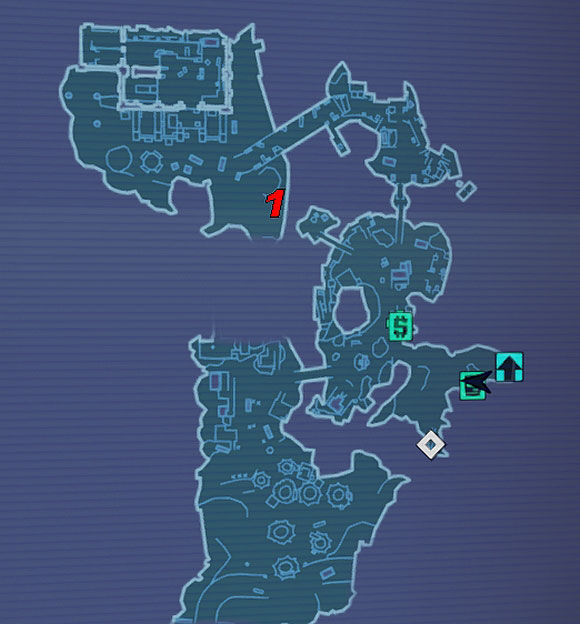
1) McShooty
![Find McShooty [1] and accept his mission - Shoot This Guy in the Face - Thousand Cuts - Borderlands 2 - Game Guide and Walkthrough](https://game.lhg100.com/Article/UploadFiles/201512/2015121216592177.jpg)
Find McShooty [1] and accept his mission. As the name itself suggests, aim at his face and shoot him. Congratulations, you have completed the mission. You can get your prize from McShooty's corpse.
You can receive this mission after your first visit in Lynchwood, during The Bane.
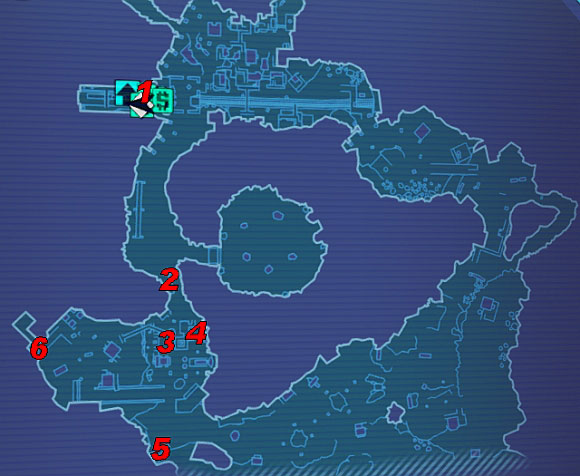
1) Bounty Board
2) Refinery
3) Lever
4) Explosive train car
5) Rail tracks
6) Detonator
![Use the Bounty Board [1] to receive this mission and head to the refinery [3] - 3:10 to Kaboom - Lynchwood - Borderlands 2 - Game Guide and Walkthrough](https://game.lhg100.com/Article/UploadFiles/201512/2015121216592151.jpg)
Use the Bounty Board [1] to receive this mission and head to the refinery [3]. In order to get there, you will have to use the elevator [2]. A timer will start counting and you will have five minutes to complete all the tasks. Start from Using the lever from the above screenshot.
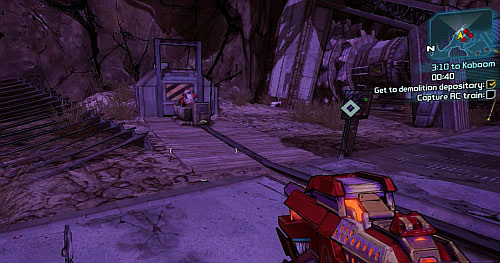
Afterwards press the button behind your back. Eventually a car with an explosive charge from the above screenshot will arrive [4]. Take it.
![With the explosive, head to the rail track marked as [5] - 3:10 to Kaboom - Lynchwood - Borderlands 2 - Game Guide and Walkthrough](https://game.lhg100.com/Article/UploadFiles/201512/2015121216592189.jpg)
With the explosive, head to the rail track marked as [5]. Place the explosive in the designated place and run to the detonator [6]. Wait for the car with the explosive to be below the train (square) and detonate it. Now you can return to the Board [1] and end the mission.
You can receive this mission during your first visit in Lynchwood, during The Bane.
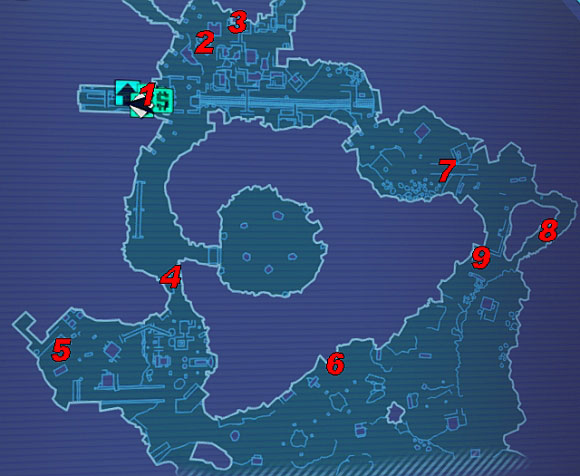
1) Bounty Board
2) Bank
3) The building from which you can access Laxative
4) Elevator
5) Mad Dog
6) Cave
7) Hideout 1
8) Hideout 2
9) Hideout 3
![Approach the Bounty Board [1] and accept the mission - Breaking the Bank - Lynchwood - Borderlands 2 - Game Guide and Walkthrough](https://game.lhg100.com/Article/UploadFiles/201512/2015121216592146.jpg)
Approach the Bounty Board [1] and accept the mission. Find the bank [2] and try opening the door from the above screenshot.
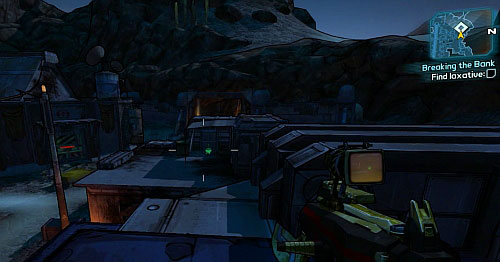
On the roof of the building opposite to the bank you will find the Laxative. In order to get there, jump there from the roof of the building marked as [3]. The item itself can be found in the toilet.
![The next part you need are explosives which can get them by killing Mad Dog [5] - Breaking the Bank - Lynchwood - Borderlands 2 - Game Guide and Walkthrough](https://game.lhg100.com/Article/UploadFiles/201512/2015121216592194.jpg)
The next part you need are explosives which can get them by killing Mad Dog [5]. In order to reach him, use the elevator [4].
![Go through the cave [6] - Breaking the Bank - Lynchwood - Borderlands 2 - Game Guide and Walkthrough](https://game.lhg100.com/Article/UploadFiles/201512/2015121216592271.jpg)
Go through the cave [6]. Place the explosive in the designated spot and pour Lexative onto it. Soon afterwards a Skag will head out of the cave and eat it. Follow the Skag and check whatever it "returns" to find the bomb.
![Now return to the bank [2] and plant the explosive on the door - Breaking the Bank - Lynchwood - Borderlands 2 - Game Guide and Walkthrough](https://game.lhg100.com/Article/UploadFiles/201512/2015121216592219.jpg)
Now return to the bank [2] and plant the explosive on the door. Detonate it and you will be attacked by enemies. With the door destroyed, head inside and search all the stashes (25 in total).
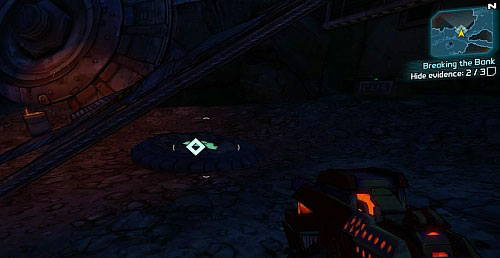
After robbing the bank, you will have to hide your loot. The first place can be found below the conveyor belt [7]. The second is inside the cave [8] and the last one behind a piece of steel from the above screenshot. Now return to the Board [1] to finish the mission.
You can receive this mission after completing 3:10 to Kaboom and Breaking the Bank.
1) Bounty Board
2) Sheriff office
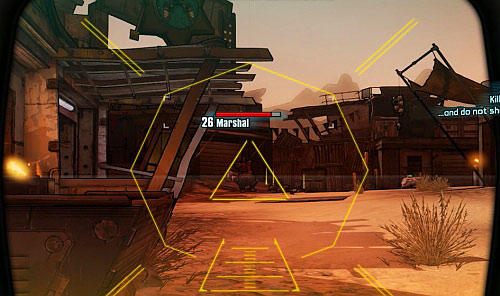
It's time to fight the Sheriff of Lynchwood himself. Accept the mission [1] and head to where the fight will take place [2], in the northern part of the map. After you get there, the Sheriff's minions will appear. You will be shot at from the ground as well as roofs of the nearby buildings. It's worth to back out a bit and eliminate the enemies from a safe distance.
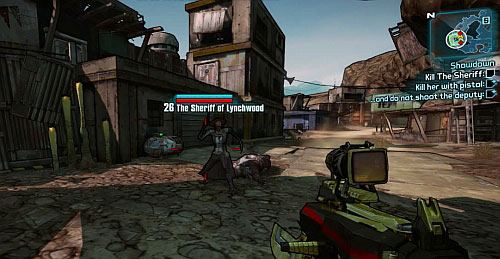
With all the Marshals killed, the Sheriff himself will attack you. He'll be at the roof of a building for some time, so just wait in a safe spot for him to come down to you. You can once again retreat to a safe place and eliminate the Sheriff by using a scoped weapon.
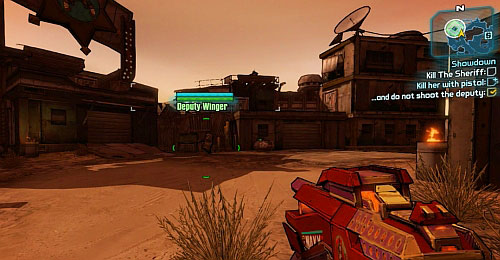
In order to gain additional experience, you would have to kill the Sheriff with a pistol and avoid shooting his Deputy shown in the above screenshot. After the fight, return to the Board [1] to end the mission.
You can receive this mission during your first visit in Lynchwood, during The Bane.
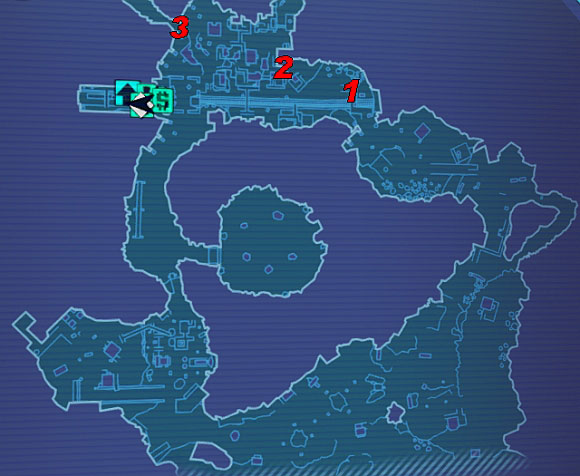
1) Dukino
2) Medicine
3) Tunnel to the northern part of Lynchwood
![In the spot marked as [1] on the map you will find a sleeping Skag Dukino - Animal Rescue: Medicine - Lynchwood - Borderlands 2 - Game Guide and Walkthrough](https://game.lhg100.com/Article/UploadFiles/201512/2015121216592240.jpg)
In the spot marked as [1] on the map you will find a sleeping Skag Dukino. Approach it and destroy his chain with a melee attack (by default V).
![Now you need to obtain the Medicine which can be found on the roof of the building [2] - Animal Rescue: Medicine - Lynchwood - Borderlands 2 - Game Guide and Walkthrough](https://game.lhg100.com/Article/UploadFiles/201512/2015121216592362.jpg)
Now you need to obtain the Medicine which can be found on the roof of the building [2]. In order to get there, head onto the roof of the building to the left of the roof with the medicine (stairs can also be found on the left side of the building). Head to the other end, following the ledge on the right wall. You will eventually reach a tank from which you can easily jump to the Medicine. Place the medicine in the designated place, beside Dukino's kennel.
![The next stage of curing the animal is collecting five Skags on a Stick which can be found in the northern part of Lynchwood (passage marked as [3]) - Animal Rescue: Medicine - Lynchwood - Borderlands 2 - Game Guide and Walkthrough](https://game.lhg100.com/Article/UploadFiles/201512/2015121216592358.jpg)
The next stage of curing the animal is collecting five Skags on a Stick which can be found in the northern part of Lynchwood (passage marked as [3]). After finding all the items, return to Dukino [1] and throw in the food from the left of the kennel.
You can receive this mission after completing Animal Rescue: Medicine.
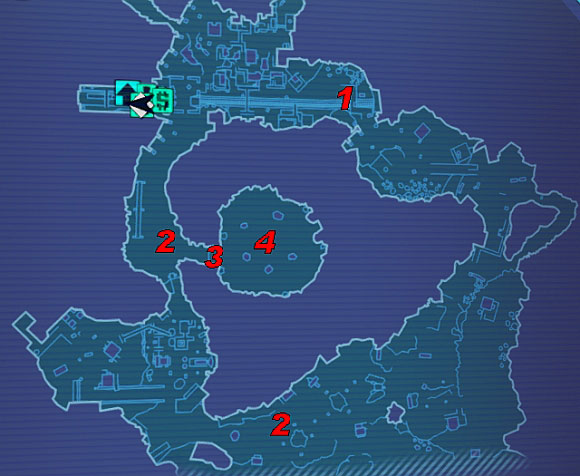
1) Dukino
2) Skag area
3) Elevator
4) Old mine
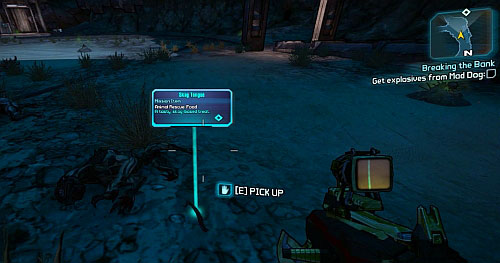
Your task will be collecting five Skag Tongues. They can be collected from the corpses of killed Skags which you can come across in the area marked as [2]. After you collect enough of them, return to Dukino [1]. Place the food in the designated place and end Food to begin Shelter.
![After accepting the mission [1], follow Dukino towards the old mine [4] - Animal Rescue: Food, Shelter - Lynchwood - Borderlands 2 - Game Guide and Walkthrough](https://game.lhg100.com/Article/UploadFiles/201512/2015121216592326.jpg)
After accepting the mission [1], follow Dukino towards the old mine [4]. Ride the elevator down [3] to the cave. Here you will have to face a big group of Bandits. Eliminate them all and approach Dukino to end the mission.
You can receive this mission during your first visit in Opportunity.
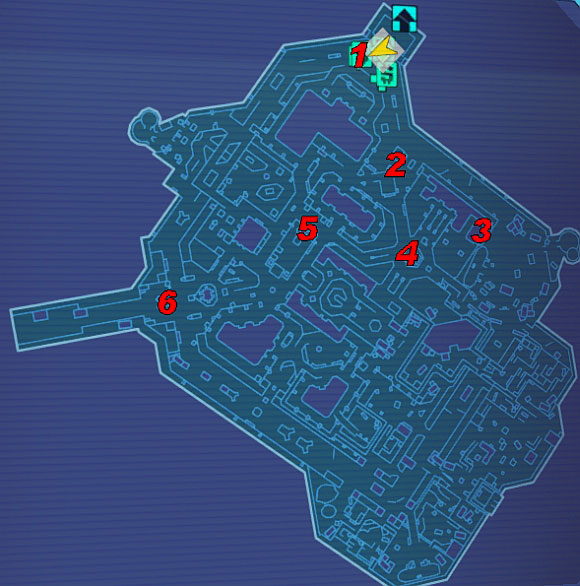
1) Bounty Board
2) Statue 1
3) Overseer
4) Statue 2
5) Statue 3
6) Statue 4
![Accept the mission [1], head to the first statue [2] and shoot at it - Statuesque - Opportunity - Borderlands 2 - Game Guide and Walkthrough](https://game.lhg100.com/Article/UploadFiles/201512/2015121216592323.jpg)
Accept the mission [1], head to the first statue [2] and shoot at it. After a few shoots, Claptrap will suggest using the Overseer.
![The robot can be found in the hangar [3] - Statuesque - Opportunity - Borderlands 2 - Game Guide and Walkthrough](https://game.lhg100.com/Article/UploadFiles/201512/2015121216592374.jpg)
The robot can be found in the hangar [3]. Approach it and activate with the button on the right side. Afterwards follow him while protecting him from the attack of Robots and Hyperion Soldiers, including a Badass Constructor.
![As you return to the first statue [2] the Overseer will start destroying it and you will once again be attacked by a big group of enemies - Statuesque - Opportunity - Borderlands 2 - Game Guide and Walkthrough](https://game.lhg100.com/Article/UploadFiles/201512/2015121216592417.jpg)
As you return to the first statue [2] the Overseer will start destroying it and you will once again be attacked by a big group of enemies. Eliminate all of them and the Overseer will start heading to the next statue [4], where the whole process will repeat itself. However at the end you will be attacked by a Constructor.
![By the next statue [5] there will be even more enemies, including a Super Badass Loader - Statuesque - Opportunity - Borderlands 2 - Game Guide and Walkthrough](https://game.lhg100.com/Article/UploadFiles/201512/2015121216592467.jpg)
By the next statue [5] there will be even more enemies, including a Super Badass Loader. The last one [6] will once again include a fight with a Constructor. If you manage to protect the Overseer and destroy all the Robots, approach it and once again press the button on its side. Wait for the robot to explode. Now you will have to return to Claptrap in Sanctuary to end the mission. Additional experience point can be gained if the Overseer will have above 50% health left after destroying all the statues.
You can receive this mission during your first visit in Opportunity.
1) Mission activation
![Use the button shown in the screenshot [1] to begin the mission - Written by the Victor - Opportunity - Borderlands 2 - Game Guide and Walkthrough](https://game.lhg100.com/Article/UploadFiles/201512/2015121216592484.jpg)
Use the button shown in the screenshot [1] to begin the mission. Around you there are five more buttons which you have to use. Listen to the history of Jack and Hyperion in the following points to end the mission.
You can receive this mission during your first visit in Eridium Blight during Toil and Trouble.

1) Bounty Board
2) Mailbox 1
3) Mailbox 2
4) Mailbox 3
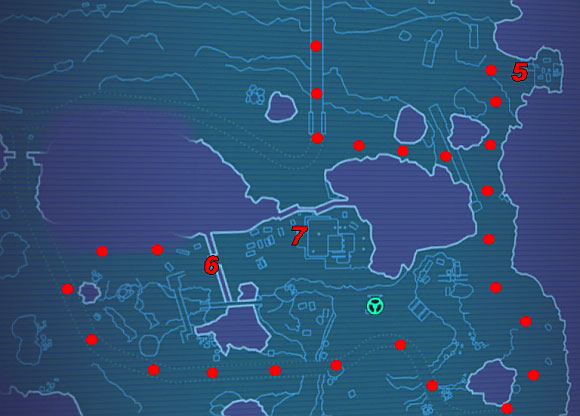
5) Mailbox 4
6) Gate
7) Mailbox 5
![Approach the Board [1] and accept the mission of retrieving Marcus's money - Customer Service - Eridium Blight - Borderlands 2 - Game Guide and Walkthrough](https://game.lhg100.com/Article/UploadFiles/201512/2015121216592428.jpg)
Approach the Board [1] and accept the mission of retrieving Marcus's money. You will have to collect letters from five mailboxes within a limited time of 5 minutes. The timer will start when you pick up the first one. The road between each package has been marked on the map, so drive from point to point according to the order.
![In order to reach [7], stand in front of the gate from the above screenshot [6] and wait for it to open, with the car waiting outside - Customer Service - Eridium Blight - Borderlands 2 - Game Guide and Walkthrough](https://game.lhg100.com/Article/UploadFiles/201512/2015121216592413.jpg)
In order to reach [7], stand in front of the gate from the above screenshot [6] and wait for it to open, with the car waiting outside. Picking up each letter ads some time to the counter, so you shouldn't have problems with making it in time. After collecting the last letter, you can return to the Board to end the mission.
You can receive this mission during your first visit in Eridium Blight during Toil and Trouble.
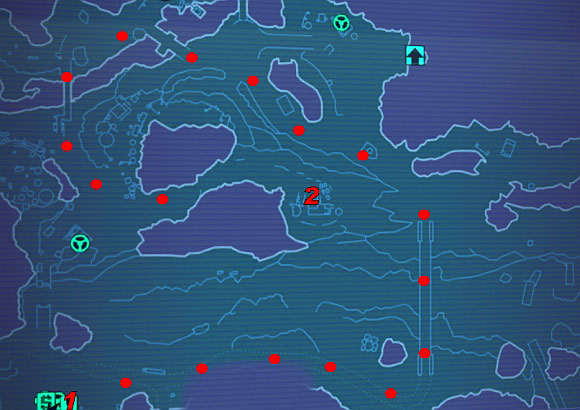
1) Bounty Board
2) House
![Take on the mission [1] at the Board - To Grandmother's House We Go - Eridium Blight - Borderlands 2 - Game Guide and Walkthrough](https://game.lhg100.com/Article/UploadFiles/201512/2015121216592538.jpg)
Take on the mission [1] at the Board. The road to the house is marked with dots on the map. After getting there, collect five Flowers on your way to [2] to receive additional experience points.
![Reaching the house [2] will result in being attacked by a group of Bandits - To Grandmother's House We Go - Eridium Blight - Borderlands 2 - Game Guide and Walkthrough](https://game.lhg100.com/Article/UploadFiles/201512/2015121216592535.jpg)
Reaching the house [2] will result in being attacked by a group of Bandits. Kill all the enemies and enter the building (though the entrance on the other side). Inside the room you will find only a Goliath. Get rid of him and pick up Grandma's Buzz Axe from the bed. Return to the Board [1] to collect your prize.
You can receive this mission during your first visit in Eridium Blight during Toil and Trouble.
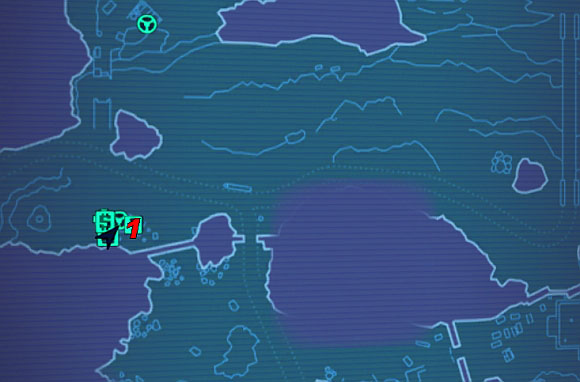
1) Bounty Board
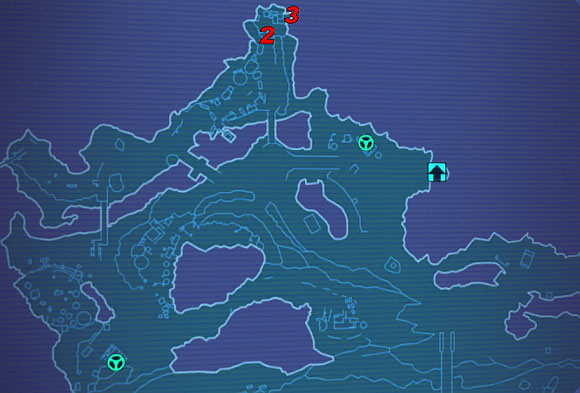
2) Ladder
3) Precipice
![On the Board [1] you will find a rather untypical mission during which you have to kill yourself (or not) - Kill Yourself - Eridium Blight - Borderlands 2 - Game Guide and Walkthrough](https://game.lhg100.com/Article/UploadFiles/201512/2015121216592599.jpg)
On the Board [1] you will find a rather untypical mission during which you have to kill yourself (or not). Head to Lover's Leap and climb up the ladder [2]. Now you can choose between jumping into the abyss [3] or using the crisis counselling shown in the screenshot. Regardless of your choice, you can return to the Bounty Board [1] to end the mission.
You can receive this mission during your first visit in Eridium Blight during Toil and Trouble.
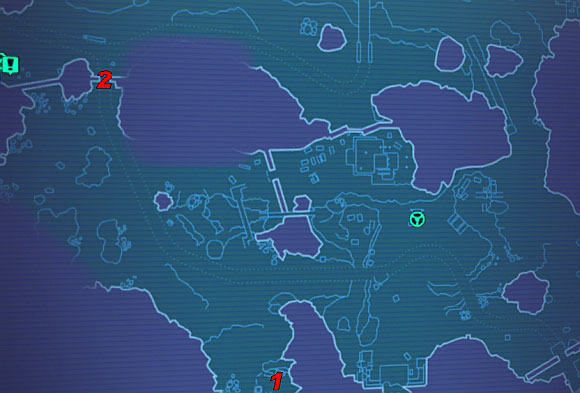
1) Mal
2) Gate
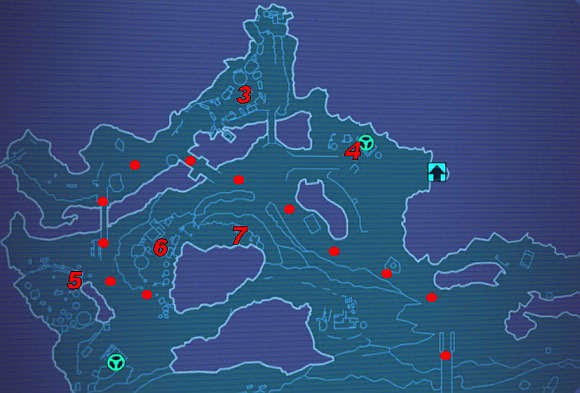
3) Bandit camp 1
4) Bandit camp 2
5) Bandit camp 3
6) Bandit camp 4
7) Bandit camp 5
![Mal [1] wants to become a human and you will have to help him accomplish this - A Real Boy: Clothes Make the Man, Face Time, Human - Eridium Blight - Borderlands 2 - Game Guide and Walkthrough](https://game.lhg100.com/Article/UploadFiles/201512/2015121216592568.jpg)
Mal [1] wants to become a human and you will have to help him accomplish this. Drive north to the Bandit camp [3]. The gate marked as [2] will open up if you drive near enough and wait a bit. Inside the camp, start killing Bandits. They will randomly drop clothes which you need. After getting a whole set, return to Mal [1] to end this part of the mission.
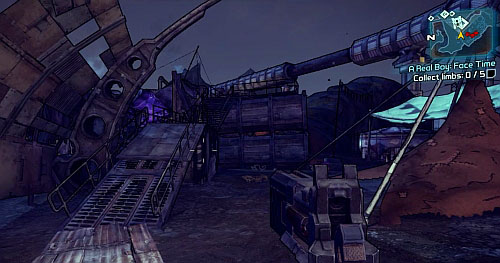
Now you will have to collect four limbs and a mask. Pay a visit to five Bandit camps [3], [4], [5], [6], [7] in which you can find the items you're looking for. In camp [5], go up the stairs shown in the screenshot to find the Right Arm.
![The road to camps [6] and [7] is marked with red dots - A Real Boy: Clothes Make the Man, Face Time, Human - Eridium Blight - Borderlands 2 - Game Guide and Walkthrough](https://game.lhg100.com/Article/UploadFiles/201512/2015121216592640.jpg)
The road to camps [6] and [7] is marked with red dots. When going for the Right Leg [7], you will be attacked by a big group of Robots. You can quickly pick up the item and just run away or stay and fight. After collecting all the items, return to Mal [1].
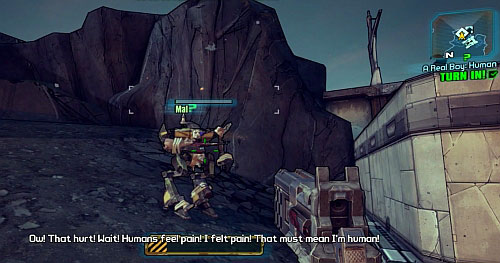
The last thing to do is fight with Mal. After reducing his life to 10%, you will be able to end the mission and collect your prize.
You can receive this mission during your first visit in Sawtooth Cauldron.
1) Passage
2) ECHO Recorder
3) Bandits camps

4) Lever 1
5) Lever 2
6) Lever 3
7) Lever 4
8) Elevator
9) Lever/Chest
![In the upper part of the camp you will find a cardboard box with an ECHO Recorder inside [2] - The Lost Treasure - Sawtooth Cauldron - Borderlands 2 - Game Guide and Walkthrough](https://game.lhg100.com/Article/UploadFiles/201512/2015121216592682.jpg)
In the upper part of the camp you will find a cardboard box with an ECHO Recorder inside [2]. In order to reach it, use the path marked as [1]. Listen to the recording and start killing Bandits in the nearby camps [3]. Your task is collecting four map parts (Treasure Clue) which can be randomly dropped by enemies.
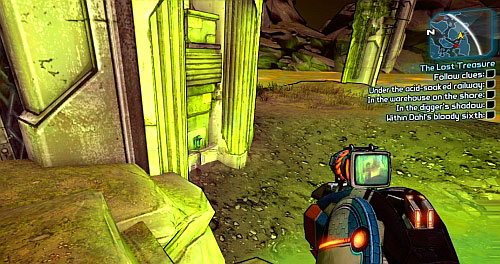
After collecting enough Clues, return to Fast Travel and travel to Caustic Caverns. Here you will have to Use four levers by following the collected clues. The first one is on the right side of the pillar (screenshot) [4].
![The second one in on the shore, on the right side of the room full of Varkid nests [5] - The Lost Treasure - Sawtooth Cauldron - Borderlands 2 - Game Guide and Walkthrough](https://game.lhg100.com/Article/UploadFiles/201512/2015121216592613.jpg)
The second one in on the shore, on the right side of the room full of Varkid nests [5].
![The next one can be found below a large excavator [6] - The Lost Treasure - Sawtooth Cauldron - Borderlands 2 - Game Guide and Walkthrough](https://game.lhg100.com/Article/UploadFiles/201512/2015121216592665.jpg)
The next one can be found below a large excavator [6].
![The last one is in the building marked as [7] - The Lost Treasure - Sawtooth Cauldron - Borderlands 2 - Game Guide and Walkthrough](https://game.lhg100.com/Article/UploadFiles/201512/2015121216592681.jpg)
The last one is in the building marked as [7]. The entrance can be found in its western part.
![After using all the levers, you will be granted access to the elevator [8] - The Lost Treasure - Sawtooth Cauldron - Borderlands 2 - Game Guide and Walkthrough](https://game.lhg100.com/Article/UploadFiles/201512/2015121216592789.jpg)
After using all the levers, you will be granted access to the elevator [8]. Use it (the lever's on the right).
![Above, follow the only possible path which will take you to the next lever [9], using which will end the mission - The Lost Treasure - Sawtooth Cauldron - Borderlands 2 - Game Guide and Walkthrough](https://game.lhg100.com/Article/UploadFiles/201512/2015121216592759.jpg)
Above, follow the only possible path which will take you to the next lever [9], using which will end the mission. In the middle of the platform, in front of the lever a chest will appear. Be sure to search it.
You can receive this mission after gaining access to the elevator leading to the roof of the construction, during Toil and Trouble.
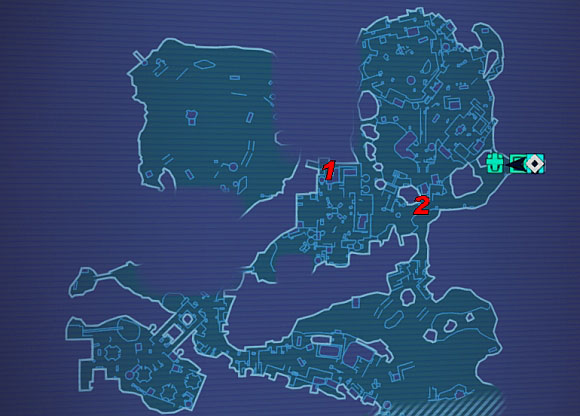
1) Ulysses
2) Hyperion Beacon
![Ride the elevator up to the roof, where you will find Ulysses [1] - The Great Escape - Sawtooth Cauldron - Borderlands 2 - Game Guide and Walkthrough](https://game.lhg100.com/Article/UploadFiles/201512/2015121216592794.jpg)
Ride the elevator up to the roof, where you will find Ulysses [1]. You will have to retrieve a beacon using which Ulysses will be able to leave Pandora. Head back to the lower level and right beside the elevator, on the right, you will see the above building. On its roof there's Frederick the Fish who will grant you additional experience.
![Head to the spot marked as [2] and head down the ladder shown in the screenshot - The Great Escape - Sawtooth Cauldron - Borderlands 2 - Game Guide and Walkthrough](https://game.lhg100.com/Article/UploadFiles/201512/2015121216592775.jpg)
Head to the spot marked as [2] and head down the ladder shown in the screenshot. Below there will be another ladder, use it as well. Pick up the Hyperion Beacon and return to Ulysses [1]. Place the beacon in the designated place beside Ulysses and speak to him to end the mission.
You can receive this mission during your first visit in Arid Nexus Badlands, as part of Data Mining.
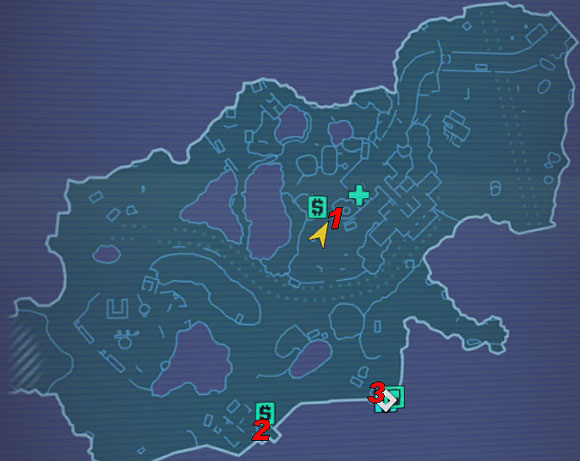
1) Bounty Board/Una Baha mailbox
2) Tedd's house
3) Hyperion mailbox
![Accept the mission from the Bounty Board [1] and head to where Tedd lives [2] - Uncle Teddy - Arid Nexus Badlands - Borderlands 2 - Game Guide and Walkthrough](https://game.lhg100.com/Article/UploadFiles/201512/2015121216592767.jpg)
Accept the mission from the Bounty Board [1] and head to where Tedd lives [2]. Head inside and pull the fan chain shown in the screenshot. That way you will open a descent to the secret room below the building.
Below, start searching all the lockers and boxes. In chosen lockers, you will find six ECHO Recorders. After finding all of them, approach the Vending Machine. Pull the lever on the left (screenshot) and take TK's Blueprint from the Machine. Now you will have two options: you can either throw the weapon plans into Hyperion's [3] (in return for a shotgun) or to Una Baha's box [1] (you'll get a pistol).
You can receive this mission during your first visit in Arid Nexus Badlands, as part of Data Mining.
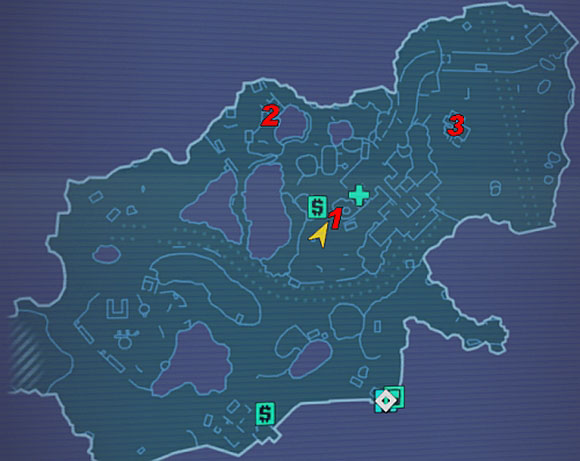
1) Bounty Board
2) ECHO Journal 1
3) ECHO Journal 2
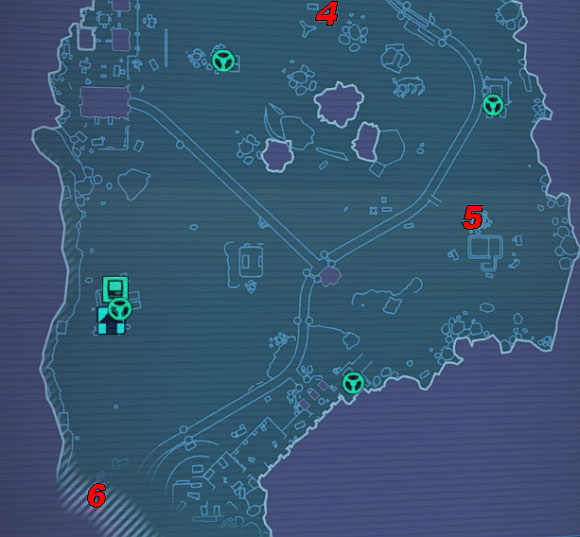
4) ECHO Journal 5
5) ECHO Journal 3
6) ECHO Journal 4
![From the Bounty Board [1] you will receive a mission of collecting five Jack's ECHO Journals - Get to Know Jack - Arid Nexus Badlands - Borderlands 2 - Game Guide and Walkthrough](https://game.lhg100.com/Article/UploadFiles/201512/2015121216592875.jpg)
From the Bounty Board [1] you will receive a mission of collecting five Jack's ECHO Journals. The first one is in the building marked as [2], on a shelf. Inside there's also a weapons chest.
![The second one is on the roof of the building [3] from the above screenshot - Get to Know Jack - Arid Nexus Badlands - Borderlands 2 - Game Guide and Walkthrough](https://game.lhg100.com/Article/UploadFiles/201512/2015121216592861.jpg)
The second one is on the roof of the building [3] from the above screenshot. To get there, jump from the balustrade onto the roof of the smaller building. From there head onto the main building's roof to pick up the recording.
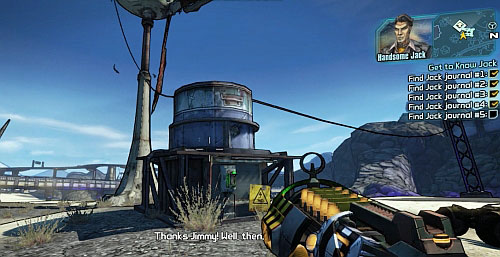
Now go to the passage in the southern part of the map to reach Arid Nexus Boneyard. For the next recording, Use the lever from the above screenshot [4]. That way you will activate a fan which will lure the Rakki from their nest. Shoot the one with the Recorder.
![Journal 3 can be found inside the container shown in the screenshot [5] - Get to Know Jack - Arid Nexus Badlands - Borderlands 2 - Game Guide and Walkthrough](https://game.lhg100.com/Article/UploadFiles/201512/2015121216592879.jpg)
Journal 3 can be found inside the container shown in the screenshot [5].
![Journal 4 [6] is inside a garage from which a couple Robots and Hyperion Soldiers will come out - Get to Know Jack - Arid Nexus Badlands - Borderlands 2 - Game Guide and Walkthrough](https://game.lhg100.com/Article/UploadFiles/201512/2015121216592899.jpg)
Journal 4 [6] is inside a garage from which a couple Robots and Hyperion Soldiers will come out. After collecting all recordings, return to the Board [1] and end the mission.
You can receive this mission during your first visit in Arid Nexus Badlands, as part of Data Mining.
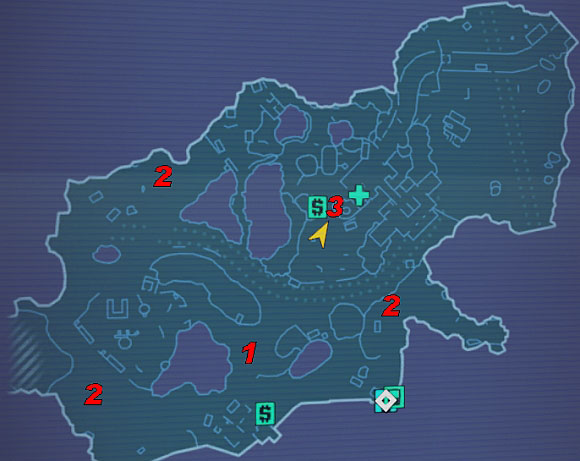
1) ECHO Recorder
2) Skag caves
3) Bounty Board
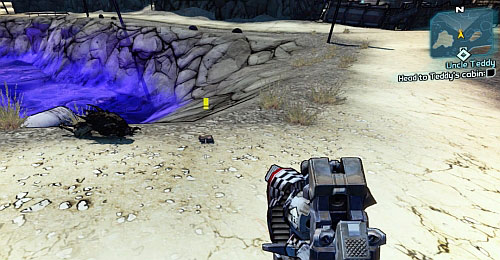
As you fight with Skags, there's a chance that one of the enemies will drop an ECHO Recorder. In my case, I found it around the area marked as [1].
![Listen to the recording and start killing Skags around [2] on the map - Hungry Like the Skag - Arid Nexus Badlands - Borderlands 2 - Game Guide and Walkthrough](https://game.lhg100.com/Article/UploadFiles/201512/2015121216592824.jpg)
Listen to the recording and start killing Skags around [2] on the map. Random Skags might drop parts of the weapon after being killed. If you kill all the Skags in the area and still miss some parts, leave the location (Fast Travel, passages) and return to respawn the enemies. After collecting all the parts, head to the Board [3] to collect the prize.


 Burnout Paradise: The Ultimate Box Game Guide & Walkthrough
 BioShock: Infinite Game Guide & WalkthroughBattleForge Game Guide & Walkthrough
 Borderlands: The Pre-Sequel! Game Guide & Walkthrough
 Batman: Arkham Asylum Game Guide & Walkthrough