Welcome to our Blue Dragon strategy guide. We've prepared a complete walkthrough, together with some useful hints on character development, lists of achievements and secrets. If you want to know all the secrets of this fine X360 jRPG, you've come to the right place.
Krzysztof "Lordareon" Gonciarz
A few hints to get you started:
- Don't avoid random encounters. Fighting is essential to developing your characters, and the more you fight, the easier it will be to eventually beat the most difficult bosses.
- Try to be patient about searching all the territories you visit. You find numerous amounts of gold this way, as well as some minor items and experience. Even if you search a spot and the speaker will say "Nothing", it's still worth to do it. Why? Well, in Jibral Town you will meet a so-called Nothing Man, who will gladly exchange all the "nothings" you've found for some truly valuable items. You can find him under the bridge that leads to the Castle.
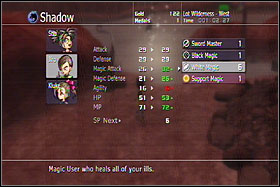
- Examine the game manual and be aware of the abilities that you can learn in certain shadow classes. Basically, it's like this: all your characters should have a primary class that will eventually be elevated up to level 99 (for the stat boost), and a few secondary classes that you will raise up to level 30-40, just for the abilities.
- Each character must be trained in Generalist shadow class, there's no other way.
- Buy all the spells you can find in shops. You probably won't have money-related problems in the game and magic is definitely a good think to invest in.
- The "official" way to max your stats is Barrier Magic class. By using Field Barrier ability you can gain experience from weak enemies without even fighting them (that saved up time all right). This ability is very costly in versions 1 and 2, so accept the fact that one of your characters will have to reach lvl 50 of Barrier Magic to get you Field Barrier 3 (defeating an enemy only costs 1MP then).
- Shadow Experience (SP) is actually more important than character experience (EXP). It is said that you have to be around lvl 50 to beat the game. It's not really that necessary, provided you have high shadow classes. I beat all the bonus quests (which are more challenging than the ending itself) on level 45 - just by mastering shadow classes.
- Be careful when selling your accessories. Some of them might come in useful later in the game, when you are to face a certain tough boss with elemental-based attacks. Even seemingly useless items can save your day, you never know.
All Barriers Released
Release all the color barriers in the game [see: DISC 3 -> Barriers].
25
1,000,000 Gold Accumulated
Get 1,000,000 Gold.
25
Successful Back Attack
Back-attack a single enemy.
5
100 Back Attacks
Back-attack 100 enemies.
30
100 Monster Fights
Engage Monster Fight 100 time.
30
Simultaneous Encounter, Over 10 Parties
Battle 10 monster parties at a time (try in Underground River [DISC 2])
30
Successful Simultaneous Encounter
Battle more than one monster party at a time.
5
Get Surprise Attacked 50 Times
Pretty obvious.
0
Run away 50 times
Use the ability to Flee 50 times.
0
All Warp Clip Set
Activate all the teleports (23). [see: DISC 3 -> Teleports]
25
Complete Item Logbook
Get all the items in the game.
25
Complete Monster Logbook
Battle all the monsters in the game.
25
All Characters Level MAX
Reach 99 experience level with all 5 characters.
50
Dragon, 1 Category Rank MAX
Reach maximum level in 1 class as a Dragon.
30
Dragon, All Category Rank MAX
Reach maximum level in every class as a Dragon.
50
Minotaur, 1 Category Rank MAX
Reach maximum level in 1 class as a Minotaur.
30
Minotaur, All Category Rank MAX
Reach maximum level in every class as a Minotaur.
50
Phoenix, 1 Category Rank MAX
Reach maximum level in 1 class as a Phoenix.
30
Phoenix, All Category Rank MAX
Reach maximum level in every class as a Phoenix.
50
Tiger, 1 Category Rank MAX
Reach maximum level in 1 class as a Tiger.
30
Tiger, All Category Rank MAX
Reach maximum level in every class as a Tiger.
50
Bat, 1 Category Rank MAX
Reach maximum level in 1 class as a Bat.
30
Bat, All Category Rank MAX
Reach maximum level in every class as a Bat.
50
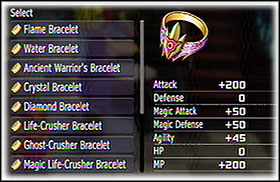
Rare Item "Dragon Bracelet"
Get Dragon Bracelet [see: DISC 3 -> Dragons]
10
Obtain All Dragon Items
Defeat all the dragons [see: DISC 3 -> Dragons]
10
Rare Item "Final War Necklace"
Obtain Final War Necklace [see: DISC 3 -> Rare items]
10
Rare Item "Ultimate Weapon Bracelet"
Obtain Ultimate Weapon Bracelet [see: DISC 3 -> Rare items]
10
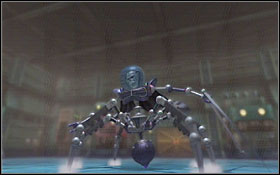
Rare Monster "Gold Mecha Robo"
Defeat Gold Mecha Robo [see: DISC 3 -> Rare monsters]
30
Rare Monster "Gold Poo-Snake"
Defeat Gold Poo Snake [see: DISC 3 -> Rare monsters]
30
Rare Monster "King Poo"
Defeat King Poo [see: DISC 3 -> Rare monsters]
30
Install all Mechat upgrade parts
[See: DISC 3 -> Mechat]
10
Successfully Close the Door
Close the door without letting any enemies through. [see: CD1 -> Flying Fortress]
5
Wagon Defense
Don't let the caravan take any damage [see: DISC 2 -> Road to Jibral]
30
Pull in the Giant Mechat
Help the giants pull down the fortress [see: CD1 -> Jibral]
5
Mechat Shooting Range 1
Beat the first Mechat mini-game without getting hit. [see: CD1 -> Flying Fortress]
30
Successfully Save Kluke
[see: DISC 2 -> Nene's Fortress]
5
Arrive before the time limit
Beat Nene's Fortress in less than 60 minutes. [see: DISC 2 -> Nene's Fortress]
5
Moon Laser Perfect
Beat the moon laser mini-game without taking any damage and without a single miss [see: DISC 2 -> Nene's Fortress]
30
Remove the neck ring
Beat the mini-game in which heroes try to remove the leash [see: DISC 2 -> Nene's Fortress]
5
Escape from Ostrich Robo
Beat the mini-game in which Shu confronts the Ostrich [see: DISC 2 -> Nene's Fortress]
5
Make your shadow emerge
Make Shu regain his shadow powers [see: DISC 3 -> Devour Village]
5
Mechat Shooting Range 2
Beat the second Mechat mini-game without getting hit [see: DISC 3 -> Upper Mecha Base]
30
Mechat Shooting Range 3
Beat the third Mechat mini-game without getting hit. [see: DISC 3 -> Mecha Robo Cube]
30
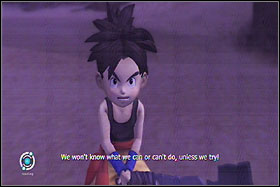
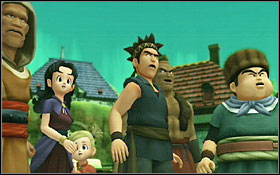
When you first take control over Shu, go left and head down the path. You'll see a title screen and an intro. When you control Fushiro, talk to Jiro's parents (they're right on the balcony in front of you). Another cutscene will commence.

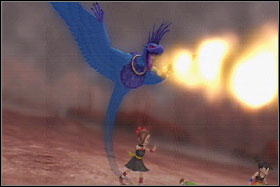
After a while you'll be controlling Shu again. Approach the land shark. When you fight it, don't worry about the damage you take. Strike the monster twice using your standard blow and when Jiro points a weak spot for you, hit it. After another scene talk to Kluke and go towards the shark to fight it again. When it's trapped, approach the net. You'll wake up in some underground ruins.
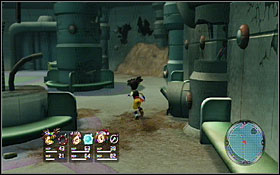
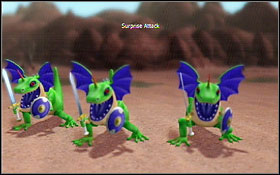
Turn around and go to Jiro and Kluke. You have to eliminate all the Poo Snakes in the vicinity. It's good to start getting accustomed to back-attacking. To do so, sneak past the enemy and attack him from the back (by pressing X). Look around the area. There's a Stone Necklace in one of the chests. Remember to search through all the machine parts, they will grant you some gold.
If you carefully search this area, you will find a Medal (ledge to the east), and a Stone Bracelet (ledge to the west). Make Shu equip the latter. When you deal with all the snakes, another chest will appear. Take the Phoenix Talon from it (it lets you revive KO'd characters). Another cut-scene under way.
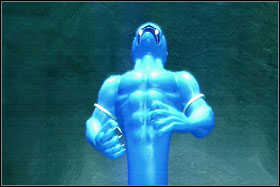
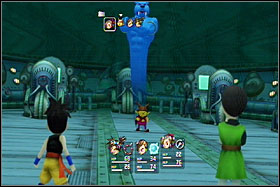
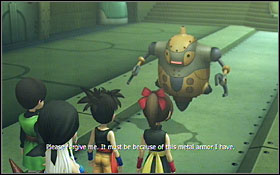
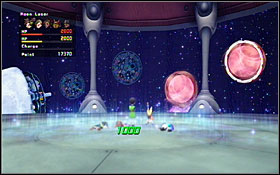
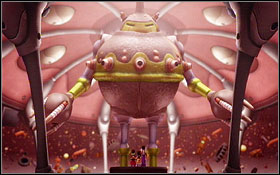
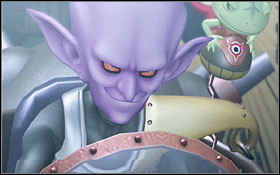
You'll in some mysterious air base now. Go to the opposite part of the dock and take the Creature Compendium from a chest (you can use it in combat to get hints on certain enemies). After a while you'll battle Nene - he's obviously out of reach for now, your party will loose after one or two turns.

After you're saved, you'll find yourself in another futuristic room. Walk around it and gather some stuff from 4 chests. Get into the center and watch another scene. Don't fight the robots that appear, just run through the door to the north.

When you're at the end of the corridor, you'll take part in a quick mini-game. You are to close the door by tapping A. If you do that without letting any enemies through, you'll unlock an Achievement. It's not easy, though.
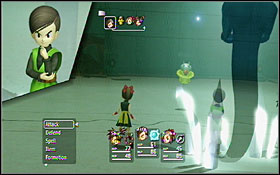
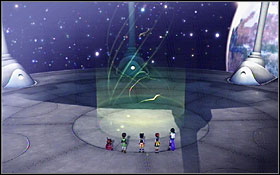
Swallow the light spheres when you're told to. The heroes will gain ability to use their shadows in combat - it's the main feature of Blue Dragon's battle system. You don't have to worry about the droids any more, now they won't pose any threat. Deal with all of them, if you have the patience. If not, just enter the airship and use it to get out of the fortress.
Follow Jiro's advice and drink from the pond. Walk around the area to get some equipment. Approach the piece of junk that block the way out and push it. You'll find a Sone Bracelet in a chest behind it. Go further to finally finish the game's introduction.
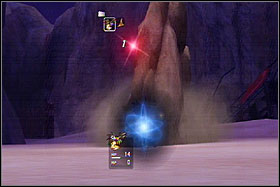
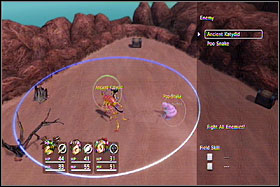
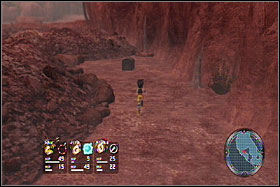
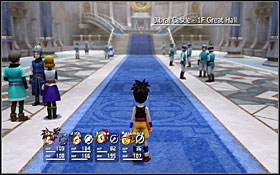
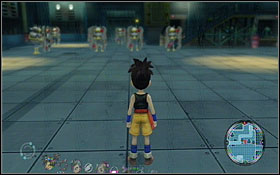
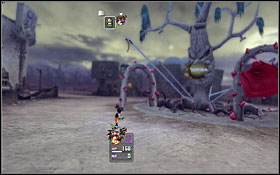
This is how the 'world map' looks in Blue Dragon. Shu is seen from a greater distance and by pressing the right trigger you turn on your battle ring. It lets you engage monsters in battle in a way that you prefer: one at a time, all at once etc. Later on, it will also enable you to use field magic abilities. You can now engage you first monster fight. To do so, catch both Poo Snakes and Ancient Katydids in the circle, then choose to fight them simultaneously. The monsters will fight each other, thus letting you get more XP with less fighting to do. Head north, through the gate. You can get some stuff from chests around the area first.
HINT: It's been said a thousand times when talking about jRPG's, but let's recap: don't avoid combat! There are no "random" encounters in the game and you have full control over when and where to fight, but don't try to rush trough the game's levels without engaging anything. This kind of attitude will come back at you during the nearest boss battle.
Go forth. When you go past a tree, knock it over to get to a chest on the ledge. A little big further, you'll see a new type of enemy - Fat Rat. It's good to make it Monster Battle the Katydids. Get past the scorpions and eventually you will reach a village.
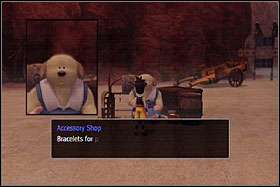
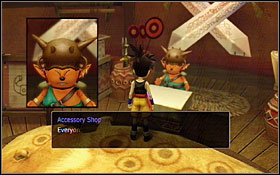
Look around the area. You'll see a few chests with items here. Use the Accessory Shop and buy enough equipment so that all the characters have full sets of Stone-based accessories. Also, buy some healing potions and perhaps a Slow spell. To use it, you have to train one of your characters in Support Magic class.
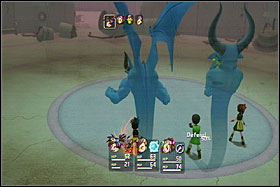
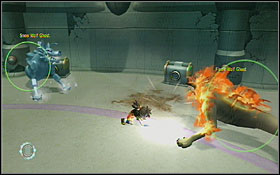
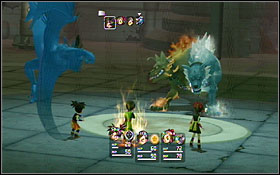
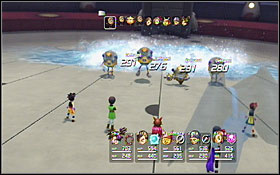
There are new enemies here - Green Grunts. You can make them fight the scorpions if you like. When you get to the other side, you'll face the first boss. When you hear the voice say "Checkpoint", heal up all your characters. Also, you might want to have two Black Magic users for the fight.
The first boss in the game is quite troublesome in fact. If you started to believe that your characters are doing great, this is the time you meet your match. The best way to deal damage to this beast is to use Black Magic (preferably Flare) on its Horn. Focus Shu and Kluke on attack, and make Jiro heal them up whenever necessary. You'll need a lot of health and magic potions. The monster has two attacks: Tremble and Mow. The former deals a lot of damage to a single character, while the latter strikes all of them for a little less HP. Besides, the boss constantly heals itself up (this is why you need two attackers to beat it!). It has about 500HP.
After the battle regenerate your strengths and save your game.
 After fighting the boss, search a narrow alley to the east to find a handy item.
Go north and west to find a gigantic drill machine. After a short scene you will be able go get inside it.
Approach the ladder and use it.
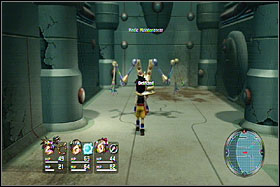
Take 1xMedal and Phoenix Talon from the chests. There are two neutral droids in here: one of them can heal your party for 18 Gold, and the other runs a shop. Regain your strengths, do some shopping and use the elevator.
Take what's inside the two chests and go through the door. There's another chest in there (some medals in it) and another elevator.
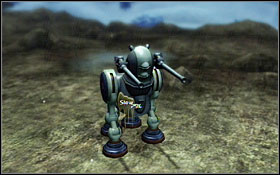
There are some aggressive droids here - they shouldn't be a problem for you. After defeating two groups go down using yet another elevator.
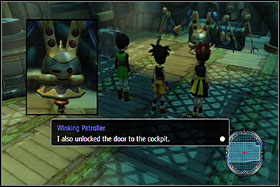
There's a mini-boss here. It's an enhanced version of a regular security droid - Winking Patroller. He's not difficult, as he mostly focuses on self-repair during combat, and doesn't take a chance to attack you. It's good to use fire magic on it, as it forces him to loose a turn for cooling. When you win, he'll give you 23 teleporter keys: they will enable you to turn on the world's teleport network (there are 23 machines like this in the game, see: DISC 3 -> Teleports). Use one of them on a nearby mechanism, and then empty the two chests. Head back to the third floor.
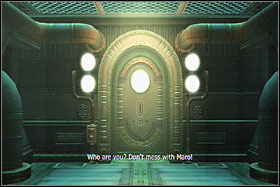
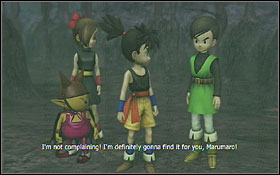
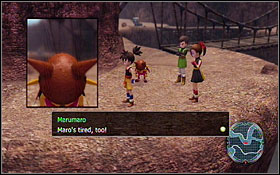
There's an open passage here that leads upstairs - go along it and defeat the droids there. Go through the door to meet a batlike whatchamightcallit named Marumaro. You have to battle his shadow. It's a simple battle that apparently can't be lost. When you deal enough damage to him, the battle will be interrupted. Go down using the elevator that Maro went into.
There are three chests here. Touch the switch near the door and one of your characters will get +1 Mana. Get outside using the door to the left. The door to the right lead you back to the shop area.
Take what's inside the chest to the right and head inside the hospital.
Two chests to be searched here. Use the red switch to turn on the lights. Look around the area. In the chest to the right you'll find a HP UP Elixir. There's an alarm droid floating around - if it detects you, it will summon some reinforcements (not to worry, though). Search through all the rooms in here. Remember to check out all the wardrobes, shelves and rubble piles. You'll always get some gold and items for trying.
When you get inside the room to the west of the center, you'll see a scene in which Kluke says some things about her late parents. Touch the operating table and you HP will be regenerated. Check out all the machinery in here for some additional bonuses. Go through the door and upstairs.
Go east, to Head Doctor's Room. Defeat the droid guarding it. The door is locked, so go back. Now head west. Defeat another robot and take a Silver Ring from the chest. Go back to the junction and this time go south. Get rid of the alarm droid (it's a lot quicker to battle when you back attack it - it won't summon any additional units this way). Get towards the center of the level.
A new type of enemy to be found here - a Wandering Wrath. There's a Silver Bracelet in a chest that he guards. Go further along the corridor surrounding the central area and push another button. Now go back, but pay attention to any newly opened doors. Some rooms in here are too dark to see - you have to find light switches inside them to make any use of them. There are stairs nearby, use them to go to the upper level
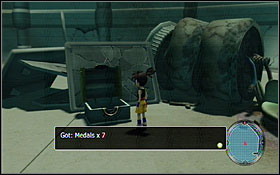
Use the light switch. Turn toward the central part and go through the door to the right. It's dark again. Defeat a Wandering Wrath and take a Silver Necklace. Examine the medical equipment to get some SP points. Go to the opposite room. Turn on the light and you'll see a save point and a chest containing 5xMedals. Examine the machinery for even more SP.
Leave by using the hole in the wall and position yourself in a way that will let your engage both fire and ice hound simultaneously. It will make things a lot easier. Head down the stairs here.
There's another blacked out room to the right. Take the elixir from a chest and use the switch that's the farthest to the right (by the monitors). You'll turn on the elevator this way. There's one more room on the second floor that you haven't already been to. Inside, there's a key to Head Doctor's Room. Go there and take a Magic Crystal Ring from a chest. Defeat all the ghosts that appear. Examine the locker to the right to get the safe key. Use it on the desk to get some additional valuable items (they include special hearts that give you +1 shadow level in a certain class).
Get back to the central part of the area and enter the elevator.
Start by defeating the two pairs of fire-and-ice hounds. Remember to use Monster Battle on them. In here you'll find MP Boost Elixir and a Silver Earring. Head south go find another pair of hounds. Take the Treasure Chest Key from a nearby chest. Head north - you'll see two locked chests inside the last room. Use the key on them to get Kelolon Powder and Magic Crystal Necklace. Regenerate your strengths and go through the gate on the other side of the corridor.
HINT: Make sure you have the ability to cast both Flare and Water spells!
This double headed wolf has two "modes" - fiery and icy. When it turns into fire mode, you have to use water against it, and when it turns into ice - use fire. It's really that simple. It's definitely easier compared to the previous boss. Watch out so that you don't mess up the spells - if you use fire on fiery opponent, you heal it instead of dealing damage. If you don't have one of the necessary spells, just use physical attack to make the monster change its mode. You won't deal a lot of damage this way, but will at least be able to keep it in a mode that suits you better.
When the battle is over, look around the arena - there are three chests here, containing Magic Crystal Bracelet and 7xMedals. Head north and talk to Marumaro. Activate the teleporter here. After another scene, touch the containers in this room to find a cure that he's seeking. There are some more medals to be found here. The cure is in the right part of the room. When you find it, a series of cutscenes will commence.
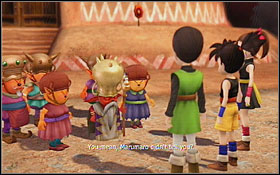
You are now in Maro's native village. There's a chest nearby. Take its contents and approach a group of deevees (that's how these little fellas are called). Head inside the town hall. After a scene take a Medicine from the chest, then head outside. When the cut-scenes are over, follow Marumaro upstairs. There's a chest with 1xMedals and a teleporter along the way. Also, use the accessory shop (you should have complete Silver-based accessories for now). At the end of the path there's a chest with 9xMedals. Get through the cave, go left at the junction to meet Marumaro. After another scene you'll be back inside the town hall. Maro will join your party. Before you leave this place, you can use the spell shop (the vendor is called Elderly Book Seller). Be sure to buy the Ground spell.
Talk to the fella that's standing by the village entrance. There's a chest to the right, where you'll find a Grand Shadow Crystal. After getting past the gate you'll be back on the world map view.
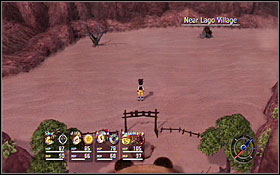
The way to the cave is to the right of the village. If you want to, head north first, to get some items from chests and some experience from fighting. Watch out for creatures called Gotsu-Gotsu. They can cast a malicious spell that prevents you from hitting them. Remember not to use Ground spell on them, as it will regenerate them instead of hurting. One of the chests is defended by a Green Soldier - it's a bit tougher sort of common Grunt lizard. You'll find a Magic Crystal Earring in it. Before you head south, pay a visit to Lago Village once more to regenerate after your training (you can get free healing from the statue inside the town hall).
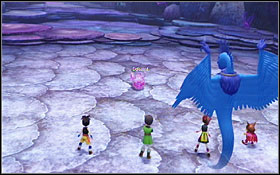
Along the way south you will meet two new types of enemies: Ancient Crickets and Ancient Moths. You can Monster-Battle them if you like. When you reach the end of the bog, head left for some goodies from a chest. When you head towards the cave (it's marked on the world map), try to search through all the remaining chests and fight as many enemies as you can. When you finally reach the cave, get inside.
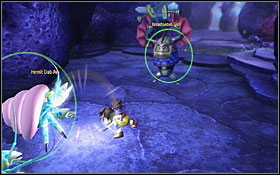
Near the entrance there's a chest containing Iridescent Wind. At the first junction turn right. Defeat the medusas (they have few HP but use powerful magic so watch out and try to back-attack) and take Water Earring from a chest. In the next chest there's a Prismatic Crystal. Head left and face three groups of Hermit Crab Poos, then go further due north. A little bit ahead you will find an enemy called Cutlass Fish. It has about 200HP.
HINT: You can cure Paralyzed status by using an item called Mobility Balm.
At the next junction go right again. At the end you'll see two chests. One contains Generalist Heart, and the second one is blocked by a magical barrier. Go back to the main corridor and go further north. The next junction take the left path. Defeat a Broadsword Fish (use Shadow magic or try to Monster-Battle it with Hermit Crab Poo). At the end of this dead end you'll see a transformation box. It lets you transform one minor item into a better one (nothing special, really). Go back to the main alley and go right this time.
By the next junction you'll see a chest. Remember its location and go further due north, until you see a cliff. When you defeat the monster there, a chest will appear. It contains a Fish-shaped key. Take it and use it to open the chest you remembered. There's a Hexagonal Crystal inside. Get back to the cliff and use it on a shell to the right. You can now cross the water.
A few steps later you'll go through a checkpoint, which means that a boss fight is coming. Go right to find a Flara spell.
This battle is very easy, as long as you can cast the Ground spell (preferably with 2 characters in each round). It enables you to simultaneously attack all 4 heads of this beast. Make the remaining two characters heal the party and you'll be fine.
After the battle heal all the characters from Poison status and get the goods from chests: Amethyst, Cure-All and a Water Necklace. Go further to finally leave the cave.
Take the Princess' Kiss from the chest and enter the village to the left. Activate the teleport in there and save your game. If you need to, use the shops and an Inn. Leave the camp and head to Forest of the Dead.
HINT: It's very wide to buy a Shine spell now.
You'll see two new types of enemies here: skeletons and wolf ghosts. The latter will probably just run away from you, but try to Monster-Battle them with the undead to make things a lot easier. Get the Grand Sapphire from a chest ahead. Go right. Take Mega Medicine and Antidote along the way. In the next chest you'll find a Thorn Branch. Go right until you see a big rat. Defeat it and take a Grand Emerald from a chest. A new enemy to be found here: Acarnivore. The only peculiar thing about it is that it can trap one of your characters inside it.
HINT: The ideal weapon against all the skeletons is the Ground spell.
Go north. There's a Light Crystal in the chest. Defeat a group of rats and Acarnivores. You'll see an unbreakable barrier to the south. Go further to reach a swamp. Walk to the north - you'll be attacked by a Purple Skeleton. Defeat it and take a Spirit of the Elder Tree from the chest. In the same area head south to find an Earth Bracelet. You can't do anything more in here - there's poisonous swamp to the south and the way through the swamp is blocked. Head back.
Along the way you will see a bigger clearing with some monsters flying around. If you defeat them, a chest with Death Earring inside will appear. Go west, through the bridge. There's a huge ghost in there, the one called Grinning Ghost. Use Magic Sword with Shine on it. Approach the tree in the middle and talk to it. Go around the area. In a chest you'll find Steadiness Salve. Head through the bridge and defeat Thief Ghosts and Shooter Ghosts there. Take Repeater Weed, Earth Ring, and 1000 Gold. Get back to the tree and this time go west. In one of the chests to the south you will find Shina spell. Go to the northern part of this isle and go further to the west. Defeat a Grinning Ghost here. Inside the chests you'll find Mega Magical Medicine and an Earth Necklace. Approach the myst generator and turn it off. Get back to the magical tree.

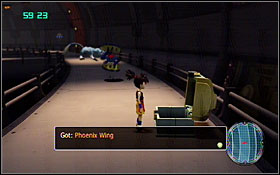
Before you go further, you can also check out the isle to the north of the tree. There's a Water Ring, Princess' Kiss, Phoenix Wing and a Kelolon Powder. Go through the bridge to the north-east.
Go through the bridge. Defeat another Grinning Ghost in there. There's a Wind Earring in the chest nearby. A teleporter can be found a little big ahead - remember to activate it. If you want to you can now teleport back to the village and buy some additional supplies. Head east to the separate area, where the boss battle awaits you.
Once again, a boss battle is not really a threat, provided you know how to handle it. You enemy is a ghost, so the only right way to get past it is by using Shine magic. If you have both Shine and Shina spell, you should be able to deal about 600 damage to him every round - he won't stand this kind of beating for long. Also, you can use fire magic - it's a bit less effective, but still sees the job done.
Take a Gabo Leaf from the little garden ahead, then teleport back to Lago Village.
Get inside the town hall. After the cut-scene, when you're inside Maro's house, go upstairs and once again enter the town hall. After another cut-scene, head outside. Marumaro will decide that he wants to accompany you on your quest. Try to leave the village for another scene, then talk to the elder. He'll open the three treasure chests in the village for you. One of them is to the left of the town hall entrance (Ordeal Ring), the second is near the upper exit from the cave (Ordeal Earring), the third one is on a little ledge where you found Maro crying earlier in the game (Flame Bracelet). Before you leave the village, visit the town hall's spell shop once more.


Head north and then east. Your goal is to reach a point that's marked on your map. Go past the Wilderness Camp and head further east. The monsters around here are fairly weak - you can train on them, but don't expect any serious XP from it. Eventually you'll see a Lazy Bear. This one can get troublesome, mostly due to a serious amount of HP he has. Defeat him and go through the part that he blocked. There's a Deevee Elixir in a chest here. At the junction turn north, then take a Grand Amethyst from a chest. Turn back and go south, towards the map marker. Take Thorn Branch and Prismatic Crystal from the chests and defeat another Lazy Bear.
A little bit further you'll have to fight yet another bear (there will be two of them this time). You'll see a gate to the right. First head left, though, and get to higher ground to find an Ordeal Bracelet. Now, get to Gul Mountains.
Get inside the town hall. After the cut-scene, when you're inside Maro's house, go upstairs and once again enter the town hall. After another cut-scene, head outside. Marumaro will decide that he wants to accompany you on your quest. Try to leave the village for another scene, then talk to the elder. He'll open the three treasure chests in the village for you. One of them is to the left of the town hall entrance (Ordeal Ring), the second is near the upper exit from the cave (Ordeal Earring), the third one is on a little ledge where you found Maro crying earlier in the game (Flame Bracelet). Before you leave the village, visit the town hall's spell shop once more.

Head north and then east. Your goal is to reach a point that's marked on your map. Go past the Wilderness Camp and head further east. The monsters around here are fairly weak - you can train on them, but don't expect any serious XP from it. Eventually you'll see a Lazy Bear. This one can get troublesome, mostly due to a serious amount of HP he has. Defeat him and go through the part that he blocked. There's a Deevee Elixir in a chest here. At the junction turn north, then take a Grand Amethyst from a chest. Turn back and go south, towards the map marker. Take Thorn Branch and Prismatic Crystal from the chests and defeat another Lazy Bear.
A little bit further you'll have to fight yet another bear (there will be two of them this time). You'll see a gate to the right. First head left, though, and get to higher ground to find an Ordeal Bracelet. Now, get to Gul Mountains.
The village has got a little more gloomy than before. Activate a teleport to the right. There's a chest with 7xMedals in here. Go through the bridge near the save point and talk to Peddler.
This monster will summon skeletons to help him - three times, that is. Shine and Shina are essential here. You won't be able to deal reasonable damage to the boss until you defeat all the skeletons. When you finally get rid of his bodyguards, focus on physical attacks. The boss uses 2nd level magic, but fortunately deals small amounts of damage.
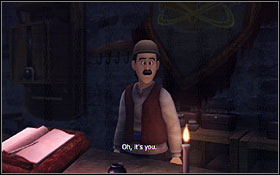
Enter the building near where Peddler was standing. Help the proprietor up and talk to him. You'll get an Ordeal Earring. You can now use the shop and rest here. Go to Fushira's house now. Go through the bridge to get near the save point and further towards the back of the screen. Go to Fushira's Workshop and read a letter.
You now have some time to look around the village. In Shu's house search through the lockers and you'll get +10 XP two times. In Kluke's house you'll see an Ancient Phonograph - mechanism that lets you play some music tracks from the inventory; also, there is +10XP upstairs. In Jiro's house you'll find a new spell - Lv3 - Heala (locker by the entrance) and +10 XP (desk upstairs). Also, there's a lot of minor items to be found in each house.
Get back to the save point and go all the way upstairs. You'll see two chests, containing 17xMedals. In the village there's one more house to check out (left of the inn). Some gold in there. Near the windmill theres a chest with 1xMedals. Touch the wall by the windmill to get Max HP +1 (seems that you could have done that at the very beginning of the game, huh).
That's about it. When you're ready, leave the village and go towards the passage to the east.
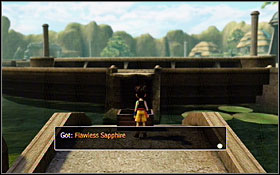
A cut-scene commences, after which you will have to battle. Take Grand Ruby from a chest that appears afterwards. Go along the cliff and go across the first bridge. To the right there's a chest with Thorn Branch. Reach the clearing and examine the chests there for Gorgo Elixir, 2xMedals, Ancient Feather, as well as a spell Lv4 - Cure Paralysis. Head further along the cliff. Another Evil Mural will attack you. One more chest here, this time containing Flawless Sapphire. A few steps further you'll fight one more mural, this time for Flawless Ruby.
At the other side of the cliff there are chests with Iridescent Wind and 5xMedals - take them if you want, then go back to the same side of the cliff. Another Evil Mural lays ahead, as well as Ultra Magical Medicine as a reward for beating him. A little bit further is a chest with 4xMedals. For defeating the next monster you'll get Flawless Amethyst. In a chest at the end of the cliff there's 500 Gold. Go across the last bridge. Defeat a mural for Grand Light Crystal. A little bit ahead is a chest with Iridescent Cyclone, and at the other side - Ancient Fossil. After crossing the cliff once more, get back a bit to get a Water Bracelet, a Flawless Emerald, and 9xMedals (these chests are guarded by ostriches).
Head towards the "right" direction again. A scene will commence, in which heroes will tell you that they want to rest. Go a bit further, across a bridge, and defeat more ostriches. Take 1000 Gold, 8xMedals and a Fire Earring from the chests here. Examine the machinery parts in here for Grand Ruby and +1 Agility. A little bit further defeat the last Mural to get Wind Necklace. Go to the end of the path.
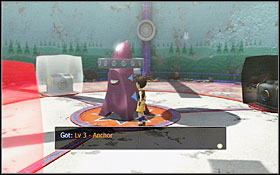
Use the save point if you like, then go further ahead. After a scene look through the rubble around the area for 2xMedals. In the next room listen to the Storyteller's tale. Get to the main room and use the shops if you need to. Get to the next room and activate a teleporter in there. Talk to one of the Child Murals to get a quest to find all the "cats" in the city. Now, mural cats look like flying spheres with eyes on them. In our case, there were 8 in the whole city. If you count them right, you'll get a spell Lv3 - Anchor.

Along the way to the next room you'll see Mystery Part Alpha. It's a part of a rare item that you won't assemble until Disc 3. In the room itself you'll see Gorgo Elixir, Ancient Feather and Part of Eternal Engine. Near the exit there's a Mural that asks you to find the Shabby Book.
There's Iridescent Cyclone to the right. Go further ahead to fight a boss.
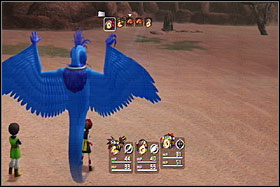
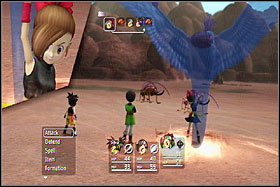
This battle is somewhat peculiar. All you need in order to win is a Winda spell. Funny thing is, that not only does it deal a lot of damage to the bird, but also increases its attack power. It's good to have a Zephyr spell available, just in case you need to heal the whole party at a time. If you have more than one character that can cast Wind/Winda (or its Magic Sword counterpart) you shouldn't have any problem with defeating this boss.
After the battle go further ahead. Go across the bridge to the left. When it falls down, take 8xMedals from a chest an defeat a Ruby Halbird that attacks you. This type of enemies can be monster-battled with Murals - it will come in handy. After defeating the nearby Mural you'll get a Jibral Earring. A little bit further you'll see a group of ostriches - defeat them to find a Shabby Book, an Ancient Feather, a Repeater Weed and 7xMedals. While you're still close to the village, it's good to return to the mural that wanted you to find the shabby book. You'll get a spell from him: Lv3 - Reflecta. When getting back to the beginning of the level, you'll see a chest containing 2xMedals as well.
When you're back to the valley, use the fallen bridge's rope to slide down to the bottom level. There's a chest with Light Crystal to the right. Get to the other side of the bridge and defeat the birds to get access to Water Bracelet, Flawless Ruby, and a Transformation Box (you can put Jibral Earring inside to get Jibral Ring - it seems worth it). A little big ahead you'll see two new types of murals: green ones (they can poison the whole party at once) and pink ones (they can cause Sleep status). You'll get Mega Invisibility Elixir for beating them, as well as Grand Light Crystal.
Go left and take a Grand Emerald from a chest. Defeat two more murals and take Phoenix Wind and Ultra Magical Medicine (the bridge will fall down when you cross it). Go further to battle another mural. You'll get Prismatic Crystal for this one (it appears on the opposite side of the valley, so you have to cross it in order to get it). Use the fallen bridge to get down again.
There's Sleep Powder and Broken Eternal Engine in the chests here. Go further to see some cut-scenes.
Drink some water from the waterfall to replenish you HP and MP. Go in the direction that Jiro pointed. After a scene you will have to fight two tigers. They deal whopping damage, but have little HP themselves - if one of your heroes gets knocked out, just resurrect him. It's a quick battle. When you defeat them, a true boss appears.
This monster's attacks are relatively weak, but you need to weaken him first in order to deal serious damage yourself. It pays to use Ground magic on him. In about 3/4 of the battle, the monster will lower his defences and increase his attack power. Monitor your health so that you don't get KO'd and steadily attack him until he falls.
When you're near the campfire, look around the area. There's a shop in one of the tents. Enter Jiro's tent (near the save point) to see a scene. Talk to Fushira. Save your game when you're prompted.
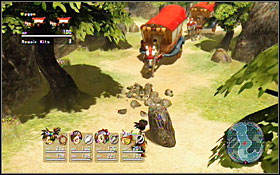
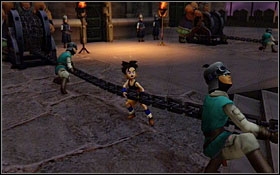
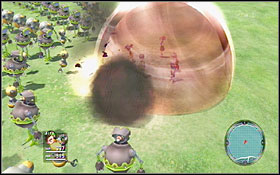
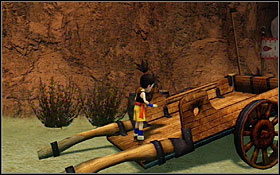
Your goal now is to escort the caravan on its way to Jibral Castle. It's not a difficult sequence to beat, but it definitely IS difficult to unlock an achievement here. In order to do that, you can't let the wagons take a single hit, even despite that you have some repair kits that bring back 20% health to the caravan. Don't use your battle circle here, better stick to attacking opponents by pressing X. It's also important to eliminate rats in the first place, and then tigers. The monsters always appear in the same spots, so if you don't manage to unlock the achievement for the first time, just learn their locations and try again.

Achievement is unlocked only when the caravan doesn't take a single hit through the entire scene.
Event
1
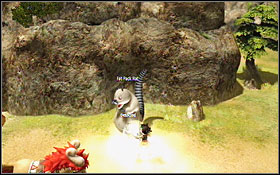
Fat Pack Rat ahead of the convoy
2
Fat Pack Rat between the wagons
3
A chest with Thorn Branch
4
Fat Pack Rat ahead, Steel-Eating Tiger between the wagons
5
Two stones to knock over
6
Another two stones. When you knock the second one down...
7
... Fat Pack Rat to the left and to the right of the convoy
8
Fat Pack Rat at the back, Fat Pack Rat between the wagons, Steel-Eating Tiger ahead
9
Two stones
10
One stone; when you knock it over ...
11
... Fat Pack Rat to the left of the first wagon, Steel-Eating Tiger to the right of the first wagon, Fat Pack Rat between the wagons
12
One stone. When you knock it over ...
13
2x Fat Pack Rat ahead of the convoy (use battle ring here).
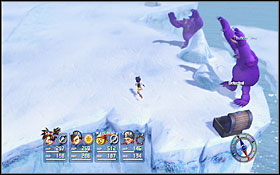
When you reach a clearing, a cut-scene will commence, after which you will be up against 4 tigers at once.
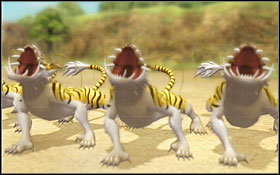
You know what these tigers are capable of by now. They use their Bite ability every two turns, which instantly kills one party member. Use Ground and Water spells, as well as any other that deals damage to the entire row of enemies at once (you can use some Flawless gems here).
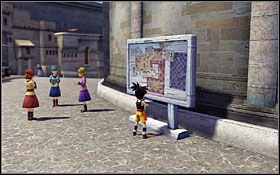
After another scene you'll find yourself by Jibral city gates. There's a chest with Cure-All to the right. Look around the town. Check out the announcement board to get +3 SP. There are three girls standing nearby - try to talk to them until they give you a medal. Find all the shops around and buy whatever you feel like (there's a few new spells available, including Revive, Cancel, Water, Slowa, Shielda). In the spell & accessory shop examine the armors by the wall to get +2SP. There are 2xMedals in a chest nearby. Touch the counter to get +10 XP. Get into the inn. Just before you enter, examine a shady corner just across the street - 5xMedals there.
Talk to Fushira. There's a chest with 3xMedals by him. Go to the castle now.
Look to the left - under a tree there's a chest with Ultra Medicine. A little bit further there's a save point and a teleporter. Get inside the palace. Go upstairs using the left staircase. Go left and enter Minister Jonveeno's office (talk to the guard to check if it's the right room). Take 3xMedals from a chest there. Jonveeno won't be able to help you in any way. Go to Senior Minister's office, that exactly in the opposite end of the corridor. Take 5xMedals from a chest there and talk to the guy. Guards will take you to the throne room.

After the scene talk to the king once more. Try it for the third time when you're on the terasse. Talk to Zola as well. Get back to the palace. Enter the king's quarters (3rd floor, to the left). In the bedroom you'll find 2xMedals (weapon rack) and a Grand Sapphire (chest). In a room at the opposite side of the floor there are a few useful items (Antidote, Seadiness Salve etc.). Get back to the 2 floor and go to the courtyard - to the left there's a chest with 25xMedals (!). On the 2 floor there're Blademaster's Quarters as well. It's worth checking out. Get to the bottom floor. You can visit a kitchen there (Grand Emerald and a few minor things). Finally, get to the basement.
Near the entrance there's a Power-Swap Dart. You'll reach a room where you'll see 3 room along the sides. Your goal is to enter the laboratory (to the left, in the back), but also take your time to look around the other rooms. Enter the back room of the lab and talk to Zola. Leave and agree to follow her to her private quarters (who wouldn't, huh). After another scene get to the bedroom and take a Grand Amethyst from a chest. In the locker's you'll find a Sapphire and a Ruby. Leave the palace and get to the inn to take a nap. If you want to buy some supplies before the act's finale, now is the time. Talk to Fushira. After a scene he'll give you 10x Phoenix Talon.
Leave the room. Go down the stairs, take a Leather Belt and Magic Shoes along the way. There are the items that can be used by characters trained in Generalist class. Leave the inn and go to the palace. Save your game and run to the courtyard.

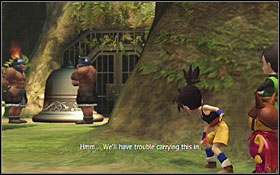
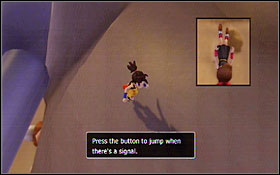
After a long cut-scene, a mini-game awaits you. You have to tap the X and B buttons in order to pull in the flying fortress (there's an achievement for perfect performance). When you deal with it, talk to Zola.
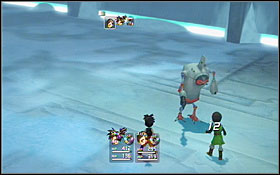
You're now in Nene's flying fortress. Zola joined your team, so take a while to customize her the way you like. Go down the stairs. There's a chest with Iridescent Wind. Follow the dark path north, and at the end you'll see a spell Lv4 - Shadowa. Get back to the main hall. The elevator doesn't work, so you have to go through the door to the east. Defeat the Hover Patrollers and take an Elevator Key from a chest. Also, there's a chest with Lv 4 - Trapflora here. Get back to the elevator and use it.
After leaving the elevator head north-east until you see a chest with Phoenix Wing. Get back near the elevator and open the door to find 1000 Gold. Now go south. When you see a blue laser that blocks your way, go through the door to the left. At the end of the path there's a big group of droids. Turn left to get a Flawless Emerald. Go through the door and up ahead until you see a computer. Head back. The blue laser isn't active now so you can go through. Behind the door there's a Jibral Bracelet. Get to the end of this corridor and defeat the enemies there. There's a Grand Amethyst in a chest here. Look around for some more items. Get through a corridor to the east to reach the first boss.
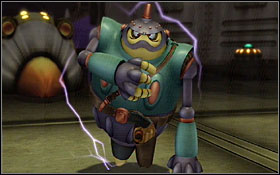
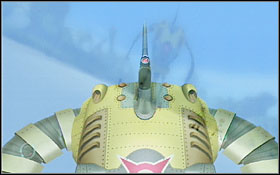
It's best to attack this droid using elemental magic: fire and water. Physical attacks don't do much against him. Notice that whenever he enters Gunman Mode, he gains the ability to counter your attacks very effectively. If you want to avoid losing lots of HP, don't attack him during that time.
Get through the southern door to get an Ancient Feather. Now head east and turn off another engine. The next blue laser has been deactivated, so follow the newly opened passage.
This droid has two special techniques: Turbulence (messes up your formation) and Anticipate (works similar to Gunman Mode of Silent Ku). The key to victory is, once again, black magic.
Another engine can be turned off to the south. Go back to the junction and go ahead. Defeat two groups of droids that guard the door and take The Way of the Thief from the chest, as well as a Supermetal Earring. A little big further you'll see a room with three chests in it (Shadow Crystal, Mega Magical Medicine, Ultra Medicine), a save point and a regeneration machine. Use the latter. Head through the next door. You'll see a group of monsters behind it (Double Axe - this guy has a lot of HP!). It's not worth it to use items in this battle - afterwards just go back to the healing machine. Turn off another engine and turn back to meet the next boss.
This battle is generally very similar to the previous ones. Whenever the enemy holds a bomb in his hand, try to target it (Jiro will suggest it after a few rounds). This way you'll deal more damage to the enemy.
After the battle once more use the healing machine and head back. Go through the newly opened passage (near the room where you found Supermetal Earring). In the next corridor turn right and take Grand Light Crystal from a chest. There's a passage to the next level just across the corridor. Before you go there, reach the end of the corridor to find a Iridescent Cyclone and a Supermetal Necklace. Get back to the door. You'll find a Warp Device there.
After using the warp device, go downstairs and use the save point. You will now face the final droid of the four.
Just the same thing once more, basically. This witch casts negative status spells on your party, and can deal damage to all the characters at once. Fire, water and wind magic will grant you success here.
Approach the mechanism. After a few scenes you'll be separated from Zola. Stand on the left warp device. Go further ahead to reach the final boss fight of this episode.
The general will summon some minor droids to help him - get rid of them in the first place. The idea of battling Szabo is essentially the same as the droids you've beaten before. He's just a little more resistant to damage.
After the battle enter the mechat.

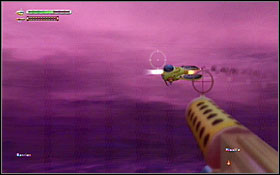
A little mini-game stands before you. If you complete it perfectly, you'll unlock an Achievement (don't count you'll do it first time through - no waaay). "Perfectly" means "without taking any damage", to be exact. It's not easy, as the gun you control isn't too precise at all, and gets overheated quite quickly. The rule is simple: use the gun to shoot down enemy rockets, and use the rockets to shoot down the enemy. Your goal is, obviously, to bring down Nene.
When the battle is over you will take control of your characters back in the castle. Talk to Manager to get a discount coupon. Also talk to the king and Zola to finally finish the first disc.
HINT: Surely you now have some understanding of the game's mechanics. Knowing that, we'll try to keep the remainder of our guide a little bit less focused on obvious things. Just remember: search all locations for Gold, and don't avoid combat. Check out all chests and other special objects, such as lockers etc.
HINT: If you want to, you can now spend some time on training Barrier Magic. Basically, you can just as well level up your characters all the way up to maximum shadow levels - but it certainly takes some time. If you feel like, go to Talta Village and walk around the clearing with Field Barrier on. The moment you gain Field Barrier 3 (which is unfortunately not available until lvl 50 of Barrier class), thigs will be much easier.
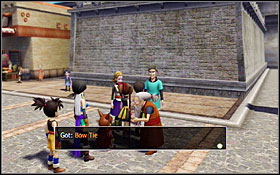
After leaving the castle you'll meet Toripo again. He's the fella that's selling stat-enhancements for medals, remember? Go to the town for now. You can get some nice rewards by talking to Jibral citizens:
- From Jiro's father: Bow Tie
- From the gift shop: Zephyr Chocolate
- From the flourist: Repeater Weed
- From the general store: Broken Eternal Engine (agree for her to sell your portrait)
- From a waitress in Cafe Jibral: HP Up Elixir
Also, visit the spell shop and the Rare Accessory Shop (it's across the street) to get some better equipment. When you're ready, go to the inn and talk to Fushira. After some scenes you'll be able to save your game before a kind of mini-game. The goal here is to produce the best ring possible as a gift for Kluke. The outcome of the "duel" between you and Jiro doesn't rally matter. Just keep it practical. The ring will be only usable by Kluke, so try to make suitable for her profile. She's probably the spellcaster in your party, so you might want to focus on MA parameter (Magical Attack). You can even grant her +150 MA by performing well!
After completing the mini-game and watching even more scenes, you'll find yourself by the city gates. You goal is to travel through a Laser Field that's to the north. Before you head there, go south first. You might want to look around Jibral for some items and medals. Also, check out the Coastal Road to the south-west (some new monster types and Ultra Magical Medicine there).
Go south-east, along the coast. After crossing the gate you'll end up in Exile Forest.
Approach the cave for a scene. Go further. When you're back to the overhead view, check out the chests for Flawless Emerald and 9xMedals. Go along the coast to reach the village.
Go to the left. After a scene approach the girl who's standing near the bell. Talk to her twice. Look around the village and visit the shops to check out what they have there. Go across the bridge to the right of the bell. There's a Flawless Sapphire and 1000 Gold in the chests. Go to the back of the chief's mansion (it's a big building that you can see in the distance). There's a Scarf in a chest here. Approach the guards for a scene, then enter the dungeon.
There's a Flawless Sapphire in a chest here. Follow Zola's ring (it's a blue dot that's floating in the air). Along the way you'll see some more chests with gold in them. At the end of the level you'll see a Gold Giant. Defeat it by using magic (try Shadow spells). If you've missed the chest containing 30xMedals, turn around and search for it (it's by the end). Go through the door guarded by the giant.
HINT: If you don't want to have to get back here on Disc 3 for an achievement, don't go through the door but go further along the corridor. You'll fall down through a hole and find yourself down, by a chest. Take Mystery Part Un from it (it's a part of rare item to be assembled much later on).
In the first phase of this battle you'll face two Gorgo soldiers. They can be dealt with by using both physical attacks and magic (Grounda, Shadowa).
Now you're up against two giants and the chief himself. Get rid of the soldiers first (Grounda, Watera). Jeelala isn't much tougher than they are, he just has a little bit more HP.
When it's all over, look around the treasure room. You'll find: Grand Light Crystal, 5xMedals, Grand Tribes' Bracelet, 9xMedals, Part of Eternal Engine, 7xMedals, Diamond-Encrusted Ring, 5000 Gold, Ancient Feather.
Use the south-western door to get to the chief's mansion. You can search it (not much to be found). Go outside to meet Sura-Sura again. She'll give you Grand Tribes' Necklace. Get back to the cave in Exile Forest.
You can now get inside. Go right at the junction to find 1xMedals. Get back and go left. When you reach a big room, you'll have to fight a boss.
Your opponent in this battle isn't really Guru-Guru, but Mist monsters that control him. Use Grounda to get rid of all of them at once. You shouldn't actually harm Guru-Guru, but he has enough damage to withstand such a blast.
When you find yourself back in the village, talk to Guru-Guru once more for a Gem of Jibral. Go back to Jibral and notice that you can now access a new house - the one with Gorgo Giant standing in front of it. Inside you will find: Broken Eternal Engine, Grand Tribes' Necklace, Grand Tribes' Ring, Grand Tribes' Earring and 9xMedals.
Head North of Jibral. Go along the rocky lowlands (grab 9xMedals along the way). Go through the gate to get into Laser Field. Activate the teleport to the left. Look around your surroundings fro Iridescent Cyclone, and a HP Up Elixir (it's protected by two turtles, they're vulnerable to fire). Also, there's a chest with Dog Collar nearby. To the east you will find Broken Eternal Engine. A little bit to the north you'll find Grand Tribes' Ring (the chest is guarded by Horned Lazy Bear - these can be monster-battled with flying mole creatures). Another group of bears guards Thorn Branch and Hp Up Elixir.
More to the north you'll see 4 units of Pyre Rats. In the next clearing you'll be attacked by satellites - run quickly so that they don't hit you. There are some chests around, they contain: HP Up Elixir, Part of Eternal Engine, Mega Invisibility Elixir, HP Up Elixir, Ancient Fossil.
You'll be up against a Centipede just a bit further. Attack it mostly with magic (Fire, Water). At the last clearing check out the chests for Grand Sapphire, Flawless Amethyst, Grand Tribes Earring. Go further for another scene.
You're now in robot city of sorts. The locals are, surprisingly, friendly. You can use a shop here (nothing special), regenerate your health in the "inn" and activate a teleport. Just by the entrance there's a chest with Generalist Heart. To the right side there's a Rebuilding Garage. Inside you'll find a Barrier Magic Heart and a droid who'll upgrade your Medicine.
To continue your adventure, enter the main building in the central part of the village. Talk to the droid there and approach the computer. After more scenes you can go through a door to the right of the main square. There are two small rooms surrounding this hall: in Control Room you'll find Light Crystal (a droid here can regenerate your HP) and in Maintenance Room - Broken Eternal Engine. Get back to the village and enter the "town hall". Go through the door to the left and go along the corridor until you reach the basement. Go through the gates and get ready for a boss fight.
It's quite obvious that you have to use Water against such an opponent, isn't it?
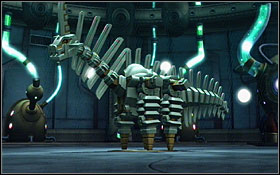
This is a simple level - just go forth at all times, killing Kelolons and collecting items. Kelolons are easy to eliminate and quite valuable experience-wise. It's good to train on them. At the end of the level you'll see a junction. There's Toripo to the south, but let's go north first. There's a huge hall with lots of Kelolons in it, as well as a dragon. The latter is a formidable opponent, but you should manage to deal with it.
Don't use magic against it, but stick to physical blows. Monitor your health and you should have no problems with winning. If you can't beat him - just remember that you don't actually have to do it for now (dragons are part of a sub-quest that's available on Disc 3).
Activate the teleport and get into the huge room. When you're attacked, choose the Flee option. You can't fight the shielded droids here. In south-eastern part of the room there's a Power-Swap Dart. Go along the stairs to get to Ancient Warrior's Necklace (the droid that's guarding it doesn't have a shield).
A little bit further you'll see chests with Grand Amethyst and Mega Magical Medicine. Step on the conveyor belt and head west. There's a chest with Grand Shadow Crystal.
Go through the southern door (the northern is blocked by a force field). Take the first left. There's a Leather Belt and a Shadow Crystal. Go through the door to the left. There's an Ancient Warrior's Earring. Get back to the corridor and this time go west. You'll face Double-Lance here (Watera works just fine). In this room you'll find a healing machine, a chest with 15xMedals and a spell Lv5 - Shieldus. Get out using the northern door and go west through the next corridor.
At the middle of this big room there're two Double Lances that guard the chests. You can beat them for Ancient Warrior's Bracelet and a Grand Emerald. Go all the way upstairs. If you like, you can monster-battle the rats with the trap-like creatures here. Along the way there's a Cure-All in a chest. Jumbo Ghost will come at you at some point - use Shina against it. A little bit further you'll battle a broken droid. If you beat him, you'll obtain a Broken Barrier Device. Go through the gate.
HINT: In a room filled with statues imitating Double Lances, you can obtain a valuable item that will help you with one of the achievements. You just have to wake up and destroy all the statues (just walk around them, or try to hit them). When you destroy them all, you'll get Mystery Part Beta.

After some scenes you will control Jiro. Turn off the shield when you're promoted (I know it's stupid, but the game doesn't give you a choice here, duh).
You've been imprisoned. Wait a moment for Yasato to help you get out. In the nearby cell there's a teleporter - activate it. A little bit ahead there're 3xMedals and Ancient Feather (in a cell with rat in it). Get through the gate and defeat the droid to get a key. Use it to free Jiro. Now go further and defeat more droids. Go to the second cell block. Free Marumaro and Zola there. There's Ancient Warrior's Ring here (a ghost will attack you when you grab it). In one of the cells there's a chest protected by a white force field. To open the huge door in the middle of the corridor, you have to close the doors to all the "corner" cells in both blocks, and open the 4 middle ones. A Sentinel Mecha Robo will attack you further. Go west at the junction.

After more scene you'll be able to save your game. You have to fight 8 droids at once two times now.
Later on, you are to chase the giant droid, avoiding the little ones that jump out of it. It's simple - even if you get in touch with some minor droids, you'll just have to fight them. Catch the giant droid twice to end the mini-game.
Start by exploring the southern area, then head north. You should find: 2xMedals, 3xMedals, Iridescent Wind, The Way of the Thief, 7xMedals, Ultra Magical Medicine. There's a bridge to the north that will take you to a chest with 3xMedals. When you're ready, enter the village with green barrier all over it.
Cross the barrier. Talk to Daveela. As in every other village, visit the shops and regenerate your strengths. While you're at the inn, search through the lockers in guest rooms: 100 Gold, Iridescent Cyclone, Iridescent Wind, Thorn Branch. Also, check out the area behind the item shop for 1xMedals, 7xMedals, Flawless Amethyst. When you're ready, talk to Daveela. After a scene go to Elder's House that's on higher ground, a little bit away from the central part of the village. Talk to the Elder. Search his house for some items: Flawless Amethyst, Grand Shadow Crystal. Get back to the main square and talk to the girl once more.
When the night falls, once again head to the Elder's house. Enter the room at the first floor and touch the vase. Activate the machinery to open the secret passage downstairs. Go there and head for the glowing tower. After a scene go down the ladder.
Go along the corridor. In lower-left corner of the big room there's a chest with 5xMedals. Cross the stairs for Ancient Feather. In the upper part of the room there's a spell Lv5 Flarus. Step on the conveyor belts twice to get to a red switch in the wall.
Now go west. Take Grand Shadow Crystal from a chest and step on another conveyor belt. Defeat the skeletons and enter the big room to face a boss.
This battle can be tough, mostly because of the Image of Death ability that the enemy uses. It can instantly kill any character, but is executed no faster than each 4 rounds. You have to hurry. Focus your attacks on the helmet - you won't do much damage, but it's the only way to beat this guy. Use physical and magical attacks. When he summons skeletons, use Shina.
You'll get a Green Device for this battle. When you're asked whether you want to get back to the surface, choose "No" and explore the room in front of you. There's Mirror Ring - take it and then go back to the village (you have to press a button to change the conveyor belt's direction along the way). Use Green Device on a broken mechanism. Well, that's it for Pachess Town.
Go a bit south from the village, towards the big, stone pillar. It'll get knocked over by orbital lasers. You'll also get the device that lets you deactivate all the green barriers in the game.
Go to the other side and look around the map. Now is the time for you to prepare to second act finale. How to do it? Well, by fighting, of course! Try to walk around the ice fields and train on all the enemies you can see. You'll notice a mobile droid factory moving around the central part of the plains - you can check it out, but it's not really worth it for now (it's a sub-quest on Disc 3 that requires the ability to lift white force fields). Focus on eliminating minor monsters here and there. A good spot to engage your Barrier abilities is to the north. That area is controlled by fearsome penguins that tend to respawn very quickly. Don't approach the huge crater until you feel ready. Your characters should be on about 33 experience level and should have very strong shadows (I'd recommend two full skill sets for each of them). If you develop them to that extent, that should be a walk in the park.
Approach the crater and eliminate the guards. Enter the hole for some cut-scenes.

When Nene throws Kluke out of the huge droid, you'll have to save her as Shu. The mini-game is to push A twice in a perfect moment. If you do that, you'll unlock an Achievement.
HINT: You now have a time limit upon you. Don't take too much time to search for minor items (the important ones are listed in the guide), or you just might run out of it.
There's no time to loose - you have only 60 minutes to get to Nene! Try to avoid combat whenever you can. Go east to find a Phoenix Wing. Go along the corridor up to the end.
Get on the moving platform and let it take you to the other side.
The first phase is quite simple. Just keep using Water magic and you might completely block the Land Shark from attacking you. Physical attacks work well against it as well. When it transforms into second form, the idea will still be basically the same. Whenever you see a message that the Land Shark is heating up, use water against it.
After the battle stand in the green warp field to get to the second floor.
Leave through the door. Use the regeneration machine if you need to. Go along the corridor and take the first left to grab a spell Lv 5 - Regenera. Go along this left corridor for another spell, Lv6 - Resistus. Get back to the main corridor and go through the door.
Get on the platform.
You are to battle all the four sub-bosses from Flying Fortress at once! There are three enemies in the front row - try to focus on them first. Use Watera against these guys. They can deal serious damage and inflict negative status effects, so watch out and keep your healing items close.
When you defeat Szabo's four sidekicks, the general himself will appear. In order to harm him, you have to destroy his cannons. Use physical attacks to do so, as they are resistant to some types of magic. Szabo has surprisingly little HP, so the battle shouldn't be too long.
Go forth. Turn left and go along the left corridor. To the right you'll see a chest with Lv6 - Cure-All. Reach the end of the corridor and go through the door.

A mini-game awaits you here. Watch the tutorial as it might be difficult to get the hang of it from the start. Your goal is to destroy two groups of orbital lasers (3 in the first round, 4 in the second one). You shoot by pressing A, and you heal by pressing B (the party's health meter is in the upper-left corner of the screen). To unlock an achievement here, you have to beat the game perfectly: without taking any damage and without a single miss. Remember: only shoot when you see that a laser is charging up. Don't think too much about charging your own weapon - it isn't necessary to succeed.
Go along the corridor. Grab the spells: Lv5-Erase and Lv6-Extractus. Reach the end of the level and go through the door.
A giant droid can be dealt with using physical attacks and water magic. When it spits out 8 little droids, watch out - each of them counters your attacks separately, so if you use a spell like Grounda here, all 8 droids will counter the spellcaster. On the other hand, you have to hurry - if you don't destroy all of them fast enough, they will hide back in the giant droid and you'll have to repeat the whole process.
If you still have some time left (about 20 minutes), steadily look around this level to get all the spells: Lv5-Healus, Lv5-Reflecta, Lv5-Paralyze, Lv5-HP Max Up. Go through the door to reach the final battle of this act.
Yasato and some of his fellow droids stand against you. Defeat all the droids, but don't attack Yasato himself. When the heroes notice that vacuum-cleaner thingy on his body, target it and destroy it with physical attacks.
After a scene Zola will leave the party for now. You'll end up in Nene's throne room. After a long series of cut-scenes (which includes two button-tapping mini-games), you'll confront Nene's stupid ostrich droid. Just choose "Flee" option here, you can't do anything more.

There are two achievements to be unlocked here: one for removing Kluke's leash, and one for escaping from the ostrich without taking damage.
Go down the stairs and talk to the old lady. Go outside. Look around the area. Find a save point and a teleport. Follow the path to find your friends. Now approach the save point of another scene. Run towards the path that leads out of the town. Examine the tree in the center of the town. You will fight it, but there's no way for you to win.
Go downstairs again and enter the inn. After a scene with Kluke go outside and head for the moons that you see in the distance.

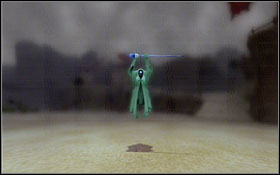
Another mini-game is upon you. All you have to do is to tap A button. You will have to fight the evil version of your own shadow. Attack it until the Corporeal option is unlocked. Use it to instantly kill this enemy.
After some more scenes you'll be able to confront the evil tree.
This way the battle is much more sensible. Shu is the only character that's fully capable of fighting, so concentrate on using him. The best attack you can use here is Flarus Sword.
HINT: If you can do this, equip Shu with Steal/Loot ability (Assassin class) and use it on the tree. This way you'll obtain an item called Black Belt - it doubles the SP gained from every enemy (a must-have when mastering the game).
When you defeat the tree, you can leave the village through the forest.
HINT: Remember that only Shu is fully capable right now - other characters can only use items in combat.
Near the entrance there's a chest with Shadow Crystal in it. Reach the end of the path and you'll enter the forest. Take a Grand Emerald from a chest and go right at the junction. You'll find The Way of the Thief and Flower Shard there (use Shina Sword to defeat the giant ghost), as well as Crystal Bracelet and Ancient Feather.
Get back to the junction and activate the mechanism in the middle. Go through the newly opened passage. Along the way grab Repeater Weed and Power-Swap Dart from the chests. Toripo awaits you ahead, so buy some hearts from him if you feel like it. At the junction take left, where you will find a spell Lv 6 - Curse and a Crystal Earring. Now follow the path east (a scene along the way). Go around the path to find Iridescent Wind and Flawless Emerald.
Follow the path right that leads "up" the map. There's a Mirror Necklace. Get back to the junction and take the path east. Defeat another ghost and take Sacred Tree Shard (there's Grand Amethyst in a chest nearby).
When you're back to the round path, go south. There's a chest with green barrier on it (you can deactivate it, remember?). Inside you find Stone Shoes. There's also Sleep Powder in a chest nearby.
Get back to the round path again and activate another mechanism. In the next part you'll find Part of Eternal Engine and Crystal Ring. Also, there's an exit.
As always, there're numerous enemies to be trained on here. Your party isn't battle-ready for now, so just head to the village. It's to the south-west (looks like a narrow mountain pass).
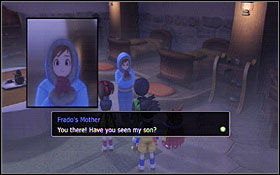
Use a save point if you need to. After a scene enter the first house to the right and talk to the old man and a girl. Leave and enter the next house (Frado's house). Talk to the woman, then leave and talk to a frozen man outside. Get back to the entrance to the village and talk to the frozen kid (Frado).
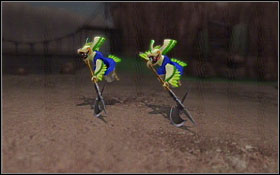
Go across the bridge and talk to the frozen children there. When all three remaining heroes get angry enough from what they see, they will summon their shadows again. You will have to fight them, in the same manner as you did with Shu's before. Just load up your Corporeal attack and then uload it on the enemy.
HINT: Tension meter loads up when you take or deal damage. If one of your characters can't manage to deal decent damage to its evil counterpart, just stick to healing and sooner or later your special attack will be ready to go.
Activate the teleport that's by the inn (a building to the left, at the end of the village). Teleport to Jibral Castle and find the king in his private quarters. Talk to him and go down to the basement. Notice that you can now open the red-barrier chest (Lv5-Waterus). Go to the lab and talk to Mad Chief Researcher. He'll teach you a spell that can free the village. Teleport back there.
There's an ancient machine in the middle of the square - similar to the one you've seen in Pachess. Activate it to initiate a boss battle.
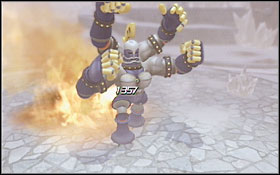
This boss' main weakness is fire. Whenever you attack it with fire spell, though, he'll counter with powerful, 500+ HP blow. That's why it's necessary to keep the healing spells close. You can also stick to physical attacks, because they don't cause the enemy to counter.
After the battle you'll get the White Device (it lets you deactivate white barriers). You can now look around the frozen village. When you're ready, approach the gate to the south. You'll see a scene in which Shu finds an Aurora Droplet. Toripo appears and asks you to give it to him. If you do, you'll get Crystal Necklace in return. Go through the gate.
Go along the path through the mountains. Get all the stuff from the chests along the way and, as always, try to fight all the enemies. You'll eventually reach Sheep Tribe Camp. There're a few people here who you should talk to.

- Knitting Sheep Tribeswoman wants you to ask someone on the other Sheep village for a knitting technique of sorts. No problem, just teleport to Wilderness Camp and ask the knitting woman. When you're back, she'll send you on a one more trip - this time to Forest Camp. When exploring that one, you'll hear a gossip about king ghost's treasure [see: Disc 3 -> Barriers] and a woman who wants to transport some herbs to her sick husband in Wilderness Camp. You'll have to do the trip three times (teleporting, of course). When the man is fine, his wife will give you Mega Medicine and Earth Bracelet. Knitting woman's reward will be a Mirror Bracelet.
- There's a fortune teller in the camp who can tell you how many unopened barrier chests there are left in the game.
- Also, there's an adventurer here. Get back to him when you obtain Autographed Manuscript.
Besides, there's a few chests here and there. One of them contains Kimono Sash.
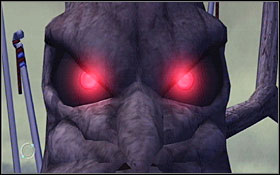
Leave the camp and head southwards. At the end of the path you'll meet another boss - quite similar to the one from ancient hospital on disc one. It's best not to engage it with any elemental magic, just attack it physically. After a few rounds the wolves will separate - this won't make things any more difficult, in fact.
Go across the bridge and towards the desert. Look around the peninsula, grabbing all the stuff from the chests. There are two valuable items here: Autographed Manuscript (south-east) and Kelolon Necklace (central-west). Autographed Manuscript should be taken to the adventurer you met in the lat Sheep Tribe Camp (cool item in exchange). When you're ready, approach one of the giant crystals.
Enter the mechat and fly south. After a few scenes you'll have complete freedom in exploring the world map. There will be numerous new markers on the map: they indicate special side-quest locations that you can visit for some additional challenges. If you really dislike the game, then I suppose you could just fly to Nene's fortress to begin the final chapter of the game. Remember, though, that some side-quests are actually far more challenging than the finale itself.
Mechat Dock is a location near the third Sheep Tribe Camp. It is a place where you can install the mechat upgrades you've collected so far. There are 9 upgrades to find and there's an achievement for collecting them all.
Upgrade
Location
Lock-On Upgrade Part A
Reward from Toripo in Aurora Ruins
Lock-On Upgrade Part B
Black chest in a cave in Exile Forest
Missile Upgrade Part A
4F Mecha Base
Missile Upgrade Part B
Black chest in Lal Mountains Camp
Coating Part A
4F Upper Mecha Base
Coating Part B
Chest behind a black wall in Kelaso Village
Heatsing Parts
Eastern Deserted Island
Laser Barrier Parts
Reward for beating the boss in Sea Cube
Weapon Parts
Ancient Ruins Forest
There are 23 teleports in the game for you to activate. Most of them are activated during the main quest, but just in case you missed something, here's a list.
Drill Machine
Ancient Factory
Ancient Hospital
Ancient Prison
Lago Village
Pachess Town
Forest Camp
Devour Village
Forest of the Dead
Noluta Village
Gul Mountains
Lal Mountains Sheep Tribe Camp
Talta Village
Kelaso Village
Mural Town
Sea Cube
Jibral Castle
Mecha Robo Cube
Alumaru Village
Primitive Cube
Laser Field
Chamber of the Cauldron
Baroy Town
Near the building there's Kelolon Necklace and Mega MP Up Elixir. Go down the stairs and examine the area - the entrance is at the back of the snowy hill. Go through the corridor and use the door. Examine the bars in the fireplace and talk to the kids. One of them will give you the key. After more scenes follow Marumaro into one of the houses. Talk to Fenu a few times - she'll always disappear and teleport to another room. After more scenes leave the house. There's a save point and a teleport nearby. Also, there's a chest with Ghost-Crusher Bracelet here, an inn and a shop. Near the exit talk to Elder Baum. This conversation will make a few dragons spawn in the game's world for you to hunt.
HINT: We're not quite sure, but the dragon event might require you to have an item obtained from Moody Dragon, found in Underground River on Disc 2 (you can get back there of course).
After approaching the map marker, land and enter the strange building. Take Kelolon Necklace from a chest and use the elevator. A boss battle is upon.
Start with attacking the enemy's head. It's best to use wind magic against it. You have to deal a lot of damage to it before it falls off and makes the monster much less dangerous.
After the battle Toripo will give you Lock-On Upgrade Part A - one of the upgrades for your Mechat.
This forest is to the north-west of Talta Village. It's a simple level where you can train combat and get some additional items. You goal is to push 7 buttons hidden in the forest - when you succeed, you'll get Gravitic Necklace as a reward. In one of the alleys you will meet a boss.
It's an enhanced version of a Land Shark that you fought in Nene's Fortress. It shouldn't be a problem to get rid of it. The best way to beat it is to use water and fire magic.
After the battle you'll get one of the mechat upgrades.
The island in south-eastern part of the world map is controlled by ghosts. The only true challenge you find there is an enhanced version of a flesh-eating tree you encountered in Devour Village.
It's not an easy opponent. It has over 10000 HP and deals considerable amounts of damage, as well as negative status effects. The key to victory is fire magic, which doesn't do much at the beginning, but as soon as the tree catches fire you practically can't loose. Just hit him with as many Flaruses as you can.
In a chest that was guarded by the boss you'll find Heatsink Parts - one of the mechat upgrades. Also, look around for another chest with 30xMedals.
This weapon consists of three elements:
- Mysterious part Alpha: found in Mural Town; cannot be missed.
- Mysterious Part Beta: reward for destroying all the statues in one of the last rooms in Ancient Factory.
- Mysterious Part Gamma: in a chest in Upper Mecha Base (1F).
When you complete all three parts, take them to the lab in Jibral Castle. The scientist there will assemble them for you.
Getting this item unlocks an achievement. In order to get, you have to find three fragments:
- Mystery Part Un: it's in Alumaru Village, in the dungeon past the chief's mansion; check out the appropriate section of the guide for details.
- Mystery Part Deux: a reward for beating Sea Cube boss.
- Mystery Part Trois: it's on Western Deserted Island. As the name suggest, it's in south-western part of the world. Take a Mechat there and grab it from a chest.
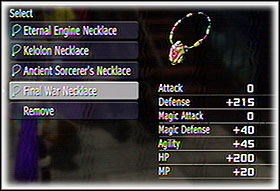
When you get all three parts, go to Castle Jibral lab and give them to Mad Chief Researcher. He'll assemble a Final War Necklace for you.
Place: Southern Deserted Island
It's a small island in the southern outskirts of the world. The only reason to go there is a Golden Poo Snake. This monster isn't any tough at all, and beating it grants you 30 Gamer Points.
Place: Ancient Ruins Caverns (north-east of Talta)
Reward: Autograph Paper, 2xGolden Poo
Enter Ancient Ruins Caverns and defeat Jumbo Poo. Take the Ancient Warrior's Ring, and a Corrosive Poo will appear nearby. Defeat it and try to leave the cave. King Poo appears in the center of the level. He's the single most difficult enemy in the game. Erm... Good luck?
HINT: Shadowus!
HINT: A great item to have in order to battle all sorts of poo is Poo Bracelet. It can be found in a blue chest near entrance to Jibral town.
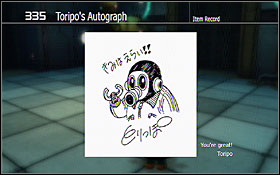
HINT: Visit Toripo in Aurora Ruins when possessing the Autograph Paper and he will give you his autograph. Any purpose to this? Naaah.
Place: Ancient Factory
Reward: Golden Eternal Engine
This droid appears in the mail room of Ancient Factory when you possess both rare items: Final War Necklace and Ultimate Weapon Bracelet. When you see an odd-looking, golden robo, attack it. He looks harmless, but in fact plays in the same league as King Poo. Only for hardcore players.
HINT: Flarus.
As you see, no guide can help you defeat these two bosses - what you really need is a few hours of training. All your characters should have full sets of skills of at least 3-4 classes. Double attack, double cast, automatic resurrection - these are the basics that you can't do without. Both of the above enemies can withstand a few corporeal attacks. The good news is - it's *only* a few. If you feel self-confident about your defence, you might want to defend and wait for the Corporeals to get loaded and then use them for, like, 3000 damage each shot. The power of these two enemies doesn't lay in their HP (as with some dragons), but in speed and damage they deal.
The dragon-hunting quest begins when you defeat the dragon in Underground River. Much later, when you visit Kelaso village, the elder in there tells you that there are more dragons to be dealt with - that conversation makes them spawn in the game's world. Besides King Poo and Gold Mecha Robo, these are the most difficult enemies in the game (well, Moody Dragon isn't tough). Don't try to eliminate them too early - you really need to be well prepared for that.
Place: Underground River
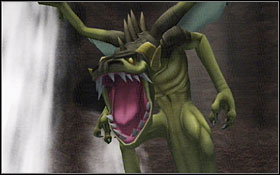
Check out the Underground River section in DISC 2.
Place: southern outskirts of The Great Desert.
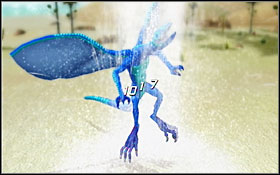
This dragon isn't impossible to beat, but it still has a whopping 25-30 thousand HP. It doesn't deal much damage, as long as you have decent wind protection. Also, don't ever attack it physically - it will heal it instead of dealing damage. Stick to the magic, folks.
Place: Coastal Road (south of Talta Village)
Get yourself some decent negative-status protection for this one (mostly Paralyze), as well as anti-Wind equipment. The enemy has lots of HP - more or less 15 thousand - so be careful and act wisely. Don't charge, even if that means you don't deal damage for two turns or more (heal instead). Remember that time is on your side - Corporeals are constantly loading up. When it comes to attack, try Windus and physical attacks.
Place: west of Kelaso Village
This monster mostly uses ice magic. To fight him you must have decent protection against it. The enemy is hellishly fast and deadly effective. In my case, I had to stick to healing and using Corporeals to kill it.
Place: Gul Mountains (behind a red barrier)
This one was the worst for me. Not sure if that was due to lack of proper protection, but it seemed like the most demanding of all the dragons. It required a little bit more training and better items. Remember to protect against wind and earth. Attack it physically or with fire.
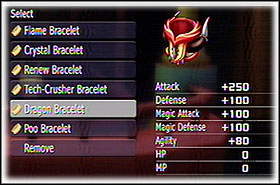
When you defeat all the dragons (there's an achievement for that), get back to Kelaso and talk to the elder. He'll assemble a Dragon Bracelet for you - definitely the best bracelet in the game (you deserve it).
Lowering barriers pays very well. Whenever you want to rest from exterminating some of the most difficult bosses, just teleport to one of the previously visited locations and look for the treasures listed below. For now you can unlock all the barriers besides black ones.
Place
Type
Reward
Hint
Ancient Ruins Caverns
Wall, Chest
Bellybutton Ring of Fire
It's a cave to the north-east of Talta Village.
Drill Machine - 2F
Chest
Ancient Warrior's Necklace
Ancient Hospital Ruins - 2F
Wall
Ancient Warrior's Earring
Wilderness Camp
Chest
Ancient Warrior's Bracelet
Lot Wilderness East
Chest
Cross Trainers
Undersea Caverns
Chest
Flip-Flops
In one of the dead ends, more or less in the center of the level.
Alumaru Village
Chest
Alacrity Elixir
Behind the chief's mansion
Jibral
Chest
Poo Bracelet
Near the entrance to the city
Jibral - Eternal Engine Lab
Chest
Shell Earring
Baroy Town
Chest
Generalist Heart
Baroy Town
Chest
Flawless Sapphire
Baroy Town
Chest
Barrier Magic Heart
Underground River
Wall
---
You must open it to get to a room filled with Kelolons and a Dragon.
Mecha Base - 2F
Wall
---
Upper Mecha Base - 2F
Two walls
---
Place
Type
Reward
Hints
Mural Town
Chest
Black Belt
Gul Mountains
Wall
---
Watch out - there's a dragon behind it! (and probably the most difficult one of all)
Exile Forest - Caverns
Chest
Epistle of the King Ghost
See green barrier list; it's protected by a Poison Hydrattler
Jibral Castle
Chest
Lv5-Waterus
In the basement
Jibral Castle Lounge
Chest
Shell Badge
In the basement
Jibral Castle Courtyard
Chest
Chain
Underground River
Chest
Shoes of the Ancients
Ancient Factory
Chest
Crystal Ring
Wire Highlands
Chest
Crystal Bracelet
Area between Ancient Factory and Ancient Prison
Mecha Base - 2F
Wall
---
Upper Mecha Base - 2F
Two walls
---
Place
Type
Reward
Hints
Lot Wilderness West
Chest
Bellybutton Ring of Water
Forest of the Dead
Wall
---
If you put Epistle of the King Ghost inside (found in Exile Cave), you'll get Crown of the King Ghost.
Gul Mountains
Chest
3000 Gold
Alumaru Village
Chest
Mirror Earring
Near the shop
Wire Highlands
Chest
Cross Trainers
Area between Ancient Factory and Ancient Prison
Devour Village
Chest
Stone Shoes
Place
Type
Reward
Hints
Ancient Hospital Ruins - 3F
Wall
3000 Gold
Ancient Hospital Ruins - 1F
Wall
Lv6-Trapfloorus; 3000 Gold
Mural Town
Chest
Gravitic Ring
Jibral Castle
Chest
Lv6-Groundus
In the basement
Ancient Factory
Chest
Ballet Shoes
In the "tower" at the end
Ancient Prison
Chest
Champion's Belt
In one of the cells
Pashess Town
Chest
Belt of Hermes
Near the cows
Pachess Town
Chest
Lv6-Zephyrus
Behind the inn
Pachess Town
Chest
Lv6-Quickus
Behind the boss battle arena; in order to get there for the second time you once more have to use the switch to change the conveyor belt's direction
Pachess Town
Chest
---
Devour Village
Chest
9xMedals
Mecha Base
Wall
---
Upper Mecha Base
Two walls
---
HINT: Black Device is the only type of barrier-lifting instrument that you don't obtain during the main quest. In order to get it, you have to go Sea Cube.
Place
Type
Reward
Hints
Mural Town
Chest
Eternity Earring
Sea Cube
Wall
Renewal Bracelet
Sea Cube
Wall
---
Lal Mountains Camp
Chest
Missile Upgrade Part B
Devour Village
Chest
Ribbon
Near the first mechanism where you unlocked the door.
Exile Forest - Caverns
Chest
Lock-On Upgrade Part B
Ancient Factory
Wall
Renew Earring, Shoes of Hermes
Kelaso Village
Wall
Coating Part B, Eternal Engine Necklace
Mecha Base - 1F
Chest
Ballet Shoes
Elevator room
Mecha Base - 2F
Chest
Belt of Hermes
Mecha Base - 3F
Chest
Eternity Bracelet
Room with egg-like monster.
Mecha Robo Cube
Chest
Mega HP Up Elixir
Mecha Robo Cube
Chest
Mega HP Up Elixir
Sea Cube is a strange construction floating in the air near Jibral Castle. Approach it with your Mechat and land on it.
Activate the teleport. Take left at the junction. Defeat the fish and take 5xMedals from a chest. go back and head north (Mega Magical Medicine along the way). Reach the end of the corridor and defeat a Kelolon to get a key. Get back to the junction and head west to get to the second level.
There's an Ancient Fossil in the chest. Go along the corridor. Defeat the Kelolons to get Phoenix Wind. Turn south. At the junction head east and get rid of more Kelolons to get a key. Get back to the junction and go west. At the end you'll see a Crystal Giant that you have to beat.
HINT: By the second warp device on this level you'll find a cool item: Tech-Crusher.
Take Grand Shadow Crystal from the chest and go east. Defeat the monsters and take the key. Go back and head north. Along the way take 5xMedals from a chest and bring down the second Crystal Giant.
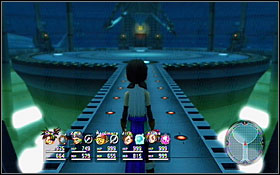
Take 1000 Gold from a chest and head north, then turn east (15xMedals in a chest), then north. Clear the room of Kelolons to get Lv6-Wallus. Get back to the junction and go northwards. After getting past the flying mussels go right. At the end get the Deep Sea Key. Get back and go west, then south. At the end defeat a group of Kelolons to get Infinity Ring. Go back north, defeat the giant and go to the next level.
This cool looking boss has a lot of HP, but besides that isn't really a threat. It deals little damage and at this point his attacks shouldn't trouble you at all. Attack it using fire magic or physical blows.
After the battle, two chests appear. In them you find Black Device and Laser Barrier Parts. The former lets you deactivate black barriers, and the latter is a mechat upgrade. Go north to grab Infinity Earring, Mystery Part Deux and Lv6-Shadowus.
Before you leave Sea Cube, you should deactivate two back barriers here: in Deepest Area (wall) and on Level 3 (another wall). You'll find Renew Bracelet behind the second one.
Mecha Base is a moving platform that can be found near Nene's fortress, in north-western part of the world. In order to get inside, just stand on its way.
Go north. At the junction take left and grab 7xMedals from a chest. Go north until you find more medals. Now turn west, then south. Defeat these Grim Security Mecha Droids and go north up until the end. Here's a chest with Lv6-Magic Atk Up, as well as a black barrier chest with Ballet Shoes. Use the elevator now.
Leave the room and turn right when you see the lasers. Get to the end of the corridor and turn left. Get to the southern end of the level. You'll see three barriers: blue, red and white. Deactivate them, but before you go through, head west. There's a small room with some robo-guards in it. You have to defeat them to activate the elevator.
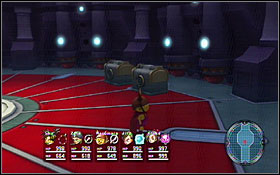
HINT: If you want to find a hidden spell here (Lv6-Previve), switch to Marumaro (LB/RB while in the menu switches characters - you knew that, right?) and use him to evade the lasers and get to a room in the north-eastern part of the level.
Take 5xMedals from a chest and go west. Follow the corridor until you have to fight an egg-like creature. There are two chests here: one with 3xMedals, one with Belt of Hermes (it has a black barrier on it). Leave through the corridor to the north-east. Take Gravitic Earring from a chest. In the elevator room you will find Brawler Elixir and Ancient King's Earring. Go further along the corridor to reach another guard room. Defeat them to unlock the elevator. Also, there's a black chest with Eternity Bracelet here. Get back to the elevator.
Take 7xMedals from a chest and go south. In there, grab 4xMedals and Prismatic Cyclone Bracelet. Head south. Defeat the robots and take 9xMedals. In the elevator room there are two more chest: with Missile Upgrade Part A and Gravitic Bracelet. Go to 5 floor.
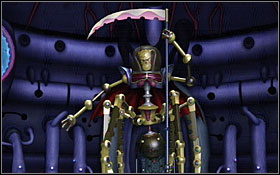
It's an easy boss. There's no special tactics to this battle, so just hit and heal, as always.
You'll get a Renew Ring for this one.

The attack begins with a second mechat mini-game in which you control the on-board gun. The controls are quite intuitive. Your goal is to disarm the enemy base. Use the gun at all times, and at the end use your own rockets to destroy a tower in the middle.
HINT: This mini-game gets easier with every mechat upgrade you install.
This level is very similar to the previous mecha base you've been to. This time in order to unlock an elevator you have to destroy all the opponents on a certain level. Luckily, there are no enemies in the corridors: they only dwell in the main rooms. When you succeed, get to the elevator. Notice the chest with Mystery Part Gamma there.
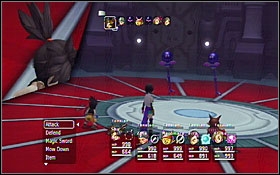
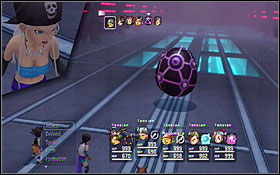
Some more barriers to be deactivated here. In the south-western part of the level there's a room where you will find a Life-Crusher Bracelet. At the end of the level (to the south) near the elevator there's an Eternity Ring and an Eternity Necklace.
Nothing special here, just cross this level when defending against enemies. The elevator is to the north. Chests here contain Shield Badge and Lei.
Same thing again. Items in the chests are Coating Part A and Infinity Necklace.

Another simple boss. You should have no problems dealing with this one - just do the same thing you always do.
Your reward here will be the Renew Necklace.
When you're ready to end your epic adventure, head for the crater in north-western part of the world. Save your game when prompted.
The final battle will begin with a third mechat mini-game, in which you are to shoot down the enemy Land Shark. The controls are the same as before. Doing this will be easier, due to mechat upgrades you (hopefully) installed.
Land on the cube to the left. You'll meet your old pals from Baroy there. Near the ship there is a chest with MP Boost Elixir and Toripo. Activate the teleport here. Or, look for two black barrier chests (Mega MP Up Elixir, Mega HP Up Elixir), as well as some other, minor goodies. You can use the shops here and get healed by the droids. When you're ready, hop on board and fly to the other cube.
Walk a few steps and you'll be attacked by a boss.

It's a very simple battle. If you did some training before entering the cube, it will be a piece of cake for you. In my case, I beat them with just one hit, huh.
After finishing the battle enter the nearby ruins.
Go along the platform and turn right to get to the console. Activate it to enable yourself to get to the chest. In the chest at the end of the room there's a Black Magic Heart. Use another console to move the floor to the left. Go through it and grab a Grand Shadow Crystal. Activate the next console. Get back to the beginning of the room and go through the newly opened passage. There's an Ancient Emblem - Moon in the chest. Take it and once again move the floor at the end of the room. Go through the door to the right.


Go through the corridor and turn left. Take MP Boost Elixir from the chest to the left. Go to the other side of the room. Take the Broken Eternal Engine and go through the door. Go forth. In the next room with lava press the button in the middle and leave through the southern door (the whole level will turn around in a way). Take Ultra Medical Medicine and go north up to the end, to the room with snakes (Immortal Wings). You'll get MP Boost Elixir there. Get back to the lava room and use the button again. There's a locker to the right; you'll find a Barrier Magic Heart there, and to the left - Monk Heart. Press the button once more to restore the walls' original positions.
Get back south and turn right through the first door. There's a huge room with snakes in it. Go through the ledge to the first console and use it to move the floor, then approach the second one and do the same. Press the button on the third computer, then get back to the second one and activate it once more. You can now reach the chest (Phoenix Wing). At the end there's a black barrier with two chests behind it (Mega HP Up Elixir + Himiko's Necklace). There's another console here. Activate it and get Ancient Emblem - Sun, then stand on the warp device.
Head east and open the door using the Sun emblem. Get through the room (there's a locker with HP Up Elixir) without pressing the button - to the east. Defeat the red ghosts there and get Support Magic Heart. Now go back to the room with the button and turn the walls. Go south - there's a Monk Heart at the end of the corridor. Get back to the junction and go north.
Defeat the ghosts and take Assassin Heart. Go further to the north. Take Grand Light Crystal from the chest to the let and activate the console to the right. Go across the bridge to the chest (Cure-All) and another button - press it. Now go to the other side. There's a Barrier Magic Hear and Ancient Emblem - Void. Before you use the teleporter, activate the last switch. If you want, you can walk around this room and deactivate the black barrier on the other side. There's Guardian Heart and Himiko's Earring behind it. Get back and use the warp device.
HINT: If you were strict about lifting barriers, you should now see the almighty "Achievement unlocked" on the screen. To make sure you've got them all, check the records: Menu -> Items -> Encyclopedia -> Adventure Record.
You'll be teleported to the dark door. You can now open it.
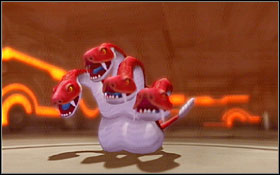
It's a very simple boss - just use Watera on it.
After the battle go further and use the teleport.
Go south and then west. You'll have to defeat a sub-boss that absorbs fire magic, so stick to other elements. After the battle push the button. Now head east and do the same thing once more. Get back to the center and turn south.
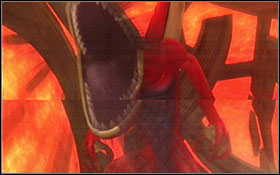
If you've done some dragon-hunting earlier on, you'd probably expect much more from this one. If you haven't, then you might get surprised by its 15000+ HP and powerful range attacks. Use Waterus and Windus on it, as well as physical attacks.
Go further due south. You'll find a teleport here - activate it. Go west at the junction. There's another "sliding" puzzle there - get to the other side to get Himiko's Ring. Make sure you restore the original positions of the bricks in the floor! Get back to the junction and go east. It's basically the same thing again - play a little puzzle for Nene's Necklace. Move the platforms so that they are back in their original positions.
You can reach the two remaining chests by getting back to the warp device and going a few steps southwards. There's a narrow corridor there, that will take you to the remainder of treasures (Nene's Ring, Himiko's Bracelet).
A little bit further you'll reach the final puzzle. It's difficult to describe the solution in plain words, so let's not complicate things unnecessarily. There are sub-bosses in the surrounding rooms: Mechataclysm and Sneezing Cyclops. The former can be defeated using fire, the latter - using water. When you finally form a bridge to the other side of the lava pit, you'll be really close to the ending. Reach the warp device and use it.
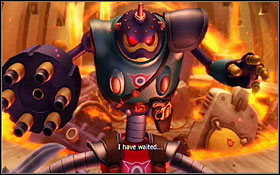
Szabo in his final form has somewhere around 20 thousand HP. The battle might take some time. Fortunately, the damage he deals isn't all that serious. He concentrates on attacks that deal damage to the whole party at once, so keep your Zephyrus ready.
After the battle follow Szabo. Grab what's in the chests and activate the last teleport in the game. The portal before you will take you to the final confrontation with Nene.
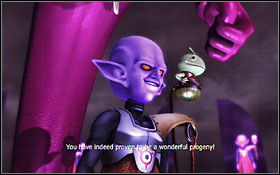
The first phase is surprisingly dull - heroes' shadows are weakened, and Nene himself apparently tries not to get too serious. The only spell that's worth using here is Flarus. Steadily attack Nene, monitoring your own health. When you deal a few thousand points of damage to him, a scene will commence in which you regain full strength. Things will get a bit more complicated now but still it's nothing out of ordinary, compared to tens of bosses you've already fought. Hurt him hard enough for him to change into his final form.
At the beginning of this round Nene will heal your party. The battle is still basically identical - just do the usual stuff and you'll be fine. It's really a test of how well you trained your team - if you can't beat him, than well, you're in trouble.
After another series of scenes you'll fight Zola. Watch out so you don't hurt her too serious - it's a stupid bug in this game, that if you kill her now, then it's game over for you. Attack her gently, then. After a few rounds, more scenes commence.
And here he is: the final boss in the game. Didn't you see it coming? Attack him with everything you've got. He has about 20000 HP and fairly strong attacks. When he creates a mist all over him, use Windus to get rid of it. When Destroy leans over towards you, attack his eyes.
When the battle is over, all that's left is to play through an epilogue of sorts. Stand on the warp device and approach the control mechanism. When you're on a plain, pick up a flower. When you take over Marumaro, approach Zola and talk to her. When you're Shu again, enter the house and talk to everyone inside. Give Kluke the flower. And that's it. It's been a pleasure, folks.


 Battleline: Steel Warfare Game Guide & Walkthrough
 Battlestations: Midway Game Guide & WalkthroughBioshock 2 Game Guide & Walkthrough
 Battlefield 2142 Game Guide & Walkthrough
 Burnout Paradise: The Ultimate Box Game Guide & Walkthrough