This BioShock: Infinite game guide contains a complete walkthrough of the game. In addition to the walkthrough you can also find a lot of hints on how to survive in the most difficult moments of the campaign, where to look for locked areas and how to receive all side missions. Both the walkthrough as well as other chapters of the guide also tell about the locations and descriptions of all the important objects the main character can obtain - voxophones (journals), vigors, weapons, infusions and gear. Finally, you'll be able to learn about the effects of the choices you're presented with in key moments of the singleplayer campaign.
A separate chapter of the guide is focused on Elizabeth and her abilities and it's important to know that she becomes an important character early on during the game.
Other important things you can find in this guide are the locations of all kinetoscopes and vantage points, as well as complete listings of all achievements and trophies along with the information on unlocking them.
Regardless if you are an unexperienced player or a veteran you'll be able to use this guide to help you in completing the most challenging scenes of the game and to find all the objects you might have missed.
More advanced players can use this guide to familiarize themselves with descriptions of all available weapons (complete tables showing damage inflicted by each weapon) and with all possible vigor combinations. There's also a chapter entirely about enemies, providing the accurate statistics on their life points, attacks and the amount of damage they inflict. This should all provide much needed help in planning the upgrades of your weapons and gear, especially while playing on Hard or 1999 difficulty settings.
This BioShock: Infinite game guide offers:
Piotr "MaxiM" Kulka ()
The game guide you're reading aside from being highly illustrated also uses different colors to help the readers in recognizing certain types of collectibles - vigors are marked with a green color, infusions are marked in orange, equipment is marked with a blue color and voxophones/kinetoscopes/telescopes are marked in red. One last thing to know is that the structure of the guide resembles chapters found in the game and you can repeat a chapter you've already completed by choosing the 'load chapter' option from the main menu.
Here's a bunch of very useful gameplay hints:
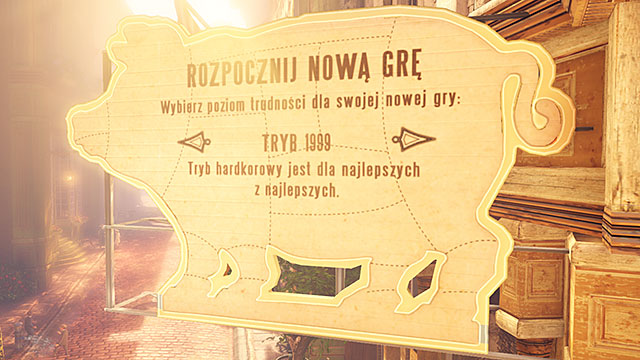
Changing your difficulty level results not only in the amount of resources (ammunition, cash etc). you find, but also affects many of the player's statistics and it's not that obvious. As a result it's recommended that you take a look at the table seen below, especially if you're planning on finishing the game on the 1999 difficulty setting. Here's a list of the modifiers affecting the gameplay depending on the current difficulty:
Difficulty level
Damage dealt
Damage received
Resurrection cost
Shield regeneration delay
Shield regeneration speed
Easy
125%
50%
$5
3 seconds
1 second
Normal
100%
100%
$25
4 seconds
2 seconds
Hard
60%
170%
$50
5 seconds
3 seconds
1999 Mode
50%
200%
$100
6 seconds
4 seconds
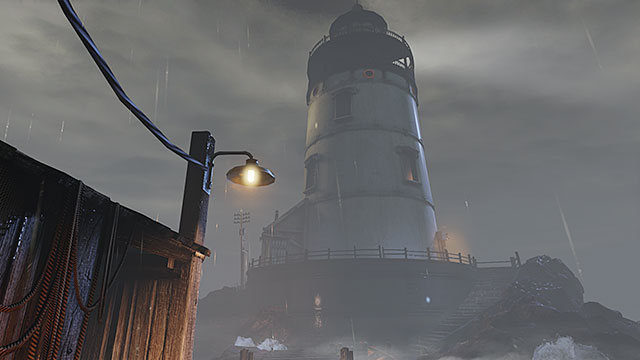
Your first order of business after arriving on the island is reaching the top of the lighthouse, because that's where a transport will be waiting for you. Thankfully you won't encounter any resistance along the way, however you should be on a lookout for silver eagles (coins) and other less important objects. The game is similiar in this way to the previous BioShock titles, so you should explore all areas and examine all barrels, drawers, bags, wallets or even trashcans. The loot found in plain view is always the same, but the objects stored in containers are randomized. You can find the first set of silver coins in the roofed area of the pier and inside a barrel found near the lighthouse (to the left of the entrance).

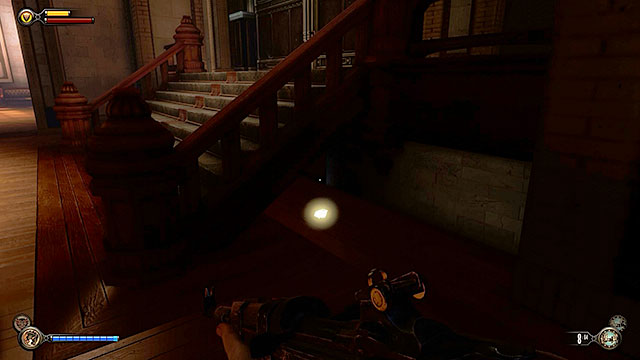
Once you've entered the lighthouse make sure to explore each floor very thoroughly. The ground floor contains several coins which are stored in the dresser under the stairs. Once you're on the first floor search the locker and pick up a wallet found under the bed. The second floor of the lighthouse has several more coins and they can be found on a table next to a dead body of the (alleged) lighthouse keeper.
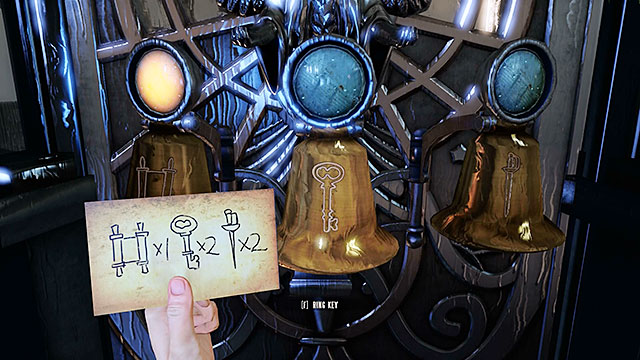
The top floor of the lighthouse has a door you need to open. You must ring three bells, following the combination displayed on the card - interact with the left bell once, with the middle bell twice and with the right bell twice. A red chair will appear behind the door in a few minutes. Sit on the chair to begin your journey to the city in the skies.
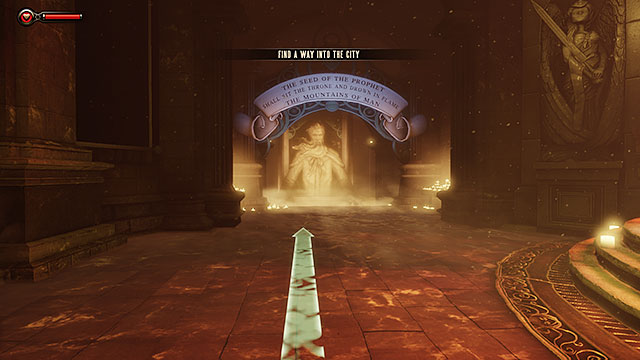
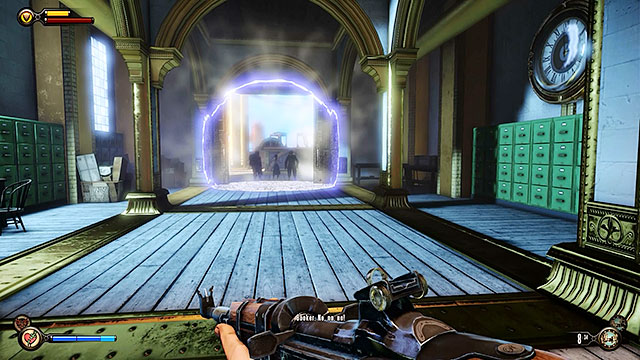
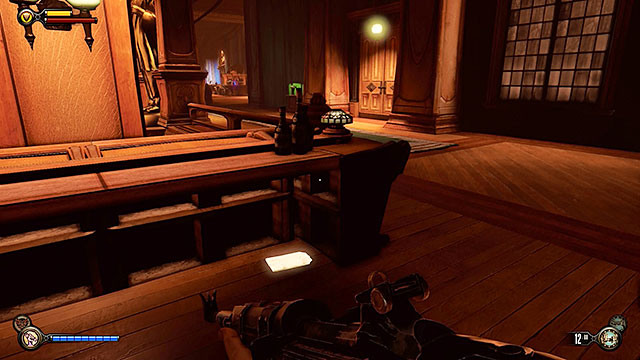
Once you've exited the "rocket" examine the benches found in the first room and then choose the left corridor. From now on you will be allowed to use a navigational arrow for help in leading you to your current objective. Use the Navigation Aid to display the arrow and your current assignment which will always appear at the top of the screen. Both of these assists are very practical and as a result you can't get lost and you won't have to use this guide to navigate you through complex mazes. An important thing to know is that the navigational arrow always points towards the primary objective!
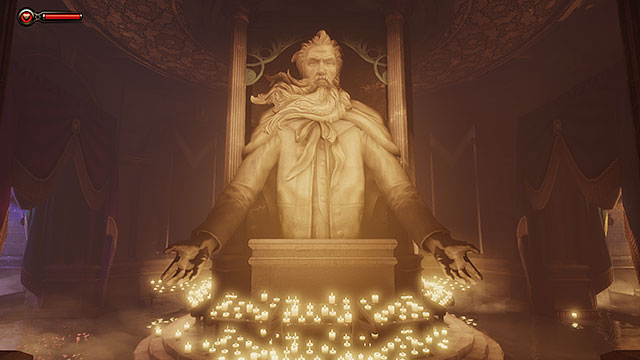
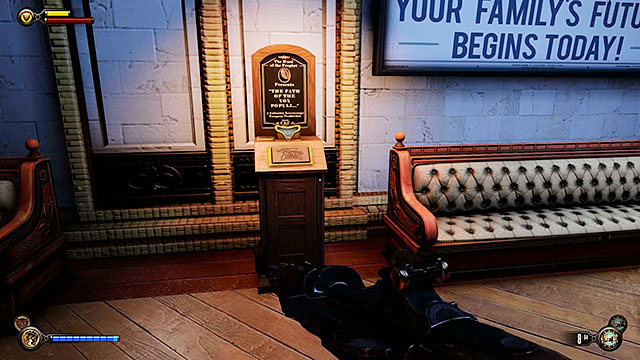
There are smaller chapels on both sides of Father Comstock's bust. Obviously you should examine them more closely so that you'll obtain more money.

The right niche of the left chapel contains the first Voxophone #1 (this item is needed to unlock the Eavesdropper achievement). Transcriptions of all the voxophones you've collected can be viewed from the Gameplay Menu by choosing the Voxophones tab.
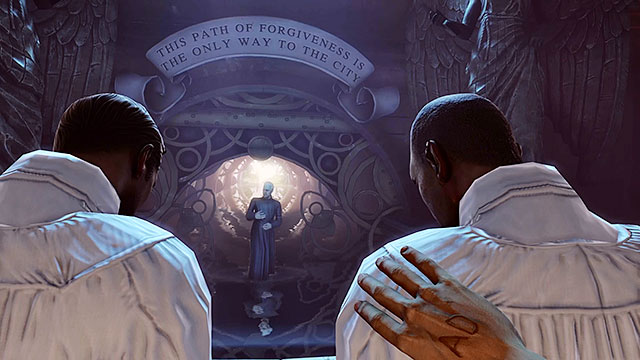
Once you've explored this area use the stairs located behind Father Comstock's bust to descend to a lower level. You'll enter a bigger chapel here and you can listen to the sermon or interrupt it by entering a ring with a group of people that are praying. In order to move on you will have to be baptized by the preacher.
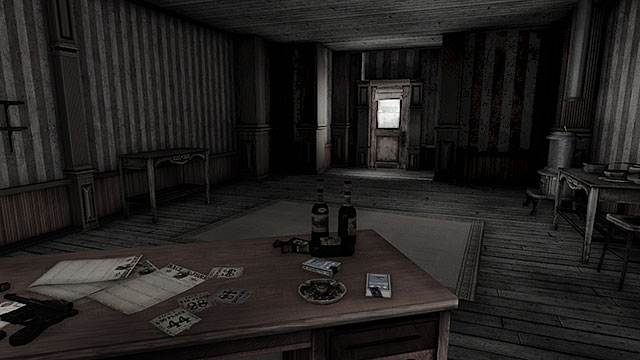
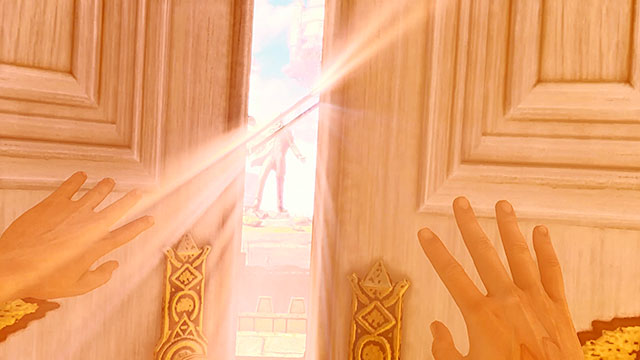
Losing your consciousness during the baptism will result in a disturbing vision taking place in Booker's office. You can end the vision simply by opening the door and you'll finally get to Columbia.
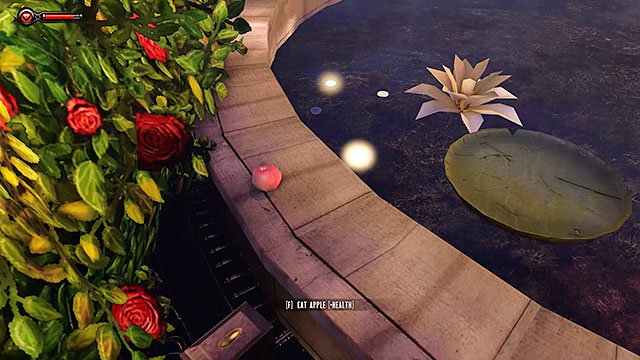
You'll awaken in a garden being surrounded by a lot of praying people. Being almost drowned by the preacher has resulted in losing some of your health so you should be on a lookout for fruits and other snacks. Make sure to examine a pond found along the way in order to find a few coins in the water.
Keep following the navigational arrow until you get to the exit from the temple garden. Get to the other side and you'll enter the streets of Columbia. As always you should explore your surroundings, because many less important objects can be found on the benches and in side alleys, as well as inside barrels and trashcans.
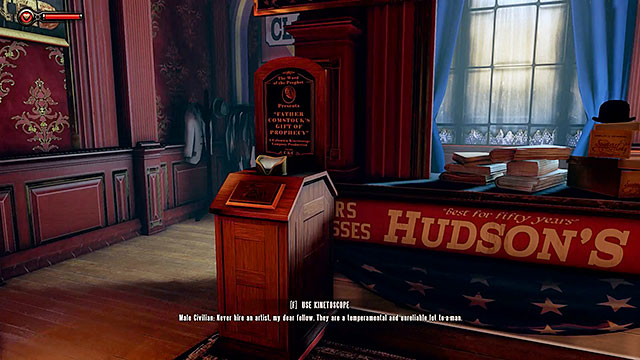
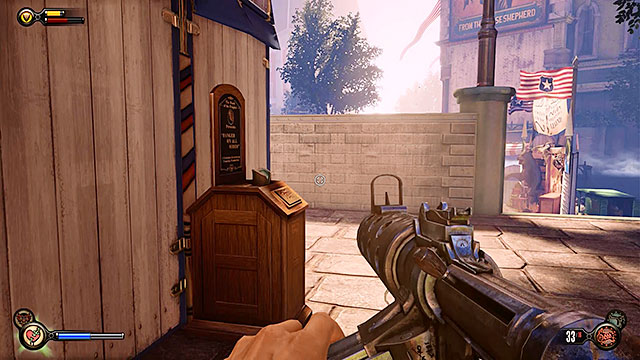
Check the area to the right of the monumental statue of Father Comstock and you should be able to locate Hudson's tailor shop. There's a bench near the store and you can find several coins under it. Enter the store to unlock Vantage Point #1: Kinetoscope (this action is needed to unlock the Sightseer achievement). Don't leave just yet, because exploring the area behind the store's counter will also result in finding Voxophone #2.

Get back to the streets and proceed towards a parade flying over the city. Wait for one of the guards to lift the barrier and move on.

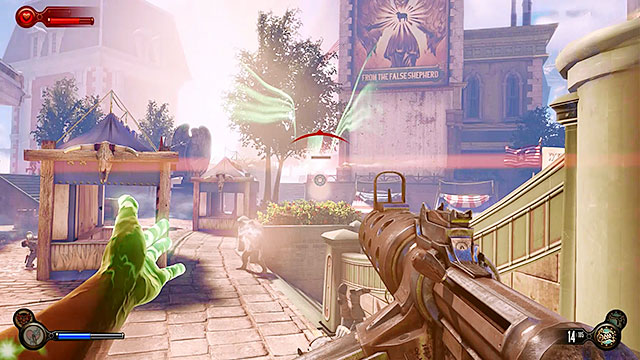
You'll notice a large poster "The False Shepherd" along the way. Examine the area near the poster to unlock Vantage Point #2: Kinetoscope.
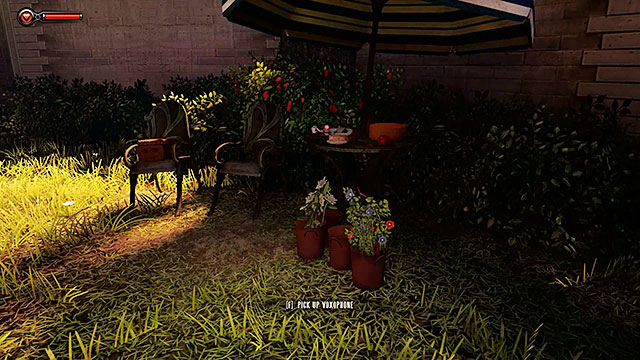
There are stairs to the left of the kinetoscope and they lead to a small garden. Locate some money and food under the umbrella, as well as Voxophone #3. You may now examine the rest of the garden and when you're done go back to the streets. Head towards a large statue seen in the distance.
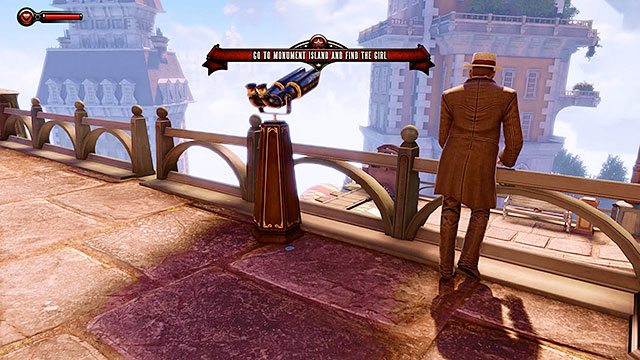
Soon after stepping through a large gate at the end of the street you should receive a rather enigmatic telegram from Lutece. Read the telegram, turn left and use the telescope located in Vantage Point #3 (this action is also needed to unlock the Sightseer achievement). If you'll use the telescope and point it at the lower sidewalk you'll notice the otherwise invisible Lutece pair.

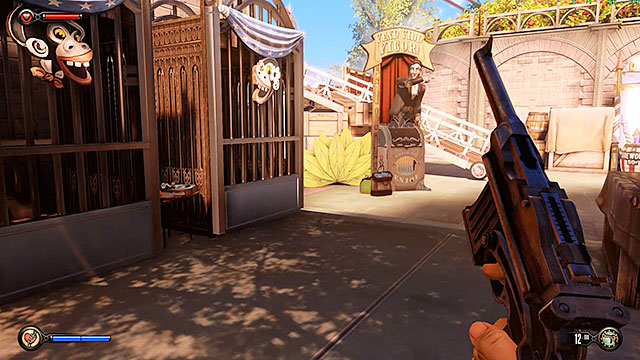
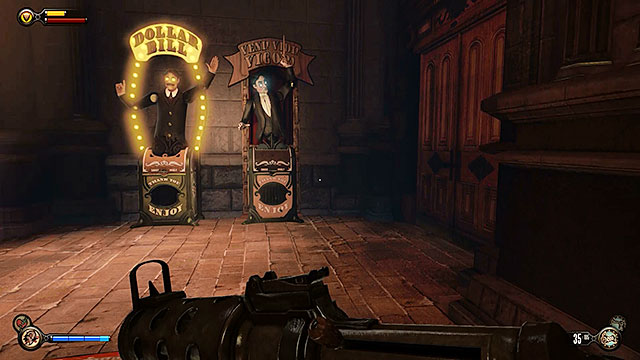
Proceed towards the fair. Near the entrance to the fair (on the opposite of the vigor's presentation stand) you'll find Vantage Point #4.
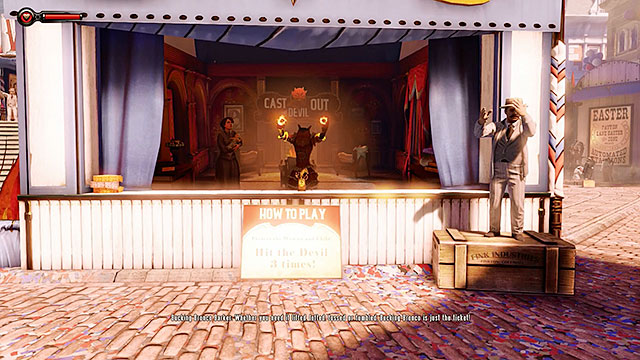
The fair contains several shooting ranges. Interacting with these attractions serves as a tutorial and can also be used to gain much needed funds. Among the attractions is a vigor presentation (Bucking Bronco) situated under the "Cast the Devil Out" signboard. As for the shooting ranges, there are two of them - "Bring Down the Sky-Line Vox" and "Hunt Down the Vox". Achieving first place in each contest is awarded with 30 silver eagles, second places with 10 and third place with a pack of cigarettes.
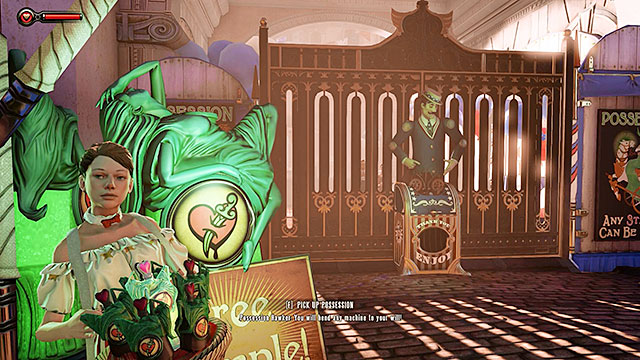
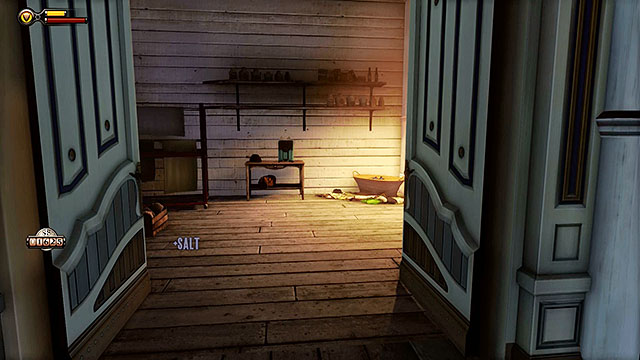
Once you're done exploring the fair and interacting with the attractions approach a stand that offers a free sample of a vigor named Possession. Take the sample from the girl with a basket and approach an automaton which guards the entrance to the lottery. You'll learn that all the tickets have been purchased by important dignitaries, however the automaton will change its mind if you'll try the newly acquired vigor on it. There's also another stand with a free sample nearby and you can now use it to replenish your salt supplies which serve as fuel for the vigors. If you need even more salt you'll find several bottles under the canopy with the girl.
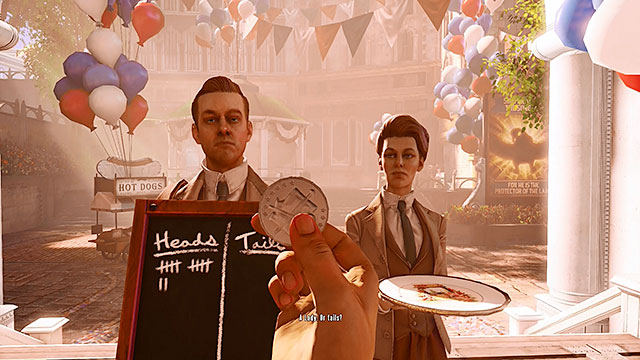
Soon after stepping through the gate you'll have a chance for your first face to face meeting with the mysterious Lutece couple. Throw a coin they gave you and head towards the lottery.
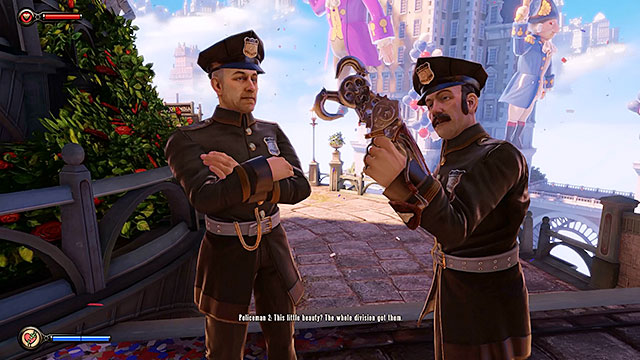
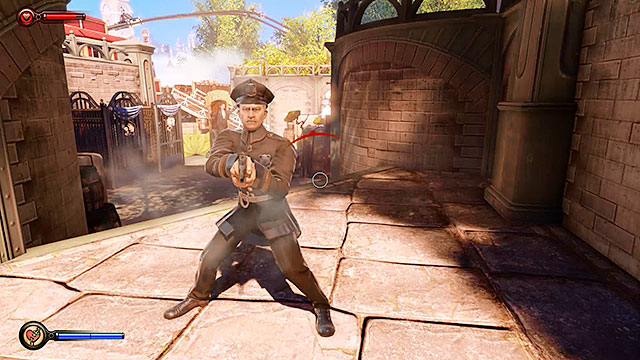
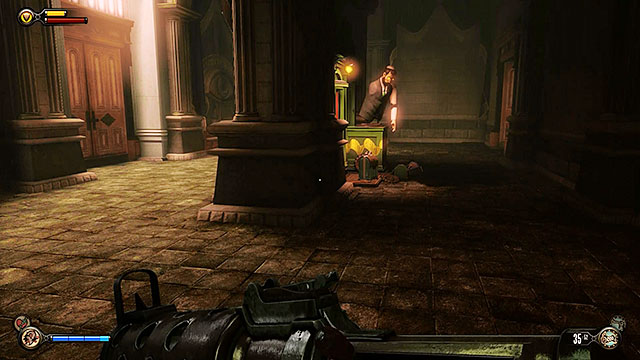
On your way to the lottery you'll also encounter two policemen. You can stop here for a moment and take a closer look at the device they have in their possession. Don't worry, because you'll soon obtain this device (after a second, more unpleasant meeting with those men).

R. Lutece monument is the next place where you should make a stop. Approach the bench and look underneath it to locate Voxophone #4.
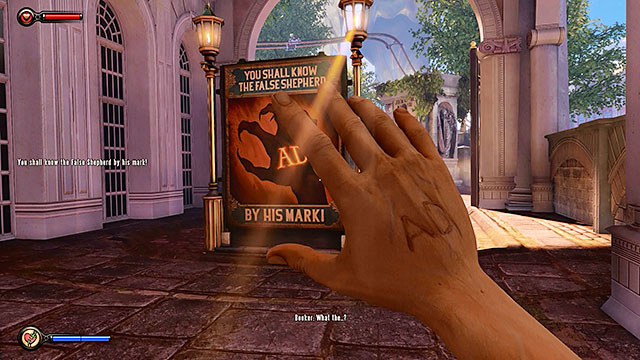
Keep moving towards the lottery, finding a "false shepherd" poster containing a warning about the events that will soon take place. Make sure that you've explored this part of the city entirely before entering the lottery area, because you'll soon lose access to this place.
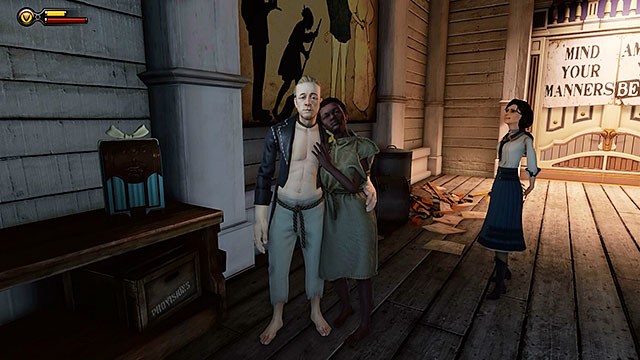
During the lottery the main character will draw a ball with the winning number (the same one as from the warning from the telegram). You'll now be presented with an important choice and you'll only have a dozen or so seconds to make up your mind. You can throw the ball at the two convicts (on the left) or at the announcer (on the right). The next part will have the same outcome no matter how you've decided, however if you've spared the imprisoned couple you'll meet them later during the game and you'll be rewarded by them with an unique part of equipment.
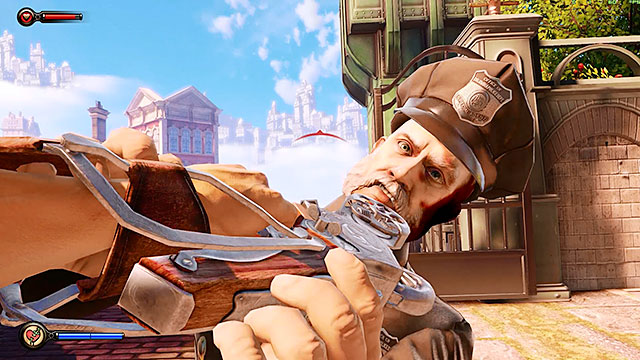
As you've probably noticed during the events that took place in the lottery area you've obtained your first weapon - a Sky-Hook. This object works in a similiar way to a wrench from the previous BioShock games. The main difference is that Sky-hook may be drawn without having to change weapons and that you can performing executions with it by holding down the attack button when a skull icon appears above the enemy's head. Another important purpose of this weapon is that it can be attached to ribbons and hooks in order to travel between buildings, but that won't occur until you're further in the campaign.
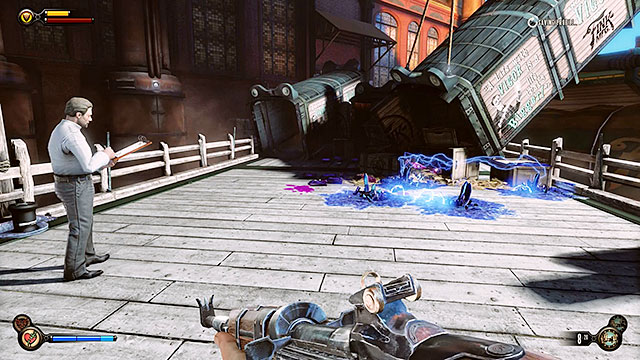
During the battle one of the killed policemen will drop a Pistol. Quickly pick it up and then proceed towards your current destination.
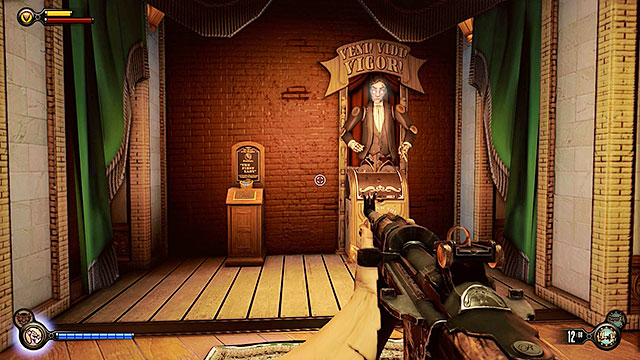
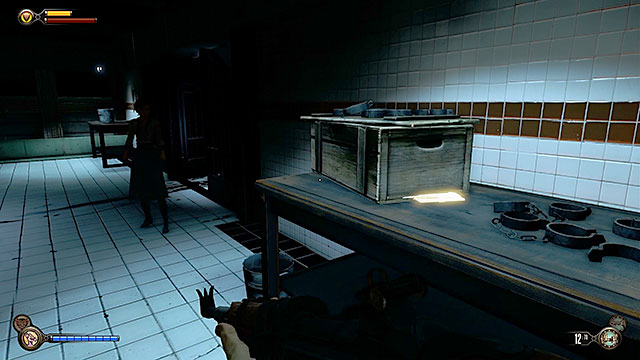
There are crates near the Veni, Vidi, Vigor! machine. Check the area between them in order to locate Voxophone #5 (there are also silver eagles nearby). Open the remaining containers and once you're done exploring resume your journey. You can also use this opportunity and upgrade your Possession vigor for a small sum of 50 dollars. Doing this will unlock the possibility of controlling not only machines, but also people.
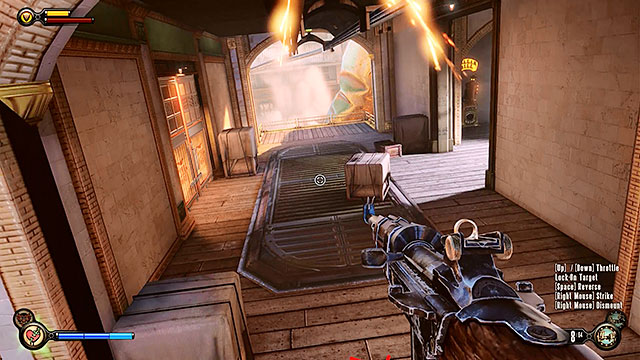
There's a barge in this area and its beak has a mechanical shooter mounted on it. This device works like a typical turret. Destroying the turrets is not a good idea at this stage of the game, because you would have to spend a lot of ammunition or perform a lot of Sky-Hook attacks, receiving serious injuries at the same time. You can on the other hand use the Possession vigor to take control over the turret and doing this will allow you to easily get rid of nearby policemen. Possessing the turret doesn't take too long so explore the barge to find salt and then proceed forward, looting bodies of all the enemies you've killed.
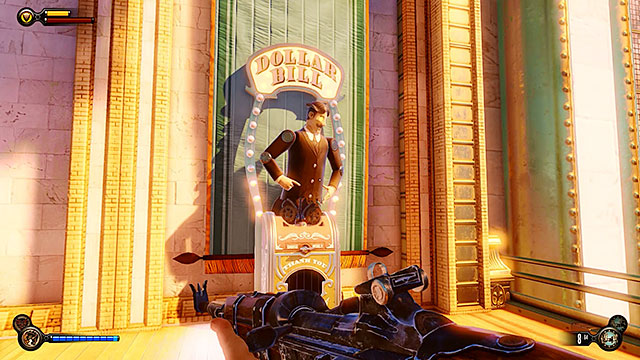
You'll have to deal with a similiar situation at the end of the park. Start off by taking control over the turret and once the area is safe head towards a narrow passageway located on the other side of the gate. Notice a Dollar Bill machine in this area - use it to replenish resources if you're out of salt or low on health.
The alleyway you've just entered will allow you to get to a grocery store. It's recommended to explore the store in order to find some food, alcohol, money and ammunition for the pistol. Notice a wagon at the end of the street. Take a closer look at tit and you'll locate a medkit and a bottle of salt. Open a nearby gate and be ready to take on a new opponent.
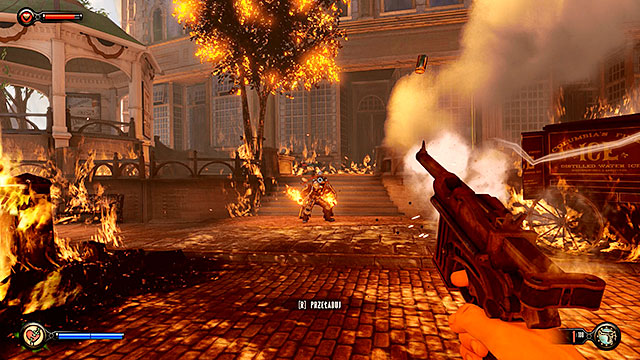
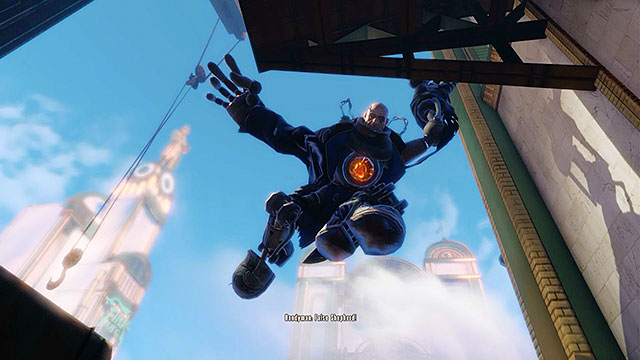
Immediately after stepping through the gate you're going to be attacked by a Fireman and he'll be using a Devil's Kiss vigor during this duel. The opponent wants to set you on fire and you should be using nearby wagons to hide from his attacks. Thankfully he's the weakest of the "arsonists" encounter during the game so this duel shouldn't cause you any problems. Remember to maintain safe distance from the Fireman each time he starts to chase you, because that's when you can expect a large explosion. Once you've defeated the Fireman collect the vigor he was using to harm you - from now on you will be able to send out fireballs and prepare fire traps. Make sure to examine a box left by the boss to find some salt and a medkit.
Proceed to the end of the street and expect to come across new policemen here, as well as a single turret. You can destroy the turret if you want to with a single and precise fire attack performed thanks to the recently obtained vigor.
Once you've dealt with all enemy unites loot their bodies and explore the surroundings for additional items. A nearby police stand contains a bottle of Devil's Kiss vigor which will replenish your salts. You should also check the area near the entrance to The Blue Ribbon Restaurant in order to replenish ammunition, health and salt supplies. Enter the restaurant when you're done exploring.

As soon as you've entered the The Blue Ribbon Restaurant you should turn around. Check the area behind the counter and open a locker. Notice three kinetoscopes at the end of the hallway leading to the main area of the restaurant. Use each kinetoscope in order to unlock Vantage Points #5-7.
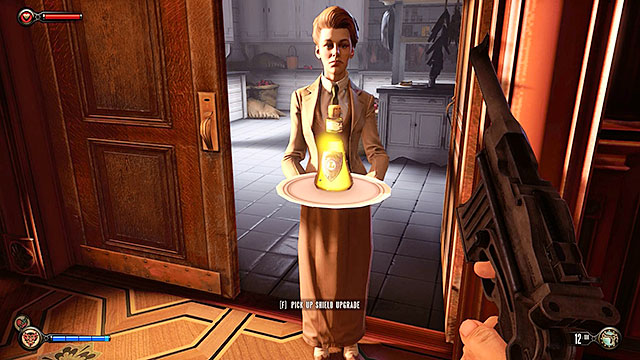
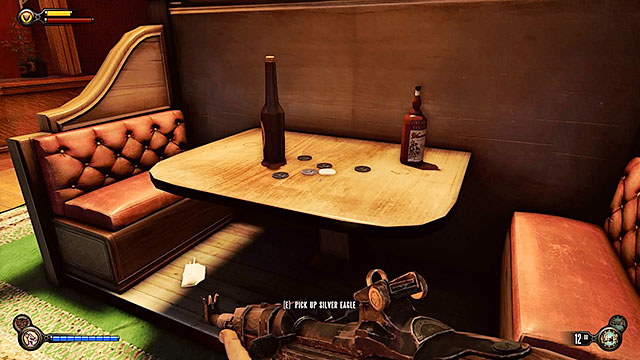
Once you've entered the main area you'll encounter the Lutece siblings again. Before you approach Rosalinda check the tables and the area behind the bar, finding coins, a wallet and some money in the register. You may now take the gift from Rosalinda and it's a new Infusion named Shield. From now on you'll notice a new bar under your health meter and it will inform you about your defences. The shield goes down first and it can regenerate on its own when you're not under attack.

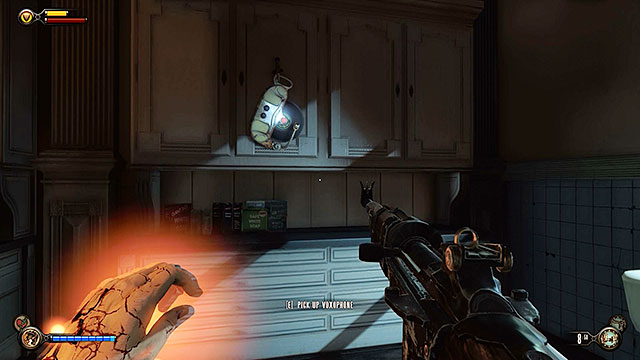
Proceed towards the kitchen. Obviously you can find some food and alcohol here, however you should also search the area for Voxophone #6. Find the kitchen exit.
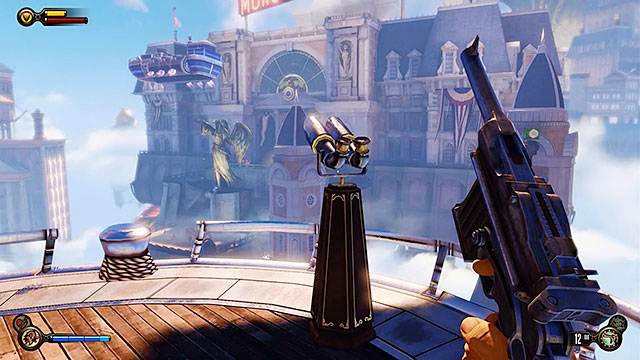
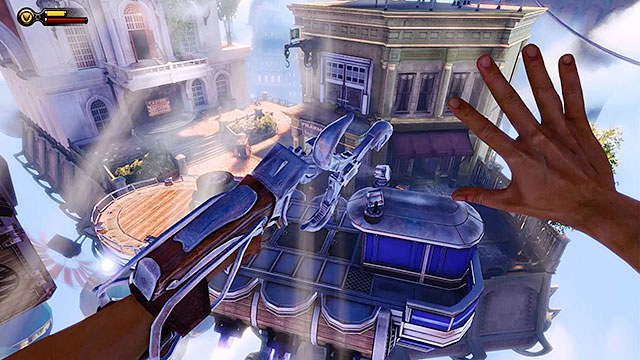
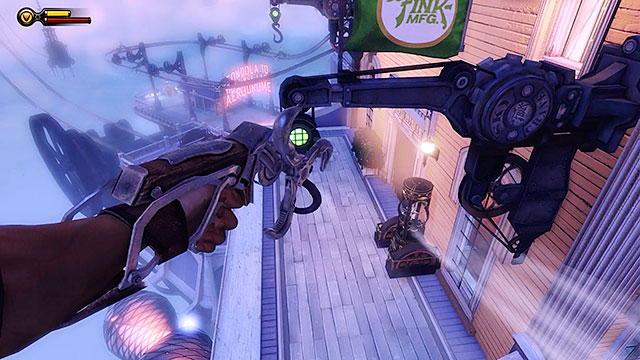
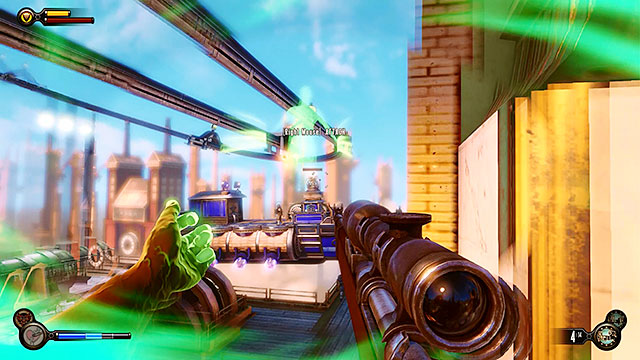
Proceed to a balcony located behind the restaurant and look up, centering the view on a red and white building hovering nearby. Aim your Sky-Hook at one of the nearest hooks and wait for it to start glowing green. Make a jump and the Sky-Hook will attach you to the hook of the wall, allowing you to travel between unconnected buildings.
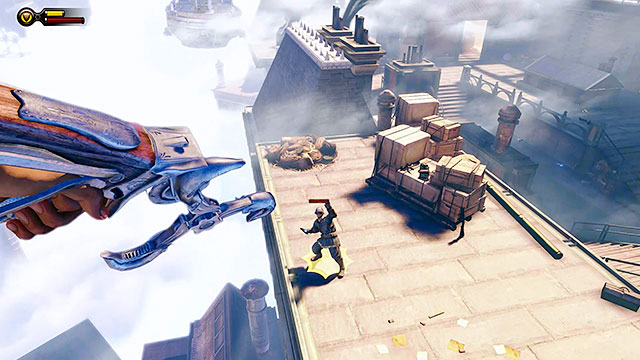
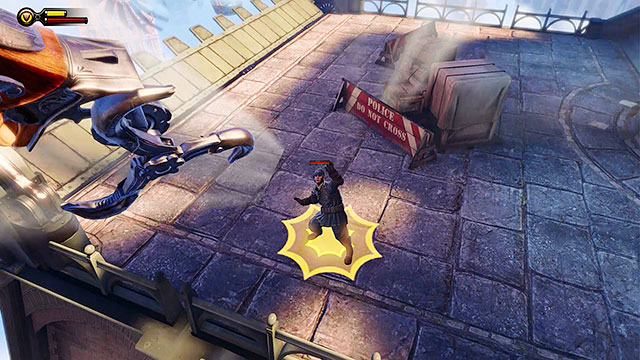
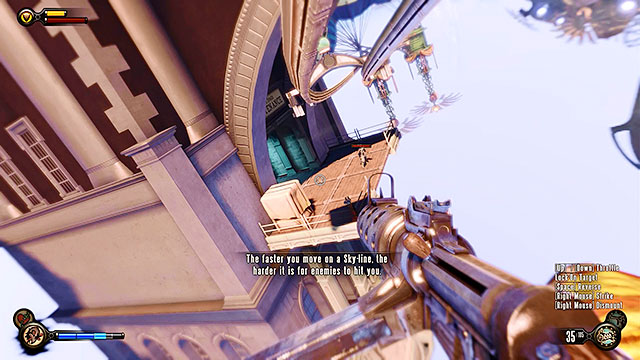
Continue using the Sky-Hook to connect to nearby hooks until you get to the last one. You'll now have your first opportunity to perform an airborne execution. Make sure you're attached to the last hook and aim at a policeman standing on a nearby roof. Jump towards the policeman as soon as a yellow marker will appear under him. Performing executions will allow you to kill most enemies with one hit.
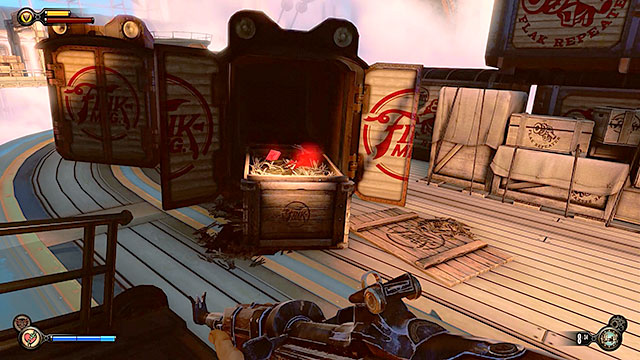
After you've landed check the crates in order to collect a Machine Gun along with some ammunition. Continue moving towards your current destination.
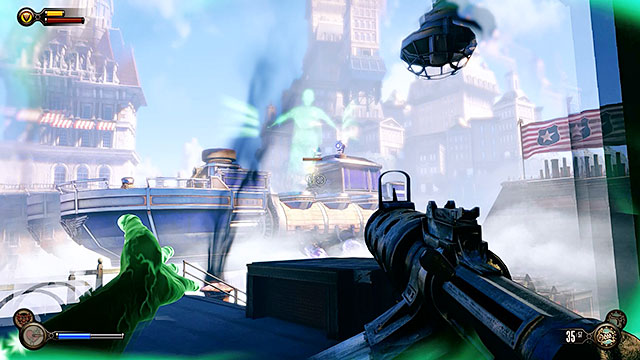
A police barge with a mounted turret is hovering near your roof. You can destroy the turret or use possession on it, however don't forget to deal with policemen heading your way. Keep moving, exploring a small room along the way (salts and several containers).
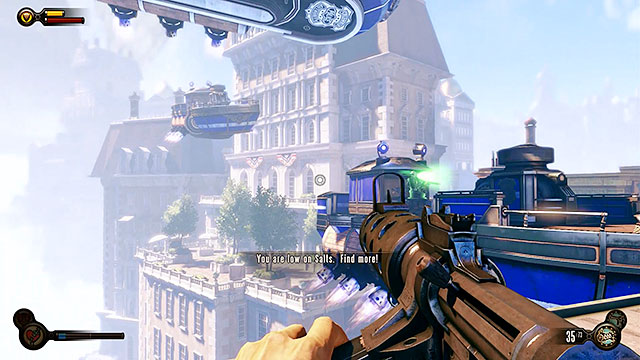
Another police barge can be located on the other side of the roof and two more will arrive soon, both with police reinforcements. I recommend possessing the turret, because it will help you to deal with the remaining enemies.
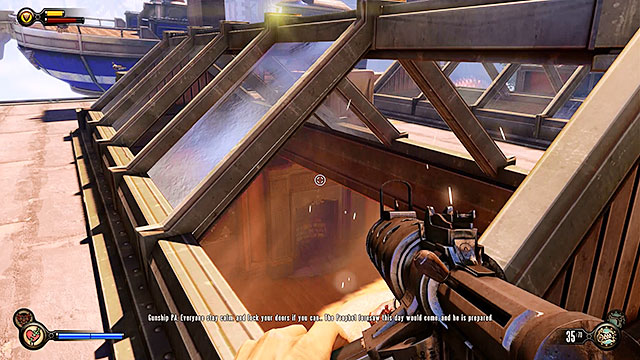
After you've won the battle (or avoided it) head down to a lower roof and locate a skylight in order to enter Lansdowne Residence. Explore the attic thoroughly before descending to a lower floor.
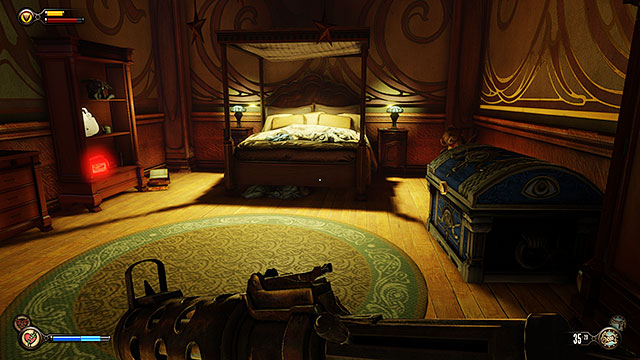
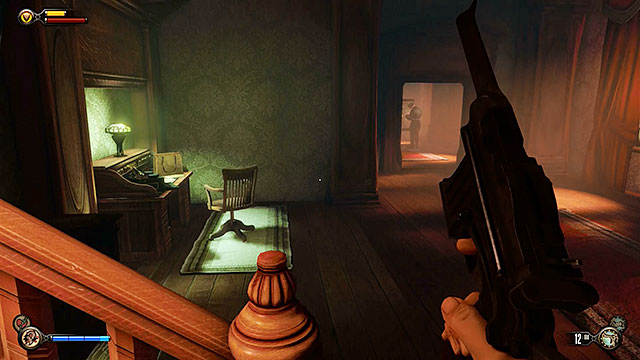
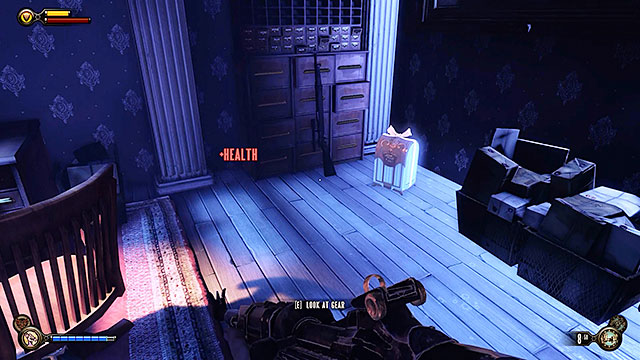
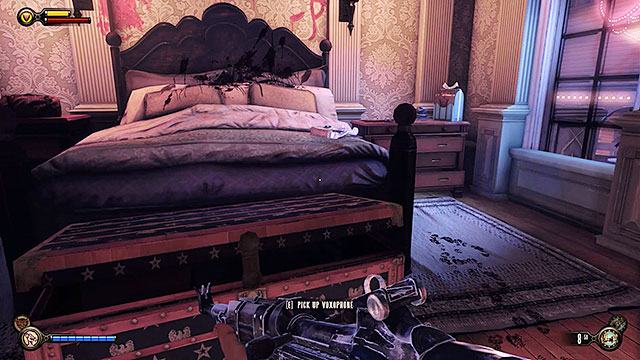
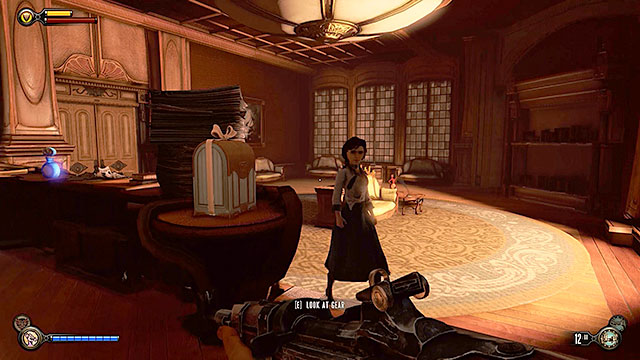
The first floor of the residence contains a bedroom. Check this room to find some interactive pieces of furniture and ammunition. There's a Voxophone #7 on one of the shelves of the dresser and an ornate chest. Examining the chest will allow you to start a side mission entitled Find the key that fits the lock (it's described at the end of this chapter).
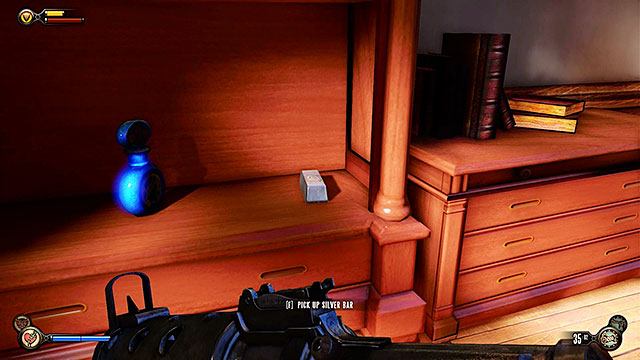
Proceed to the ground floor. You can find some salts here, a silver tab and several other things. When you're done exploring return to the top floor and head to the balcony.
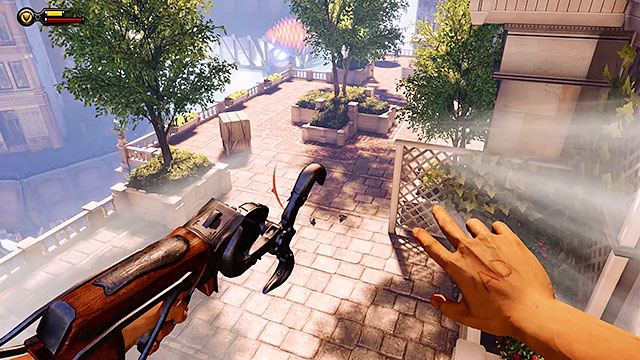
You can use a Sky-hook to travel from the residence balcony to a nearby terrace. Check the garden area under the umbrellas and open a mailbox. You may now enter a printing house.
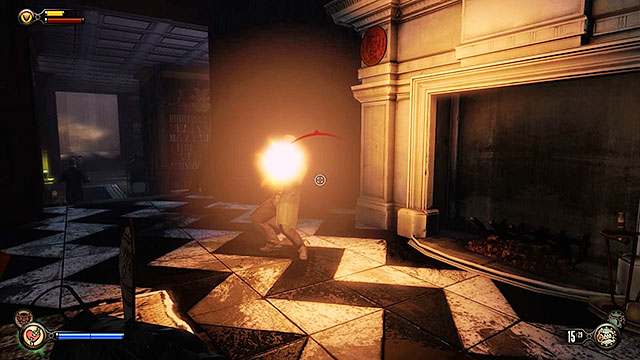
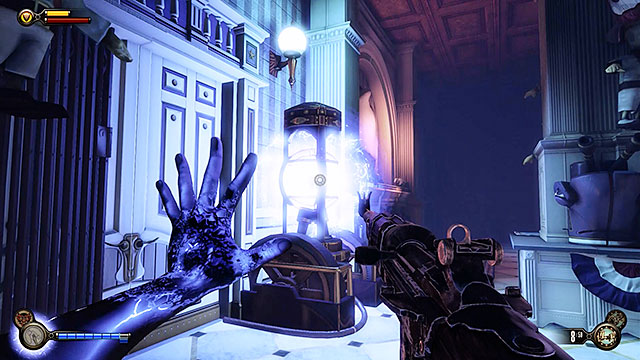
Once you're in the main area of the printing house you'll probably notice that police reinforcements are trying to get in. Quickly use the corridor to travel to nearby rooms, because otherwise you would start the battle in a bad spot. Stop in a room with a fireplace. Check the area near the door to find a machine gun and salt supplies.
Use the back door to leave the building and expect to be forced to engage a new group of police units. Notice that your enemies are accompanied by a Fireman and there's also a turret above the battlefield. Use possession on the turret and then eliminate all hostile units so that you'll be able to explore this area in peace.
Use the stairs found behind the Dolar Bill machine. Explore the area behind the wooden shed to find Vantage Point #8: Kinetoscope.

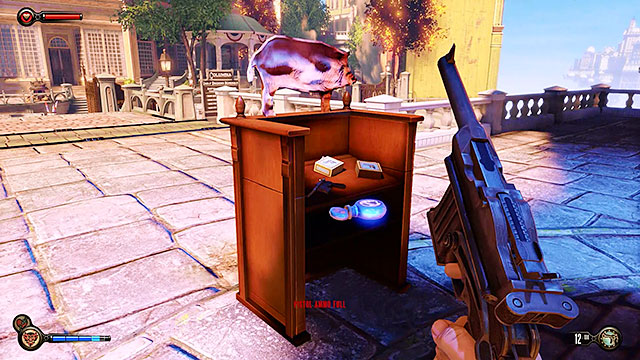
Another interesting item can be found on the stage, below the terrace. Approach a small table located below the stuffed bear and pick up Voxophone #8.
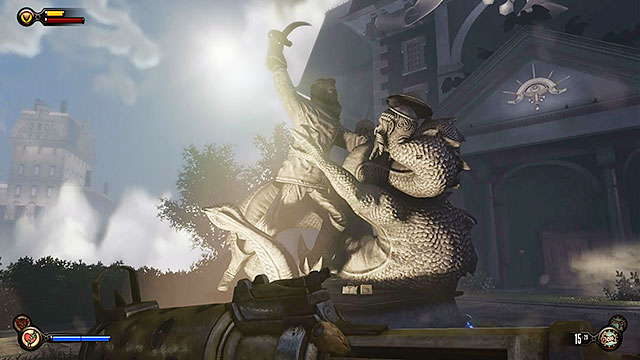
Proceed towards the gate leading to the Fraternal Order of the Raven. Examine a statue found on the other side of the gate, because you can find ammunition and a medkit here. Once you're done exploring enter the building of the Order.
There are several enemies in the dining room and at the bar, but thankfully they're not equipped too well so killing them shouldn't cause you any problems. There's a dining room with a large table to the right of the entrance and you can find some money there. Notice a corridor behind the stairs in the main hall - it connects side rooms. Make sure to check these rooms to find a machine gun and some silver eagles.

A bar is located to the left of the entrance. Inspect the area behind the counter to find a bag filled with money. There's also Voxophone #9 on the counter. Once you've explored the ground floor return to the main hall and use the stairs leading to the first floor.
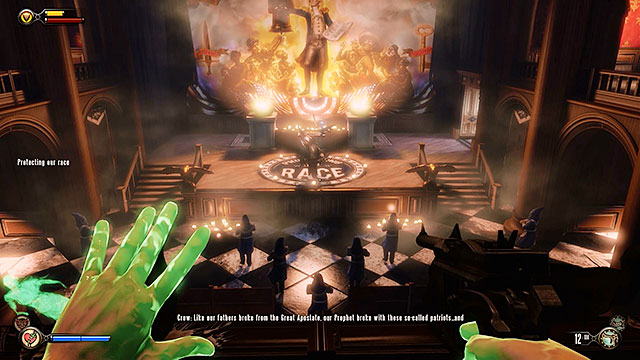
Eventually you'll end up on a balcony with a view of the altar where all the members of the Order are gathered, looking very much like Ku Klux Clan members. If you want to get rid of most of them at the same time you should throw a fiery trap from the balcony using Devil's Kiss vigor. Those who survive will use the stairs to get to you and the priest (Crow) will escape using a door located to the right of the altar.
Once you've successfully eliminated all members of the Order you should explore the balcony and then descend to the lower level. Check the area between benches and the altar to find Voxophone #10. The altar itself also holds two important items. The first item is an Infusion you may use to upgrade your armor, health or salt bar.
The second item is a key to the chest in the Lansdowne Residence needed to complete a side mission of this chapter.
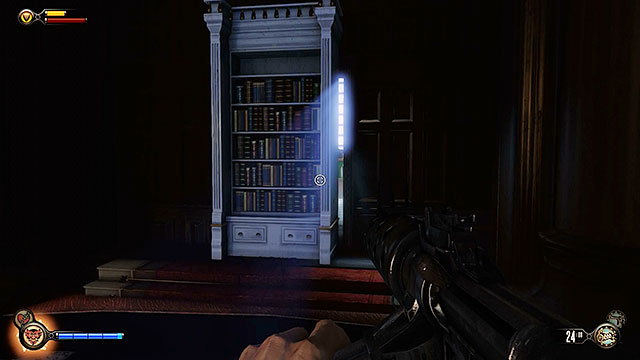
You must now proceed to the door Crow has used to escape. You'll end up in an office with an elevator. The office itself doesn't hold any valuable items, so you may use the elevator right away, allowing it to transport you to an upper floor. Resume the exploration to end up in a projection room with a round table in the middle. Examine the table to find some money and other resources and then check the rest of the room. Take a closer look at a book shelf located to the right of the table and you should notice light - this is a secret passageway which will lead you to a private prison of the Order.
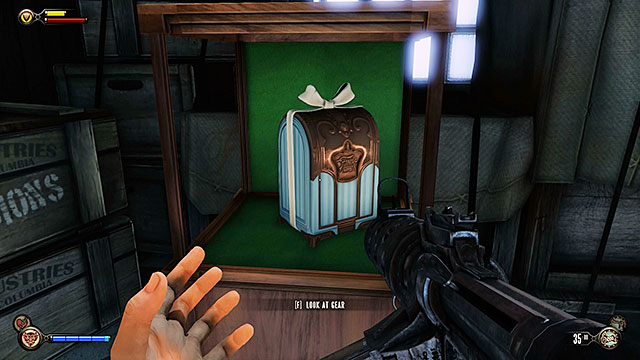
Examine the area near the cell and you'll uncover Gear #1 - Head. You don't have any gear on you at the moment and therefore the main character will automatically wear this object. You'll find more items intended for head protection later in the game and you'll be allowed to choose manually which of them you want to wear depending on the current situation. All elements of the main character's gear are hidden in predetermined areas, however collected objects are always randomized! You can find more about this game mechanic in the Gear chapter of the guide.
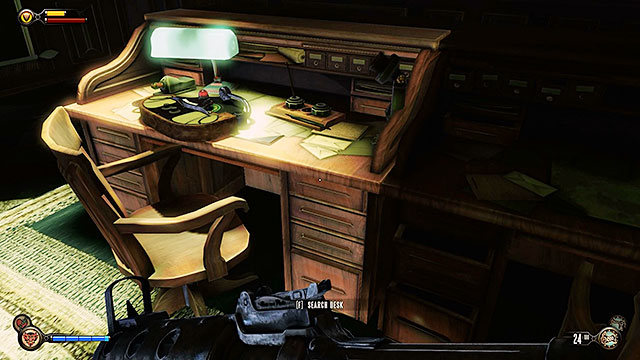
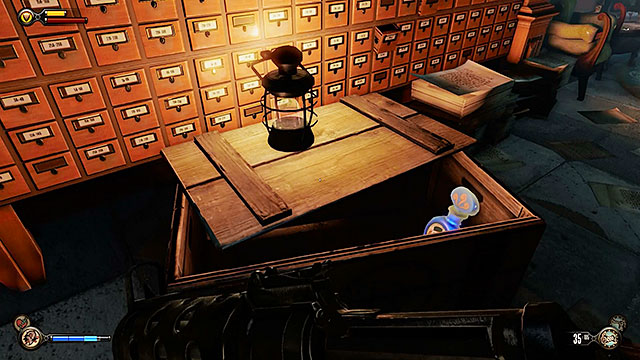
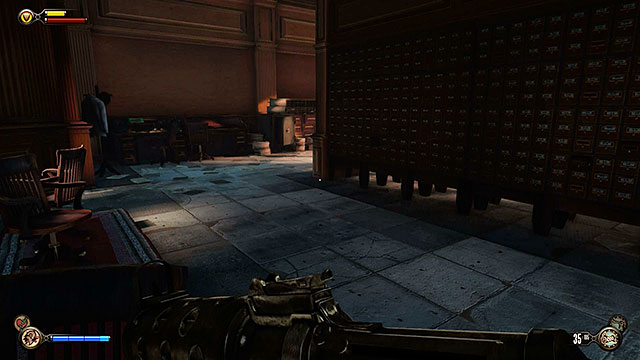
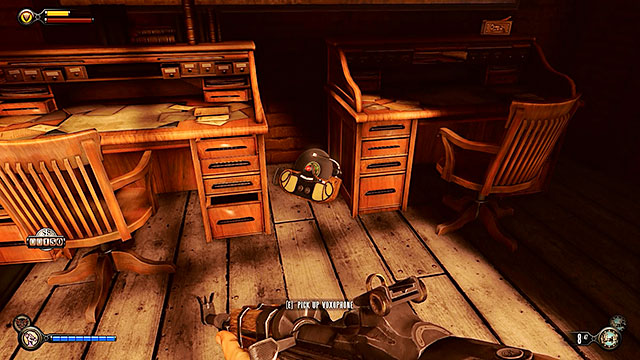
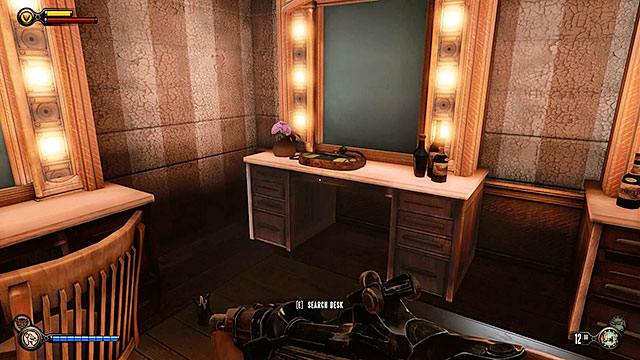
Proceed towards a small office, to the left of the table. There are several desks here and you should examine them to locate Voxophone #11. Once you're done resume following the Crow.
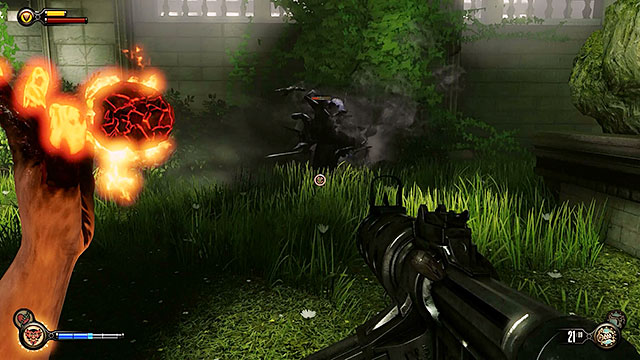
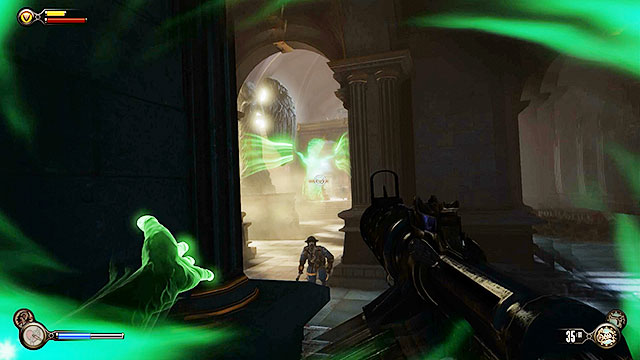
The stairs found in the projection room lead to the aviary and that's where you'll be forced to participate in a duel with the Crow. This opponent is similiar in concept to the Fireman so he's much stronger than typical enemies and he possesses unique abilities tied to vigors. The Crow moves around the battlefield by taking a shape of a flock of birds. When he's in this state he becomes immune to your attacks and much harder to spot, especially in darker areas. You're allowed to attack the Crow only when he's in his human form. A good method of injuring the Crow is to place fire traps and lure him there when he takes a form of a flock of birds, because when he'll return to his normal form he'll become vulnerable to conventional attacks. The Crow may seem like a very tough opponent, but that's just an illusion. Sacrificing one or two machine gun clips combined with aiming for his head should be enough to kill him. The outcome of this duel will be the same no matter how you've won, because the Crow will leave a new vigor for you as a gift - Murder of Crows. This vigor is perfect choice when you want to weaken or stun a group of enemies, however sometimes a single charge may even be enough to kill a single opponent.
As soon as you've collected the new vigor you'll have a chance to test it on a group of policemen, because they'll arrive here. Eliminate them and then explore the aviary to find salts and medkits.
Leave the aviary and make a stop near the exit from the Order building. Find a broken jewish version of the Dolar Bill machine and pick up Gear #2 - Legs.
Use the back door to leave the Order of the Raven building. Explore the area and you'll notice a police barge. Get to the barge to uncover Vantage Point #9 - Telescope.
Check the area to your right to find interactive hooks. You may use them to get to the gondola station, however make a stop at the second hook and look to your right. Find a building located below the terrace. Drop to the terrace and enter the building to uncover that the police is trying to establish a portrait of Booker. Deal with the policemen and search the apartment. Take special interest in a desk found near the stairs, because you'll find a bag here filled with money. Once you're done exploring the apartment go back to the terrace and grab the nearest hook.
Continue moving towards the gondola station. Once you've reached the last hook you will be allowed to use the Sky-hook to perform an airborne execution on one of two policemen guarding access to the station. Deal with the remaining policeman and explore the area before moving on.
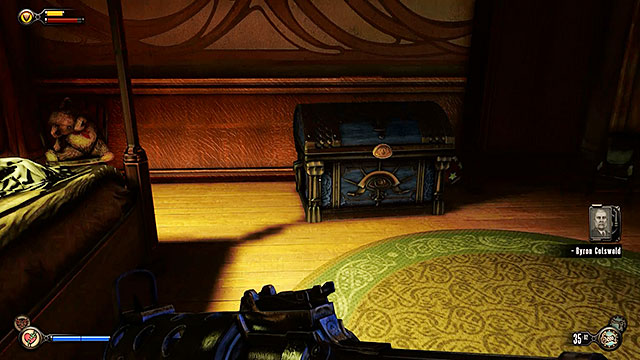
While exploring the Lansdowne Residence you'll find a locked chest in one of the bedrooms. Examining the chest will begin this side mission. The key to the chest can be found close to the end of this chapter so after obtaining it you will have to backtrack quite a lot in order to check its contents.

The key needed to open the chest can be found close to the altar in the Fraternal Order of the Raven, next to the first Infusion. Once you've picked up the key go back to the Lansdowne Residence.

Backtracking to the chest is a profitable action, because the chest holds valuable treasures - a new Infusion and a bottle of salt.

After entering the gondola station you will be allowed to interact with Veni, Vidi, Vigor! and Dollar Bill machines located on the left side. You'll soon take part in an intensive battle with a squad of policemen, so if you have enough money (and if you're interested) you should upgrade your vigors and replenish health and salt. There's also a Vantage Point #10 to your right (the only one in this chapter).
Once you're ready use one of the side corridors to get to the main hall of the gondola station. You can make this new battle a lot easier by immediately taking control over a turret located behind the angel statue in the middle of the hall. Use the fact that enemies are distracted by turret attacks. The policemen may even destroy the turret so you also won't have to worry about it. Another good idea is to stun enemies using the Murder of Crows vigor when they're engaged in a firefight with the turret, allowing you to quickly and painlessly deal with them. Once the battle is over explore the main hall and side corridors, searching for ammunition, medkits and bottles of salt.
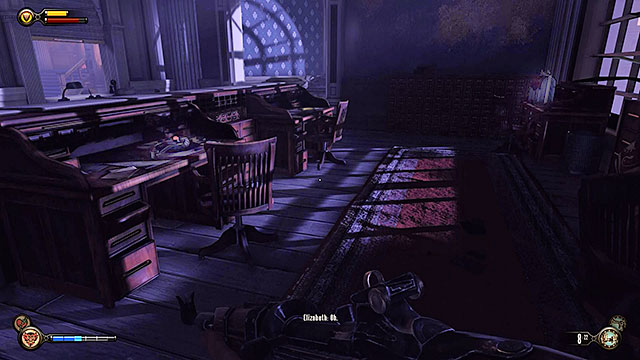
Use the stairs to get to the ticket office. There are rooms on both sides of the office and they have a lot of loot. The room to your right contains salts, a machine gun and some silver.
The room to your left on the other hand contains a safe with a lot of coins found around it. Examine the rest of the furniture and then go back to the ticket office.
In order to get to the middle ticket stand you must use a nearby door and turn right after reaching a new corridor. The door to the stand can be found just around the corner, near vending machines. The stand contains mostly money.
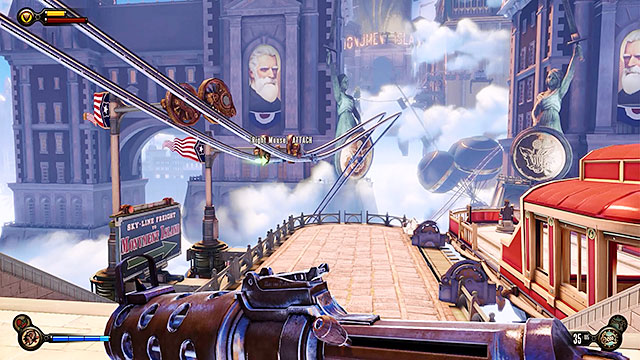
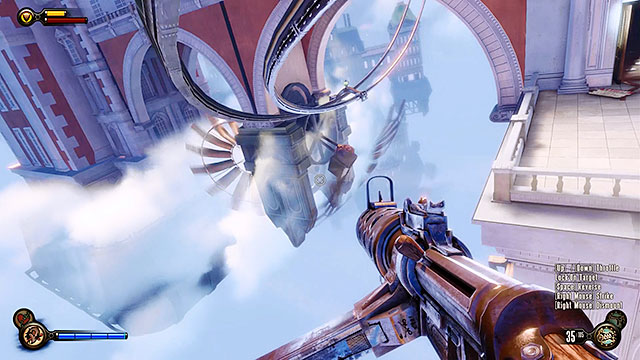
Leave the station to find yourself standing on a large platform with a barge docked to your right. Search the barge and then attach yourself to the sky-line to continue the mission.
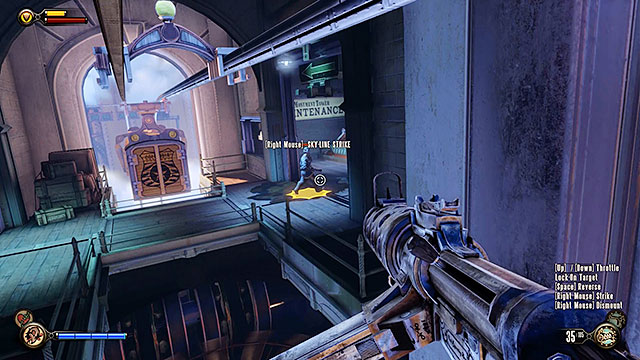
Let go of the sky-line when you're under the archway of the maintenance tower. There's a room here and it's being guarded by two policemen. Explore the room to find Infusion #3 on the desk, as well as some money and alcohol.
Once you're done exploring the room mentioned above find Vantage Points #11- a telescope next to the balustrade. Get back to the sky-line to continue your journey to an upper level.
The sky-line at the top of the tower is blocked by gondolas. Deattach yourself from the sky-line (the best moment to do that is when you can land on a guard seen on a walkway) and search the rooms located on both sides. The room with the gondola control panel has a Voxophone #12 in the back. When you're ready activate the gondola and start following it using the sky-line.
The gondola will soon block your path again and this is the moment when you'll have to land on a nearby police barge. Your current destination is an abandoned apartment and you can get to it by using the Sky-Hook to reach its balcony. Before you to perform that jump deal with the police forces found on the square and search all containers.
Once you've made your way to the apartment you should look behind the dresser found next to the bed in the first room. There's some money here, as well as Gear #3 - Torso. The corridor leading to the terrace also contains a bottle of salt.
Proceed towards the terrace located on the other side of the apartment and start using the sky-line again in order to reach the next blockade.
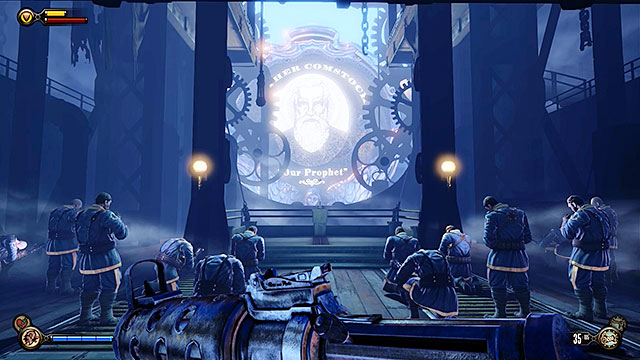
Before you'll end your trip using the sky-line you'll notice that all policemen have received orders from Prophet and as a result they will enter a state of prayer, ignoring the main character instead of attacking him. Killing the policemen won't do you any good here, because they won't leave any loot behind and you won't be able to pick up their weapons.
Enter the building and stand on the service elevator while listening to Comstock's speech. Use the elevator to get to a new floor.
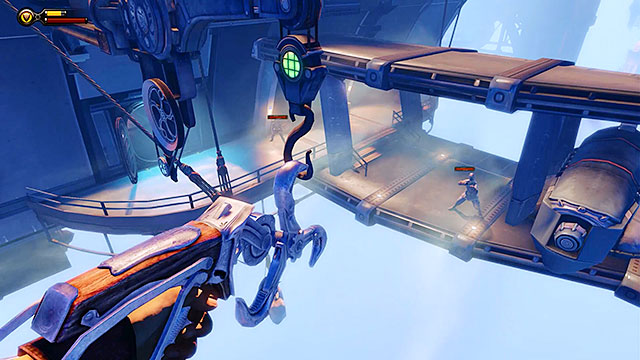
Comstock will constantly make efforts to make it hard for you to return to the sky-line. Travel through a hole in the wall and use the hooks to board Prophet's zeppelin. Head inside and find a control panel.
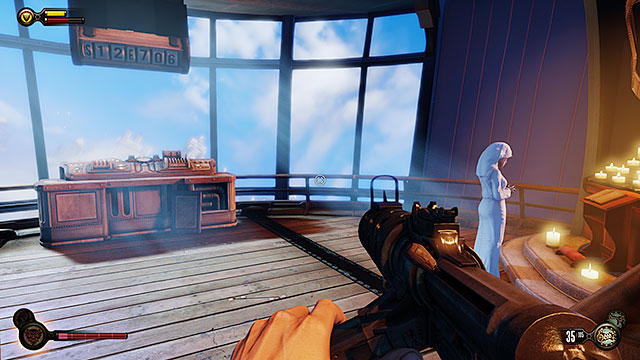
Once you've entered the pilot's chamber you should spend some time exploring it. Soon after taking control you'll trigger a scene and the zeppelin will catch on fire.
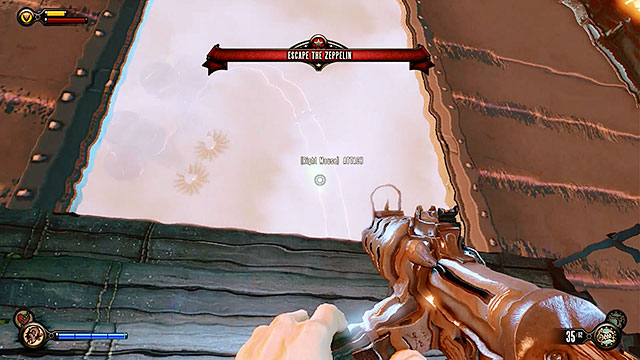
Immediately proceed towards the back of the zeppelin and leave it by jumping through a hole in the cargo bay. Attach yourself to the sky-line and make your way to the final station.
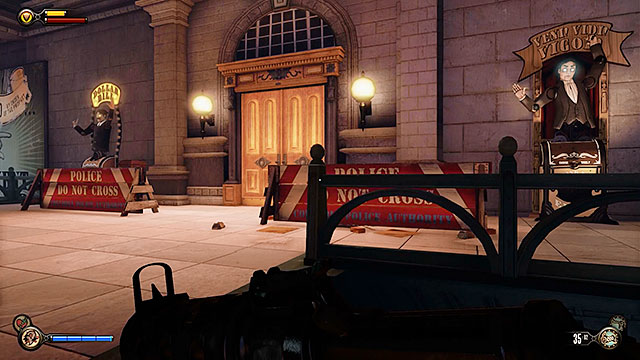
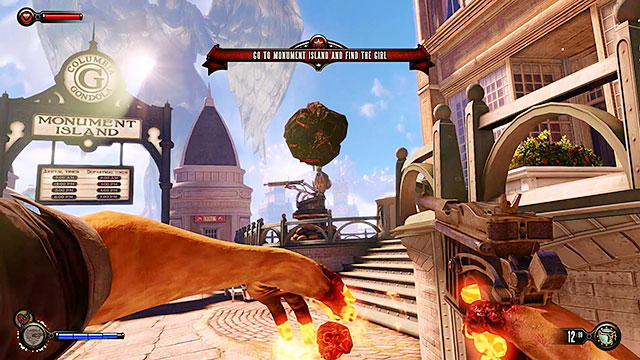
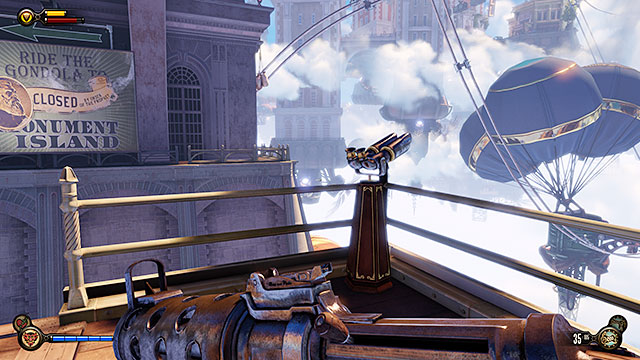
There are two vending machines near the exit from this unguarded station and you can also find a machine gun, ammunition and medkits behind one of the police barriers. Once you're done exploring proceed to the Monument Island.
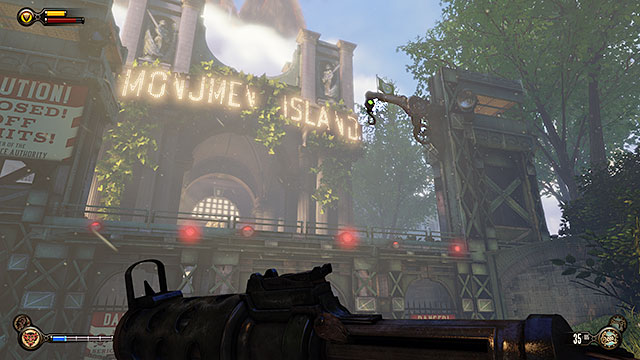
Once you've made your way to the island collect the money located next to the fountain and then proceed towards the gate. Interact with a hook found above the gate to get to the other side and then enter the tower.

You'll notice an opened locker in the first room to the right of the entrance and you should definitely search it, because you can find Voxophone #13: Tiger by the Tail - Ty Bradley. Explore the rest of the room to find less important loot. The room with the Passive Siphon doesn't have anything interesting so you may head further into the building.

You'll end up in a corridor leading to three different rooms. The laboratory to your left contains Voxophone #14: To: R. Thompson Re: Fuses - Ty Bradley, as well as a bottle of salt and a medkit. When you're done searching proceed towards the proper Siphon.

There's a Voxophone #15: A Reward, Deferred - Ty Bradley on the desk in this room and you can also find Infusion #4 just behind it. Collect these items and then move towards the elevator located on the other side of the room.
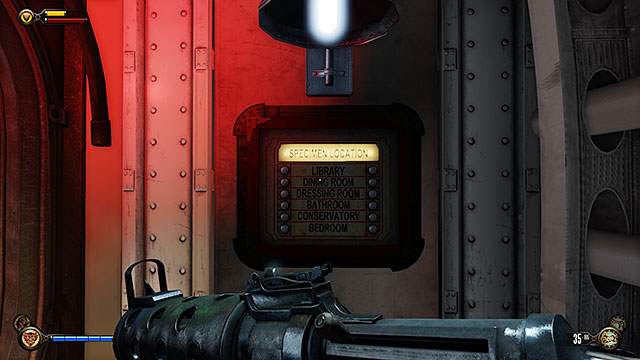
The elevator will take you to Specimen Observation Room #1. You won't anything useful here so proceed to the corridor located to your left. You'll notice a Specimen Tracker on the wall and after using it you'll find out where to look for the girl. Step through a hatch to get to the next room.

Pull a lever after entering Specimen Observation Room #2 in order to see Elizabeth for the very first time. Head to the next hallway, use the Specimen Tracker again and then proceed to Specimen Observation Room #3. You'll see the girl here one more time and once that scene has ended resume your journey.
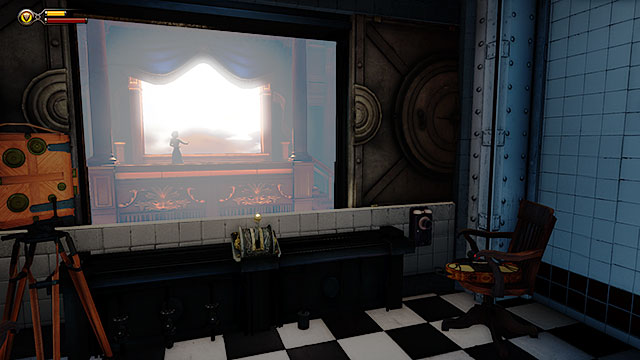
Specimen Observation Room #4 has yet another two-way mirror, however you'll also find a collectible here - Voxophone #16: The Source of Her Power - Rosalind Lutece. Take the item and proceed to the top of the tower.
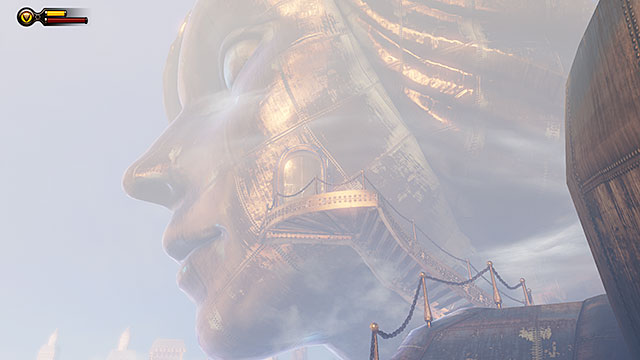
Once you're outside use a small walkway leading to a room located inside the statue's head. You'll get to the Library from here and that's where you'll find Elizabeth.
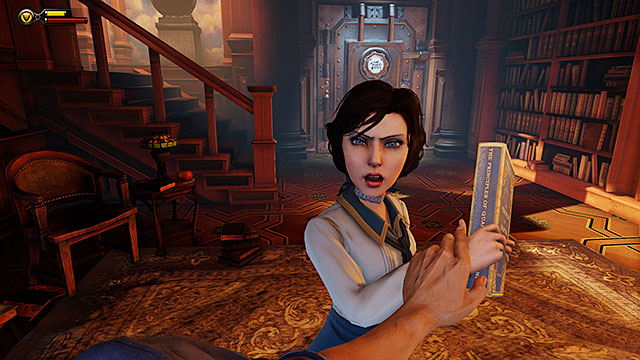
After getting acquainted with the girl and handing over her key you will have to start following her by stepping through an opened hatch. Keep following Elizabeth until you get to the elevator you've used before to get up here.
Songbird will attack you here and once the attack is over approach the elevator's frame and drop down to a staircase. Continue following Elizabeth until you both get to the top of the monument. Some dramatic scenes will take place here and once they're over you'll find yourself in Booker's office again. The solution is the same as during your previous visit in this place so you must simply open the only door.
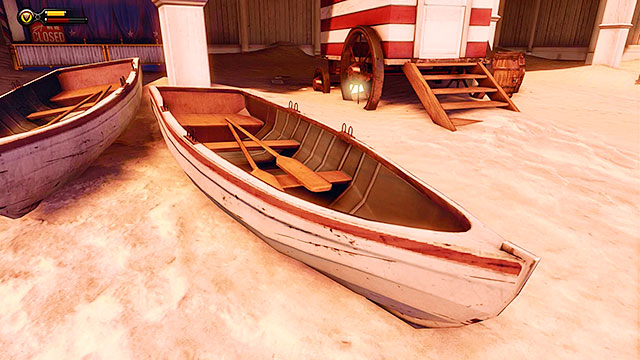
You'll end up on the beach. Elizabeth will move ahead and you'll soon lose her from your line of sight. You don't have to be too hasty about finding her and as a result it's a good idea to explore the beach in order to find plenty of silver eagles, food and drinks. The most important item is hidden beneath the trailer with painted stripes - it's a Voxophone #17: Born in the River - Ed Gaines.

Once you've explored the first beach head to the corridor leading to the next one. The corridor itself contains a Vantage Point #12: Kinetoscope - Battleship Bay. Before entering the second beach you should also check a maintenance room. There are supplies and money there.
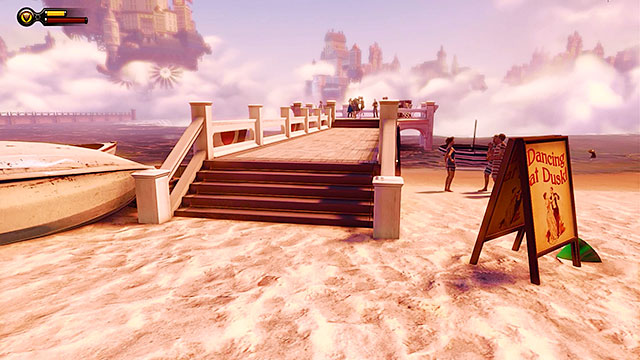
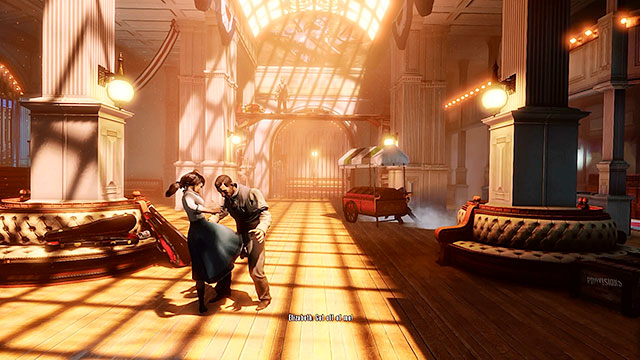
Just as before, you don't have to be too quick about finding the girl. Elizabeth is dancing on the pier and you should make sure to explore the beach before approaching her. Get to Elizabeth once you're ready to move on with the mission.
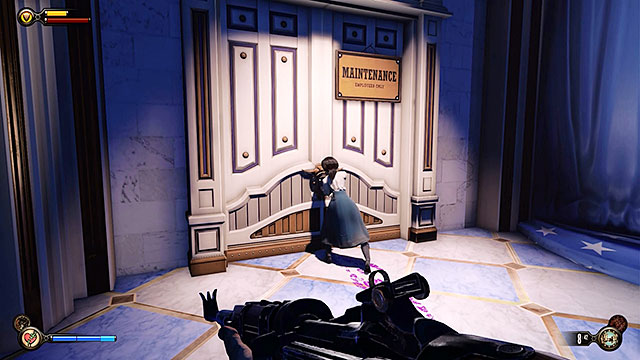
Head towards the door leading to the souvernirs shop. Make sure to explore the store, including a side room designated for employees only and a small entresol to the left of the exit.
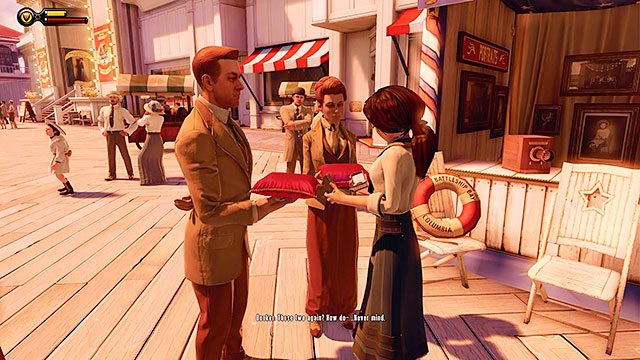
After leaving the shop you'll both encounter the mysterious Lutece siblings. Elizabeth will ask you for making a choice of a pin and you can choose between a cage and a bird. From now on Elizabeth will be wearing the pin you've picked for her.
Explore the remaining stands on the promenade and then proceed towards The Arcade.
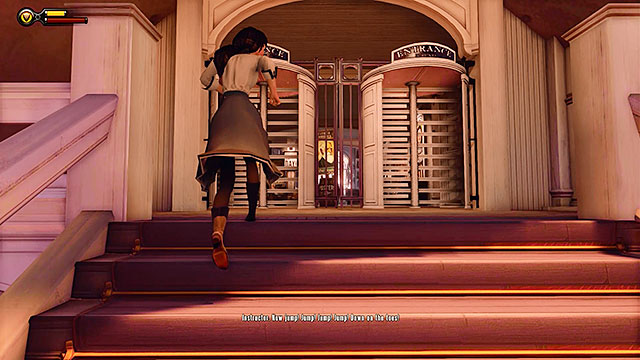
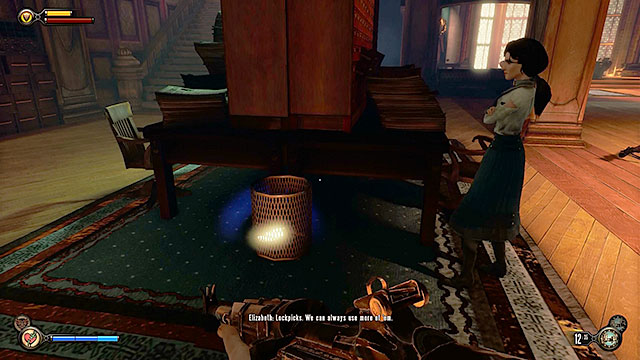
The Arcade is closed and therefore you'll have to ask Elizabeth to brake the lock on a door located to the right of the main entrance. This is the first lock encountered in the game and only the girl's hairpin is required to open the door. You should know that only story-related locks are so easy to pick and all the remaining ones will require to have a sufficient number of lockpicks.
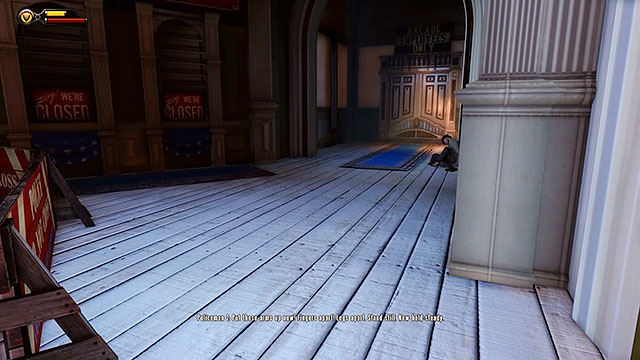
Explore the office you've just entered and then enter the corridor leading to the arcade. Before getting to the main area you'll find a Dollar Bill machine. Check the corridor located behind this machine, because there's a small room for employees at the end of it. There's Gear #4 - Legs on the table and Voxophone #18: Heaven - Daisy Fitzroy in the basket.
There may be a surprise waiting you in the last corridor leading to the arcade. If you didn't throw a ball at an imprisoned young couple in chapter 3, then you'll meet them here and they'll have a small gift for you: Gear #5 - Head. Search the nearby "Colored & Irish" washrooms and then enter the arcade.

Make sure to explore the arcade, collecting mostly money and groceries. There are toilets for "white" people opposite to the corridor you've used to get here. The toiled on the left (the one with the sleeping servant) has more valuable treasures, including Voxophone #19: A Dog's Loyalty - Zachary Hale Comstock.

Once you've searched the washrooms go to where the corridors are separating. You'll find Vantage Point #13: Kinetoscope - Solving the Irish Problem here.
When you're done exploring the arcade proceed towards the entrance to the Gondola Station. This is a one-way passageway so make sure that you've performed all side activities in previous areas. Use the corridor to get to the ticket hall, but before entering it explore the lower floor located behind the hot-dog stand.
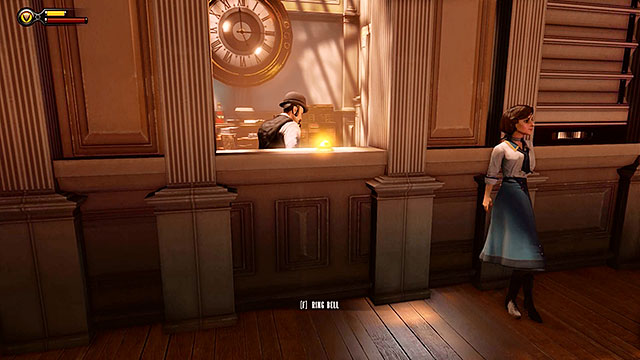
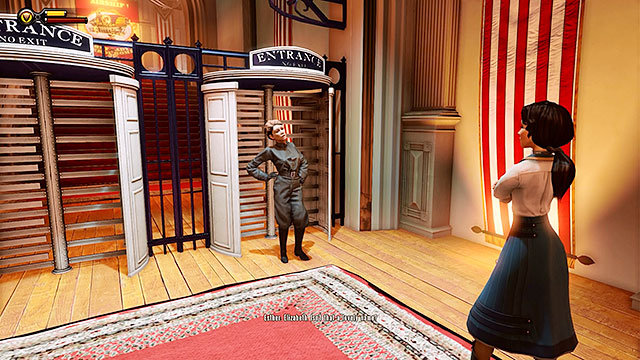
Enter the waiting room and use the bell to call the usher (notice an infusion located behind him). The salesman won't be particularly interested in your person and this is a moment when you have a chance to make a new decision: you can draw your gun, ask for the tickets or restrain yourself from doing anything. Depending on your choice you can expect Elizabeth to act differently at the end of this chapter. If you decide to ask for the ticket, then Booker's hand will receive a wound resembling a stigma.
It doesn't really matter how you've reacted towards the usher, because you'll soon find out that you've been ambushed and that people gathered in this hall want to capture the girl. Elizabeth will run to the gondola and you'll have to fight your way out of this area. Try to deal with the thugs as soon as possible, because reinforcements will soon use a previously unaccessible door to get here. Once the battle is over search the area and then proceed to the opened gates. Elizabeth will escape towards the gondola.

Before you start your pursuit after Elizabeth you should do one more thing and that is to explore an office located to the right of the ticket hall. Check the desk to uncover Voxophone #20: Take Her Alive - Esther Mailer. Search the rest of the office before leaving.
You'll soon reach a junction and you shouldn't move towards the gondola just yet. There are two side rooms here for you to explore. Start off by descending the stairs found to your left.
The stairs will lead you to the ticket room. Explore the area thoroughly, collecting Infusion #5 before heading back up.
There's a staircase behind the door at the end of the corridor and it leads to lower floors. Explore all containers found along the way and also check a storage space located under the stairs. There is a lot of money here, as well as Voxophone #21: The Golden Path to Heaven - Zachary Hale Comstock.
You may finally focus on finding Elizabeth and she'll be waiting for you in the gondola. Before you start this machine look around to find additional loot. After you've activated the gondola you'll be transported to the next station (in peace).

Make sure to check the upper station, because there's a Vantage Point #14: Telescope in front of the entrance. Once you're ready to end this chapter you must walk past the gate of the station.

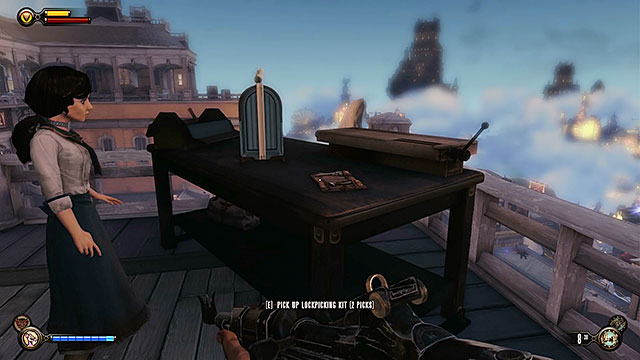
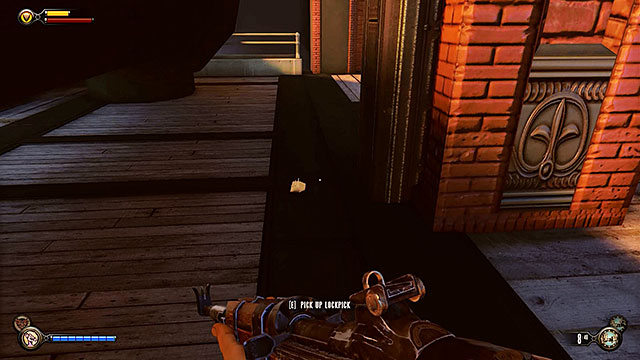
Enter the Soldier's Field Welcome Center and turn left to find a locked door leading to the security room. Notice a lockpick near the door. Take this item and allow Elizabeth to use it to open the lock.
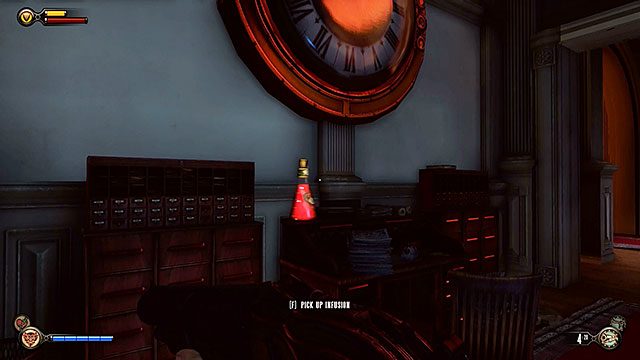
Once you're inside the office check the desk under the window to find Infusion #6. Explore the rest of the room and also take a look inside a nearby study.

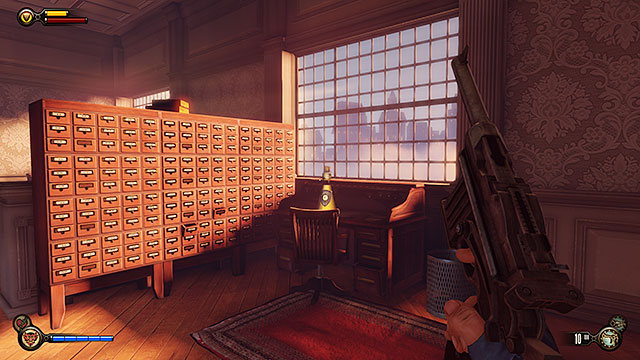
The study contains a locked safe and in order to open it you're going to need 5 lockpicks so return here once you've gathered the required number of these items. One of the lockpicks can be found on a desk behind the safe. You should also inspect an opened vault located to your right - you'll find a rifle there and Voxophone #22: A Place in the World - Daisy Fitzroy.

You may now proceed to the left part of the pavilion where you'll find Minuteman's Armory vending machine. Check a wooden crate located to the right of the vending machine in order to obtain two lockpicks.
There's a model of the Soldier's Field a little further ahead. Inspect the area behind the model to unlock Vantage Point #15: Kinetoscope - A City in the Sky? Impossible!.
When you'll approach the exit from the pavilion the electricity will malfunction and the door will close. Open the door using brute force. Leave the building and enter the main area of Soldier's Field.
As soon as you've stepped through the gate turn left and walk past Duke and Dimwit's ice cream shop. You'll soon unlock Vantage Point #16: Kinetoscope - Mighty Songbird Patrols the Skies!.

There's a new Voxophone #23: I Am His Mirror - Zachary Hale Comstock on one of the tables inside the ice cream shop. If you're not looking for trouble, then I strongly suggest that you don't make any attempts to steal money from the shop's register. Each time a container turns red it means that someone is guarding it (in this case it's the person selling ice creams) and you can expect the authorities to be informed about your crime. Furthermore, you won't miss anything if you don't steal from this register and you'll be allowed to return here later on when the ice cream shop will be closed.
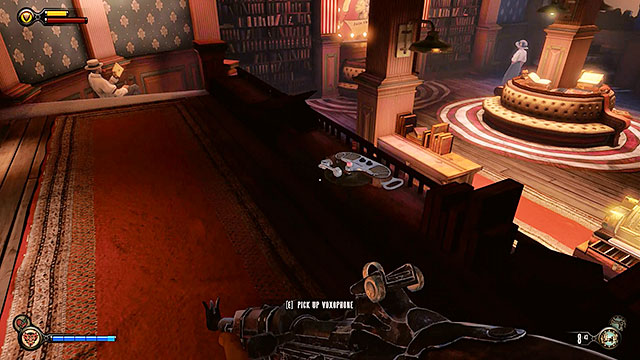
You may now proceed to the Founder's Book store located to the right. Check the entresol to uncover Voxophone #24: Viewing the Infinite - Rosalind Lutece.
Once you've left the book shop turn right and use the promenade to get to the Toy Soldiers store located next to the carousel. You can steal the Heater's replica if you want to, but I suggest to drop the subject, because you would have been noticed by the policeman guarding the object. Heater is a shotgun manufactured by Vox Populi and you'll have more opportunities later in the game to add it to your arsenal.

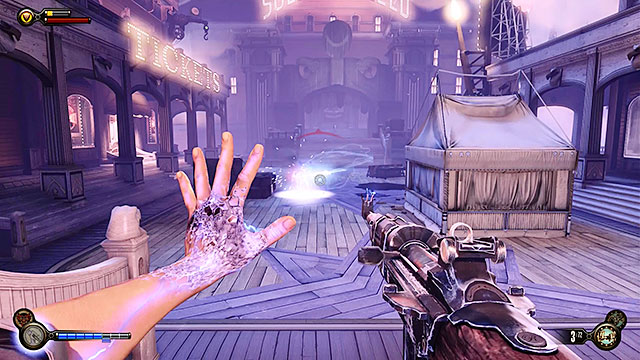
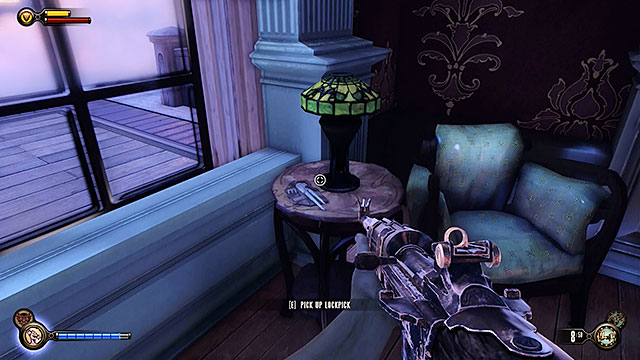
Leave the store and inspect the carousel's stairs to find another lockpick (a shining object seen on the screen above).
Descend to the promenade located beneath the carousel and turn right. Proceed to the gondola which travels to the First Lady airship. Approach the gondola's panel and pull the lever. The device will malfunction and in order to activate the gondola again you're going to need a Shock Jockey vigor.
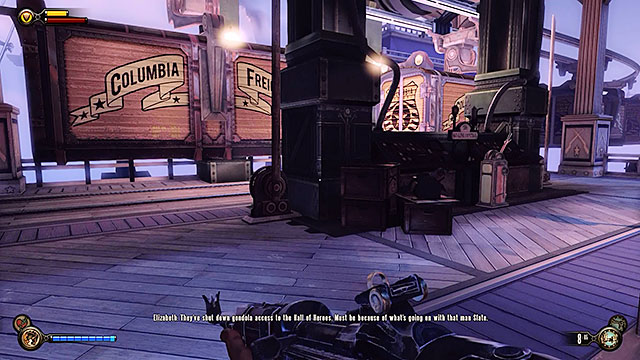
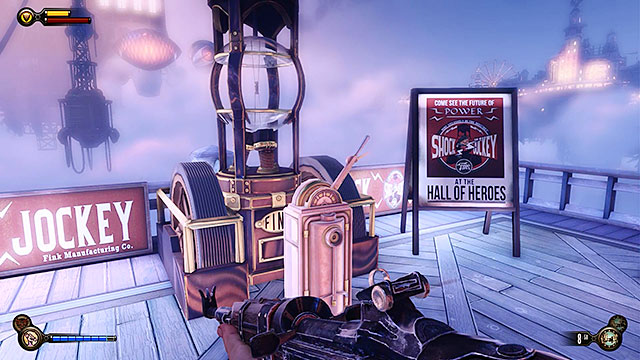
You will now have to fight your way back to the beginning of the promenade. A small unit of police officers will stand in your way and all the stores you've visited recently will now be closed. Locate a gate leading to the Hall of Heroes. You'll find an elevator here, but don't use it just yet.

There's a tool box near the elevator and you can find a new lockpick next to it. You should now go back to the security office in the Soldier's Field Welcome Center, because you probably have 5 lockpicks with you and therefore you can open the safe that contains several hundred silver eagles. On your way back to the Hall of Heroes you can also revisit the ice cream shop and steal from the unguarded cash register.
When you're ready to continue enter the elevator and press a button. The elevator will stop at half way and as a result you must open a fuse box in order to repair it.

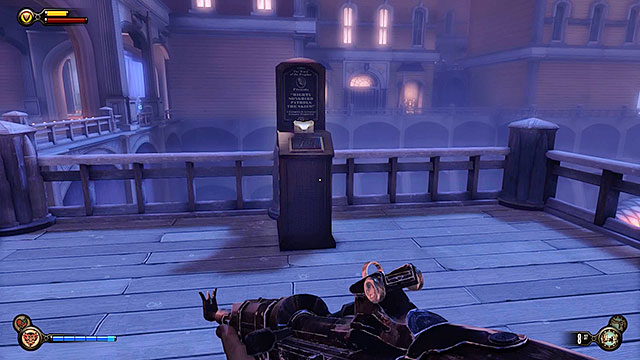
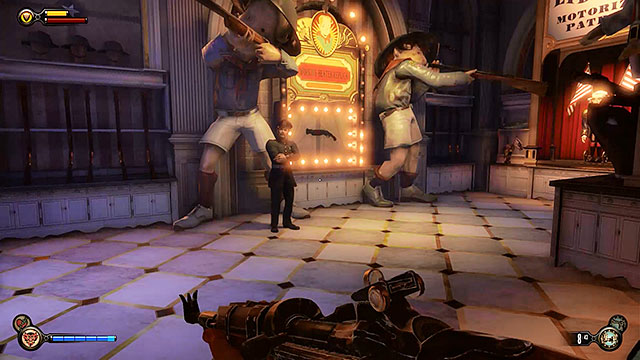
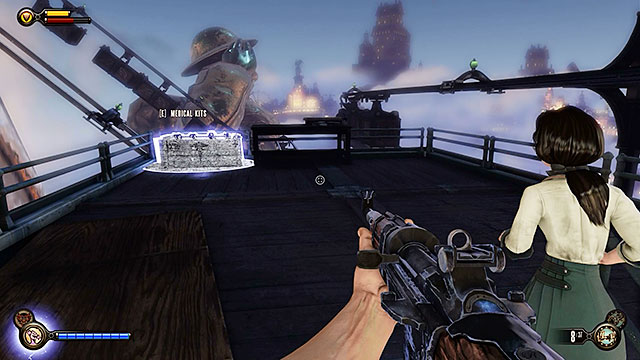
Wait for the elevator to transport you to your destination and explore the pavilion, collecting medical supplies and a shotgun found to the right of the Motorized Patriot. Go behind a fallen statue of a soldier. Explore the area near a broken down vending machine and you'll collect a lockpick that will come in handy real soon.

The bathroom to the right of the damaged vending machine is occupied by two policemen. Shoot them before they figure out what's going on and then explore the room. The opposite bathroom contains one more lockpick found next to one of the toilets.
Once you have both lockpicks with you go to the left side of the pavilion and ask Elizabeth to open a nearby door. There's a turret on the other side and it guards an office. Deal with the turret and then explore your surroundings, finding Voxophone #25: Never Seen the Face - Capt. Cornelius Slate under the window and Gear #6 - Torso.
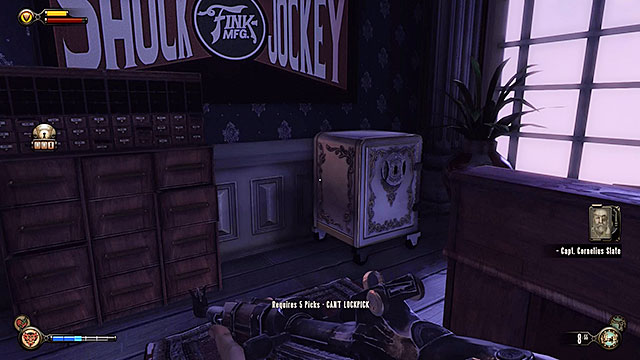
The study that was guarded by the turret contains a new safe and once again you're going to need 5 lockpicks to open it. You don't have enough of these objects at the moment, however you will revisit this area at the end of the next chapter and that's when you should break in.

Soon after leaving the main hall of the pavilion you will find two bottles of a new vigor - Bucking Bronco. Take one of the bottles and leave the pavilion after drinking it.
Once you're back outside you'll have to take part in a battle with a large group of policemen. You can test the newly acquired vigor, using this opportunity to neutralize two turrets guarding the entrance to the Hall of Heroes. Watch out for a new Raven, because this enemy will soon arrive at the battlefield.
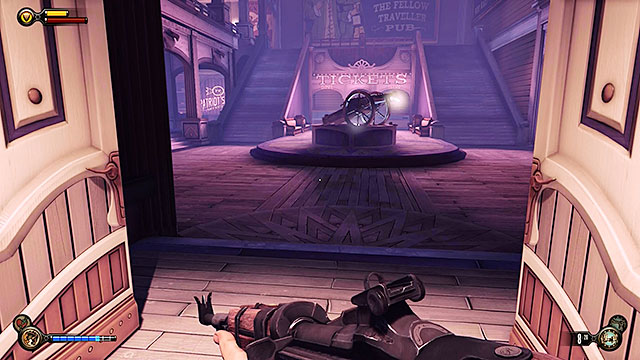
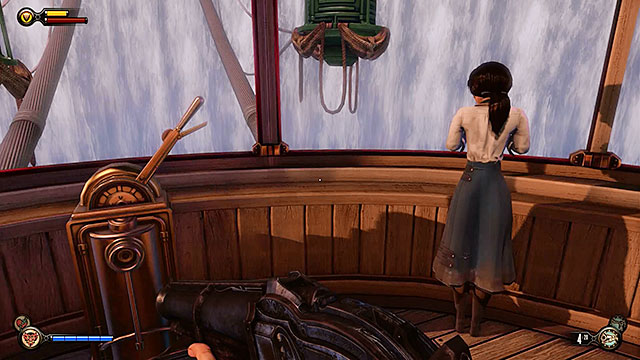
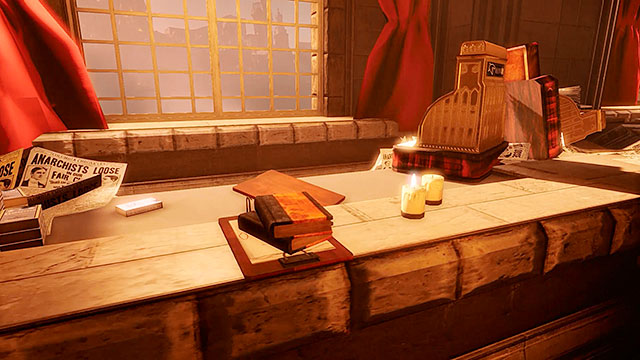
Keep fighting until you've won and then go to the ticket office. Use the front doors to get in and notice a cannon in the middle of the room. Examine the cannon's barrel to find a code book. Taking this object will unlock a new side mission - Use the cipher to crack the Vox code (it's described at the end of this chapter).

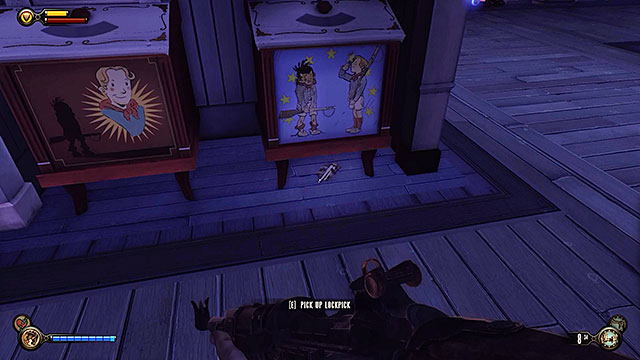
There's a ticket stand behind the cannon. Notice that the blind hasn't been properly closed and as a result you can collect a new lockpick.
Proceed to the first floor of the building. Yet another lockpick can be found behind the Duke and Dimwit vending machine. You should also examine the area near the remaining vending machines to find additional money.
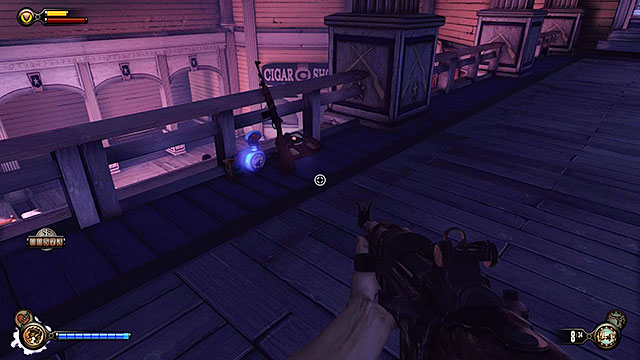
Check the area near the balustrade on the same floor, finding a rifle, salts and Voxophone #26: A True Soldier - Lance cpl. Vivian Monroe.
Go back to the ground floor. There's a Vantage Point #17: Kinetoscope - Who Are the Vox Populi? in the room to the left.

The room with the kinetoscope also contains a weapons upgrade station and a locked door. You can open this door assuming you still have 2 lockpicks with you. Wait for Elizabeth to break the lock and get to the ticket counter in order to collect a bag with silver coins and Gear #7 - Legs.

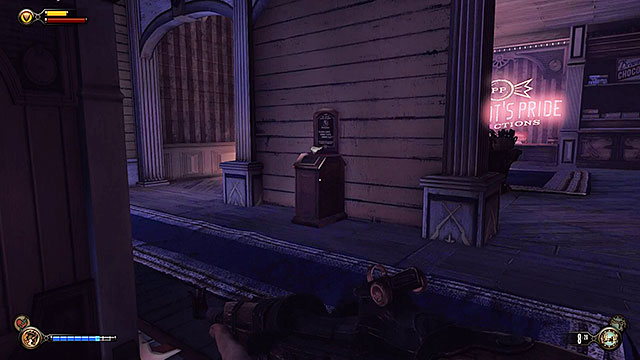
Once you've searched the ticket office proceed to the Fellow Traveller bar located on the opposite side of the square. Enter the bar and turn right, finding a lockpick on a table.
There are corpses in front of the kitchen door and on the bar and you can find a lot of ammunition. The kitchen also contains Voxophone #27: Vox Contraband Inventory - Sgt. Leander Manley. Make sure to explore the bathroom to find cipher needed to complete the side mission described at the end of this chapter.
There's also one more thing for you to do at the station and that is to clear the way to sky-lines in order to use them to get to the Hall of Heroes. You can do that by pulling a lever found in the gondola's control panel. Wait for the cargo gondolas clear the way and attach yourself to the sky-line to get to the next station.
Once you've reached your destination use the stairs to descend to a lower platform and explore a nearby gondola. One of the cabins contains Voxophone #28: A Final Stand - Capt. Cornelius Slate. There's also a grenade launcher along with some ammunition next to this gondola.
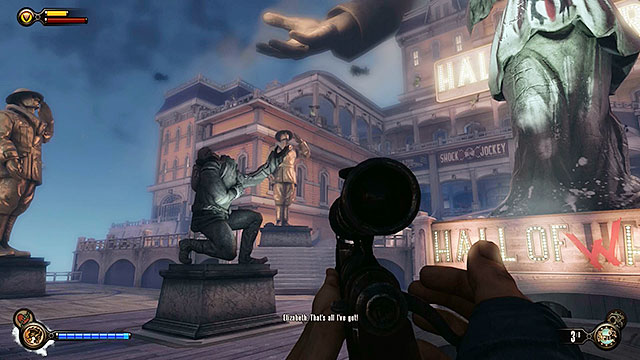
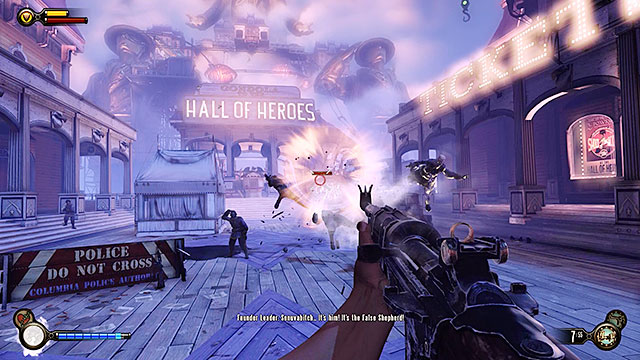
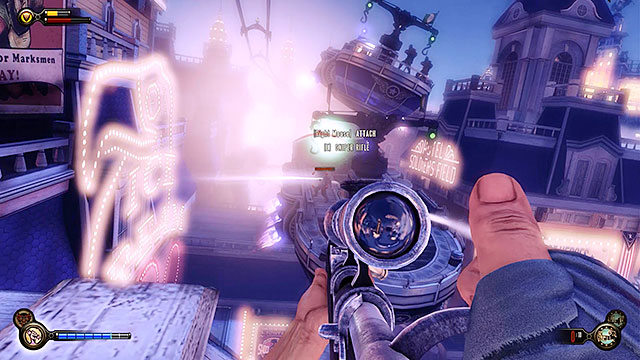
Approach the devastated statue found on the square in front of the Hall of Heroes. Elizabeth will give you a Sniper Rifle (it will replace the weapon you're currently holding in your hands) and point a sniper on a balcony to the left. Kill this sniper and deal with the remaining enemy units occupying the entrance. The sniper rifle will be very helpful in winning this battle.

Once you've eliminated all enemy units start moving towards the main entrance to the Hall of Heroes. There's a Vantage Point #18: Kinetoscope - Who Needs the Power Company? to the right of the entrance and you can also find a machine gun and some money to the left of the entrance. When you're ready enter the Hall of Heroes to end this chapter.

After you've used the elevator to get to the upper level of the Soldier's Field find a ticket pavilion building (TICKETS sign). There's a cannon in this building and a Vox code book inside its barrel. Collecting this item will start the mission.
Across the ticket pavilion is a Fellow Traveler bar. Locate the bathrooms behind the bar. One of the bathrooms hides a Vox code painted on a wall. Assuming you already have the code book you only have to enter this bathroom and Elizabeth will read the code.

In order to get to the Vox secret room you must go to the other bathroom. Locate a hat hanger and interact with it. As a result one of the walls will move, unlocking a narrow passageway.
The secret room contains weapons, ammunition, medical supplies and money. There's a small table in the middle of the room. You can find three valuable items here - a lockpick, Infusion #7 and Voxophone #29: Their Sun is Setting - Daisy Fitzroy. Once you've searched the room leave it and resume your primary mission.
The first thing you should do after entering the Hall of Heroes is to proceed to the left corridor (the one with the motorized patriot) and search the ticket office. There's a Voxophone #30 on the table on the other side of the door and you'll also find one lockpick under the usher's desk.
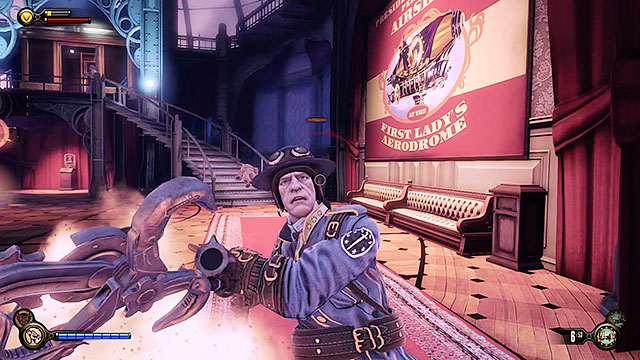
Leave the ticket office and you'll soon encounter Slate's men. Fight your way to the big hall with Comstock's Statue and after talking to Slate deal with his people. Once the battle has ended go to the same room the enemies came from.

This room contains several useful items, including a new lockpick found under the shoe of a statue located in one of the corners.

Check the table found opposite the statue in order to collect one more lockpick, as well as a silver tab and Infusion #8. Once you're done exploring this room proceed further into the Hall of Heroes.
You'll now get to an area with different paths leading to various parts of the main exhibit. It doesn't matter which part you'll visit first, but to keep things in order let's start with the Wounded Knee exhibit.
Turn left at the first junction and proceed towards a room reserved for employees only. Check the table found in this room to locate a grenade launcher and Gear #9 - Head.
Return to the previous corridor and head to the room with the main exhibit. Once you're inside this room you're going to be attacked by a group of Slate's men and one Raven will accompany them. There are medical supplies to the left and to the right of the exhibit in case you need them. Once you've won the battle return to the hall leading to other exhibits. If you didn't take the grenade launcher from the employees room then I suggest that you do this now, because you'll soon encounter a motorized patriot.
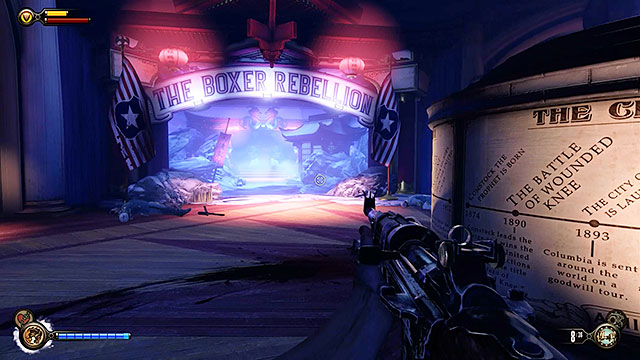
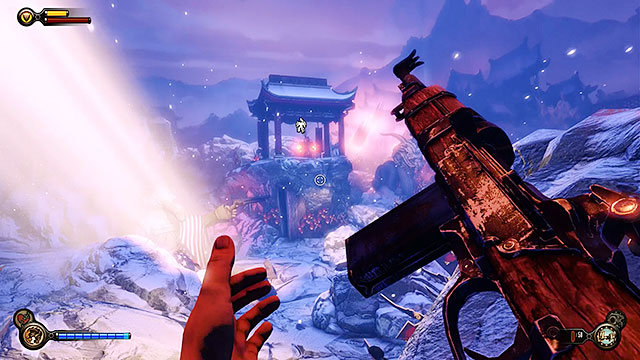
You're going to be attacked by Slate's men again in the main hall. Deal with them and then proceed to the Peking Exhibit.
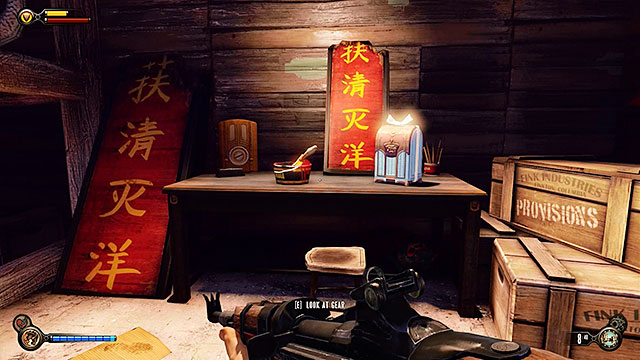
Just as before, when you'll reach a junction you should start by going to the room reserved for employees. Locate two valuable items on a table - a silver tab and Gear #10 - Torso.

Notice a poster located near the table. Check the back of this poster to find a lockpick.
Continue moving towards the main exhibit where once again you'll be forced to engage Slate's people in battle. Notice that there's a sniper rifle to your left (behind the rocks) and it may help you in getting rid of enemy unites. A new Fireman will soon join the battle and he'll appear on a distant hill. Kill him and once you've won the battle make sure to examine the Fireman's remains in order to obtain a new lockpick.

On your way back to the area with different paths you should notice a lockpick hidden behind a gong.
Expect to encounter resistance from Slate's men after getting back to the main hall. Eliminate all enemy units and then proceed towards the final exhibit.
Continue exploring the initial corridors of the exhibit and you'll soon come across a locked door. Just as with the previous story-related doors you won't need any lockpicks here, because Elizabeth will use her hairpin to open the door.

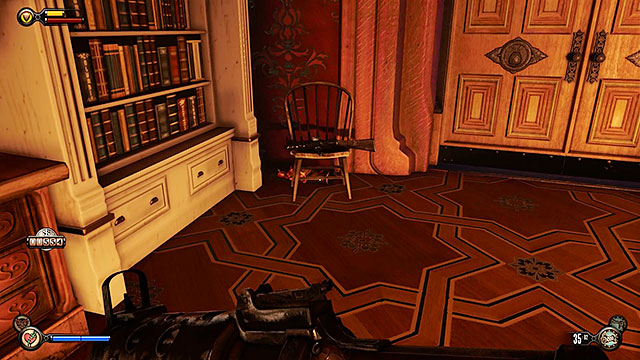
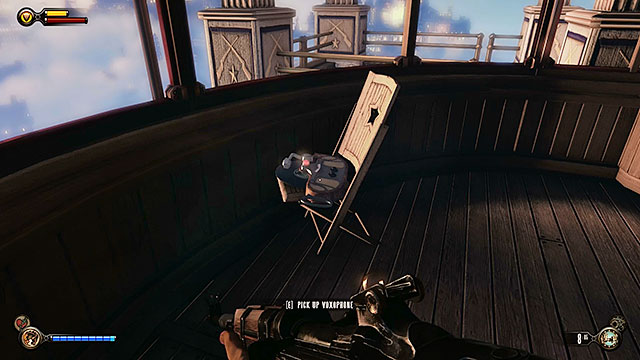
There's a room with a fireplace to the right of the door. Examine a chair located under Lady Comstock's painting to find Voxophone #31. Pick up this collectible and resume your journey, proceeding to the next rooms.
Once you've arrived at the courtyard you'll find a locked gate and only Elizabeth will be able to squeeze through a small opening. Thankfully Elizabeth's supernatural abilities will begin to manifest more often from now on and she'll be able to open tears for you. Start off by opening the nearest tear in order to summon scaffoldings you will be able to use to get to the other side of the gate.
The courtyard is guarded by a squad of Slate's men and a rocket turret. Notice new tears around this courtyard and you'll be able to use them to summon hooks or a barricade with an allied turret. Remember that opening one tear automatically closes the other one. I recommend that you practice to effectively use tears, because they will become an inseparable part of the tactical aspect of the game. Tears will be available in most of the battles you'll take part later in the game and they'll allow you to achieve victory in different ways depending on your invention or preferred style of play.

After leaving the courtyard you'll get to the gift shop's vestibule. There are vending machines here and you'll also uncover Vantage Points #19 and #20. Watch all the materials and then enter the store.

There's a Vantage Point #21 in the middle of this room. Watch a new material and prepare for battle.
This is the moment when a grenade launcher mentioned earlier in the walkthrough may come in handy, because you're going to be attacked by a mechanized patriot armed with a crank gun. The weakest points of the patriots are their backs and you should be aiming at flywheels marked in red.
Once you've defeated the patriot search the shop and ask Elizabeth to unlock a door.
Sadly you won't find a shock jockey in the maintenance room, however you will be allowed to replenish your salt supplies and to break into a new safe (you'll need 5 lockpicks to perform this action). The safe holds a medkit and several hundred silver eagles.
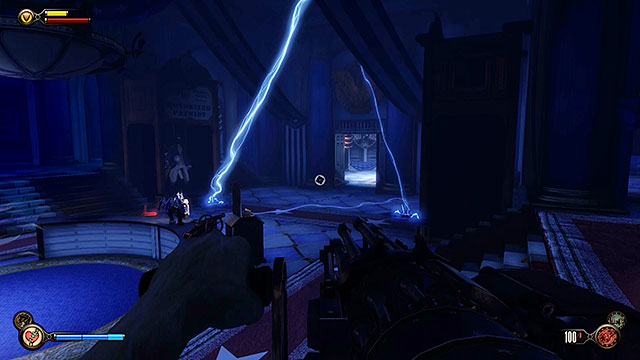
You must now start pursuing Slate who took the vigor you're looking for. Slate has left several electrical traps behind, however you will be able to neutralize them easily by shooting at the electric crystals.
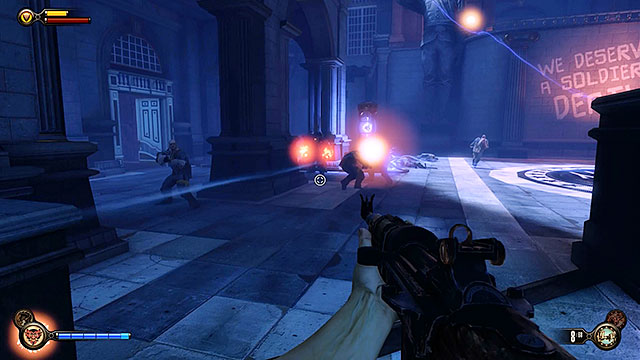
You'll soon return to the square and you should expect to encounter heavy resistance here from Slate's men. Notice that a Fireman and a Motorized Patriot are among the ones you need to kill. Remember to use tears to your advantage and to avoid electrical traps.

A new door will open during the battle, leading to a small warehouse located to the left of the square. Make sure to explore the warehouse to find a Voxophone #32 on the table and Infusion #9 hidden inside a tool box.
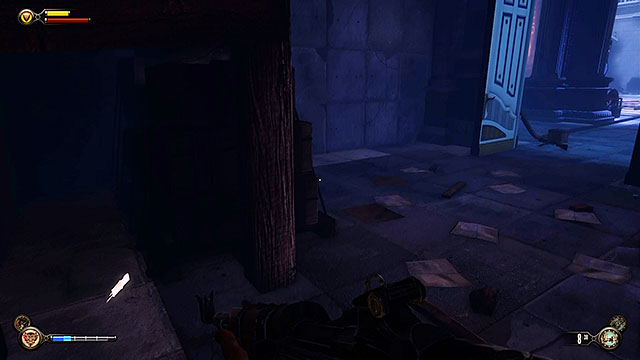
Don't leave the warehouse just yet. Check one of the darker corners located opposite the entrance and you'll find a lockpick.
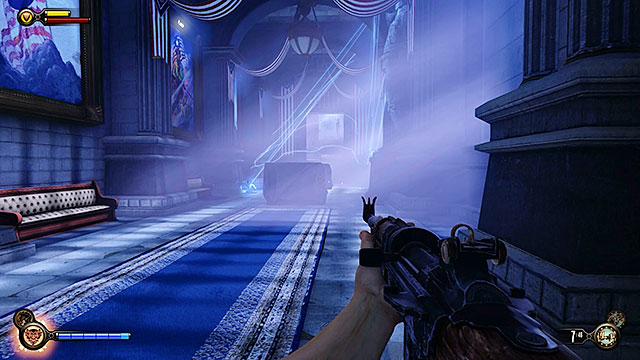
You must now make your way to a terrace from which Slate was dropping electrical traps. Continue pursuing him, finding several new traps along the way and dealing with small groups of enemies.

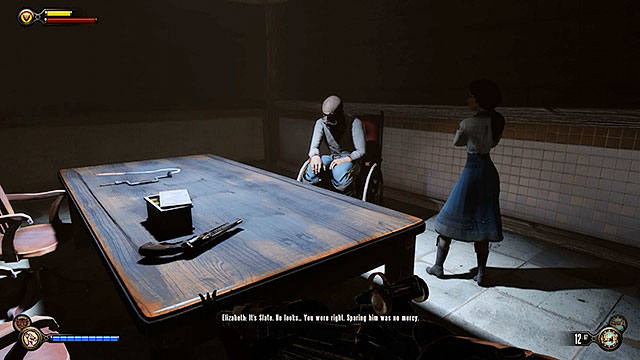
Slate himself can be found at the end of path, close to an entrance to a new display. Before you take the vigor him you will have to make a choice what to do with him - you can kill the captain or spare his life. The consequences of this choice are minor. No matter how you've chosen collect the Shock Jockey vigor and start going back to the Soldier's Field.
On your way to the exit you should expect several more encounters with the remains of Slate's forces, including a single Raven. Once you've dealt with all enemy units use the newly acquired Shock Jockey vigor on an electrical node found next to a closed gate.

As soon as you've left the Hall of Heroes you're going to take part in a battle with a large group of policemen. I recommend remaining close to the gate. Open a tear containing a sniper rifle, pick up this weapon and then summon the Mosquito to the battlefield. You shouldn't have problems eliminating enemies from a safe distance with the rifle.

Once you've won the battle use the Shock Jockey vigor on an electrical node found near the angel statue. Doing this will unlock access to the maintenance room, allowing you to reach the balconies.
There's a table near the stairs. You'll find 2 lockpicks here, as well as Gear #11 - Head. Search the entire balcony before heading down.

Proceed towards the gondola and attach yourself to the sky-line. Using the sky-line will allow you to get to a lower platform with a police barge docked nearby. Drop down to the platform and eliminate all policemen. You can make this fight easier by summoning a Mechanize Patriot thanks to a tear found on this platform. The construct will be helpful especially in getting rid of enemies equipped with grenade launchers.

Check the back of the platform. A lockpick can be found on the wooden beams under the stairs leading to the upper level.
Get to the upper level. Take some time to find the salts and a tear containing medkits which may prove to be helpful in the upcoming battle.
There's only one more thing to do here and that is to attach yourself to the sky-line to travel to Patriot's Pride Pavilion. A new police squad will be waiting your there and a single Fireman will also be present on the battlefield. Eliminate all enemy units and make sure to examine the Fireman's body to uncover several useful items, including a lockpick.

Once you've reached the Patriot's Pride Pavilion you will encounter a construct armed with a Crank Gun. Destroy the machine and make sure to revisit the "employees only" section of the office. Approach the safe again. You should now have enough lockpicks with you to open the safe and as always you can count on obtaining several hundred silver eagles and a medkit.
Once you've searched all the nearby buildings proceed to the elevator and allow it to transport you back to the Soldier's Field.

You shouldn't focus on starting the gondola right away. It's best to return to the stores found on the promenade, because they're all closed for business. Most of them can be accessed using brute force. The Founder's Books store contains a lockpick and you'll also find plenty of money behind the counter.
The store with toy soldiers has an inactive electrical node. Use the Shock Jockey vigor on this node and you'll be allowed to explore the back of the store.
Search all the interactive containers found at the back of the store. There are also two valuable items in one of the corners of the room - a sniper rifle and Gear #12 - Torso.
Use the sky-lines to get to the hotel's balcony located in the middle of the promenade (between the ice cream shop and the gondola station). Gain access to this building by using the Shock Jockey vigor on the electrical node found near the door.
Open the door and locate a lockpick on a small table near the window.

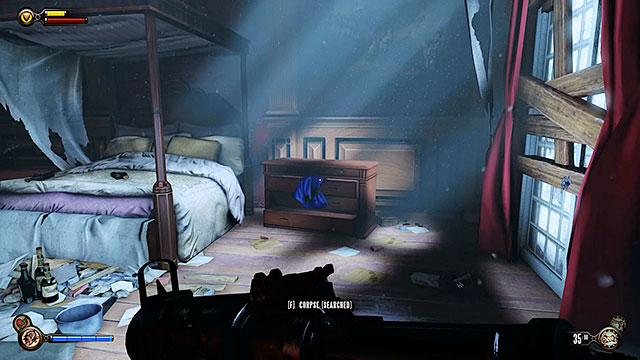
The second room is a murder scene. You'll also find a lockpick here - it's near a closet behind the corpse.
Check the large bed to find a Voxophone #33. That's not all, because there's also Gear #13 - Feet on a dresser next to the bed. Explore the rest of the room and then head back to the gondola station.
Use the Shock Jockey vigor on an electrical node in order to power up a control panel. Pull the lever to summon the gondola.
Get ready for a new battle, because while you're waiting for the gondola to show up police barges will start arriving at the promenade. Don't forget to use nearby tears to your advantage and to obtain valuable weapons and medical supplies. Focus on eliminating cops with grenade launchers and also watch out for a Motorized Patriot that will arrive with the gondola. As long as you stay on the move you shouldn't have any major problems dealing with the remaining policemen.

When you get to the gondola allow Elizabeth to deal with a locked entrance to the cabin. Explore the corners of the cabin to obtain some silver and a lockpick. Pull a lever found in the cabin when you're ready to continue the mission.
The upper station is occupied by several more policemen and they're guarding access to the airship. Check the area under the stairs (behind a model of the ship) to find one more lockpick and Vantage point #21 - Kinetoscope (from a practical point of view this is the same kinetoscope as the one found in the gift shop in the Hall of Heroes).

Once you've explored the station enter the elevator which will transport you to the airship. When you're on board of the airship make sure to check the entire cabin, because aside from a lot of money you'll also find Infusion #10. You may now use the console located on the ship's beak to end this chapter.
This chapter will begin with a hard landing. Enter the shipping center located to your left and check the area between to desks located next to the left wall to find Voxophone #34.
You can explore most of the areas in the docks without any restrictions, however entering a barge located to the right will result in a hostile reaction from its guard. If you attack this person you'll also have to deal with nearby policemen and Mosquitos flying above the docks.
There's a freight elevator in the middle of the docks. Head up the stairs and explore the room where some workers are cleaning the vending machines. You'll find some money here, as well a lockpick.

Enter the building with the "employees only" sign located at the other side of the docks. Notice an opened safe containing a lot of silver and Gear #14 - Legs. If you've been avoiding confrontations so far, then you must know that taking any items from this office will force you to deal with a bunch of policemen, Mosquitos and a Motorized Patriot.
Once you've cleared and fully searched the docks proceed towards a tunnel located near the building with a safe. Check the area behind the pillar before entering this tunnel and you'll uncover one more lockpick.
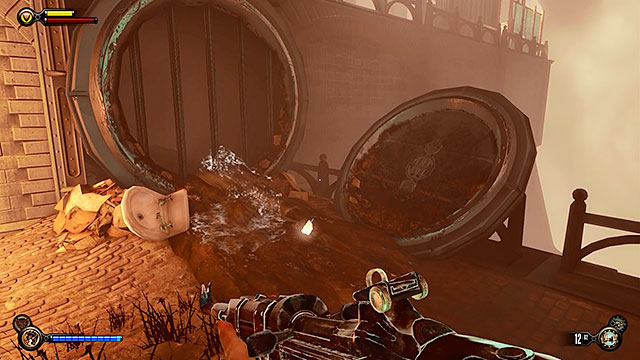
Reach the opposite end of the tunnel. You'll notice several crashed gondolas here. Look around to find salt (Shock Jockey bottles) and a passageway to the next chapter.
Get to the other side of the barricade and open a large door. You'll notice Elizabeth and you'll begin your pursuit after her. Don't move too fast, because you should check each corner for valuable loot. The girl will be making it harder for you to catch up, opening tears with various obstacles. She will finally unintentionally become captured by Fink's men.

Enter a small room located on the left of the corridor. You'll find a Voxophone #35 here, as well as money and a grenade launcher hidden behind the desk.
Once you're ready to help the girl leave the building via a door located on the right side of the corridor.
Once you're outside the building start off by exploring the nearest barge. You'll find a sniper rifle with some ammunition here and it will be useful in the upcoming battles.
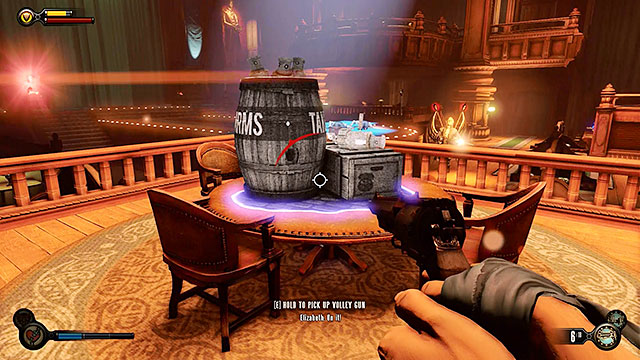
Keep following Elizabeth's voice until you get to a corridor at the top of the stairs. You will be able to take out most of the policemen quite comfortably from here, however some of them may try to use the sky-lines to close the distance. A police barge will soon arrive at the arena. Be careful, because it has a mounted turret. Furthermore, one of the law officers will be equipped with a Volley Gun.

Once you've cleared the area of enemy units descend to a lower platform and keep going until you get to a room on the ground floor. There's a prison cell here and you should notice Infusion #11 behind the bars.
Use the sky-line above the square to reach an upper floor. There's a room with vending machines at the top and you'll find some money and ammunition there. Open the left door to find a new trail. Attach yourself to a sky-line Elizabeth has summoned for you and follow her.
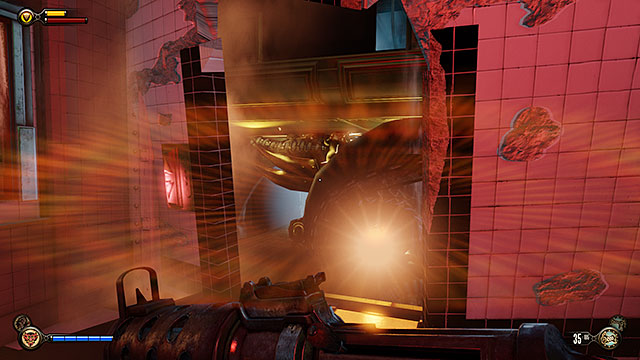
You'll end up in a dock and for the first time you'll encounter a Handyman here - one of the strongest opponents in the game. Thankfully this is only a staged scene so treat it a taste of things to come. Notice a large orange heart of this half-man, half-machine. It's his weakest point and its vulnerable to attacks even from basic firearms.

Once you've landed at the gondola station you should turn around to uncover Vantage point #22 - Telescope.

There's a gondola nearby and it has a locked cabin. Ask Elizabeth for help in opening the cabin (you must have 5 lockpicks) and take a look inside. You will find a silver tab here, as well as Gear #15 - Legs.
Before you leave the gondola station you should explore the area and interact with the Dolar Bill vending machine. You can purchase 3 lockpicks and each lockpick costs 48 dollars. Once you're ready proceed to Finkton Proper.
Enter the building, turn left and search the area under the stairs in order to obtain a new lockpick.
The left corridor also contains a machine used to upgrade vigors and Vantage point #23 - Kinetoscope.

Proceed to the building's main hall and explore the office located in the middle. There are two important items here - a lockpick and Voxophone #36. You should also check the floor near the desk to find a bag filled with money.
Explore the area behind the main desk to find yet another lockpick hidden between a smaller desk and a scale.
A locked room can be found nearby. Ask Elizabeth for help in opening the lock (5 lockpicks are required for this activity). There's an Infusion #12 on a desk to the right and exploring the back area of this office will allow you to collect a Volley Gun among other things.
Walk past the people standing in front of a vending machine located in the middle of the hall and use the stairs (it doesn't matter on which side) to get to a lower floor. Locate a new locked door here. Thankfully Elizabeth can open this door without using any lockpicks.
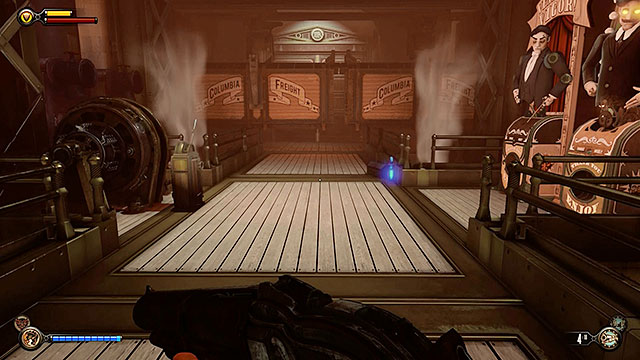
The room on the other side of the door you've just opened is guarded by a Mechanized Patriot and a squad of policemen. Your objective is to get to a service elevator located on the ground floor. Expect reinforcements to arrive from the upper floor and fight your way to the lowest level.

Once you've defeated all hostile units you should explore the entire hall. A room located opposite the elevator contains a shotgun and a locked safe. You only need one lockpick to open this safe and it contains about 100-200 coins.
Make sure to check the trash bin located next to one of the bookstand in the middle of the hall to obtain a lockpick.
Go to the room with the elevator. There's another lockpick on one of the desks near the window.
Press a button to call the elevator. Elizabeth should approach an opened locker at this time and it's wise to take interest in it as well, because it contains Voxophone #37.
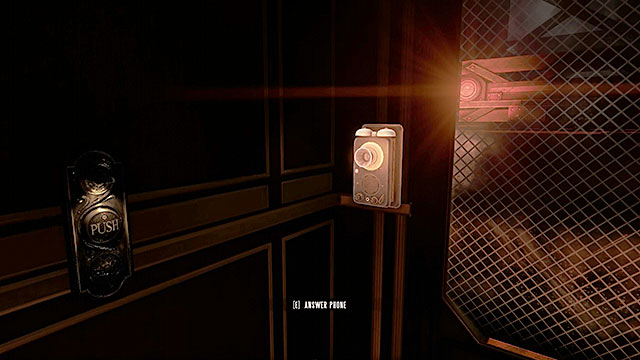
The elevator will stop half way to its destination. Pick up a phone hanging near the glass to continue your journey.
When you'll get to the ground level Flambeau will already be waiting you. Check the table seen in front of you to collect medical supplies, money, a lockpick and a new weapon - Hand Cannon. This is a revolver which holds six bullets and offers supreme firepower at a cost of low fire-rate. You should also know that finding ammunition for this gun is not easy. I recommend the Hand-Cannon to experienced shooters who like to kill their targets with single shots and never miss. Once you're ready leave the building to advance to the next chapter.
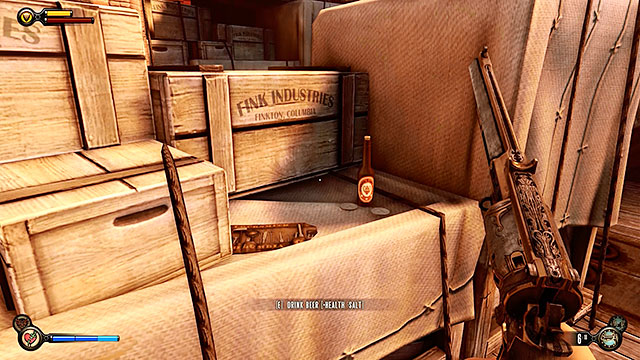
Enter the plaza, turn right and proceed towards the watchmaker's store. In order to get to the store you must stay close to the right side of the plaza, walking under the arcades until you get to the dock. You'll notice crates in front of the locked store and you'll find beer, money and 2 lockpicks here.
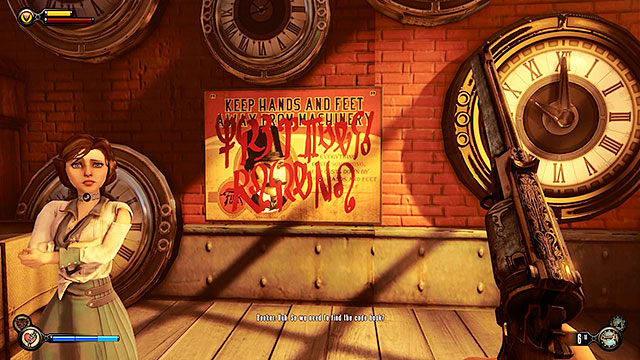
Get inside the store which shouldn't be difficult since you only need one lockpick to unlock the door. Notice Vox code on a wall with large clocks. Examining this code will trigger a new side mission (it's about finding the cipher) and you'll have a chance to complete it after advancing to the next chapters.
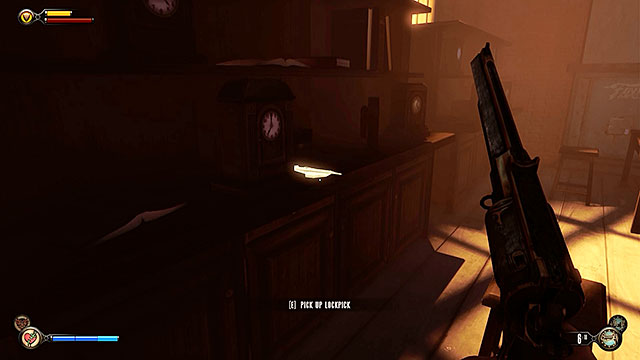
The area to your right holds another lockpick found on a shelf between clocks. Search the rest of the room and then get back to the plaza.
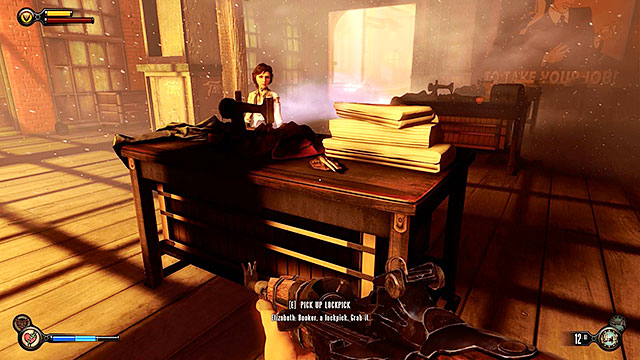
Explore the area behind Fink's factory (to the left of the job fair) to find a tailor workshop with a very unusual red tear. There's a new lockpick on one of the tables and you'll also find a machine used to upgrade vigors in a nearby smaller room.

Use the sky-hook to get to a small roof located opposite The Good Time Club. You'll find a new lockpick under the "Killing Time Kills Columbia" billboard, along with some ammunition for the grenade launcher.
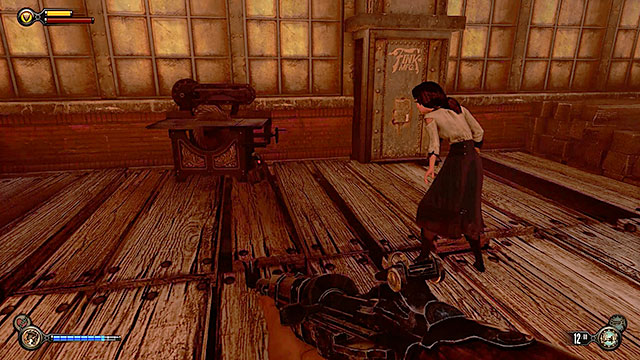
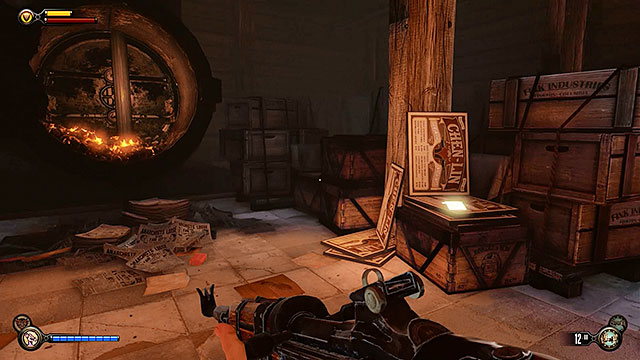
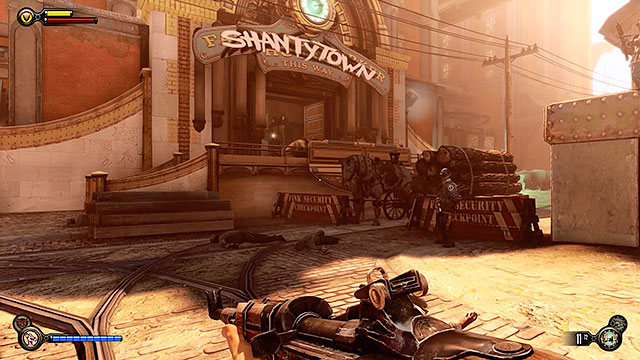
Once you've explored the roofs proceed to a dead end alley located behind the (locked) entrance to Shantytown. Approach a circular saw to find Voxophone #38.
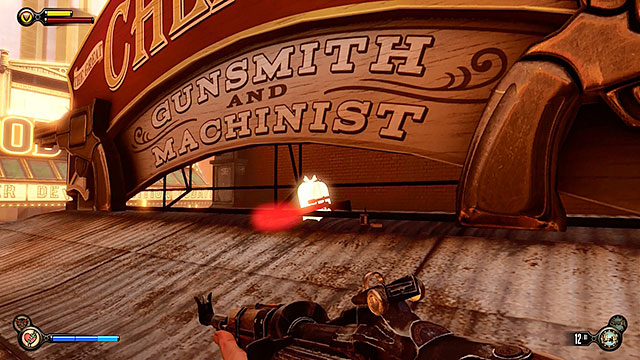
Climb on the roof of the Chen Lin's store. You shouldn't have any problems finding two items under the store's sign - a sniper rifle and Gear #16 - Torso. Once you've collected these things check the nearby roofs. The most valuable find is a Volley Gun found opposite the gate leading to Shantytown and it'll come in handy after the visit in Chen Lin's store.

You may finally focus on your current objective by entering the store. Explore the entire shop. There's a lockpick and Voxophone #39 on the counter. Once you have these items use the red door to enter the gunsmith's workshop.
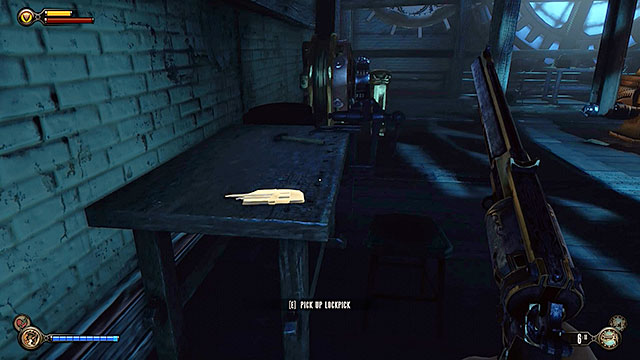
Search the ground level after entering the workshop and once you're done get to the last floor. You won't find Chen Lin, but there's a new lockpick on the table in the corner.
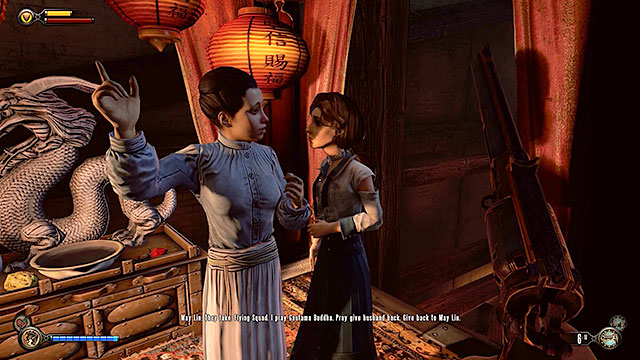
Once you've properly searched the top floor of the workshop you should hear someone crying behind the Budda's altar. This person is going to turn out to be Lady Lin and she'll inform you that the gunsmith has been taken to The Good Time Club. This is a good moment to go there.
Expect a surprise attack from the Handyman after leaving the store and sadly this time you won't be allowed to avoid the duel with this person. Running away to nearby rooftops won't do you any good, because the Handyman can traverse the environment at least as good as the main character. He's also very strong and even attacks based on vigor won't inflict serious wounds. The best method to win is to maintain safe distance from the Handyman and either start aiming for his heart or use explosive weapons (grenade launcher, volley gun etc.).
Once the Handyman has fallen you'll have a chance to collect a proper reward for your struggle in the duel - Gear #17 (random type). Finish exploring the plaza before going to The Good Time Club. If you like long distance fights make sure to take a sniper rifle with you (there's one on the rooftop of the gunsmith's store).
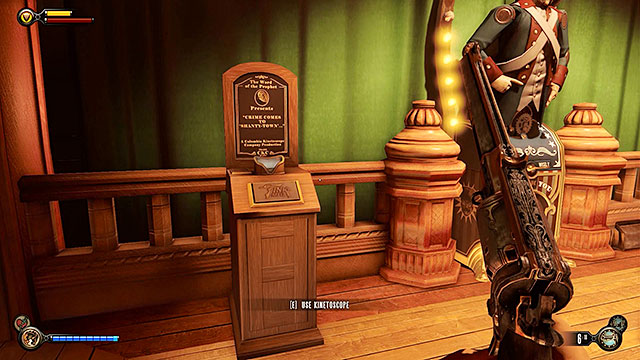
Locate a vestibule after entering the club and use the stairs to get to the upper floor. You'll find a machine here used to upgrade weapons and Vantage point #24 - Kinetoscope.
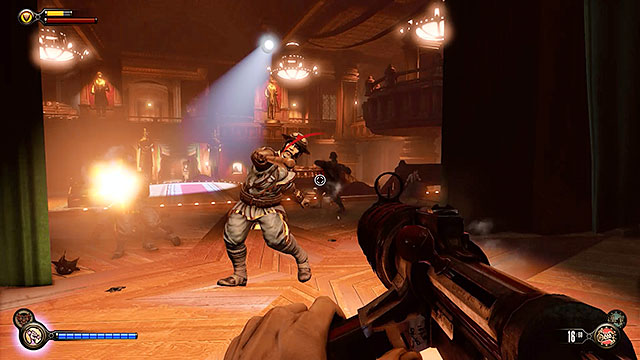
The first wave of enemy units will appear on the stage moments after entering the main area of the club. A new Fireman will be among the people you need to neutralize. If you plan on using a weapon suited for long range kills, then it's best not to use the stairs leading to the stage. Weaker enemies will come to you and you'll have an easier job disposing of the Fireman without engaging him in direct battle. Don't forget to inspect the Fireman's body when he's dead to find a lockpick.

Once you've eliminated all enemies from the first wave a new Crow will appear on the stage. This isn't your first duel with this type of an opponent, so you should now how to react. After the Crow is dead deal with his helpers.
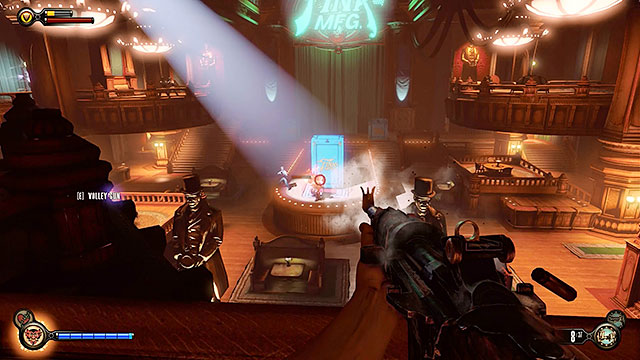
The last surprise Fink has prepared for you are various types of machines. You'll be dealing with stationary turrets, Mosquitos and a Mechanized Patriot. The Volley Gun will be very helpful here and Elizabeth can summon this weapon by opening a tear located on the left side of the stage. It's recommended to use tables and bar counters for cover and in case you'll start running low on health or salts check the areas reserved for the audience.
After you've passed "the interview" proceed to the toilets located opposite the stage. The right toilet contains a new lockpick.
Go past the toilets and at the end of the corridor you'll find the Veni! Vidi! Vigor! vending machine. There's also Vantage point #25 - Kinetoscope here.
Proceed towards a small bar located to the right (there's a Dollar Bill vending machine near the door leading to it). Check the left side of the bar to find a lockpick hidden under one of the tables.

There's an Infusion #13 on the bar's counter, next to the "Free Sample!" sign. Also - make sure to look behind the counter to find two vigors and a shotgun.
Leave the bar and use the stairs to get to the upper floor. There are 2 lockpicks hidden behind a minibar to the left (when facing the stage).
There's a room with a fireplace nearby (it was previously locked) and obviously you should explore it. Approach the desk in the saloon and find Gear #18 - Feet hidden beneath a stack of papers.

There is a safe near a large clock behind the desk and it can be opened by using 3 lockpicks. The safe contains about 200 silver eagles.
It's time to go behind the stage. The first room you'll get to contains a Voxophone #40 and this collectible can be found in front of a mirror.
Use the stairs to get to the cellar where you'll encounter two policemen. There's a smaller room to the left (opposite the hallway) and after opening a door you'll uncover a lockpick and some rifles.
Proceed further into the basement. You'll locate a locked door here and you'll find out that the gunsmith is being held in cell number 9. Ask Elizabeth to break the lock (you don't need any lockpicks for this action) and enter the prison.
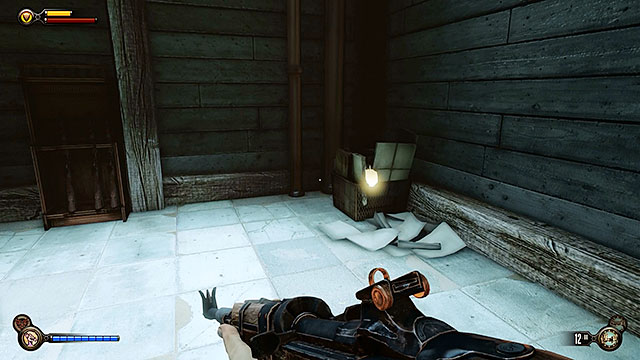
There's a room with items prepared for recycling on the other side of the door. Examine the crates located close to the furnace and you'll find a Vox cipher needed to complete a side mission in the Plaza of Zeal.
Go past the projection room to end up in a corridor with the cells. Locate a lockpick and Voxophone #41 near the entrance.
If you've spared Slate during an encounter in the Hall of Heroes, then you'll find him in cell number 6. Take a Hand cannon and some ammunition from the table.

Ask Elizabeth to open the door leading to cell number 8 (you must have 5 lockpicks). Pick up Gear #19 - Head found next to a dead prisoner.
You must now unlock cell number 9 and the good news is that you don't need to have any lockpicks. Descend the stairs to get to a dark interrogation room. Check the table next to the cell to find a lockpick hidden behind a crate.
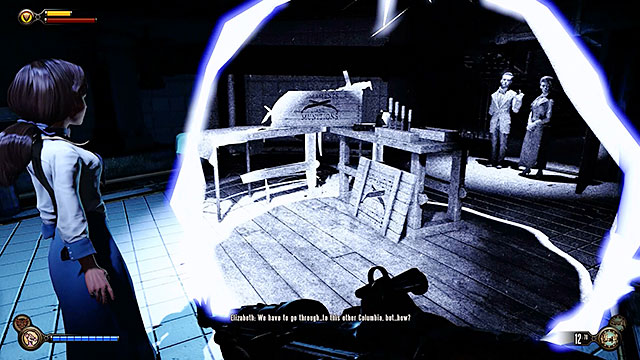
Enter a new room and use a glowing switch on a wall to turn on the lights. This will allow you to find Chen Lin's body. The Lutece siblings will arrive here shortly and thanks to them Elizabeth will be able to open a tear to an alternate world in which the gunsmith is still alive. Make sure that you've collected all the items from this location, because after you've advanced to the next chapter some of them will disappear or others will be replaced by new things.
Once you've opened the tear you'll find yourself in one of the many alternative realities you're yet to discover. Proceed towards the exit from the club. You'll have to fight your way to the door, eliminating police forces gathered in large numbers around the stage.

One of the things that will change in this version of Columbia will be a kinetoscope located near the exit from the club. In this version it can be found to the left of the Minuteman's Armory vending machine and it'll be treated as a new object - Vantage point #26. Leave the club to end this chapter.
Expect serious resistance from the police units after arriving at the plaza. All the machines you've destroyed will appear again, along with heavily armed opponents equipped with Volley Guns.

You will now have a chance to finish an optional mission involving the Vox code in the watchmaker's store. Return to that shop and follow the instruction by using the clock found on the wall. You'll be rewarded with Infusion #14, Voxophone #42 and several less important items. Once you're done exploring the plaza return to Chen Lin's workshop.

Get to the last floor of the workshop and initiate a conversation with "spectral" Chen Lin. Once you're done talking go to the lower floor. You'll meet an alternative version of Lady Lin near the altar and she'll tell you where her husband's machines are being kept. You may return to the Plaza of Zeal.
Immediately after leaving the workshop you're going to have to deal with a new group of policemen guarding the access to Shantytown.
Once you've won the battle enter a tunnel and pull a lever, gaining access to a bridge.
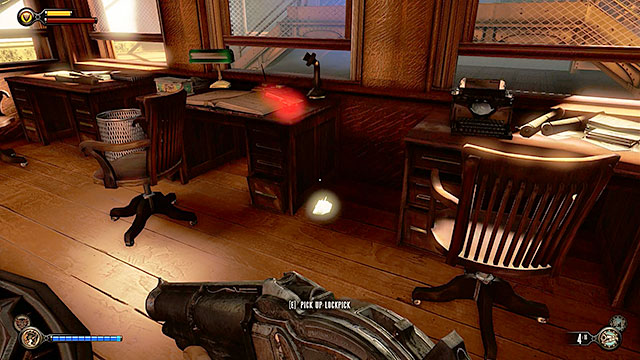
Fight your way through the bridge, eliminating new police officers. Enter a station located on the other side. A new lockpick is hidden between two desks in the ticket office. You'll also notice a new vigor behind the bars, however you won't be able to get to it in this chapter. Once you're ready to proceed to the next location (and chapter) enter an elevator located opposite the ticket office and press a button.
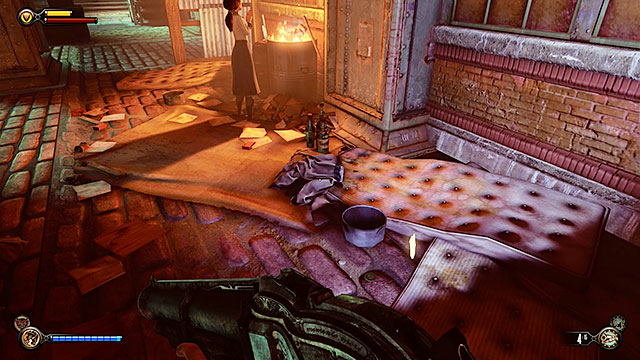
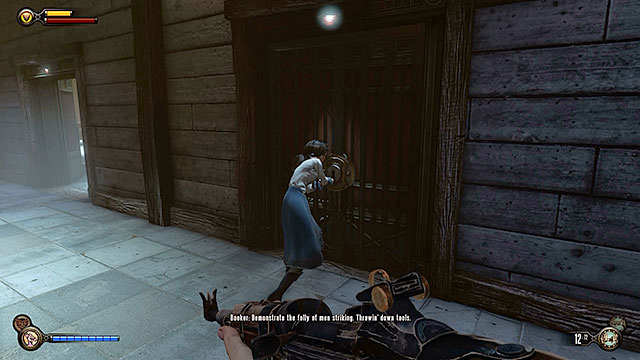
Walk past the local preacher after arriving in Shantytown and turn left. Go under a provisional roof and stop near a burning barrel. You'll find some coins here and a lockpick.
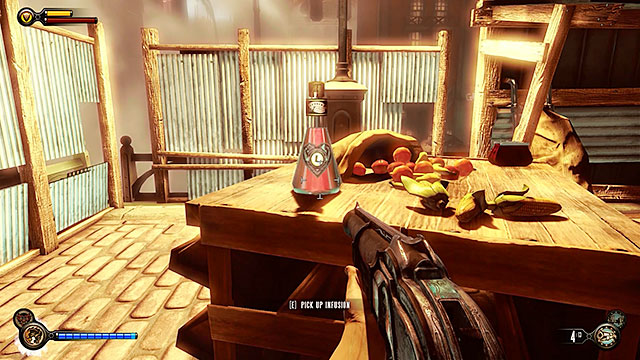
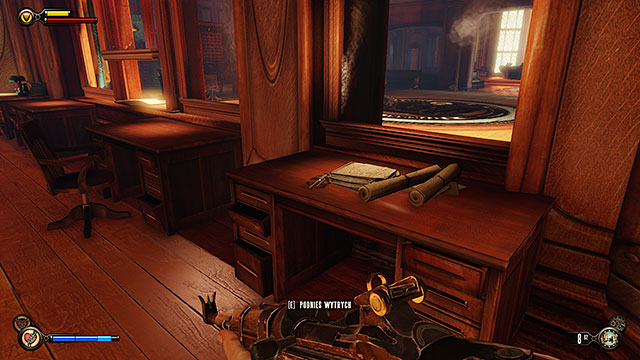
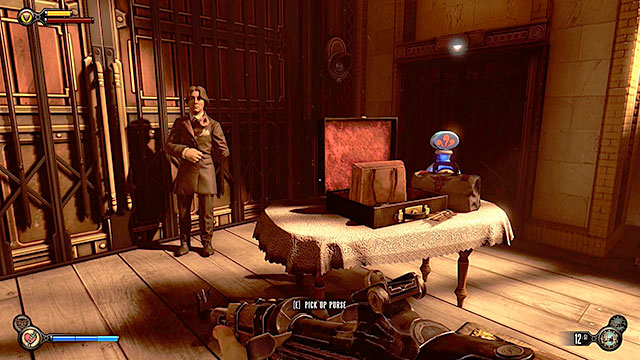
You're going to be attacked by two of the locals a little further ahead and they'll be waiting for you in a side alley located to the left. Find a table with a lot of fruits that was defended by the hostiles. You can find a purse and Infusion #15 here.
Use the nearby stairs to get to the Graveyard Shift Bar. There's a sewer tunnel to the left of the stairs, along with a basin with some laundry. Inspect the muddy area in front of the tunnel to locate a lockpick.
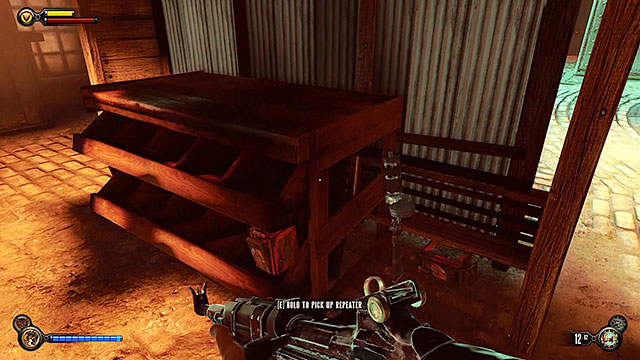
You'll also find a small stand near the entrance to the bar. Examine this area a little closer to uncover a Repeater rifle along with some ammunition.
Enter the bar and approach a vending machine located next to a wall. There's a new lockpick to the right of the machine.
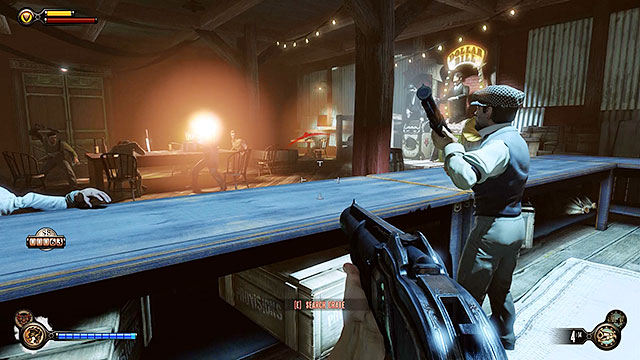
If you're planning on stealing items from crates found behind the bar's counter, then you must acknowledge the fact that you're going to be attacked by the bartender and by the guests. No matter how you've chosen to act sooner or later you'll have to go to a small cellar located to the right of the counter.
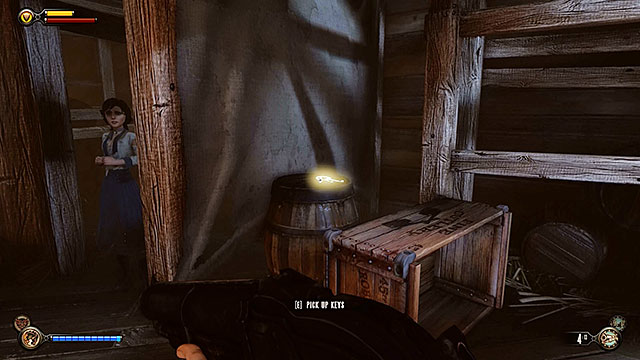
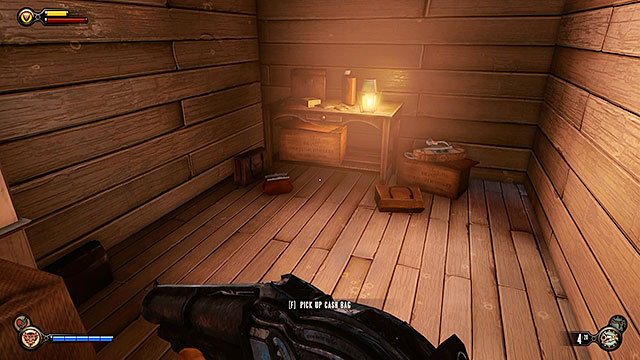
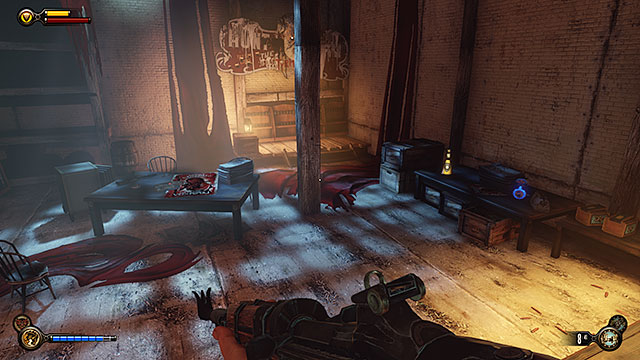
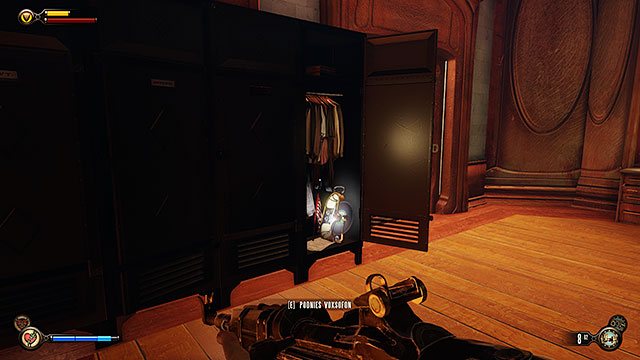
A guitar can be found in the cellar. Play on the guitar and then search the room. The most important find are the keys and collecting them will trigger a new optional side mission (Find a locked chest). It's important to know that you'll be able to end this quest in the next chapter.

There's a table opposite the area where you've found the keys and you'll locate a Voxophone #43 here. You can also collect a Repeater rifle found behind the table. Once you've collected all the items return to the part of the street with the stands.

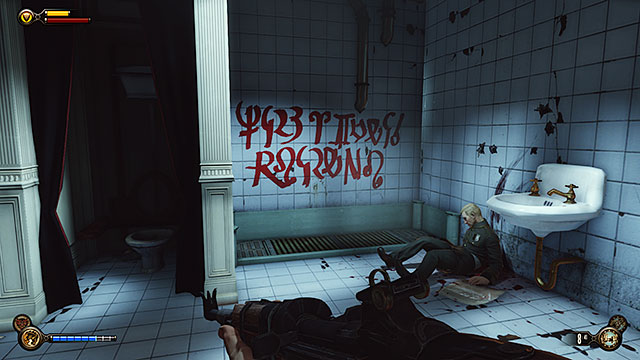
Keep going towards your current destination and you'll encounter a pair of beggars attacking a vending machine. Turn left before using the stairs leading to the main street and go towards a new burning barrel. Check the area near a large pipe to find a hidden lockpick.

You may now return to the main street with the broken vending machine. If you'll try to collect money found next to the machine you're going to be attacked by the beggars mentioned above. You can avoid the unnecessary bloodshed by opening a nearby tear. This will result in the beggars going towards the summoned food, allowing you to take the money without any problems.
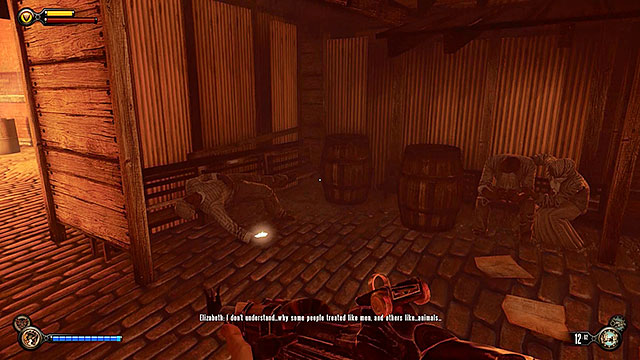
Proceed towards the opposite end of the tunnel (to the singing girl). Inspect the area to the left and you'll find a new lockpick next to a sleeping citizen.
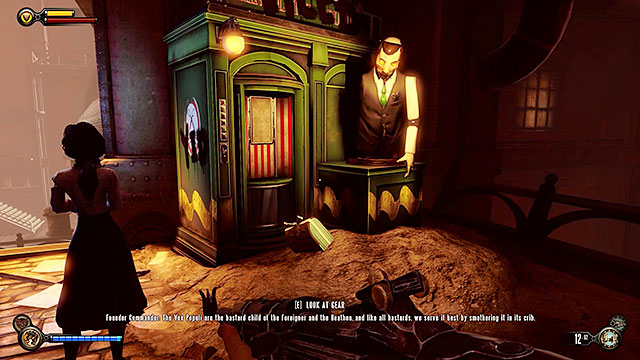
Use the next tunnel. You'll come a cross a jewish vending machine along the way. Explore this area to find Gear #20.
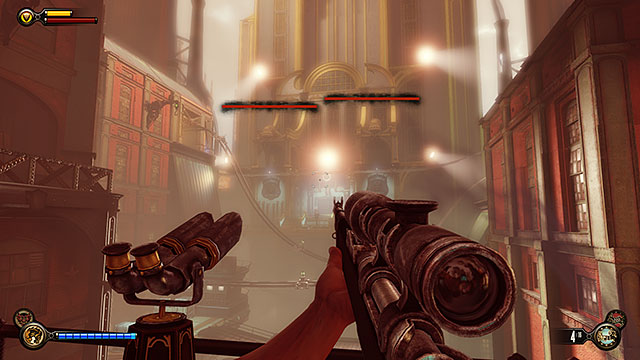
Once you've collected the gear move closer to the courtyard located in front of the Bull House impound where a briefing of a small squad of policemen is taking place. Don't start the battle just yet and instead climb to the left balcony. Look through a telescope to unlock Vantage point #27. Using the telescope will also allow you to familiarize yourself with the situation in front of the precinct. You can find a sniper rifle here and it will be very helpful in the upcoming fights.
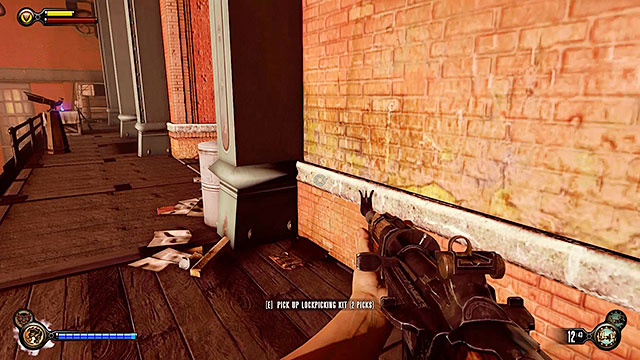
Check the corner near the telescope to find a locksmith's set containing two lockpicks.
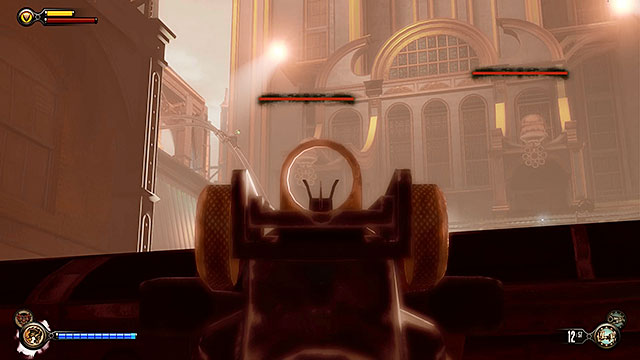
Before you'll be able to enter the police impound you're going to have to defeat a small group of policemen. The police units will be supported by two rocket turrets, one machine-gun turret and a Mechanized Patriot. The best way to handle this challenge is to remain on the balcony with the telescope. The balcony is large enough to move around freely and it offers a lot of cover against the enemy fire. Besides, enemy attacks shouldn't be such a big problem from this distance. The sniper rifle you've found here contains enough ammunition for you to destroy all the turrets. If you're playing on a normal difficulty setting each rocket turret will explode after receiving eight hits from the sniper rifle. Elizabeth should provide you with additional ammunition and you can use it to get rid of the policemen and the Patriot.
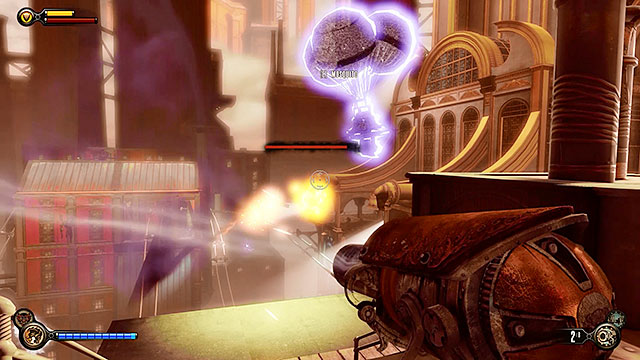
If by some chance you prefer short distance fights, then you should take some time to find Grenade Launchers (on a building in the right side of the square and on a roof of a barge to the left) and Volley Guns (on top of the building to the right). You can also open a tear located near the left building (it contains one more sniper rifle) or above the entrance to the police precinct (it summons a Mosquito). Use the sky-lines to travel between buildings, using this opportunity to eliminate enemy units while moving. If you encounter problems with your health, then you should open a tear located close to the right building, because it contains medkits. Finally, there's a shooting range behind the left building and you can summon a machine with rockets.
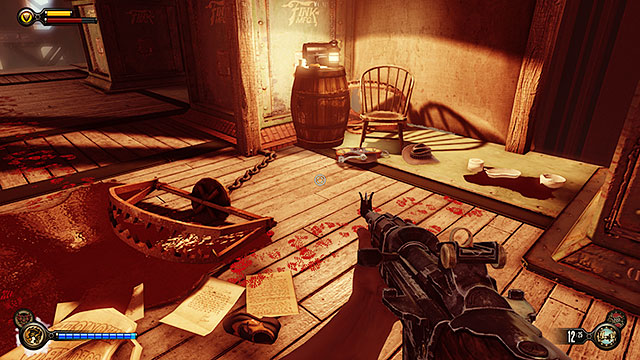
Once you've eliminated all enemy units use the sky-line to get to the back of the right building. Collect Voxophone #44 and enter the police precinct to end this chapter.

Go through the main hall of the precinct, heading towards a reception located to your right. There's a lockpick on one of the desks and a Vantage point #28 - Kinetoscope to the right.
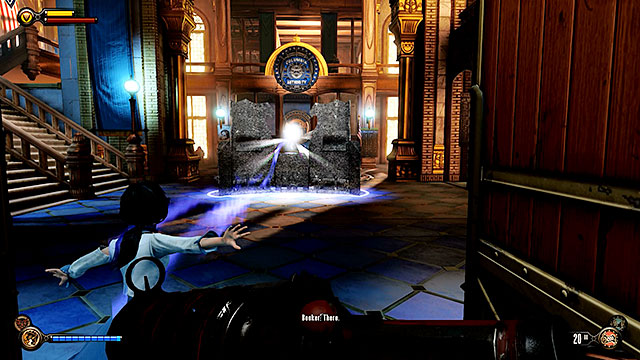
Enter a large hall located on the other side of the door and immediately summon a shield by opening a tear found in this location. Quickly deal with nearby police officers, because a Mechanized Patriot will show up very soon. A corridor located to your right contains a Crank Gun and this weapon will be useful here.
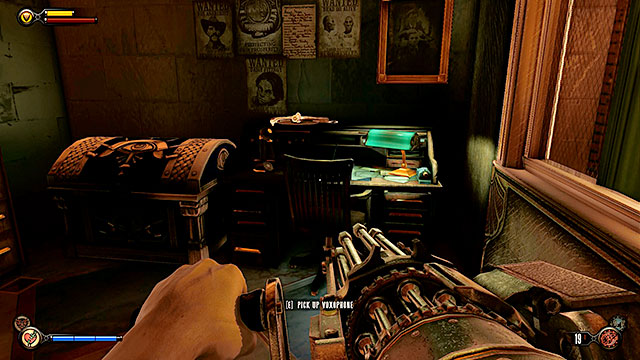
Proceed to the first floor and search the office located directly in front of the entrance. There's a Voxophone #45 on a desk in one of the smaller rooms. You'll also find a decorated chest next to the desk and you can open it using the keys found in the previous chapter (in the cellar of the Graveyard Shift Bar). The chest contains Infusion #16. One last item you should look for is a lockpick and it can be found on the ground behind a small wall in the same room.

A locked armory is located to the left of the office area you've just visited and you must use 5 lockpicks in order to gain access to it. Doing this will allow you to collect Infusion #17 and Gear #21.
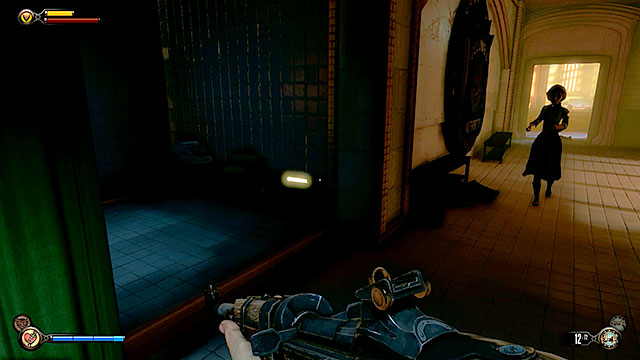
You may now proceed to a dressing room which can be found on the other side of the corridor on the same floor. Pick up a lockpick found under a shower and then explore the rest of the room.
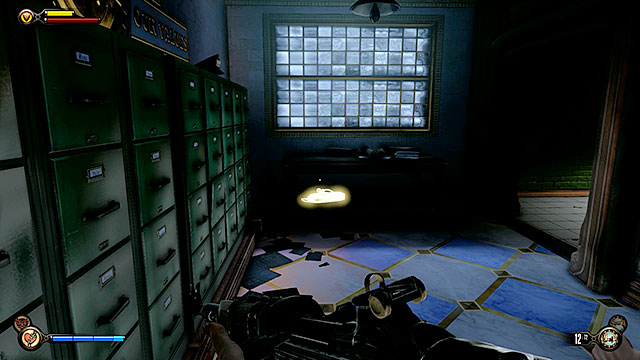
Return to the ground floor and search the interrogation room located next to the stairs leading down (left side of the hall). There's a Voxophone #46 here and in the room with more lights you'll also find the locksmith's set.
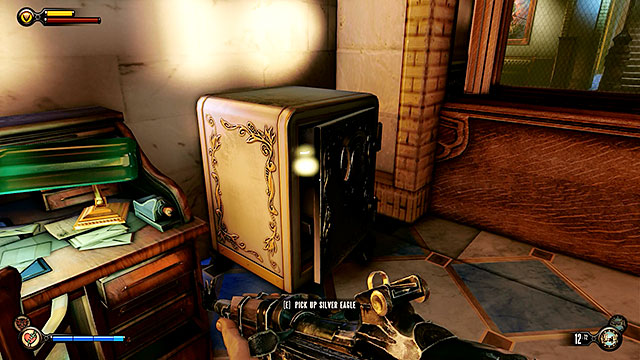
Check the office to the right and you'll find an unlocked safe containing a lot of silver.
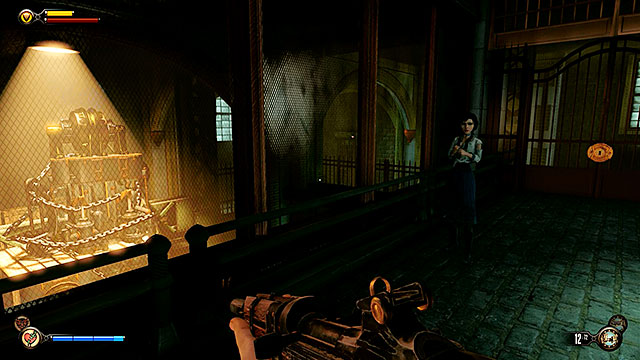
Once you've explored all the rooms use the stairs mentioned before to descend to the cellar where Chen Lin's tools are being stored. Ask Elizabeth to open a nearby door for you. Head down, but make sure to explore the middle floors along the way.

You'll find an opened cell on your way to your current destination. Examine the floor near a corpse to locate another lockpick.
When you're ready to move on with your mission open a tear near gunsmith's tools. Before you do that make sure that you've taken all the items from the police impound, because this is going to be a one-way trip.

Once you've stepped through the portal return to the ground floor of the impound. Make sure to check a room near the entrance to the cellar, because there's a Voxophone #47 on the desk. Proceed to the yard located in front of the police impound.
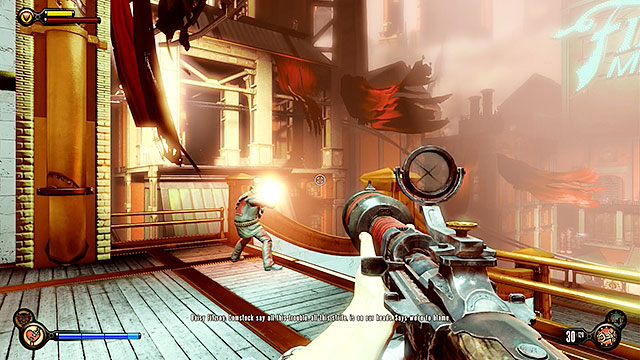
Exit the impound and you'll notice that Vox forces are fighting here with the police units. You don't have to participate in this battle, especially since reinforcements will continue to show up as long as you don't leave the yard. As a result it's best not to waste time and resources on pointless combat. Instead use the sky-lines to quickly get to the other side of the square.

Use the well-known path leading towards the Graveyard Shift Bar. You'll notice several Vox taking pictures in front of a defeated Handyman. Make sure to examine this half-man, half-machine to uncover Voxophone #48.
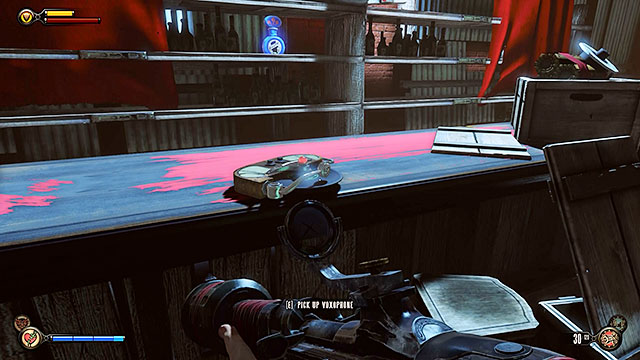
Go inside the Graveyard Shift Bar. There's a Voxophone #49 on the bar's counter and once you have it return to the elevator to travel back to the Plaza of Zeal.
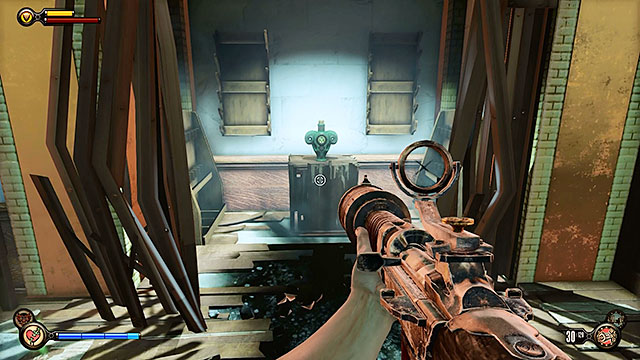
Start off by exploring an office that previously had an inaccessible storage area. This time you won't have to worry about the bars blocking your way and as a result you'll be allowed to collect a new vigor - Charge. This vigor will make you much stronger in close combat.
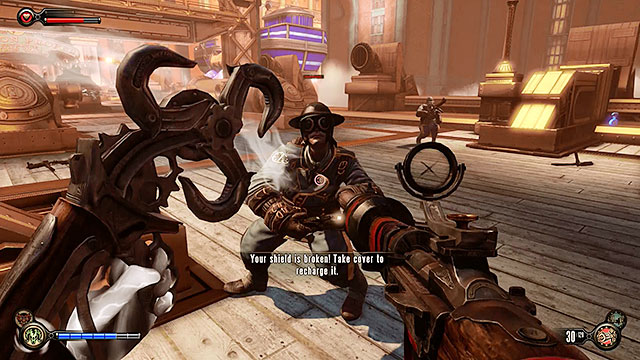
The only way to return to the workshop is to fight your way through the bridge in the Plaza of Zeal. Don't forget to use the tears to your advantage, especially since they weren't here before. The enemies will remain in similiar strength so you should know what to expect.
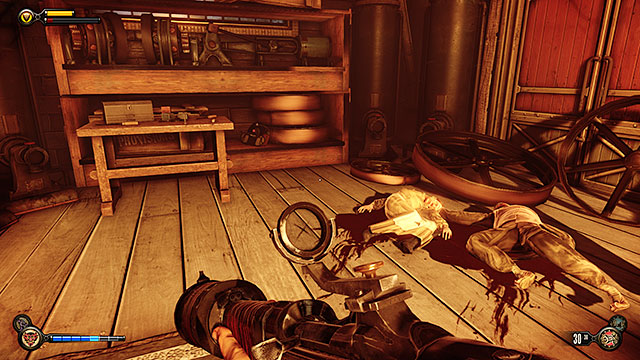
Once you're at the plaza use the fact that the Vox are engaged in battle with the police and quickly make your way to Chen Lin's workshop. You'll find a corpse of Lady Lin here and also make sure to examine a nearby shelf to find Voxophone #50.

Leave Chen Lin's workshop at approach a door located opposite the store. This passageway will soon become unlocked. Explore the first room before heading towards the factory.
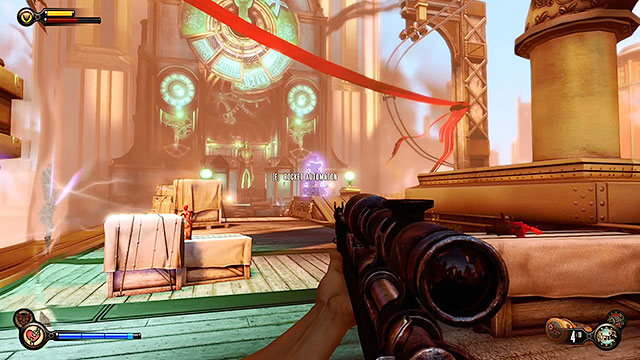
Your job is to fight your way to a gate located on the other side of this area. You will have plenty of tears at your disposal and you'll also find a lot of salt and medical supplies. Wait for a Mechanized Patriot to join the battle before opening a tear that summons and automaton with rockets. Once you've won explore the entire battlefield looking for supplies (you can also return to the Plaza of Zeal if you wish to). Approach the factory gate and deal with the remaining police forces.
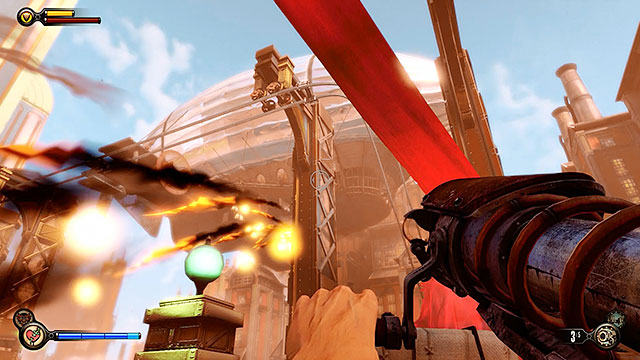
As soon as you and the Vox have approached the gate a zeppelin will show up. The ship is armed with a rocket cannon and it will start shooting at the gate. Don't try to destroy this cannon from the ground. It may look identical to rocket turrets encountered in front of the police impound, but you can't destroy without taking out the entire zeppelin along with it.
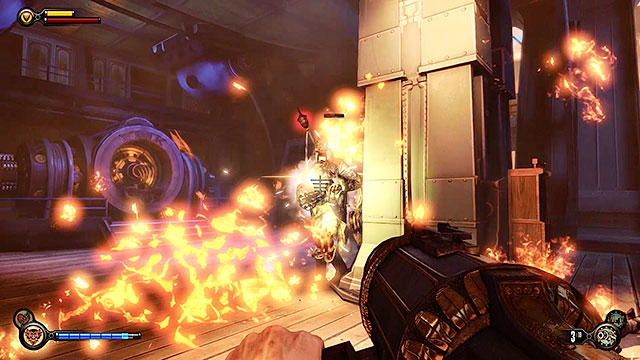
Use the sky-line located to the right of the platform to get on board of the zeppelin and eliminate all hostile units stationed there. One of the enemies will be a Mechanized Patriot and the best way to eliminate him is to use a Volley Gun found on a table near the window or a Grenade Launcher found near a control panel close to the zeppelin's beak.
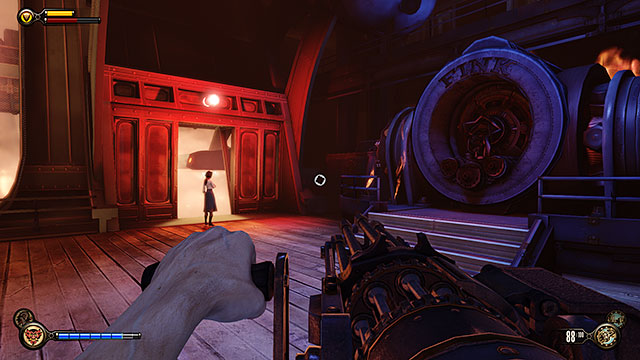
Keep fighting until you and Elizabeth are the only ones alive aboard the zeppelin. Make sure to explore the entire flying machine to replenish supplies. Proceed to the back of the airship to locate bare engine wires. Use the Sky-Hook to sewer the wires and then escape from the zeppelin via the left door, attaching yourself to a sky-line as soon as it's possible.
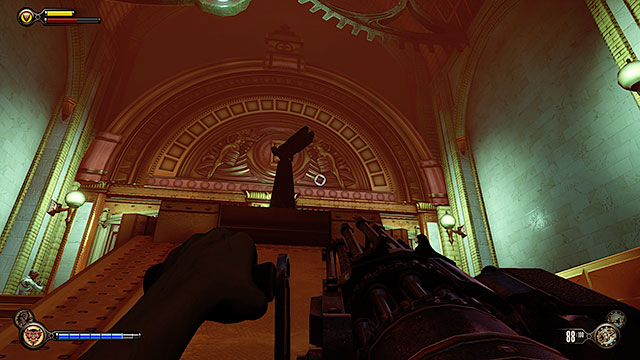
Once you've landed on a platform you should notice that the gate leading to the factory has opened. Don't go there right away, because you can unlock Vantage point #29 - Telescope here.
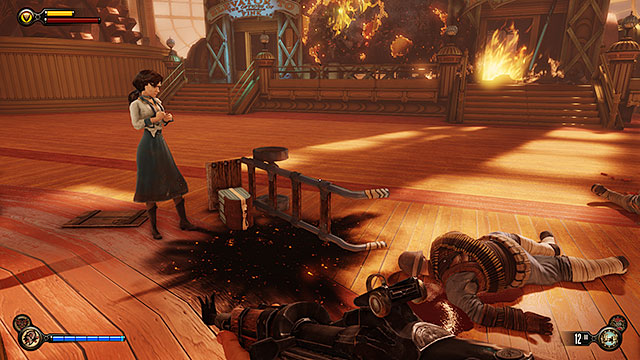
Enter the factory and explore two of the closest areas. There's a luggage cart near the elevator and you'll find Gear #22 next to it. Remain close to the elevator and search the floor near a policeman's corpse to find a locksmith's bag. Once you're ready use the elevator to reach an upper level. The elevator will stop between floors and you'll have to pick up a phone before being able to resume your journey.
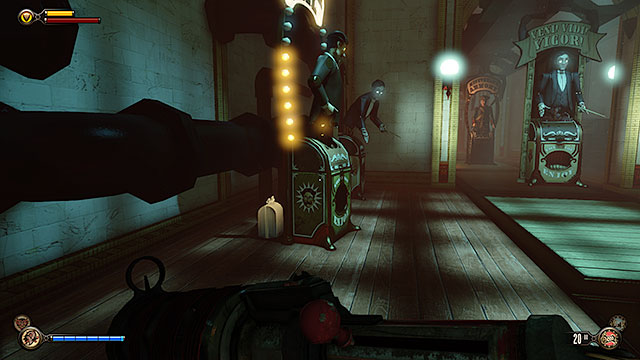
After arriving on the new floor you'll encounter the Vox and you should know that they won't be your allies anymore. Defeat them and then proceed to a smaller room located to the left. Find Gear #23 behind one of the vending machines.

Make a stop near the exit from the building. Examine the area near a board with Songbird's sketch to locate Voxophone #51.
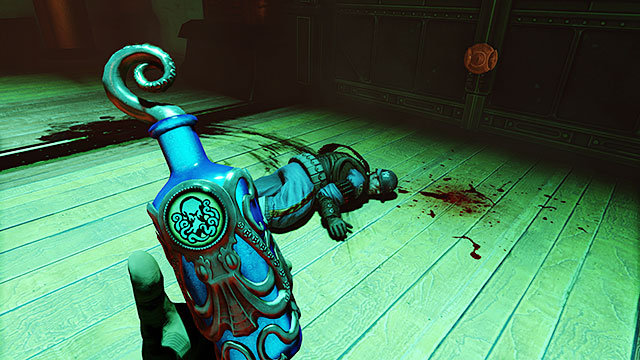
There's an opened safe behind the desks in the reception. Loot it before exiting the hall and also take some time to find a locksmith's bag behind another desk.
A corpse can be found next to a door leading outside. Check the floor near the corpse to uncover a new vigor - Undertow. This vigor may come in handy during the upcoming battle, because it can be used to throw enemies into the abyss. Ask Elizabeth to open a new door for you (she doesn't need any lockpicks) and enter the square located on the other side of this door.

Some dramatic events will take place in Fink's office in the middle of the square. A Vox barge will hover above this area and a small squad of enemies led by a Fireman will appear here. Start the fight and use the sky-lines and a tear that summons a tesla coil to make it easier.
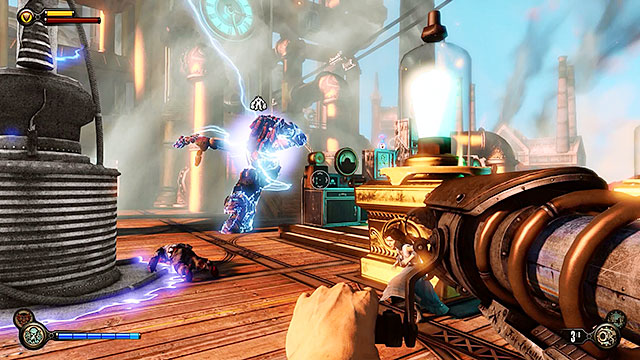
Once you've defeated the first group of enemies a new Handyman will arrive at the square. Stay close to the tesla coil you've summoned recently, because it will help you in defeating the giant. After you've killed the Handyman examine his corpse to find Gear #24. You may now deal with the remaining Vox forces present in the area.
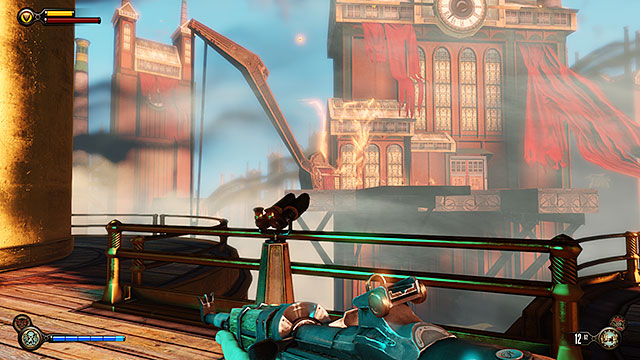
Keep fighting until you've eliminated all the hostiles. Approach the balustrade located to the left of the tesla coil and interact with a telescope to unlock Vantage point #30.
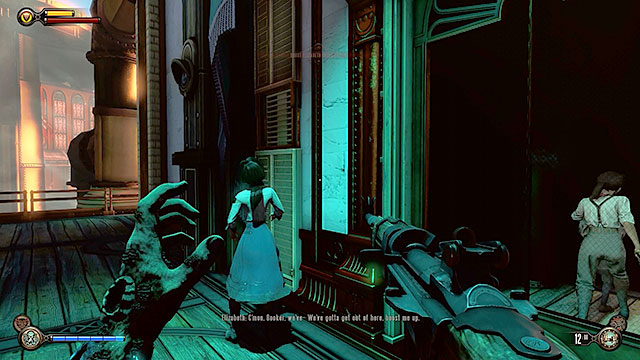
Go to the platform located under Fink's office. Wait to receive instructions and lift Elizabeth so that she can enter a ventilation shaft. You may now approach the glass door. Knock on the door to distract Daisy. Wait for Elizabeth to do her part of the job. Cheer her up and enter the office.

Make sure to explore a room located to your right before you head towards the airship. There's a Voxophone #52 next to Fink's body.

The room found to the left contains a table and there's an Infusion #18 there.
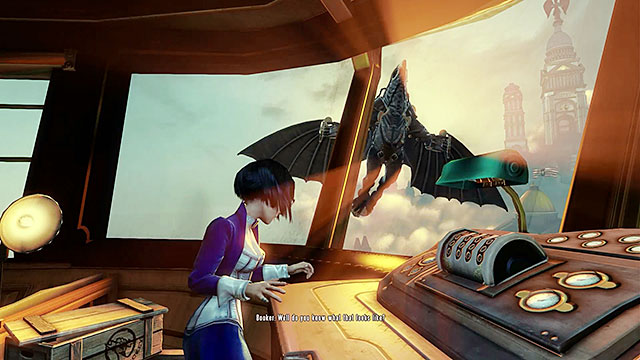
Once you've searched the office open the door Elizabeth has already used and start moving towards the First Lady. When you're on board of the airship knock on the door located at the back to call the girl and then interact with the ship's control panel to set course. Use the panel again as soon as things will start to complicate.
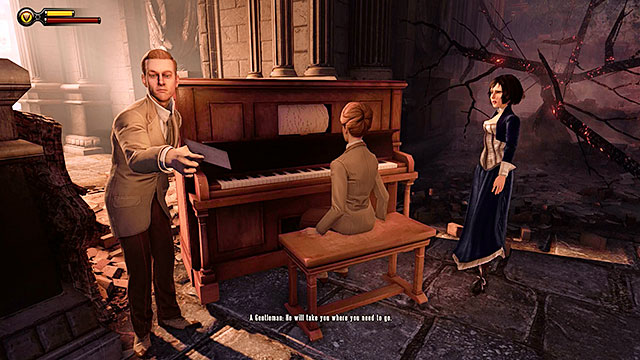
Once you've landed at the Emporia assist Elizabeth in opening a floodgate for the airship and also listen to what the Lutece siblings have to say. You'll receive a card with instructions from Robert after a while. Move the piano so that you'll be able to continue your journey.
Search the luggage belonging to the escaping citizens of Columbia and then use the stairs leading to Port Prosperity. You're going to be attacked by a large group of the Vox in the square in front of the station and a grenadier will be among them. Use nearby tears to your advantage, summoning med kits or a Mosquito.
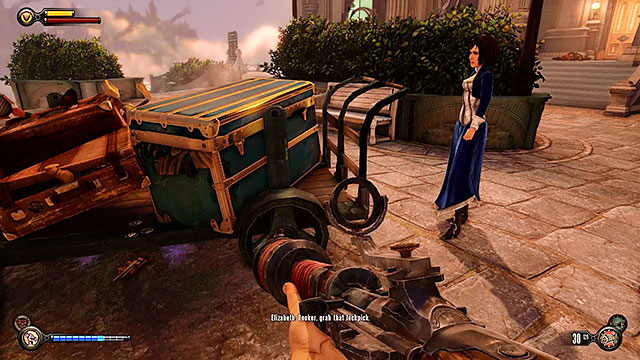
Once you've killed all hostile units inspect a luggage cart found in front of the station. You'll find some silver and a lockpick here.

When you're ready to move on with your current mission ask Elizabeth to open the station's door (she won't need any lockpicks). Enter the building and turn left to find another locked door. This time you will have to use three lockpicks. If you've managed to unlock the door, then you will be allowed to collect a new weapon (Heater) and an Infusion #19 located inside a steel basin at the end of the corridor.
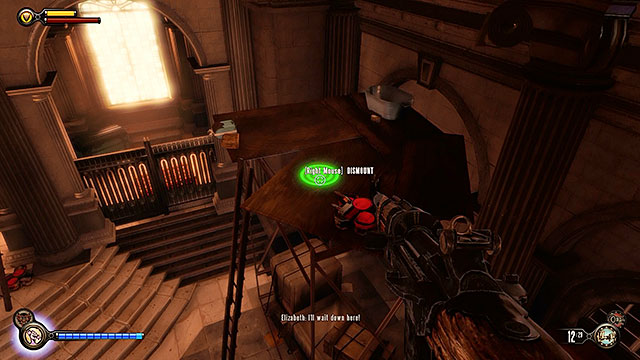
Return to the area near the entrance to the station and open a tear located above the main door. Use the maintenance hook you've summoned to get to the left scaffolding. You can find Gear #25 and a lockpick on the scaffolding (it's inside a new basin).
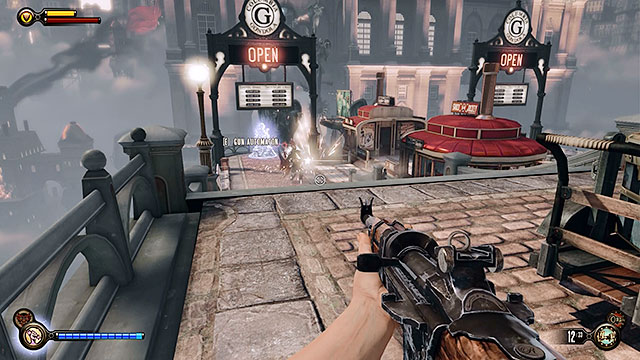
You must now proceed to the corridor leading to the gondola station. You'll encounter several Vox along the way, but they won't be a serious threat. A proper fight will begin after arriving at the station. Notice new tears in this area. The first tear is located to the right of the exit and it summons a Mechanized Patriot and the second tear is located at the platform and it summons a turret. In both cases opening a portal will make the upcoming battle much easier for you. Wait for the gondola to arrive and get ready to start attacking a new squad of Vox accompanied by a Motorized Patriot of their own.
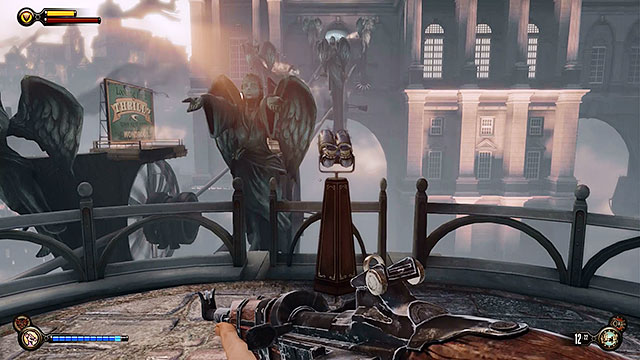
Once the battle has ended take your time to explore the platform. There's a Vantage point #31 - Telescope to the right of the gondola.
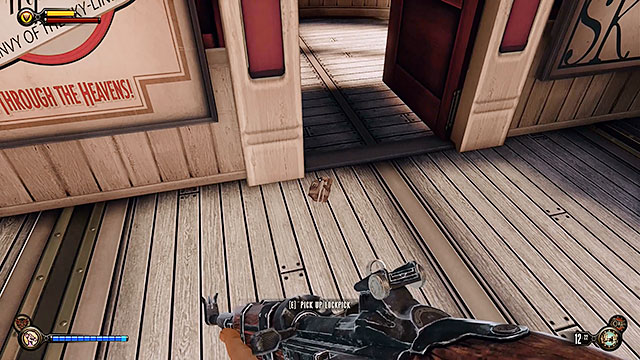
Approach the opened cabin of the gondola and find a new lockpick near the door. The cabin itself contains salts and a Hand Cannon.
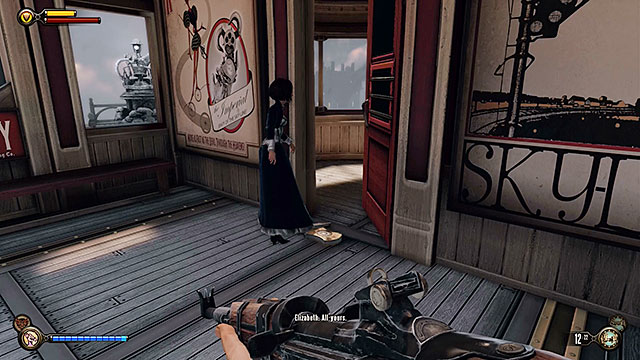
The second cabin of the gondola is locked, but it has a very simple lock that doesn't need any lockpicks. Once you're ready to move on to the next chapter open this cabin and start the gondola.

Wait until you've arrived at the station and go to the ticket hall where you'll encounter two Vox. Deal with them and enter the office to locate a safe in the first room (it requires 3 lockpicks). Open the safe to gain access to several hundred silver eagles.
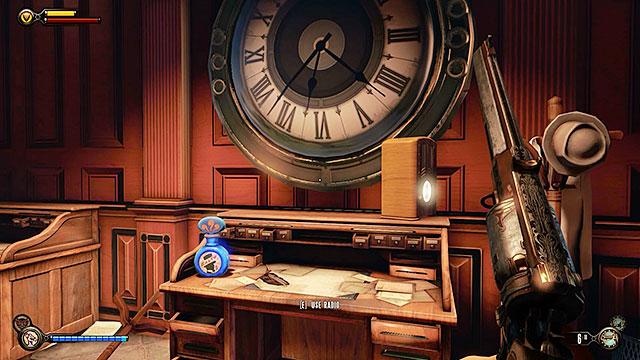
Continue exploring the office, finding a lockpick and some salt on a desk under a large clock. A small storage area at the back of the office holds a Volley Gun with plenty of ammo.

Go to the corridor located opposite the ticket office and proceed to the next hall. Make sure to examine all the luggage you come across, because doing this will allow you to earn a lot of money. There's a crate with a dead body at the end of the corridor. Make a stop here to collect Voxophone #53 and a lockpick (it's next to the body).
Enter the second ticket office to find another safe. Opening this safe is only possible if you have 3 lockpicks and its contents are very similiar to the previous safe. Search the rest of the office, along with the storage area at the back.
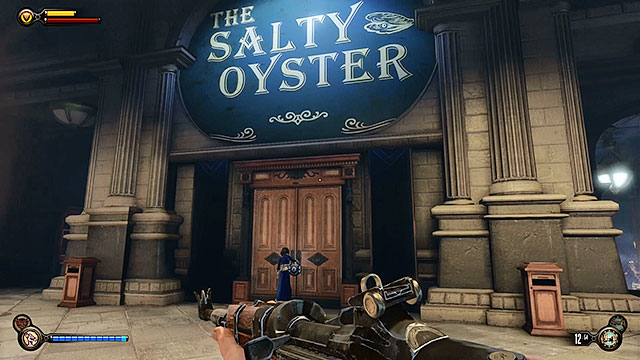
Proceed towards The Salty Oyster bar. Opening the door to the bar requires three lockpicks.
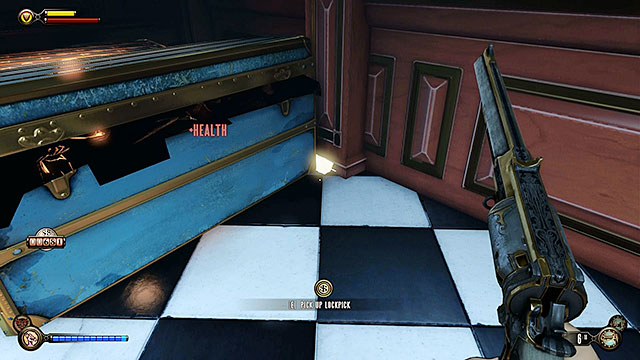
Defeat the policemen guarding the bar and find a blue chest located close to the tables reserved for guests. There's a lockpick in one of the corners of the chest.
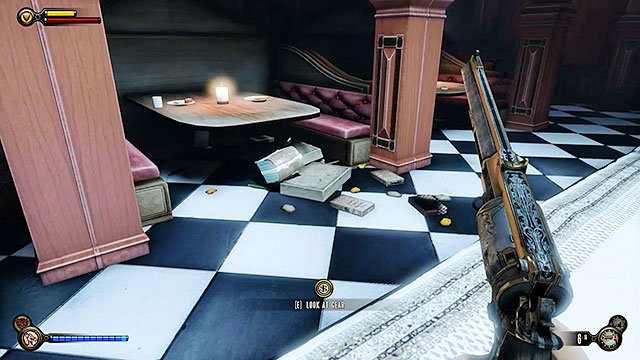
Take some to examine the bar's tables. There's Gear #26 located under one of the tables opposite the chest. Once you've explored the bar area proceed to the toilets.

Locate a Vantage point #32 - Kinetoscope between the two toilets. Once you've unlocked this vantage point explore the washrooms to find a Grenade Launcher and a lot of silver.
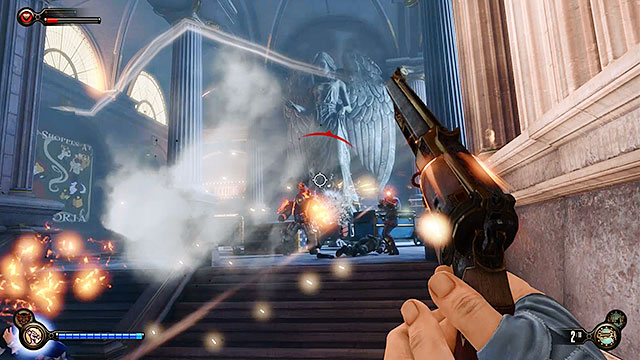
Use the stairs found opposite the restaurant to reach the upper floor. Be careful, because when you'll get closer to an angel statue you're going to be attacked by a Fireman and a policeman. Consider summoning a turret (staircase) to score an easier win.
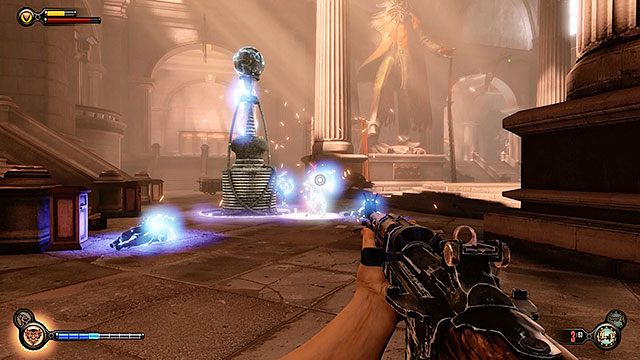
Use the stairs again to reach the next floor and you'll soon arrive in the main hall of Port Prosperity. Expect to be attacked by a very large group of Vox near Comstock's statue and aside from them you'll also have to deal with a Mechanized Patriot and several Firemen. You can find shelter to the left and to the right by going to the ticket offices and you can also hide behind the stairs. A good way to preserve ammunition, time and health during this battle is to summon a tesla coil thanks to one of the tears and to lure enemies to move closer to the coil.
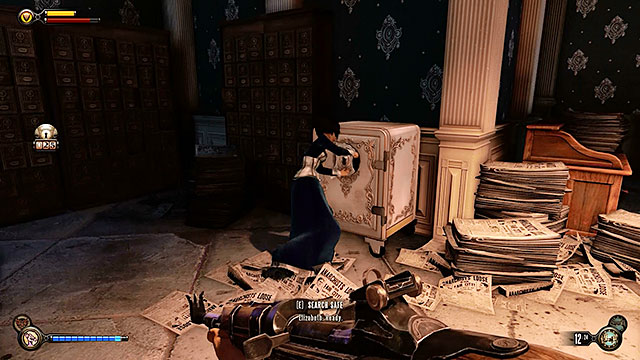
There's a safe in the office to the left of the statue. Opening it requires using 3 lockpicks and it contains several hundred silver eagles.

You'll also find a storage area with stacks of newspapers opposite the safe and there's a Voxophone #54 among the papers. Make sure to check a darker corner of this room and you'll also locate a new Grenade Launcher.
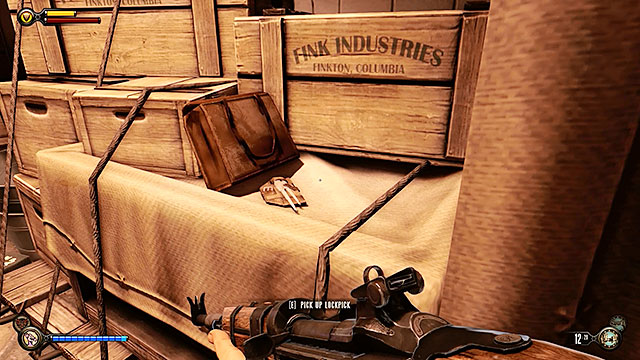
You may now go to the office located to the right of the stairs. Open all interactive containers and then go to the storage area at the back in order to collect silver and a lockpick.
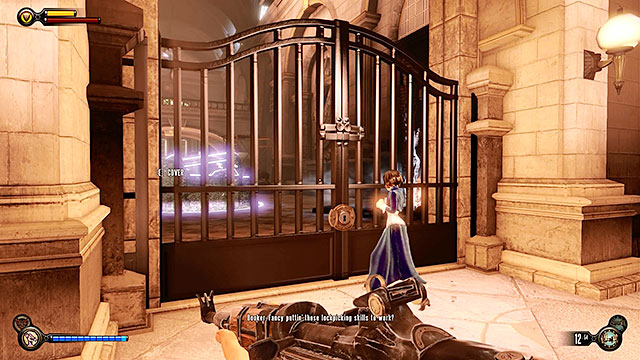
Once you've fully explored the main hall use the stairs to get to the next floor and eventually you'll find a locked gate leading to the exit. Wait for Elizabeth to open the gate and then summon a shield located in the center of the corridor. Get ready to face two snipers occupying a platform in front of you.
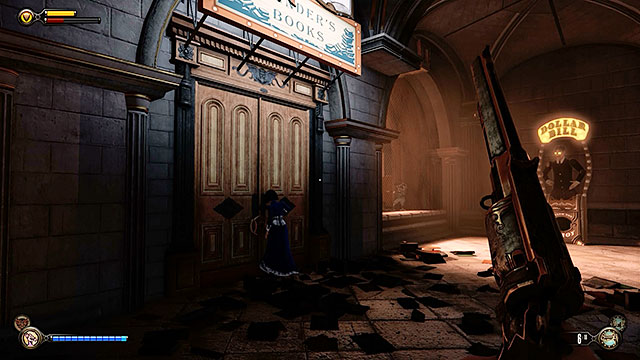
Get rid of the snipers and then approach an entrance to the room located on the left side of the corridor. This is a books store and opening the door leading to it requires only one lockpick.

Check the counter found in the middle of the library to find Gear #27 and some cash in the register.

There's a stuffed bear near the exit and you'll find Voxophone #55 in front of it. Take the collectible and go to the reading room located on the store's lower floor.

As soon as you've used the stairs leading to the reading room you're going to be attacked by several Vox. Eliminate them and once it's safe find Voxophone #56 on a small table. Picking up this item will trigger a new optional mission - Investigate the Bar (it's described at the end of this chapter).
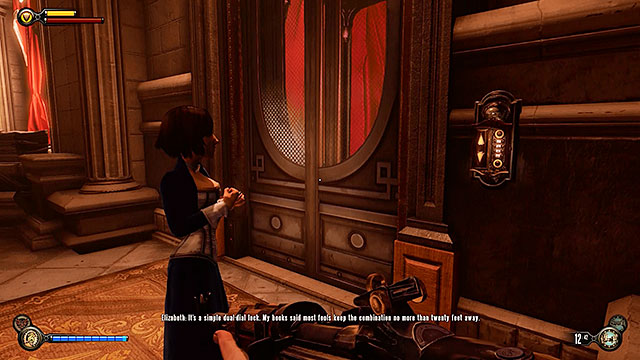
Once you've explored the surrounding area return to the rotary doors located at the end of the corridor and get to the other side. The doors will close behind you, so make sure that there's nothing more to do at the station. You'll end up in a corridor and there's an elevator at the end of it. A button used to call the elevator requires inputting a proper code, however it can easily be found on a nearby stack of newspapers.

Pick up the books that cover the code (they can be found on the first stand opposite the rotary doors). Watch a cut-scene and once it's over return to the elevator to travel to the Downtown Emporia.

This side mission can be triggered after you've broken into a books store at the end of this chapter (before using the rotary doors). Go to the lower level of the books store to enter a reading room and locate Voxophone #56. Pick up this item to start the quest.
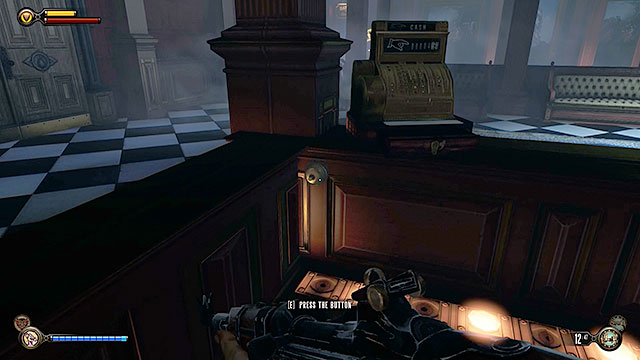
Return to The Salty Oyster bar located in one of the previous halls of the station. Break into the bar and go behind the counter. You'll find a golden button here and pressing it will open a secret door.
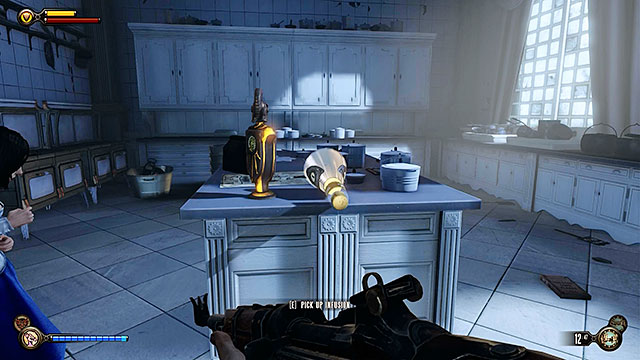
The hidden room located behind the bar contains tons of valuable items. Most objects can be found on the main table - a bag with money, a locksmith's set, Infusion #20 and a new vigor - Return to Sender. Also, make sure to check the corners of the room. There's a steel basin on the floor and it contains Voxophone #57.
The following two chapters take place in the same large location - Downtown Emporia. This part of the city is divided into smaller districts and they're connected by alleyways and tunnels. There are maps hanging on the walls near these passageways and they always mark your current location to make the navigation easier. You can also find large signs above the gates leading to the different precincts. In order to make the navigation process even easier we've prepared a map of Downtown Emporia with 1-5 points. The walkthrough of chapters 30 and 31 will often mention these points so make sure to return to the map each time to figure out where you are and where you need to go.
As soon as you leave the elevator you're going to be forced to take part in a pretty challenging battle with the Vox and the police. It's recommended to deal with the reinforcements using barges as soon as possible, because a new Handyman will soon join the battle. The best place from where you can organize your attacks on weaker foes is a balcony located opposite the elevator and you can reach it thanks to a sky-line. You can also summon a Mosquito so that it will start flying above the balcony. Another good method is to start pushing enemies off the ledges using the Undertow vigor.

Be careful when using sky-lines after the Handyman has joined the fight, because if you're going to hang on the Sky-Hook for too long he can electrify you. The best way to defeat this opponent is to use a Volley Gun or a Grenade Launcher and both of these weapons can be found on the balconies under the sky-lines. Another important aspect is to exploit nearby tears. Once you've defeated the Handyman don't forget to examine his corpse to collect Gear #28.
Once you've won the battle in front of the bank climb on a balcony mentioned above and ask Elizabeth to use 3 lockpicks on a nearby door. You'll find some salts on the other side of the door, as well as Voxophone #58 and a Heater.
Return to the plaza level and open a gate leading to the Harmony Lane (use the map added on the previous page if you need help with directions). Find a new lockpick on one of the crates (next to the ammunition for the Grenade Launcher).
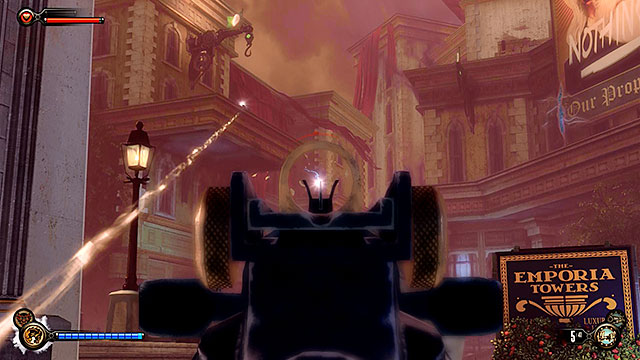
You're going to be attacked by snipers occupying nearby rooftops after entering the Harmony Lane. If you want to quickly get closer to them then you should use a tear located on the right side of the alley to summon a maintenance hook. The right side of this location also contains a second tear (near an information board) and it summons a sniper rifle.
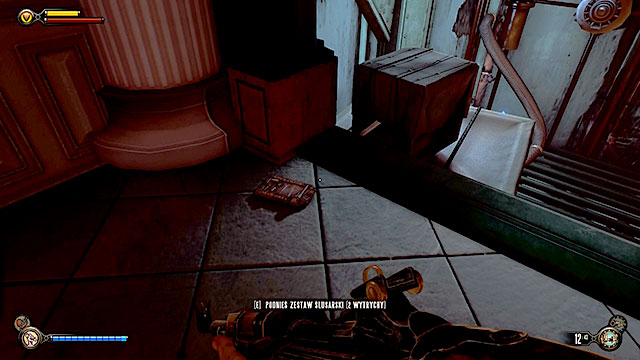
There's an apartment building near the tunnel exit (second door on the left) and you can break in without using any locks. Find a locksmith's set near a broken down elevator.
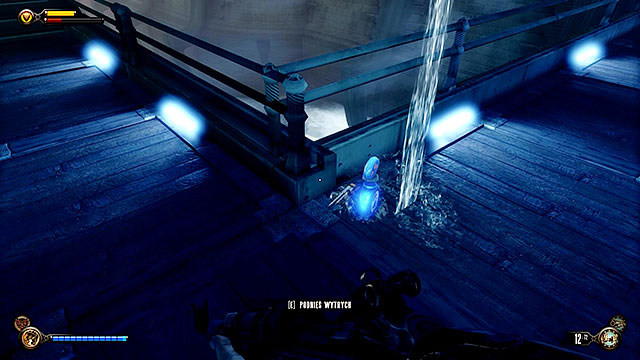
Leave the apartment building and check the area under a nearby platform. You'll find a lockpick and some salt there.
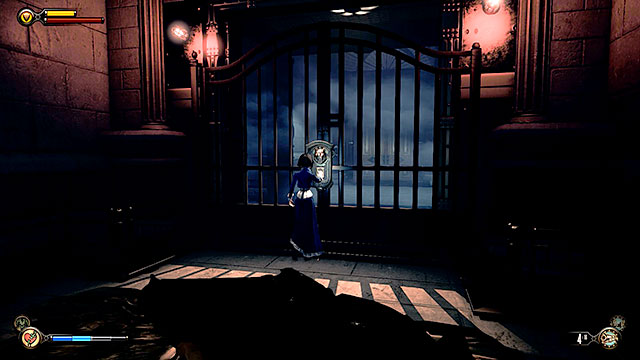
There's a bar on the other side of the bridge, inside the right building. Enter the bar and then proceed directly into the cellar. Defeat three drinking revolutionists and take Voxophone #59 from a crate located under the wines.

Keep travelling through the alley and you'll notice a locked store to your left. Use 3 lockpicks to open the lock, enter the building and use the stairs to get to the top level to find Gear #29.
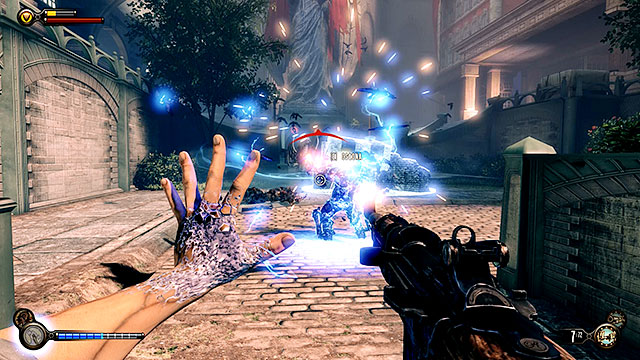
Walk past the Photo Studio (don't go there right now). Kill all the enemies in the alley (Vox forces, a Fireman and a Mechanized Patriot).

Once you've won the battle open a locked store with some paintings which is located on the left side of the alley. There are two important items being stored here - Voxophone #60 and Gear #30.
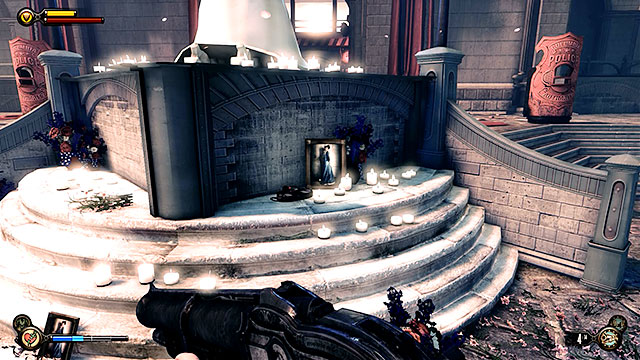
Return to the alley and keep moving until you reach Z.H. Comstock Victory Square. Approach Lady Comstock's statue located in front of the "prophet's" home. There's a Voxophone #61 on the stairs behind the statue.
You may now approach the gate of the Comstock's house (point number 1 on the map) and interact with a fingerprint reader. Listen to a short conversation with Elizabeth before proceeding to the Memorial Gardens.
Make sure to check your surroundings on your way to the crypt and you will find Vantage point #33 - Telescope.

There are linked stores opposite the entrance to the cemetery. Locate a safe inside one of these stores and use three lockpicks to open it, receiving several hundred silver eagles in return.
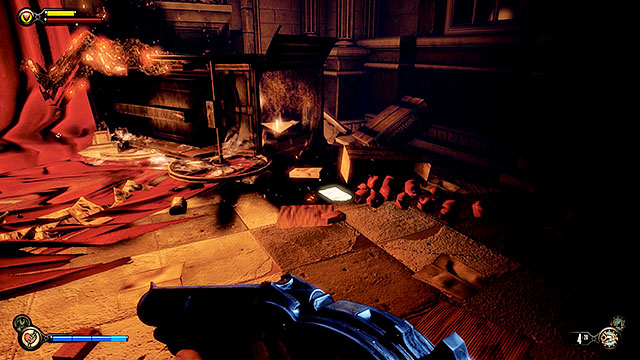
Once you've searched the stores enter the Memorial Gardens (point number 2 on the map). Explore the cemetery thoroughly and familiarize yourself with the locations of nearby tears, because they will be very helpful in the upcoming battle. Enter a terrace from which you can see the flames. There's a locksmith's set next to a burning carriage. It's also a good idea to collect a Volley Gun right now by opening a tear located near the wreckage.
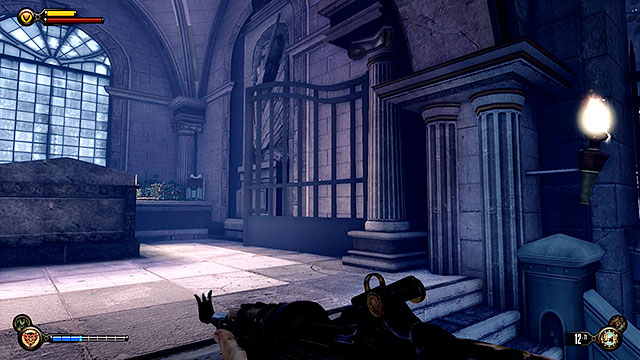
Approach Lady Comstock's crypt and find a smaller unnamed tomb to the right. Use the Devil's Kiss vigor to light the torches located on both sides of this crypt, unlocking the entrance. Enter the tomb and pick up Gear #31.
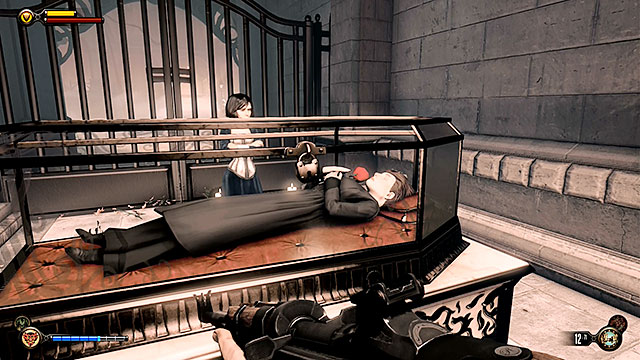
You may finally go to Lady Comstock's crypt. Open a mini-tear that appeared in the lock. Ask Elizabeth to break the lock and head inside. Listen to the conversation with Elizabeth and open the padlock of her mother's coffin.
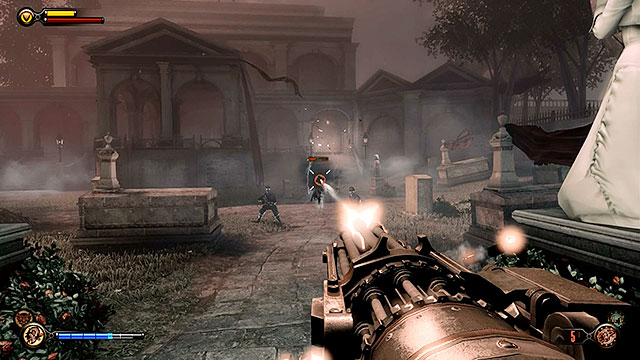
As soon as Lady Comstock has "risen from the dead" a new battle will commence. Lady Comstock has an unpleasant habit of bringing nearby dead people back to the world of the living and as a result killing standard enemies is pointless since she can resurrect them. Focus your attacks on the ghost and try to immobilize Lady Comstock's helpers by using Bucking Bronco or Murder of Crows vigors. Following this tactic should allow you to gain an easy victory and as soon as Lady Comstock is dealt with all of her spectre allies will return to the underworld as well.

Leave the cemetery after the battle, listening to Lutece siblings along the way. Open tears responsible for summoning ammunition or medical supplies if you need to, because you'll soon take part in new fights. You should also memorize the tears in case you need to return for the supplies while fighting your way through the Emporia.

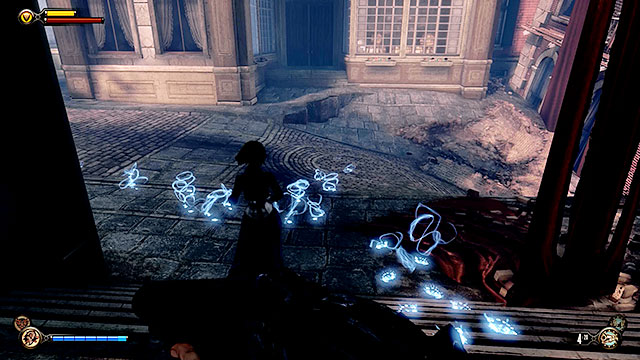
Your new objective is to follow Lady Comstock's spectral trails that will appear on the ground. As for the tears you're looking for, they're marked on the map: point number 3 is Lutece Labs, point number 4 is the Bank of the Prophet and point number 5 is the Photo Studio.
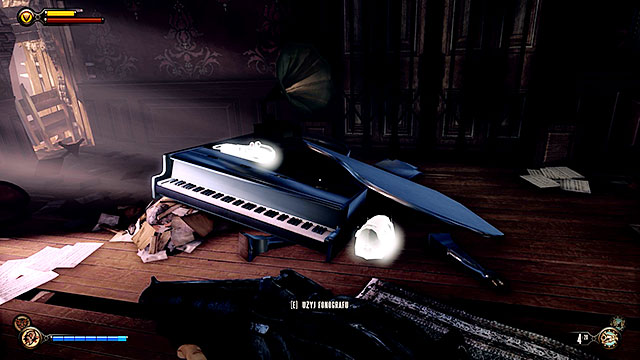
Let's start with Lutece Labs by heading to the right of the exit from the Memorial Gardens. Be on a look out for the Magical Melodies building floating to the left of the sunken street. Locate an opening in the wall and head inside. Aside from a red tear with Cindy Lauper's music you'll also find locksmith's set and Voxophone #62 here.

Proceed to the Market district located just around the corner. Stop after encountering a Dollar Bill machine and find a new lockpick near the barrels.
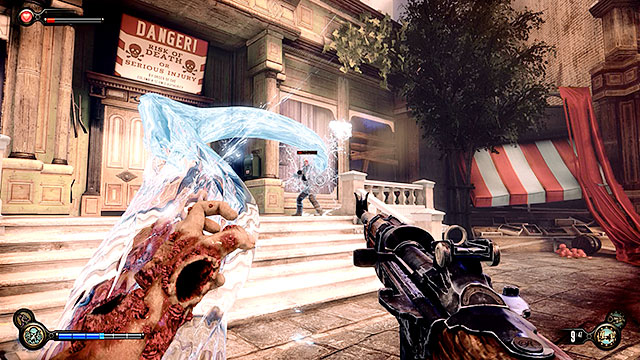
The entrance to the laboratory is being guarded by several revolutionists. Once you've dealt with them ask Elizabeth to break the lock and head inside.
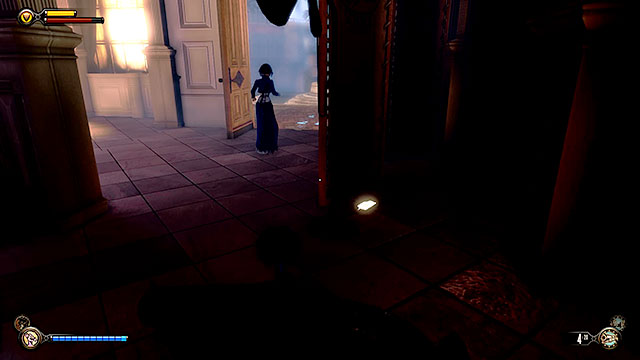
Find a lockpick in a dark corner near the entrance, behind a screen.

Go to the next room, but instead of heading directly towards the Lutece machine use the stairs leading to the first floor. Check the bedroom on the upper floor to find a Voxophone #63 stuffed between a bed and a drawer.
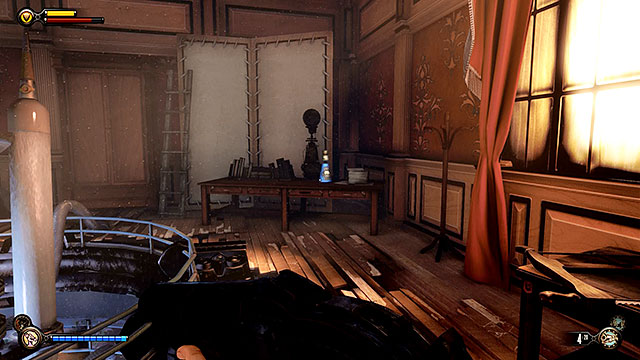
There's an Infusion #21 in the same room, next to the beak of Lutece's machine.
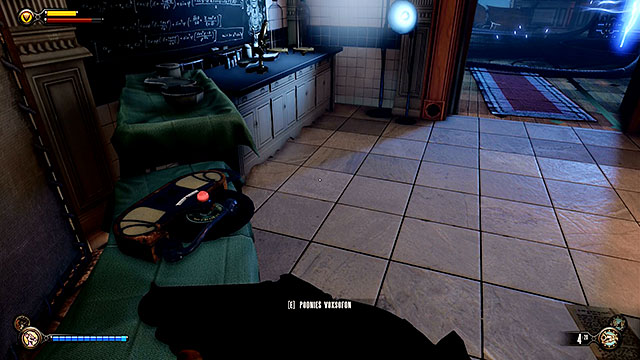
Once you've fully explored the first floor return to the ground floor and enter a kitchen located to the right of the machine. Locate Voxophone #64 near a board.
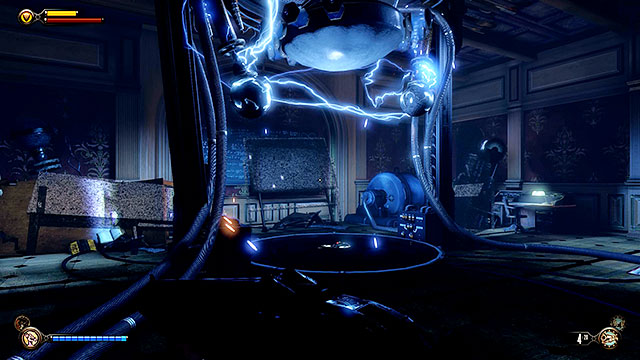
Go back to the main room and open the first tear you were searching for. Wait for the tear to close again, because it will drop Voxophone #65.

Exit the laboratory and proceed towards a nearby store. Check the area behind the counter to locate some money and a locksmith's set.
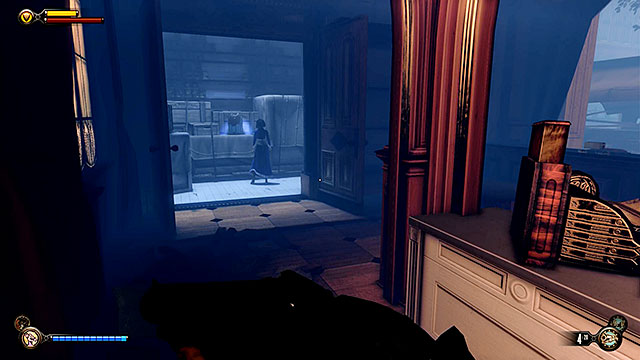
There is a locked store to the right of Lutece laboratory and the lock on the door requires 3 lockpicks. Once you're in find some money next to the counter and Gear #32 at the back.
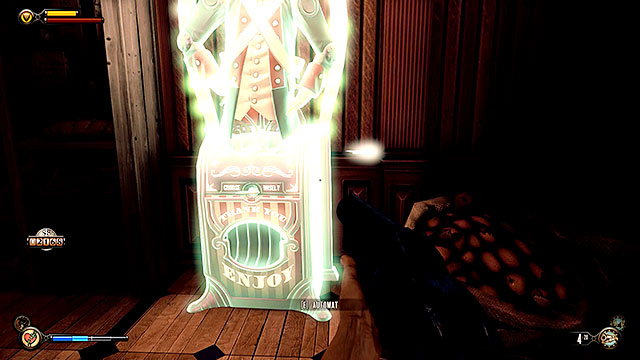
Go to the other side of the street and locate the burning Excelsior groceries store. Explore this entire store, finding a lockpick next to a machine used to upgrade weapons.
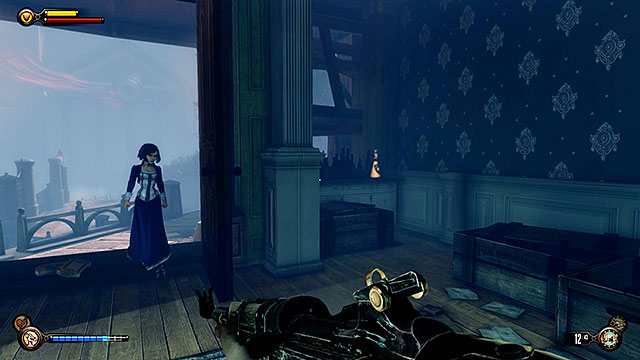
On your way to the bank you'll find a locked Wilson Bros. & Company liquor store. Ask Elizabeth to break the lock (she'll need 3 lockpicks), enter the store and find Infusion #22 in a corner behind the door. This room also contains a lot of silver (money and bars).

Continue moving towards the bank. There is a Hudson's clothes store opposite the gate leading from the bank's square. Enter this store and descend to the basement to locate a safe in a dark area. The lock on this safe requires 3 lockpicks and you'll find even more of them in the immediate area - one of the lockpicks is on top of the stairs and other 3 lockpicks (locksmith's set) are in a crate under the stairs.
Approach a brighter niche located behind the corner. There's a small shelf next to the sink and you will find a new Vox cipher here. Collecting this item will trigger another side mission - Find the Vox code (it's described at the end of this chapter).
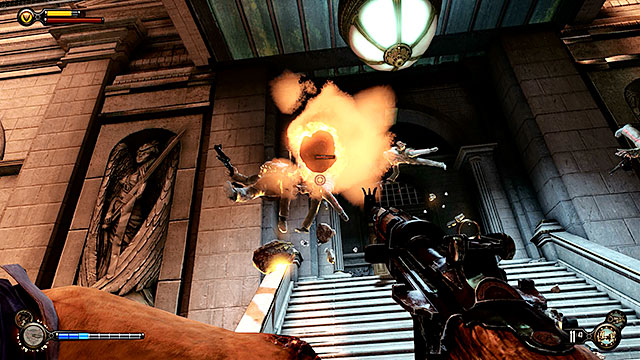
Ask Elizabeth to open a gate leading to a square located in front of the bank and use the stairs to get to the building. You're going to be attacked by two Crows when you're close enough to the entrance. Eliminate them and wait for two groups of armed Vox to run out of the building. Notice that enemies are close to each other so you can use the Devil's Kiss or some other vigor good at eliminating groups of opponents. Be careful, because a single Fireman will join the battle soon.
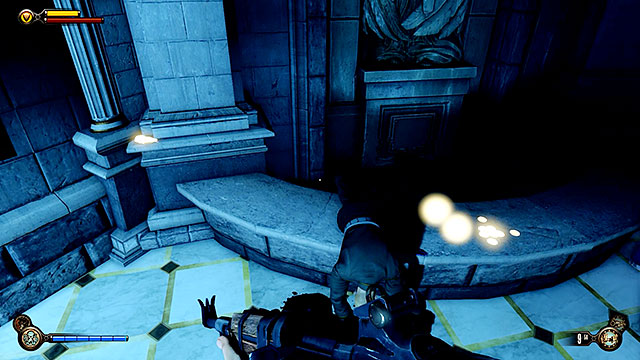
Once you've entered the building take your time to search all the rooms. This is a bank so it's not a surprise that you can find a lot of money. There's also a lockpick near the fountain, opposite the entrance.
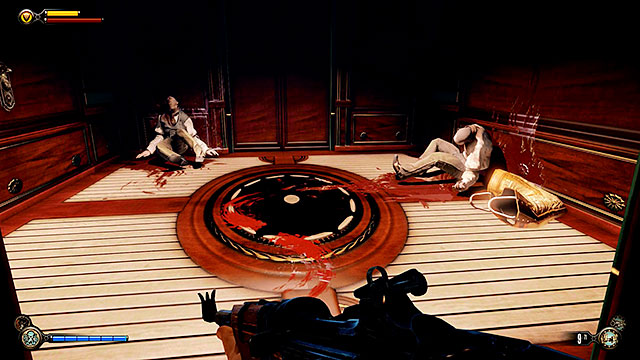
Don't bother examining three kinetoscopes located in the atrium, because this is the same set as the one located at the beginning of the game in the Blue Ribbon Restaurant. Once you've explored the entire area go to the elevator to transport the main character to the main area of the bank.
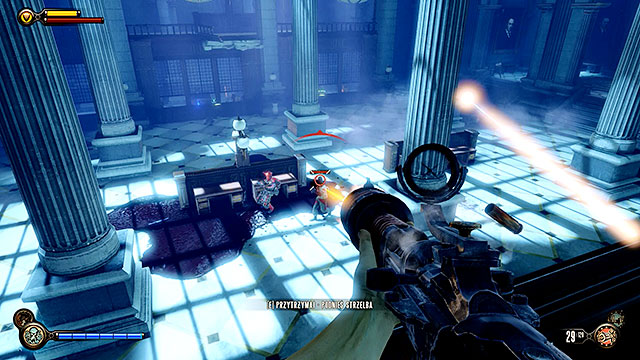
You'll soon reach the main area of the bank and you should make a choice between the left or the right entresol. There's a sniper rifle to the right and a Burstgun to the left. A group of Vox will soon enter the main hall. Use the height advantage to your advantage and when they're gone start searching the cash registers found under the stairs.
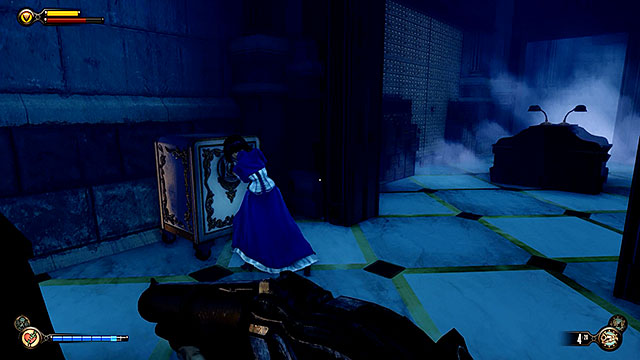
The area located on the left side of the main hall contains a safe that needs only one lockpick. The safe holds several hundred silver eagles and you'll also find at least as much money after looting all the cash registers.
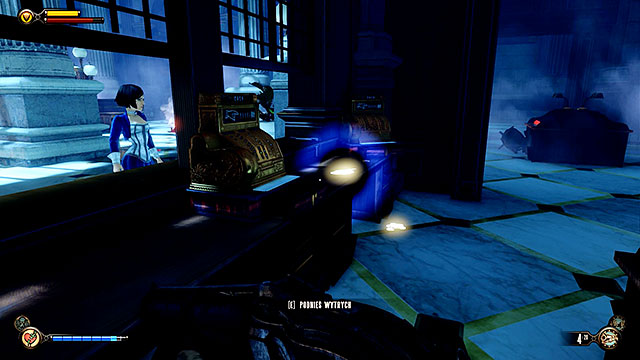
The area located to the right contains not only more money, but also a lockpick found on a desk.
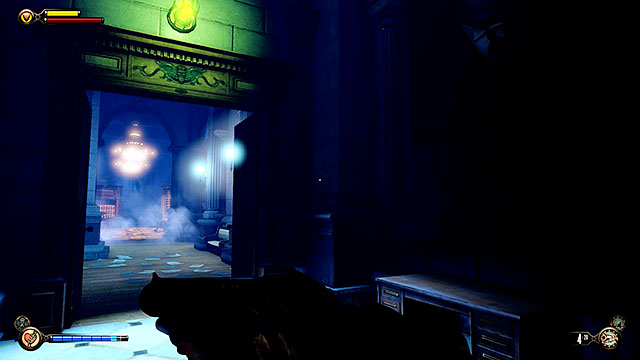
You may now proceed towards a gigantic vault. Lady Comstock's trail leads to an entrance to the right, but for now you should head left.
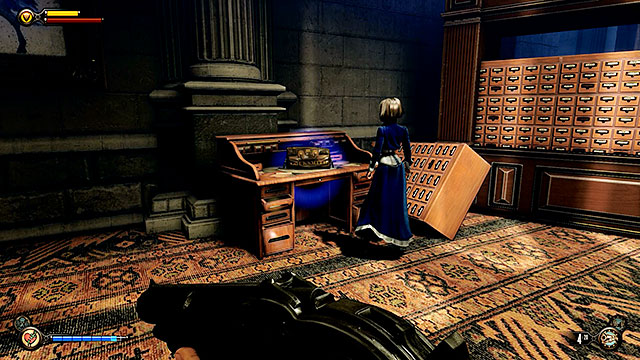
Walk through the corridor leading to the archive room with overturned bookstands. There's a desk in front of the entrance and you can find locksmith's set here.
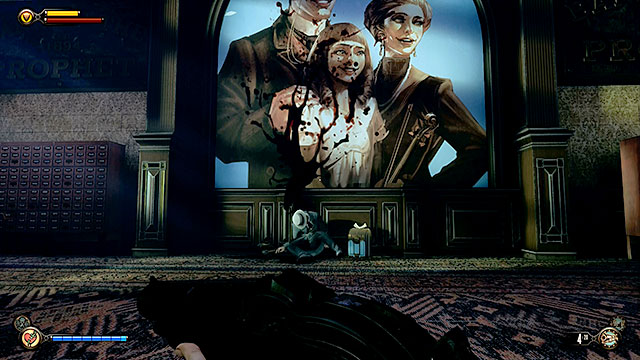
Go to the next room with a large painting on the wall. There are two important items under the painting - Gear #33 and one more locksmith's set.

Another room in this wing is tied to an optional mission you've unlocked some time ago. I recommend skipping to the end of this chapter to find its description.
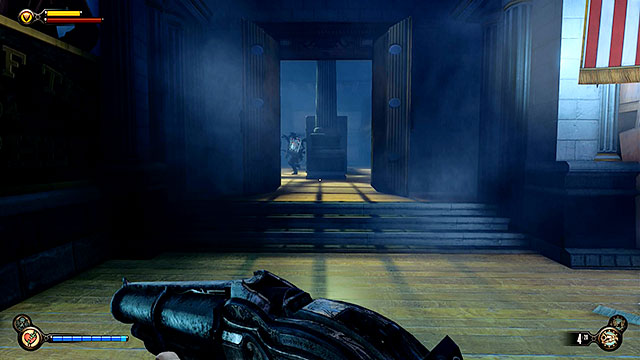
Return to the main hall of the bank and proceed to the right corridor (the one with Lady Comstock's trail). You will notice a red Raven while going through this corridor and treat it as a warning of the upcoming battles.
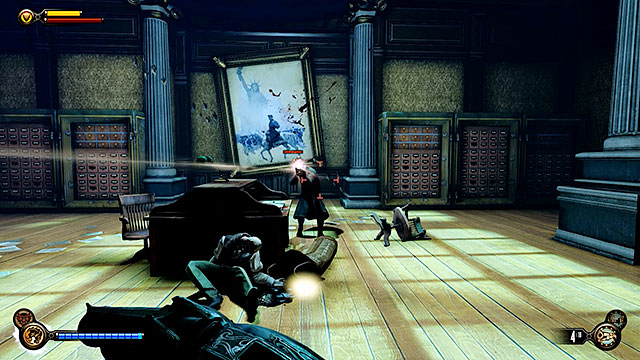
As soon as you've reached an archive in this wing a Crow will send a group of revolutionists at you. It's best that you defeat them without coming out from behind the bookstands, because there's a sniper waiting for you on the other side of the office. Deal with the sniper after all the remaining enemies have been killed and then take your time to search the area. You'll find 2 lockpicks on a desk among other valuable things.
The room located next to the vault holds Gear #34. The item you're looking for is inside the basin, near a dead worker.

After you've entered the vault you should hold off for a while with opening a tear. Go to the room located to the left. There's a safe at the back of this room and you can open it only if you have 3 lockpicks. You can also find Voxophone #66 just behind the safe. As for the room located to the right, it contains only a Vox repeater rifle.
Approaching a tear located in the vault will result in a red Raven appearing behind it. Kill this enemy, open the tear and collect Voxophone #67 that will pop up in its place.
Proceed to the other side of the statue where the tear could originally be found and approach the vault's door. The entrance to the vault will soon open and Lady Comstock's ghost will be waiting for you inside the vault. This is a very similiar battle to the previous encounter with the spirit and therefore you should use the same tactics - immobilize or ignore Lady Comstock's helpers and focus your attacks on weakening the ghost. Once you've won leave the back in the same elevator you've used to get here.
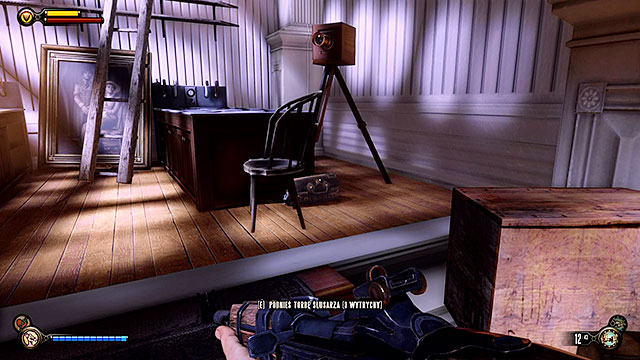
After you've left the bank begin your journey to the Photo Studio (point number 5 on the map). Once you're there ask Elizabeth to open the door and enter the studio. Explore this entire location before opening the last tear. There are some items at the back of the studio, including a new locksmith's set.
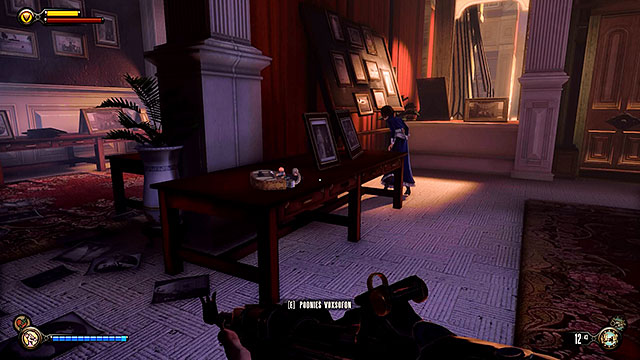
Once you're ready open the tear, listen to its "content" and collect Voxophone #68 that will appear in its place.
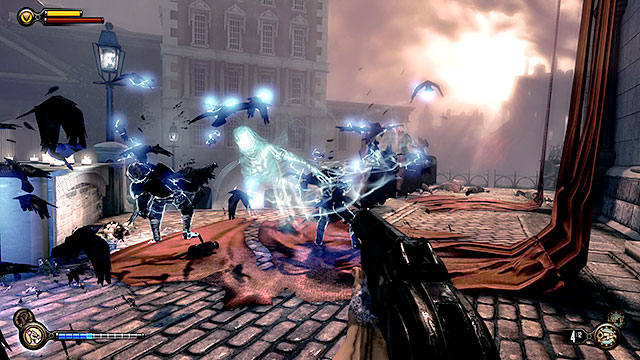
As soon as you've returned to Lady Comstock's statue her spirit will appear for the last time to challenge you in a duel. The rules of this fight remain the same and this means that you should immobilize Lady Comstock's helpers while focusing the majority of your attacks on the ghost. If everything goes according to plan everything will return to normal and the gate leading to Comstock home will open. Step through the door located behind the gate to advance to the next chapter.
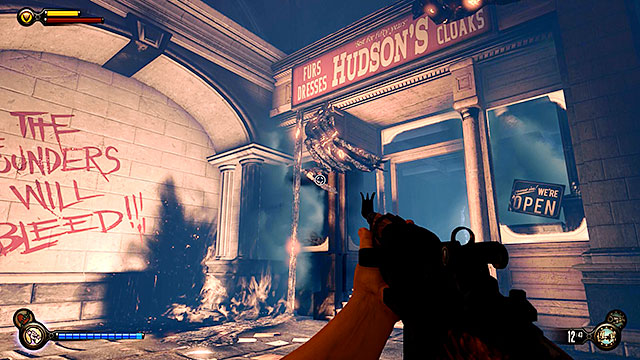
This side quest can be started by visiting Hudson's clothing store (or rather what's left it). The store is located to the right of the Bank of the Prophet building.

Once you've entered the store go to a dark cellar and find the Vox cipher. It's on a shelf to the left of the sink.
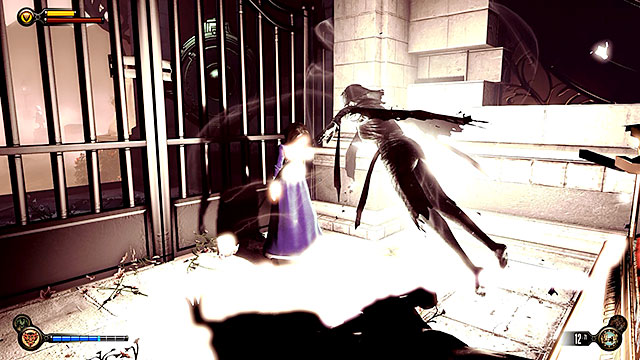
You won't be able to continue this mission until you've released Lady Comstock's ghost and therefore began your search of the three tears. This is when you'll be allowed to go deeper into the bank and that's where the code is being stored.
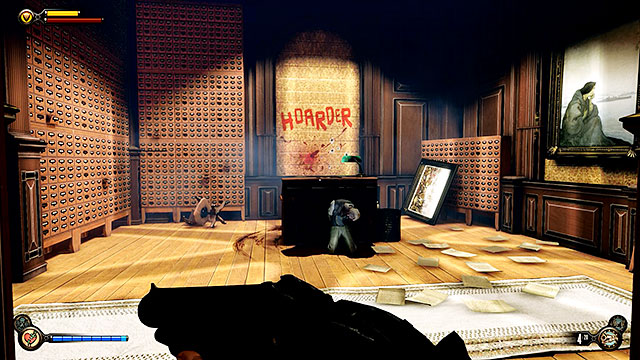
After you've used the elevator to reach the main part of the bank you'll end up in front of a large vault door. Proceed to the left corridor and continue exploring this wing until you get to a bright room with a HOARDER sign on the wall.
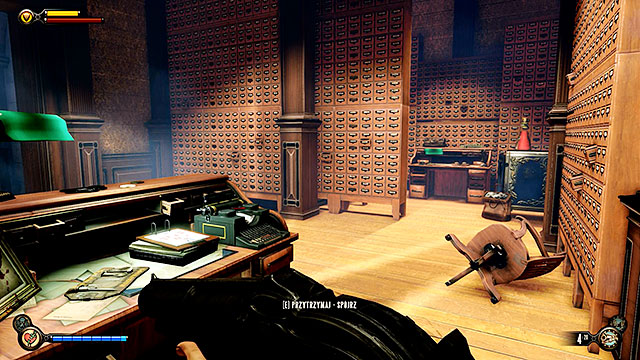
Once Elizabeth has deciphered the code use the typewriter to open a secret passageway located behind a bookshelf. The hidden room contains a lot of money, a locksmith's set, Voxophone #69, Infusion #23 and a Burstgun rifle. There's also a smaller locksmith's set on a desk to the right of the typewriter.
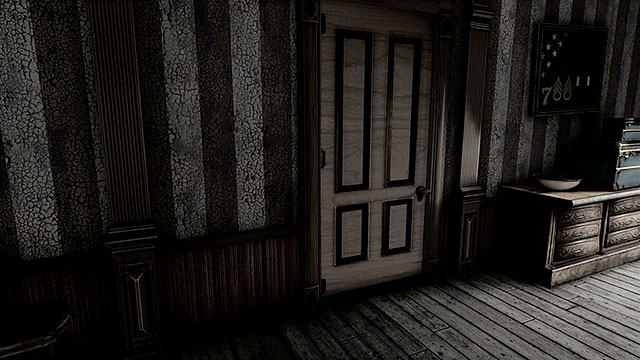
After you've entered the new location begin exploring it, finding a lever you need to pull. You'll soon lose consciousness and once again you'll end up in DeWitt's office. In order to continue to open a door leading to a side room.
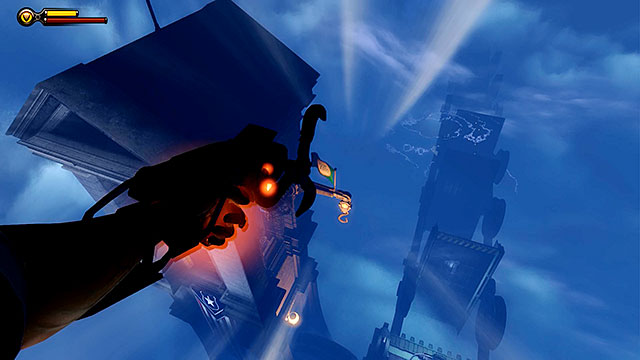
The only way to return to the bridge is to jump through a hole found in the attic and attach Booker to a maintenance hook. Land to the bridge, go to the other side and then enter Comstock's house by going through an opened gate.
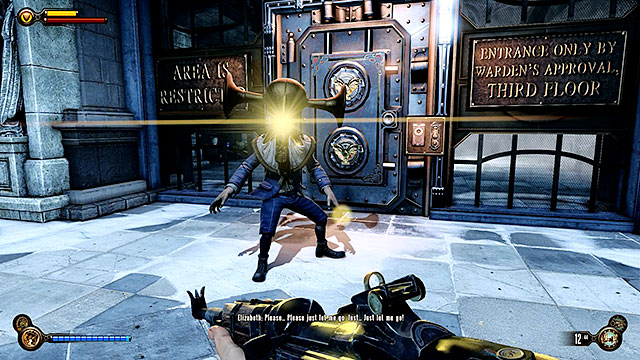
After you've entered the building start moving forward and you'll soon reach a closed gate that's guarded by a Boy of Silence. This is a new type of an opponent. The boy is powerful and you'll encounter more of them while exploring Comstock's house. A very important thing to know is that you won't be attacked by the Boys of Silence unless you make too much noise or find yourself standing in beams of light their masks are emitting. Notice strange beings wearing Benjamin Franklin masks that accompany the boys - none of them will attack you as long as you remain undetected. It's not possible to kill the boy himself after he detects you, because that's when he'll possess one of the "Franklin's" and use that body to organize the attacks. Deal with the first Boy of Silence and then press a button he was guarding.
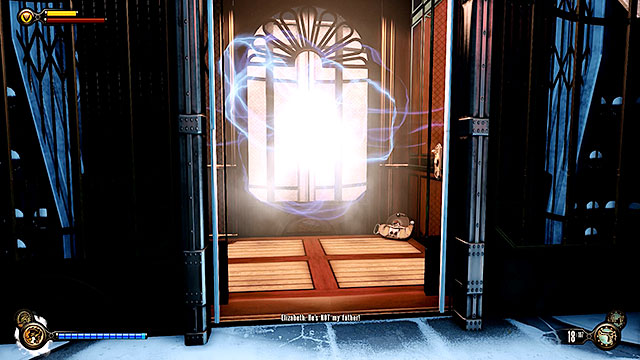
Your current objective will change soon and an elevator will show up near the gate. Enter the elevator, pick up Voxophone #70 and travel to the upper floor.

As soon as you leave the elevator you'll encounter new "Franklin's" and a Boy of Silence. You shouldn't have any problems slipping past this opponent, however if you plan on defeating all the hostiles you should lure them to the elevator and use vigors capable of doing major area attacks (the best combination is Murder of Crows/Bucking Bronco + Devil's Kiss).
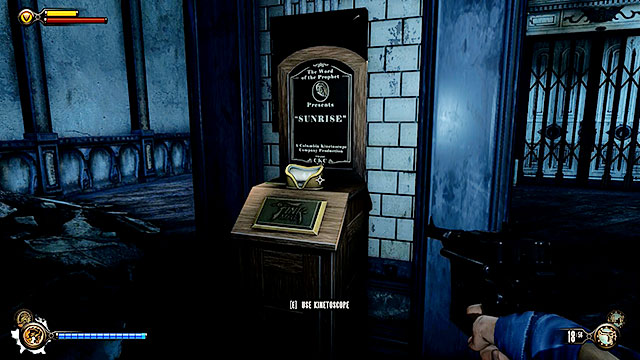
Enter the room that was guarded by the boy, turn left and locate Vantage point #34 - Kinetoscope just around the corner.

You should now proceed to a room located to the right of the elevator (Where We Weep). Turn left and enter the incinerator room with "Where We Weep" sign. Find Voxophone #71 under the furnace, near the coffin.
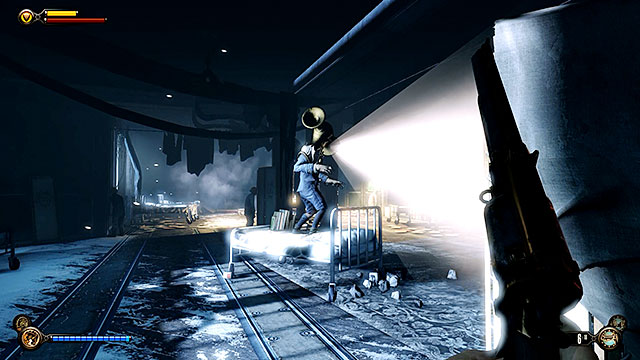
Once you've searched all the rooms mentioned above enter the bathroom with "Where We Cleanse" sign. Explore this area and then proceed to the bedroom ("Where We Sleep" sign). This room is guarded by another Boy of Silence. Sneak past the boy or kill his marionettes and then search the room, finding ammunition and salt.
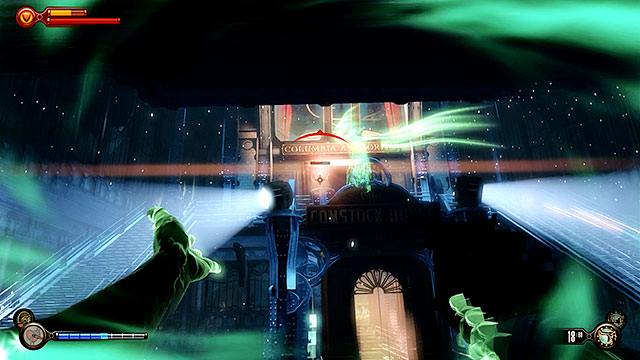
Use the bedroom's door located near a new tear to reach the second part of the atrium. You'll be forced to take part in a battle with several guards here and they'll be accompanied by a Crow. There are also two turrets guarding the stairs (you may have noticed them before).
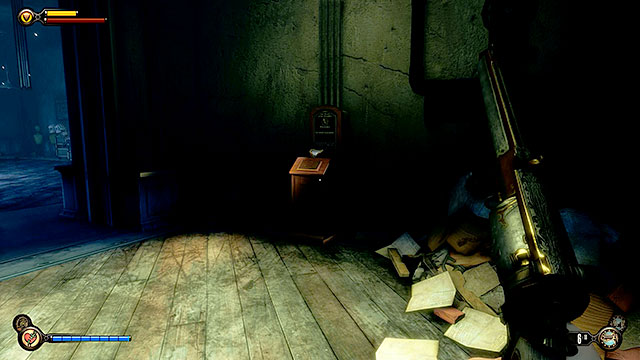
Once you've dealt with all the hostile targets use the stairs to get to the next floor and proceed to a dark hallway leading left. Enter the next corridor (the one with "Where We Work" sign). There's a Vantage point #35 - Kinetoscope at the end of this corridor.

Make sure to explore the room with the masks to find the locksmith's bag on a table near the tear (among other useful things).
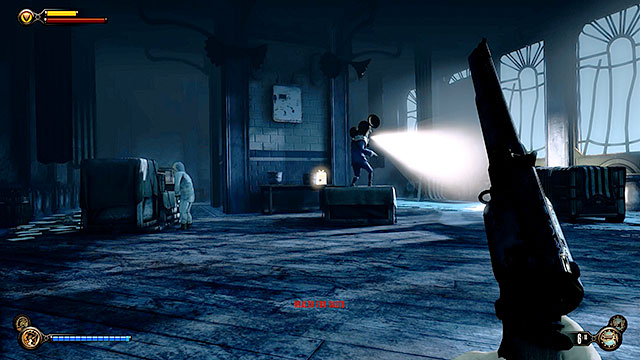
Travel through the corridors filled with mannequins to reach a warehouse guarded by a new Boy of Silence. Use your favorite tactic to deal with the boy and then explore the room. There's Gear #35 next to the pillar where the boy was (or still is) standing.
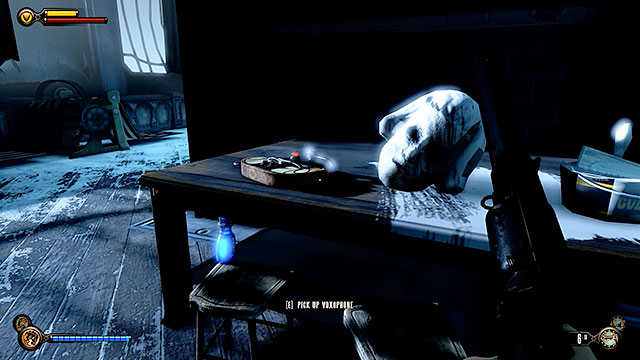
A table can be found behind another pillar. Examine it to locate Voxophone #72.

Exit the warehouse to return to the atrium and find a corridor leading to the projection room ("Where We Learn" sign). Jump through a destroyed glass window to reach a corridor leading to the warden's office. Locate Vantage point #36 - Kinetoscope around the corner.
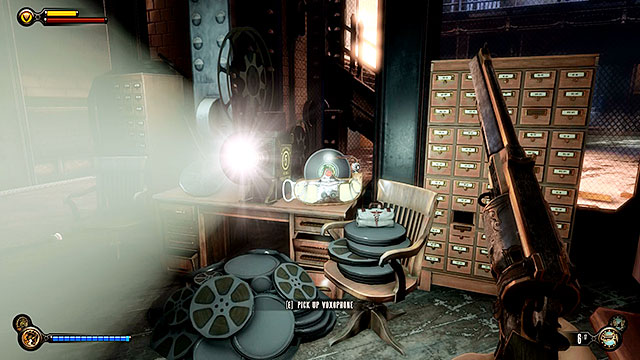
Enter the guard's office and locate a projector that's already turned on. Take some time to find Voxophone #73 (it's next to this projector), medical supplies, salt, ammunition and weapons.
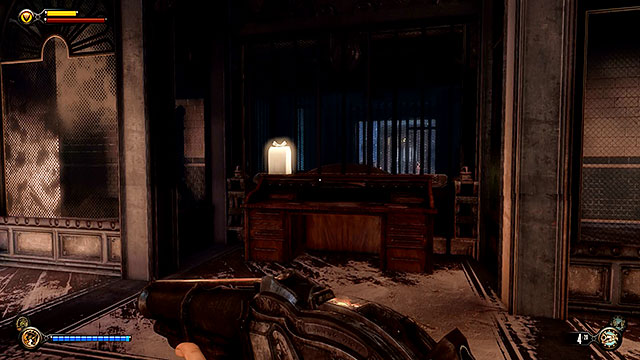
There is a desk opposite the stairs leading to the next floor and you should check it to uncover Gear #36. Collect this item and then proceed to the upper level.
It shouldn't take you much longer to reach the warden's office. Pick up a Voxophone #74 from one of the chairs and then pull a lever located by the control panel under the monitors. Doing this will unlock a security gate on the ground floor.
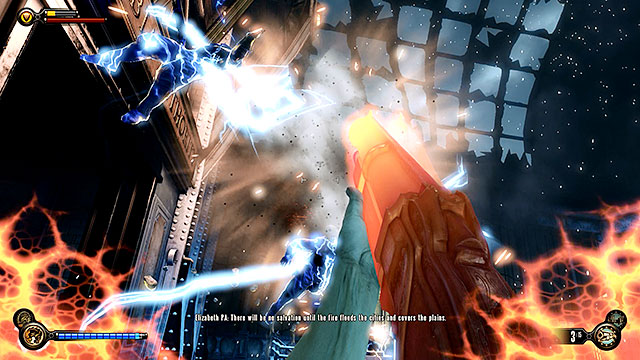
A new Boy of Silence will suddenly appear behind you after you open the gate on the ground floor (ready for a heart attack?) and in this case he will summon a group of armed guards instead of the usual puppets with masks.
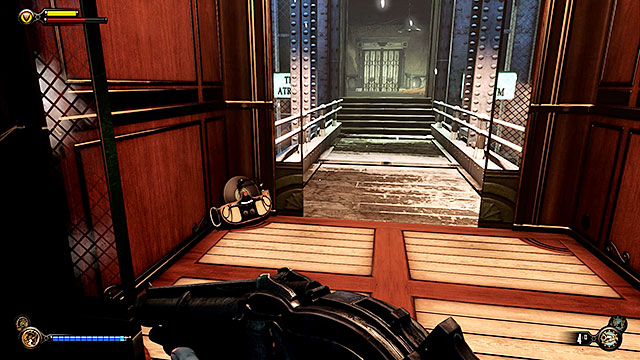
Fight your way to the atrium where you'll encounter another group of guards. Enter an elevator after the battle, pick up Voxophone #75 and travel to the ground level.
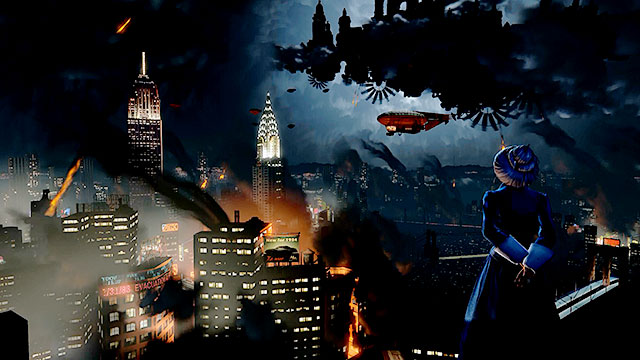
Walk through a recently opened armored door and head further info the building. Listen to a new conversation with the Lutece siblings met along the way and then enter the snow-covered hall. You'll finally encounter Elizabeth near the door at the end of the room. Talk to her and give her your hand to advance to the next chapter.
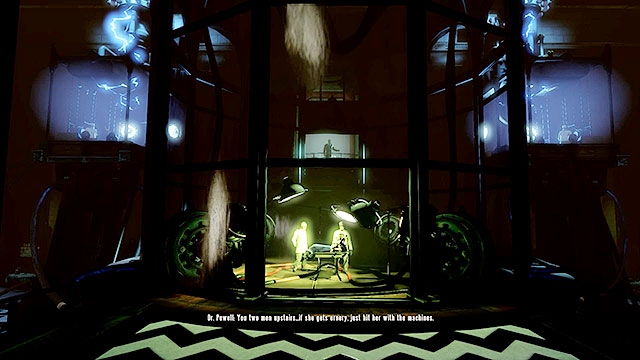
Notice that you've returned to 1912. Continue exploring the main corridor until you get to the operating room. The only way to rescue Elizabeth is to turn off two generators that power the siphon, because that will unlock her abilities. Both generators are located on an upper level behind the operating room.
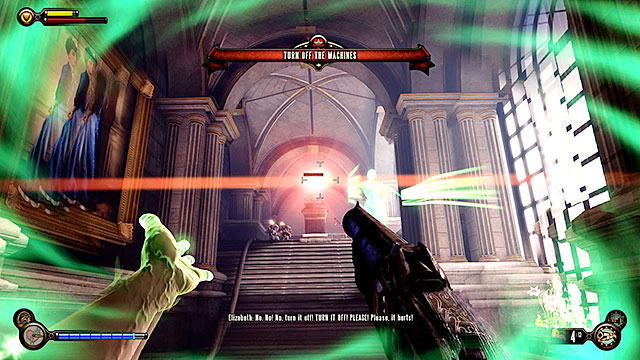
You will have to use one of the side corridors (doesn't matter which one) leading to the upper level to get closer to the generators. Both of these objects are guarded by Comstock's men and by machine gun turrets.
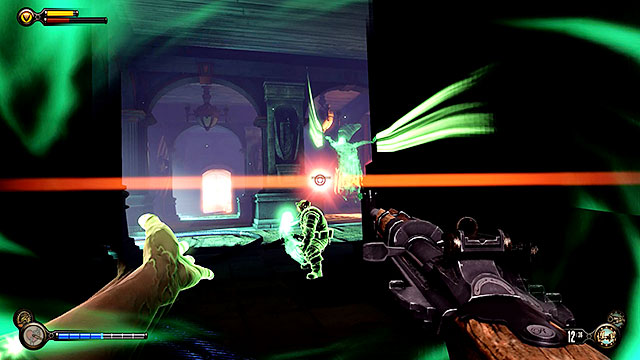
The hallway on the first floor holds two additional turrets and a group of guards from the corridor you've ignored before.

Once you've eliminated all the guards use the stairs leading to one of the generators and pull a lever to turn it off.
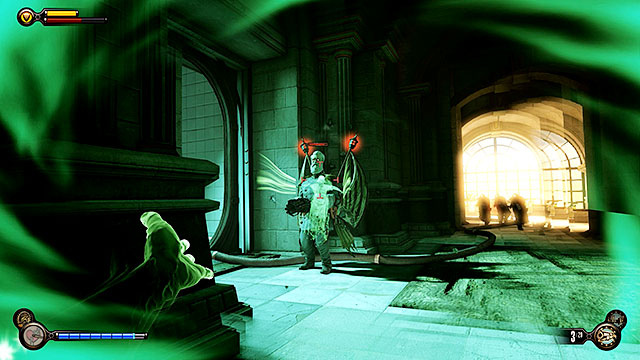
Return to the lower floor where you'll be stopped by a Mechanized Patriot and a new group of guards.
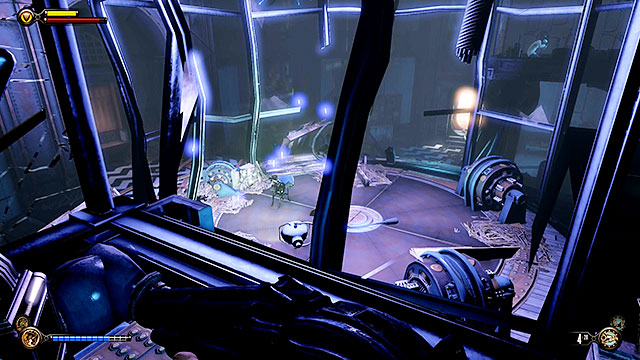
Kill all enemy units and find the staircase leading to the remaining second generator. Turn off this generator and then get back to the operating room.
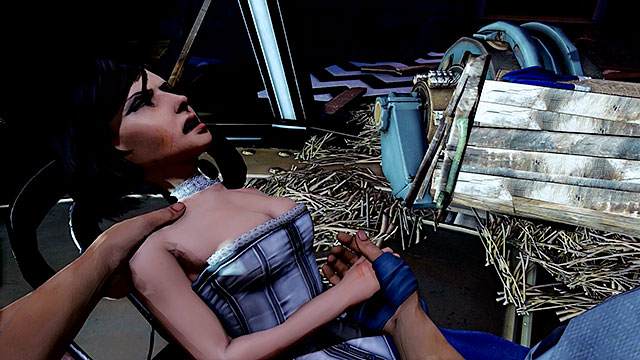
Once you've returned to the operating room approach the girl. Help Elizabeth to free herself and then lace up her corset.
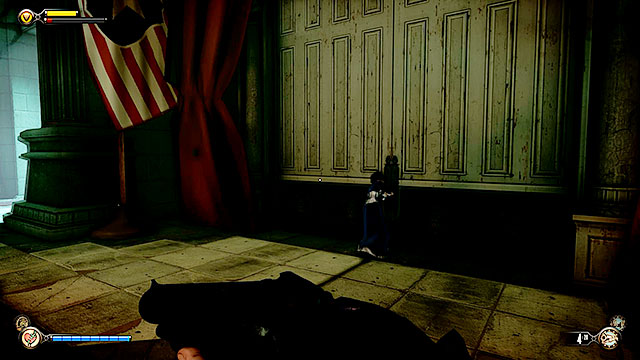
Go back to the first floor of the operating block and ask Elizabeth to break the lock on a door located between the corridors leading to turned off generators (the lock requires 3 lockpicks).

Explore a newly unlocked room and check the desk to find some silver, Voxophone #76 and Infusion #24 (last one in the game).
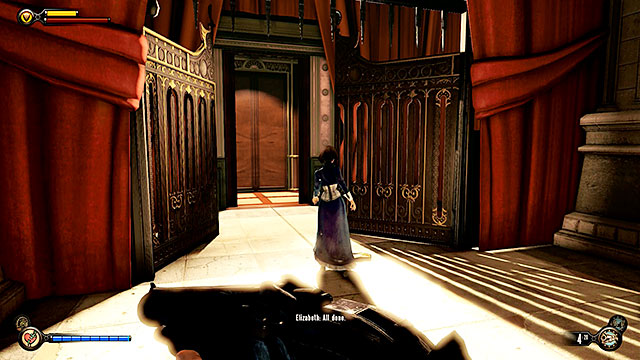
Return to the hall with the closed gate, wait for Elizabeth to open it (she won't need any lockpicks) and enter an elevator located on the other side of the gate.
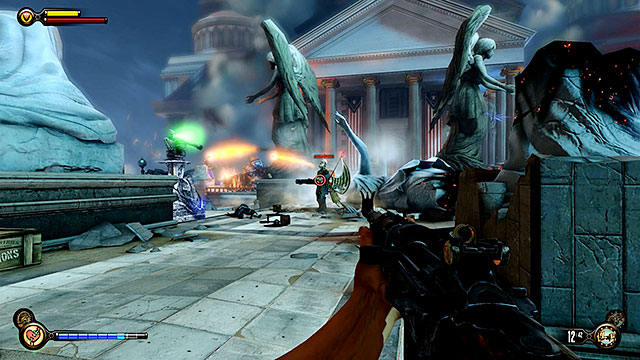
Once you've left Comstock's house search the room you're currently standing in very thoroughly and then ask Elizabeth to break a lock on a door leading to the roof. Go there and expect to take part in a new battle. Pods with Mechanized Patriots will land on the roof and you'll also have to deal with standard soldiers. Make sure to exploit nearby tears to aid you in the battle, especially since they can be used to summon a rocket automaton and a Mosquito.

Search the roof after you've won the battle. There is a new lockpick next to a dead policeman to the left of the building with closed doors.
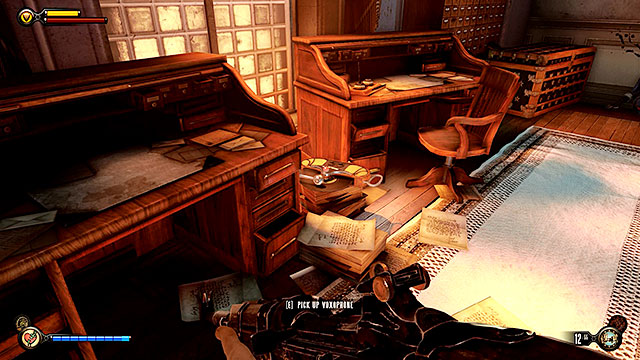
Break into the building mentioned above (the lock requires you to have 3 lockpicks) and check the left room to uncover Voxophone #77 on a stack of documents.
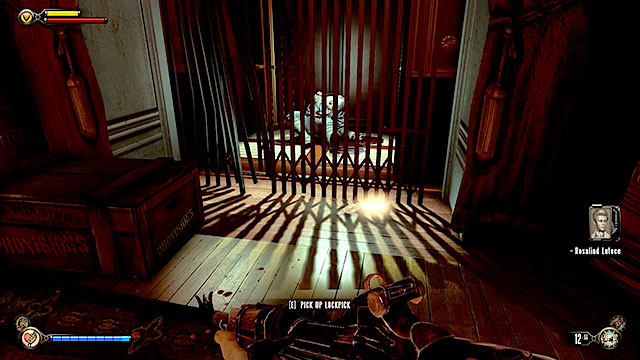
You can find 2 additional lockpicks in front of the barred elevator in the main corridor.

There is a safe in a room with a hole in the wall. Opening the safe requires only 1 lockpick and it should contain about 100 silver eagles. Once you've searched all the rooms and interacted with the machine used to upgrade vigors head outside and proceed towards the moored barge.
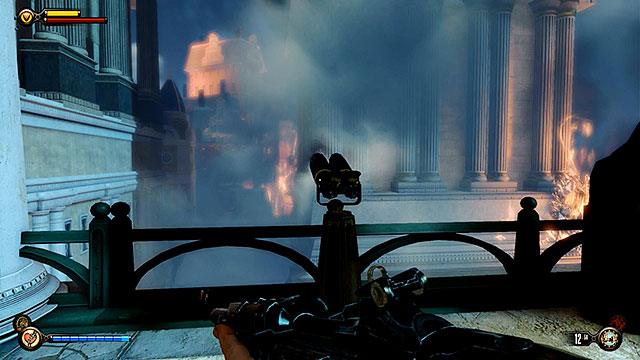
Make sure to unlock a nearby Vantage point #37 - Telescope before entering the barge (this is the last vantage point in the game).
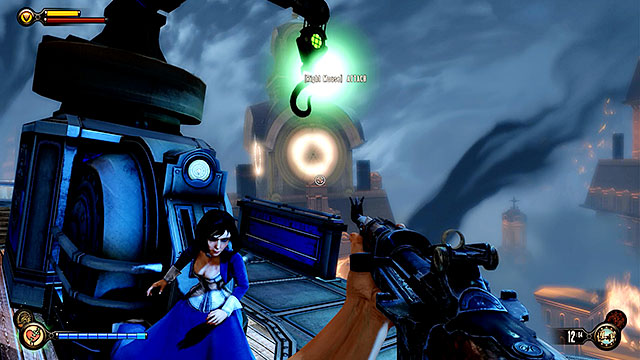
Once you're ready to move on with the mission enter the barge and start it by pulling a lever located at its beak. The barge will automatically set course towards Comstock's zeppelin. Notice maintenance hooks on this barge. An air battle will begin soon and that's when they will come in handy.
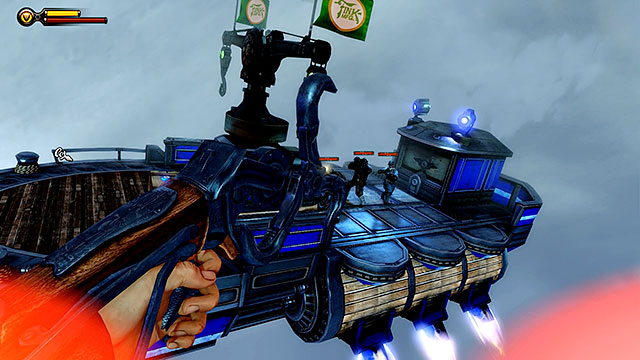
Soon after leaving the port new barges belonging to Comstock and the Vox will start heading your way and they will be accompanied by Mosquitos. Use the maintenance hooks mentioned earlier to move between the barges, allowing you to close the distance on enemy units. It's recommended to use the Undertow vigor during this battle, because eliminating groups of enemies at the same time will allow you to save on time and ammunition. It's also important to know that each of the attacking barges contains some salt, medical supplies and weapons. Eventually you'll get to the zeppelin, advancing to the next chapter.
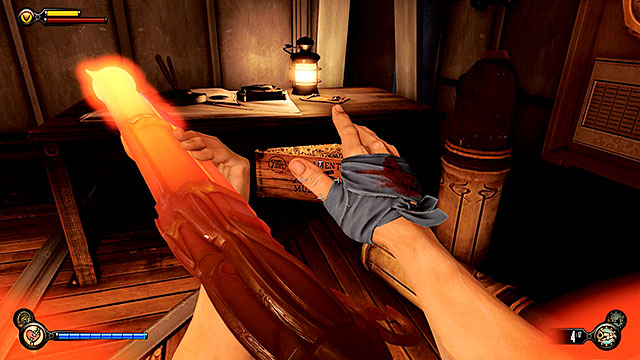
Start fighting your way through waves of enemies, heading to the lower deck's beak area. There is a locksmith's set inside one of the first cabins to the right, next to a Veni! Vidi! Vigor! vending machine. The remaining cabins hold ammunition, medical supplies, salt and a weapon.
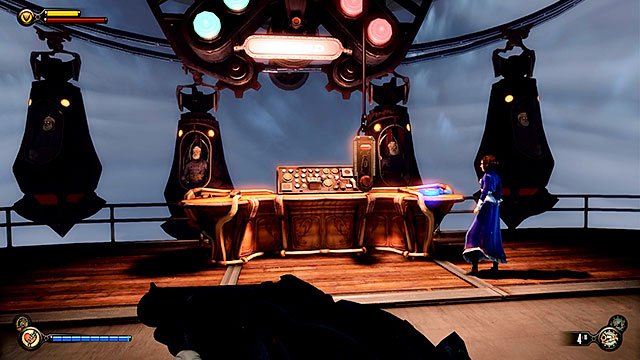
Once you've neutralized all enemy resistance finish your exploration of the lower deck to find a panel at the zeppelin's beak that controls pods with Mechanized Patriots. Press a button to drop the pods and then attach yourself to the sky-line in order to reach the upper deck.
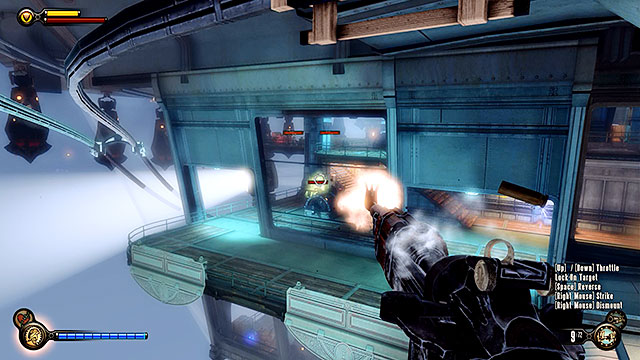
Start clearing out the second deck of the hangar. Thankfully there aren't too many of Comstock's men here and you can also use the sky-lines to maintain safe distance from them, making them very easy targets. Return to the back of the deck after you've secured the area.

There is a locked gate in the corridor that links the left and the right side of the deck and it leads to Secure Area. Opening the gate is only possible if you have 3 lockpicks.
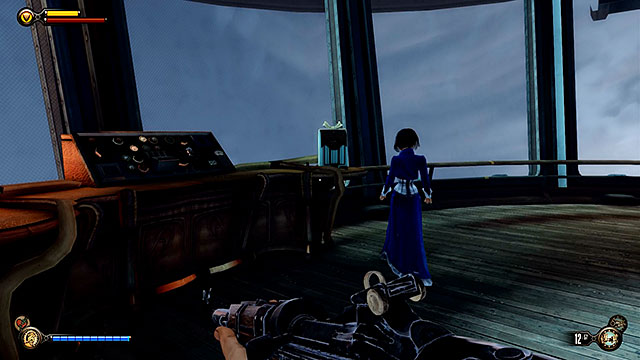
The cabin located on the other side of the locked gate contains some supplies and weapons. The most important find is Gear #37 located next to a control panel behind an inactive Mechanized Patriot.
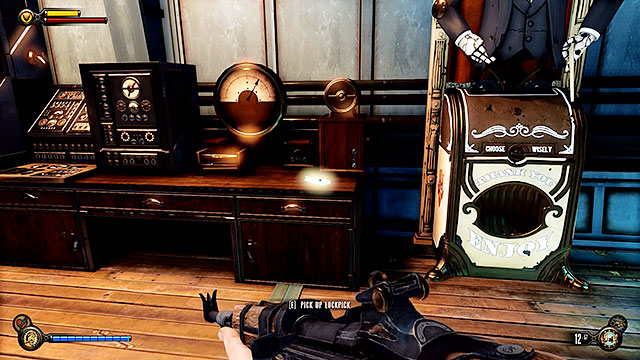
Use the stairs to get to an upper deck and you'll find yourself above the room you've explored very recently. Locate a new lockpick on a table between the vending machines.

Go back to the lower deck and start moving towards the zeppelin's beak. There is a locked engineering room opposite the stairs and the lock on the gate can be broken with only one lockpick.

Proceed further into the cabin and you'll find a Voxophone #78 on a table in the second room (under the board). Search the remaining rooms and then resume your journey towards the zeppelin's beak.
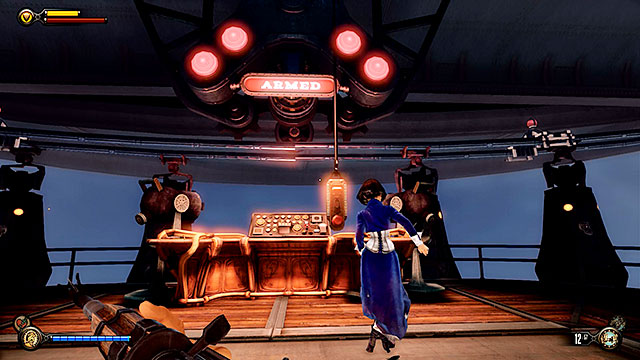
Press a button responsible for releasing pods with new Mechanized Patriots. There's also another lockpick here.
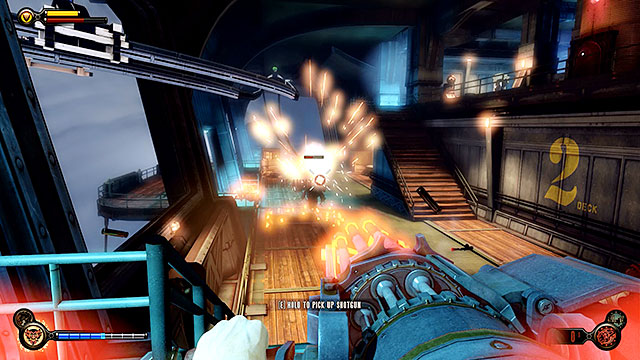
This time the pods are going to be released very slowly and in the meantime you will have to defend yourself against the Vox arriving using barges. There are going to be several Mechanized Patriots and heavily armored Volley Gun users among the standard revolutionists so be careful. Once you've eliminated all the hostiles attach yourself to the sky-line that will transport you to the next deck of the flying machine.
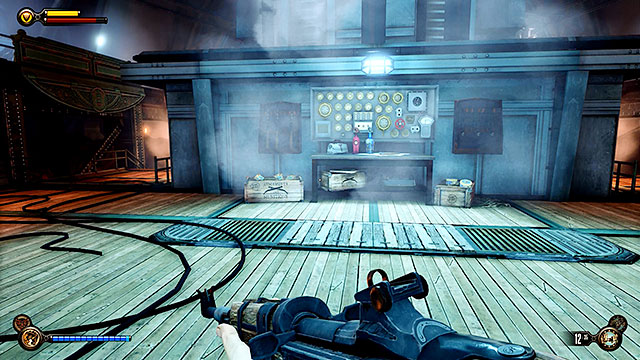
Explore the area near the entrance to this deck to find rifles, Volley Guns and other resources. I recommend picking up the weapons stored here, because you're about to take part in a rather difficult battle.
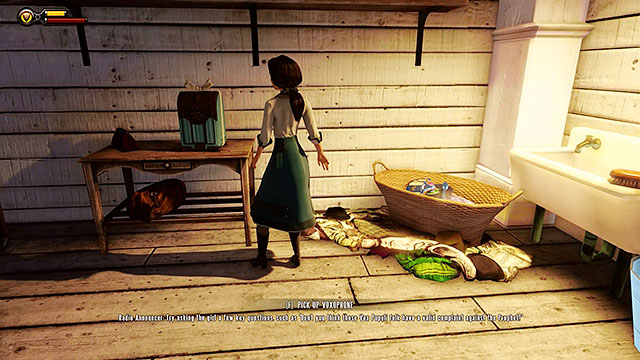
Head further into the deck and you are going to be attacked by soldiers accompanied by a new Handyman. Be careful while using the sky-line located above the deck until you get rid of the giant. Consider using nearby tears to summon turrets that will assist you in achieving victory.

Don't forget to collect Gear #38 left by the slain Handyman. This is the last box with gear you'll find in the game.
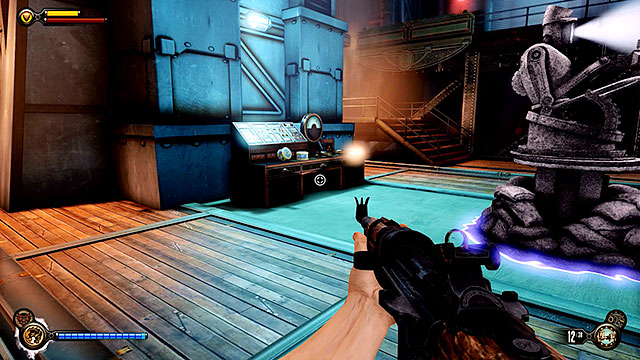
There's also a locksmith's set on a table, near a tear used to summon a rocket turret.
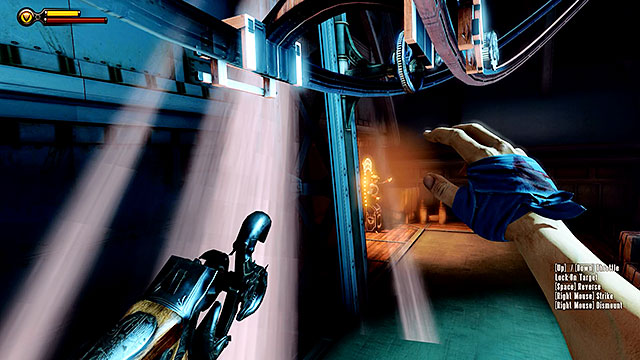
The second part of the deck is being guarded by two turrets stationed on both sides of the room. Reach a new deck to find a machine used to upgrade weapons. I recommend purchasing all the upgrades you can afford, because you're close to the finale of the game and you won't need the money later. Once you've unlocked new upgrades attach yourself to a sky-line located above the vending machine and wait until you're transported to the top deck.
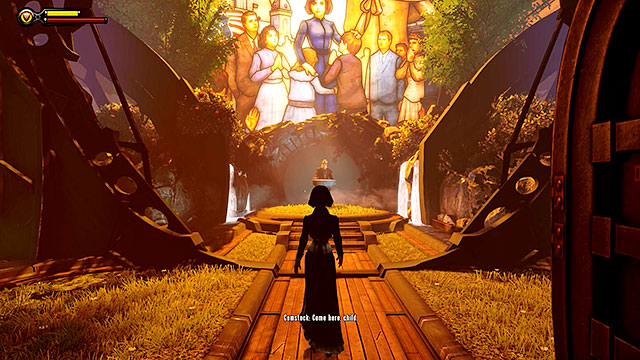
Go past the first room found on the top deck and confront Comstock. Once you've dealt with him use the new newly unlocked gate to start moving towards the bridge.
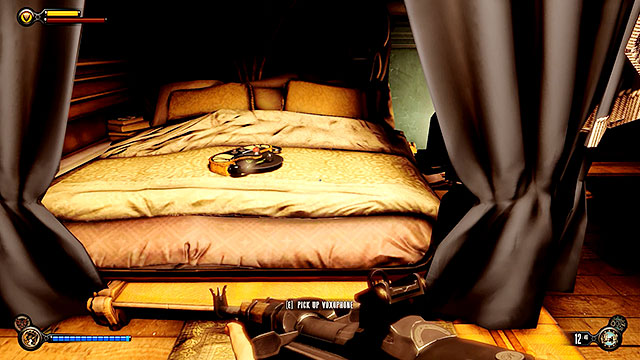
Make sure to explore Comstock's bedroom on your way to the bridge. The bedroom is located between floors, opposite the stained-glass window. Pick up Voxophone #79 from the bed.
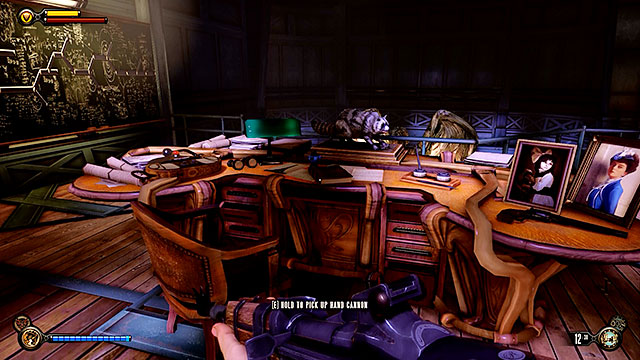
There's also Comstock's study on the same floor. Approach the large desk found in this cabin and collect Voxophone #80 (this is the last recording you'll find in the game).
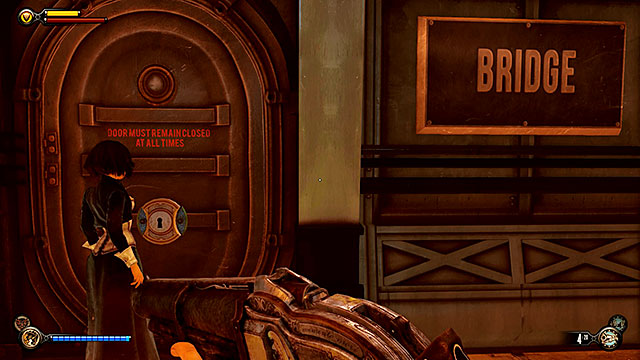
Go behind the glass-stained window and ask Elizabeth to open a gate leading to the zeppelin's bridge. Use the steering controls found on the bridge when you're ready for the final battle.
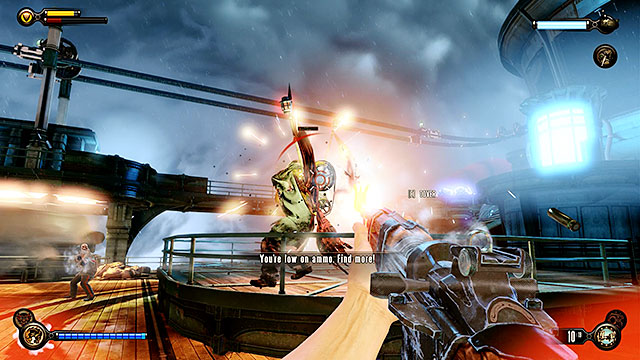
Your last challenge will be to protect a generator responsible for powering the zeppelin. The Vox units will be arriving in waves and aside from simple soldiers you'll also be dealing with automatons (thankfully you won't encounter any new Handymen). The current technical state of the generator is represented by a blue energy bar located in the upper right corner of the screen and if the generator is destroyed you will have to restart this entire battle. Thankfully you can find a lot of weapons and ammunition on the deck so don't worry about conserving your supplies. You can also locate some salt in the area and as a result you will be allowed to use vigors more often than usual.
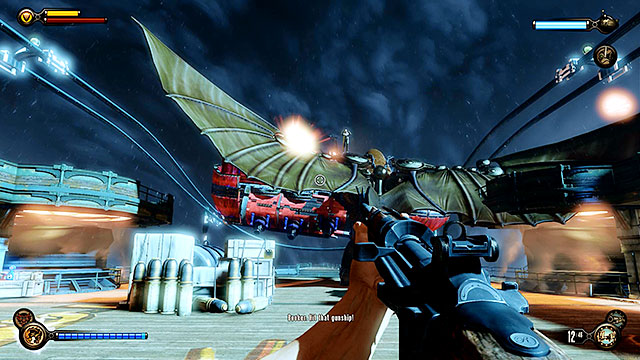
The game will allow you to designate targets for the Songbird, however the bird will need to rest before the next attack and that recharge period is represented by a timepiece seen under the generator's energy bar. Use the Songbird as often as you can, ordering the bird to attack airborne targets or enemy troops on the zeppelin's deck.
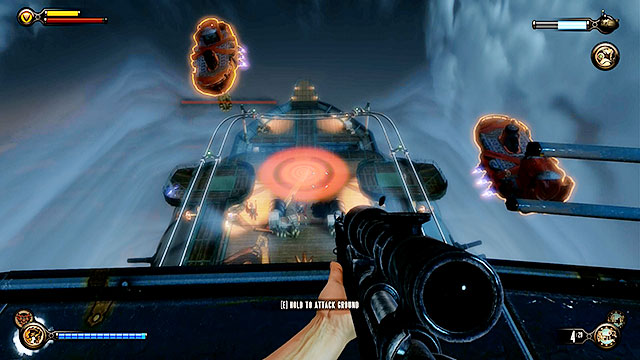
There's a sky-line above the deck and you can use it to get to the top of the zeppelin. You can find some tears at the top, containing medical supplies and a sniper rifle. This is a good spot to attack your enemies from a safe distance and to issue orders to the Songbird, because you will be able to see the entire deck from here.

At some point of the battle Vox zeppelins will appear above the battlefield and they will begin dropping reinforcements. Destroying these zeppelins should become your top priority and it's best to use the Songbird for this. Don't forget about the troops stationed on the deck of your zeppelin, because you still have to prevent the generator from being destroyed. The battle should end soon after taking out the last Vox zeppelin.
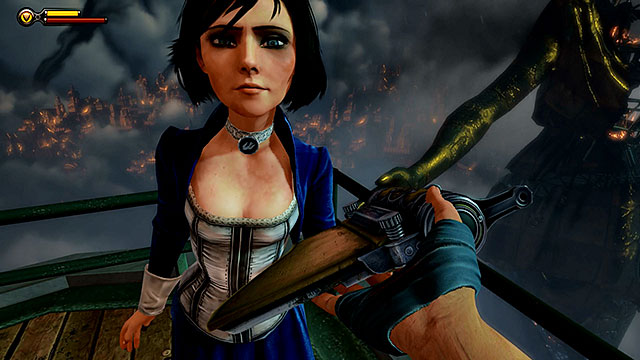
Join Elizabeth (she can be found close to the zeppelin's beak) and take the whistle from her to end this chapter and to proceed to the ending.
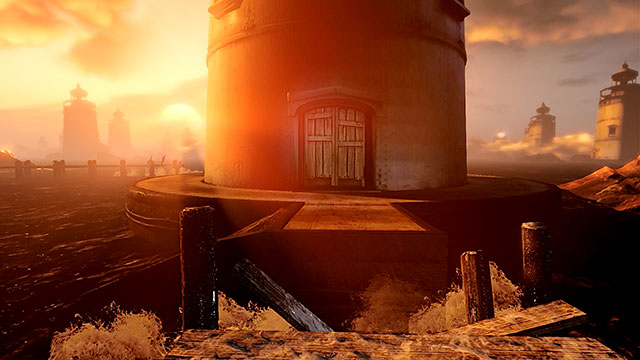
This chapter serves as an epilogue. All you have to do is to remain on the path and to listen to what Elizabeth is telling you to do. You can't get lost or make any mistakes here and you also can't influence how the game's going to end, so just enjoy the grand finale.
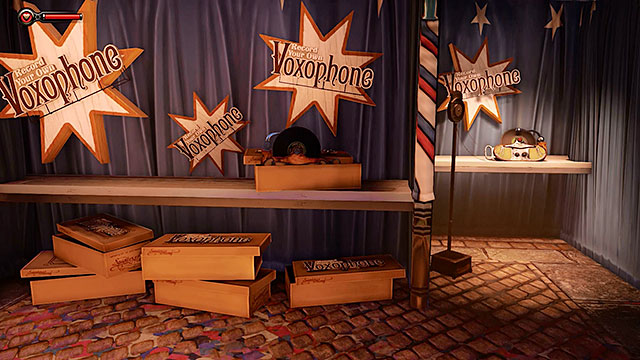
Voxophones are the BioShock's version of audio logs you may know from many other games and their role is to provide story background and to fill the gaps left in the main campaign. These journals are a hot commodity in BioShock: Infinite, because they answers a lot of questions needed to fully understand the ending of the game. You'll find 80 Voxophones over the course of the singleplayer mode and collecting them all is required to unlock the Eavesdropper achievement/trophy.
There's also an additional Voxophone that for unknown reasons never made it to the final version of the game. Its transcription can be seen below.
"How is it that we of Columbia are so careful with the pedigree of our dogs and horses and then leave the ancestry of our children to blind sentiment? A lovely young woman could be riddled to the core with feeble genetic code. Here genes could breed criminals, paupers, and bedlamites if not rooted out of the genetic pool! Citizens should not choose mates for themselves!"
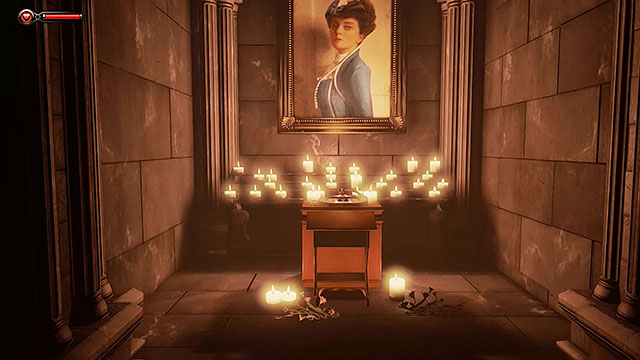
Welcome Center - in one of the niches of the chapel located to the left of Father Comstock's bust.
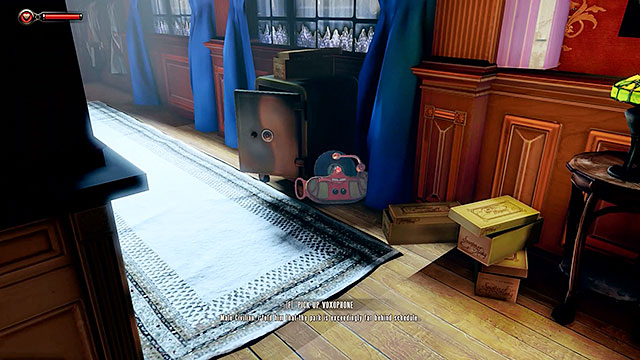
New Eden Square - inside the Hudson's tailor shop, to the right of the monument of Father Comstock.

Parade Crossing - in the garden to the right of the flower girl encountered after crossing the draw bridge.
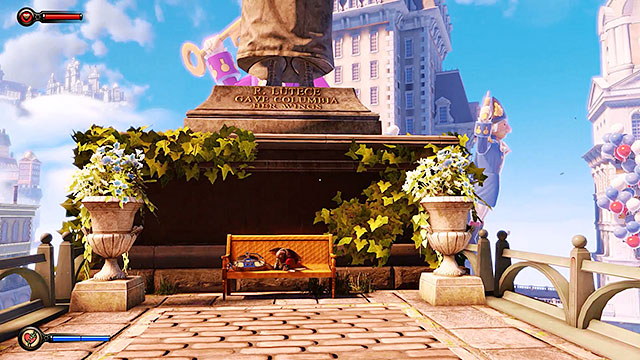
Path of the Scroll - under R. Lutece's monument found after leaving the fair.

Raffle Square - soon after ending the first battle with the policemen. The recording can be found between the cages, near the Veni, Vidi, Vigor! machine.

The Blue Ribbon Restaurant - in the kitchen behind R. Lutece (she gives you the shield).
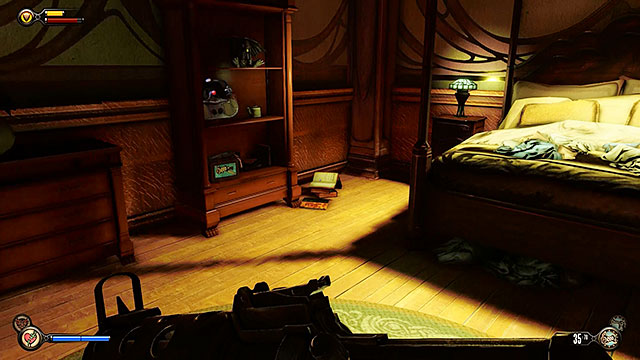
Lansdowne Residence - in the bedroom on the first floor. You can get to the bedroom by dropping down from the skylight.
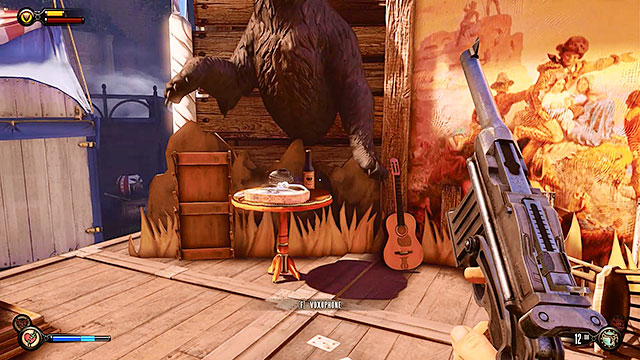
Comstock Center Rooftops - on a stage with the stuffed bear. The stage is located at the back of the printing house.
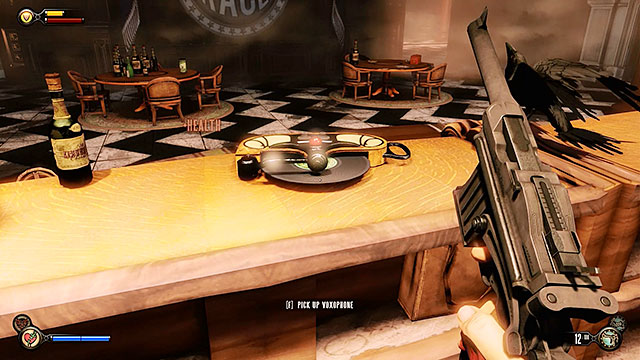
The Fraternal Order of the Raven - on the bar's counter to the left of the entrance.
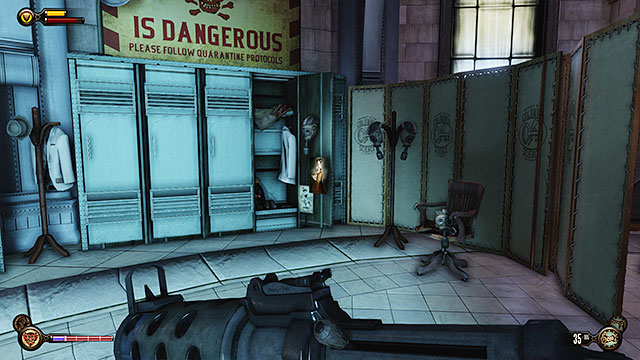
The Fraternal Order of the Raven - on the chapel's bench where the Crow was doing a sermon.
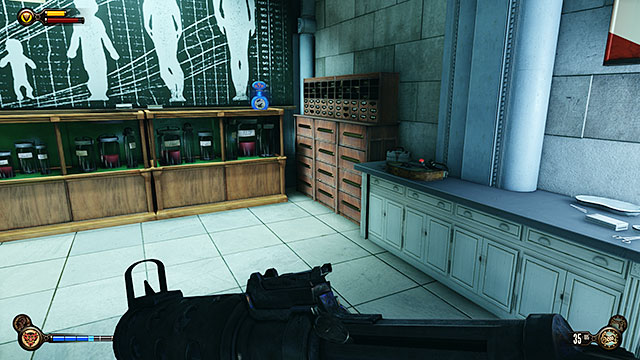
The Fraternal Order of the Raven - in the office to the left of the projection room (you visit this area soon before confronting the Raven).

Gondola to Monument Island - at the top of the maintenance tower, in the room with the gondola control panel.
Monument Island - locker in the first room of the Monument Island.
Monument Island - in the laboratory behind the Passive Siphon.
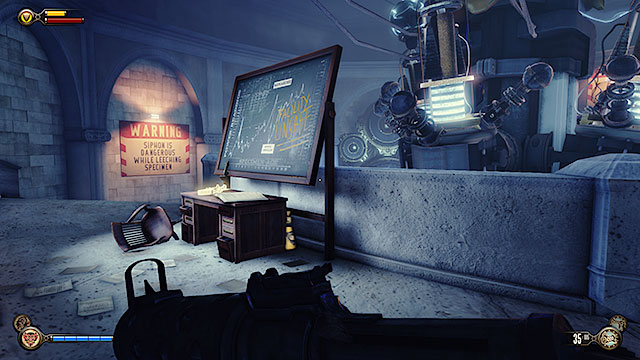
Monument Island - on a desk inside the room with the Siphon.

Monument Island - inside the Specimen Observation Room #4.
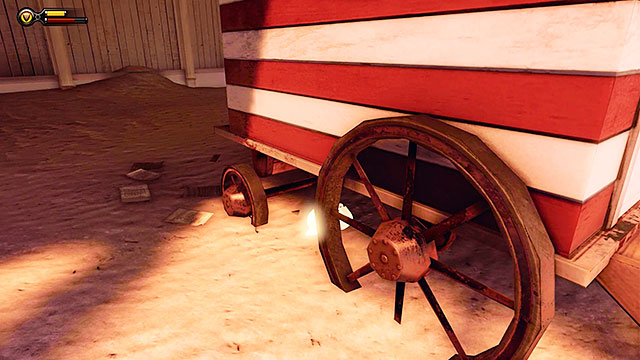
Battleship Bay - under the trailer in the first part of the beach (where Booker wakes up).
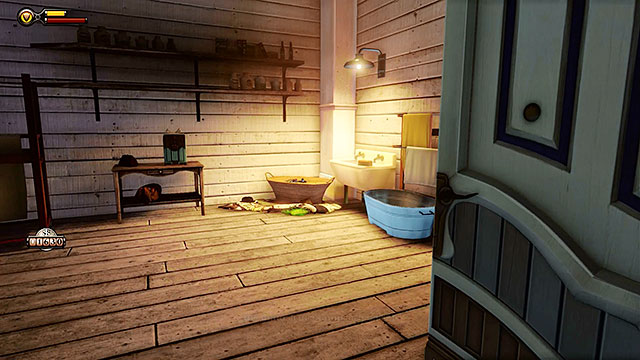
The Arcade - inside a basket in a room reserved for employees only (near a corridor leading to the main area of The Arcade).
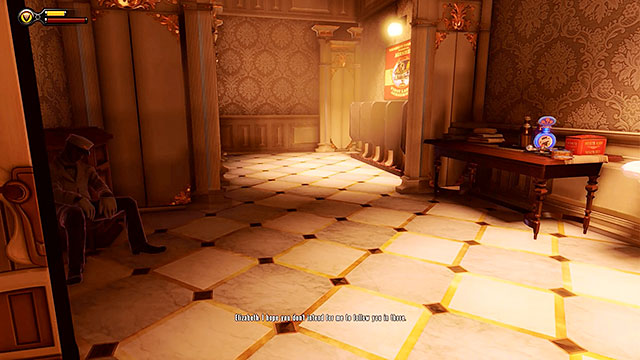
The Arcade - in a toilet reserved for "white" people, to the left of the arcade.
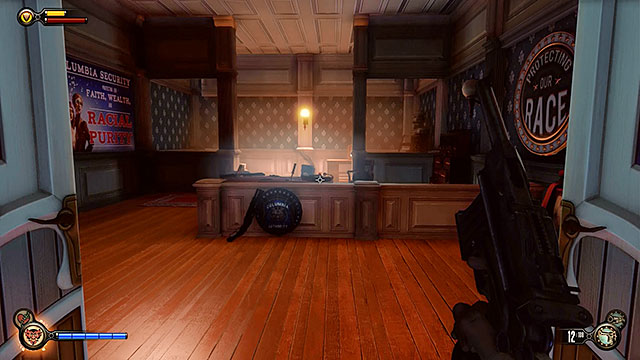
Park Ticketing - to the right of the ticket hall. You can find this secret after you separate with Elizabeth.

Park Ticketing - in a room under the stairs, to the left of the gondola the Elizabeth has run off to.

Soldier's Field Greeting Pavilion - inside a safe in the security office you have to gain access to by opening a lock.
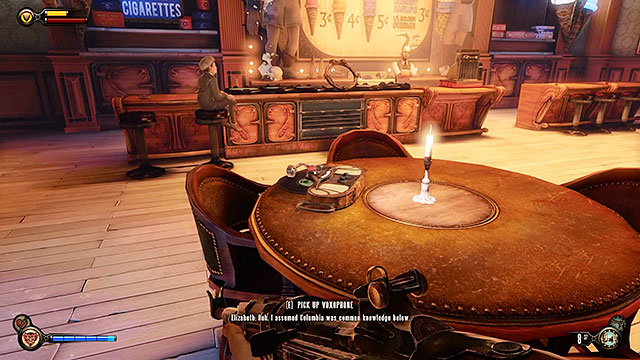
Soldier's Field - inside Duke and Dimwit ice cream store in the upper promenade.

Soldier's Field - inside the Founders Books store in the lower promenade.

Patriot's Pride Pavilion - in a closed office to the left of the elevator. Check the desk opposite the window.

Soldier's Field - on the first floor of the ticket hall.

Soldier's Field - inside the kitchen of the Fellow Traveller bar.

Hall of Heroes Plaza - inside the gondola's cabin (the one close to the angel statue).
Soldier's Field - inside a secret cellar of the Fellow Traveller bar. The main character can access this area by completing the only side mission of the 8th chapter.
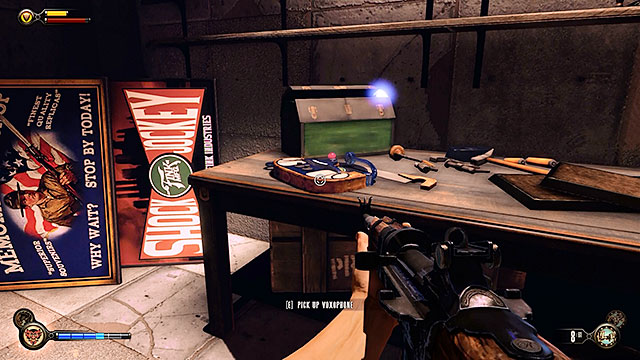
Hall of Heroes - inside a ticket office near the entrance to the building.
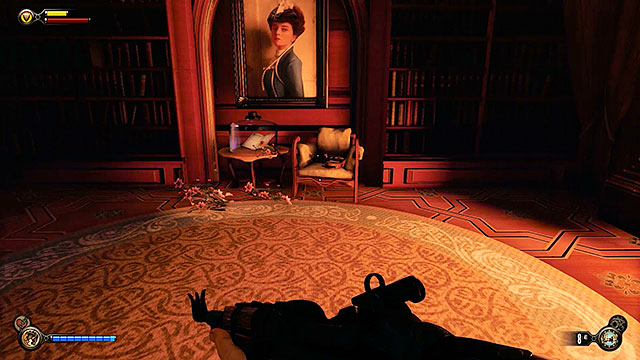
The Murder of Our Lady - a room with a fireplace at the First Lady exhibit.
The Courtyard - inside a small warehouse on the ground floor (you can explore it after the battle with Slate's men).

Soldier's Field - inside a hotel room (in order to get inside this room you'll need a Shock Jockey vigor).

Finkton Docks - between the desks in the shipping center.
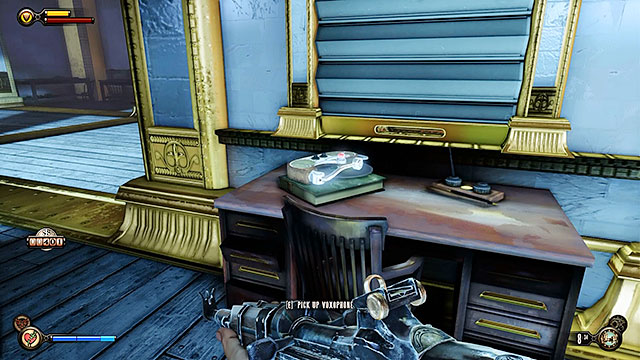
Fort Franklin - on a desk in a hallway close to the end of the chapter.
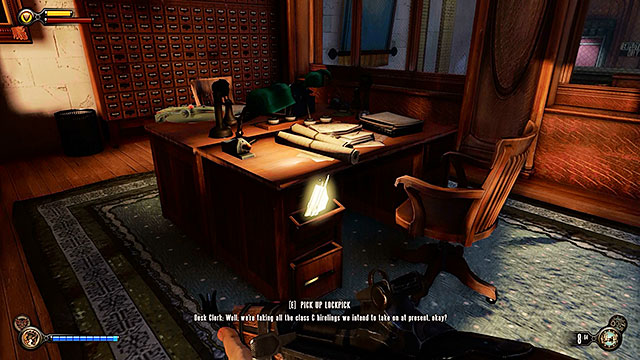
Worker Induction Center - on a desk in the middle of the main hall.

Worker Induction Center - a locker near the elevator (close to the end of the chapter).

Plaza of Zeal - an alley behind the Shantytown gate.
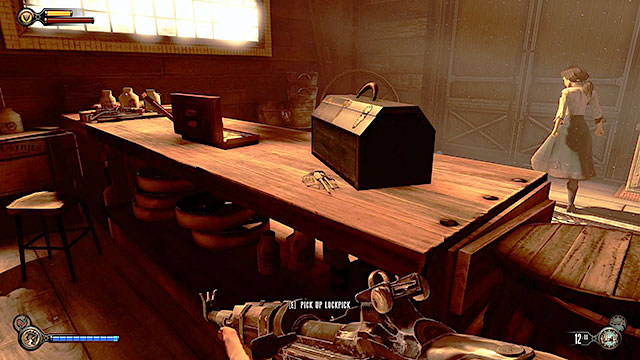
The Great Chen-Lin, Gunsmith and Machinist - on a store's counter.

The Good Time Club - in a dressing room behind the stage.
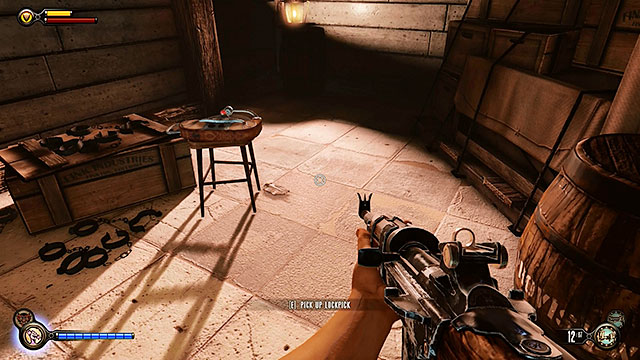
The Good Time Club - in the cellar. You explore this area on your way to the prison.

Plaza of Zeal - inside the watchmaker's store. You need to complete a side mission to gain access to this collectible.
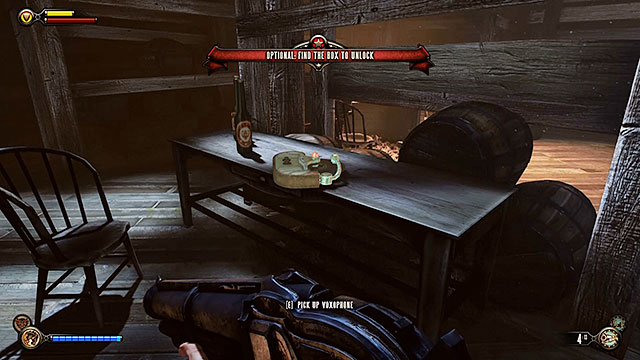
Graveyard Shift Bar - in the bar's cellar, next to a guitar.

The Bull Yard - in the attic of a building located on the right side of the yard.

The Bull House - on a desk in an office on the first floor.

The Bull House - in the interrogation room on the ground floor.
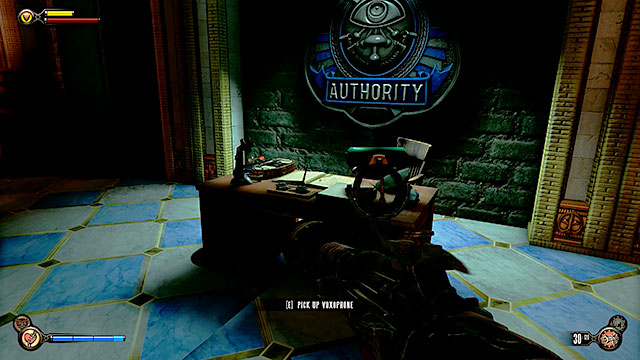
The Impound - on a desk of the impound's guard.
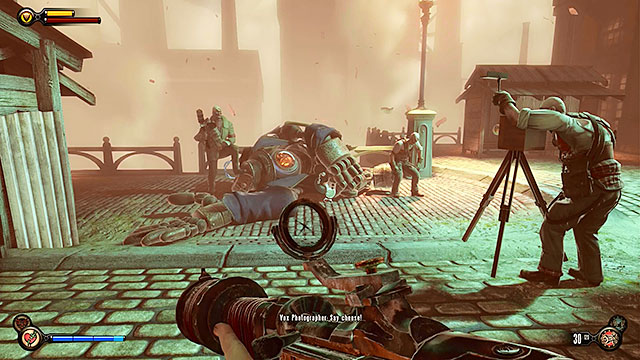
Shantytown - held by a defeated Handyman (you can find it after stepping through the tear).

Graveyard Shift Bar - on the bar's counter (you can find it after stepping through the tear).
The Great Chen-Lin, Gunsmith and Machinist - on a shelf next to the dead Chen Lin couple.
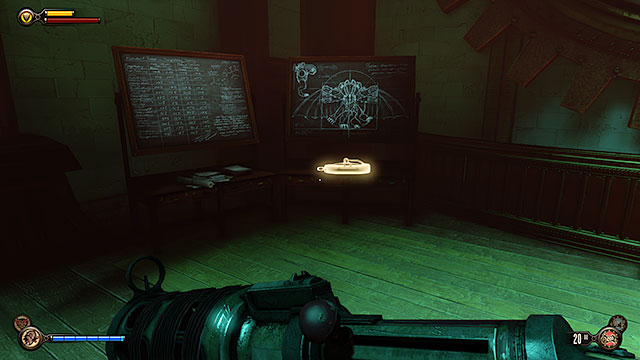
Office of Jeremiah Fink - next to a board found near the exit from the factory.
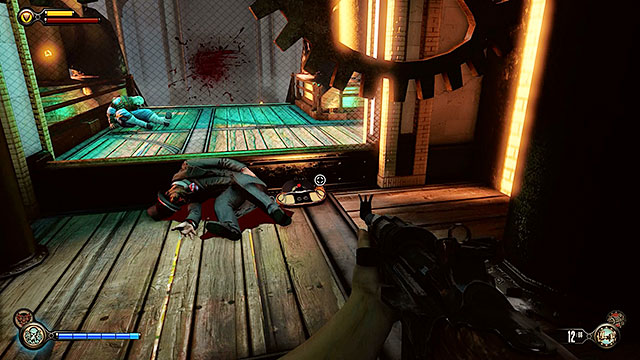
Office of Jeremiah Fink - next to Fink's dead body.

Grand Central Station - next to a crate in the corridor located between the ticket offices.
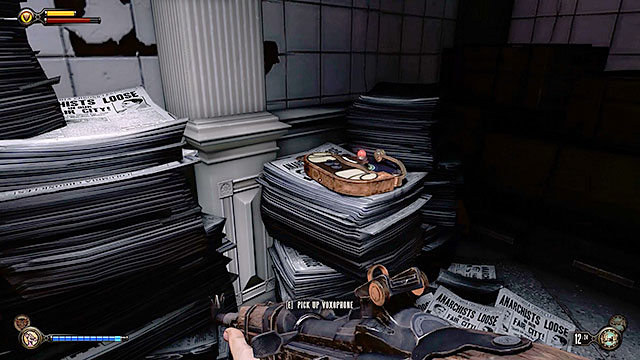
Grand Central Station - storage area next to an office in the station's main hall.
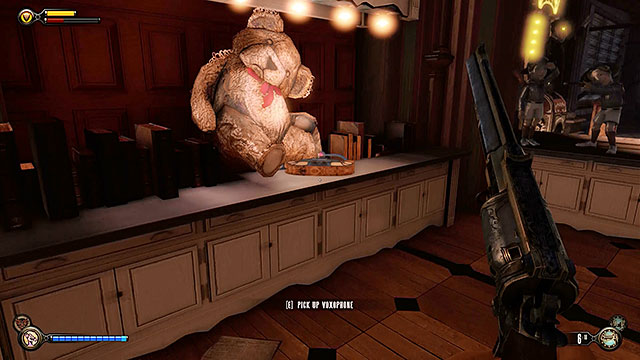
Founder's Books - on a display, next to a stuffed bear.
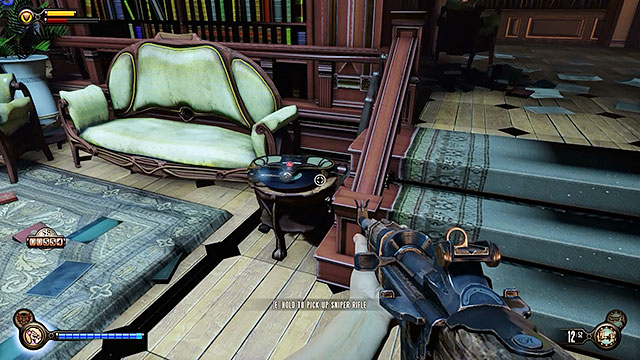
Founder's Books - on a small table in the reading room (lower floor of the store).

Salty Oyster Bar - in a locked room behind the bar (it requires Voxophone #56).

Financial District - inside a locked room on a terrace with a view of the bank's plaza.
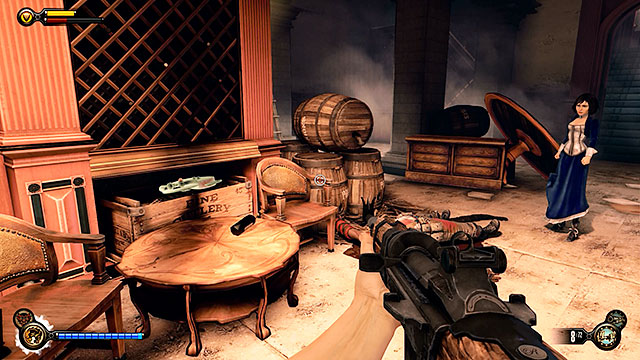
Harmony Lane - inside a cellar of a bar located near the platform.
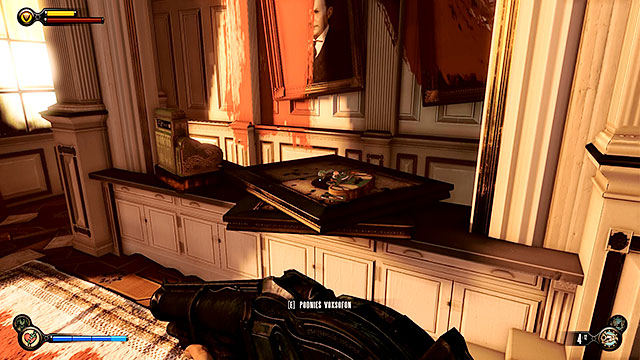
Downtown Emporia - on a counter inside a locked store with the paintings.
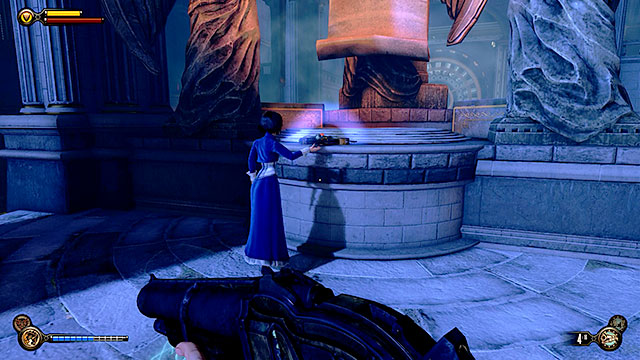
Comstock Victory Square - at the base of Lady Comstock's statue located in front of the Comstock house.
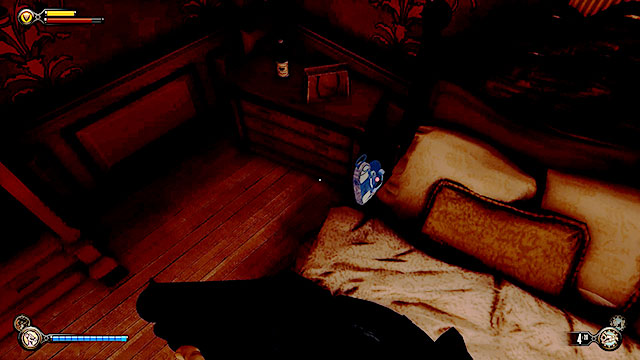
Market District - inside the Magical Melodies building located opposite the cemetery.
Market District - inside a bedroom on the first floor of Lutece Lab.

Market District - at the back of Lutece Lab.

Market District - inside a fear found in the Lutece Lab.

The Vault - in the left wing of the vault, near a closed safe.
The Vault - inside a tear in the middle of the vault.

Downtown Emporia - inside a tear in the Photo Studio.

Financial District - inside a secret room at the end of the corridor to the left of the vault (Vox cipher is required).

Her Loving Embrace - in an elevator opposite the security gate.
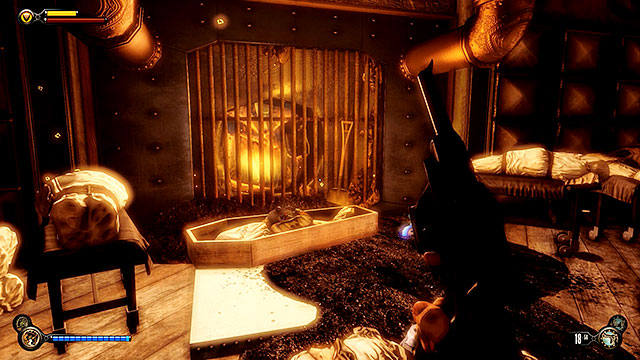
Where We Wep - inside a coffin found in the incinerator room.

Where We Work - on a table in the warehouse, behind one of the pillars.
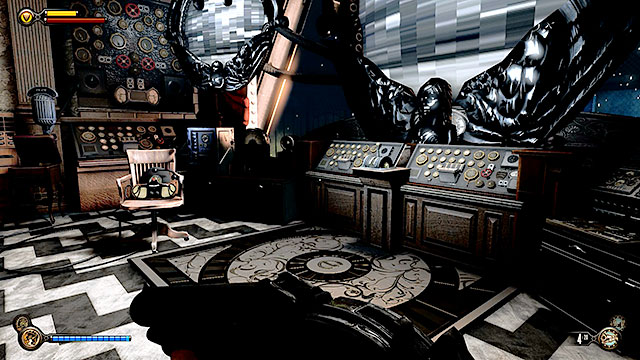
Warden's Office - on a desk next to an active projector.
Warden's Office - on a chair near a large control panel.

The Atrium - inside an elevator used to return to the security gate.

The Operating Theatre - inside a closed office located above the operating room.

Comstock House Roof - inside an office near a port with a docked barge.
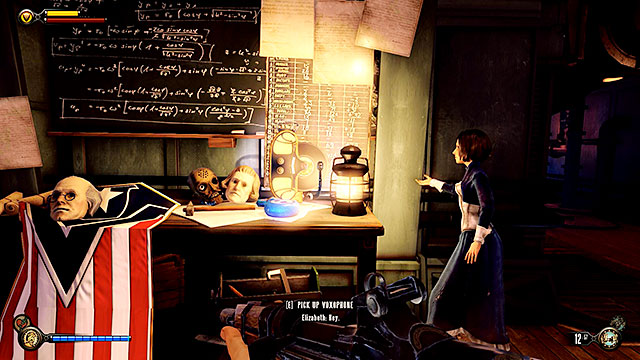
The Hand of the Prophet - inside an engineering room, close to the beak in the upper deck of the hangar.

The Hand of the Prophet - on a bed inside Comstock's bedroom, above the command deck.

The Hand of the Prophet - inside Comstock's study, above the command deck.
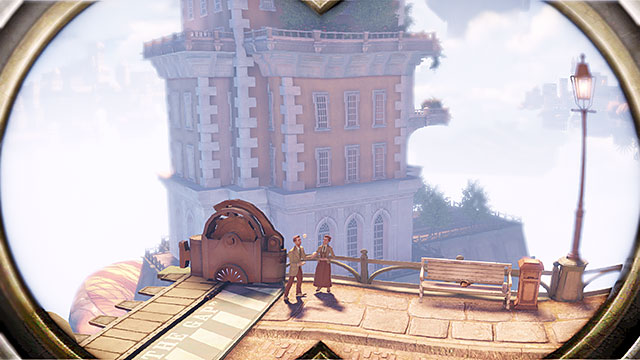
The following chapter contains a complete list of Kinetoscopes and Telescopes scattered throughout the entire Columbia. Much like Voxophones, vantage points often offer additional information about the city and how it was built. The telescopes can also help you in discovering things you wouldn't normally see. Finding all vantage points is needed to unlock the Sightseer achievement/trophy.

Hudson's tailor shop, to the right of the monumental statue of Father Comstock. You can visit this area soon after leaving the temple and entering the main square.

Alleyway explored just after crossing the draw bridge (the one that is lowered after the fair has ended).

To the left of the gate where you've received a telegram from Lutece.
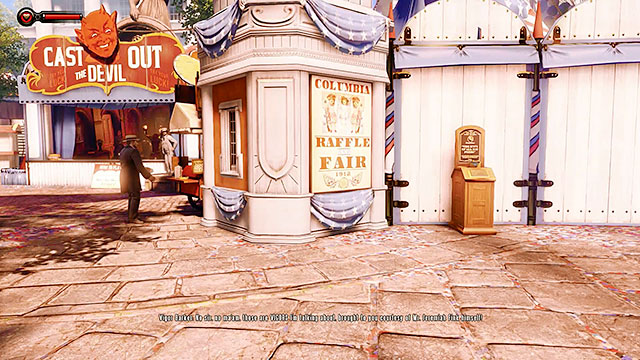
Near the entrance to the fair, on the opposite side of where the vigors are being presented.

The Blue Ribbon Restaurant - at the end of the hallway near the entrance.

Comstock Center Rooftops - behind the wooden stand at the back of the printing house.

Sky-line - near the gondola station. The telescope is placed on a hovering police barge.


Gondola to Monument Island - on the lower floor of the maintenance tower, near the balustrade.
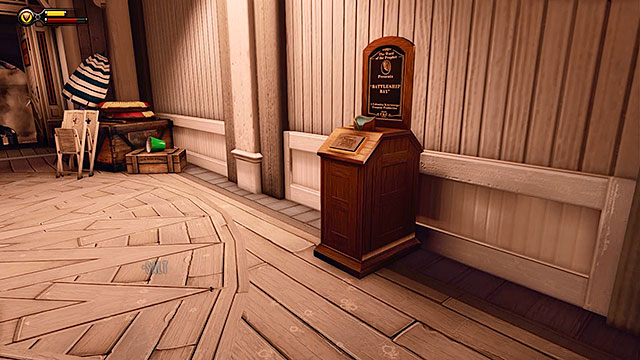
Battleship Bay - in a corridor linking the two beaches.
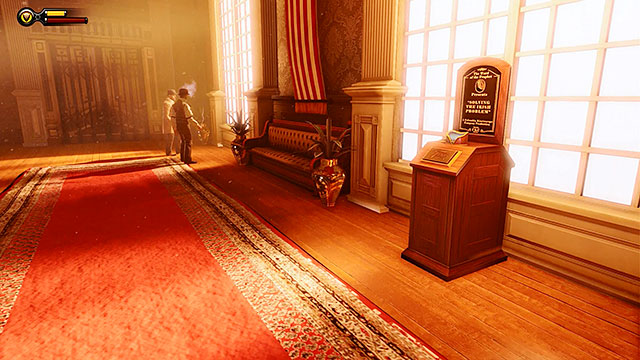
The Arcade - at the end of the corridor leading to the toilets for "white" people.
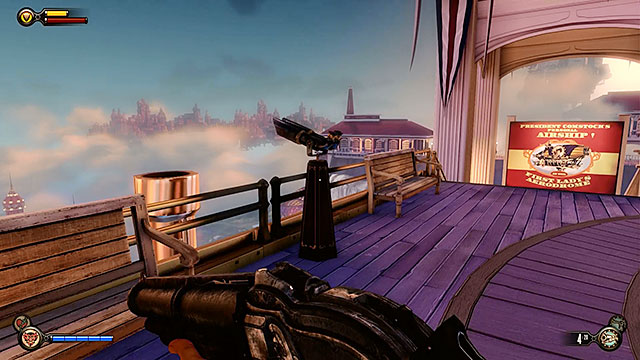
Battleship Bay - on the platform explored just before leaving this location.

Soldier's Field Greeting Pavilion - in a room with a model of the Soldier's Field.

Soldier's Field - next to the Duke and Dimwit ice cream store in the upper promenade.

Soldier's Field - in the ticket hall, to the left of the cannon.
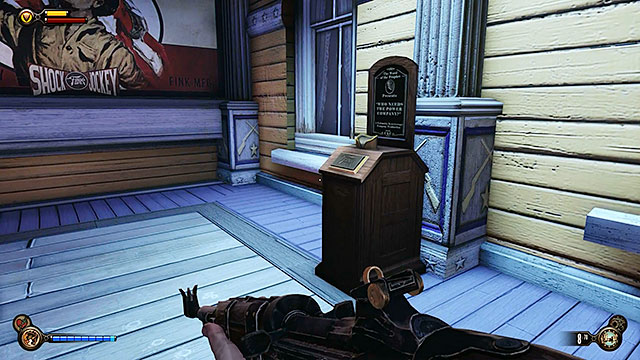
Hall of Heroes Plaza - to the right of the entrance to the Hall of Heroes.
Hall of Heroes Gift Shop - in the gift shop's vestibule.
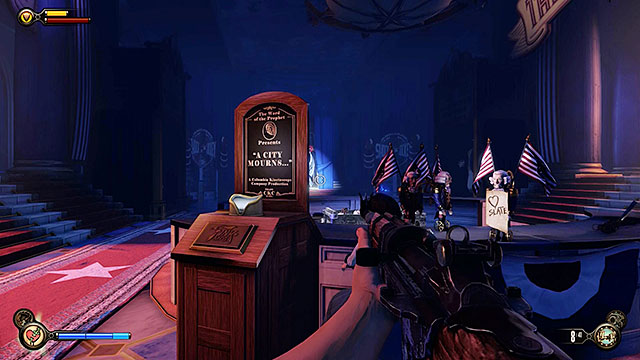
Hall of Heroes Gift Shop - near a round counter in the middle of the room. A copy of this kinetoscope can also be found near the First Lady airship, however it's not treated as a vantage point.
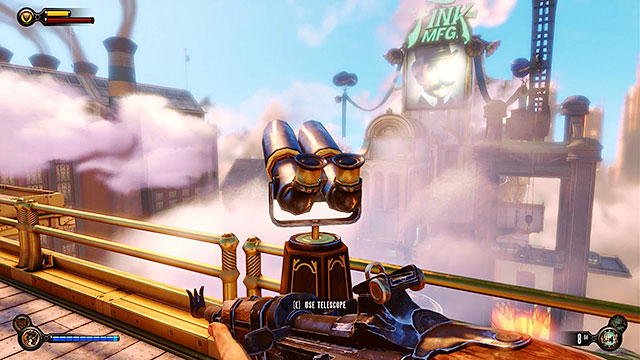
Worker Induction Center - a platform at the gondola station.

Worker Induction Center - in a corridor located to the left of the statue in the main room.

The Good Time Club - in front of the entrance to the audience section of the club.

The Good Time Club - behind the toilets, opposite the stage.
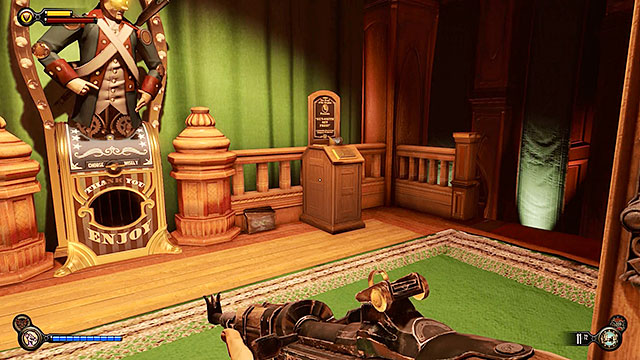
The Good Time Club - in front of the entrance to the audience section of the club (after stepping through the tear).

The Bull Yard - on a balcony opposite the police precinct.
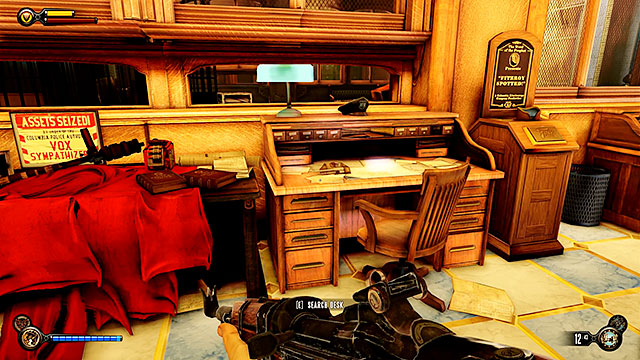
The Bull House - on a desk inside the police precinct's reception.

Factory Courtyard - in front of the entrance to the factory.

Office of Jeremiah Fink - next to a tesla coil at the back of the office.

The Emporia - a dock with a gondola travelling to the Grand Central Station.
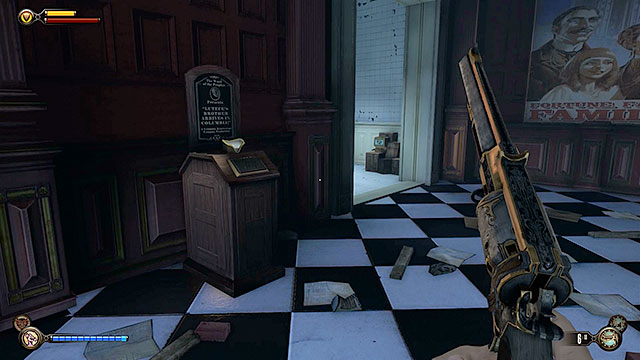
Salty Oyster Bar - a corridor near the washrooms.
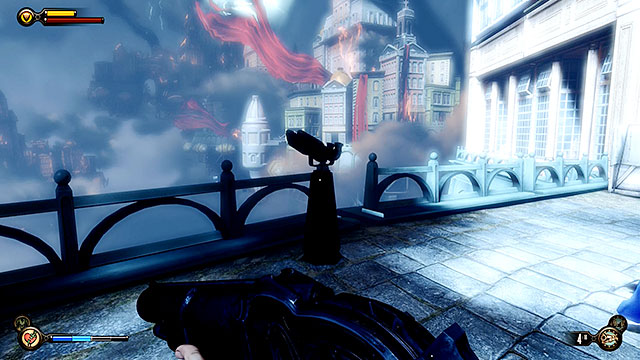
Memorial Gardens - passageway between Comstock's house and the cemetery.

The Atrium - on the first floor, near a room guarded by a Boy of Silence.

Where We Work - a corridor near a workshop.
Warden's Office - a corridor linking the projection room with an office.

Comstock House Roof - a port near a docked barge.
Vigors in BioShock: Infinite work in a similiar way to plasmids from the previous games of the series. Aside from the obvious offensive capabilities vigors can also serve as traps. A very important thing (often missed by the players) is a possibility of combining available vigors to receive very effective and very efficient combos.
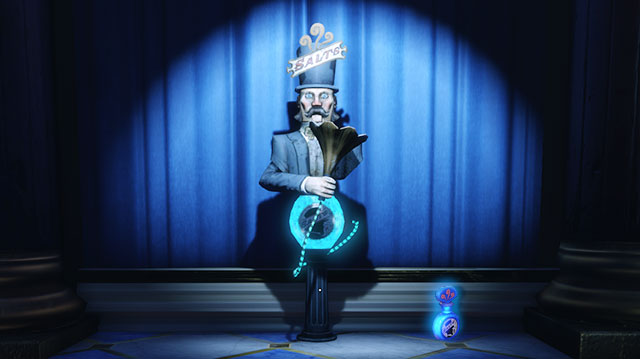
Salt is the fuel for vigors and you can find this resource by collecting blue bottles scattered throughout the entire Columbia or by making purchases from vending machines (only in the early chapters). Thankfully if you'll run out of salt in a combat situation Elizabeth should help you in replenishing your current supplies.
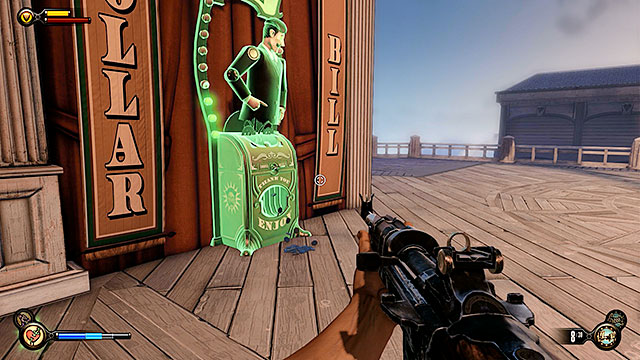
The POSSESSION vigor can be used to "hack" vending machines found in Columbia. Each time a machine has been hacked it will drop a small number of silver eagles, however you won't be able to repeat the hacking process for the second time.
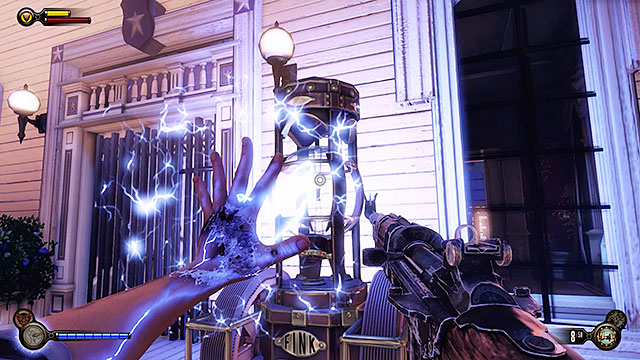
The SHOCK JOCKEY vigor can be used to power some of the inactive generators. It's usually required to complete the current main objective, however this method can also be sometimes used to unlock access to secret rooms.

POSSESSION
Description: Drive enemies into a killing frenzy against their comrades.
Effect 1: Possession can turn machines and people into allies.
Effect 2: Hold and release to create a ghastly trap.
Location where the vigor can be found for the first time: Welcome Center.
SHOCK JOCKEY
Description: Shock enemies with a stream of electricity or a crystaline trap.
Effect 1: Press to send out a stream of electricity.
Effect2: Hold to create a fiery trap.
Location where the vigor can be found for the first time: Hall of Heroes.

MURDER OF CROWS
Description: Unleash a murder of crows that damage and harass your enemies.
Effect 1: Press to send murderous crows.
Effect 2: Press and hold to create a nest trap.
Location where the vigor can be found for the first time: Comstock House Roof.

RETURN TO SENDER
Description: Absorb enemy fire or place an explosive trap that draws power from damage.
Effect 1: Press to create a magnetic shield.
Effect 2: Hold to absorb damage and then release to send it back.
Effect 3: Hold and release to create an explosive trap.
Location where the vigor can be found for the first time: Port Prosperity.

DEVIL'S KISS
Description: Throw fireballs or place them against surfaces to burn unsuspecting enemies.
Effect 1: Press to throw an incendiary grenade.
Effect 2: Hold and release to create a fiery trap.
Location where the vigor can be found for the first time: Raffle Square.

CHARGE
Description: Charge into enemies with a powerful melee attack.
Effect 1: Press to charge towards enemies in order to inflict a serious blow.
Effect 2: Hold and release to charge a more powerful attack.
Location where the vigor can be found for the first time: Finkton Proper.

BUCKING BRONCO
Description: Generate an energy wave or place a trap that lifts enemies into the air.
Effect 1: Press to send enemies flying in the air.
Effect 2: Hold and release to create an explosive trap.
Location where the vigor can be found for the first time: Hall of Heroes.

UNDERTOW
Description: Pull or throw enemies with a watery tentacle.
Effect 1: Press to wash enemies away.
Effect 2: Hold to grab enemies and then release to pull them towards the main character.
Location where the vigor can be found for the first time: Factory.

There are eight possible vigor combinations in BioShock: Infinite and using them can increase their usefuleness in combat. Some of the vigors (like for instance MURDER OF CROWS or SHOCK JOCKEY) may seem like they have identical use with only a different visual effect, but that's wrong. If they use only them they may seem similiar, however if combine them together the final effect will be much more deadly. Vigor combinations are almost a requirement if you're going against many enemies at the same time, because they will allow you to get rid of a lot of hostiles in one swoop. You should also know that testing all of these eight combinations will allow you to unlock the Combination Shock achievement/trophy. Check the table seen below for a complete list.

Combination 1: BUCKING BRONCO + CHARGE
Instruction: Use charge on a target that's currently in the air (as a result of using bucking bronco) in order to inflict major damage and to push the enemy away.
Combination 2: MURDER OF CROWS + DEVIL'S KISS
Instruction: Hit the hungry crows with a devil's kills and you'll create more powerful burning crows!

Combination 3: BUCKING BRONCO + DEVIL'S KISS
Instruction: Send the devil's kiss to the area affected by the bucking bronco's and it will divided into several grenades, injuring more enemies at the same time.

Combination 4: MURDER OF CROWS + SHOCK JOCKEY
Instruction: Hit the hungry crows with a shock jockey and you'll create more powerful electric crows capable of electrifying your enemies.
Combination 5: POSSESSION + SHOCK JOCKEY
Instruction: Hit a possessed enemy with a shock jockey and he'll electrify all other opponents standing next to him.

Combination 6: DEVIL'S KISS + CHARGE
Instruction: Charge at a person set on fire with the devil's kiss and that enemy will explode!

Combination 7: POSSESSION + DEVIL'S KISS
Instruction: Hit a possessed enemy with a devil's kiss and he'll set on fire all other opponents standing next to him.

Combination 8: UNDERTOW + SHOCK JOCKEY
Instruction: Enemies soaked down with undertow receive more damage from shock jockey and the electric current can also affect other nearby opponents.
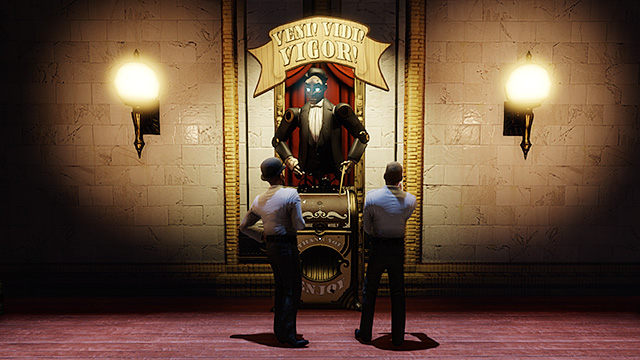
Vigor upgrades can be purchased by interacting with Veni! Vidi! Vigor! vending machines found throughout the entire Columbia. Some of the upgrades are available in all the machines and some can only be obtained in certain locations. A complete list of upgrades, along with their costs and location info, is in a table seen below.

POSSESSION AID
Description: Adds ability to possess humans who suicide when the effect expires.
Location where the upgrade can be bought: Raffle Square.
POSSESSION FOR LESS
Description: Decreases the Salts necessary to use Possession.
Location where the upgrade can be bought: Hall of Heroes Gift Shop.
Price:
$50
Price:
$1653

SHOCK CHAIN AID
Description: Adds ability to chain lightning strikes from one enemy to others.
Location where the upgrade can be bought: Factory.
SHOCK DURATION AID
Description: Increases stun duration.
Location where the upgrade can be bought: Downtown Emporia.
Price:
$1265
Price:
$575

CROW TROP AID
Description: Causes the corpses of Murder of Crows victims to become crow traps.
Location where the upgrade can be bought: Monument Island Gate.
CROWS BOOST
Description: Increases stun duration.
Location where the upgrade can be bought: Factory.
Price:
$1485
Price:
$545

SENDER AID
Description: Adds ability to absorb and collect incoming ammunition.
Location where the upgrade can be bought: Downtown Emporia.
SEND FOR LESS
Description: Increases shield duration (press) and decreases Salts cost (hold).
Location where the upgrade can be bought: Downtown Emporia.
Price:
$1287
Price:
$898

DEVIL'S KISS AID
Description: Adds mini clusters for greater area of effect range and damage.
Location where the upgrade can be bought: Monument Island Gate.
DEVIL'S KISS BOOST
Description: Increases damage.
Location where the upgrade can be bought: Finkton Docks.
Price:
$1241
Price:
$666
CHARGE AID
Description: Adds brief invulnerability on attack and recharges shield.
Location where the upgrade can be bought: Factory and later.
CHARGE BOOST
Description: Adds explosive damage.
Location where the upgrade can be bought: Downtown Emporia.
Price:
$1614
Price:
$421

BRONCO AID
Description: Adds ability to chain floating effect from one enemy to others.
Location where the upgrade can be bought: Finkton Docks.
BRONCO BOOST
Description: Increases duration of the enemy's float time (2x).
Location where the upgrade can be bought: Factory.
Price:
$777
Price:
$421

UNDERTOW AID
Description: Increases number of enemies you can pull at one time.
Location where the upgrade can be bought: Emporia.
UNDERTOW BOOST
Description: Increases effective range (2x).
Location where the upgrade can be bought: Downtown Emporia.
Price:
$306
Price:
$1143
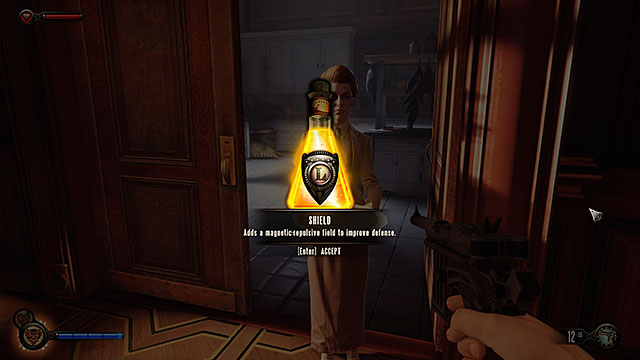
Infusions (they're also called essences) are used to improve the main character's primary statistics: health, shield and salts. The first infusion you'll receive is called shield. It won't be an upgrade, because you will receive a basic shield itself (you'll get it from Rosalind Lutece after reaching The Blue Ribbon Restaurant in chapter 4).
The shield mentioned above works like an electromagnetic barrier. It absorbs some of the damage and it eventually breaks. Once this occurs the shield will need a few moments of peace to regenerate itself. The time and speed of shield's regeneration are based on the difficulty level:
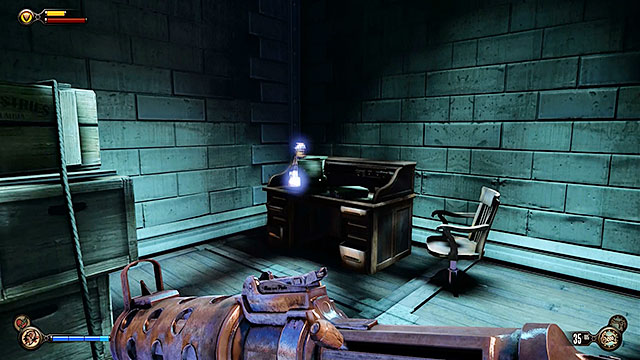
Each infusion should be considered as "three bonuses in once". Once you've taken the essence you will be allowed to improve one of the statistics (up to ten points). Sadly you'll find only 24 infusions throughout the course of the entire game and this means you won't be allowed to fully upgrade all of your statistics. You must plan your character development right from the start.

If you have a collector's edition or if you've pre-ordered BioShock: Infinite, then you will be given an opportunity to receive five additional infusions at the beginning of the game. The essences (much like gear) will be waiting for you in the Blue Ribbon Restaurant (chapter 4).
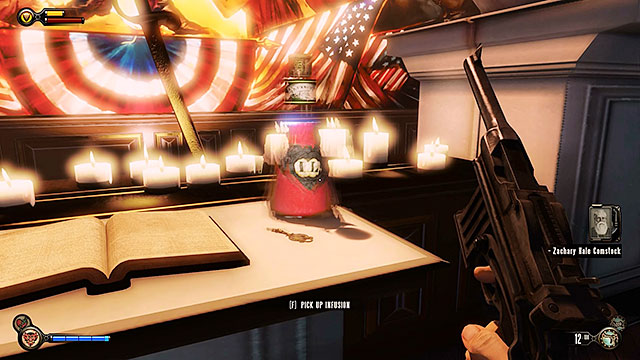
The Fraternal Order of the Raven - on the chapel's altar (where the sermon was taking place).
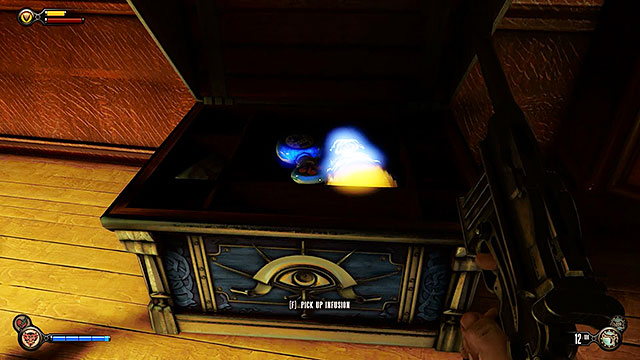
Lansdowne Residence - inside a chest found in the bedroom. The chest can only be opened by completing a side mission.
Gondola to Monument Island - on a lower level of the maintenance tower, inside a room located beneath the tower's archway.

Monument Island - behind the desk in a room with the Siphon.

Park Ticketing - inside the ticket room (you can collect this item after you've separated with Elizabeth).

Soldier's Field Greeting Pavilion - on a desk in the security office you can gain access to only by breaking in.

Soldier's Field - inside a secret cellar of the Fellow Traveller bar. The main character can access this area by completing the only side mission of the 8th chapter.
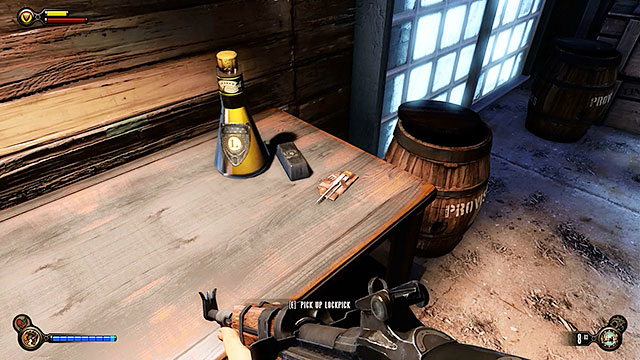
Hall of Heroes - a side room visited along the way to the exhibit.

The Courtyard - inside a small warehouse on the ground floor (you can explore it after the battle with Slate's men).
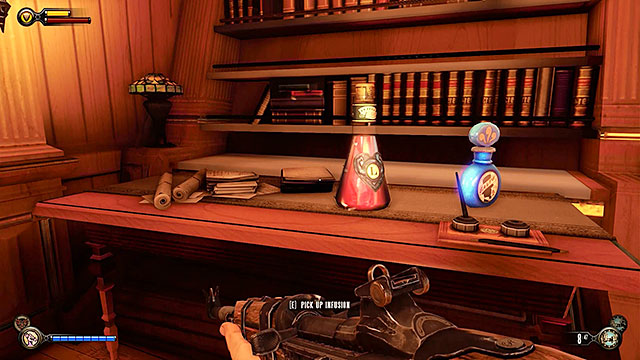
Soldier's Field - on board of the First Lady airship.
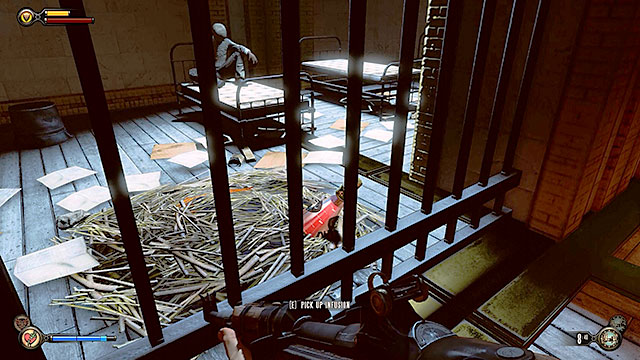
Fort Franklin - behind the bars in a prison cell located under the sky-line.

Worker Induction Center - inside a smaller office near the main hall.
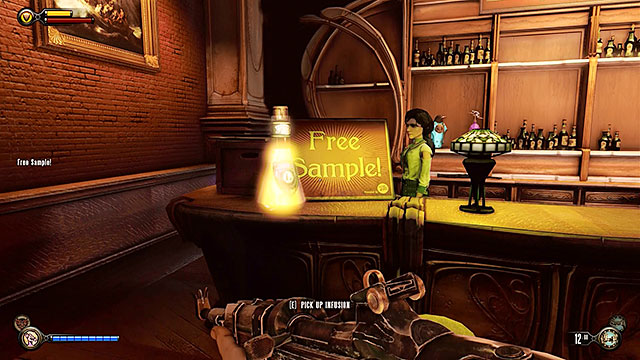
The Good Time Club - on the bar's counter, opposite the stage and behind a Dollar Bill vending machine.
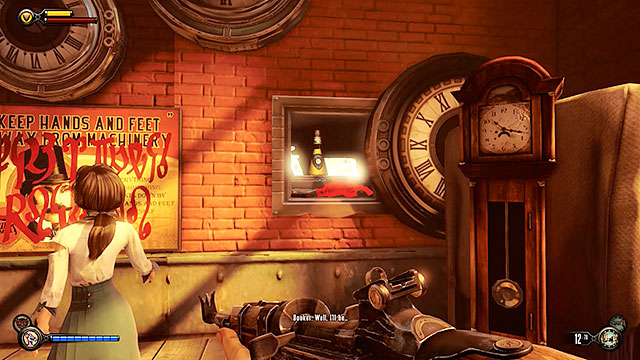
Plaza of Zeal - inside the watchmaker's store. You need to complete a side mission to gain access to this item.

Shantytown - in an alley to the left of the elevator.
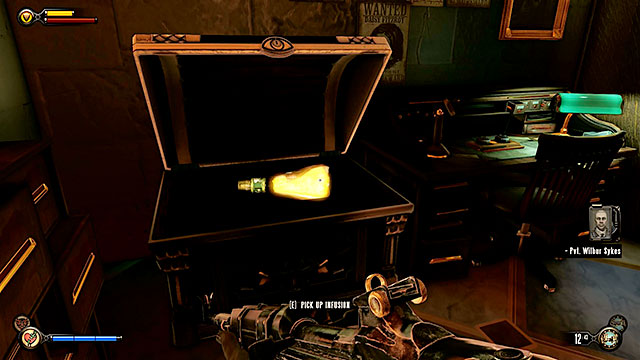
The Bull House - in a chest in an office on the first floor (optional mission).

The Bull House - inside an armory on the first floor.
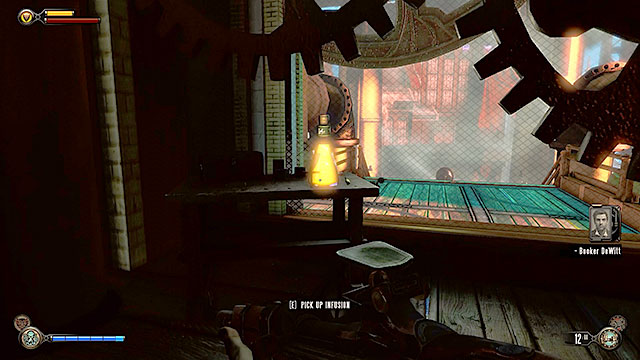
Office of Jeremiah Fink - inside a room to the left, opposite Fink's dead body.
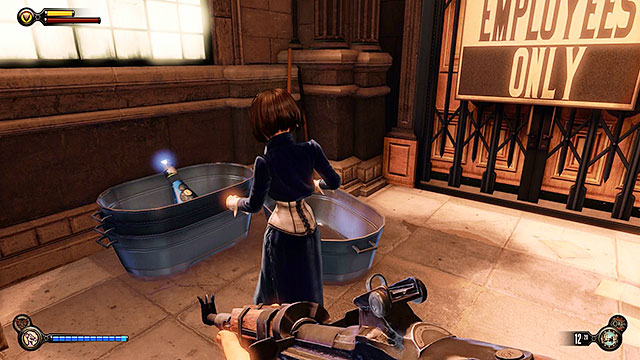
Grand Central Station - inside a locked room to the left of the entrance to the station.
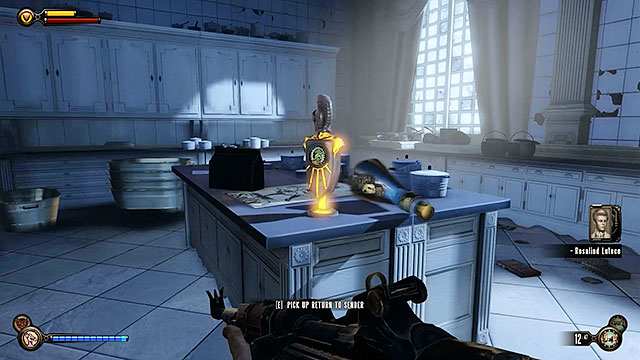
Salty Oyster Bar - in a locked room behind the bar (it requires Voxophone #56).

Market District - inside a bedroom on the first floor of Lutece Lab.

Market District - in a locked Wilson Bros. & Company liquor store.
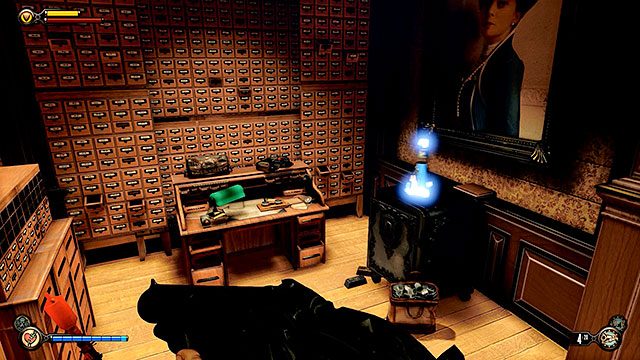
Financial District - inside a secret room at the end of the corridor to the left of the vault (Vox cipher is required).

The Operating Theatre - inside a closed office located above the operating room.
Gear in BioShock Infinite serves as skills that may be used to specialize Booker in some fields or to balance his offensive and defensive capabilities. By choosing your gear wisely you can create an entirely new "character class", much like in RPG games. New gear can be found in nicely wrapped boxes and most of them are hidden in less obvious and/or less accessible areas. As a result the only way to make sure you've collected the entire gear throughout the course of the game is to explore each dark corner and to gain access to all areas hidden behind locked doors.
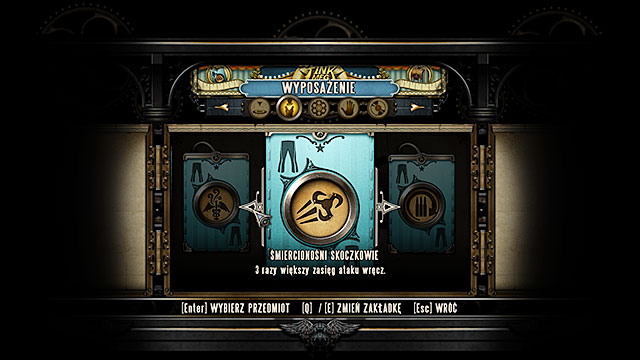
The basic version of the game contains 43 gear elements, however only 38 of them can be obtained during a single playthrough. Gear can always be found in predefined places, however the content of the box is always generated randomly. An important thing to know is that the game performs the draw when you're opening the box and you can use this mechanic to your advantage by returning to the last checkpoint after receiving an element you didn't find useful (more on this later in this chapter).
There are four types of gear: hats (head protection), shirts (torso protection), pants (leg protection) and boots (feet protection). You can change your current gear at any point of the game (assuming you have other objects of the same type) by choosing the GEAR option from the player's menu.
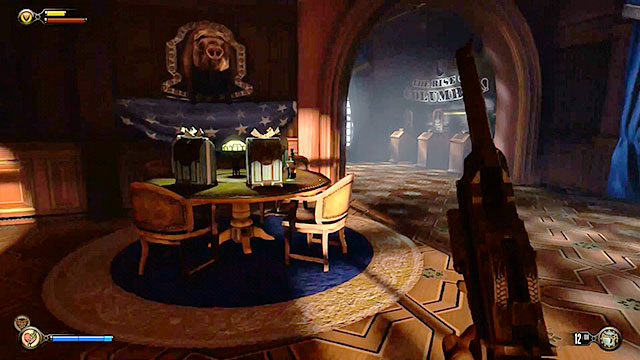
If you've acquired a special edition of the game (a pre-order or one of the collector's editions), then you will receive up to 10 additional gear elements and they can be found on the tables in the Blue Ribbon Restaurant visited at the beginning of chapter 4.
All available gear elements have been described on the List of gear elements page.
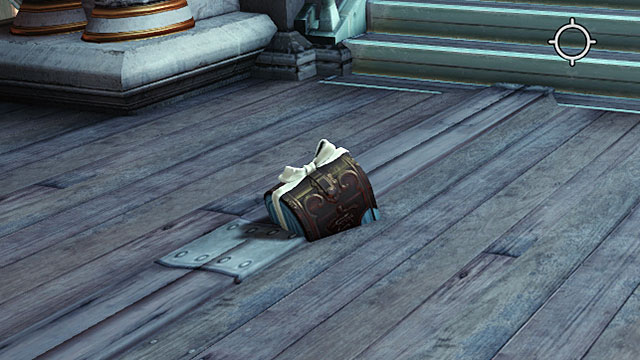
Aside from the predefined locations mentioned above you can also find new gear next to each Handyman you've managed to kill. Once you've defeated such an opponent examine his body closely, especially since the loot can sometimes "blend into" the level's geometry or can be missed easily if the body is in a darker area. If you can't find any gear next to Handyman's body, then it means that it may have disappeared from the map or is stuck in a wall or some other obstacle. The only way to resolve such a problem is to reload the last checkpoint and repeat the duel with the Handyman.
Despite the fact that gear is usually randomized there are five objects that will always be the same and will be always waiting to picked up in the same places. It happens probably because the authors of the game have decided that this should be an absolute minimum for you as the player should have. Here's a list of these objects along with the info on where they can be found:

BURNING HALO
Location: The Fraternal Order of the Raven - Aviary, next to a broken down vending machine near the exit from the building (Chapter 4, Gear #2).

SPARE THE ROD
Location: Jeremiah Fink's Office, inside a room to the left of the elevator, near the exit from the factory (Chapter 27, Gear #23).

SPECTRAL SIDEKICK
Location: Financial District, inside a steel basin near the entrance to the Bank of the Prophet's vault (Chapter 31, Gear #34).

HEALTH FOR SALTS
Location: Where We Work, on a table next to a pillar in the Comstock's warehouse (Chapter 33, Gear #35).

RISING BLOODLUST
Location: Warden's Office, on a desk between the staircase and the elevator in Comstock's house (Chapter 33, Gear #36).

You can use the mechanic responsible for generating random gear to your advantage. Once you've advanced to chapter 7 you will have a chance to gather 2 elements of your clothing near the entrance to the Arcade. There is a room near the washrooms reserved for "colored" members of Columbia. One of the boxes with gear is hidden inside it. As for the other box (depending on the decisions made during the lottery), you will receive it from a couple encountered around the corner or from Flambeau near the entrance to the Arcade. There is a checkpoint in the corridor in front of the Arcade and if you don't like what you've found/received go back to the previous checkpoint before activating this new one. You can repeat this pattern as many times as you want and you should eventually obtain gear elements that you were looking for.
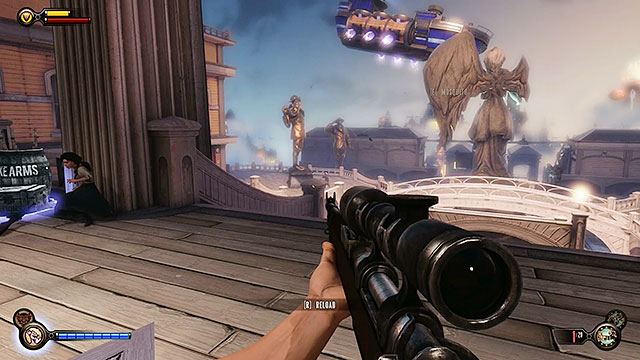
There is a glitch in the game and you can use it to clone some of the items collected in chapter 12 (Soldier's Field). It's not fair to the game to use this exploit , however the final decision is up to you. If you want to try this method, then you should ignore enemy units occupying the square after leaving the Hall of Heroes. Run past them, heading towards the gondola dock. Use the Sky-Line to get to Patriot's Pride Pavilion.

Use the elevator travelling between the pavilion and the promenade and then go to the Toy Soldiers store located near a carousel.

Once you've entered the store use the Shock Jockey vigor on a generator located in the middle of the room, gaining access to the back area. There's a box with a gear element behind the door. Pick it up and return to the Hall of Heroes (head inside). Replenish your salt supplies using a nearby distributor and then head back to the promenade to repeat all the actions described above. Doing this will allow you to collect all 38 gear elements, however of course it will be time consuming. This method won't give you the guaranteed gear mentioned earlier, but the rest can be collected. If you're persistent you should really try, because you'll be able to make your character strong early in the campaign and this will be especially useful if you've chosen to play on the '1999' difficulty setting.

Hats are used primarily to support your melee attacks by charging them with the effects of some of the vigors. They should also offer additional protection and make you faster in combat.

AMMO CAP
Effects: When shooting, empty clips have 40% chance of auto filling without reload.

BURNING HALO
Effects: 70% chance that a melee target is set ablaze. Victim takes 300 damage over 4 seconds.

ELECTRIC PUNCH (DLC)
Effects: 70% chance that a melee target is stunned. Victim is vulnerable for 4 seconds.
Availability: Only for the Early Bird season pass owners.

ELECTRIC TOUCH
Effects: 50% chance that a melee target is stunned. Victim is vulnerable for 3 seconds.

EXTRA! EXTRA! (DLC)
Effects: When found, Voxophones provide Silver Eagles.
Availability: Only for the Collector's Edition owners.
GEAR HEAD
Effects: Become harder to detect. Affects Automated Turrets, Zeppelins, and Motorized Patriots.

HILL RUNNER'S HAT
Effects: Shield breaking increases movement speed. 50% faster for 5 seconds.

QUICK HANDED
Effects: Decrease weapon reload times by 30%.

RISING BLOODLUST
Effects: After each successful kill (up to 5), weapon damage is increased. Resets 10 seconds after last kill.

SHELETRED LIFE
Effects: Grants brief invulnerability when gaining health from snacks and health kits.
SPARE THE ROD
Effects: 30% chance melee target becomes Possessed. Possessed victim is an ally for a few seconds.

STORM
Effects: Killing with Devil's Kiss, Shock Jockey, or Bucking Bronco causes effects to chain to nearby enemies.

THROTTLE CONTROL
Effects: Increased throttle and braking control on Sky-Lines.
Shirts are used mostly to support the effectiveness of your firearms and they can also assist in surviving in the bigger battles. Some of the shirts also provide passive "auras" that inflict damage to the attacking opponents.

AMMO ADVANTAGE (DLC)
Effects: Increases clip size for all weapons by 75%.
Availability: Only for the Early Bird season pass owners.

BLOOD TO SALT
Effects: Enemies provide Salts upon death 40% of the time.

BULLET BOON
Effects: Increases clip size for all weapons by 50%.

COAT OF HARMS
Effects: Enemies become easier to melee execute.

DROP CLOTH
Effects: Landing off a Sky-Line increases movement speed. 50% faster for 5 seconds.

EXECUTIONER
Effects: Melee strikes against staggered enemies add 60% chance to critical hit. Victims take 25% more damage when struck.

NITRO VEST
Effects: Increase radius of explosive weapon splash damage.

PYROMANIAC
Effects: When struck, 50% chance to burn nearby enemies. Victims take 400 damage over 3 seconds.

SCAVENGER'S VEST
Effects: Enemies provide ammo upon death 40% of the time.

SHOCK JACKET
Effects: When struck, 50% chance to shock nearby enemies. Victims take 50 damage, vulnerable for 2 seconds.

SKY-LINE ACCURACY
Effects: Increase weapon accuracy on Sky-Lines.

SUGAR RUSH (DLC)
Effects: After eating a snack, move 50% faster for 3 seconds.
Availability: Can be won in the Industrial Revolution mini-game (pre-order).

WINTER SHIELD
Effects: When dismounting from a Sky-Line, applies a shield that can absorb up to 50% of your maximum health in damage.

Boot upgrades offer various effects than can increase both your offensive as well as defensive capabilities. Some of these effects may radically influence the player's effectiveness in dealing with large groups of enemies.

BETRAYER (DLC)
Effects: Killing a Possessed human causes them to explode. Nearby enemies take 360 damage over 5 seconds.
Availability: Only for the Collector's Edition owners.

DEATH FROM ABOVE
Effects: Increase weapon damage by 30% on Sky-Lines.

EAGLE STRIKE (DLC)
Effects: Increase weapon damage by 50% on Sky-Lines.
Availability: Only for the Early Bird season pass owners.

FIT AS A FIDDLE
Effects: When revived, recover full health.

FLEET FEET (DLC)
Effects: When evading, movement speeds are increased. Affects side strafing and backpedaling.
Availability: Can be won in the Industrial Revolution mini-game (pre-order).

HANDYMAN NEMESIS (DLC)
Effects: Increases damage against Handymen by 50%.
Availability: Can be won in the Industrial Revolution mini-game (pre-order).

KILL TO LIVE
Effects: Melee executions have 65% chance to give health.

NEWTON'S LAW
Effects: Landing off a Sky-Line knocks back nearby enemies.

NOR'EASTER
Effects: Killing an enemy from a Sky-Line gives 50% chance of brief invulnerability.

OVERKILL
Effects: Killing with excessive damage stuns nearby enemies.

TUNNEL VISION
Effects: Aiming increases damage by 25%. Hip firing reduces damage by 25%.

VAMPIRE'S EMBRACE
Effects: Melee kills give health.
Pants are used mostly to increase the player's offensive capabilities, especially in direct close combat. Most of the effects work well with an aggressive style of play that often puts the main character on a brink of death.

ANGRY STOMPERS
Effects: When extremely low on health, deal 2x damage.

BRITTLE-SKINNED
Effects: Melee targets briefly vulnerable. Victim takes 2x damage for 5 seconds.

BULL RUSH (DLC)
Effects: Melee targets are knocked back.
Availability: Only for the Collector's Edition owners.

DEADLY LUNGERS
Effects: Melee strike range increased by 3x.

FIRE BIRD
Effects: Jumping from a Sky-Line has a 100% chance to burn nearby enemies. Victims take 400 damage over 3 seconds.

GHOST POSSE
Effects: Killing with a Vigor trap has a 50% chance to cause the enemy gun to become a ghostly ally for a few seconds.

GHOST SOLDIER (DLC)
Effects: Killing with a Vigor trap has a 70% chance to cause the enemy gun to become a ghostly ally for a few seconds.
Availability: Only for the Early Bird season pass owners.

HEAD MASTER
Effects: Increases critical hit damage by 50%.

HEALTH FOR SALTS
Effects: When out of Salts, you will use health to cast Vigors.

LAST MAN STANDING
Effects: When very low on health, killing an enemy gives health.

SKY-LINE RELOADER
Effects: Jumping on or off a Sky-Line reloads weapon.

SPECTRAL SIDEKICK
Effects: Dropping a weapon creates a ghostly ally for a few seconds.

URGENT CARE
Effects: Decrease shield recharge delay by 1 second. Increase shield recharge rate by 2x.

The Fraternal Order of the Raven - on the top floor of the building. You must find a secret room hidden behind a book cabinet in the projection room.

The Fraternal Order of the Raven - in the aviary, next to a broken down vending machine.

Gondola to Monument Island - behind a dresser found next to the bed in the abandoned apartment guarded by the police.

The Arcade - on a table inside a room designated for employees only. You can visit this room on your way to the arcade.

The Arcade - received from a young couple near the "Colored & Irish" washrooms. You will meet the couple only if you didn't throw a ball at them in chapter 3.

Patriot's Pride Pavilion - on a desk in a locked office located to the left of the elevator.
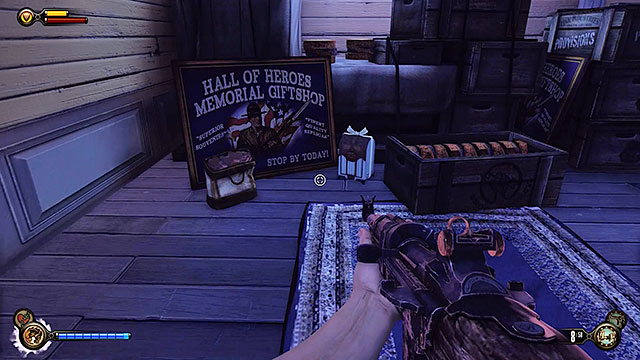
Soldier's Field - behind a closed door in the "employees only" section of the ticket hall's ground floor.

Wounded Knee Exhibit - inside a room reserved only for the employees.

Peking Exhibit - inside a room reserved only for the employees.

Hall of Heroes Plaza - behind the stairs of the balcony located above the plaza (you can get here only by using the Shock Jockey vigor).

Soldier's Field - at the back of the toy store (you can get here only by using the Shock Jockey vigor).

Soldier's Field - inside a hotel room (you can get here only by using the Shock Jockey vigor).
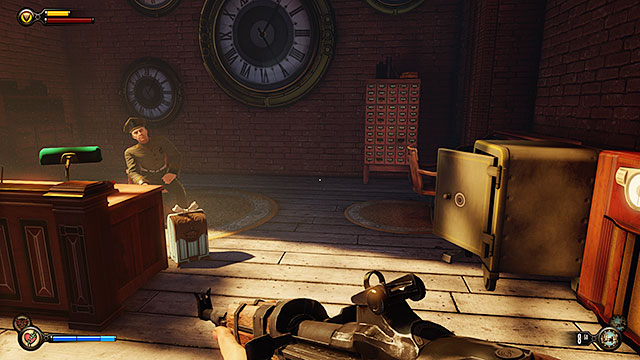
Finkton Docks - inside the building reserved for employees, near the tunnel leading to Beggar's Wharf.
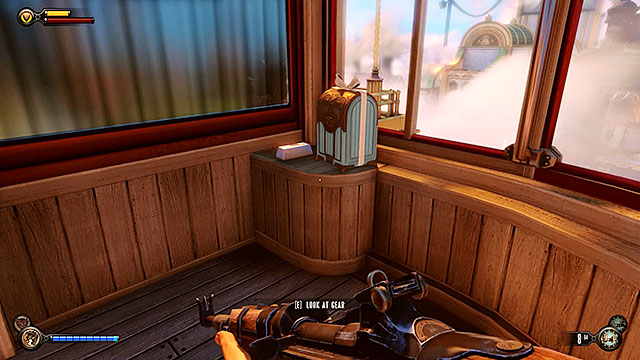
Worker Induction Center - inside a closed cabin of the gondola.

Plaza of Zeal - under the sign of the gunsmith's workshop.

Plaza of Zeal - near the Handyman's corpse. You can obtain this item after you've defeated the Handyman in a duel.

The Good Time Club - inside a study with a fireplace, opposite the stage on the first floor.
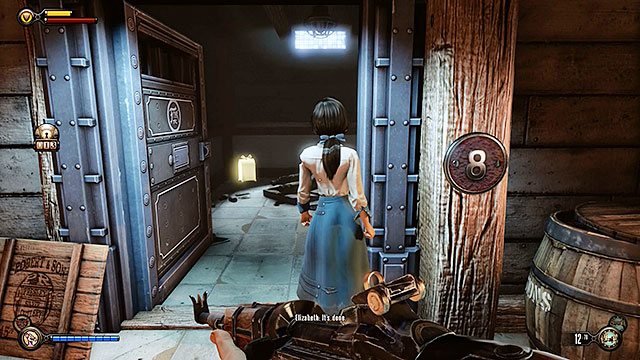
The Good Time Club - cell number 8 located in a prison behind the stage.

Shantytown - in front of the entrance to The Bull Yard.

The Bull House - inside an armory on the first floor.

The Factory - opposite the elevator travelling to upper floors.

Office of Jeremiah Fink - inside a room to the left of the elevator (you can visit before leaving the factory).
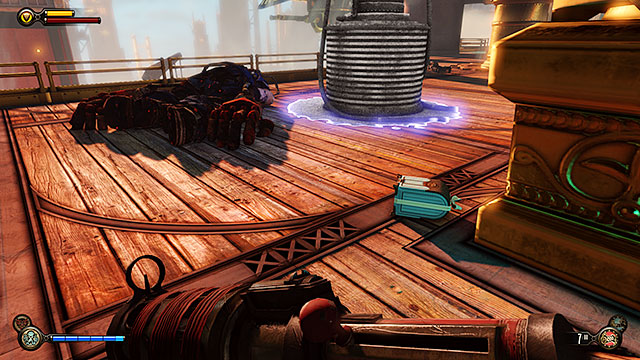
Office of Jeremiah Fink - next to Handyman's corpse.

Grand Central Station - on a scaffolding located near the entrance to the station.

Salty Oyster Bar - under one of the bar's tables.

Founder's Books - on a counter found in the middle of the closed books store.
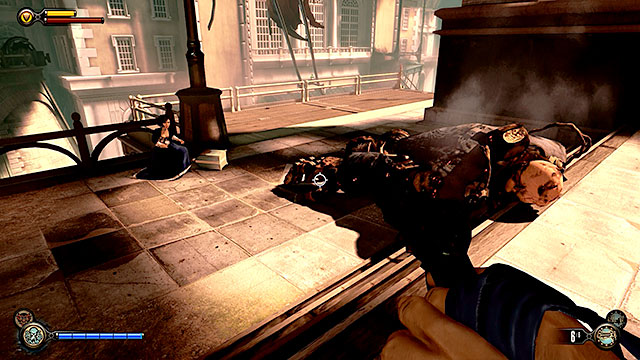
Financial District - left by a slain Handyman in the plaza in front of the Bank of the Prophet.
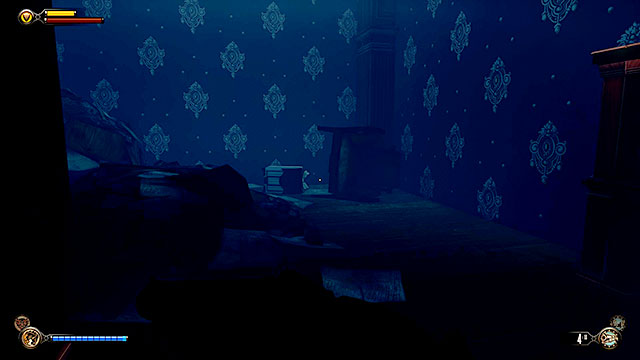
Harmony Lane - inside a locked room in the left side of the lane.
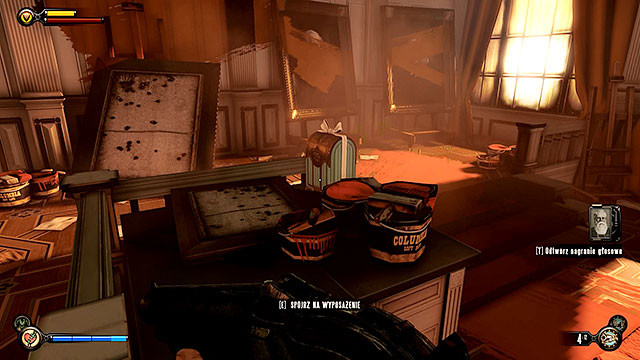
Downtown Emporia - on a table with some paint, inside a closed store with the paintings.

Memorial Gardens - inside a locked tomb located to the right of Lady Comstock's crypt. The only way to gain access to this tomb is to light two torches found in front of it.

Market District - inside a locked store located to the right of the Lutece Lab.

Financial District - inside an archive in the left wing of the Bank of the Prophet.

Financial District - in a steel basin found after entering the vault.

Where We Work - on a table in the warehouse, behind one of the pillars.

Warden's Office - on a desk found opposite the staircase.

The Hand of the Prophet - in the Security Area on the second deck of the hangar.
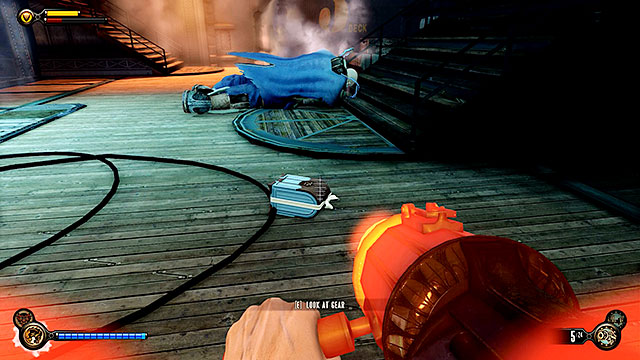
The Hand of the Prophet - left by the slain Handyman in the engineering deck.

Lockpick (1 item)
Locksmith's Set (2 items)
Locksmith's Bag (3 items)

Lockpicks in BioShock: Infinite come in three different forms displayed above. You can carry up to 30 lockpicks and you can check the current number of these items in your inventory by pausing the game. The lockpick counter also appears on the screen if you've collected a new lockpick.

Lockpicks are used to open locked doors (they usually lead to rooms with valuable items) and safes (they usually contain a lot of money). You will be dealing with a serious deficiency of these items in the early stages of the game and that's why a separate chapter of this guide contains a detailed info on all lockpicks you can find in chapters 8-12.

Once you've advanced further into the game you'll notice that lockpicks are being sold in the Dollar Bill machines and as a result not having enough of them won't be a problem anymore. Still, locations of all lockpicks have been mentioned in the game's walkthrough.
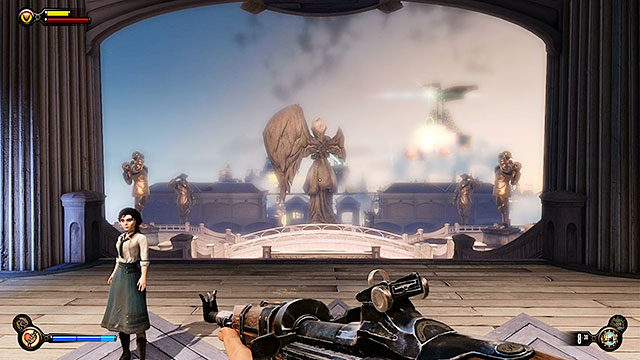
There is a glitch in the game and you can use it to duplicate some of the items collected in chapter 12 (Soldier's Field). It's not fair to the game to use this exploit to obtain a maximum number of lockpicks early in the game, however the final decision is up to you. If you want to try this method, then you make a stop between the Soldier's Field and the Hall of Heroes (after finding the Shock Jockey vigor).
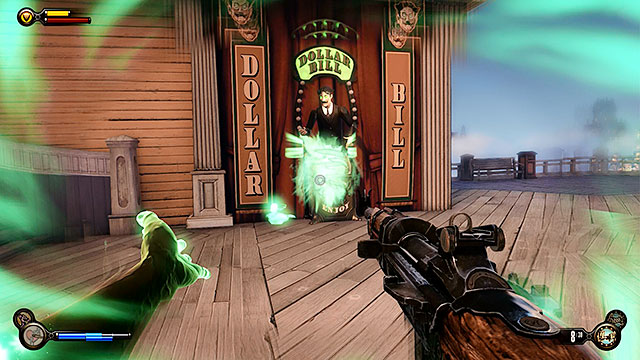
Exit the Hall of Heroes and use the Possession vigor on a Dollar Bill vending machine found at the plaza. Gather all the money dropped by the vending machine.
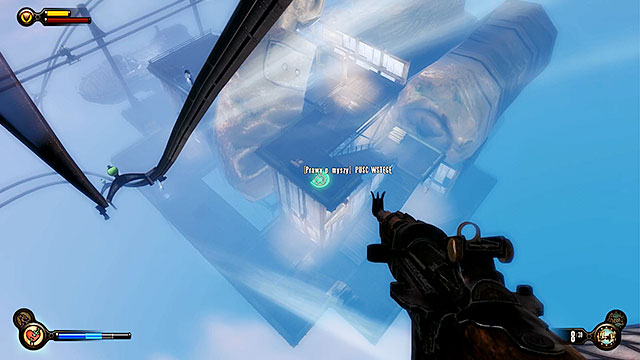
Proceed to the gondola port and use the sky-line to travel a lower platform. Drop from the sky-line after you've reached the area seen on the screen above (it'll save you some time).

You should notice a lockpick under the stairs where you've dropped from the sky-line.
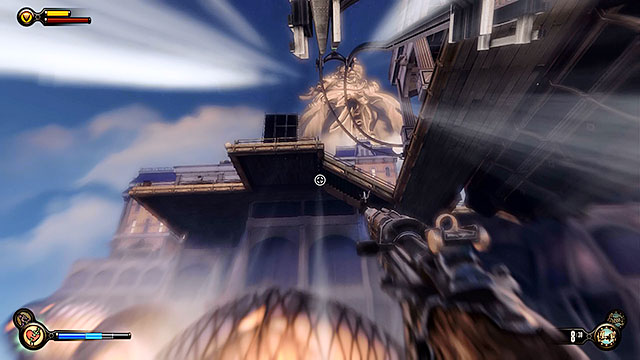
Pick up this lockpick, return to the sky-line and head back to the Hall of Heroes.
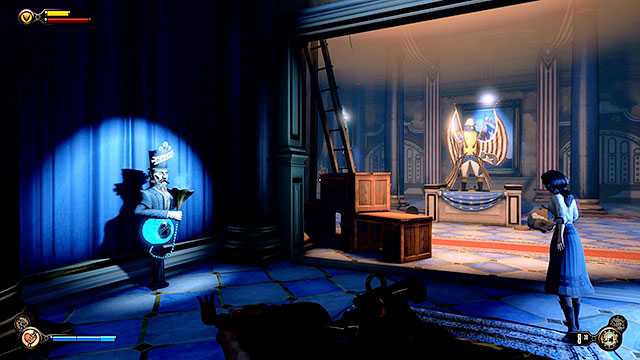
Enter the Hall of Heroes and interact with an automaton used to purchase salts in order to replenish your supplies. You may now return to the Hall of Heroes and repeat all the actions described above. Ignore possessing the Dolar Bill machine and regenerating salts if you're only interested in gathering more lockpicks.

Soldier's Field Greeting Pavilion - under the door leading to the security office.

Soldier's Field Greeting Pavilion - on a desk behind the safe in the security office (you must break into this room).
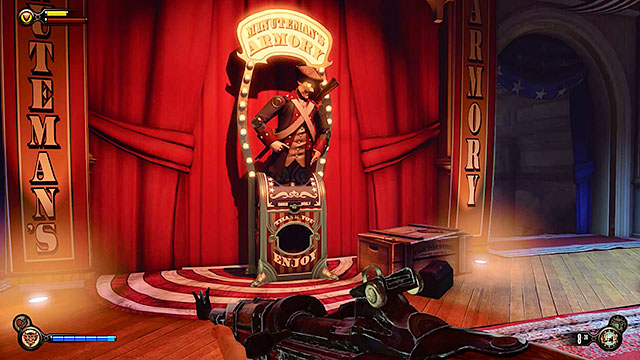
Soldier's Field Greeting Pavilion - next to the Minuteman's Armory vending machine located in a room behind the model of the Soldier's Field.
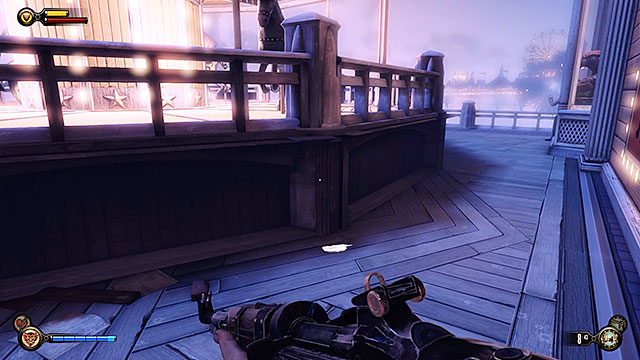
Soldier's Field - behind the stairs, near the carousel.
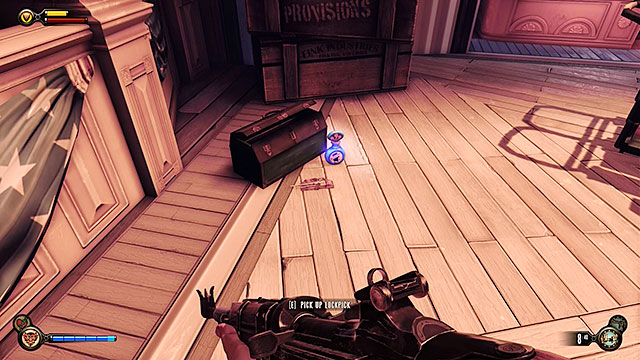
Soldier's Field - on a ground next to a tool box, close to an elevator travelling to Patriot's Pride Pavilion.
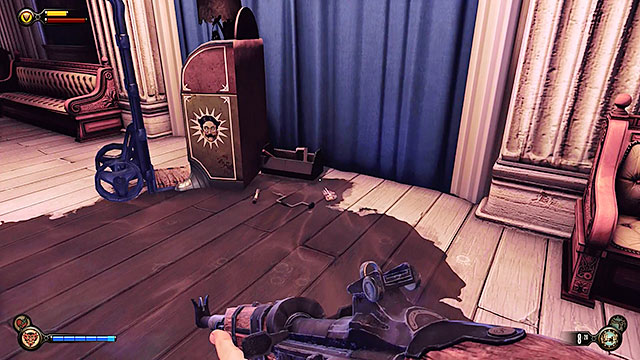
Patriot's Pride Pavilion - next to a broken down vending machine found close to the toilets.

Patriot's Pride Pavilion - inside a toilet located to the left of the broken down vending machine.
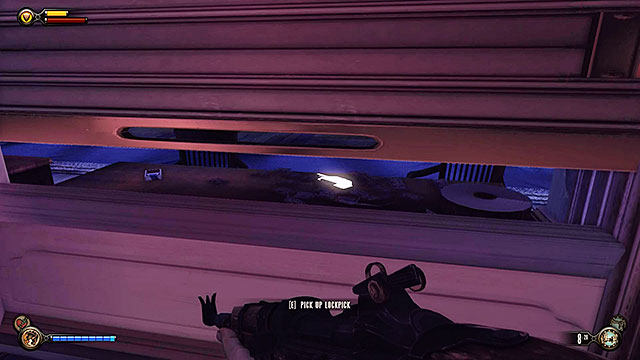
Soldier's Field - behind a blind of the ticket counter.

Soldier's Field - under the Duke and Dimwit machine on the first floor of the ticket hall.
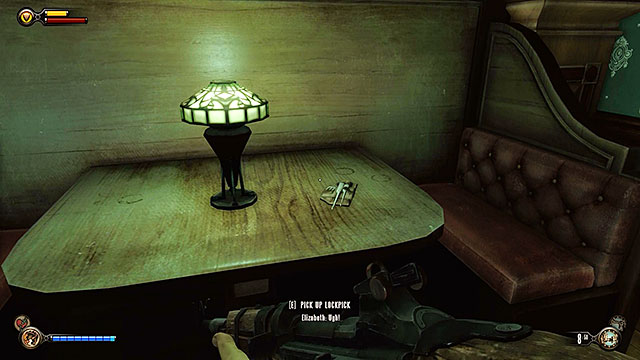
Soldier's Field - on a table inside the Fellow Traveller bar.

Soldier's Field - inside a secret cellar of the Fellow Traveller bar. The main character can access this area by completing the only side mission of the 8th chapter.

Hall of Heroes - under the desk in the ticket office, near the entrance to the building.

Hall of Heroes - in a side room visited along the way to the exhibit.
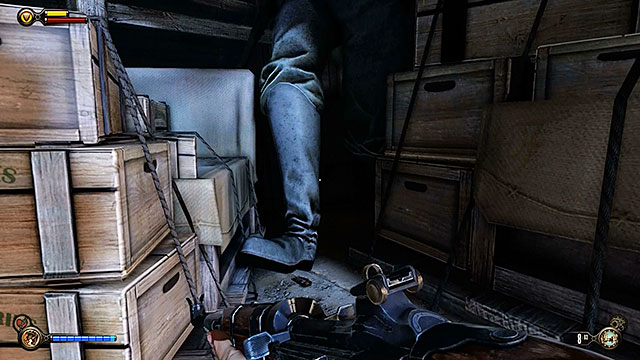
Hall of Heroes - under the statue's feet in a side room visited along the way to the exhibit.
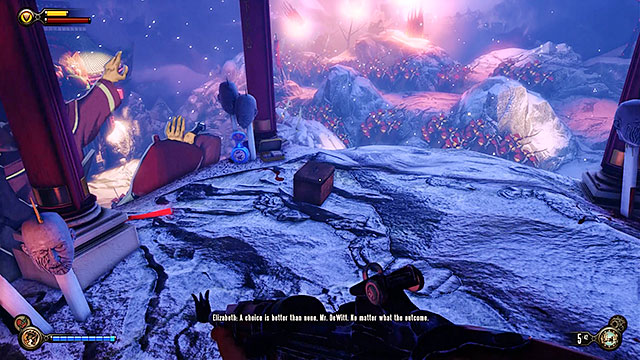
Wounded Knee Exhibit - near the Fireman's corpse in the main part of the exhibit.
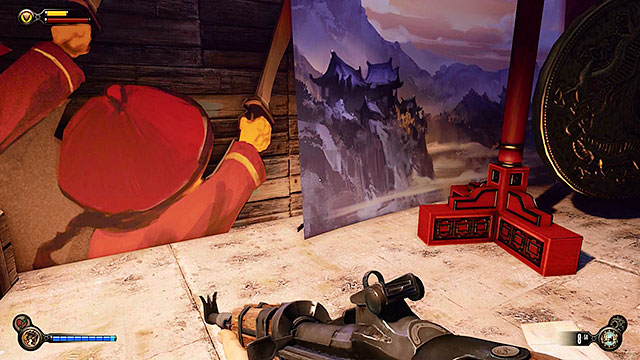
Peking Exhibit - inside a room reserved only for the employees.
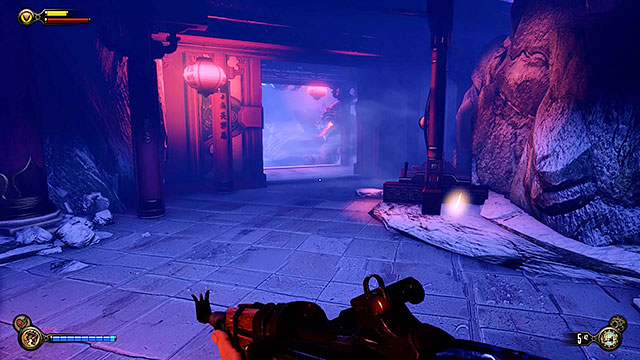
Peking Exhibit - behind a gong in the corridor leading to the main part of the exhibit.

The Courtyard - in a dark corner of a small warehouse on the ground floor (you can explore it after the battle with Slate's men).

Hall of Heroes Plaza - behind the stairs of the balcony located above the plaza (you can get here only by using the Shock Jockey vigor).
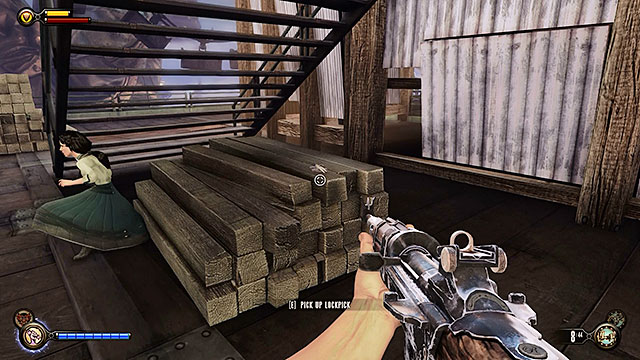
Soldier's Field - under the stairs on the platform between the Hall of Heroes and Patriot's Pride Pavilion.
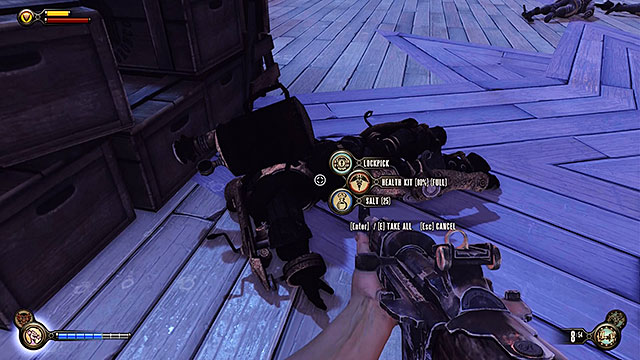
Soldier's Field - near the Fireman's corpse in a square in front of Patriot's Pride Pavilion.
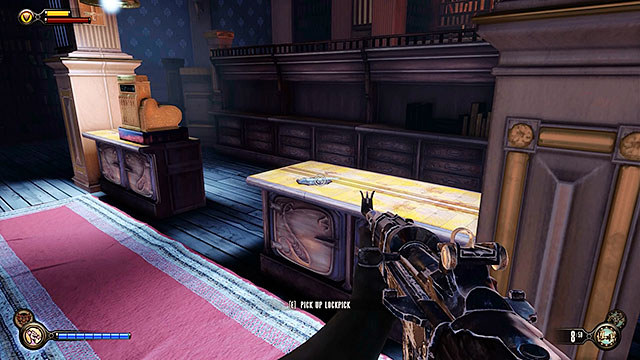
Soldier's Field - inside the books store (you can get here only by using the Shock Jockey vigor).

Soldier's Field - inside a hotel room (you can get here only by using the Shock Jockey vigor).
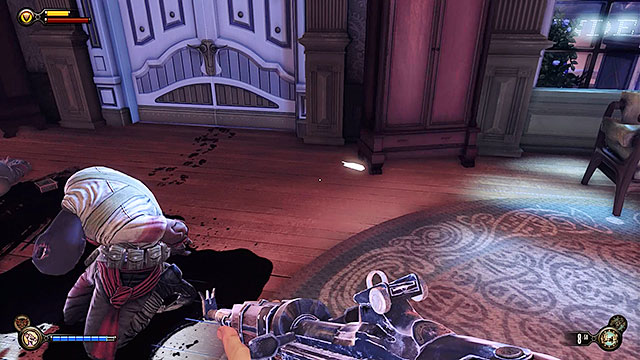
Soldier's Field - inside a hotel room (you can get here only by using the Shock Jockey vigor).
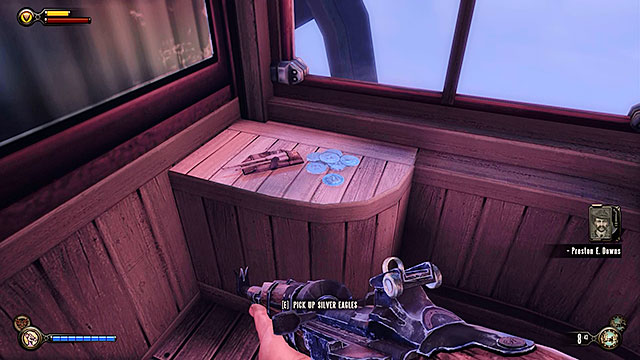
Soldier's Field - inside the cabin of the First Lady airship.
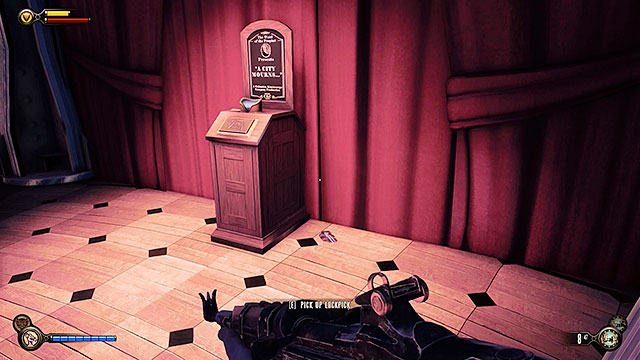
Soldier's Field - next to the kinetoscope at the upper gondola station.

Once you've entered the Soldier's Field Welcome Center turn left and you'll encounter a locked door leading to the security office. You can open this door with one lockpick.
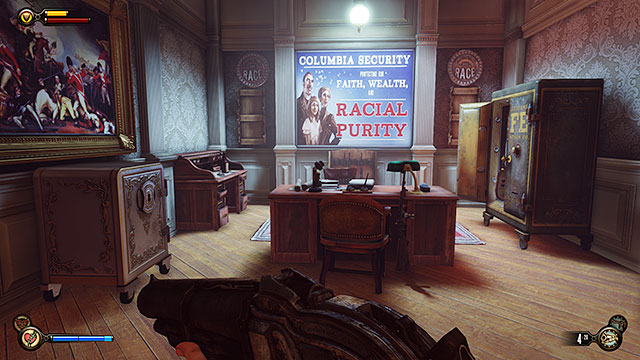
Check the study located on the other side of the door and you'll uncover a locked safe. Unlocking this safe is possible only if you have 5 lockpicks.
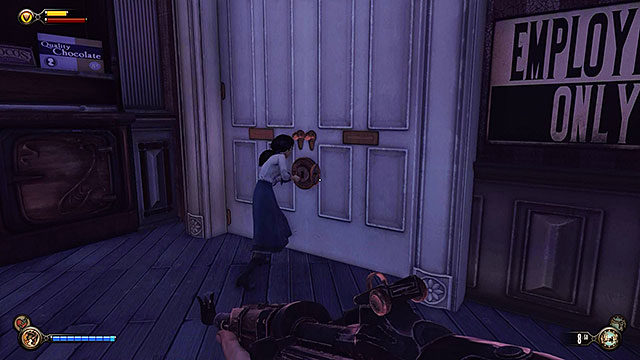
There's a weapons upgrade station at the end of the ticket hall, near a kinetoscope. Locate closed doors here and use 2 lockpicks to open them.
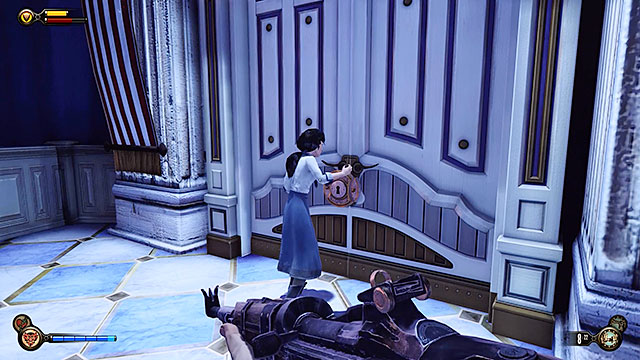
Once you've entered the Patriot's Pride Pavilion you'll come across a hostile construct armed with a Crank Gun. Destroy the automaton and make sure to explore the office marked with the "Employees Only" sign. Opening the door to this office requires only 1 lockpick.
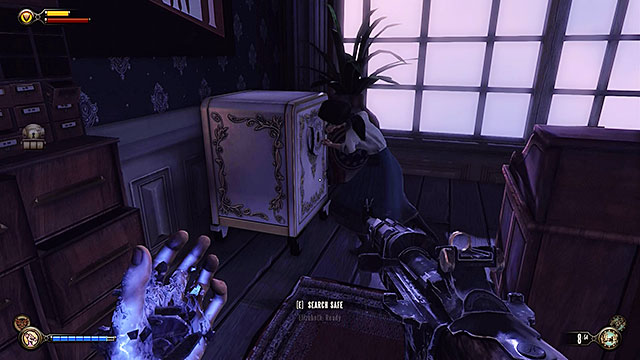
The office you've unlocked contains a safe and in this case you'll need 5 lockpicks.
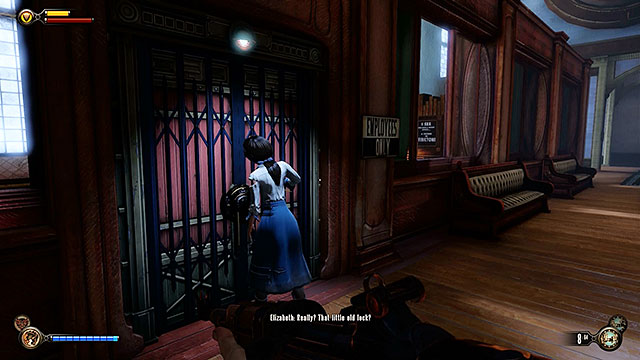
Enter the main hall of the Worker Induction Center and proceed to the left side of the room. Ask Elizabeth to break the lock on a door leading to a side office (she will need 5 lockpicks).
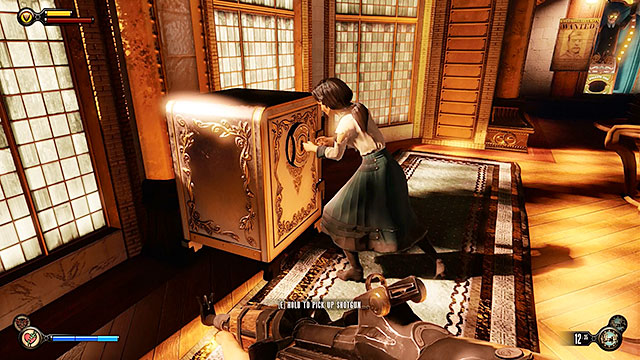
There is a room opposite the elevator on the lower level of the Worker Induction Center. Explore this room to find a safe and open it with 1 lockpick.
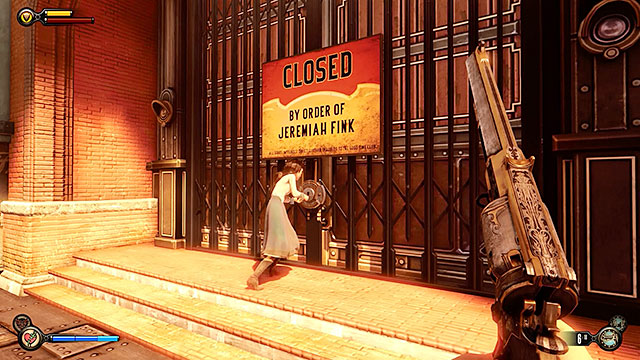
There is a watchmaker's store to the right of the job fair. Breaking in means sacrificing only 1 lockpick.
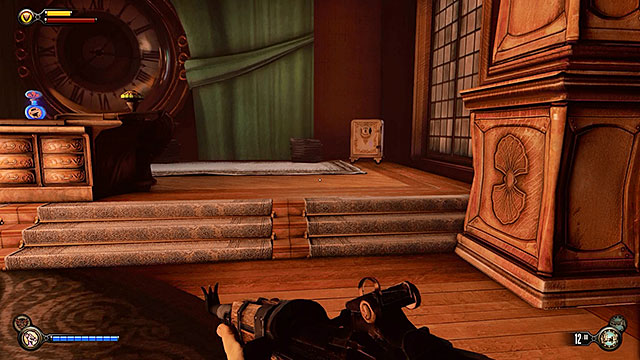
You'll find a study on the first floor of the club. Check one of the corners near a huge clock behind the desk to locate a locked safe. Opening this safe requires 3 lockpicks.

Get to the prison located in the club's underground area. Ask Elizabeth to break into cell number 8 (the lock requires 5 lockpicks).
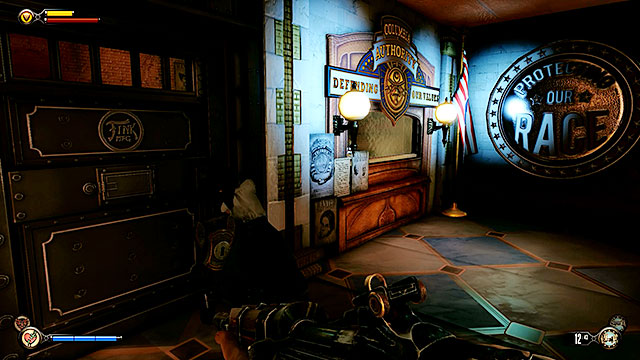
You'll find a locked armory on the left side of the building's first floor. Gaining access to the armory is only possible if you have 5 lockpicks.
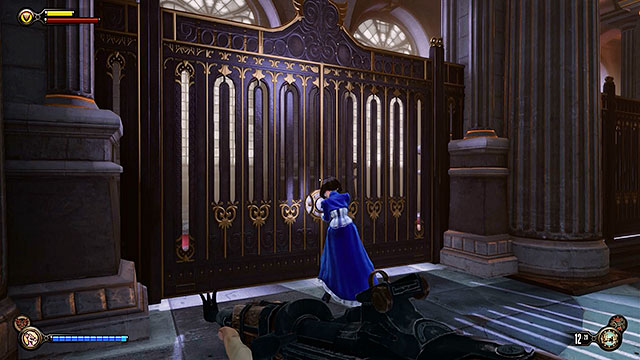
Enter the gondola station and find a locked gate to the left. Ask Elizabeth to break the lock (she will need 5 lockpicks).
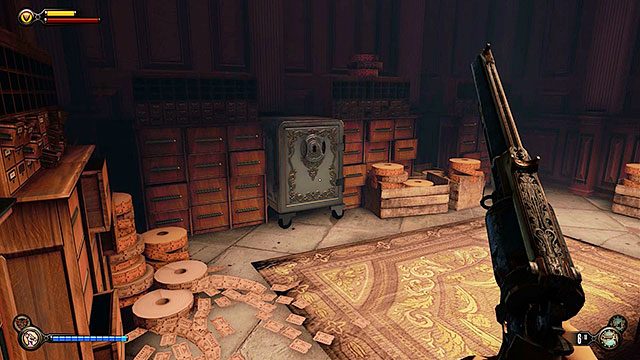
Once you've arrived at the Grand Central Station proceed to the ticket office. Enter the office and locate a safe in the first room (the safe's lock requires 3 lockpicks).
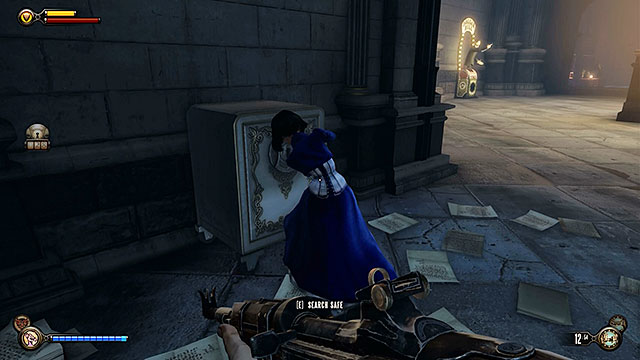
The second ticket office contains another safe and you'll also need 3 lockpicks here.

The only way to gain access to The Salty Oyster bar is by breaking the lock (3 lockpicks).
There's an office near the stairs to the left of Comstock's statue (station's main hall). Find a safe there and open it with 3 lockpicks.

After you've ended the battle near the rotary doors proceed to the Founder's Books store located on the left side of the corridor. Opening the doors leading to this store is possible if you have one lockpick with you.

After you've won the battle in front of the Bank of the Prophet make your way to the left balcony. You'll find a large door here and opening this door requires 3 lockpicks.
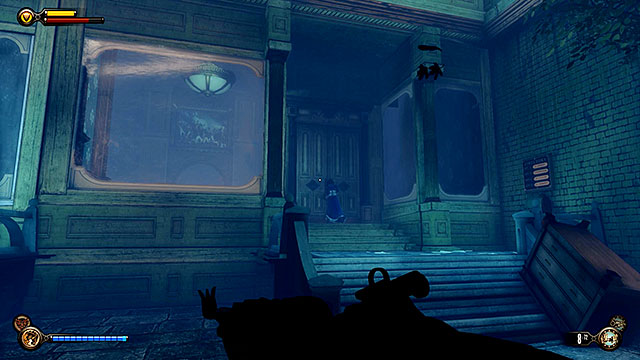
There is a locked store in the left side of the Harmony Lane. Open the door to this store with 3 lockpicks.

You'll find a locked store with paintings near the photo studio. You can break into this store assuming you have 3 lockpicks in your inventory.

Find two linked stores opposite the entrance to the cemetery. Explore both stores to find a safe located near one of the doors (the safe will require 3 lockpicks).
There's a Hudson's clothing store near a closed gate leading to the bank's plaza. Enter the store and descend to its basement. Explore the dark room to uncover a locked safe (you must use 3 lockpicks).

Explore the register office in the Bank of the Prophet to find a safe. Opening this safe requires only one lockpick.
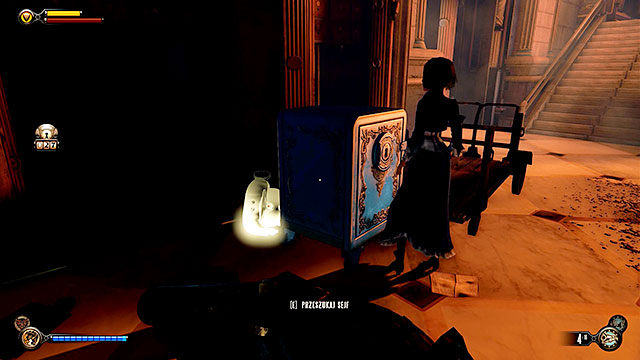
Once you've entered the bank's vault proceed to a room located to your left. Explore the back area of this room to find a safe that can be opened with 3 lockpicks.

Go to the first floor of the operating theatre and ask Elizabeth to break a lock on a door located between the passageways leading to the generators (you must have 3 lockpicks with you).
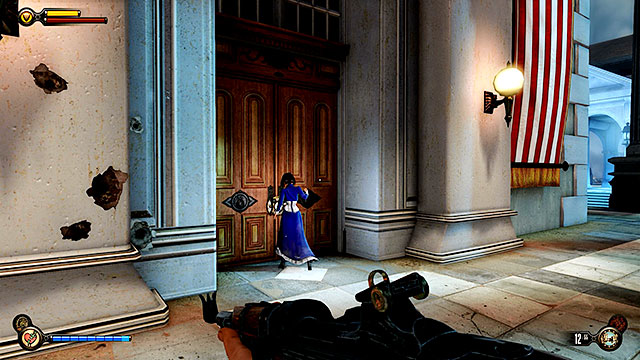
There is a locked building in the middle of the Comstock House Roof and you can gain access to it by using 3 lockpicks.
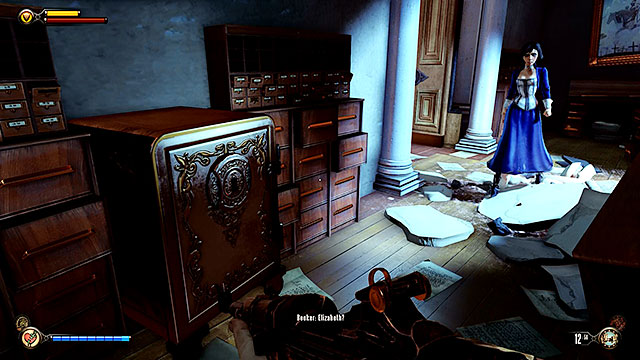
You'll find a safe inside a room with the hole in the wall. The good news is that opening the safe is possible with only 1 lockpick.
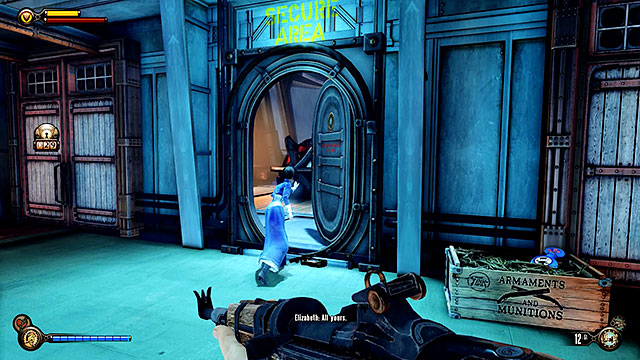
Go to the back and locate a corridor linking the right and the left side of the upper deck. You'll find a locked gate here leading to the Security Area and opening the gate requires 3 lockpicks.
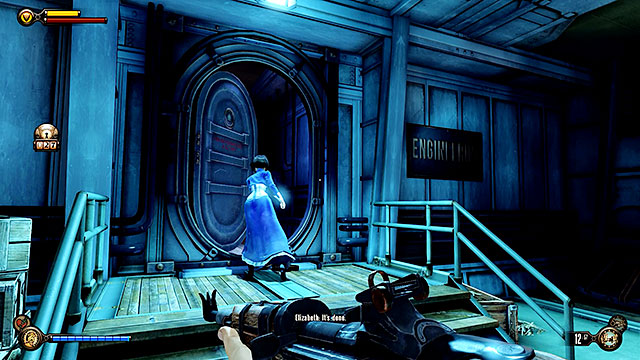
There is a locked engineering room near the stairs leading to the zeppelin's bridge. Breaking the lock is possible with only one lockpick.

Elizabeth is not only a key character in BioShock: Infinite, but she's also a very resourceful companion. The girl has several unique abilities that may prove to be useful in combat or while trying to gain access to optional areas. Continue reading to find more about the skills she can use in the game.
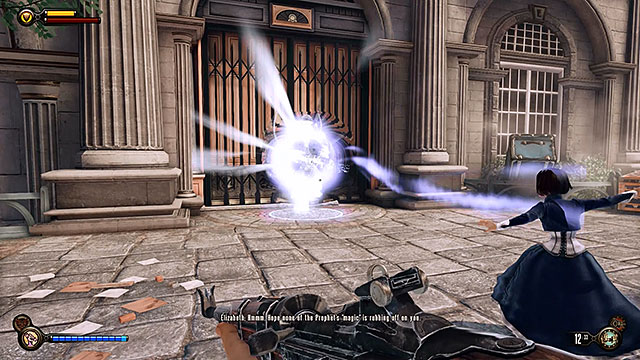
One of the most important of Elizabeth's abilities is to open tears (portals). By opening a tear you can summon various things to the battlefield, starting from maintenance hooks and ending with weapons and Motorized Patriots. Each time you've located several tears close to each other it means you're about to start a fight with a group of opponents or you came across a well-hidden secret. It's wise to analyze the strategic use of each tear before attacking enemy units so that they will be used in the best way.

Another very useful skill Elizabeth possesses is opening locks and safes. This action can be performed only be spending lockpicks and you'll start finding them since chapter eight (only main storyline locks don't require any lockpicks). The best thing about breaking locks is that they give you access to new areas and valuable treasures so make sure to always have a sizeable number of locksmith's tools with you.
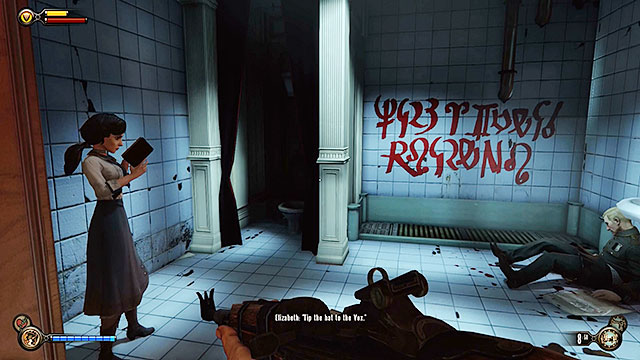
Elizabeth has spent her entire life in solitude studying various books. That allows her to decipher Vox code and this activity is always tied to the game's side missions. A reward for deciphering a code is usually the same - receiving access to secret rooms filled with collectibles and other useful items.
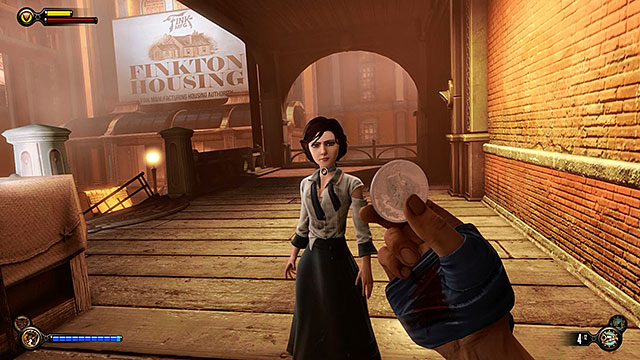
During your journey with Elizabeth she will be finding coins for you from time to time. From the gameplay's standpoint it usually occurs in the areas you're exploring yourself trying to find interactive objects. It's also recommend to interact with vending machines often, even if you don't plan to buy anything, because Elizabeth usually examines them to uncover extra money.
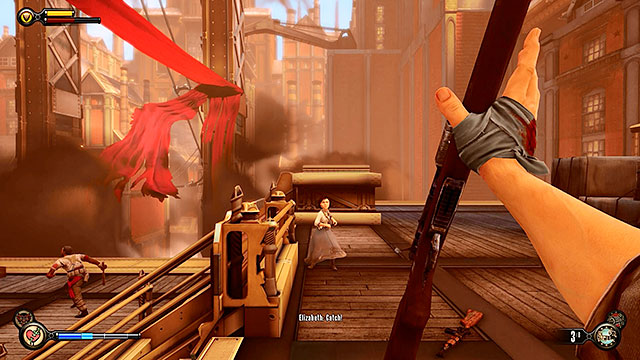
Elizabeth's searching skills may also come in handy during combat. Each time you're low on ammunition, health or salt the girl may find a useful item in the area. Elizabeth will be delivering the supplies you ran on low first. For example, if your health bar has been lowered to a dangerously low level before using up almost all ammunition, then you can be sure that Elizabeth will deliver a medical kit to you instead of additional clips. Some time must pass before she can help you again and resume her search for precious supplies.
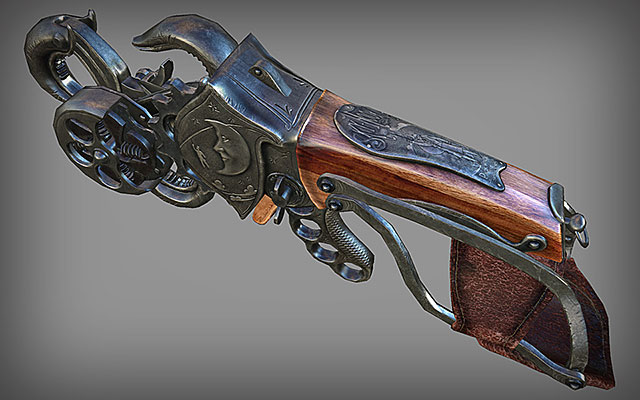
One of the differences between BioShock: Infinite and the previous games in the series is that you're limited to having two weapons and a Sky-Hook (it's used for melee combat). Despite this restriction the authors of the game have ensured that the player will never be defenseless, especially in bigger fights. Even if you're not equipped properly for an especially difficult battle you can be sure that exploring the battlefield will result in finding weapon stands, barrel or interactive tears that can be used to summon better guns. You also shouldn't have any problems finding ammunition for the Founder's weapons, even when playing on harder difficulty settings. The only real problem you may have is saving enough ammo for more esoteric Vox tools of destruction and as a result you should be using them briefly instead of making them long-term weapons. A good example is a Vox Heater, because this is a rare weapon with limited supplies and therefore it should be treated as a temporary attraction. The good side of those rare weapons is that can often help you in achieving victory, because most of them inflict very serious damage.
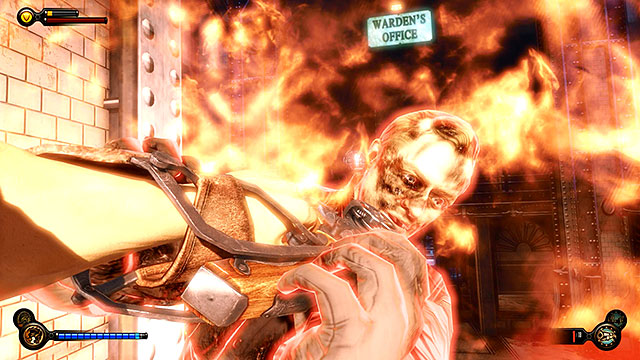
The only weapon that's going to stay with you for the entire game is a Sky-Hook. This object acts independently from the firearms held in the main character's right hand, so as a result you don't have to choose it from the inventory like with the wrench from the first BioShock game. Sky-Hook is directly tied to one of the vigors (Charge) and most of the upgrades guaranteed by the gear used by the main character can turn into a deadly weapon.
The table seen below provides information on a lot of useful things, including the damage inflicted by the player's guns (this doesn't include weapons used by enemies). Damage values seen in the table apply only to a NORMAL difficulty setting. On other difficulty setting the damage changes and here's more on the differences:
If you're planning on playing on Hard or 1999 difficulty setting, then you should examine the table carefully in order to find out in which weapon you should invest. Also, make sure to familiarize yourself with the costs of different weapon upgrades presented at the end of this chapter.

PISTOL
Description: Broadsider pistol.
Ammunition (clip/stock): 12/100
Damage (min/max): 85/115

HAND CANNON (PADDYWHACKER)
Description: A six-shooter that asks no questions and takes no names.
Ammunition (clip/stock): 6/18
Damage (min/max): 510/690

SHOTGUN (CHINA BROOM)
Description: Close-range personal protection.
Ammunition (clip/stock): 4/20
Damage (min/max): 765/1035

MACHINE GUN (TRIPLE R)
Description: RRR machine gun.
Ammunition (clip/stock): 35/185
Damage (min/max): 72/88

CARBINE (HUNTSMAN)
Description: A semiautomatic rifle with good range and stopping power.
Ammunition (clip/stock): 8/72
Damage (min/max): 213/287

SNIPER RIFLE (BIRD'S EYE)
Description: Bird's Eye sniper rifle.
Ammunition (clip/stock): 4/20
Damage (min/max): 595/805

VOLLEY GUN (PIG)
Description: A semiautomatic projectile launcher that allows the user to saturate an area with explosives.
Ammunition (clip/stock): 8/24
Damage (min/max+explosion): 550+200/650+250

RPG (BARNSTORMER)
Description: Fires explosive rockets.
Ammunition (clip/stock): 2/6
Damage (min/max): 1250/1750

CRANK GUN (PEPPERMILL)
Description: A multi-barrel automatic weapon that allows the user to maintain a high rate of fire.
Ammunition (clip/stock): 100/100
Damage (min/max): 70/130

HEATER
Description: Vox-modified China Broom shotgun.
Ammunition (clip/stock): 1/8
Damage (min/max): 1360/1840

REPEATER
Description: A Vox modification to the RRR machine gun.
Ammunition (clip/stock): 20/60
Damage (min/max): 170/230

BURSTGUN
Description: Custom, Vox-manufactured three round burst rifle.
Ammunition (clip/stock): 30/120
Damage (min/max): 85/115

HAIL FIRE
Description: A Vox-modified Pig that allows the user to delay detonation when the trigger is held. Release to make it explode.
Ammunition (clip/stock): 5/25
Damage (min/max): 580/820
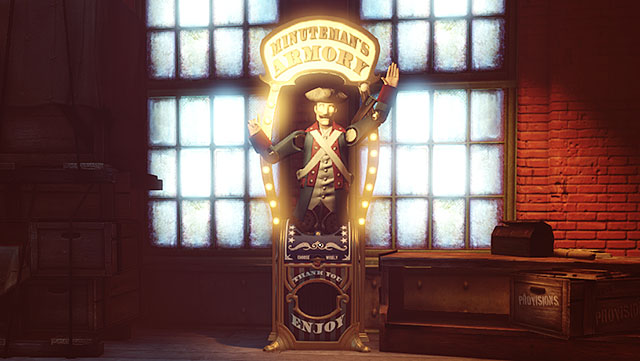
Every weapon available in the game (aside from the Crank Gun) has four upgrades. You can upgrade the weapons using the Minuteman's Armory machines scattered throughout the entire Columbia. You will be finding these vending machines often so you shouldn't have any problems performing the upgrades, assuming of course you'll have enough money. The table seen below offers a complete list of possible upgrades along with the costs of attaching them to your weapons.

DAMAGE BOOST 1
Description: Increases PISTOL damage by 25%.
DAMAGE BOOST 2
Description: Increases PISTOL damage by 25%.
CLIP INCREASE
Description: Increases PISTOL clip size by 50%.
AMMO INCREASE
Description: Increases PISTOL reserve ammo by 50%.
PRICE:
$199
PRICE:
$199
PRICE:
$275
PRICE:
$404

DAMAGE BOOST 1
Description: Increases HAND CANNON damage by 25%.
DAMAGE BOOST 2
Description: Increases HAND CANNON damage by 25%.
RECOIL REDUCE
Description: Decreases HAND CANNON recoil by 20%.
RELOAD INCREASE
Description: Increased HAND CANNON reload speed by 50%.
PRICE:
$448
PRICE:
$448
PRICE:
$350
PRICE:
$656

DAMAGE BOOST 1
Description: Increases SHOTGUN damage by 25%.
DAMAGE BOOST 2
Description: Increases SHOTGUN damage by 25%.
SPREAD BOOST
Description: Increases SHOTGUN cone width by 20%.
RELOAD INCREASE
Description: Decreases SHOTGUN reload time by 50%.
PRICE:
$255
PRICE:
$255
PRICE:
$360
PRICE:
$456

DAMAGE BOOST 1
Description: Increases MACHINE GUN damage by 25%.
DAMAGE BOOST 2
Description: Increases MACHINE GUN damage by 25%.
CLIP INCREASE
Description: Increases MACHINE GUN clip size by 100%.
ACCURACY BOOST
Description: Reduces MACHINE GUN weapon spread by 75%.
PRICE:
$236
PRICE:
$236
PRICE:
$391
PRICE:
$512

DAMAGE BOOST 1
Description: Increases CARBINE damage by 25%.
DAMAGE BOOST 2
Description: Increases CARBINE damage by 25%.
CLIP INCREASE
Description: Increases CARBINE clip size by 50%.
RECOIL DECREASE
Description: Decreases CARBINE recoil by 60%.
PRICE:
$357
PRICE:
$357
PRICE:
$484
PRICE:
$333

DAMAGE BOOST 1
Description: Increases SNIPER RIFLE damage by 25%.
DAMAGE BOOST 2
Description: Increases SNIPER RIFLE damage by 25%.
FIRE RATE BOOST
Description: Increases SNIPER RIFLE fire rate by 100%.
RECOIL DECREASE
Description: Reduces SNIPER RIFLE recoil by 50%.
PRICE:
$349
PRICE:
$349
PRICE:
$654
PRICE:
$288

DAMAGE BOOST 1
Description: Increases VOLLEY GUN damage by 25%.
DAMAGE BOOST 2
Description: Increases VOLLEY GUN damage by 25%.
CLIP INCREASE
Description: Increases VOLLEY GUN clip size by 100%.
RADIUS INCREASE
Description: Increases VOLLEY GUN explosion radius by 50%.
PRICE:
$522
PRICE:
$522
PRICE:
$740
PRICE:
$536

DAMAGE BOOST 1
Description: Increases RPG damage by 25%.
DAMAGE BOOST 2
Description: Increases RPG damage by 25%.
CLIP INCREASE
Description: Increases RPG clip size by 50%.
RPG SPEED BOOST
Description: Increases RPG projectile speed by 100%.
PRICE:
$385
PRICE:
$385
PRICE:
$816
PRICE:
$333

DAMAGE BOOST 1
Description: Increases HEATER damage by 25%.
DAMAGE BOOST 2
Description: Increases HEATER damage by 25%.
SPREAD BOOST
Description: Increases HEATER cone width by 20%.
RELOAD INCREASE
Description: Decreases HEATER reload time by 50%.
PRICE:
$554
PRICE:
$554
PRICE:
$467
PRICE:
$752

DAMAGE BOOST 1
Description: Increases REPEATER damage by 25%.
DAMAGE BOOST 2
Description: Increases REPEATER damage by 25%.
CLIP INCREASE
Description: Increases REPEATER clip size by 100%.
RECOIL DECREASE
Description: Decreases REPEATER recoil by 50%.
PRICE:
$416
PRICE:
$416
PRICE:
$449
PRICE:
$711

DAMAGE BOOST 1
Description: Increases BURSTGUN damage by 25%.
DAMAGE BOOST 2
Description: Increases BURSTGUN damage by 25%.
RECOIL DECREASE
Description: Decreases BURSTGUN recoil by 50%.
AMMO INCREASE
Description: Increases BURSTGUN reserve ammo by 50%.
PRICE:
$423
PRICE:
$423
PRICE:
$822
PRICE:
$672

DAMAGE BOOST 1
Description: Increases HAIL FIRE damage by 25%.
DAMAGE BOOST 2
Description: Increases HAIL FIRE damage by 25%.
CLIP INCREASE
Description: Increases HAIL FIRE clip size by 60%.
RADIUS INCREASE
Description: Increases HAIL FIRE explosion radius by 100%.
PRICE:
$688
PRICE:
$688
PRICE:
$399
PRICE:
$415
The phrase 'common enemies' means Columbia's infantry. Enemies from this group don't have any particularly dangerous skills, however their gear can range from sticks to sniper rifles and rocket launchers. In most cases a single shot to the head is enough to kill a common enemy. You should also know that all opponents are equipped with Sky-hooks and that they can use sky-lines to go after you or to surprise you from behind.
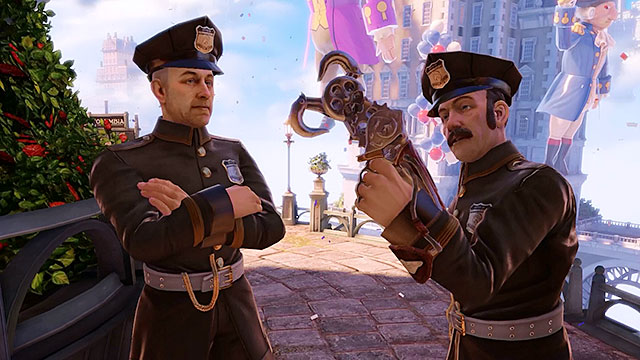
Policemen and Vox members are the most common and the weakest groups of enemies. Their equipment consists mostly of sticks and small caliber firearms. Policemen don't use any advanced tactics while trying to take out the main character and their low stamina results in them tripping a lot, allowing the player to quickly eliminate them. Policemen and common Vox members aren't resistant in any way to vigors and they're also vulnerable to melee attacks.
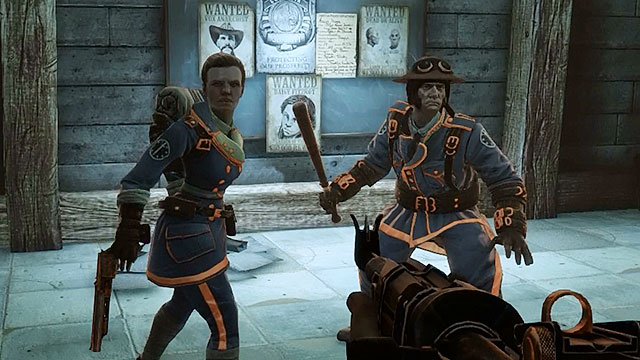
Soldiers aren't the same as policemen. They not only look different, but they're also better trained and equipped with higher quality items. Soldiers are more coordinated in combat situations and they use simple tactics to attack the main character from the flanks or from the back. Enemies from this group use a lot of different weapons, starting with sticks and ending with high caliber firearms (sniper rifles, hand cannons etc). Soldiers and less common Vox members aren't resistant in any way to vigors and they're also vulnerable to melee attacks.
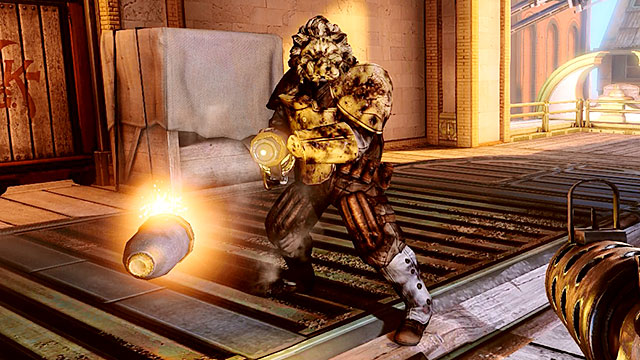
Beasts are specialized units wearing thick, steel armors. They're usually equipped with explosive weapons (Volley Guns or RPG's). Their steel masks resemble animal heads (that's why they're called beasts) and they protect them even from sniper rifle headshots. Elements of the beast's armor may be destroyed during combat, therefore revealing their weaker spots. Beasts are extremely immune to melee attacks and they have also a limited resistance to some of the vigors.
Effectiveness of the vigors:
Possession: 100%
Shock Jockey: 100%
Murder of Crows: 100%
Return to Sender: 100%
Devil's Kiss: 100%
Charge: 50%
Bucking Bronco: 100%
Undertow: 50%
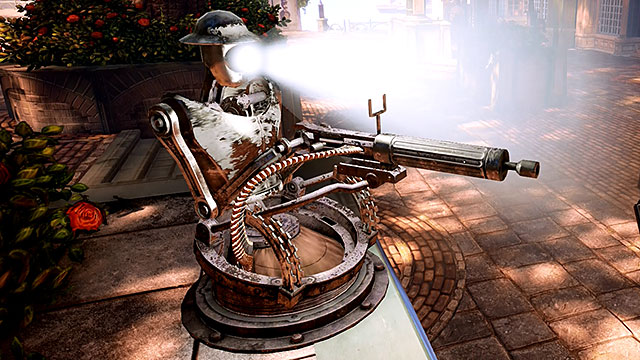
Automatons are nothing else but turrets and they're armed with machine guns or rocket launchers. All turrets have a limited range of view. A white color emitted by a turret means that the main character hasn't been detected yet. Yellow lights signalizes that the turret has located the player and that there's only a few seconds to hide before it starts firing. Red color means that the turret is now in combat mode. All turrets can be possessed or temporarily deactivated thanks to the vigors. Possession result in a turret becoming the main character's ally for a short period of time and this of course means it will start firing at enemy units.
Effectiveness of the vigors:
Possession: 200% (duration)
Shock Jockey: 100%
Murder of Crows: 0%
Return to Sender: 100%
Devil's Kiss: 100%
Charge: 100% (stun)
Bucking Bronco: 0%
Undertow: 100% (stun)
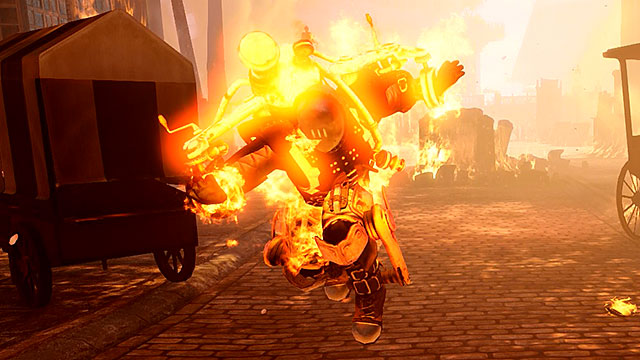
Mosquitos are the flying version of turrets. They can patrol large areas and they can also follow the player instead of remaining in only one spot. Aside from the mobility factor they don't have any other major differences. Mosquitos can't be stunned with the help of the vigors.
Effectiveness of the vigors:
Possession: 200% (duration)
Shock Jockey: 100%
Murder of Crows: 0%
Return to Sender: 100%
Devil's Kiss: 100%
Charge: 0%
Bucking Bronco: 0%
Undertow: 100% (pushing back)
Powerful enemies appear less often than the common infantry and they usually play a role of support for the weaker units. There are also plenty of differences between them and common enemies. Powerful opponents aren't using conventional weapons and instead they prefer exotic weaponry and vigors. Each of the unique enemies has some kind of a weaknesses and is also resistant to certain vigors, however normal weapons are equally effective.
Powerful enemies sometimes appear in several different versions and they're named "ranks" later in the guide. Enemies with a higher rank won't appear until later in the game and you'll have to remember about them being slightly different when you encounter them.
The list seen below can be very helpful for those of you who dared to complete the game on the highest '1999 mode' difficulty setting. I strongly recommend that you take some time to read about your opponent's life points and resistances so that you'll be able to plan your gear and upgrades much better.
Firemen (contrary to what they're called) are experts in setting things and people of fire and they've mastered using the Devil's Kiss vigor. Each time they're on a brink of death they attempt a suicide run towards the main character, hoping to explode in flames. An impending detonation is signalized by a time meter appearing above the Fireman's head. As you've probably suspected they are fully resistant to fire damage. Don't forget to examine their bodies, because each Fireman will always leave one lockpick behind (the only exception is the Fireman encountered in the Raffle Square), as well as salts and a medkit.
Life points:
Rank 1: 1430
Rank 2: 2860
Rank 3: 4833
Rank 4: 4833
Damage dealt:
Rank 1: 240 [attacks from distance], 300 [direct combat], 360 [detonation]
Rank 2: 480 [attacks from distance], 600 [direct combat], 720 [detonation]
Rank 3: 691 [attacks from distance], 864 [direct combat], 1037 [detonation]
Rank 4: 829 [attacks from distance], 1037 [direct combat], 1244 [detonation]
Effectiveness of the vigors:
Possession: 50%
Shock Jockey: 100%
Murder of Crows: 100%
Return to Sender: 100%
Devil's Kills: 0%
Charge: 100%
Bucking Bronco: 100%
Undertow: 100%
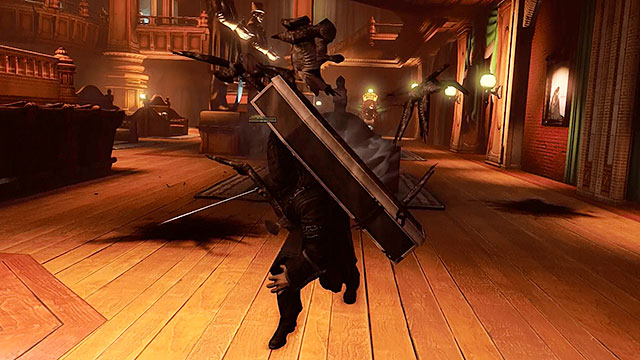
Crows (they are also referred to as Zealots) prefer melee weapons and they attack the player with a large sword. They appear alone or in pairs and they are rarely accompanied by other enemies. Zealots move around the battlefield by taking a form of a flock of crows and that's when they become invulnerable to attacks. Once they materialize back to their original form the main character has only a few seconds for the attack. The best way to defeat a Crow is to lure him to a fiery trap and then attack him with a high caliber weapon after he's returned to his standard form. Zealots don't use Murder of Crows vigor, however they're immune to it.
Life points:
Rank 1: 2356
Rank 2: 3062
Rank 3: 3981
Rank 4: 5175
Damage dealt:
Rank 1: 532 [direct combat]
Rank 2: 639 [direct combat]
Rank 3: 767 [direct combat]
Rank 4: 921 [direct combat]
Effectiveness of the vigors:
Possession: 50%
Shock Jockey: 100%
Murder of Crows: 0%
Return to Sender: 0%
Devil's Kiss: 100%
Charge: 100%
Bucking Bronco: 100%
Undertow: 100%
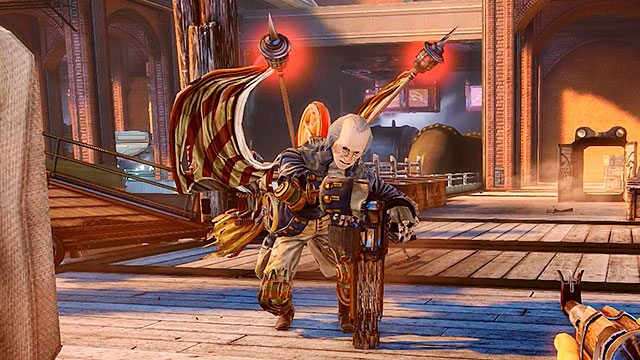
Motorized Patriots are human-like automatons and they carry very powerful Crank Guns. They're fearless opponents and they will continue following you no matter the danger, not stopping and not using any cover until they're destroyed. The only time when you're allowed to have a short breathing moment is when the Patriot is reloading the Crank Gun. Motorized Patriots have a weak spot - it's a flywheel mounted on the back. Destroying the Patriot's head stops him only for a short time, but it won't destroy him and it won't prevent him from continuing with the attacks. A good way to win is to possess a Patriot or one of the other nearby enemies, forcing the opponent to reveal his back. You can also try hiding behind cover and waiting for Patriot to start reloading his weapon, giving you a few seconds to shoot at the flywheel. Patriots wear different masks depending on their rank. You should also know that killing a Patriot is one of the rare occasions to obtain the Crank Gun mentioned before.
Life points:
Rank 1 (Franklin): 5053
Rank 2 (Washington): 6569
Rank 3 (Comstock): 8540
Damage dealt:
Rank 1 (Franklin): 72 [attacks from distance], 432 [direct combat]
Rank 2 (Washington): 86 [attacks from distance], 518 [direct combat]
Rank 3 (Comstock): 104 [attacks from distance], 622 [direct combat]
Effectiveness of the vigors:
Possession: 50%
Shock Jockey: 75%
Murder of Crows: 0%
Return to Sender: 100%
Devil's Kiss: 100%
Charge: 100%
Bucking Bronco: 10%
Undertow: 100%
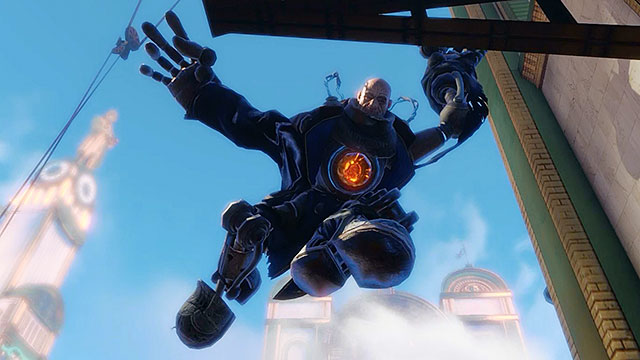
A Handyman is a fusion between a man and a machine and it's often called the new version of the Big Daddy known from the previous games in the BioShock series. Handymen move quickly and freely in the environments where they appear and that makes escaping them almost impossible. The only way to slow down the giant is to either use the Murder of Crows or the Undertow vigor. The weakest point on the Handyman's body is his orange glowing heart located on his chest. An interesting thing to know is that immobilizing the Handyman with vigors makes it easier for the player to unlock the Heartbreaker achievement/trophy. Handymen like to attack the main character from a distance, throwing dead bodies or even opponents who are still very much alive. As for the close combat, they use their massive fists and they also emit deadly electricity that has a significant range. Don't forget that you shouldn't be using the sky-lines too often when fighting Handymen, because they can send a powerful impulse to harm you. The only good thing that comes out of it is that the Handyman is stunned for a while after electrifying the sky-lines, making him vulnerable to your attacks. Each Handyman you've killed will leave a random gear element behind.
Life points:
Rank 1: 9952
Rank 2: 12938
Damage dealt:
Rank 1: 1334 [attacks from distance], 800 [direct combat], 1382 [electrical discharges]
Rank 2: 1601 [attacks from distance], 960 [direct combat], 1382 [electrical discharges]
Effectiveness of the vigors:
Possession: 0%
Shock Jockey: 10%
Murder of Crows: 75%
Return to Sender: 0%
Devil's Kiss: 100%
Charge: 0%
Bucking Bronco: 0%
Undertow: 100% (weaken)
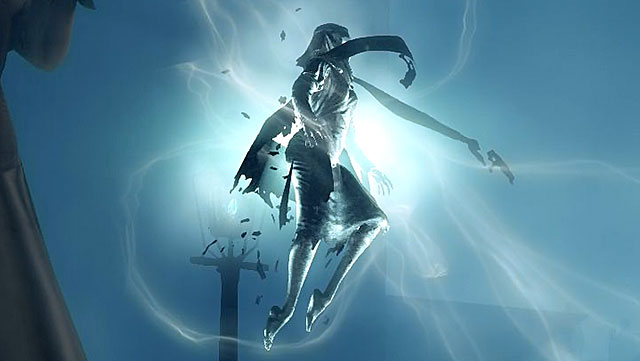
Lady Comstock who's been brought to life back from the dead is the only real boss in the game. You will have to defeat her three times: at the cemetery in Memorial Gardens, near the entrance to the Bank of the Prophet and near a gate leading to Comstock's House. The siren resurrects nearby dead corpses to help her in the duel. She likes to maintain safe distance from the main character, however she may also attack you if you get too close.
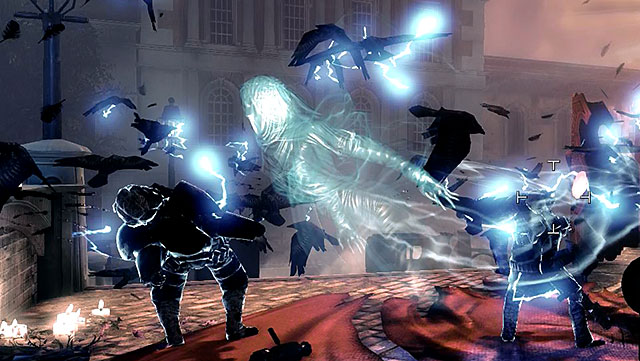
The siren remains in her spectral form for most of each battle and she materializes only to summon more zombies. This is an ideal moment to inflict serious injuries and as a result you should be using high powered weapons, such as a shotgun, a sniper rifle, a hand cannon or an rpg. Maintain a rather close distance from the siren. Don't move too close to avoid her melee attacks, but be ready to use your weapons effectively. I don't recommend that you focus on killing the enemies Siren is bringing back from the dead. It's much better to immobilize them using the MURDER OF CROWS + SHOCK JOCKEY vigor combination while attacking the Siren at the same time. Don't waste your vigors on the Siren (even though she has a weakness for fire) and instead leave the salts for zombies.
To summarize: use firearms on the Siren and paralyze the summoned zombies with vigors. Repeat this until the boss is defeated.
Life points:
15994
Damage dealt:
985 [direct combat]
Effectiveness of the vigors:
Possession: 10%
Shock Jockey: 10%
Murder of Crows: 10%
Return to Sender: 0%
Devil's Kiss: 150%
Charge: 10%
Bucking Bronco: 10%
Undertow: 10%
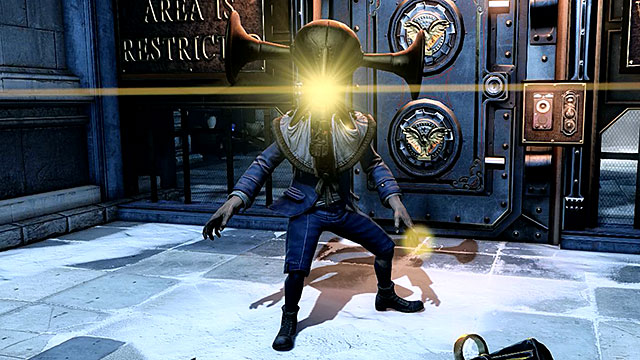
Boys of Silence act in a similiar manner to security cameras. Their objective is to find hostiles, either basing on their sight or hearing. Each time a boy has tracked down an enemy (meaning - you) he dematerializes (without inflicting any damage to the player) and he takes control over his helpers. From this moment onward you can't harm or kill the boy himself.
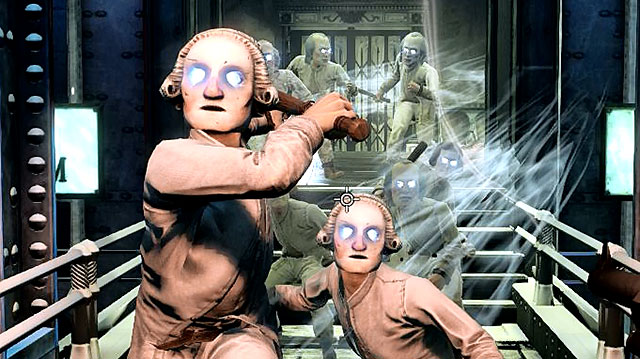
Boys of Silence are always accompanied by non-aggressive "patients" wearing masks. These helpers become aggressive and a threat after they've been taken over by the boy. They're equipped only with sticks, but their strength is in numbers. A good vigor combination against them is BUCKING BRONCO + DEVIL'S KISS. Lure all the patients into one spot and then use the vigor combination mentioned above. If you're lucky you'll kill all of them (or at least most of them) with one attack. One last thing to remember when fighting the helpers is to prevent them from forcing you to a corner and therefore surrounding you.

WRITTEN IN THE CLOUDS
Completed Lighthouse.

WELCOME TO MONUMENT ISLAND
Reached Monument Island.

SHOCK TACTICS
Retrieved Shock Jockey.

FIRST CLASS TICKET
Boarded The First Lady.

ARMED REVOLT
Assisted the Gunsmith.

WORKING CLASS HERO
Completed Factory.

BLOOD IN THE STREETS
Completed Emporia.

HIGHER LEARNING
Completed Comstock House.

THE BIRD OR THE CAGE
Completed The Hand of the Prophet.

TIN SOLDIER
Completed the game on Easy difficulty or above.

SAW THE ELEPHANT
Completed the game on Normal difficulty or above.

STONE COLD PINKERTON
Completed the game on Hard difficulty or above.

AULD LANG SYNE
Completed the game on 1999 mode.

SHOULD AULD ACQUAINTANCE...
Unlocked 1999 mode.

INDUSTRIAL ACCIDENT
Killed 20 enemies with a Sky-Hook Execution.

AERIAL ASSASSIN
Killed 20 enemies with a Sky-Line Strike.

A REAL PISTOL
Killed 25 enemies with the Broadsider Pistol.

PASSIONATELY RECIPROCATED
Killed 150 enemies with the Founder Triple R Machine Gun or Vox Repeater.

STREET SWEEPER
Killed 50 enemies with the Founder China Broom Shotgun or Vox Heater.

BIG GAME HUNTER
Killed 100 enemies with the Founder Huntsman Carbine or Vox Burstgun.

LOOSE CANNON
Killed 25 enemies with the Paddywhacker Hand Cannon.

ON A CLEAR DAY...
Killed 30 enemies with the Bird's Eye Sniper Rifle.

HERE LITTLE PIGGY
Killed 30 enemies with the Founder Pig Volley Gun or Vox Hail Fire.

MASTER OF PYROTECHNICS
Killed 20 enemies with the Barnstormer RPG.

SEASONED TO TASTE
Killed 30 enemies with the Peppermill Crank Gun.

WELL ROUNDED
Used all 8 Vigors against enemies.

VIGOROUS OPPOSITION
Killed 75 enemies either with a Vigor or while the enemy is under the effects of a Vigor.

MORE FOR YOUR MONEY
Lured 3 enemies into a single Vigor trap 5 times.

COMBINATION SHOCK
Performed all 8 of the Vigor combinations.

MIND OVER MATTER
Killed 20 enemies using Possessed machines.

TEAR 'EM A NEW ONE.
Opened 30 Tears.

STRANGE BEDFELLOWS
Killed 20 enemies using allies brought in through a Tear.

ON THE FLY
Killed 30 enemies while riding a Sky-Line.

BOLT FROM THE BLUE
Killed 5 enemies with a headshot while riding a Sky-Line.

HAZARD PAY
Killed 10 enemies by utilizing environmental hazards.

BON VOYAGE
Killed 20 enemies by knocking them off Columbia.

SKEET SHOT
Killed 5 enemies while they are falling.

LOST WEEKEND
Killed 5 enemies while you are drunk.

DAVID & GOLIATH
Killed 20 "Heavy Hitter" enemies.

HEARTBREAKER
Killed a Handyman by only shooting his heart.

DRESS FOR SUCCESS
Equipped a piece of Gear in all four slots.

KITTED OUT
Fully upgraded one weapon and one Vigor.

RAISING THE BAR
Upgraded one attribute (Health, Shield, or Salts) to its maximum level.

INFUSED WITH GREATNESS
Collected every Infusion upgrade in a single game.

SIGHTSEER
Used all telescopes and Kinetoscopes in the game.

THE ROGUISH TYPE
Used Elizabeth to pick 30 locks.
EAVESDROPPER
Collected every Voxophone.

GRAND LARGESSE
Spent $10,000 at the vending machines of Columbia.

COINS IN THE CUSHION
Looted 200 containers.

SCAVENGER HUNT
Completed the game in 1999 mode without purchasing anything from a Dollar Bill vending machine.


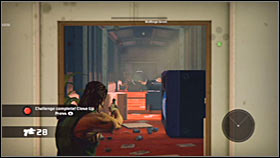 Bionic Commando Game Guide & Walkthrough
 Banished Game Guide & Walkthrough
 Black and White 2 Game Guide & Walkthrough
 Brothers in Arms: Hells Highway Game Guide & Walkthrough
 Burnout Paradise: The Ultimate Box Game Guide & Walkthrough