
This unofficial guide to Aliens: Colonial Marines contains an exhaustive walkthrough of all 11 missions. Each chapter has detailed information on how to complete quests, eliminate Xenomorphs and enemy units, and find secret items (Dog Tags, Audio Logs, Legendary Weapons). All collectibles are listed at the end of the guide to help quickly locate any missing items.

The guide follows the single player campaign, with a team controlled entirely by AI. In multiplayer, some battles with obviously take a different turn, depending on the abilities and decisions made by the other players.
Most standard items, such as armor pieces, med-packs, or ammo, pop up in random places. As a result, the guide doesn't specify their locations, which means you'll have to scan every newly unlocked area on your own.
For easier orientation, all secret items have been marked in green. These include Dog Tags of fallen marines, Audio Logs, and the so-called Legendary Weapons. You can follow your progress in finding them by opening the current mission objectives screen. Full statistics are additionally displayed at the end of each main mission.
Jacek "Stranger" Halas

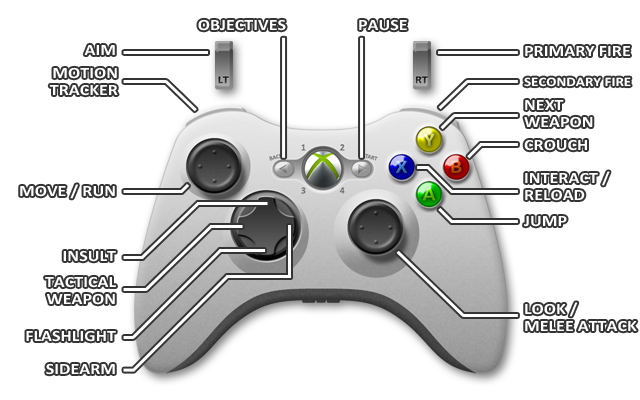
Move

Flashlight

Run

Equip Tactical Weapon

Look

Equip Sidearm

Melee Attack

Motion Tracker

Jump

Aim

Crouch

Secondary Fire (Alternate Fire)

Interact; Reload

Primary Fire

Select Next Weapon

Display Scoreboard and Objectives

Insult

Pause

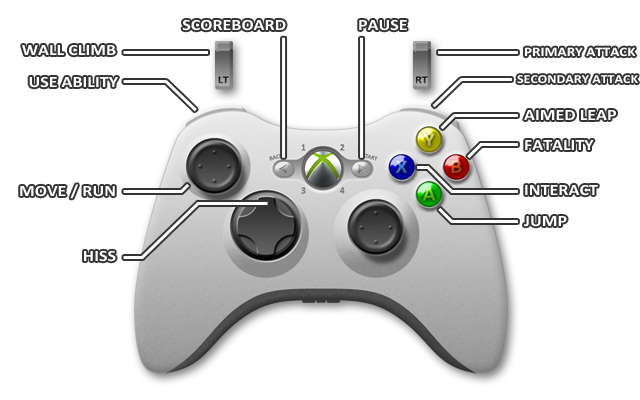
Move

Use Ability

Run

Wall Climb

Jump
Secondary Attack

Fatality

Primary Attack

Interact

Display Scoreboard and Objectives

Aimed Leap

Pause

Hiss

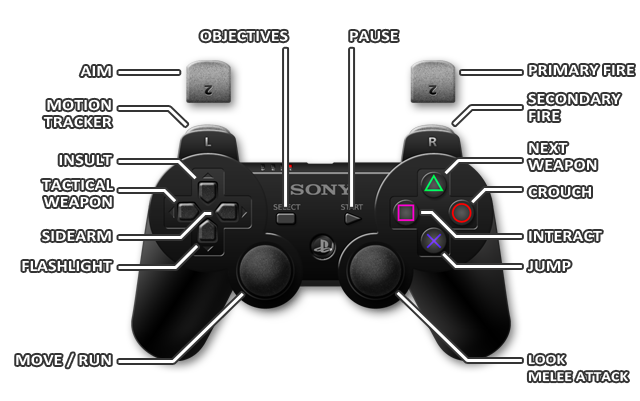
Move

Flashlight

Run

Equip Tactical Weapon

Look

Equip Sidearm

Melee Attack

Motion Tracker

Jump

Aim

Crouch

Secondary Fire (Alternate Fire)

Interact; Reload

Primary Fire

Select Next Weapon

Display Scoreboard and Objectives

Insult

Pause

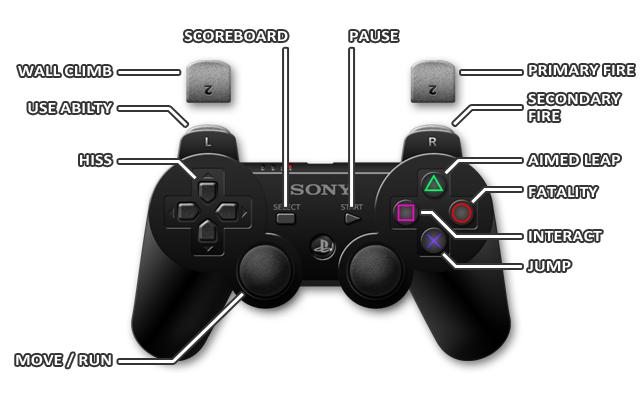
Move

Use Ability

Run

Wall Climb

Jump

Secondary Attack

Fatality

Primary Attack

Interact
Display Scoreboard and Objectives
Aimed Leap

Pause

Hiss

Move

Flashlight

Run

Equip Tactical Weapon

Look

Equip Sidearm

Melee Attack

Motion Tracker

Jump

Aim

Crouch

Secondary Fire (Alternate Fire)

Interact; Reload

Primary Fire
Select Next Weapon

Display Scoreboard and Objectives

Insult (Multiplayer only)

Pause

Move

Use Ability

Run

Wall Climb

Jump
Secondary Fire

Fatality

Primary Fire

Interact

Display Scoreboard and Objectives

Aimed Leap
Pause

Hiss
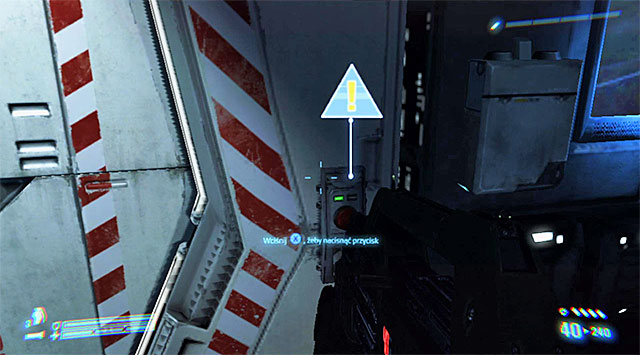
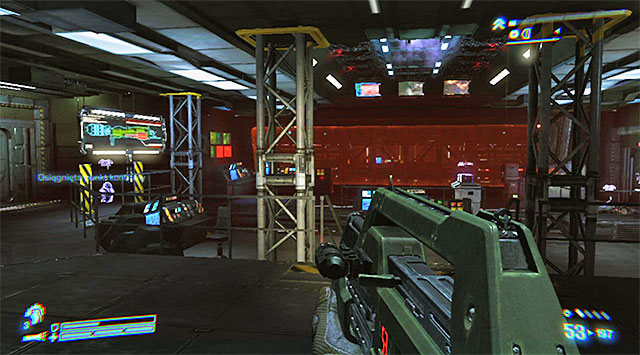
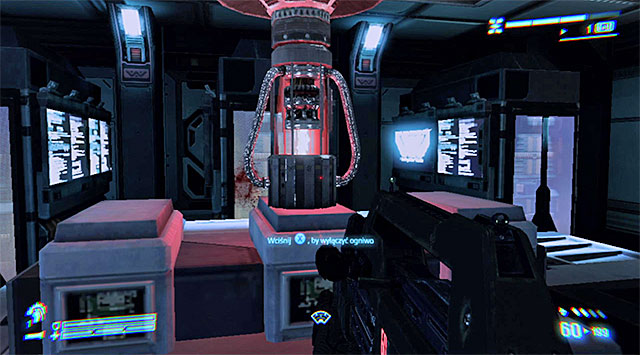
The beginning of the game is very linear and you don't have worry about any premature encounters with Xenomorphs. Start by interacting with the nearby control panel to open the hatch on the left.
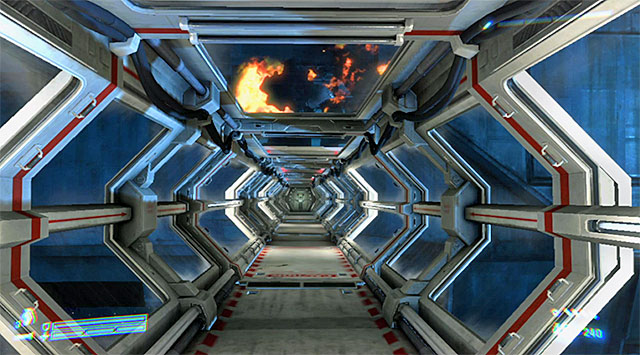
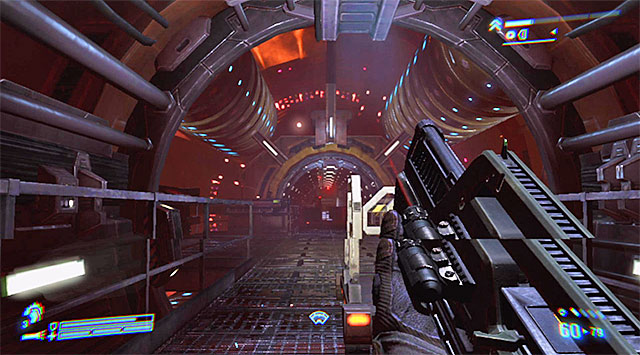
Use the newly unlocked passage and move forward. After finding yourself in the tunnel connecting both spaceships, you'll witness an explosion, but in spite of what it looks like you don't have to hurry. Continue the march forward and a while later you'll step on board USS Sulaco.
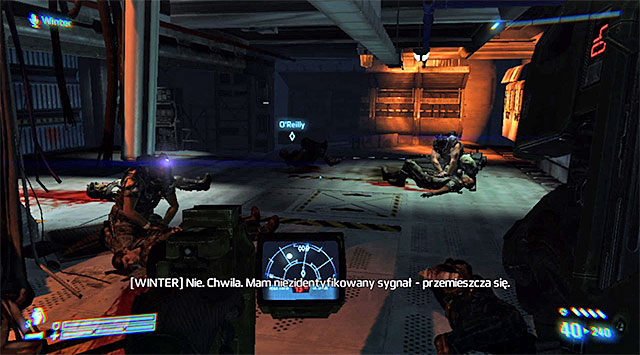
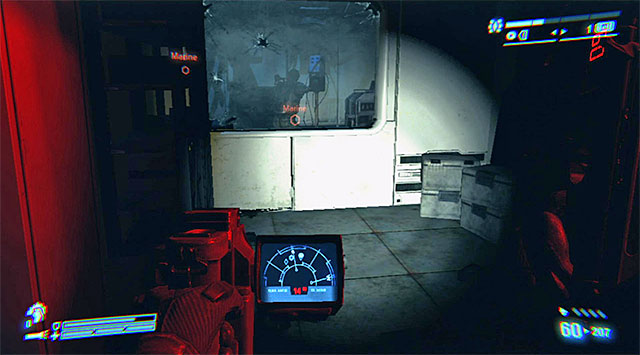
Your destination is the room with several wounded marines where you'll listen to new conversations. Following the game's suggestion, select the motion tracker from your inventory (notice that you can't use your firearm at the same time); it will allow you to locate a few unidentified signals and get further objectives.
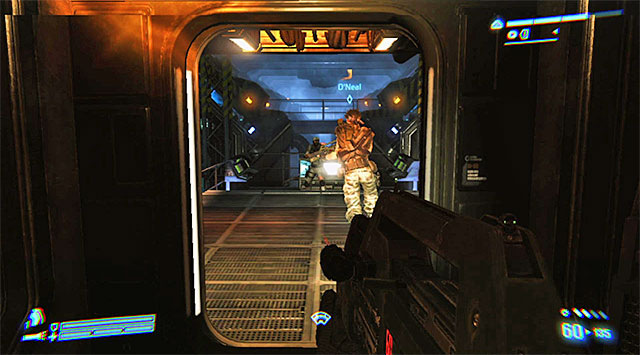
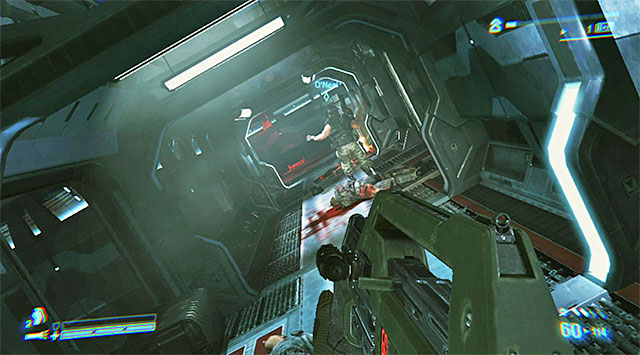
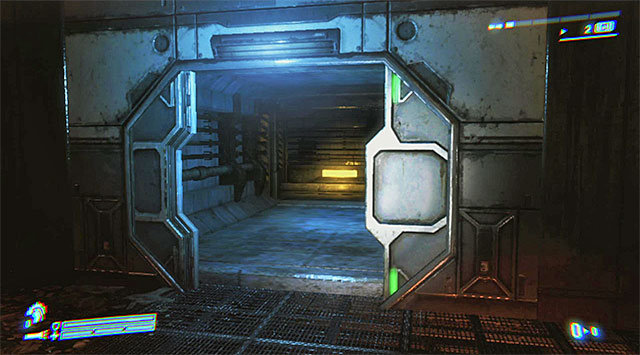
Wait until O'Neal opens the hangar door, and go through it. You can go the door on the right at once, but it's worth to take a look at the massacred body of Bishop.
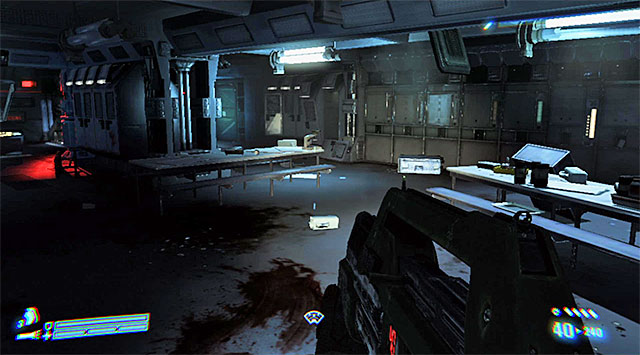
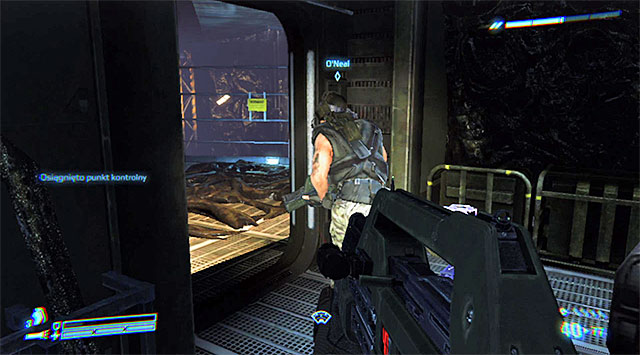
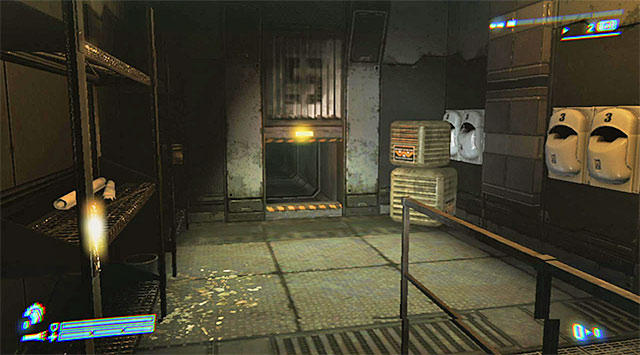
Start exploring the empty rooms. From this point on, it pays off to use the flashlight, especially since you don't have to worry about batteries running out. As you go, the game will throw you hints about using the motion tracker. It's not mandatory; you'll be easily able to find your way without it. After checking out the locker room, go through the mess hall and the room with cryo chambers.
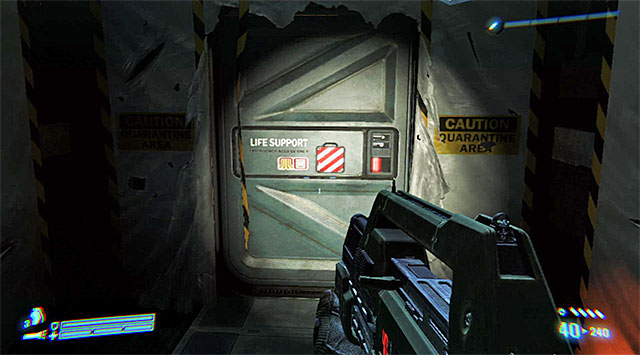
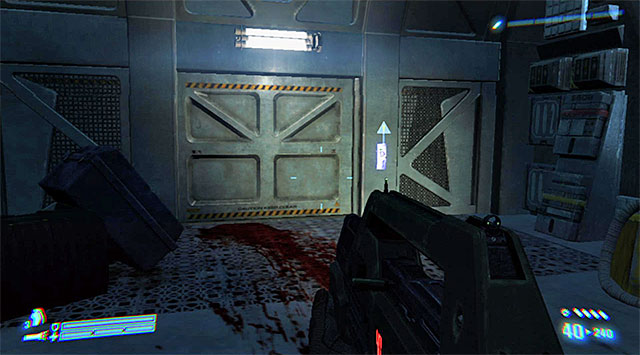
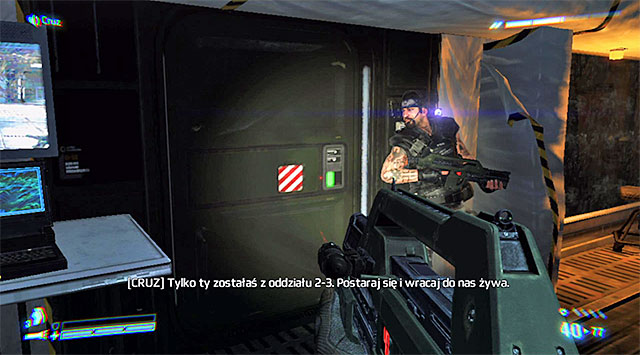
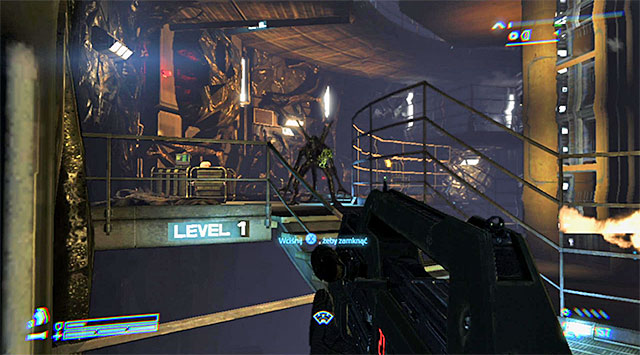
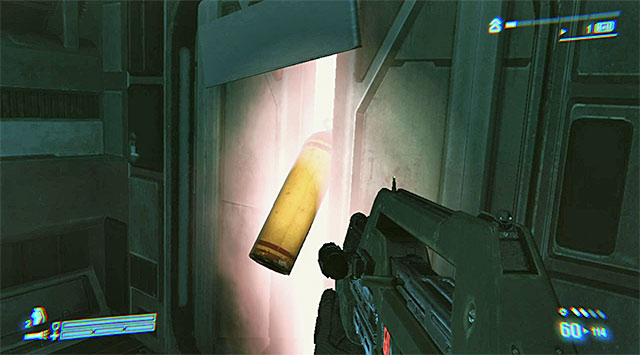
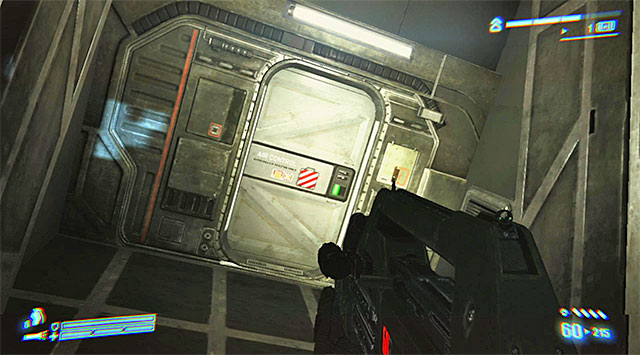
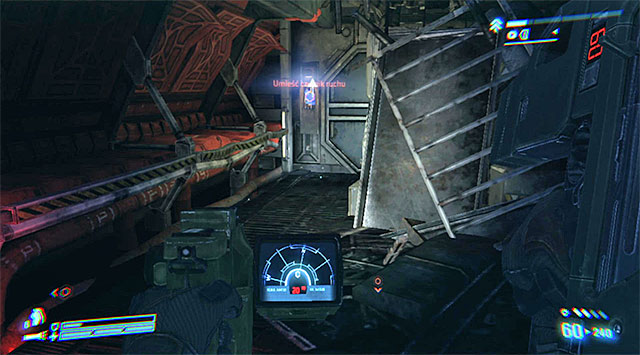
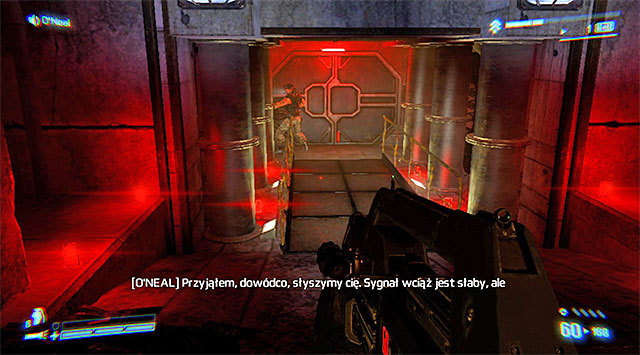
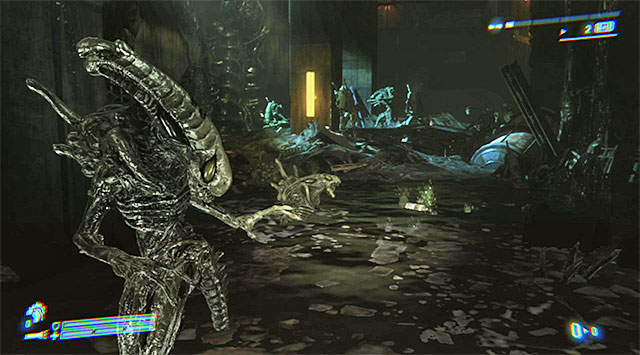
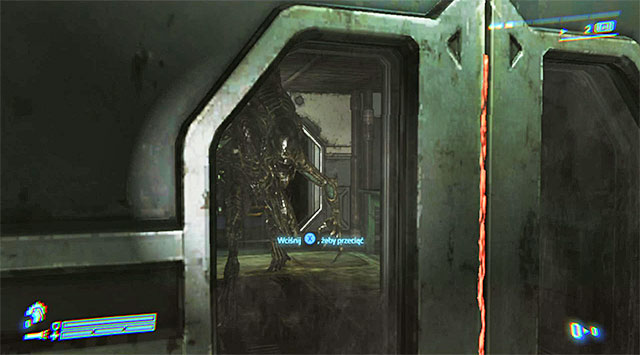
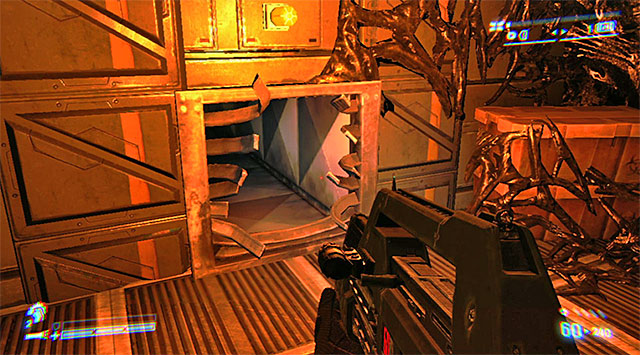
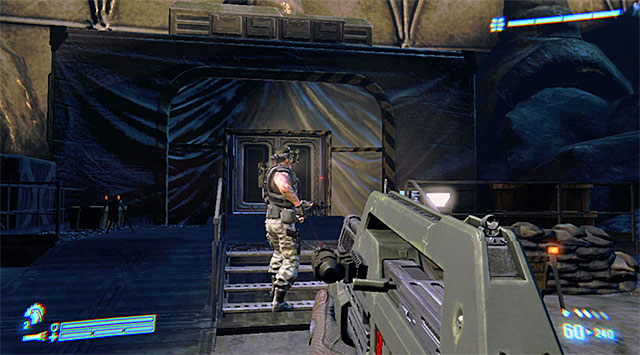
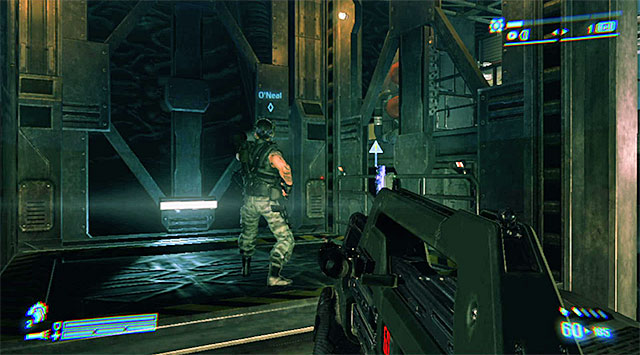
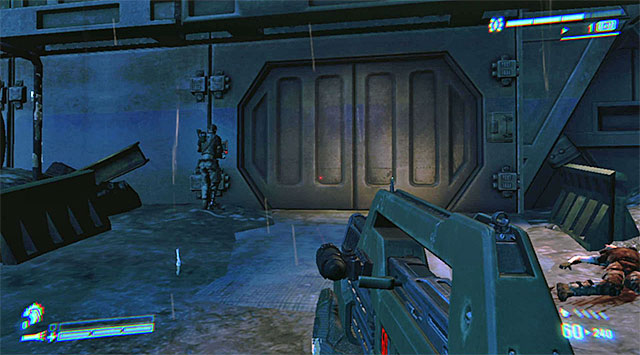
At the fork in the road, turn right. Approach the door pictured on the above screen. Interact with it to use the welding torch and unlock further passage. Go down the stairs and you'll enter the quarantine zone, which clearly suggests Xenomorph presence. Again, follow the linear path; on the way you'll stumble upon dead marines and alien eggs from which Facehuggers have already hatched.
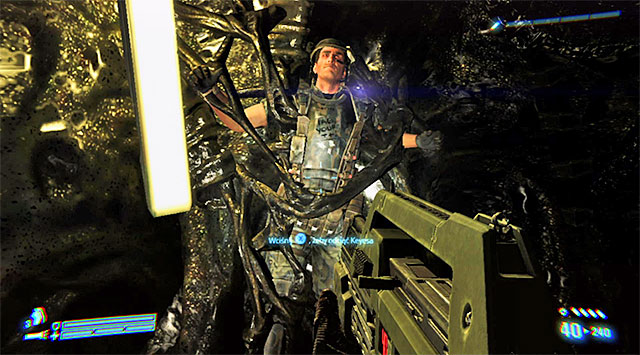
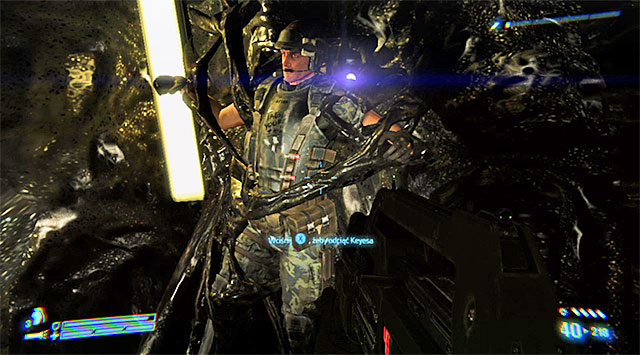
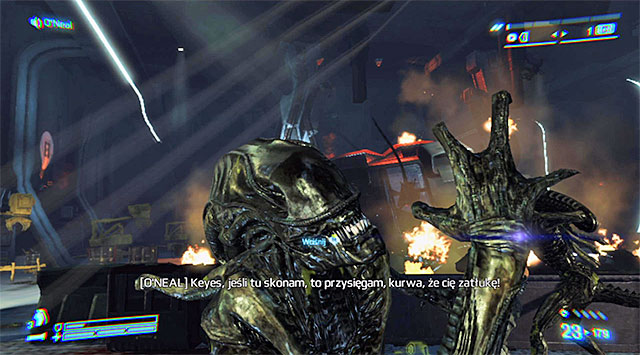
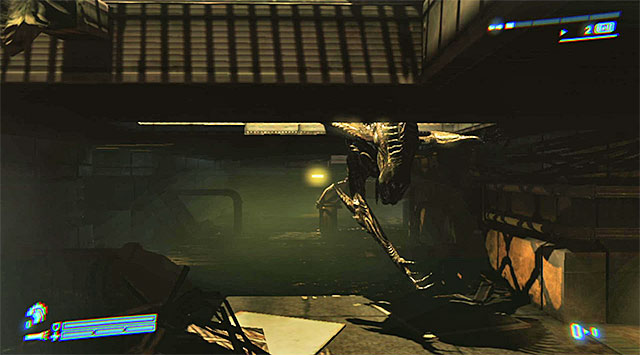
Examine the area to find Keyes, the only one to still be alive. Approach him and attempt to free him.
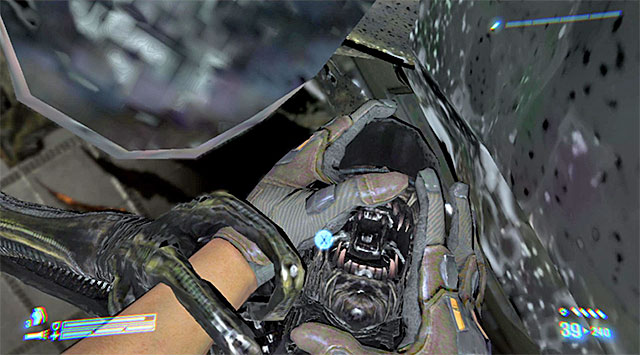
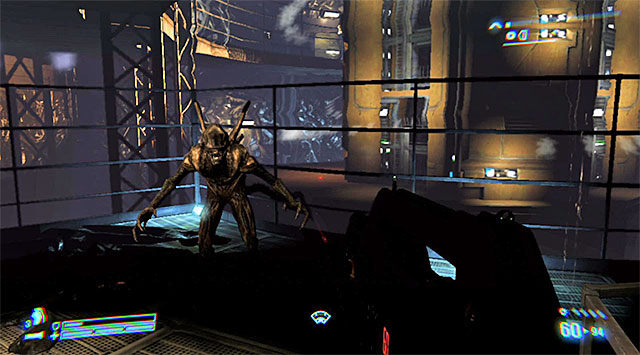
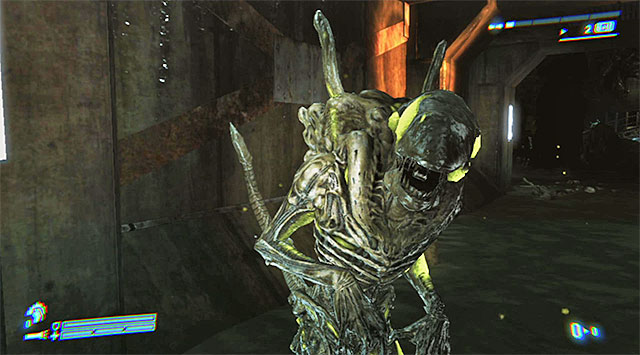
Your first encounter with a Xenomorph is about to begin. After being flung to the ground, prepare to rapidly tap the interact button to throw the alien away. Fire a few shots at it, though the real "hunt" is only about to begin.

You can use the motion tracker to locate the fugitive Xenomorph, but it's not a requirement. If so, you'd have to be ready to quickly select the firearm from the inventory. The alien should be hiding near the stairs you took to enter the quarantine zone, so backtrack to the rooms you've already checked out. When you locate the Xenomorph, use any weapon (preferably the pulse rifle or a shotgun) to get rid of it.
Go back to where Keyes is trapped. If you've lost a lot of body armor points, look around the area; you may find some armor pieces (once again: collectibles are pop up randomly). Approach Keyes again and push the interact button to finish cutting him down. Listen to a new conversation with the command.

Follow Keyes and wait for him to open a nearby passage. Enter the new room; there's a another piece of armor inside.

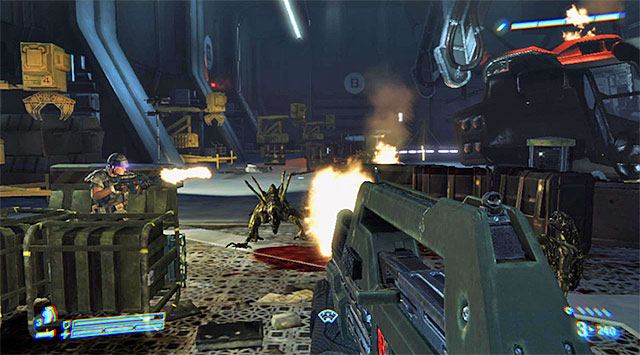
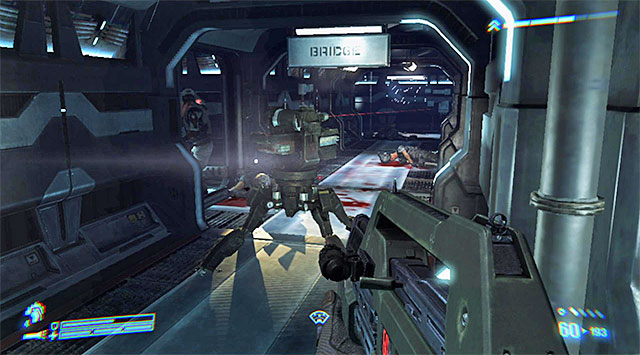
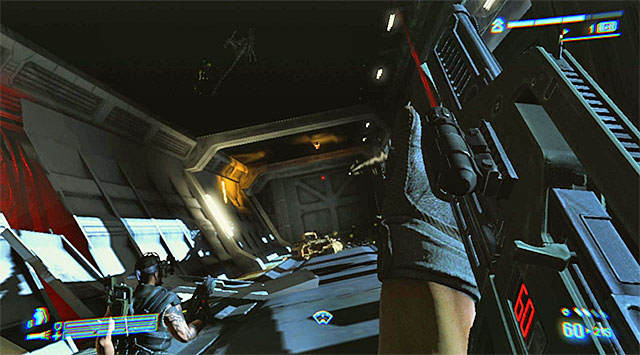
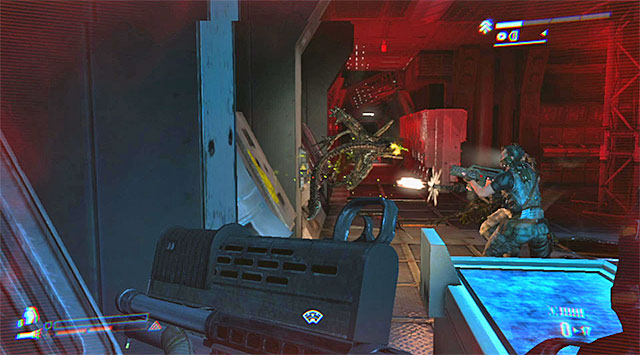
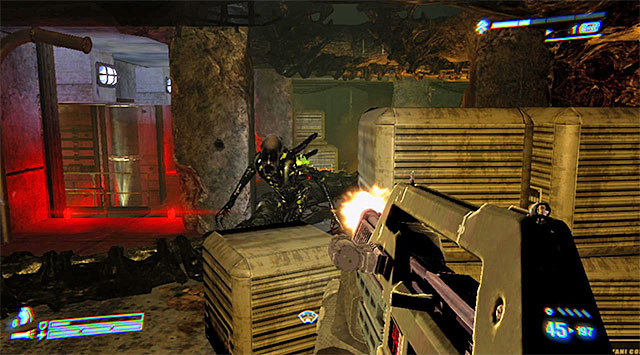
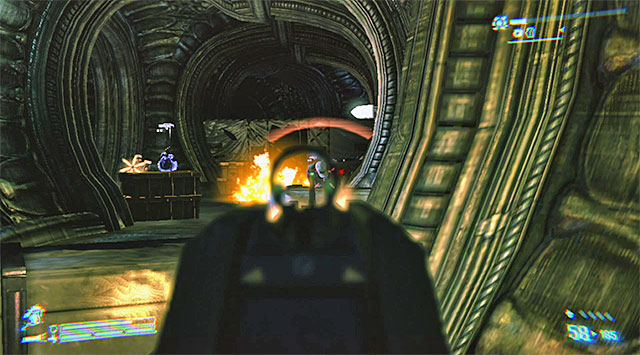
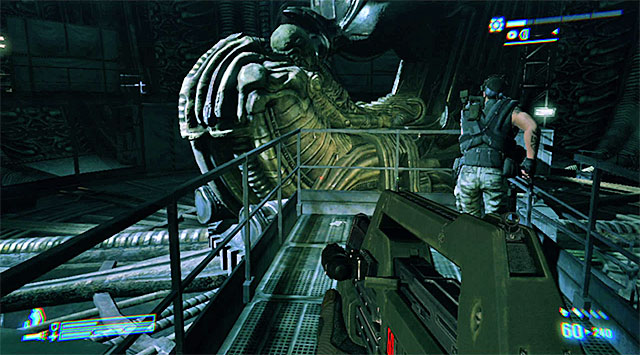
Proceed forward. When you enter the larger room, Xenomorphs will attack. I suggest taking a stand near the narrow passage so as not to give the aliens a chance to perform a surprise attack. If you're using the pulse rifle, I'd recommend firing a grenade launcher as support, to eliminate large groups of Xenos.

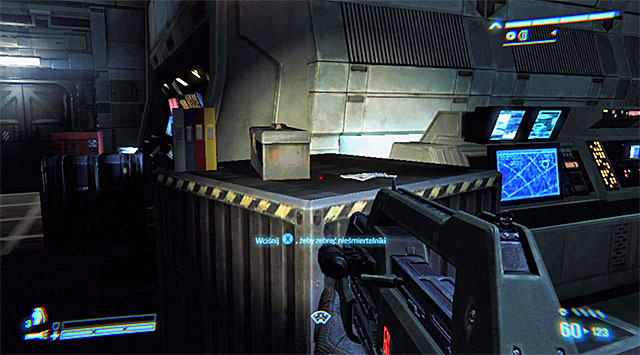
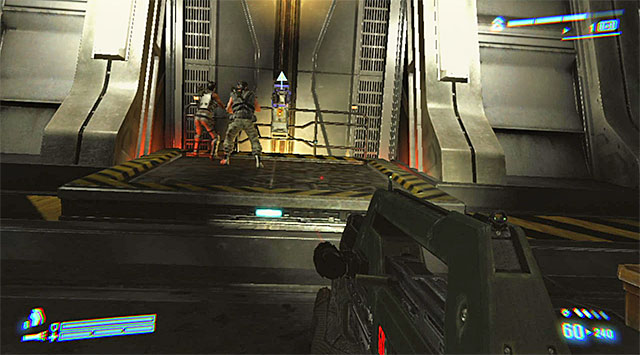
When you're done with the first wave, examine the area to the right of the entrance. Approach the railing, but watch out for another Xenomorph which may show up on the left without warning. Locate the Dog Tag from the screenshot (Cpl Dwayne Hicks).
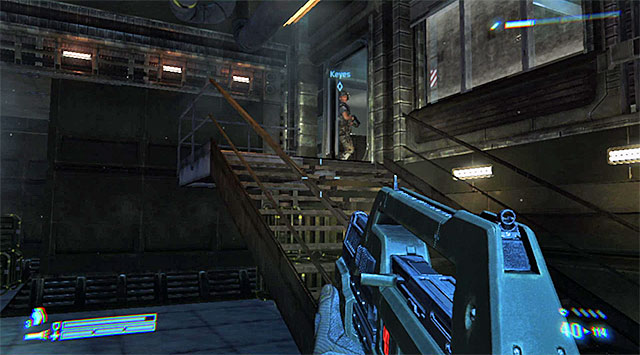
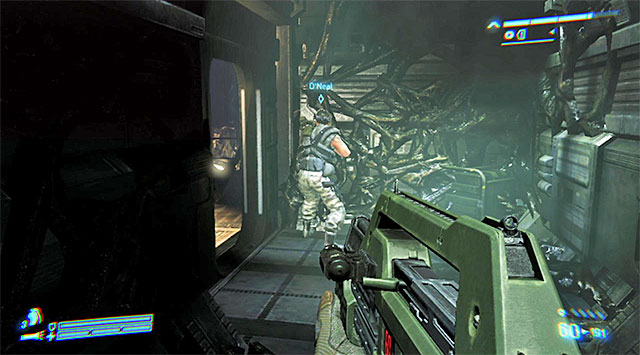
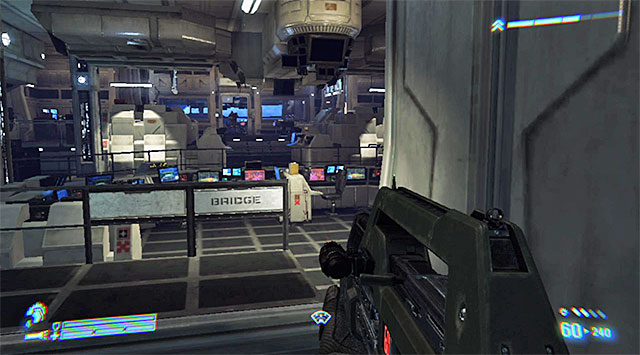
Follow Keyes. Try to stay near him and be ready to face new Xenomorphs that may stand in your way. Use the stairs leading to the control room. Go inside quickly so that Keyes could weld the door and prevent the aliens from attacking.
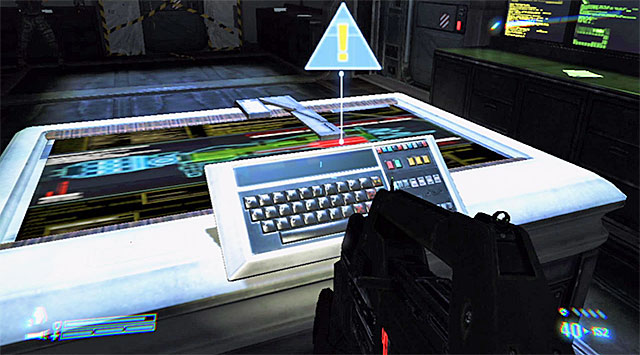
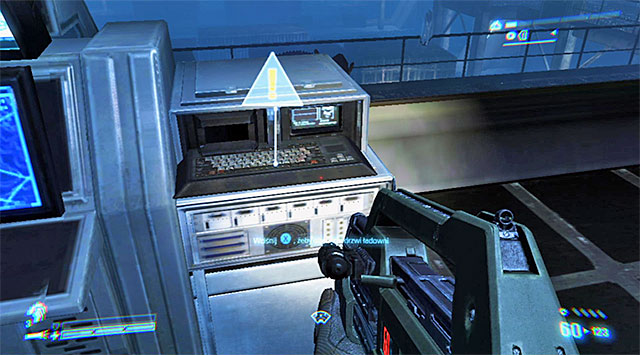
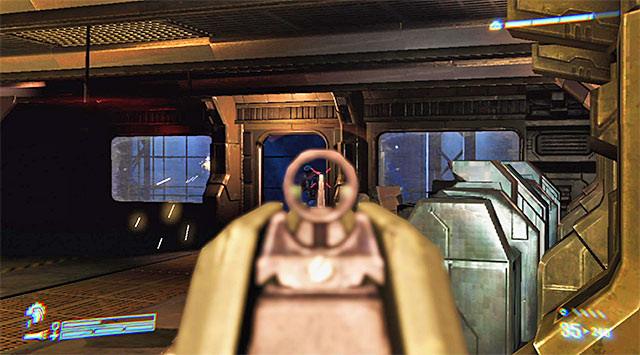
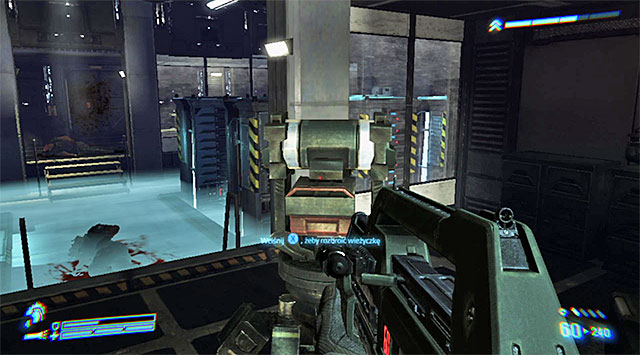
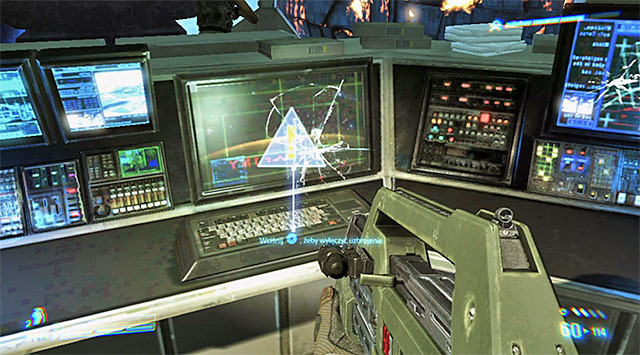
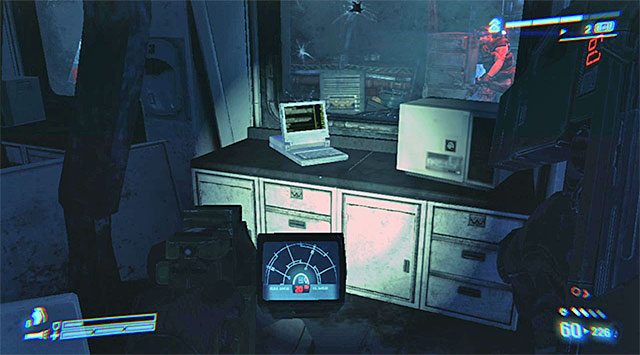
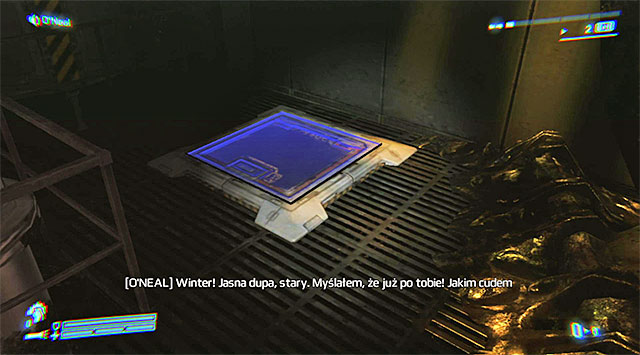
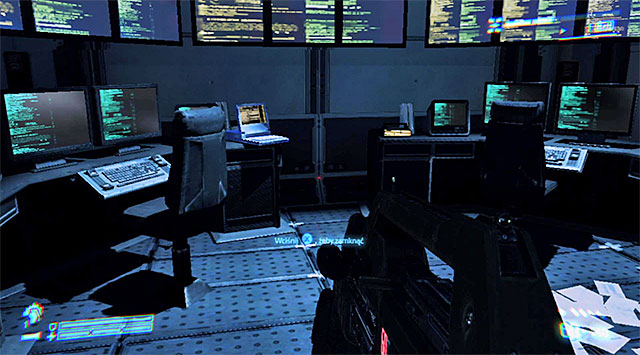
Be prepared to take down at least one Xenomorph that may cut through the windowshield even before shutting down the blinds. When the situations calms down, look around for the terminal illustrated on the screenshot above. Take the flight records and approach Keyes to hand it to him.
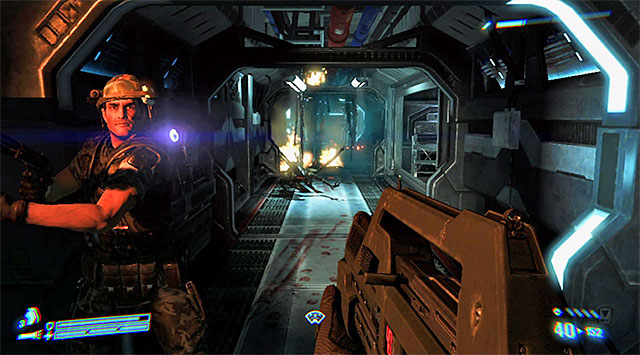
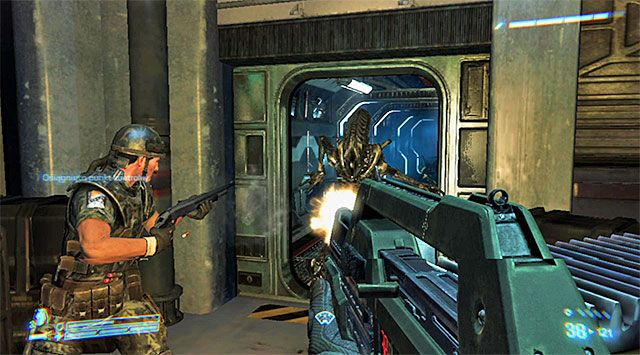
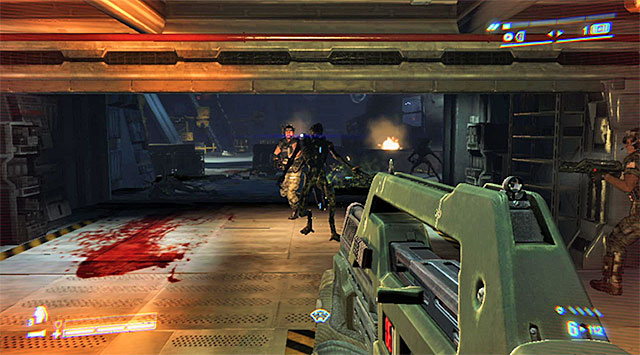
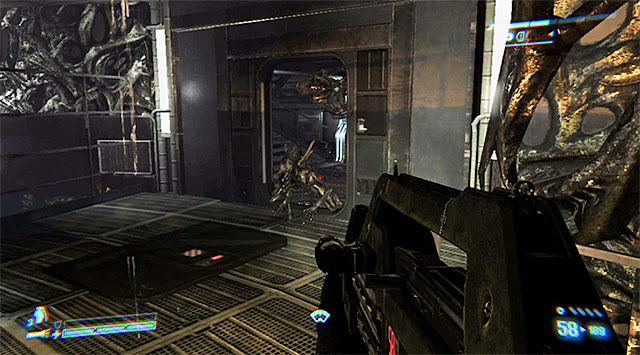
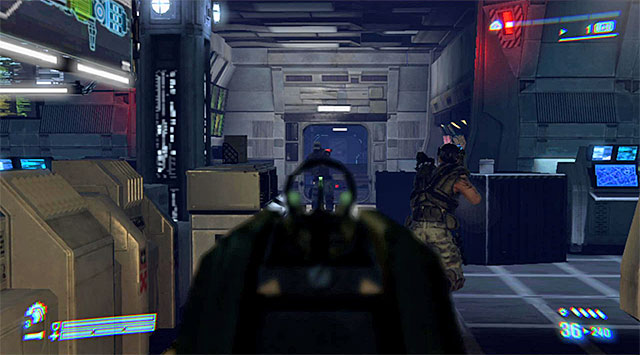
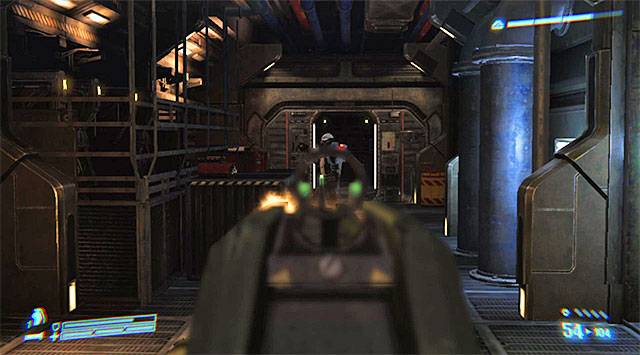
Wait until Keyes opens another passage. Once you're inside the corridor, get ready to take down the aliens that will show up from the room on the right. When it's clear, go inside, because the main corridor in blocked.
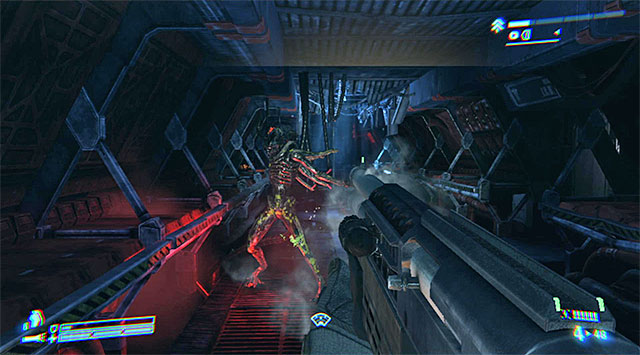
Eliminate further Xenomorphs, not forgetting the ones that will break through the small window on the left. Head for the next room. Here, start with the aliens that will show up right in front of you; then take care of the ones coming from the left corridor.
Backtrack to the main corridor and turn right. Take down a new batch of Xenomorphs and immediately follow Keyes, because pretty son this place will be crawling with unlimited numbers of aliens. Turn left at the fork and don't stop until you reach another room.
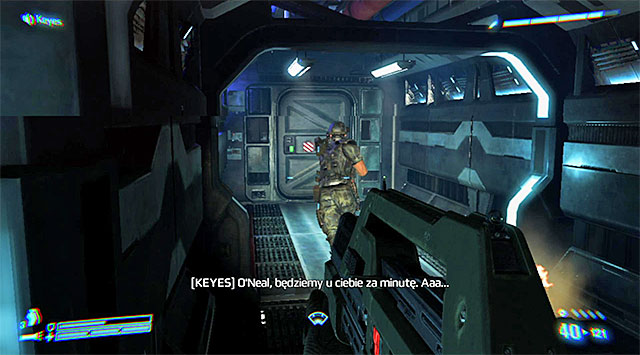
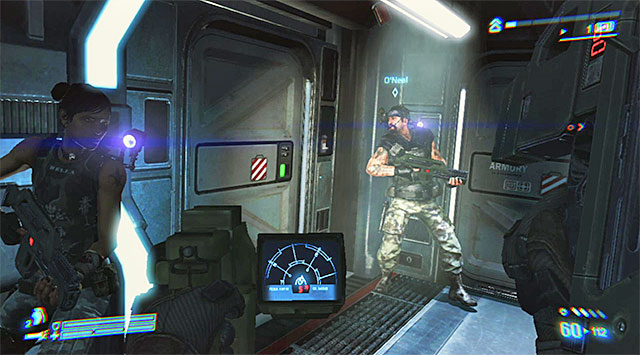
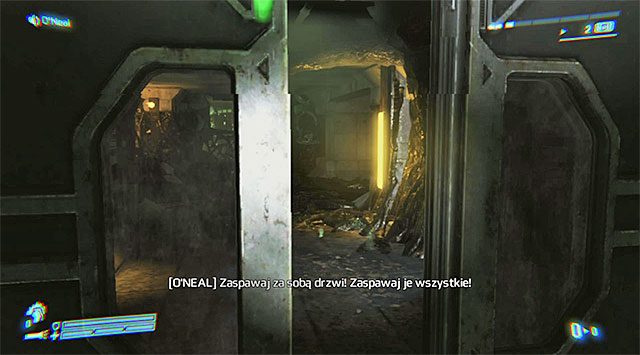
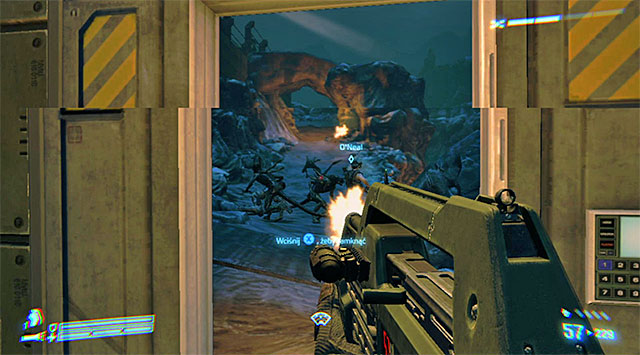
Turn around and eliminate a single alien that will be trying to open the door again. Check the room for supplies. In the meantime, Keyes will open the door to the hangar. Wait until he moves and follow him to the hatch where a group of marines is fending off aliens.
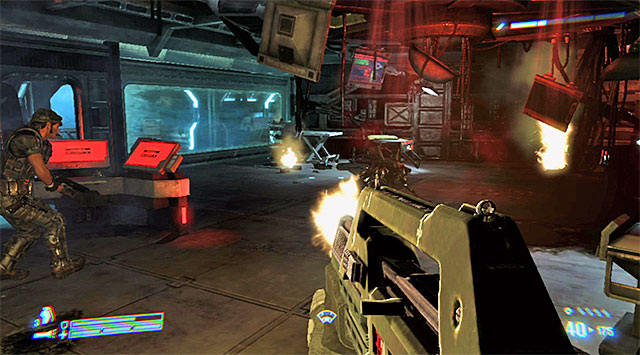
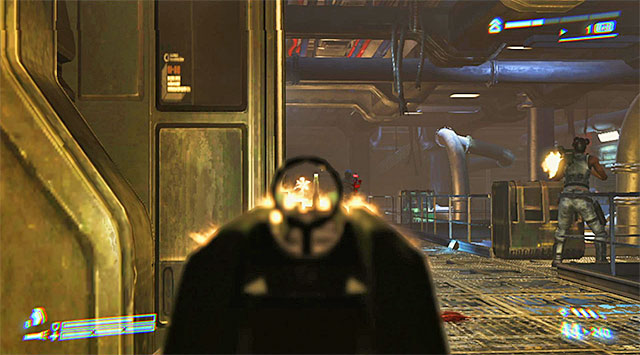
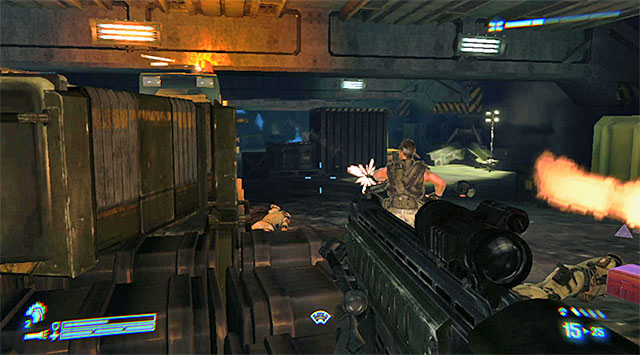
Now it's time for a defensive task. Stand behind the barricade and take a moment to locate some ammo and armor (if you need them). When the battle starts, focus mainly on those Xenos that will appear by the hatch. Depending on preferences, you can use the pulse rifle or (if you don't have ammo for the grenade launcher) the shotgun.
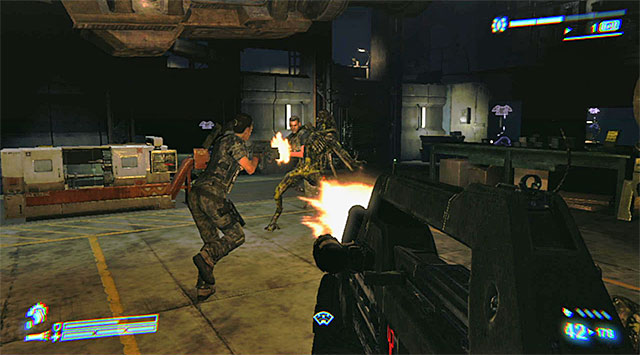
While fighting, keep in mind that in case you find yourself directly in front of a Xenomorph, you can perform a melee attack: hit it with the butt of your gun.
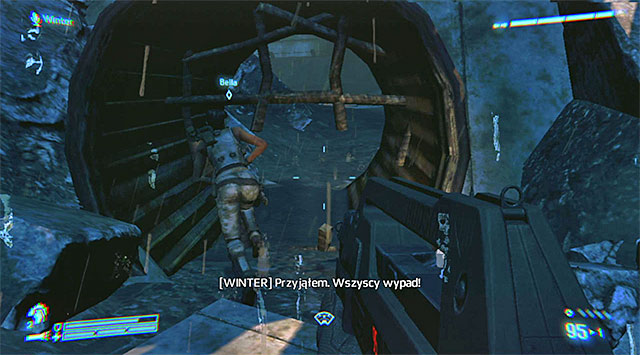
As soon as you receive info about unlocking access to the hatch, back out of the hangar (don't forget to take the armor, if you haven't already); this is the only way to stop the advance of the aliens. Again, head for the tunnel connecting Sulaco to Sephora. You'll watch and interesting cutscene there, and when it ends, you'll resume the game in the company of O'Neal.
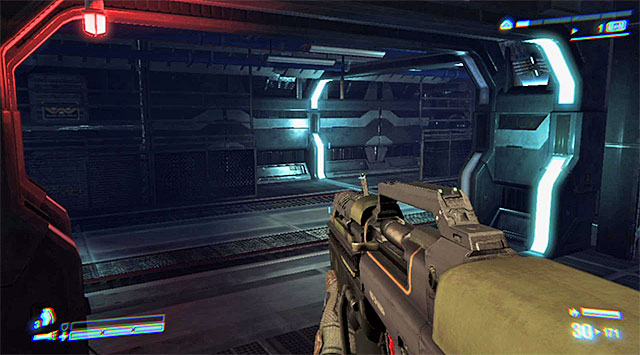
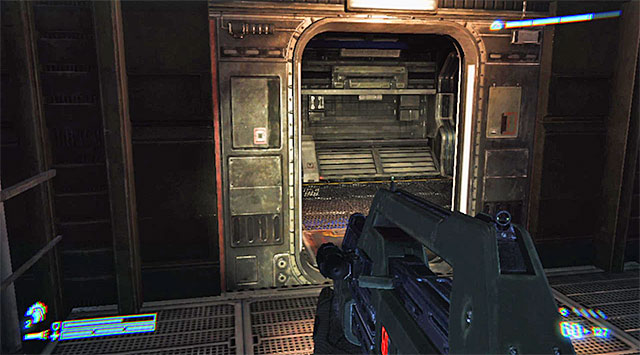
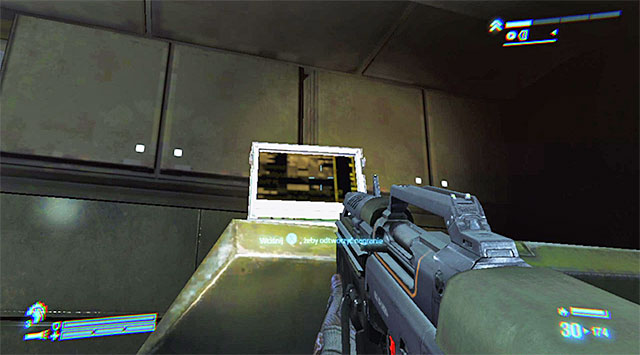
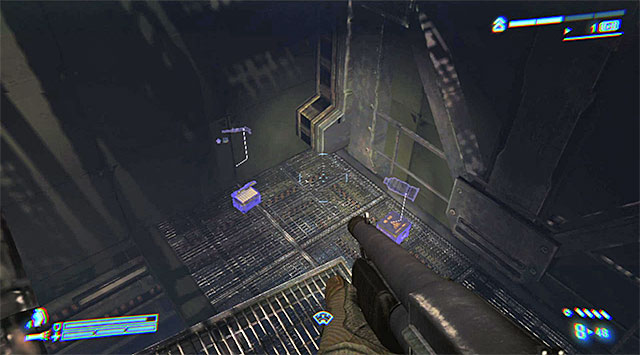
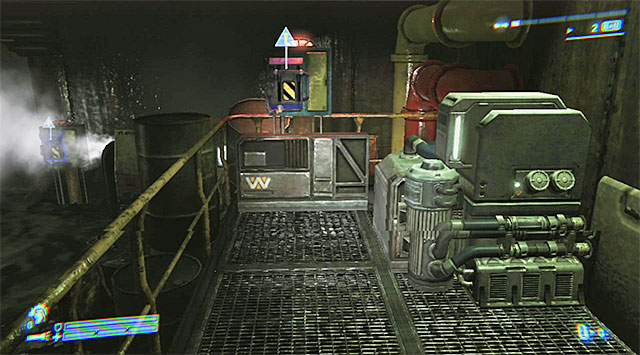
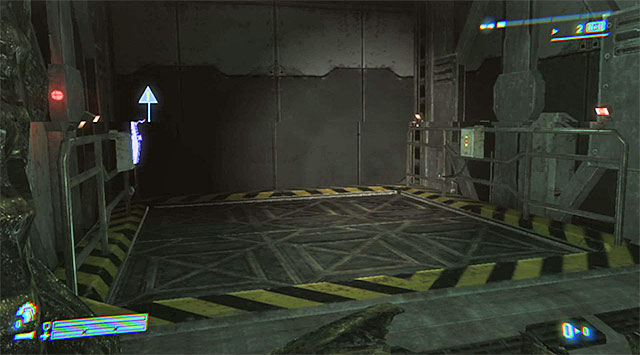
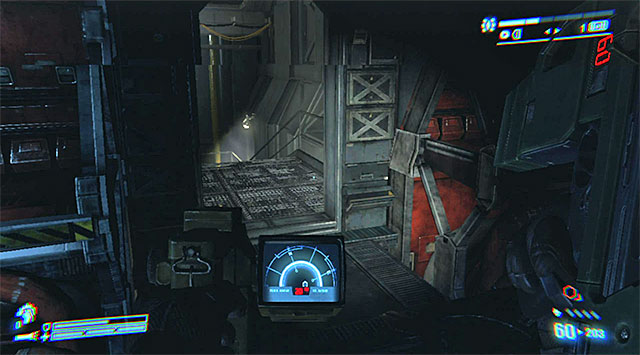
Wait for O'Neal to open the maintenance hatch, then jump down, crouching when necessary. In the new room, move towards the only available door. Wait until you're quarantined and proceed forward. Listen to a new conversation in the next room, then turn towards the newly unlocked interactive door.
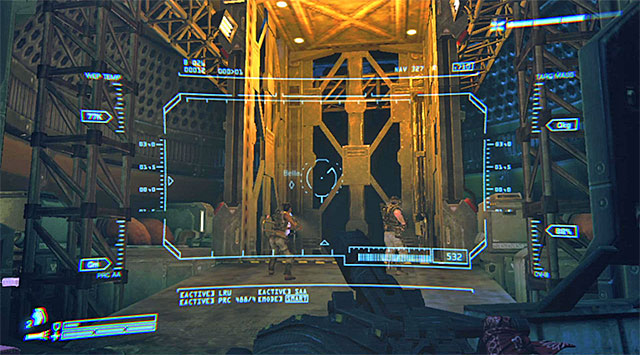
The current part of exploring the USS Sulaco is very linear, and what's more, you won't run into any aliens for now. The fighting will resume only shortly after using the above entrance to the gravitational well.
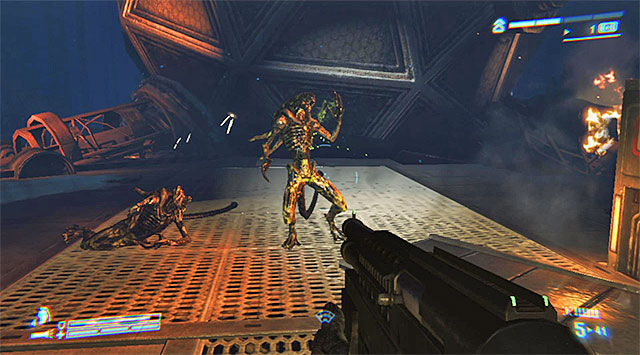
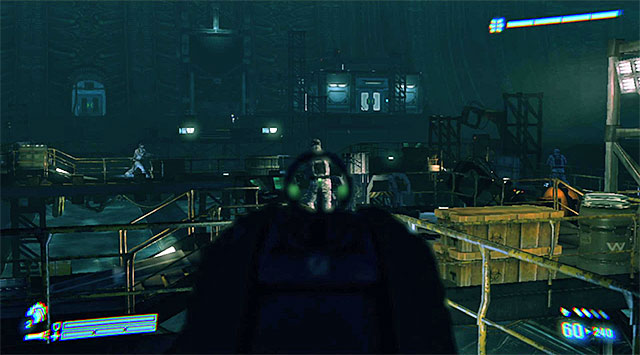
Start by attacking the Xenos on the right. Use the pulse rifle or any other weapon with similar accuracy, taking them down before they come closer and jump down on the platform you're currently on. After eliminating the first wave, go left. Get ready to send some other Xenos to hell. Here as well it's better to shoot them from a larger distance and assist yourself with the flashlight to spot them in less lit places.
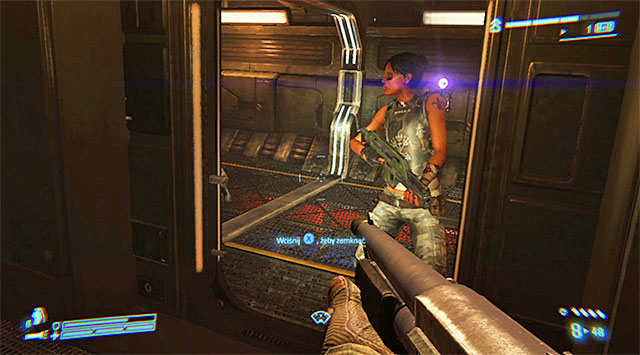
Stop when you reach a closed door. Theoretically, you could use the welding torch yourself, but this way you'd become defenseless and your teammate would have a hard time trying to keep you alive. It's much better to wait for O'Neal and let him handle the door, protecting him in the meantime (I recommend the shotgun).

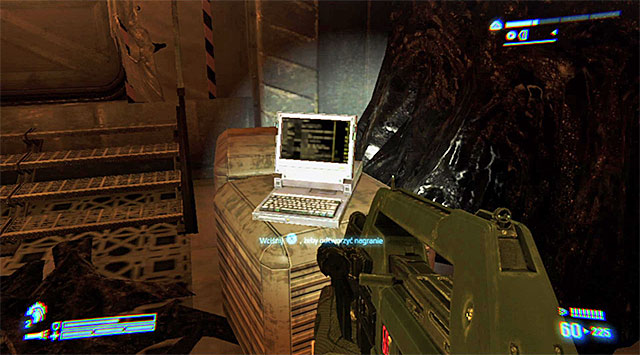
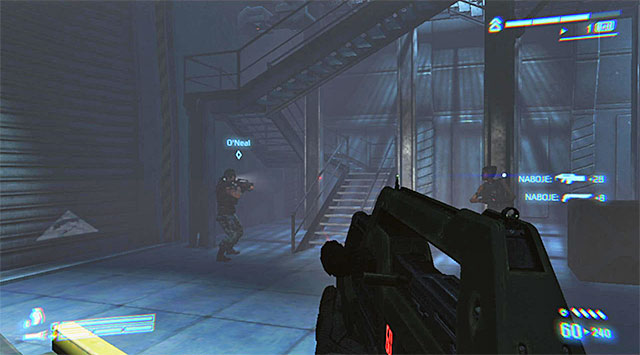
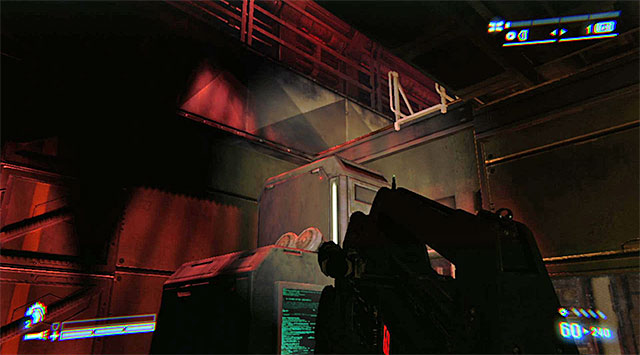
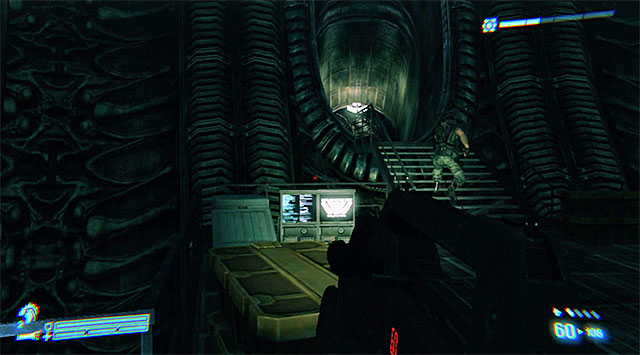
Start examining the new linear corridors. After entering the control room, clear the area of Xenomorphs, then look around closely for an Audio Log, pictured on the screenshot. Once you've thoroughly checked out the whole room, move to the entrance by which O'Neal should already be standing.

In the next room, you'll be surprised by several Xenomorphs, so be ready to use your weapons quickly. Continue the move forward; there is another Dog Tag by the computers (PFC M. Moore). Take the passage leading to the second level of the gravitational well.
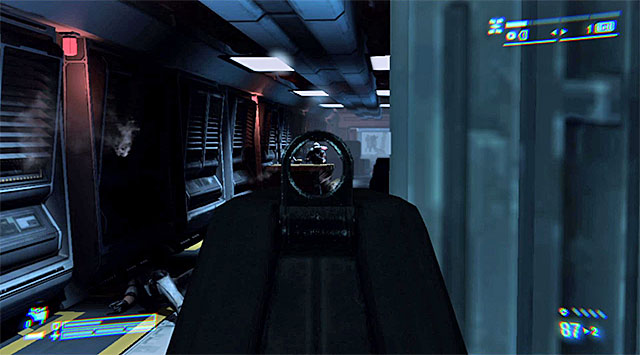
Again, there will be Xenomorphs coming at you from around the area, which they better be kept at bay. Nevertheless, keep going forward. Watch out for the aliens that will quite unexpectedly use the door on the right at the very end of the metal gallery.
Take the newly unlocked passage and get ready to eliminate the aliens that will show up on the ceiling. Check out every adjoining corridor and room; most of all, you'll find a complete set of armor as well as Hick's Shotgun, pictured above, which is a Legendary Weapon. Replace your regular shotgun with it.
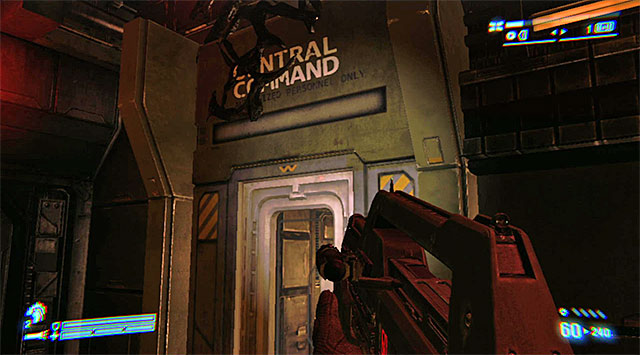
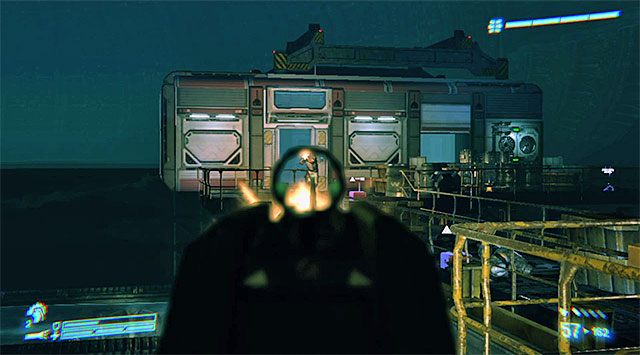
Proceed to the passage leading to the metal galleries on the third level of the gravitational well (the above screenshot). Attack other Xenomorphs and get to the new locked door.
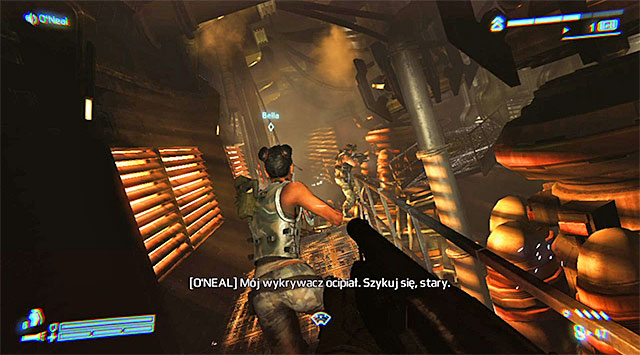
The task isn't any different from the battle you've fought on the first level. Same as before, I recommend mostly the shotgun (preferably the one you've just acquired), unless you have ammo for the grenade launcher or any other similarly powerful weapon. Try not to move too far from O'Neal and use the flashlight to spot the aliens quickly. Don't spare your ammo and by any means necessary don't let the Xenos use melee attacks against you too often.
As soon as it's possible, go through the passage opened by O'Neal. Once you're in the corridor, you can turn around and shoot the rest of the Xenos; you'll be in a much better spot, also the number of the aliens is finite. Follow O'Neal. Resume the linear path along the corridors, all the while looking around for supplies. Soon you'll reach a door leading to your current destination, the cargo bay.
Get rid of the surrounding Xenomorphs and find the stairs to the upper galleries. Eliminate further aliens. Pay attention, since most of them will moving on the ceiling. Don't let any of them surprise you; if needed, use your flashlight and the motion tracker.
Follow O'Neal. At the entrance to the control room you'll be once again forced to defend your ally. In this case, I'd suggest a weapon with high accuracy rate, trying to kill the Xenomorphs before they reach the gallery you're currently on.
Enter the control room as soon as O'Neal unlocks the door. Ignore the Xenomorphs visible behind the windshield, and check out the room to find a new Dog Tag (PFC S. Trubetskoy).
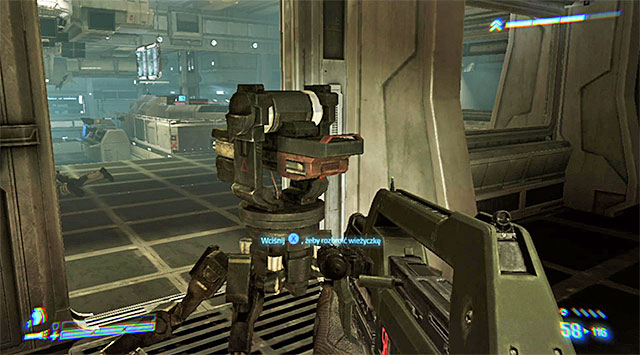
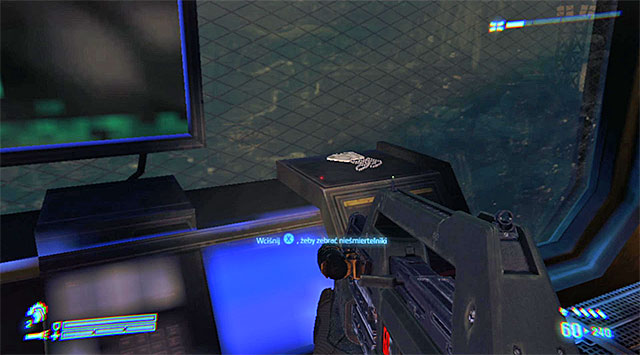
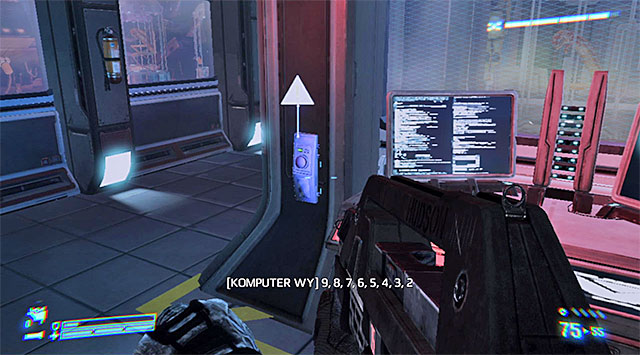
Once you've collected everything there is to collect in the control room, interact with the above terminal which controls the cargo bay door. This will prompt new cutscenes and the end of the mission.
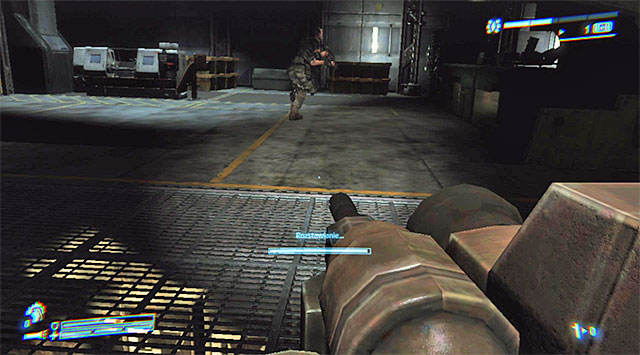
Right at the beginning of the mission you'll be forced into the first battle with the mercenaries hired by the Weyland-Yutani corporation. Following the game's tip, crouch to hide behind covers. Your tactics should differ from the Xenos encounters, too. It's better to attack the enemies from a larger distance, trying, if possible, to aim at their heads. I also recommend using every kind of grenades you have.
Once the place is secured, use the only available way leading to the next area. There's more enemy soldiers to defeat. I suggest sticking to the upper gangways, moving right and looking for any opportunity to flank the enemies. What's helpful here is that most of the mercenaries will be busy attacking O'Neal.
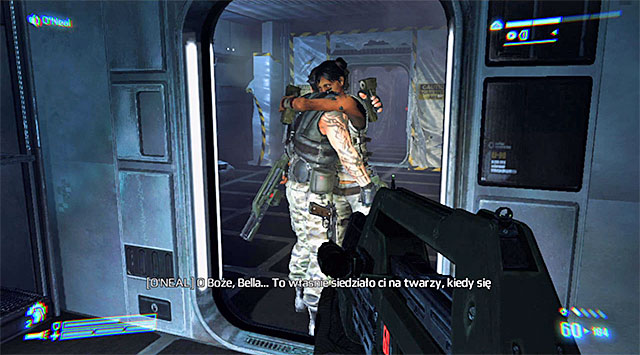
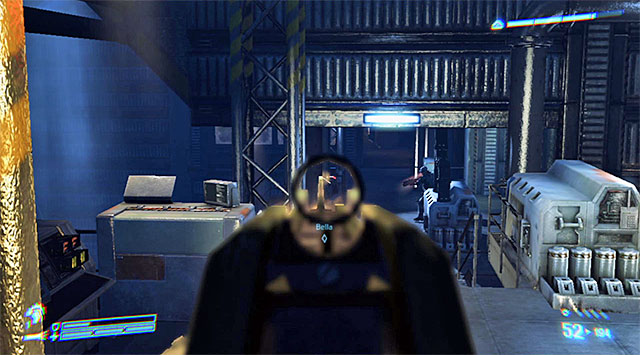
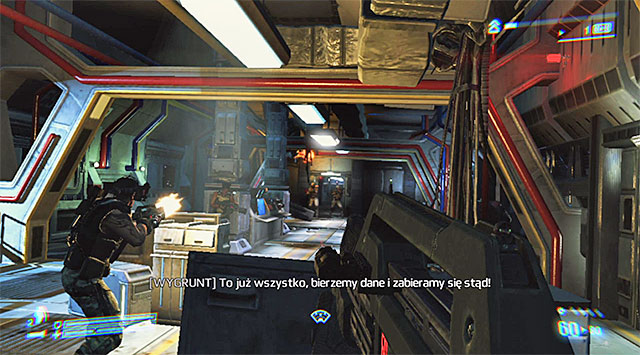
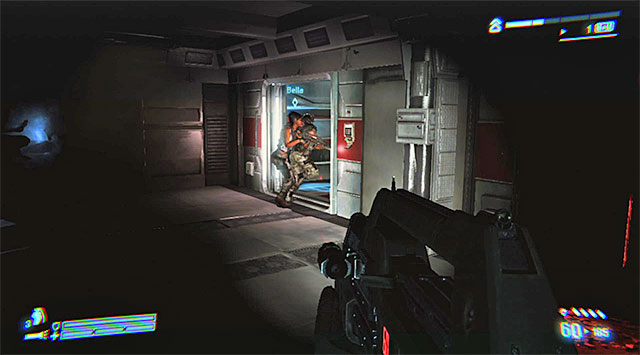
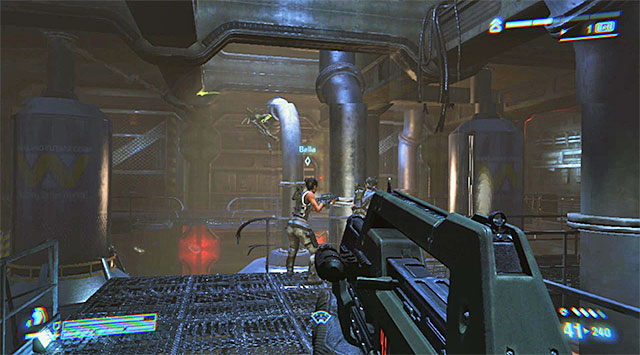
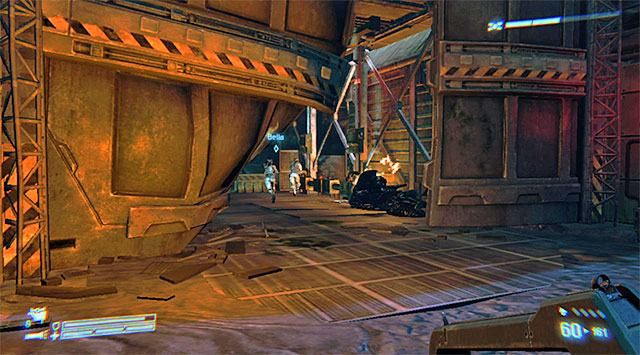
When it's over, examine the area where you fought the first battle, because many enemies drop valuable supplies when they die. When you're ready, go through the door pictured above. Turn left and listen to the conversation with Bella.
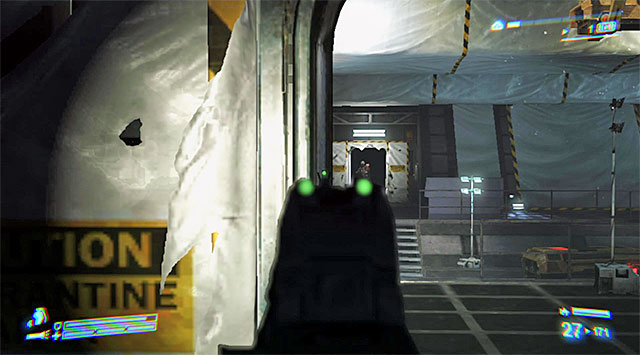
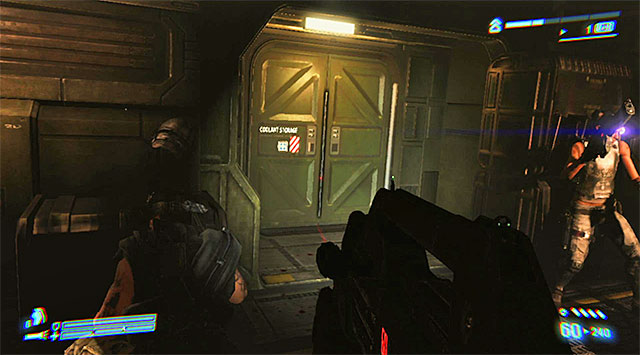
Go towards the door O'Neal is waiting at and start exploring the linear corridors. On your way you should stumble upon a complete set of armor, so it pays off to take a minute and look around. Find the stairs leading to the lower deck and go through the door on the right. Watch out for a soldier you'll see in the distance. Take him down, then head for the blocked passage he came from. Listen to what O'Neal has to say.
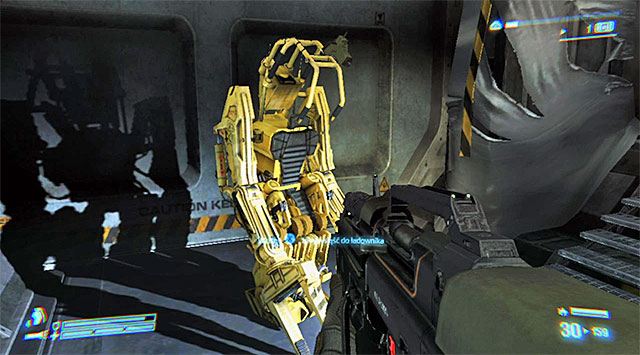
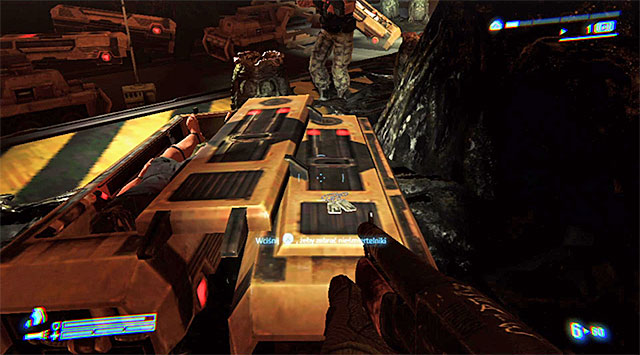
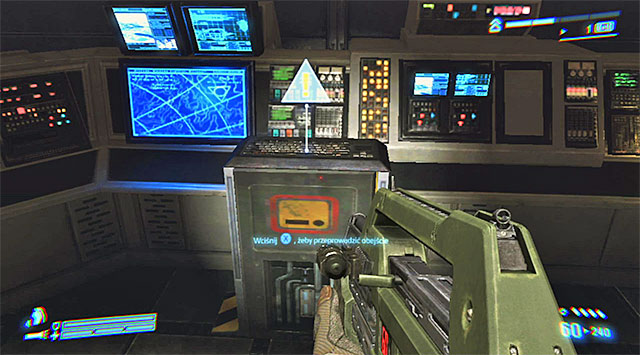
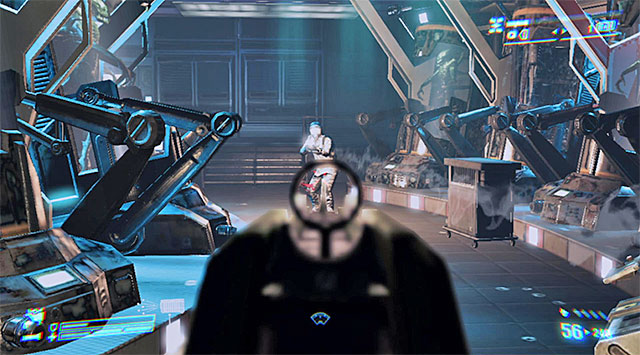
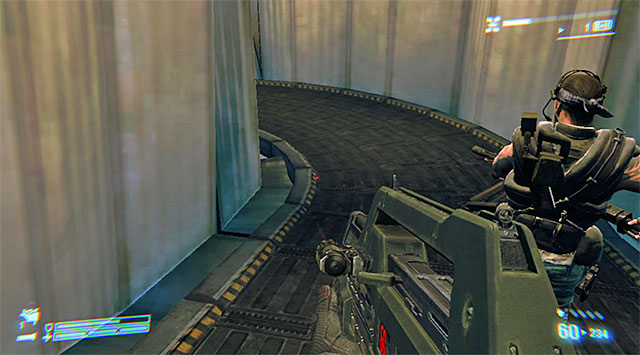
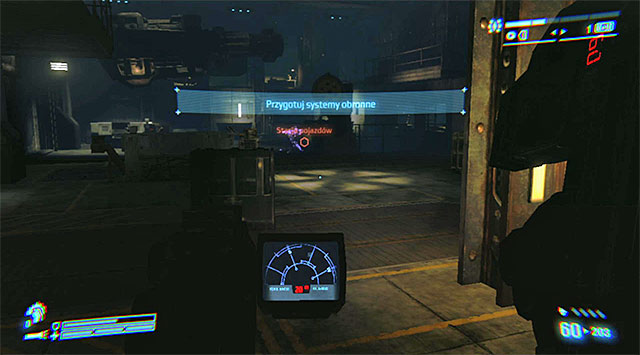
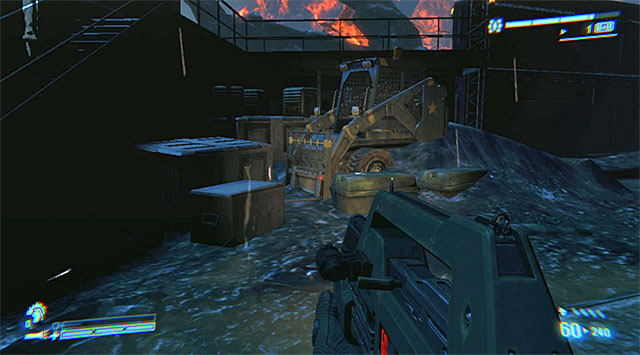
A very easy task. Go down to the lower level and interact with the above powerloader.
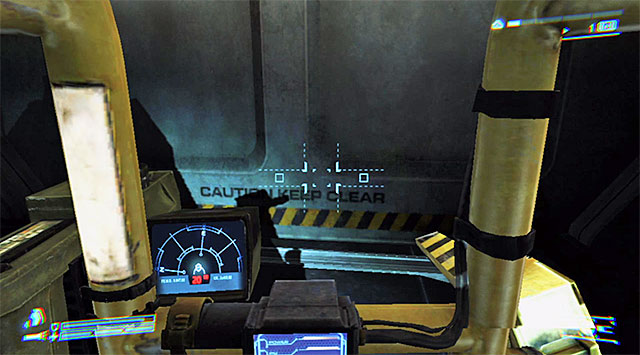
Go straight ahead, bypassing the obstacles. Stand by the large door and use the Powerloader's right arm to lift it. This will conclude the short ride and you'll be given further objectives.
Begin by taking a thorough look around the room with the dead marines, and you'll find the first Dog Tag (Cpl Cynthia Dietrich). Use the only available way to the next location.
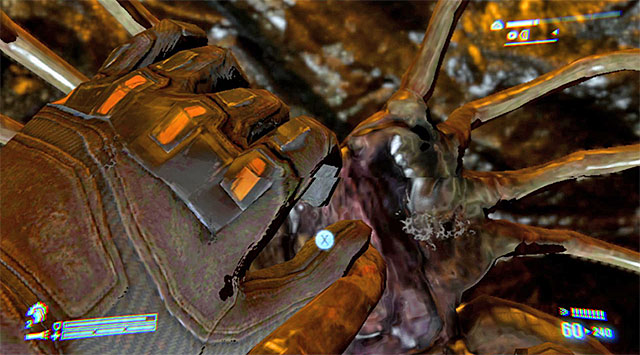
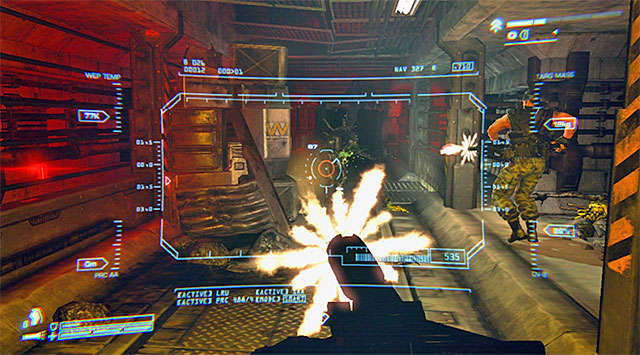
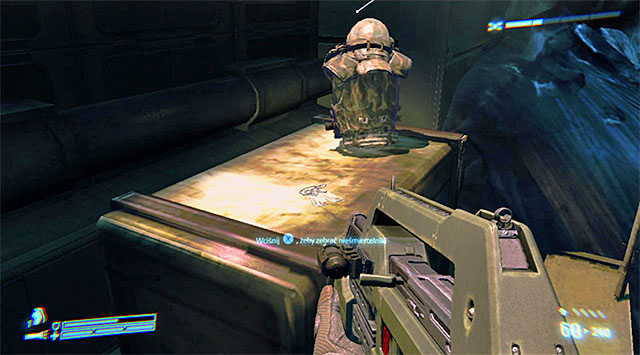
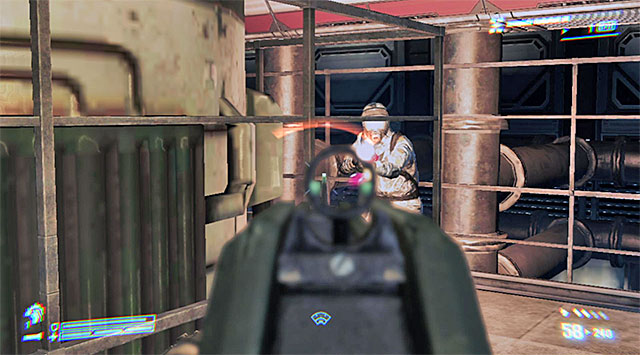
Get ready for your first encounter with a Facehugger that will spring from one of the alien eggs. Rapidly tap the interact button to throw it back (screenshot 1), then use the machine gun to kill it (screenshot 2).
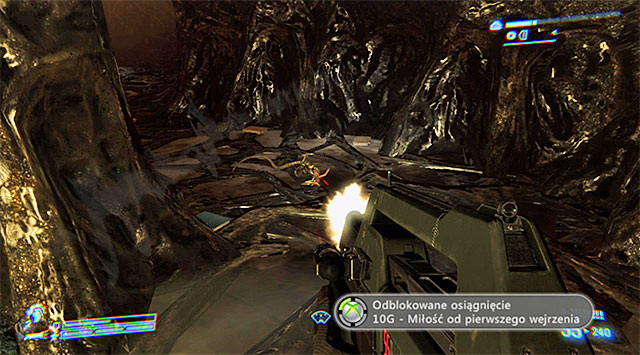
Continue exploring the area. From now on you'll come across more eggs from which Facehuggers haven't yet hatched. Destroy them from a safe distance; it's best not to take any chances. If there is an encounter, don't let them get close to the main character; use the flashlight and the motion tracked to detect them as quickly as possible.
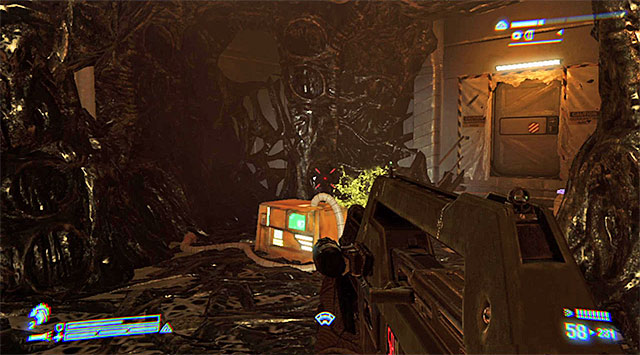
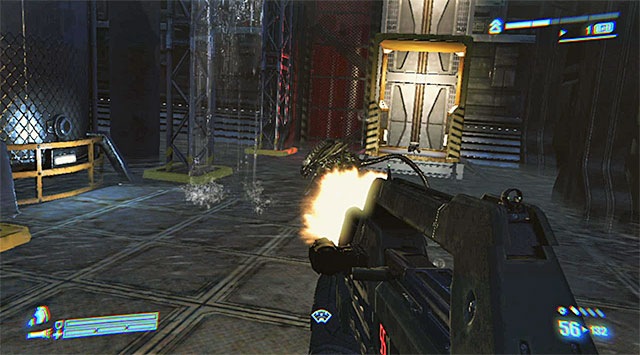
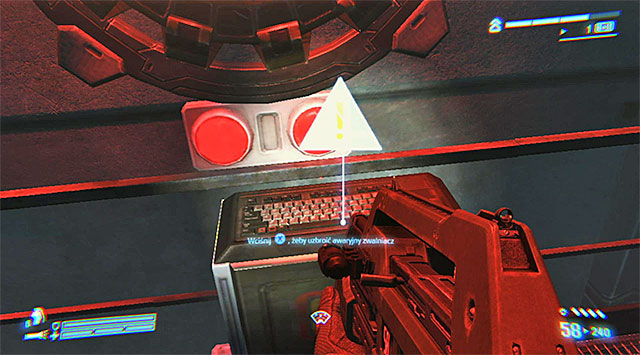
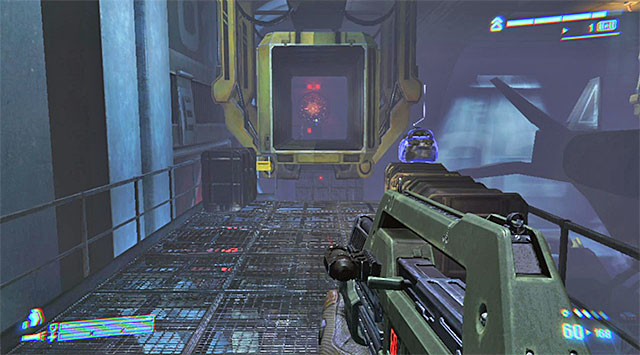
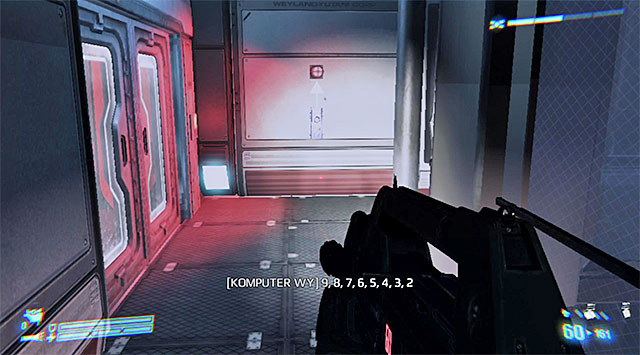
Continue the march forward to find the first Audio Log in this area. Approach the door with the pulsating red light and use the welding torch to unlock further passage.
When you open the door, be ready to get rid of another Facehugger and destroy more eggs. Move forward, but don't be in a hurry; try to destroy every egg you find and stop every time you get a warning about a Facehugger showing up in the vicinity.
Your destination is the door marked as quartermaster. Soon after opening it you'll stumble upon Bella, who'll join the team. Listen to the conversation, pick up supplies from the area and head for the closed door leading to the quarantine zone; open it with the welding torch.

Examine the large room with no enemy encounters. Find the corridor with very distinct blood stains. It will take you to another armor set and another Dog Tag (Sgt Z. Forcher). Pick them up, approach the door leading to another section and open it with the unfailing welding torch.
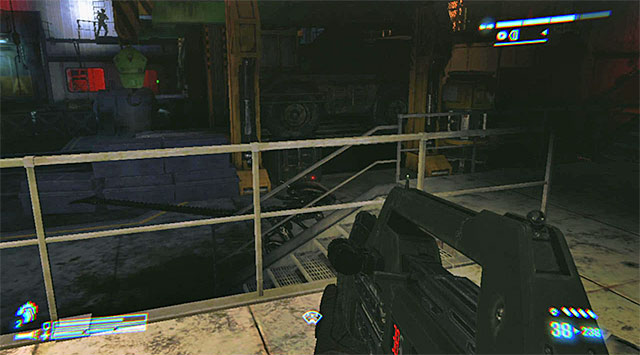
After unlocking the door, head for the stairs leading to the service line and go straight ahead. As you may be guessing, there will some fighting with the Weyland-Yutani mercenaries. I suggest starting off with the grenade launcher or regular grenades; it's the easiest way to get to the covers. Further on, try to move towards the galleries on the right so as to gain height advantage and be able to flank several enemies.
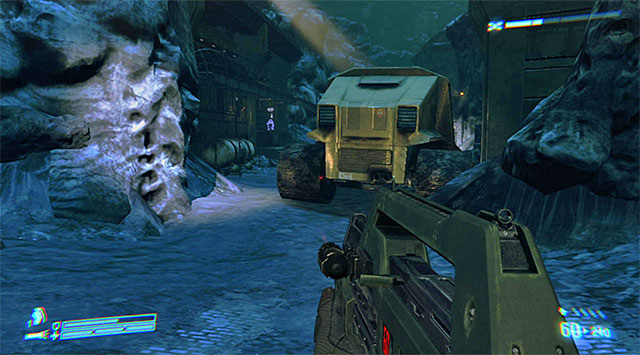
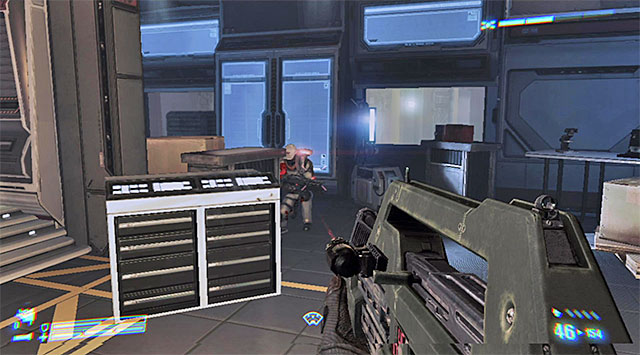
While moving in a straight line, keep an eye for quite numerous collectibles scattered around. Go through the vehicle on the service line and get ready to fight a visibly stronger soldier. Attack him from behind a cover, using explosives when needed to inflict more damage. When you defeat him, he should drop a full armor set.
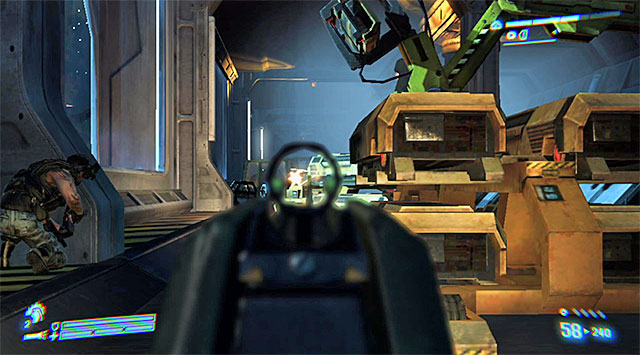
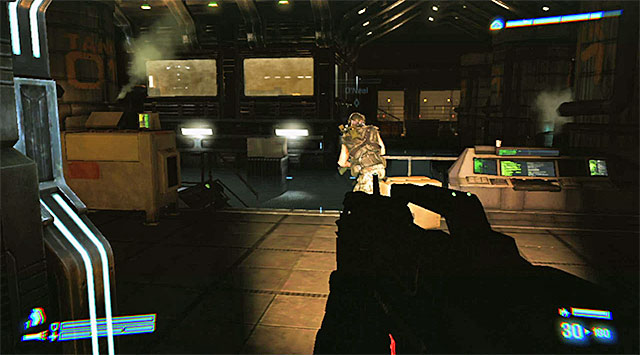
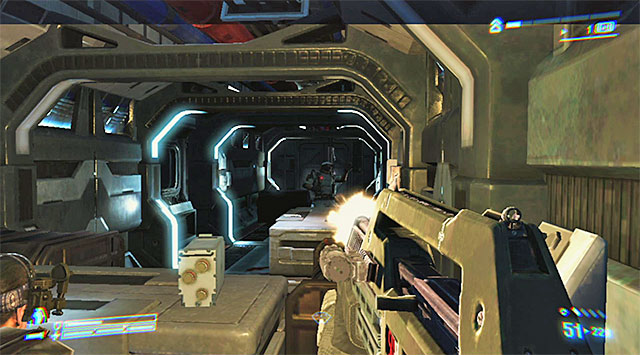
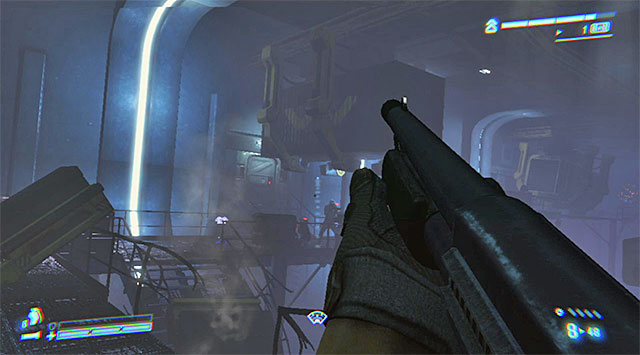
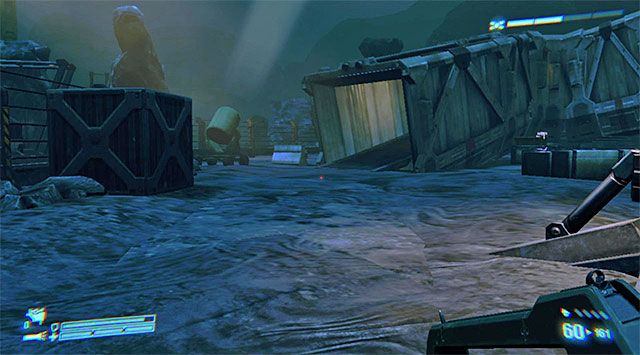
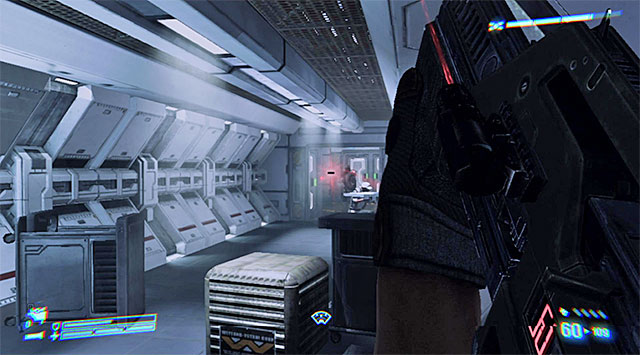
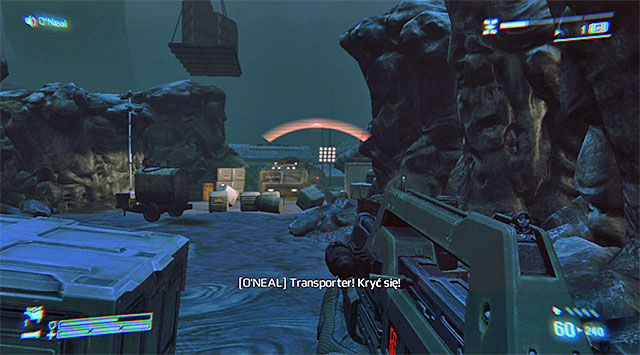
Resume going forward. At the end of the service line, turn right and approach the only interactive door. You'll come across new enemies after entering the larger room (the above screenshot).
I don't recommend trying to take a stand at the entrance, but rather immediately going left or right. Begin securing the chosen area, all the while counting on your teammates to take care of the rest of the place. While fighting, try to aim at the numerous yellow tanks; even if an explosion doesn't kill a mercenary at once, it will at least set him on fire, making him an easy target.
Afterwards, examine the area for collectibles, then move towards the entrance pictured above. After a while you should reach an elevator. Hail it, go inside, and use the control panel. Wait for it to take you to the new level.
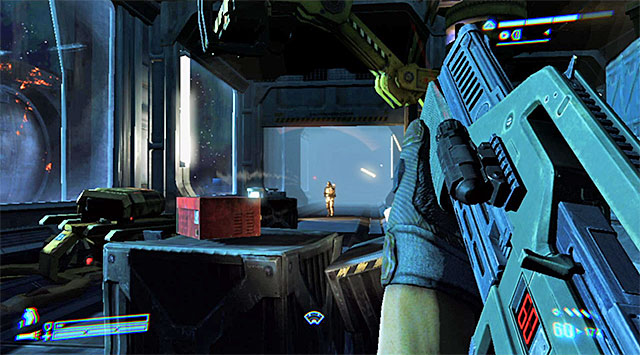
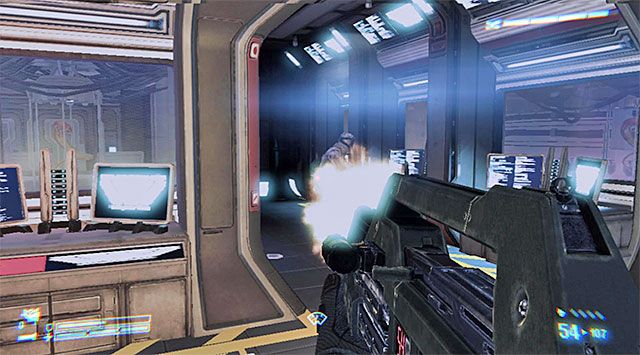
Follow the rest of your teammates. New mercenaries will appear where seen on the screenshot, but be aware that more enemies will show up on the metal galleries outlined in the distance. When you eliminate them, head for those galleries and turn right.
Move forward, but don't hurry; some new soldiers will stand in your way. Crouching works good here, as well the grenade launcher and shooting the tanks. When the area is secured, enter the next section. In one of the nearby room there should be a single soldier to take down.
Keep moving forward, one step at a time. Another big battle will take place in the room illustrated on screenshot 1. Watch out especially for the mercenaries that will appear in the upper room on the left. Depending on preferences, you can try to eliminate them from a distance (use covers) or reach the door as quickly as you can to take them out in close combat (screenshot 2).
When it's over, examine the area; apart from supplies you'll also find the third Dog Tag (PFC J. Ziglar). Continue the march towards your current destination.
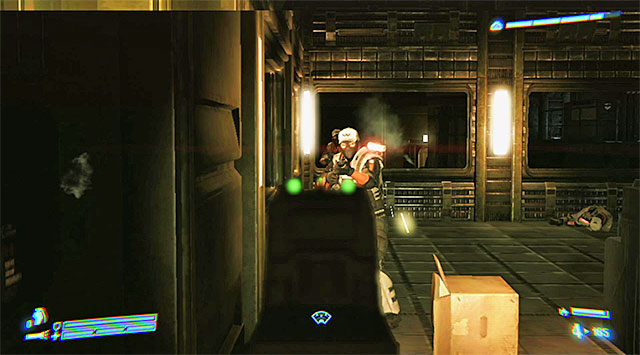
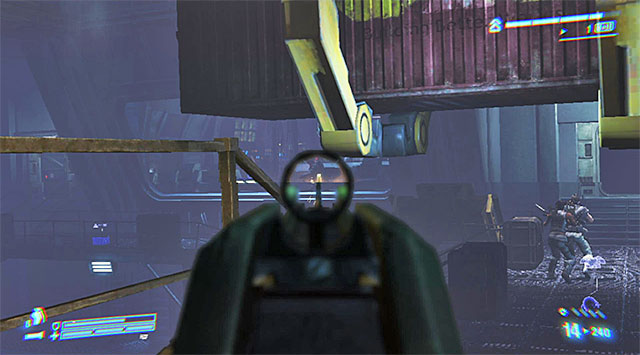
There are three subsequent larger rooms ahead of you, and in each one of them there is an equally large group of hostile mercenaries. Remember to use covers, replenish your supplies and shoot the explosive tanks to your advantage. When you reach the third room (the above screenshot), take notice of the better equipped opponent which will show up in the distance. Shoot him from a solid cover so as not to lose too much energy.
When the last battle is over, examine the room to find an Audio Log where shown above (make sure to stand in a proper spot, it's the only way to render it interactive).
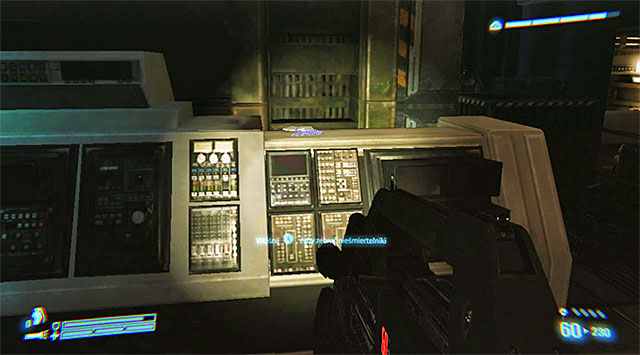
Locate the control panel to unlock the door to the engineering section. There are a few narrow corridors ahead of you. Each of them contains several enemies to defeat, and taking into account the layout of the area, it's best to use grenades or the grenade launcher against them. Your destination is the elevator. Same as before, hail it and use the control panel inside.
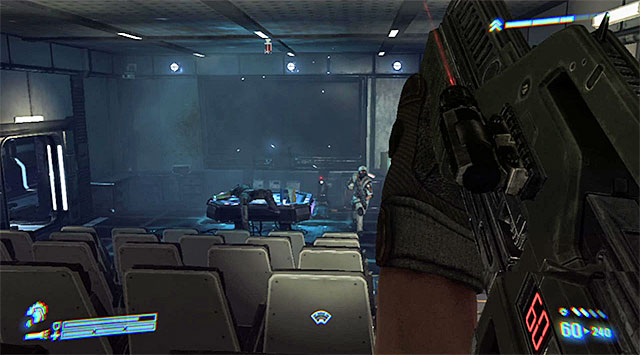
Be ready to kill the first mercenary after stepping off the elevator. Replenish your supplies if needed, and move forward. New enemies should be waiting for you in the screening room pictured above. When you to try continue exploring the command deck, you'll receive a warning about active auto turrets, which you'll have to deal with.
There are two turrets in the closest area. The left corridor leads to the first. When you reach the fork, don't turn right, but go to the left room. Kill some mercenaries which will surely show up, and go around the back of the turret to disable it (the above screenshot).
The second turret can be reached through the corridor to the right of the screening room. Similarly, it's not recommended to try to approach it in a straight line (through the server room), but going around it on the right (the above screenshot). It's worth adding that for the task to be completed you only need to disable one turret, but of course, it's better to deactivate both.
Continue going through the command deck, choosing the passage close either to the left or the right turret. Your current destination is the captain's bridge illustrated above, where, naturally, you'll be welcomed by enemy fire. Shoot from behind a cover, using the motion tracker to detect the enemies.
I recommend eliminating the enemies without moving away from the lower part of the room, because there is a third turret at the main entrance and you might easily get caught in its fire range. I don't recommend wasting supplies on trying to destroy it; instead go through one of the side rooms (left or right) so as to get behind it and deactivate it safely.
The last objective is pure formality, you won't even encounter any new enemies. Examine the whole bridge to pick up collectibles and find the control panel pictured above. Interact with it to prompt a cutscene and successfully conclude the second mission.
The first part of this mission is linear and you won't encounter any enemies. Follow your teammates as they go through partly destroyed areas of the bridge. Keep in mind that despite the ship being torn apart, you don't have to escape in a hurry. You're also safe in the corridors with lightly depressurized doors; they will try to suck you in only with marginal force.
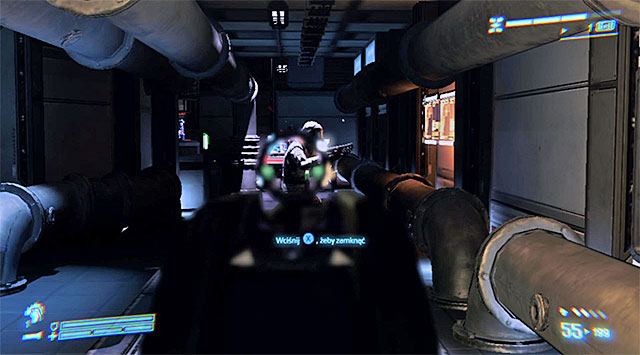
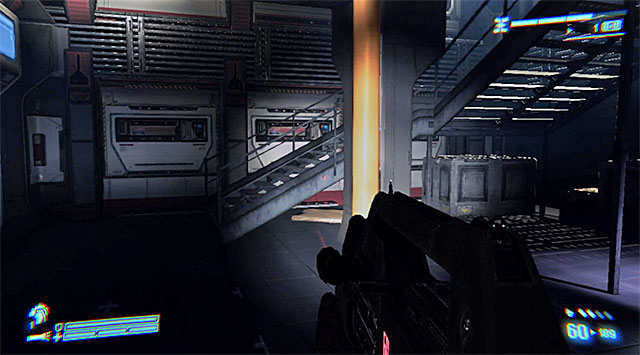
When you reach the screening room from the previous mission, turn right and go upstairs. In the nearby corridor fire at the yellow canister to fully close the door and let you continue onwards.
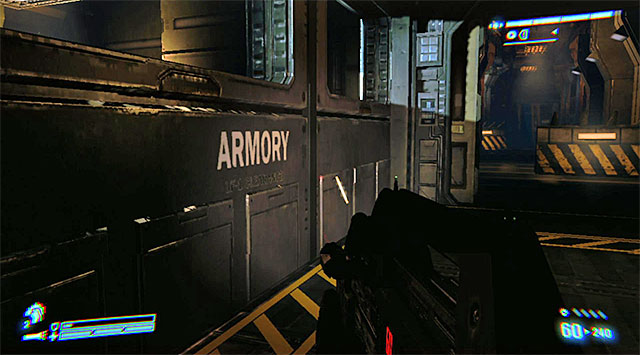
Follow the linear corridors, using the stairs on the way. When you reach the spot pictured above, start off by examining the right door that lead to the armory. Inside there is a bonus weapon, M240 Incinerator Unit. I don't recommend taking it, though, as it won't be especially useful in the coming battles, and you can't add it to your inventory (when you try switching weapons, the flamethrower is automatically discarded).
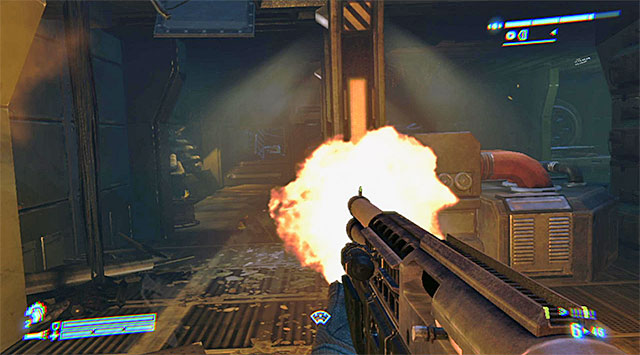
When you're done checking out the area, go through the left door and get ready for the first battle with the Weyland-Yutani mercenaries. Use covers as often as you can, as well as explosives and the yellow tanks. Watch out for enemies that will show up at the door at the end of the corridor. One precisely aimed explosive round should take care of them in an instant. Before leaving, examine the closest area, including two smaller corridors on the right.
Proceed forward to reach a new door. Open it and attack the enemies visible ahead (the above screenshot). As soon as one of your teammates stops using the welding torch, go left to enter another large corridor. Same as before, hide behind covers, looking for opportunities to attack effectively and safely.

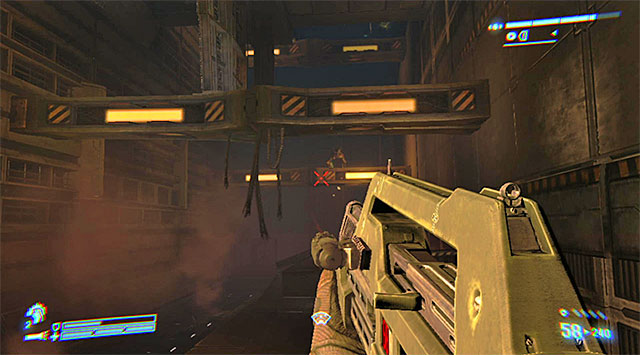
Keep moving forward, eliminating whoever comes your way. After securing the main corridor, choose one of two passages on the right. There will be some new enemies to take down here. Afterwards, go right to find yourself on the other side of the barricade. Pick up another Dog Tag, as seen on the screenshot (PFC Ricco Frost).
Continue exploring the deck. You shouldn't run into any new enemies, so pay more attention to picking up collectibles you find on the way. Your current destination is the elevator illustrated above. Use the control panel take a thrilling ride to another deck.
Check the other elevator for supplies, then go towards the left door. Resume your very linear march, stopping only after reaching the door shown above. Look around for collectibles again and use the welding torch when you're ready.
Get ready, because as soon as you open the door you'll be forced to take down some new mercenaries. What makes it easier this time is that they'll be busy attacking Xenomorphs, so you can surprise them. At the beginning, I suggest staying close to the door and moving forward only after eliminating the closest enemies. Same as with the previous battles, use the explosive canisters to decimate the enemy's ranks more quickly.
Whether you choose the left or the right galleries, at one point you'll lose the ground under your feet and land on the bottom level. Exterminate two Xenomorphs there. To get back up the galleries, use the elevator in one of the corners. Resume the march until you reach the exit.
In another room with metal galleries, watch out both for mercenaries and Xenomorphs. Enemies will come at you from the left in several waves, so this time don't leave your cover after killing all visible targets. Be on alert as you may fall down to the bottom again, though this time you wouldn't have to worry about being attacked by Xenos. Reach the passage where your teammates are waiting. You'll receive an update on your objectives in the next room.
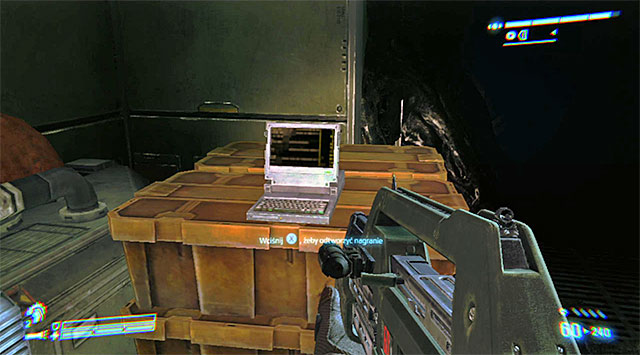
For starters, take a close look around the whole room, as you should find a lot of additional items helpful in replenishing your supplies. When you're done, interact with the above terminal. Using it will allow you to run a bypass and go back to the previous mission objective.
Use the newly unlocked passage and equip your best weapon against Xenomorphs (my recommendation is the regular or tactical shotgun), because soon you'll be bumping into them. With the help of your teammates the battle should go pretty swiftly. Use the motion tracker if needed and above all else don't let the aliens anywhere near you.

Your need to get to the spot where there is a hole to jump into; you'll land in a partially flooded corridor. Follow your teammates and you'll reach a ramp, together with a new door on the right. Where you're on the partially demolished stairway, measure your leaps carefully. Try to land on the gallery shown on screenshot 1, because there are supplies as well as Dog Tag from screenshot 2 (PFC E. Greenlief) left there.
Jump down to the bottom of the stairwell and move forward, past a room with a dead soldier. There will be some new Xeno encounters in the next area, illustrated above. Use the flashlight to lit the darker spots. Check out the ceilings as well and side walls to prevent the aliens from performing a surprise attack.
If by any chance you fall down to the bottom level, find a ramp to go back up. Regardless of the path, reach the passage you see above. Turn left, but be ready to take down some new Xenomorphs. The steam will obstruct your vision, making it harder for you to locate the aliens, so it's better to keep firing a bit longer than usual.
Continue onwards, but keep looking around for collectibles. After reaching the large hangar bay, find the only available passage leading to the next location. Watch out for a single Xenomorph; take it down as soon as you open the door pictured above.
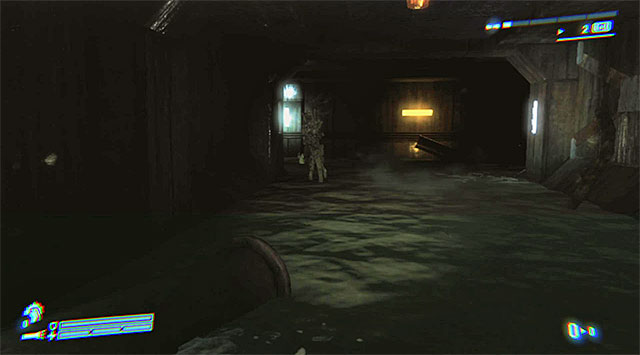
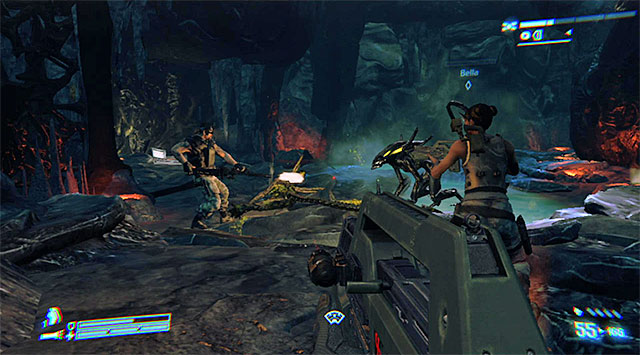
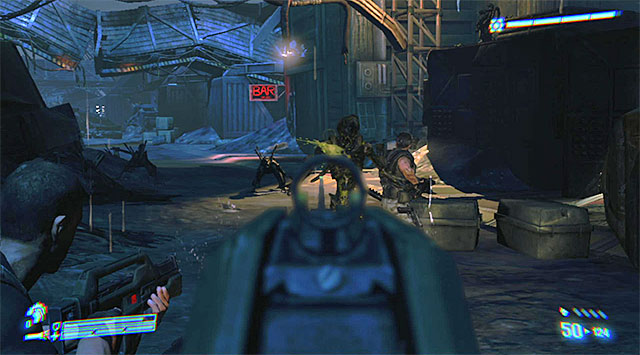
Move forward and soon you'll reach a tunnel where some mercenaries should be fending off Xenomorphs. Take this opportunity to shoot the enemies from a larger distance, using a good rifle and, if possible, the grenade launcher.
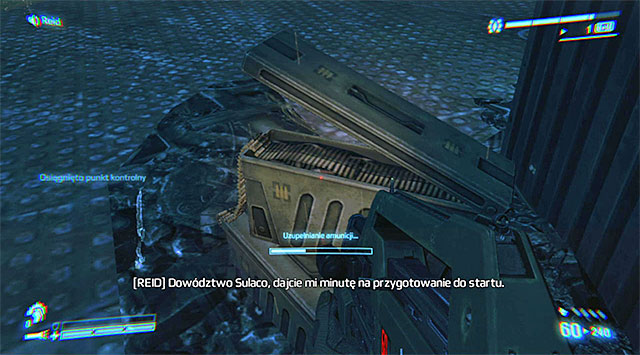
There won't be any new enemies in the next tunnel, you'll only have to reach the hatch (no need to hurry, too). Find the elevator you see on the screen. Wait until your teammates step on it and run it to reach the upper level.

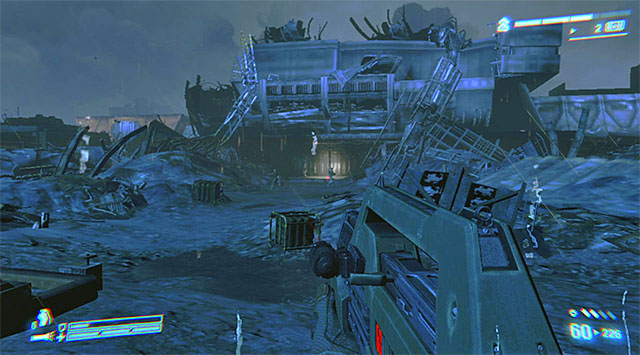
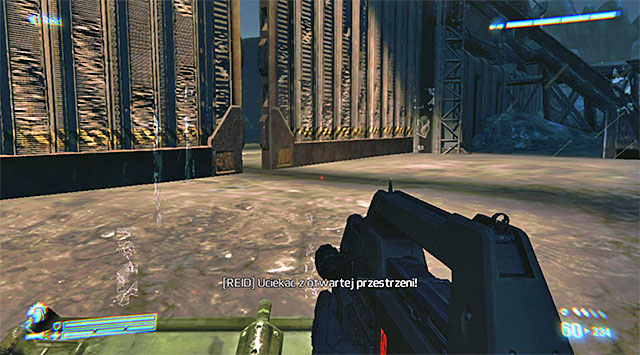
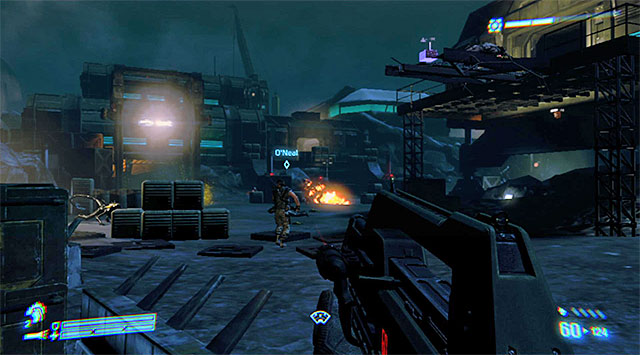
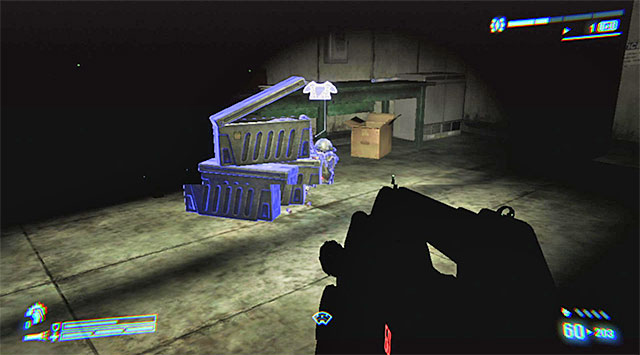
There, turn left and check out the area near one of the large containers to find the above Dog Tag (Cpl T. Ashley). Head for the door leading to the hangar bay where the dropship is, listening to new orders from Reid in the meantime.

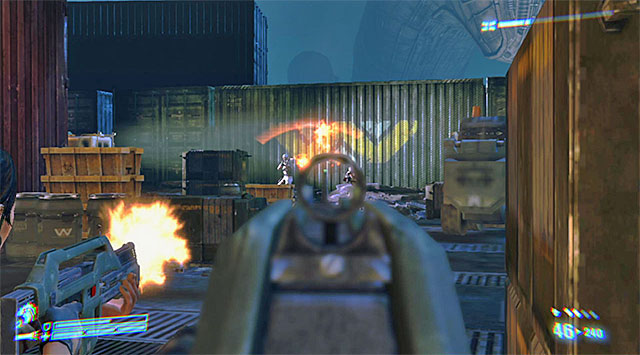
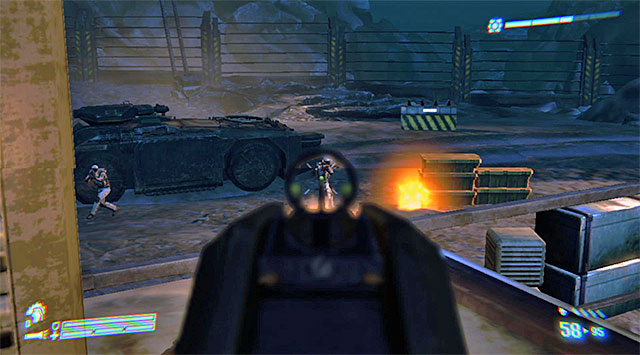
There are two ways to proceed now. If you want to help the marines get rid of the first group of Weyland-Yutani mercenaries, I recommend going a little to the right, taking the place as shown. From here you'll be able to easily eliminate any approaching enemies. Watch out for the stronger one; use explosives against him, they work best. When he dies, he should drop a full set of armor.
If you don't wish to waste time aiding your allies (they'll can deal without you) or if you've already gotten rid of the first group of enemy units, go left, towards the stairs leading to upper galleries of the hangar bay.
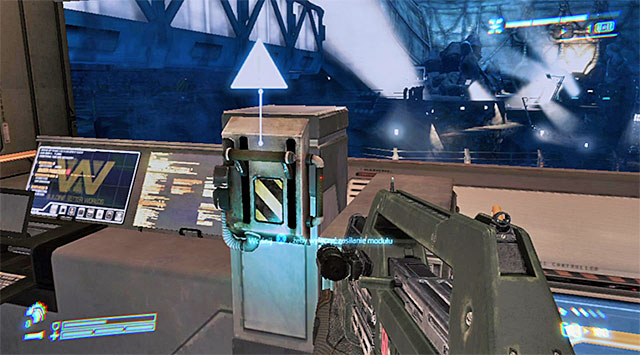
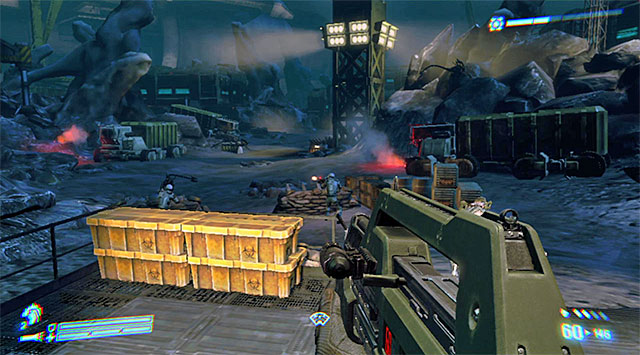
Turn left and interact with the terminal pictured above, which is responsible for arming the first emergency release. Stay on your guard because doing so will spawn new enemies in the hangar bay. Ignore the ones downstairs, by the dropship where you're teammates are taking a stand. Instead, attack the mercenaries on the galleries using crates for cover.
Keep moving straight ahead, but stop every time you see a new wave of enemies. After you reach the currently closed control room, turn right twice, killing enemies which show up where shown on the above screenshot. Try to get close to the other control panel you see in the distance. You'll notice a missing fragment of the gallery and receive an update on the objectives.
Keep in mind that immediately after receiving the task new enemies will spawn on both levels of the hangar bay. Focus on the ones on the upper gallery and in the control room. Use covers, especially since one of the enemies should be heavily armored (traditionally, use grenades or the grenade launcher against him). Don't lean out of the cover until you've secured the whole upper level.
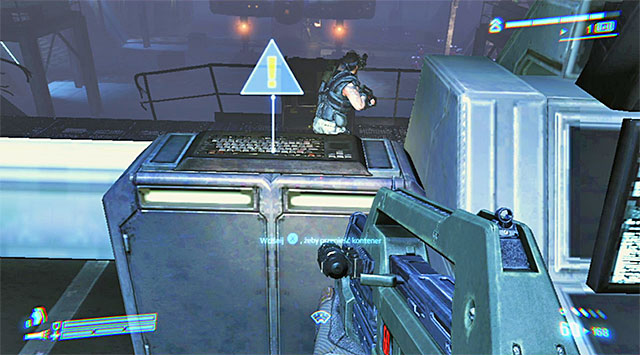
Head for the control room; you can enter it now. Look around for any interactive objects, but don't forget to interact with the control terminal for the containers (the above screenshot).
Wait until the containers are properly set. Stay in the control room when they are moving; that way you won't risk any unnecessary encounters from the mercenaries attacking the marines below. Once one of the containers are set in place, go back to the gallery and head for the panel responsible for arming the second emergency release.
Notice that Xenomorphs have taken the place of the mercenaries. Despite what it looks like, you don't have to hurry to help them; the marines will have no trouble getting rid of the aliens. If you want to reach the dropship as quickly as possible, find the spot from which you can jump down below. It's quite risky, though, because on your way to the evac zone you may be attacked by Xenos.
If you don't want to take unnecessary risks, use the upper gallery to go around the whole hangar bay and reach the spot from which you've released the first arm. You can use the stairs again. Regardless of the choice, approach the dropship to prompt a cutscene that ends the mission.
Follow the other marines. You won't run into any hostile units for the next several minutes, so you can lower your guard and stop looking over your shoulder. At the first fork in the road, choose whichever path suits you, they meet again a while later.
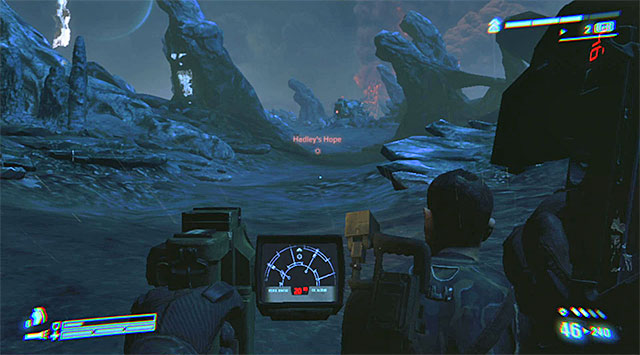
Continue exploring the planet's surface and a few moments later you'll reach the titular colony. As you make your way for the entrance to the complex, you'll receive new orders.
Explore the colony (if you don't want to wait until someone opens the door, use the control panel yourself). Follow your teammates again, there are no aliens to run into. Take a look inside the first room on the left to find the only Audio Log in this mission, pictured above.

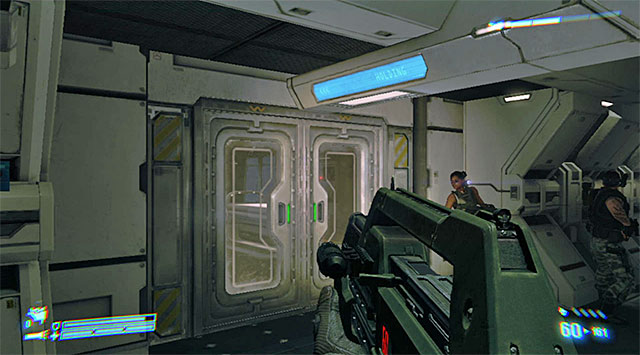
Backtrack to the main corridor and move forward, past some other rooms. When you find the stairway, move up to the first floor. Your destination is the door illustrated above, which you need to open using the welding torch.
I recommend checking the room out thoroughly, because apart from ammo there's also a Dog Tag to find, shown above (LT. B. Norton).

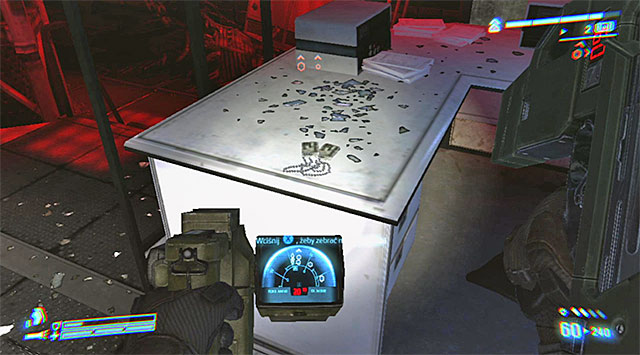
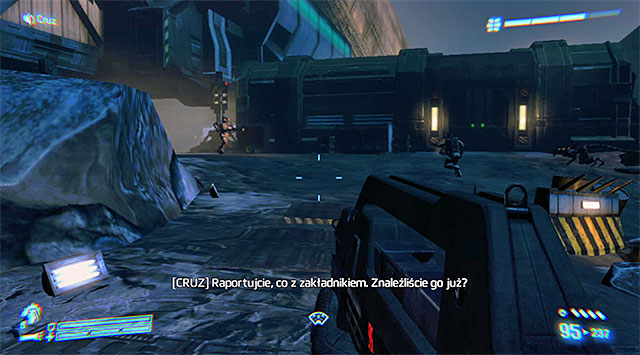
Approach the lever (unless someone else has already pulled it), then go the large table to listen to Cruz's briefing. You'll learn that you need to place stationary motion sensors around the area.
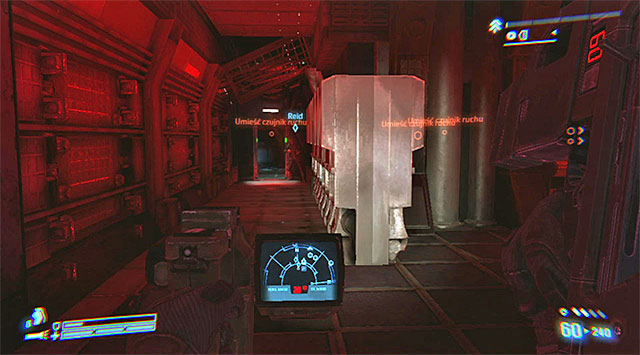
There are five motion sensors to place, which, given that the rest of the colony's building has an open structure, can be activated in any order. To find the spots where to put the sensors, use the motion tracker. Start off by taking the above passageway leading to the adjacent rooms.

Three of five sensors have to be placed in the medlab, which is the closest to the operations room. In one of the smaller rooms there is also a Dog Tag to take (PFC Trevor Wierzbowski).
Place the fourth sensor at the end of the corridor with disabled turrets (the above screenshot), while the last, the fifth - in the morgue to the right.
Depending on your current location, make your way to the morgue again (to the right of the corridor with disabled turrets) or simply approach the last sensor you've just activated. Get ready for the first battle here, which will start the moment you reset the sensor.
Head back to operations where your teammates are, but be cautious because on your way you'll be attacked by groups of Xenomorphs. Take care of the first wave in the morgue, remembering to watch the ceiling and the walls closely. I don't recommend staying there for too long, though, because killing enough of them won't stop others from coming.
Once you're back in the main corridor, with the sentry turrets, move towards the other end, eliminating aliens on your ways. When you reach the barricade, turn right to enter the medlab.
Go straight ahead, then turn left to return to operations (if you get lost, use the motion tracker, which displays the destination). Attack the Xenos that are bothering your teammates. Try and find a wall or any other obstacle to put behind your back so as to prevent the aliens from performing a surprise attack.
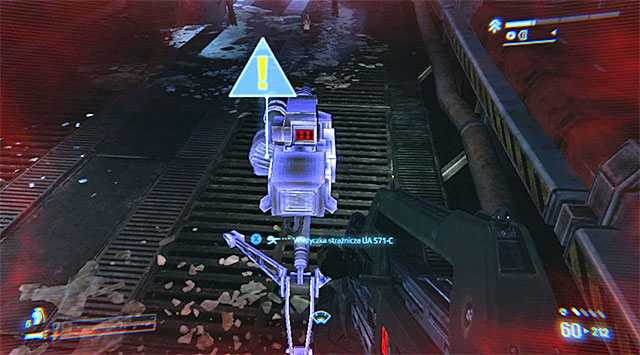
Make your way back to the corridor which separates the medlab from the morgue, because that's where the disabled turrets are. Don't hurry too much as you'll almost certainly run into some additional aliens. Once you're there, approach the turret UA 571-C on the right and push the interact button to lift it.
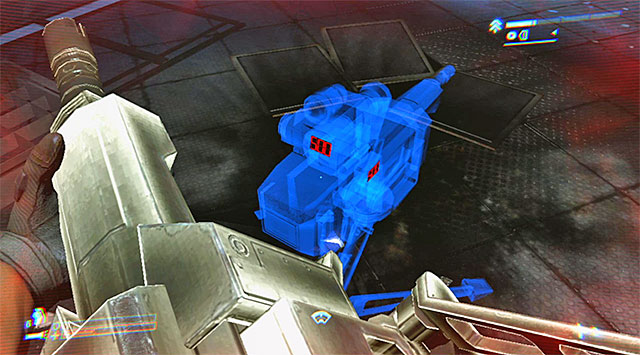
With the turret, head for the operations room. There shouldn't be any more aliens on your way, but if you happen upon a lost soul, drop the turret for a moment so that you could reach for your gun. In the operations room, place the turret where the screenshot shows, which is by the weapons locker (take a minute to replenish your ammo supplies).
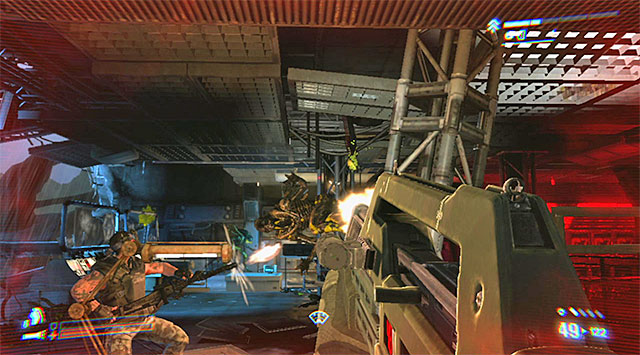
My recommendation now is to place yourself at the console that Bishop is using; this way you'll have a narrow passageway separating you from the aliens. Focus primarily on the Xenomorphs in closer range.
Keep firing until the aliens stop coming. Approach Cruz to receive new orders, revolving around the fact that you've lost contact with Bella and Reid and having to go to the comm tower to power it up again.
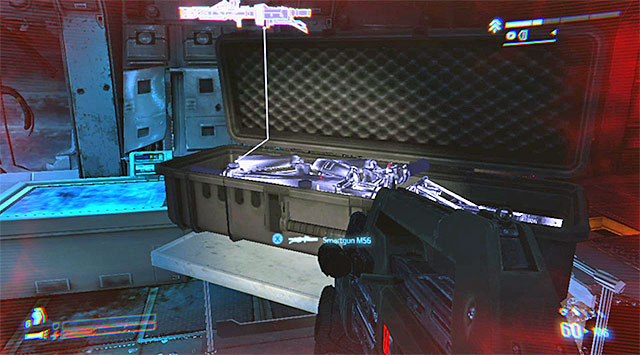
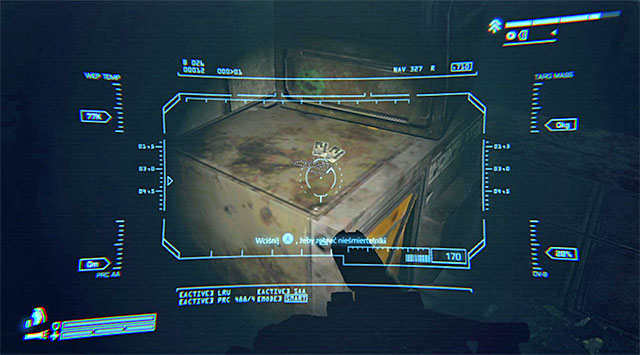
For starters, go to the weapons locker to get some ammo, because you've probably used up a lot of it in the last encounter with Xenos. Afterwards, approach the crate where the M56 Smart Gun is. It works on the same basis as the other unique weapons: it's not added to your inventory. Nevertheless, the smart gun will prove very useful in the coming battles, so take it with you without hesitation.

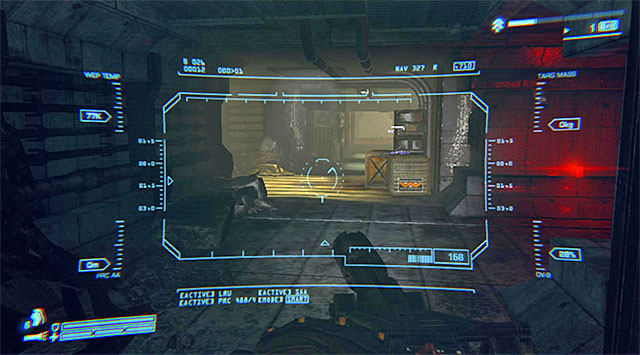
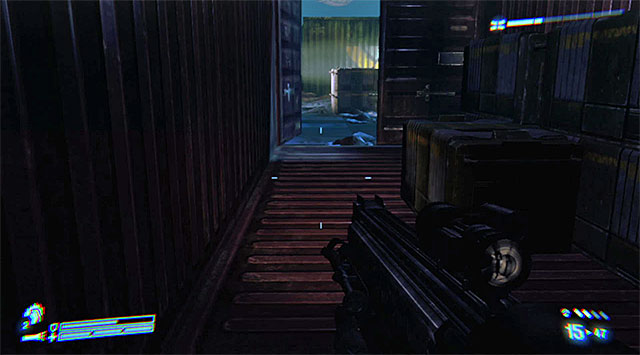
Take the side passageway leading to the medlab, but turn left on your first chance, into a corridor that has been previously unavailable (the above screenshot). Move forward. When you reach the part that is destroyed, jump down to the level below. Find the stairwell and go down one level more. Open the nearby door.
Turn left and prepare to eliminate the Xenomorphs coming your way. Obviously, I recommend using the smart gun, which has the advantage on staying on target, but, since it has large firepower and you can't reload it, fire in short bursts only. If you want to spare ammo even more, let O'Neal take down some aliens without your involvement, but don't risk it too much.
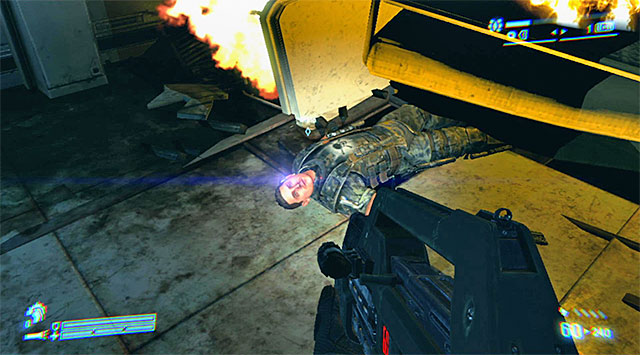
Keep moving forward, killing every alien you encounter and trying to keep the smart gun for as long as possible. Look for a room which you can enter, where, apart from a single Xenomorph, you can also find a full set of armor and the above Dog Tag (PFC Jenette Vasquez).
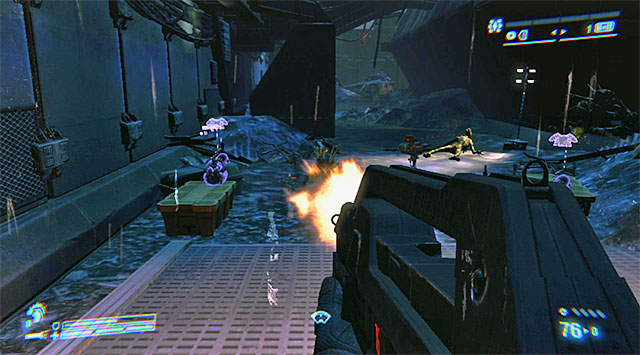
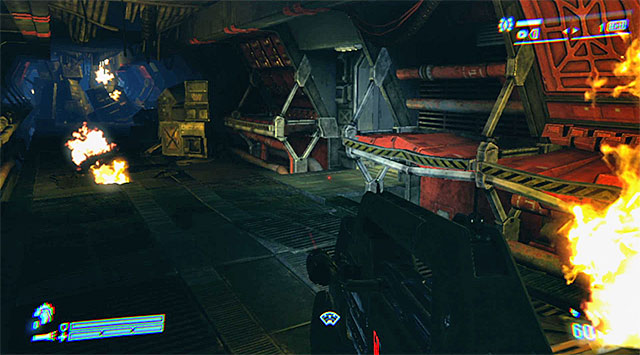
Go back to the main corridor and resume the move forward. Expect the next Xeno encounter at the fork pictured above. You'll need to be especially careful here because the aliens will come at you from both corridors. It's best to retreat a little so that you could eliminate them from a safer distance.

Stop and at the fork. I recommend taking the left corridor, pictured on screenshot 1, because it's the easiest way to a new secret item. When you get to the edge, jump down to the level below (which means you can't go back to the previous area) and turn around. In the spot illustrated above, on screenshot 2, there is a new Dog Tag (PFC M. Macaulay).
As you make your way to the last part of the base, watch out for Xenomorphs Lurkers. They're much smarter than the regular ones; they can hide and wait for the right moment to charge and perform a melee attack. Try to prevent it any way you can; use the smart gun or any other strong weapon (i.e. the tactical shotgun). As a last resort, be ready to play the traditional mini-game (rapidly tap the interact button). Lurkers let out a characteristic sound, so if you use the motion tracker you can also try to avoid them altogether.
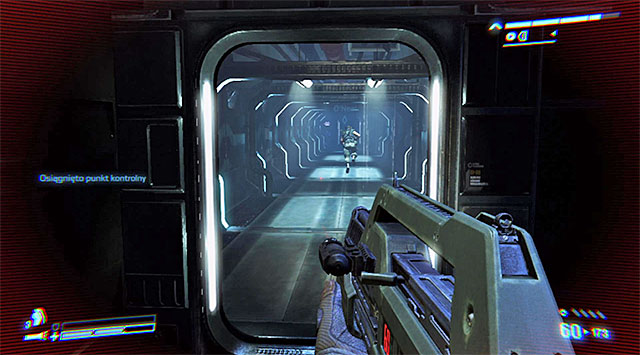
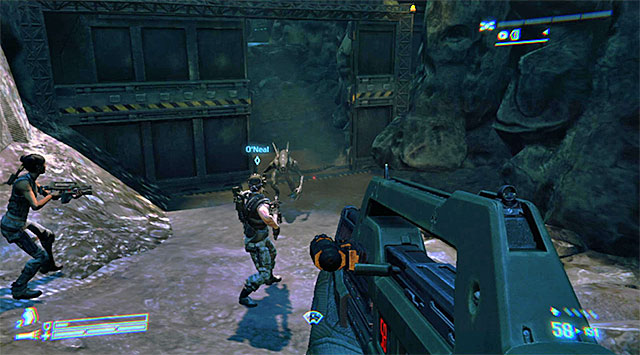
Your current destination is the passage illustrated above. Wait for O'Neal to open the door and move into the next location.

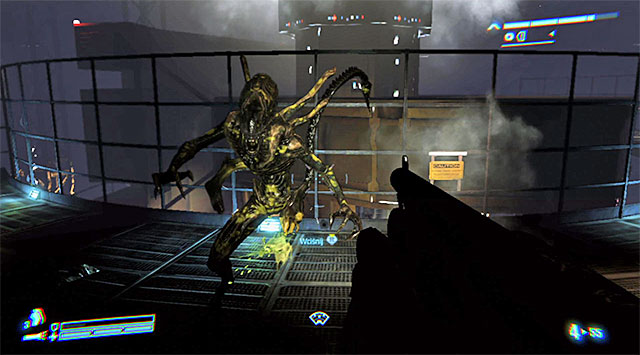
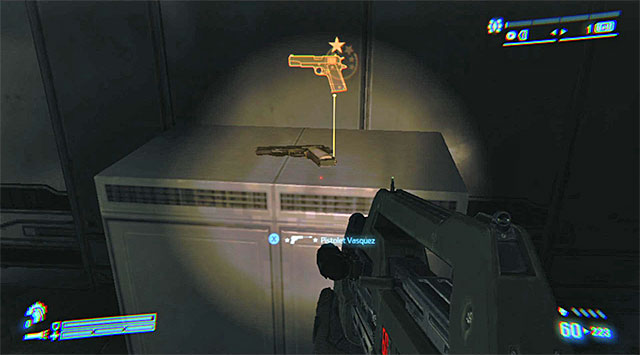
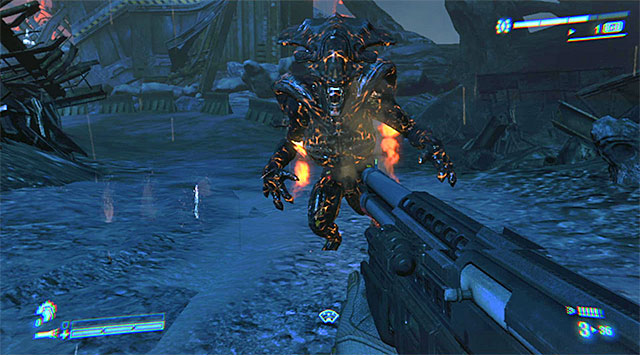
Search the room you'll find in a few moments. Apart from standard supplies, you can also find a Legendary Weapon here: Gorman's Pistol (the above screenshot). Use the welding torch to unlock access to the adjoining area. You'll have a surprise encounter with an overgrown Xenomorph which ends the mission.
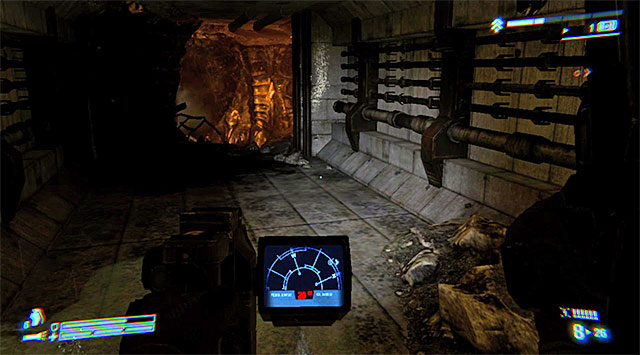
You can't stay too long where you've been cocooned, because the overgrown Xenomorph responsible for this will soon return and you wouldn't have any means to defend yourself. Turn left, find the above manhole and open it.
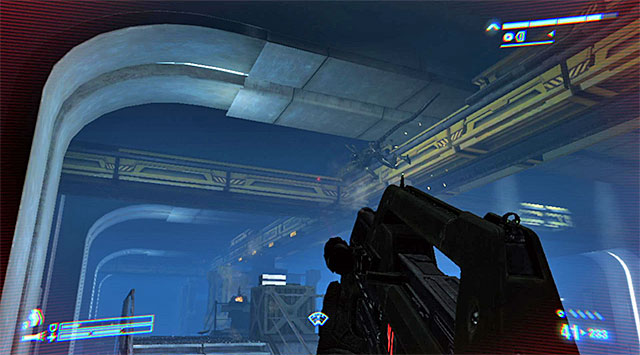
The Xenomorph won't jump after you, but as you move through the very narrow corridors, stop where the alien starts tearing ceiling fragments in the attempts to grab you.
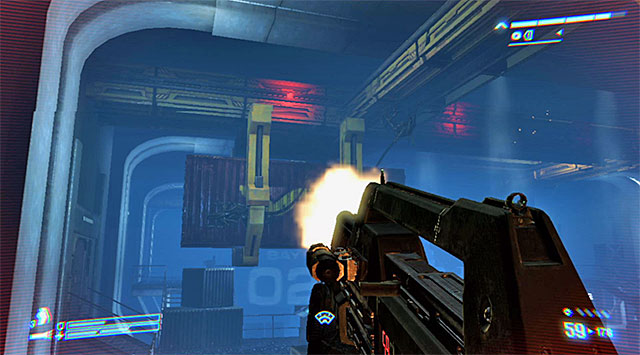
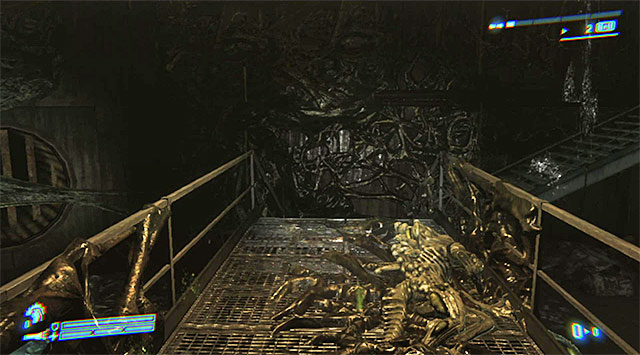
Take the ramp to get to the gallery. You can't stop here as well because the Xenomorphs that's after you will soon break through the window on the left. Go right quickly to reach the above vent shaft (crouch). The chase will come to end here, so you can finally slow down.
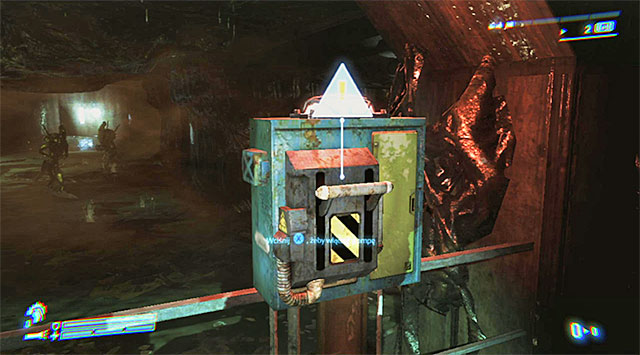
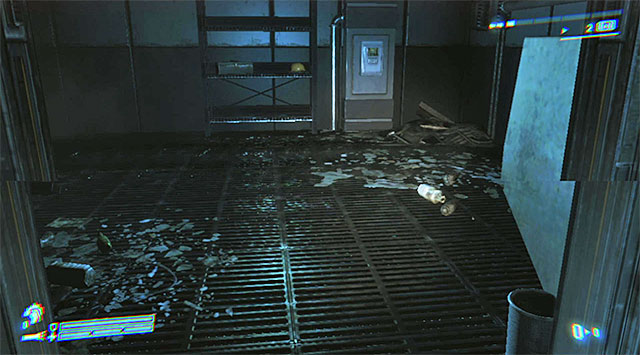
After leaving the vent shaft, make your way to the near passage. There are two levers to pull. Start off with the one that shuts down the pump in the sewers (the above screenshot), then go the one that opens the gate. Move forward, listening to a conversation with O'Neal in the meantime.
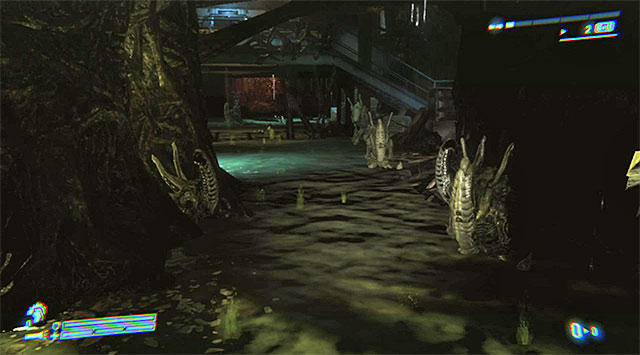
Here's where you'll run into a new variety of aliens, as seen on screenshot 1. They're called Boilers and their most distinctive feature is that they locate their potential victims only by the sense of hearing. You need to walk very slowly when you move around them, and if you alert them, stop altogether for a while. Don't worry if the alien gets too close to you (screenshot 2); as long as you don't make any sudden moves (you can turn around at will), you won't be harmed in any way.
Don't try to outrun the "dormant" aliens, because they can move very fast, exploding on contact, which may lead to a serious loss of health or armor points. Just keep moving, very slowly, and keep your finger on the pulse, checking whether the nearby aliens are active or not. Take the tunnel leading to the further parts of the sewers (the above screenshot).
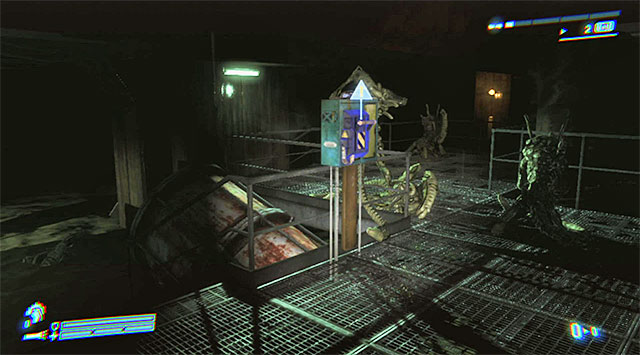
Soon after going through another checkpoint you'll find yourself in the section occupied by new dormant aliens. Theoretically, you could try and walk past them, keeping an eye on them all the time, but it's better to just get rid of them for good. To do it, move forward, but get on the small balcony on the right the first chance you have. Pull the lever (the above screenshot) to power up a nearby pump. As a result, each Xenomorph will run towards it and explode on contact with it.
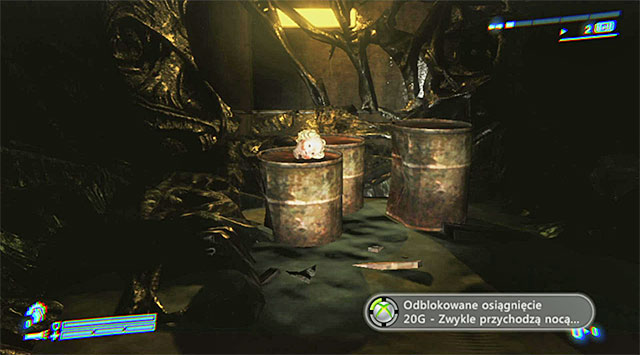
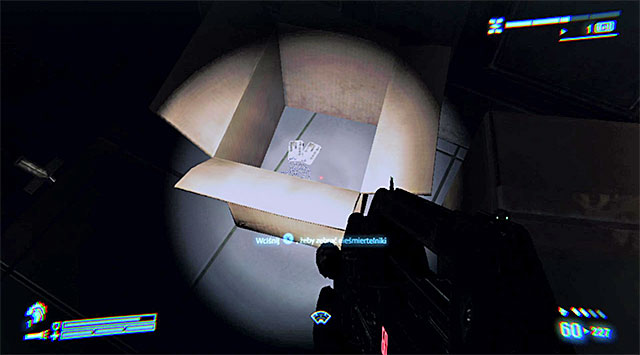
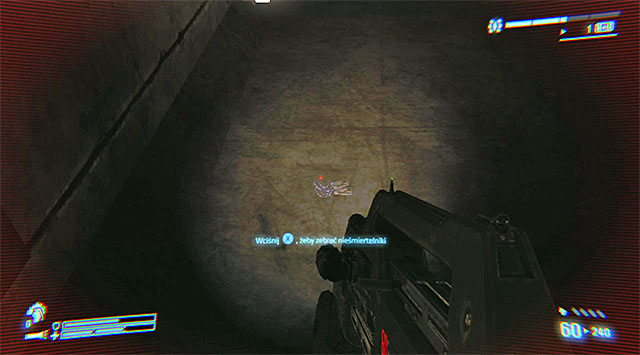
You're free to move forward without worrying about evading anything for the moment. I suggest searching every corridor; one of them hides a bonus item, Newt's doll, pictured above (it also involves unlocking a Trophy/Achievement). Move forward and stop when you get to the new area with aliens.
Get on the metal gallery and start walking very slowly. The task here is practically the same: find and pull an interactive lever to encourage the aliens to commit suicide at the activated pump.
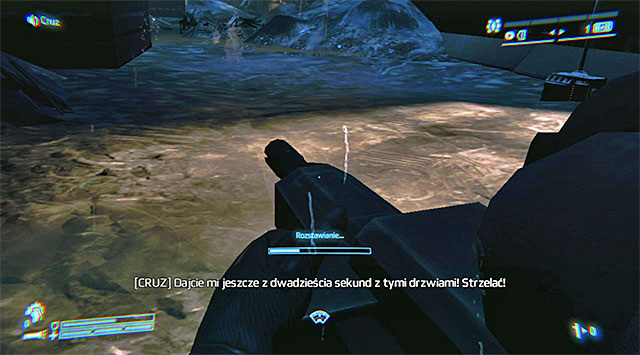
Find a door and use the welding torch to open it (without worrying about the noise). In the new area, approach the destroyed metal platform (the above screenshot). Jump to the adjacent one and quickly reach and pull another lever. Wait until the ground floor is "cleared" of aliens.
Jump down and use the welding torch again. Listen to a fruitless conversation with O'Neal and take the left tunnel. Stop when you reach the above area; there's quite a large pack of dormant aliens there.
Carefully, make your way ahead, stopping every time you detect any activity from the aliens. Take the ramp to the metal platform. You have to options now: continue walking along the upper platform (screenshot 1) or wait for the left door to open and enter the side room (screenshot 2). In both cases make sure not to accelerate even after moving away from the Xenos, because you can still alert them to your presence.
Both ways lead to the same place, the above passageway. Use it and turn right. Use the welding torch at the end of the corridor and you'll receive an update on your objectives.
Go straight ahead, and turn right at the fork. Approach the new door and open it to commence the second part of the great chase starring the overgrown Xenomorph. Turn around immediately, close the door and use the welding torch on it.
Approach the second door. You'll need to use the welding torch twice - first to unlock further passage, second to hinder the Xenomorph's chase.
Head for another door and weld it behind you. Afterwards, make your way to the elevator pictured above and interact with the control panel. Wait until it takes you to O'Neal, then approach the large bag to retrieve your previously lost equipment.
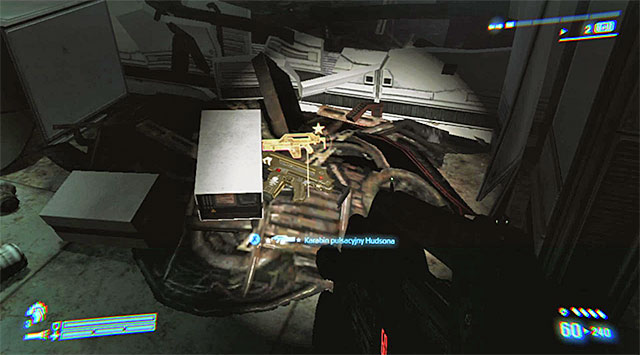
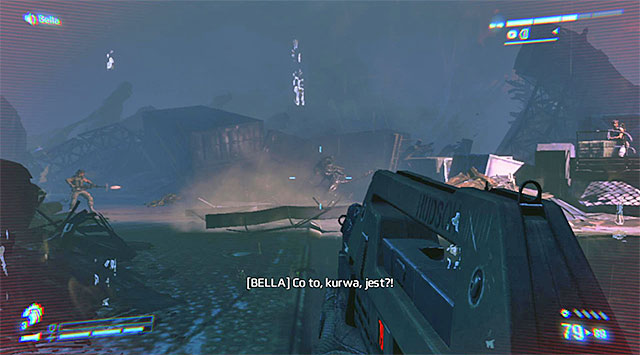
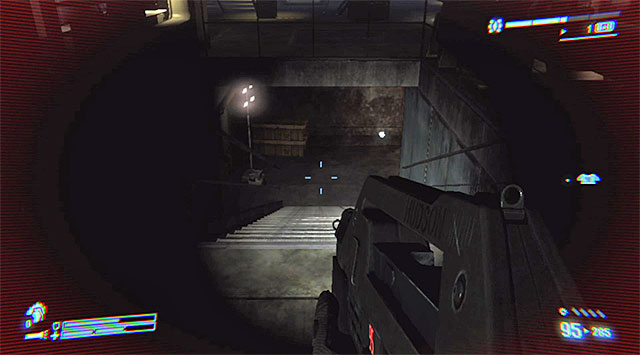
Use the passage unlocked by O'Neal. Thoroughly search every room for a new Legendary Weapon - Hudson's Pulse Rifle (the above screenshot). Move forward to reach the surface.
Be ready to face some regular Xenomorphs. The battle shouldn't be too difficult as long as you remember to detect them and keep a safe distance.


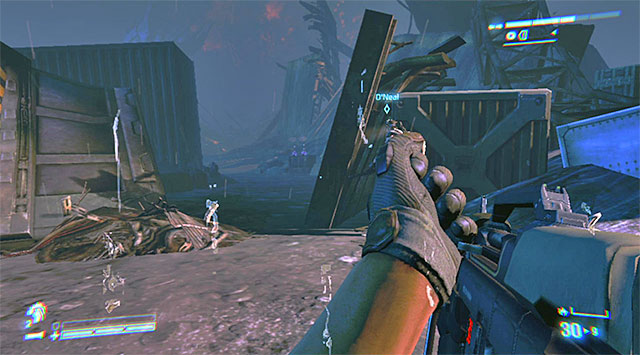
When it's over, check out one of the larger containers on the left. Climb the one on screenshot 1 to find a new Dog Tag (LT. William Gorman). Now get to the one indicated by the game, where Bella has been hiding.

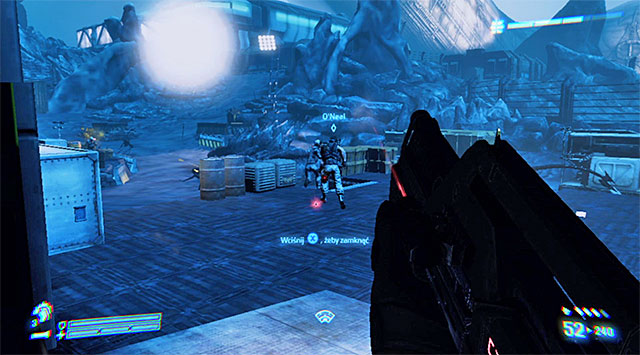
Ignore whatever item you find and don't need; there will be another battle here in the further part of this mission. After replenishing your supplies, go around the container where Bella had been hiding and start eliminating the Xenomorphs in the vicinity. When you're done, approach Reid and help her by pushing the interact button to complete the current objective.
Backtrack to the previous area, but be aware that more regular aliens will stand in your way. Take them down one by one, using the motion tracker when needed. Try not to move away from your teammates and don't attack them by mistake. You'll receive new objectives once you're near the comm tower.
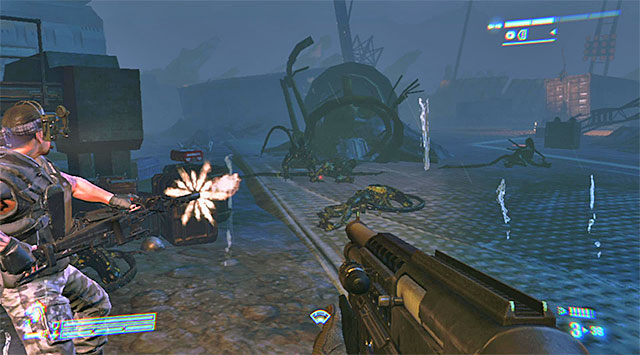
The task is simpler that it may seem at first, because the Xenomorphs will be much more interested in attacking the main character and O'Neal instead of Reid working at the comm tower. Since they show up in packs, I recommend using explosives more often than usual. It's also good to shoot them from a greater distance, especially given that they'll only be coming from one direction.
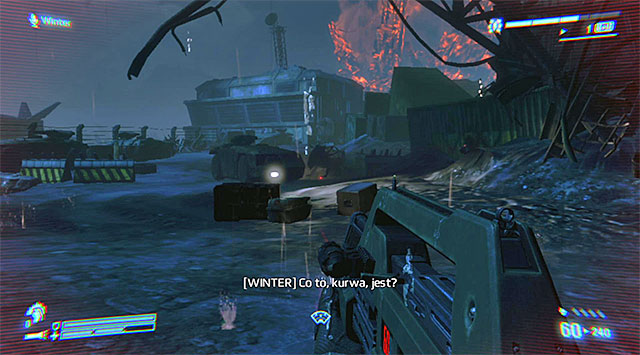
The battle will come to an end when the overgrown Xenomorph that cocooned you earlier you shows up. Don't waste ammo trying to shoot it; it's immune to your attacks. Wait until it starts chasing after Bella and Reid, that's when you'll receive new orders.
Once again, search the area where the last battle has been fought to replenish your supplies. When you're done, take the passage pictured above; O'Neal should already be waiting there.
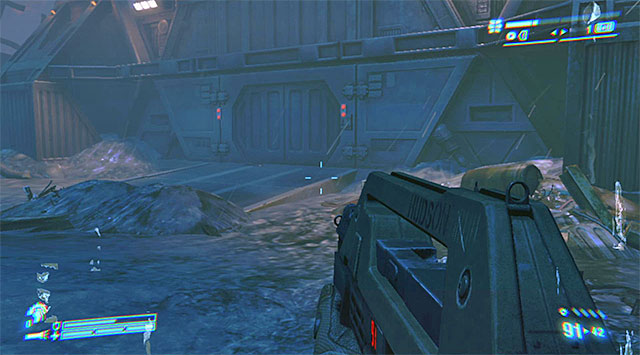
Follow O'Neal, but don't hurry too much because you'll be regularly plagued by quite numerous packs of Xenomorphs. When you reach the colony's complex, head for the closed door located on the left (the above screenshot). Examine the area to find another Dog Tag (PFC C. Bradley). Move onwards, but stay on the main path, and you'll find the entrance to a new building.
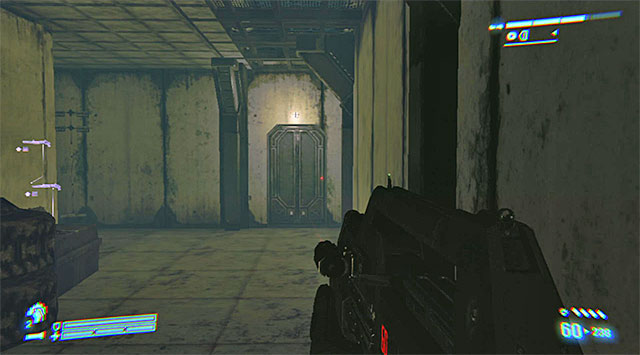
Go inside and start exploring the narrow corridors; you won't come across any aliens for now. When you get to the closed door, use the welding torch the only way you know how to get through to a huge garage.
Take a moment to search the first part of the place - you'll find a Dog Tag under the stairs on the right (PFC M. Jelley), and a full set of armor on the upper platform. Afterwards, go to the end of the garage to stumble into Bella and Reid.
The conversation will be cut short when alien Lurkers show up. Apply the same tactics as in the last part of the previous mission: detect them with the flashlight and the motion tracker, then attack from a large distance using the best weapon you have. If you can, don't let them charge to perform a melee attack.
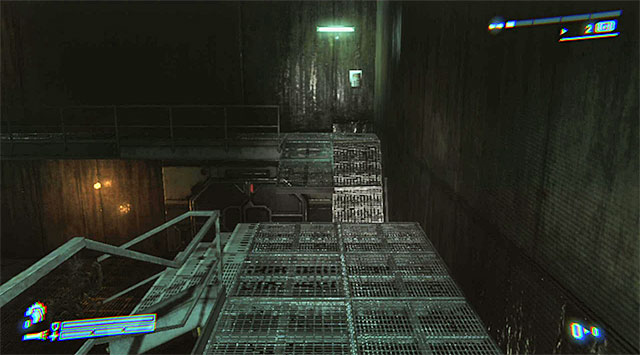
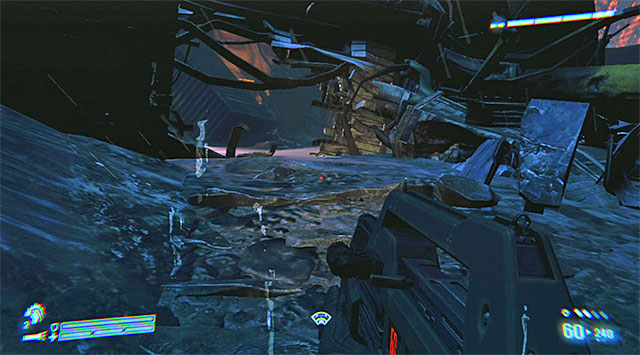
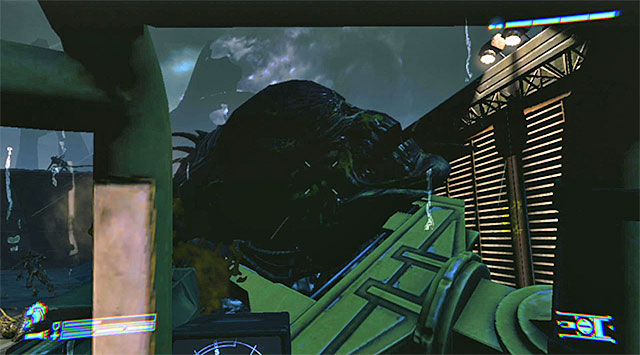
Pick up every interactive item from the garage, then go through the newly unlocked exit. Soon after jumping down to the level below, be ready to IMMEDIATELY run to the tunnel pictured above to avoid the overgrown Xenomorph which will show up on the left. Make sure to crouch, that's the only way to go under the damaged grate.
Move forward. Eliminate regular Xenomorphs in the meantime; don't let any of them stay alive or surprise you. Make your way to the container, which should hide some precious supplies.
Jump into the hole in the container and get ready to evade the overgrown Xenomorph again. Follow your two teammates towards the above pathway.
Resume the offensive against regular Xenomorphs, always looking over your shoulder to make sure to keep them at bay. Further way is very similar to one of the previous scenes - jump into the hole, then immediately run to the partially opened gate, pictured above. Here's where you'll meet up with O'Neal and fight the last battle in this mission.
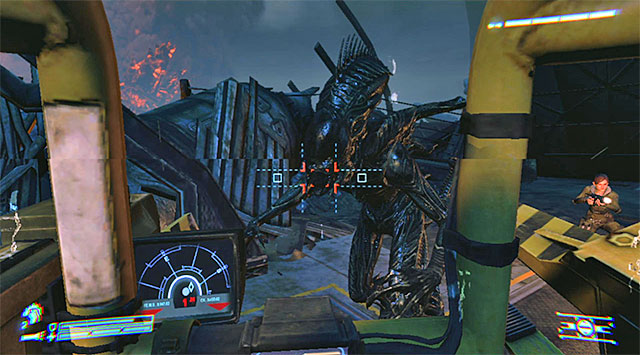
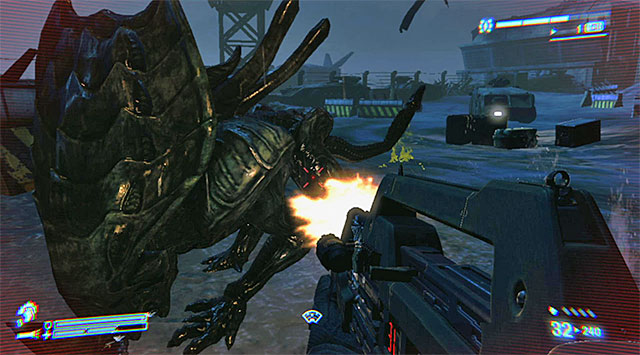
Naturally, start off by taking the seat of the powerloader. Ignore the regular aliens in the area and focus solely on the overgrown Xenomorph, which serves as some sort of boss. Attack with the left arm, trying to knock the alien unconscious.
Each time you succeed, try to grab it with the right arm.

To win, you need to grab it that way several times; it will eventually lead to and spectacular execution.

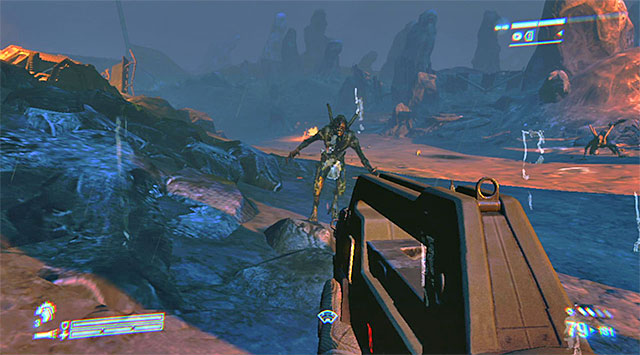
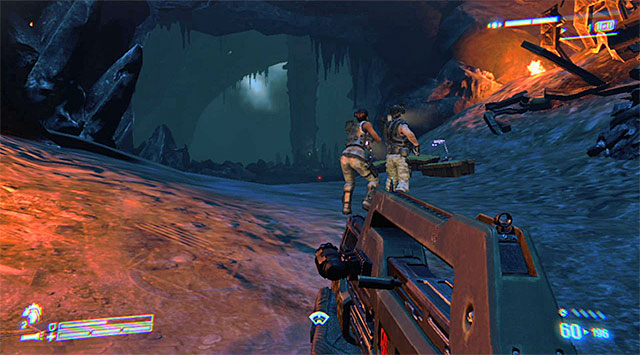
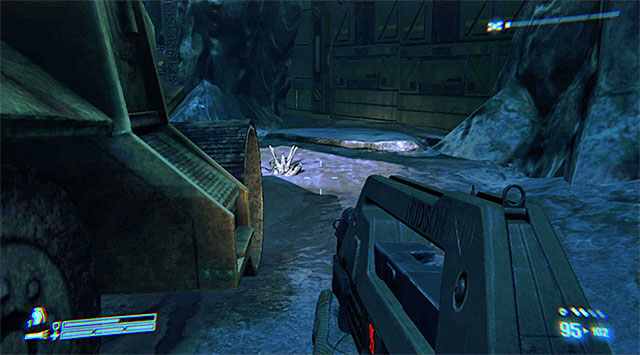
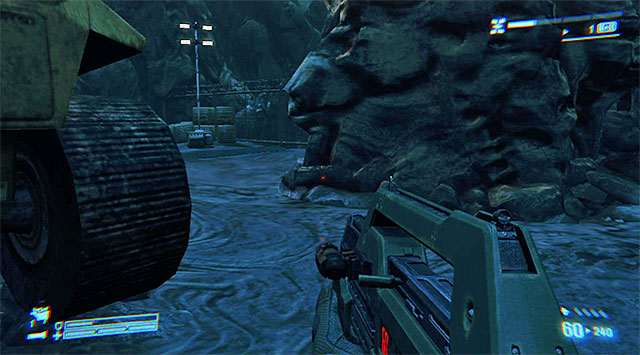
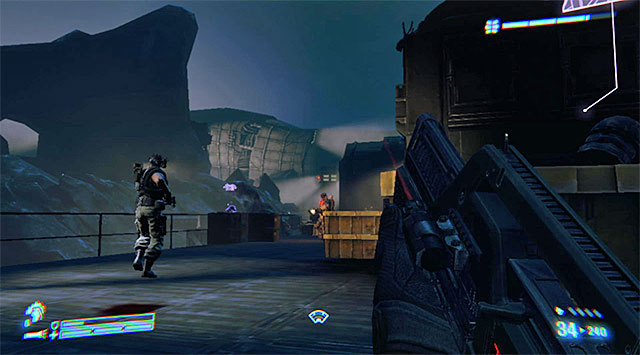
Head for the Weyland-Yatani Facility. On your way you'll notice several military Cheyennes flying towards the same destination, but there's no additional activity connected to it; your team won't be detected. At the first fork, I recommend the right path; you'll get an additional conversation. A little further you'll stumble upon a small camp (the above screenshot) where you can find the first Dog Tag (Cpl M. Bailey).
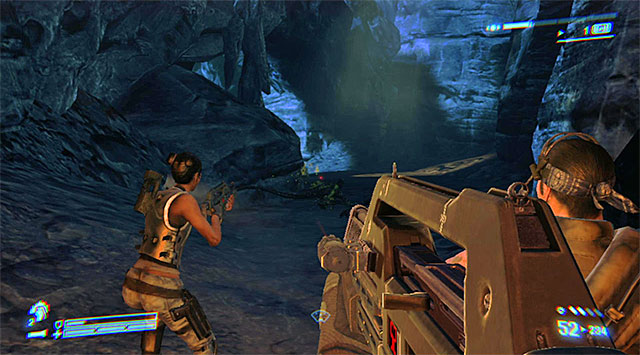
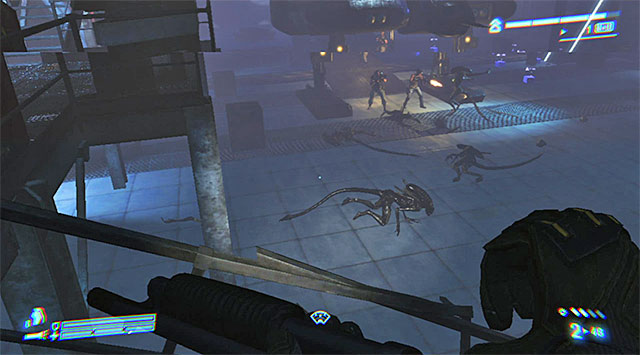
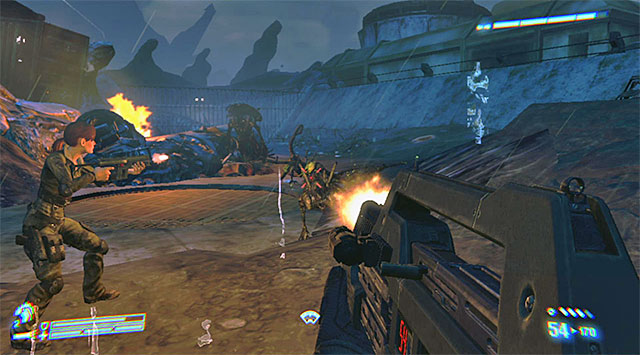
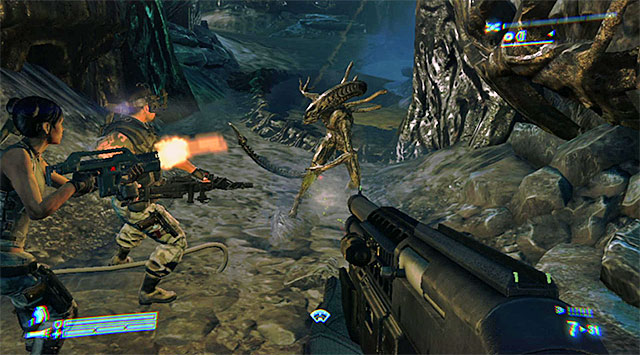
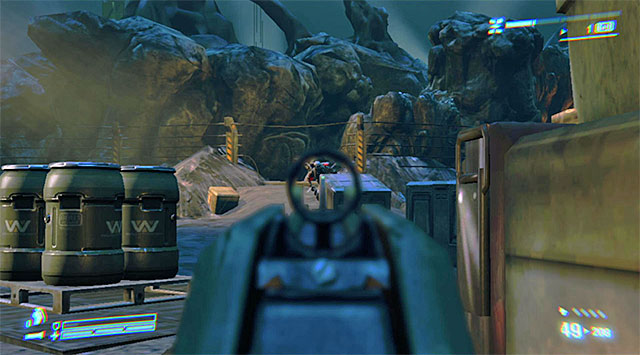
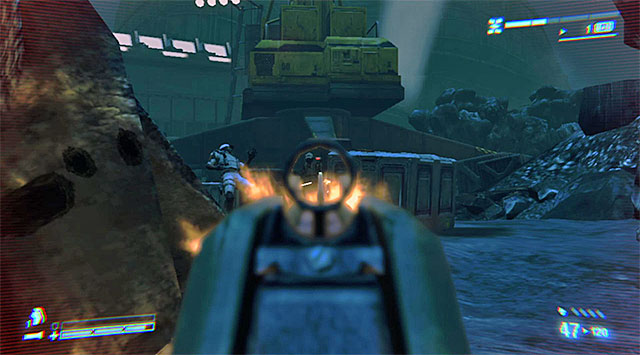
Continue the linear march forward, looking around for supplies in the meantime. The first series of battles will take place in the above canyon and the nearby camp. Eliminate Xenos, remembering to keep them at bay; your health and armor points will come in handy further on.

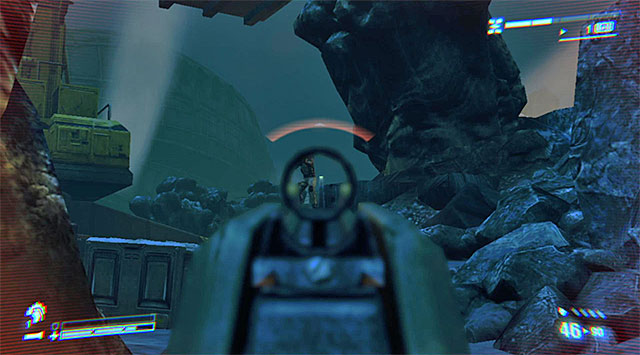
Make sure you've killed all Xenomorphs, then make your way to the next area, past a wreckage. You'll be regularly attacked by large packs of aliens. It shouldn't be difficult to cut through, though it's better not to take any chances. When every battle has been won, search the area for the above Dog Tag (PFC J. Washenfelder).
Afterwards, take the narrow passage that leads from the canyon to another area and take care of another group of Xenos. Before you enter the above cave complex, sweep the area for supplies, especially armor pieces.
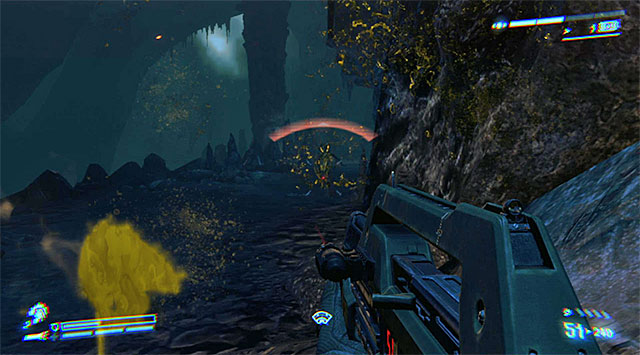
Soon after entering the caves you'll run into a whole new type of Xenomorphs called Spitters. As the name suggests, they spit acid and can attack from a large distance. Use your best rifle against them (preferably with an optical scope) and keep moving to make it harder for them to hit you. Also, notice that they often try to hide by the ceiling, so detect them with the motion tracker and the flashlight.
The whole passage through the caves is one and the same. Expect Spitters on a regular basis. Each time you run into a new batch, shoot them using the scope and keep moving to maintain your health and armor gauges at safe levels.
Your destination is the exit illustrated above. See to the supplies below, then take the only available path leading to the premises.
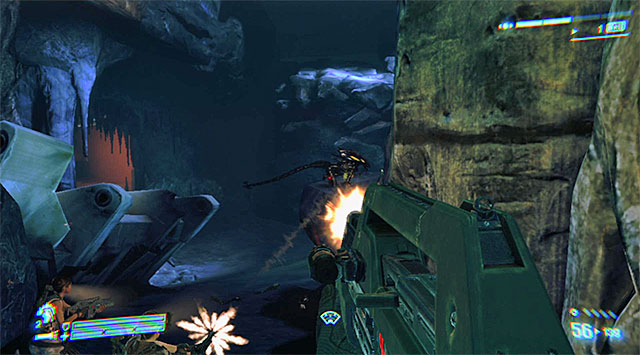
Go through subsequent rooms; apart from supplies you won't find anything interesting there. When you reach the last room, go up the stairs. Be on your guard, in a moment you'll be attacked by a large group of regular Xenomorphs. Given the narrow lay of the area, use the tactical shotgun or any other weapon with high firepower on short distances. Traditionally, check the ceiling and the walls, don't let anything surprise you.

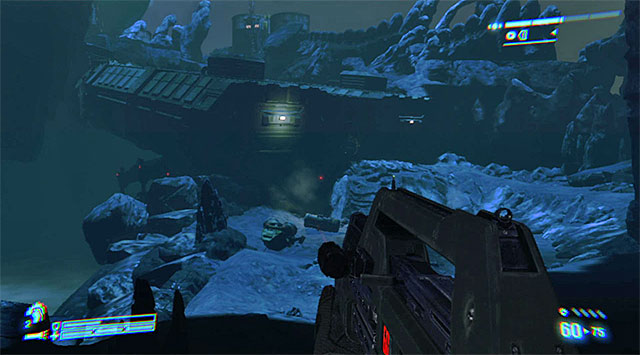
After taking care of the first group of Xenos, get to the ramp which will take you to the surface. Expect an attack from new aliens, though that shouldn't be a problem any more. Move to the next building (the above screenshot) and start exploring the damaged corridors and rooms. The good news is you won't run into any enemies.
New Xenomorphs will star showing their ugly faces in the corridor pictured above, which is soon after using the stairs. I suggest retreating to the previous area; it's much harder to keep track of the aliens' movements in the main corridor, much less react to them.

When the battle is over, move forward until you reach a hatch in the floor. Jump down and carefully make your way to the above platform where the first Audio Log is to be taken. Continue moving forward and you'll receive new orders in one of the rooms.
Take the stairs leading to the science building. Go straight ahead, but, after receiving a warning about an active sentry turret, crouch under the armory's windows (the above screenshot).
Turn left and enter the armory. Approach the turret to disable it, then look around the room to locate the second Audio Log, pictured above. Go back to the main corridor and move forward. Stop when you reach the area with two new turrets.
Move ahead without stopping at any of the forks to avoid getting in the fire range of the turrets on your right. At the end of the corridor, on the left, you can crawl inside a vent shaft, illustrated above.
Crawl through it to find yourself in a small room. Start climbing where shown on the screen; you need to get to the adjacent room.

Leave the room, turn right and disable the first turret. I suggest going to the other side of the corridor now, which the turret has been monitoring. Use the welding torch on the door to the room on the right (the above screenshot) and search it to get the third and last Audio Log.
Backtrack to the disabled turret and use the welding torch on the closed door there (the above screenshot). Approach the second turret and shut it down.
Wait until Bella opens the door and use the newly unlocked passage to reach the operations room. Depending on preferences, you can listen to the conversation about the personnel manifest or find the above Dog Tag in the meantime (PFC Daniel Spunkmeyer). You're about to receive new objectives.
Despite what it looks like, you don't need to hurry, because the dropship won't attack your team. Don't forget to pick up the dog tag from the operations room, if you haven't already, then follow the other marines. The first encounter with the Weyland-Yutani mercenaries will take place in the area with containers, pictured above.
Depending on preferences, you can fire from behind cover, looking for opportunities for perfect shots, or take a more aggressive approach. In the former, consider using grenades and going through the left container (the above screenshot) to flank your enemies.
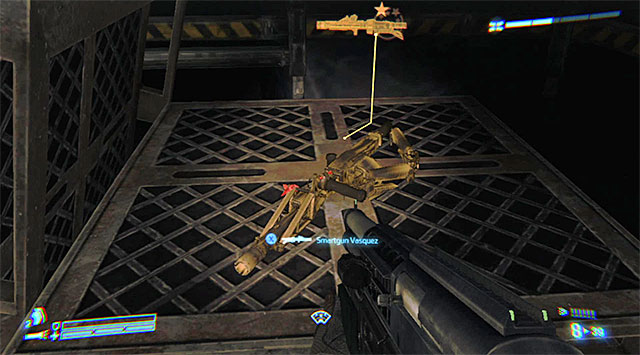
Enter the new building and go down the stairs. When you find yourself in the garage, search the area on the left to find a Legendary Weapon: Vasquez's Smart Gun. Same as with the regular smart gun, this one won't be permanently added to your inventory as well. Nevertheless, consider taking in with you for the further battles, especially since the game won't allow you to take it to the next mission.
Approach the exit of the garage. From now on you'll be forced to fight off both new mercenaries and regular Xenomorphs. Take advantage of the fact that the Weyland-Yutani soldiers will often be busy shooting aliens, so either surprise attack them, or even wait until one side falls.
After exiting the garage, start walking towards the hill outlined in the distance. I don't recommend going too fast, though, because you could suddenly find yourself under heavy fire or surrounded by Xenos. Be extra careful especially around the above area; there's a large group of enemies to deal with there.
Follow the path towards the elevator, eliminating whoever's left on the way. Once you reach your destination, examine the area thoroughly to replenish your supplies. When you're ready, take the elevator. Push the lever to end the mission.
Leave the elevator and go straight ahead. You'll run into the first Xenomorphs at the above gate. Be aware that at the beginning of the mission, apart from regular Xenos, you may also occasionally encounter Spitters. Take them down as quickly as possible, making sure to keep them at bay and staying mobile all the time.
When the first wave of fighting is over, try to get to the upper gallery on the left; there should be an armor piece there. Make your way towards the gate on the right and you'll enter caves with some new Xenomorphs. Same as before, don't rush anything; first off, focus on spotting Spitters. Continue forward to reach the exit.
At the exit, kill the Xenomorphs coming at you and take notice of the stationary gun that lights the area looking for targets. No matter what, stay away from that light; consequently, to move close to the left wall (under the gun).
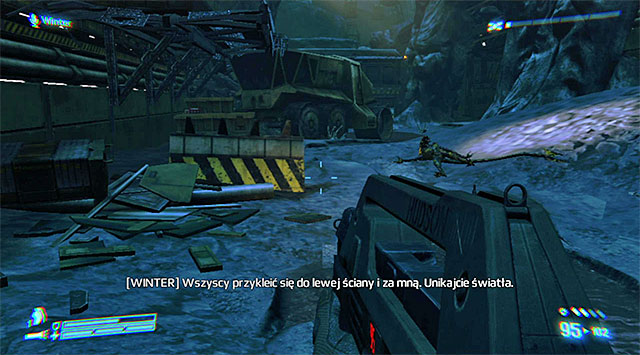
Stop by the vehicle pictured above. Wait until the gun rotates to the right to light the area you've just came from. Only then move forward; that way you won't need to worry about being detected and shot. Head for the entrance to another cave complex.
Be on alert even more as you'll not only be running into Xenomorphs (watch out for Spitters!), but will also have to avoid being detected by the second stationary gun. Observe where the light falls at a given moment, and move between covers, trying to stay close to your teammates. If needed, use the grenade launcher or the shotgun to quickly dispose of any alien and don't stay too long in one place.
As soon as you leave the caves, I suggest taking the right path, on screenshot 1, first. Make sure to avoid the light. What you can find here is a full set of armor and a Dog Tag from screenshot 2 (Sgt Al Apone).
Backtrack to caves' exit and take the main path now, following your teammates. Take care of some new Spitters on the outlying rocks, then enter the building on the left. Go upstairs, stand at the exit and start eliminating subsequent groups of Xenomorphs. In case of danger, retreat to the building to make it harder for the aliens to hit you.
Move forward, ignoring the sounds of fighting; you're not on the radar of either the Xenos or Weyland-Yutani forces. Turn left the first chance you have and take the above pathway.
Don't worry about the fact that you can't use your weapons or the motion tracker at the moment; you're safe here. Make your way towards the hill, ignoring the mercenaries you'll see on the upper gallery. Ignore the supplies as well, because you'll be able to pick them up only towards the end of the mission. Your current destination is the tunnel, pictured above, that leads inside the new building.
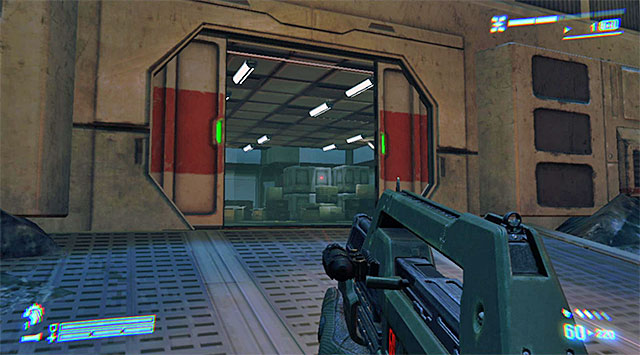
When you're inside the science facility, open the door and listen to a conversation between Bella and O'Neal. Head for the above door. An important cutscene will be shown: a meeting with a Weyland-Yutani scientist which ends with Bella's death.
Move to the adjacent room and go upstairs. For the first in the game you'll be forced to shut down emergency protocols to stop the spreading of a poisonous gas. You have only 10 seconds to do it, but luckily, the terminal is just on the right, at the end of the corridor (the above screenshot).
Hit the room where the Weyland-Yutani mercenaries are defending themselves; otherwise you'd have some difficulty locating them. Get rid of all enemies, they shouldn't pose any serious threat.


When the fighting is over, locate two new secrets. For starters, backtrack to the corridor in which you used the control panel earlier. Search the area on your right to find the Dog Tag pictured on screenshot 1 (PFC K. Barrington). Enter the science lab you've just secured and look for the Audio Log from screenshot 2.
Go through the door leading to the next area of the facility. Follow the linear path until you reach the stairs, and go down. Take care of a single guard and go for the exit. In the new corridor, watch out for new enemies which will show up where the screenshot indicates. Get rid of them using the grenade launcher or regular grenades.

Continue exploring the facility, but don't worry, there are no new encounters for the moment. When you enter the dimly-lit room with two bodies, look around for the second Audio Log, illustrated above.
There are armed scientists in the adjacent room. The best thing to do would be to follow O'Neal's advice and deal with them immediately, not letting them a chance to react (screenshot 1). If you're not fast enough, one of the scientists may run to a control panel and sound the alarm. If so, you're going to have to repeat the process of shutting down the emergency protocols (screenshot 2), again with 10 seconds at your disposal.

When all enemies are down, search the small corridor on the right to find a full set of armor. Backtrack to the room with the murdered scientists and take the main door. You'll run into new enemies in the area pictured above; due to weak lighting, use the motion tracker to detect hostile units.
A much harder encounter awaits you in the nearby corridor, though, (the above screenshot), because new enemies will spawn quite regularly. The best spot to eliminate them from is around the entrance; if possible use grenades or the grenade launcher. Don't lean out of the cover and don't try to search the corridor until all Weyland-Yutani mercenaries are killed.
In one of the subsequent room you'll come across three armed scientists (the above screenshot), but given that they're poorly armored, they shouldn't pose any threat. Get rid of them and proceed forward.
When you reach the room pictured above, prepare to take some extra measures. The enemies should be taken down as soon as possible so that none of them could reach the control panel and sound the alarm. Pick a good spot and fire in series if needed. When it's over, resume the move forward. You'll receive new orders in one of the adjacent rooms.
Follow the linear path, but keep an eye out for a showcase where you should find a large supply of collectibles. After a while you'll reach a tunnel which will take you back to the surface.
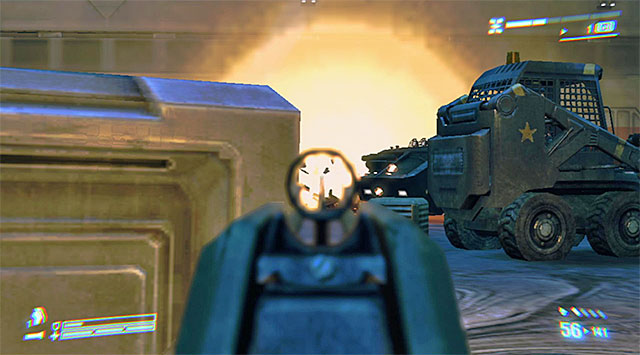
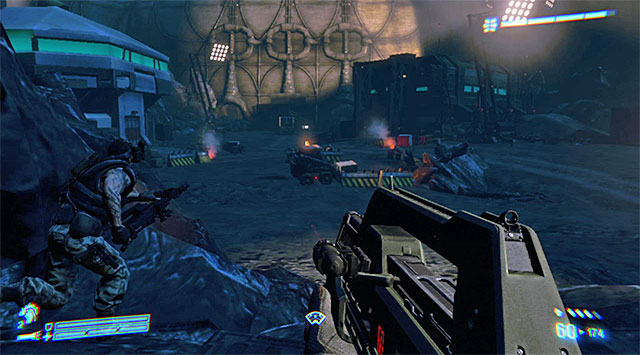
Follow O'Neal and get ready for an encounter with an armed vehicle (the above screenshot). Don't attempt to attack it, you won't do any damage even if you use explosives. Your only solution for the moment is to avoid its fire by taking covers and running from one to another.
Don't move towards the vehicle, but take the sideway path illustrated above, trying to keep close to O'Neal. Continue onwards, all the time taking covers and not staying in one place for too long.
Soon, the vehicle will be backed by enemy soldiers, which can only mean some more trouble. Try to get rid of them from behind the covers so as not to risk getting shot by the machine. Use the motion tracker to detect them easier. Make your way towards the gap in the fence.

Turn right, trough a small canyon. Jump down and turn left. Use the height advantage to attack the guards below. Afterwards, move along the platform on the left, jump down and pick up whatever items the enemies' have dropped.
This is not a difficult task, but you need to make sure not to accidentally get into the vehicle's fire range. The general theory is that you need to induce the driver of the vehicle to retreat under the crane by causing a detonation of the tank to its left (the above screenshot). It's worth mentioning that O'Neal can do this whole thing for you, though you shouldn't have any difficulties placing yourself in the proper spot and shooting the tank.

Enter the APC area (if you haven't already) and go right, taking covers and sprinting whenever necessary. I recommend taking the above sideway path; it will take you even further away from the enemy vehicle.
I don't recommend hurrying to the crane's control panel, because soon the place will be crawling with Weyland-Yutani mercenaries. Same as before, use covers, grenades and better weapons, even more often than you usually do. Keep track of their movement using the motion tracker, because at least several enemies will try to get close and surprise you.
When you get close to the crane, watch out for soldiers who may show up on the hill on the right; they will have the height advantage. Pay attention to the soldier with the rocket launcher, on the left (O'Neal should take care of him, but you're free to help him out).
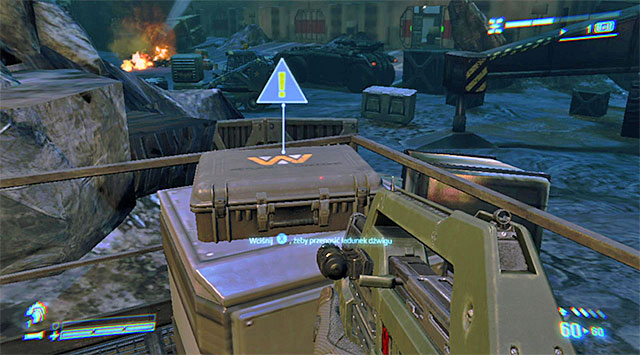
Your current destination is the above crane's control panel, with which you need to interact. Notice that placing the charges in proper places will take up some time, so before using the console make sure you've cleared the area of all hostile units.
Start off by searching the site where the vehicle has been, especially since the soldier with the rocket launcher should drop a full set of armor. Afterwards, make your way towards the main entrance, pictured above. Turn left, after O'Neal.
Soon you'll reach an unguarded area comprised of one large room and several smaller ones. The one pictured above hides the third Audio Log. When you're done searching through them, go to the double door where O'Neal should be waiting.
Go upstairs and take care of a group of armed scientists in the new area. Afterwards, approach O'Neal and listen to the details of the next objective.
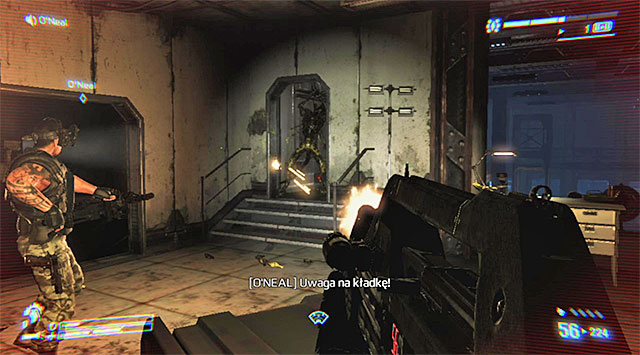
Use the door left of O'Neal and go down the stairs. In one of the cardboard boxes you can find the above Dog Tag (Cpl C. Nelson).
As for the cells, you can locate them with the motion tracker. Two of them are easily reachable; you only need open the interactive door and shoot a single enemy (screenshot 1). Interact with the cells to disable them (screenshot 2).

Getting to the third cell is a little more problematic. Look for a stairwell pictured on screenshot 1; it's in one of the corners. When you reach the room upstairs, find the hole in the floor (screenshot 2). Depending on preferences, you can throw in a grenade or jump down to get rid of the enemies yourself. When everyone's dead, disable the third cell.
If you've disabled the cells following my instructions, go through the newly unlocked door. Backtrack to the stairs where you've found the dog tag earlier. Listen to what O'Neal has to say, then pull the above lever to end the mission.

Follow O'Neal, ignoring the battles outside; you're not in any danger for now. Go left at the end of the corridor, then search the small room pictured above to find the first Audio Log.
Resume the march to reach the stairs leading to the lower level. Make your way towards the above elevator and wait until takes you to a new floor; on the way you'll make a shocking discovery about the alien queen. Follow O'Neal and jump down when the platform is destroyed. Your life won't be in any danger here, so pay no attention to the queen and her attempts to break free. Use the stairs again. Soon you'll reach the exit.
Get ready for a battle, because as soon as you open the large door leading outside you'll find yourself in the area where mercenaries are fighting Xenomorphs. It's a good idea to let the aliens deal with the soldiers so you won't waste ammo or take any unnecessary risks. It doesn't mean, though, that you shouldn't be careful. Watch out especially for Spitters; make sure to shoot them from a distance and not stay in one place for too long.
Keep moving forward, eliminating both the Weyland-Yutani mercenaries and Xenomorphs. Remember to use covers and look around for collectibles. When you get close to the above building, focus your fire on the stronger soldier using your best weapon available against him.
Depending on preferences, you can go through the aforementioned building (there should be some supplies to take) or stay on the main path. Regardless of the choice, expect to run into new enemies. Be extra careful around the area pictured above; apart from regular mercenaries, there's also a heavily armored opponent.


You can also take a look inside the second building, but there's nothing in there besides some supplies. Make sure, though, to check out the third garage; there is a Dog Tag lying on one of the crates (screenshot 2) (PFC Tim Crowe).
Leave the building and follow O'Neal. Expect new encounters after reaching the area illustrated above. In spite of what it looks like, you don't need to hurry to get behind the covers, because there are only Xenomorphs to eliminate. It's better to stay on the hill and take them out from a safe distance.
Once they're down, pick up collectibles and head for the entrance to the underground facility. Go through a small tunnel, receiving new objectives in the meantime.
Move through the linear corridors and after a while you'll find yourself in a larger room (the above screenshot) in which you'll run into some new enemies. Notice that the game gives you a chance to surprise them; it definitely pays off to use this opportunity and deal with several closest enemies before they have a chance to return fire.
In subsequent battles, try to get rid of enemies from a large distance and find covers as you go so as not to become an easy target for anyone. Don't use grenades this time; since the fighting takes place on small galleries, most of them may land in the wrong places.

Keep moving forward, picking up whatever supplies you find. Make sure to look inside the first building you'll pass by (the one on the right); there is an Audio Log inside. When you take it, head for the second building (left) and go all the way through it.
Get ready to eliminate the last group of mercenaries which will show up by the door at the end of the current area. Traditionally, take proper precautions when you notice the heavily armored enemy. When the battle is over, search the place for collectibles (the elite soldier should have a full set of armor) and use the elevator pictured on the screen.
Wait until the elevator takes you to another level and move forward. Don't hurry; as soon as you reach the above area you'll be forced to fight off fresh waves of Weyland-Yutani mercenaries. Luckily, the underground complex facilitates the use of grenades, so use them a lot to kill the enemies hiding behind covers.
Continue onwards until you reach the large oval room. Make your way towards the platforms on the left, but turn right the first chance you get. Examine the end of the above gallery to find a new Dog Tag (Cpl S. Baroski).

Afterwards, retreat immediately and hide behind a cover, because new enemies will start showing up in the distance. If possible, try to shoot them from as large a distance as you can, using the scope. Same as with the other battles, be on your guard when it comes to the heavily armored soldier.
When the fighting is over, pick up supplies and make your way towards the only exit here (the above screenshot). Follow the linear corridors. There'll be some more fighting on the way, but, providing you don't charge, use grenades and your best weapons, not too challenging. Continue the way towards the exit and you'll get new objectives.
The second visit to the surface is very similar to the last one. Start off by attacking the mercenaries by the barricade. Further on, focus on the Xenomorphs which will be trying to get close to you and O'Neal, as well as Spitters; it's best not to let them take any of your health and armor points.
Keep moving forward, pick your targets carefully and pay close attention to what the aliens are doing. Make sure to clear the upper galleries - single mercenaries may be hiding there, and wait for the heavily armored soldier to appear; when he does, focus solely on him.


When the battle ends, search the hill pictured on screenshot 1 first. Check out the area near the parked vehicles to find a Dog Tag from screenshot 2 (PFC D. Capes).
Go back to the main site, pick up supplies and make your way towards the building indicated by the game. Be cautious, there is another group of mercenaries hiding near it. Given that they're hiding behind the barricade, use grenades to get rid of them quickly.
Explore the rest of the building; you shouldn't run into anyone anymore. You'll come across the last group of mercenaries only after reaching the place where the prisoner is kept. Try to surprise the enemies by attacking from the upper gallery, but watch out for their grenades. When the battle is won, approach the hostage and wait for the mission to end.
Follow Cruz and O'Neal. Be prepared to face Xenomorphs almost immediately. Look for Spitters first, avoid their ranged attacks and keep moving all the time. Make sure to use the motion tracker; a lot of the aliens will be climbing walls or hiding on rooftops.
Move ahead, one step at a time, and keep checking your back; a group of Xenos will show up behind your backs, near the place where the mission started (the above screenshot).
As soon as you get to the closed door leading inside the colony's building, run to the disabled sentry turret on your right. Face it in the direction you've just came from.
Get ready for some Xeno extermination and make sure not to let them too close to where attempts at opening the door are being made. Don't forget about Spitters, there are still a lot to detect and eliminate.
Continue fighting until you've gotten rid of all aliens, which should coincide with opening the door inside the colony's complex. Go inside and turn left at the main fork. Search the room on the left at the end corridor; apart from a full set of armor, you'll also find a Legendary Weapon - Vasquez's Pistol (the above screenshot).
Backtrack to the fork and go through the unexplored main corridor, following O'Neal's footsteps. Open the small door on the left and go upstairs. Notice that you've found yourself in the same spaces where a previous mission had you placing motion sensors. You're free to explore the area as well, but if you wish to find a new secret and complete the current objective quickly, follow the tips outlined below. Move ahead, into the damaged main corridor (the above screenshot). Take the pathway on the right, towards the labs.
There are three marines to save here that you can locate with the motion tracker. The first ally has been crushed under the ceiling wall (the above screenshot); help him on his feet. Watch for Xenomorphs in the meantime, though, especially since there will be Lurkers among them. Keep an eye on them on the motion tracker so as not to let them run up and attack you in close combat.

Move to the next lab room. Take care of more Lurkers, then search the area thoroughly; you'll find the above Dog Tag (PFC Mark Drake).
The second marine is trying to defend himself in the room adjoining both the labs and the operations room (the above screenshot). To get to him, open the door on the left using the welding torch. Kill the Xenomorph that will show up there.

The third and the last marine is fighting in the operations room; the same in which you've already fought off Xenos in one of the previous missions. Help him get rid of the aliens.
Make your way back to Cruz and the rest of the marines, they're at the entrance to the colony's building. If you have trouble navigating through the corridors, use the motion tracker. Your destination is the stairs that will take you near the morgue.
Once you've joined your allies, listen to what Cruz has to say to you and the rest of your teammates; you'll receive the current objective. Afterwards, take the newly unlocked passage. Follow your allies and stop when you reach the vehicle bay pictured above. You'll receive new orders and the main battle of this mission will begin.
You have about 10 second to prepare for the Xenomorphs' offensive, so be quick about it. Start off by picking up the new sentry turret. Where you put it won't determine the win or the loss of the battle, but if done right, it will greatly help you out. I suggest placing it at the very centre of the vehicle bay and facing it towards the wall furthermost of the entrance (the above screenshot).
The storeroom on the right, illustrated above, plays an equally important part. Don't pick up the full armor set if you don't need in now, it may prove much more useful towards the end of the battle. The ammo depot will fully replenish your supplies, but the whole action will cost a few seconds. It's good to do it immediately and at least once again after the fighting has begun, preferably in between the aliens' attacks.
Try to stay within the main area of the vehicle bay for the most of the battle, especially given that the rooms are small are poorly lit, and many Xenomorphs will come out of vent shafts. The first wave will show up near the entrance. Don't worry about the sentry turret being faced the other way, those aliens shouldn't be difficult to get rid of.
The following waves will start coming from the further area of the bay, and this is when the sentry turret comes into play; it will not only fire at the Xenos jumping down on the floor, but the ones trying to get to your allies on the gallery as well.
Stay within the main area until the sentry turret runs out of ammo. As soon as it happens, get to the storeroom, replenish your supplies and take the nearby stairs to the above gallery. Keep fending the aliens off until all of them are gone, but try to stay close to your teammates and keep an eye out on the ceiling and the walls.
Go back to the ground floor, but make sure to replenish your supply if you can. Before leaving the vehicle bay, search the main area for the entrance to the underground tunnels, pictured on screenshot 1. Check them out to find the Dog Tag from screenshot 2 (LT P. Watkins).
Make your way towards the newly unlocked exit of the vehicle bay and you'll return to the surface. Move ahead, but stop where the screen points; you're about to face an alien Crusher for the first time.
Focus primarily on dodging to avoid the alien's charges. Don't expect to find cover behind the barricades on the left, though; the Xeno may easily destroy them.
Each time you manage to perform a dodge (otherwise you'll be crushed into the ground and lose some health), hit the Crusher with what best weapon you have. My recommendation is the tactical shotgun, but you may obviously use a rifle or the grenade launcher as well. Soon, other Xenos will join in on the fight, but take an interest in them only if they get too close and may pose a direct threat.
Keep dodging and firing until you've done the job. Get rid of the other Xenos and follow your teammates towards the landing pad. Wait until Cruz opens the door to the new building.

Go inside and start exploring to stumble upon the above Dog Tag (PFC D. Rechner). Move forward and jump down to get to the lower level. Exit the building and approach the landing pad to receive new orders.
Before you take to completing this objective, there are two optional things worth doing. Take a look inside the ammo depot on the right (screenshot 1). In the area to the left of the landing pad you can also find the last Dog Tag in this mission, pictured on screenshot 2 (Sgt R. Siwiak).
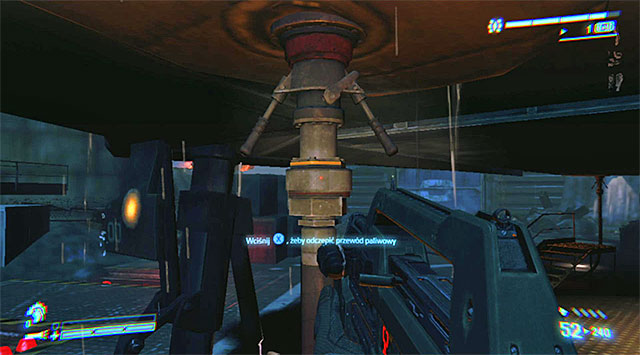
There are three fuel lines to disconnect; you can check their location on the motion tracker. Before approaching any of them, make sure to clear the area of any Xenomorph in the closest vicinity, because even though you can't take any damage while working on the lines, you'd still be surrounded with no way to escape. Approach the lines one by one, but be aware that disconnecting them would spawn new aliens around you.
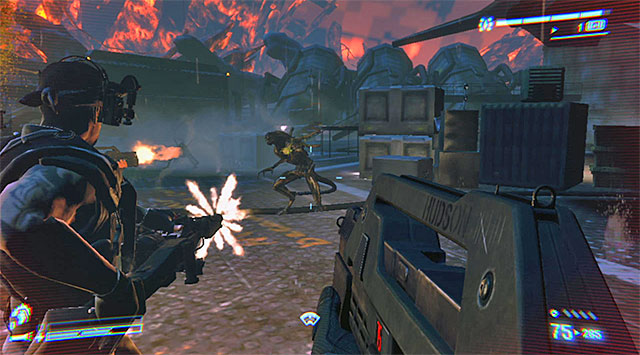
You'll get this objective as soon as you disconnect the third fuel line. I suggest staying close to your teammates; this will reduce the risk of receiving critical damage in the final part of the mission. Aim at Spitters and Lurkers first. Use your best weapons; you won't need the ammo later. Keep fighting until the mission ends, which is soon after the dropship gets back.
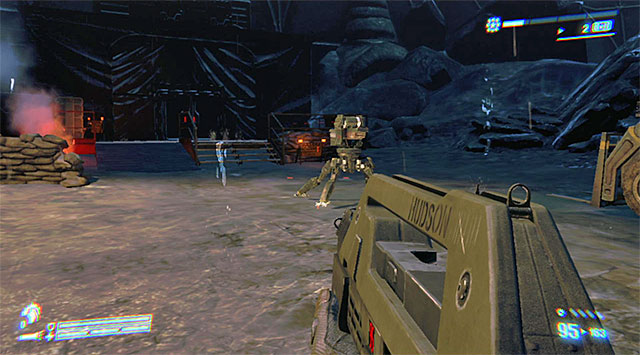
As soon as the mission begins, run to the covers to attack the Weyland-Yutani mercenaries. Don't lean out when you don't have to, but make use of the exploding barrels.
When the fighting is over, check the area for collectibles (there should be a full set or armor somewhere there), then follow your teammates towards the building pictured above. Don't hurry, because you won't be able to go inside until you've shut down the enemy sentry turret that's facing it. Disable it, then open the door using the welding torch.
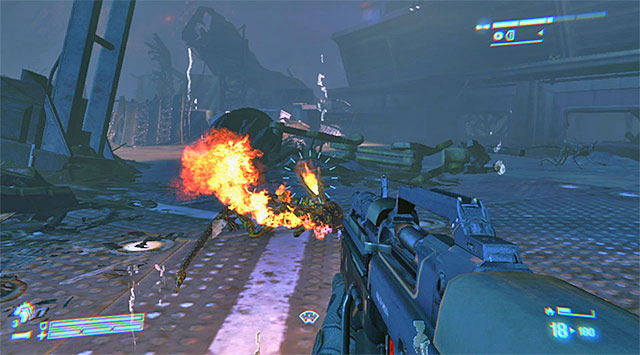
Take the newly unlocked passage. Depending on preferences, you can pick up the M240 Incinerator Unit (the above screenshot) or stick to your current weapons. Personally, I recommend taking the flamethrower; you'll only be facing Xenomorphs for a while, and the flamethrower is very effective against them.
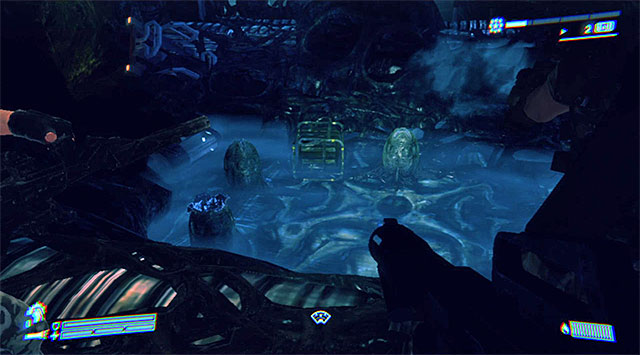
Go through subsequent linear corridors; you won't run into anything or anyone for the moment. Stop when you get to place shown above, with the alien eggs. Starting from here on, make sure to take a moment and destroy the eggs from a safe distance; you'll save yourself the stress of having to worry about defending against Facehuggers (if that happens, rapidly tapping tap the interact button).
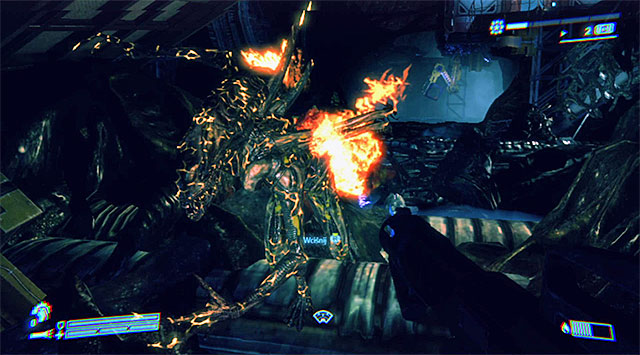
Be cautious, because apart from Facehuggers you'll also come across "adult" Xenomorphs. Given the presence of Lurkers, caution is a crucial factor. Try to prevent any face-to-fact encounters, all the while keeping an eye on the motion tracker and listening to the sounds of their presence.
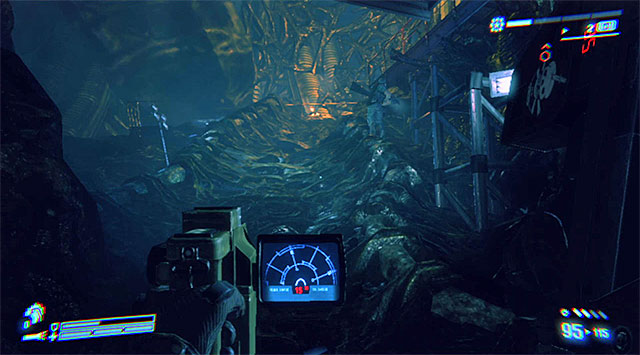
Keep moving forward through the egg-infested area to reach the above ramp, which will take you to the upper gallery. The game will give you another objective.
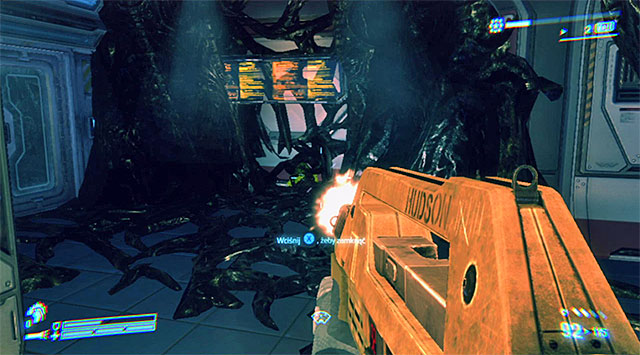
Examine the gallery to find some precious supplies. Head for the door on the left and be ready to eliminate a Lurker immediately after opening it. Afterwards, make your way to the other door.
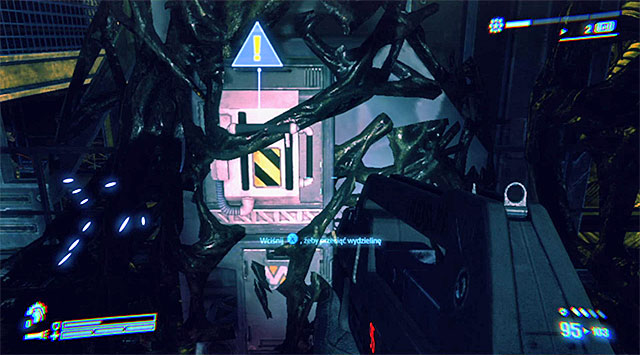
Approach the unreachable lever. There's not much to do except push the interact button to automatically clear the infestation. Pull the lever to restore power to the elevator.
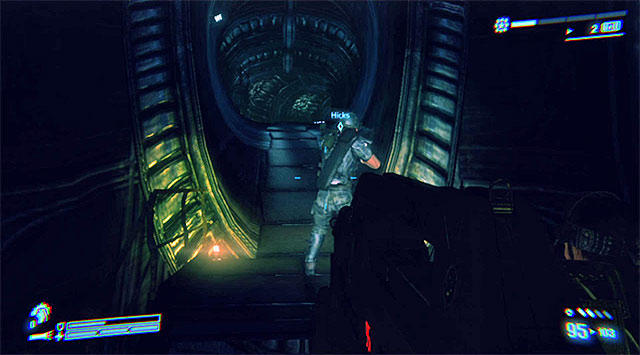
Backtrack to the elevator you went past earlier. Stand on it and interact with the control panel to have it take you up. Make your way towards the above passage and start exploring the corridors.
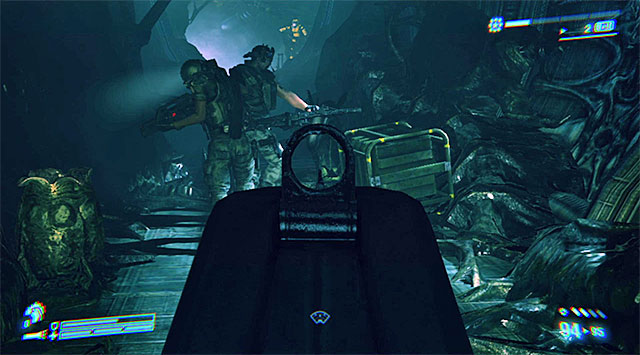
Watch out for Lurkers, they're here as well. Stop each time you hear something that may suggest their presence, so that you'd have a free moment locating and getting rid of them. Make sure to destroy each and every one egg you stumble upon so that you won't have to waste ammo (and lose armor points) trying to kill Facehuggers.
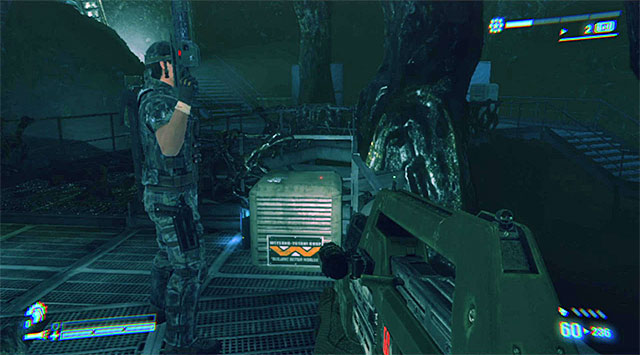
Continue onward, past the ancient Space Jockey. When you get to the gallery, it's wiser to slow down. There are not only Lurkers to take care of, but also a crate with the above Dog Tag (PFC J. Ma).
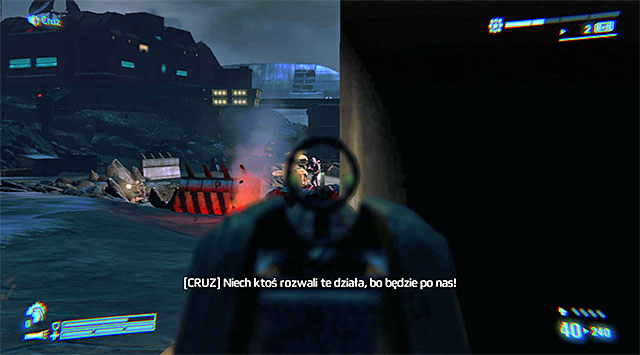
Move forward. Before leaving this place, check out the area on the right, but destroy the eggs first. You should find a full set of armor there. Make your way to the near corridor, you have a free way. A few moments later you'll reach the passage, pictured above, that leads to the surface. Listen to new orders which will tell you to destroy the first of three AA guns in the area.
Before you get to destroying the first gun, it's better to clear the area first. It's not required, you can succeed without it, but it should reduce the damage in the further part of the mission, assuming you'll start using covers as soon as possible. Attack the mercenaries you see in the distance, but be aware that new enemies may show up in a while. What's more, sooner or later at least two Lurkers will join in on the fight, so don't let them surprise you.
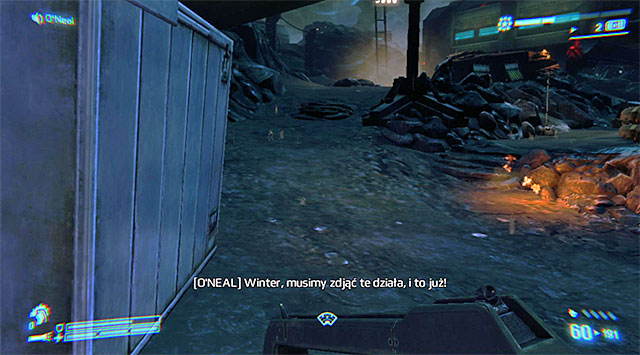
Regardless of whether you chose to eliminate or ignore the enemy forces, head for the hill on the left, pictured above. If you find yourself under fire, sprint.
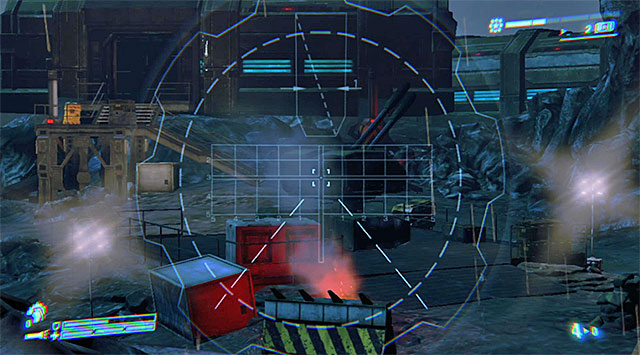
You'll find a full set of armor and the M5 RPG Launcher. Pick it up and aim it at the AA gun. Three successful hits should seal the deal (you can drop the RPG, you'll find another one on the next hill).
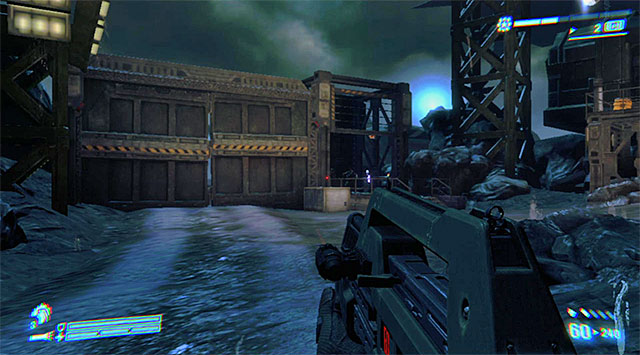
If there are some mercenaries left on the field, take them out now. The hill is the best spot to fire as it will give you the height advantage (don't forget about the Lurkers mentioned earlier!). When it's done, pick up supplies and take your team to the elevator pictured above.
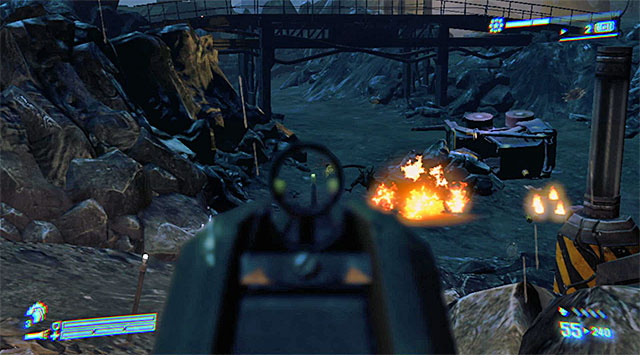
Follow the linear path towards the second AA gun. There will be some Xenomorphs to take down on the way, and quite a lot of them. Apart from regular soldiers and Lurkers, you may also run into individual Spitters. Eliminating them should obviously be your priority
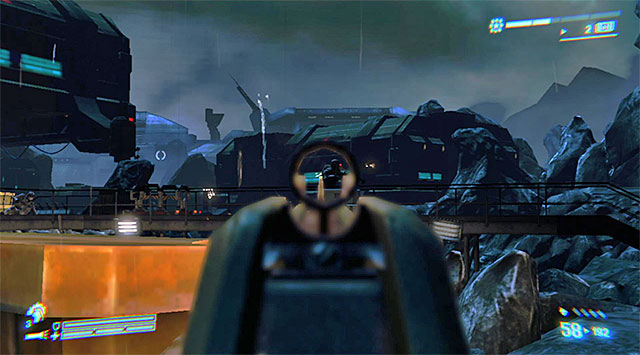
As soon as you enter the wider area, find some good covers and start firing at mercenaries and aliens alike. Take advantage of the above gallery. Watch out for elite varieties of aliens, as well as the heavily armored soldier. When the battle is over, get on the gallery or choose the low path.
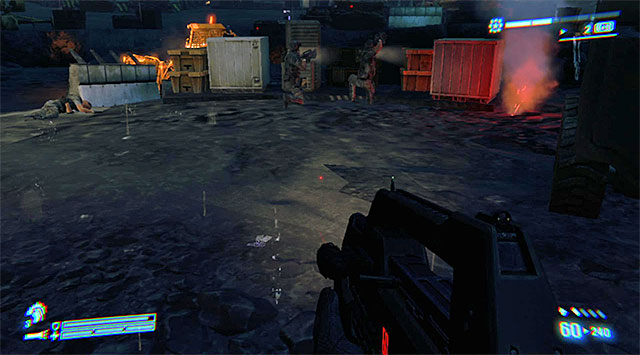
Personally, I recommend the gallery, because it'll be easier to fire at the enemies around the AA gun. See to some supplies in the middle of the site and take a moment to search the area; there is a Dog Tag lying in the ground (Sgt. K. Morales).
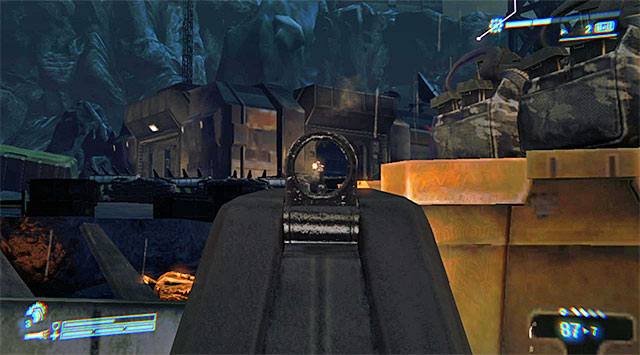
Watch out for the enemies keeping guard at the building on the left. Take them out because that's where the new RPG launcher is. Locate it with the motion tracker (there should also be some ammo and a full set or armor in the warehouse), then use the RPG to destroy the second AA gun.
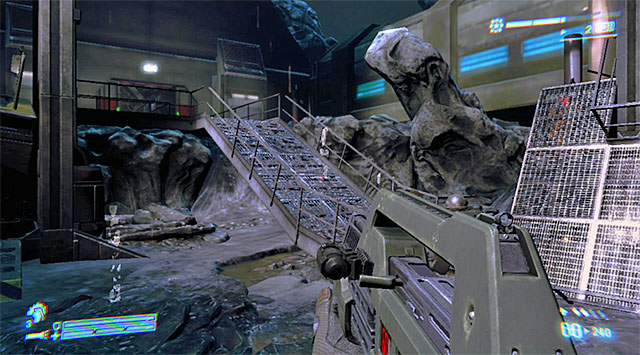
Follow your teammates towards the entrance pictured above. Be on alert because as soon as you go inside you'll be attacked by a group of Lurkers. Take proper precautions in killing them.
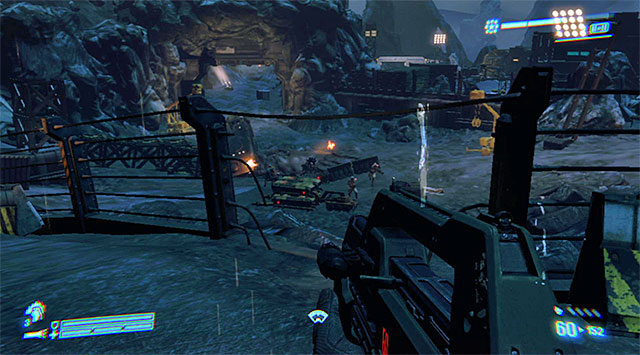
Another group of Xenos, though not too large, will be waiting for you after you leave the building. Notice some mercenaries defending themselves in the above valley. Theoretically, you could wait until they're taken care of by the aliens, but it's better to just get rid of them yourself. I suggest showering them with grenades and then shooting the rest, taking advantage of the height difference.
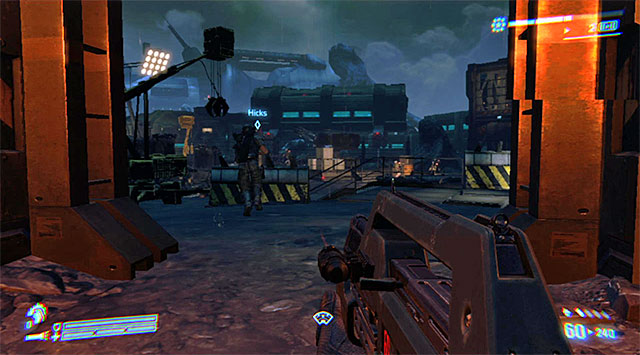
Go down when the fighting is over. Pick up collectibles and make sure to disable a sentry turret. Make your way towards the third AA gun. When you're there (the above screenshot), eliminate a group of Weyland-Yutani mercenaries. Use the scope to aim at the explosive barrels.
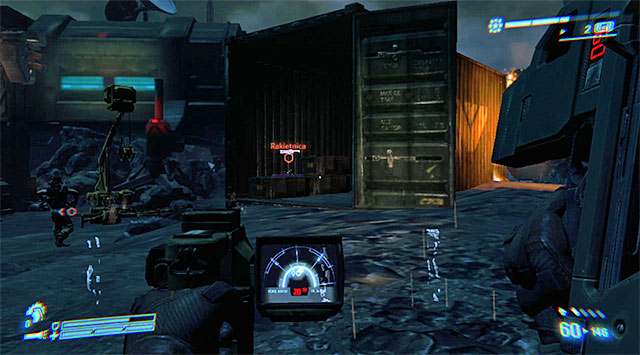
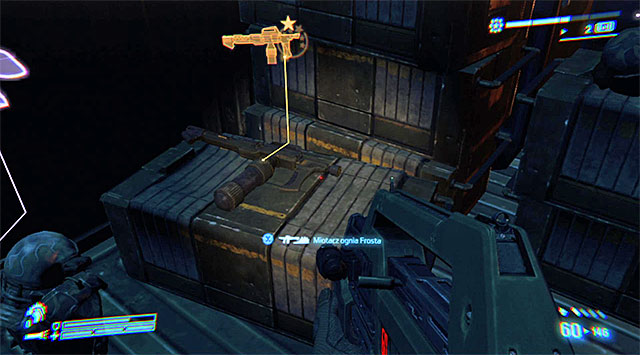
Destroy the third gun the same as the other two, with the RPG launcher. You'll find it inside the container pictured on screenshot 1, but make sure to pick up the last Legendary Weapon first - Frost's Flamethrower.

Get the RGP launcher (you'll have to drop the flamethrower first) and use it the only way you know how to destroy the third and the last AA gun.
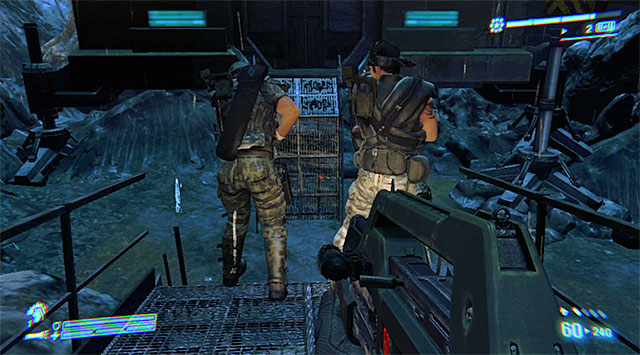
Traditionally, start off by sweeping the area of precious collectibles (there should be a full set of armor in the container where you found the RPG). Afterwards, follow your allies off the platform to the ground level.
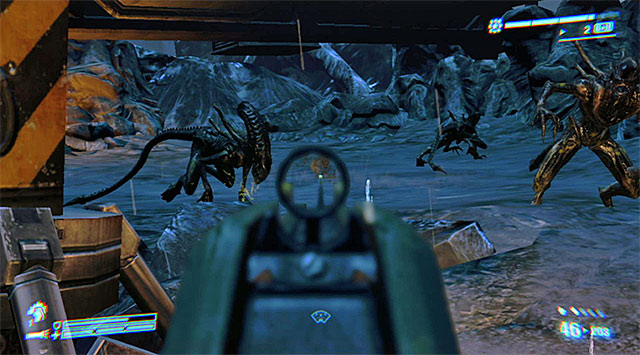
Don't rush towards the crash site; there'll be some fighting with Xenos first. Similarly to any previous encounters, make sure to quickly dispose of Spitters and Lurkers first. Keep track of what's going on the ceilings so that you don't get surprised.
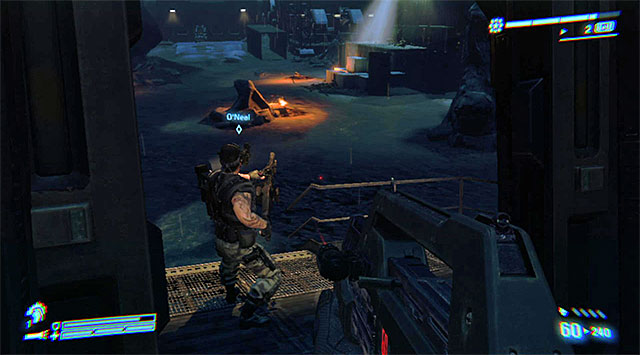
Run through the small building. If you want, you can stop at the above gallery and shoot the Xenos from there. You don't have to, though; the area is wide and there won't be too much aliens to fight with anyway.
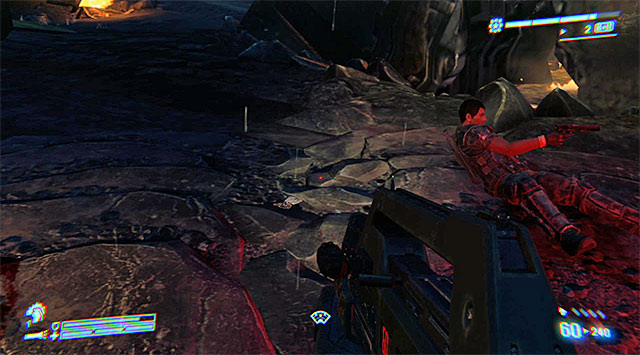
Sooner or later should get close to two marines defending themselves at the crashed dropship. Take a moment to pick up a Dog Tag (Cpl Colette Ferro).
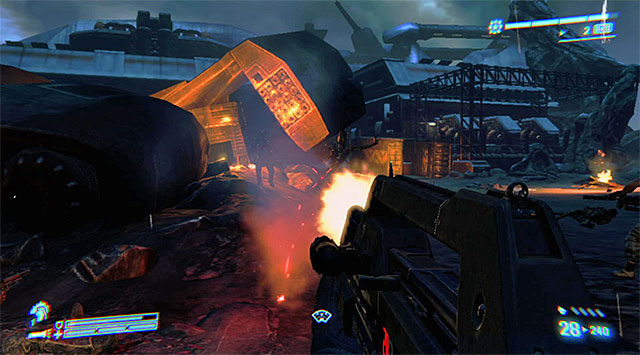
Focus on the Xenos. Try not to get too far your allies; you'll be an easy target otherwise. Keep looking over your shoulders because the aliens will be coming at you from more than one side.
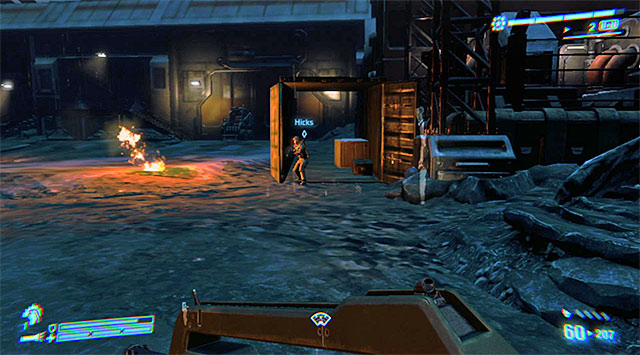
Soon, the alien queen will show up on the battlefield. DON'T attempt to fight with her, just find a shelter as soon as possible. There are some containers nearby (the above screenshot) in which you and your teammates should hide. Each of them also has some ammo and armor.
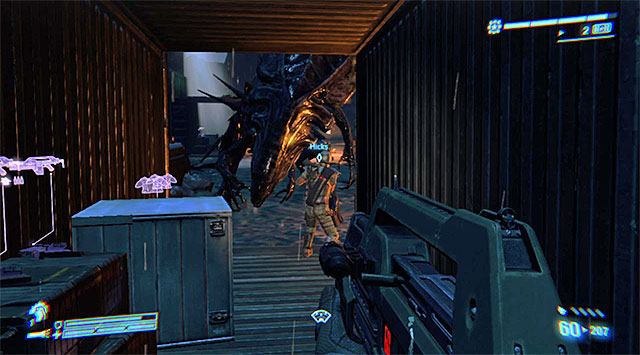
If you stand in the middle of the container, the queen won't be able to reach you. You won't even have to monitor her movements, because she can't tear the container apart.
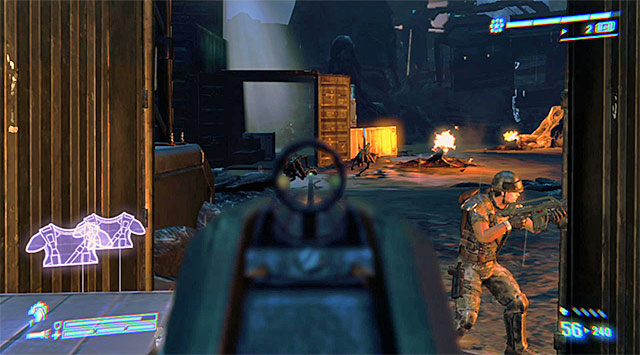
Instead of the queen, watch out for the regular Xenomorphs; try to eliminate them without changing your position. You'll have to keep defending that way until the queen runs off. Take the opportunity to replenish your supplies one more time.
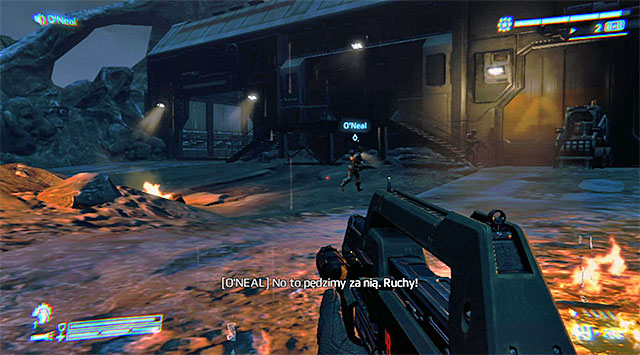
Make your way towards the entrance to the above building. Keep your eyes open, because the place will soon be overrun by Xenomorphs, Lurkers among them. When all of them are dead, head for the exit.

The next part or the mission will have you run through an area full of containers. As you may be guessing, the aliens won't give you a break, so be on you guard, don't let them get too close and kill the elite ones as fast as you can. Watch your back; not every Xeno will show up in front of you.
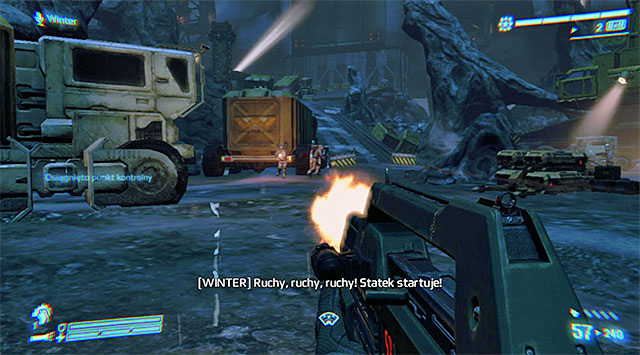
When you pass the last container, you'll reach an area which is also full of Weyland-Yutani mercenaries. Most of them are busy with the evacuation, though you shouldn't ignore them; some of them may still turn against you.
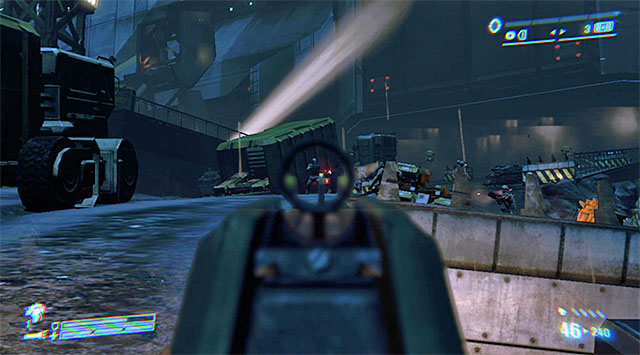
Take the above pathway towards the ship outlined in the distance. Clear your way of mercenaries (the grenade launcher should be helpful) and aliens.
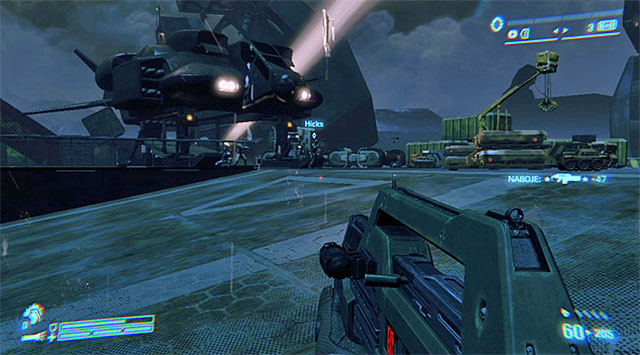
When the ship flies away prematurely, focus only on getting to the dropship piloted by Reid; this will end the mission.

Before getting to the alien queen, it's a good idea to acquire the last three dog tags in the game. The queen will show up only after ending the preliminary conversation with the other marines, but you'll regain your mobility much earlier. As soon as the mission begins, turn around. The first Dog Tag is lying on the box pictured above (Cpl L. Papp).

Finding the second one is a bit more tricky, considering that the alien queen may show up in the meantime (read how to avoid her in the further part of the text). To get to the item, turn right and move at the edge of the hangar bay. The Dog Tag (PFC A. Montgomery) is lying on a box in the poorly lit spot (the above screenshot).
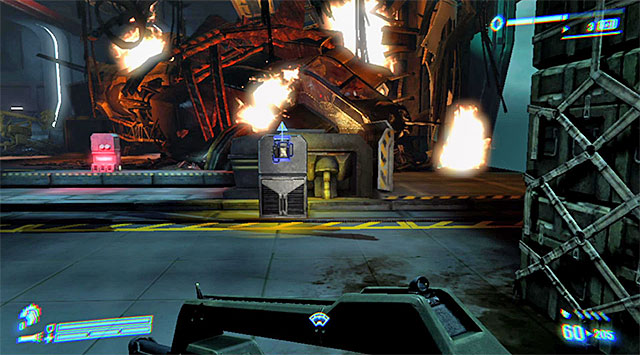
Keep moving along the edge, making sure not to get too close to the alien queen. The last secret has been put where the screen shows, which is near the body and the burning ship fragments. Examine the floor to find the last Dog Tag (PFC William Hudson).
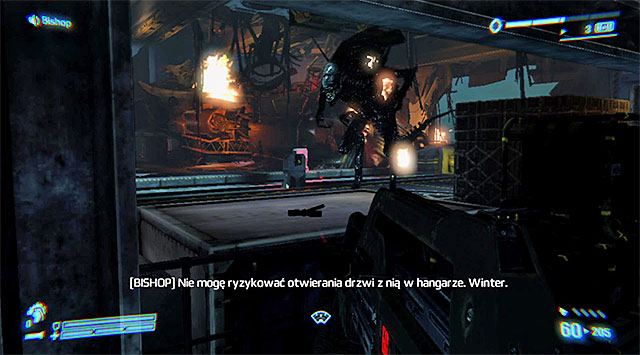
You can now focus on the queen. This isn't going to be a traditional encounter, because the queen is invulnerable to your attacks. What makes it easier, though, is that given her size she can only move around the central area of the hangar bay. It's crucial that you keep moving around the edges of the "arena", sprinting every time the queen tries to grab or hit you.
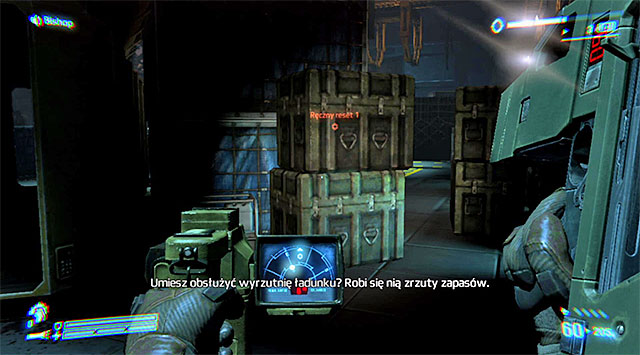
The only way to get rid of the alien queen is to activate the catapult, which is a process consisting of several steps. The first step involves resetting four manual switches connected with the catapult. To locate each of them, use the motion tracker (the above screenshot).
Approach each switch very carefully, all the while moving along the edges. Wait until the queen backs off (retreat if needed) and sprint as fast as you can towards the target (the above screenshot).
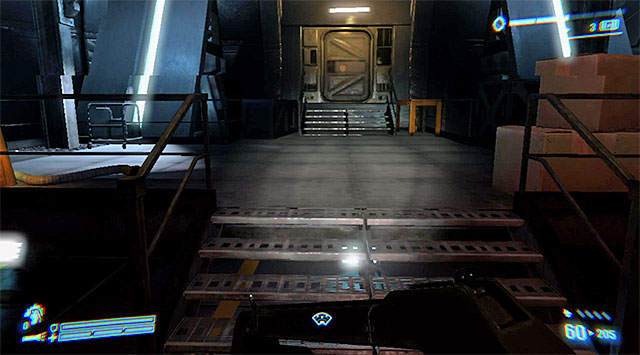
Immediately after interacting with the switch, turn around and get back to the edge. If the queen manages to catch up to you, don't forget to search the area for armor pieces. Repeat the process with three other switches, moving between the right and the left area of the hangar bay.
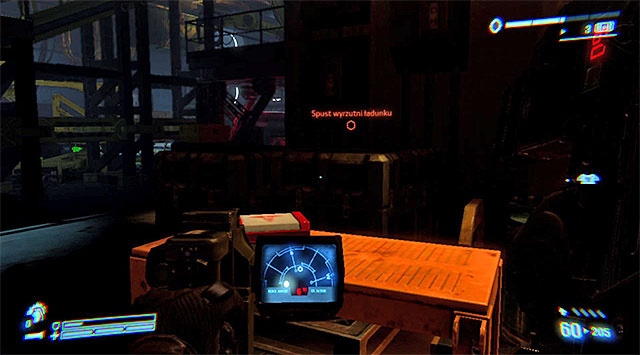
After resetting the four manual switches, use the motion tracker for the last time to locate the cargo launcher release.
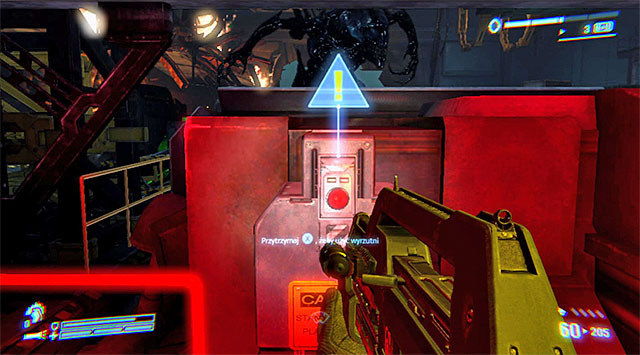
Luckily, the release is located in an easily reachable spot. Wait until the queen is near and fire the catapult to get rid of her and finish the game. Congratulations!
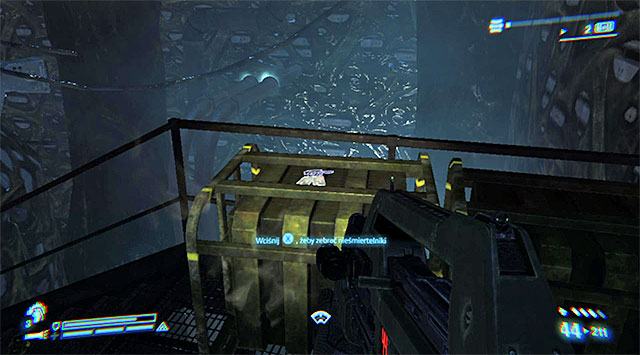
DOG TAG 1/35 (Cpl Dwayne Hicks) - In the room where you fight the first major battle with Xenos, right after cutting down Keyes. After going in, turn right and approach the railing.

DOG TAG 2/35 (PFC M. Moore) - On the desk near the computers; found on the way to the cargo bay before entering the second level of the gravitational well.

DOG TAG 3/35 (PFC S. Trubetskoy) - In the control room where the first mission ends. For obvious reasons, pick it up before interacting with the terminal.

DOG TAG 4/35 (Cpl Cynthia Dietrich) - On a chamber with marines murdered by aliens; found right after opening the door using the powerloader.
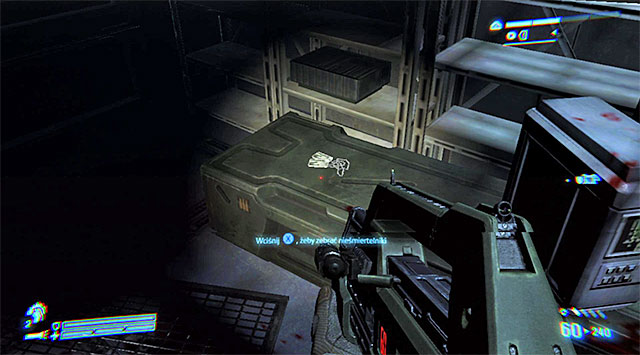
DOG TAG 5/35 (Sgt Z. Forcher) - Shortly after finding Bella and opening the door with the welding torch. Follow the blood stains on the floor and examine it to reach a crate; the dog tag is lying on top.
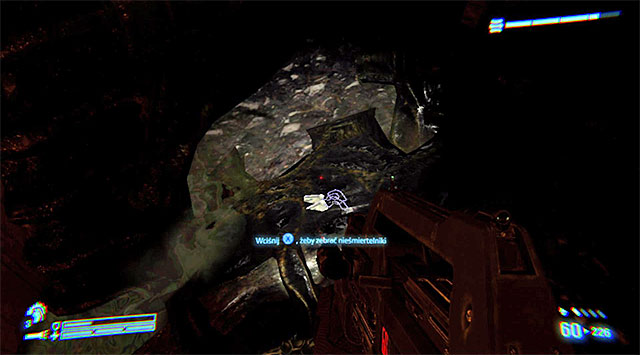
DOG TAG 6/35 (PFC Ziglar) - While going through engineering, right after breaking through the large double-decked room heavily occupied by enemy forces. It's on top of one of the computers.
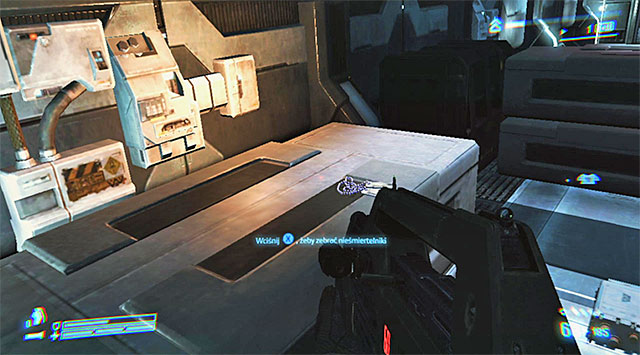
DOG TAG 7/35 (PFC Ricco Frost) - While exploring the initial rooms of the ships. In one of the corridors you'll be forced to stop at a barricade while your ally attends to the door. When you clear the way of enemies, reach the other side of that barricade and take the dog tag from the table.

DOG TAG 8/35 (PFC E. Greenlief) - On the way to the dropship in the hangar bay, at the destroyed stairwell. Try to land on the middle gallery; that's where you'll find it.
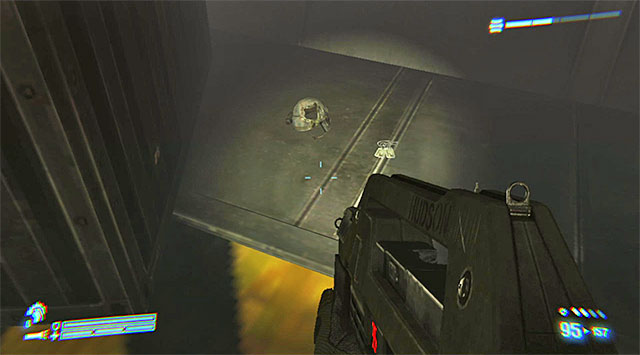
DOG TAG 9/35 (Cpl T. Ashley) - Just prior to entering the hangar bay with the allied dropship (the end of the mission). After using the elevator, check out the container on the left.

DOG TAG 10/35 (LT B. Norton) - On the desk in the operations room. You can pick it up upon entering or during the second visit which takes place further in the mission.
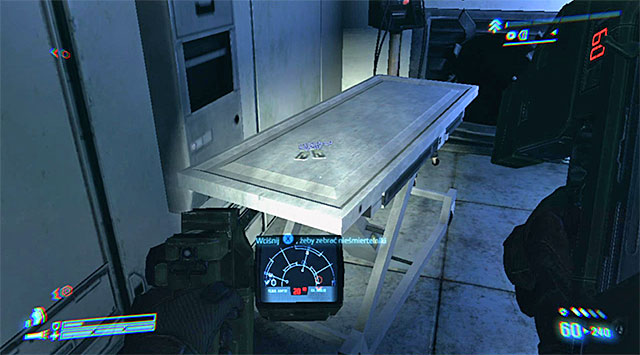
DOG TAG 11/35 (PFC Trevor Wierzbowski) - Inside one of the smaller rooms adjoining operations (where you place motion sensors).

DOG TAG 12/35 (PFC Jenette Vasquez) - In the small room adjoining the long corridor in which you find yourself shortly after receiving the smart gun, once you've managed to fend the Xenos off the operations room.
DOG TAG 13/35 (PFC M. Macaulay) - In the last, Lurker-infested, area of the mission. At the fork underground (right after finding the previous Dog Dag), take the left corridor. Reach the end, jump down and turn around.
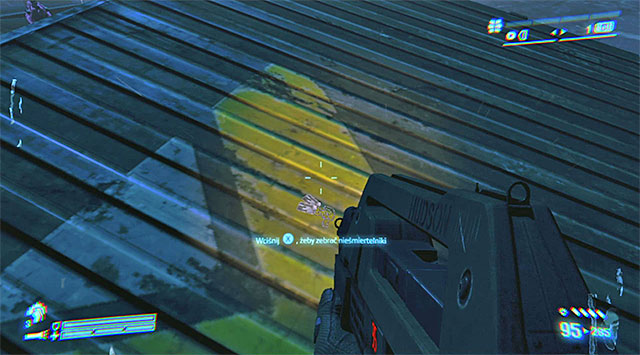
DOG TAG 14/35 (LT William Gorman) - You'll find it shortly after you and O'Neal go out to the surface for the first time (moments before reaching Bella and Reid). Examine the area to find a large container on the left, and climb it.
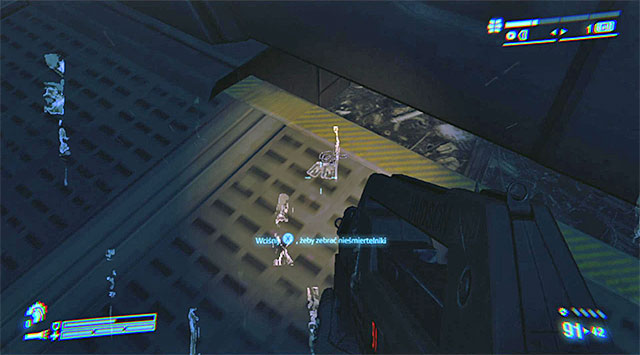
DOG TAG 15/35 (Cpl C. Bradley) - Found shortly after the overgrown Xenomorph rushes after Bella, and you and O'Neal head for the entrance to a new building. When you get there, take a slight left turn. The dog tag is lying by one of the closed gates.
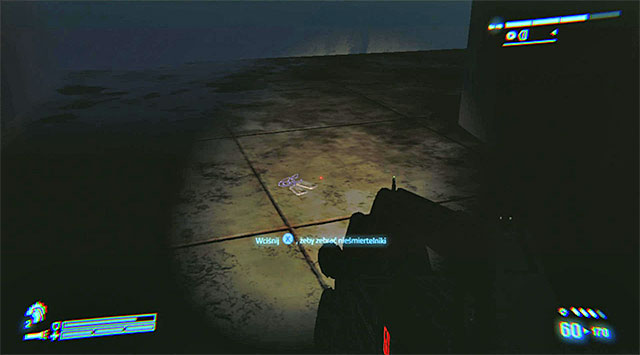
DOG TAG 16/35 (PFC M. Jelley) - In the warehouse where you meet up with Bella and Reid again. It's under the stairs, where it's dark, so use the flashlight.
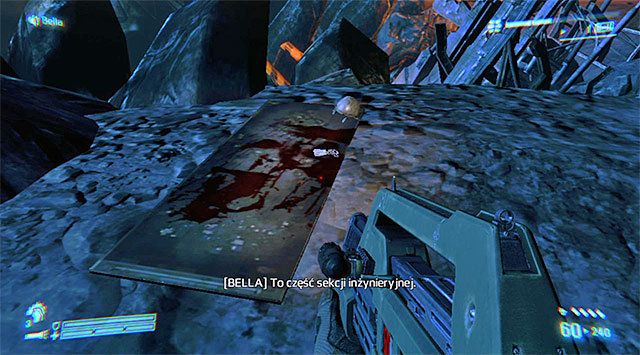
DOG TAG 17/35 (Cpl M. Bailey) - Found right at the beginning of the mission, when you reach the camp with blood-stained mattress and before running into the first wave of Xenos.

DOG TAG 18/35 (PFC J. Washenfelder) - At the beginning of the mission, during the walk to the Weyland-Yutani research facility (before the caves with Spitters). It's lying on top of a yellow box.
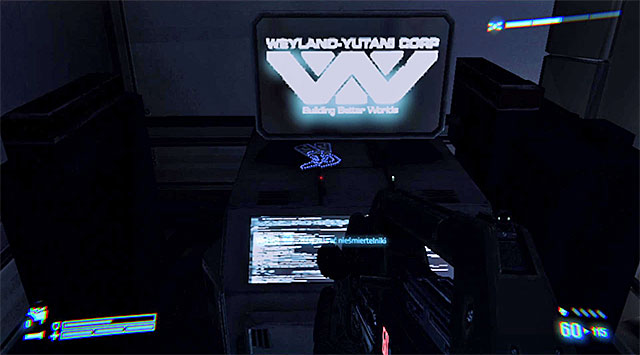
DOG TAG 19/35 (PFC Daniel Spunkmeyer) - In the operations room where you find the personnel manifest, near the terminal O'Neal is using.
DOG TAG 20/35 (Sgt Al Apone) - At the beginning of the mission, shortly after leaving the cave lit by one of the stationary guns. Turn right and search the narrow alley, but make sure to avoid the light. The dog tag is lying on the table.
DOG TAG 21/35 (PFC K. Barrington) - Shortly after meeting the scientists who was supposed to save Bella, in the corridor with the first emergency containment protocol release. The dog tag is lying on the terminal on the right.

DOG TAG 22/35 (Cpl C. Nelson) - Right after receiving the objective to disable the three cells (the end of the mission). Go down the stairs and use the flashlight to find it.

DOG TAG 23/35 (PFC Tim Crowe) - On the box in one of the last warehouses on the way to the underground facility. It's the beginning of the mission.

DOG TAG 24/35 (Cpl S. Baroski) - While going through the underground facility. Search the metal gallery in the room with the Space Jockey.
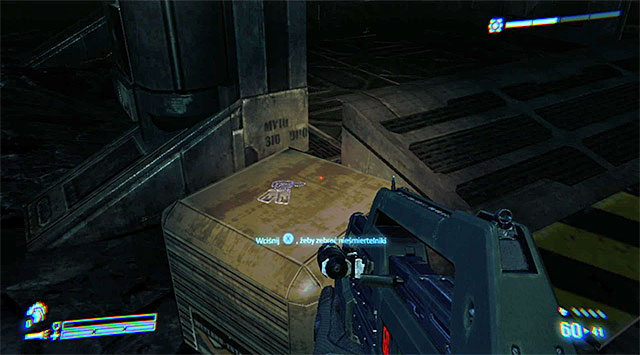
DOG TAG 25/35 (PFC D. Capes) - On the hill close to the last battlefield, the one you get through prior to finding the captive marine. The hill is on the left and you have to go past a parked vehicle.

DOG TAG 26/35 (PFC Mark Drake) - In one of the lab rooms (the same you went through in the mission 4), on the table.

DOG TAG 27/35 (LT P. Watkins) - In the corridors below the garage where you fight the main battle with Xenomorphs. It's best to try and find it after the battle, by locating the stairs that lead to the underground section of the building.
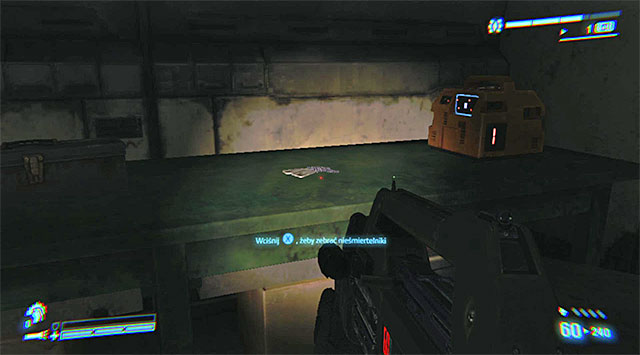
DOG TAG 28/35 (PFC D. Rechner) - Shortly after defeating the Crusher (towards the end of the mission). When you go inside the new building, look for a green table.
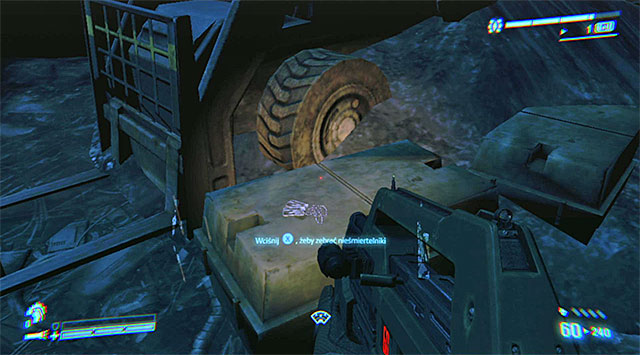
DOG TAG 29/35 (Sgt R. Siwiak) - At the very end of the mission, when you disconnect the fuel lines. Check out the area to the left of the dropship and you'll reach some boxes. The dog tag is on top one of them.

DOG TAG 30/35 (PFC J. Ma) - On top one of the boxes in the underground corridors which you explore are the beginning of the mission. It's where you also find the Space Jockey.

DOG TAG 31/35 (PFC K. Morales) - On the ground in the area with the second AA gun; near the ammo depot on the main site.

DOG TAG 32/35 (Cpl Colette Ferro) - At the end of the mission, near the marines fending off aliens by the crushed dropship.
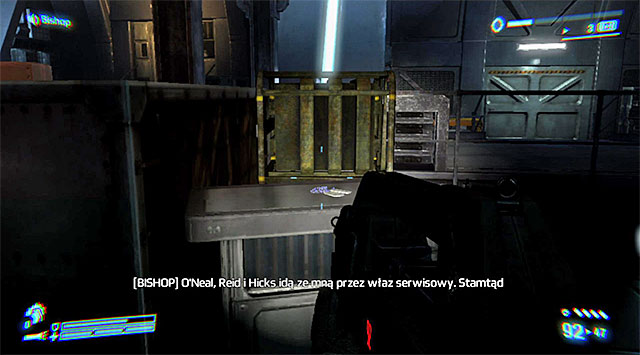
DOG TAG 33/35 (Cpl L. Papp) - As soon as you regain control. Turn around and approach the nearest box.
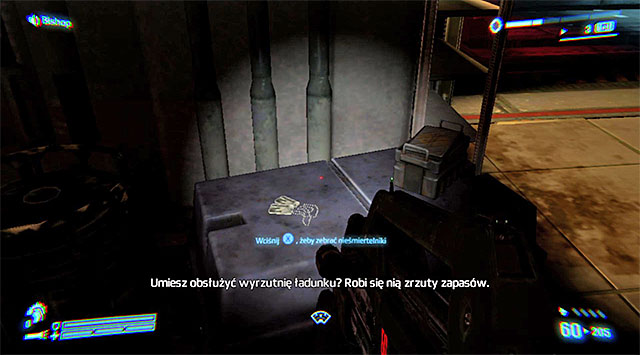
DOG TAG 34/35 (PFC A. Montgomery) - On a box at the edge of the hangar bay. When you pick up Dog Tag 33, turn right.

DOG TAG 35/35 (PFC William Hudson) - On the floor at the edge of the hangar bay, near the body of a marine and the burning dropship fragments.

AUDIO LOG 1/12 - In a room you enter while going through the first level of the gravitational well (on your way to the hangar bay).

AUDIO LOG 2/12 - Right after opening the door using the powerloader, in the area where you encounter Facehuggers for the first time.

AUDIO LOG 3/12 - In the last room of the engineering section (where you attack the heavily armored soldier from a large distance). Locate the green generator and place yourself in the proper spot (or jump) to be able to interact with the terminal.

AUDIO LOG 4/12 - In a sideway room on the ground floor, where you get shortly after entering the colony's complex at the beginning of the mission.
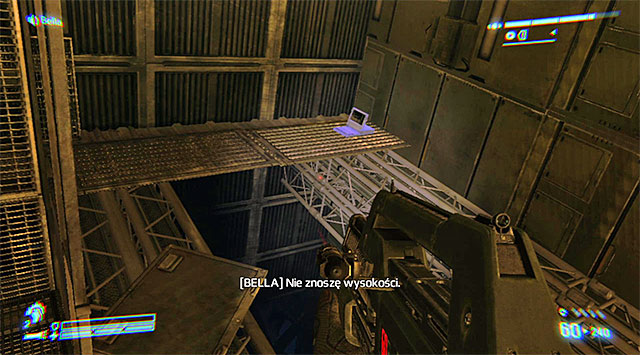
AUDIO LOG 5/12 - On the metal gallery which you can reach shortly after entering the first level of Weyland-Yutani research facility (prior to receiving the objective connected to the personnel manifest).

AUDIO LOG 6/12 - In the armory. which you enter it almost immediately after acquiring the previous (fifth) log.
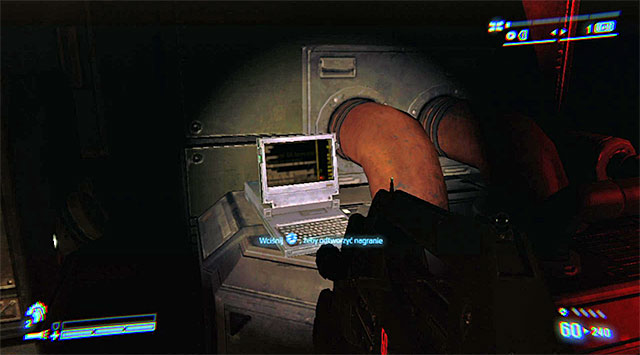
AUDIO LOG 7/12 - On the way to the operations room, in the area with two hostile sentry turrets. After disabling the first one, go to the end of the corridor and examine the room it's been protecting.
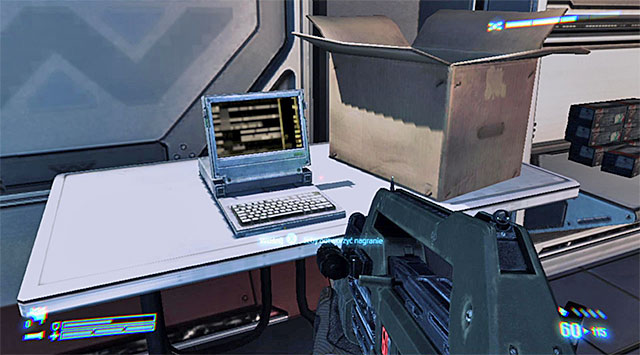
AUDIO LOG 8/12 - Soon after meeting the scientist whose job was to save Bella, in the room with the first wave of mercenaries. Once it's clear, look for a table with a terminal on it.
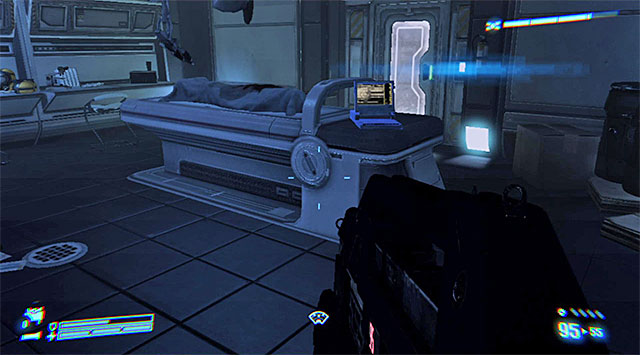
AUDIO LOG 9/12 - In one of the poorly lit lab rooms; just before reaching the area where the group suggests to dispose of enemies in a quiet way.

AUDIO LOG 10/12 - Shortly after destroying the enemy dropship and entering the new building. Stop when you get to the area with a few sideway rooms, and search the one with a lot of computers inside.
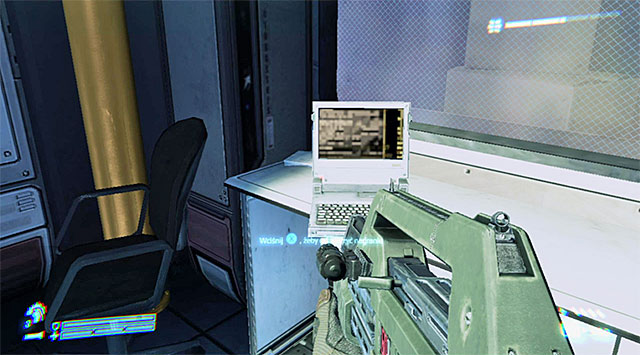
AUDIO LOG 11/12 - In one of the sideway rooms right at the beginning of the mission (before taking the elevator).
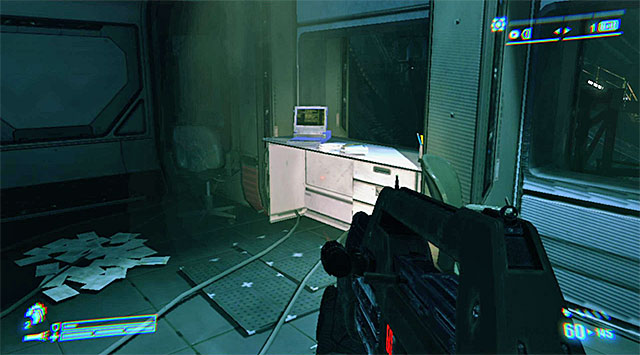
AUDIO LOG 12/12 - While going through the huge underground hall where you face off Weyland-Yutani mercenaries. Check out the first room you come across, on the right of the metal gallery.
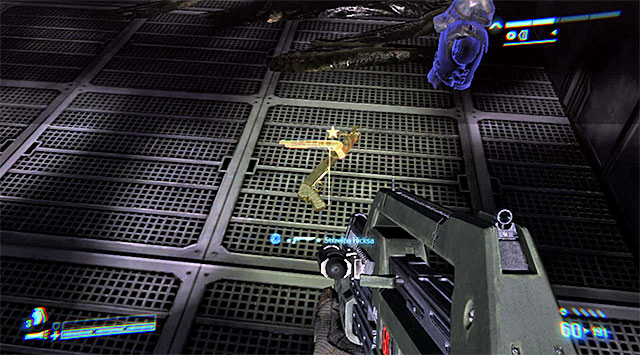
LEGENDARY WEAPON 1/6 (Hicks' shotgun) - On the way to the cargo bay, in a sideway room near the way to the third level of the gravitational well.

LEGENDARY WEAPON 2/6 (Gorman's Pistol) - Literally seconds before the end of the mission. After you pass the area guarded by Lurkers, get to a room with a green table. Don't leave until you've picked up the weapon because the missions ends the moment you run into the overgrown Xenomorph.

LEGENDARY WEAPON 3/6 (Hudson's Pulse Rifle) - Shortly after meeting up with O'Neal and retrieving your equipment. Search the nearby rooms before taking the passage to the surface.

LEGENDARY WEAPON 4/6 (Vasquez's Smart Gun) - Towards the end of the mission, after reaching the warehouse which will be overrun by Xenos and mercenaries if you try to use the exit (shortly before making for the hill with the elevator).

LEGENDARY WEAPON 5/6 (Vasquez's Pistol) - Shortly at the beginning of the mission. When your team manages to open the way inside the colony's complex, go in and turn left (you need to find the weapon before making your way back to the operations room).

LEGENDARY WEAPON 6/6 (Frost's Flamethrower) - On the box inside the container from which you take the RPG launcher needed to destroy the third AA gun.
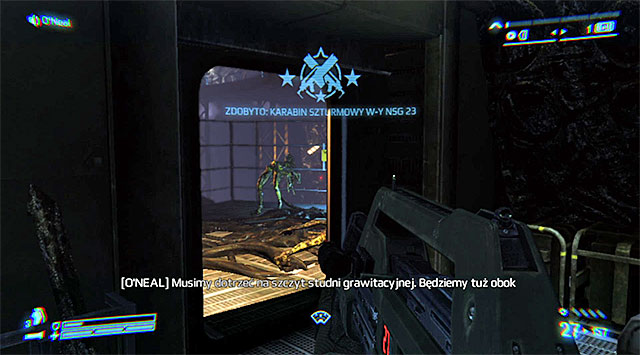
The first thing you need to know about weapons is that not all of them are available at the beginning of the game. Despite of what may seem, new weapons are not purchased, but automatically unlocked upon ranking up. Ranks may be treated as experience levels. There are three ways to earn experience points: by killing enemies, finding secret items, and completing active challenges (explained on the next page). Luckily, you don't have to keep checking your inventory: if acquiring a new rank involves unlocking a new weapon, the game will let you know (the above screenshot).
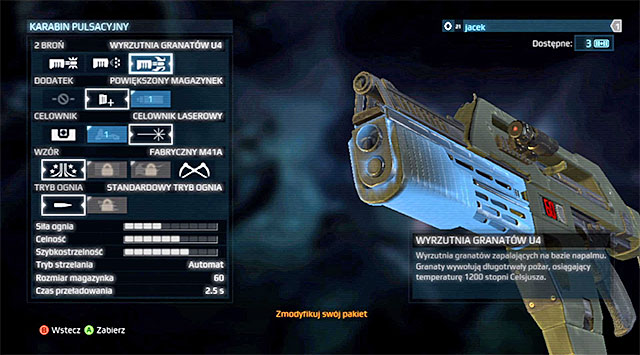
New weapons aren't the only rewards for ranking up; marines also receive points which they can spend on upgrading their weaponry. Customizing your gear isn't mandatory, but it greatly pays off considering how effective it can become on the battlefield. Upgrading is divided into five categories: alternate fire (alternative firing type), attachment (mount additional elements, such as a silencer or an extended clip), sights (mechanical, laser, optical), pattern (paint your weapon - doesn't affect it in any way) and fire mode (switch the primary fire mode). When upgrading a weapon, try to adapt to the conditions on the battlefield. For example, the rifle you use to eliminate enemies from large distances can be enhanced by the addition of a grenade launcher and an optical sight, while a shotgun could benefit from a component that would reduce its recoil effect. Keep in mind that modifications are made for all weapons from a given group. If, for example, you have more than one pulse rifle (the regular one and Hicks' legendary), both of them would be modified.
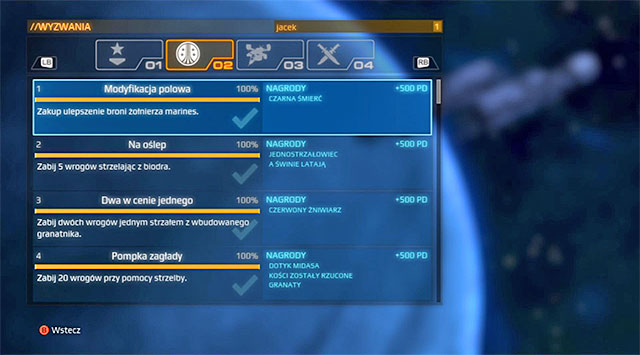
In total, there are 86 small challenges divided into three categories. At a given moment, only three challenges are active (each from a different category) and you can view them by pausing the game. It's crucial to remember that the remaining challenges, which you haven't yet completed, will remain inactive and you won't be able to check them off even if you've done what their descriptions require. Consequently, focus only on the active ones and try to complete them as you go. It should motivate you that each completed challenge will give you 500 EXP, but they can also raise your statistics or paint your weapons in new patterns.
Note - Challenges can be completed both in the single player campaign as well as in multiplayer. Sadly, you can't ignore the co-op modes because there is a whole category dedicated to playing as a Xeno. In the single player campaign, try to pick your missions in accordance with the challenges' current objectives. For example, if the game forces you to eliminate enemies in hand-to-hand combat, chose a mission where you encounter weakly armed scientists.
The table below lists all Achievements available for Xbox 360. They overlap the Playstation 3 Trophies and Steam Achievements for PCs.
ACHIEVEMENT
REQUIREMENTS AND NOTES
Quoth The Raven
Unlocked automatically during the campaign, can't miss it.
Adios, Muchachos
Kill two Xenomorphs in one attack. Use a weapon with a mounted grenade launcher to aim at a group.
Fire Drill
In Sulaco Falls, arm three emergency releases and escape under 2 minutes and 30 seconds. Set the lowest difficulty level and eliminate the enemies only directly in your way.
Arbitrarily Exterminated
Kill 2179 Xenomorphs in total.
Field Promotion
Earn rank 2 playing as a marine.
No Offense
Kill a Lurker when it tries to perform a melee attack. Use the tactical shotgun or any other weapon with high firepower.
Secreted from What?
Kill five Spitters without being damaged. Stay mobile and attack from a distance.
I Can Handle Myself
Buy all upgrades for a chosen weapon.
Field Modified, Kill Certified
Upgrade every slot for a weapon.
State Of The Badass Art
Complete the game on Ultimate Badass difficulty.
Adaptive Morphology
Upgrade every Appearance slot once for a Xenomorph class (multiplayer).
Ready To Fry Half A City
Change the active weapons of a marine (available after unlocking the first new weapon upon leveling up to rank 3).
I Heard THAT
Find all 12 Audio Logs.
Let's Rock!
Kill 10 Xenomorphs with the smart gun. You can't go through a checkpoint, so conserve your ammo.
Don't Count Me Out
Revive a teammate.
I Feel Safer Already
Have another player join you (co-op).
I Love the Corps!
Earn rank 60 as a marine
Another Bug Hunt
Complete any challenge.
Another Day In The Corps!
Unlocked automatically during the campaign, can't miss it.
Game Over, Man!
Complete the game.
I Like to Keep These Handy
Find all 6 Legendary Weapons.
... But No Cigar
Rescue an ally from a close encounter (with an "adult" alien or a Facehugger).
Bad Feeling About This Drop
Unlocked automatically during the campaign, can't miss it.
Distinguished Service Medal
Complete all 86 challenges.
Micro Changes in Air Density
Track 100 enemy targets using the motion tracker.
Love at First Sight
Survive a direct encounter with a Facehugger (tapping the interact button mini-game).
Personal Friend of Mine
Find any Legendary Weapon.
No Need For Alarm
In One Bullet, don't let anyone sett off the alarm. Surprise your enemies and immediately dispose of those close to the alarm panels.
Easter Egg
Find the easter egg. At the beginning of Battle for Sulaco, look for a door control panel which only looks inactive.
It's a Dry Heat
Kill 3 enemies with a single U4 Firebomb.
Not Bad For a Human
Complete the game on Hardened difficulty.
Dragged Queen
Unlocked automatically during the campaign, can't miss it.
Oorah to Ashes
Find any Dog Tag.
Short, Controlled Bursts
In Distress, in Sulaco's hangar bay, kill all Xenomorphs without letting them cross the barricade. Stand in front of the barricade so that every Xeno focuses on you. It's also a good idea to lower the difficulty level.
Remember the Fallen
Find all 35 Dog Tags.
Perfect Killing Machine
Upgrade every Loadout slot for a Xenomorph class (multiplayer).
Need a Deck Of Cards?
Set up a remote sentry.
Structural Perfection
Edit a Xenomorph Loadout (multiplayer).
Heavy Lifting
Defeat the overgrown Xenomorph (The Raven) under 1 minute and 10 seconds. Lower the difficulty level so as not to worry about receiving damage.
Still Got a Job to Do
Unlocked automatically during the campaign, can't miss it.
Majority Shareholder
Spend 30 commendations (awarded for ranking up) for upgrading weapons.
Entry Prohibited
Kill 10 Xenomorphs that are using vent shafts.
Anytime, Anywhere
In Hope in Hadley's, kill the Crusher without receiving any damage.
You Look Just Like I Feel
Upgrade every Appearance slot once for your marine.
Coming Outta the Walls!
Kill a Xenomorph climbing on the walls or ceiling.
Stay Frosty
Complete all challenges from a chosen category.
Lean And Mean
Earn rank 20 as a marine.
Mostly Come At Night...
Find Newt's Doll. It's in the sewers in The Raven, where you activate the pump to lure Boilers.
Just A Grunt
Unlocked automatically during the campaign, can't miss it.
Eat This!
Kill a Xenomorph at close range using the shotgun.


 Assassins Creed: Revelations Game Guide & Walkthrough
 Alan Wake Game Guide & Walkthrough
 Alien: Isolation Walkthrough Closing the Book
 Altered Beast Walkthrough Level 1
 Army of Two Game Guide & Walkthrough