NOTE: A ticklist for the collectible items is included at the end of each chapter -- you will want to review this before you begin the chapters to familiarize yourself with these.
Completing the challenge of the Motel
The chapter begins with you back in your apartment in New York City, with a wicked hangover. You are prompted to find your glasses and some painkillers -- the glasses are on the bedside table, and the pain killers are in the bathroom. Leave the bedroom and listen to your answering machine message, then do as Barry says and go turn on the TV (TV Program 14/14). You will unlock the Achievement "Couch Potato" for a whopping 30 GP.
After you watch the show you get a CS with Alice in which you discuss - among other things - the trip to Washington. The narrative resumes, and you are back in the vault. When the CS ends look on the table near you for the next collectible (Coffee Thermos 90/100).
Before we continue here I need to mention something... There is an Achievement you can pick up here called "Gunless Wonder" but to unlock it you have to get to the lake without firing a gun -- any gun, or rather any weapon that uses the right trigger -- cannot be used. You do not have to do this now, you can reload this chapter later and do it, it is up to you.
Now check out the Verizon billboard -- man I used to have them as a cell provider, their coverage sucks here on Cape Cod., I am just saying... Now jump in your car and head down the road, and drive until you hit the rest area, where you should stop and get out. By the trailer is a sign that says "The Majestic" which you should read (Sign 22/25).
Get back in your car and drive until you reach the logging site, then drive down the site to the shack, get out and go in for the next collectible (Supply Chest 26/30). A side-note, if you have not been saving up flare gun ammo, start conserving it now, as you are going to need it soon very badly.
Head back up to the road and drive until you reach the tunnel, then stop! Get out and head to the left along side the barn here to grab the next collectible (Coffee Thermos 91/100). The tunnel is blocked inside, forcing you to get out and walk, which you do. As you reach the exit the darkness returns in a CS and day has been turned to night! Damn, I was enjoying the sunshine!
After you exit, ahead on the road are some Taken and the next collectible (Manuscript Page 86/106). If you are going for the no-gun Achievement here is a good place to use a grenade! After that, read the page and then proceed along the path to the car on the right side of the road. Jump in and start driving.
As you drive some Taken will spawn in the road -- the easiest way to deal with them is to boost your lights and run them down. When they are dead continue along to the hotel and turn into its parking lot. When you get out of the car look at the low wall on the left side of the parking lot for the next collectible (Can Pyramid 11/12). If you are going for the no-gun Achievement you do NOT want to shoot these!
I did an experiment, first checking my statistics to see what the count was for the cans, and it was 10/12, then I climbed up on the wall and knocked the cans down with my feet, and checked the statistics -- it was now 11/12! So you do not have to shoot them for them to count!
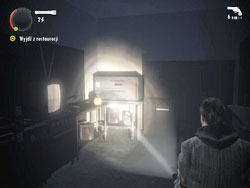
Now you can head inside, where you will find the next two collectibles, first a sign (Sign 23/25) and then a Thermos (Coffee Thermos 92/100) in the bathroom. On the counter in the office is the motel register, read that to learn that the Fed was staying here. There is a shotgun and ammo here - you can grab them even if you are doing the no-gun Achievement.
Now exit by the door and go into the first room on the right -- Room number 2 -- and you will see Agent Nightingale's jacket. Examine the stuff here and do not forget to grab the grenades off of the kitchenette!
Get back in the car now and use it to take out the Taken, then use the rear exit in the parking lot to get back on the road. Take out the possessed objects with the car's headlamps, and the other Taken, and when the car starts smoking (it will) head back to the motel parking lot and grab a fresh one, rinse and repeat until you have cleared the area of bad guys!
Chances are pretty good that you will die at least once trying to cross the bridge, probably when the excavator attacks since it can trap you on the bridge and really hurts when it hits! Just grin and bear it then, right?
Your best tactic here is really the slow-and-steady approach, as in slow-and-steady wins the race. Move carefully forward and when the objects attack kill them all quickly, then back up a little bit and let the torch recharge, so you are not burning through all of your batteries. When it has recharged continue forward, rinse and repeat. Before you approach the excavator make sure that your torch battery is fully recharged, and then try to hit it hard with it and not miss?
When the excavator attacks it blocks the path behind you with a wire spool so you cannot retreat. Your best strategy is to hit it with your torch and move left and right from side to side, avoiding its jaws. Once it is dead, carefully continue to the Haven Light, where you will regain health and hit a checkpoint. Excellent!
You can actually drive the car that is under the light -- so climb into it and drive! As you progress down the road you will see a field with a possessed monster truck and a barn. Kill the monster truck and then head for the barn, where you will be getting the next collectible (Coffee Thermos 93/100) at the house near the barn!
Drive down the road and eventually you will come to a bunch of cars and trucks blocking the road jsut before a tunnel where you will be forced to get out and walk -- there is a Haven Light here, and as you get past it, mind the dark pools on the ground.
There are supplies on the ground inside the tunnel and you will be attacked by Taken as you gather them. Once you have finished them off and grabbed the supplies, you will see the next collectible on the ground ahead (Manuscript Page 87/106). Once you read that, continue to the exit, where you will see a truck you can drive. Hop in and drive!
You will quickly reach a barricade in the road with a sign on the right that says Larsen's. Stop and get out, go to the gate to the right of the bigger sign, and read the small sign on the gate (Sign 24/25). Get back in the truck and drive around the right side of the roadblock then drive for a bit and stop at the next roadblock. There is a collectible on the running board of the green dump truck here (Manuscript Page 88/106) so grab that and read it.
Now you need to drive back to and around the first barricade and turn left, going through the gate to Larsen's and following the dirt road to the Haven Light, where you can get out and heal (if you need to) then explore the area. The next collectible is here, a chest behind the building (Supply Chest 27/30) that has some flares and grenades in it, both of which are worth having.
Head back around to the front of the building, and before you enter read the sign on the outside (Sign 25/25) to complete the Sign Collection and unlock the Achievement "Bright Falls Aficionado" worth a whopping 30 GP!
I want to add for posterity that unlocking this Achievement sent my Gamer Score to 70,011 which broke me into the 70K club and, I should add, is rather amazing. I have only owned a 360 for just a month over 2 years, and I am told that 70K in 2 years is a lot of Gamer Score... Just so you know I am not an Achievement Whore, I also review games for a newspaper and a web site, which is why I play so many and, obviously, have so high a Gamer Score. Ia m just saying...
After you enter head to the left side of the garage, where you will be attacked by two Taken. Once they are dead, grab the next collectible (Coffee Thermos 94/100) off of the shelf in the back, and some batteries off the shelf across from it.
Head upstairs and you will find the next collectible (Can Pyramid 12/12) on the deck outside. If you are going for the no-gun Achievement you will want to use your body to knock them down. Head up the stairs to the second floor to be attacked by two more Taken, then grab the grenade off of the shelf, a flare gun off of the desk, and use the switch at the top of the stairs. There is a door here, and when you exit through it you are on a deck with the Can Pyramid just to be clear.
Head back downstairs and jump in the blue truck, then drive through the gate to the left and you will encounter three Taken you can kill with the truck, before you reach a ramp ahead. Just before the ram stop, get out, and look to the right where you will find the next collectible (Coffee Thermos 95/100). Once you have that, jump back into the truck and take the ramp at speed -- and land below.
Follow the path around to the right and then left until you reach a container near the Haven Light ahead. You have to get out of the truck to reach the light -- do that, and you will find the next collectible nearby the light (Manuscript Page 89/106) next to some revolver ammo, three flares, and some batteries. The light includes a checkpoint as usual, and there is a ladder here for you to climb!
At the top of the ladder is a generator for you to start, and a flare gun, flares, and grenade to collect. The generator makes a switch below useable (you are shown that), and then you can climb down and quickly jump back into the pickup truck. A nearby front-loader will come to life as a pair of Taken spawn -- use the headlamps of the truck to kill all three, then drive to the switch and, getting out, use it.
Using the switch slowly raises the shipping container that was blocking your path -- you can now drive through or simply run through as there is another truck on the other side past the Haven Light you have now revealed. I chose to drive through and then hop out to use the checkpoint at the Haven Light before continuing in my original truck... Now drive along the road up the hill to the next Haven Light, where you can hop out and empty a red supply box!
Collectible Items Ticklist
-- Can Pyramid 11/12
On the wall on the left side of the parking lot at the Majestic Motel.
-- Can Pyramid 12/12
On the deck of the second floor of Larsen's Garage.
-- Coffee Thermos 90/100
On the table near you after the CS ends.
-- Coffee Thermos 91/100
Beside the barn to the left of the tunnel entrance.
-- Coffee Thermos 92/100
Inside the motel in the bathroom.
-- Coffee Thermos 93/100
At the house near the barn after killing the monster truck.
-- Coffee Thermos 94/100
In the left rear of Larsen's garage.
-- Coffee Thermos 95/100
To the right of the ramp in the junkyard after leaving the garage.
-- Manuscript Page 86/106
In the road after you exit the tunnel.
-- Manuscript Page 87/106
On the ground after you exit the tunnel.
-- Manuscript Page 88/106
On the running board of the green dump truck at the second barricade.
-- Manuscript Page 89/106
Near the Haven Light after jumping the truck over the ramp into the junkyard.
-- Nightmare Manuscript Page 103/106
On a bench inside the motel lobby.
-- Nightmare Manuscript Page 104/106
On the top floor of the barn after killing the monster truck.
-- Nightmare Manuscript Page 105/106
On a table on the second floor of Larsen's Garage.
-- Sign 22/25
At the rest area on the right near the trailer.
-- Sign 23/25
Inside the motel.
-- Sign 24/25
A small sign on the gate to the right of the roadblock.
-- Sign 25/25
Outside of Larsen's before you go through the door.
-- Supply Chest 26/30
In the shack at the bottom of the hill at the logging site.
-- Supply Chest 27/30
Behind Larsen's.
-- TV Program 14/14
Watch the TV in the living room.