NOTE: A ticklist for the collectible items is included at the end of each chapter -- you will want to review this before you begin the chapters to familiarize yourself with these.
An Homage to Barry
We resume in the jail cell with Barry, and lament that the Fed now has all of the pages from the manuscript. Speak of the devil, here comes the Fed! The Sheriff and the Fed start to argue and then you find an unlikely ally in the Sheriff! Who would have thought it?
The lights go out, the cell is open, it is time to explore the jail, right?
As you exit the cell there is a page on the floor (Manuscript Page 74/106) and nearby that another (Manuscript Page 75/106) so pick those up and read them, and then follow the Sheriff into the office, where you will find the next collectible (Coffee Thermos 70/100) near the window.
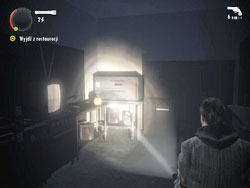
Follow the Sheriff around the corner to her office, which she unlocks, and then gives you back all of your kit! Excellent! We don't have to find this stuff all over again! Follow the Sheriff back through the cell corridor and outside, where there is a Haven Light. The gate is broken and someone has to go to the other controls -- and that someone is YOU!
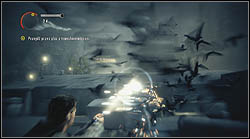
Head to the rear of the lot and climb over the wooden fence here and through the hole in the chain link fence from before when we found Alice's driving license. On the wall is a leve you can pull to lower an access ladder that you climb to get to the roof. Once up there work your way around to the front of the building killing the dark pools you encounter. Climb up the ladder to the next area and take out more dark pools and three flocks of birds, and then use the lift to get to teh ground.
At the control box there are three (3) dead pools you need to destroy -- two on the door in plain sight, one on top. The one on top can damage you when you use the controls (it does not always but still) and so it needs killing.
Once the gate is open you will be attacked by Taken - defeat them and then head out into the next street, take out another group of Taken, and then go to the right to the covered picnic shelter where you will find the next collectible (Coffee Thermos 71/100). Now keep going down this road towards the black gate past the boat on a trailer and you can swing around on the boardwalk to the left where you will find supplies (Supply Chest 19/30) of a flare gun and and ammo for it. Now turn around and backtrack until you see the cannery (it says Fresh Seafood on it) and run out onto its pier through the gate door. You will spot the arrow markings then -- follow them around the back where you fight some more Taken, then climb the stairs to the chest and more supplies (Supply Chest 20/30) from which you will obtain some batteries and another flare gun. Excellent!
As you exit this area you will see the diner ahead of you -- go inside and play the jukebox there to unlock the Achievement "Drink 'Em Both Up" and then grab the supplies here. Your next collectible is on the floor by the cash register behind the counter (Coffee Thermos 72/100) so grab that and the supplies on the counter now.
Head to the back towards the bathroom for the next collectible (Manuscript Page 76/106). Once you have that it is time to resume our travel along the path! There will be another fight with Taken and then a button you can push to turn on a Haven Light and get a checkpoint. Do that and then follow the Sheriff as she heads towards our destination, and a car alarm will go off. Nearby here is a hotdog stand, and our next collectible (Can Pyramid 9/12). Shoot the cans off the top of the hotdog trailer then follow along.
At the end of the street by the barricade there is a Deerfest Banner strung over the road, and under it on the left is a port-a-potty with our next collectible (Coffee Thermos 73/100) on the ground as well as some supplies. Follow the Sheriff to the gate where you get ambushed by a lot of Taken -- after you defeat them head through the gate and then immediately look to your left -- under the party tent there is our next collectible (Coffee Thermos 74/100).
Basically search the town hall -- around the corner is our next collectible (Manuscript Page 77/106). Once you read that head upstairs ti watch some TV (TV Program 12/14) then empty the nearby chest (Supply Chest 21/30) of its flare gun and flare.
Now head back downstairs to get the keys! As you go through the main area and into the hall a Taken will burst out of the door ahead -- after you kill it enter the room it came from and grab the supplies -- there is a Hunting Rifle here if you want it -- then go into the room off of this one and grab your next collectible (Coffee Thermos 75/100).
In the office with the keys you will swap for the higher power torch and grab some supplies as well as the keys, then head back to the Sheriff. As you exit you get a CS with teh Sheriff and Barry -- poor Barry, this is just not his night. Before you follow the Sheriff head across he street to the park and read the Sign on the statue (Sign 15/25). Noe you can follow the Sheriff!
After a funny CS with the Doc, you head into the bookstore -- where we find our next collectibles, a thermos (Coffee Thermos 76/100) and a sign (Sign 16/25) on the right wall by the table. Head towards the back where the Sheriff is and there is another collectible (Manuscript Page 78/106) so grab that and read it then follow on!
As you exit the book store go to the left and into the building there to get the next supplies (Supply Chest 22/30) to add a flare gun and ammo to your kit. Now follow the Sheriff into the playground and turn left, gabbing your next collectible from the sandbox (Coffee Thermos 77/100). Further on you reach the church, but before you enter read th4e sign outside (Sign 17/25).
After you read the sign follow the street to the right and you will find a yellow rental van -- in the back is the next collectible (Manuscript Page 79/106). Once you read that head back to the church, where you will be ambushed again. Defeat the Taken and go inside -- the next collectible is on the lectern ahead of you (Manuscript Page 80/106).
You now have to go through the church basement to reach the parking lot behind it -- in the corner is our next collectible (Coffee Thermos 78/100) but before we can reach it we get ambushed! Kill those Taken! As you exit the church basement you get jumped by a brute, but save by Barry. Barry?! Sweet! I always liked that guy!
As you head up the stairs to the helicopter and approach the last set our next collectible is on a table ahead (Manuscript Page 81/106). After you grab the page off of the table and read it, continue along to the chopper pad, where you will find lots of supplies and, on the left on the barricade, a collectible (Coffee Thermos 79/100). That, by the way, is the final collectible for this chapter, so all that is left is for you to defend the pad until you can take off!
[ ] Coffee Thermos 70/100
In the office area of the jail by the window.
[ ] Coffee Thermos 71/100
On the counter in the picnic shelter to the right of the exit from the jail street.
[ ] Coffee Thermos 72/100
On the floor behind the counter in the diner.
[ ] Coffee Thermos 73/100
On the ground under the Deerfest Banner by the blue port-a-potty at the end of the street.
[ ] Coffee Thermos 74/100
Under a party tent after you get through the ambush at the gate, and the gate.
[ ] Coffee Thermos 75/100
In the storage room off of the office with the rifle.
[ ] Coffee Thermos 76/100
On the shelf in the front of the bookstore.
[ ] Coffee Thermos 77/100
On the sandbox in the playground.
[ ] Coffee Thermos 78/100
In the church basement.
[ ] Coffee Thermos 79/100
On the left of the helipad before the entrance.
[ ] Manuscript Page 74/106
Just outside of the cell door.
[ ] Manuscript Page 75/106
Near the exit door just outside of the cell door.
[ ] Manuscript Page 76/106
Near the bathroom in the diner.
[ ] Manuscript Page 77/106
On the stage near the podium around the corner from the fuse box.
[ ] Manuscript Page 78/106
On the counter in the back of the book store.
[ ] Manuscript Page 79/106
In the back of the rental van on the street with the church.
[ ] Manuscript Page 80/106
On the lectern in the church.
[ ] Manuscript Page 81/106
Off the stairs leading to the helipad.
[ ] Sign 15/25
On the statue in the park after leaving Town Hall.
[ ] Sign 16/25
In the bookstore on the right wall by the table [ ] it talks about your character from your books.
[ ] Sign 17/25
Outside of the church.
[ ] Supply Chest 19/30
On the boardwalk at the end of the street after turning right.
[ ] Supply Chest 20/30
On the Cannery pier towards the rear.
[ ] Supply Chest 21/30
On the second floor of the Town Hall in the left rear.
[ ] Supply Chest 22/30
In the building on the left after exiting the bookstore.
[ ] TV Program 12/14
On the second floor of the town hall.