

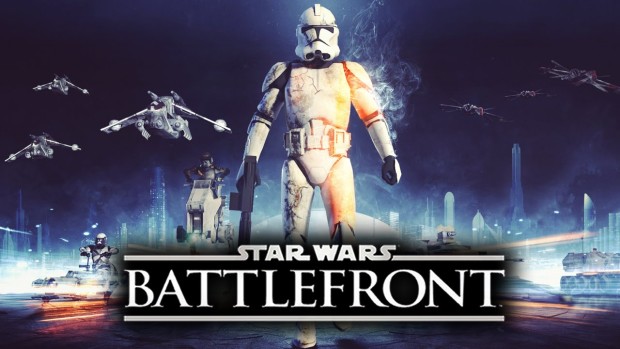
Endor in Star Wars: Battlefront has a lot of natural cover which is why it is extremely hard for snipers to get a clear shot unless they are in some open areas.
Our guide provides an overview of Endor and its major locations:
Supremacy
The first capture point is located on the center of the area which can be accessed and captured from various locations. During the Imperial’s ‘Push Forward’, you need to head to Rebel camp.
You need to make sure to drop in smoke and use buildings to your advantage. The next capture point is located a little ahead in the Rebel base. The Rebel forces should use hollow trees as cover and avoid getting flanked from the lake side.
During the Rebel’s ‘Push Forward’, beware of the turret and avoid heading in from the main entrance. Furthermore, make sure to use Blast Cannon to have some extra firepower.
Finally, the transport ship is open and encourages the use of AT-ST walkers which not only provides decent firepower, but also some cover.
Walker Assault
The dense forest allows players to head near the disabled AT-ATs without getting noticed by enemies, but they should beware of the mounted turrets.
The first uplink is located near the middle bunker which can be reached via different routes and can be defended through doorways and halls in the nearby areas. The second uplink is near the creek, right next to a fallen tree. It is a good idea to capture this area as early as possible.
The final phase of the battle is pretty challenging. It is highly unpredictable since the uplinks are extremely hard to defend. It is a good idea to keep some distance between the uplink and your position and avoid grenades raining down in the area.
Blast
In Swamp Crash Site, you need to stay behind cover at all times, rack up as many kills as possible, and try not to die.
Use mid-range blasters such as E-11 and DLT-19 as well as Pulse Cannon and Cycler Rifle. I do not recommend using smoke grenades in this area. You need to roam the outer edges of the map or find an elevated position and pick your enemies from a distance.
On the Imperial Station, you need to calculate your movement and do not move aimlessly in random areas. There are many corners and tight areas which enemies can use to ambush you.
You can also head to the top of facilities on both sides in order to provide cover to your team, share the locations of power-ups, and enemies’ locations. The central area holds most of the engagements and you can use the Jump Pack to move from one ship to another or even use them as cover.
Cargo
This mode is only playable in the Imperial Station. You need to wait for the perfect opportunity to grab the cargo and head towards the base. You need to wait until you notice chaos in the map and then make your move.
The Imperial cargo is located in the reactor room which has multiple entrances and players with a Jump Pack get an obvious advantage.
The Rebel cargo, on the other hand, is inside the intel room where the Jump Packs are completely useless. This area has also 3 entrances, but due to the openness of the area, you should consider using flash grenades and smoke grenades to hide your presence.
Droid Run
This mode is only playable in Swamp Crash Site. The first droid roams near the hill and the best time to get it when it is behind large trees at the bottom of the hill.
The second droid is located between two cargo containers and the best way to defend it by using long-range blasters such as Pulse Cannon. The final droid is located at the very top of the hill which is extremely hard to defend.
Hero Hunt
Since Swamp Crash Site as an open area, ranged characters really shine here and close-combat characters must be lured in. While playing as Darth Vader, you should consider fighting below the transport ship and near the cargo wreckage.
As for defeating Palpatine, you should never take him on in closed spaces and always keep a safe distance between him and you and make sure to stay behind cover at all times.
You need to have some powerful ranged blaster to deal with him effectively. Finally, when it comes to Boba Fett, despite his Jump Pack, his blaster becomes pretty inaccurate at long ranges which is where you can easily defeat him using Cycler Rifle or the Pulse Cannon.
Similar strategies apply when defeating these characters on the Imperial Station.
Heroes vs. Villains
In Swamp Crash Site, some of the stronger characters include Han Solo, Princess Leia, and Boba Fett. The reason for this is because these are ranged characters that do not have to be in the middle of a fight in order to get some kills.
Both Leia and Palpatine are pretty decent support characters and when played intelligently, they can shine in this area as well.
As for Imperial Station, it encourages close-quarter combat which is why characters like Luke Skywalker and Darth Vader. You need to lure these characters in order to deal with them efficiently.
In addition to this, do note that Palpatine is also pretty good on this map, but can easily be countered using Han Solo.
Don’t forget to share your own tips and strategies with us in the comments section below!

 Star Wars Battlefront Collectibles Locations 'Scrap Collector Guide
 Star Wars Battlefront Tatooine Map Guide - Locations, Tips and Strategy
 Star Wars Battlefront Weapons Guide - Best Blasters, Tips, How to Unlock
 Star Wars Battlefront Power-Ups Guide - Tips, Field Pick-Ups and Strategy
 Star Wars Battlefront Best Loadouts Guide - Best Hands, Blasters