

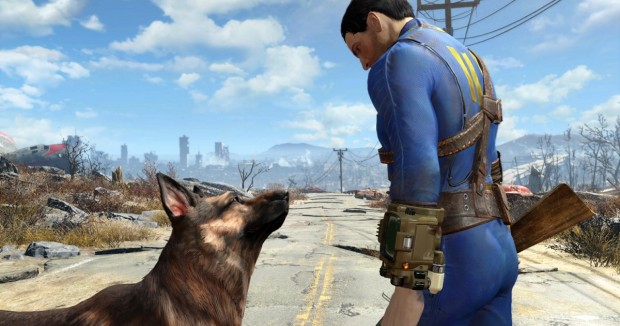
In Fallout 4, when it comes to damage extenuation, there is nothing that can be compared to Power Armors. These heavy structures not only mitigate damage, but also provide sheer raw power.
For more help on Fallout 4, read our Settlements Locations, Fallout 4 Character Builds, Companions Locations and Magazines Locations Guide.
Power Armors can be constructed using multiple exchangeable and customizable components. Doing so requires a lot of resources; however, you can render the process a tad easier using certain perks.
Once inside Power Armor, you instantly acquire+11 strength, radiation resistance, negate falling damage, and even stomp on enemies.
Furthermore, some Power Armors also support jet-pack allowing you to reach otherwise inaccessible areas. Then there are several other mods which increase the base effects.
However, do note that you need a constant supply of Fusion Cores to maintain the Power Armor up and running. In order to repair Power Armor, you should maintain an ample quantity of items such as Aluminum, Copper, and other resources.
In addition to this, when inside Power Armor, you lose all other boosts offered by pre-equipped items. Finally, always make sure to remove the Fusion Core as soon as you eject it to prevent it from being stolen.
You need to have a frame in order to craft Power Armor, however, do bear in mind that you cannot carry these frames. But even if you simply equip a frame, you acquire +60 damage resistance and +60 energy resistance.
Once you’ve a frame, you can combine different parts to create your ideal suit. As for earning frames, you need to purchase them from vendors, find scattered across the world, and from completing quests.
Fallout 4 Power Armor Frames Locations
Although not 100% guaranteed, you can explore the following locations to find Power Armor Frames:
Every Power Armor part that you can find in the game belongs to one of five Power Armors Sets.
Out of these sets, the X-01 is the most powerful and the Raider is the least powerful. The important thing to understand here is that mods are Power Armor specific and cannot be applied on anything.
However, you shouldn’t try and get a complete Power Armor set. Instead, simply choose the part that you feel comfortable with! Following section provides a brief overview of all Power Armor set:
Key: Armor Part – Damage Resistance – Energy Resistance – Radiation Resistance – Weight – Value
Raider Power Armor
This Power Armor doesn’t support jet-pack or stealth-boy mods:
T-45 Power Armor
This Power Armor supports all the available mods:
T-51 Power Armor
This Power Armor provides more protection that standard T-45 and supports all mods:
T-60 Power Armor
This Power Armor is among the best Power Armors in the game and supports all mods and paint jobs:
X-01 Power Armor
This Power Armor set is the best set in Fallout 4 which is also the rarest to find:
Power Armor Part #1
Location: Neigborhood; Financial District, 35-Court
Recommended Level: N/A
Head inside the structure followed by going up the ramps and opening up a pod in the side rooms to find this part inside.
Power Armor Part #2
Location: Natick and the Glowing Seas; Abandoned Shack
Recommended Level: 25+
You’ll find a Power Armor part along with a Power Armor station inside this shack.
Power Armor Part #3
Location: Quincy and Southern Commonwealth; Atom Cats Garage
Recommended Level: 40+
You’ll find this Power Armor part along with Fusion Core on the exterior of the area.
Power Armor Part #4
Location: Neighborhood; Financial District, Bobble’s Place [The Big Dig]
Recommended Level: 20+
You need to head over to Kill or be Killed in order to find a Power Armor part and a workbench here.
Power Armor Part #5
Location: Neighborhood; Cambridge, Cambridge Polymor Labs
Recommended Level: N/A
You need to head inside the Lab-C2 and find a unique piece of Power Armor near the fabrication window.
Power Armor Part #6
Location: Natick and the Glowing Sea; Cave [Super Duper Mart]
Recommended Level: 25+
Beware before entering the cave to claim the Power Armor part as it contains extreme radiations.
Power Armor Part #7
Location: Western Commonwealth; Fiddlers Green Trailer Estates
Recommended Level: 15-25
You need to head inside one of the caravans in the area to find a Power Armor part as well as some ammo.
Power Armor Part #8
Location: Neighborhood; North End, Crashed Vertibird [Military Barge]
Recommended Level: N/A
You’ll find a Power Armor part belonging to T-45 set inside a locked cage.
Power Armor Part #9
Location: Western Commonwealth; Federal Ration Stockpile
Recommended Level: 6-14
Once you head to the area, you need to search the container truck which contains a Power Armor part. You’ll also find a Fusion Core at the backside of the bunker.
Power Armor Part #10
Location: Western Commonwealth; Fiddlers Green Trailer Estates
Recommended Level: 15-25
You’ll find a Power Armor part in addition to some ammo inside one of the caravans.
Power Armor Part #11
Location: Coastal Commonwealth; Fort Strong
Recommended Level: 35+
You need to head over to the north side of the exterior area to come across a security kiosk which contains a couple of Power Armor parts as well as some ammo.
Power Armor Part #12
Location: Neighborhood; Theater District, Mass Bay Medical Center
Recommended Level: 25+
You need to search this area thoroughly in order to find a Power Armor part belonging to T-45 set.
Pages: 1 2

 Fallout 4 Diamond City Blues Side Quest Guide
 Fallout 4 Brotherhood of Steel Faction Quests Guide - Objectives, Tips
 Fallout 4 Creatures Guide - Animal Control, How to Kill
 Fallout 4 The Institute Radiant and Misc Quests Guide
 Fallout 4 X-01 Power Armor Locations Guide